

It’s easy to feel like your handmade projects are missing that final touch of polish. You have the skills and the passion, but translating your vision into a piece that feels cohesive, intentional, and truly finished can be the hardest part.
Let’s set aside the complex patterns and expensive supplies for a moment. The most significant transformations often come from small, deliberate choices—the way you finish an edge, the texture of your thread against the fabric, or the confidence of a single, perfectly placed motif.
Here, you’ll find ideas that focus on technique over tools. These are ways to refine your eye and your hand, empowering you to create fabric crafts that not only look expensive but feel deeply and personally yours. It’s time to make things you’re truly proud to display, wear, or gift.
1. Create a Memory Quilt with Textural Stitching

Transform fabric scraps into a cohesive wall hanging by focusing on texture and a unifying thread.
Combine materials with distinct surfaces—denim, linen, soft cotton—and arrange them in an improvisational grid.
Instead of complex quilting, use a simple, evenly spaced running stitch with a contrasting metallic or perle cotton thread to connect the patches.
This technique, inspired by Japanese Boro, celebrates imperfection and creates a visual rhythm that makes the entire piece feel intentional and artistic, not just assembled.
2. Elevate Linens with a Single Botanical Motif

A single, well-placed sprig of lavender can make a simple linen napkin feel like a boutique discovery.
Focus on stitch precision: use a delicate stem stitch for the stalk, ensuring your stitches are small and even for a smooth curve.
For the blossoms, create small, tight lazy daisy stitches or French knots, varying the placement slightly to mimic natural growth.
Choosing a thread color that is just a few shades deeper than the fabric creates a subtle, sophisticated harmony that whispers elegance rather than shouts.
These delicate lavender stitch ideas are perfect for adding a touch of calm to your home.
3. Use Appliqué with an Exposed, Graphic Stitch

Turn simple fabric shapes into bold, graphic statements by making the stitch a key part of the design.
Cut abstract, organic forms from felt or sturdy cotton canvas, leaving the edges raw for a hint of texture.
Instead of hiding your stitches, use a contrasting, thick thread—like a perle cotton—and a deliberately spaced blanket stitch or whipstitch to attach the appliqué pieces.
This approach transforms a functional stitch into a decorative outline, adding a playful, handcrafted detail that feels both modern and authentic.
4. Cover Journals with Curated Fabric Remnants

Give a plain notebook a bespoke finish by covering it with a special piece of fabric.
Choose woven fabrics like brocade, jacquard, or even a sturdy printed cotton with a small-scale pattern that won’t get lost on the cover.
Use a strong adhesive like Mod Podge or bookbinding glue, ensuring you smooth out any bubbles for a flawless finish.
This is the perfect way to use precious scraps from other projects or even showcase small embroidered pieces, turning an everyday object into a personal treasure.
Try adding subtle motifs from these hand-embroidery leaf patterns to personalize journals and daily planners.
5. Reinvent Denim with Geometric Sashiko Stitching

Elevate a simple tote made from upcycled denim with the meditative art of Sashiko.
The beauty of this technique lies in the repetition of a simple running stitch to create a complex, interlocking geometric pattern.
Use a traditional white Sashiko thread, which is strong and has a matte finish that contrasts beautifully against the blue denim.
The key to a polished look is stitch consistency—aim for stitches that are longer on the top and shorter on the bottom, like grains of rice.
This adds structure and a graphic focal point, turning a casual bag into a piece of wearable art.
6. Compose Abstract Art with Neutral Fabric Layers
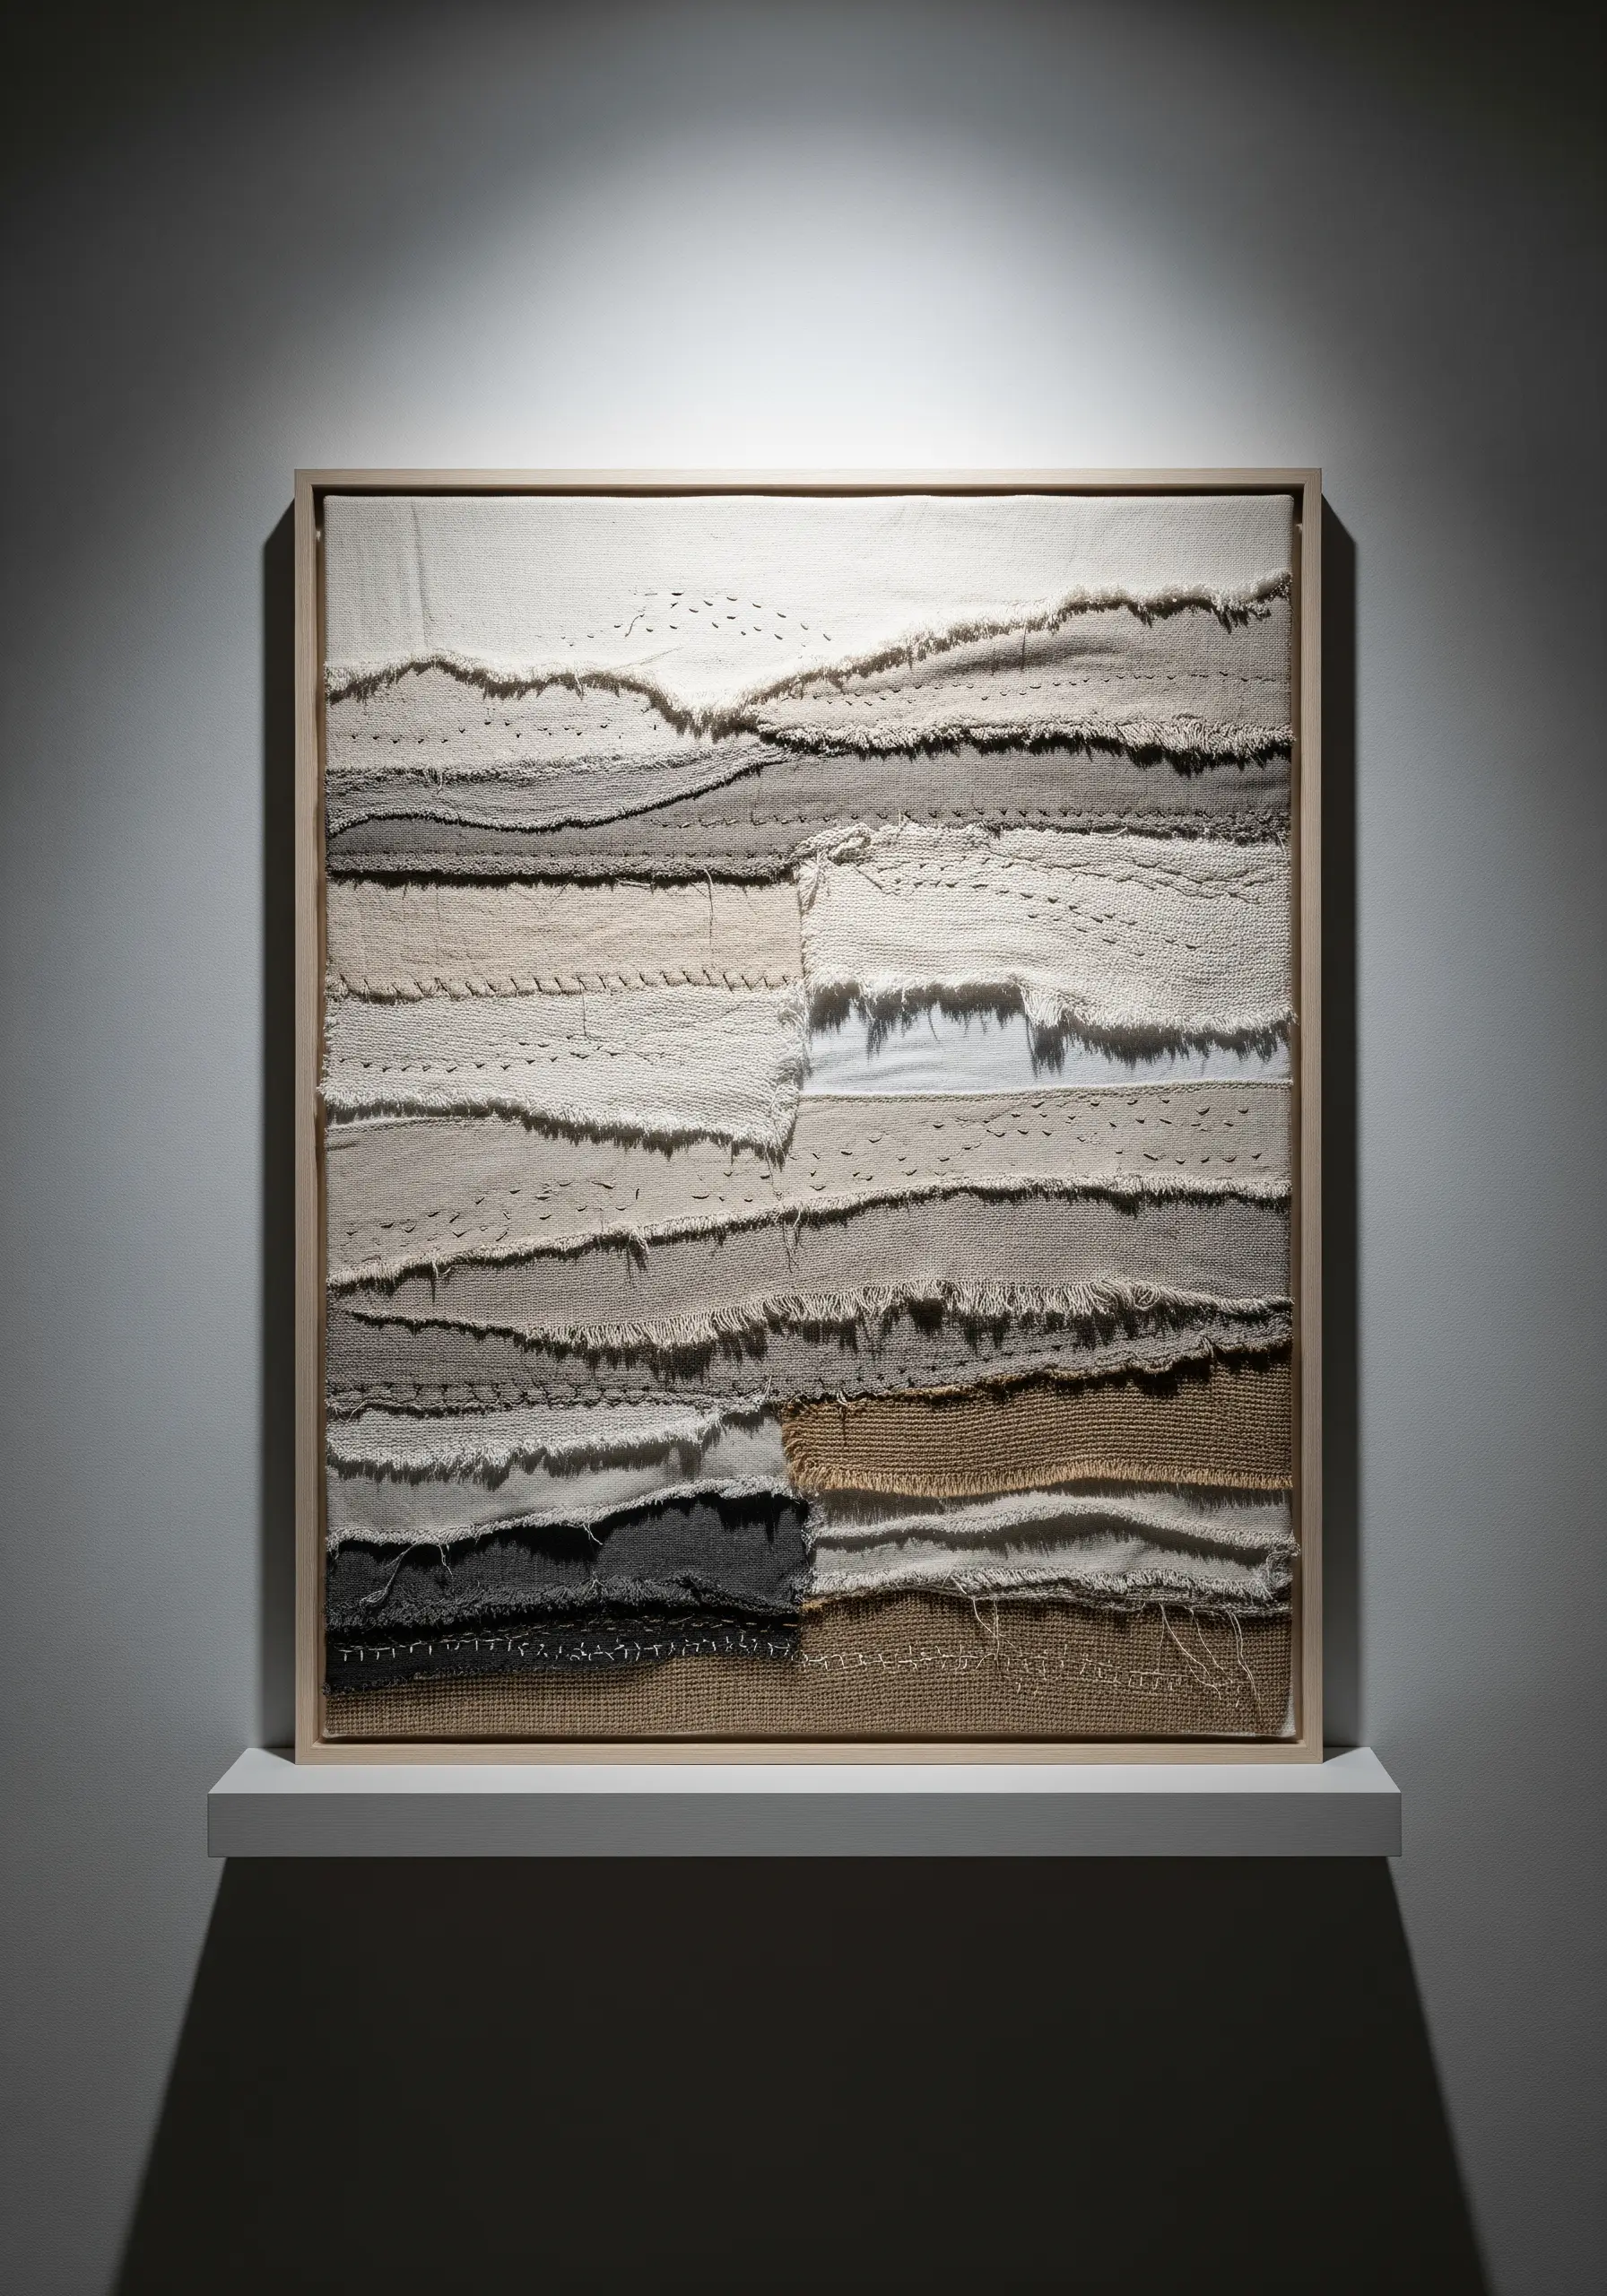
Create a sophisticated, gallery-worthy art piece by focusing solely on texture and tone.
Layer scraps of neutral-colored fabrics—canvas, muslin, linen, burlap—allowing the raw, frayed edges to become part of the composition.
Use simple, subtle stitches like seed stitch, running stitch, and French knots in matching thread colors to add another layer of quiet detail.
The lack of bright color forces the viewer to appreciate the interplay of light, shadow, and weave, resulting in abstract layered thread collage ideas that feel deeply calming and high-end.
7. Adorn Terracotta Pots with Block-Printed Fabric

Give inexpensive terracotta pots a custom, artisan look with fabric wraps.
Instead of using pre-printed fabric, create your own pattern on plain canvas or muslin using a simple block printing technique.
You can carve a simple design into a potato or a rubber block and use fabric paint to stamp a repeating motif.
The slight imperfections of block printing add character and warmth, while a simple twine bow provides the perfect rustic finish.
8. Stitch on Sheer Fabric for a Floating Effect
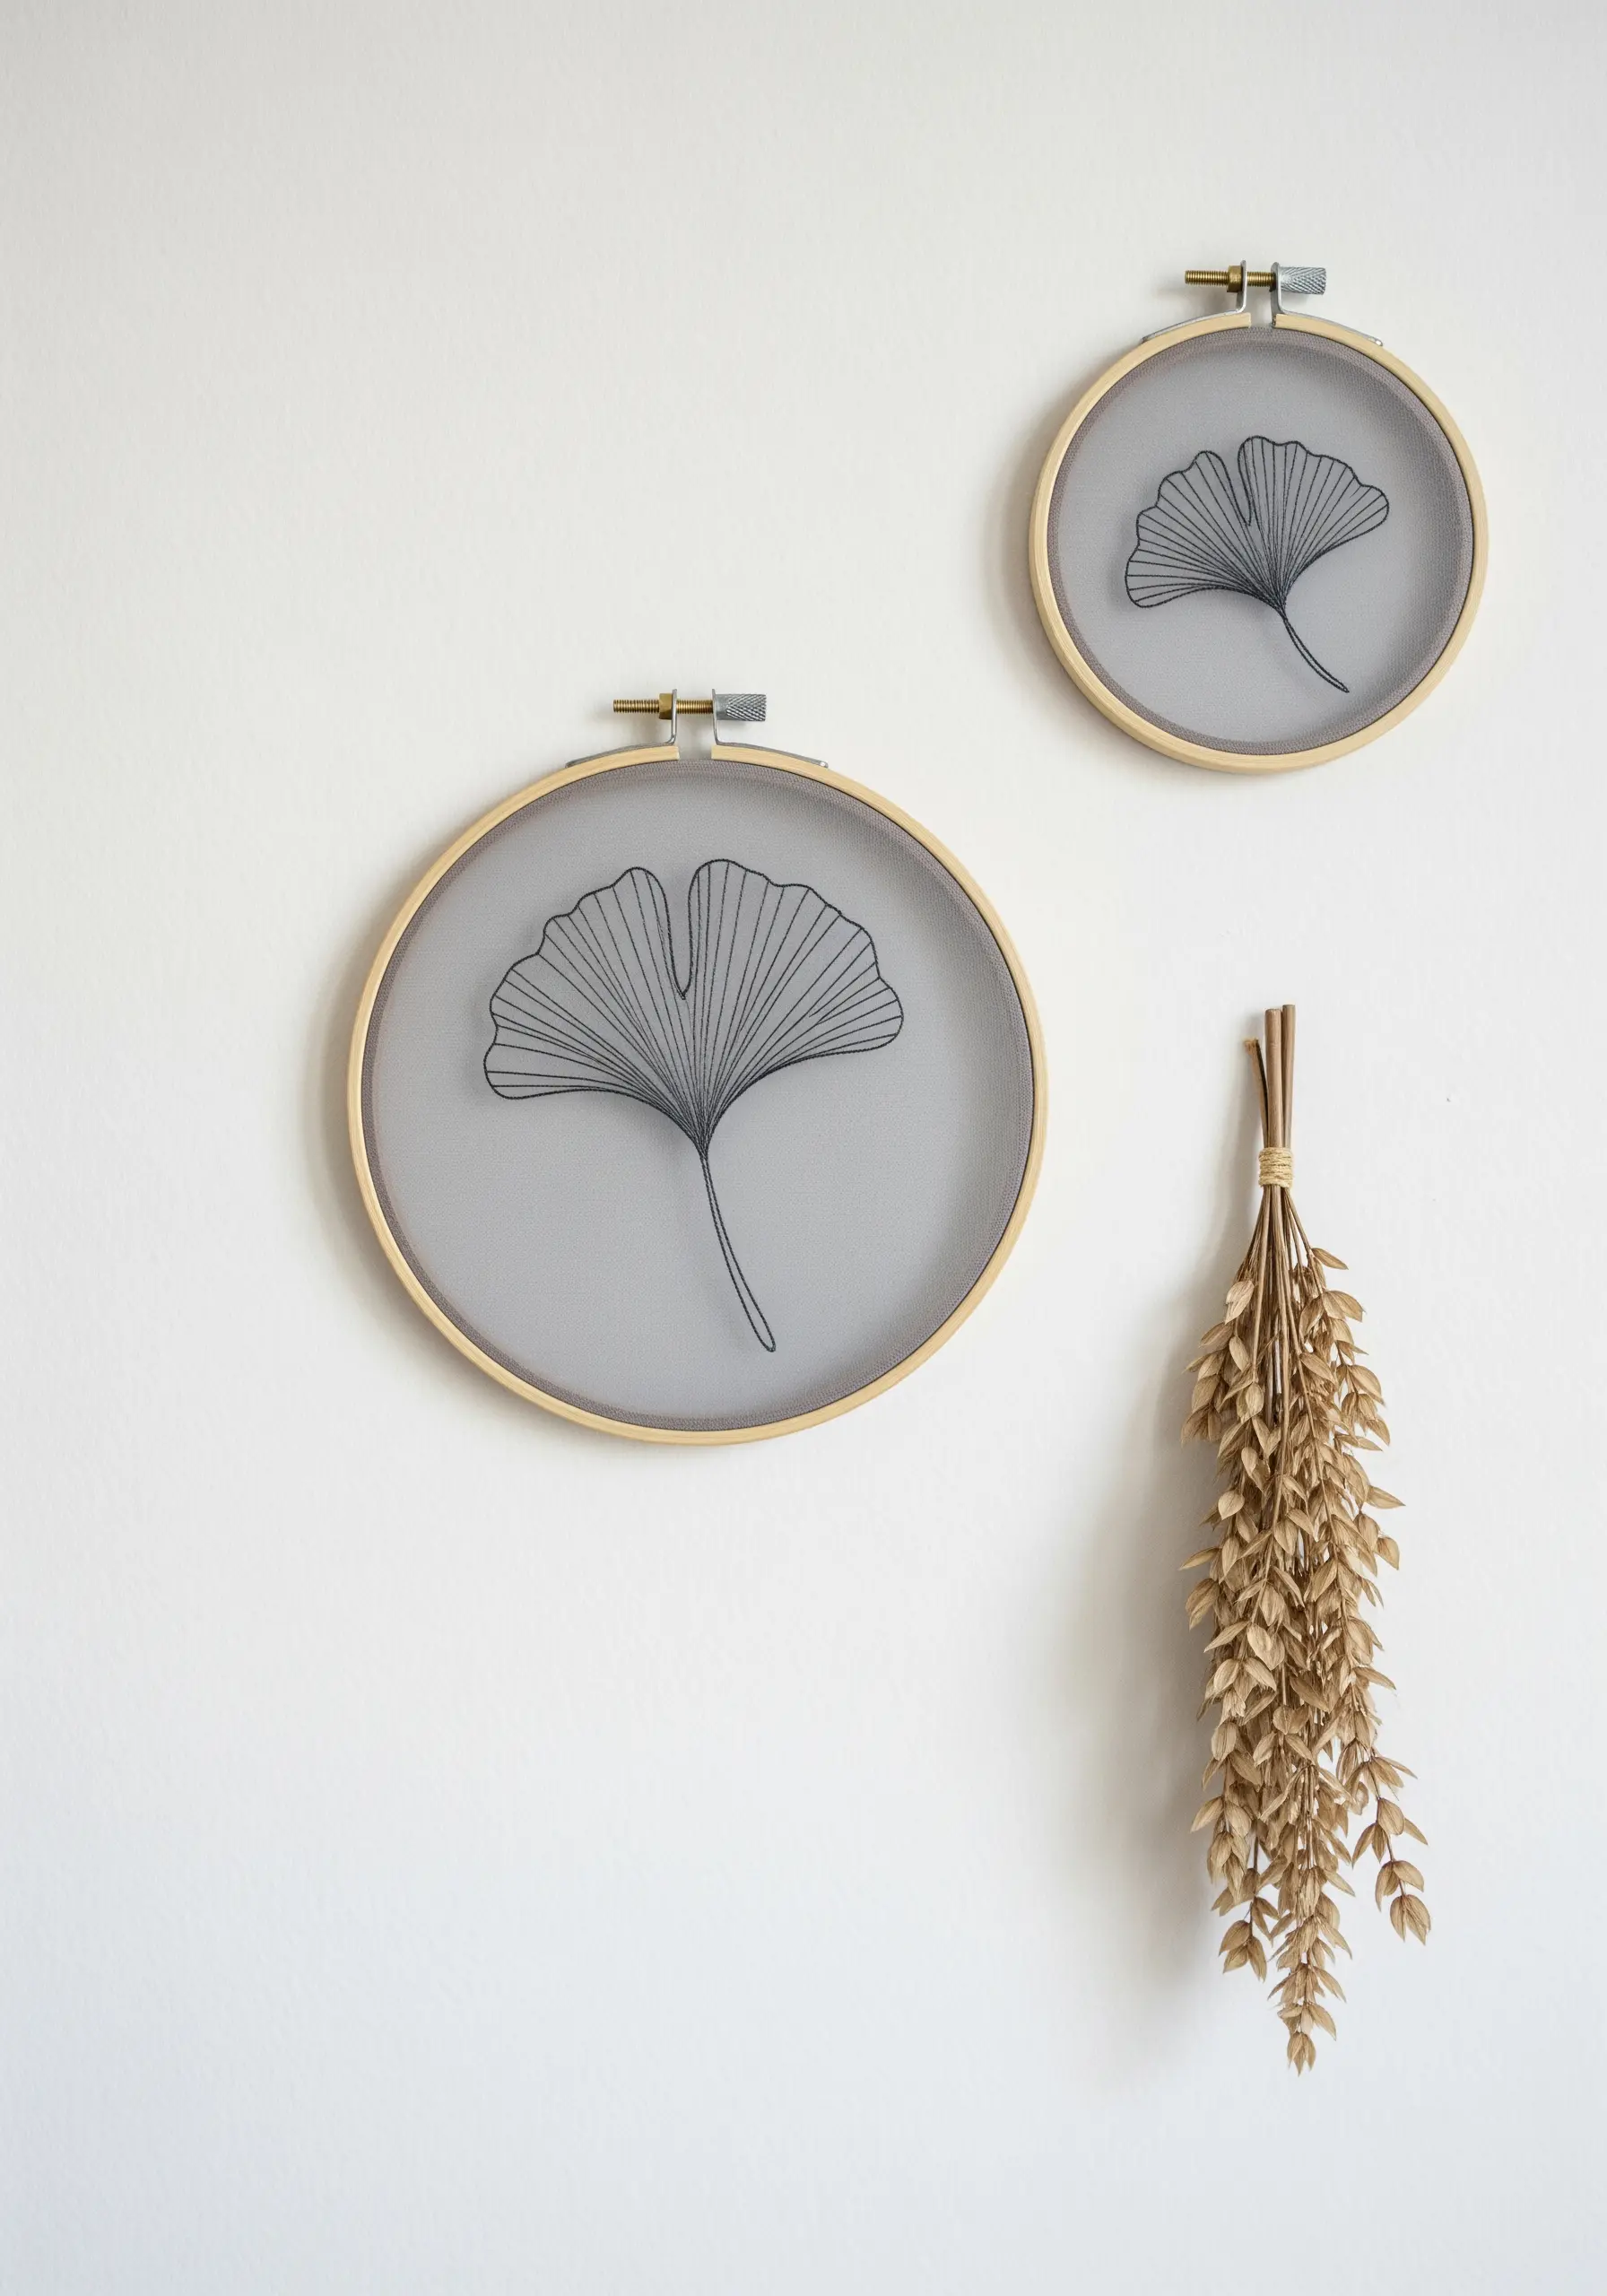
Create ethereal, modern hoop art by stitching your design onto a transparent or semi-transparent fabric like tulle, organza, or voile.
The key to success is using a stabilizer; hoop your sheer fabric with a layer of water-soluble stabilizer to prevent puckering and provide support as you stitch.
Use a simple, clean line stitch like a backstitch or stem stitch to create a delicate, illustrative design.
Once you dissolve the stabilizer, your embroidery will appear to float within the hoop, creating one of the most elegant minimalist embroidery wall art ideas.
9. Coil Fabric Scraps into Durable Coasters
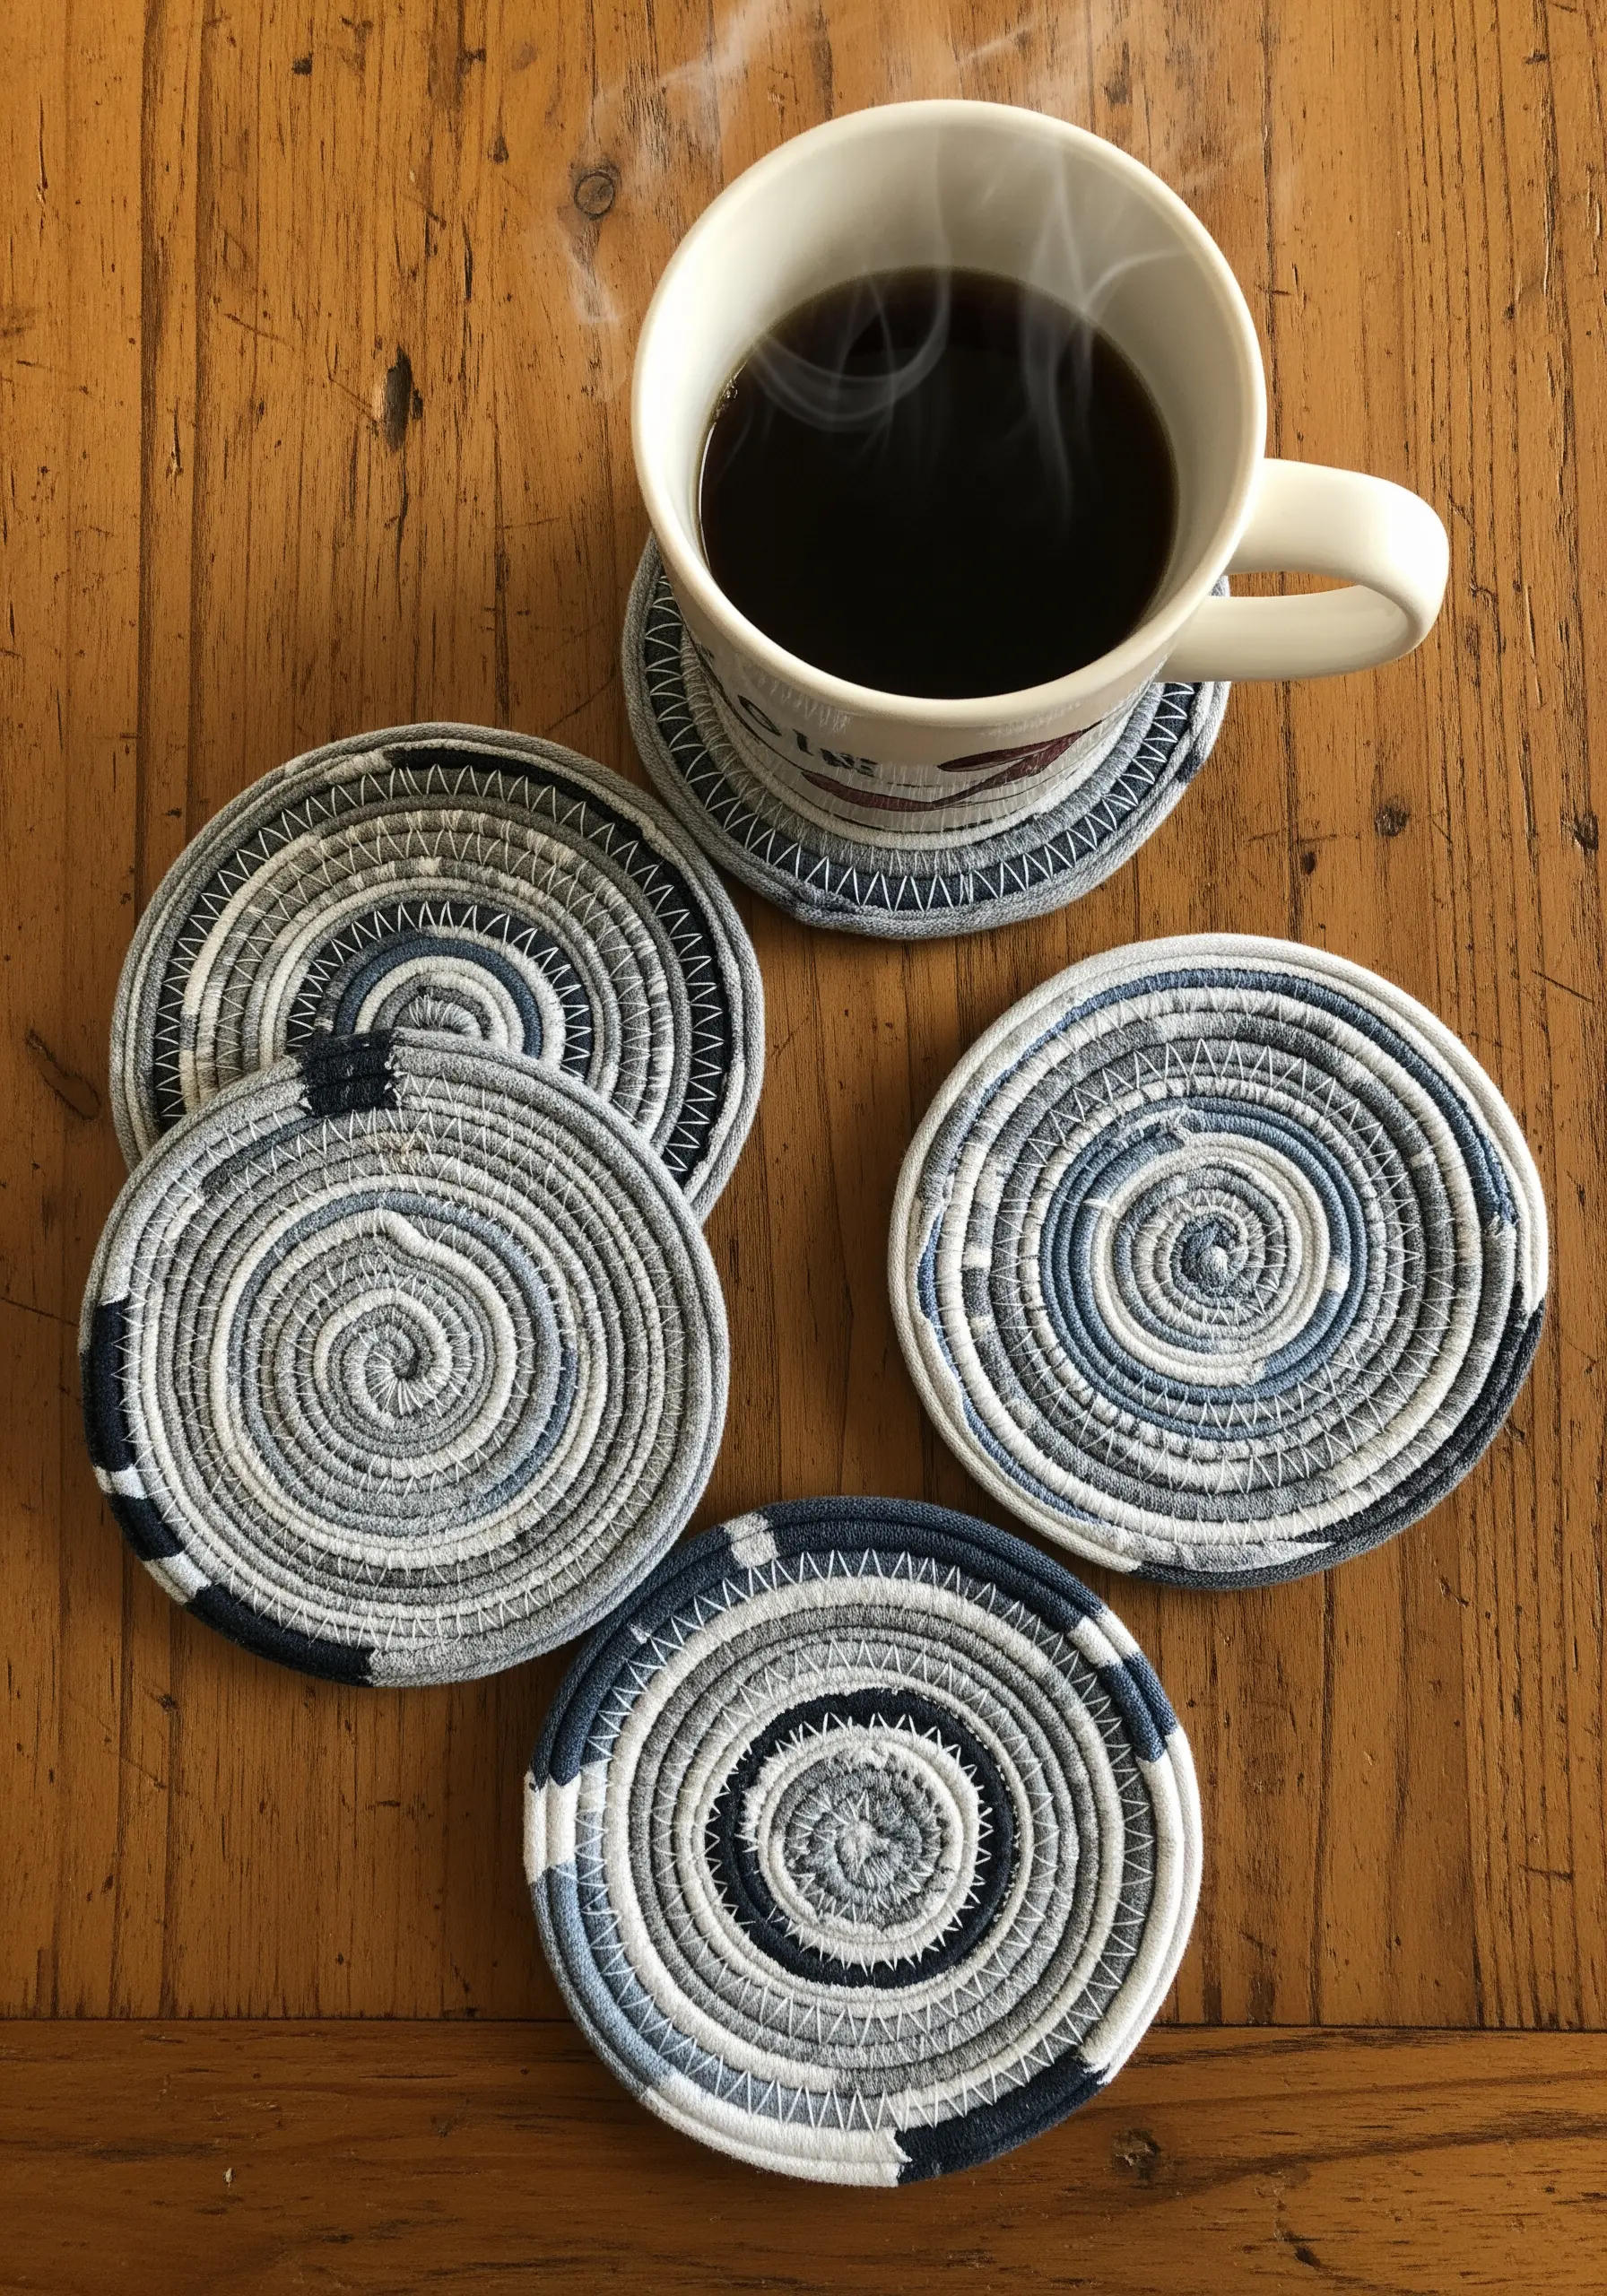
Turn thin fabric scraps into sturdy, functional coasters by creating your own textile rope.
Cut your fabric into long, one-inch strips and wrap them tightly around a piece of cotton piping cord or thick yarn.
As you wrap, begin coiling the rope into a flat spiral, securing it with a simple, strong whipstitch using a contrasting thread every half-inch or so.
The visual appeal comes from the planned color changes in your fabric strips, allowing you to create a spiral pattern that looks complex but is deceptively simple to make.
10. Braid T-Shirt Yarn into a Plush Area Rug

Create a surprisingly soft and expensive-looking rug from old t-shirts.
First, make your own ‘t-yarn’ by cutting the t-shirts into continuous one-inch strips.
For a no-sew method, create three very long strands of t-yarn and braid them together, coiling and hand-stitching the braid into a circle as you go.
The key to a modern aesthetic is a curated color palette—stick to two or three complementary shades for a look that feels intentional rather than scrappy.
11. Craft a Polished Pennant Banner with Wooden Beads

Elevate the classic fabric banner by focusing on clean finishes and sophisticated details.
Use pinking shears to cut your fabric triangles; the zigzag edge prevents fraying and adds a decorative touch without any sewing.
Instead of simply stringing the pennants, alternate them with natural wooden beads.
This simple addition adds weight, texture, and a sense of rhythm to the garland, making it feel like a piece of decor from a high-end children’s boutique.
12. Add Hand-Stitched Accents to Simple Patchwork

Give a modern, color-blocked quilt a tactile, handcrafted feel with minimal hand stitching.
After piecing together your large fabric blocks, use a thick, contrasting thread like perle cotton or sashiko thread to add simple, straight running stitches.
These stitches don’t need to be functional quilting; they are purely decorative accents that add texture and draw the eye.
Placing them strategically—like the simple white lines on this throw—adds a layer of artistry that makes the piece feel personal and unique, much like other embroidered throws and blankets.
13. Define Small Motifs with Metallic Thread Edging
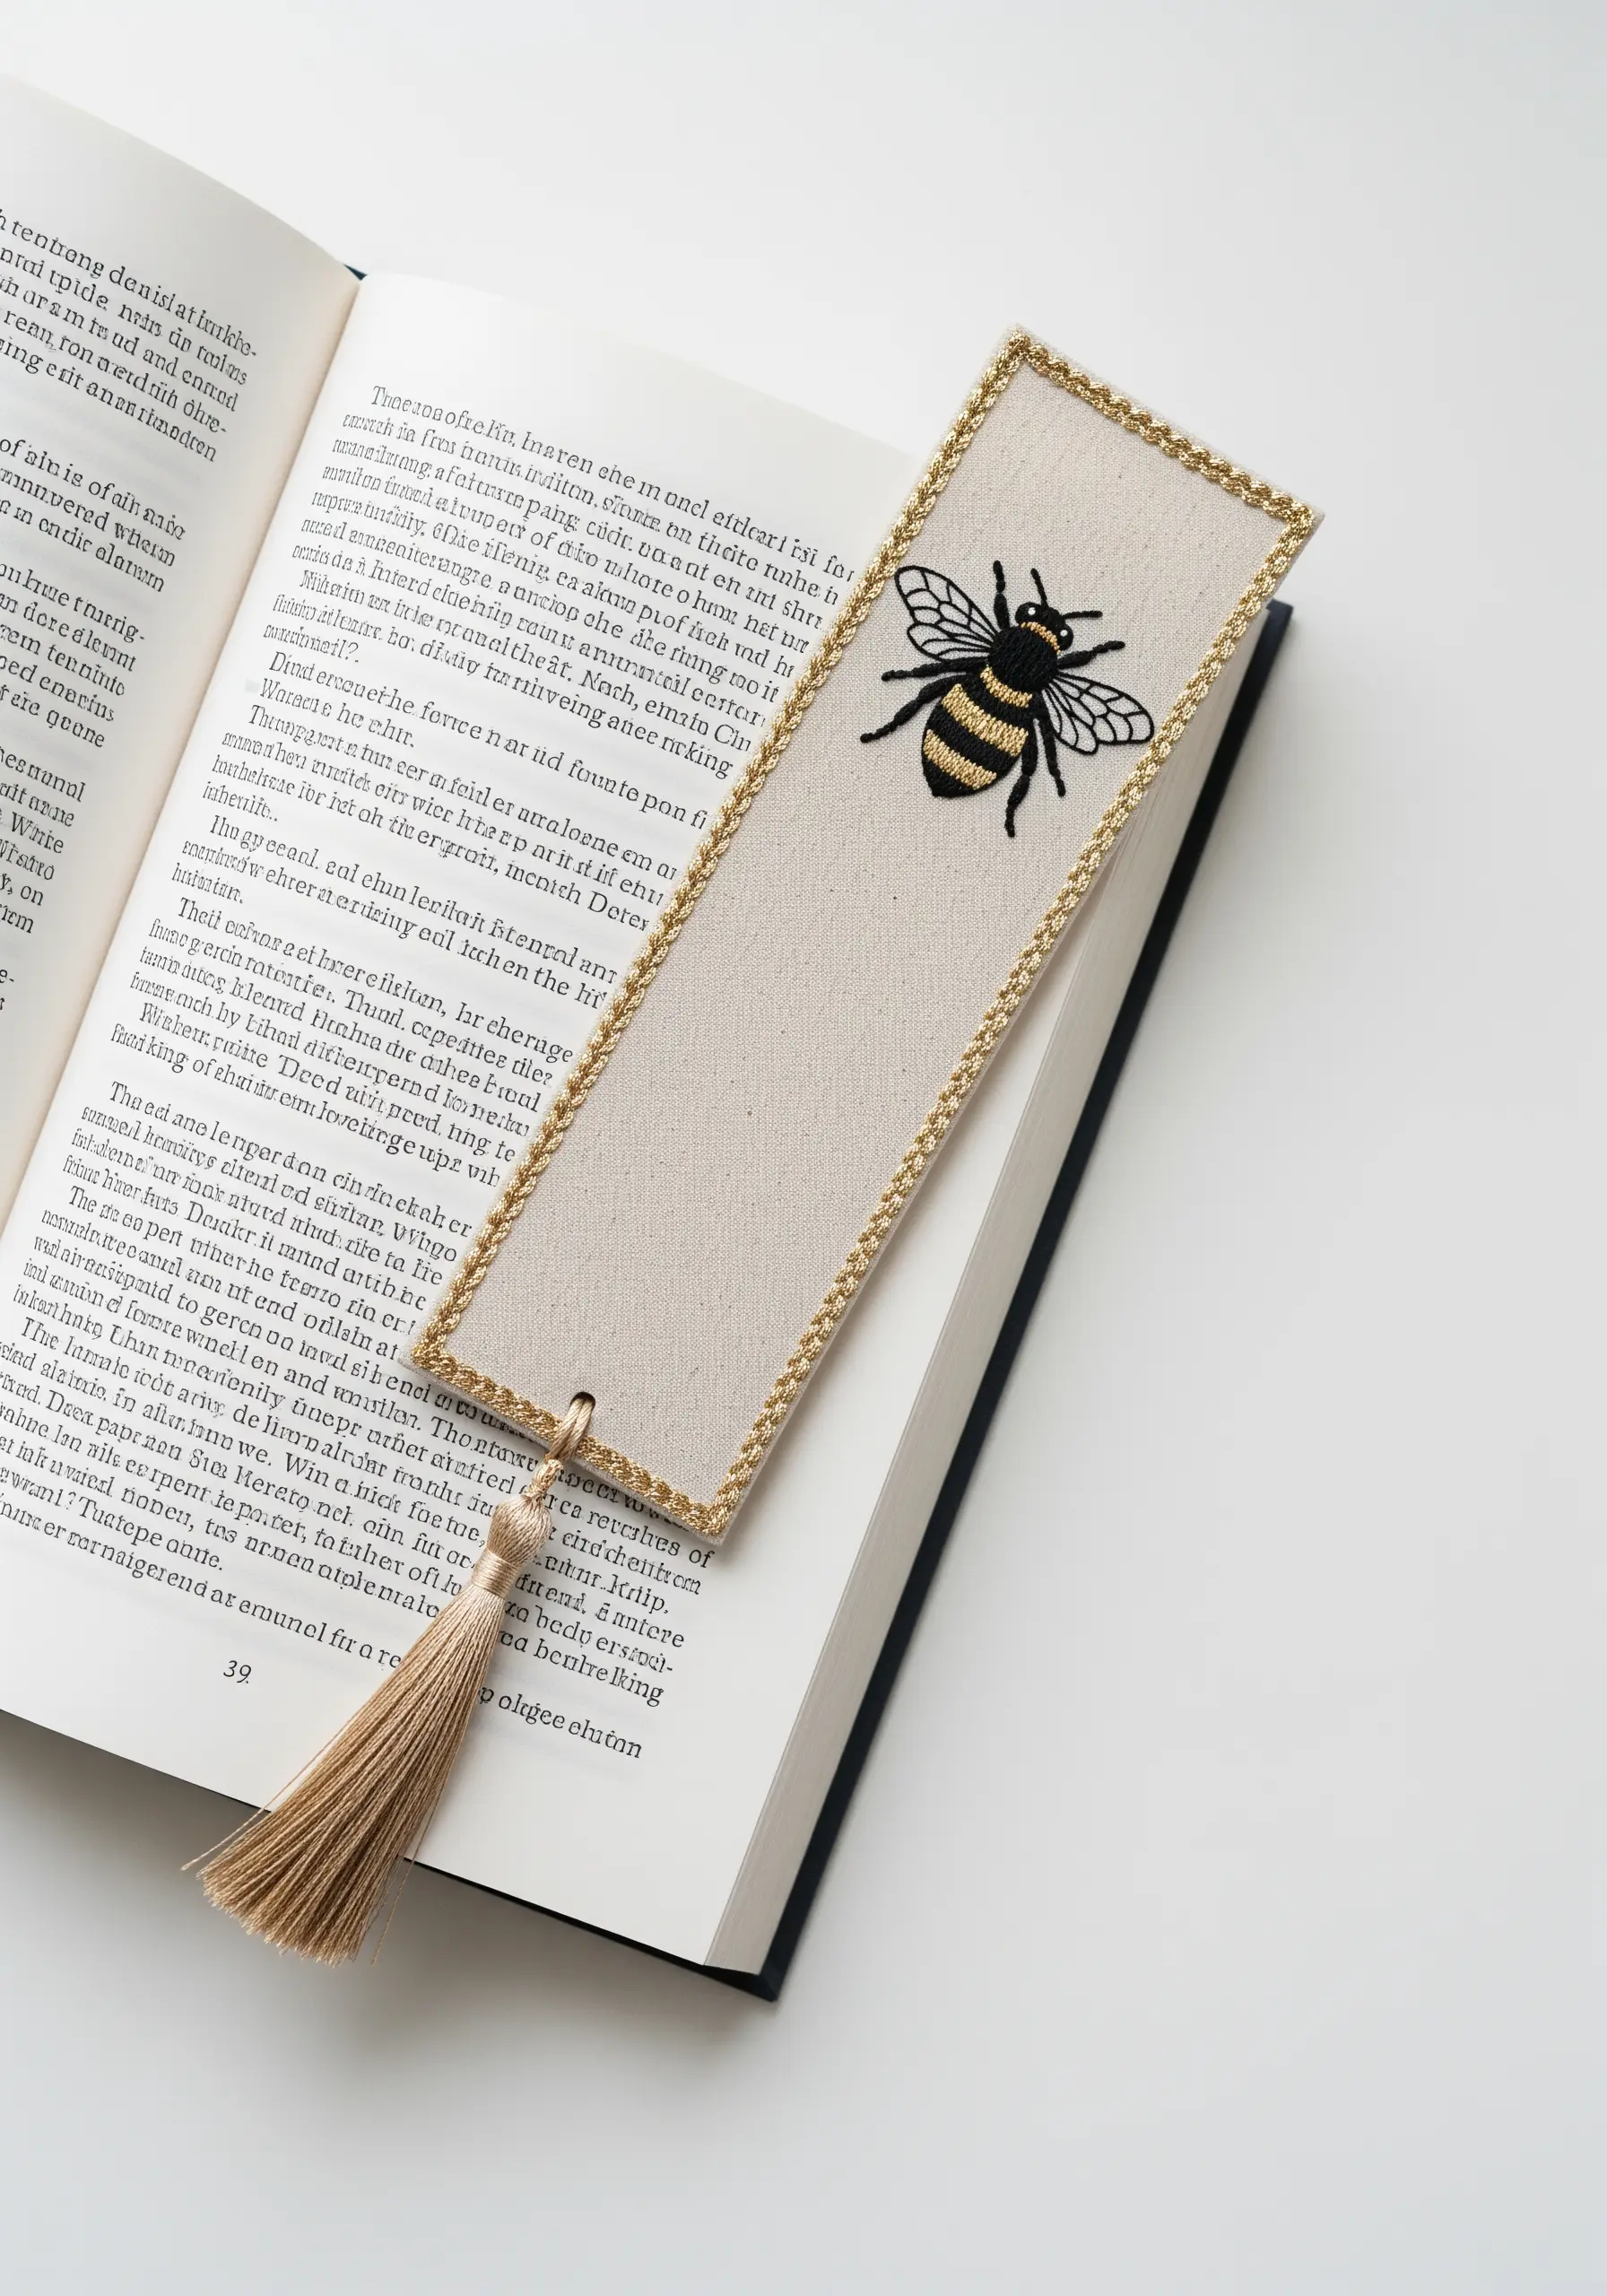
Make a small embroidered motif feel precious and important by giving it a polished border.
After stitching your central design—like this bee—frame it with a simple couching stitch using a fine metallic thread.
To do this, lay the metallic thread along your desired outline and use a second, regular thread to tack it down with tiny, evenly spaced stitches.
This technique adds a clean, shimmering edge that catches the light and instantly makes the entire piece, such as a bookmark, feel more luxurious and complete.
14. Upgrade Storage with Geometric Fabric Wraps
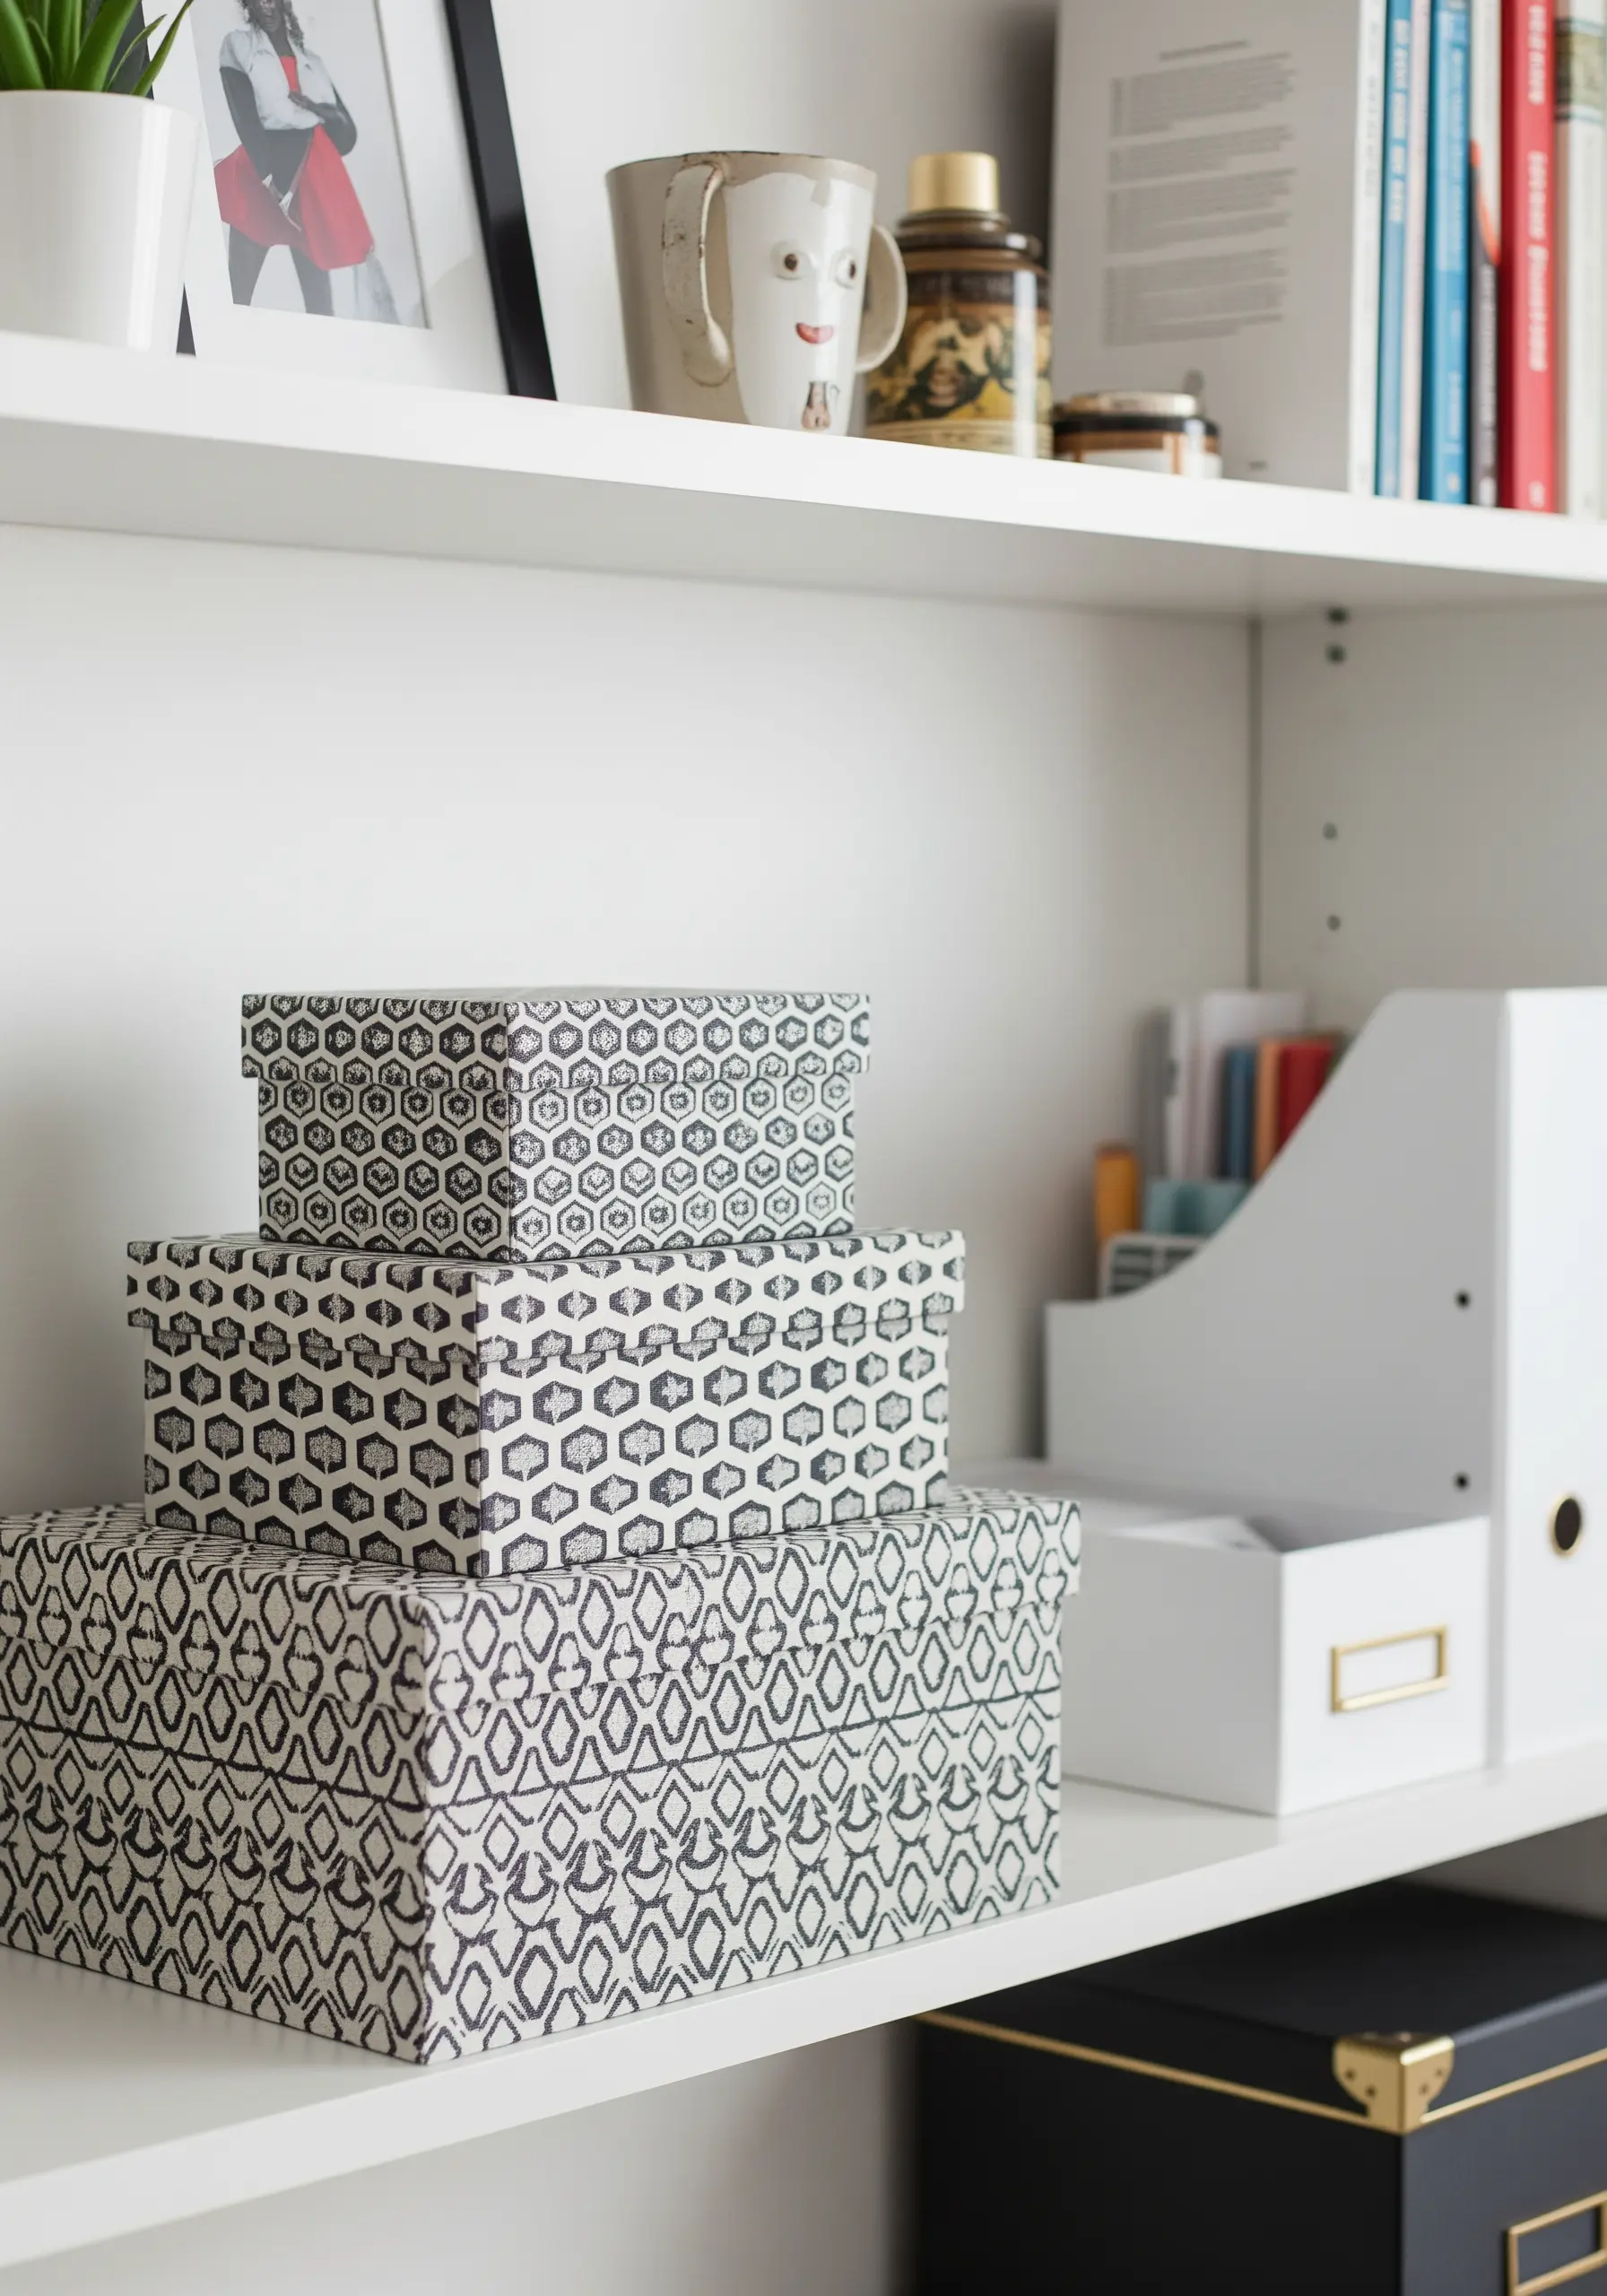
Transform inexpensive cardboard storage boxes into a chic, coordinated set with fabric.
Choose a non-directional, geometric-patterned cotton fabric, which is forgiving and makes it easier to hide seams and align pieces.
Apply a thin, even coat of fabric-safe decoupage glue to the box, then carefully smooth the fabric over it, working from the center out to eliminate air bubbles.
This simple DIY creates custom storage that looks significantly more expensive than its components.
15. Highlight Seams with a Contrasting Utility Stitch

Turn a structural element into a design feature on three-dimensional fabric projects like this pouf.
After constructing your piece from patchwork denim squares, use a thick, brightly colored yarn or embroidery floss for the final seams.
A simple, visible whipstitch or blanket stitch in a bold color like orange not only reinforces the seams but also creates a graphic grid that defines the pouf’s shape.
This technique celebrates the construction process and adds a pop of intentional color that ties the entire design together.
16. Add a Hand-Stitched Trim to a Plain Lampshade
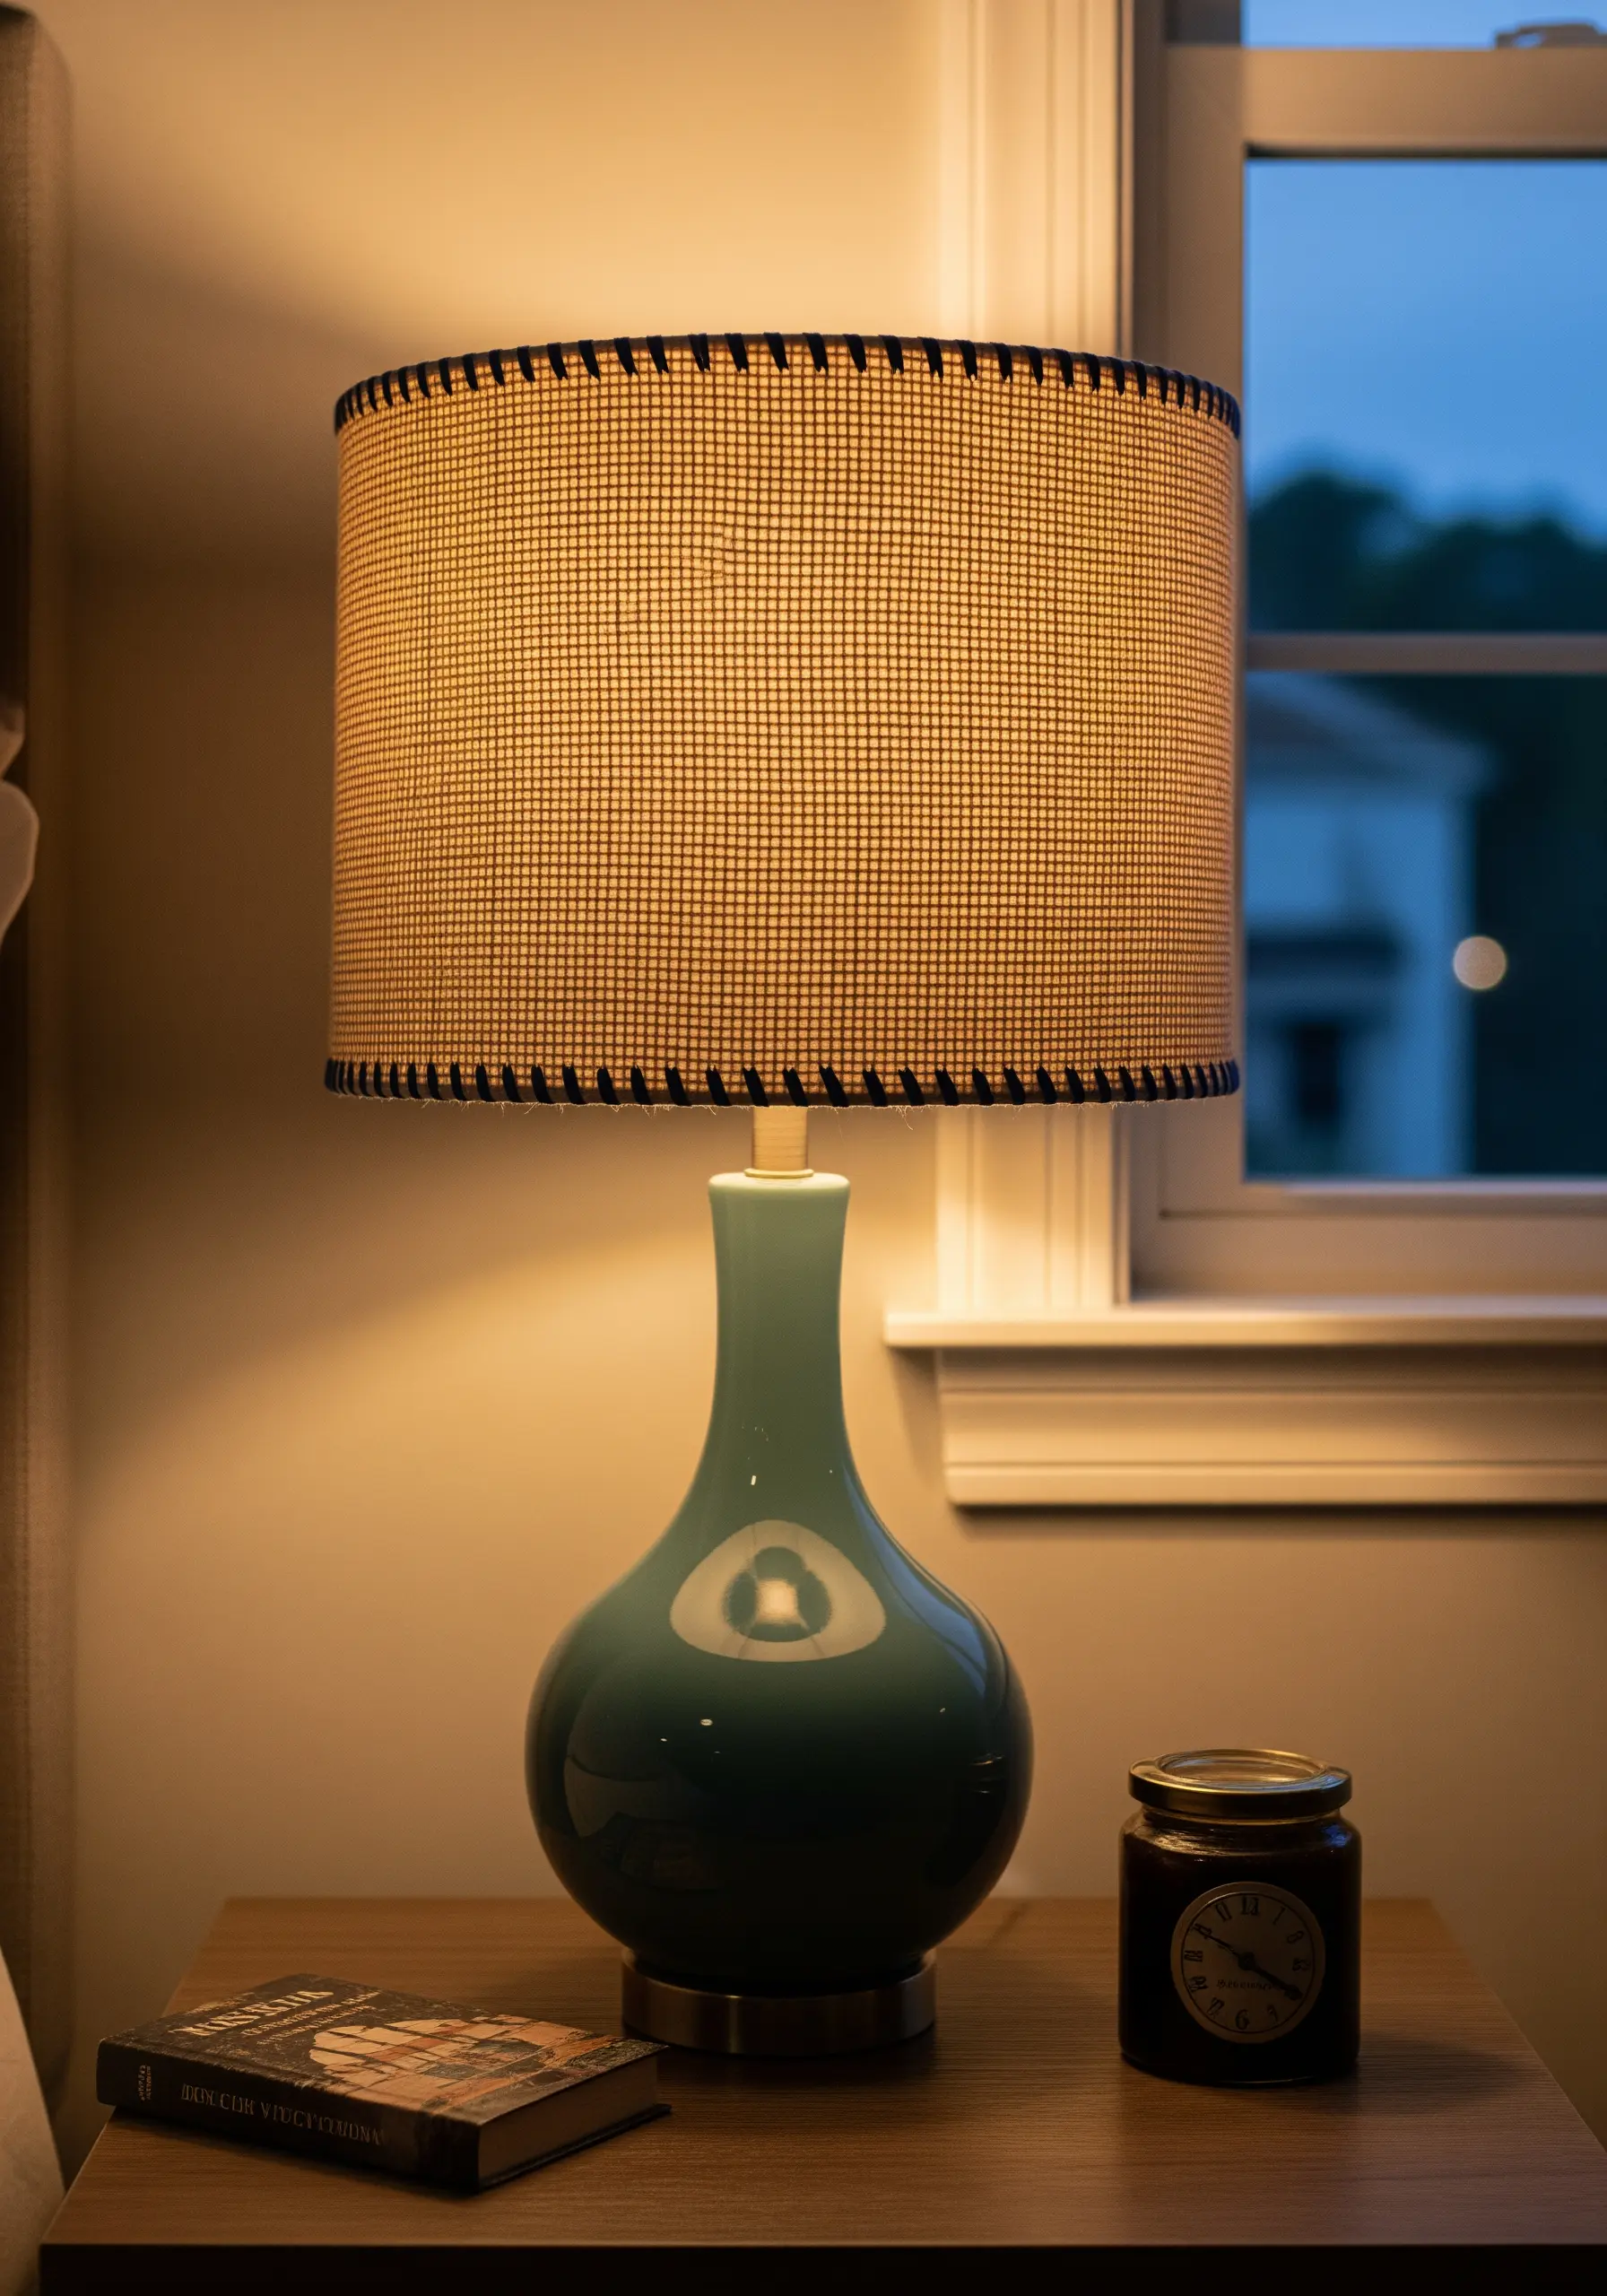
Give a generic lampshade a custom, designer finish with a simple touch of thread.
Using a thick, dark-colored yarn or perle cotton, wrap the top and bottom rims with a neat, evenly spaced whipstitch or blanket stitch.
You’ll need a sharp, curved upholstery needle to easily pass through the tough material of the lampshade frame.
This subtle detail creates a crisp, graphic border that adds definition and a handcrafted touch, making the entire lamp feel more considered and unique.
17. Design a Modern Mobile with Felt and Natural Wood

Create a serene, contemporary mobile using felt, thread, and a piece of driftwood.
The key to a high-end look is the color palette: choose a sophisticated combination of muted tones like mustard, charcoal, and dusty teal.
Cut geometric shapes from stiffened felt, place them back-to-back with the string sandwiched in between, and sew them together with a neat running stitch along the edge.
Hanging them from a natural branch adds an organic element that balances the clean geometry, perfect for embroidered nursery decor ideas.
18. Frame a Mirror with Yarn Wrapping and Tassels
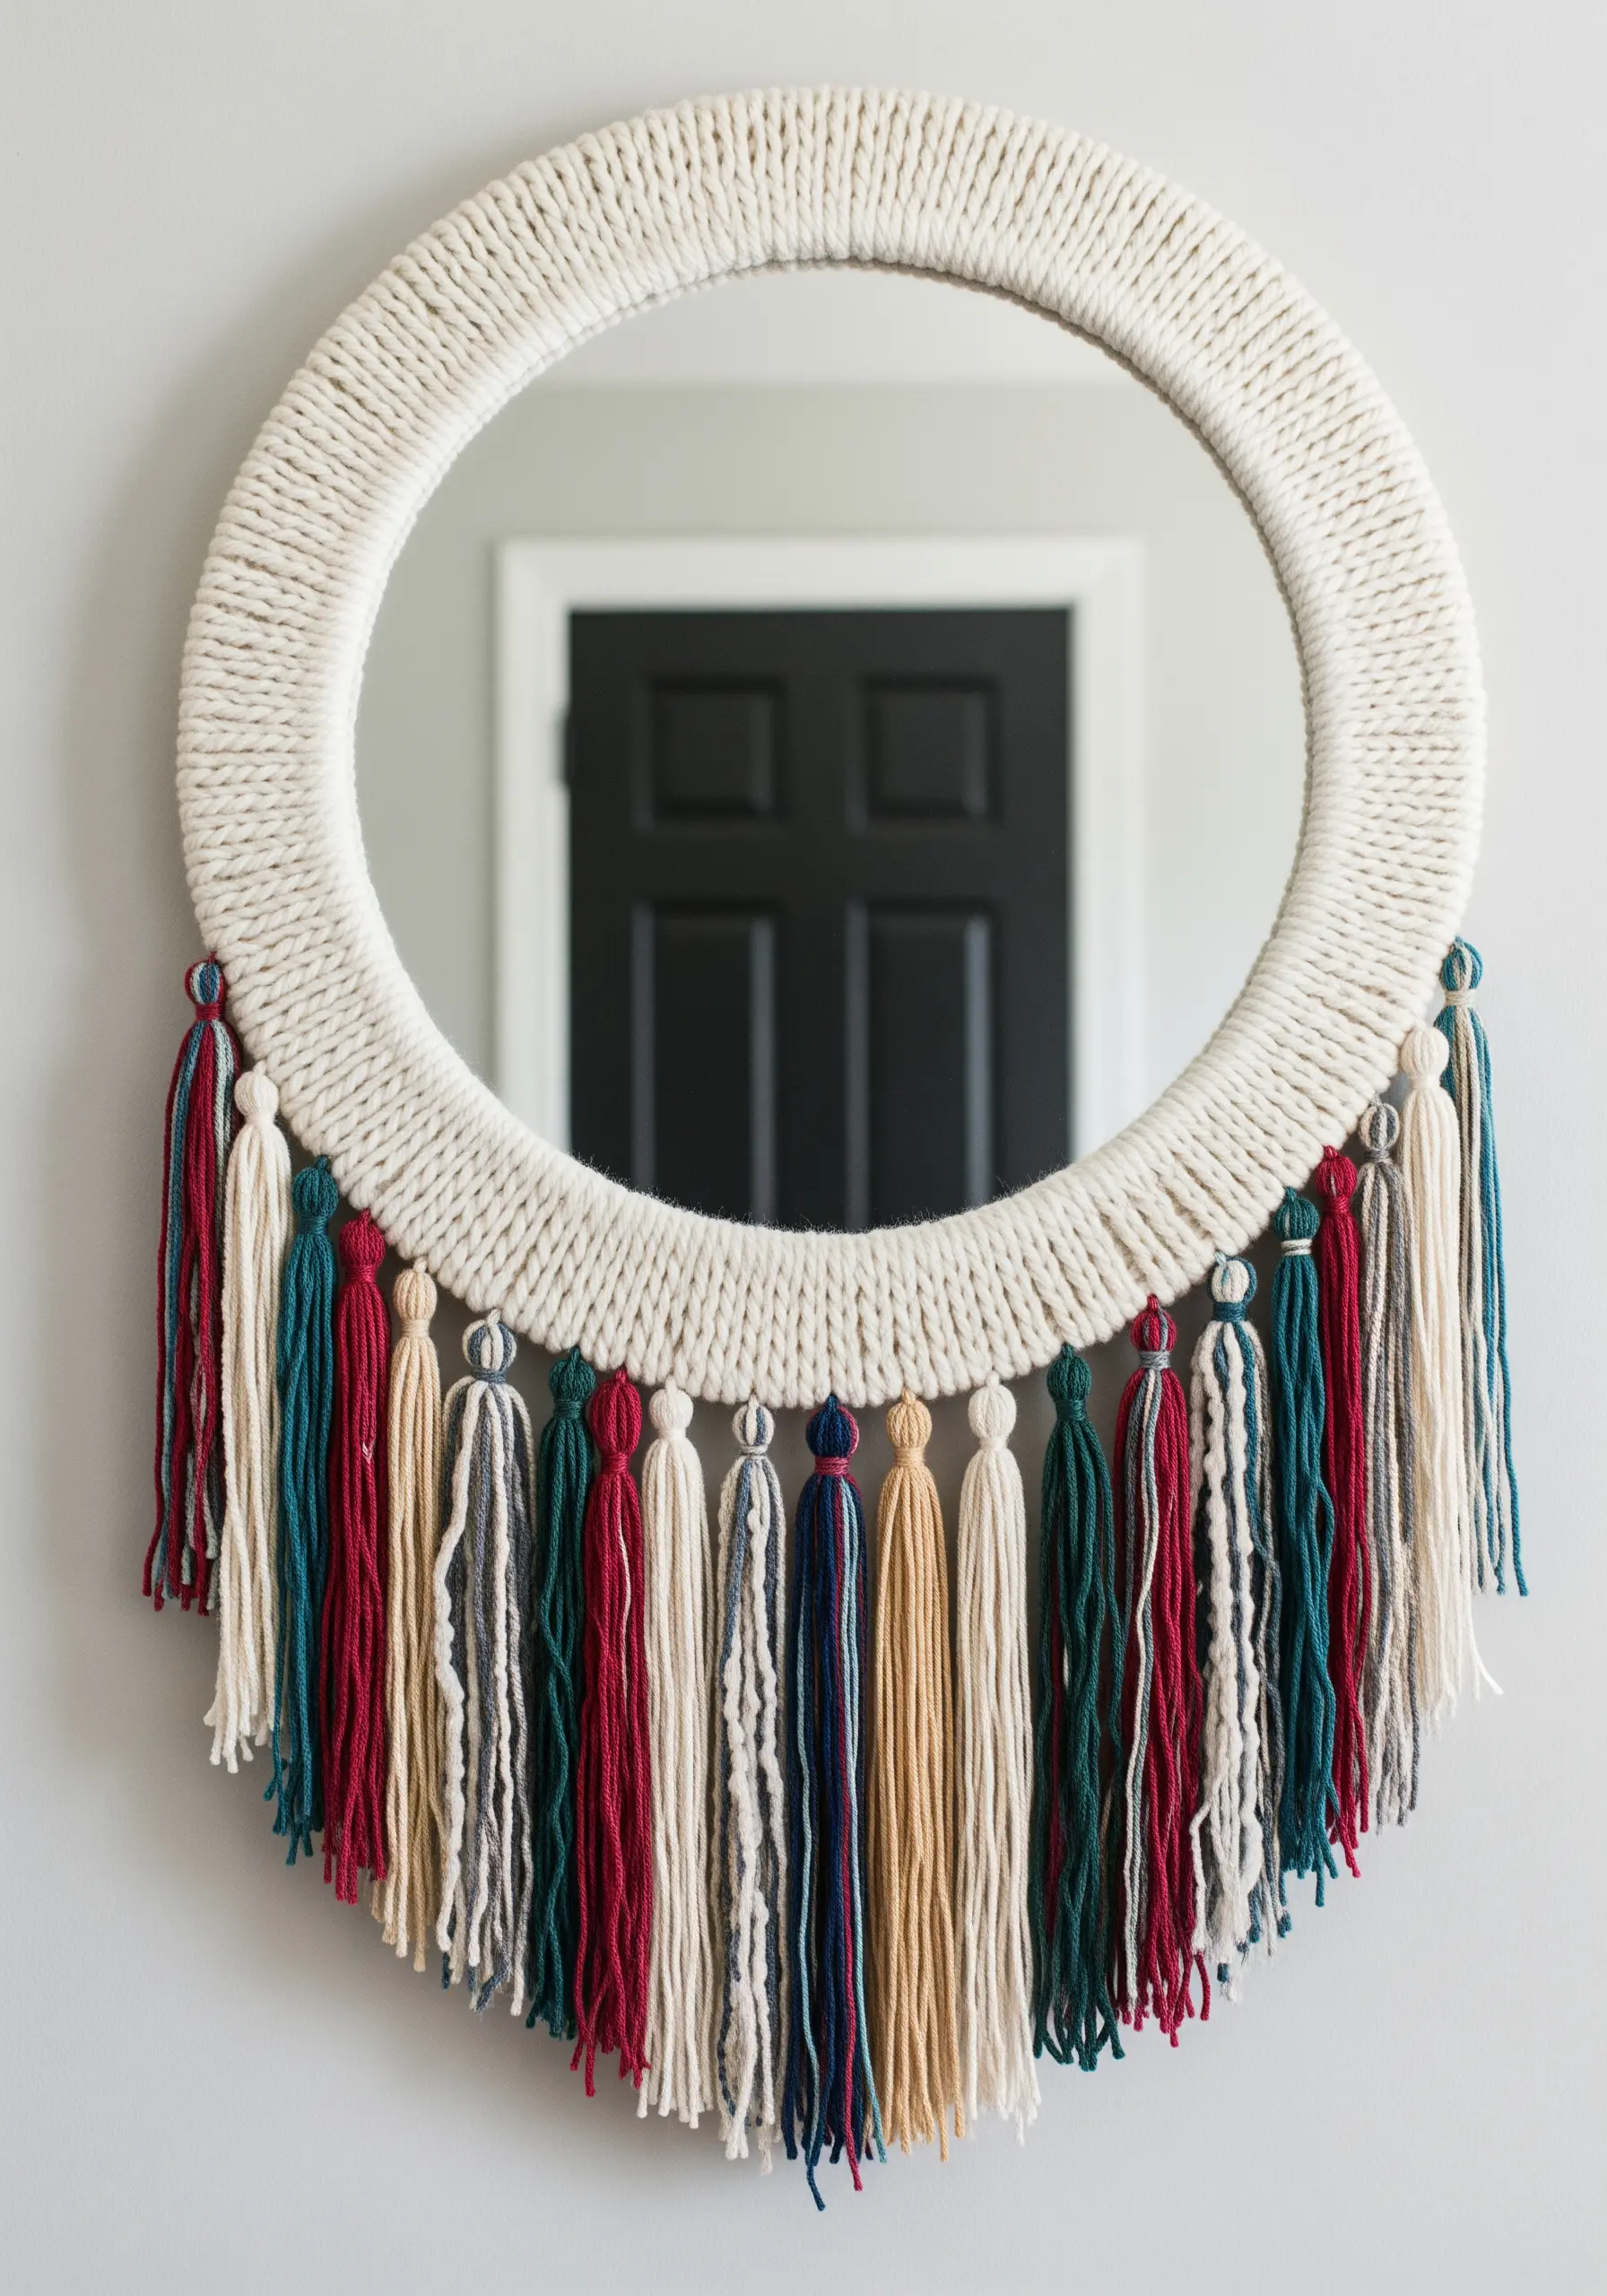
Transform a basic craft store mirror into a bohemian statement piece with yarn.
Tightly wrap a plain circular frame with a neutral-colored yarn, like cream or ivory, ensuring your wraps are close together with no gaps.
The real artistry comes from the tassels. Create lush, multi-colored tassels from your yarn scraps and attach them to the bottom half of the frame.
Varying the colors and lengths of the tassels adds texture, movement, and a playful yet sophisticated finish that looks professionally made.


