

Have you ever finished an embroidery project and felt that, while beautifully stitched, it was missing a certain spark? You know the stitches, you love the threads, but translating that skill into a piece of art that feels truly polished and intentional can feel just out of reach.
The secret to creating embroidery that looks expensive isn’t about complexity or rare materials. It’s found in the small, deliberate choices you make: the direction of a stitch, the weight of a thread, the unexpected contrast of a color, or the clean, modern finish of a frame.
This collection is your guide to mastering those choices. Here, you won’t just find inspiration; you’ll find the specific techniques that elevate a simple motif into a statement piece. It’s time to move beyond just following a pattern and begin designing with confidence, creating art that reflects your own sophisticated style.
1. Create Depth with Linear Landscapes
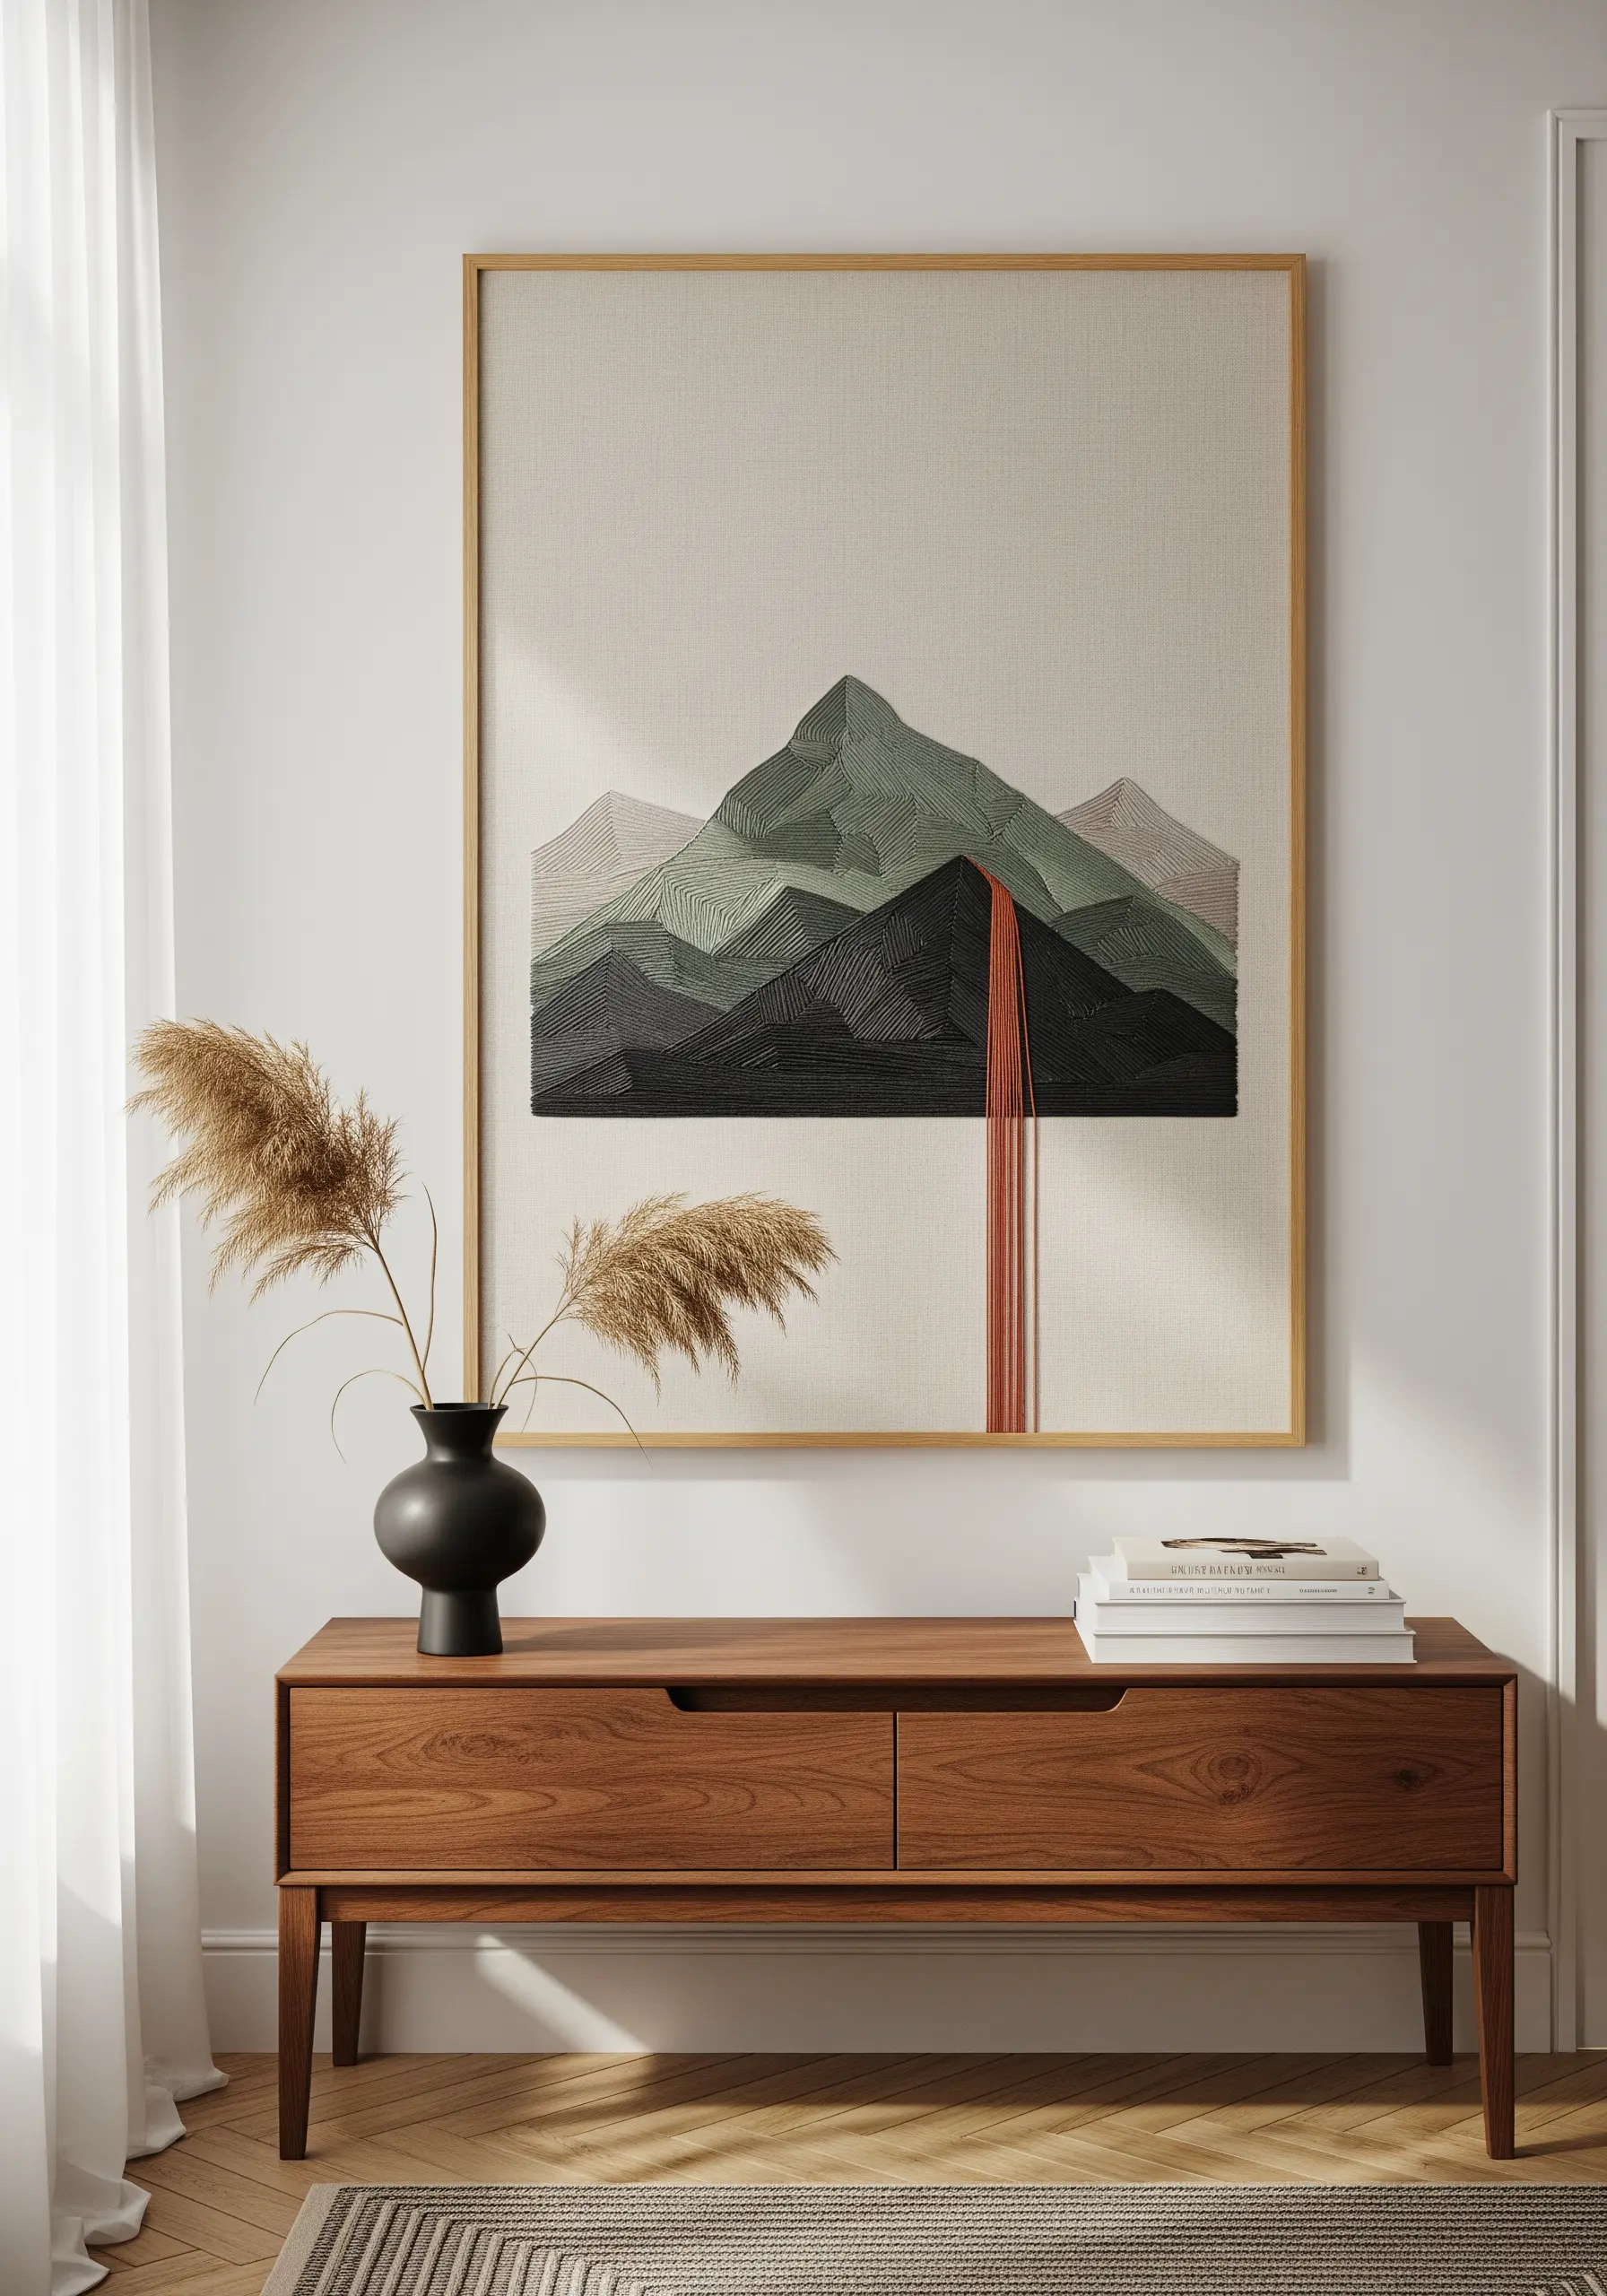
Build a modern landscape using dense, parallel straight stitches to form graphic shapes.
Create a sense of depth by using a heavier-weight thread for foreground elements and a finer thread for those in the distance.
The dramatic waterfall effect is achieved by letting strands of thread hang loose, secured only at the top—a technique that adds texture and a focal point.
Anchor the entire composition with a single, high-contrast color to draw the eye and create a memorable, modern thread art statement.
2. Stitch Radiant Geometry with Metallic Thread

To achieve this flawless, radiant burst, use a high-quality metallic thread on a tightly stretched black fabric like linen or cotton drill.
Use a stem stitch or whipped backstitch for the radiating lines to give them a smooth, rope-like finish that catches the light.
The central woven pattern can be created with a woven wheel stitch, which adds a beautiful textural contrast to the sharp lines surrounding it.
Perfect tension is non-negotiable here; it prevents the fabric from puckering and ensures every line remains crisp, transforming a simple concept into an embroidered mandala wall art design.
3. Sculpt Lifelike Botanicals with Directional Stitching
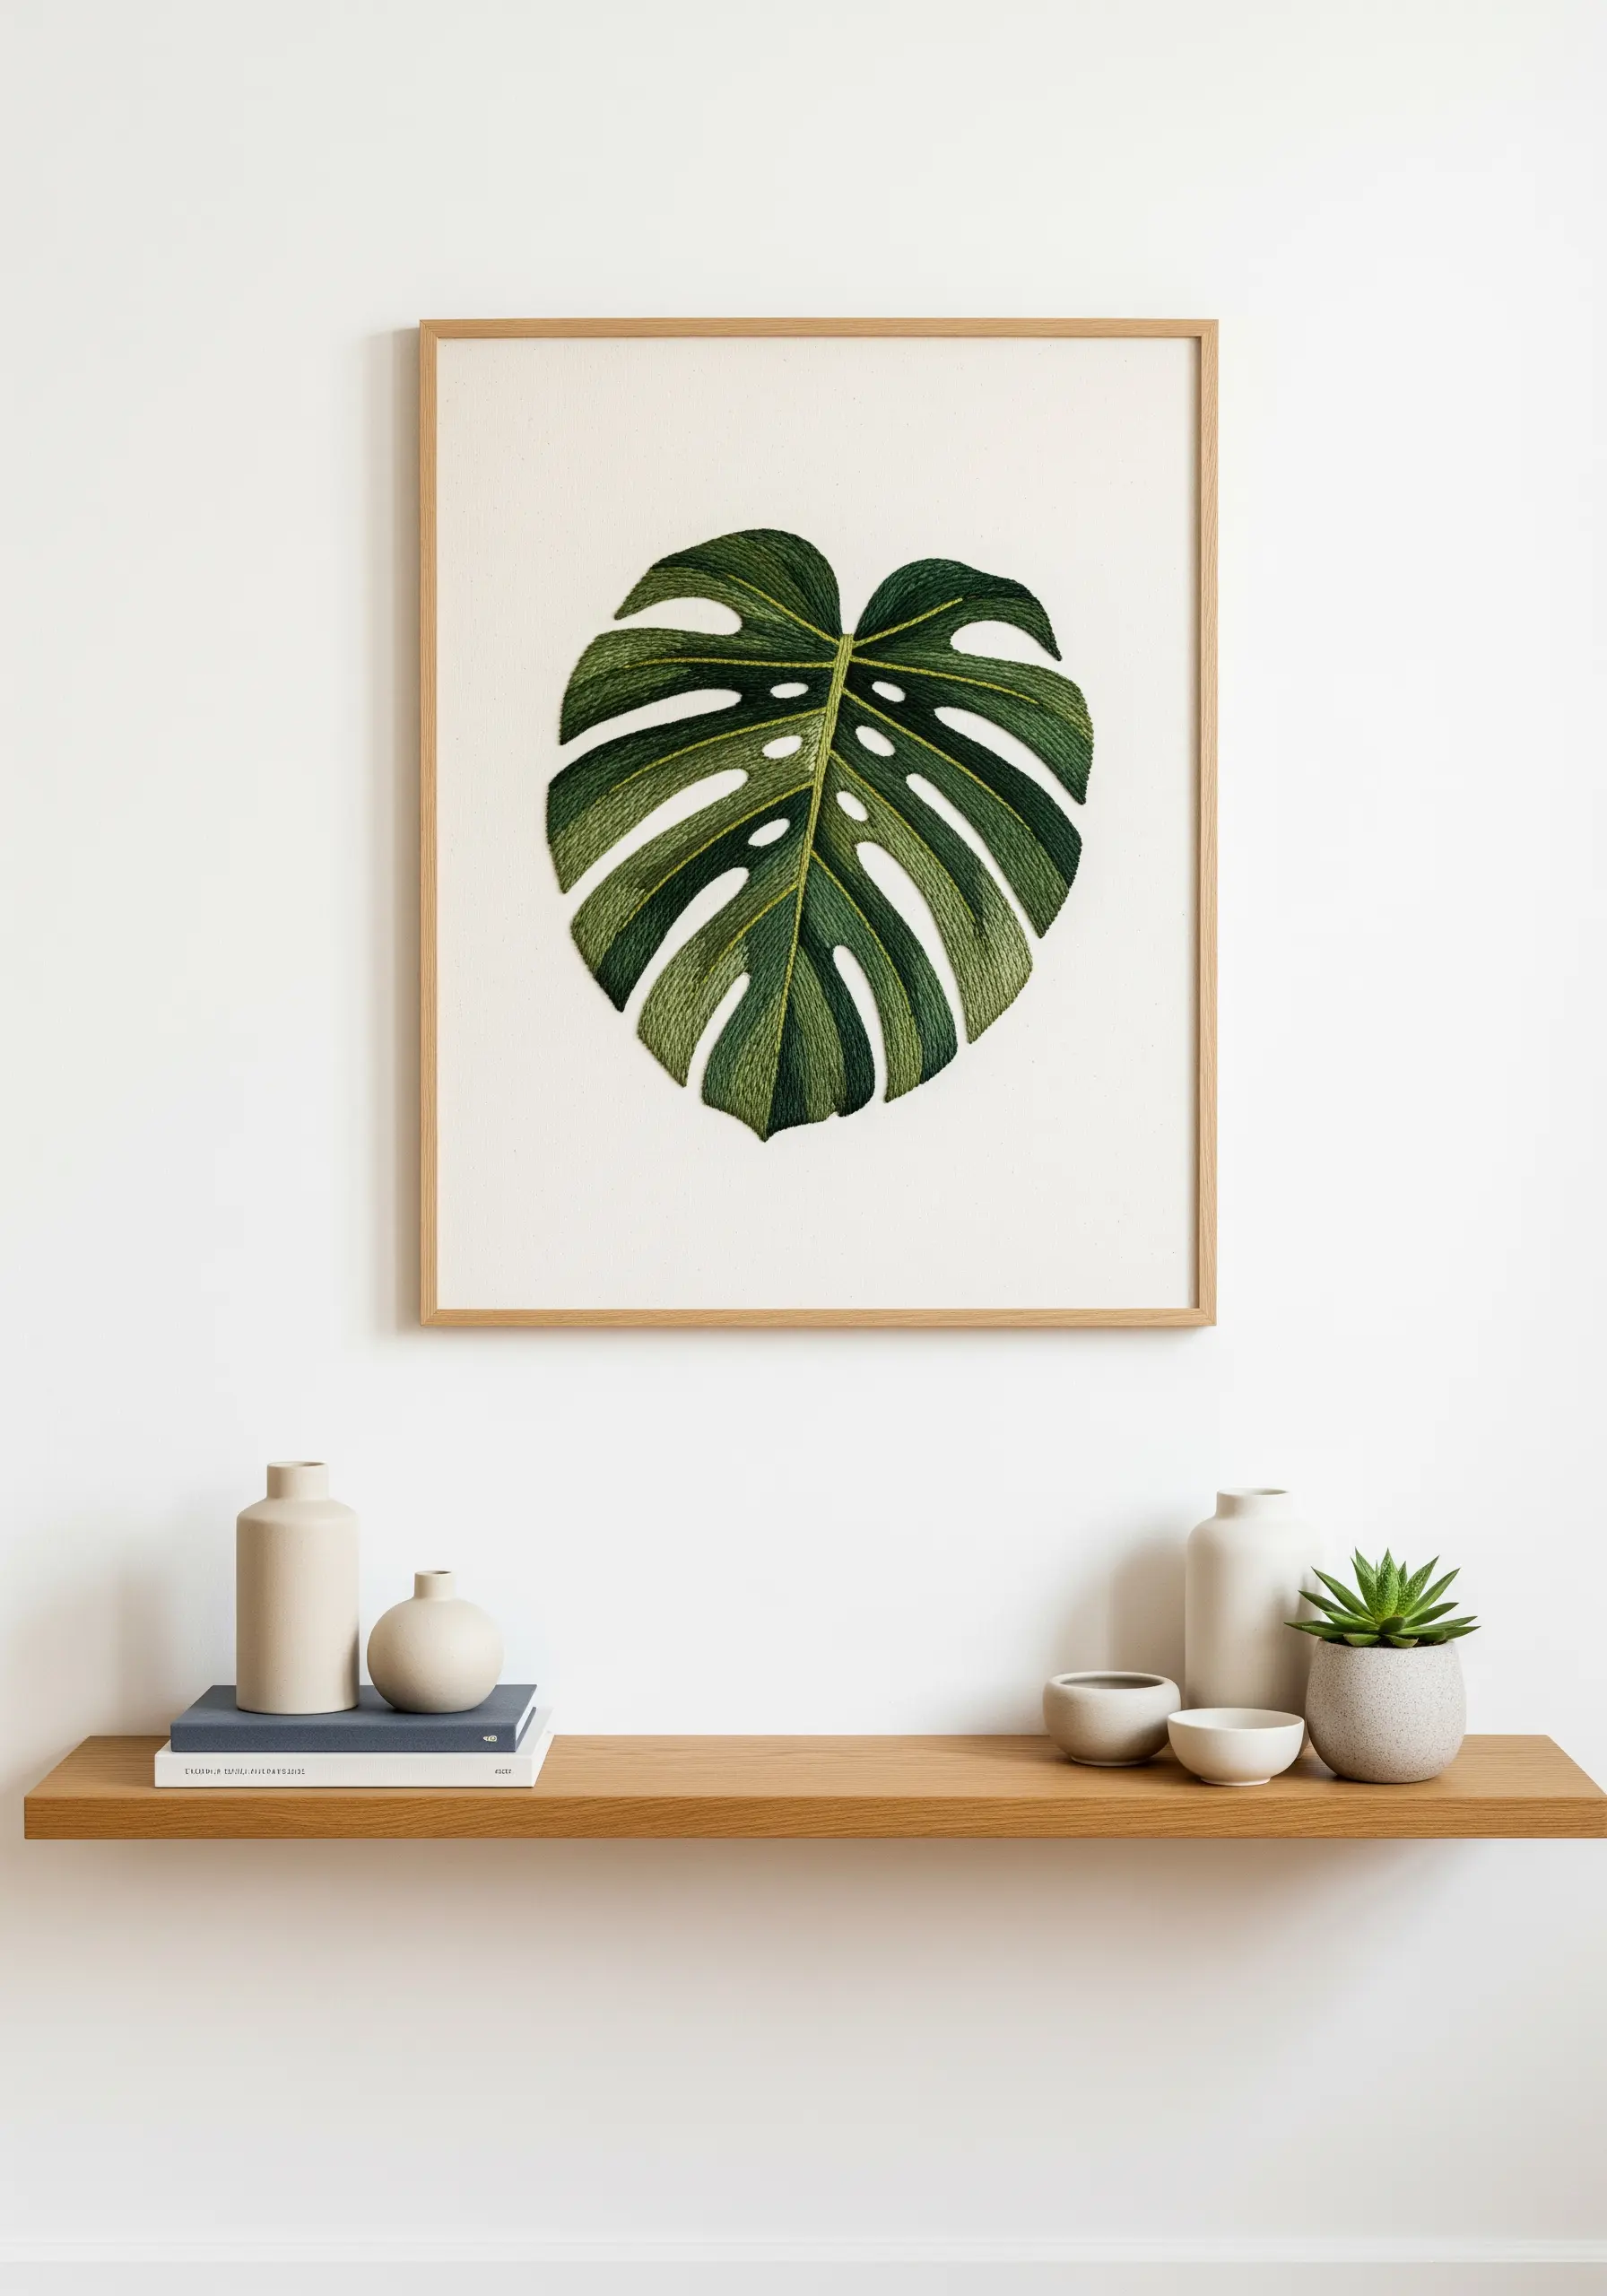
Move beyond flat satin stitch to give your leaves a three-dimensional, painterly quality.
Use the leaf’s natural veins as a guide, angling your long-and-short stitches to follow their direction. This simple shift creates the illusion of light and shadow.
Blend three to four shades of green to enhance realism, transitioning from darker tones near the stem to lighter ones at the edges.
This directional approach turns a simple botanical motif into a dynamic, lifelike piece of art, making it perfect for custom hand-embroidery leaf patterns.
4. Curate a Cohesive Celestial Gallery
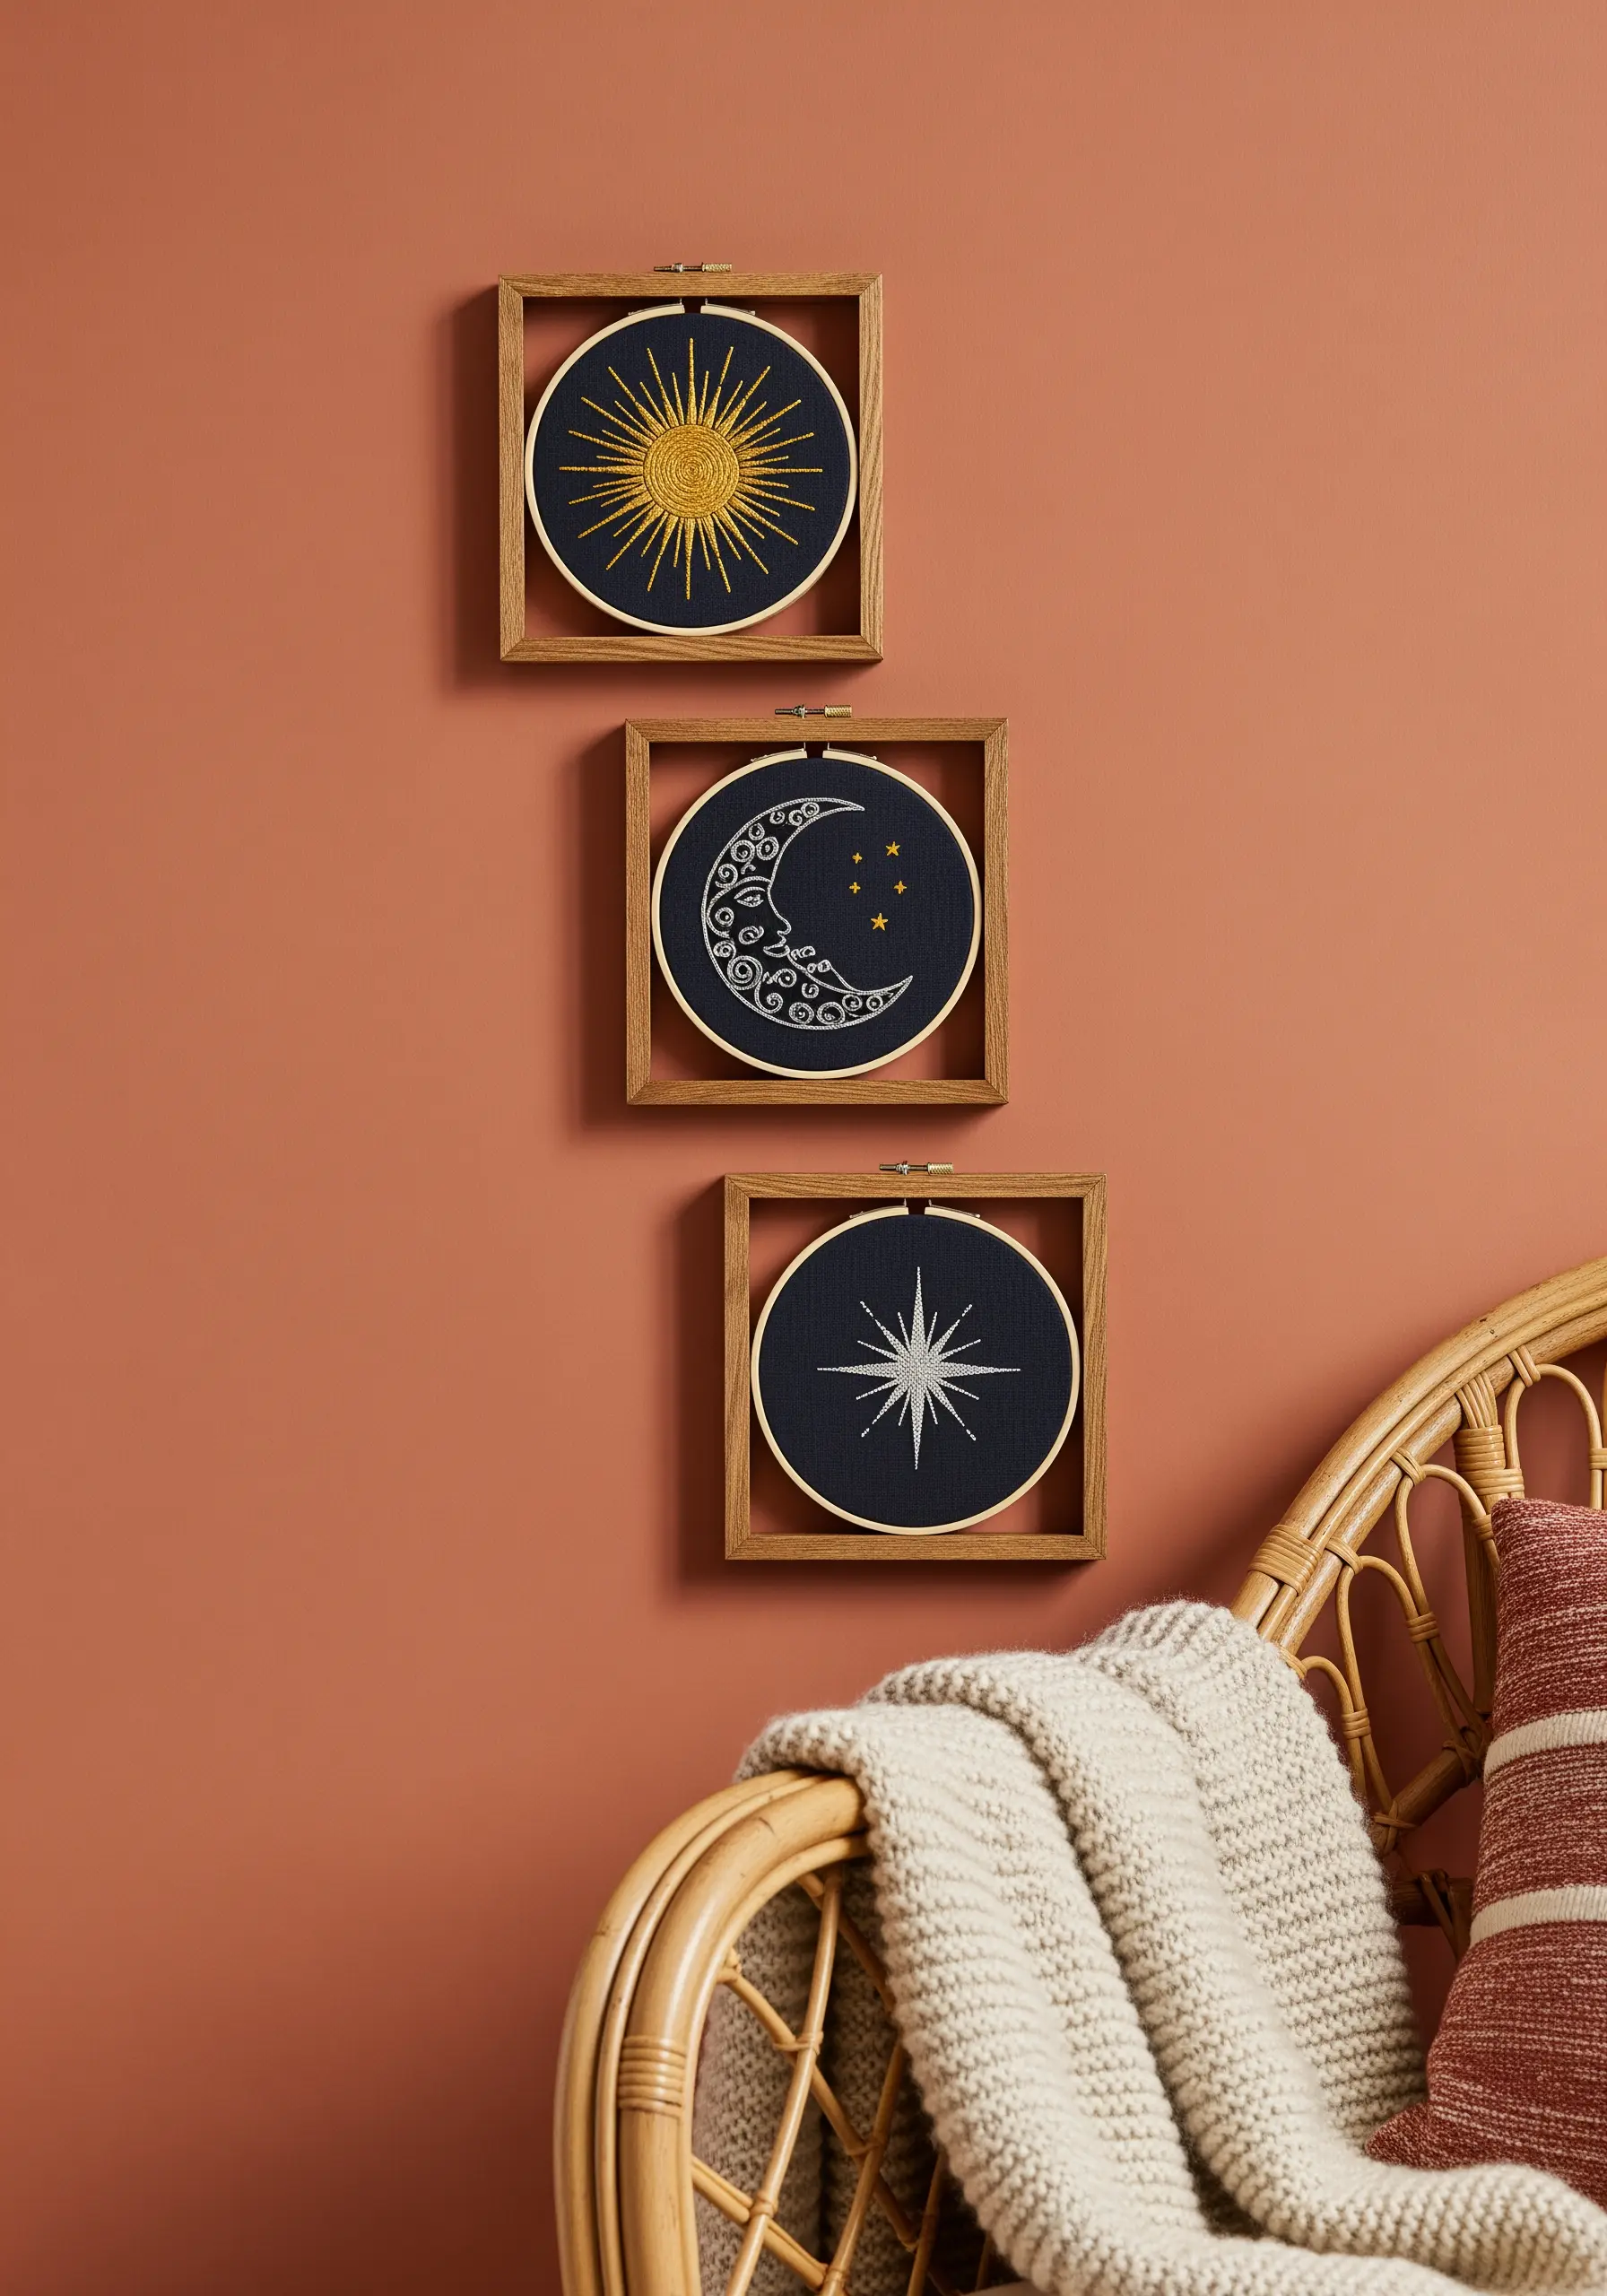
Elevate simple motifs by presenting them as a cohesive triptych.
Use a consistent thread weight—such as all six strands of embroidery floss—to give your linework a bold, graphic presence against the dark fabric.
The key to a polished look is unifying the collection with a strict color palette and matching frames.
Placing traditional round hoop art inside square frames adds an unexpected, modern layer that immediately looks more intentional and curated, perfect for displaying subtle heart & star motifs.
5. Paint with Iridescent and Metallic Threads
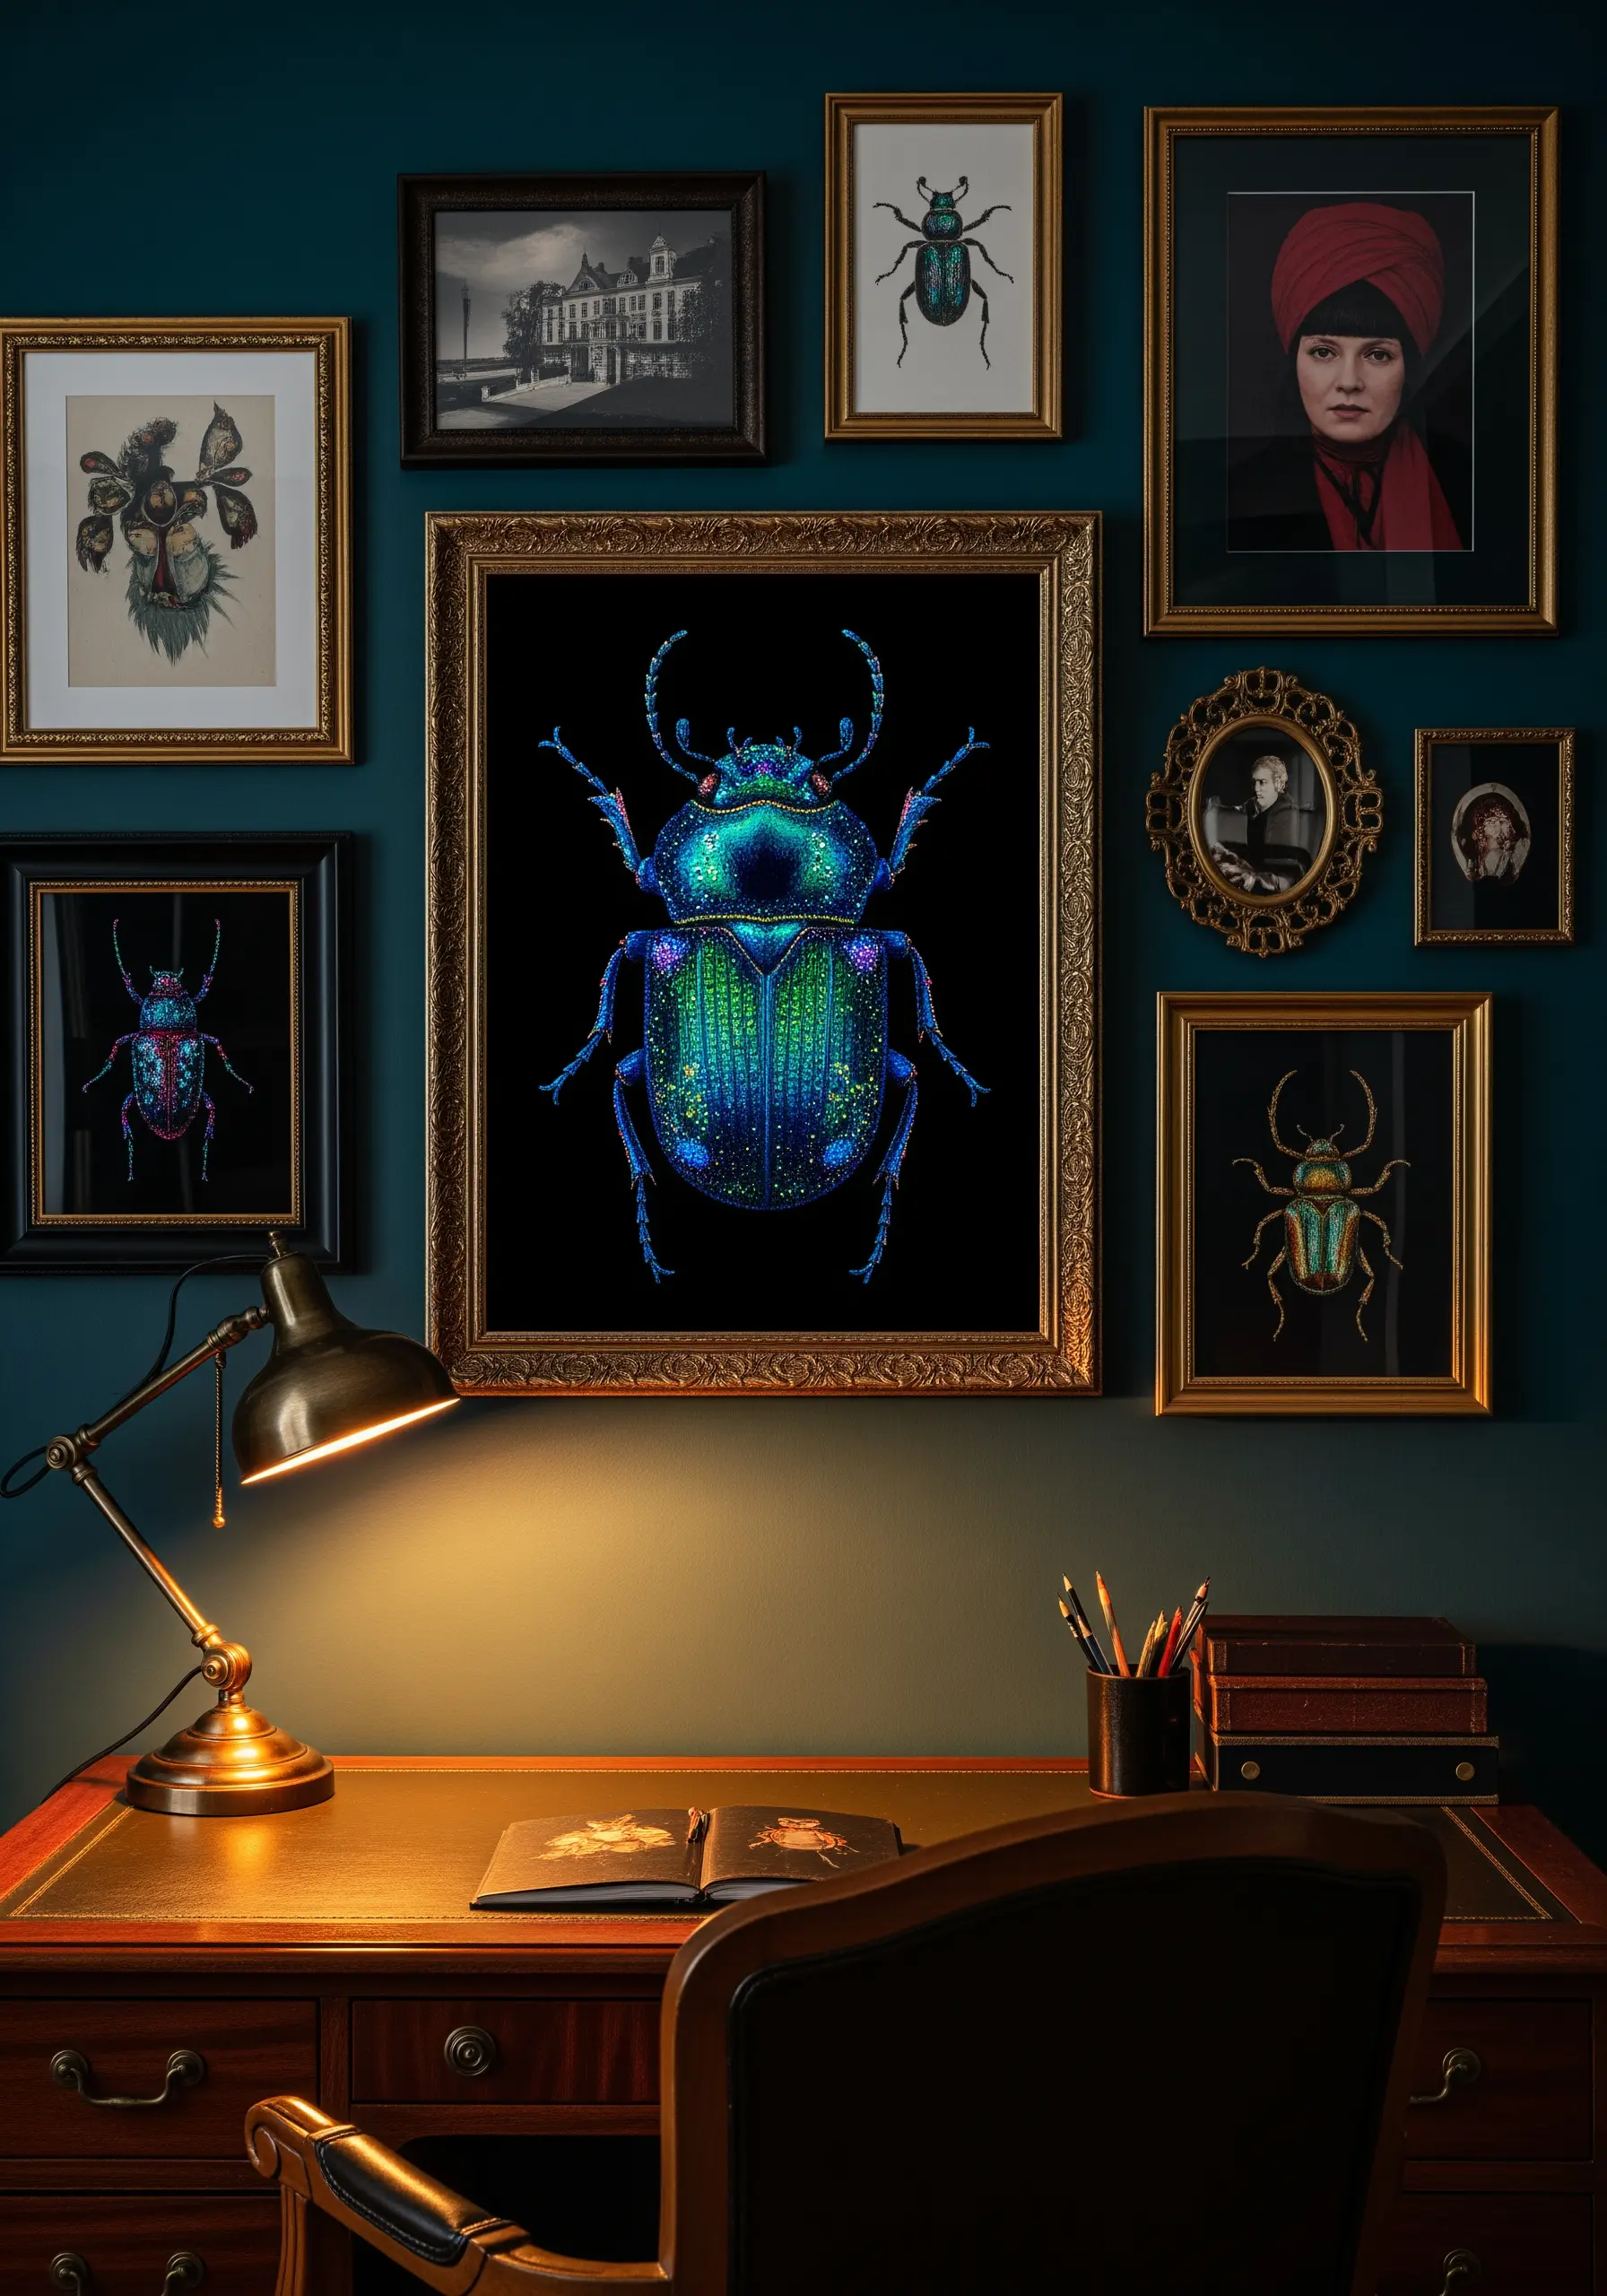
To capture the shimmering, multi-tonal shell of a beetle, you must blend different types of thread.
Combine metallic, silk, and variegated floss using single-strand long-and-short stitches to create a smooth, painterly transition between colors.
Add tiny, scattered French knots with metallic thread to mimic natural sparkle and add a layer of tactile texture.
This technique turns your needle into a paintbrush, allowing you to create realistic animal & insect embroidery patterns that seem to glow from within.
6. Embrace Negative Space with Delicate Wildflowers
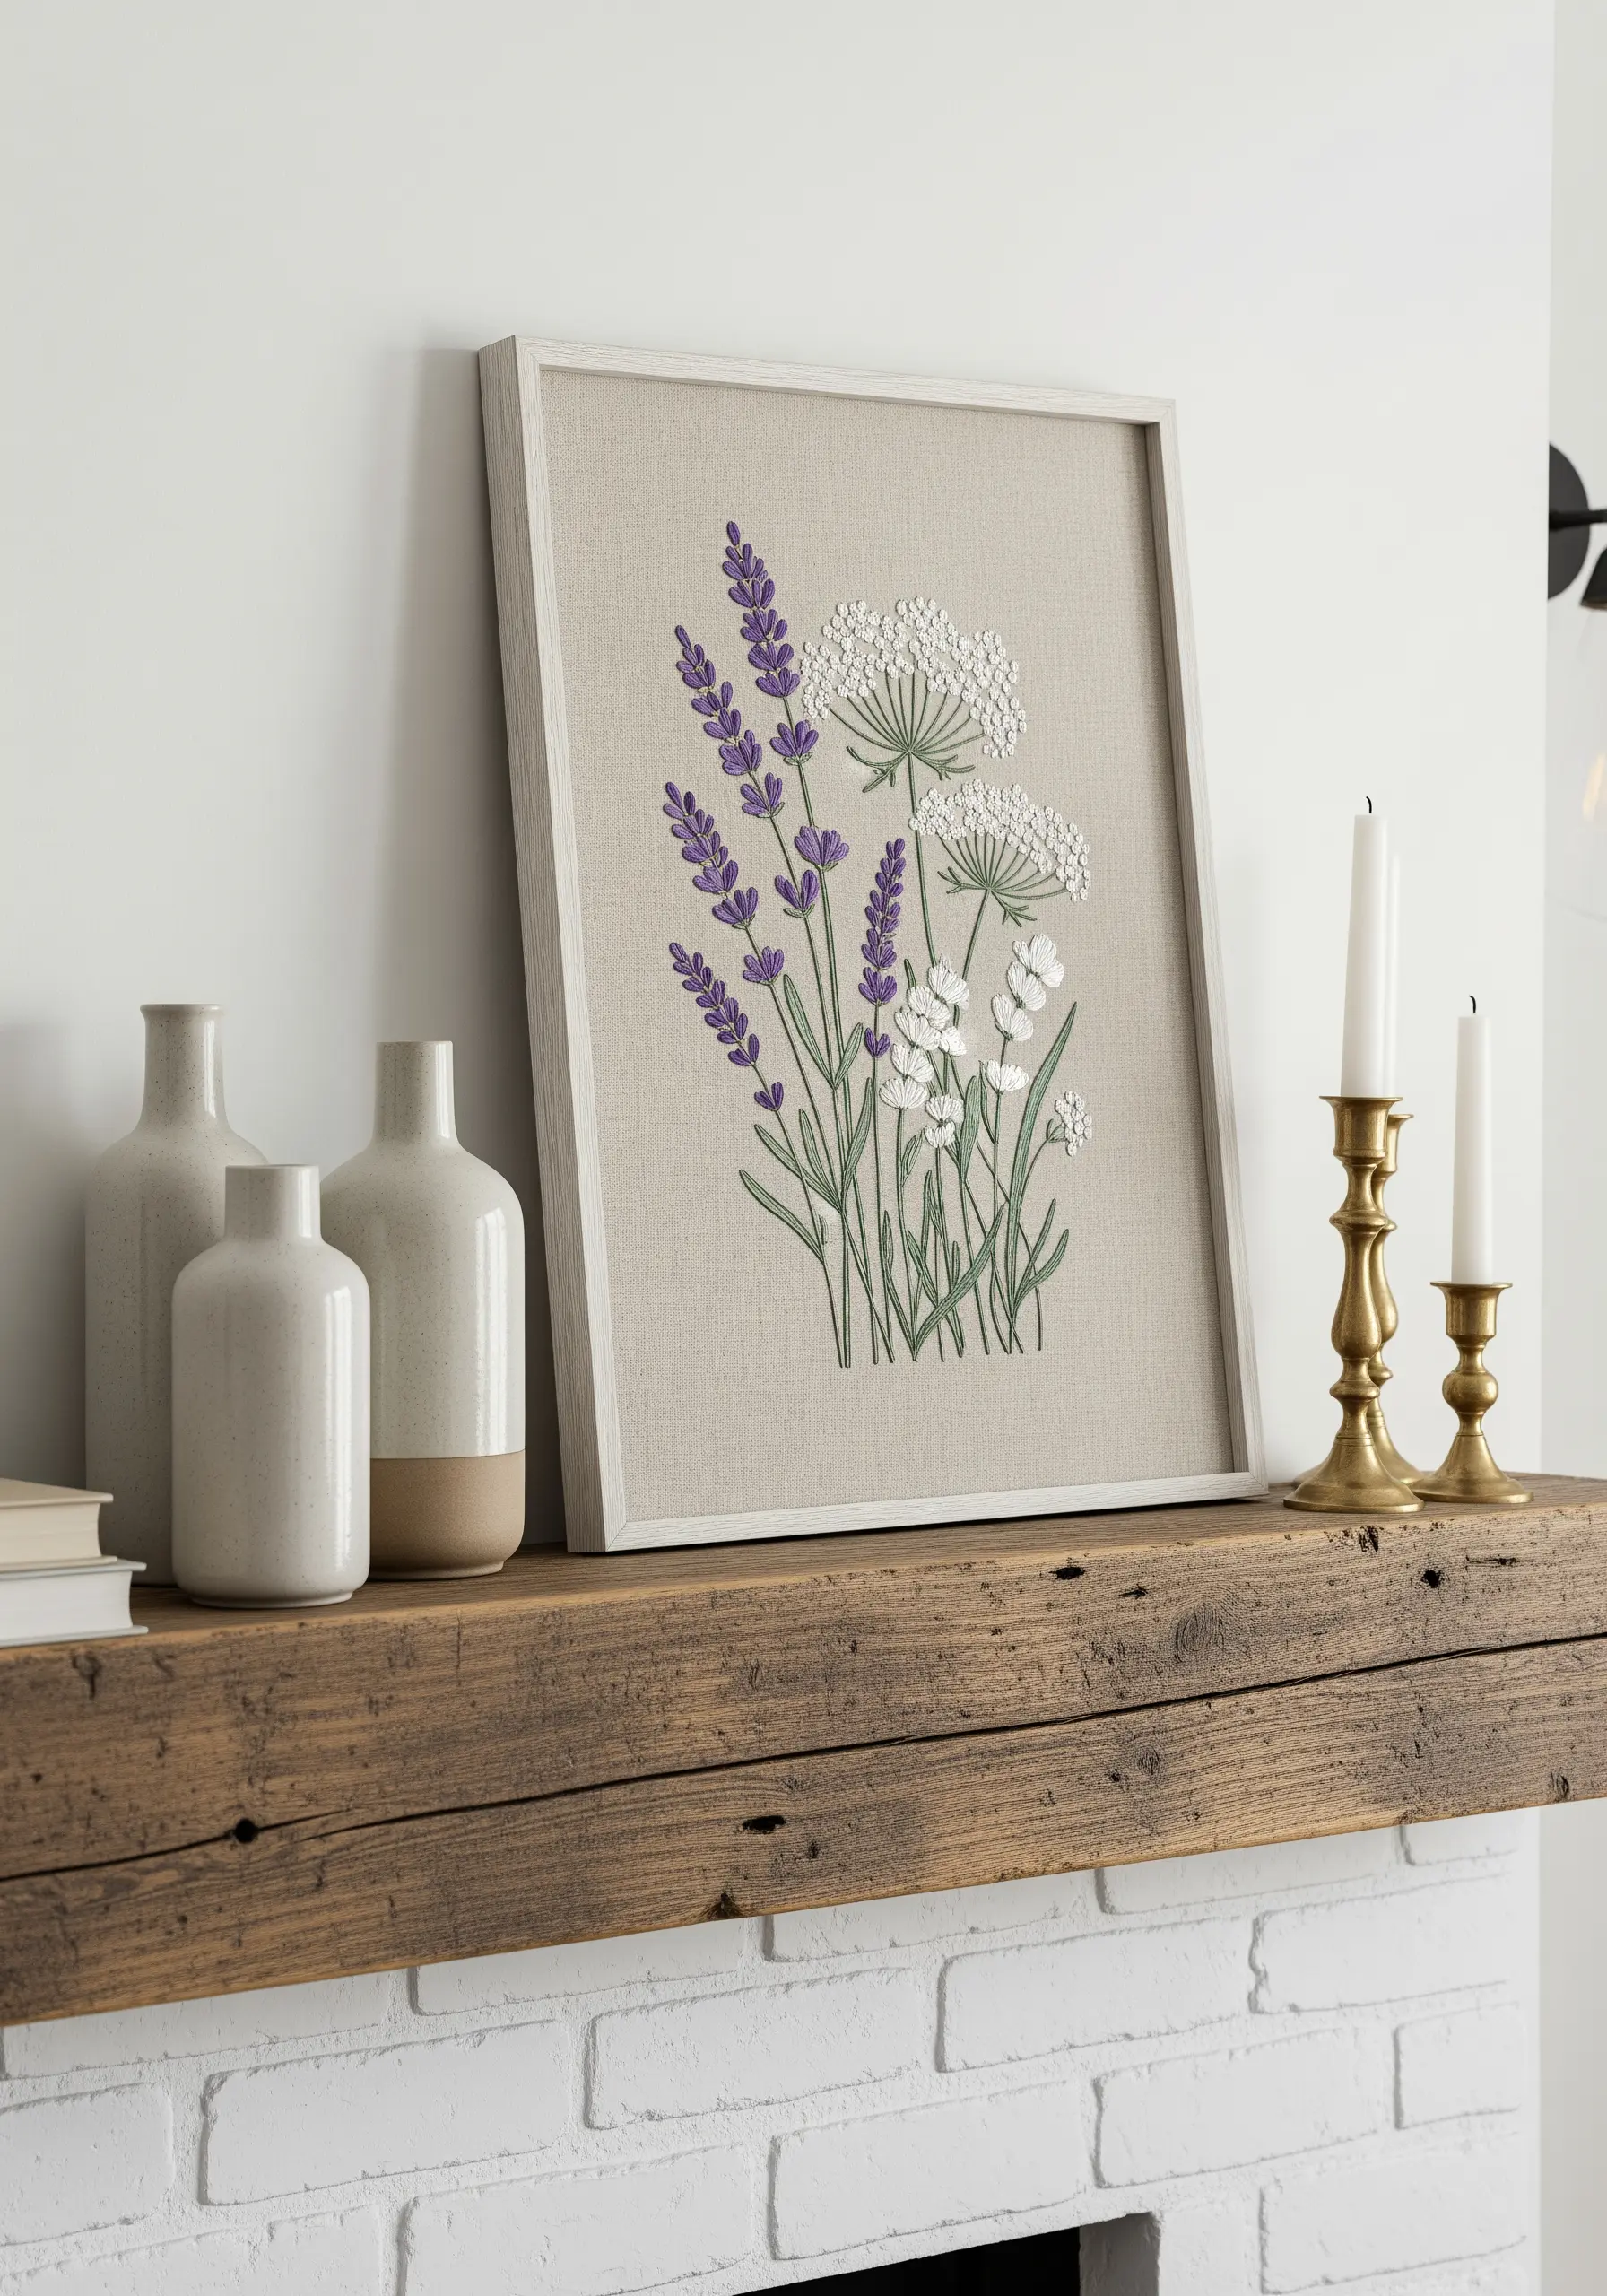
Let your fabric do half the work by choosing a beautiful, textured natural linen as your canvas.
Use a light touch with simple stitches: French knots for lavender, detached chain stitches for leaves, and tiny straight stitches for Queen Anne’s lace.
By keeping the stitching minimal and allowing the fabric to show through, you create a design that feels airy, elegant, and effortlessly rustic.
This approach proves that thoughtful composition is often more impactful than complex stitching, making it ideal for botanical line art embroidery patterns.
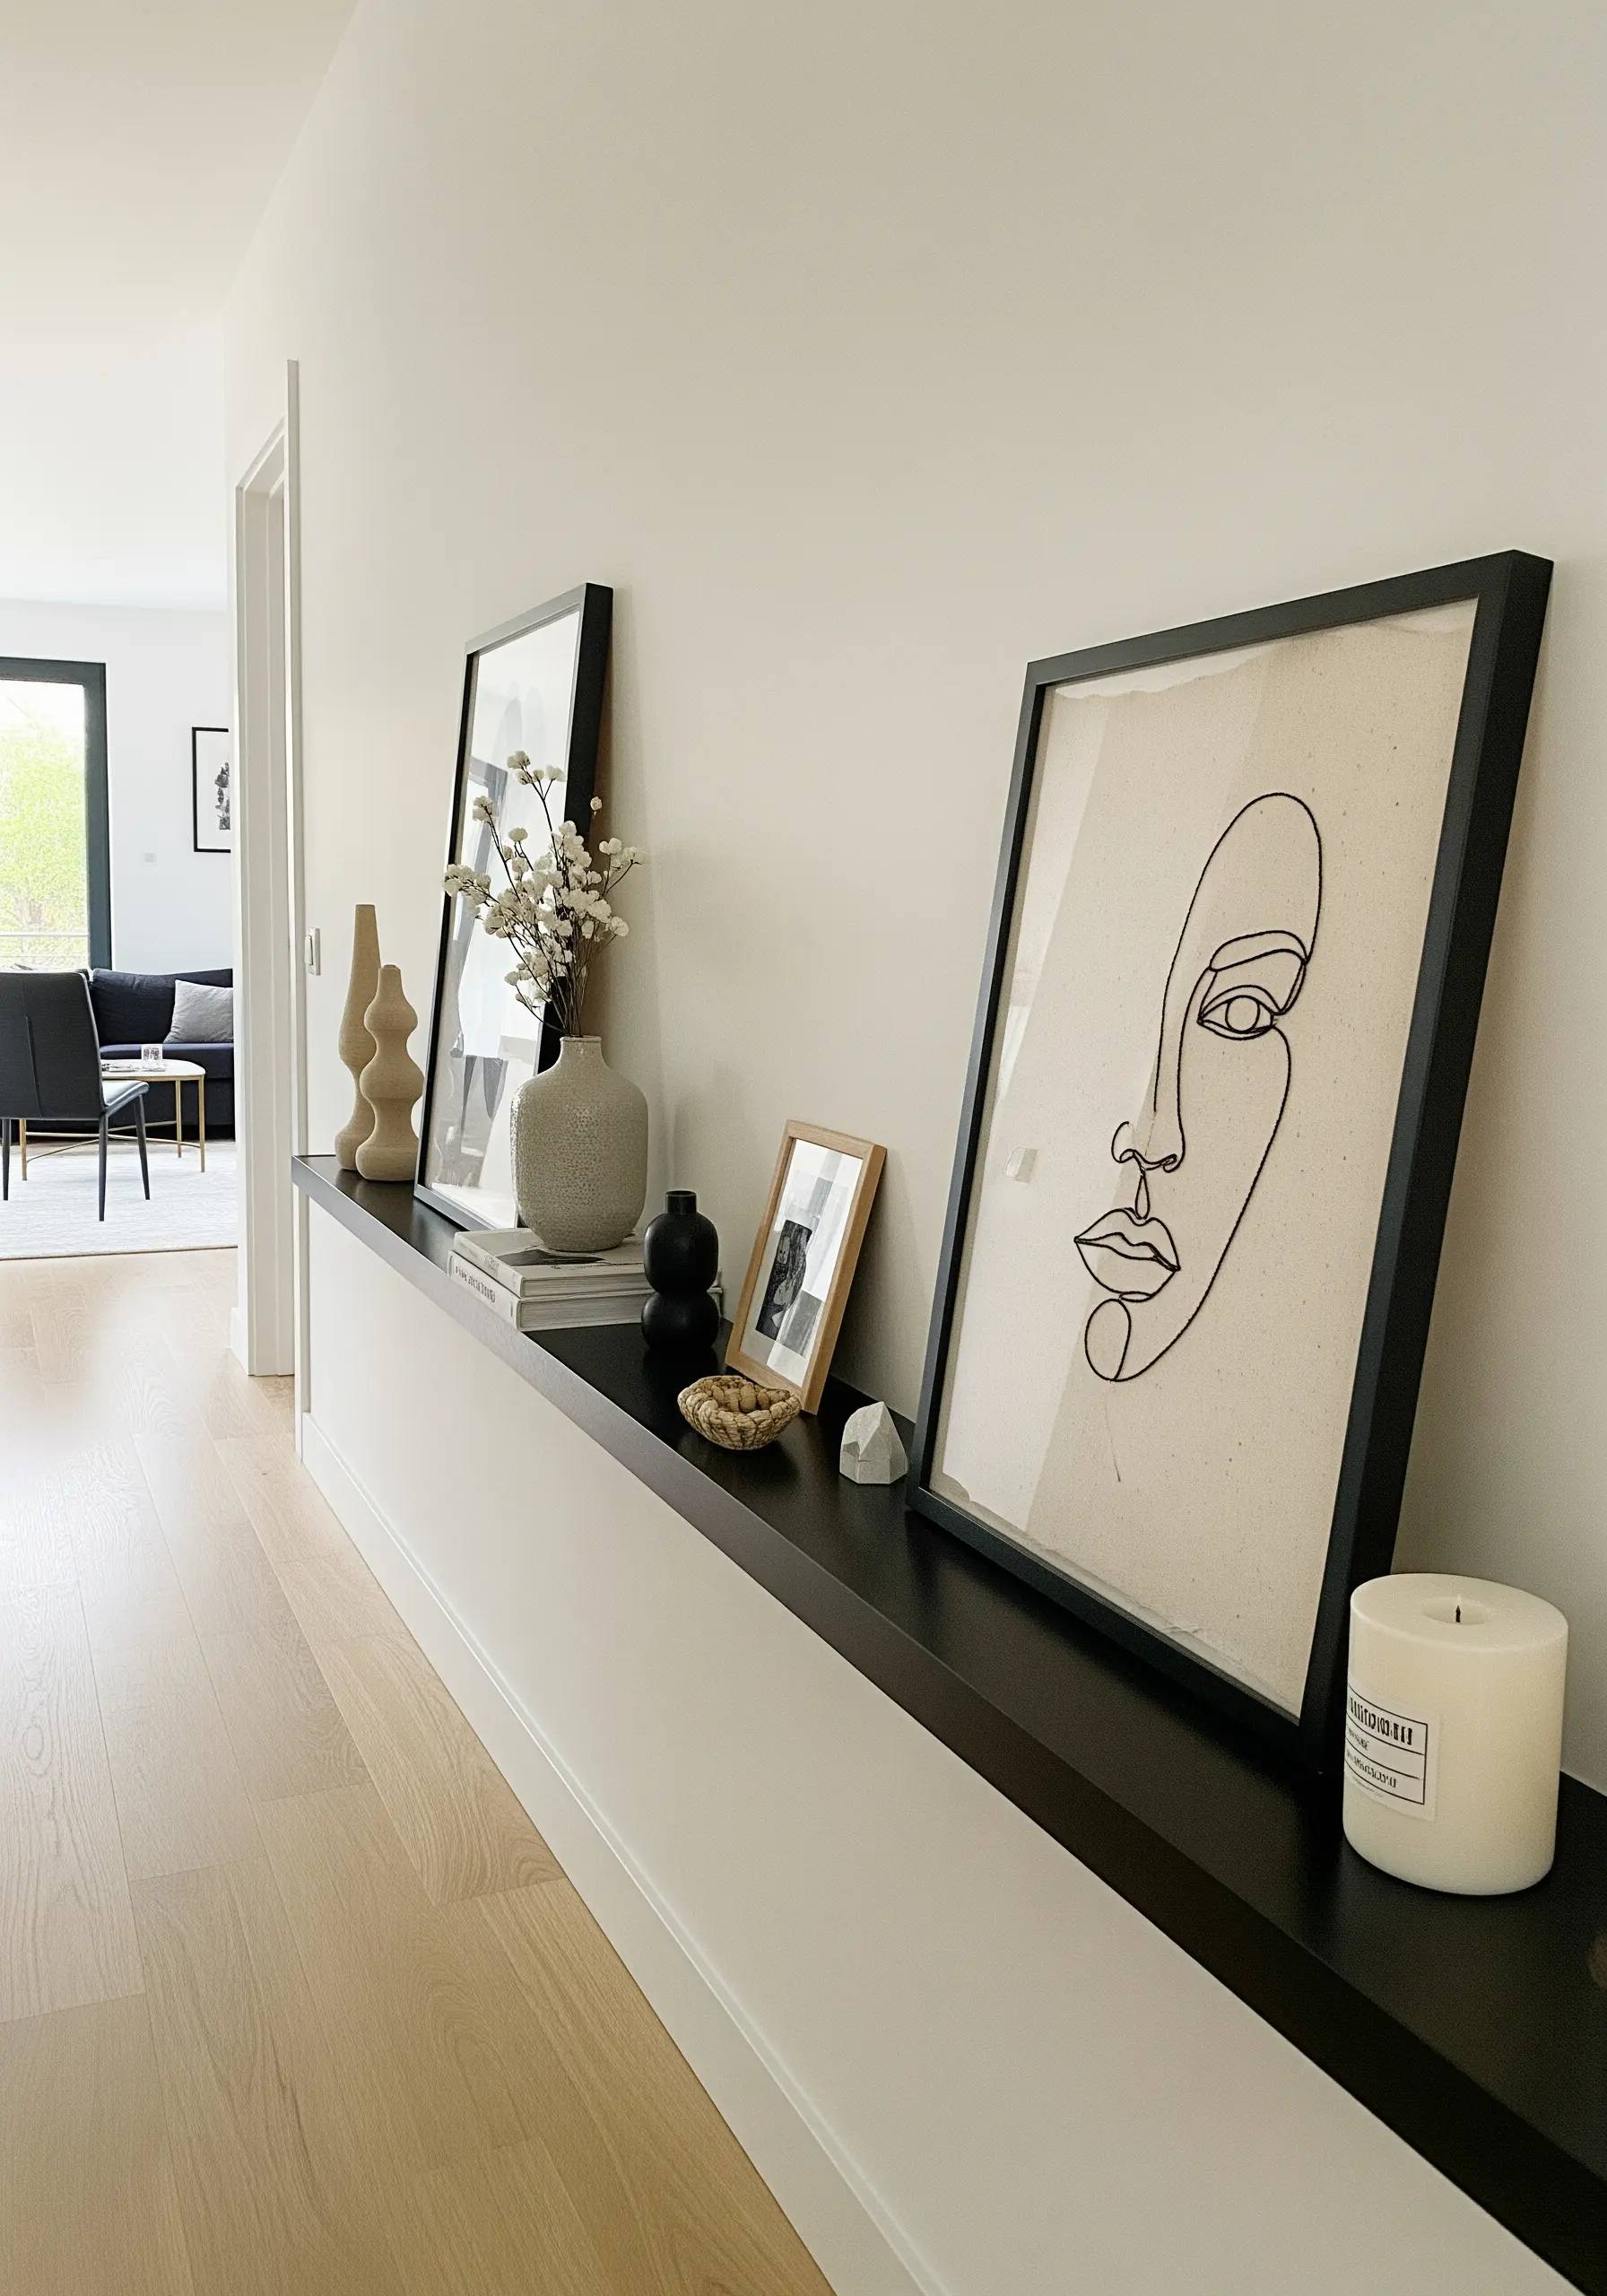
7. Master Architectural Elegance with a Single Line

The impact of this piece lies in its absolute minimalism and flawless execution.
Use a whipped backstitch or a stem stitch to create a single, continuous line that is smooth, raised, and more substantial than a basic backstitch.
Choose a crisp, sturdy fabric like cotton canvas that can handle tight stitch tension without puckering.
The key is precision—a perfectly rendered line on a clean background is one of the most sophisticated and delicate line art embroidery ideas you can create.
8. Achieve Mid-Century Modernism with Color Blocking
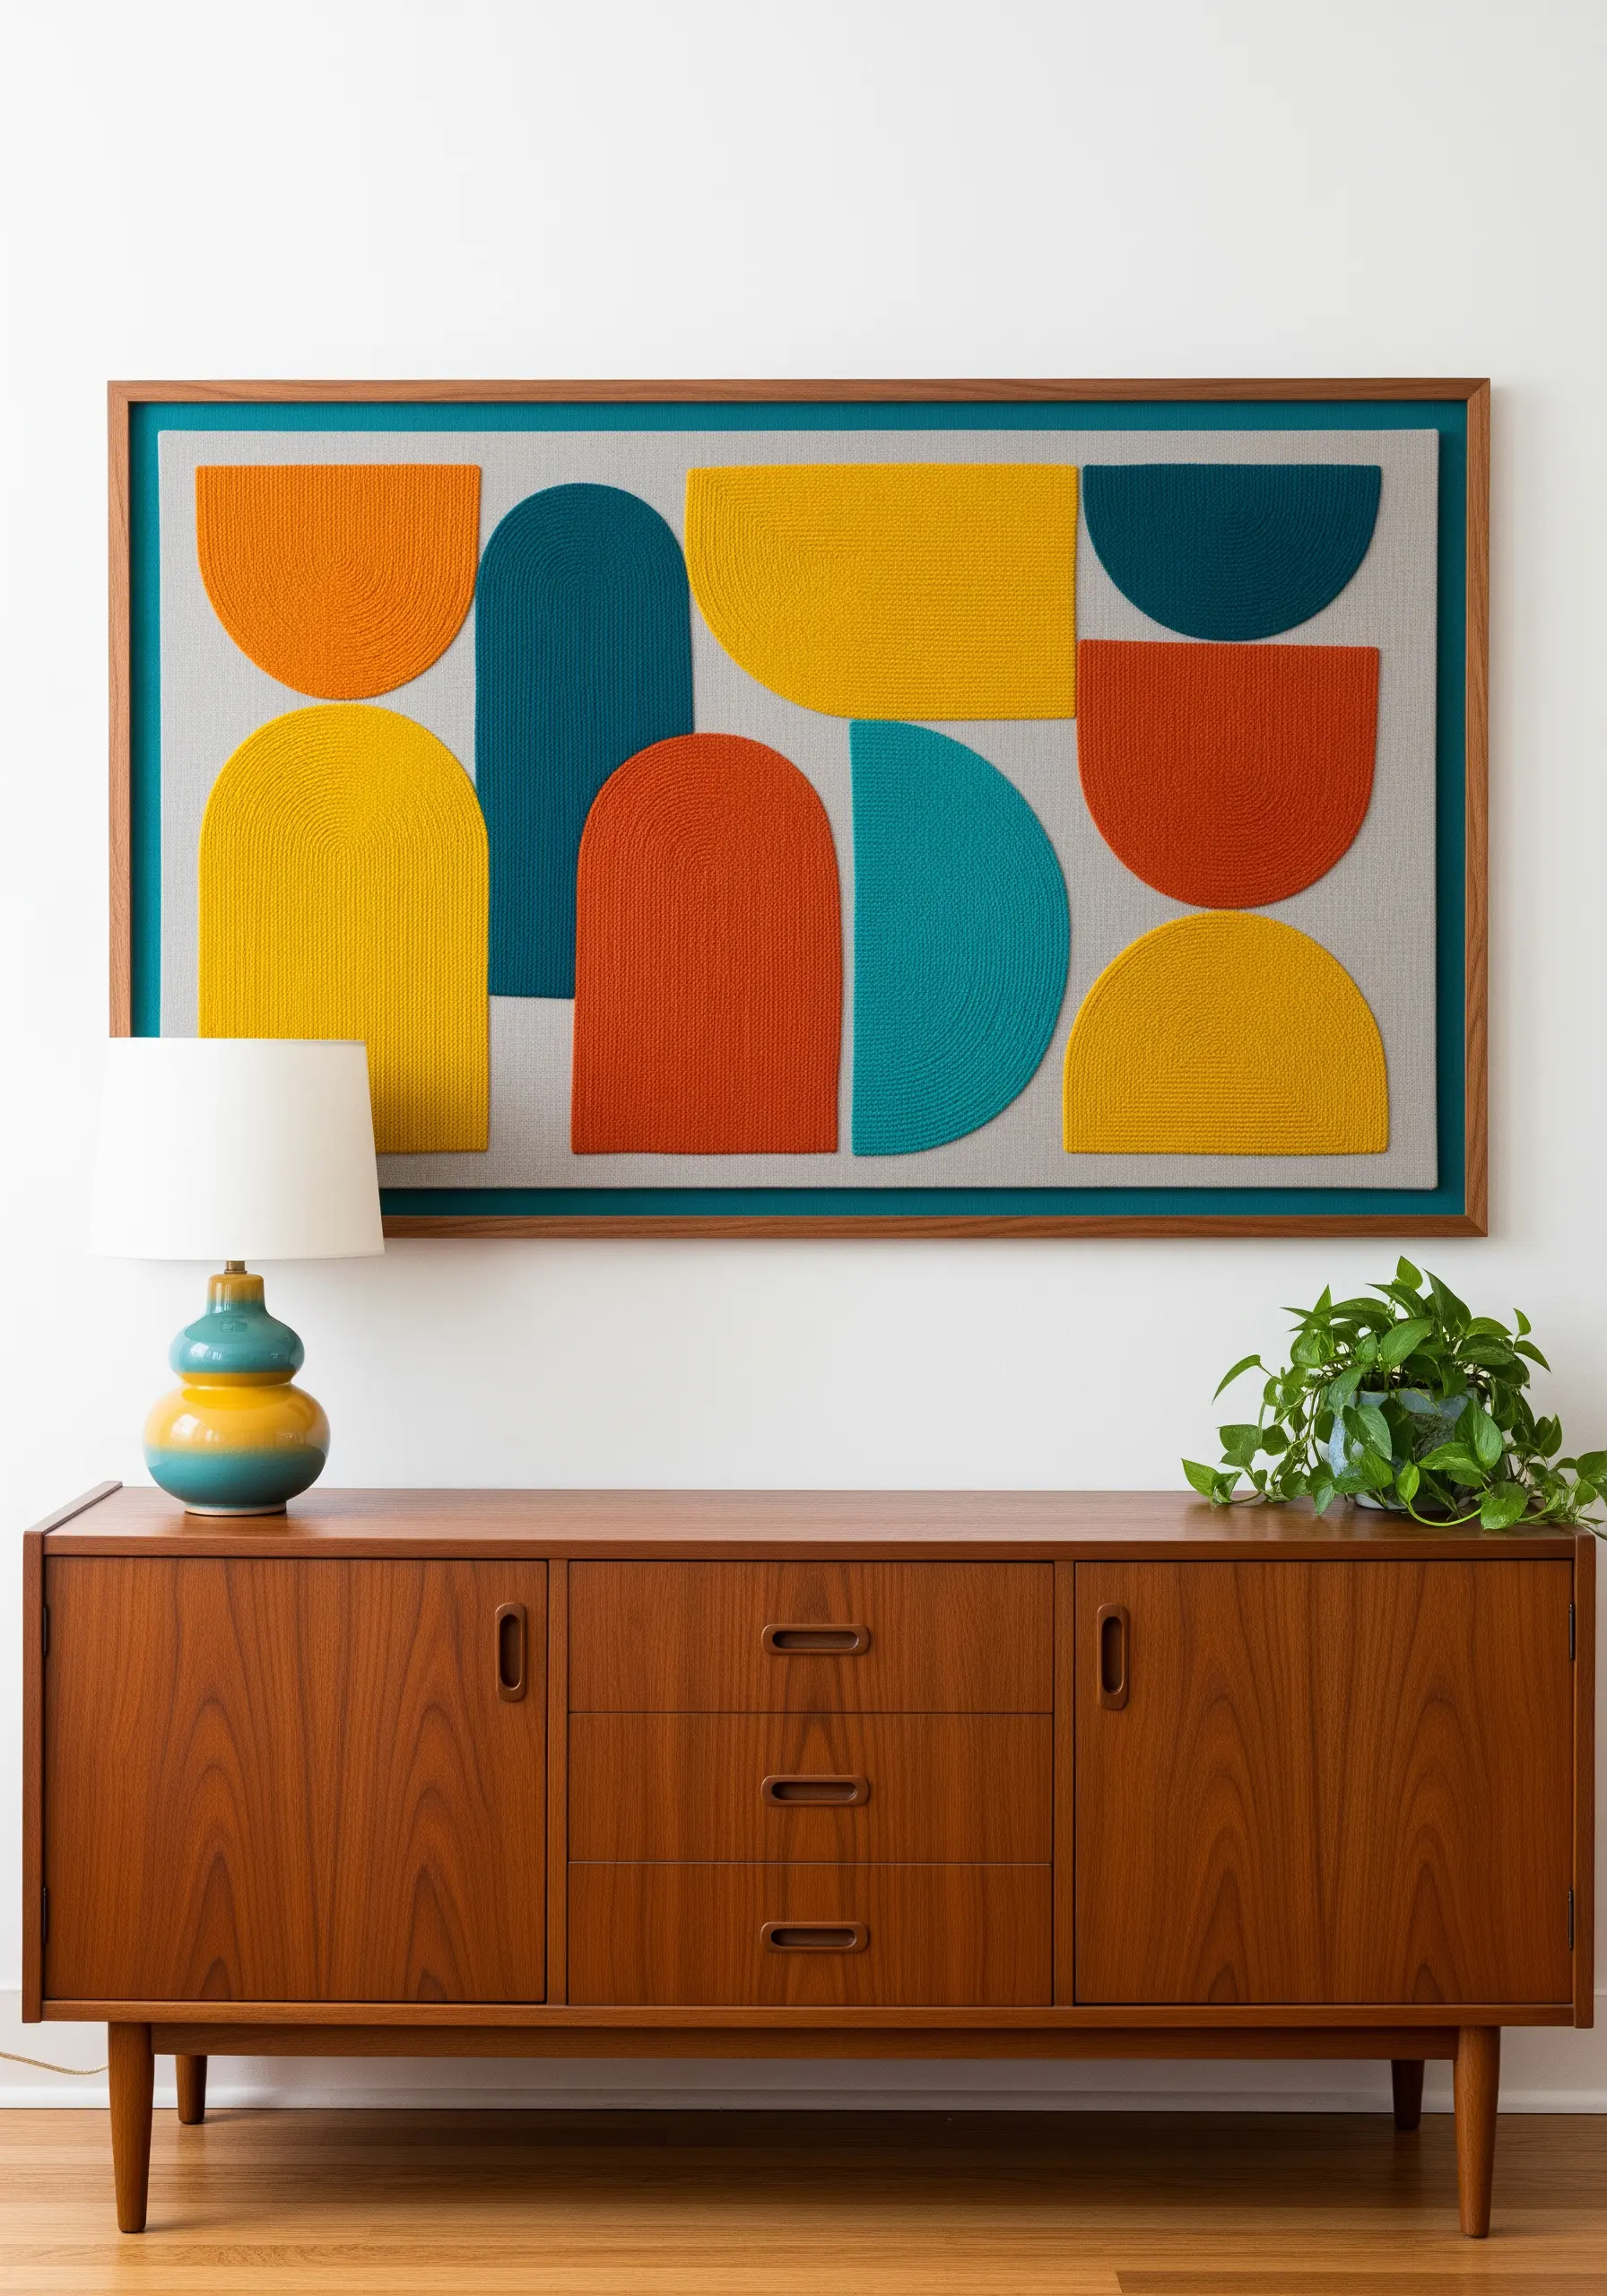
This style is all about creating flat, dense fields of color with impeccable edges.
Use a thicker yarn or pearl cotton and lay it down with couching stitches or perfectly parallel straight stitches to achieve that uniform, woven texture.
To ensure clean shapes, draw your design on paper first, then transfer it to the fabric. All stitches within a single colored block should run in the same direction for a cohesive finish.
This technique transforms simple shapes into powerful yarn wall art projects with a distinct mid-century feel.
9. Build Organic Texture with Layered Stitches
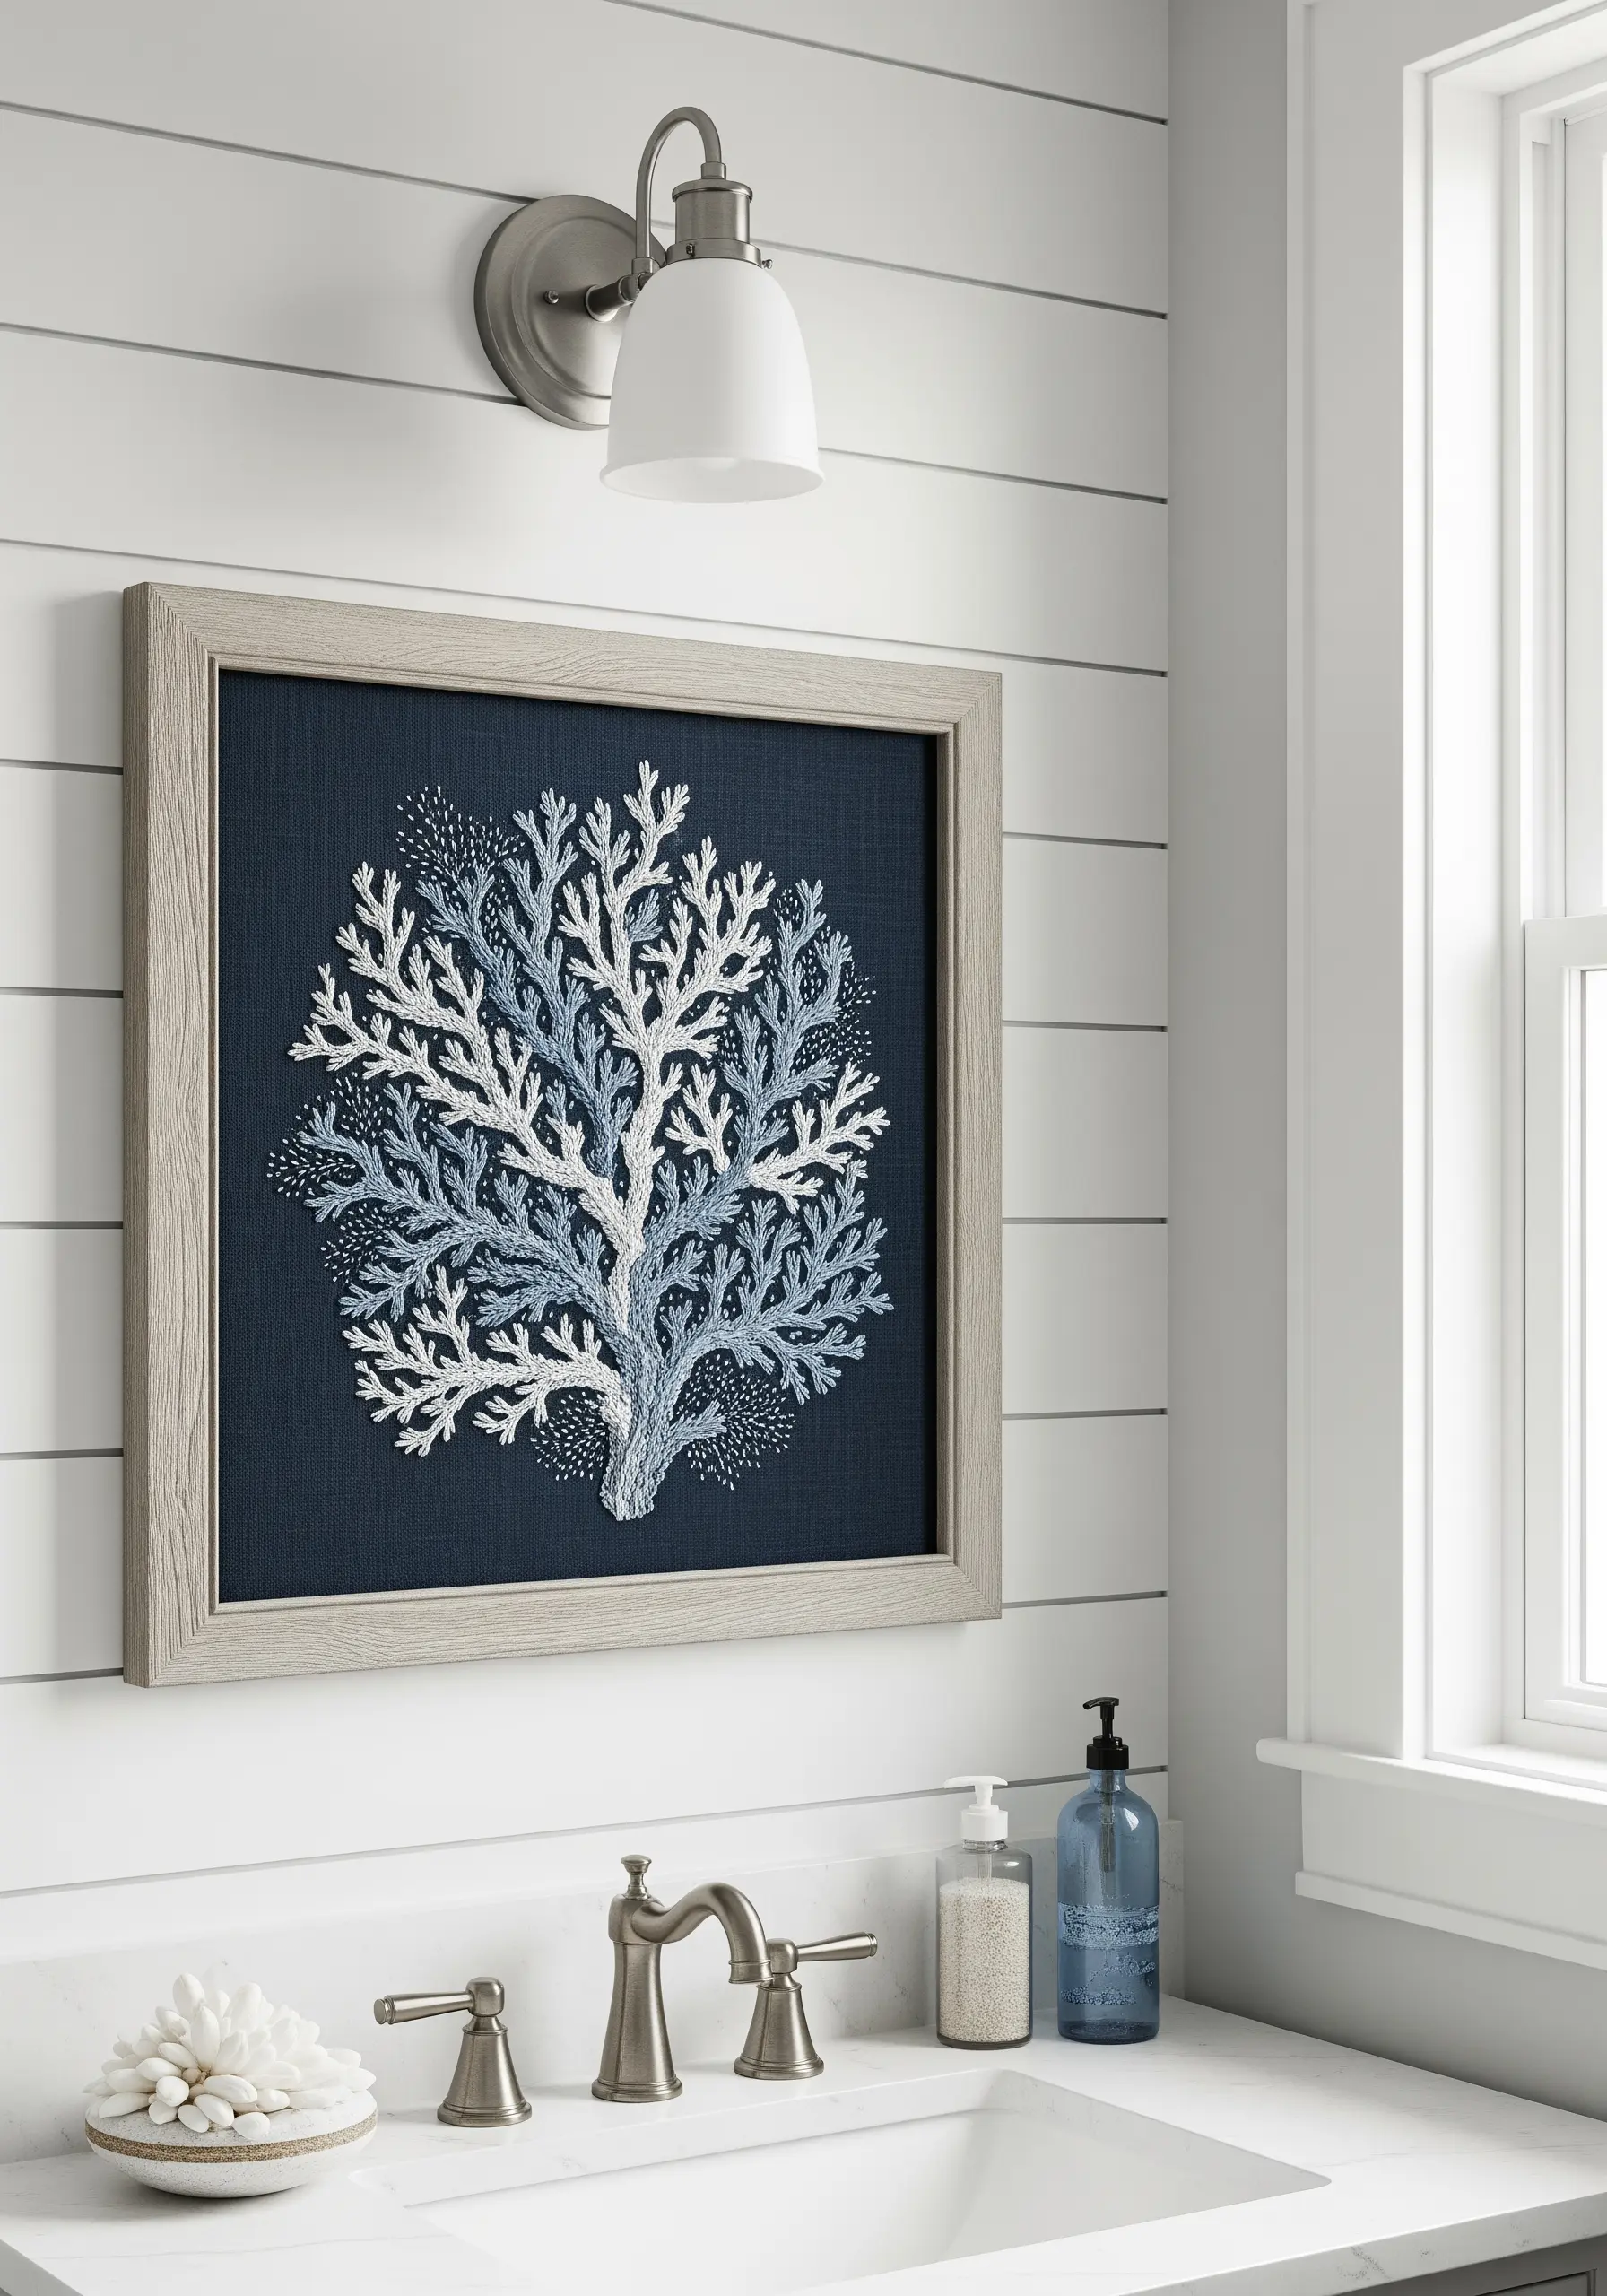
Create a tactile, coral-like effect by building texture in layers.
Start with a foundation of split stitch to define the main branches of your design.
Then, layer on dimension with dense clusters of French knots, colonial knots, and seed stitches in varying shades of blue, grey, and white.
Stitching on a dark navy fabric provides a dramatic background that makes the lighter, textural stitches pop, perfect for coastal-theme tiny embroidery art.
10. Capture Fluid Motion with Directional Thread Painting
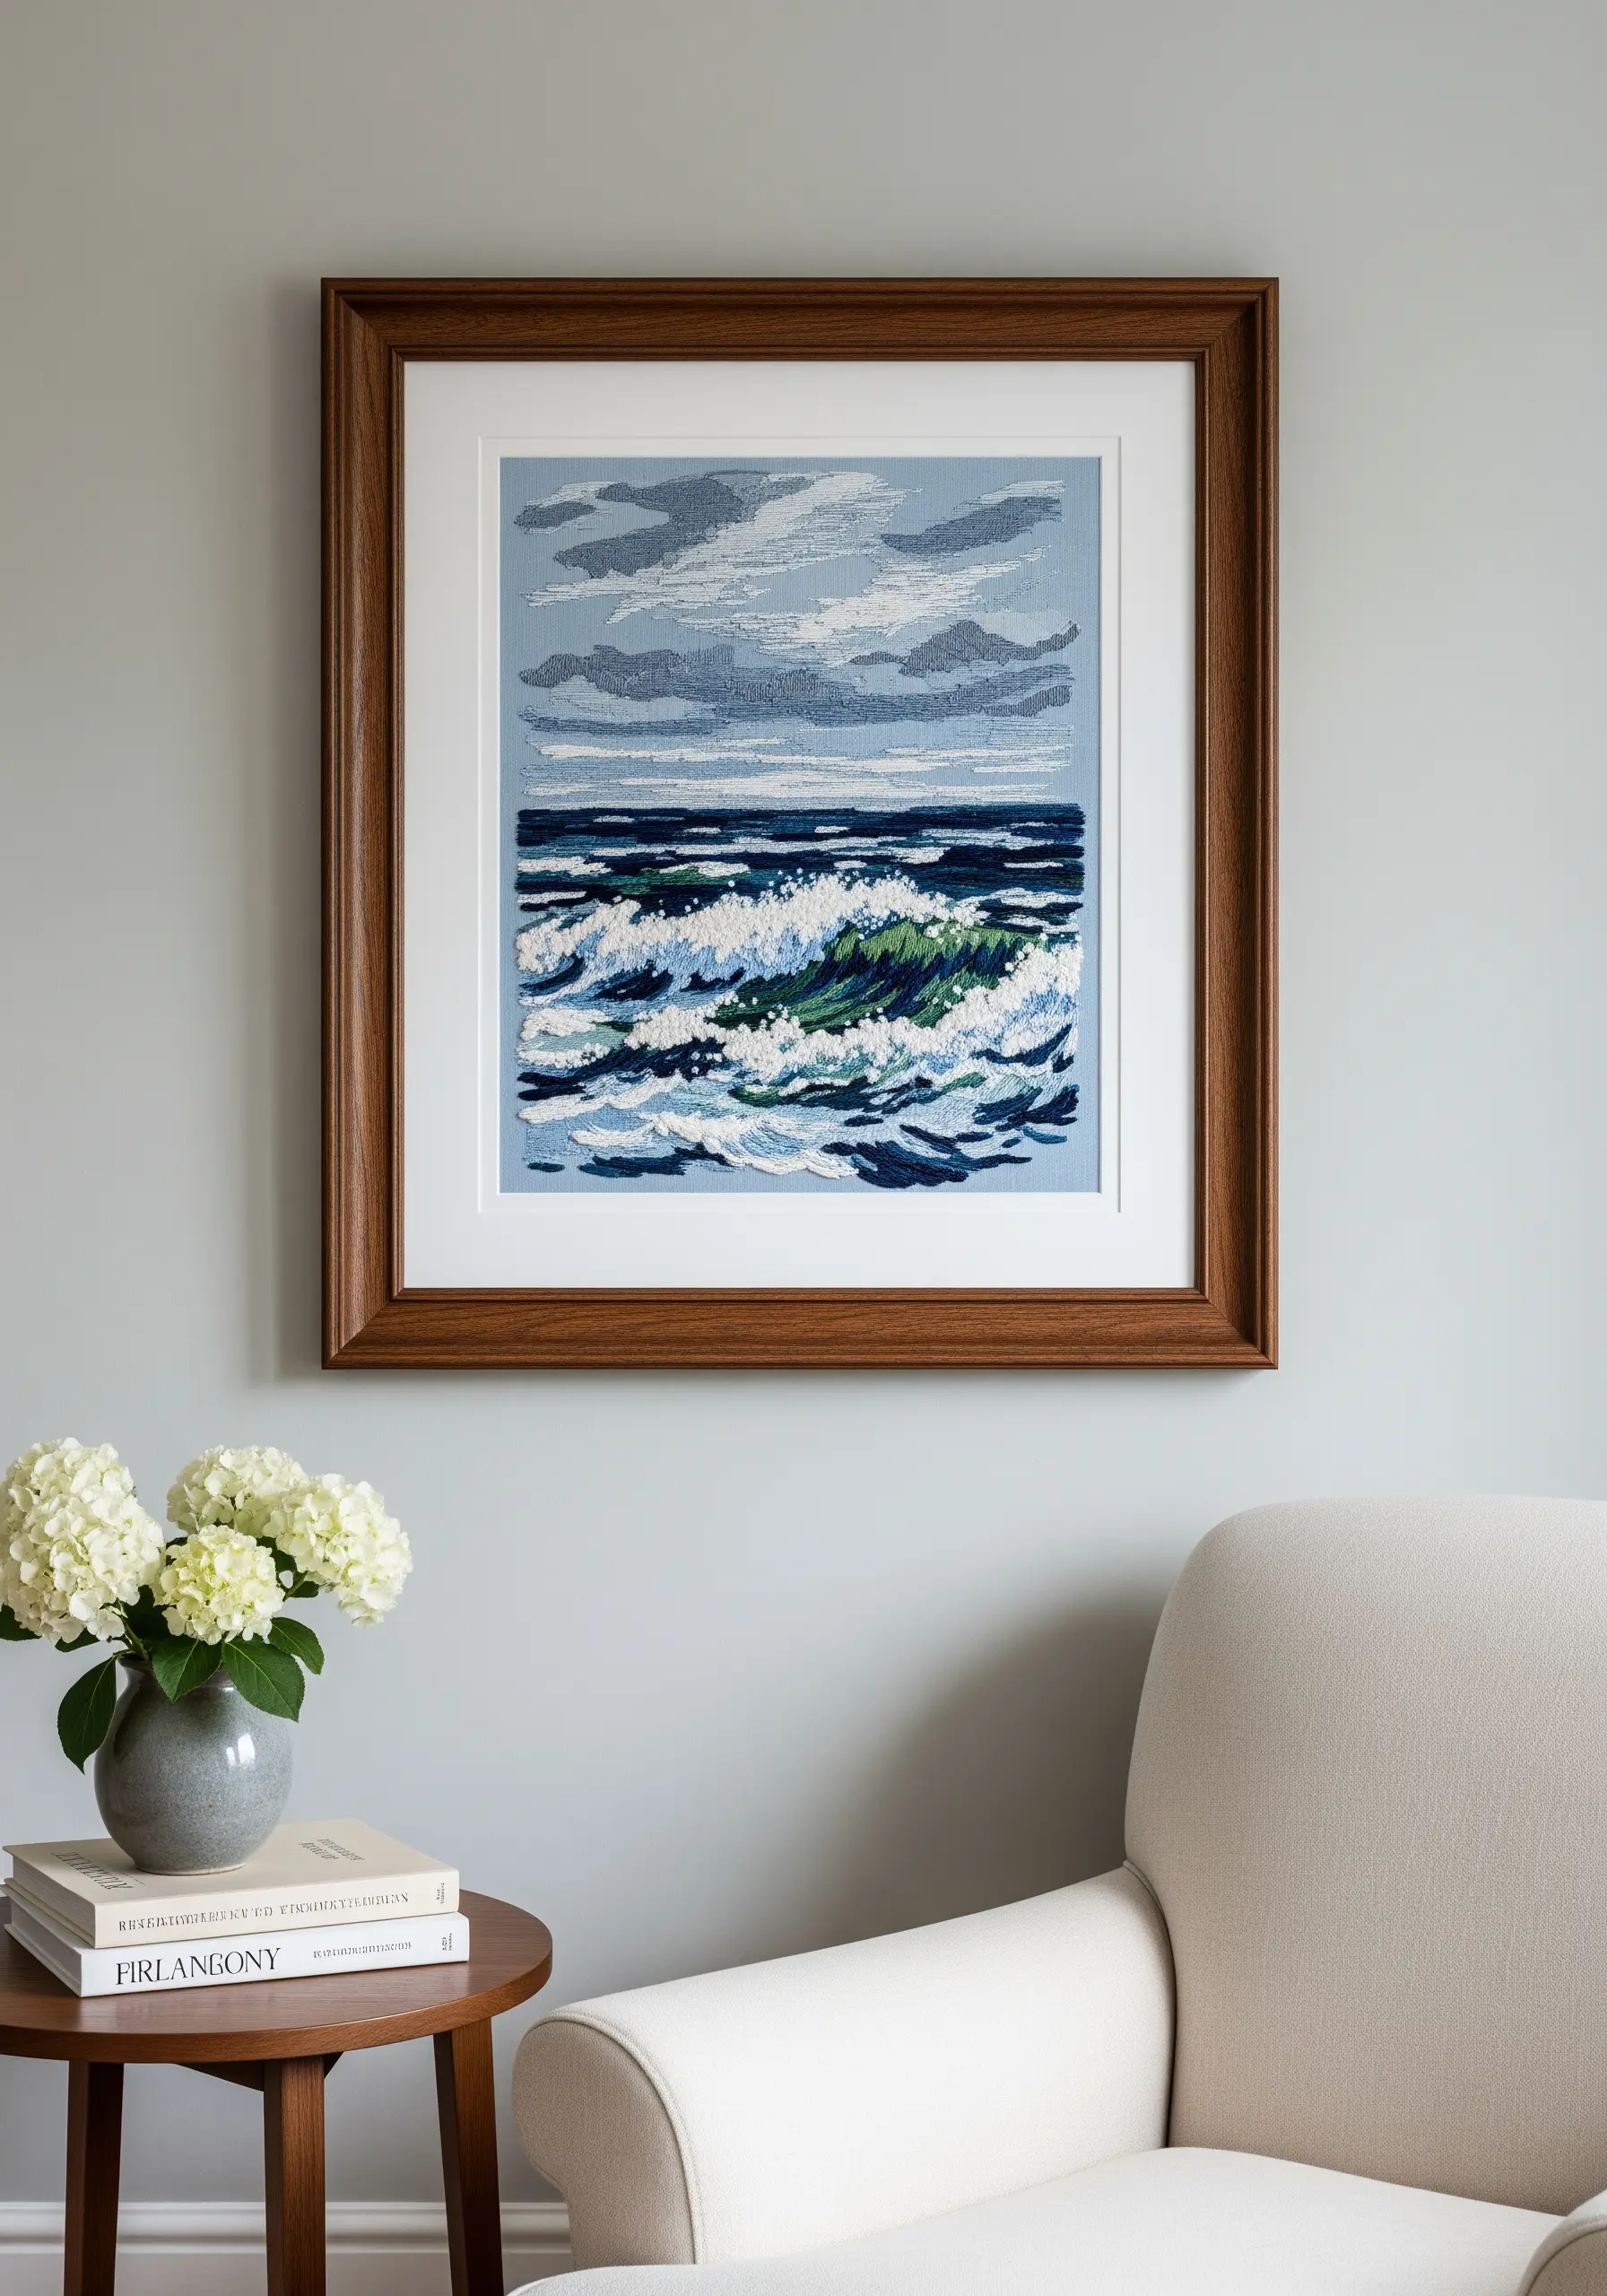
The secret to stitching realistic water is capturing its movement through the direction of your stitches.
Use long-and-short stitch to blend blues, teals, and white, ensuring your needle follows the natural curve and flow of the waves.
For the frothy seafoam, use short, chaotic straight stitches and French knots in bright white to create texture and contrast against the smoother water.
This painterly approach beautifully mimics the embroidery ideas inspired by the subtle textures of nature.
11. Create a Gilded Botanical Diptych

Achieve an instantly luxurious look by pairing a simple motif with high-impact materials.
Use a single color of metallic or silk thread on a stark black fabric to create dramatic contrast.
A fishbone stitch is perfect for creating the fern’s delicate, symmetrical leaves with a defined central spine.
The most important step for an expensive feel is creating a diptych—two matching pieces hung together. This simple act of repetition elevates the art from a craft project to a design statement, ideal for all leaf & plant embroidery ideas.
12. Make an Impact with an Expressive Contour Line
The power of this piece comes from its confident, unbroken line.
Use a thick thread, like pearl cotton or all six strands of floss, to ensure the line has weight and visual presence against the raw canvas.
A stem stitch or whipped backstitch will create a smooth, dimensional line that feels more like drawing than stitching.
This project celebrates imperfection; the goal is expression, not precision, making it one of the most accessible single-line face profiles you can create.
13. Achieve Vibrant Color with Dense Satin Stitch
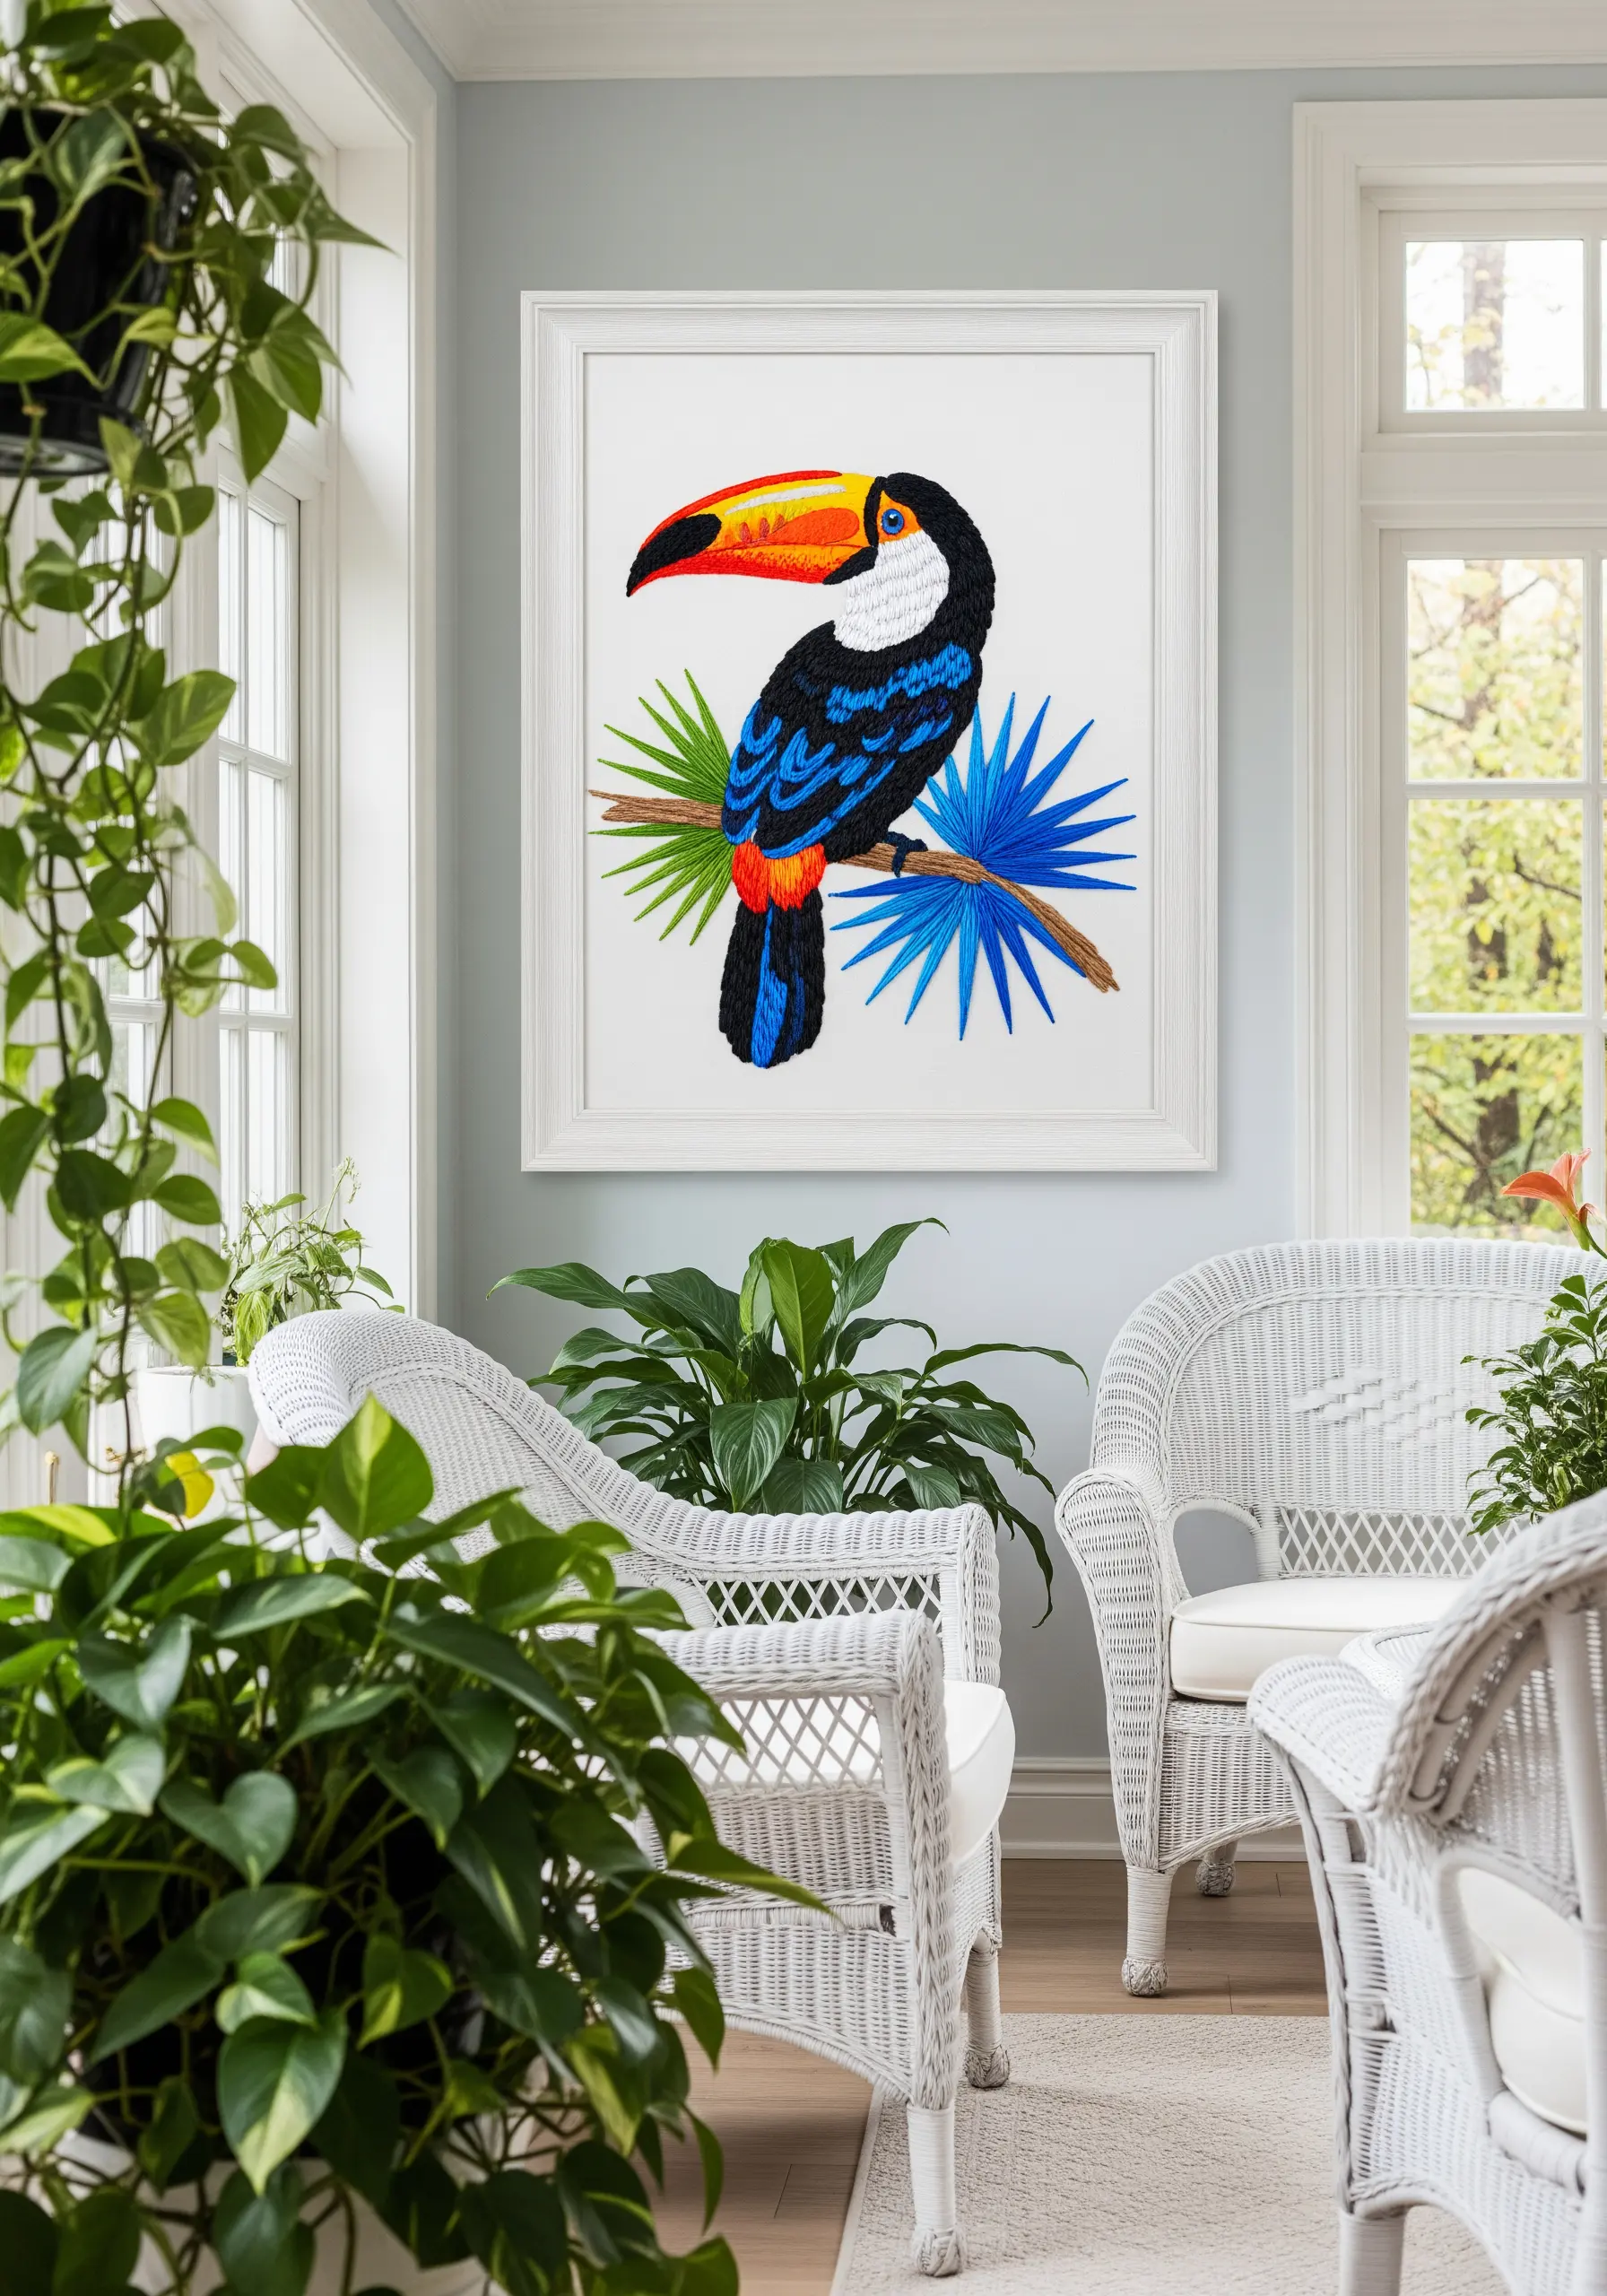
For brilliant, fully saturated color, dense satin stitch is your best tool.
To prevent the fabric from puckering under the tension of such large filled areas, always use a stabilizer on the back.
Create the beak’s smooth color gradient using a long-and-short stitch, which allows you to seamlessly blend the reds, oranges, and yellows.
Finish by outlining the entire bird in a single-strand backstitch; this final step adds a crisp, clean edge that makes the colors pop, a technique perfect for colorful tropical bird embroidery stitches.
14. Design an Optical Pattern with Geometric Precision
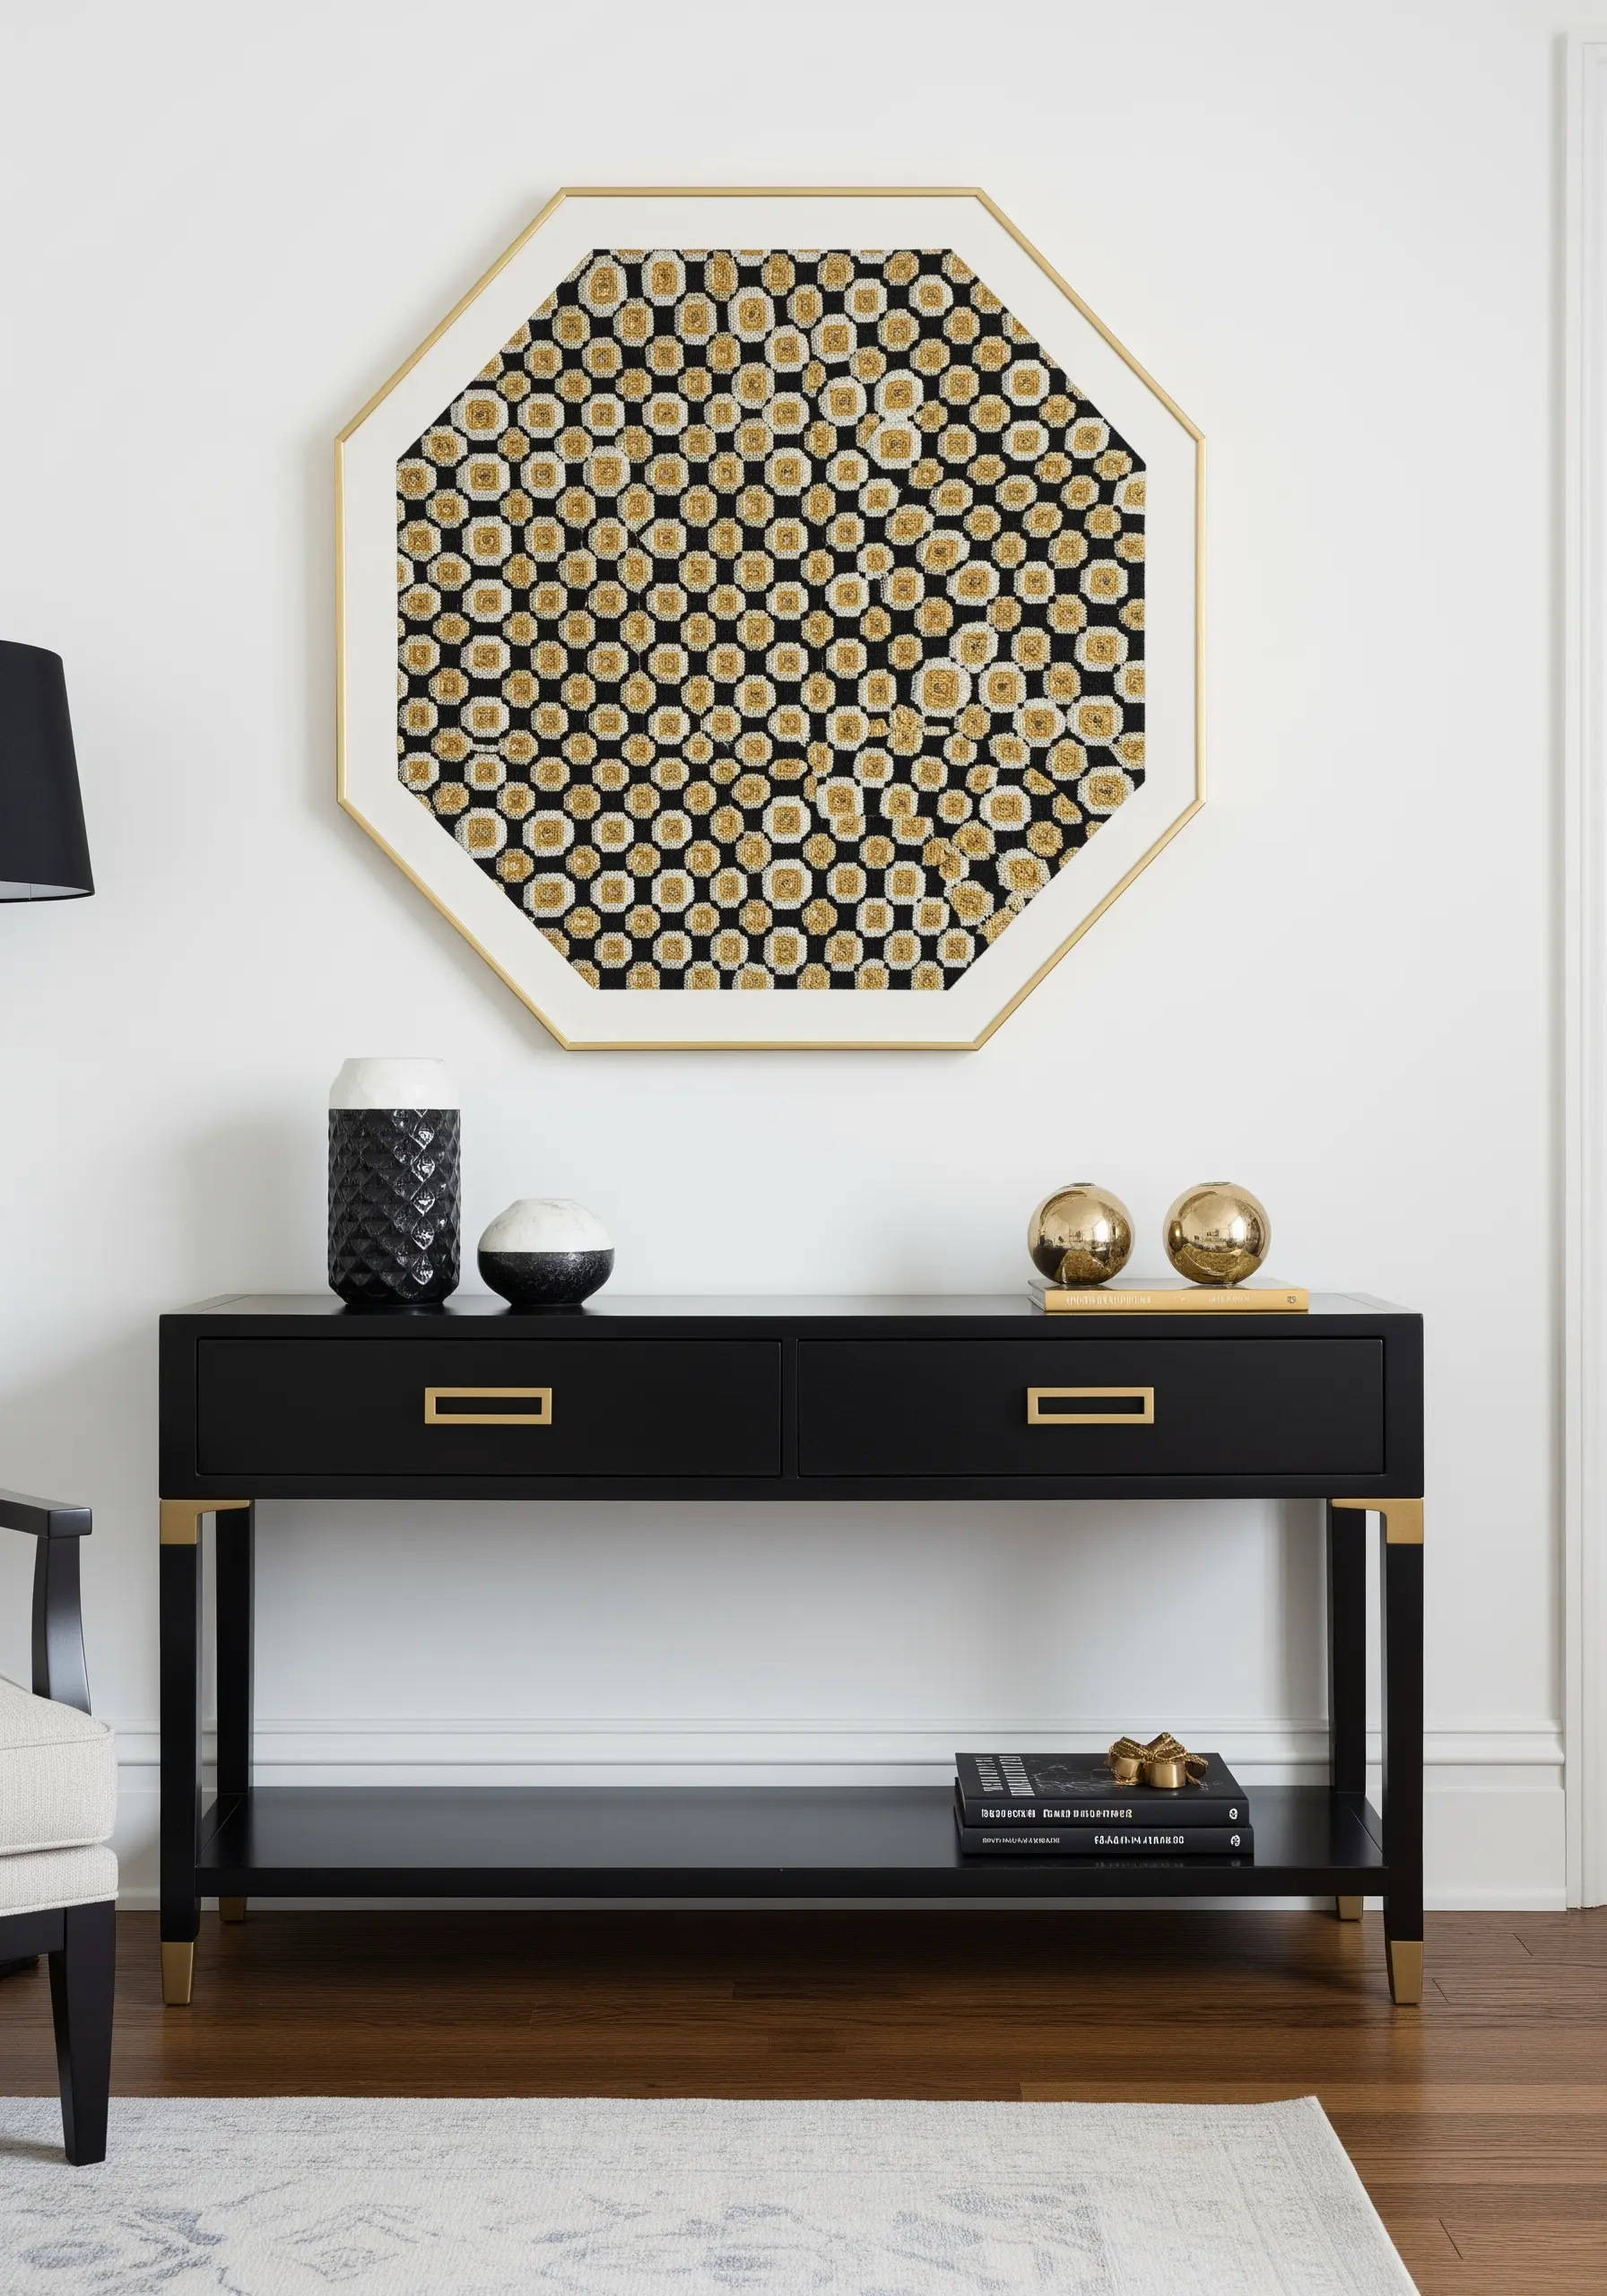
This design’s hypnotic effect relies on perfect repetition and high contrast.
Start by drawing a precise grid on your fabric with a water-soluble pen to guarantee uniform spacing for your stitches.
Use a simple satin stitch or even small cross-stitches to fill in each block of color.
By limiting your palette to two or three high-contrast colors like black, cream, and gold, you can create sophisticated, minimal embroidery designs that use only three colors but have maximum visual impact.
15. Build a Woodland Scene with Layered Depth
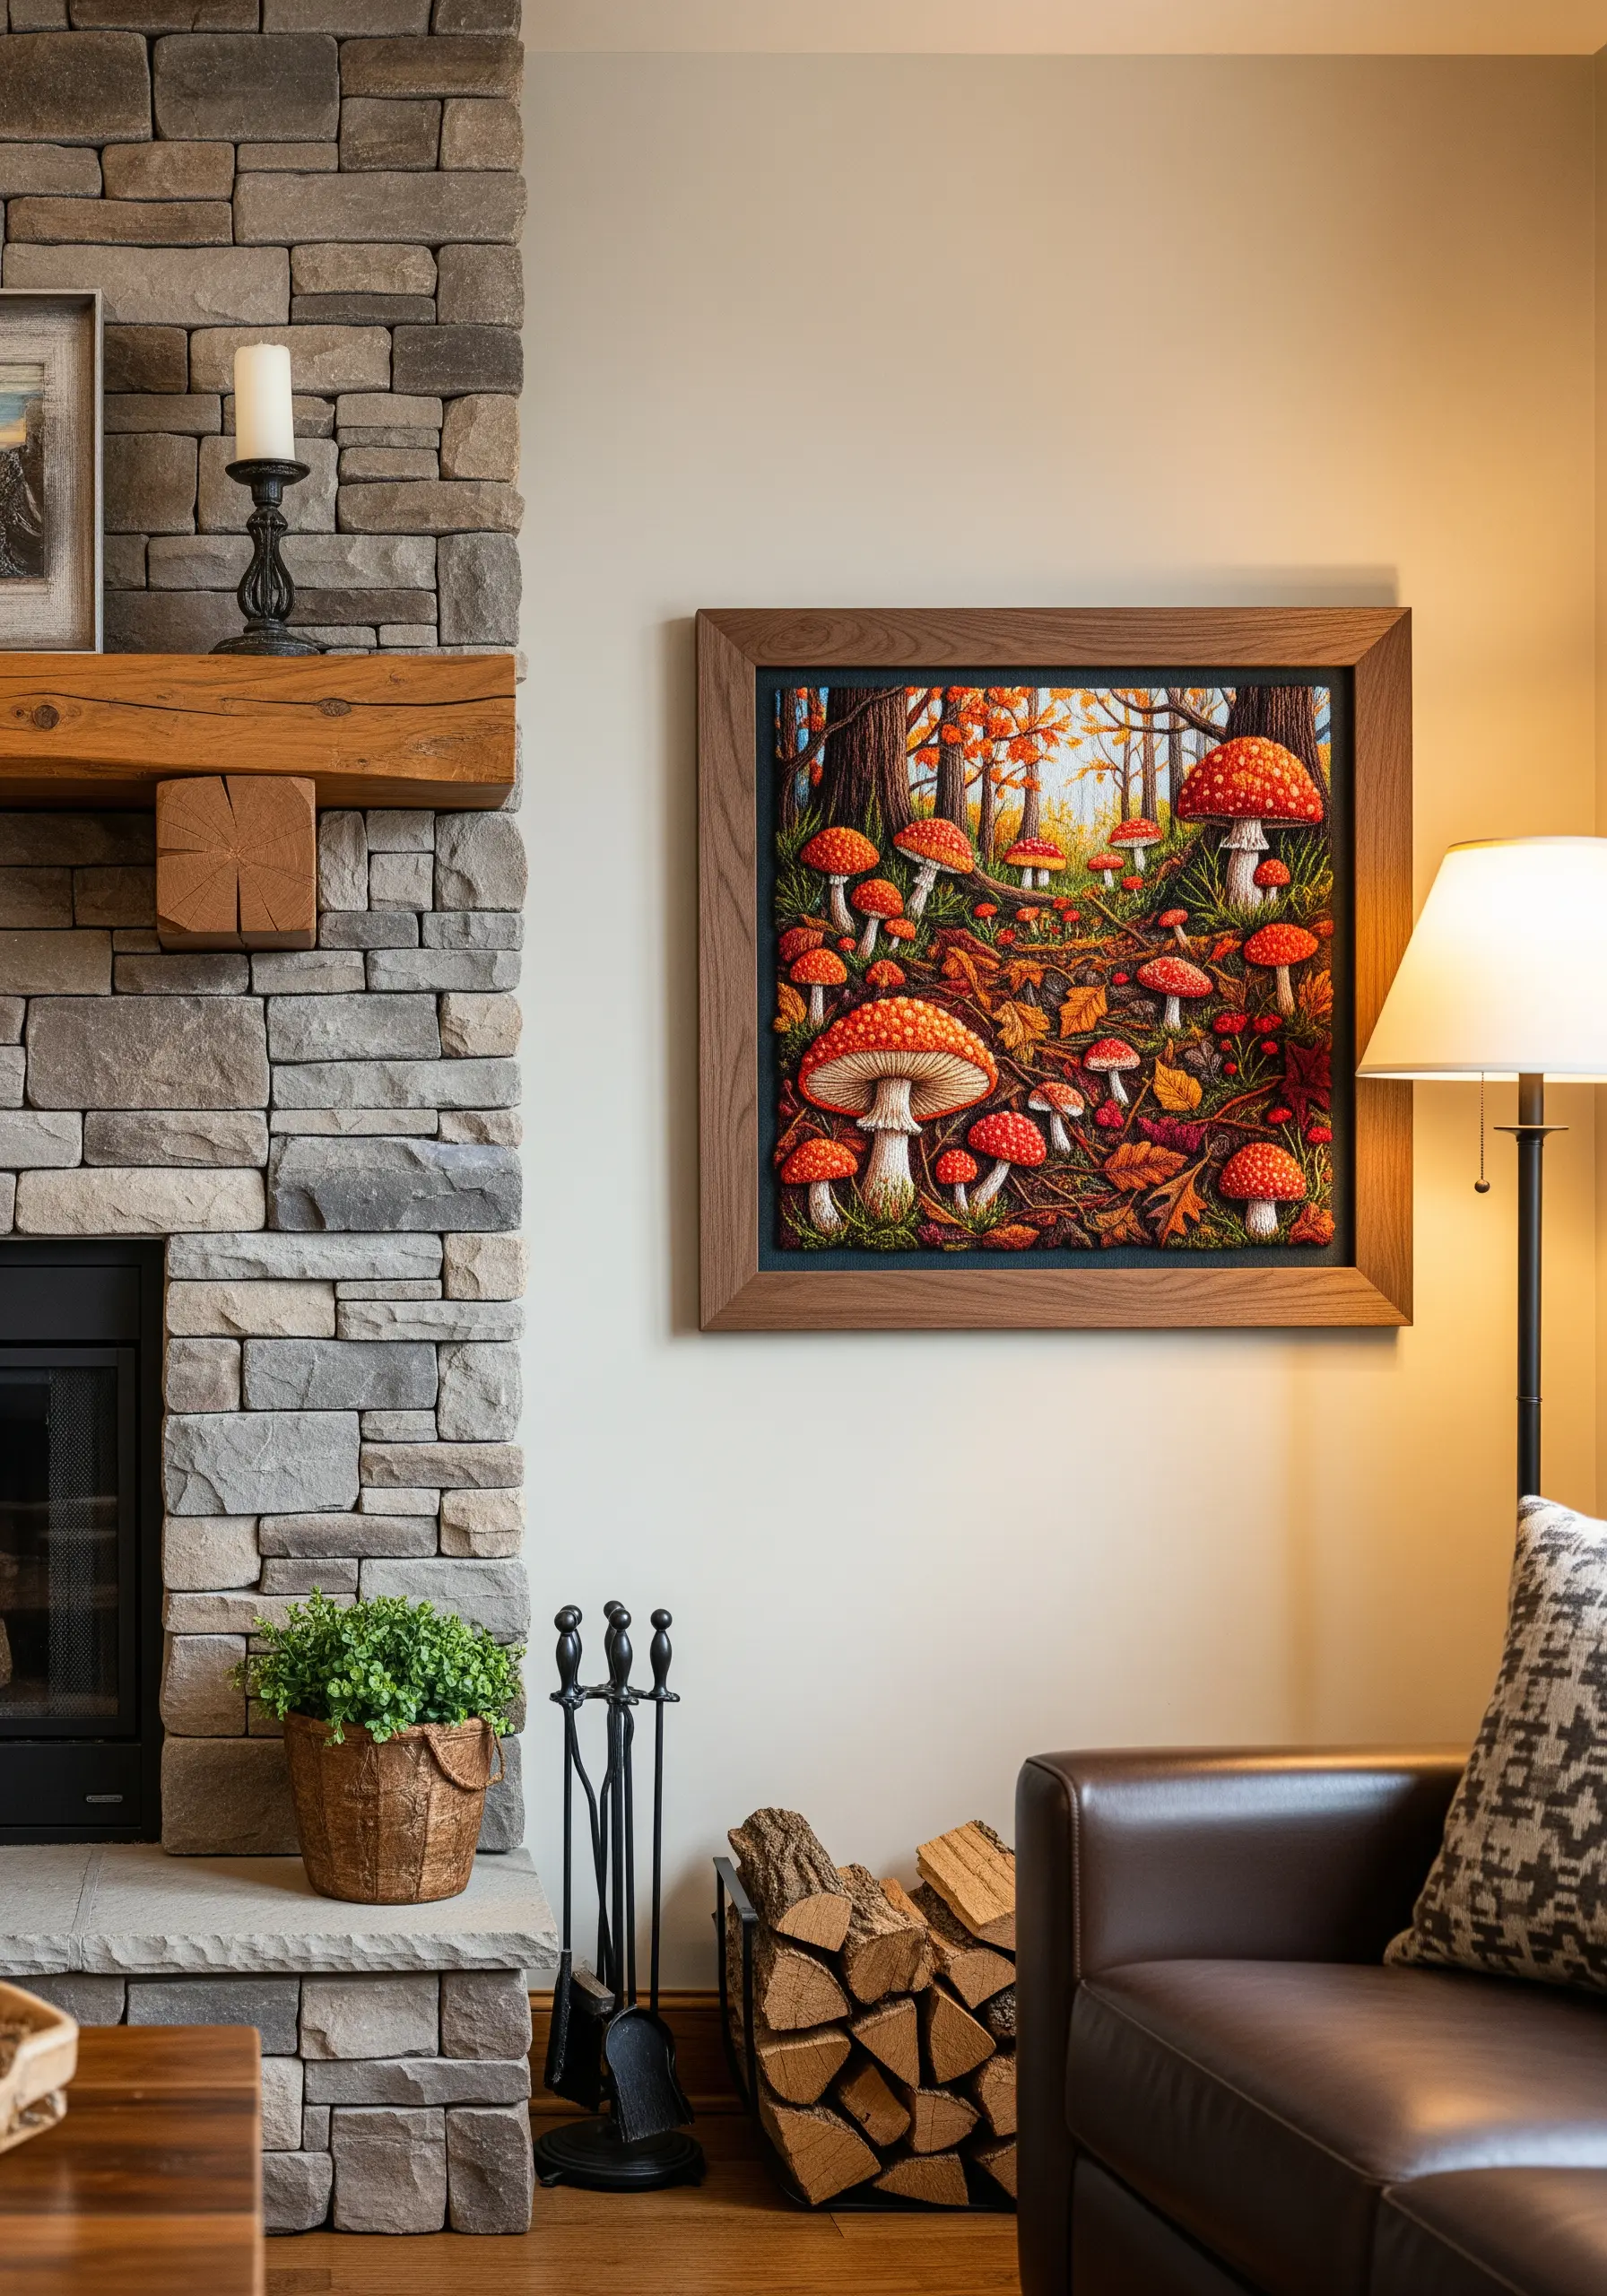
Create a sense of a deep, immersive forest by building your scene in layers, from back to front.
Stitch the background elements first—the distant leaves and forest floor—using simple seed stitches and lazy daisies.
For the foreground mushrooms, use a padded satin stitch. Create a base of small straight stitches first, then cover it with your final satin stitch to give the mushrooms a raised, three-dimensional effect that makes them pop.
This technique is essential for creating realistic mushroom forest floor embroidery projects.
16. Map the Stars with Minimalist Detail
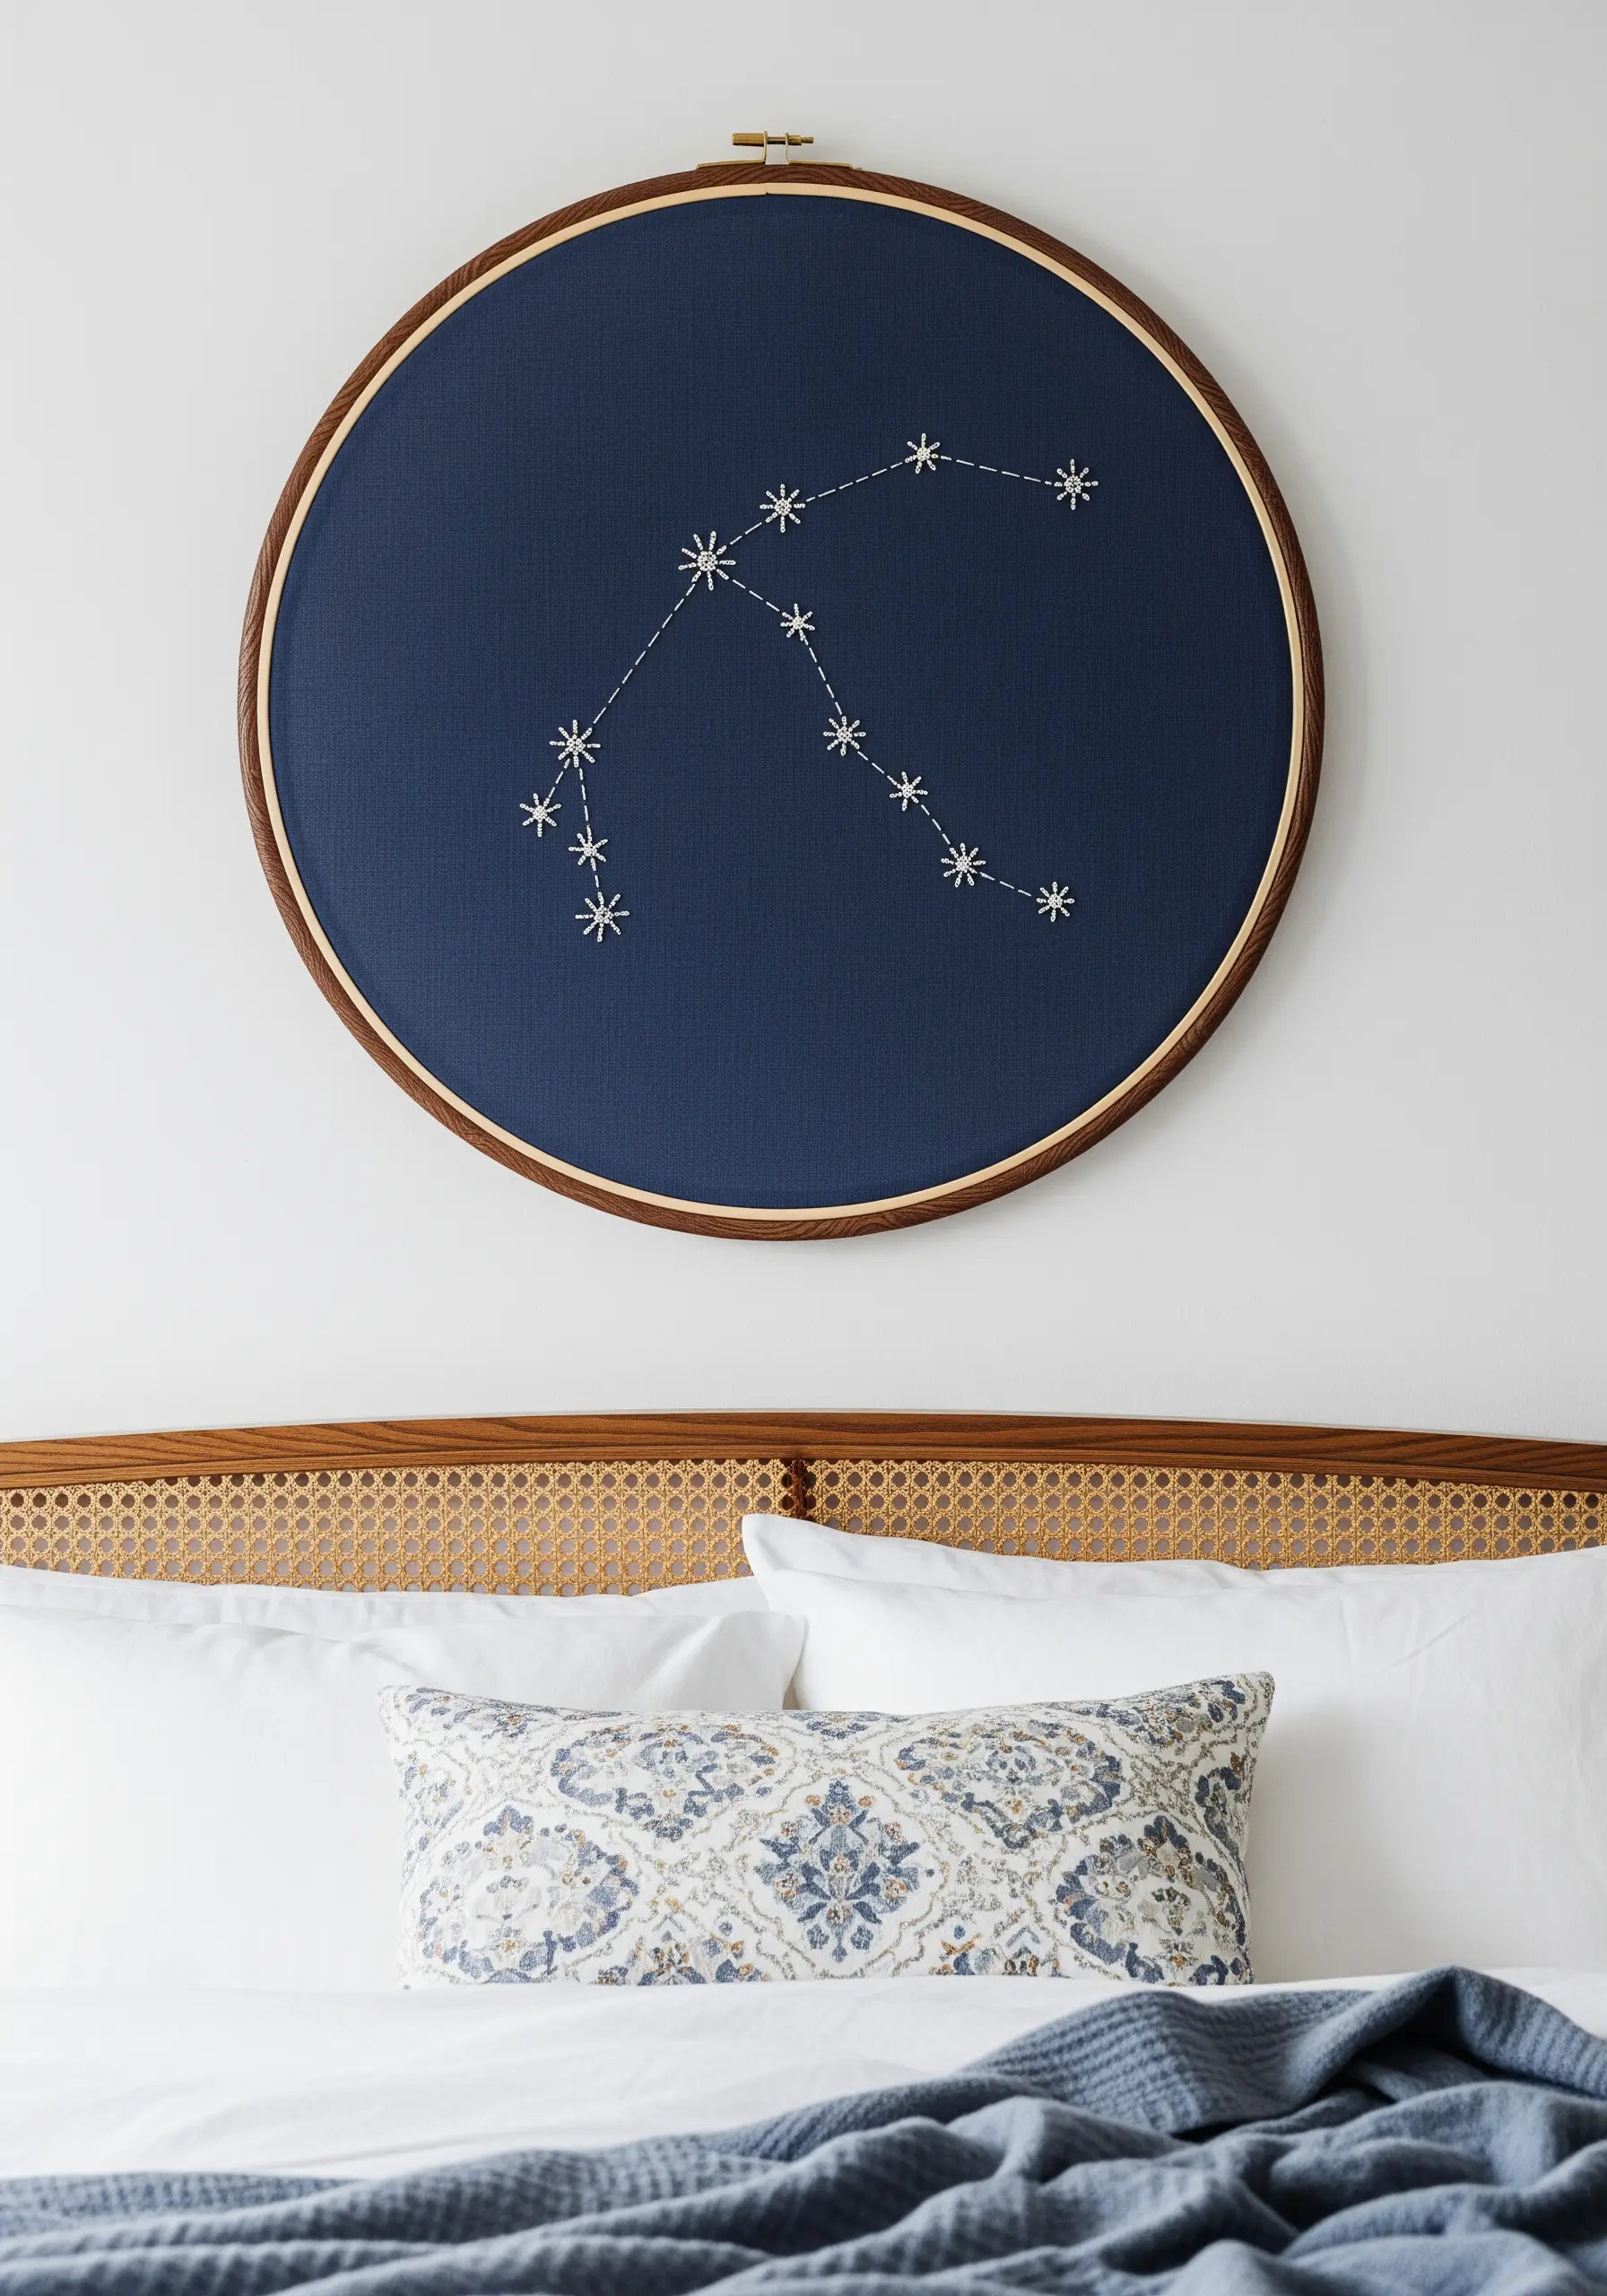
This project proves that simplicity can be breathtakingly elegant.
Use a single strand of metallic or bright white thread against a deep navy blue fabric for dramatic contrast.
Create the stars with a simple star stitch or a tiny cluster of three French knots, then connect them with a clean, delicate backstitch.
The choice of an oversized hoop as the final frame is a modern, cost-effective alternative to traditional framing, ideal for creating oversized hoop wall displays.
17. Create Topographic Art with Color Gradients
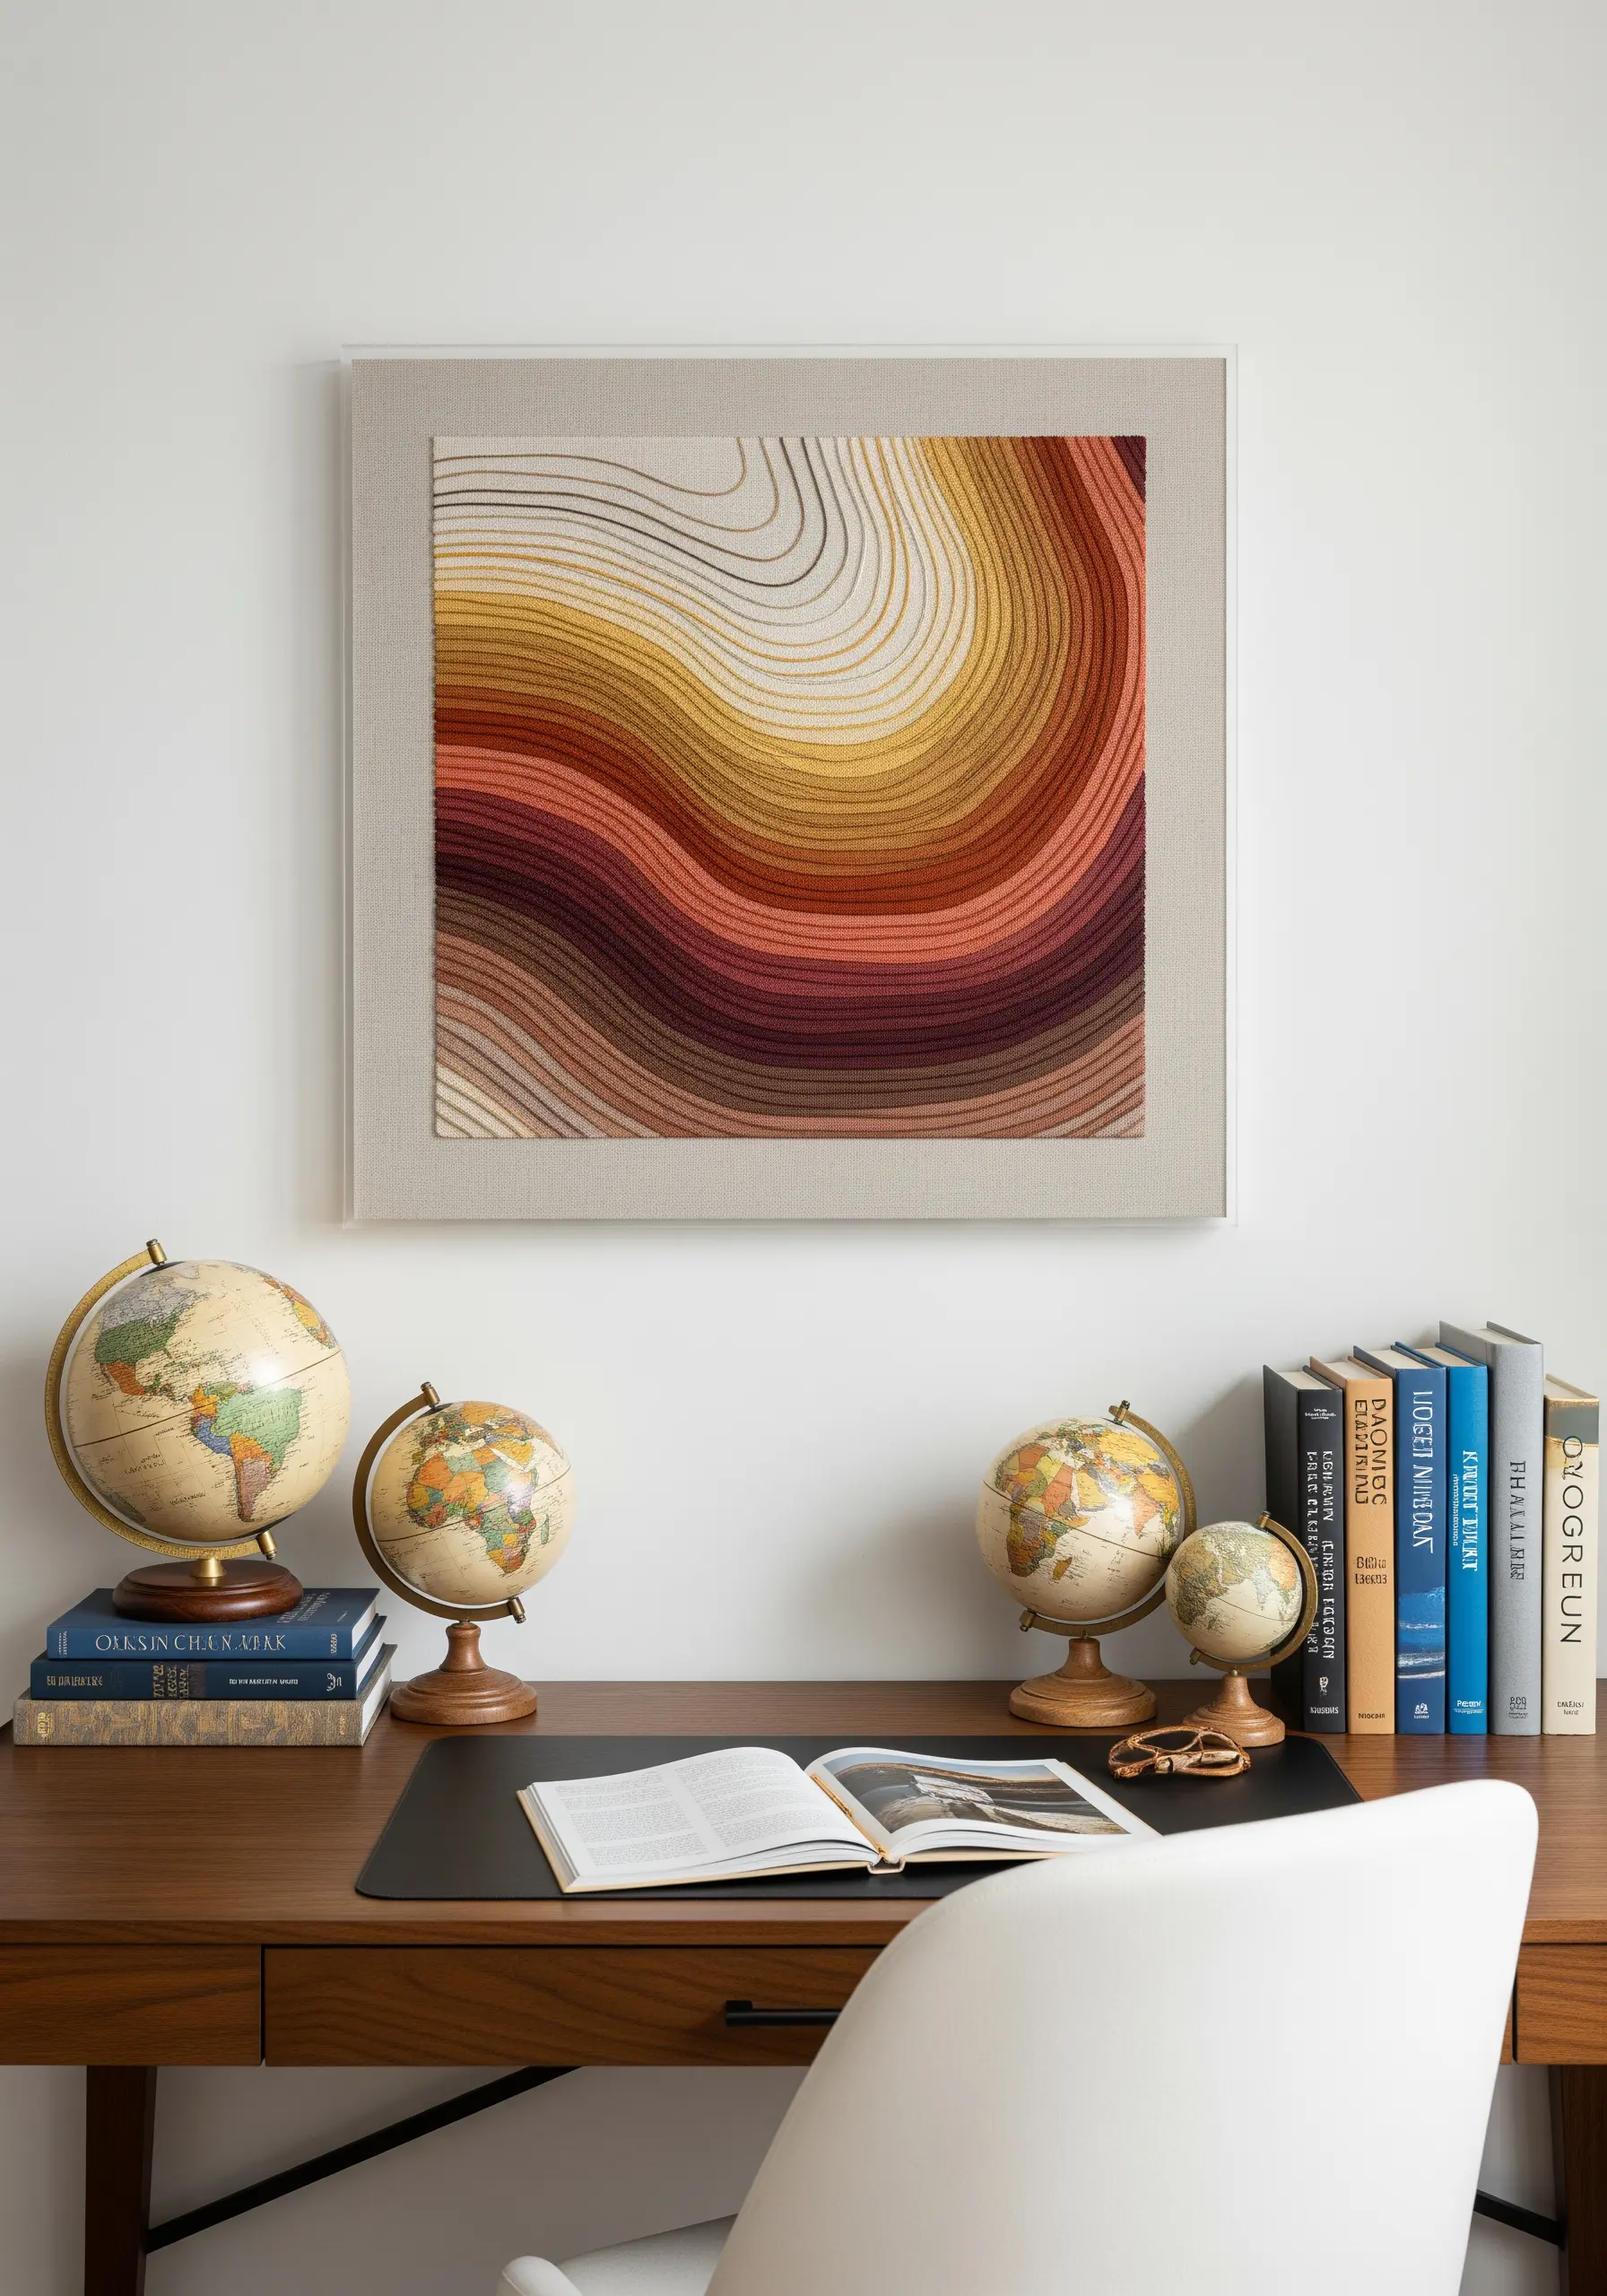
This mesmerizing effect is achieved through the meditative repetition of a single stitch, like the backstitch or stem stitch, packed tightly together.
The artistry is all in the color planning. Select an analogous color palette of 10-15 shades and arrange them to create a seamless gradient.
The beauty of the piece emerges from the subtle color shifts, transforming simple lines into a complex, topographic landscape.
This technique is perfect for exploring gradient color floral embroidery ideas or abstract art.


