
It’s easy to feel that beautiful, polished embroidery is out of reach—that it requires complex stitches or years of practice. But I want you to reconsider. The true secret to sophisticated work isn’t complexity; it’s intention.
It’s knowing that changing the direction of a satin stitch can make a surface glow, or that choosing a single strand of thread over six can create breathtaking delicacy. It’s understanding that a simple French knot, repeated with care, can build more texture than a dozen fancier stitches combined.
These designs are your invitation to explore that idea. Each one is built on a foundation of simple, accessible techniques, but they showcase the small adjustments that create disproportionately beautiful results. Let’s start stitching with purpose—you’ll be amazed at the elegance you can achieve right now.
1. Master the Directional Satin Stitch
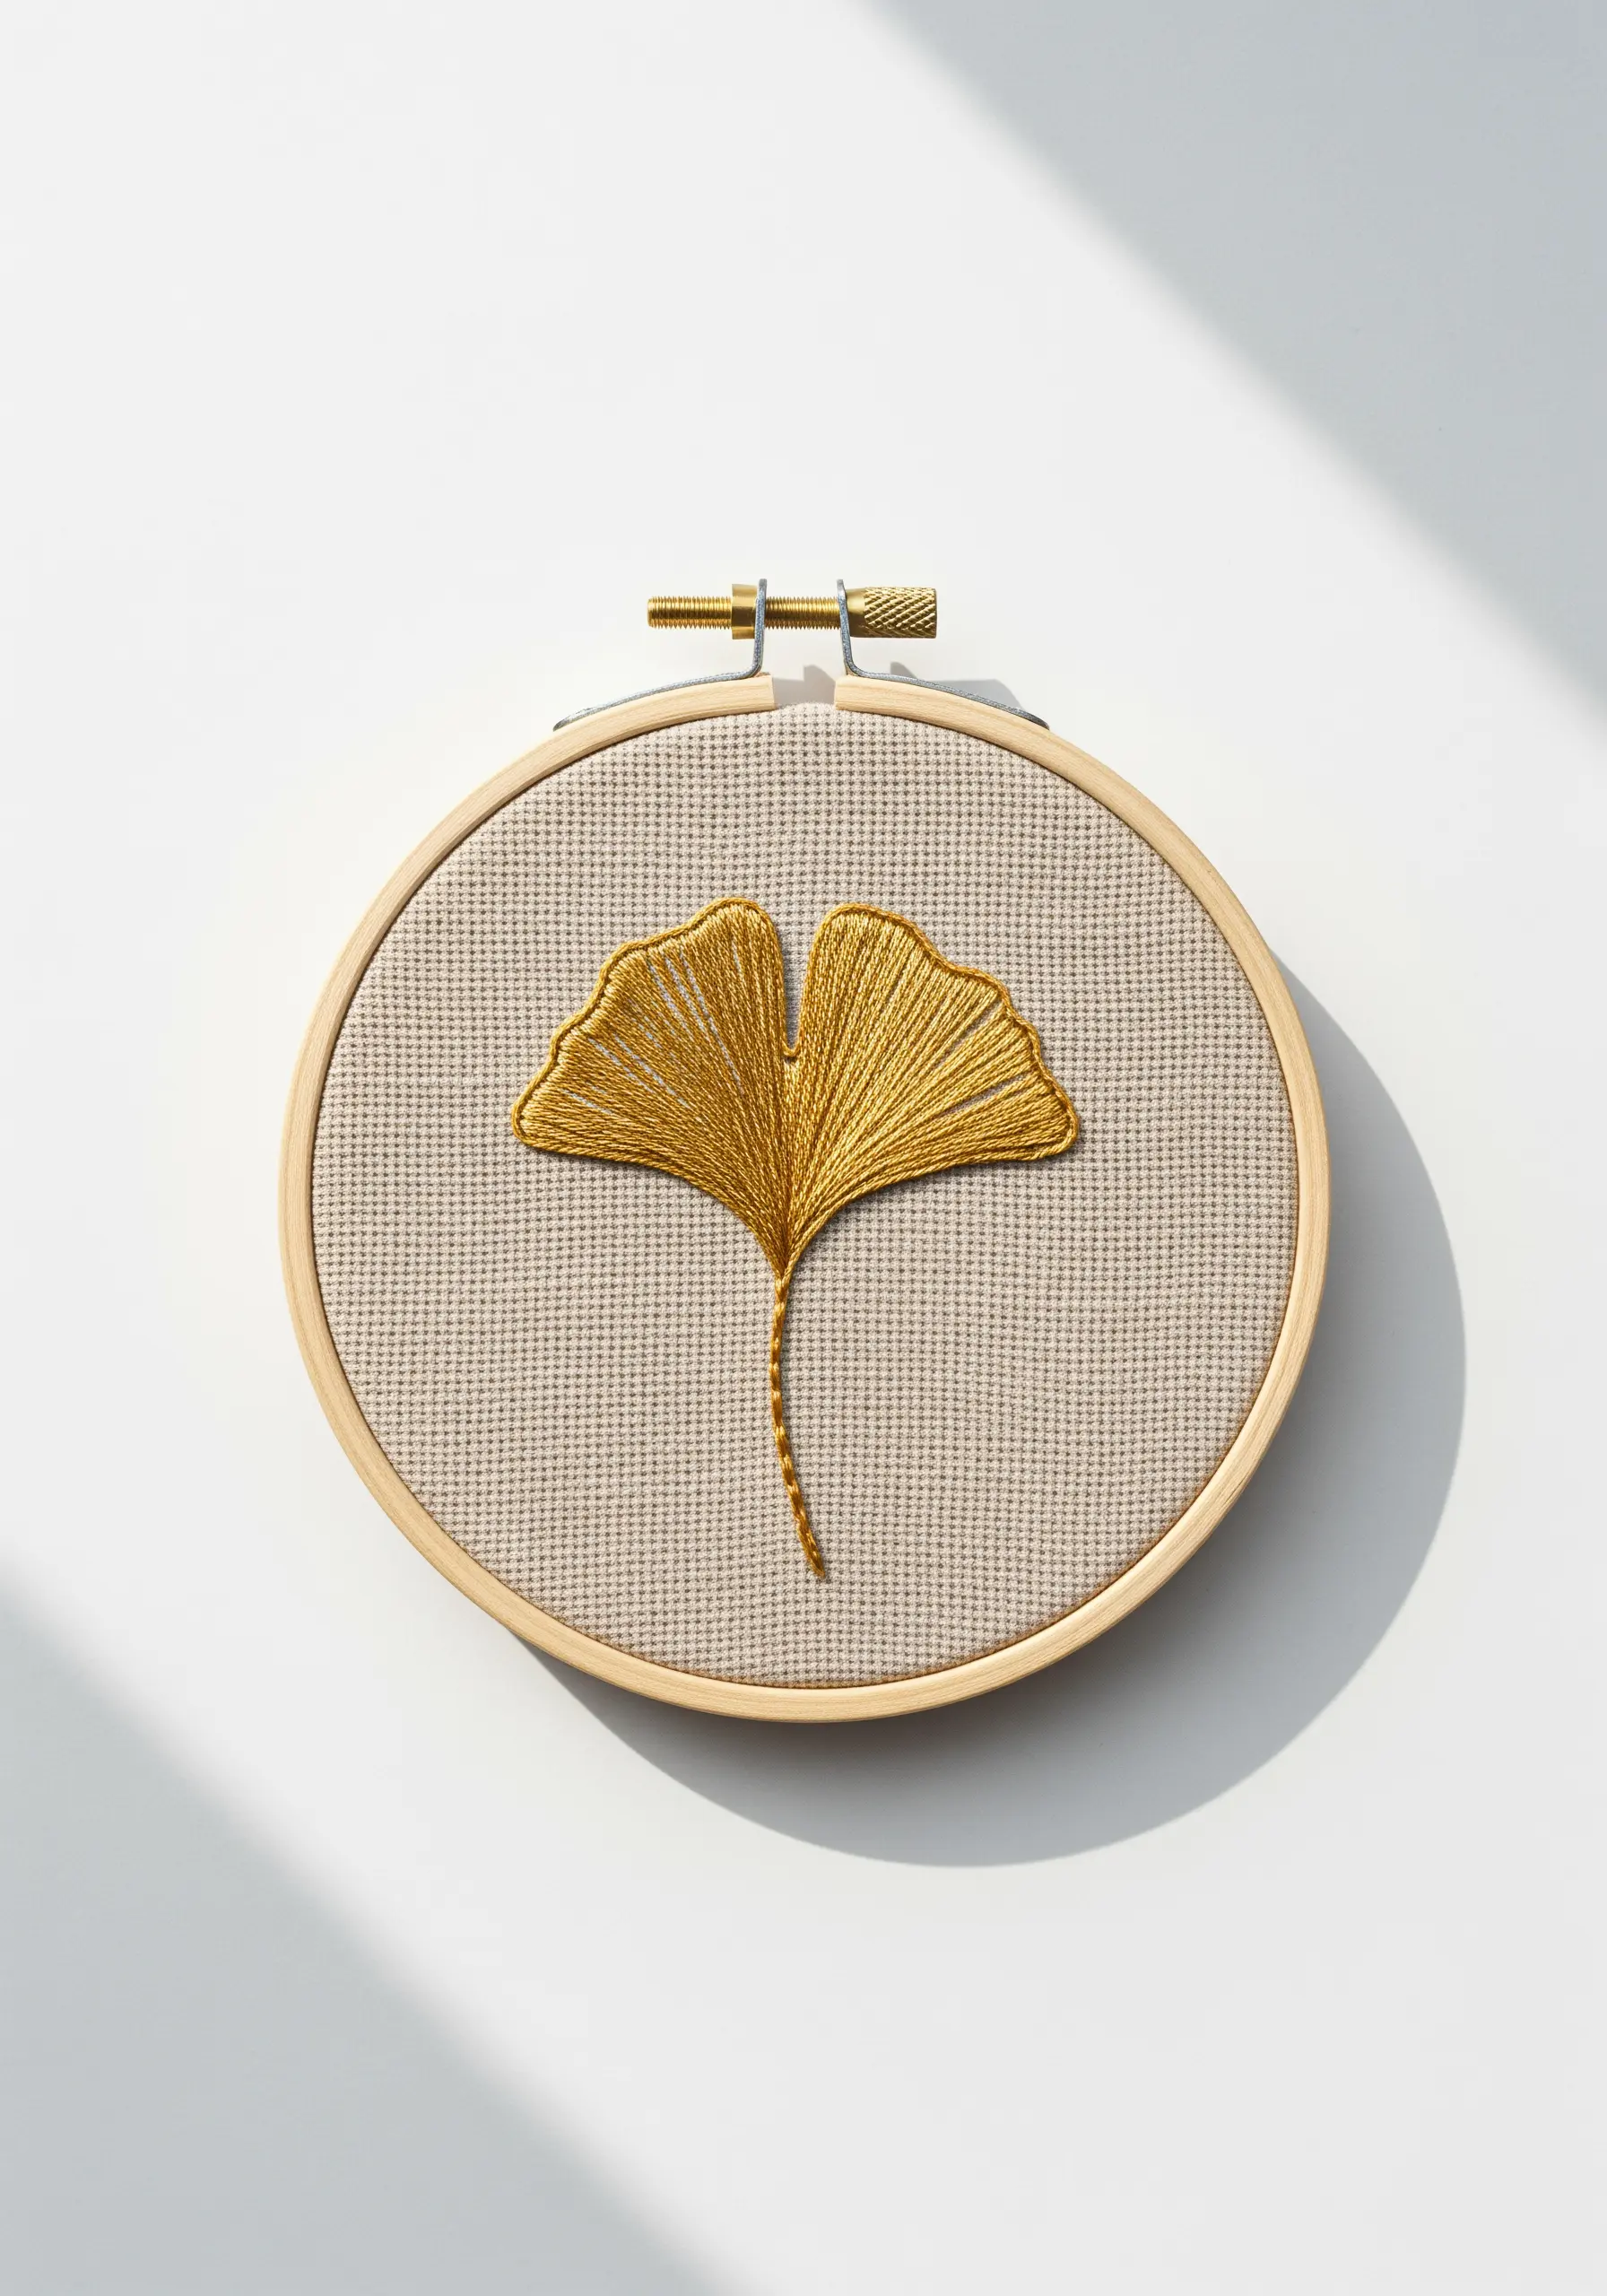
A single ginkgo leaf becomes a masterpiece when you master directional satin stitch.
Instead of filling the shape with uniform vertical or horizontal lines, angle your stitches to follow the leaf’s natural veins, fanning out from the stem.
This simple adjustment creates an illusion of movement and catches the light, giving the thread a lustrous, almost metallic sheen.
For an impeccably sharp edge, first outline the entire leaf with a single line of split stitch; this gives your satin stitches a slightly raised, clean border to rest against.
2. Combine Fills and Lines for Graphic Impact
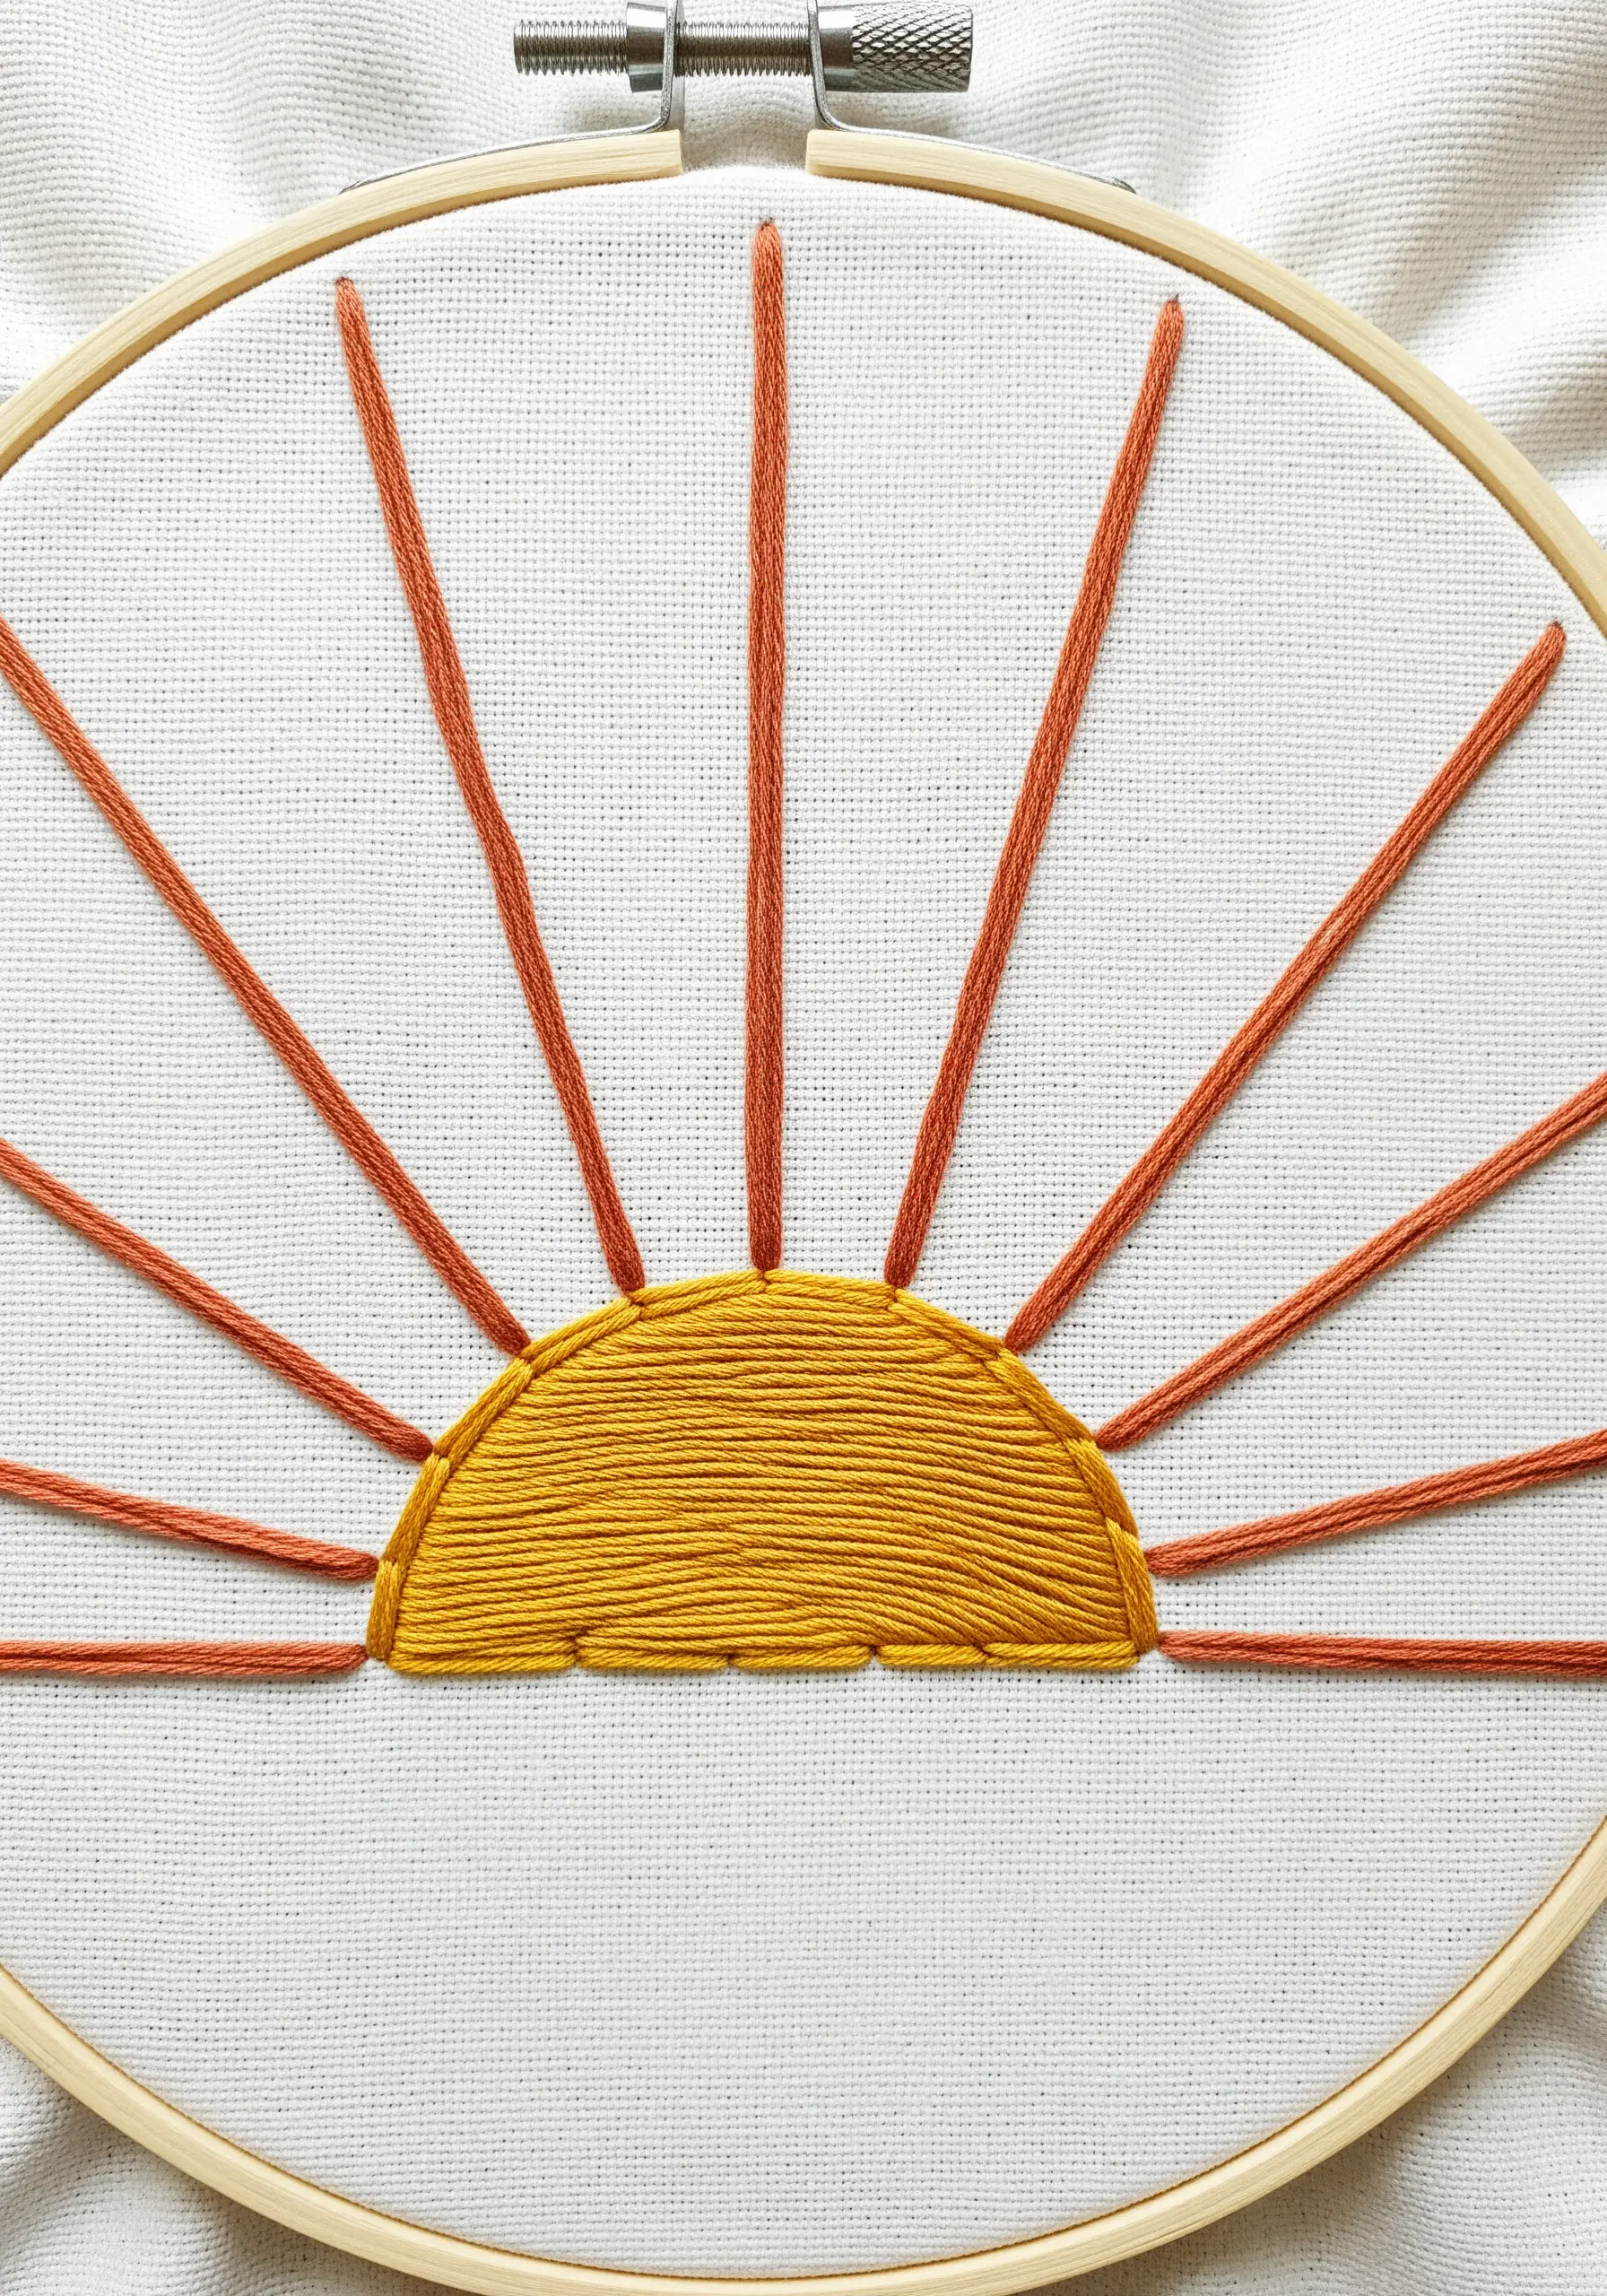
This rising sun demonstrates how two basic techniques can create a bold, graphic statement.
Fill the semicircle with a smooth satin stitch, ensuring your stitches are parallel and taut for a solid block of color.
For the rays, use a simple straight stitch, but pay close attention to tension—if the stitches are too loose, they will sag; if too tight, they will pucker the fabric.
Anchor each long stitch securely on the back to maintain clean, sharp lines that radiate with energy.
3. Stitch a Celestial Map with Floral Details
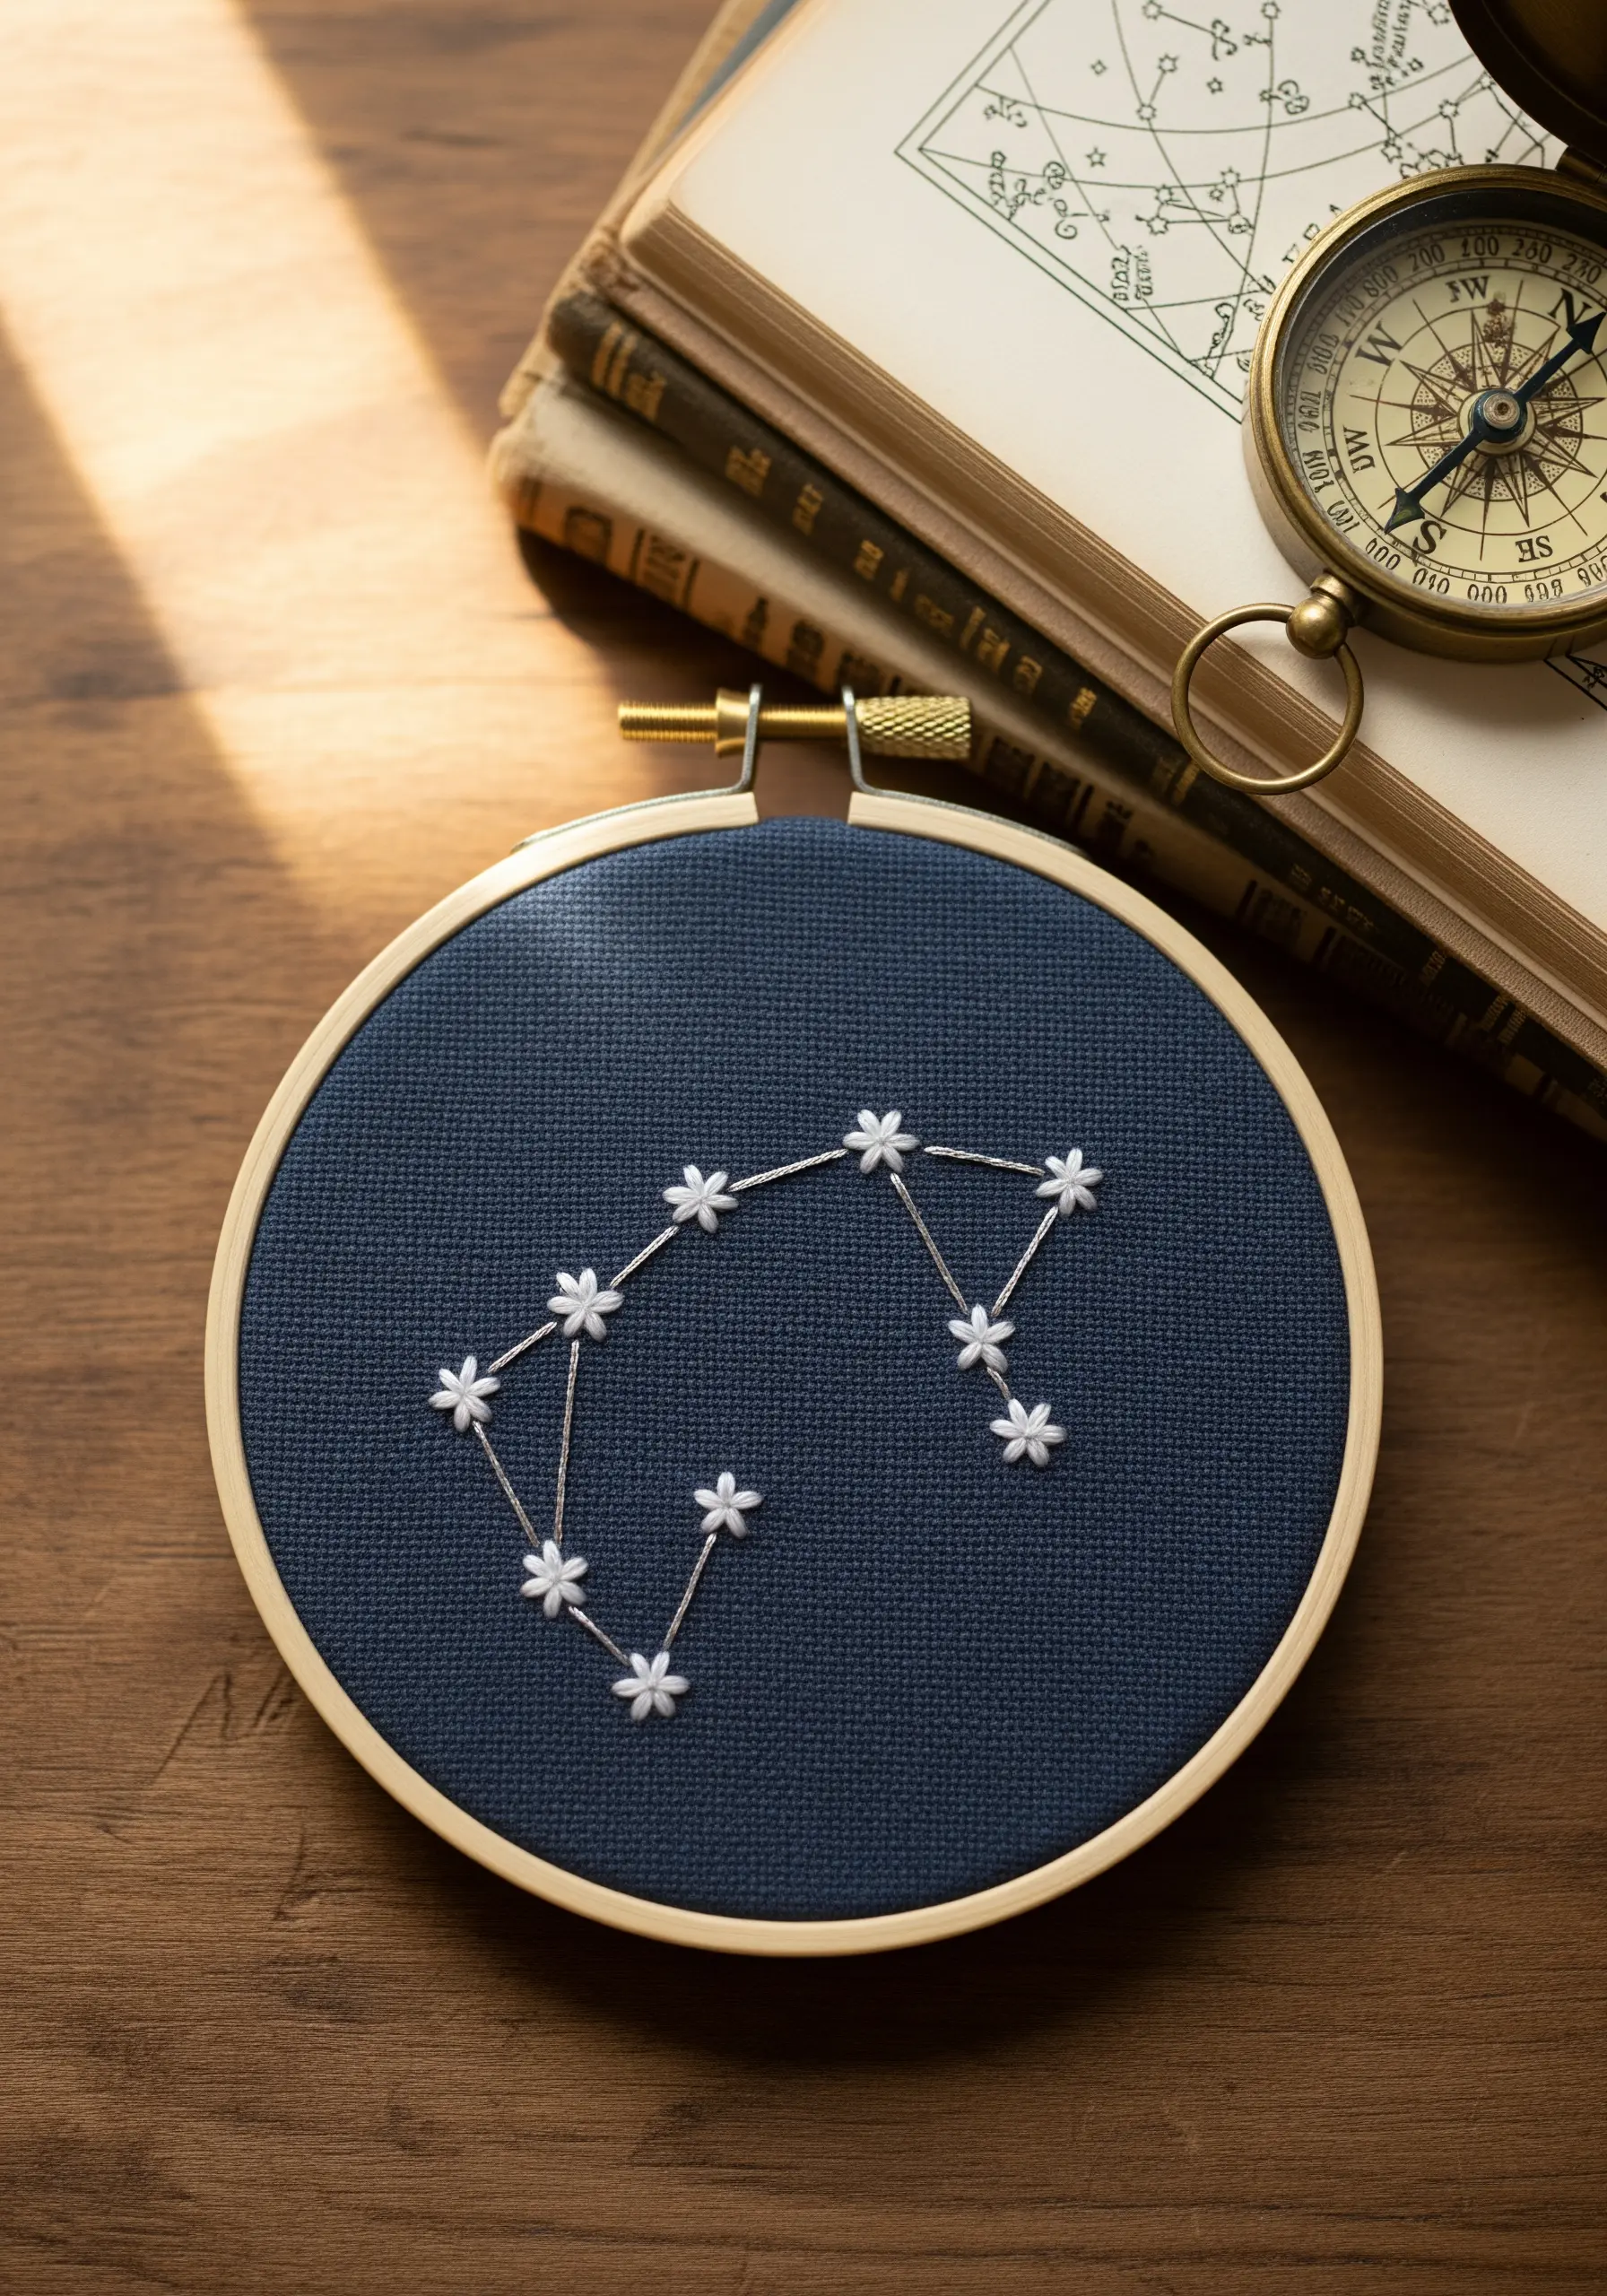
Transform a simple constellation into a delicate botanical map using the lazy daisy stitch.
Instead of French knots, place a tiny lazy daisy stitch at each star point to create the illusion of a five-petaled blossom.
Use a single strand of bright white or silver thread on a dark navy or black fabric to achieve a dramatic, high-contrast effect that mimics a clear night sky.
Connect your floral ‘stars’ with a fine backstitch to complete the constellation’s form with elegance.
4. Create Sculptural Lines with a Single Stitch
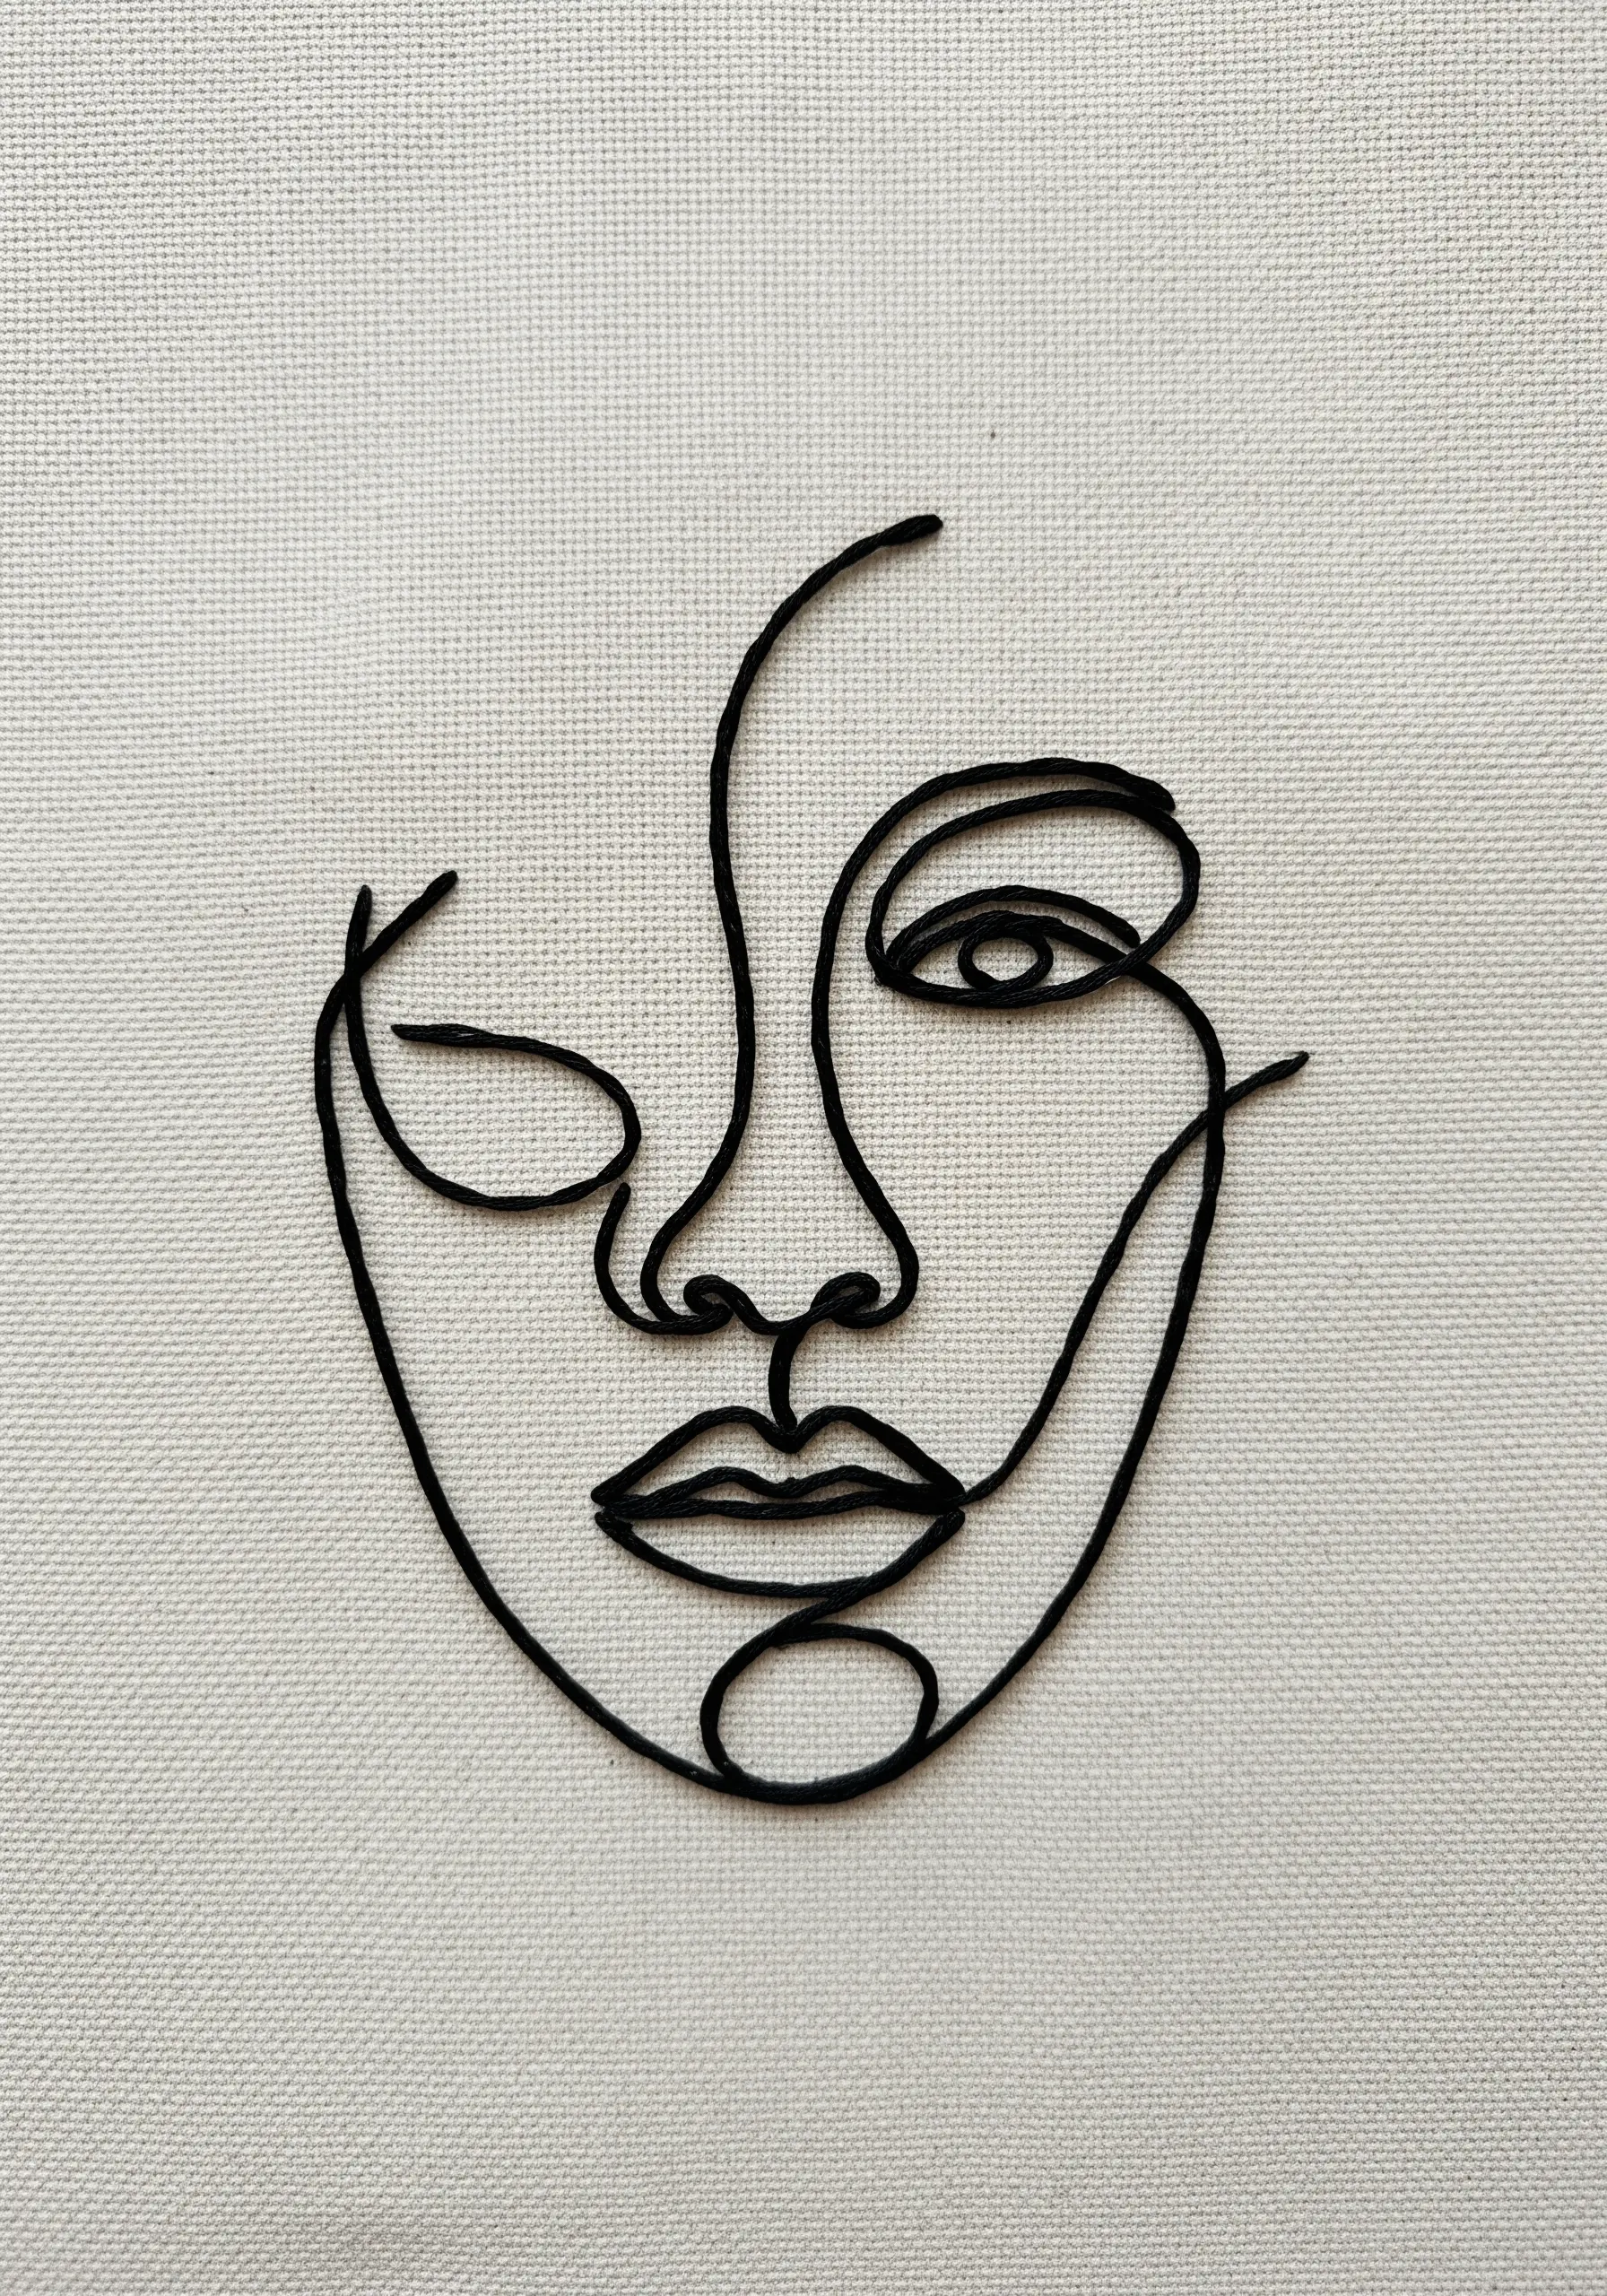
Achieve the fluid look of a continuous line drawing by mastering the stem stitch or a whipped backstitch.
Trace your design onto the fabric and use a single, unbroken thread for as long as possible to maintain a seamless flow.
To give your line weight and a raised, sculptural quality, use all six strands of embroidery floss or switch to a thicker thread like pearl cotton.
This technique turns a simple sketch into a tactile piece of modern line art with minimal effort.
5. Weave Tiny Lavender Blossoms
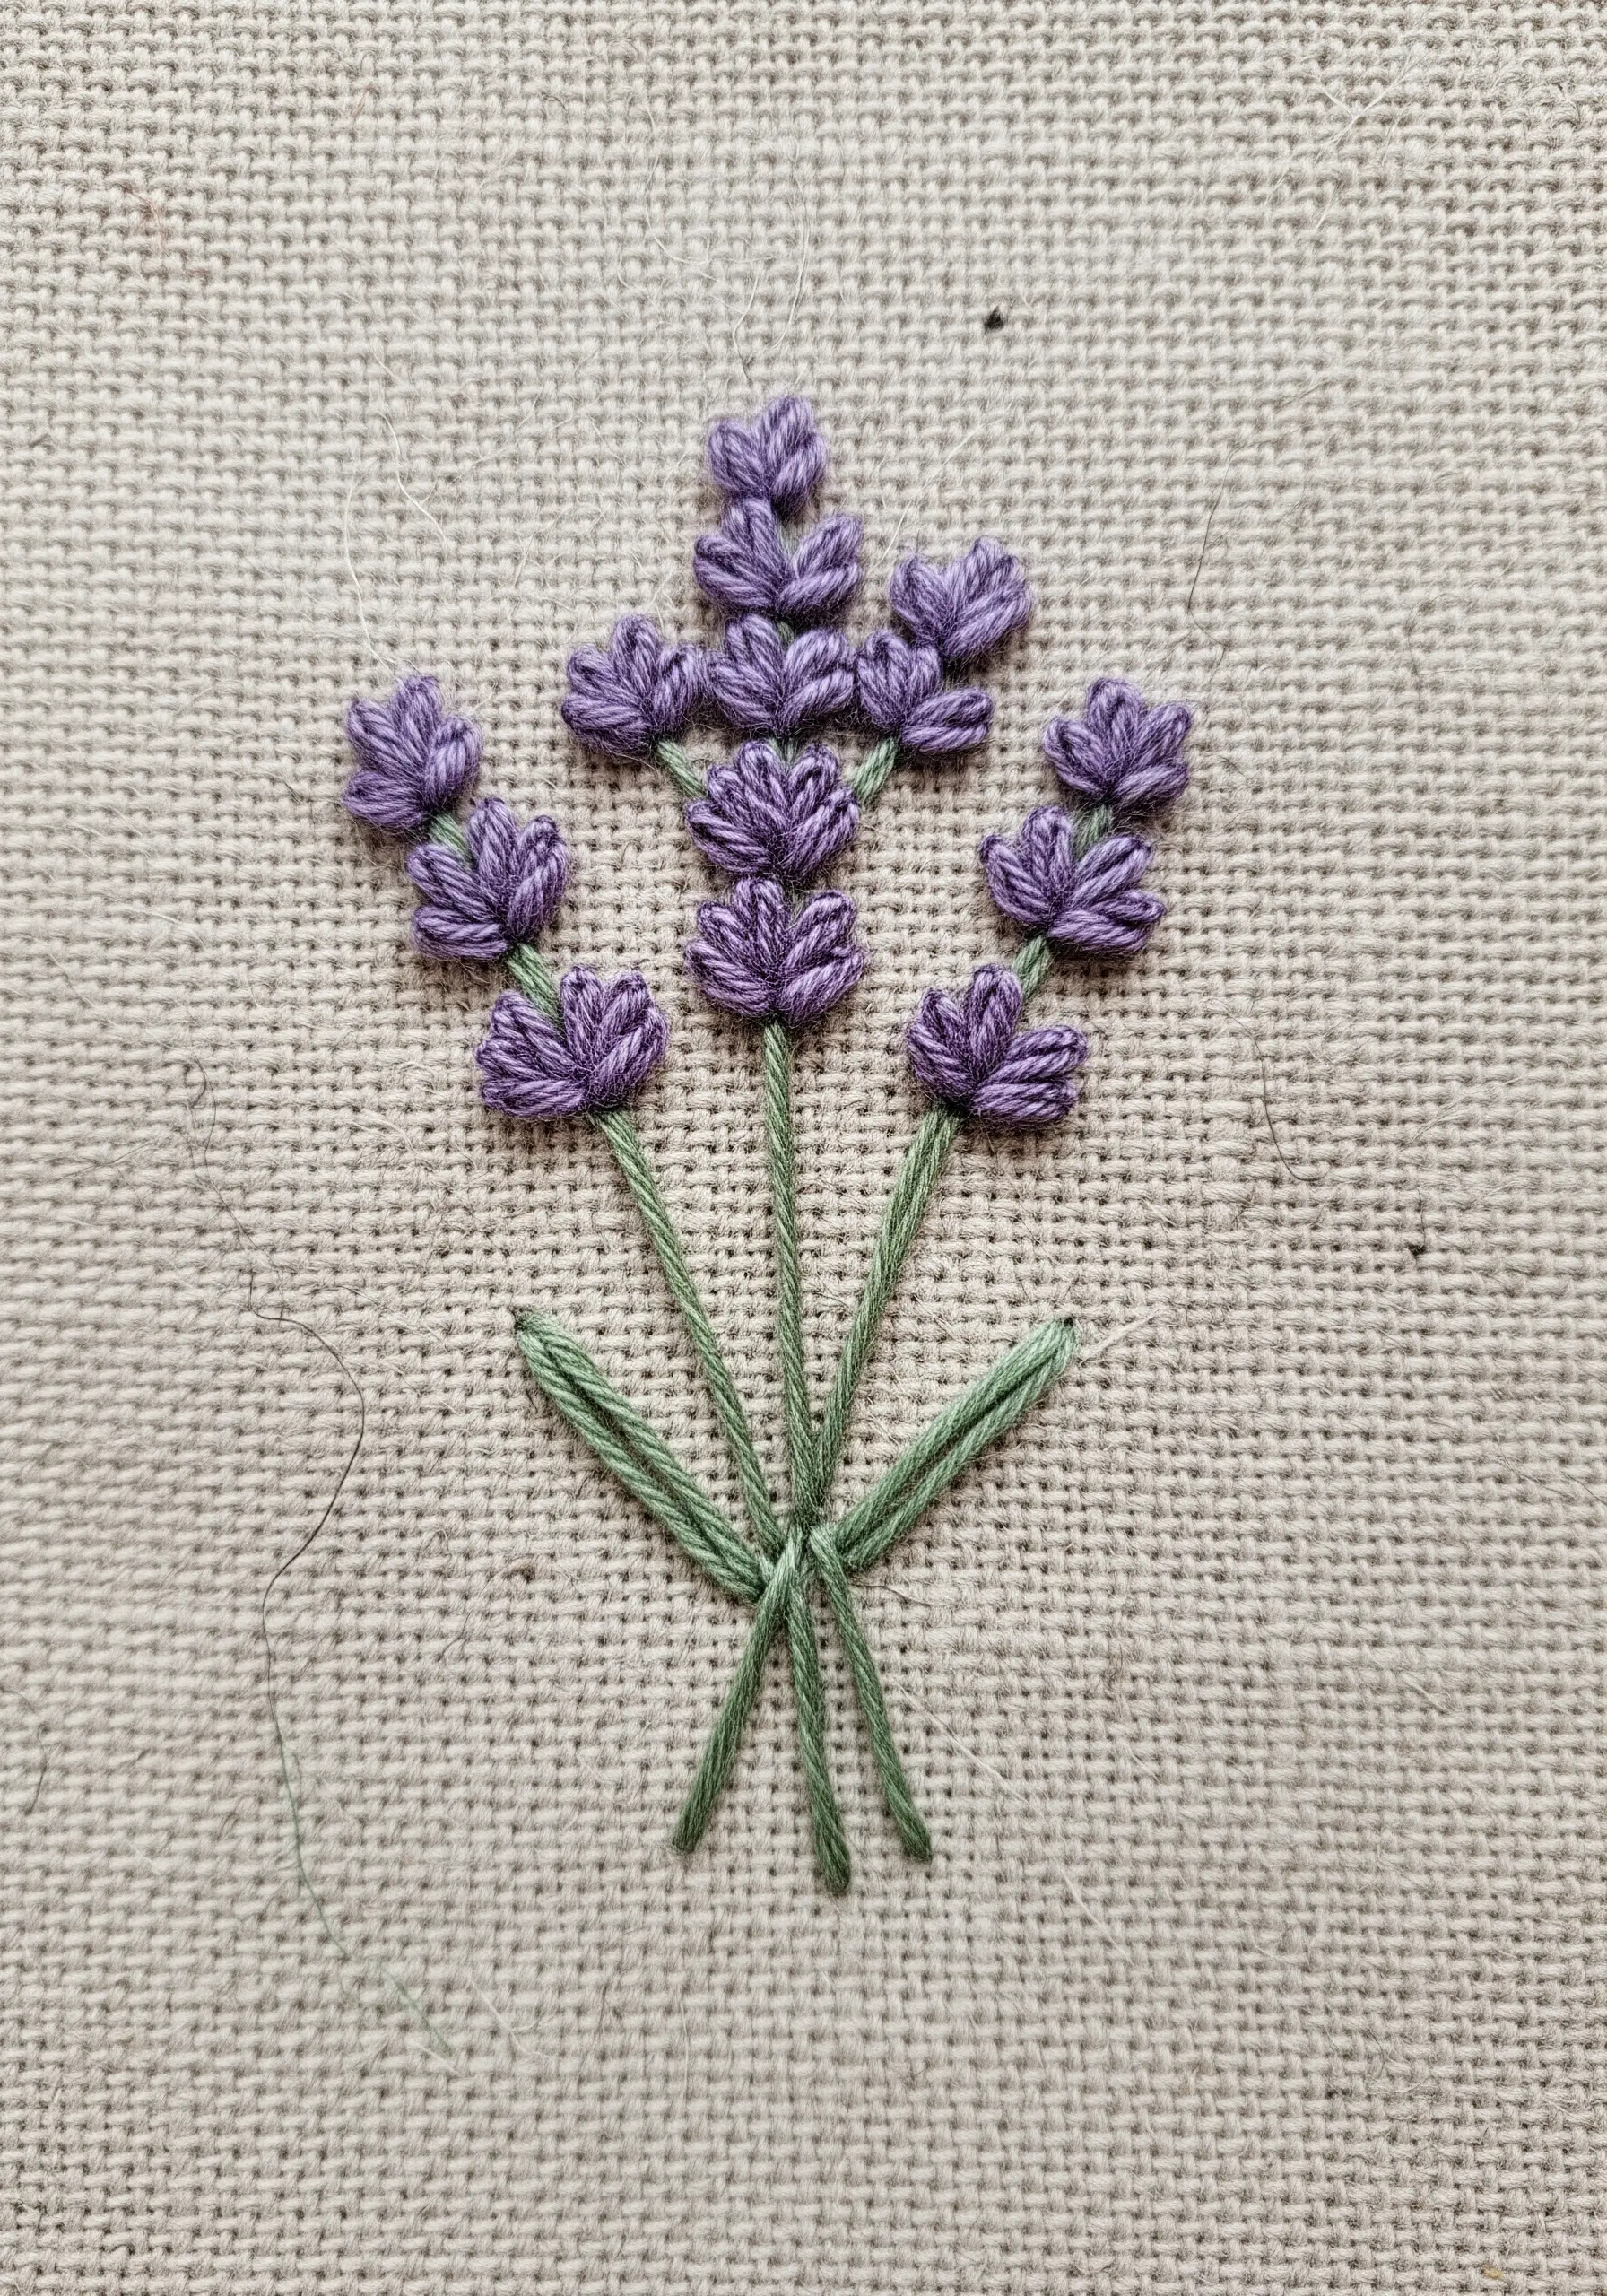
This lavender bouquet looks intricate, but each blossom is just a modified spider web stitch—a technique that requires more wrapping than stitching.
Create a small star of straight stitches as your base, then weave your thread over and under each spoke until you form a small, textured bud.
For a more natural look, vary the tightness of your weave; a tighter wrap creates a dense bud, while a looser one appears more open and fluffy.
Pair them with simple stem stitches for a realistic and charming finish.
6. Elevate Lettering with a Padded Foundation
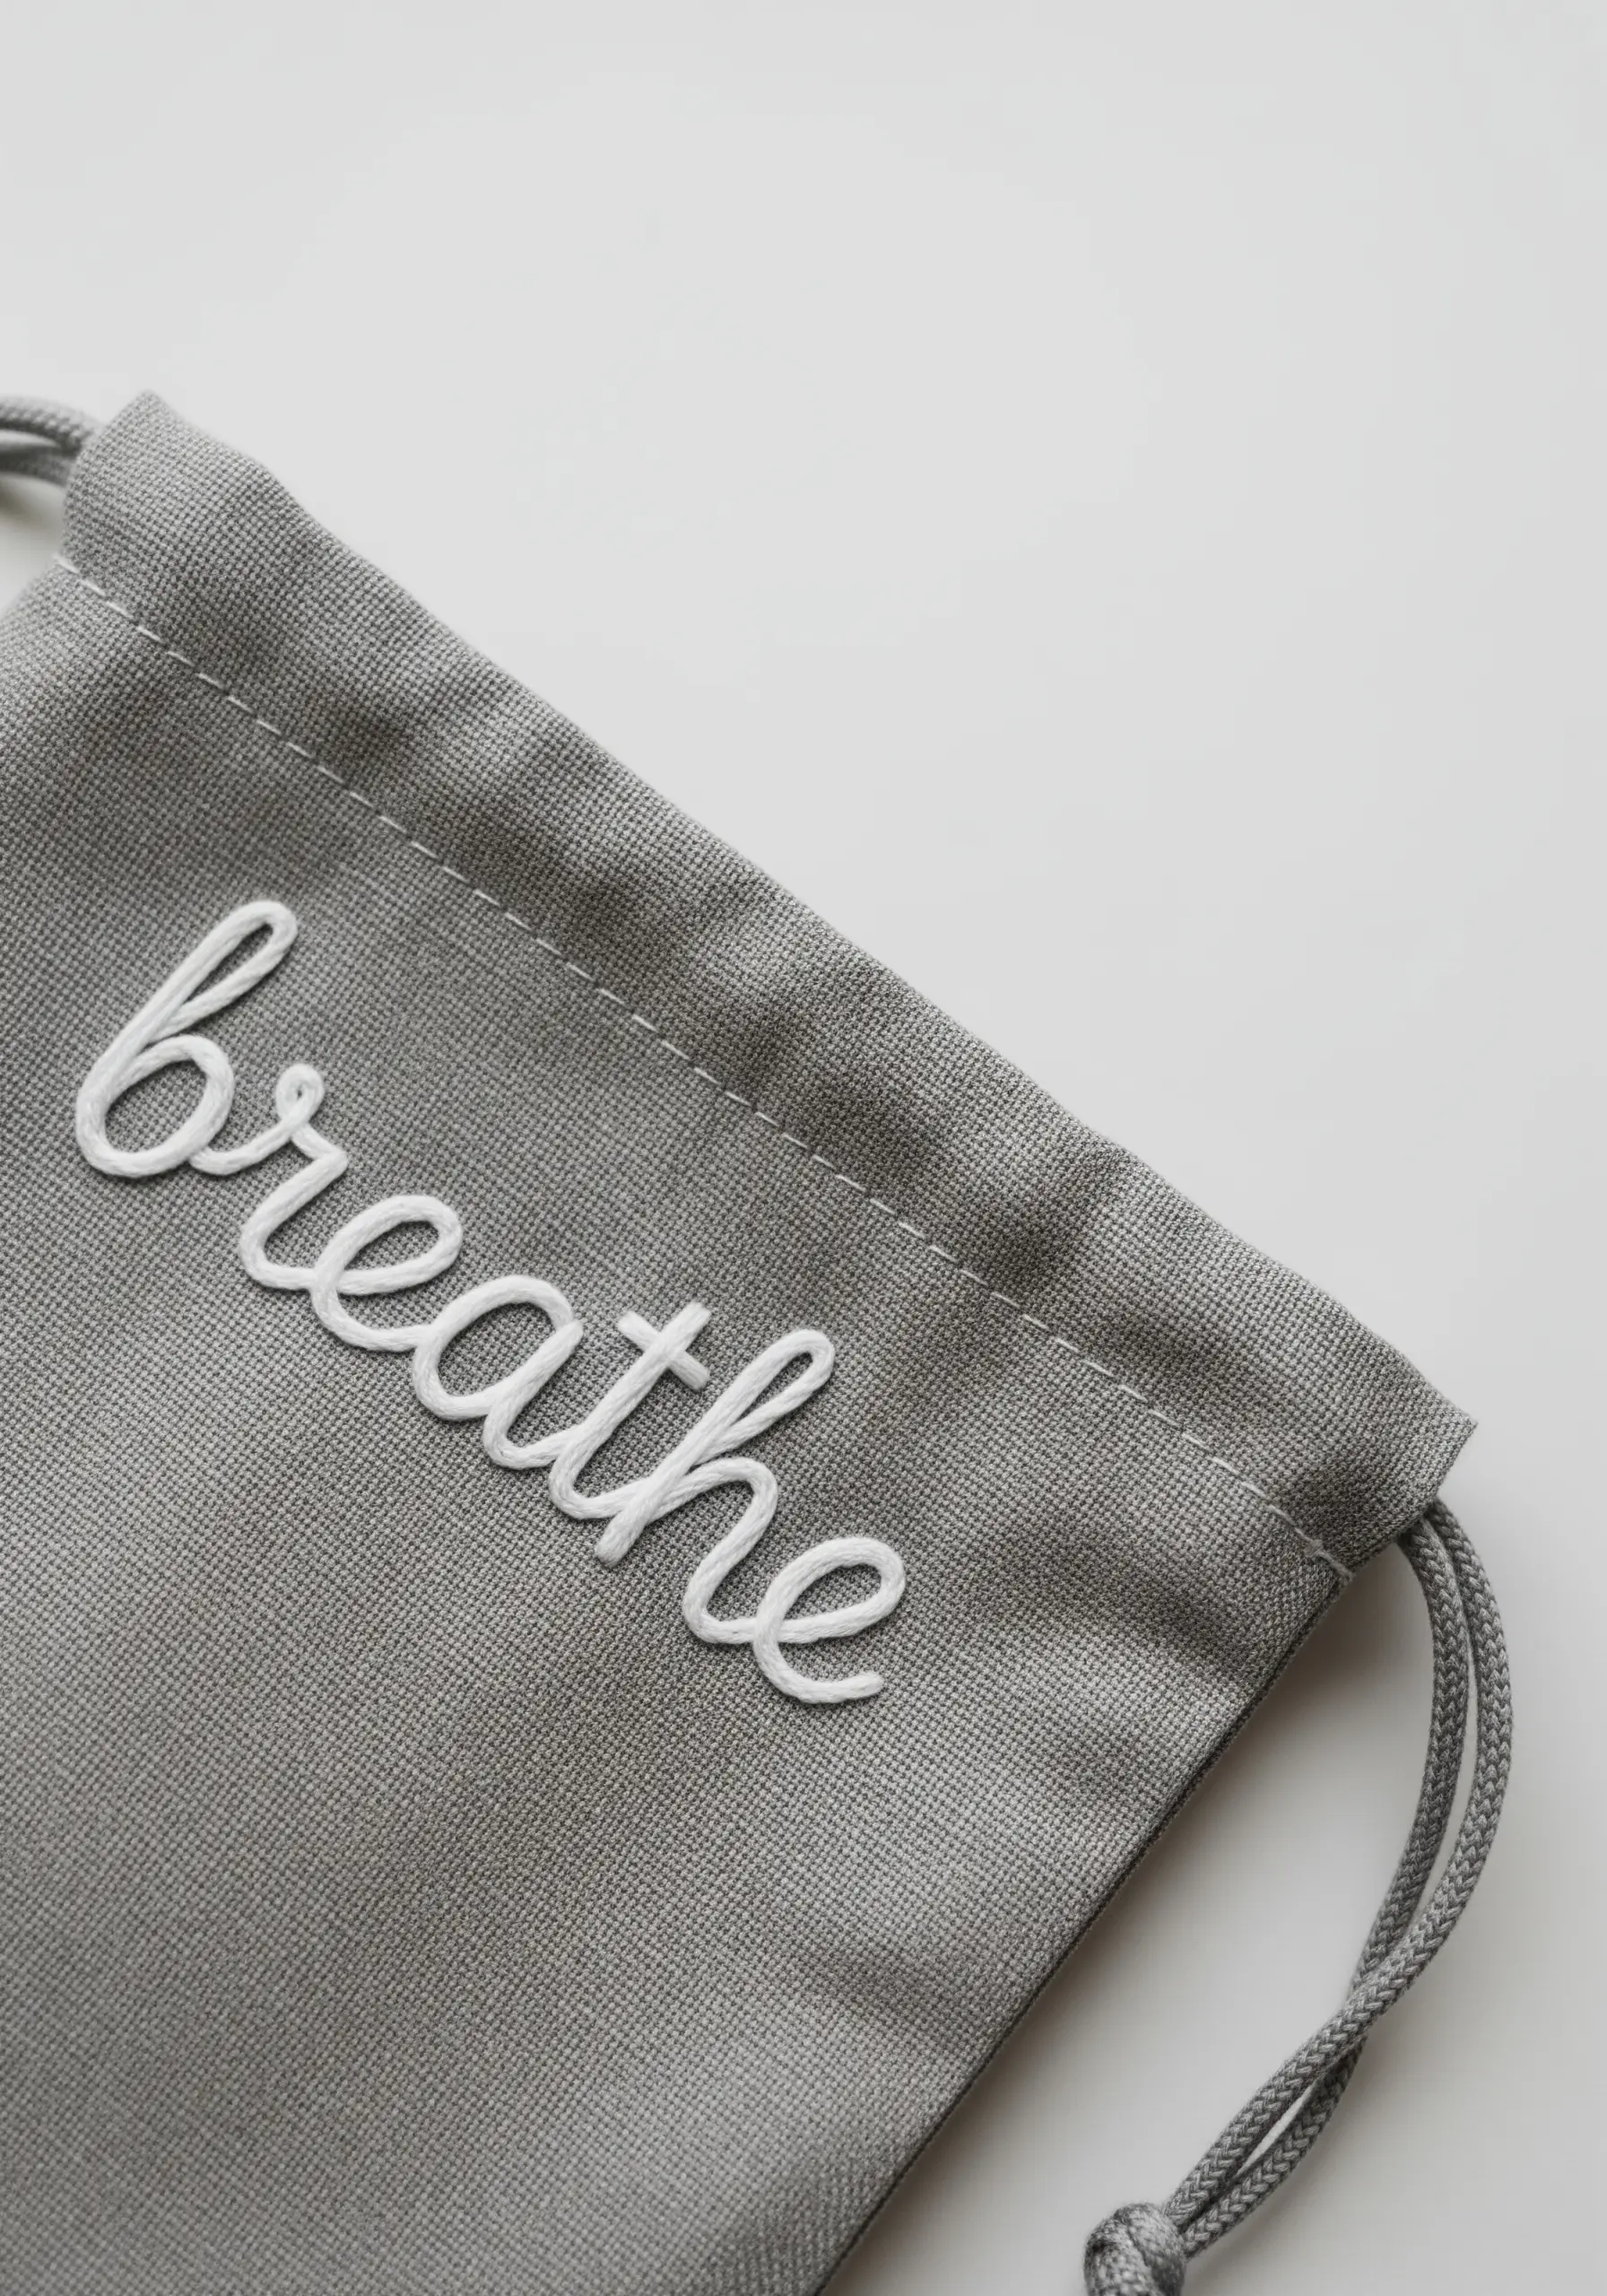
Make your embroidered words pop with a padded satin stitch, a simple technique that adds beautiful dimension.
First, stitch the outline of your letters using a backstitch or split stitch. Then, fill the interior of each letter with horizontal straight stitches—this is your padding.
Finally, cover the padding with vertical satin stitches, going just slightly beyond your original outline for full coverage.
The result is smooth, raised lettering that looks professionally crafted and feels luxurious to the touch.
7. Fill Shapes with a Textured Seed Stitch
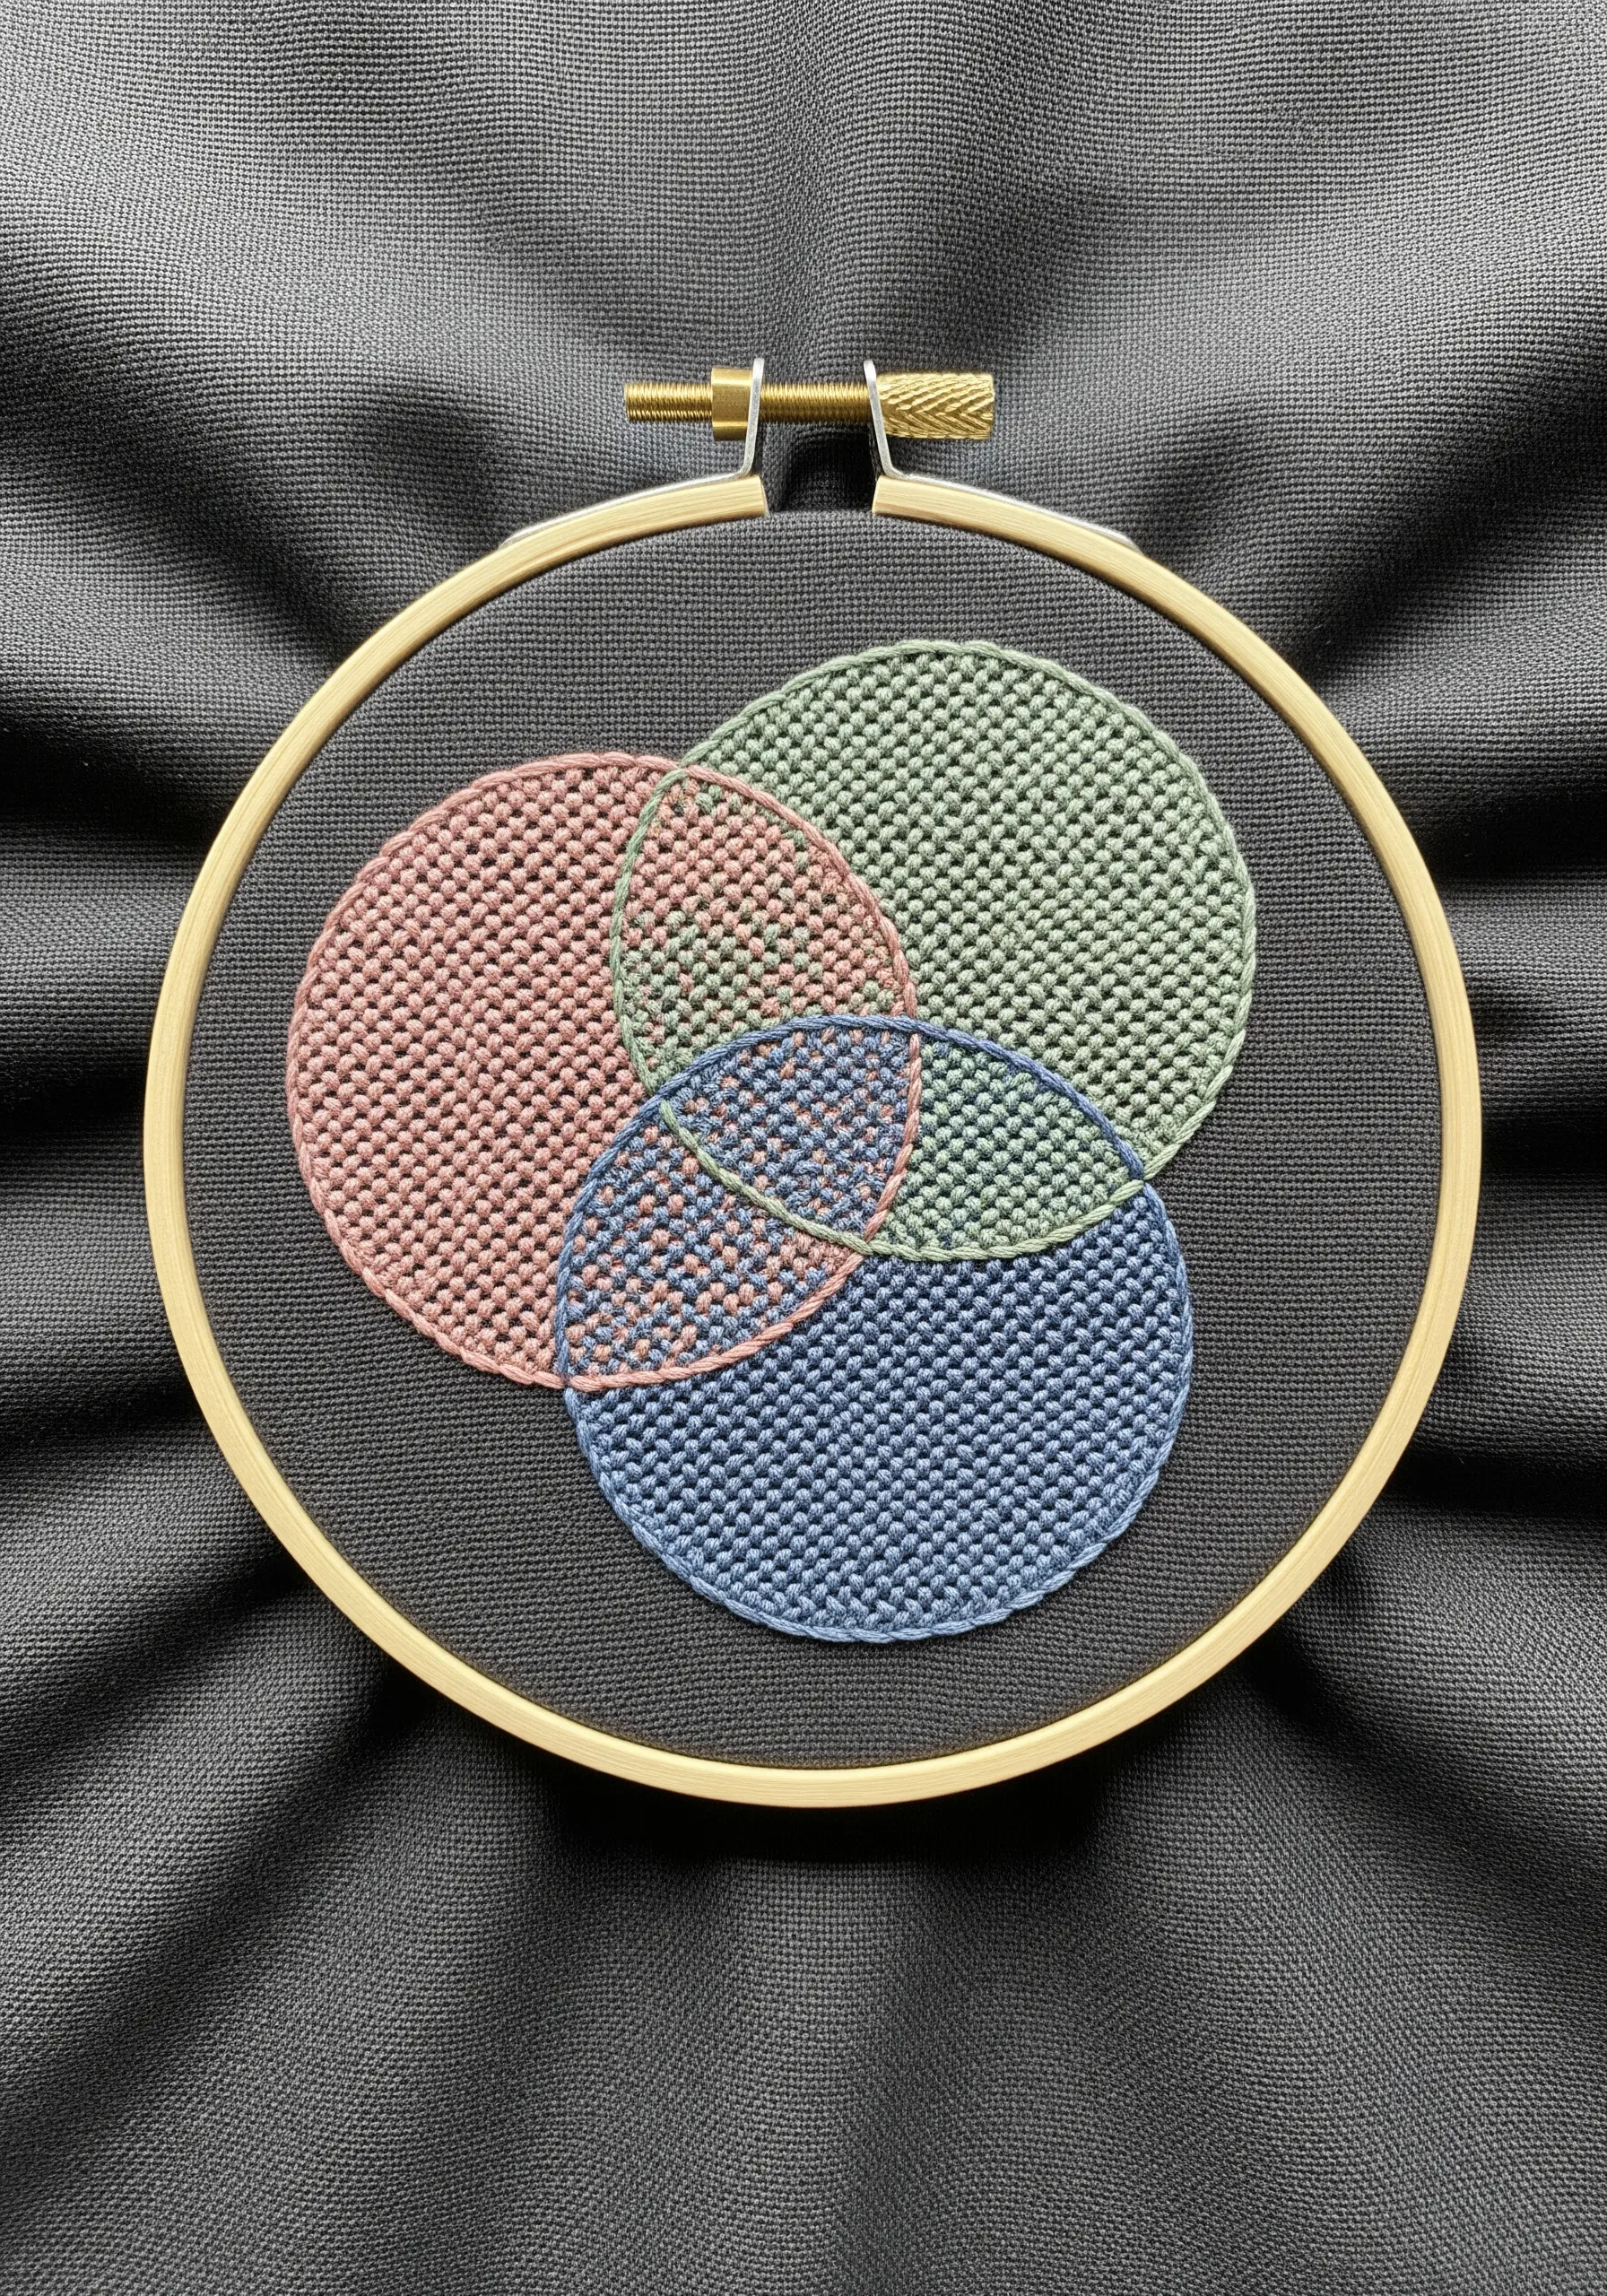
Instead of a flat satin stitch, use the seed stitch to fill shapes with gentle, elegant texture.
The seed stitch is simply a series of small, straight stitches scattered randomly within a shape, like seeds tossed on the ground.
To create the color-blended effect of a Venn diagram, simply work your seed stitches in the corresponding colors, allowing them to overlap naturally in the shared spaces.
This method is forgiving for beginners and creates a much more interesting surface than a standard fill.
8. Capture Movement with Detached Stitches
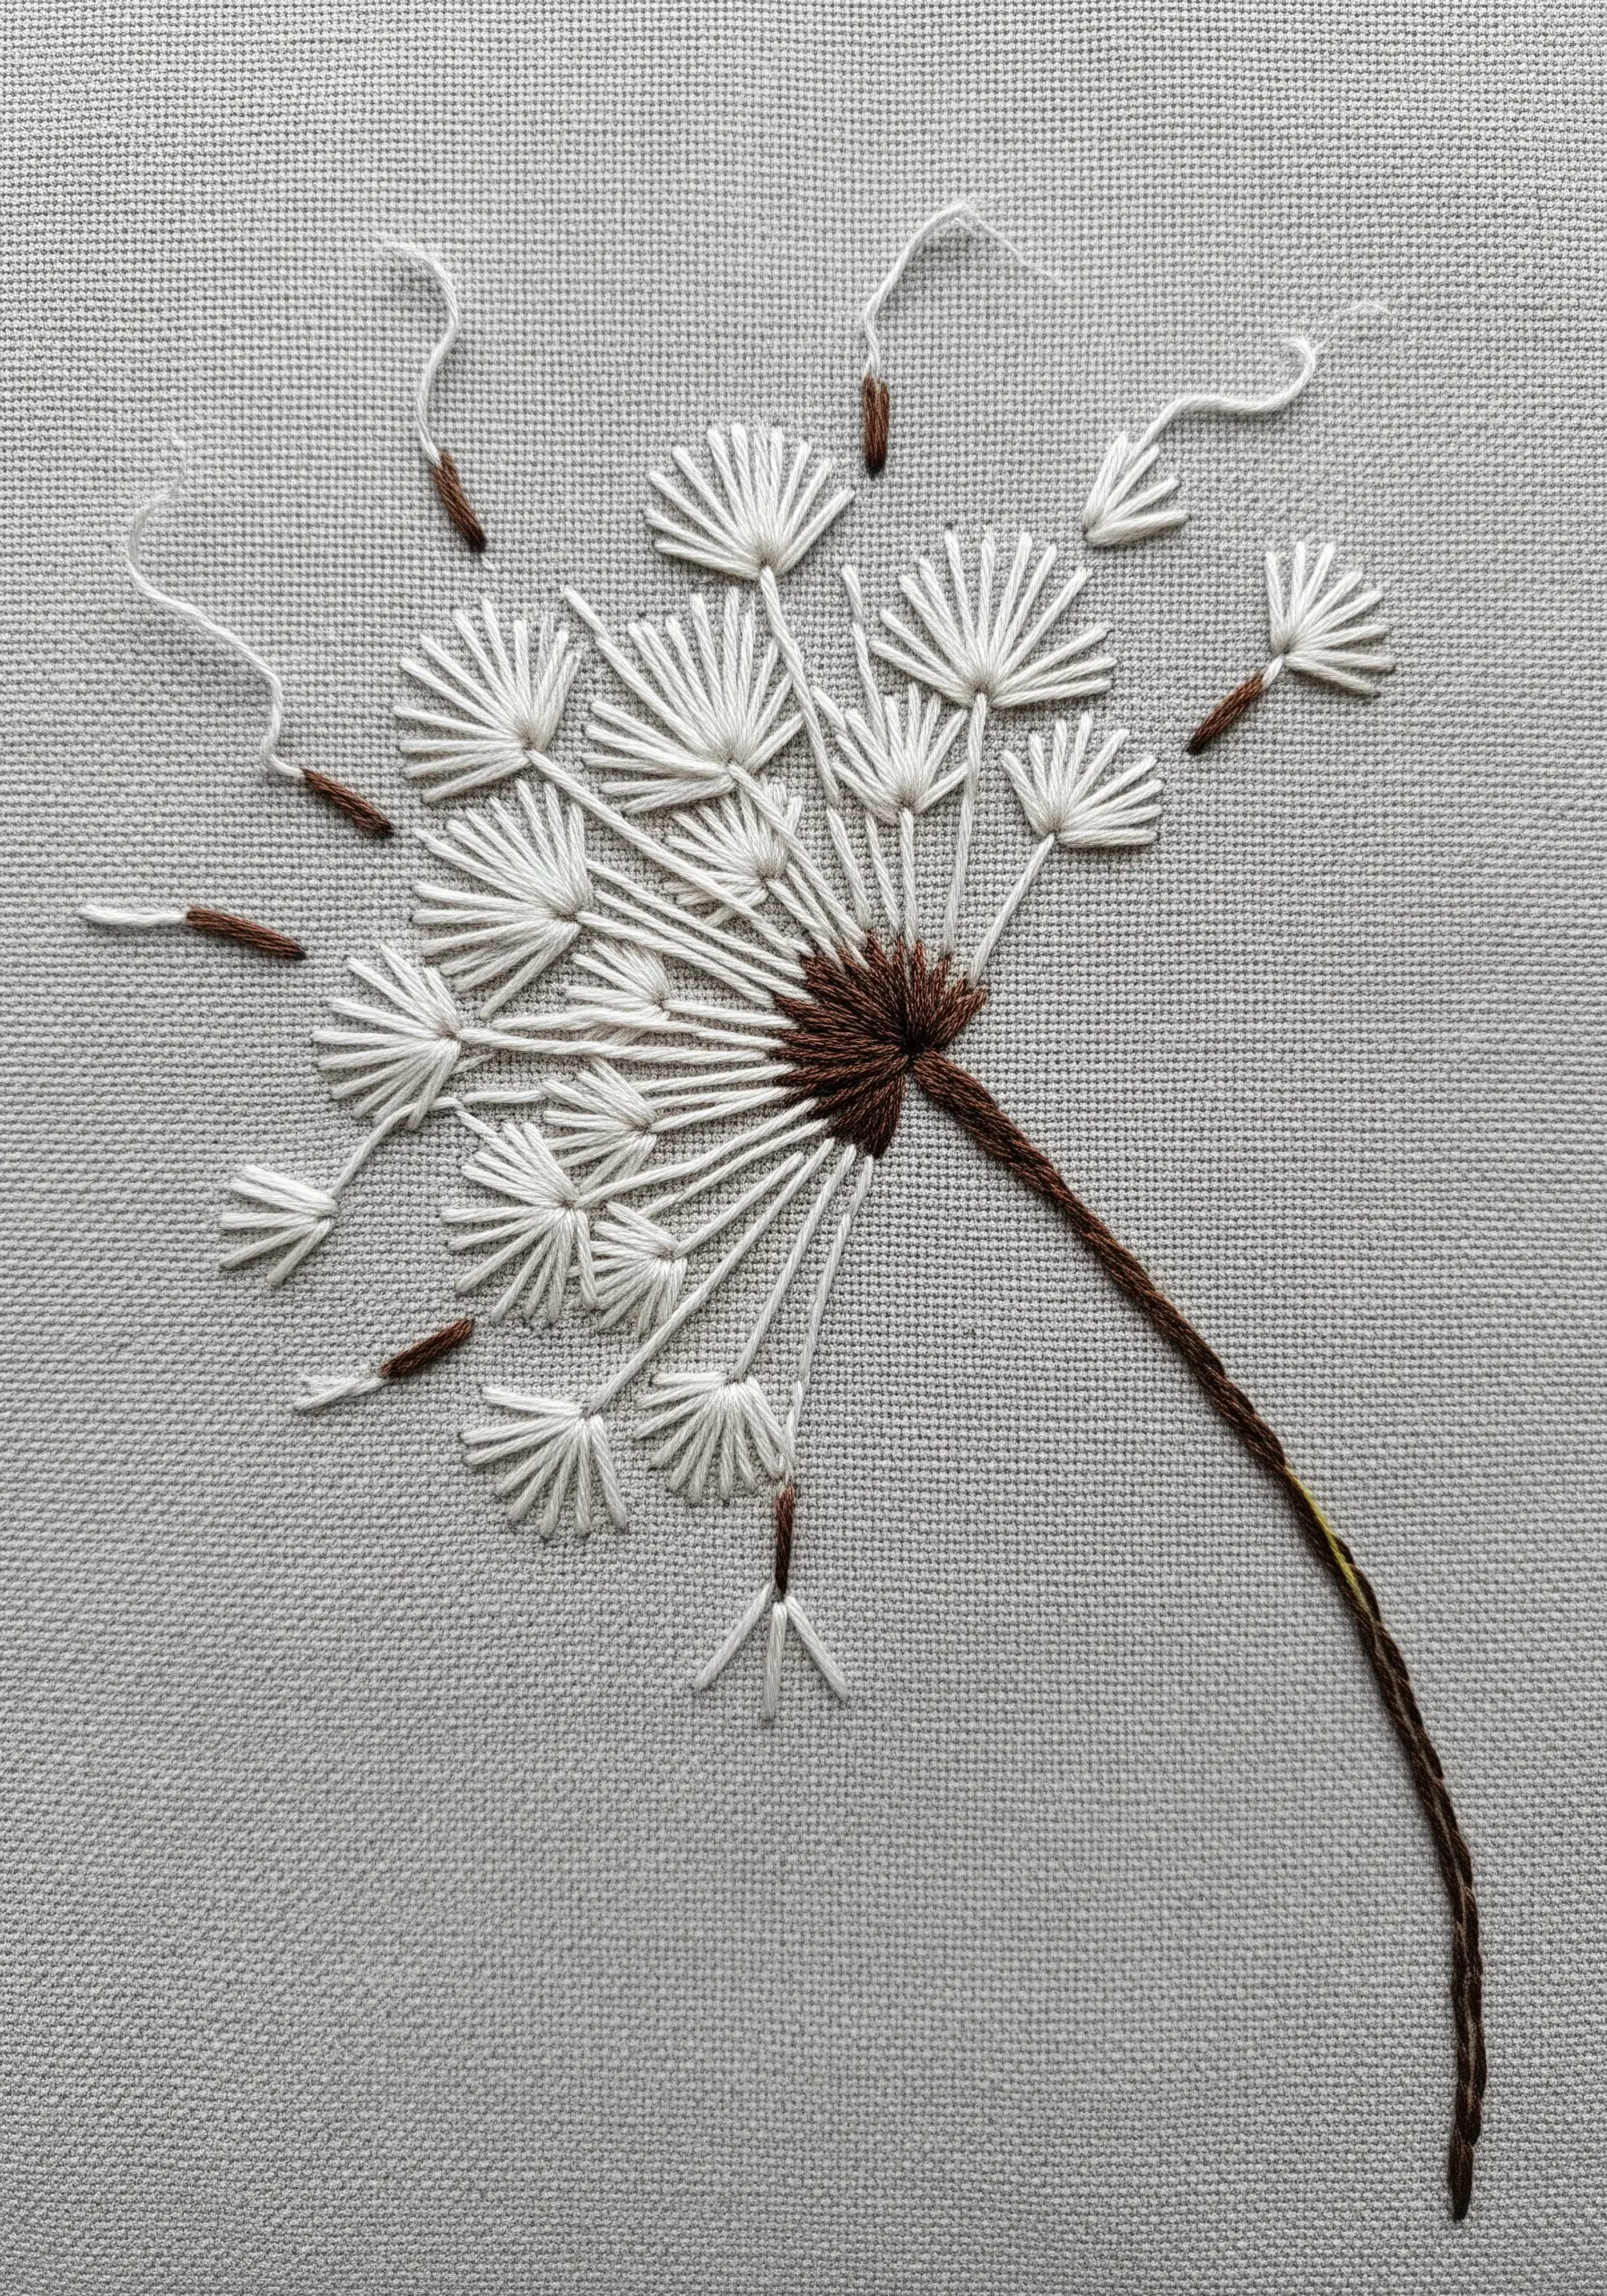
This delicate dandelion head is an exercise in creating the illusion of movement with a few simple stitches.
The main florets are made with a detached chain stitch, which forms a perfect teardrop shape with a single motion.
To suggest seeds blowing in the wind, add a few stray detached chain stitches and single straight stitches floating away from the main flower.
Varying the angle and length of each stitch is the key to making the composition feel alive and breezy.
9. Paint a Landscape with Thread Blocking
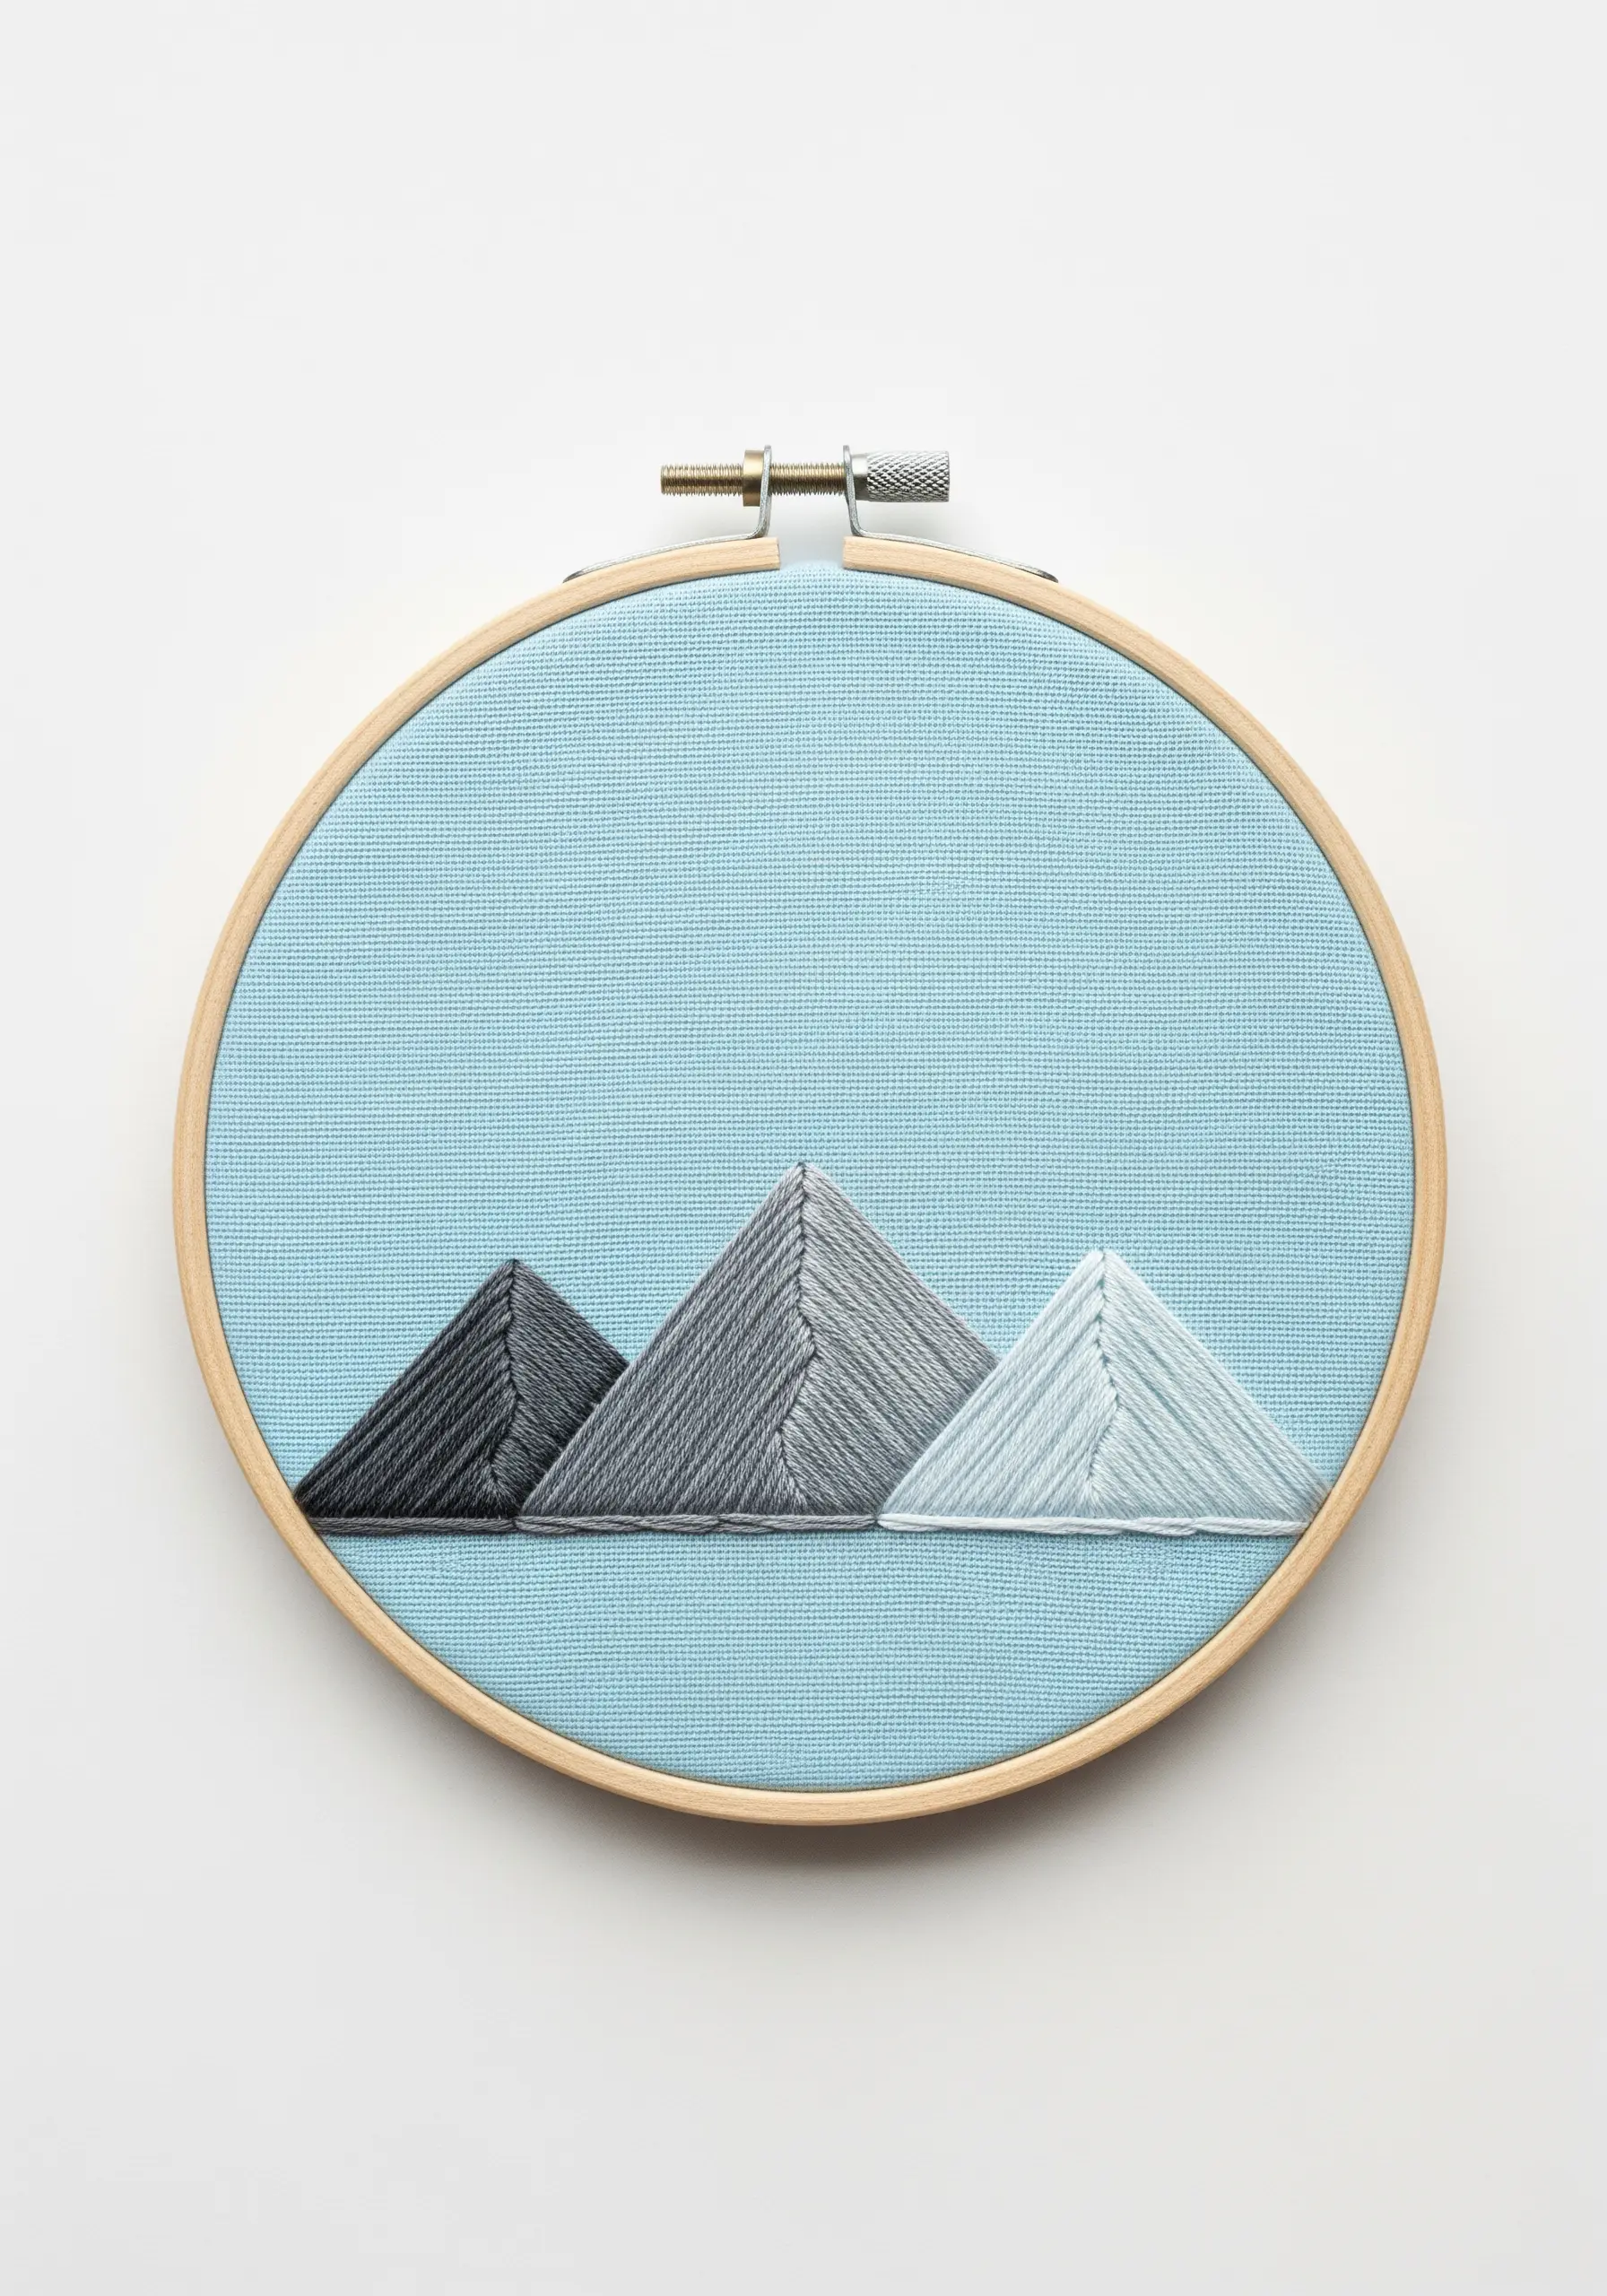
You don’t need complex blending skills to create a stunning landscape. This mountain range uses a technique called thread blocking.
Each mountain is filled with a long-and-short stitch, but instead of blending colors within a single shape, you stitch each mountain in a solid shade of gray.
Arrange the tones from darkest to lightest to create a sense of atmospheric perspective and depth.
By angling your stitches to follow the slope of the mountain, you add contour and realism without any extra effort.
10. Build Detailed Motifs from Simple Stitches
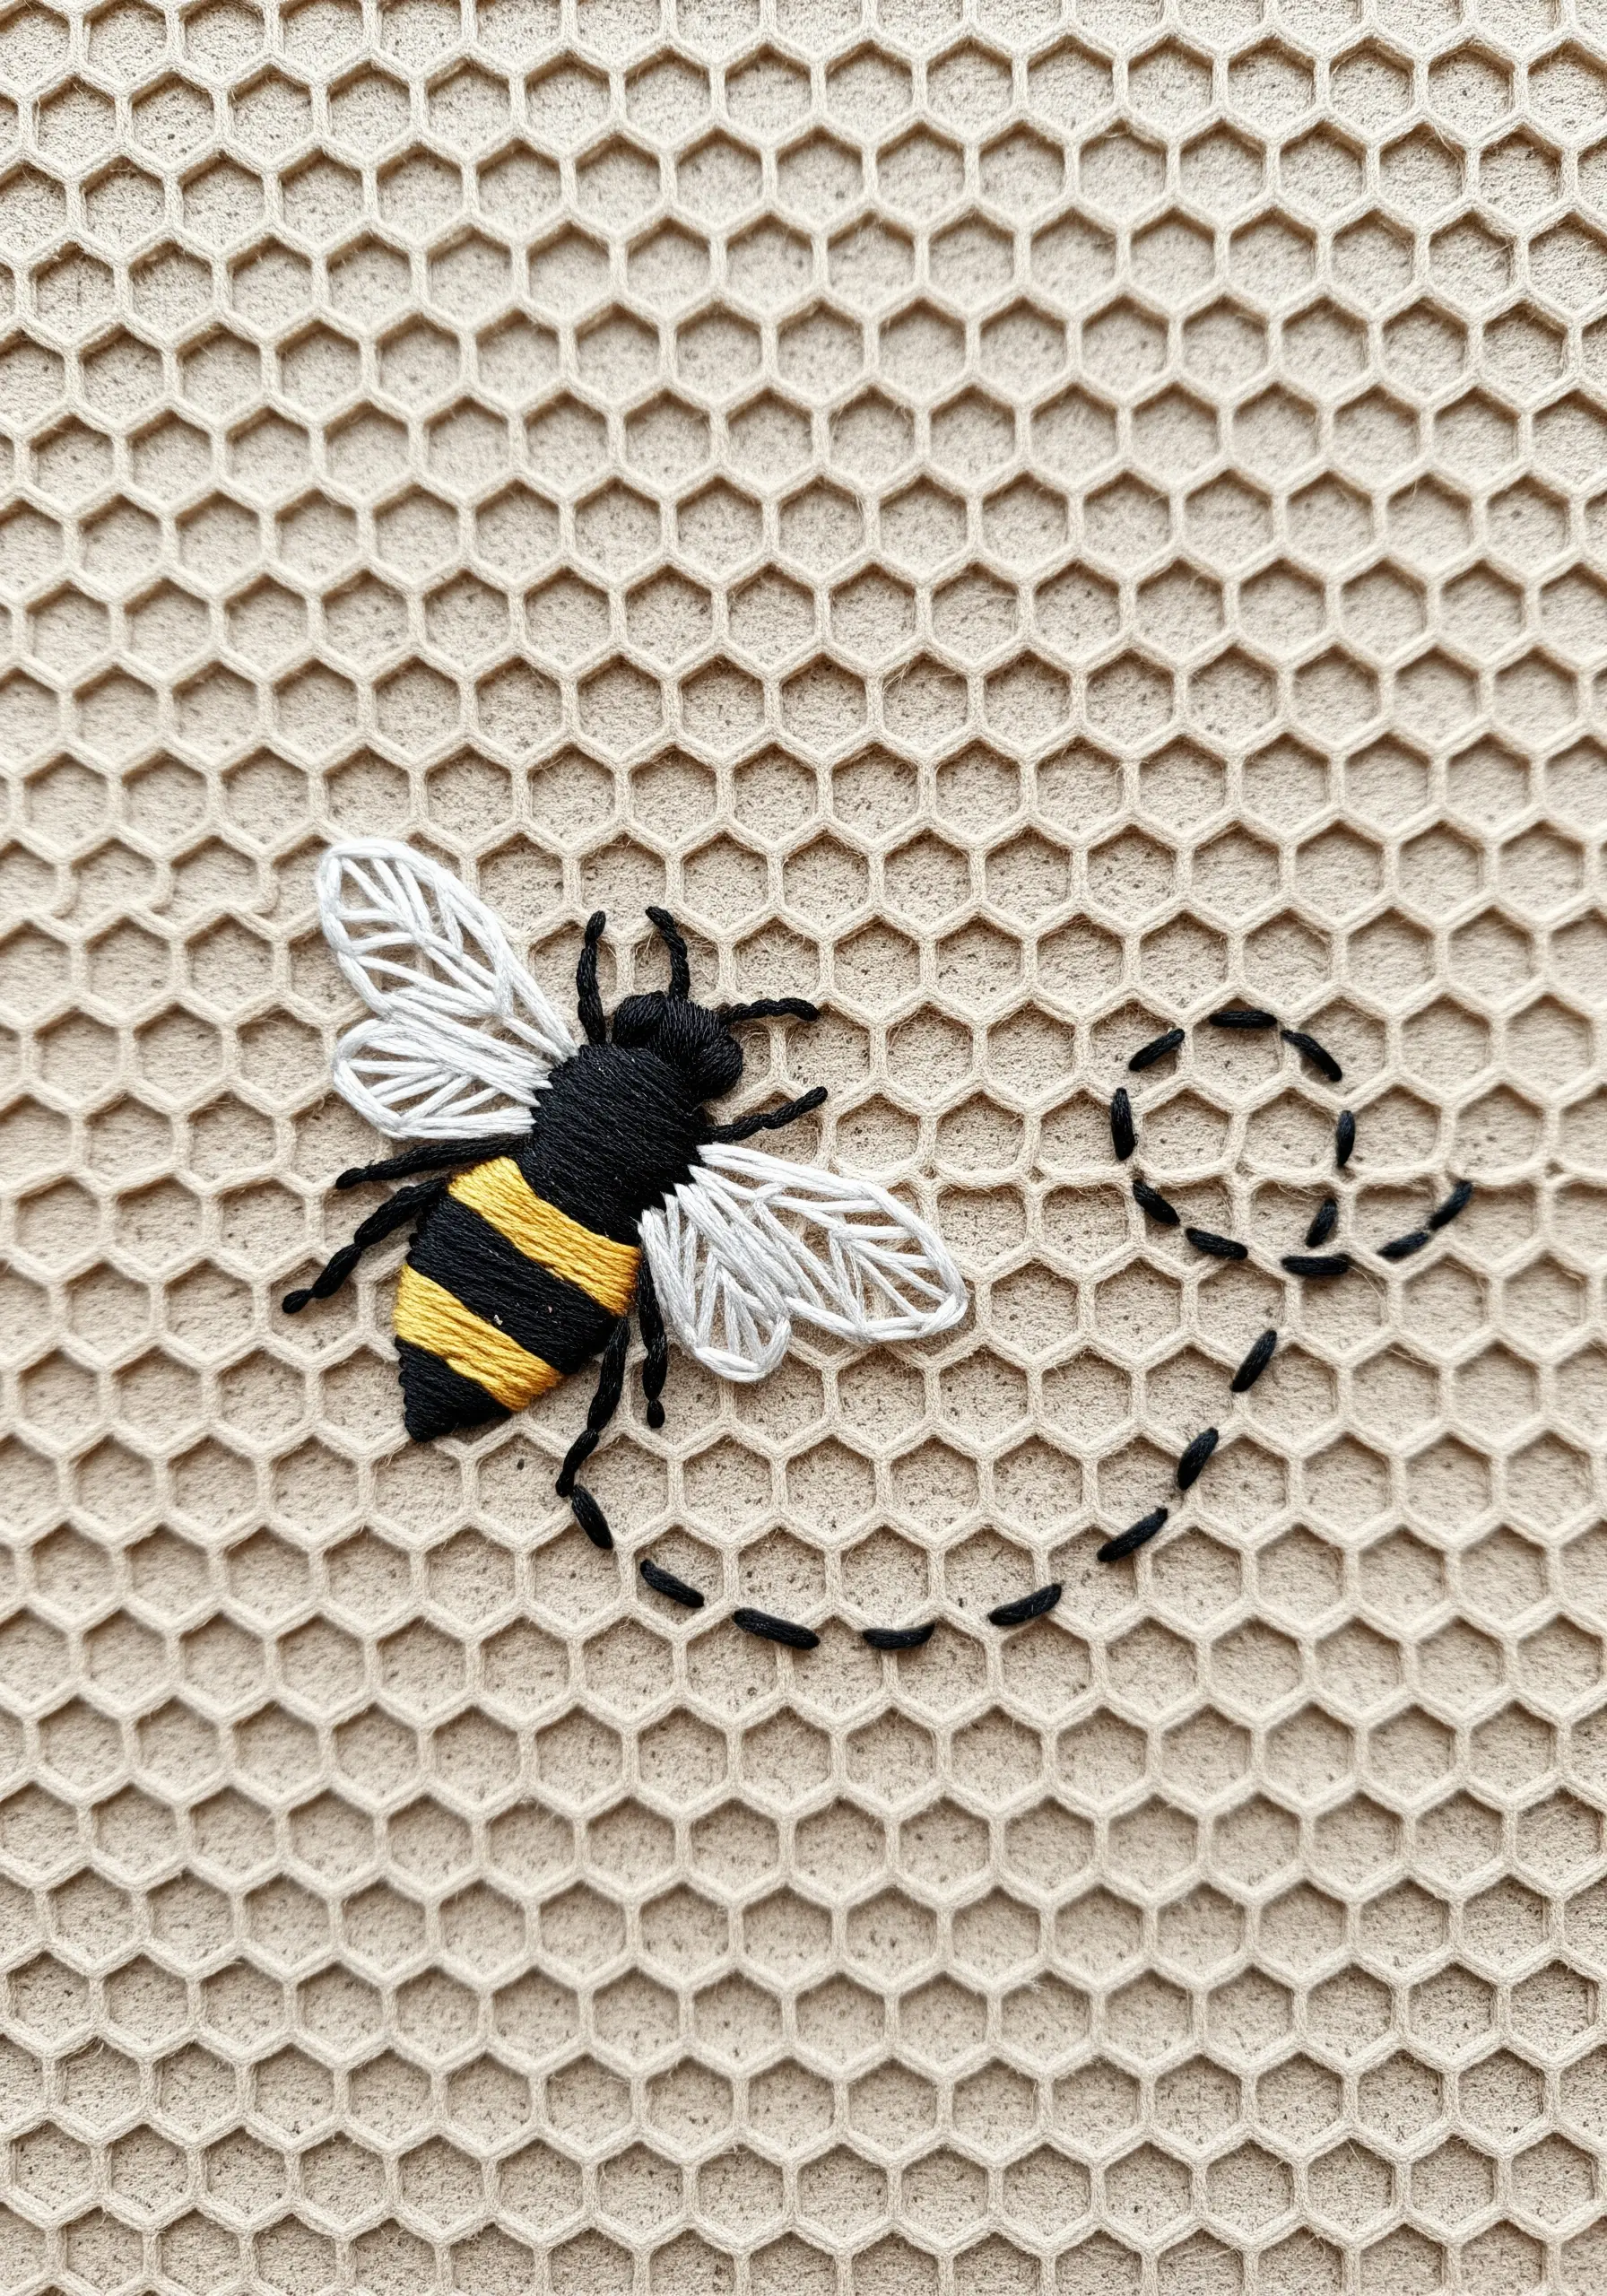
A complex-looking bumblebee is just a combination of your most basic stitches.
Use a satin stitch for the bold black and yellow body stripes, a detached chain stitch for the delicate wings, and a simple backstitch for the legs and antennae.
The key to making it look refined is adjusting your thread count: use all six strands for the plush body, but switch to a single strand for the nearly-transparent wings and fine legs.
11. Embrace Elegance with Negative Space
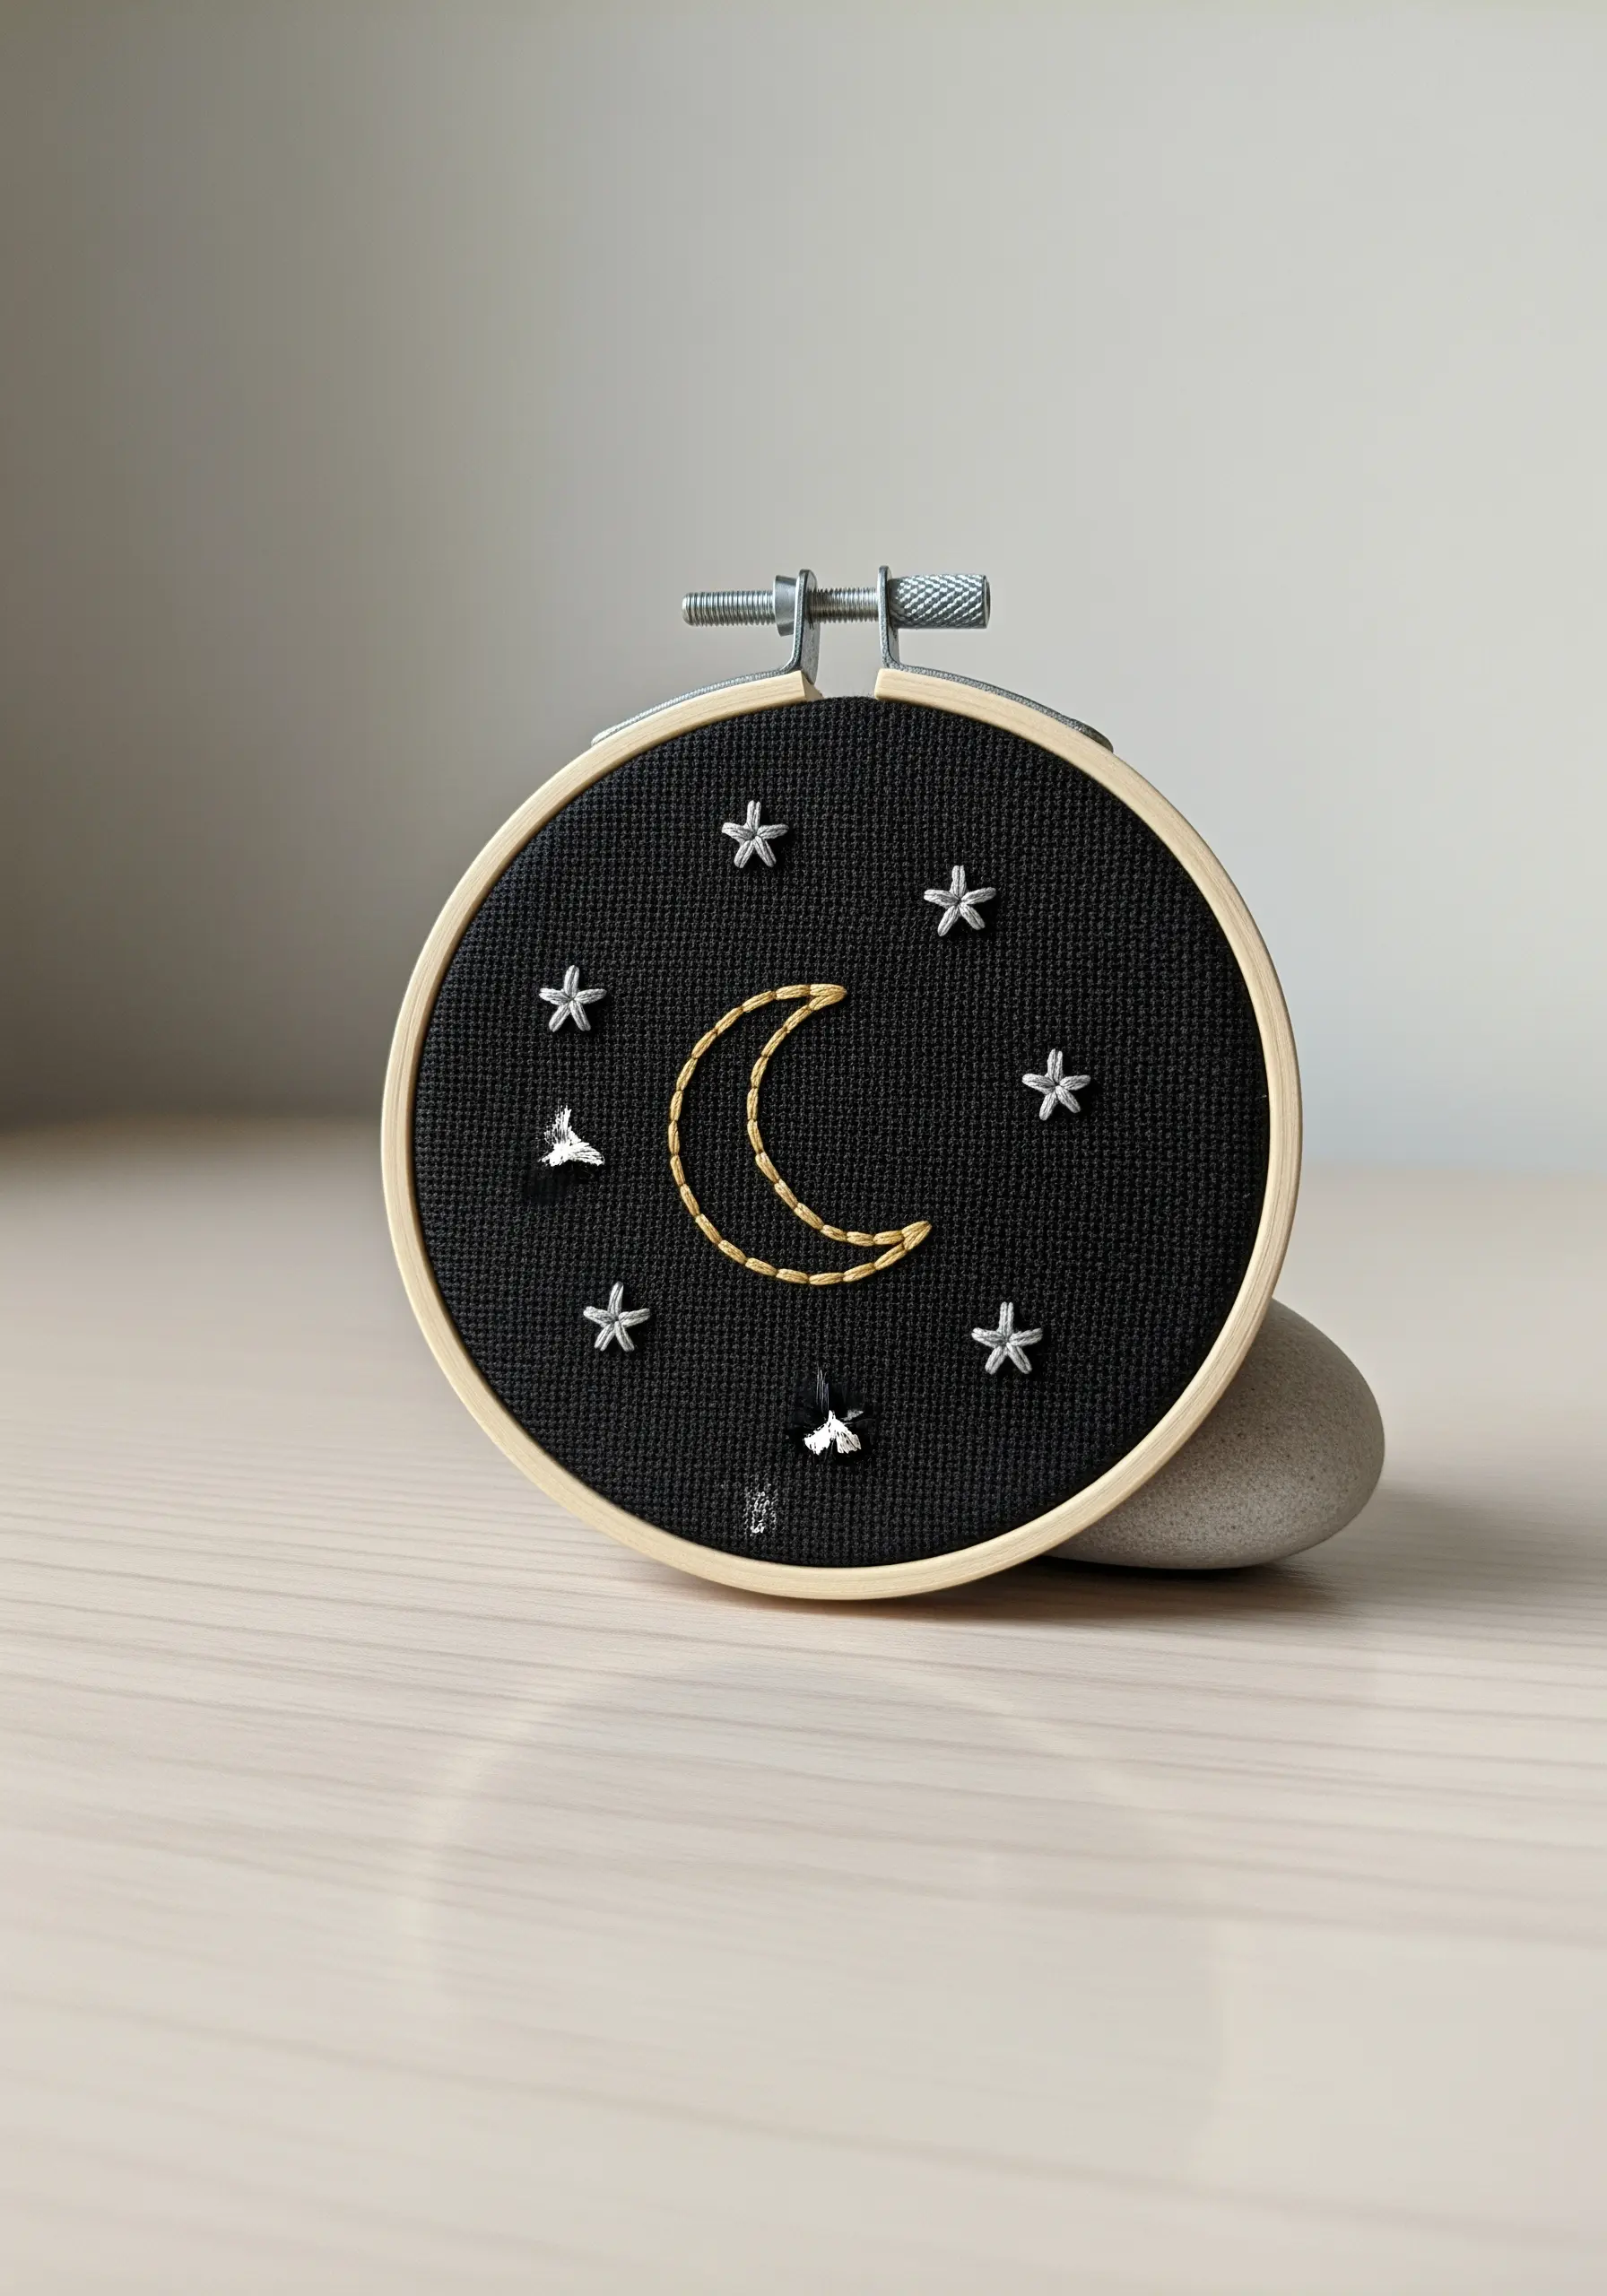
Sometimes, the simplest designs have the most impact, especially when you use negative space effectively.
On a dark, tightly woven fabric, stitch a simple crescent moon using a backstitch or chain stitch, and scatter a few star stitches around it.
The real sophistication comes from the contrast and the composition—the vast, empty black fabric makes the delicate metallic or white stitches feel more significant and luminous.
This is a perfect example of how minimalist embroidery projects can look exceptionally chic.
12. Create a Realistic Fern with Fishbone Stitch
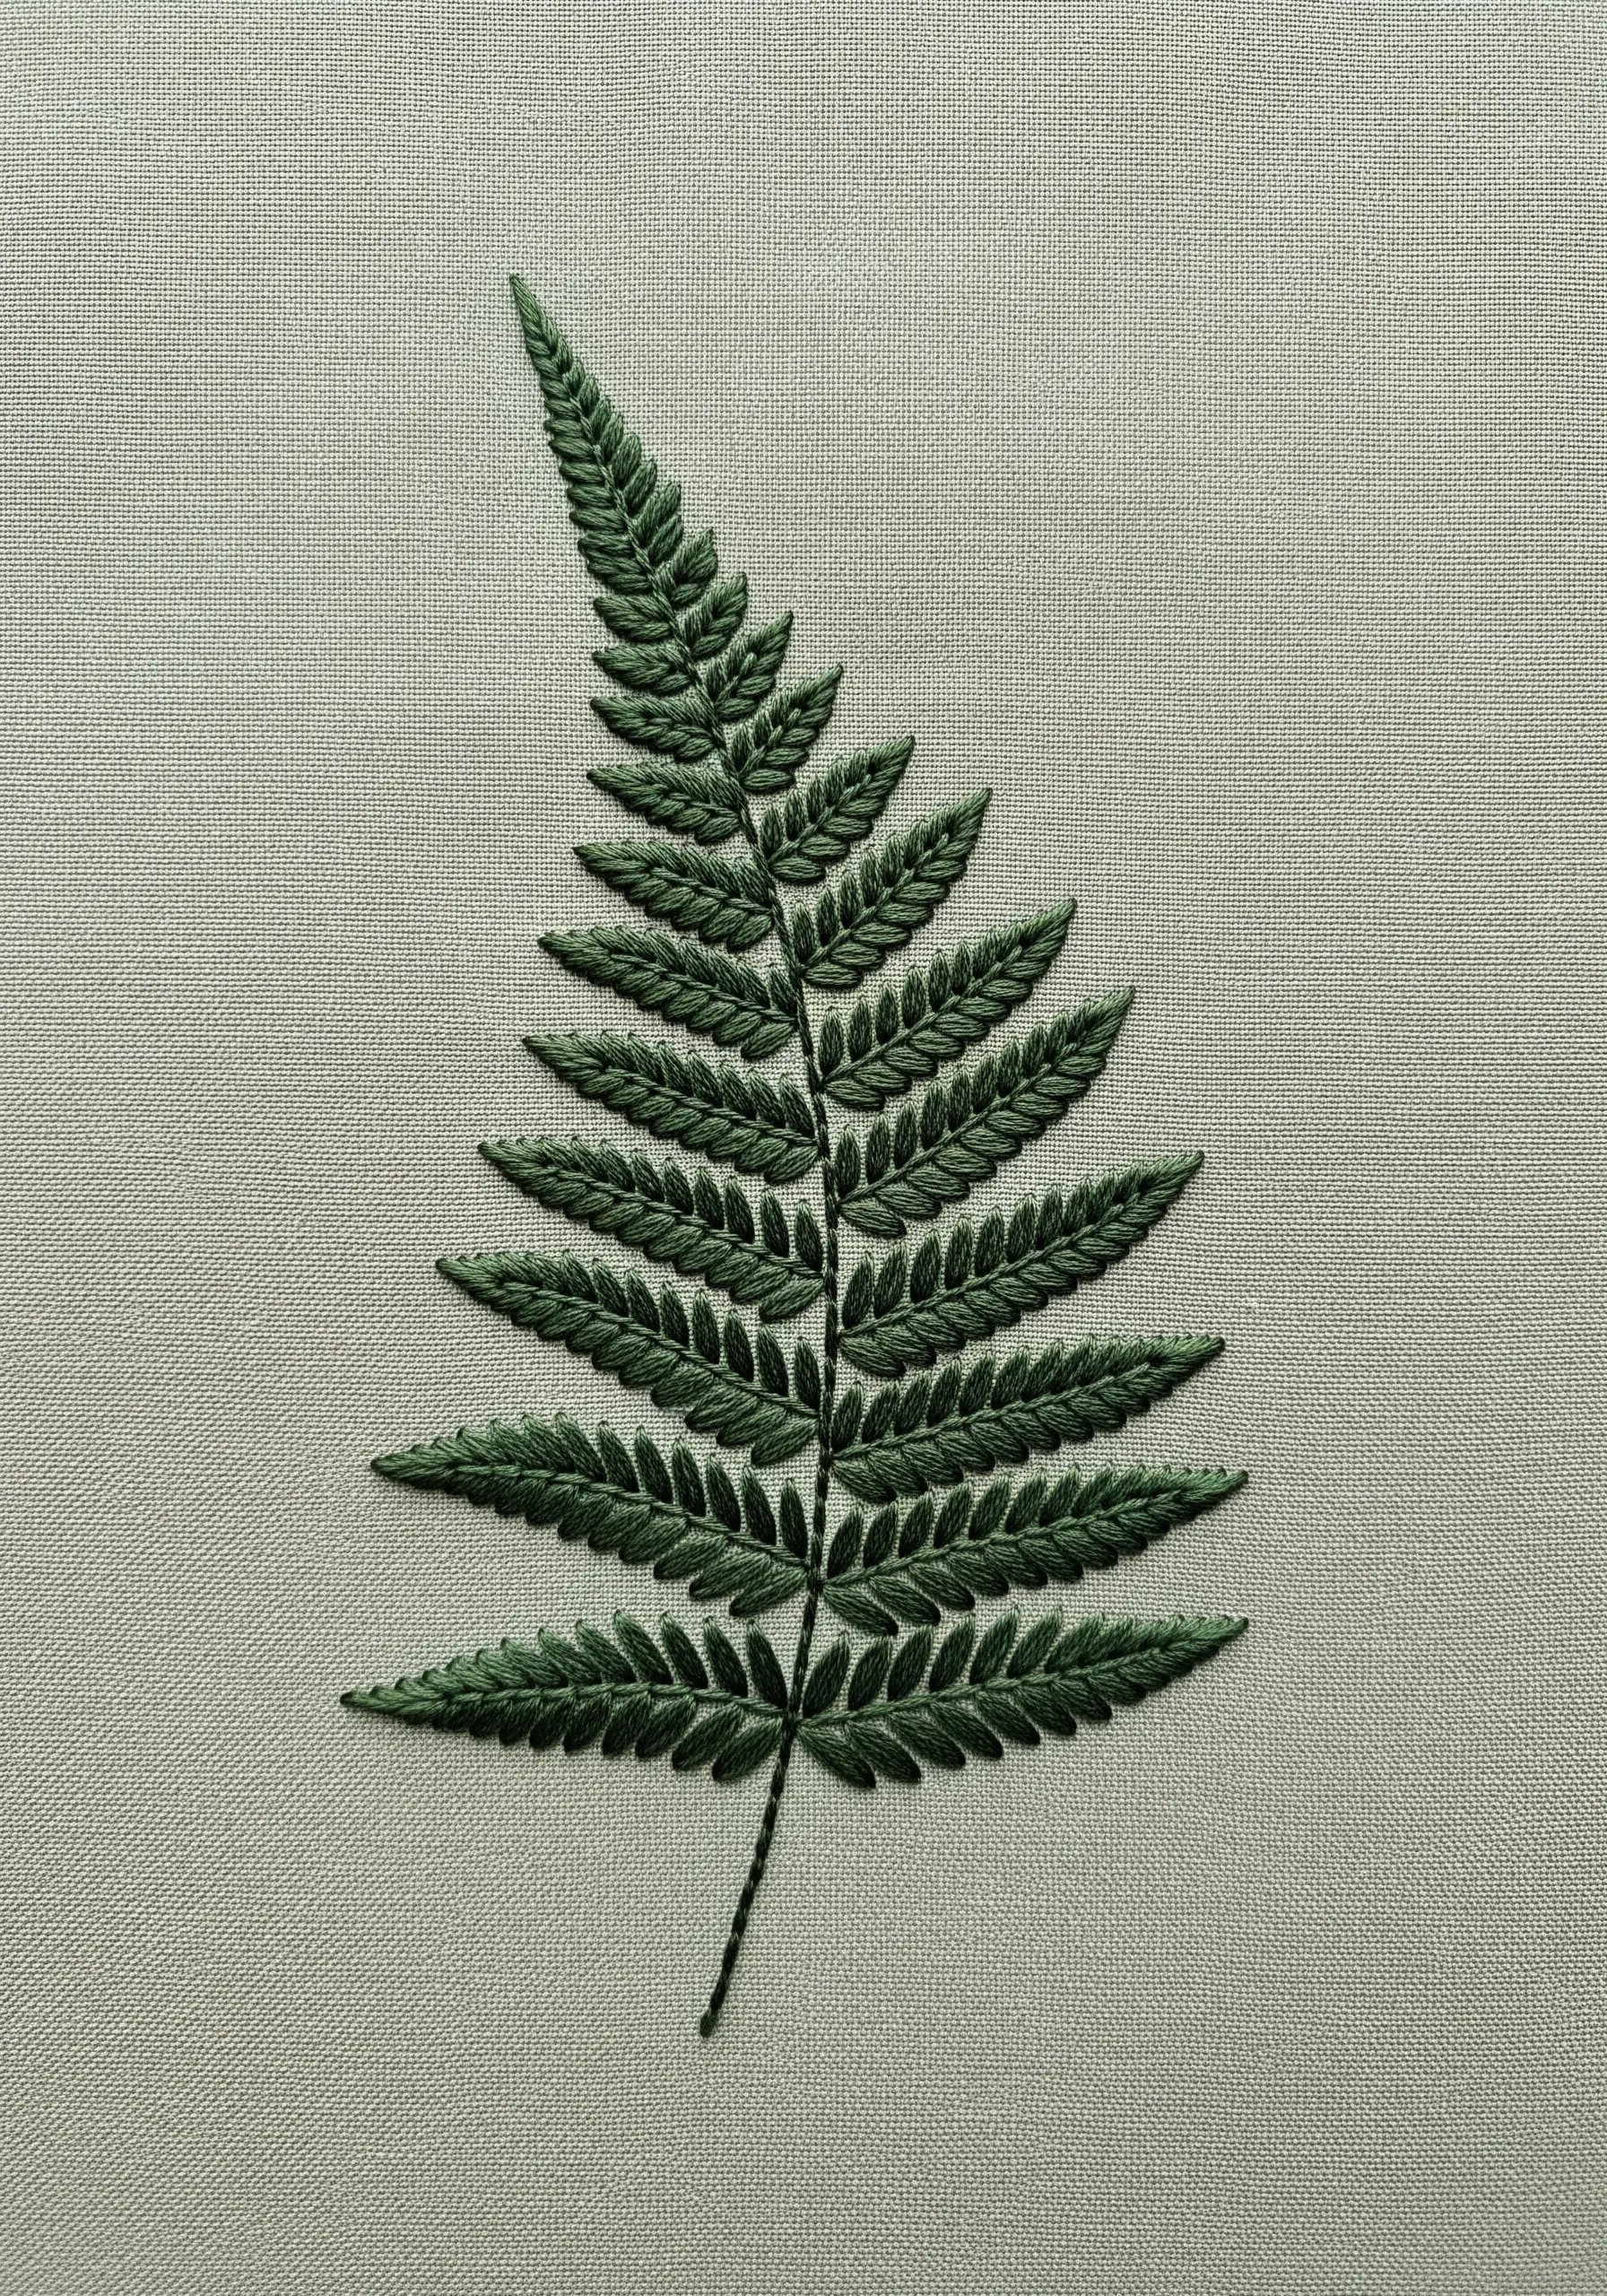
The fishbone stitch is the secret to creating beautiful, realistic leaves with almost no effort.
This entire fern frond is created by repeating one stitch over and over. Start with a stem line using a backstitch.
Then, for each leaflet, work fishbone stitches from the center line outward, overlapping them slightly to create a dense, smooth texture that mimics a natural leaf.
The magic is in the stitch itself—it automatically creates the central vein and angled leaflets simultaneously.
13. Achieve Flawless Fills for Geometric Art
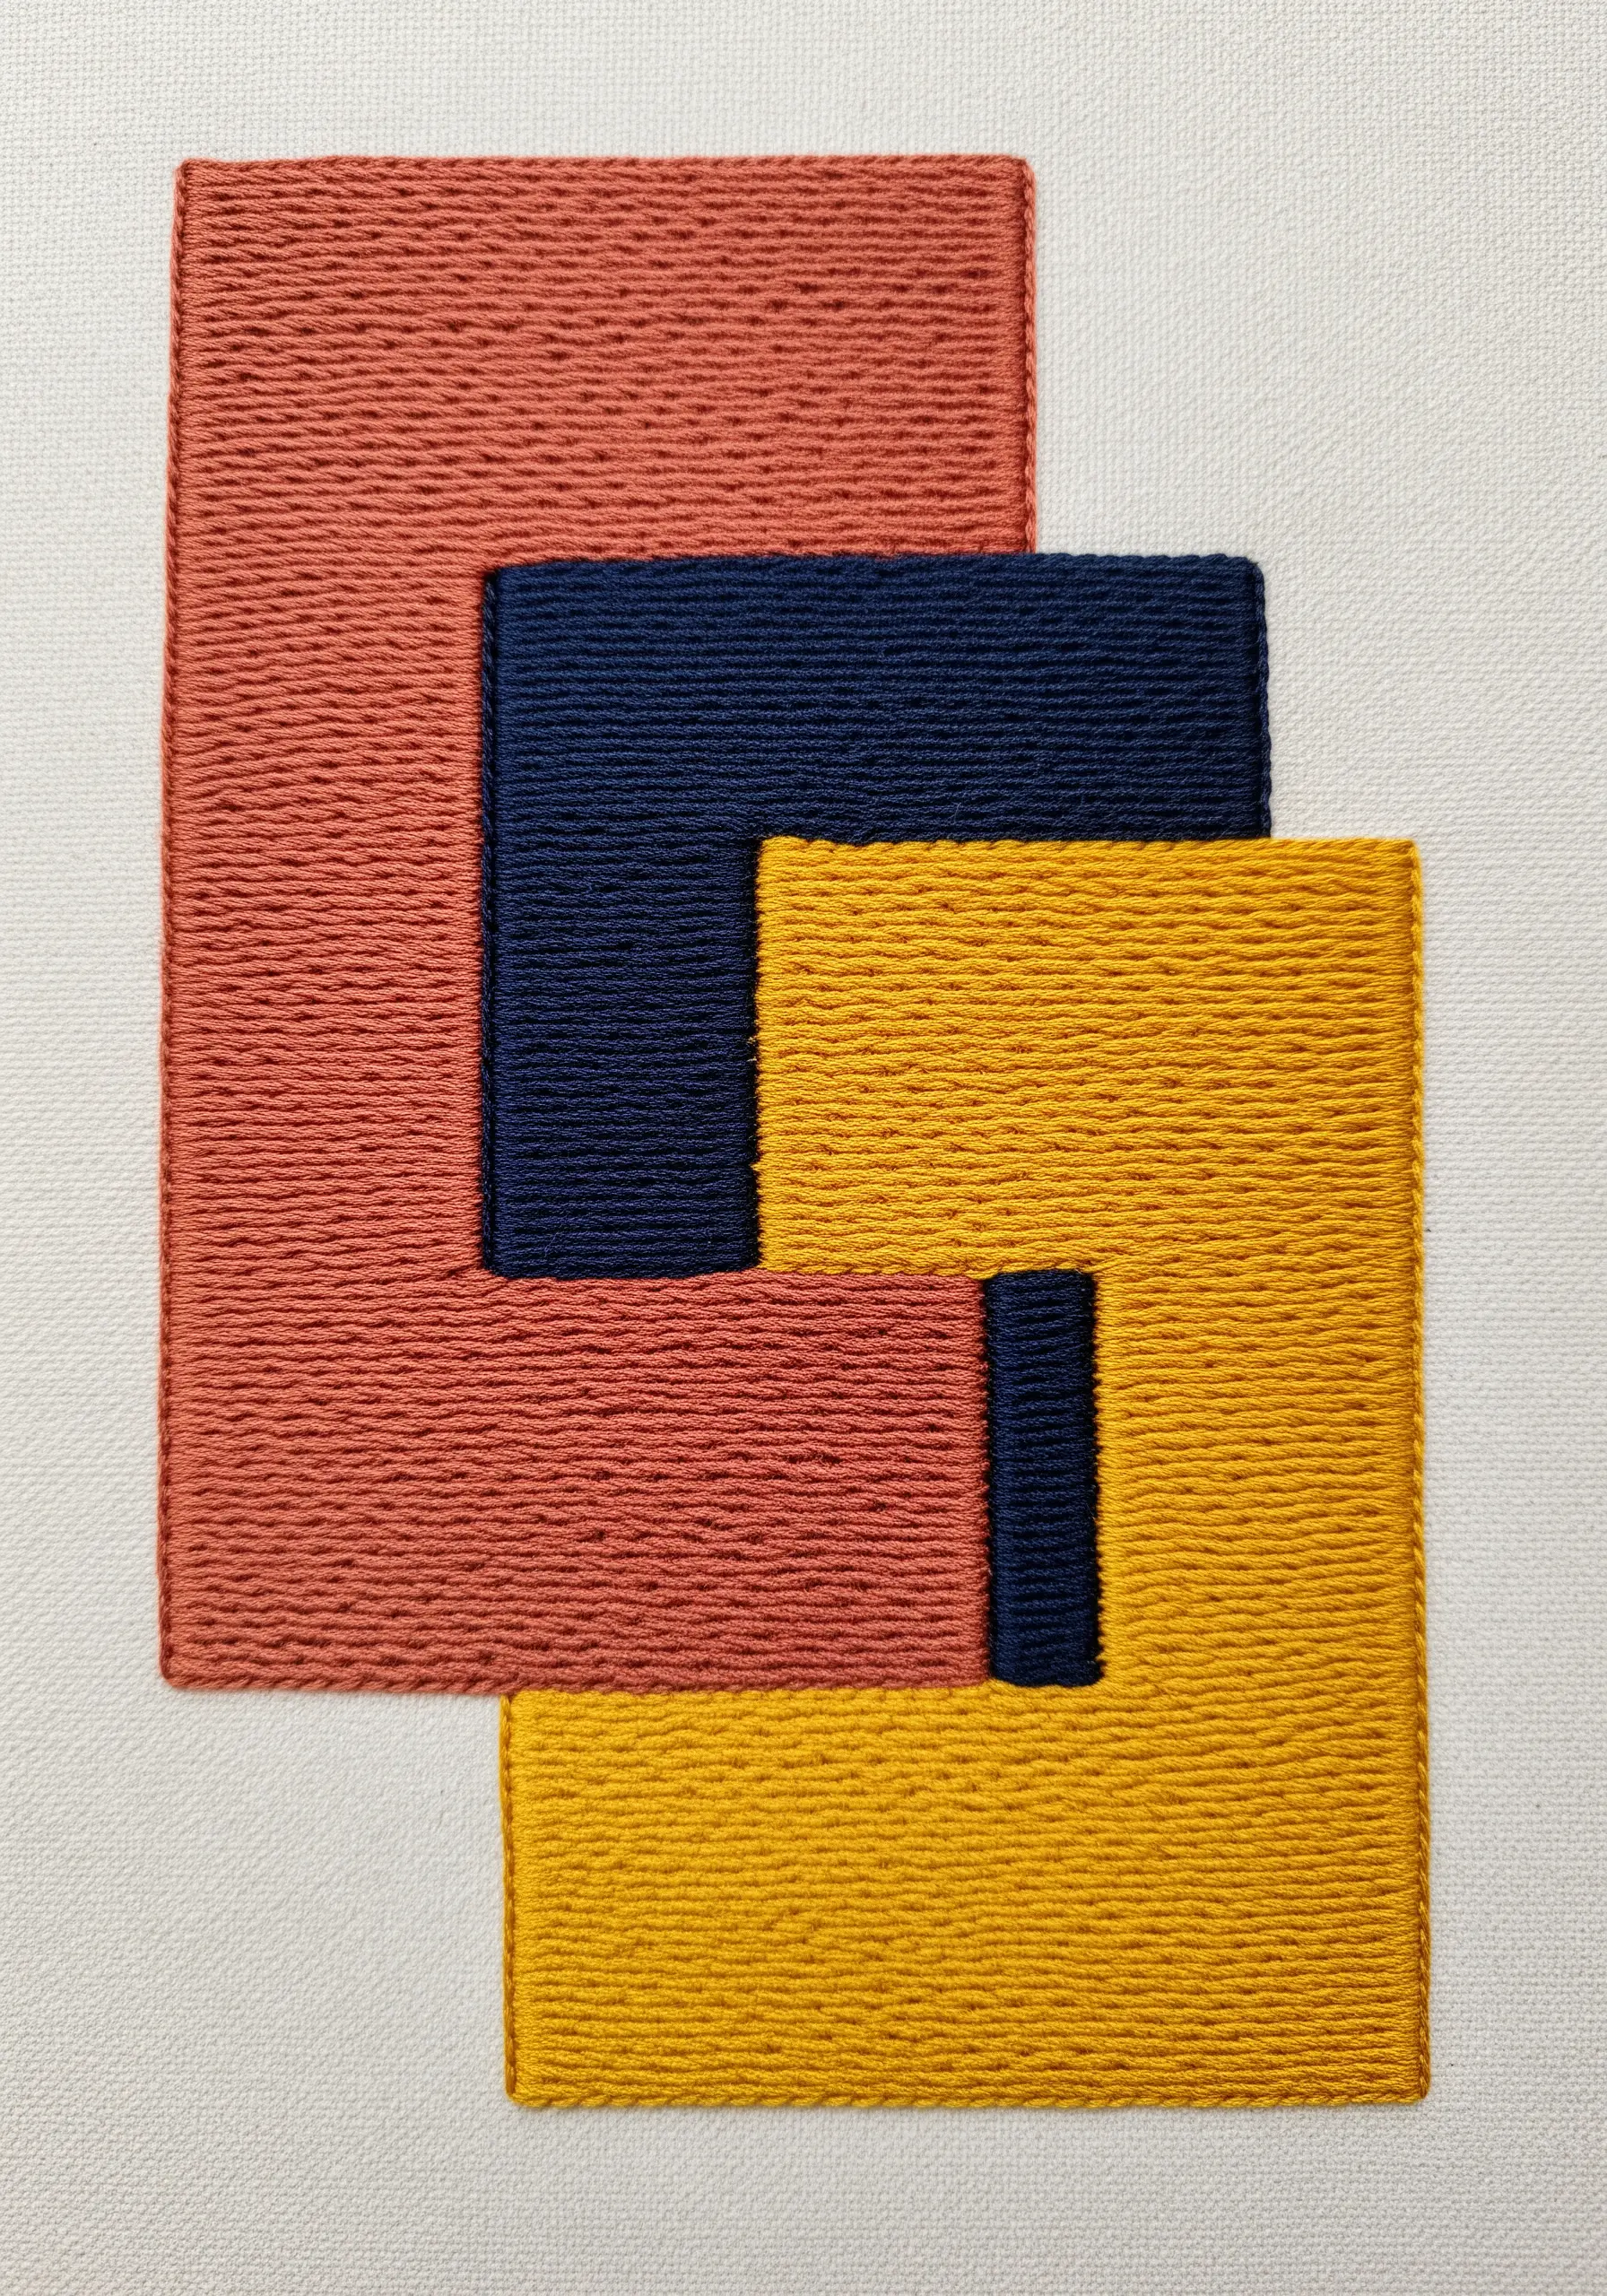
For bold, modern geometric pieces, a perfect satin stitch is essential. The trick is in the preparation.
First, outline each shape with a split stitch. This raised edge prevents your fill stitches from slipping and creates a crisp, clean boundary.
Next, lay your satin stitches as close together as possible without overlapping, keeping them perfectly parallel.
This method ensures a dense, even fill with sharp edges, turning simple blocks of color into a striking piece of abstract textile wall art.
14. Build a Wildflower Bouquet with Three Basic Stitches
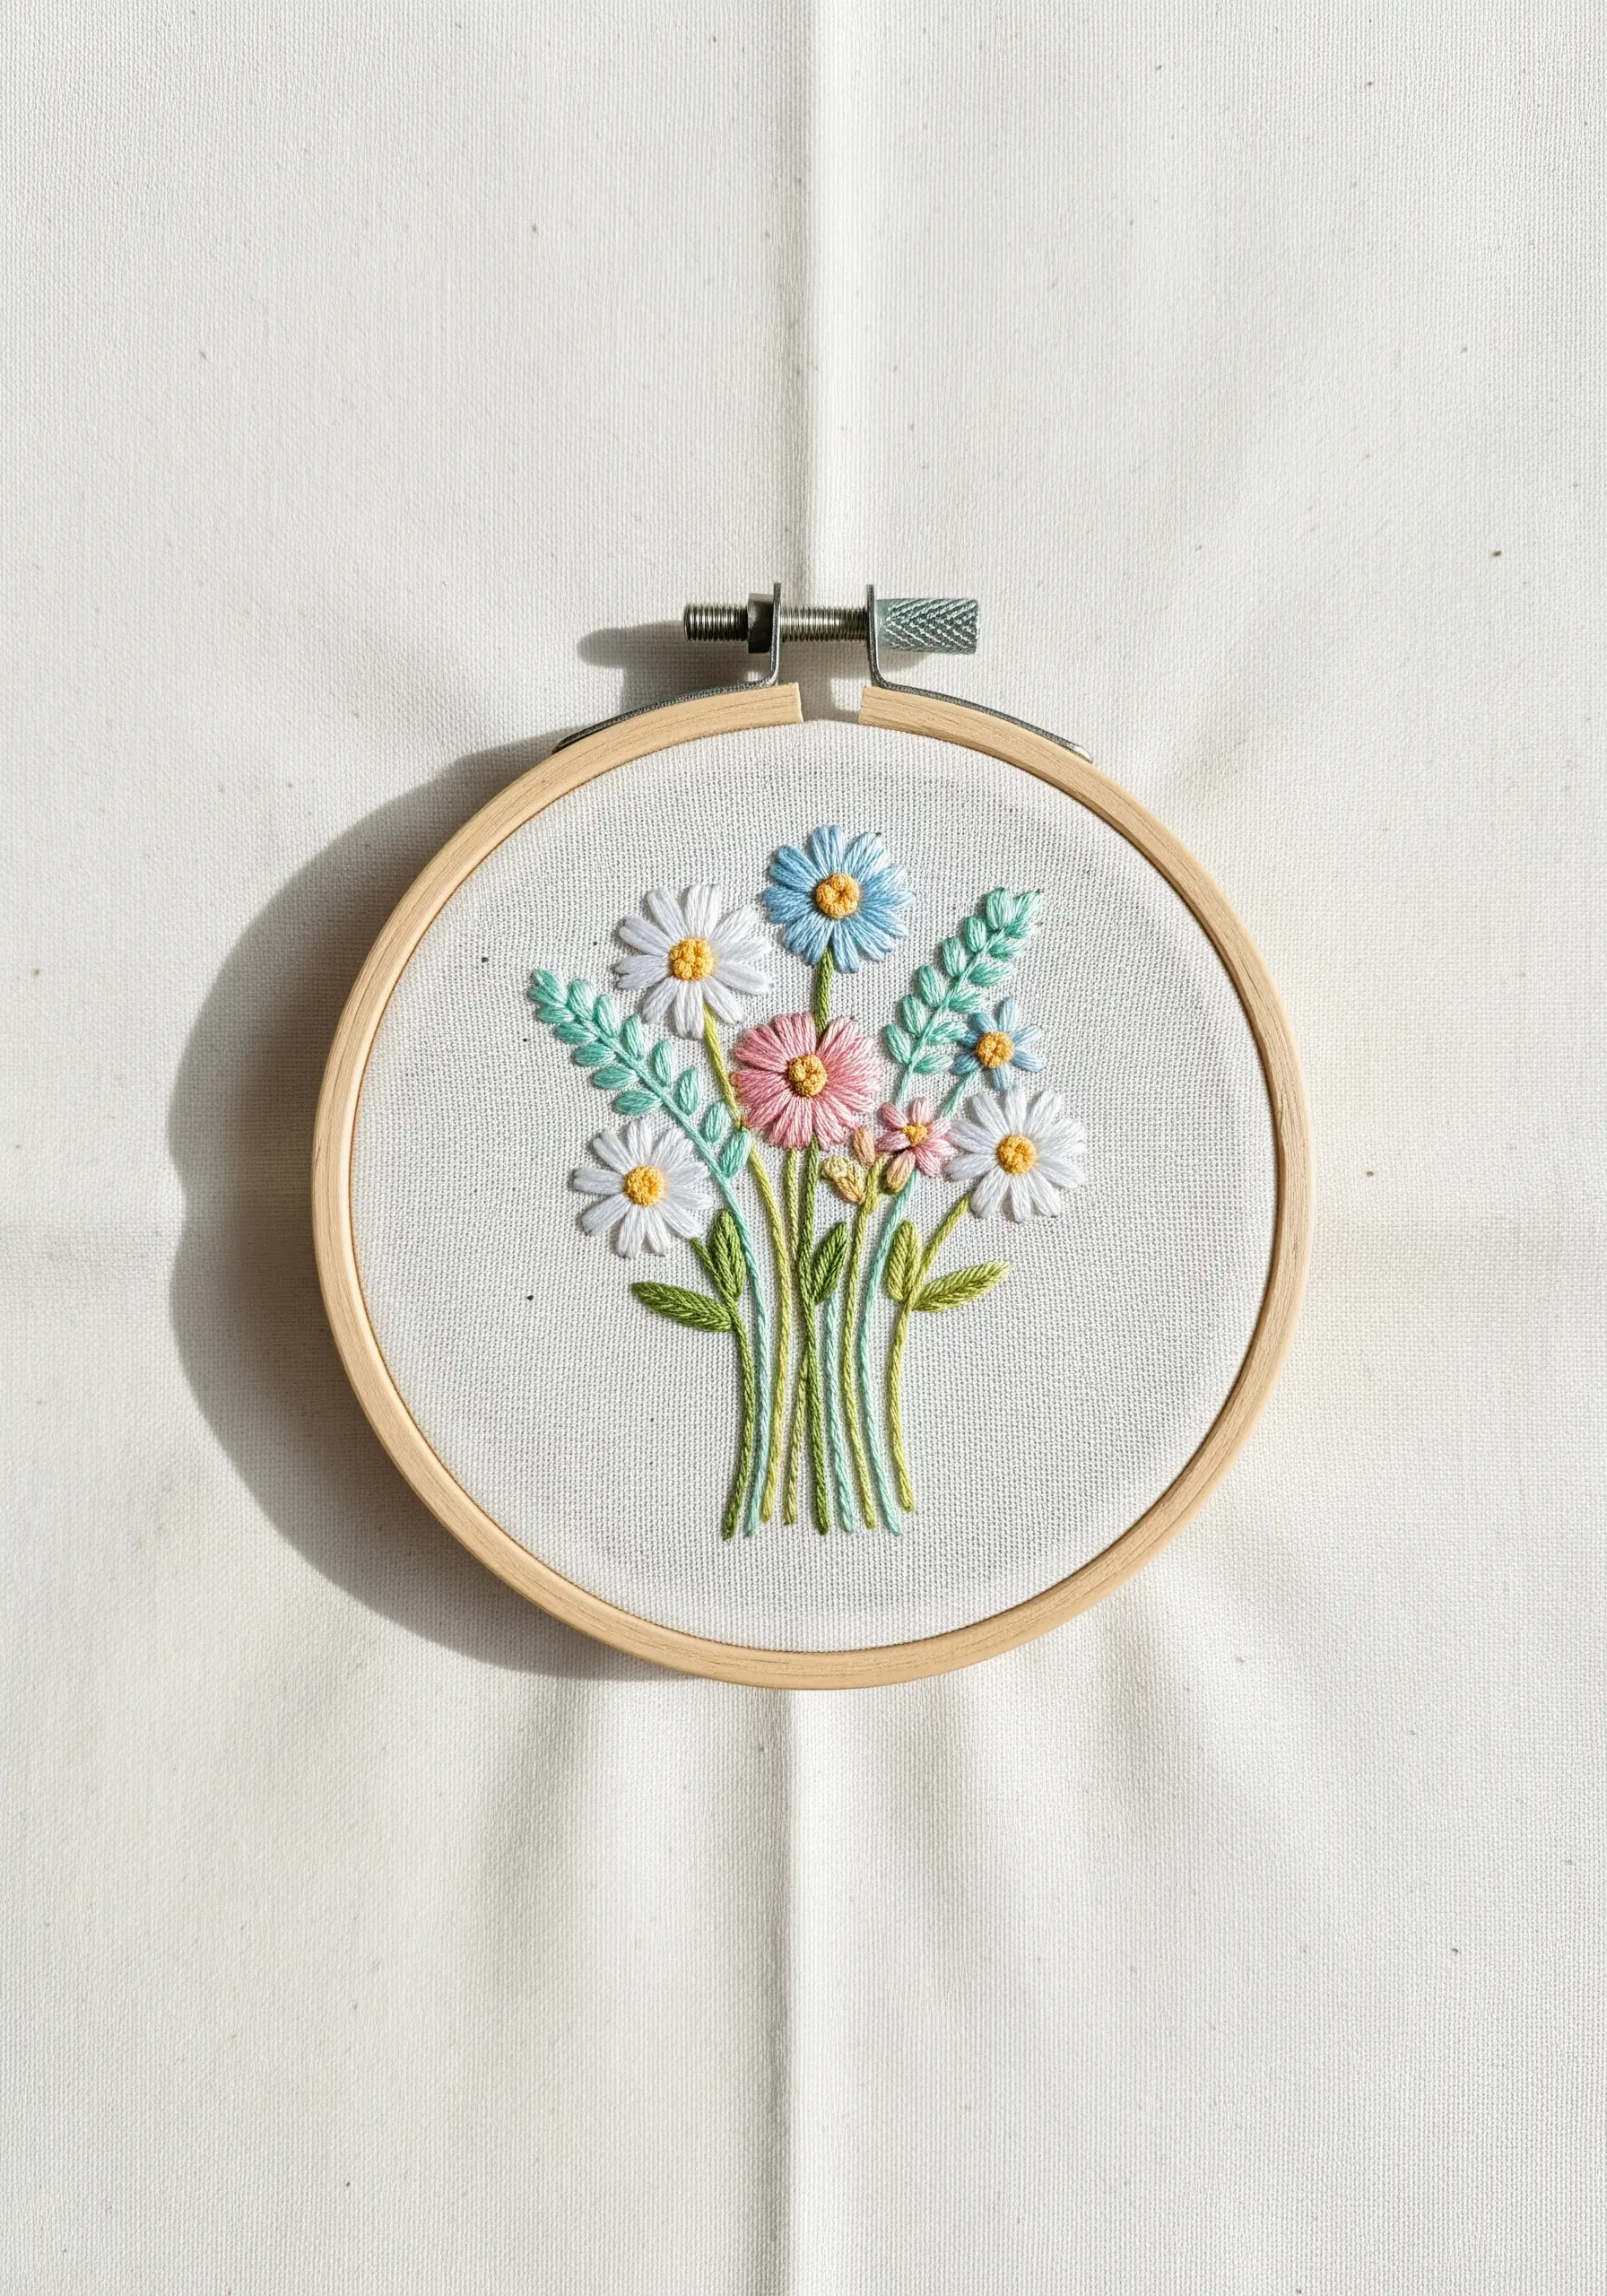
You can create a lush, charming bouquet by combining just three beginner-friendly stitches.
Use lazy daisy stitches for the flower petals—white and blue for the daisies, and pink for the cosmos.
Add a French knot to the center of each flower for a realistic touch of texture and color.
Finally, bring it all together with clusters of stem stitches for the stems and a few fishbone stitches for simple leaves. It’s a classic combination that always looks beautiful.
15. Define Symbols with a Textured Chain Stitch
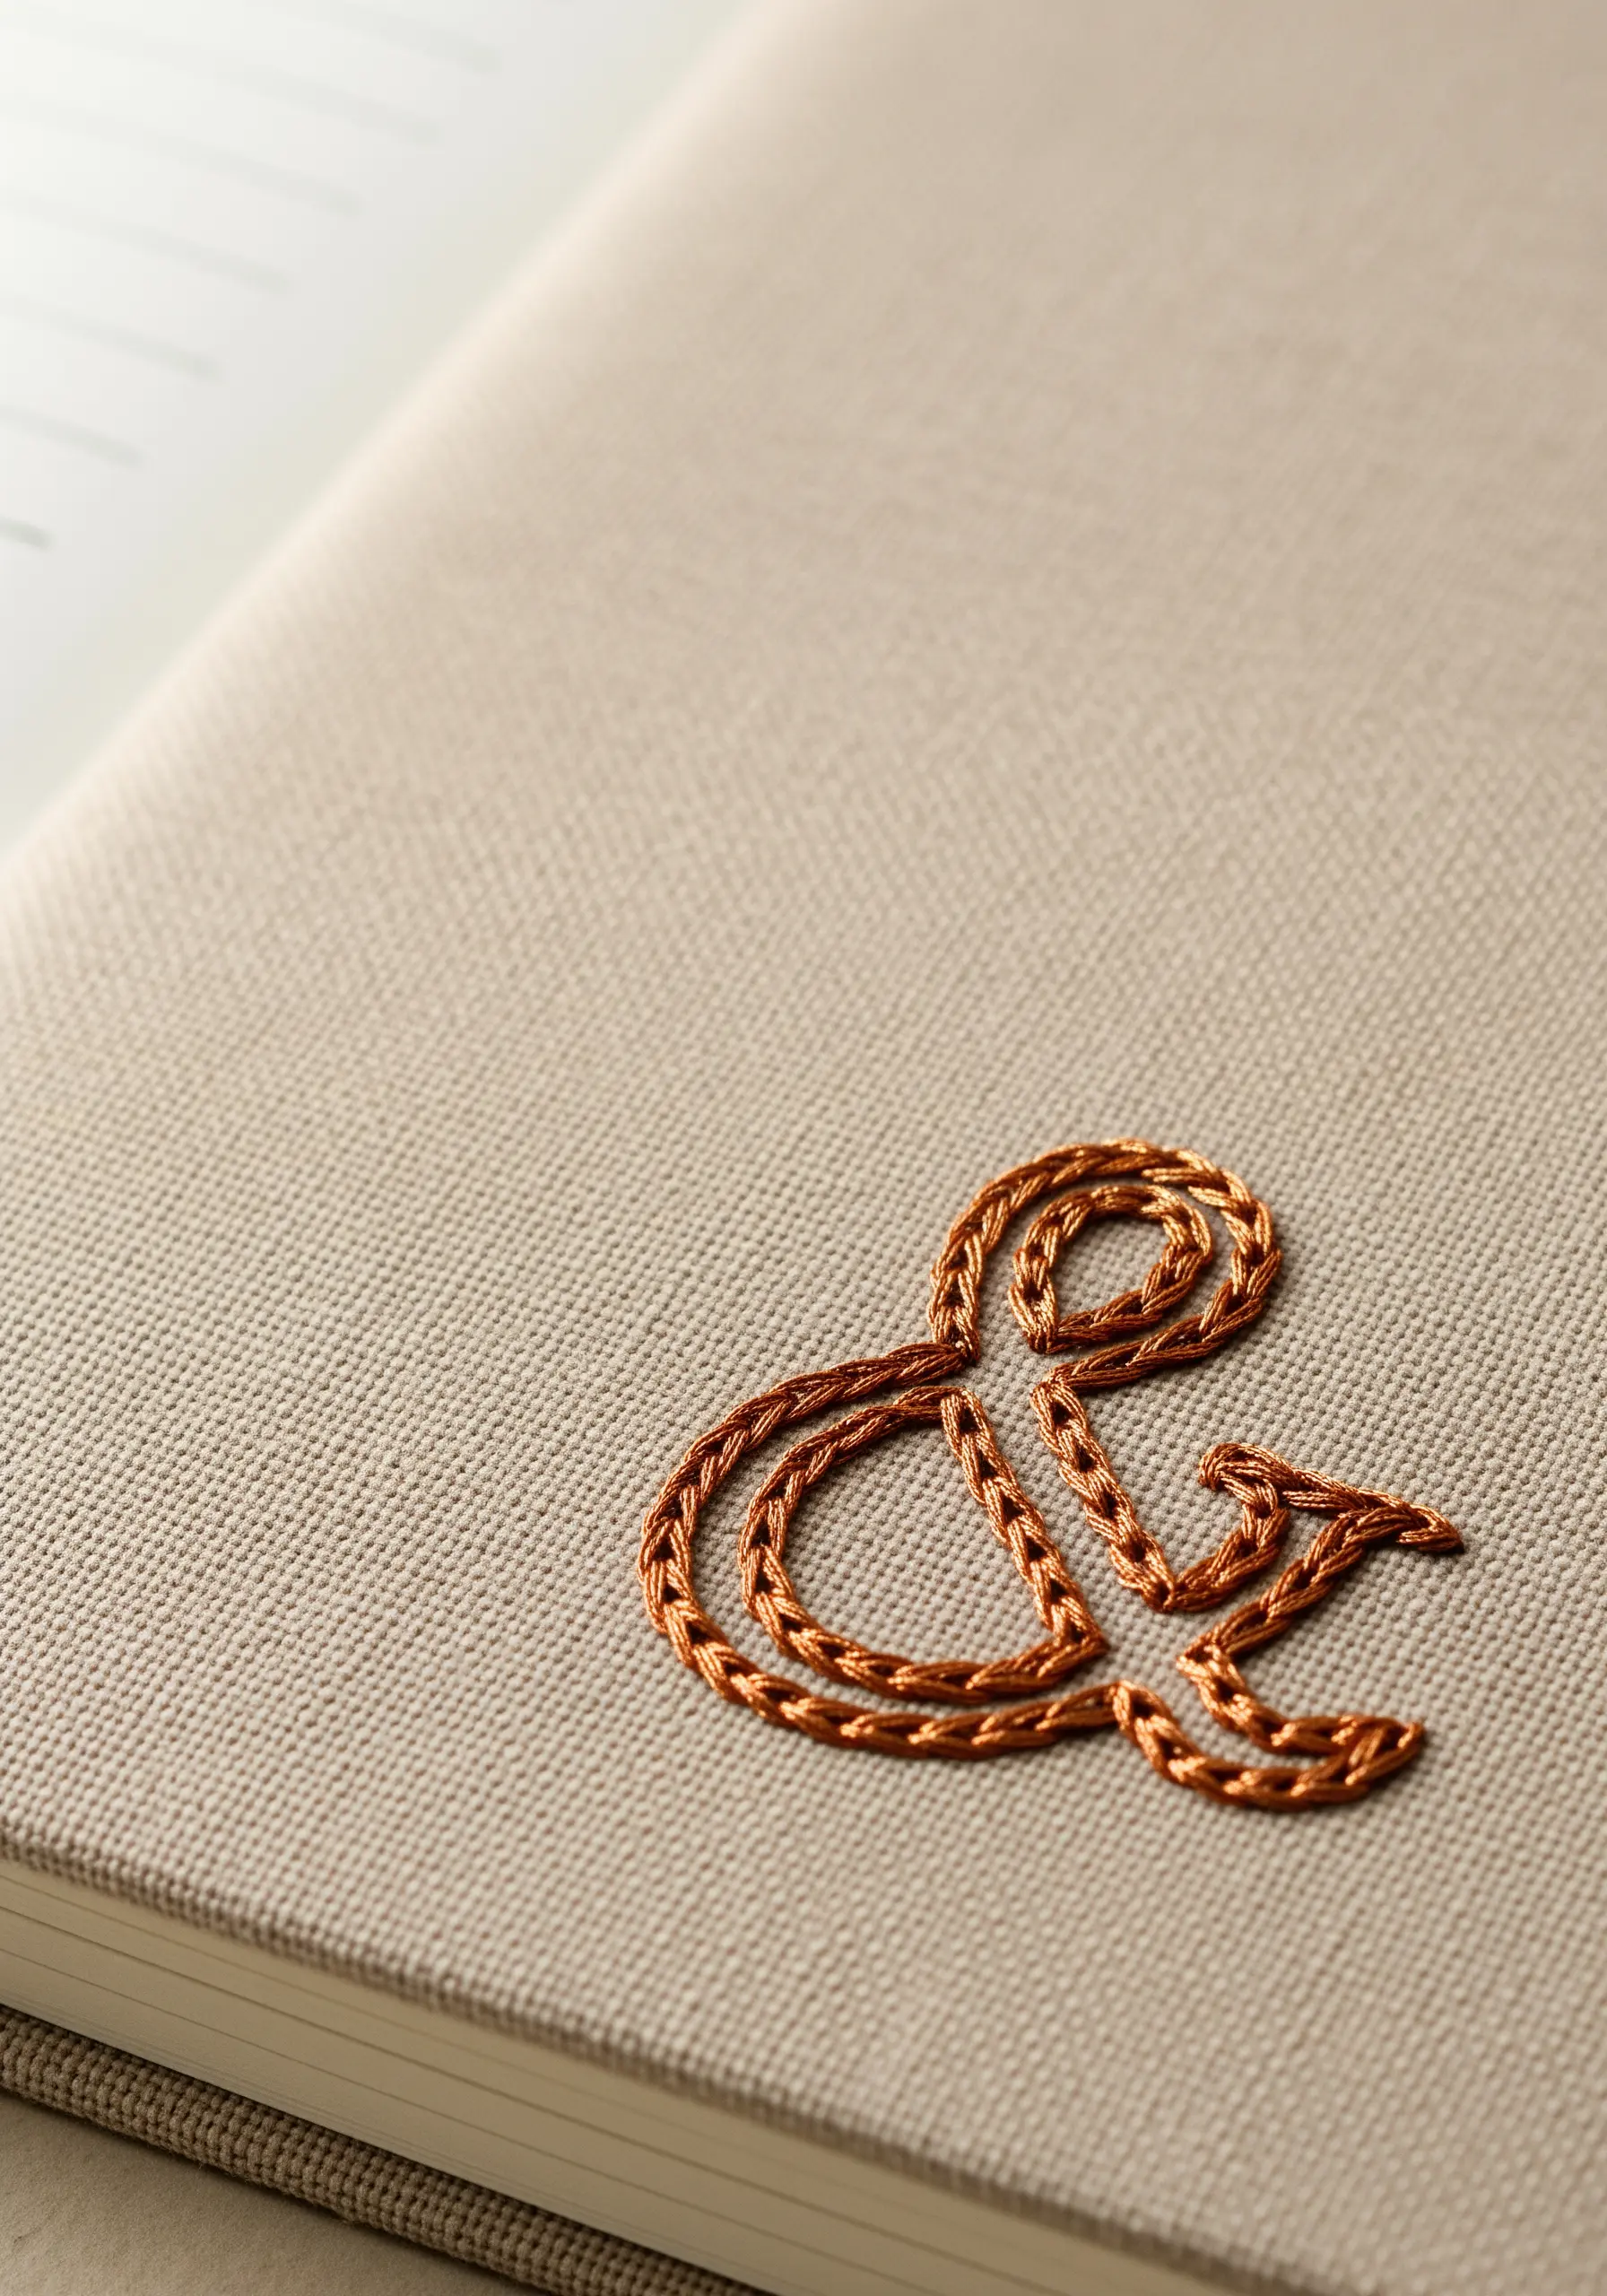
For elegant monograms, letters, or symbols, the chain stitch is a far more sophisticated choice than a simple backstitch.
It creates a linked, rope-like texture that has substance and visual weight, perfect for making a single design element the star of the show.
Using a metallic or silk-blend thread enhances this effect, catching the light and highlighting the intricate texture of the linked stitches.
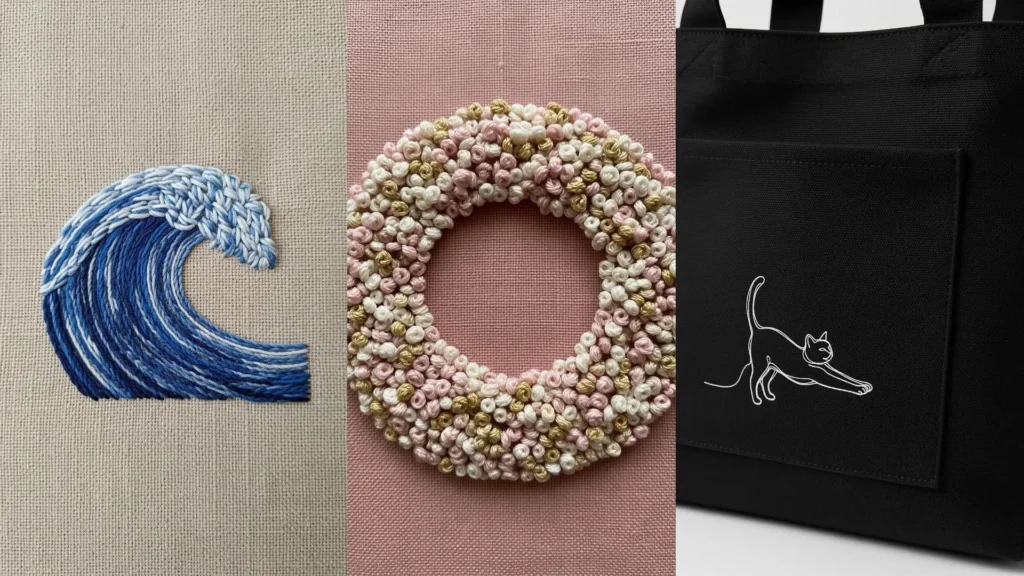
It’s an ideal way to add a personal, luxurious touch to a notebook cover, a handkerchief, or a tote bag.
16. Create Watery Movement with Varied Textures
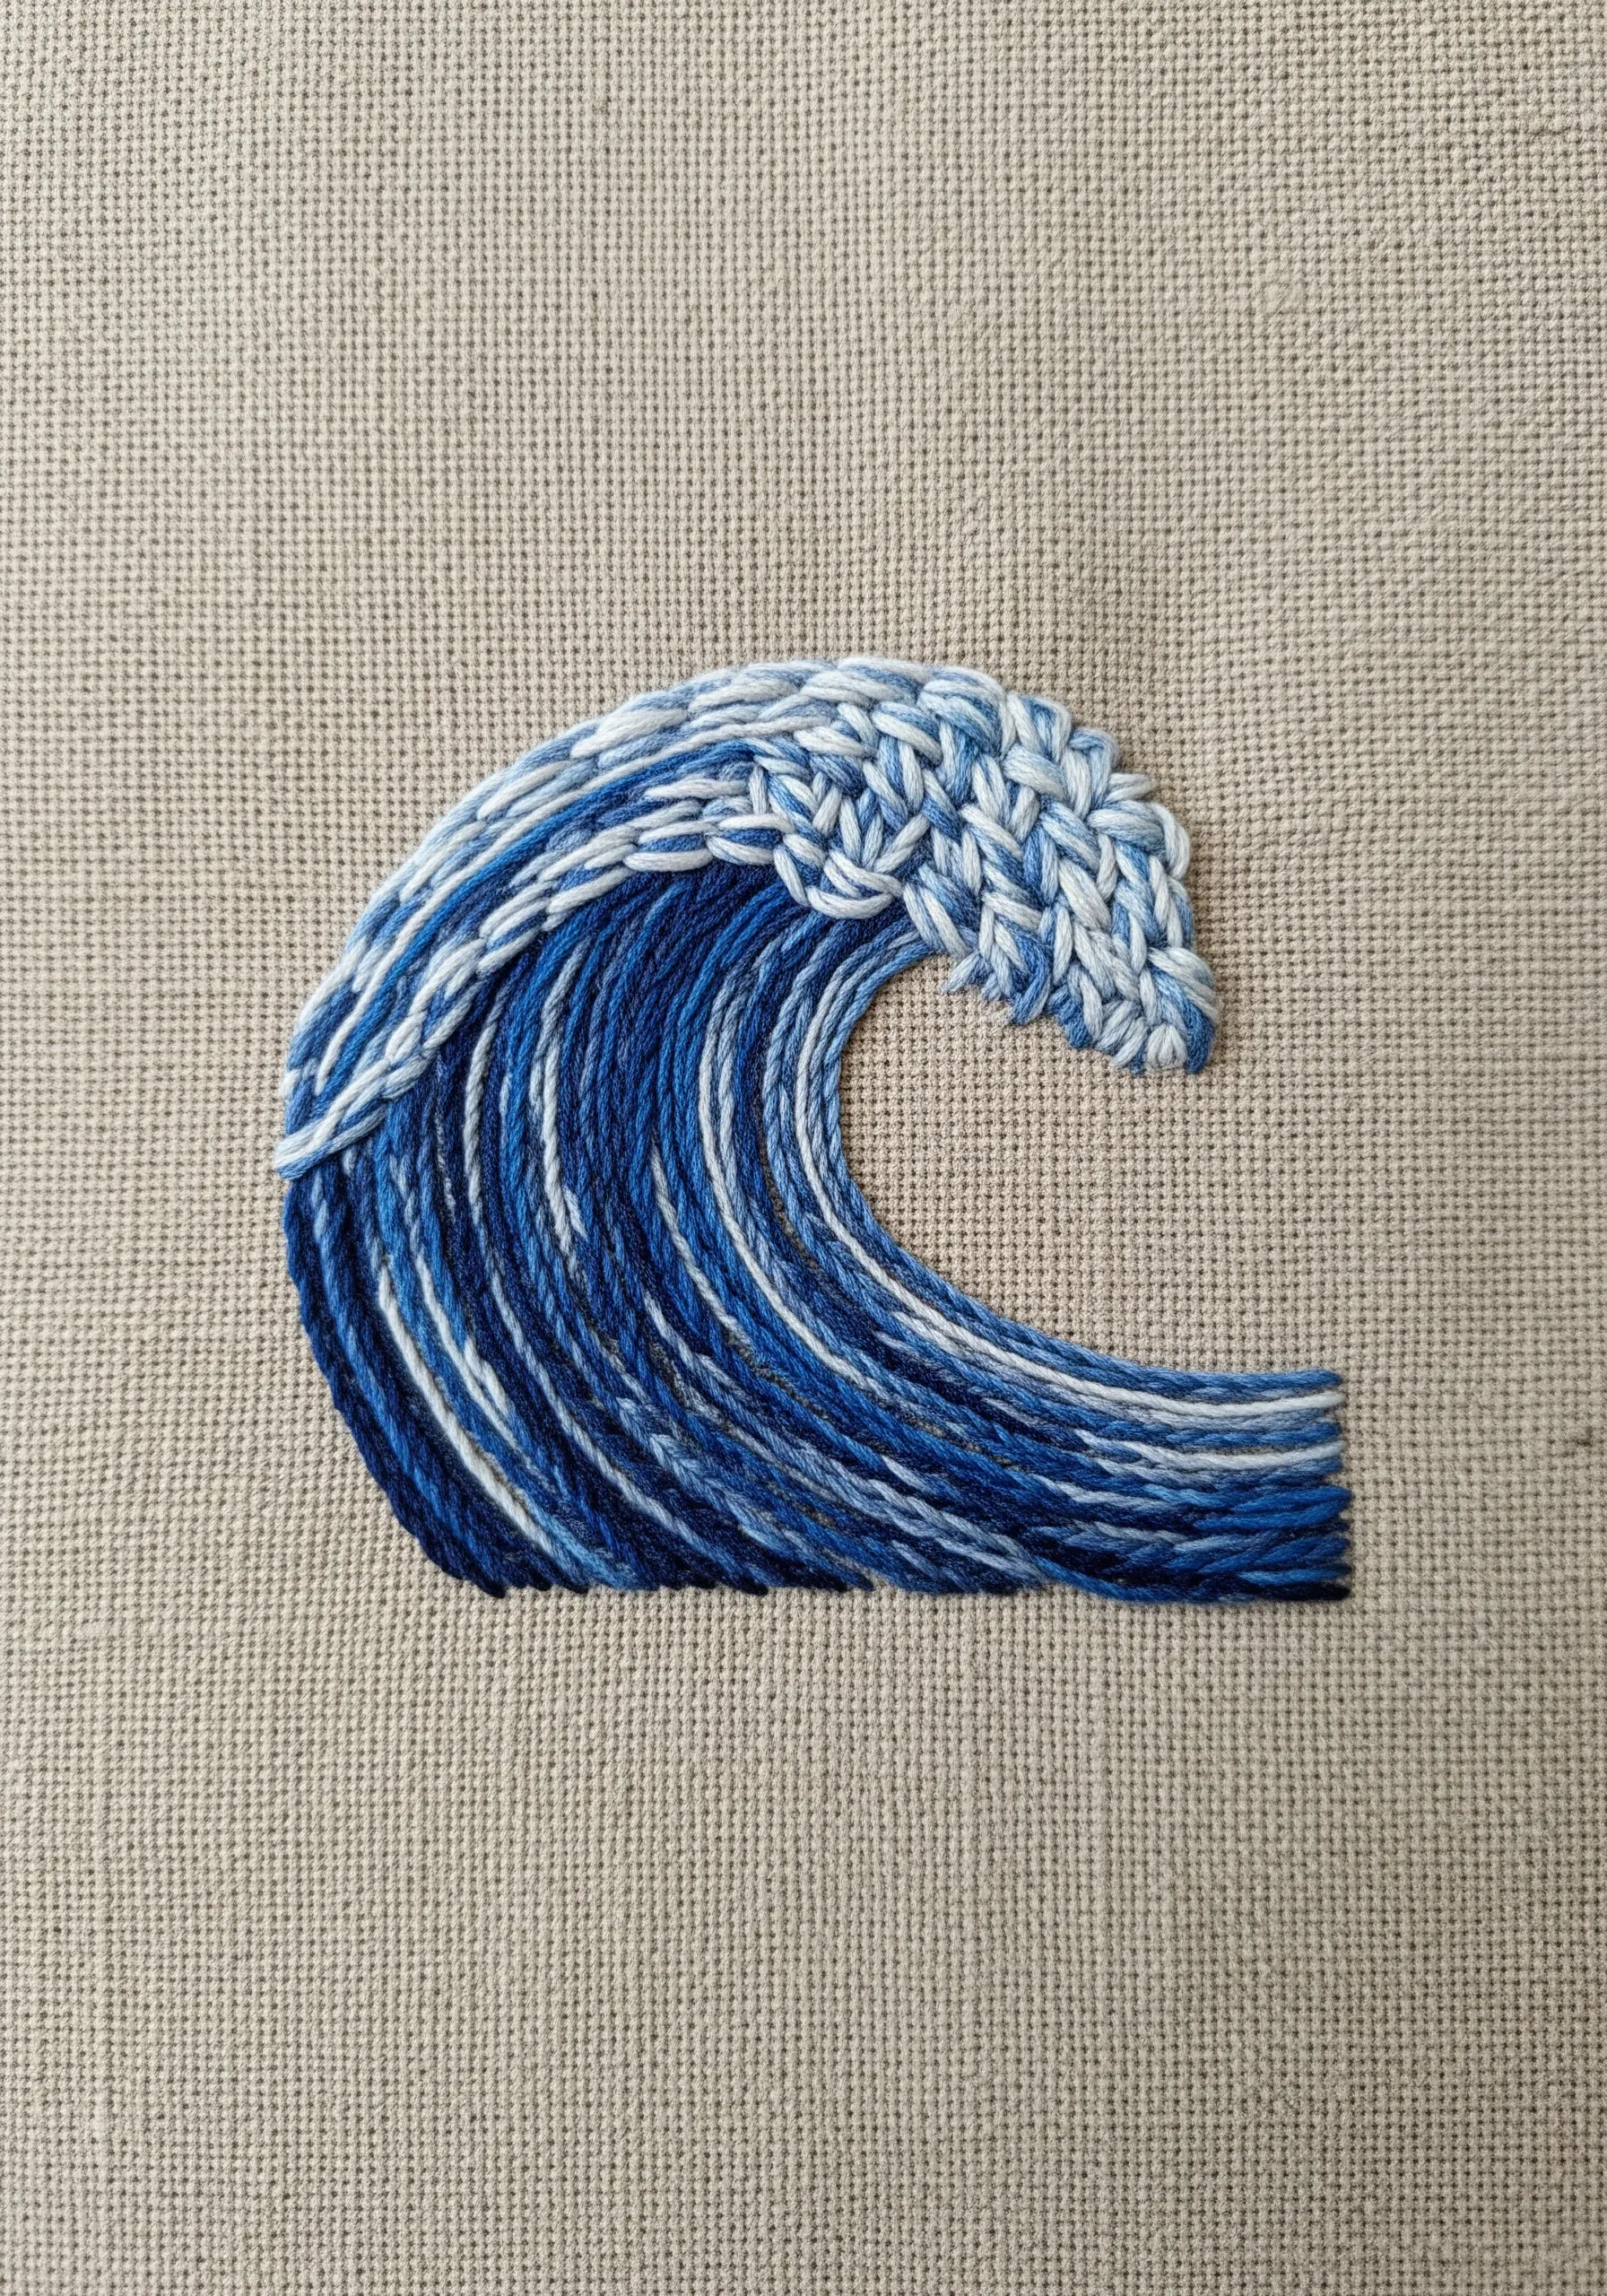
Capture the motion of a wave by layering different stitches and thread textures.
Start by laying down long, straight stitches in various shades of blue and white to form the base and direction of the water.
Then, create the foamy crest by working chunky chain stitches or a series of woven wheel stitches over the top using a thick, variegated white or light blue thread.
This layering technique builds dimension and makes the wave feel dynamic and alive.
17. Imply Detail with Outlines and Scatter Stitches
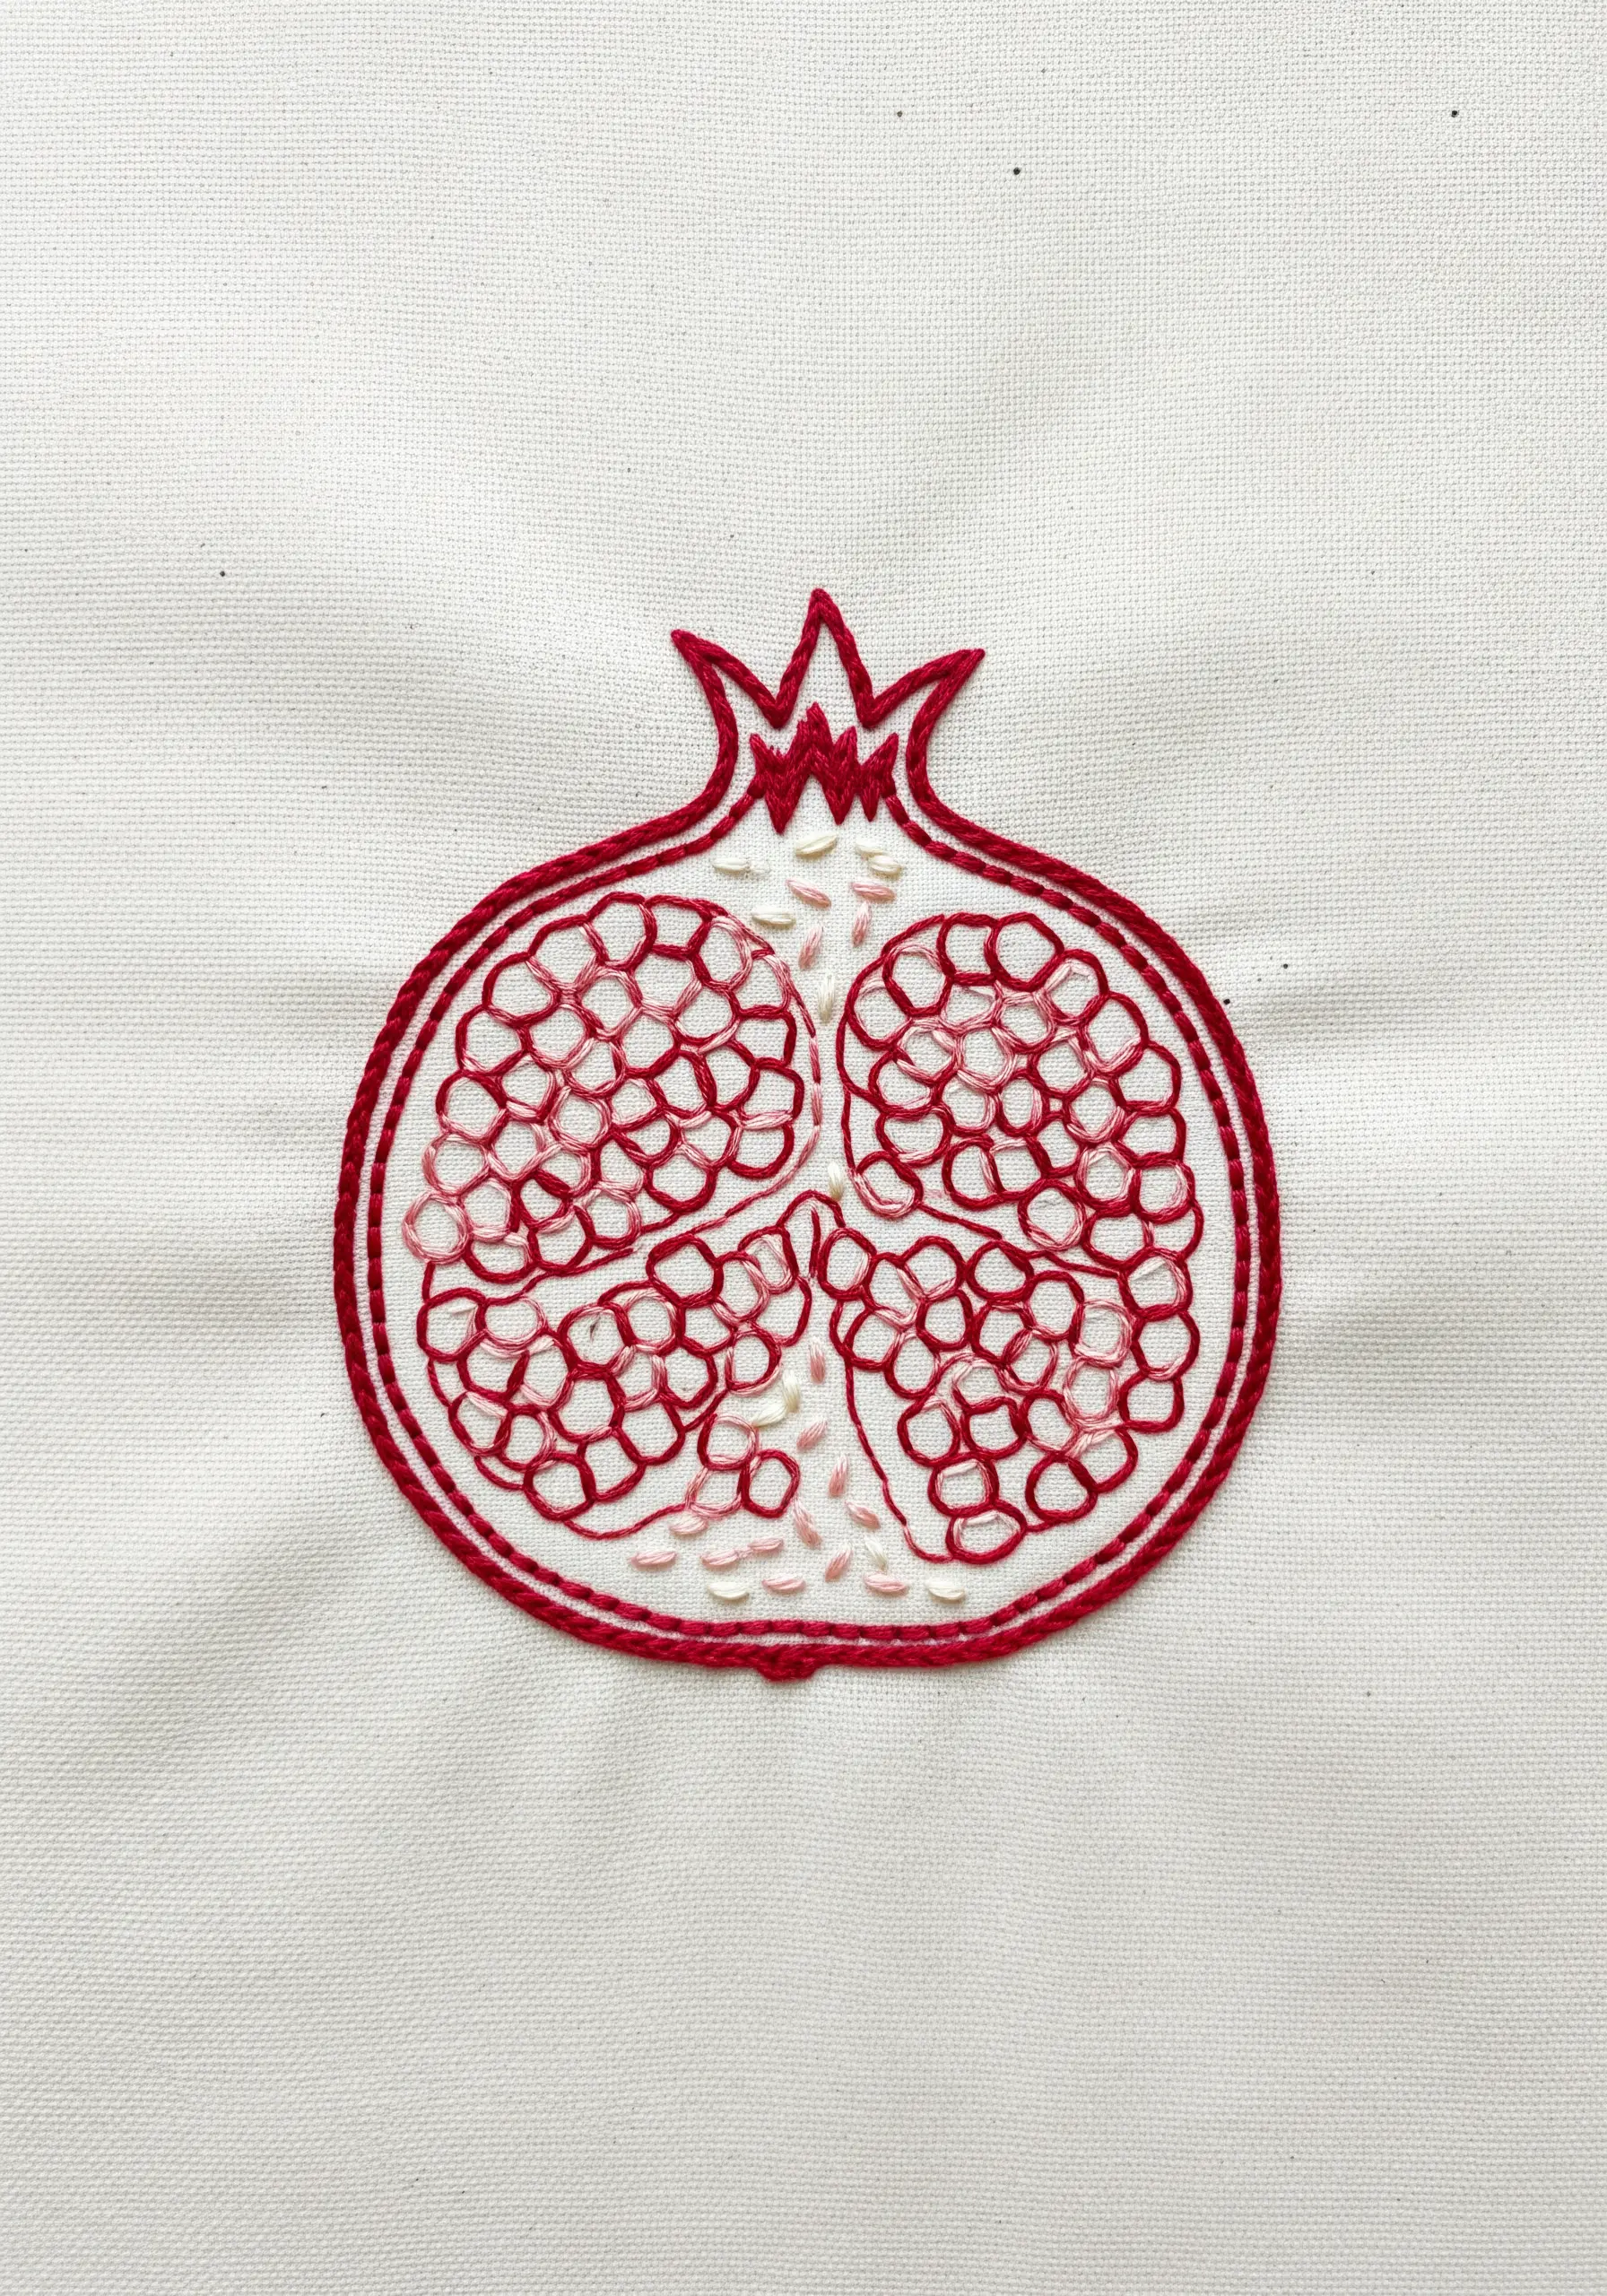
You don’t need to fill every inch of a design to make it feel complete. This pomegranate uses outlines and sparsely placed stitches to suggest detail.
Use a clean backstitch or stem stitch for the main outline of the fruit and the inner membranes.
For the seeds, use a mix of French knots and single seed stitches, clustering them more densely in some areas and leaving others more open.
This technique allows the fabric’s color to show through, creating highlights and depth while keeping the design light and airy.
18. Add Understated Luxury with a Tiny Motif
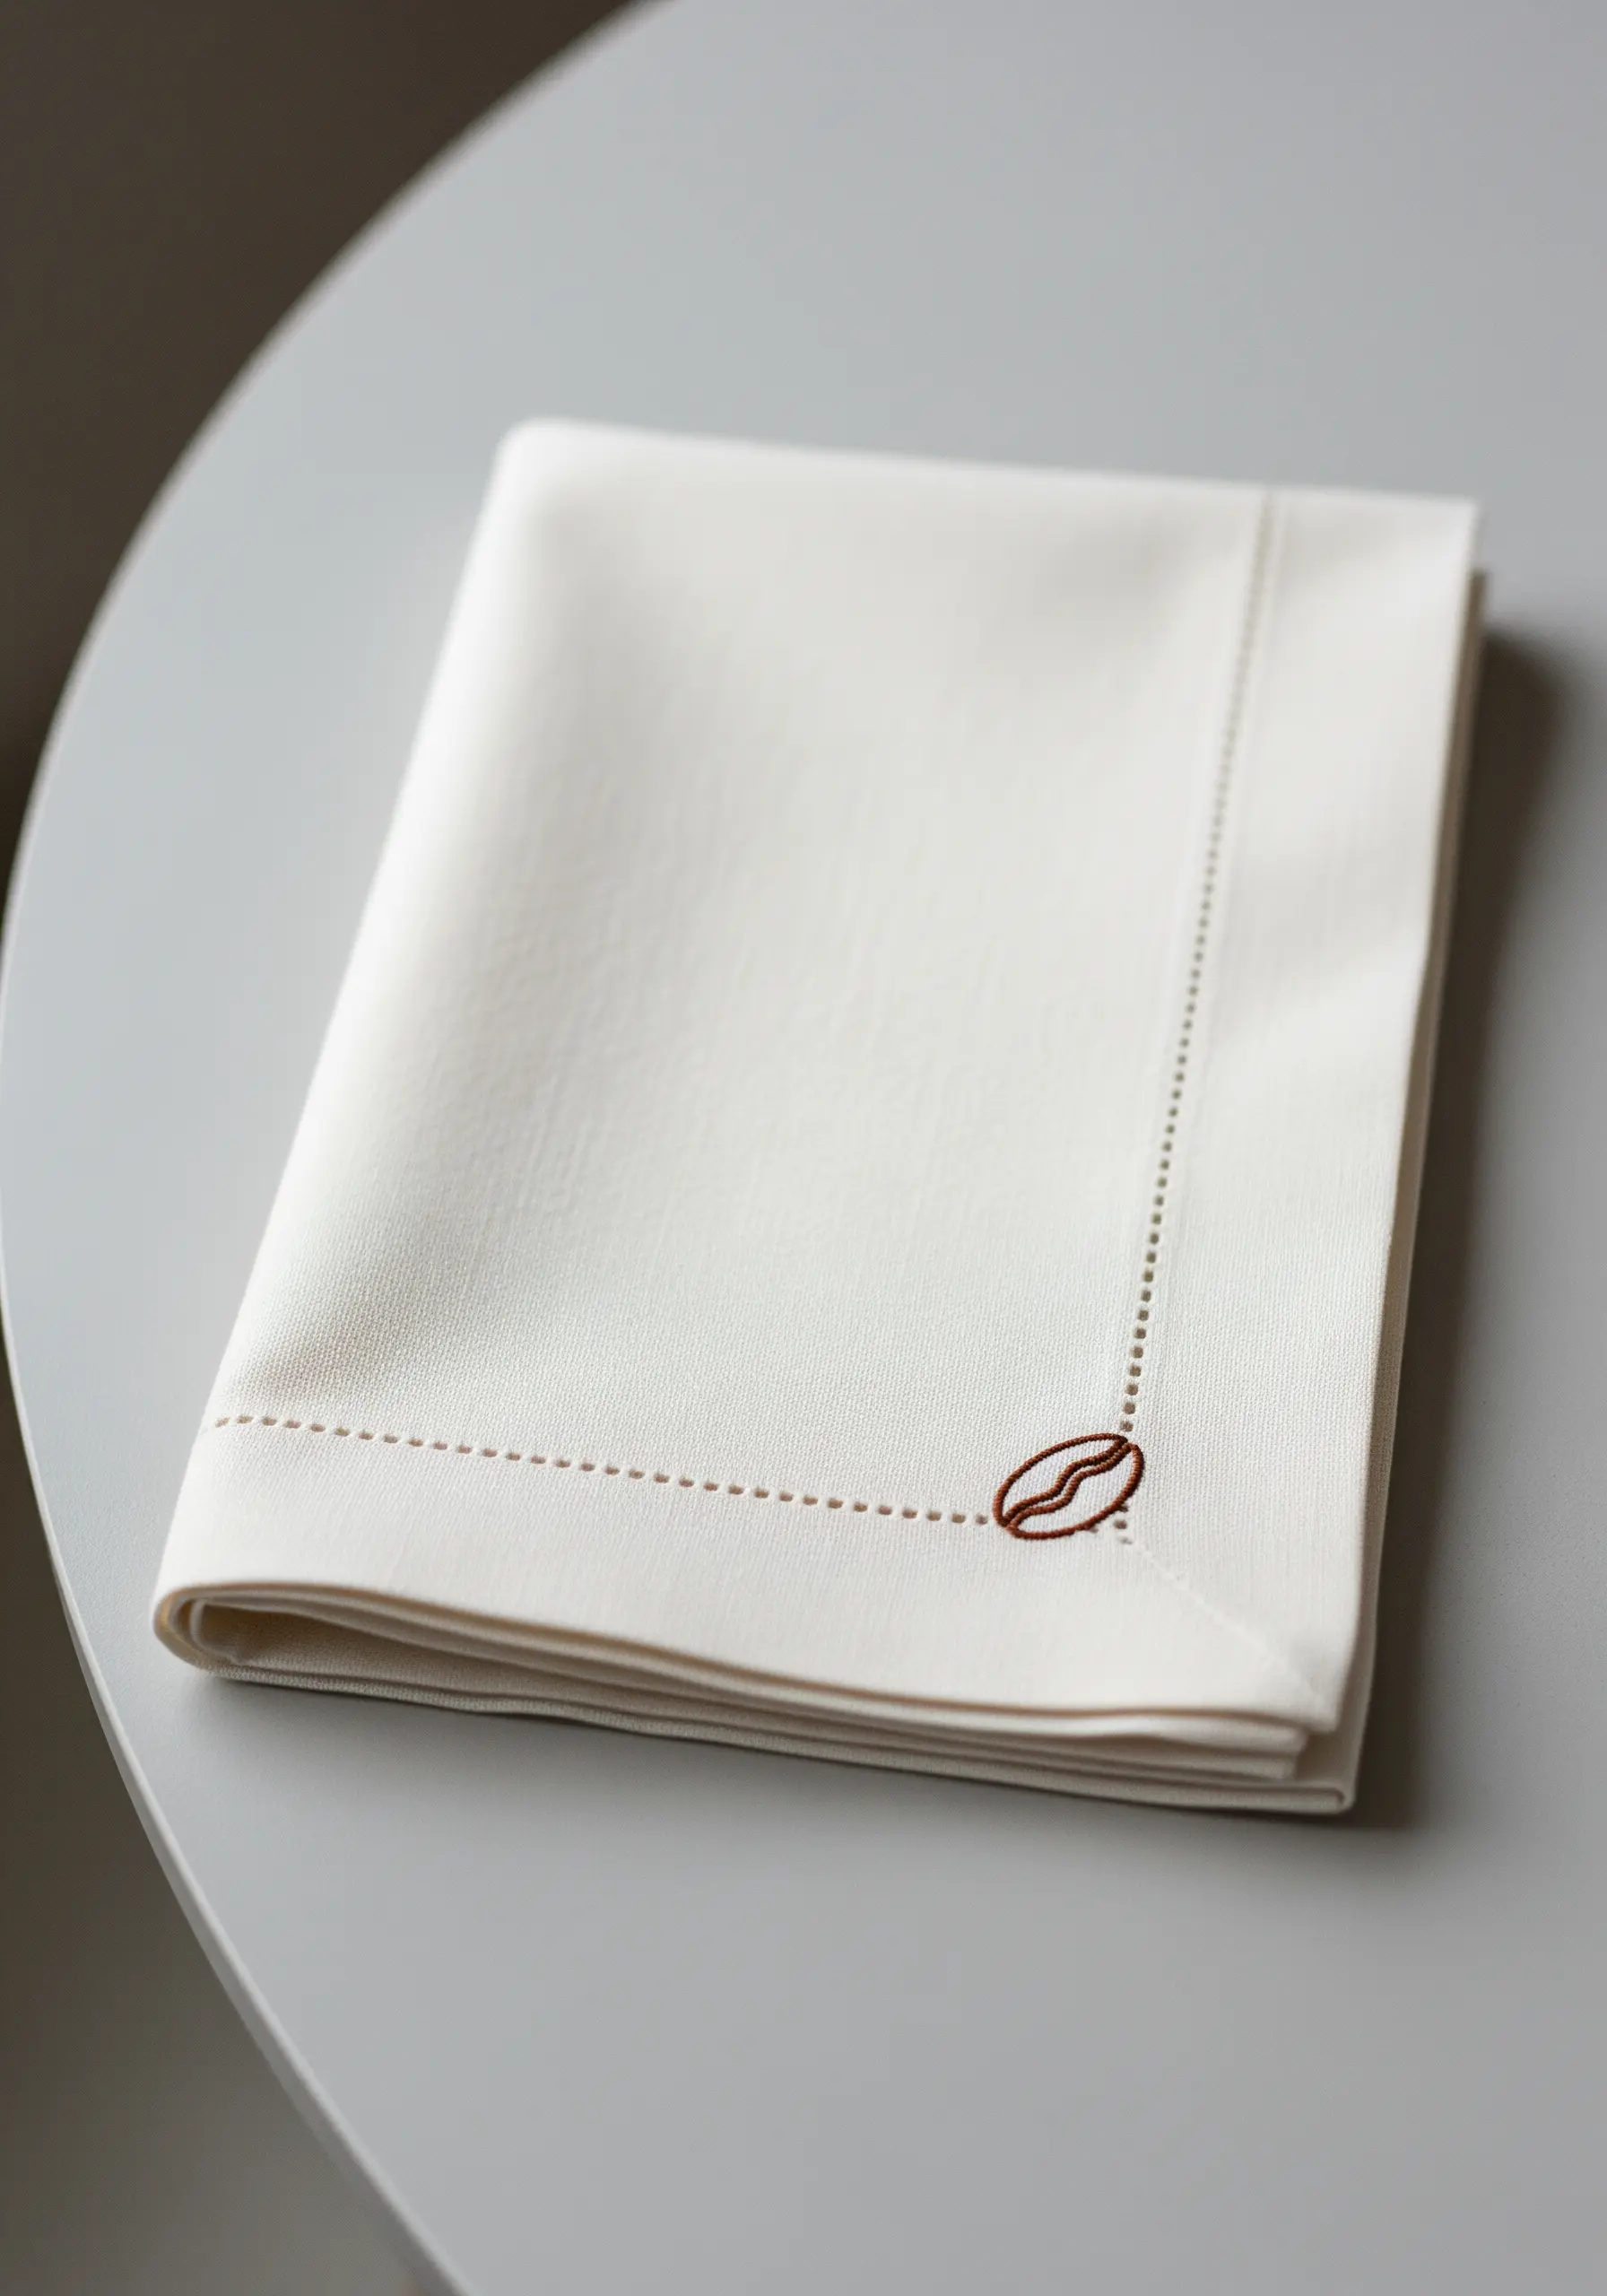
A single, perfectly executed motif can transform a simple textile into a bespoke object.
Choose a simple design—like this coffee bean—and render it with a neat satin stitch. Placement is key; positioning the motif in a corner or along an edge feels intentional and elegant.
Use just a few strands of floss (two or three) for a refined, delicate finish that complements the fabric rather than overpowering it.
This approach works beautifully on napkins, pillowcases, and shirt cuffs, adding a touch of sleek and subtle style.
19. Create Geometric Patterns with a Simple Outline
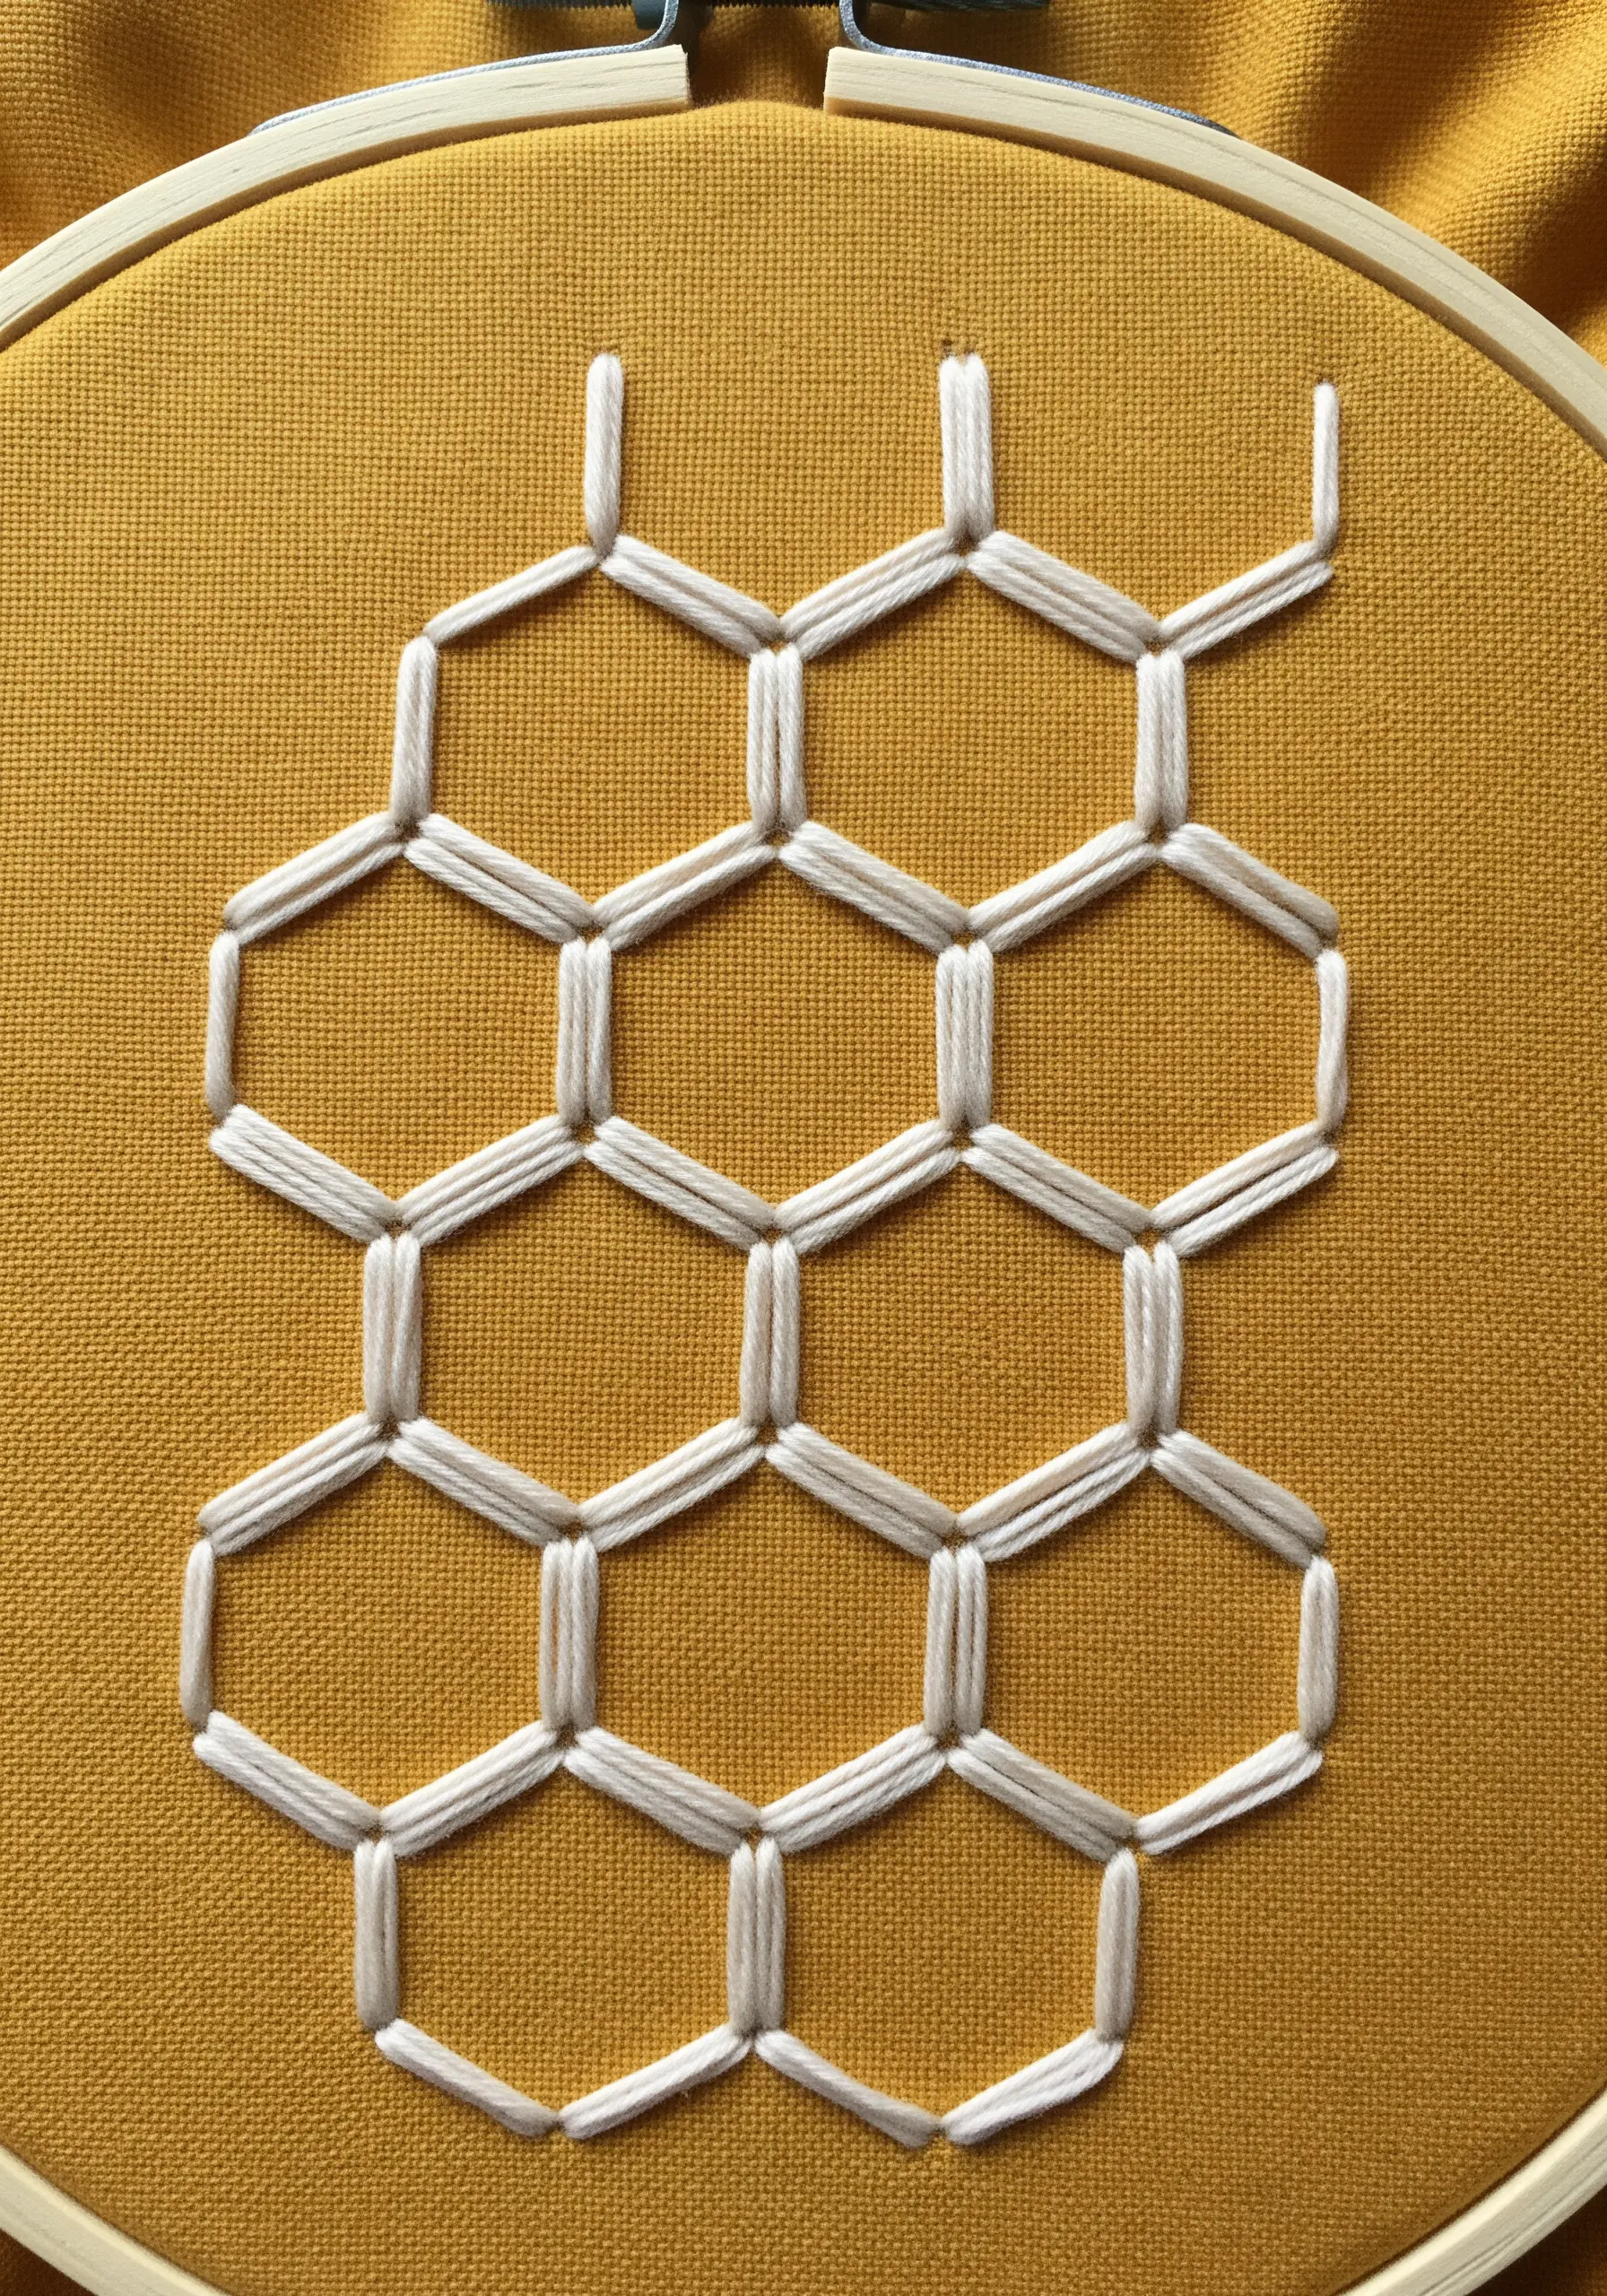
An intricate-looking honeycomb pattern is actually one of the easiest geometric designs to stitch.
It is composed entirely of straight lines connected at angles, making it a perfect project for practicing a neat backstitch or stem stitch.
For perfect symmetry, lightly draw your hexagonal grid onto the fabric with a water-soluble pen before you begin.
The repetition of the simple shape on a solid, contrasting background is what gives this design its striking, modern appeal.
20. Use Stitch Direction to Sculpt Shapes
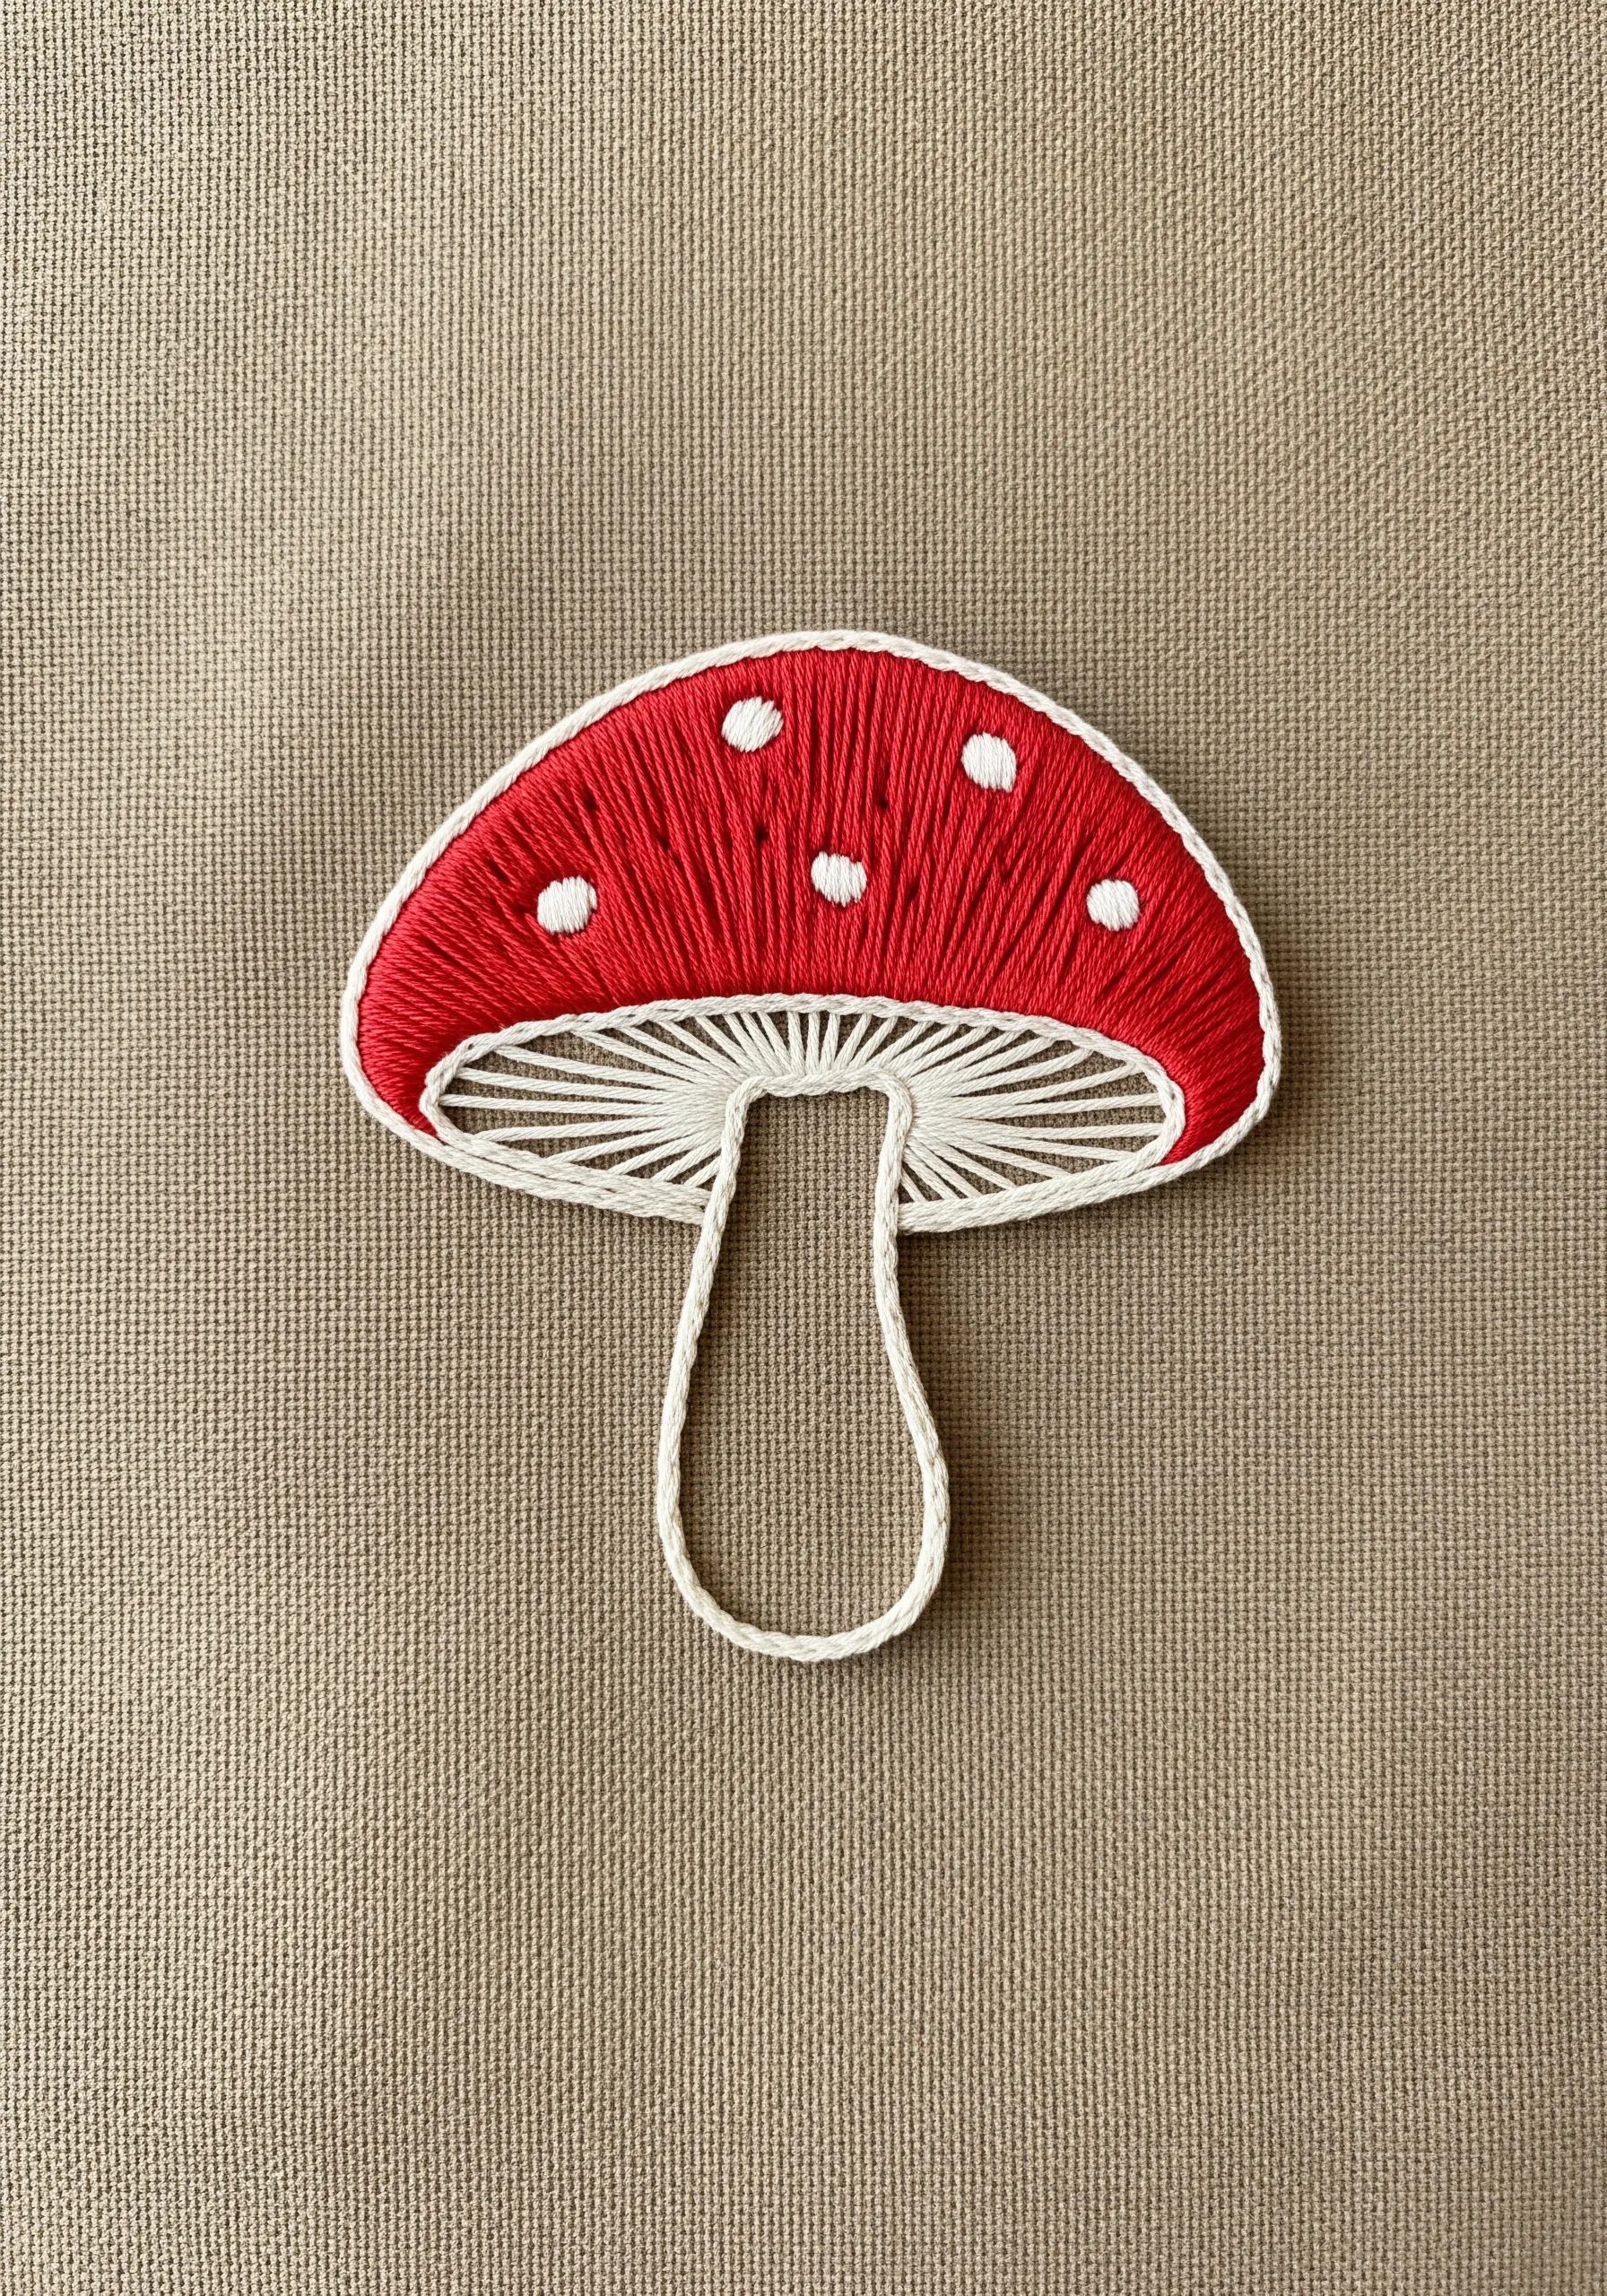
This charming mushroom demonstrates how the direction of your stitches can create contour and dimension, effectively sculpting with thread.
For the red cap, angle your satin stitches so they radiate from the center top, fanning outwards and downwards. This naturally creates a rounded, convex shape.
For the gills underneath, use straight stitches that radiate from the stem outwards to the edge of the cap.
This intentional use of stitch direction is a simple way to make flat shapes feel three-dimensional.
21. Tell a Story with a Single, Expressive Line
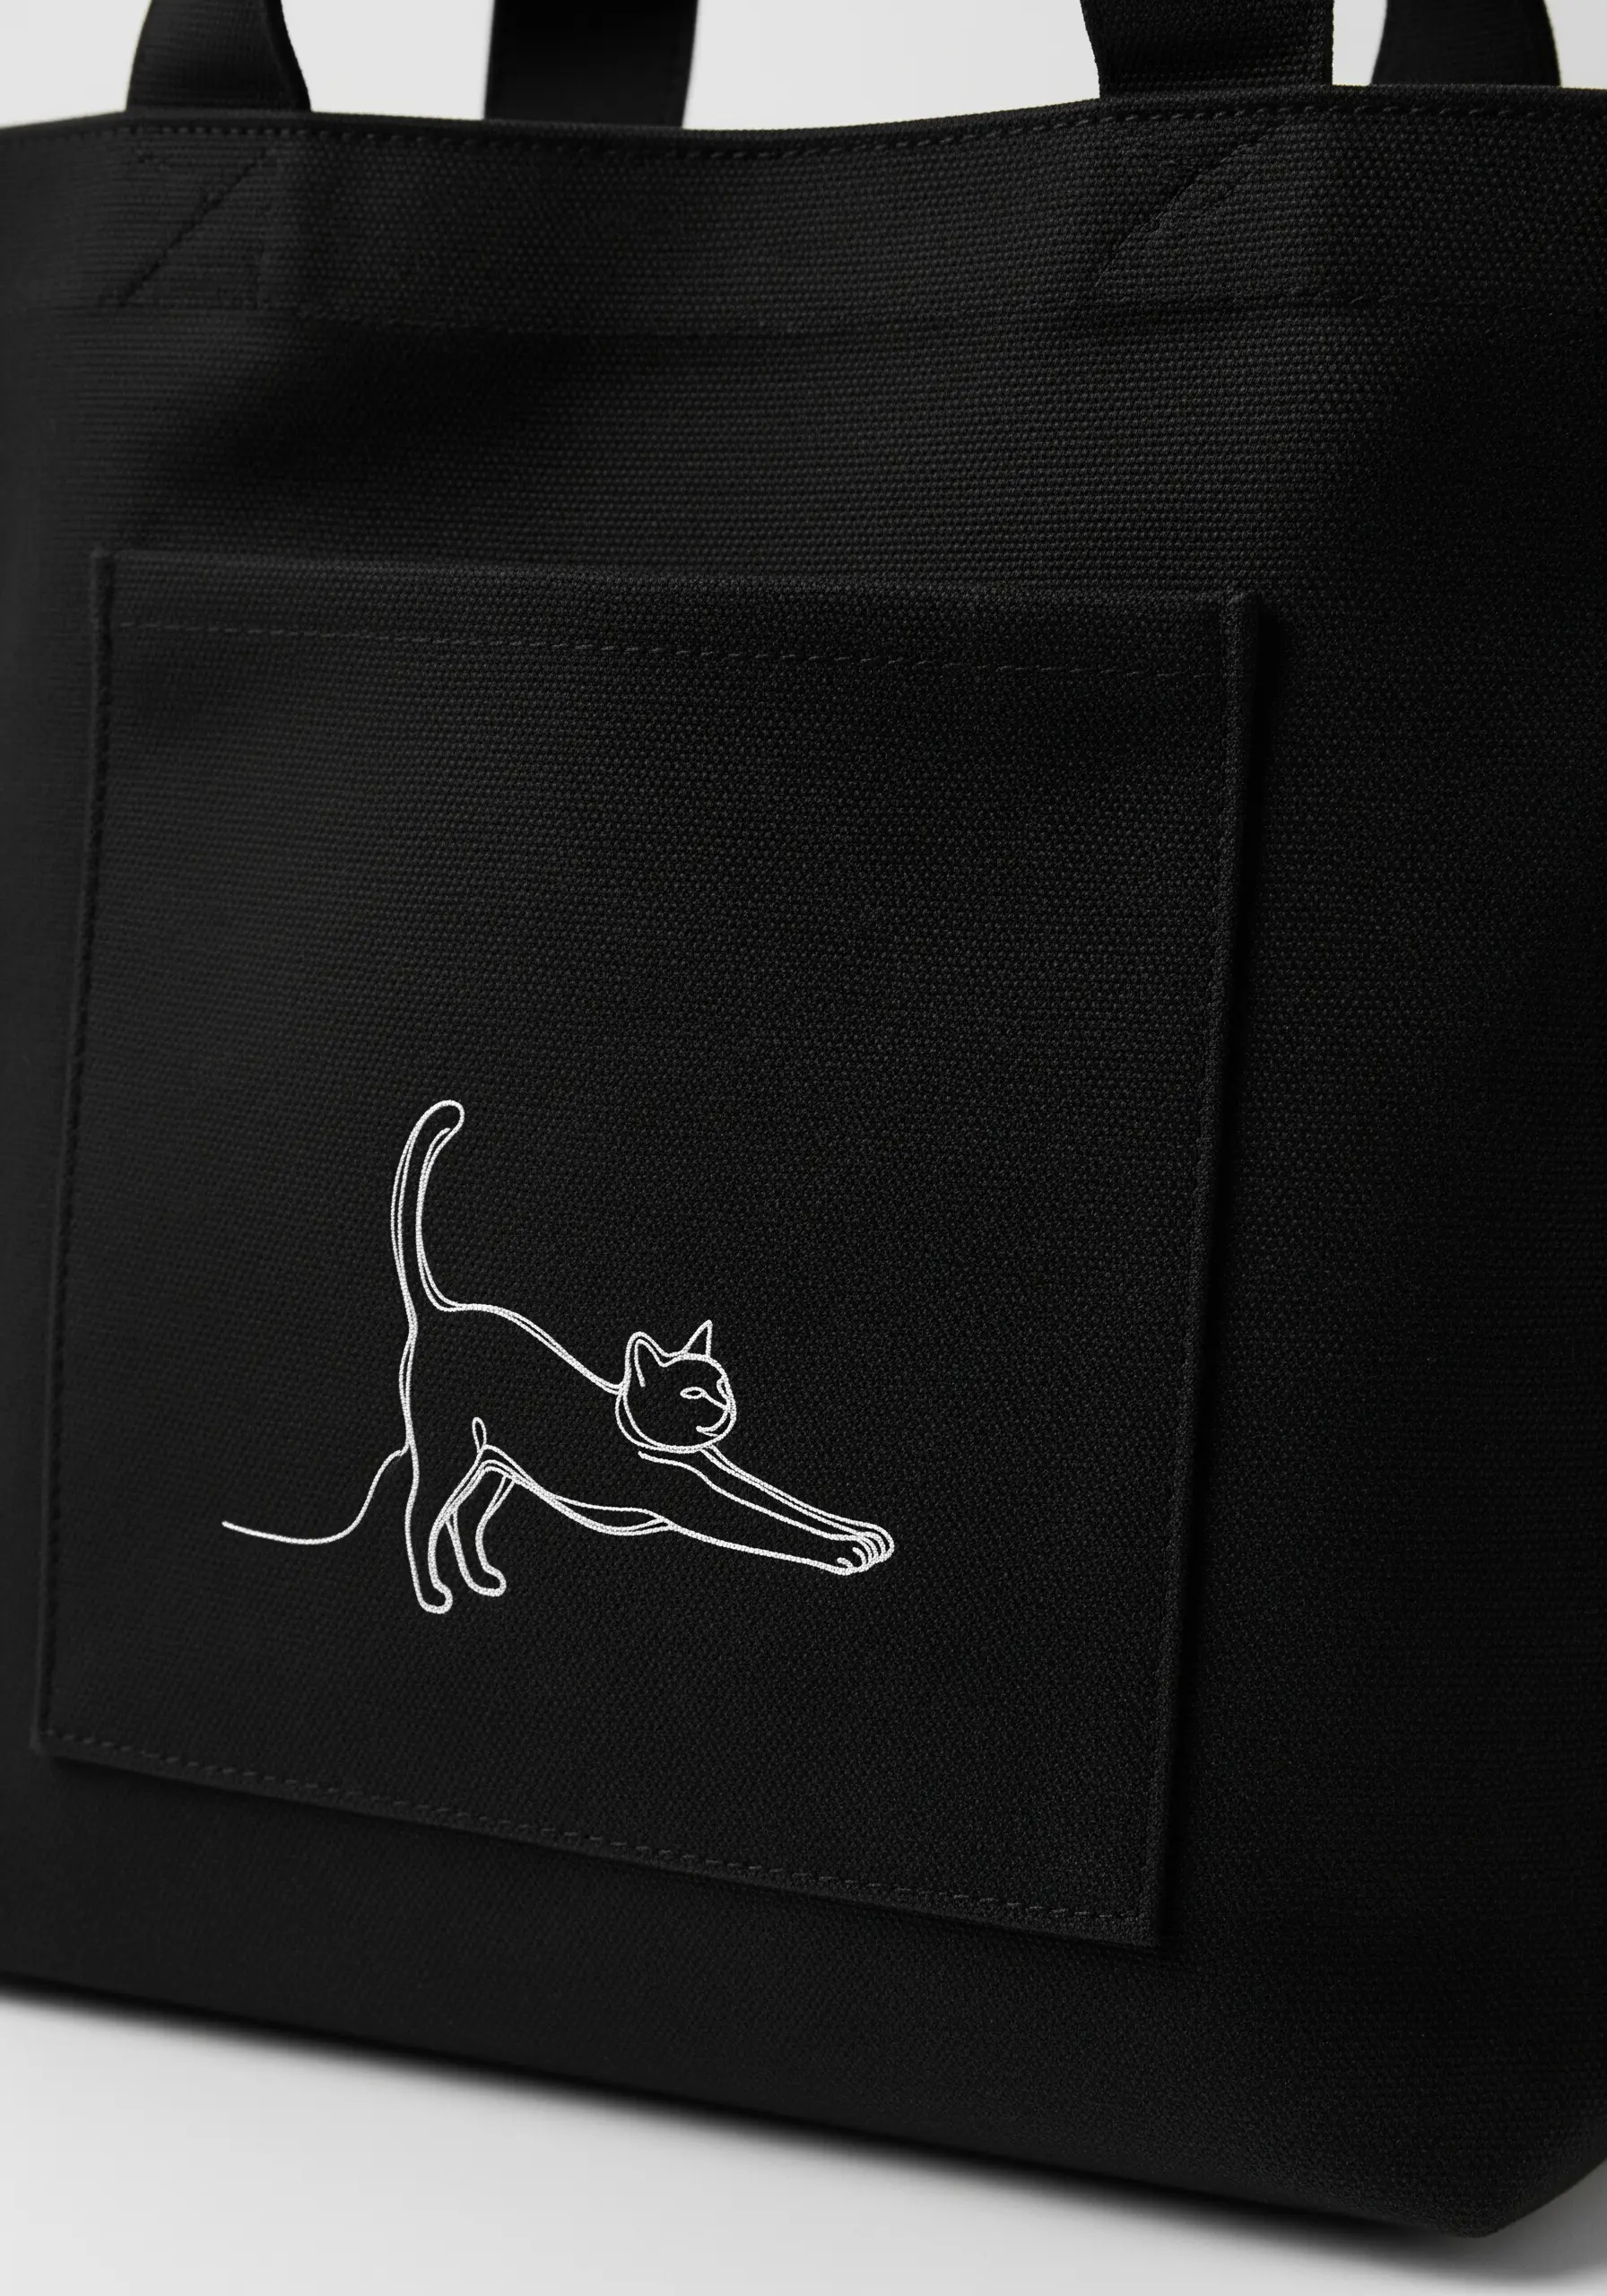
Capture the essence of a subject with a continuous line design, which relies on simplicity and fluidity.
The key to success is a clean and consistent stitch, like a backstitch or stem stitch, that can handle smooth curves without breaking the illusion of a single line.
Use a fine-tipped, heat-erasable pen to transfer the design, ensuring your guide marks vanish completely.
Stitching a single-line motif on an accessory like a blank canvas bag adds a touch of modern, artistic personality.
22. Build Rich Texture with French Knots
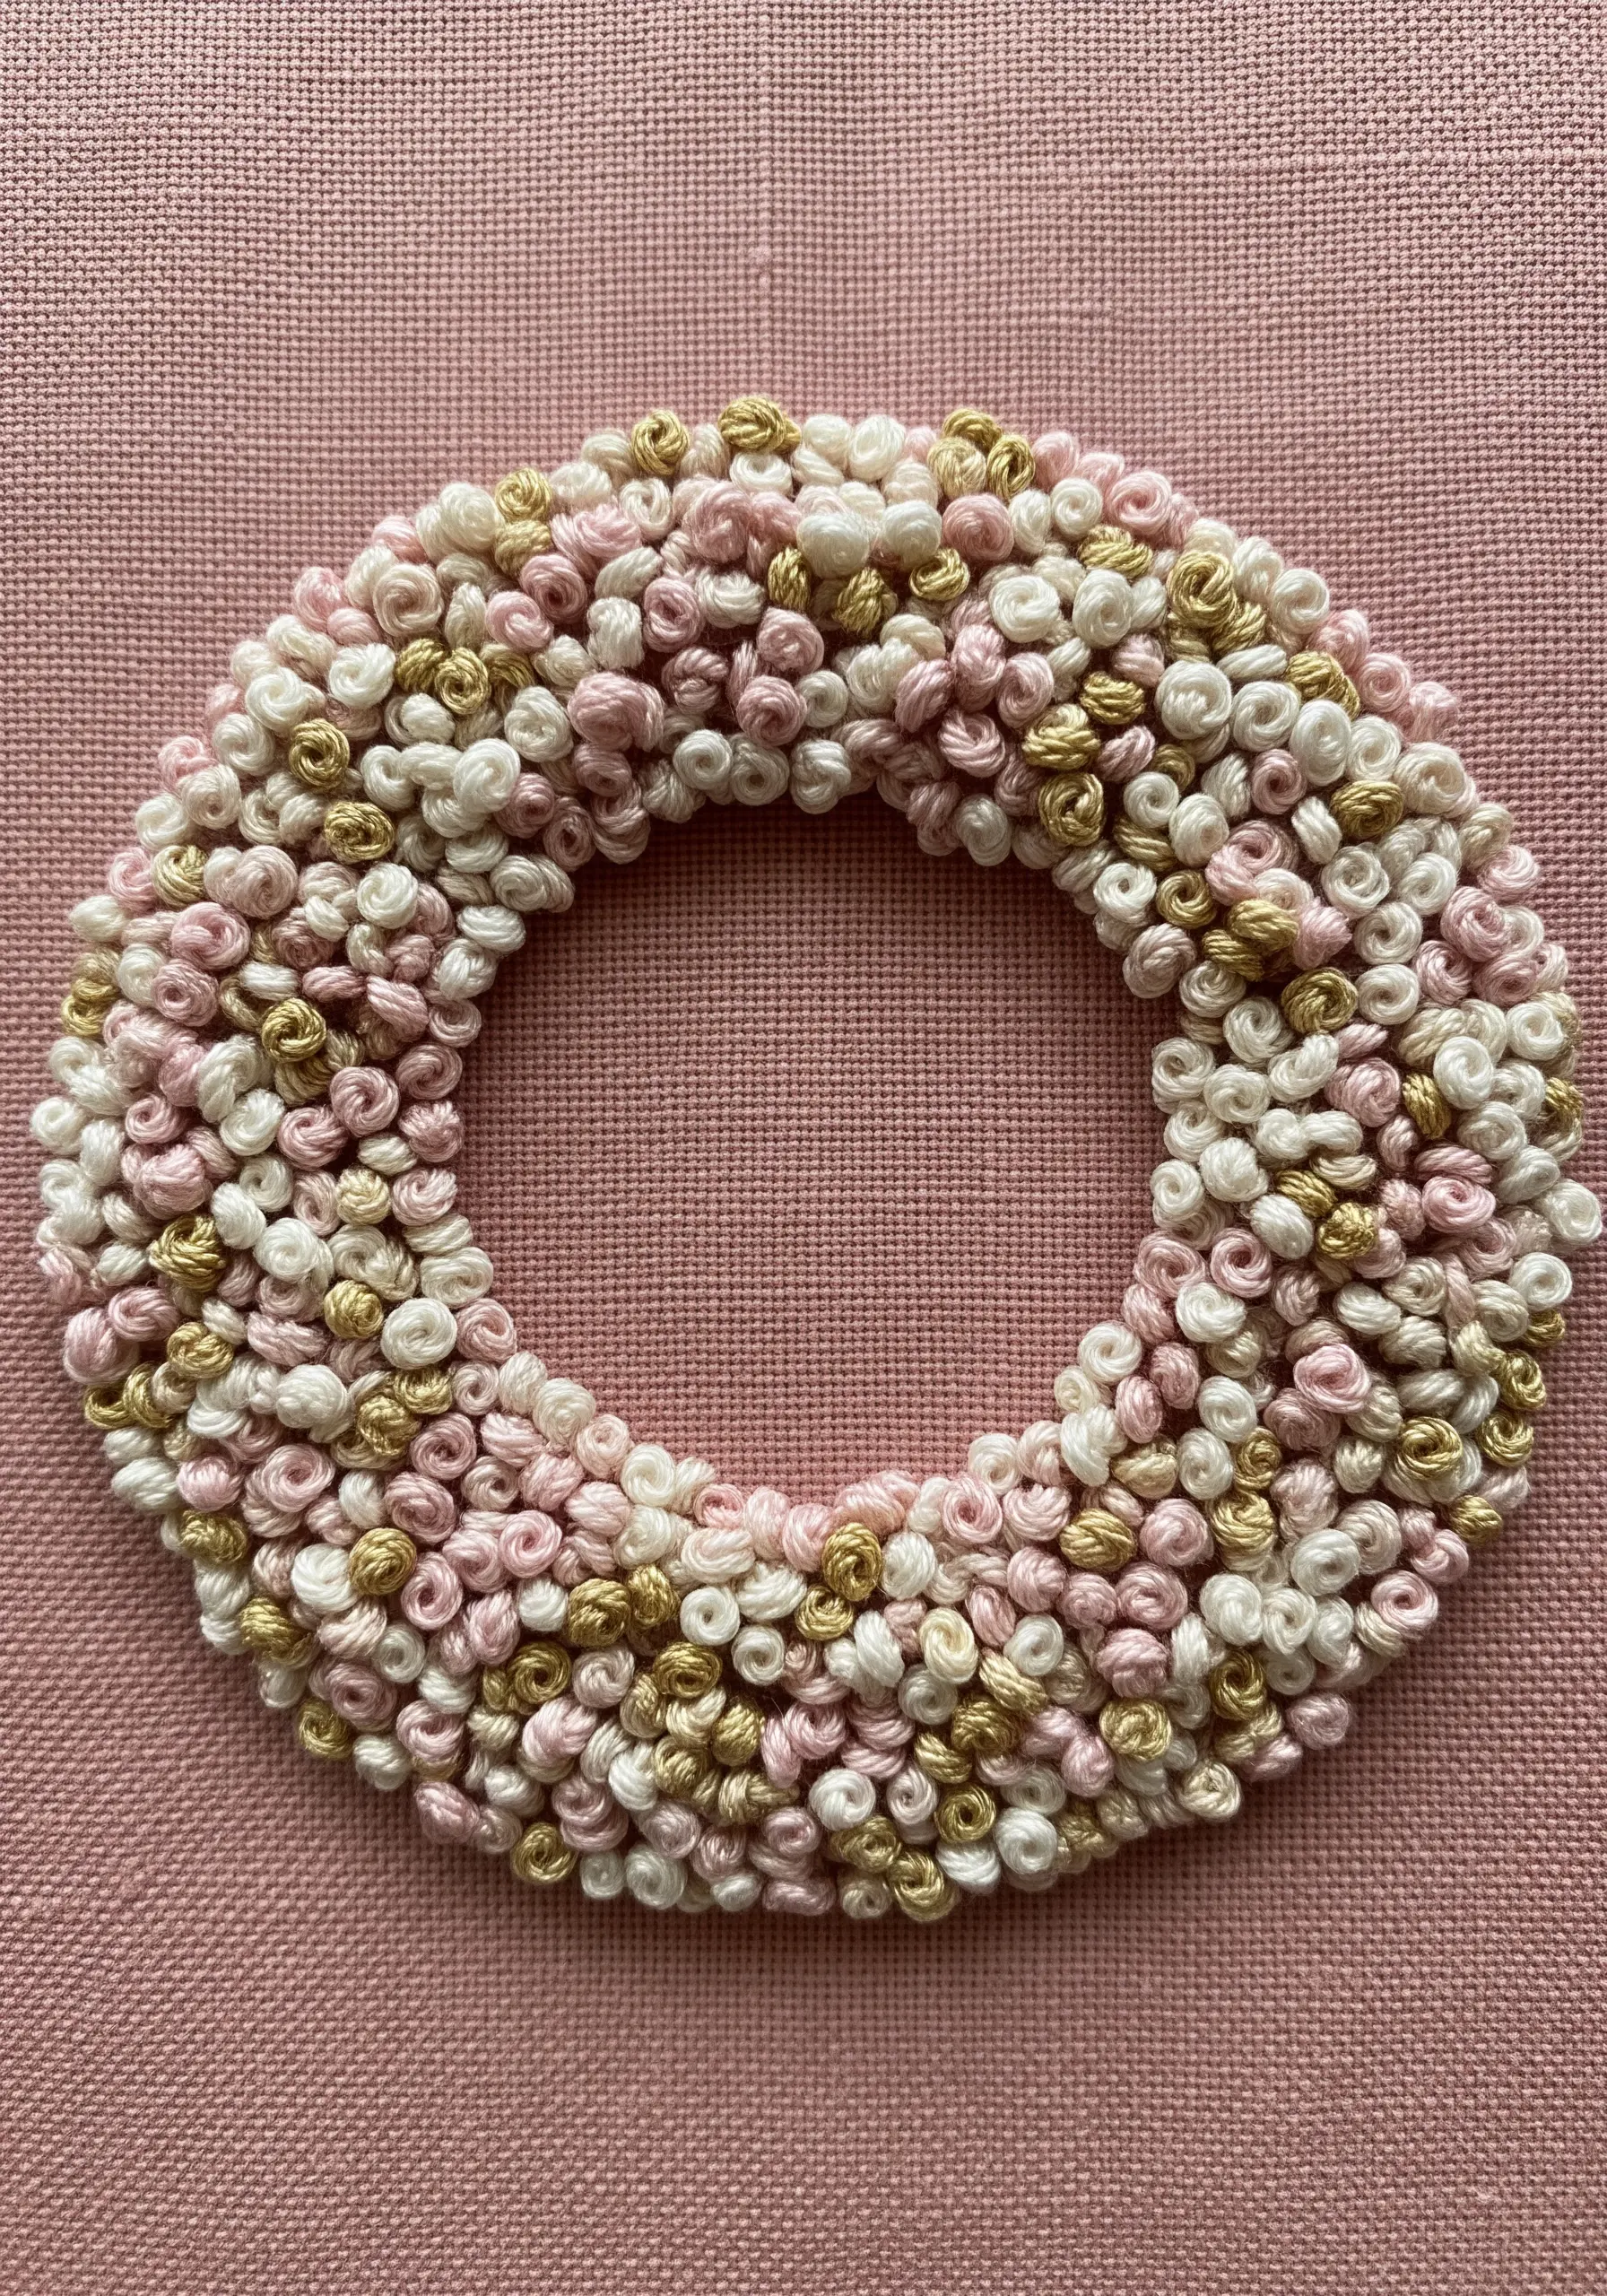
This stunningly textured wreath may look advanced, but it is created with just one stitch: the French knot.
The secret to its plush, dimensional appearance is variation. Create knots of different sizes by varying the number of times you wrap the thread around the needle (once for a small knot, twice for a medium one).
Cluster the knots closely together, mixing shades of pink, white, and gold to create a painterly, confetti-like effect.
This is a wonderfully meditative process that yields an incredibly impressive result.
23. Elevate Simple Shapes with a Decorative Border
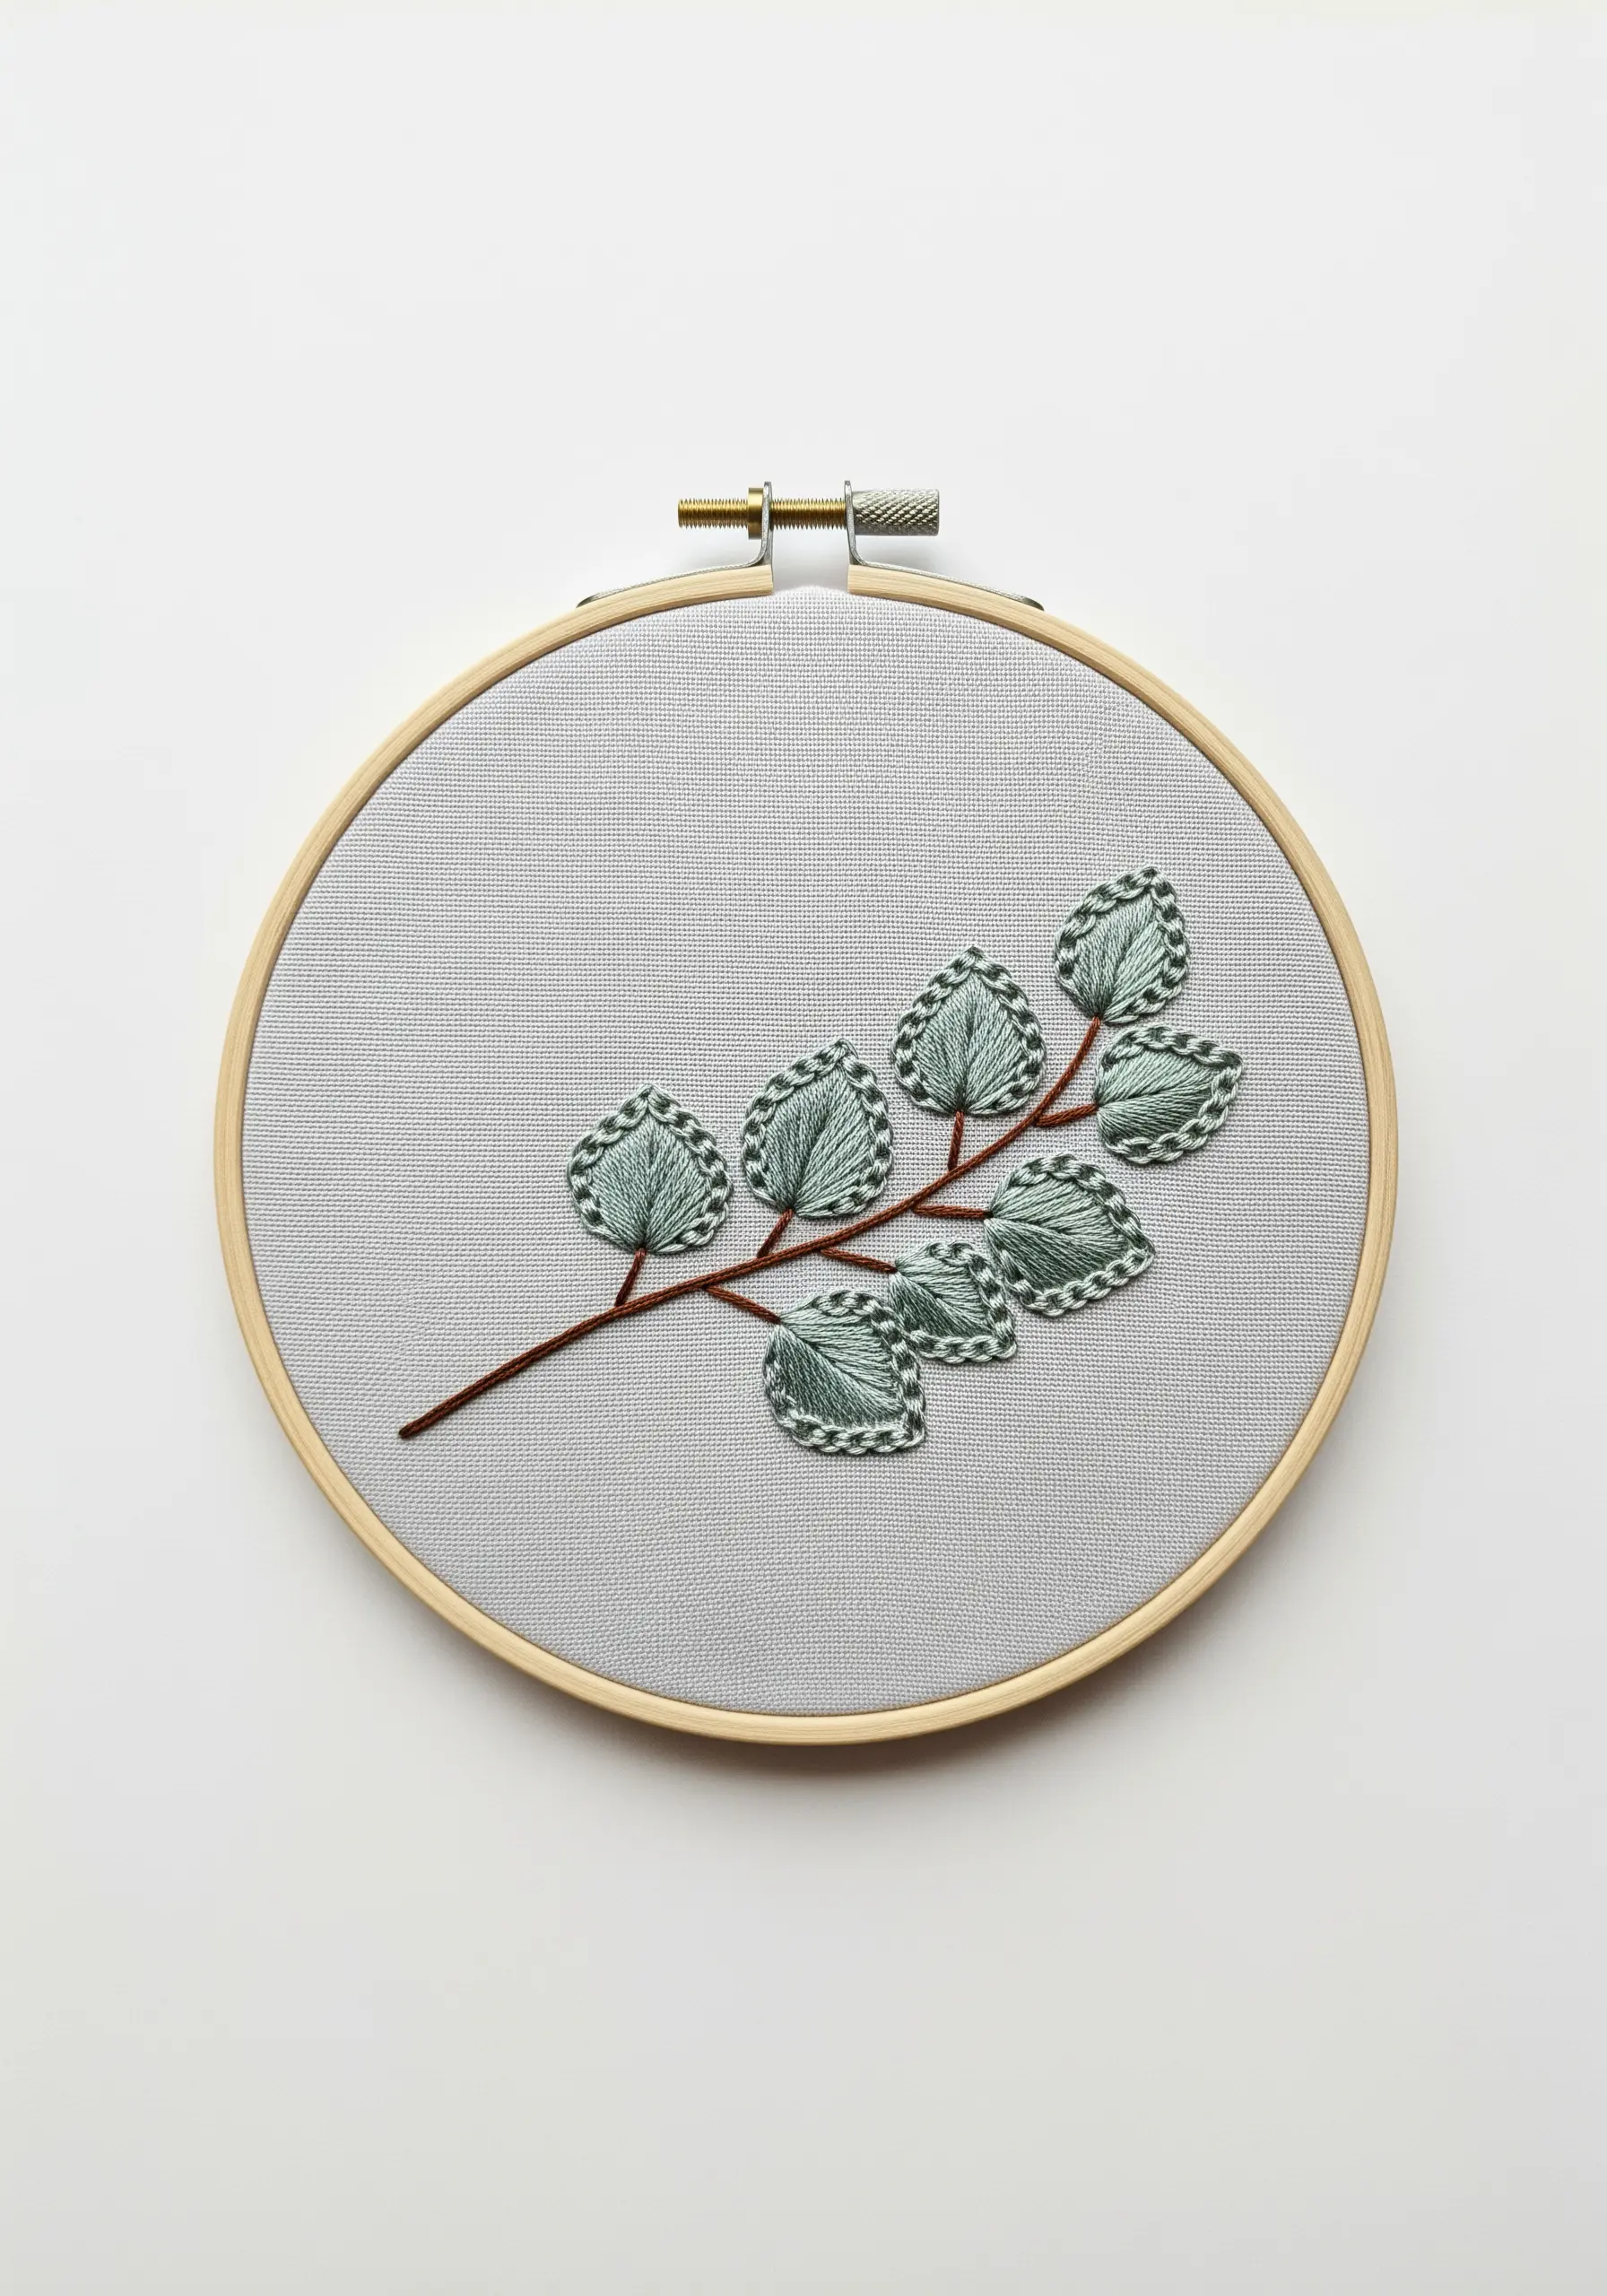
Transform a simple leaf or petal shape from basic to beautiful by adding a decorative border stitch.
First, fill the eucalyptus leaves with a simple satin stitch in a soft green. Then, outline each leaf with a contrasting blanket stitch or Palestrina knot stitch.
This second layer adds definition, texture, and a sense of polish that instantly elevates the entire design.
It’s a simple, two-step process that makes your work look far more detailed and intentional.
24. Achieve Radiance with Two Basic Stitches
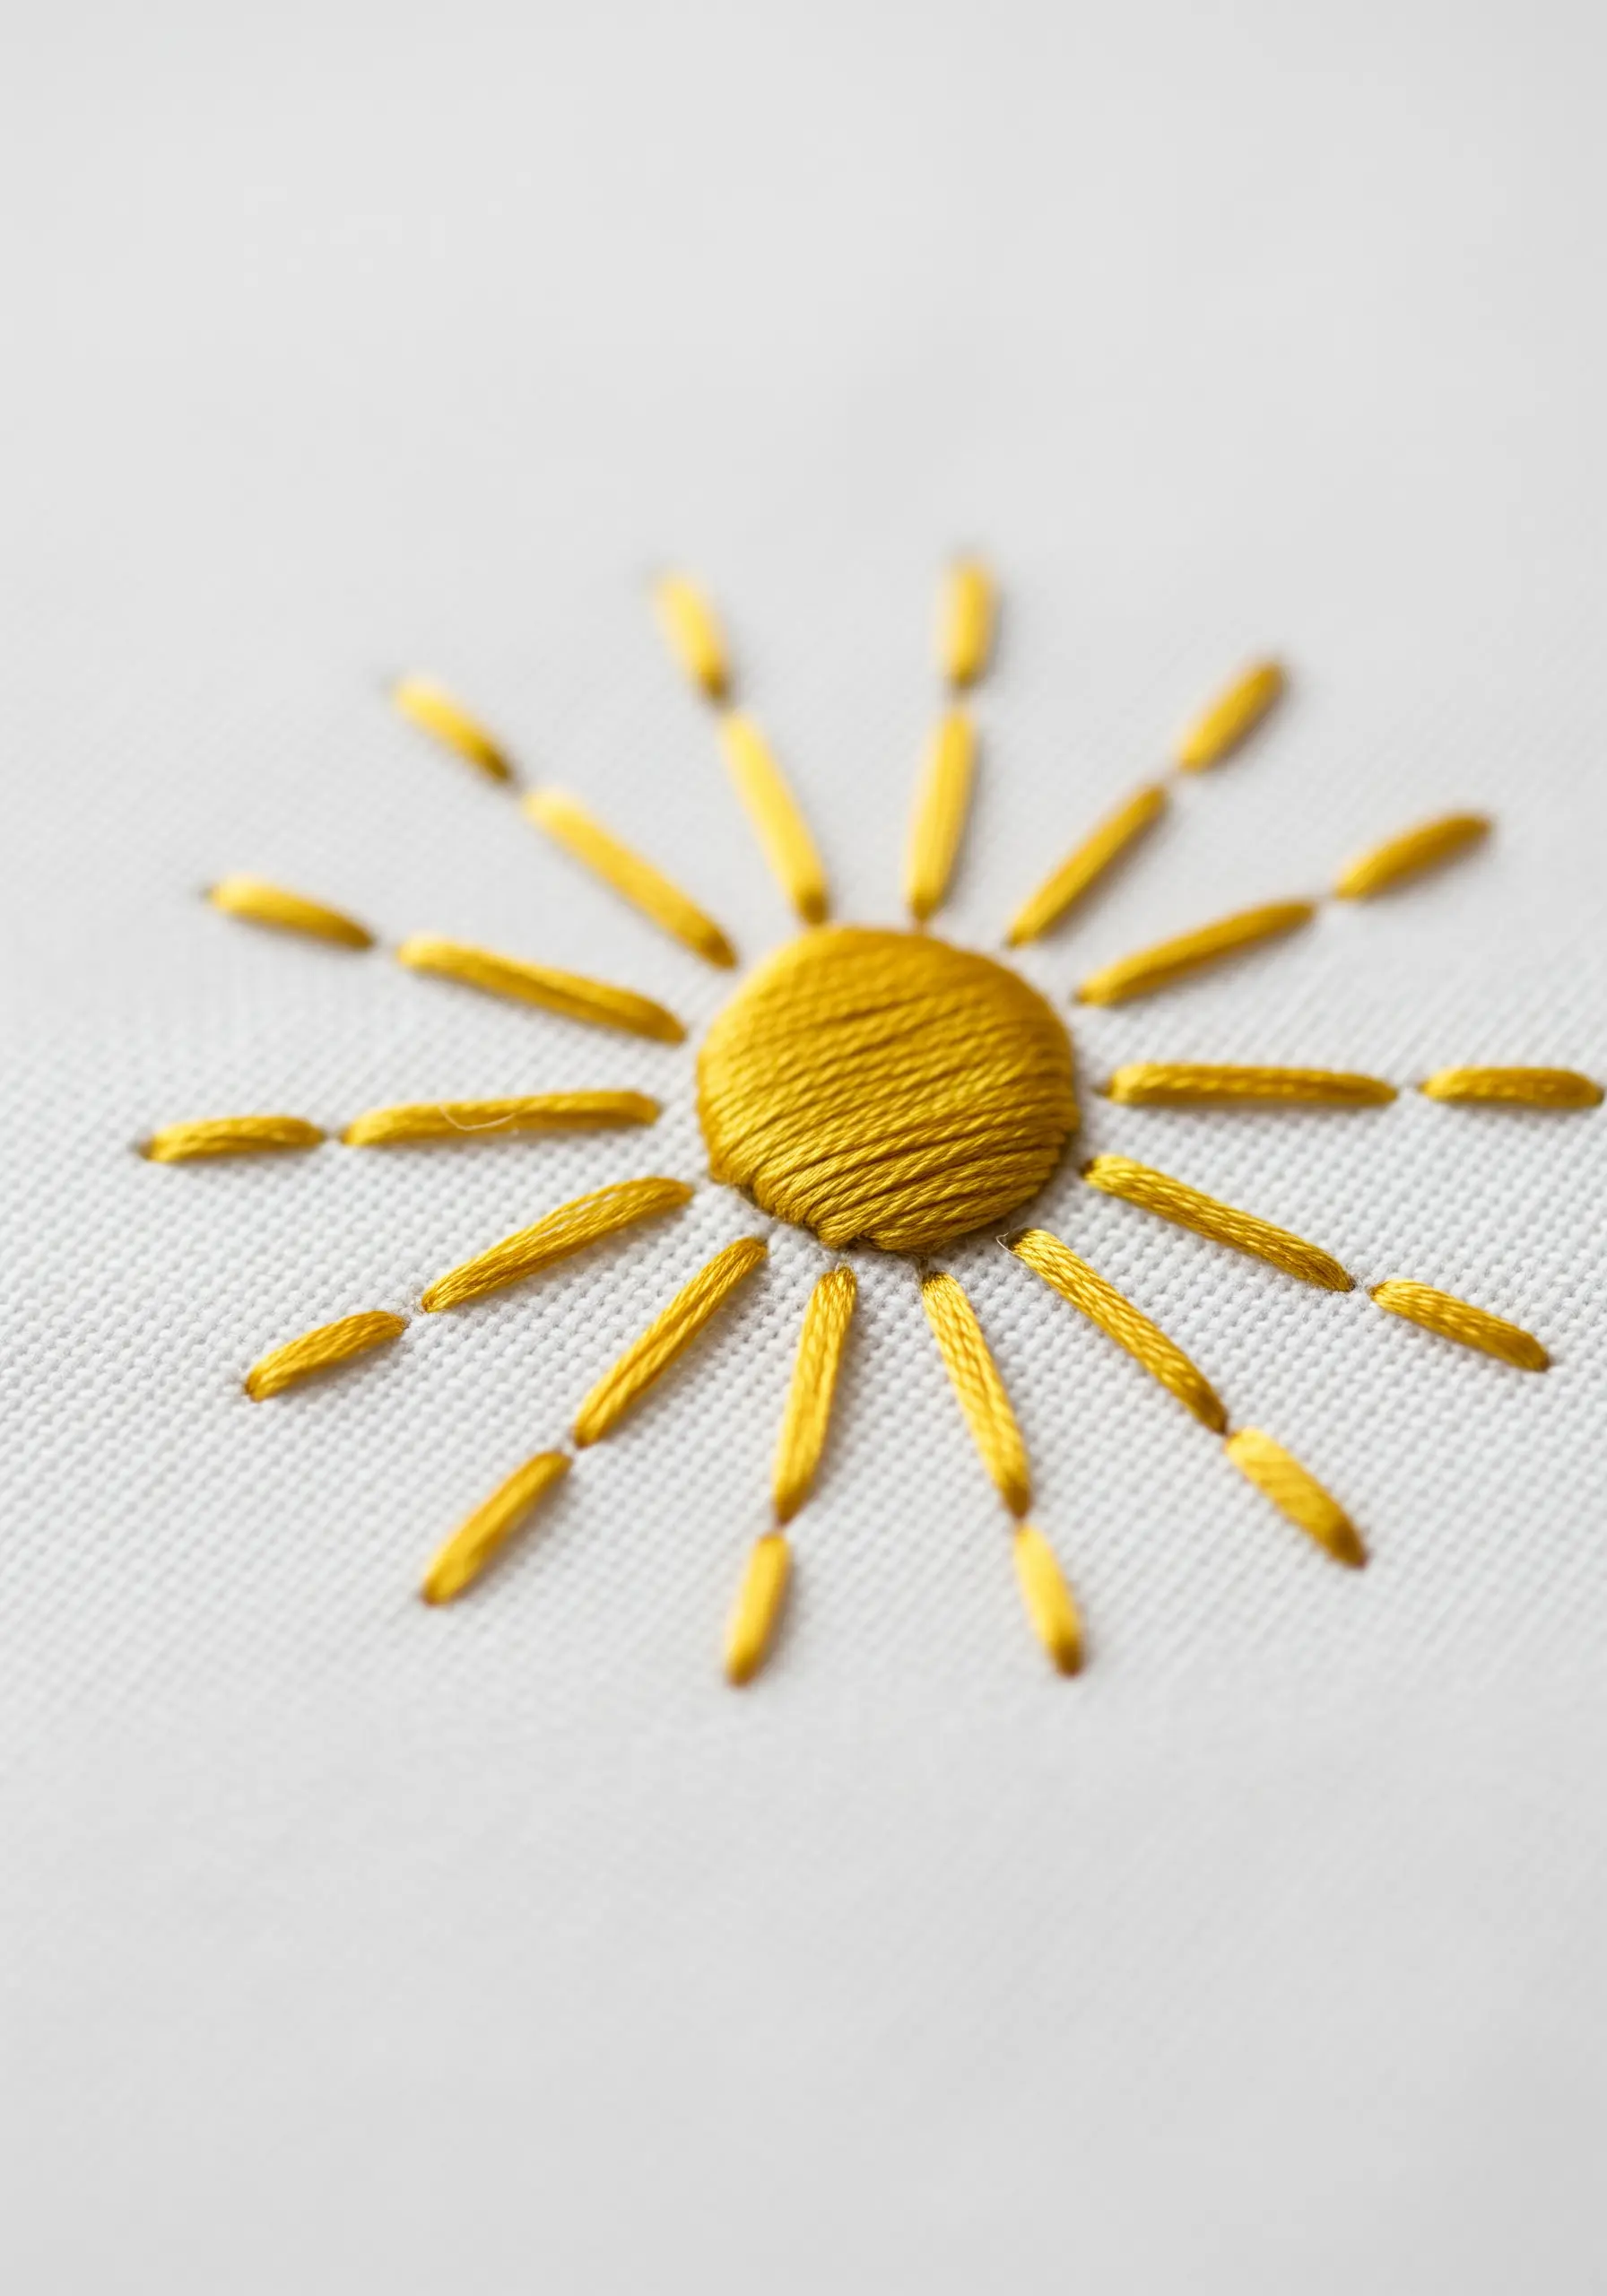
Create a perfect, glowing sun motif using only a satin stitch and straight stitch.
First, work a small circle in a smooth, dense satin stitch. For a perfect circle, stitch in one direction (e.g., horizontally) rather than in a spiral.
Next, add the rays by making straight stitches that radiate outwards. Create a more dynamic, shimmering effect by varying the length of the rays slightly, rather than making them all identical.
Using a silk or satin thread will enhance the glow and give your simple design a luxurious finish.
25. Layer Stitches to Build Botanical Forms
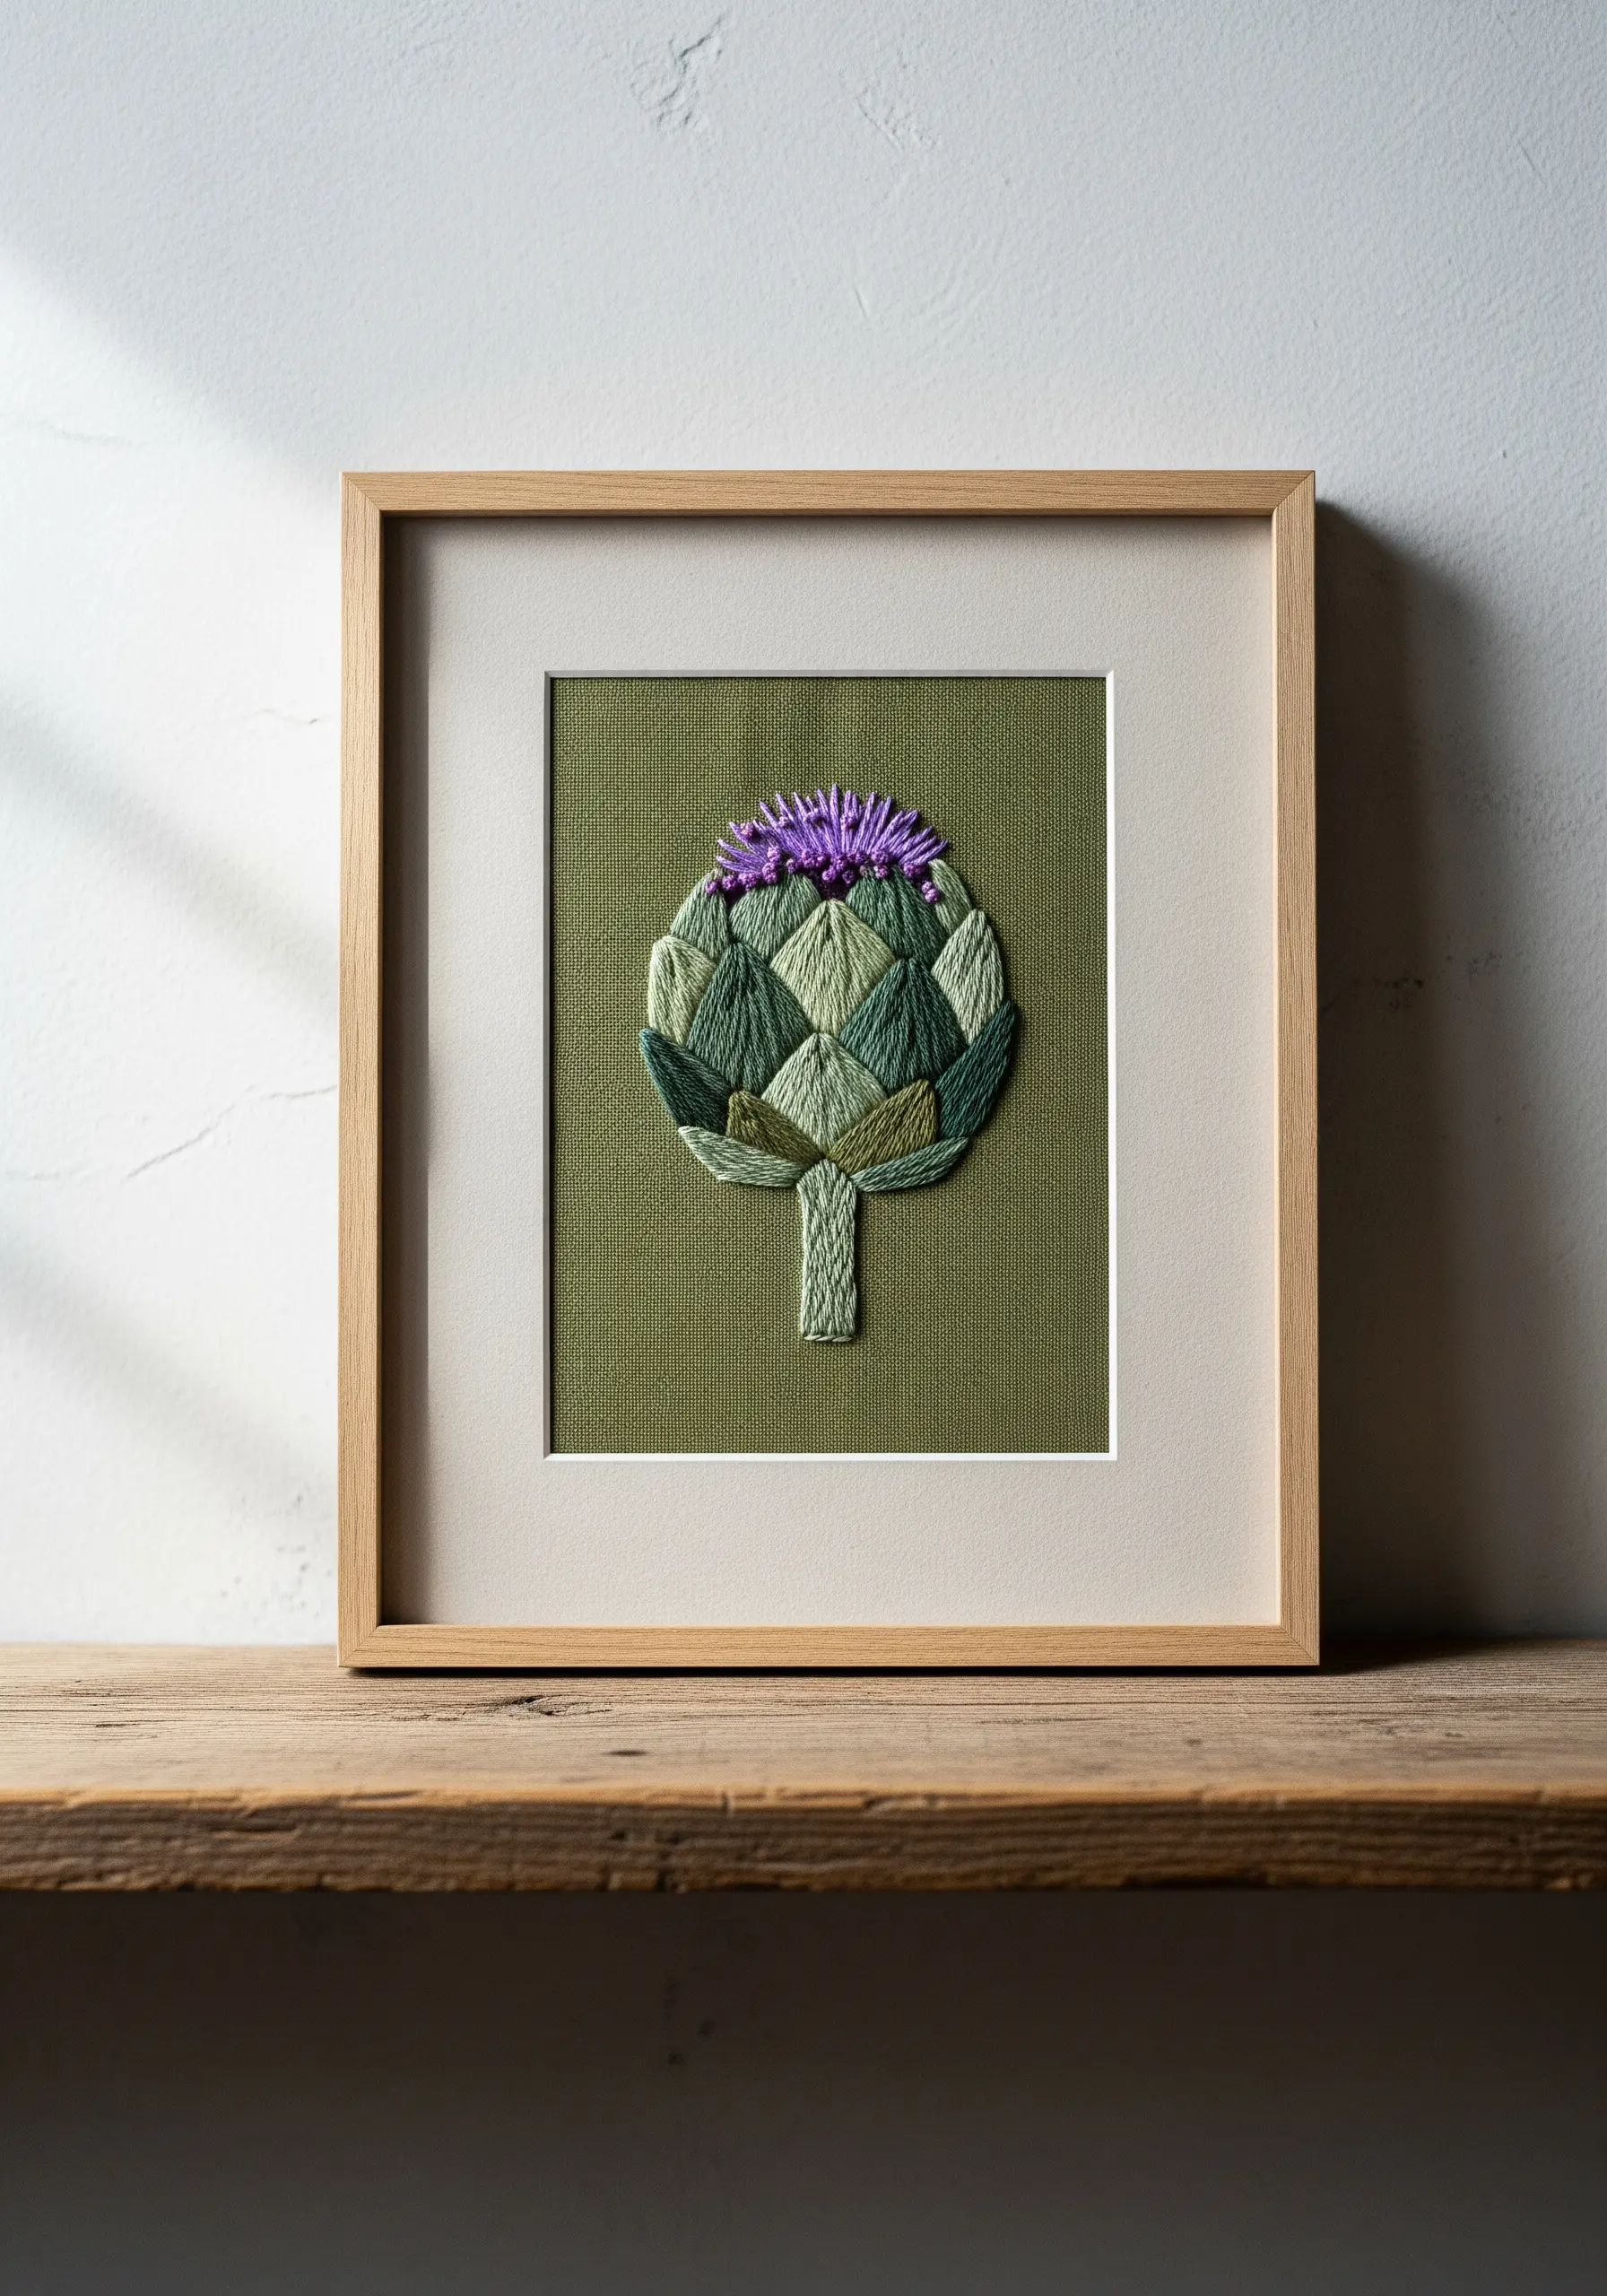
You can construct a complex botanical like an artichoke by layering simple stitches from the bottom up.
Use a fishbone stitch or an angled satin stitch for each individual leaf, working in rows that overlap the one below.
Vary the shades of green to create depth and realism. For the purple blossom at the top, a cluster of straight stitches or a bit of turkey work will create a fluffy, distinct texture.
This layered approach breaks a complicated subject down into simple, manageable steps, perfect for a hand-stitched framed piece.
26. Create Calm with a Rhythmic, Simple Pattern
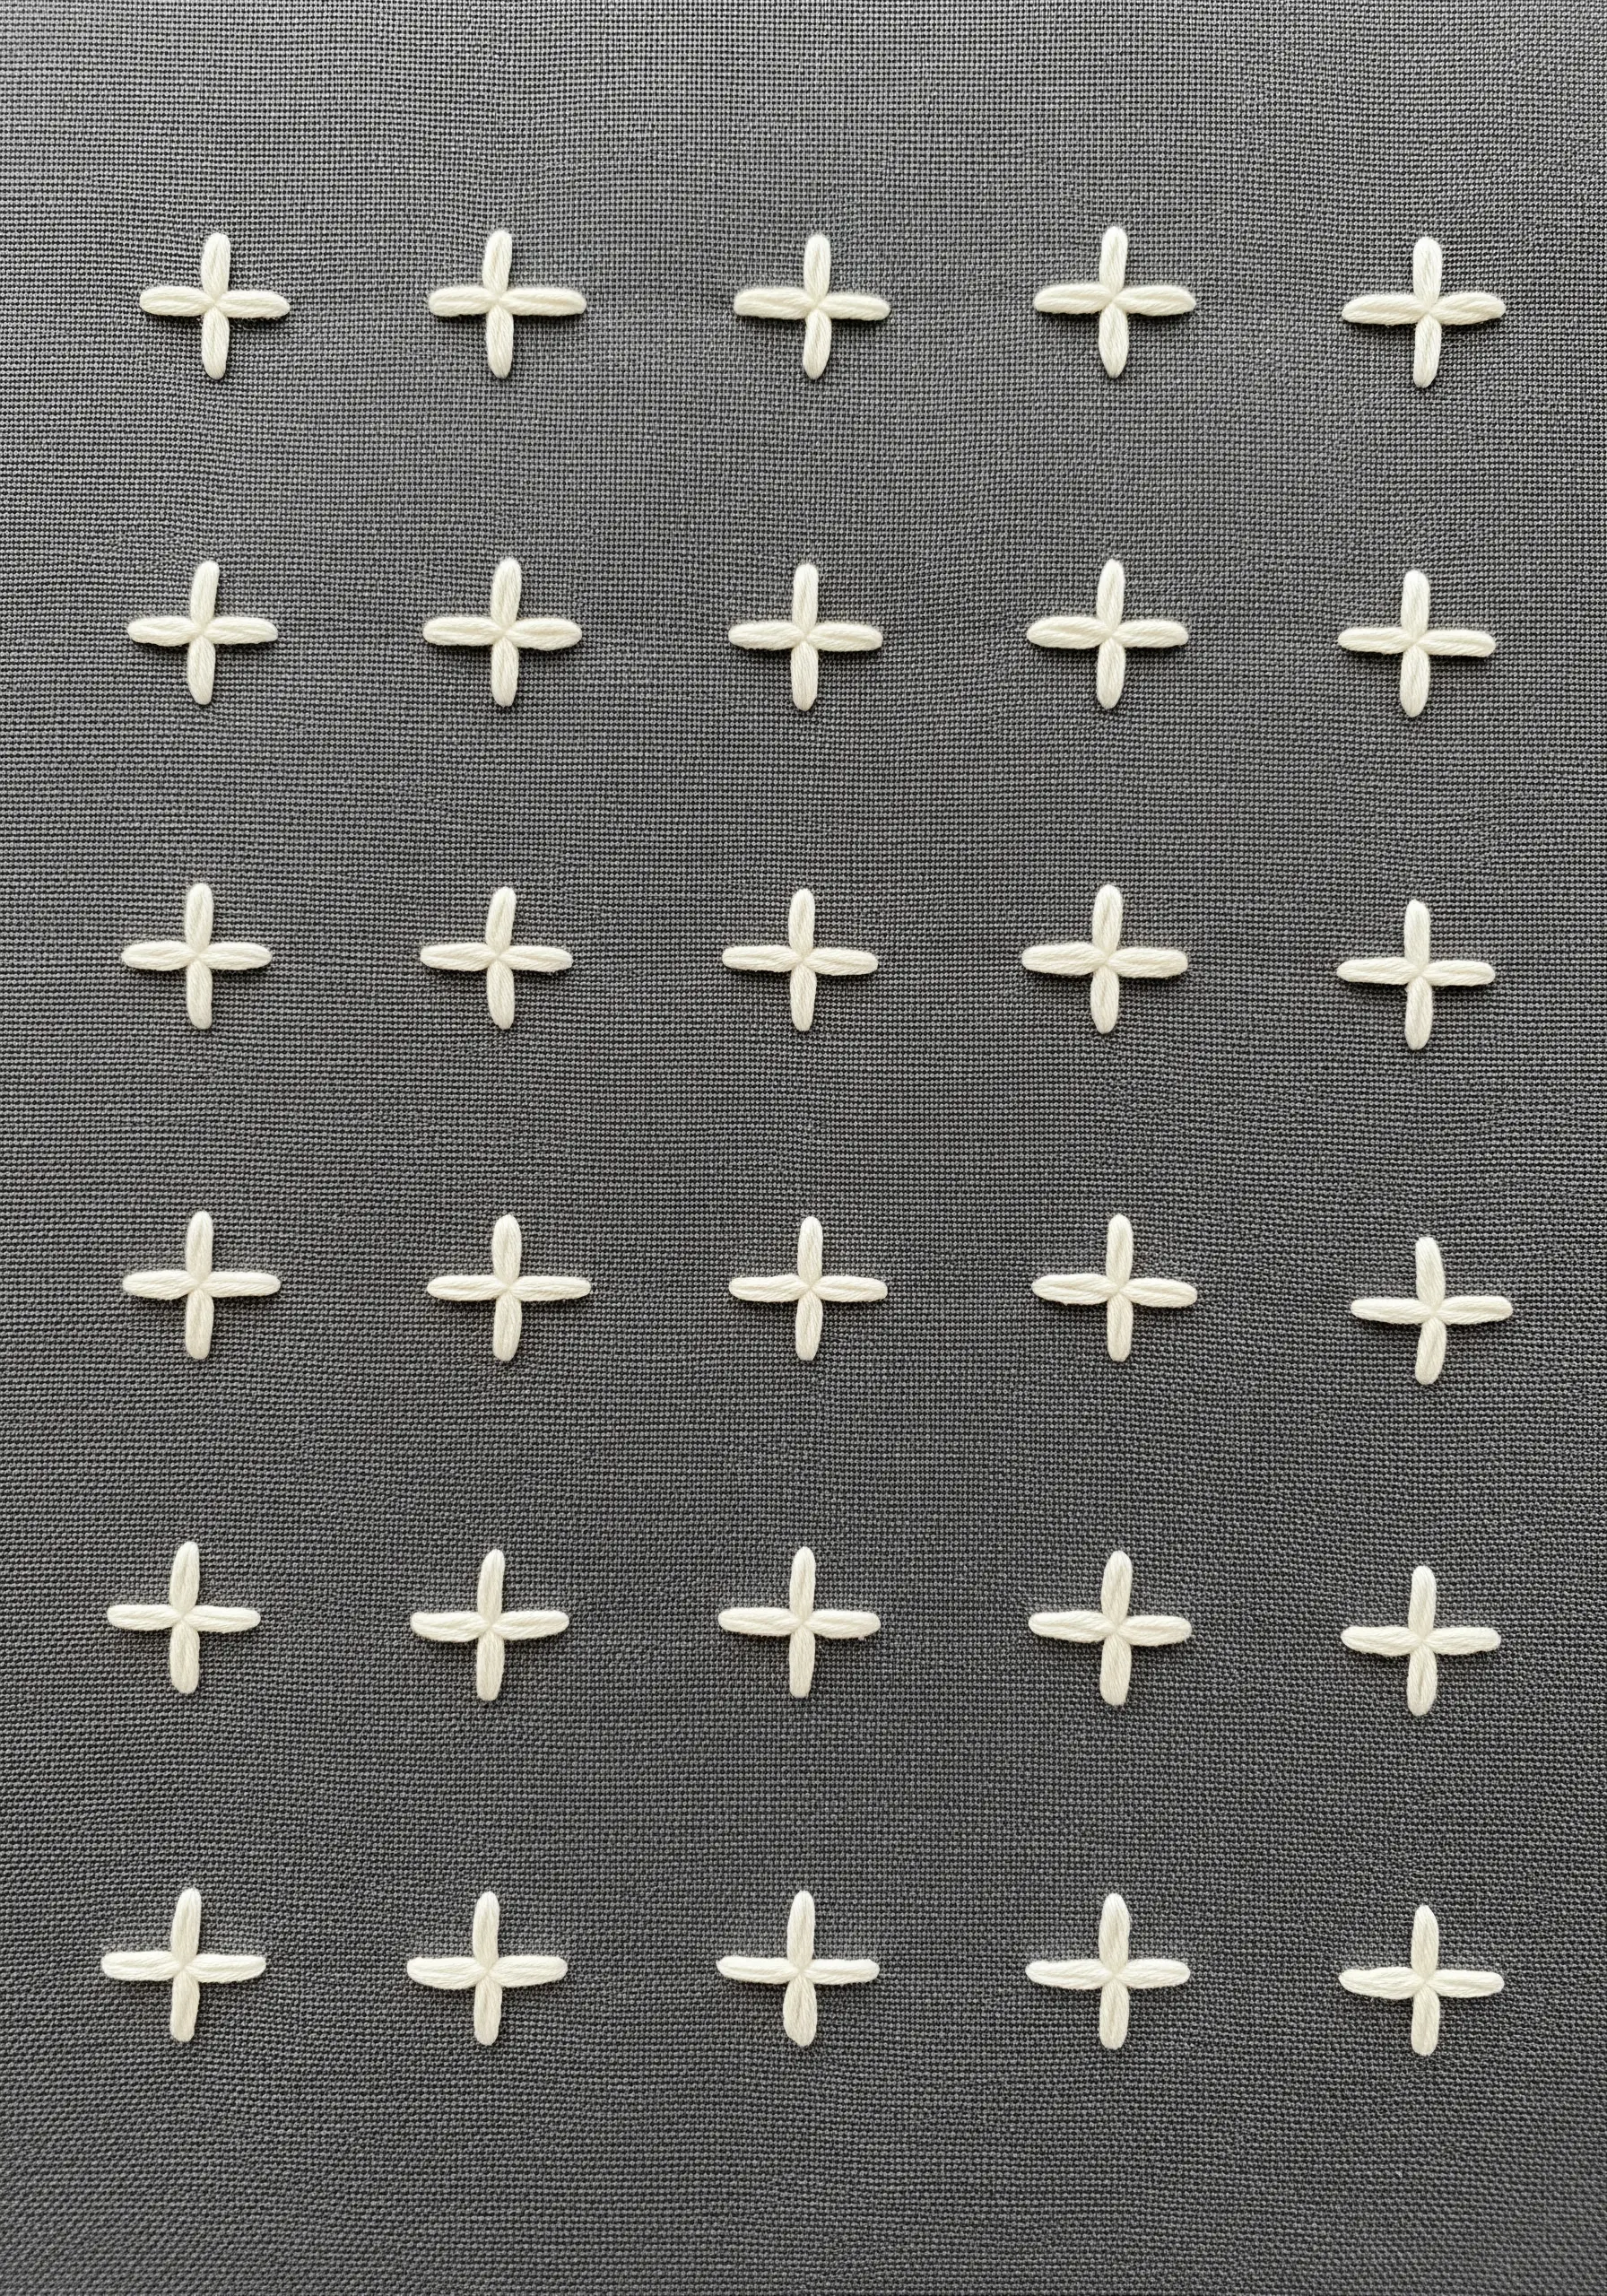
The most elegant designs are often the most simple. This pattern is nothing more than a grid of small plus signs.
The beauty comes from precision and repetition. Each plus sign is made of two small, perfectly centered straight stitches.
Use a ruler and a fabric marker to create a grid, ensuring your spacing is perfectly even. The rhythmic, meditative process of stitching a uniform pattern is incredibly calming.
This minimalist design is perfect for adding subtle texture to home decor items like pillows or wall hangings.


