

Perhaps you’ve mastered the basic stitches and followed a few patterns, yet you feel a gap between the craft you practice and the art you envision hanging on your wall.
The secret to bridging that gap isn’t about learning dozens of complex new stitches. It’s about learning to see thread, fabric, and space with an artist’s eye—focusing on texture, composition, and the powerful interplay between different materials.
These designs are more than just inspiration; they are invitations to experiment. They will show you how to manipulate scale, embrace negative space, and combine fibers in ways that feel both intentional and deeply personal. Let’s move beyond the pattern and transform your thread into expressive, abstract art.
1. Pair Sculptural Roving with Delicate Line Work

Create dramatic textural contrast by combining chunky wool roving with fine, radiating straight stitches.
First, couch the thick roving onto a sturdy backing fabric like linen or canvas, shaping it into an organic, cloud-like form.
Then, use a single-strand floss in analogous colors—like ochre, gold, and rust—to stitch long, straight lines emanating from a central point beneath your roving.
This juxtaposition of scale and texture—the soft, bulky wool against the sharp, delicate thread—creates a powerful sense of depth and energy.
2. Curate a Cohesive Textured Triptych
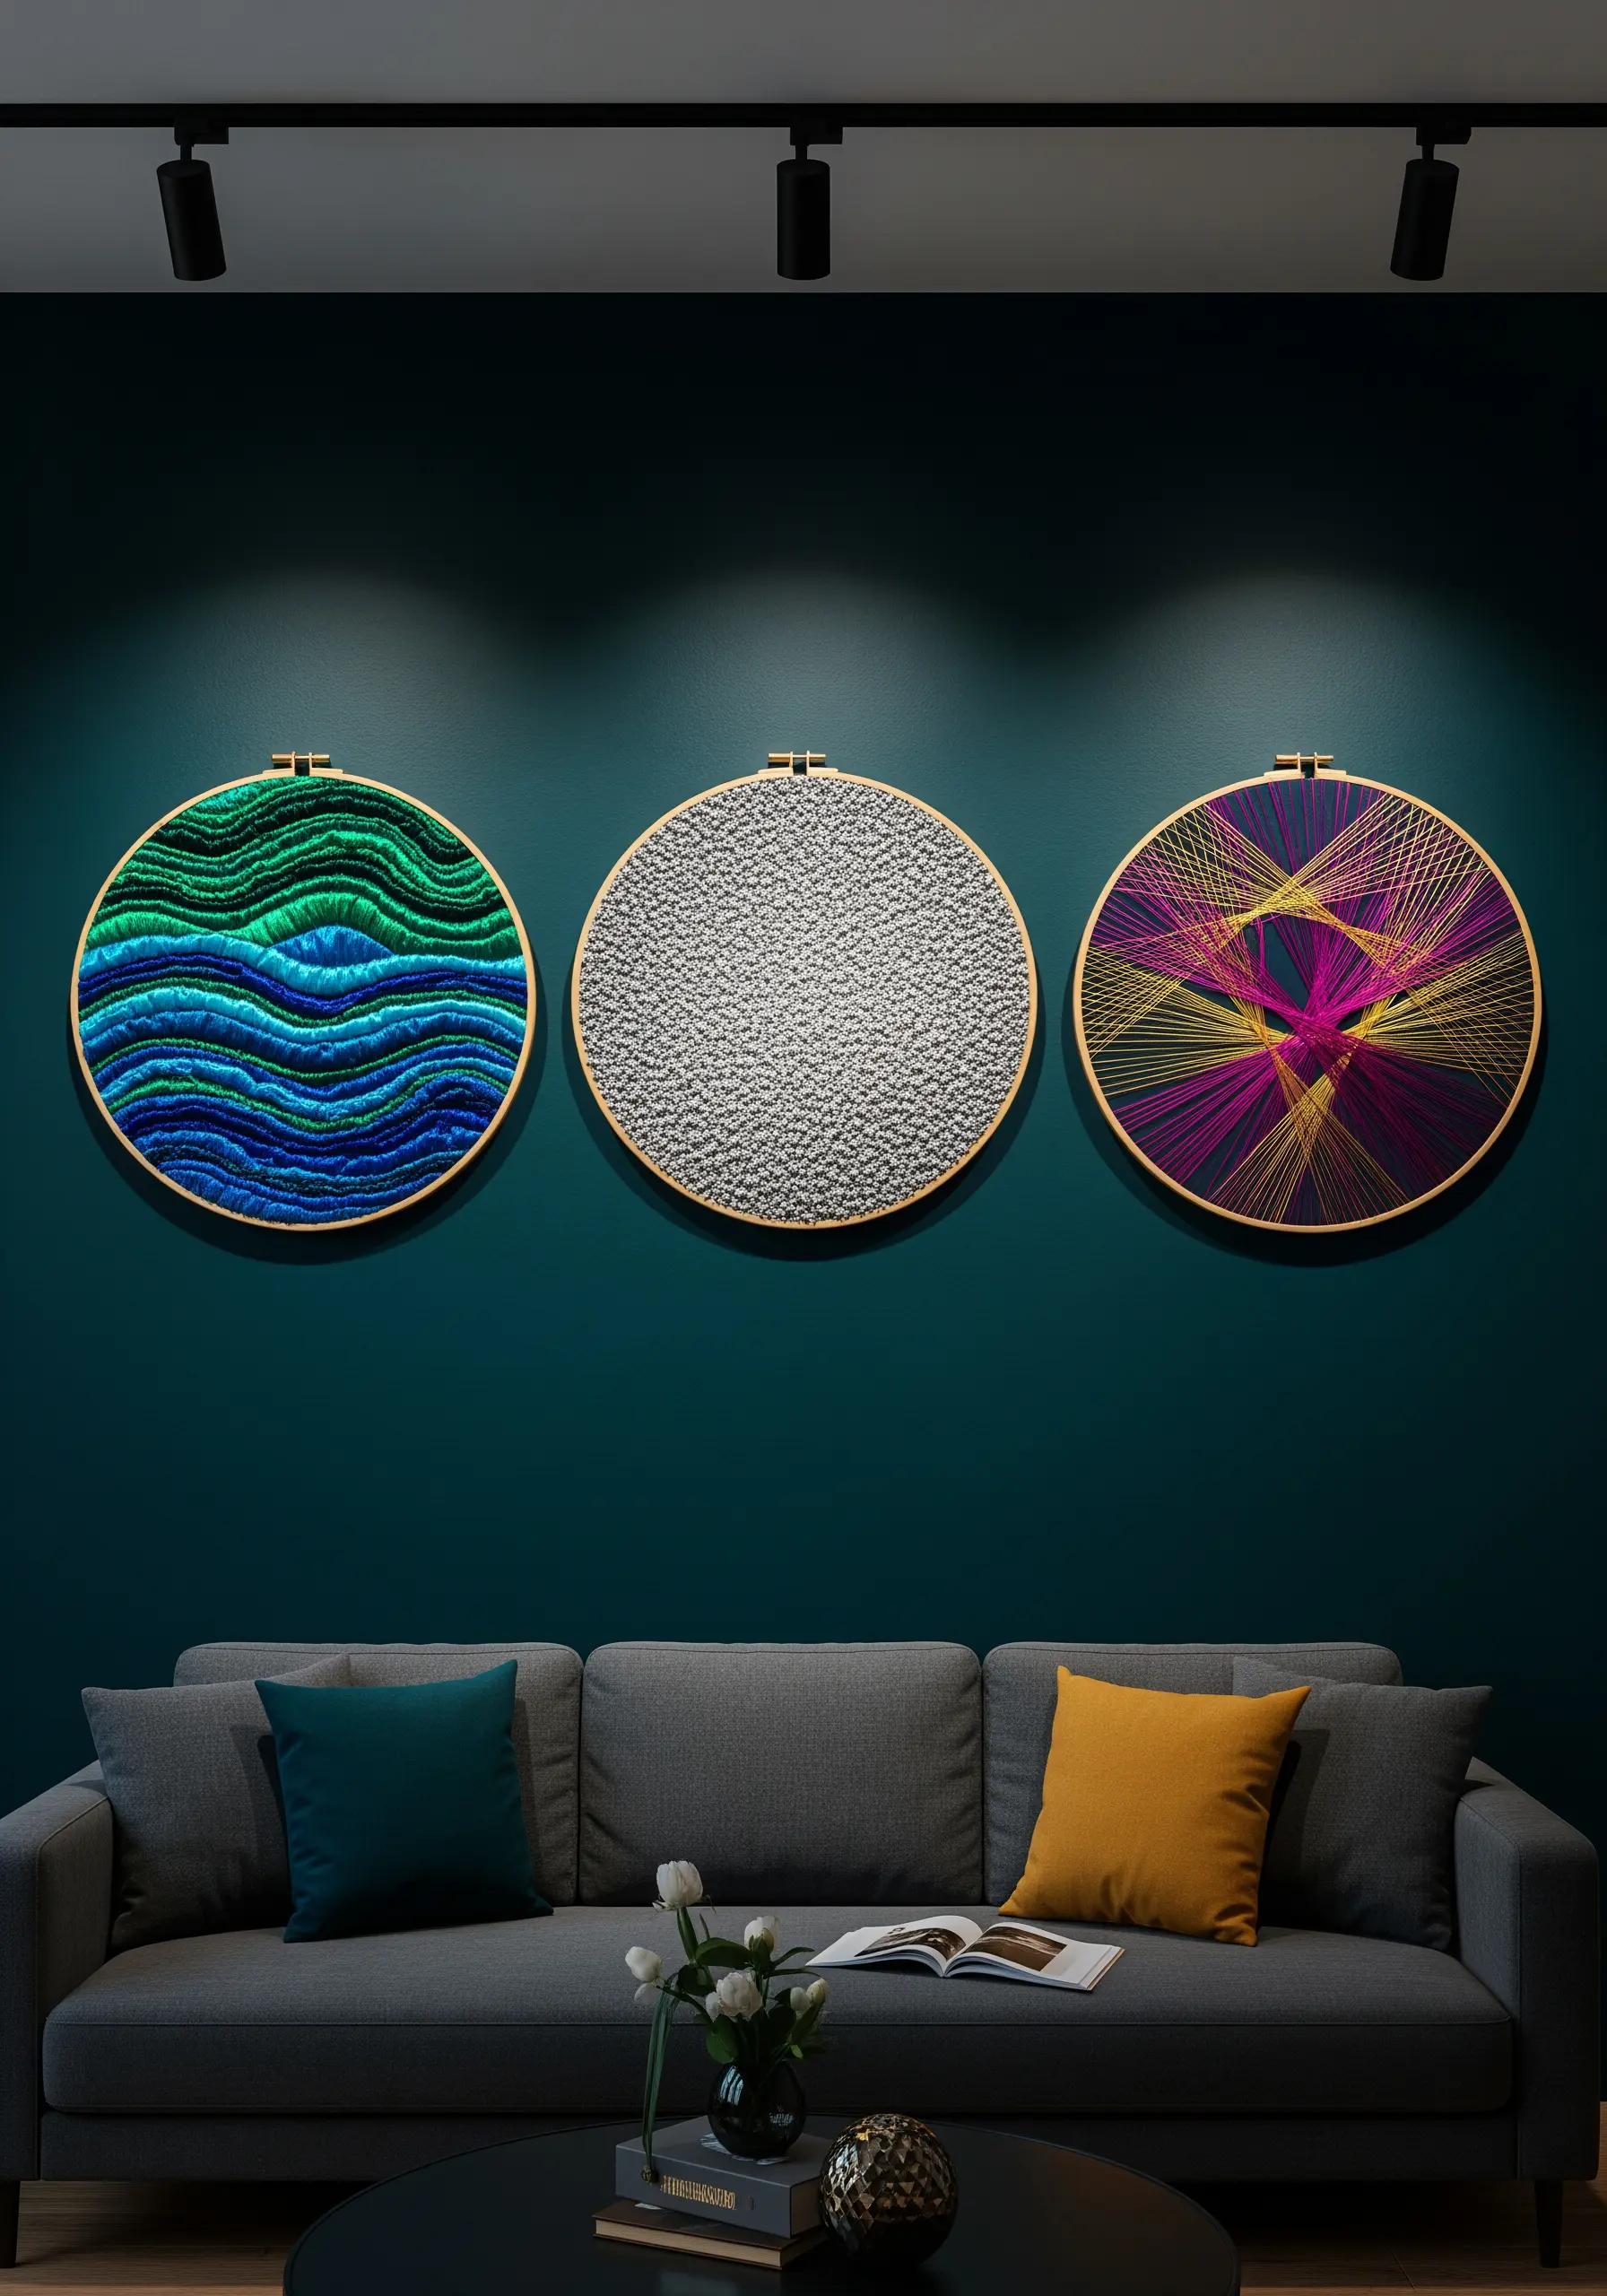
Elevate your hoop art by designing a series of three pieces that explore a single theme through varied textures.
Choose a unifying element, such as a consistent color palette or hoop size, to ensure the collection feels intentional.
Dedicate each hoop to a different textural stitch: fill one with dense French knots, another with contoured rows of chain stitch to mimic waves, and the third with geometric thread wrapping for sharp, linear contrast.
Displaying them together transforms individual pieces into a compelling gallery-style decor statement.
3. Build Organic Landscapes with Layered Felt and Roving
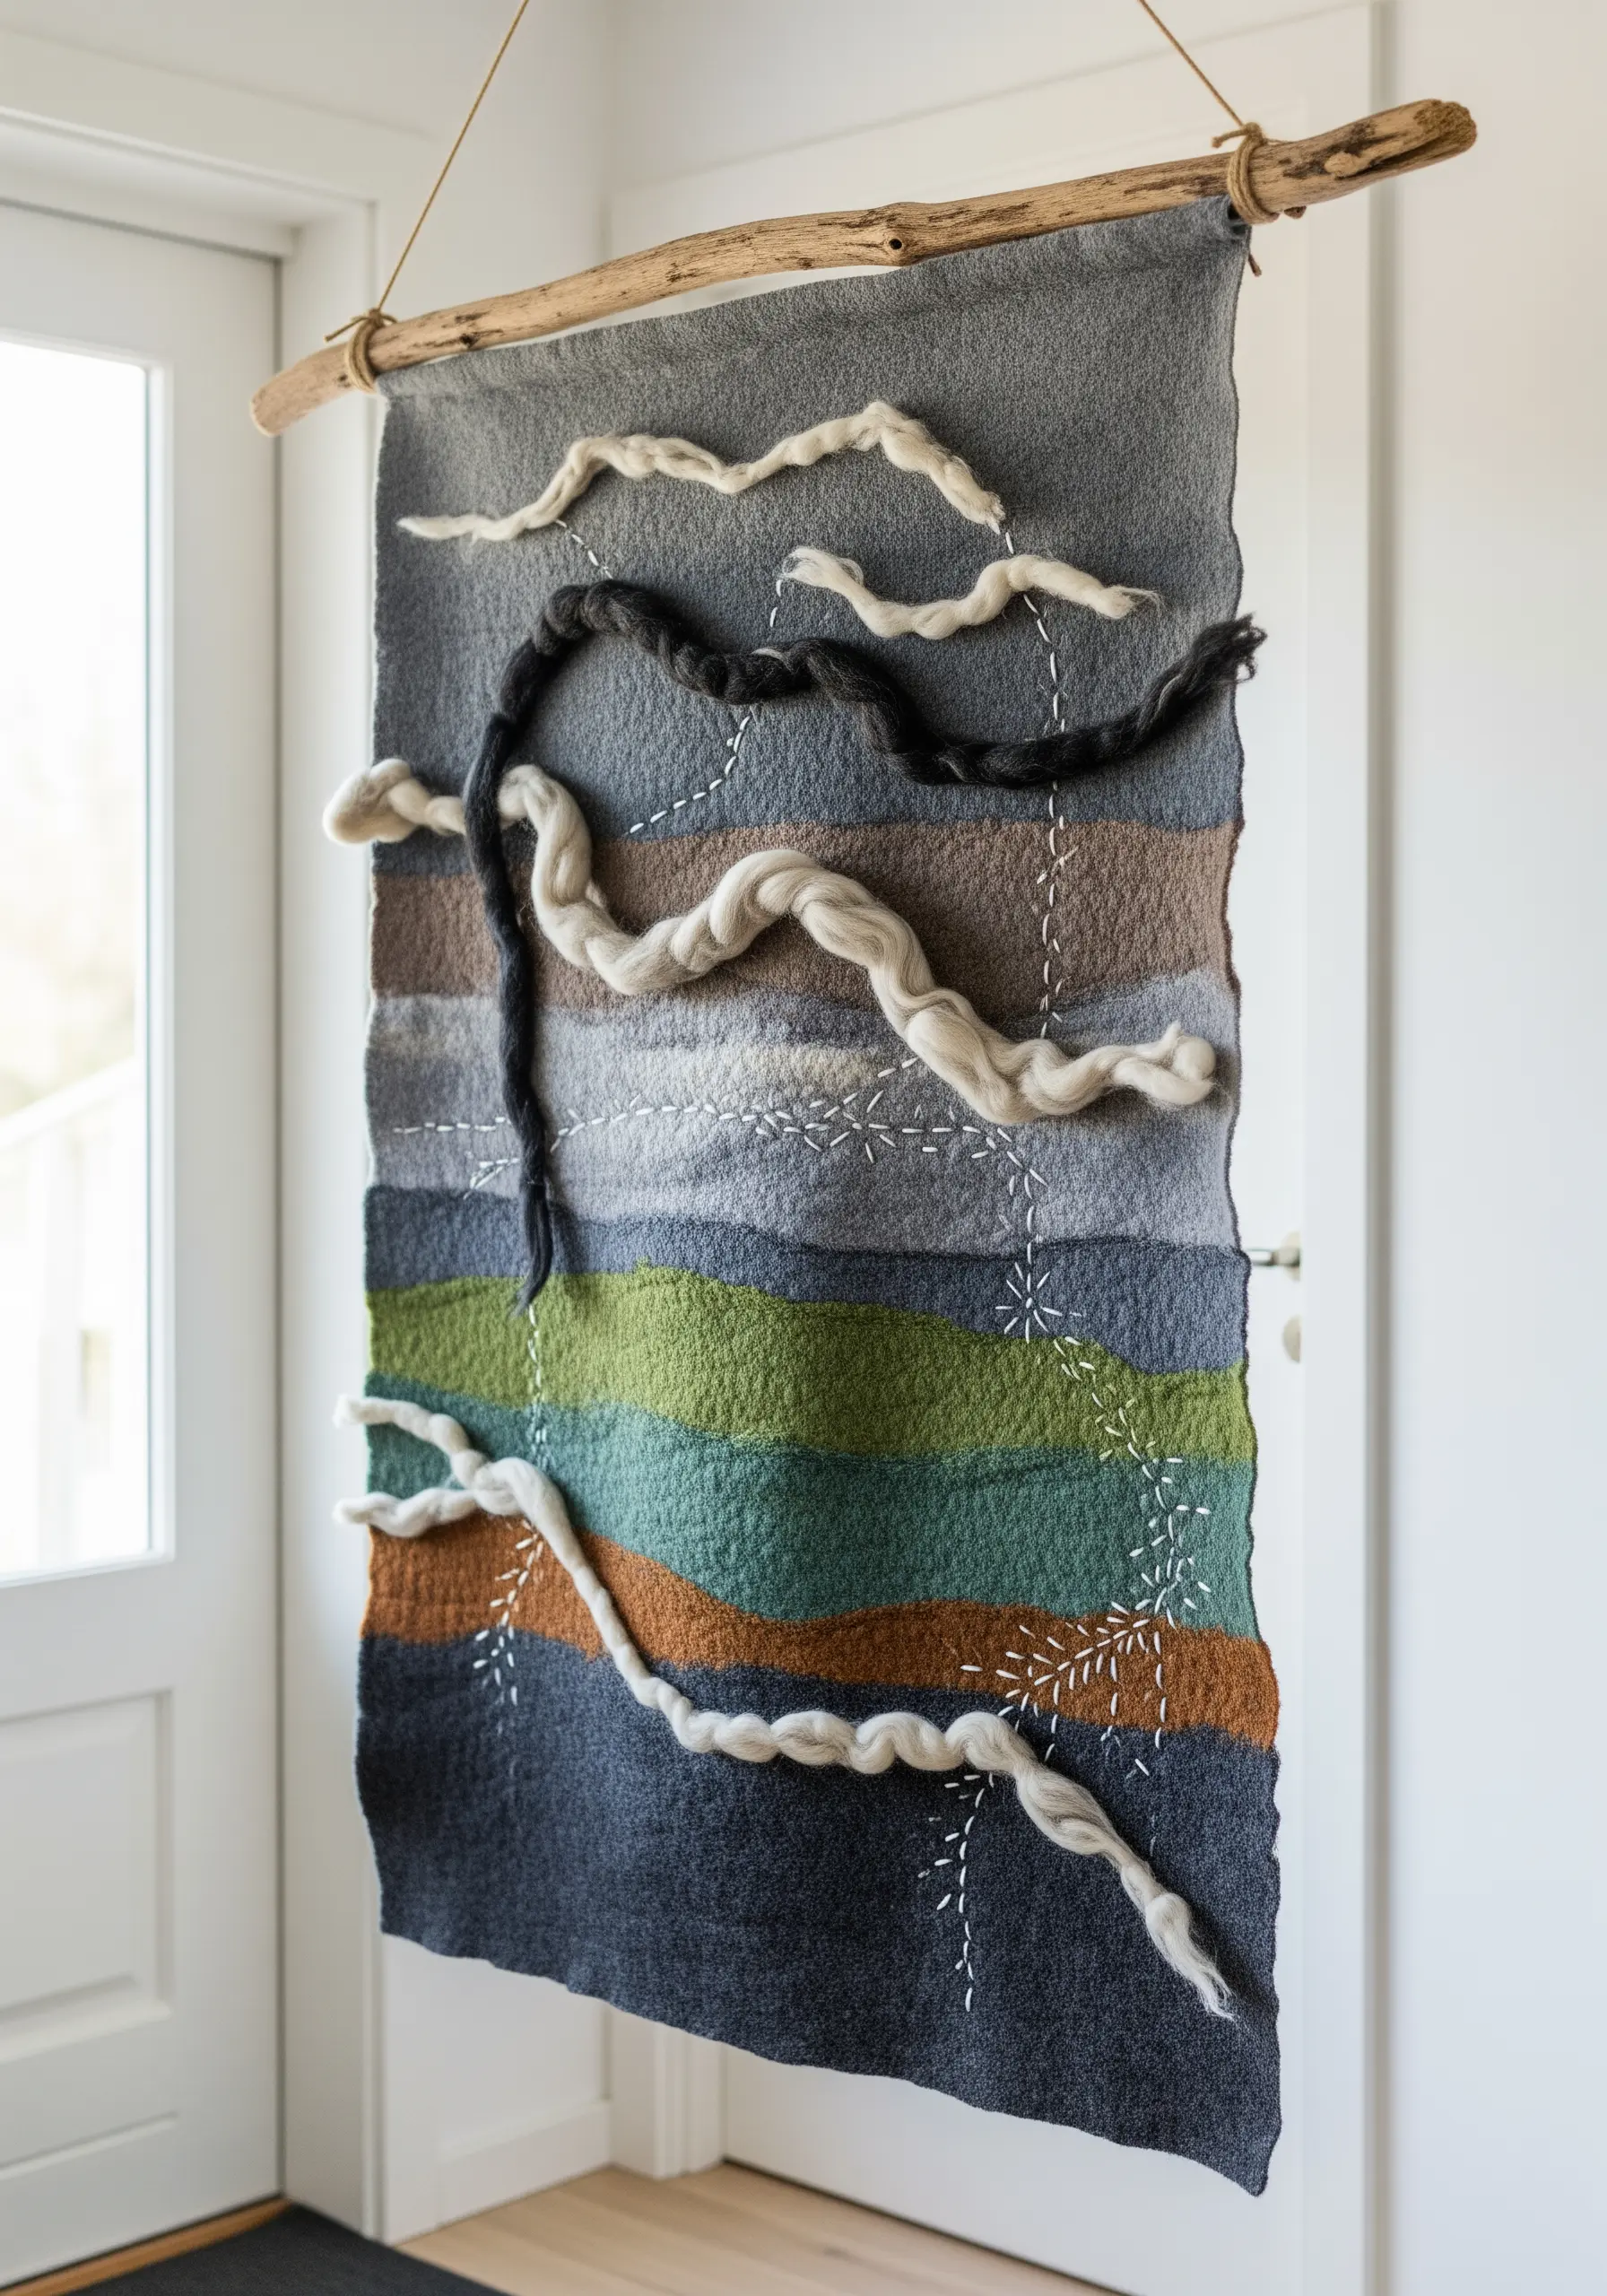
Move beyond flat surfaces by building up your composition with layers of felted wool and unspun roving.
Start by appliquéing large, organically shaped pieces of felt in an earth-toned palette onto a darker wool or felt background to create abstract strata.
Then, couch or needle-felt thick, twisted strands of roving on top to suggest movement, like flowing water or wind-swept hills.
Finish with sparse, scattered seed stitches in a contrasting white thread to add a delicate, star-like detail that balances the heavier textures.
4. Stitch on Three-Dimensional Forms to Create Textile Sculptures

Transform your embroidery from a two-dimensional art into a sculptural object by stitching over a structured, geometric form.
Create a base shape using sturdy materials like buckram, foam, or even recycled cardboard, then cover it tightly with fabric.
Use a simple, repetitive grid stitch in a contrasting color to accentuate the planes and angles of your form.
This technique forces you to consider how thread interacts with light and shadow, turning a simple stitch pattern into a sophisticated architectural piece.
5. Mimic Woven Textures with Punch Needle Color Blocking
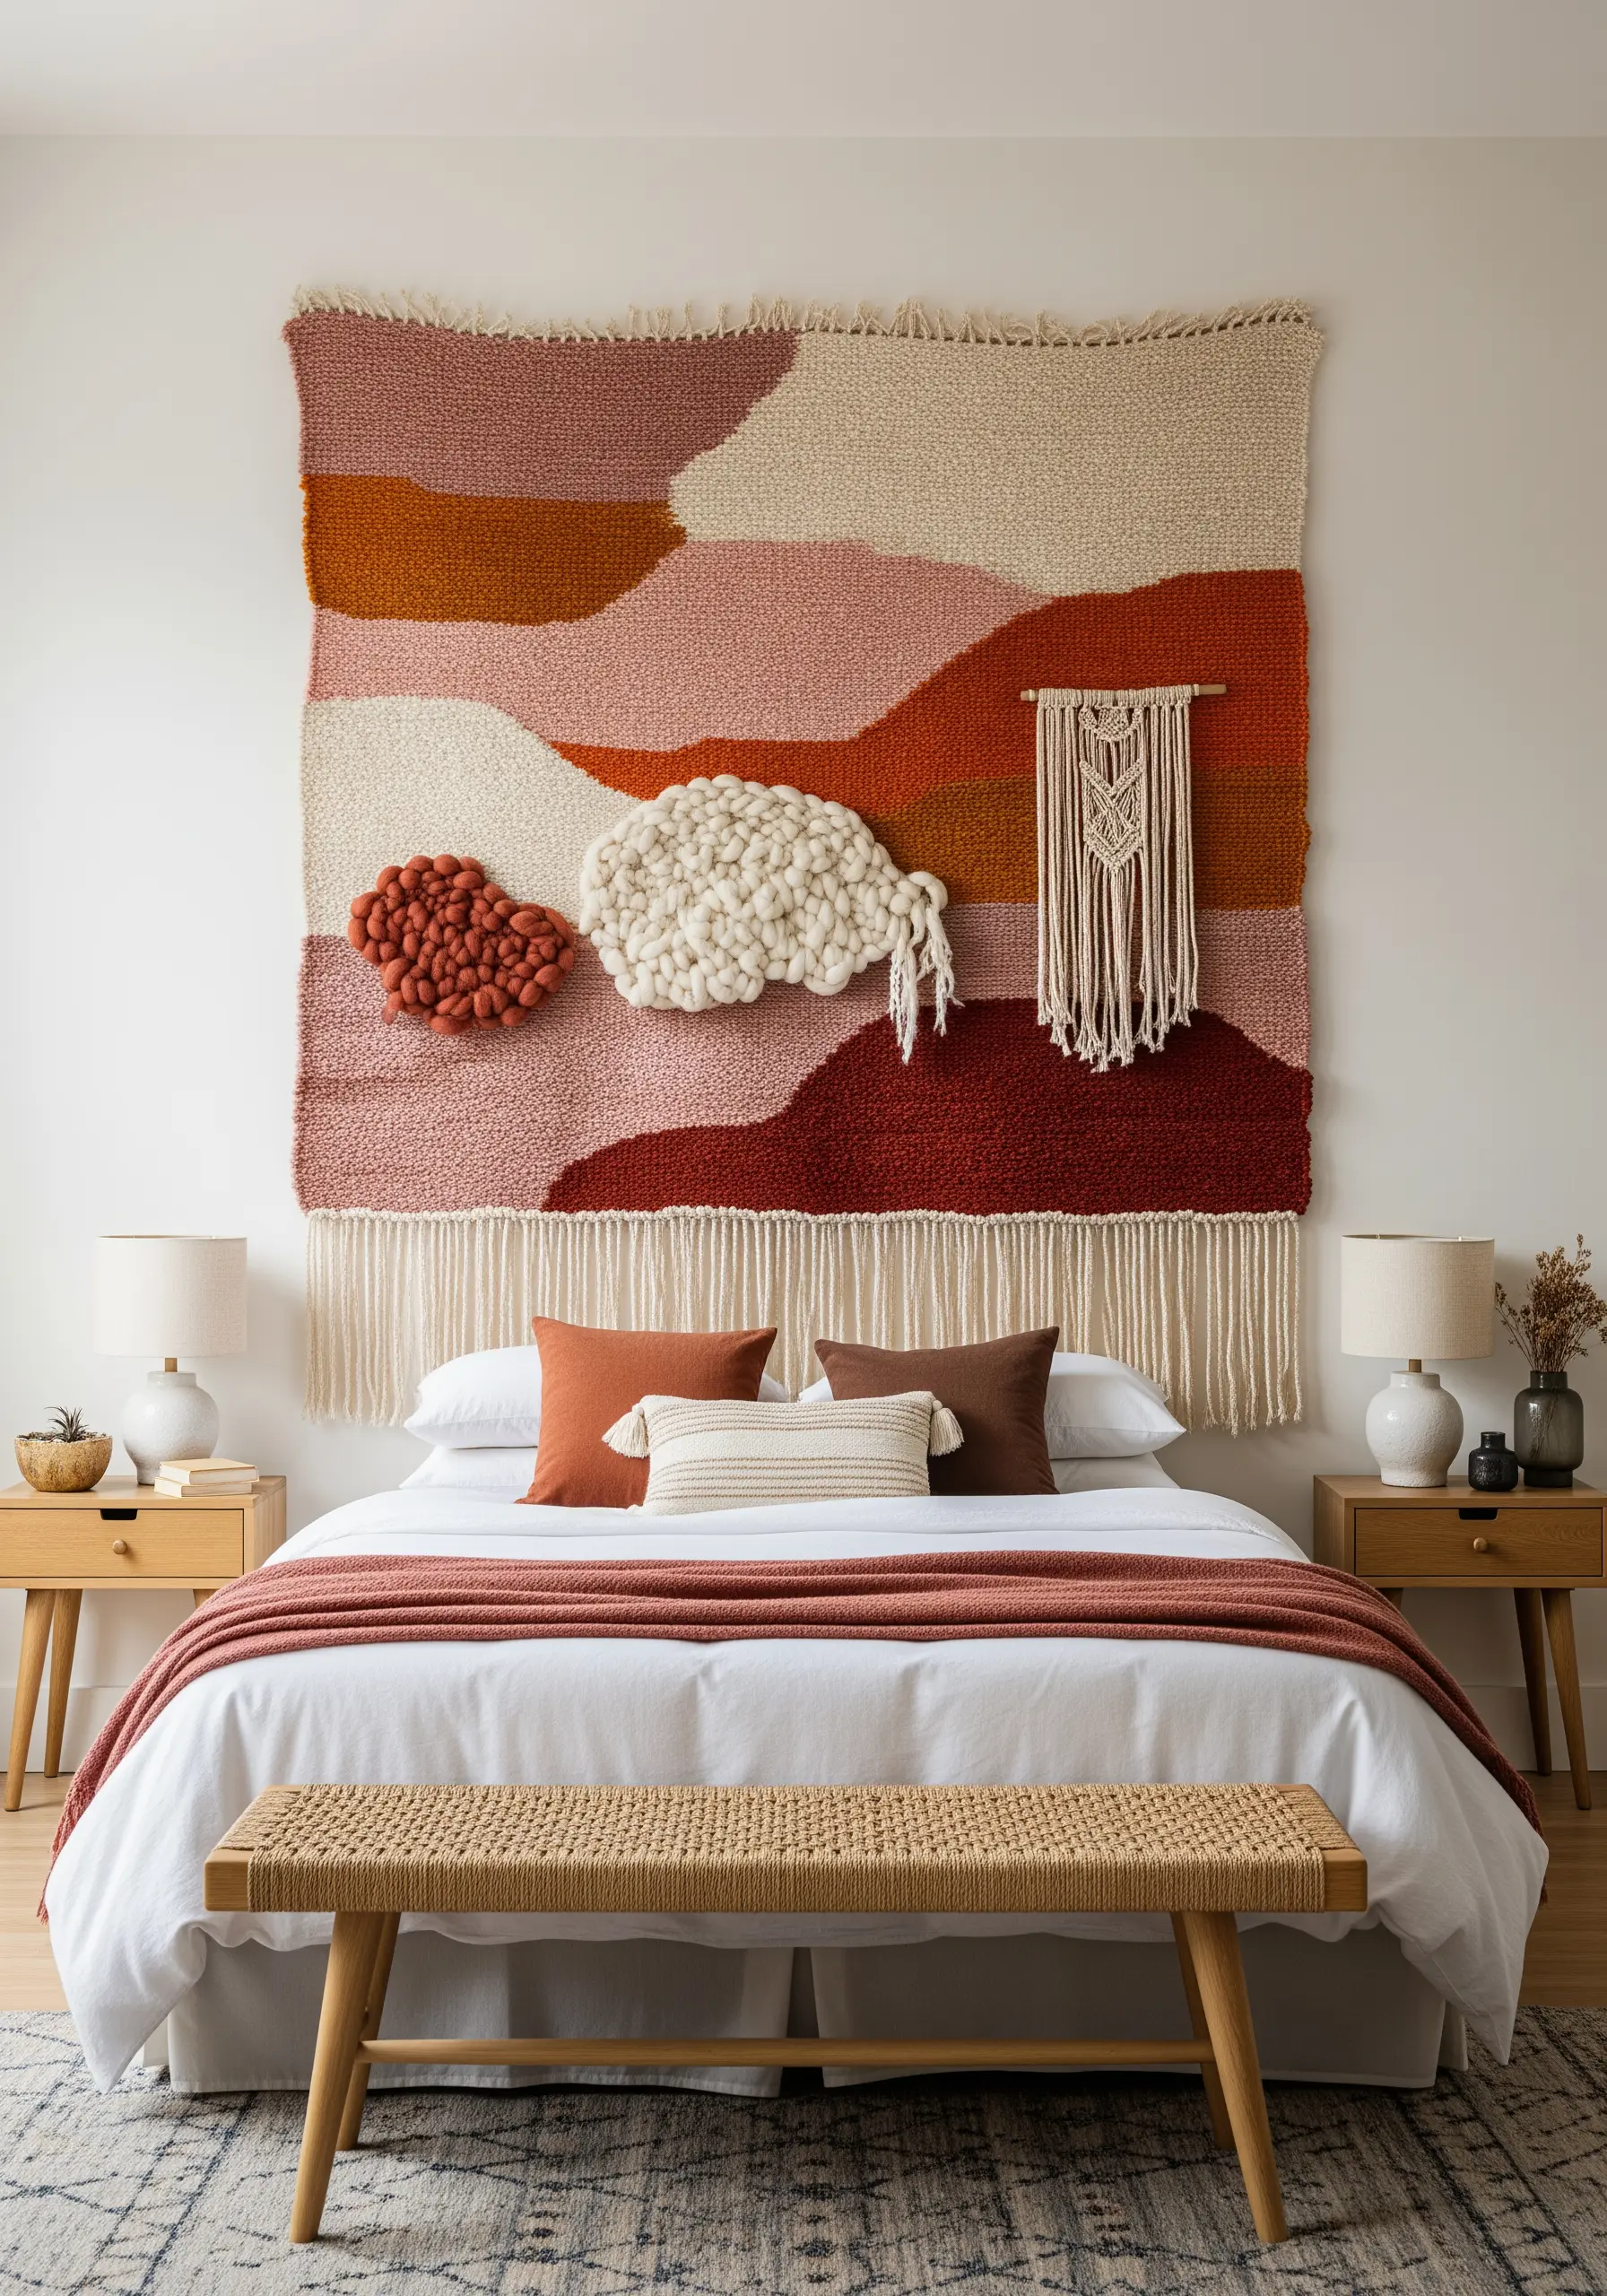
Achieve the rich, textural look of a large-scale weaving without a loom by using punch needle techniques.
Sketch out large, abstract color-blocked shapes inspired by landscapes or geological forms onto monk’s cloth.
Use thick yarn in a warm, cohesive palette to fill each section with dense loops, creating a plush, rug-like surface.
You can further enhance the texture by incorporating tufted or couched elements, adding another layer of dimension to your yarn wall art.
6. Use Negative Space to Animate a Single Line
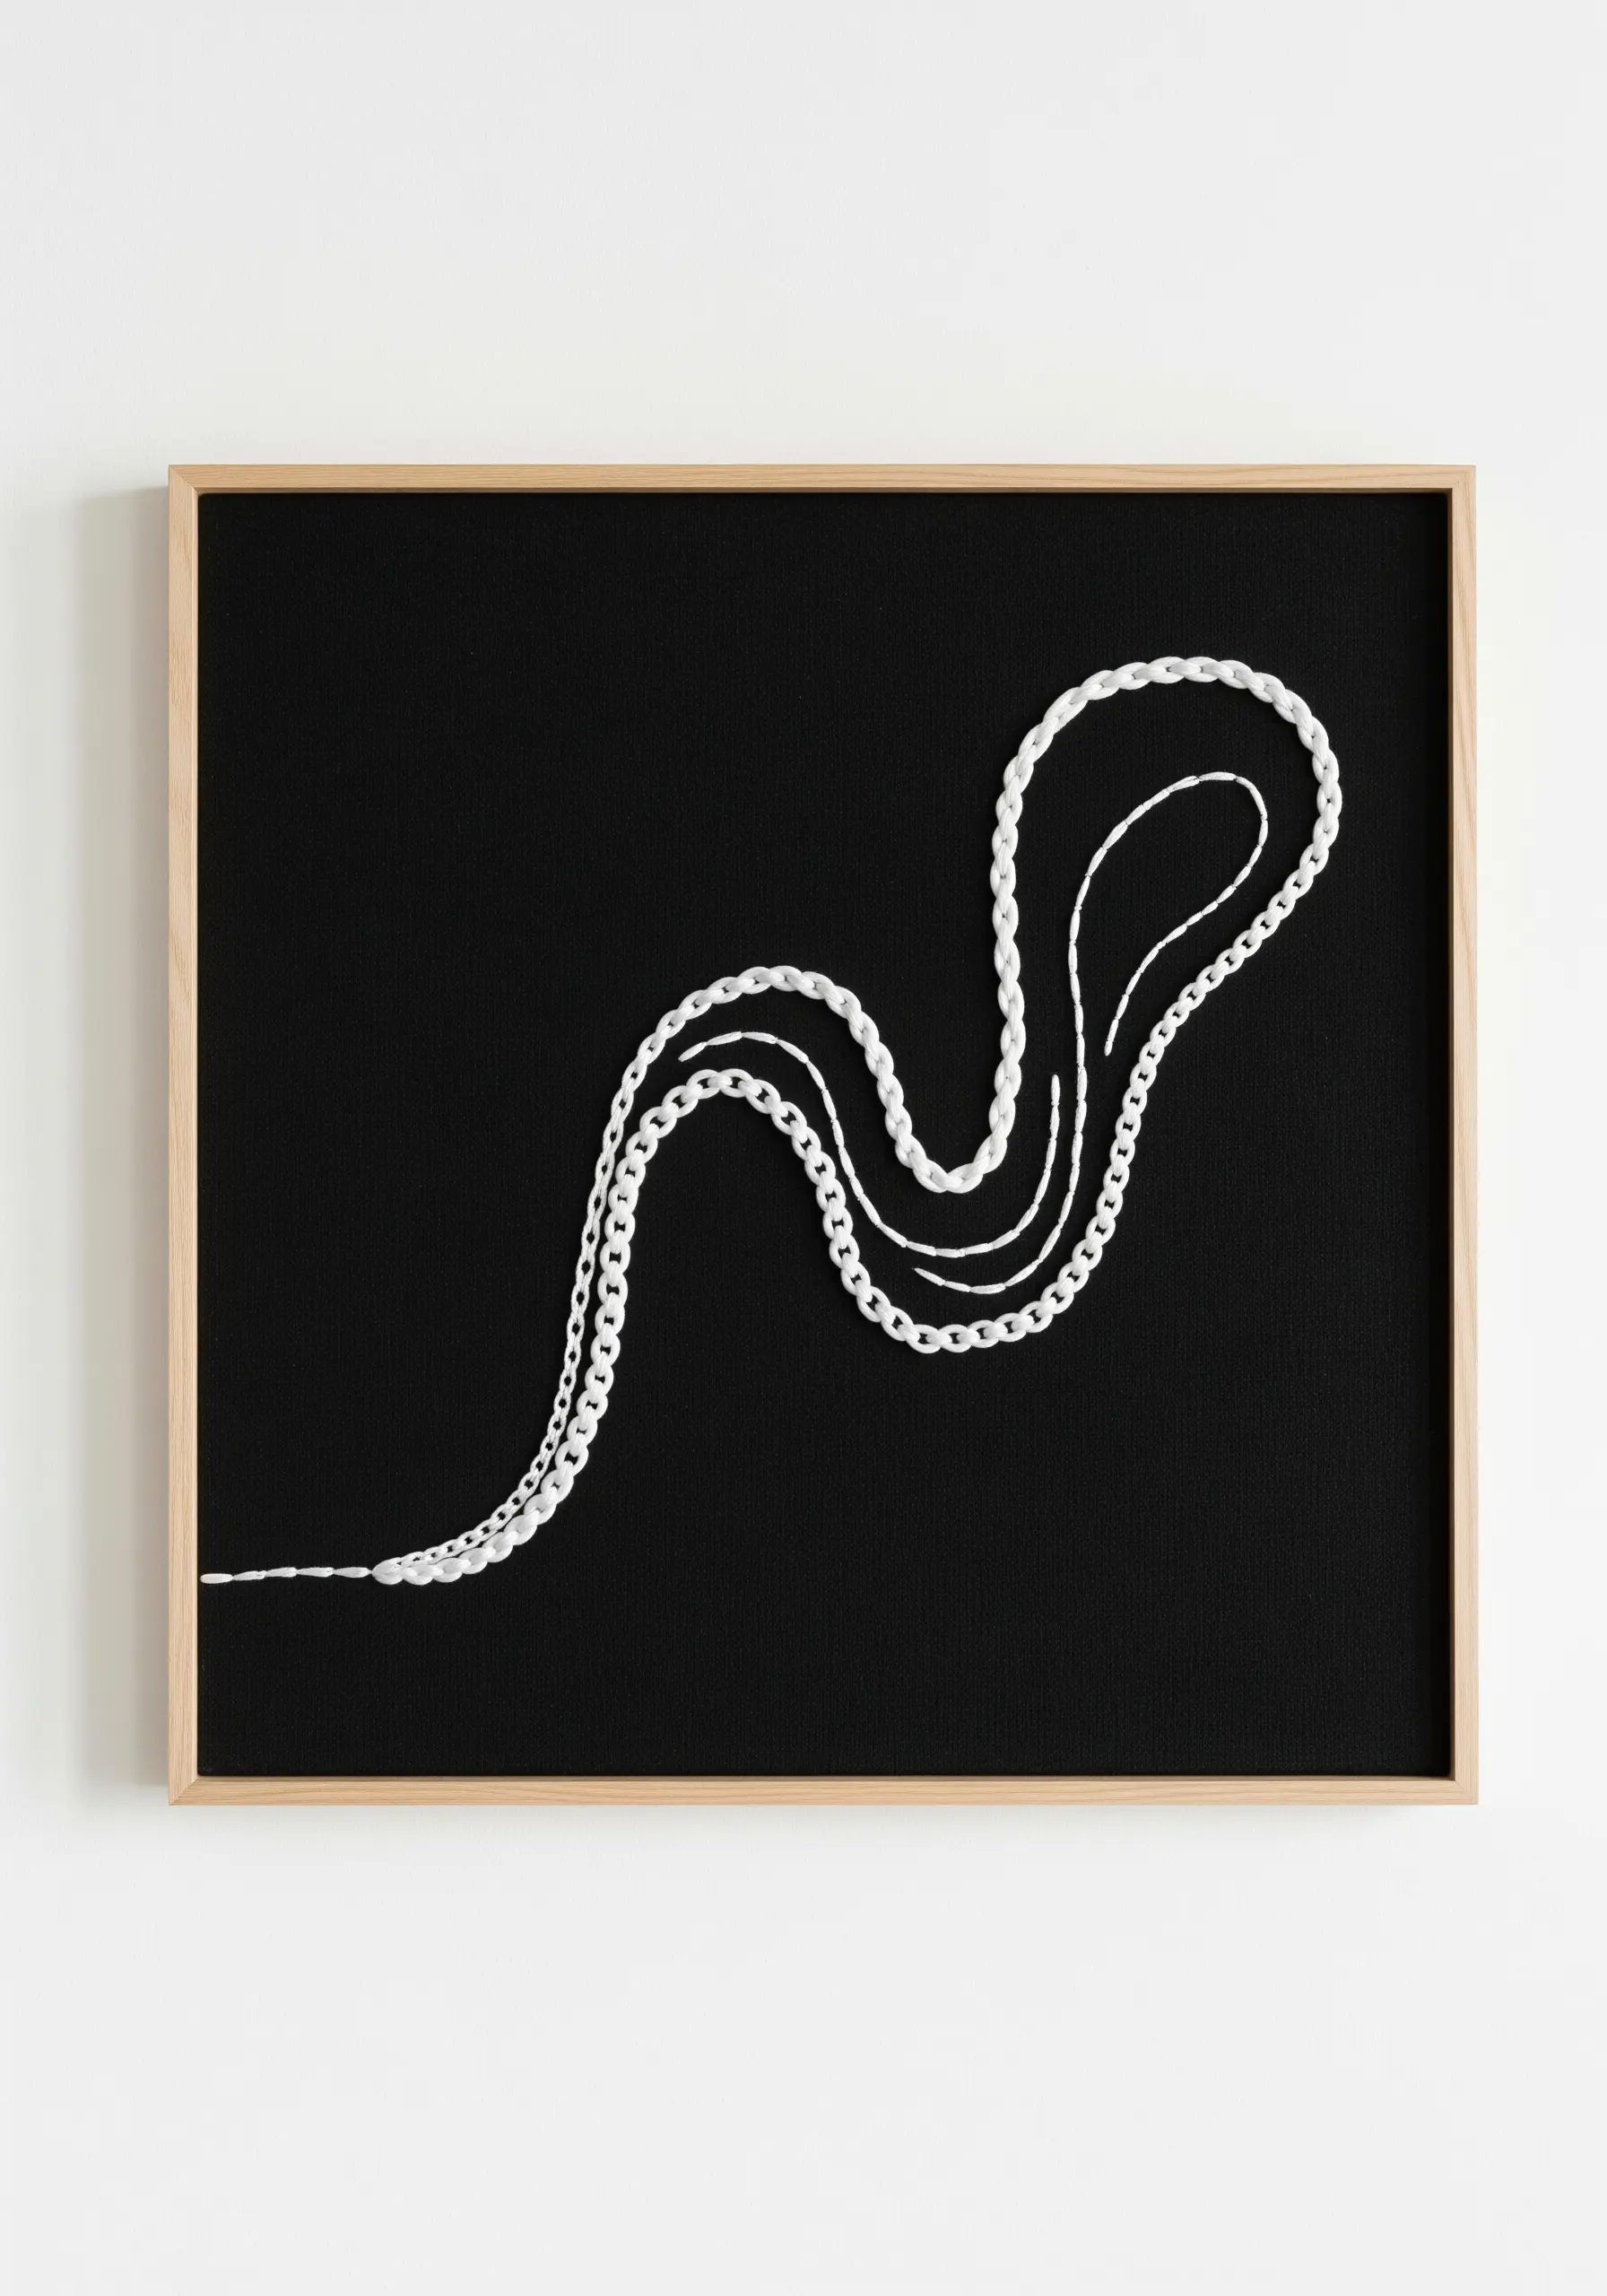
Create a powerful composition not with dense stitching, but with the intentional use of negative space.
On a stark black canvas, a single, meandering line in white thread becomes the undisputed focal point.
Vary the weight and texture of your line by switching between stitches—a thick chain stitch, a smooth whipped backstitch, and a delicate running stitch—all in the same color.
This subtle variation gives the line a sense of rhythm and movement, proving that minimalist stitched ideas can be incredibly dynamic.
7. Translate Digital Soundwaves into Tangible Thread Art
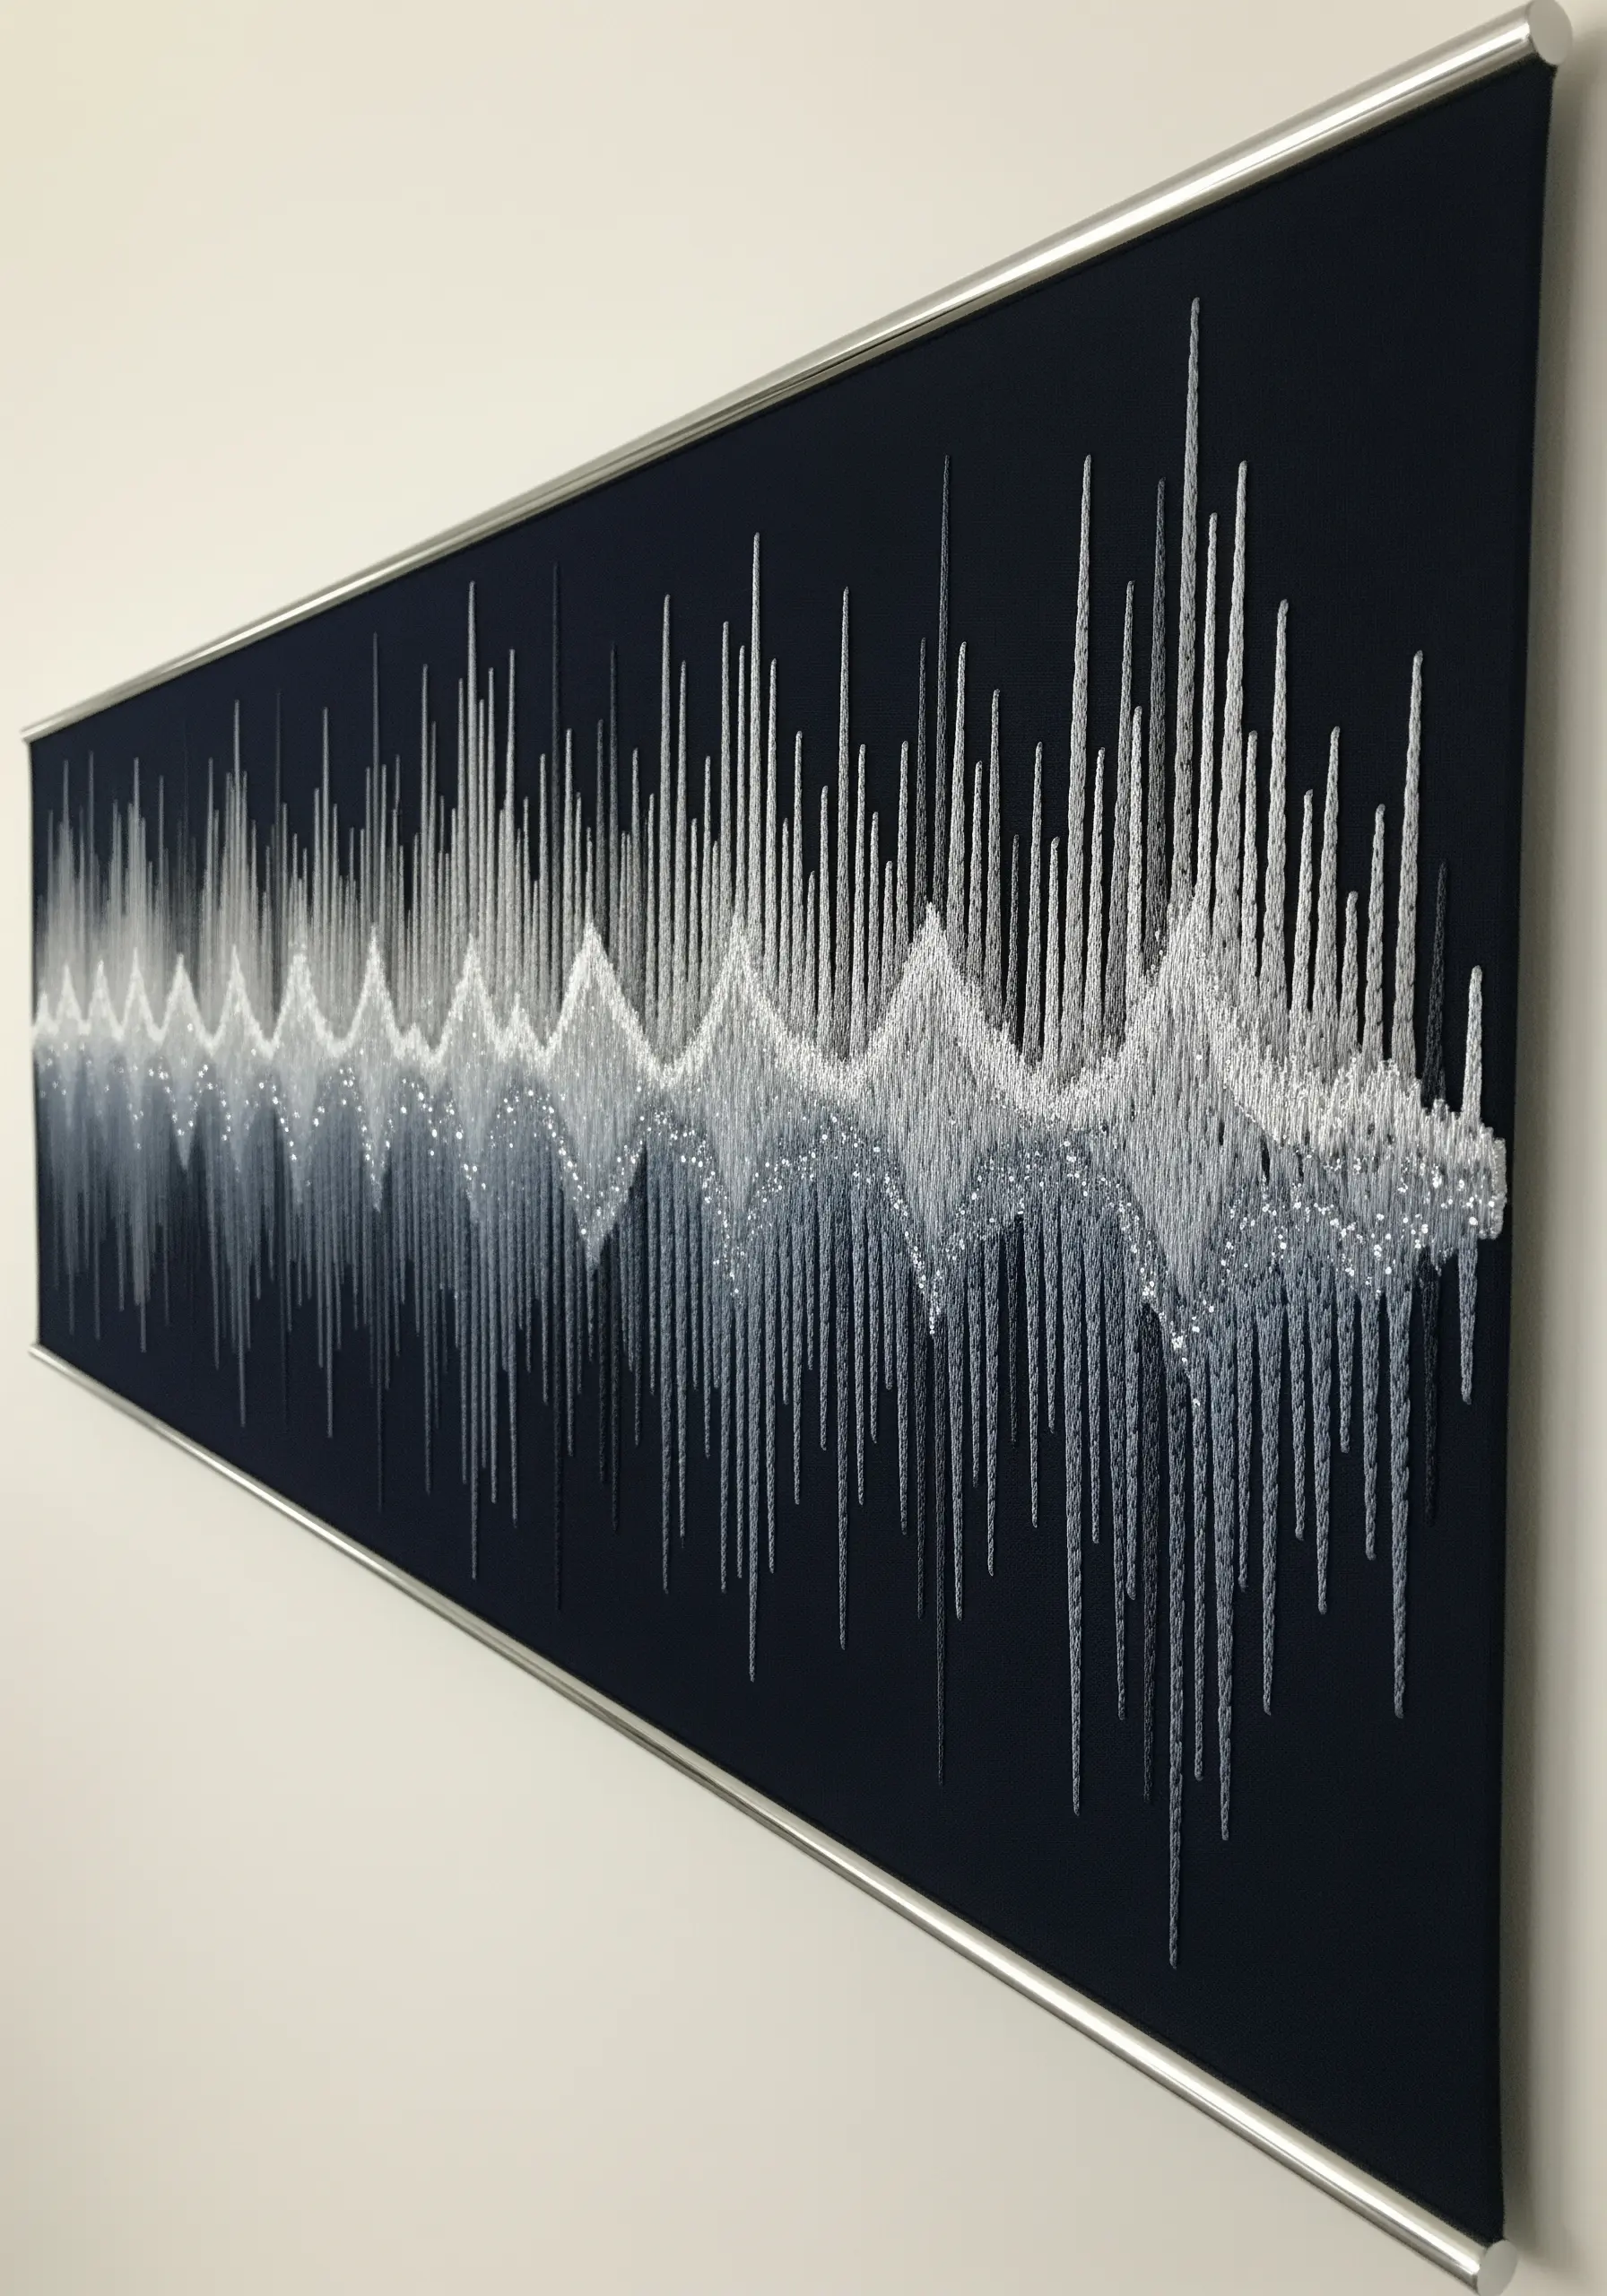
Personalize your art by transforming a meaningful audio clip—a favorite song, a voice message—into a visual soundwave.
Use a free online tool to generate a visual of your soundwave, then transfer the outline to a dark fabric.
Use straight stitches anchored at a central line, varying their length to match the peaks and valleys of the wave.
Employing a gradient of thread colors, from white to grey, adds a beautiful sense of depth and vibration to the finished piece.
8. Deconstruct Geometric Shapes for Graphic Appeal
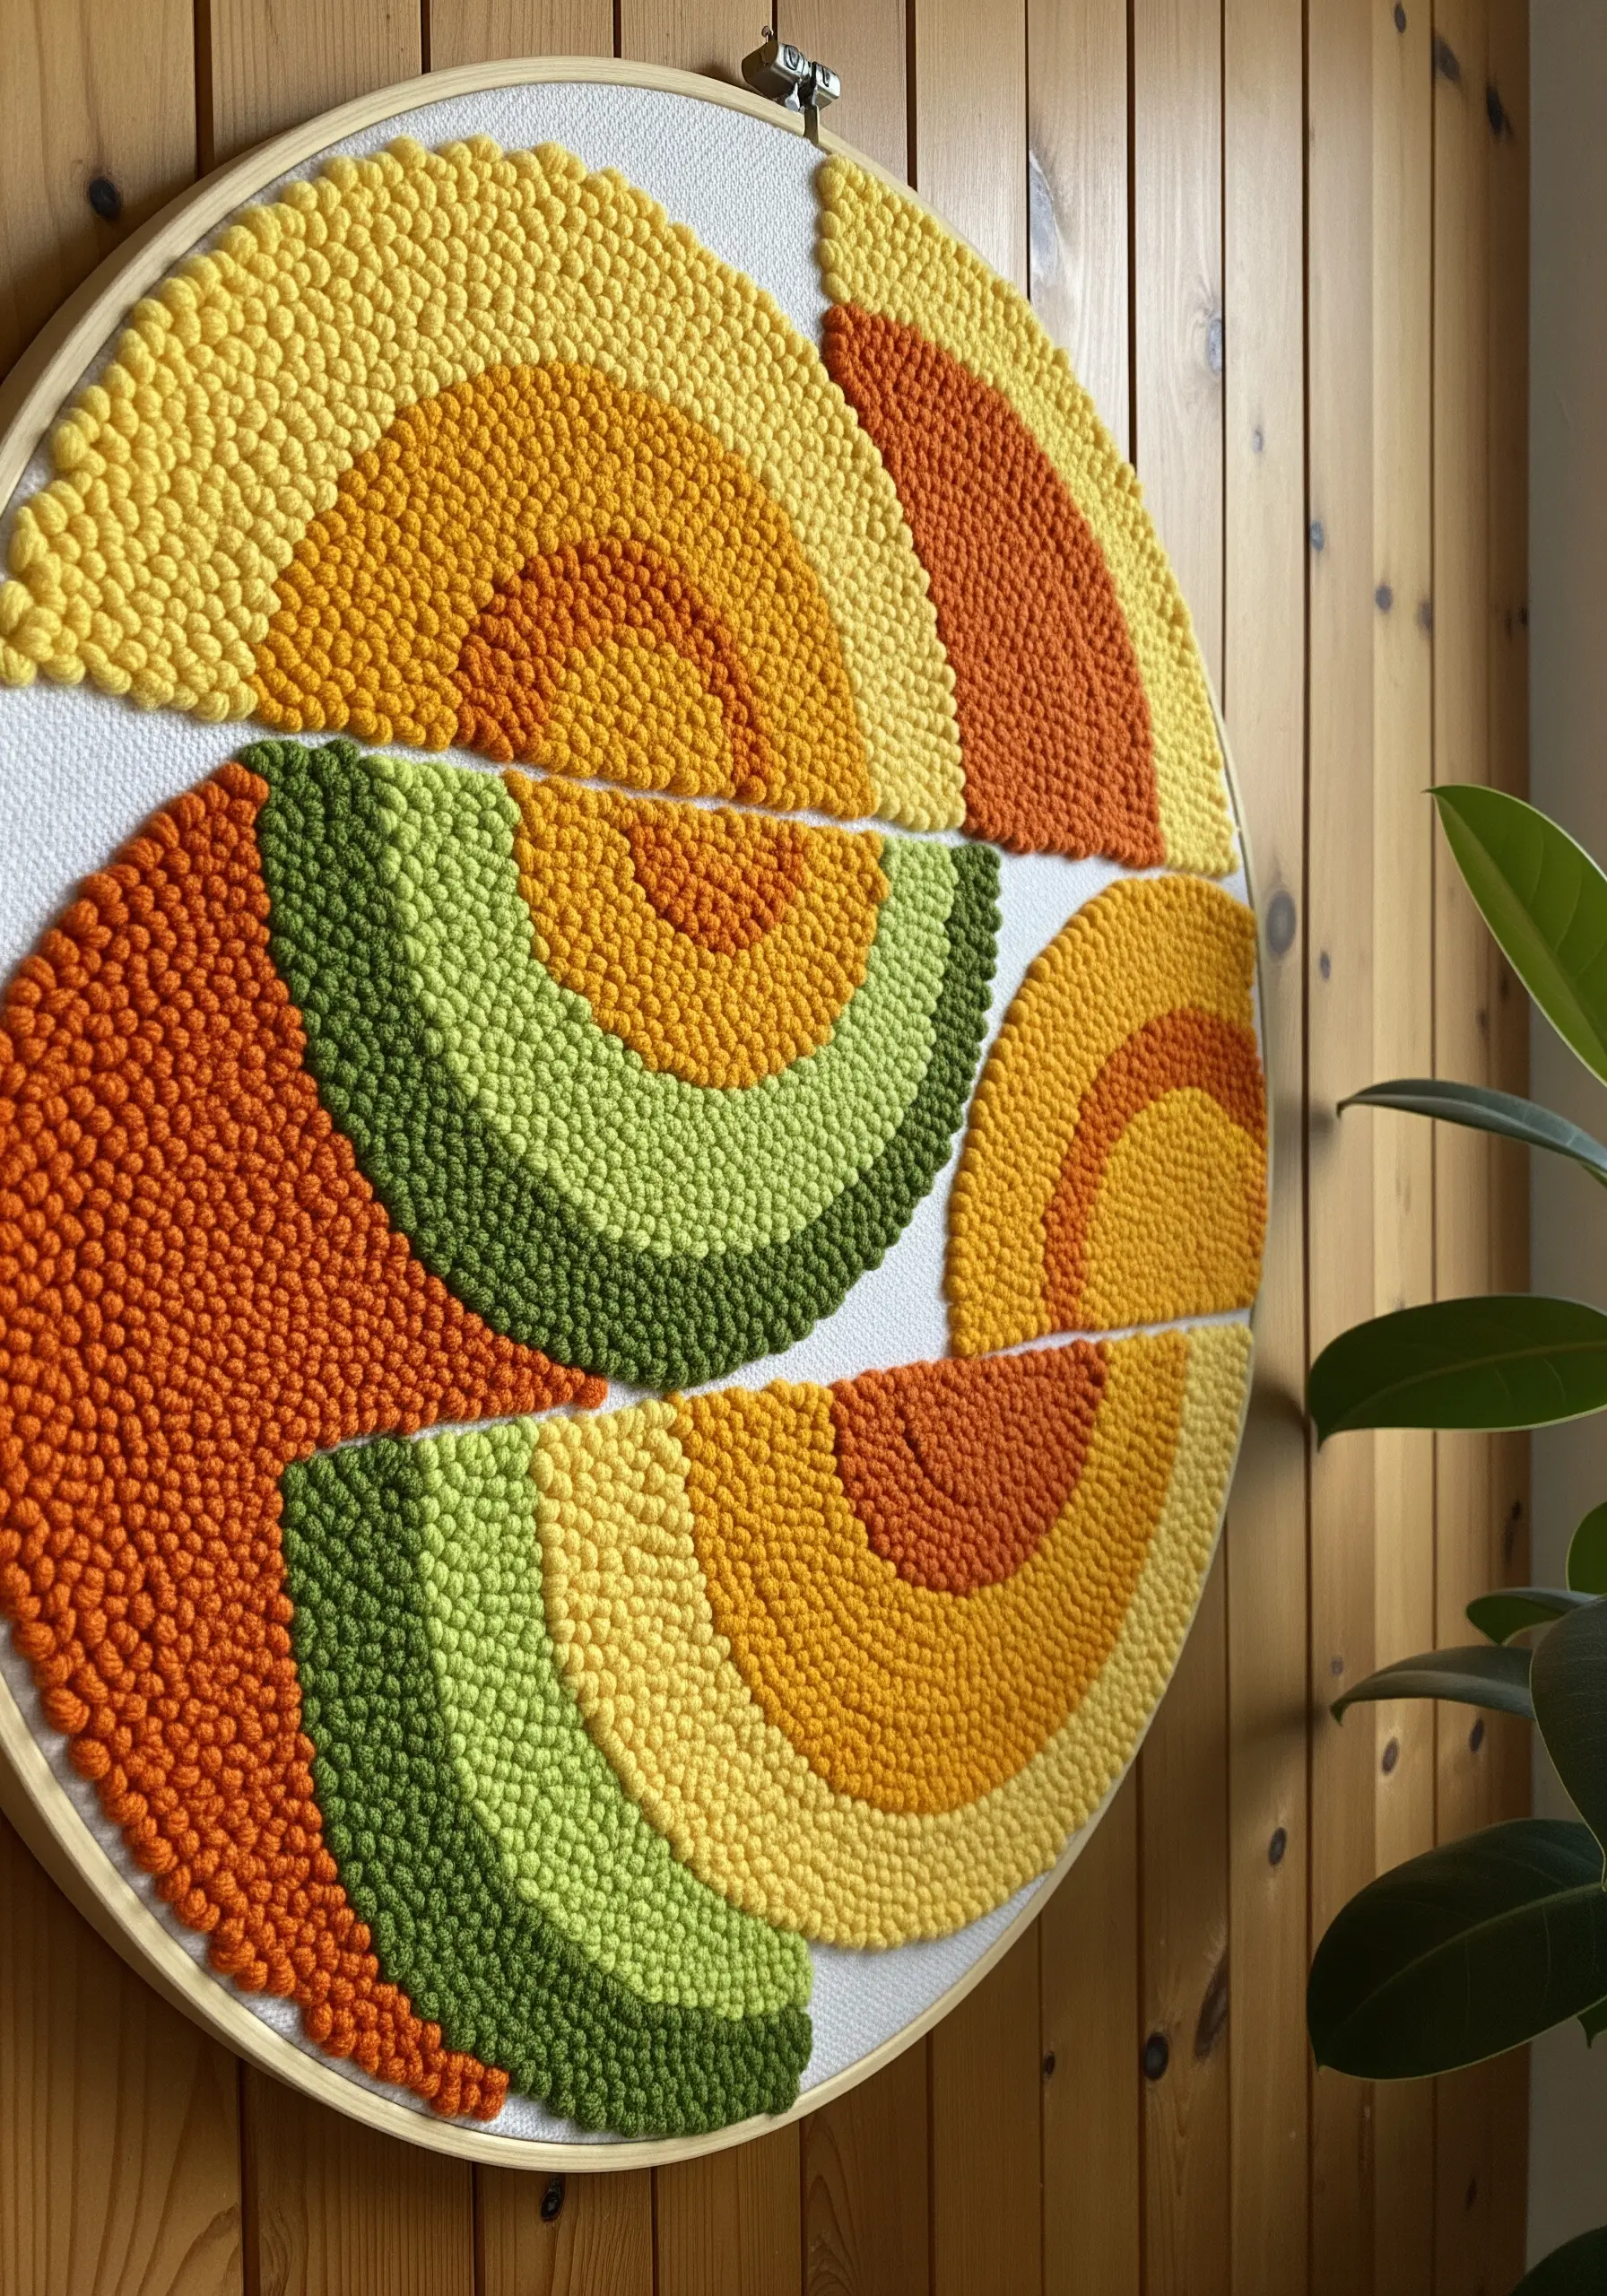
Add a contemporary edge to a classic shape, like a rainbow or circle, by deconstructing and reassembling it.
Instead of a seamless design, intentionally break the form into segments with clean, empty channels between them.
Fill each segment with a uniform texture, like punch needle loops or French knots, using a vibrant, analogous color scheme.
This simple act of fragmentation interrupts the viewer’s expectation and turns a familiar motif into a modern, graphic statement.
9. Create Ethereal Depth with Sheer Fabric Overlays
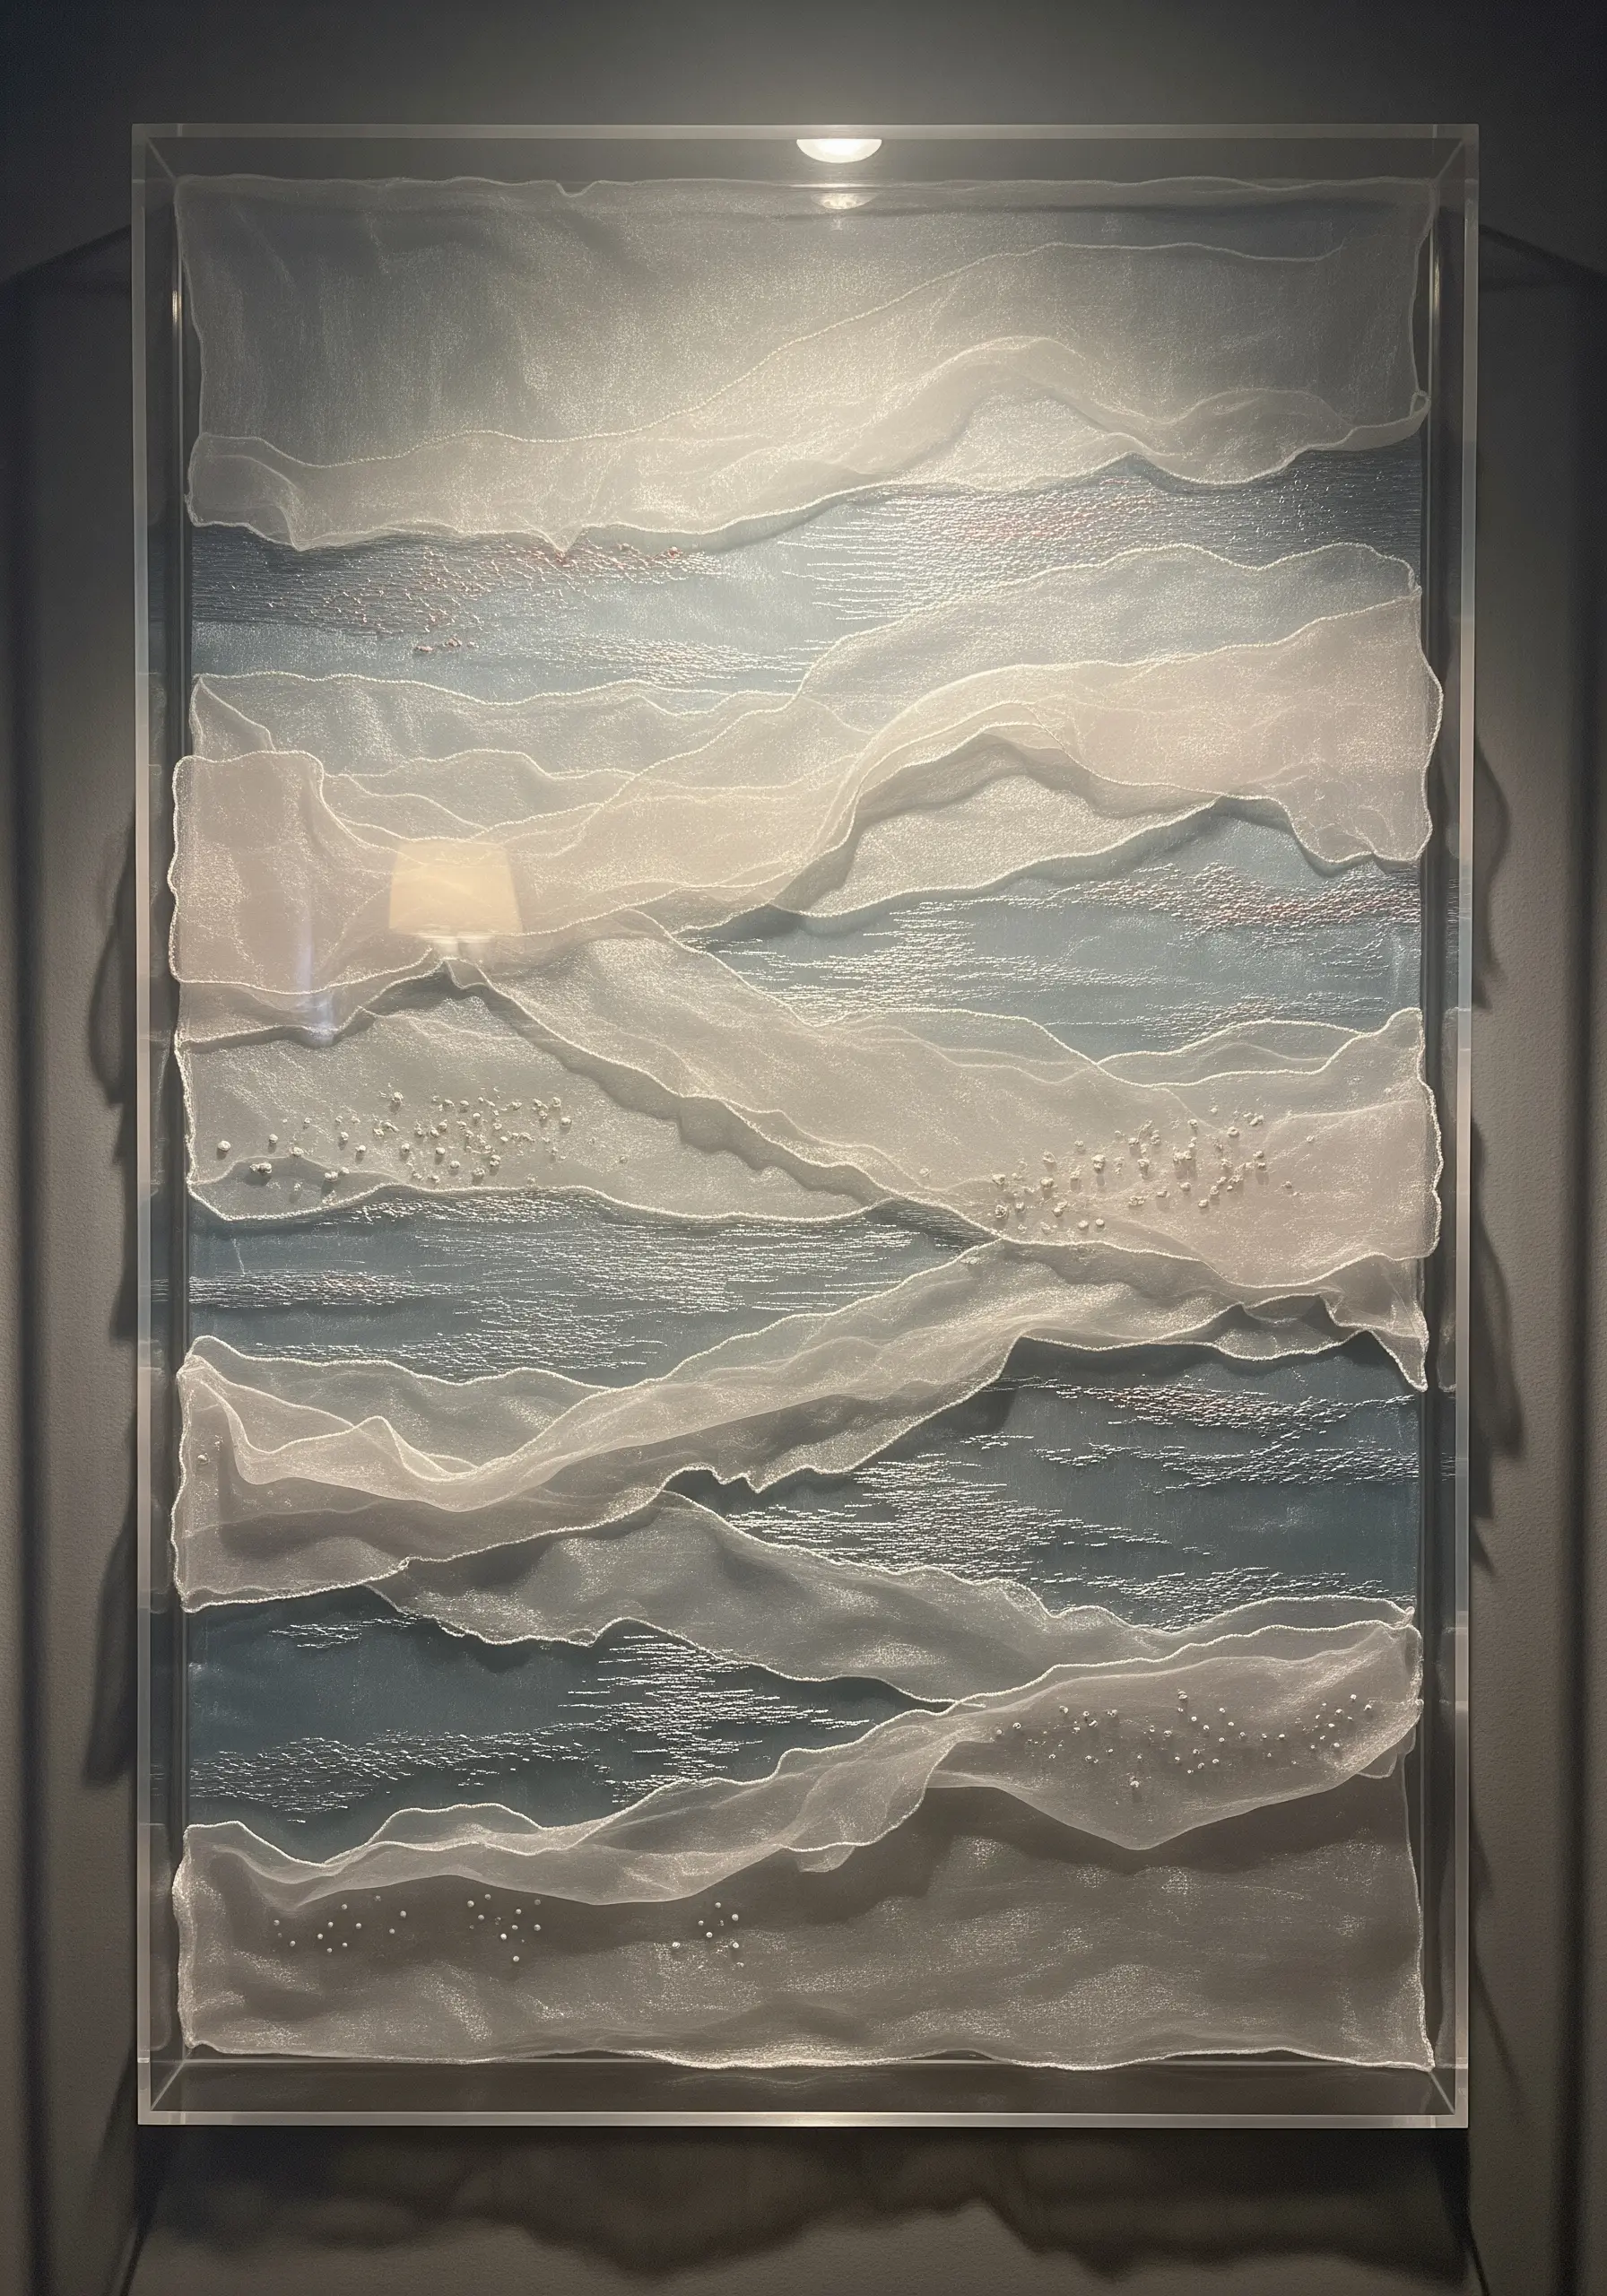
Introduce a sense of mystery and softness by layering translucent fabric, like silk organza or tulle, over a stitched base.
First, create a subtle, textured background using seed stitches or a light color wash on your canvas.
Drape the sheer fabric over the top, securing it with minimal, elegant stitches to create soft folds and waves.
Embellish the overlay with tiny pearl beads or French knots; they will appear to float, creating a dreamy, atmospheric effect that draws the viewer closer.
10. Embrace Visible Mending as a Design Element
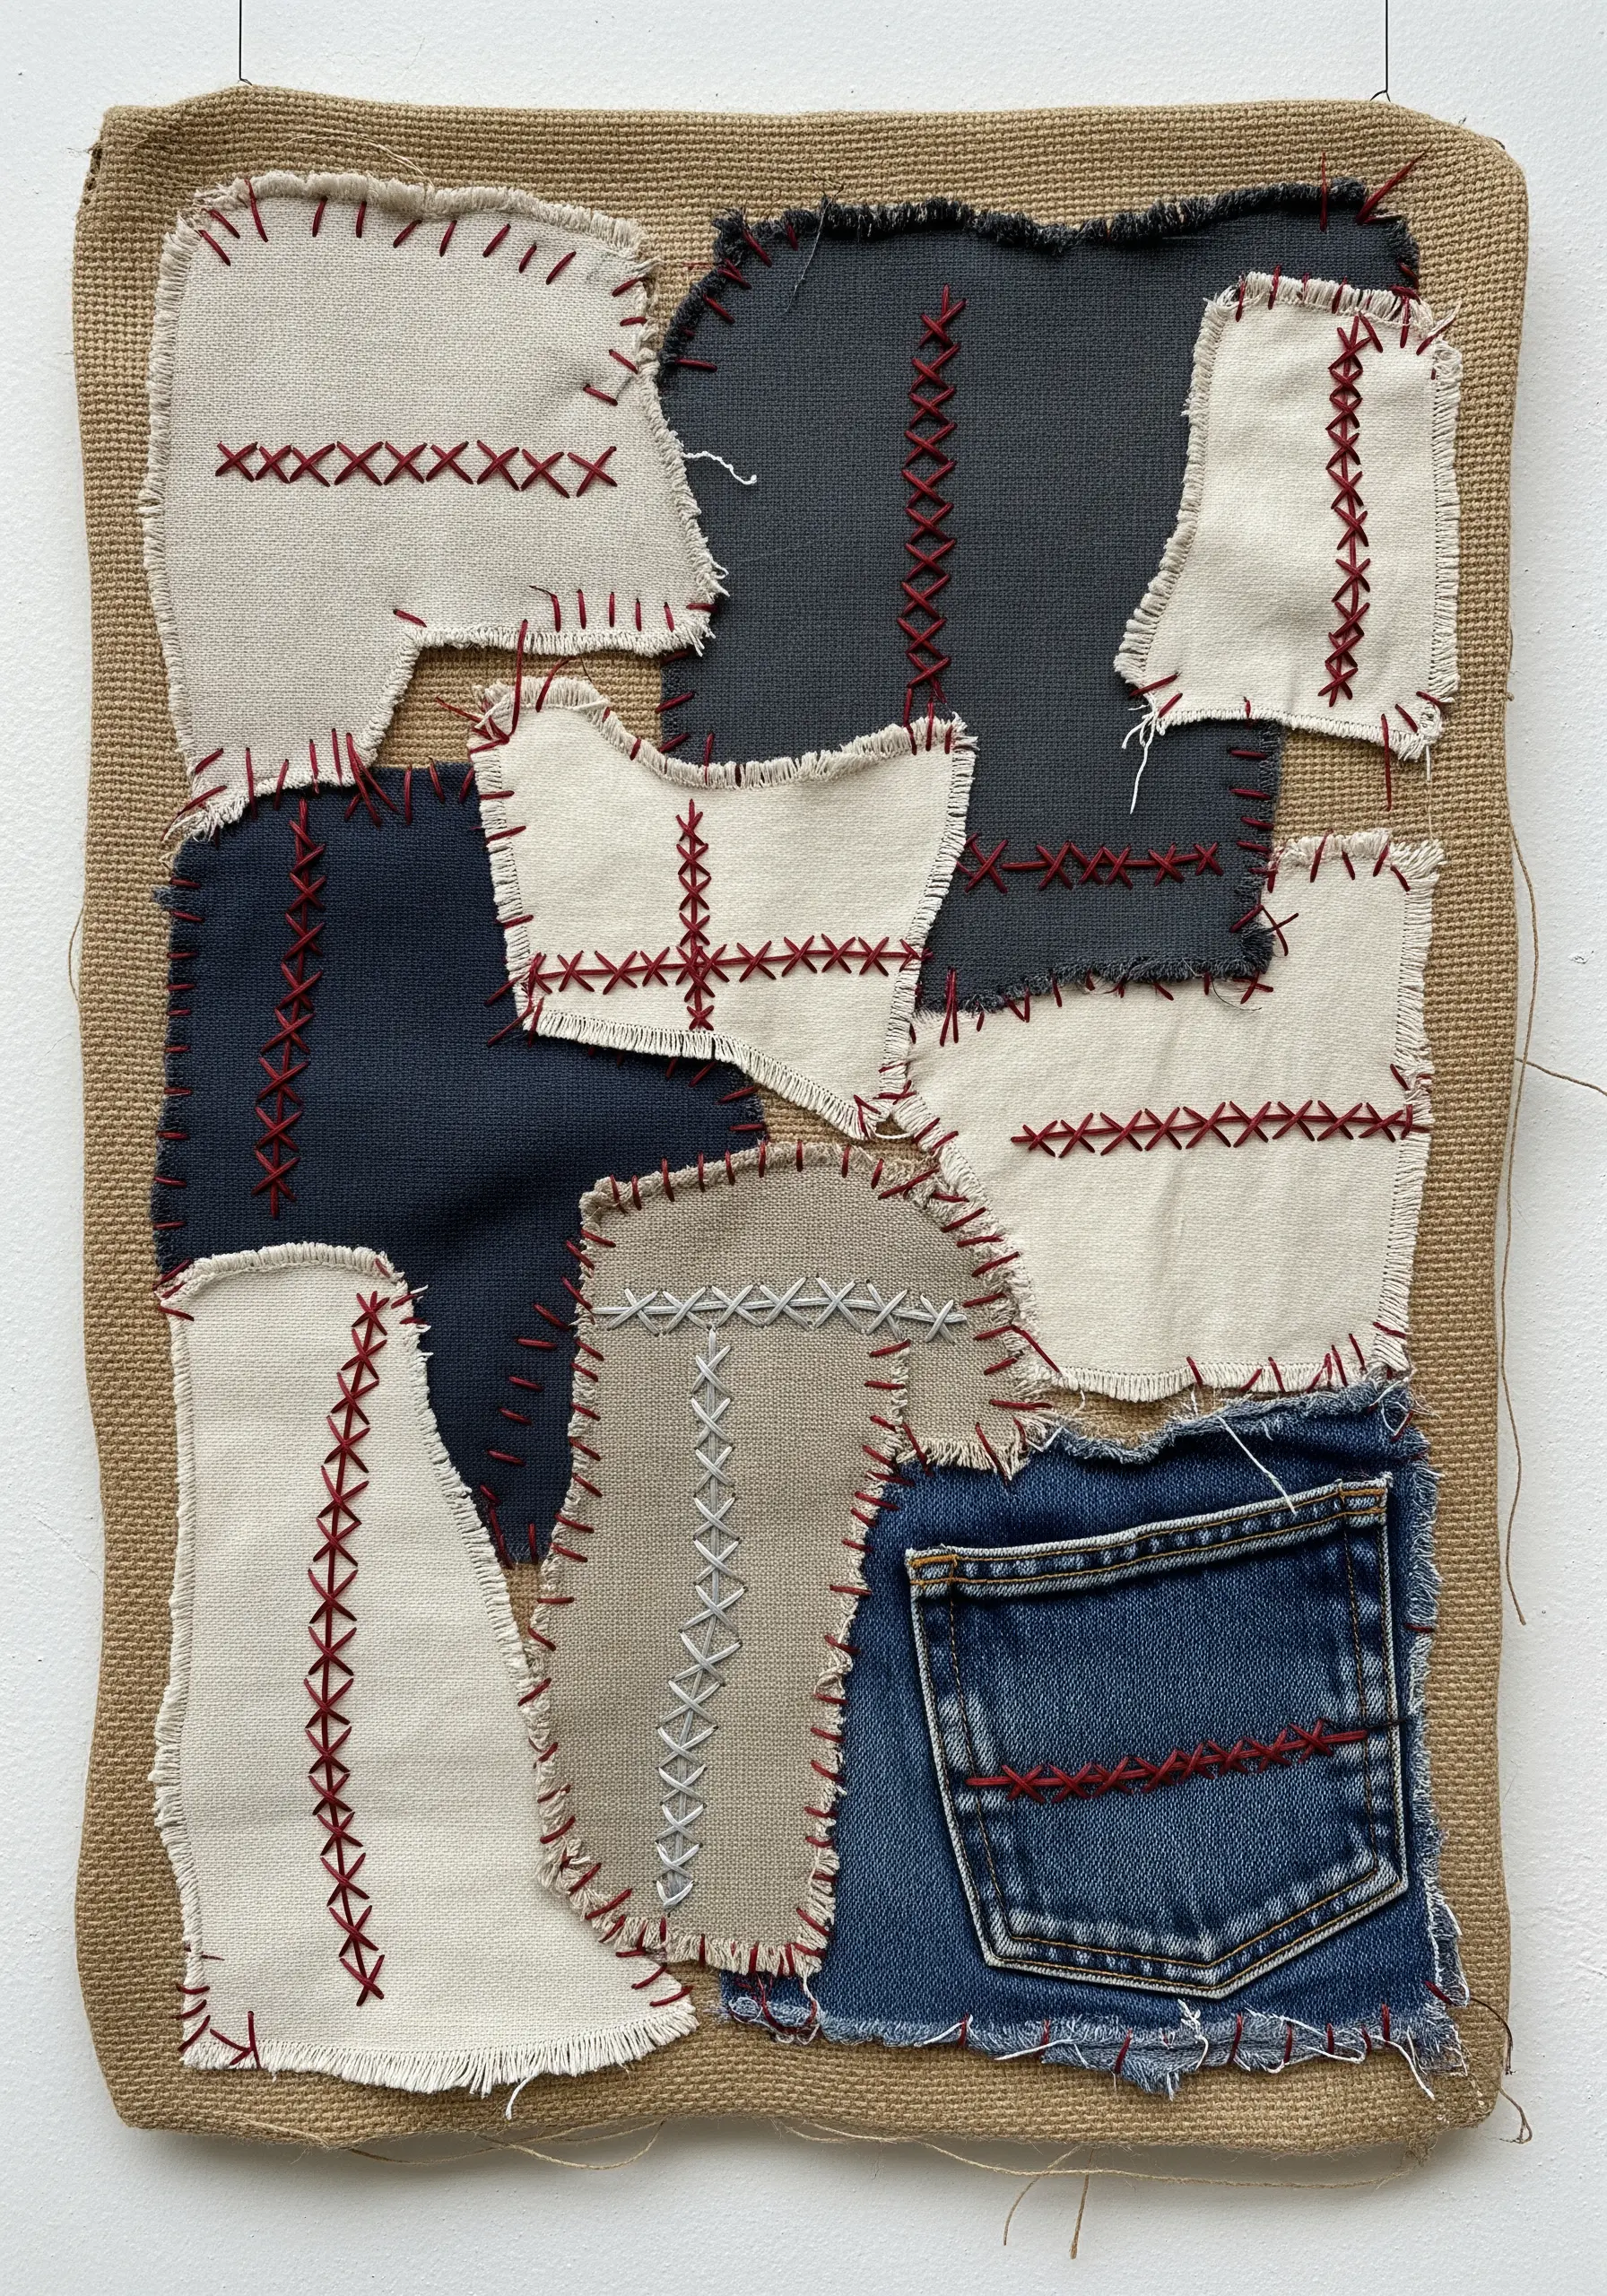
Transform fabric scraps into a cohesive composition using the principles of visible mending, or ‘boro’ stitching.
Arrange irregularly shaped pieces of linen, canvas, and even old denim onto a burlap or hessian base.
Instead of hiding your stitches, make them the focal point by using a thick, contrasting thread (like a crimson floss).
Use bold, simple stitches—such as cross stitches and running stitches—to secure the patches, turning the act of joining into a decorative, rustic statement. This is a perfect way to explore fabric collage embroidery ideas sustainably.
11. Use Dimensional Cording for Bold Graphic Statements
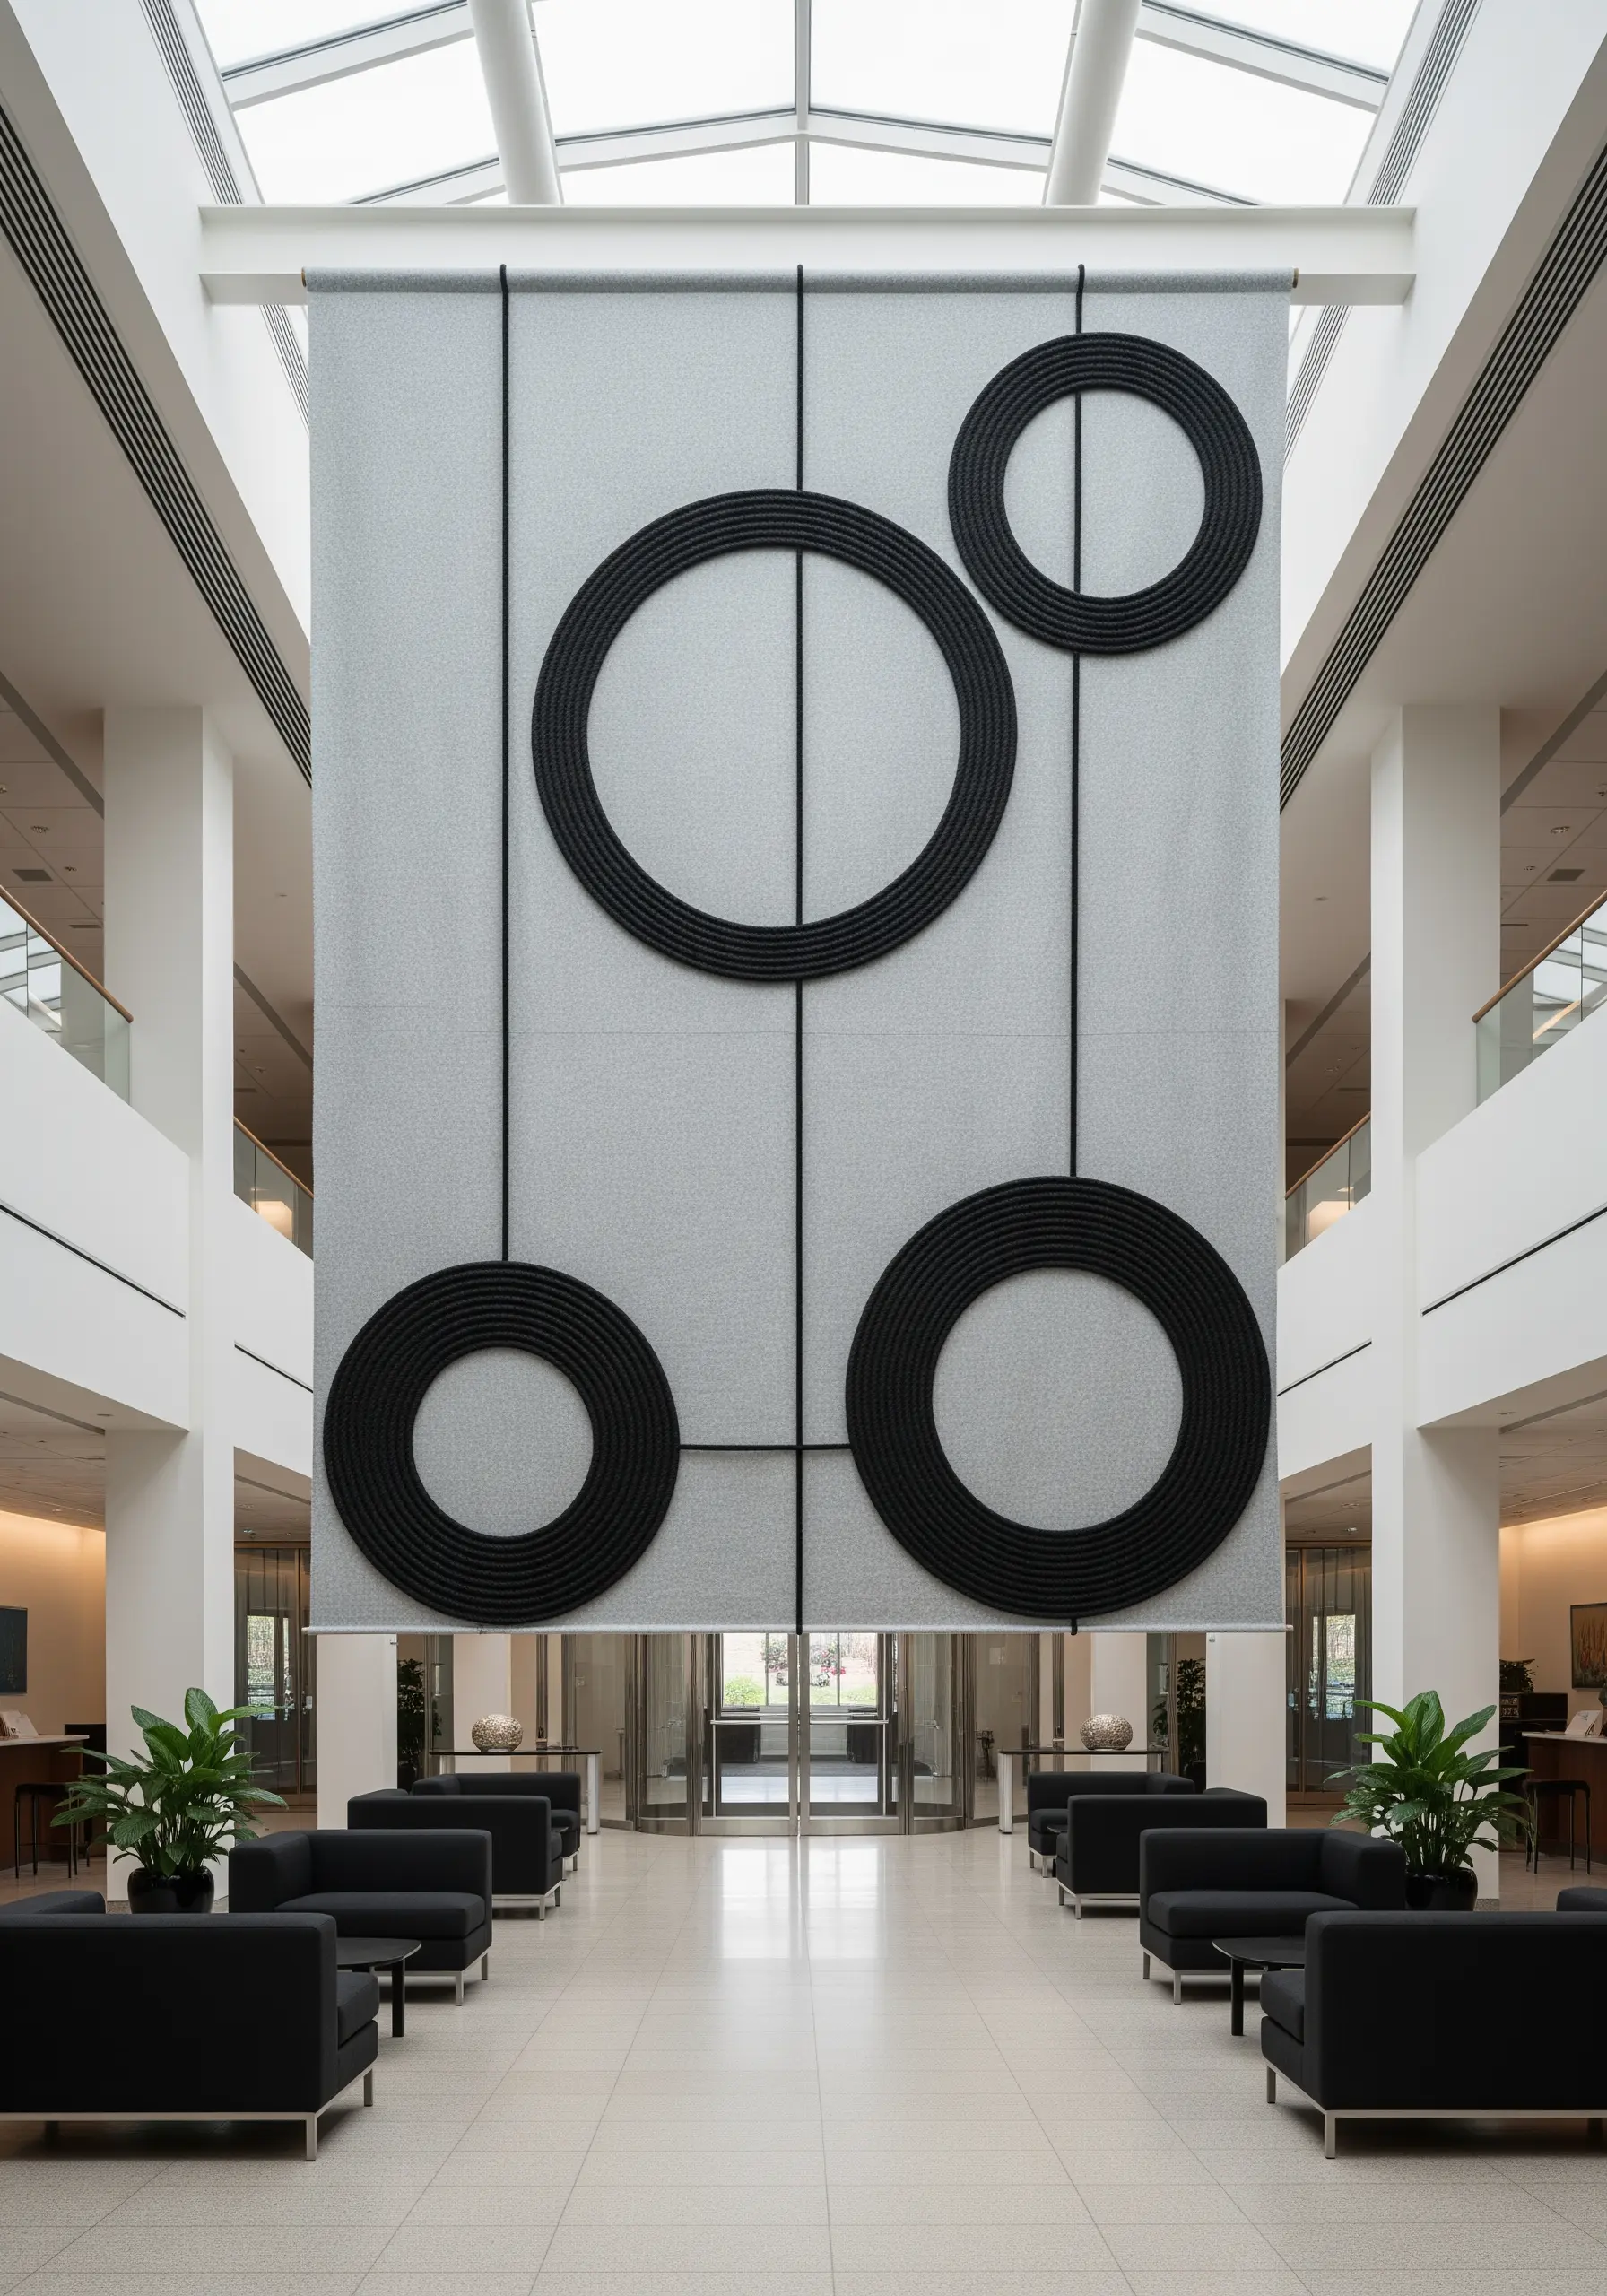
For large-scale installations where fine thread would be lost, use thick cording or piping to create bold, graphic lines.
Plan a simple, geometric design, as the thickness of the material itself will provide significant visual weight.
Secure the cording to a heavy fabric panel by couching it with a strong, invisible thread, ensuring your stitches are evenly spaced for a clean finish.
This technique is perfect for creating impactful fiber art installations that can command attention even in a large, open space.
12. Build a Textured Bouquet with a Vocabulary of Stitches
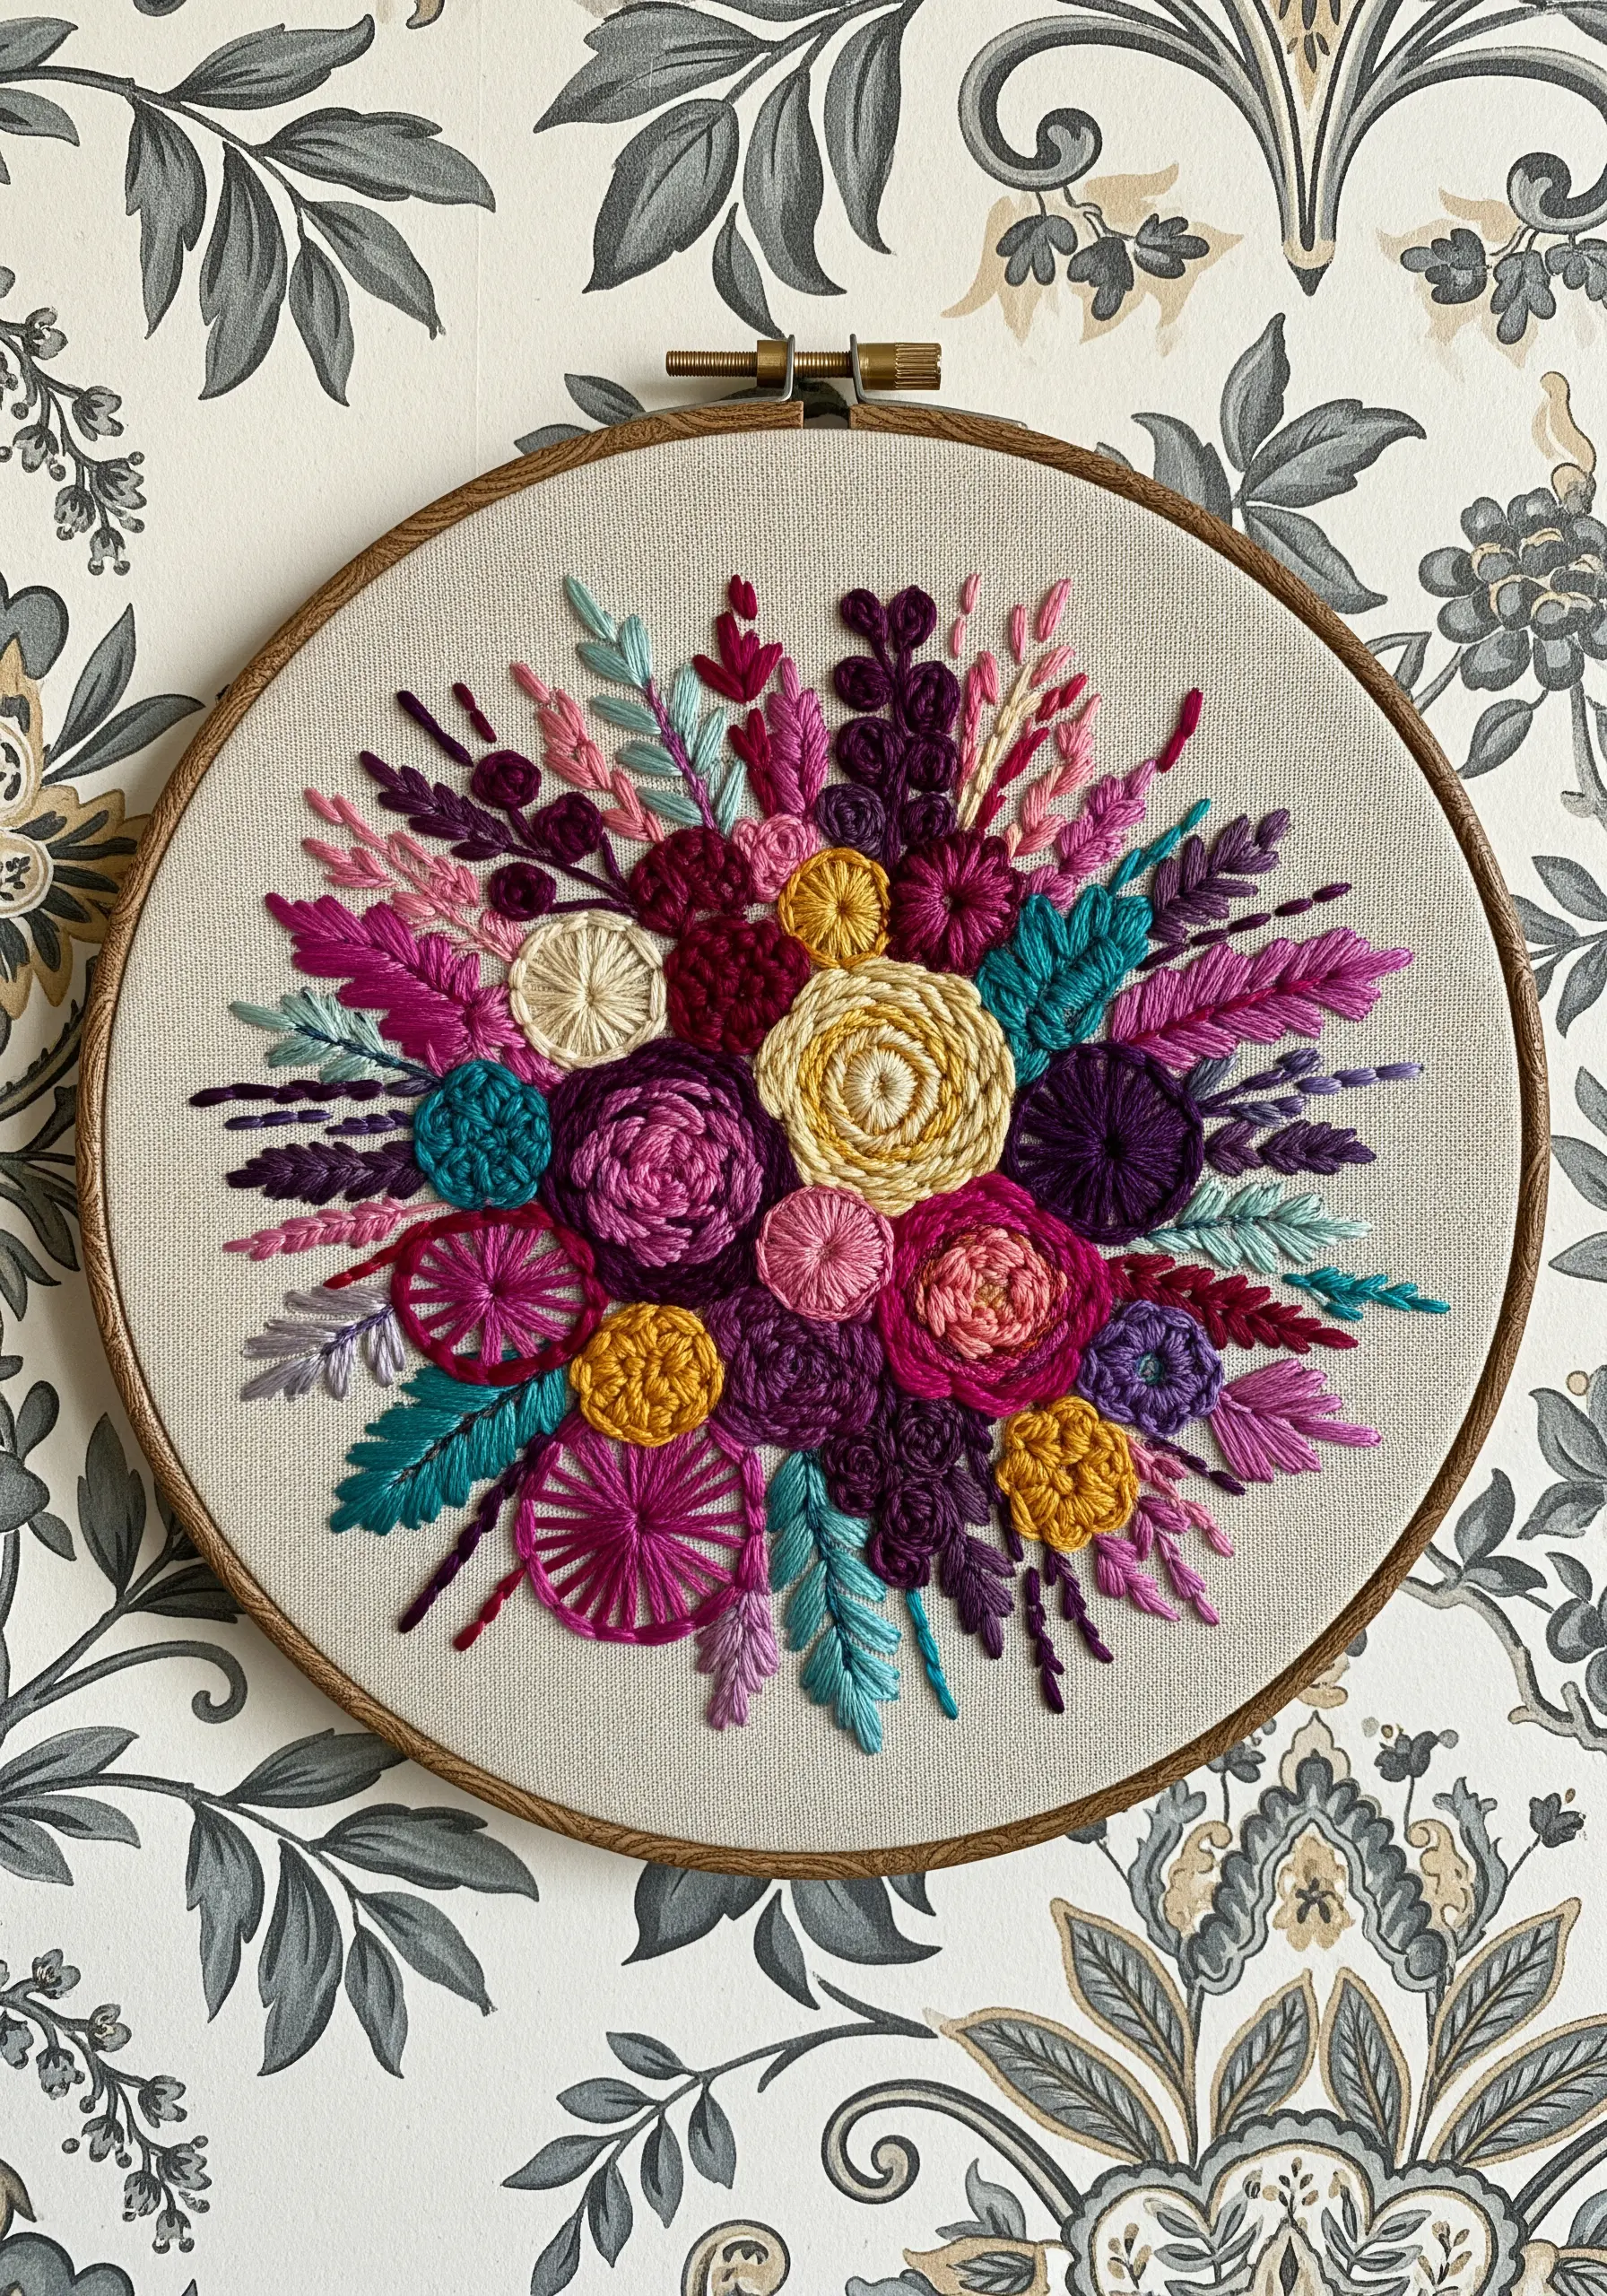
Instead of striving for realism, focus on creating a ‘sampler’ bouquet where each flower is an exploration of a different stitch.
Use woven wheel stitches for roses, French knots for fluffy fillers, and lazy daisy stitches for small petals.
Combine these with straight stitches for sharp leaves and satin stitches for smoother elements.
By varying the stitch type, thread weight, and color saturation, you create a rich, dimensional piece where the texture itself is the main attraction.
13. Explore Monochrome Texture with a Stitch Sampler
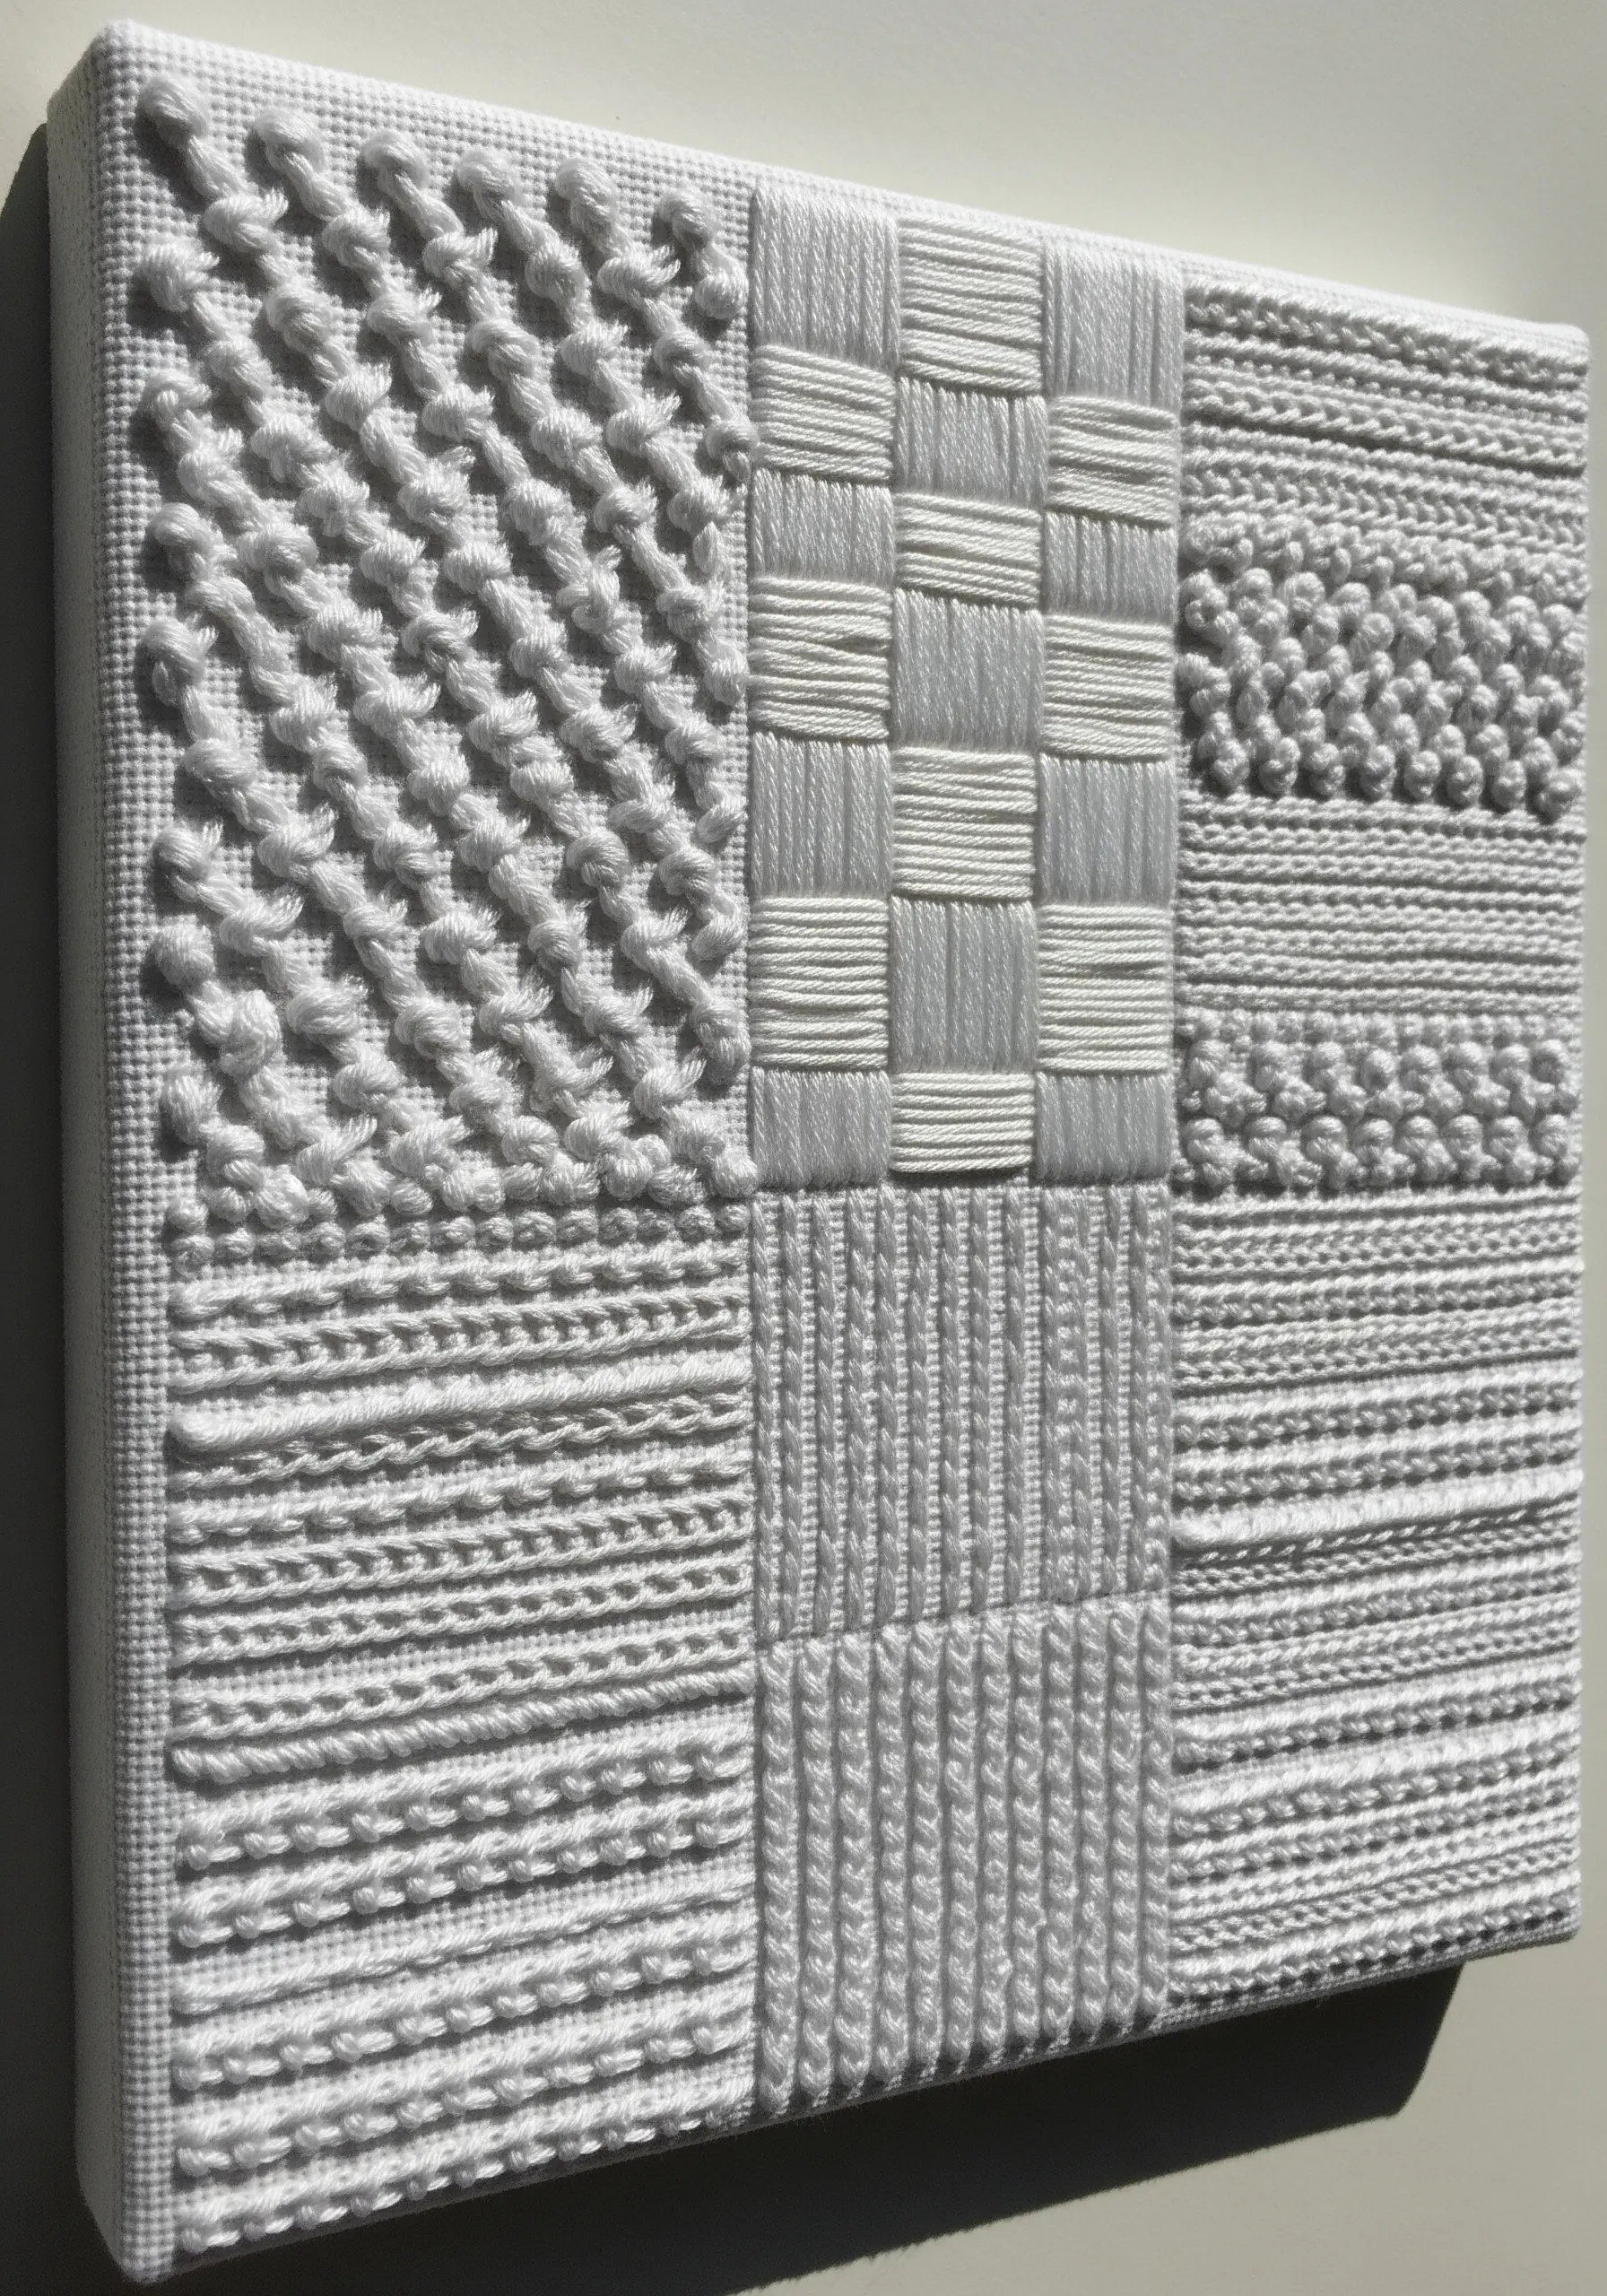
Challenge yourself to create a visually complex piece using only one color of thread.
Divide your canvas into a grid and fill each section with a different textural stitch: French knots, basket weave stitch, diagonal satin stitches, or bullion knots.
Without color to distract the eye, the focus shifts entirely to the way each stitch pattern reflects light and creates shadow.
This exercise sharpens your understanding of texture and proves that a monochrome textile wall art piece can be incredibly rich and detailed.
14. Map Topographies with Contoured Stitching
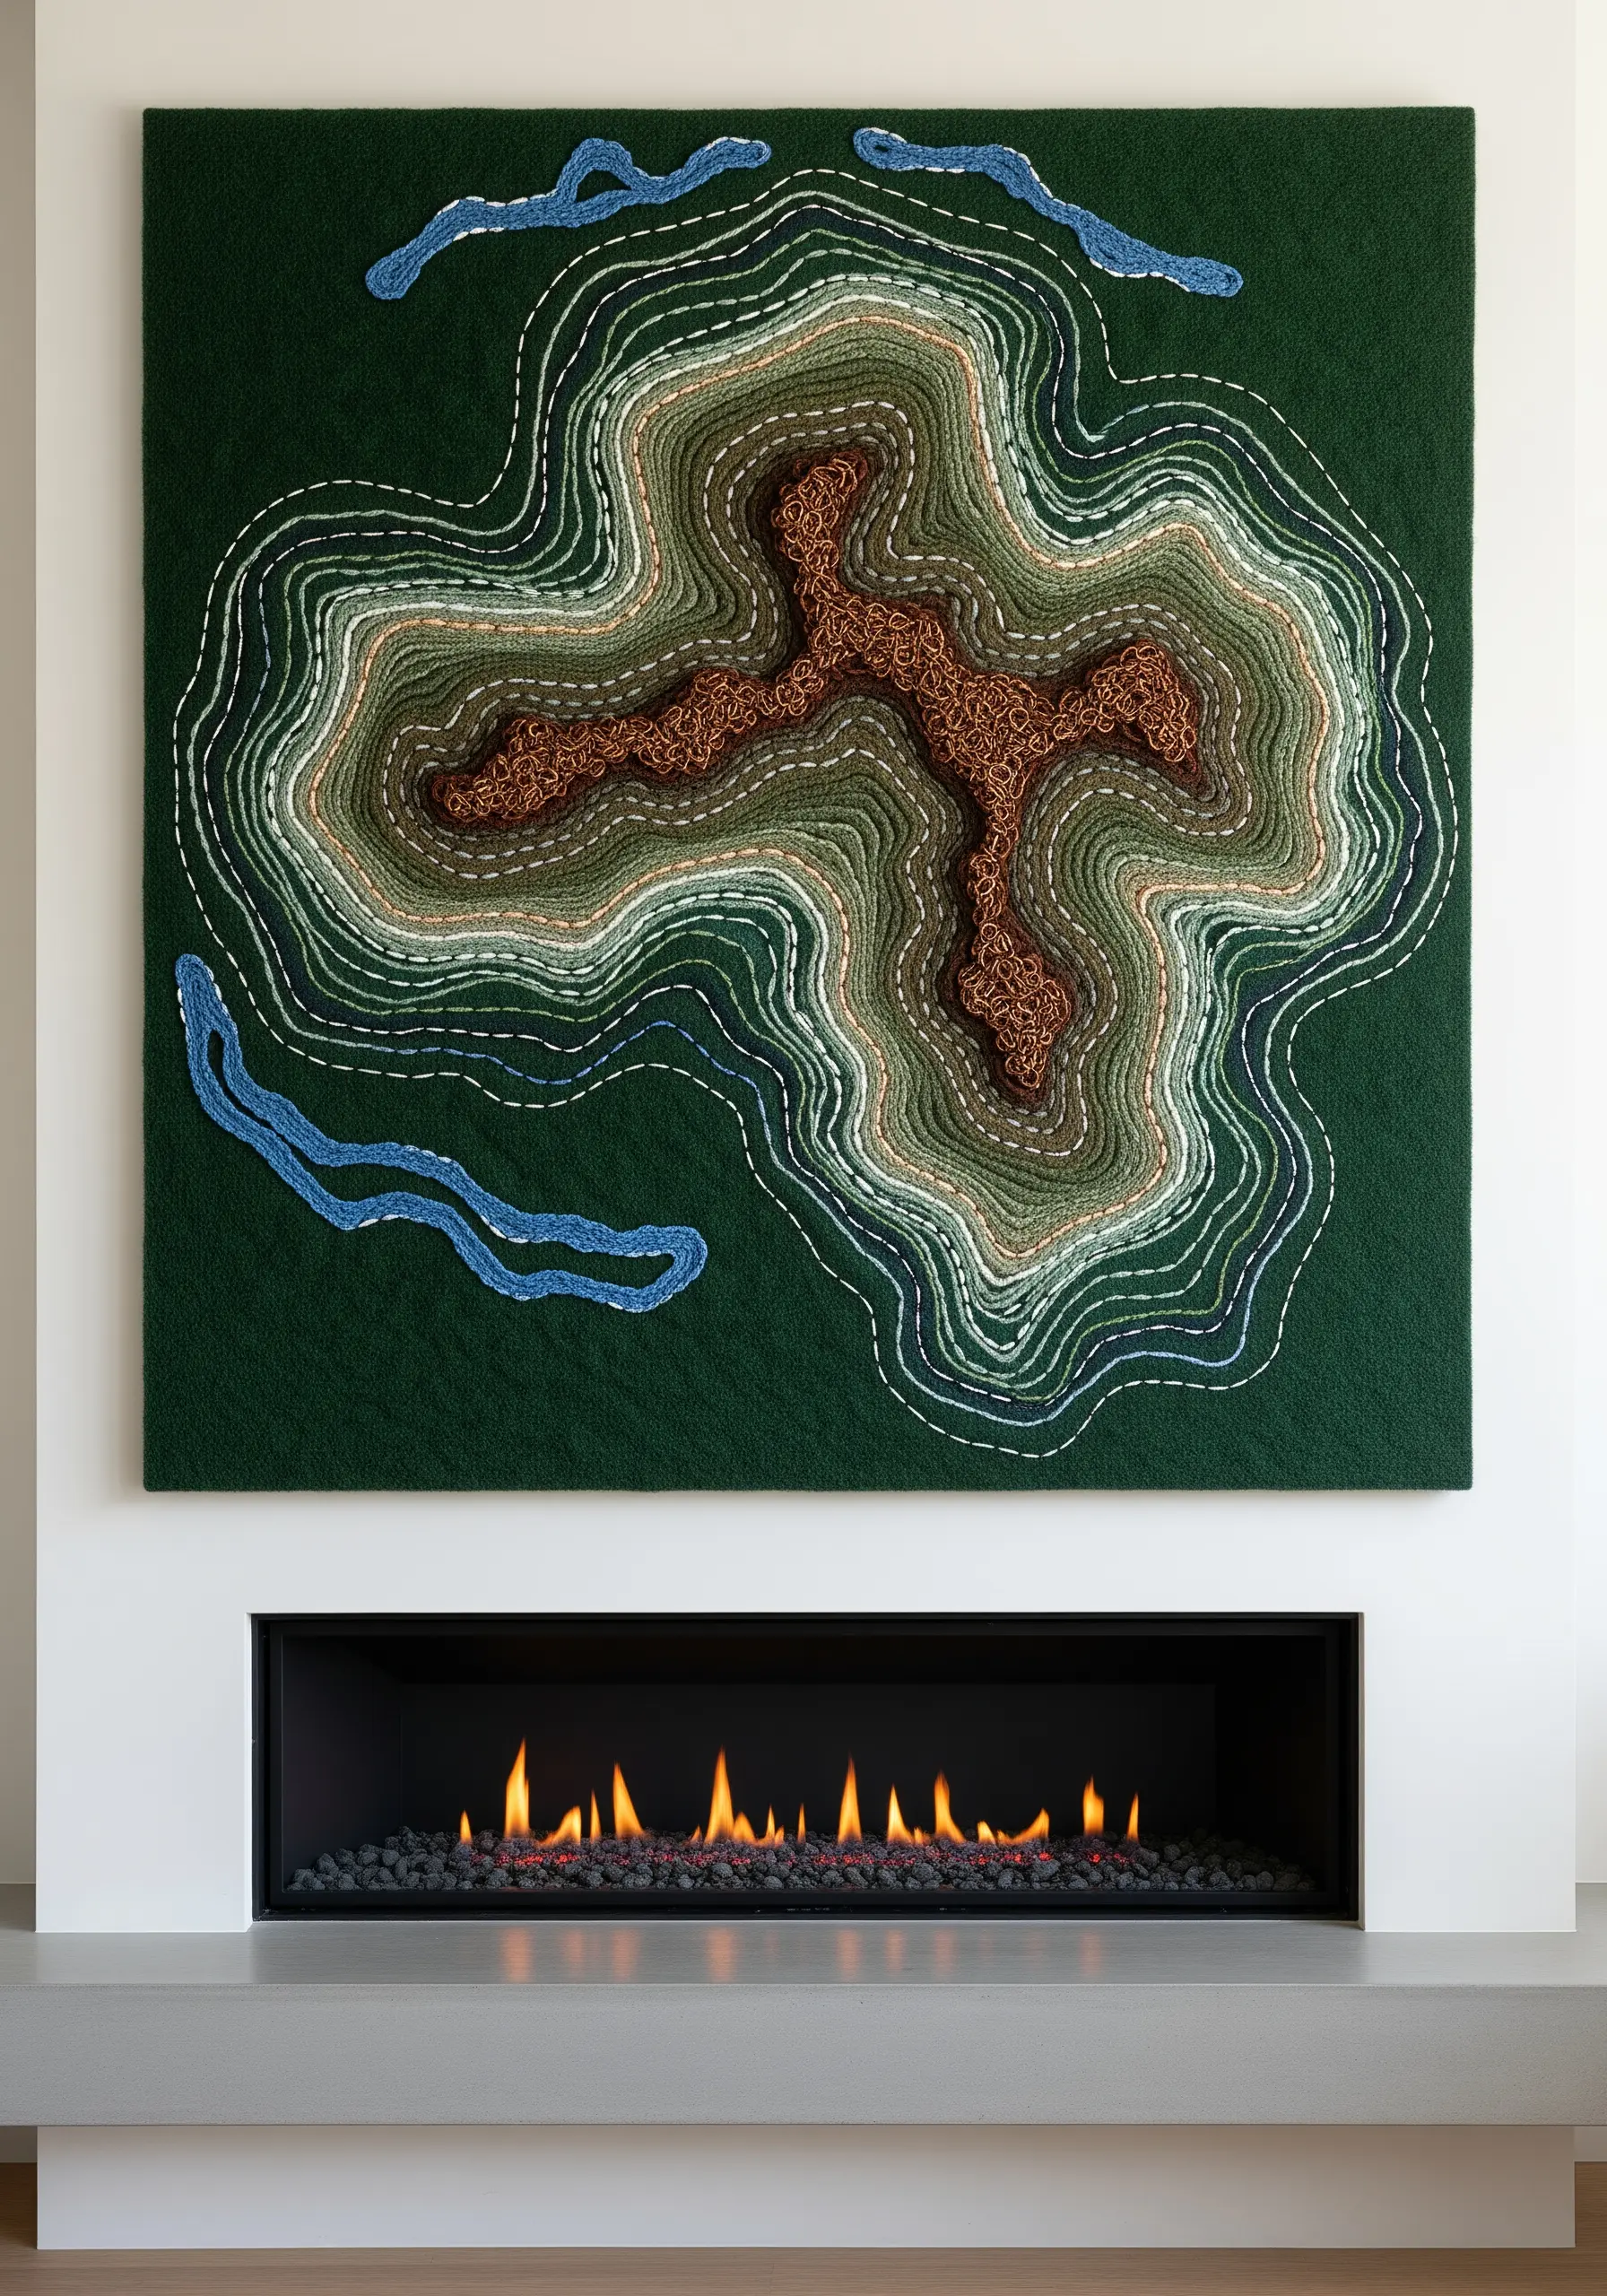
Create abstract landscapes that mimic topographical maps by layering contoured lines of thread.
Start with a dark, solid background fabric, like a deep green wool felt, which absorbs light and adds depth.
Use a simple backstitch or stem stitch to create flowing, concentric shapes, changing your thread color gradually from dark to light as you move outward.
The dense lines of thread create a raised, relief-like effect, while the subtle color shifts give the impression of changing elevation.
15. Create Celestial Maps with Metallic Threads
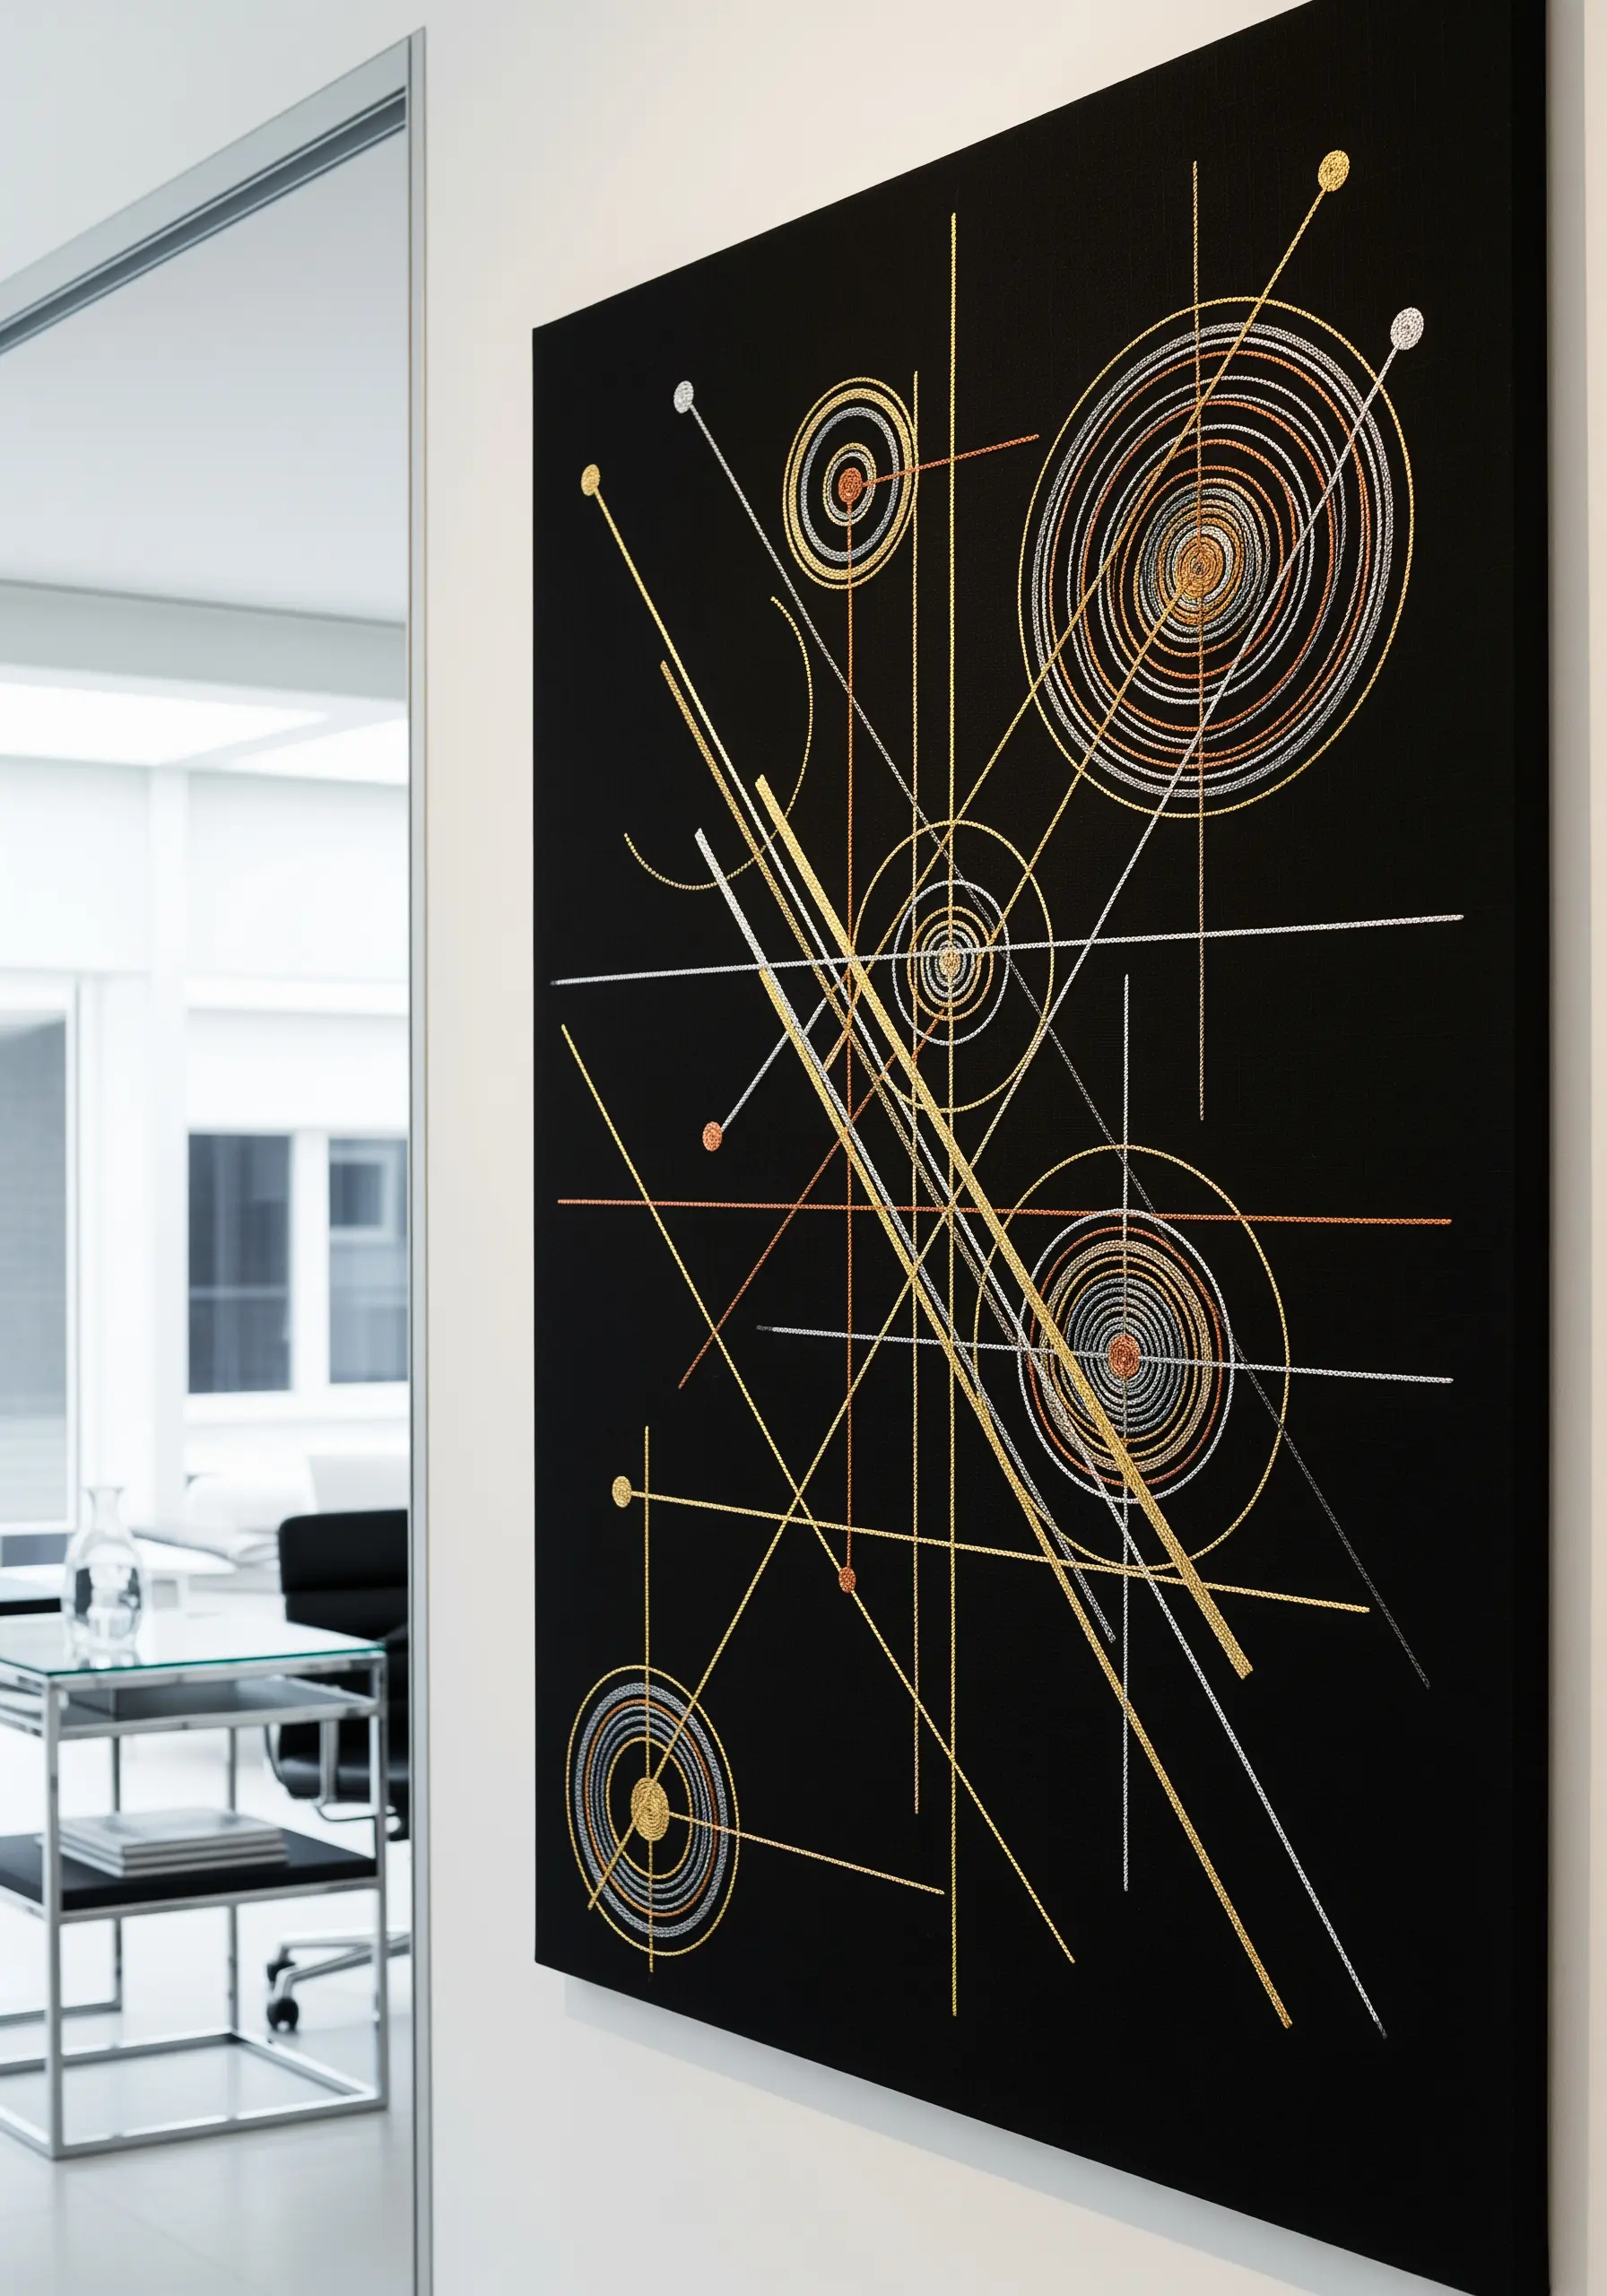
Evoke the feeling of astronomical charts or circuit boards using fine metallic threads on a dark canvas.
Plot out a geometric composition of intersecting lines and concentric circles, using pins to mark your anchor points.
Use different metallic tones—gold, silver, and copper—to define different elements within your design.
The way metallic thread catches the light adds a dynamic, shimmering quality that feels both futuristic and luxurious.
16. Sculpt and Fold Felt into Organic Structures
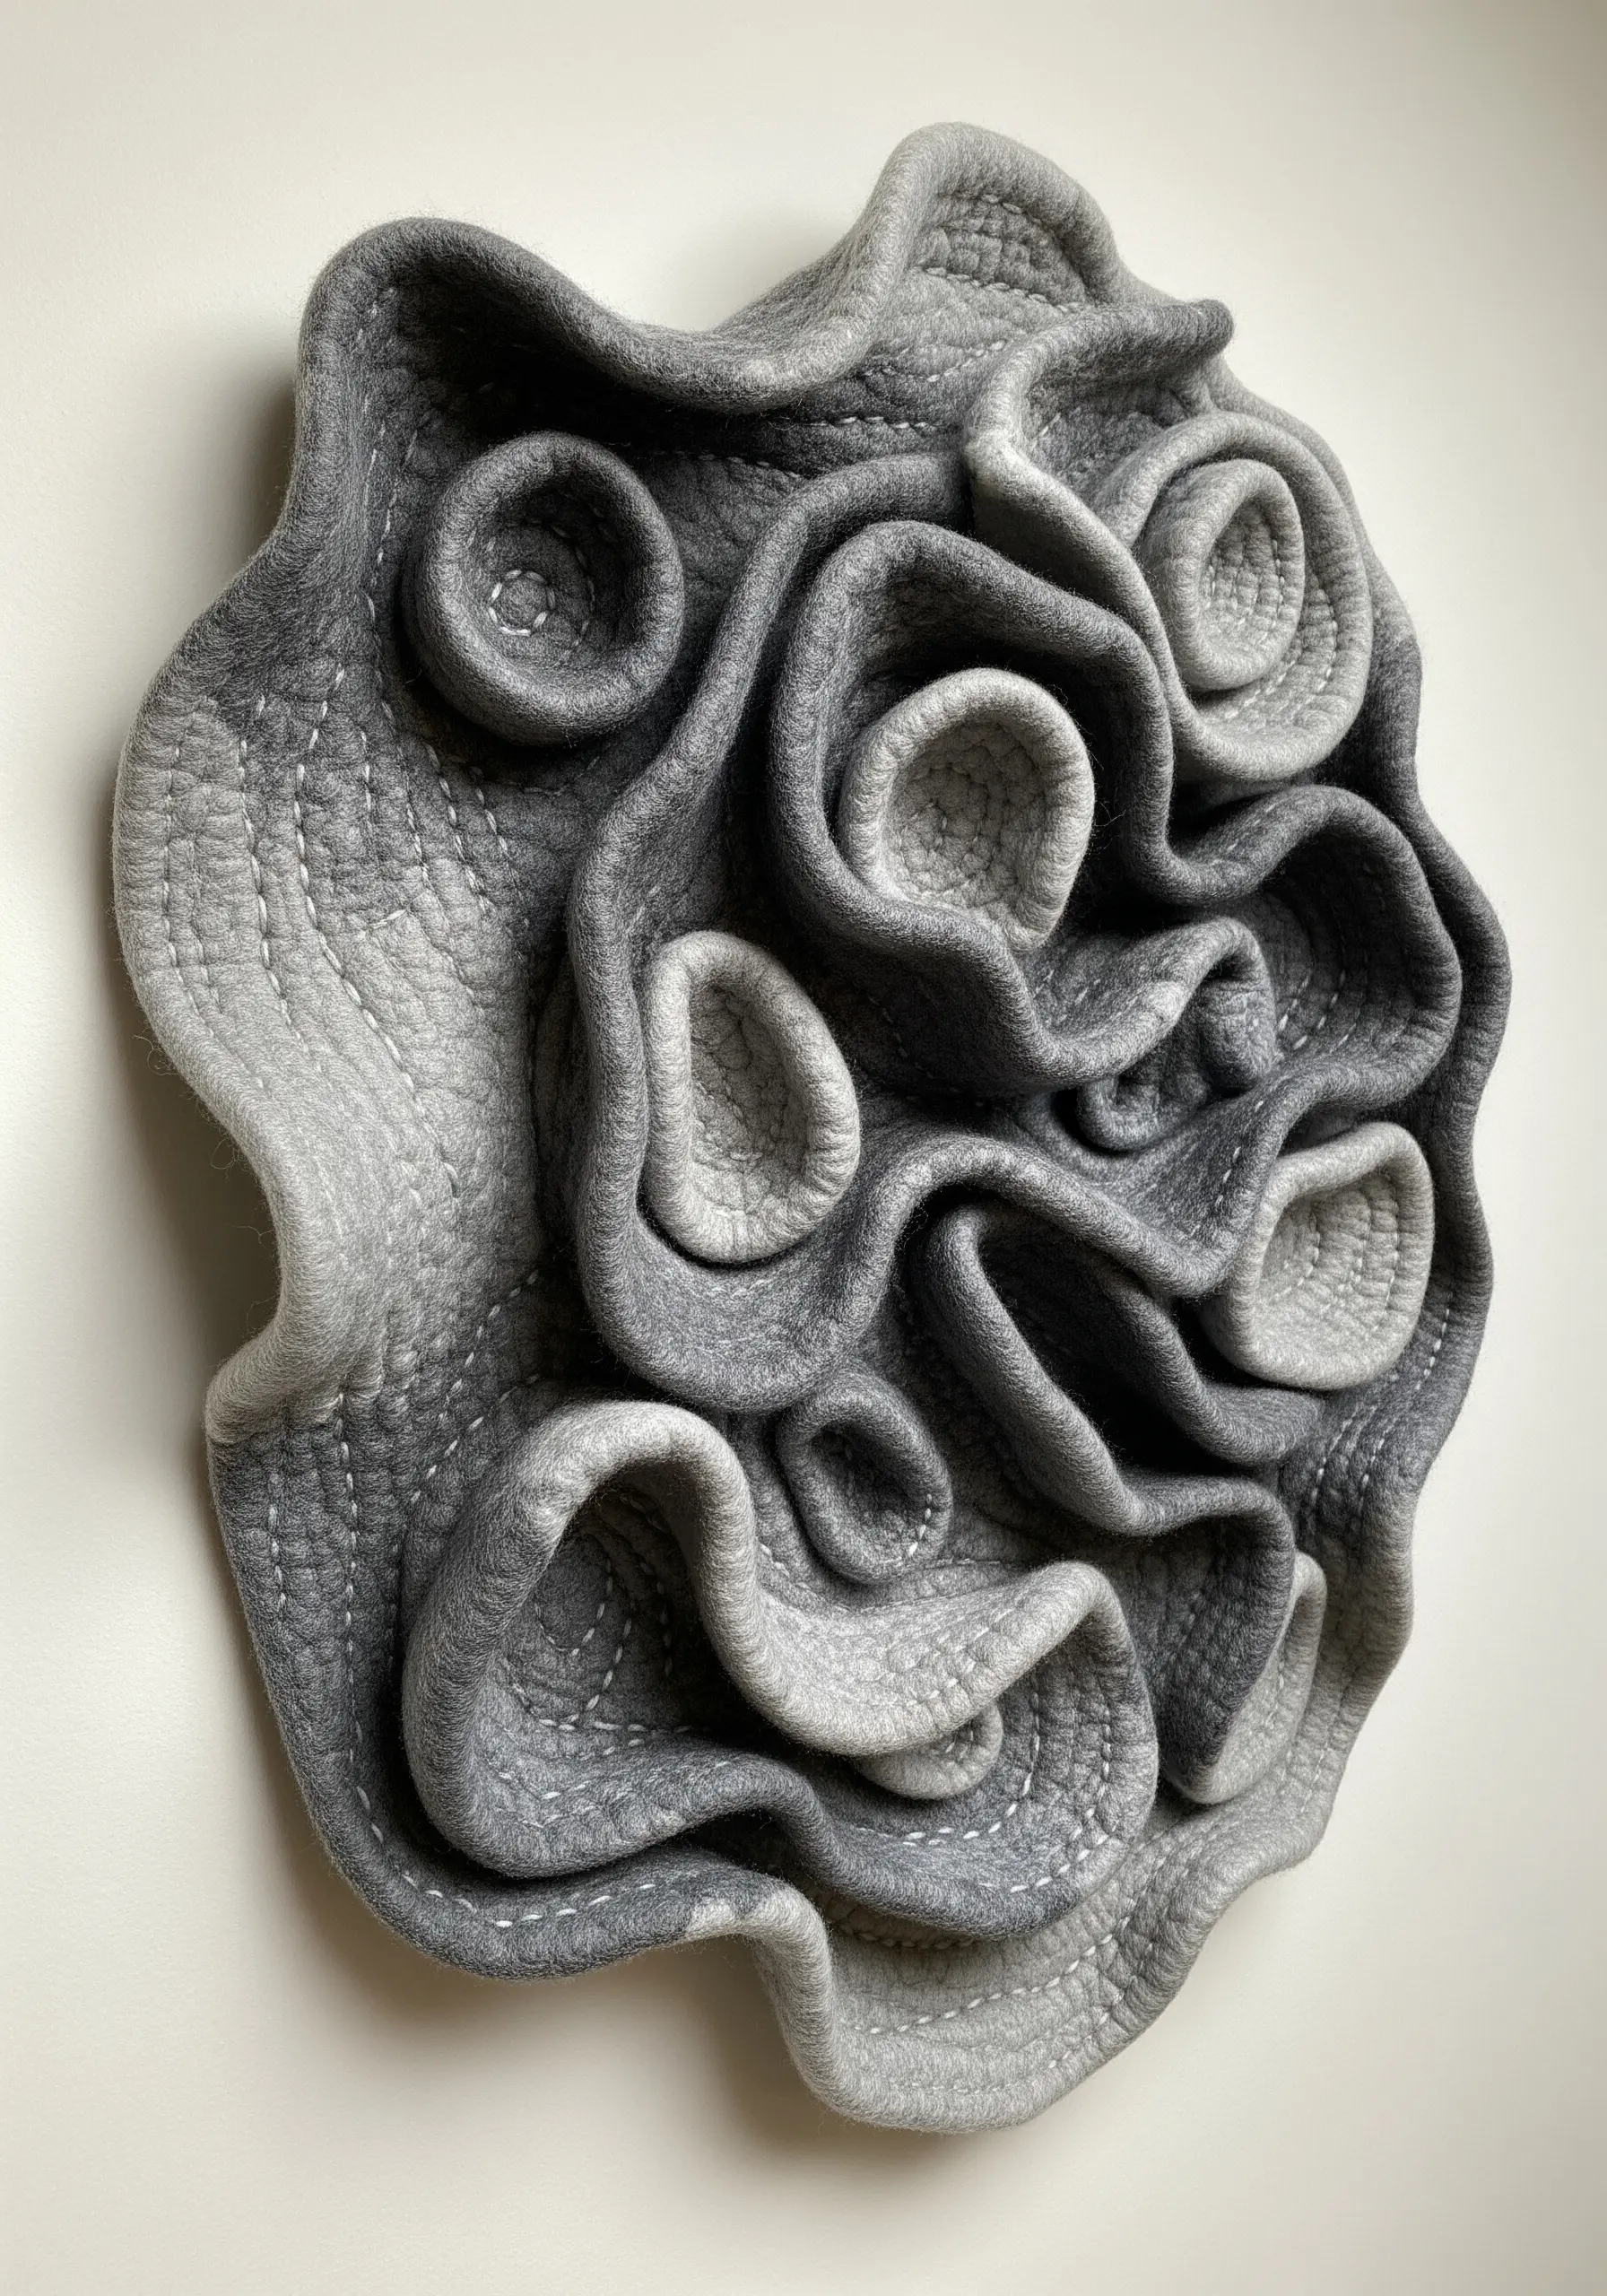
Use thick, malleable felt as your primary medium to create self-supporting, three-dimensional textile art.
Start with a flat piece of industrial or craft felt, then begin folding, pinching, and rolling it to create organic, coral-like forms.
Use a simple running stitch or whip stitch in a matching or subtly contrasting thread to secure the folds in place.
The stitching becomes both a structural necessity and a delicate decorative detail, highlighting the soft contours of the felt.
17. Paint with Thread Using Pointillist French Knots
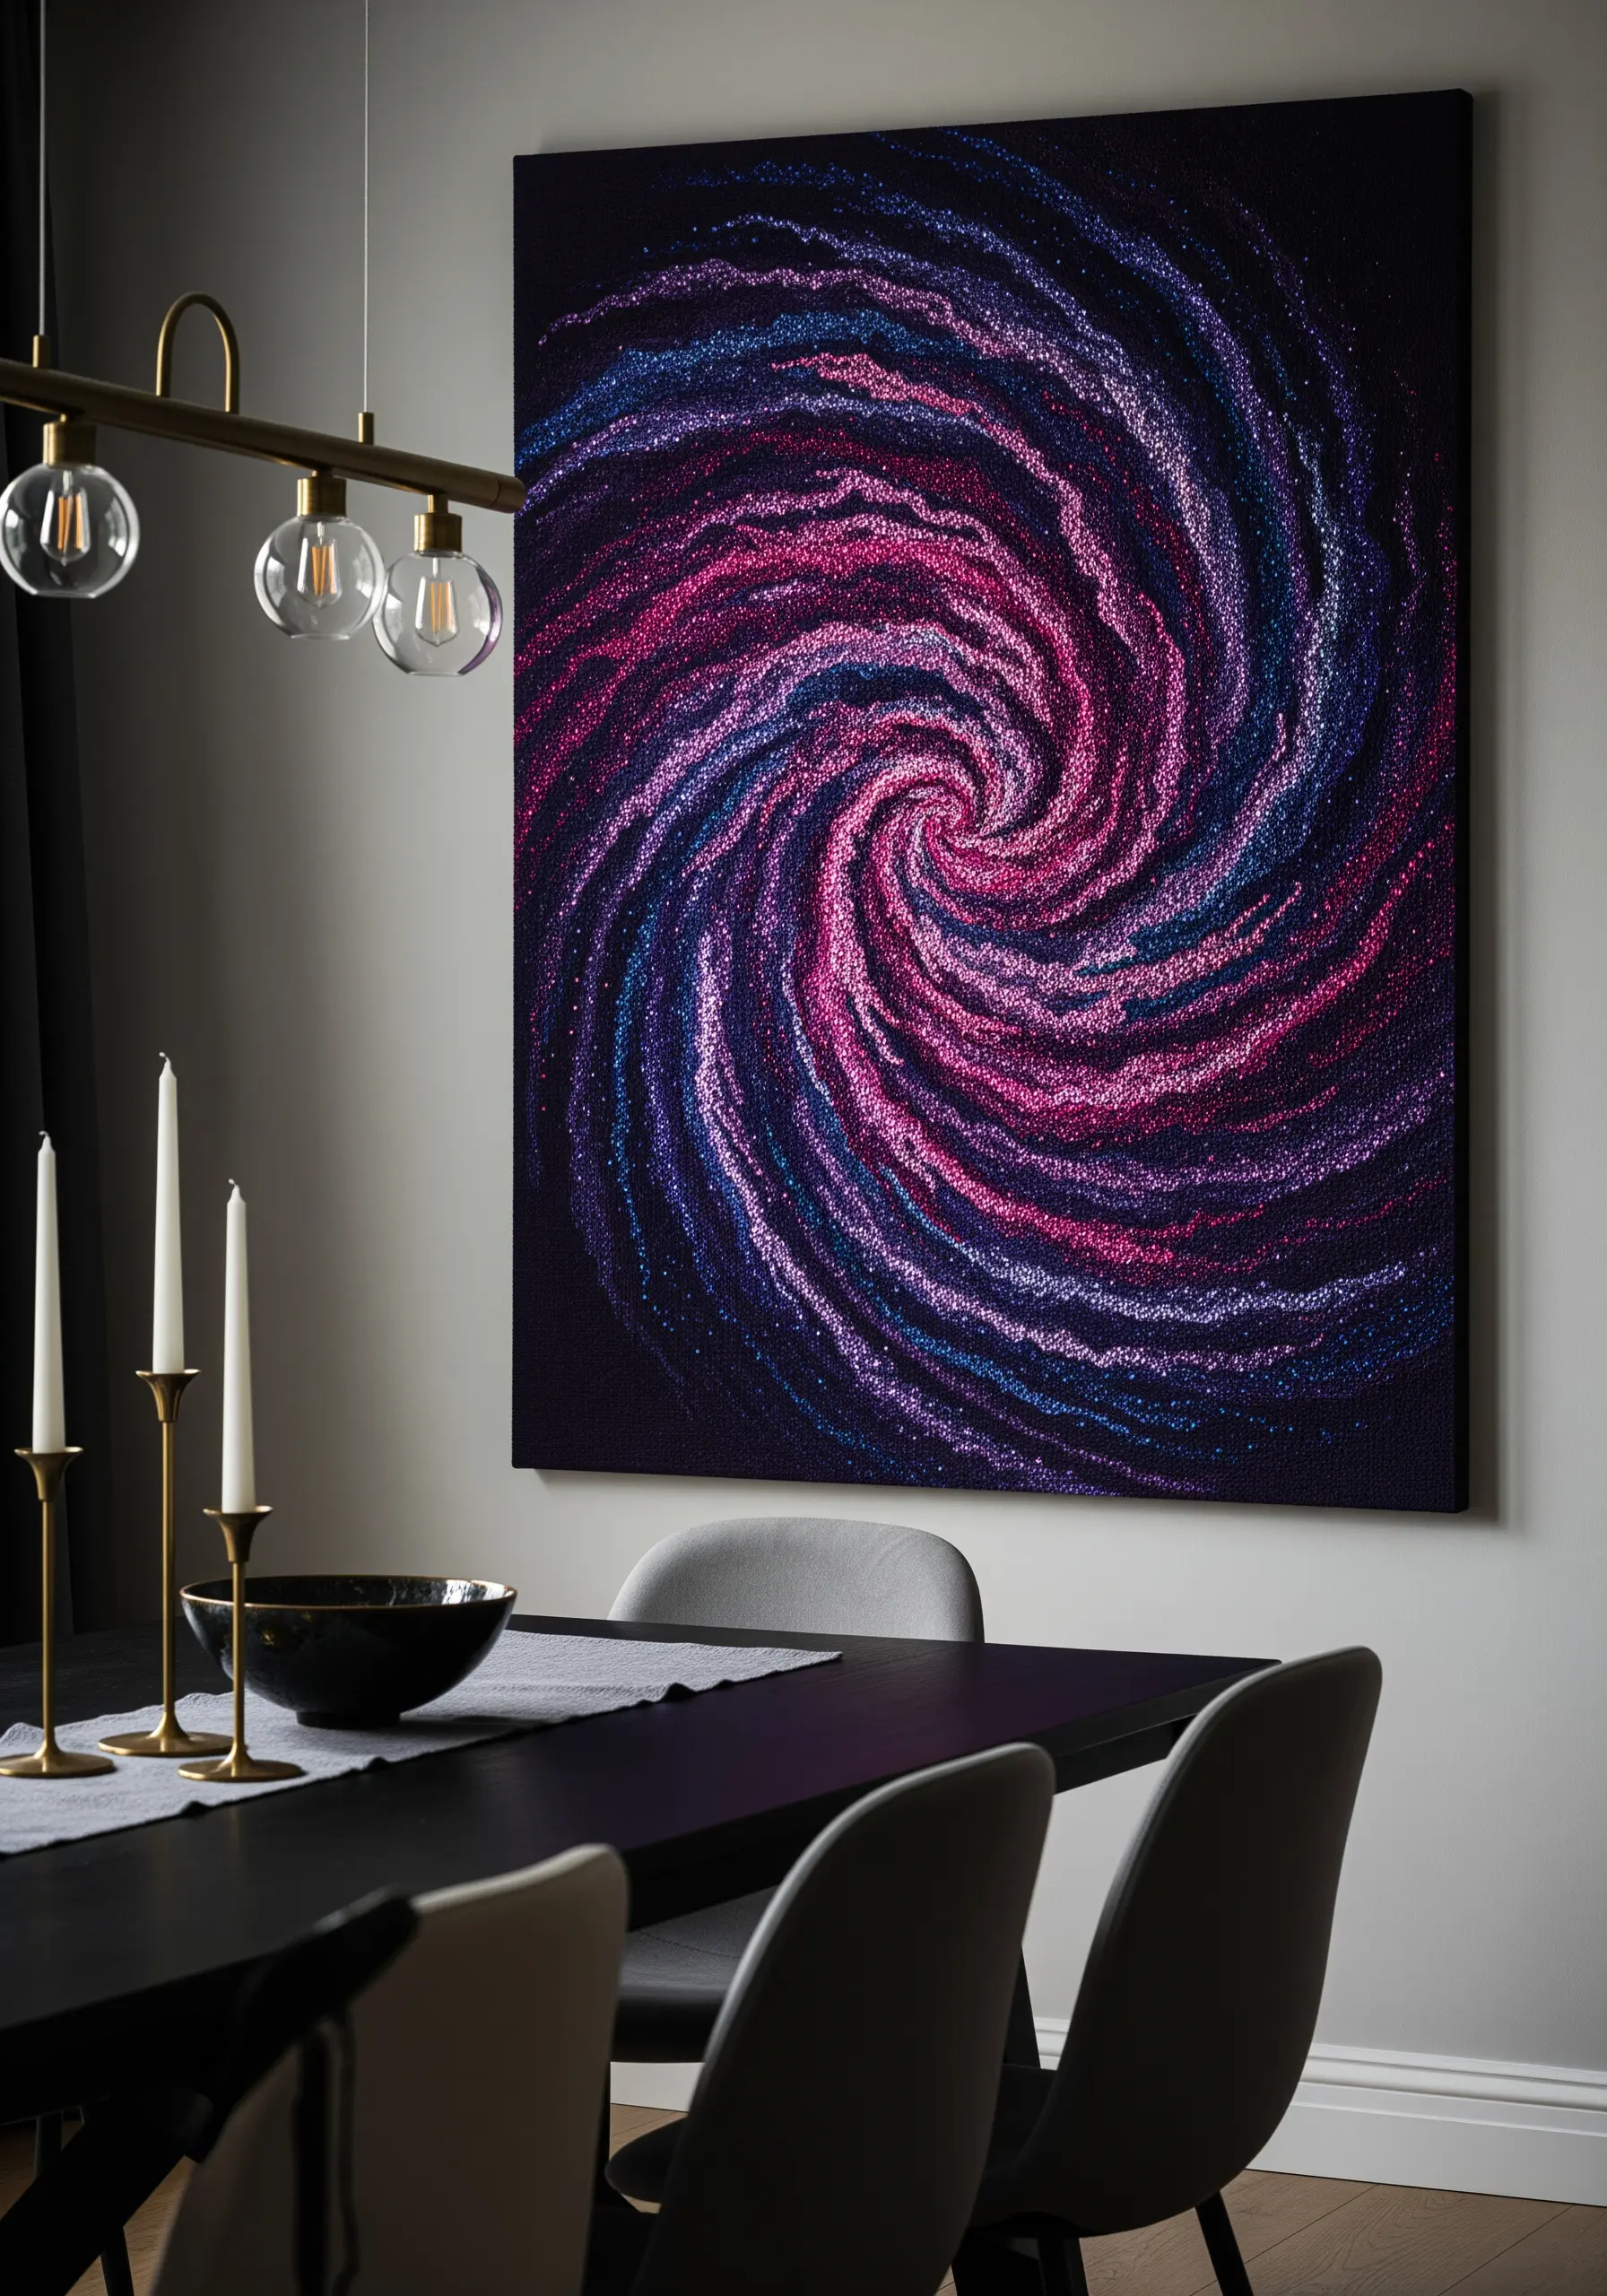
Create a swirling, galactic effect by using thousands of French knots as points of color, similar to Pointillist painting.
Work on a dark background to make the colors pop. Instead of filling solid blocks, allow your colors to blend and mix organically.
Place knots of different colors—pinks, purples, blues—close together, letting them swirl into one another to create a sense of cosmic movement and energy.
Varying the tightness and size of your knots will add another layer of subtle texture to the final piece.
18. Compose with Negative Space and Geometric Blocks
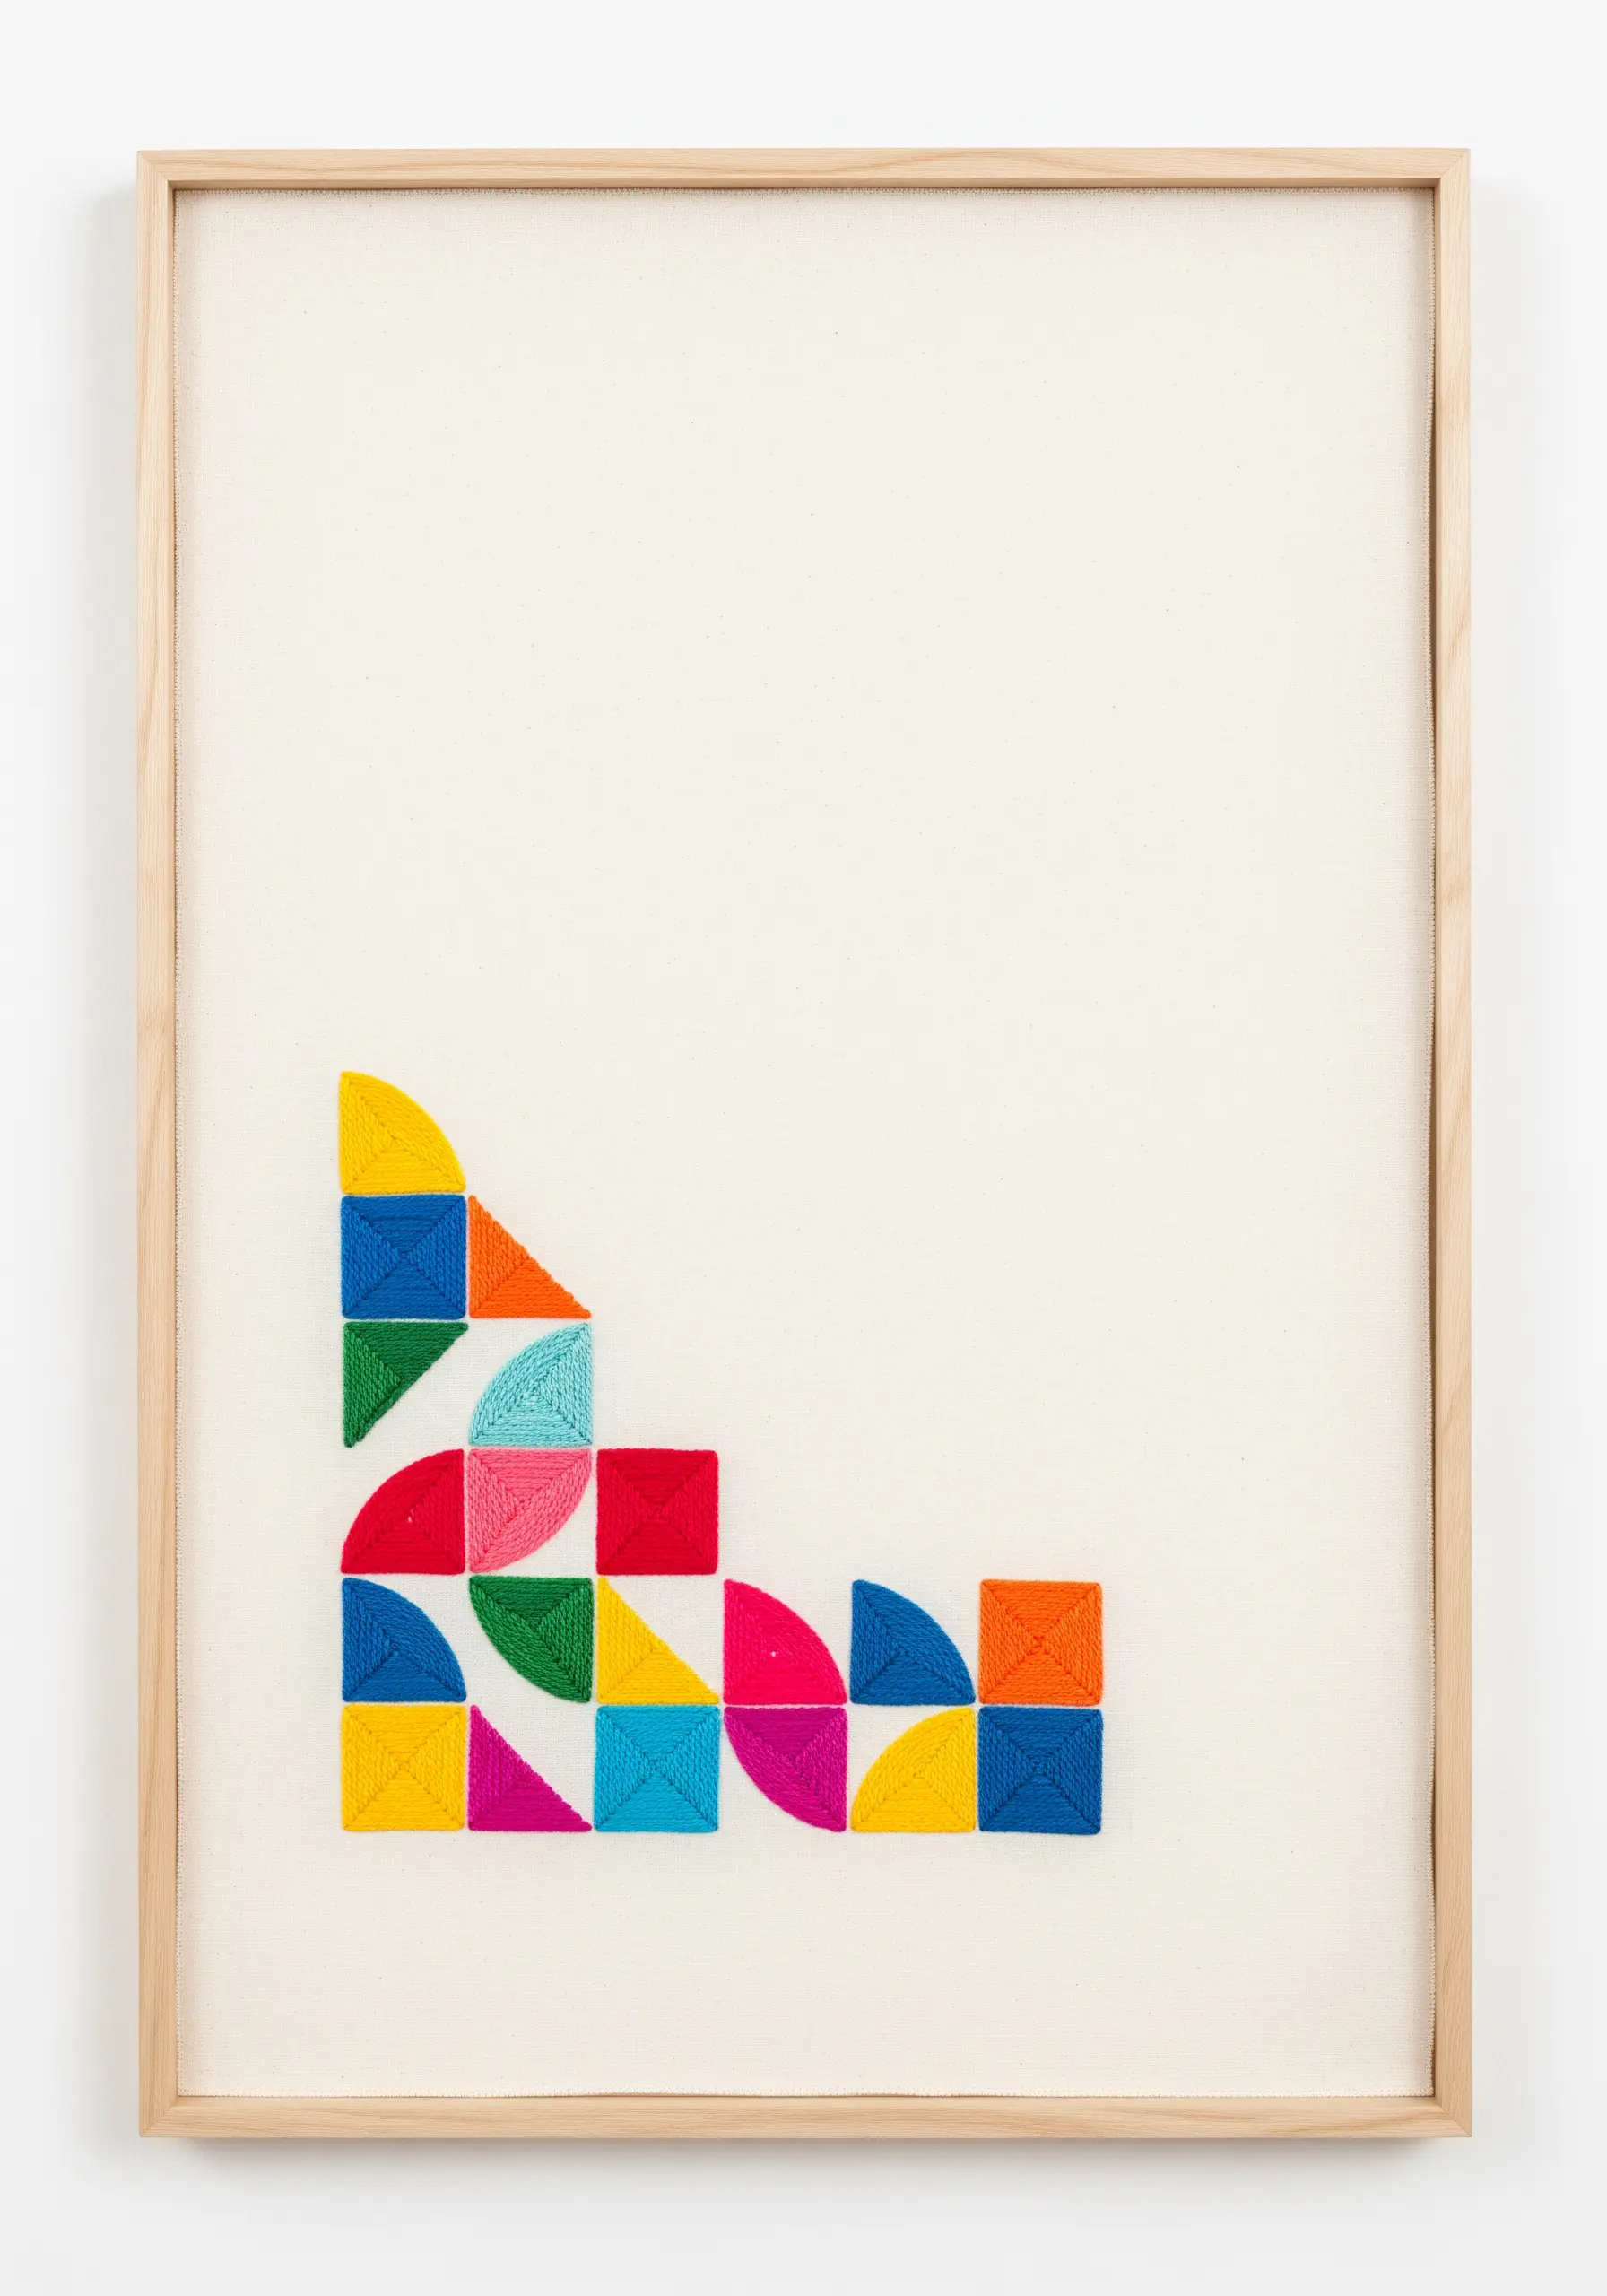
Make a bold statement by confining your stitching to one corner of the canvas, leaving the majority of the fabric untouched.
Use neatly executed satin stitches to create a mosaic of small geometric shapes—squares, triangles, and quarter-circles.
A bright, playful color palette prevents the minimal composition from feeling stark.
This negative space embroidery technique draws the eye and makes a small amount of stitching feel incredibly intentional and impactful.
19. Play with Light and Shadow on Sheer Panels
Embroider on semi-transparent fabrics like voile or organza to create art that interacts with light.
Choose a simple, continuous line pattern, as complex designs can be lost in the fabric’s transparency.
When hung in front of a window, the stitched lines will cast delicate shadows that shift throughout the day, adding a dynamic, ever-changing dimension to your work.
Experiment with white, grey, and black thread on matching sheer panels for a sophisticated, high-contrast display.
20. Integrate Weaving and Roving within a Hoop

Combine basic weaving techniques with sculptural fiber elements directly within an embroidery hoop for a modern take on woven wall hangings.
Warp your hoop with a strong cotton thread, then use a tapestry needle to weave different yarns and create a solid, color-graded background.
Leave a portion of the hoop open to create an interesting crescent shape.
Finish by couching or needle-felting super-chunky roving along the edge of your weaving, adding a soft, cloud-like texture that breaks the frame’s boundary.
21. Layer Frayed Fabrics for a Deconstructed Feel
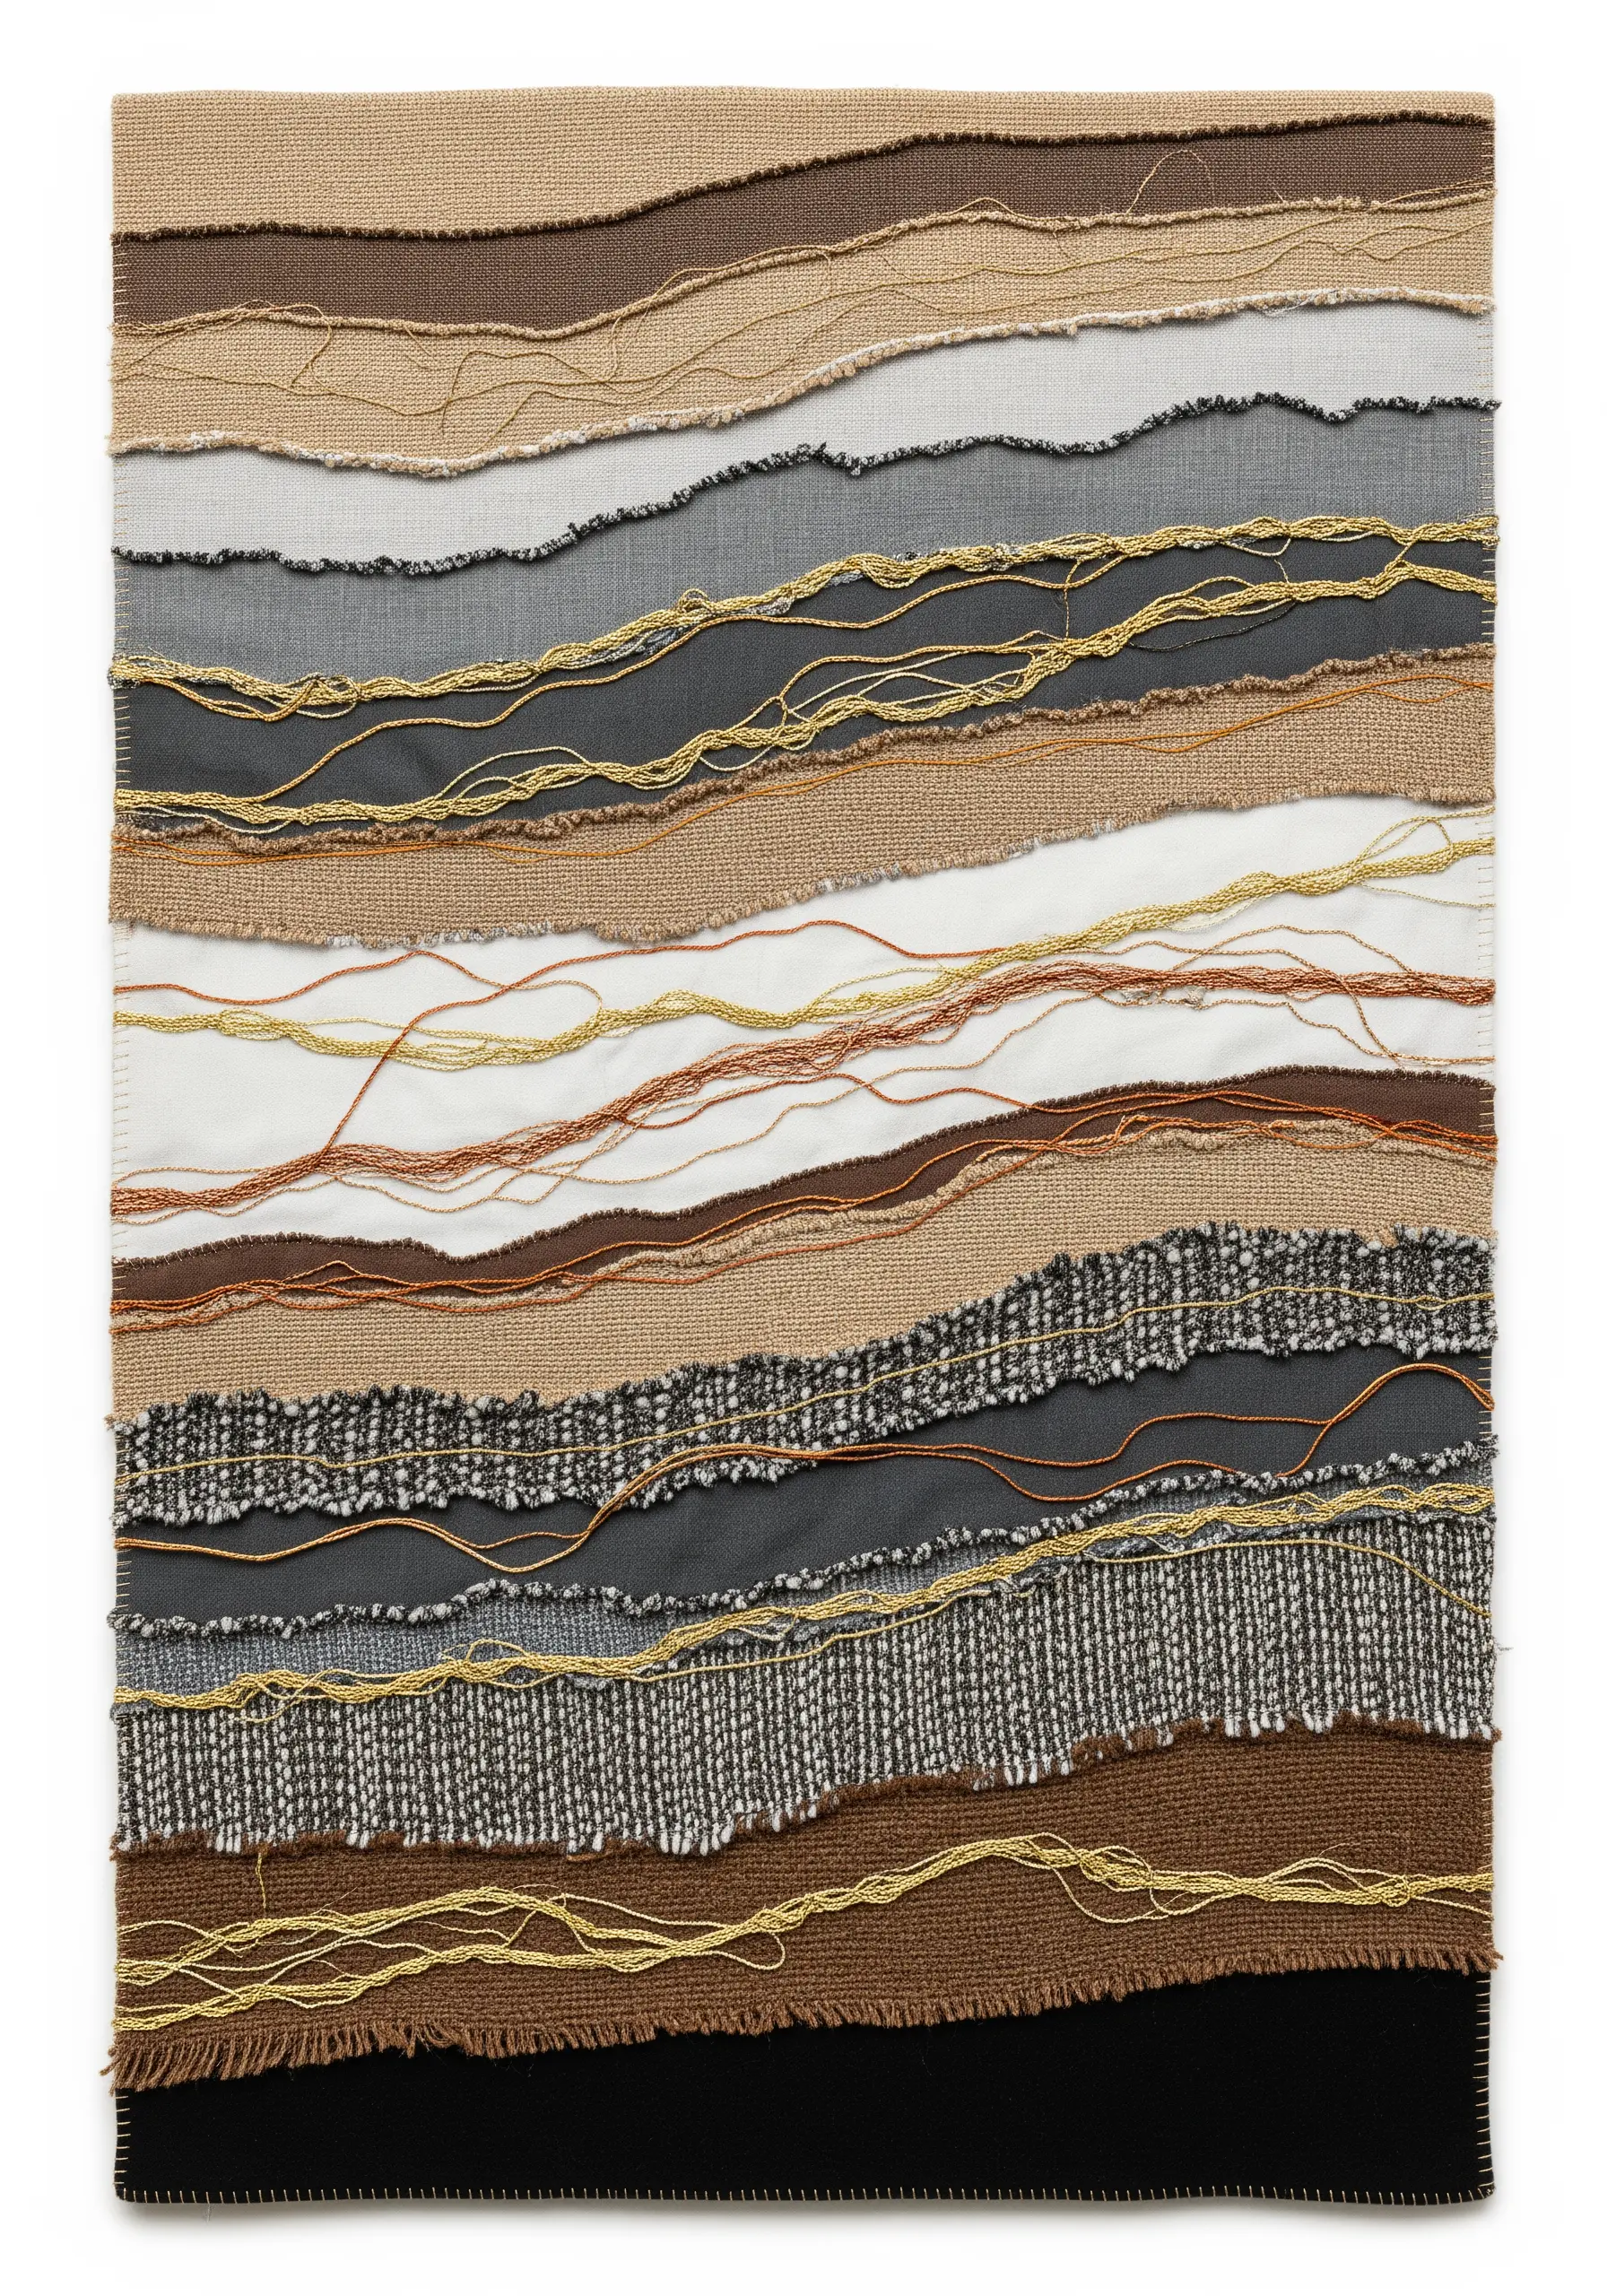
Create a rich, layered texture by working with the raw, frayed edges of different fabrics rather than hiding them.
Cut or rip strips of various textiles—linen, tweed, cotton duck—and arrange them in overlapping, wavy layers.
Secure the layers with minimal stitching, then add loose, wandering lines of fine metallic or contrasting thread over the top.
This technique celebrates imperfection and creates a piece with an organic, geological feel, turning scrap materials into sophisticated layered fabric collage embroidery projects.
22. Create a Cascading Waterfall of Colorful Yarns
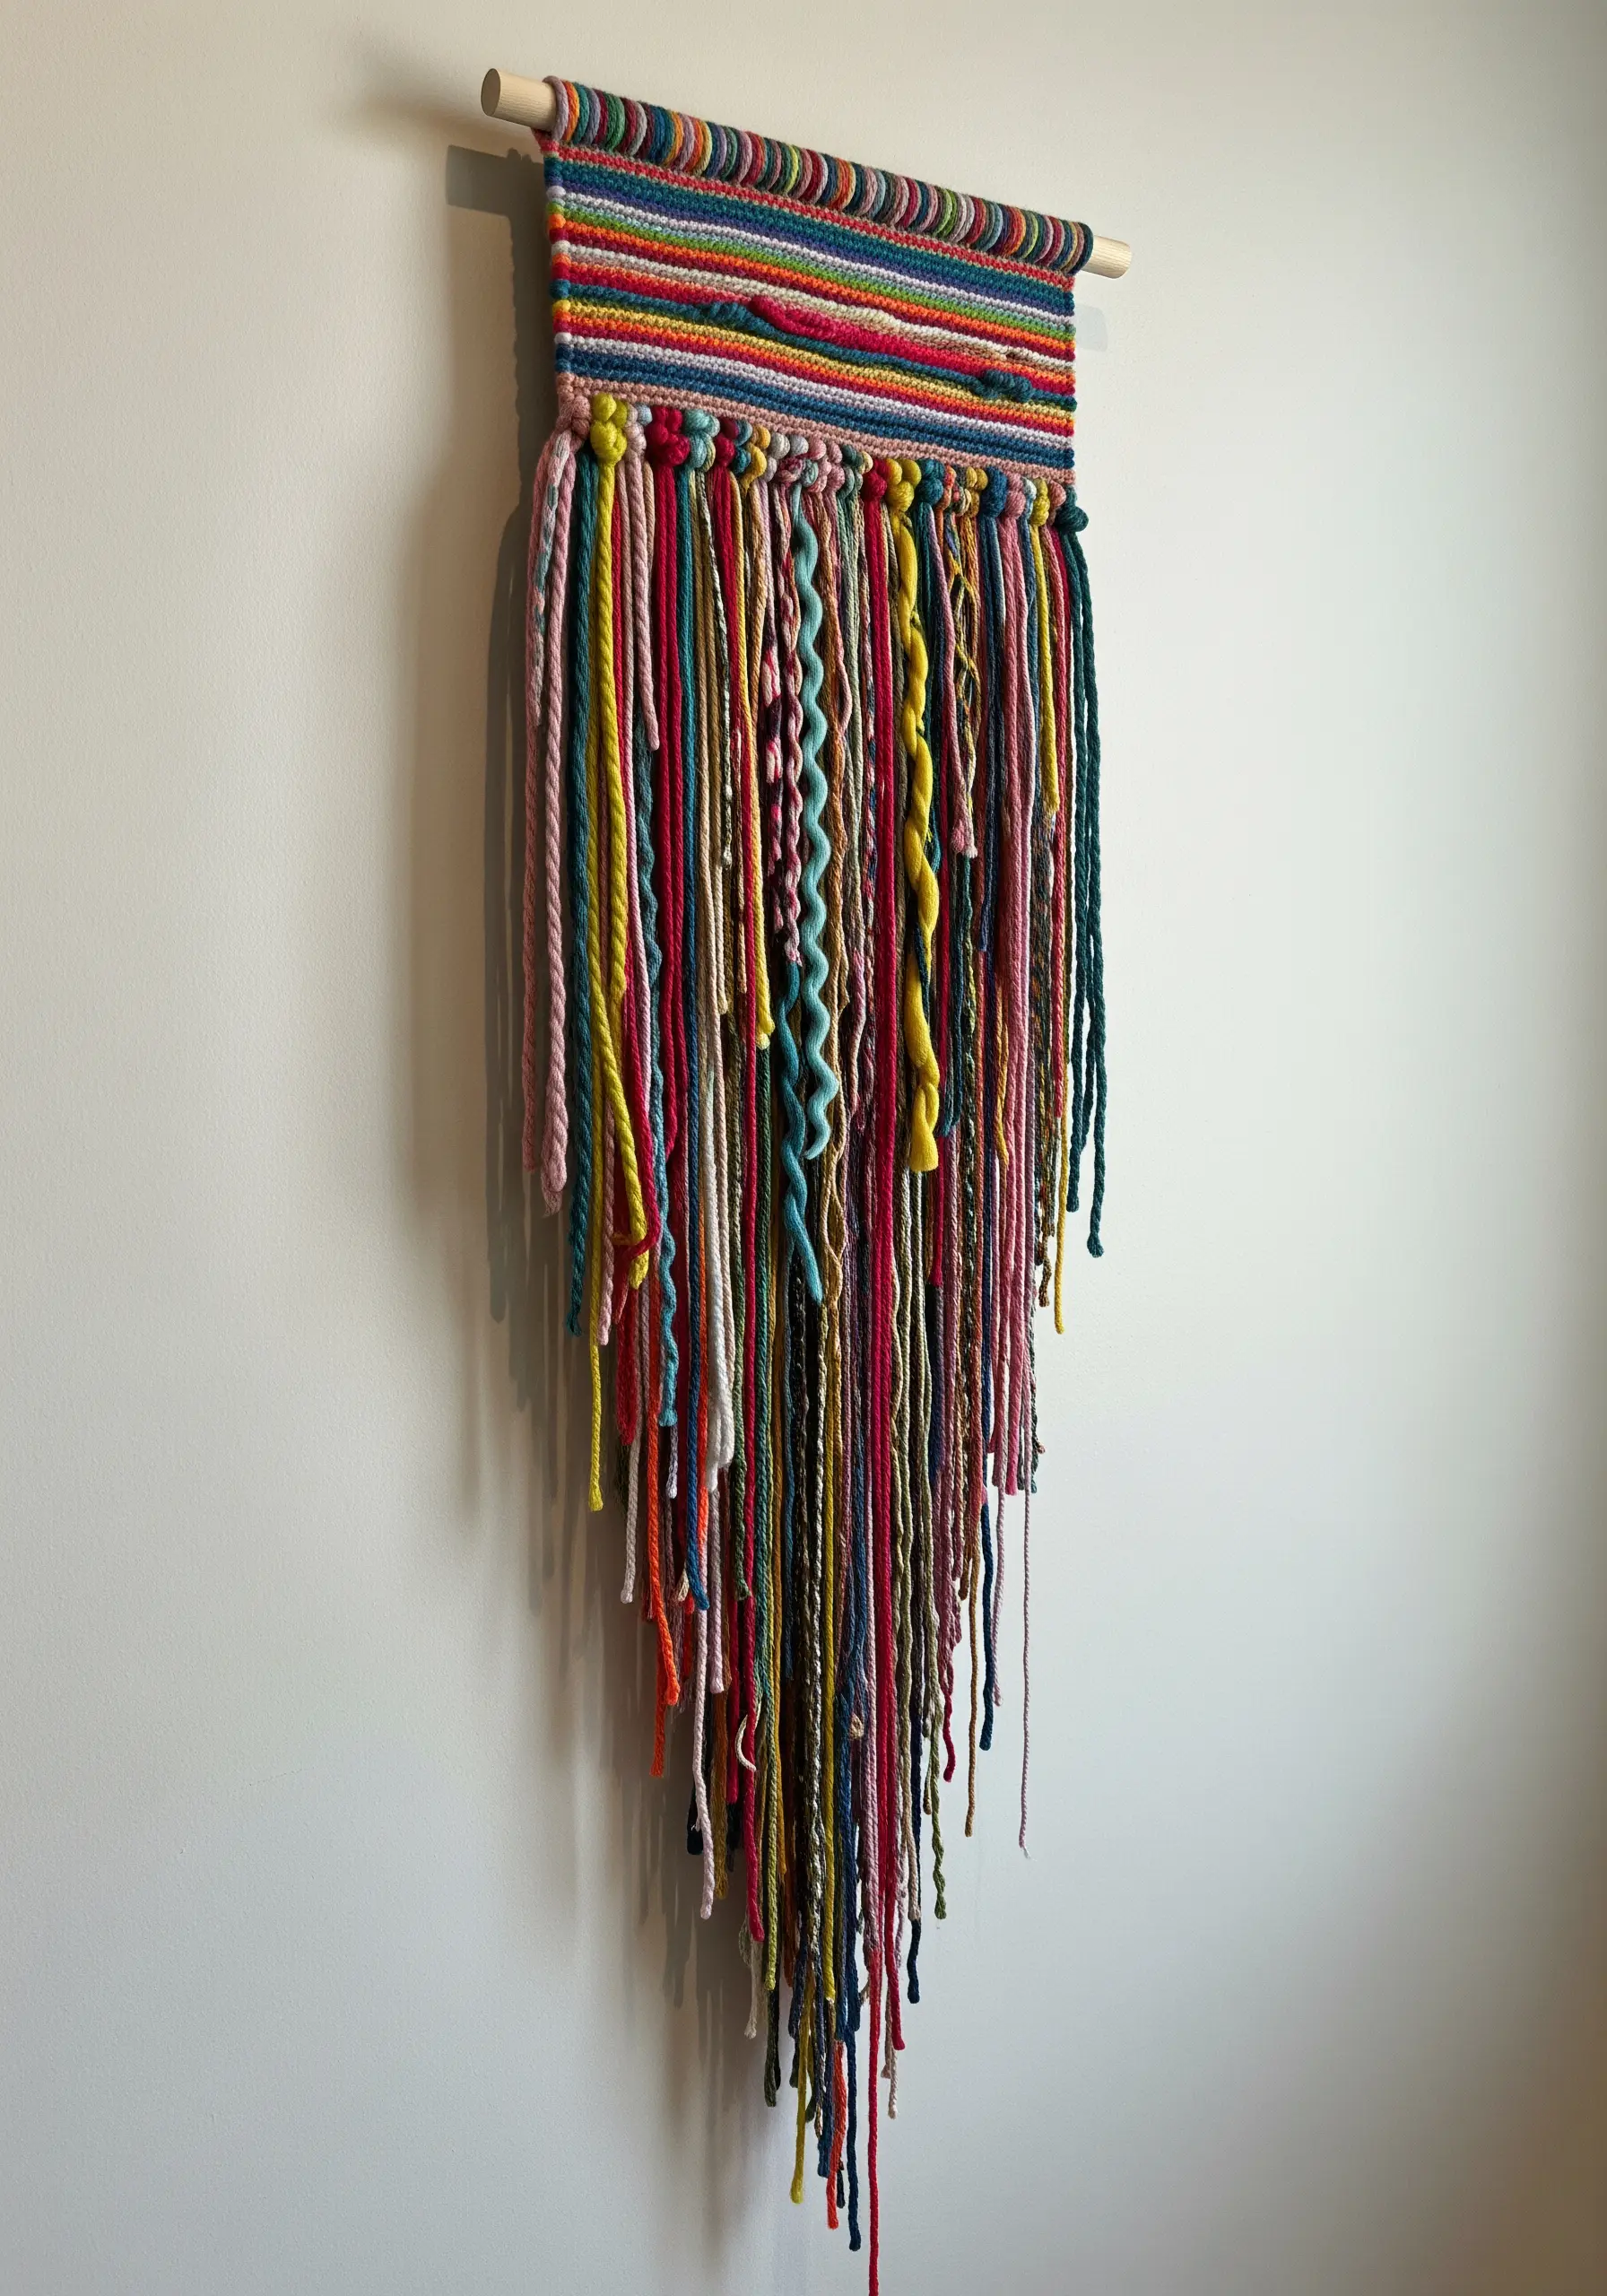
Construct a vibrant, free-flowing wall hanging that focuses on the beauty of the yarn itself.
Begin by creating a tightly woven or stitched band at the top, which will serve as the anchor for your piece.
From this band, allow dozens of strands of yarn in various colors, weights, and textures to hang freely.
Introduce variety by adding simple braids, twists, or knots to a few of the strands. This creates a playful, tactile piece that is all about color and movement.
23. Use Appliqué and Cut-Outs for a ‘Reverse’ Design
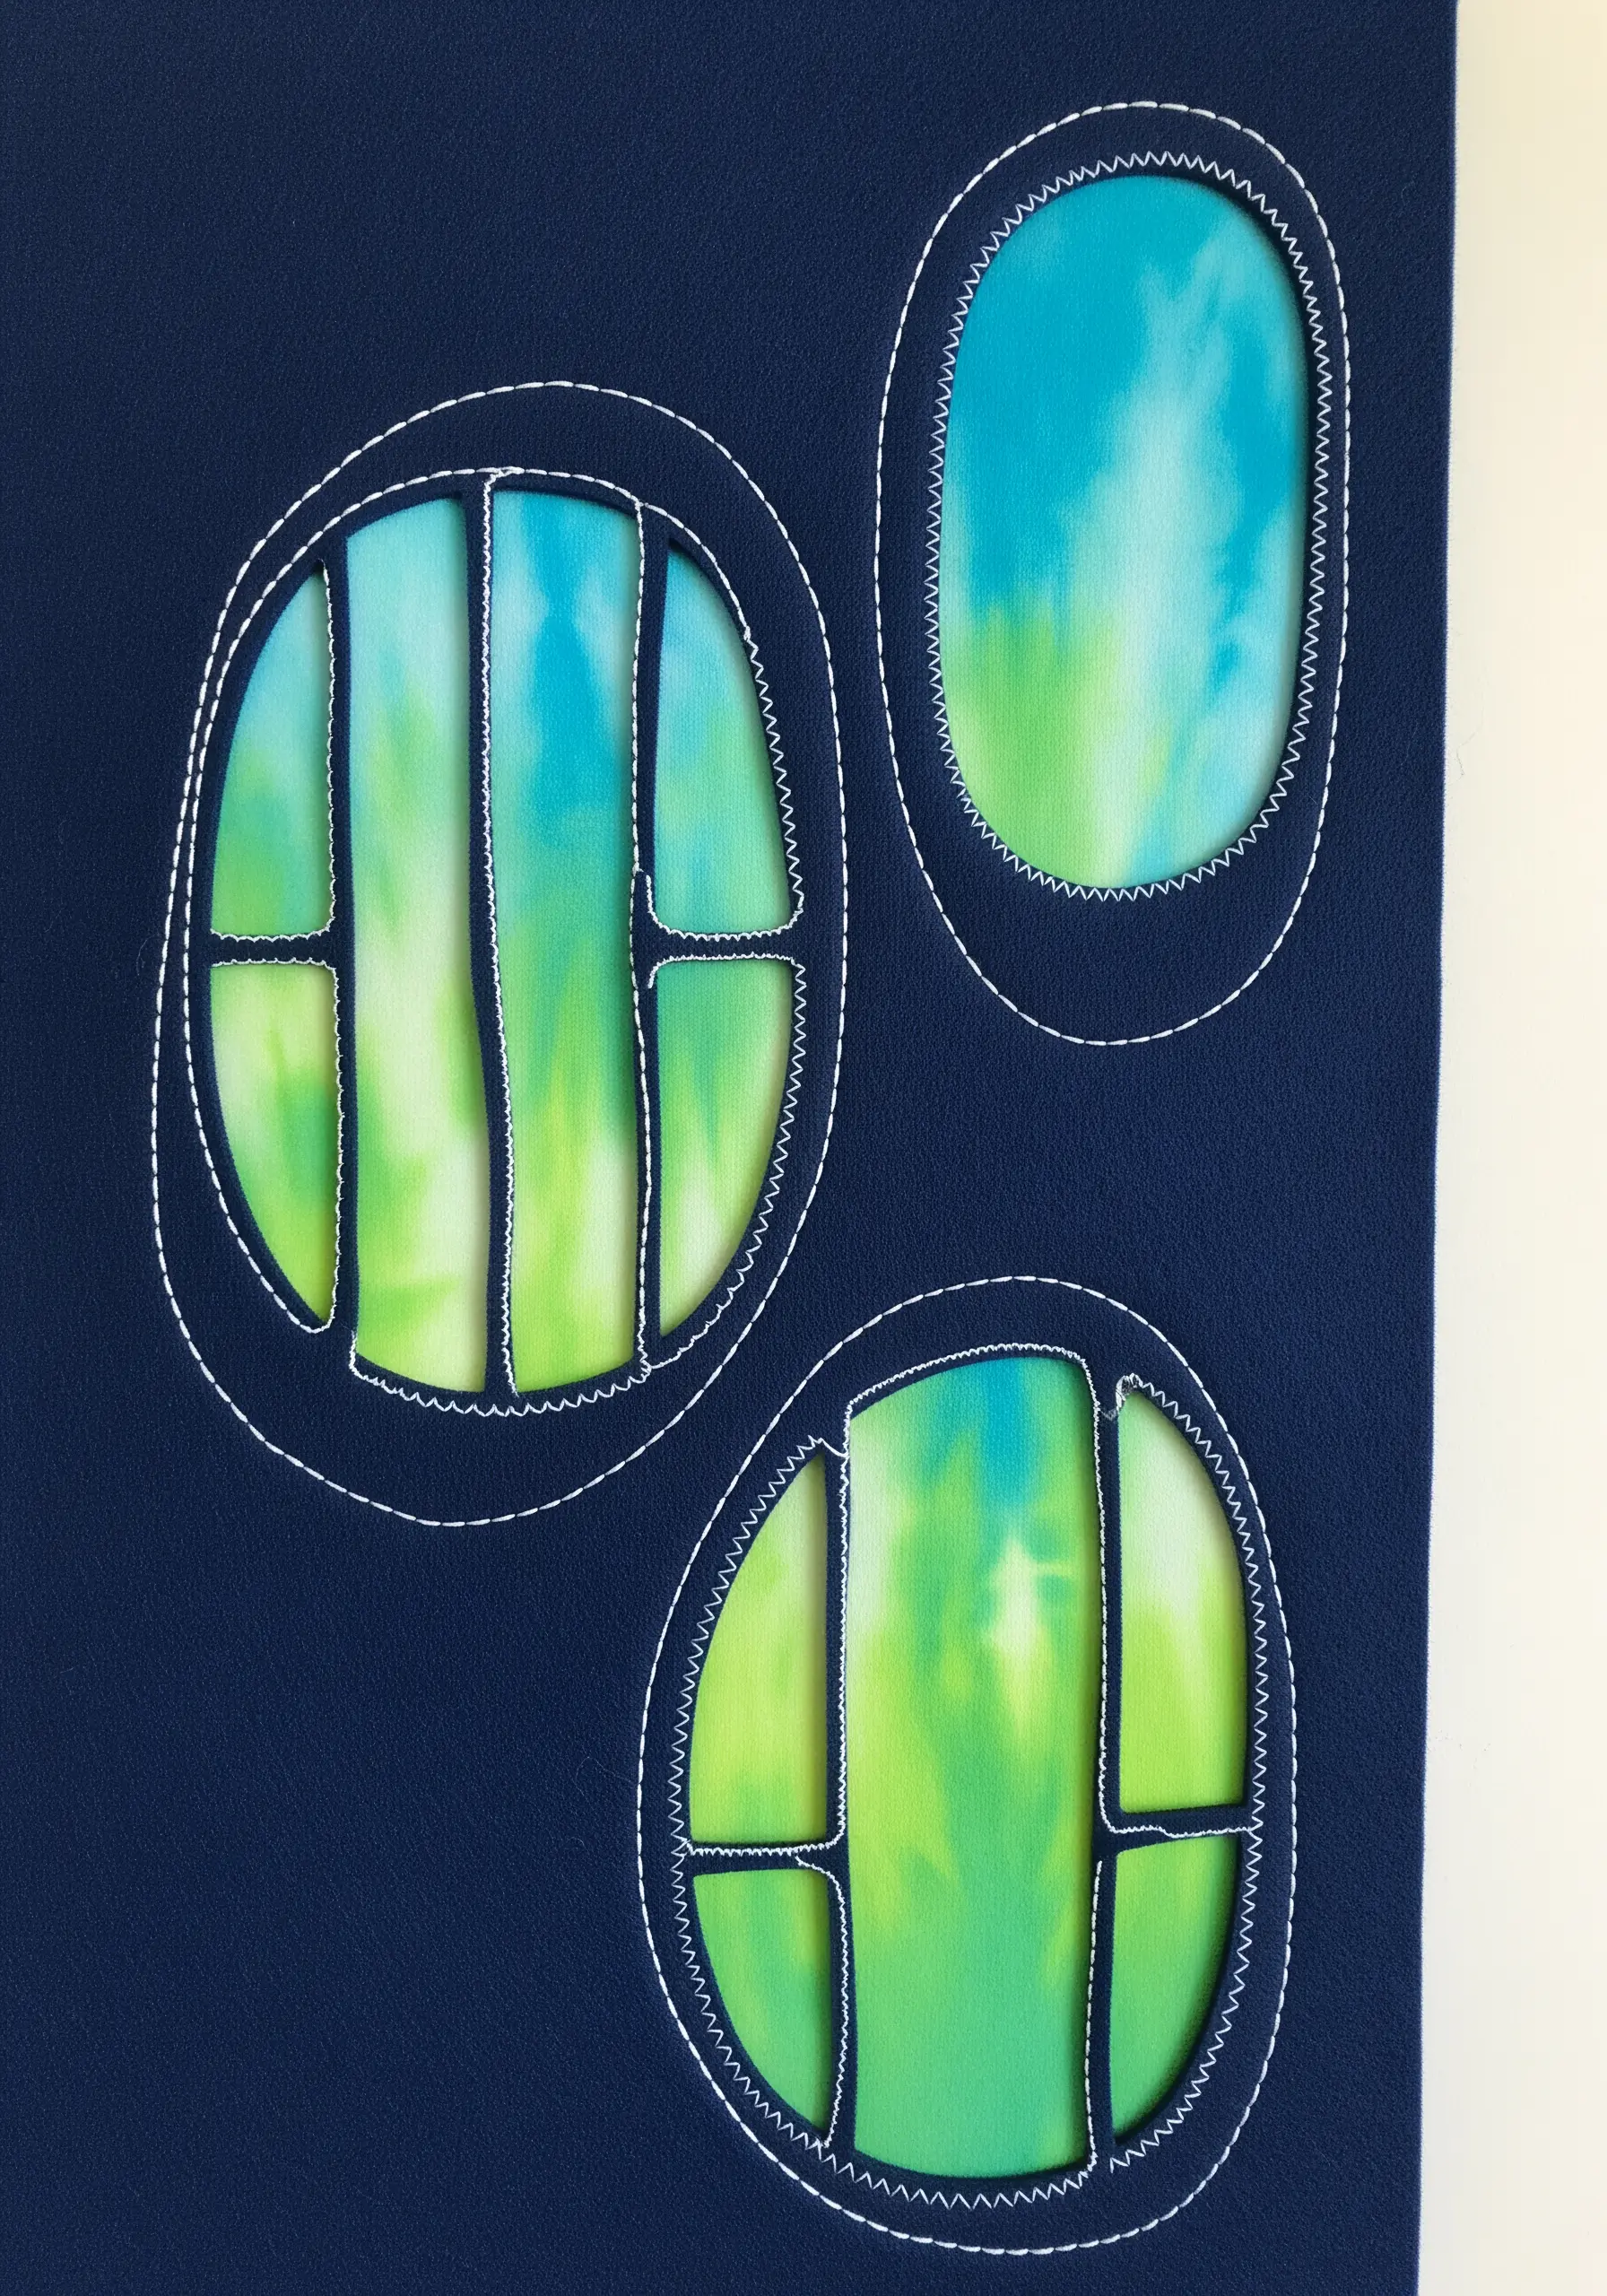
Instead of adding thread to a surface, reveal a different fabric from underneath in a technique known as reverse appliqué.
Layer two fabrics, with a vibrant or patterned piece on the bottom and a solid color on top.
Stitch your desired shapes through both layers, then carefully cut away the top fabric from inside your stitched lines to reveal the color below.
A simple zigzag stitch around the cut edge adds a clean, graphic finish and prevents fraying.
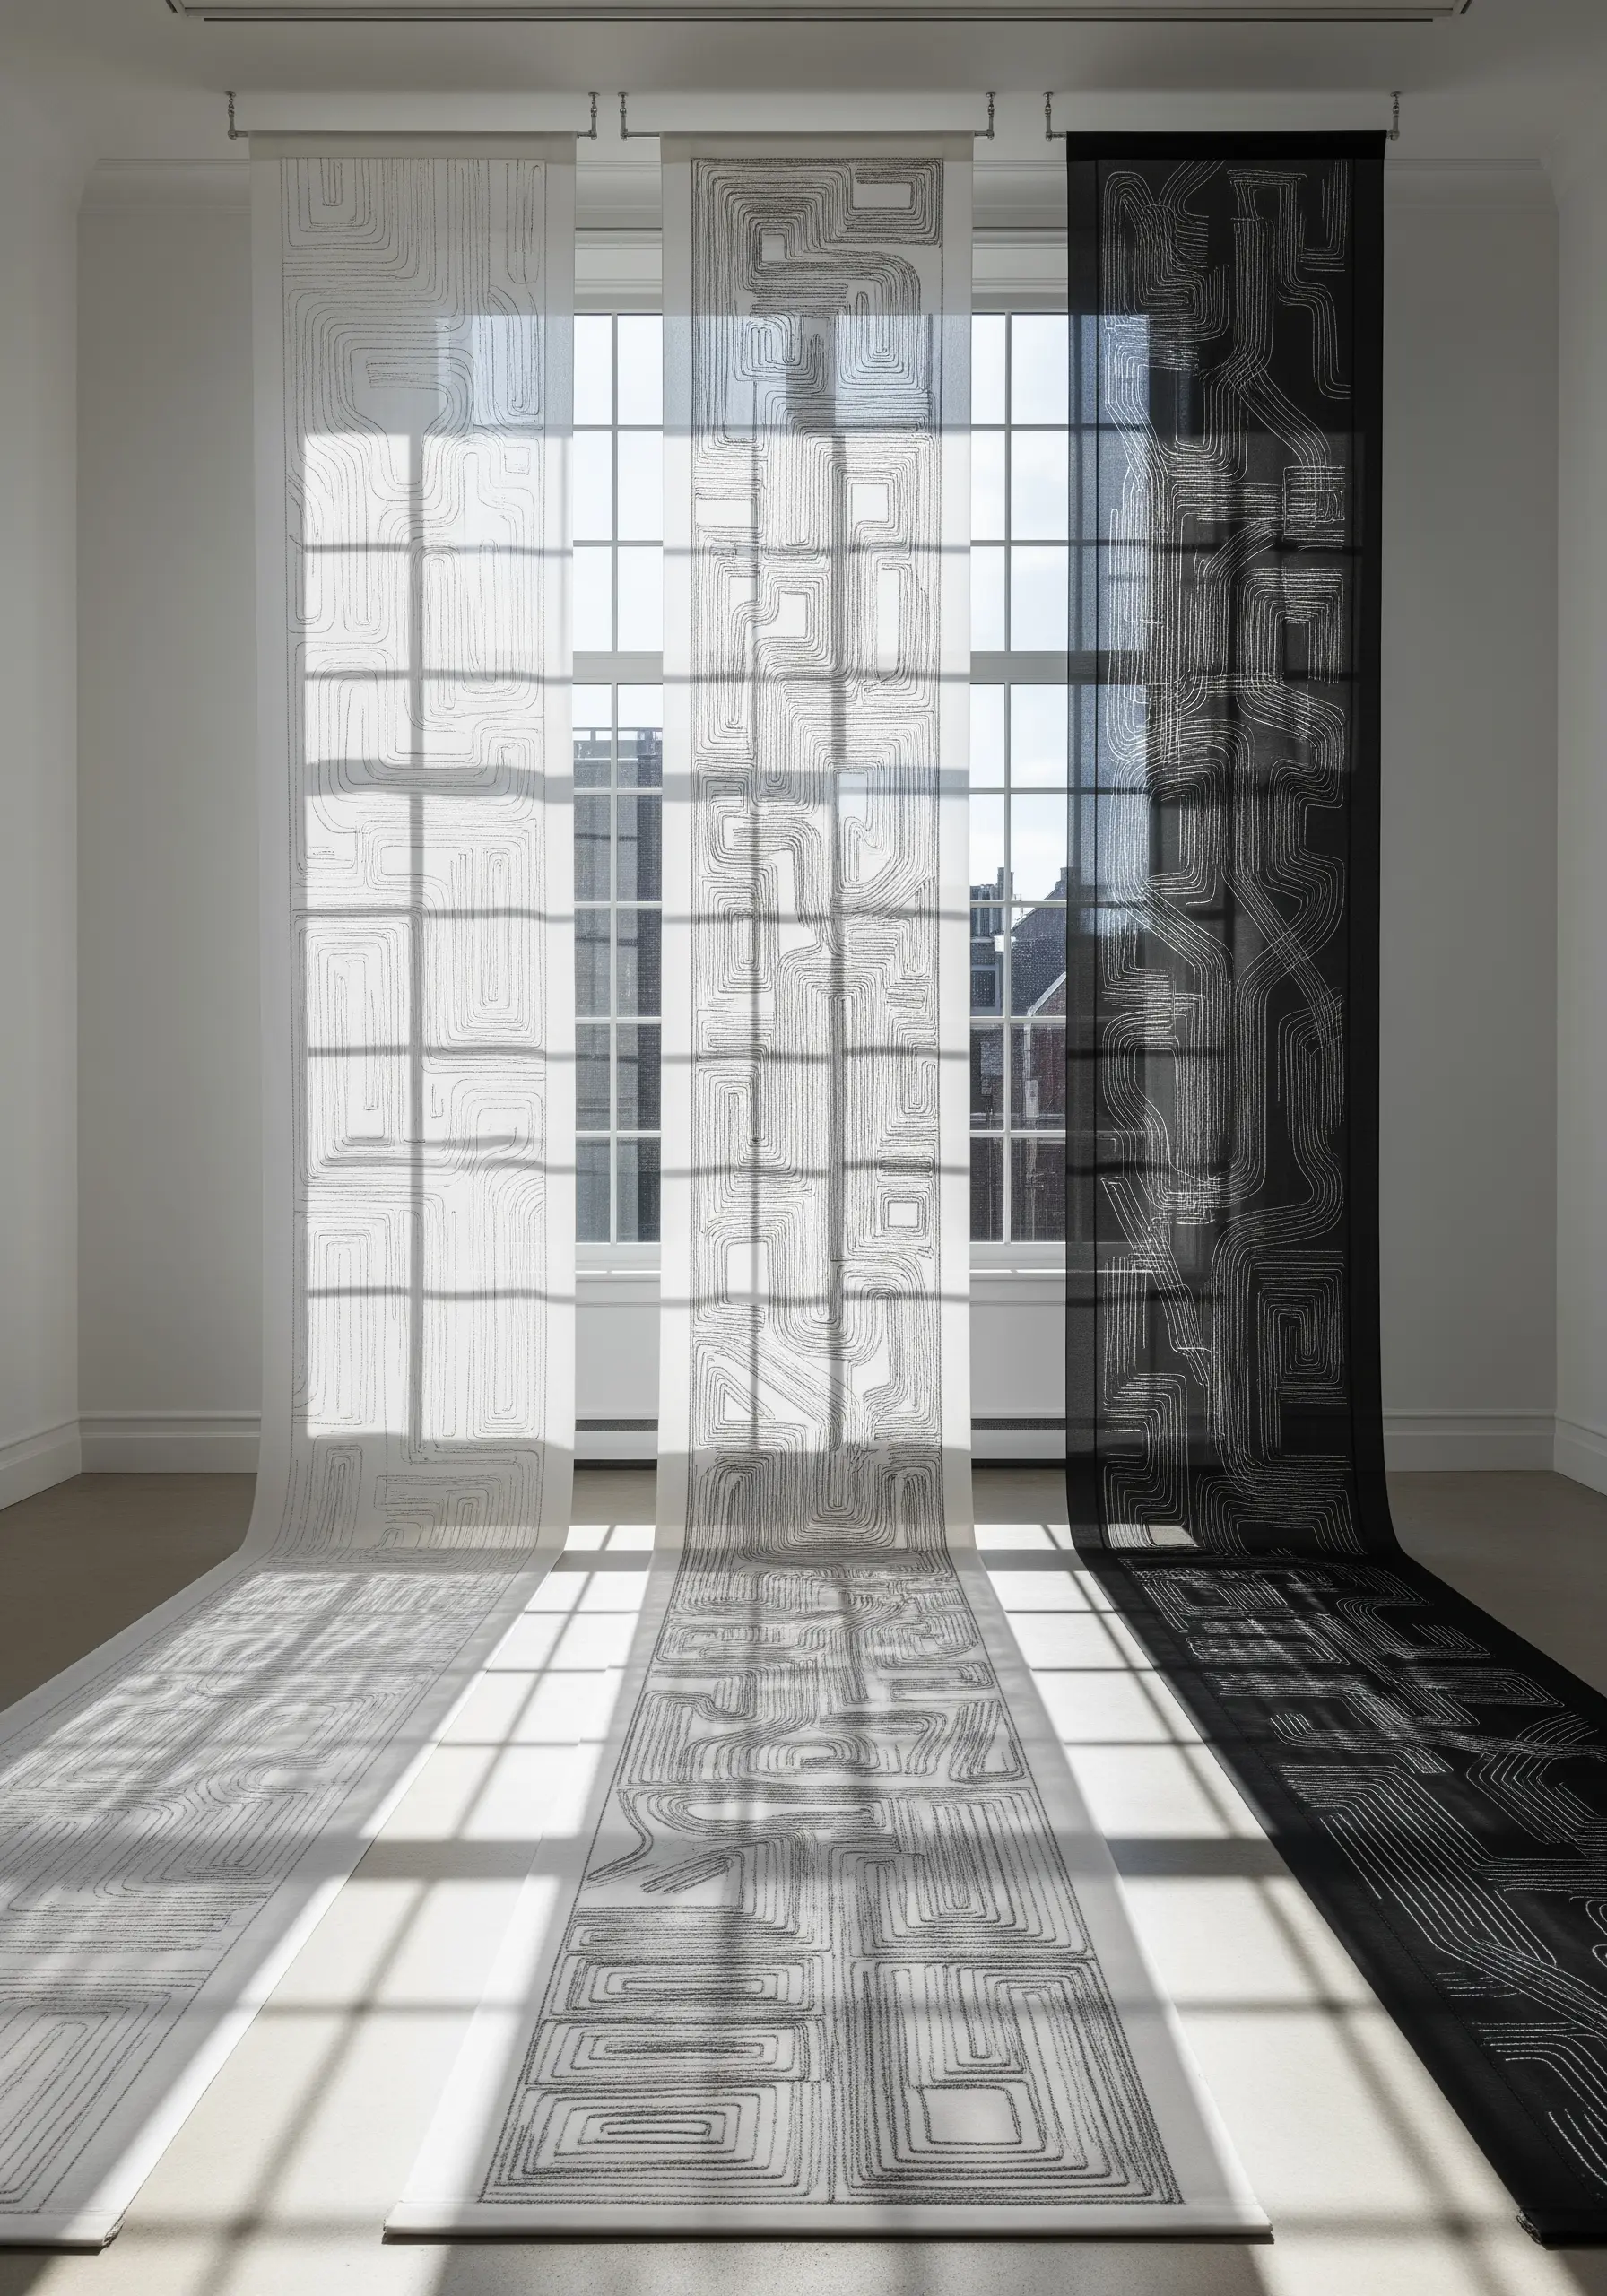
24. Explore Gravity with Large-Scale Thread Installations
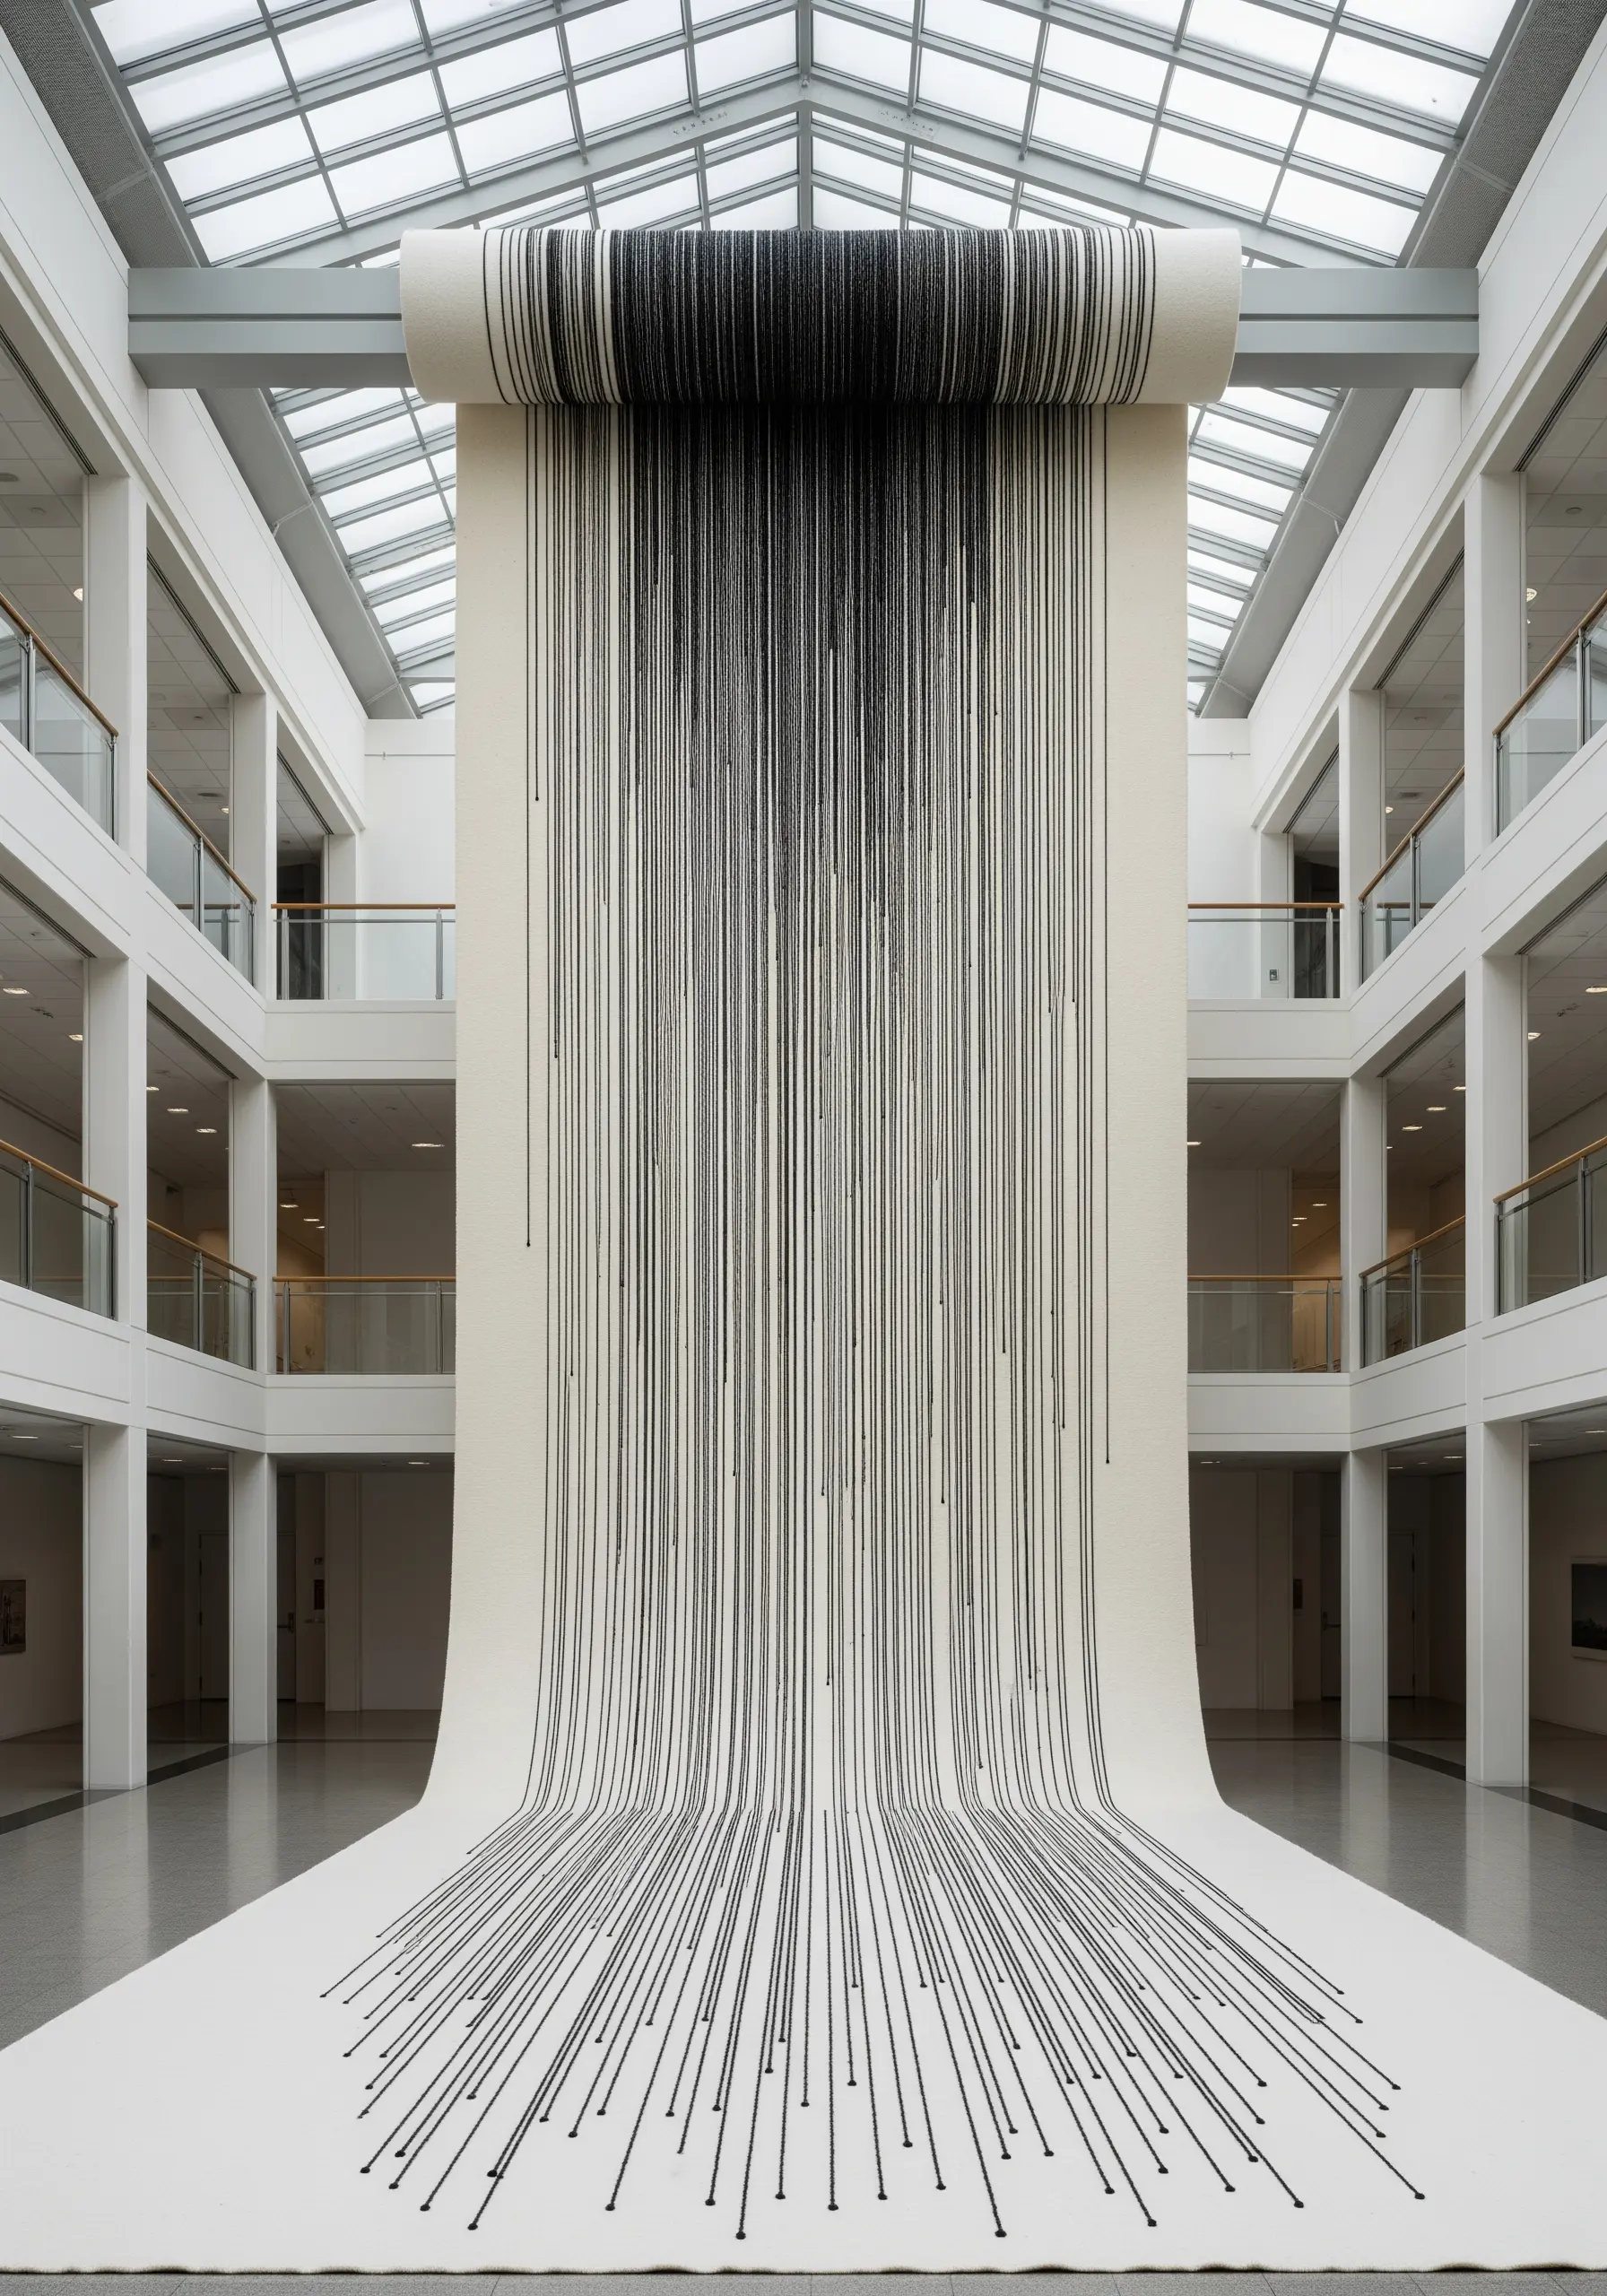
Think beyond the hoop and use an entire room as your canvas for a dramatic, large-scale fiber art installation.
Using a long roll of heavy canvas or felt, allow thread to dictate the form of the piece.
Anchor thick, heavy threads or cords at the top of the roll and let them hang, allowing gravity to create long, elegant vertical lines.
The threads can pool on the floor or be anchored at specific points, creating a powerful visual connection between the wall, the floor, and the space itself. This embodies the spirit of mind-blowing fiber art installations.


