
Have you ever looked at your embroidery and felt that, while you love the process, something is missing? You follow the patterns, you master the stitches, but you’re craving that spark of originality that transforms a craft into art.
Inspiration for that next level doesn’t always come from another embroidery pattern. It comes from looking at how artists handle fiber on a monumental scale—how they use thread to command a room, how they manipulate texture to tell a story, and how they use color to evoke an emotion.
This collection isn’t just for admiration. It’s a practical guide to deconstructing big ideas and translating them into techniques you can use right now, in your own hoop. Let’s look at these incredible installations and discover the secrets you can borrow to make your own work more intentional, more dynamic, and more uniquely yours.
1. Architectural Knotting for Dramatic Texture
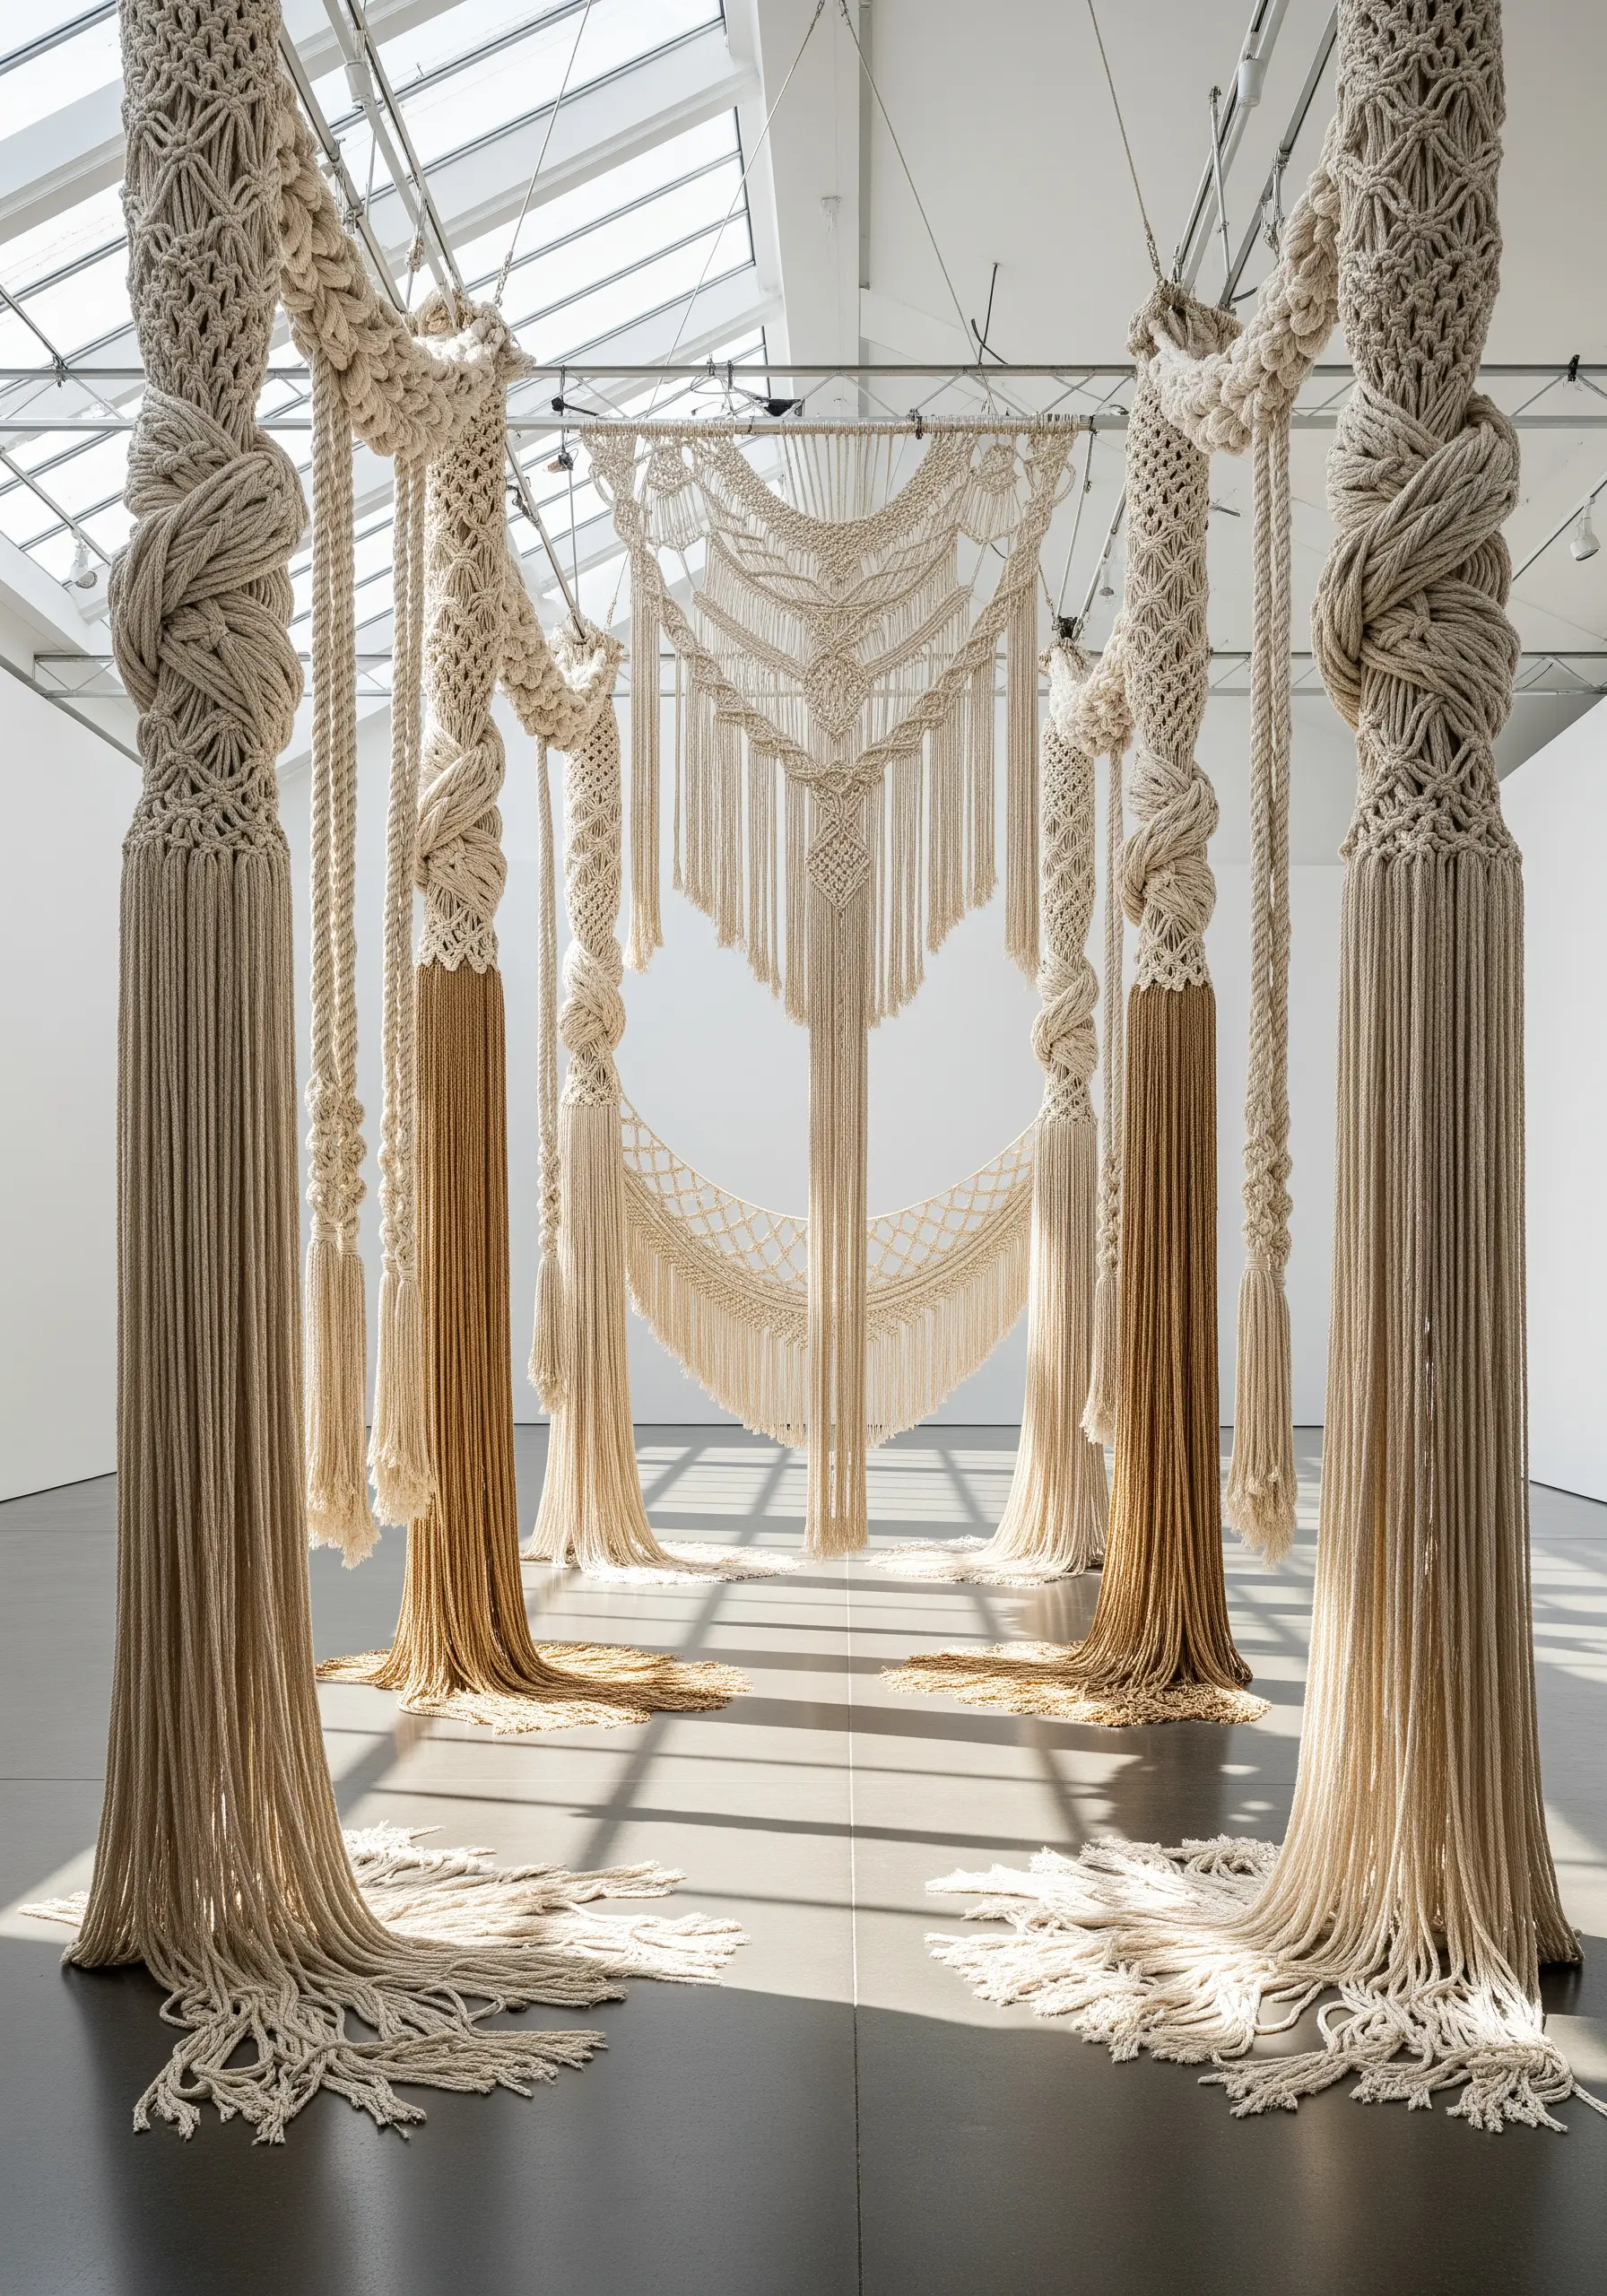
Translate the scale of monumental macrame into your hoop by couching thick fibers, like wool roving or cotton rope, onto your base fabric.
Vary the tension of your couching stitches—tighter stitches create a controlled line, while looser ones allow the chunky fiber to swell and dominate.
This technique creates an immediate textural contrast between the heavy rope and the delicate couching thread, adding architectural dimension to your work.
Play with scale by pairing a single, bold knotted form with tiny, detailed seed stitches in the background.
2. Weaving with Light and Geometric Tension

Use your embroidery hoop as a loom to explore the art of tension and color interaction, without stitching into fabric at all.
Stretch neon threads from one side of the hoop to the other, securing them tightly around the frame.
As you layer different colors, like pink over green or blue over yellow, you’ll discover how threads create optical illusions and new hues where they intersect.
This is a powerful exercise in composition and color theory, driven entirely by the precise placement of straight lines.
3. Building Sculptural Forms with Padded Stitches

To give your embroidery a playful, three-dimensional quality, move beyond flat stitches and explore sculptural techniques.
Use padded satin stitch, where you lay down a base of felt or smaller stitches, to create raised, cartoon-like shapes that pop off the fabric.
For even more dimension, incorporate the turkey work stitch (ghiordes knot) and trim the loops to create a dense, plush surface reminiscent of chenille.
You can even appliqué small, stuffed crochet elements directly onto your embroidery for a true mixed-fiber creation.
4. Capturing Volume with Thread Wrapping

You can create the illusion of solid spheres using only thread and a frame.
Start with a small metal or wooden ring and wrap your thread across it in multiple directions, building up layers until you achieve a dense, orb-like form.
On fabric, replicate this effect by packing French knots tightly together in a circular pattern, using slightly different shades to create highlights and shadows for a more realistic 3D effect.
This technique teaches you how to build form and volume through layering and density.
5. Painting Landscapes with Tufted Textures

Achieve a soft, painterly landscape effect using techniques that prioritize texture over line.
Punch needle embroidery is perfect for this, as it allows you to fill large areas with plush loops, creating a surface that feels like a painting you can touch.
To create the smooth gradients between the mountains, carefully map out your color zones and blend the borders by interspersing loops of adjacent colors.
Alternatively, a sea of densely packed French knots in varying shades will produce a similar, highly tactile result.
6. Mastering the Art of Negative Space

The most powerful part of your design can often be the space you leave empty.
Experiment with water-soluble stabilizer to create delicate, free-standing lace structures that seem to float.
Simply stitch your pattern onto the stabilizer, and once you rinse it away, only your thread work remains.
This technique is perfect for creating intricate, web-like patterns or botanical skeletons that play with light and shadow, making the surrounding air a part of the art itself.
7. Directing Flow and Movement with Fiber

Guide the viewer’s eye and create a powerful sense of motion by strategically aligning your stitches and fibers.
Use long, unbroken stitches that flow in a single direction to mimic the cascade of a waterfall or the sweep of the wind.
Amplify the effect by combining threads of different weights and sheens—a matte wool next to a lustrous silk—to create a current of texture.
For a truly dynamic piece, let your threads drape off the bottom edge of your hoop or canvas, breaking the boundary of the frame.
8. Exploring Architectural Lines and Color Theory

This installation is a masterclass in precision and optical blending, concepts you can scale down for your own work.
Use a single strand of thread and a sharp needle to create crisp, unwavering lines with a simple backstitch.
The magic happens when you overlap primary colors—red, yellow, and blue—to see how they visually mix to create secondary hues.
This exercise sharpens your control and deepens your understanding of how colors interact within a clean, geometric composition.
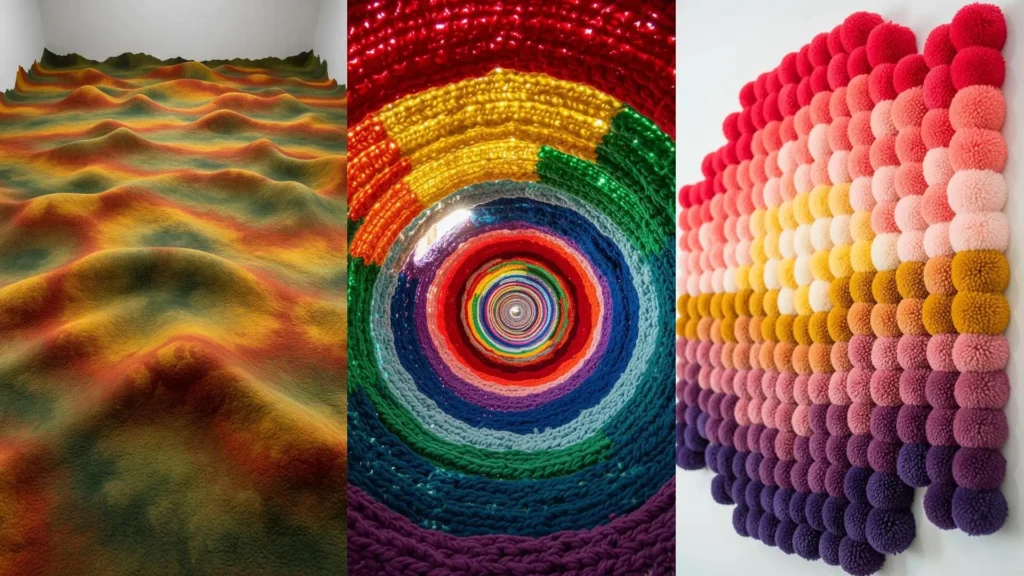
9. Sculpting Soft Gradients with Needle Felting

Create soft, undulating landscapes by applying needle felting techniques directly onto your fabric base.
Build up layers of wool roving in different shades, using your felting needle to blend the colors seamlessly and sculpt gentle peaks and valleys.
For a purely embroidered approach, use the long-and-short stitch with a single strand of floss. This classic stitch is unrivaled for achieving the smooth, painterly gradients that give your work depth and realism.
10. Integrating Nature with a Living Trellis Effect

Combine the rigid structure of a grid with the untamed beauty of nature in your next piece.
Couch down a grid of thick yarn or rope to establish a strong framework on your fabric.
Within this structure, stitch organic, botanical embroidery ideas, allowing leaves and vines to break free from the lines.
Use stumpwork techniques to create raised, 3D leaves that appear to grow from the knots, creating a beautiful tension between order and wildness.
11. Creating Depth with Concentric Color and Texture
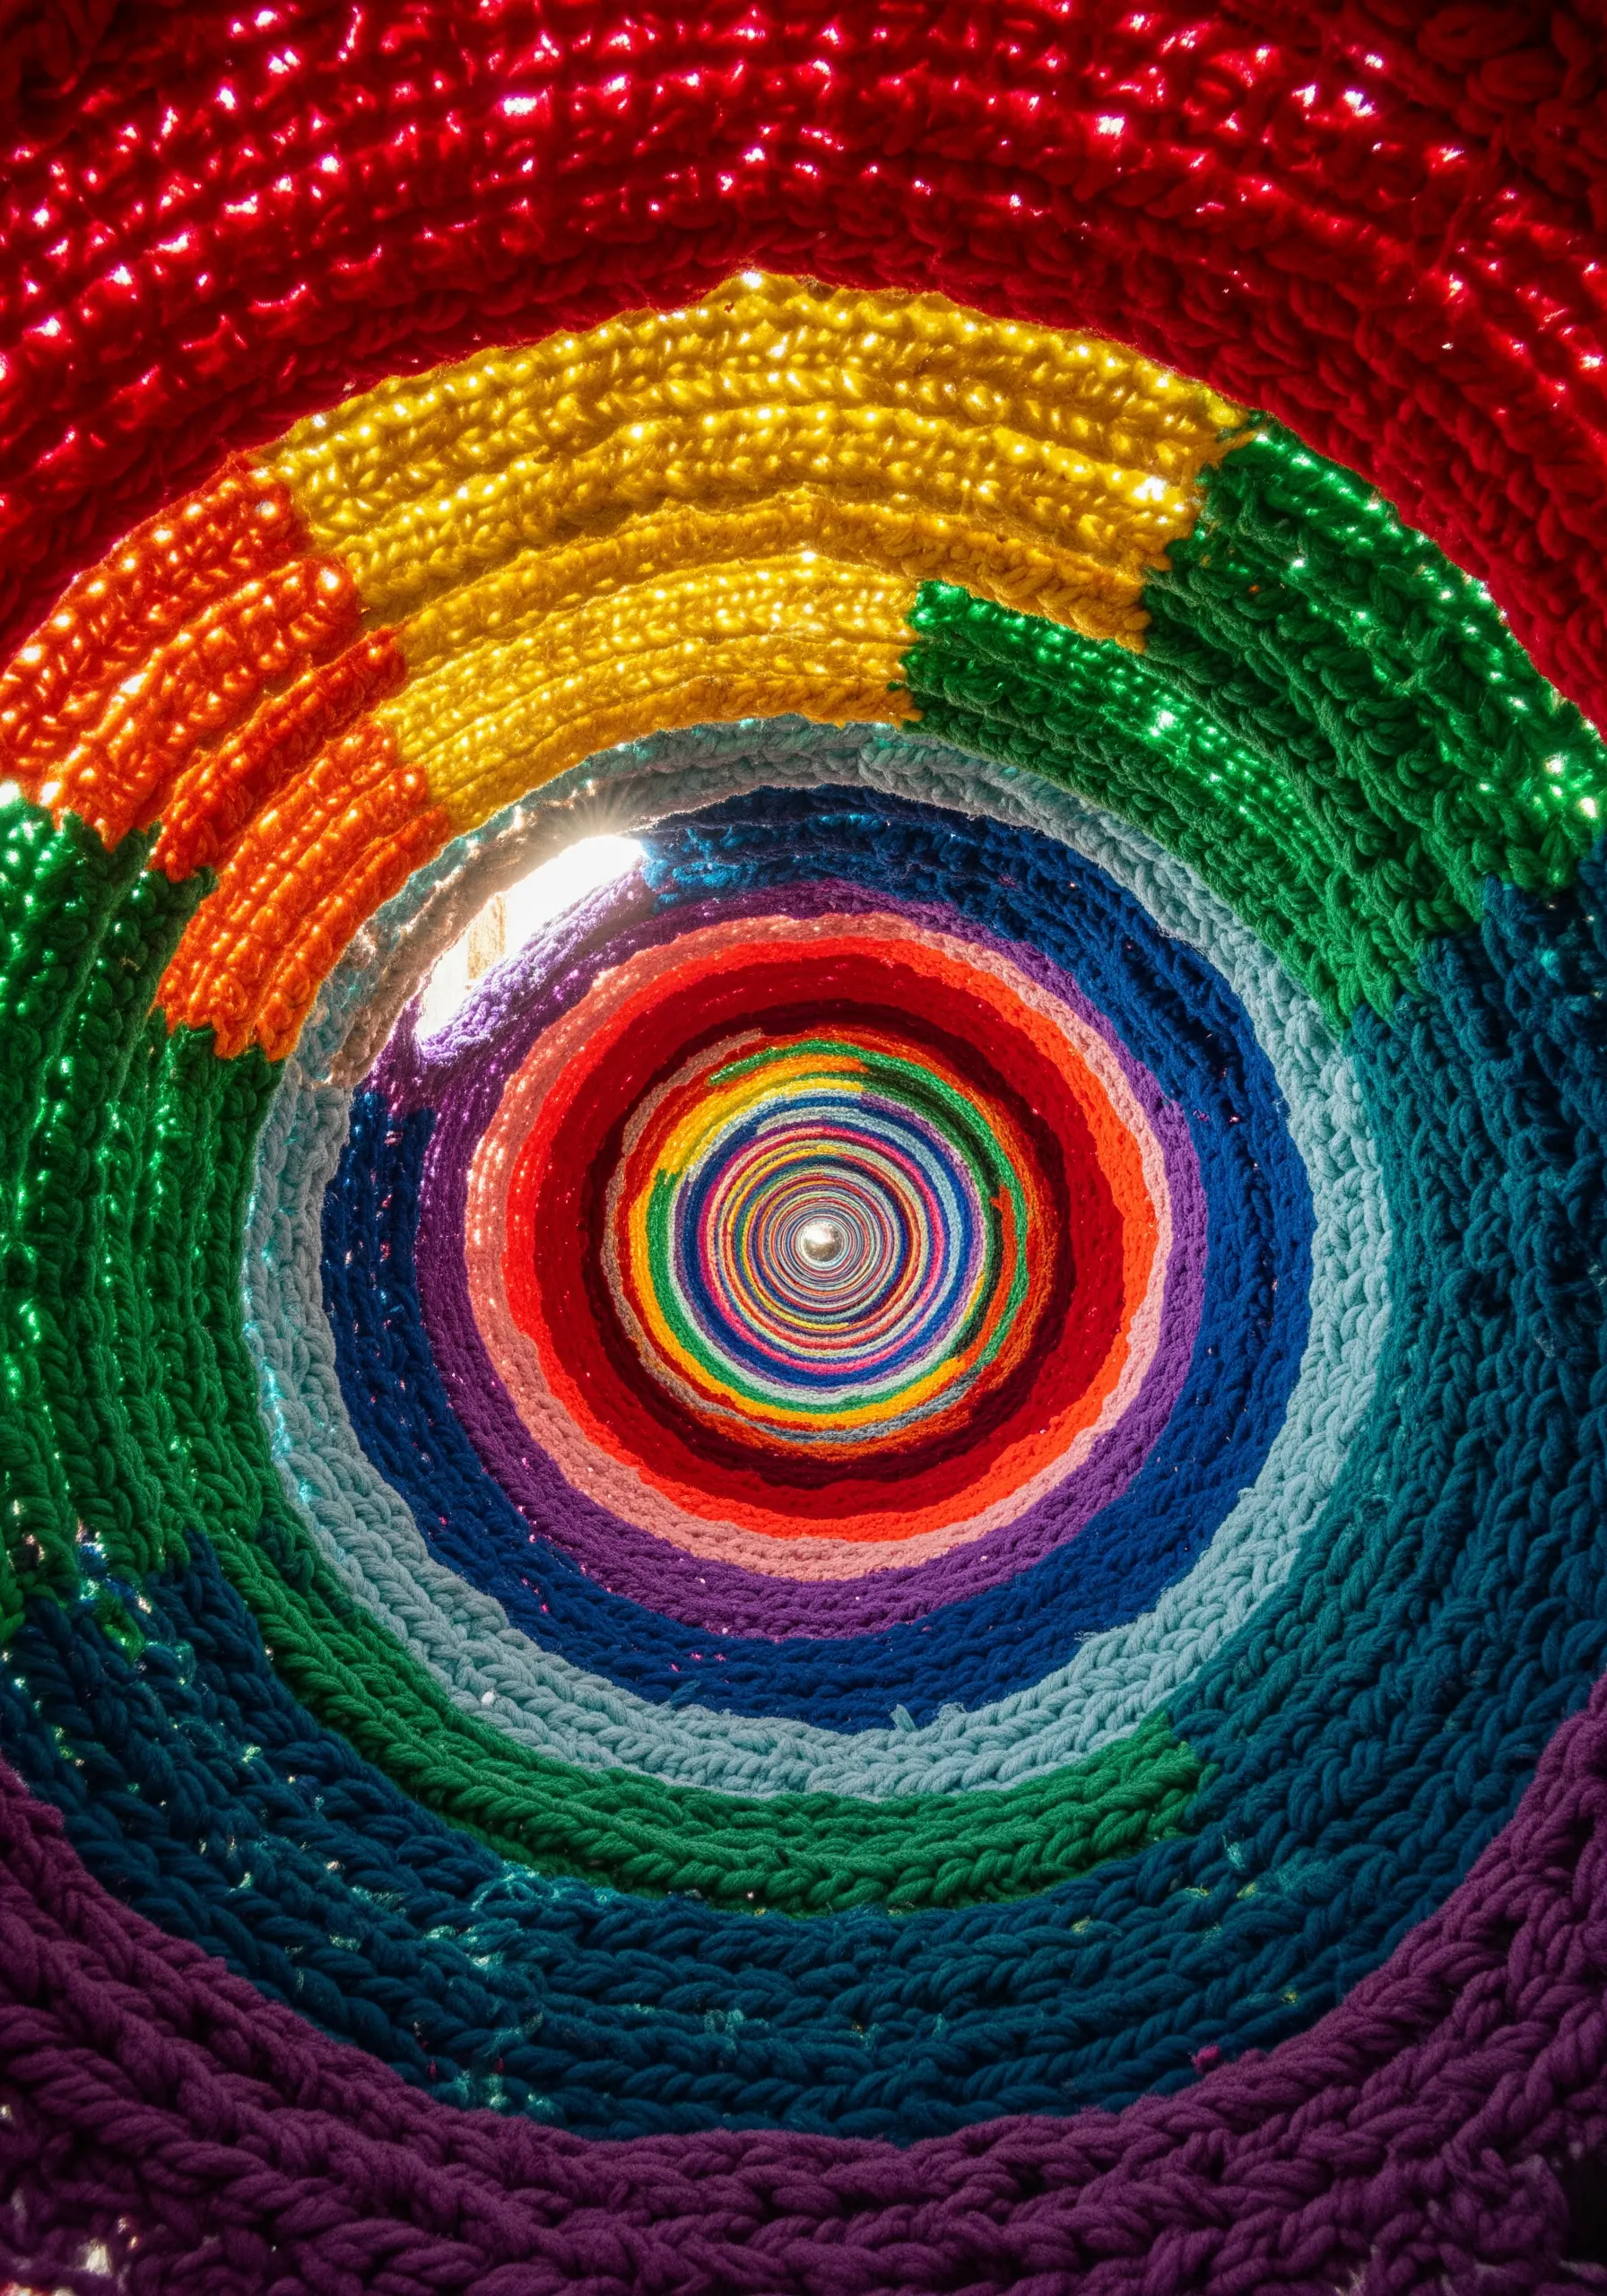
Draw the viewer into your design using the mesmerizing power of repeating, concentric circles.
Instead of using a single stitch, assign a different one to each color ring to build a rich textural gradient.
Try a smooth split stitch for one ring, a nubby French knot for the next, and a linear chain stitch for another.
This simple method transforms a basic rainbow palette into a tactile journey that invites closer inspection.
12. Finding Drama in Monochrome Texture

Challenge yourself to create a compelling design using only a single color, forcing you to focus entirely on texture, form, and light.
Layer different fabrics of the same hue—like black velvet, linen, and felt—and connect them with tonal stitching.
Use dimensional stitches like raised stem stitch bands or padded satin stitch to build up areas and create shadows.
Without the distraction of color, you learn to see the profound impact of subtle shifts in surface and shadow.
13. The Art of Layering with Sheer Fabrics

Explore depth and subtlety by working with transparent fabrics like organza, tulle, or chiffon.
Instead of a single piece, create a composition across multiple layered hoops. Stitch a simple element on each layer—a line on one, a shape on another.
When displayed together, the layers create a delicate, ethereal effect where motifs overlap and interact with light.
This technique transforms simple stitches into a sophisticated, multi-dimensional artwork.
14. Pointillism with Poms for a Pixelated Gradient
Create a lush, pixelated surface by translating the idea of pom-poms into dense stitch work.
Plan a simple grid on your fabric and fill each square with tightly packed French knots to create a pointillist-style gradient.
For an even fluffier texture, use the turkey work stitch and trim the loops to an even height, turning your fabric into a canvas of soft, handmade pom-poms.
This meditative technique is perfect for creating vibrant, ombre gradient thread embroidery ideas.
15. Sophistication Through Subtle Color Shifts

Discover the quiet power of an analogous color palette, where you use shades that sit right next to each other on the color wheel.
Fill a simple shape with bands of satin stitch, using hues of a single color that are very close in value—like five shades of ocean blue.
The subtle, almost imperceptible shifts in tone create a serene, sophisticated effect that feels clean, modern, and incredibly calming.
This approach proves that elegance often lies in restraint.
16. Embracing the Beauty of Raw Materials

Move beyond pristine threads and incorporate unconventional, organic materials into your embroidery.
Couch down small twigs, strands of unspun wool, or frayed strips of fabric to introduce a raw, untamed energy into your work.
Use deliberately loose, expressive stitches to secure them, celebrating imperfection and the natural textures of each element.
This wabi-sabi approach connects your stitching to the natural world and creates pieces with profound character.
17. The Power of Modular, Collective Design

Make a large-scale project feel approachable and joyful by breaking it down into small, modular components.
Stitch a series of small fabric squares, each with its own unique pattern, color story, or stitch combination.
Once you have a collection, arrange and stitch them together to form a larger, cohesive piece like a quilt, wall hanging, or table runner.
This method celebrates both individual creativity and the beauty of a unified whole.
18. Weaving Geometric Elegance with Metallics

Capture the spirit of Art Deco by combining strong geometric patterns with a touch of glamour.
Use high-shine metallic threads on a dark, matte fabric like black linen or deep navy velvet for maximum contrast and impact.
Stitch crisp, symmetrical lines inspired by architectural details, focusing on precision and clean execution.
The interplay between the shimmering thread and the rich background creates an instant sense of luxury and timeless elegance.
19. Telling Stories with Fabric Scraps

Transform your fabric scraps from waste into a defining feature of your artwork.
Create incredible texture by coiling, rolling, and layering small pieces of fabric onto a base, securing them with simple stitches.
This technique allows for a spontaneous exploration of color and pattern, building up a surface that has depth and history.
Use meaningful scraps from old garments to imbue your fabric collage embroidery with personal stories and memories.
20. Stitching Illusions with Light-Catching Threads

Create embroidery that transforms in different lighting conditions by choosing threads with unique properties.
Use glow-in-the-dark floss on a black background for a design that reveals a secret self in the dark.
For a more subtle effect, work with highly reflective metallic or rayon threads that catch the light and shimmer as the viewer moves.
These materials add a dynamic, almost magical element to your work, making it feel alive.
21. Composing with Bold Blocks of Textural Color

Approach your next design like a painter by focusing on the relationship between large, interlocking shapes of color.
Instead of intricate lines, fill bold, abstract areas with dense textural stitches like the seed stitch or French knot.
By using a limited, powerful palette and letting the texture of the fill do the talking, you create a piece with immense graphic impact.
This method teaches you to think about composition, balance, and the visual weight of different textures.
22. The Unforgettable Impact of a Single Hue

Prove that you don’t need a complex palette to create a masterpiece by committing to a single, powerful color.
Select a vibrant hue and explore its possibilities by combining different threads, stitches, and textures all in that one color.
Pair a chunky wool with a fine silk, or a smooth satin stitch next to a rough knot.
This restraint forces you to focus on form and texture, resulting in a cohesive and incredibly dramatic statement embroidery piece.


