

You have the threads, the fabric, and the desire to create something beautiful. But sometimes, there’s a gap between the vision in your mind and the finished piece in your hands. You want your work to feel less like a hobby project and more like a piece of intentional art that truly belongs in your home.
The secret isn’t necessarily learning more complex stitches. Instead, it’s about refining your approach—thinking like a designer about how color, texture, and placement can work together. It’s about the small, deliberate choices that elevate a simple motif into something with depth, emotion, and a sense of calm confidence.
Here, you’ll find techniques that bridge that gap. These ideas are designed to help you see your materials differently and to stitch with greater intention. Let’s move beyond just following patterns and start creating handmade pieces that feel natural, personal, and seamlessly woven into the story of your space.
1. Create Realistic Depth with Layered Stitch Directions
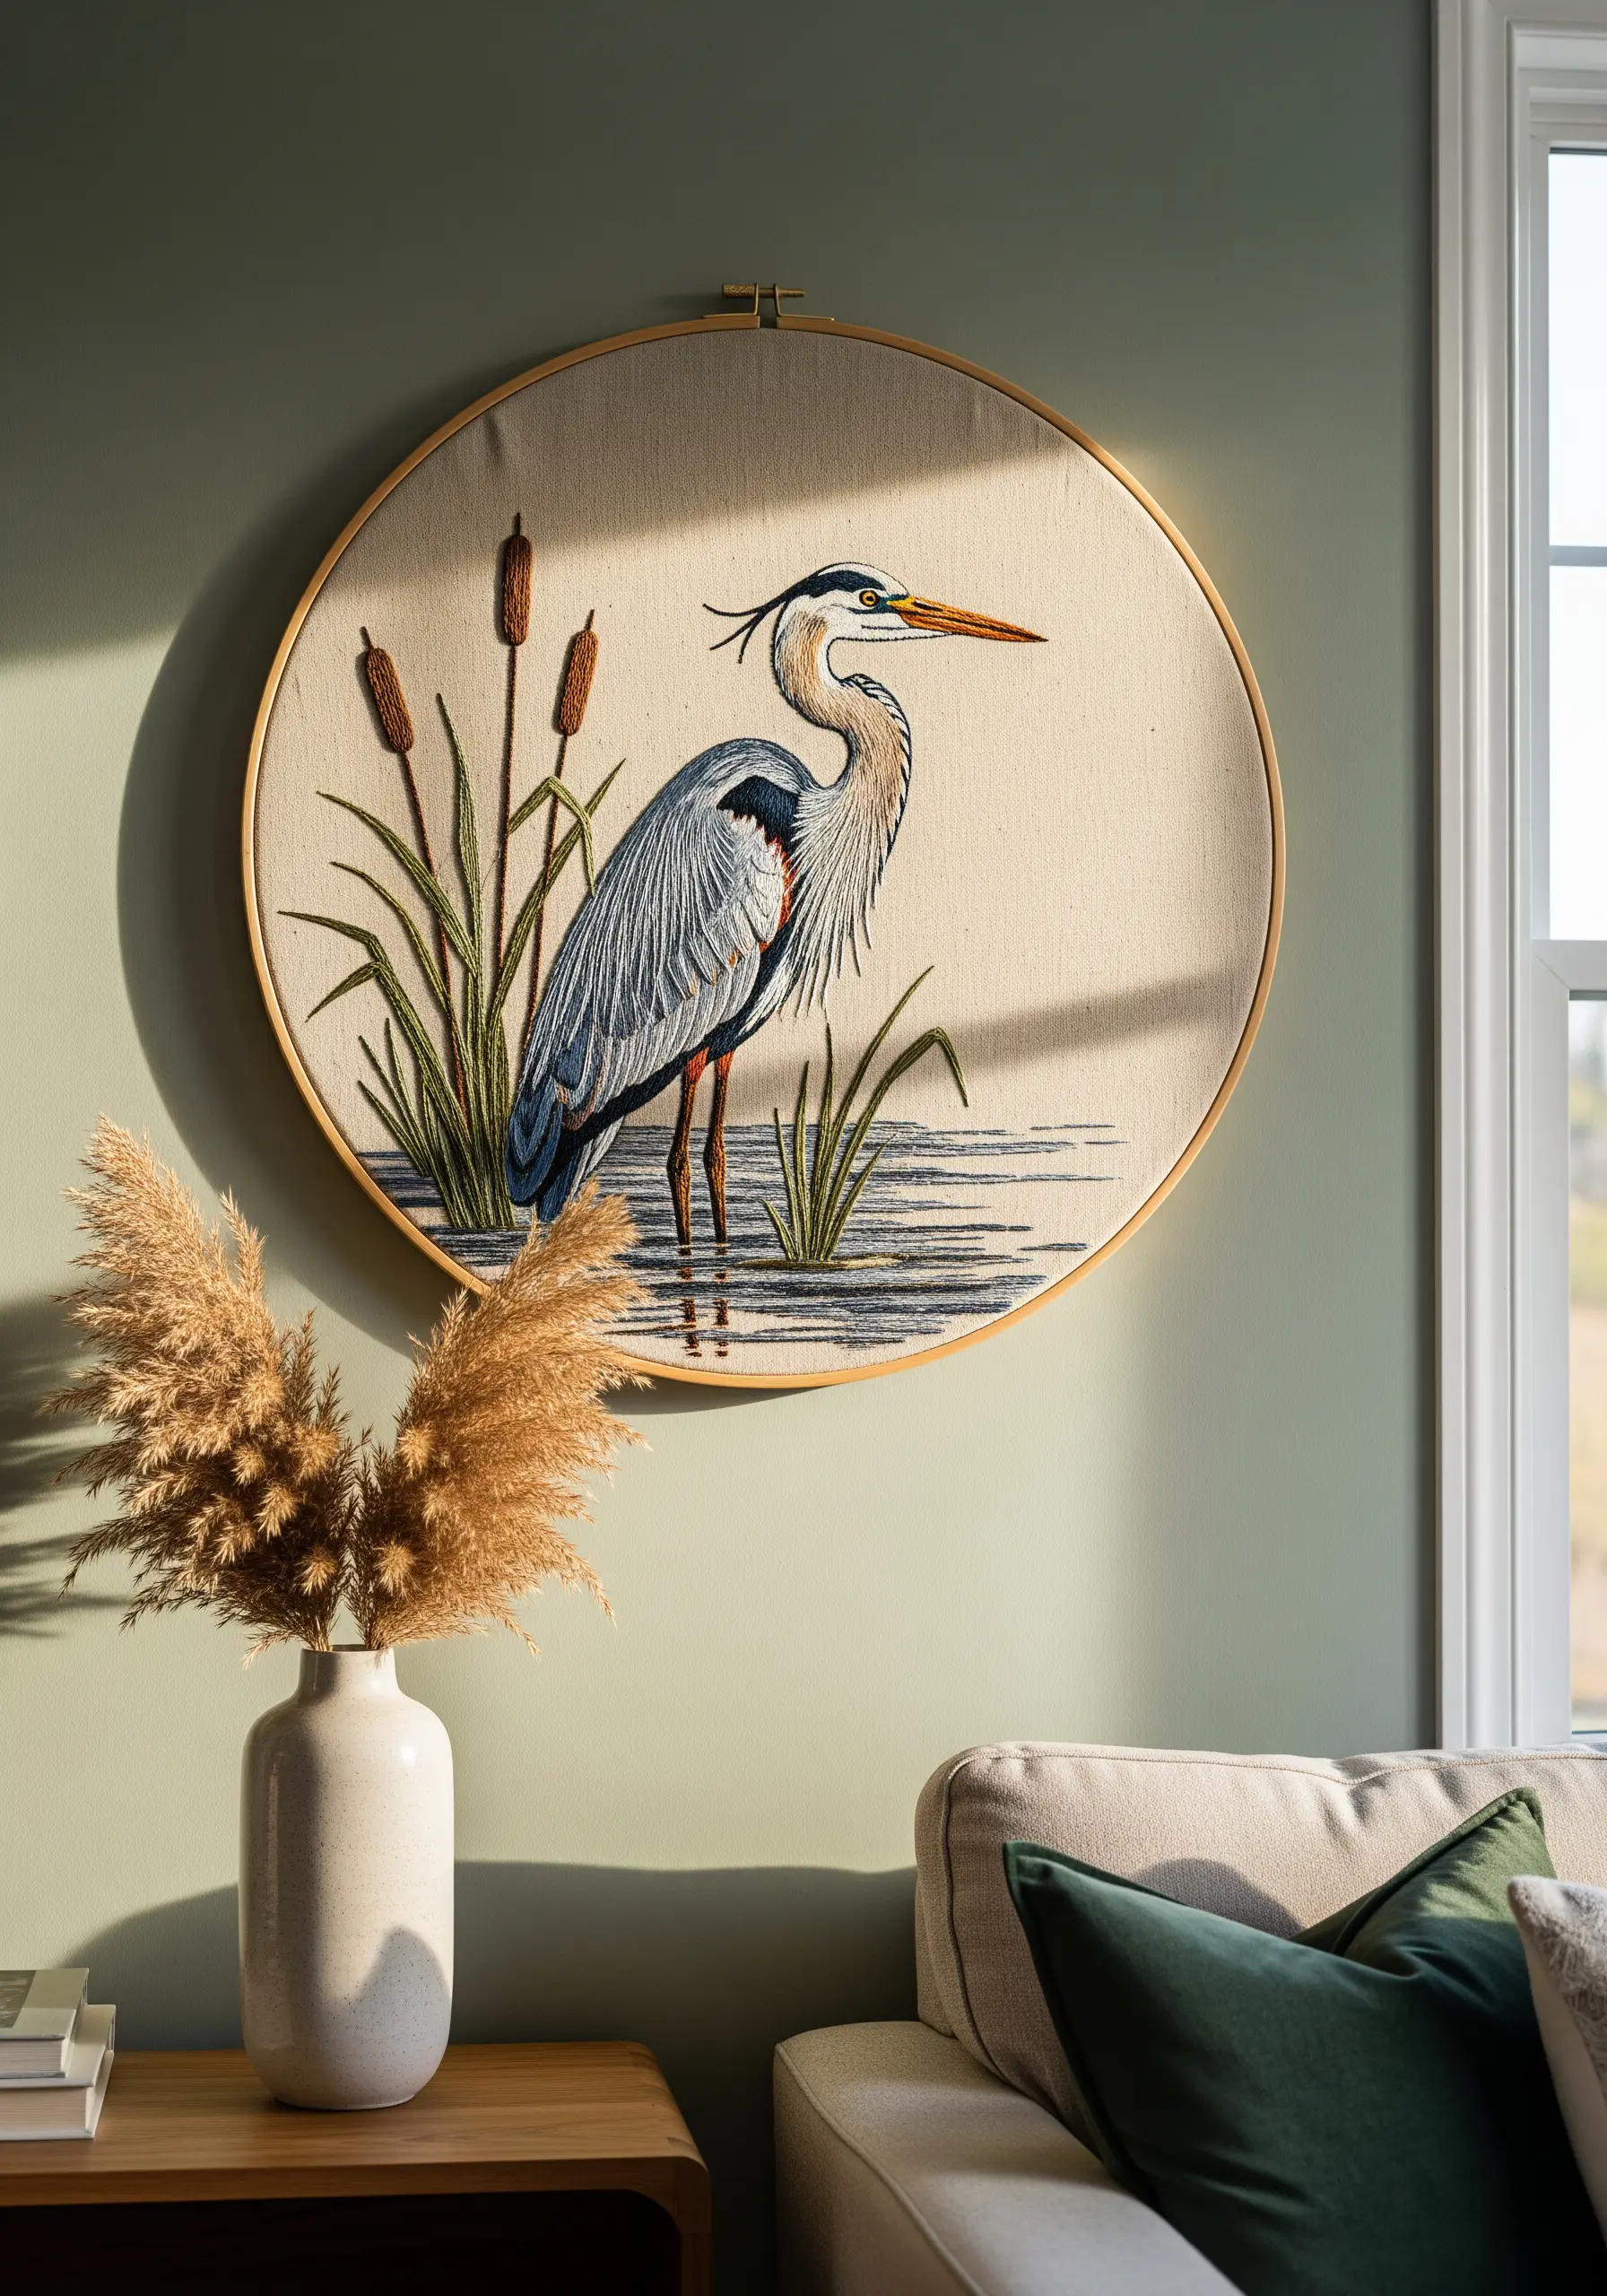
To give embroidered wildlife a sense of dimension, vary the direction of your long-and-short stitches to mimic the way feathers or fur naturally lay.
Contrast these painterly areas with bold, vertical satin stitches for reeds and simple, horizontal straight stitches for water to create a clear separation between foreground and background.
For the finest details, like the heron’s eye and beak, switch to a single strand of black floss to achieve crisp, sharp lines that define the entire piece.
2. Build Tactile Dimension with Padded Satin Stitch
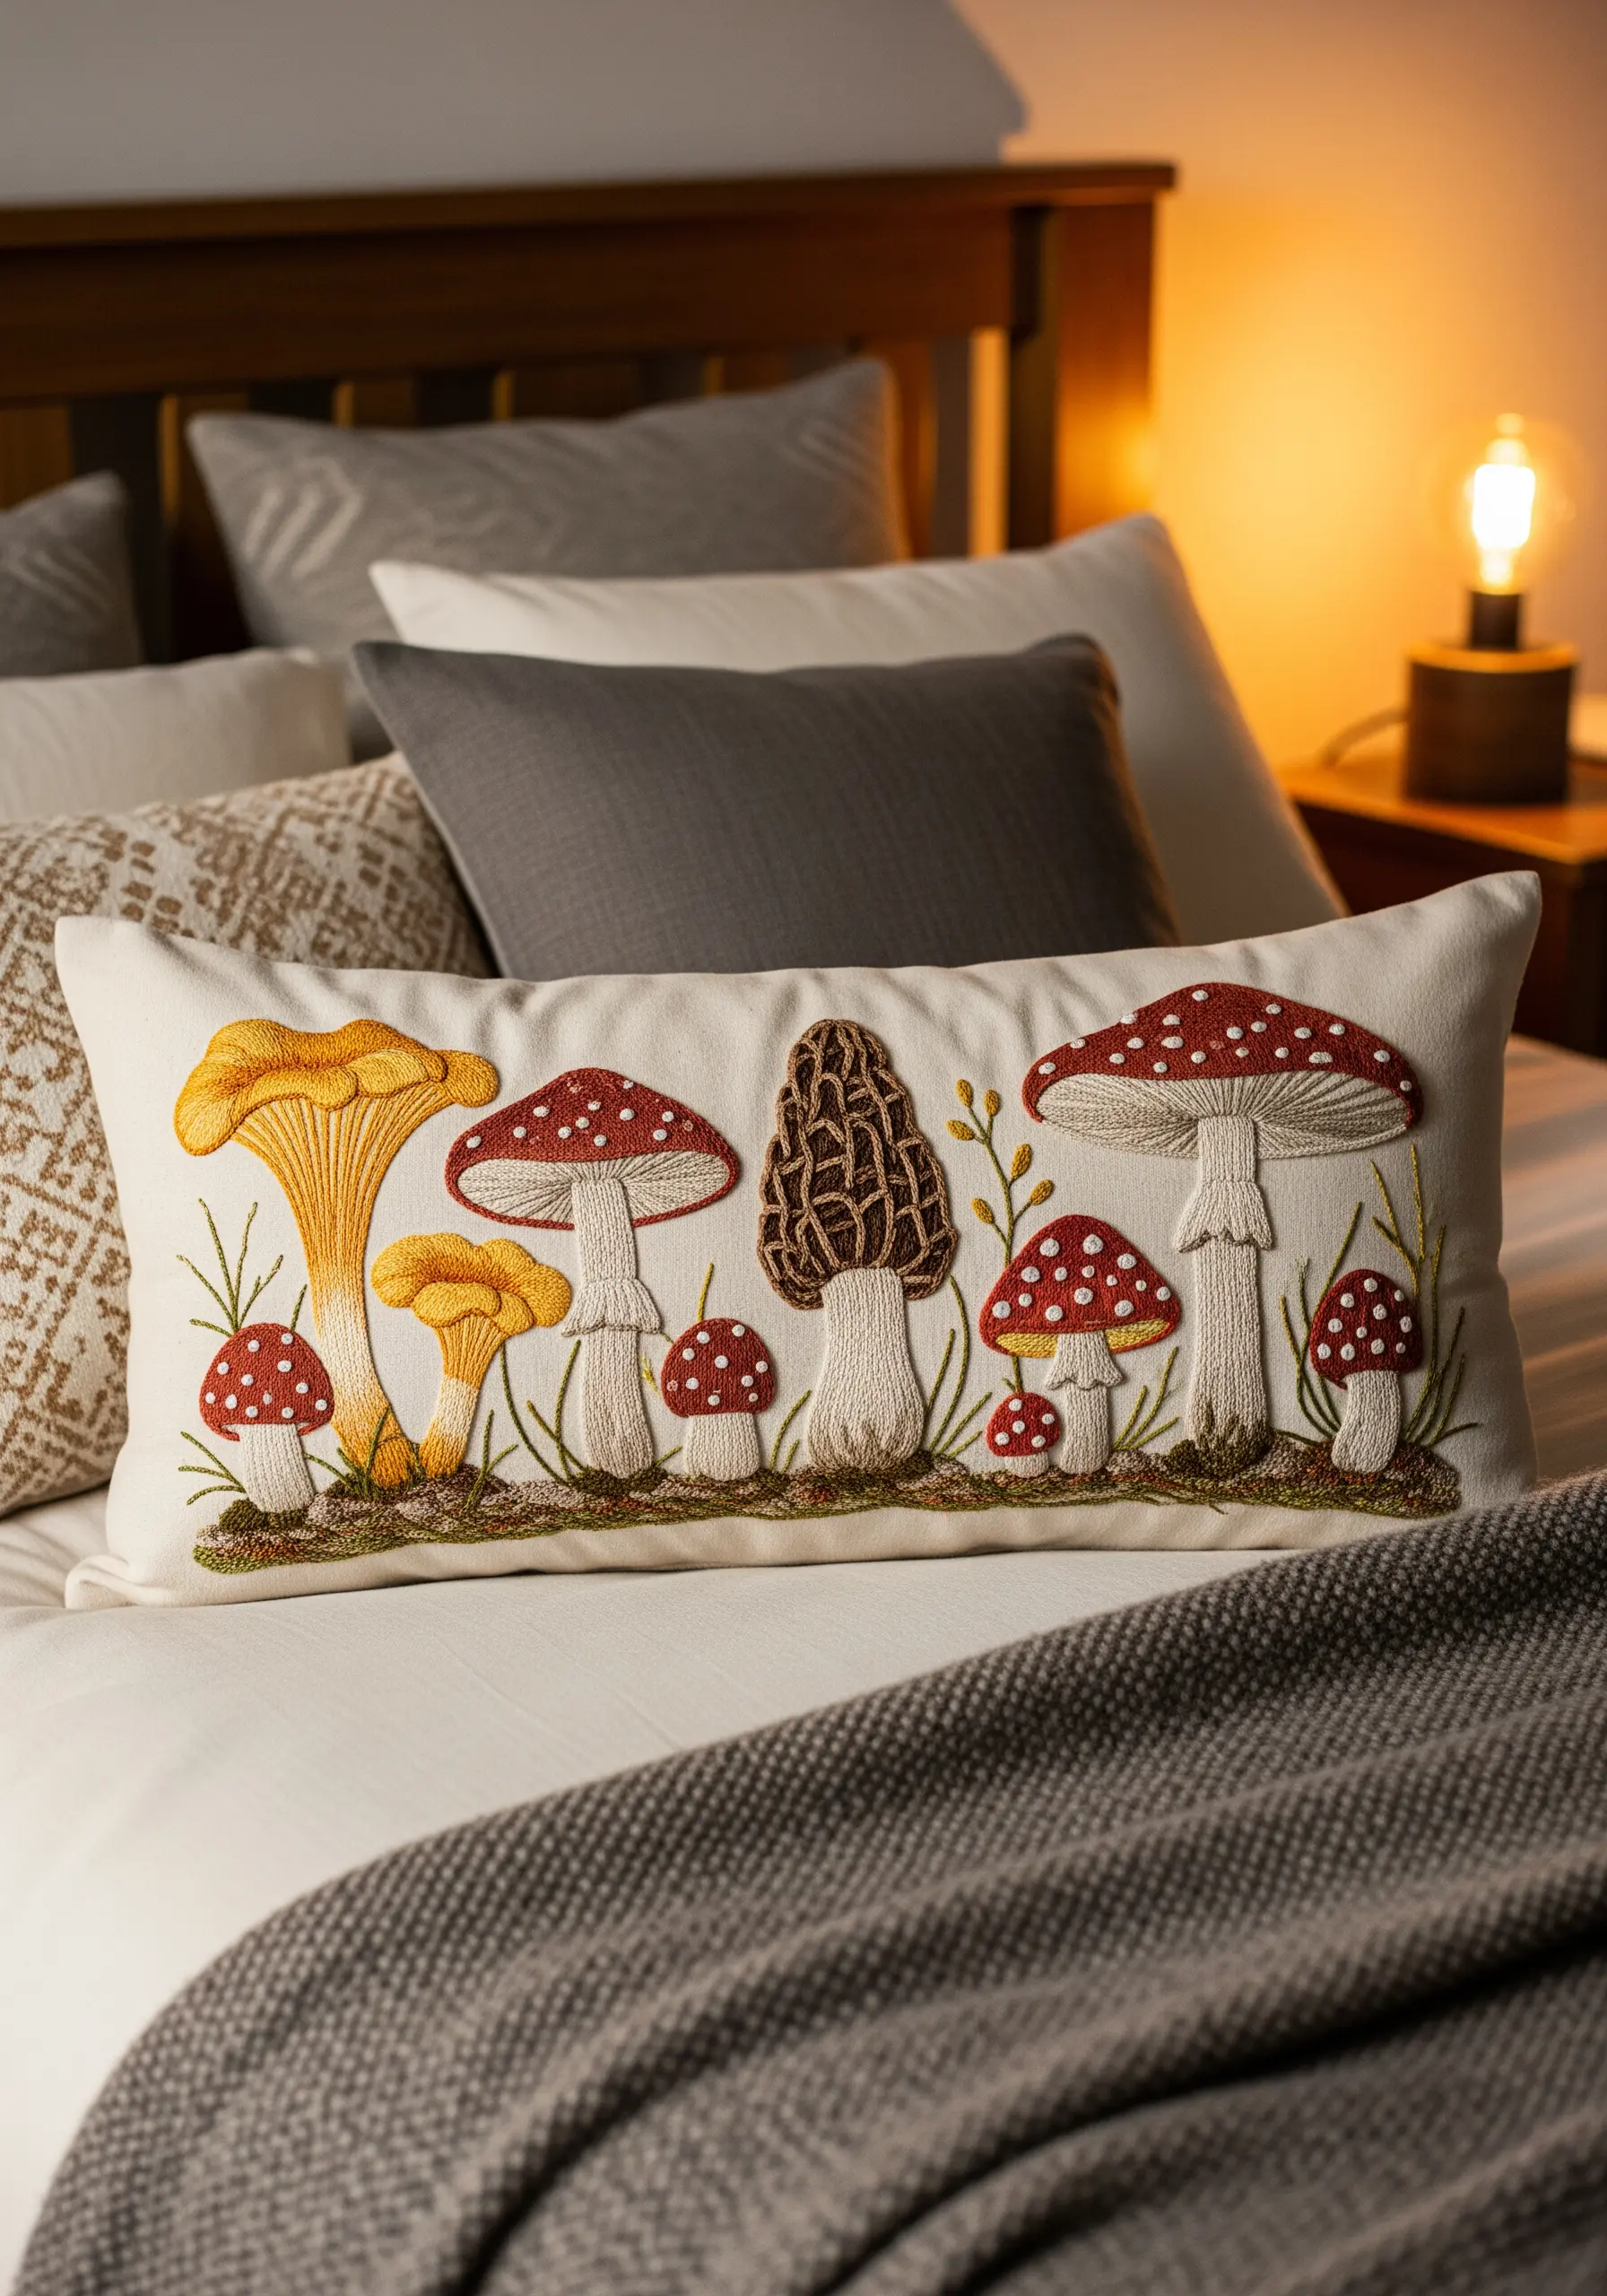
Make your motifs literally stand out by using padded satin stitch—a technique that creates a raised, three-dimensional effect perfect for the rounded caps of mushrooms.
First, create a base of small seed stitches or lay down a small piece of felt, then cover it completely with smooth satin stitches.
This elevation adds shadows and highlights, making the embroidery more dynamic and inviting to touch.
Complete the texture play by using French knots for the spots, adding another layer of tactile detail to the design.
3. Select Your Fabric for Refined Botanical Sprigs
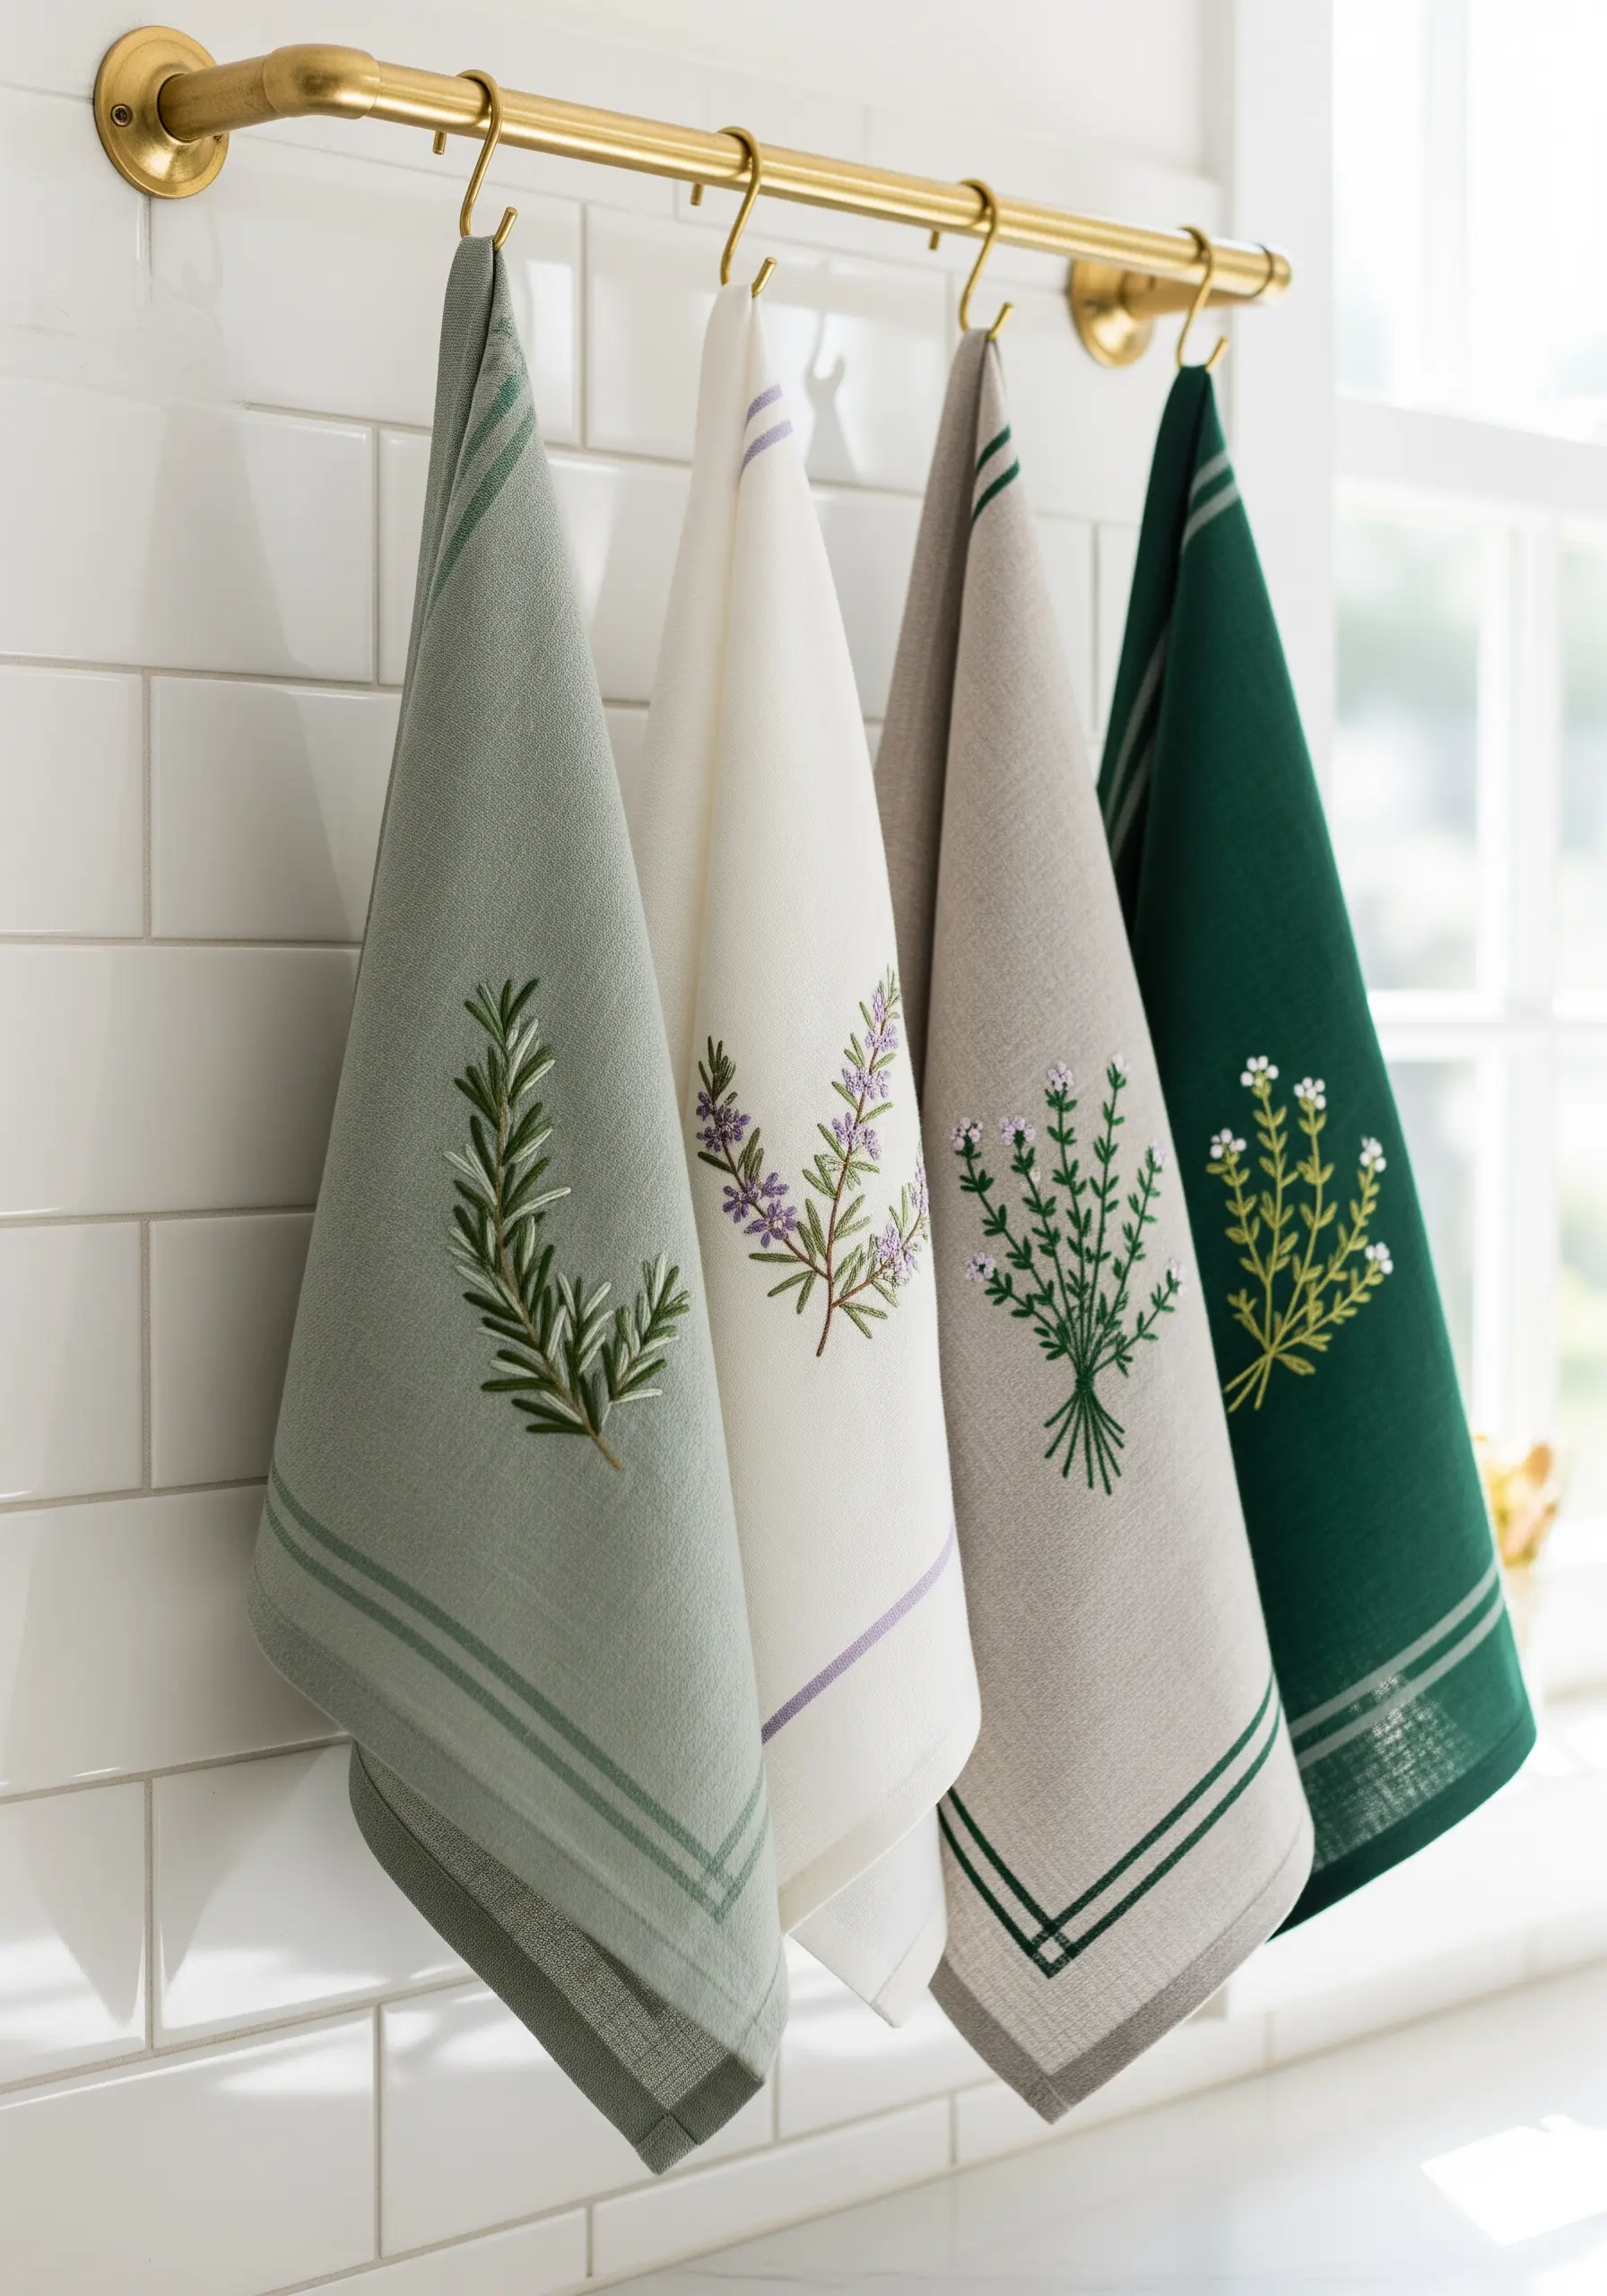
The foundation of elegant embroidery is your fabric choice; a crisp linen or a cotton-linen blend provides the ideal structure for delicate botanical motifs.
Its natural texture prevents the fine stitches from looking stark, adding a soft, organic quality to the finished piece.
Use just two or three strands of floss with a simple stem stitch for the main branches and lazy daisy stitches for leaves to maintain a clean, uncluttered look.
These botanical line art embroidery patterns are perfect for this minimalist approach, allowing the fabric to breathe.
4. Master Monochromatic Landscapes with Thread Painting
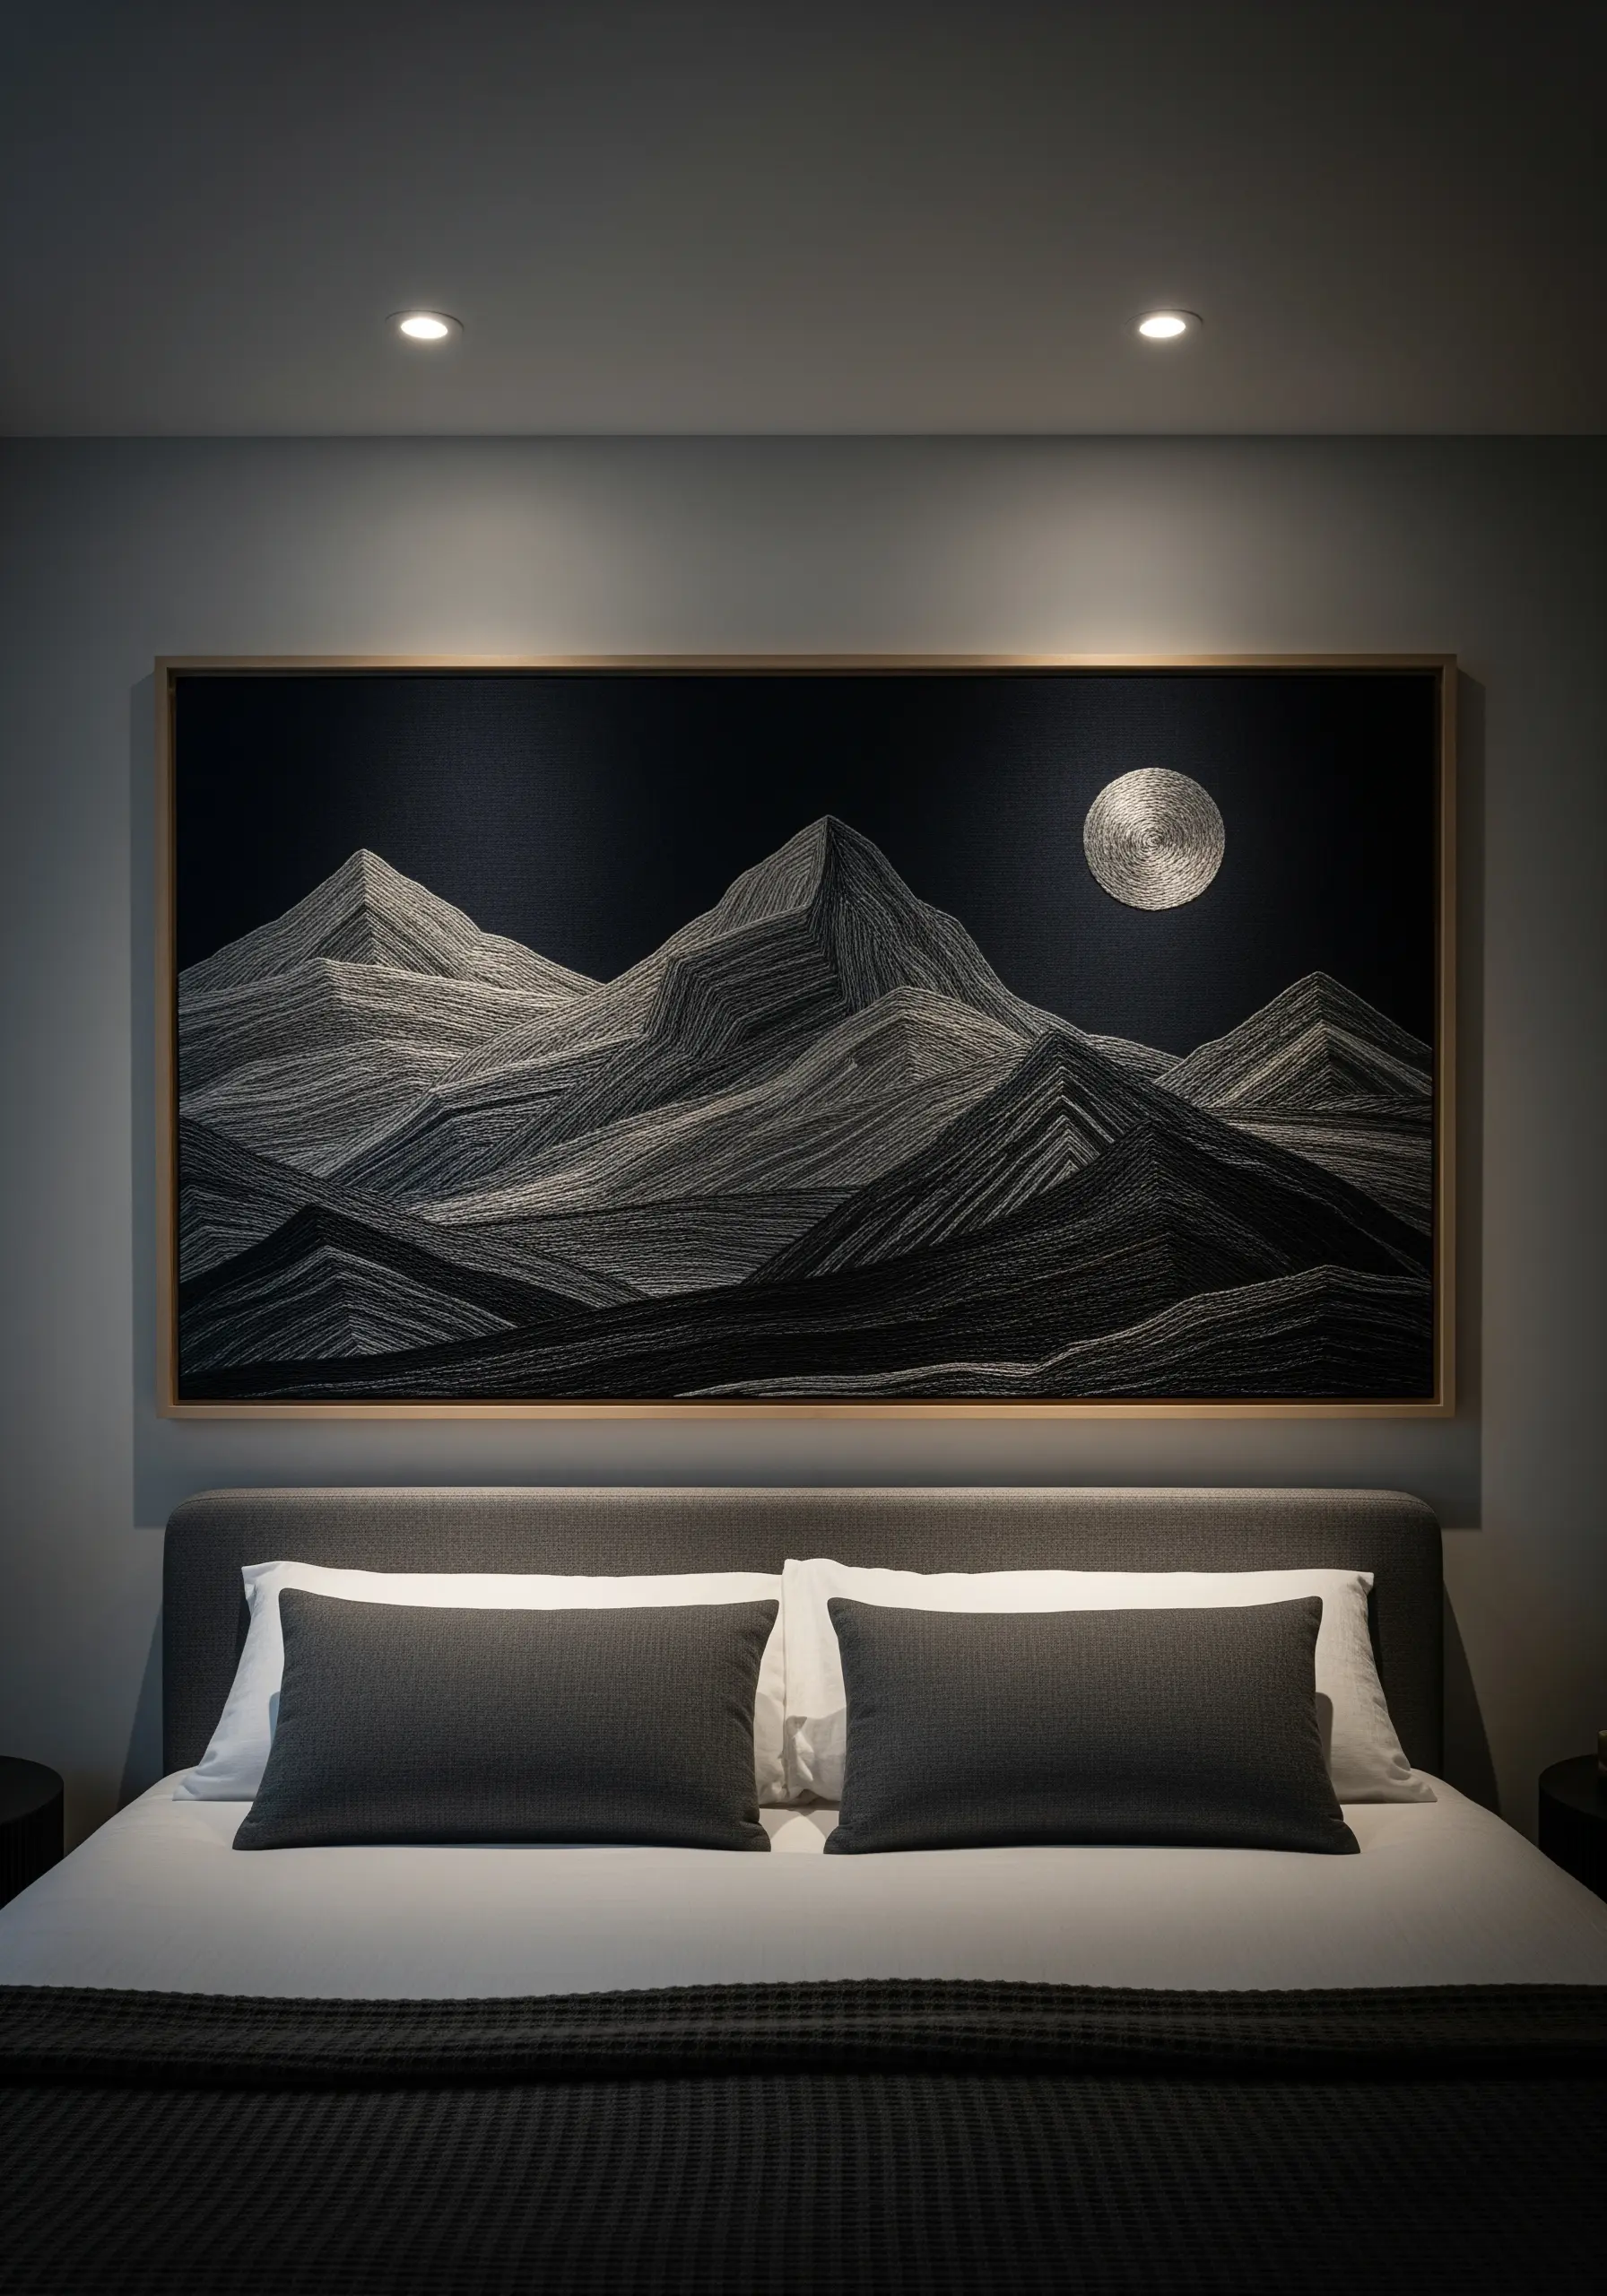
Create the illusion of dramatic mountain slopes and deep shadows using only shades of grey, black, and white.
The key is to use long, dense straight stitches—a form of thread painting—and to vary their angle and length to represent different planes of the landscape.
For the moon, use a tight, circular satin stitch with a metallic silver thread to create a focal point that contrasts beautifully with the matte texture of the mountains.
This technique allows you to embroider realistic shadows and highlights without needing a complex color palette.
5. Anchor Intricate Motifs on Heavy Textiles with an Appliqué Base
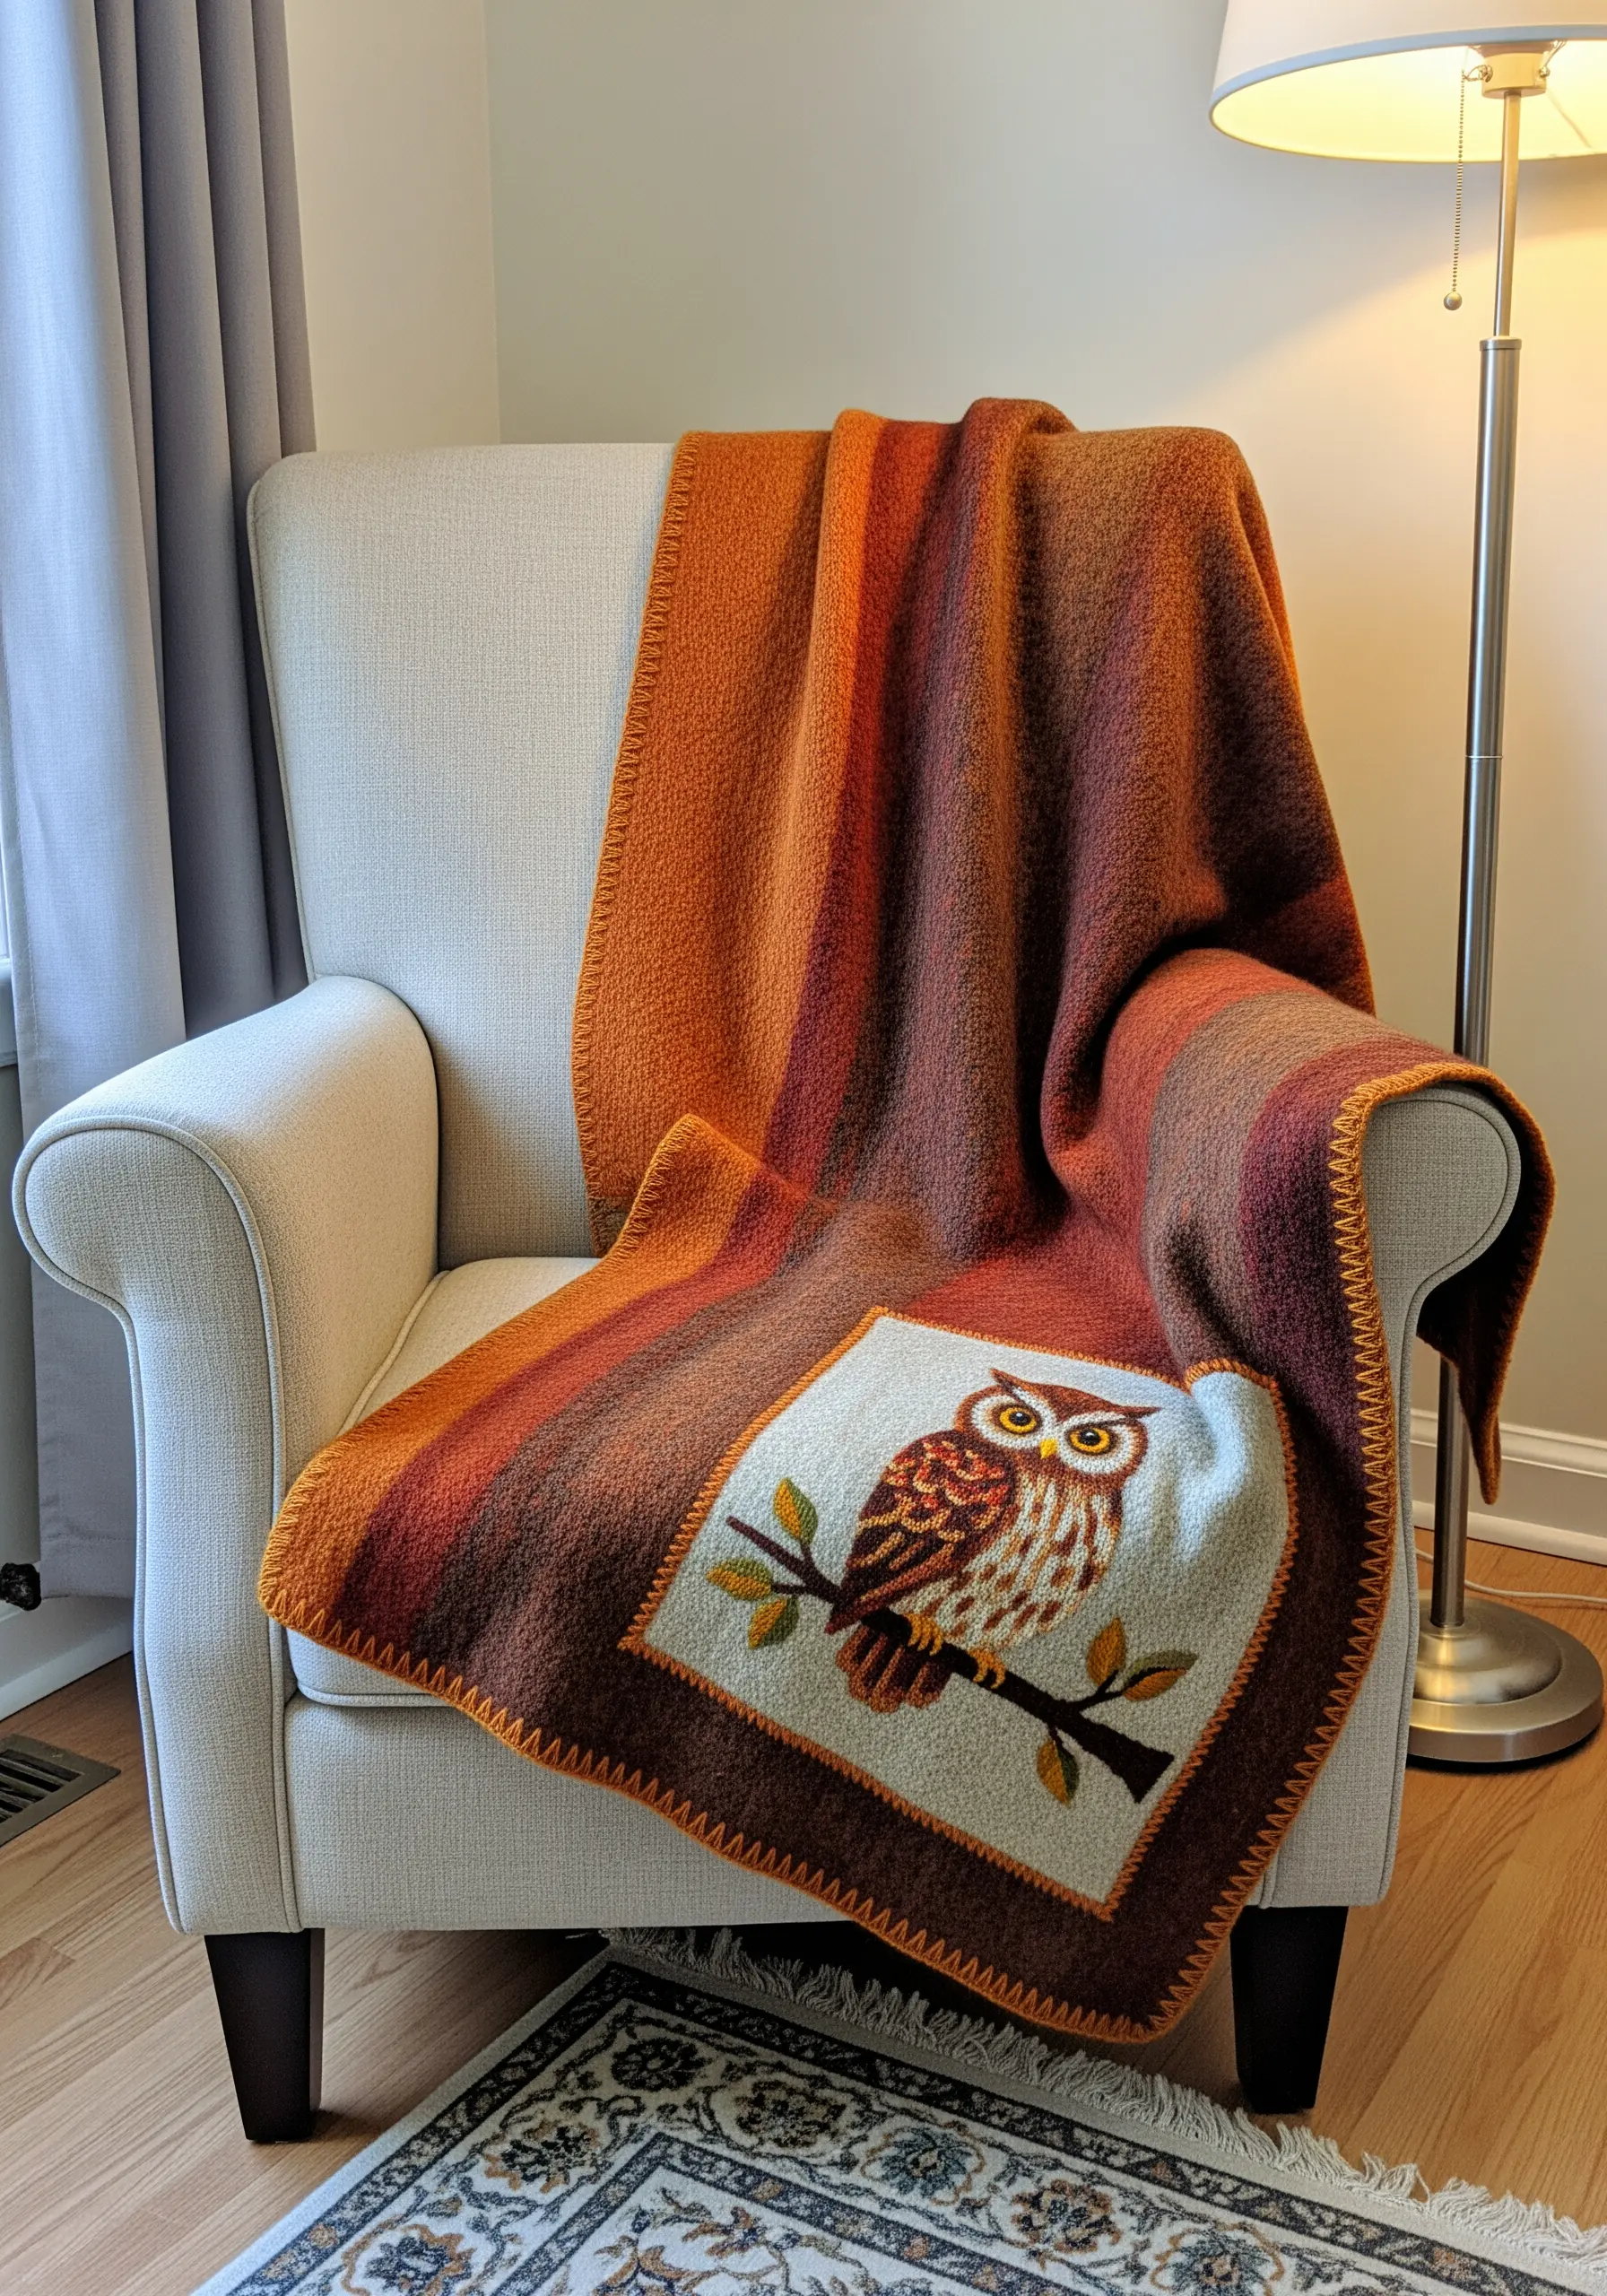
Stitching a detailed design directly onto a thick or stretchy textile like a wool blanket can cause distortion and puckering.
Instead, embroider your motif on a separate, stable piece of non-stretch fabric, like felt or heavy linen, and cut it out.
Secure this embroidered patch to the blanket with a decorative blanket stitch around the edge.
This method keeps your stitches crisp and even, making it one of the best ways to create detailed embroidered throws and blankets.
6. Define Negative Space with Graphic Line Work
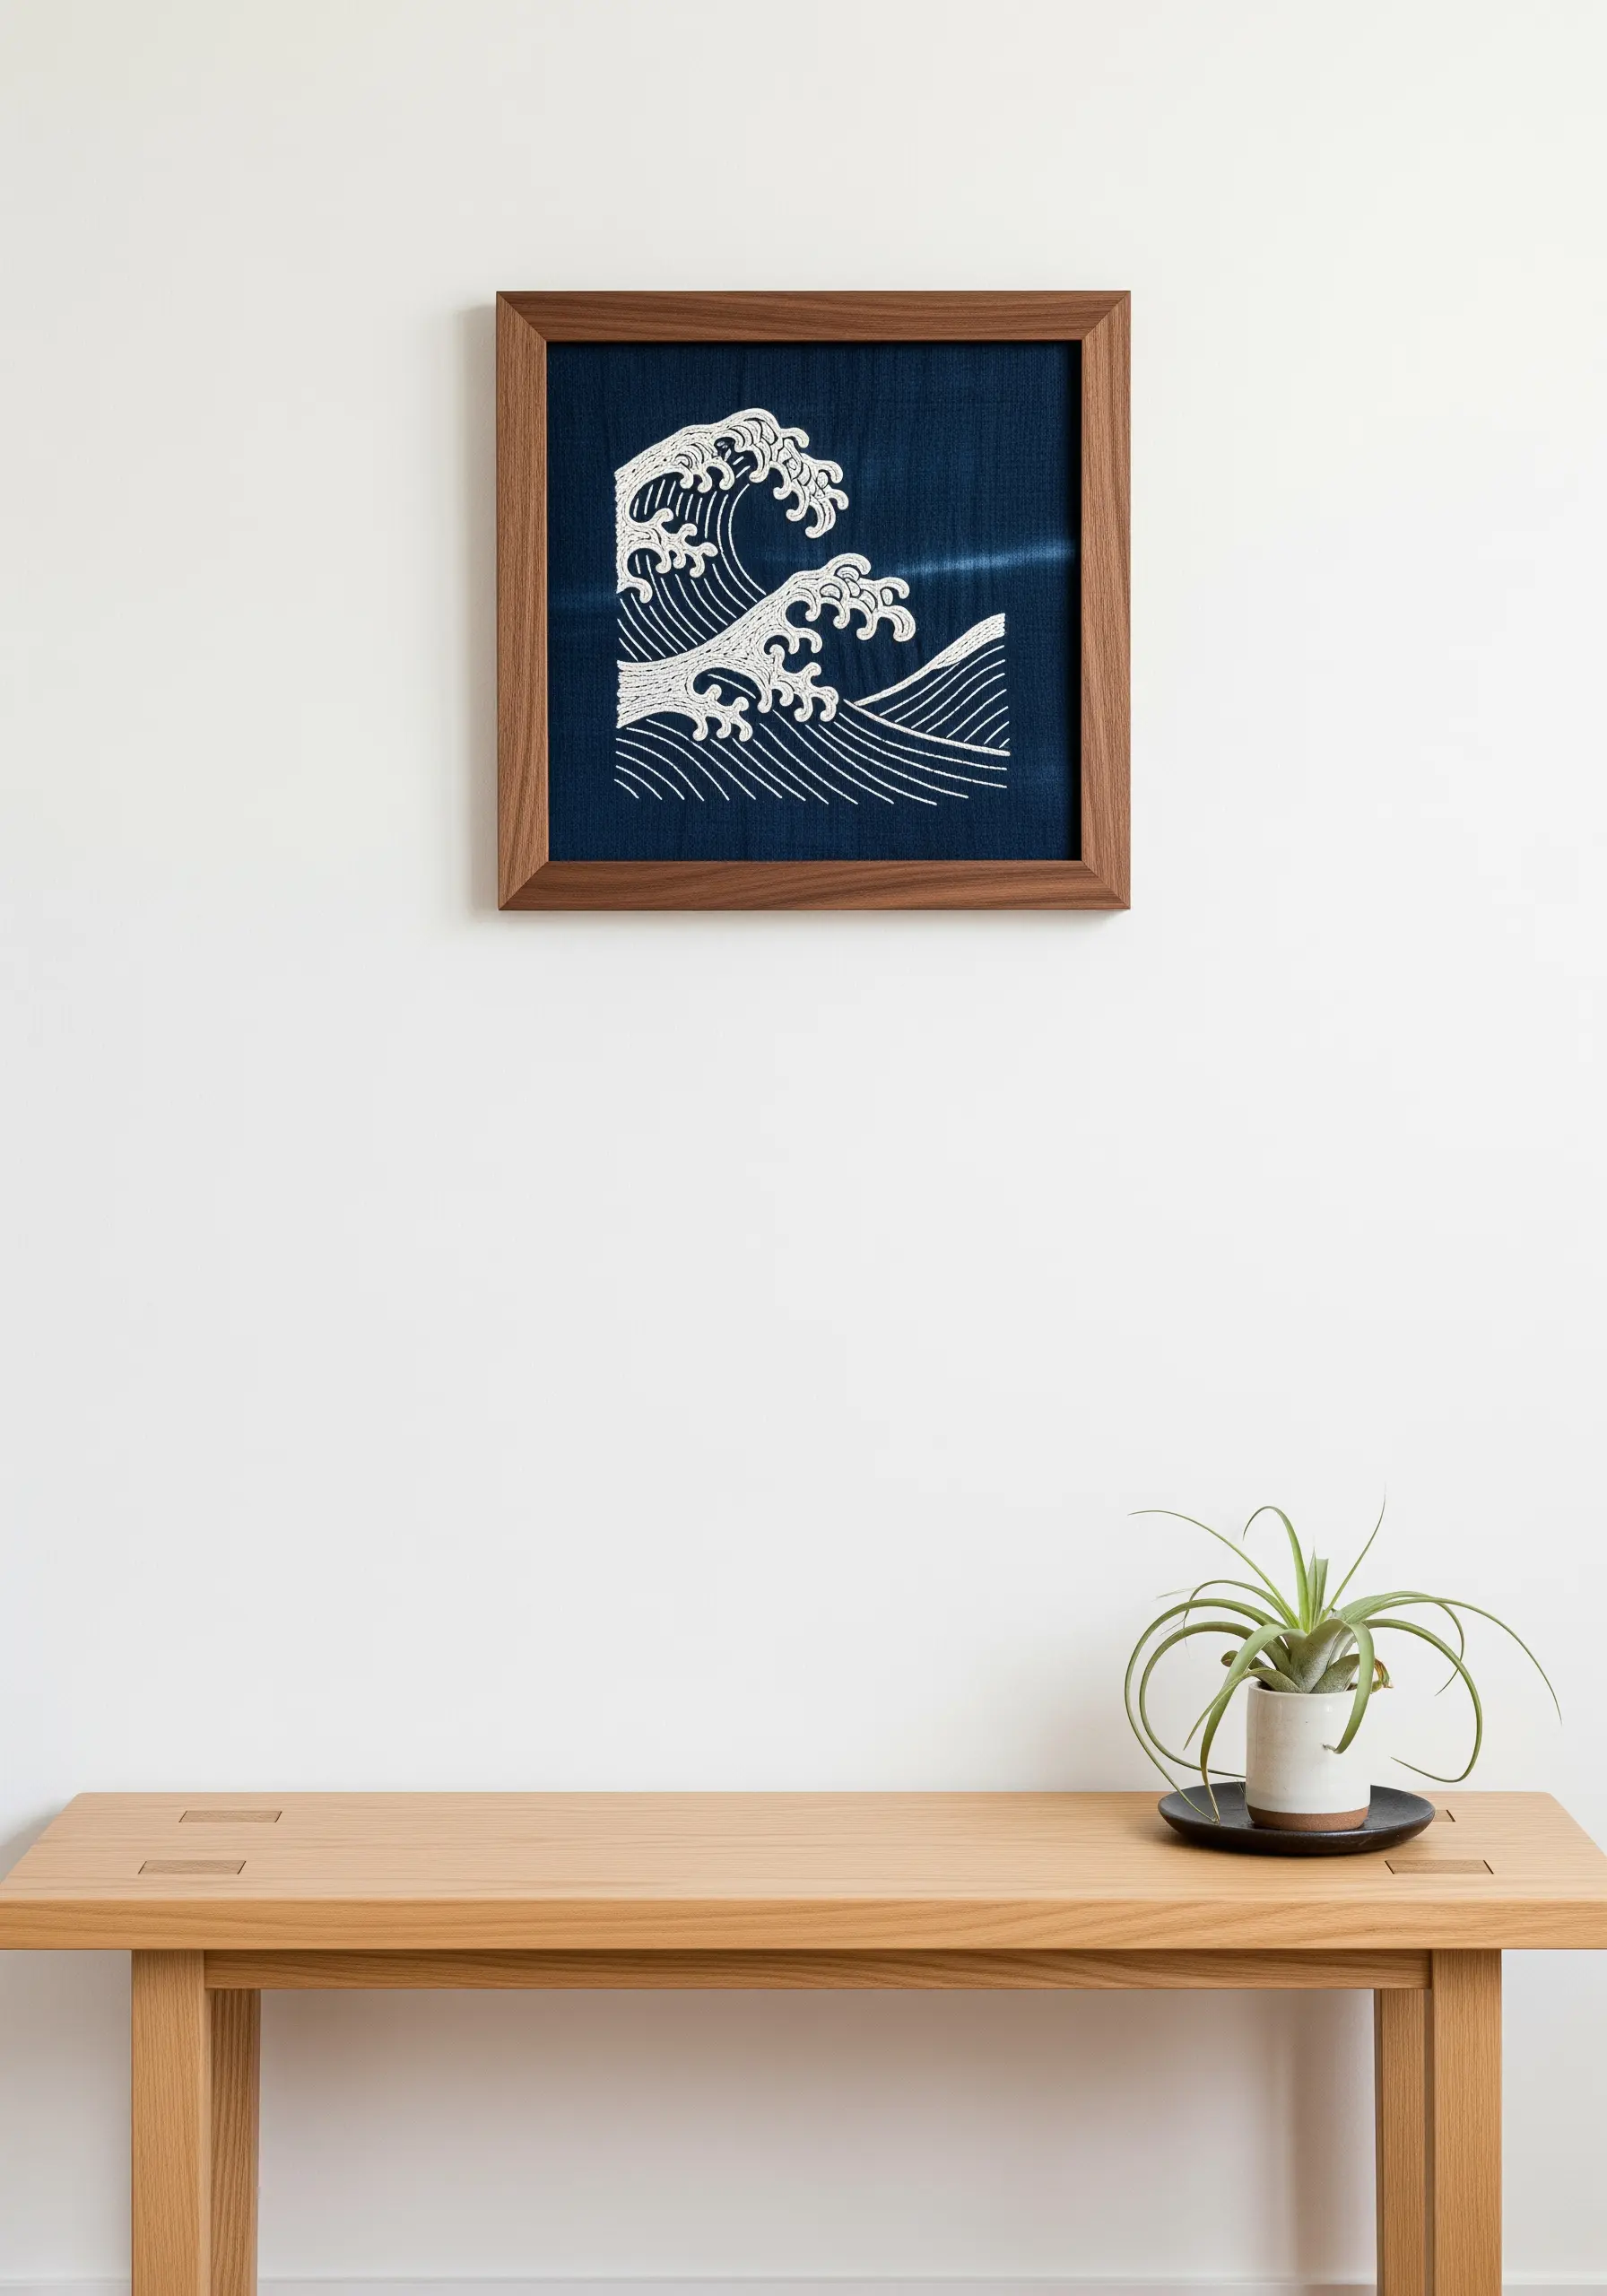
Create a powerful visual statement by focusing on the elegance of a single line, inspired by Japanese Sashiko stitching.
Using a bright white thread on a dark indigo fabric immediately draws the eye, making the unstitched background just as important as the stitched lines.
Use a simple backstitch or running stitch, concentrating on consistent stitch length and spacing to achieve a clean, rhythmic pattern.
This minimalist approach turns simple outlines into compelling art.
7. Imply Movement Across Sheer Fabric
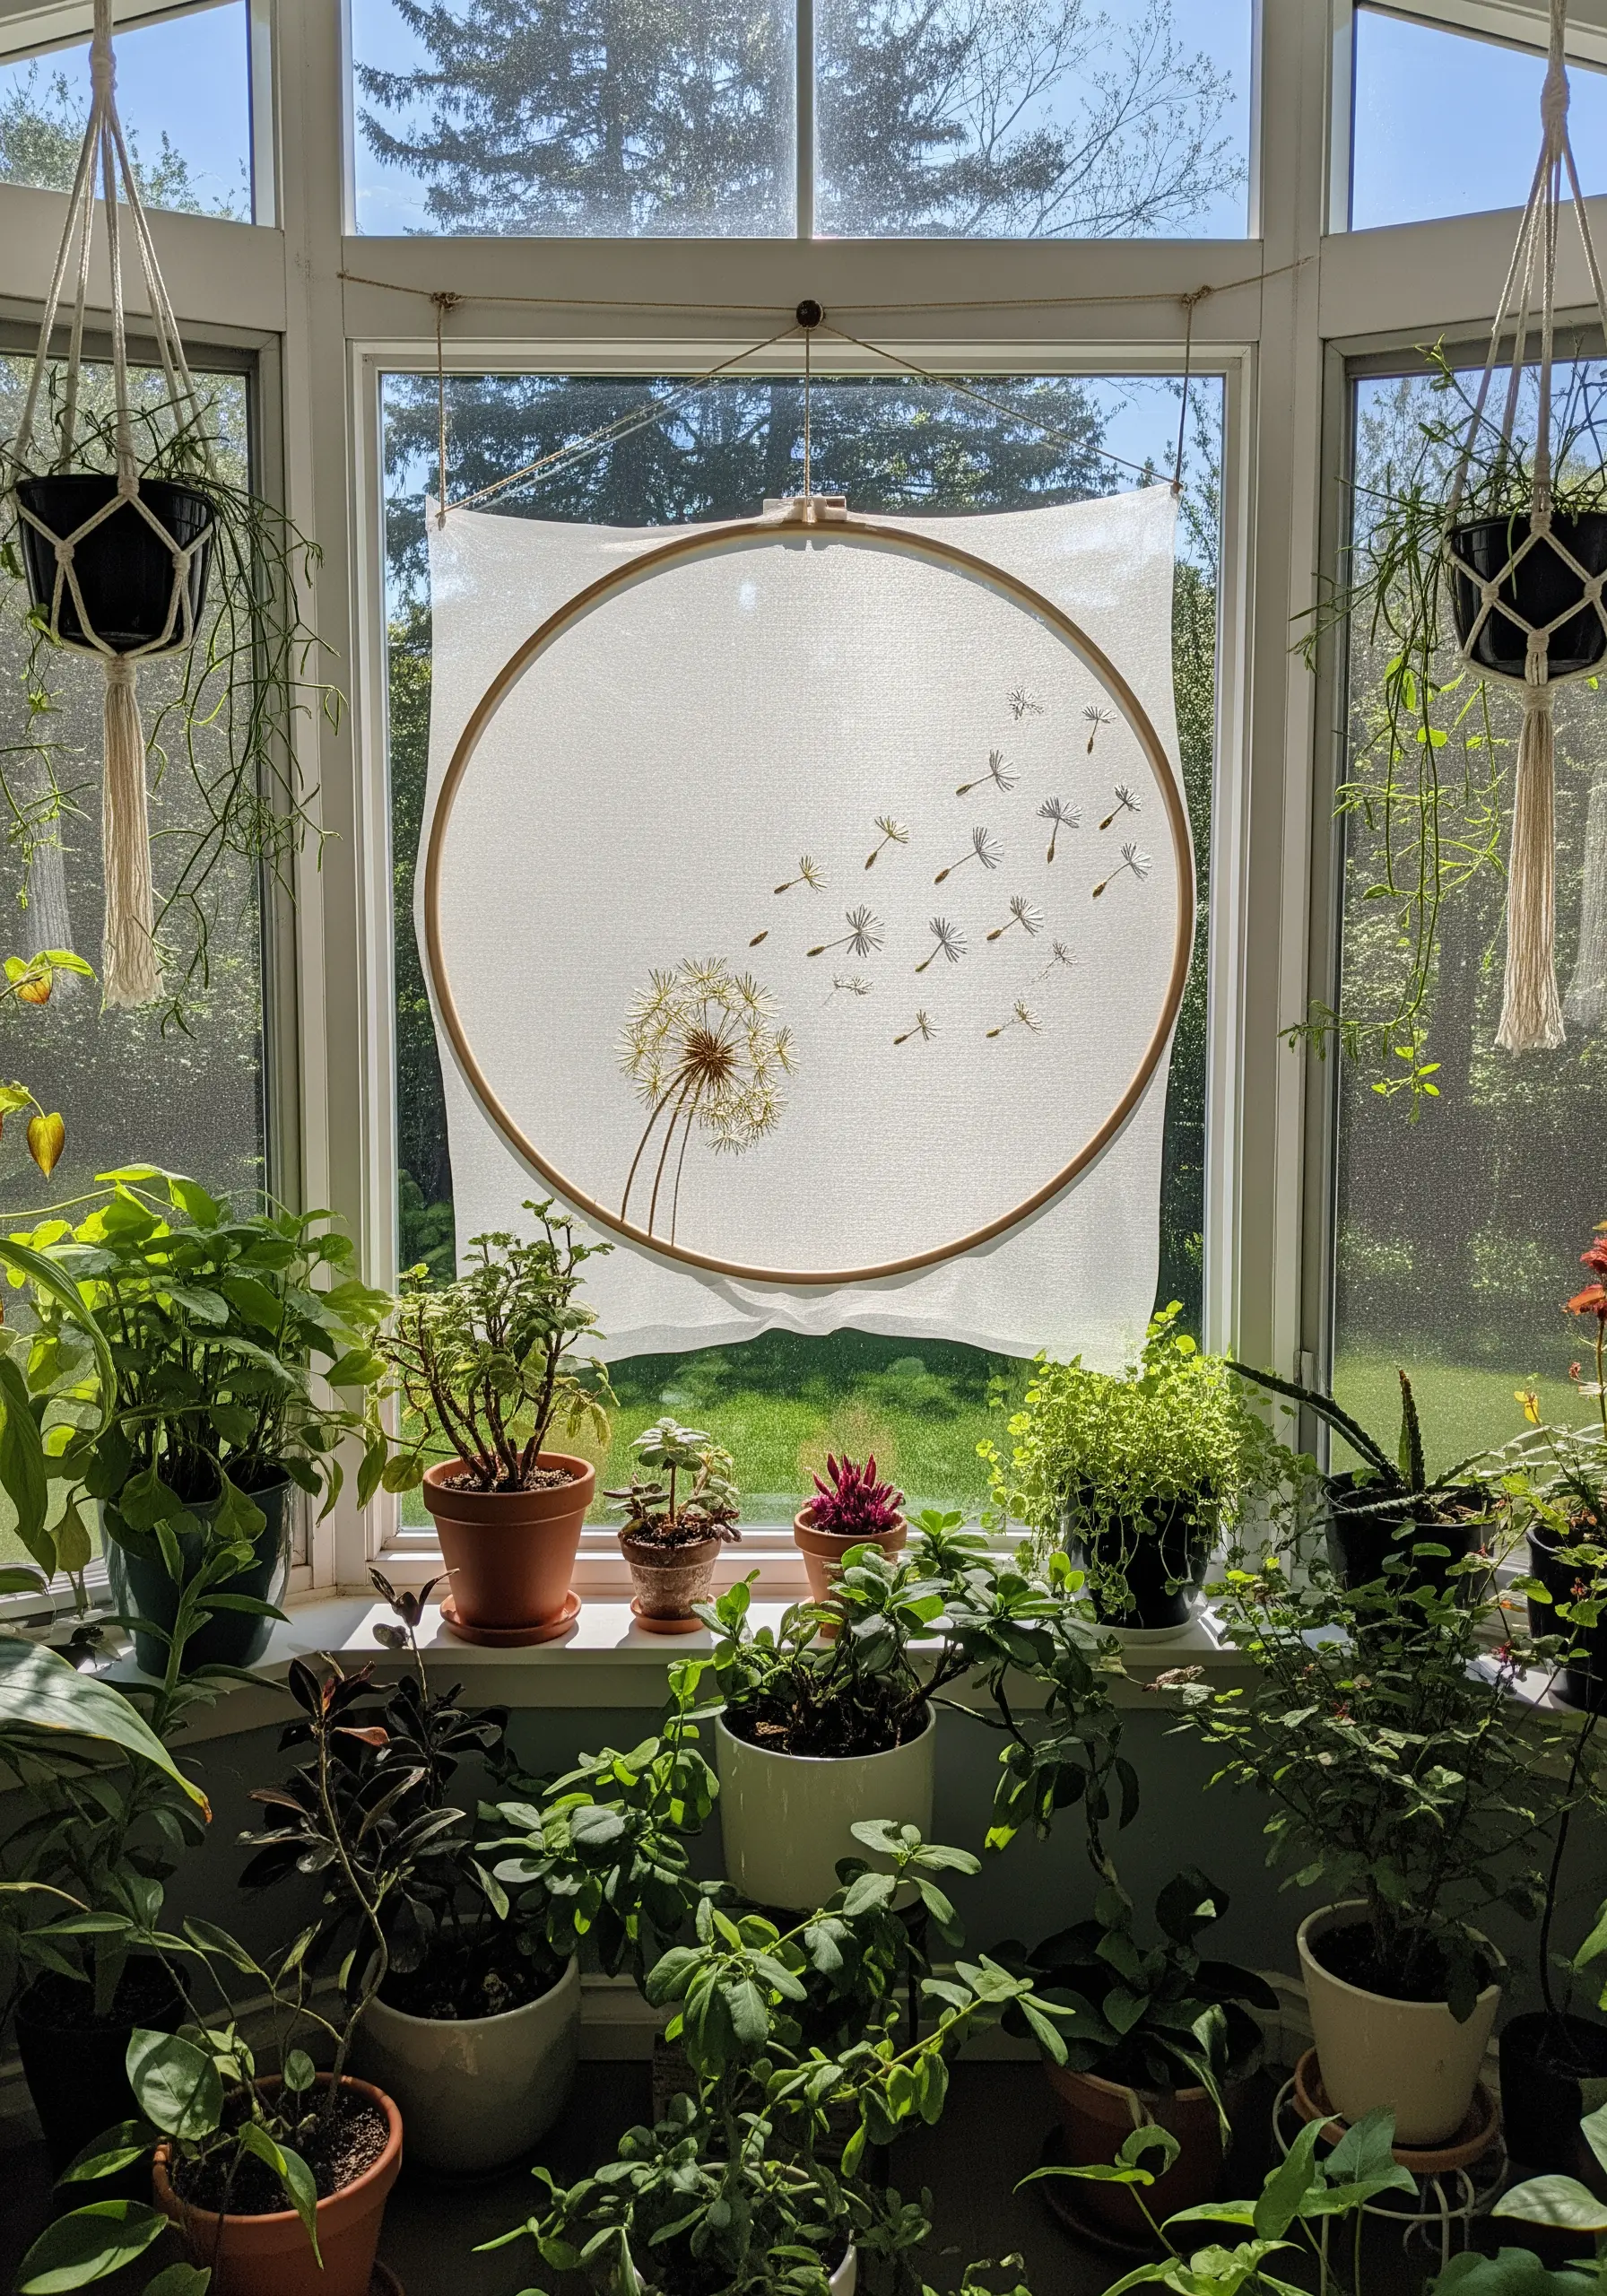
Capture a sense of lightness and motion by stitching on a sheer or semi-sheer fabric like organdy or voile.
The transparency of the material makes the embroidered elements appear to float, which is perfect for depicting dandelion seeds drifting on the wind.
Use single straight stitches and tiny seed stitches arranged in a gentle curve to guide the viewer’s eye across the hoop, creating a visual narrative of movement.
This technique shares a delicate aesthetic with inspiring pressed flower art projects.
8. Achieve Natural Gradients with Tonal Thread Blending
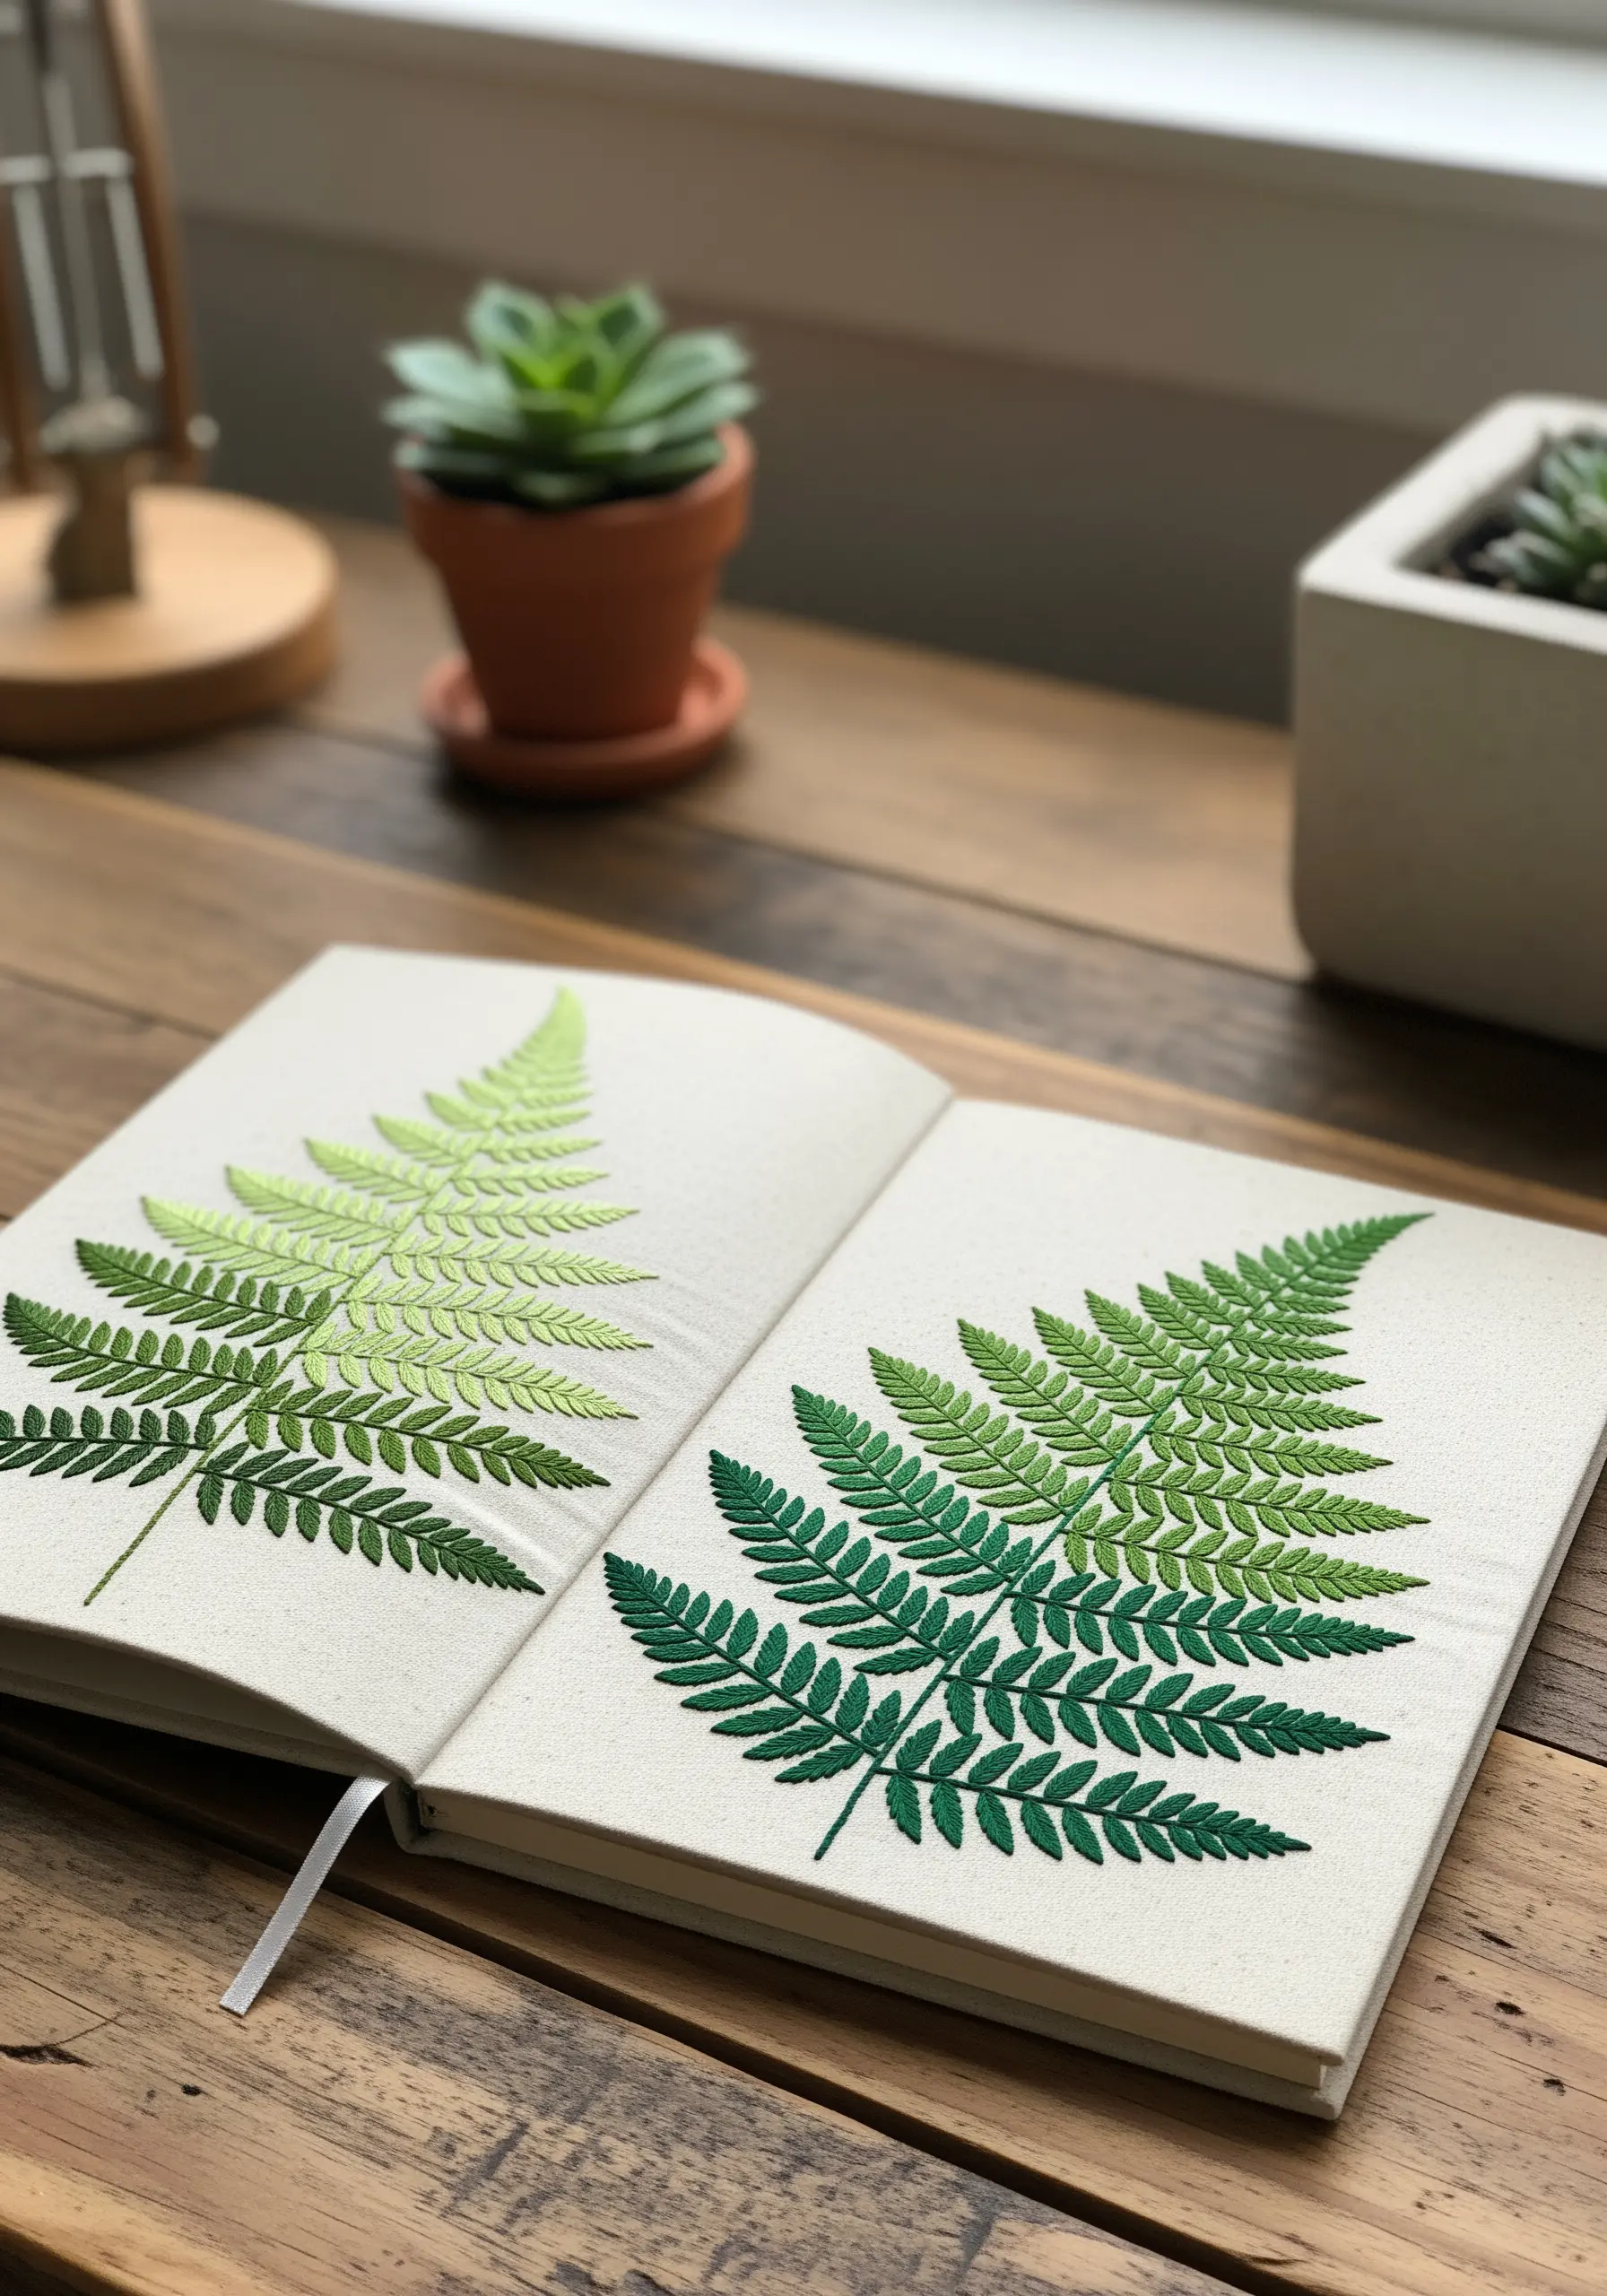
Give botanical embroidery a photorealistic quality by blending several shades of the same color within a single leaf.
Using a long-and-short stitch, you can seamlessly transition from a light green to a deep forest green, mimicking the way light hits a real fern.
This technique eliminates harsh lines between colors, creating soft, painterly gradients that add incredible depth and realism.
It’s a perfect way to work with contemporary rainbow blend stitches in a more naturalistic style.
9. Animate a Scene with Asymmetrical Motifs
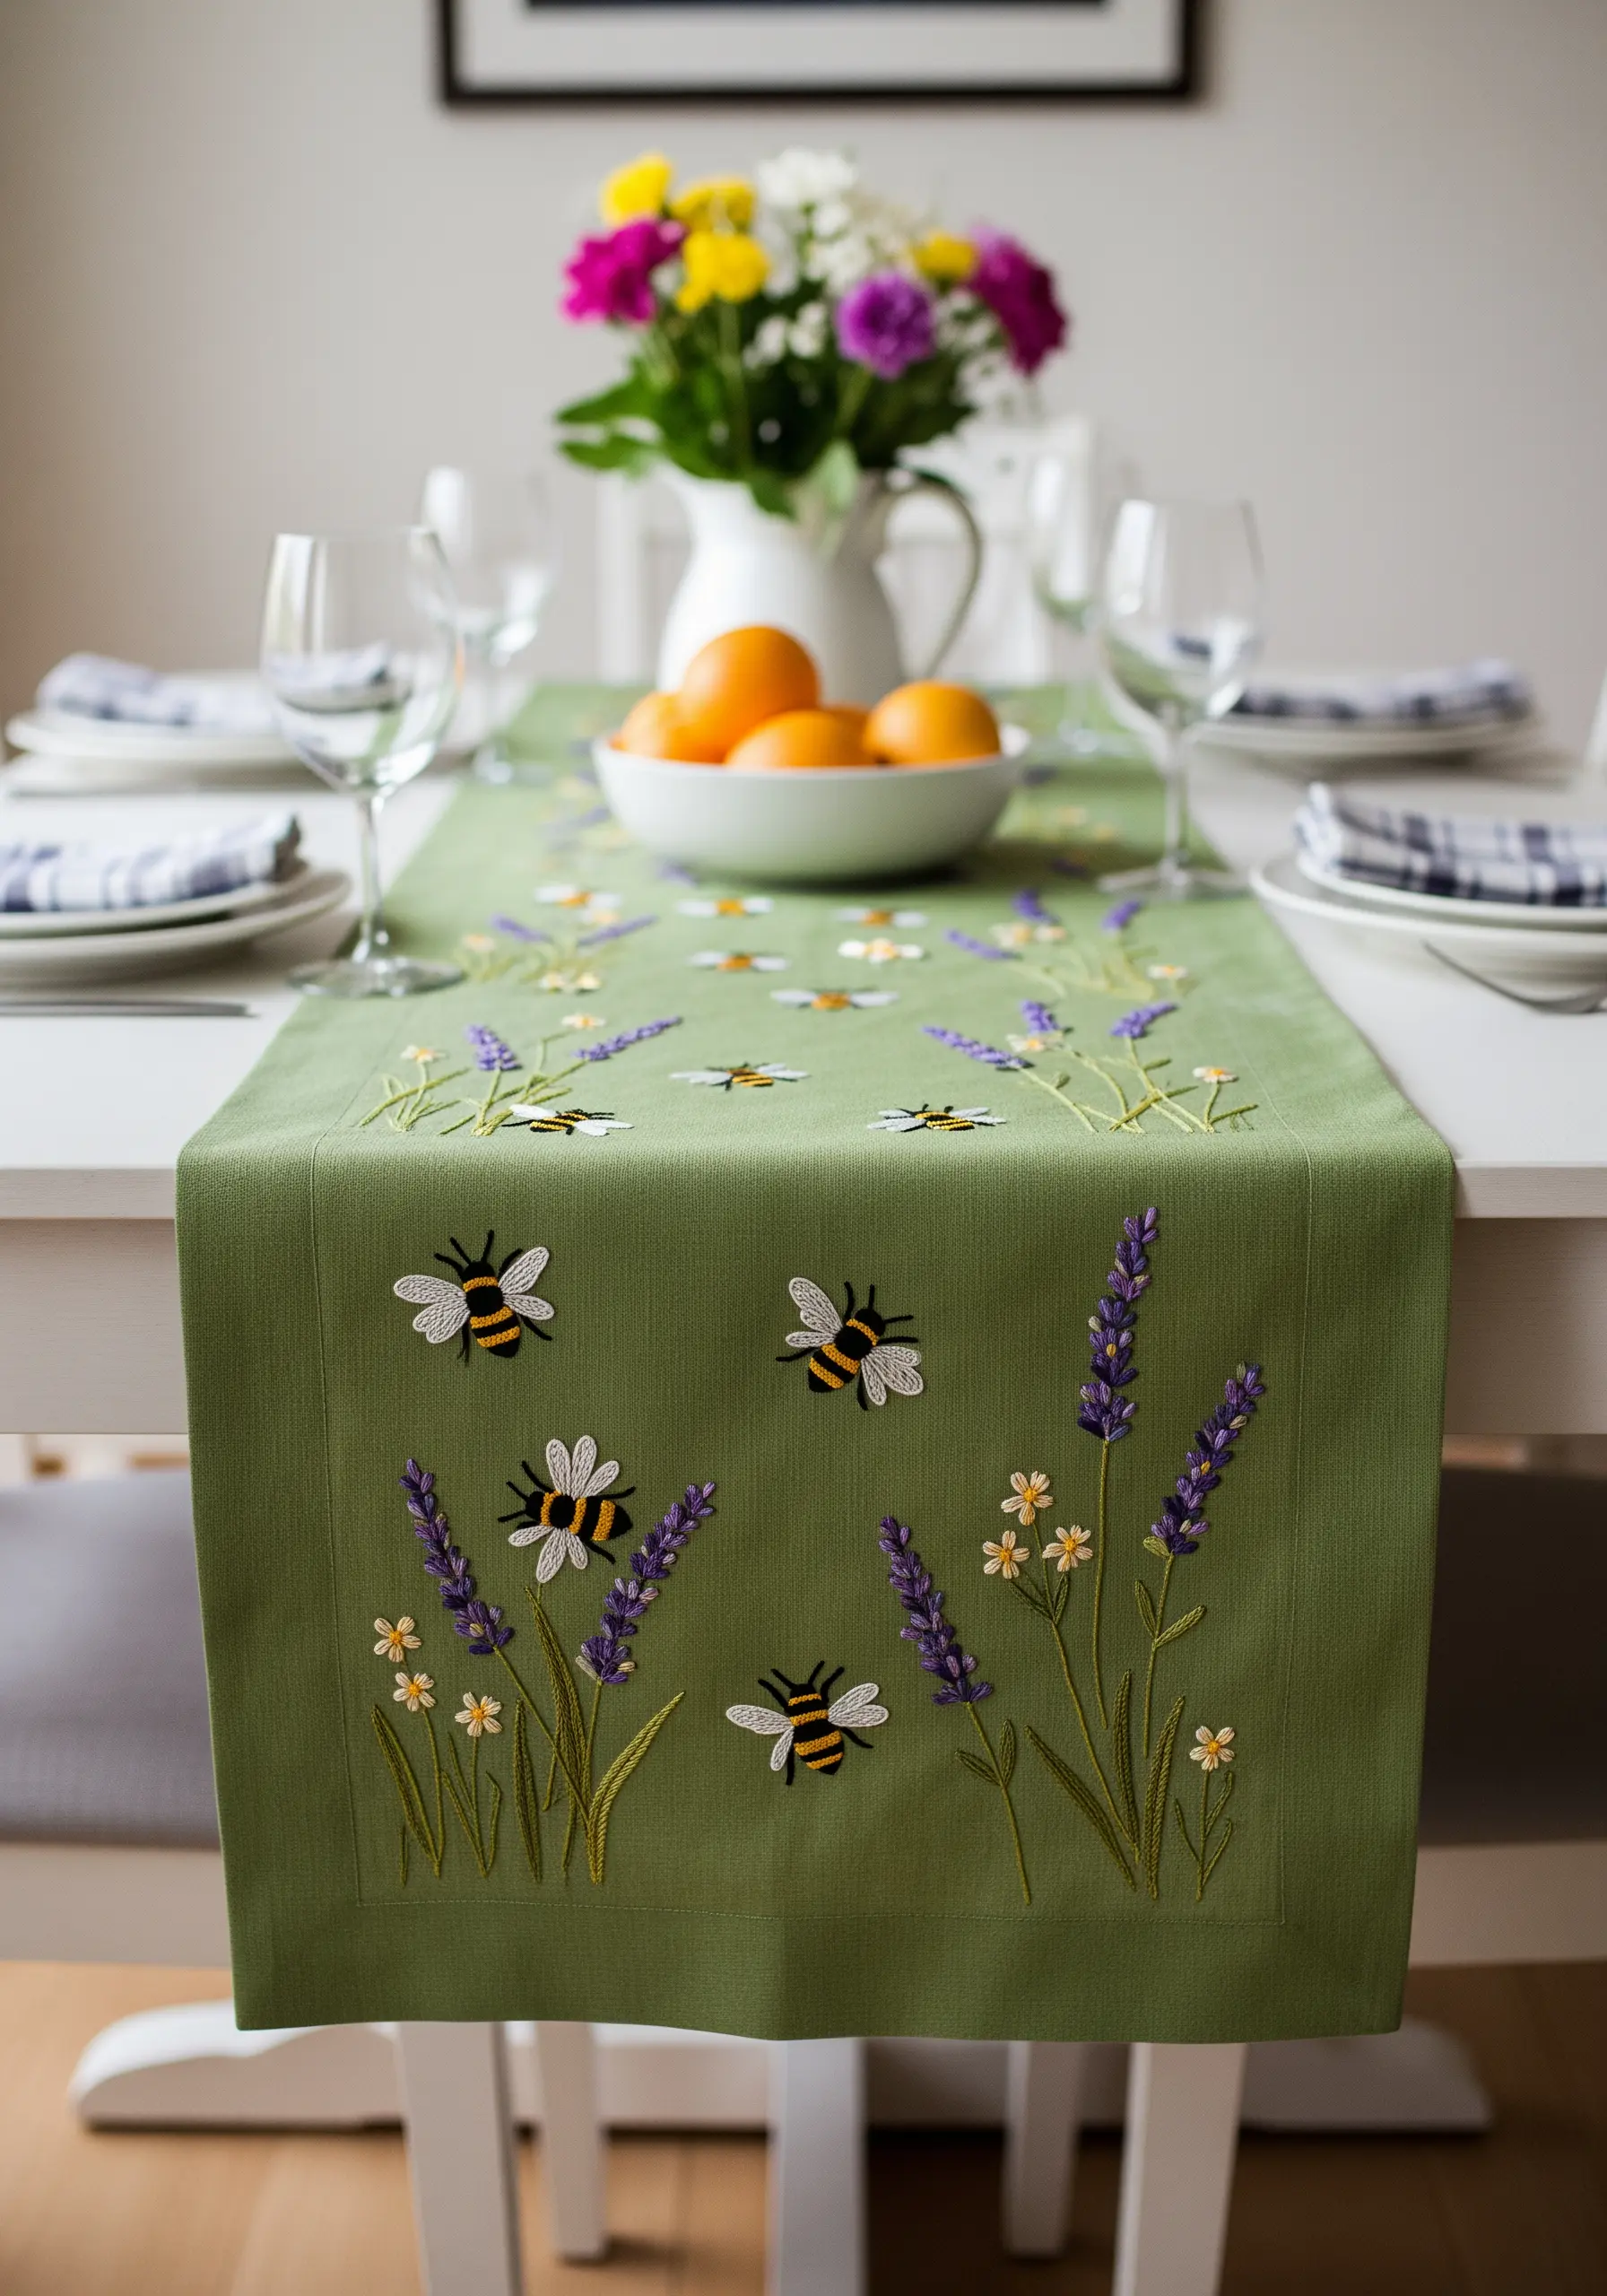
Instead of a single, centered design, bring your textiles to life by scattering smaller, related motifs across the surface.
Place bees and lavender sprigs at varying heights and angles on this table runner to create a dynamic composition that feels alive and buzzing with energy.
This asymmetrical arrangement encourages the eye to move around the piece, discovering new details along the way, making the scene feel less like a static pattern and more like a glimpse into a garden.
10. Add Crisp Detail to High-Pile Fabrics
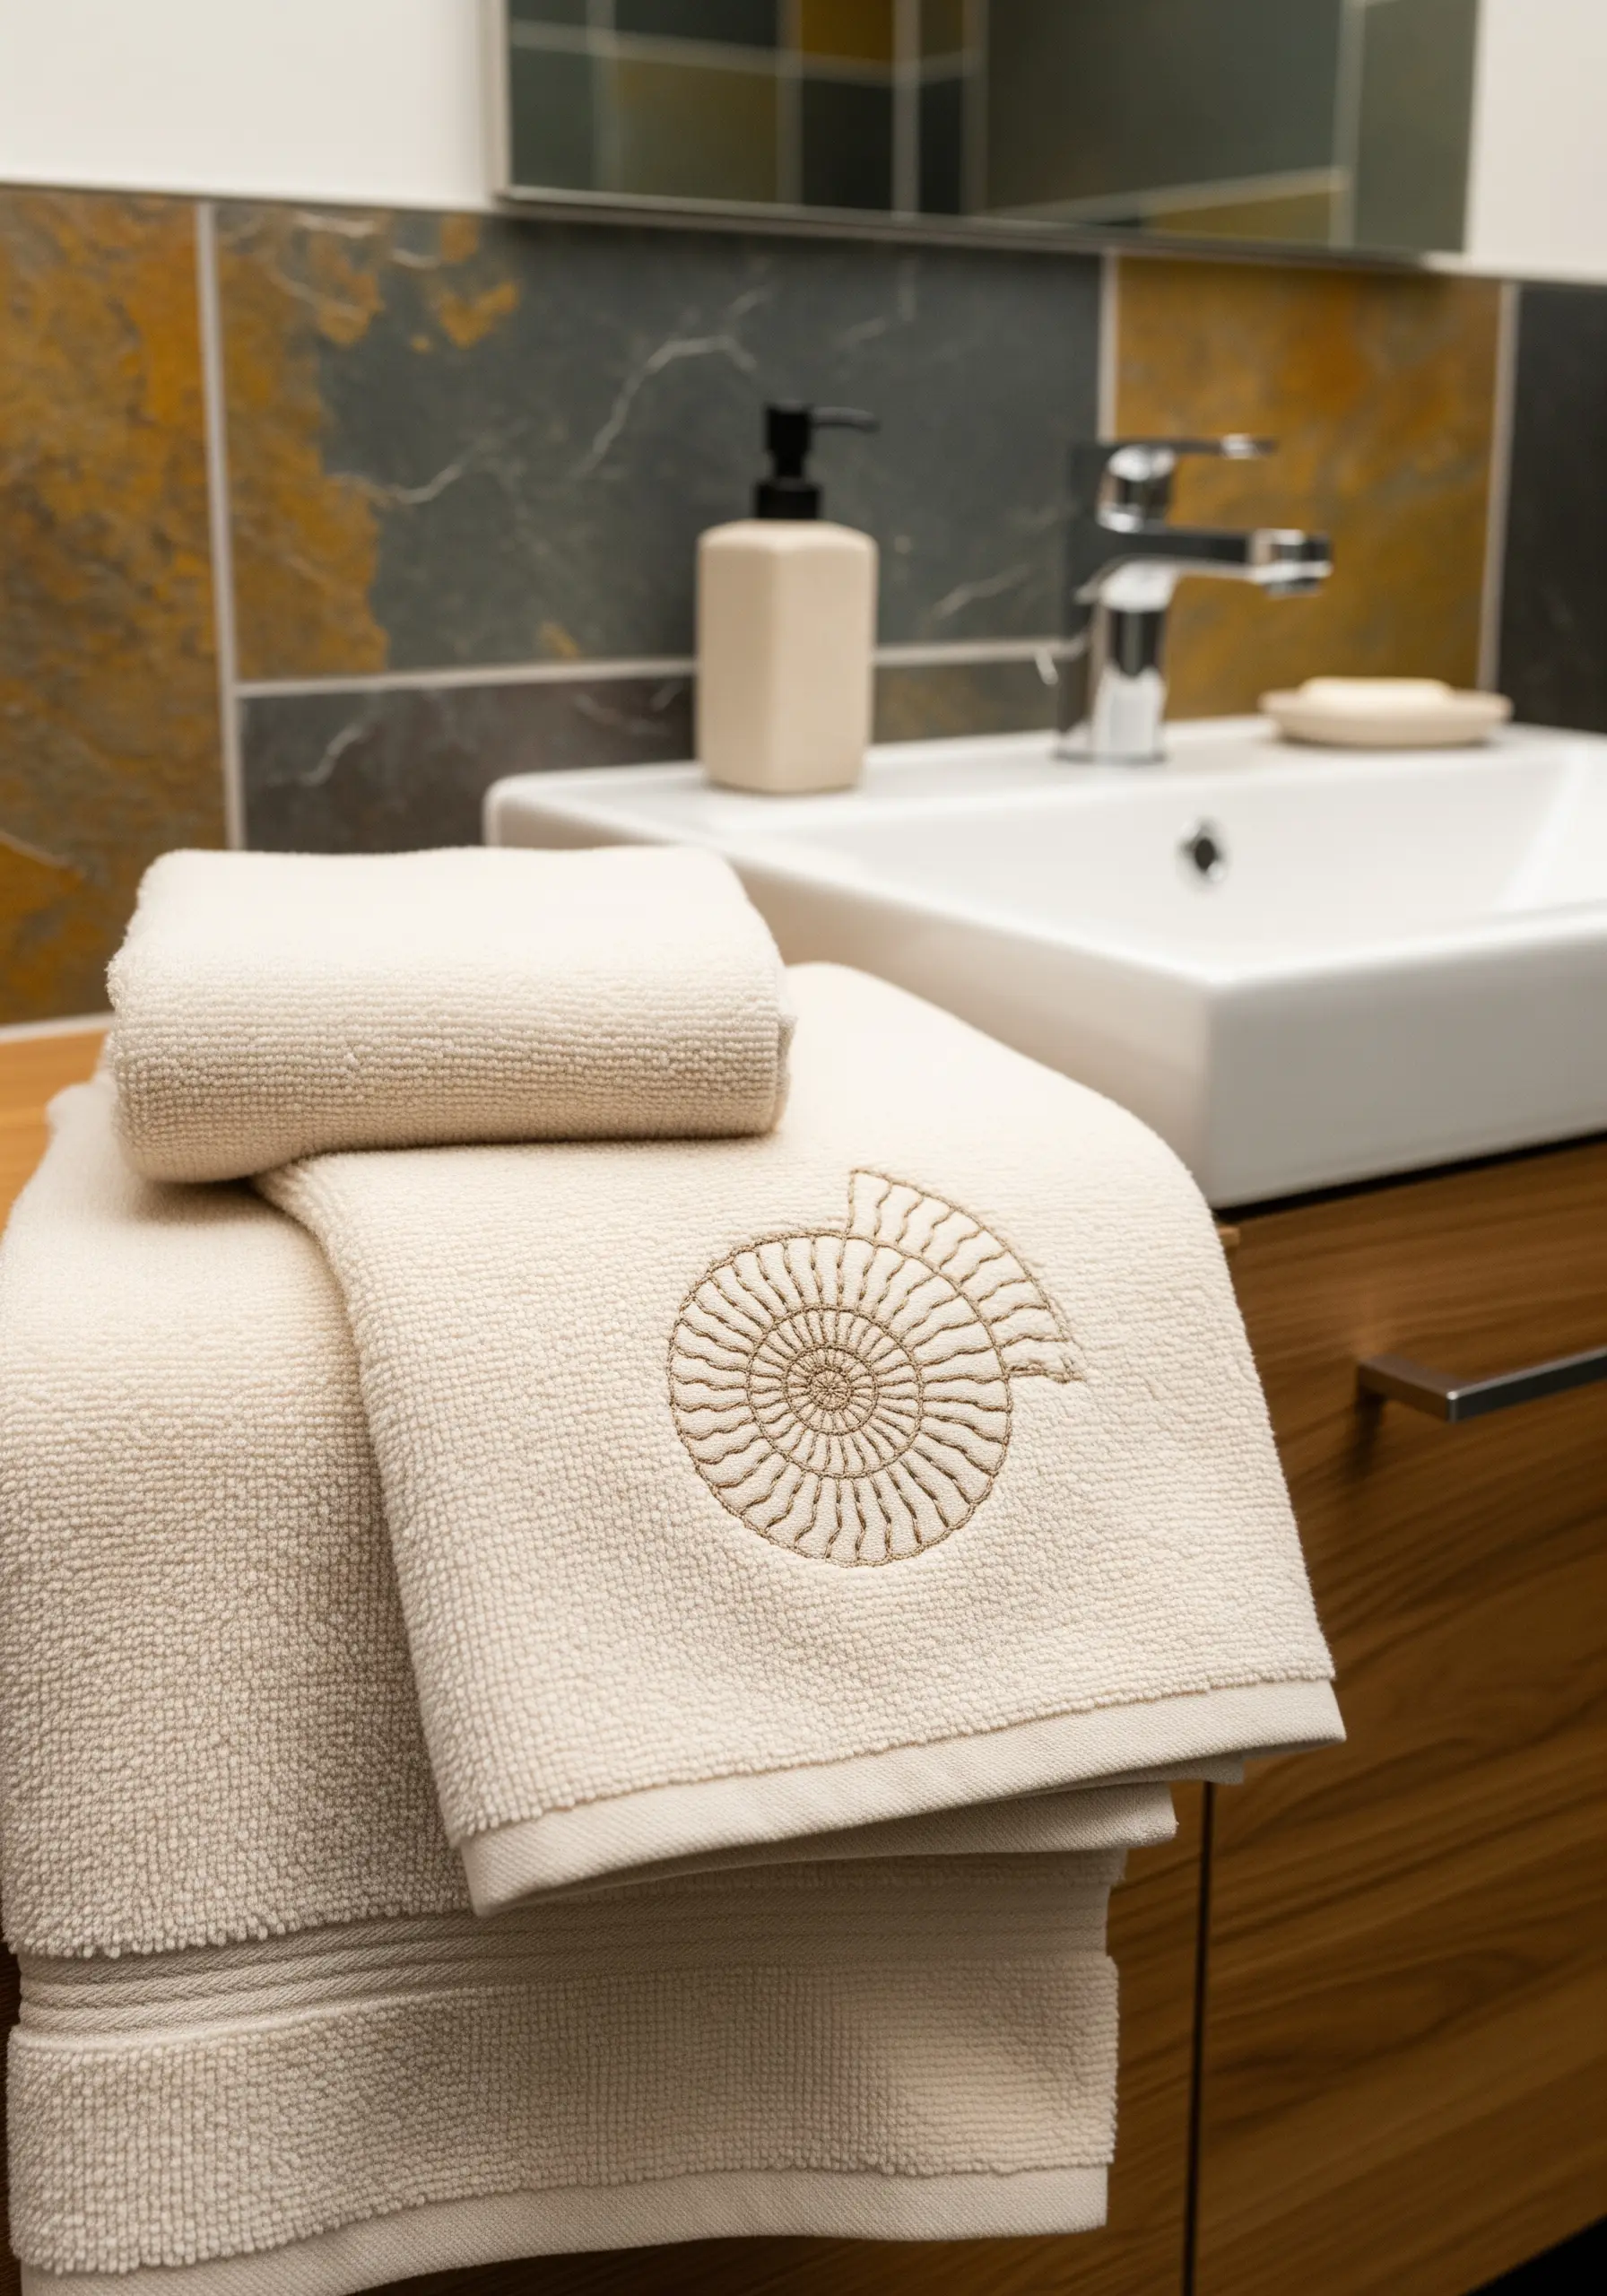
Embroidering on heavily textured fabrics like terrycloth towels can be frustrating, as stitches often sink and disappear into the loops.
To solve this, place a layer of water-soluble stabilizer over your design area before you begin stitching.
The stabilizer creates a smooth, flat surface for your needle and thread, ensuring your stitches sit neatly on top of the pile.
Once you’re finished, simply wash it away, leaving a sharp, professional-looking design inspired by textures you’d find on a nature walk.
11. Combine Metallic and Matte Threads for Visual Contrast
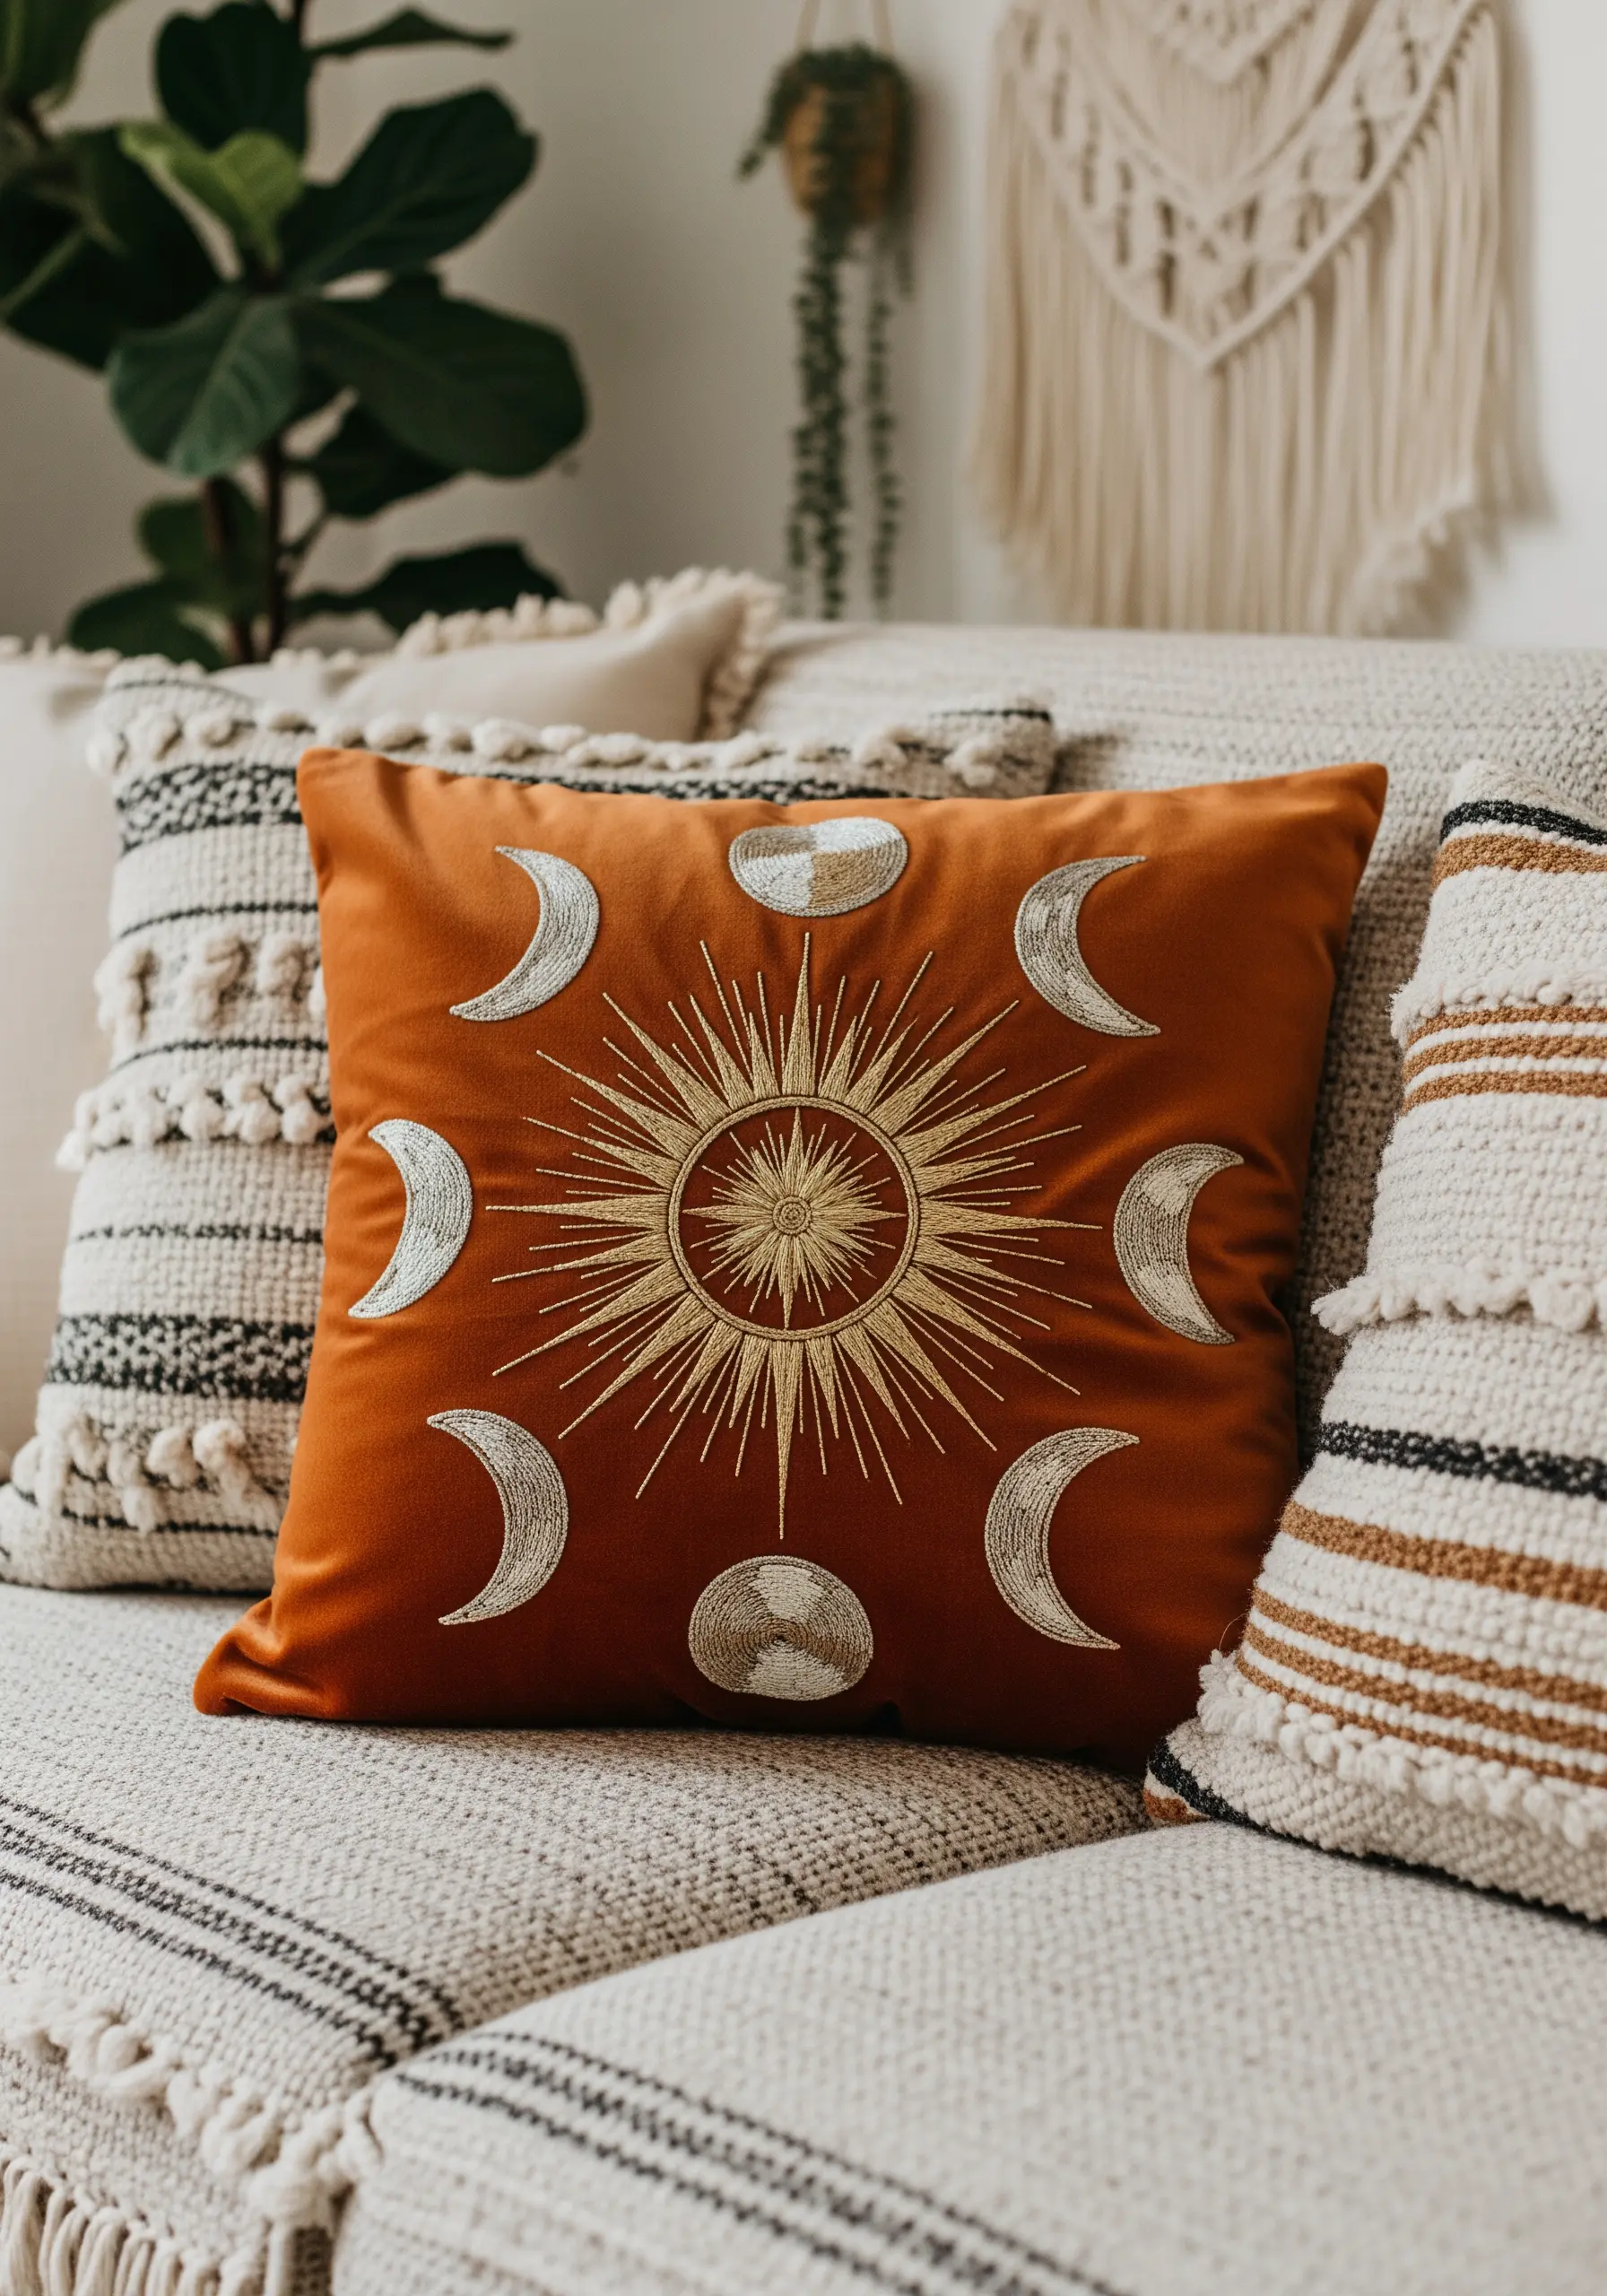
Elevate a simple design by introducing a mix of thread finishes. Use a shimmering metallic floss for elements you want to highlight, like the sun’s rays or crescents of the moon.
Pair it with standard matte cotton floss for the remaining areas.
This contrast in textures creates a sophisticated visual effect; the metallic threads catch the light and draw attention, while the matte threads provide a soft, grounding balance.
To prevent tangling, work with shorter lengths of metallic thread.
12. Create a Cohesive Story with a Thematic Triptych
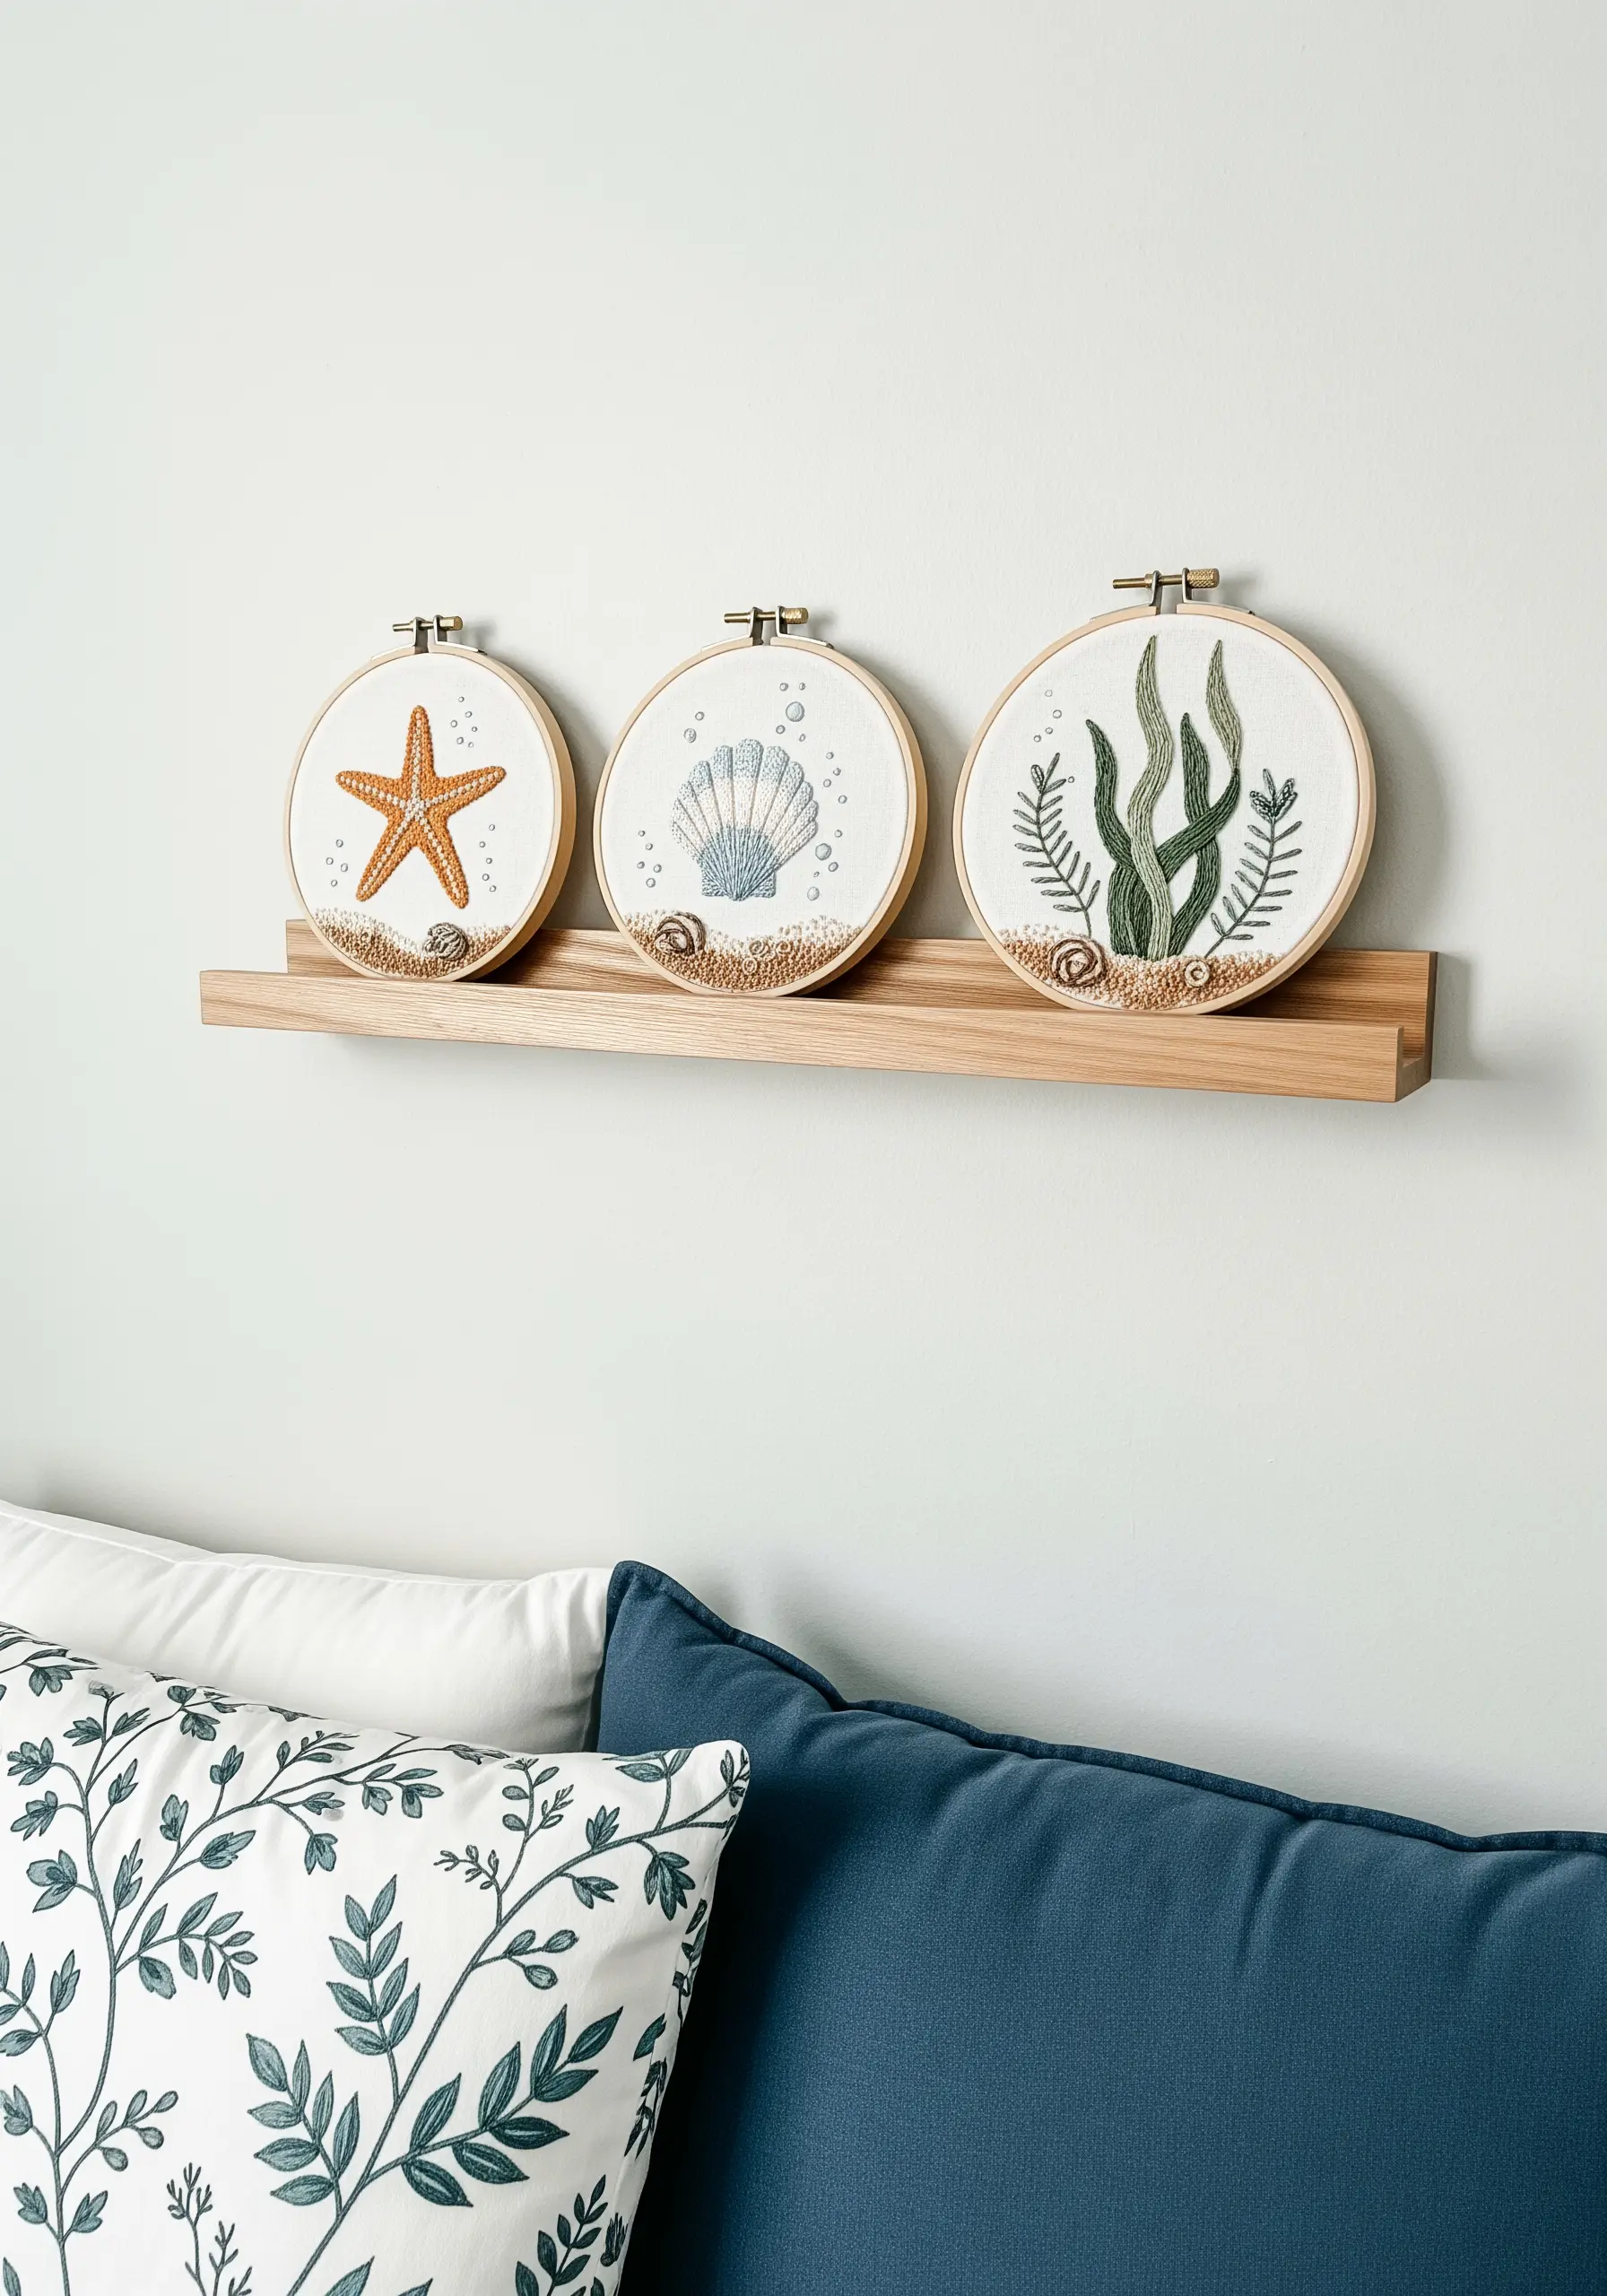
Turn a collection of small hoops into a unified piece of wall art by linking them with a common theme, color palette, and fabric.
To further connect the individual pieces, add a shared element to each one, such as the sandy shore created with French knots and seed stitches at the base of these coastal hoops.
This simple technique transforms three separate designs into a single, intentional triptych that tells a larger story.
13. Pair Elegant Typography with Minimalist Motifs
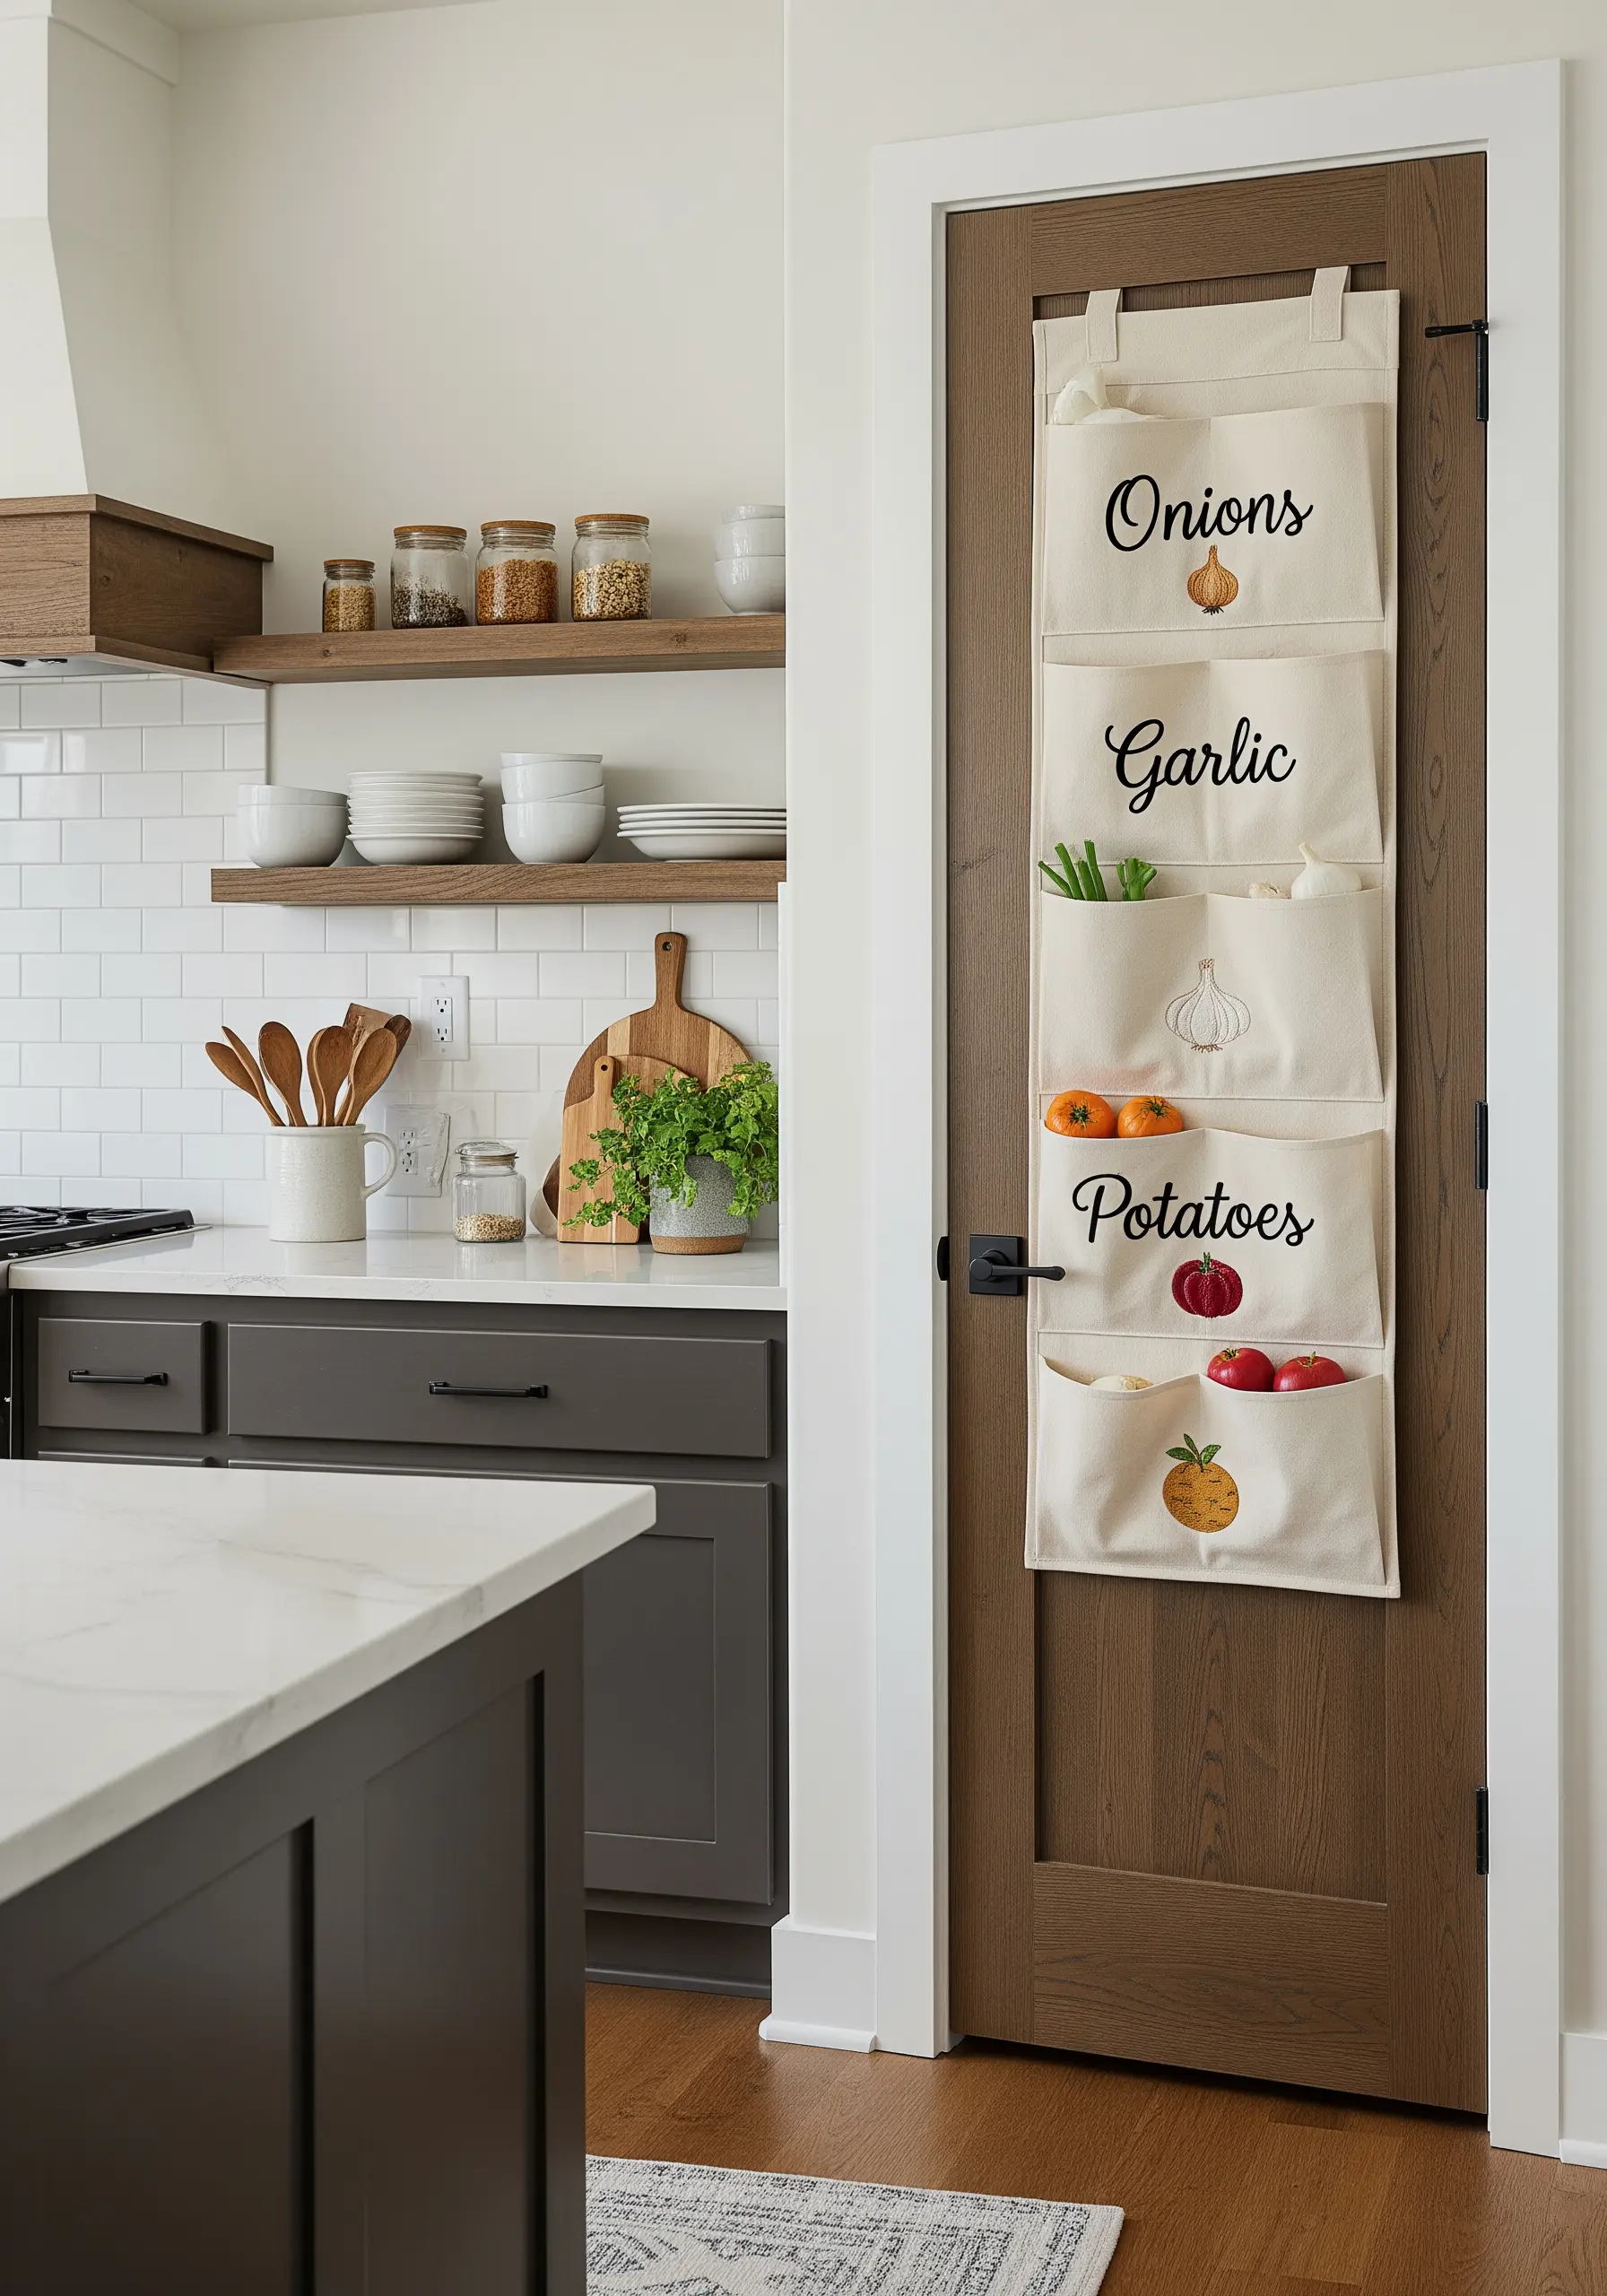
Combine form and function by adding embroidered labels to everyday items like kitchen storage.
Choose a clean, readable script and stitch it using a smooth backstitch or stem stitch for clarity.
Pair the text with a simple, corresponding line-art illustration.
This thoughtful detail not only helps with organization but also transforms a purely practical object into a piece of custom home decor.
14. Define Intricate Patterns with Raised Outline Stitches
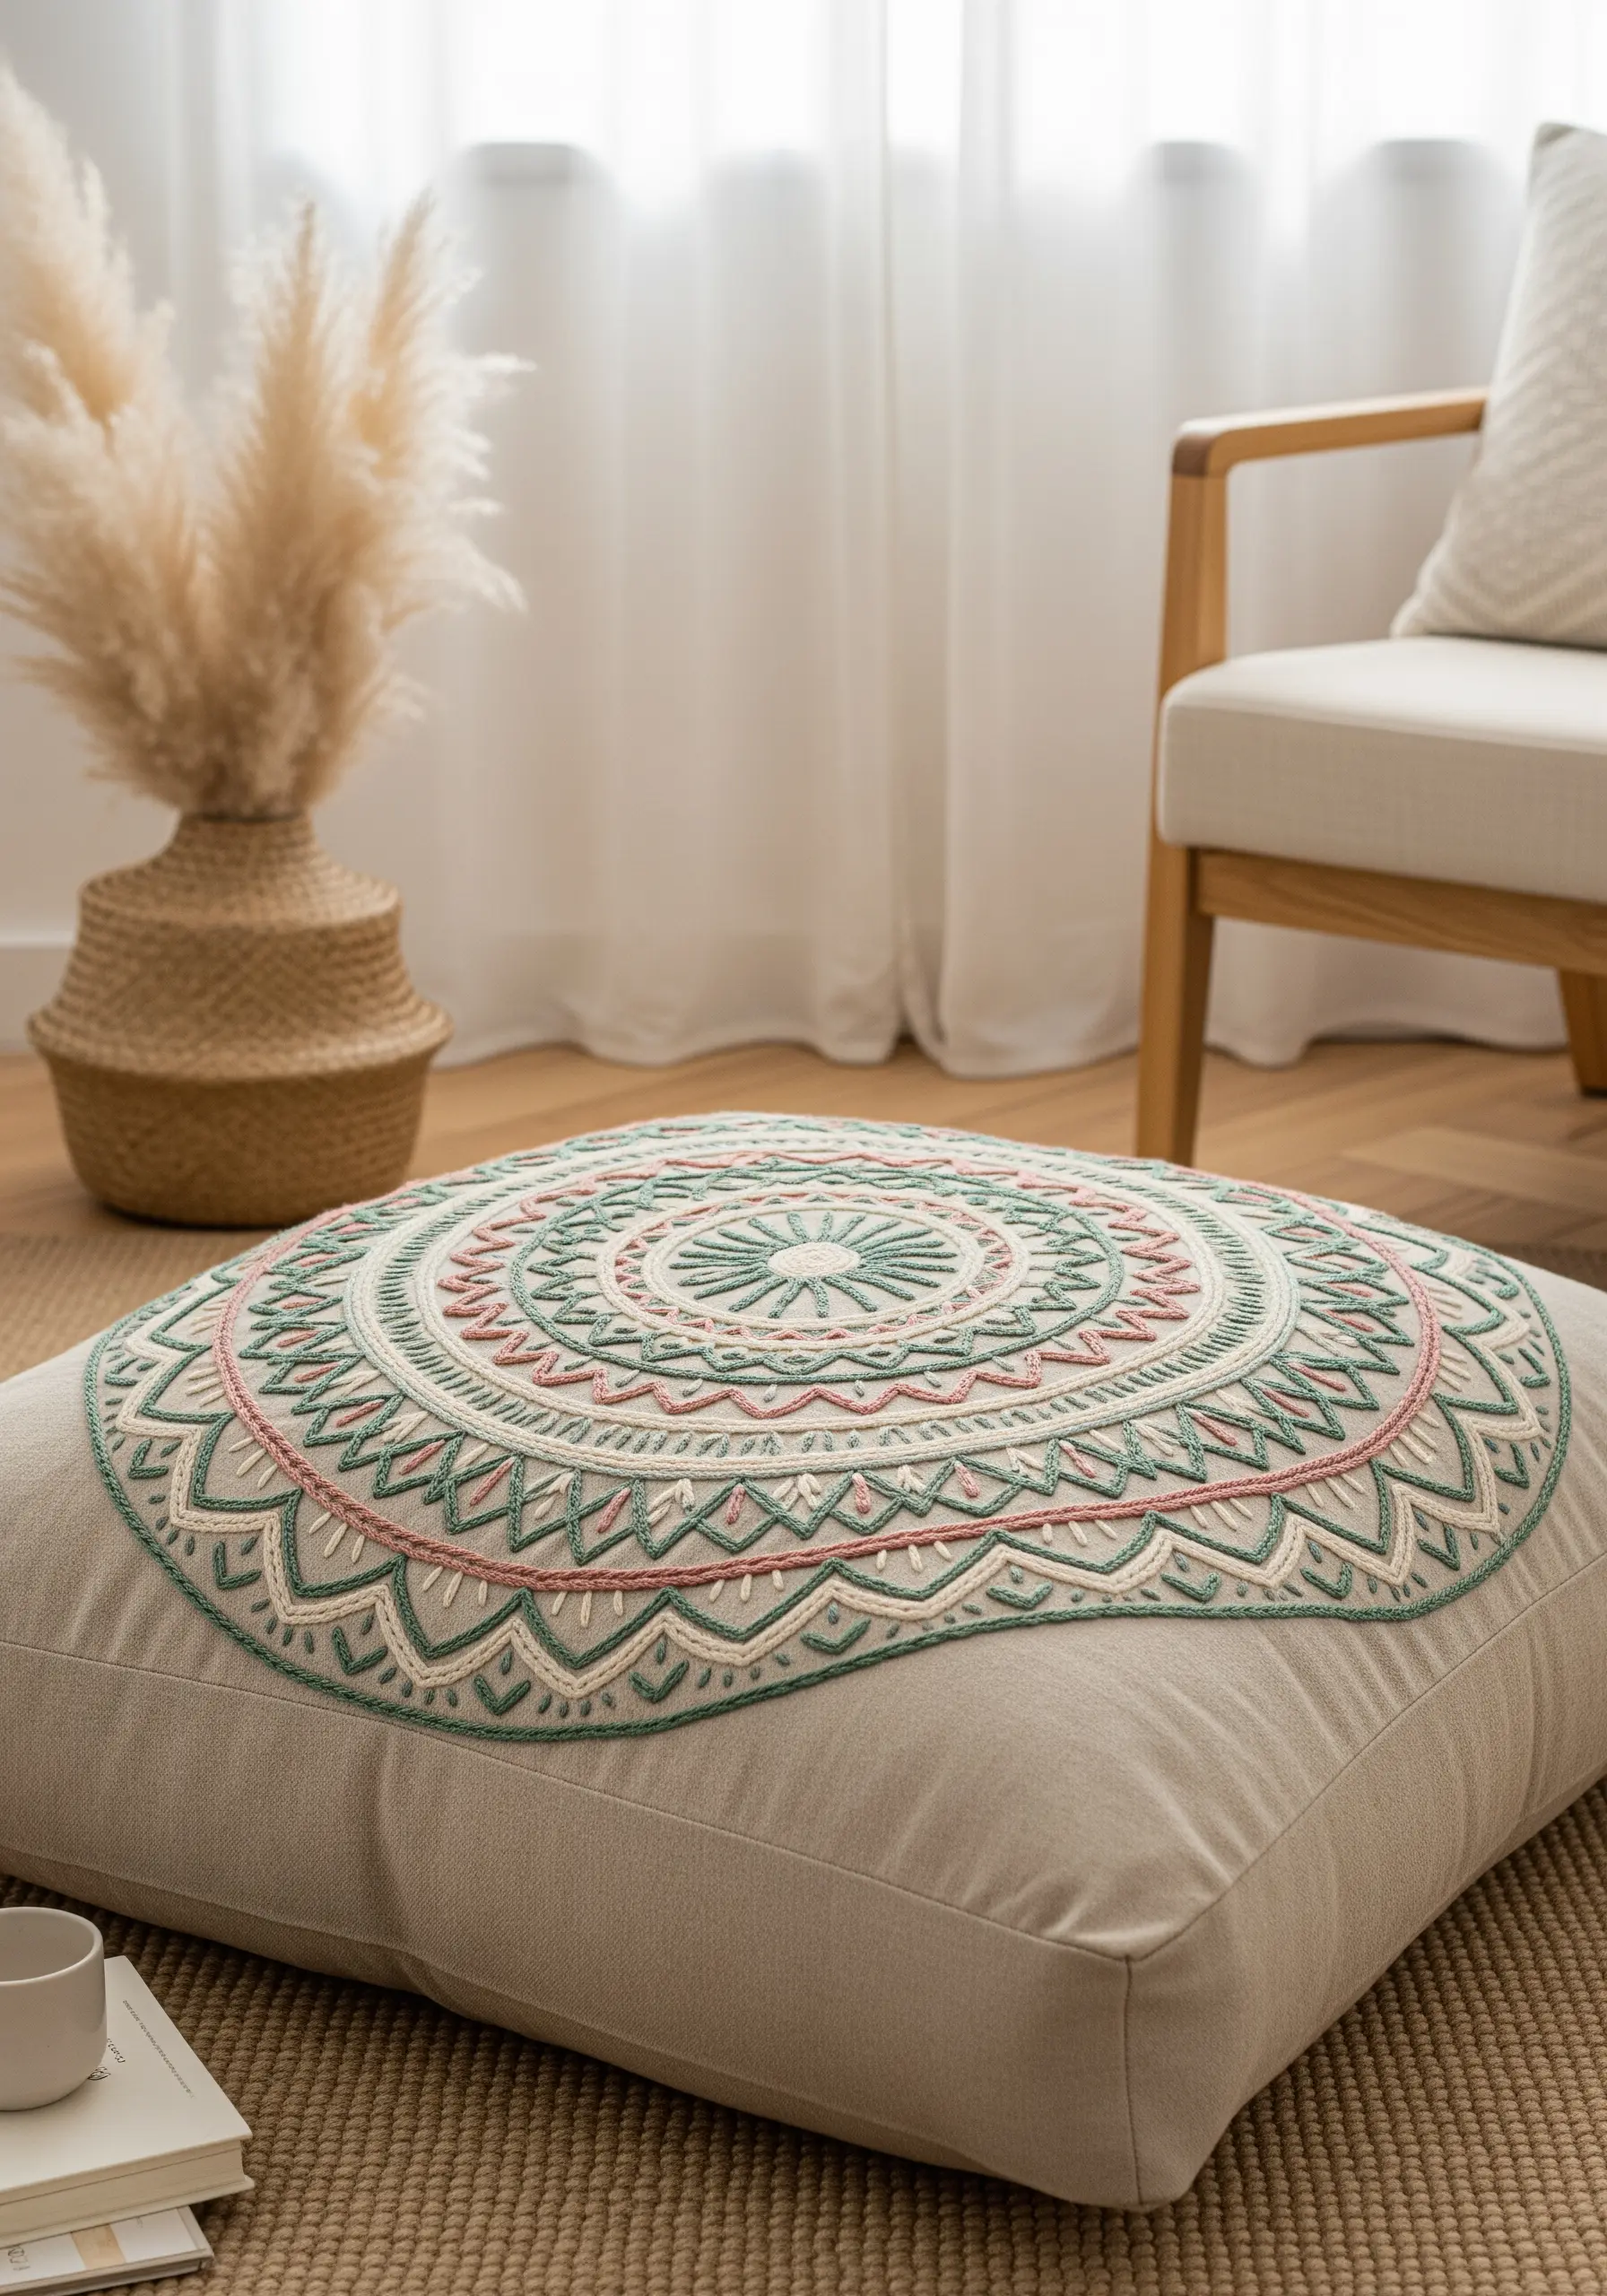
When working on a large, intricate design like a mandala, prevent it from looking flat by emphasizing the outlines.
Instead of a simple backstitch, use a more dimensional stitch like a chain stitch, whipped backstitch, or even a Palestrina knot.
These raised stitches create texture and shadow, helping the different sections of the pattern stand out distinctly.
This technique is especially effective for floral mandala embroidery ideas on functional items like floor cushions.
15. Integrate Embroidery Directly into Upholstery
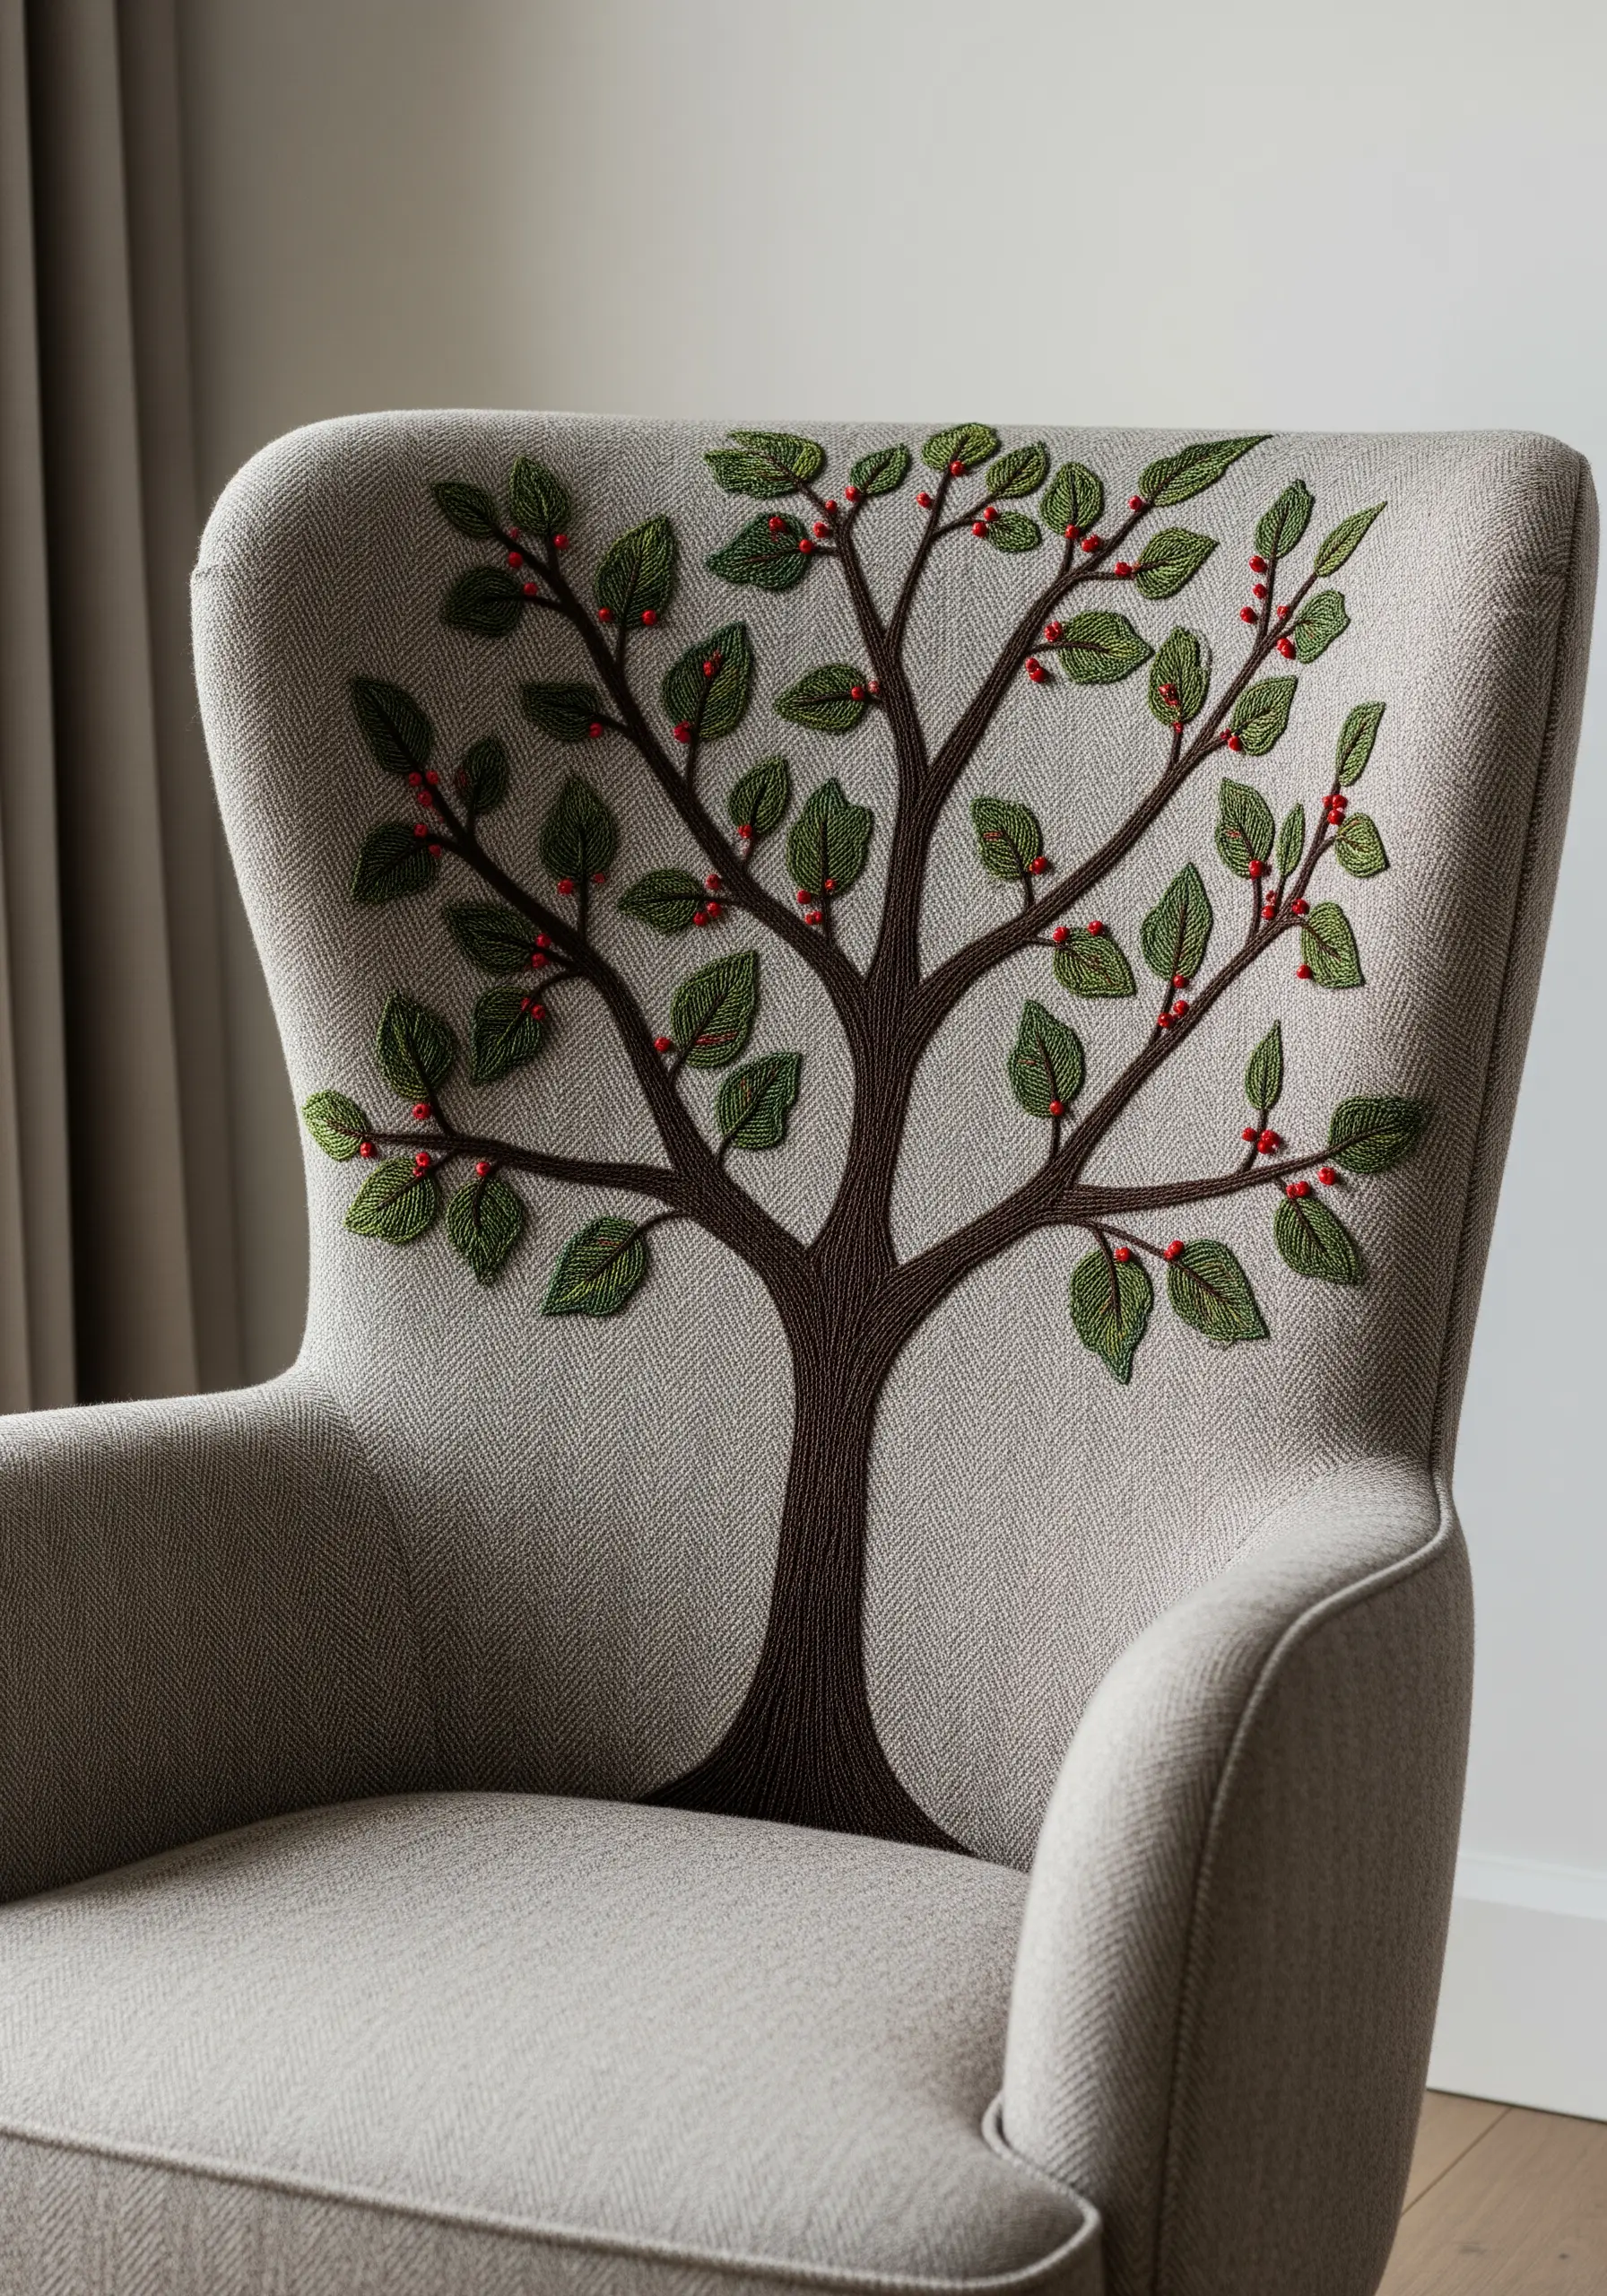
Transform a piece of furniture into a one-of-a-kind work of art by incorporating embroidery directly into its upholstery.
For the best results, stitch your design onto the fabric panel before it’s attached to the furniture frame.
Choose durable, tightly woven upholstery-grade fabric and use robust stitches like satin stitch, chain stitch, and French knots with a thicker thread or yarn to ensure the design withstands daily use.
16. Create Delicate Sprays with French Knots and Stem Stitch
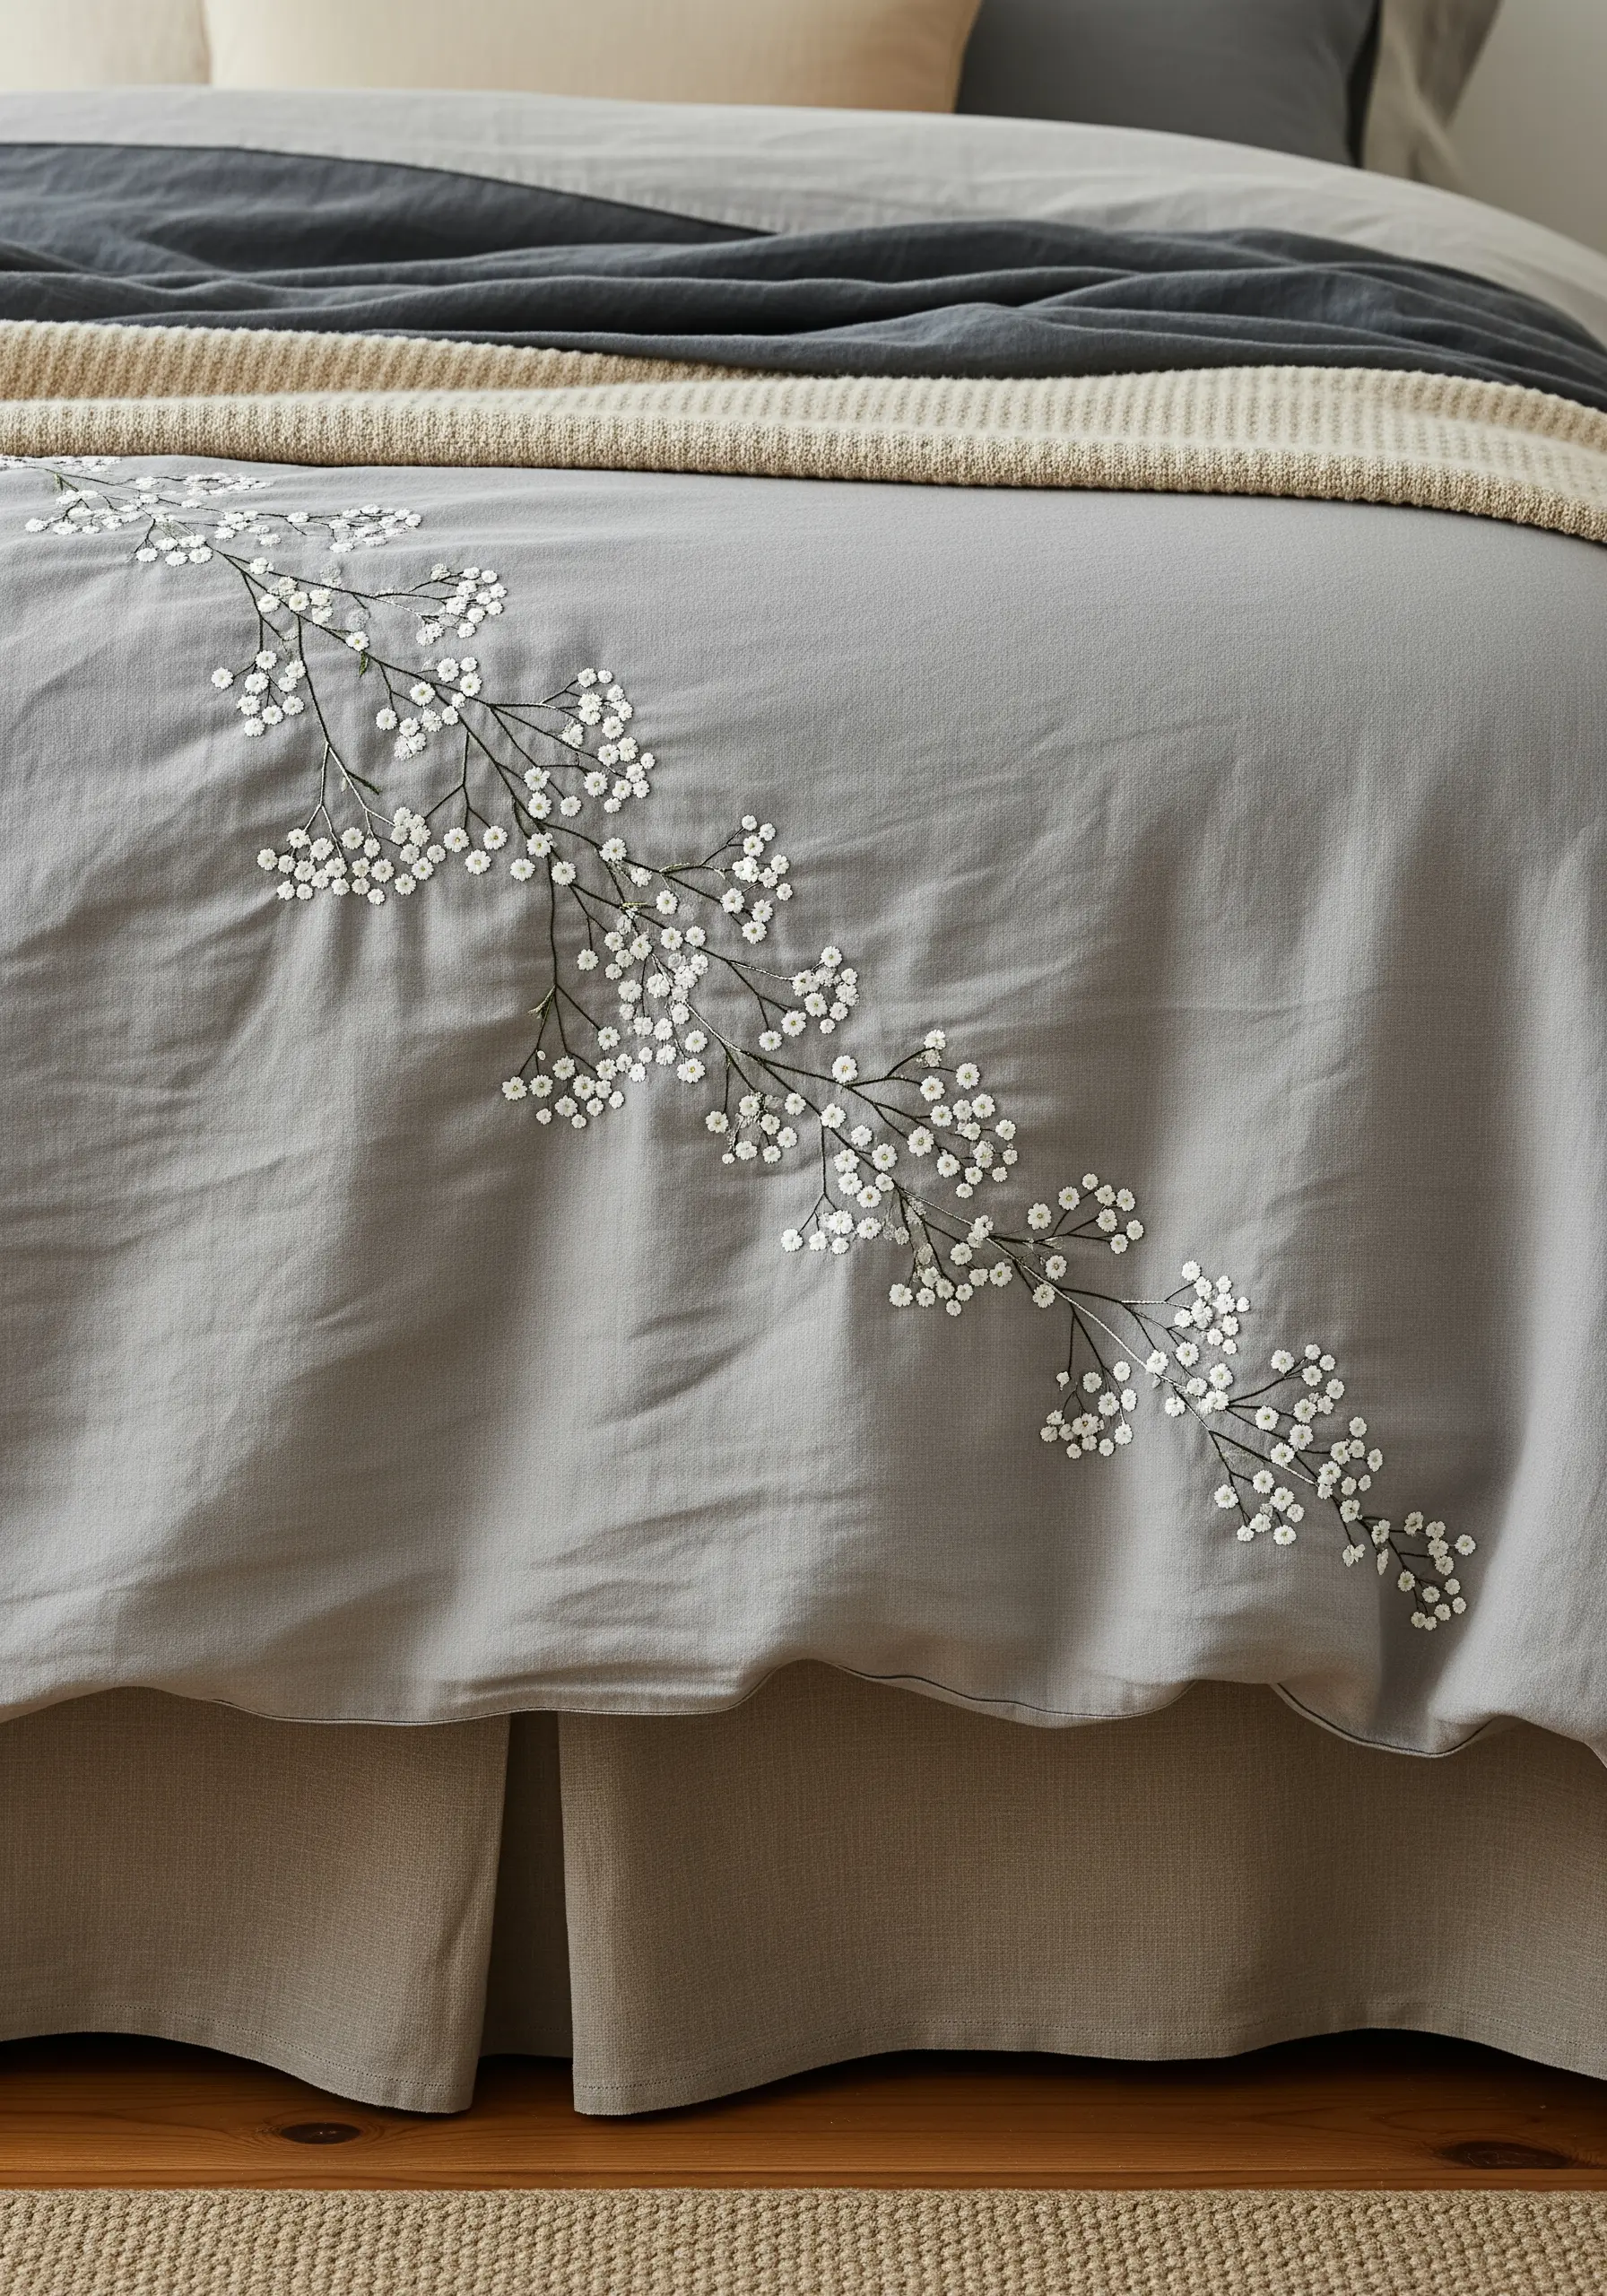
Capture the airy, delicate nature of flowers like baby’s breath by combining two simple stitches.
Use a thin, wandering stem stitch in a darker color to create the network of fine branches.
Then, cluster small, white French knots at the tips of these branches to represent the blossoms.
Varying the number and placement of knots in each cluster will give the design a more organic, natural feel, perfect for emotional nursery decor.
17. Use Simple Line Art for Clear, Stylish Labeling

Elevate your home organization with custom embroidered labels that are both practical and beautiful.
A simple backstitch using three strands of a dark, contrasting floss is all you need to create clean, minimalist icons for laundry bins or pantry storage.
This approach turns a mundane task into a design opportunity, adding a cohesive, handcrafted touch to your space.
These are perfect examples of tiny embroidery patterns that make your clothes look custom made, but for your home.
18. Blend Colors for a Painterly, Lifelike Effect
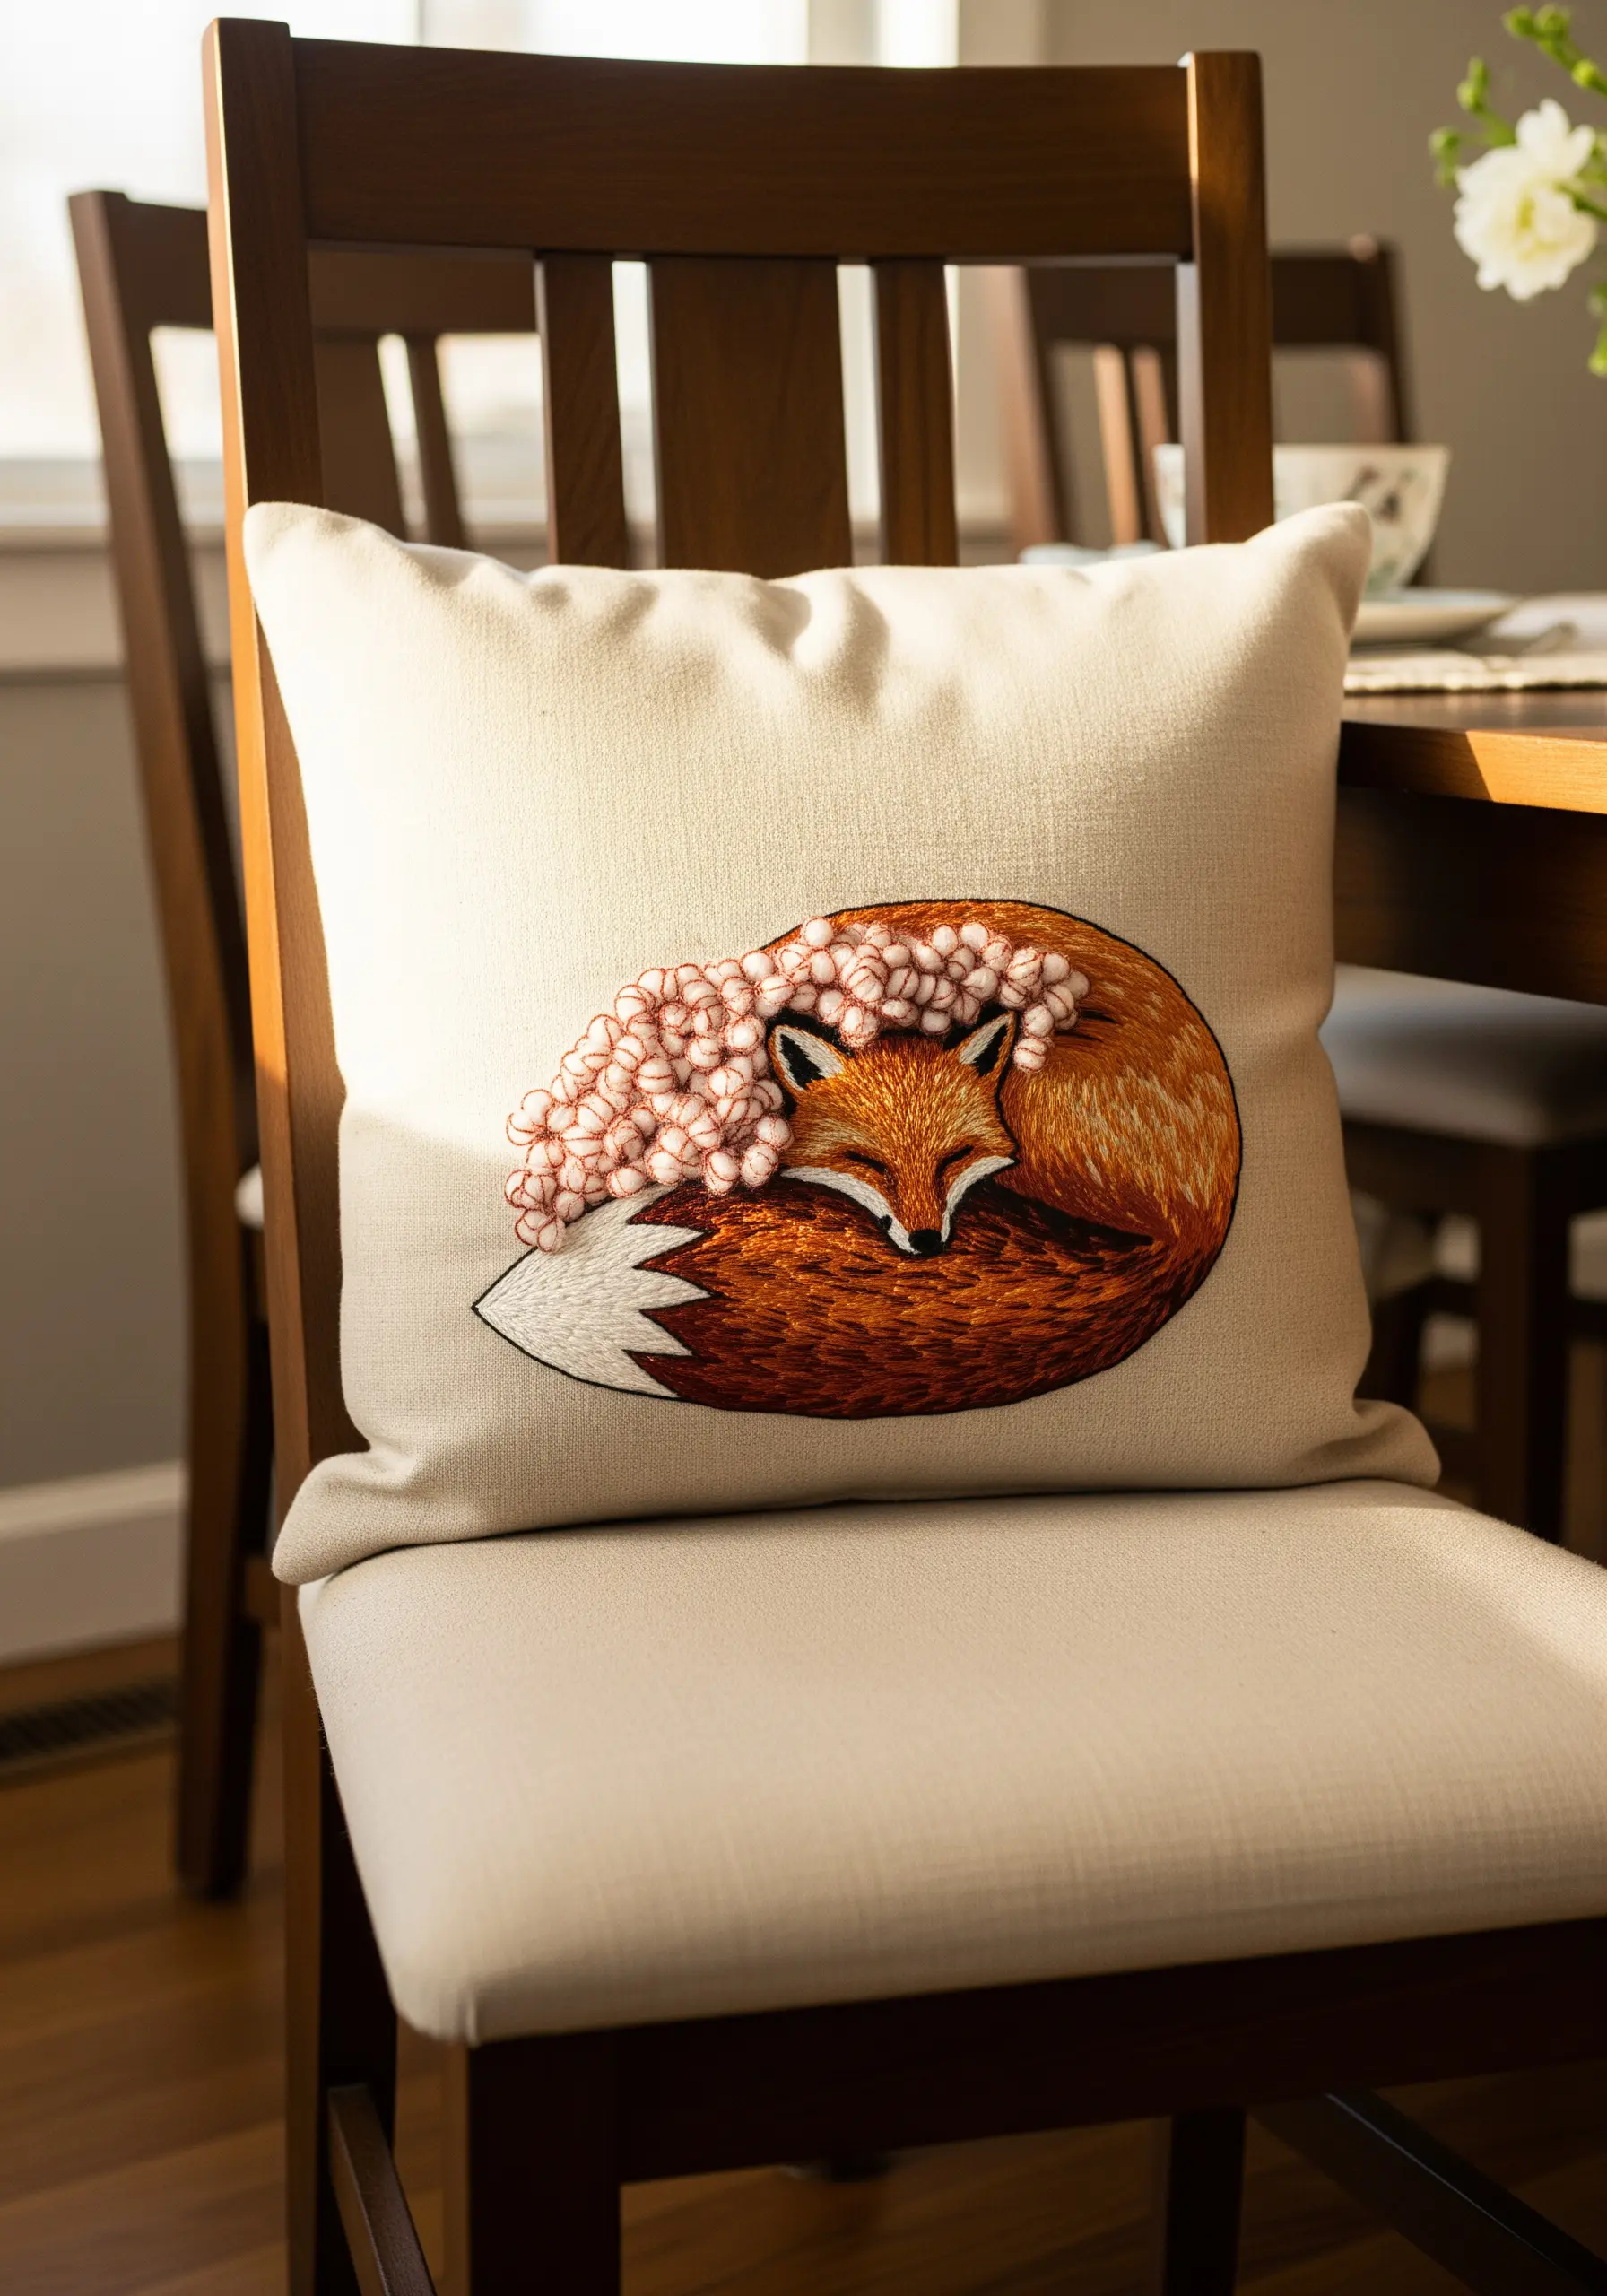
To create the soft, dimensional look of a fox’s fur, use the long-and-short stitch technique, also known as needle painting.
Work with several closely-related shades of rust, orange, and brown, blending them together seamlessly.
Always angle your stitches to follow the natural direction of fur growth for maximum realism.
The result is less like stitching and more like painting with thread, giving your animal motifs a soft, touchable quality.
19. Embroider on Lampshades for Unique Accent Lighting
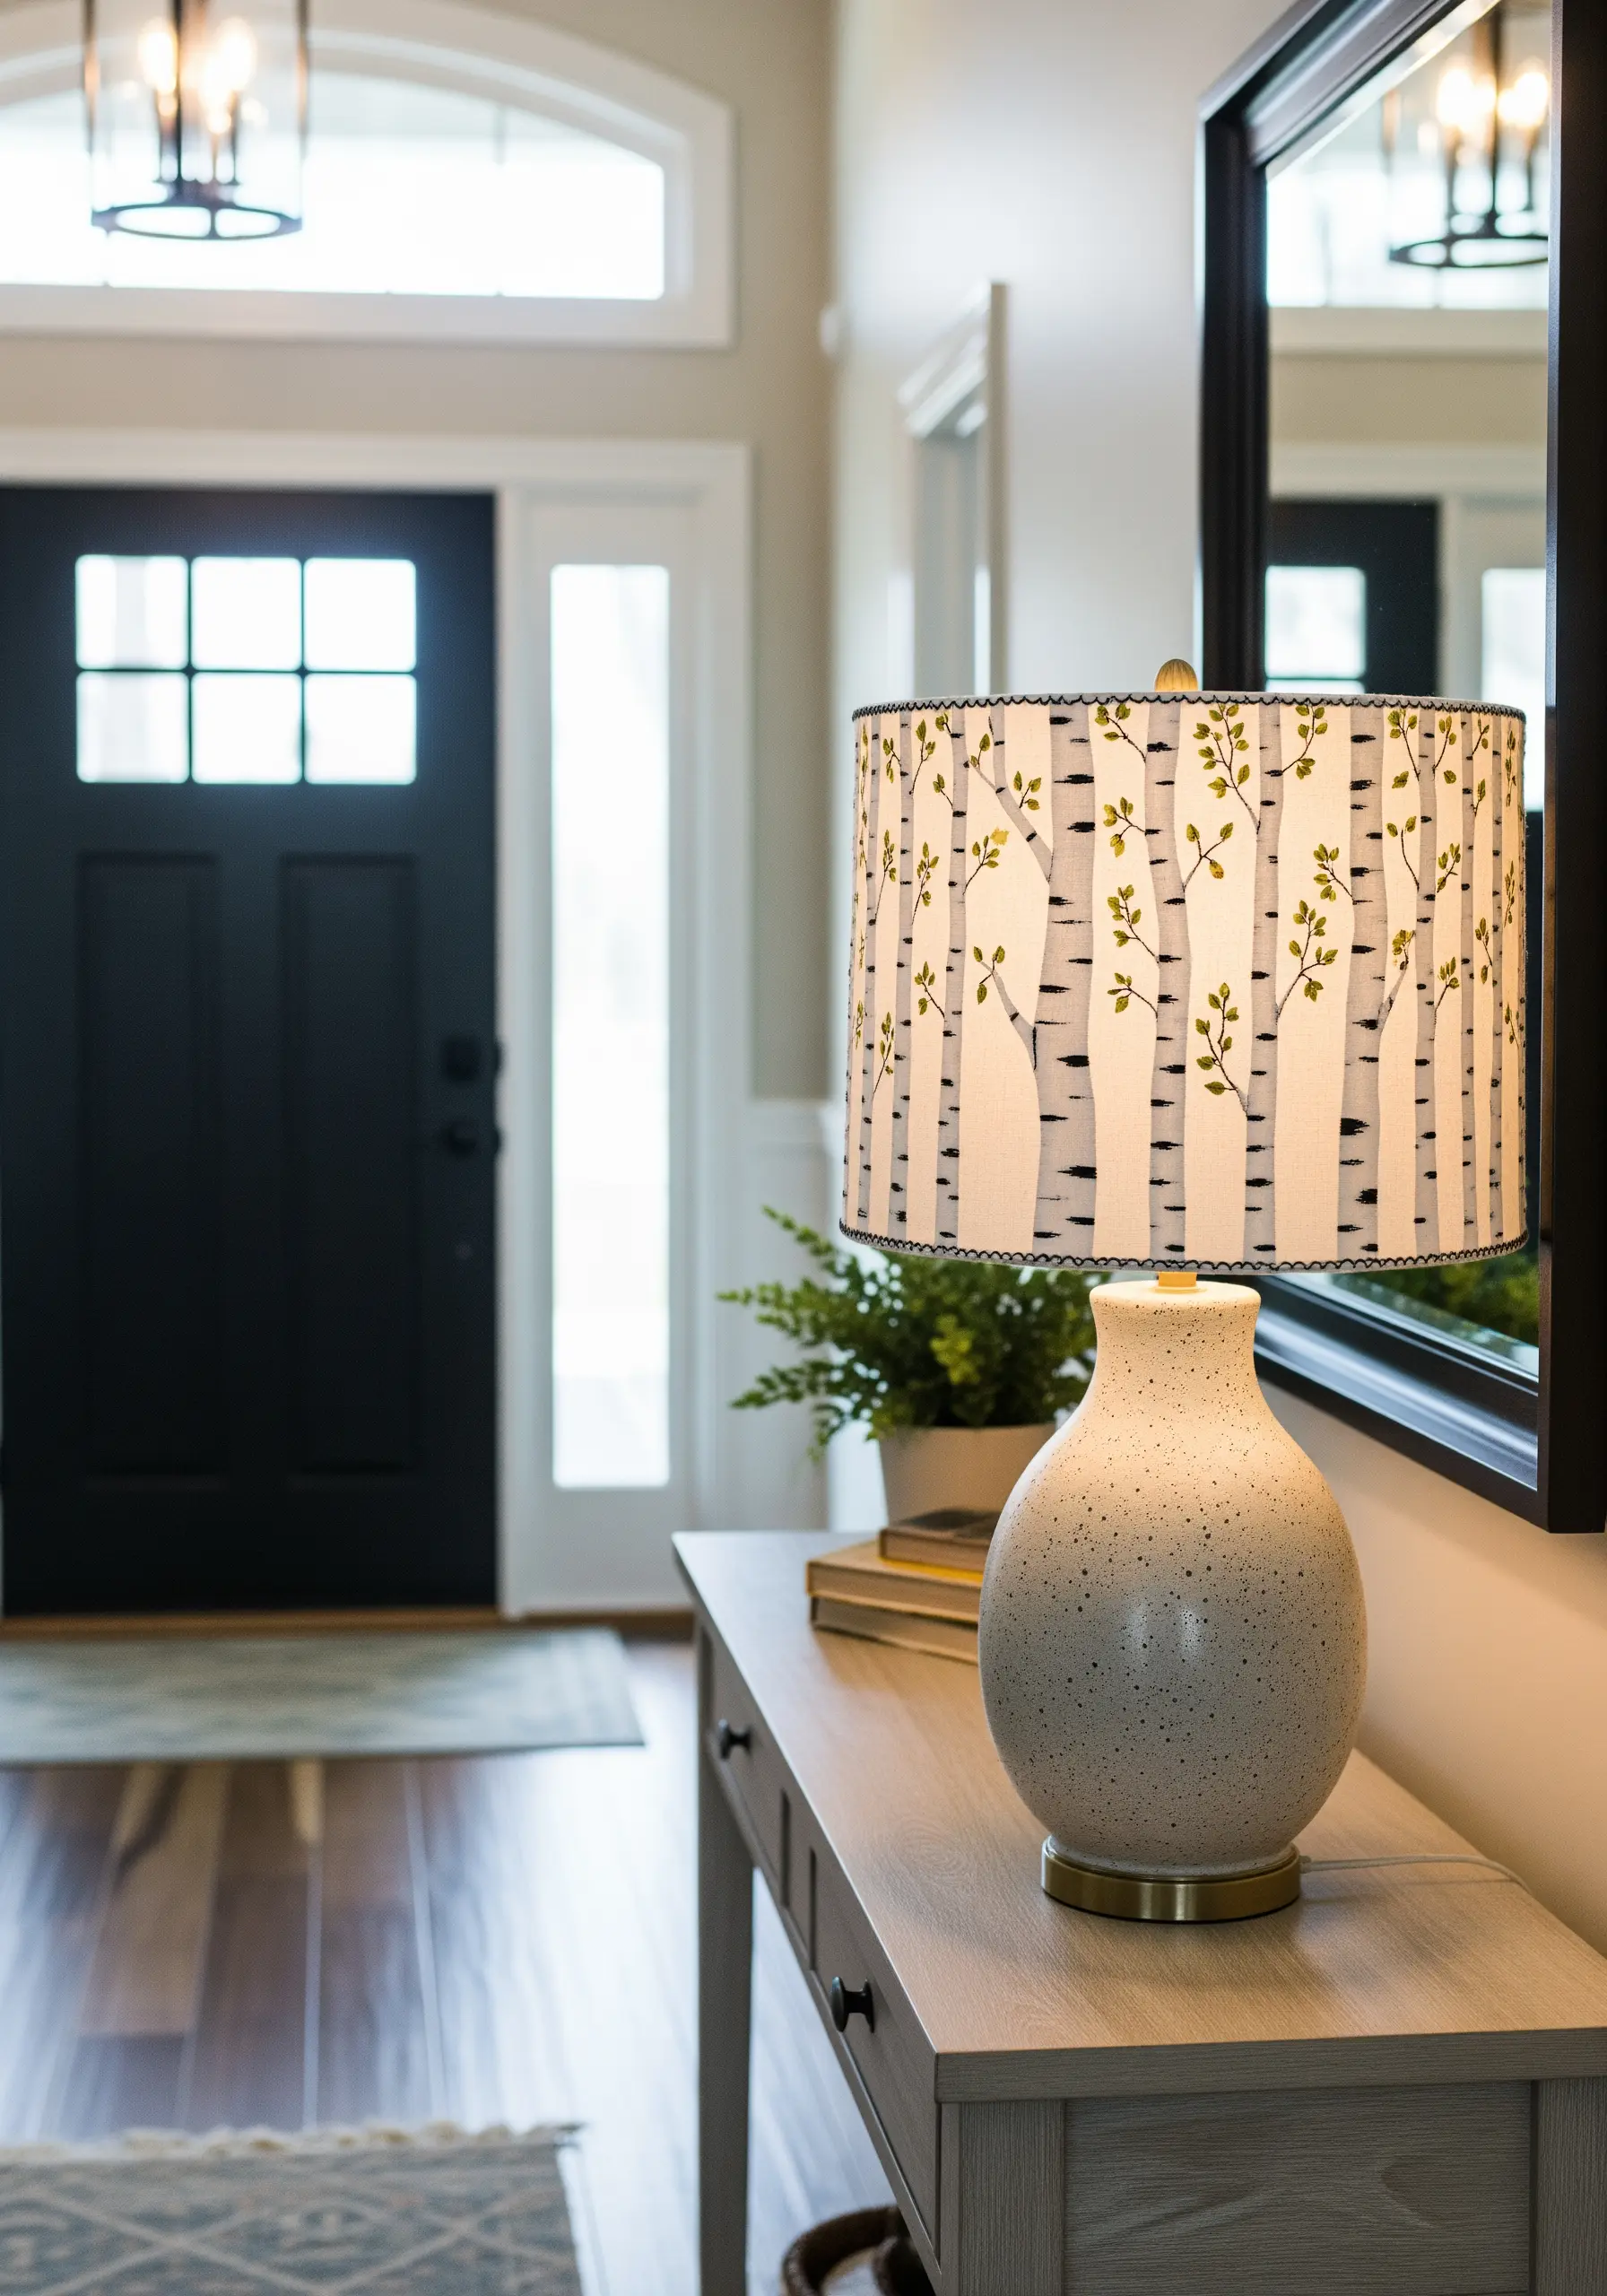
Take your embroidery beyond the hoop by stitching directly onto a fabric lampshade.
Choose a simple, graphic design with clean lines, like these birch trees, to avoid complex stitching on a curved surface.
Use a basic backstitch for the outlines and simple satin stitches for the leaves.
When the lamp is turned on, the light will shine through the threads, creating a beautiful, glowing effect that highlights your handiwork.
20. Design a Border Print for Custom-Feel Curtains
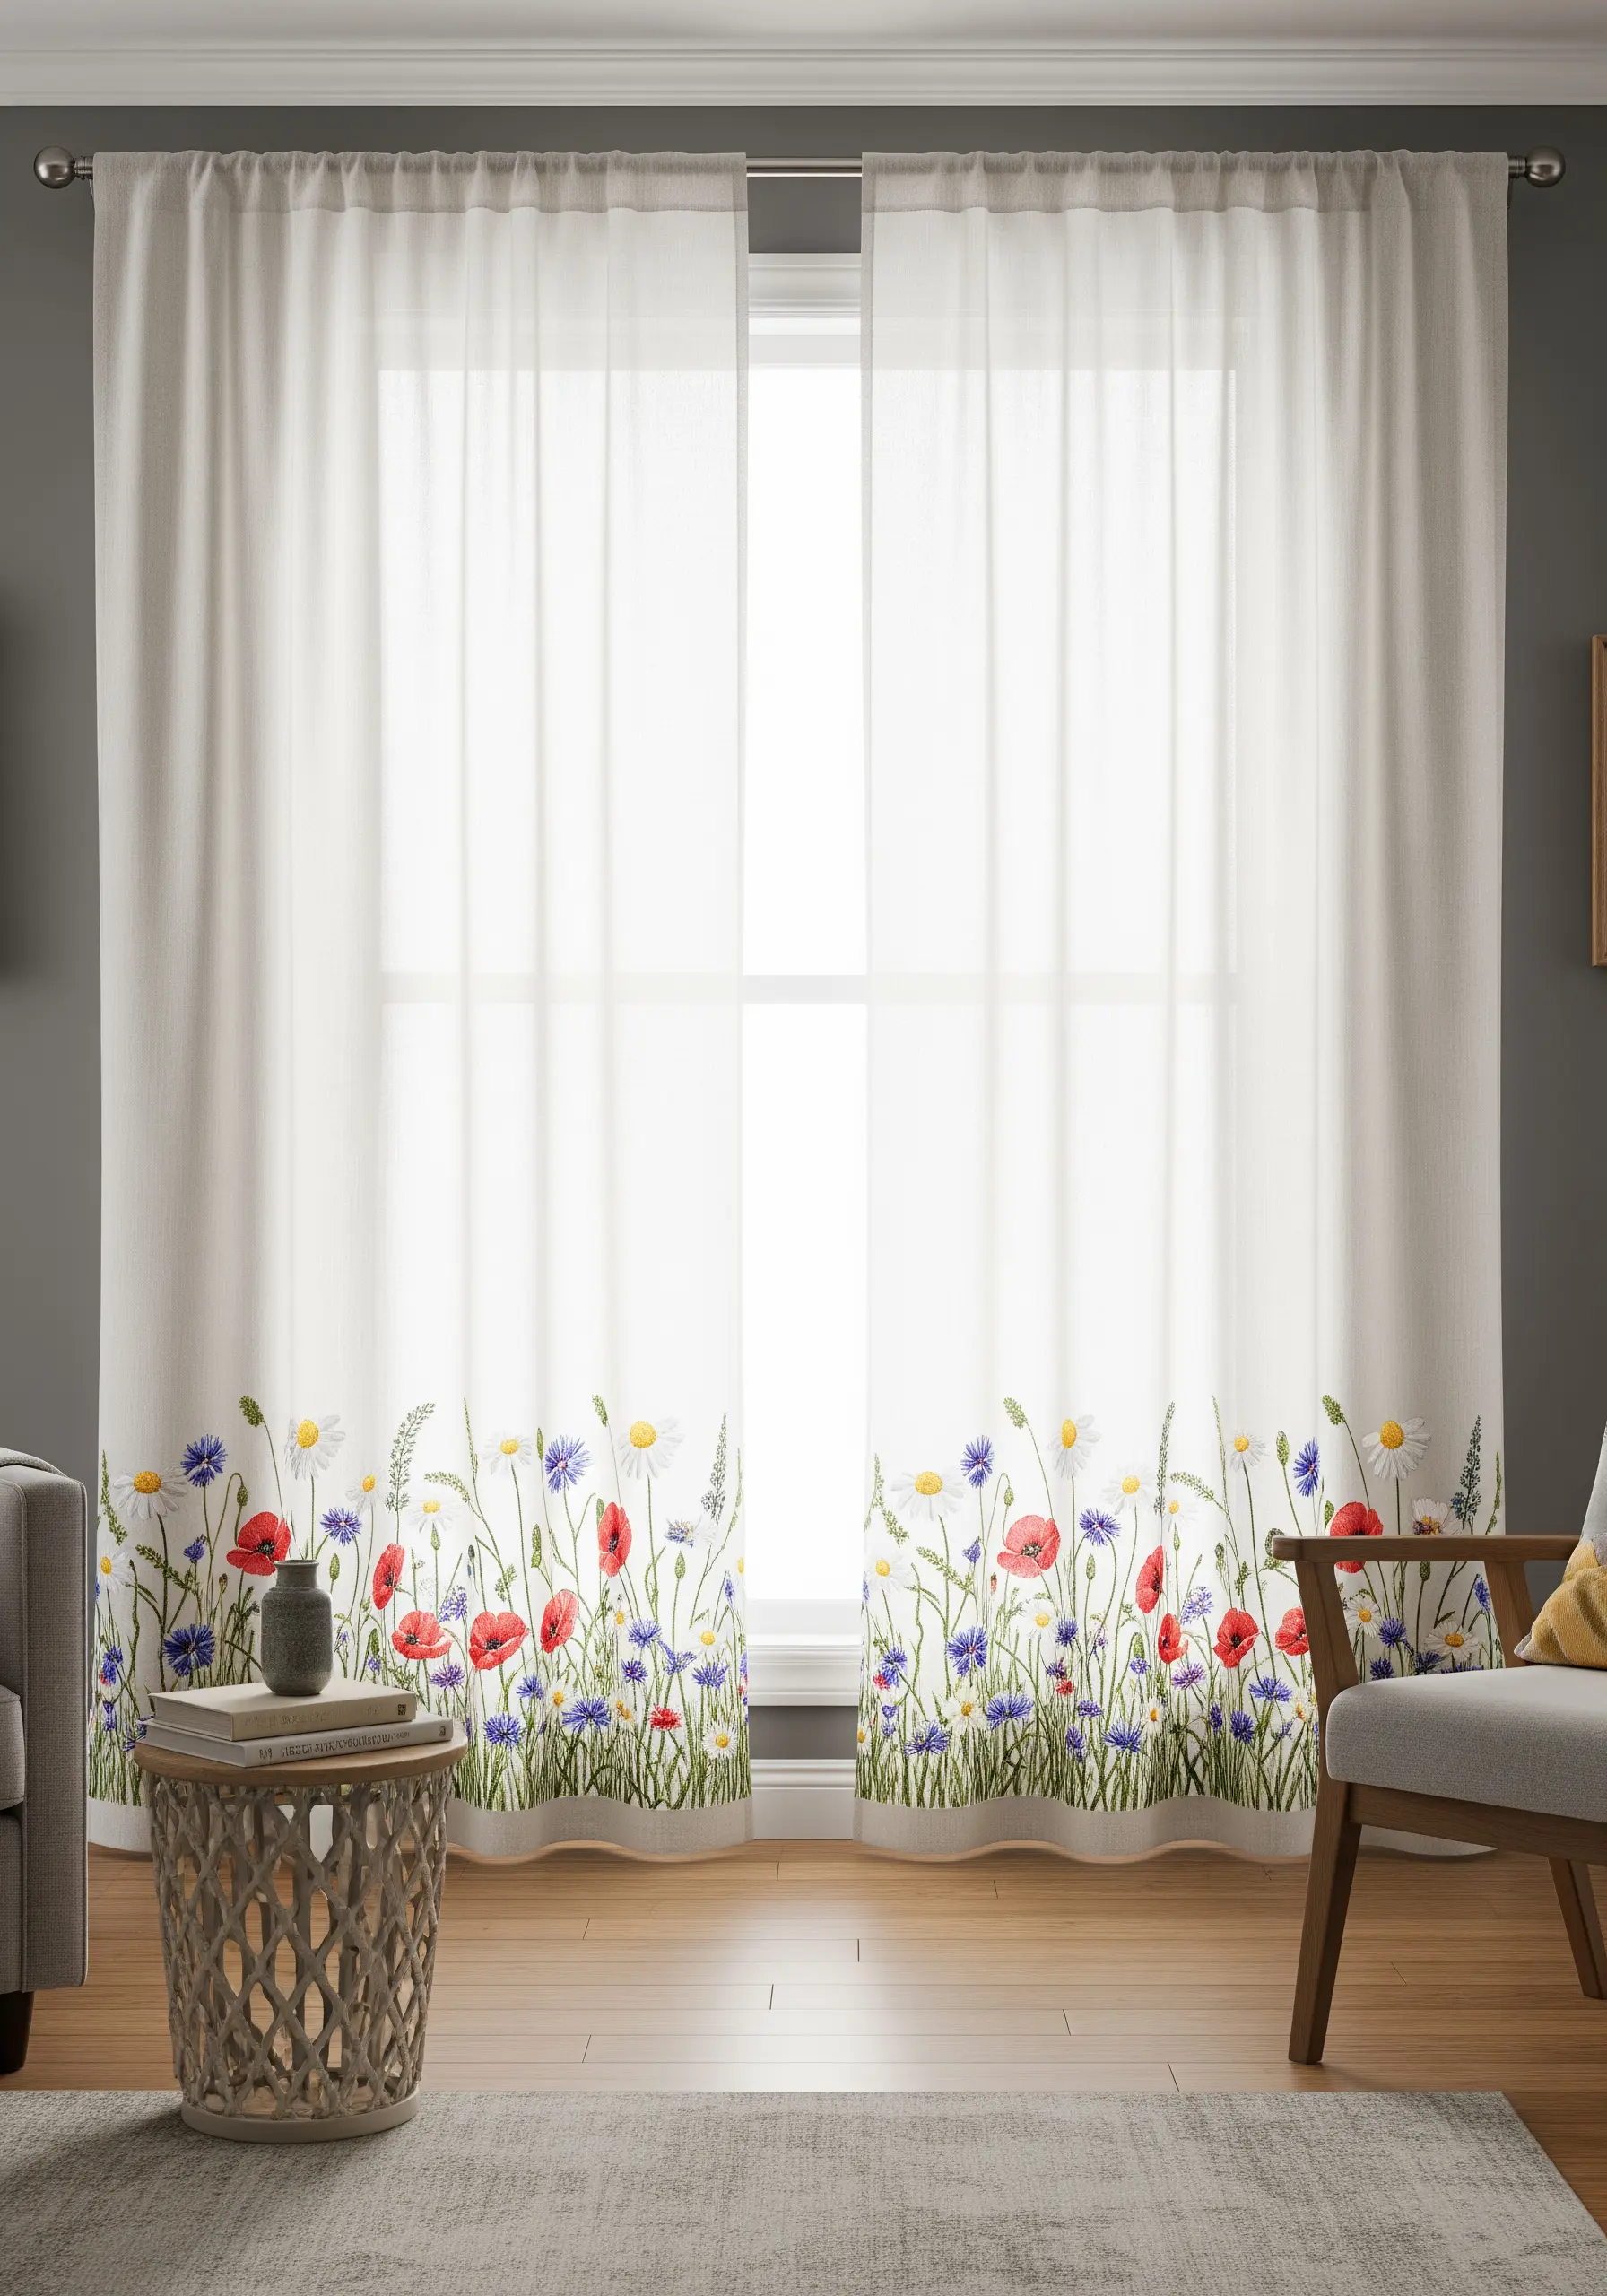
Give plain curtains a high-end, bespoke feel by concentrating your embroidery along the bottom edge to create a floral border.
This grounds the design and draws the eye, mimicking the look of expensive, custom-printed fabric.
Vary the height, type, and density of the wildflowers to create the organic, untamed feel of a natural meadow. The effect is impactful without overwhelming the entire curtain panel.
21. Layer Felt and Thread for Atmospheric Depth
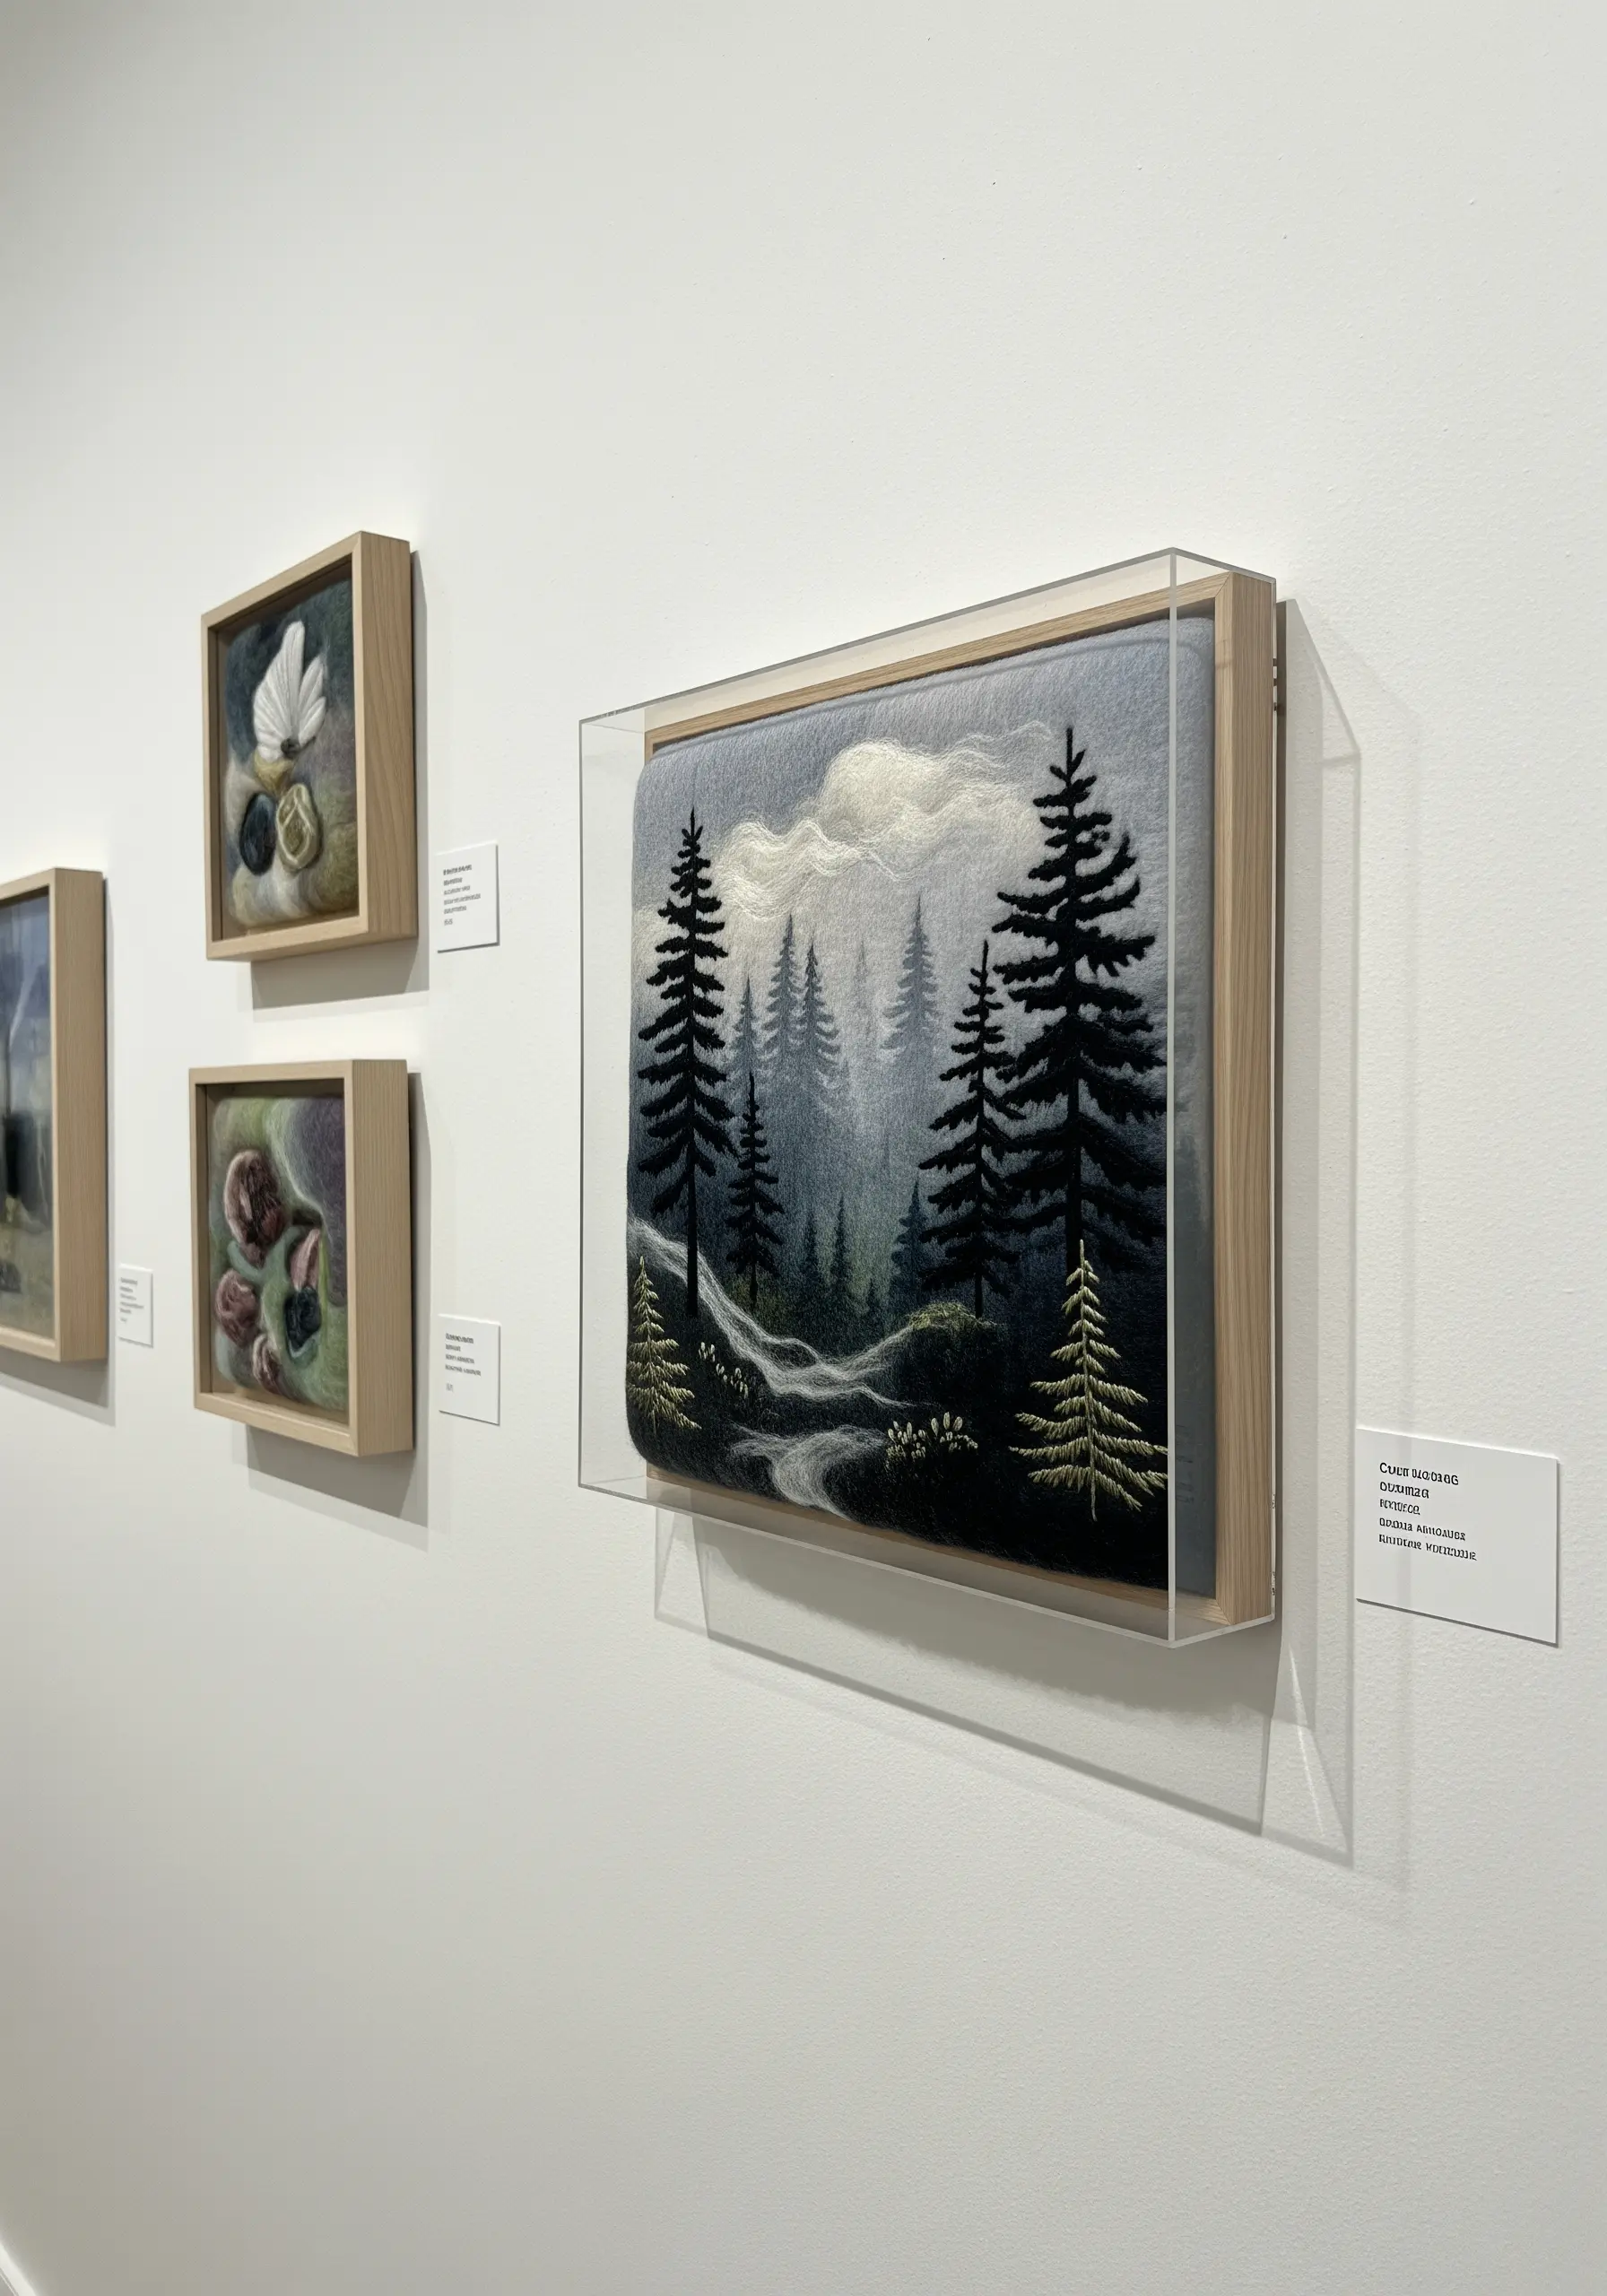
Create a convincing sense of distance in your landscape pieces by building them in physical layers.
Start with a needle-felted wool background to suggest a soft, misty sky, then add embroidered trees on top.
Stitch the trees in the foreground with darker thread and more detail, while the trees further back should be lighter and less defined.
This technique of layering materials is one of the most effective ways to make stunning framed embroidery pieces that feel truly three-dimensional.
22. Fill Bold Shapes with Dense Satin Stitch
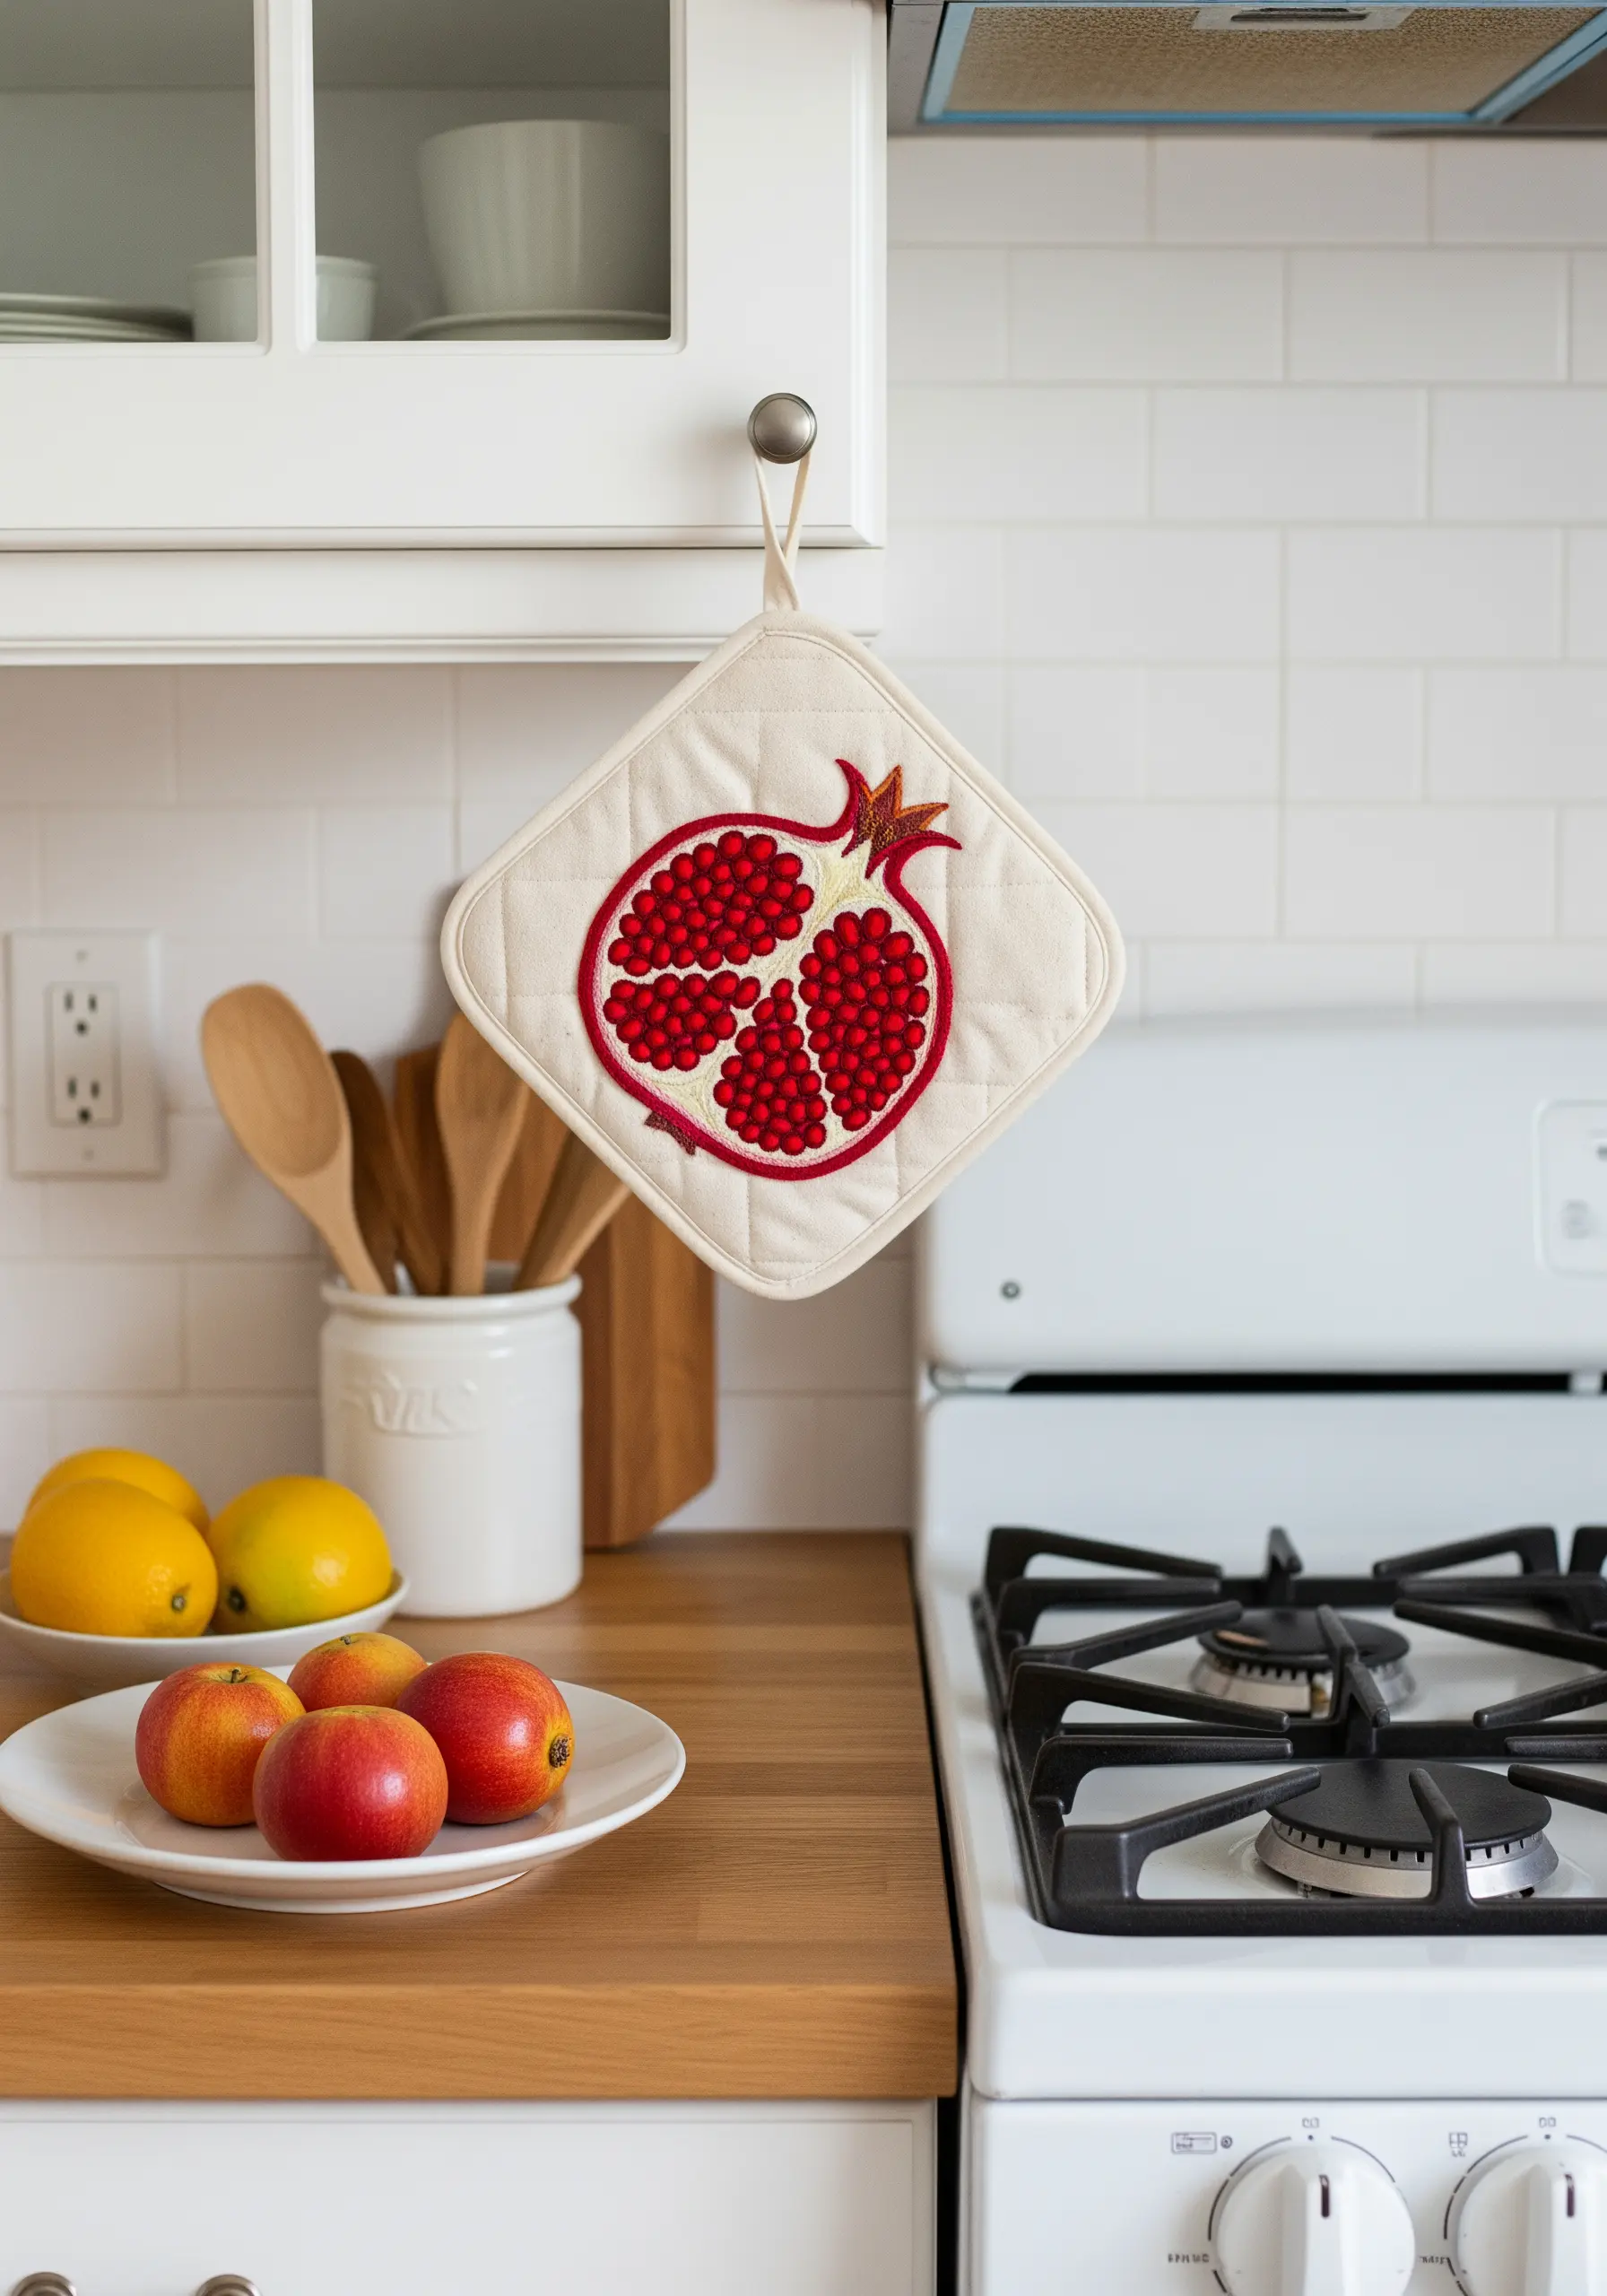
For functional items that need to make a quick visual impact, like a pot holder, embrace the simplicity of bold, graphic shapes.
Use a dense, smooth satin stitch to fill in the sections of the pomegranate, creating solid blocks of vibrant color.
Define the entire motif with a clean backstitch outline in a contrasting color. This technique ensures the design is immediately recognizable and adds a cheerful pop of color to your kitchen.
23. Tell a Seasonal Story with Sequential Panels

Use a long textile, like a mantel runner, as a canvas for telling a visual story through a series of related motifs.
Embroidering the same tree in four different seasons creates a beautiful narrative of change and continuity.
Differentiate each season with specific details: French knots for spring blossoms, dense green leaf stitches for summer, a palette of reds and golds for autumn, and bare branches with a few colonial knots for snow in winter.
24. Construct Soft Sculptures with Felt and Simple Stitches
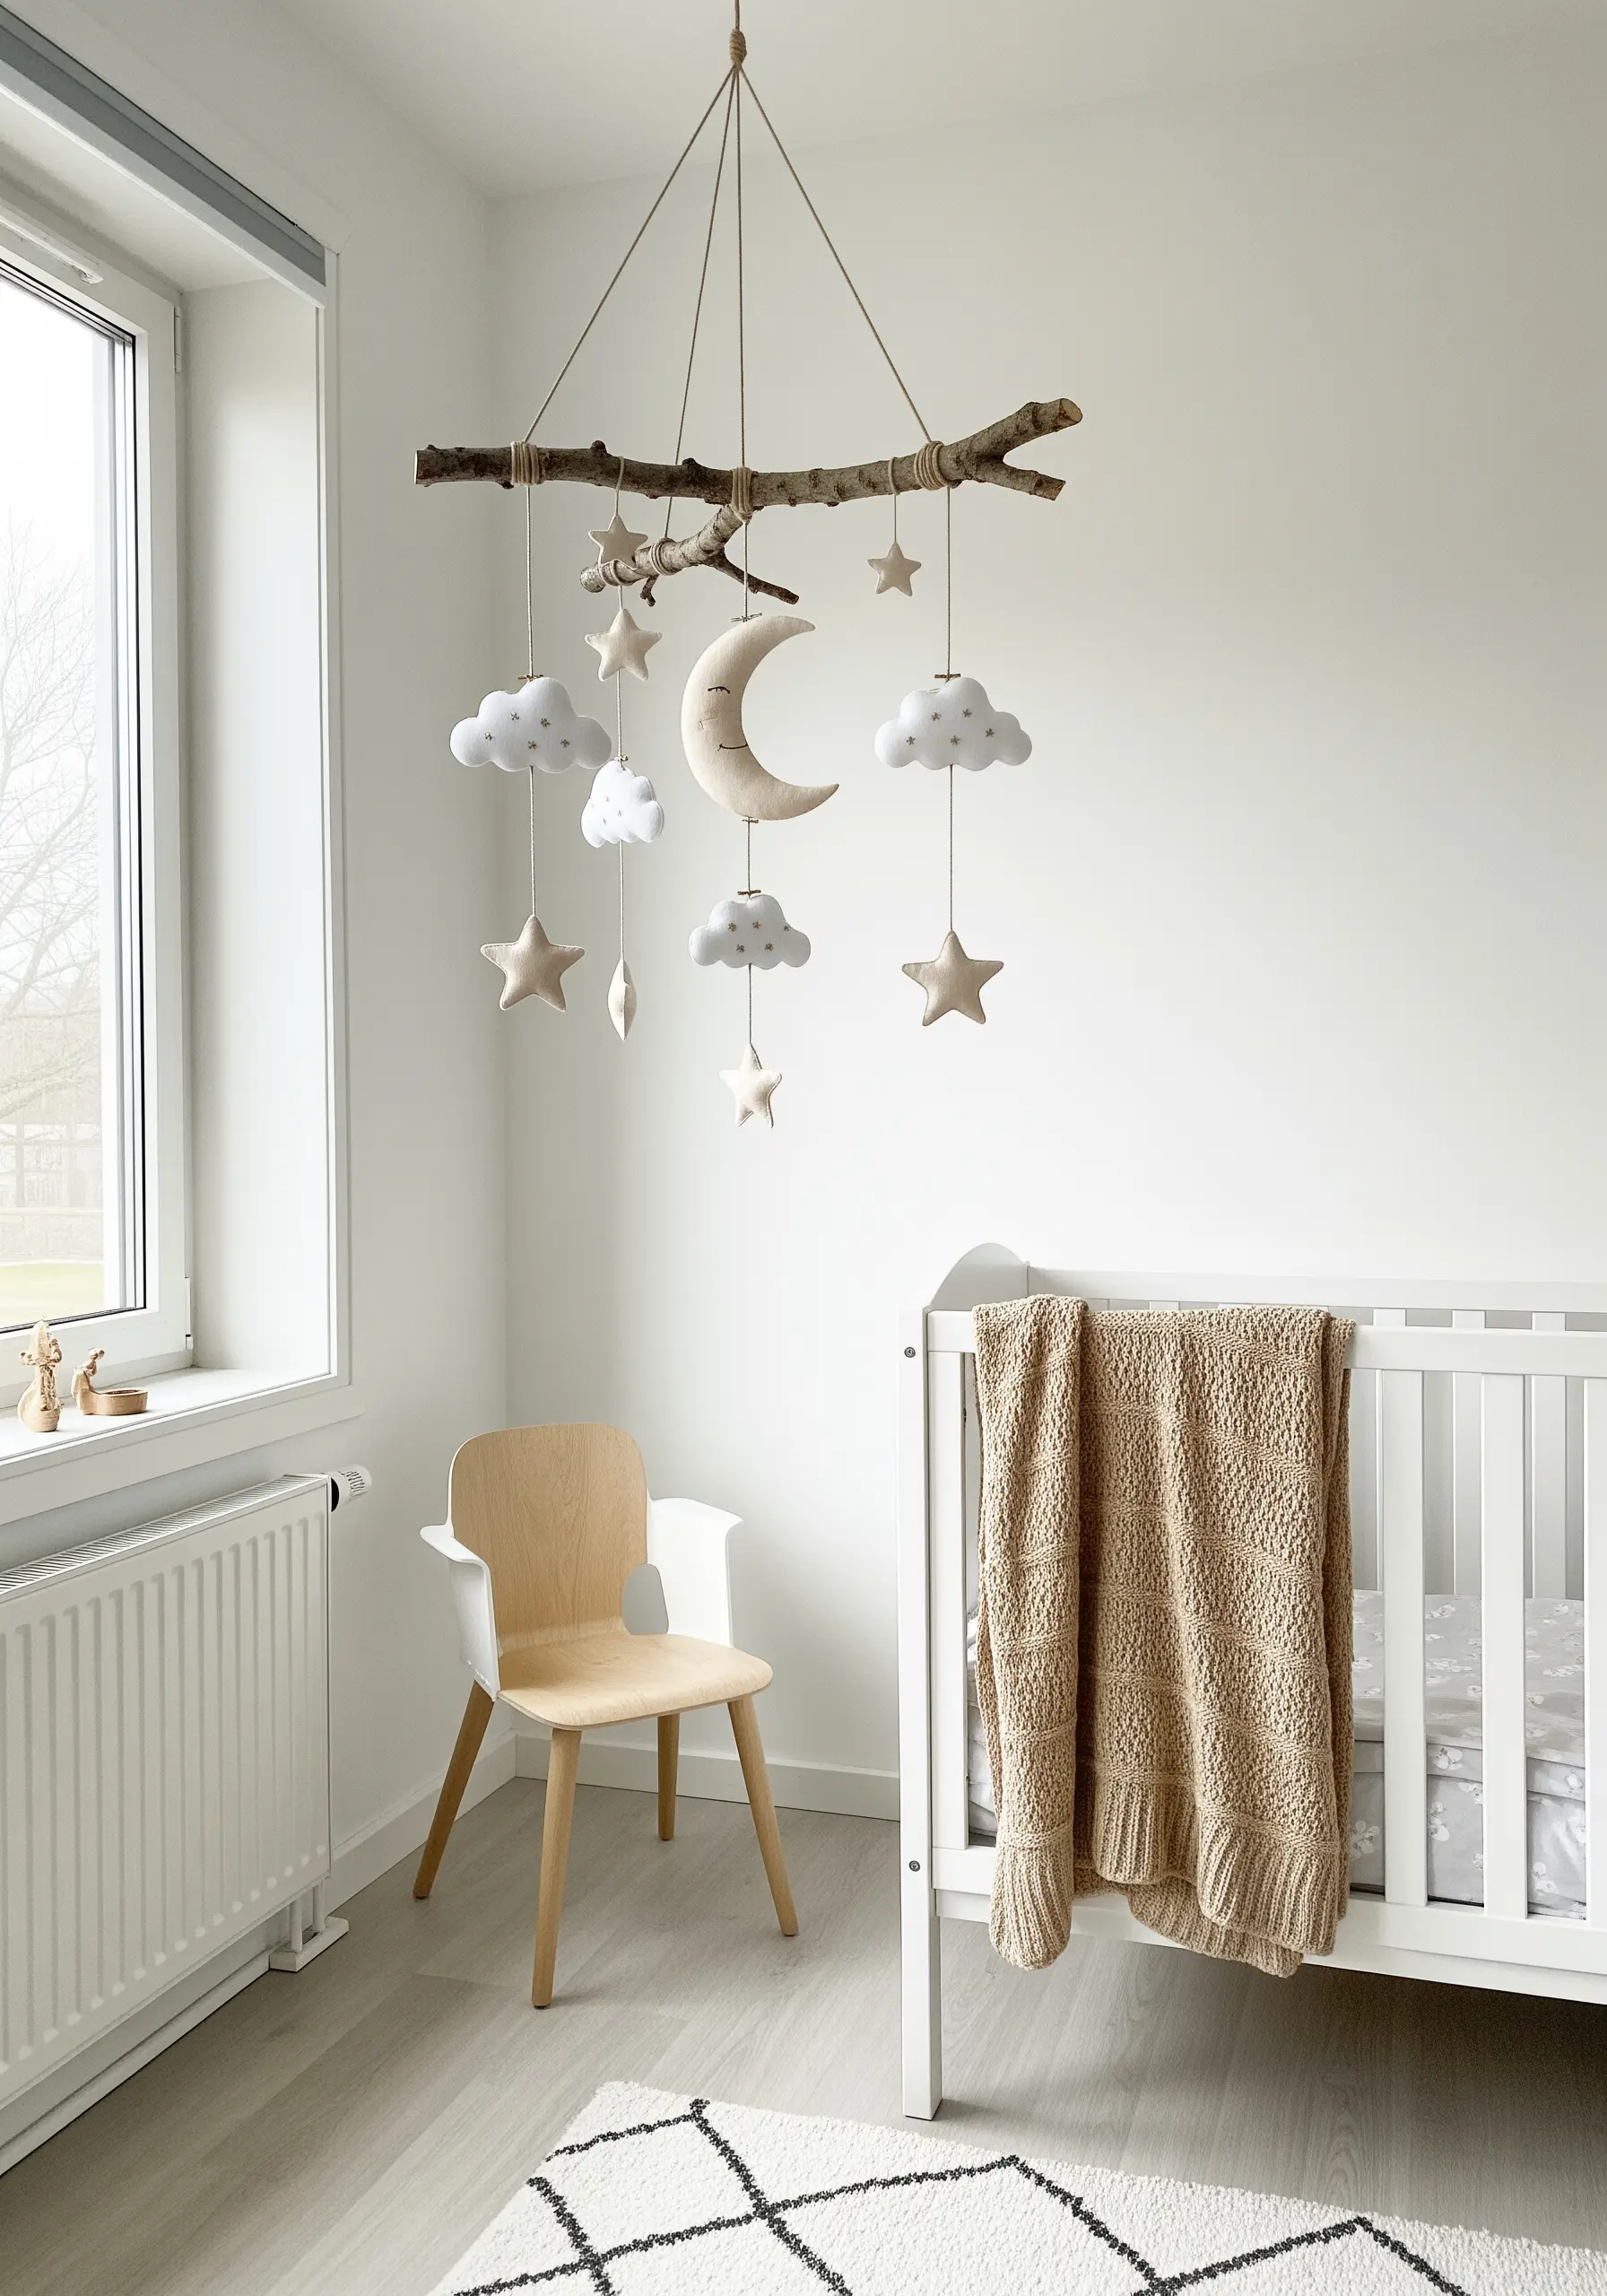
Take your embroidery into the third dimension by creating soft, stuffed objects from felt.
Cut out two identical shapes, add minimal embroidered details—like sleepy eyes with a few backstitches—and then join the pieces with a neat blanket stitch around the edge.
Add stuffing before you stitch it completely closed.
This simple construction is perfect for making charming nursery mobiles and other cartoon-style embroidery ideas.
25. Add Rhythmic Interest with a Repeated Motif

Create a subtle but intentional design feature on a long surface, like a stair runner, by repeating a single, simple motif.
Embroidering one leaf on each step provides a sense of rhythm and cohesion.
To keep the design interesting, vary the color of the leaf on each step, using a warm, autumnal palette.
This thoughtful repetition turns a plain runner into a custom piece that guides the eye upward.
26. Achieve Opulence with Goldwork and Padded Stitching
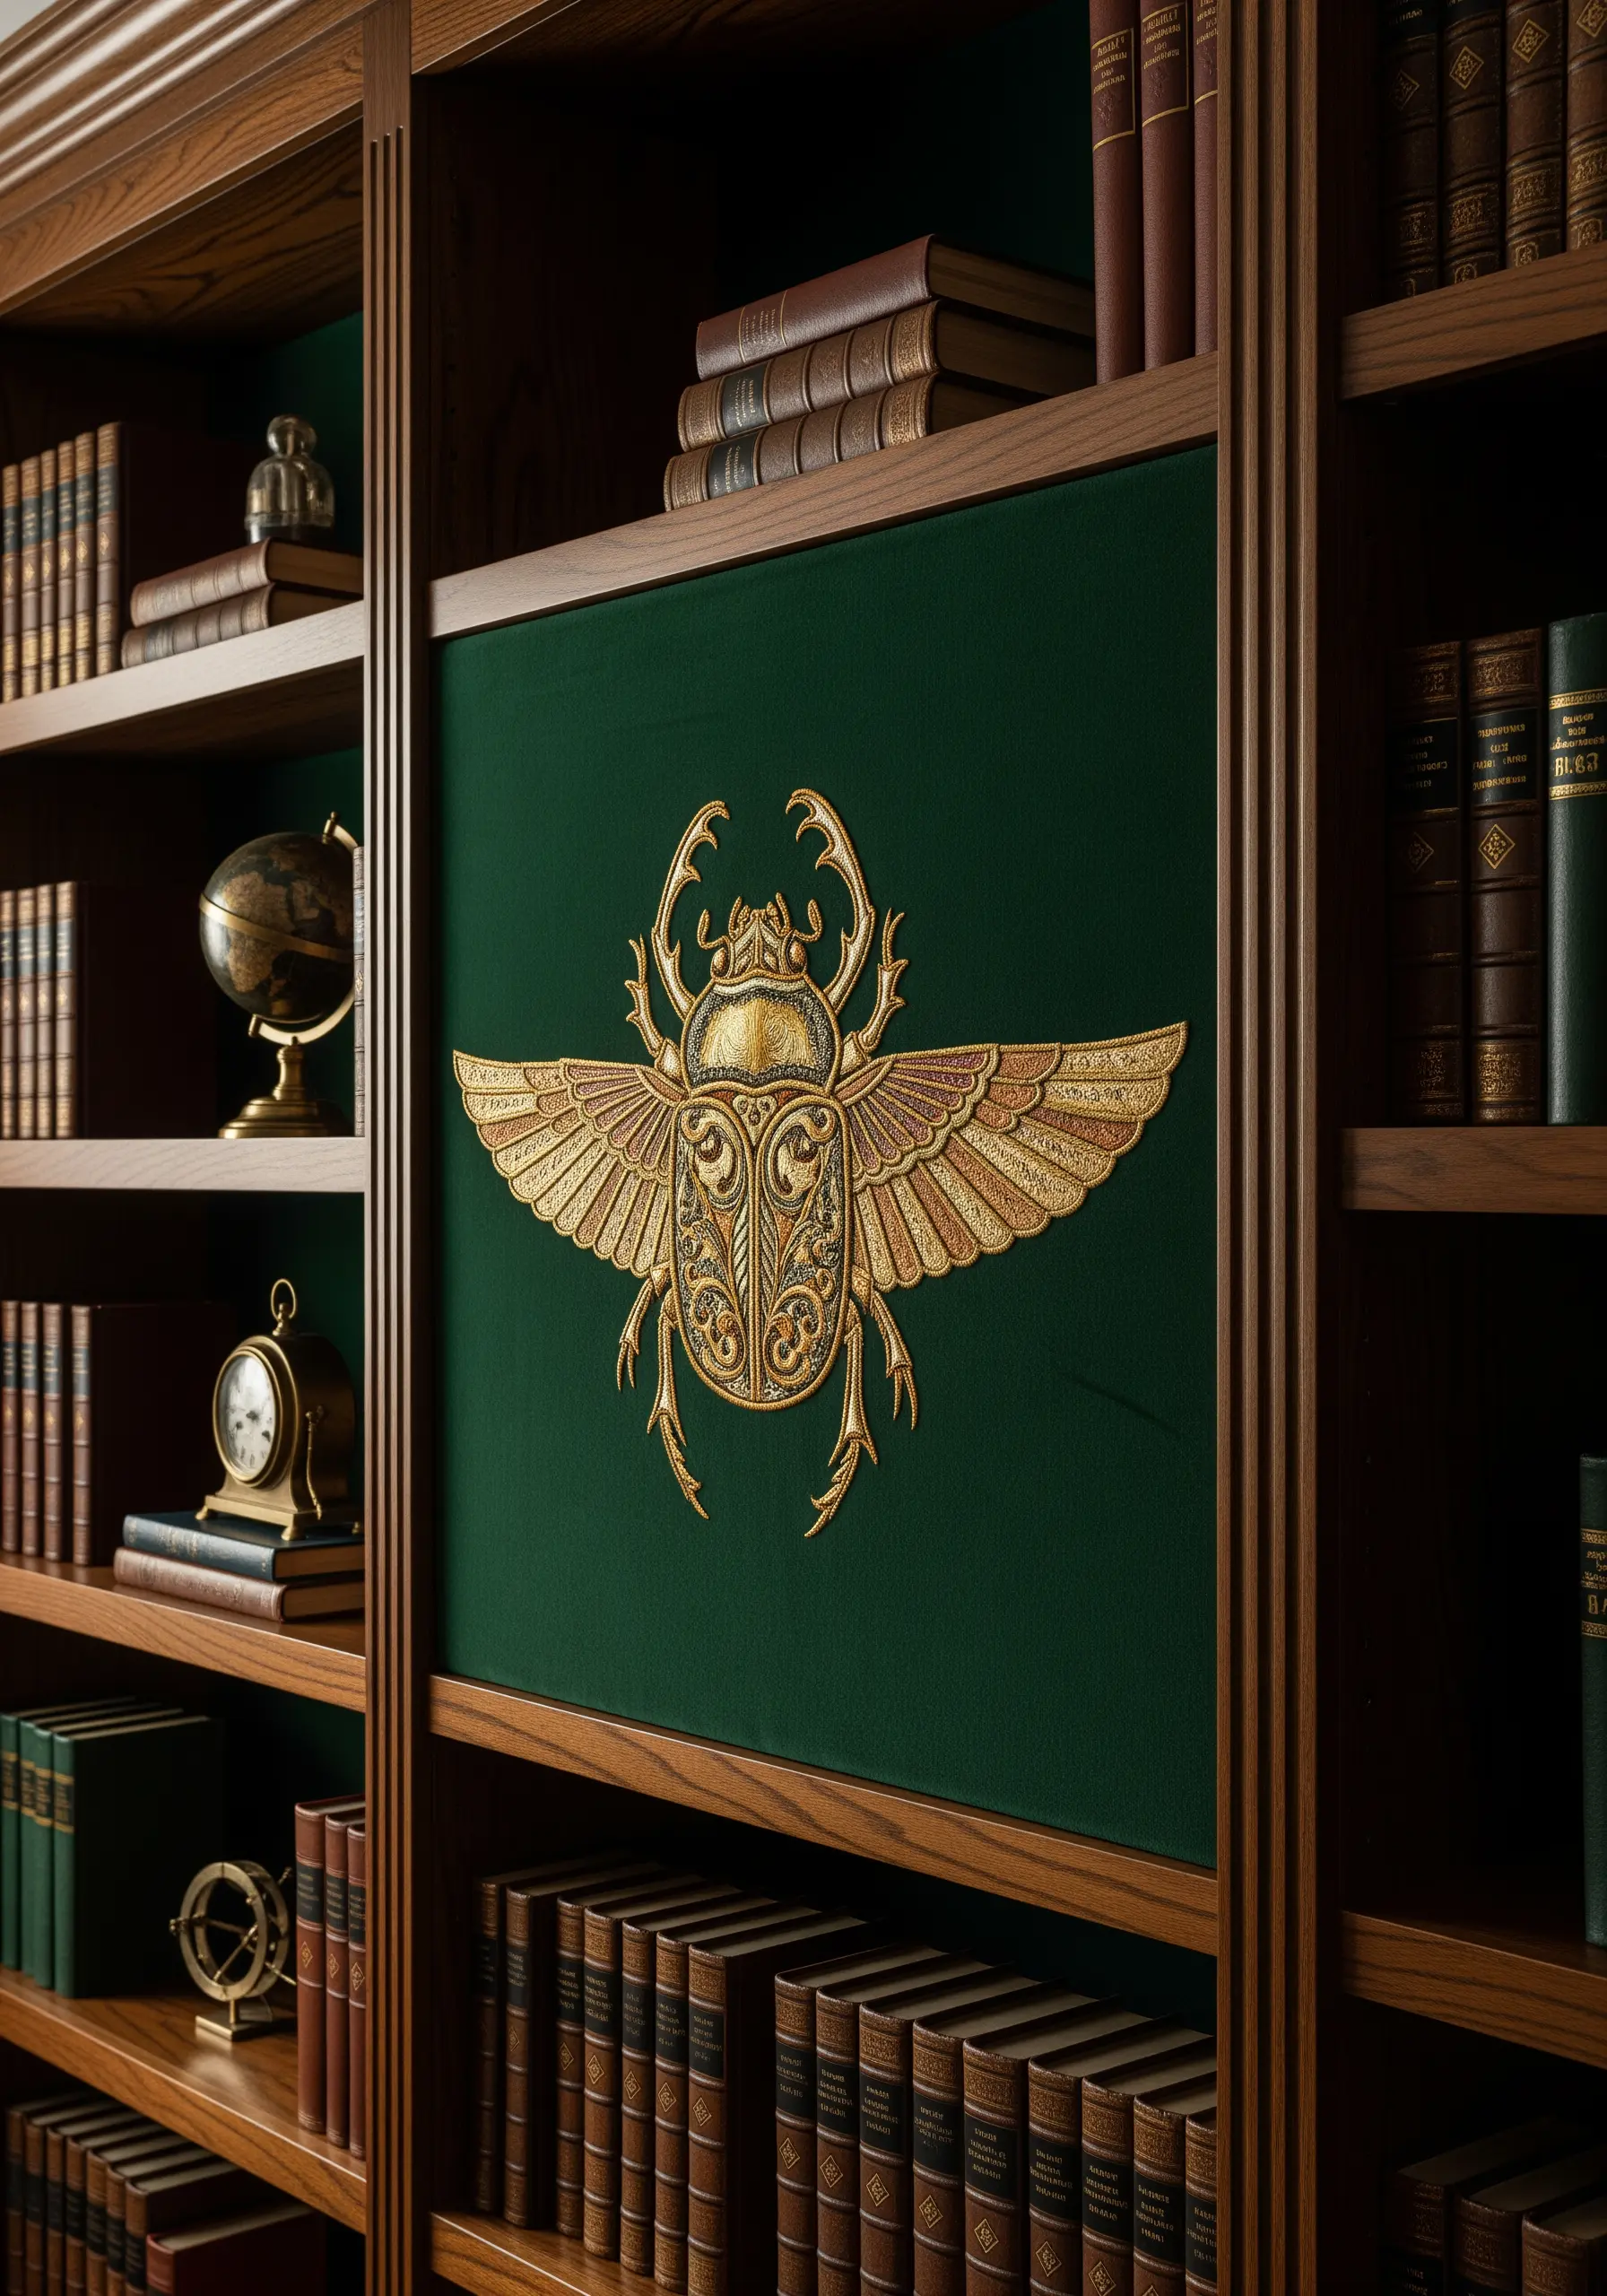
For a truly luxurious and dimensional effect, explore the techniques of goldwork embroidery.
Create a raised surface by first stitching down padding—like felt shapes or thick string—and then covering it with metallic threads.
Use a couching stitch to lay the metallic threads flat over the padding, creating a smooth, embossed surface that catches the light.
This method is perfect for creating intricate, jewel-like pieces with an almost sculptural quality.
27. Render Fine Detail with Single-Strand Floss
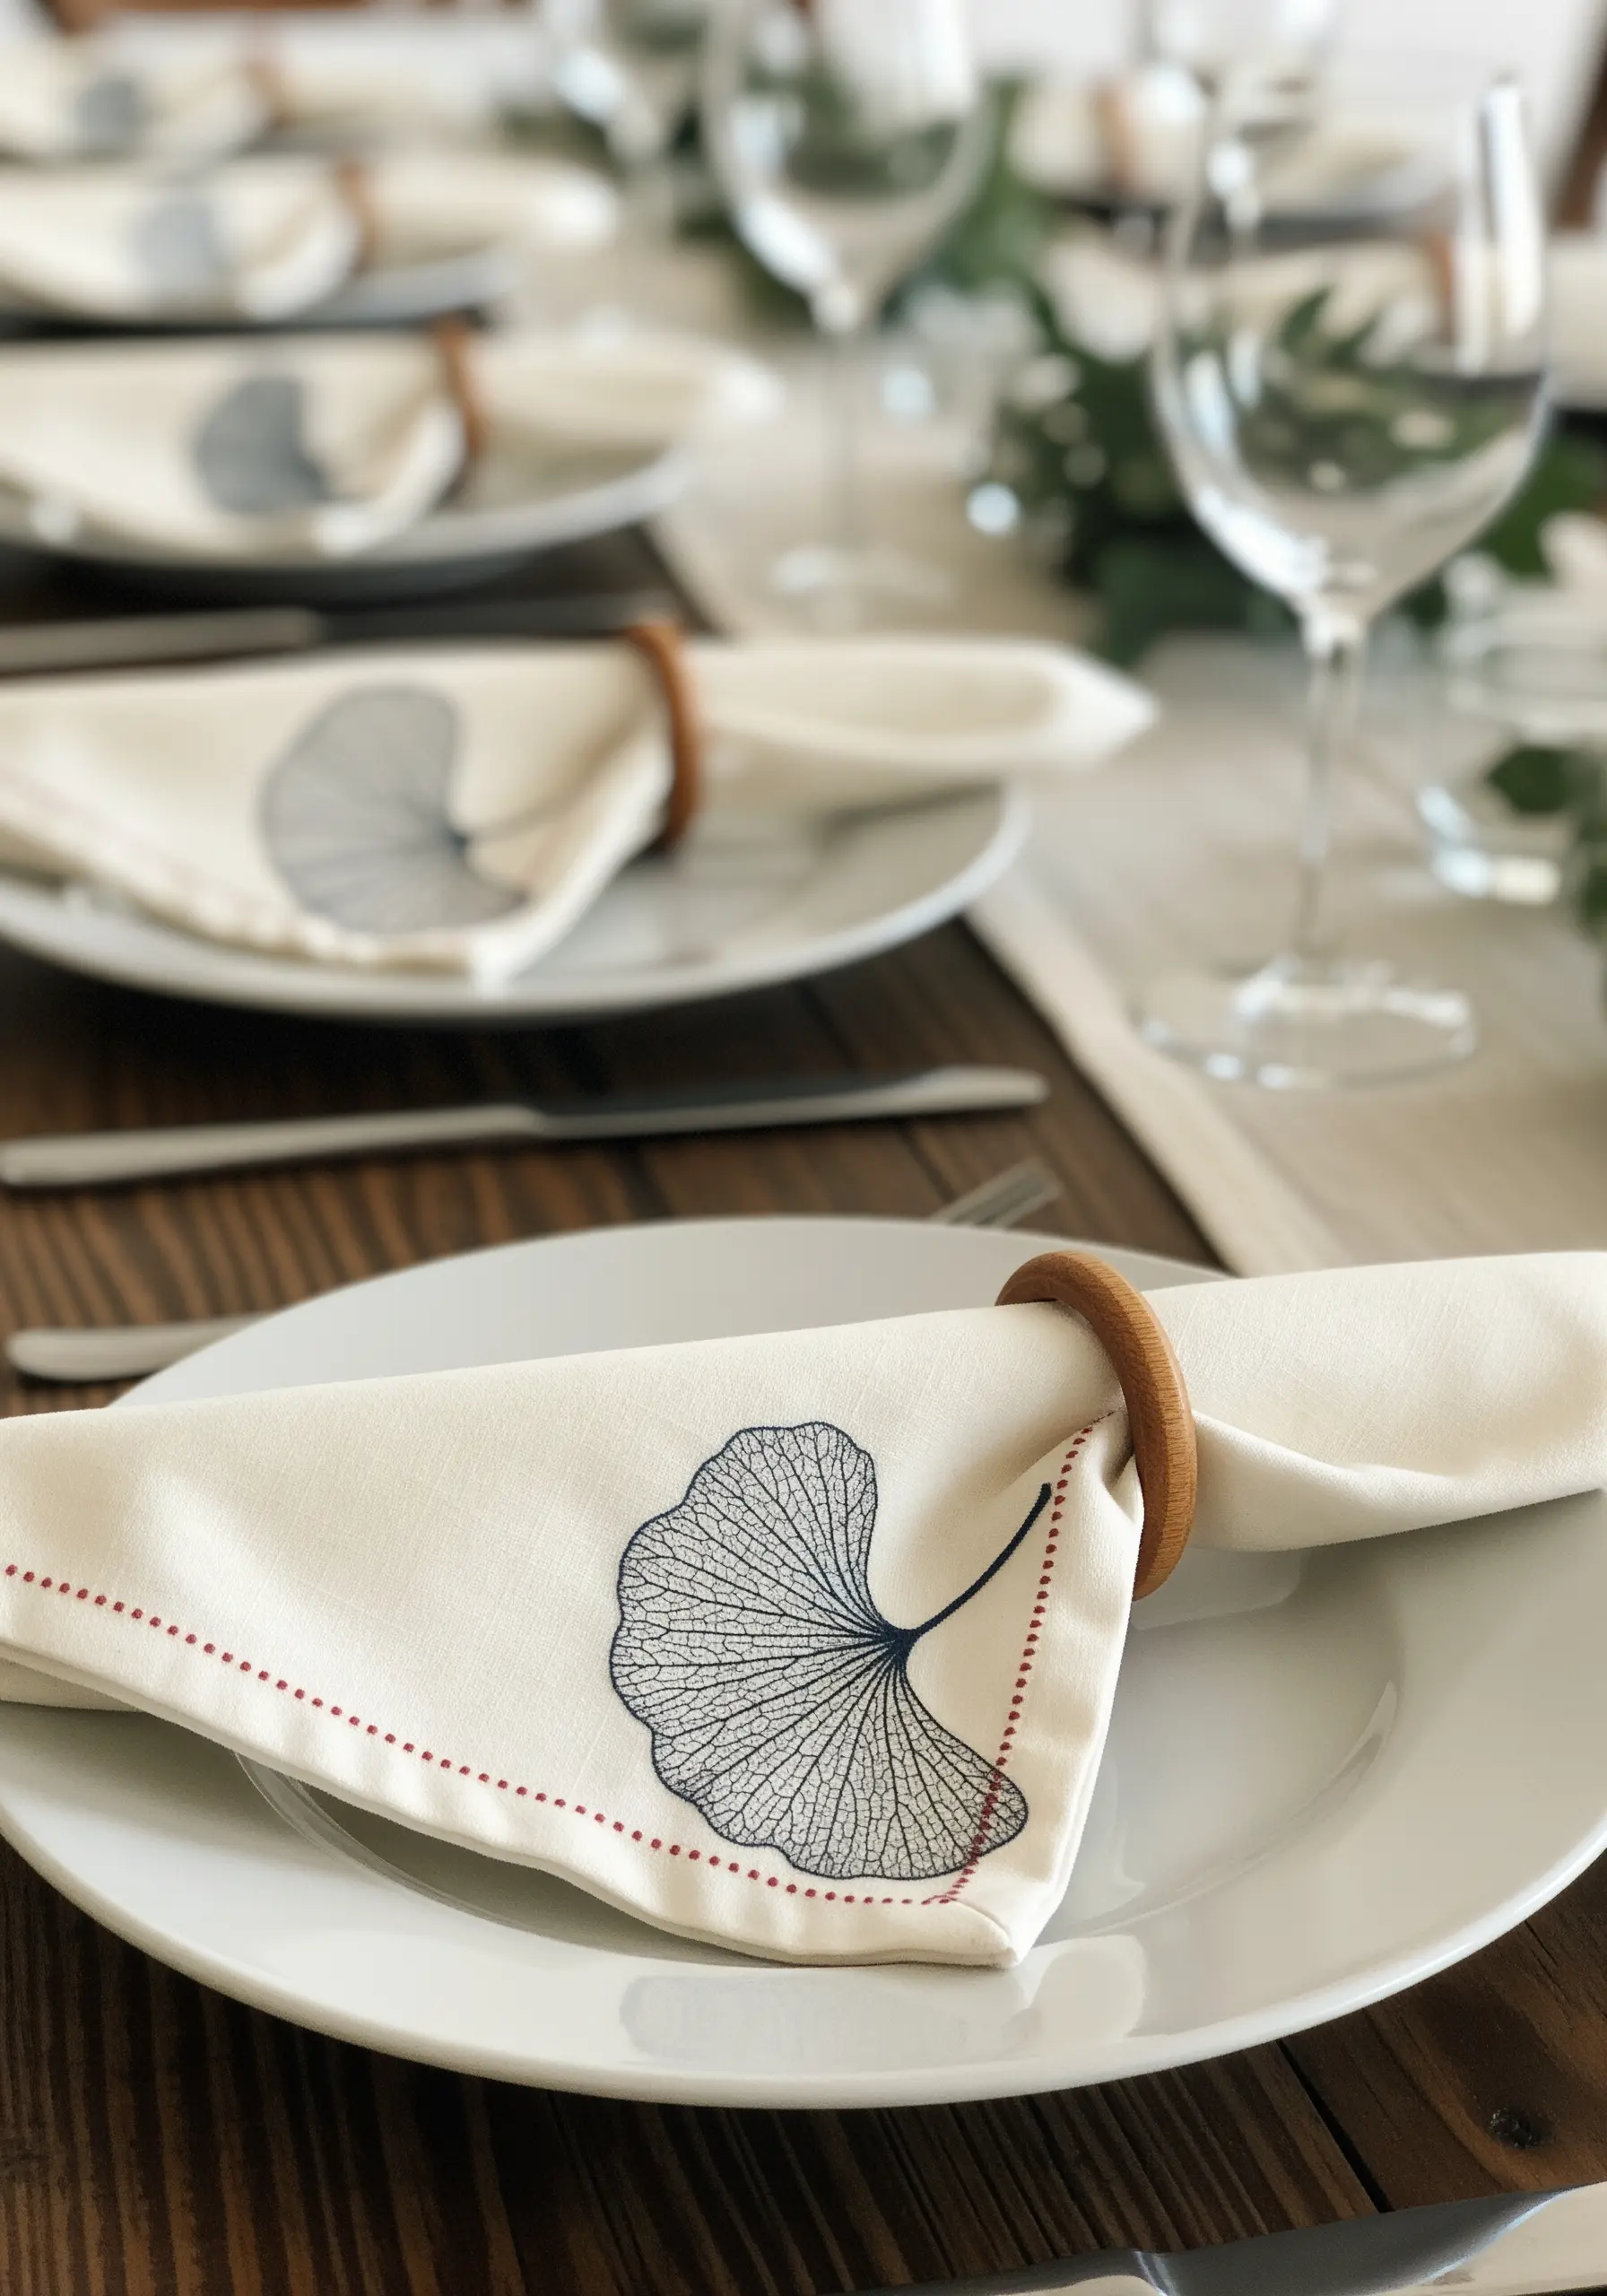
When you need to capture the most delicate details, like the intricate veins of a ginkgo leaf, the key is to reduce your thread count.
Separate your embroidery floss down to a single strand.
Using just one strand with a precise backstitch or split stitch allows you to create lines that are incredibly fine and sharp, giving your work the look of a delicate ink illustration.
This is a simple adjustment that dramatically elevates the sophistication of your stitching.
28. Commemorate a Place with an Embroidered Map
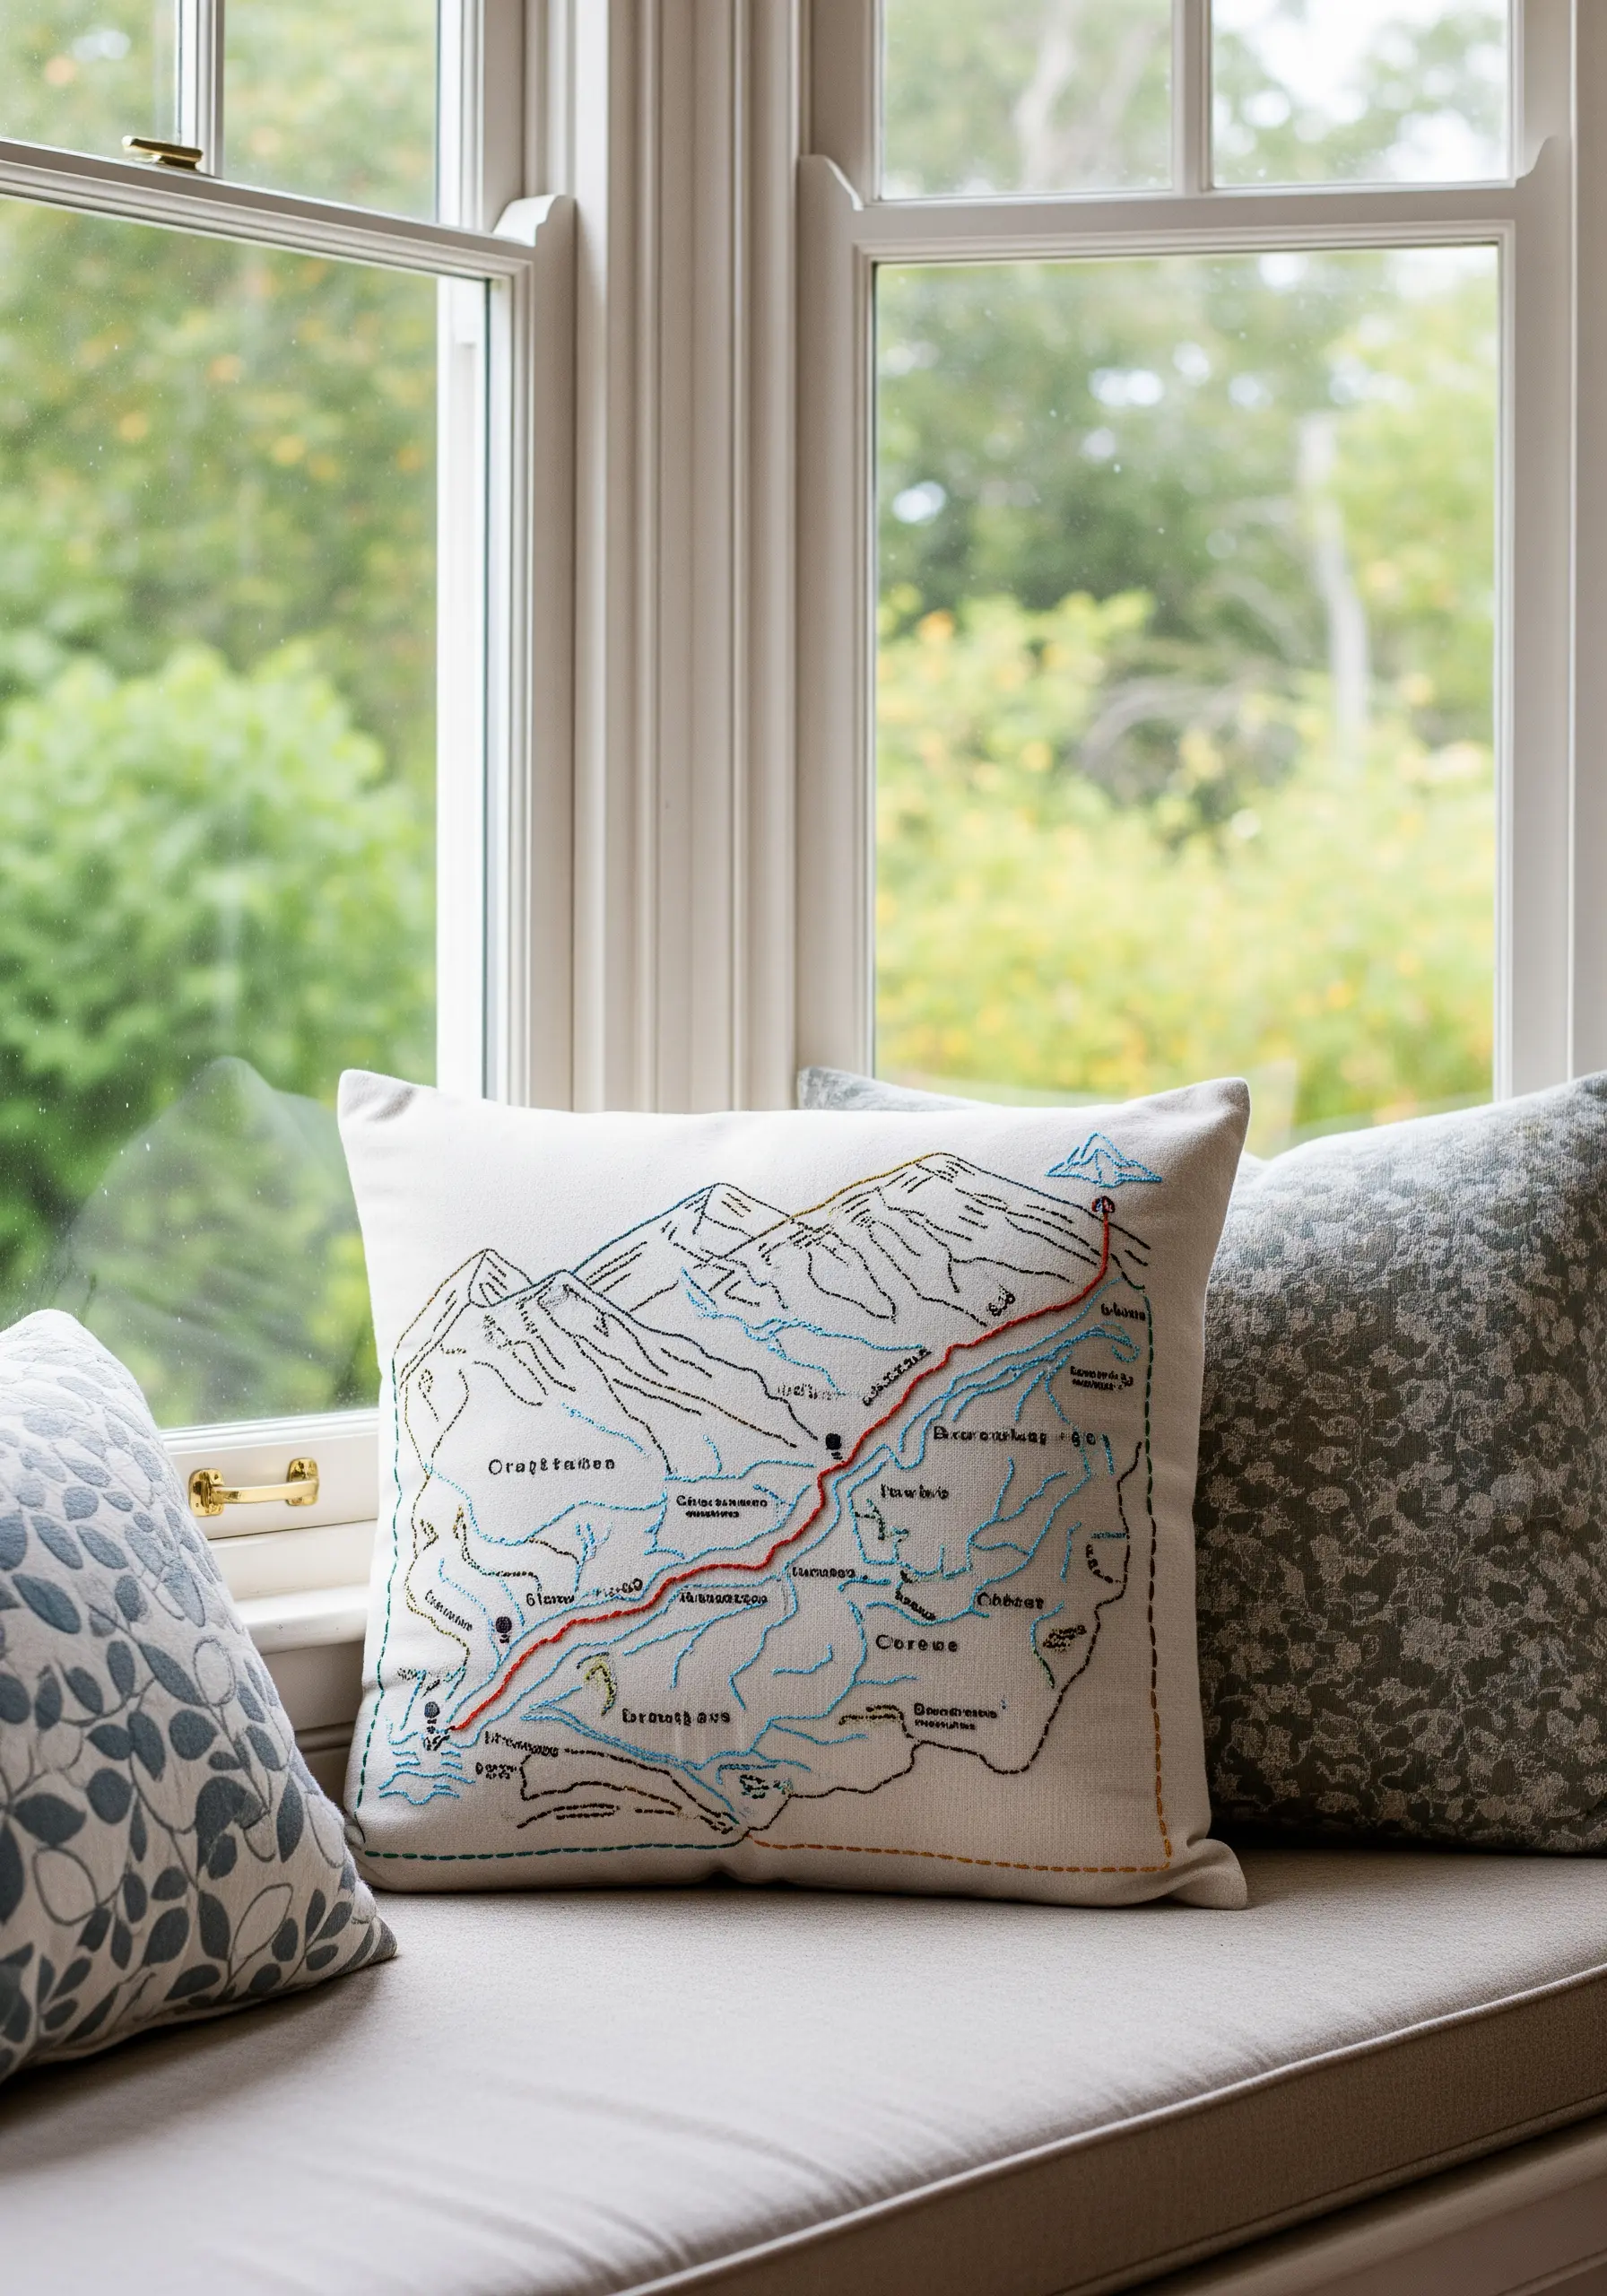
Transform a personal memory into a tangible piece of art by stitching a map of a meaningful location.
Trace the topographical lines, trails, or roads onto your fabric and use a simple backstitch to outline them.
You can use different colors to highlight a specific route or landmark, creating a unique and deeply personal piece that tells a story of place and experience.
It’s a perfect way to stitch line art travel adventure symbols directly into your decor.
29. Convey Symbolism Through Color and Composition
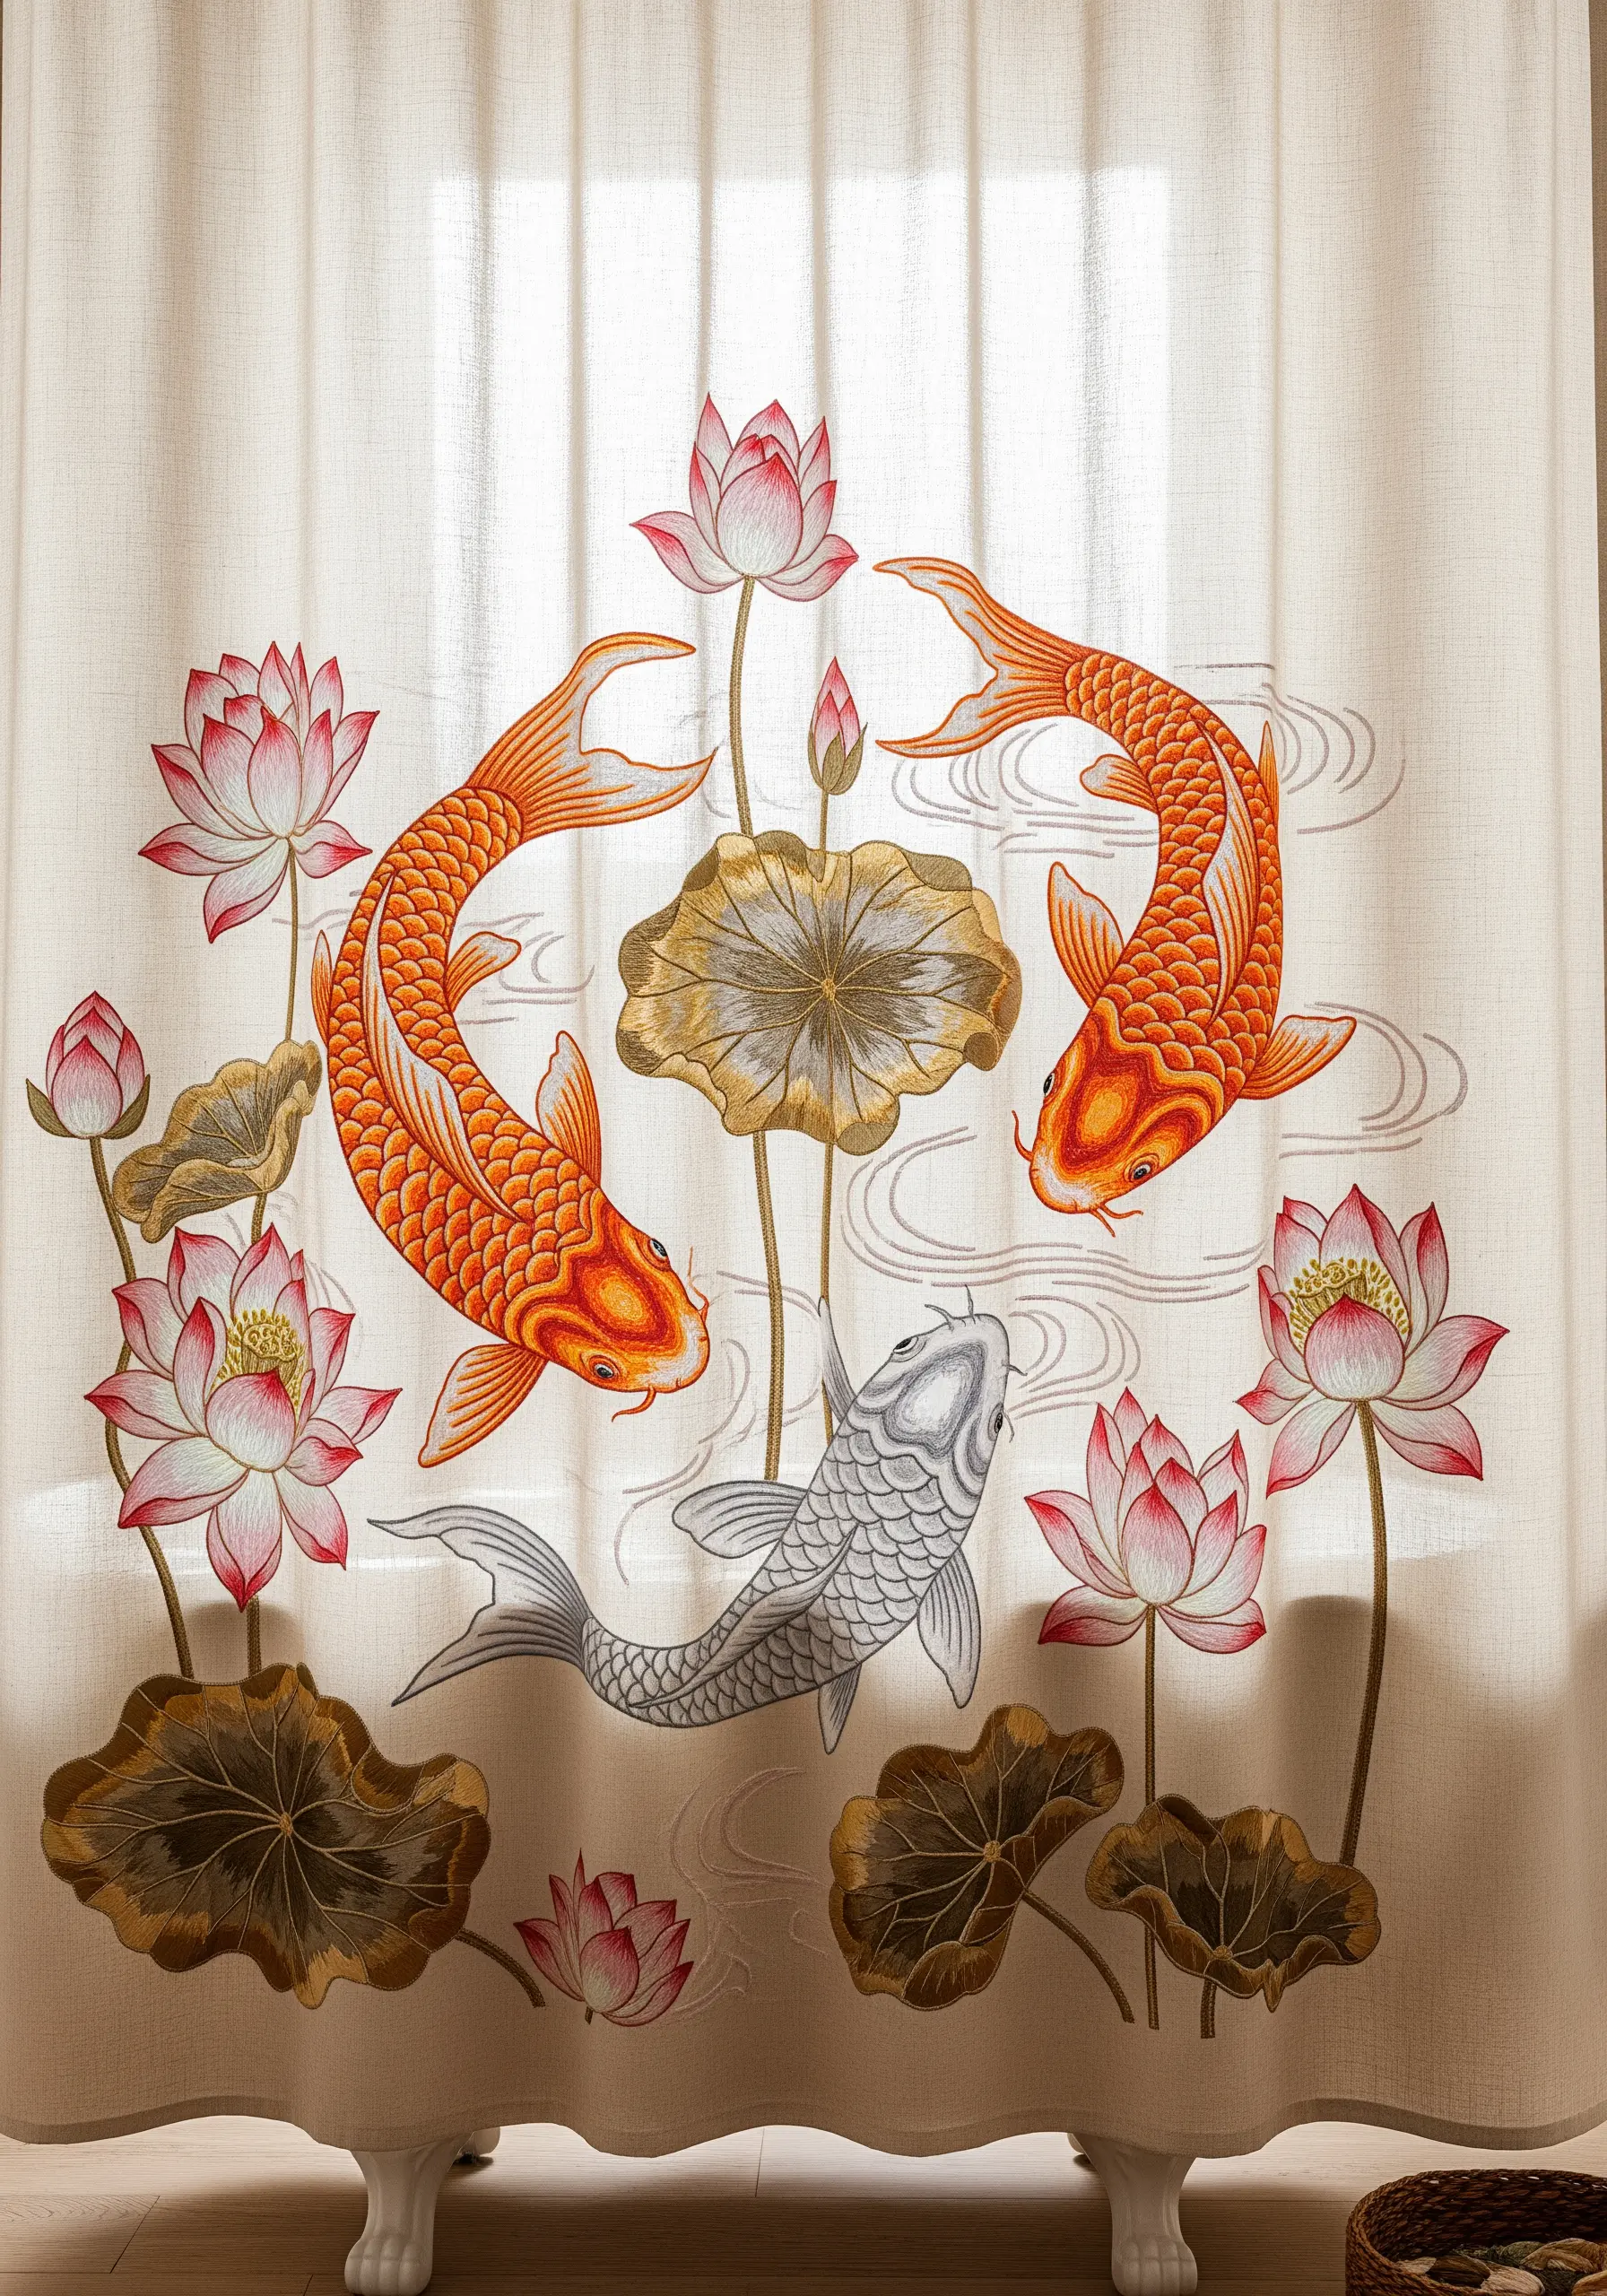
Go beyond pure decoration by using your embroidery choices to add a layer of meaning to your work.
In this design, the circular arrangement of the koi and lotus flowers creates a sense of harmony and perpetual motion.
The choice to stitch one fish in a contrasting cool grey among the vibrant oranges adds a point of visual rest and symbolizes balance.
Thoughtful decisions about color and placement can turn a beautiful image into a symbolic one.
30. Mimic Natural Geology with Textural Stitches
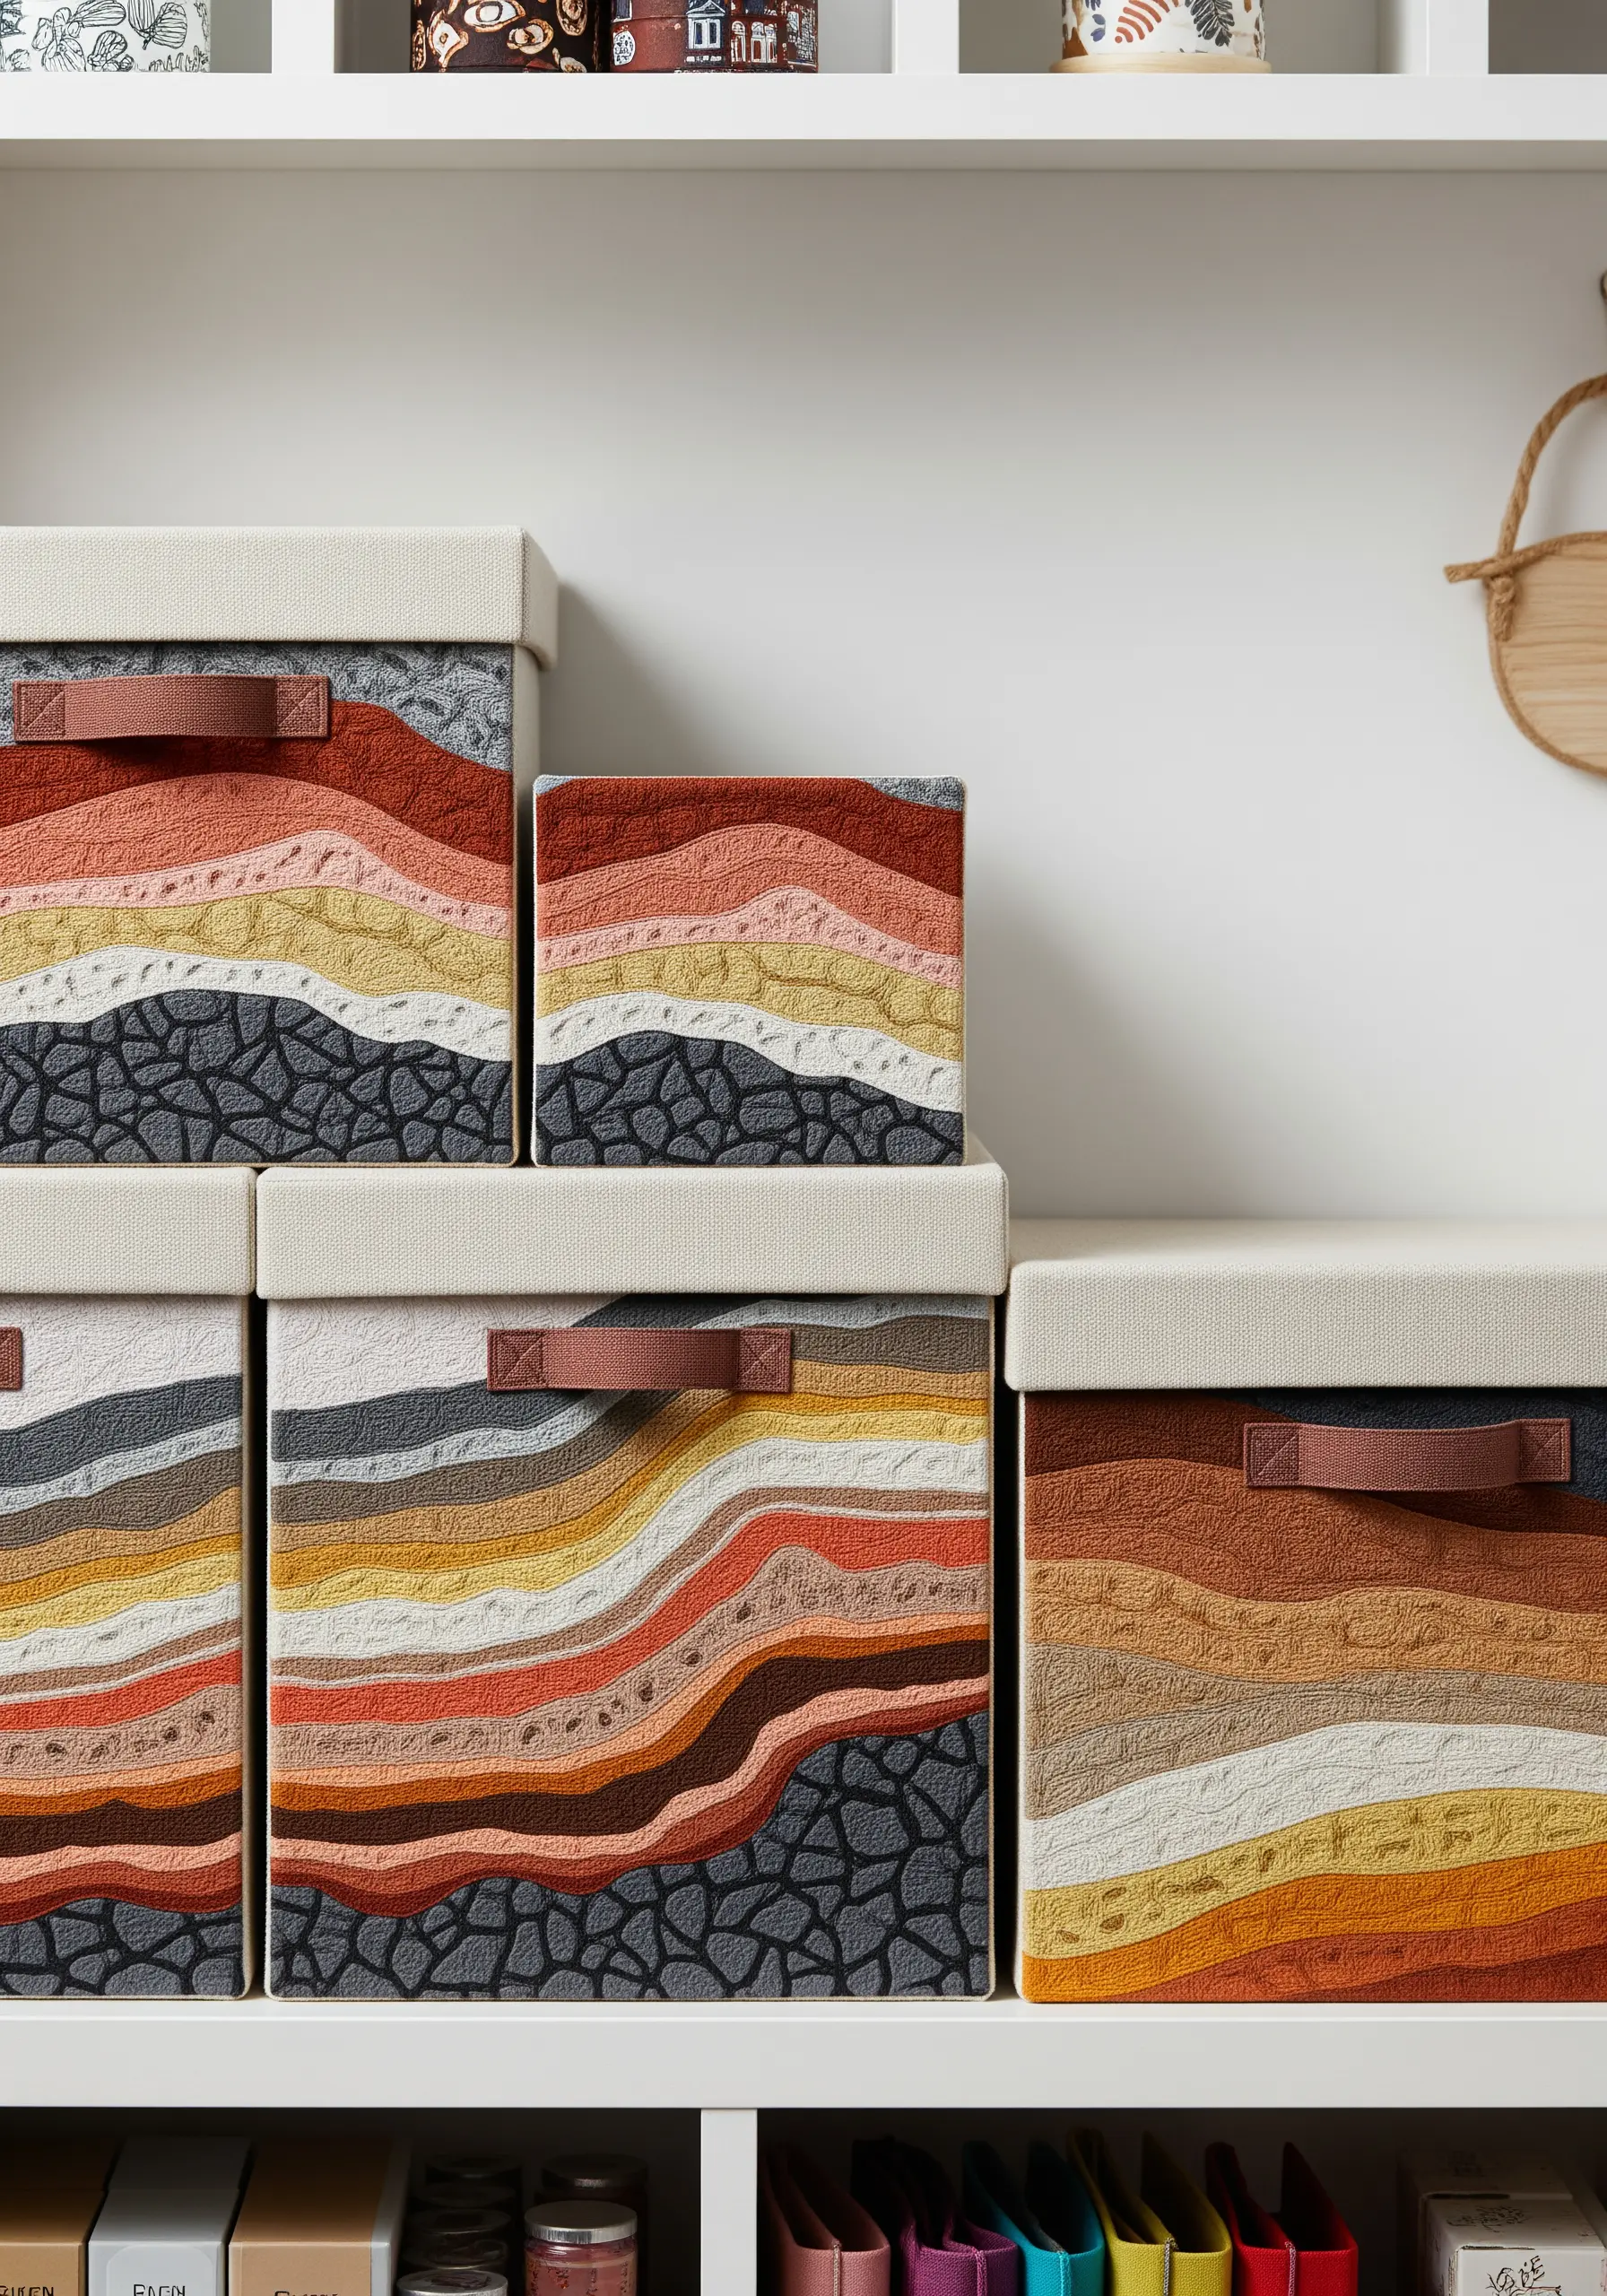
Think of your thread and stitches as tools for creating pure texture, not just images.
To replicate the look of a geode or rock strata, combine different stitches and thread weights.
Use rows of chain stitch or stem stitch in earthy tones for the layered sediment, and then create the crystalline center with dense clusters of French knots or by couching a textured yarn.
This approach transforms functional items into tactile art inspired by yarn wall art projects.


