

Let’s set aside the idea of simply decorating a piece of fabric and instead think about what it means to create an atmosphere for your home. A table runner is more than just a centerpiece; it’s a canvas that runs through the heart of your gatherings, holding space for conversations and meals.
The transformation from plain linen to a piece of art doesn’t require dozens of complicated stitches. Often, it begins with a single, intentional line. By focusing on the quality of that line—its weight, its texture, and its path across the fabric—you can evoke a feeling of modern elegance or rustic charm with surprising simplicity.
In the ideas that follow, I’ll guide you through specific techniques that elevate these simple line-art motifs. We’ll explore how a subtle shift in thread count, a deliberate use of negative space, or a surprising color choice can turn a humble stitch into a sophisticated statement. This is your opportunity to create not just a beautiful object, but a future heirloom.
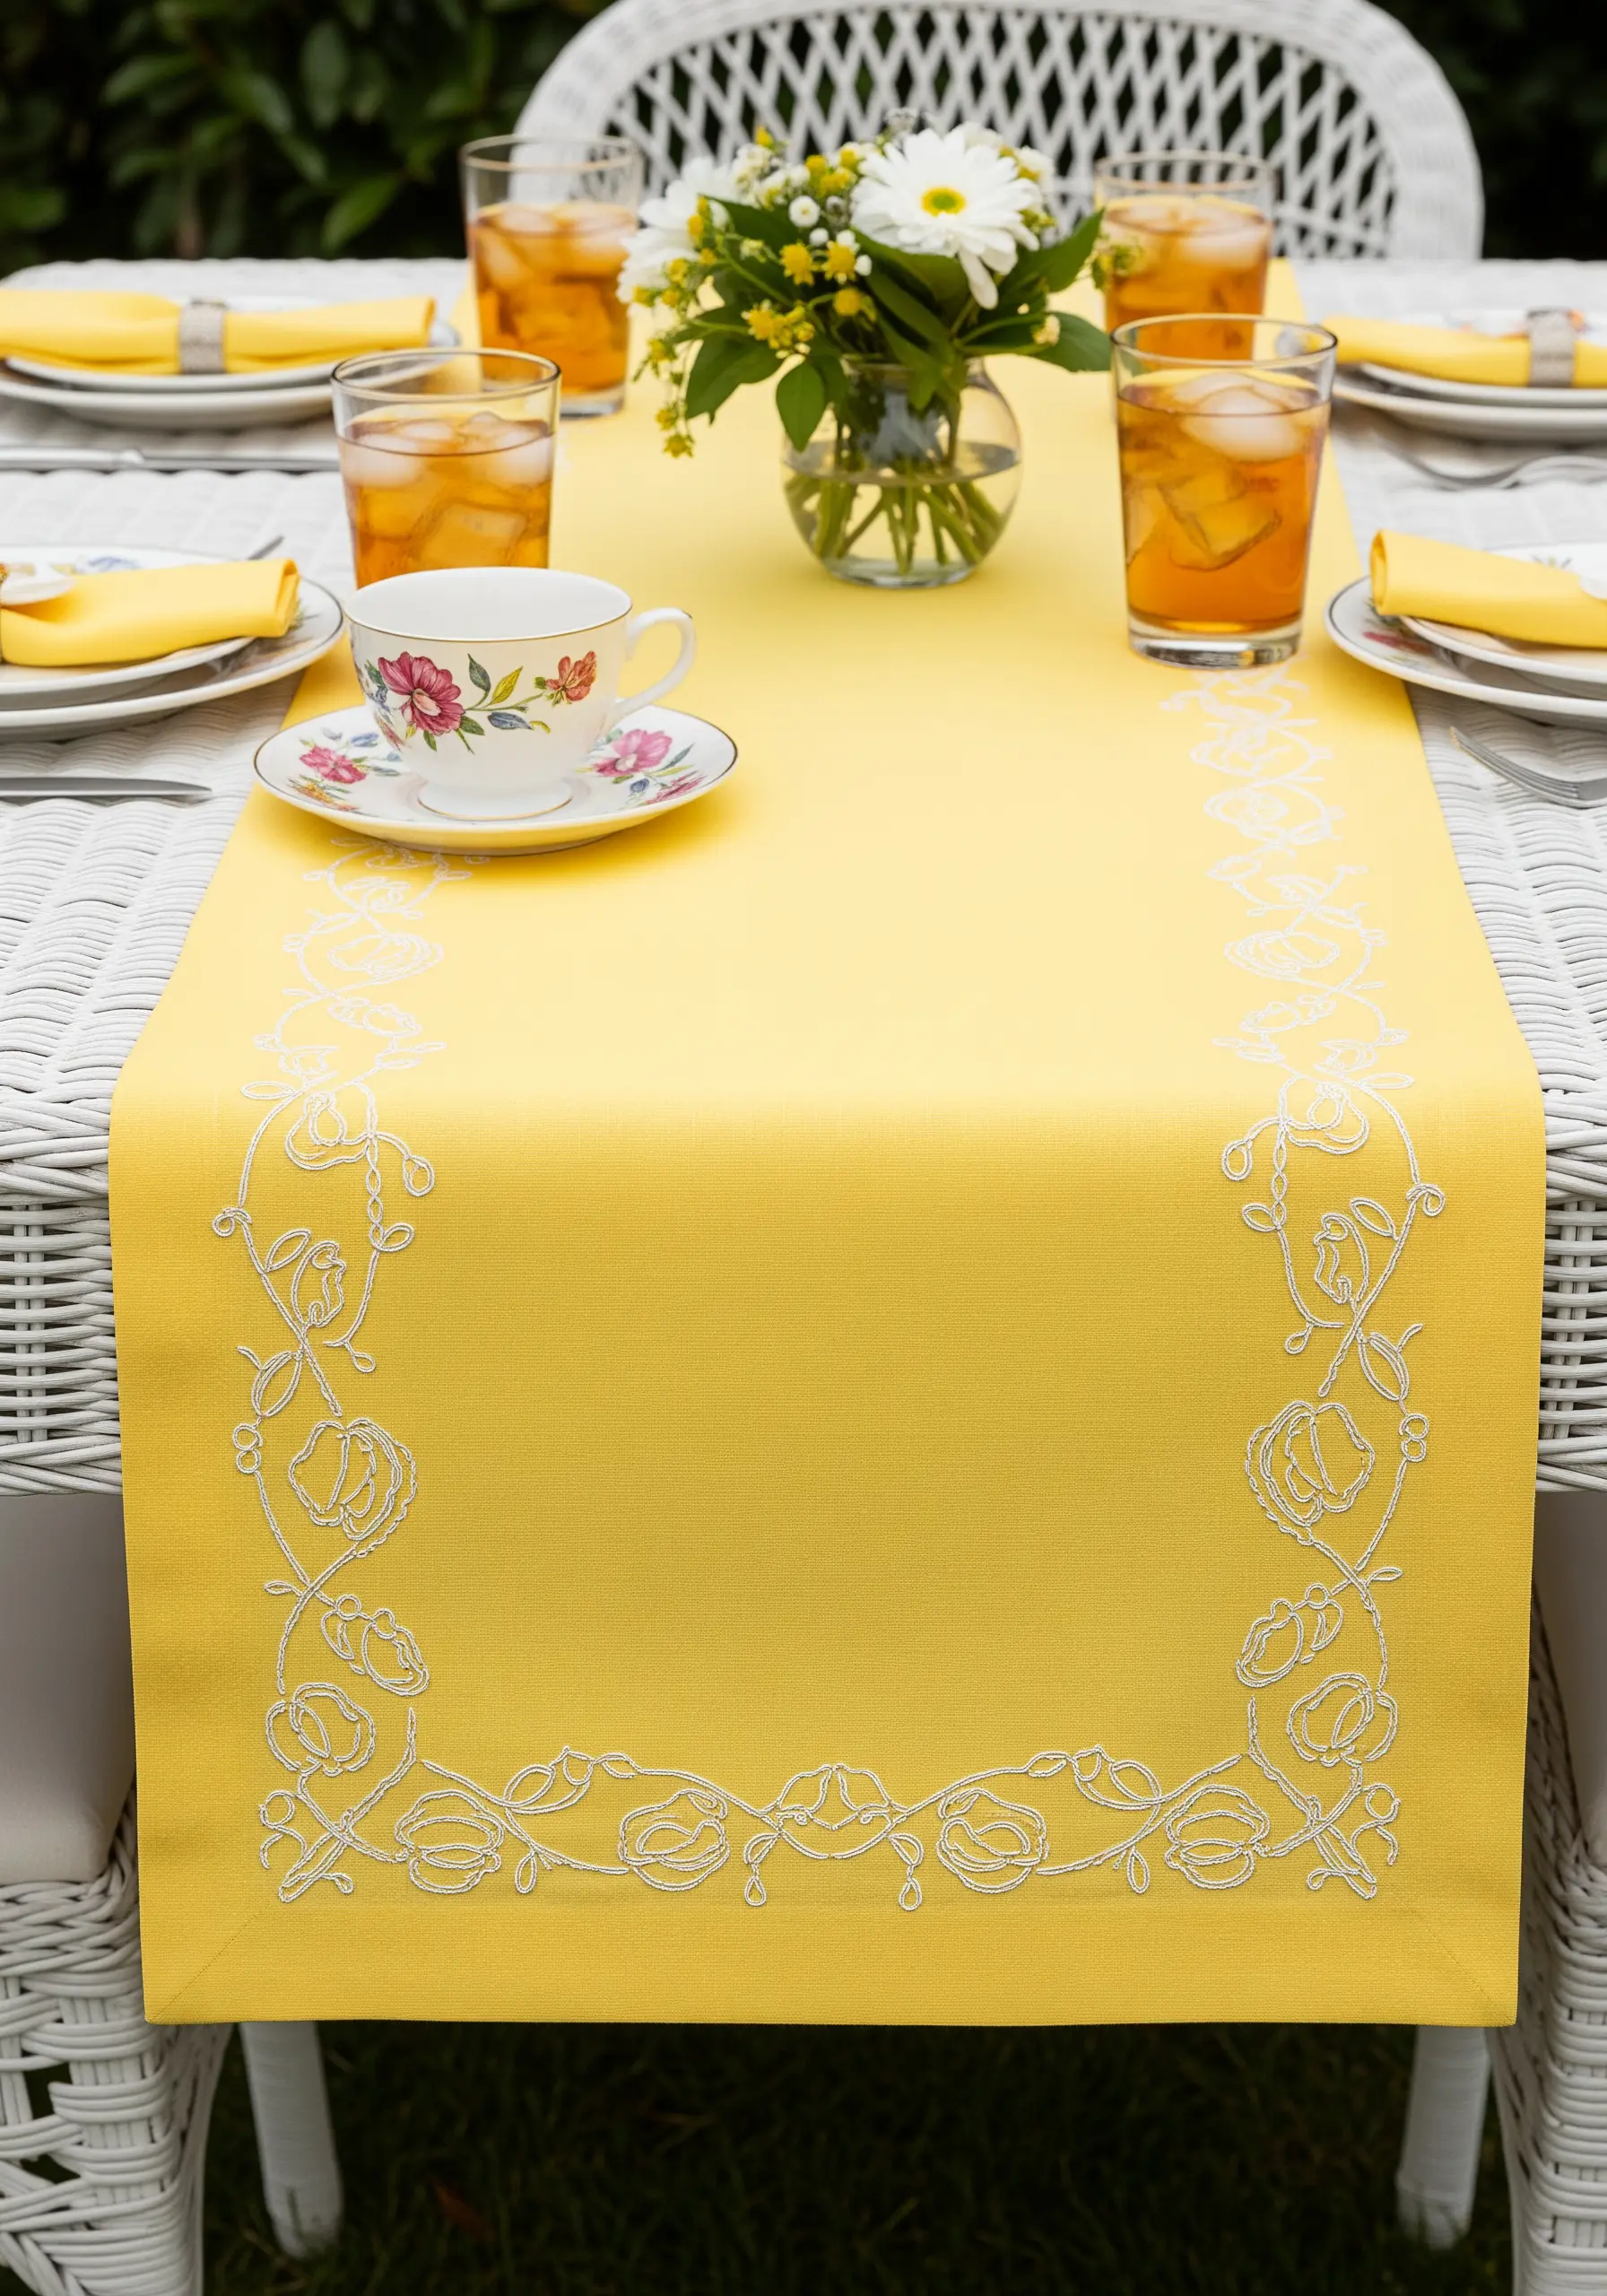
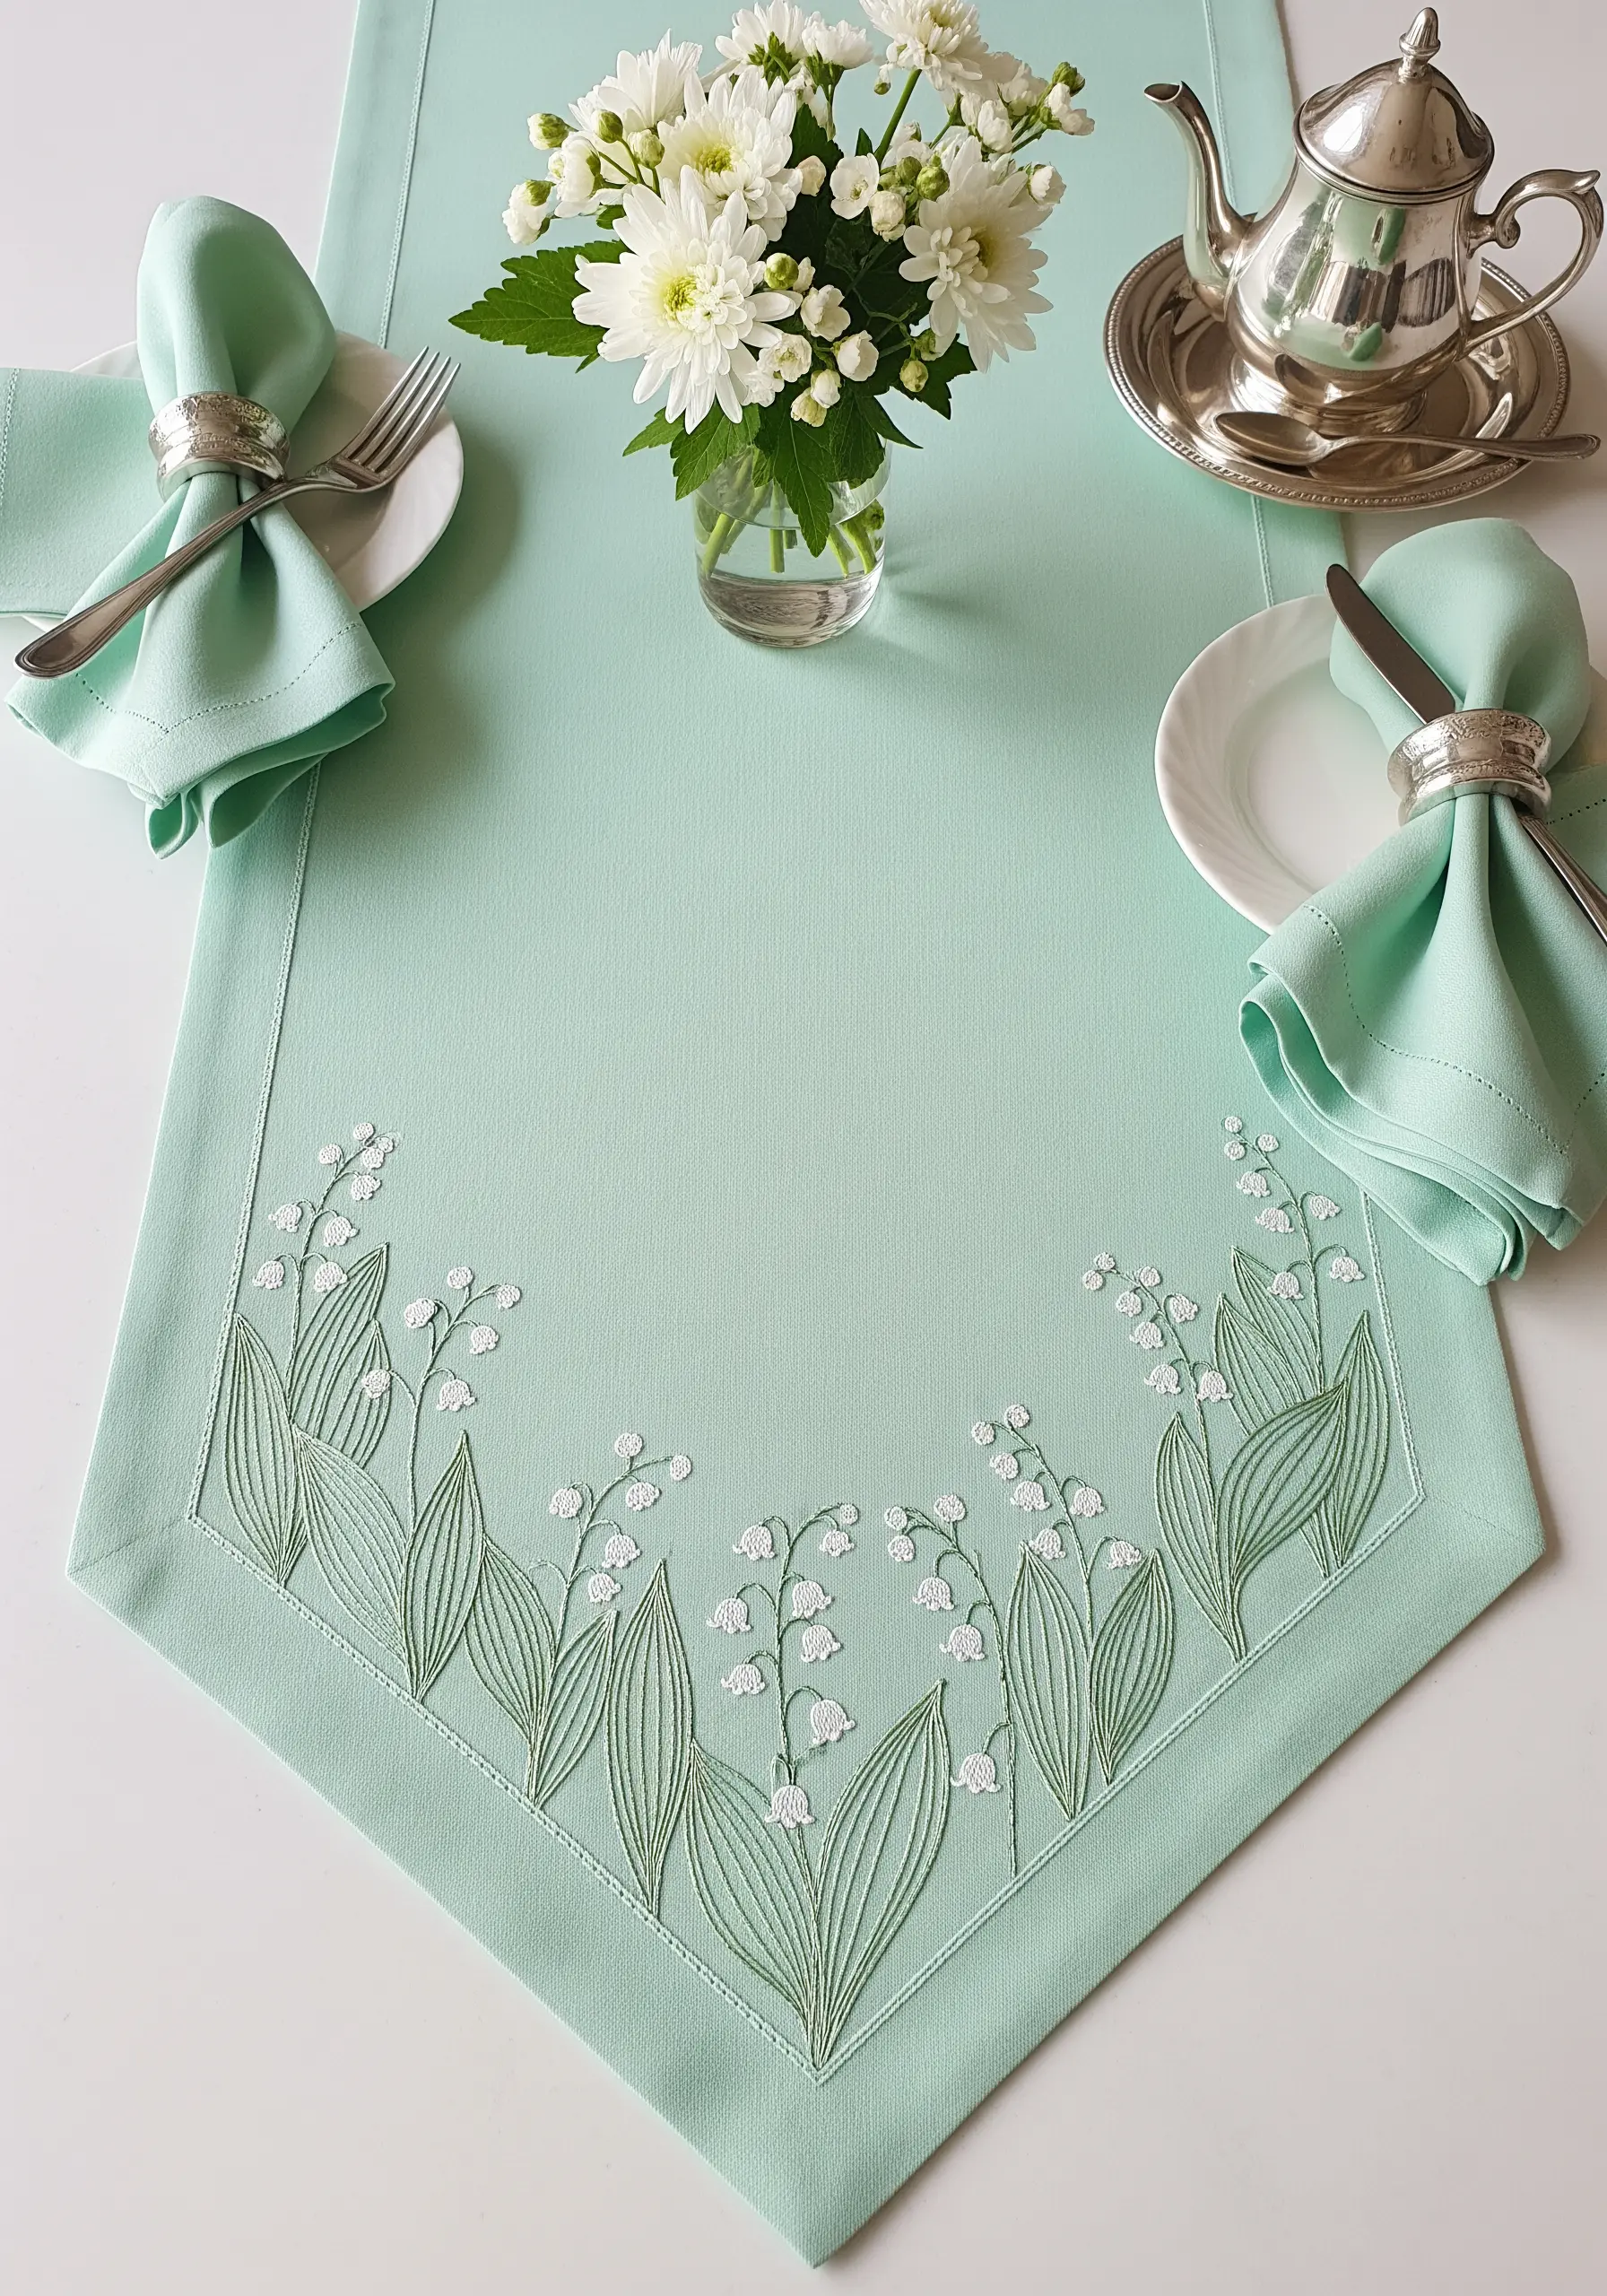
1. The Modern Tulip Border: Grounding Your Design
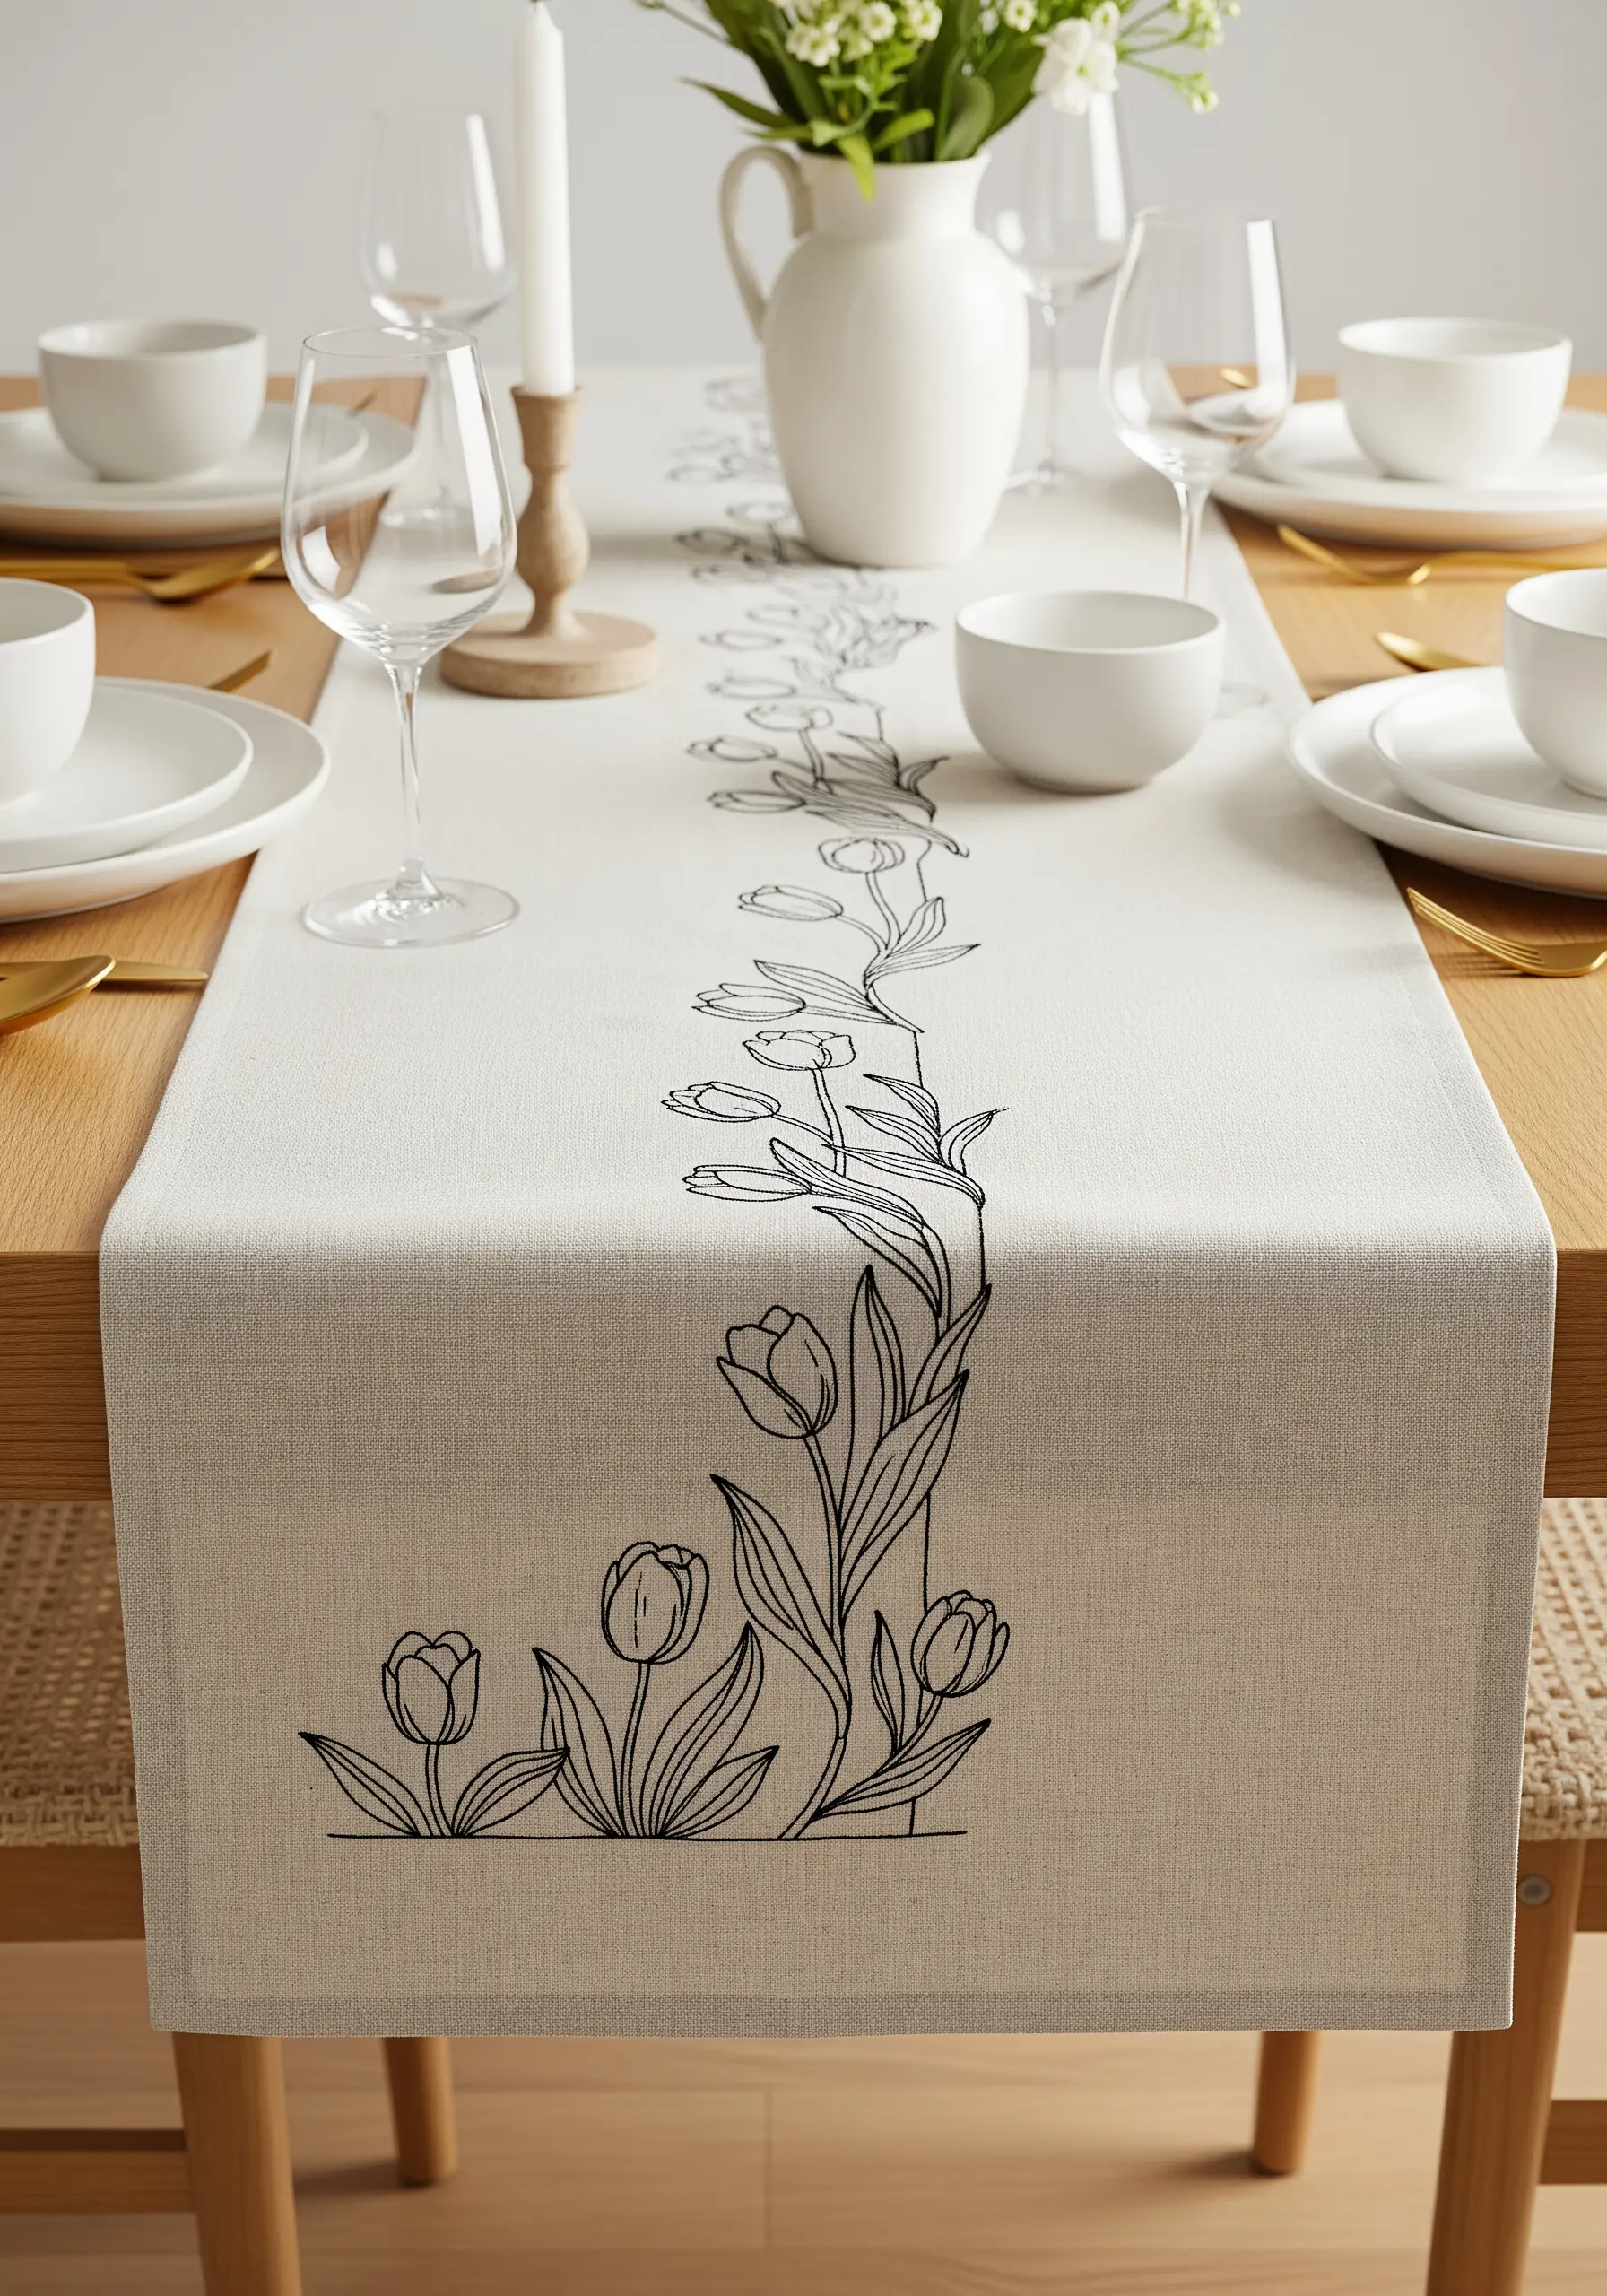
For a clean, graphic floral, use a consistent backstitch or stem stitch with three strands of floss to achieve a defined, modern line.
Notice how the design is anchored by a solid horizontal line at the bottom.
This simple addition prevents the vertical tulips from feeling like they are floating aimlessly, giving the entire composition a deliberate and polished foundation.
It provides a clear visual endpoint for the runner, making the tablescape feel more intentional.
2. Gilded Bees: Mastering Metallic Thread
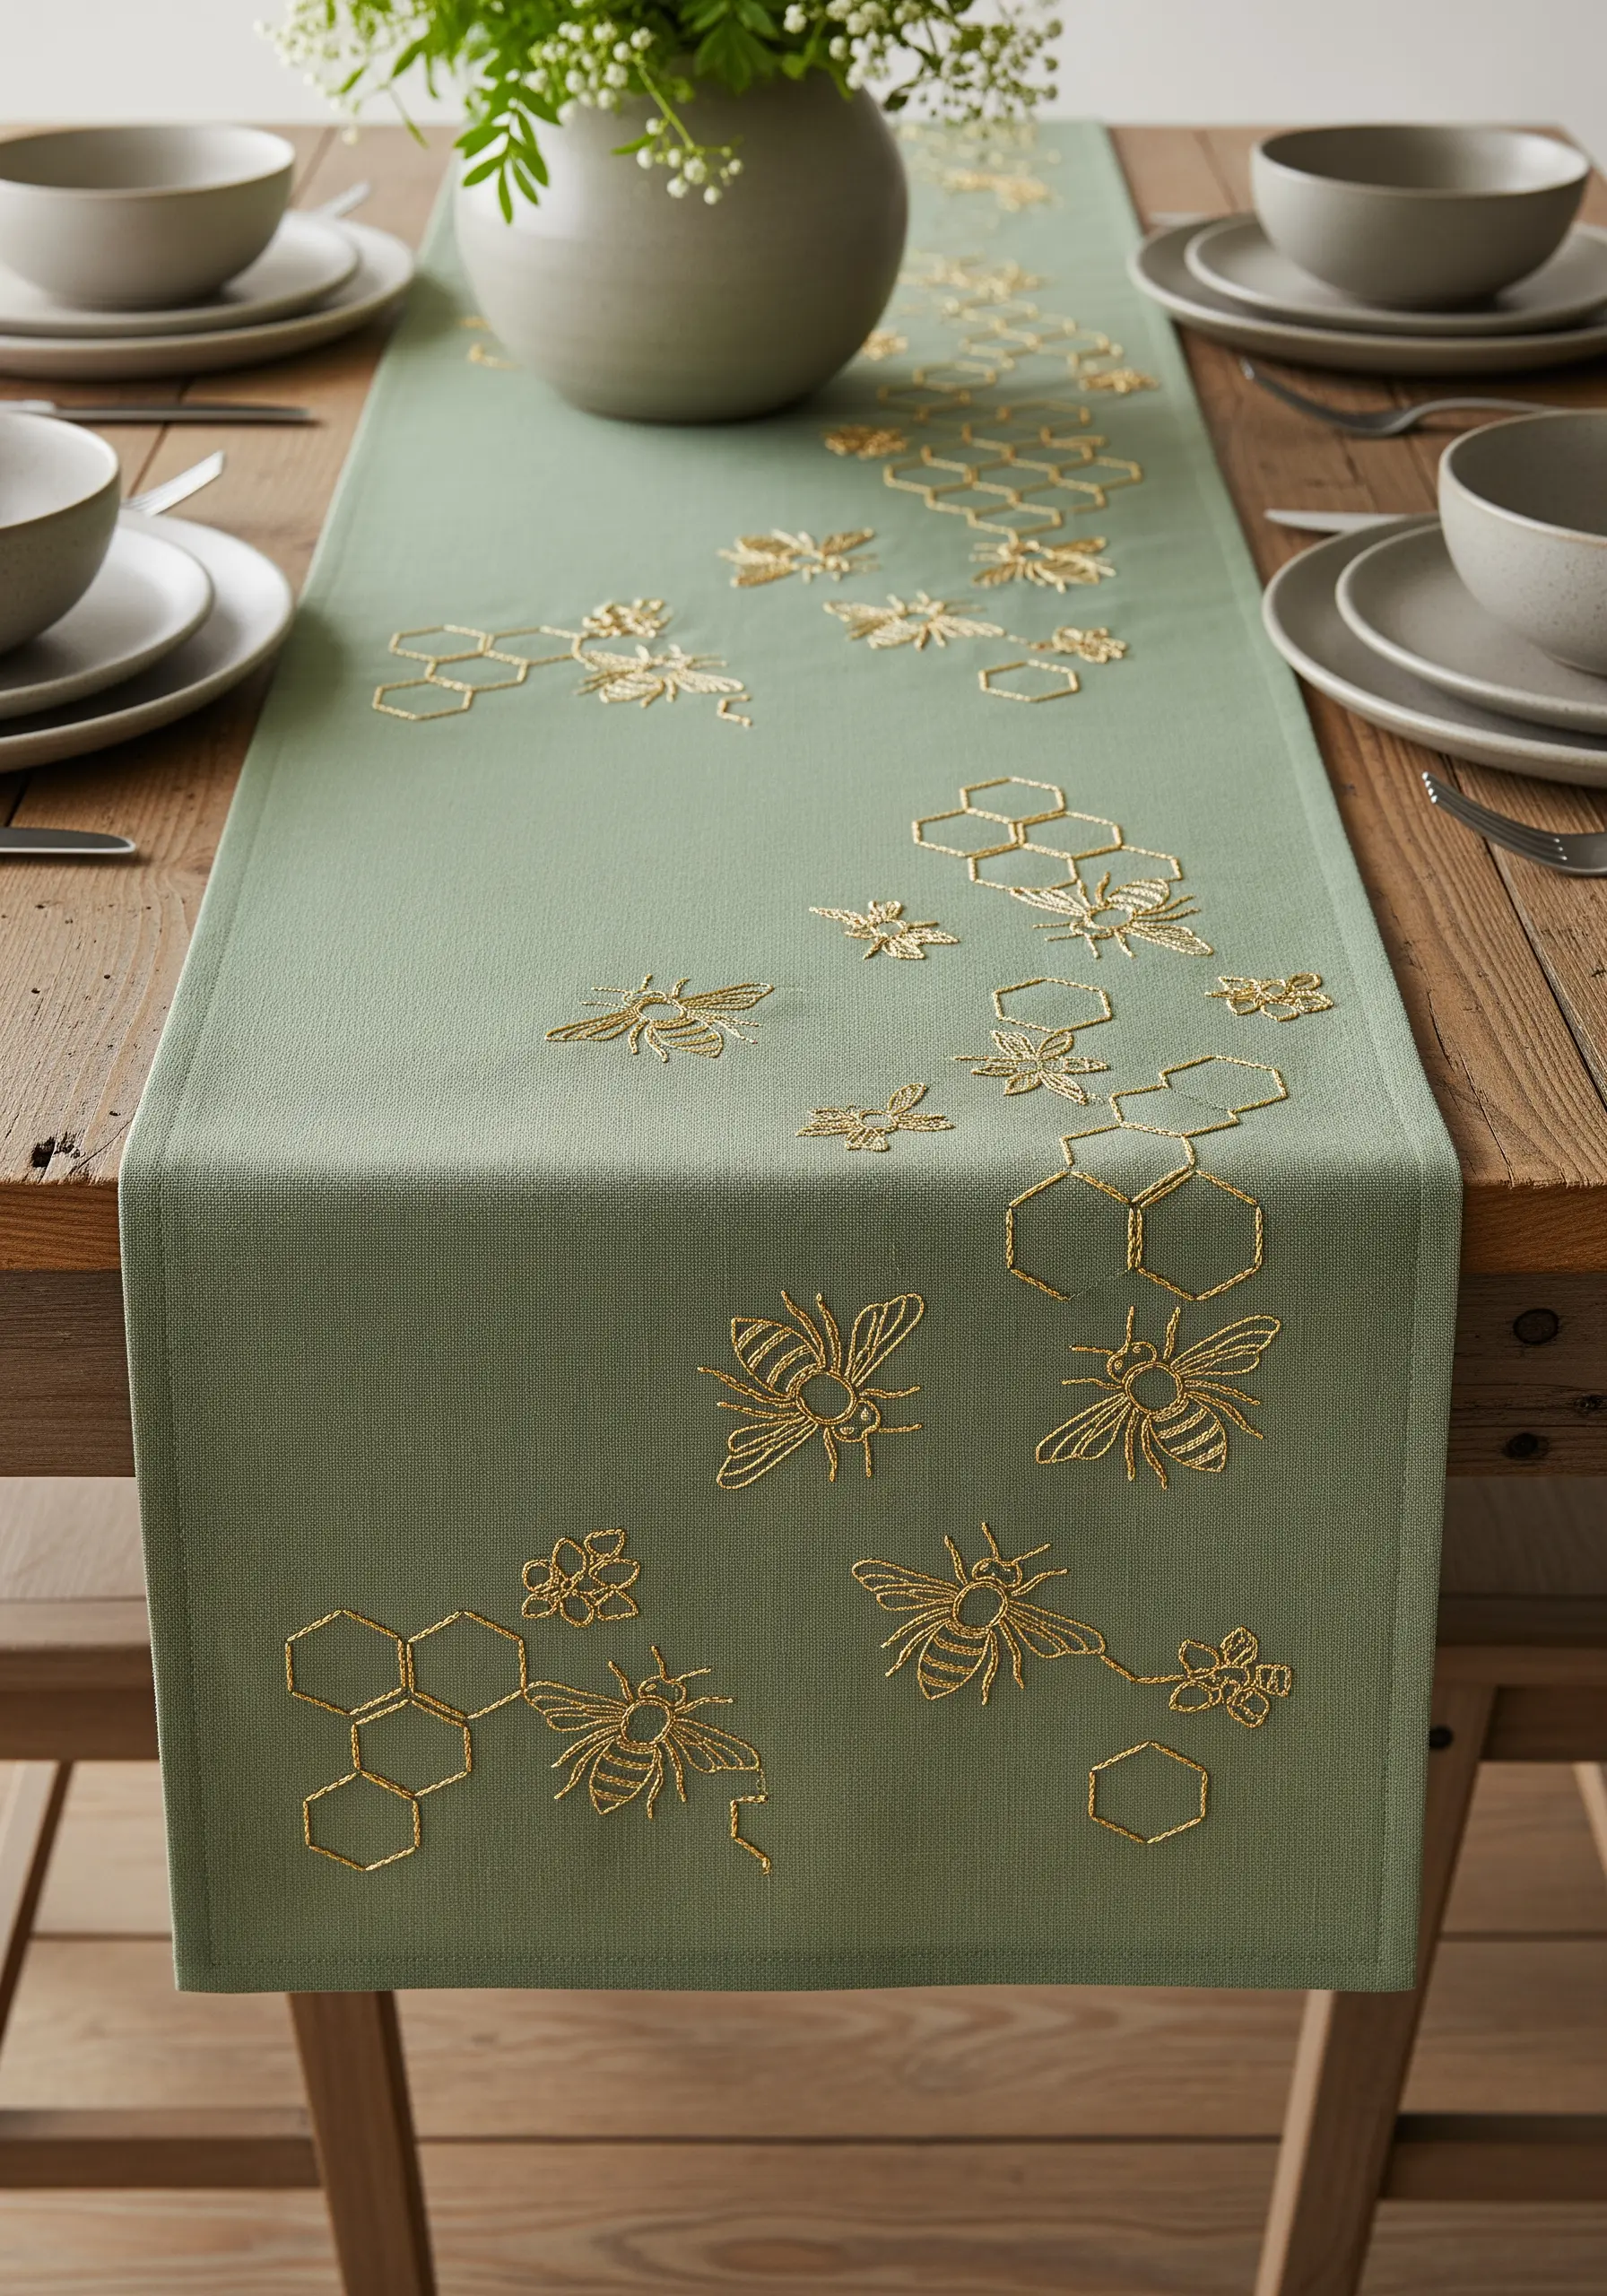
When working with metallic thread, cut shorter lengths—about 12 inches—to minimize tangling and fraying, which are common with these threads.
A thread conditioner like beeswax can also make stitching smoother.
Balance the detailed bee motifs with simple, open honeycomb outlines. This creates visual rhythm and prevents the design from becoming too busy.
Using a single metallic color on a muted, solid fabric is an immediate way to create a sense of luxury without adding complexity.
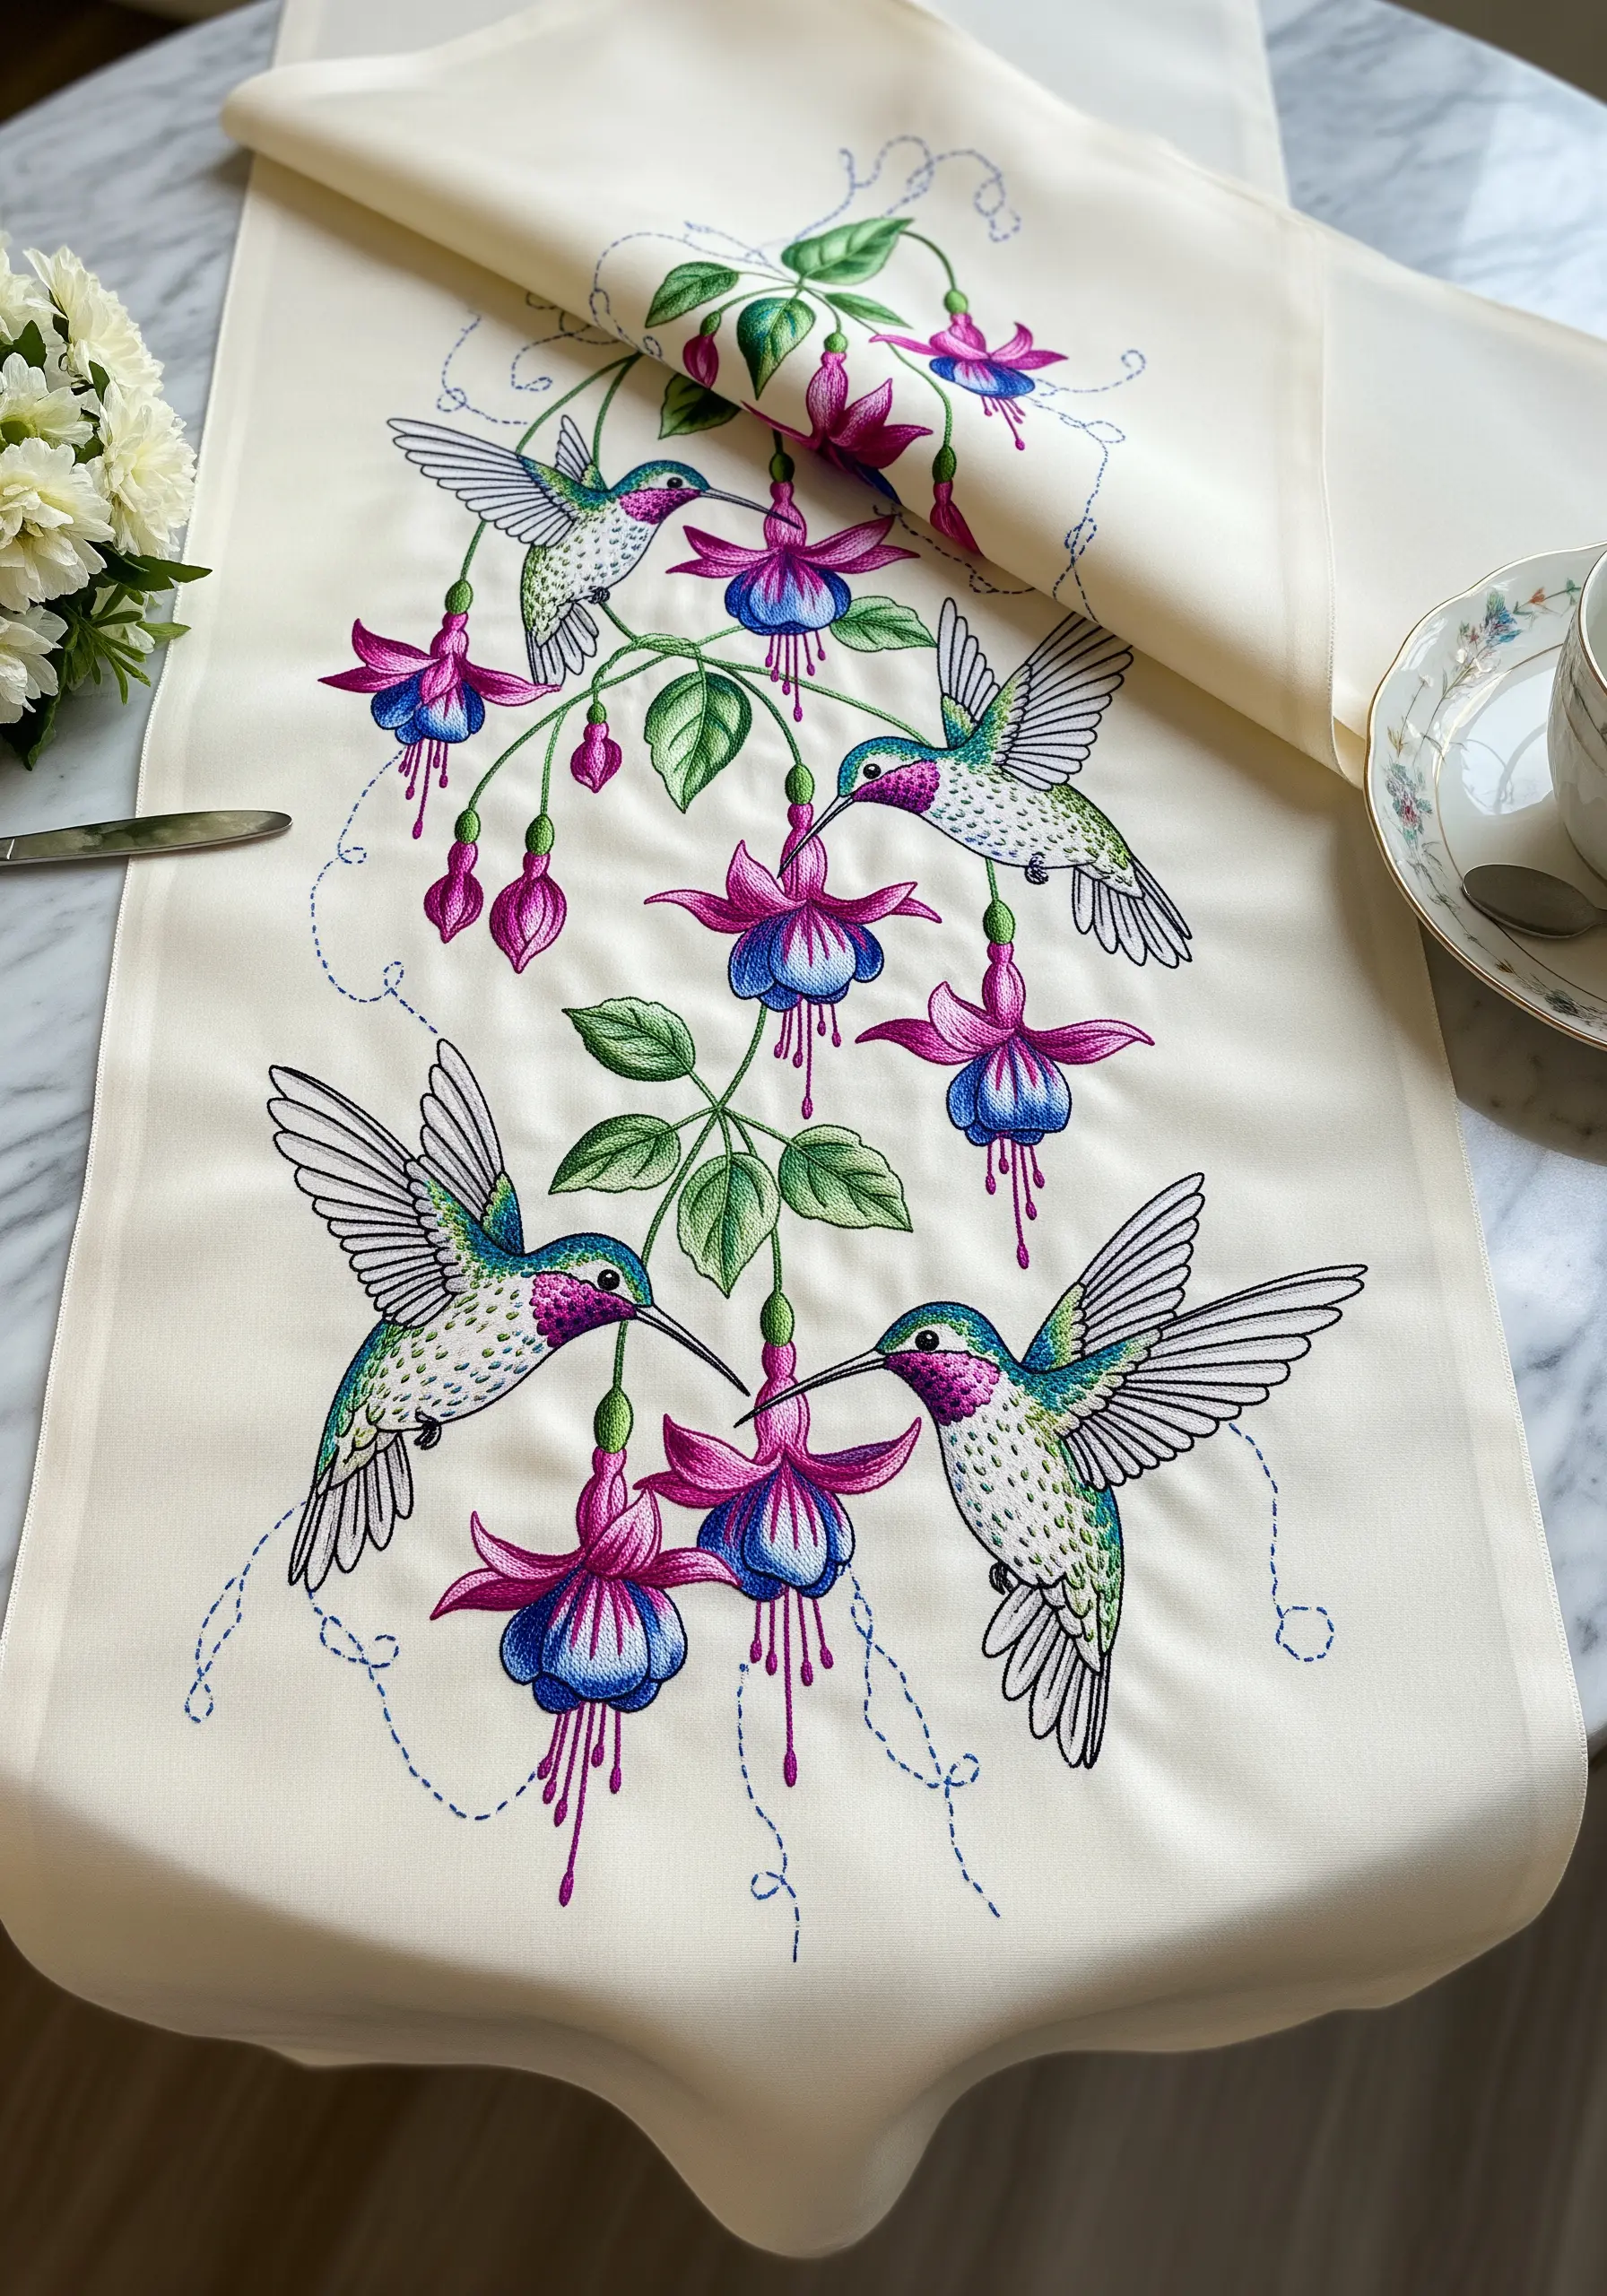
3. Subtle Gradients in Cherry Blossoms
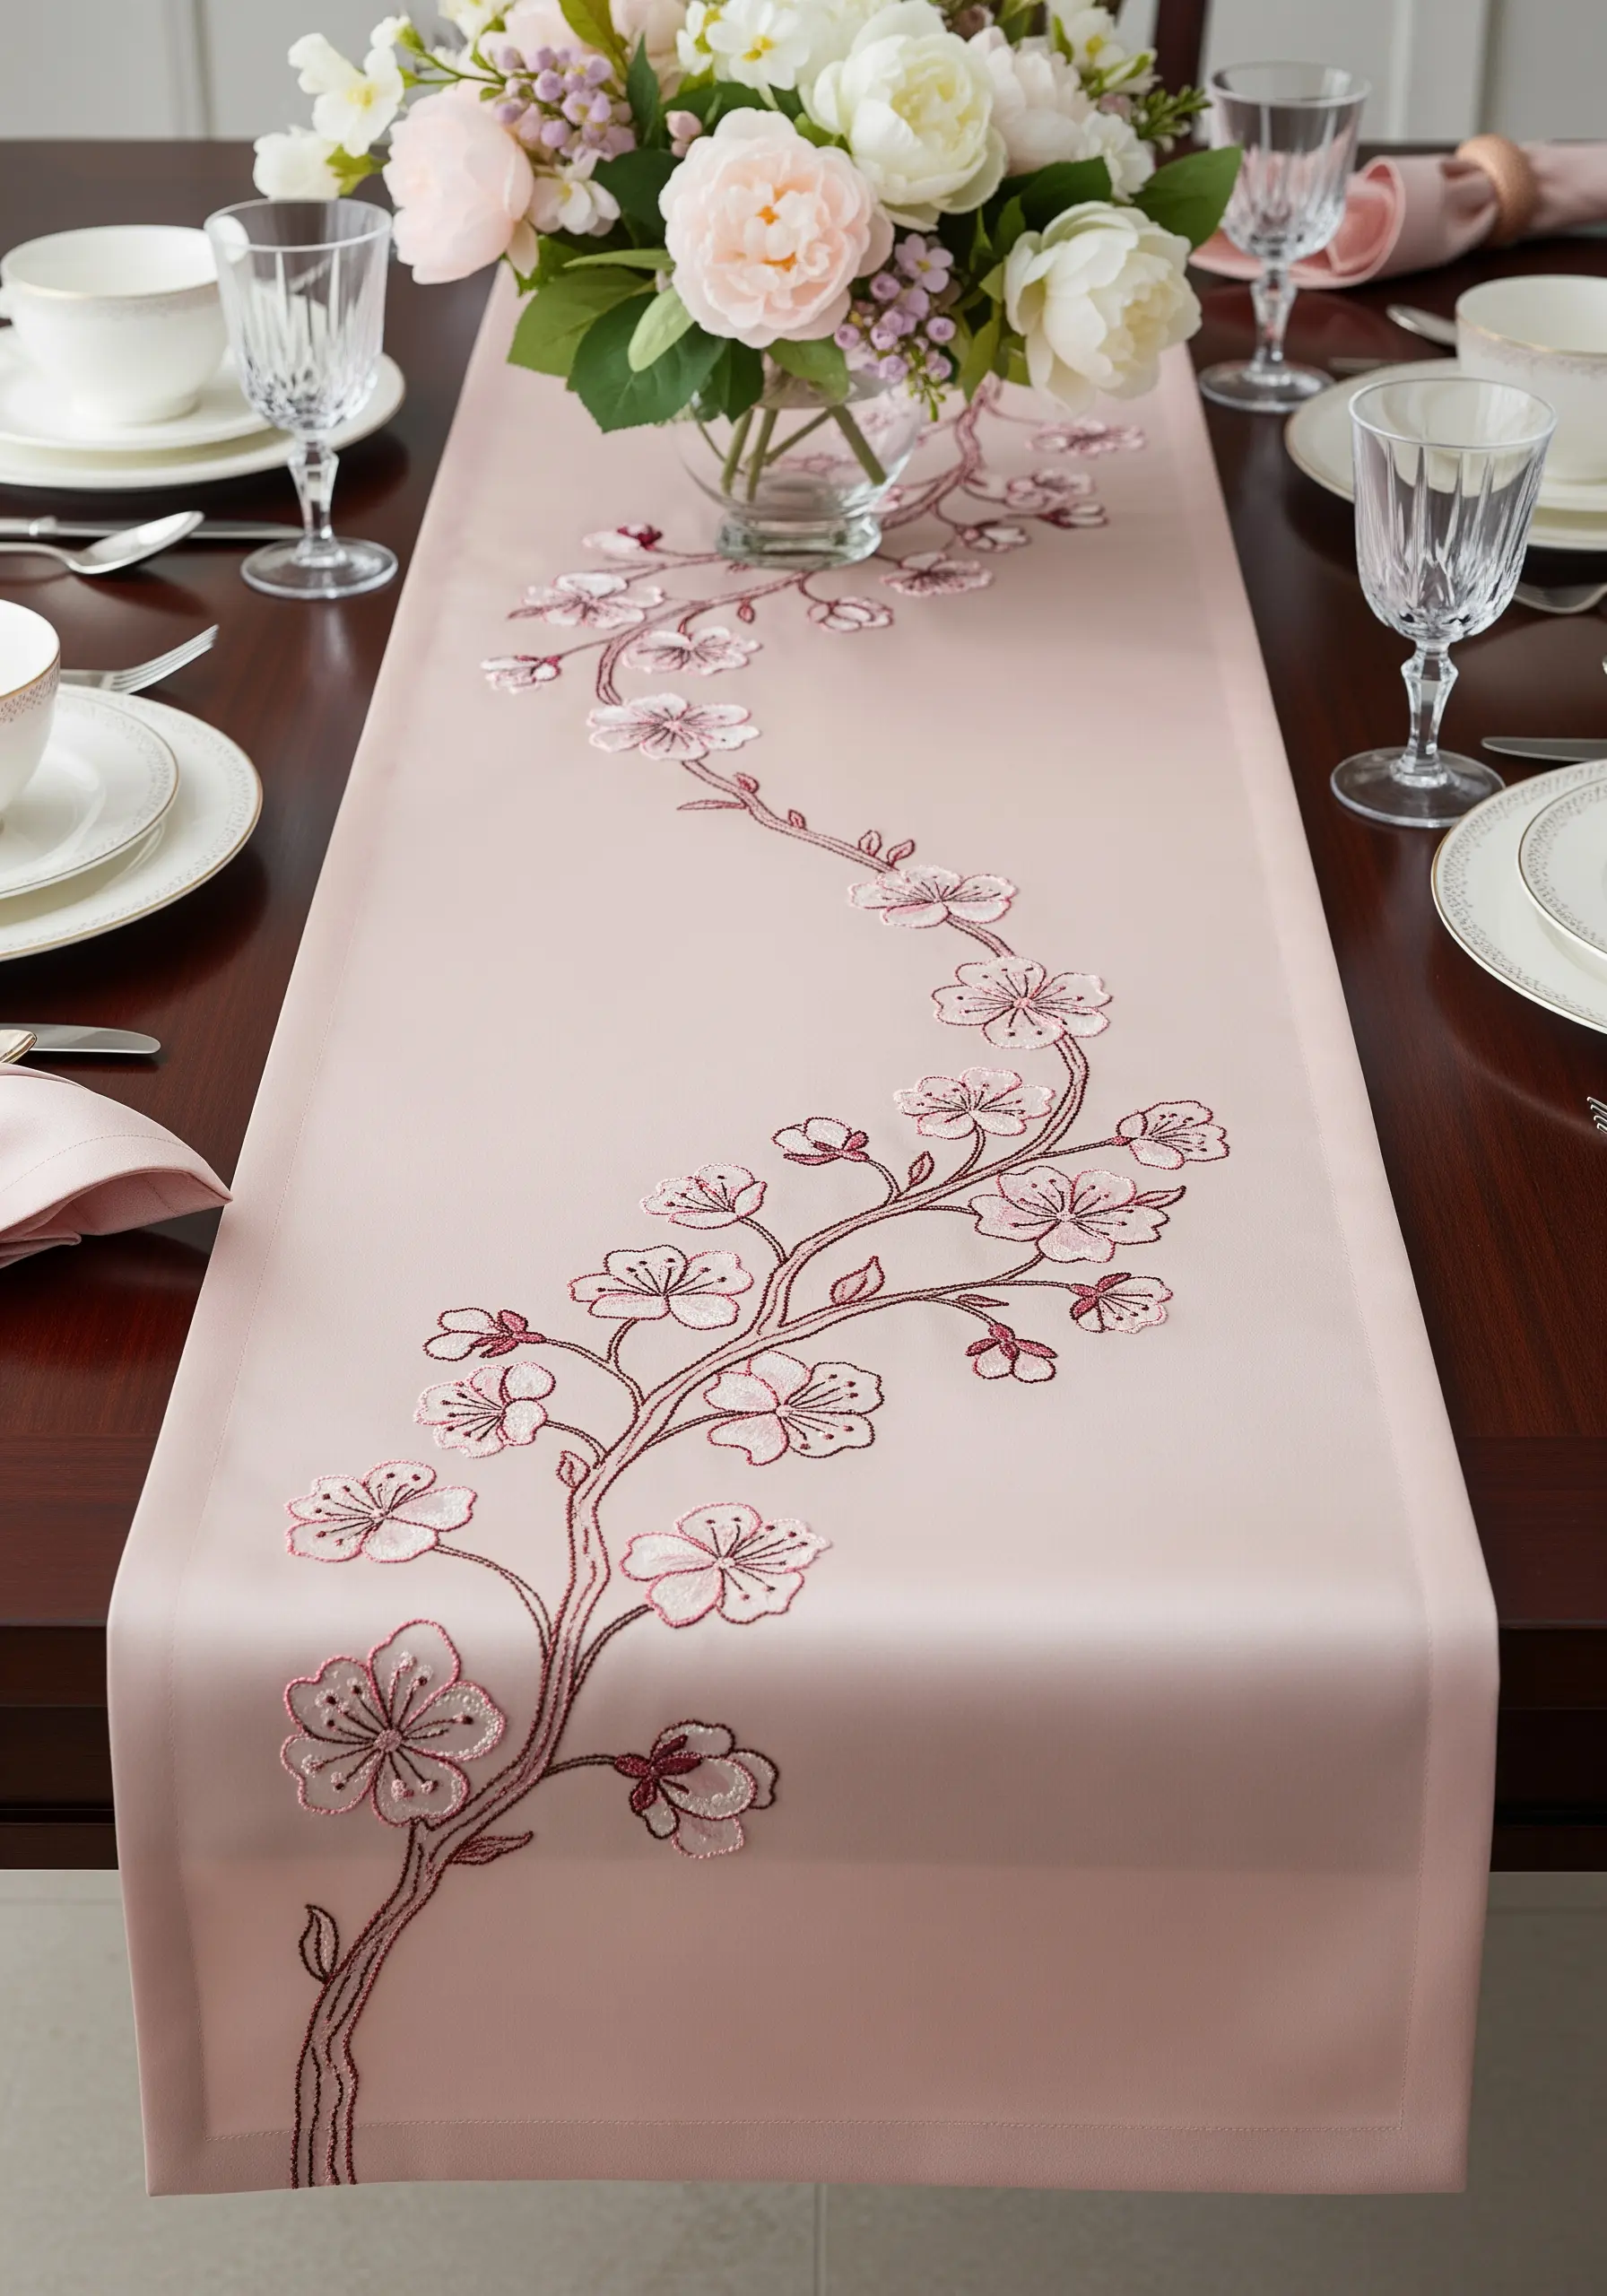
Create soft, painterly depth in your blossoms using just two or three shades of a single color.
Use a single strand of a darker floss for the delicate outlines of the petals.
Fill small sections with two strands of a medium shade, and then add a few strategically placed stitches of an almost-white hue for highlights.
This layered approach adds dimension and realism without requiring complex thread-blending techniques.
4. High-Contrast Drama with Bold Chain Stitch

To make a graphic design truly stand out, choose a stitch that has physical presence.
The chain stitch creates a thick, rope-like line that is perfect for bold outlines, especially in a high-contrast palette like red on black.
Amplify this effect by using a heavier thread, such as Perle cotton #8, or all six strands of standard floss.
This technique makes the line itself a primary feature of the art, celebrating texture as much as form.
5. Creating Atmosphere with Varied Textures
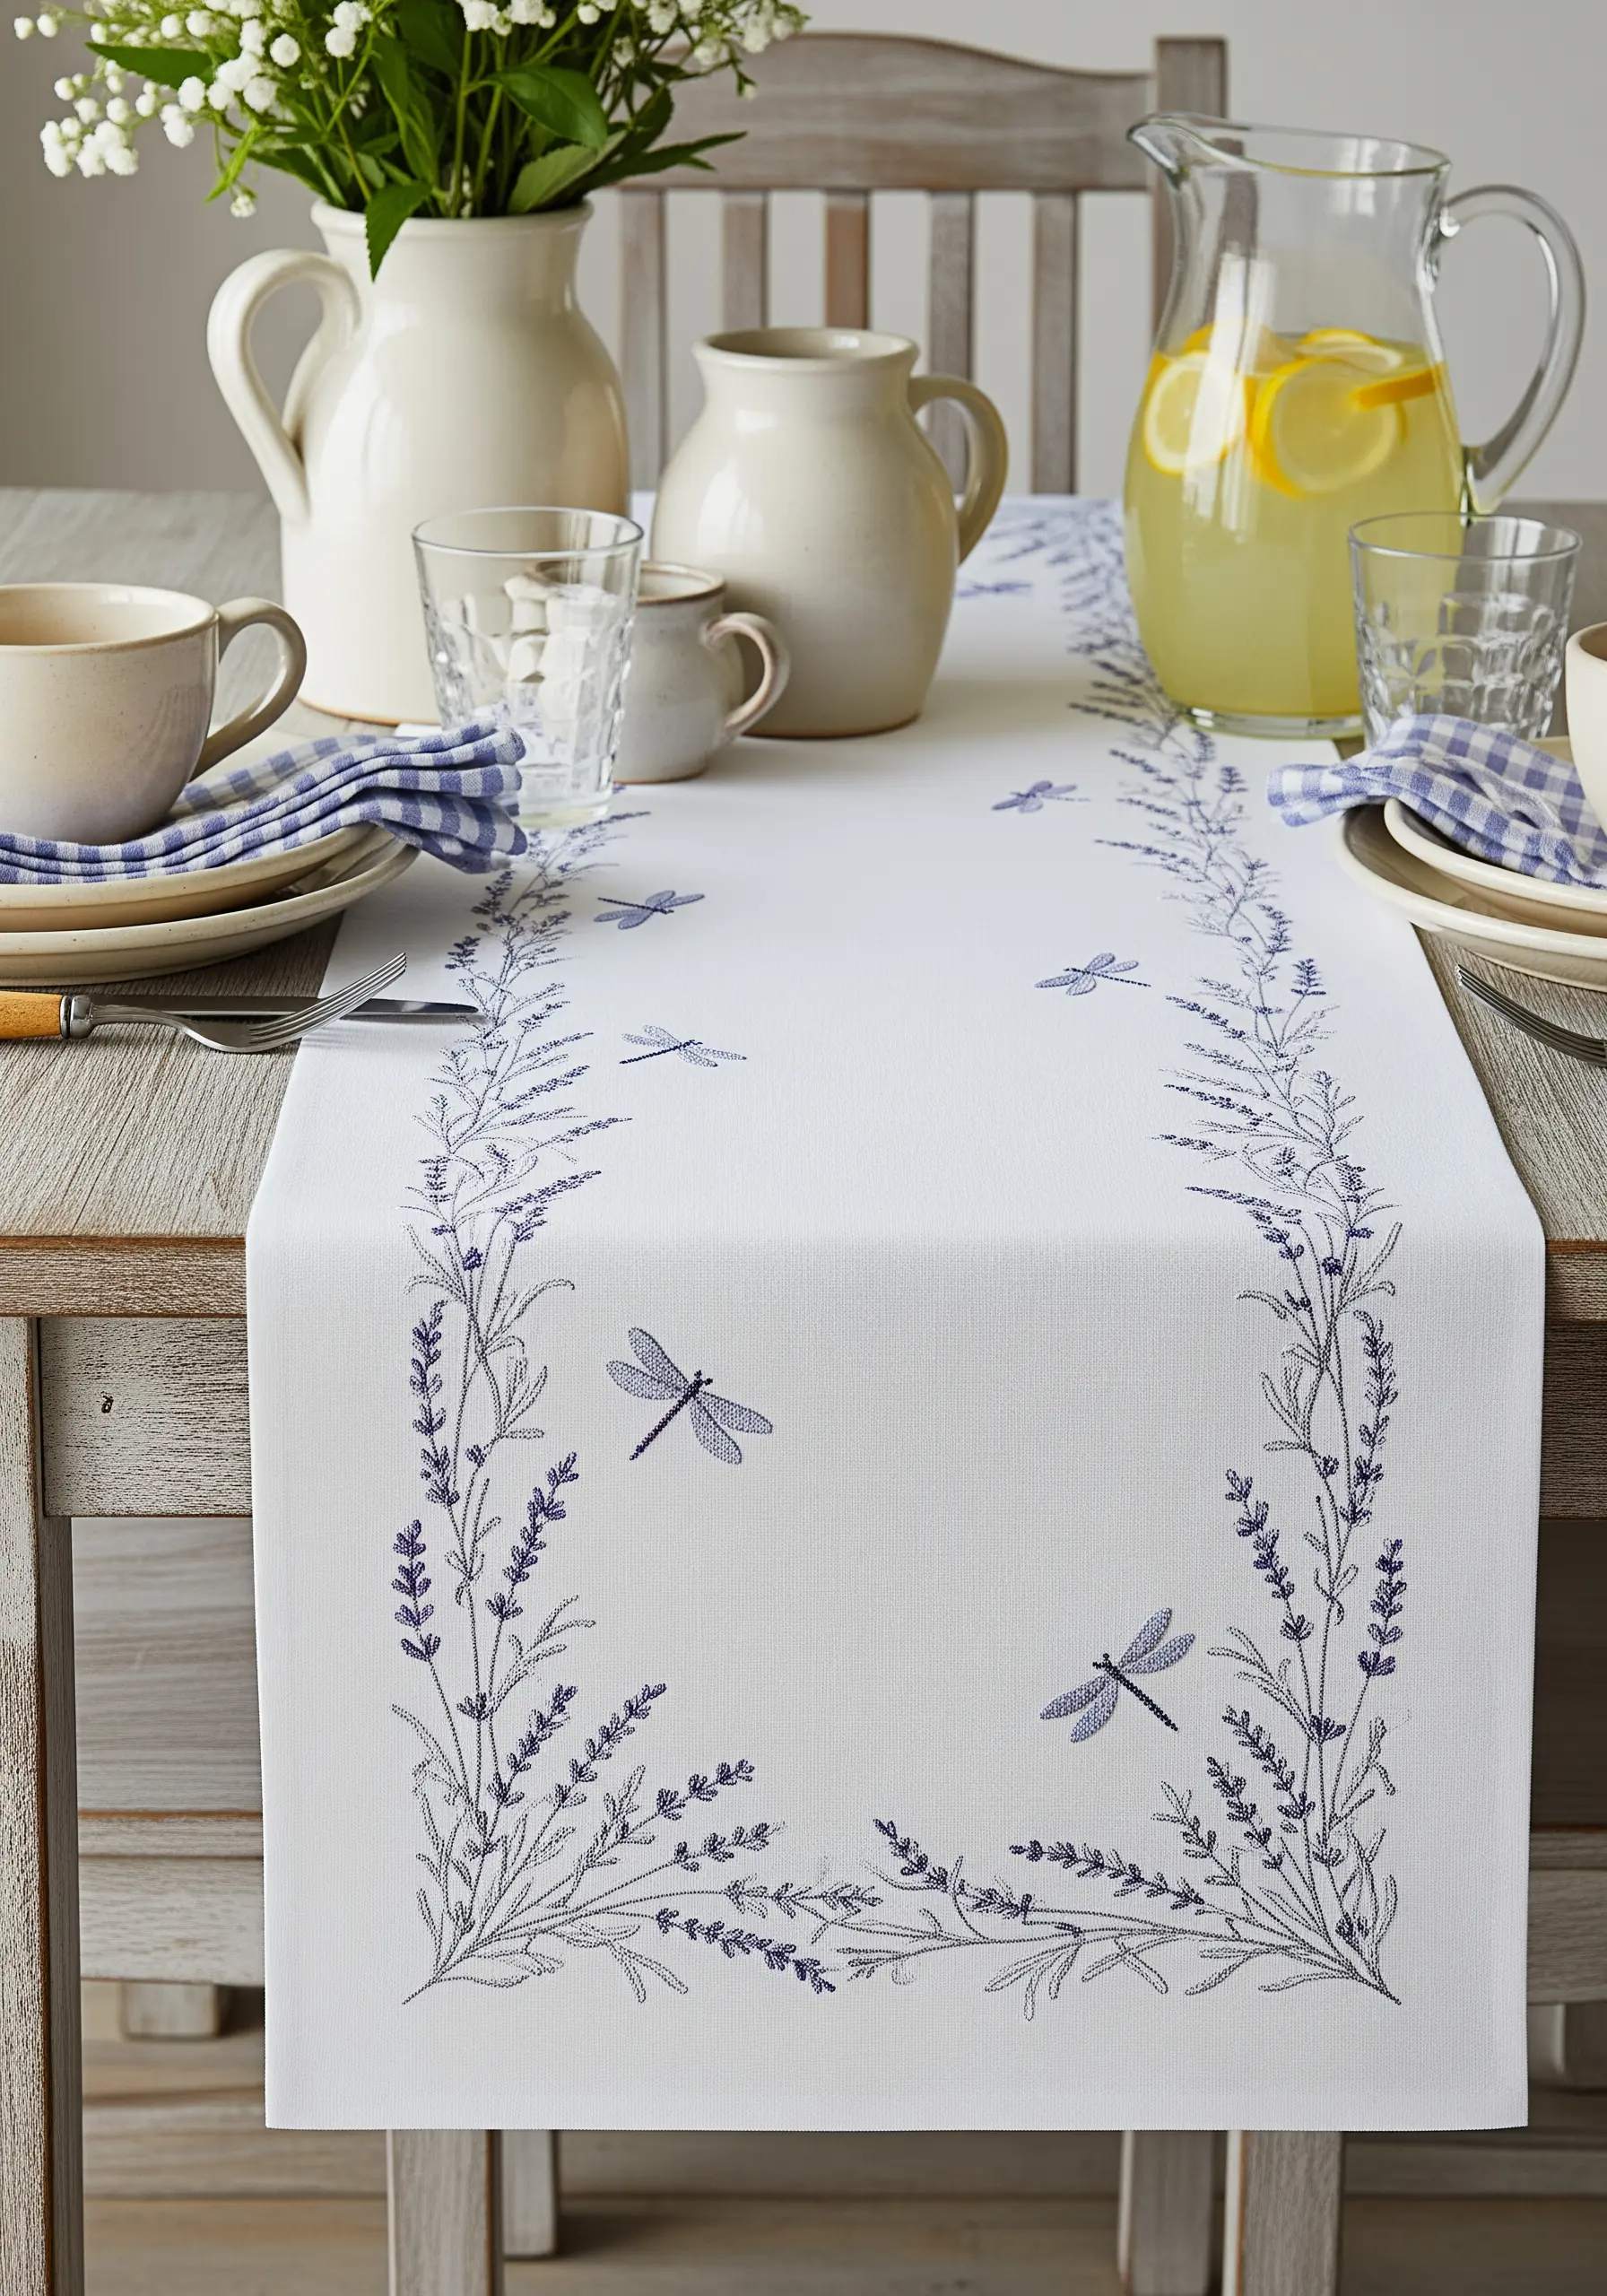
Evoke the delicate feeling of a lavender field by using tiny seed stitches or single-wrap French knots for the flower heads.
This creates a soft, textural impression rather than a hard outline, suggesting the flowers rather than defining them perfectly.
Contrast this airy texture with a solid, clean backstitch for the dragonfly wings and lavender stems.
This juxtaposition of textures is what makes the scene feel dynamic and alive.
6. The Meandering Vine: A Lesson in Asymmetry
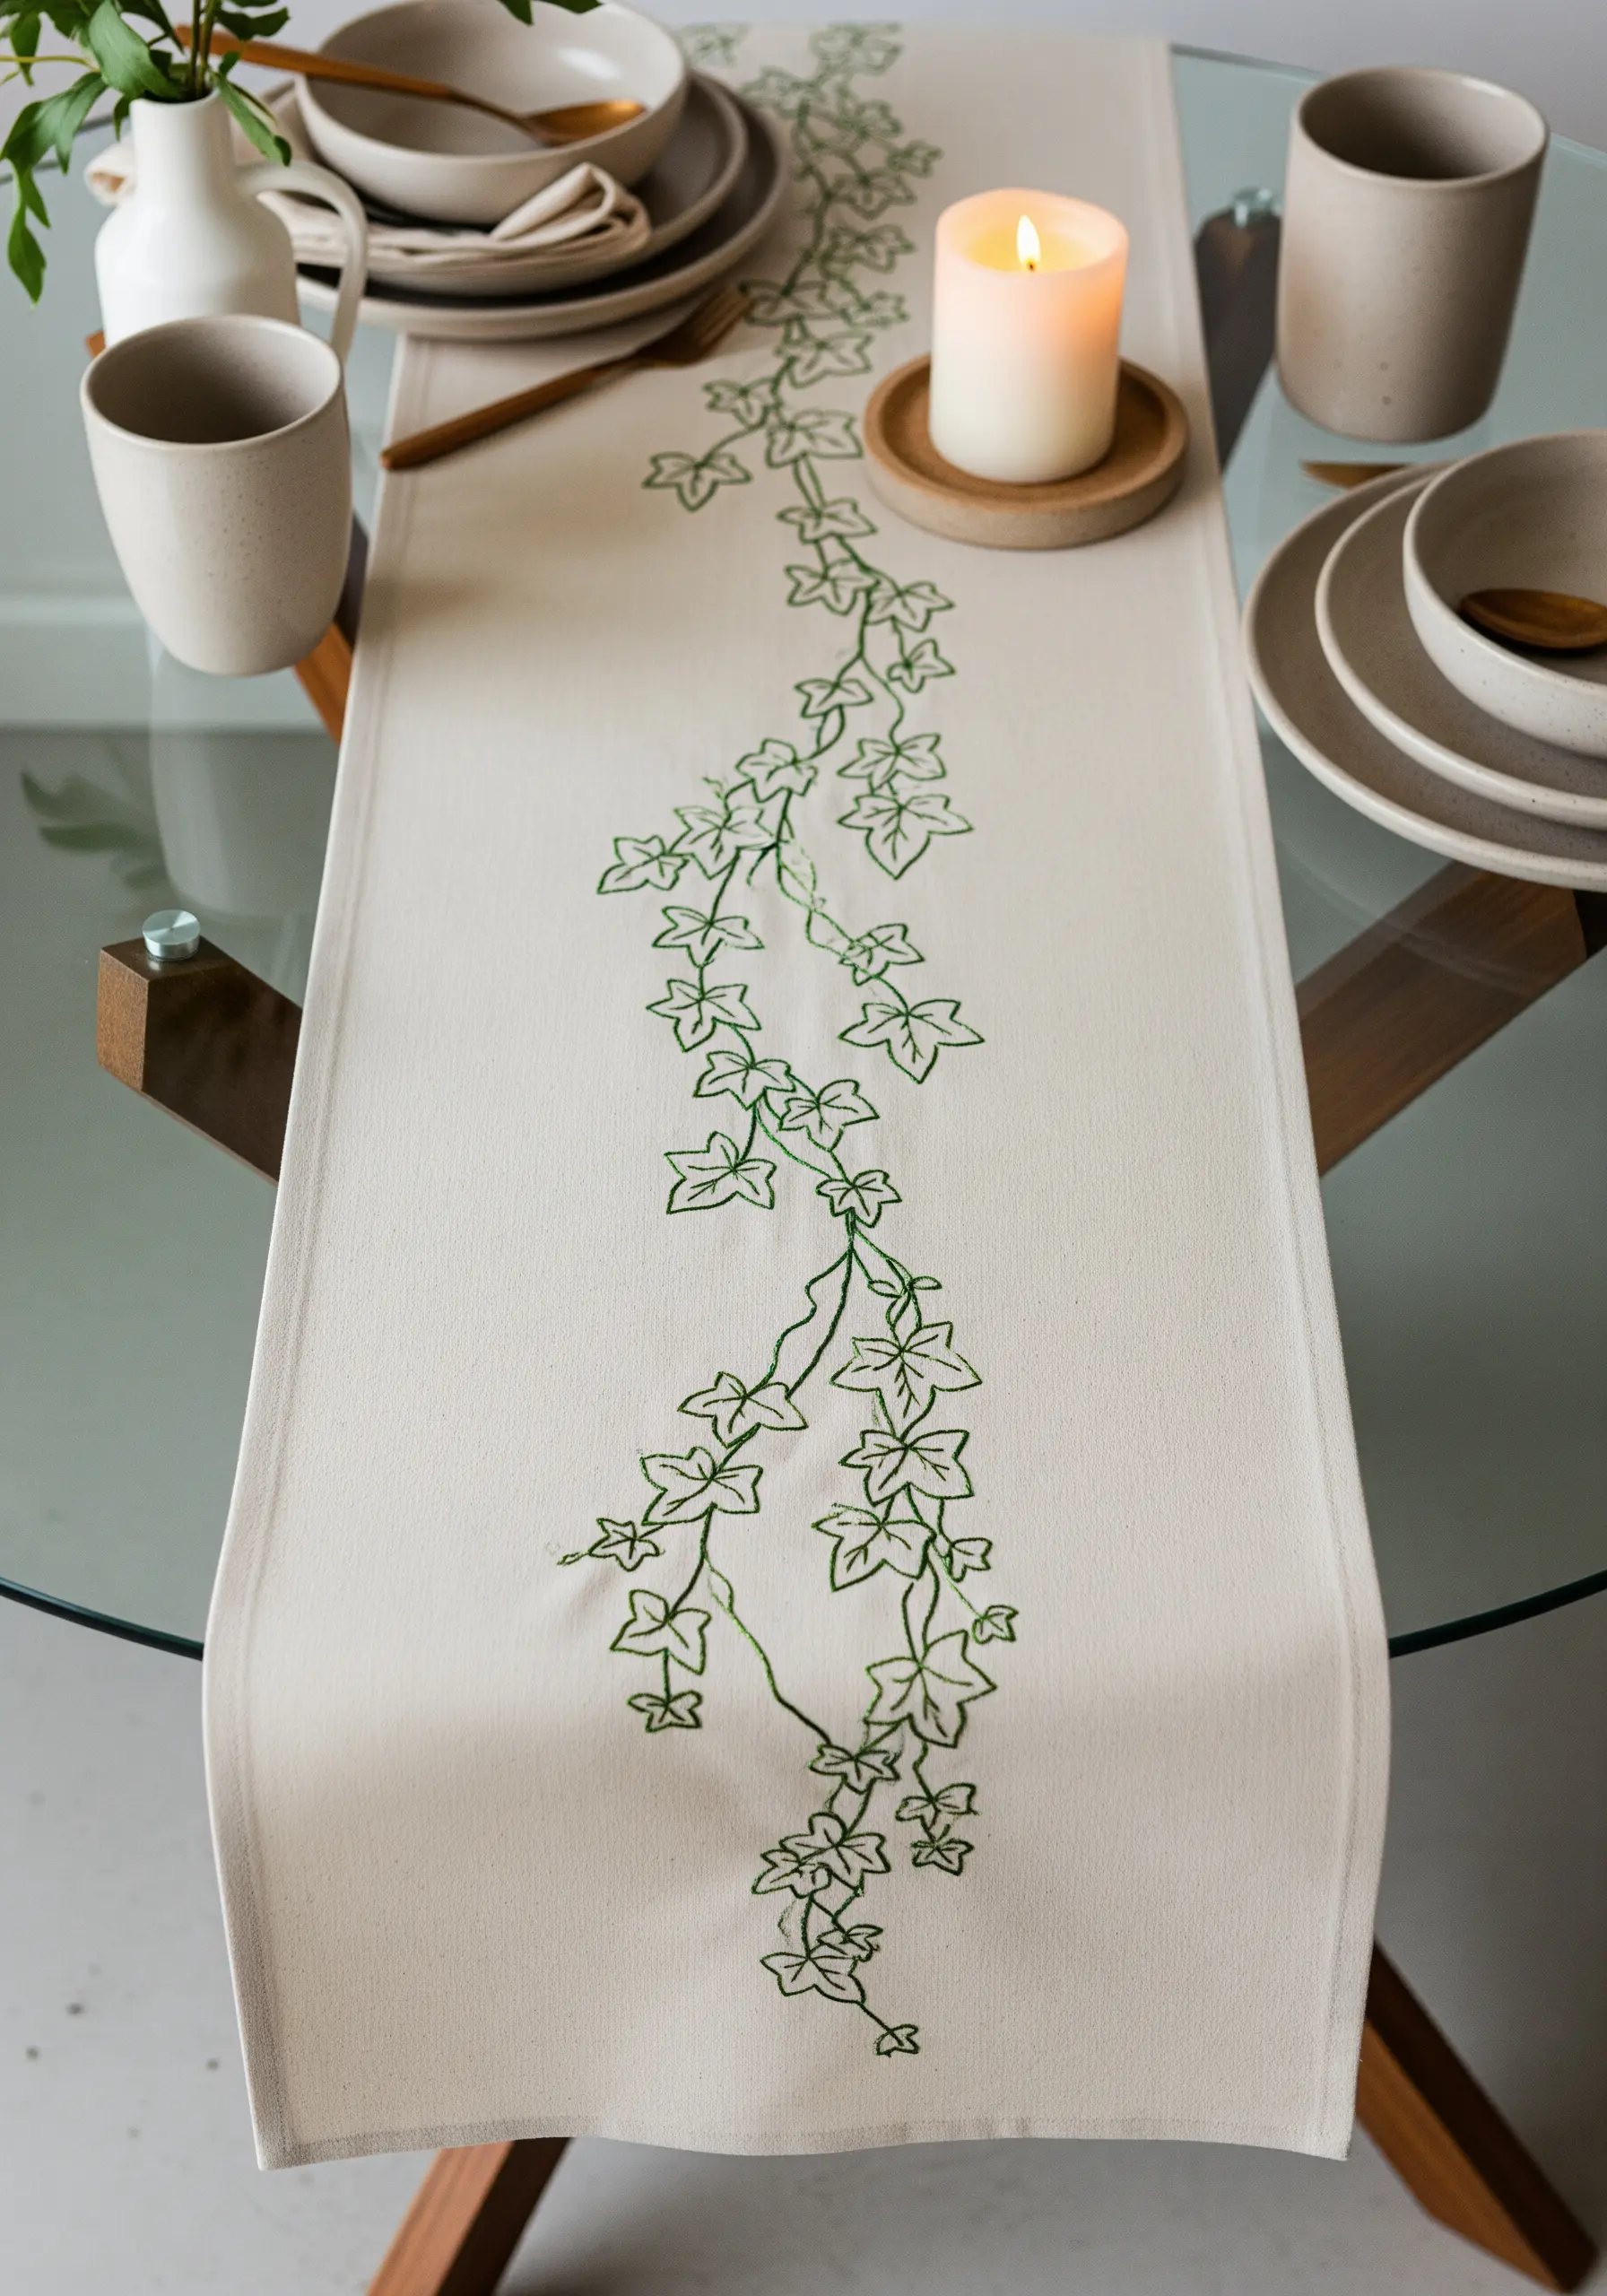
An asymmetrical composition often feels more organic and elegant than a perfectly centered one.
Allow a vine to meander naturally down the length of the runner, drawing the eye along a gentle, flowing path.
Use a stem stitch, which is designed to create smooth curves. To keep the curves from looking stiff or angular, slightly shorten your stitch length as you navigate tighter bends.
This organic placement feels sophisticated and less rigid than a formal border.
7. Capturing Motion with Disconnected Stitches
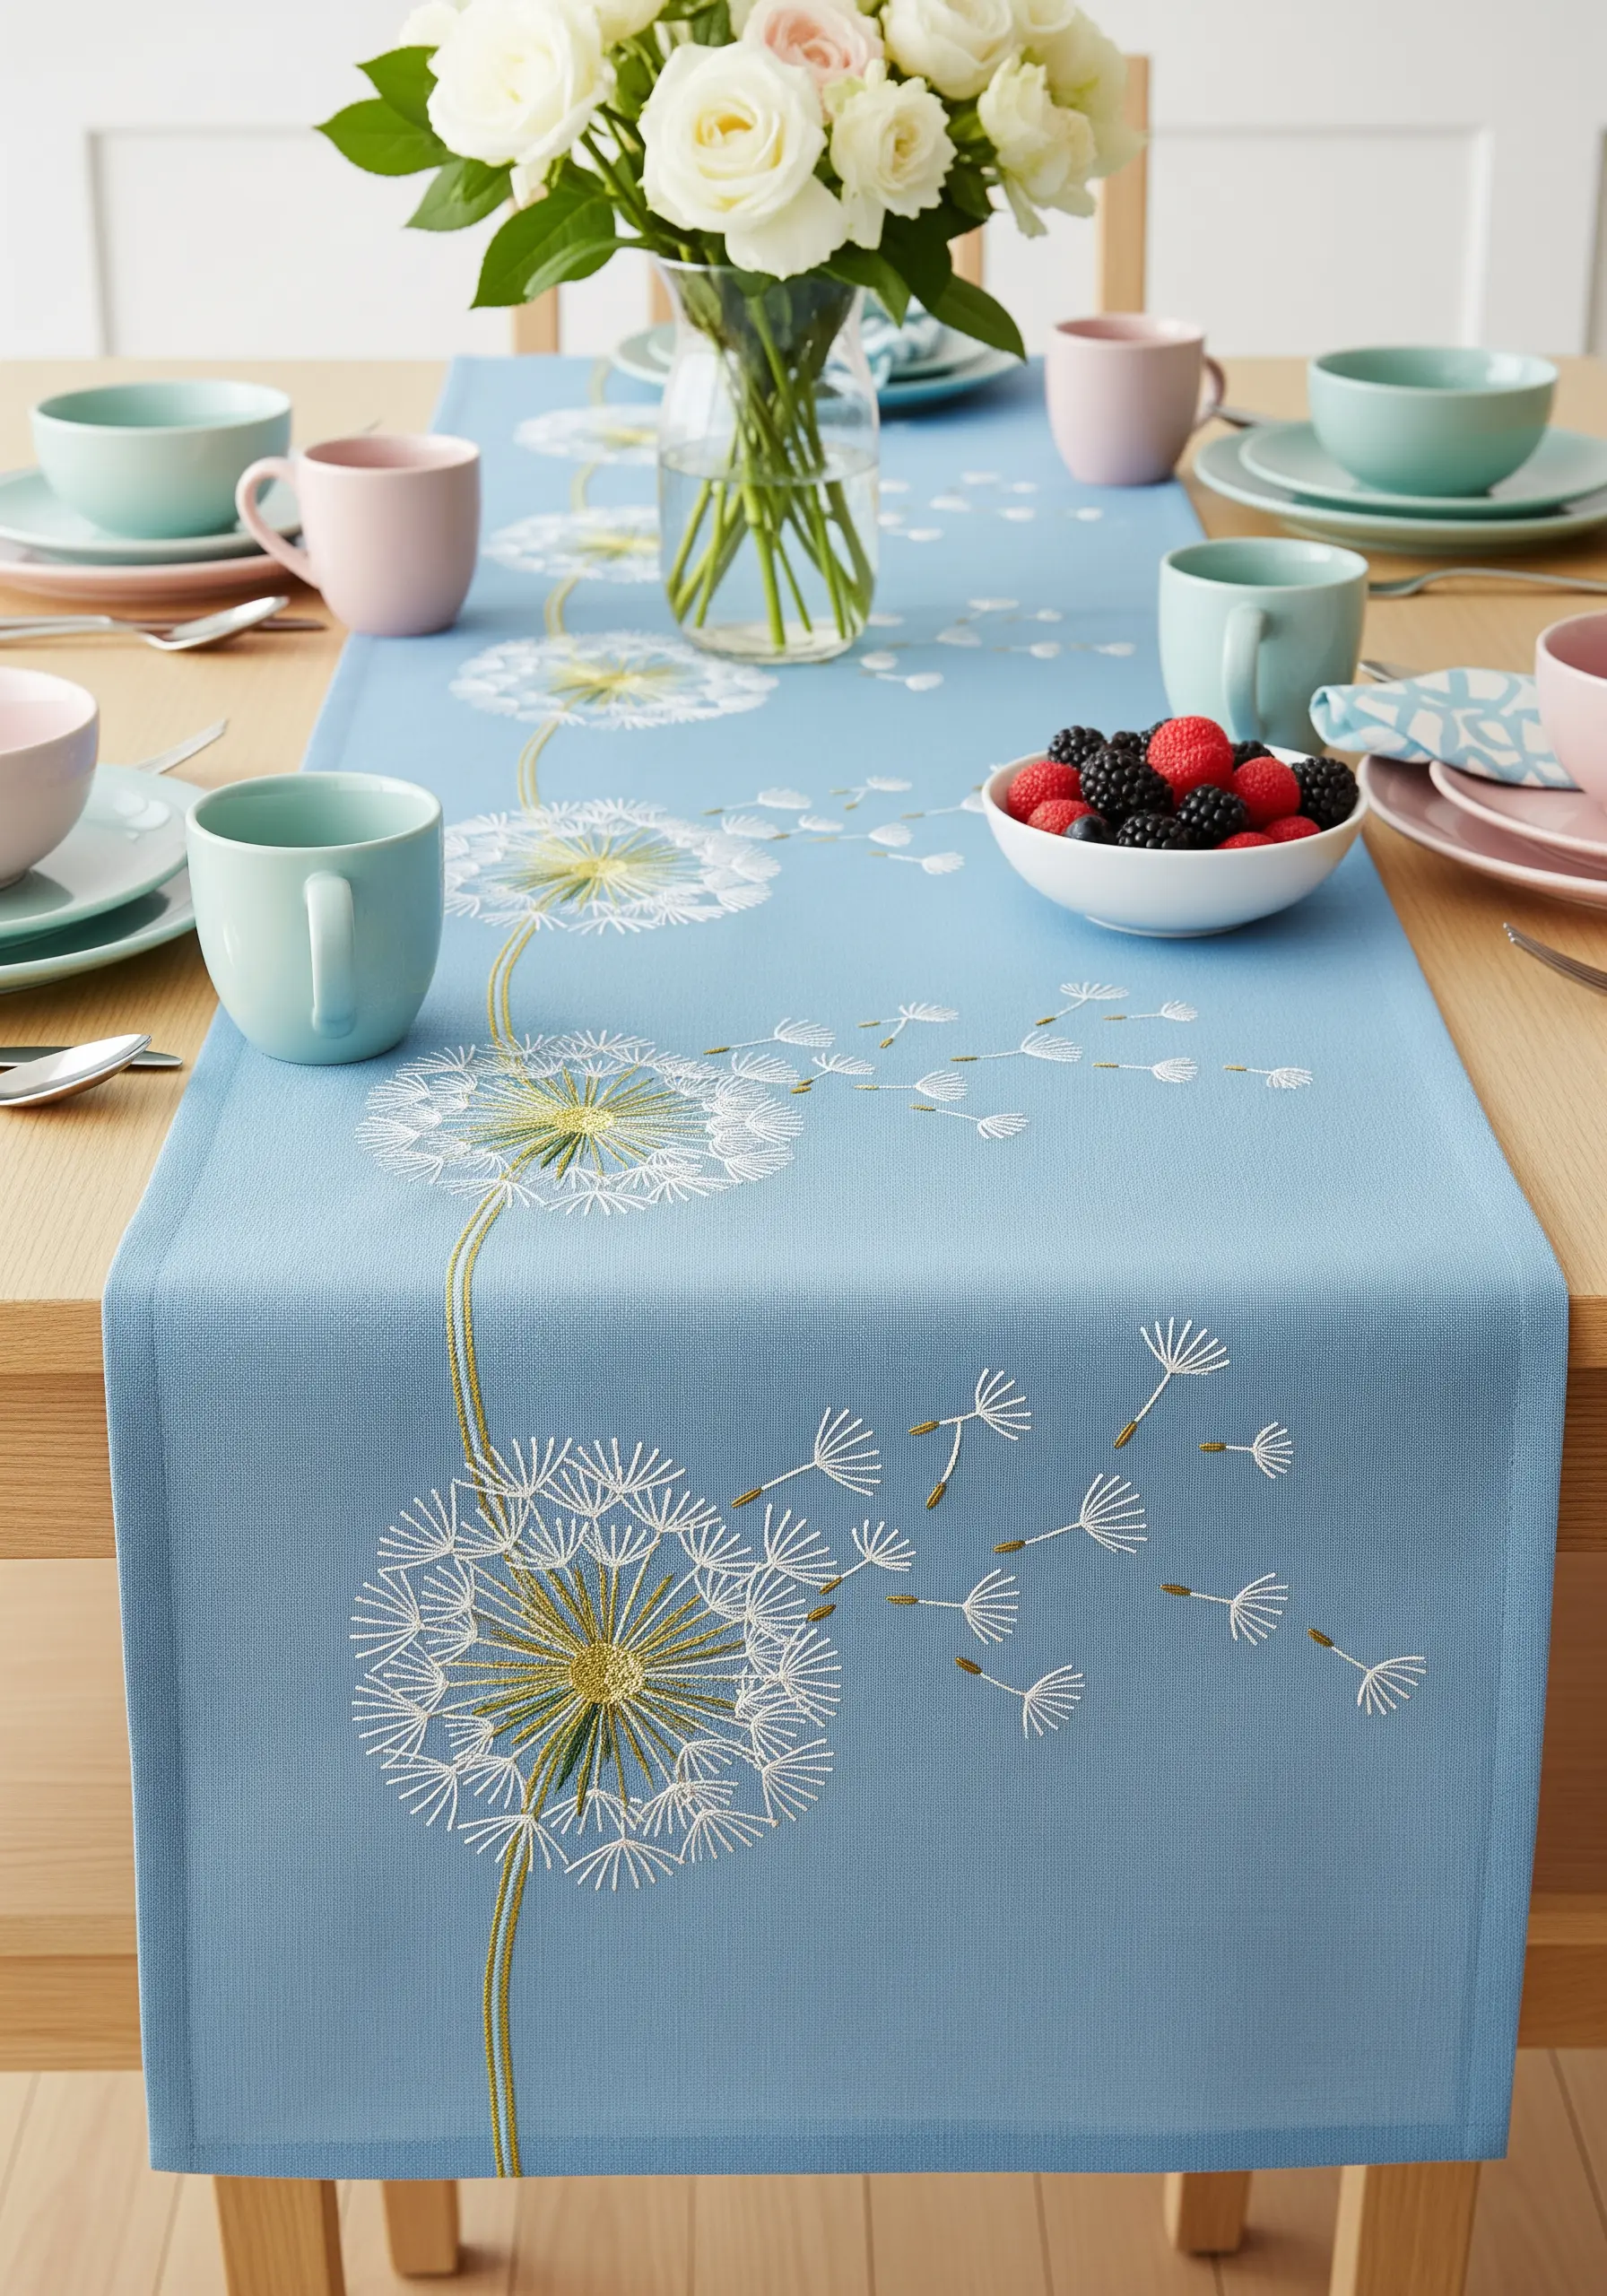
To create the illusion of dandelion seeds drifting on the wind, use single, detached straight stitches.
Vary the angle and spacing of each stitch to mimic a natural, random dispersal.
For the main dandelion clock, combine dense straight stitches for the head with tiny French knots at the center for texture.
The visual contrast between the dense, static flower head and the sparse, floating seeds tells a beautiful story of movement.
8. Weaving Florals and Constellations
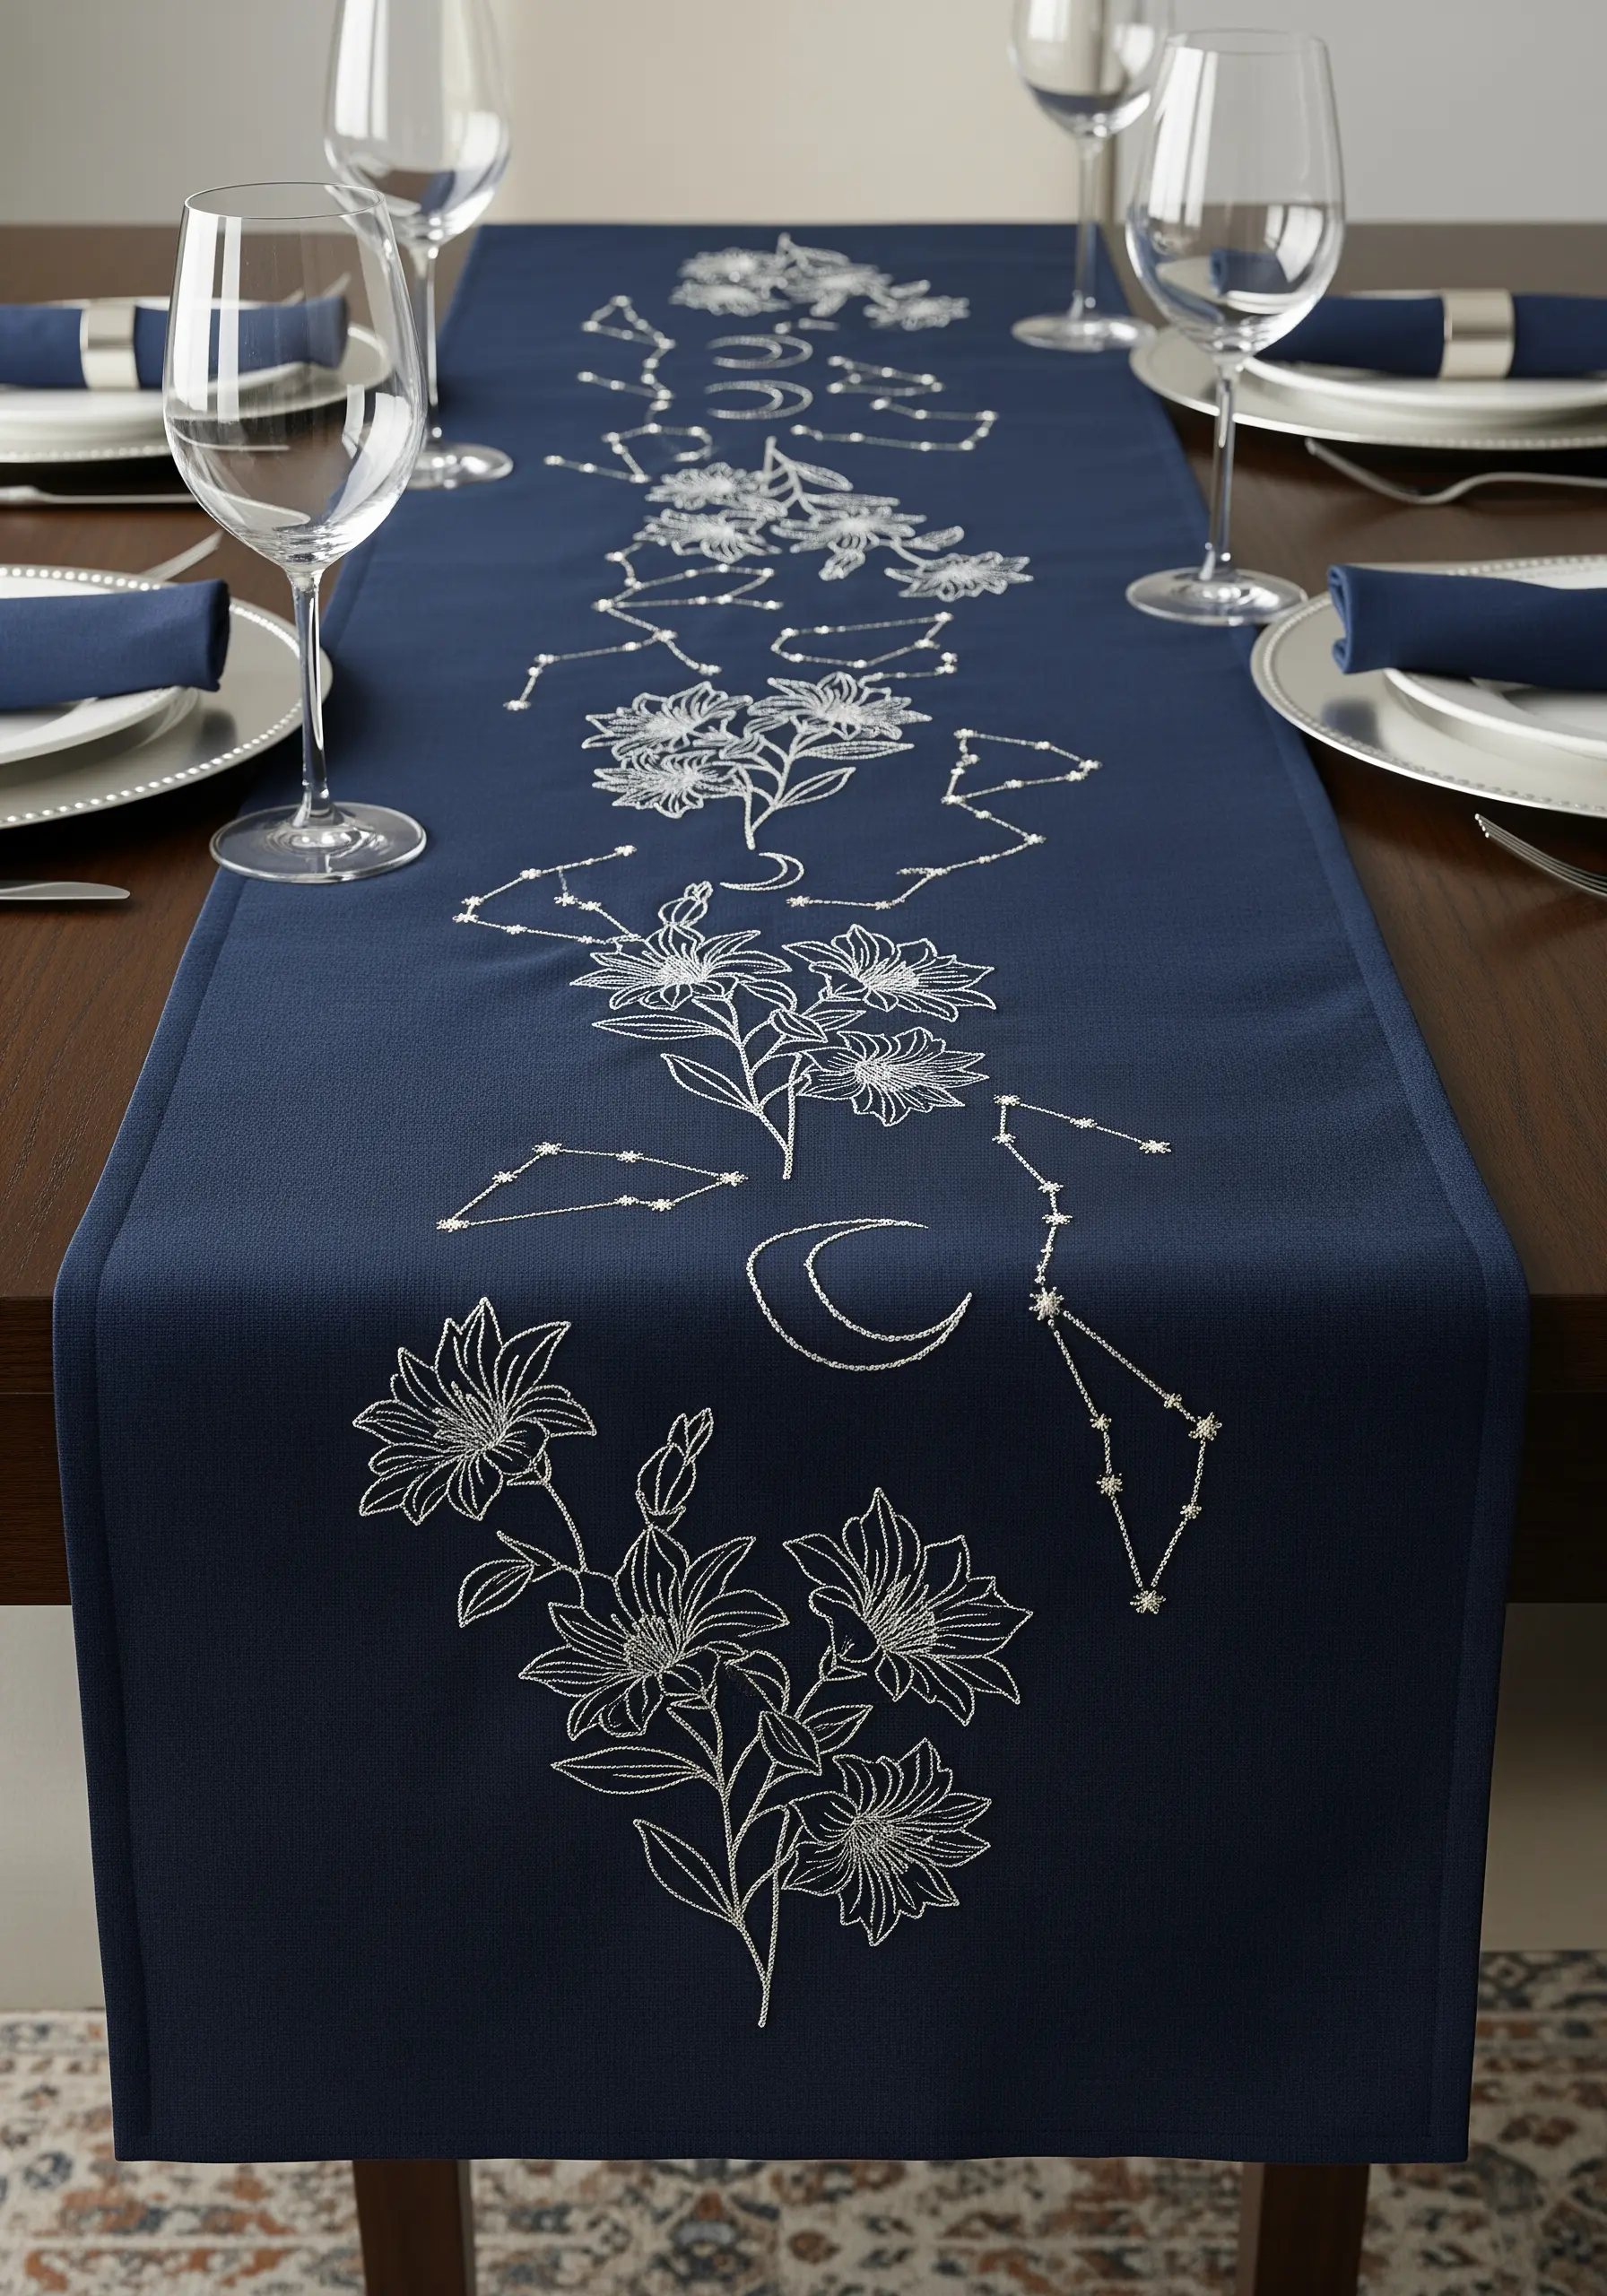
When combining two distinct motifs, use line weight to create a clear visual hierarchy.
Stitch the constellations with a fine, single-strand backstitch to keep them looking delicate and distant, like true starlight.
For the florals, switch to a bolder three-strand backstitch or stem stitch to bring them to the foreground.
This intentional contrast in thread thickness ensures that the two elements complement each other rather than compete for attention.
9. Graphic Botanicals with Negative Space
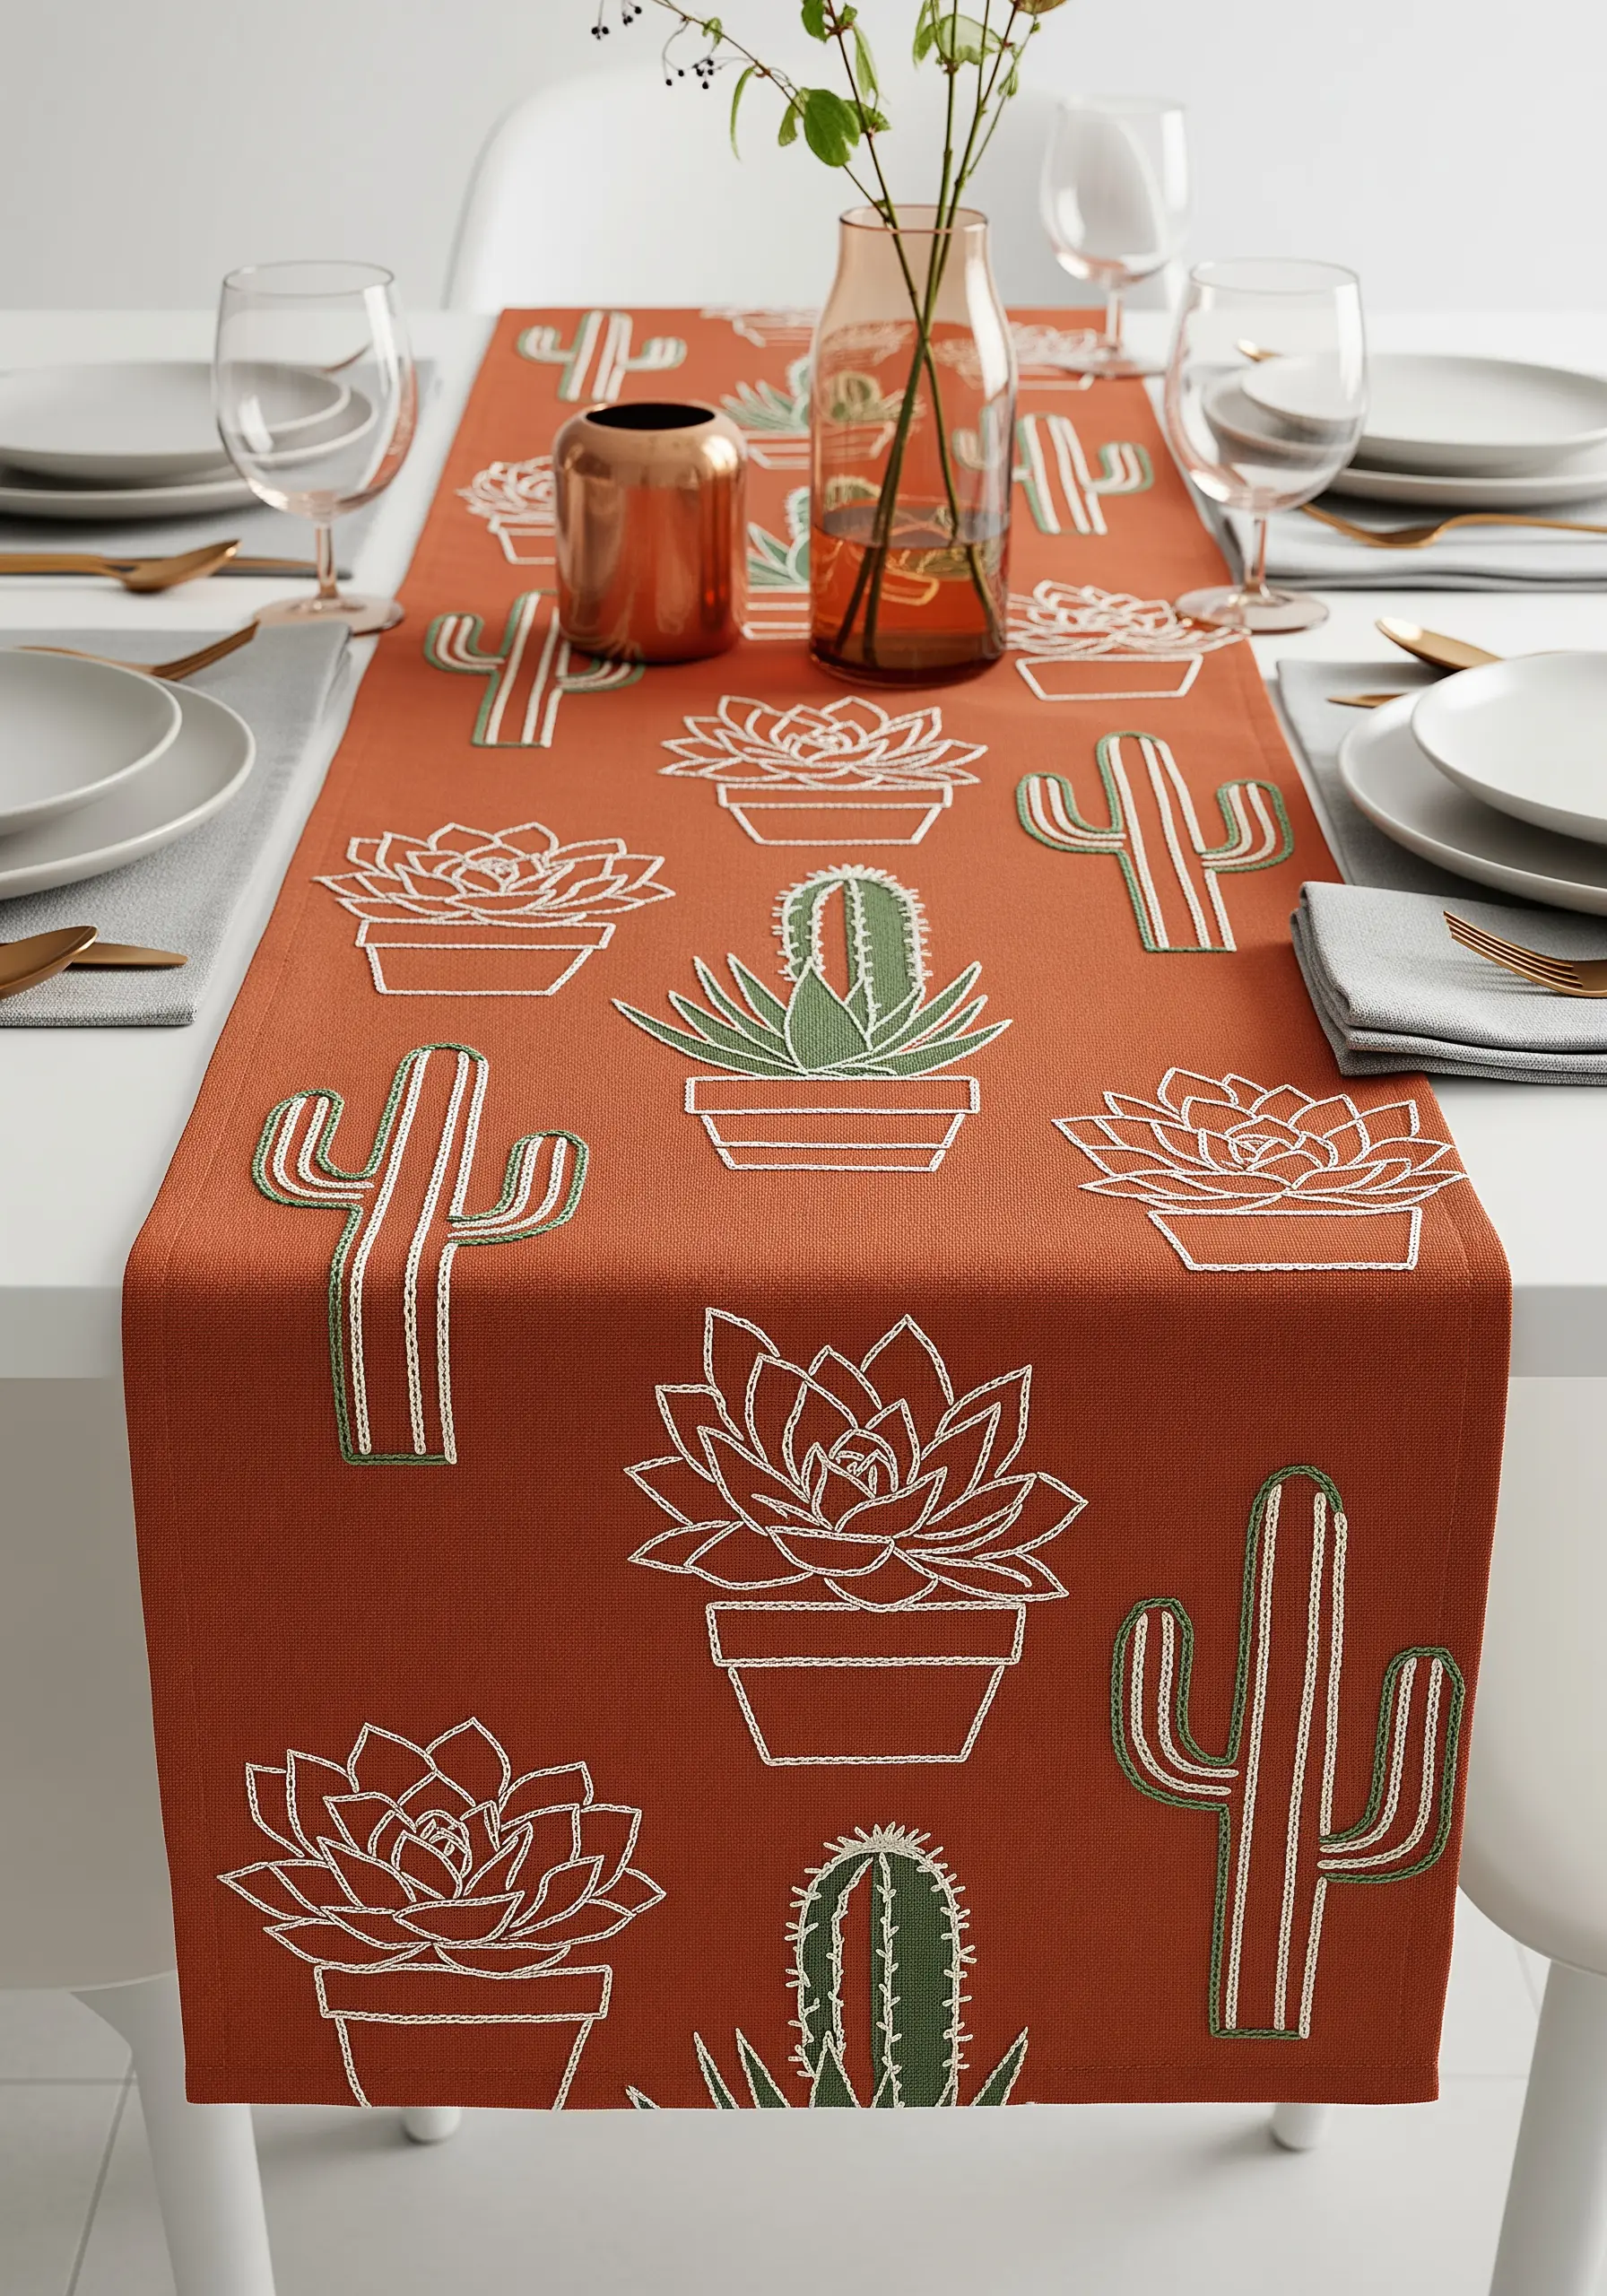
This modern, graphic style relies on bold outlines and the confident use of negative space.
Create a smooth, solid outline using a whipped backstitch or a tight satin stitch.
Instead of filling the shapes with more thread, let the color and texture of the fabric become an integral part of the design.
Adding a secondary, thinner line of color just inside the main outline provides a subtle layer of detail that elevates the entire piece.
10. Painterly Effects with Satin Stitch Blocks
Instead of traditional blending, achieve a vibrant, illustrative effect by blocking in small areas with satin stitch.
Keep your stitches short and angle them to follow the natural contours of the subject—the curve of a petal or the direction of feathers.
This technique, similar to color-blocking in painting, allows you to place color with clean precision, resulting in a crisp, dimensional, and highly stylized finish.
11. Tone-on-Tone Elegance for a Subtle Finish
Create an exceptionally sophisticated look by stitching with thread that is only a few shades lighter or darker than your fabric.
This tone-on-tone technique emphasizes texture and light over color contrast.
For the effect to be successful, choose a stitch that has a raised profile, like a stem stitch or a whipped backstitch.
This ensures the design is defined by its subtle shadows and sheen, creating a quiet, luxurious statement.
12. Radiating Straight Stitches for Graphic Impact
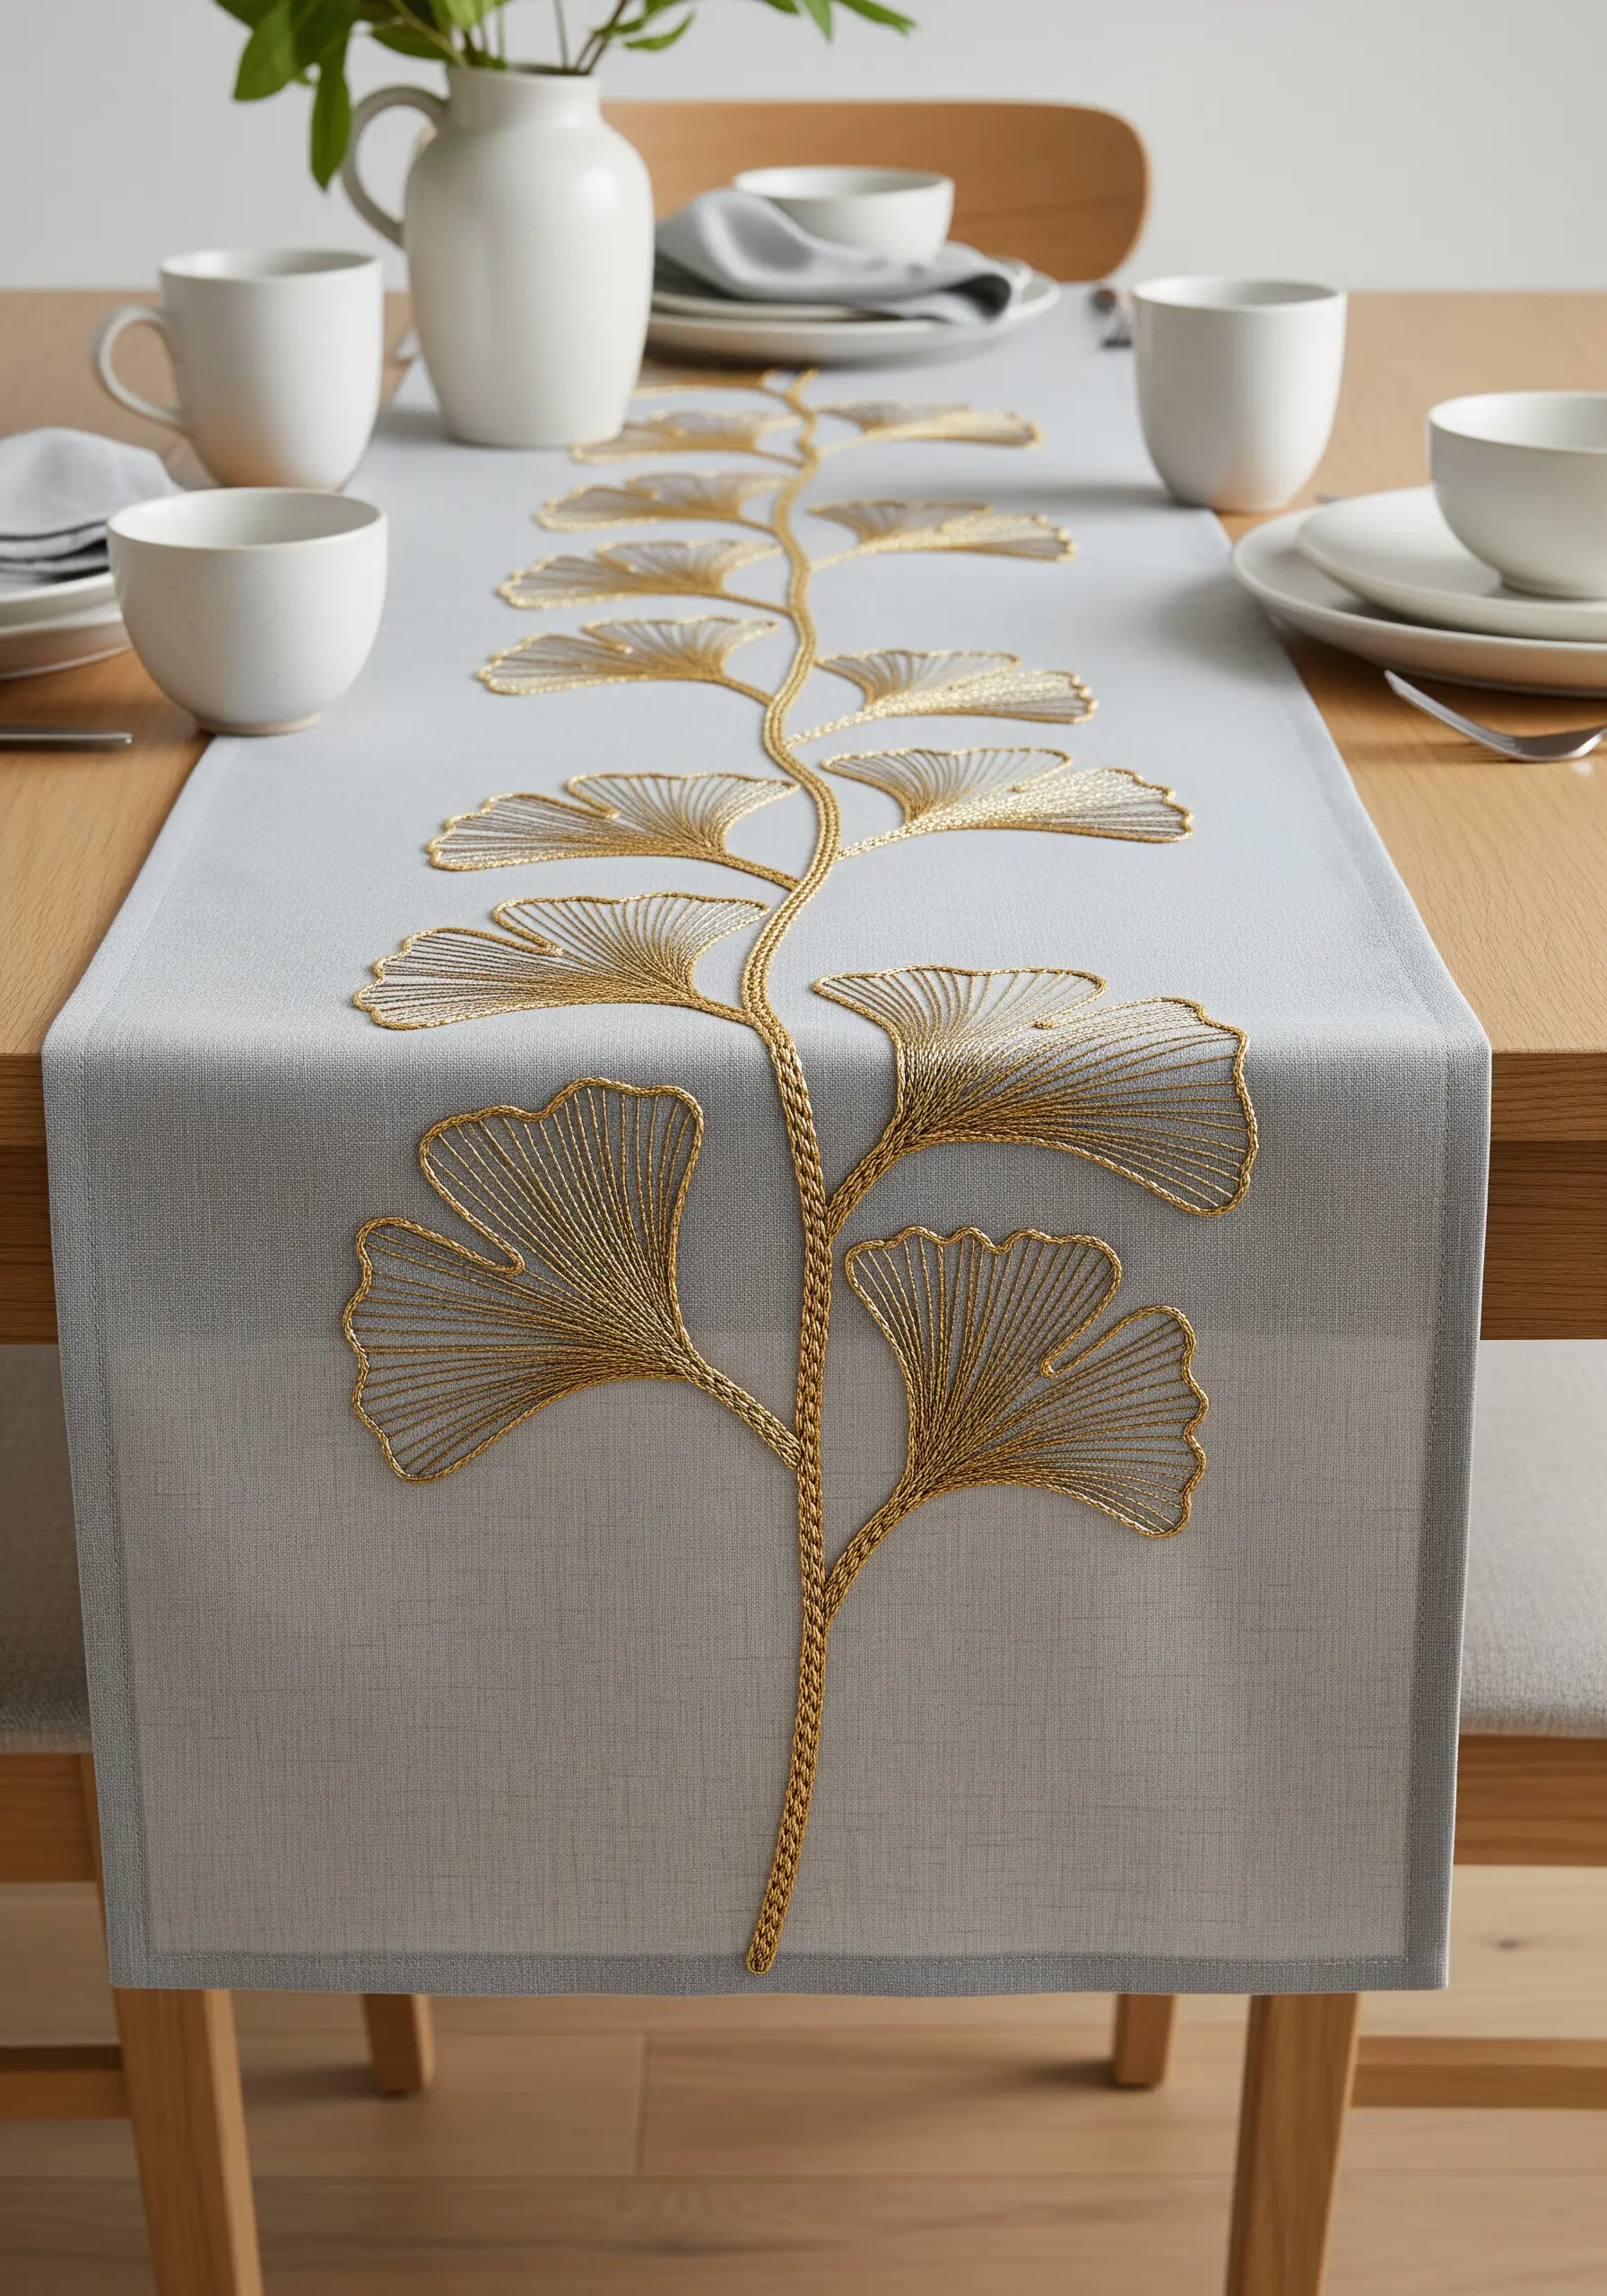
The beauty of this ginkgo leaf lies in the precision of its radiating straight stitches.
To keep the lines taut and perfectly even, mark your start and end points before you begin stitching. Use a single, long stitch for each line.
Contrast the delicate leaves with a heavier stem by using a thick chain stitch or couching a strand of thicker yarn.
This balance of weight is crucial for creating a composition that feels both graceful and strong.
13. A Scattered Motif for Rustic Charm
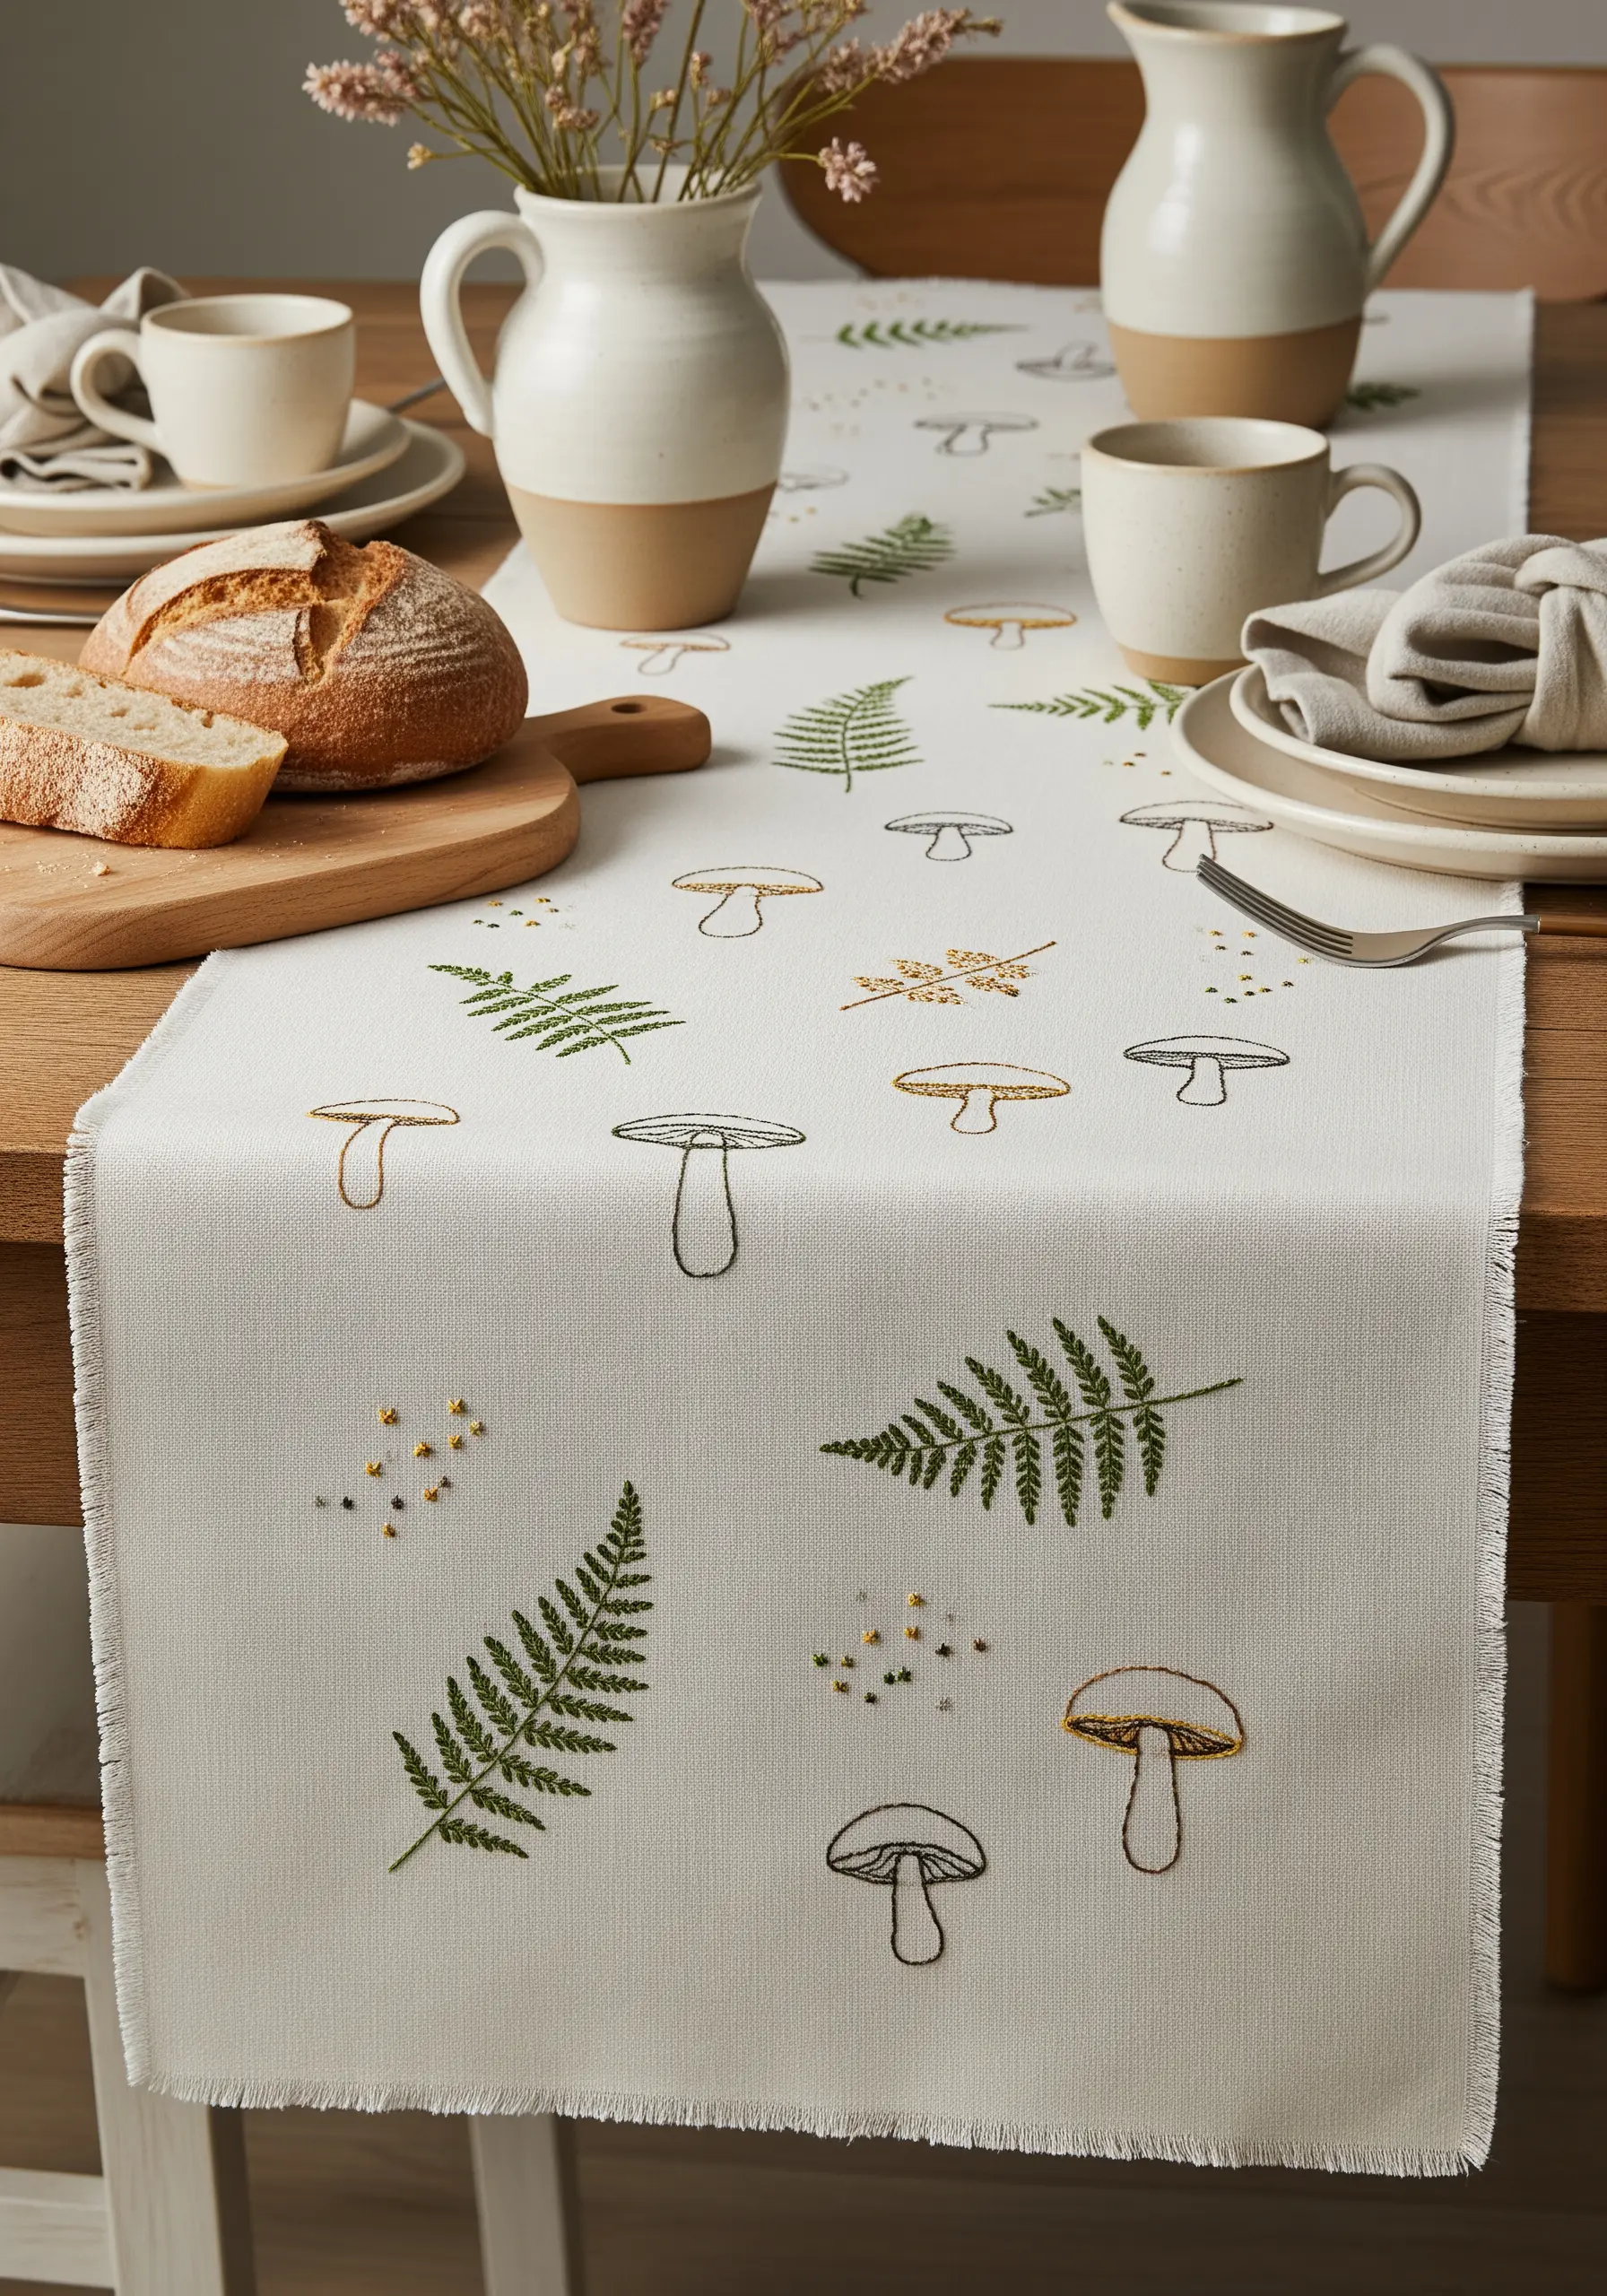
Instead of a single, central design, create a relaxed, natural feel by scattering smaller motifs across the fabric.
To ensure the composition feels cohesive and not chaotic, limit your color palette and vary the scale and orientation of each element.
Incorporate textural variety by using a fishbone stitch for the filled-in fern leaves, contrasting with the simple outlines of the mushrooms.
This thoughtful approach to placement makes the design feel spontaneous yet perfectly balanced.
14. Shaping Leaves with Directional Satin Stitch
You can create the illusion of three-dimensional form in a simple leaf using nothing but the direction of your stitches.
Instead of stitching straight across, angle your satin stitches to follow the natural, curving veins of the leaf, from the outer edge toward the center.
This simple adjustment instantly creates highlights and shadows, making the flat embroidery appear curved and lifelike without any color changes.
15. Playful Fills with Open Stitchwork
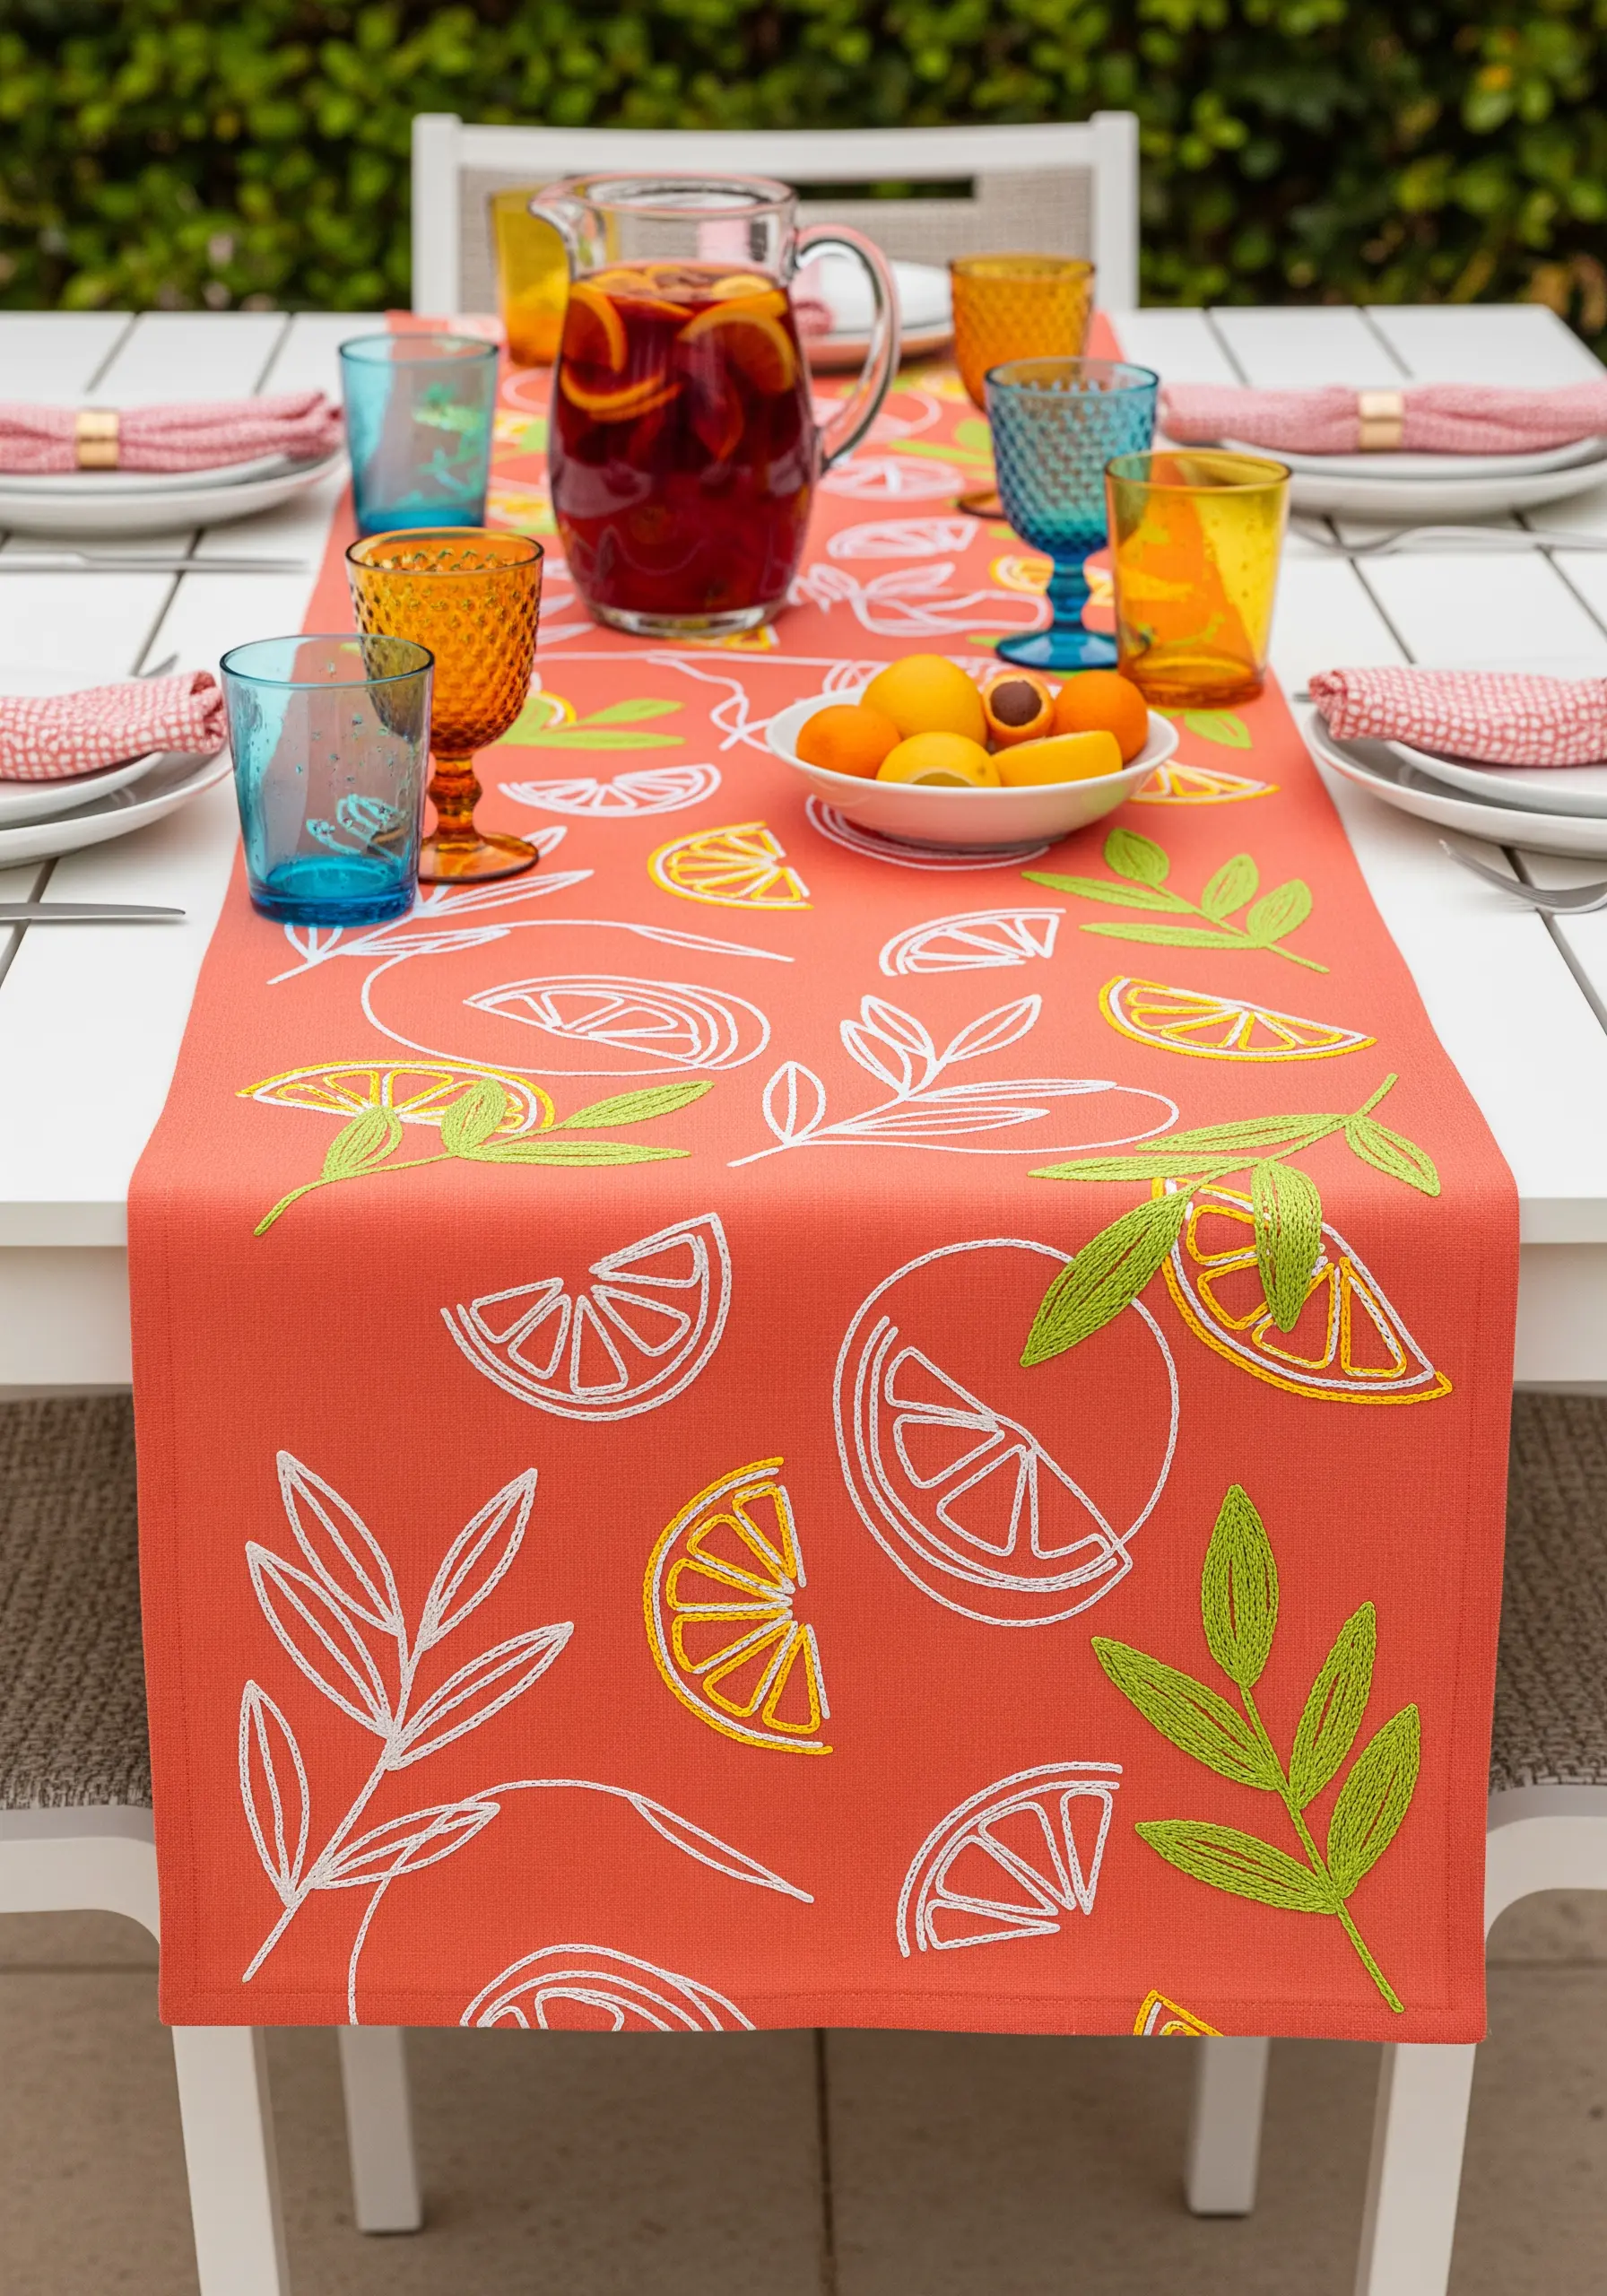
Instead of completely filling in your motifs, add pops of color and texture with open stitches like seed stitch or sparsely placed straight stitches.
This technique adds visual interest without creating a heavy, dense patch of embroidery.
It also allows the bright color of the base fabric to remain a key component of the overall design.
The result is a light, fresh, and energetic feel that is perfect for a lively tablescape.
16. Thread Painting for Botanical Realism
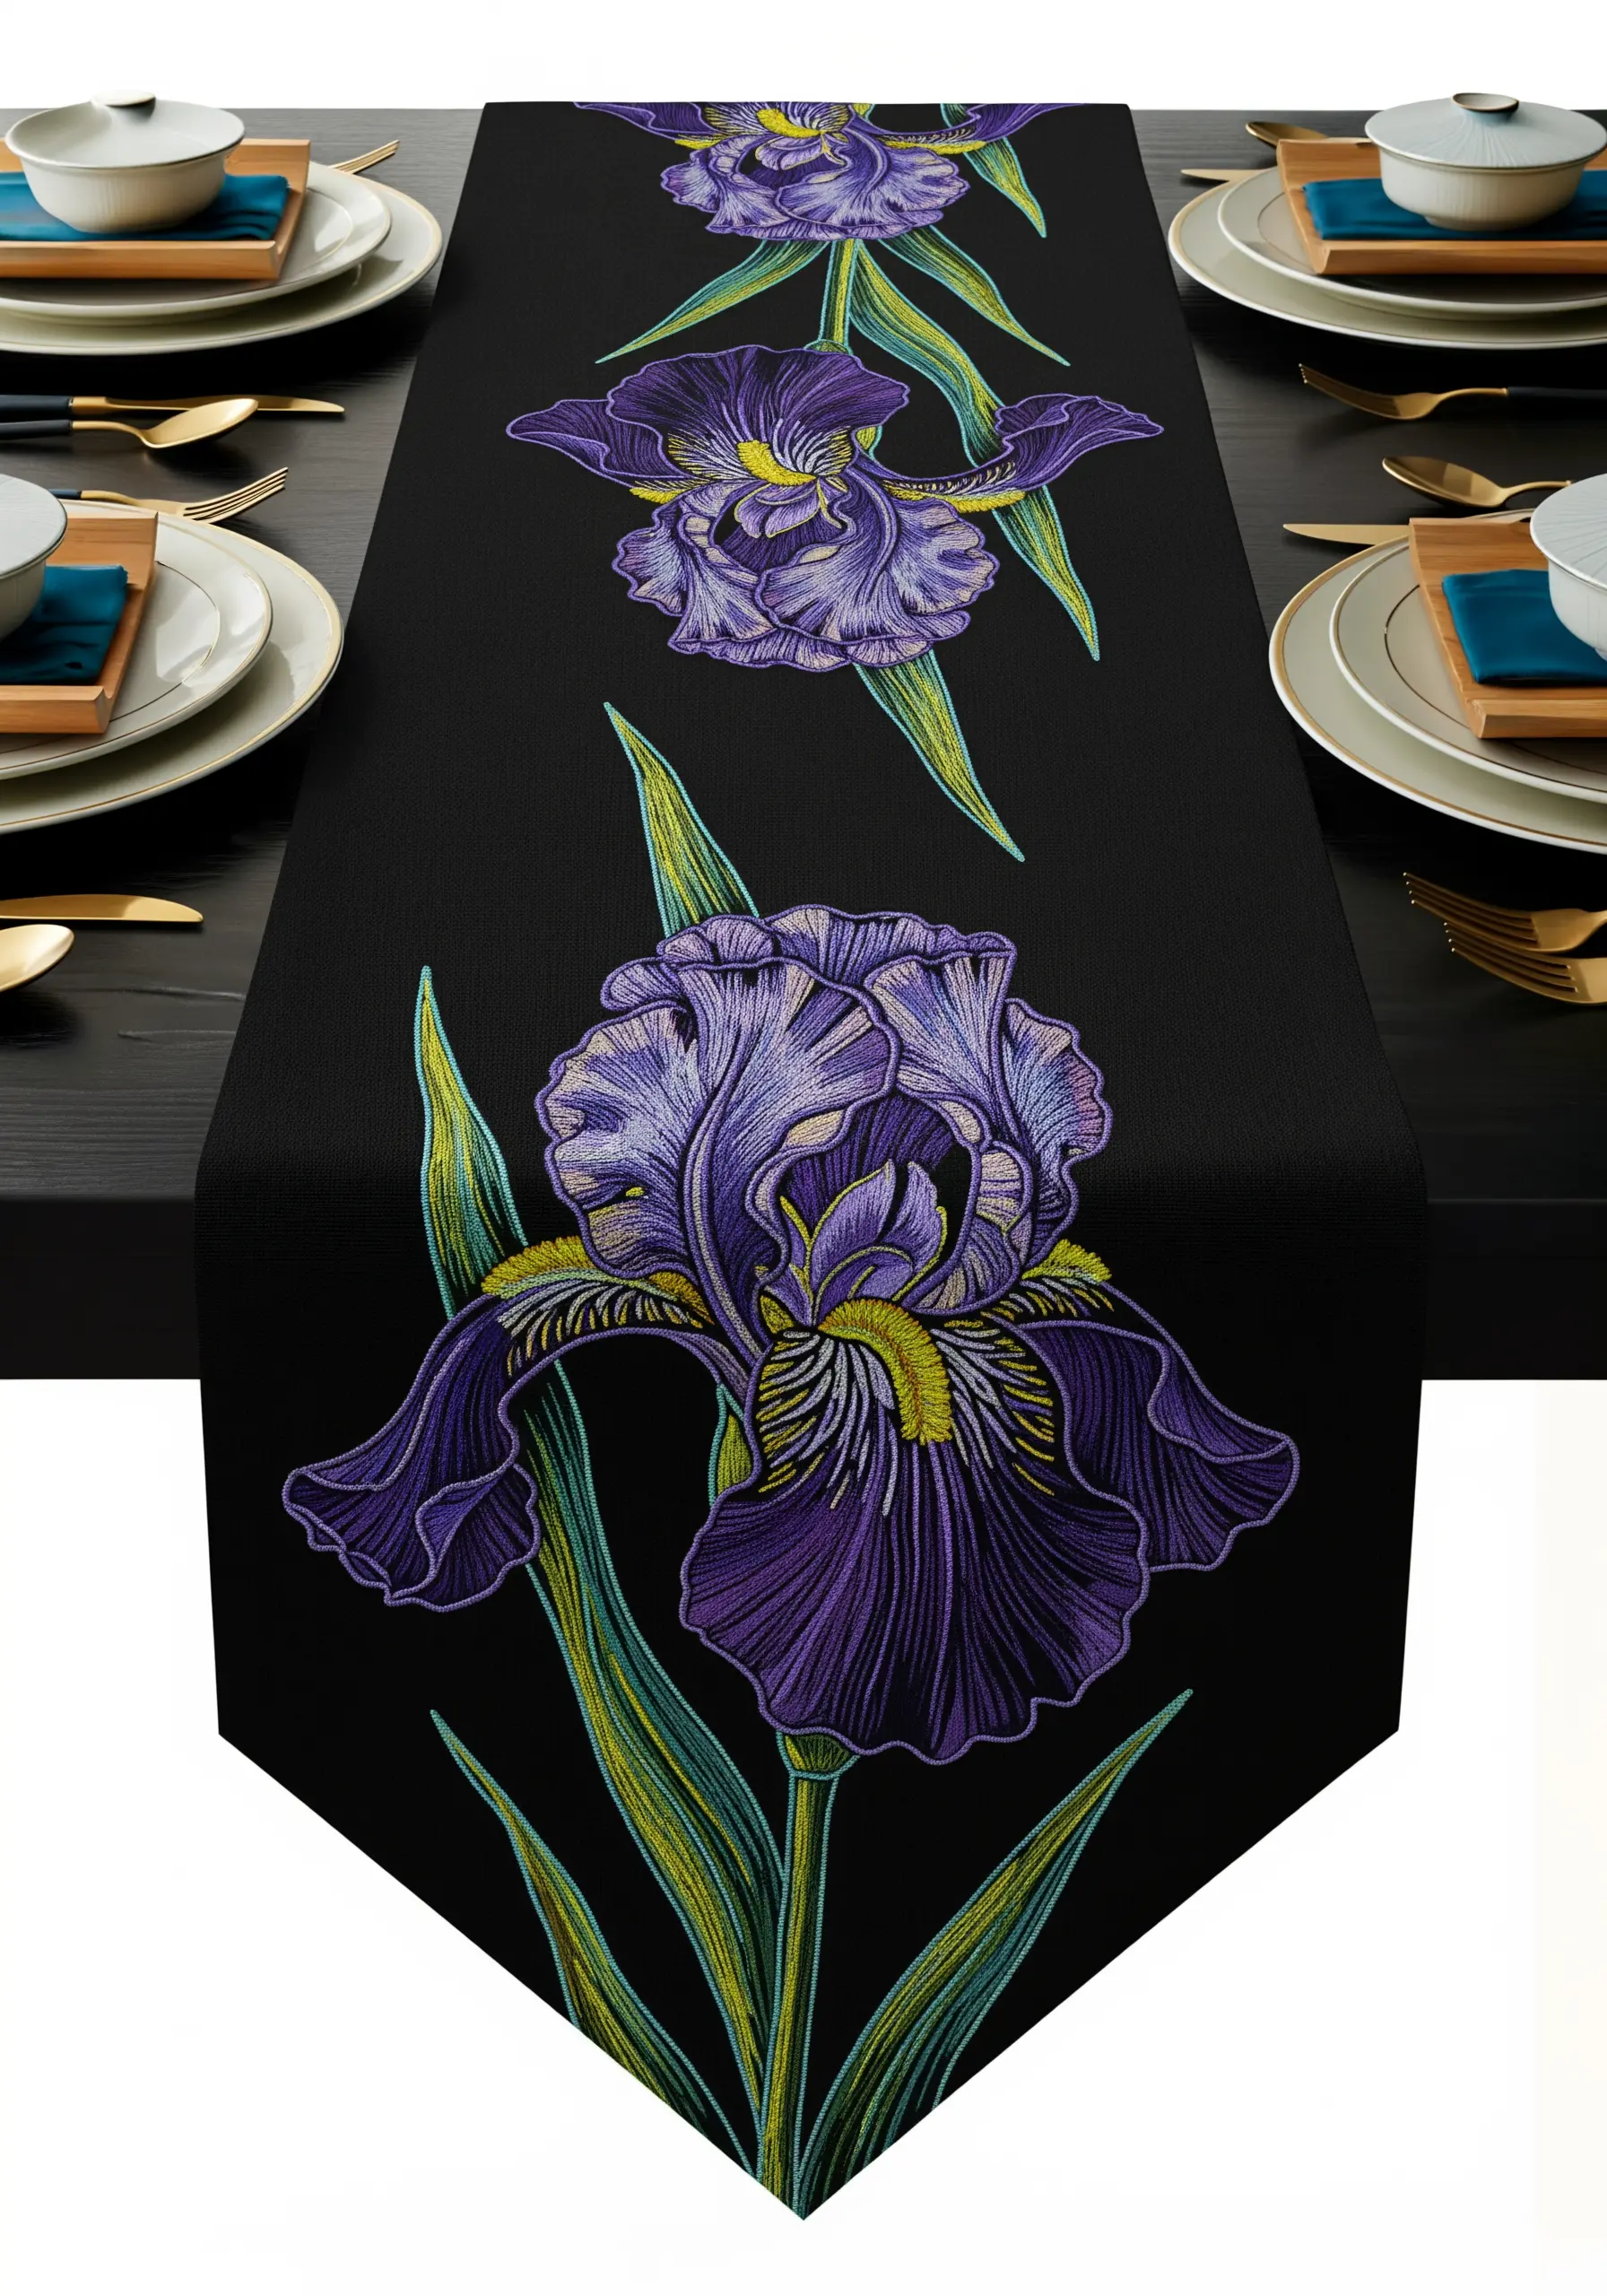
For this level of depth and realism, you will use long-and-short stitch, often called thread painting.
Work with a single strand of floss at a time, blending colors just as you would with paint.
Start with your darkest shades in the areas of shadow and gradually introduce lighter colors, ensuring your stitches interlock seamlessly to create a smooth gradient.
This technique transforms a simple outline into a breathtakingly detailed botanical illustration and is one of the best ways to embroider realistic shadows under leaves for depth that looks painted.
17. Whimsical Charm with Simple Backstitch
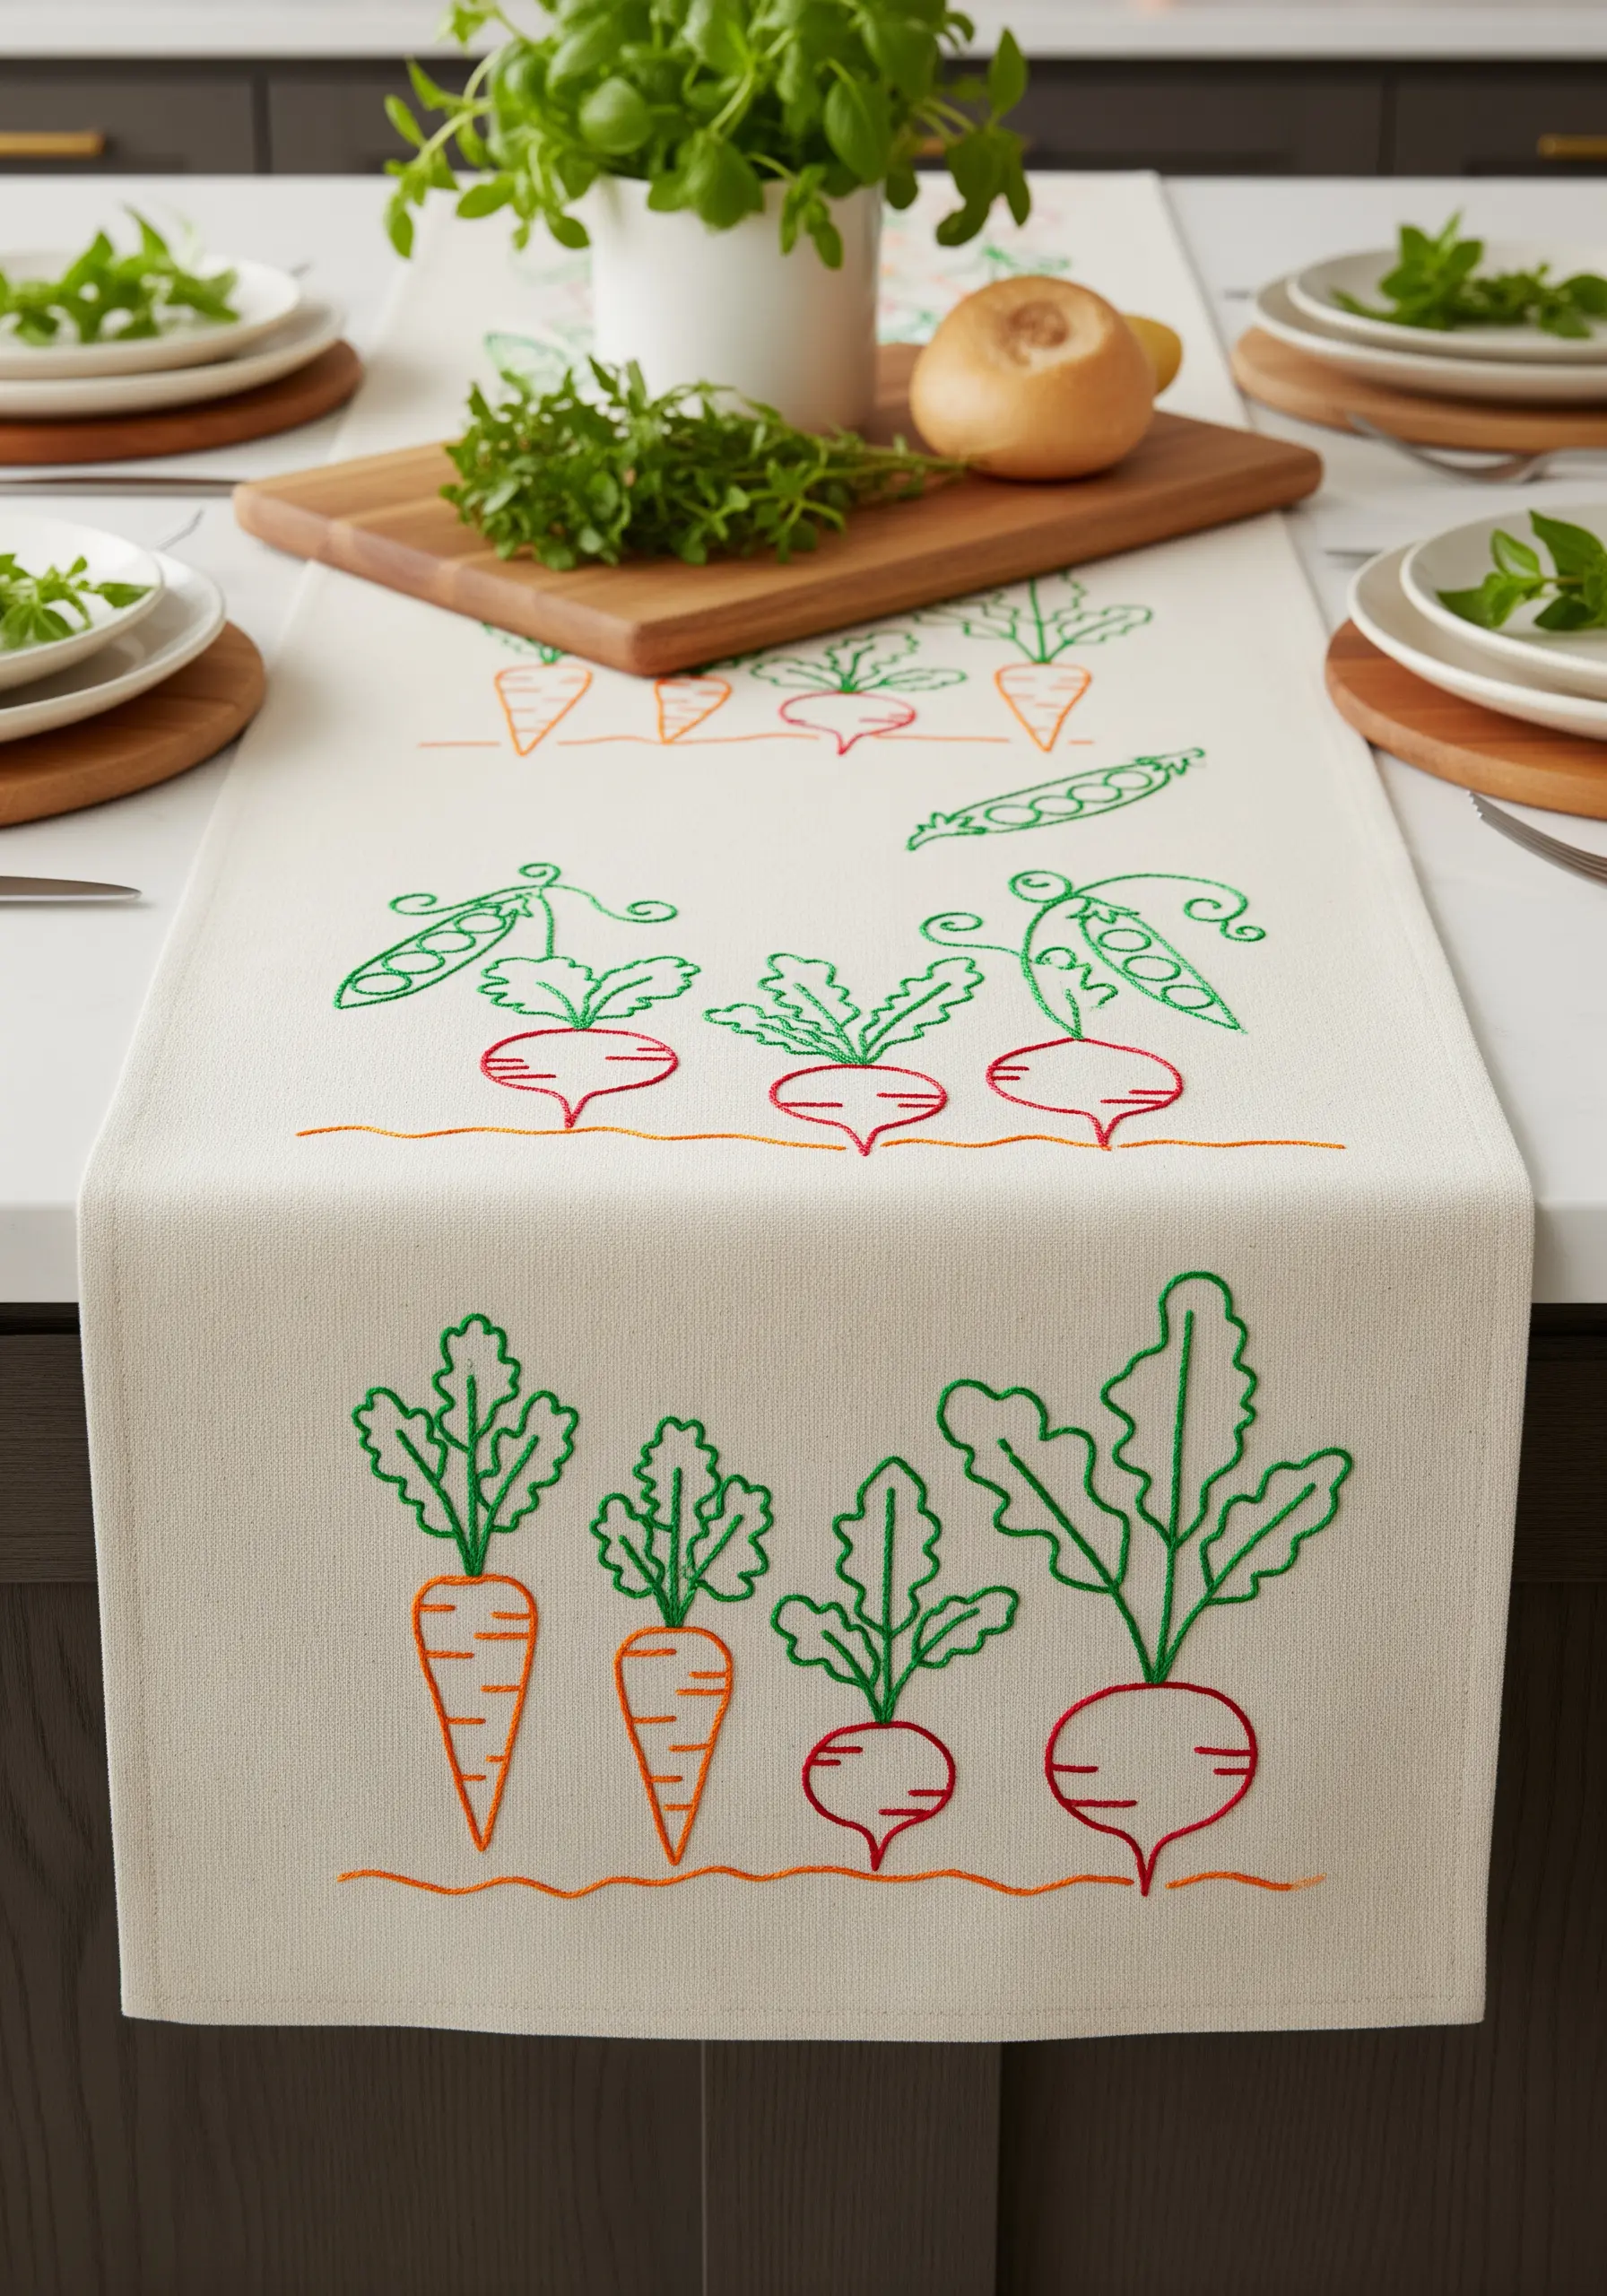
This delightful vegetable patch proves that you don’t need complex stitches to create a captivating design.
A simple backstitch is used for every outline, providing clean and consistent lines.
The charm comes from the quirky illustrations themselves and the bright, limited color palette.
This is a perfect demonstration of how playful cartoon-style embroidery ideas can be elevated into sophisticated and joyful home décor.
18. Layering Outlines for a Sketch-Like Effect
Create an elegant, illustrative effect by layering two different line weights and textures.
First, establish the main shape of the leaves with a wide, smooth satin stitch in a solid color.
Then, stitch directly over it, defining the edges and adding veins with a delicate backstitch in a contrasting, shimmering thread.
This technique mimics a fine art drawing, where a solid block of color is enhanced with a precise ink line, adding dimension and polish.
19. The Intricate Thorny Rose Wreath
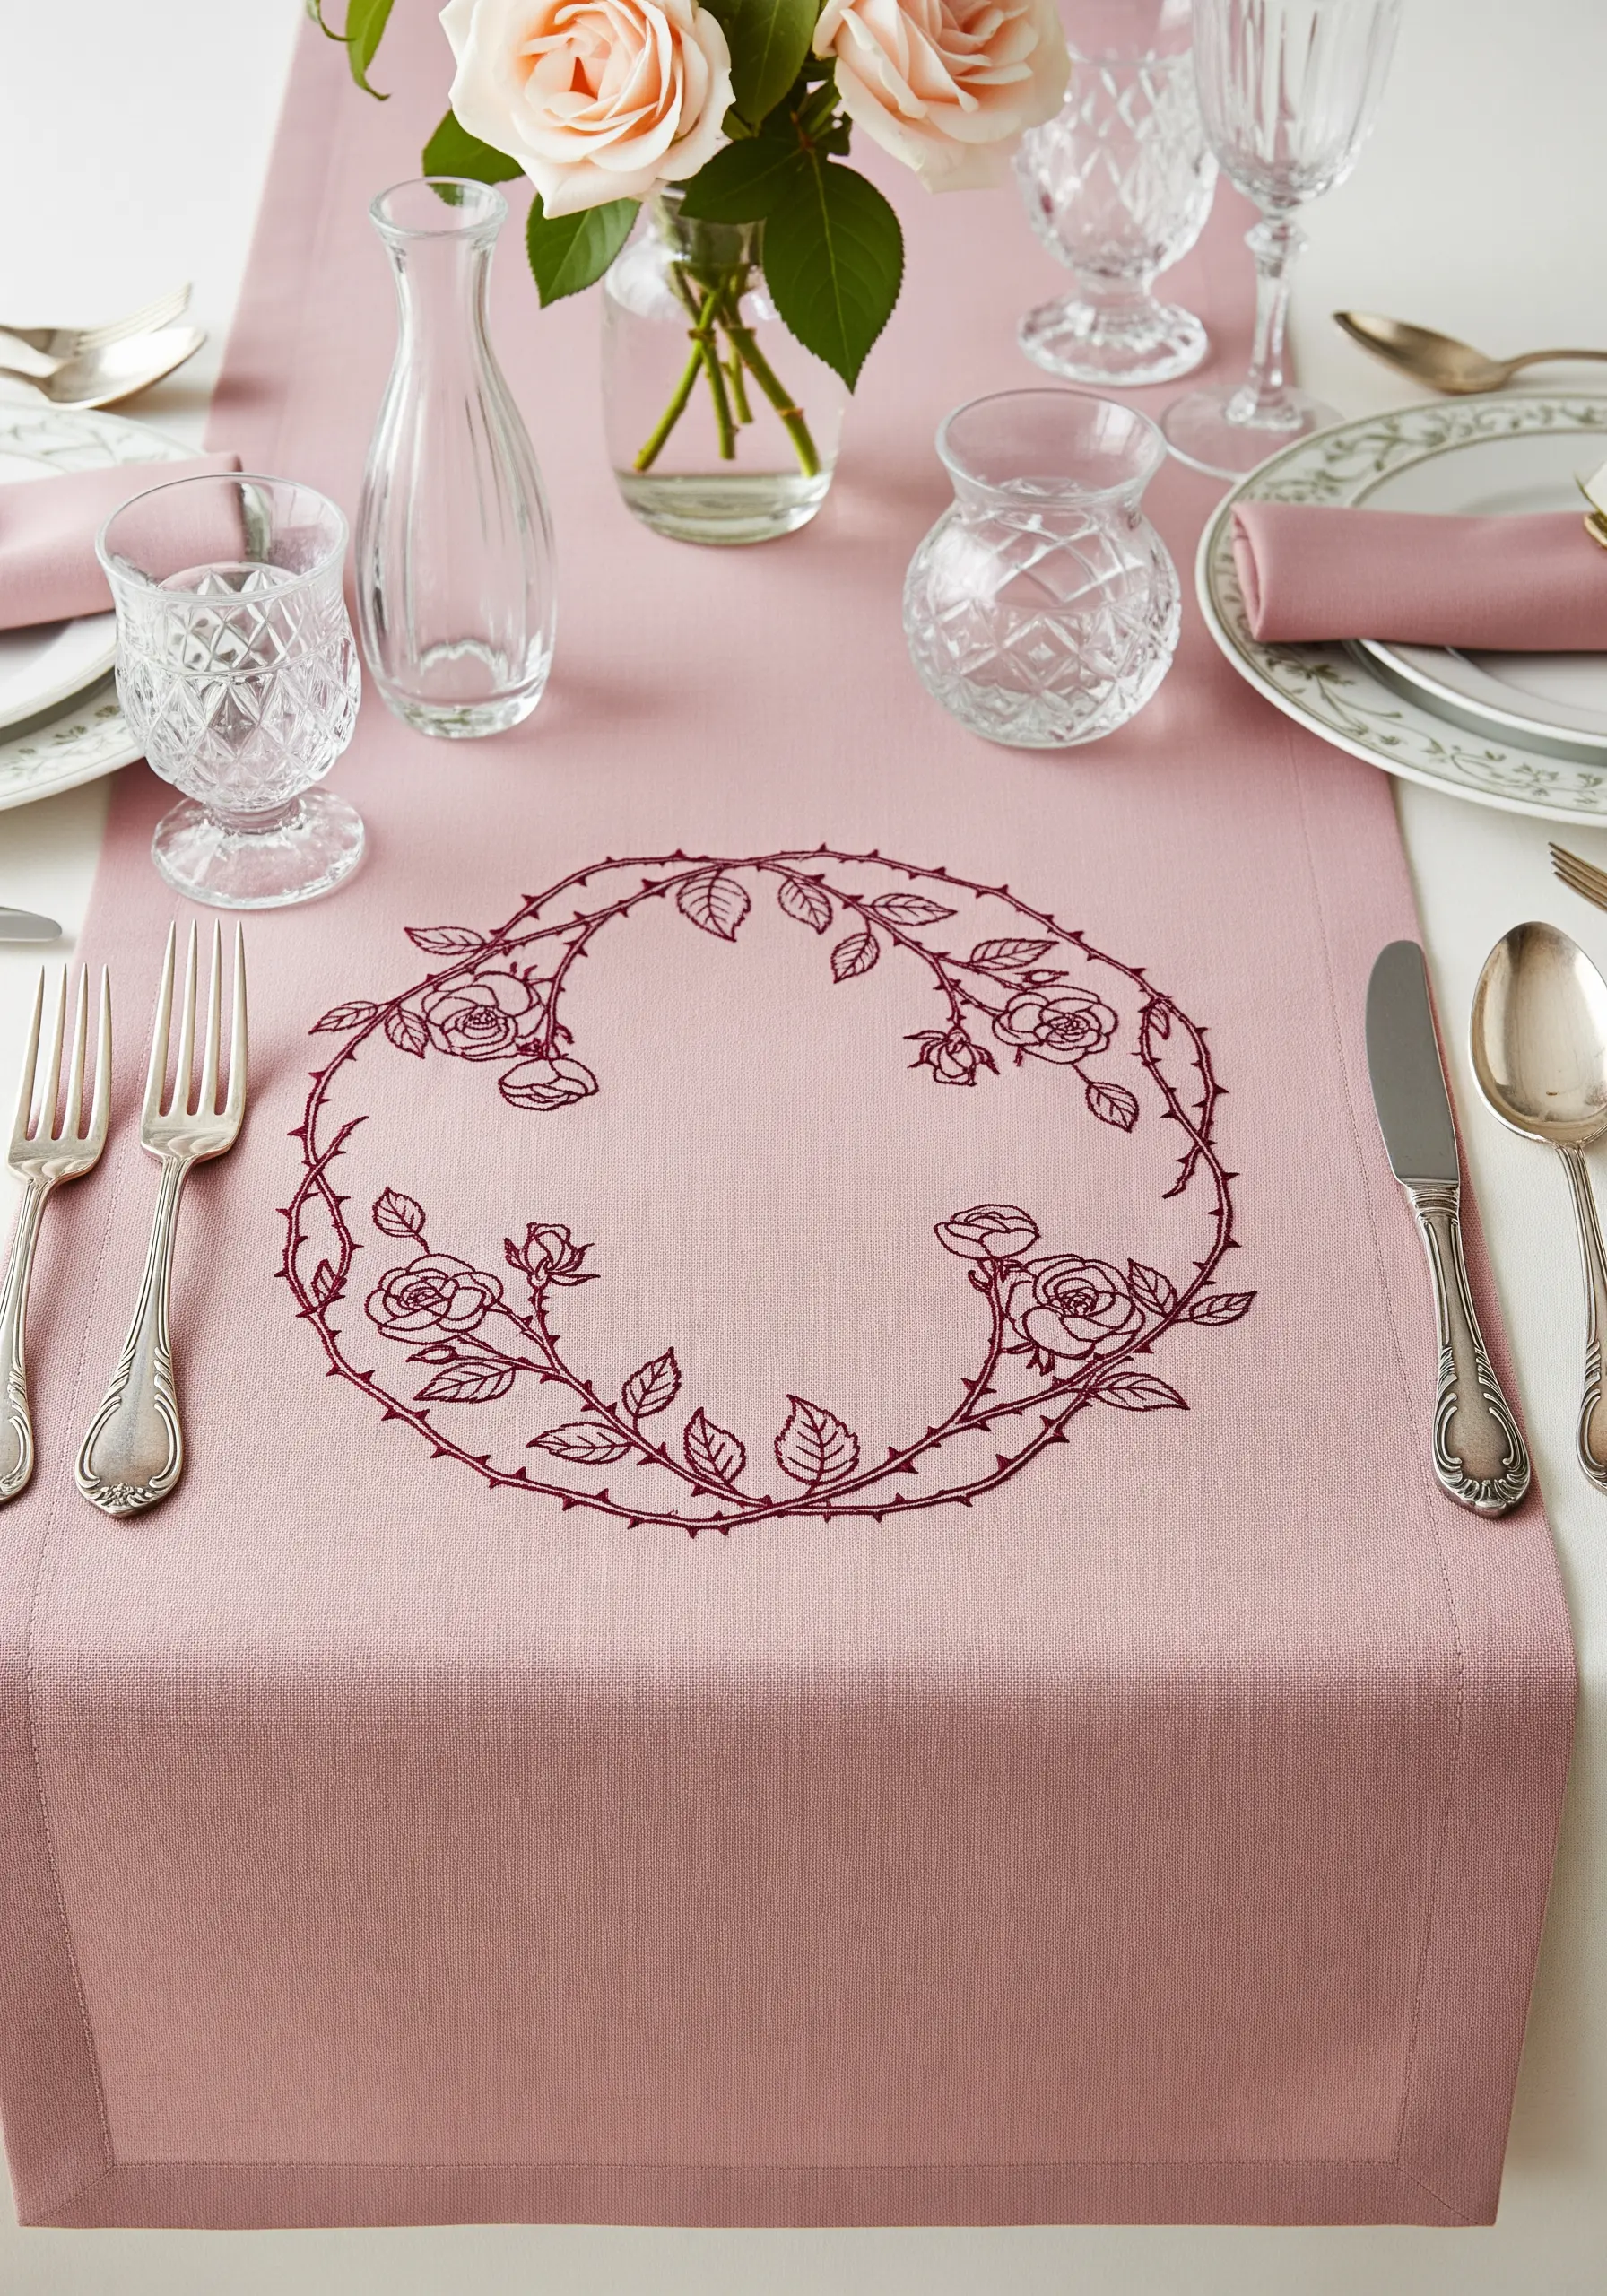
To ensure the thorns on a rose stem look sharp and delicate rather than thick and clumsy, use a single, tiny straight stitch for each one.
Angle the thorn away from the main stem to give it a natural, protective posture.
For the stem itself, use a whipped backstitch to create a smooth, rounded surface.
This contrast between the sharp thorns and the fluid stem adds a beautiful layer of realism and elegance to your floral line work.
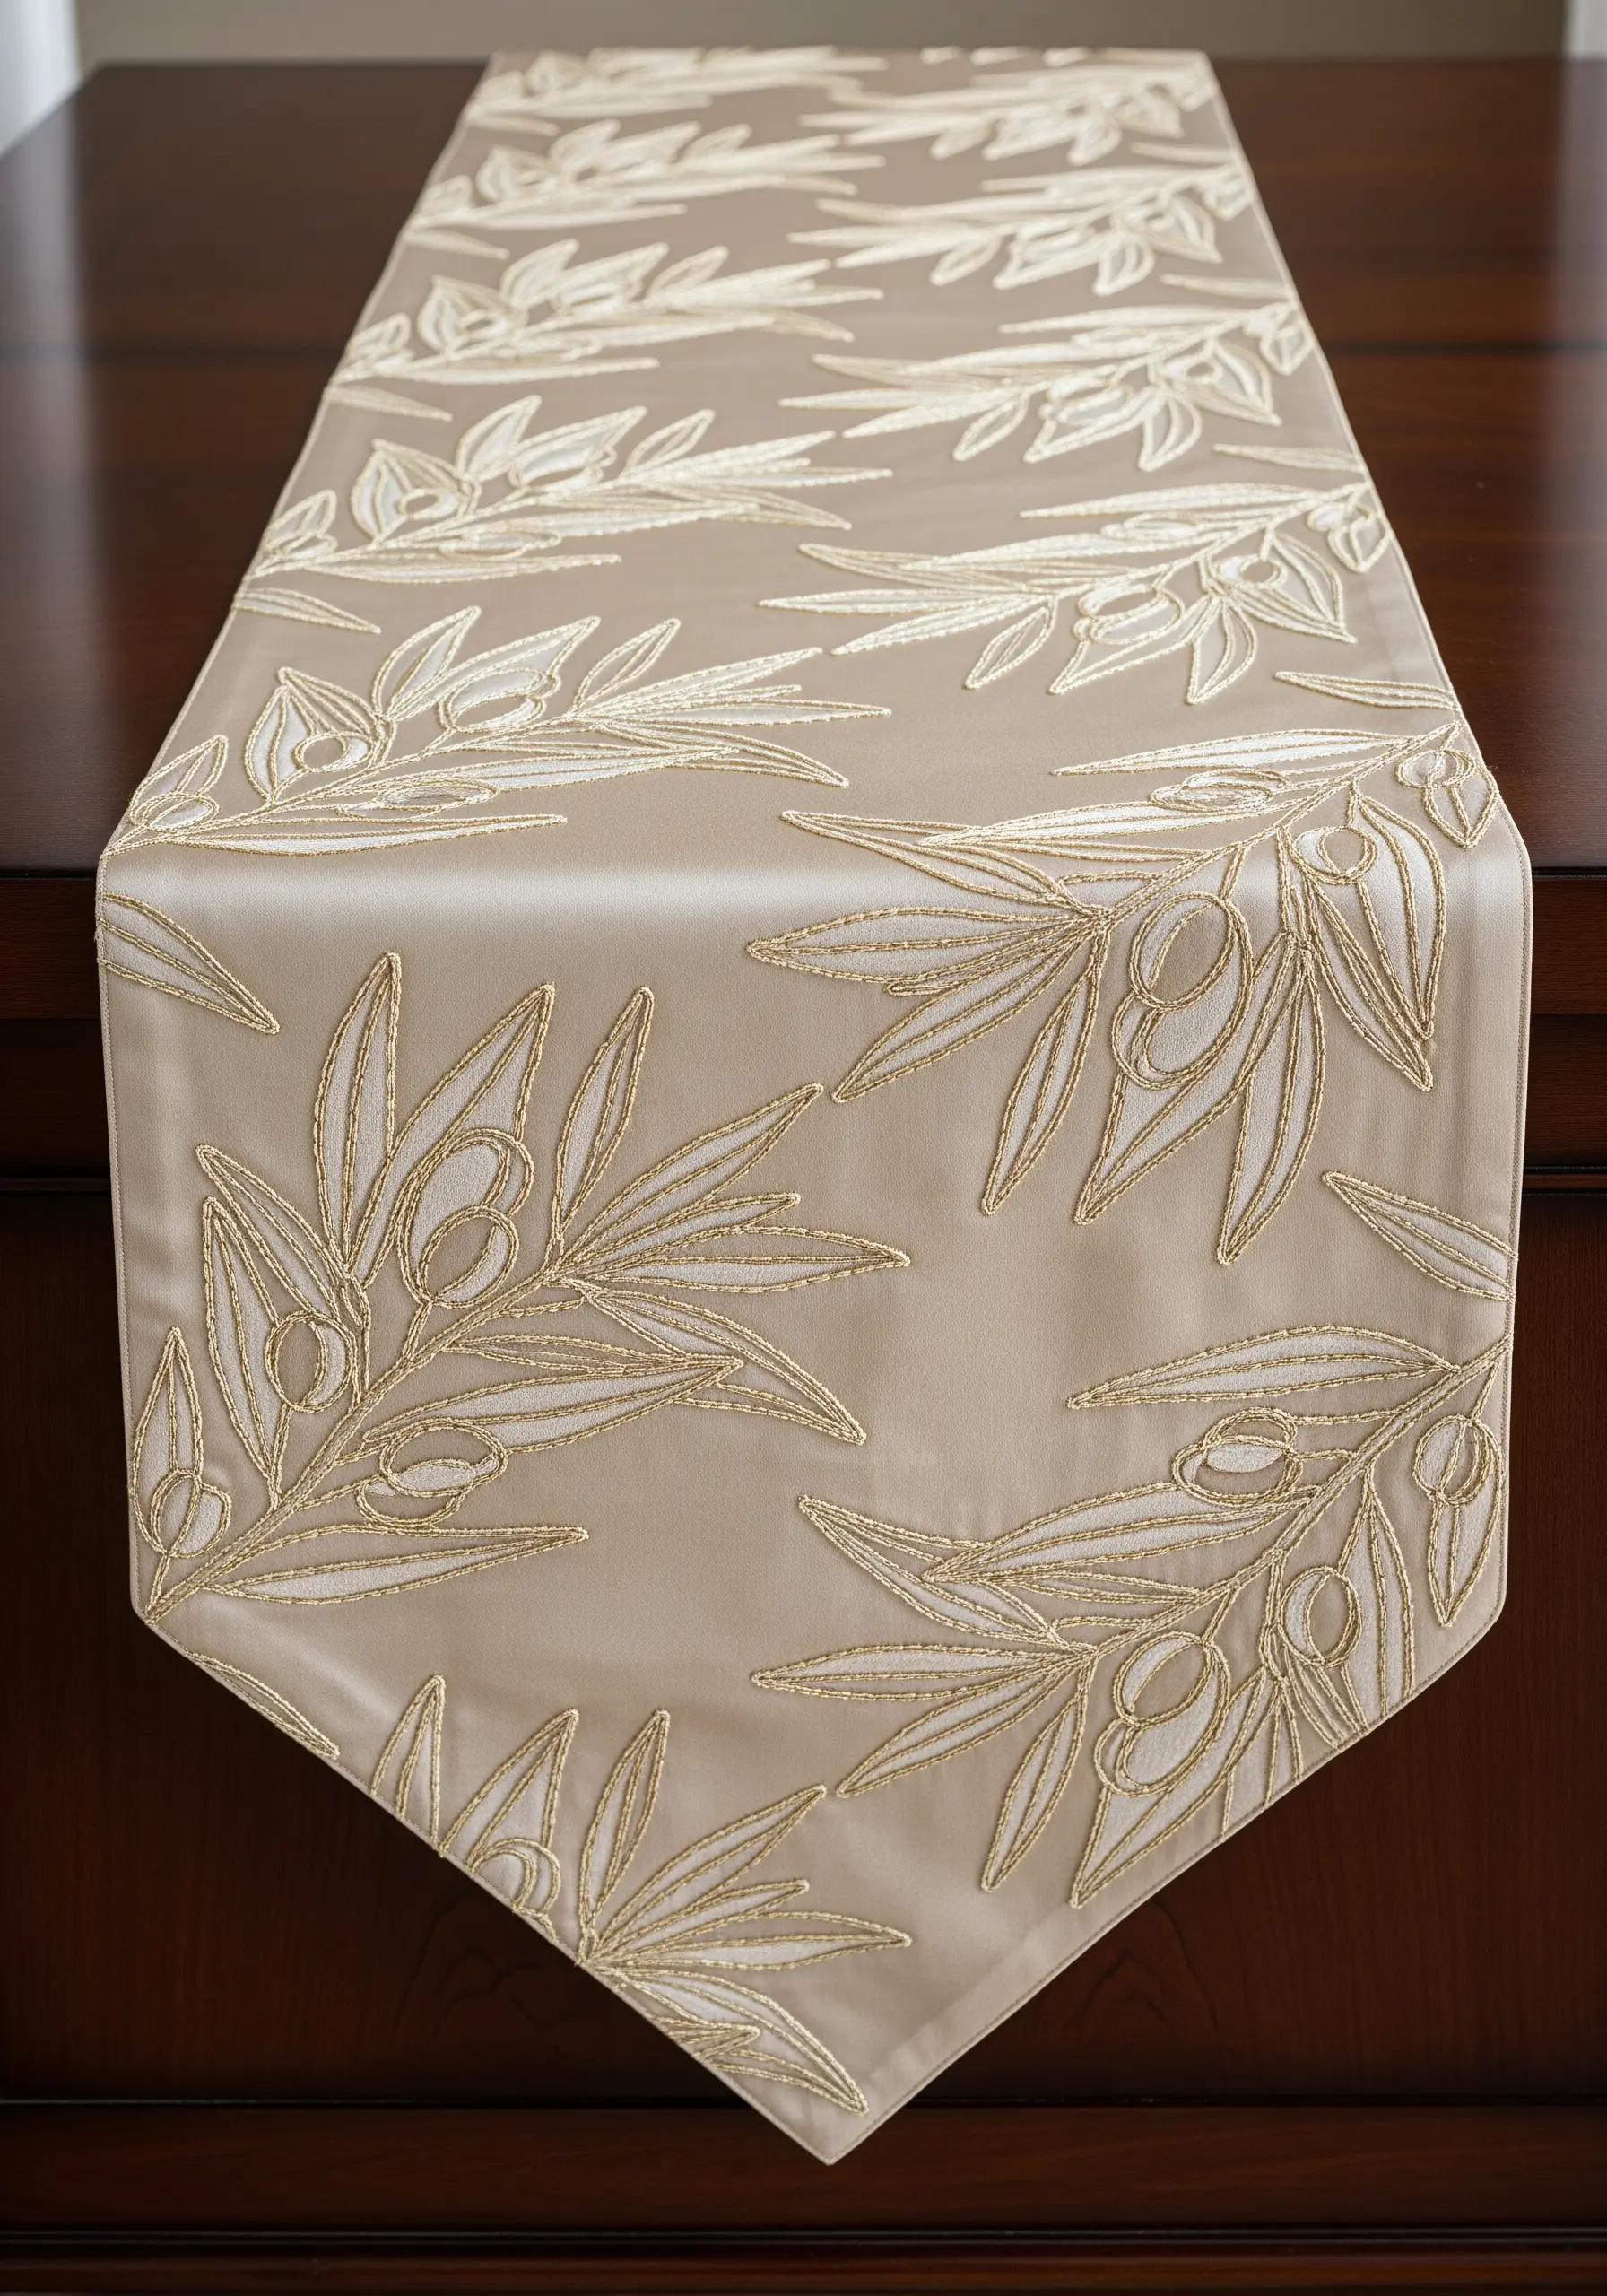
20. Bold Pattern with a Heavy Chain Stitch
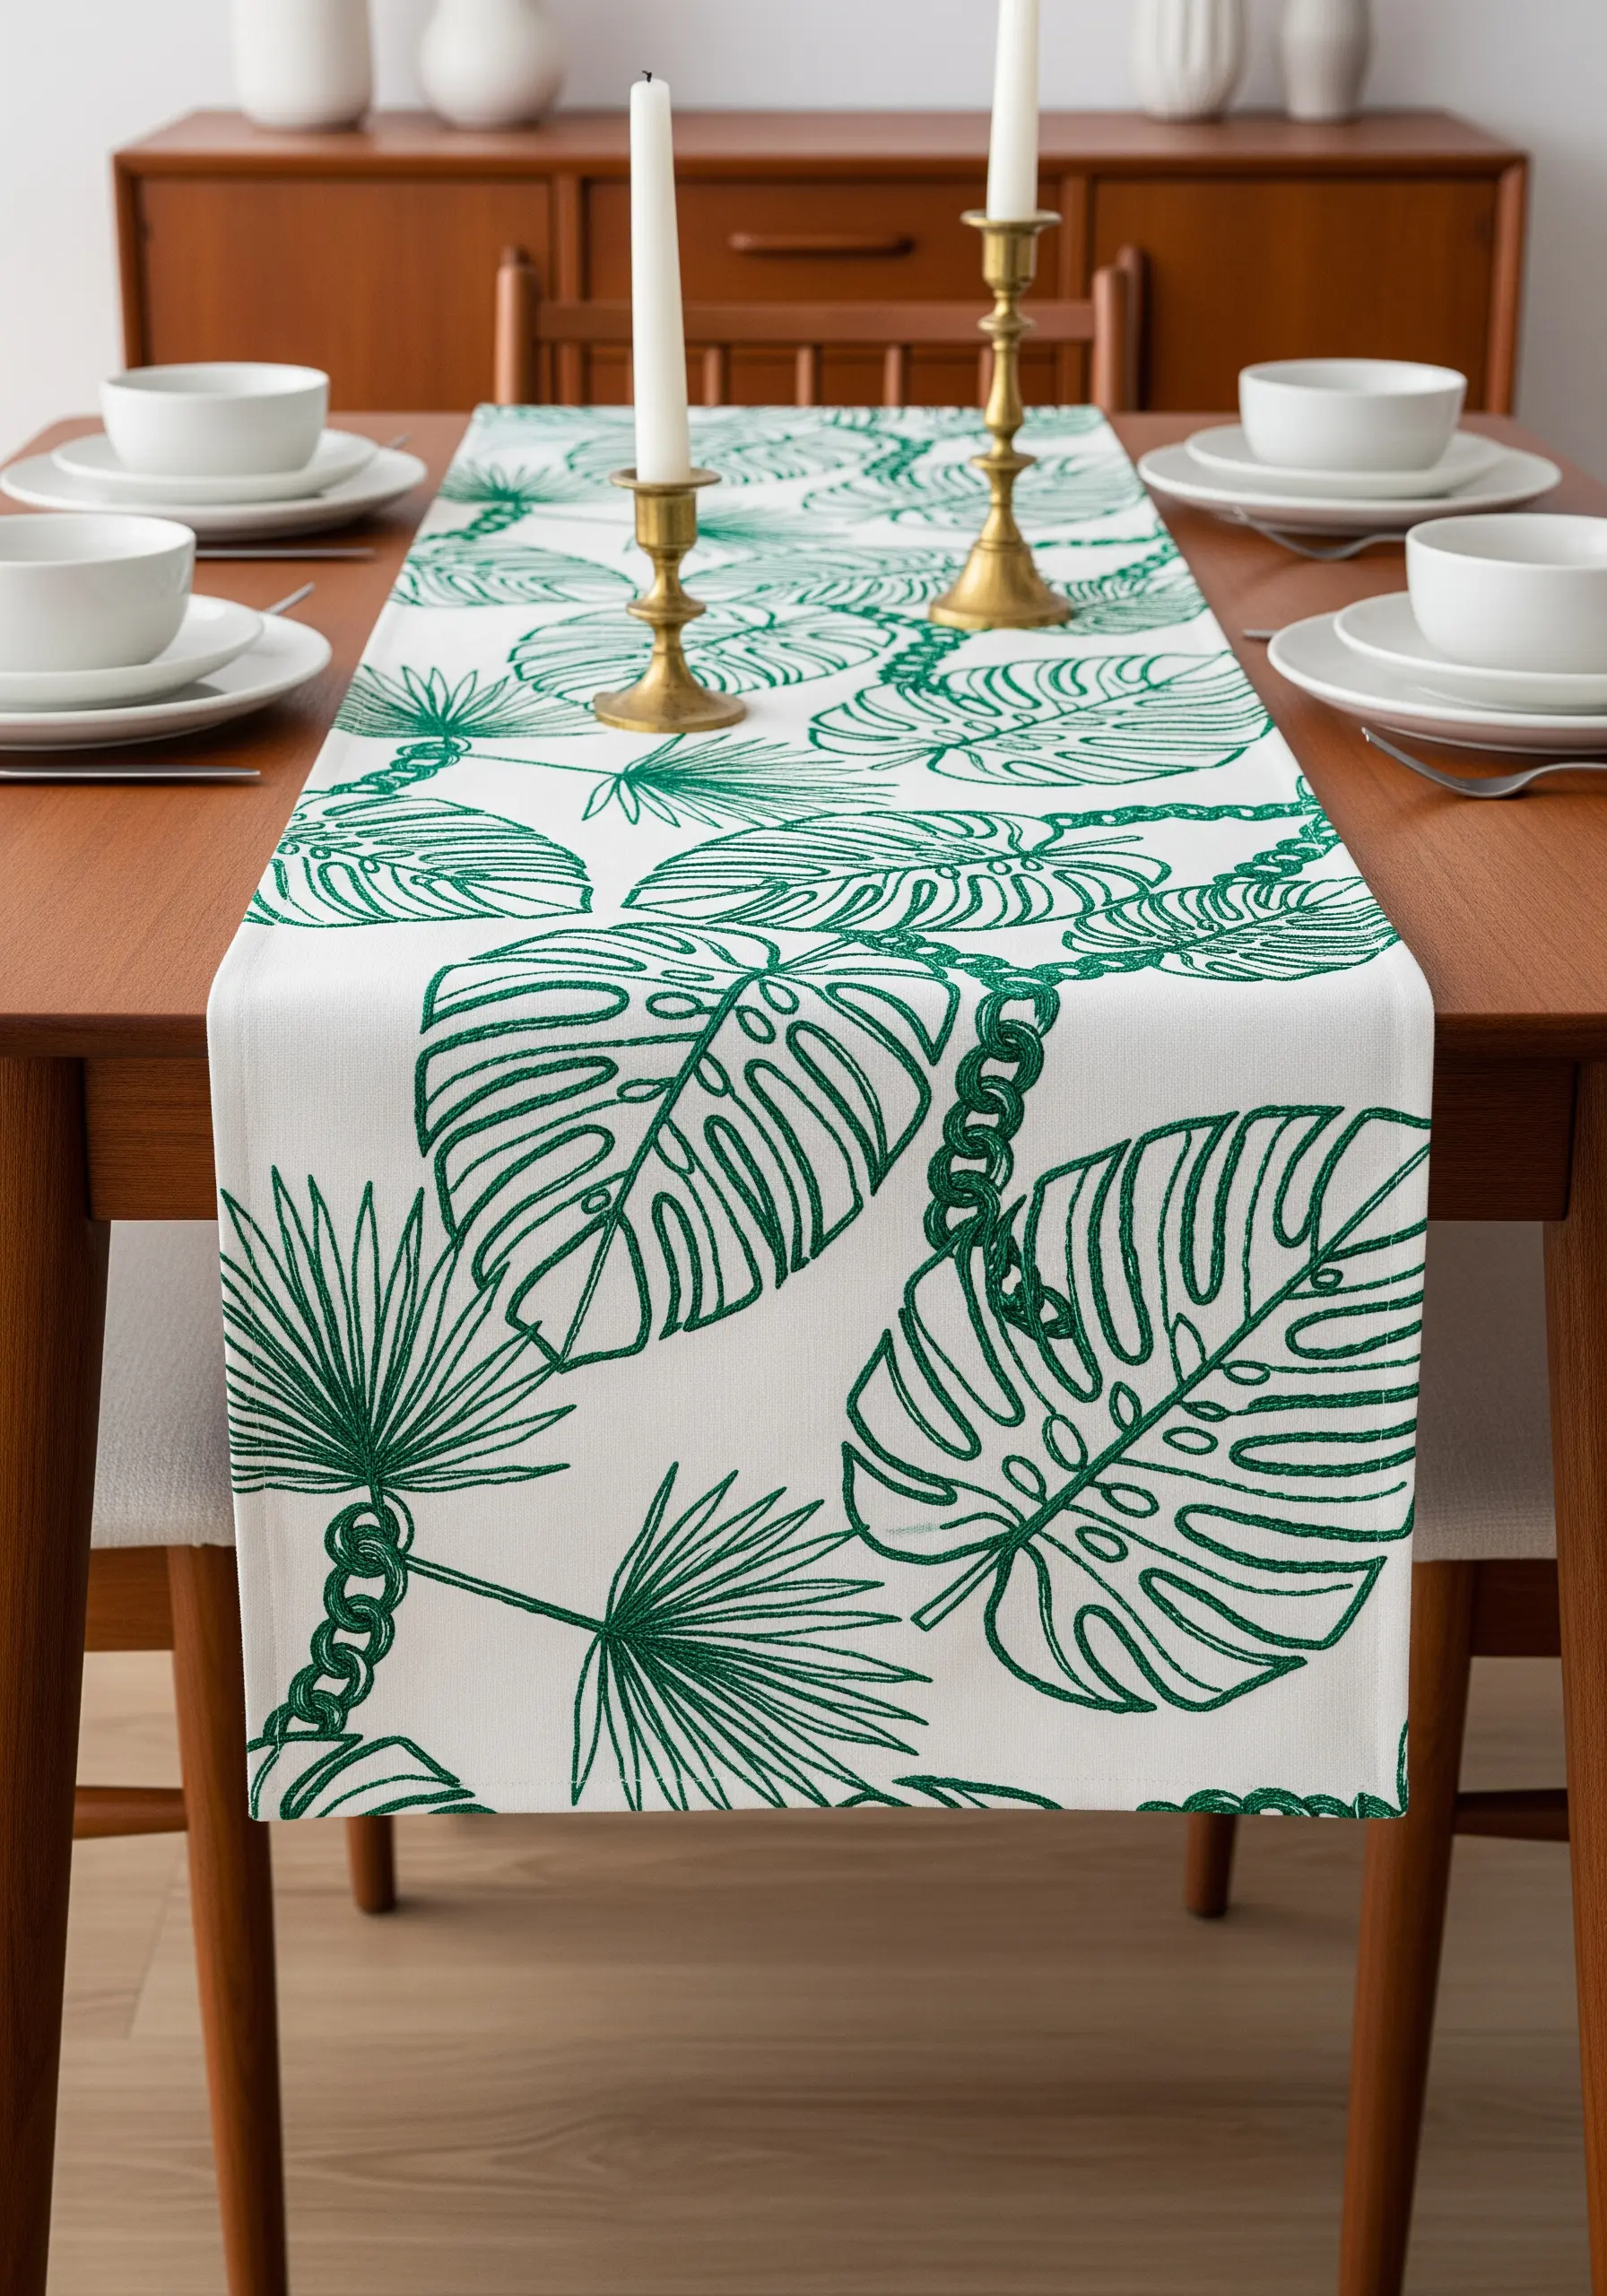
When creating an all-over pattern like this, your stitch choice must have enough visual weight to carry the design.
A heavy chain stitch, worked with all six strands of floss or a thicker Perle cotton, is ideal.
Its rope-like texture creates a bold, graphic line that defines each leaf shape clearly and adds a wonderful tactile quality to the finished piece.
This makes the embroidery a feature you can not only see but also feel.
21. Building Airy Texture with French Knots
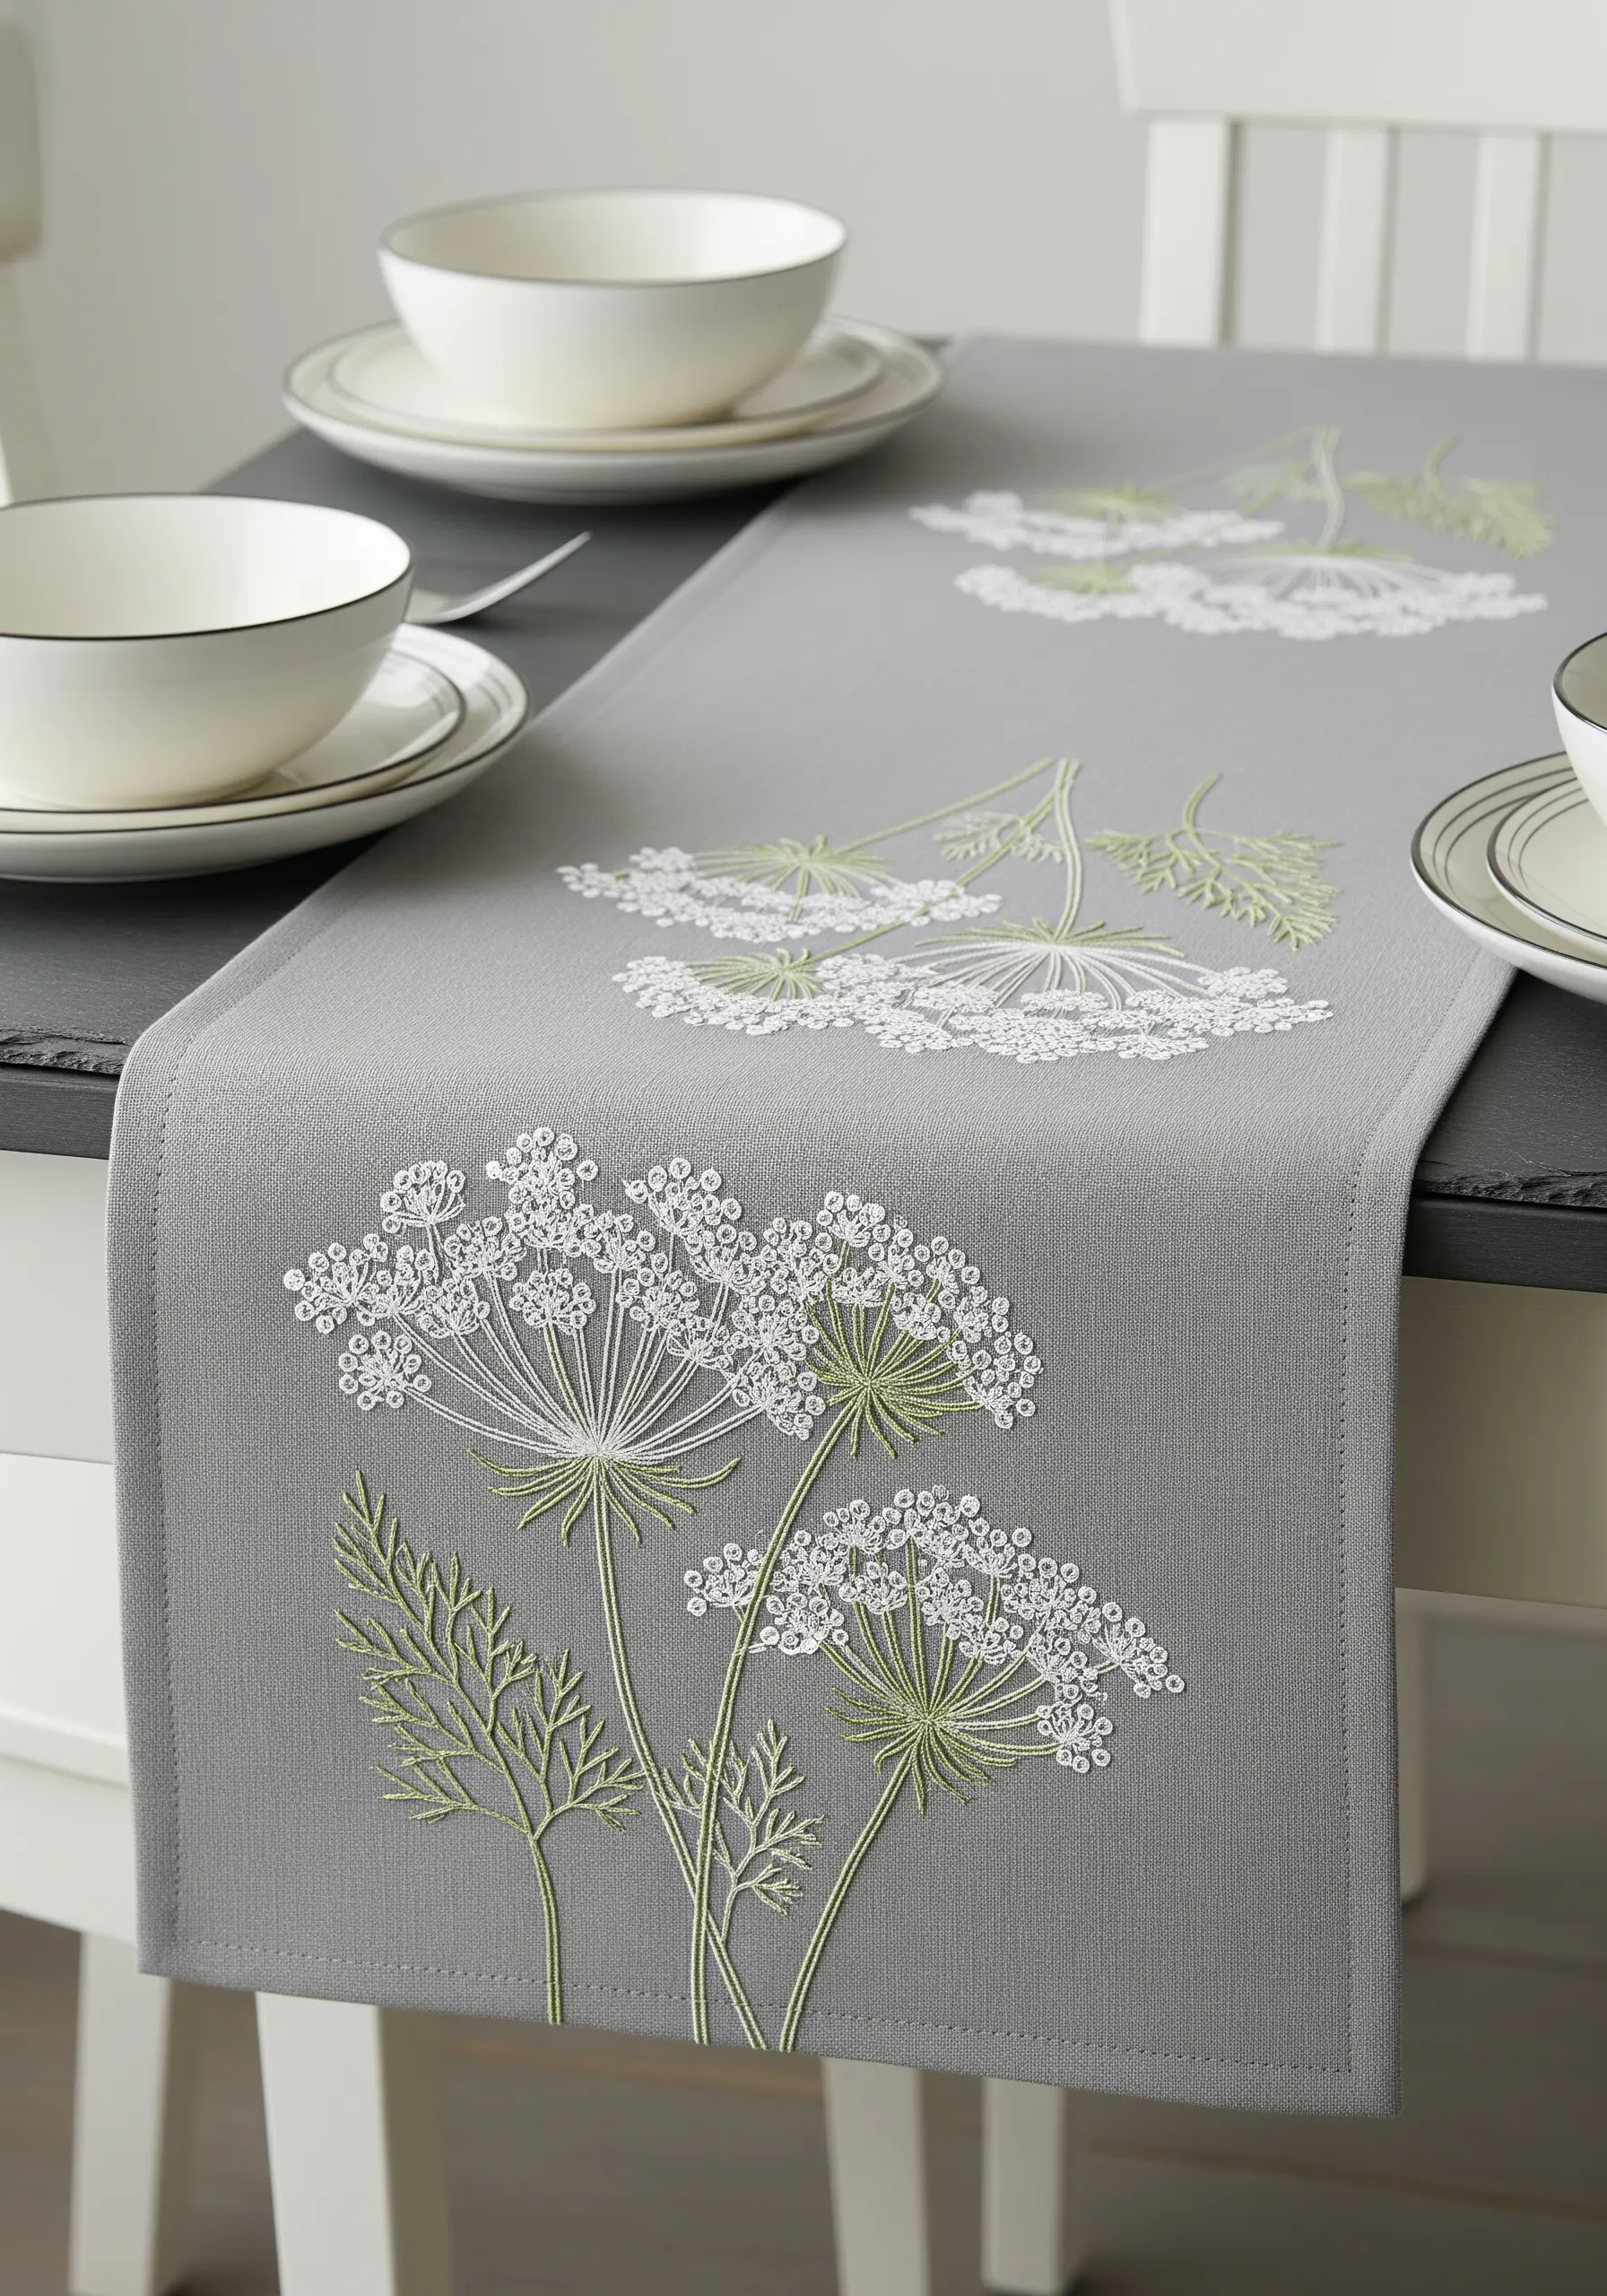
You can beautifully replicate the frothy, delicate heads of Queen Anne’s Lace by clustering French knots.
For a more organic look, vary the size of the knots by wrapping the thread once for smaller knots and twice for larger ones.
Use a crisp white or soft cream thread to capture their ethereal quality, and pair the textural flower heads with simple, slender stem stitches for the stalks.
22. Zen-Inspired Lines for a Sense of Calm

This design’s power lies in its minimalist composition and thoughtful use of negative space.
Create the raked sand effect with parallel rows of a simple running stitch.
To maintain a fluid, hand-drawn feel, allow for slight variations in the length of your stitches and the gaps between them.
The resulting rhythmic pattern creates a meditative quality, a key principle in many botanical line art embroidery patterns, and provides a perfect contrast to the single cherry blossom branch.
23. Art Deco Glamour with Metallic Threads

Capture the essence of the Art Deco era by combining shimmering metallic threads with strong, geometric precision.
Use a gold metallic thread and a simple backstitch for the symmetrical, radiating lines.
For the small, solid areas of color, like the eyes of the peacock feathers, use neat, dense satin stitches in rich jewel tones.
The interplay between the glittering lines and the solid blocks of opulent color is the hallmark of this timelessly glamorous style.
24. Open-Weave Embroidery on Burlap
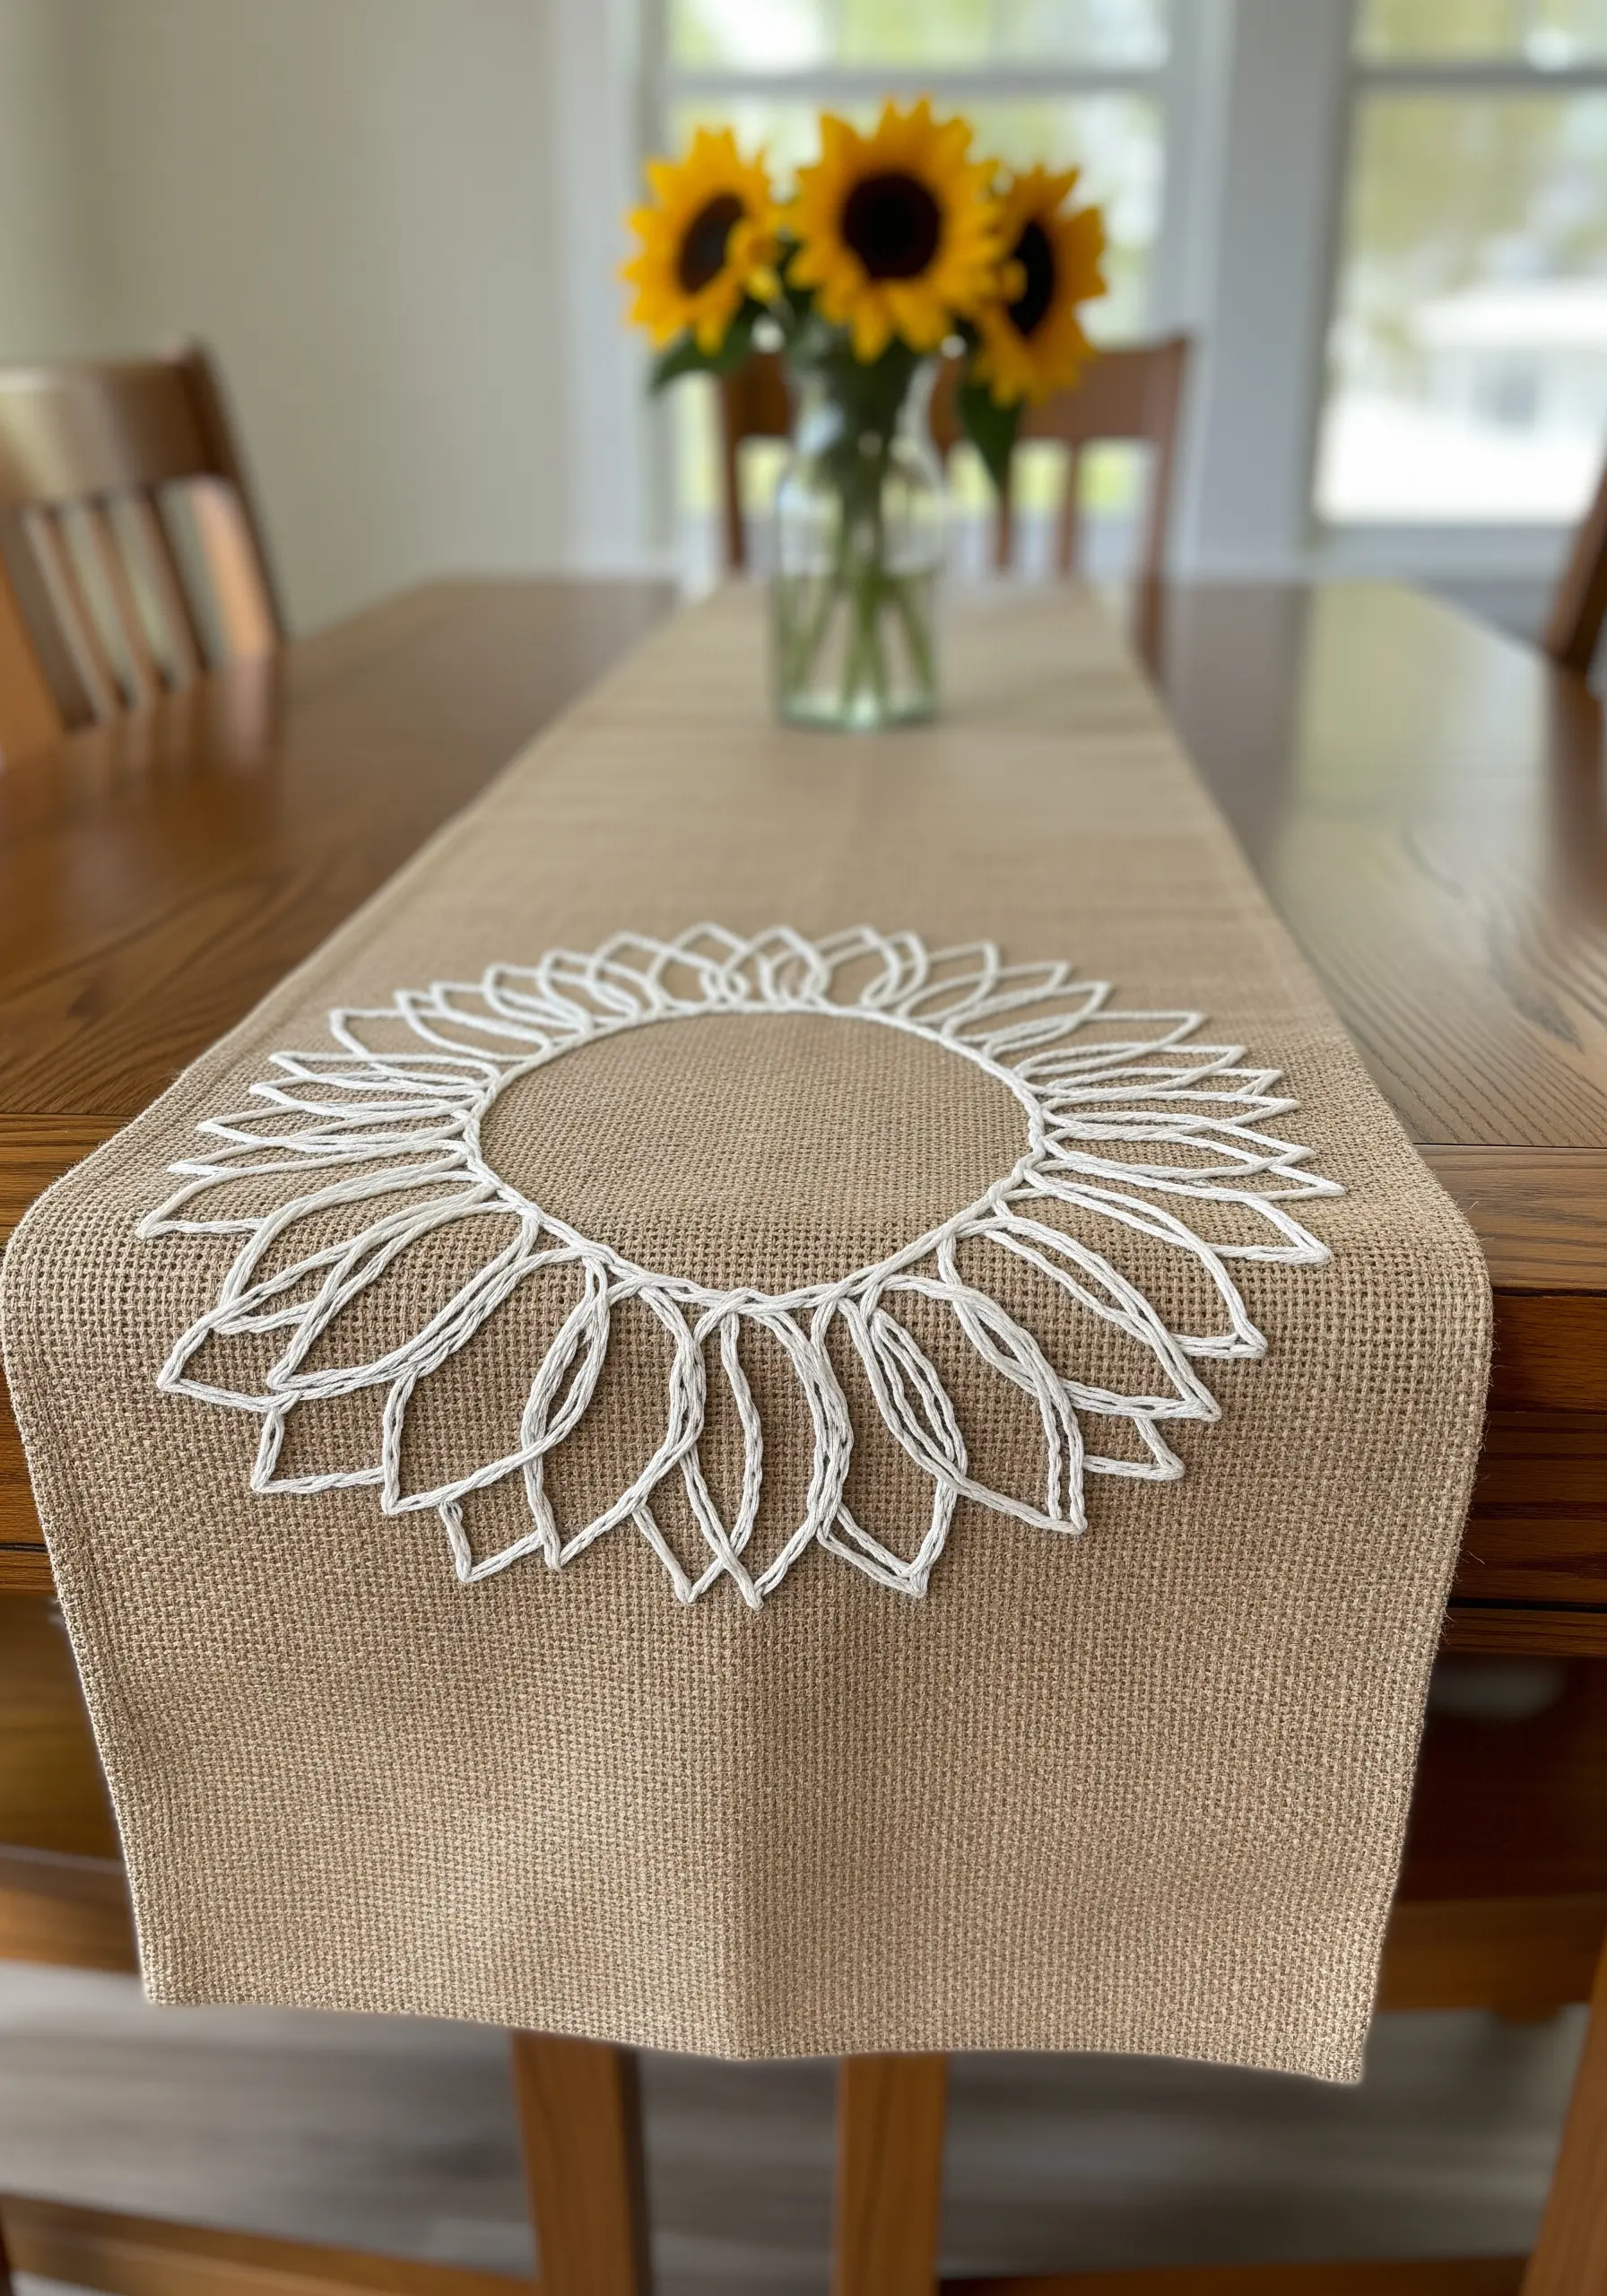
Stitching on a coarse, open-weave fabric like burlap requires you to adapt your materials.
Use a thicker thread, such as yarn or all six strands of embroidery floss, to ensure your stitches are bold enough to be seen.
Embrace negative space in your design; the open petals here allow the rustic texture of the burlap to shine through, becoming an essential part of the artwork itself.
A whipped running stitch or chain stitch will give you a solid, visible line.
25. Appliqué with an Embroidered Outline
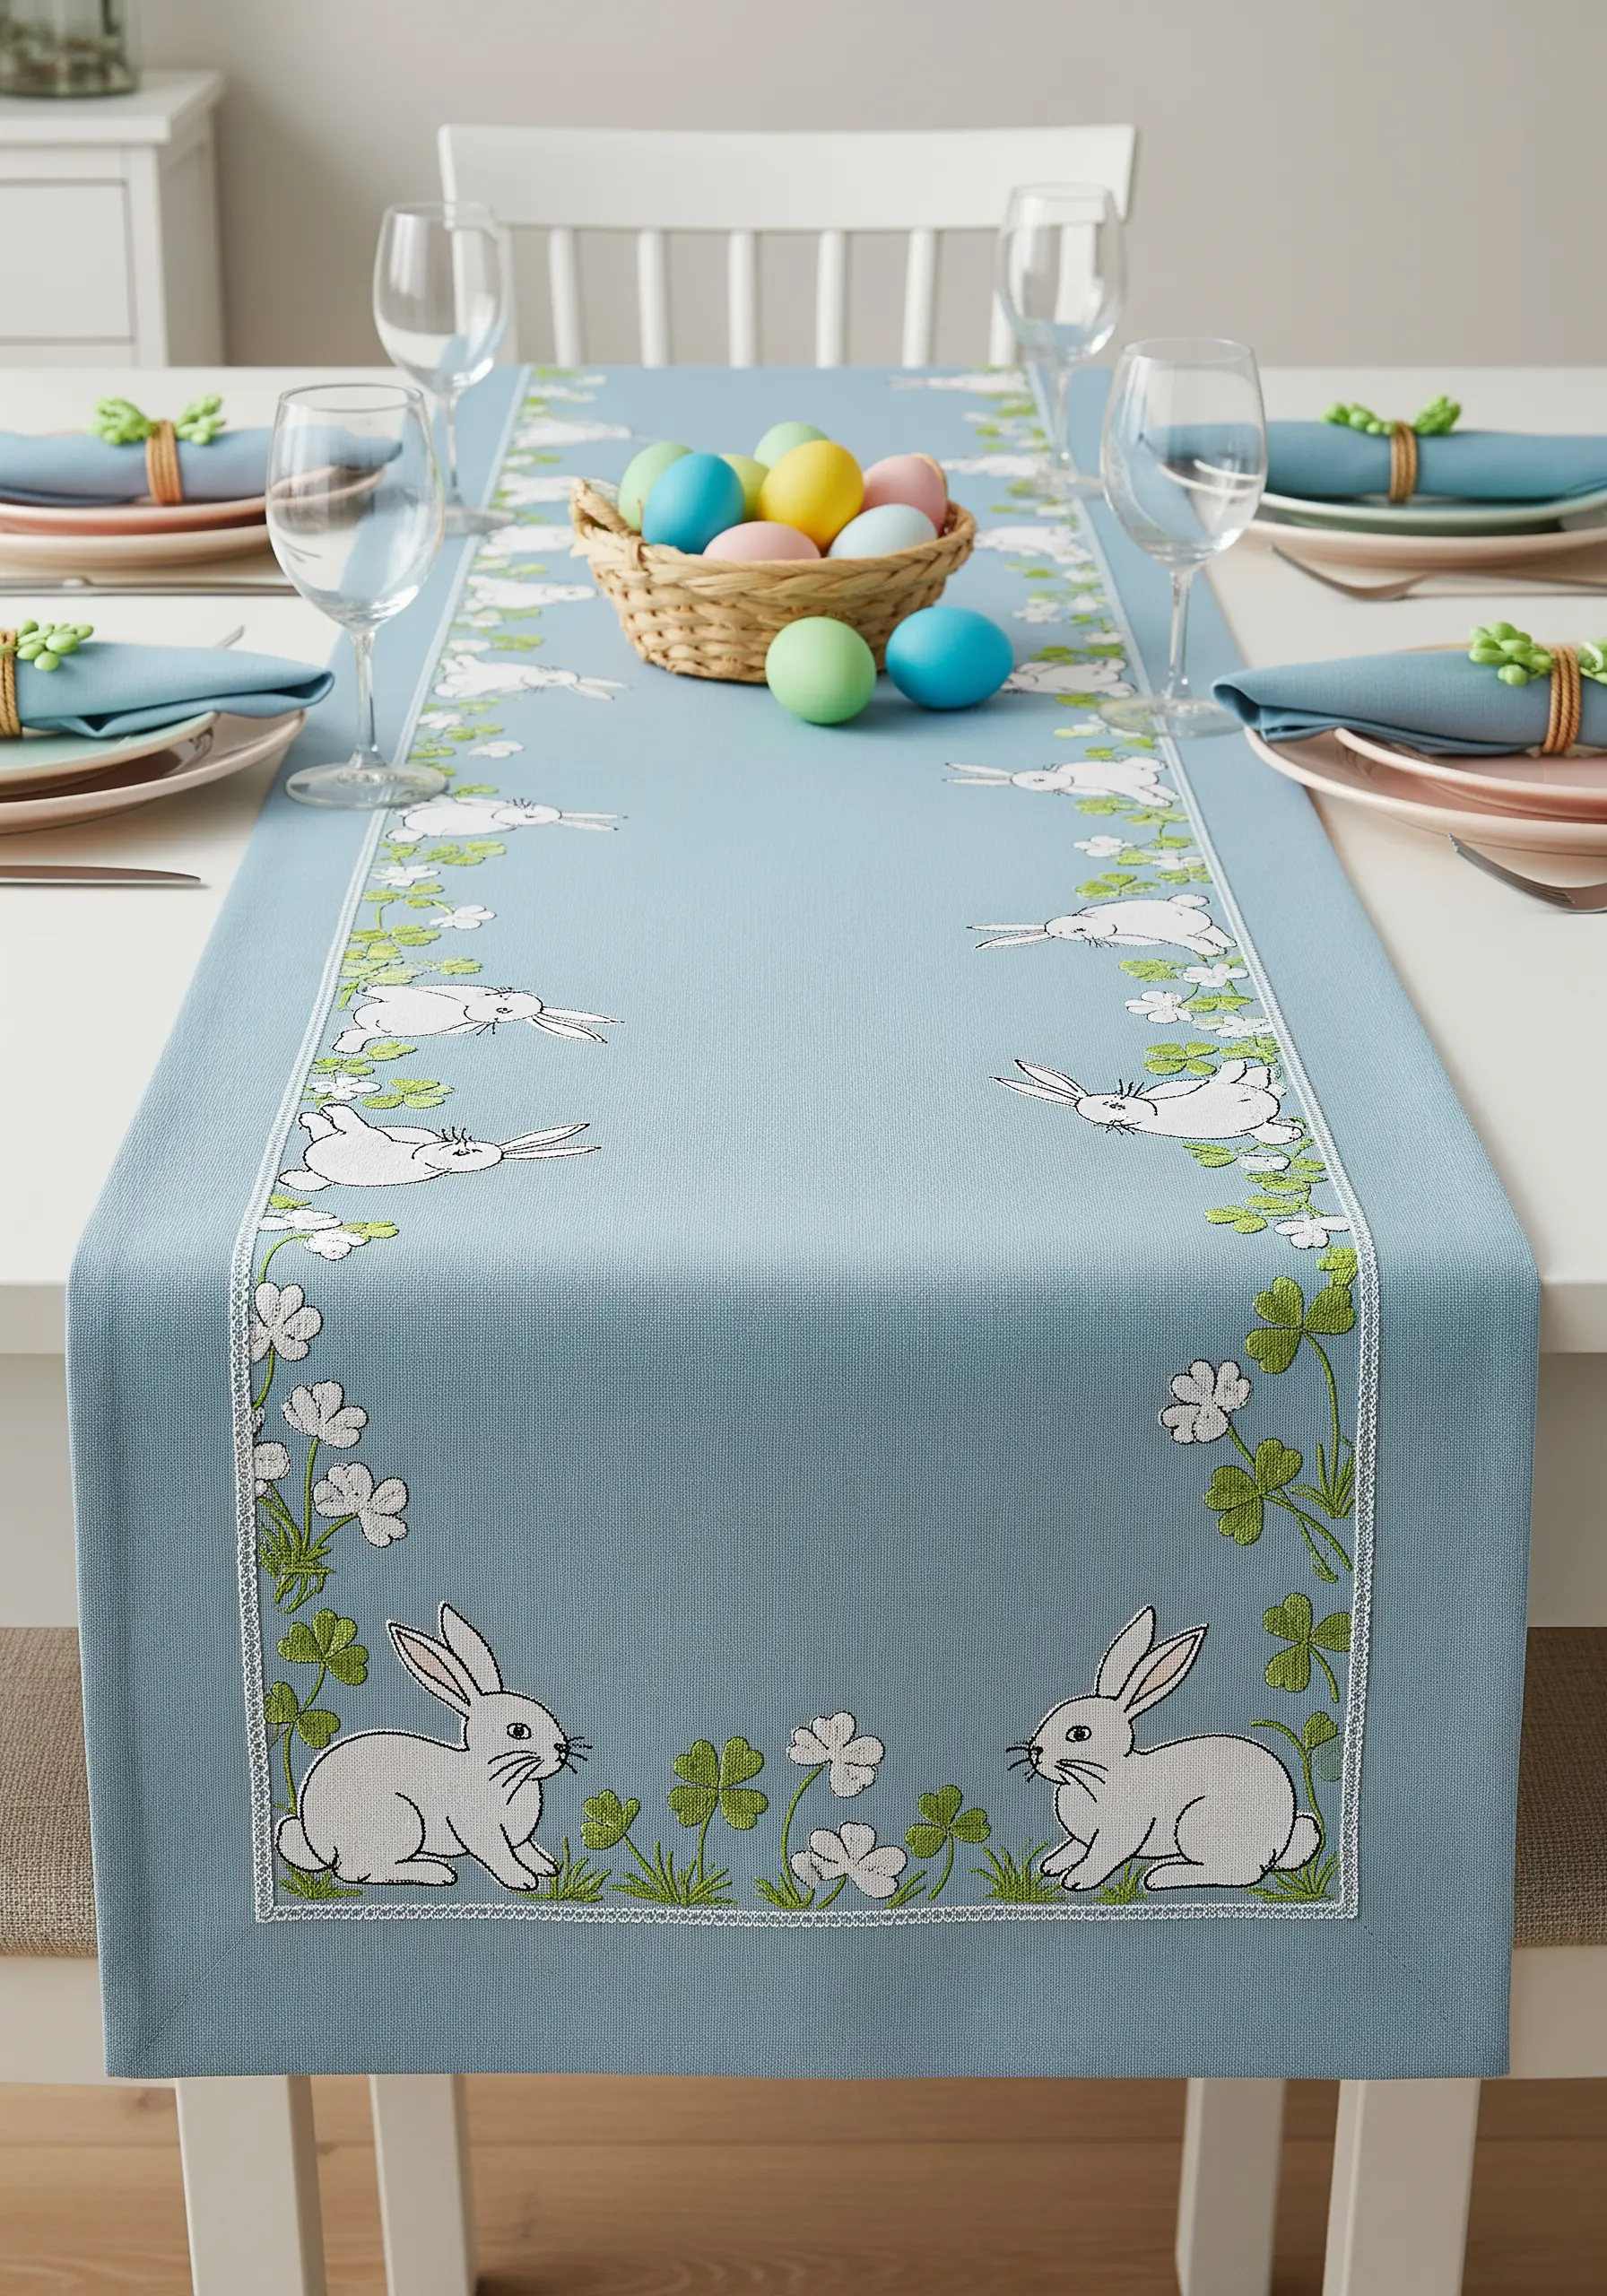
For motifs that require a perfectly solid, opaque fill, combine the techniques of appliqué and embroidery.
First, cut the rabbit shape from a piece of white felt or tightly woven cotton fabric and secure it to your runner.
Then, work a tight satin stitch or blanket stitch around the entire edge. This neatly conceals the raw edges of the fabric and creates a crisp, clean, and beautifully finished outline.
26. Creating Depth with Layered Tonal Outlines
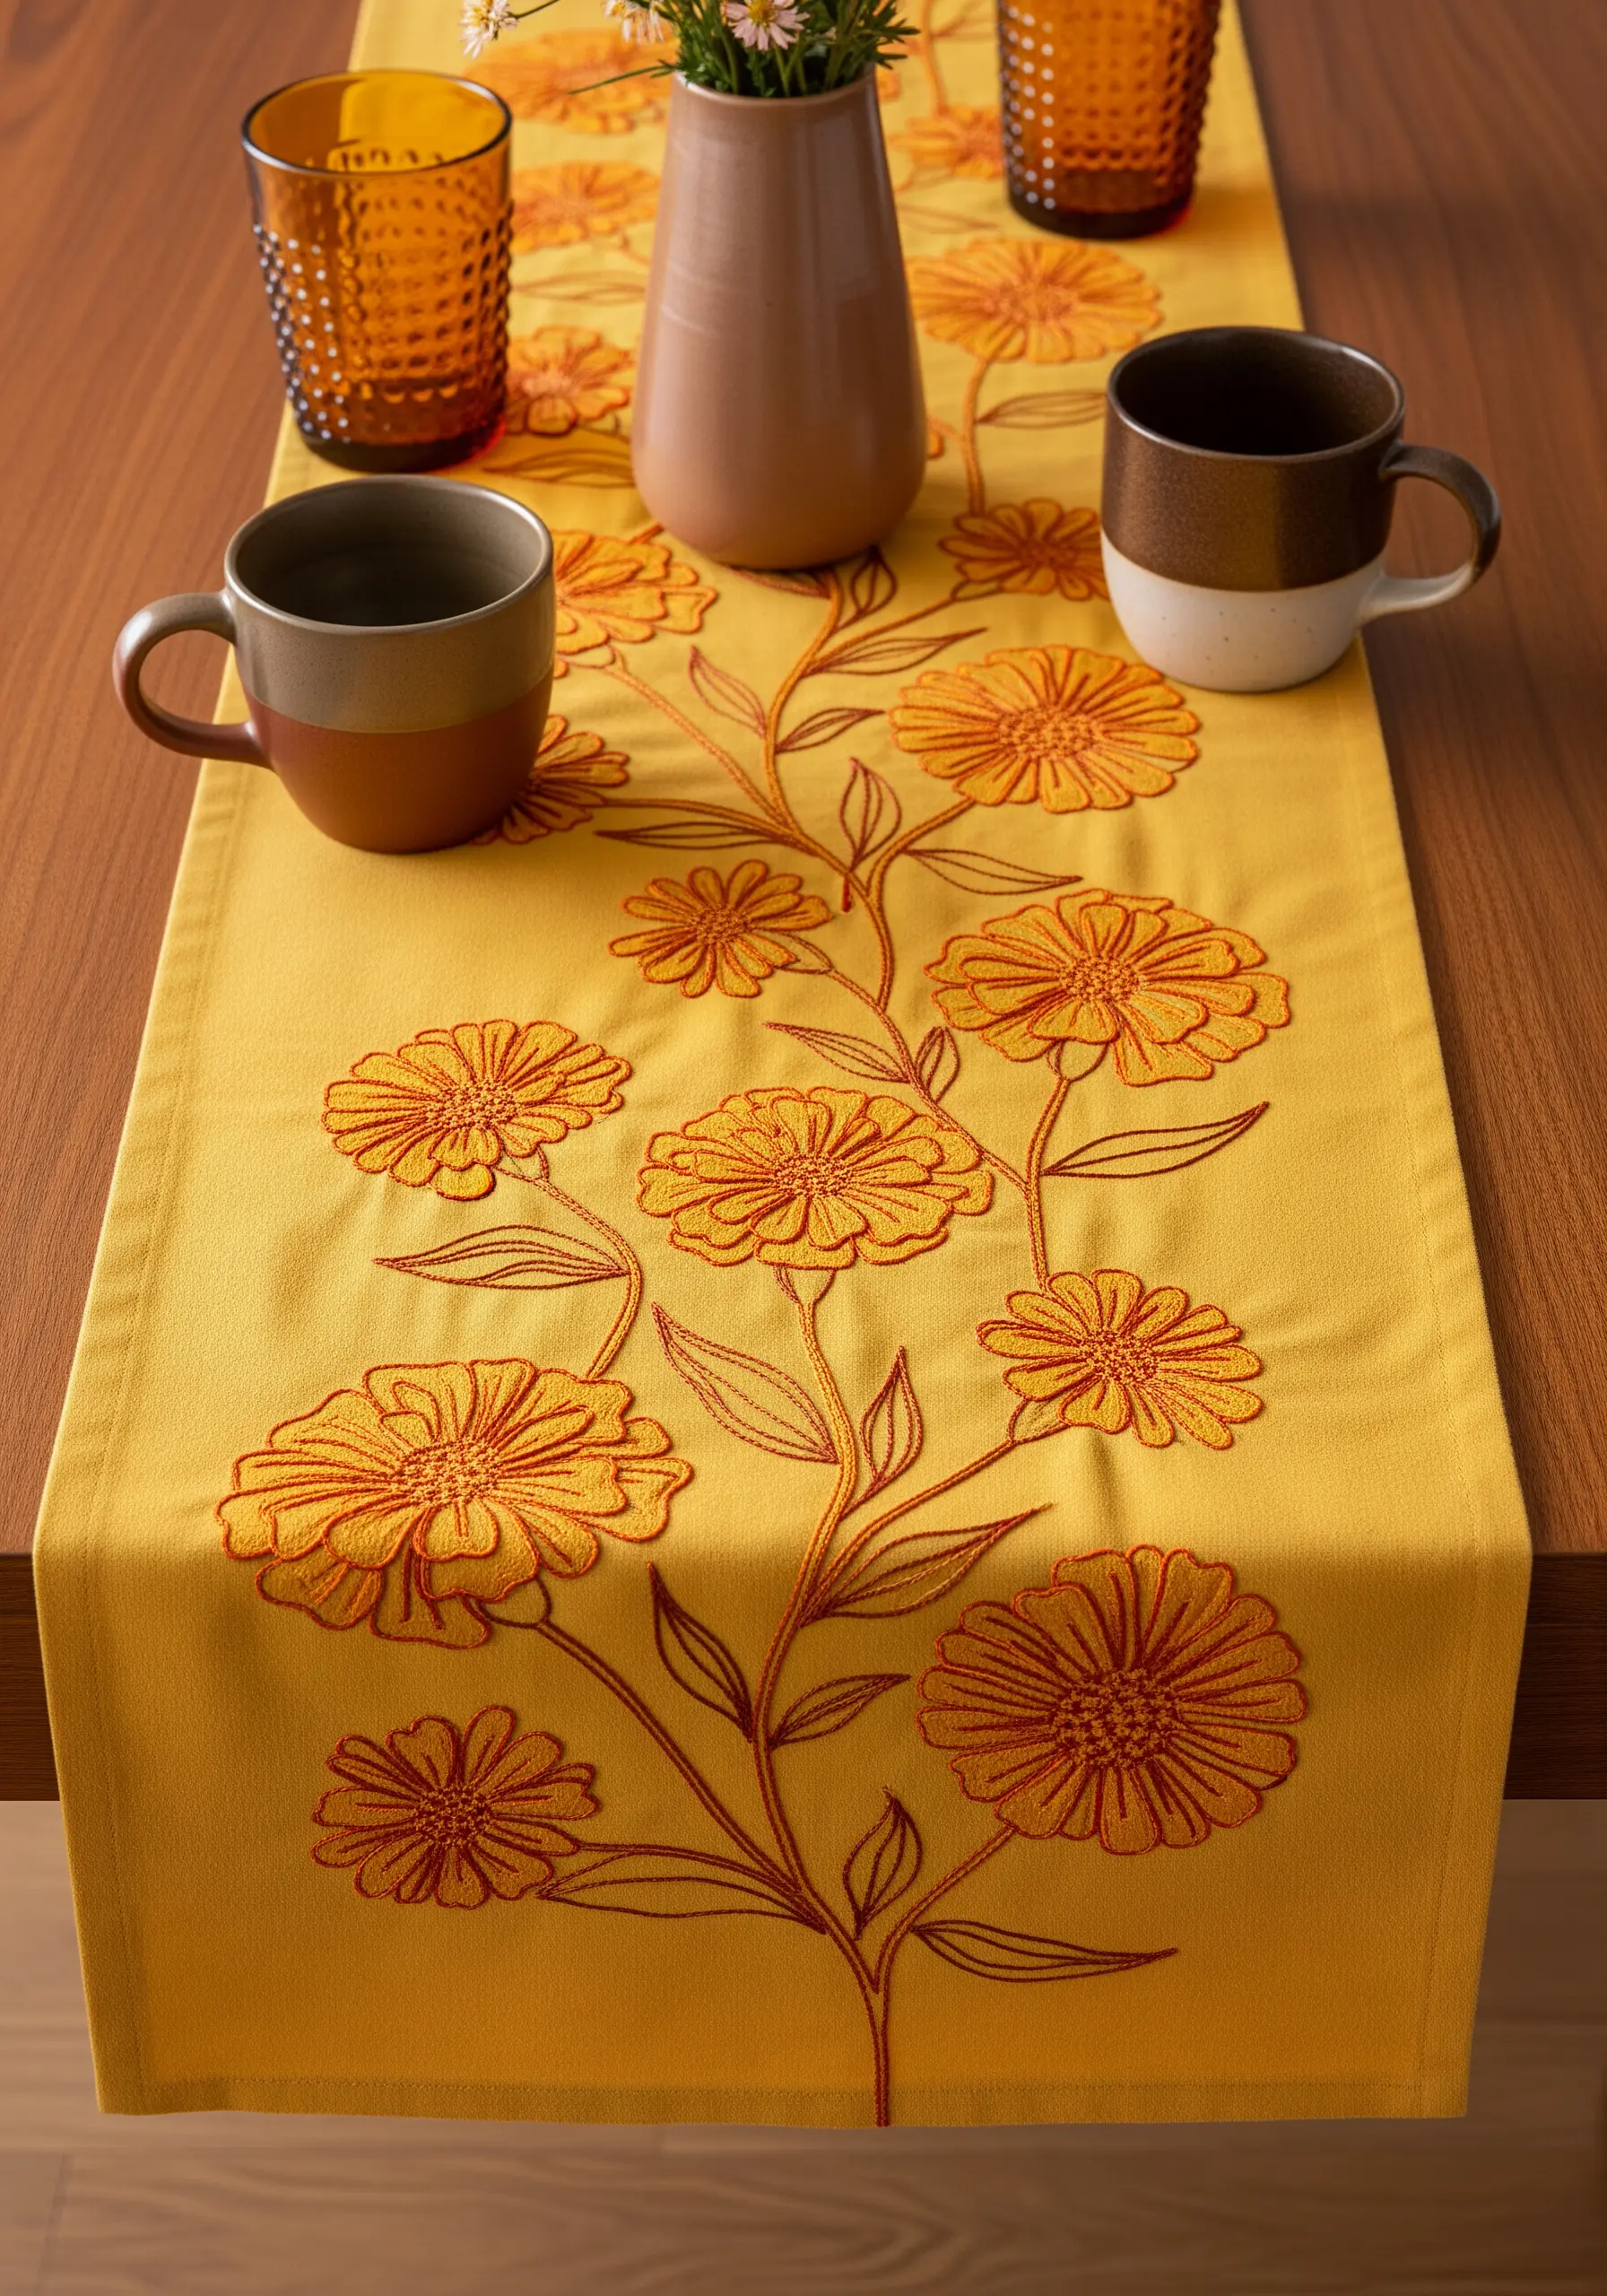
This retro-inspired design achieves its charming dimension through a simple layering technique.
First, stitch the inner details of the flower using a lighter, warmer floss and an open fill stitch like long straight stitches.
Then, using a darker, contrasting thread, stitch the main outline on top with a clean backstitch.
This method of layering a dark outline over a lighter fill creates an immediate sense of depth and produces a graphic, screen-printed look that is perfect for vintage florals.
27. Delicate Herb Sprigs for a Minimalist Table
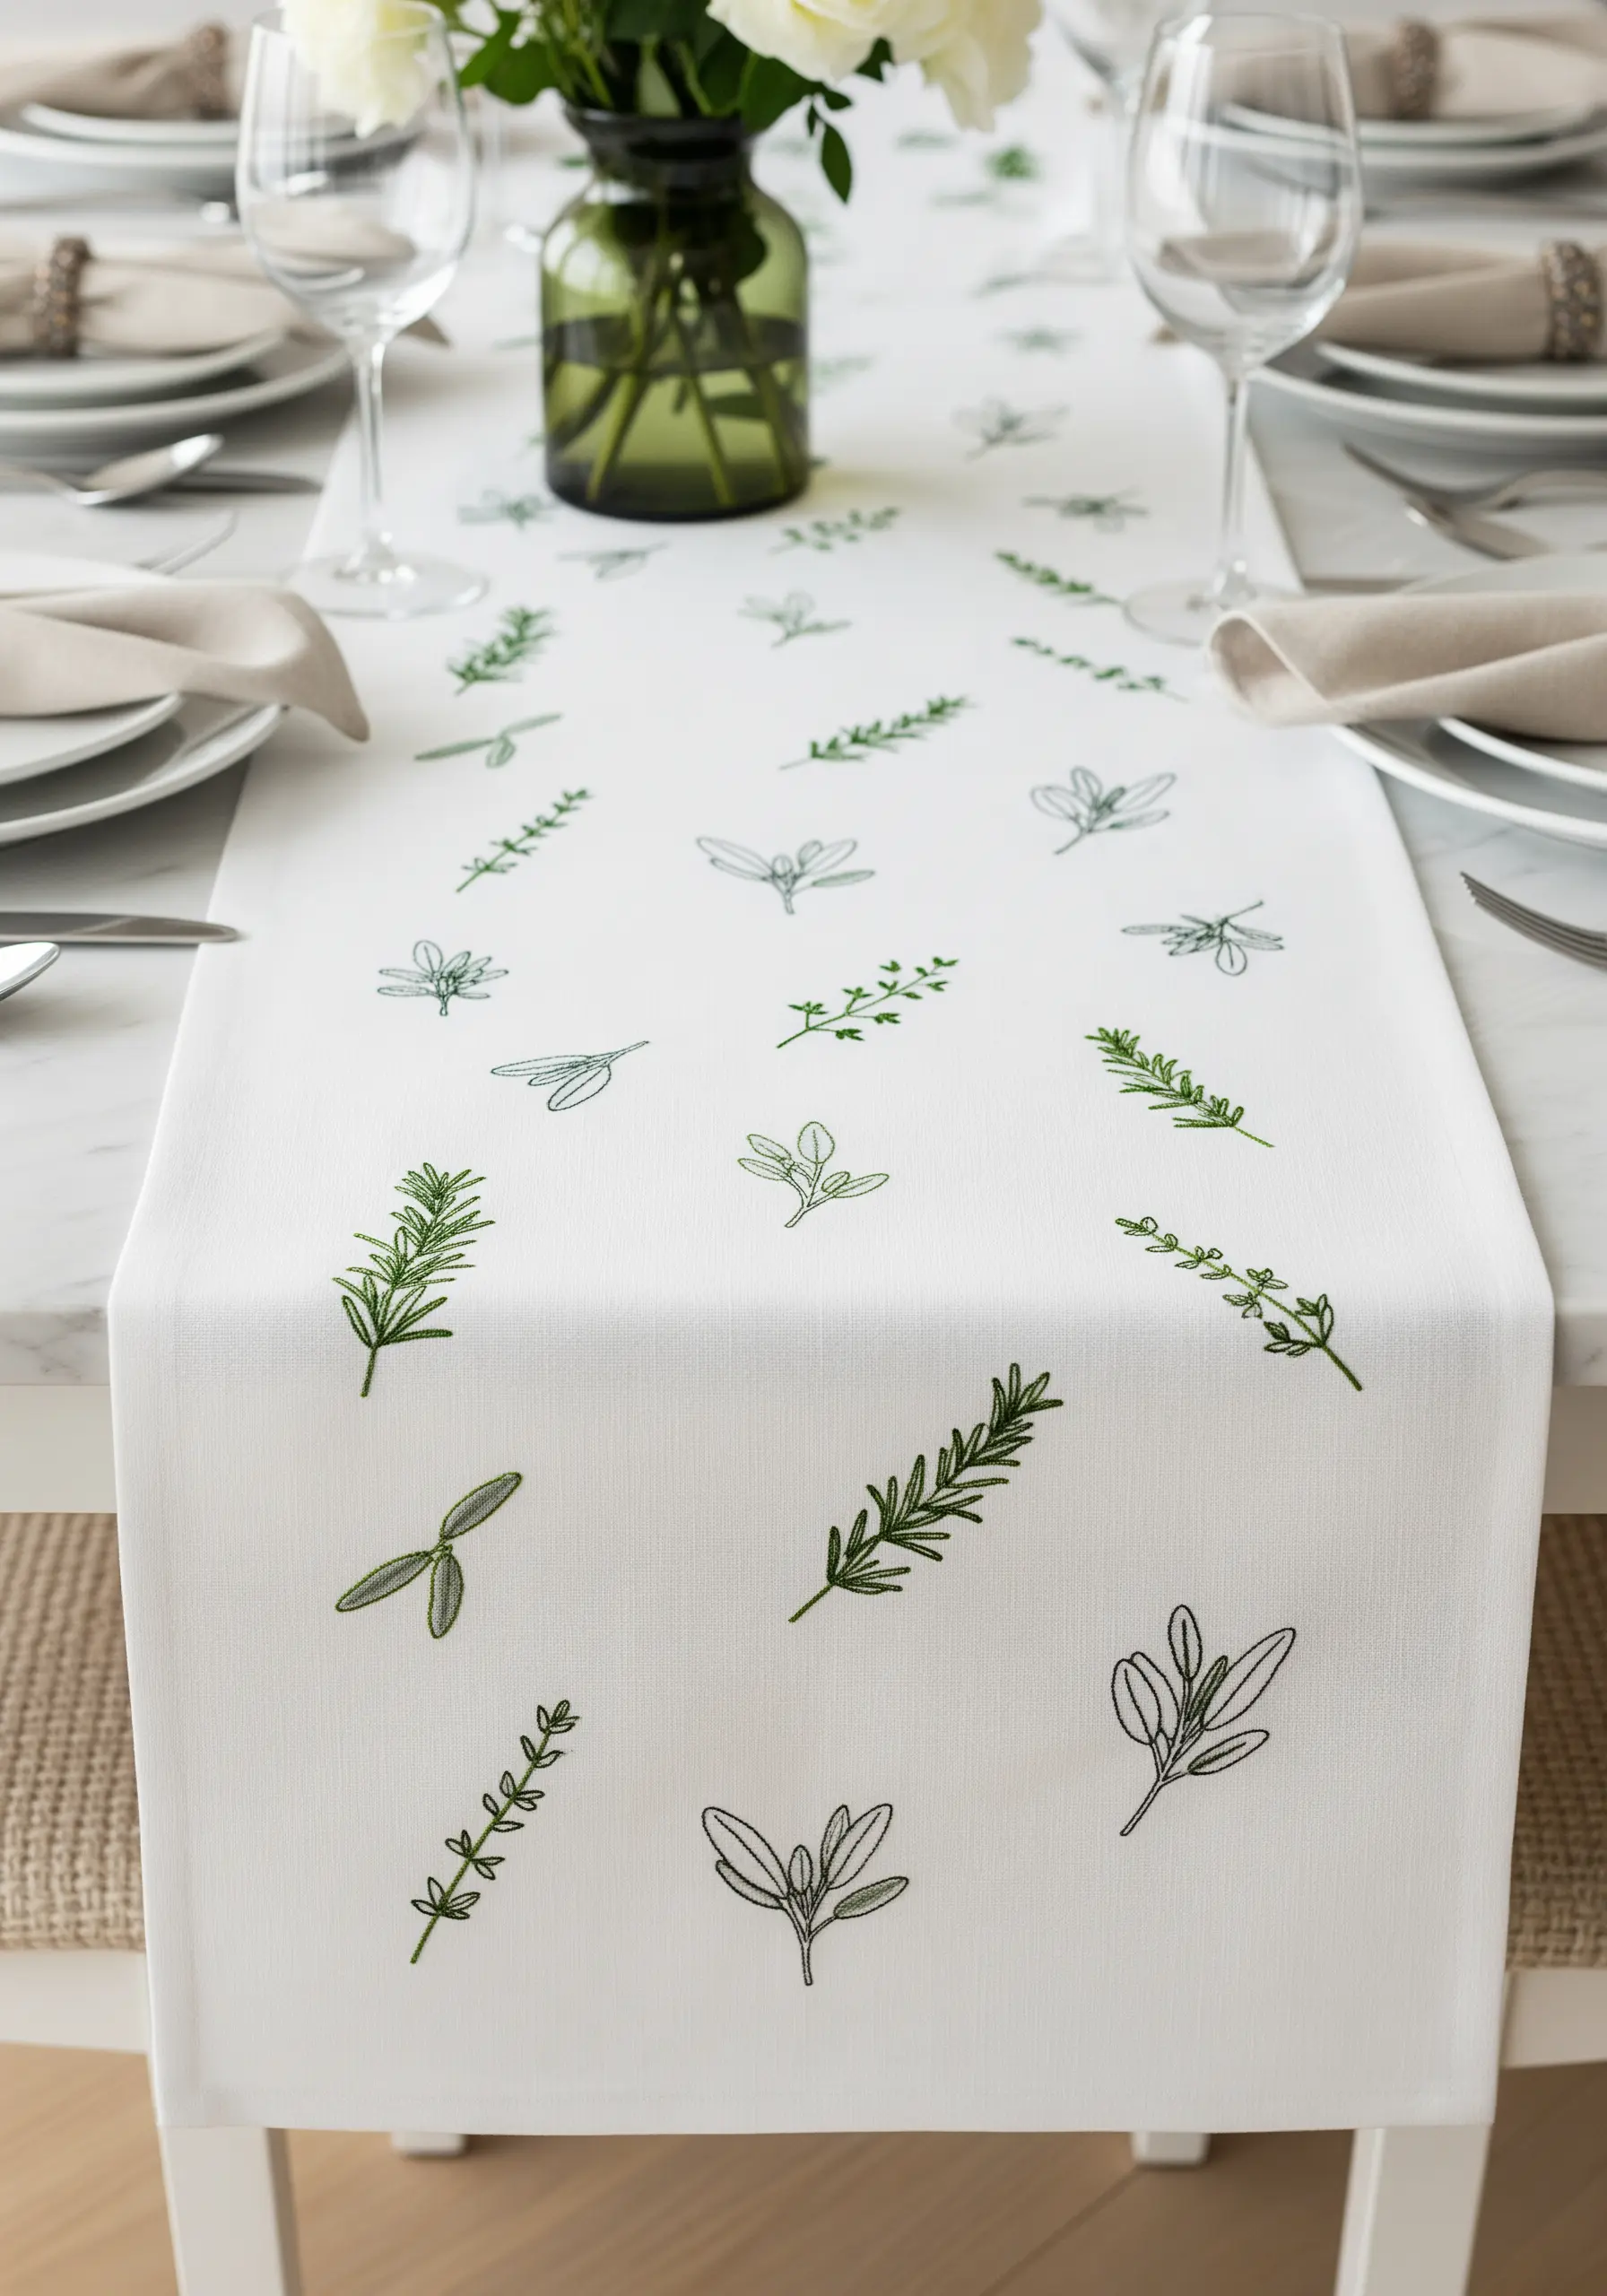
The elegance of this design lies in its restraint and delicate execution.
For fine herbs like rosemary and sage, use only one or two strands of floss to keep the lines crisp and light.
A simple backstitch is perfect for the stems, while tiny detached chain stitches or single straight stitches form the leaves.
By scattering these tiny embroidery patterns across the runner, you create a light, airy composition that feels effortlessly chic and modern.
28. Coastal Elegance with Two-Tone Neutrals
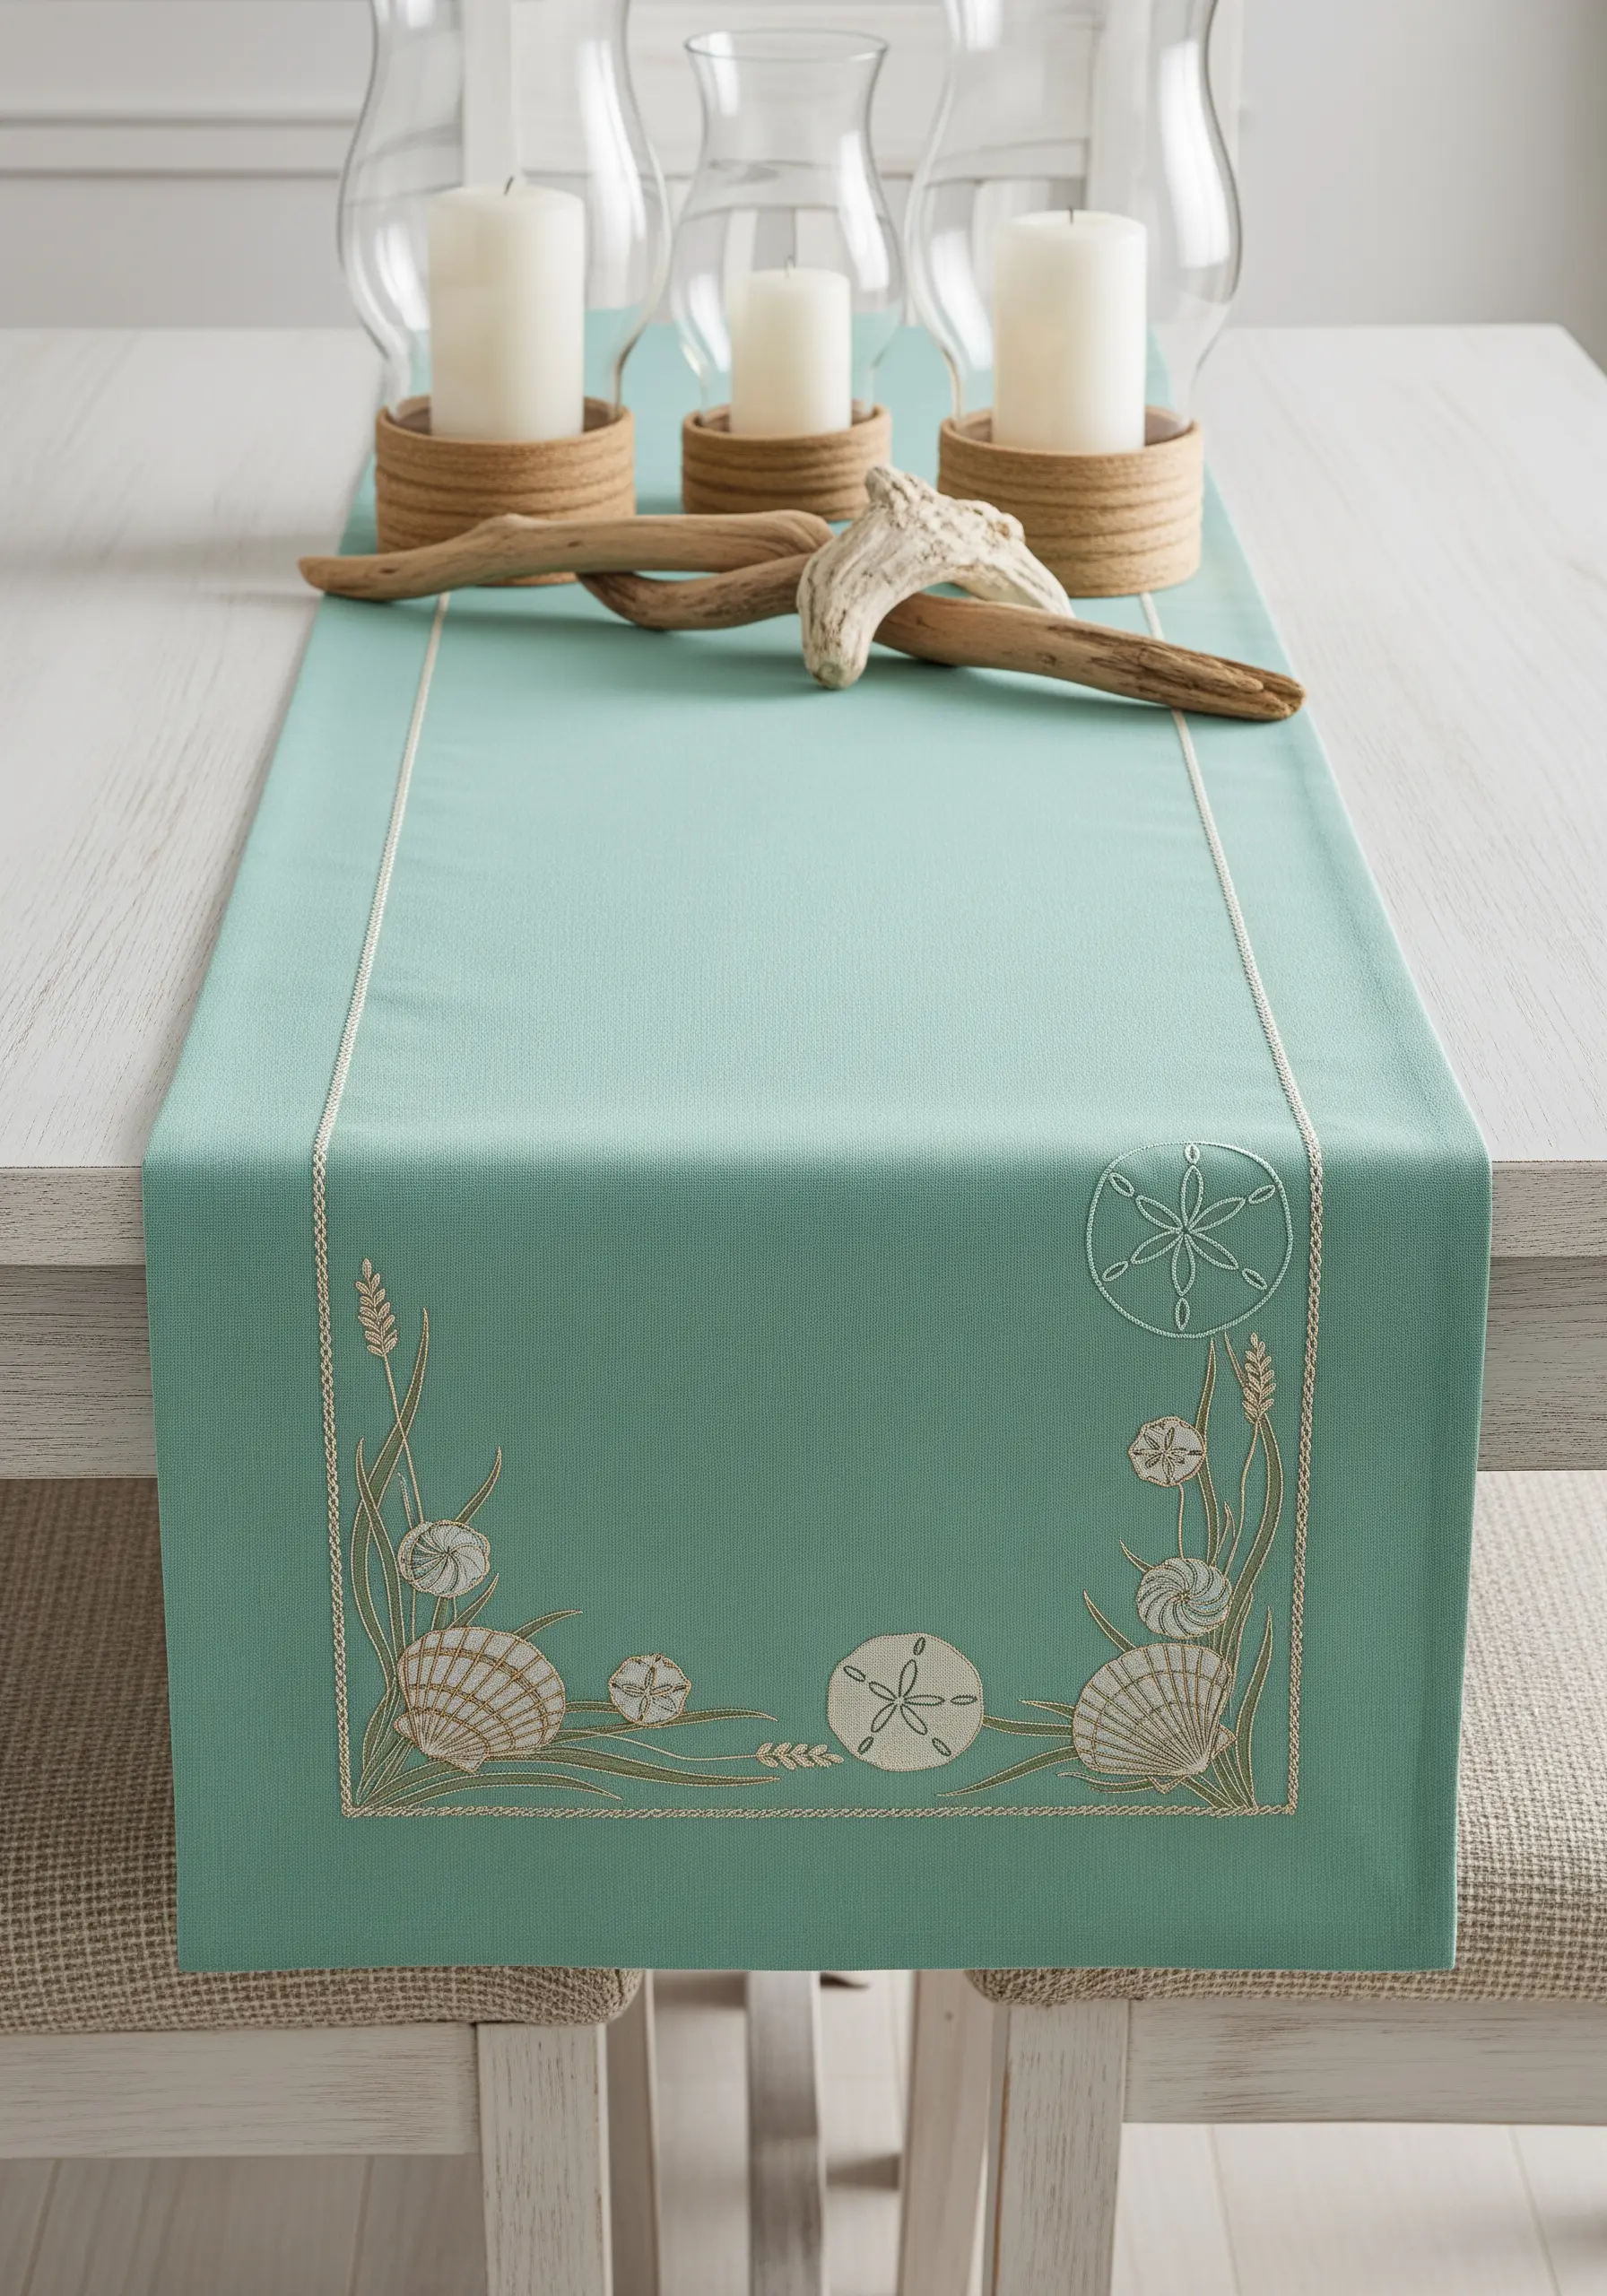
Give your seashell motifs a subtle, sun-bleached sophistication by working with two closely related neutral colors.
Use a soft beige or taupe for the main outlines of the shells and seaweed.
Then, add delicate highlights and details—like the fine ribs on a shell—using a slightly lighter off-white or cream thread.
This tonal variation adds far more depth than a single flat outline and perfectly evokes a serene, natural coastal feeling.
29. Shimmer and Sparkle on a Dark Background
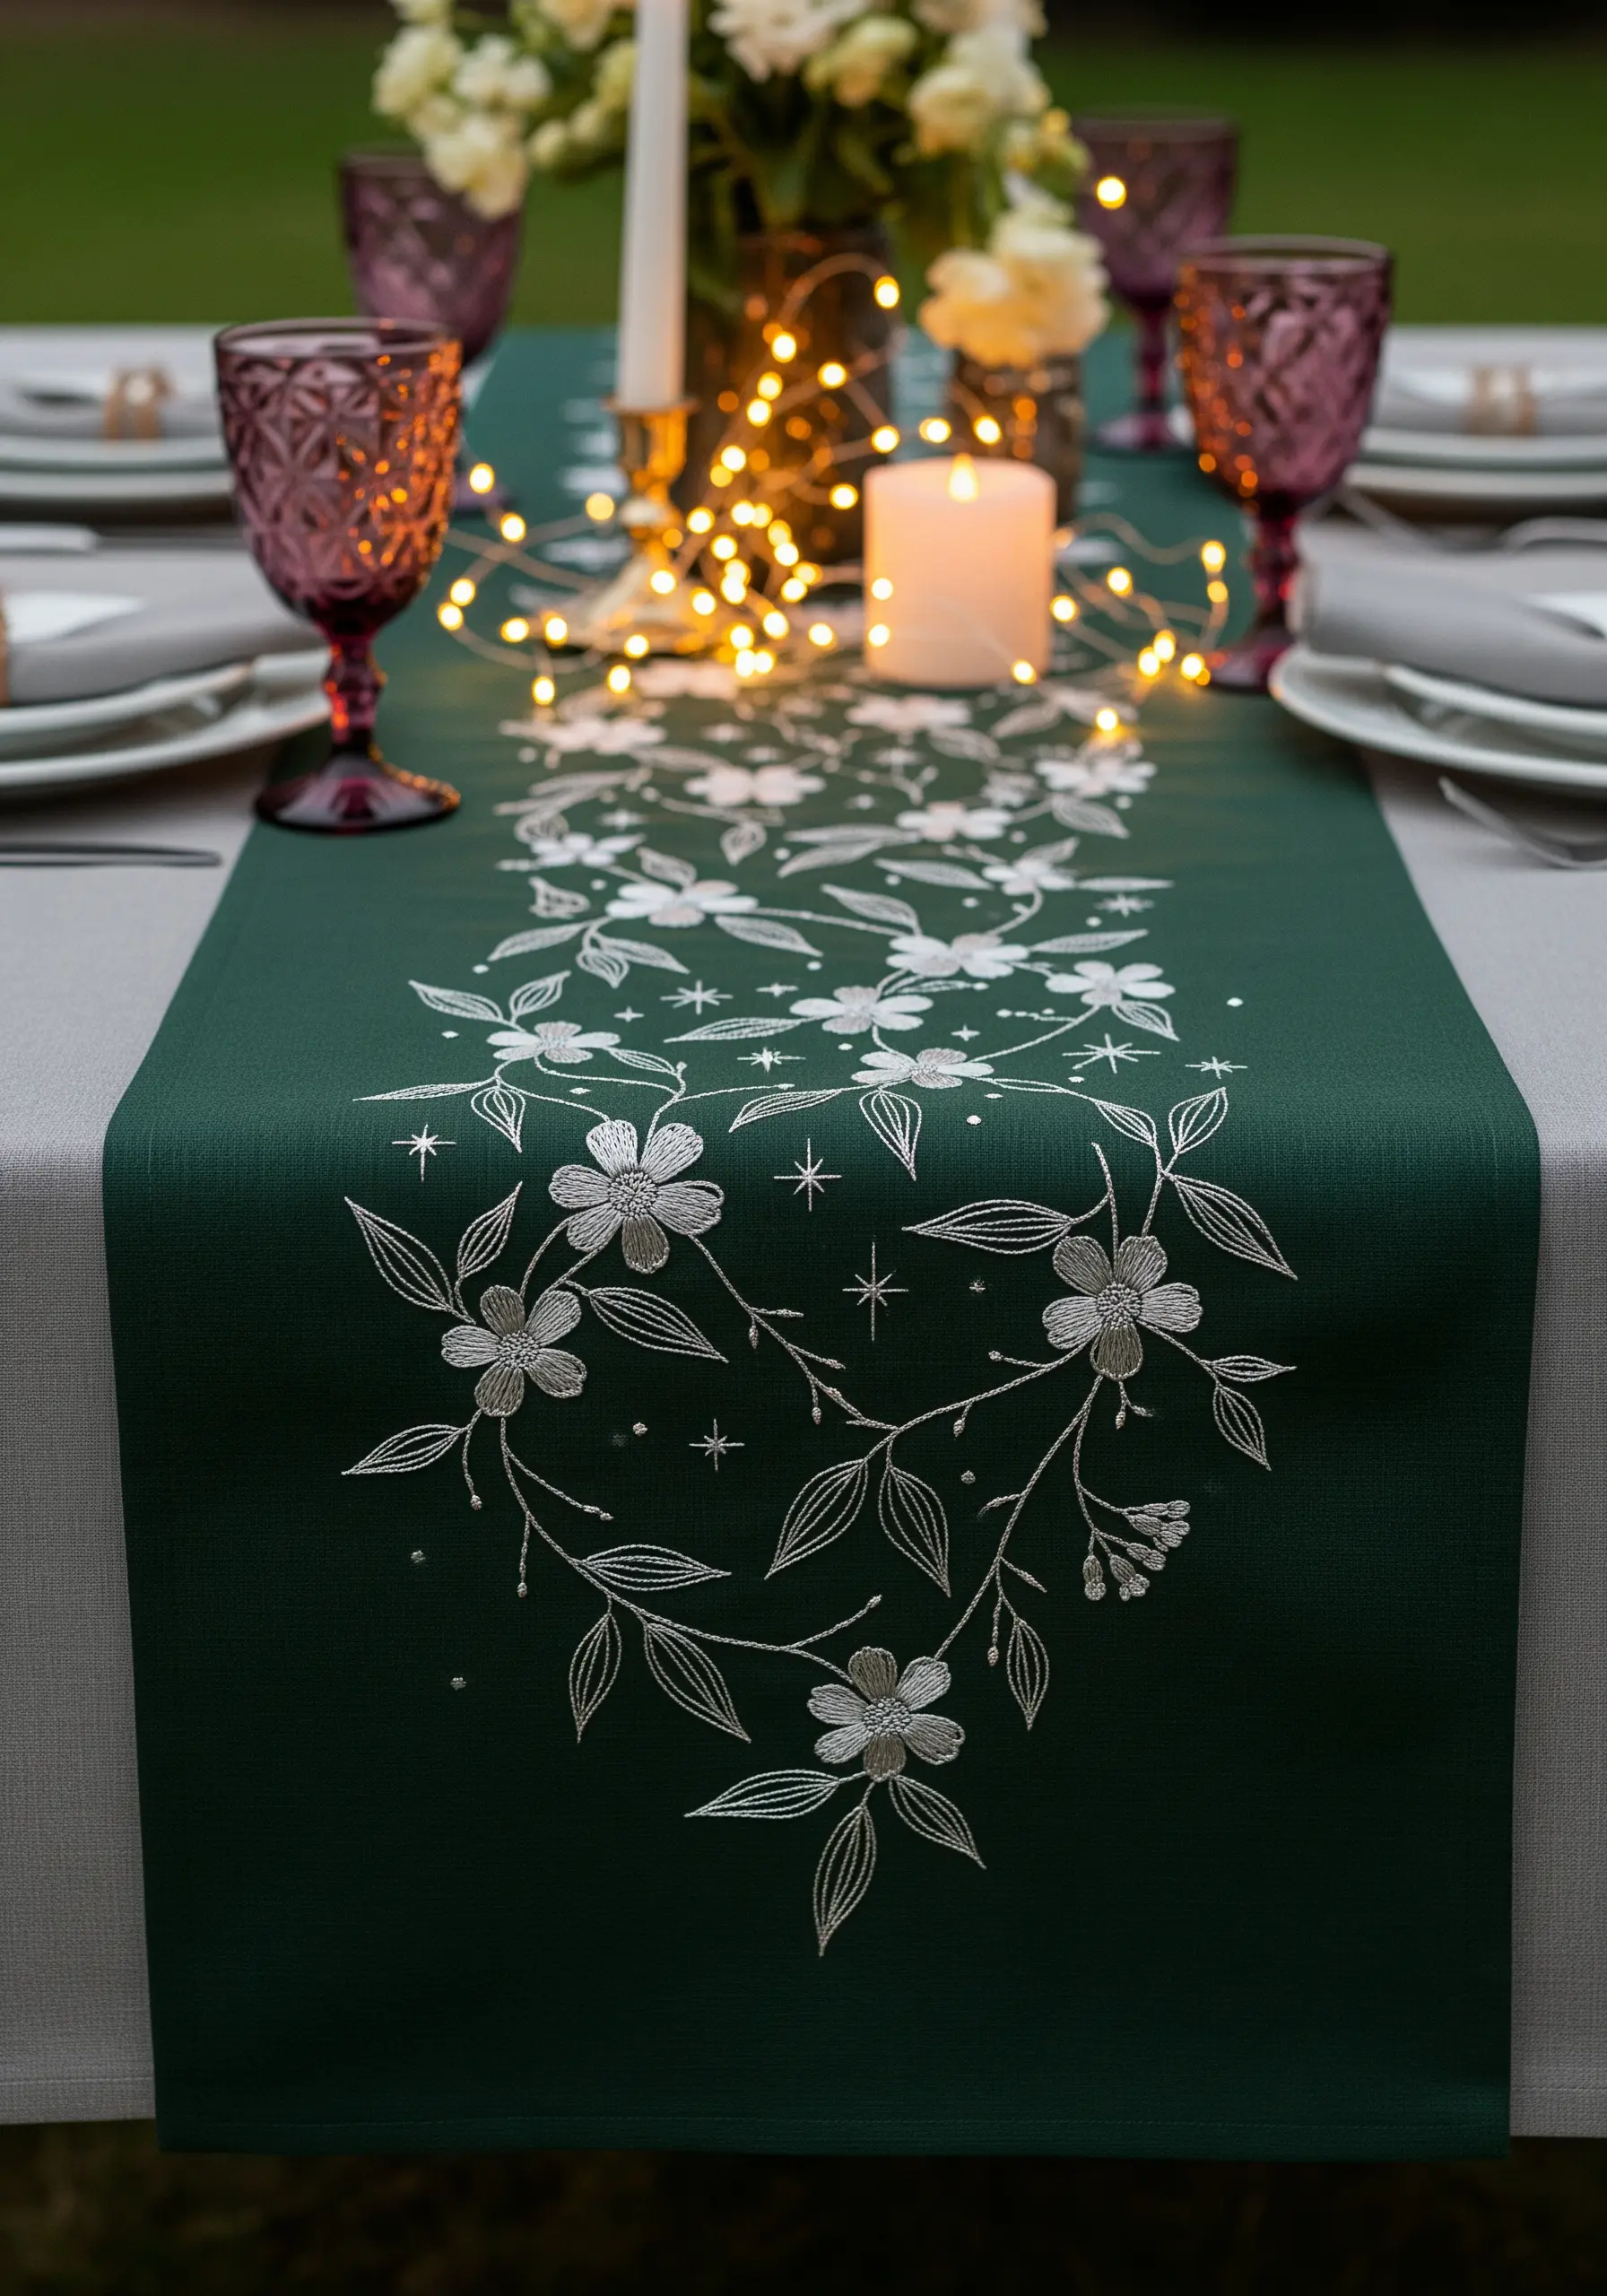
To make your embroidery truly glow on a dark fabric, incorporate elements that catch the light.
Use a standard cotton floss in a light color for the main floral outlines.
Then, strategically add highlights along the curves of the stems and petals using a shimmering silver metallic thread.
Finally, a few carefully placed silver seed beads or French knots in metallic floss will act like stars or dewdrops, adding a final touch of magic.
30. The Classic Laurel and Peony Emblem
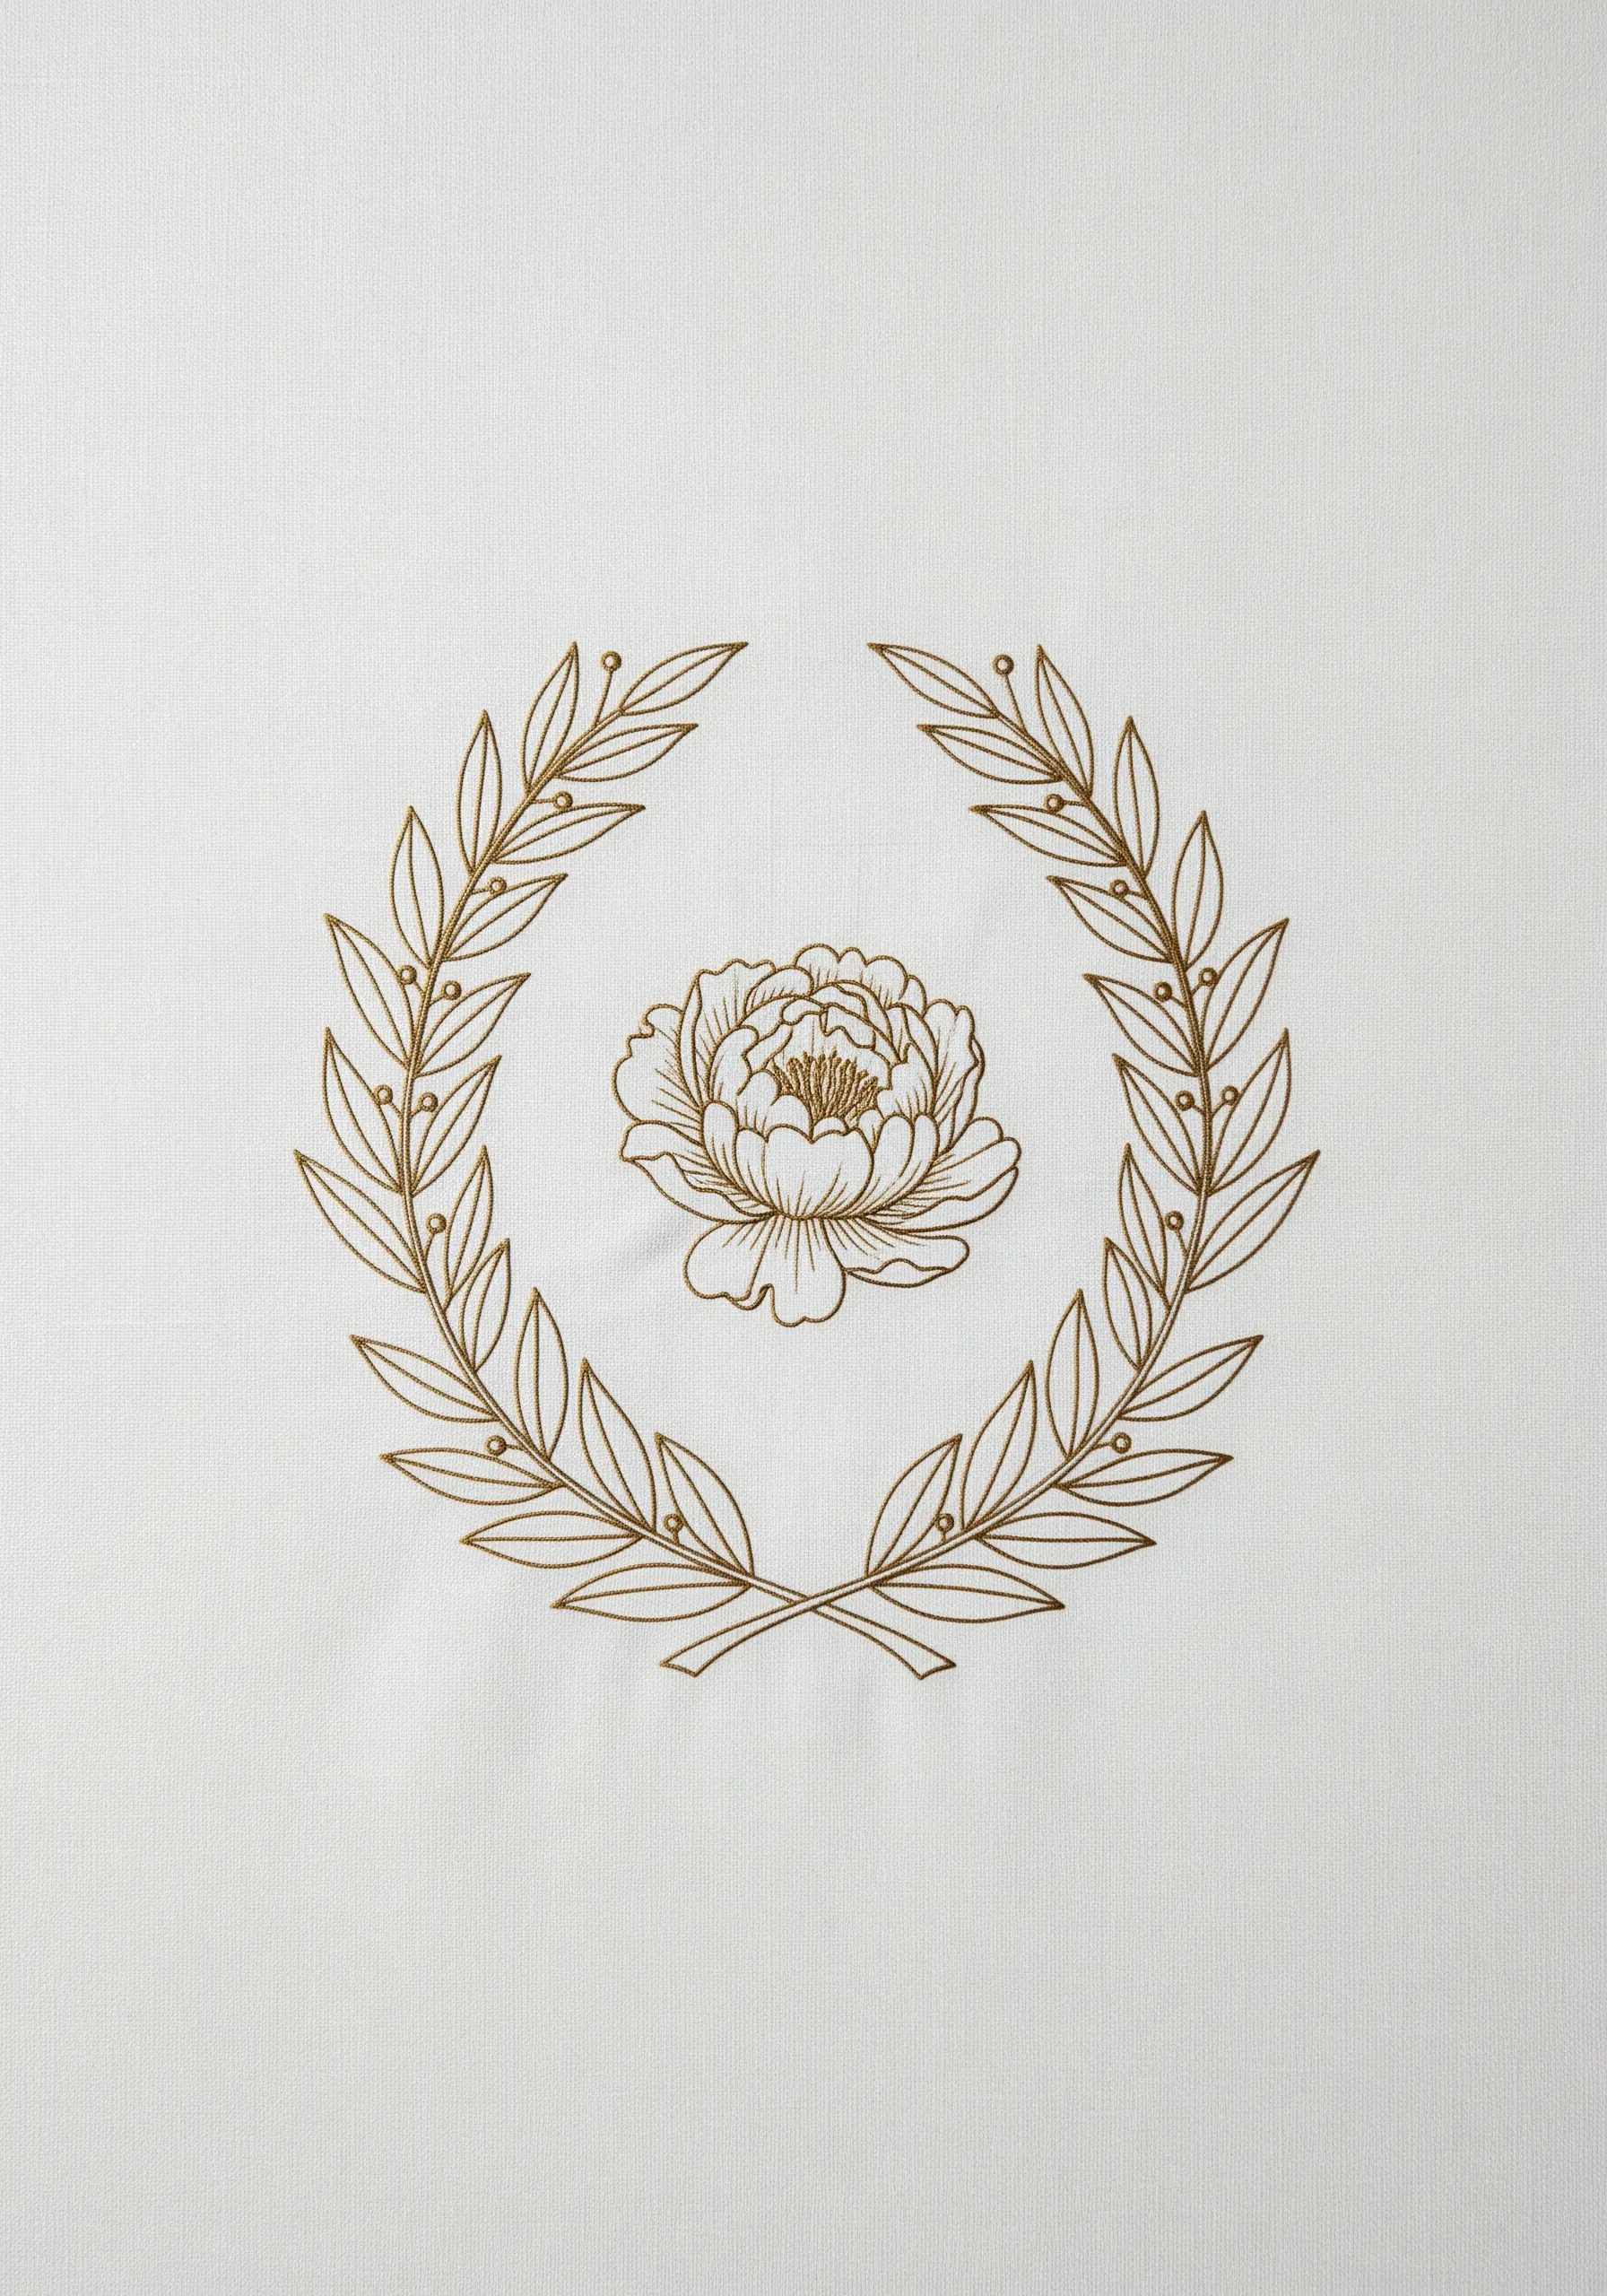
This timeless composition achieves its elegance through a balance of texture and line.
For the laurel leaves, use a fishbone stitch. This stitch naturally creates a central vein and gives the leaves a pleasing, dimensional texture.
In contrast, render the more complex peony flower with a simple, clean backstitch outline.
This balance—the textural leaves framing the delicate line art of the flower—is the key to its classic and sophisticated appeal.
31. Playful Paths with a Dotted Running Stitch
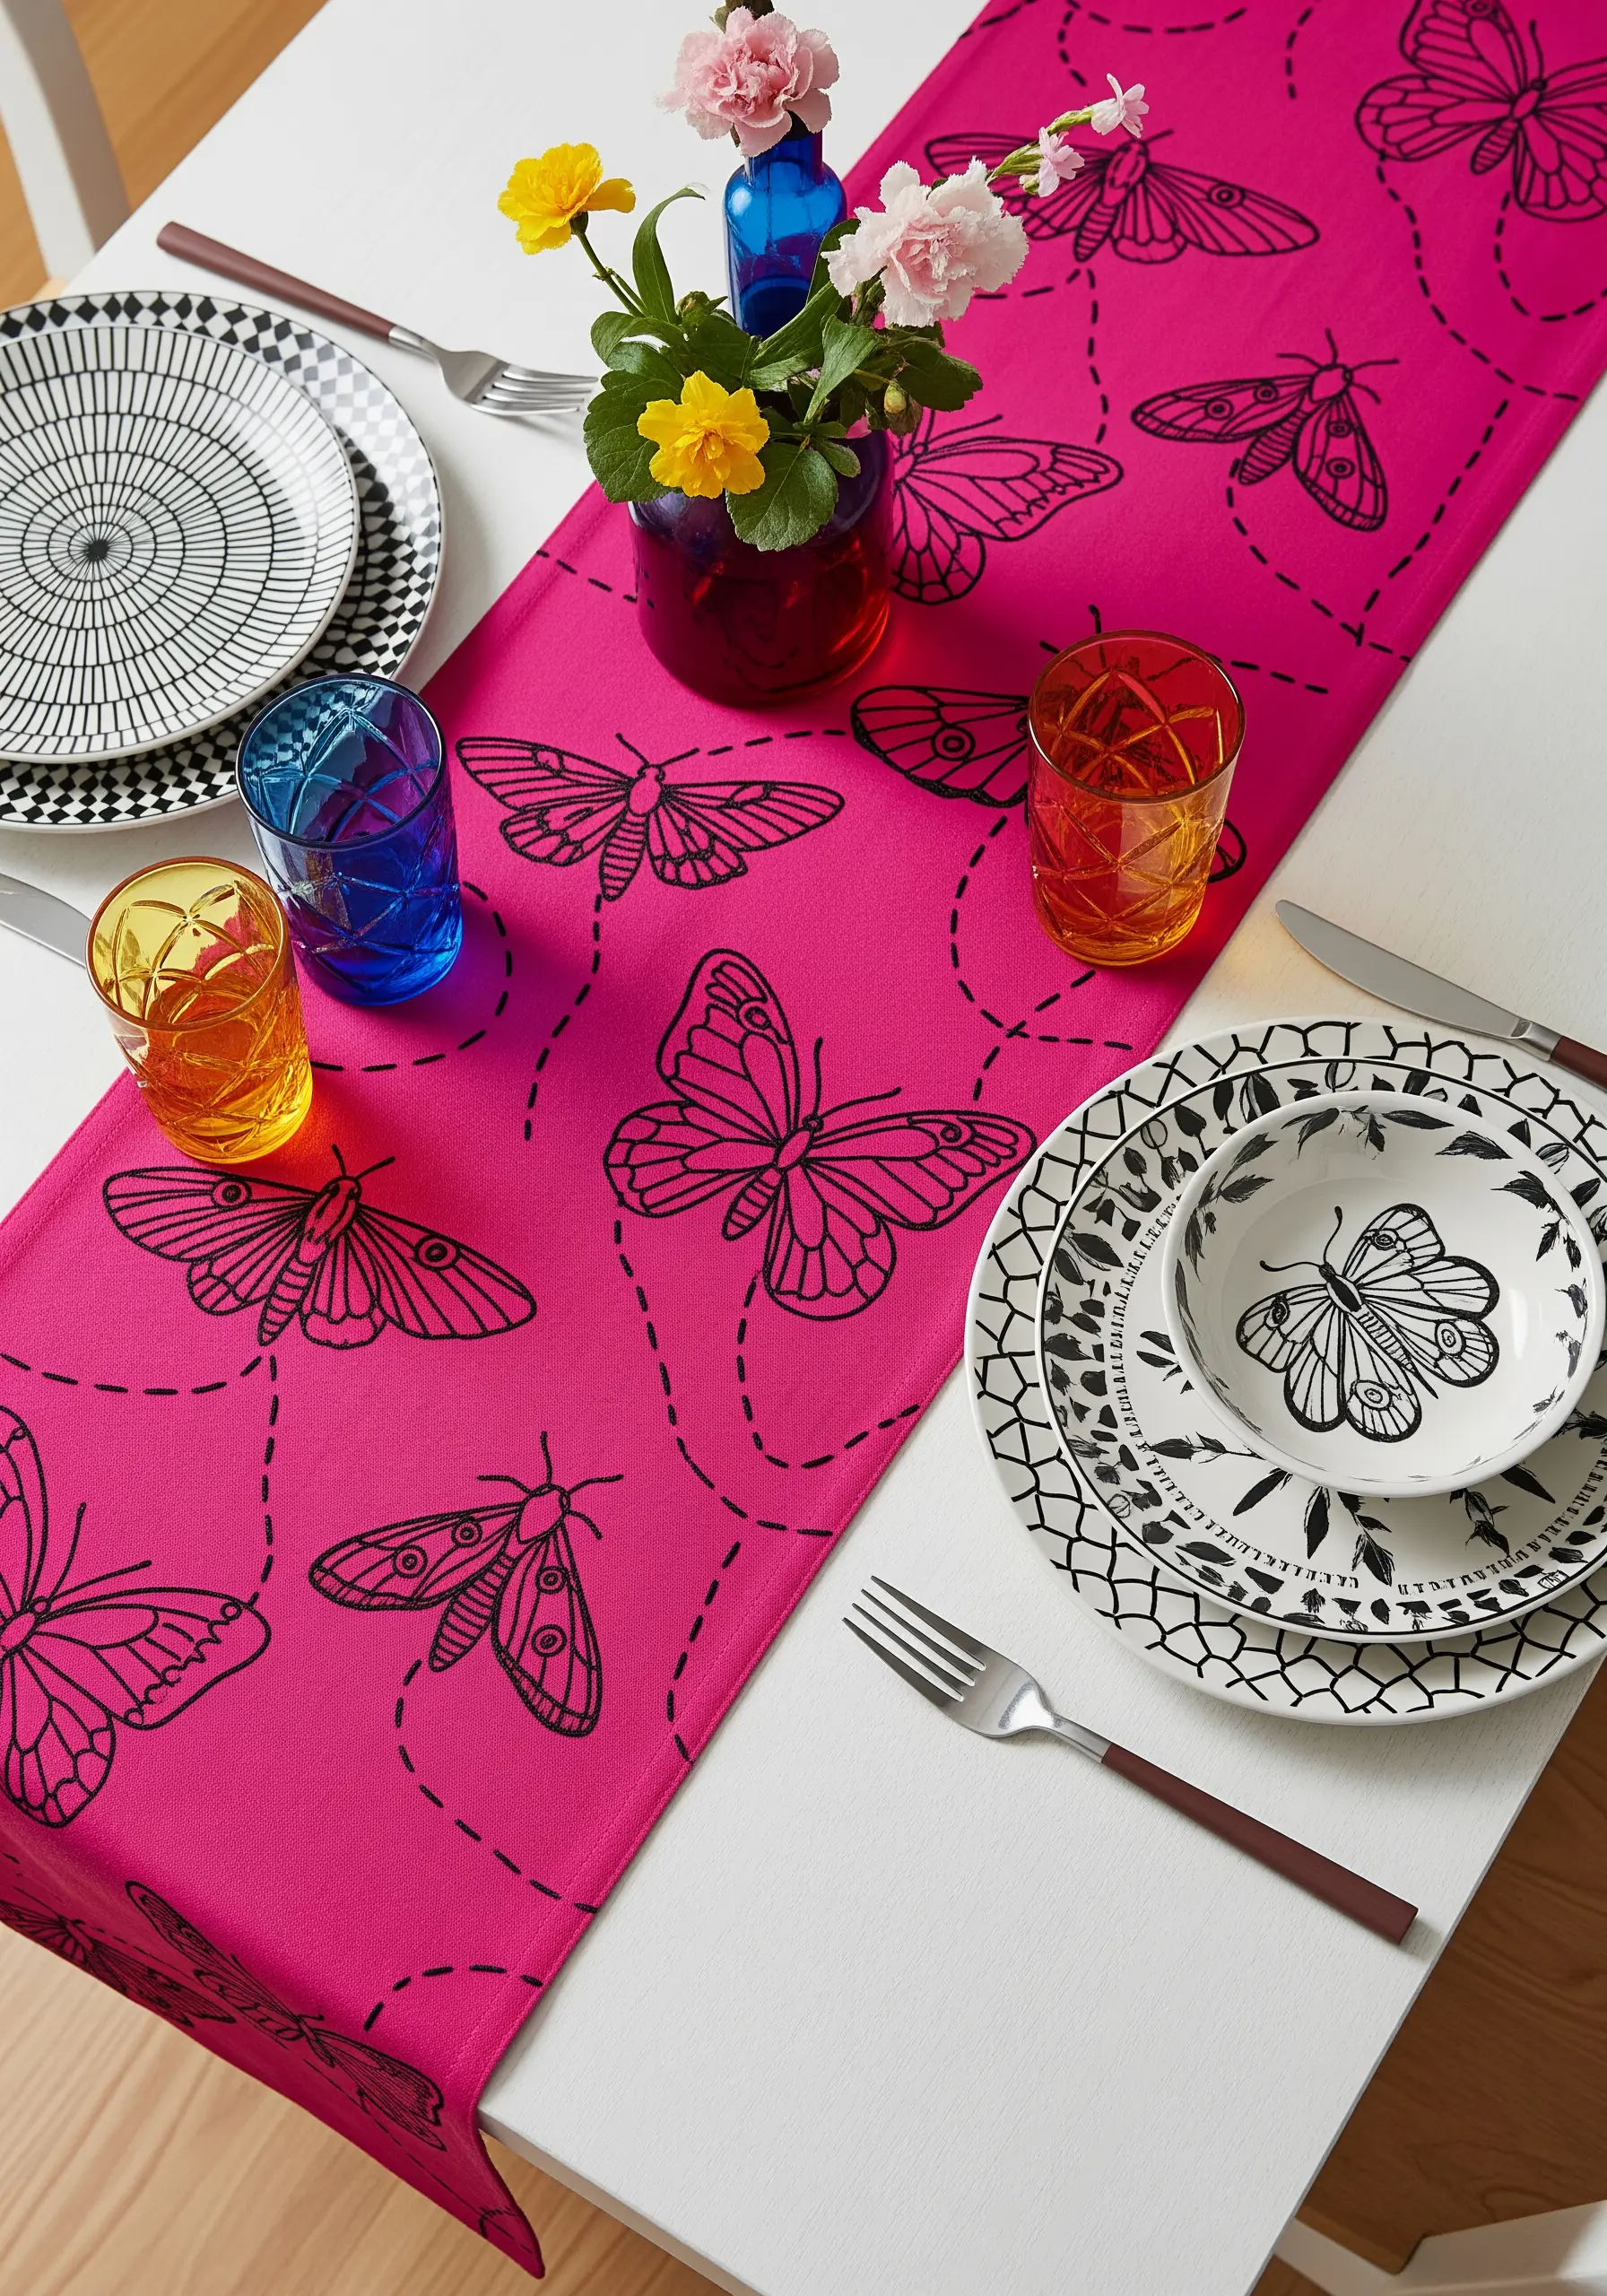
You can instantly create a sense of movement and connect scattered motifs by adding a simple dashed line.
Use a basic running stitch with evenly spaced gaps to create these charming flight paths.
It is a highly effective graphic element that guides the viewer’s eye across the fabric, tying the individual butterfly and moth illustrations into a single, cohesive, and dynamic pattern.
32. Modern Wheat Sheaves with Geometric Lines
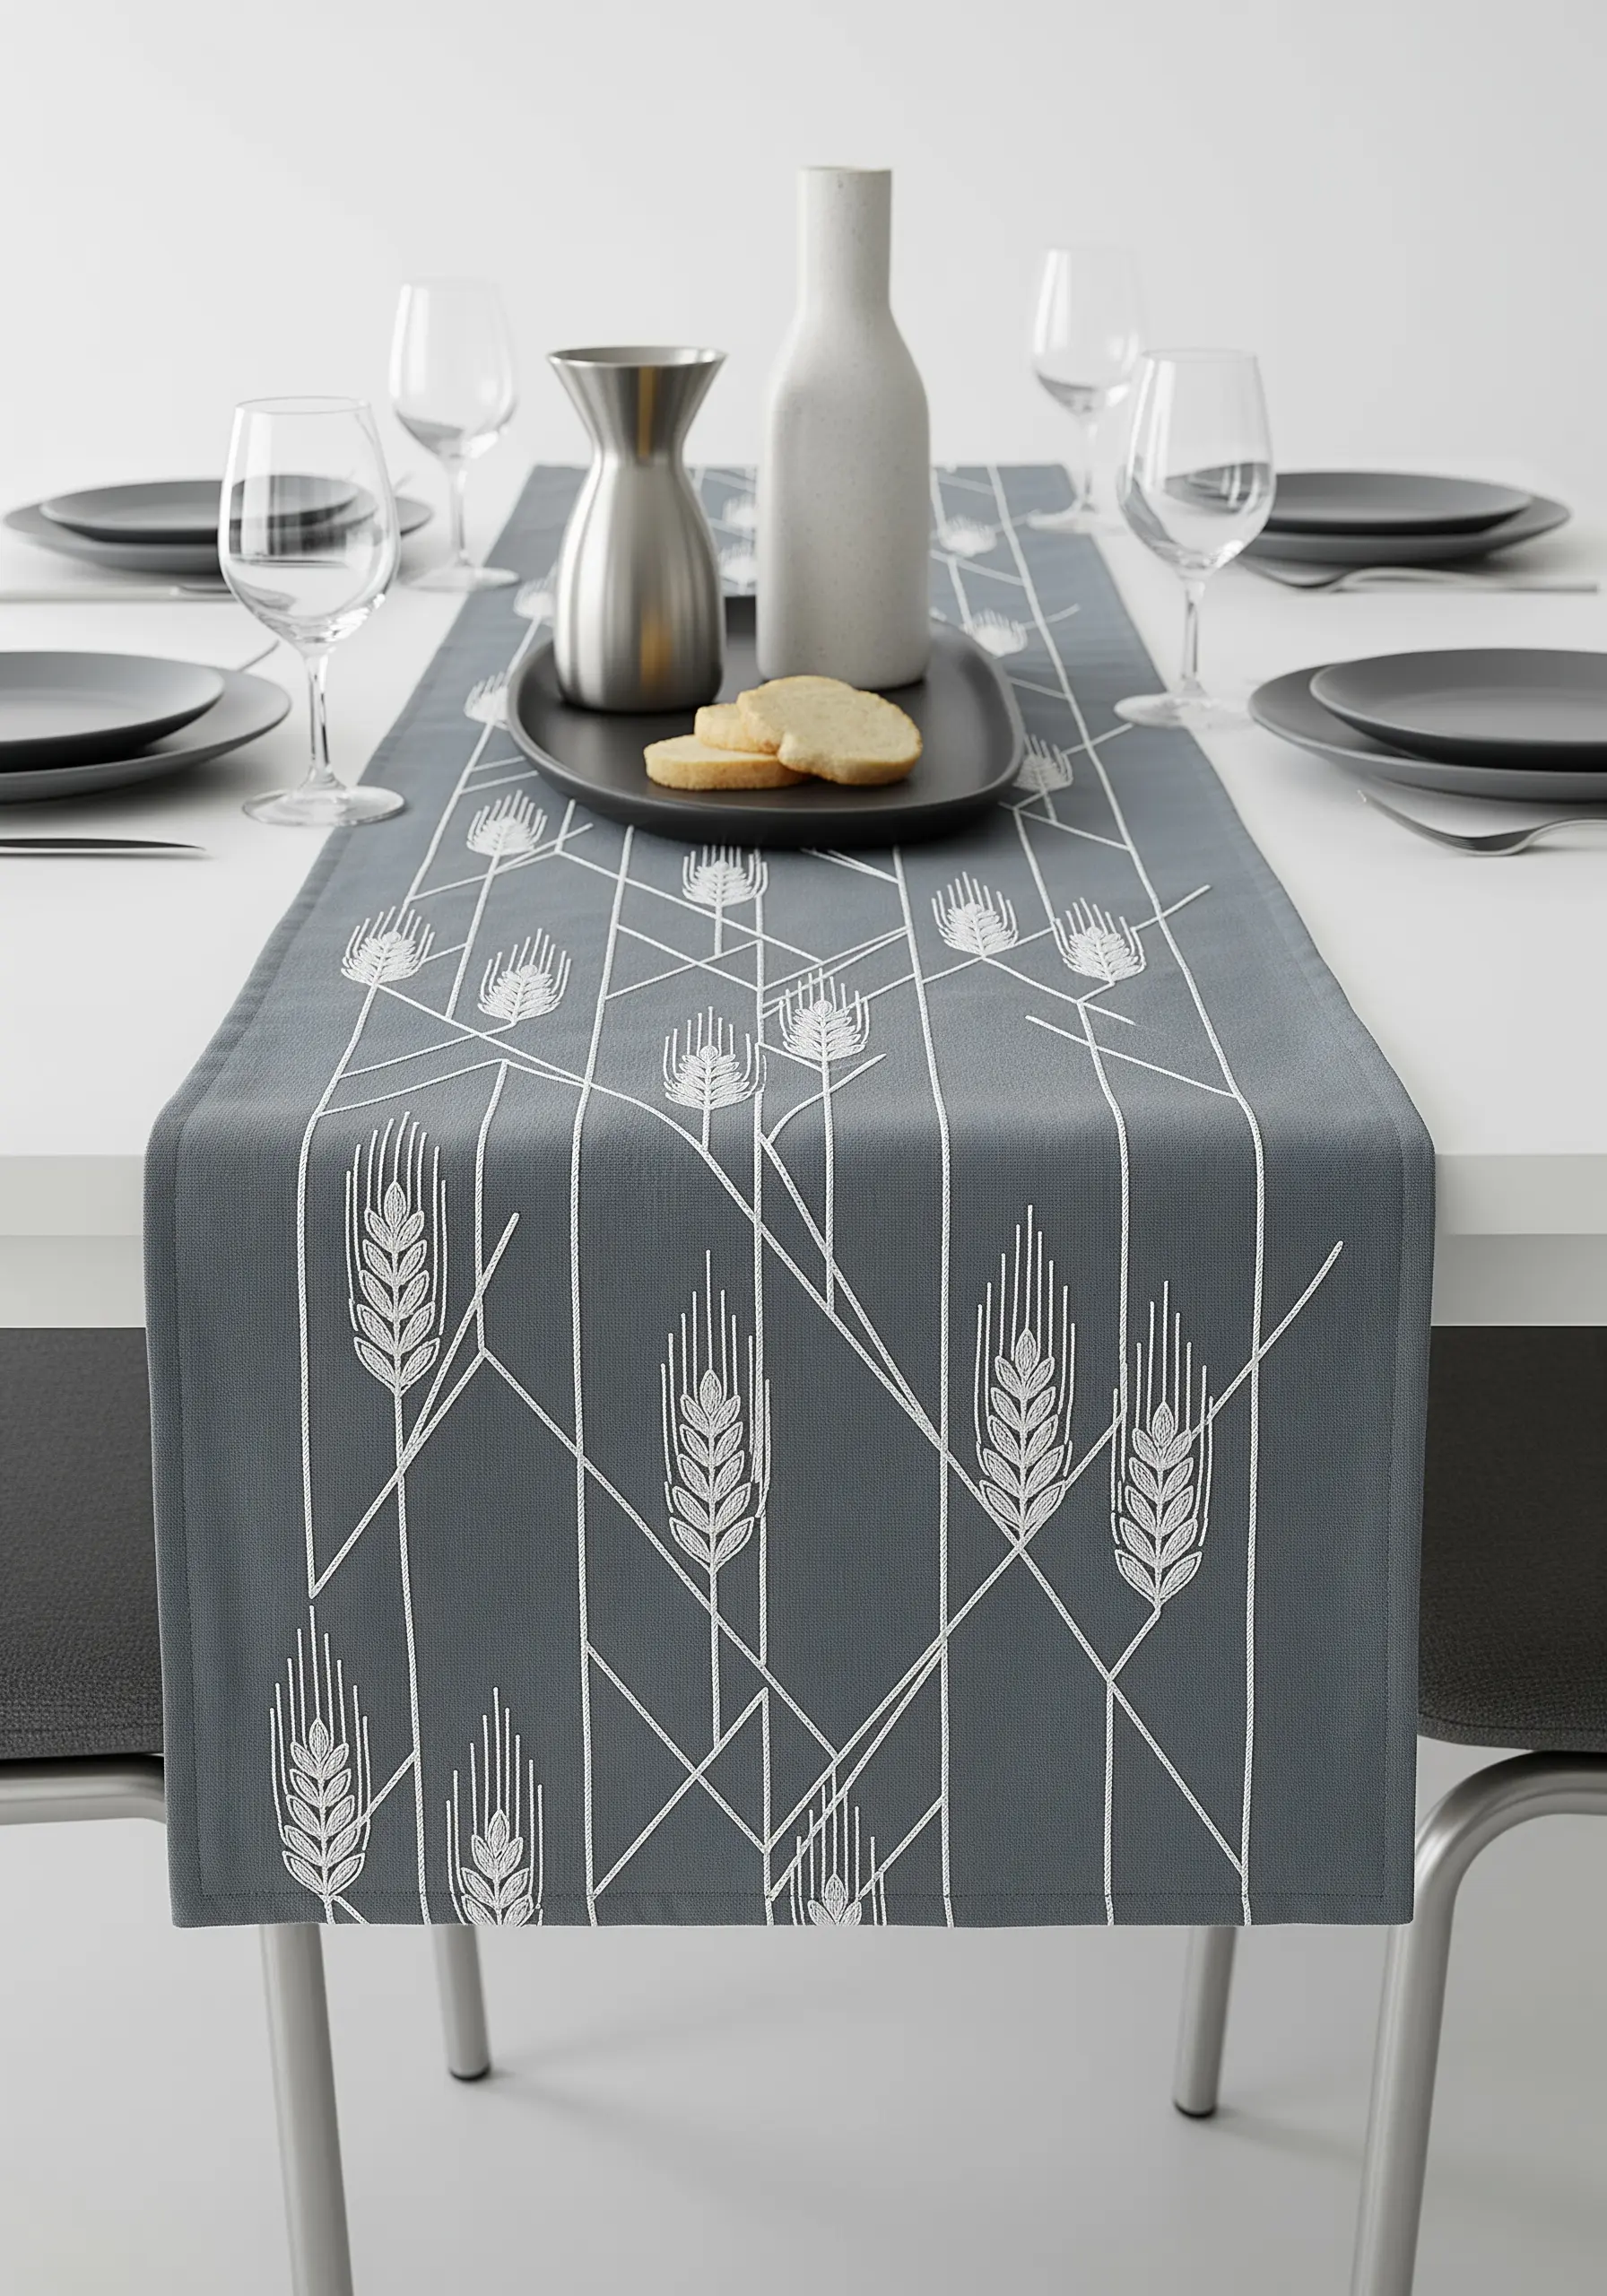
Transform a traditional, natural motif into a striking modern pattern by introducing strong geometric elements.
First, stitch the organic wheat stalks using a simple satin stitch or fishbone stitch.
Then, overlay the entire design with a grid of intersecting straight lines using a crisp backstitch.
This interplay between the soft, natural forms and the hard, abstract grid creates a contemporary design that is visually captivating, similar to the principles in yarn wall art projects inspired by geometric patterns.
33. Capturing Grace with Cascading Stitches
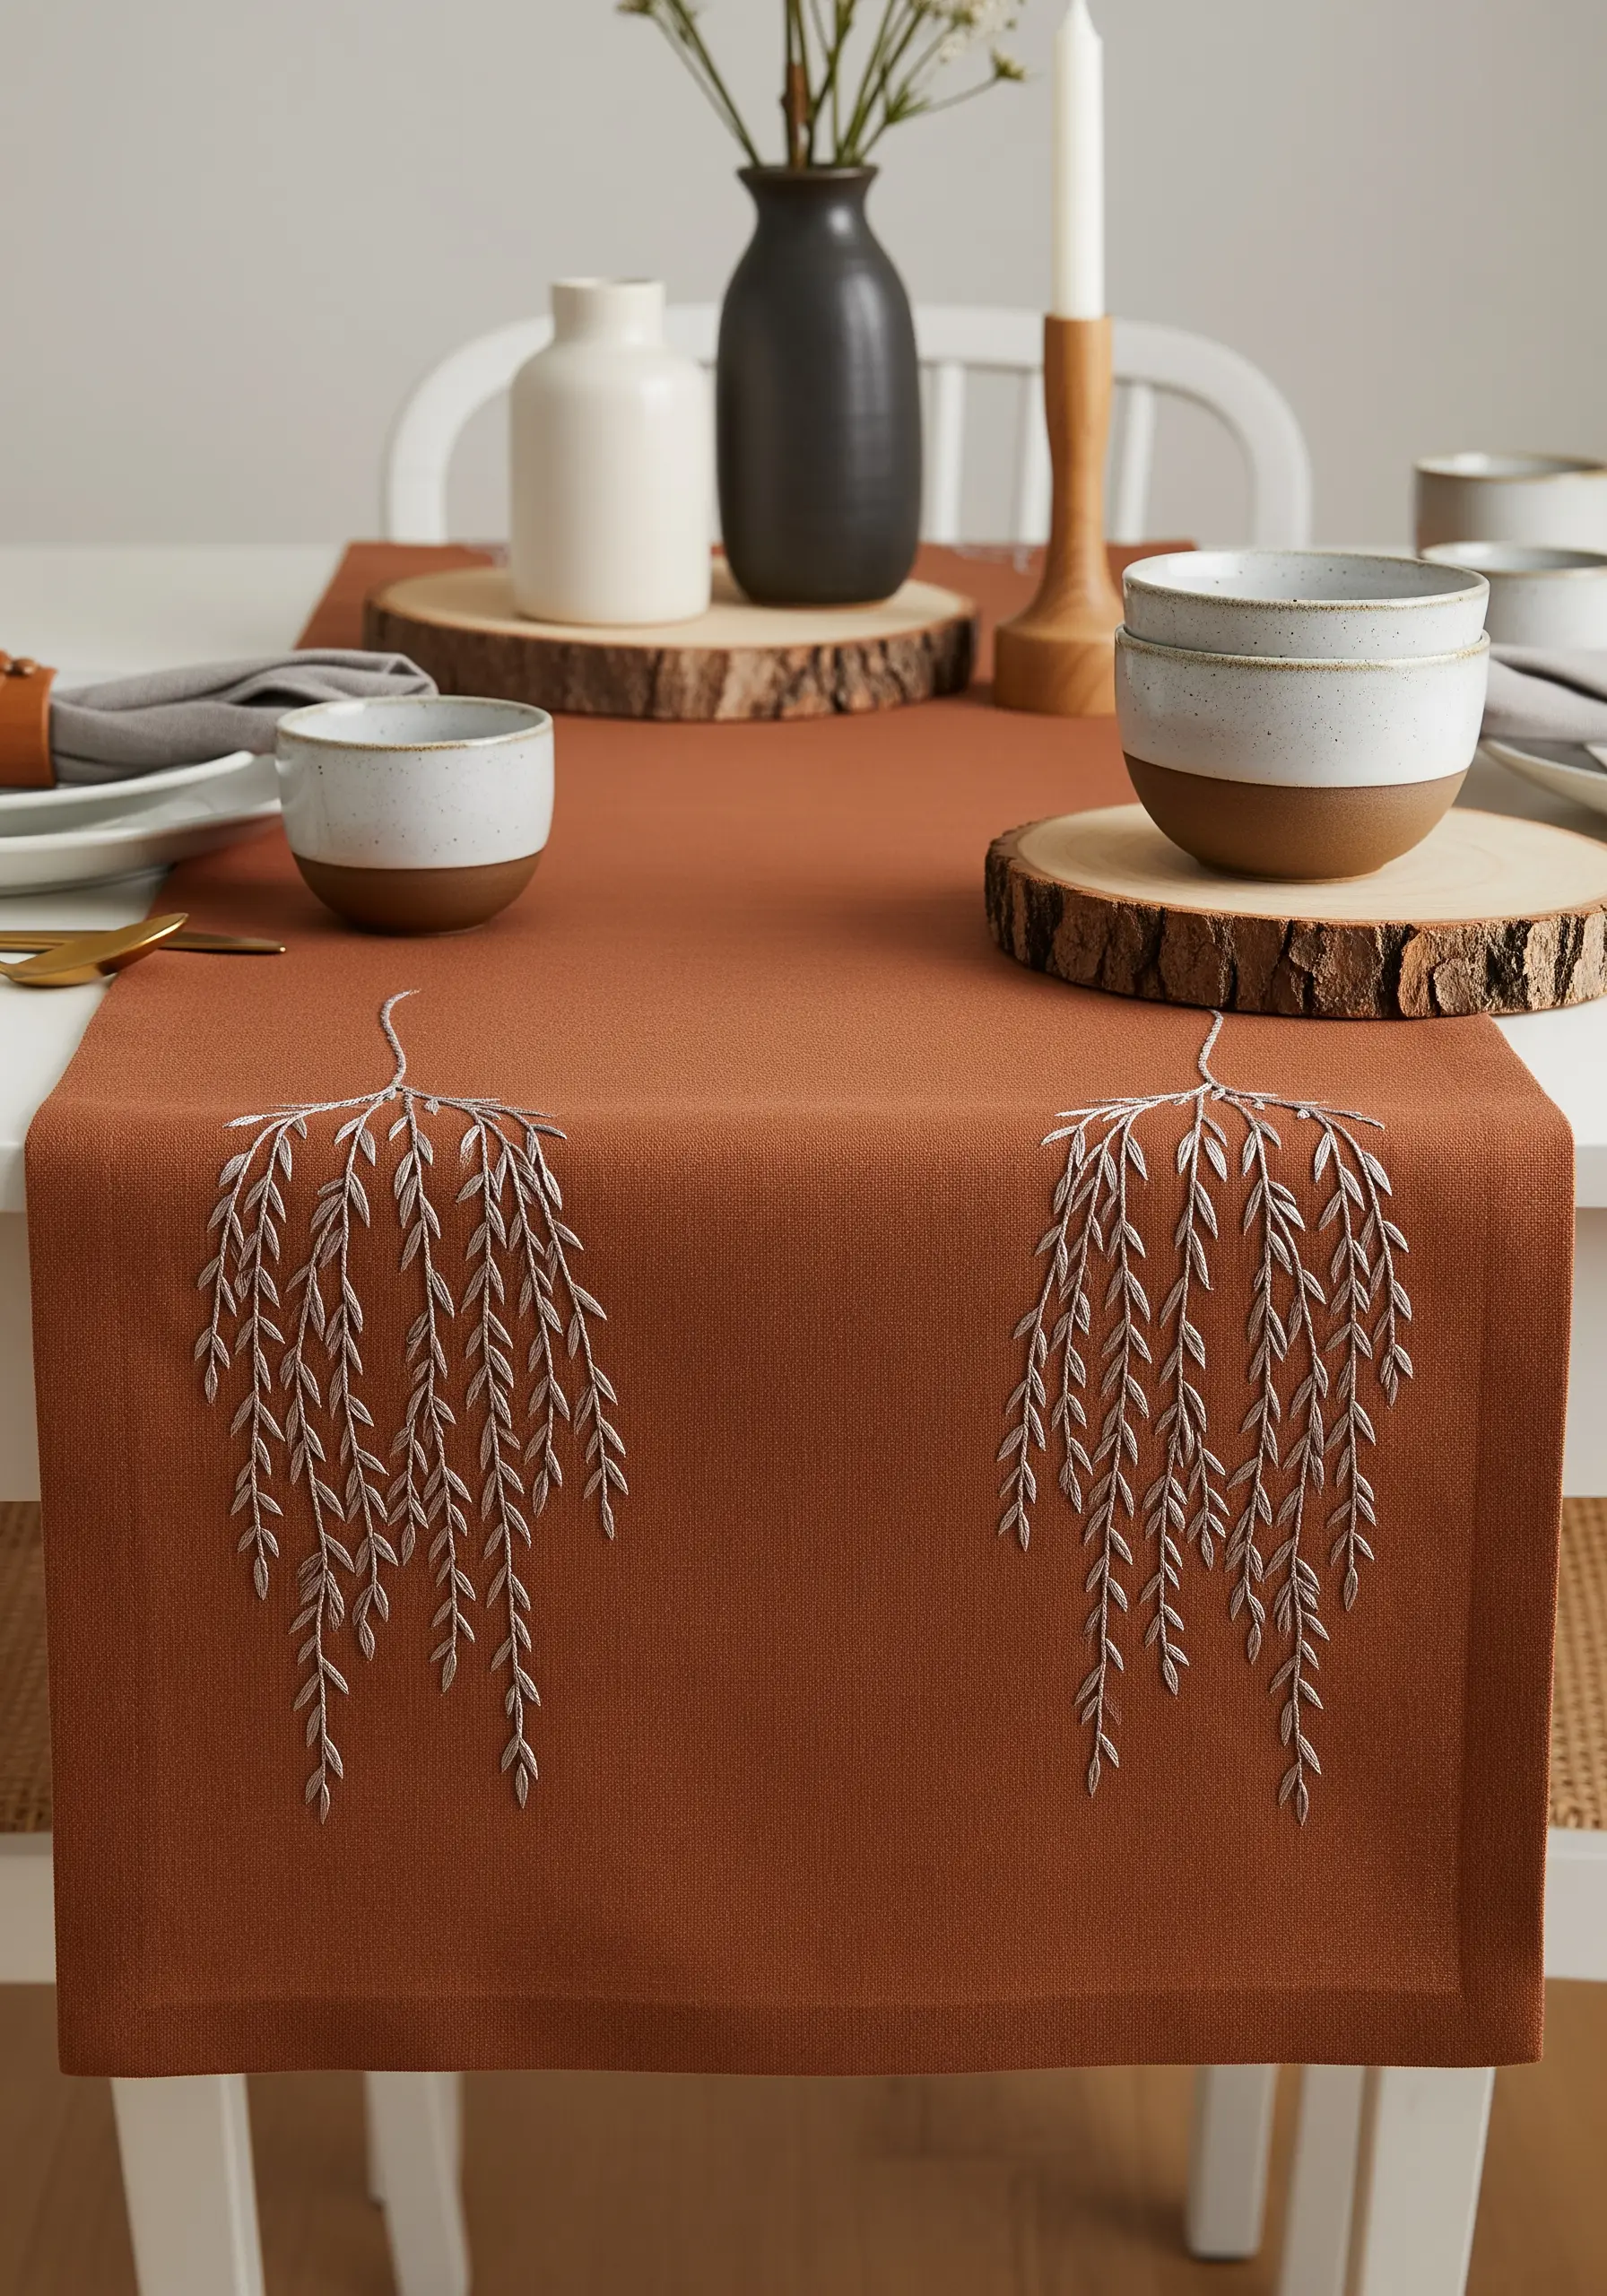
To perfectly mimic the graceful, drooping branches of a weeping willow, use a detached chain stitch (or lazy daisy).
Elongate the stitch by pulling the small tacking stitch at the end taut, creating a teardrop shape.
Arrange these stitches in overlapping vertical cascades, flowing downward from a central point.
This method creates a wonderful sense of movement and texture that captures the tree’s essence far more effectively than simple straight stitches ever could.
34. Building Wisteria with Layered French Knots
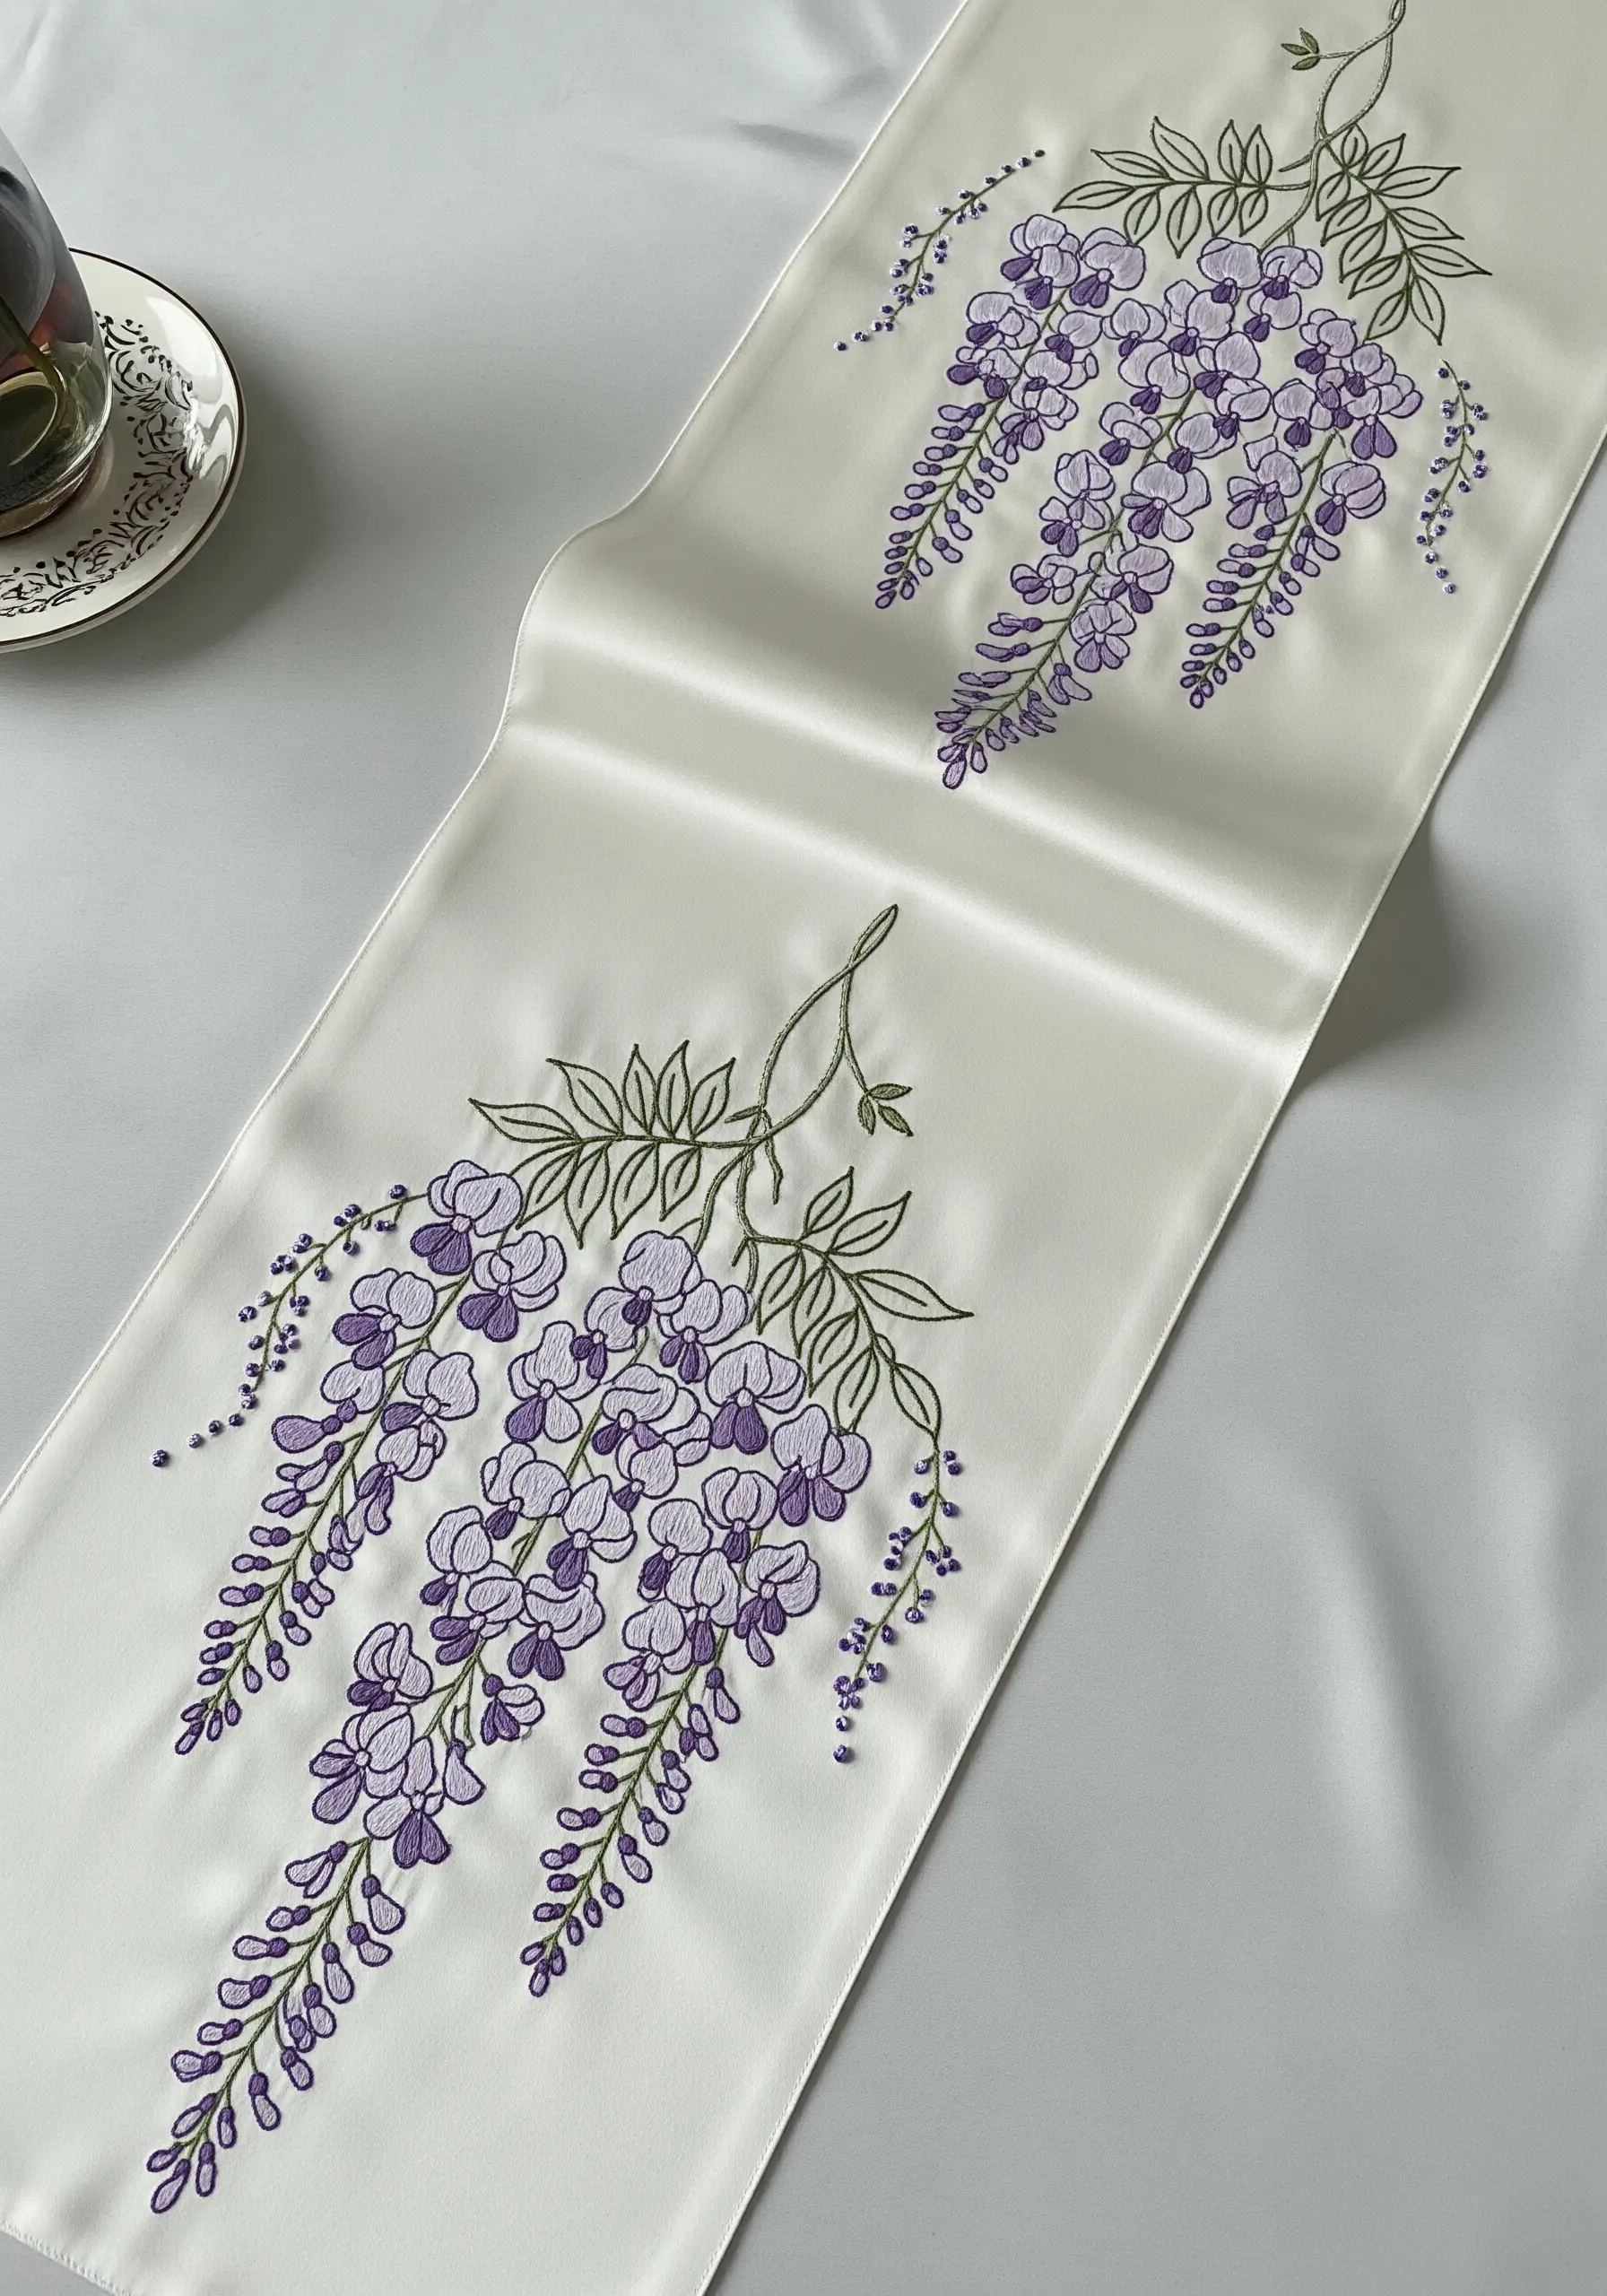
Create the lush, full appearance of wisteria flowers by building up clusters of French knots in several shades of purple.
Begin with your darkest shade at the top of each drooping cluster, where it connects to the stem.
Gradually transition to medium and then lighter shades as you work your way down, adding a few white knots at the very tip.
This layered, tonal approach creates a beautiful gradient and gives the flowers a convincing three-dimensional form.
35. Stitching Boldly on Striped Fabric
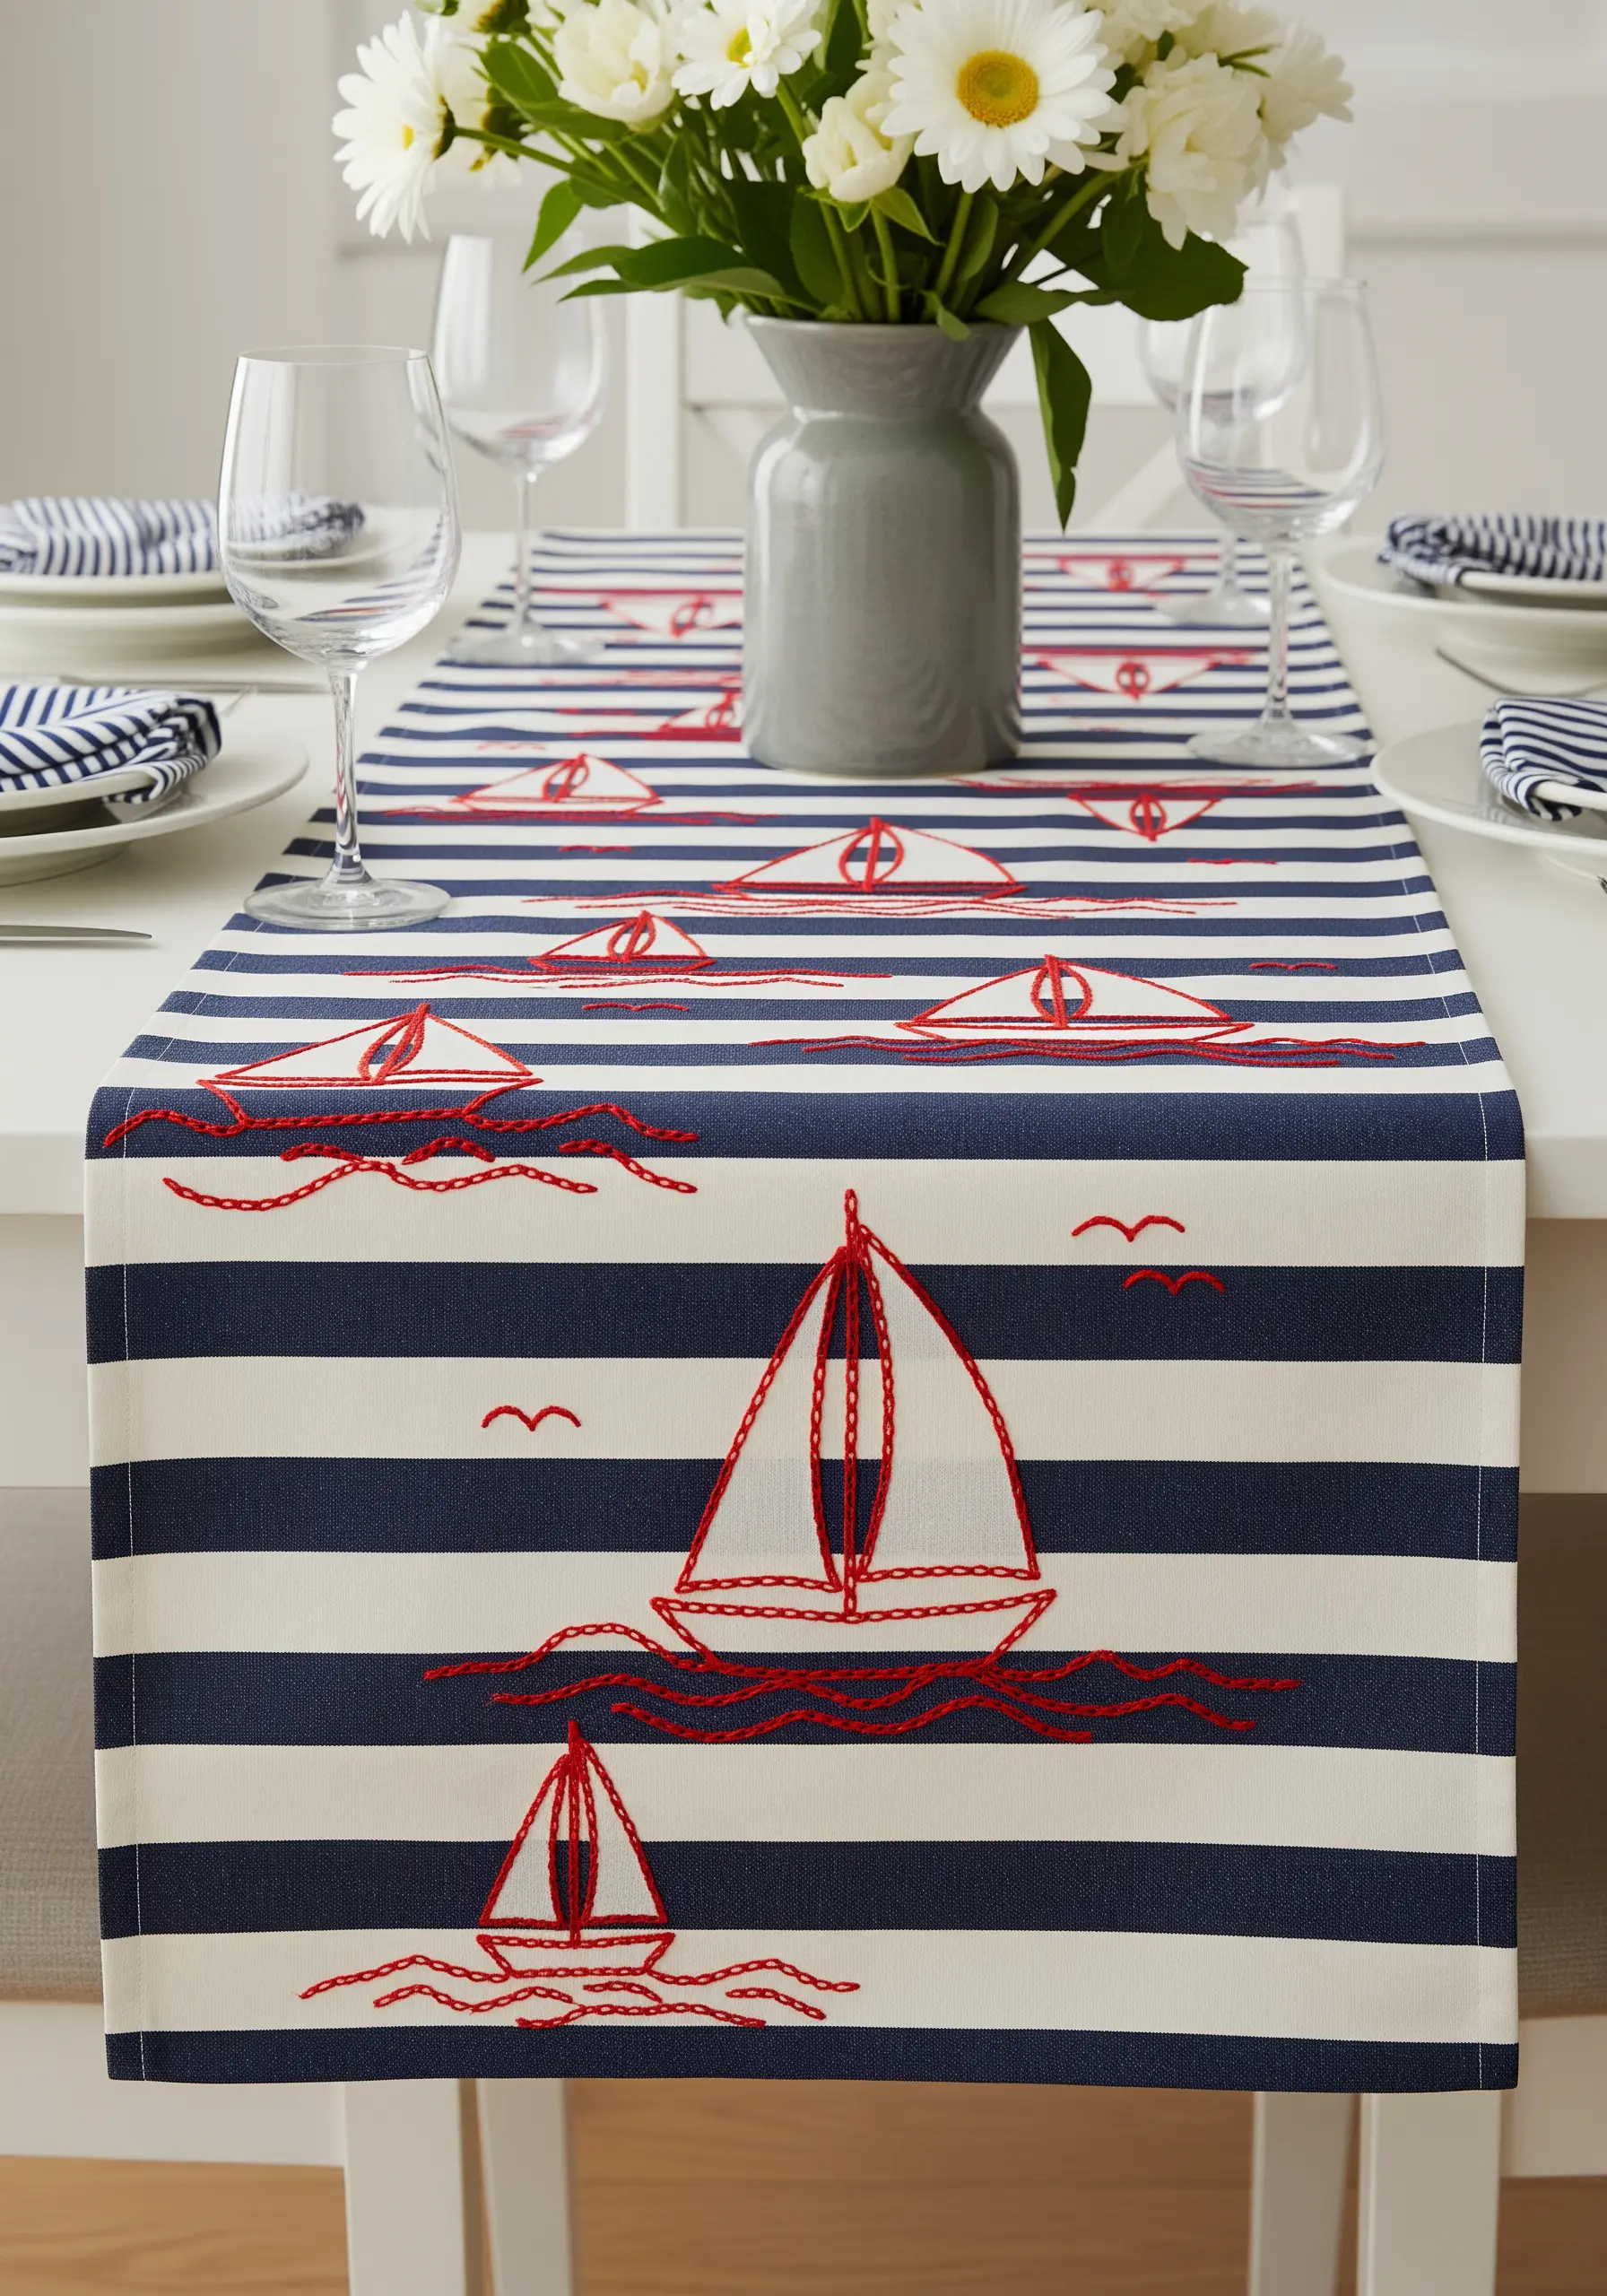
When your fabric is already patterned, your embroidery needs to be confident to stand out.
Choose a single, bold thread color that contrasts strongly with all the colors in the background pattern—here, the bright red pops against both navy and white.
Keep your stitch style simple and graphic, like this clean line art, so your design complements the stripes rather than competing with them.
The key is to work with the existing pattern, not against it.


