

Your table linens hold stories—of shared meals, quiet mornings, and joyful gatherings. Embroidering them is a way to infuse those stories with personal artistry, transforming simple cloth into something that feels uniquely yours.
But achieving that beautiful, cohesive look you envision isn’t about mastering dozens of complex stitches. It’s about making thoughtful, intentional choices: the subtle texture of a single leaf, the gentle curve of a vine, the radiant energy of a sun stitched with just the right thread.
These motifs are more than just patterns; they are invitations to slow down and create with purpose. Each idea is designed to give you a specific technique or a new way of seeing color and composition, empowering you to stitch with confidence and create linens that truly capture the warm, soulful spirit of the Mediterranean.
1. The Cascading Olive Branch
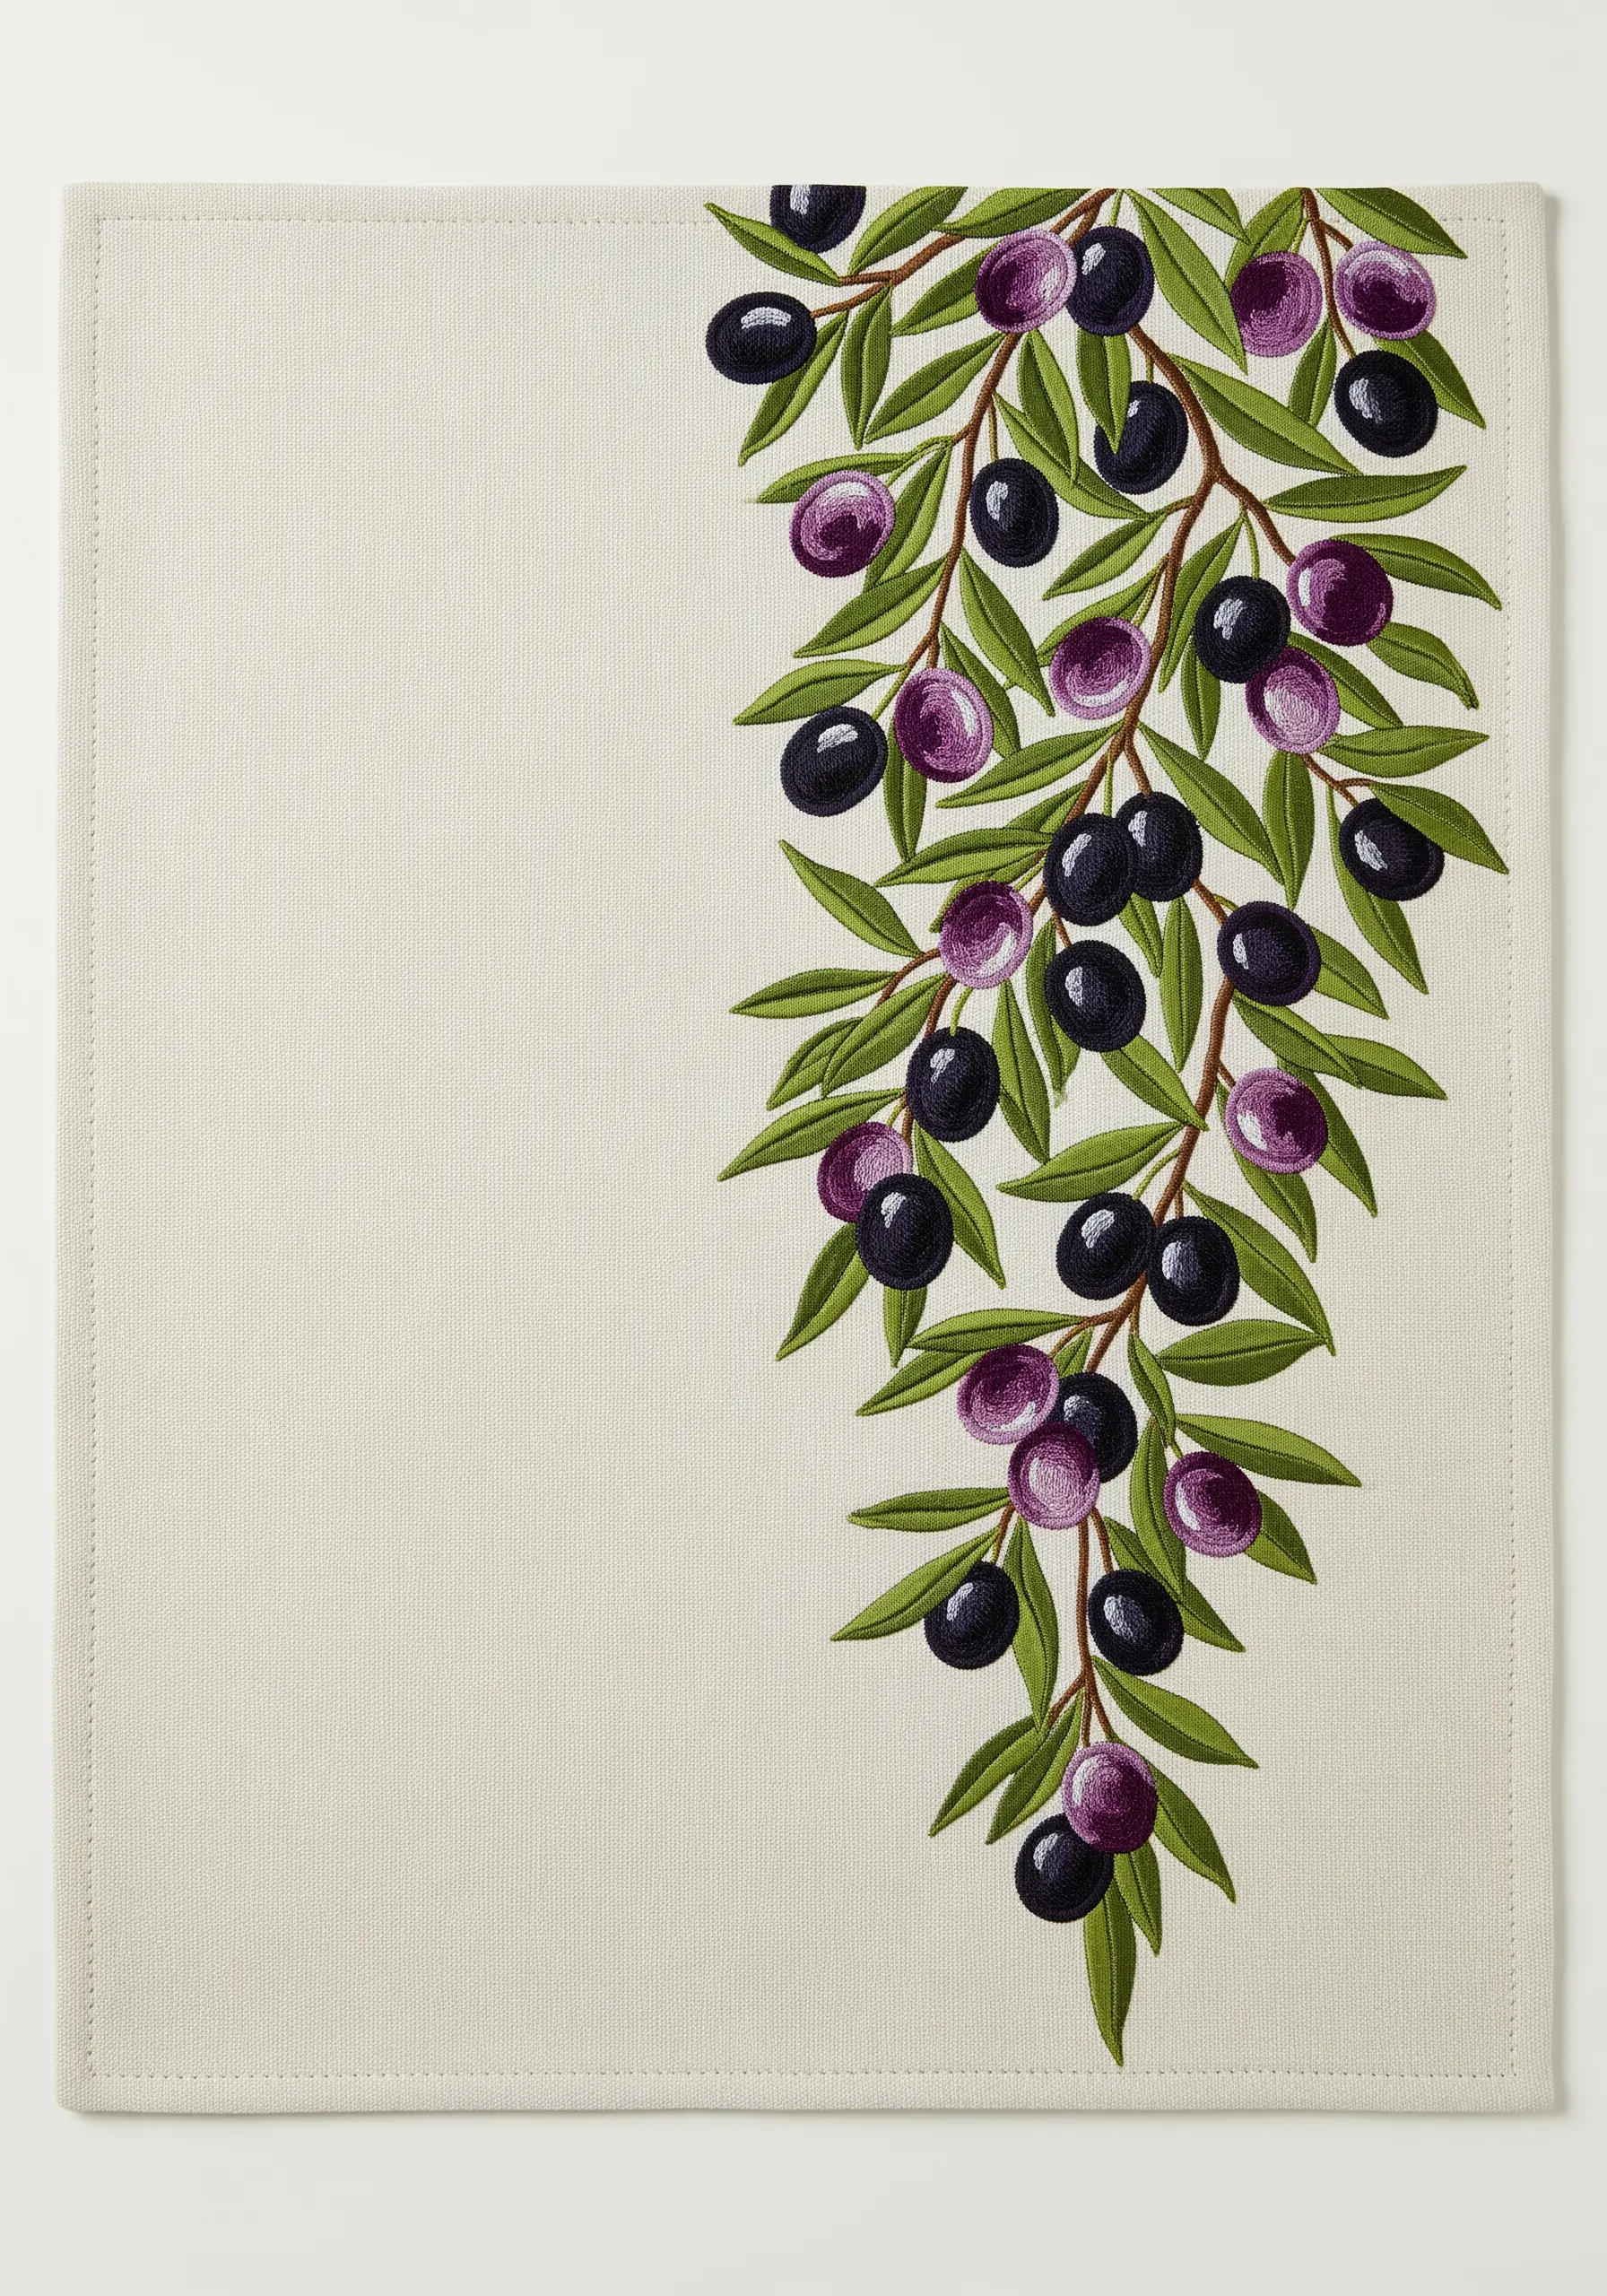
To give your olive branch a lifelike, tumbling quality, avoid a perfectly straight line and let it curve organically down the edge of your placemat.
For the olives, use a padded satin stitch by first laying down a few foundation stitches; this will give them a subtle, rounded dimension that catches the light.
Vary the colors of the olives—from deep violet to near-black—to suggest different stages of ripeness, adding realism and visual interest.
Use a fishbone stitch for the leaves, alternating between a muted sage and a deeper olive green to create natural-looking highlights and shadows.
2. Geometric Tilework with Crisp Edges
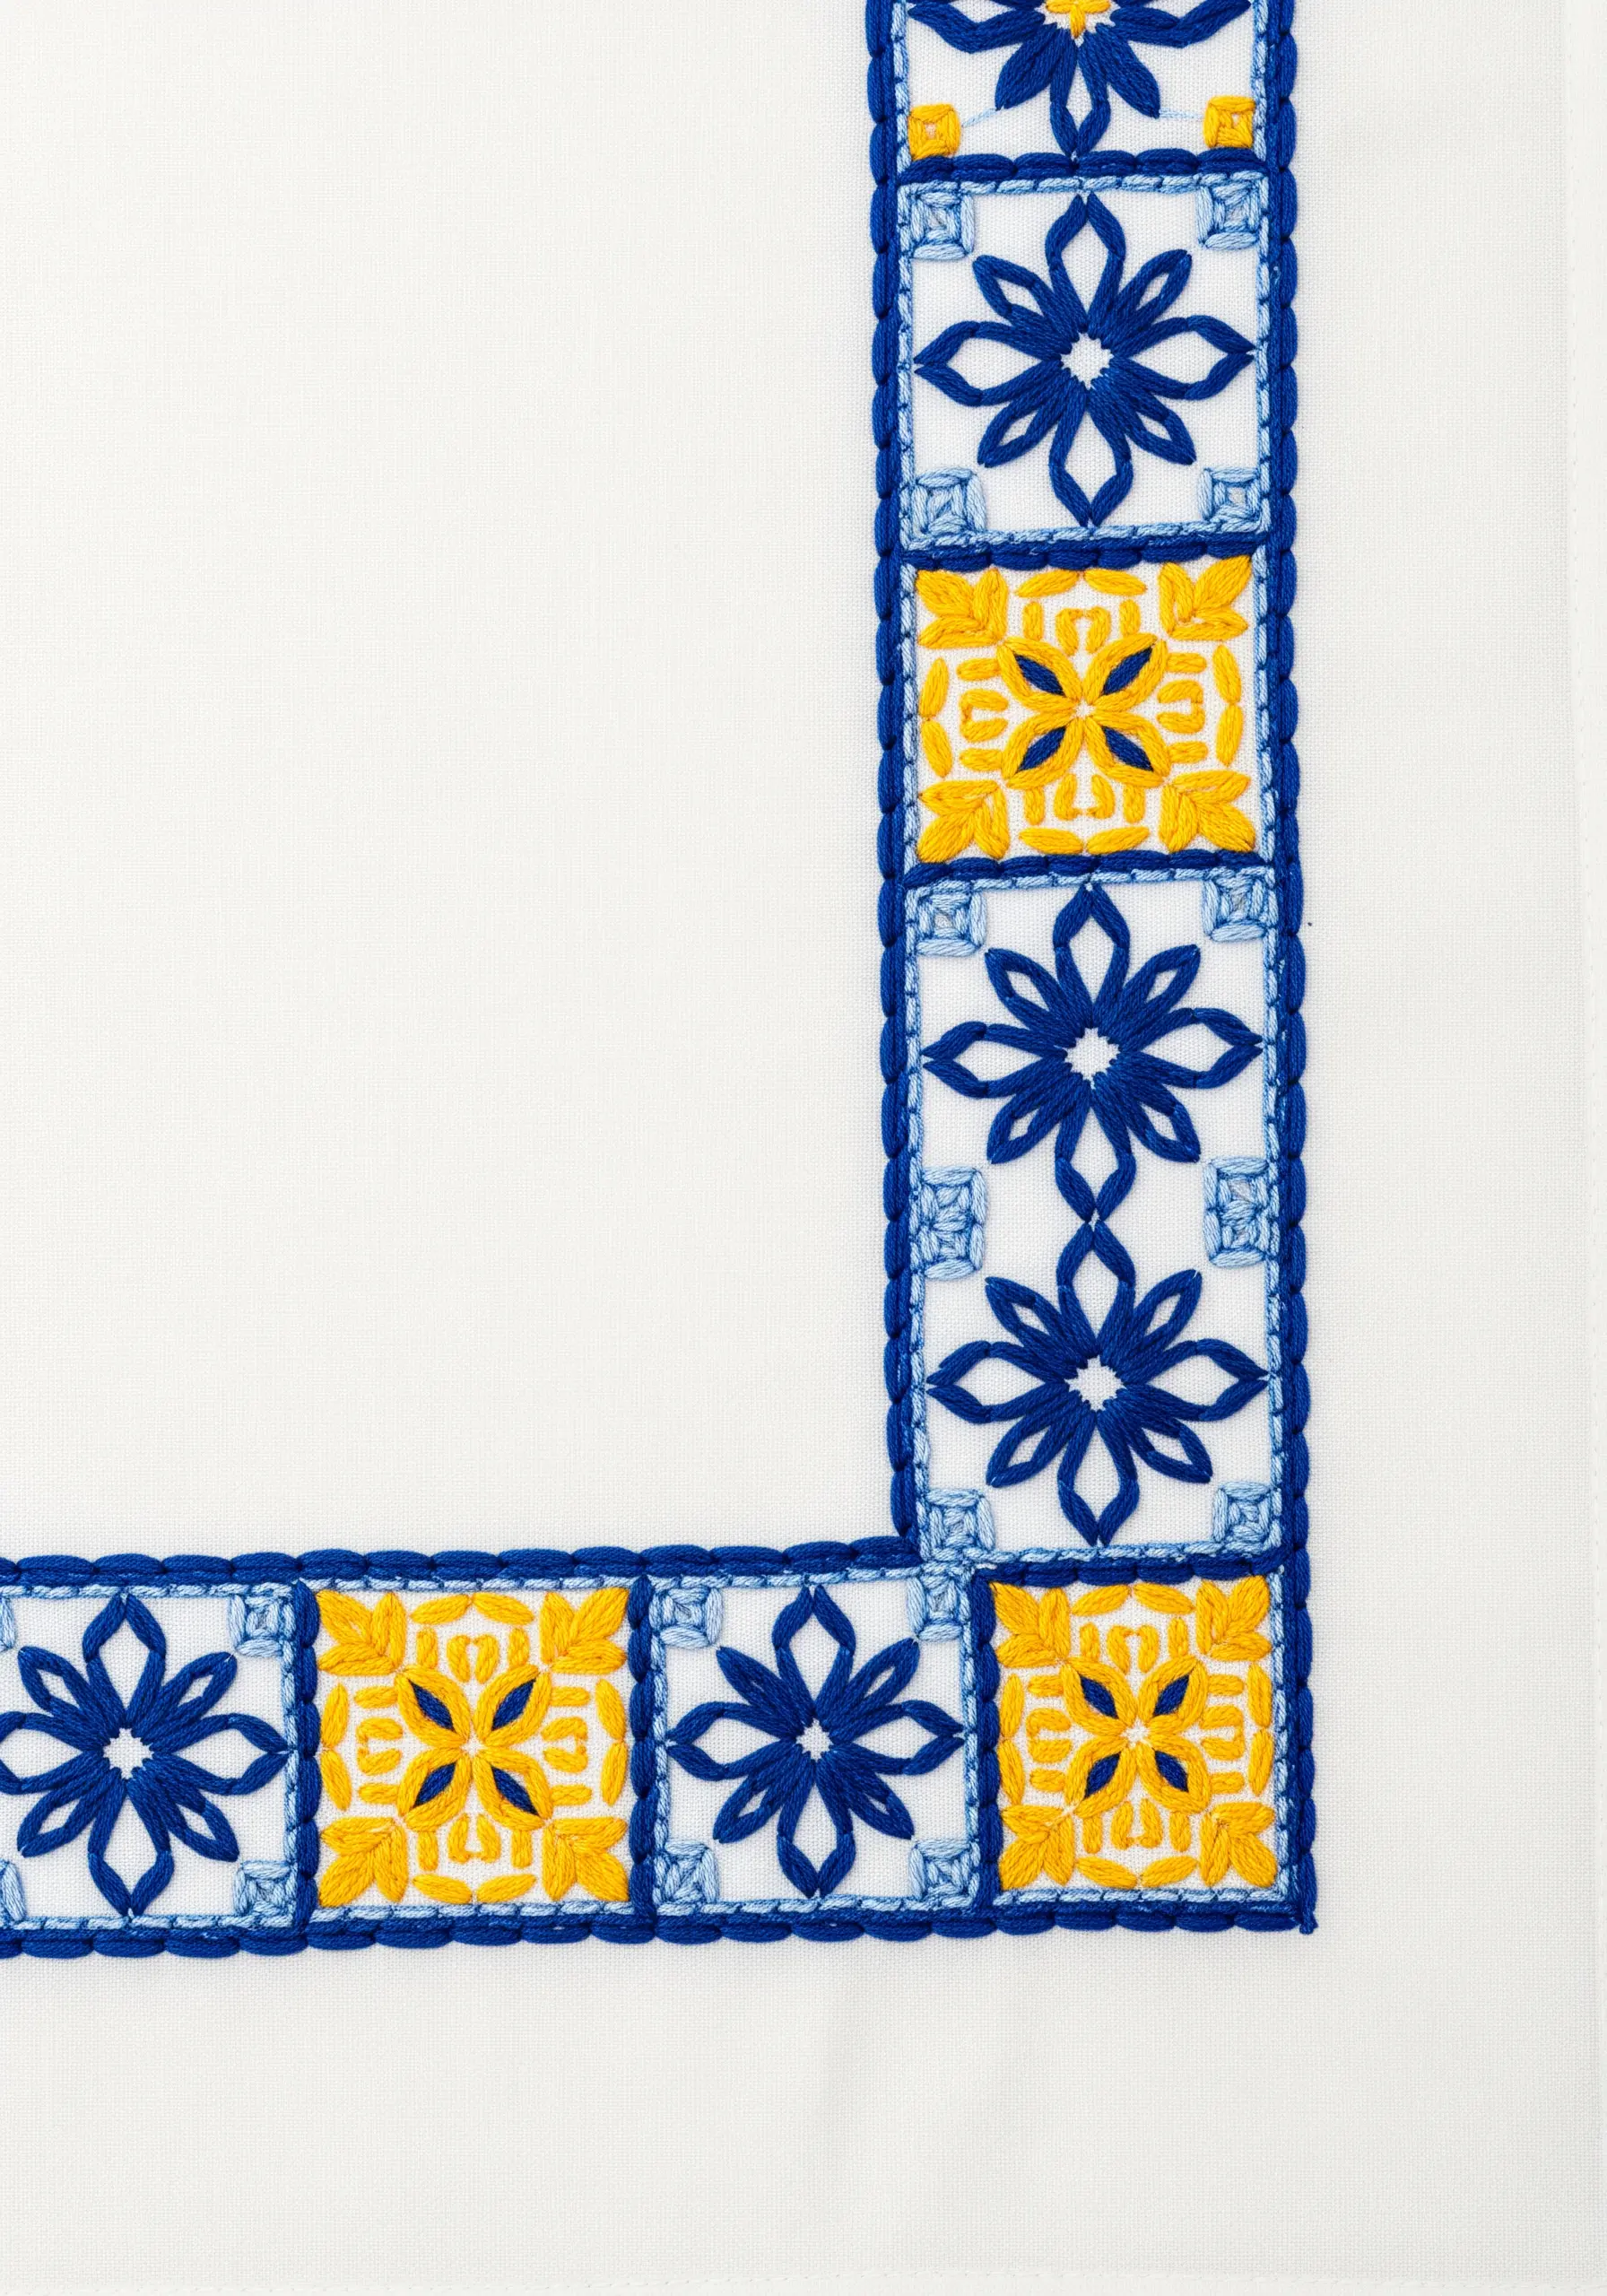
Achieve the sharp, clean look of ceramic tiles by first outlining each square with a single line of split stitch before filling it in.
This simple preparation creates a raised edge that contains your satin stitches, preventing them from bleeding into one another and ensuring your geometric shapes are perfectly crisp.
For the delicate patterns inside the tiles, switch to a single strand of floss. This allows for much finer detail than the standard two or three strands.
Create the braided frame effect with a whipped backstitch, which adds a beautiful, rope-like texture that neatly contains the entire border.
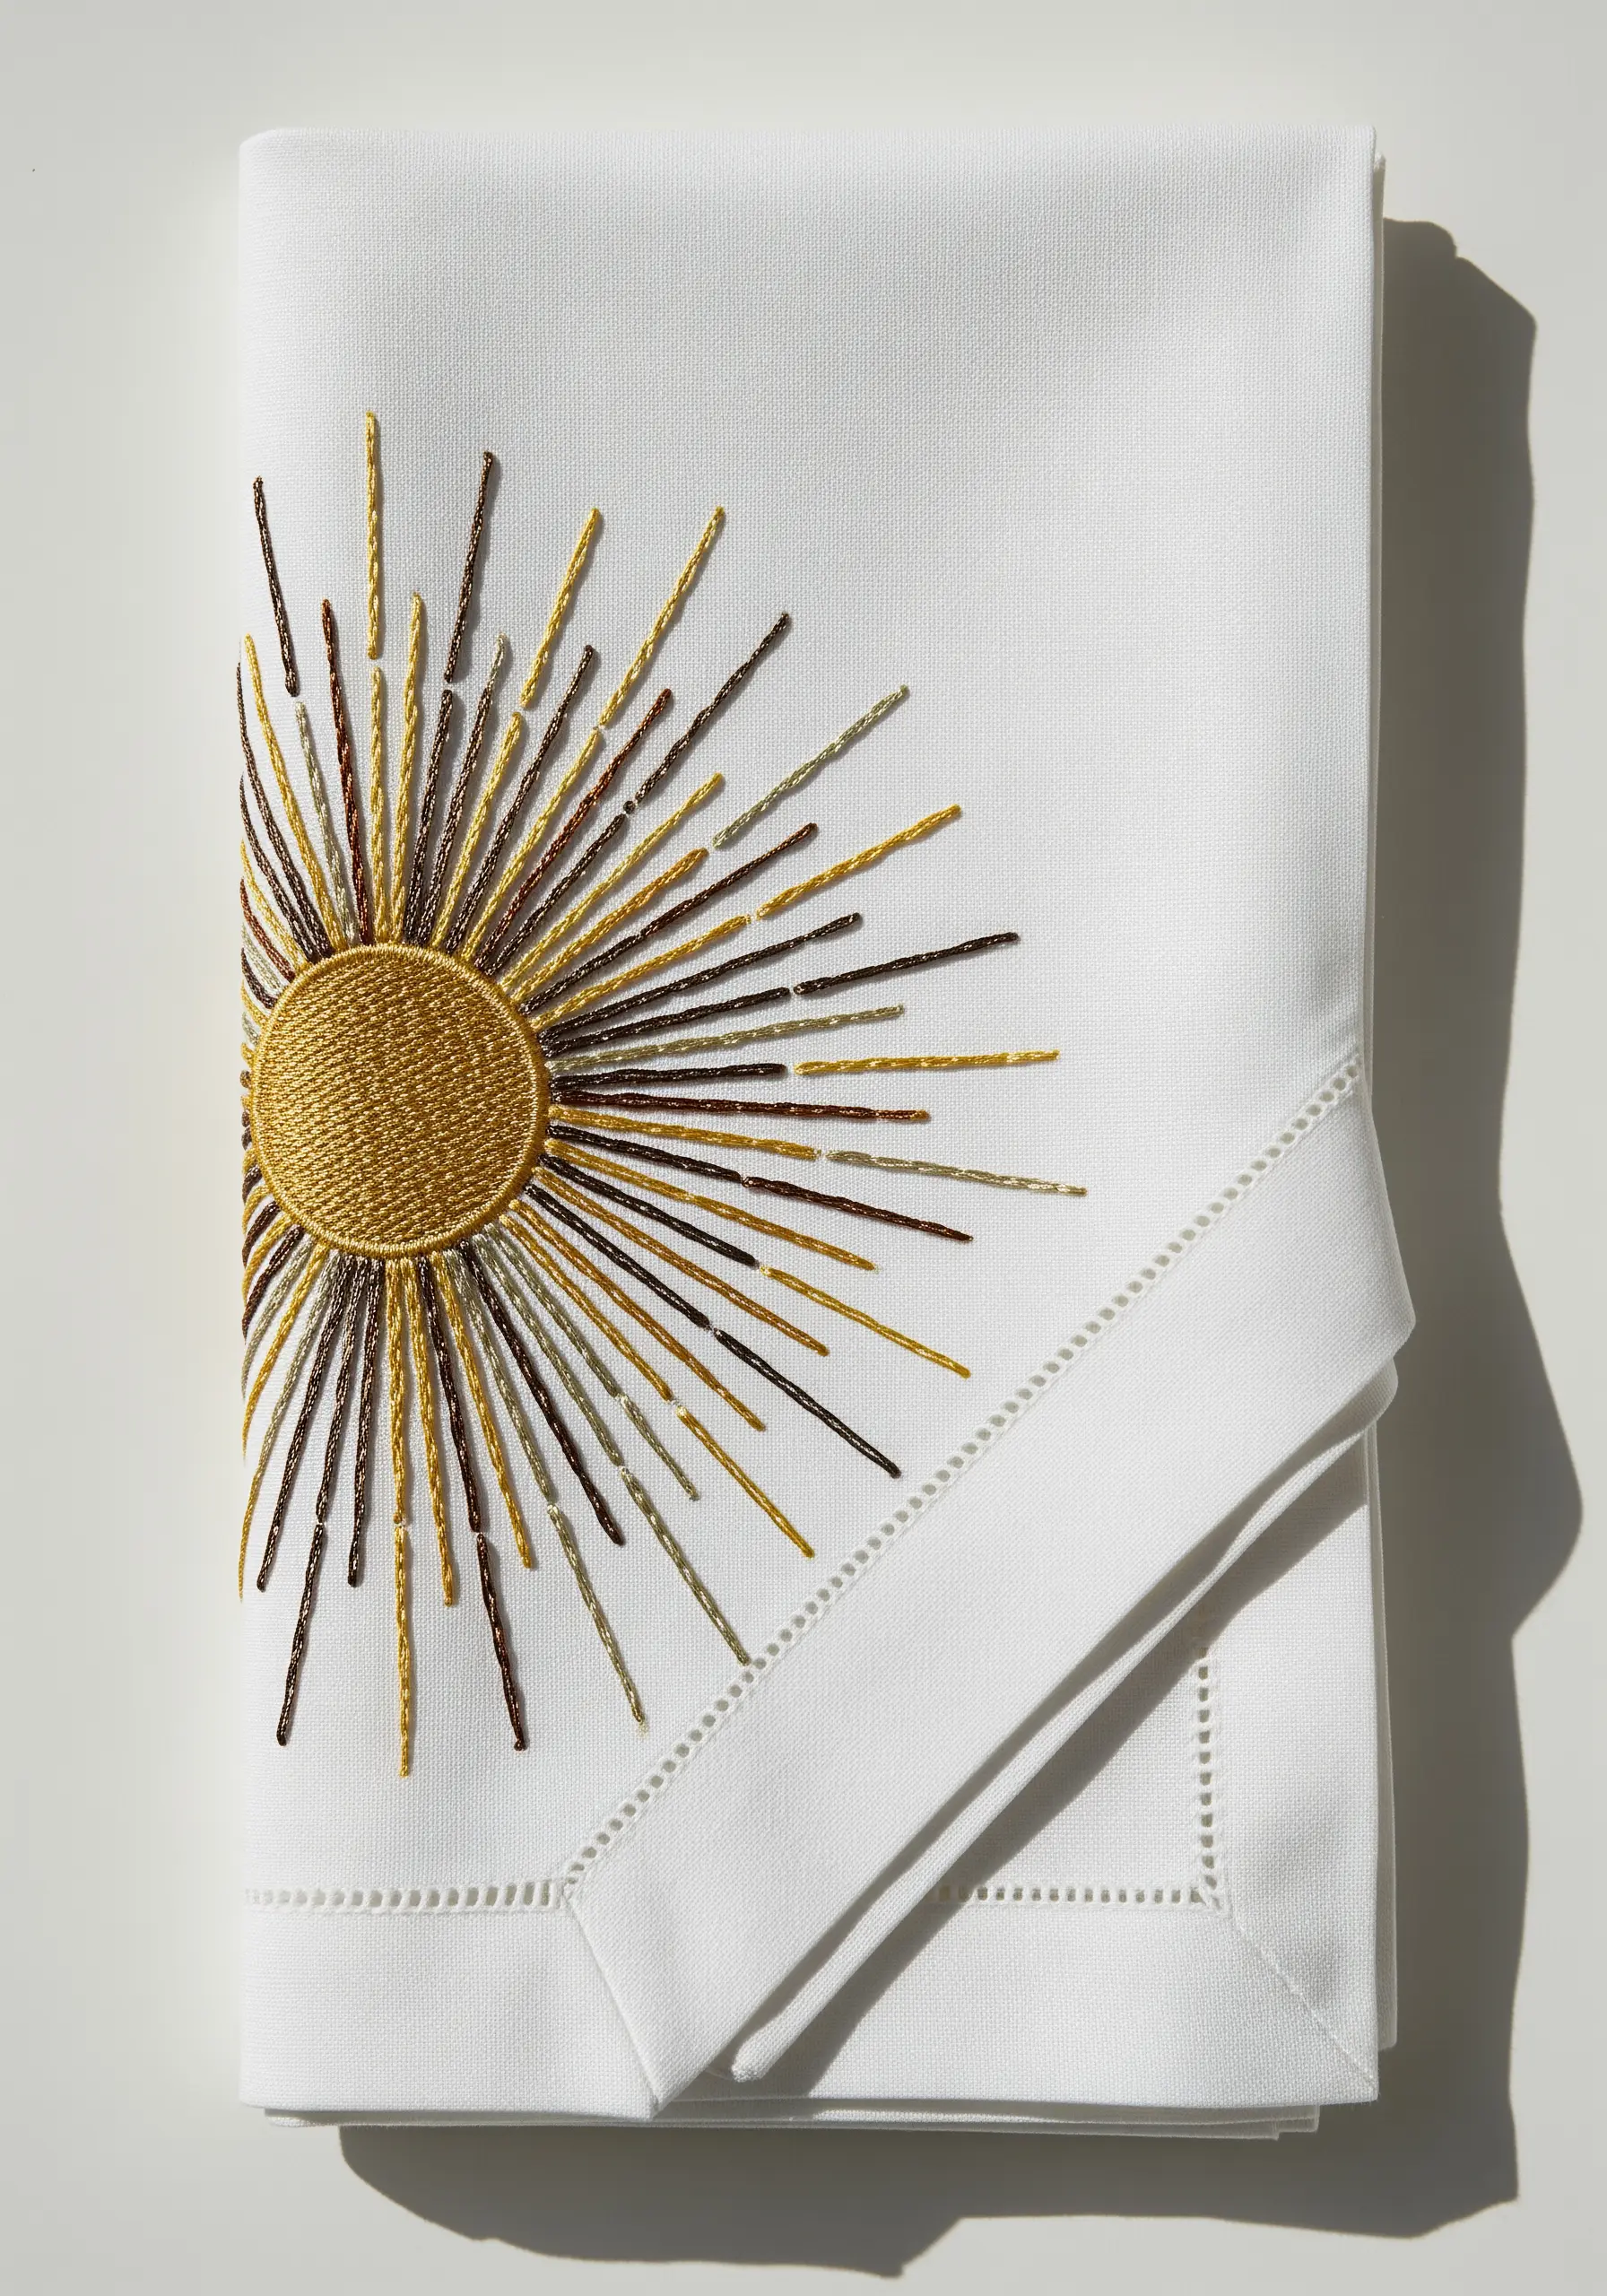
3. Sun Motifs with Radiant Textures
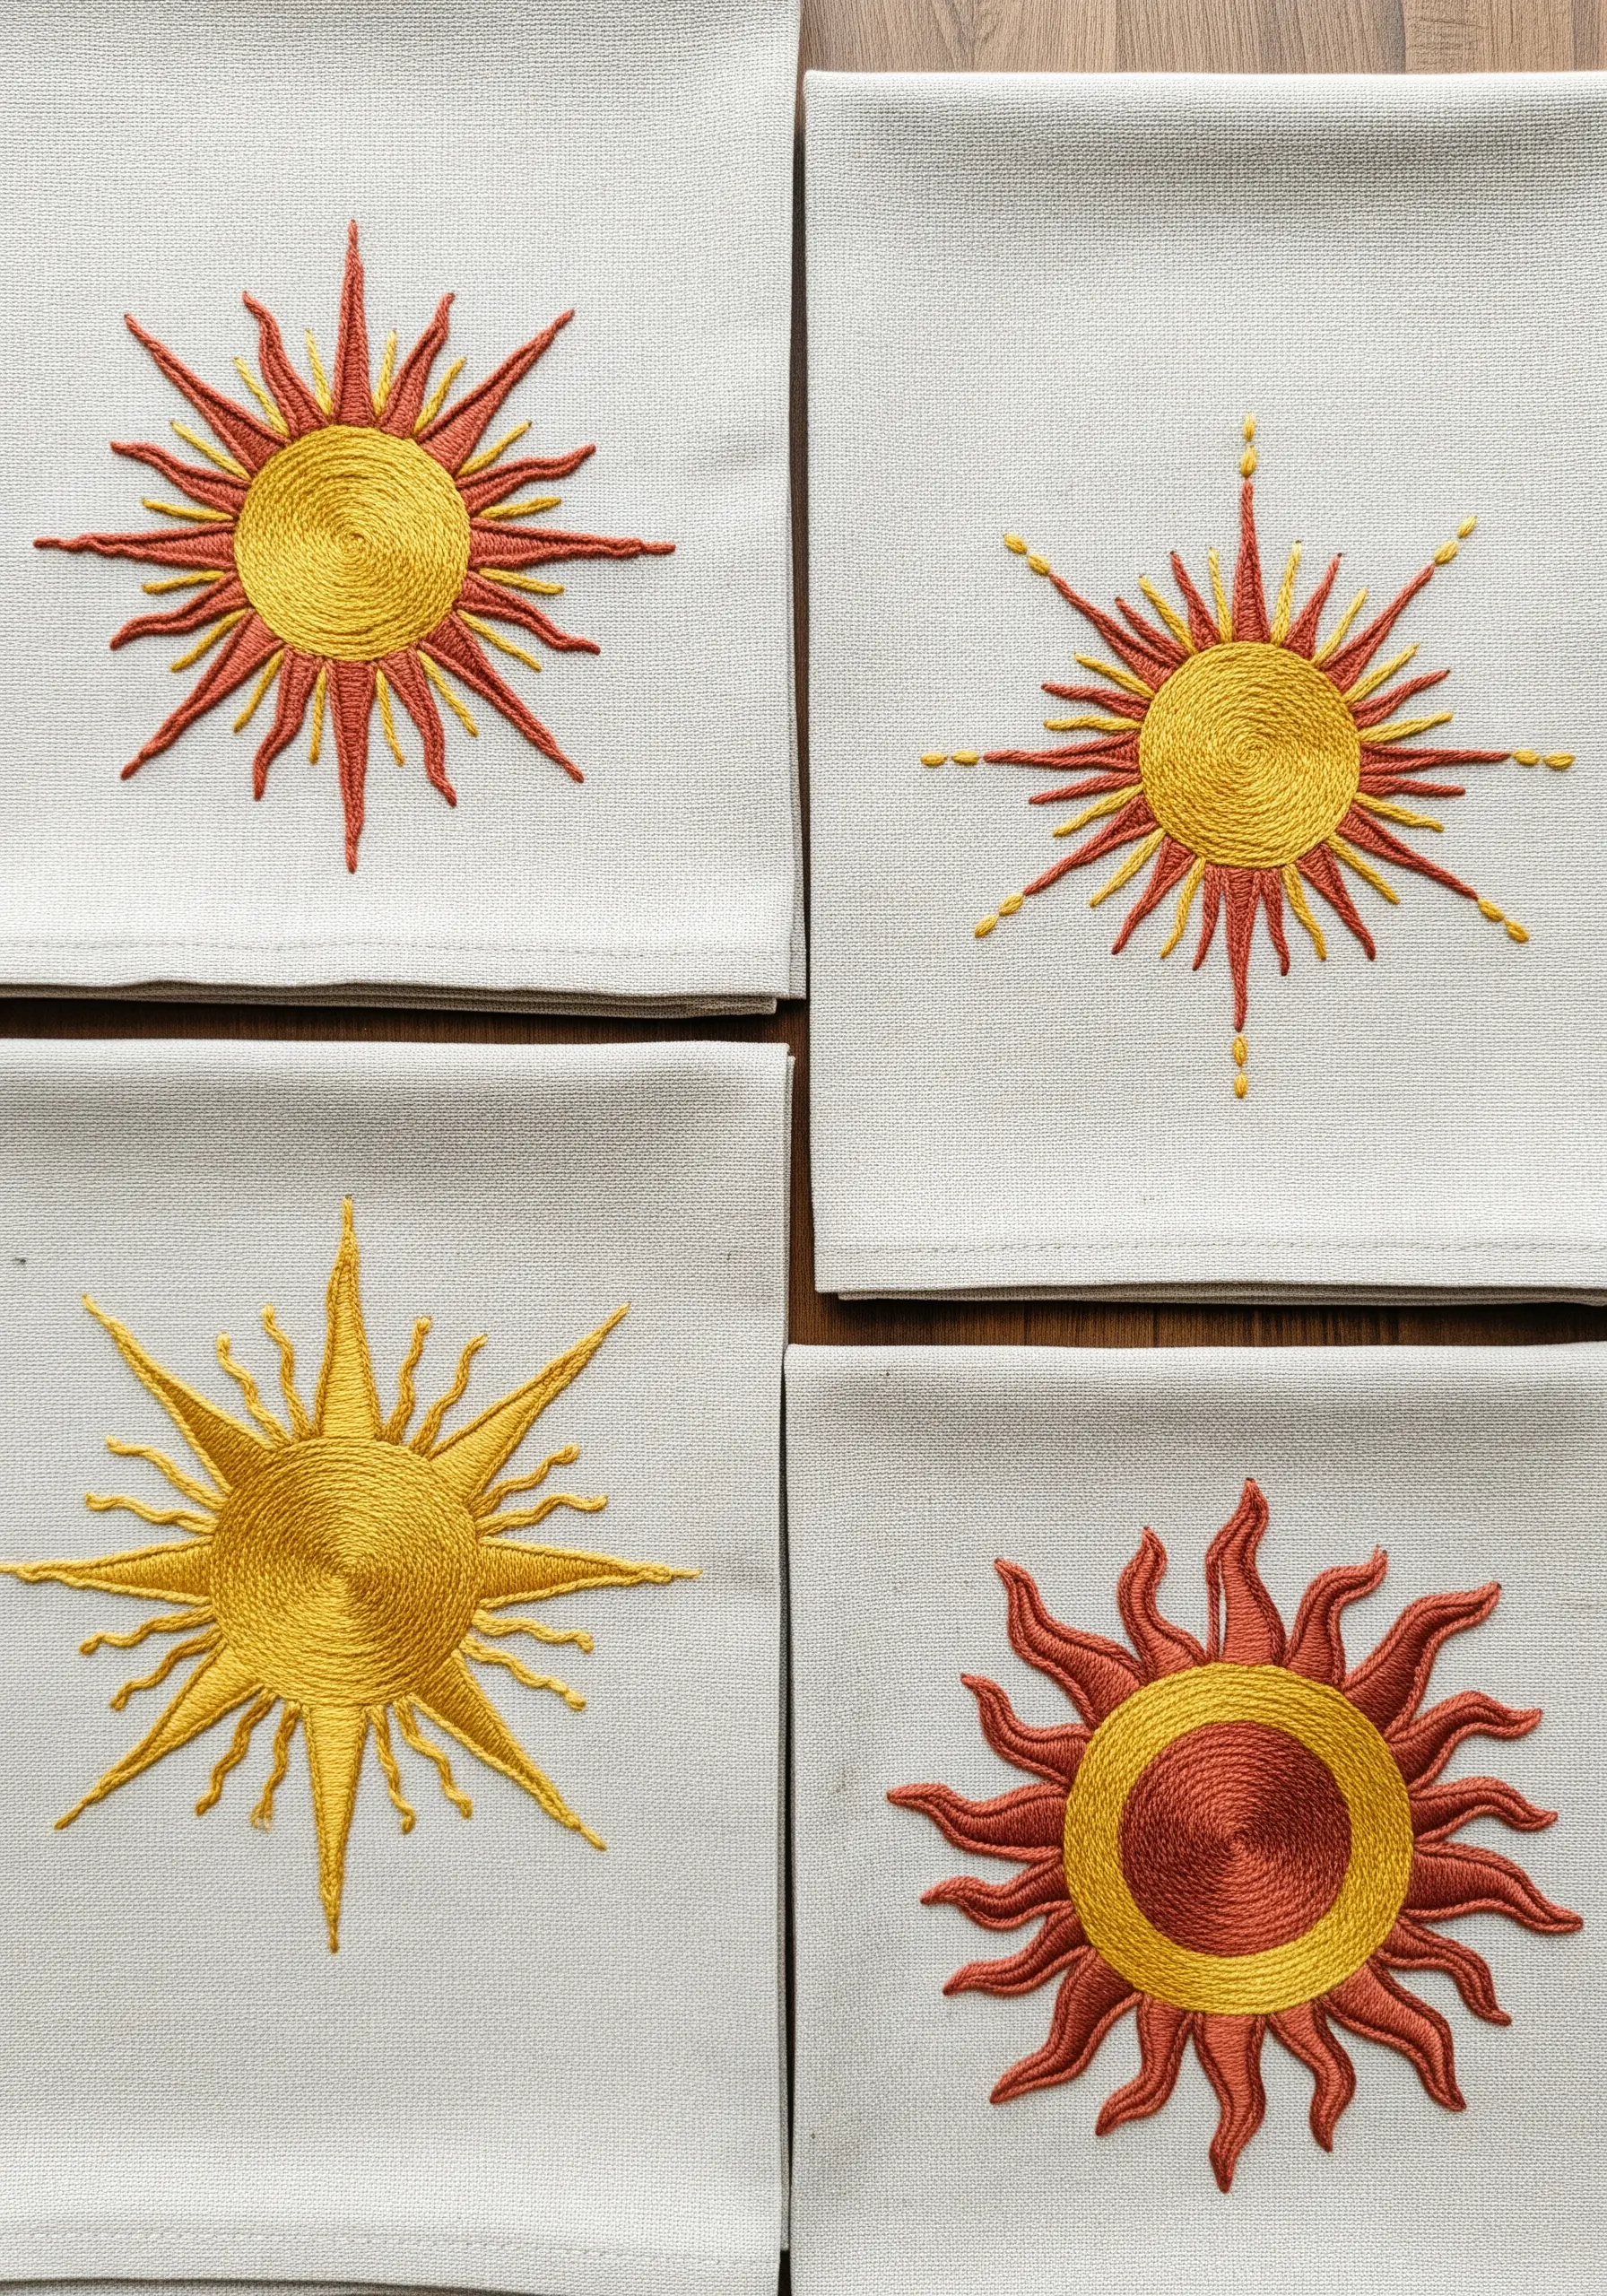
Give your sun motifs unique personalities by exploring different stitch combinations for the core and rays.
For a dense, vibrant center, fill a circle with a spiral of stem stitch or tightly packed satin stitches.
For the rays, experiment with texture: use sharp straight stitches for a classic sunburst, add French knots to the tips for a sparkling effect, or try a whipped backstitch to create raised, defined lines.
Using two shades of the same color—one slightly darker for half the rays—adds instant depth and the illusion of light and shadow.
4. Tonal Stitching on Colored Linen

When embroidering on a colored fabric like this dusty blue, select thread tones that create a soft, harmonious blend rather than a stark contrast.
Muted greens, soft greys, and even pale taupes will create a sophisticated, painterly effect that feels integrated with the fabric.
Instead of a solid satin stitch for the leaves, use a long and short stitch. This technique allows for subtle color blending and results in a softer finish that won’t pull or pucker on delicate linen.
5. Textured Mosaic Mandala
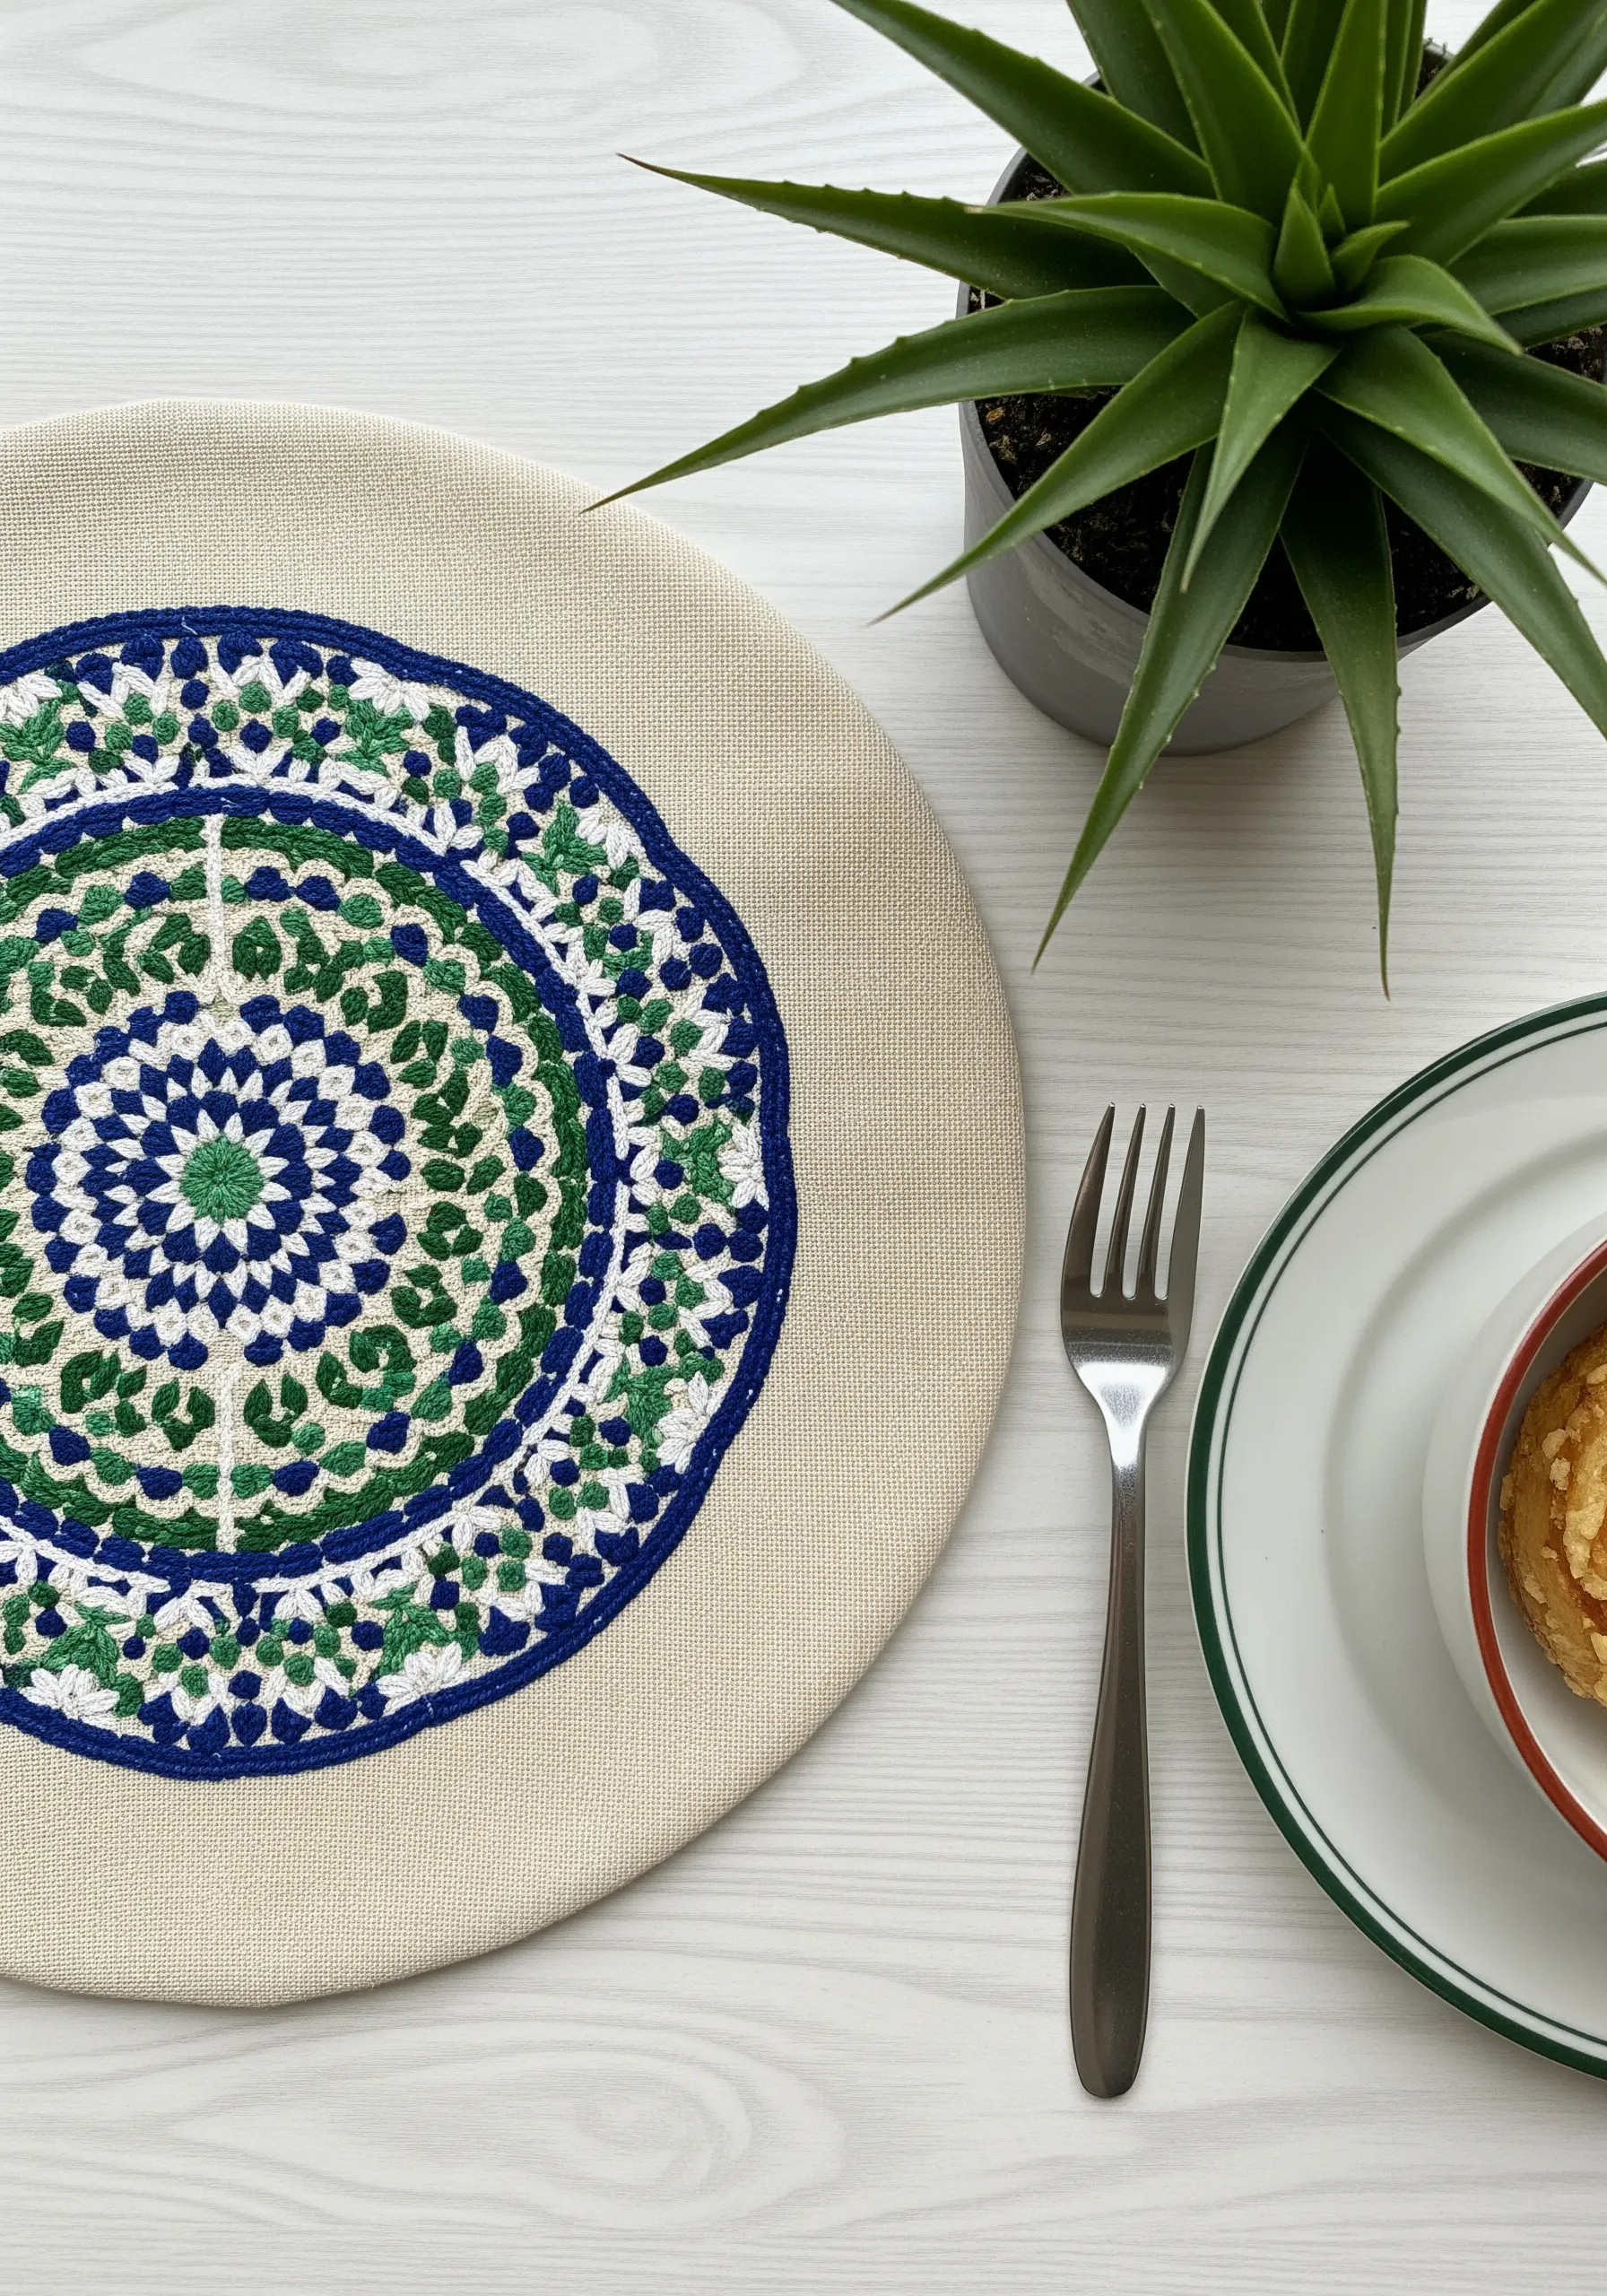
To replicate the textured feel of a Moroccan mosaic, use a chain stitch for both outlines and fills.
This stitch naturally creates a raised, braided line that mimics the grout lines of real tilework, adding wonderful dimension to your design.
For smaller details within the pattern, switch to seed stitch or tiny satin stitches to create a textural contrast against the dominant chain stitch loops.
Always work your circular patterns from the center outwards to ensure the geometry remains perfectly symmetrical and balanced.
6. Sunburst with Metallic Accents
Introduce metallic thread as a highlight, not the main feature, for a look that feels luxurious rather than overwhelming.
Pair shimmering metallic rays with a solid, matte floss center. The contrast in finishes makes the metallic threads appear even more luminous and eye-catching.
To prevent frustration, use a needle with a larger eye for your metallic thread, which will reduce friction and prevent the thread from shredding as you stitch.
Simple straight stitches are perfect for metallics, as they allow the thread to lie flat and catch the maximum amount of light.
7. Balancing Borders and Scatter Motifs
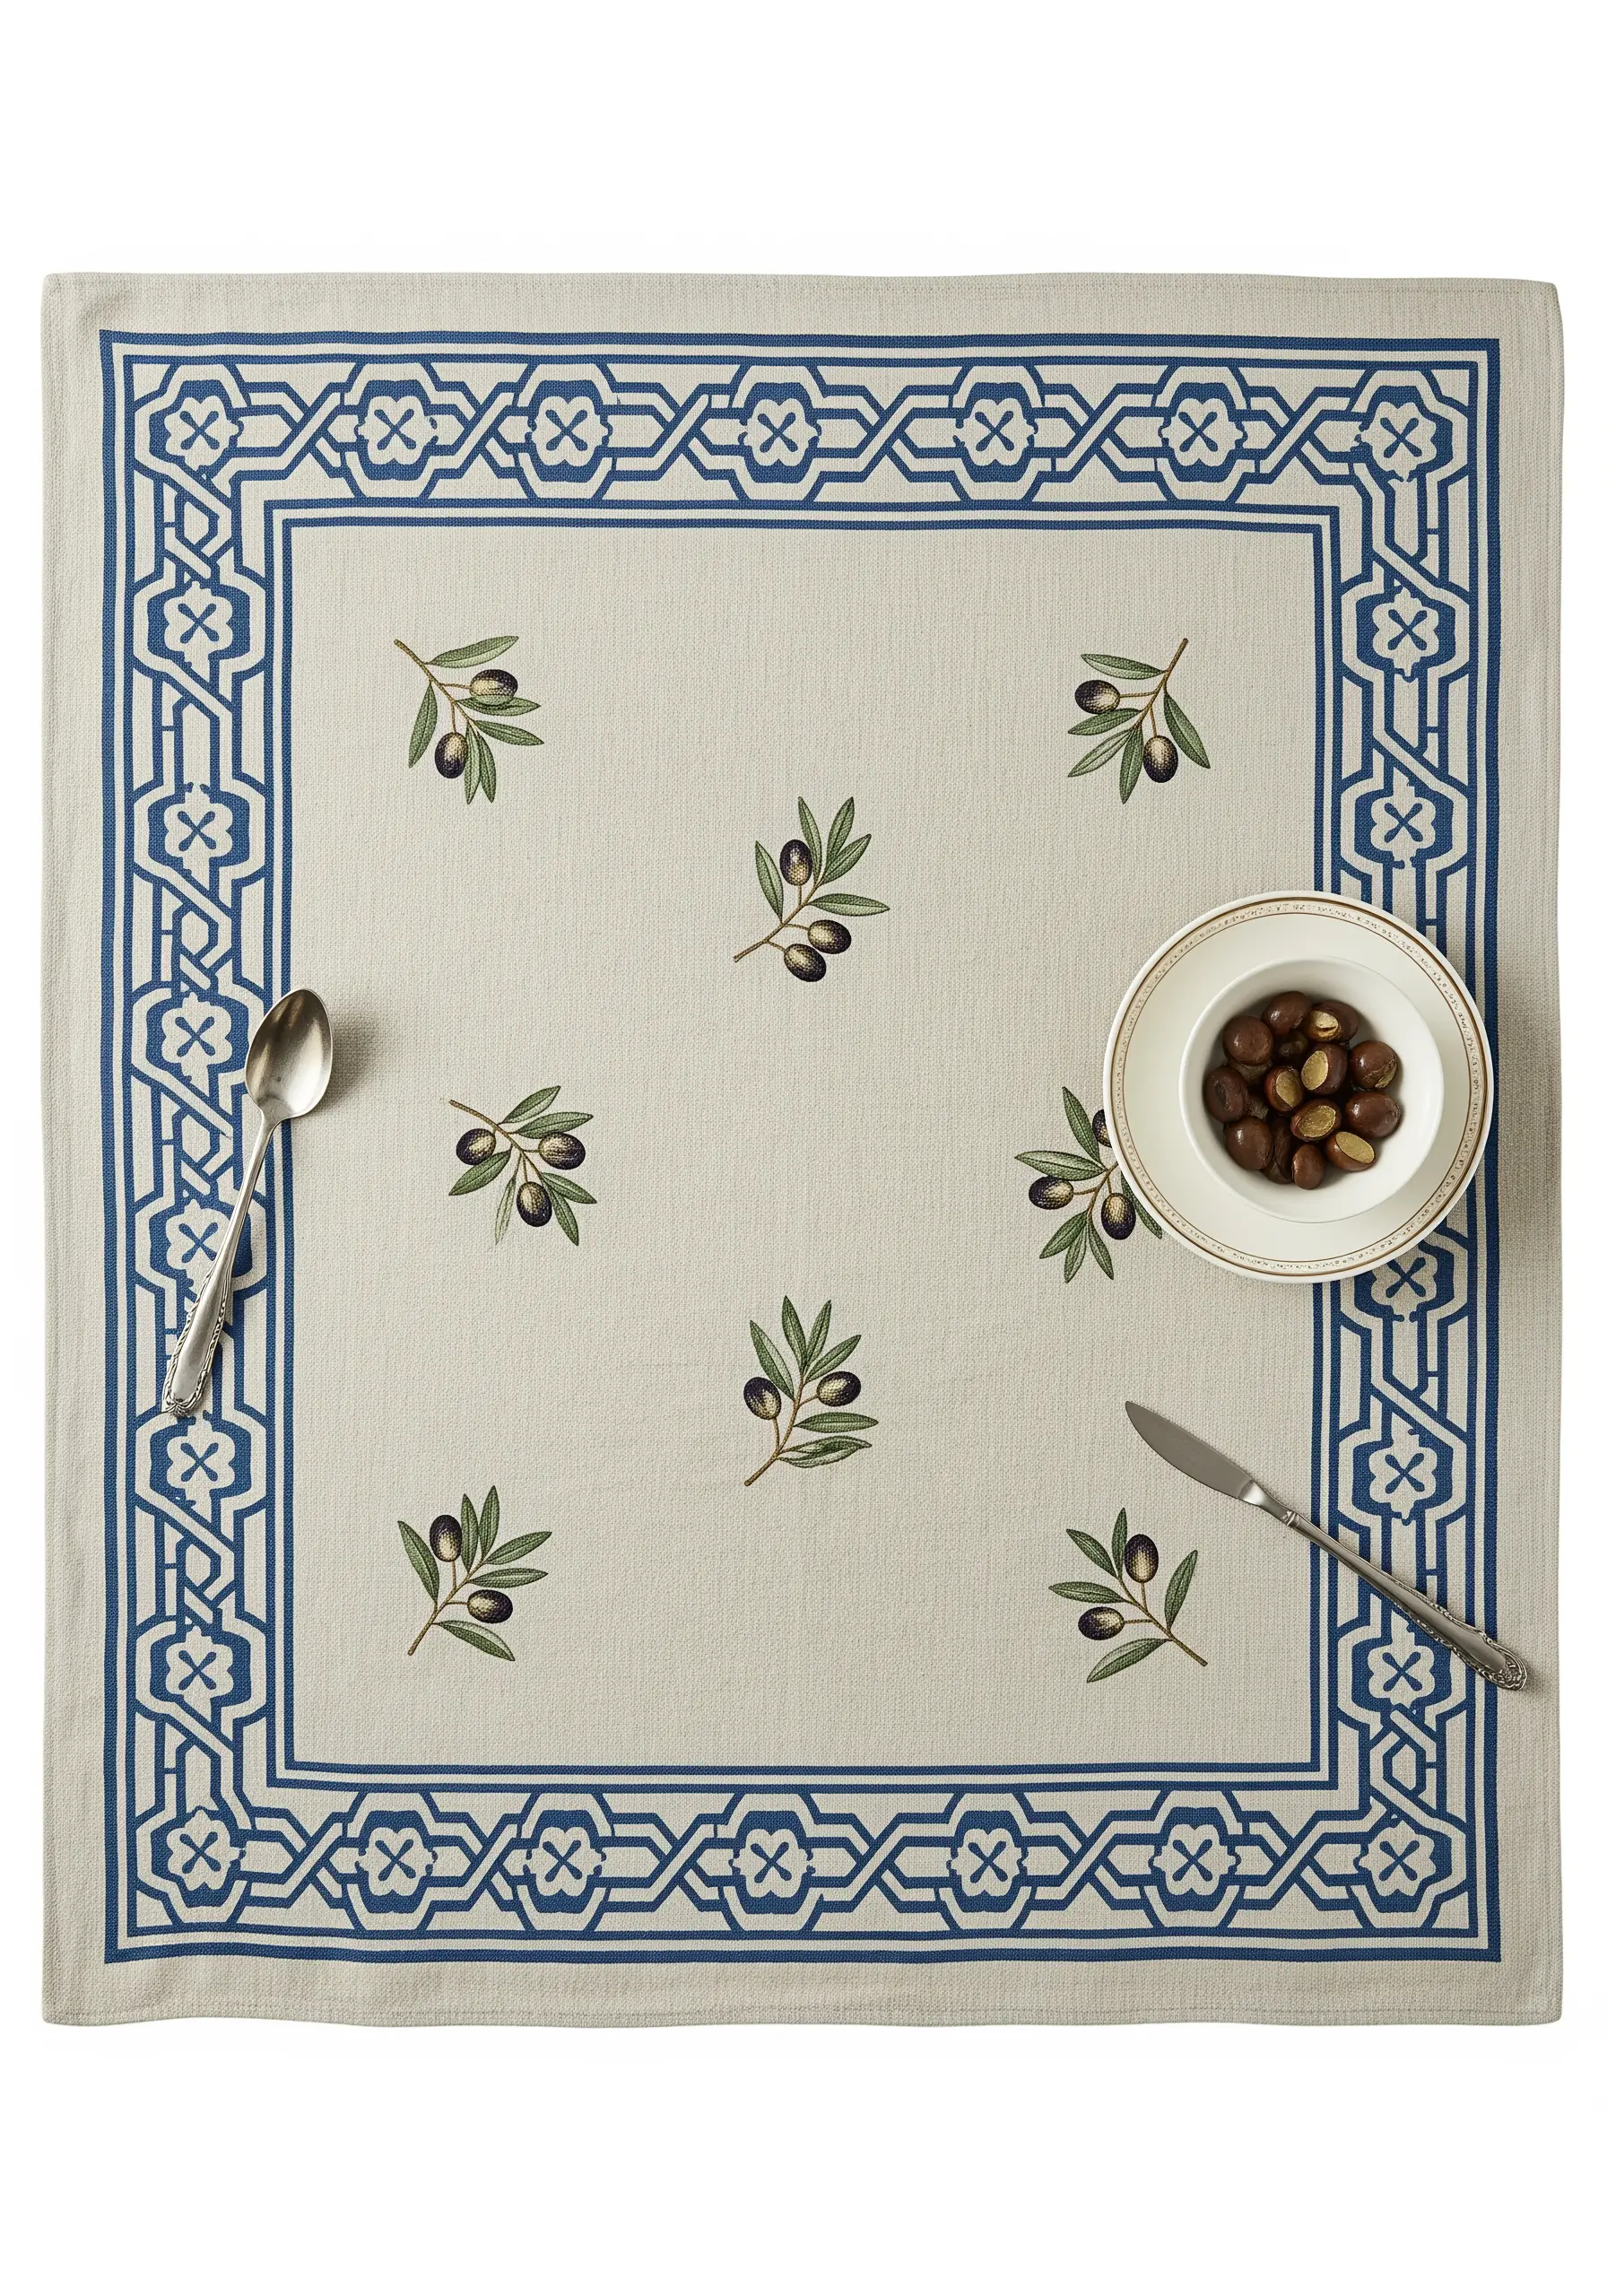
Create a harmonious composition by pairing a strong, graphic border with delicate, sparsely placed motifs in the center.
The key to success here is negative space. Allowing for plenty of empty canvas lets both the bold frame and the small olive sprigs command attention without competing.
Keep the central motifs simple, using only a few stitches and colors. This ensures they read as graceful accents rather than a cluttered central pattern.
This principle of balance creates a professional, intentional design that feels both complete and uncluttered, perfect for elegant table linen embroidery.
8. Dimensional Sun with Couched Rope
For a bold, sculptural effect, use couching to attach thick cotton rope or cord directly onto your fabric.
Simply lay the rope in your desired shape—a spiral for the sun’s center, straight lines for its rays—and then tack it down with a standard embroidery floss in a matching color.
Use small, evenly spaced vertical stitches that sink into the rope’s texture, becoming almost invisible.
This technique is all about adding dramatic dimension and is most effective on sturdy fabrics like heavy linen or canvas that can support the weight.
9. The Understated Wreath
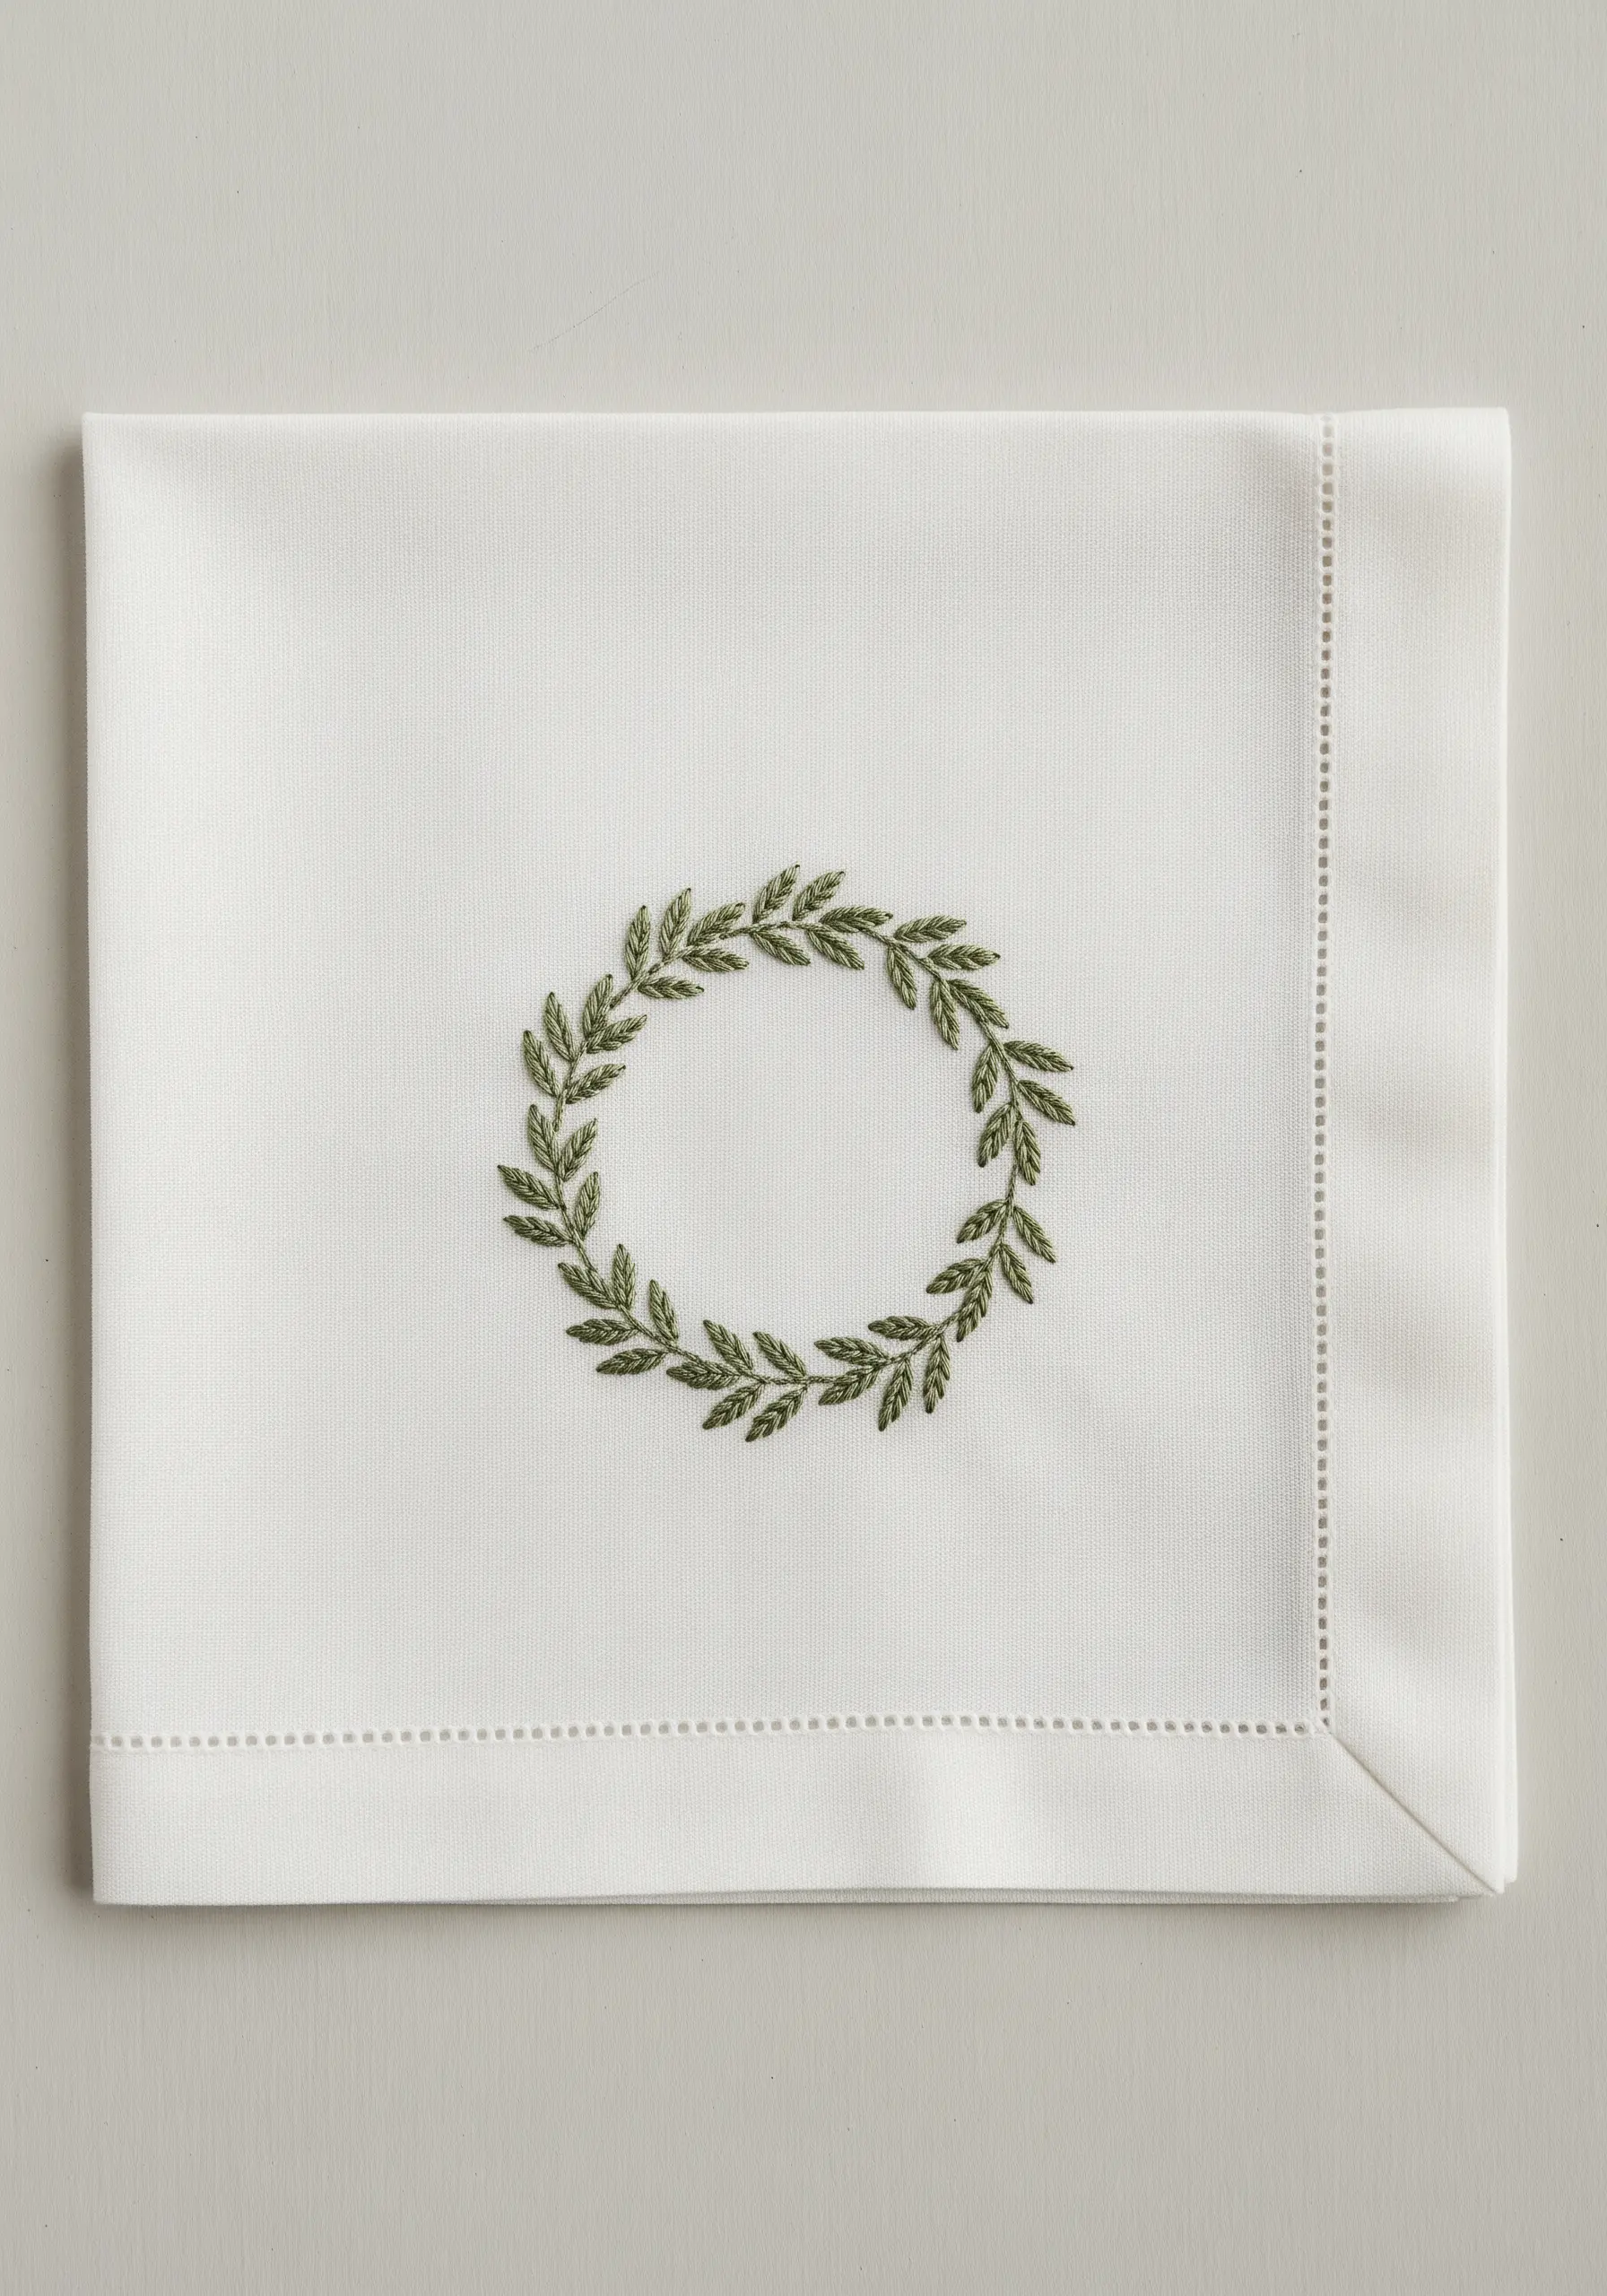
For a truly elegant wreath, focus on simplicity and precision rather than complexity. Use only one or two strands of floss for a delicate, refined line.
The fly stitch is ideal for creating the individual leaves; stitch them in a V-shape to form a tapered leaf with a central vein in a single motion.
Lightly trace a perfect circle on your fabric with a water-soluble marker as a guide to ensure your wreath is beautifully shaped.
Using just one or two closely related shades of green results in a timeless design that whispers sophistication.
10. Modern Mosaic with Appliqué

Create a contemporary mosaic effect by combining fabric appliqué with embroidery.
Cut irregular shapes from various fabrics—satin for shine, glitter fabric for sparkle, and plain cotton for a matte finish. Arrange them on your base fabric and secure them with a light application of fabric glue.
Then, unify the entire design by outlining each fabric piece with a consistent stitch, like a delicate chain stitch or whipped backstitch in a contrasting color.
This technique turns fabric scraps into a cohesive piece of modern textile art.
11. A Cohesive Set Through Variation
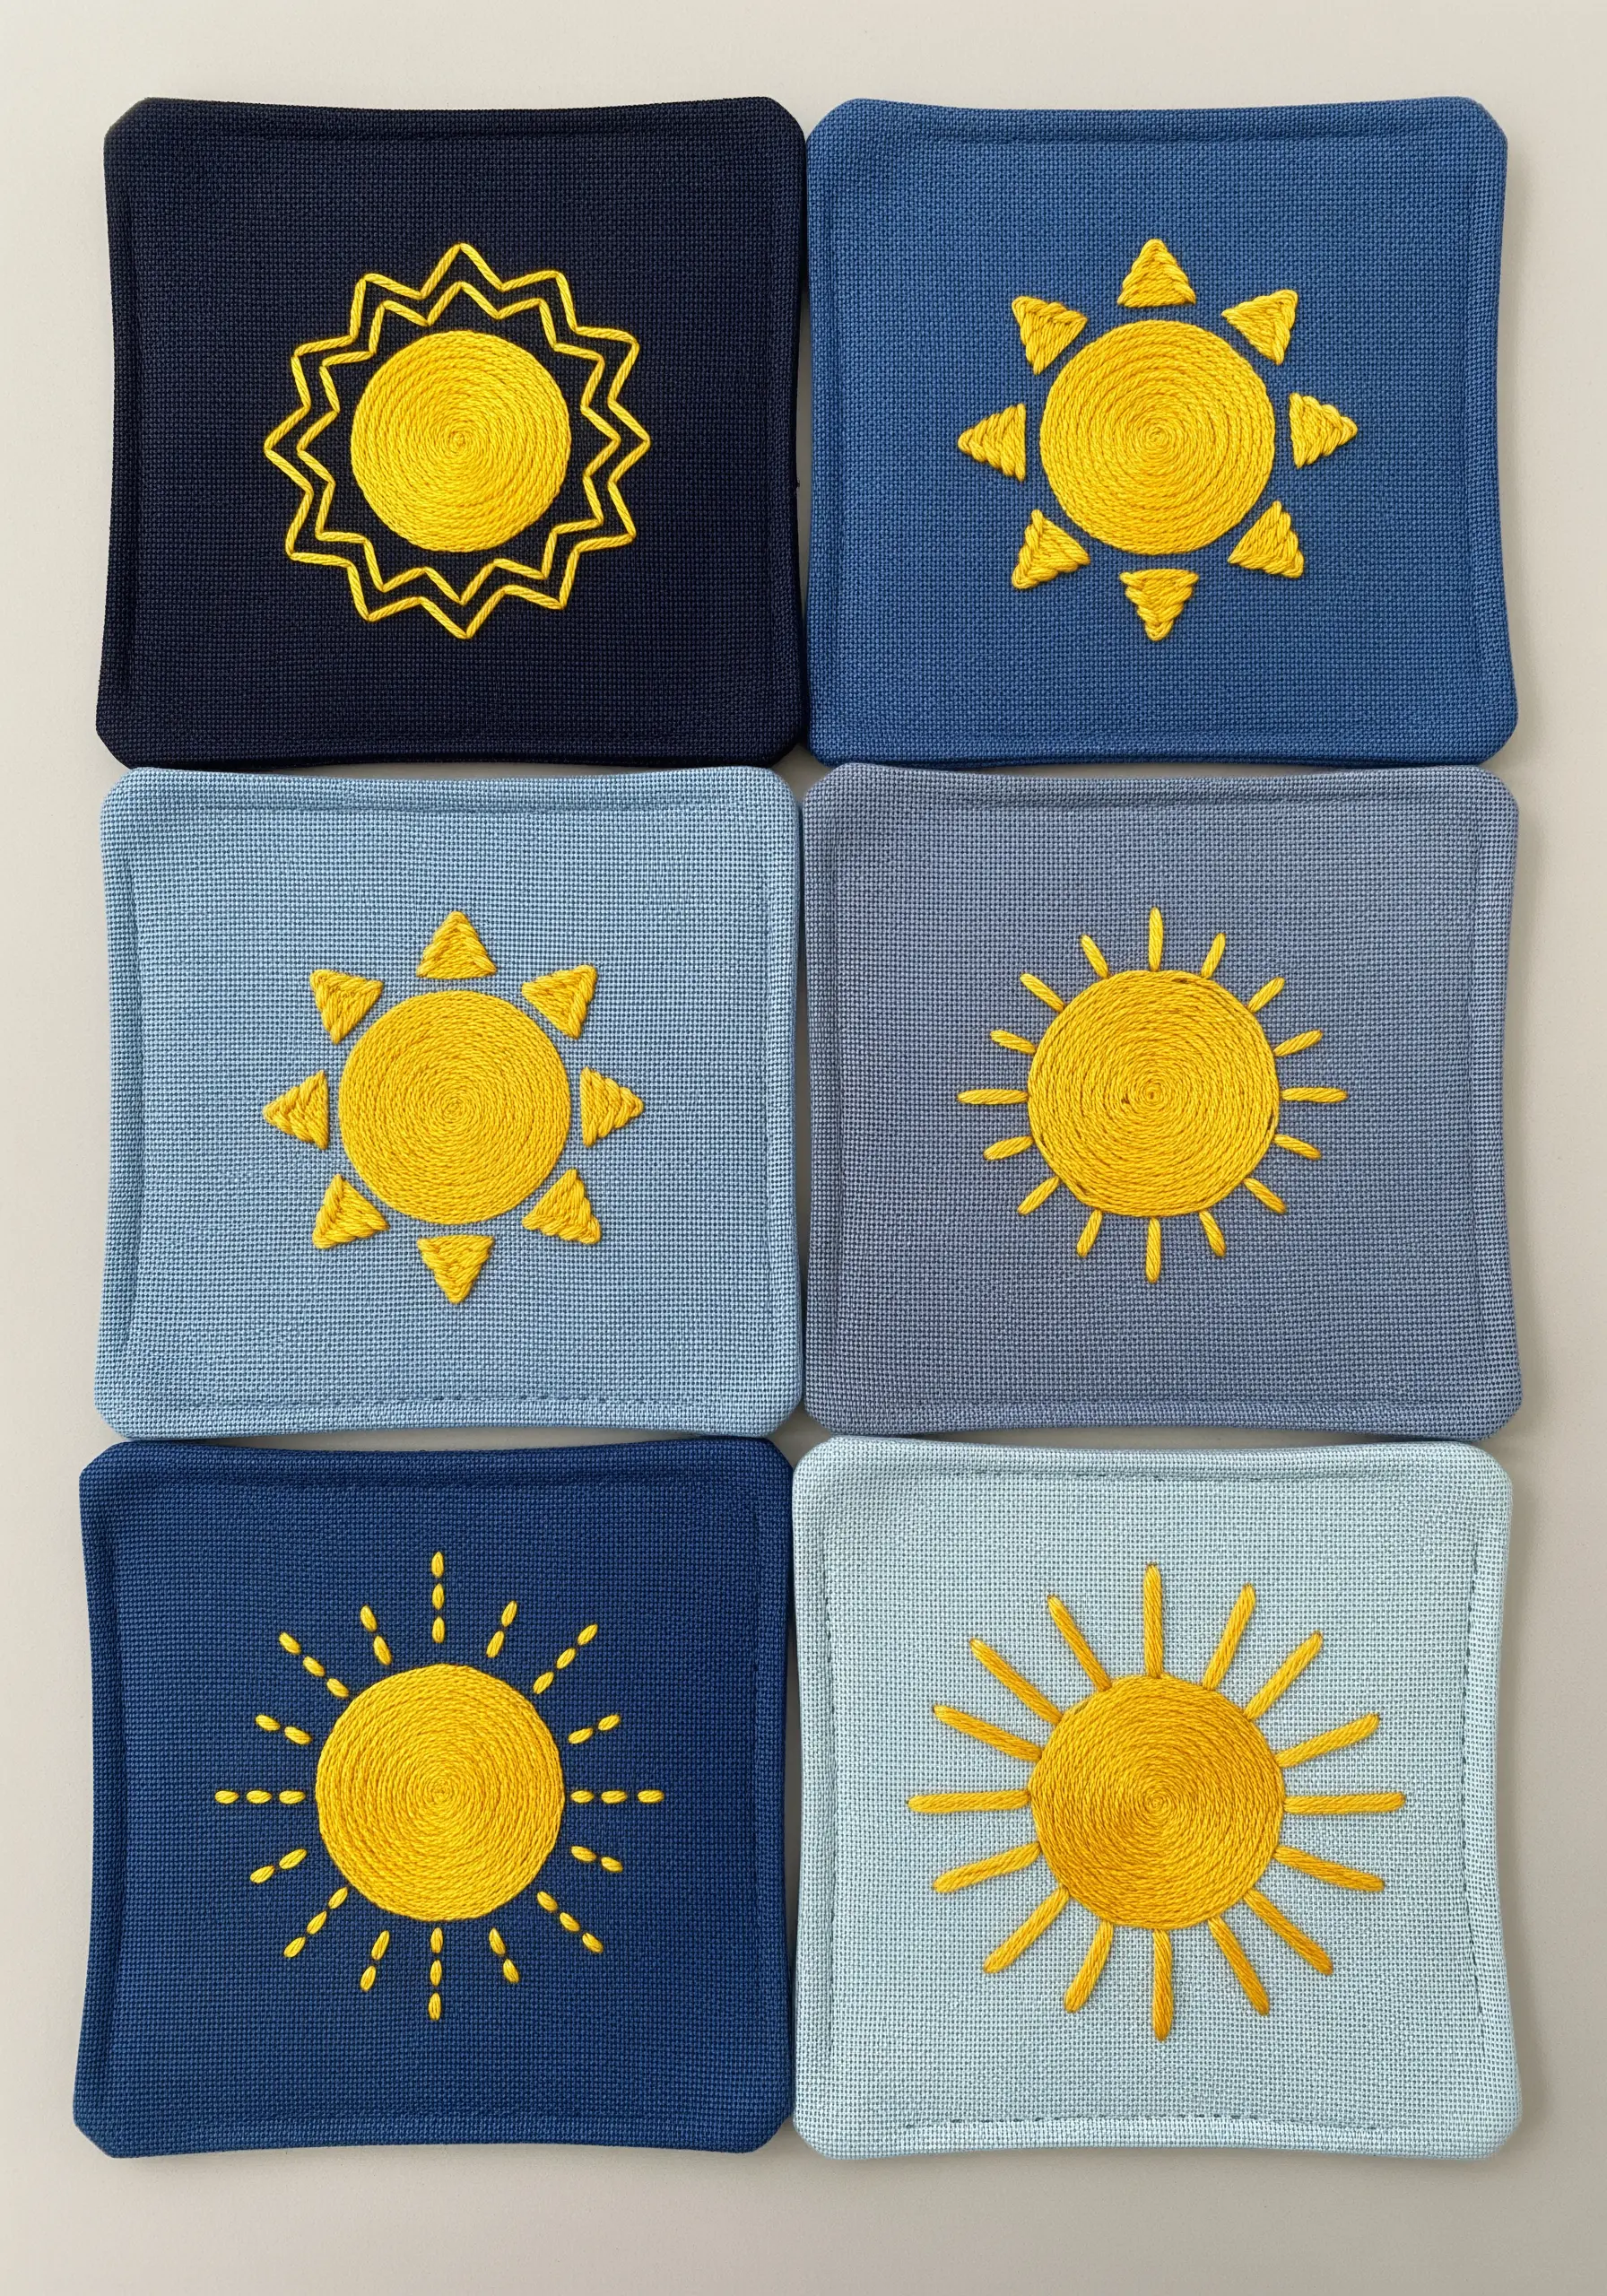
To create a coordinated set of napkins or coasters that feels dynamic, not monotonous, use a single motif but vary the context.
Embroider the same sun design on fabrics in a harmonious color family, such as different shades of blue, from sky to navy.
Tweak the details on each piece: on one, use only an outline stitch; on another, fill the center; on a third, use a different stitch for the rays.
This approach results in a collection that is clearly related yet individually unique, adding curated depth to your table setting.
12. Landscape Embroidery as Thread Painting
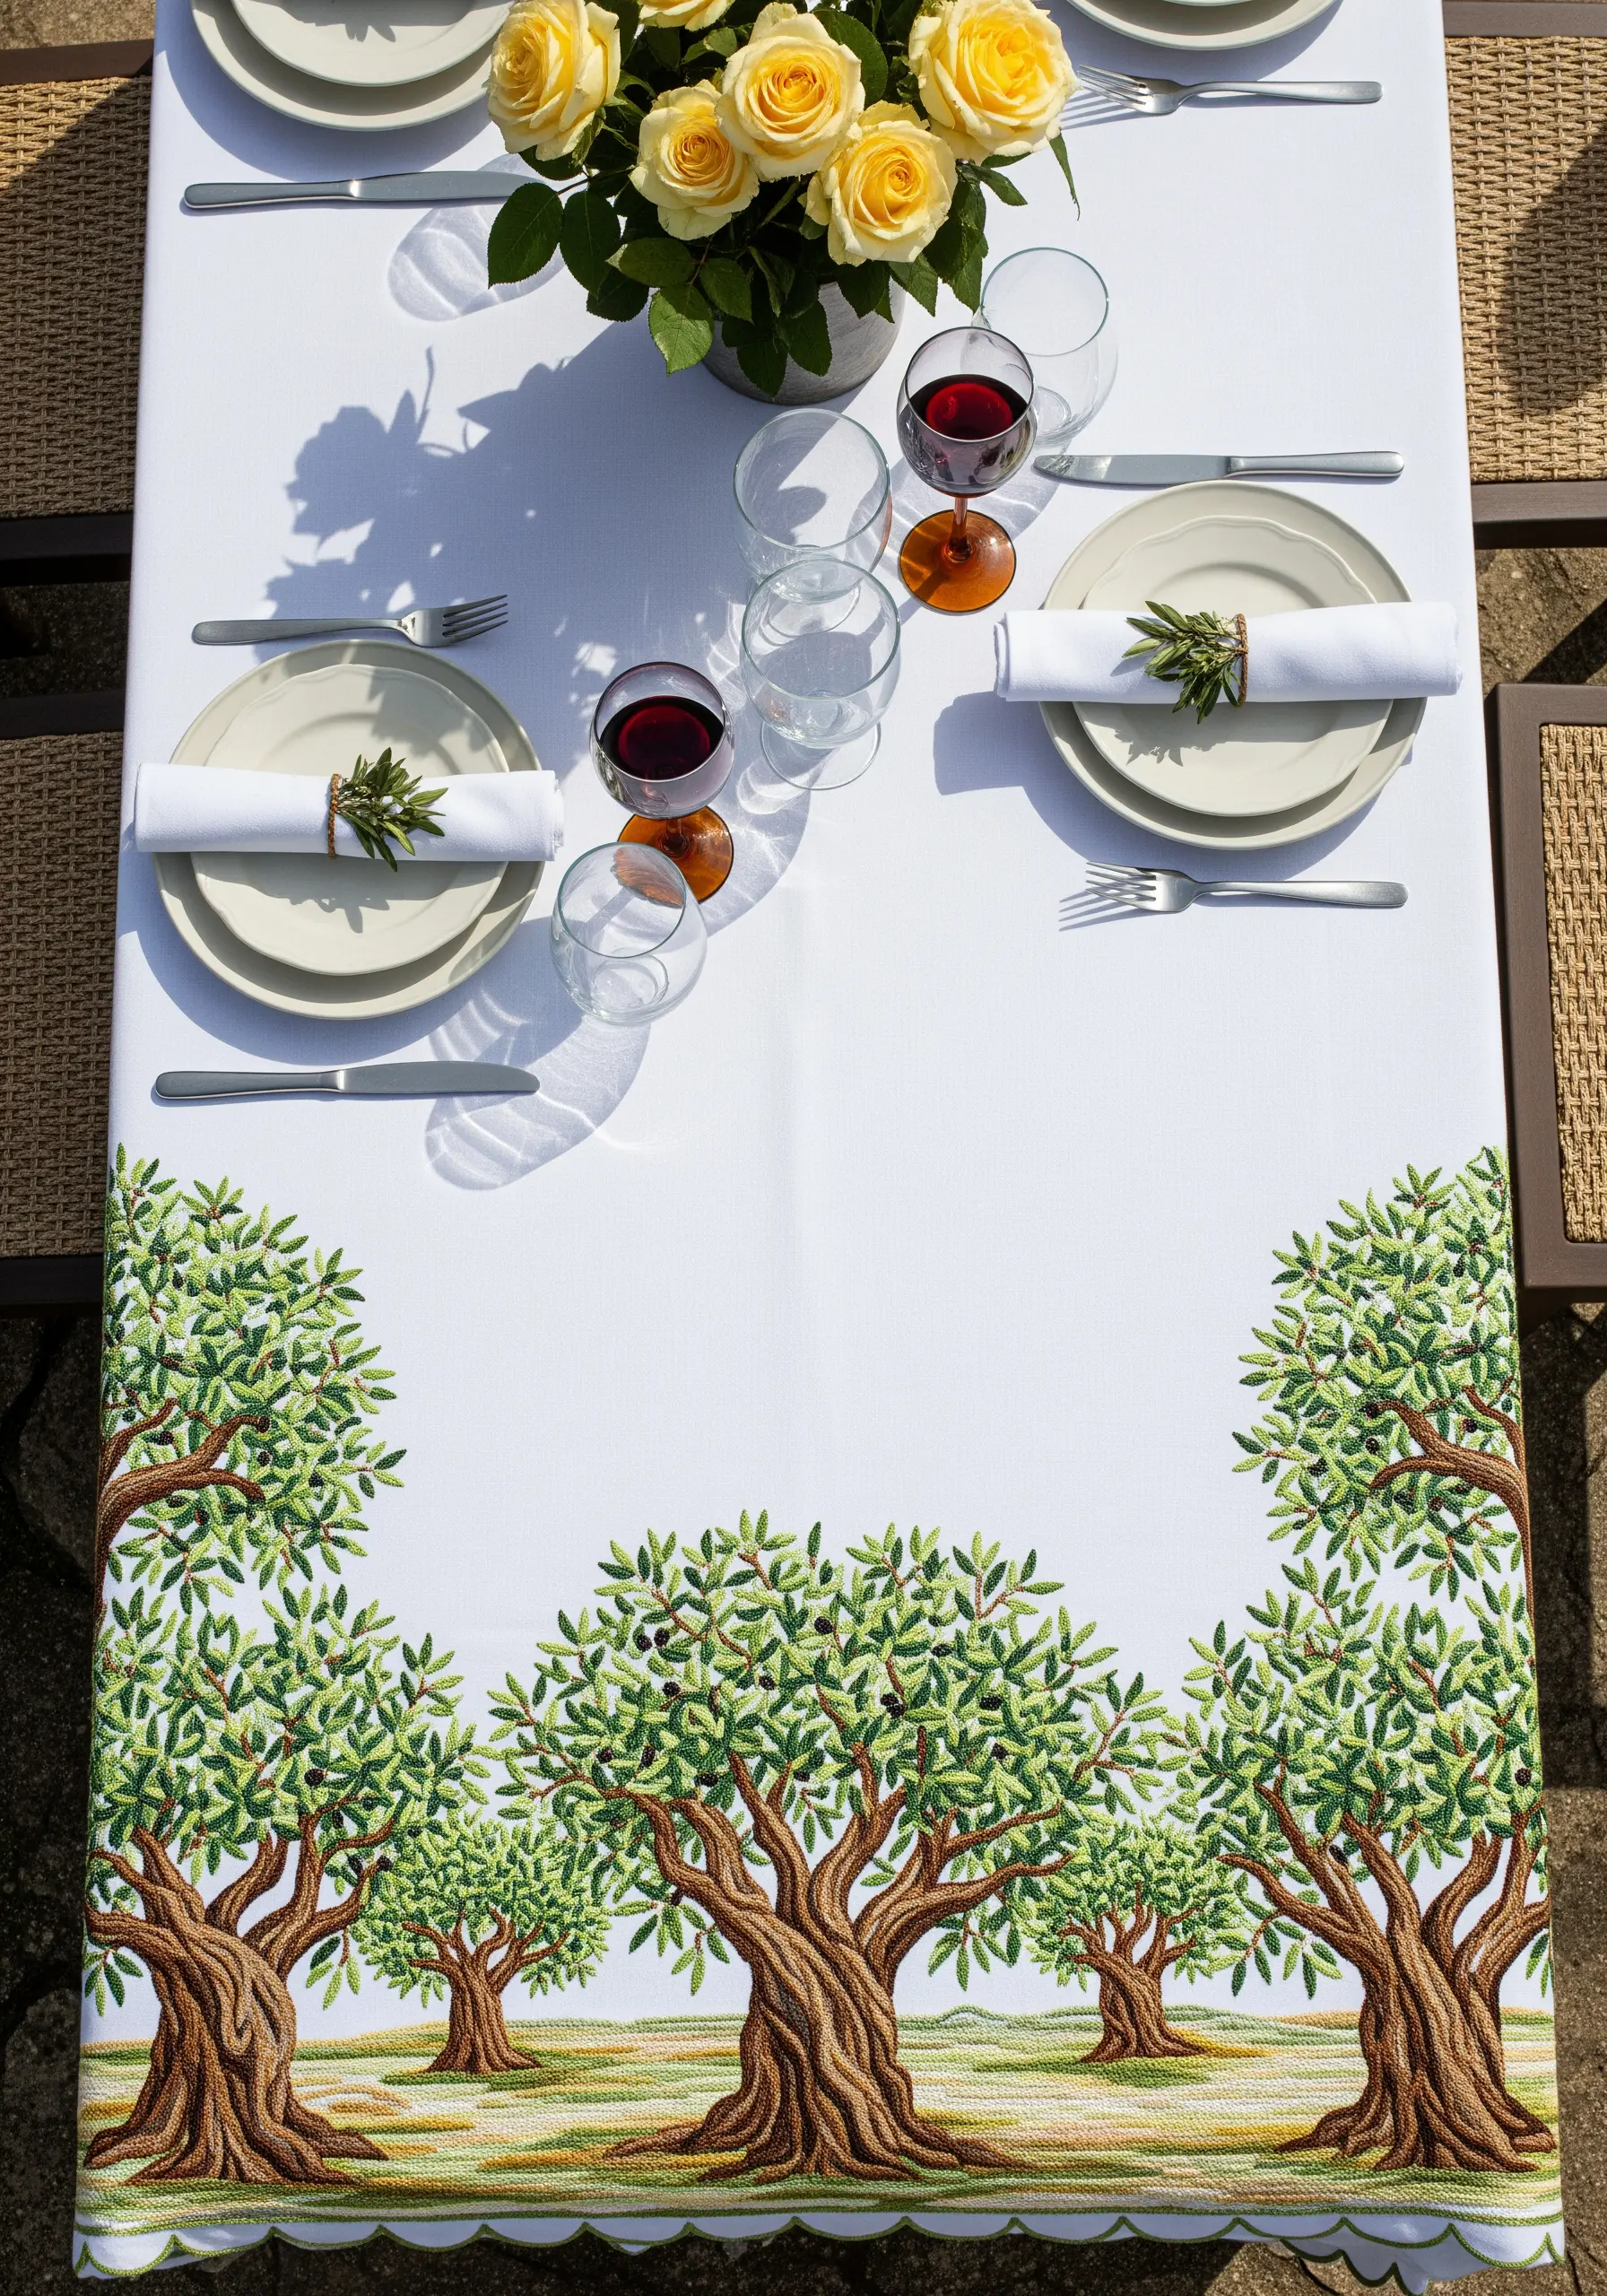
To stitch a detailed scene like an olive grove, approach it as you would a painting, building layers of color and texture.
Use long and short stitch to seamlessly blend shades of brown in the tree trunks and greens in the leaves, creating a realistic sense of light and shadow.
Reserve single strands of thread for the finest details, like individual olives or delicate branches.
For the ground, use short, horizontal satin stitches in earthy tones to suggest perspective and depth, transforming your fabric into a canvas.
13. Layered Stitches for Intricate Tilework
Build complex geometric patterns with a methodical layering of stitches, working from the background to the foreground.
First, establish the foundational grid with a simple backstitch in a neutral or primary color.
Next, fill in the larger background shapes with a smooth, dense satin stitch.
Finally, add the topmost decorative elements, like the green flourishes, using a raised stitch like a French knot or a detached chain stitch. This layering adds physical dimension and makes the design pop.
14. Symbolic Celestial and Botanical Motifs
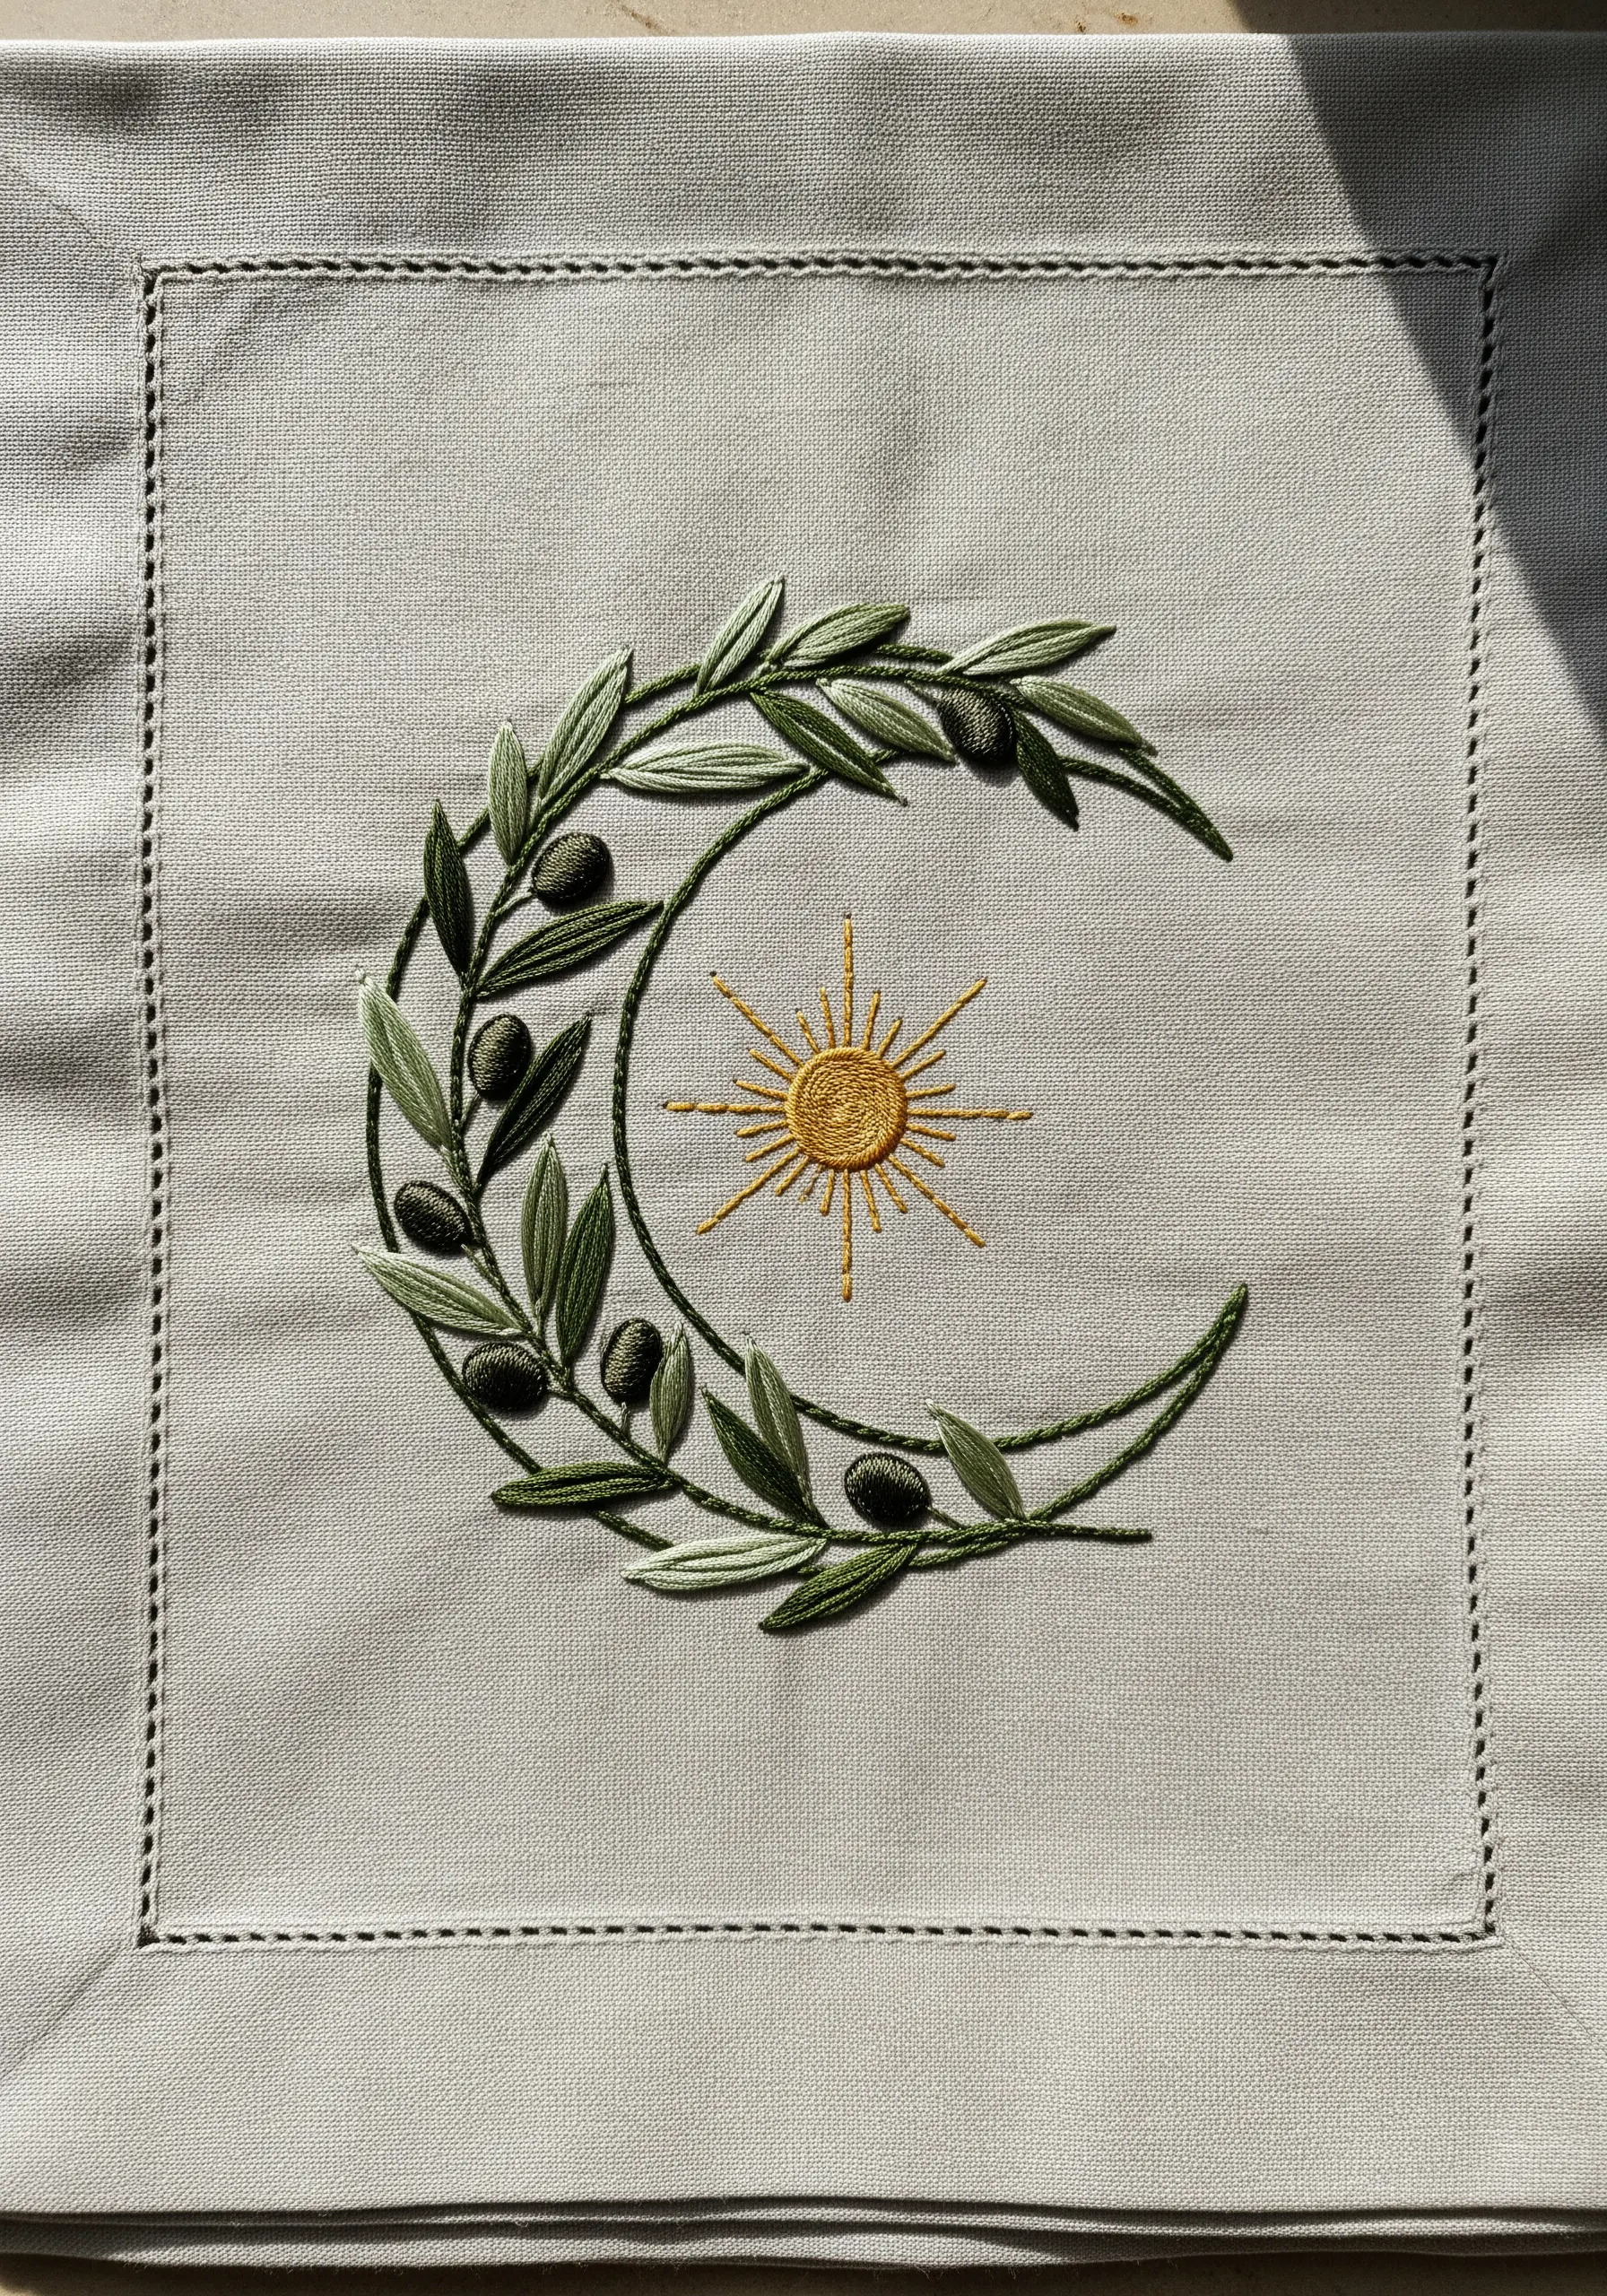
Combine different symbolic motifs to create a design that tells a story, like this pairing of an olive branch and a sun.
To ensure each element is clear and distinct, vary their textures. Use a smooth, solid satin stitch for the olive leaves and a split stitch for the branches to create a defined crescent shape.
For the sun, use radiating straight stitches in a lighter, brighter thread. This textural contrast gives each symbol its own identity while unifying them into a single, meaningful composition.
15. An Ornate Border with Gilded Outlines
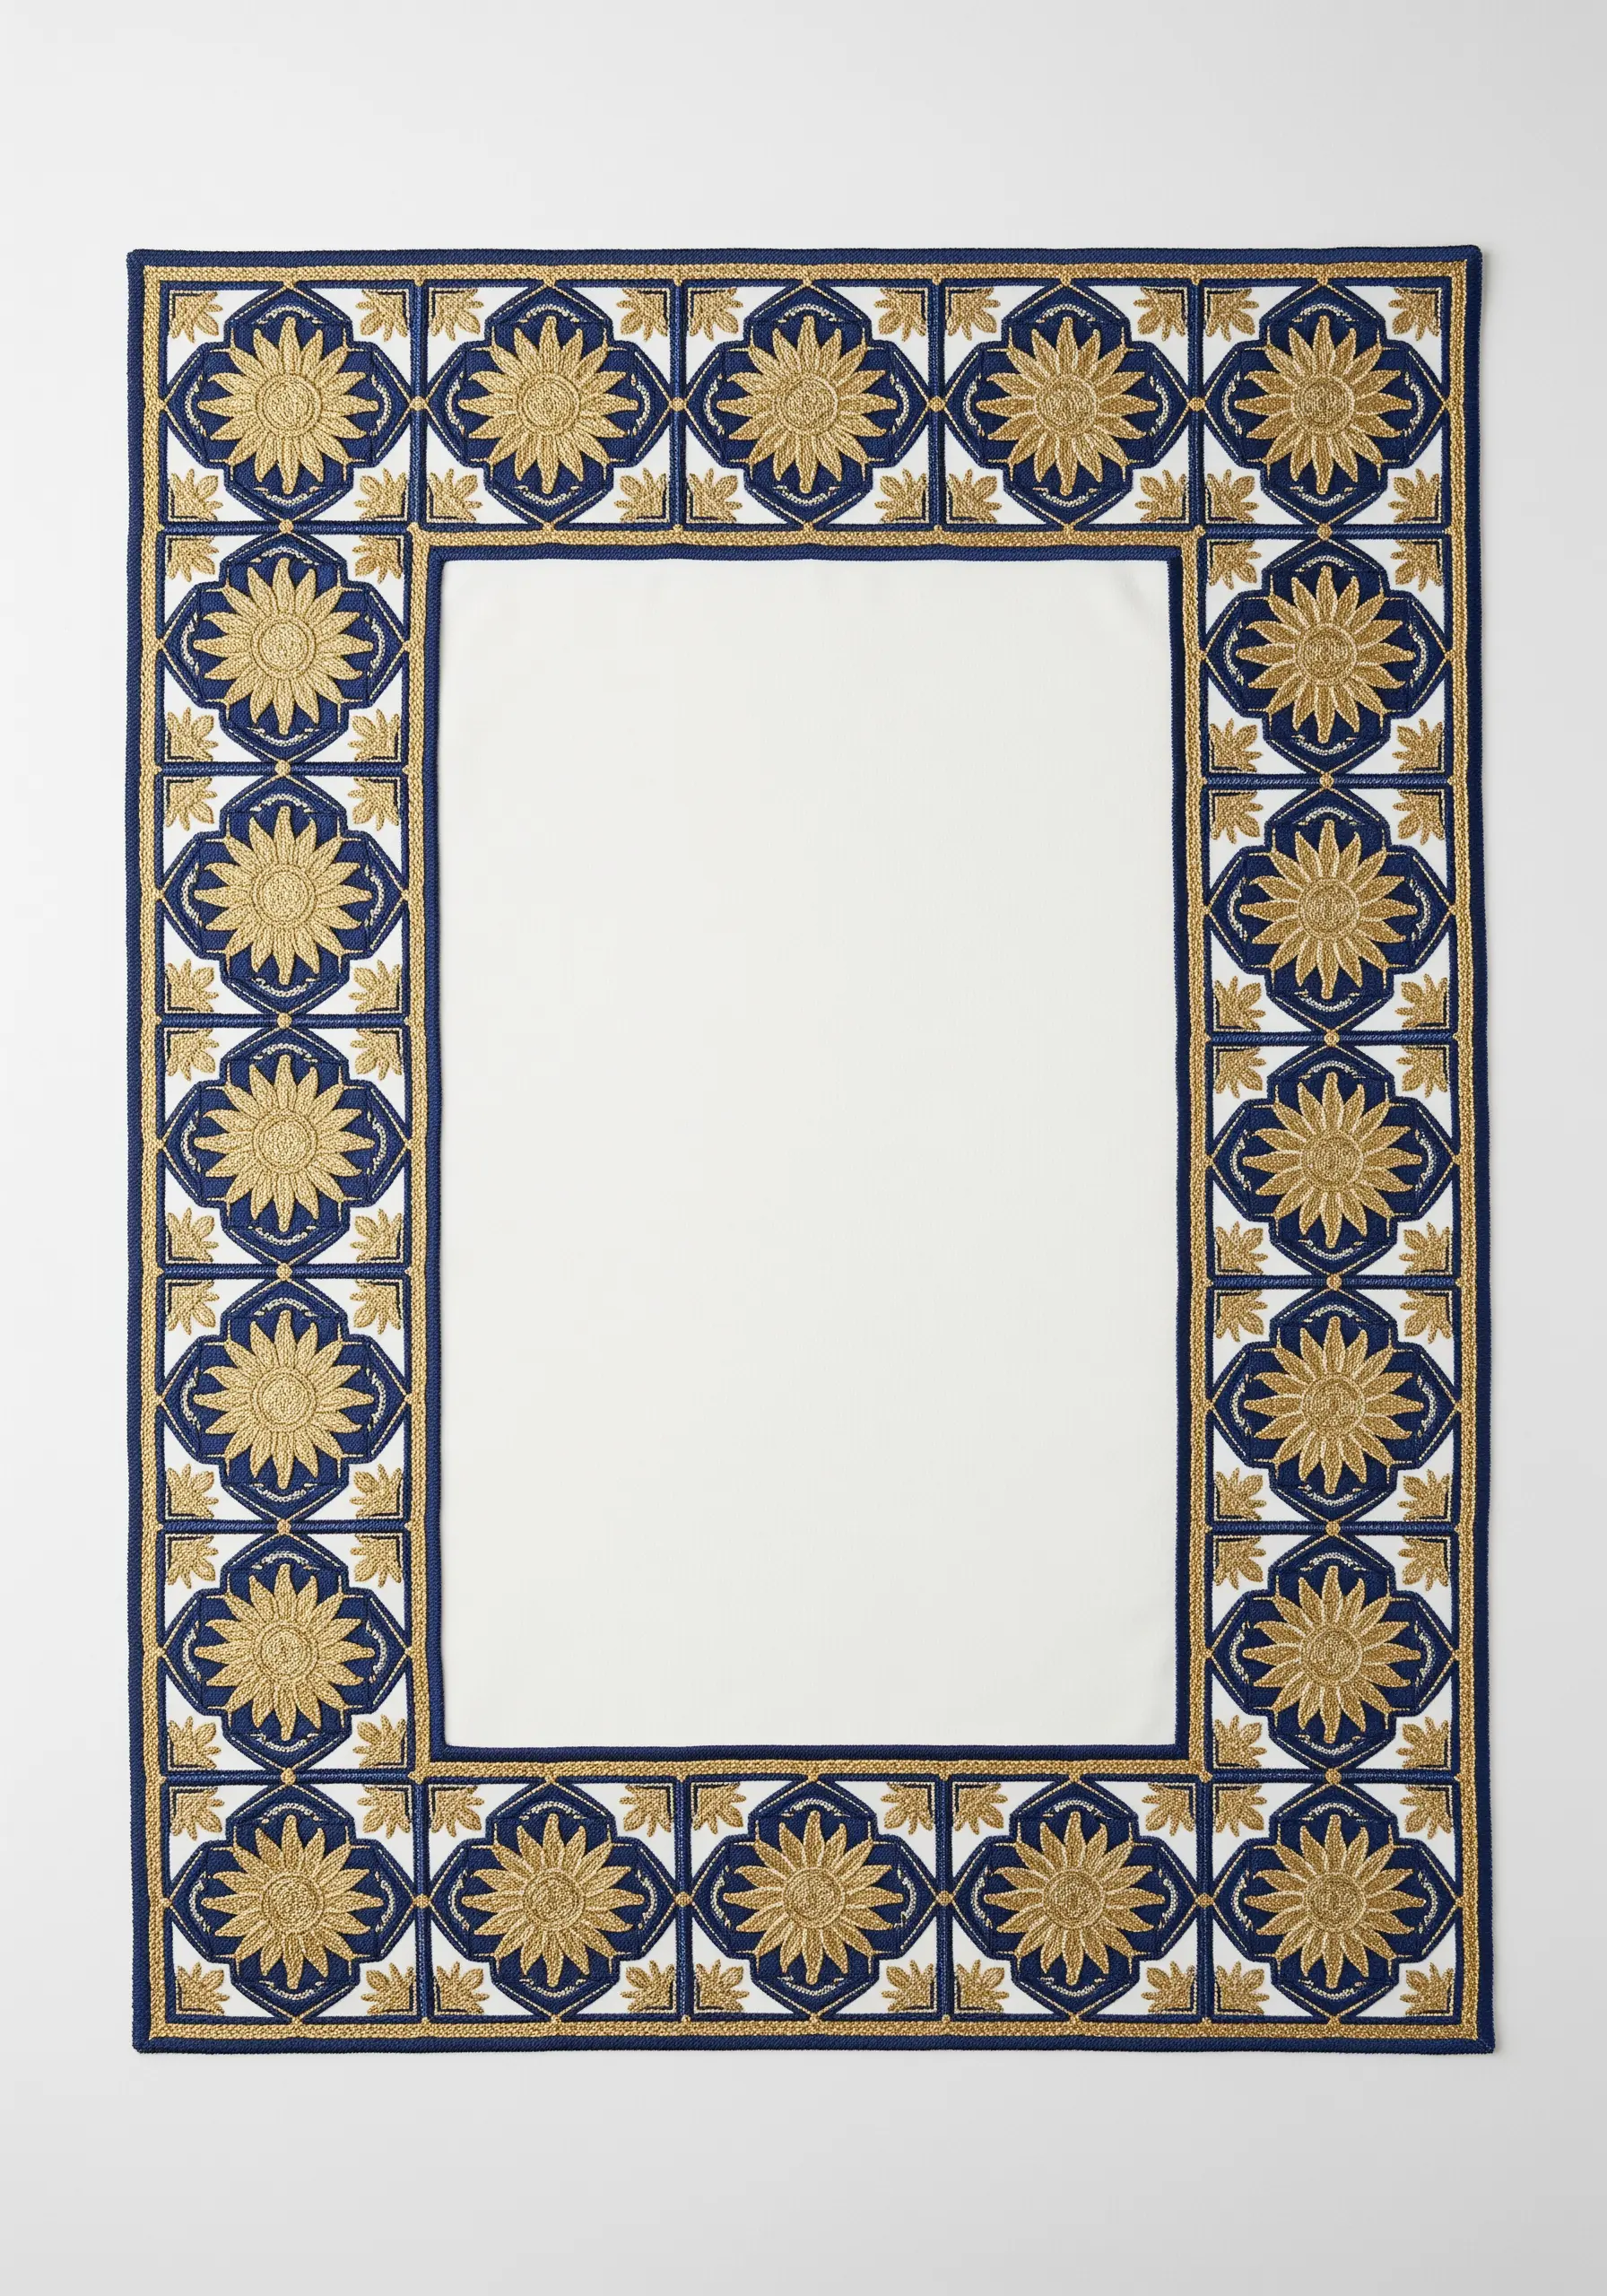
For a formal, opulent border, use a high-quality metallic gold thread to outline each repeating element.
This not only defines the pattern with sharp, shimmering lines but also adds a luxurious feel reminiscent of gilded tiles or architectural details.
Fill the interior of each shape with a deep, matte color like navy blue. The dramatic contrast between the flat, dark fill and the sparkling outline creates a sophisticated and high-impact finish.
Always use a tear-away stabilizer behind such dense embroidery to prevent the fabric from puckering under the tension of the stitches.
16. A Playful Pattern of Scattered Olives

Create a vibrant, modern placemat by scattering simple motifs in a random-looking pattern across the fabric.
The key to keeping this type of design from feeling chaotic is a strictly limited color palette. Here, just deep purple and two shades of green create a cohesive look.
Vary the orientation of each little olive sprig—some pointing up, some down, some sideways—to create a sense of playful movement and energy.
This is a fun and quick way to fill a surface with tiny motifs that add personality.
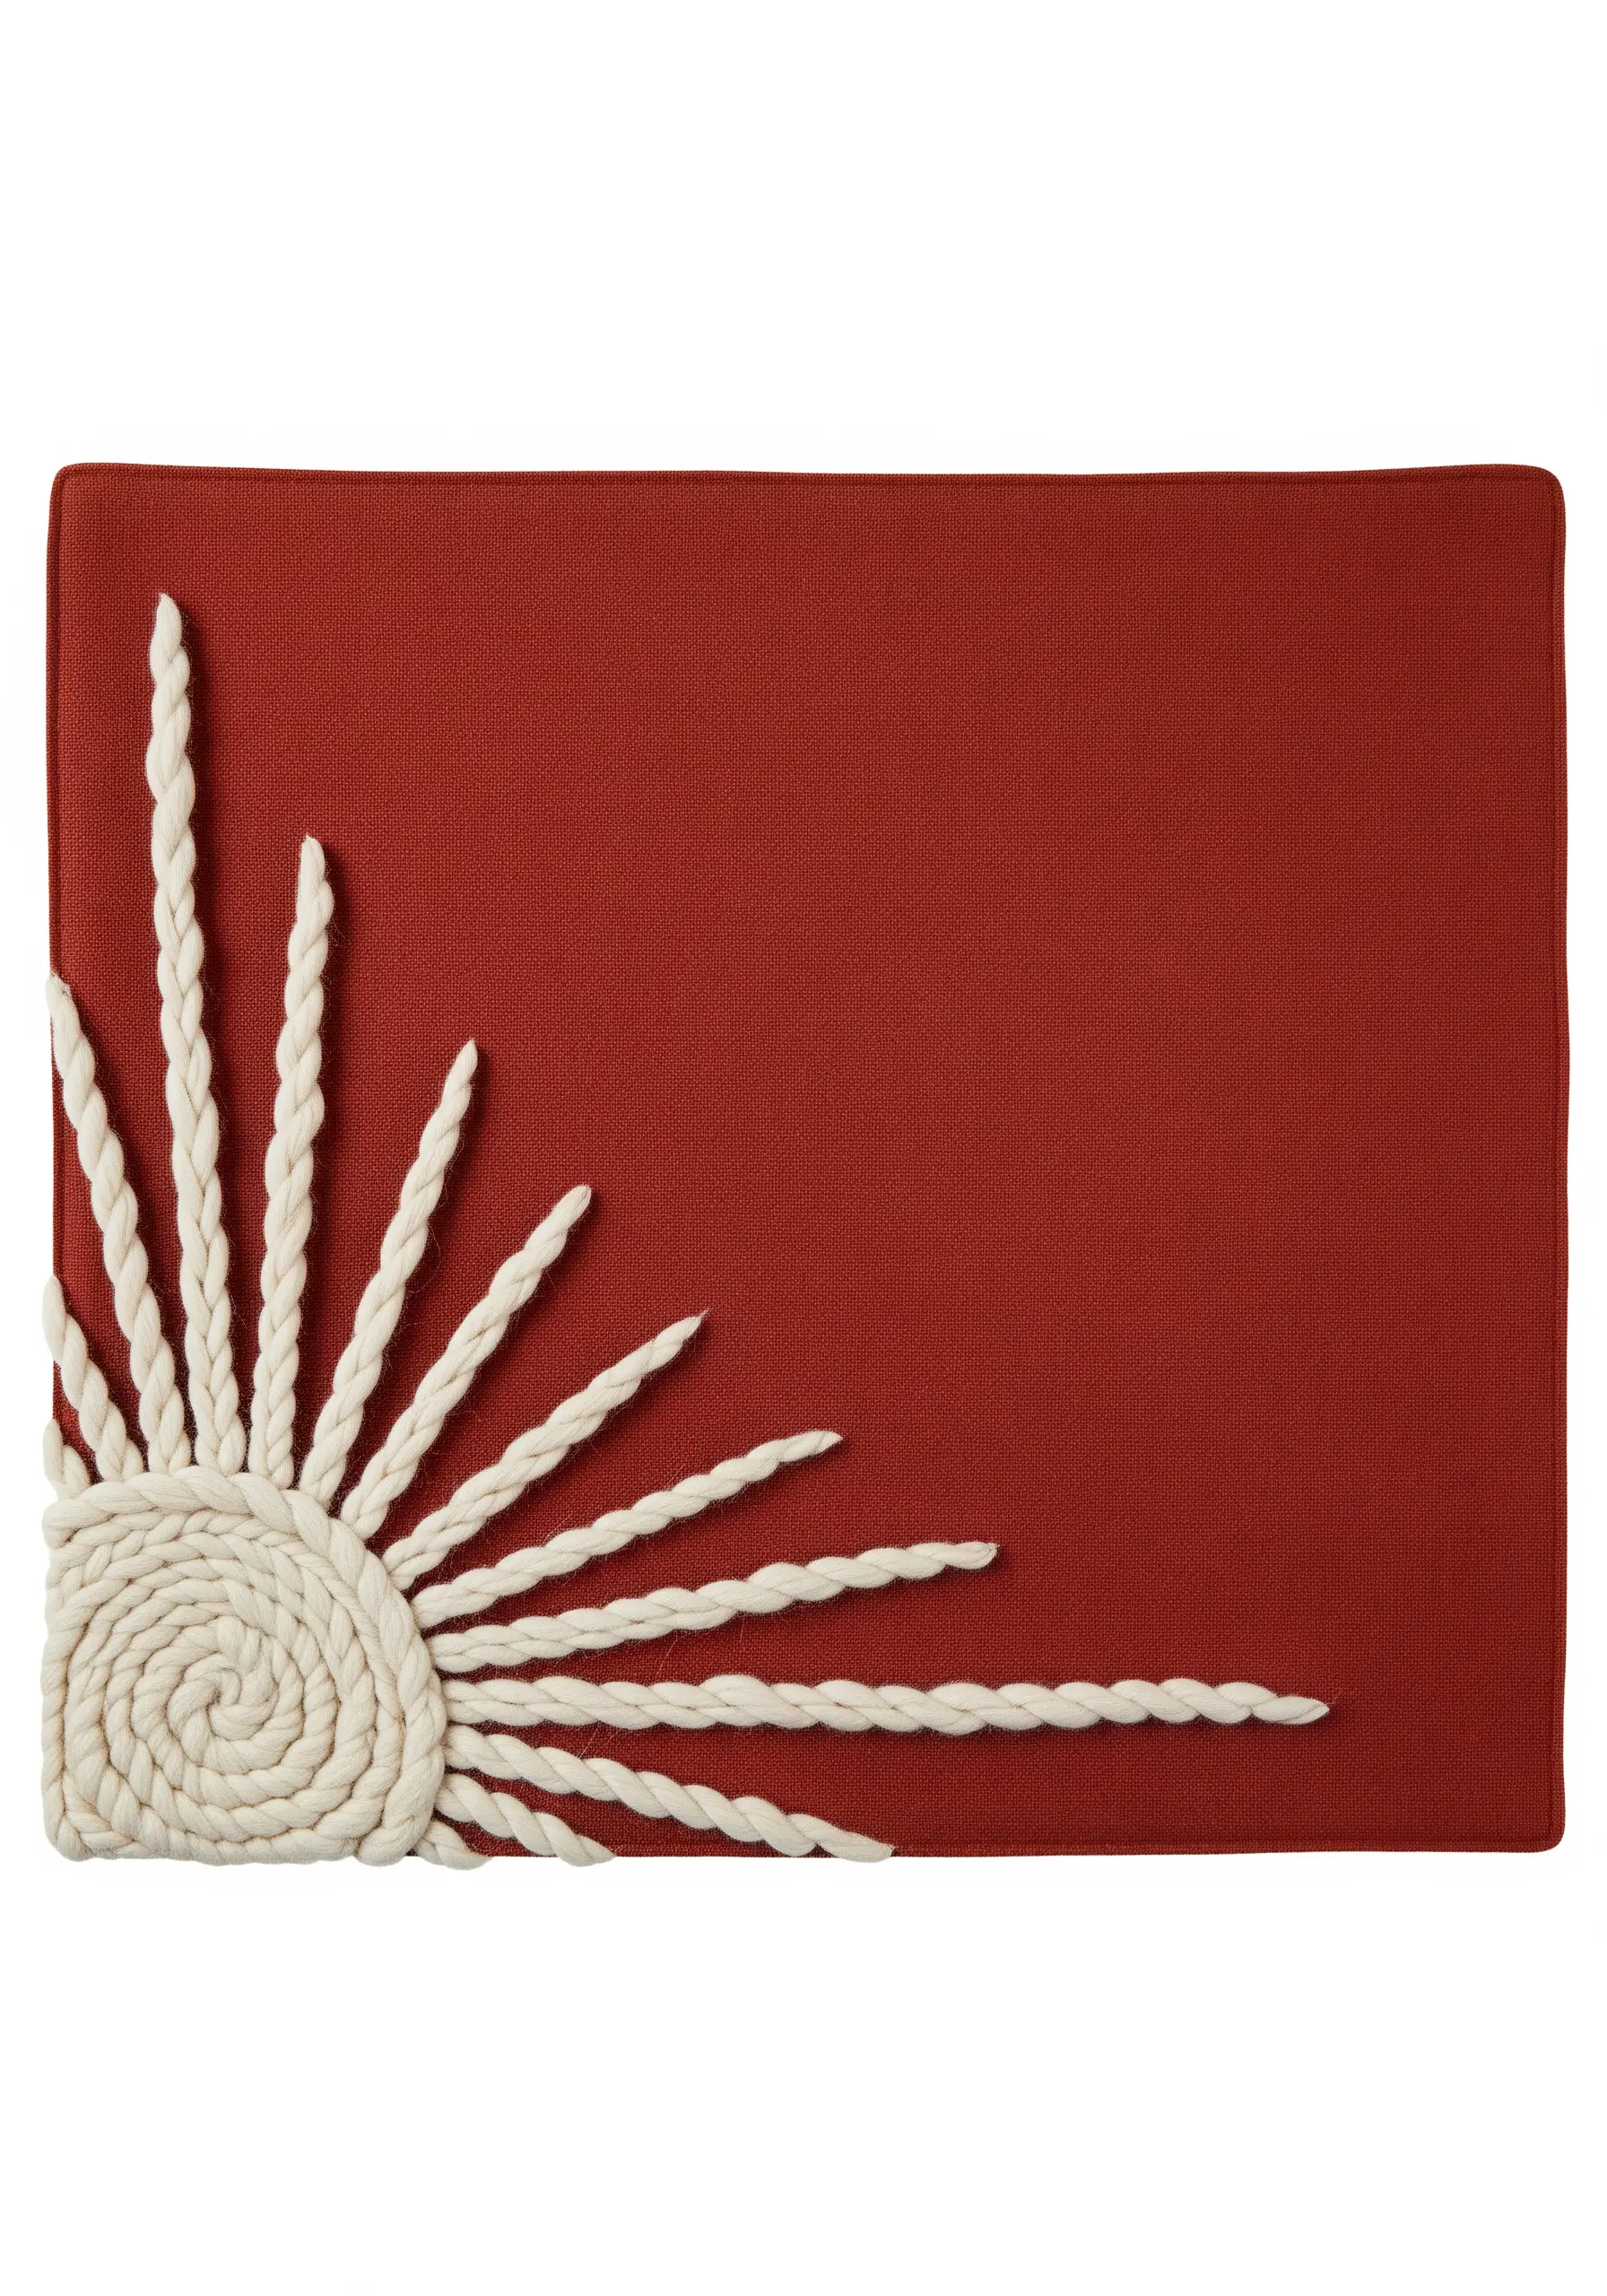
17. High-Contrast Graphic Rope Work
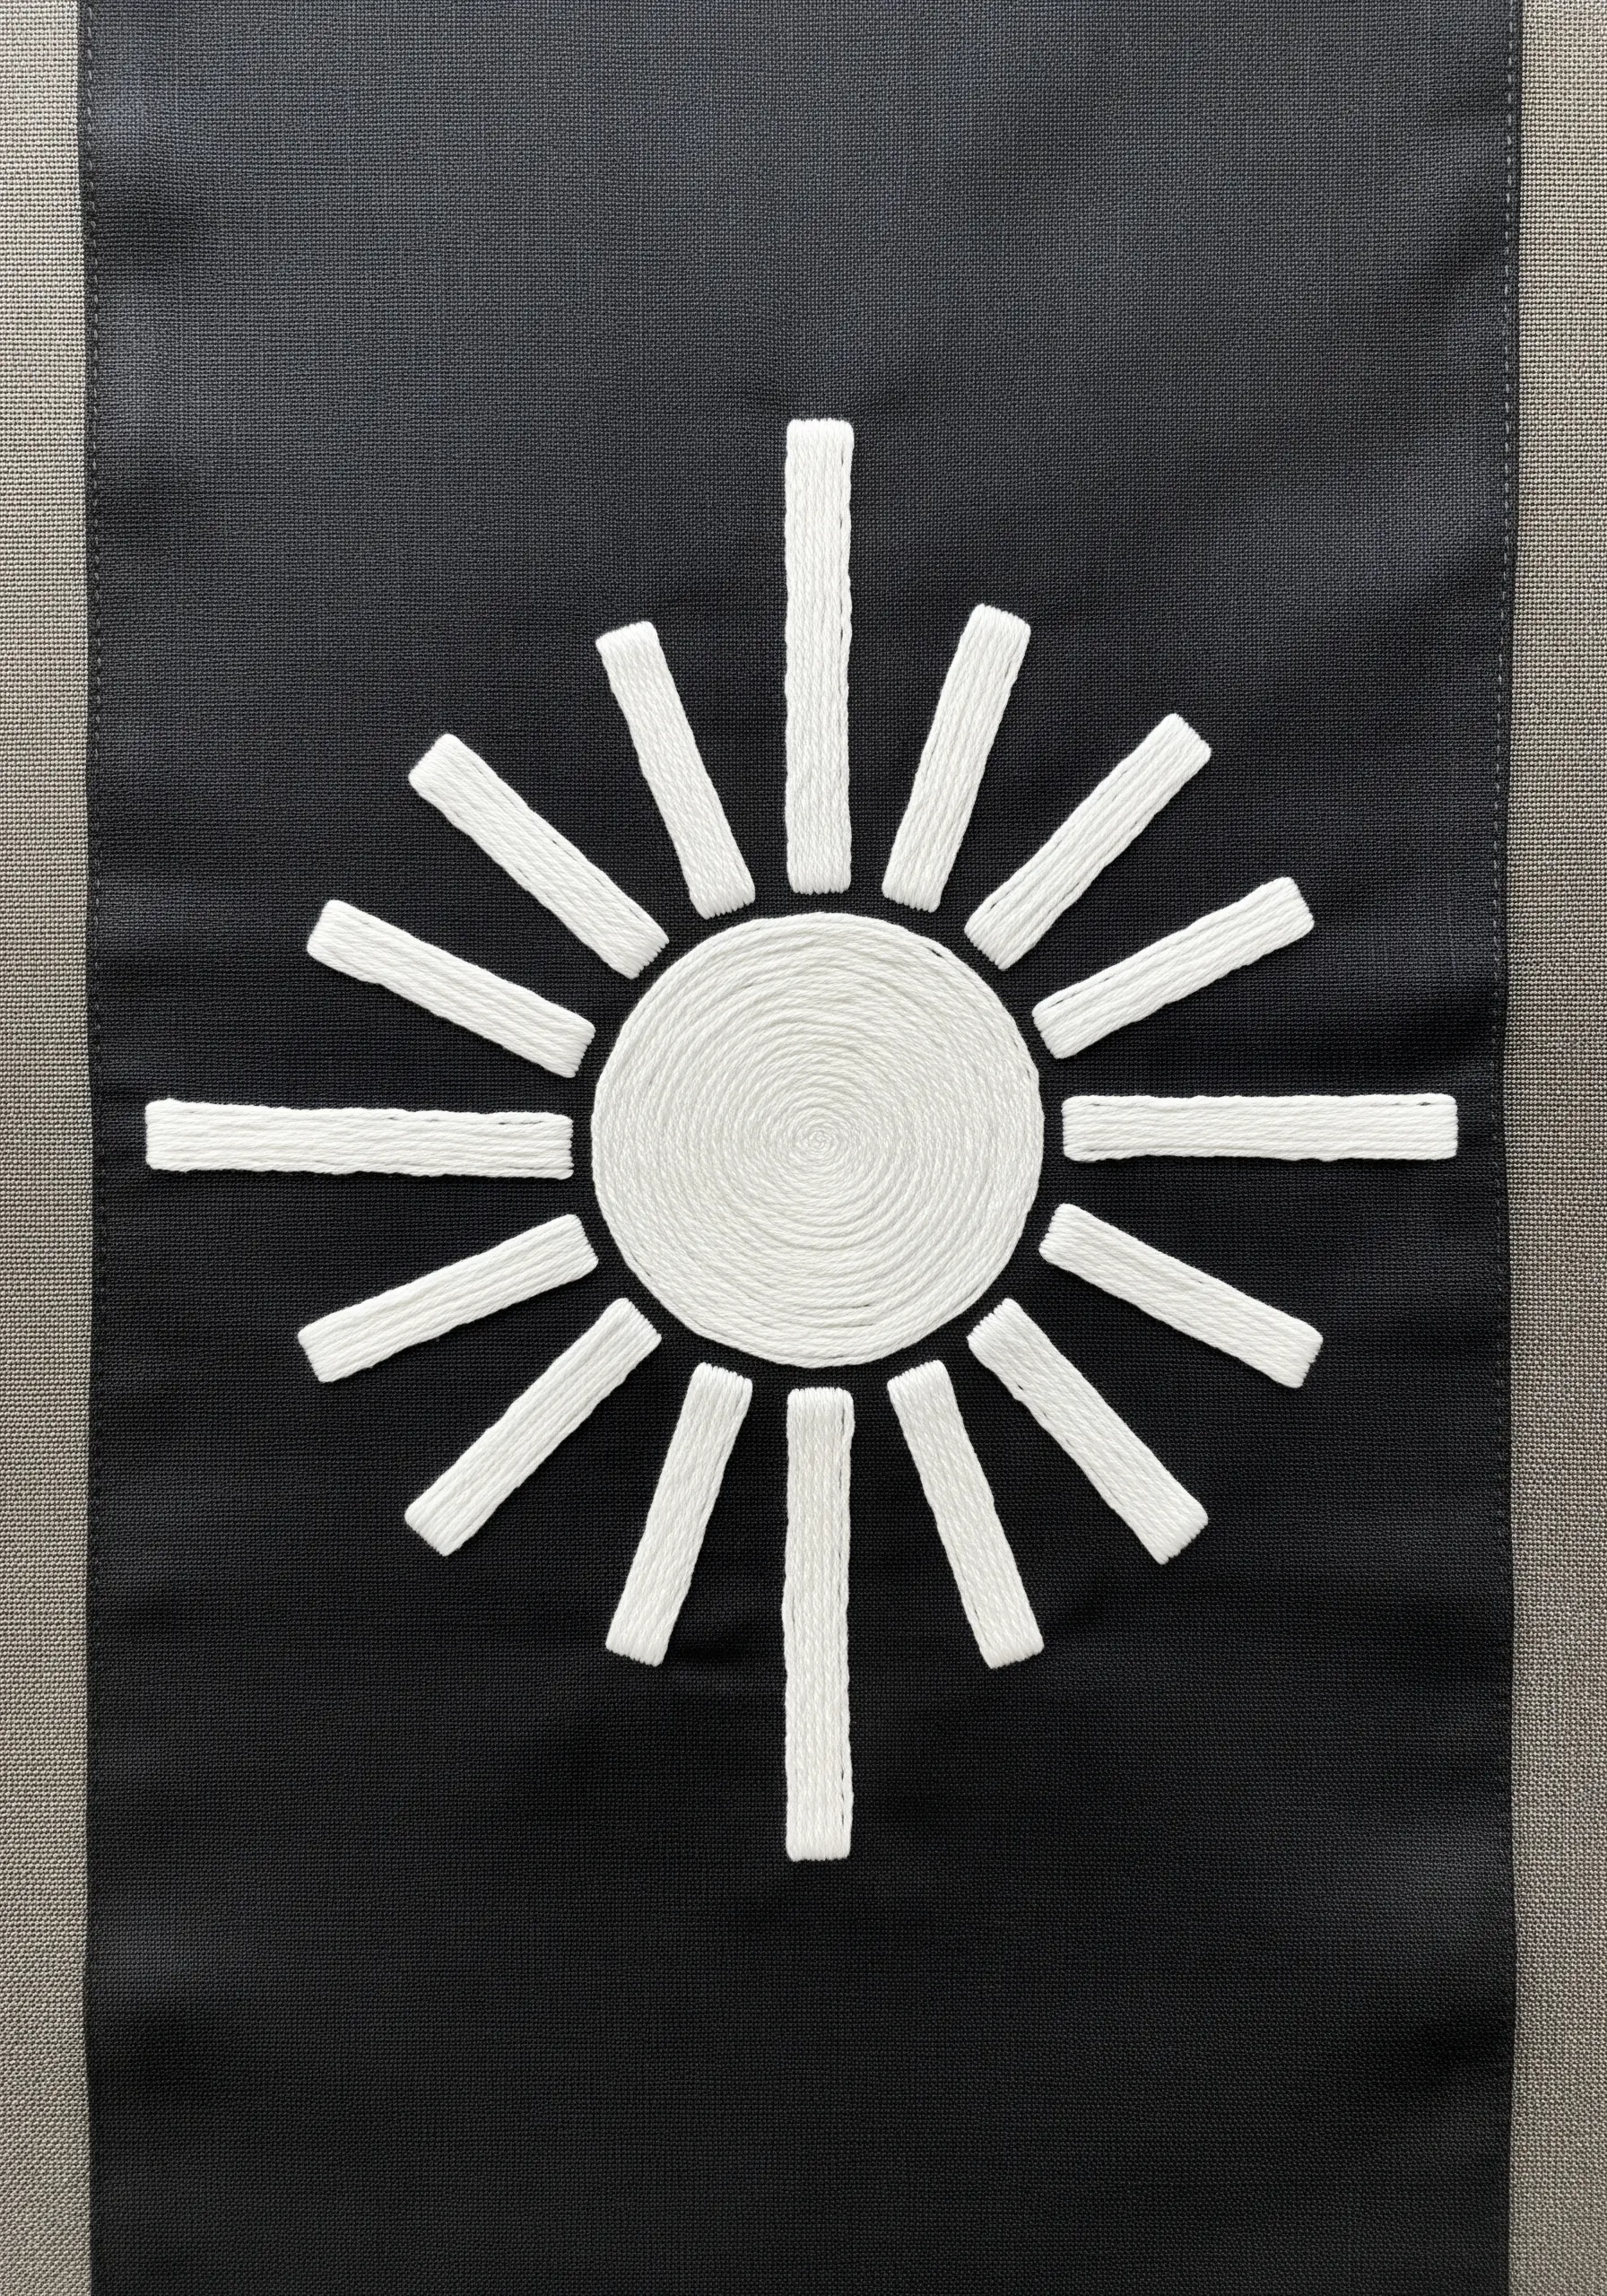
For maximum visual impact, you can’t beat the drama of high contrast. Couching a thick, textured white rope onto a deep, matte black fabric creates a bold, graphic statement.
This technique is less about intricate stitching and more about the power of pure shape and texture.
Keep your couching stitches discreet by using a matching white thread and hiding them within the natural twists of the rope, making the motif appear as if it’s simply resting on the surface.
18. Classical Urn with Line and Fill
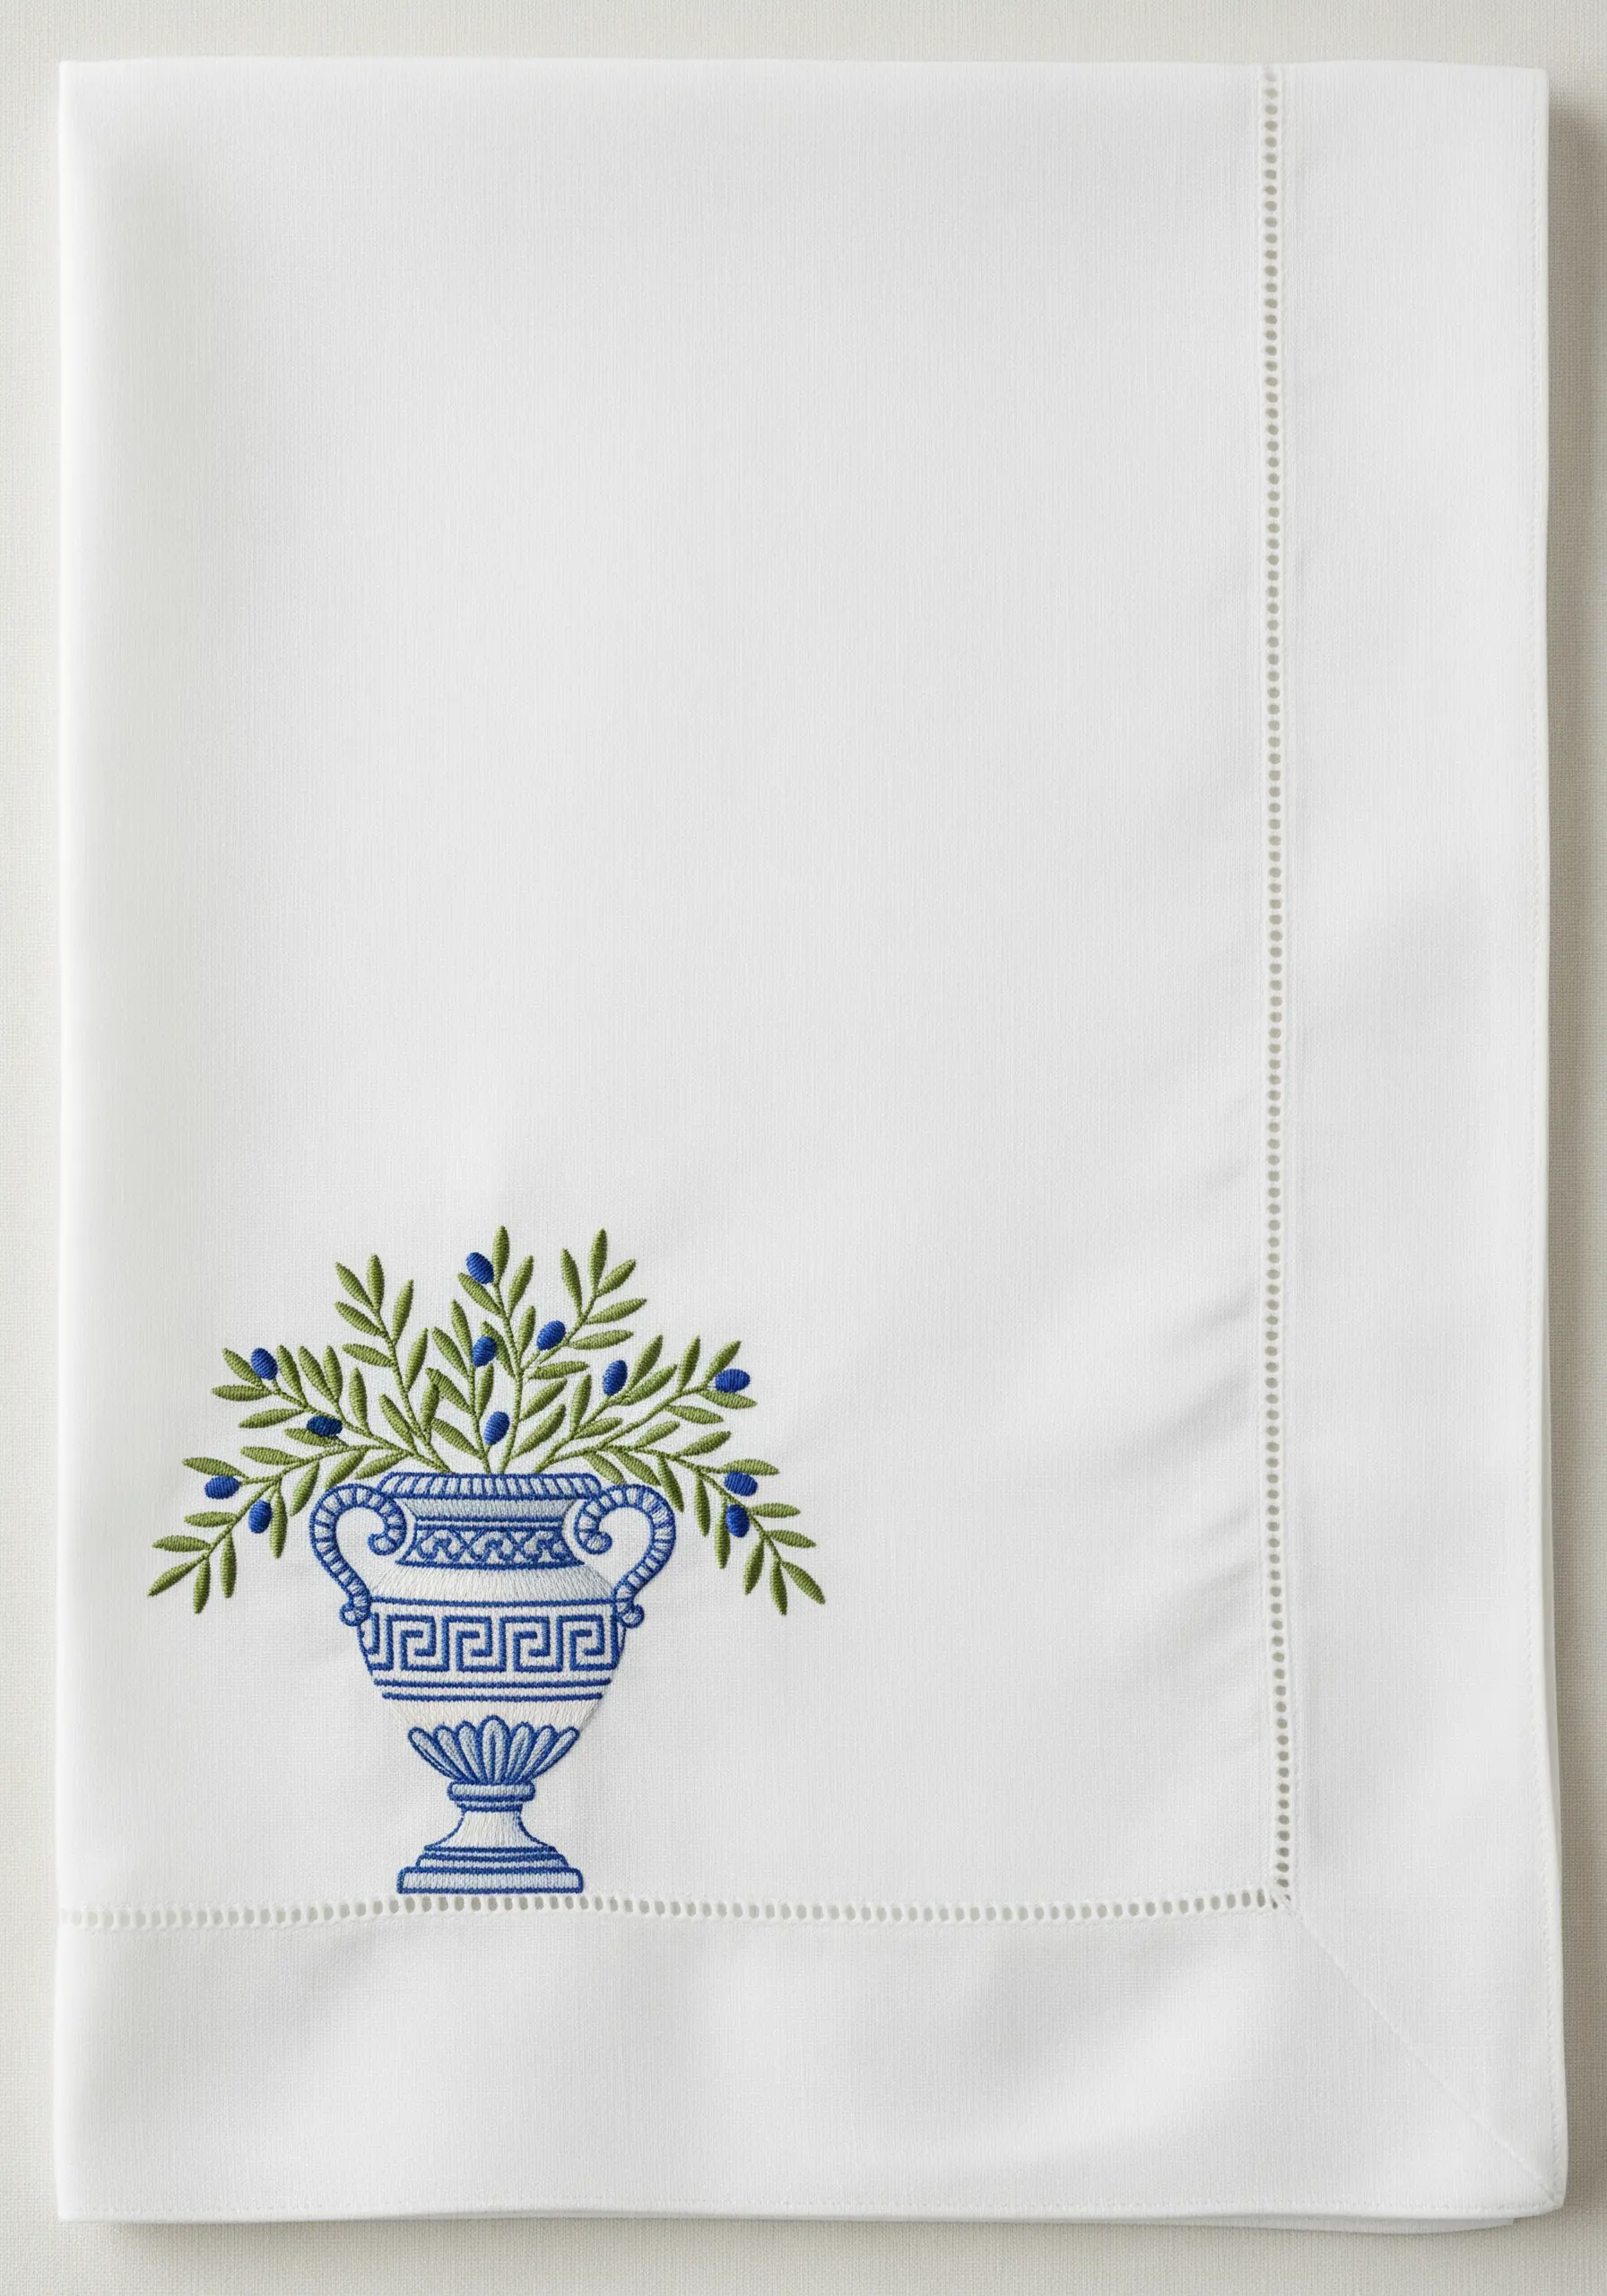
To render classical forms like a Greek urn, thoughtfully combine outline stitches for detail and fill stitches for substance.
Use a stem stitch or split stitch to execute the fine decorative patterns; these stitches create clean, flowing lines that are perfect for curves and geometric details.
Fill the main body of the urn with a solid satin stitch to give it a sense of weight and volume.
Contrast the urn’s precise geometry with more organic stitches, like fishbone or detached chain, for the foliage spilling out of it.
19. Faux Woven Tiles on Jute

Mimic the look of woven fabric by using thick yarn and a darning needle on a coarse base like burlap or jute.
Create a grid of laid stitches by running parallel strands of yarn across your target area. Then, weave a contrasting color over and under these strands, tacking it down only at the edges.
This technique of surface weaving adds incredible dimension and a rustic, handmade charm, making it perfect for cozy, country-inspired table linens.
20. The Light and Airy Scatter
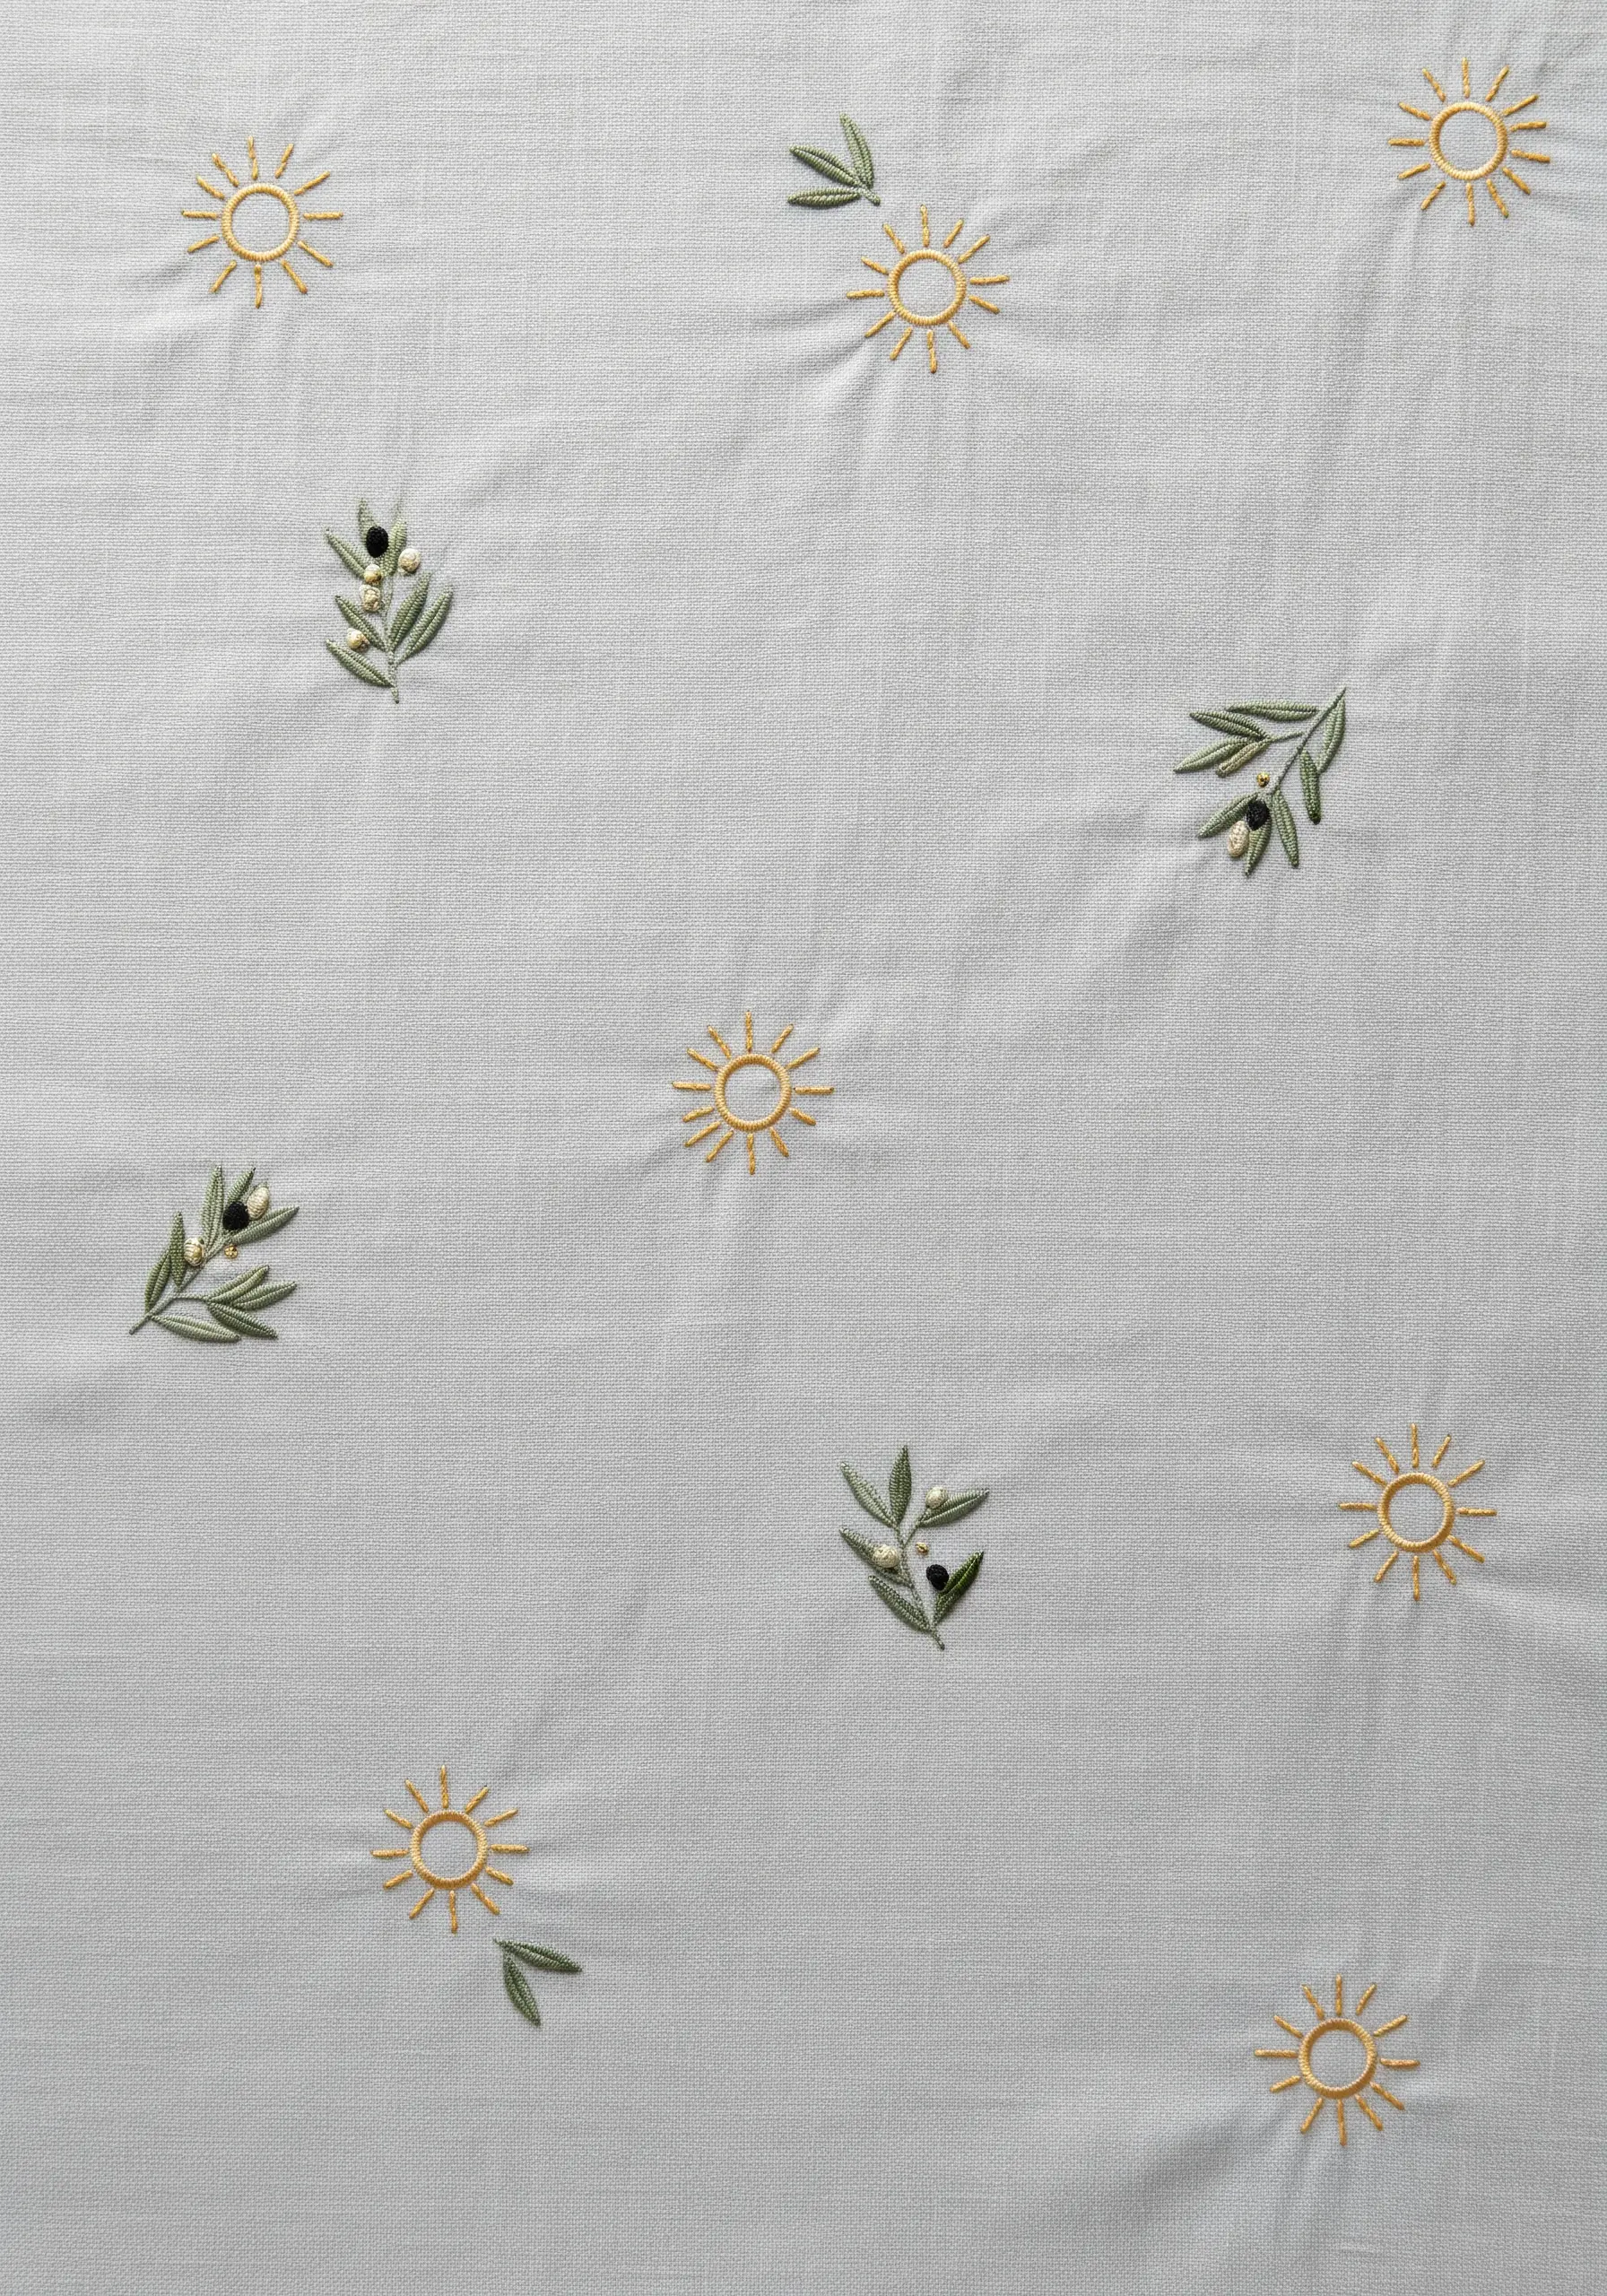
For a subtle, breezy tablecloth that feels effortlessly chic, scatter very small and simple motifs far apart from one another.
The most important element in this design is the negative space; it allows the fabric to breathe and makes the tiny embroidered details feel like special little discoveries.
Use a light hand with your stitching—a single strand of floss and minimal stitches per motif will maintain the airy feel.
This is a perfect approach for creating linens that feel calm and minimalist.
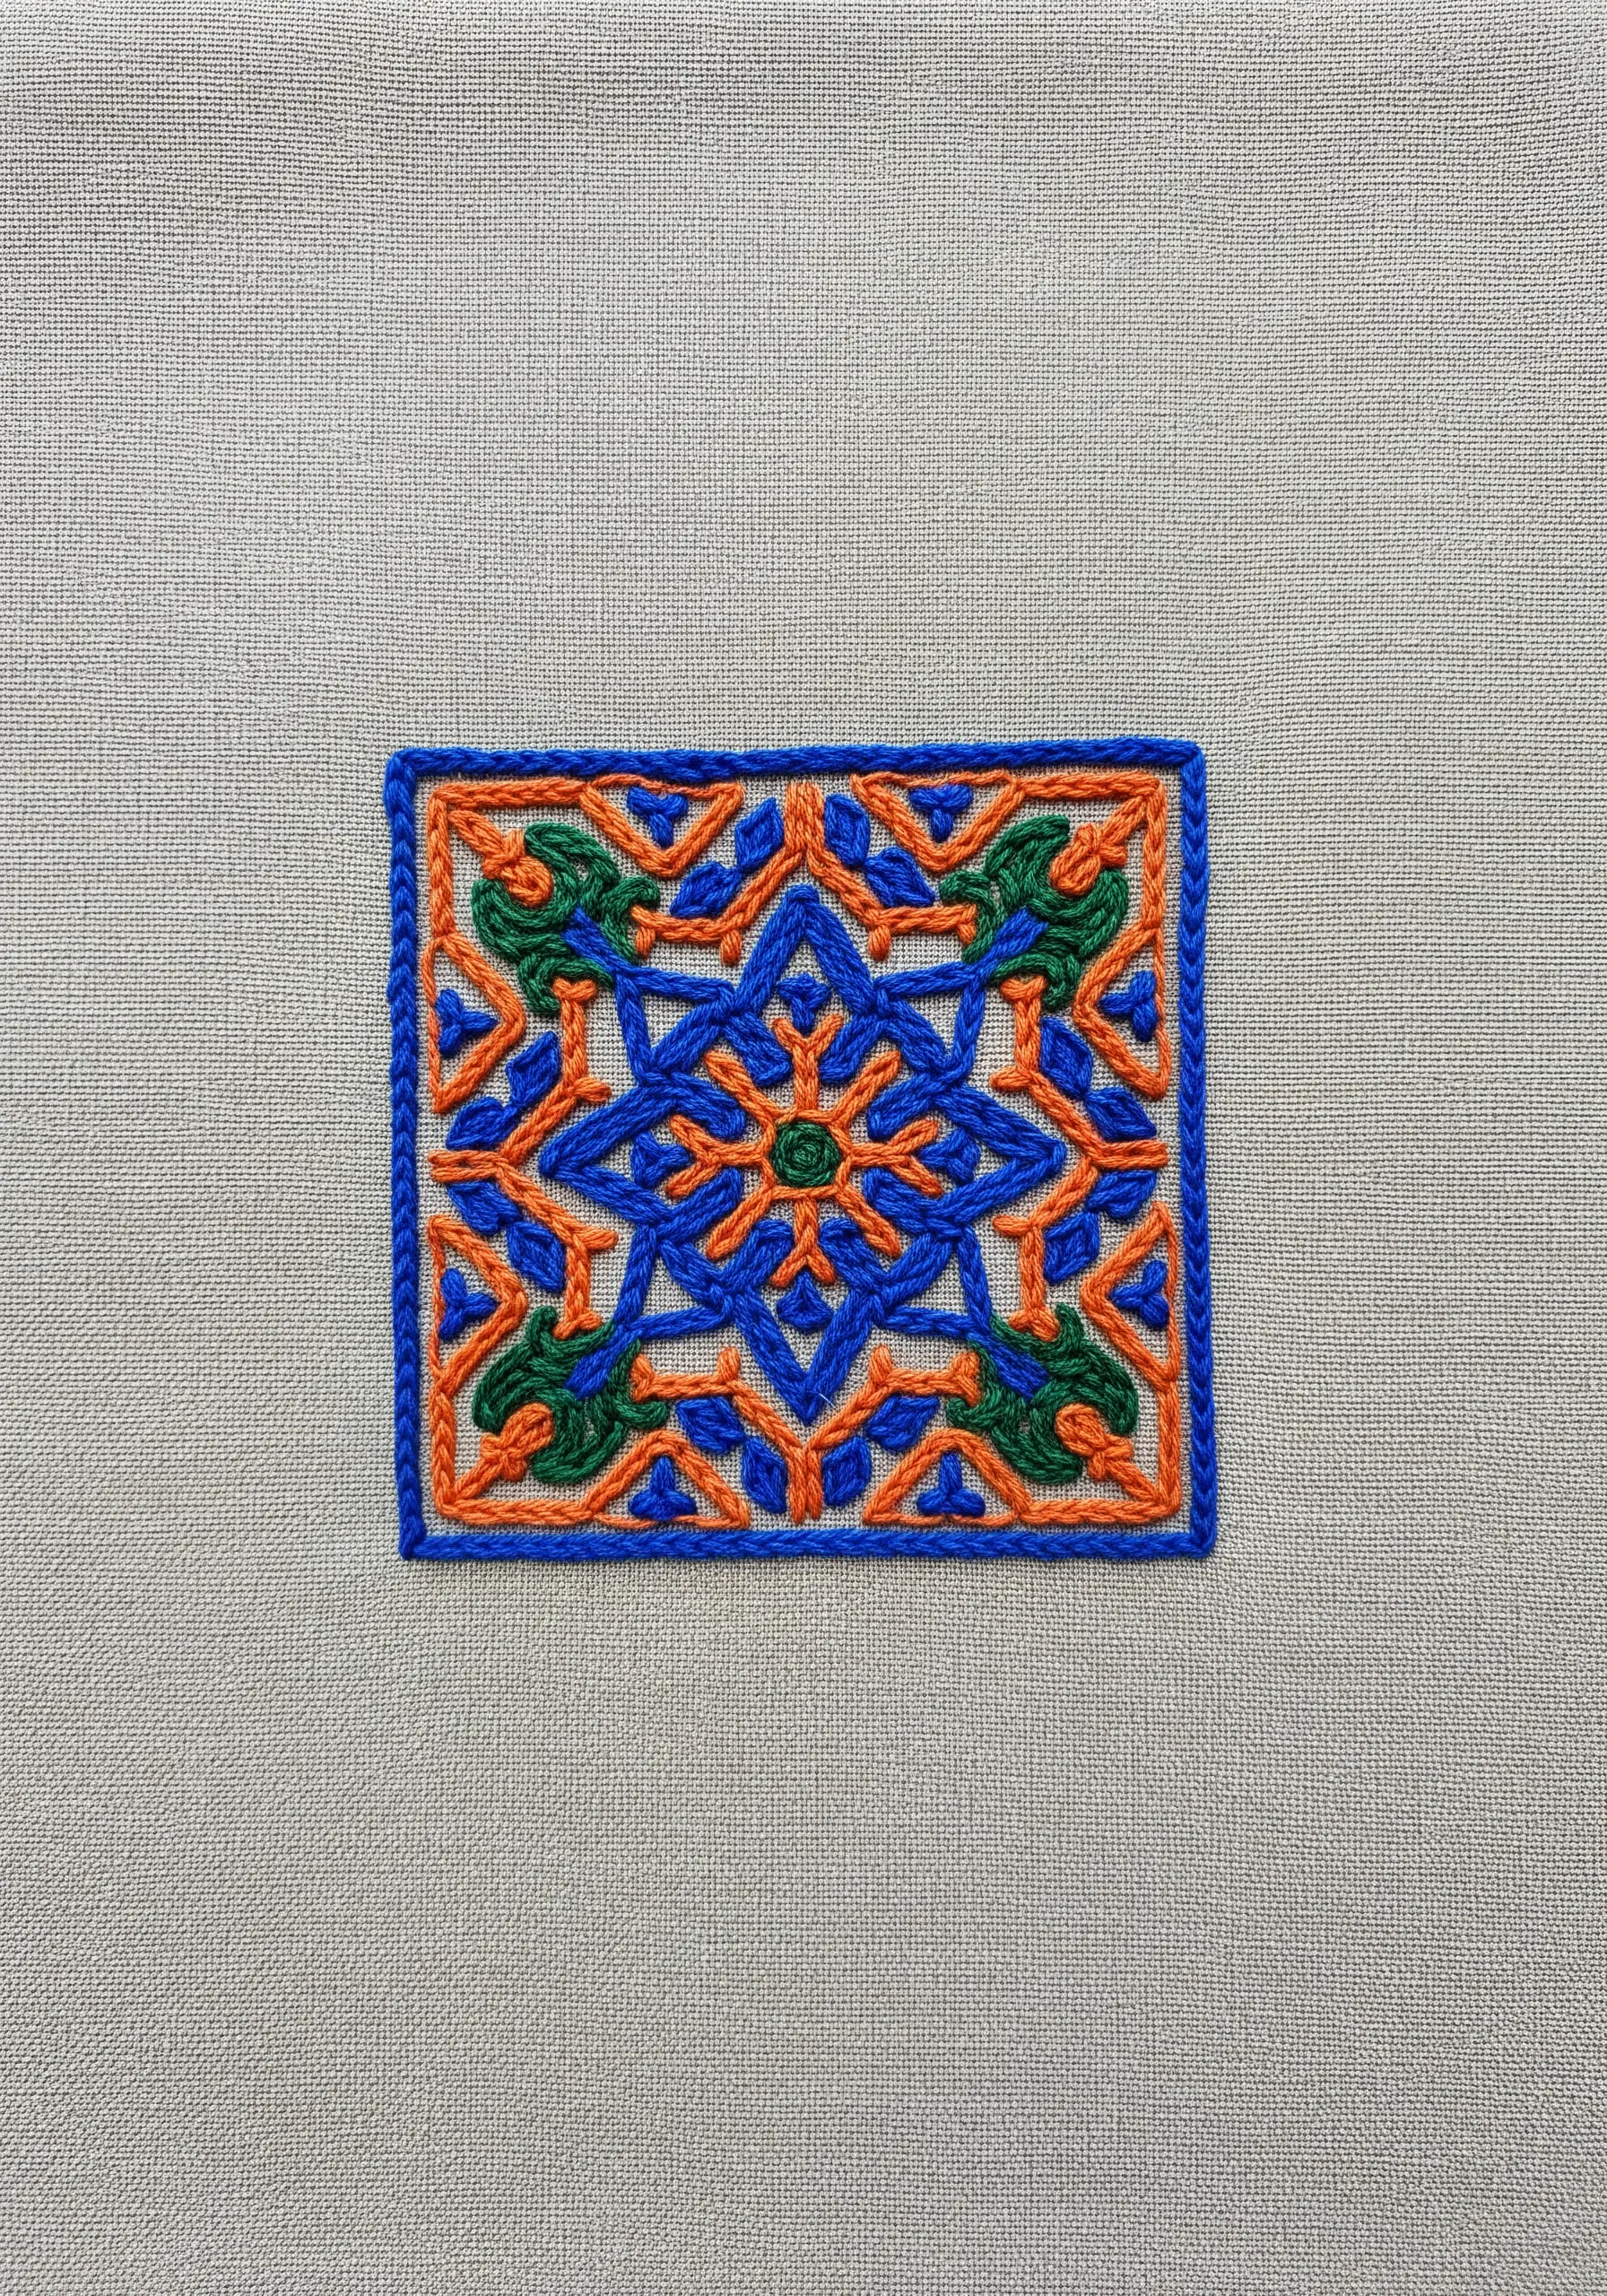
21. The Single, Powerful Statement Motif

A single, exquisitely stitched motif can have more impact than a fully covered surface, especially when placed thoughtfully.
Position one highly detailed tile design asymmetrically in the corner of a napkin to create a sophisticated, modern focal point.
On a dark, moody fabric, use bright, highly saturated thread colors. The dramatic contrast will make the motif pop like a jewel, drawing the eye instantly.
22. Formal Symmetry with Radiating Lines
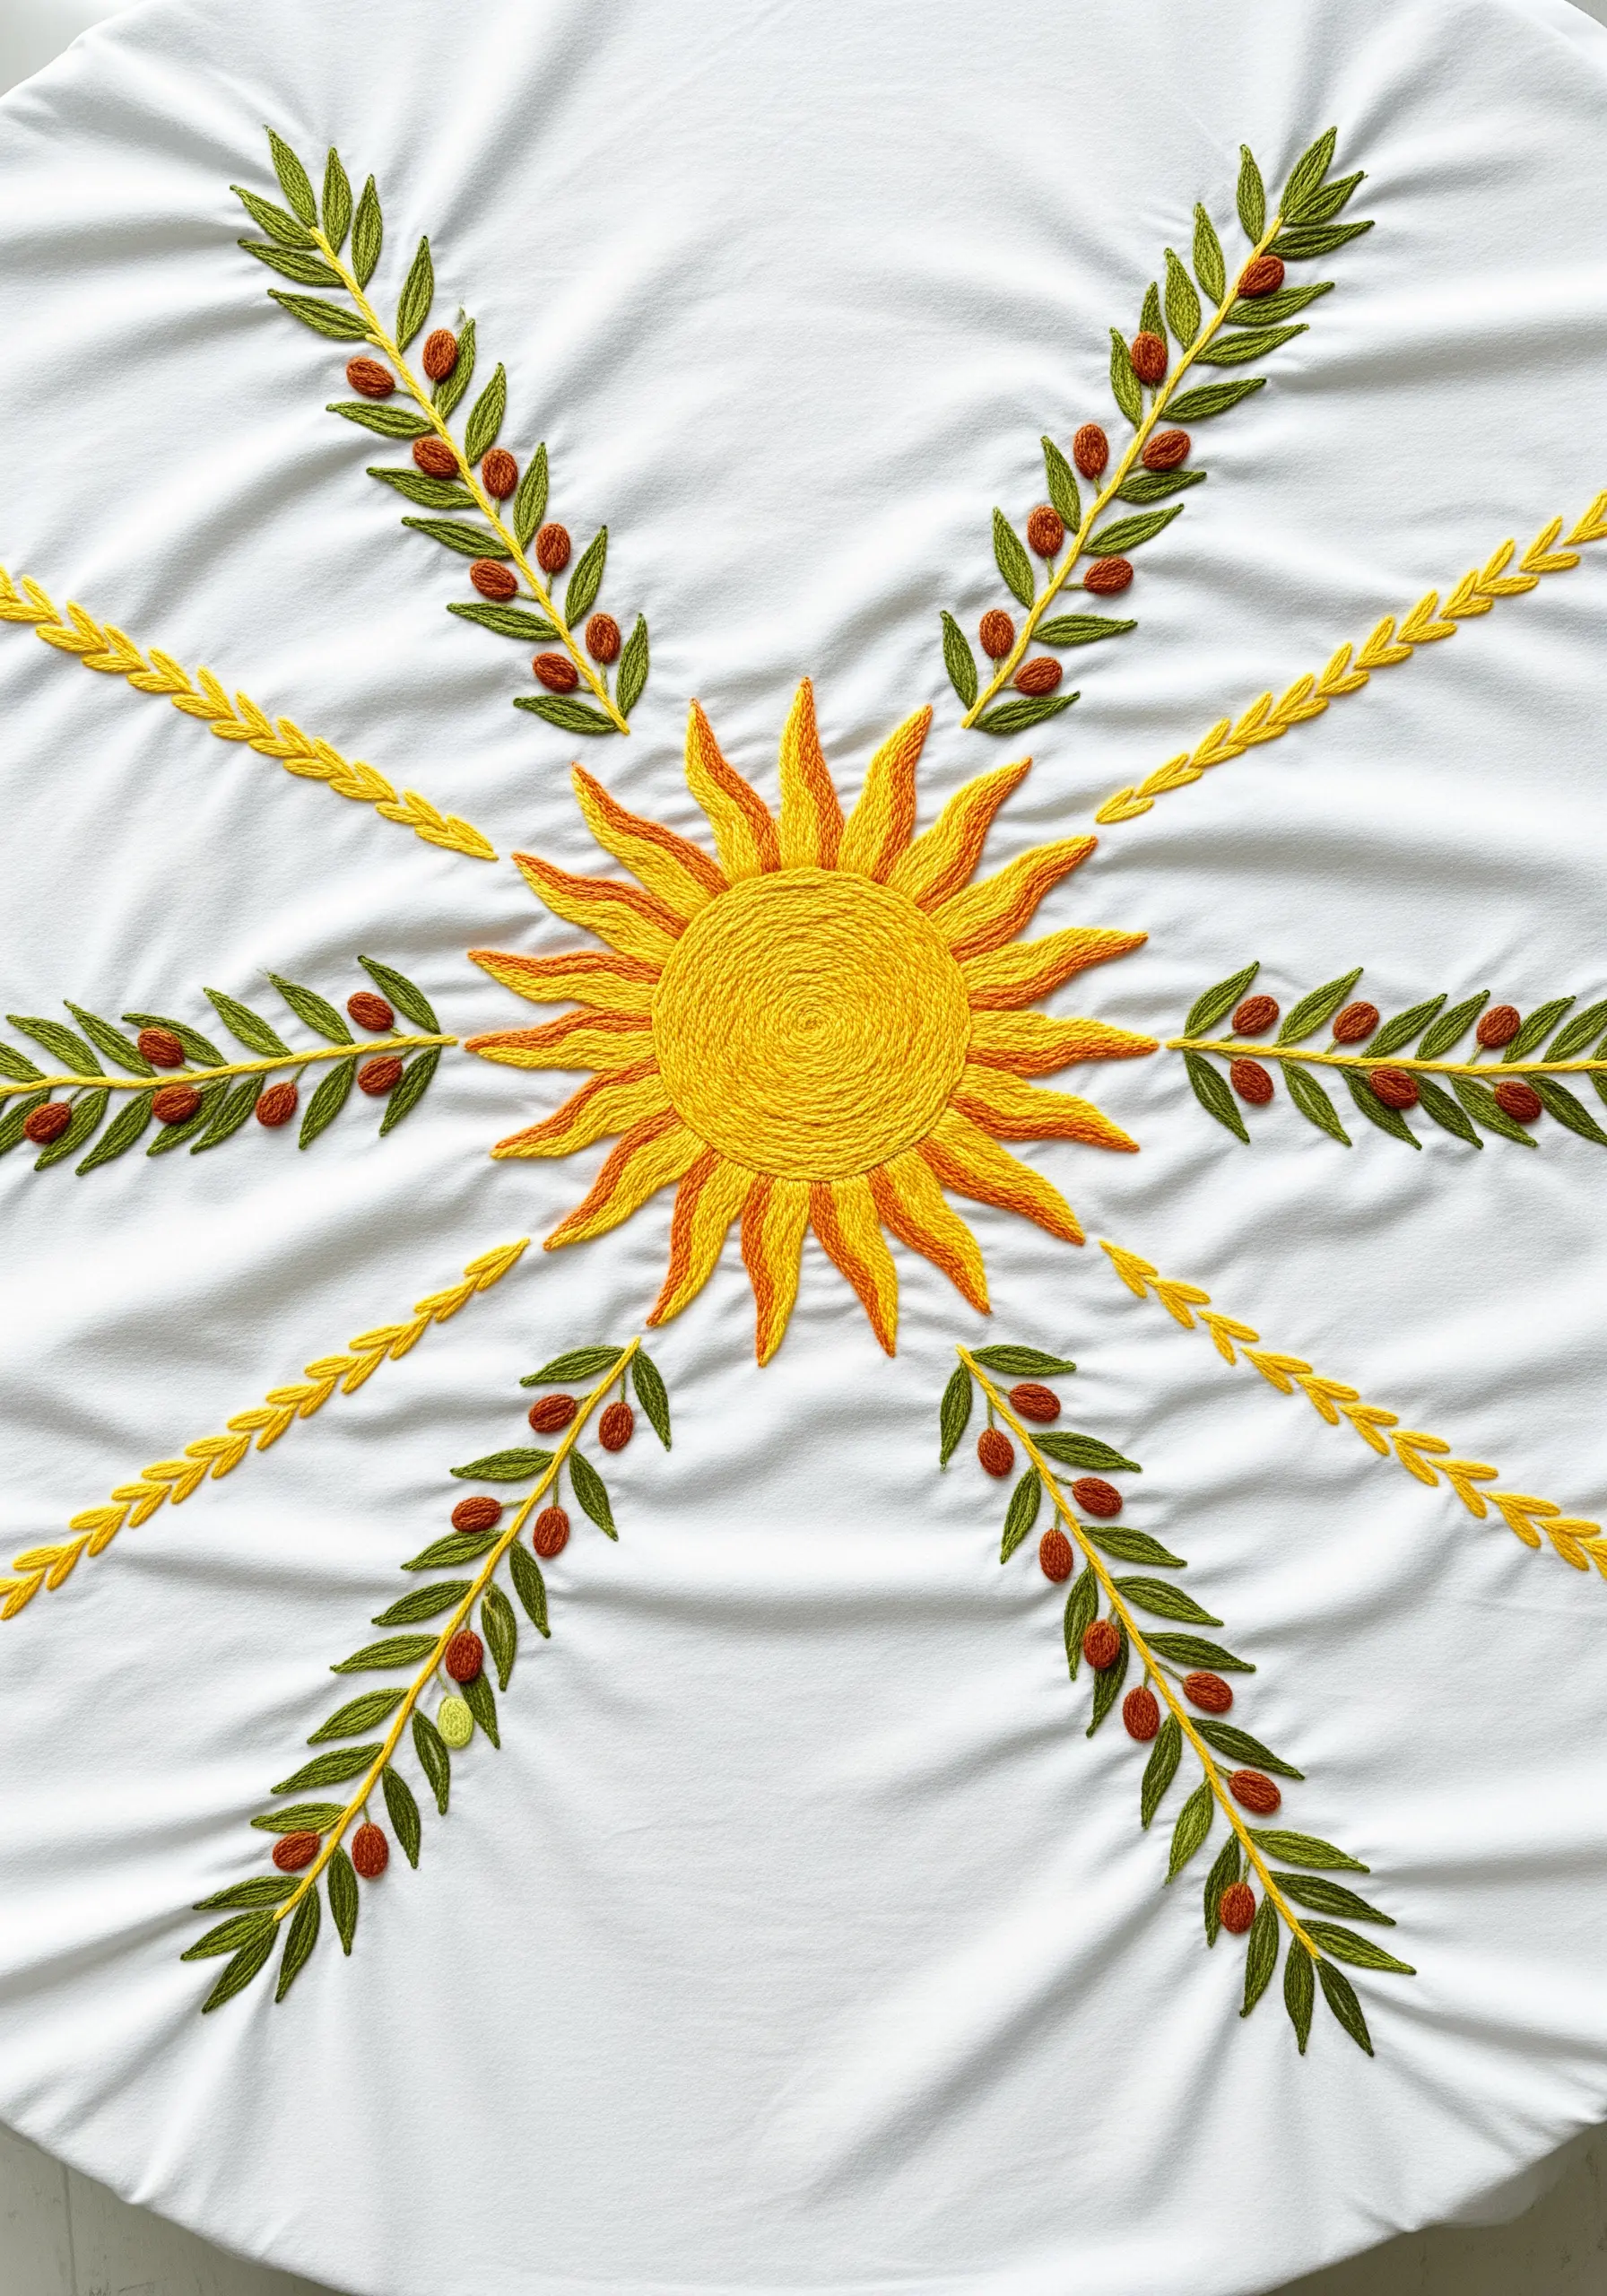
Impose a sense of grandeur and classical order on your tablecloth with a perfectly symmetrical, radiating design.
Begin with a strong central element, like this vibrant sun, and mark precise axial lines radiating outwards using a water-soluble pen.
Use these guidelines to place your repeating motifs, like the olive branches and wheat sheaves, ensuring they are perfectly mirrored.
Repeating the same stitches throughout—like the braid stitch for the rays and fly stitch for the leaves—reinforces the design’s satisfying rhythm and formality.
23. Simplified Tile Border with Line Art
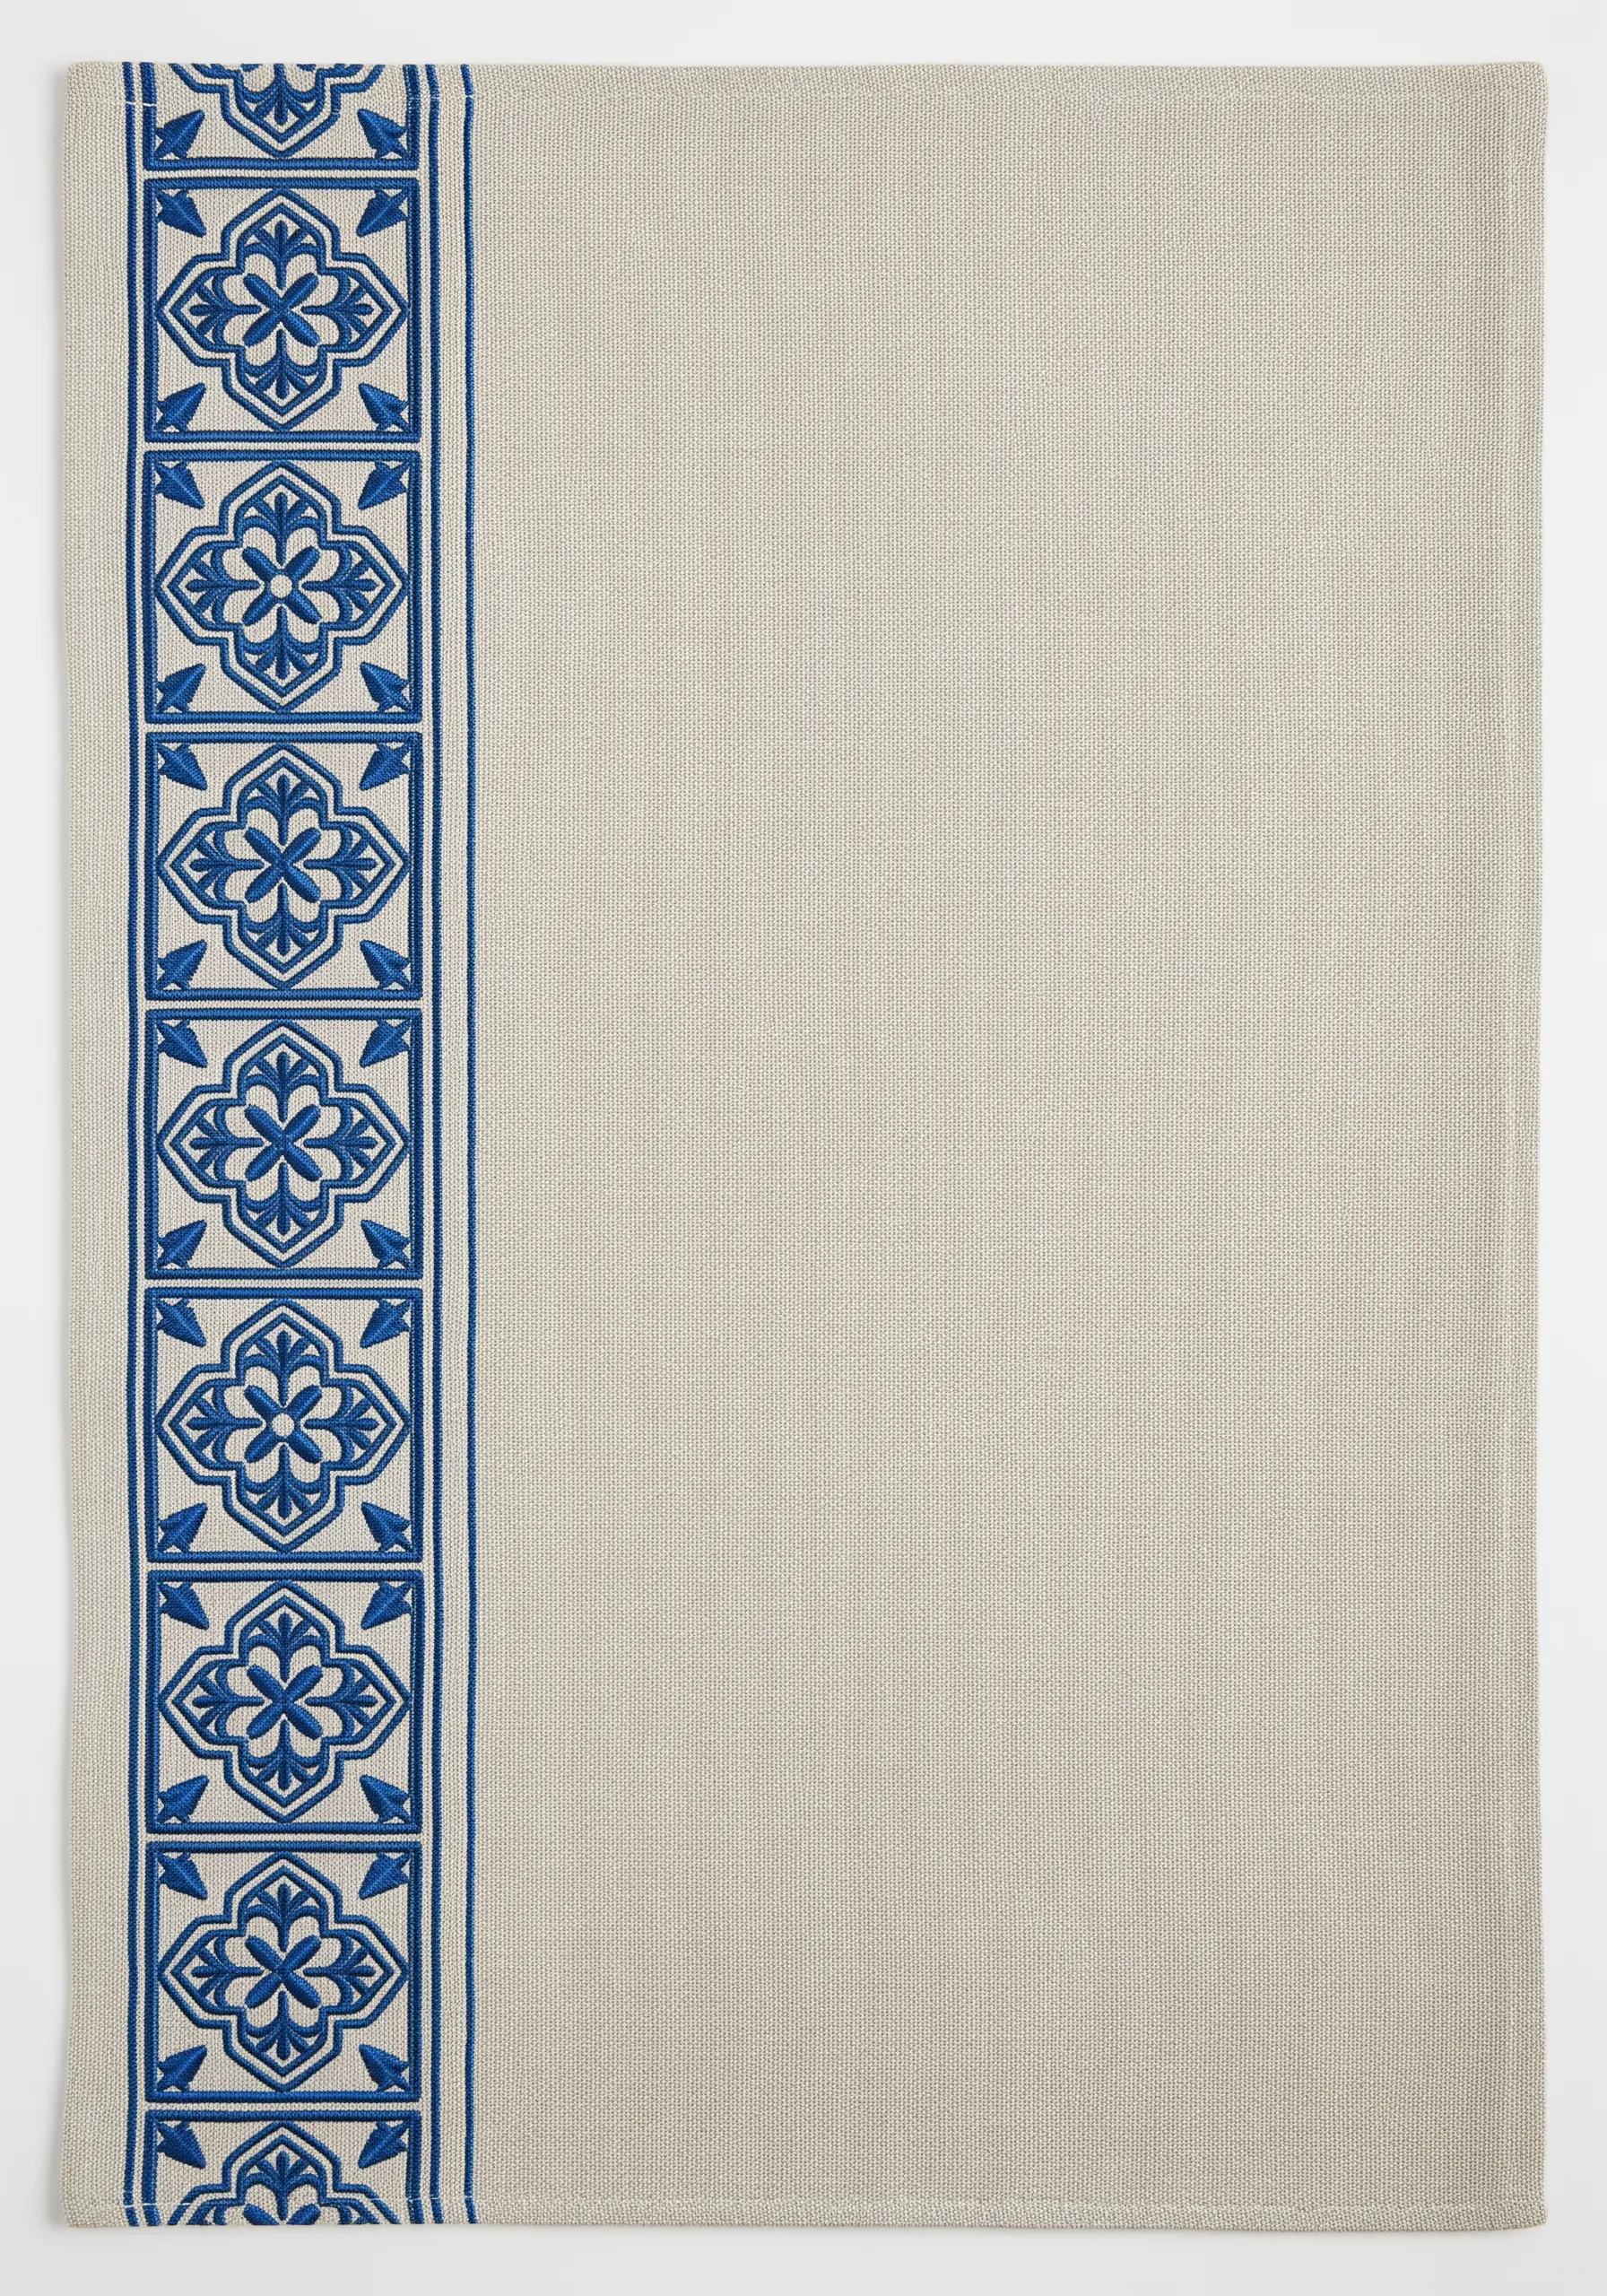
You can evoke the feeling of intricate tilework without the time-consuming effort of filling every shape.
Instead, use a bold outline stitch, such as a stem stitch or chain stitch, to define the pattern’s structure.
This line-art style gives the design a modern, airy quality and is much faster to execute.
For visual balance, you can choose to fill in just a few key details with satin stitch, adding a strategic pop of solid color against the open linework.
24. The Minimalist Corner Sprig
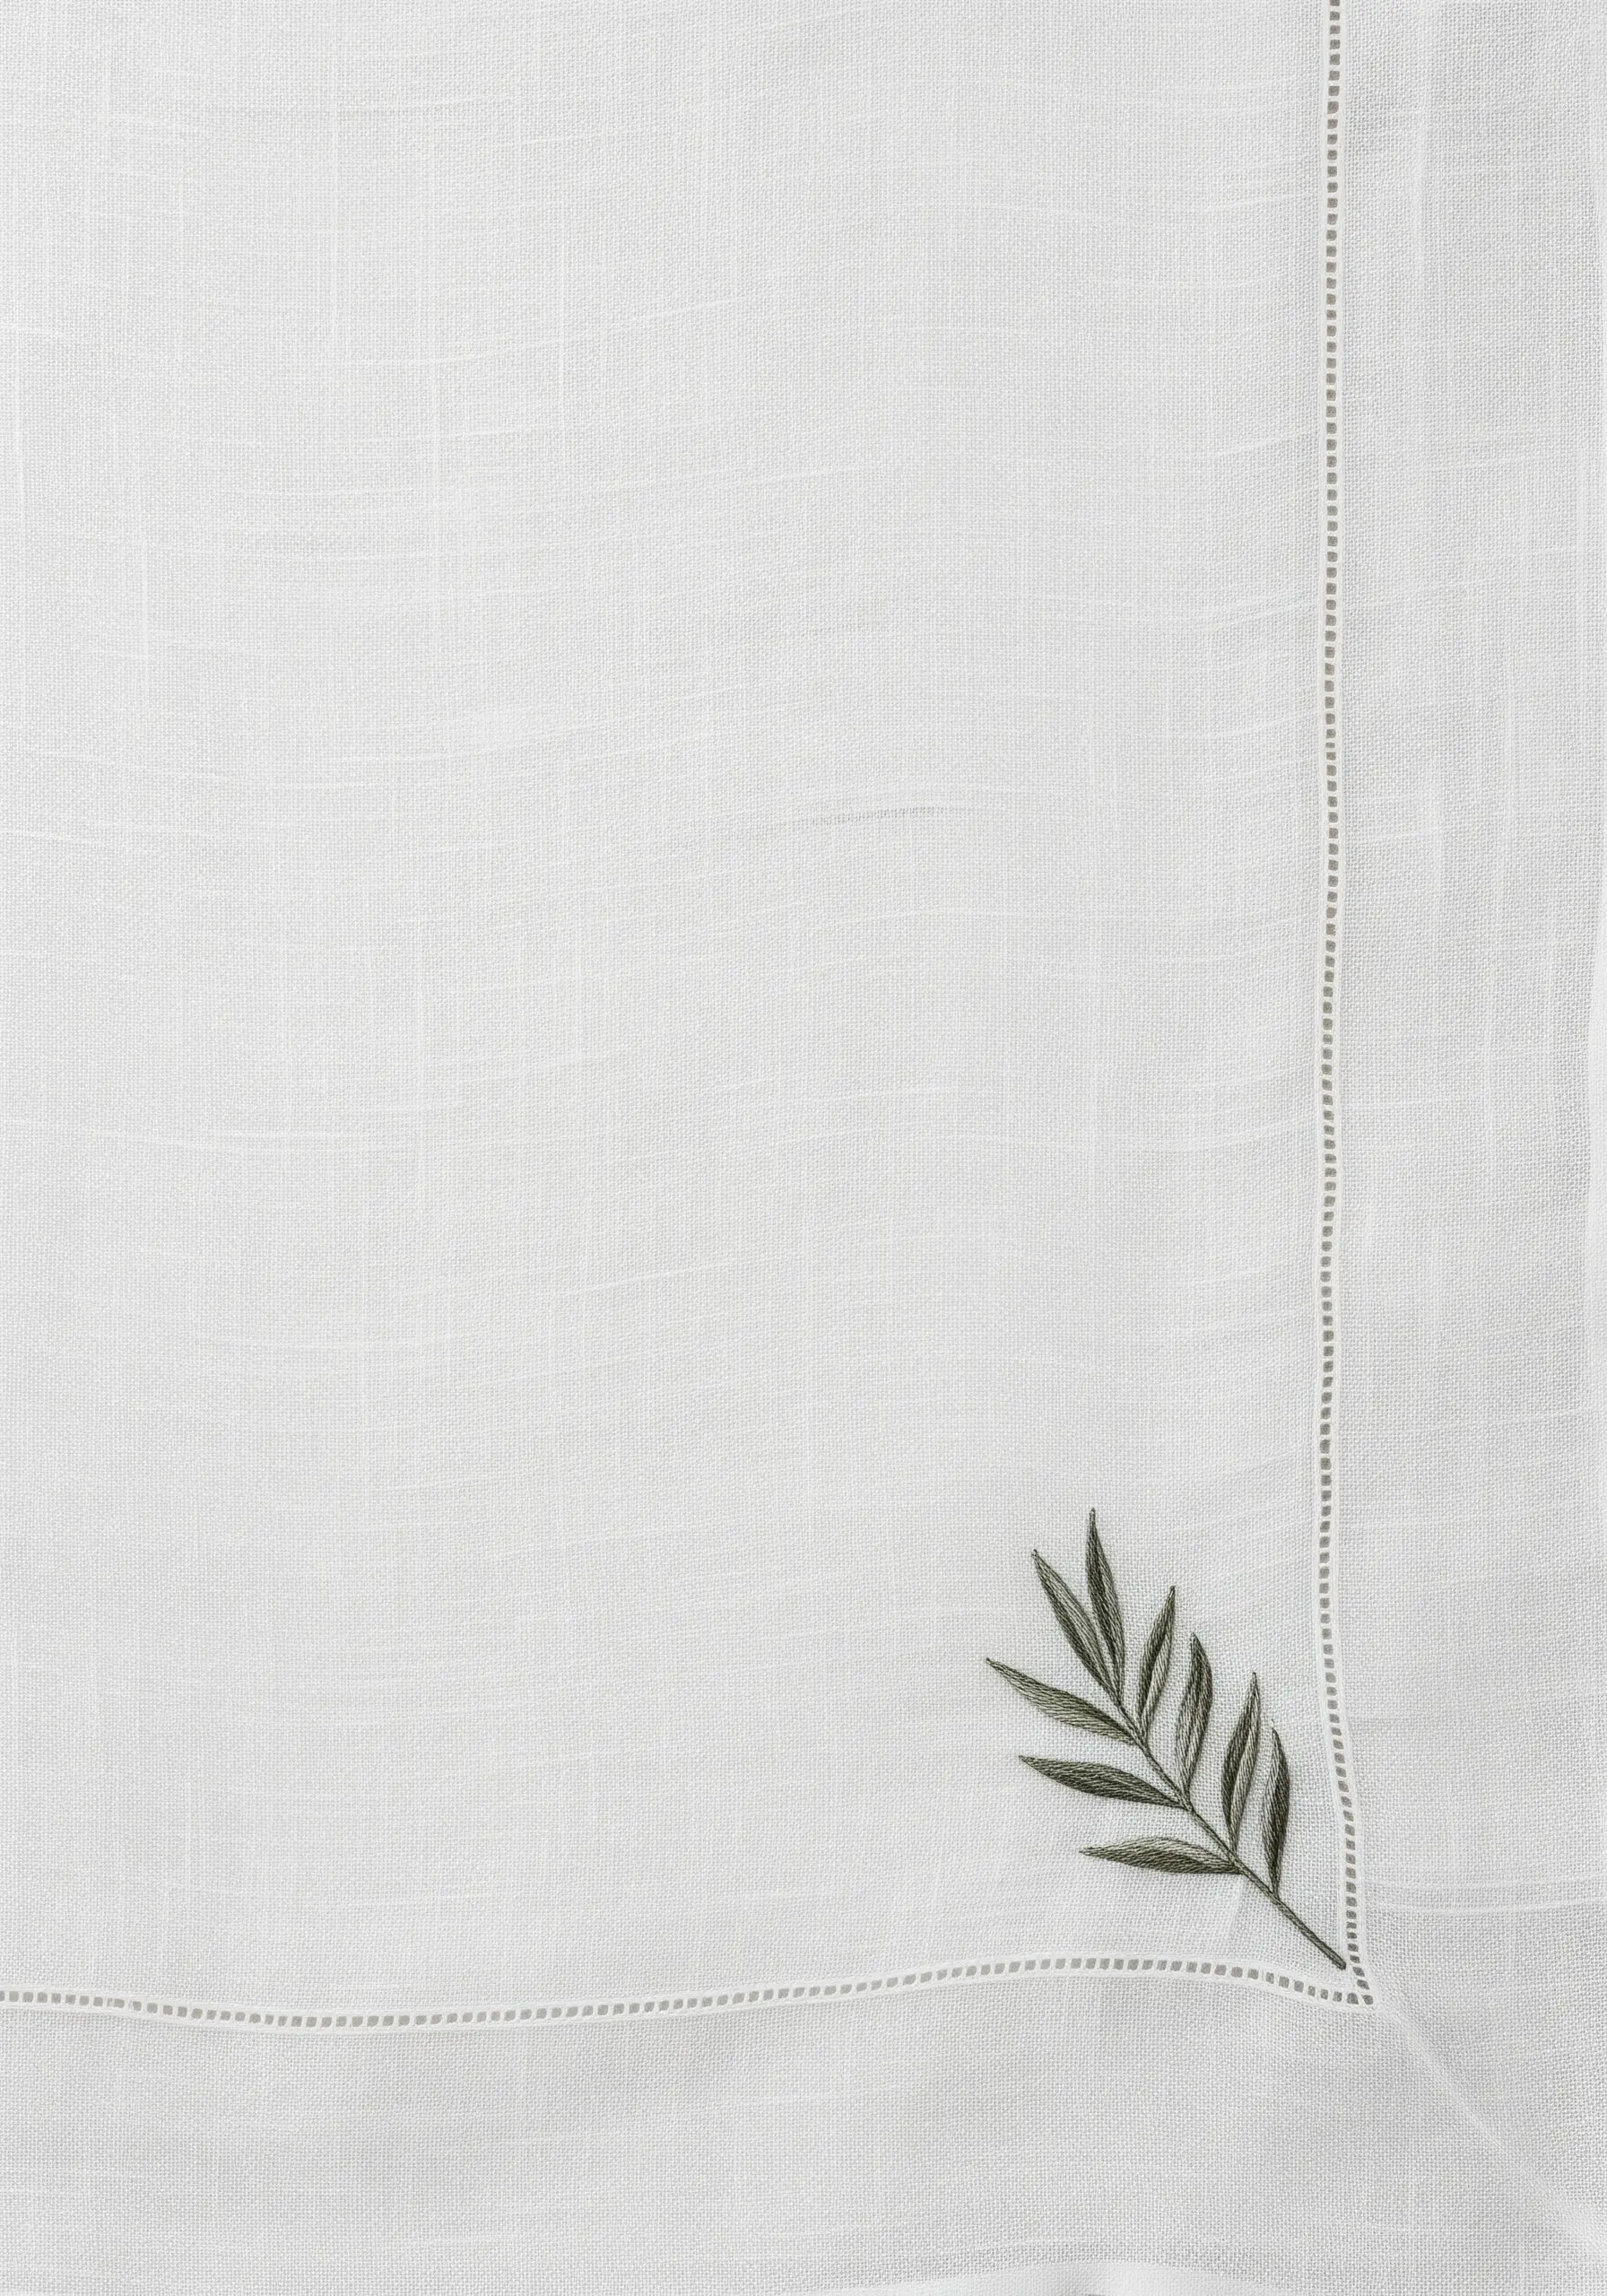
Never underestimate the power of a single, perfectly executed detail. A tiny sprig in the corner of a fine linen napkin speaks volumes.
Focus on flawless technique. Use a fishbone stitch for the leaves to create a clean central vein and beautiful texture, and a simple stem stitch for the branch.
Integrate the design thoughtfully by positioning it so it appears to grow naturally from the napkin’s corner or hemstitch border.
This whisper of embroidery is the definition of quiet luxury.
25. Joyful Maximalism with Pattern and Color

Embrace a vibrant, ‘more-is-more’ aesthetic by confidently mixing motifs, colors, and textures on a single piece.
The secret to successful maximalism is underlying structure. Here, a repeating grid of squares keeps the diverse sun and flower designs from feeling chaotic.
Within that structure, play with texture: use chunky French knots for flower centers, smooth satin stitch for petals, and thick chain stitches for outlines.
The combination of a defined layout and varied, joyful details creates a piece that is both energetic and harmonious.
26. The Deconstructed Artistic Frame
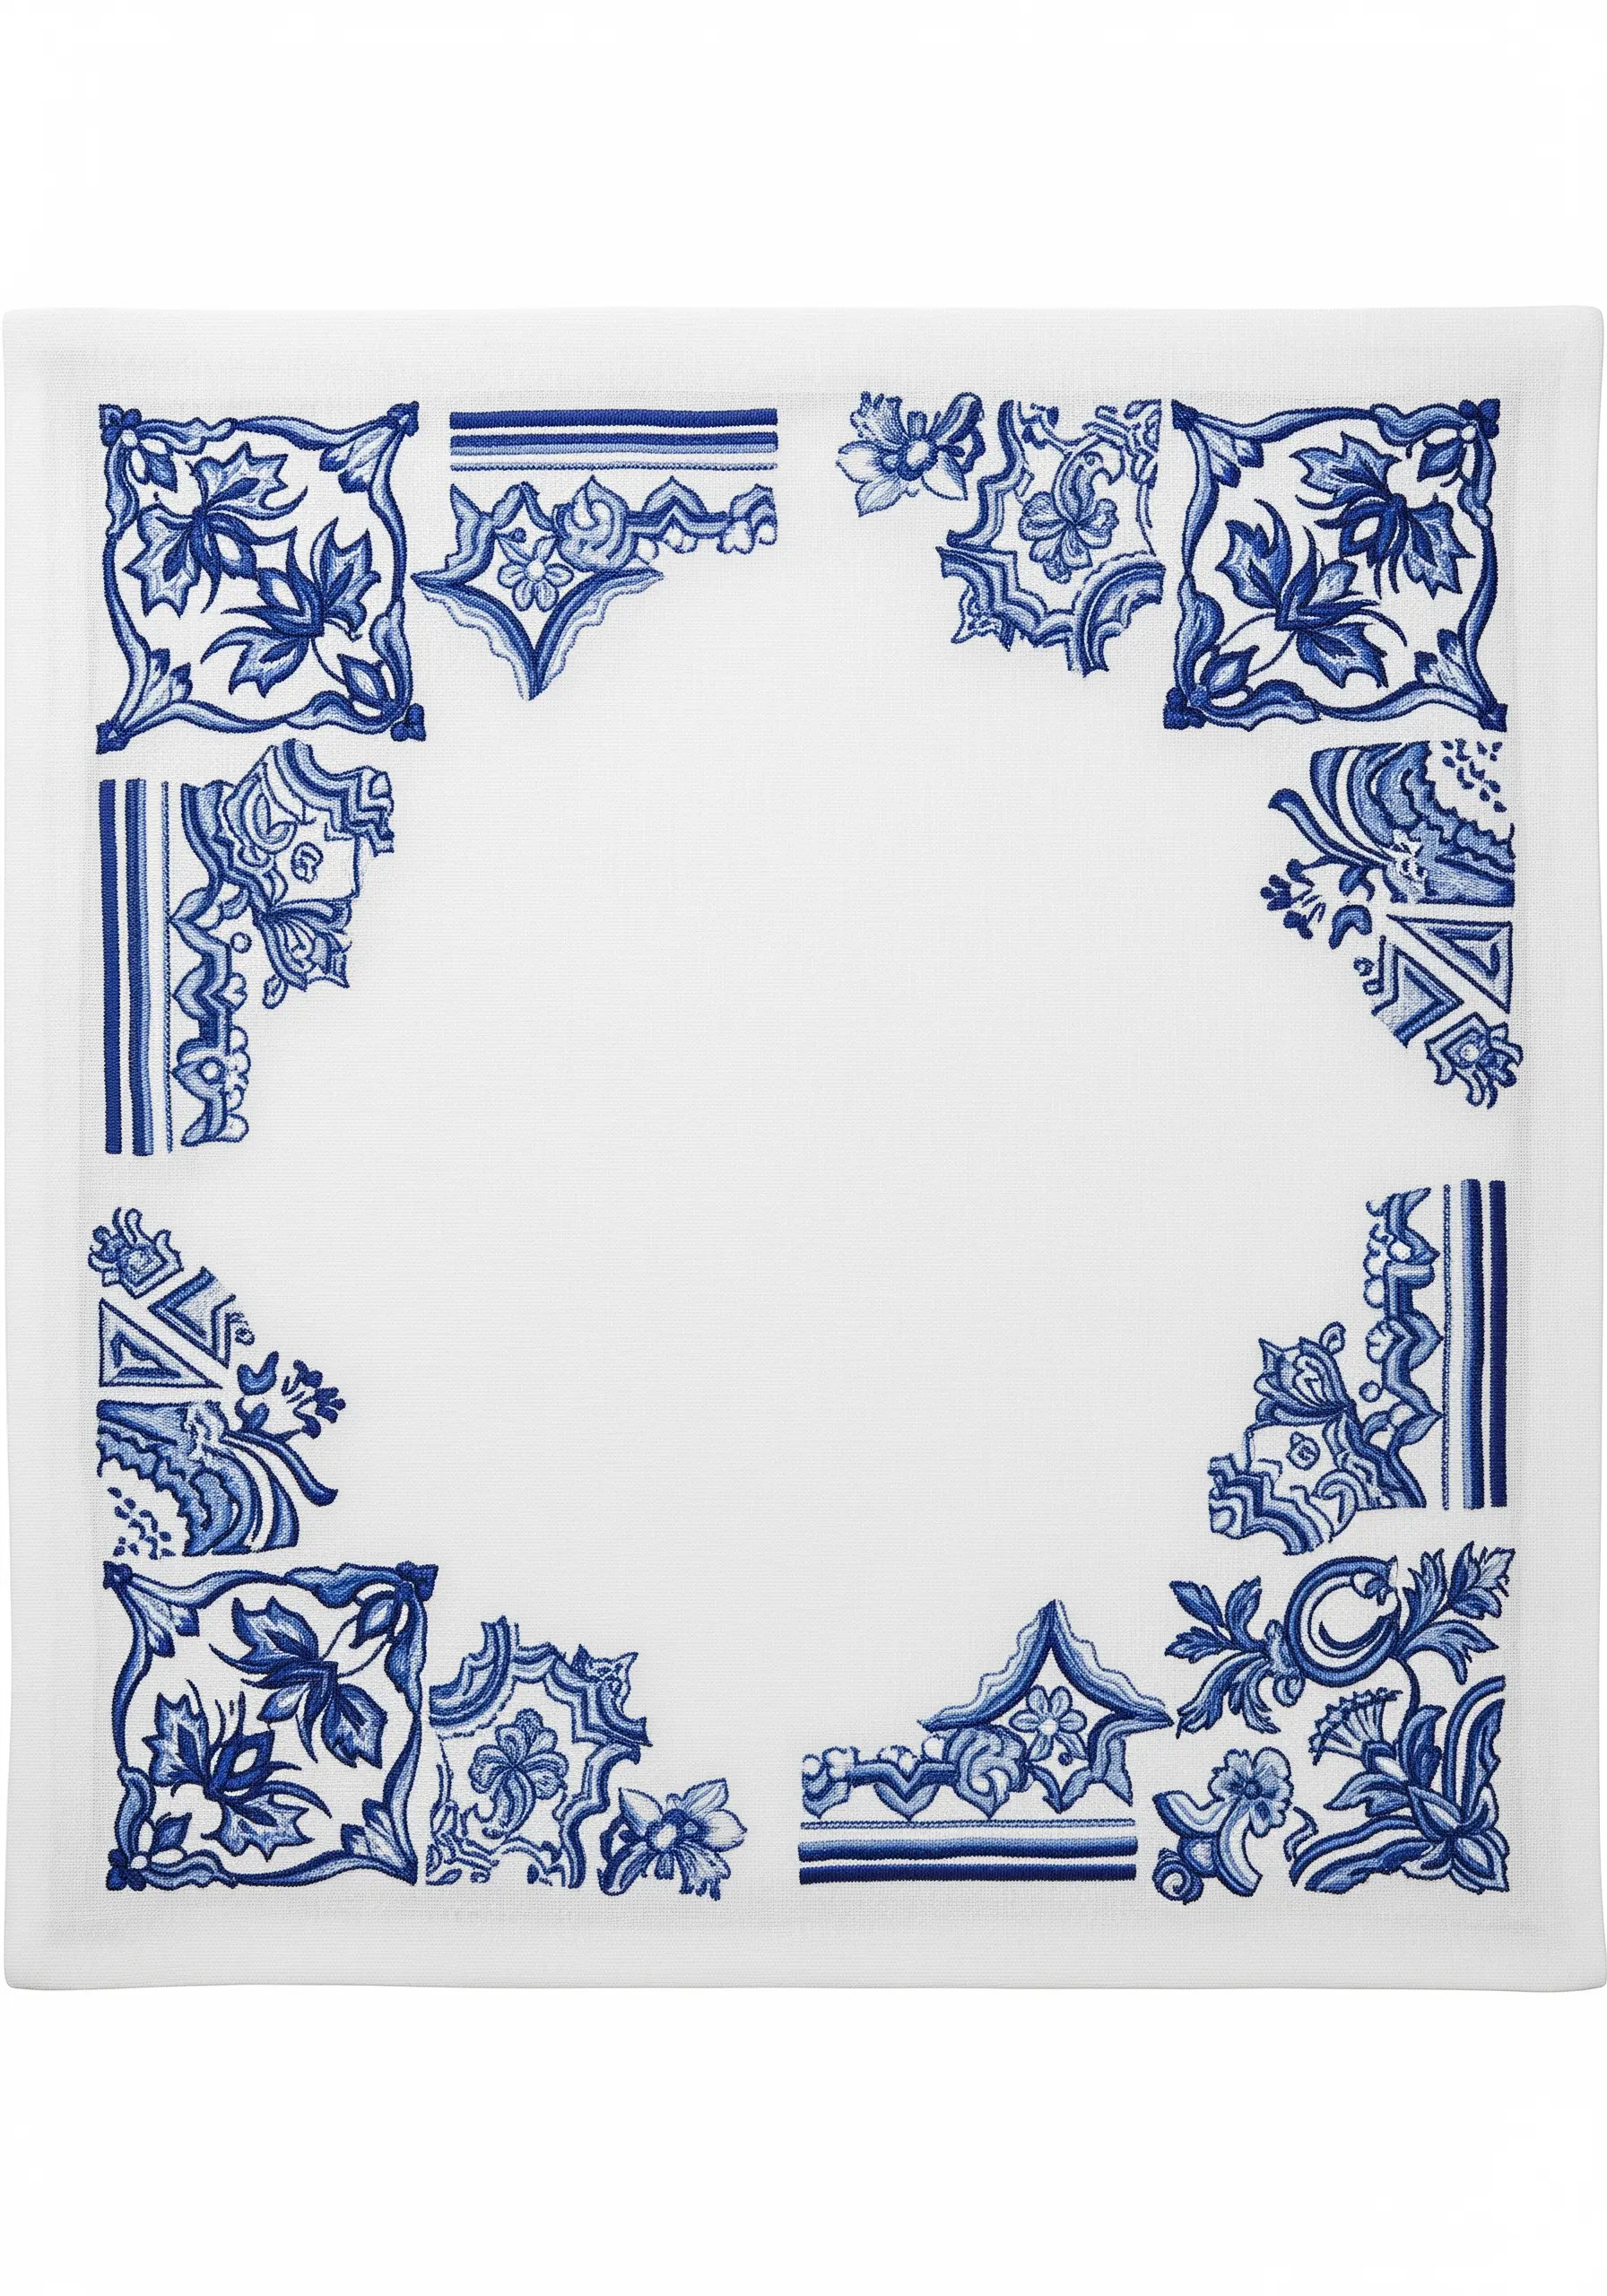
Move beyond the traditional solid border and create a more artistic, dynamic frame using fragmented or ‘deconstructed’ motifs.
Instead of a continuous line, place partial tile designs in the corners and along the edges, intentionally leaving gaps in between.
This technique creates a lighter, more contemporary feel that draws the eye inward without boxing in the center.
Use a long and short stitch to fill the shapes, giving them a soft, painterly quality that enhances the artistic, ‘found fragment’ aesthetic.
27. Designing a Cohesive Linen Suite
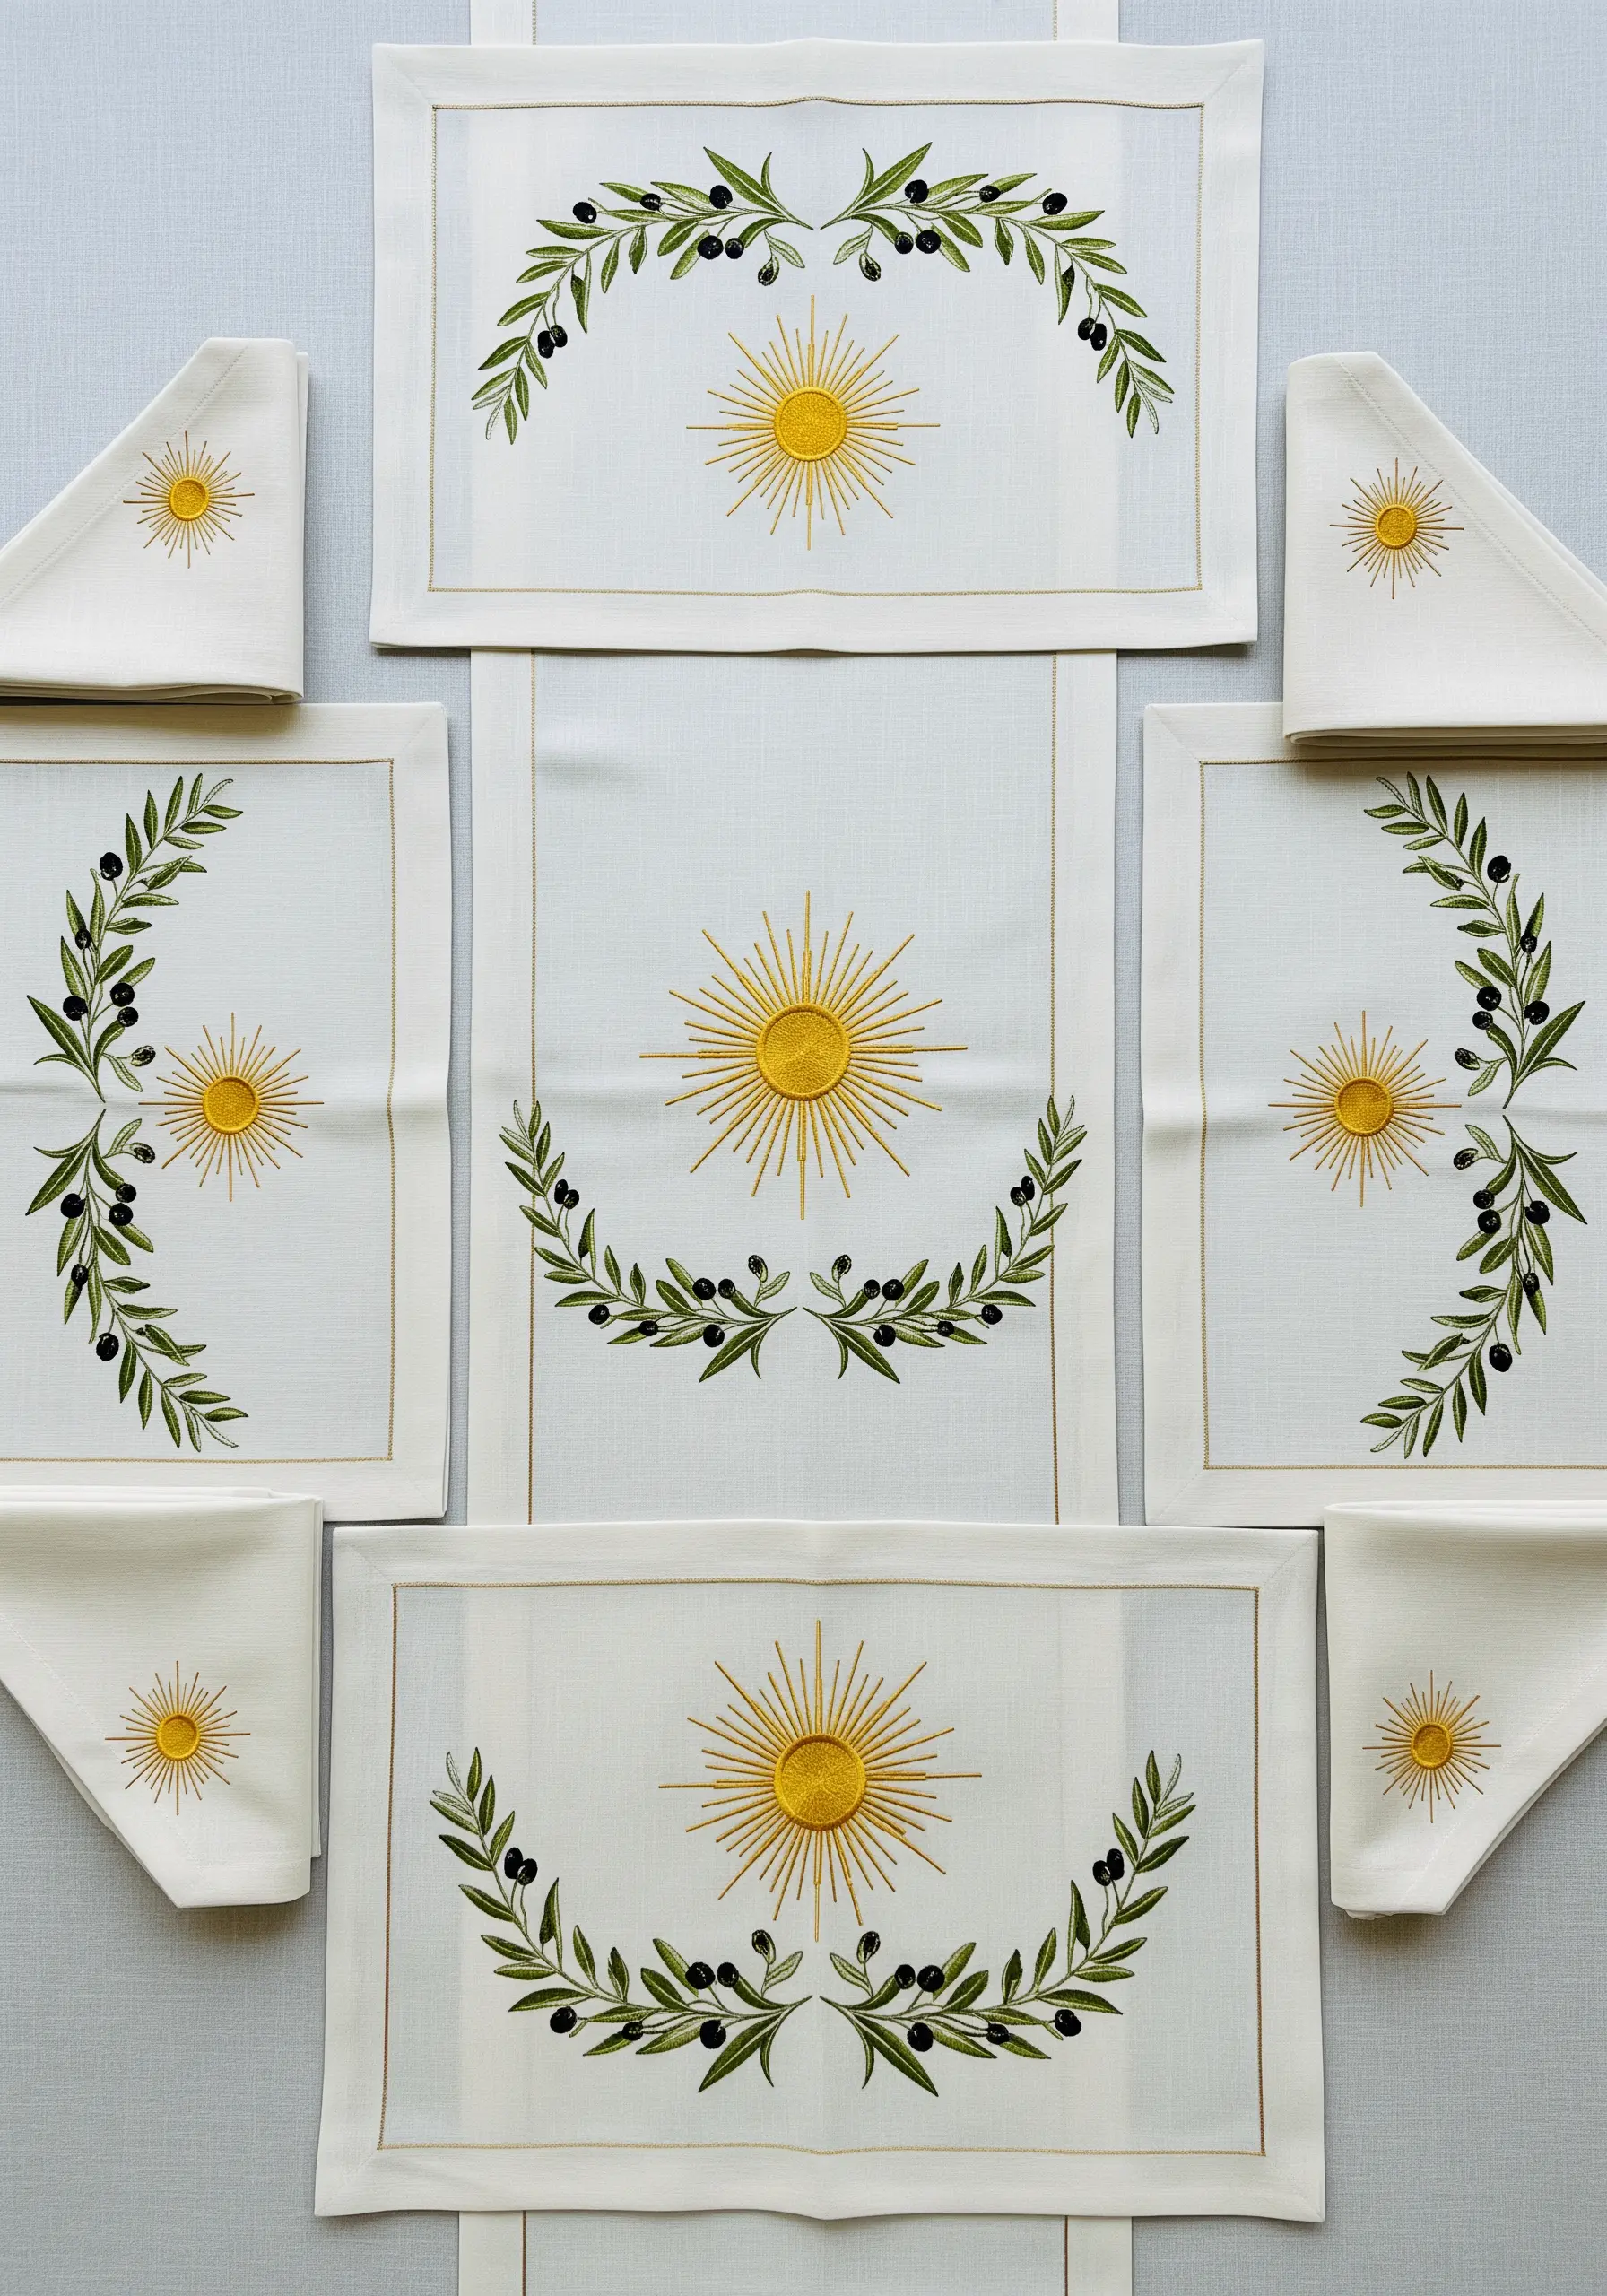
To create a beautifully coordinated set of table linens, establish a small ‘library’ of core motifs—in this case, a sun and an olive branch.
Use the most elaborate combination of these motifs on your largest piece, like the table runner or main placemats.
For the smaller, supporting pieces like napkins, pull just one single, simplified element from your main design—a tiny sun or a curving olive sprig.
This creates a sophisticated, harmonious collection where every piece relates to the others without being boringly identical, resulting in a truly polished tablescape.


