

Your table linens are more than just functional; they are a canvas waiting to tell a story. Instead of settling for simple patterns, let’s explore motifs that bring warmth, character, and a touch of the countryside right into your kitchen.
These ideas are about elevating your embroidery through thoughtful technique. You’ll see how changing a stitch direction can make a vegetable look plump, how layering threads can mimic the softness of fur, and how combining textures can bring a simple flower to life.
This is your invitation to stitch with intention. Whether you’re embellishing a single napkin or an entire tablecloth, these motifs will help you create heirloom-quality pieces that feel both personal and polished, turning every meal into a quiet celebration.
1. Render Plump Berries with Padded Satin Stitch
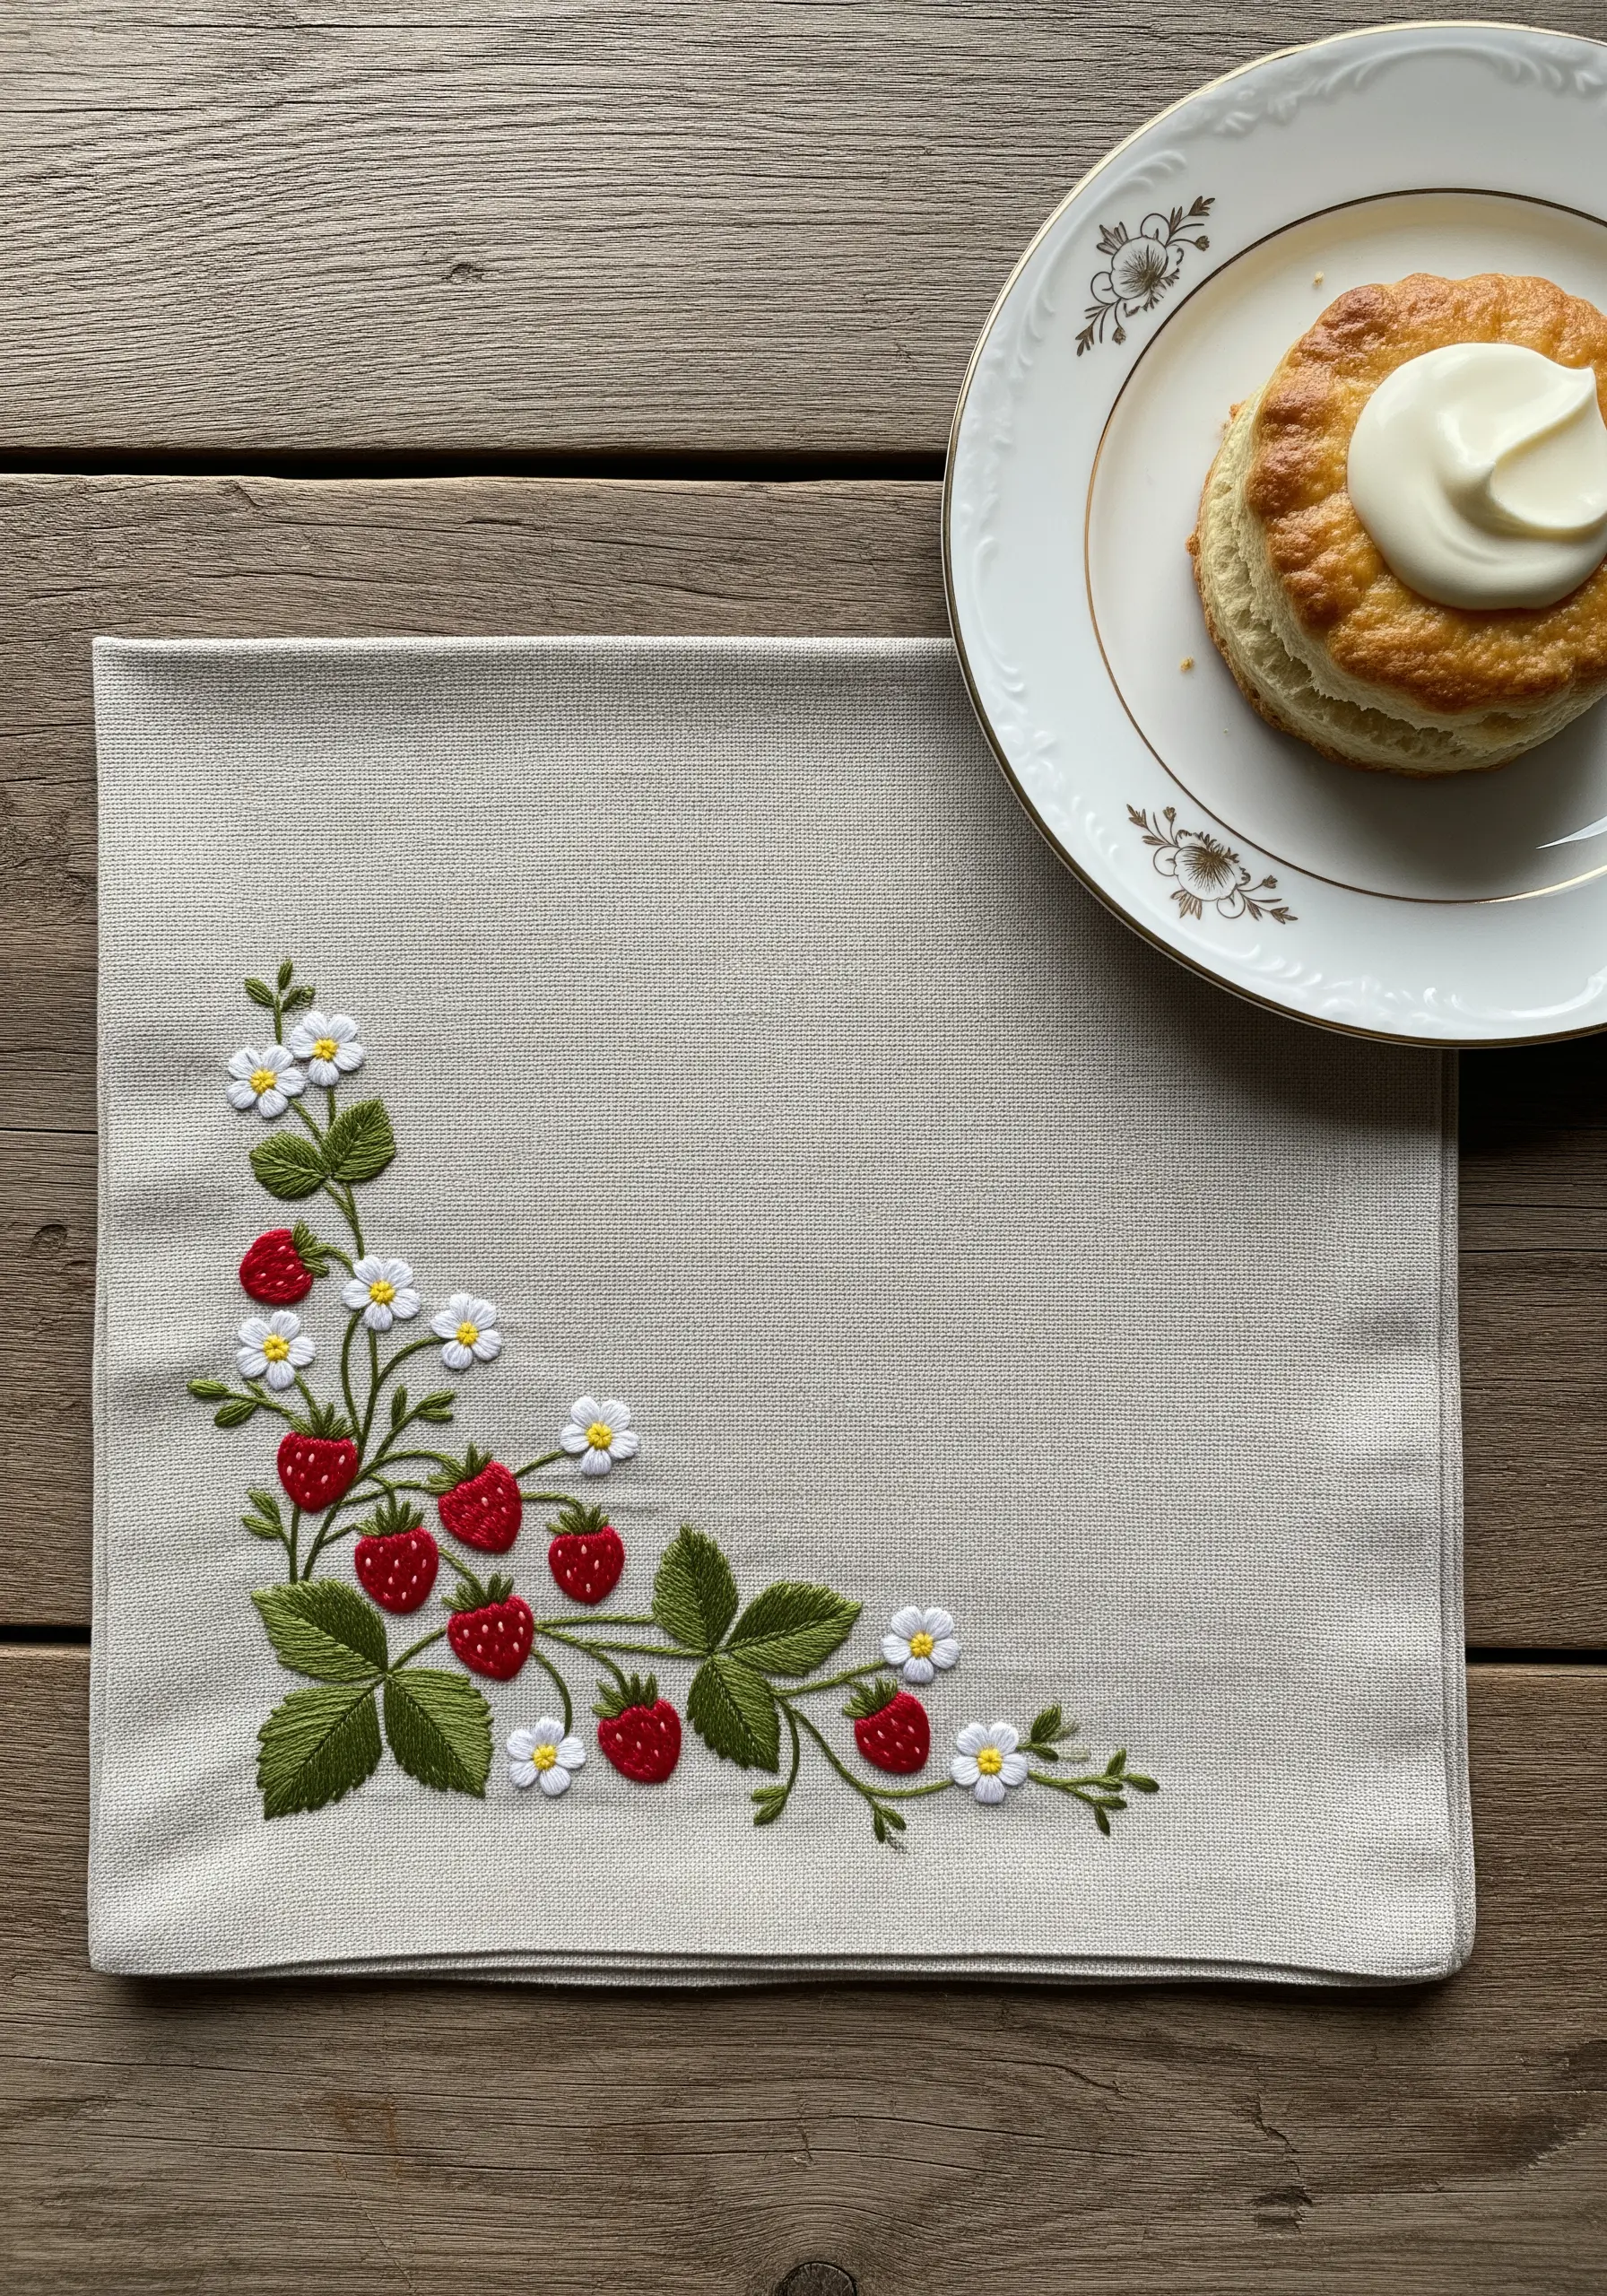
To give your strawberries a juicy, three-dimensional feel, start with a foundation of small running stitches within the berry’s outline.
Stitch your final satin stitch layer directly over this padding.
This simple preparation lifts the threads, catching the light and making the fruit appear fuller and more realistic than flat satin stitch alone.
For the seeds, use a contrasting single strand of pale yellow or off-white thread to make tiny seed stitches or French knots that sit neatly on top of the red.
2. Stitch an Airy Lavender Border with Varied Textures
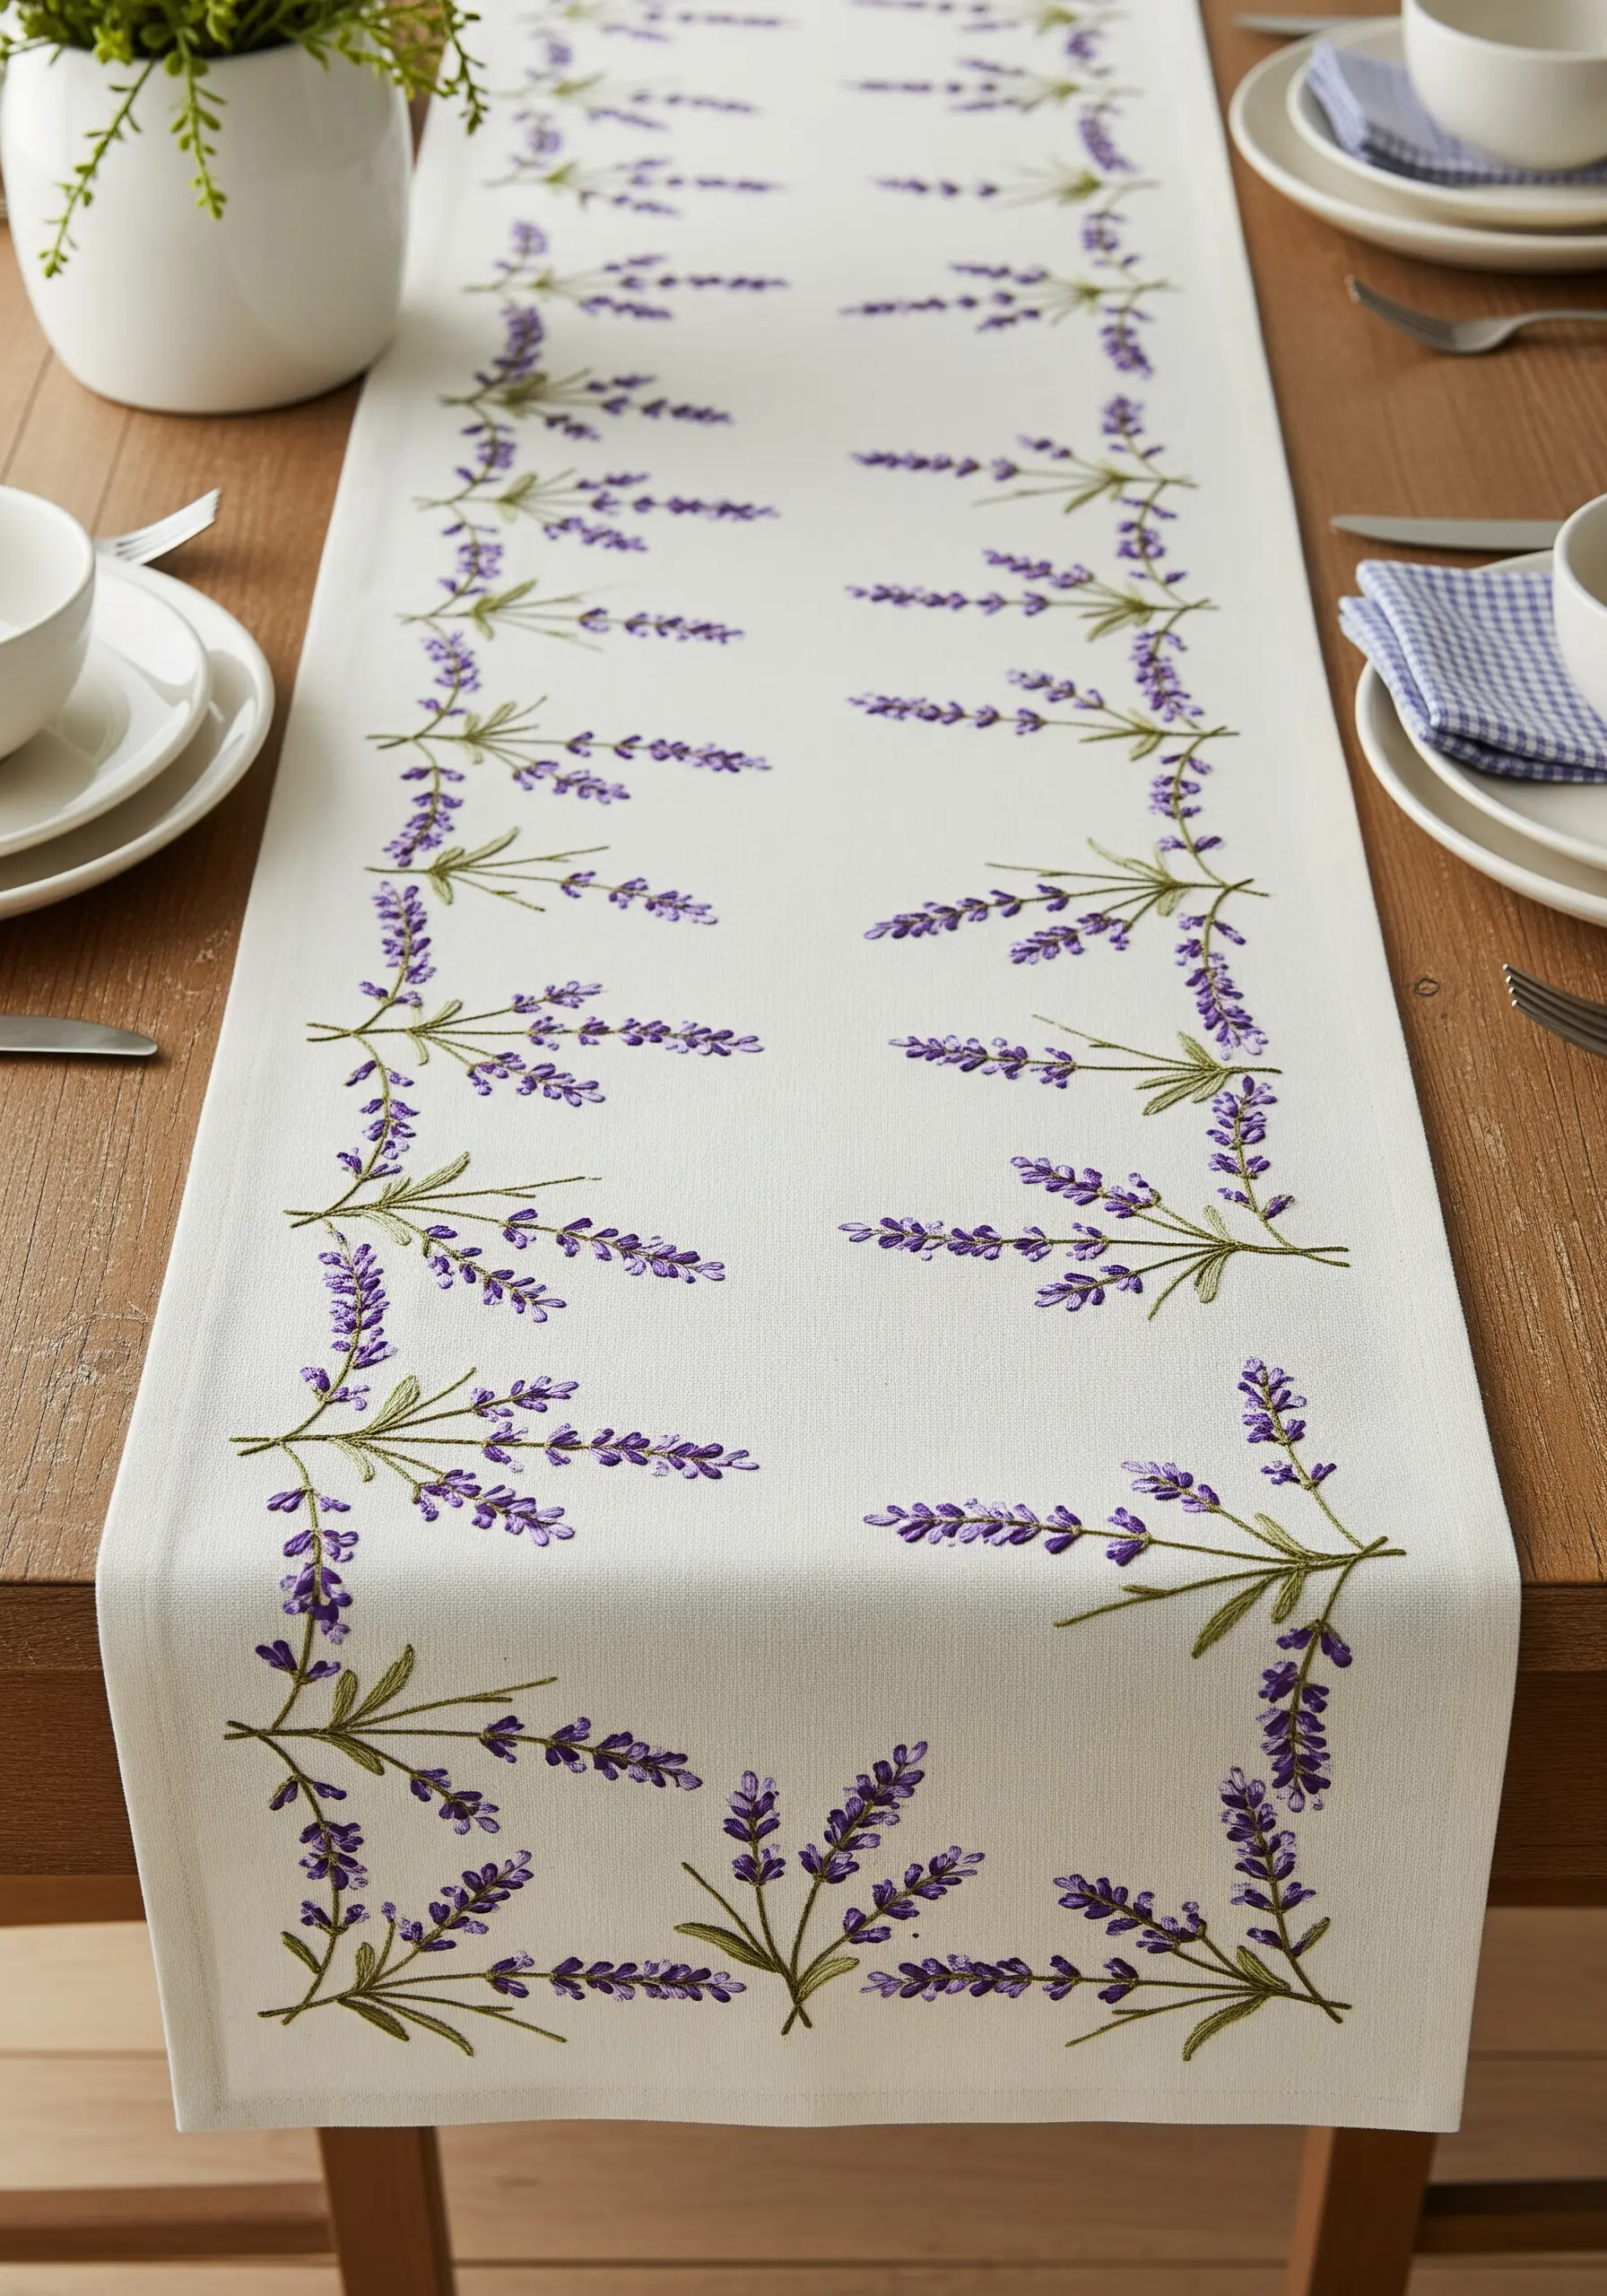
Capture the delicate nature of lavender by combining two simple stitches: French knots and short straight stitches.
Use French knots for the fuller, rounded tops of the lavender buds and transition to tiny, spaced-out straight stitches as you move down the stalk.
This variation in density mimics how a real lavender sprig grows, creating a design that feels light and organic, not stiff.
For a cohesive table runner, mirror the design on both edges to create a balanced, elegant frame for your tablescape.
Explore more lavender-inspired embroidery designs to bring this calming aesthetic to other spaces.
3. Create Fuzzy Bee Bodies Using Bullion Knots

Move beyond basic satin stitch for your bees and give them a charming, fuzzy texture with bullion knots.
Wrap the thread around your needle 6 to 8 times to create the elongated, caterpillar-like stitch that forms the bee’s body.
Alternate yellow and black threads to build the stripes, creating a raised, touchable effect.
For the delicate wings, switch to a single strand of white or light gray floss and use an open fishbone stitch to suggest translucency.
4. Master Realistic Fungi with Thread Painting
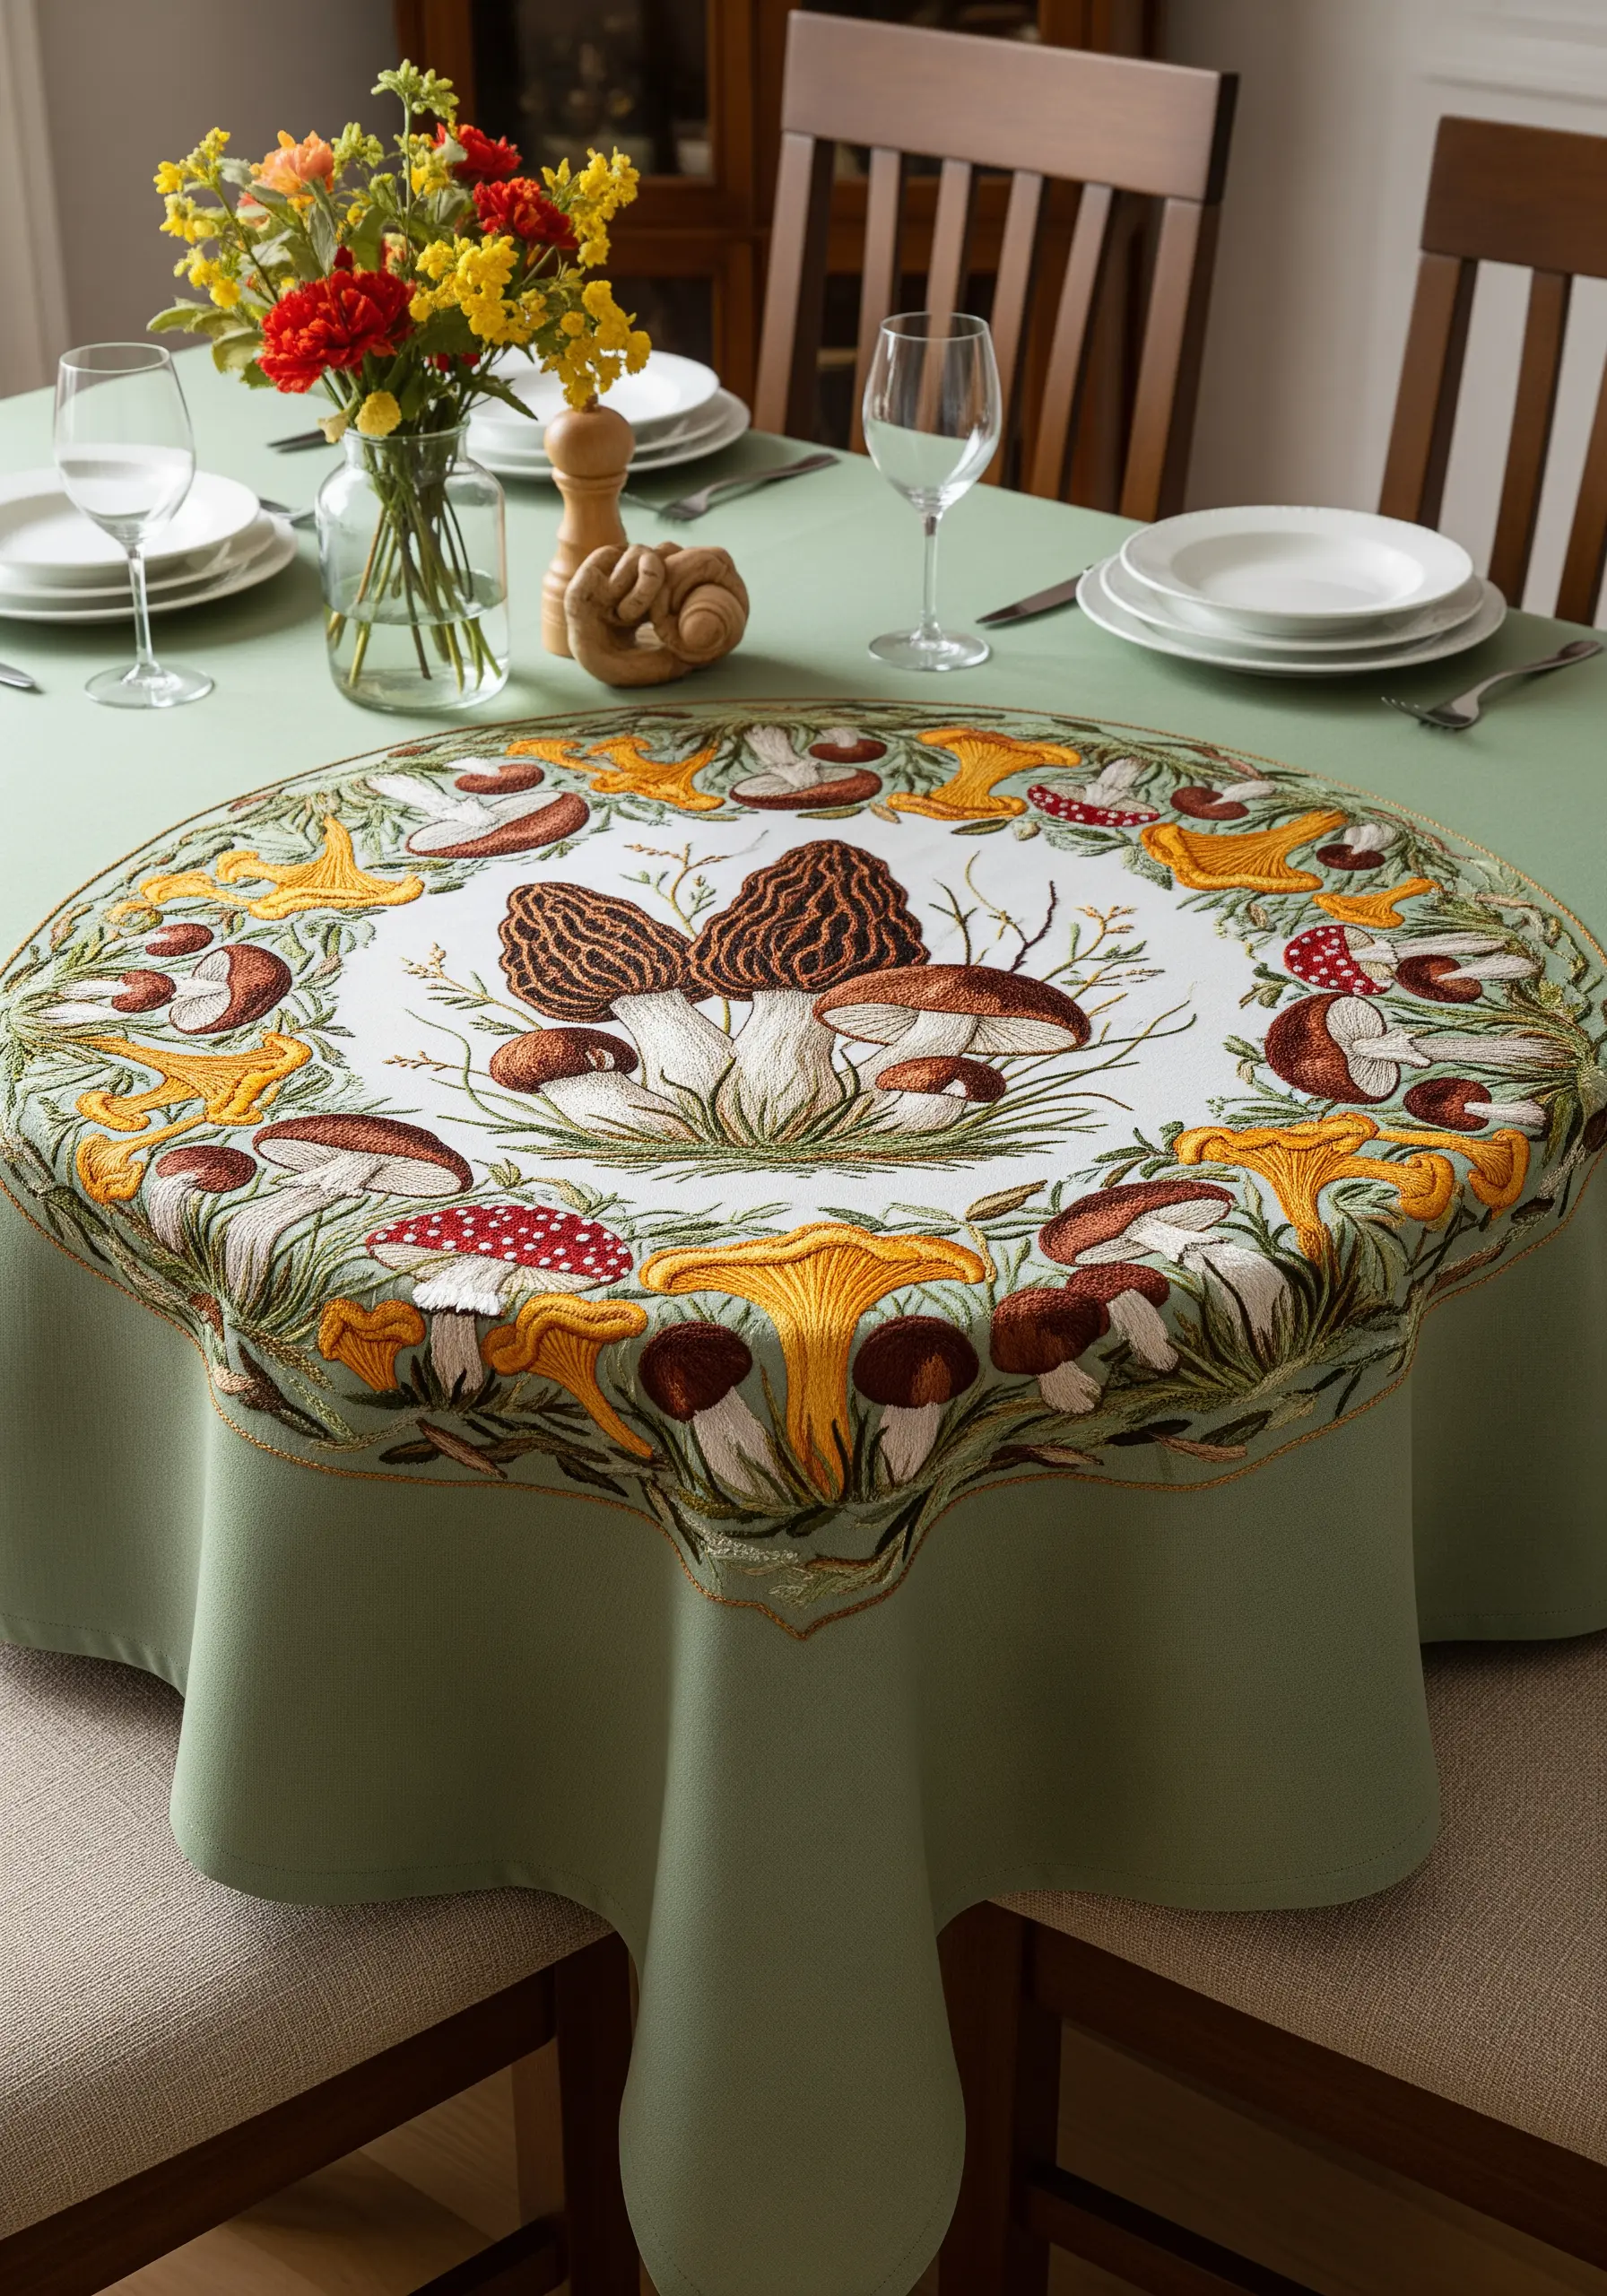
To achieve the beautiful gradients seen on mushroom caps, you need to embrace the long-and-short stitch, the foundation of thread painting.
Work in rows, using several closely related shades of brown and tan to blend the colors seamlessly, mimicking natural variations.
Always direct your stitches to follow the curve of the mushroom cap—this is what creates the illusion of shape and volume.
Start with your darkest color on the bottom edge and work your way up to the lightest shade at the top to create a sense of light and shadow.
5. Illustrate Delicate Herbs with Fine-Line Stitches
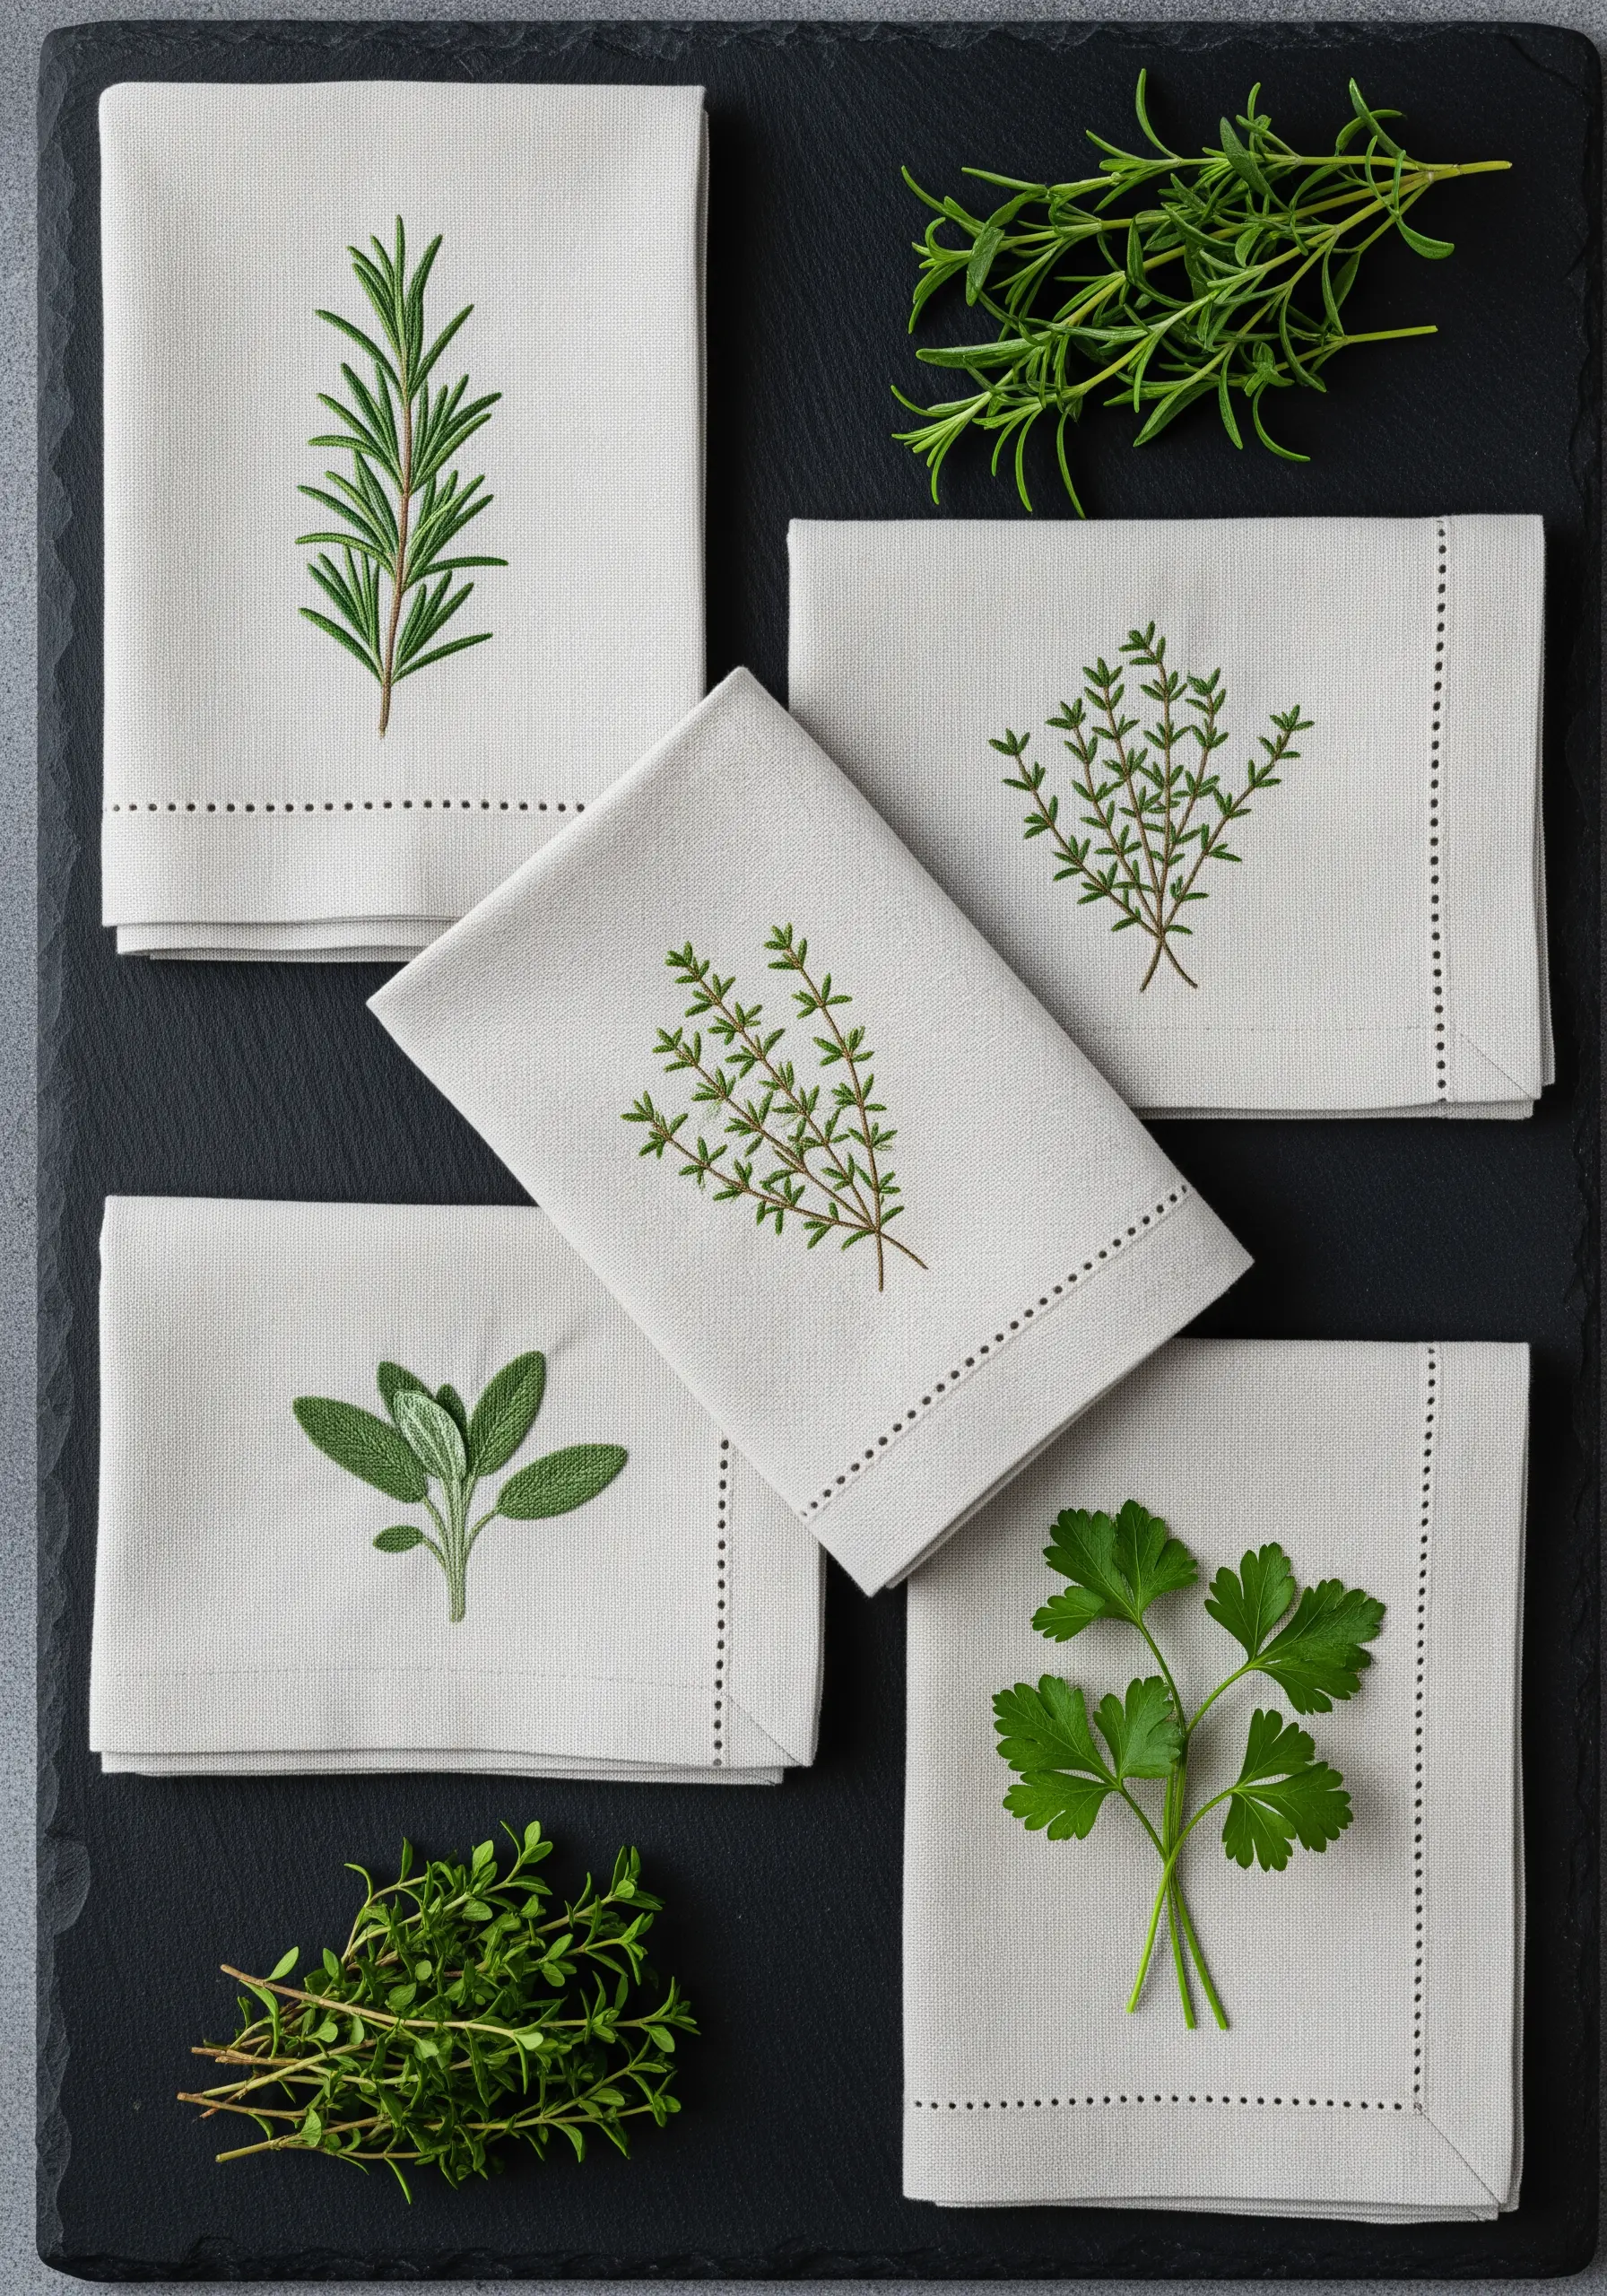
For realistic herbal motifs like rosemary and thyme, precision is more important than density.
Use only two strands of floss and rely on elemental stitches like stem stitch for the main branches and tiny detached chain stitches for the leaves.
This minimalist approach keeps the design from feeling heavy or bulky, resulting in a clean, illustrative style that looks elegant on crisp linen.
The goal is to capture the essence of the plant’s structure, not to fill it in completely.
These small hoop kitchen herb embroidery designs are perfect for practicing this refined technique.
6. Capture Feather Details Through Color Blocking
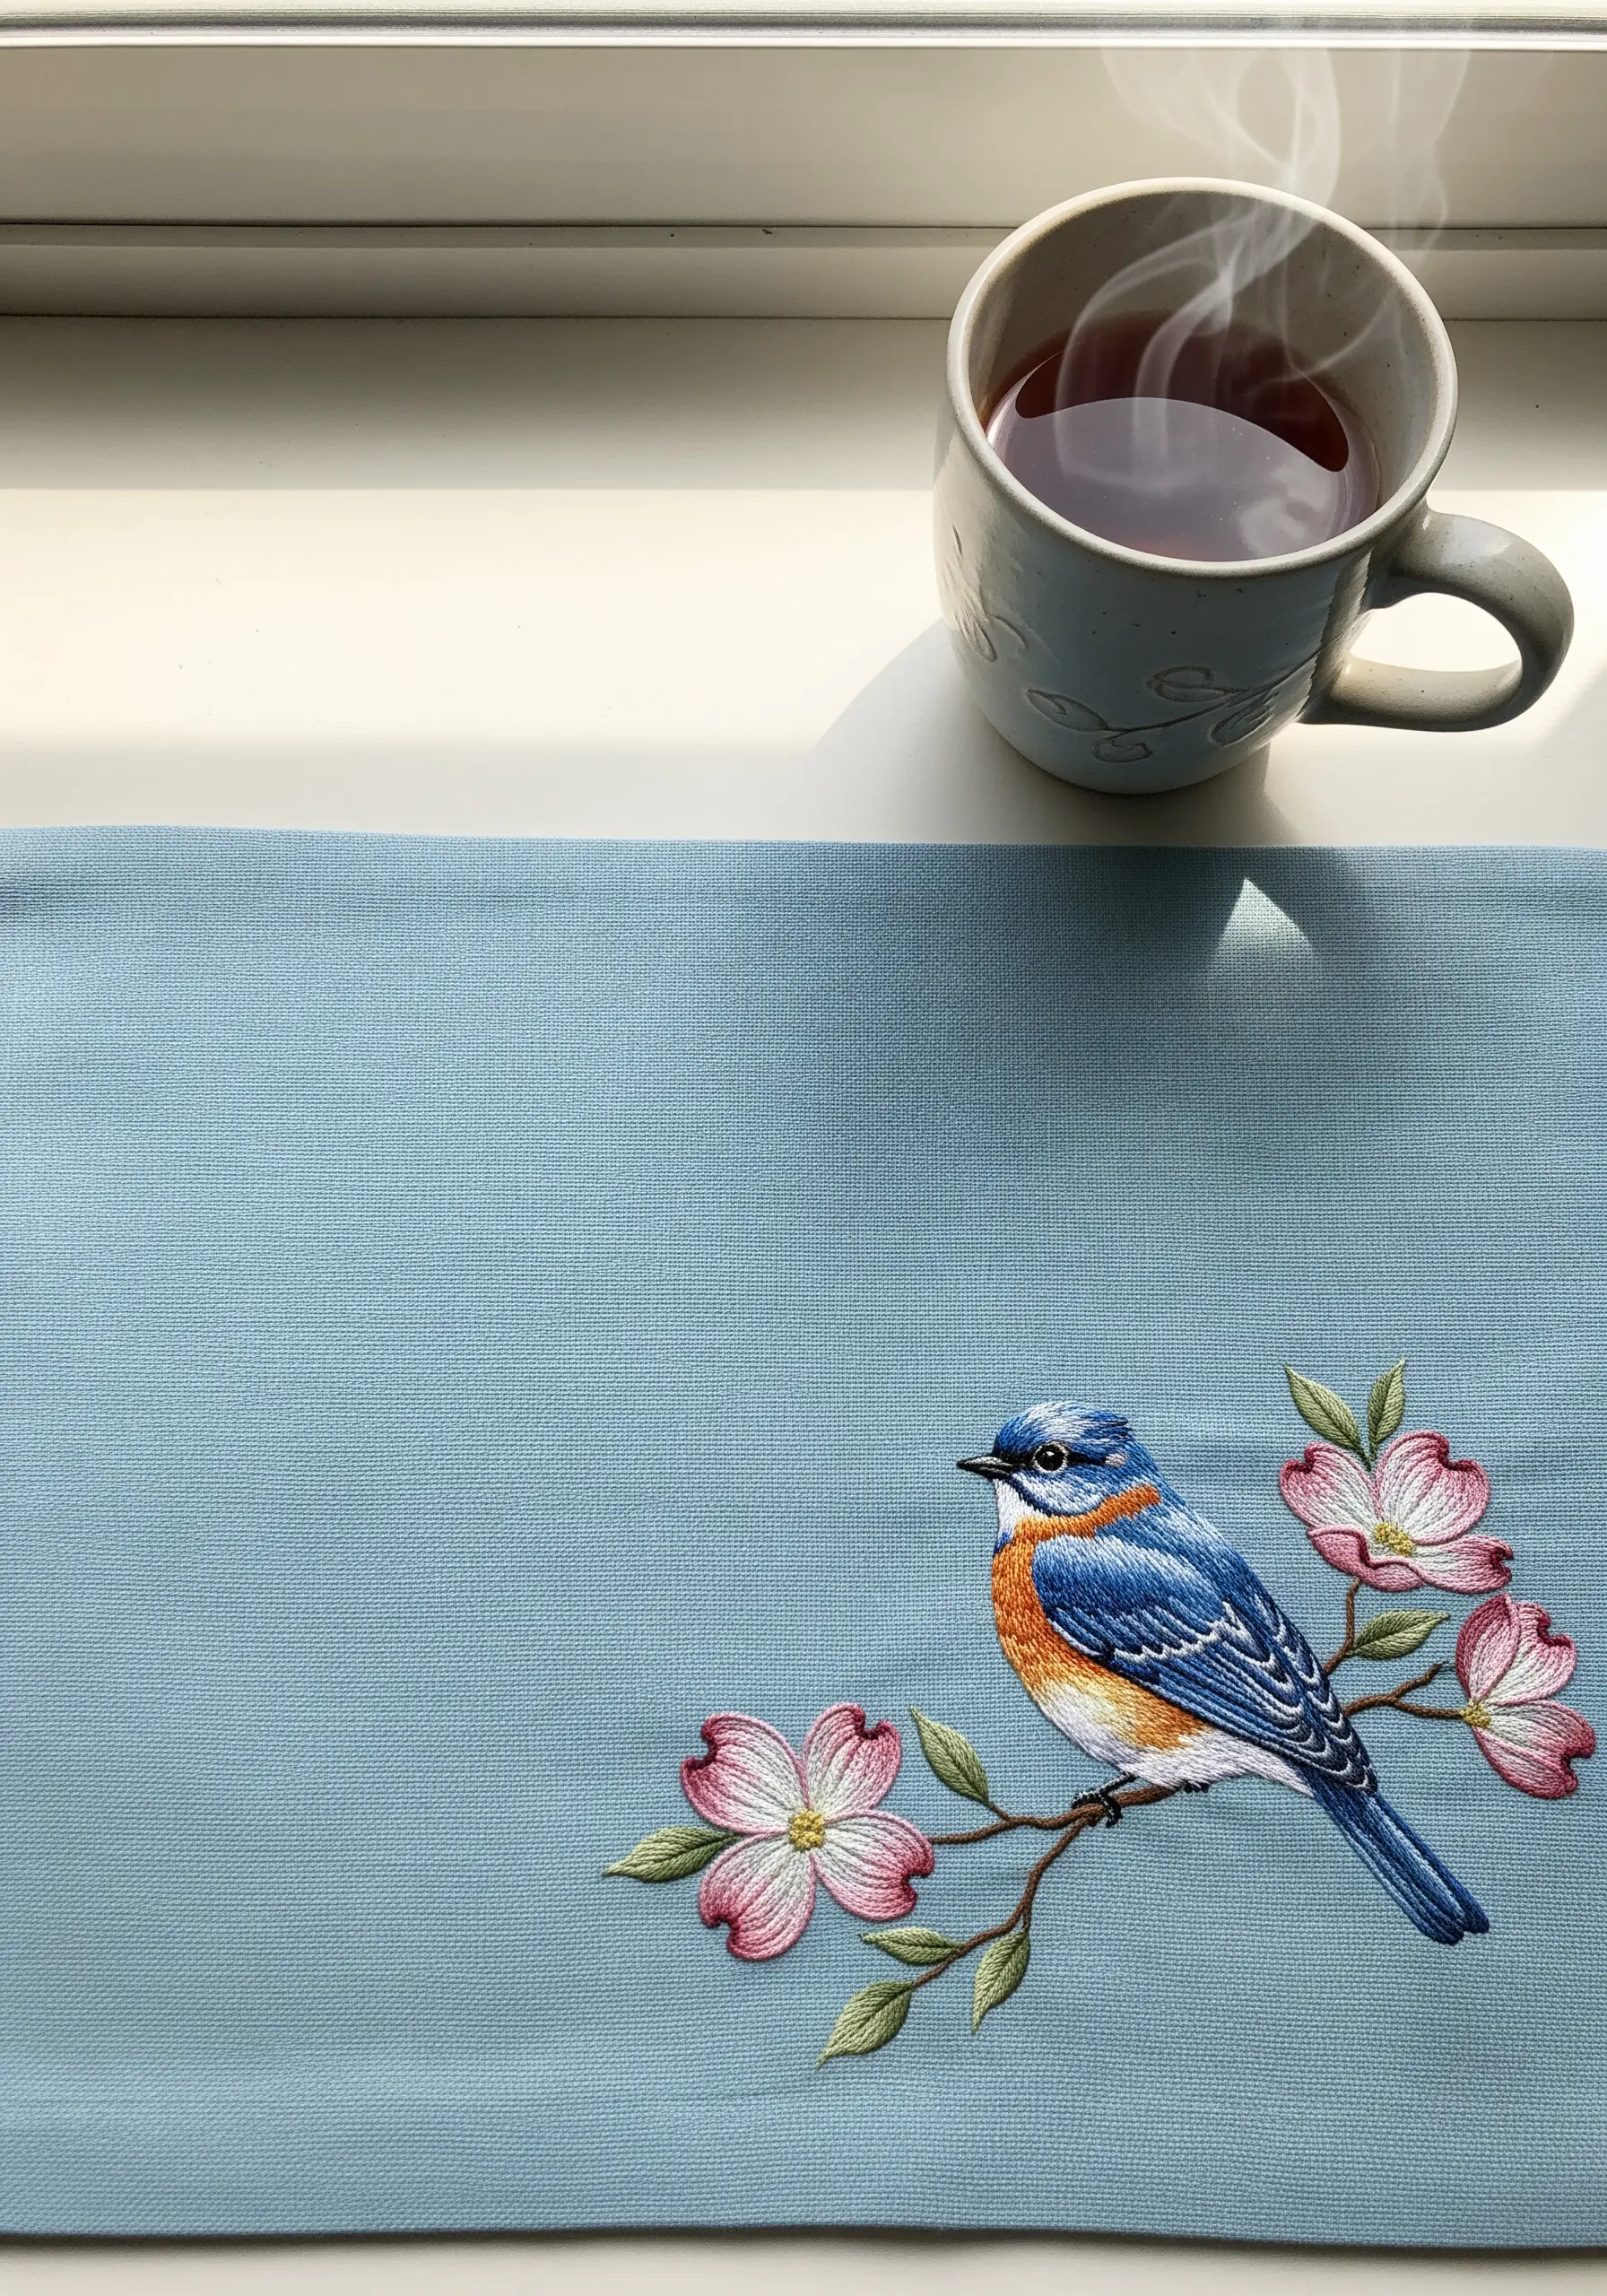
Thread painting a bird can feel intimidating, so simplify the process by breaking it down into color blocks.
Lightly sketch out the main color areas—the blue back, the orange chest, the white belly—before you begin.
Fill each section with directional long-and-short stitches, using a single strand of floss for the smoothest blend.
Where two colors meet, allow the stitches to overlap slightly, using a mix of both shades to create a soft, natural transition instead of a hard edge.
7. Combine Appliqué and Embroidery for Dynamic Texture
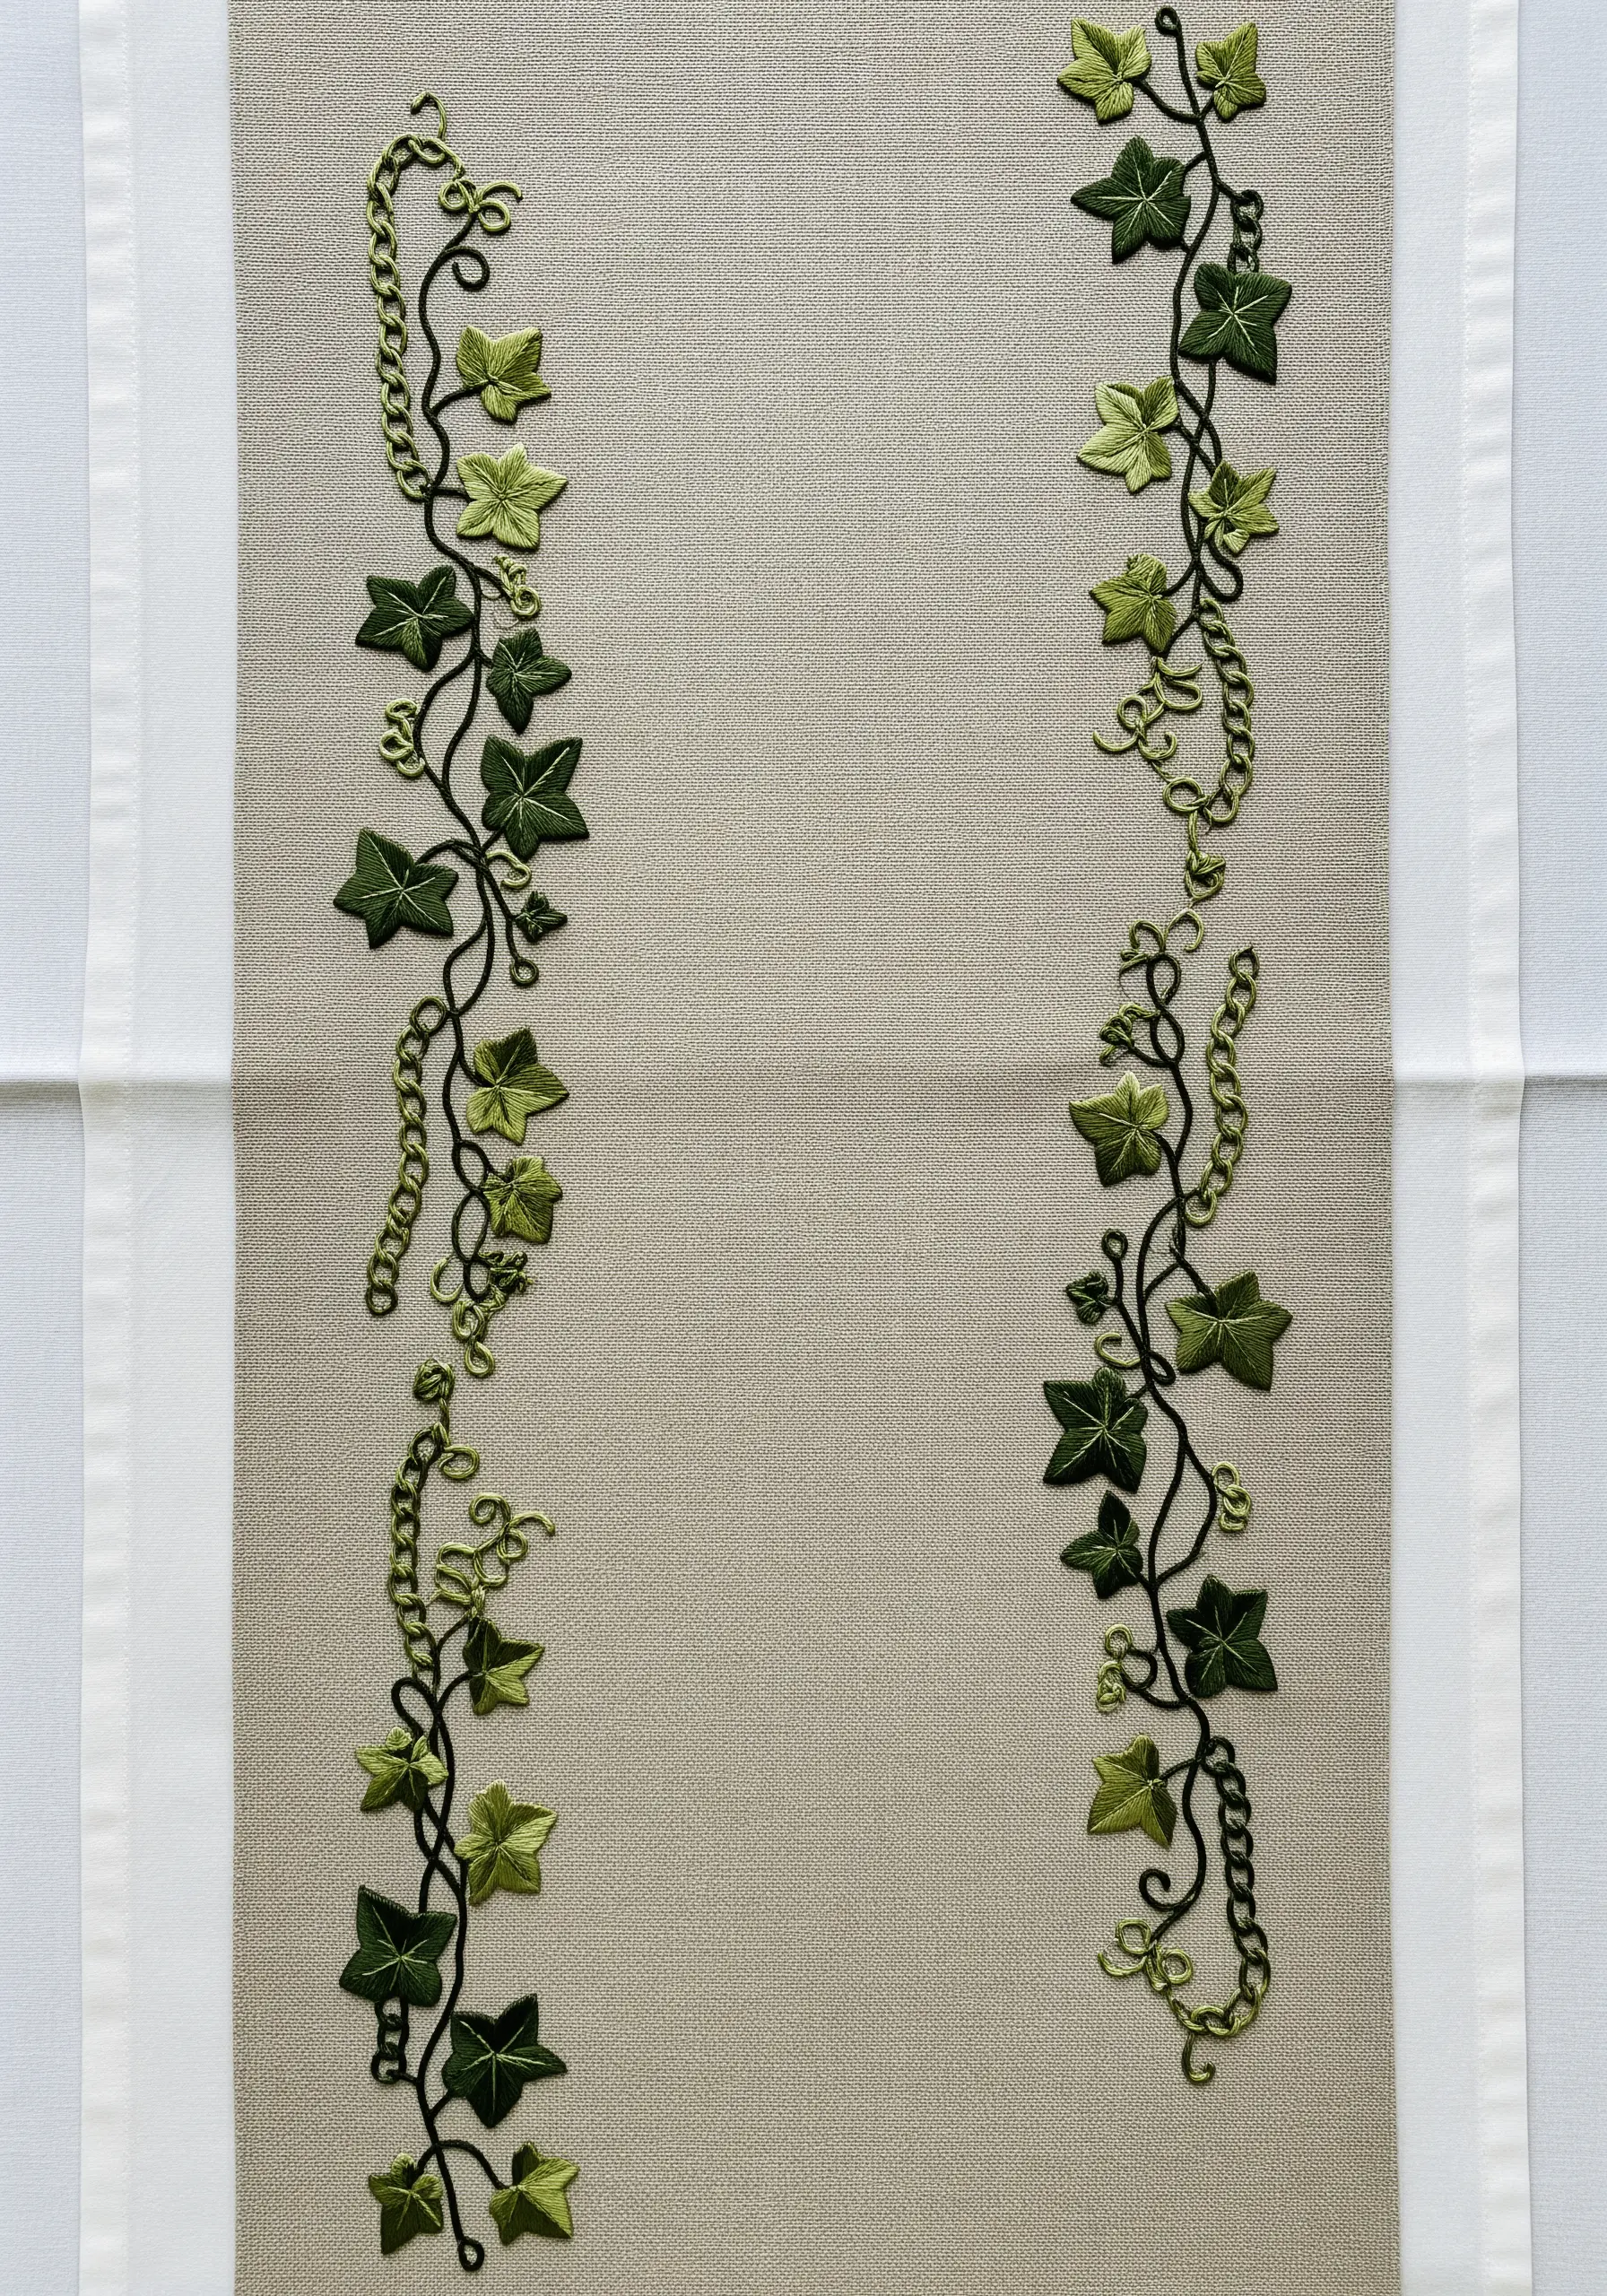
Create a stunning high-contrast design by pairing fabric appliqué with traditional embroidery.
Cut the ivy leaf shapes from a smooth cotton fabric and secure them to your linen with an iron-on adhesive.
Then, edge each leaf with a tight satin stitch or blanket stitch in a matching color to conceal the raw edges and give them a clean, polished finish.
Embroider the twisting vines and delicate chain details directly onto the base fabric, allowing them to weave around the appliqué leaves for a layered, dimensional effect.
8. Form a Playful Wreath with Directional Satin Stitch
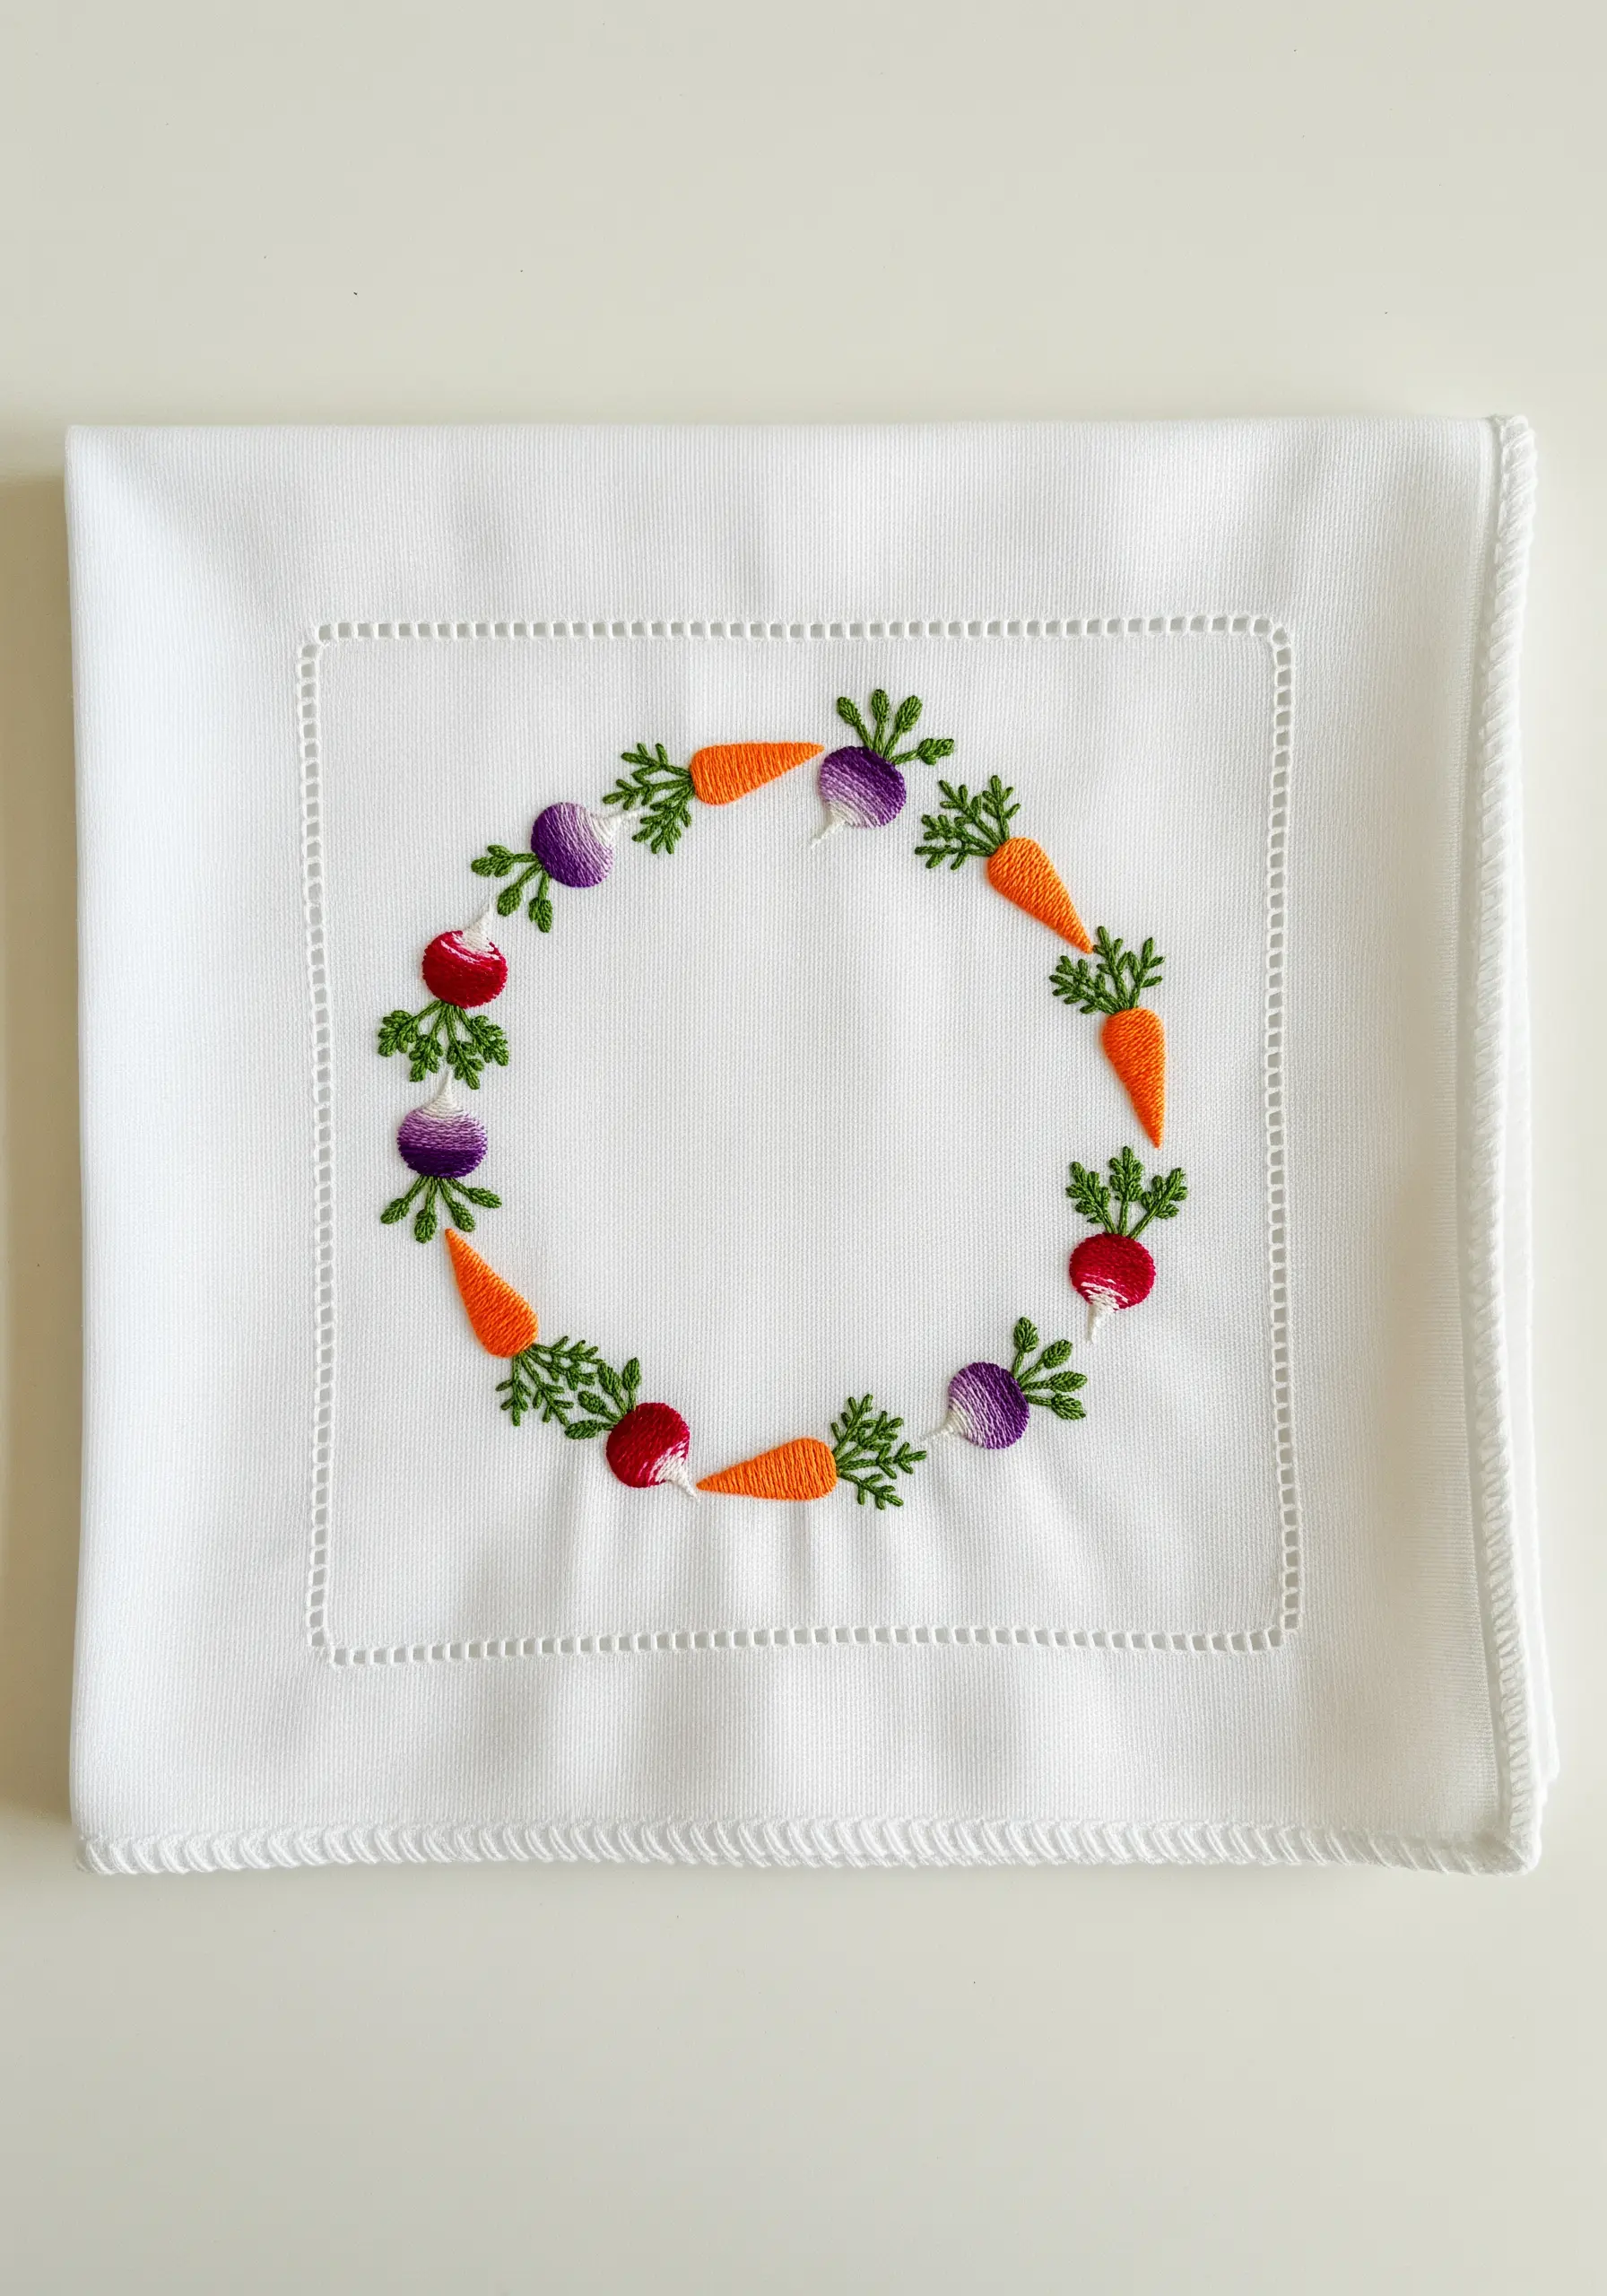
When stitching a circular motif like this vegetable wreath, the direction of your satin stitch is crucial for creating shape.
For the round radishes and turnips, angle your stitches like the spokes of a wheel, radiating from the center outwards to enhance their spherical form.
For the carrots, keep your stitches straight and vertical, following the vegetable’s natural length.
This conscious choice in stitch direction is a subtle detail that makes each element distinct and recognizable.
9. Embrace Elegance with Minimalist Line Art
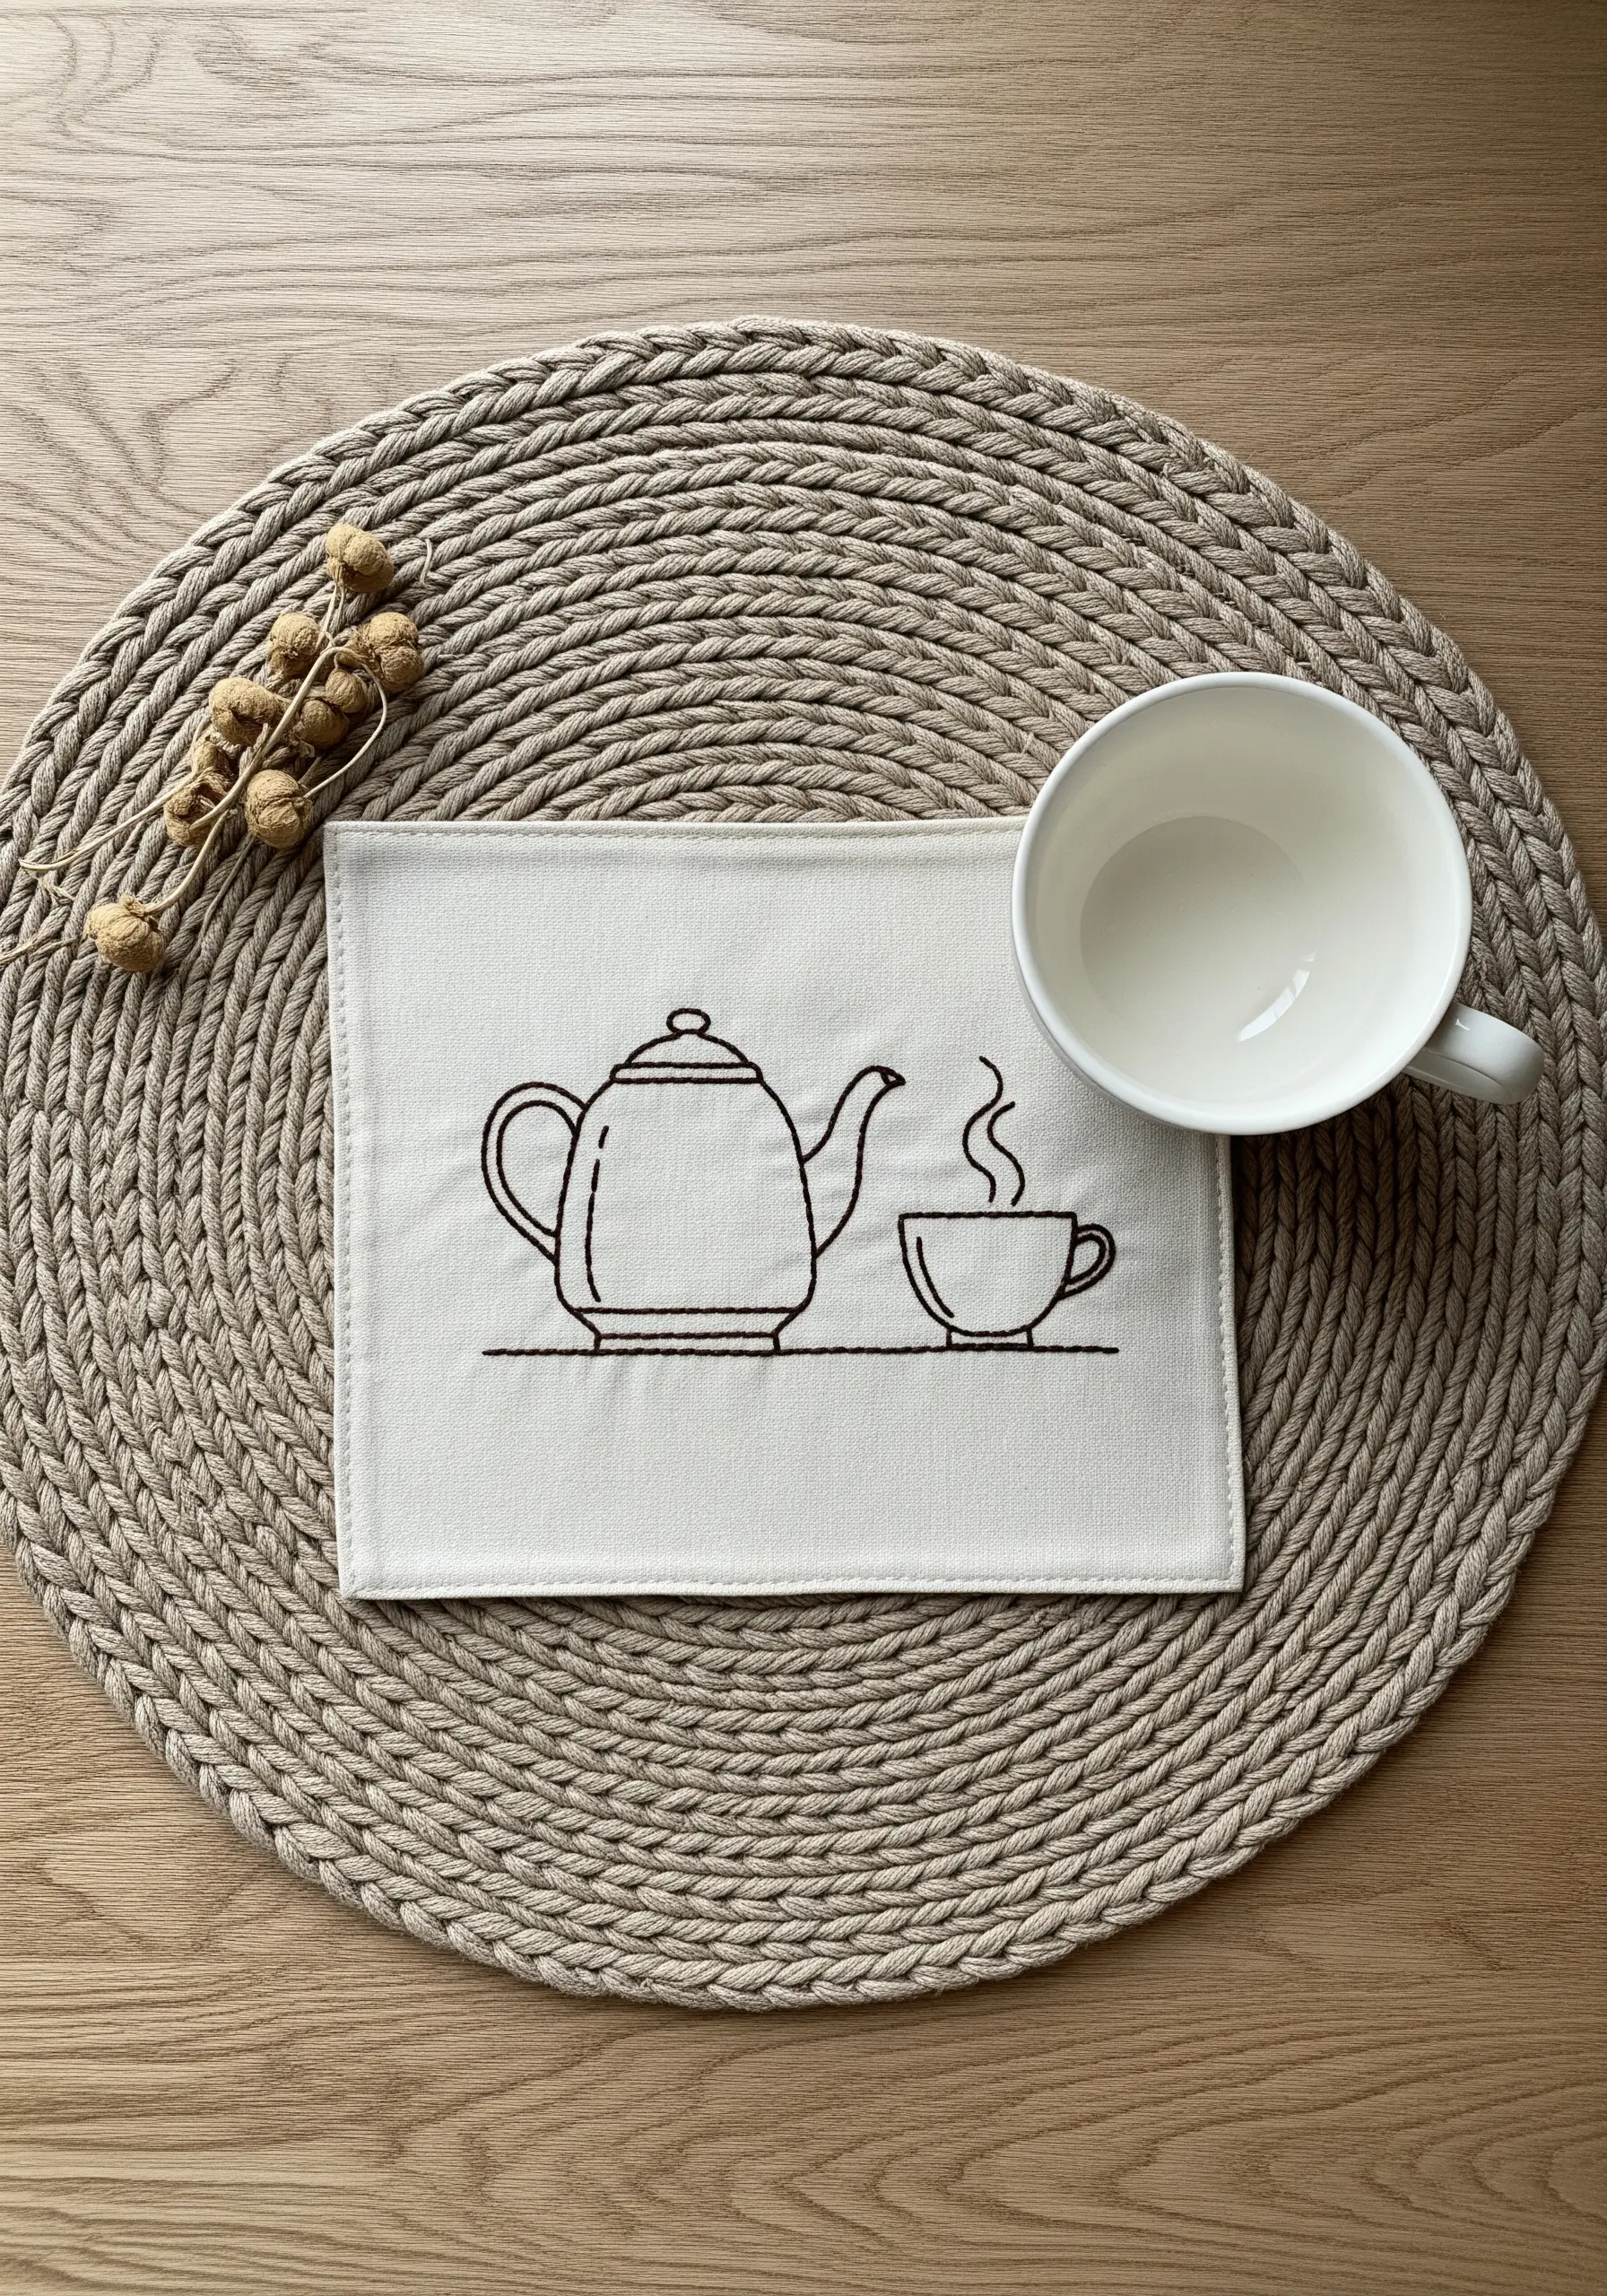
Prove that a single line can be as impactful as a fully colored design.
This minimalist line art embroidery relies on the clarity and consistency of a simple backstitch or stem stitch.
Choose a high-contrast thread, like dark brown on cream linen, and use three strands of floss to give the line a confident, graphic weight.
Focus on maintaining even stitch length and smooth curves—the beauty of this style lies entirely in its clean execution.
10. Layer a Wildflower Meadow with Varied Stitches
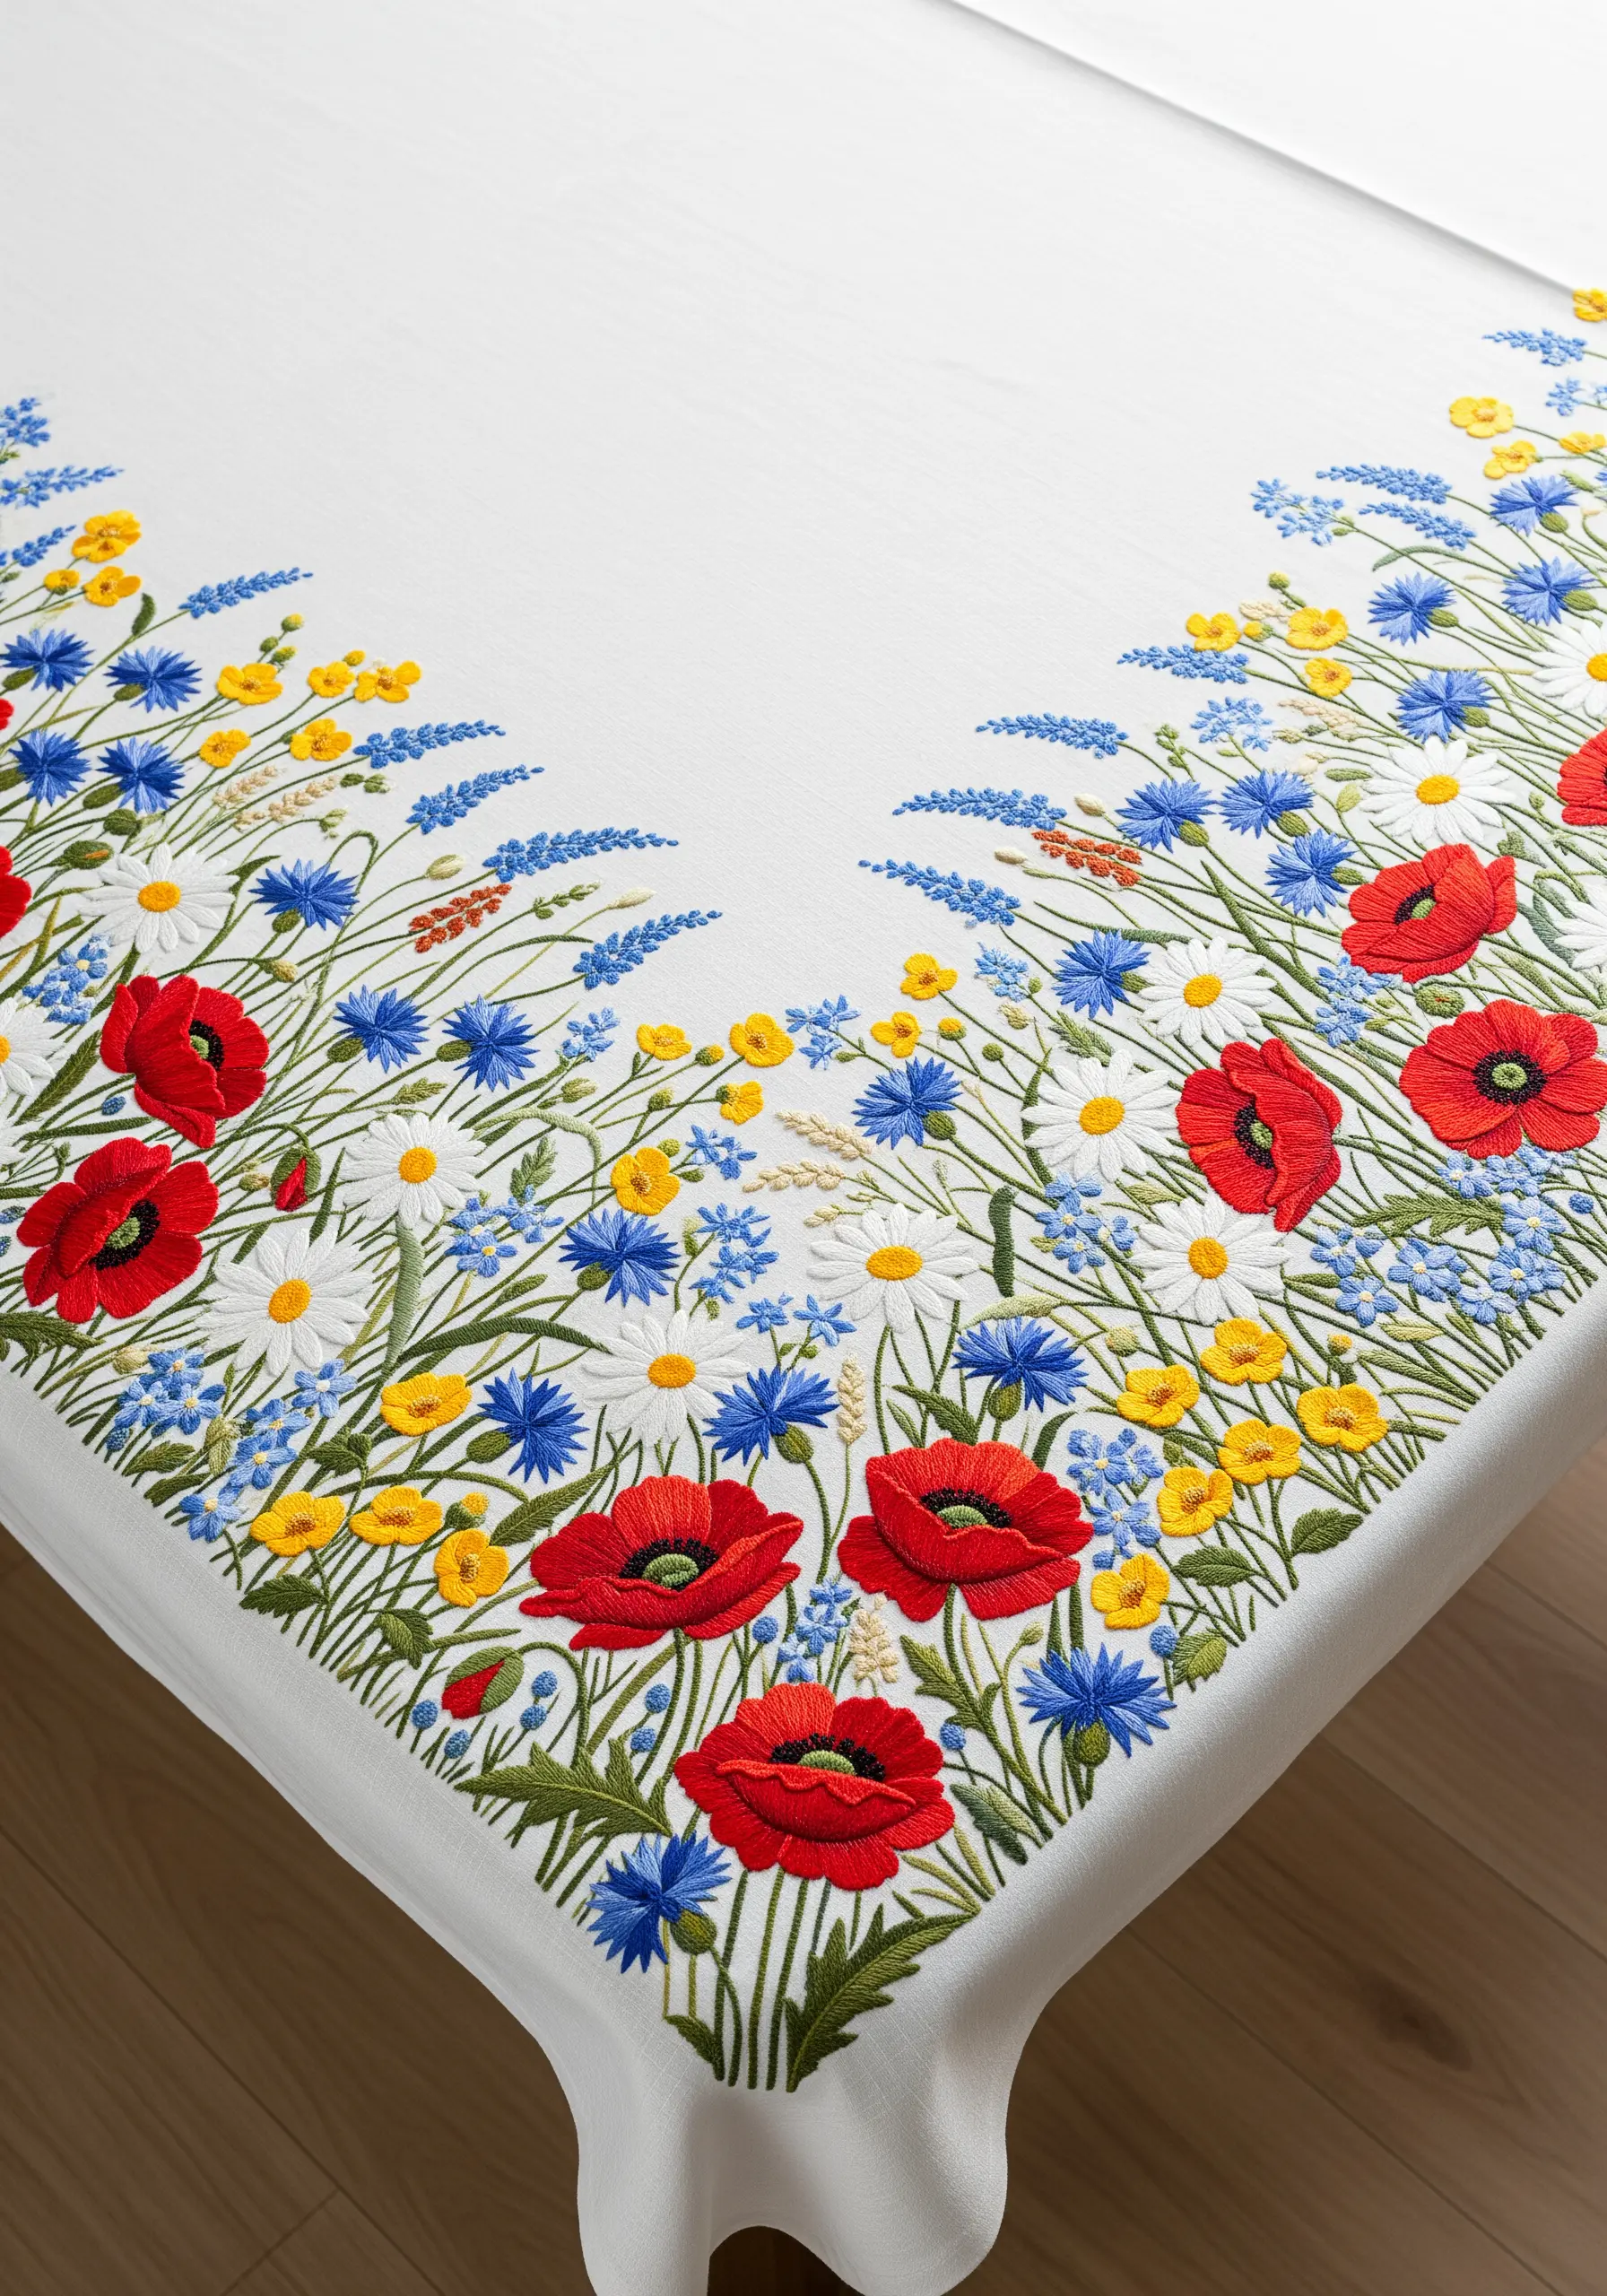
To create the joyful chaos of a wildflower field, you need to build texture by layering different stitches.
Use lazy daisy stitches for the petals of daisies and cornflowers, dense clusters of French knots for the yellow buttercups, and delicate straight stitches for the slender lavender stems.
Overlap the elements slightly, allowing stems to cross and petals to touch, which creates depth and a sense of abundance.
The key is to avoid uniformity; vary the height, density, and direction of your stitches just as they would appear in nature.
Master the art with these wildflower thread painting techniques.
11. Convey Fur Texture with Directional Thread Painting
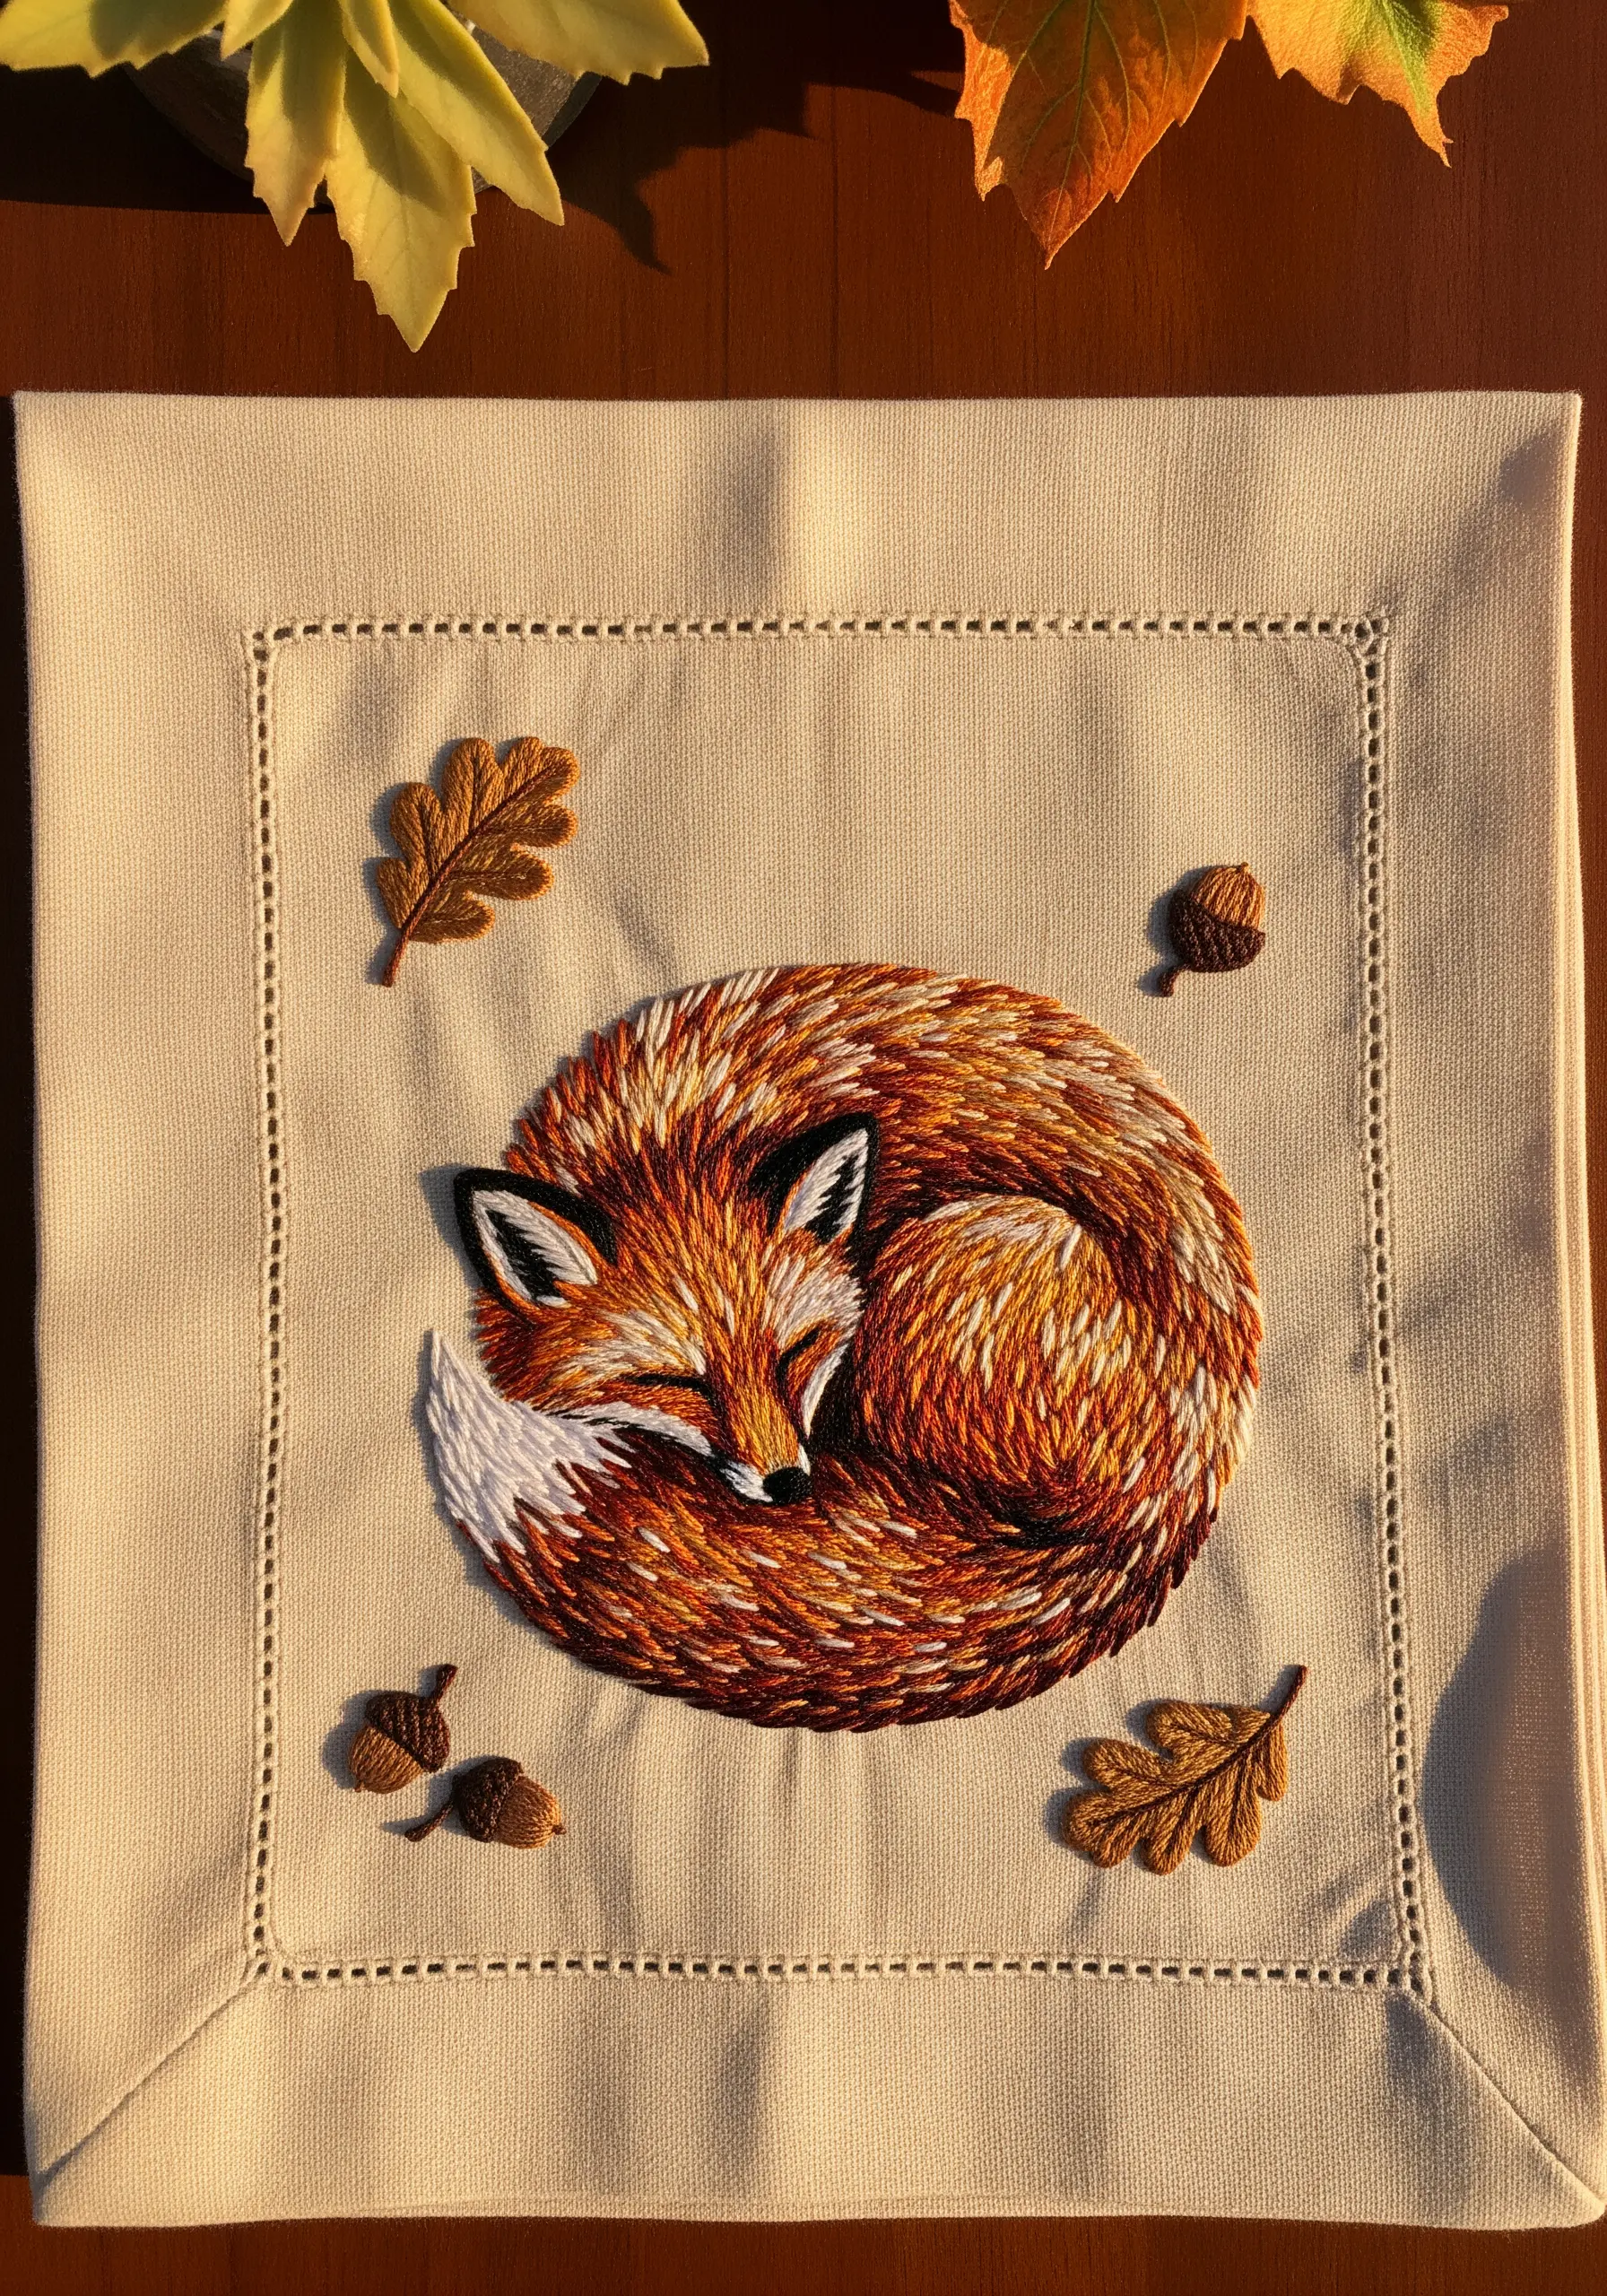
The secret to stitching realistic fur is to treat your needle like a paintbrush, laying down stitches that follow the natural direction of hair growth.
For the sleeping fox, use long-and-short stitches that curve around its body, creating a sense of form and movement.
Blend several shades of rust, orange, and cream within each section, using single strands of floss to achieve a soft, nuanced gradient.
This meticulous technique transforms a flat design into a textured, lifelike portrait.
12. Achieve a Baked Crust Effect with Color Blending
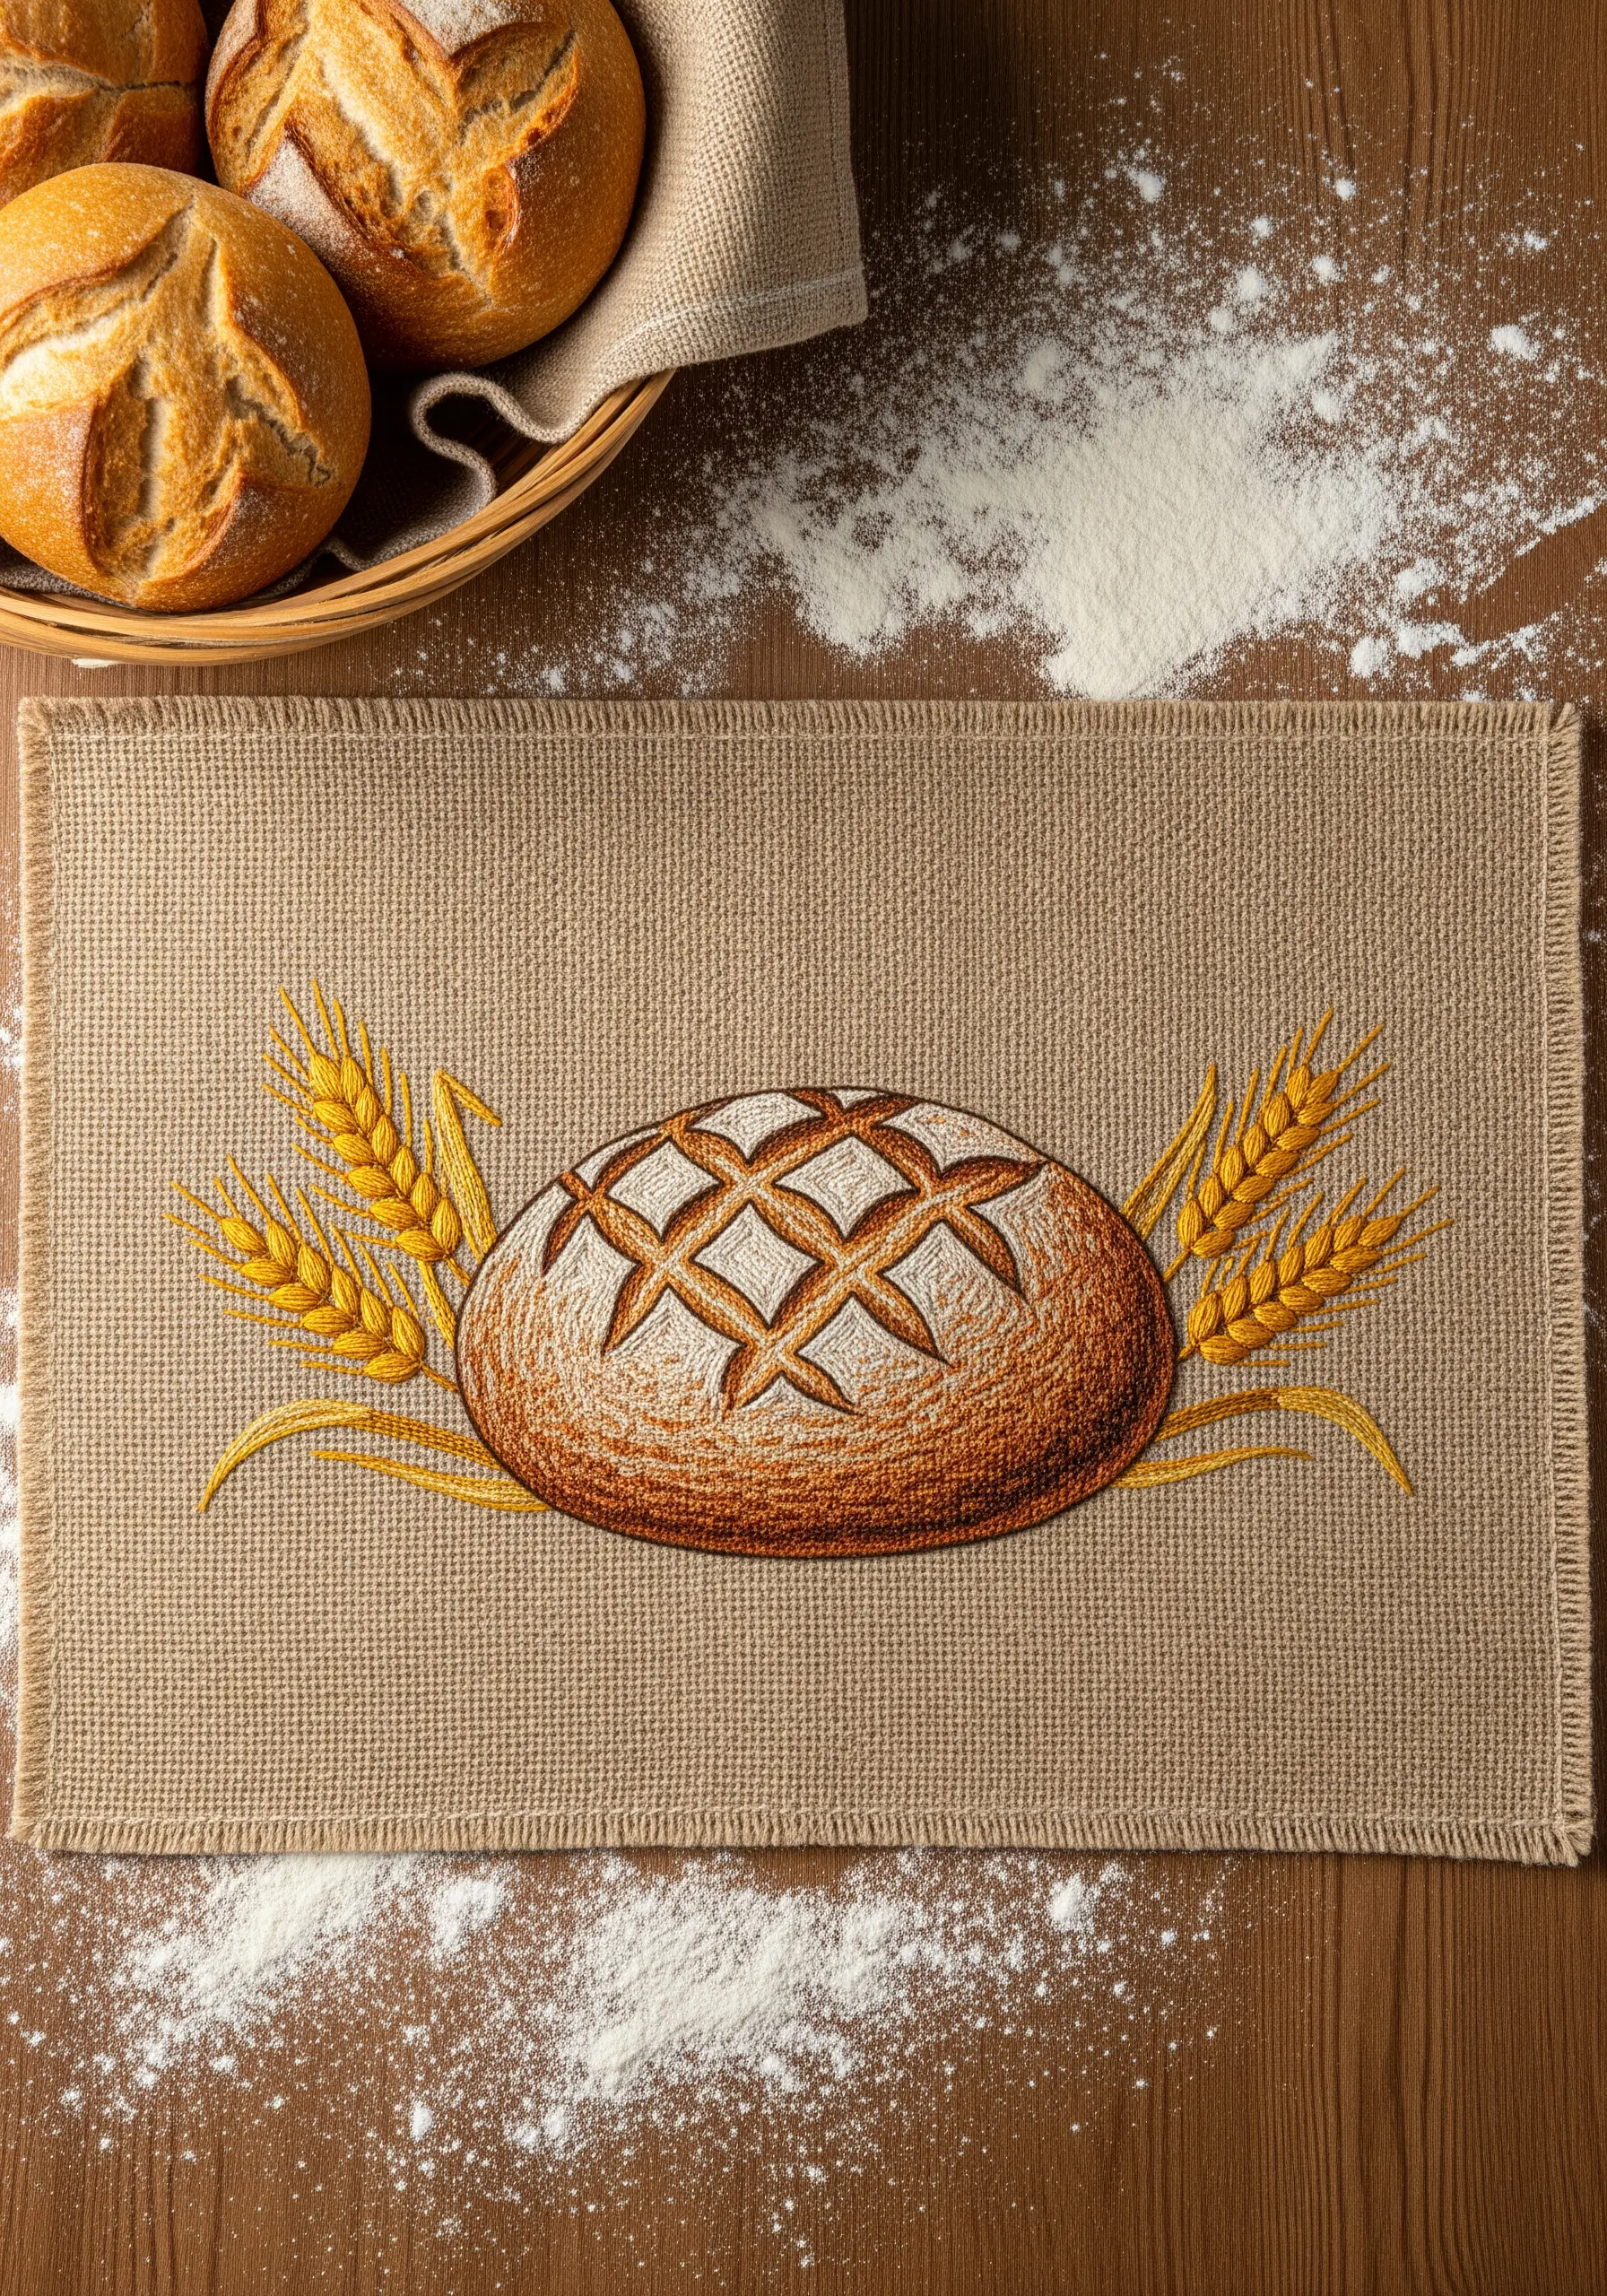
To give your embroidered bread a convincing, oven-baked appearance, select a palette of at least four shades of brown and gold.
Fill the loaf using long-and-short stitch, concentrating the darkest browns around the bottom and outer edges and blending into lighter golden tones toward the center top.
This mimics where a real loaf would brown most in the oven.
Use a darker, contrasting backstitch for the score marks on top to create depth and definition.
13. Frame Appliqué with a Bold Satin Stitch Border
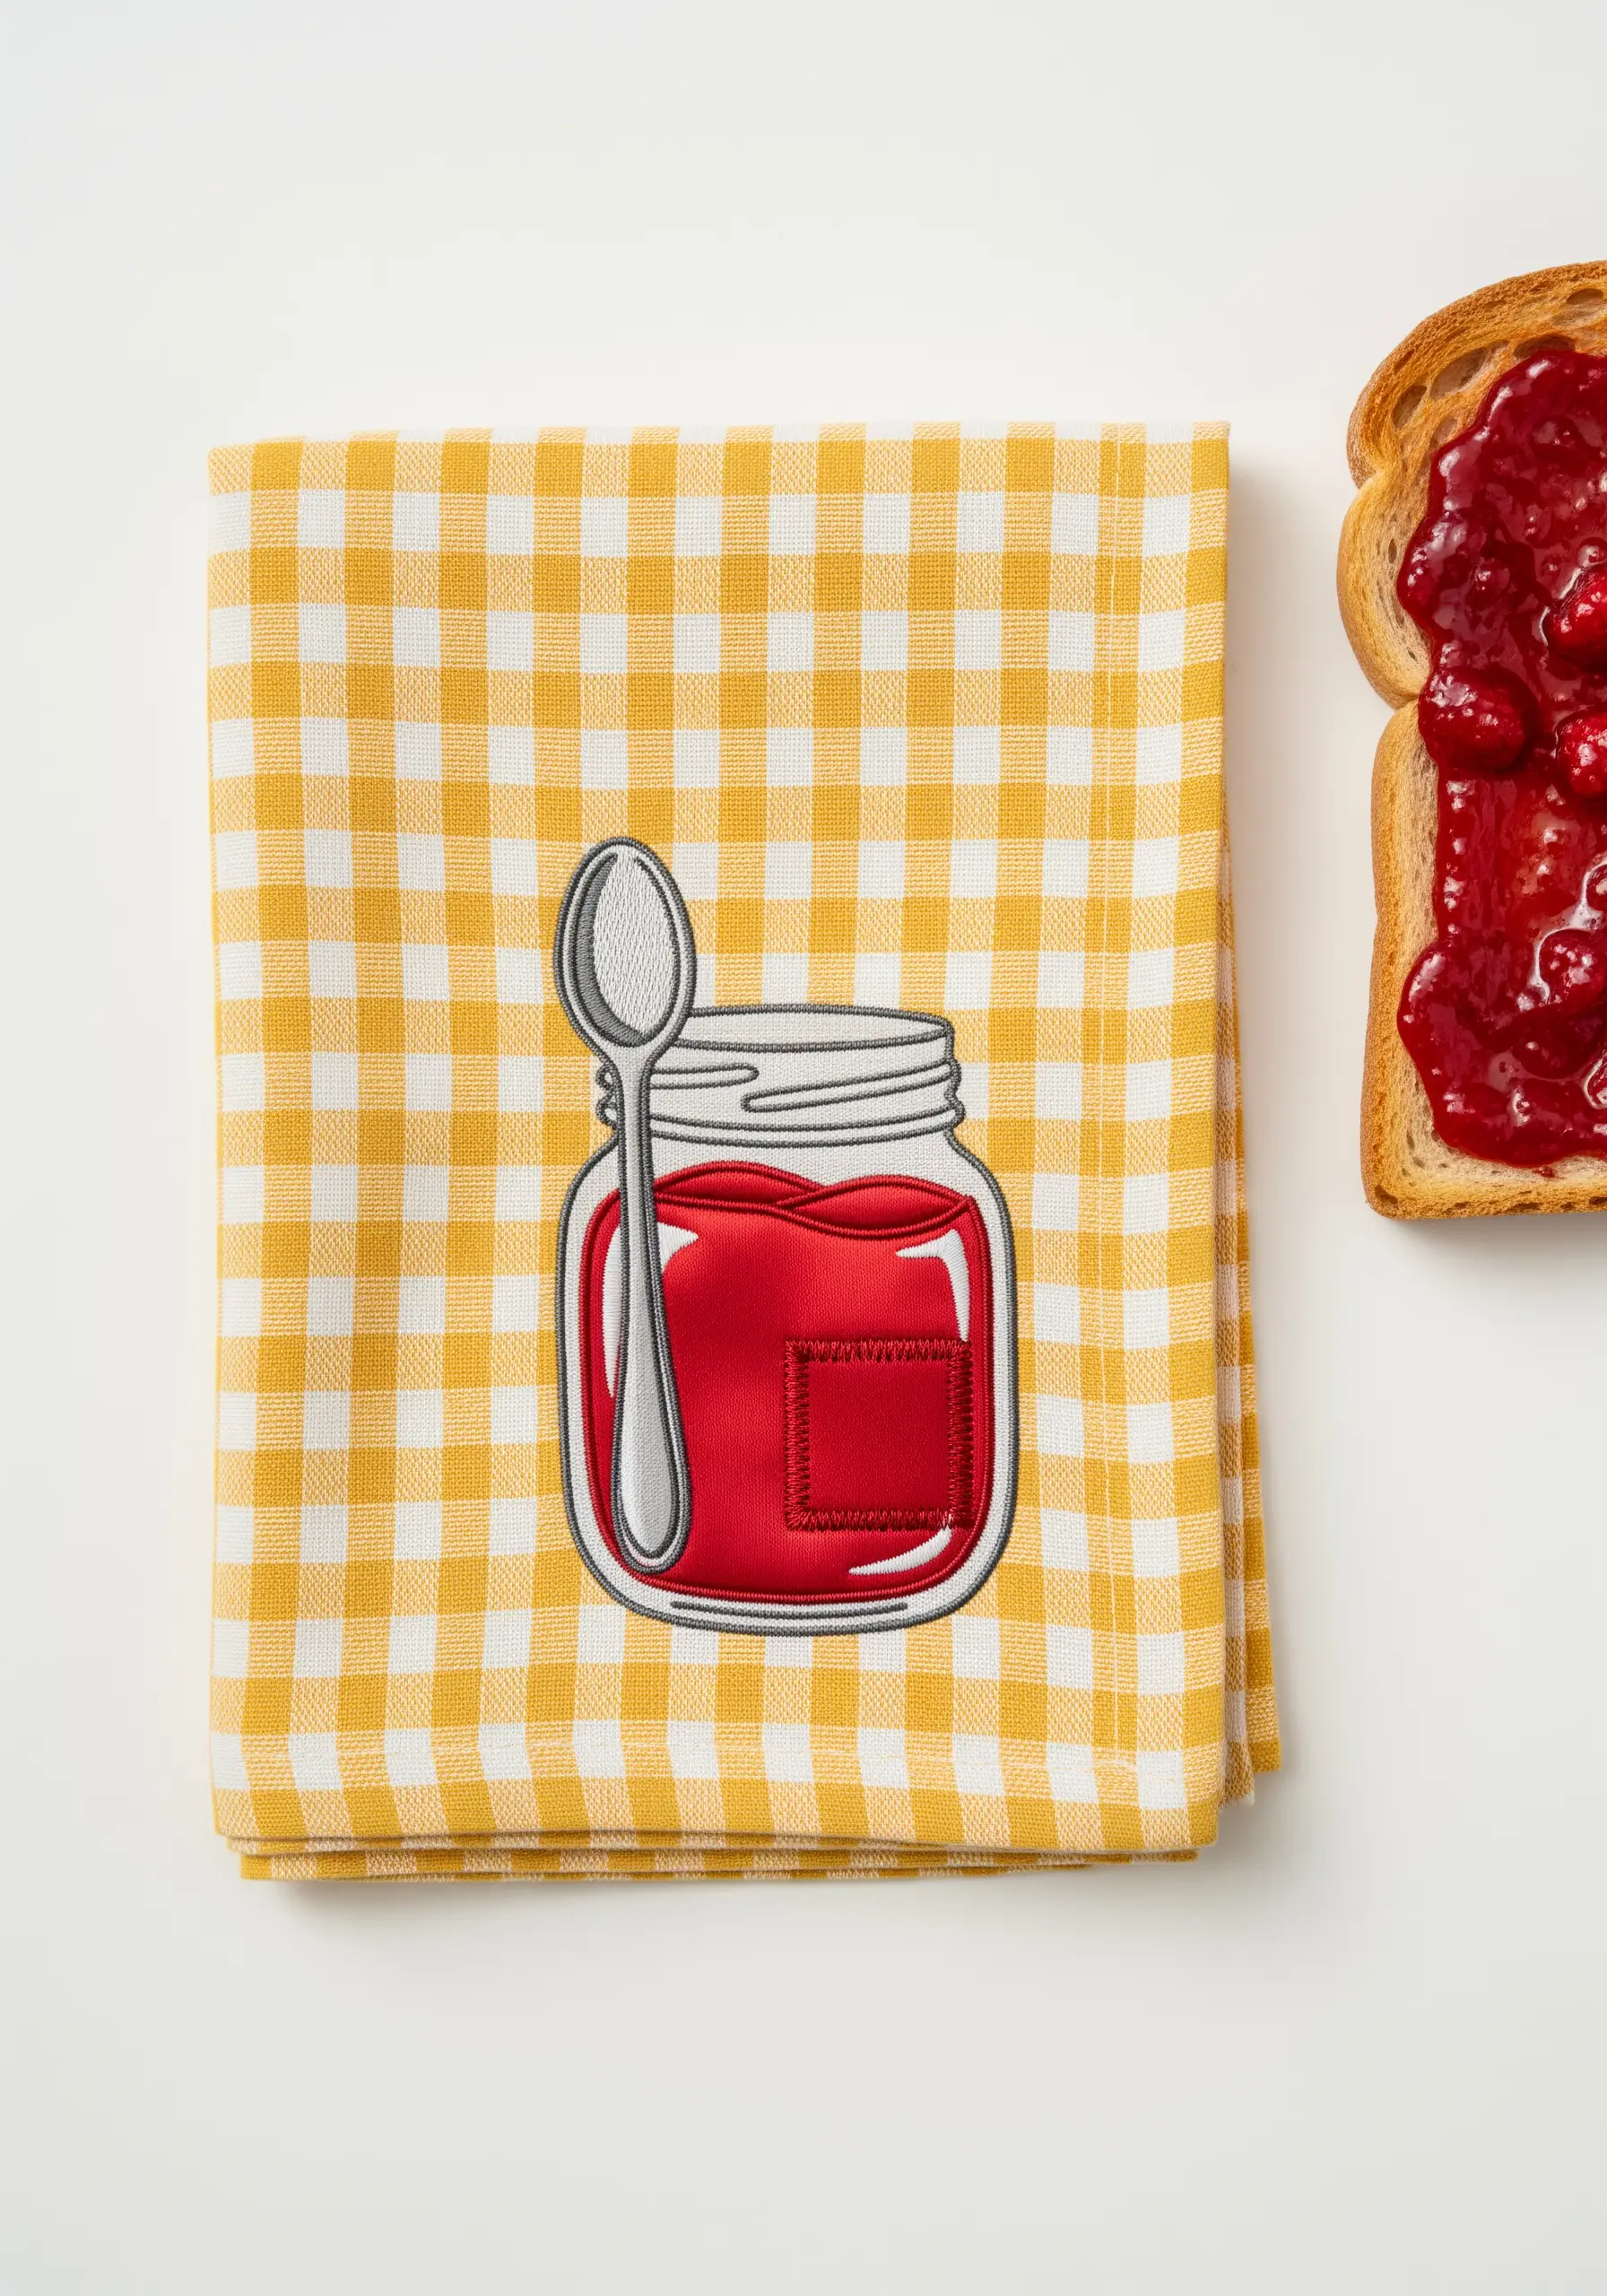
Make a simple appliqué piece look incredibly polished by encasing it in a thick, perfect satin stitch outline.
After securing your red fabric for the jam, use a dark gray or black thread to stitch a border that slightly overlaps the fabric’s edge.
This not only hides any potential fraying but also creates a clean, graphic line that makes the color pop, especially against a patterned background like gingham.
The technique turns a simple shape into a bold, intentional design element.
14. Build a Blossoming Tree with Raised Knotted Stitches
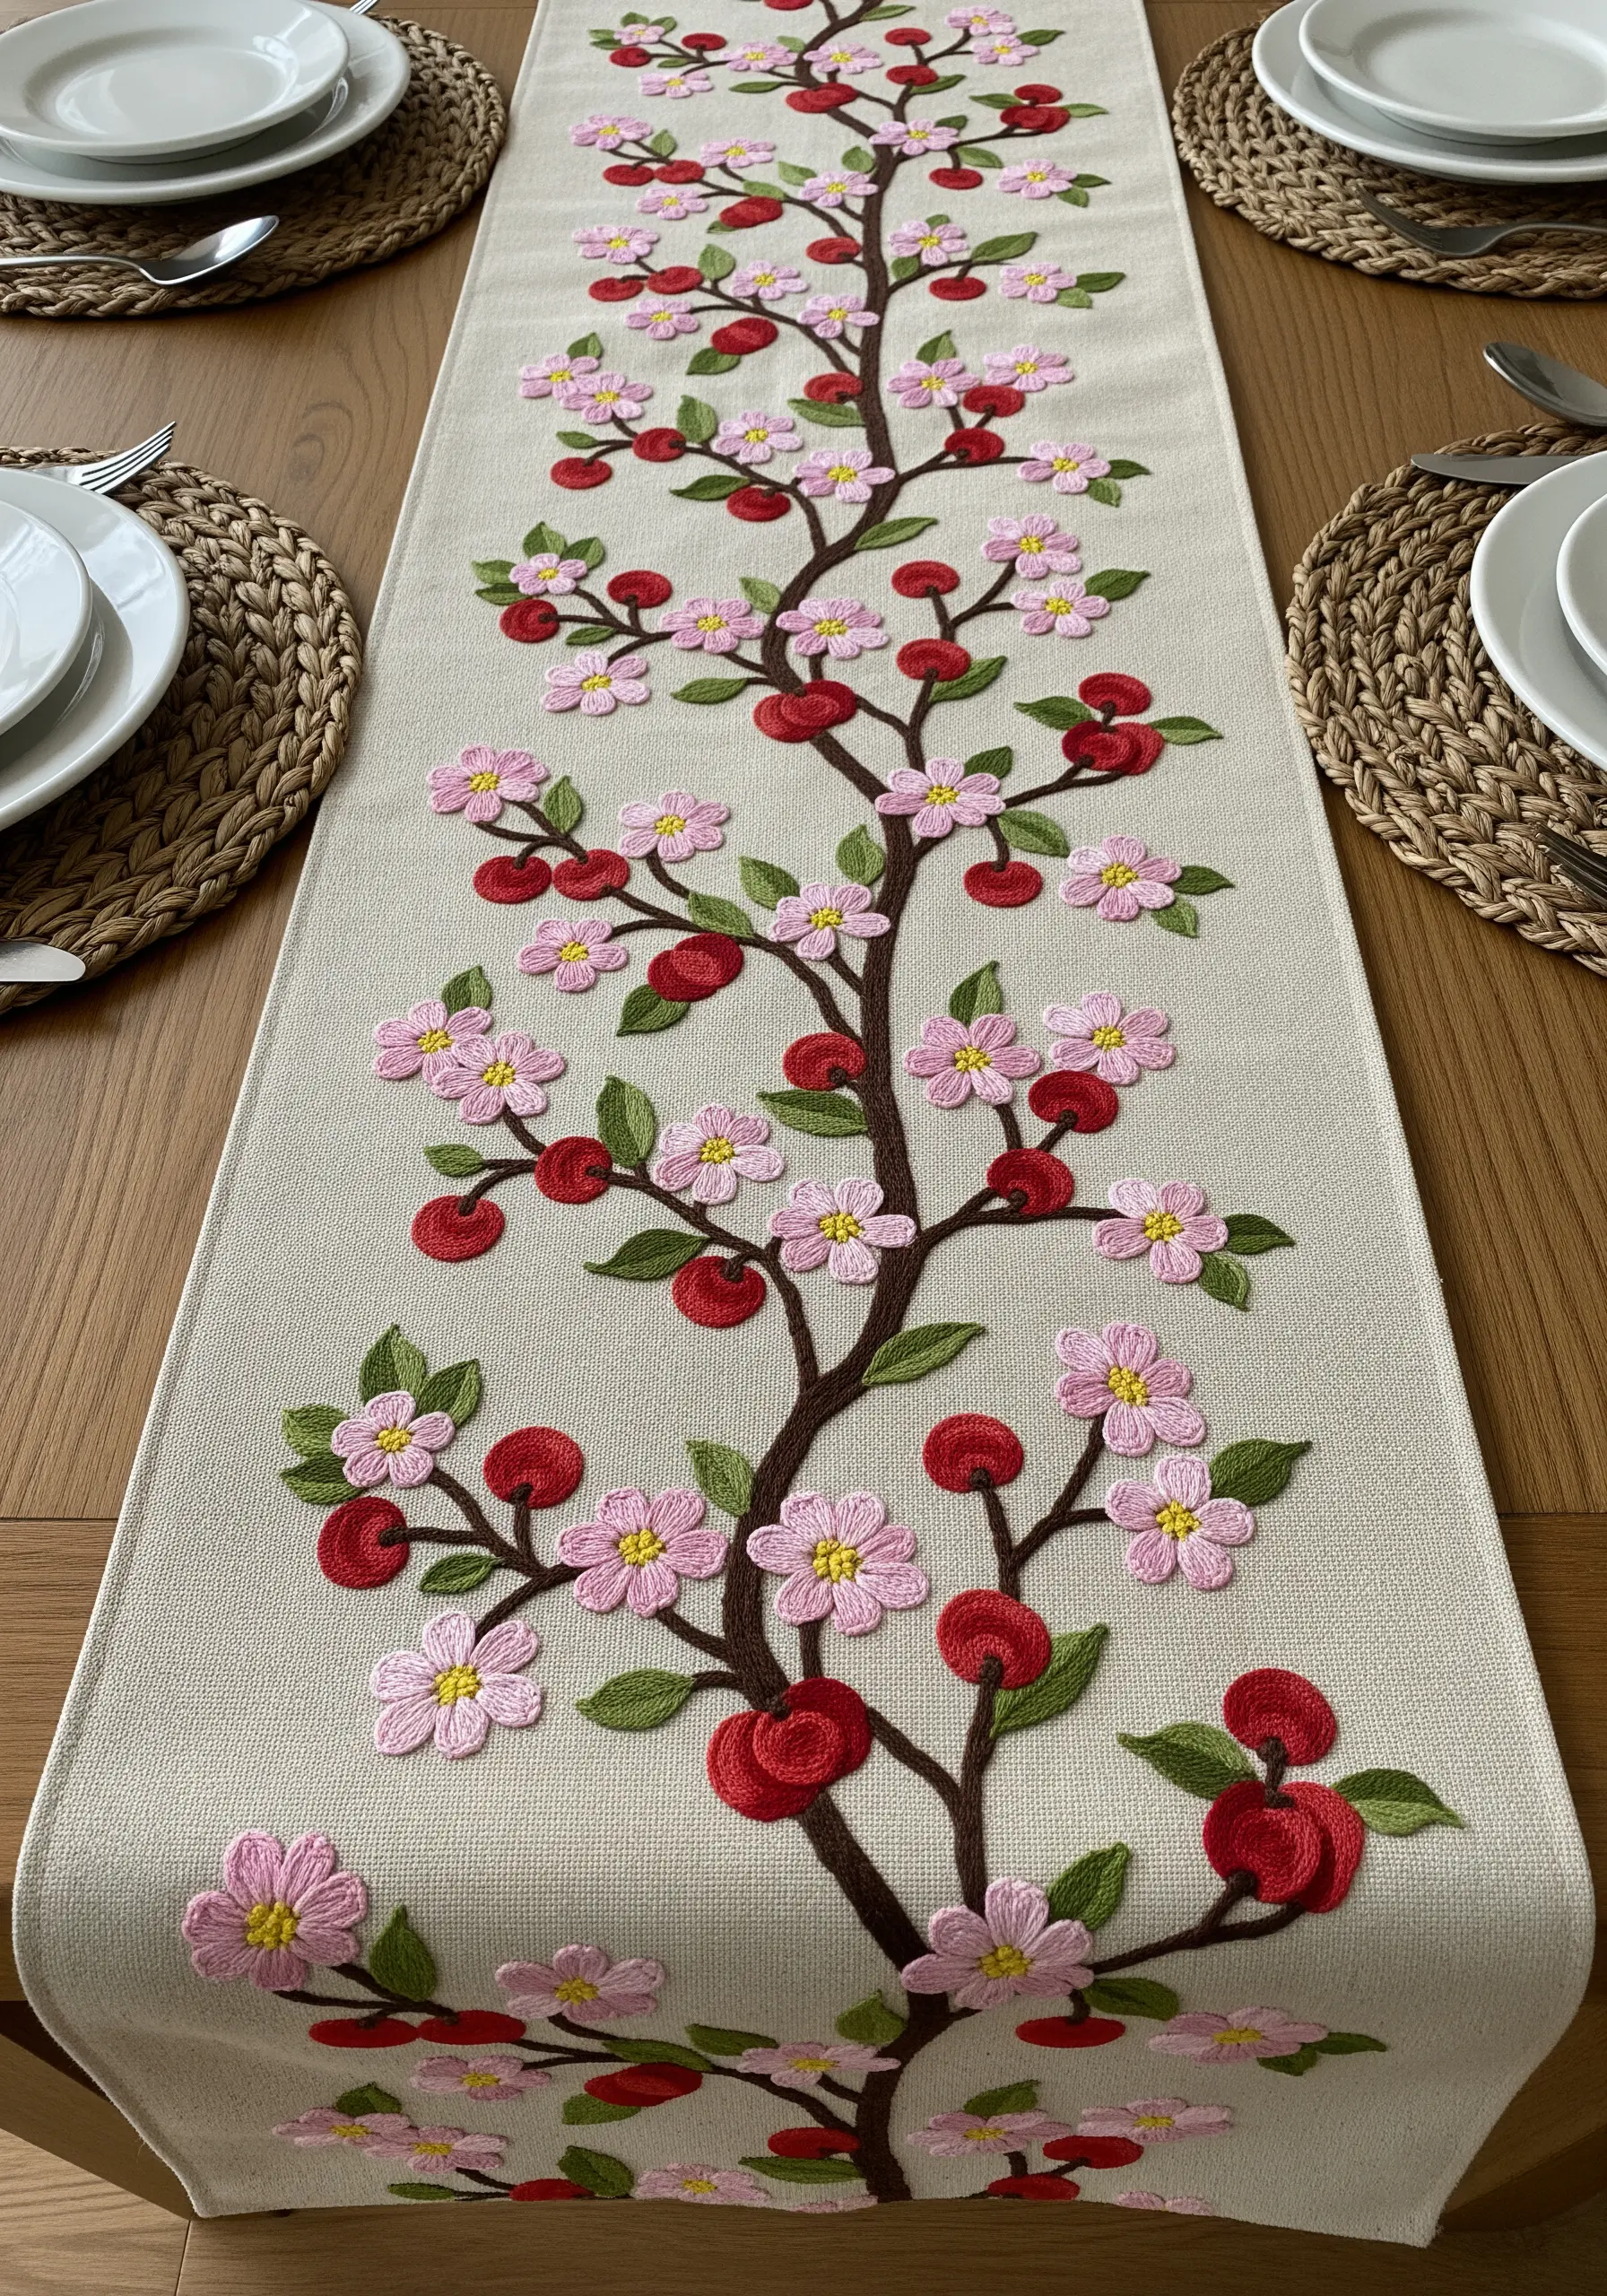
For motifs like cherry blossoms, create a lush, textured canopy using raised knots.
Instead of flat satin stitch, fill each flower with five to six French knots or Colonial knots clustered together.
This technique gives the blossoms a fluffy, three-dimensional quality that stands out from the fabric.
Use a whipped backstitch for the tree branches; this covers the backstitch with an overwrapping thread, resulting in a thicker, smoother line that provides a solid foundation for the delicate flowers.
15. Create Prickly Texture with Layered Straight Stitches
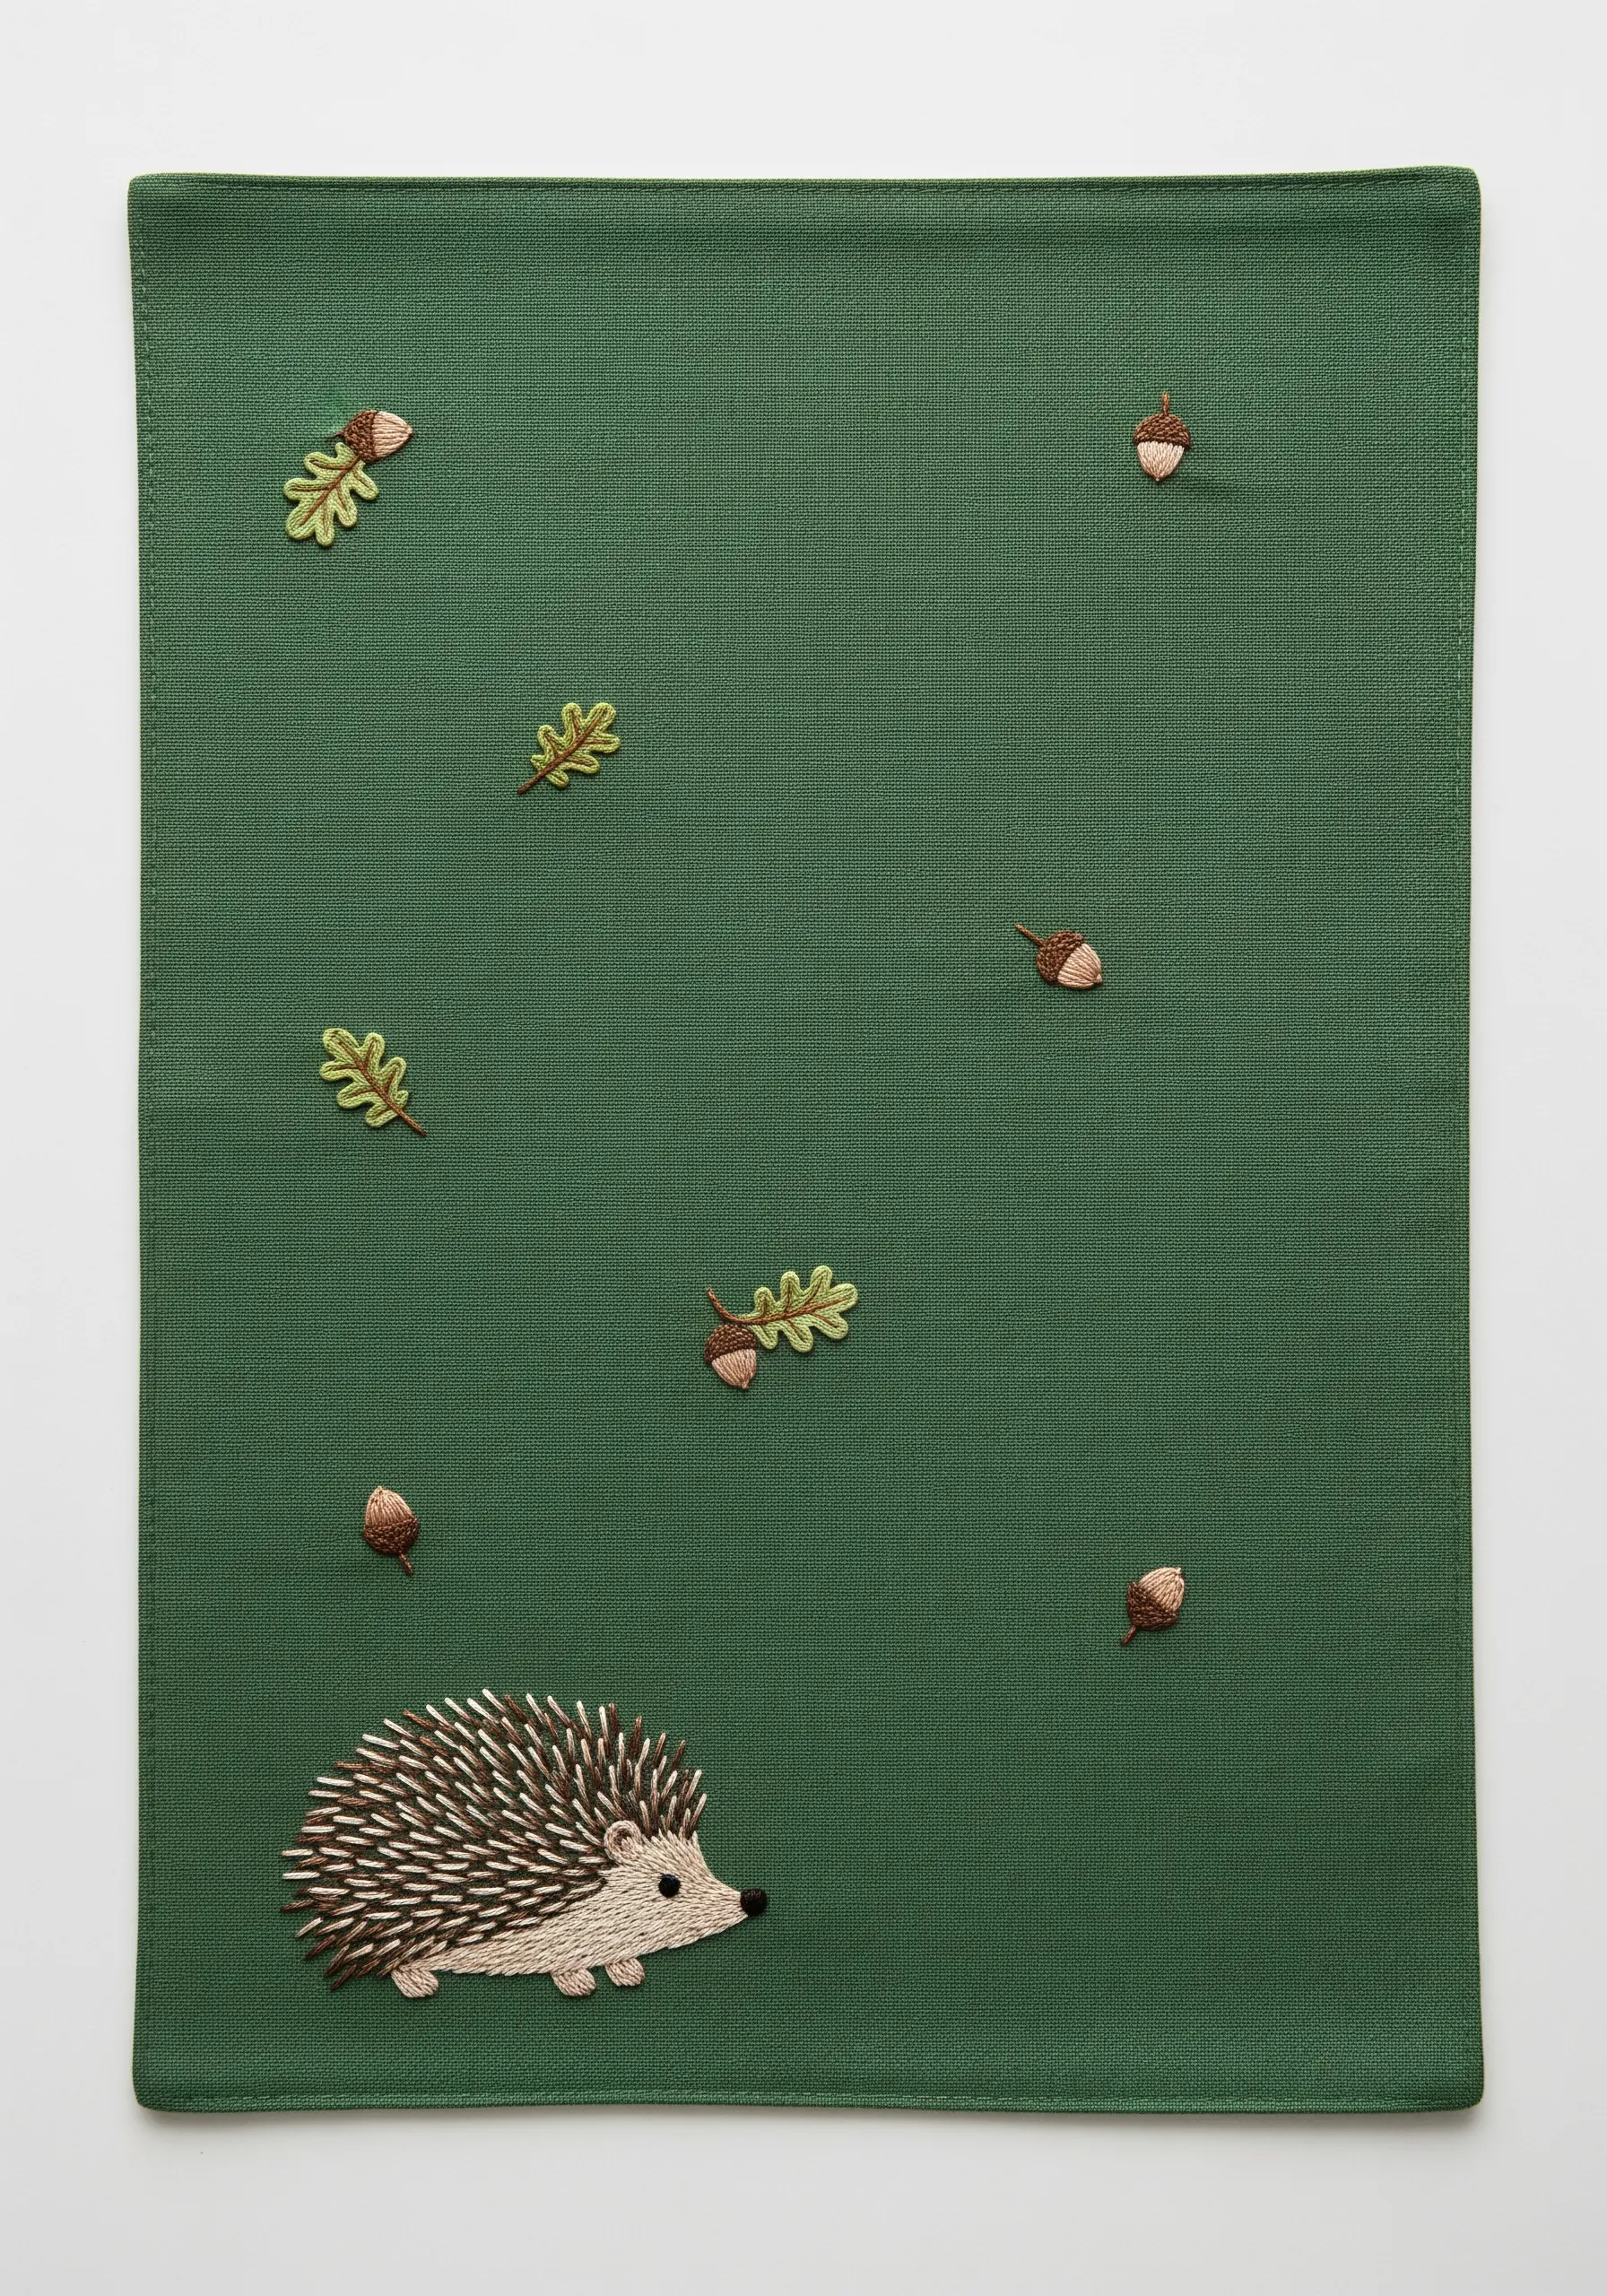
Capture a hedgehog’s signature quills by layering straight stitches in various lengths and colors.
Start with a base layer of stitches in a dark brown, then add subsequent layers in lighter browns, tans, and creams.
Angle the stitches slightly differently in each layer to build up a dense, varied texture that looks sharp and realistic.
This simple stitch, when layered thoughtfully, is incredibly effective for creating spiky or furry effects. For more woodland creatures, try these hedgehog and squirrel embroidery patterns.
16. Replicate a Sunflower Center with Dense French Knots
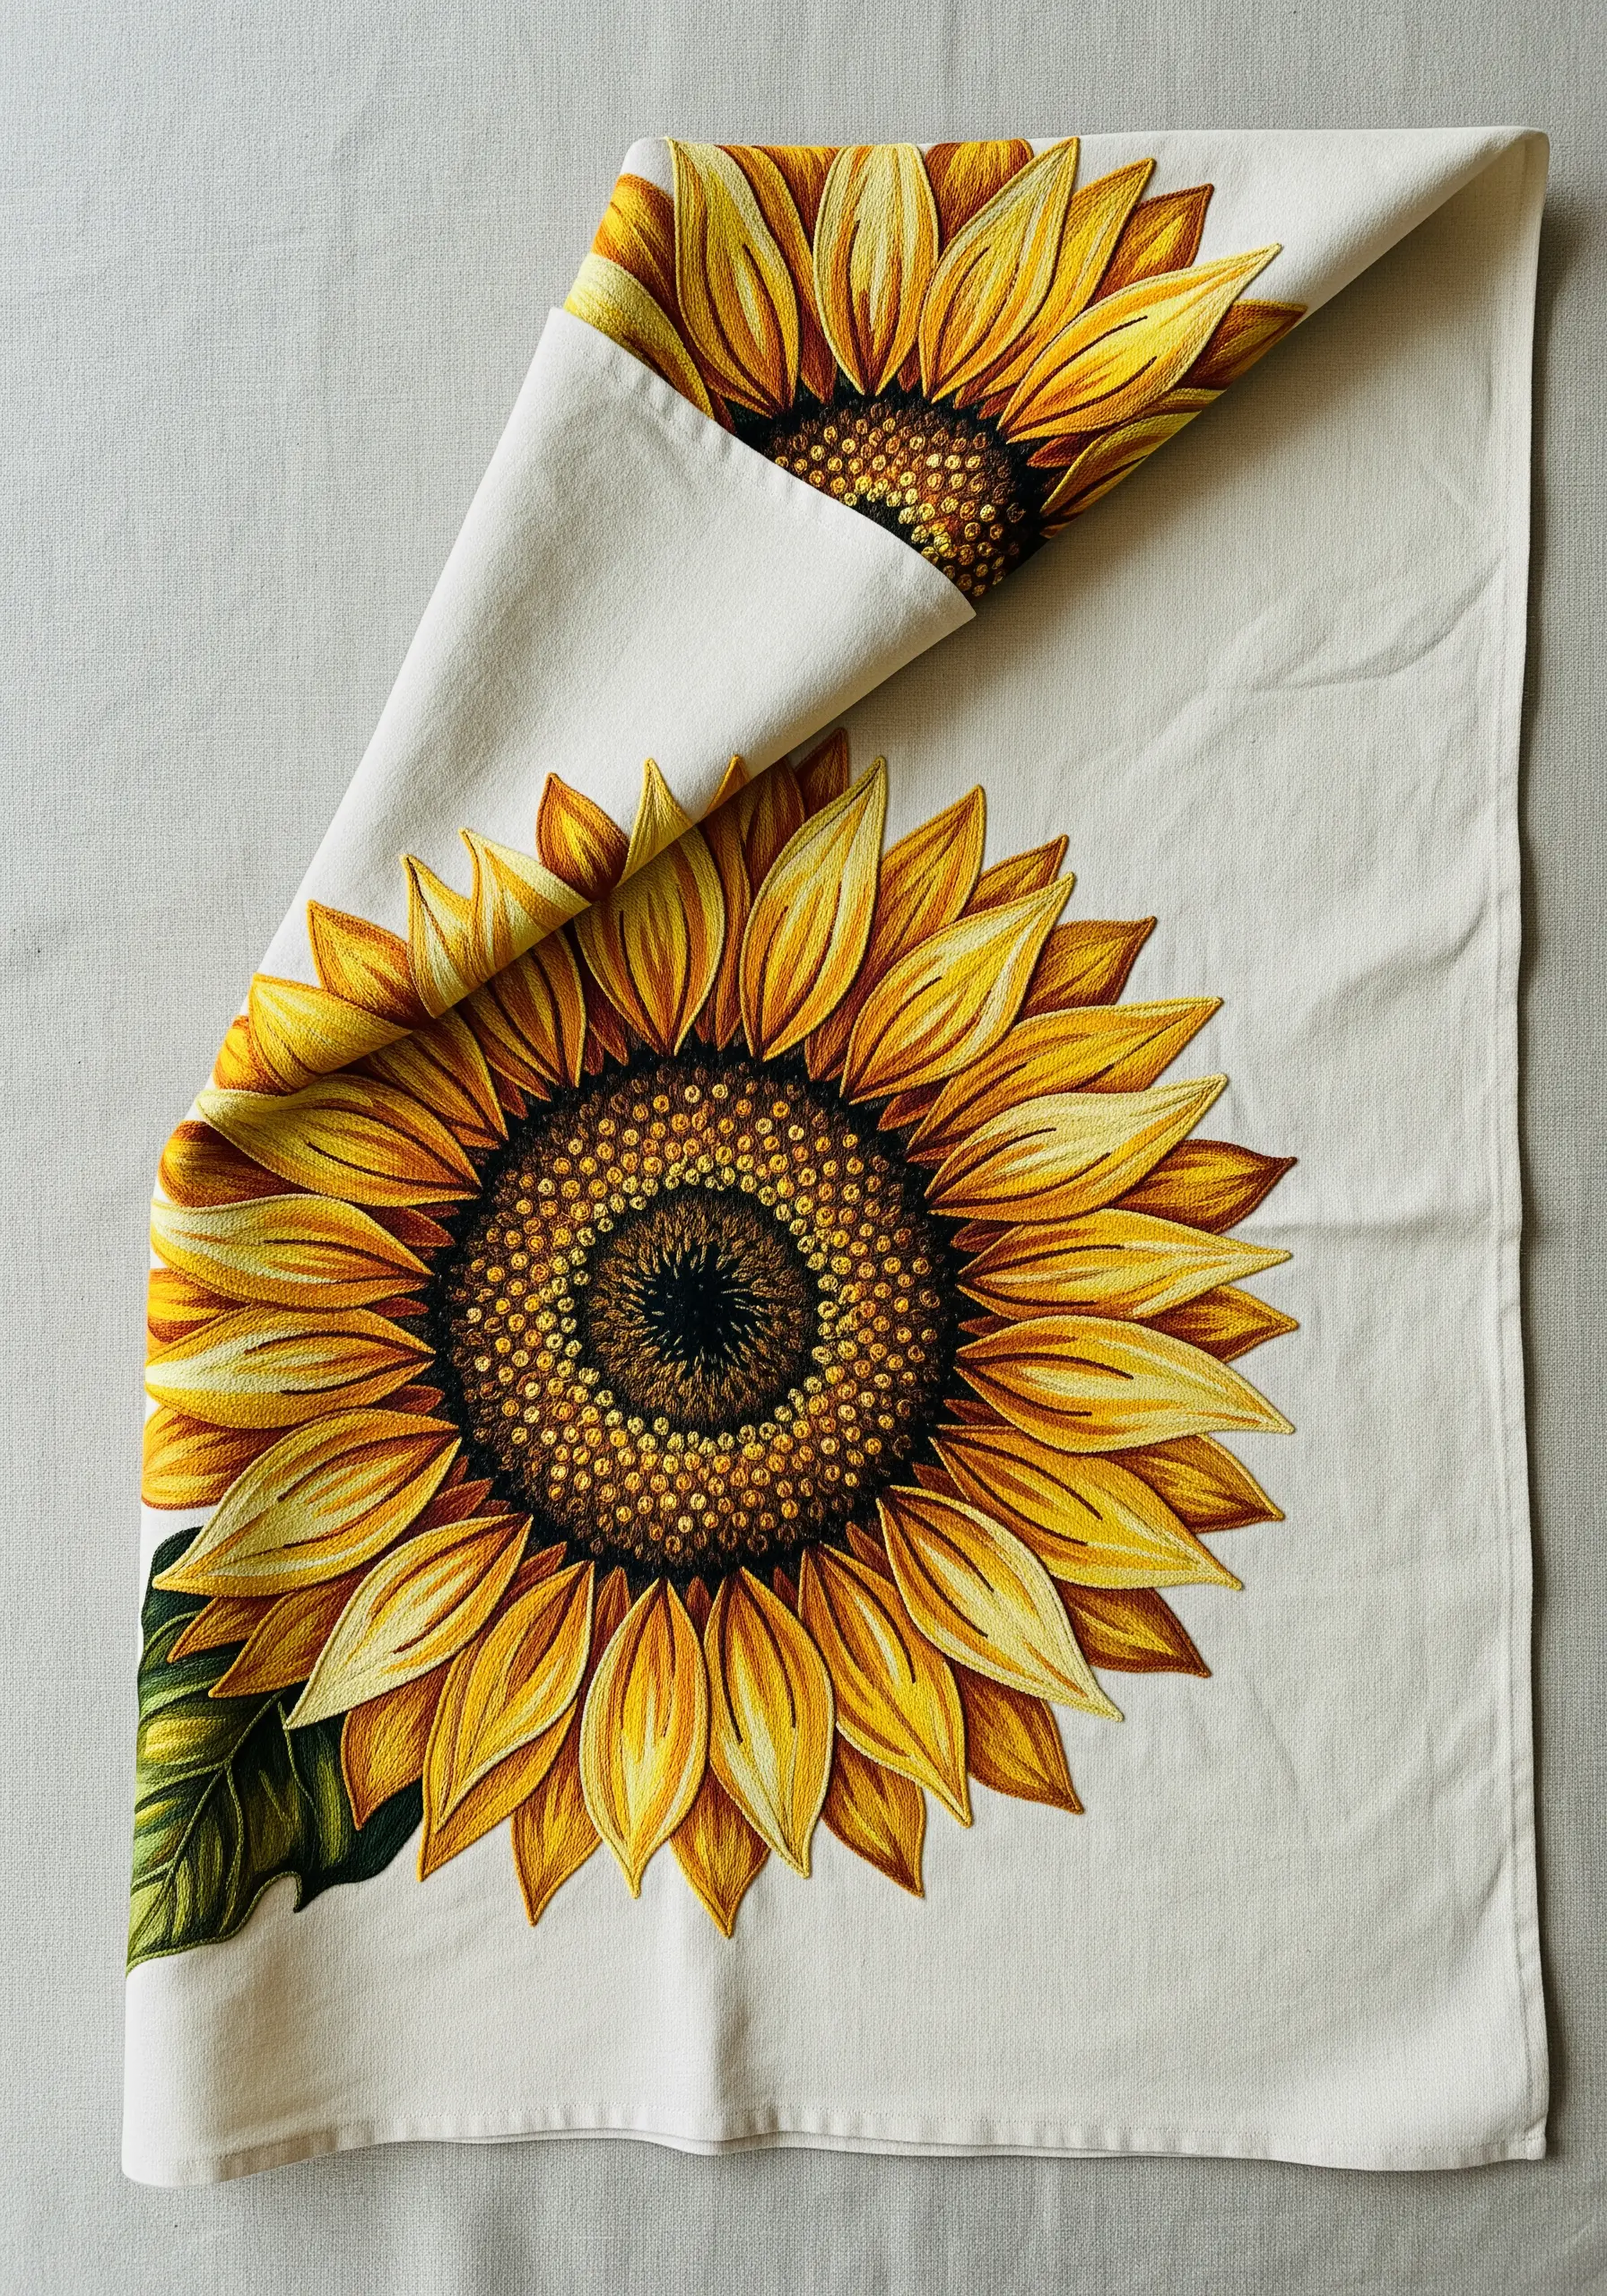
The most defining feature of a sunflower is its seed-packed center, which you can replicate perfectly with a dense field of French knots.
Use three to four different shades of dark brown, black, and deep gold thread to add variation and depth.
Pack the knots tightly together, varying the colors randomly to create a rich, mottled texture that mimics a real sunflower head.
This textural center provides a beautiful contrast to the smooth, thread-painted petals.
17. Suggest Movement with Open, Airy Stitches
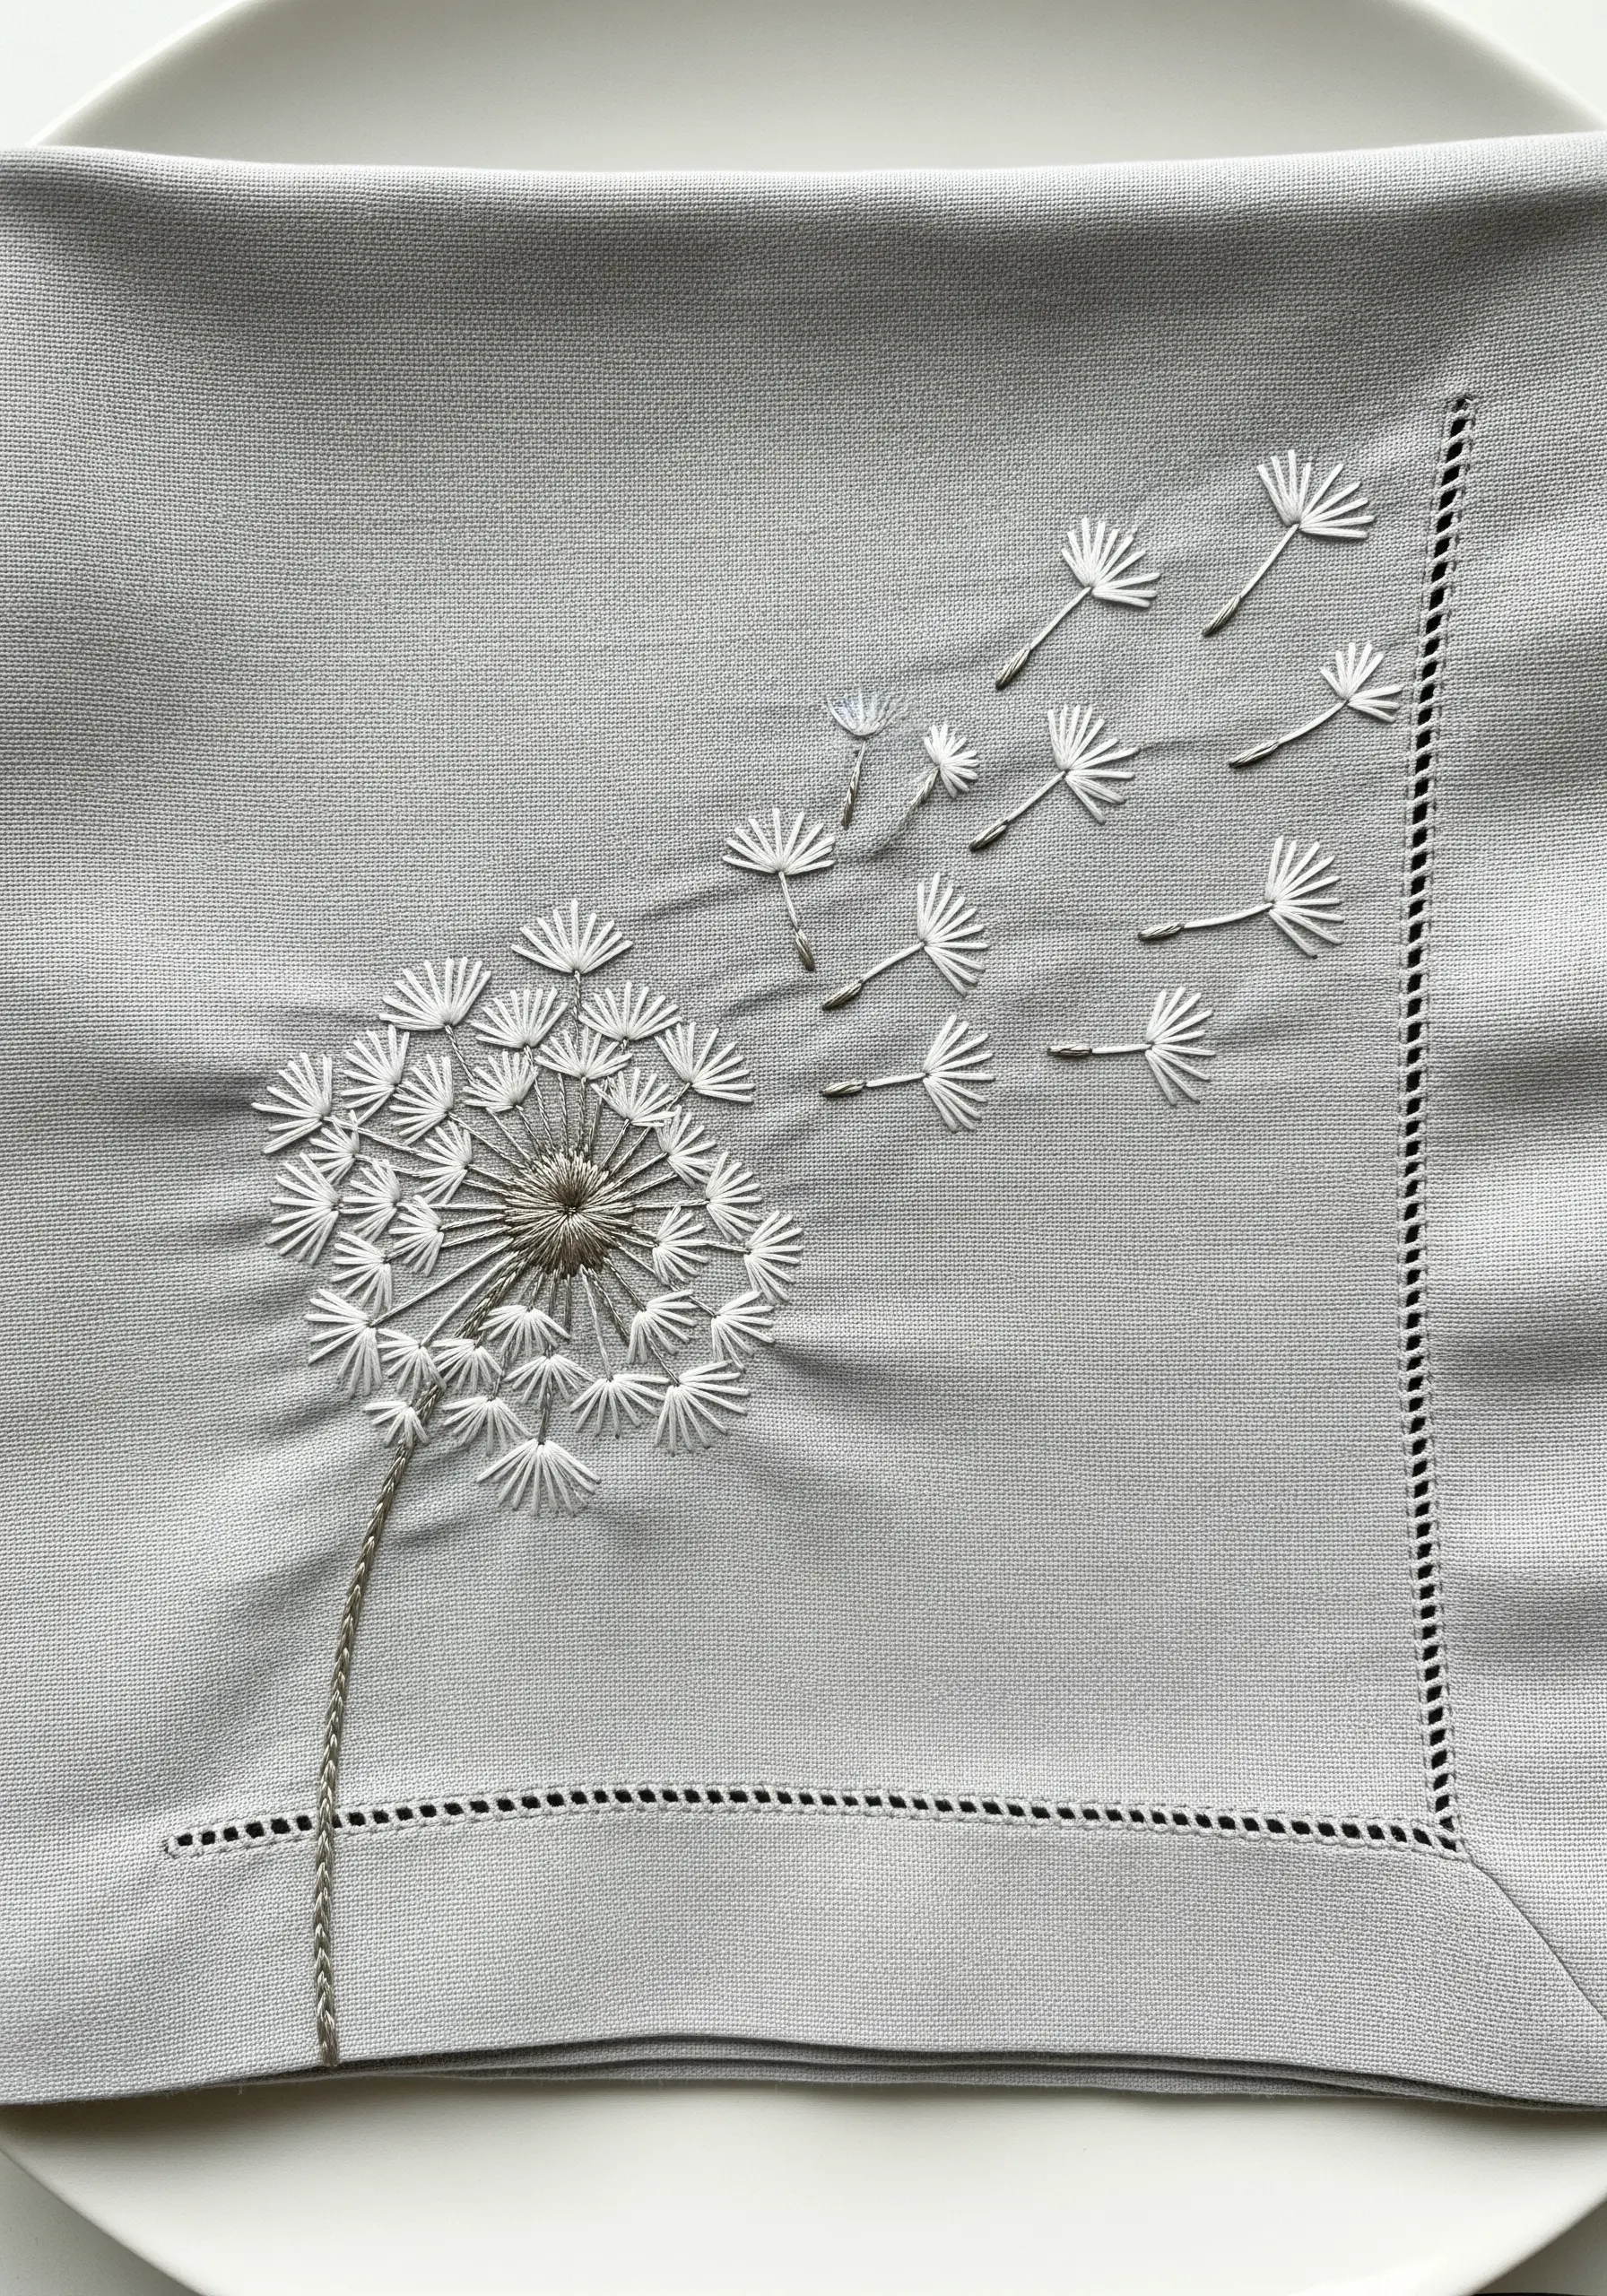
To capture the feeling of dandelion seeds floating on the wind, choose stitches that emphasize lightness and negative space.
Create each drifting seed using just two stitches: a single lazy daisy stitch for the parachute and a short straight stitch for the stem.
Space them out irregularly across the fabric to create a sense of gentle motion.
The main dandelion head can be stitched as a series of straight stitches radiating from a central point, leaving small gaps to maintain that airy quality.


