

You have the threads, the hoops, and the patience for stitching. But sometimes, you finish a piece and feel that something is missing—that final touch of polish that turns a project into art. You might wonder how to make your work look more intentional, more cohesive, more…you.
The secret isn’t in mastering hundreds of complex stitches or buying expensive materials. Instead, it lies in the small, deliberate choices you make along the way. It’s about selecting the perfect thread count for a delicate outline, varying your stitch direction to play with light, or arranging your finished hoops in a way that tells a story on your wall.
These mini retro-style ideas are designed to be your guide to those choices. Each one is a small lesson in technique, color theory, or composition, perfectly suited for compact homes and busy lives. Let’s explore how these tiny frames can make a huge impact, helping you stitch with more confidence and create work that truly feels complete.
1. Unify Your Collection with a Cohesive Palette
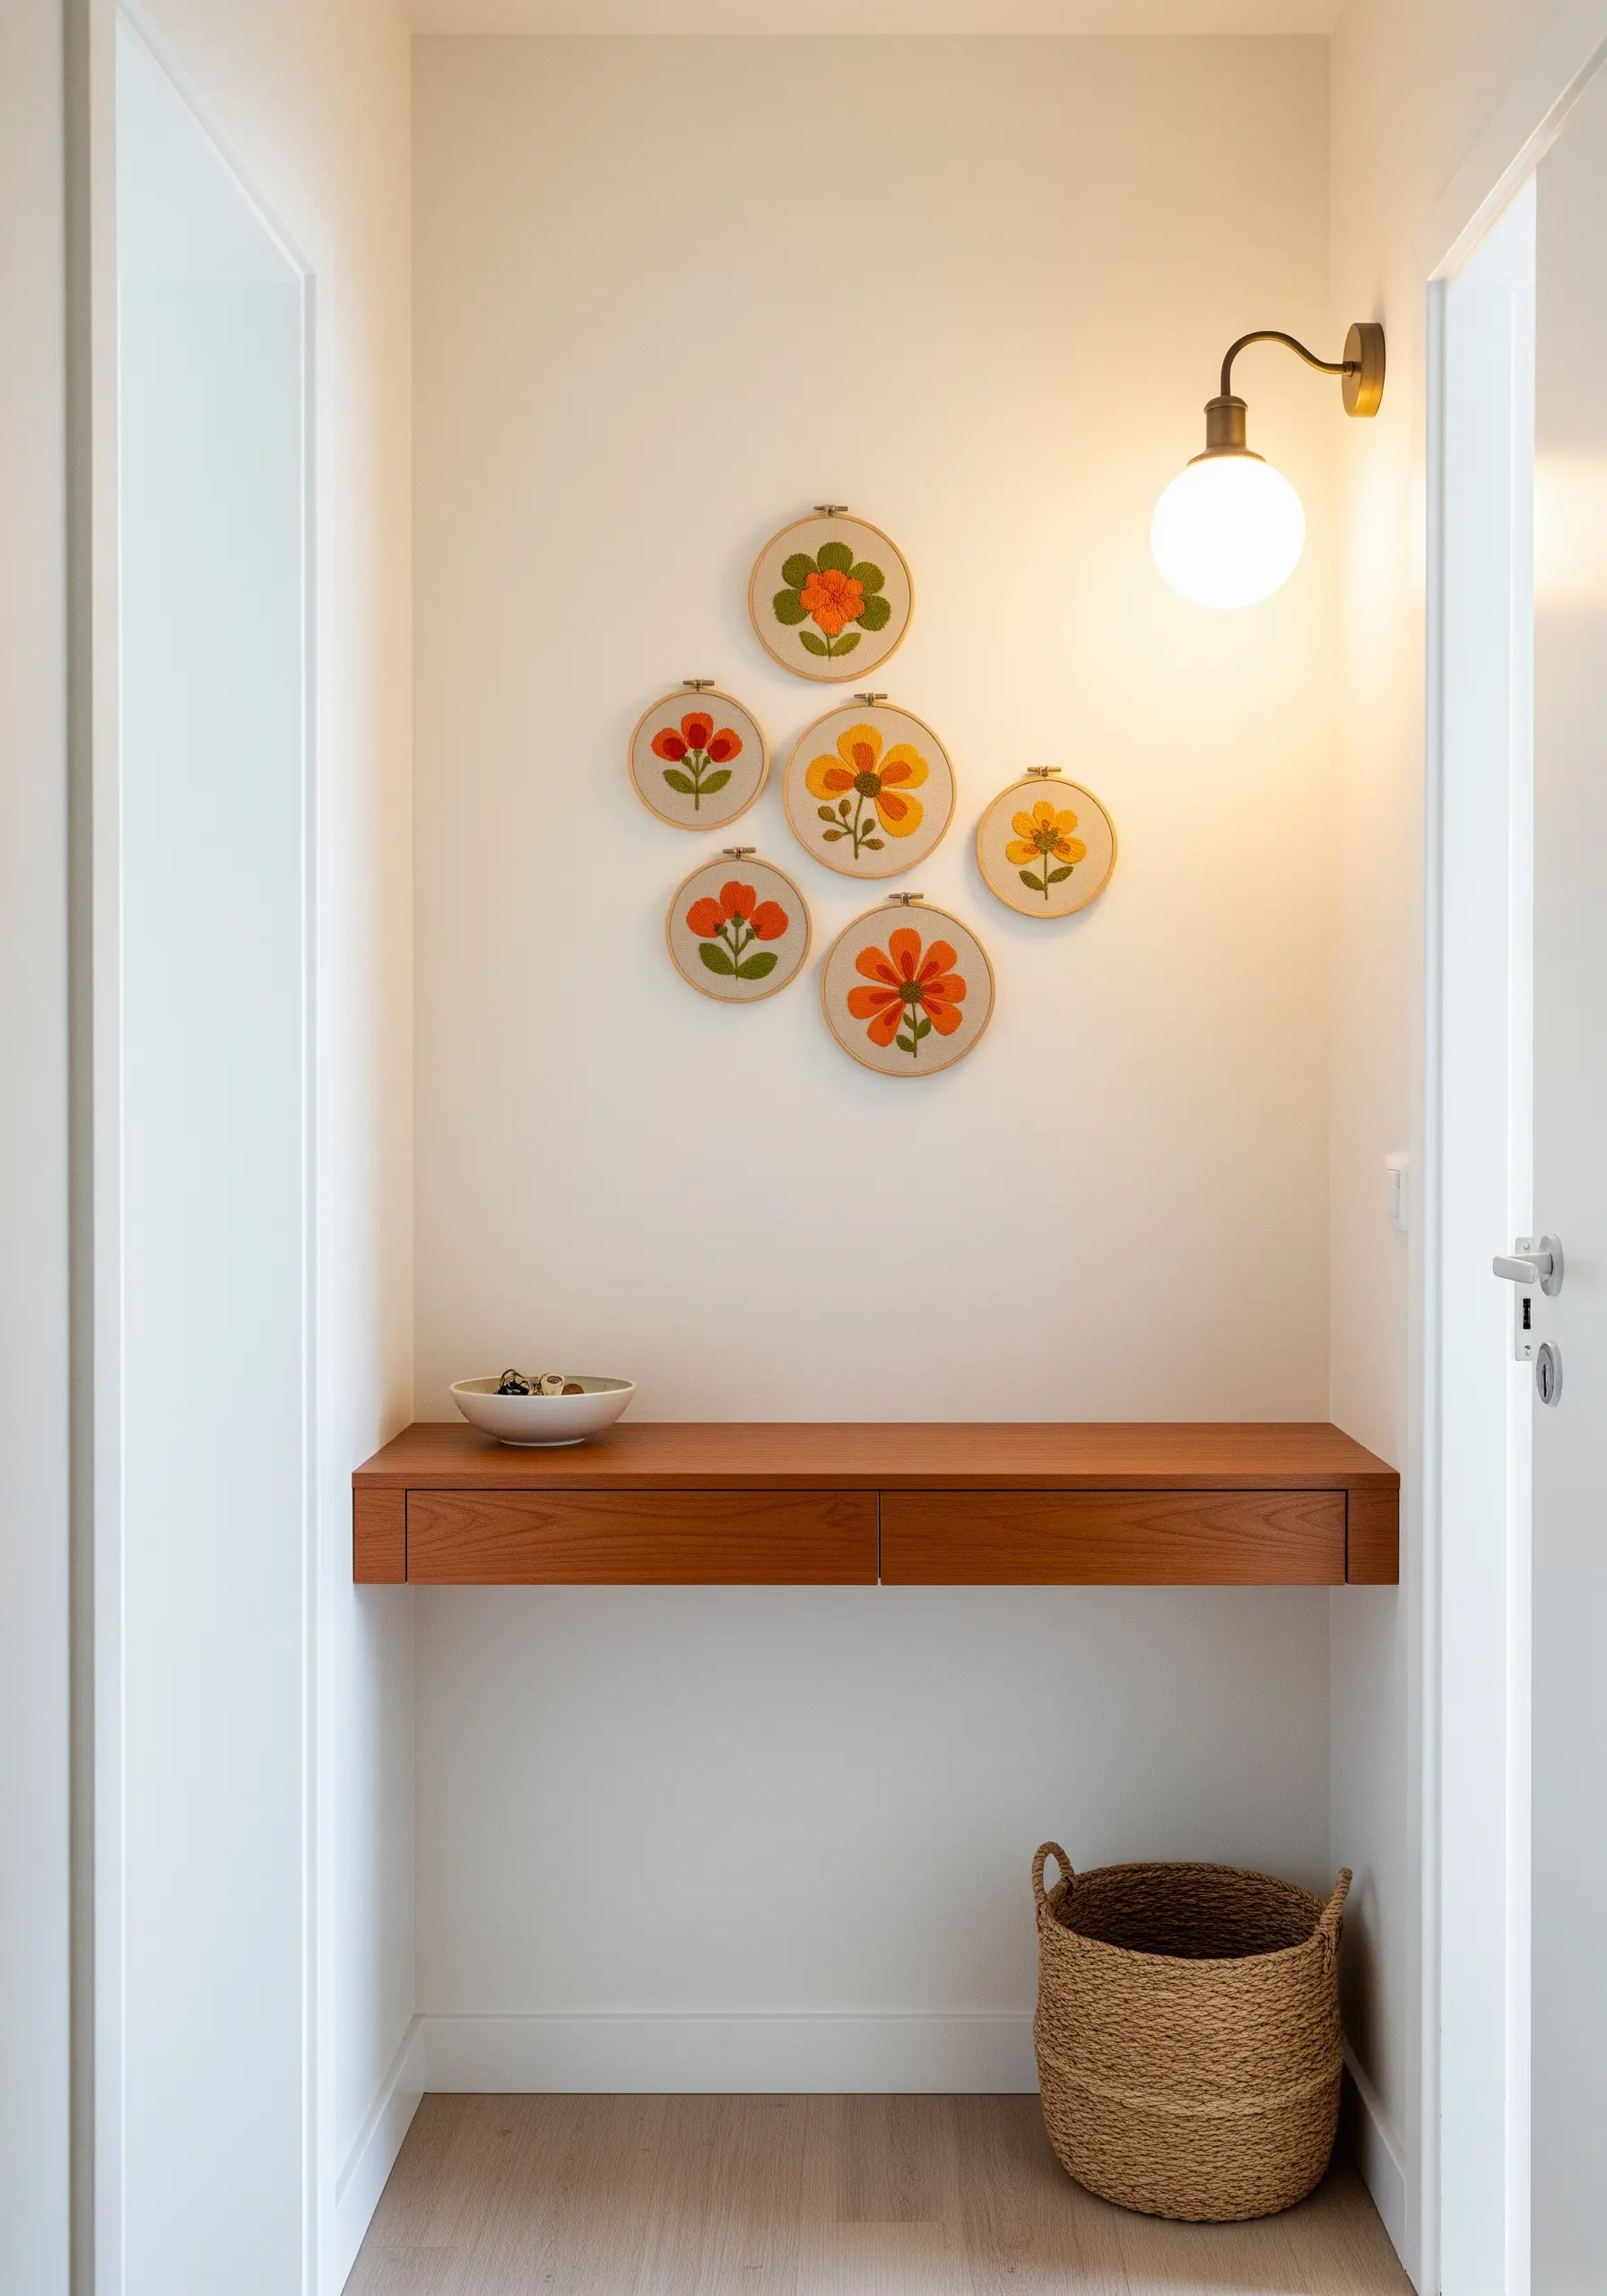
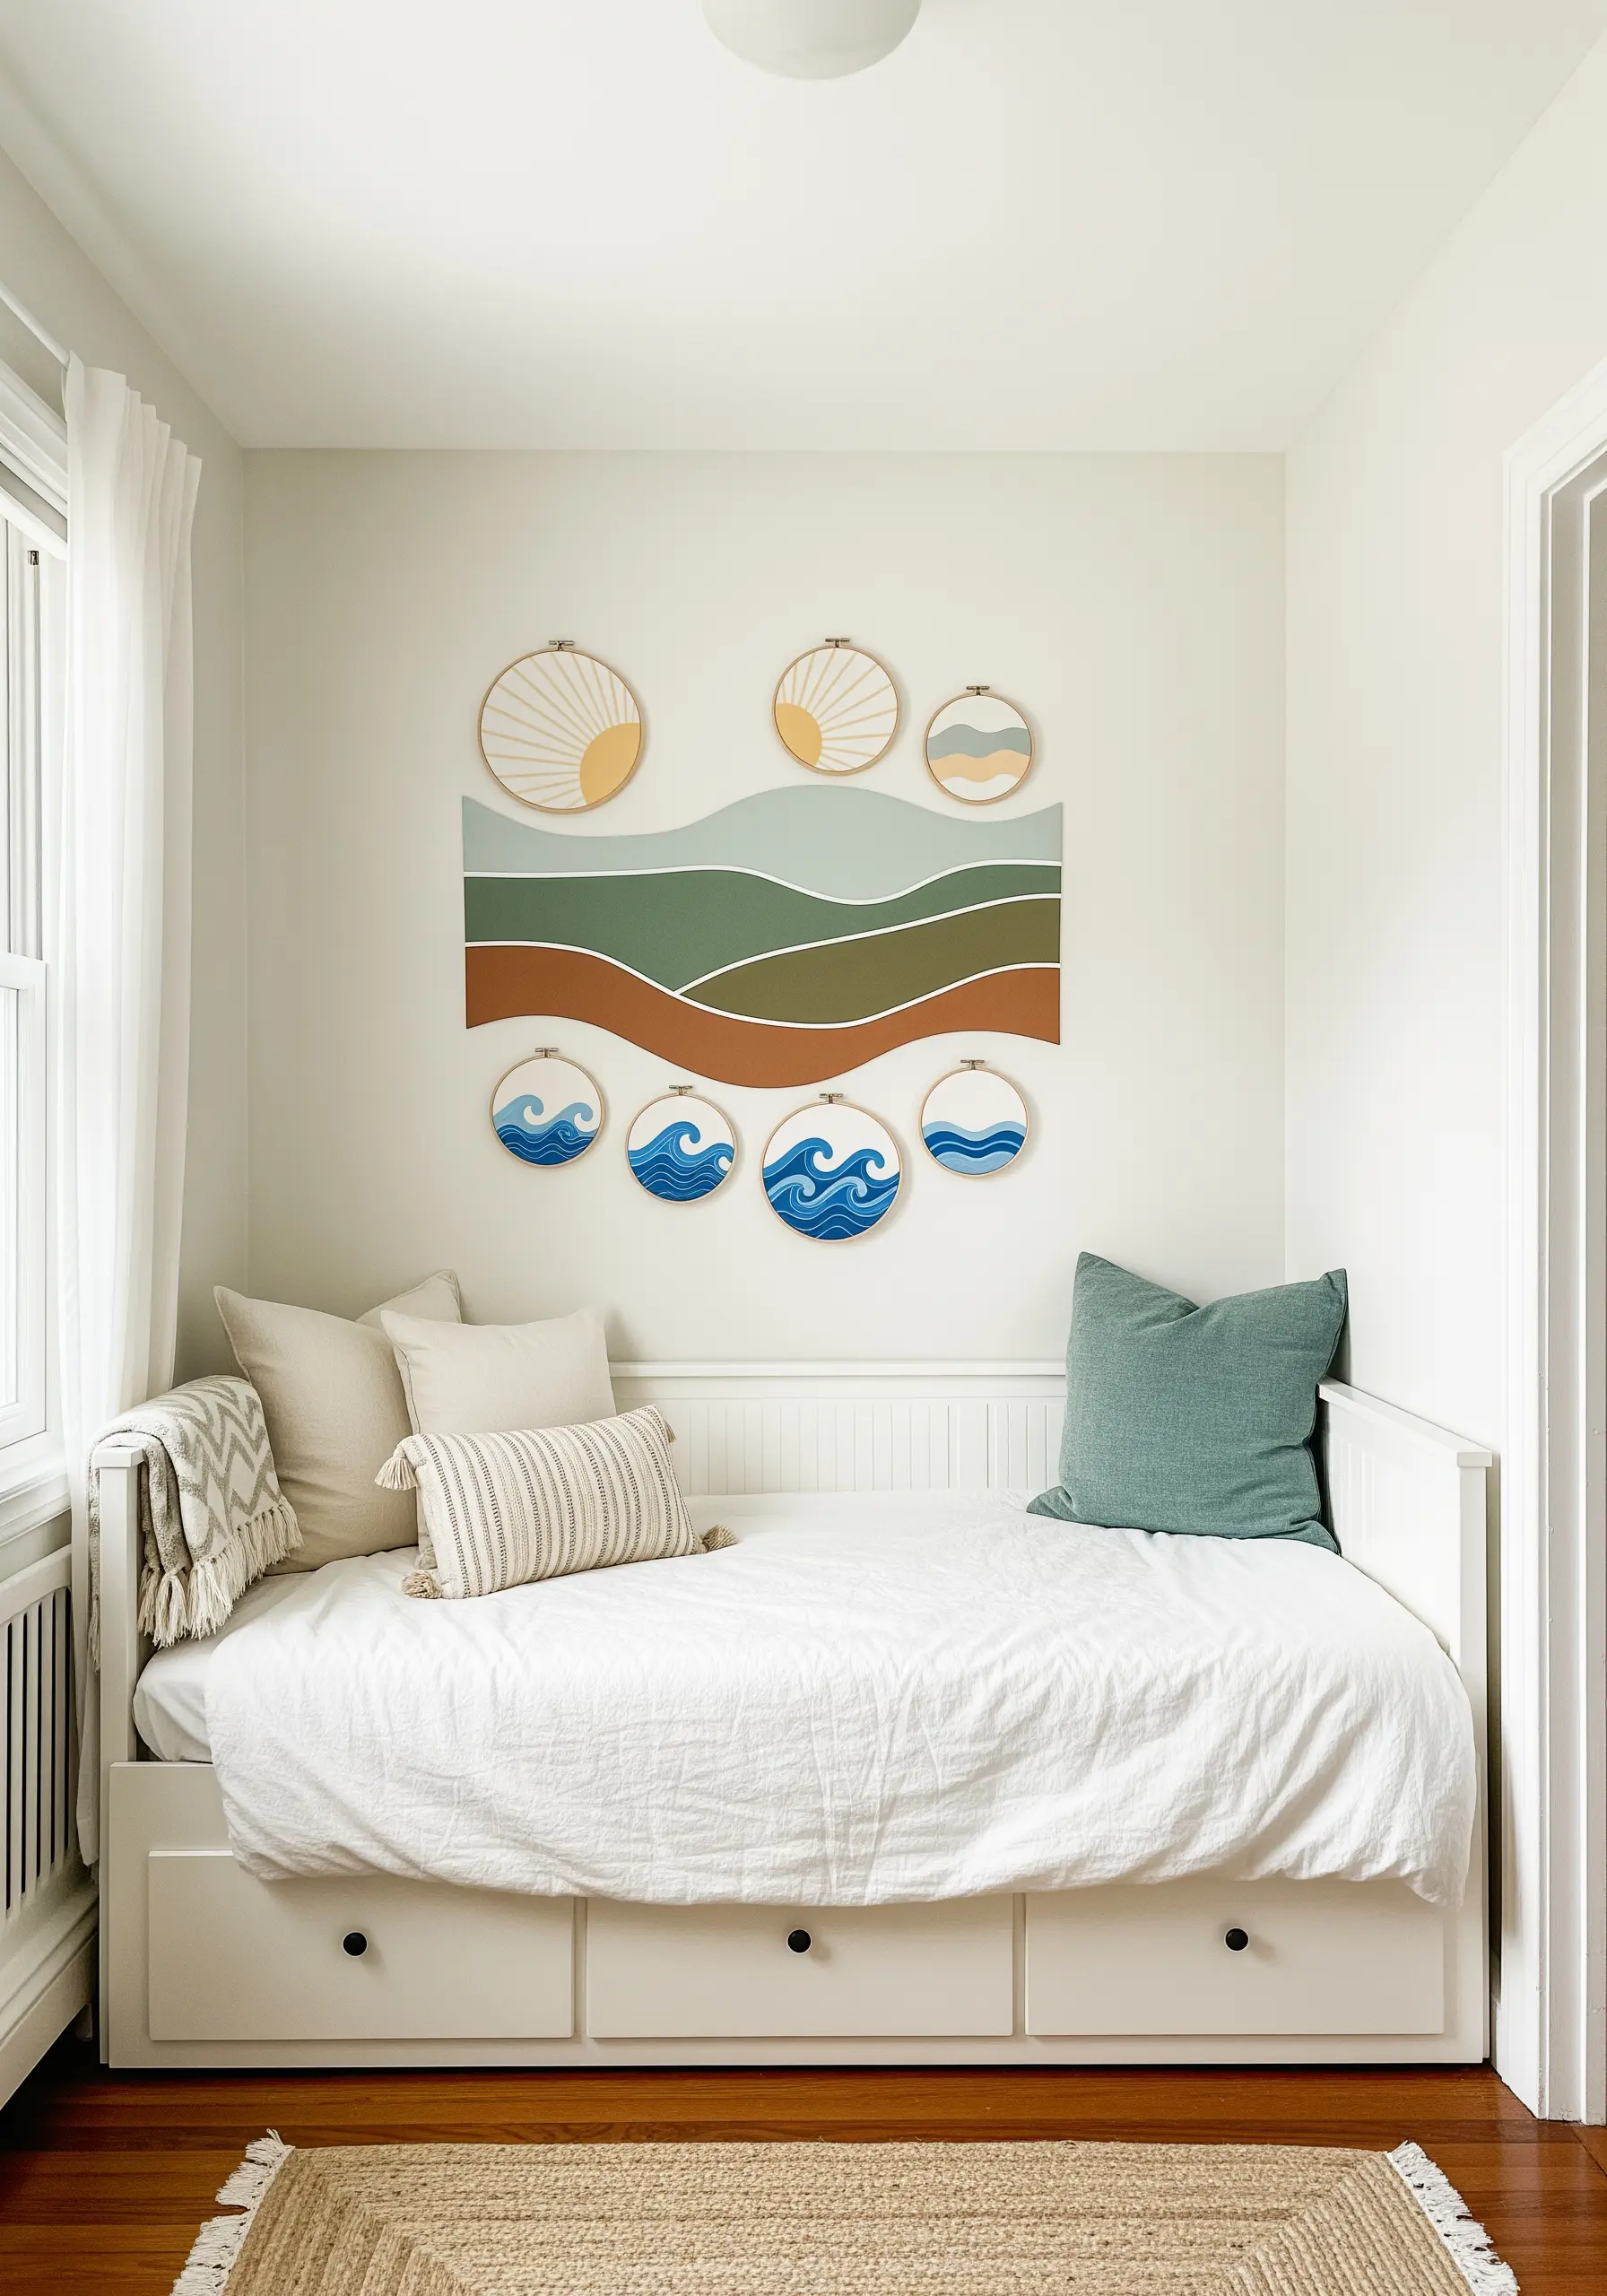
Create a stunning gallery wall by restricting your color palette to just three or four complementary shades across multiple hoops.
This retro-inspired combination of orange, marigold, and avocado green creates instant harmony, making the collection feel like a single, intentional art piece.
Use a dense satin stitch for the petals, but vary the direction of your stitches in each flower to create subtle shifts in how the light reflects off the thread.
This adds depth and visual interest without introducing new colors or complex techniques.
2. Achieve Botanical Realism with Precision Stitches
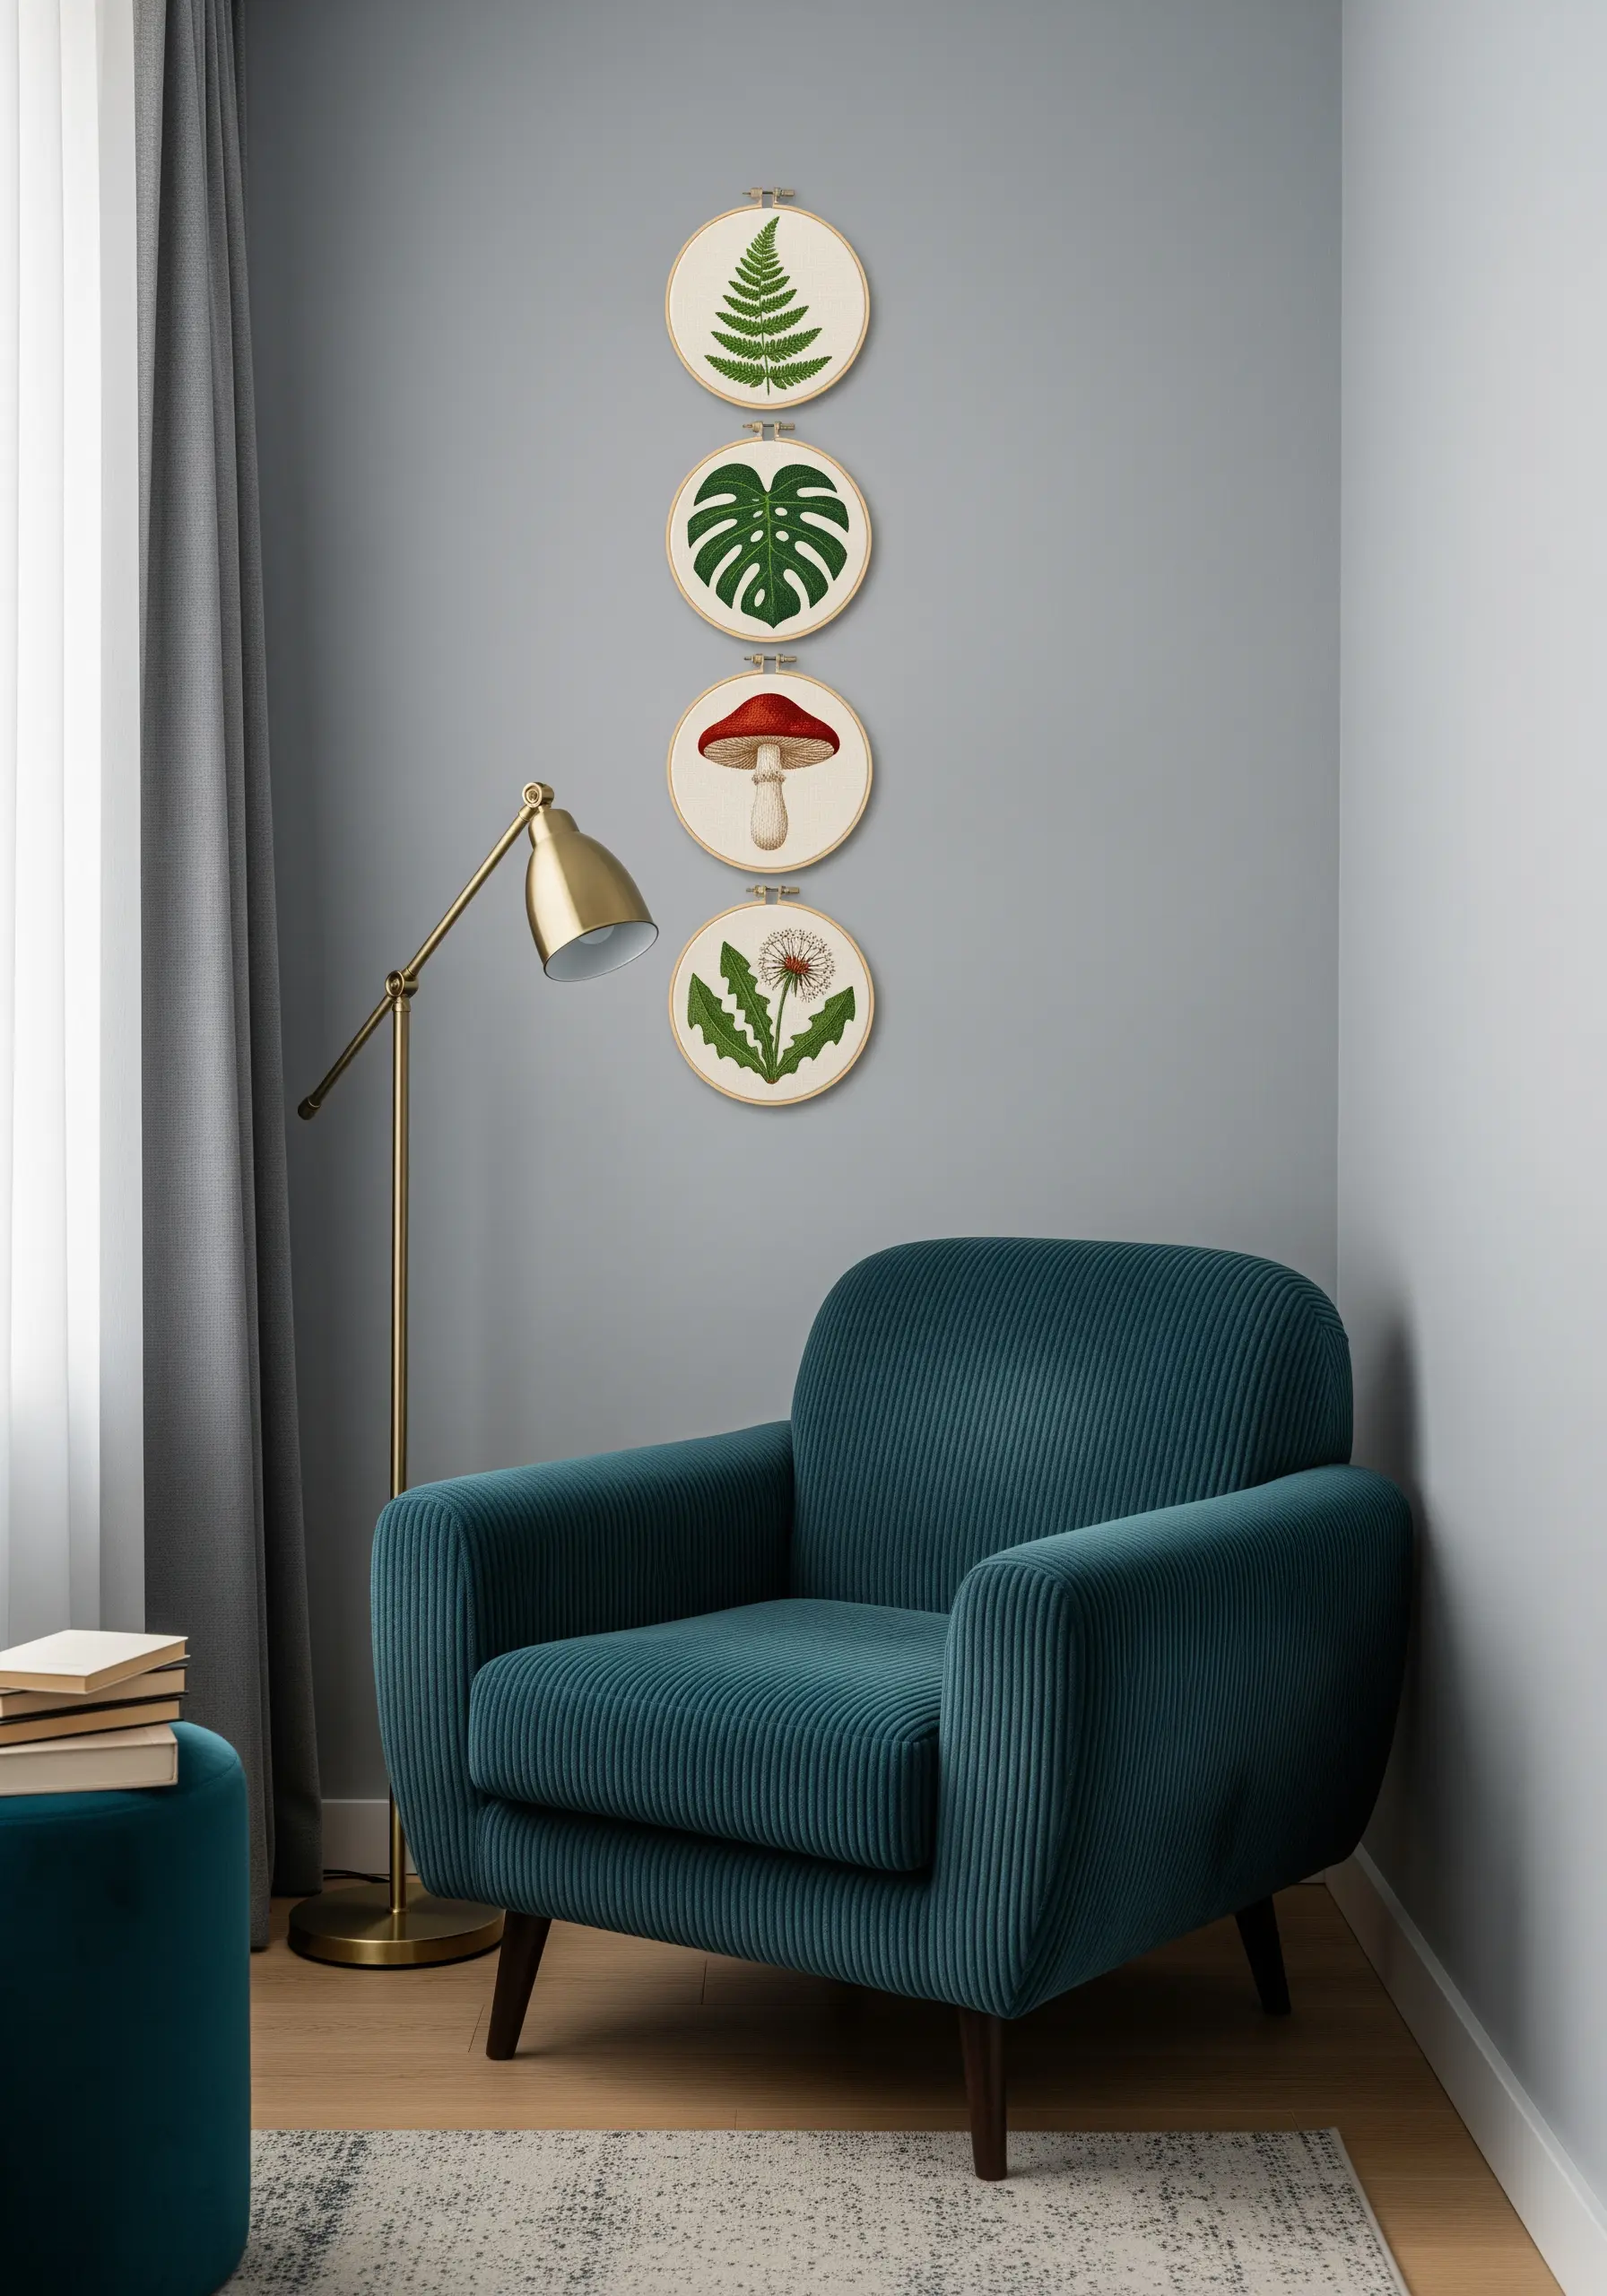
For detailed botanicals like ferns and monstera leaves, use a single strand of thread and a sharp needle to execute a precise split stitch for the veins.
This technique creates crisp, delicate lines that mimic nature, giving your work an almost illustrative quality.
Contrast this fine detail with bolder textures, like using French knots for the spots on a mushroom cap or a padded satin stitch for its stem.
This interplay between delicate and dimensional stitching makes each element pop against the neutral fabric.
These tiny botanical embroidery frames that add life to micro-studio spaces are perfect for this technique.
3. Master Graphic Shapes with Perfect Satin Stitch
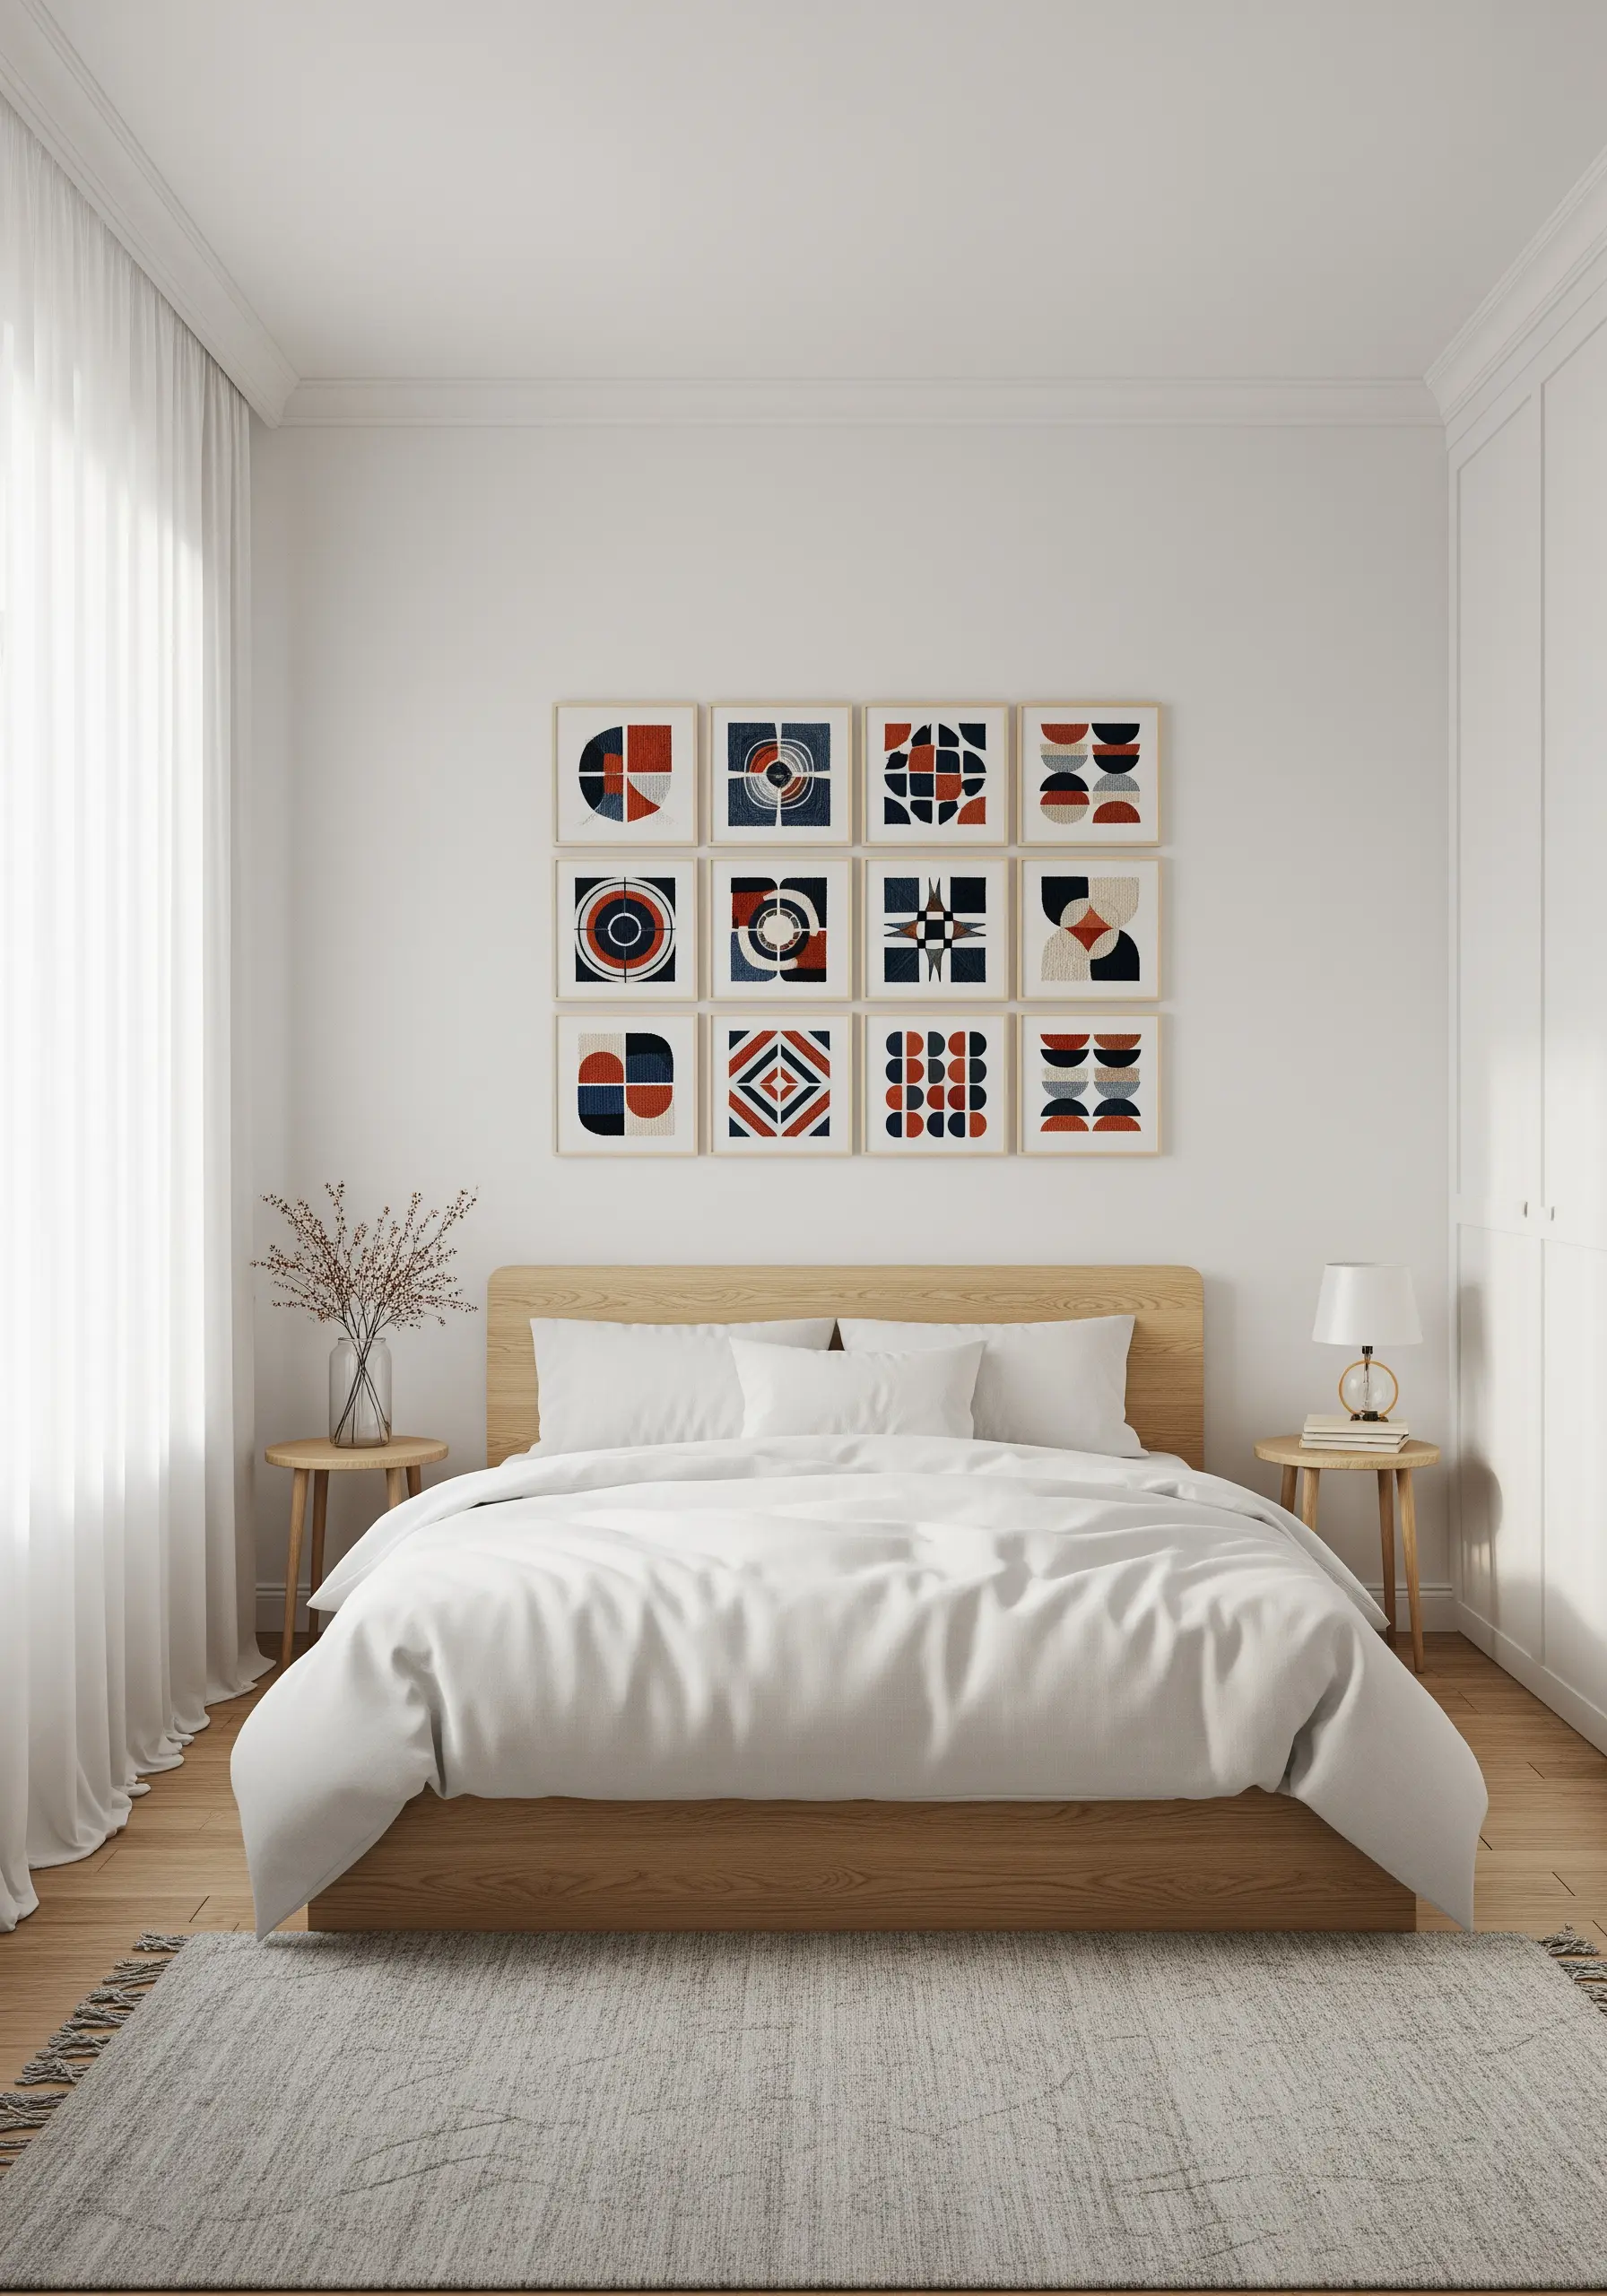
For bold, geometric designs, the goal is a flawless, glass-like surface.
Achieve this by using a high-quality, tightly woven fabric and a stabilizer to prevent puckering.
Keep your satin stitches close together, parallel, and consistent in tension—any variation will disrupt the smooth finish.
Outline your shapes with a split stitch first; this creates a raised edge that makes it easier to tuck your satin stitches underneath for a razor-sharp, clean boundary.
The negative space becomes just as important as the stitched areas, giving the composition a modern, balanced feel.
4. Capture Retro Icons with Illustrative Outlines
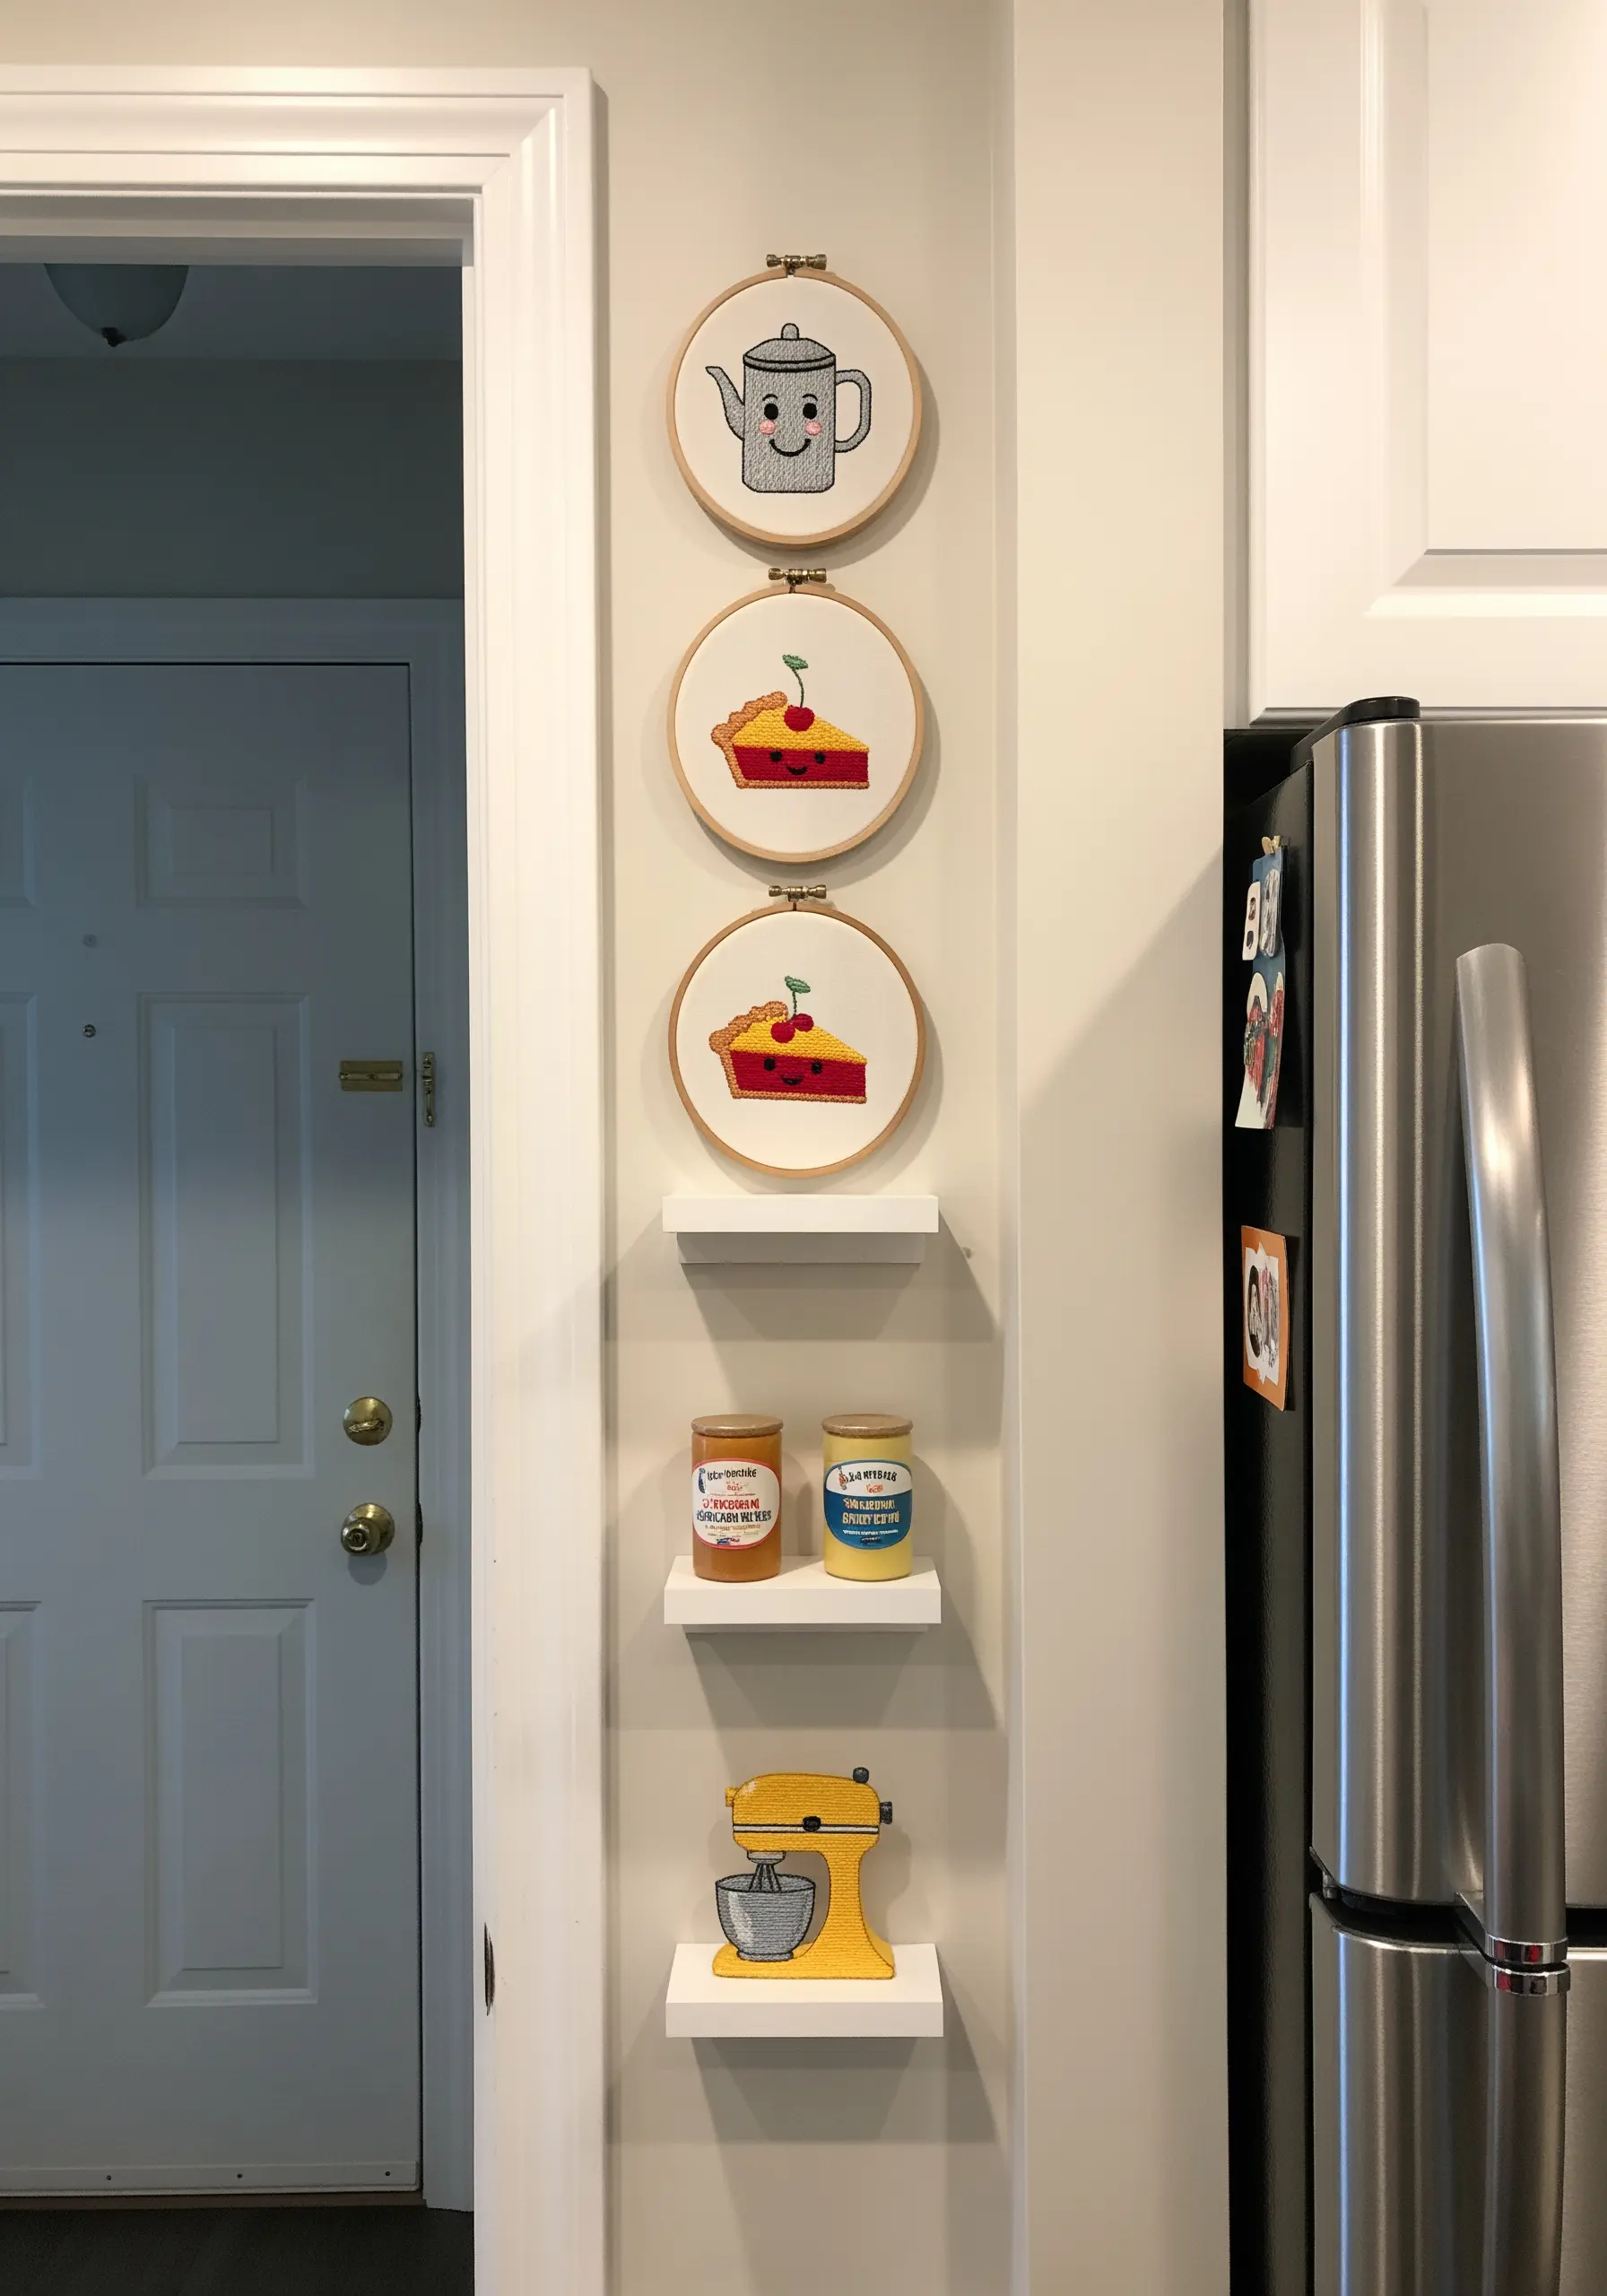
Give retro objects like typewriters and rotary phones a clean, graphic novel feel by outlining them first with a two-strand backstitch.
This defines the shape and contains your fill stitches, ensuring your work looks sharp and polished, not fuzzy.
For the fill, use a single strand of floss in a long-and-short stitch to create a smooth, matte finish that contrasts beautifully with the bold outline.
Consider using a thread with a slight sheen, like cotton perle or rayon, to mimic the gloss of vintage plastic and metal.
5. Add Whimsy with Minimalist Facial Features
When creating charming, anthropomorphic designs, less is more.
Use a single strand of black thread for eyes and mouths to keep the expressions delicate and subtle, preventing them from overpowering the main design.
A tiny straight stitch for a smiling eye or a single French knot for a rosy cheek adds immense character with minimal effort.
This technique ensures your work feels sweet and whimsical rather than cartoonish.
6. Use French Knots to Create Effervescent Bubbles
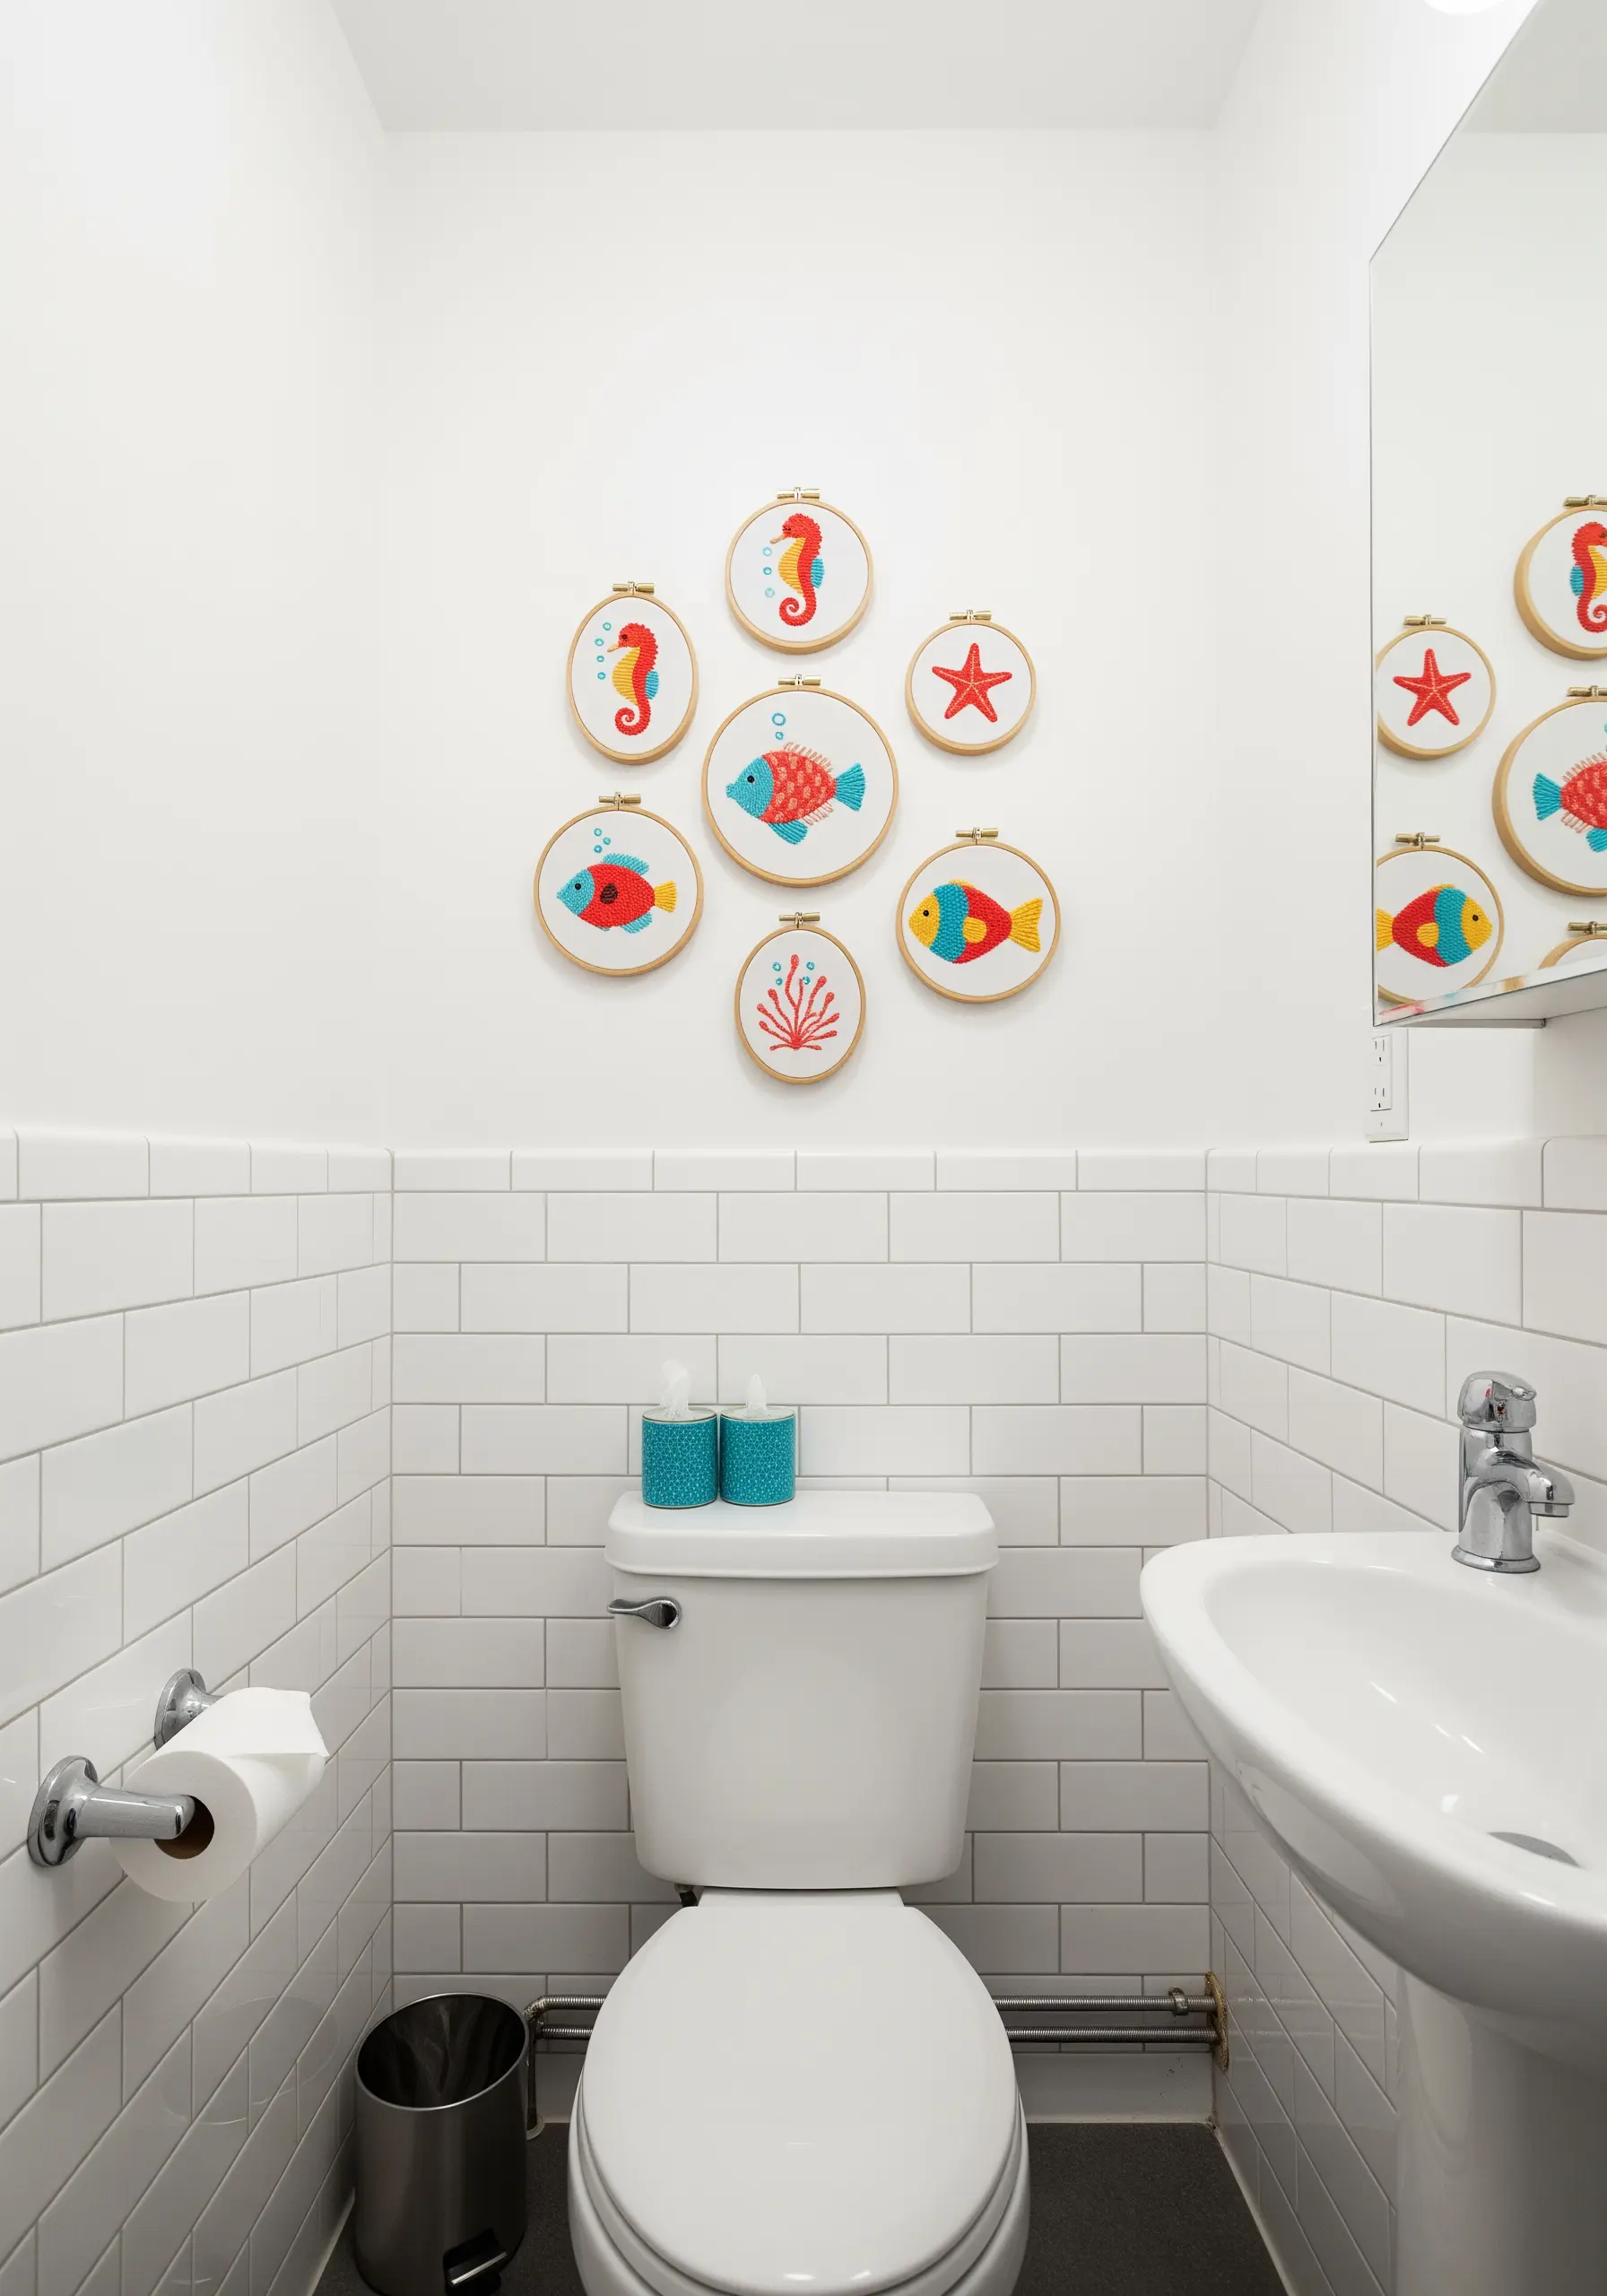
Instead of stitching simple circles, use French knots to represent bubbles in an underwater scene.
Vary the number of times you wrap the thread around the needle (once for small bubbles, twice for larger ones) to create a sense of depth and movement.
Stitch them in gentle, upward-drifting curves to enhance the illusion of floating.
This simple textural shift turns a flat design into a dynamic and playful piece, perfect for a small space like a bathroom.
7. Elevate Bookshelf Displays with Framed Pieces
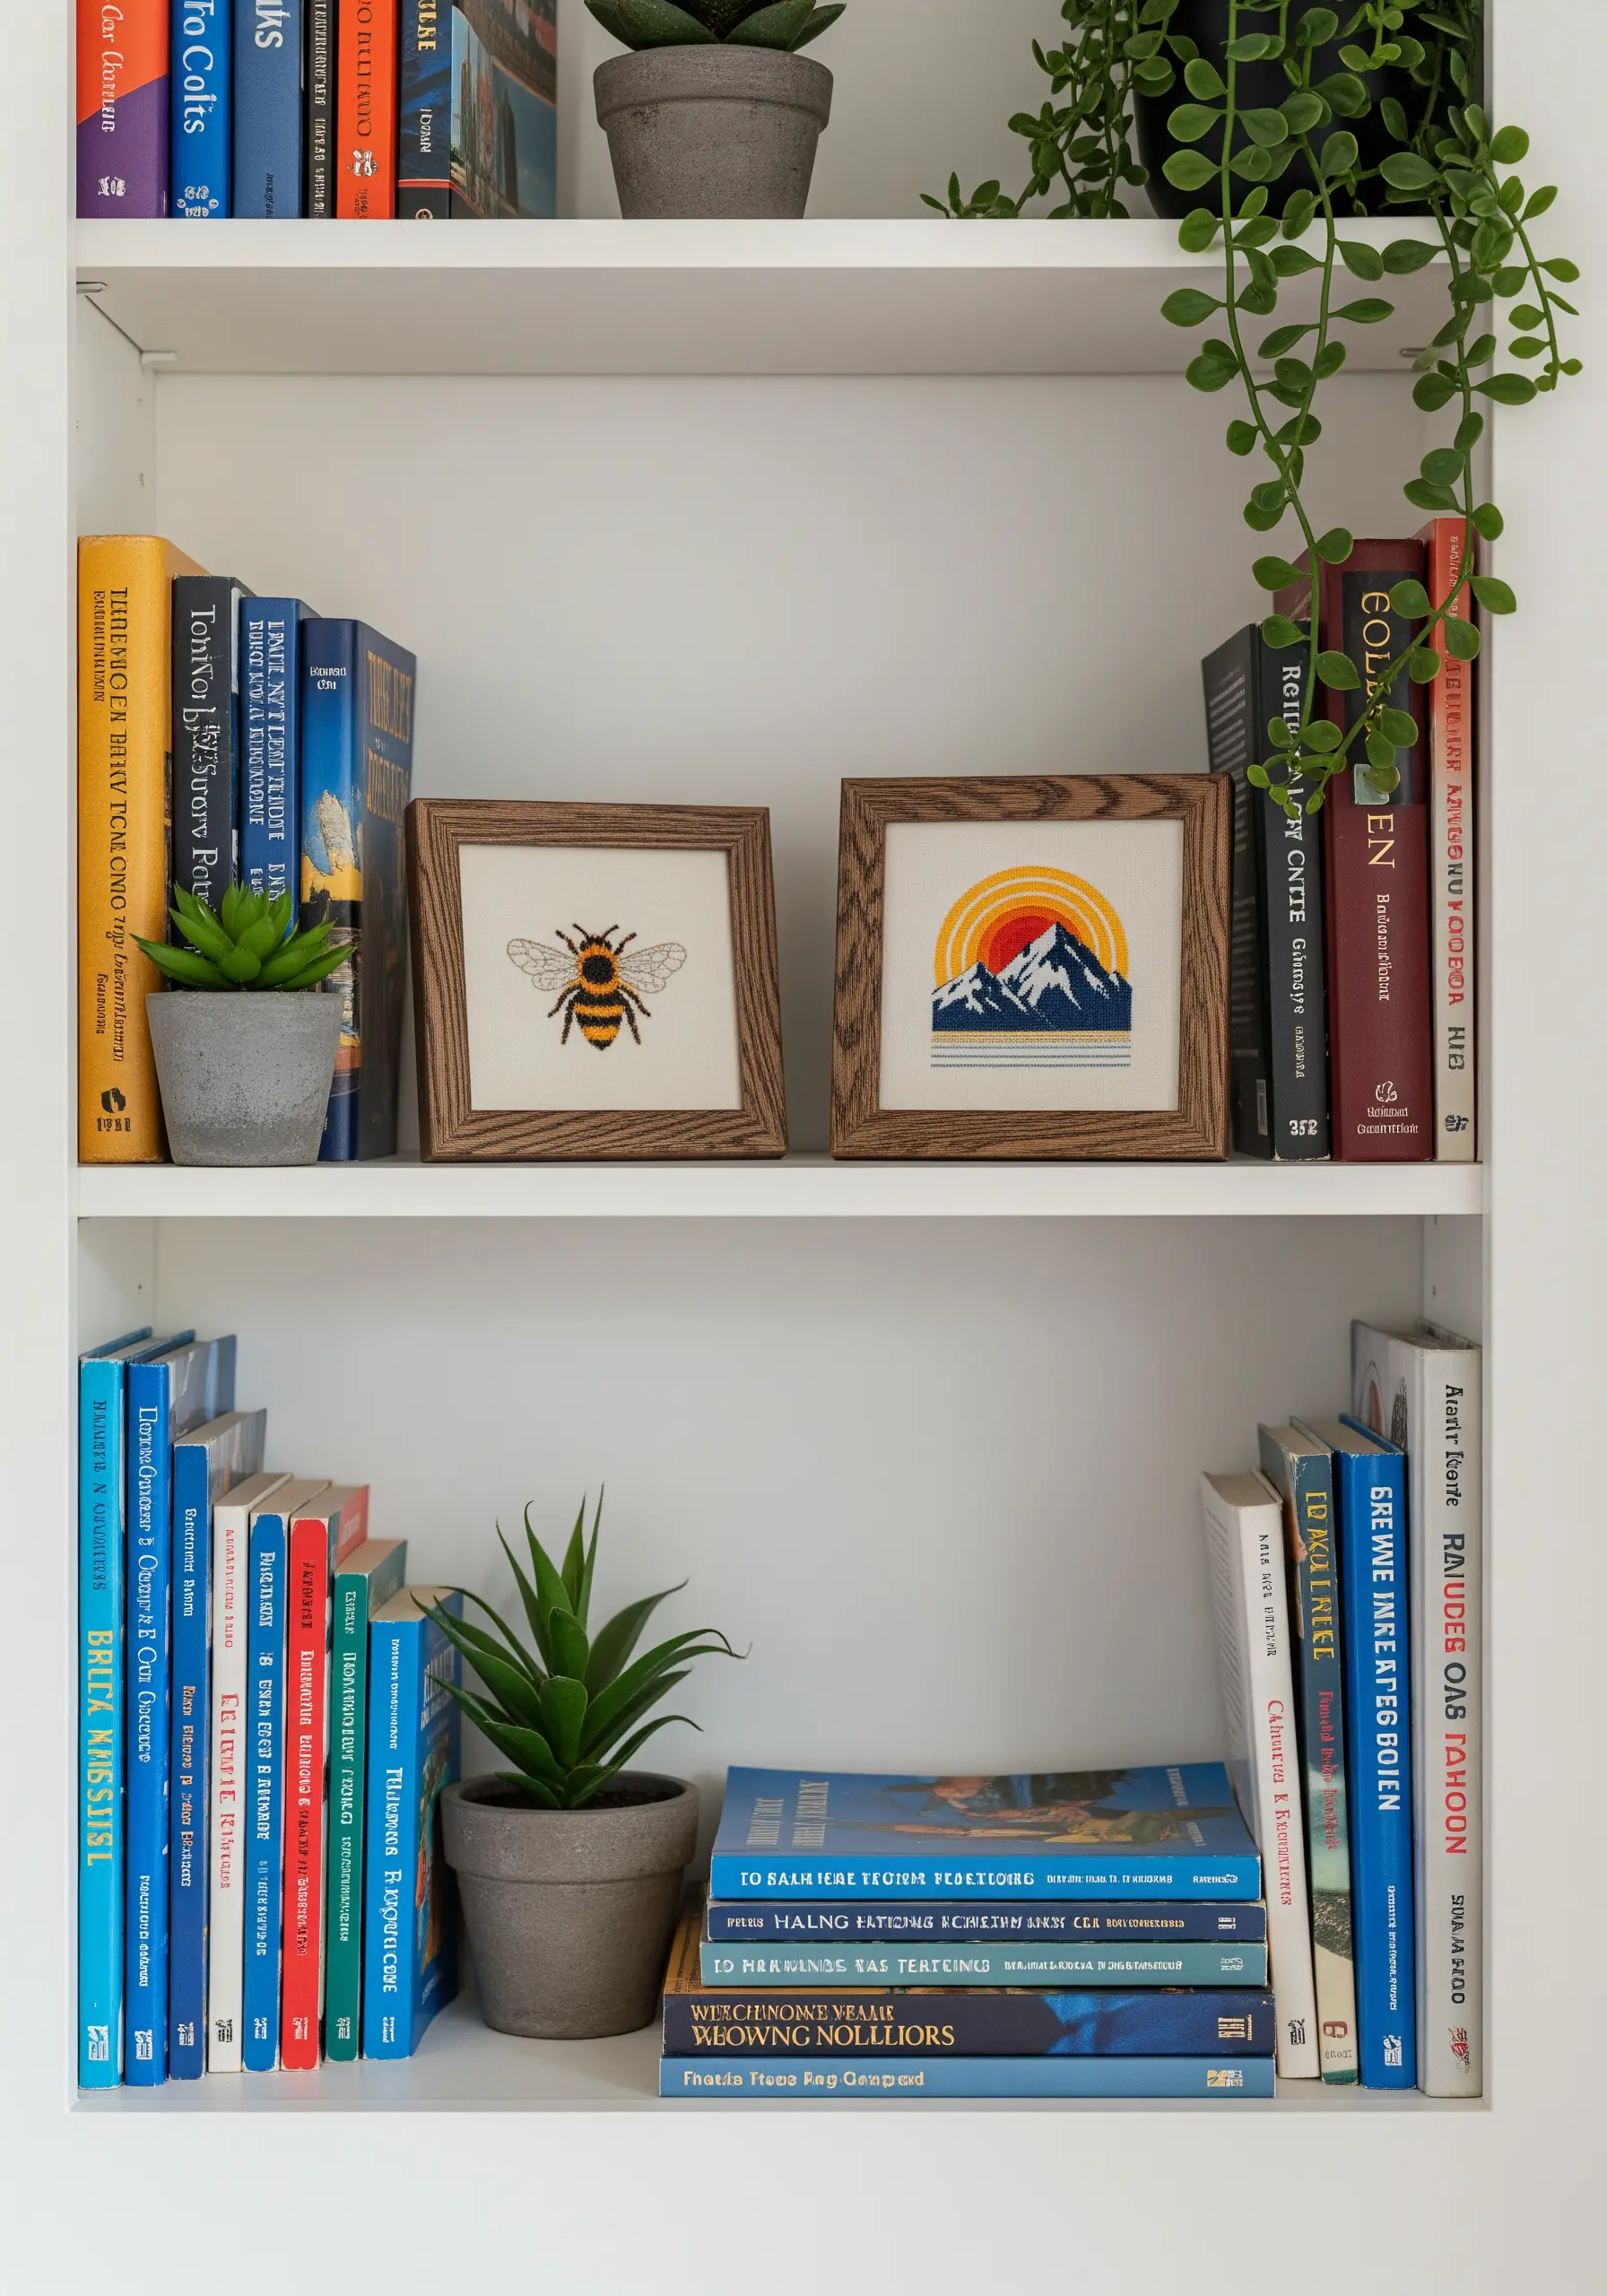
Move beyond the hoop by mounting your small embroidery pieces in square wooden frames.
This simple switch instantly elevates your work from a craft project to a finished piece of art, making it feel more intentional when placed among books and decor.
Choose frames that match the wood tones in your room to create a cohesive, integrated look.
Stitching on Aida cloth can give your work a pixelated, retro feel that pairs well with graphic motifs.
8. Pair Delicate Lettering with Botanical Motifs
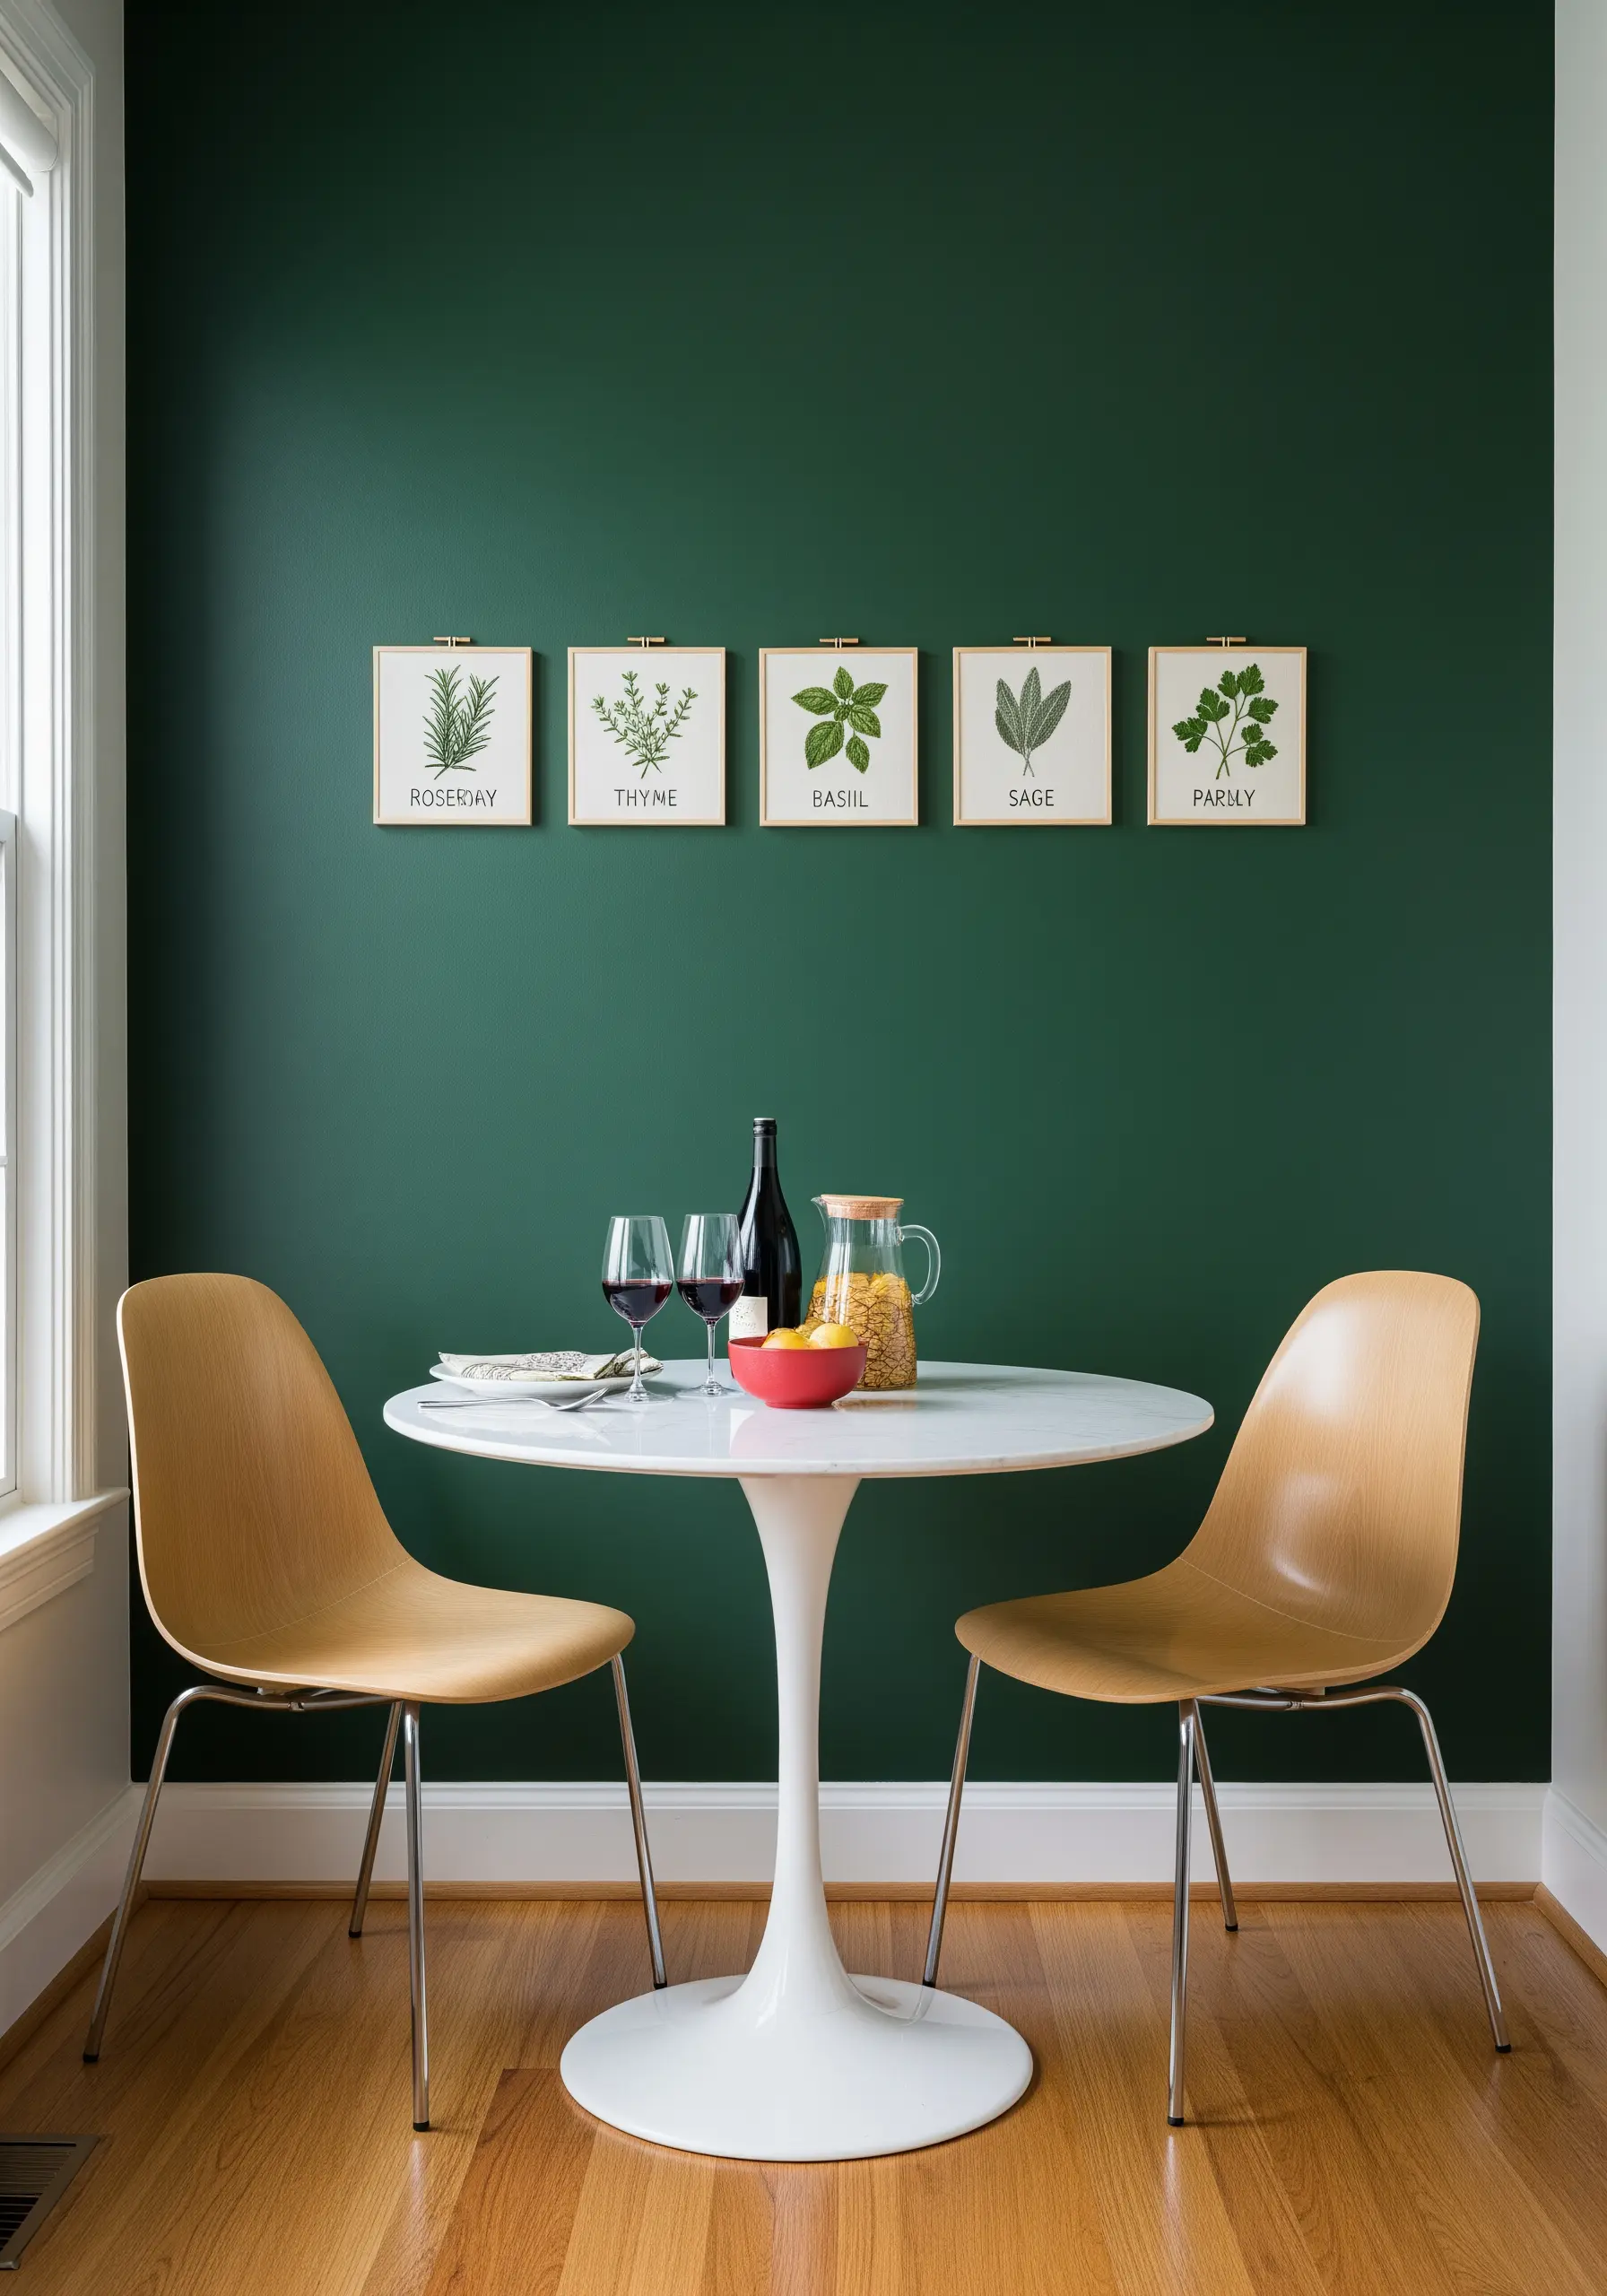
For designs that combine text and imagery, ensure the lettering complements, rather than competes with, the main motif.
Use a simple, single-thread backstitch or stem stitch for the words, keeping them clean and legible.
This allows the more detailed botanical element—stitched with satin stitches and French knots—to remain the focal point.
This balance creates a refined, elegant composition that feels both decorative and informative, just like a classic botanical illustration.
Explore more medicinal herb embroidery designs to celebrate lavender, mint, rosemary & more to expand your collection.
9. Create a Themed Pegboard Craft Corner
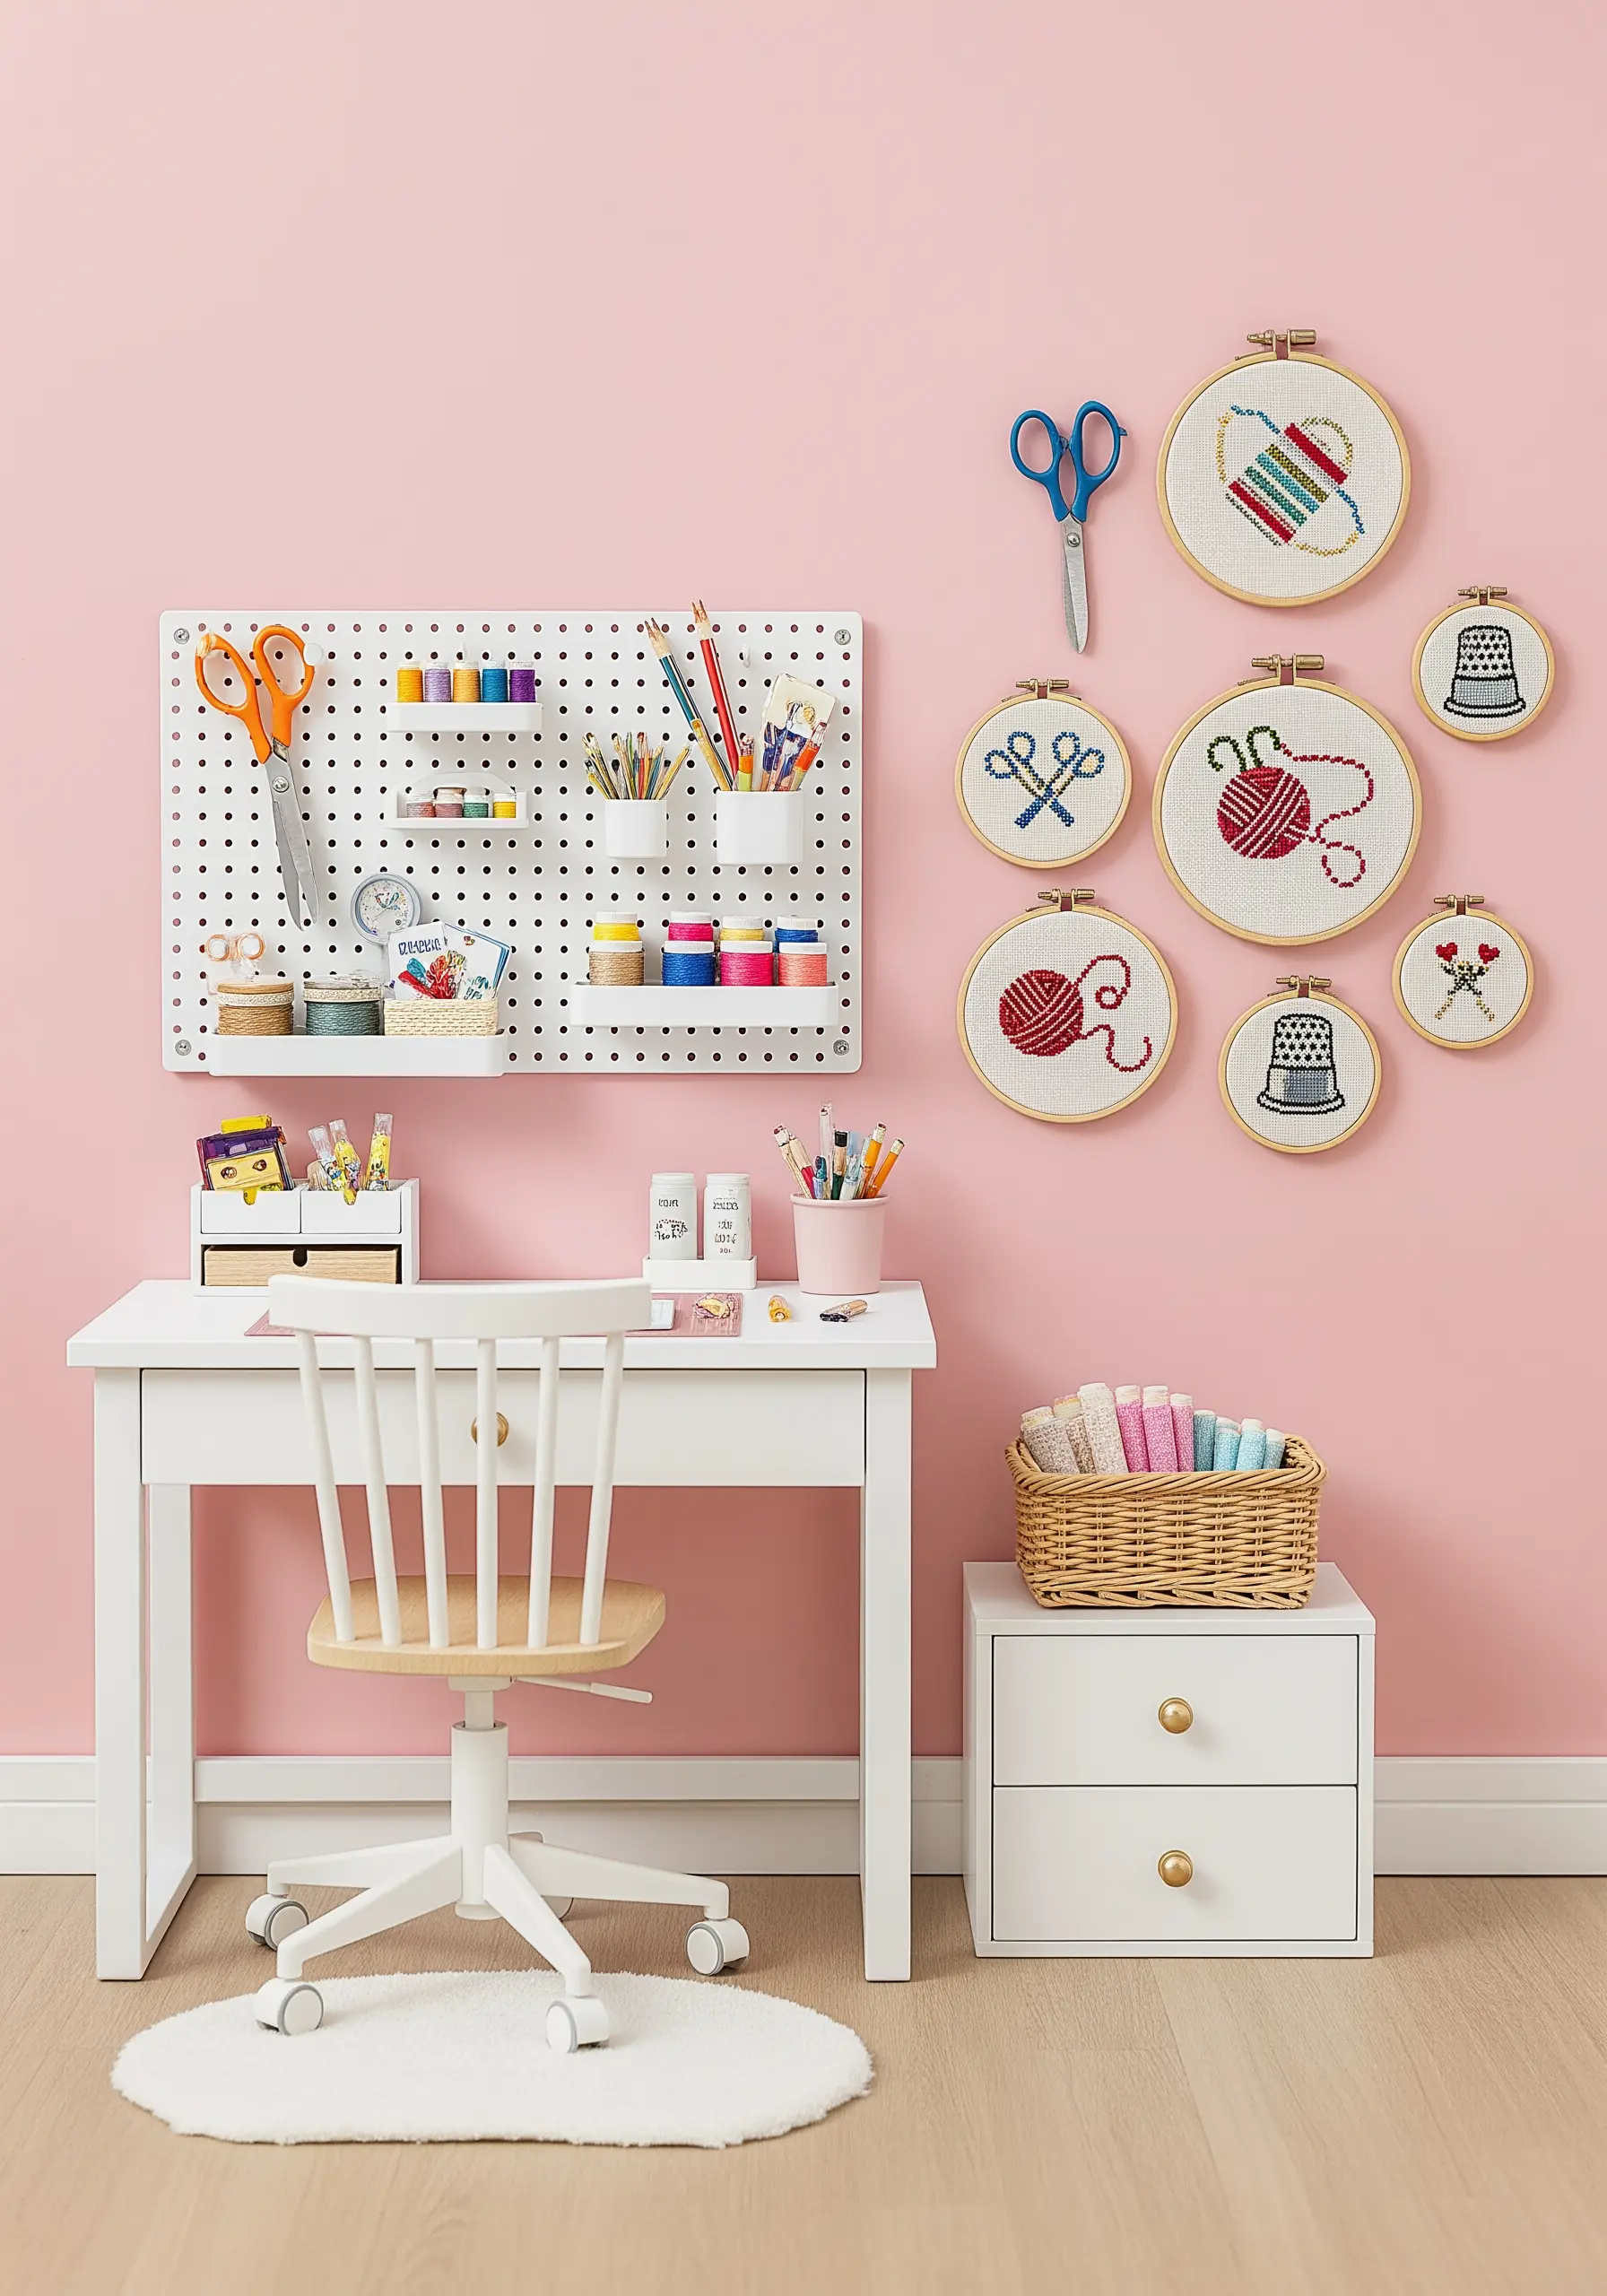
Organize your craft space by turning your embroidery into part of the decor.
Create a series of small hoops featuring your favorite crafting tools—scissors, thread, thimbles—and hang them beside your pegboard organizer.
Use a consistent color palette that ties into your craft supplies for a look that feels both personal and impeccably organized.
This not only celebrates your hobby but also makes your creative space feel inspiring and uniquely yours.
10. Capture a Vibe with High-Contrast Graphics
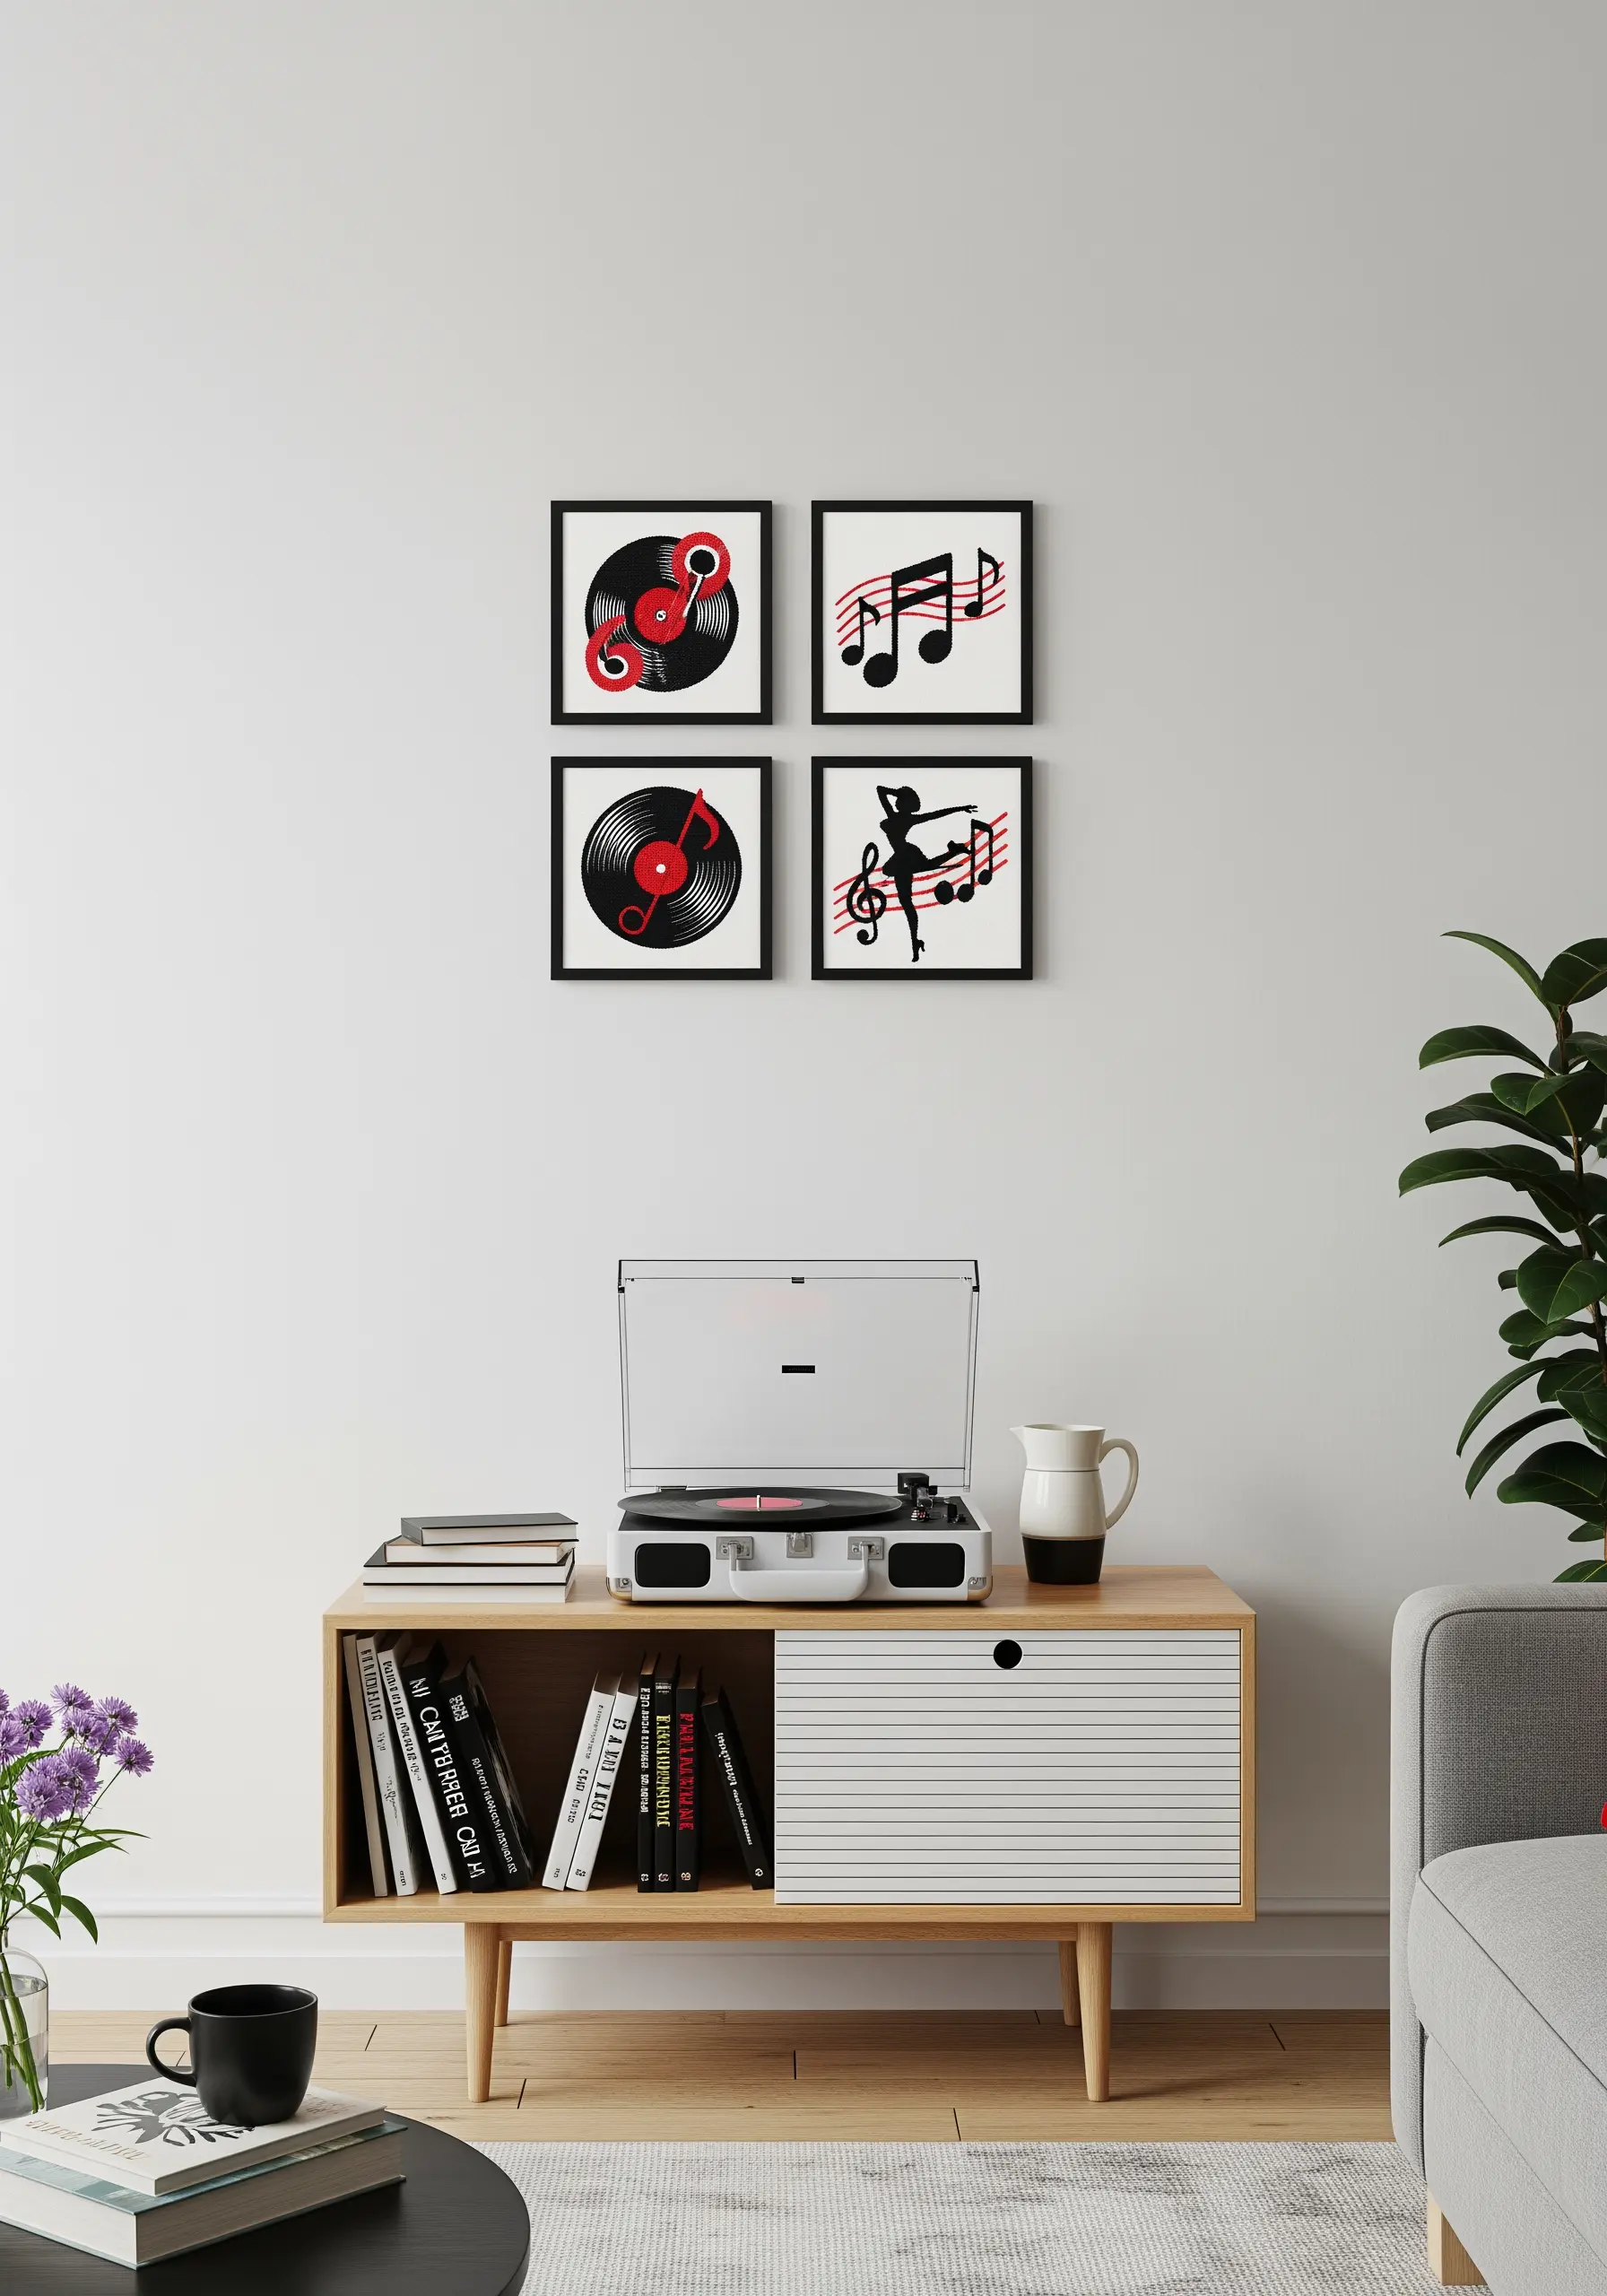
Make a bold statement in a minimalist room by using a stark, high-contrast color scheme.
Black, white, and a single pop of vibrant red create an immediate graphic impact that feels modern and energetic.
When stitching, ensure your fill areas are completely opaque. Use enough strands of floss (three or four) in your satin stitch to achieve solid color blocking with no fabric showing through.
This technique is perfect for music-themed art or any design that benefits from a punchy, retro-poster aesthetic.
11. Stitch a Lunar Cycle on Dark Fabric
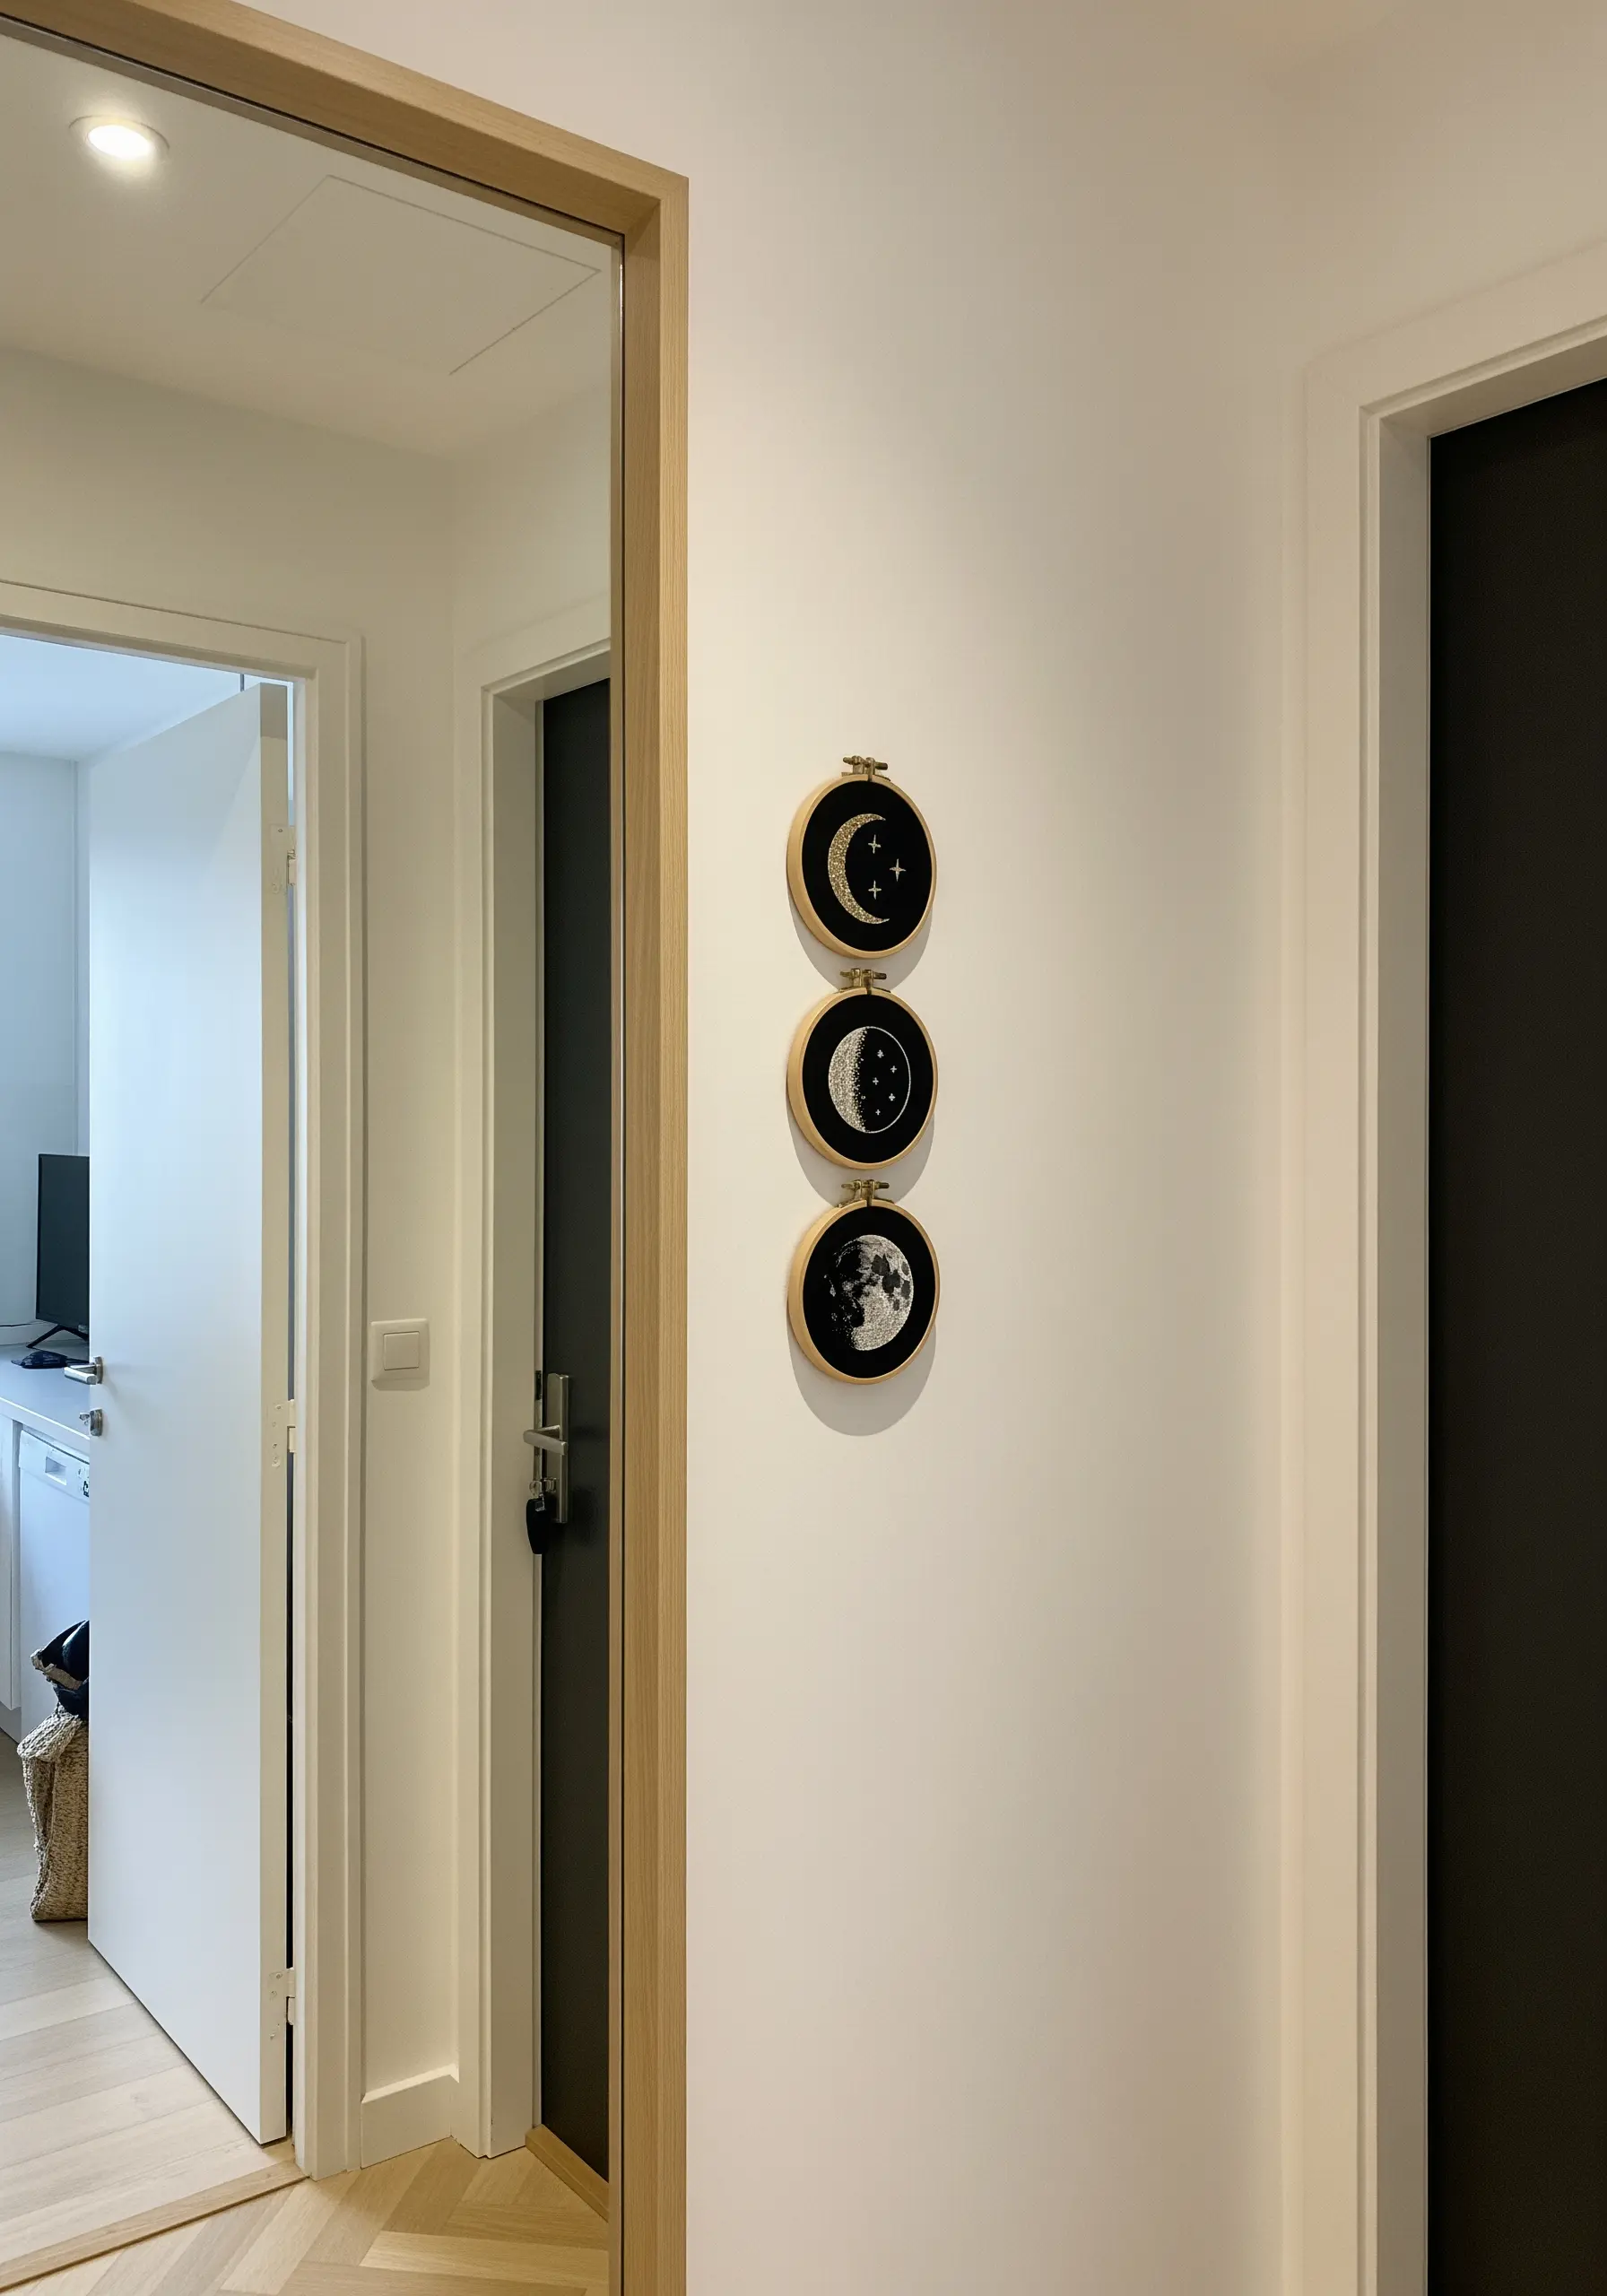
Create dramatic celestial designs by stitching with white and grey threads on black or navy fabric.
To make the moon’s texture, use a chaotic arrangement of seed stitches and French knots in varying shades of grey and off-white instead of a flat satin stitch.
This technique mimics the cratered, uneven surface of the moon, giving your work a realistic, tactile quality.
The high contrast makes these celestial micro-embroidery ideas incredibly striking, even from a distance in a narrow hallway.
12. Create a Floating Effect with Sheer Fabric
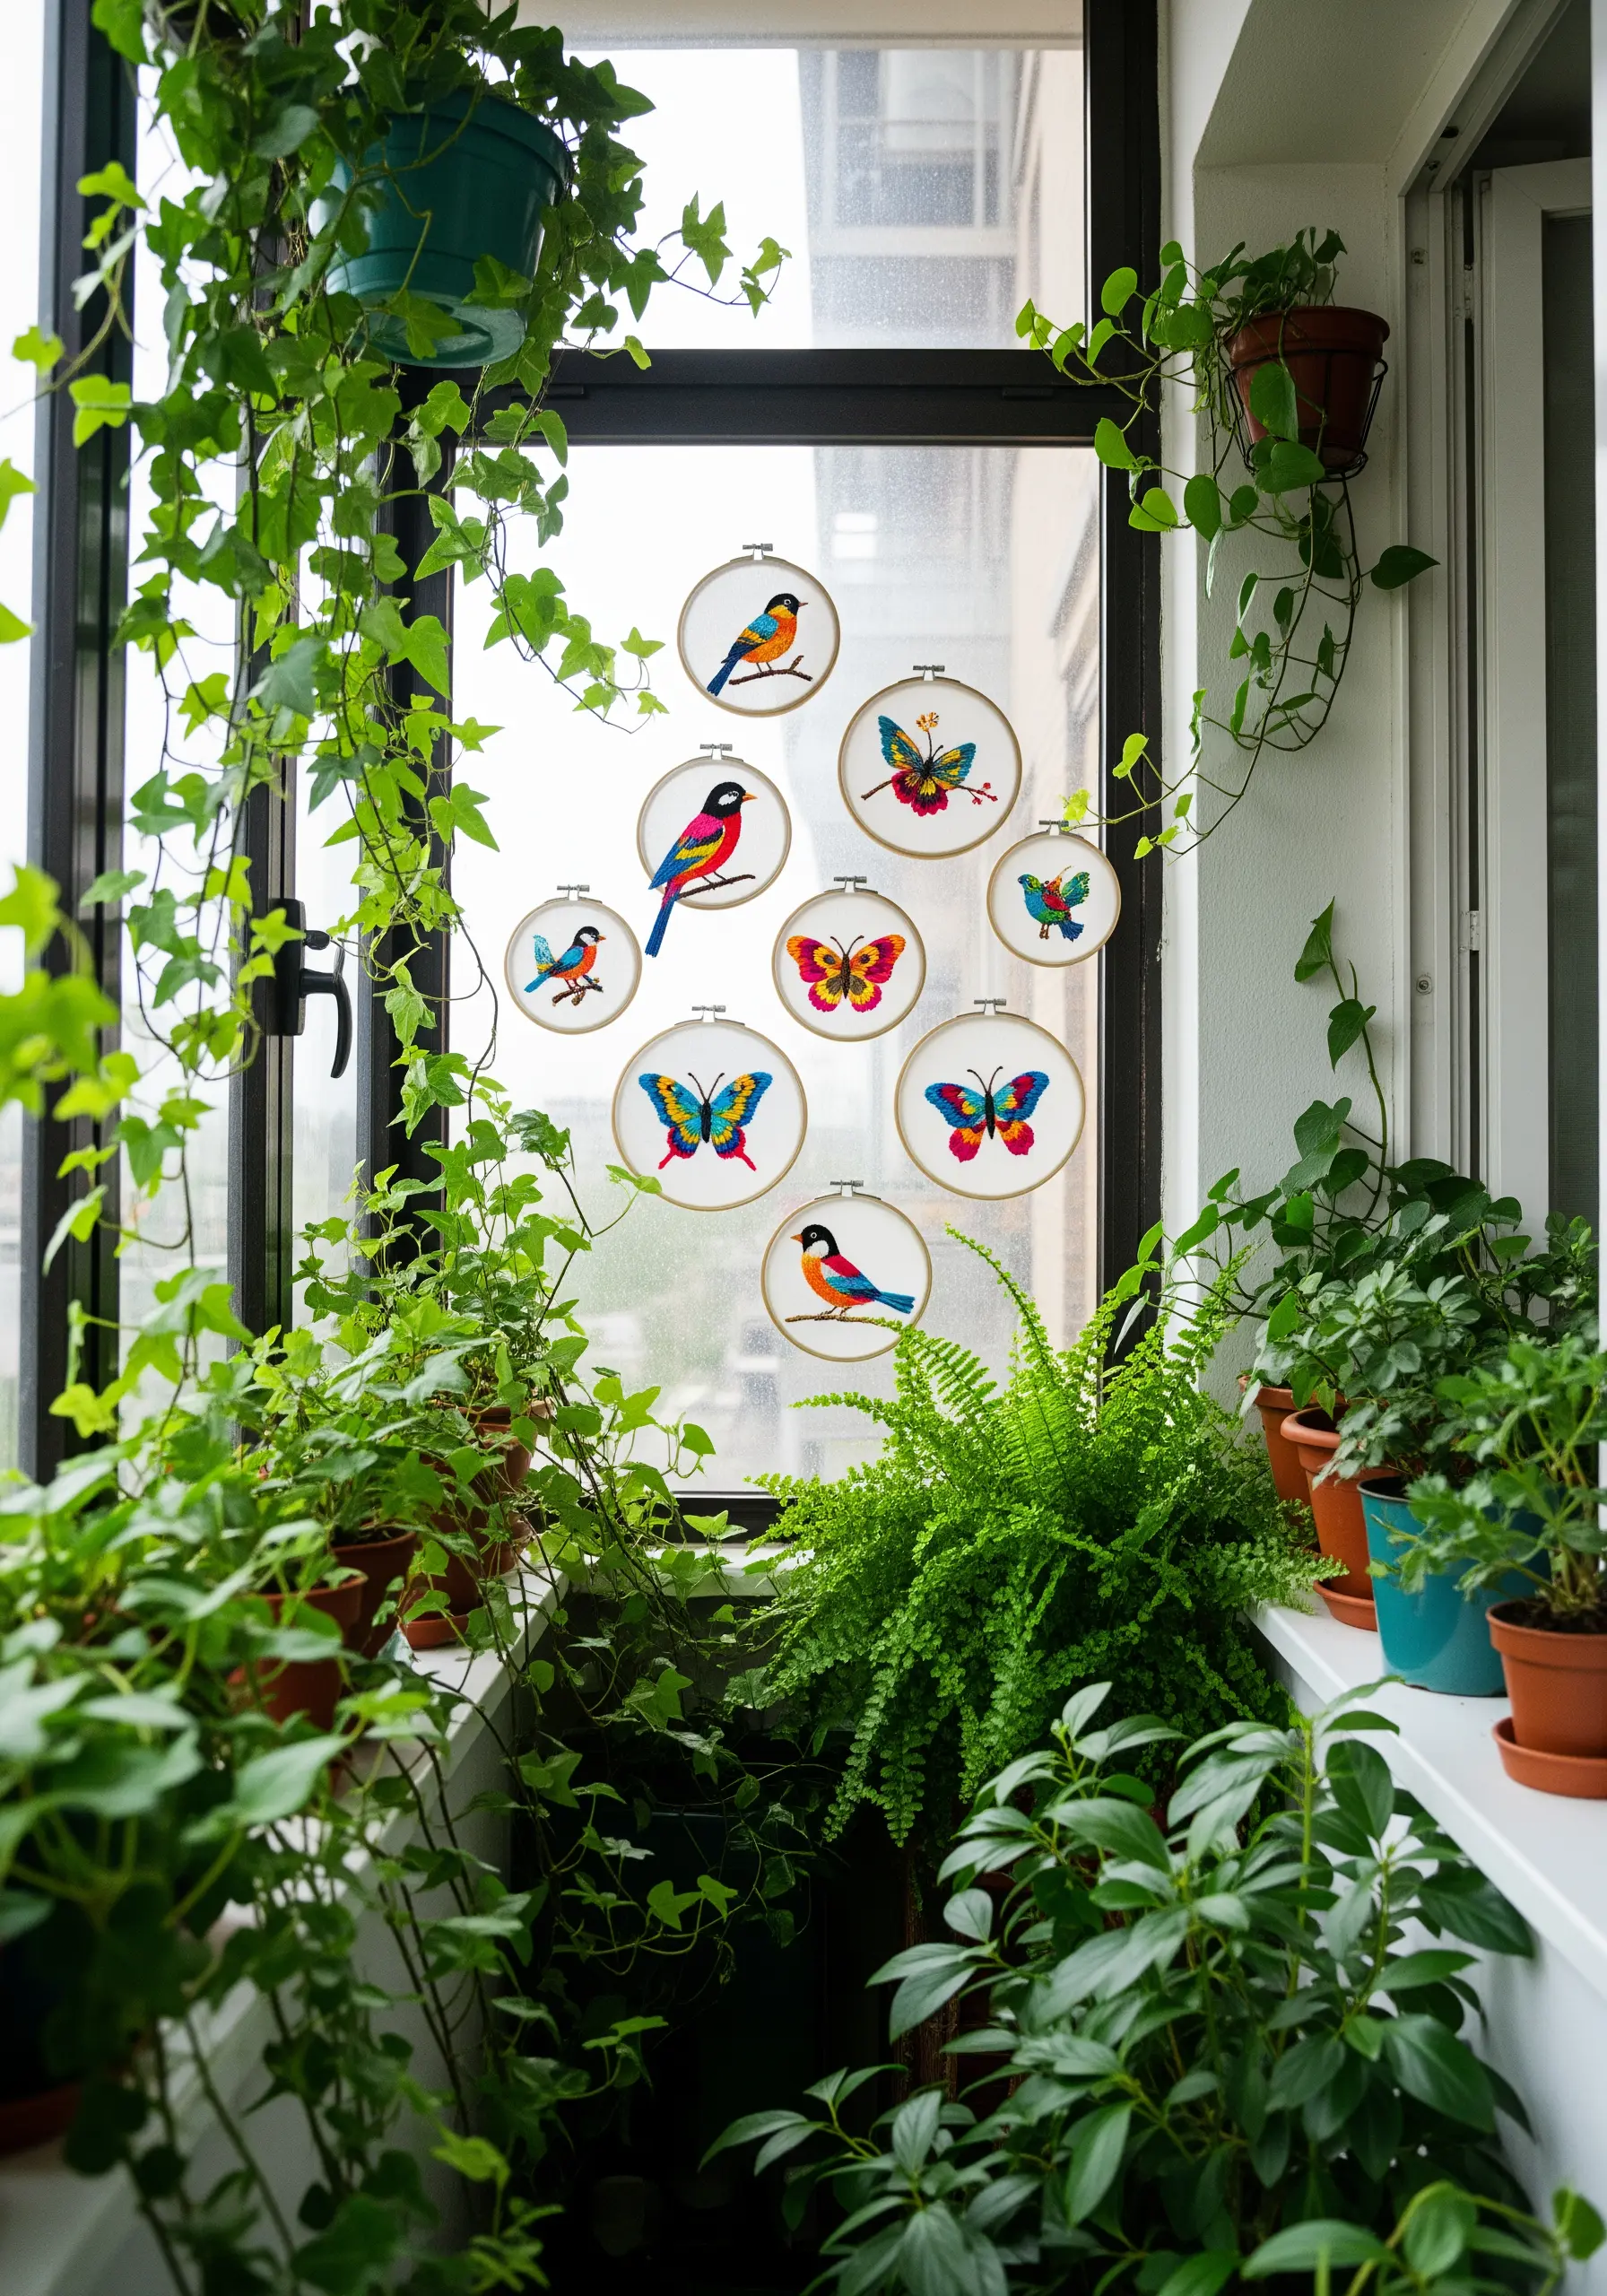
Stitch your designs on organza or tulle and display them against a window for a beautiful, sun-catcher effect.
Use a water-soluble stabilizer on top of the sheer fabric while you stitch; it will provide support and then dissolve away, leaving only your thread work.
This technique makes your birds and butterflies appear as if they are floating in mid-air.
Choose vibrant, colorfast threads to ensure your work remains brilliant even when exposed to sunlight.
These bird & butterfly embroidery patterns that make fabric come alive are perfect for this ethereal style.
13. Frame a Theme with Mirrored Motifs
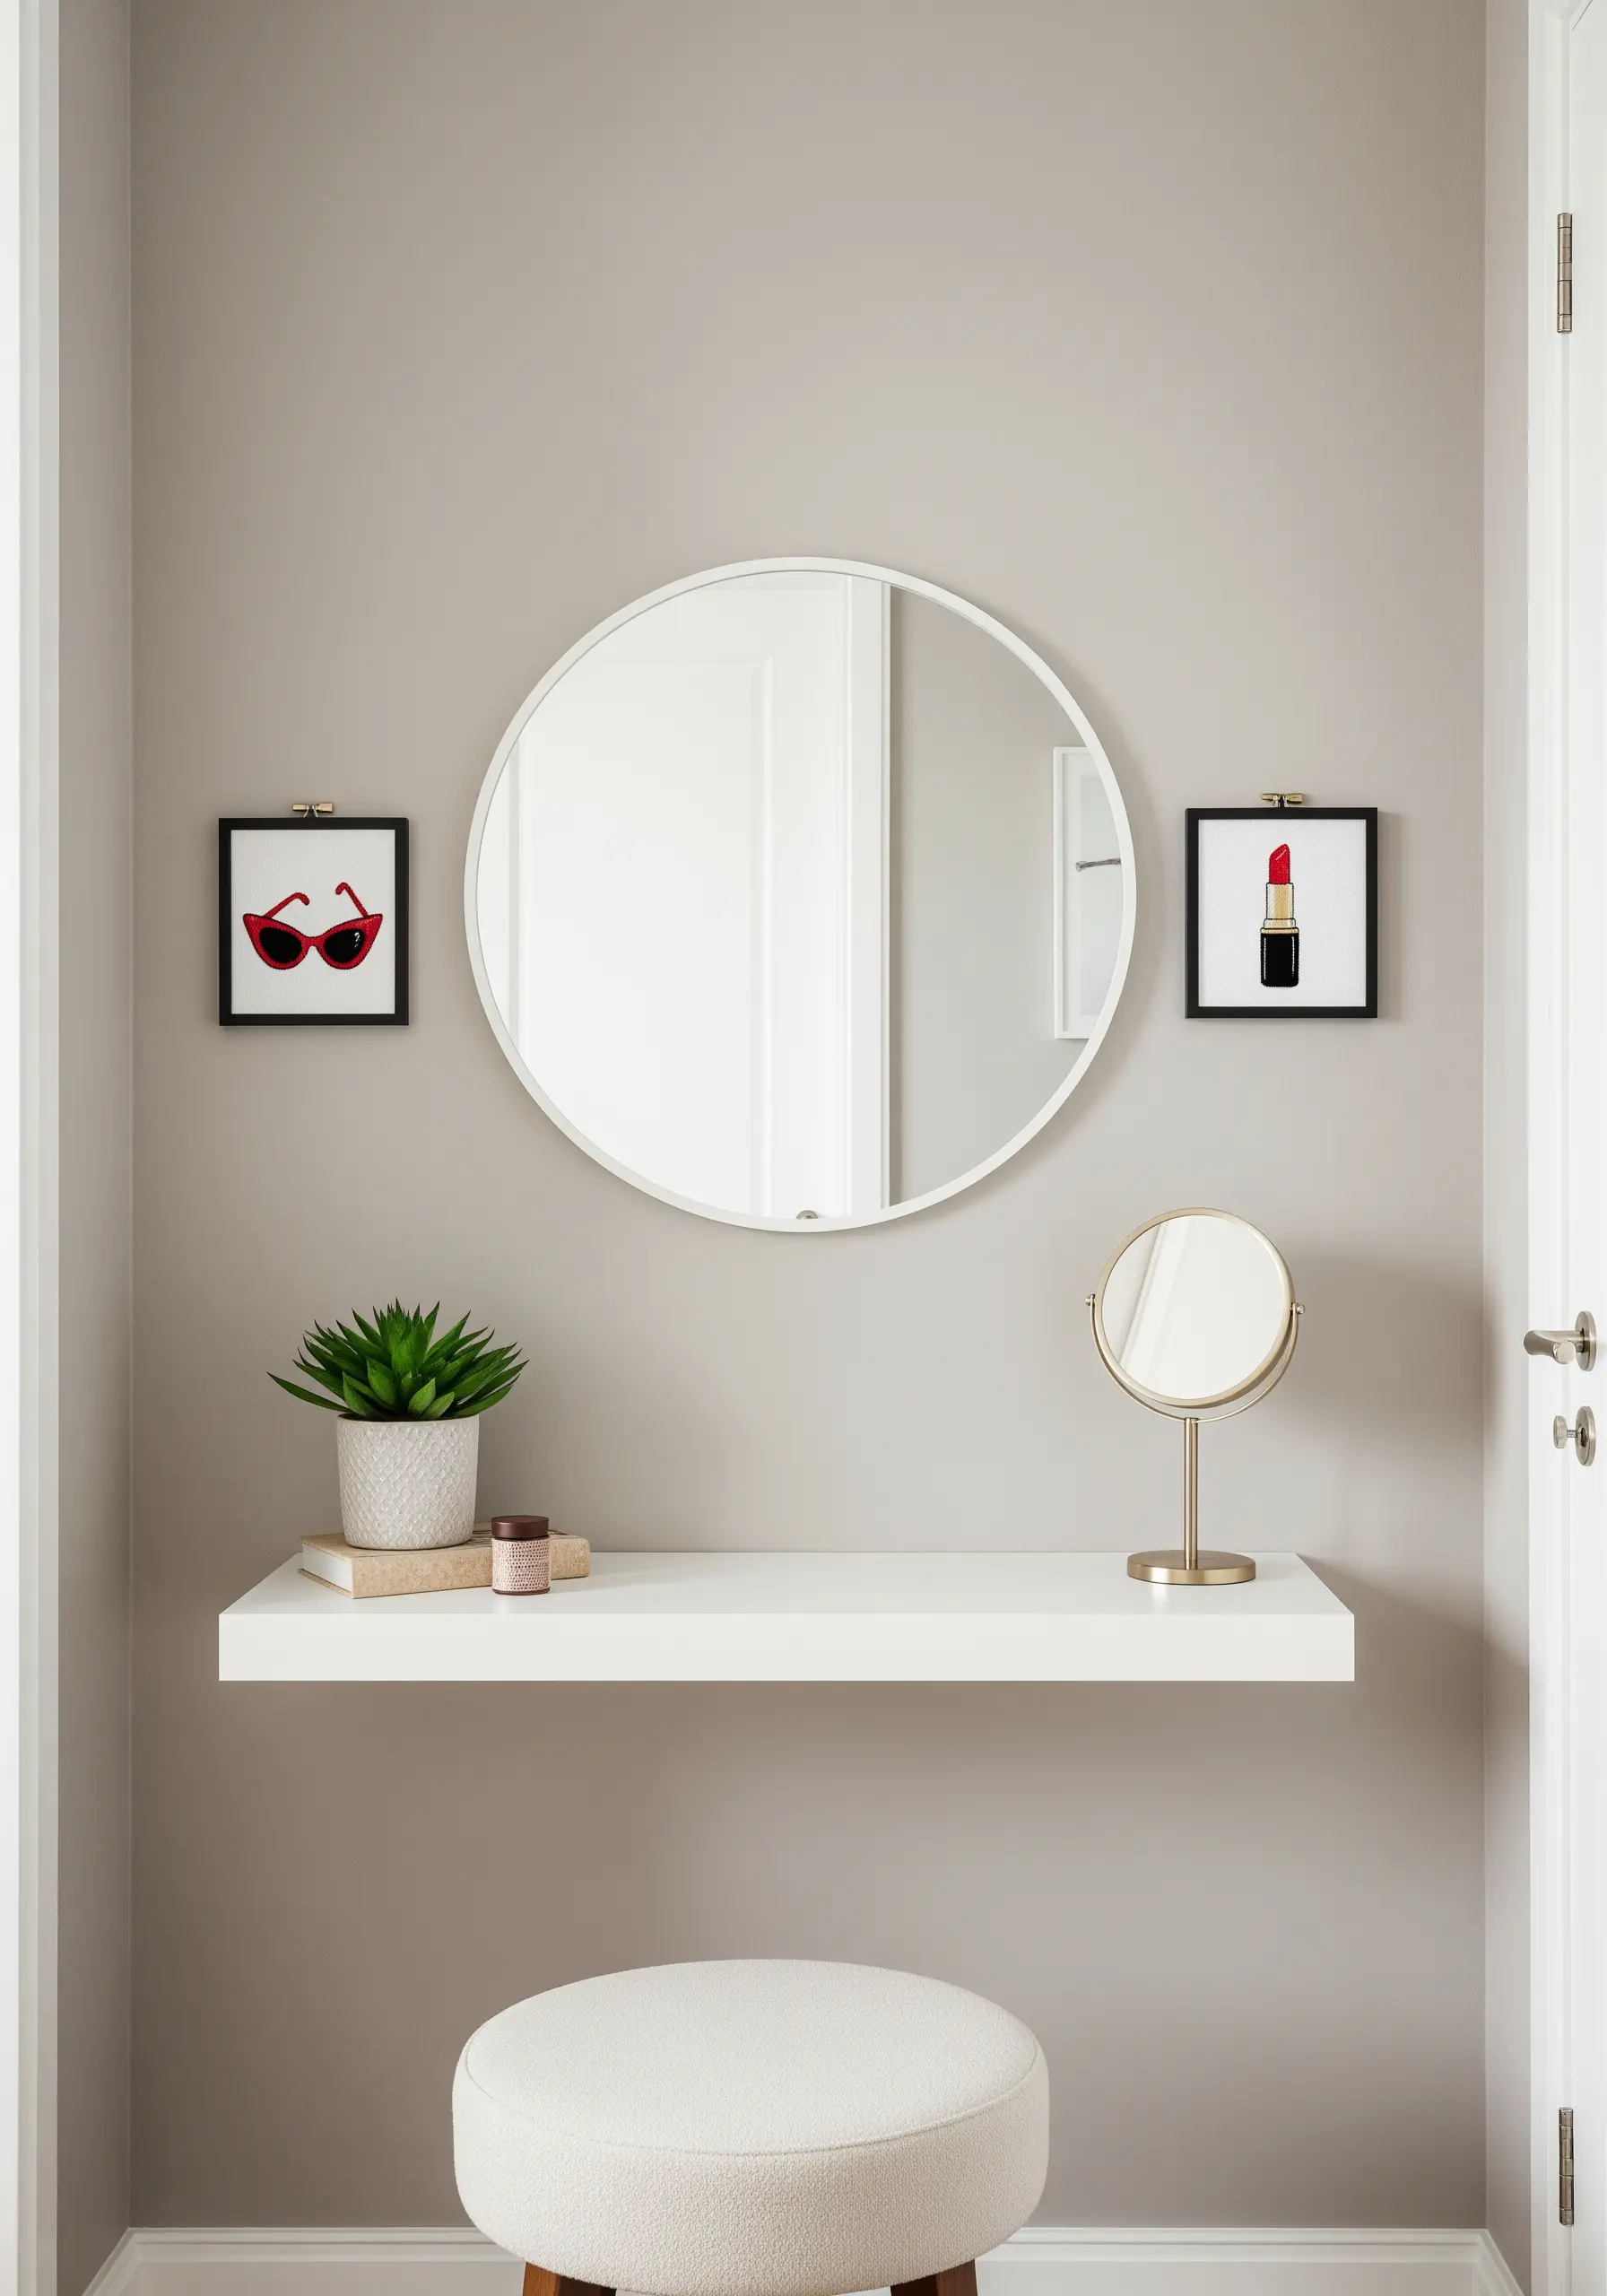
Add symmetry and balance to a space like a vanity by creating two small, complementary pieces.
Instead of identical designs, choose related motifs—like sunglasses and lipstick—that tell a small story together.
Framing them identically and placing them on either side of a central object, like a mirror, creates a sense of intentionality and polish.
This simple design principle turns two small embroideries into a sophisticated, cohesive decorative statement.
14. Build a Pixelated Gradient Mosaic
Create a large, impactful art piece from multiple small frames by stitching a pixelated gradient.
Divide a simple sunset gradient into a grid, then stitch each square as an individual piece.
Use a limited thread palette of reds, oranges, and purples, and fill each block with uniform cross-stitches or satin stitches for a clean, digital look.
Arranging the finished pieces together creates a stunning, deconstructed mosaic that is far more dynamic than a single large hoop.
Explore more gentle gradient embroidery designs for a calming effect.
15. Tell a Story with Thematic Travel Hoops

Curate a collection of hoops that represent a journey or a favorite place, perfect for a compact space like a camper van or travel trailer.
Combine iconic symbols (a compass, a map outline) with personal motifs (a retro camper, a specific landscape) to tell your unique story.
Varying the hoop sizes adds visual rhythm, while a consistent, limited color palette ensures the collection feels connected and cohesive.
This turns your wall into a personal, stitched travel journal.
16. Embrace Simplicity with Minimalist Line Art
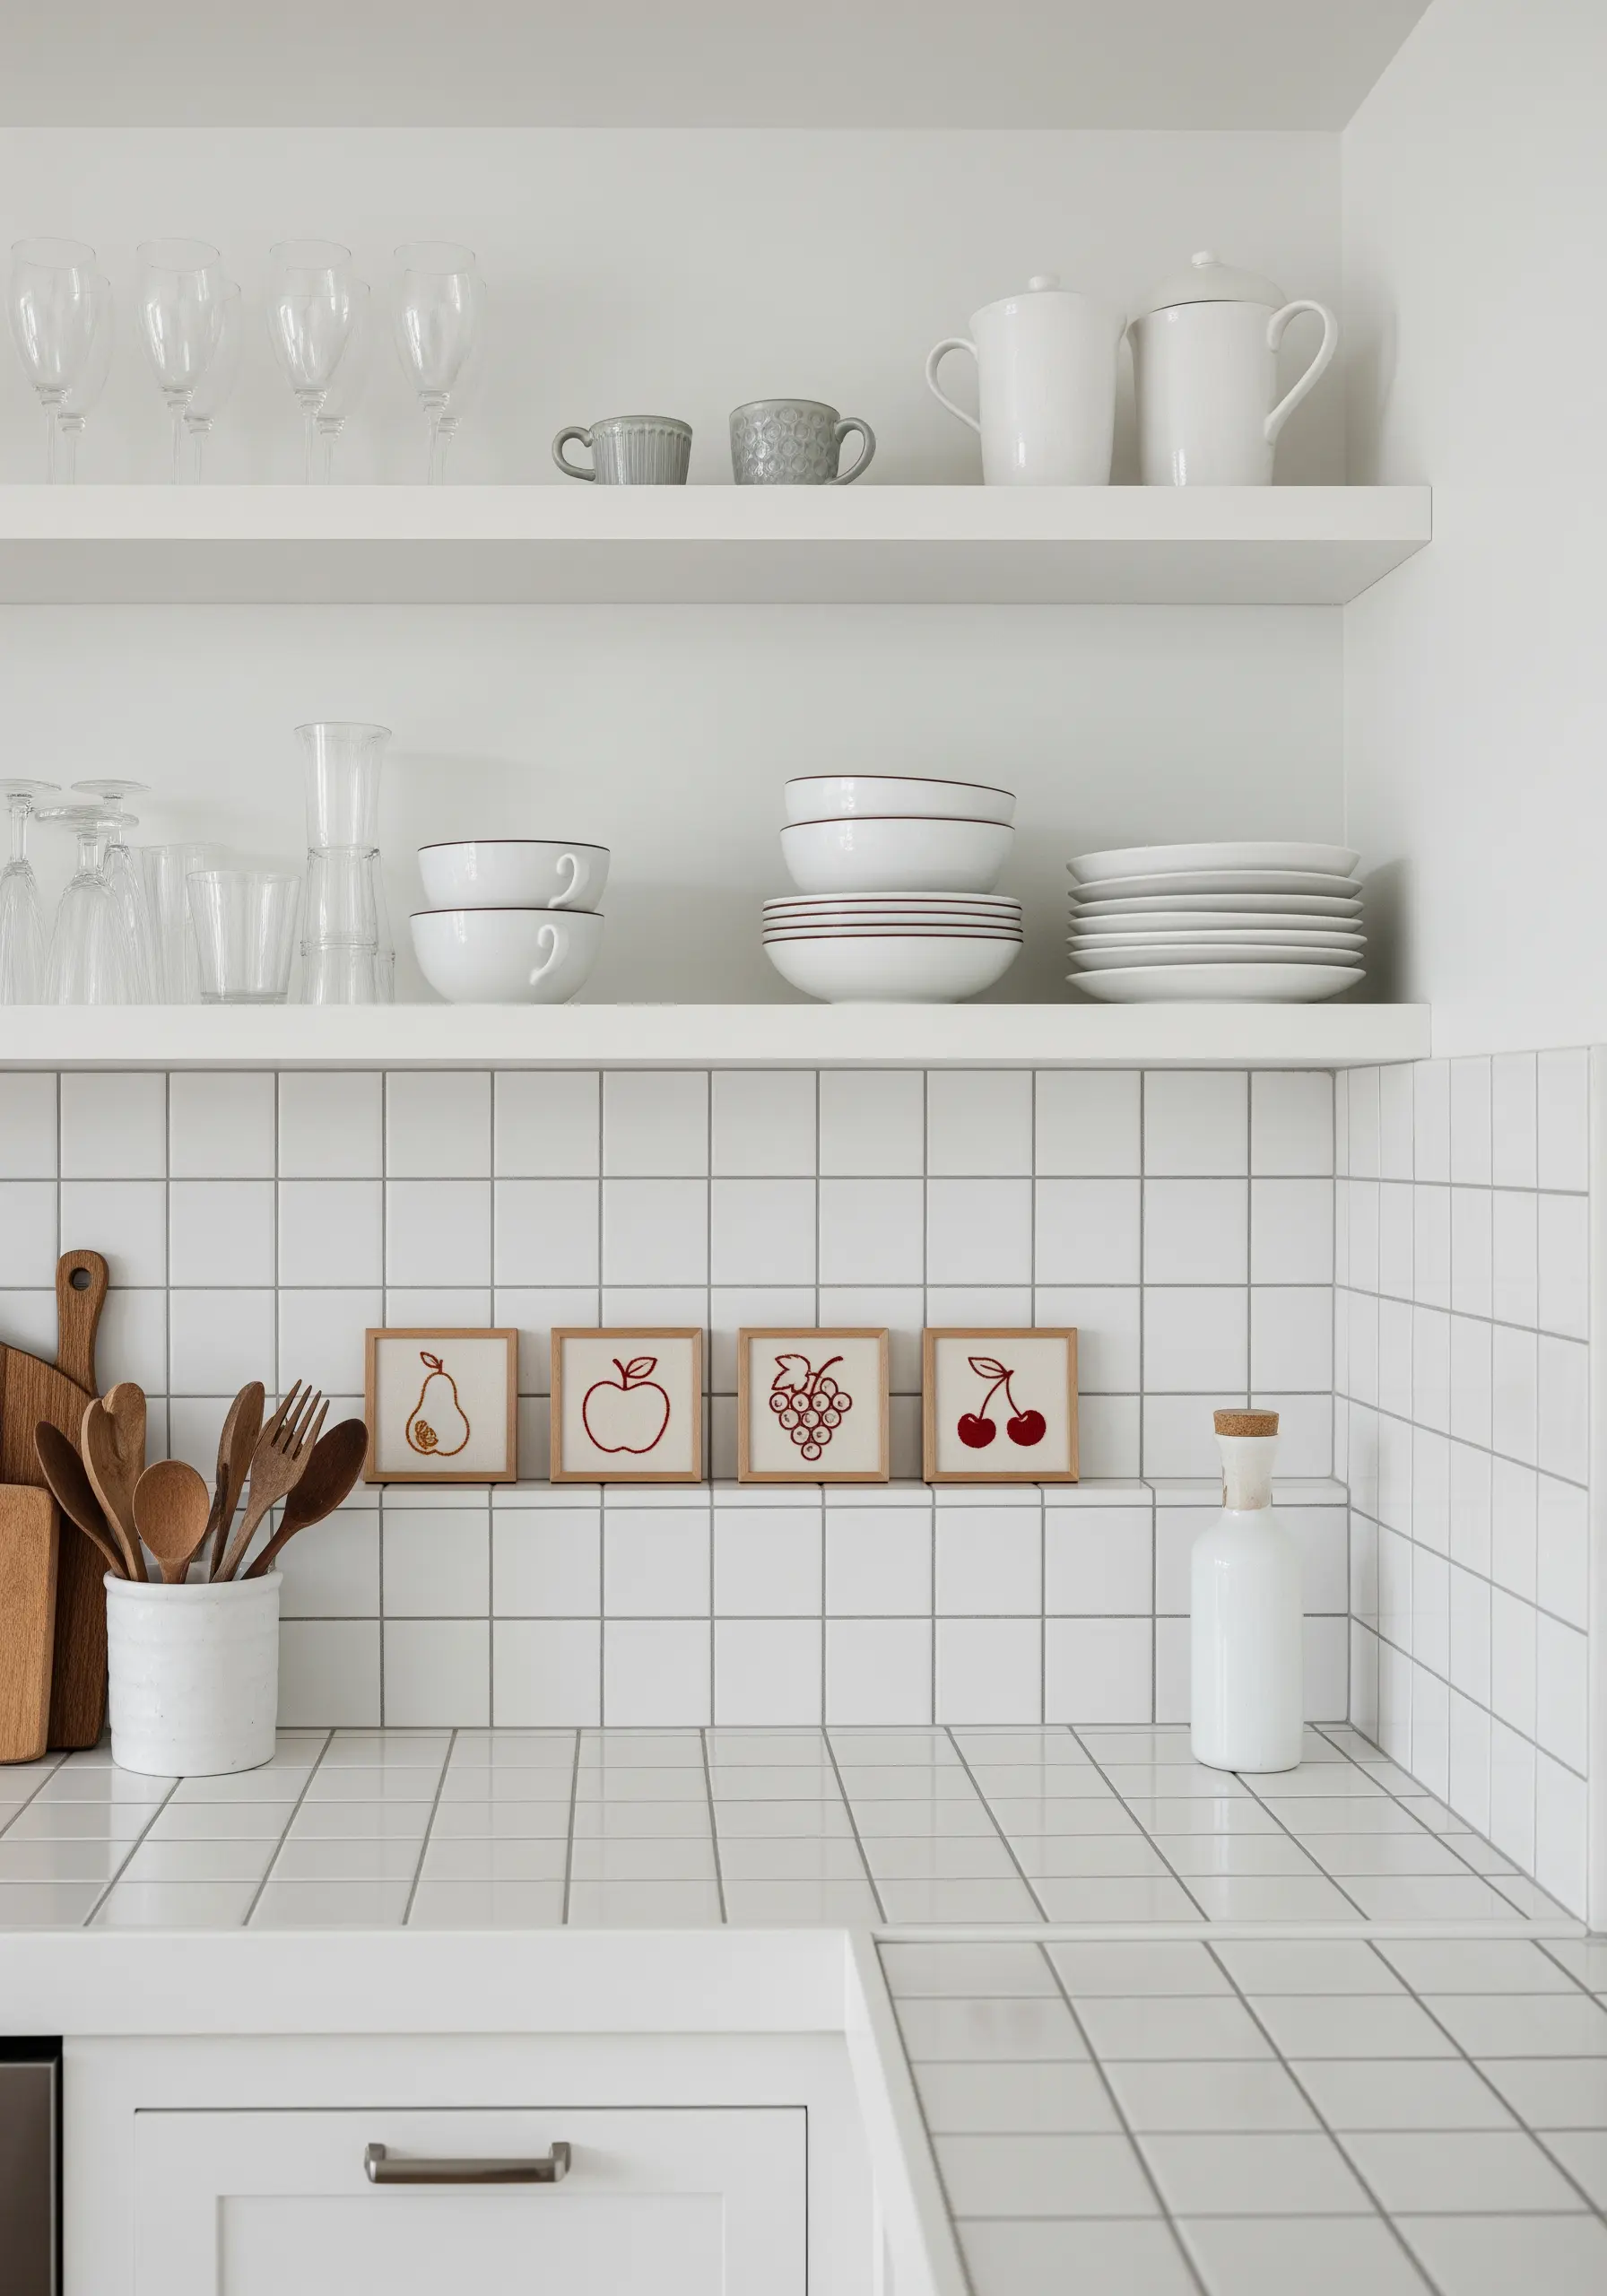
In a clean, minimalist space, a simple line drawing can have more impact than a dense, fully stitched piece.
Use a basic backstitch or stem stitch with just two or three strands of thread to create delicate, single-line fruit motifs.
The beauty of this technique lies in its restraint and the elegance of the negative space.
It adds a touch of handmade warmth to a modern kitchen without creating visual clutter, proving that powerful design doesn’t require complexity.
These are perfect examples of minimalist stitch designs that fit in the palm of your hand.
17. Mix Typography and Motifs for a Gallery Wall
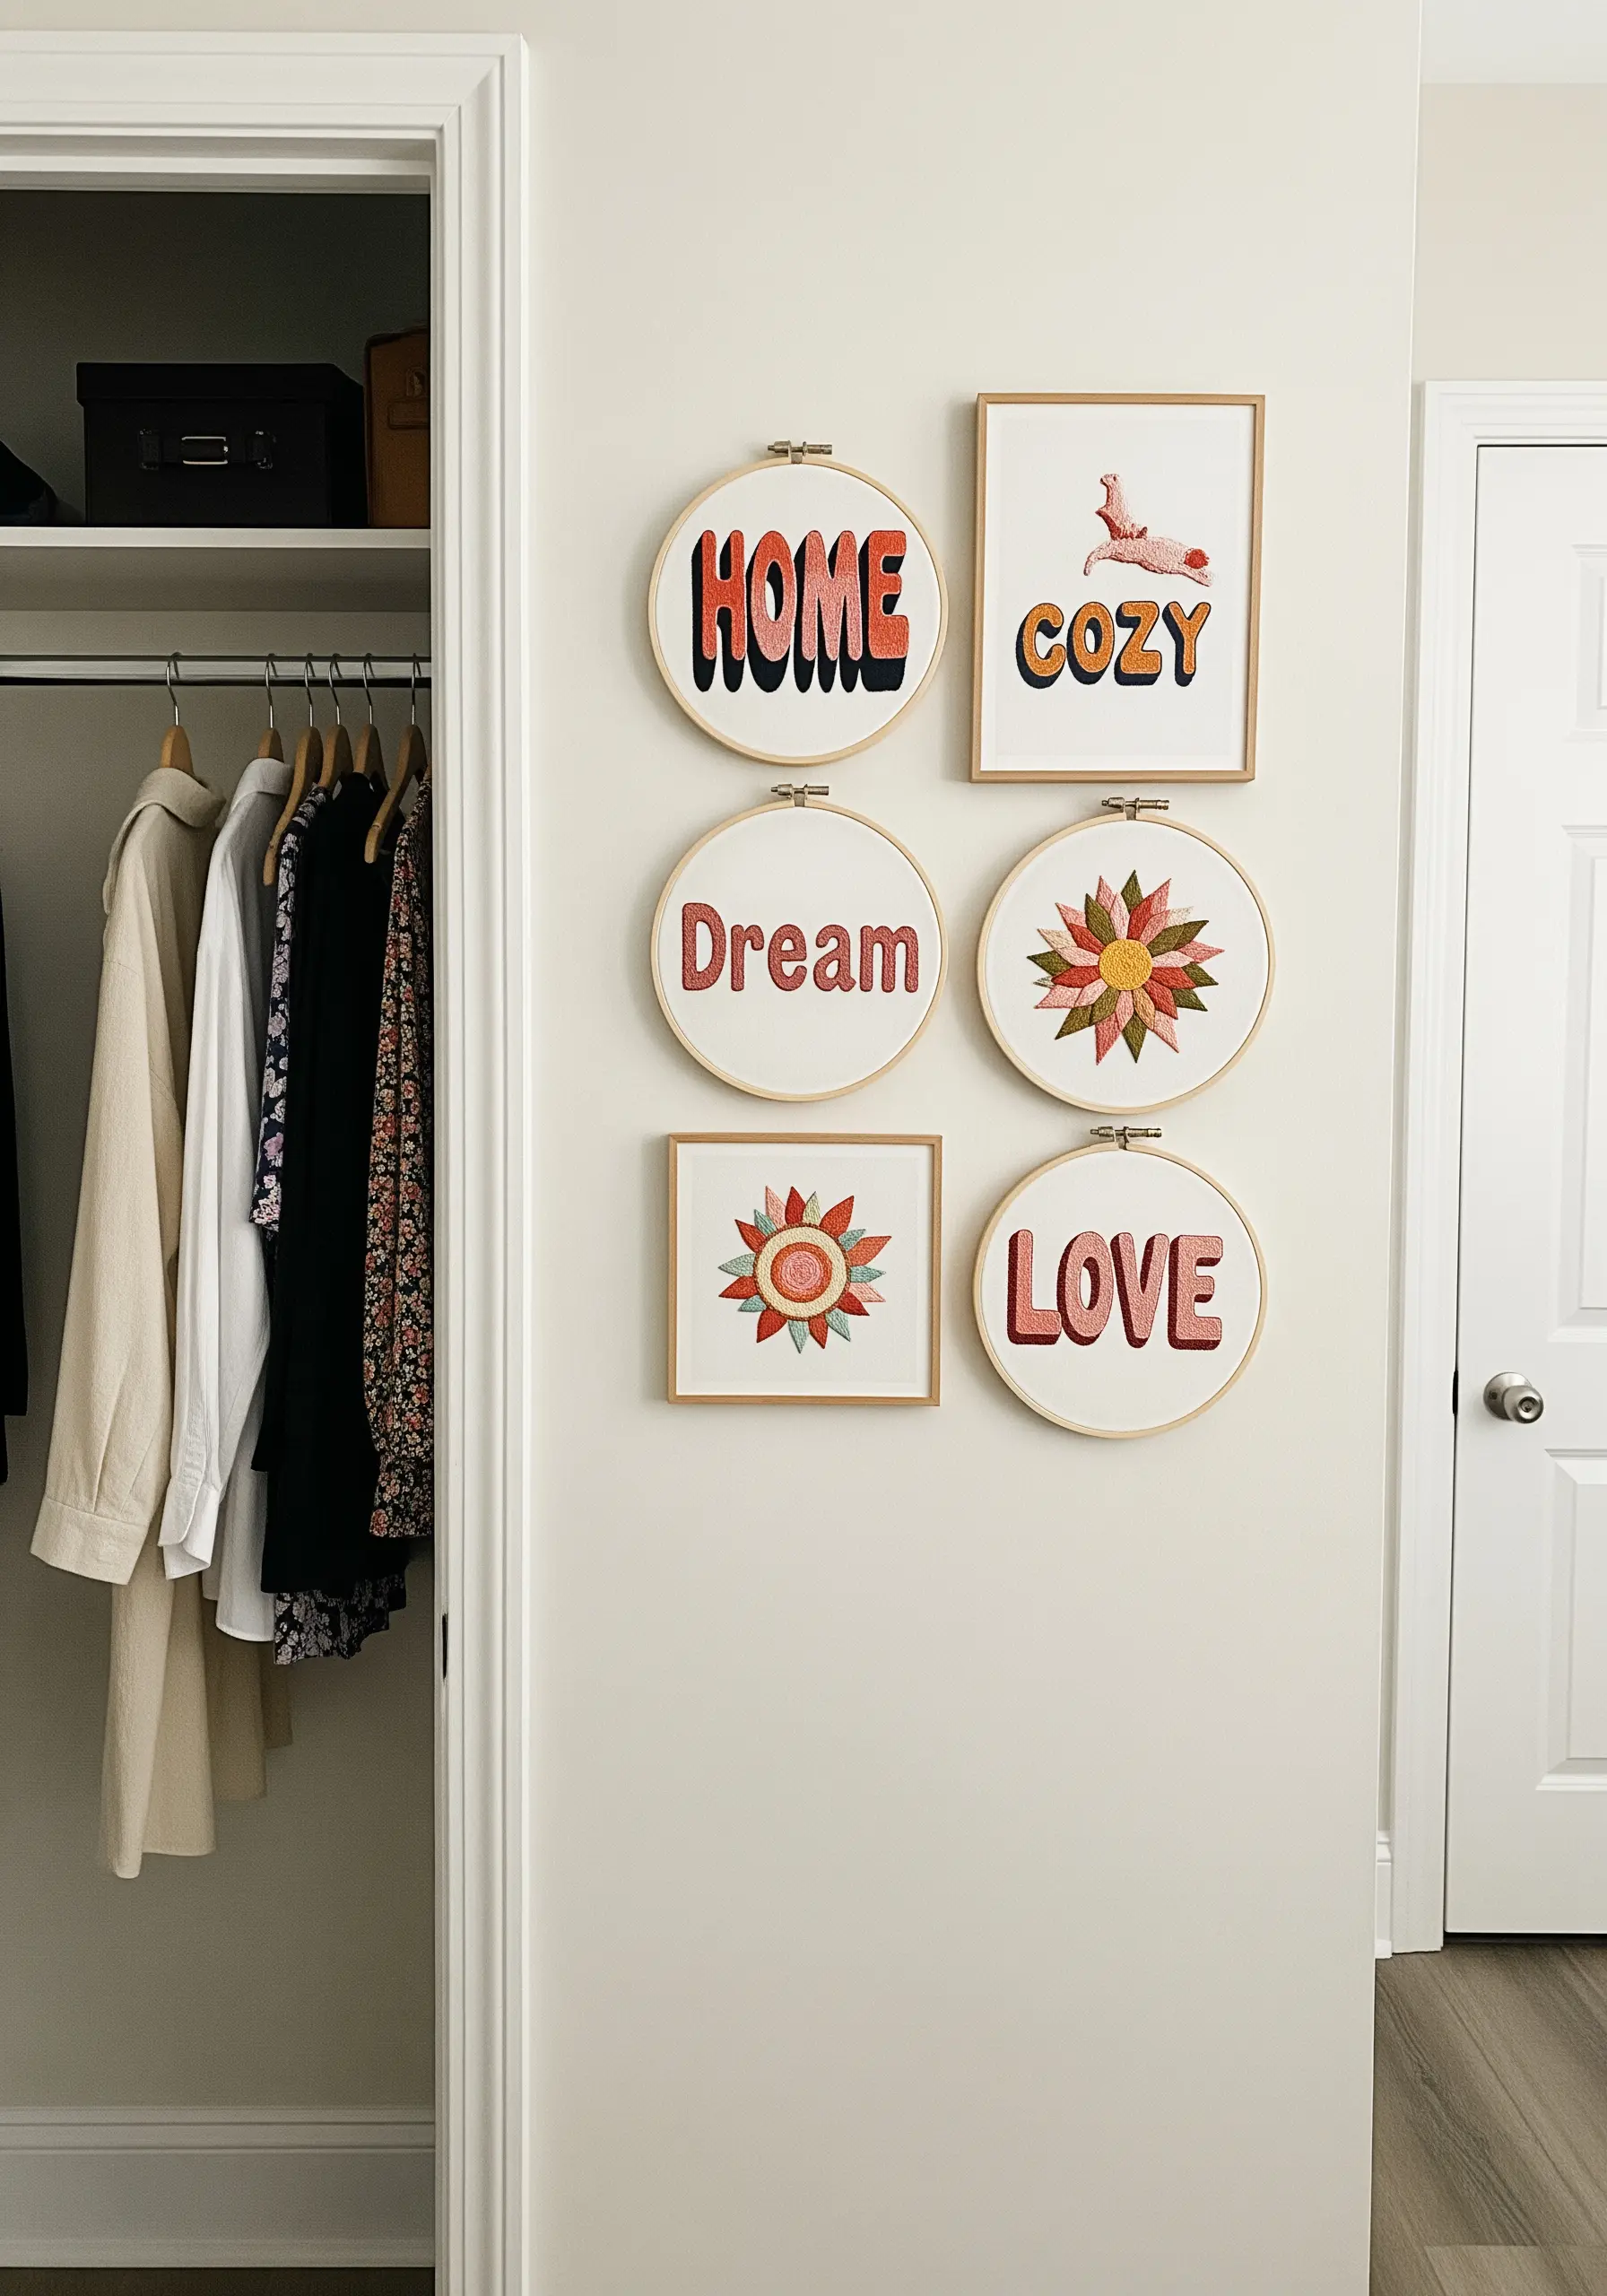
Create a dynamic and personal gallery wall by mixing bold typographic hoops with complementary floral or abstract designs.
To achieve the retro 3D effect on the lettering, use a satin stitch for the main letter and a contrasting color in a single long stitch for the shadow.
Tie the collection together by repeating colors across the different pieces—the red from a word can reappear as a petal in a flower.
This creates a cohesive yet eclectic look that feels vibrant and full of personality.
18. Create a Focal Point with a Single, Centered Piece
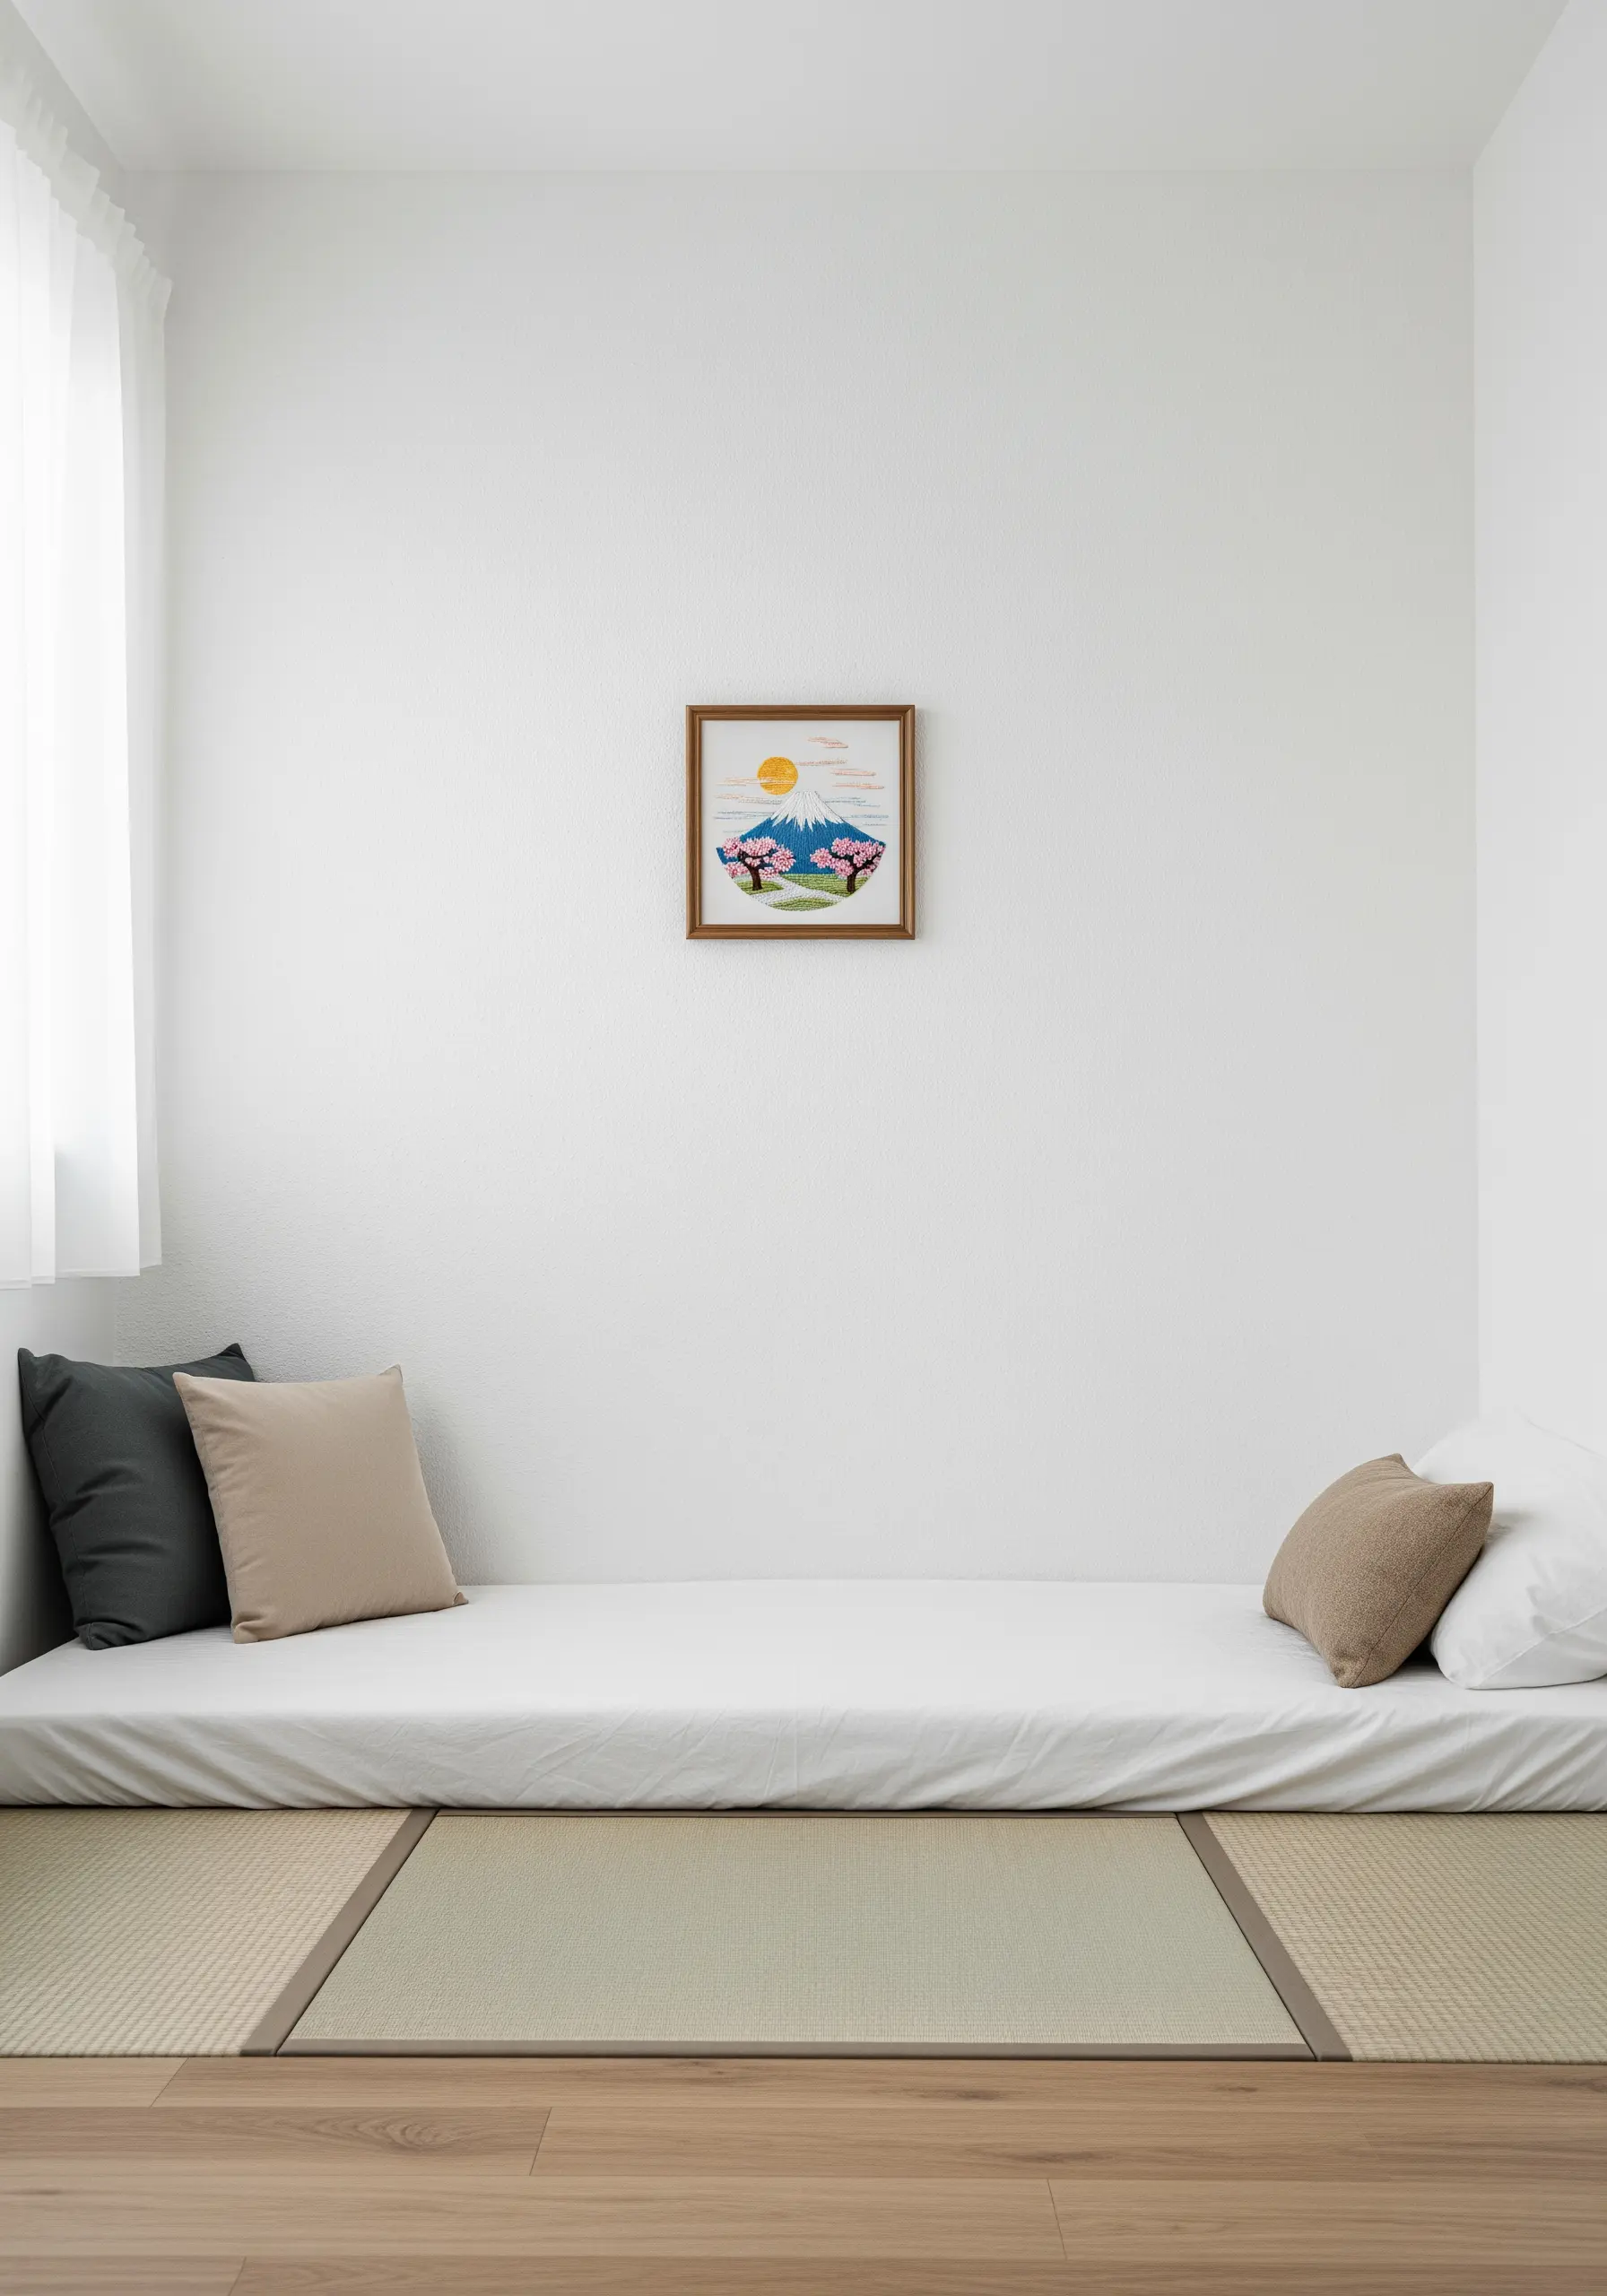
In a minimalist or Japanese-inspired room, resist the urge to fill the wall.
Instead, create a single, beautifully executed piece and give it the space to breathe.
Choose a calming, nature-inspired subject and mount it in a simple, high-quality wood frame that complements the room’s aesthetic.
Centering it on a large, empty wall turns it into a meditative focal point, drawing the eye and inviting quiet contemplation.
This approach values intention over volume.
19. Construct a Geometric Display with Bamboo Sticks

Arrange four seasonal hoops into a diamond shape and connect them with bamboo sticks or wooden dowels for a unique, structured wall hanging.
Simply lash the sticks to the hoop hardware with embroidery floss or twine in a coordinating color.
This method transforms individual hoops into a single, cohesive art piece with a modern, slightly rustic feel.
It’s an inventive way to add geometric structure and a larger presence to smaller works.
20. Add Playful Character to Utilitarian Spaces
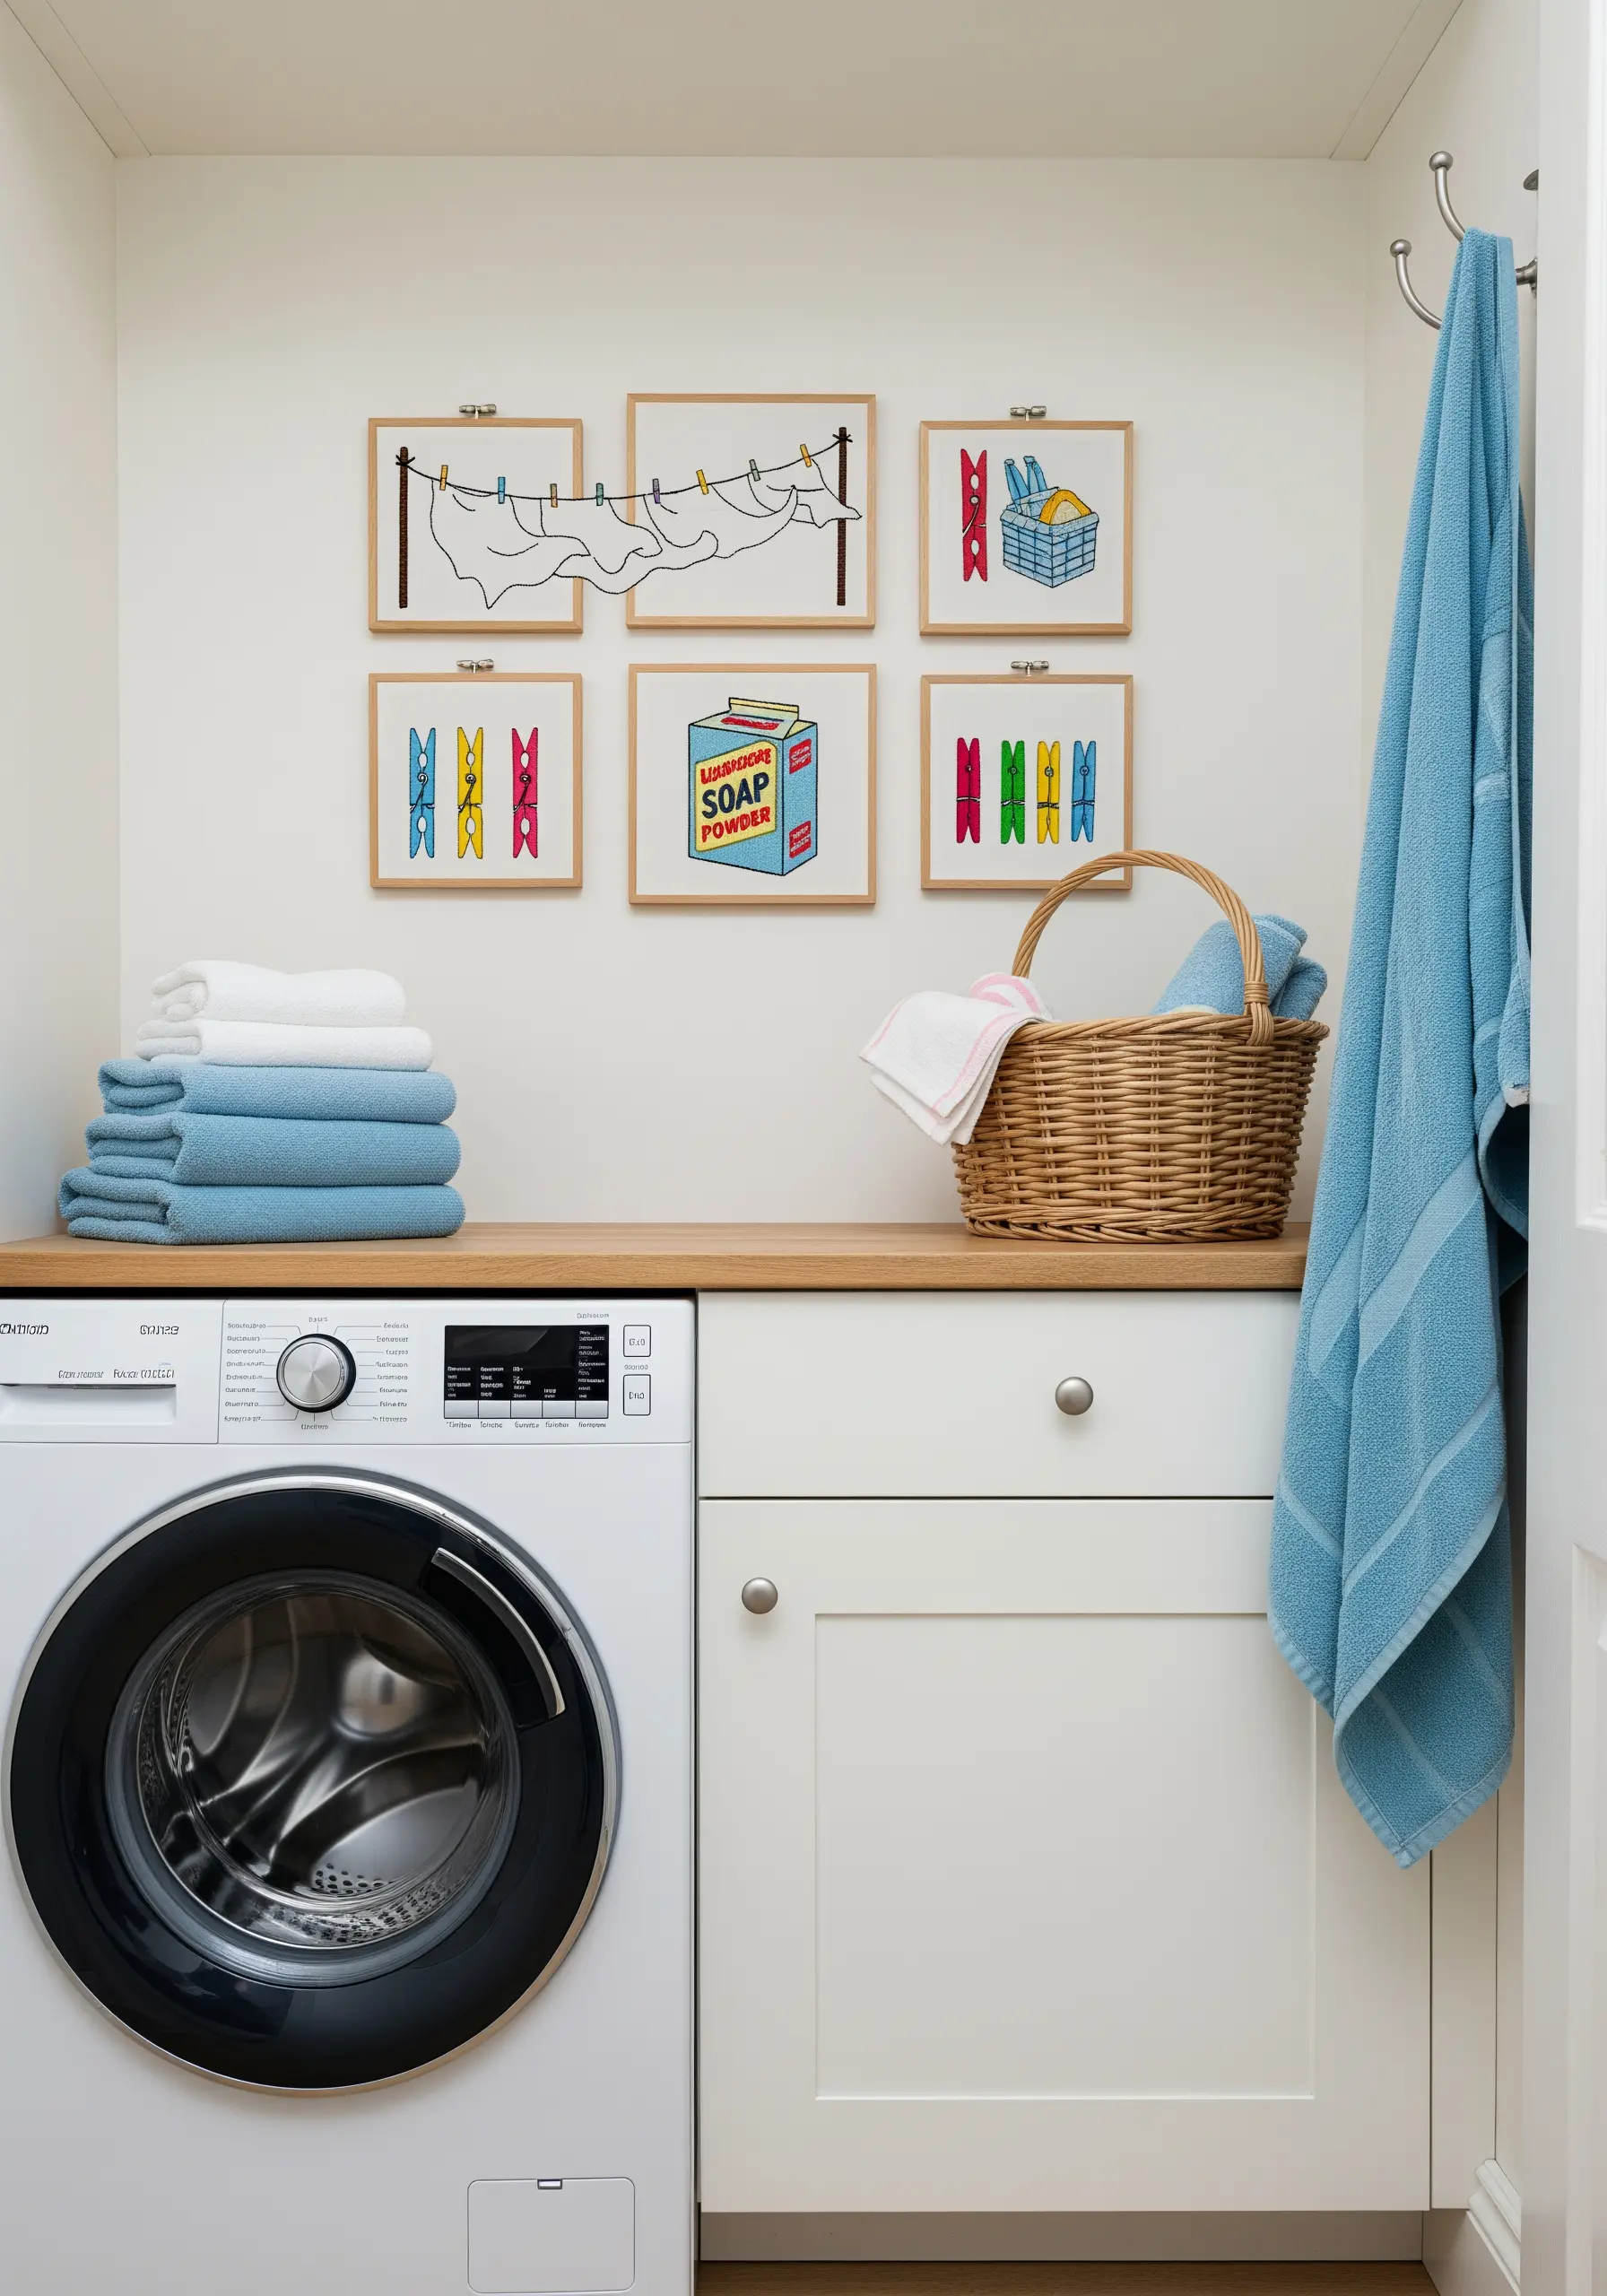
Brighten up a functional space like a laundry room with a collection of fun, themed embroidery.
Use simple line work and bold color blocking to create playful motifs like clothespins and soapboxes.
The key to making this work is consistency in framing and style. Using identical frames for all pieces creates a sense of order and intention.
This turns a mundane area into a cheerful spot that showcases your creativity and sense of humor.
21. Use Vertical Space on Narrow Walls
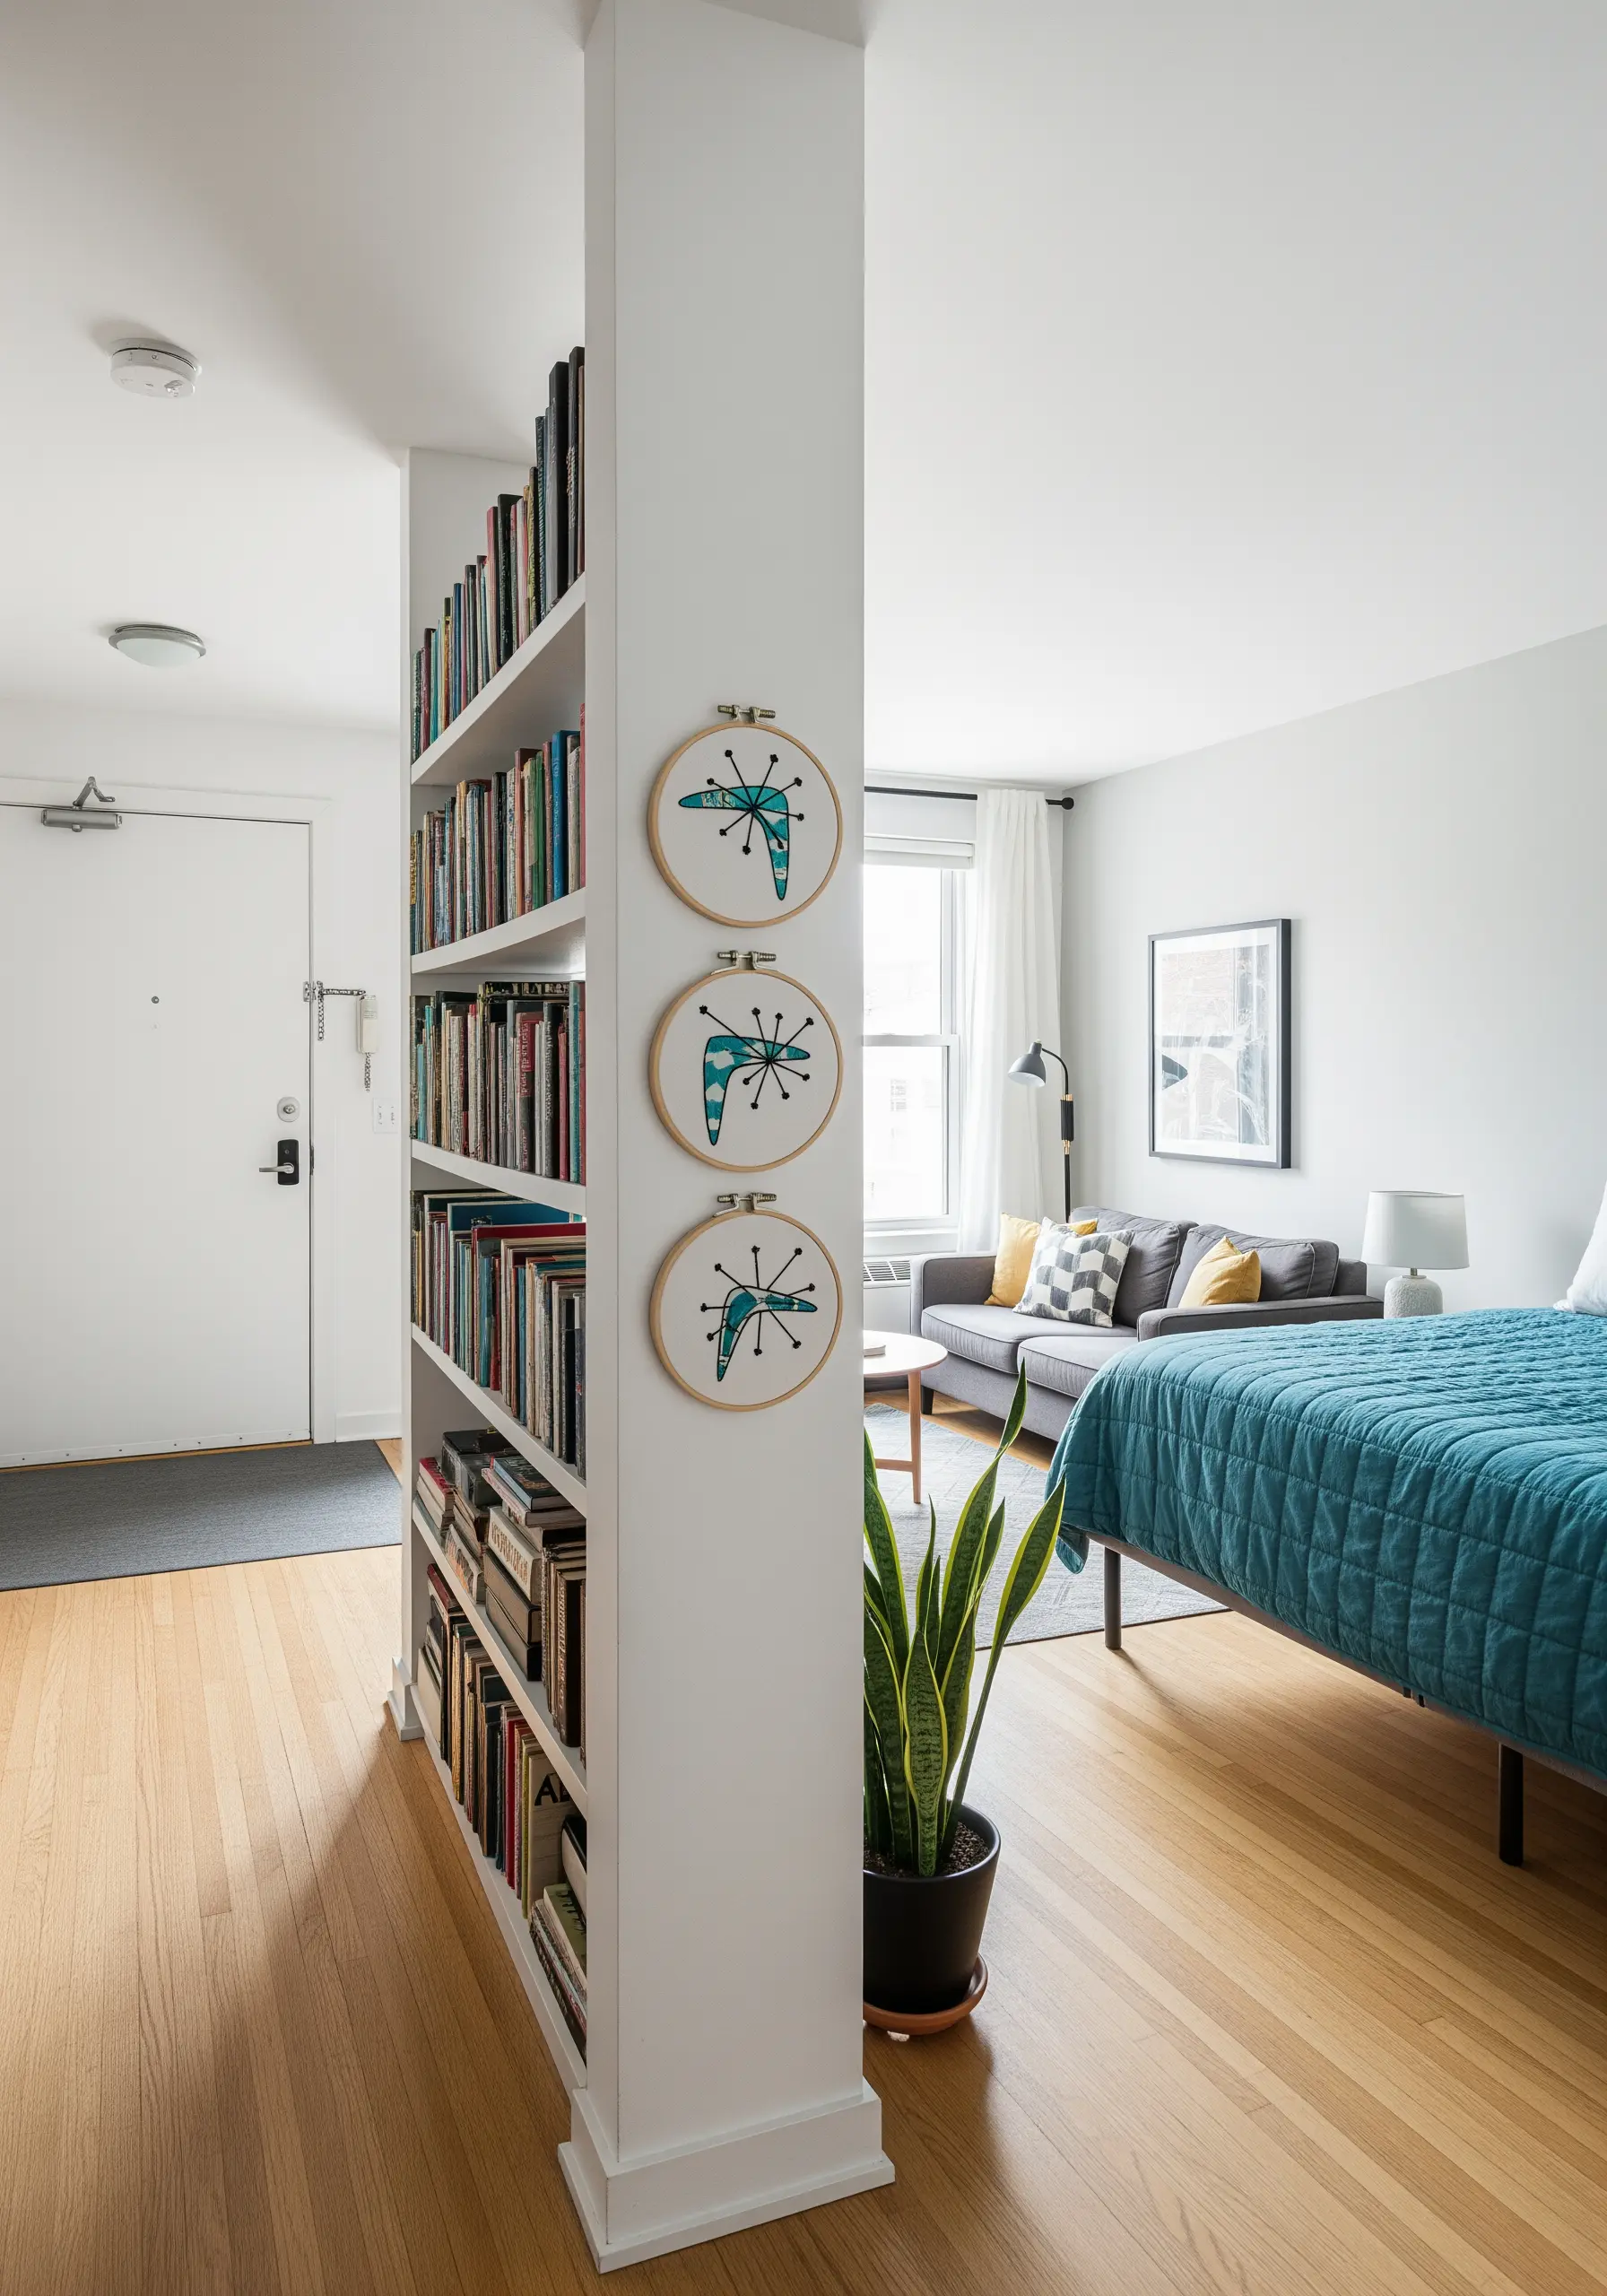
Maximize the impact of embroidery in a small apartment by utilizing narrow vertical spaces, like the side of a bookshelf or a slim pillar wall.
Stacking three or more hoops in a vertical line draws the eye upward, creating an illusion of height and turning an overlooked architectural feature into a design moment.
Choose designs with a strong graphic quality, like these mid-century modern abstracts, so they are easily readable from across the room.
These abstract thread designs using negative space are perfect for this.
22. Cultivate a Calm Corner with Zen-Inspired Motifs
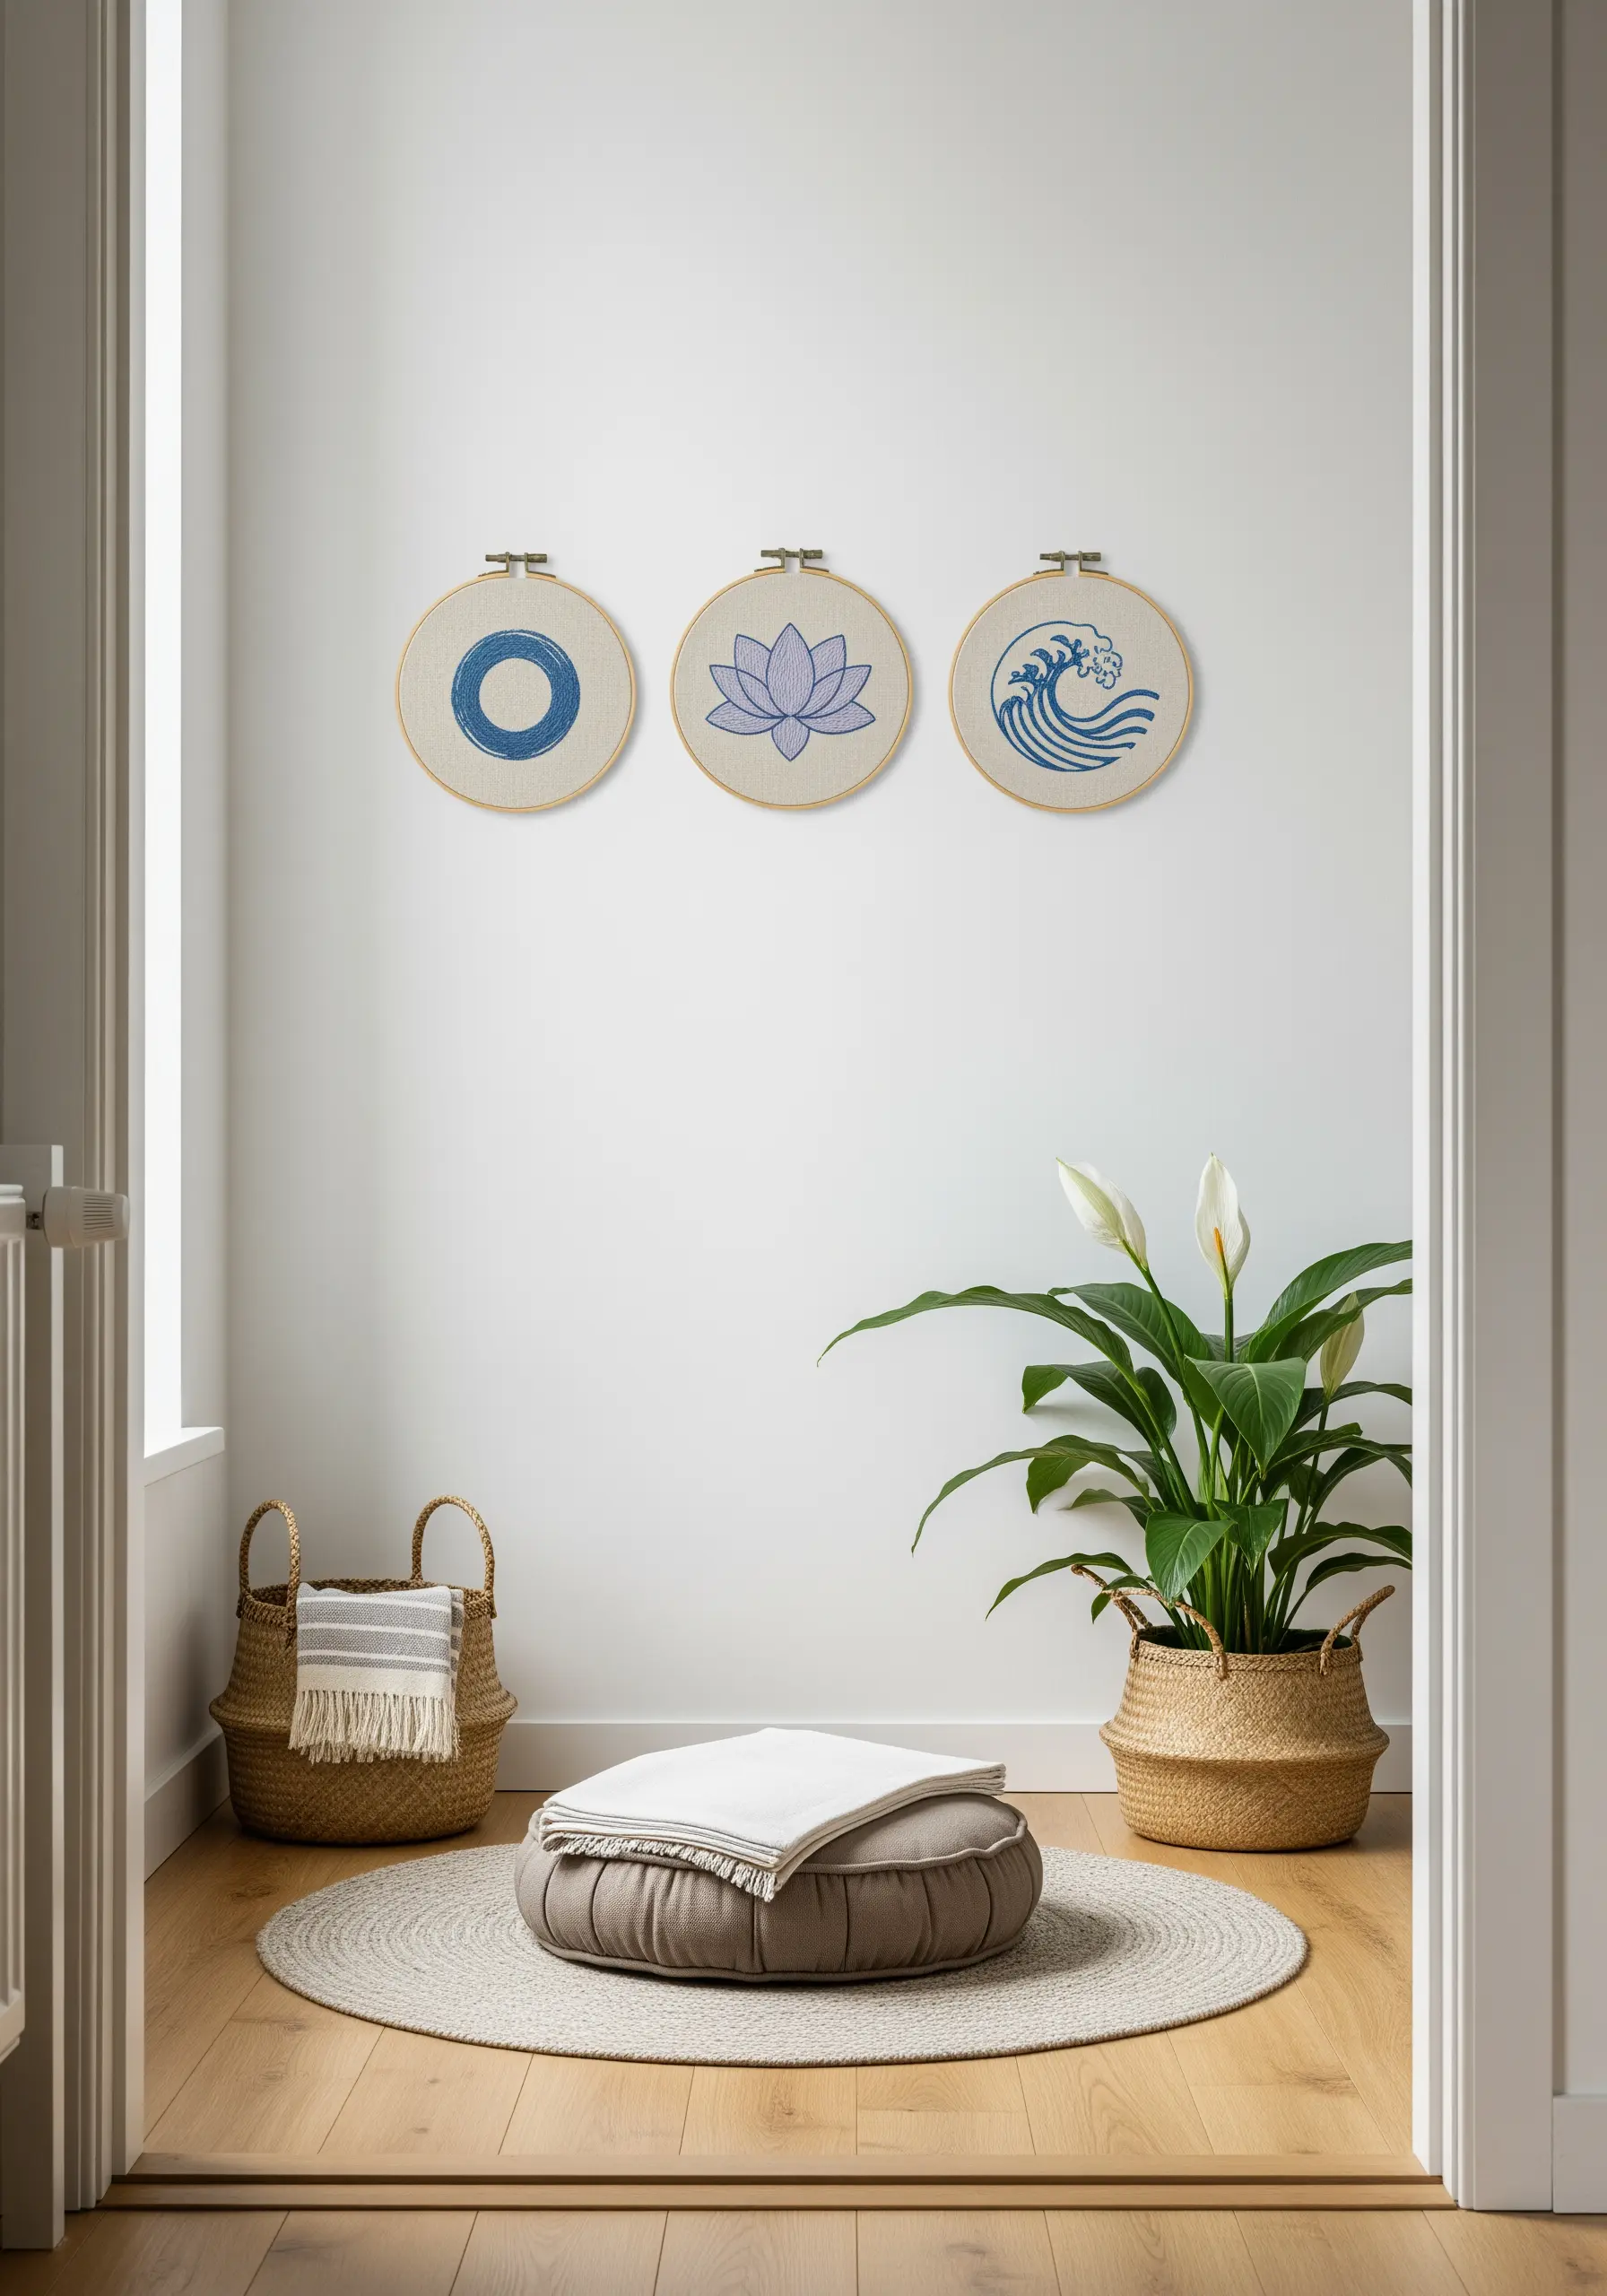
Designate a space for relaxation by curating a trio of hoops with meditative symbols.
Use a calming color palette of blues, lavenders, and natural linen to enhance the tranquil atmosphere.
To create the soft, watercolor-like fill of the lotus flower, use single-strand long-and-short stitches, blending shades of purple very gradually.
This ‘thread painting’ technique gives the design a gentle, organic feel that’s perfect for a meditation or yoga space.
23. Create Architectural Symmetry in a Window Nook
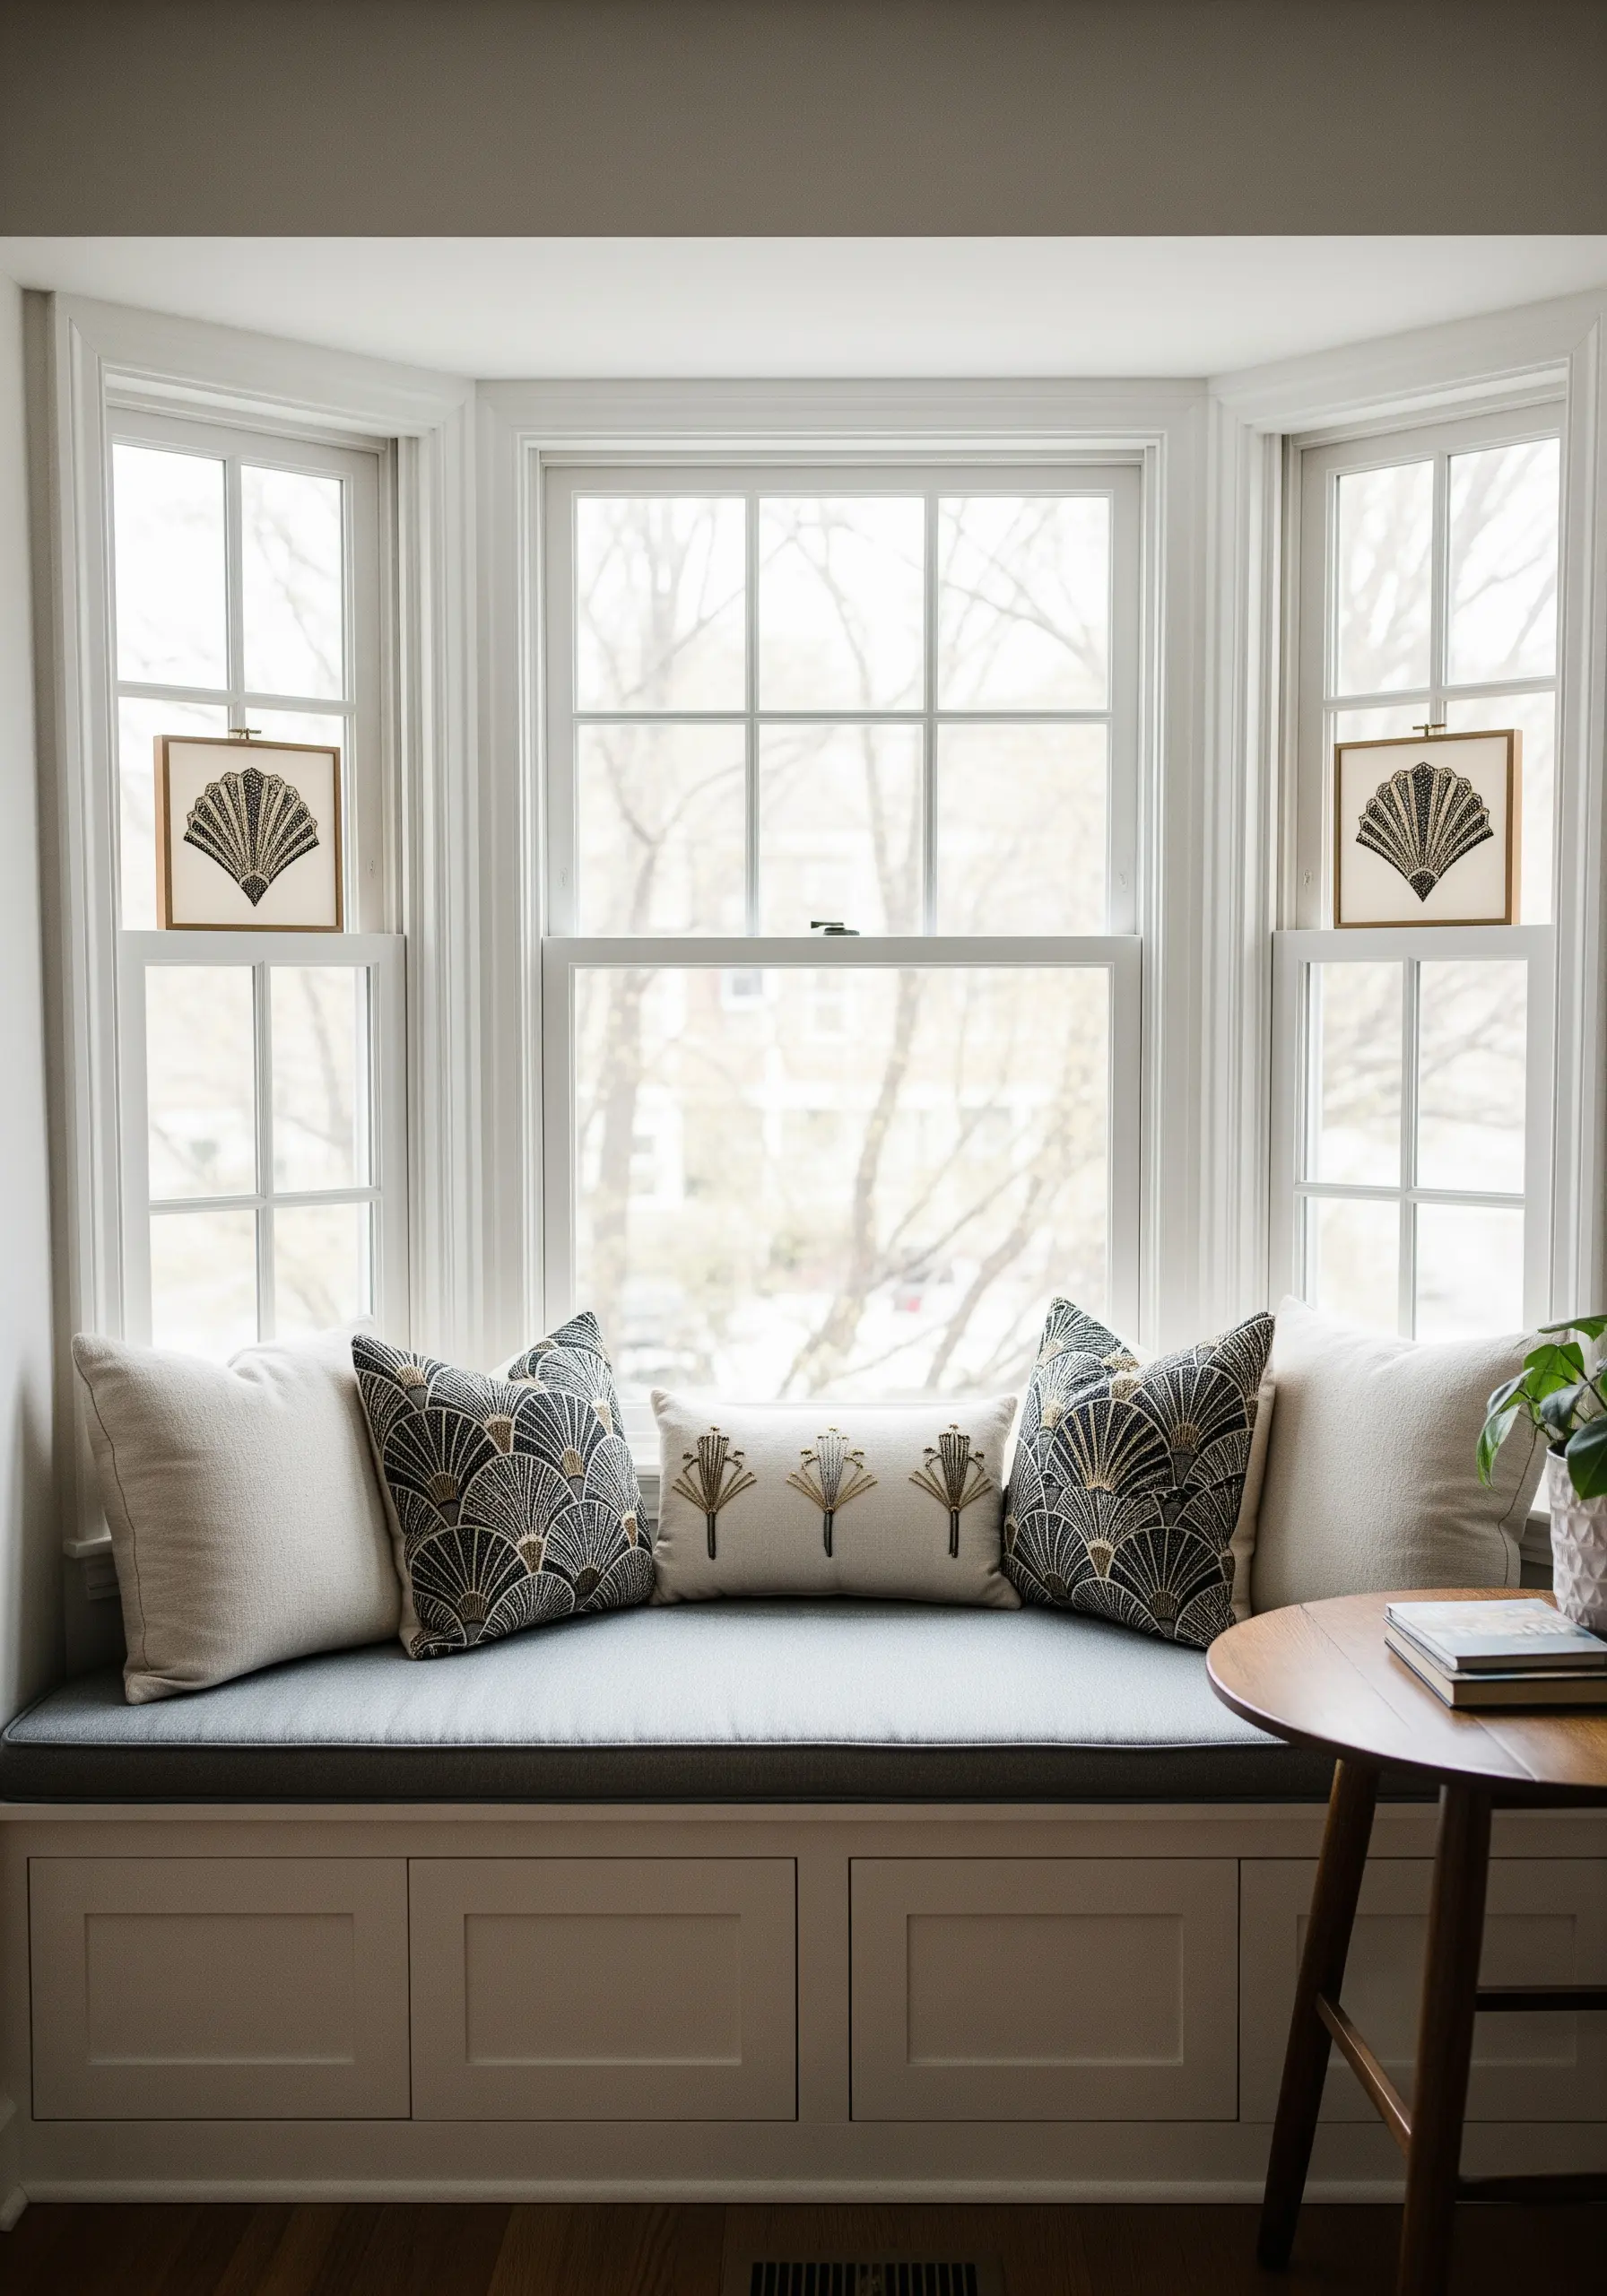
Enhance the architectural features of your home, like a bay window, by placing identical framed pieces in the narrow wall spaces on either side.
This creates a sense of balance, symmetry, and intentional design, framing the window as the central showpiece.
For art deco motifs, use a combination of satin stitch and metallic thread to capture the geometric elegance and subtle glamour of the style.
The metallic threads will catch the natural light from the window beautifully.
24. Curate a Cocktail Gallery Above a Bar Cart

Personalize your entertainment area with a playful gallery of embroidered and framed cocktail art.
Mix frames and hoops of different sizes and orientations to create a dynamic, salon-style hang.
To make the liquid in the glasses look realistic, use a satin stitch with threads that have a slight sheen and leave a small sliver of unstitched fabric to represent a highlight.
This simple trick adds a touch of dimension and makes the drinks look deliciously real.
25. Guide the Eye with a Staircase Gallery
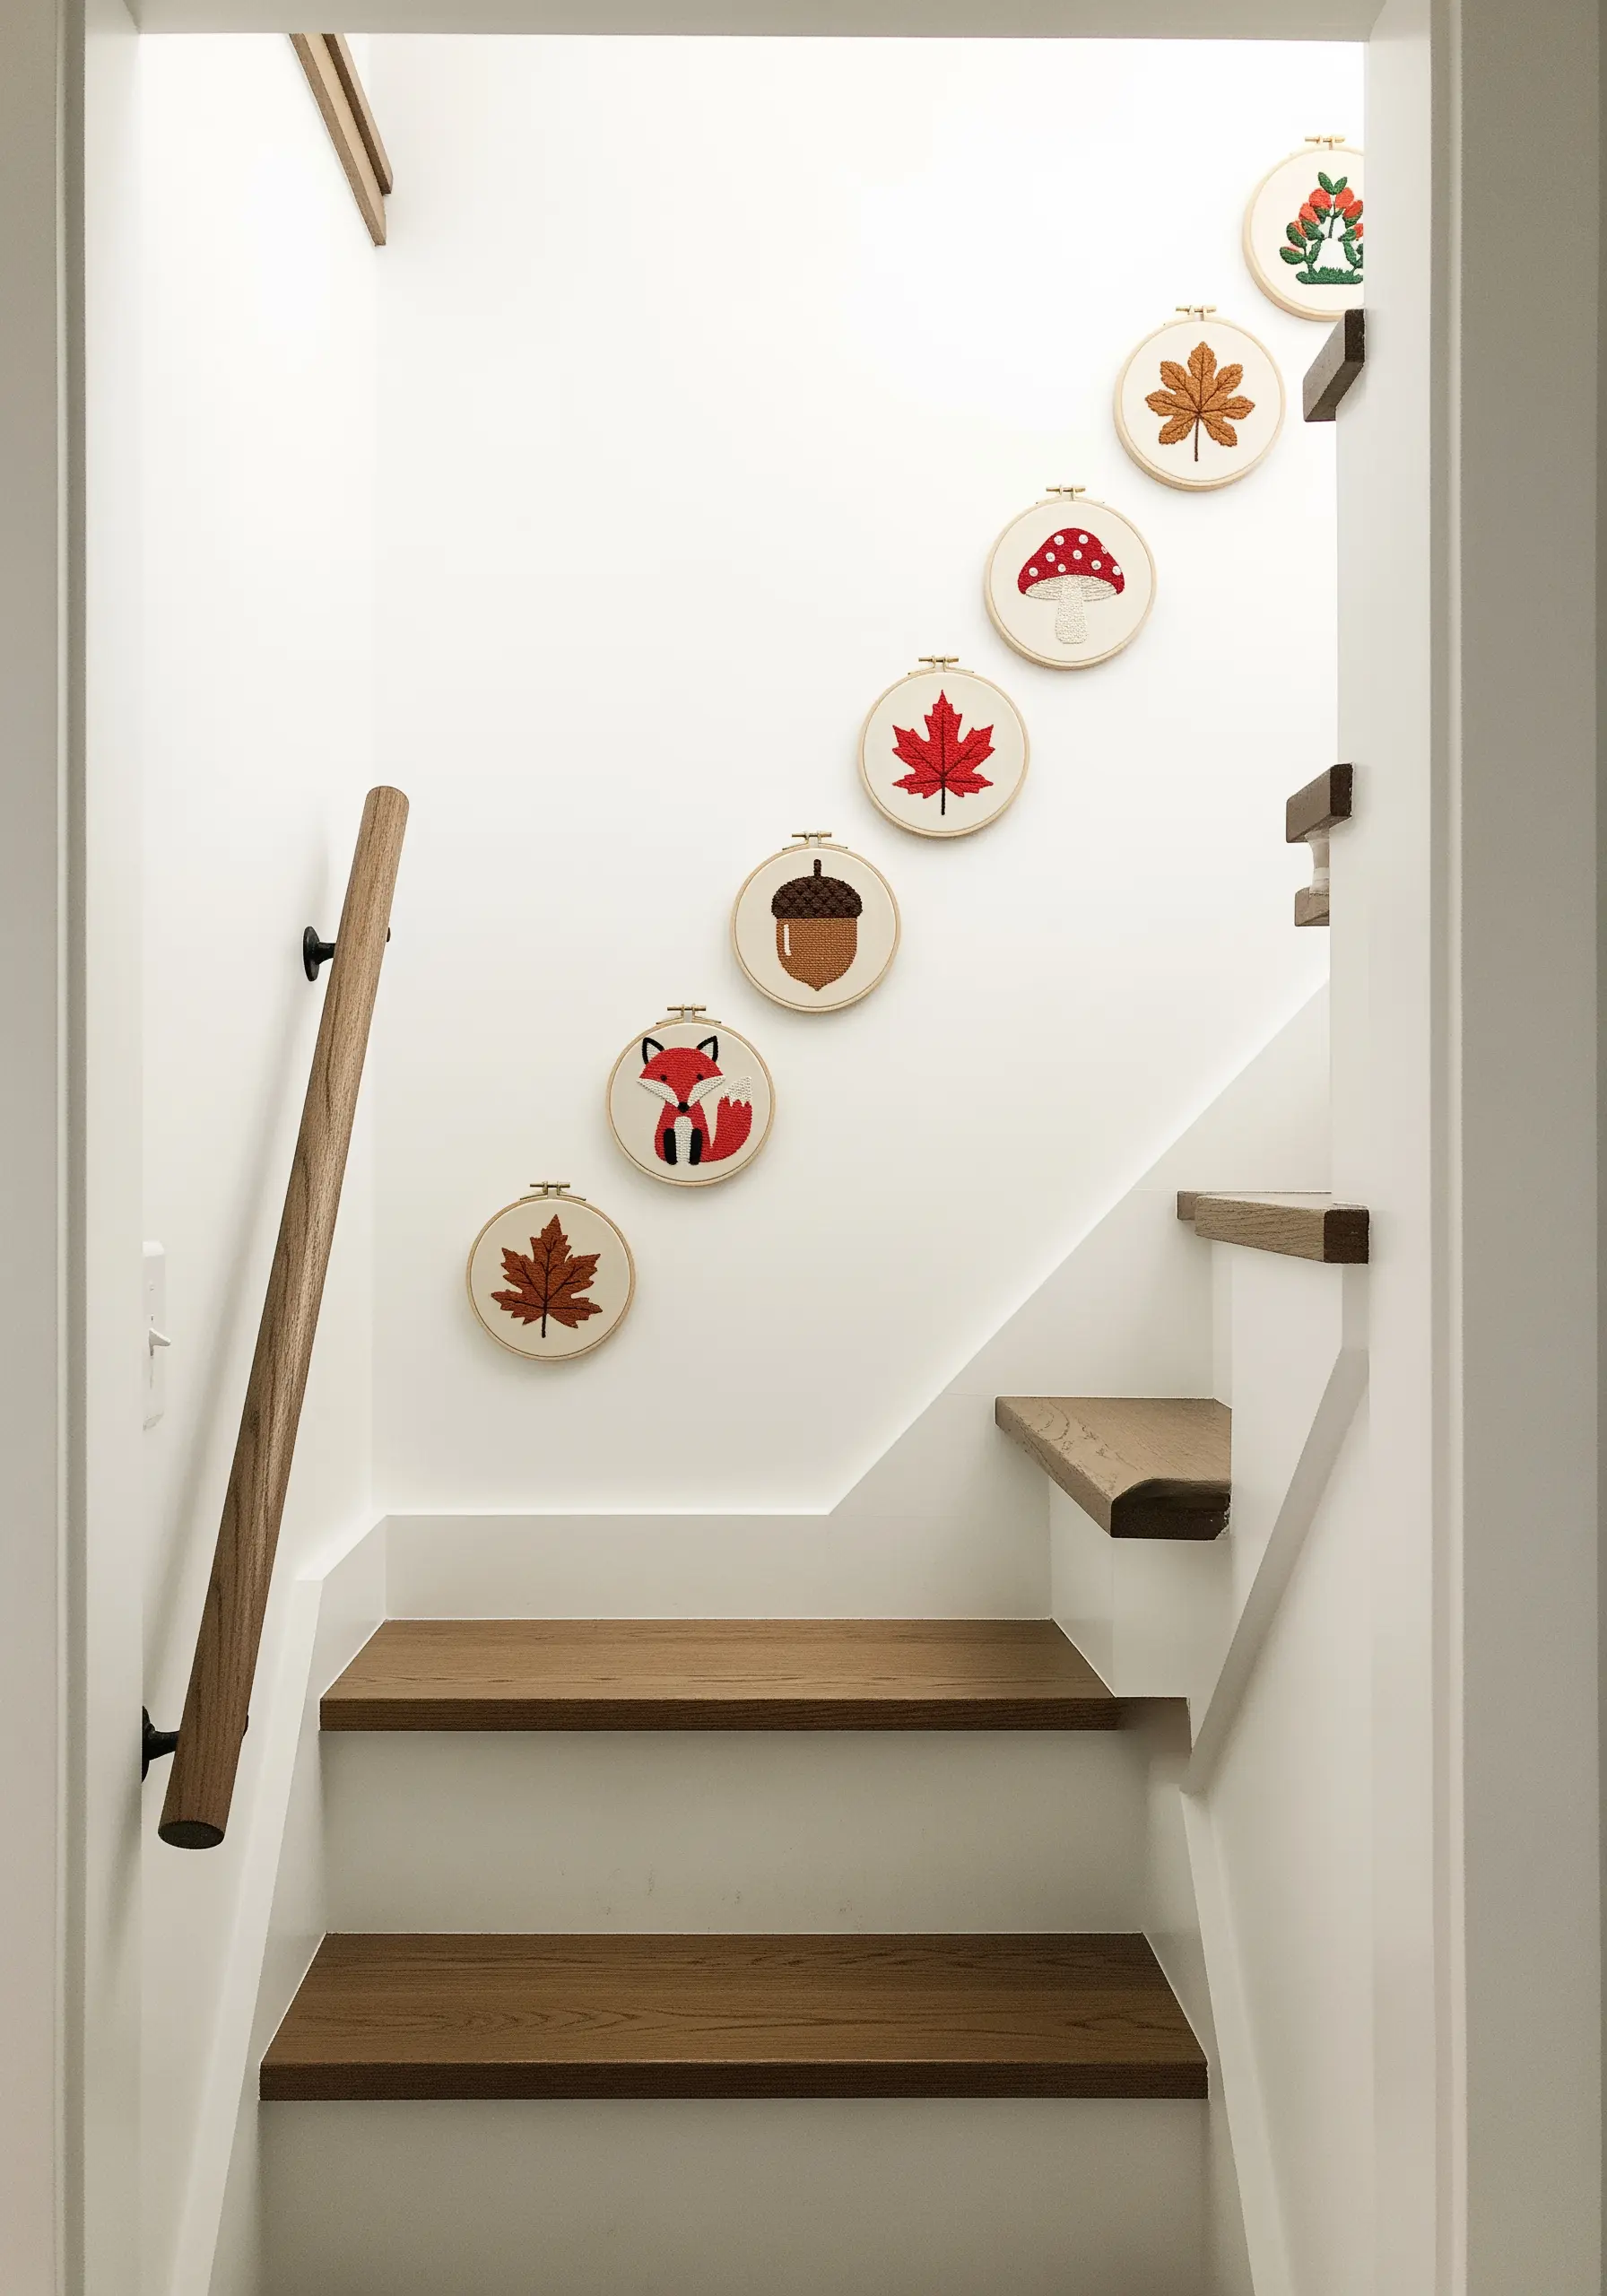
Use the natural diagonal line of a staircase to create a dynamic, flowing gallery wall.
Arrange your hoops to follow the angle of the banister, creating a sense of movement that leads the eye upward.
A unifying theme, like these autumnal motifs, ensures the collection feels cohesive.
This is a brilliant way to add personality and color to a transitional space that is often overlooked.
26. Immortalize a Pet with a Thread Portrait
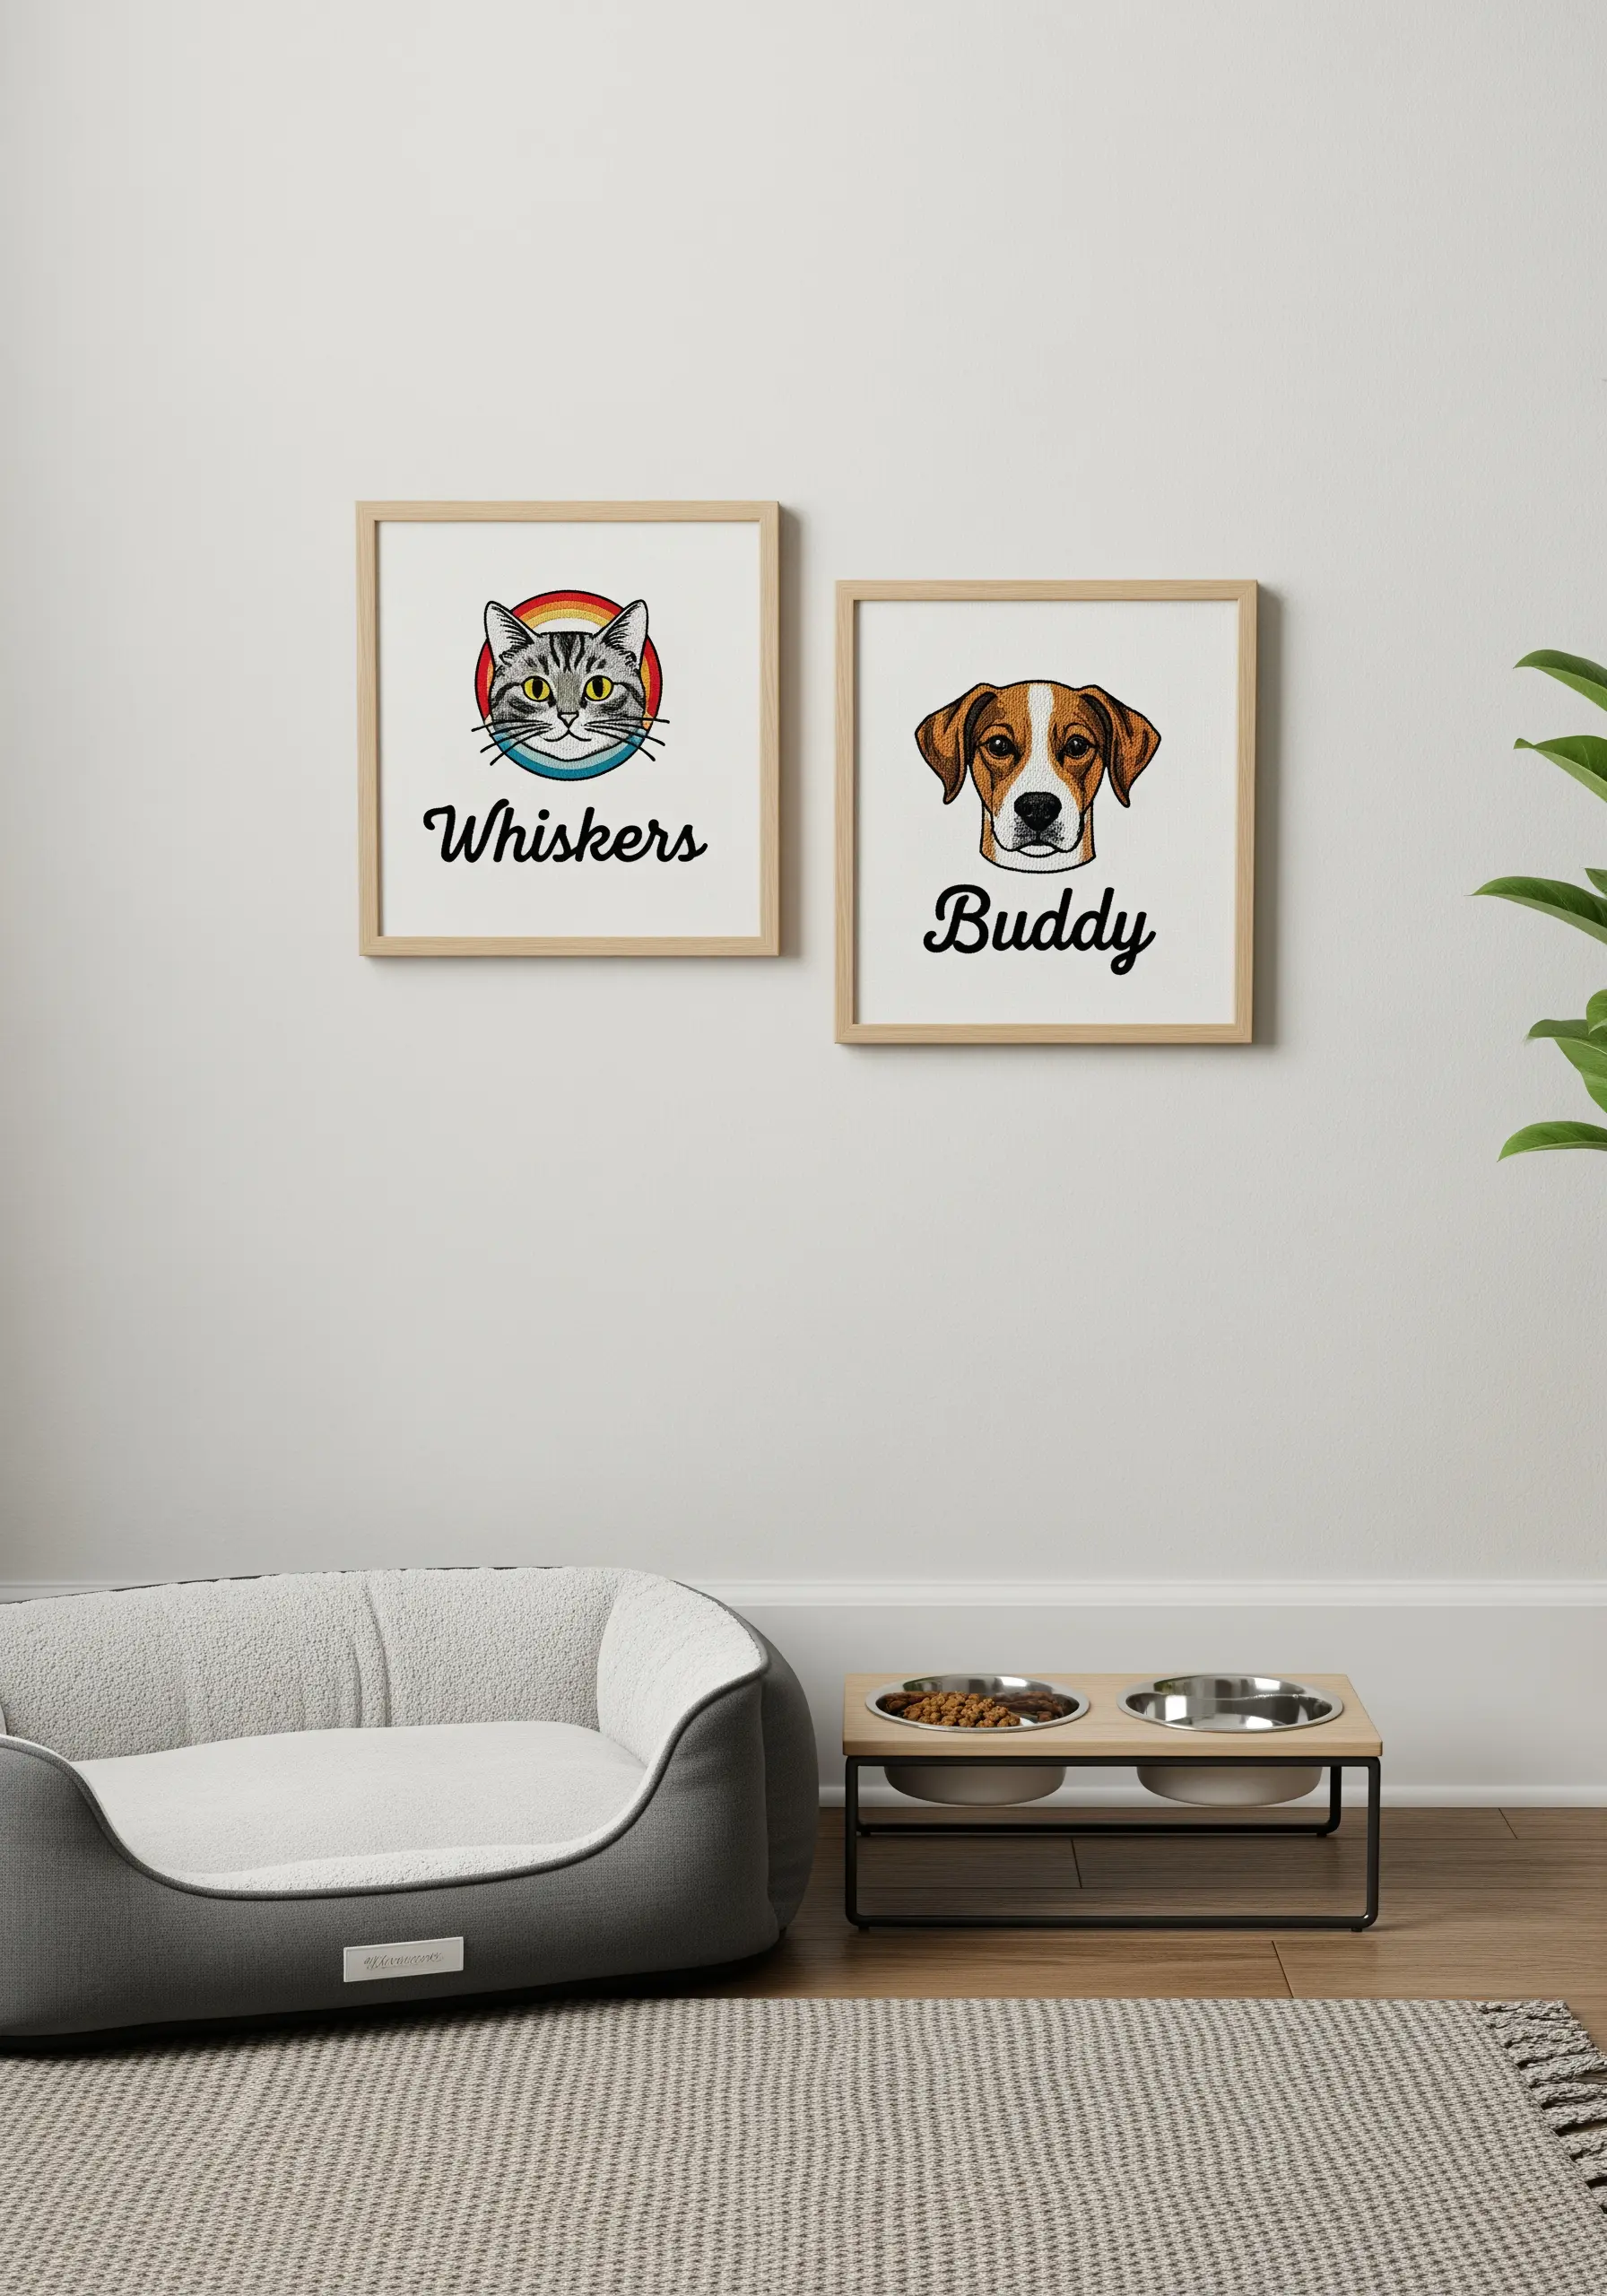
Capture your pet’s personality by creating a custom embroidered portrait.
Instead of aiming for hyper-realism, focus on a graphic, illustrative style that highlights their key features.
Use satin stitch in bold, flat blocks of color for the main shapes, and add definition with clean backstitch outlines.
Pair the portrait with bold, retro typography for their name to create a piece that’s both a loving tribute and a stylish piece of pop art.
Try these delicate pet line art embroidery ideas for a more minimalist approach.
27. Plant an Embroidered Kitchen Garden
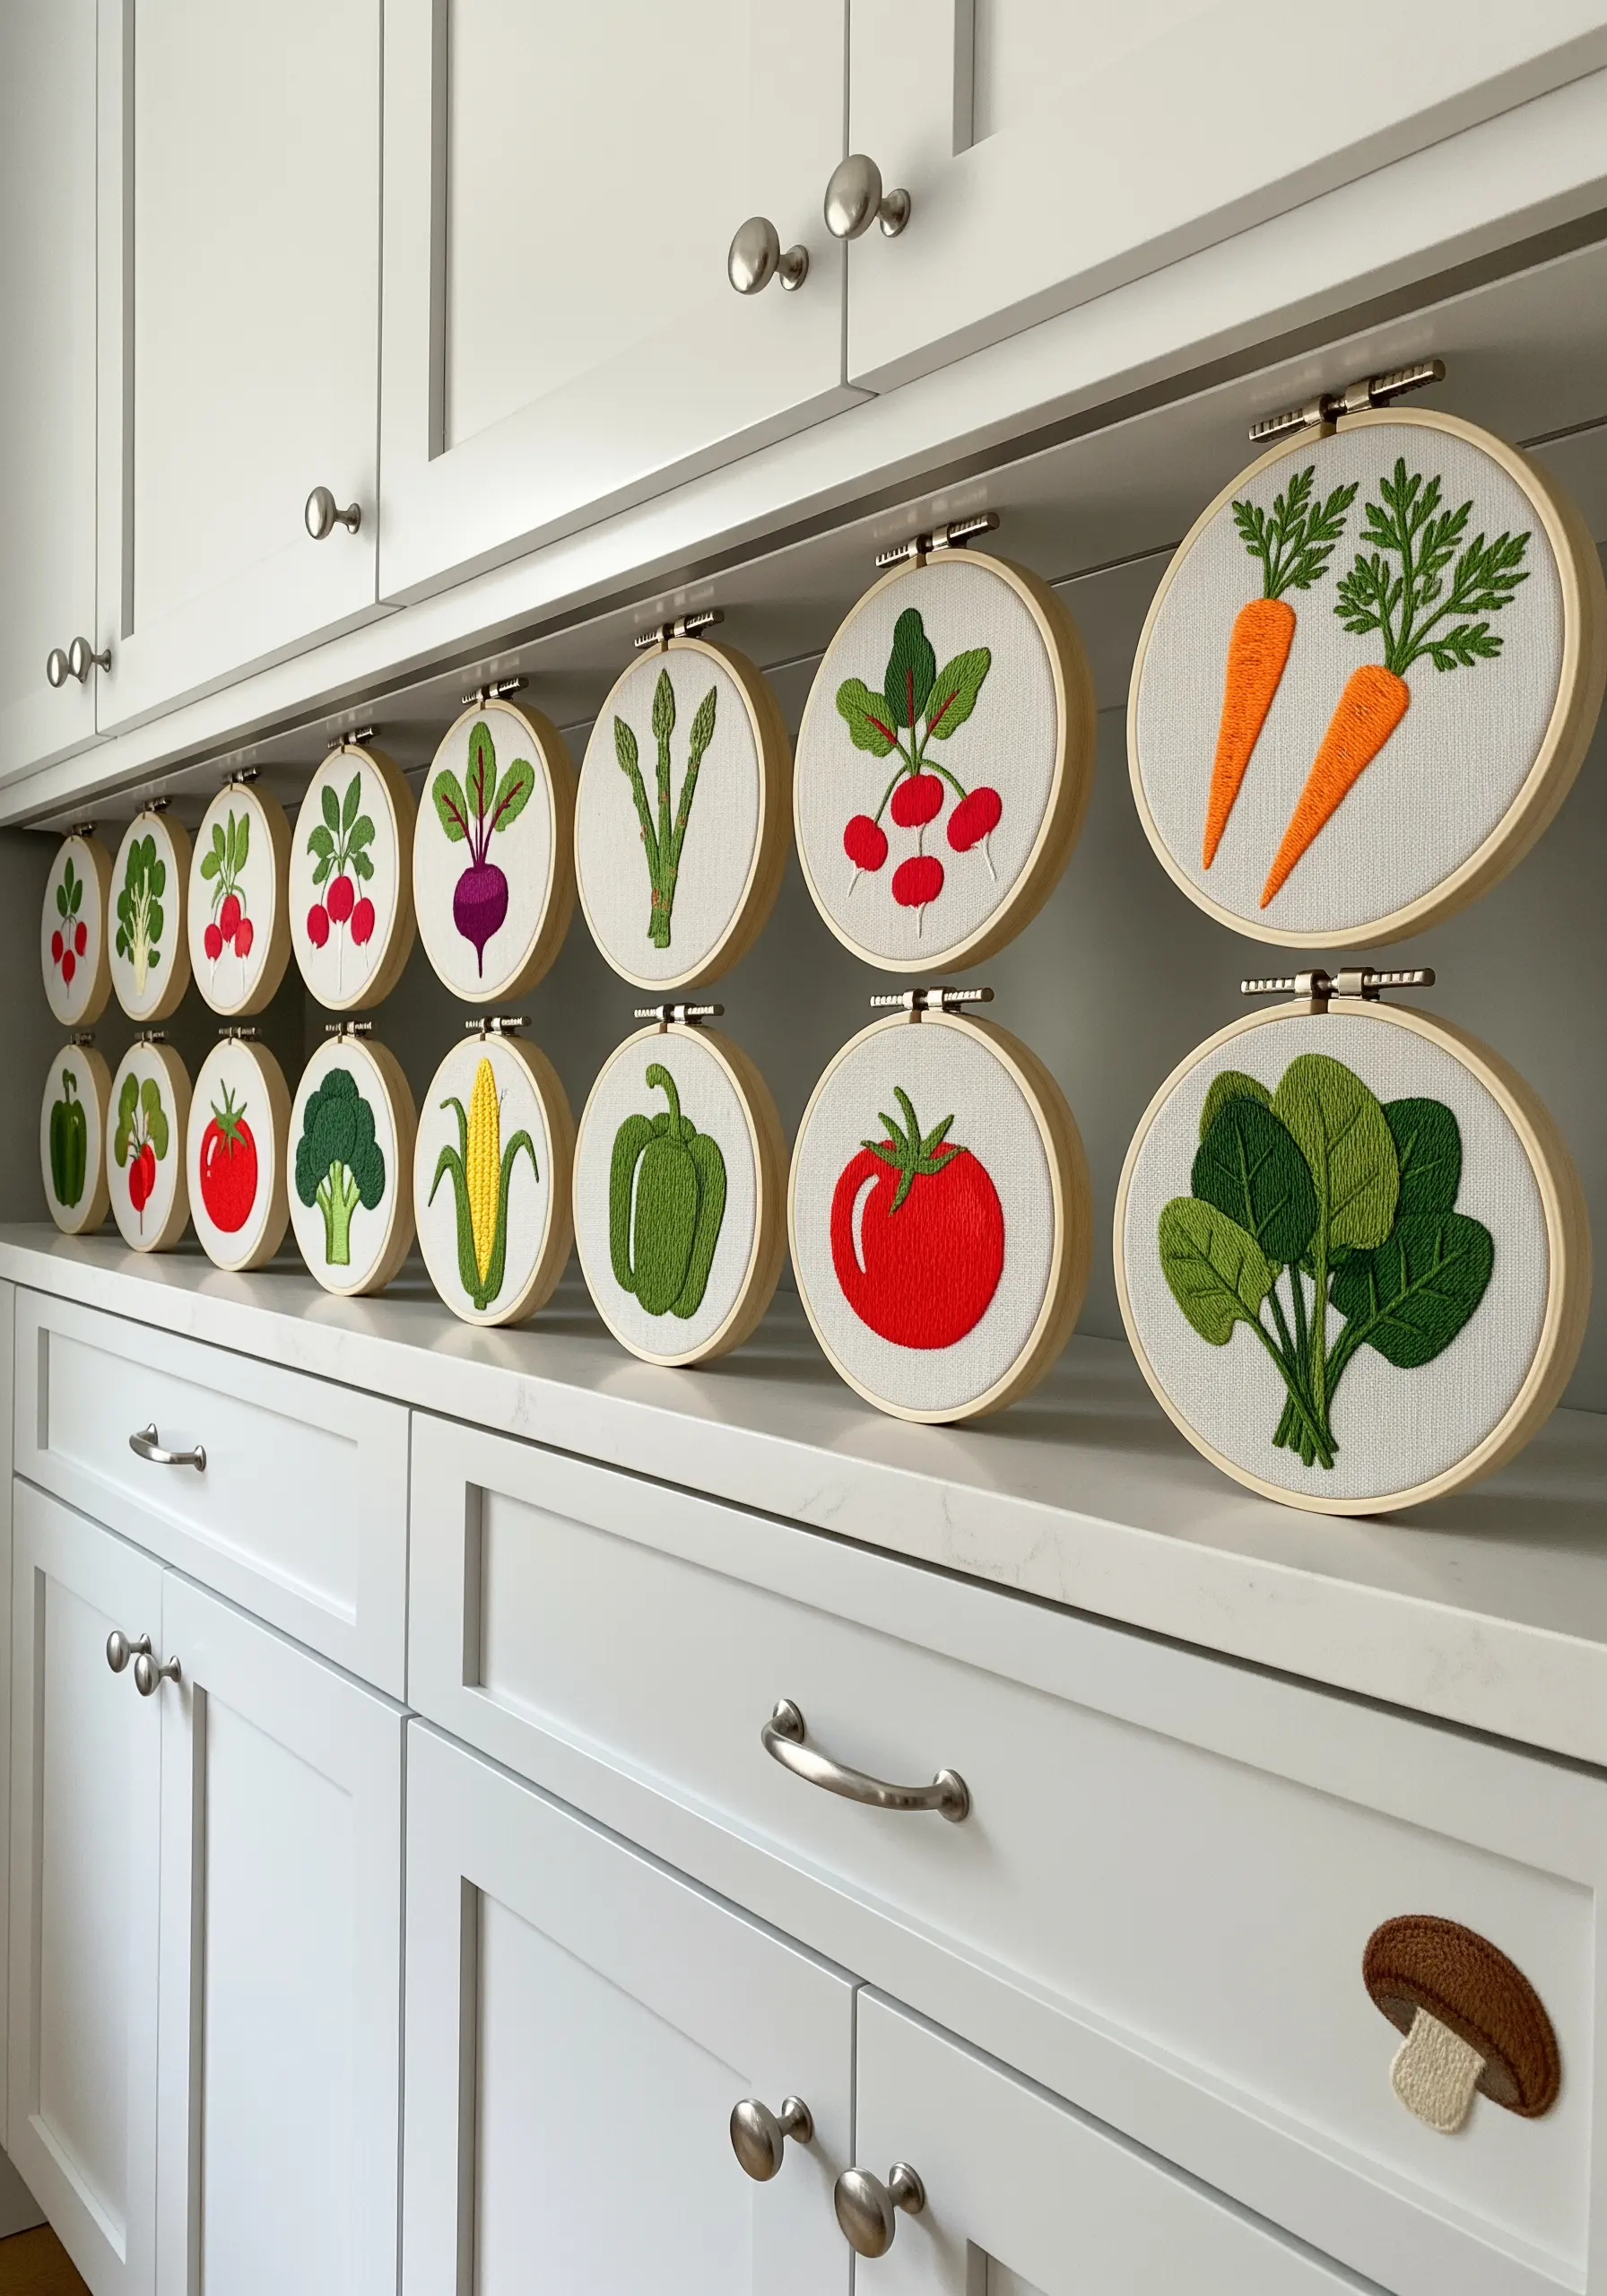
Bring the freshness of a garden into your kitchen with a collection of embroidered vegetables.
Line them up neatly above or below your cabinets for a charming, farmer’s market-inspired display.
For root vegetables like carrots and radishes, use vertical satin stitches, and for leafy greens like spinach, use radiating stitches from the center vein outwards.
This directional stitching subtly mimics the natural growth patterns of the plants, adding a layer of thoughtful detail.
28. Build a Grand Statement with a Floral Salon Wall
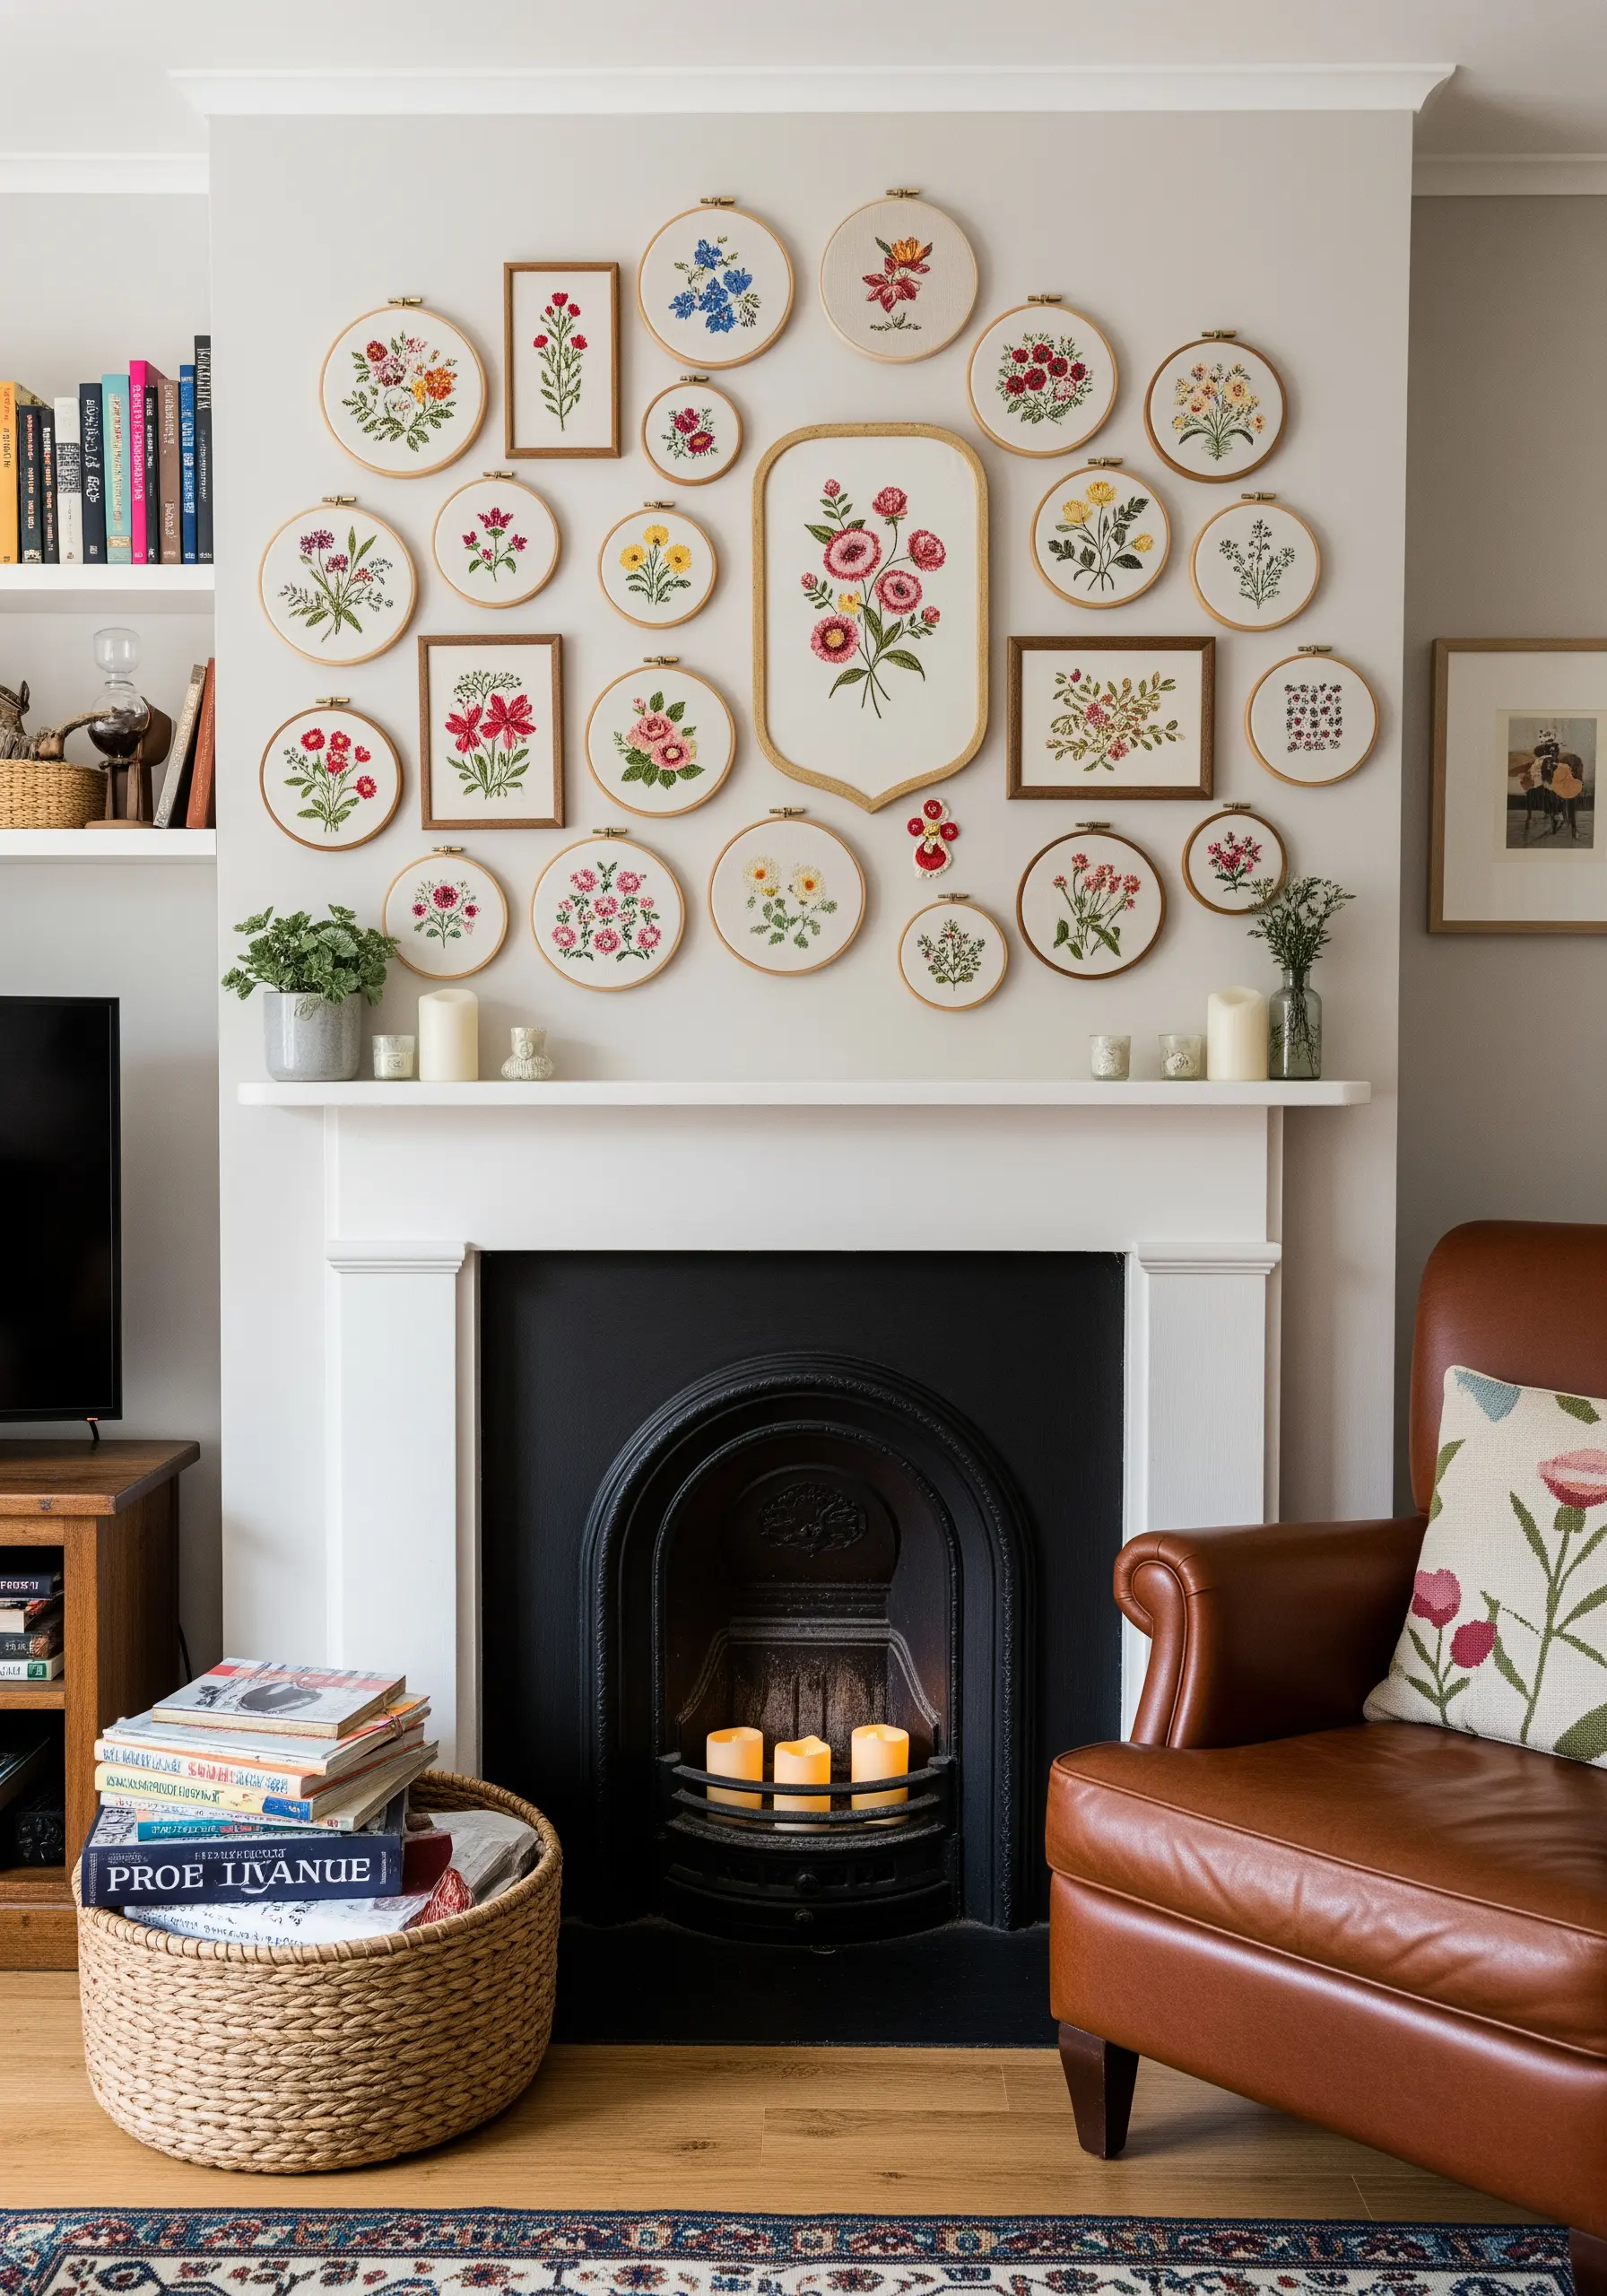
Create a stunning focal point above a mantelpiece by curating a dense, salon-style hang of floral embroideries.
The key to success is variety: mix round hoops with rectangular frames, small delicate sprigs with large lush bouquets, and simple line work with dense thread painting.
Establish a unifying element, like a consistent color palette of pinks, reds, and yellows, to prevent the display from feeling chaotic.
The result is a rich, layered tapestry of texture and color that feels like a cherished collection grown over time.
This arrangement turns simple hand-stitched flower wreath hoop ideas into a masterpiece.
29. Craft a Personalized Family Tree
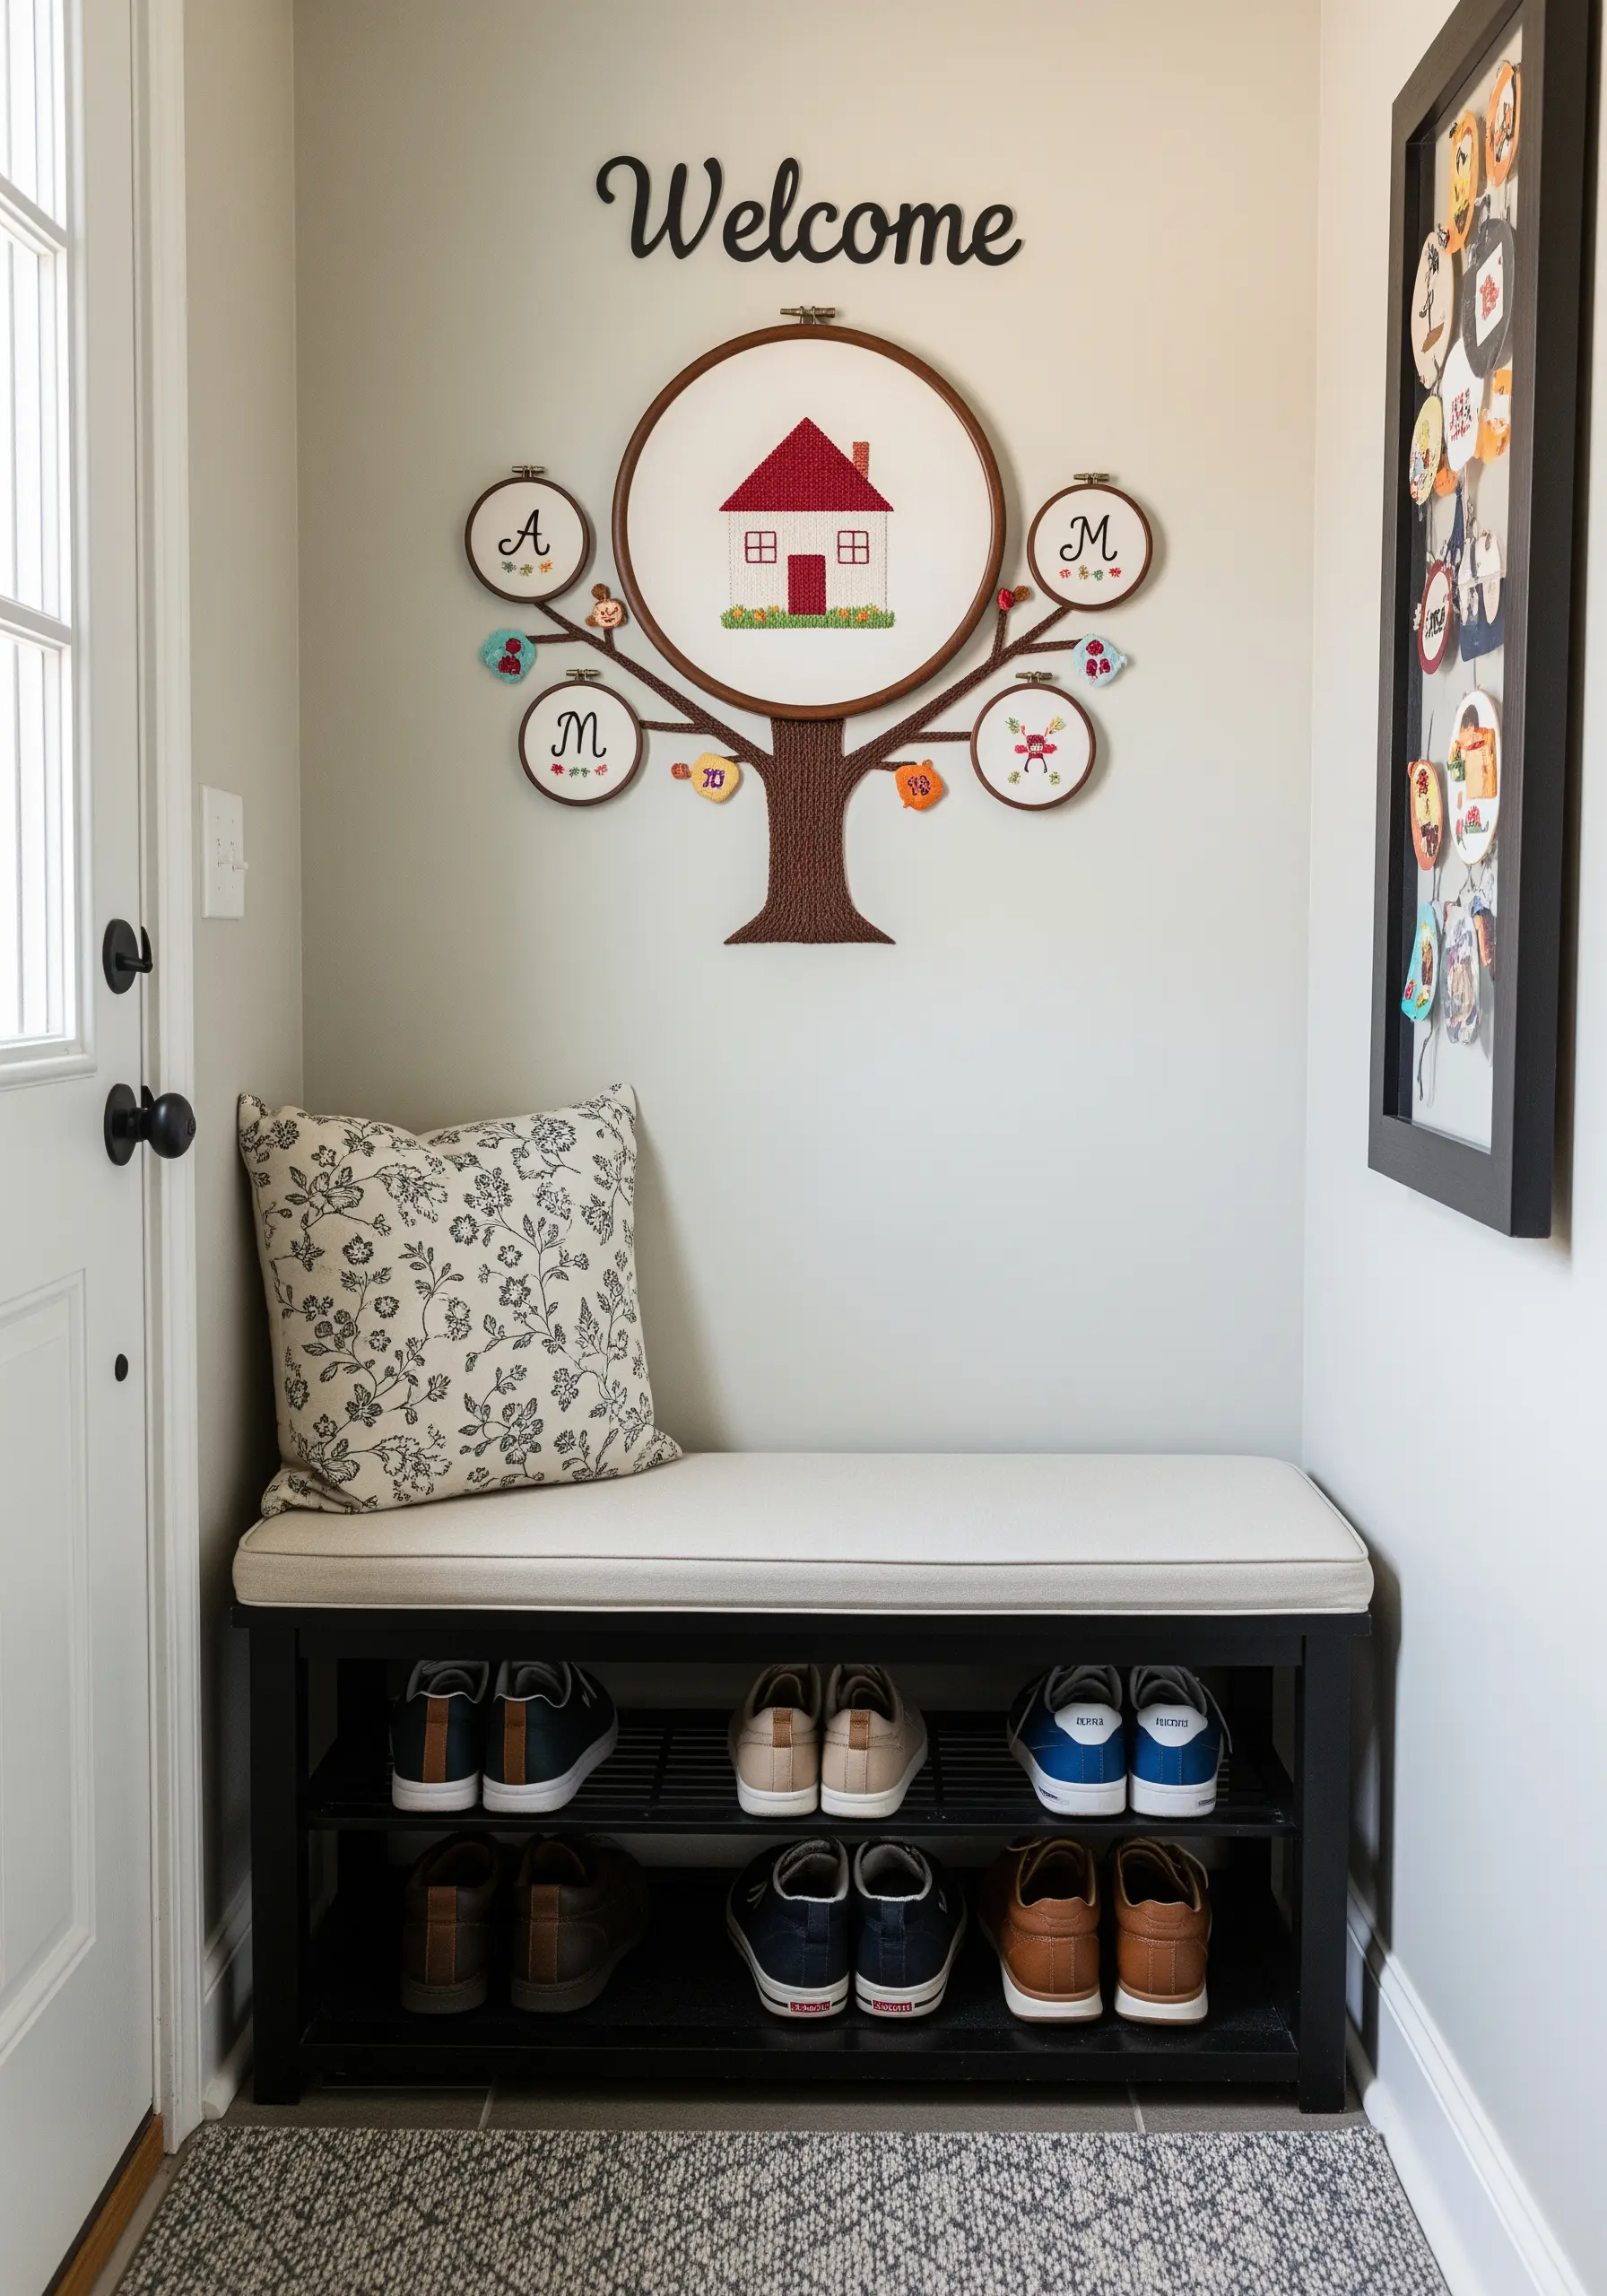
Design a unique family tree by using a large central hoop for the main image and smaller surrounding hoops for individual family initials.
For the tree trunk and branches, use a couching technique—laying down a thick yarn or multiple strands of floss and tacking it in place with a thinner thread.
This creates a wonderfully raised, textural effect that stands out from the flatter satin stitches of the house and leaves.
It’s a meaningful, handmade piece of art that can grow with your family.
30. Blend Embroidery with a Painted Mural
Create a truly integrated, mixed-media art piece by combining embroidery hoops with a painted wall mural.
Paint abstract, flowing shapes on the wall that connect the spaces between your hoops, making it seem as though the embroidered elements are floating on a cohesive landscape.
Choose paint colors that are drawn directly from your thread palette to ensure a seamless blend between the two mediums.
This innovative approach turns a simple wall into an immersive, one-of-a-kind art installation.
This is one of the most creative embroidery project ideas to refresh your apartment decor.
31. Spark Imagination with Celestial Kids’ Room Art
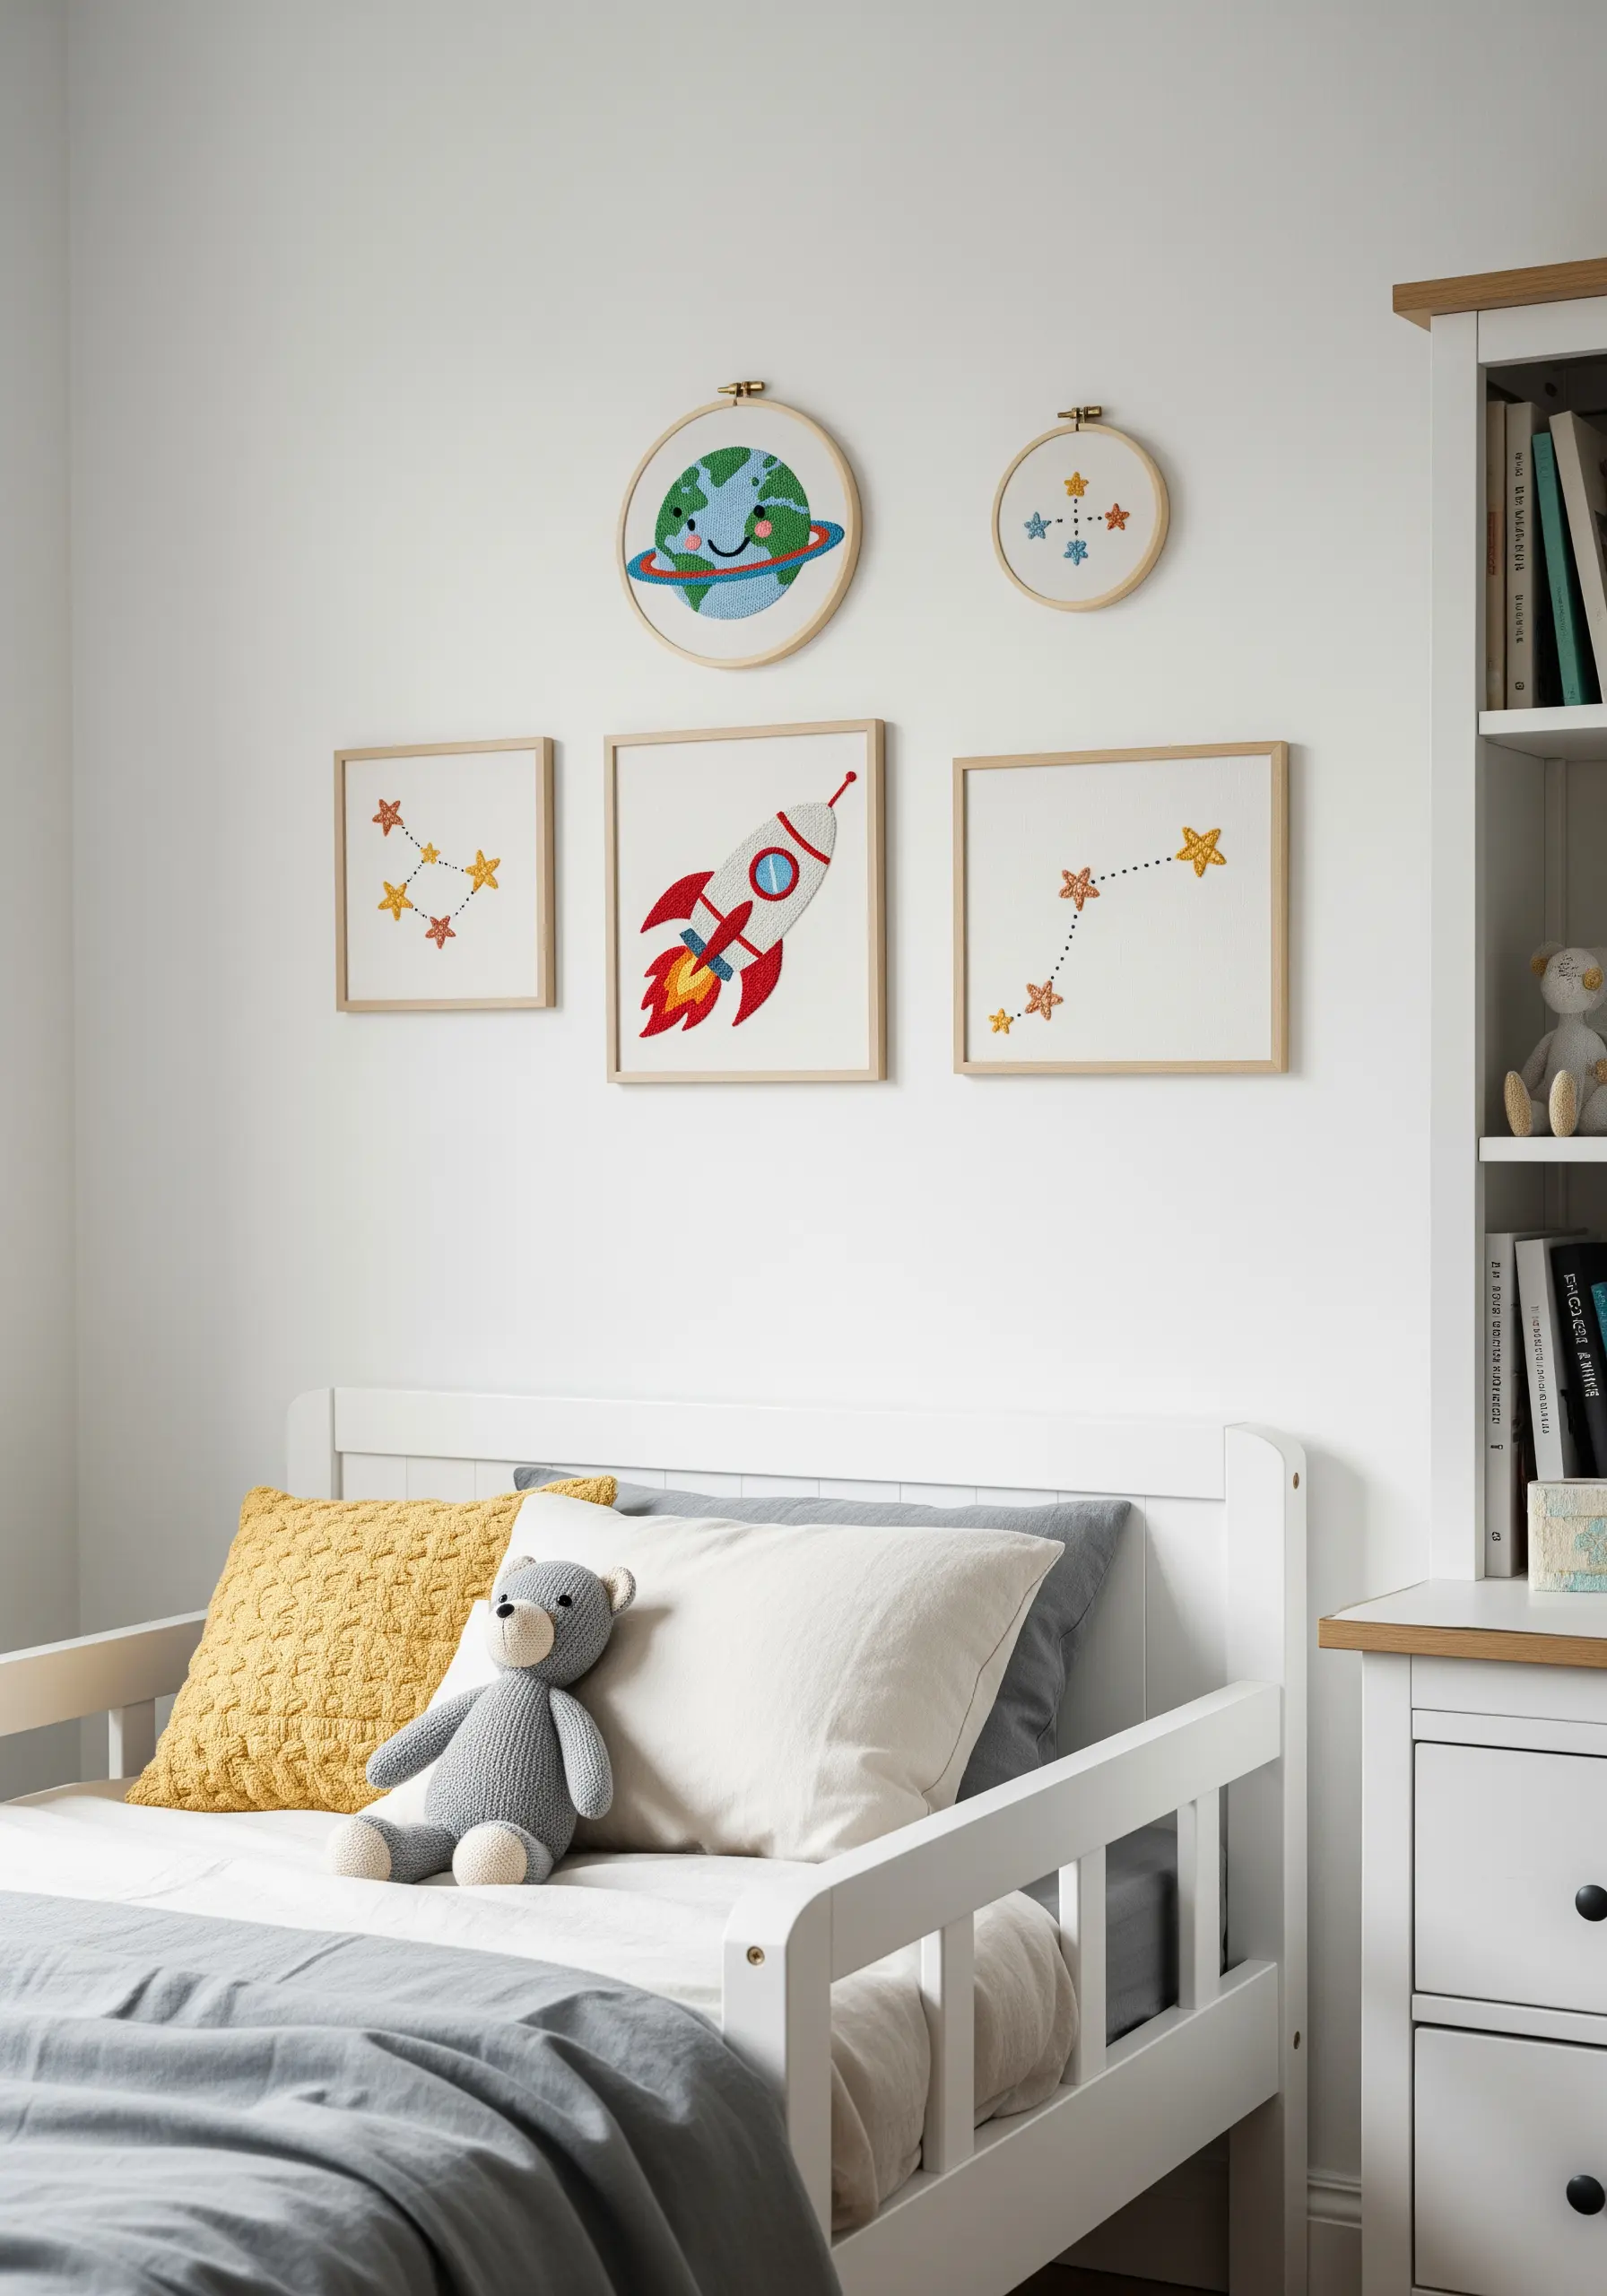
Decorate a child’s room with a charming collection of space-themed embroidery.
Mix fun, character-driven designs like a smiling planet with more educational motifs like constellations.
To make stars and sparkles truly pop, use a metallic or glow-in-the-dark thread. A simple star stitch or a single French knot with these specialty threads adds a touch of magic that kids will adore.
This creates a stimulating and imaginative environment that feels both playful and personal.
32. Brighten a Breakfast Nook with Cheerful Motifs

Fill a sunny corner with a collection of bright and cheerful breakfast-themed embroidery hoops.
To achieve clean, readable text like “Good Morning,” use a whipped backstitch. First, create a standard backstitch outline, then weave a second thread through the stitches without piercing the fabric.
This technique creates a smooth, solid line that looks much neater than a standard backstitch, making your lettering stand out.
The playful theme and bright colors are a perfect way to start the day with a smile.
33. Define a Zone with Thematic Silhouettes
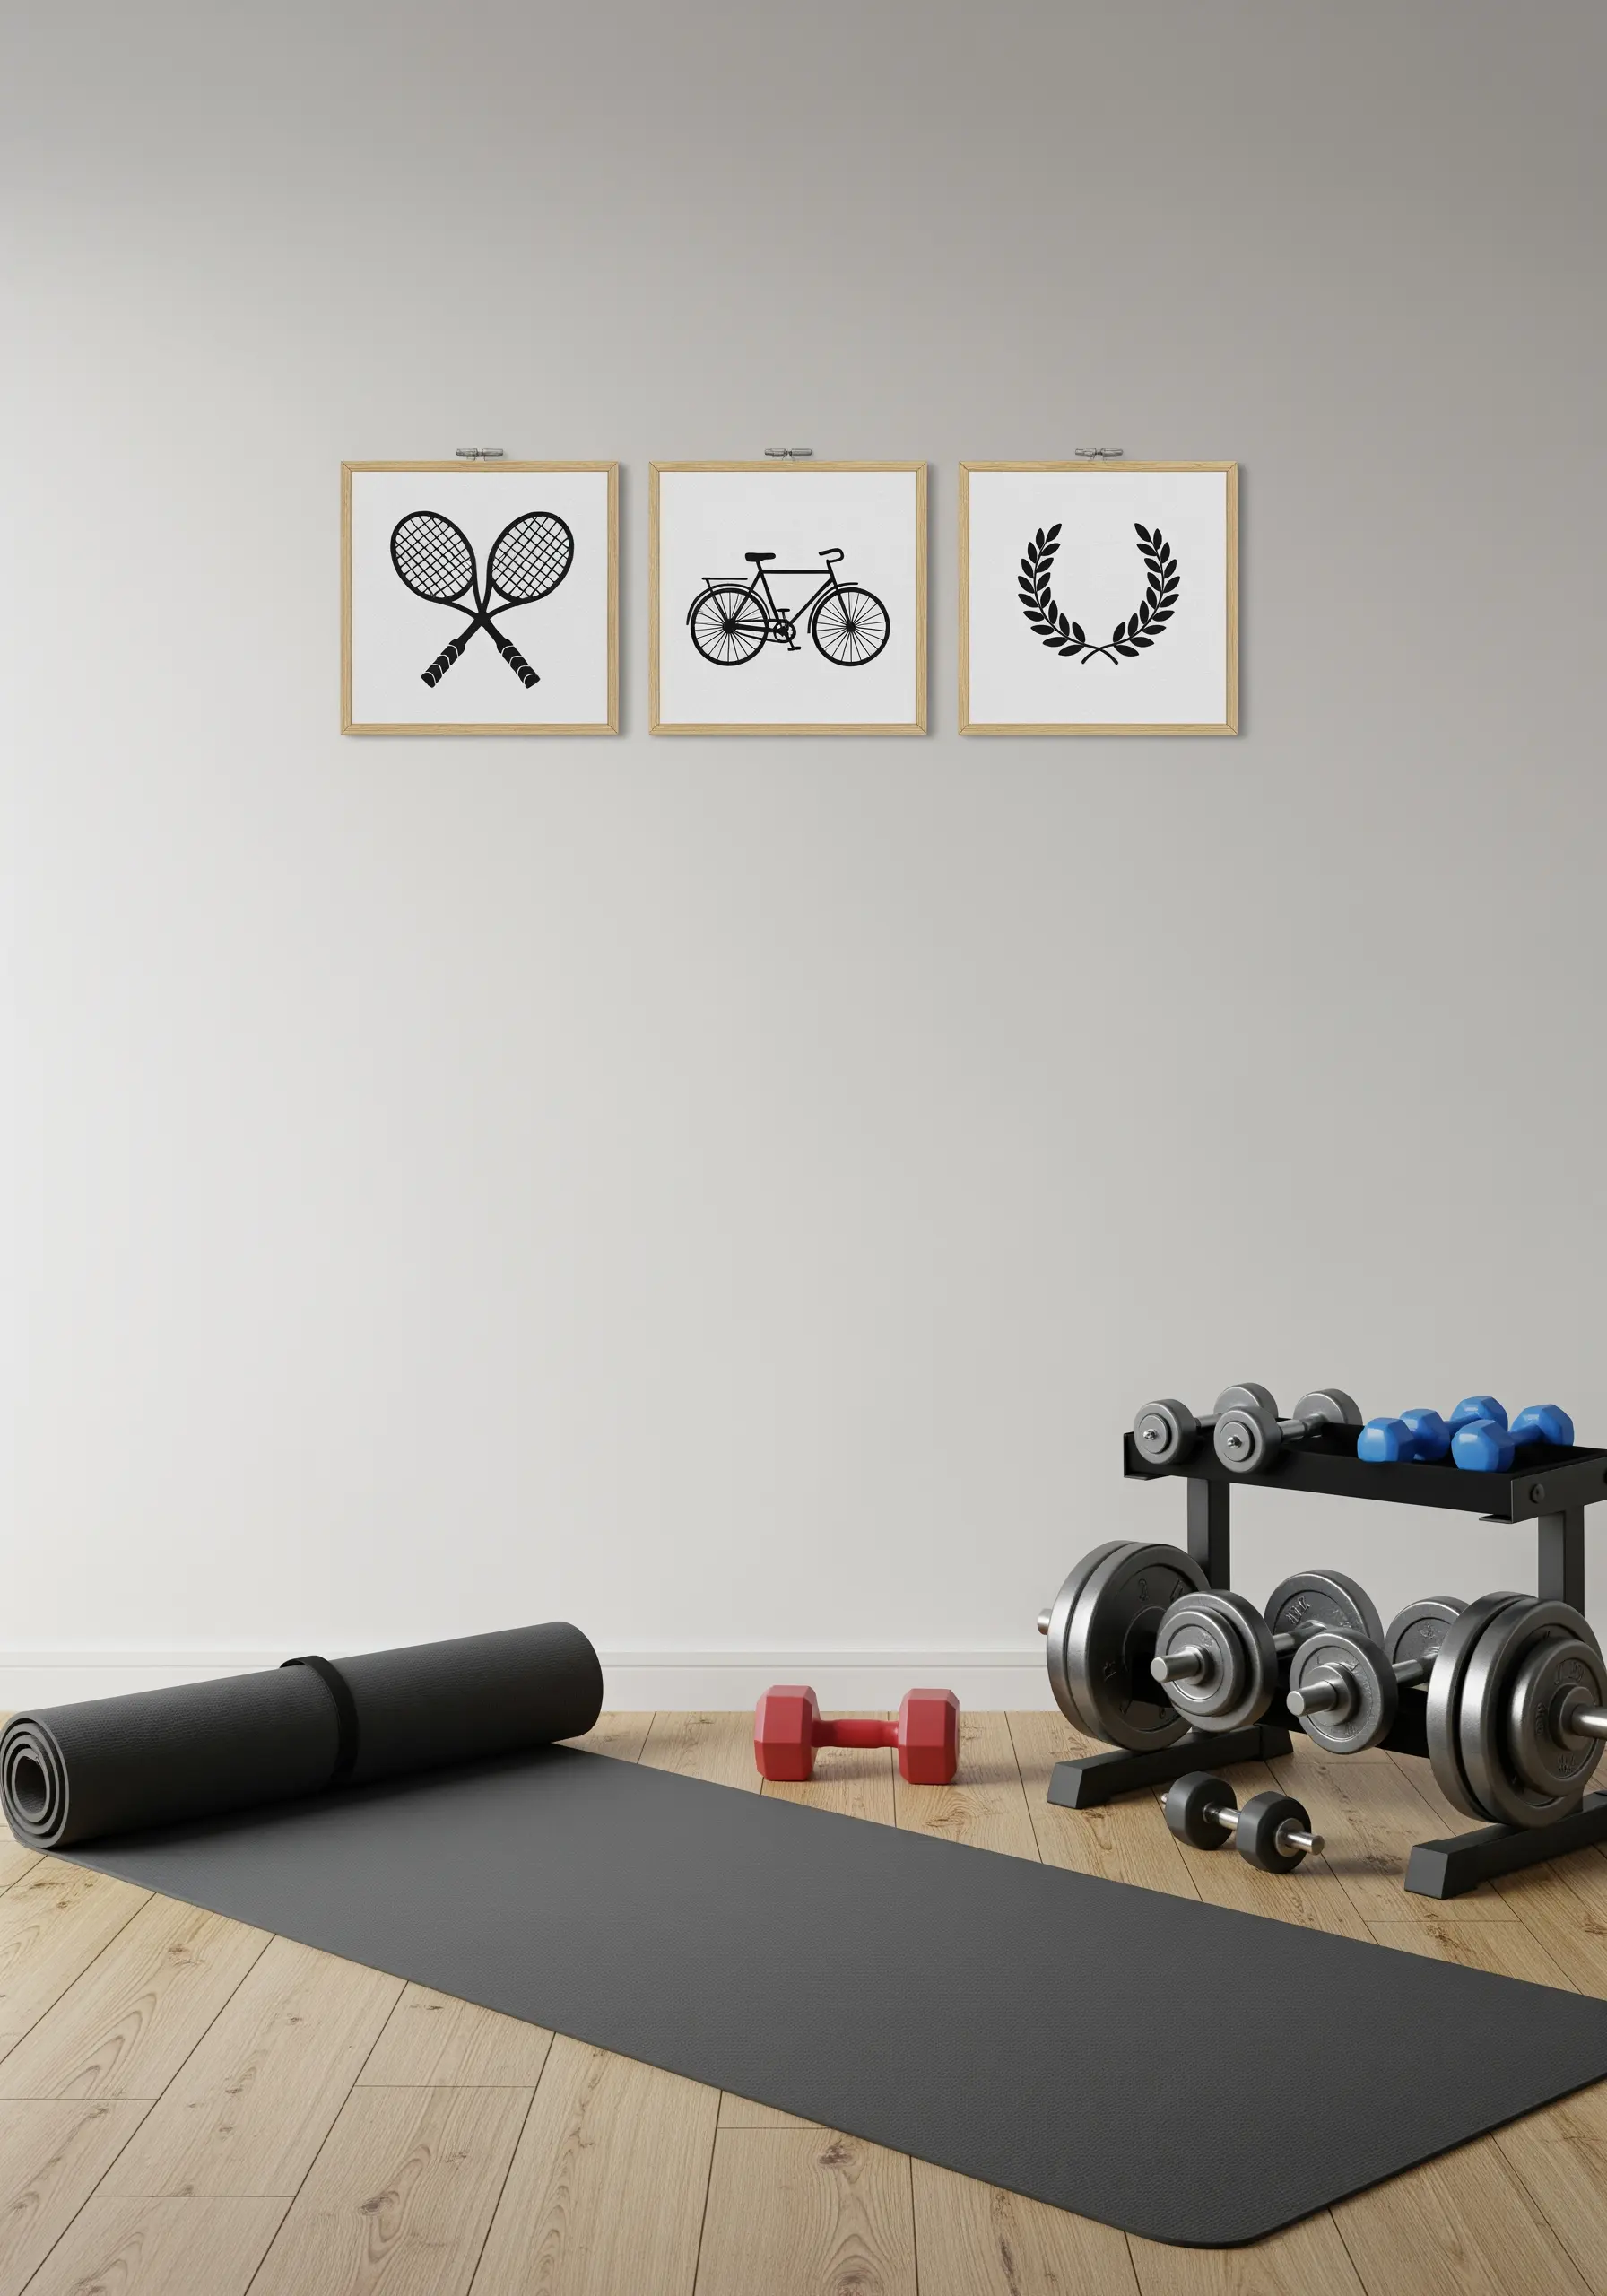
In an open-plan home, you can use framed art to visually define a specific zone, like a home gym.
Choose simple, universally recognizable silhouettes that relate to the area’s purpose.
Stitching in a single color—in this case, black—on a neutral background creates a clean, modern, and graphic look.
This is an elegant and understated way to add thematic character without introducing clutter or distracting colors.


