

Your cushion covers are more than just soft furnishings; they are blank canvases waiting for a story. Forget fleeting trends and busy, complicated patterns. Instead, let’s explore the quiet power of a single, well-placed line—the kind of detail that transforms a simple object into a piece of personal art.
The secret to a modern, aesthetic home isn’t about filling every space. It’s about choosing your details with intention. In embroidery, this means focusing on the quality of your line, the texture of your thread, and the elegant interplay between stitch and fabric.
Here, you’ll discover how a simple shift in technique—from a flat backstitch to a sculptural couched cord, or from six strands of floss to a delicate two—can completely elevate your work. These are not just designs; they are exercises in refined simplicity, ready for you to stitch right now.
1. Sculptural Presence with Couching Stitch

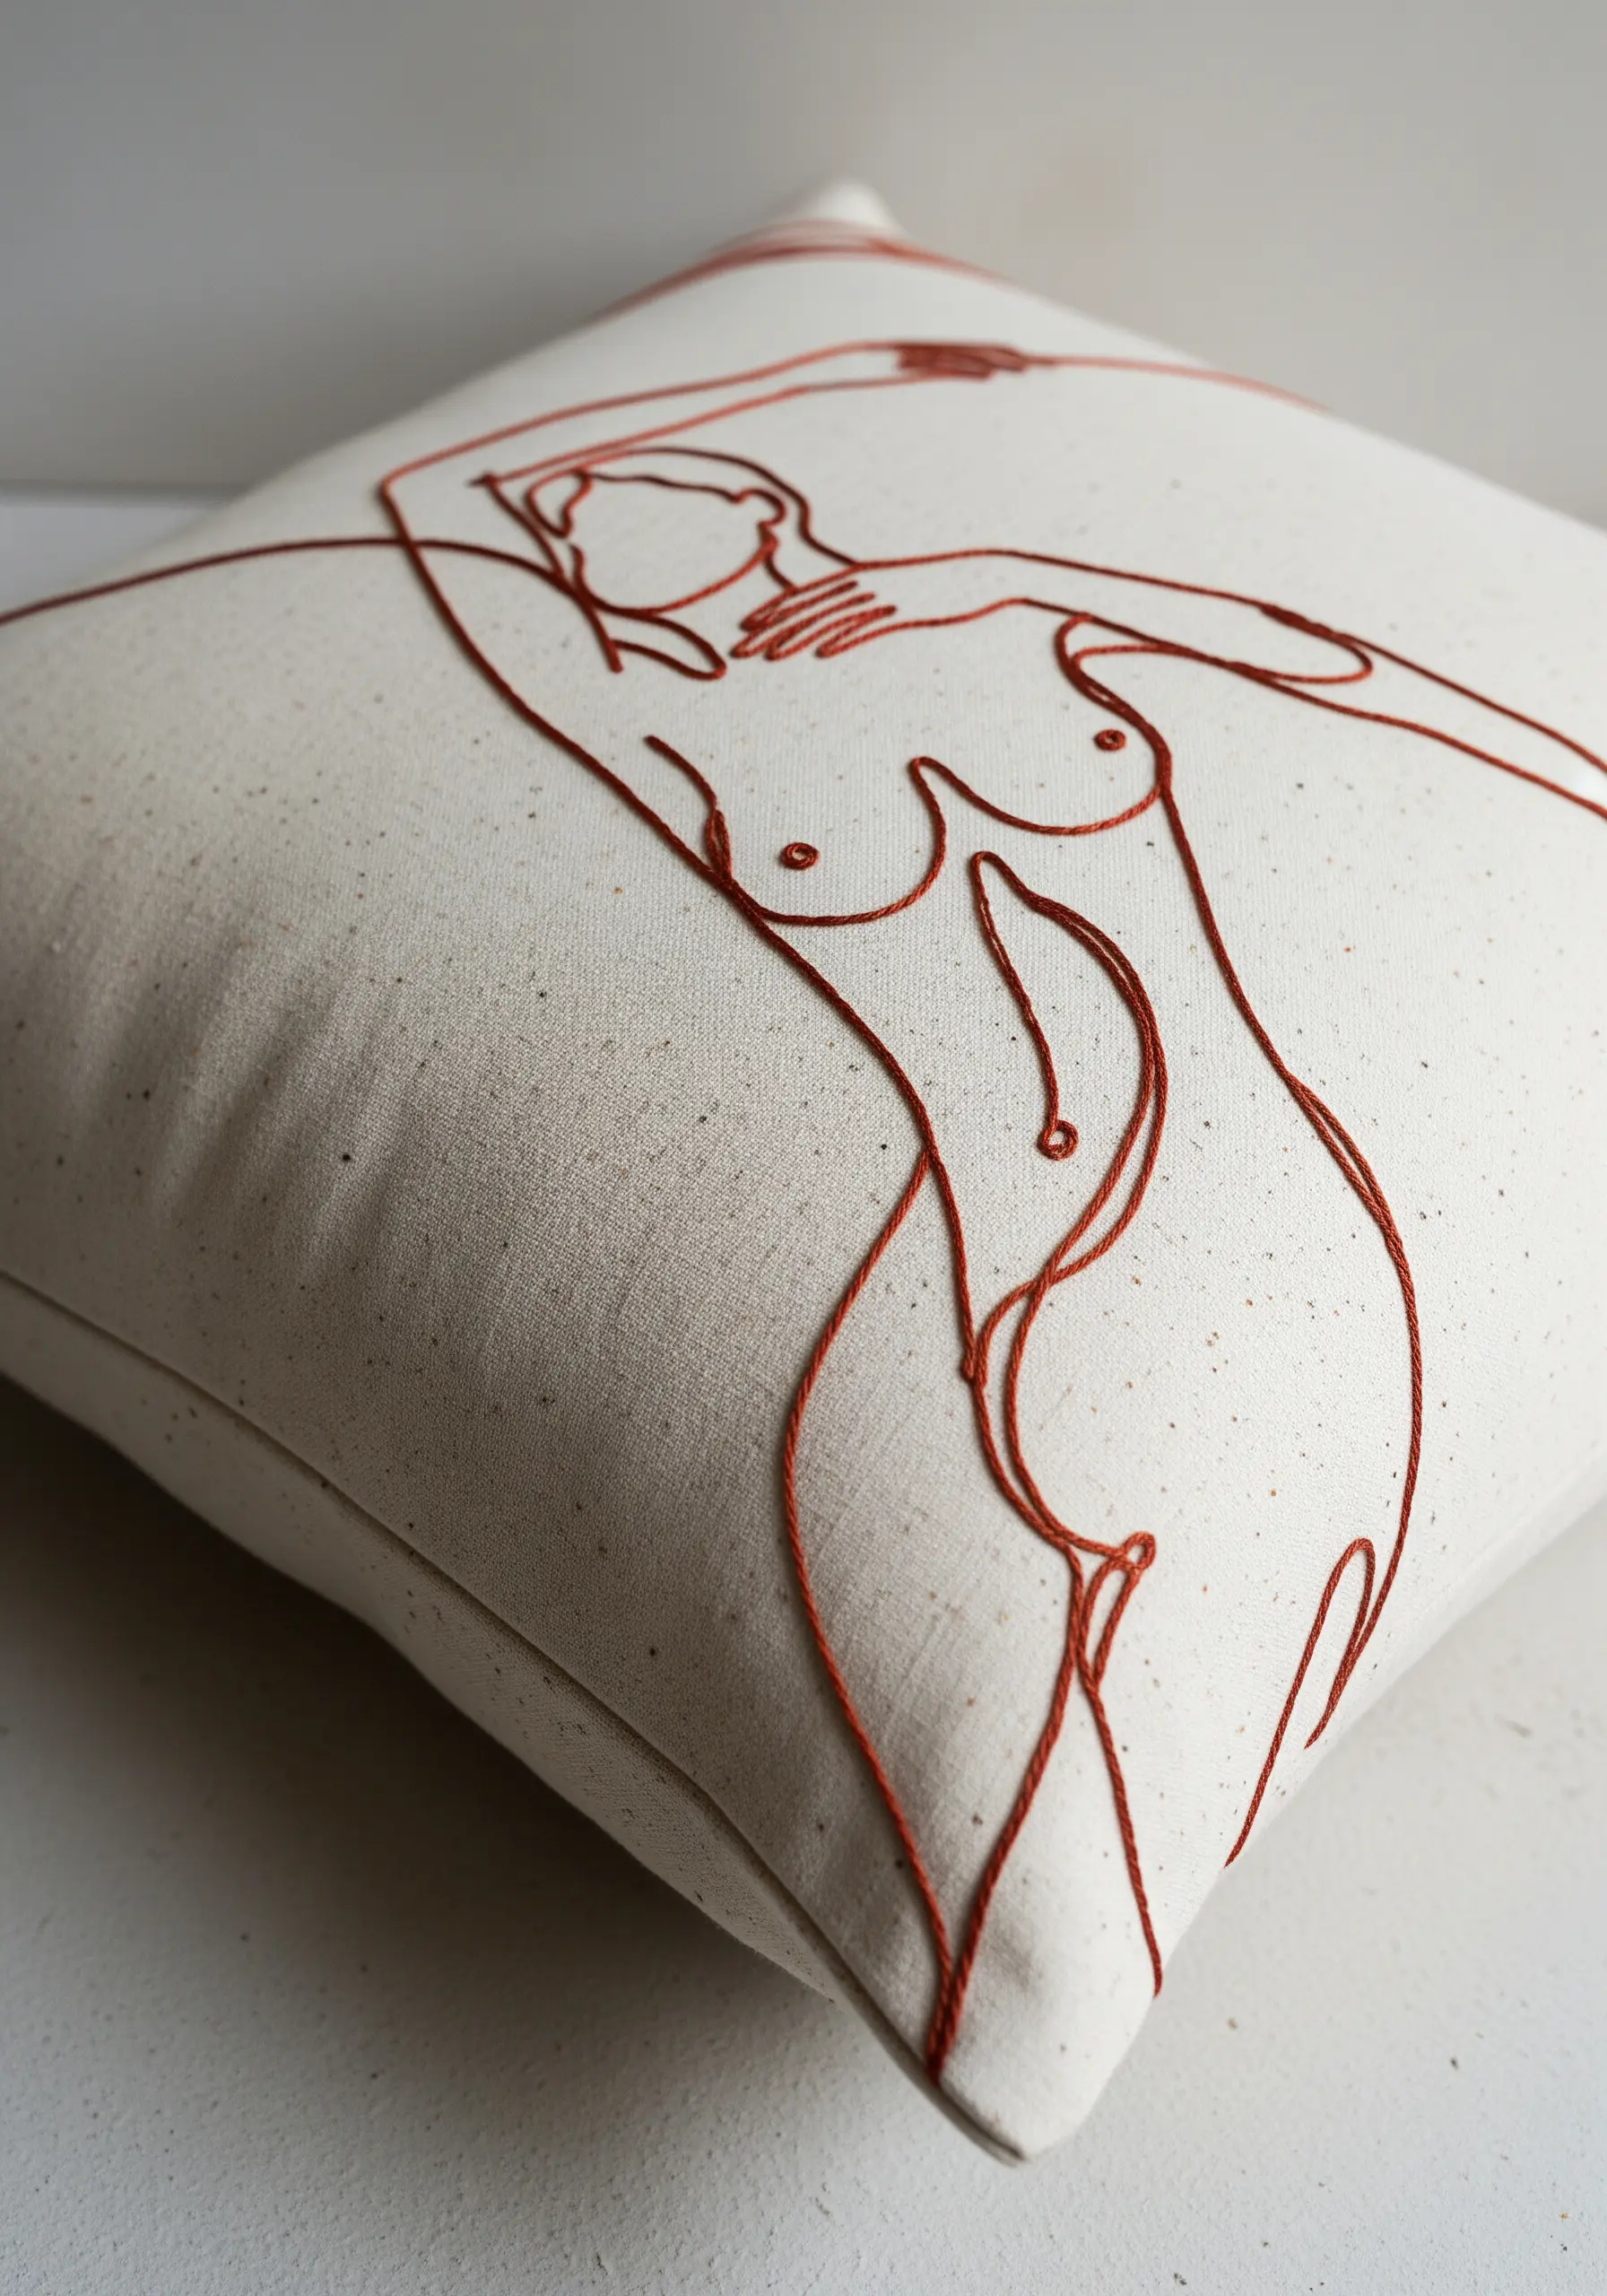
For a bold, three-dimensional line that stands off the fabric, use the couching technique.
Lay down a thick, textural yarn or cord along your design line and tack it in place with a thinner, matching thread every quarter-inch.
This method creates a powerful graphic statement that is both tactile and visually striking, perfect for the prominent lines of an abstract face.
It also provides durability, which is essential for a functional item like a cushion.
2. Delicate Definition with Fine Backstitch
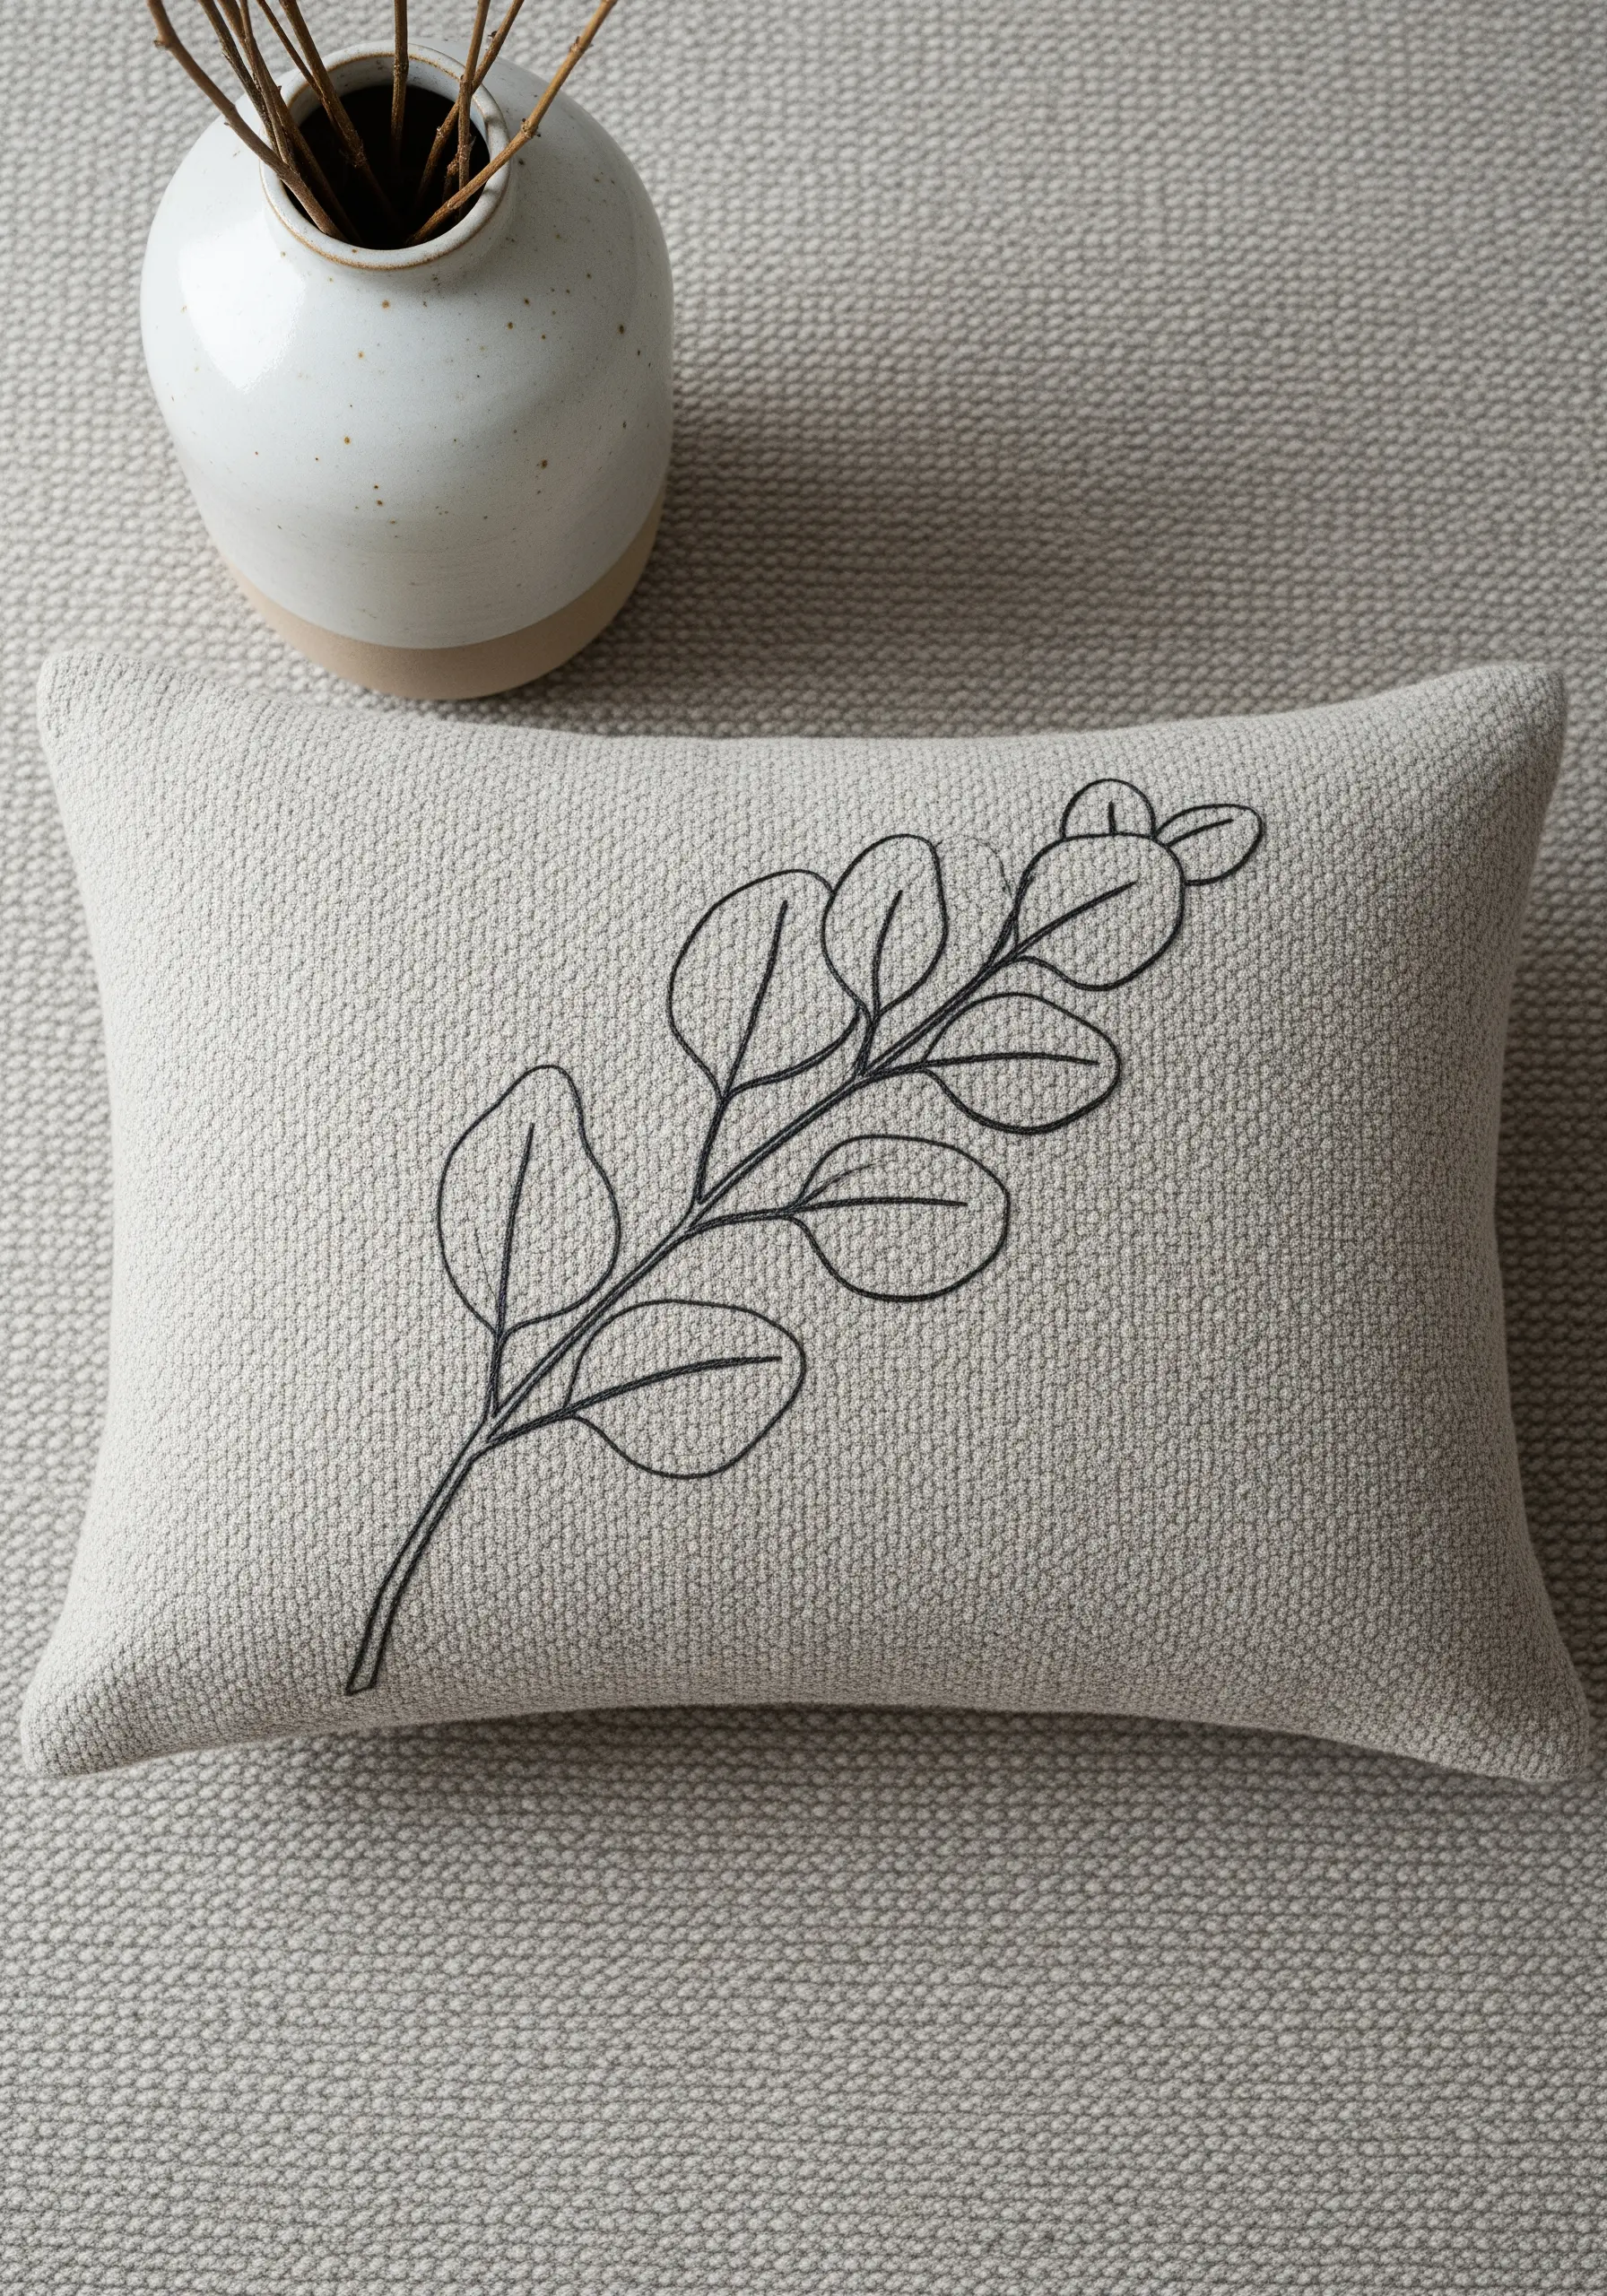
To achieve crisp, delicate botanical lines on a textured fabric like linen or canvas, reduce your thread count.
Use only two strands of embroidery floss and a simple backstitch, keeping your stitch length consistent and relatively small—around one-eighth of an inch.
This ensures the thread sits neatly on top of the fabric’s weave rather than sinking into it, preserving the design’s clean, illustrative quality.
3. Elevate Geometric Shapes with Wrapped Stitches
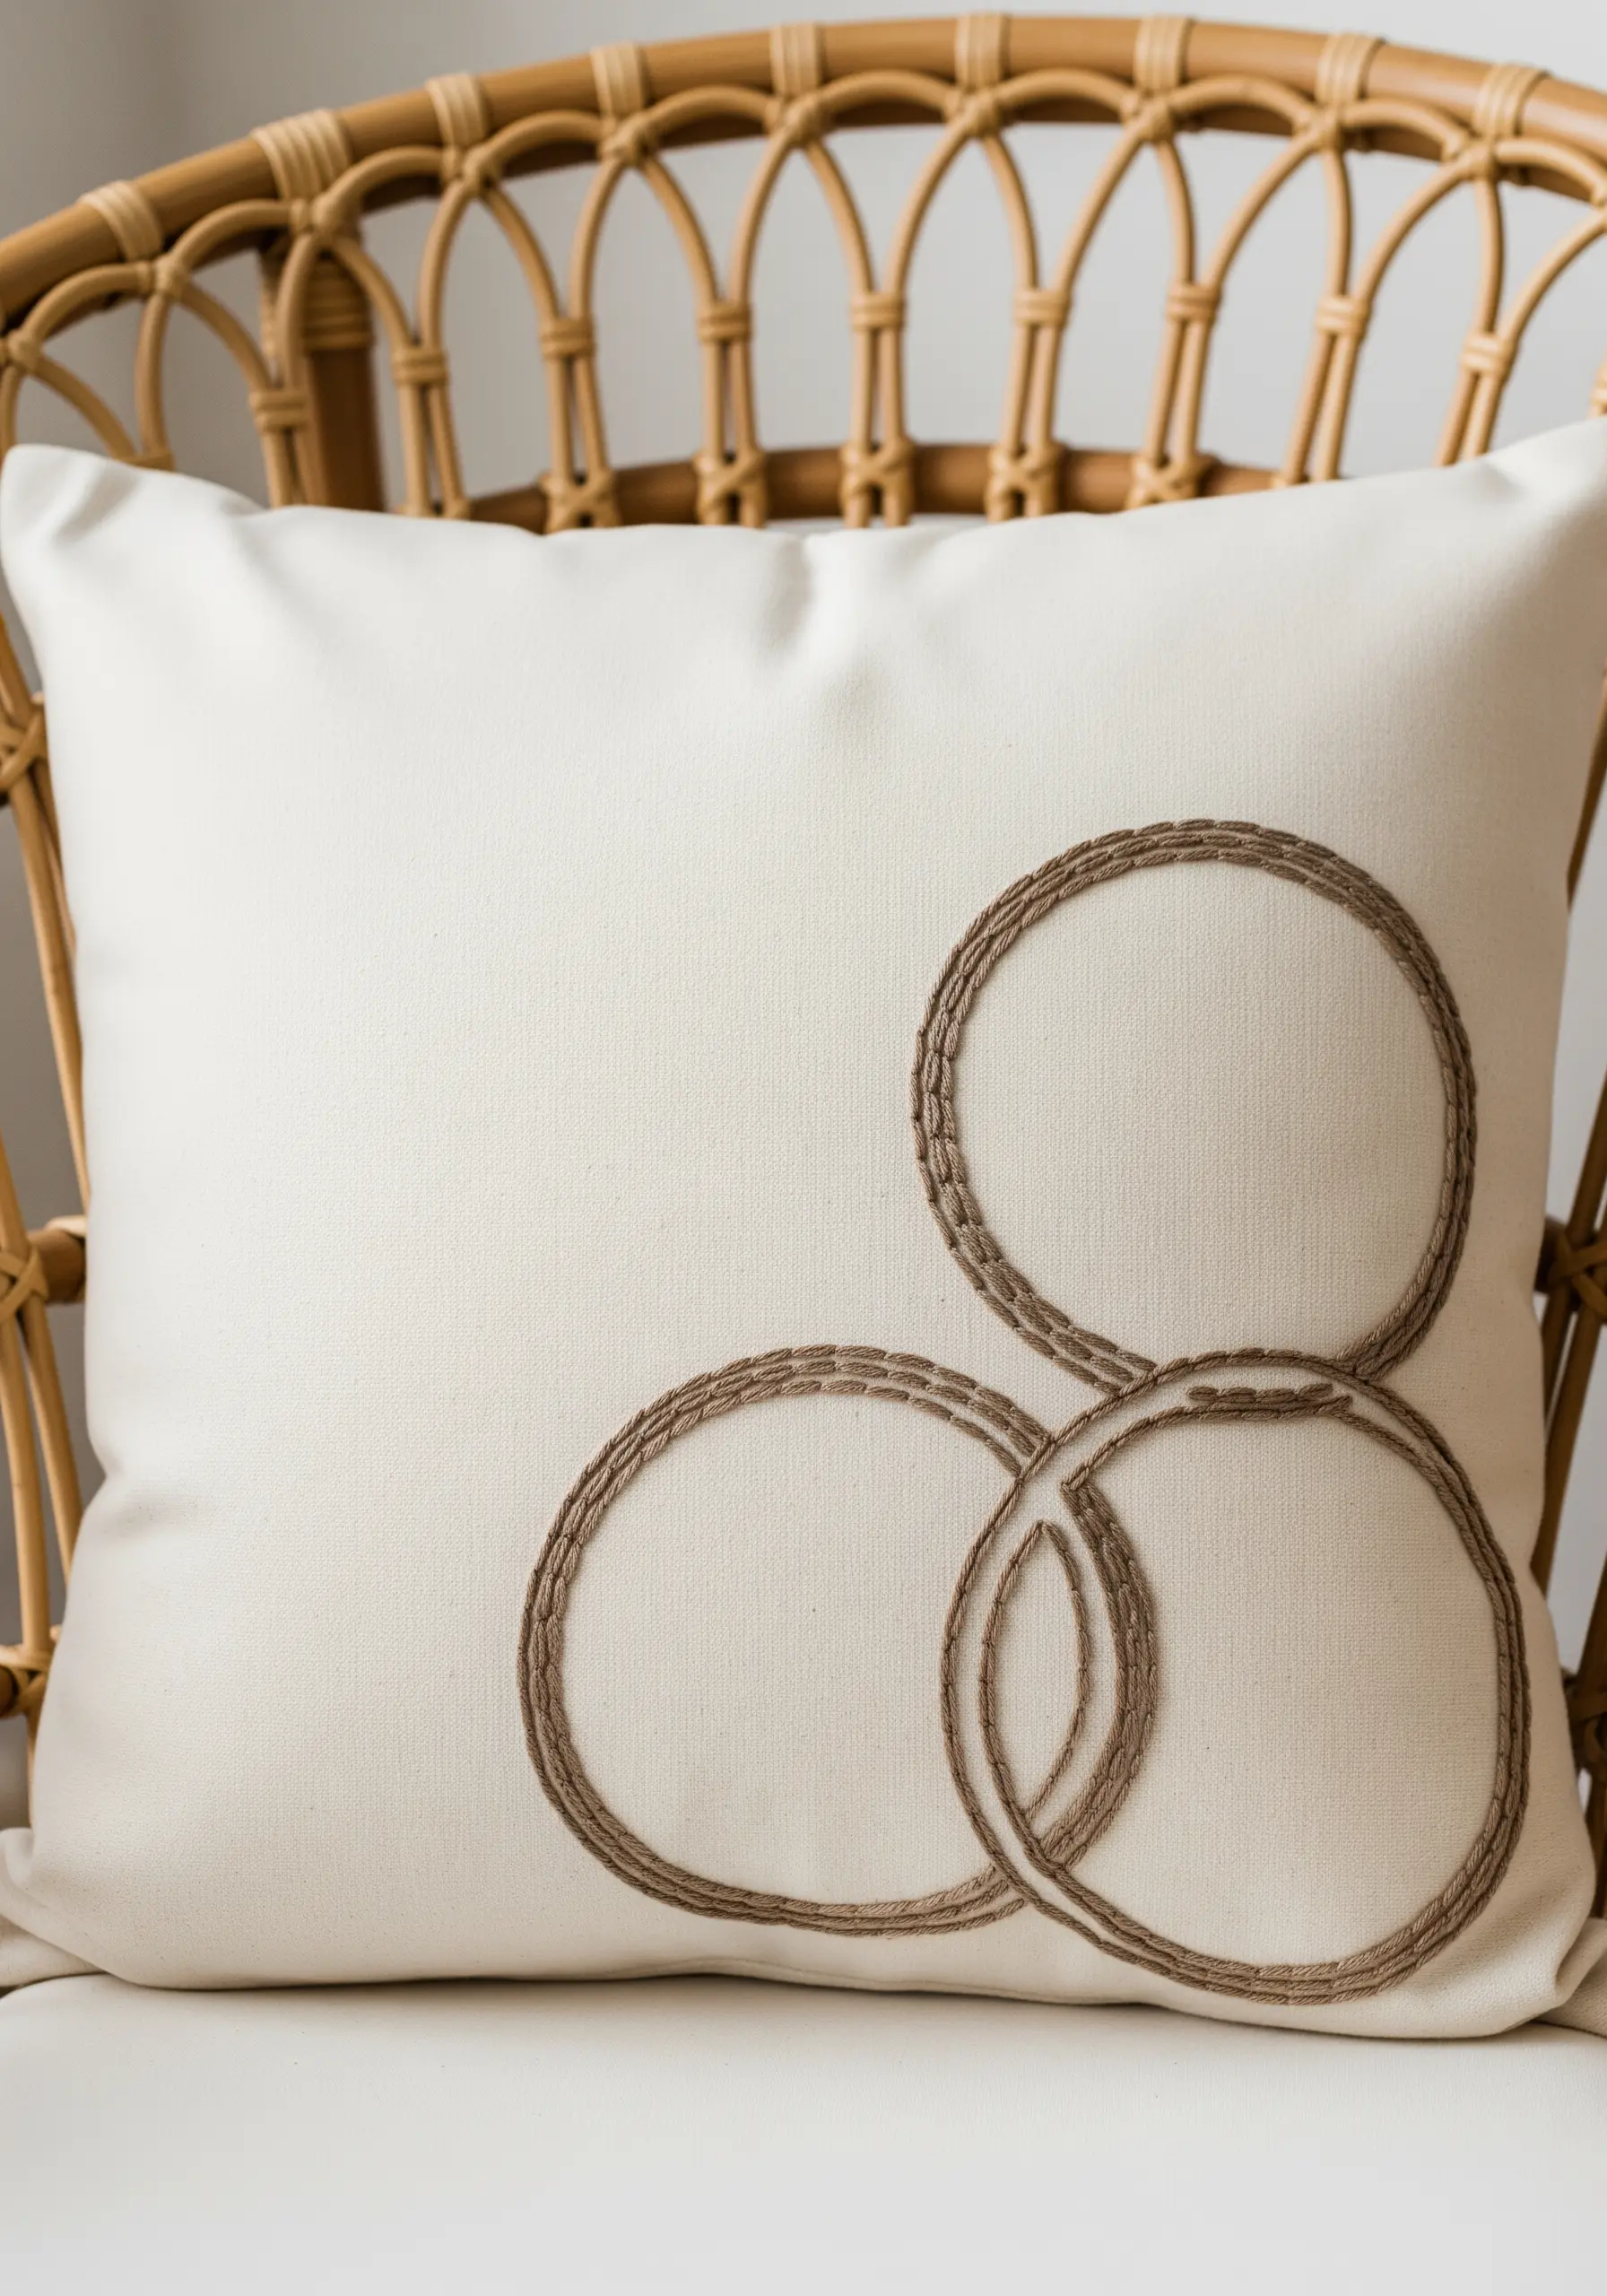
Transform a simple outline into a point of textural interest by using a wrapped backstitch or Pekinese stitch.
First, create a foundation of simple backstitches along your circular design.
Then, without piercing the fabric, loop a second thread through the backstitches, creating an intricate, rope-like effect.
This technique adds dimension and a handcrafted feel to minimalist geometric patterns, catching the light beautifully.
4. Convey Emotion with a Continuous Line
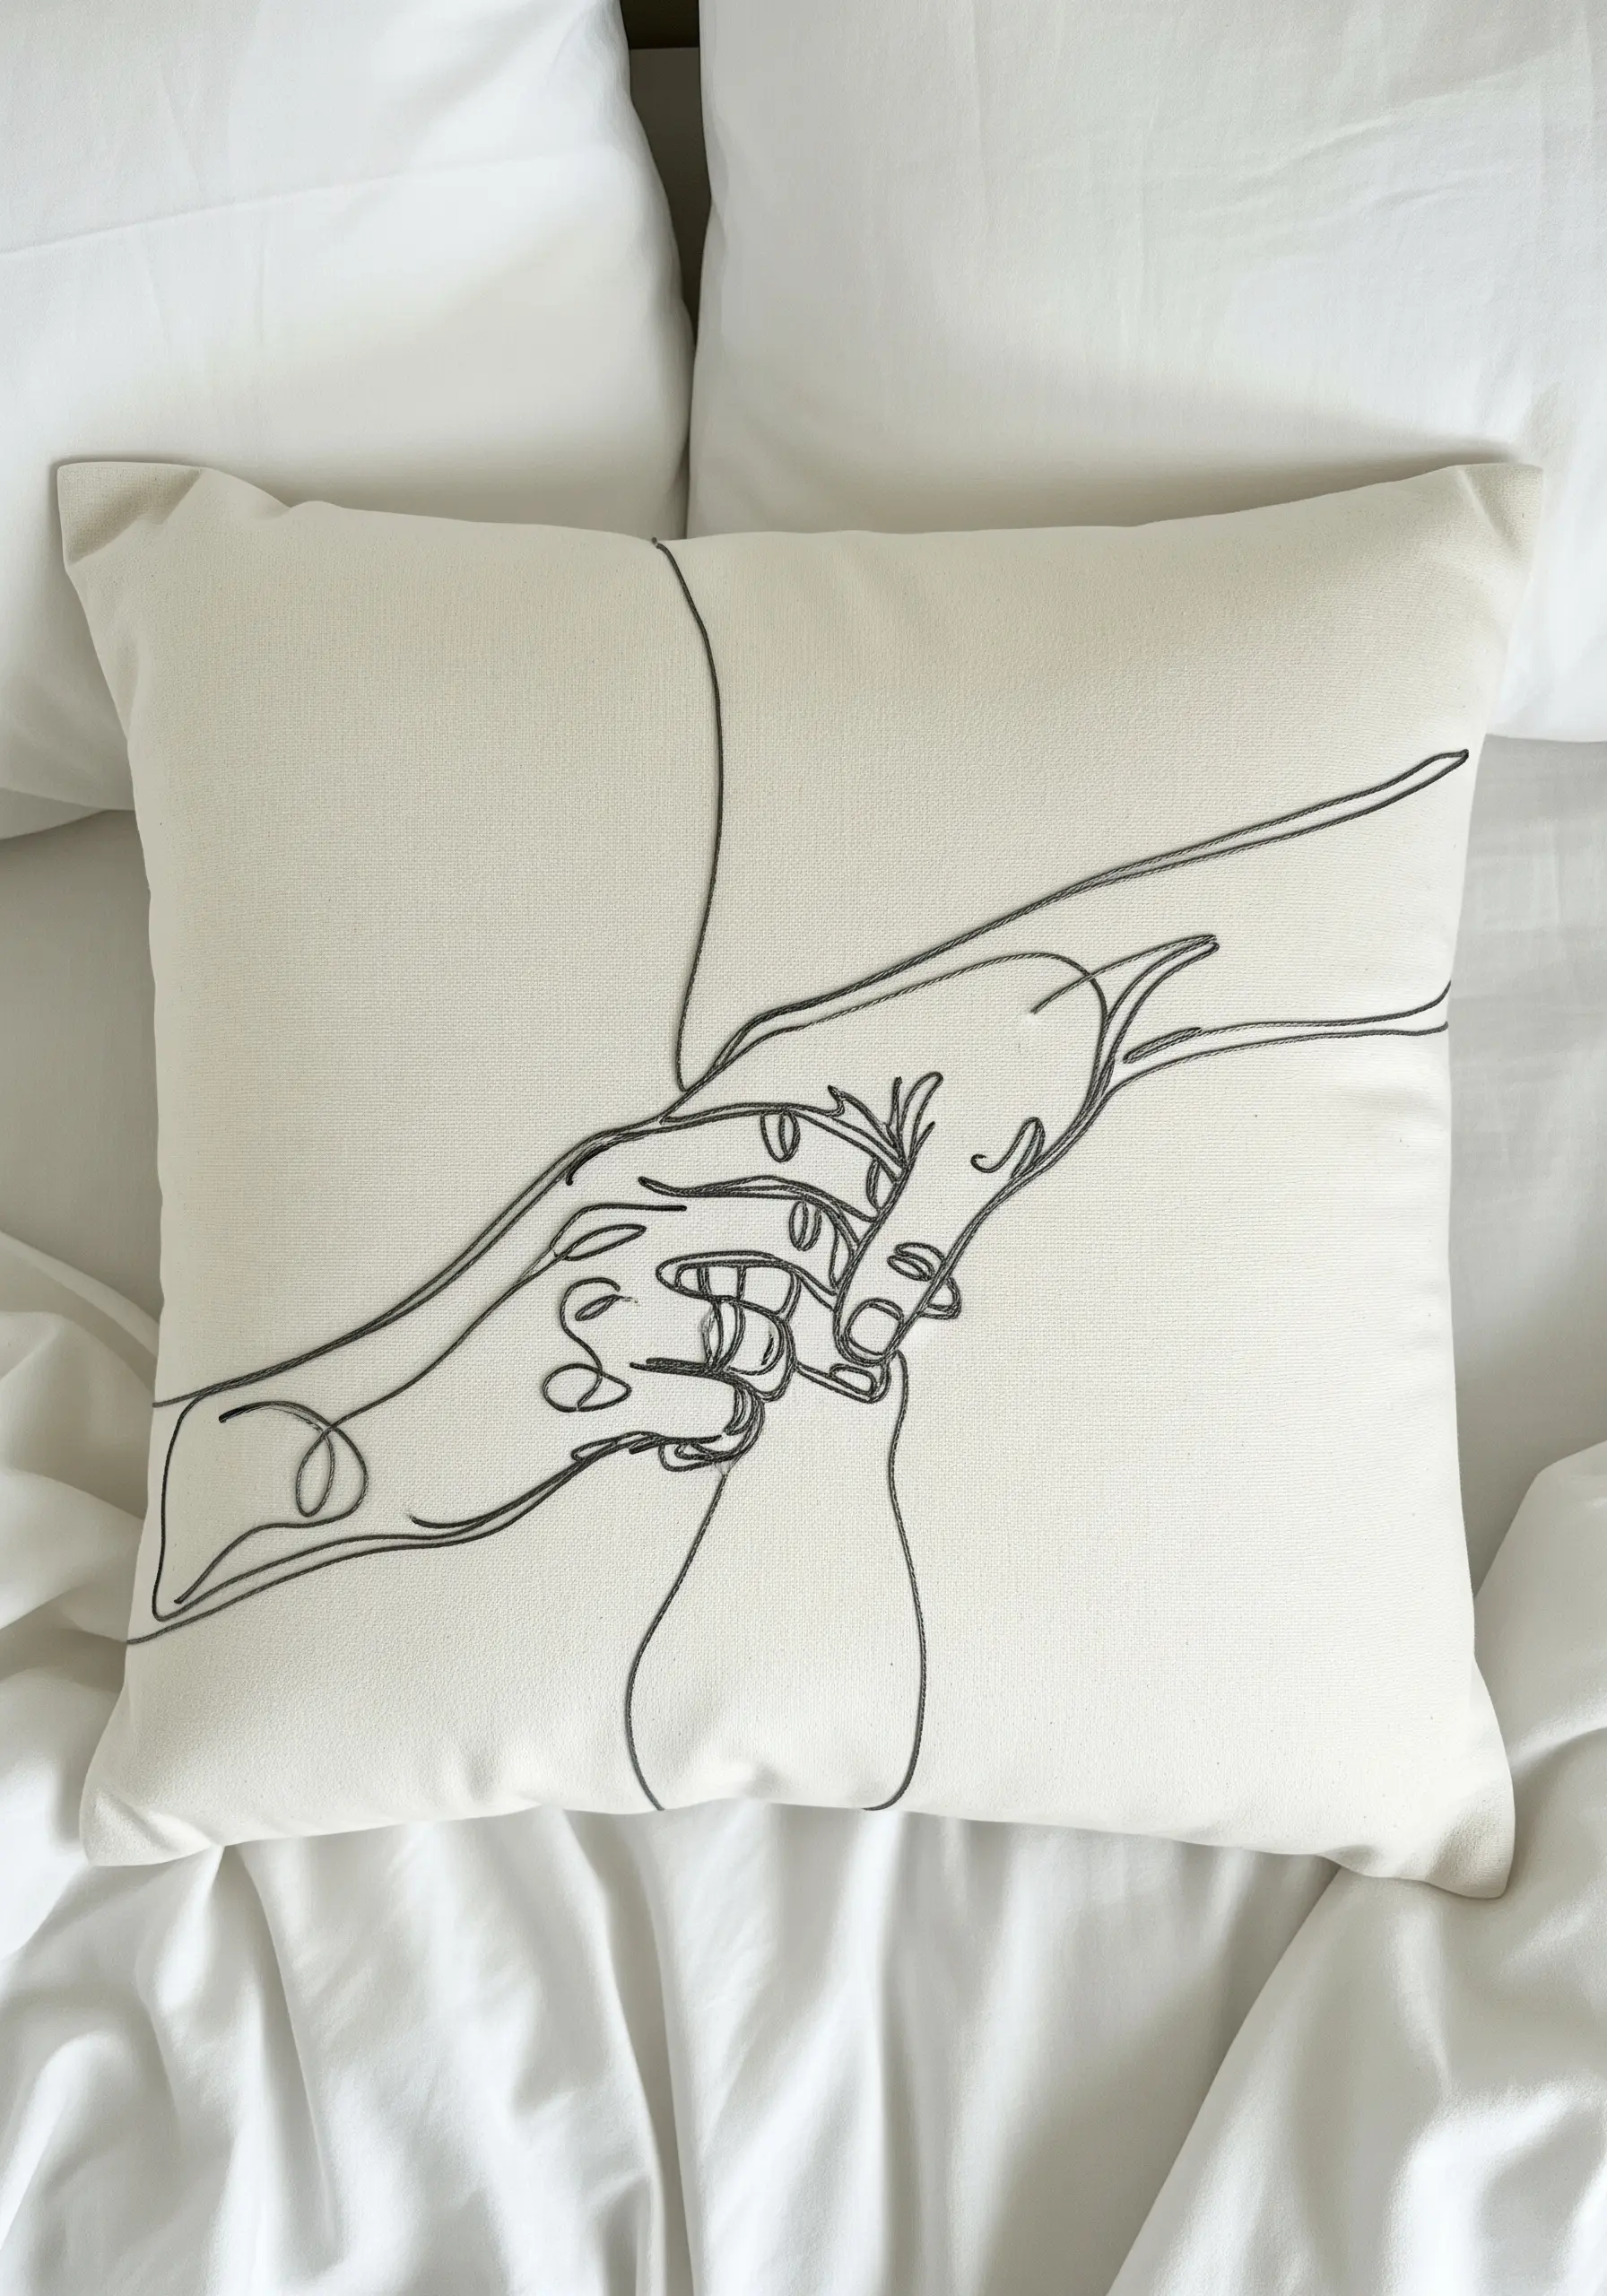
Capture the fluidity of a single-line drawing by using a stem stitch, which creates a smooth, twisting line ideal for curves.
Plan your stitching path before you begin to minimize the need to start and stop your thread, maintaining the illusion of an unbroken pen stroke.
Using just two or three strands of floss keeps the line delicate and expressive, perfect for romantic couple line art embroidery patterns that rely on subtlety and grace.
5. Create Dynamic Flow with Parallel Stitches
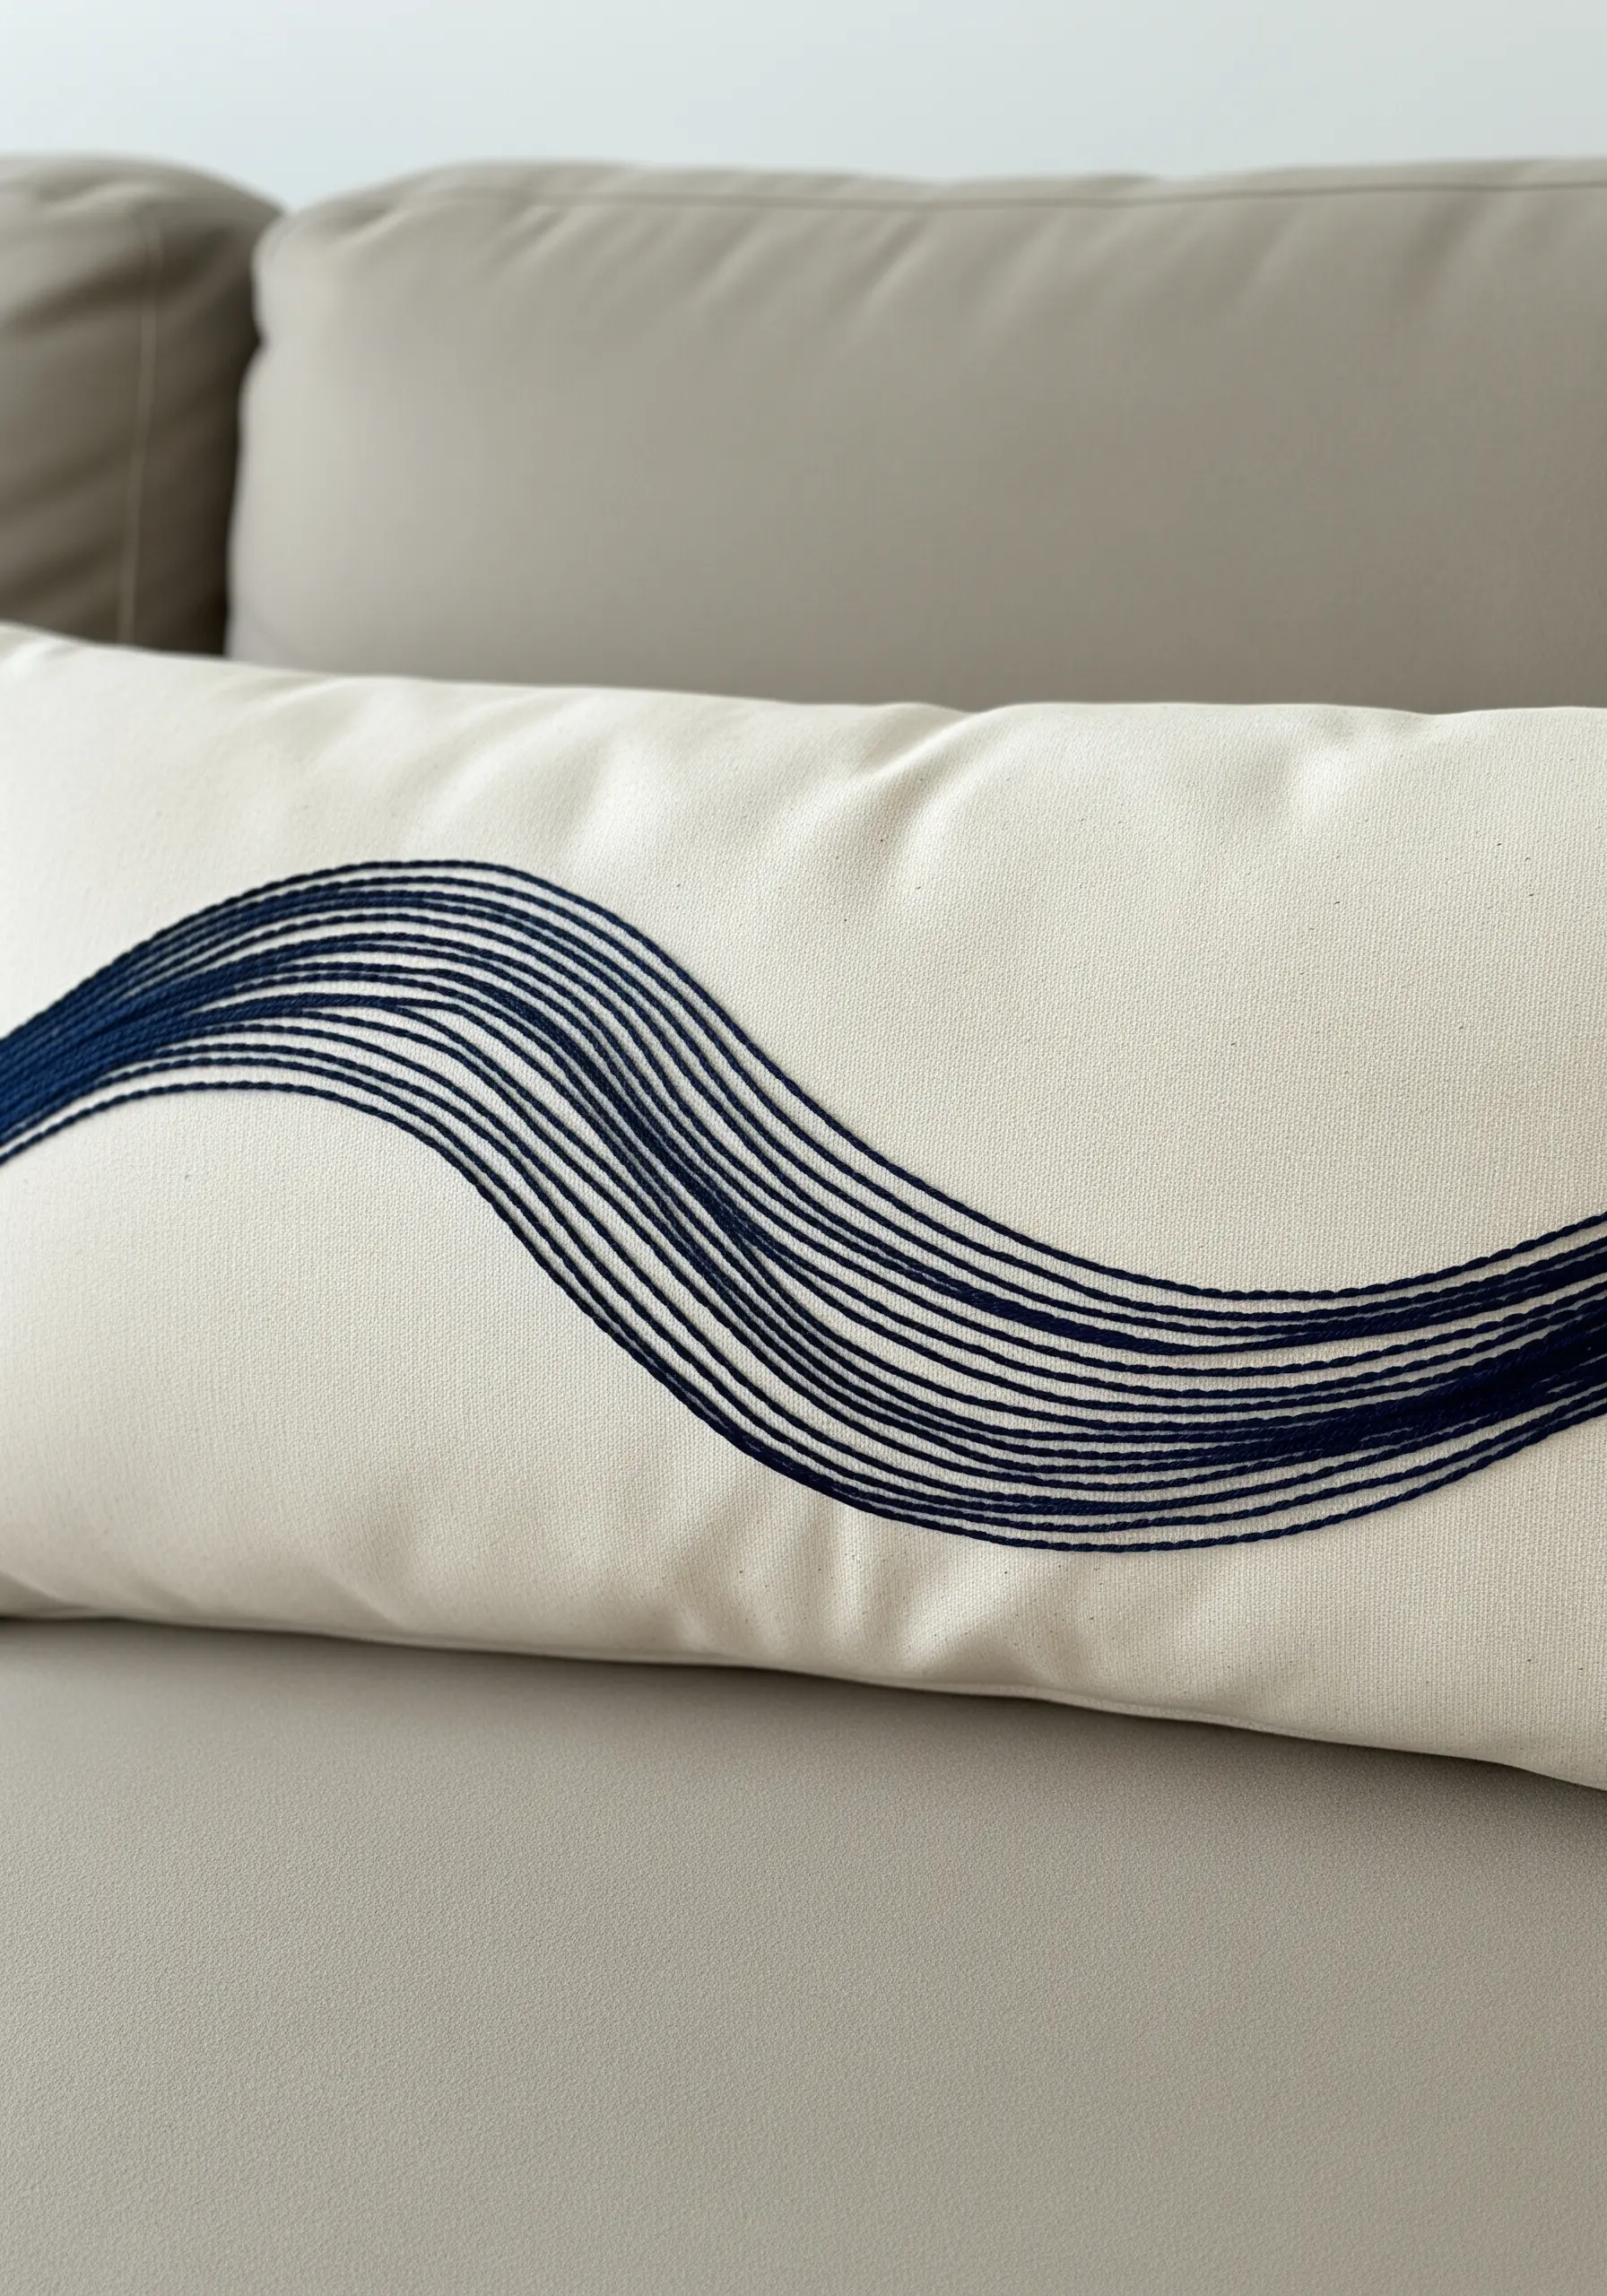
Achieve this sense of movement by using long, parallel straight stitches worked closely together.
To ensure your lines are perfectly spaced and taut, use a water-soluble marker and a ruler to draw guidelines first.
Keep your thread tension even to prevent the fabric from puckering—this is crucial for a smooth, professional finish on a long lumbar pillow.
Using a thread with a slight sheen, like pearl cotton, will enhance the wave-like, light-catching effect.
6. Master Asymmetry and Negative Space
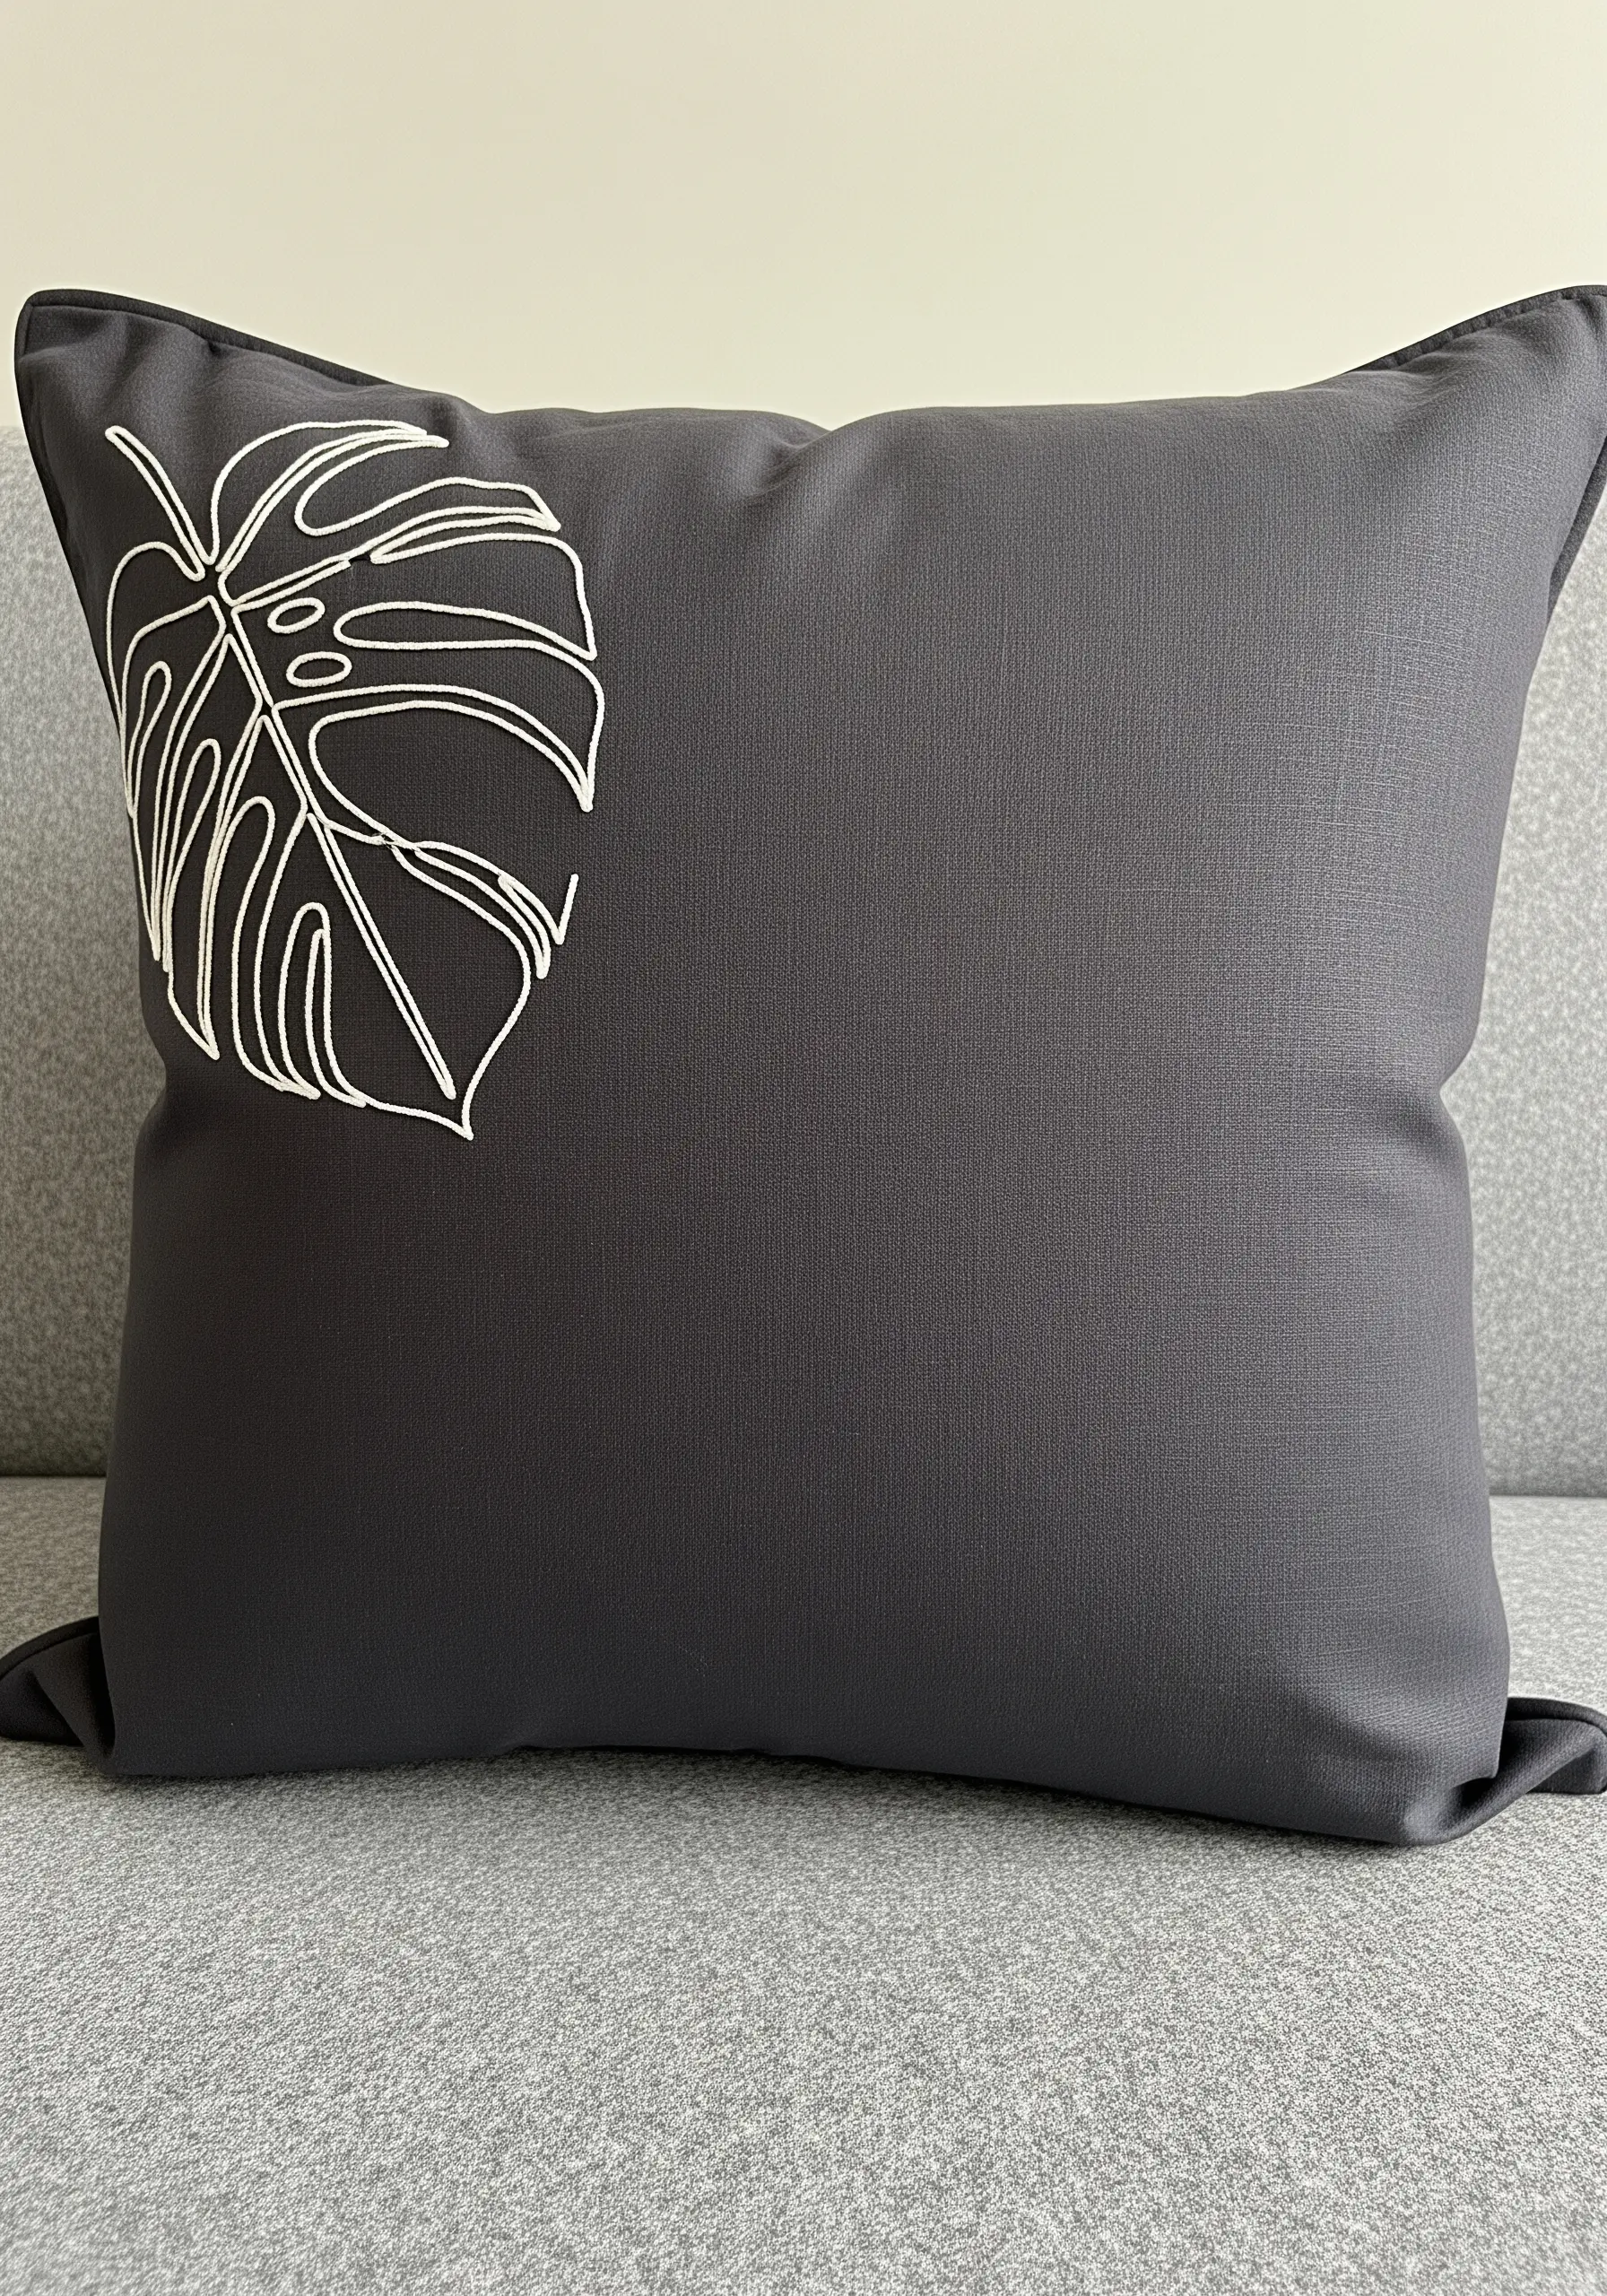
Create a modern, sophisticated composition by placing your motif off-center, allowing the negative space to become an active part of the design.
Stitch a monstera leaf in the corner of a dark cushion cover using a bright, contrasting thread like ecru or white.
A whipped backstitch will give your outline a smooth, raised quality, making it pop against the dark background and emphasizing its graphic shape.
7. Preserve Clean Lines on Plush Fabrics
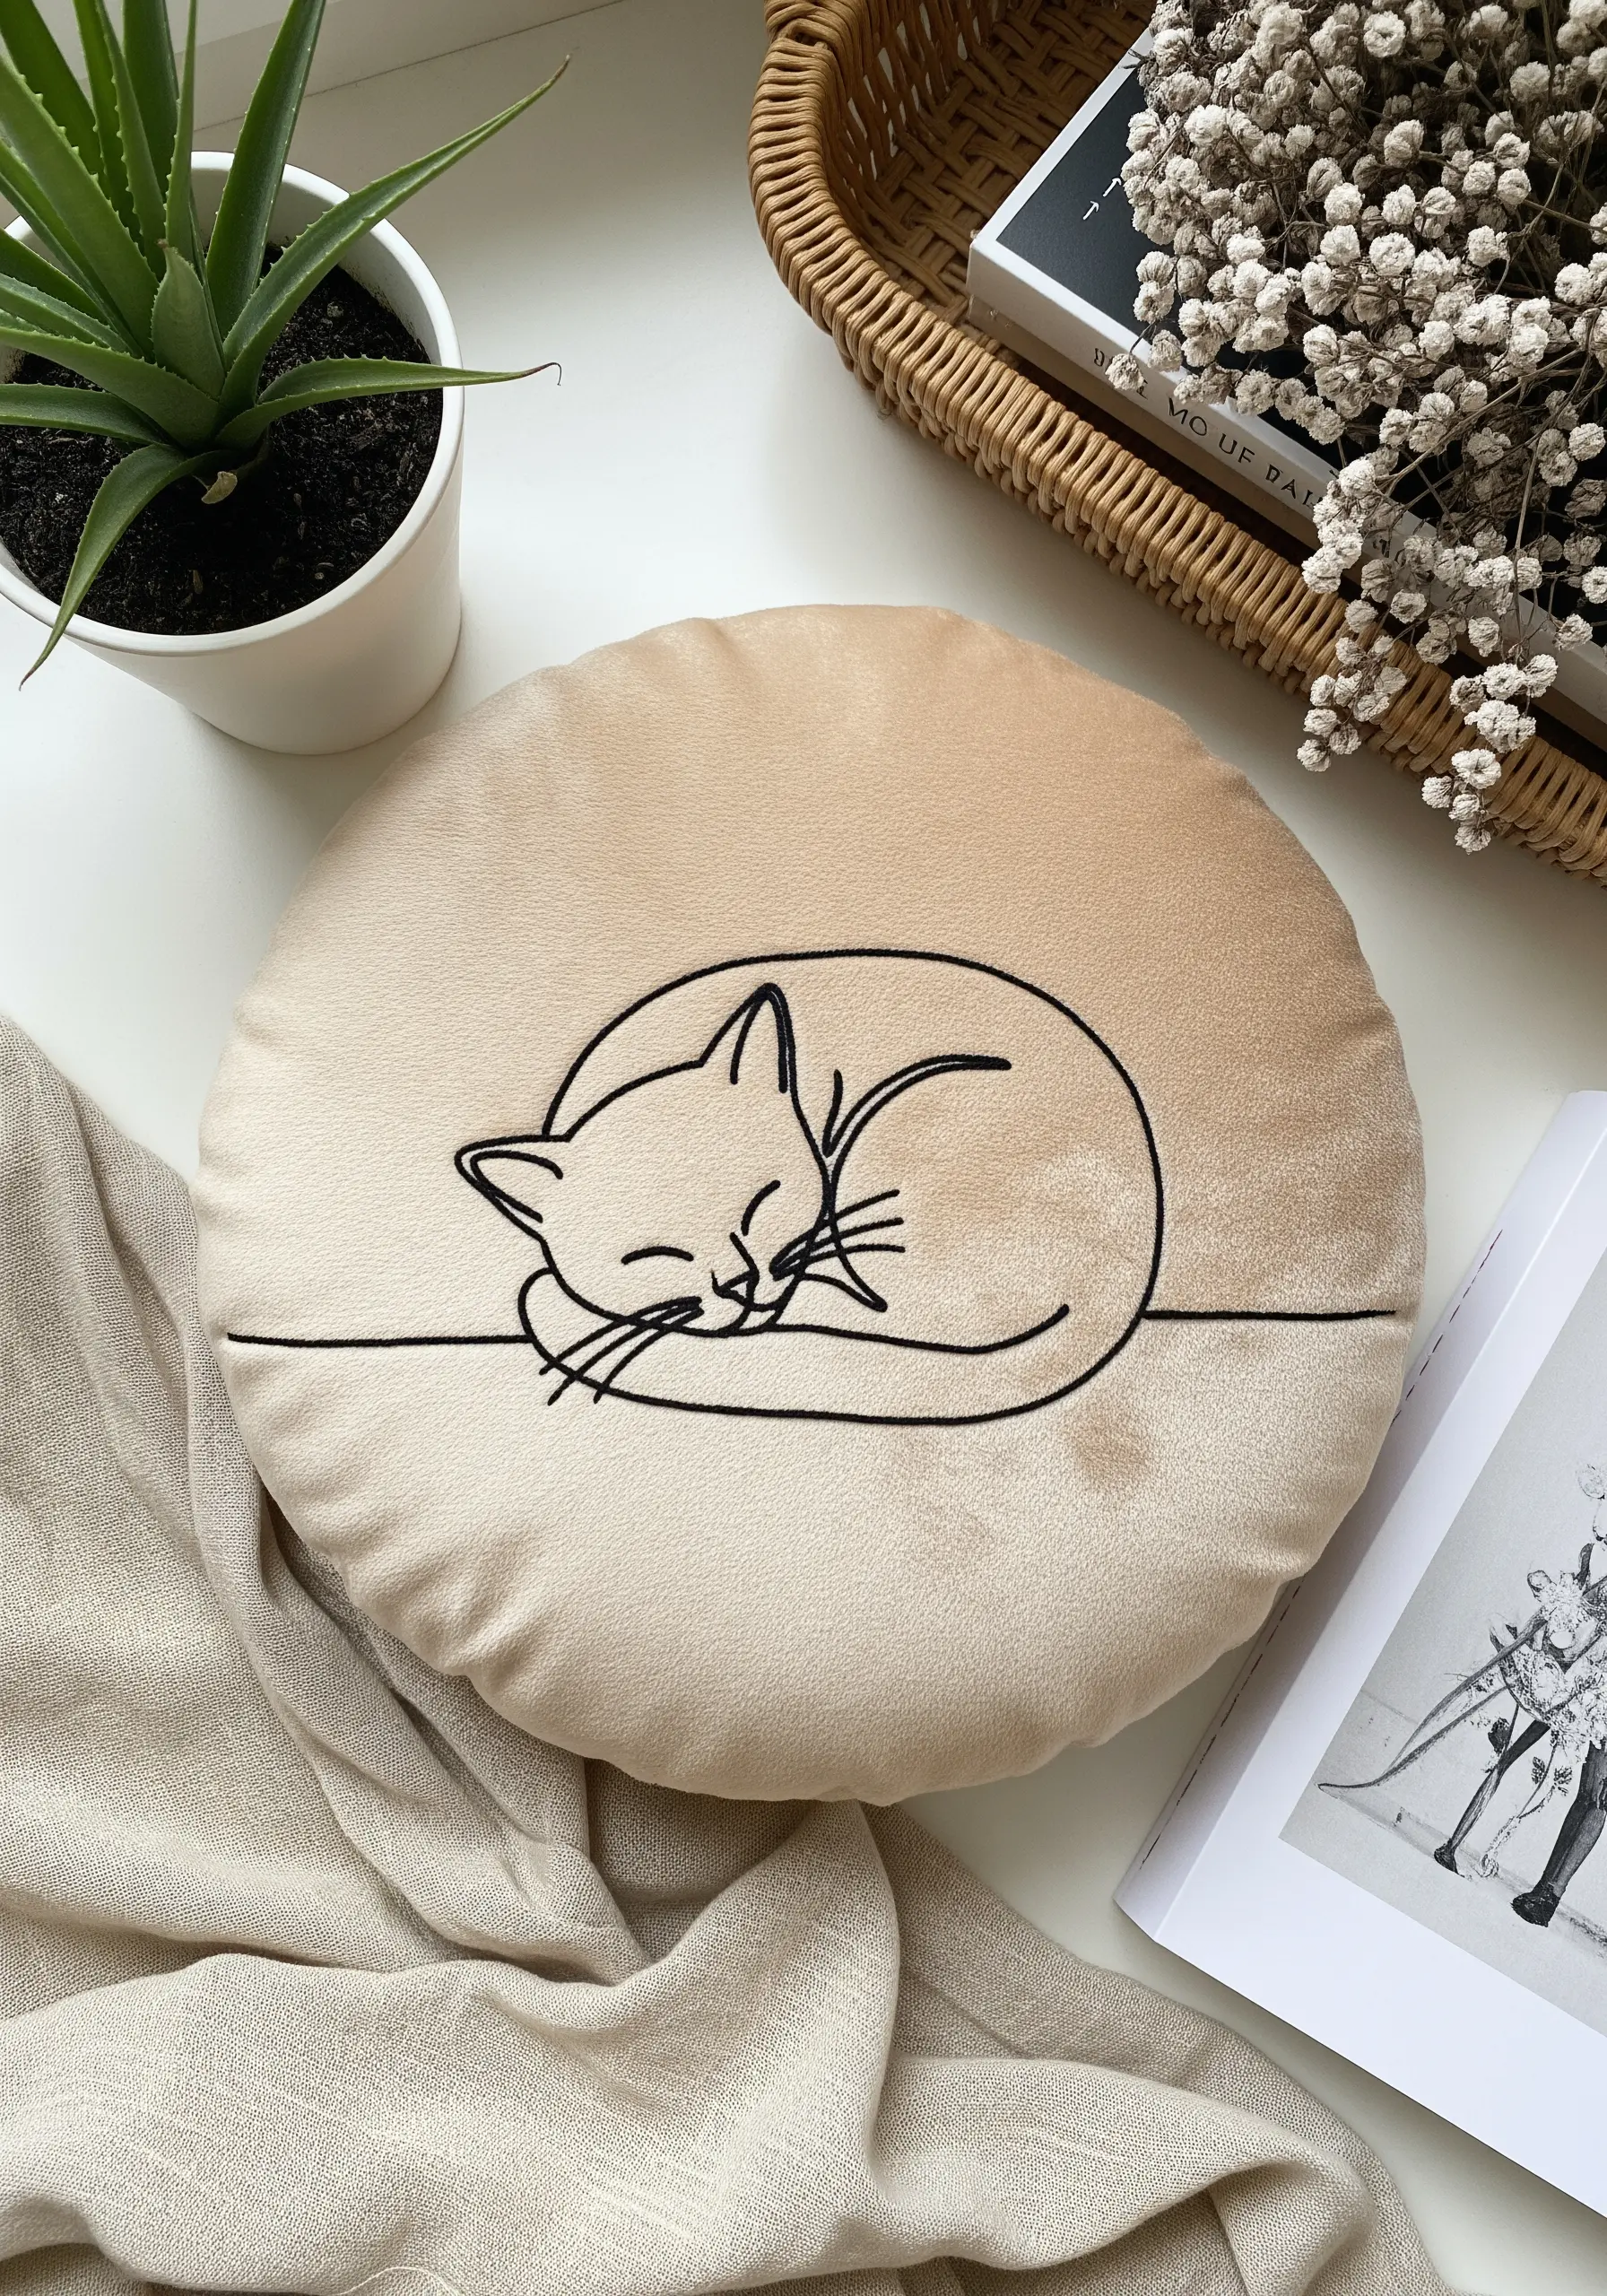
When embroidering on velvet or other plush fabrics, prevent your stitches from disappearing into the pile by using a stabilizer.
A stick-and-stitch water-soluble stabilizer provides a smooth surface to work on and ensures your lines remain crisp and visible.
For the clean curves of this sleeping cat, a split stitch is ideal, as it creates a solid, chain-like line that resists distortion on soft textiles.
8. Build Texture with a Mix of Stitches

Add depth to a celestial design by assigning a different stitch to each element for varied texture.
Use a simple backstitch for the connecting constellation lines, tiny star stitches or French knots for the stars, and small, neat satin stitches for the crescent shapes.
Stitching with a metallic gold thread adds a subtle shimmer that elevates the design, making it feel both playful and luxurious.
9. Introduce Sculptural Form with Wired Thread
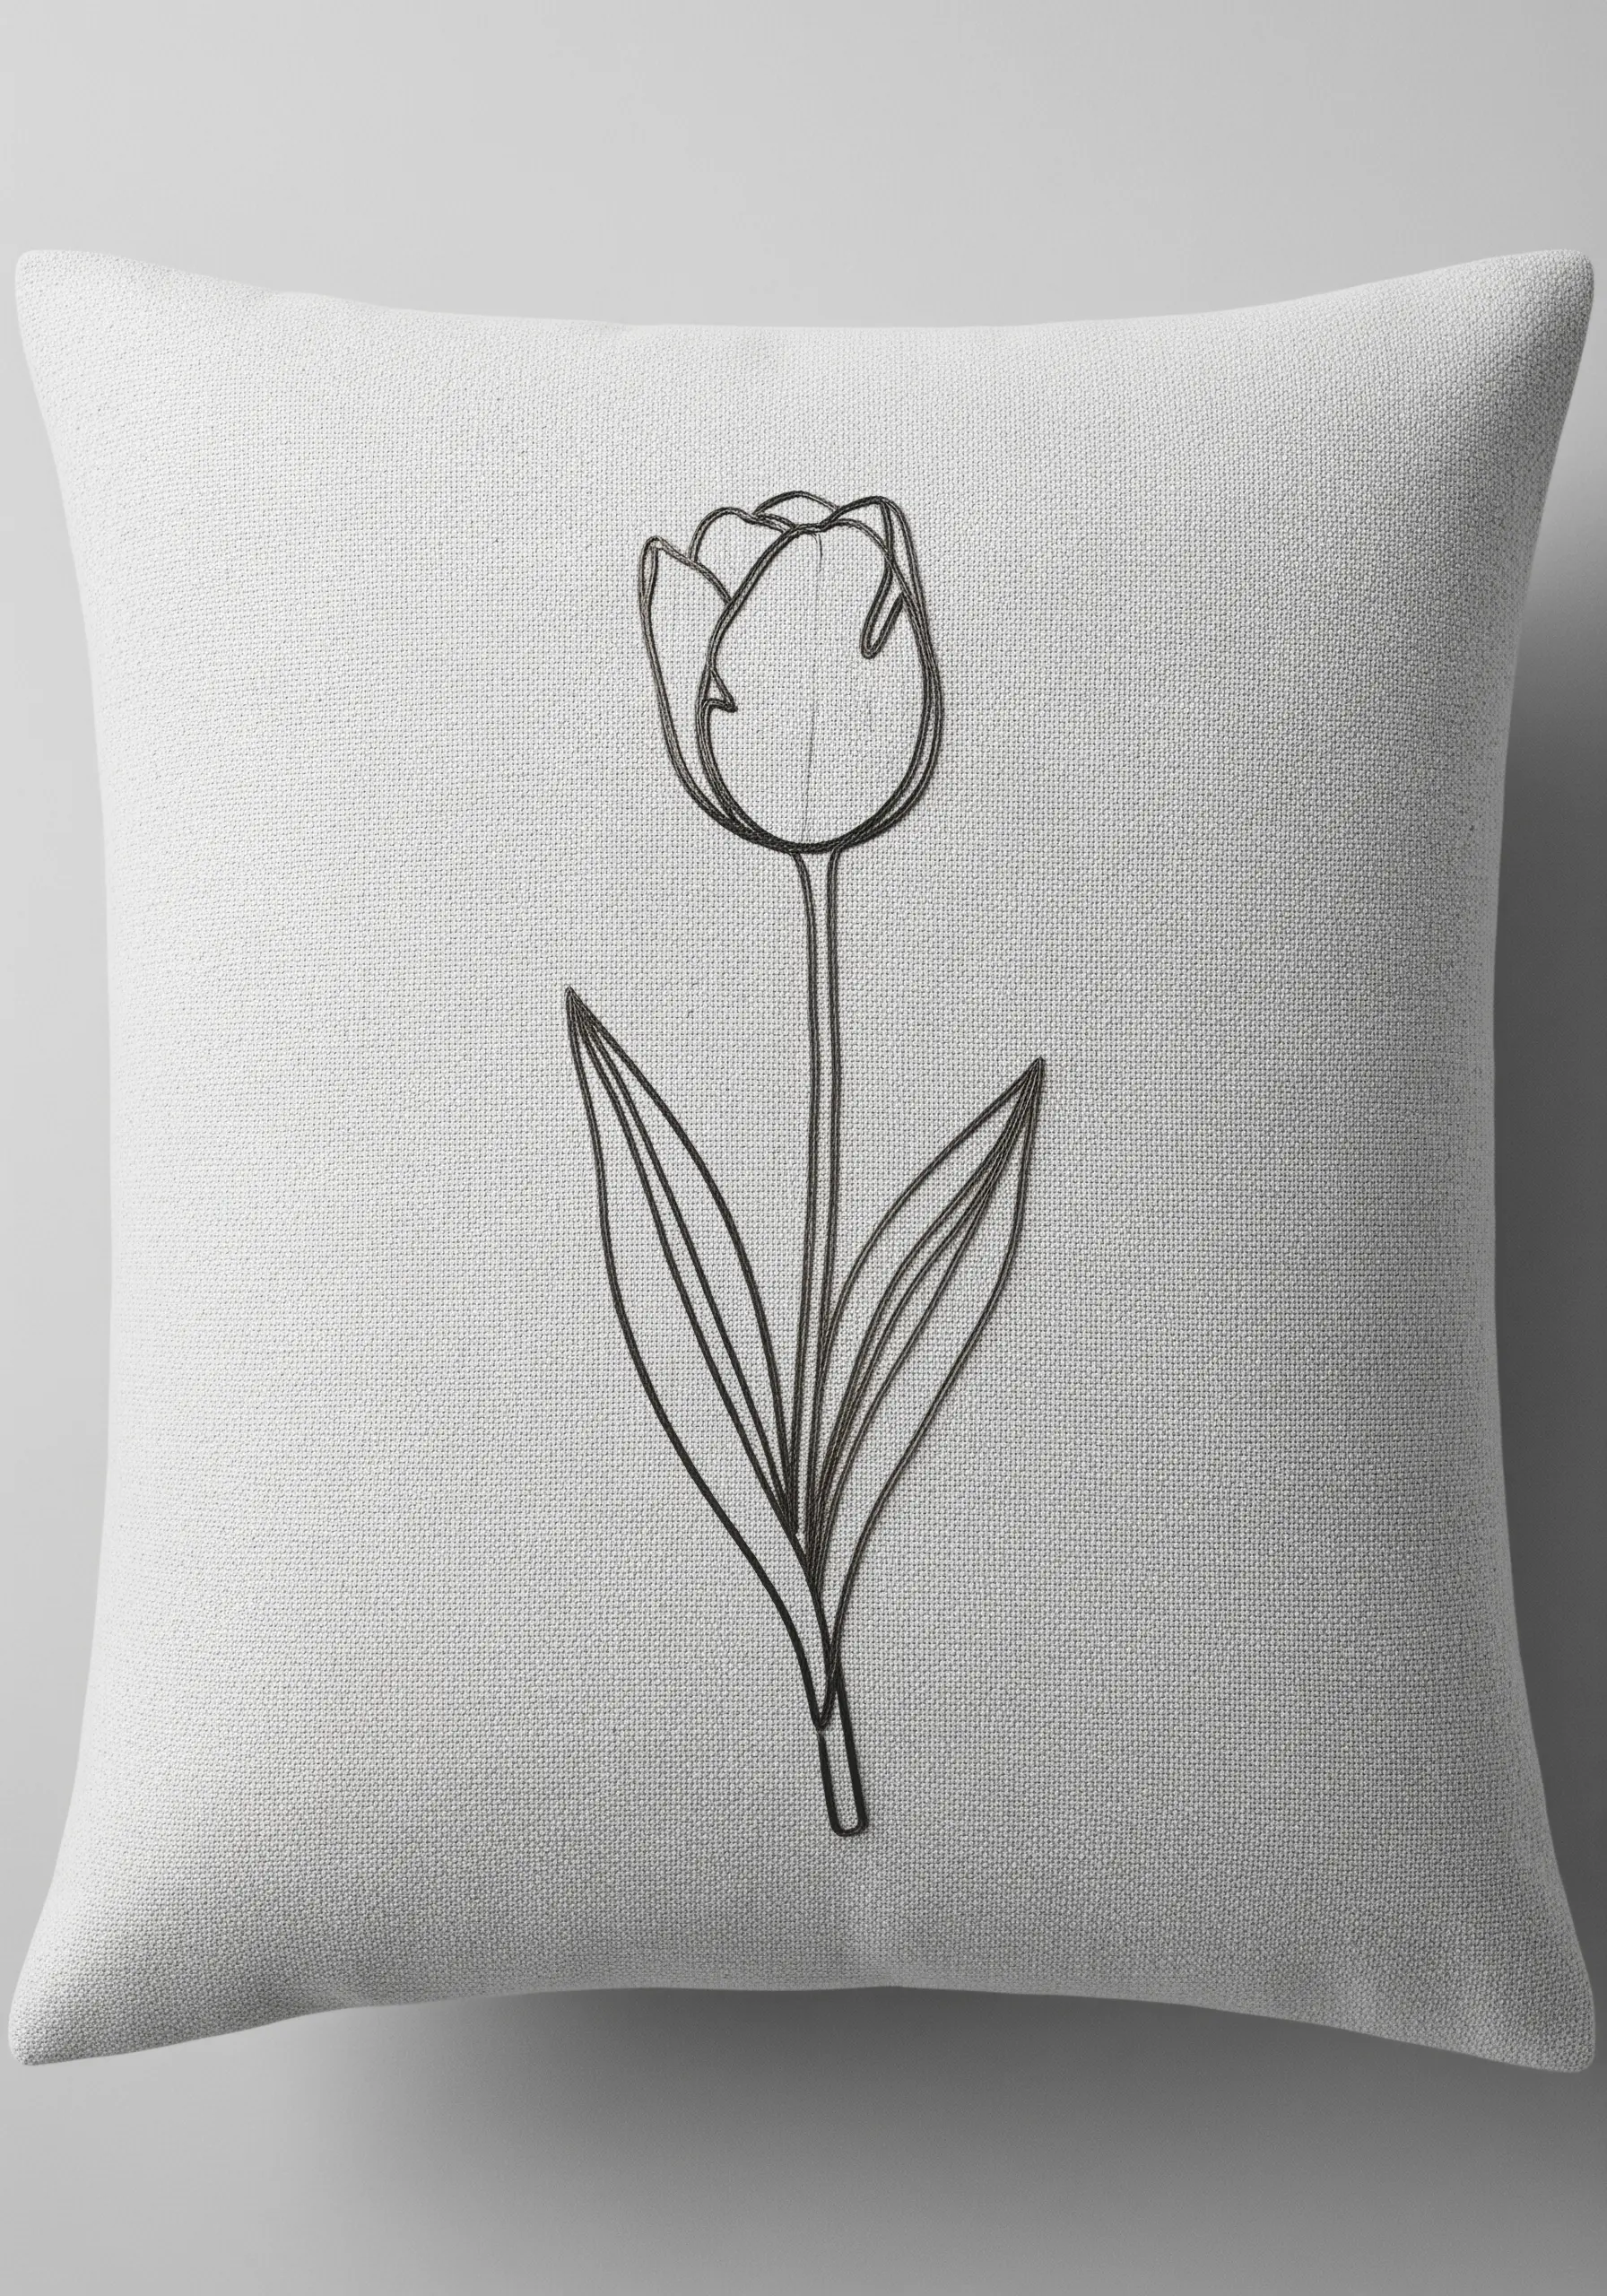
For a line that truly stands away from the fabric, creating a subtle 3D effect, consider stitching over a fine, pliable craft wire.
Lay the wire along your design line and couch it down with tight, close stitches, shaping the wire as you go.
This technique gives your line art a rigid, sculptural quality, turning a simple flower outline into a delicate yet sturdy piece of textile art.
10. Combine Embroidery with Other Fiber Arts

Introduce a dramatic textural contrast by pairing embroidery with knitting or crochet.
Embroider the mountain peaks using a chunky chain stitch with thick wool yarn for a rustic, rugged feel.
Then, create a separate knitted or crocheted panel and stitch it firmly to the bottom of the cushion cover.
This mixed-media approach turns a simple pillow into one of your most interesting natural texture embroidery ideas.
11. Maintain Clarity in Overlapping Lines

When your line art design involves many overlapping elements, stitch choice is key to maintaining clarity.
A stem stitch, worked with two or three strands of floss, provides a consistently smooth and slightly rounded line that reads clearly even when layered.
Focus on maintaining even tension throughout the entire piece to ensure the fabric remains flat and the complex design looks effortless and fluid.
12. Create Visual Rhythm with Pattern Repetition
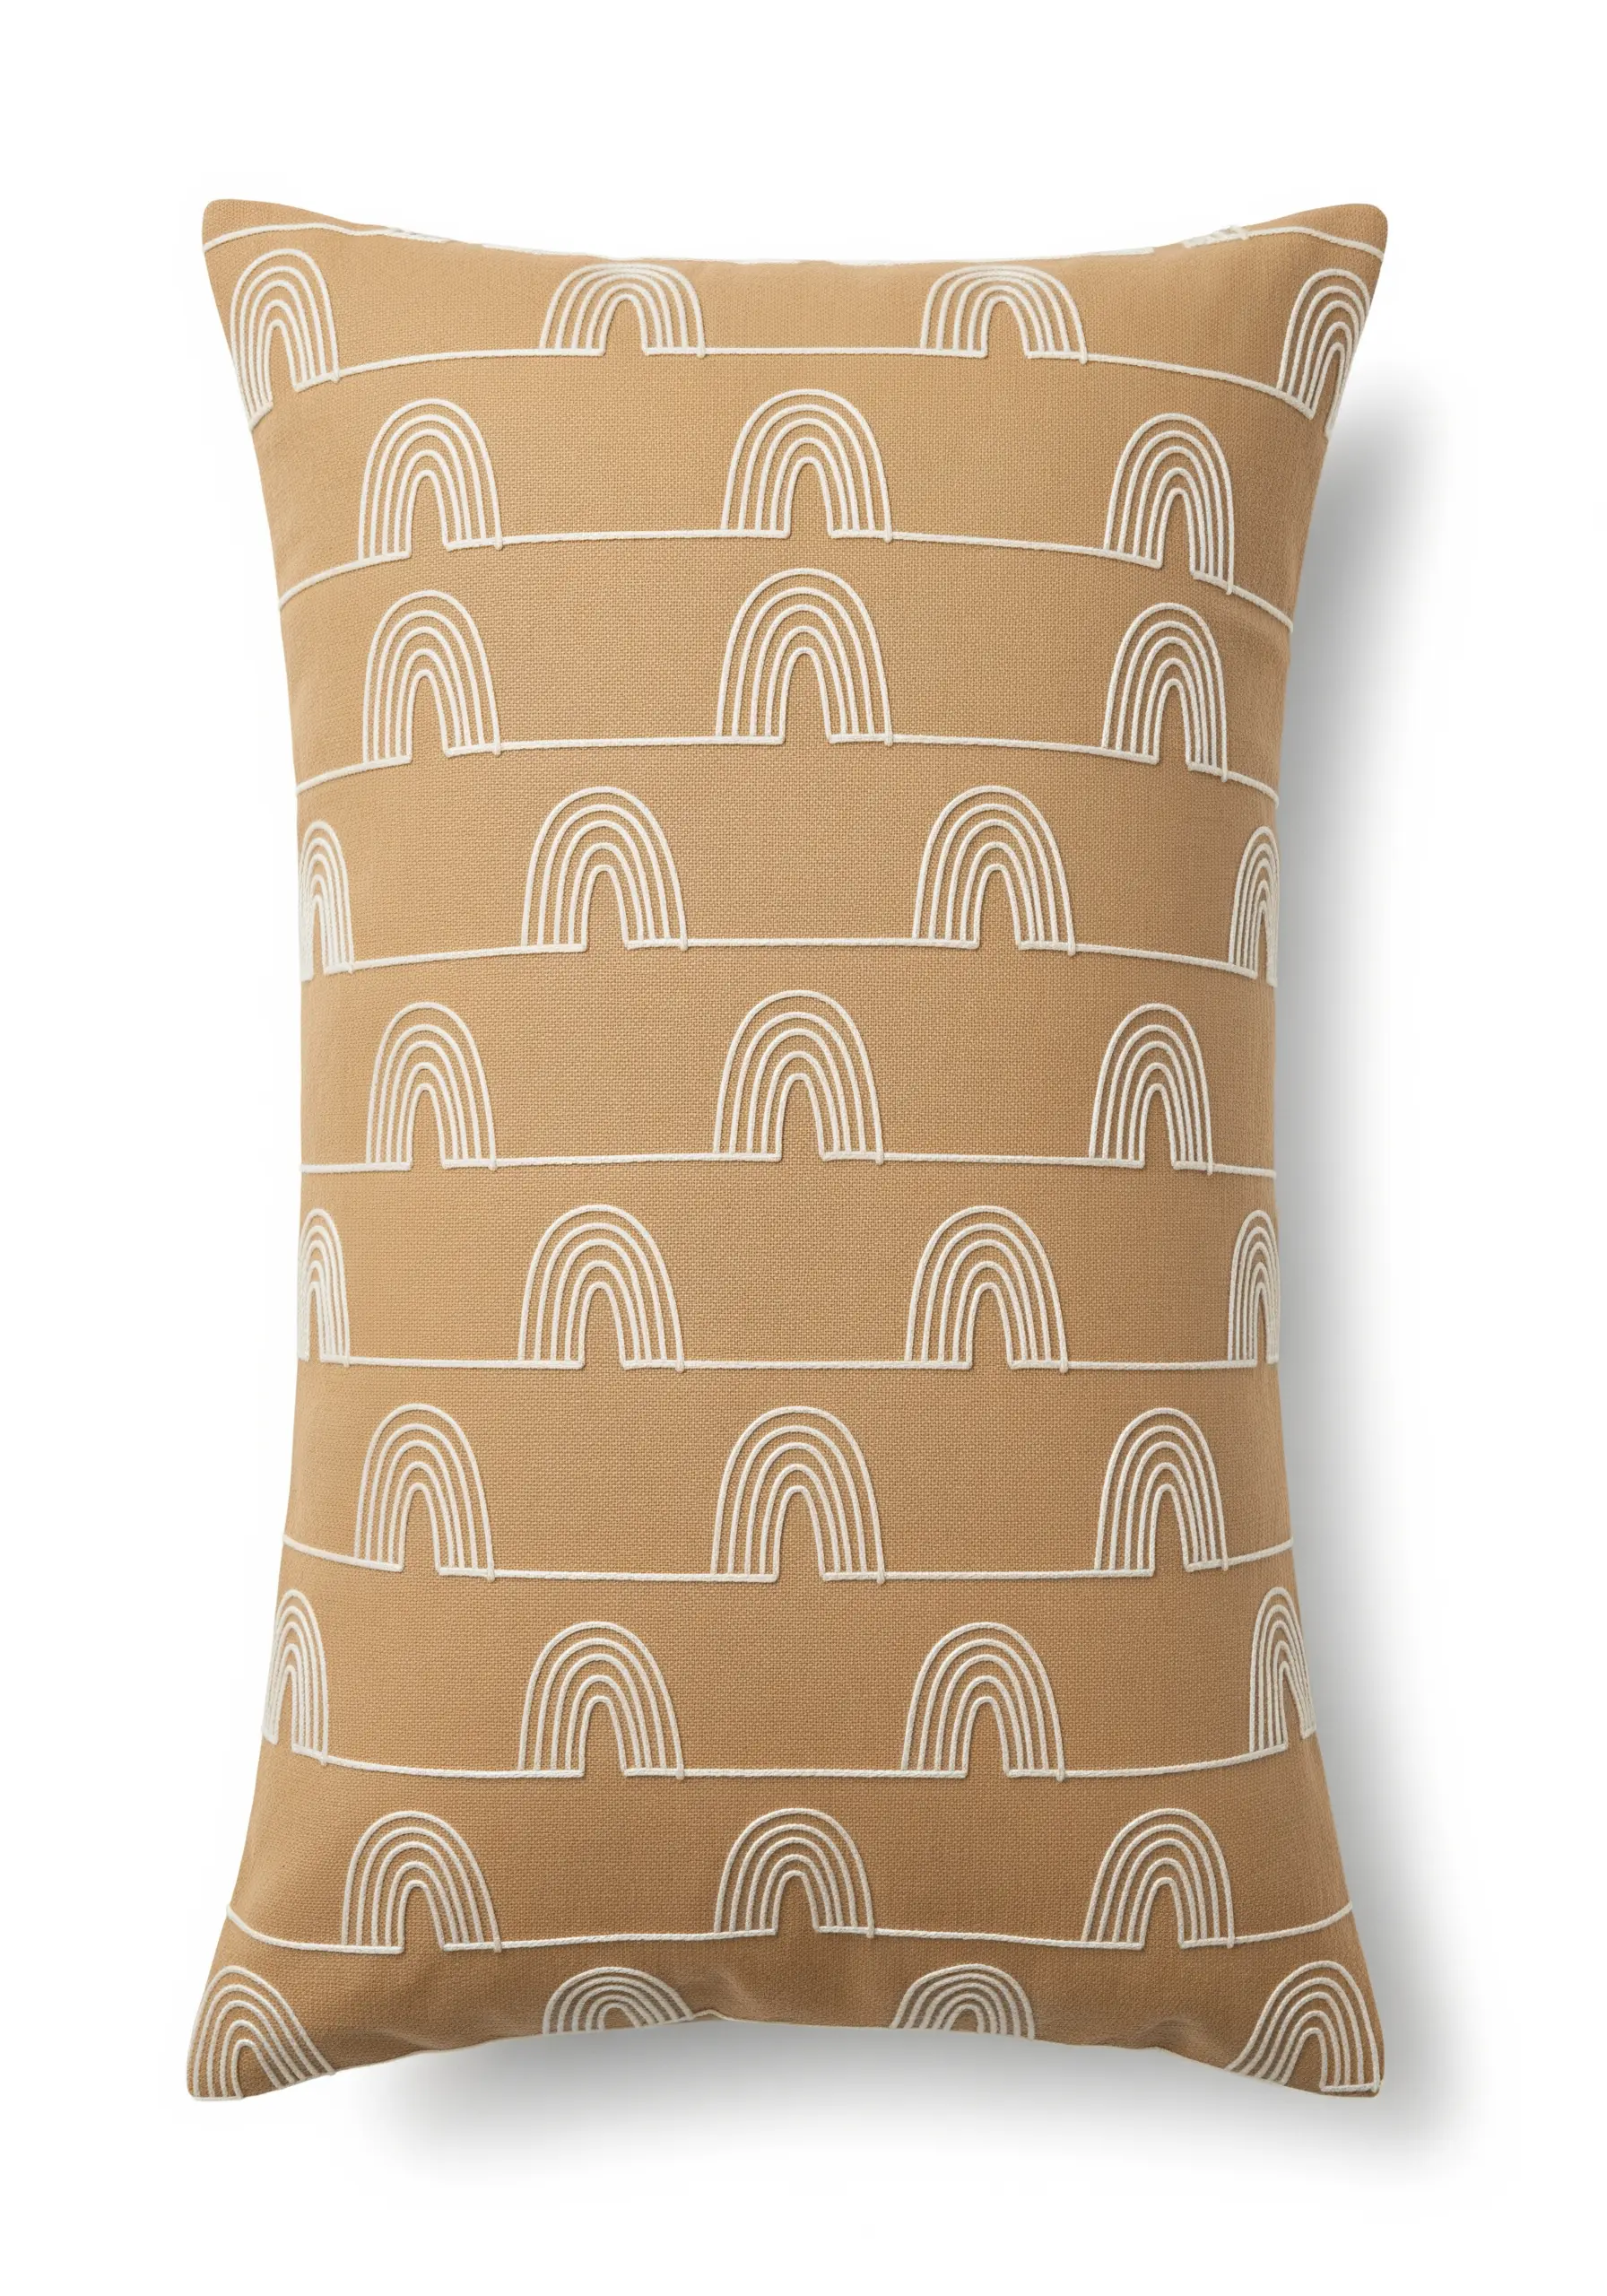
A simple, repeated motif can transform a plain cushion into a bespoke textile piece.
Use a water-soluble transfer pen to create a grid, ensuring your rainbow arcs are evenly spaced for a polished, geometric look.
Stitch the pattern with a simple backstitch or split stitch using a contrasting thread color to emphasize the clean, graphic quality of the repeating design.
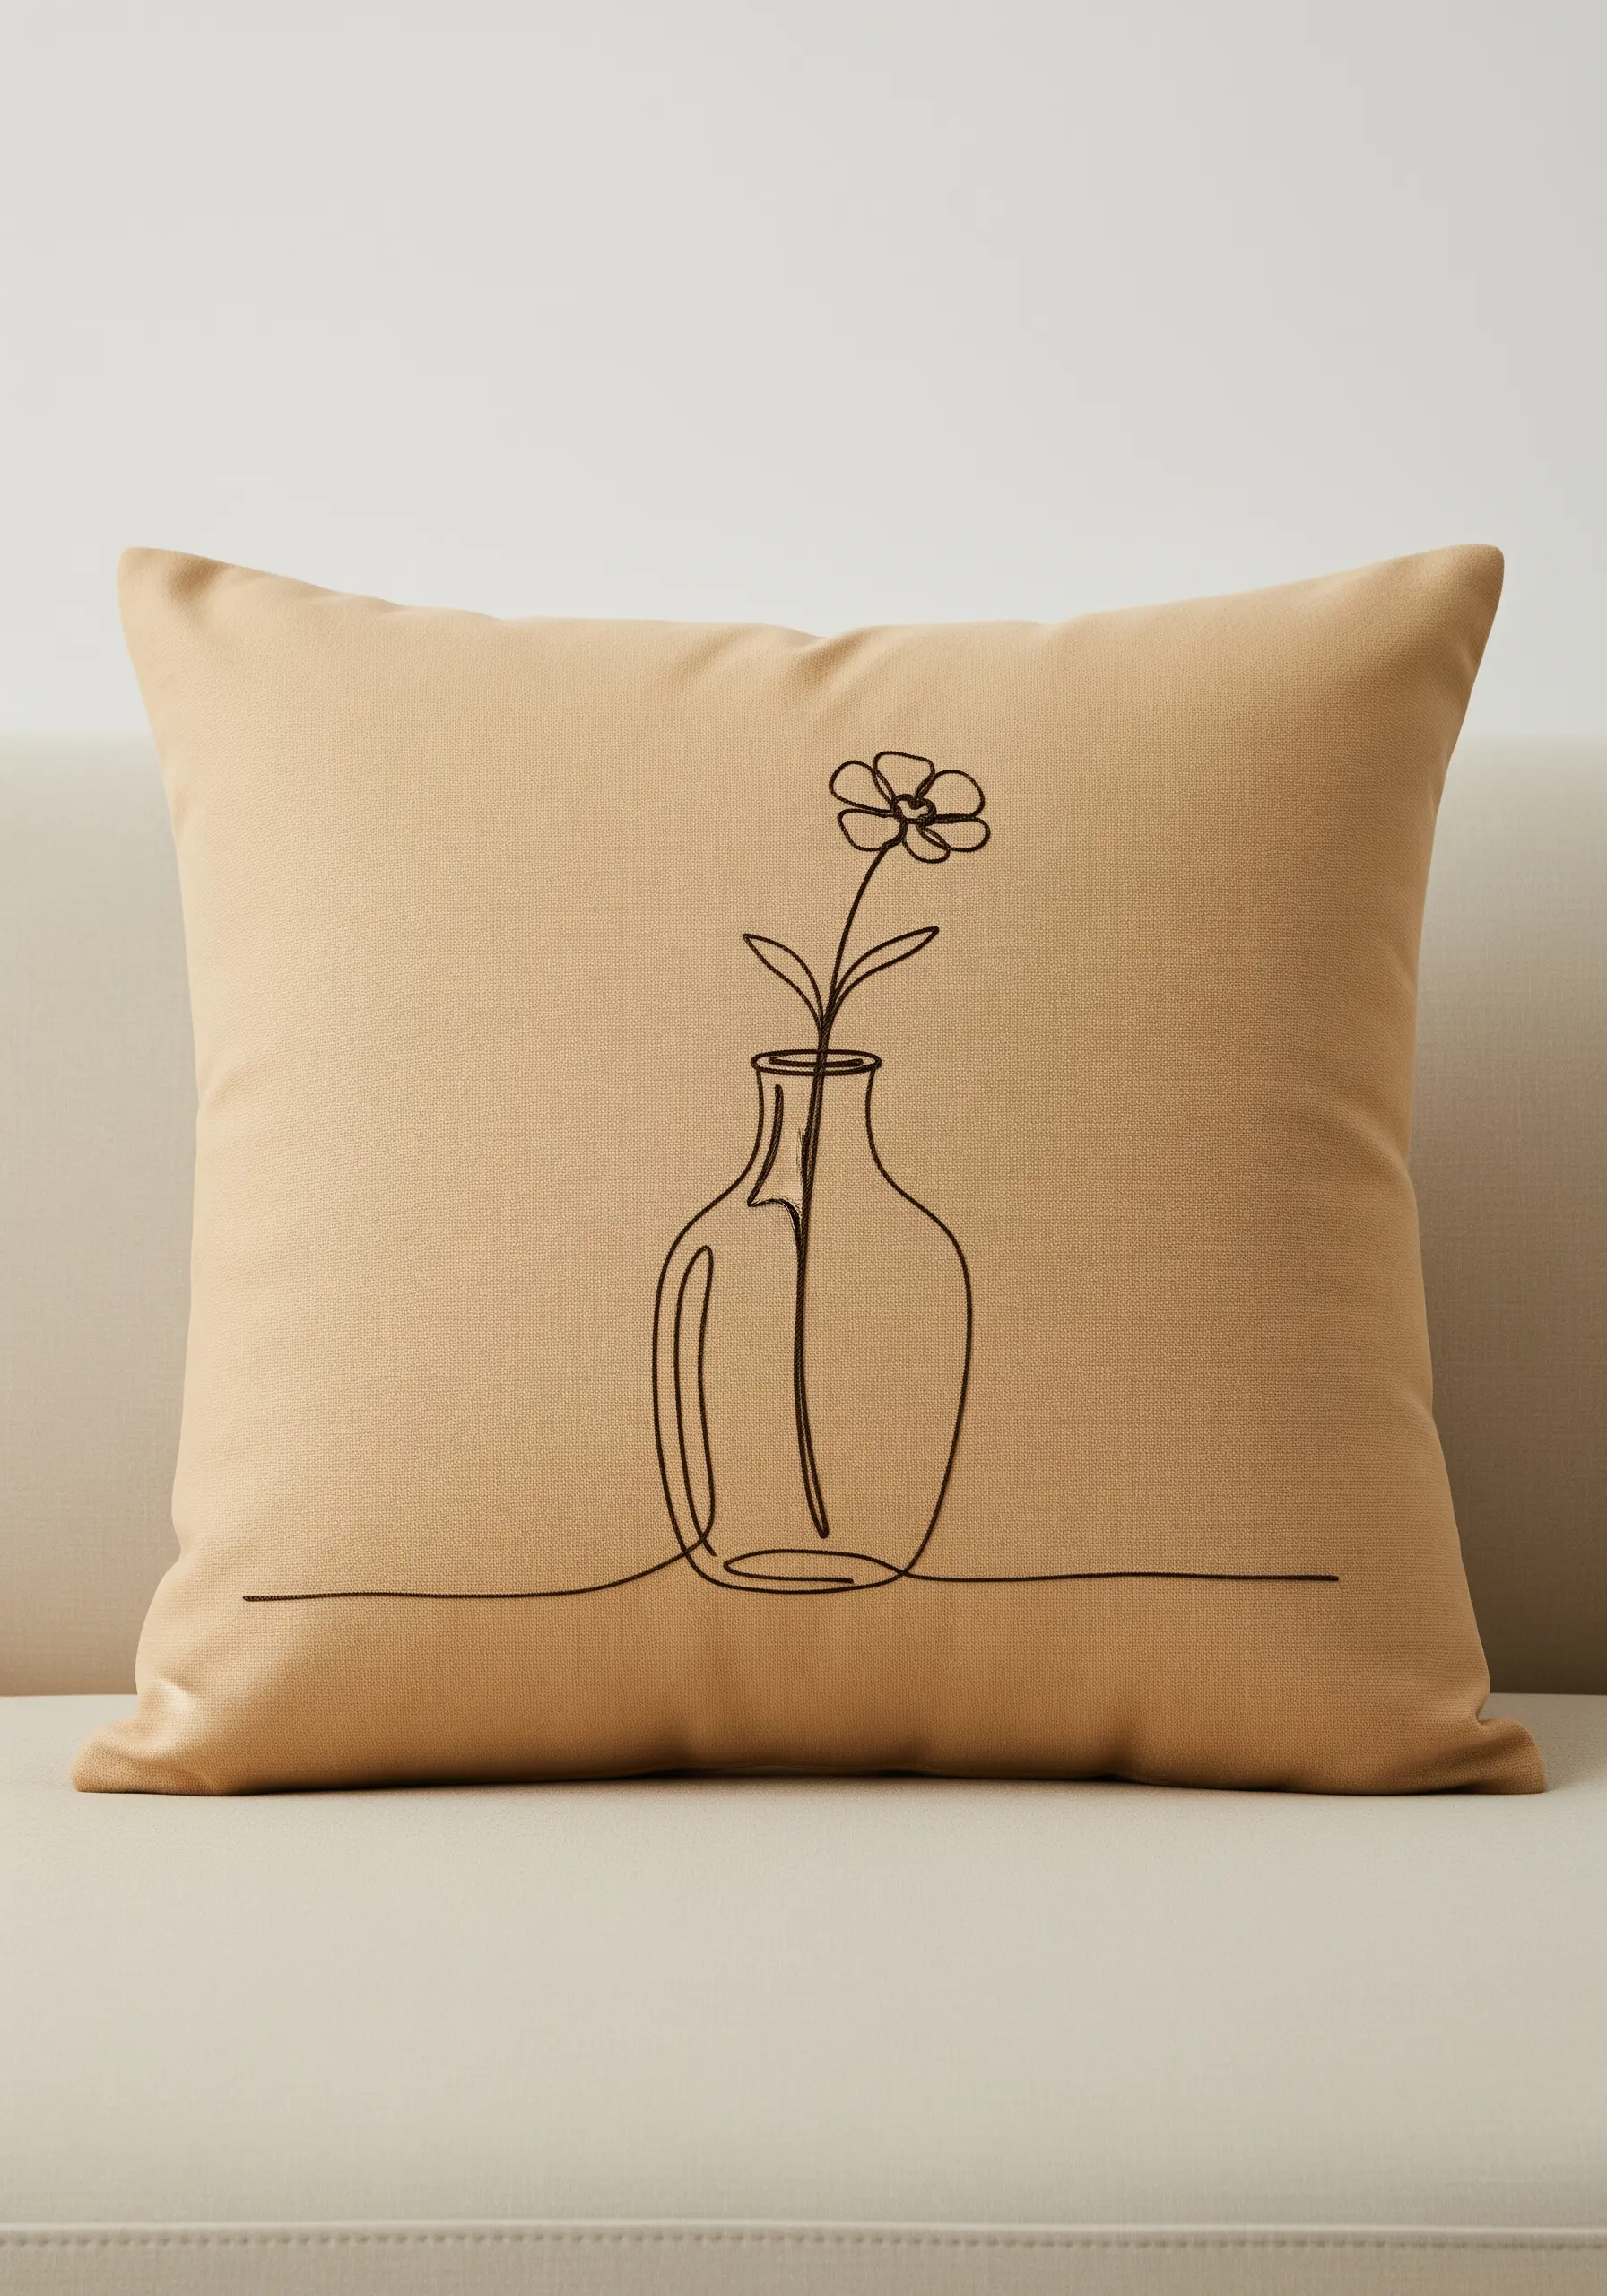
13. Unify a Composition with a Grounding Line

Anchor a floating motif by extending one of its lines across the entire width of the cushion.
This simple compositional trick creates a sense of place and intention, making the design feel grounded and complete.
Use a single, continuous line of backstitch or stem stitch for the horizon line to contrast with the more detailed shape of the coffee cup, adding visual balance.
14. Define Motifs with Directional Stitches

Use the direction of your stitches to enhance the character of each element in your design.
For the sun, work your backstitches in a circle for the outline and use straight stitches radiating outwards for the rays to create a sense of light.
For the moon, use a tight chain stitch following its curve; this adds a slightly heavier, more solid texture that contrasts beautifully with the airy sun.
15. Achieve Elegance with Radiating Straight Stitches

The beauty of a ginkgo leaf lies in its delicate, fanning veins. Recreate this effect using carefully placed straight stitches.
Start by outlining the leaf shape with a stem stitch, then fill the interior with long straight stitches that radiate from the base of the leaf to the outer edge.
Maintaining perfect tension is essential to prevent any puckering, resulting in a design that showcases the power of thread and negative space.
16. Create Bold Silhouettes with Appliqué
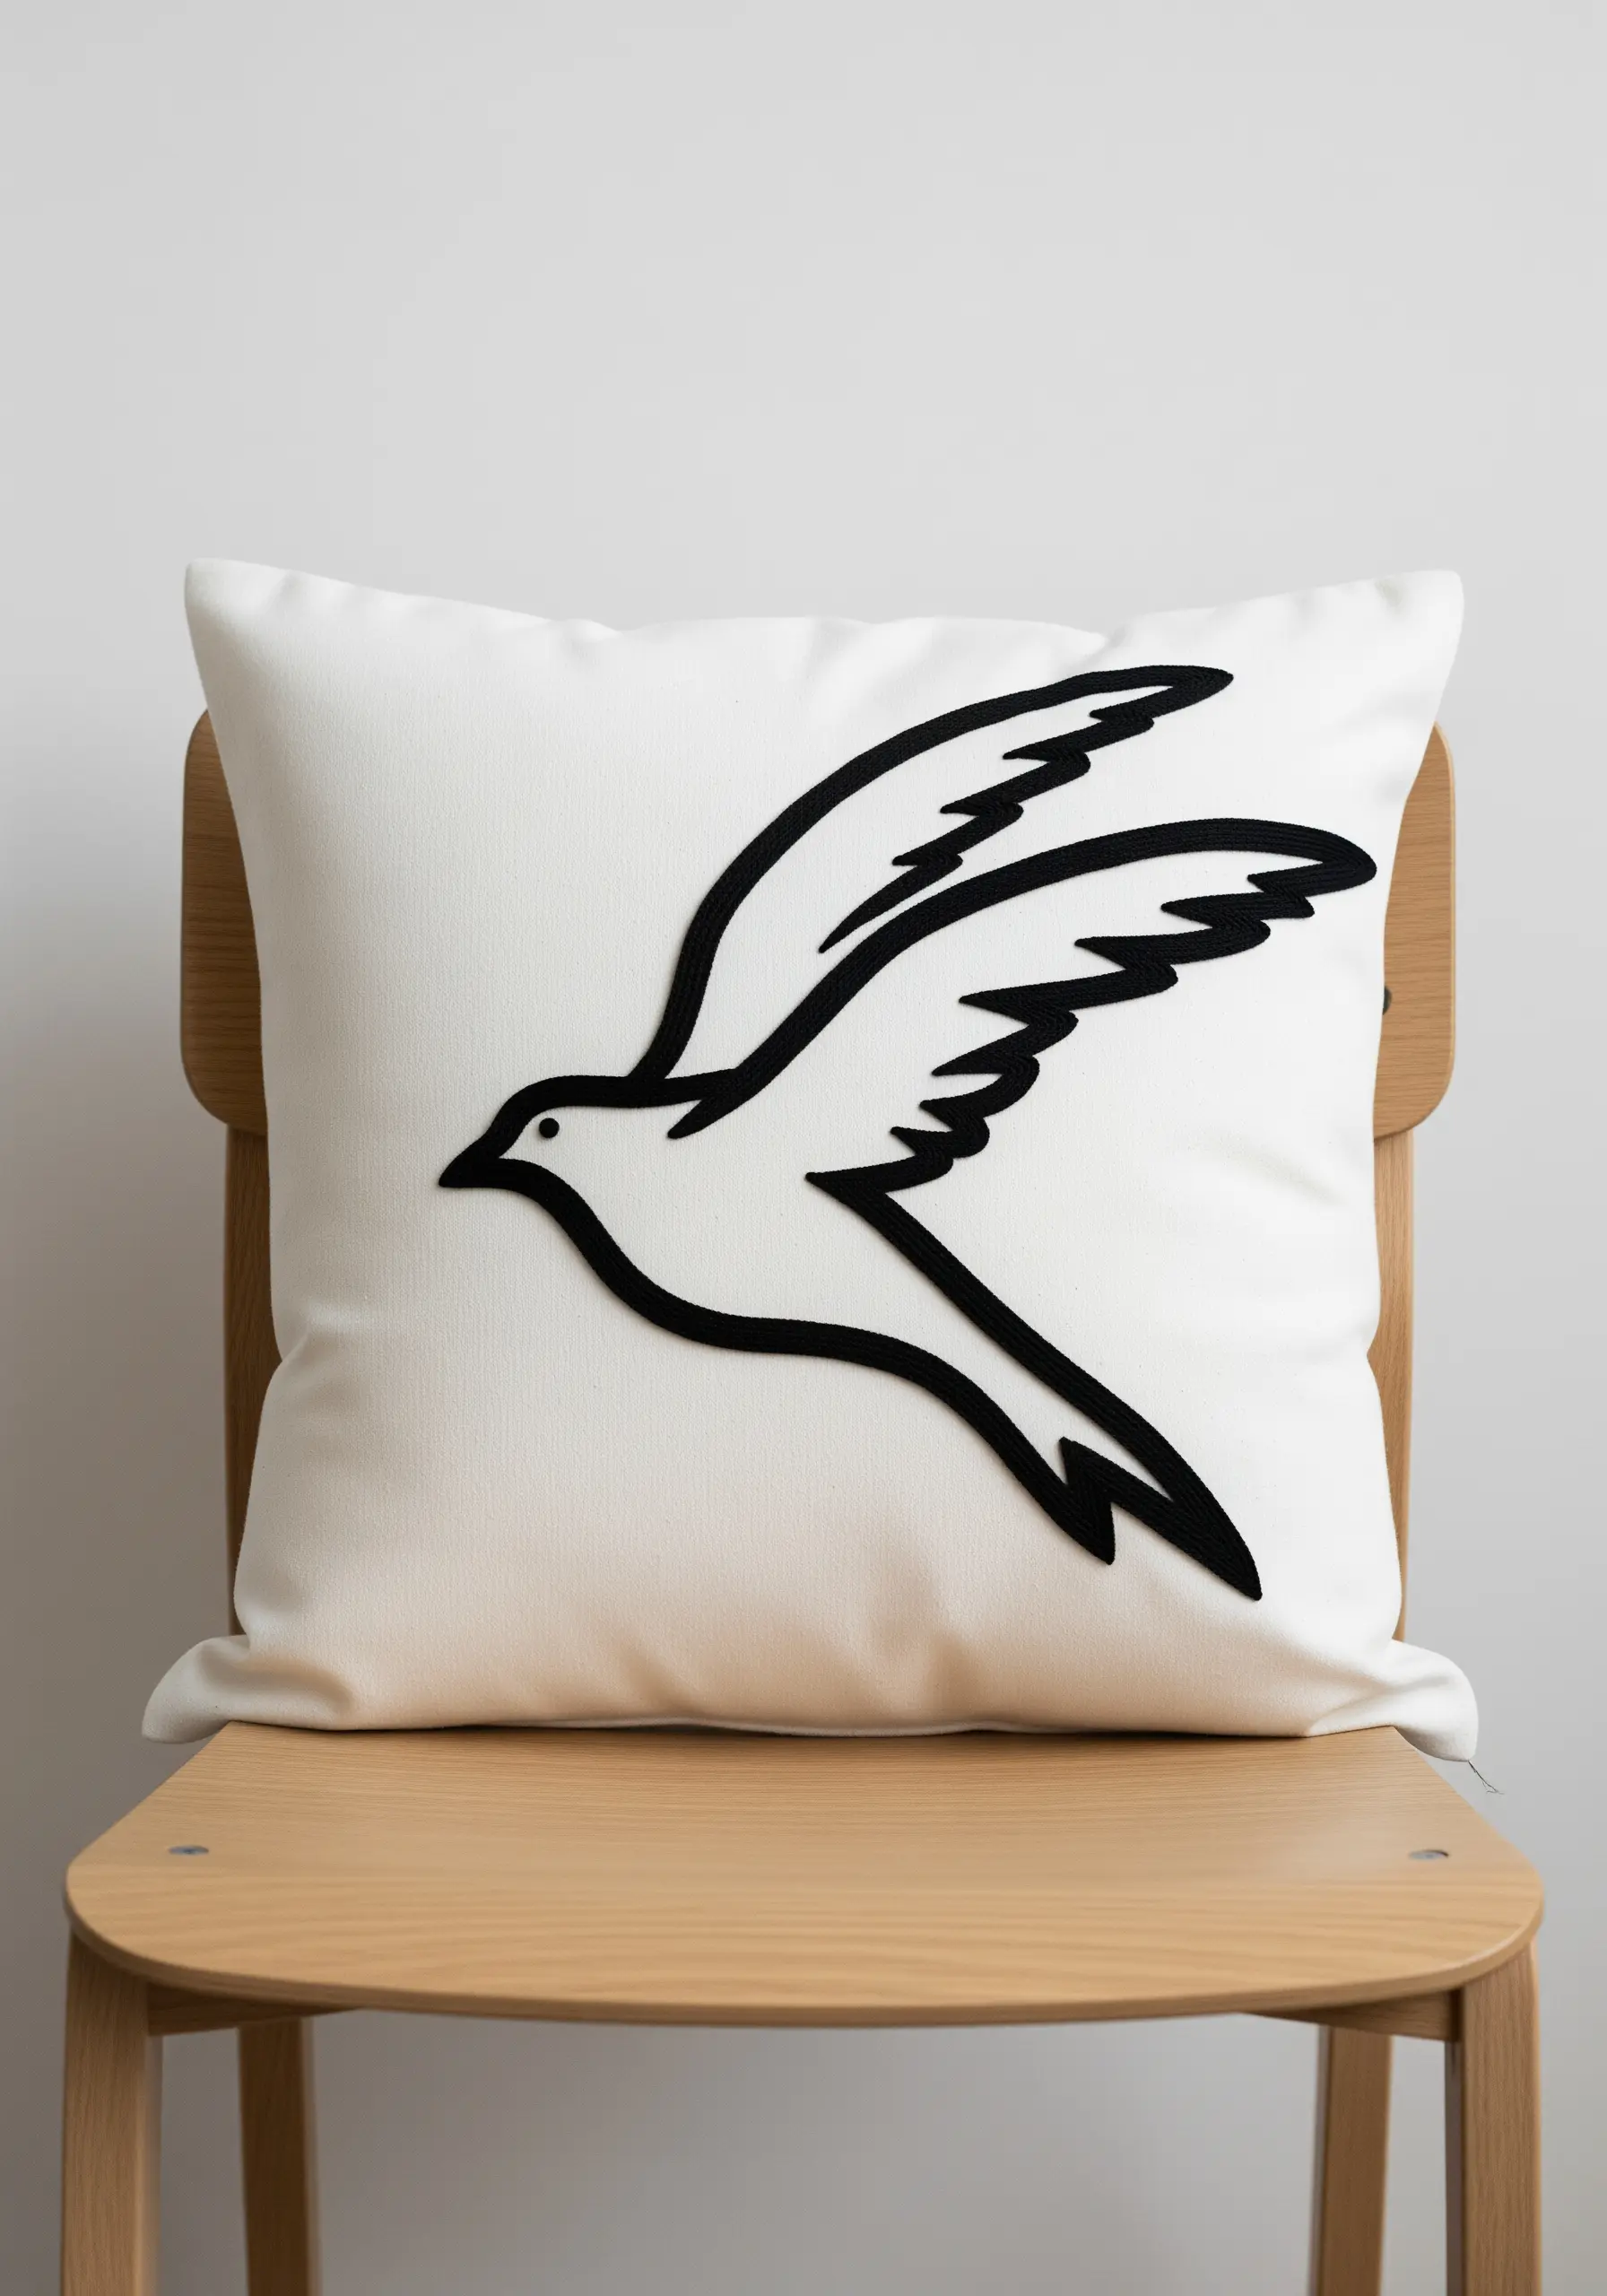
For a strong, graphic silhouette that is both fast and impactful, consider appliqué instead of dense fill stitching.
Cut your bird shape from a piece of non-fraying felt and secure it to the cushion cover using fabric glue or fusible web.
Then, stitch around the edge with a neat blanket stitch or a tight satin stitch. This technique gives a clean, raised effect with significantly less time and thread.
17. Capture Detail with a Single Strand

For intricate designs like a city skyline, clarity is paramount. Switch to a single strand of embroidery floss.
Using just one strand with a simple backstitch allows you to render fine details and sharp angles without the lines becoming bulky or losing definition.
The result is a crisp, architectural drawing in thread that feels both delicate and precise, especially when using a high-contrast color palette like white on charcoal.
18. Plan Your Stitch Path for Seamless Flow
The magic of a continuous line drawing is its uninterrupted flow. Replicate this by planning your stitch route before you even thread your needle.
Trace the design and identify a start and end point that allows you to cover the entire motif without breaking the thread.
A stem stitch is your best choice here, as it navigates curves smoothly and maintains the illusion of a single, fluid pen stroke.
19. Form Perfect Spirals with Couching

Creating a perfectly uniform, smooth spiral with individual stitches is challenging. Instead, couch a thicker cord onto the fabric.
Start at the center and slowly spiral the cord outward, using a thinner, matching thread to tack it down from the underside every half-inch.
This method guarantees a flawless, continuous curve and adds a pleasing, raised texture that enhances the hypnotic quality of the spiral.
20. Create Line Variation for Artistic Depth
Emulate the pressure variations of an ink pen by strategically changing your thread’s thickness within a single design.
Use a split stitch throughout for consistency, but switch from three strands for the main outlines to a single strand for delicate details like facial features or shadows.
This subtle shift in line weight adds a layer of artistic sophistication and depth to your figurative embroidery.
21. Isolate a Motif for Minimalist Impact

Amplify the impact of a small, simple motif by placing it off-center and surrounding it with generous negative space.
This technique draws the eye directly to the embroidered detail, turning a humble pair of glasses into a chic, intentional design statement.
Use a clean split stitch with three or four strands of floss to give the object just enough substance to stand on its own. It’s one of the simplest minimal embroidery accents that works every time.
22. Juxtapose Textures for Tactile Appeal
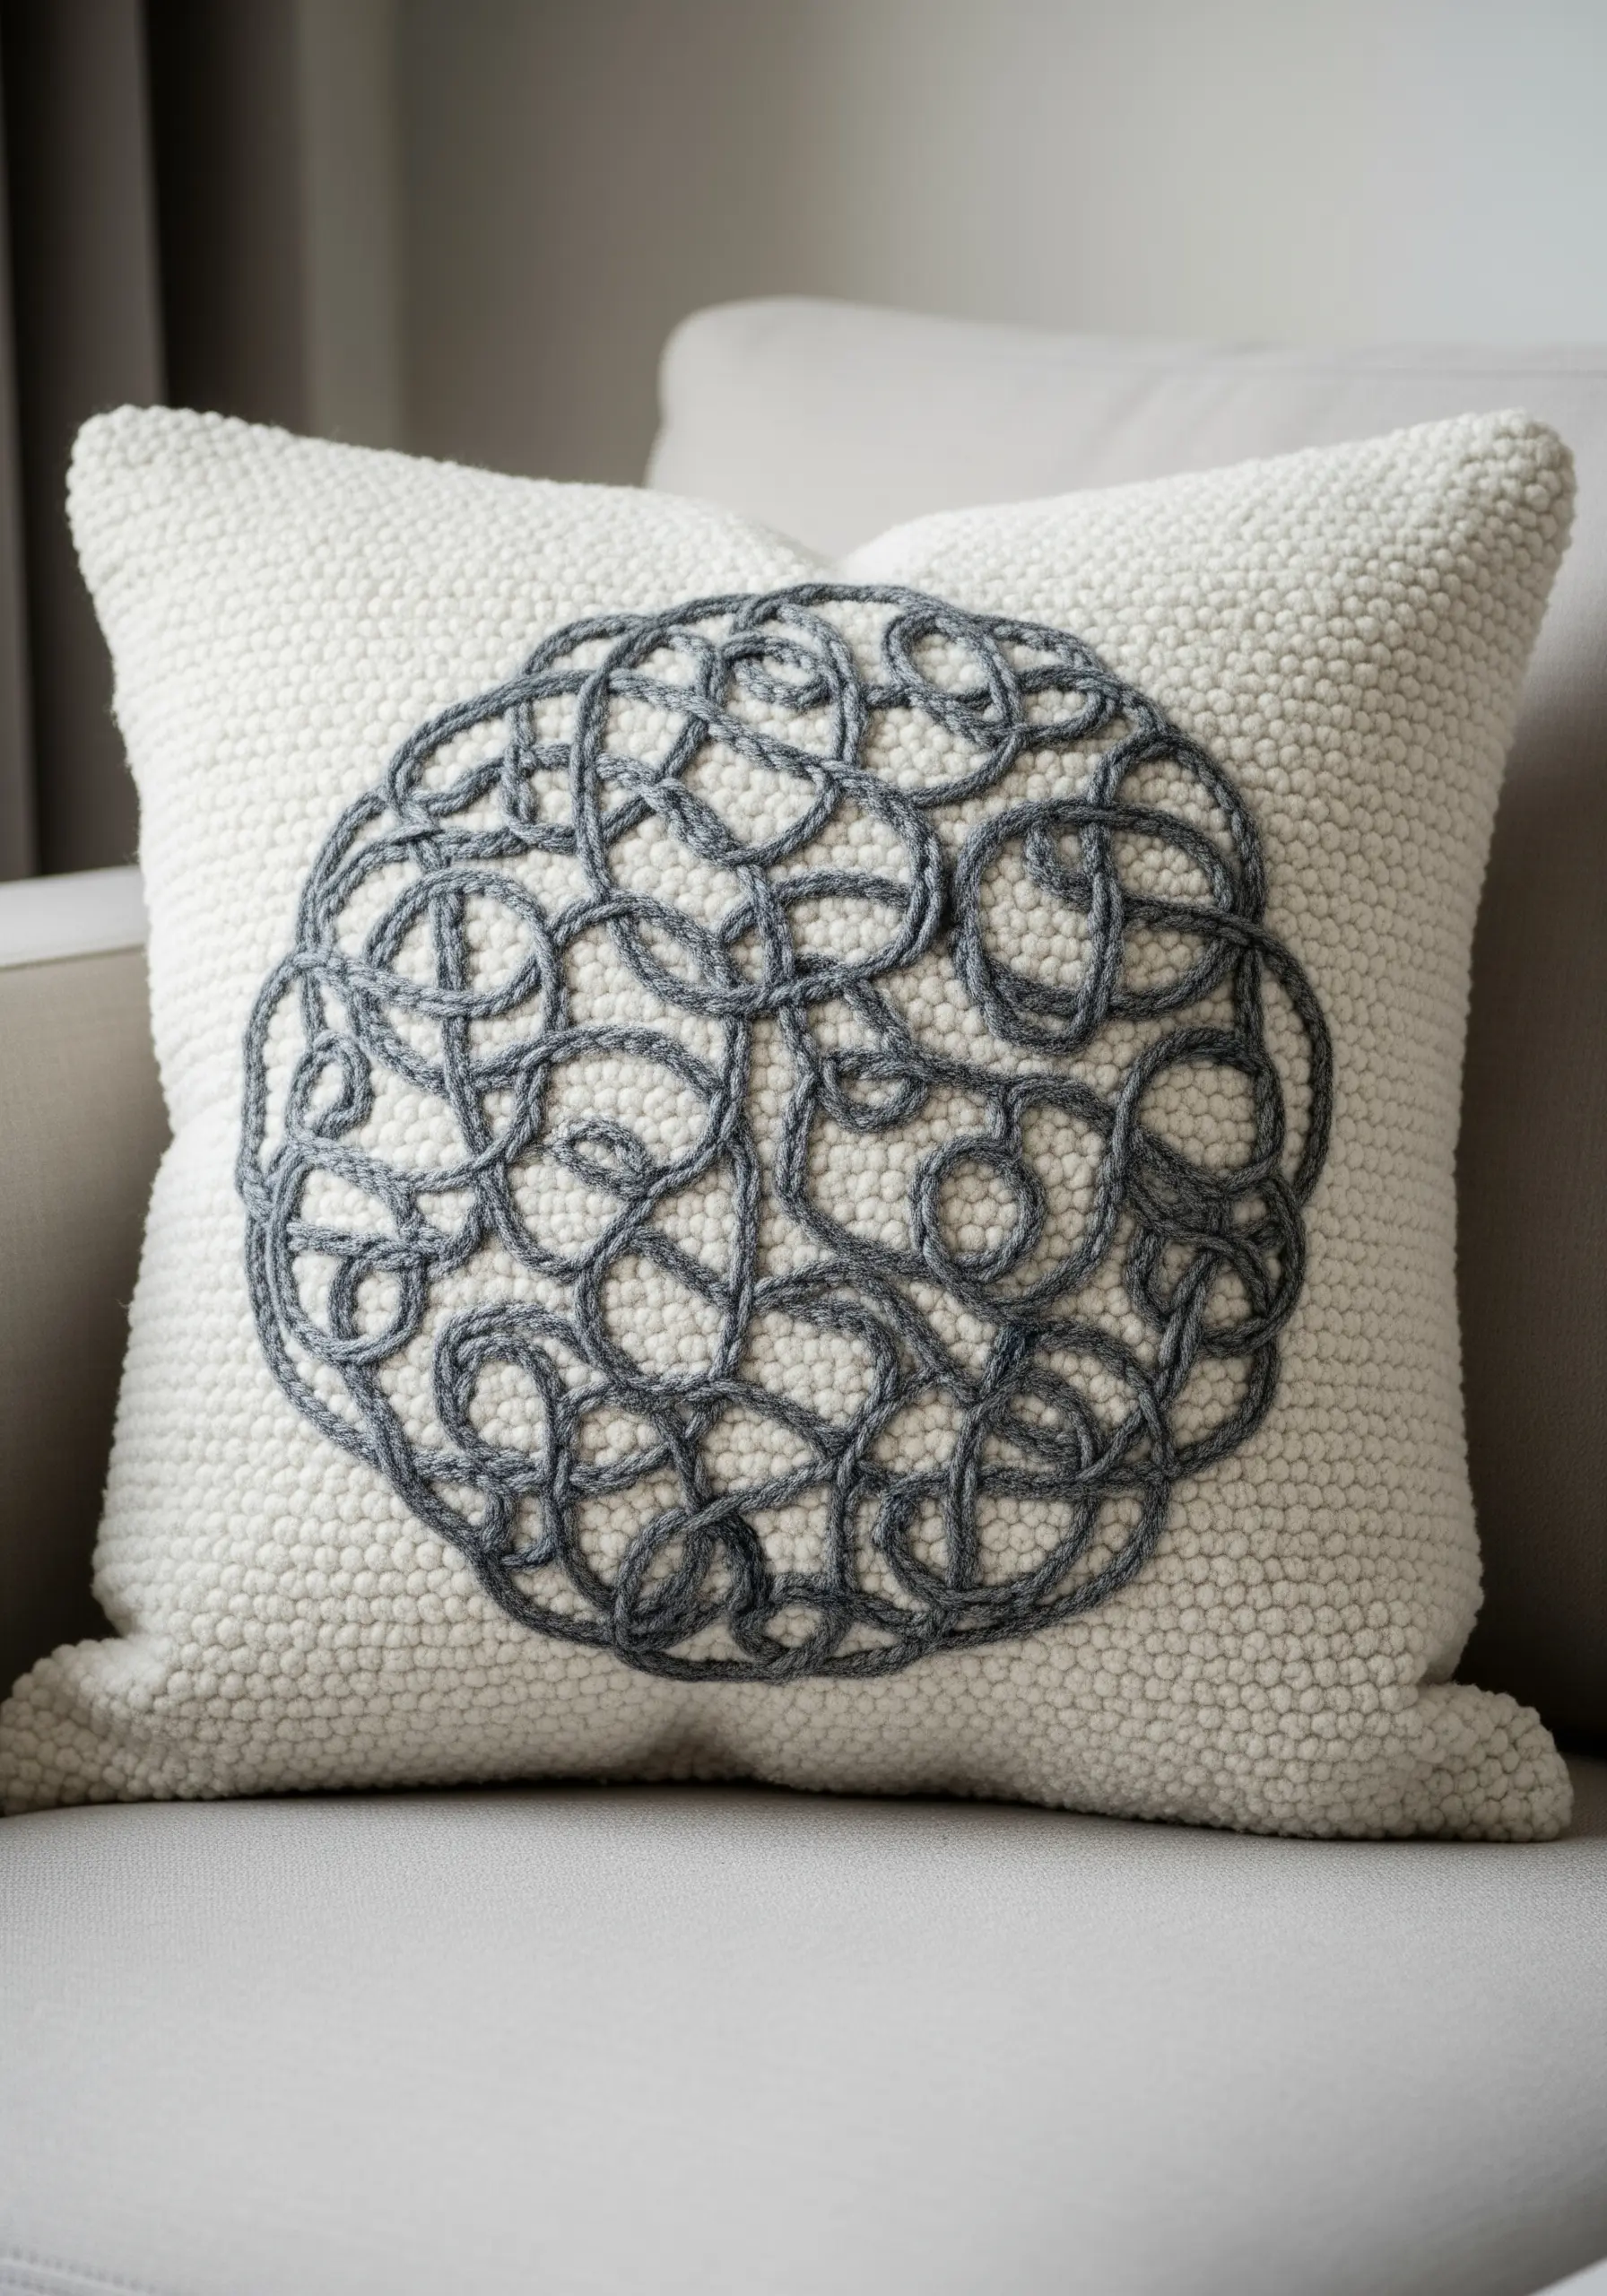
Create a rich sensory experience by pairing a smooth, couched yarn with a highly textured base fabric like bouclé or sherpa.
The contrast between the clean, flowing lines of the couched wool and the bumpy, nubby surface of the cushion creates a compelling visual and tactile dialogue.
This approach emphasizes the inherent qualities of your materials, turning a simple abstract knot into a piece of touchable art.
23. Design a Sampler of Modern Lines
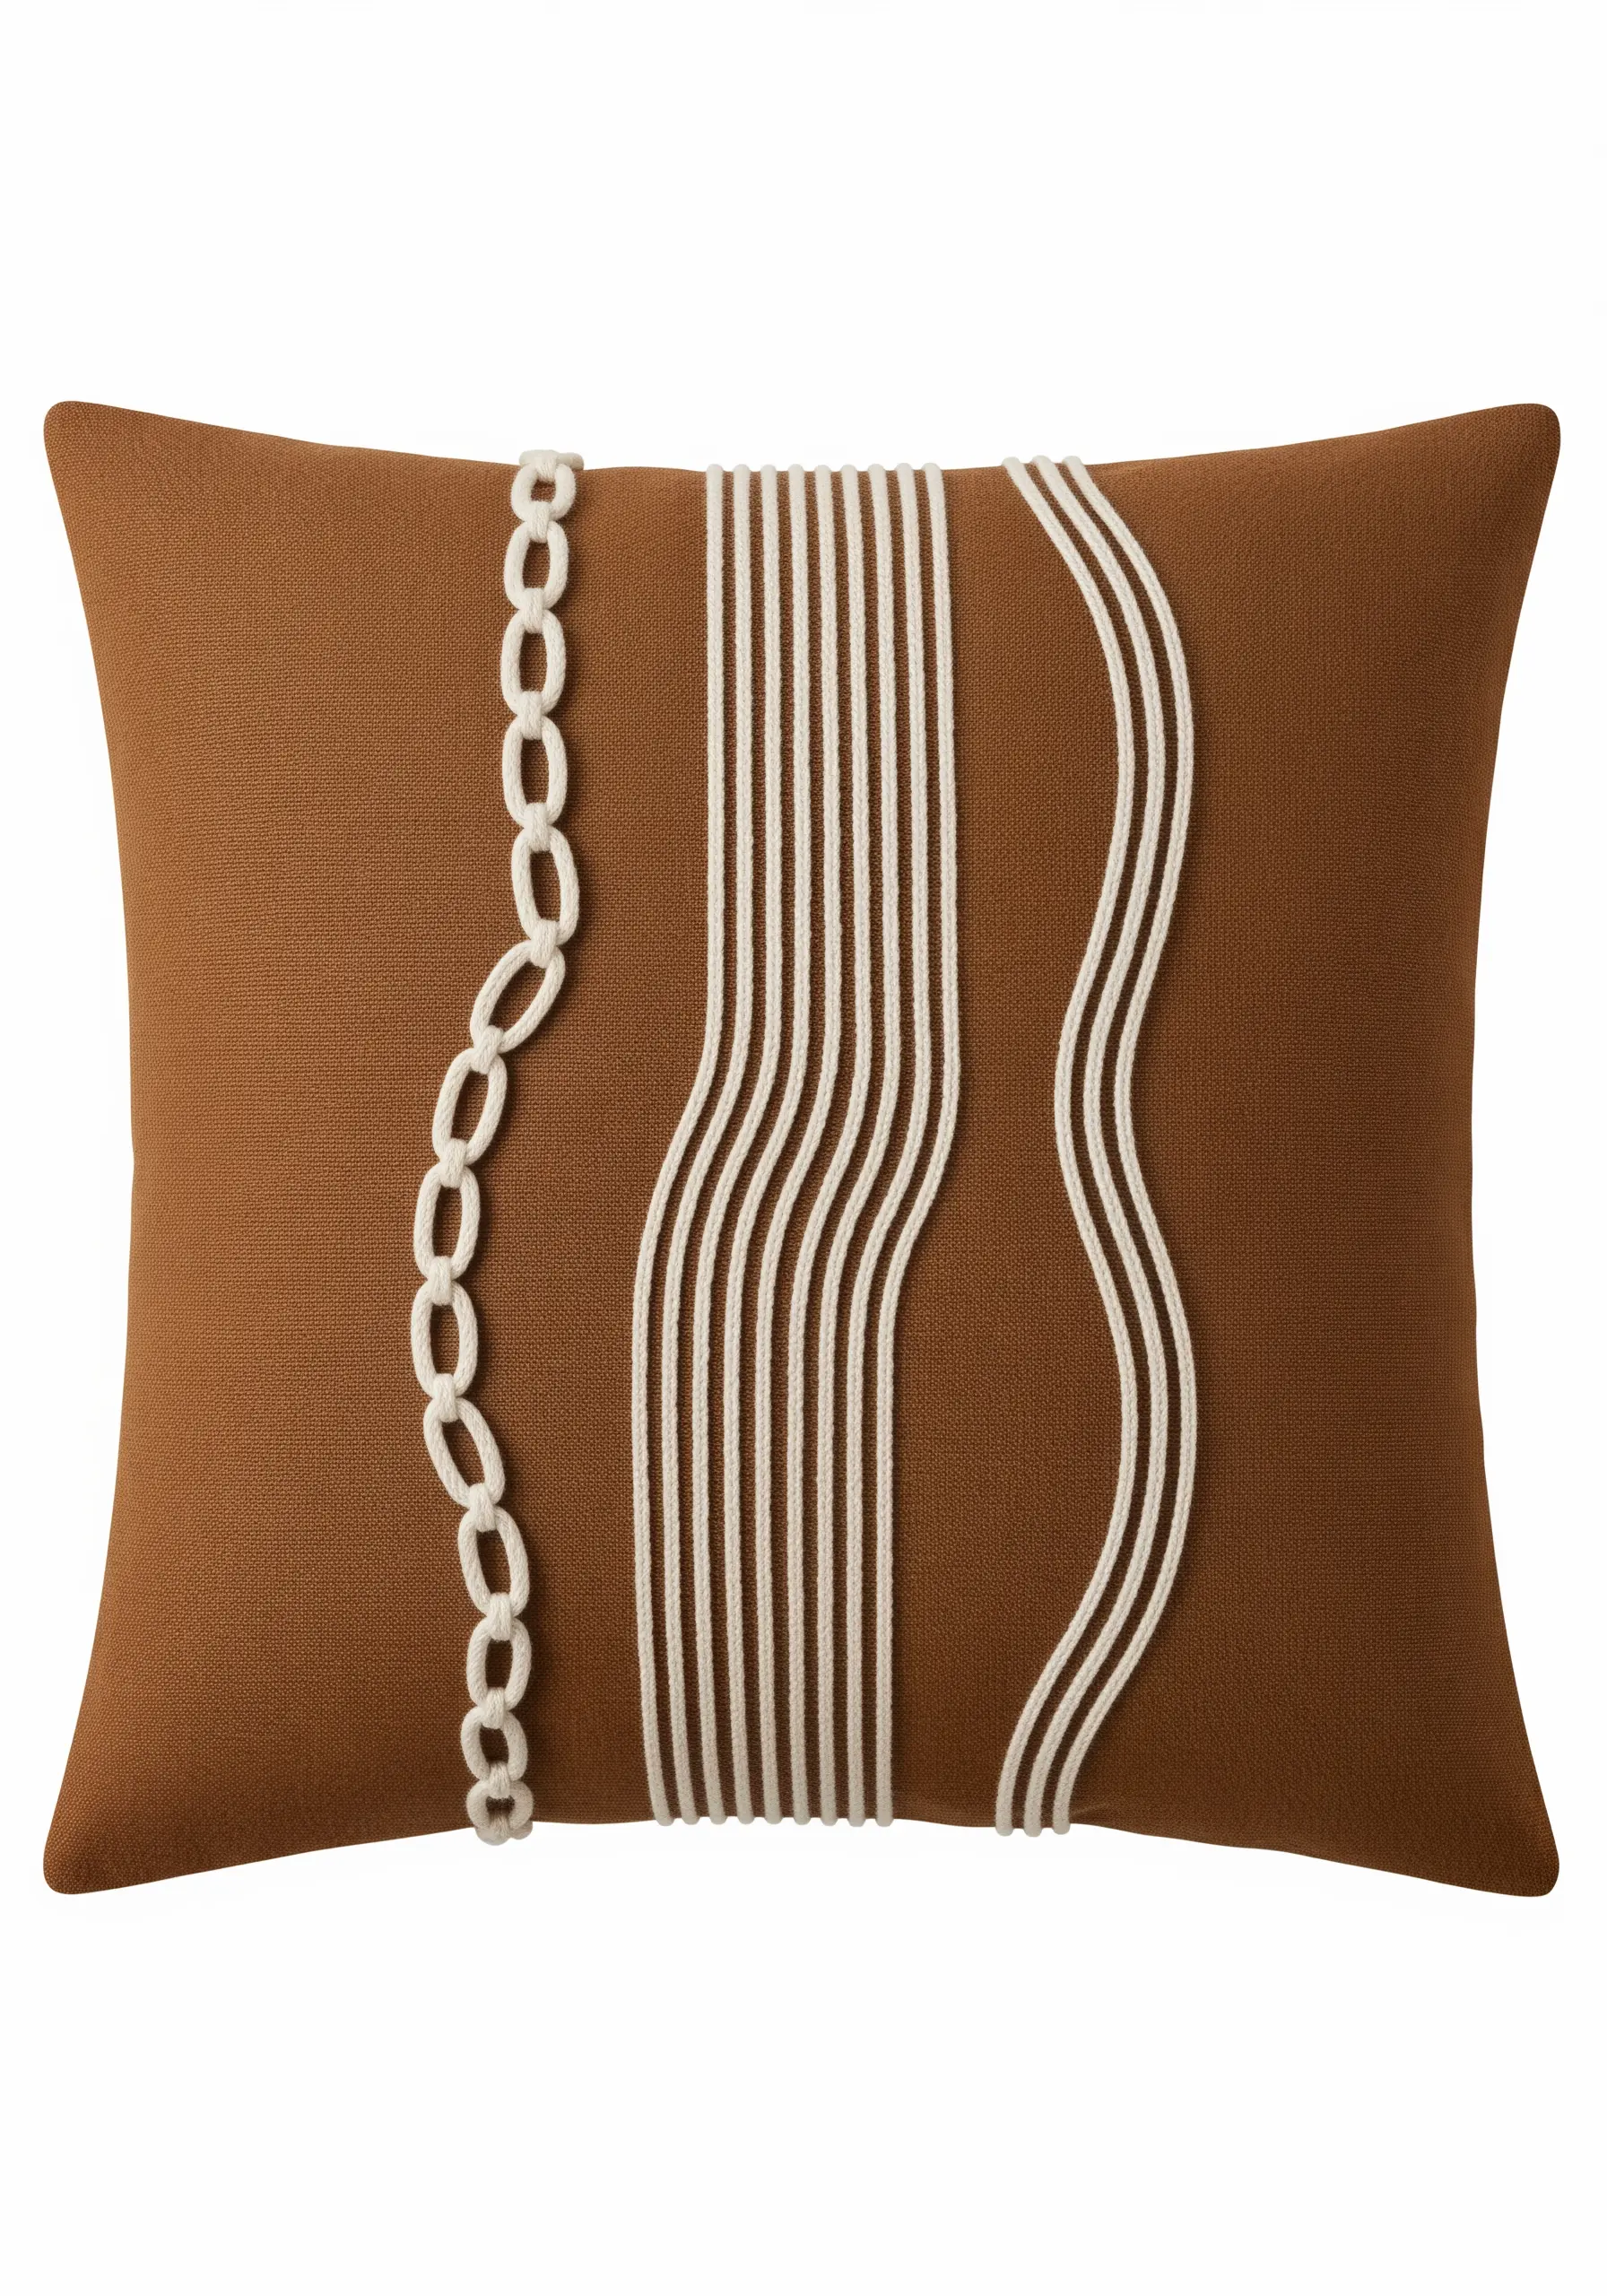
Showcase a variety of textures by combining different line-making techniques in one abstract composition.
Use a bold chain stitch for one element, couch a smooth cord for another, and use a simple whipped backstitch for a third.
This approach not only creates a visually dynamic piece but also serves as a sophisticated sampler of your skills, turning a cushion into a conversation starter.
24. Mimic Organic Forms with Stem Stitch
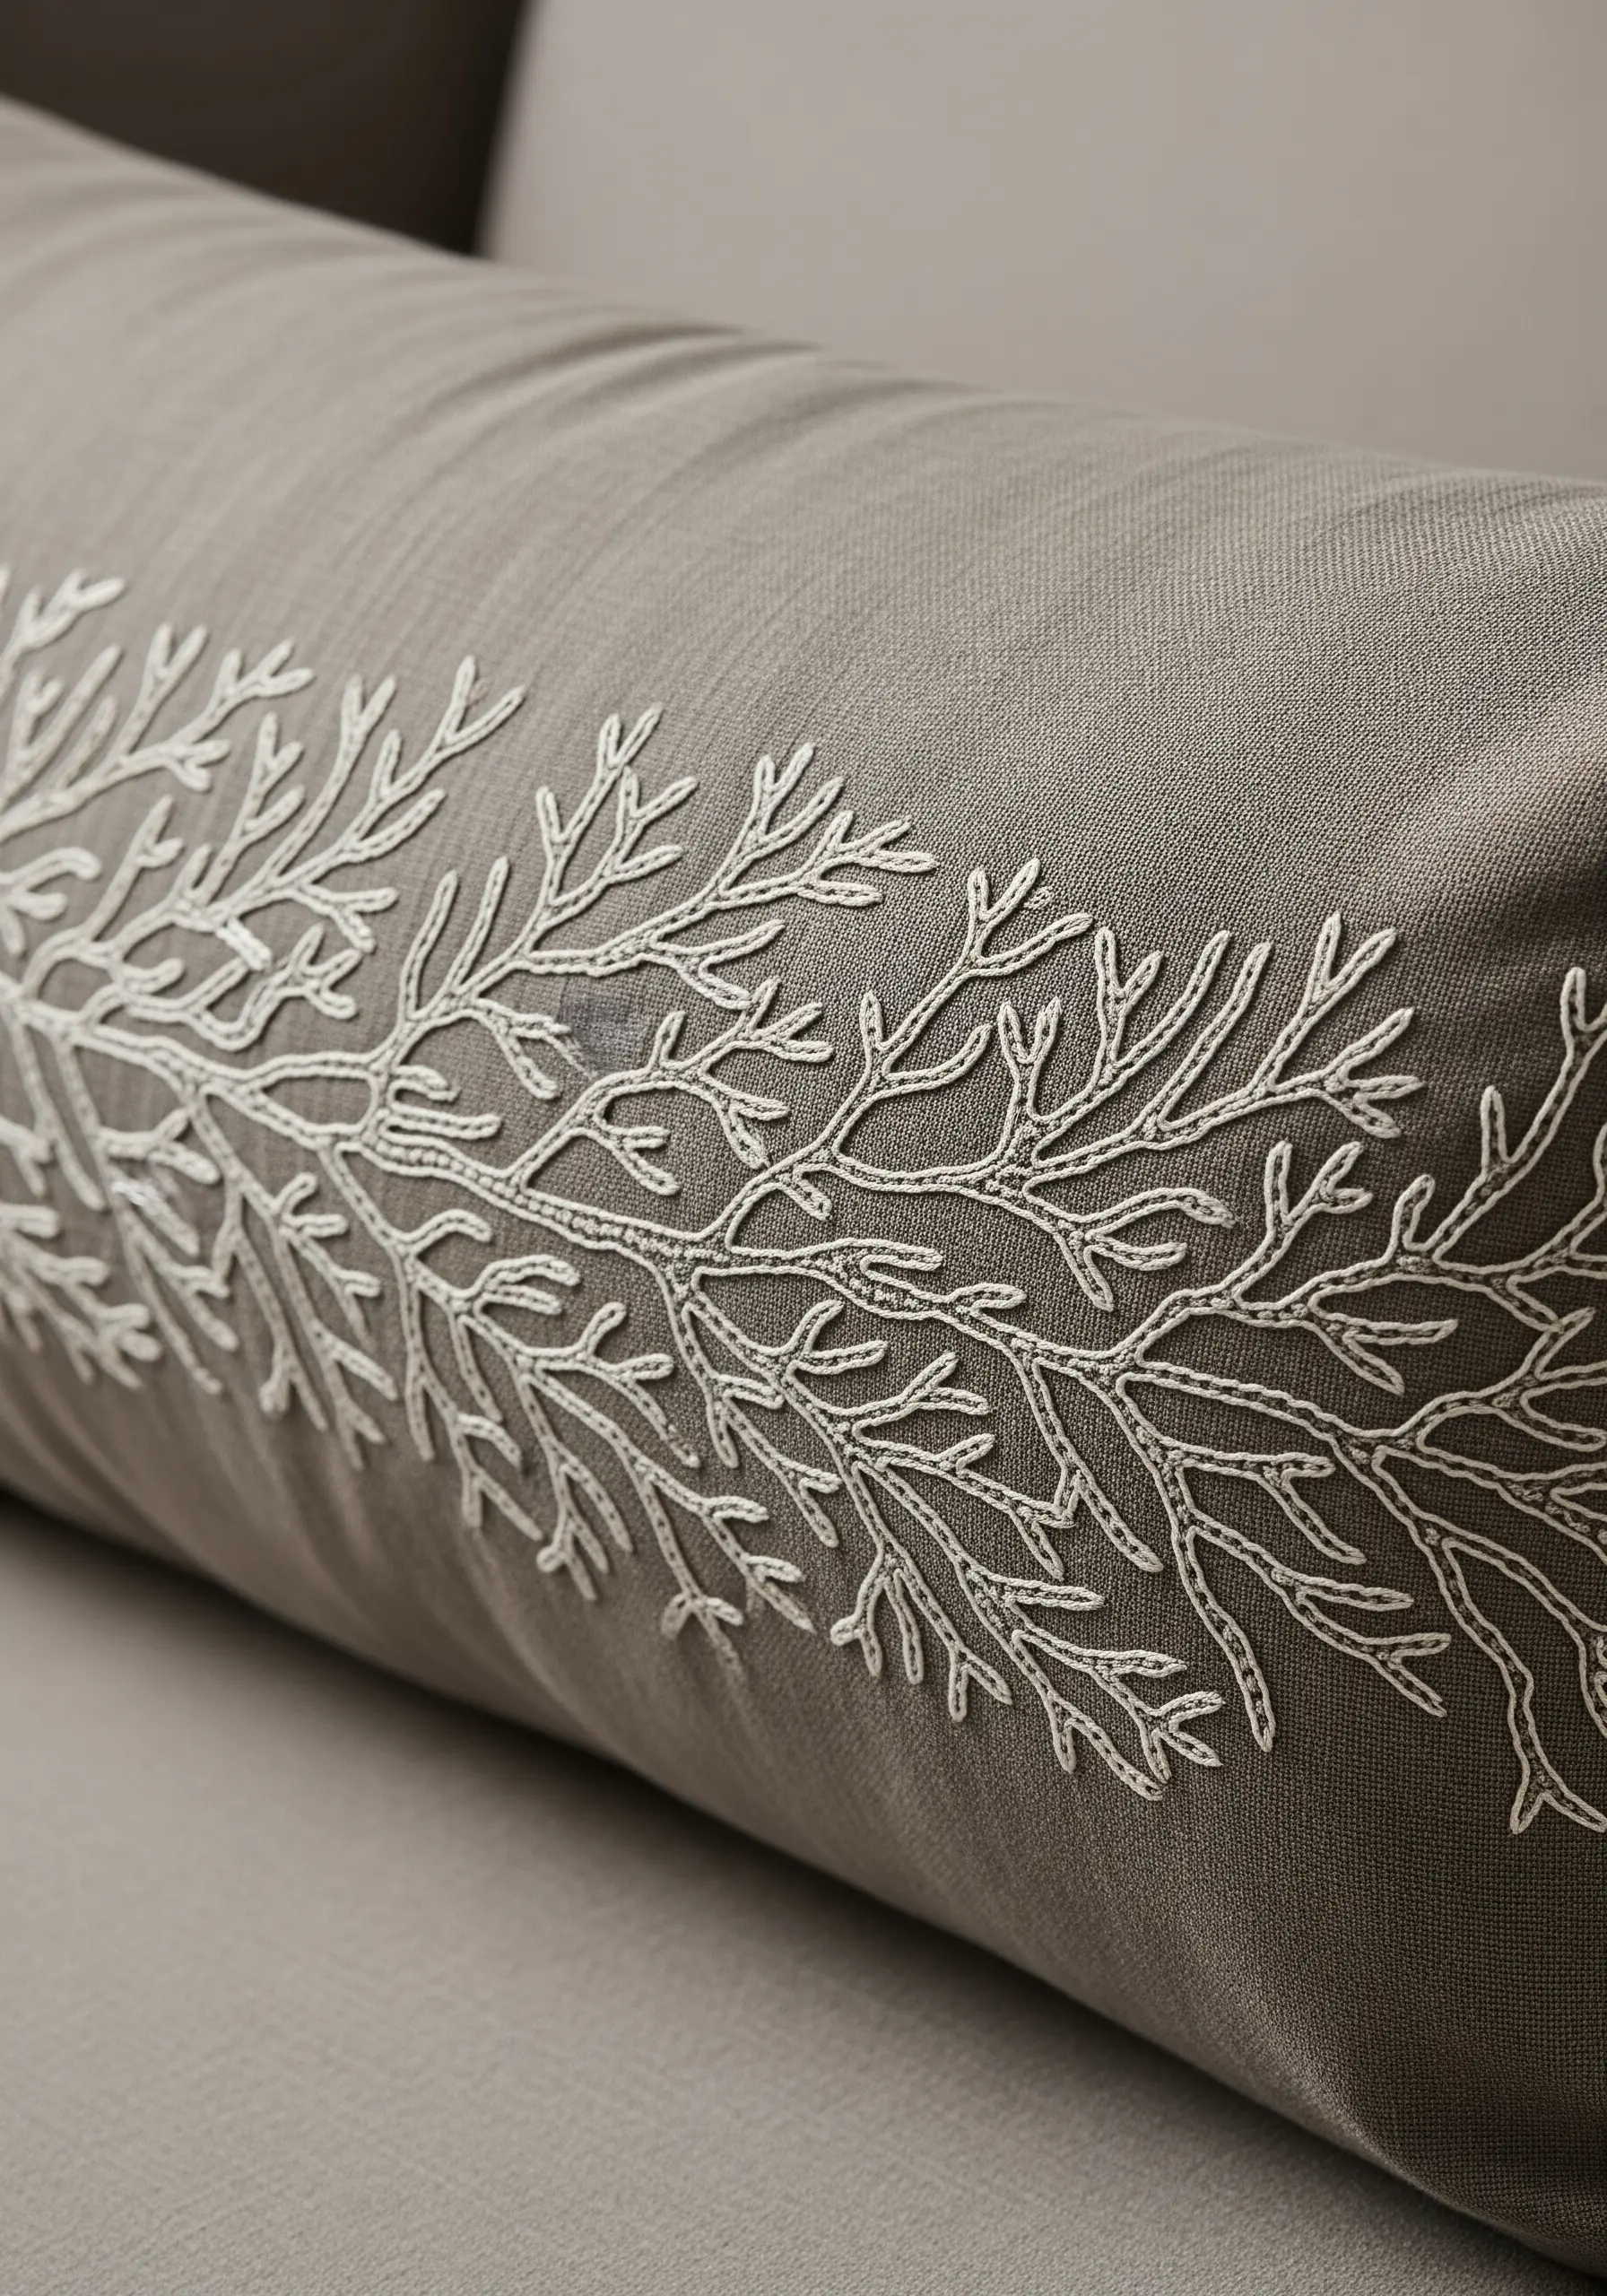
The stem stitch is unparalleled for creating the graceful, branching lines found in nature, like coral or tree limbs.
Its twisted, rope-like texture naturally mimics the way branches grow and divide.
For an even more organic feel, use a variegated thread that subtly shifts in color, or a slub cotton thread with natural variations in thickness. This adds depth without complicating the stitch itself.
25. Imply Shading with a Seed Stitch Fill

Instead of a heavy satin stitch, use a delicate seed stitch to add shading to your line art.
Fill the crescent shapes of the moon phases with tiny, randomly placed straight stitches, like scattered seeds.
This technique provides a gentle, textured fill that suggests shadow and form without overwhelming the clean outlines of the design. It’s a modern, breathable alternative to traditional fills.
26. Balance Bold Outlines with Fine Details

Create visual hierarchy in your design by combining different line weights.
Use a heavier stitch, like a chain stitch or a four-strand stem stitch, for the main outline of the key to give it presence and structure.
Then, switch to a single strand of floss and a simple backstitch to render the intricate details on the bow and the key’s bit. This contrast makes the design feel polished and intentionally crafted.
27. Create Depth with Overlapping Backstitches
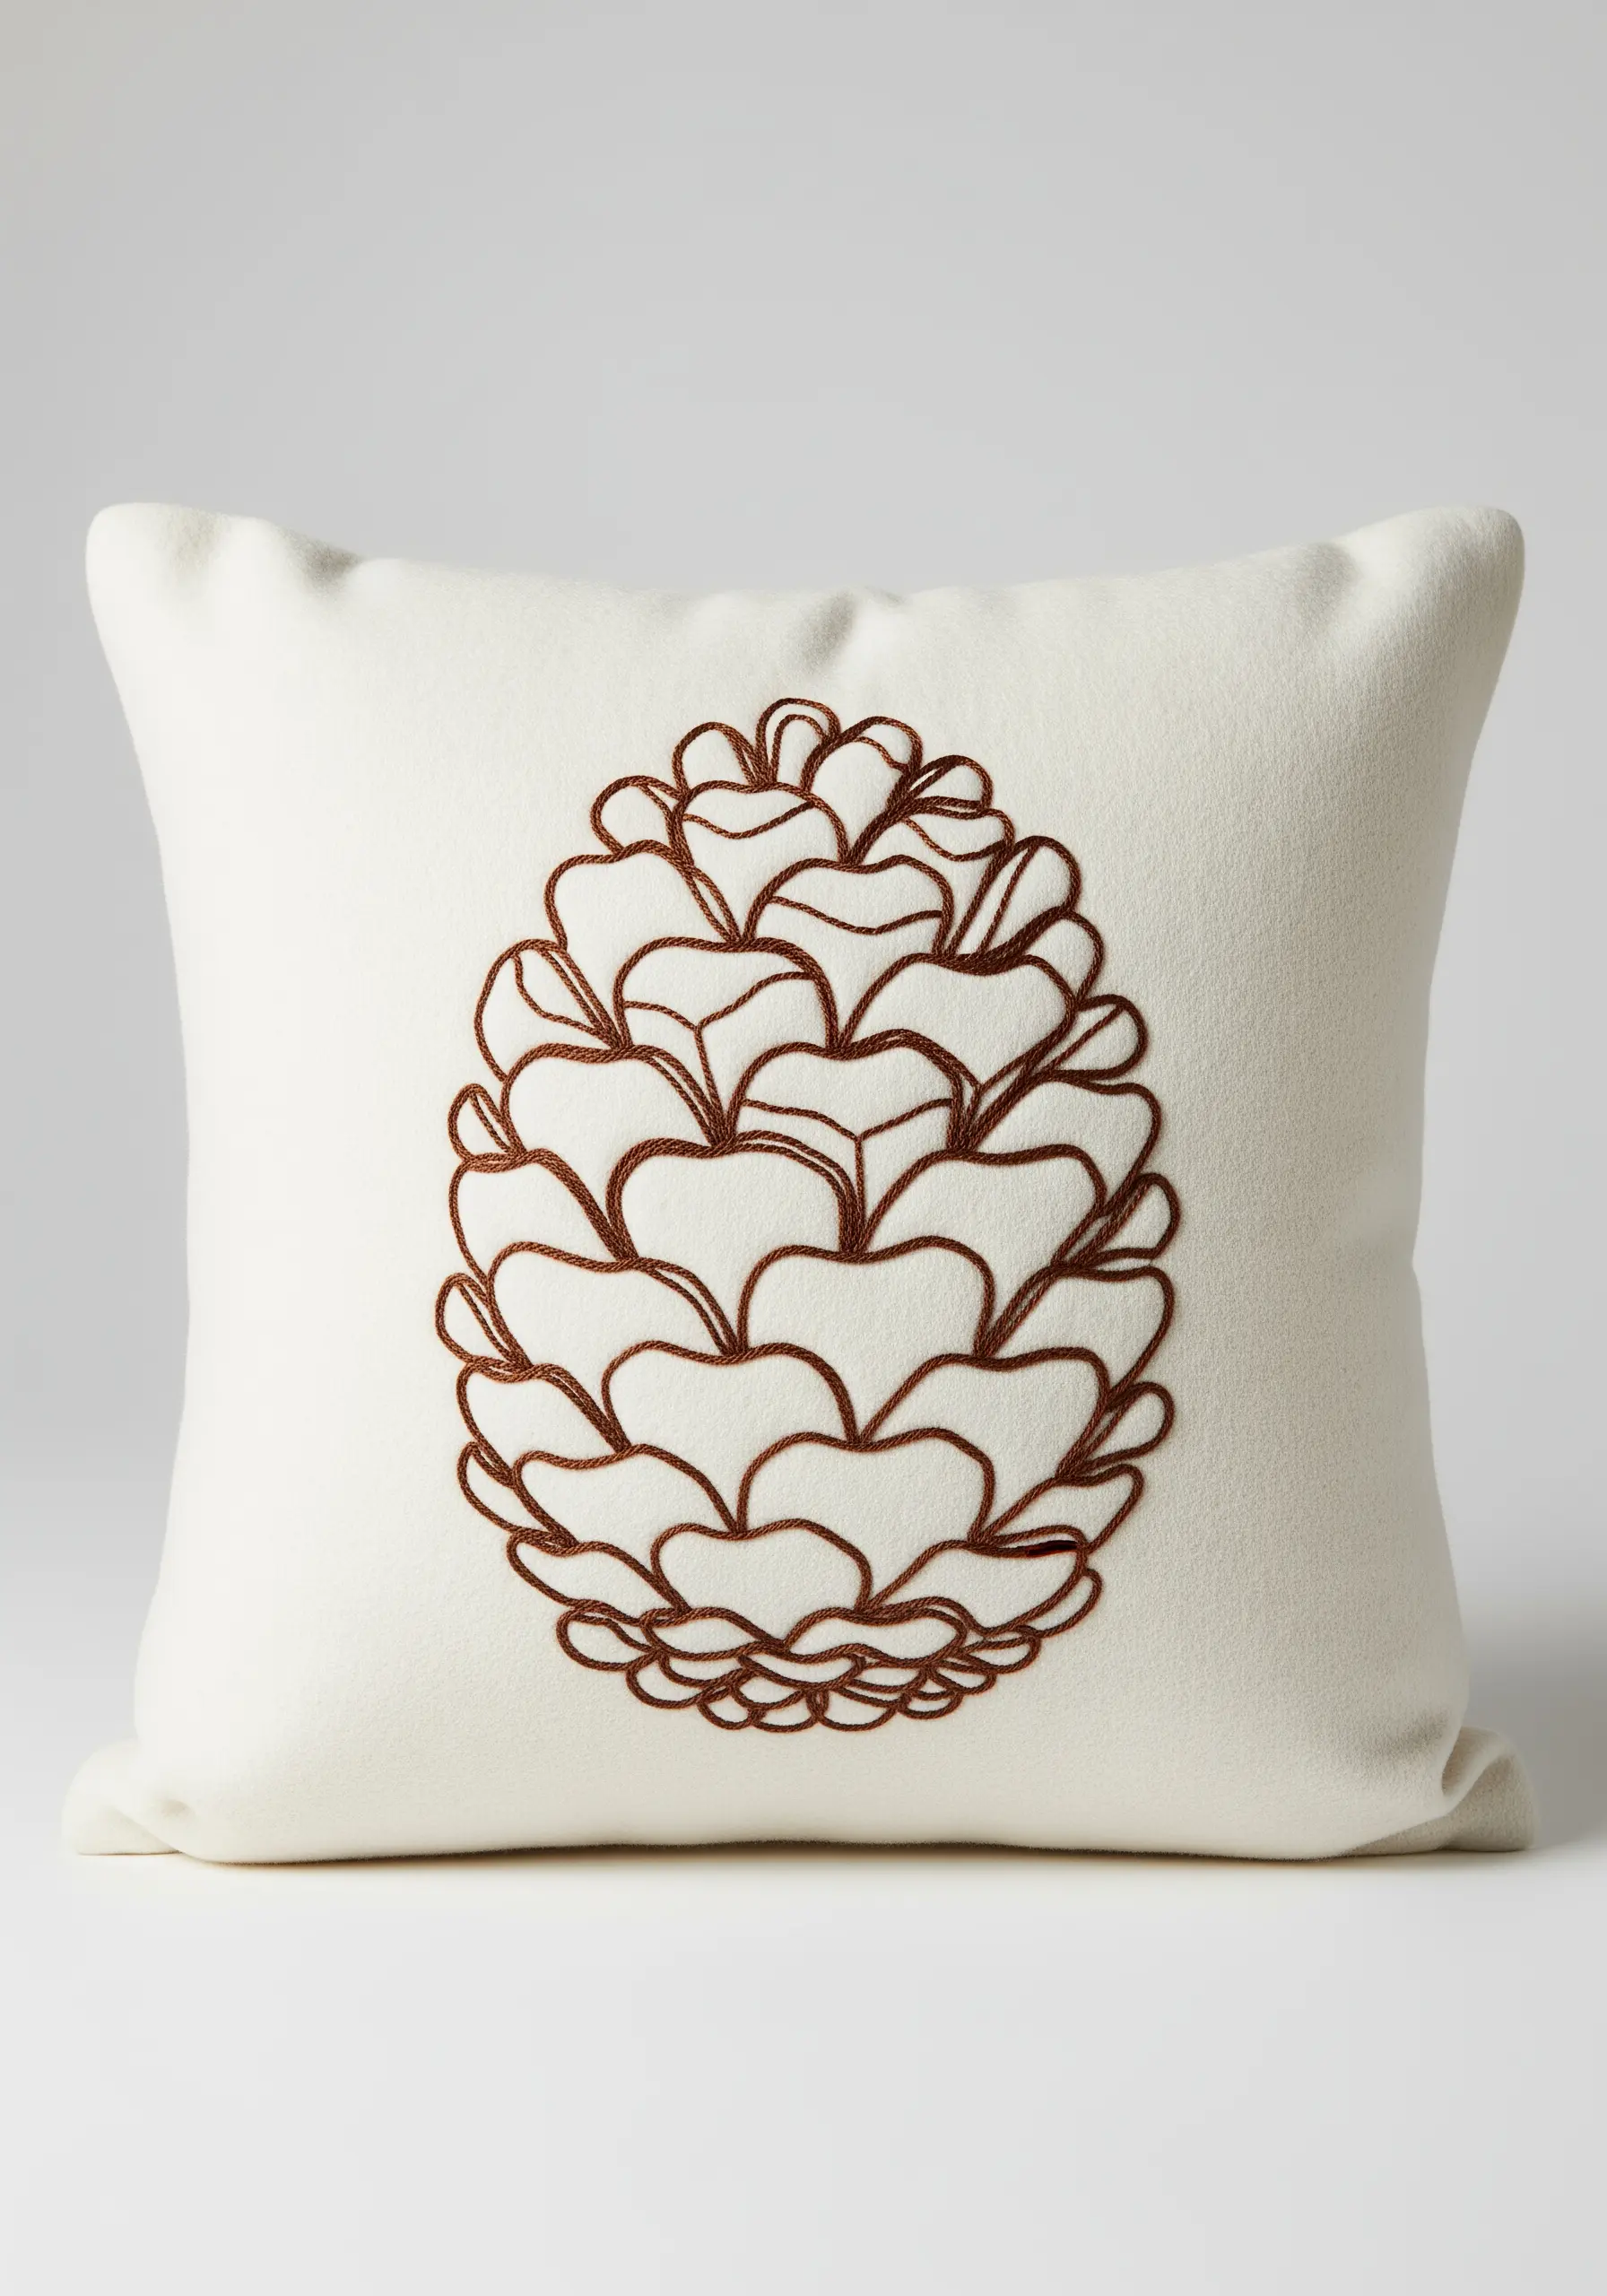
To give the illusion that the scales of the pinecone are layered, you need to plan your stitching order carefully.
Stitch the elements that are ‘in the back’ first. Then, stitch the ‘forward’ elements, ensuring your needle comes up just over the previously stitched lines.
This simple technique of overlapping your backstitch lines creates a subtle but effective sense of dimension and realism in complex patterns.
28. Make a Single Line an Intentional Accent

A single embroidered line can divide a space and serve as a powerful design element, but the stitch you choose makes all the difference.
Elevate a simple line by using a more decorative stitch, such as a threaded backstitch or a small, neat chain stitch.
This transforms it from a mere divider into a deliberate, textural feature that feels both minimalist and luxurious, proving that even the smallest details matter.
29. Combine Line and Fill for Expressive Detail

Use a combination of stitch types to give different parts of the design their own distinct character.
For the long, sweeping eyebrow, use a long and short stitch to create a soft, filled-in texture that mimics hair.
Contrast this by using a crisp, sharp split stitch for the eyeliner and individual straight stitches for the eyelashes. This mix of techniques adds a dynamic, expressive quality to the artwork.
30. Tell a Story with Intersecting Paths

Use multiple threads and overlapping lines to create a sense of movement and connection in a map design.
Stitch the main continental outlines with a clear backstitch in a dark color. Then, add winding, intersecting travel paths using a lighter-colored thread.
The layering of these simple lines tells a story of journeys taken and connections made, adding a layer of personal meaning to a graphic design.
31. Replicate Delicate Textures with Precise Stitches
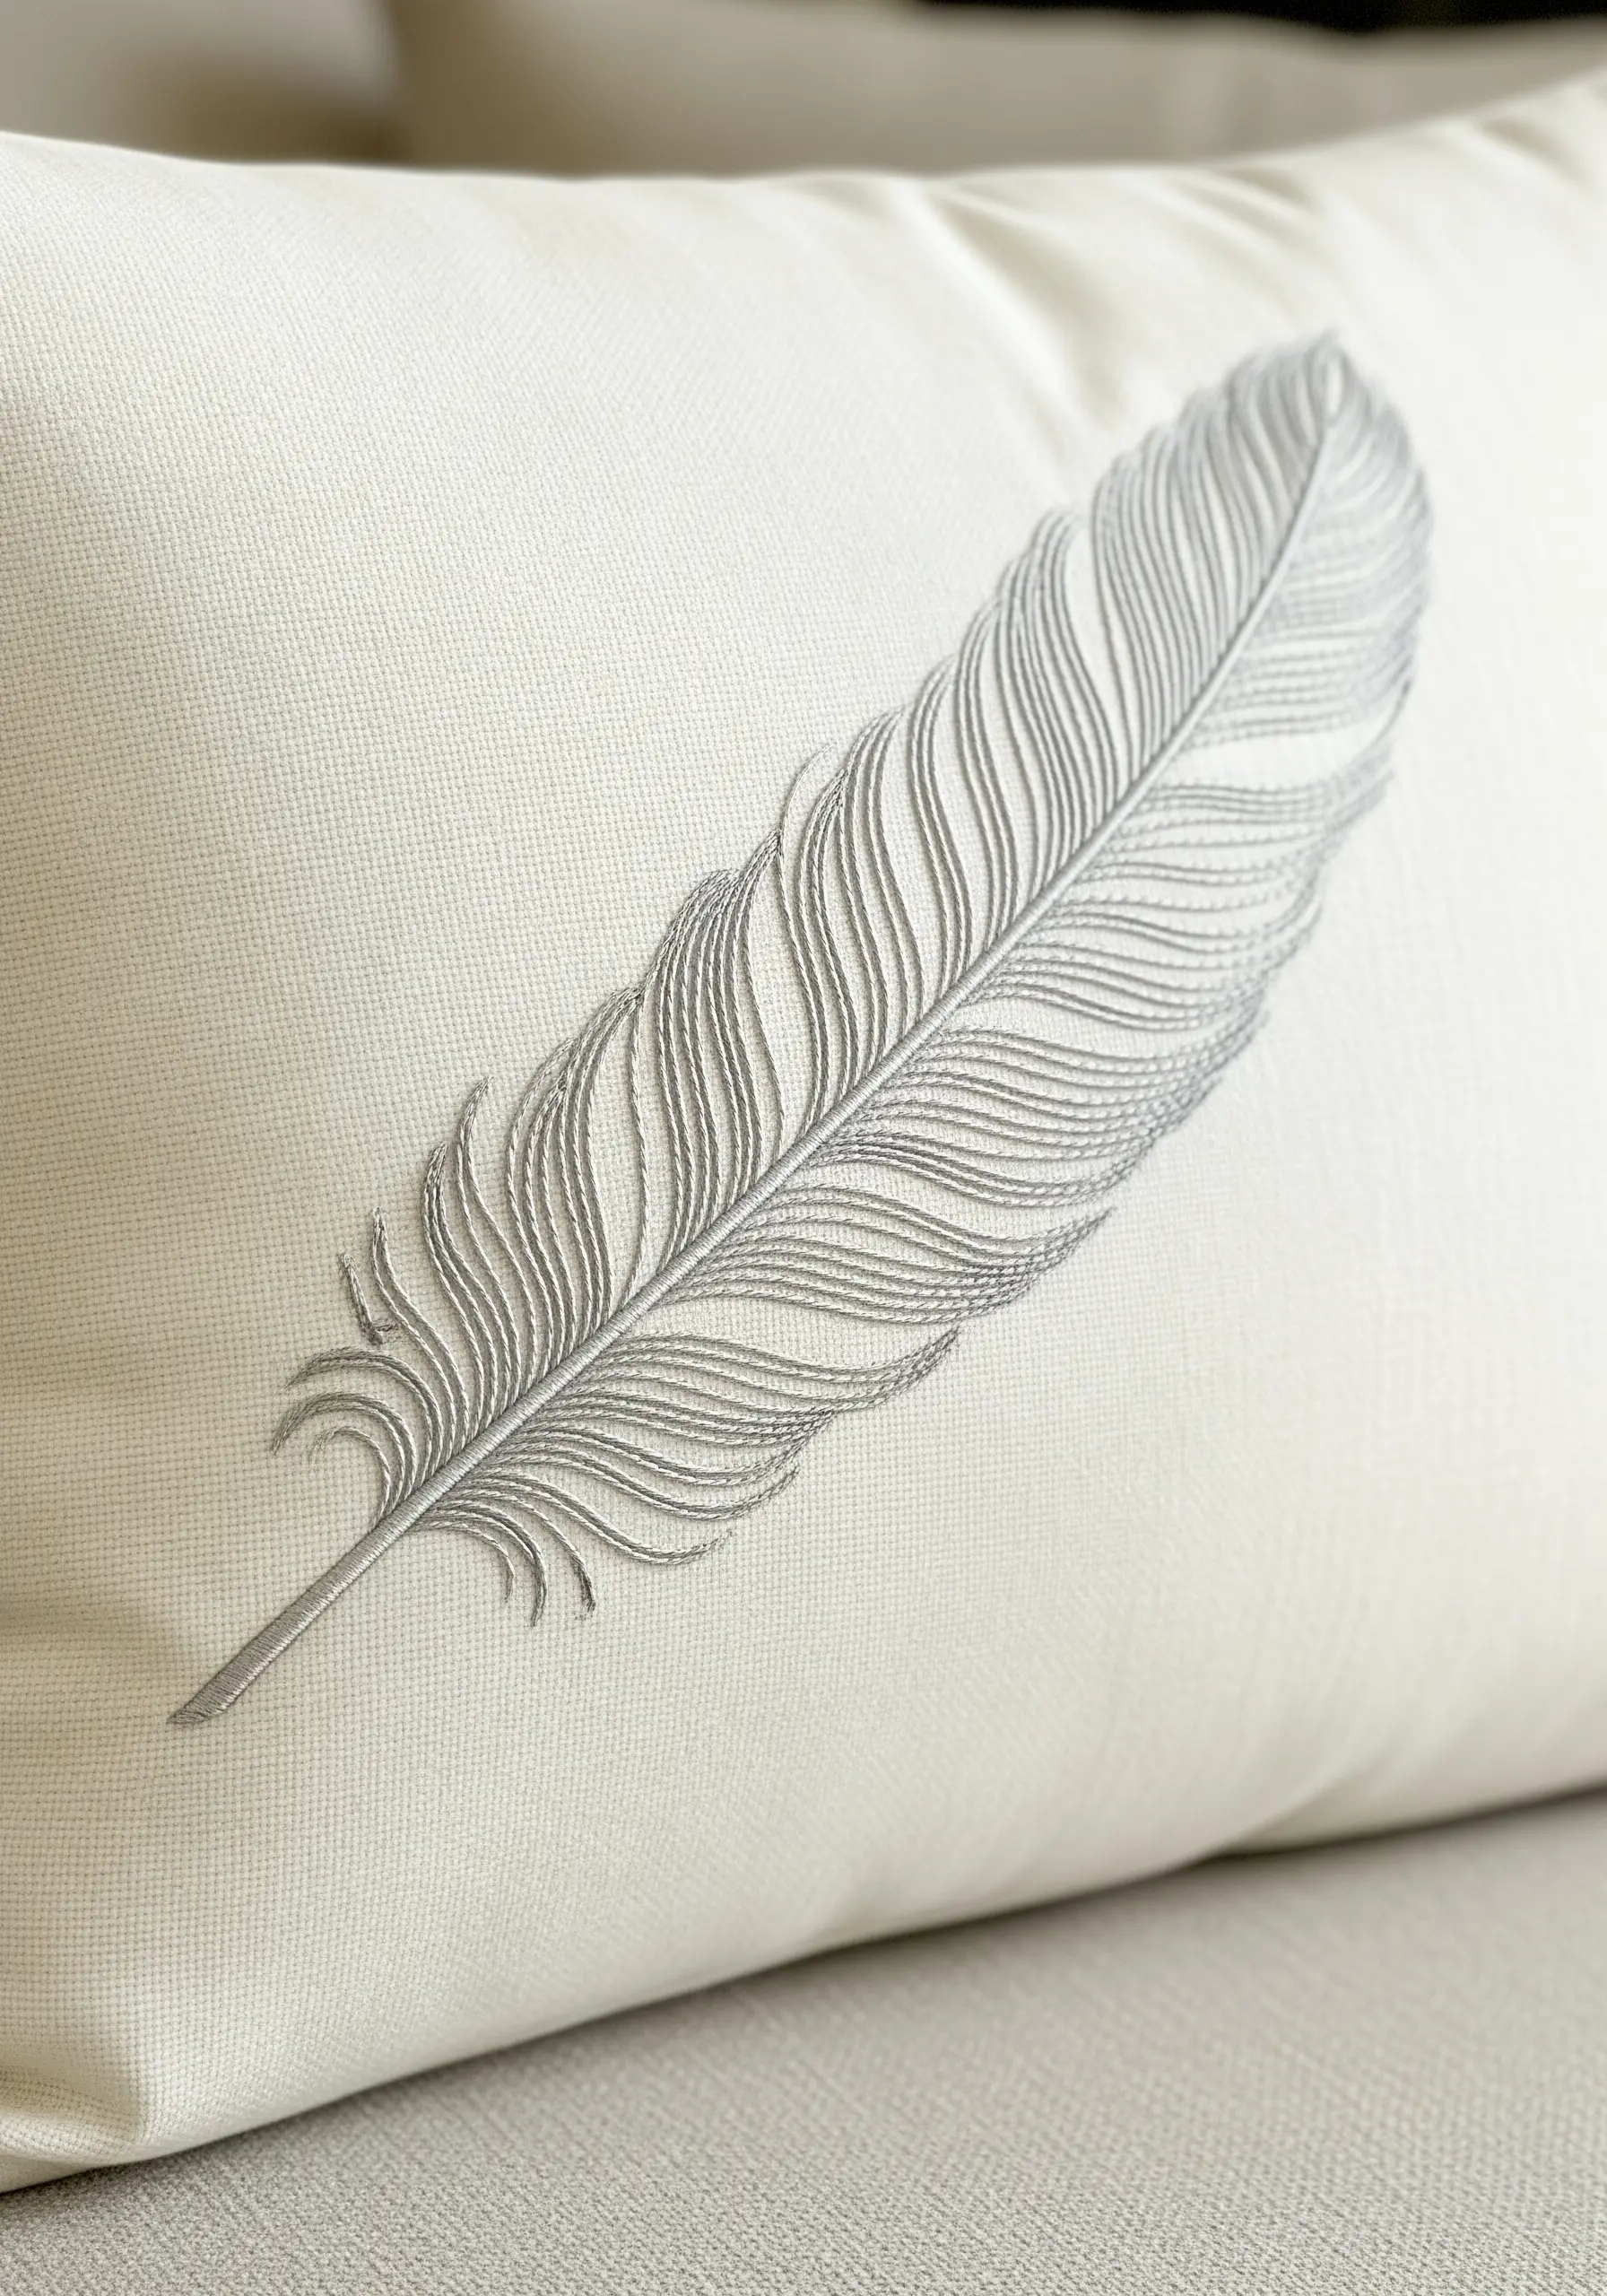
Capturing the airy quality of a feather requires precision and a light touch.
Use a single, solid line of split stitch for the central shaft to give it strength and stability.
For the feather’s barbs, use individual, sharply angled straight stitches worked from the shaft outwards. Keep them fine and closely spaced, but not overlapping, to create a texture that looks incredibly light and realistic.
32. Achieve Complex Knots with Couching
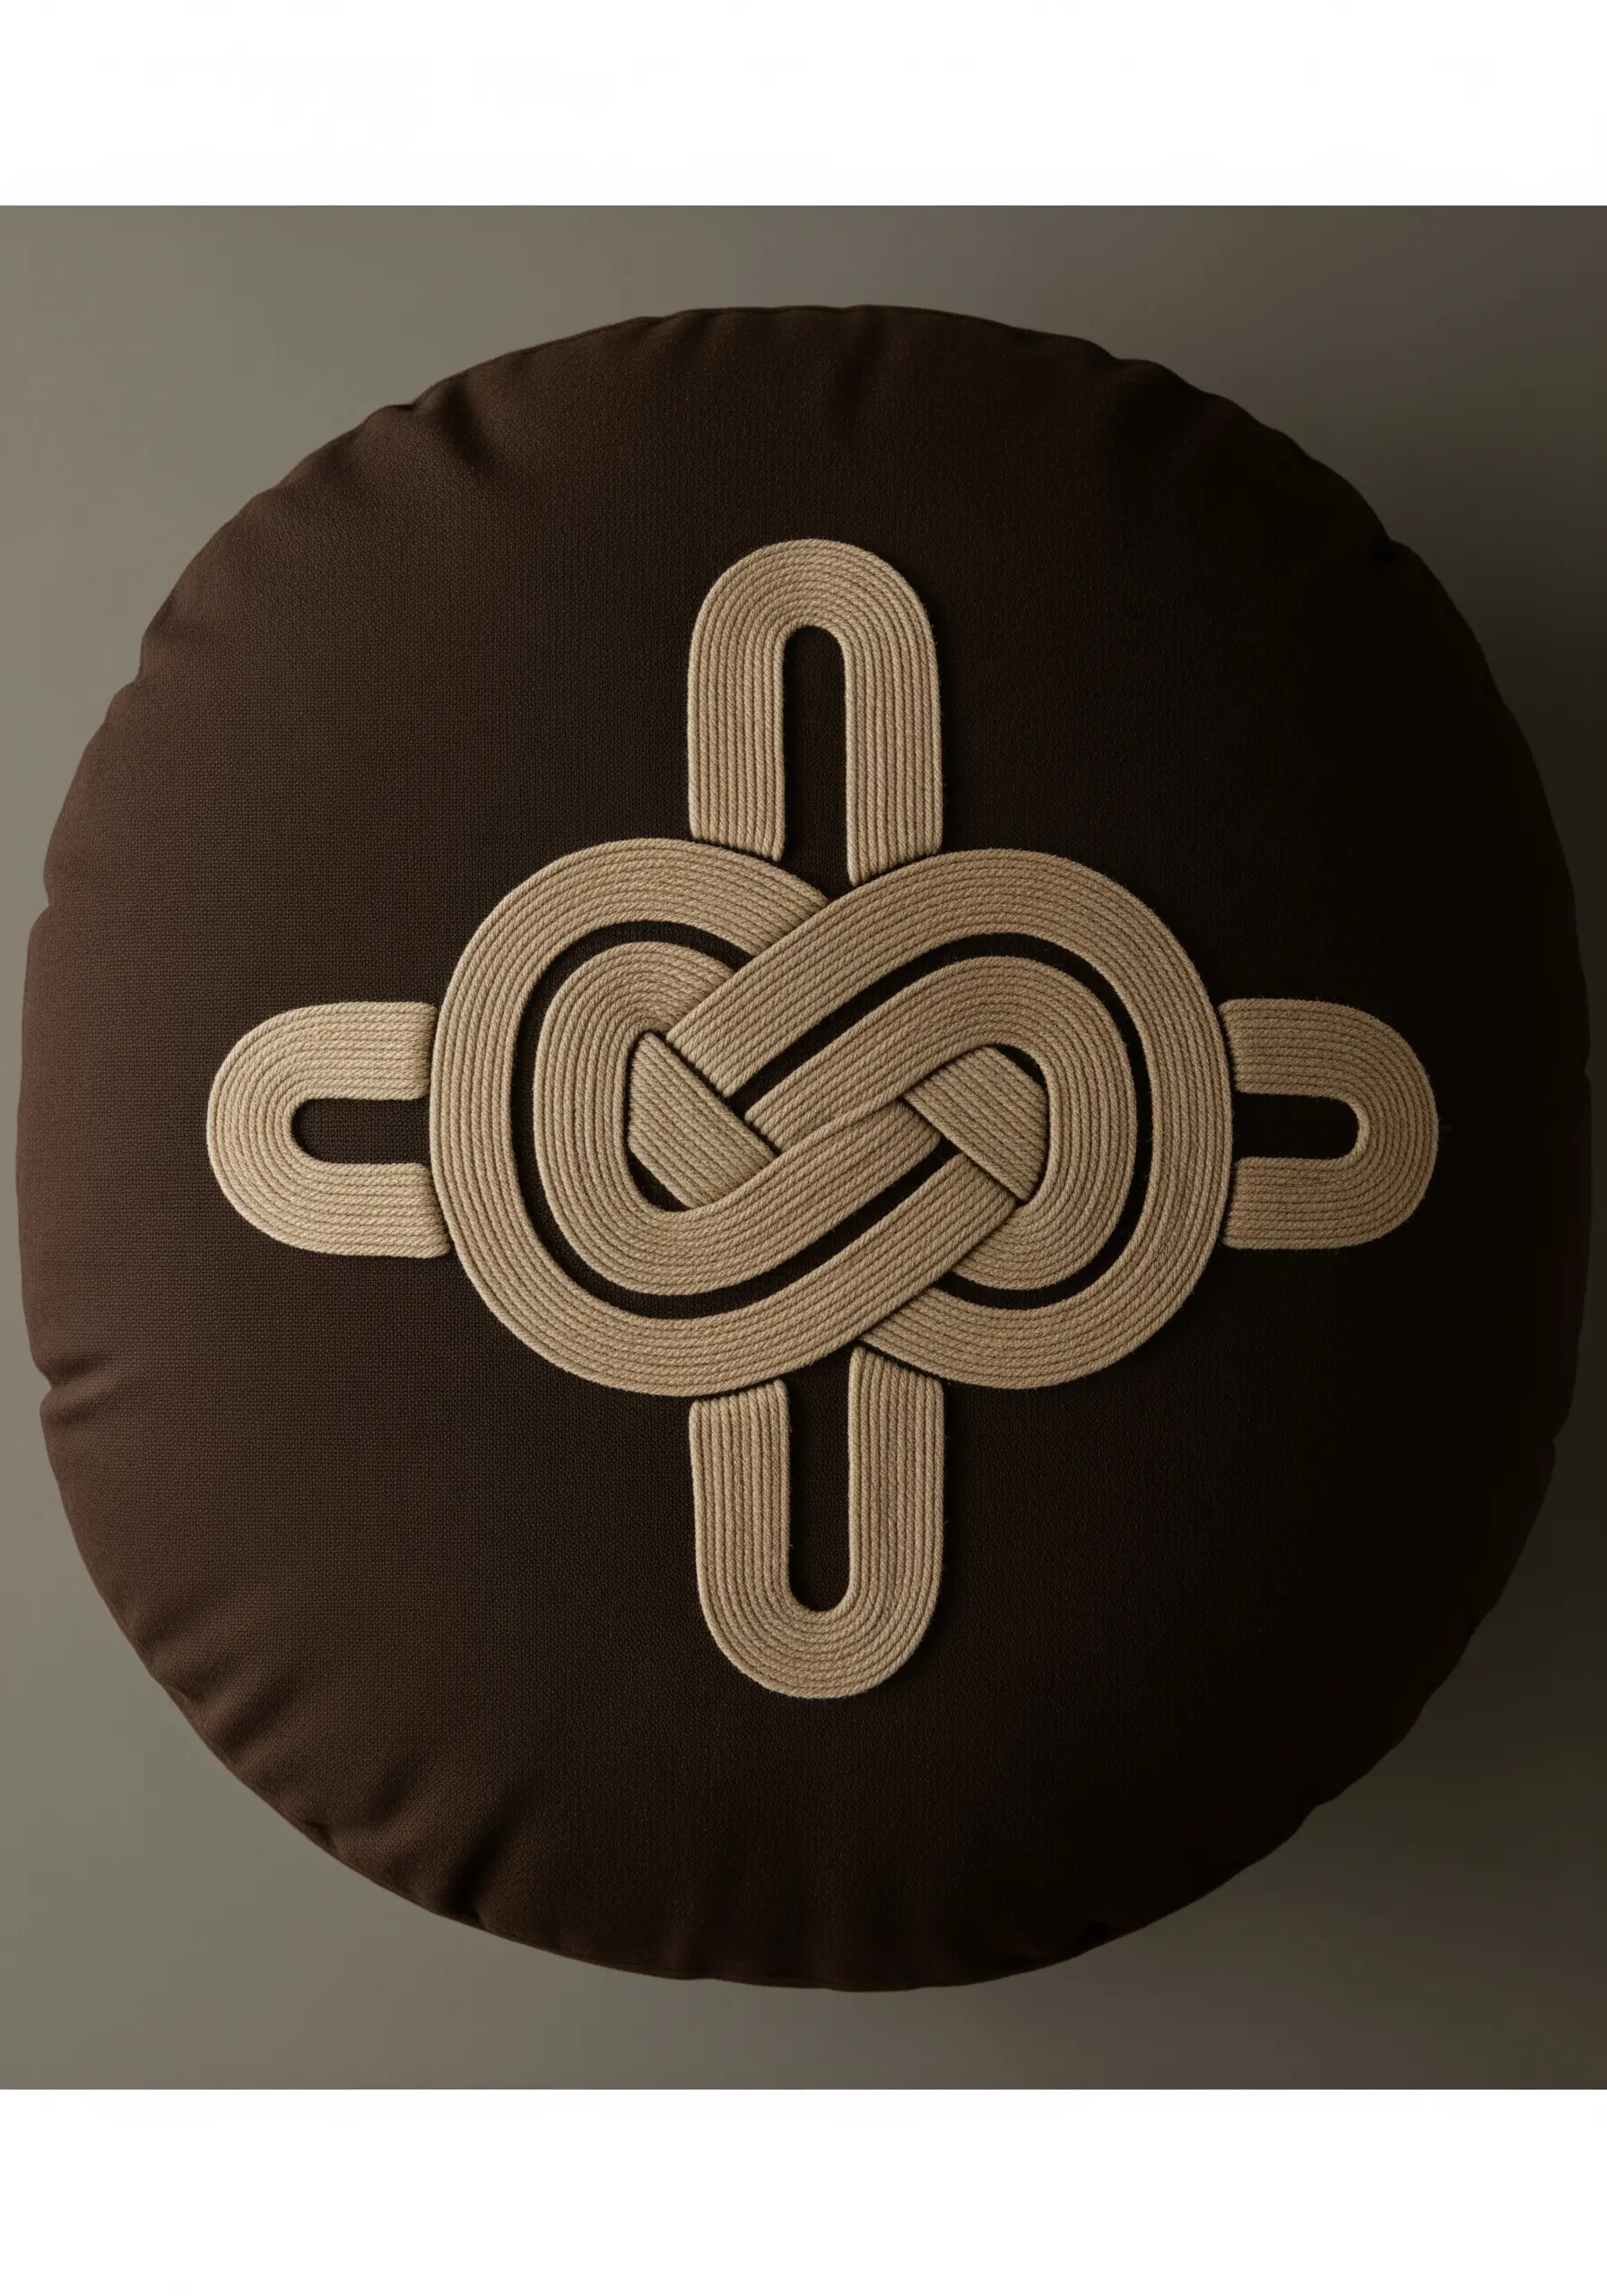
For intricate, overlapping knotwork, couching is the most effective technique for a clean, professional result.
Lay down a thick cord or several strands of yarn held together, carefully shaping the interwoven paths of the knot.
Use a thin, discreet tacking thread to secure the cord at every curve and intersection, ensuring the lines stay smooth and the ‘over-under’ illusion is perfect. This creates one of those handmade sculptures that look like they belong in a museum.
33. Capture Botanical Shapes with Stem Stitch
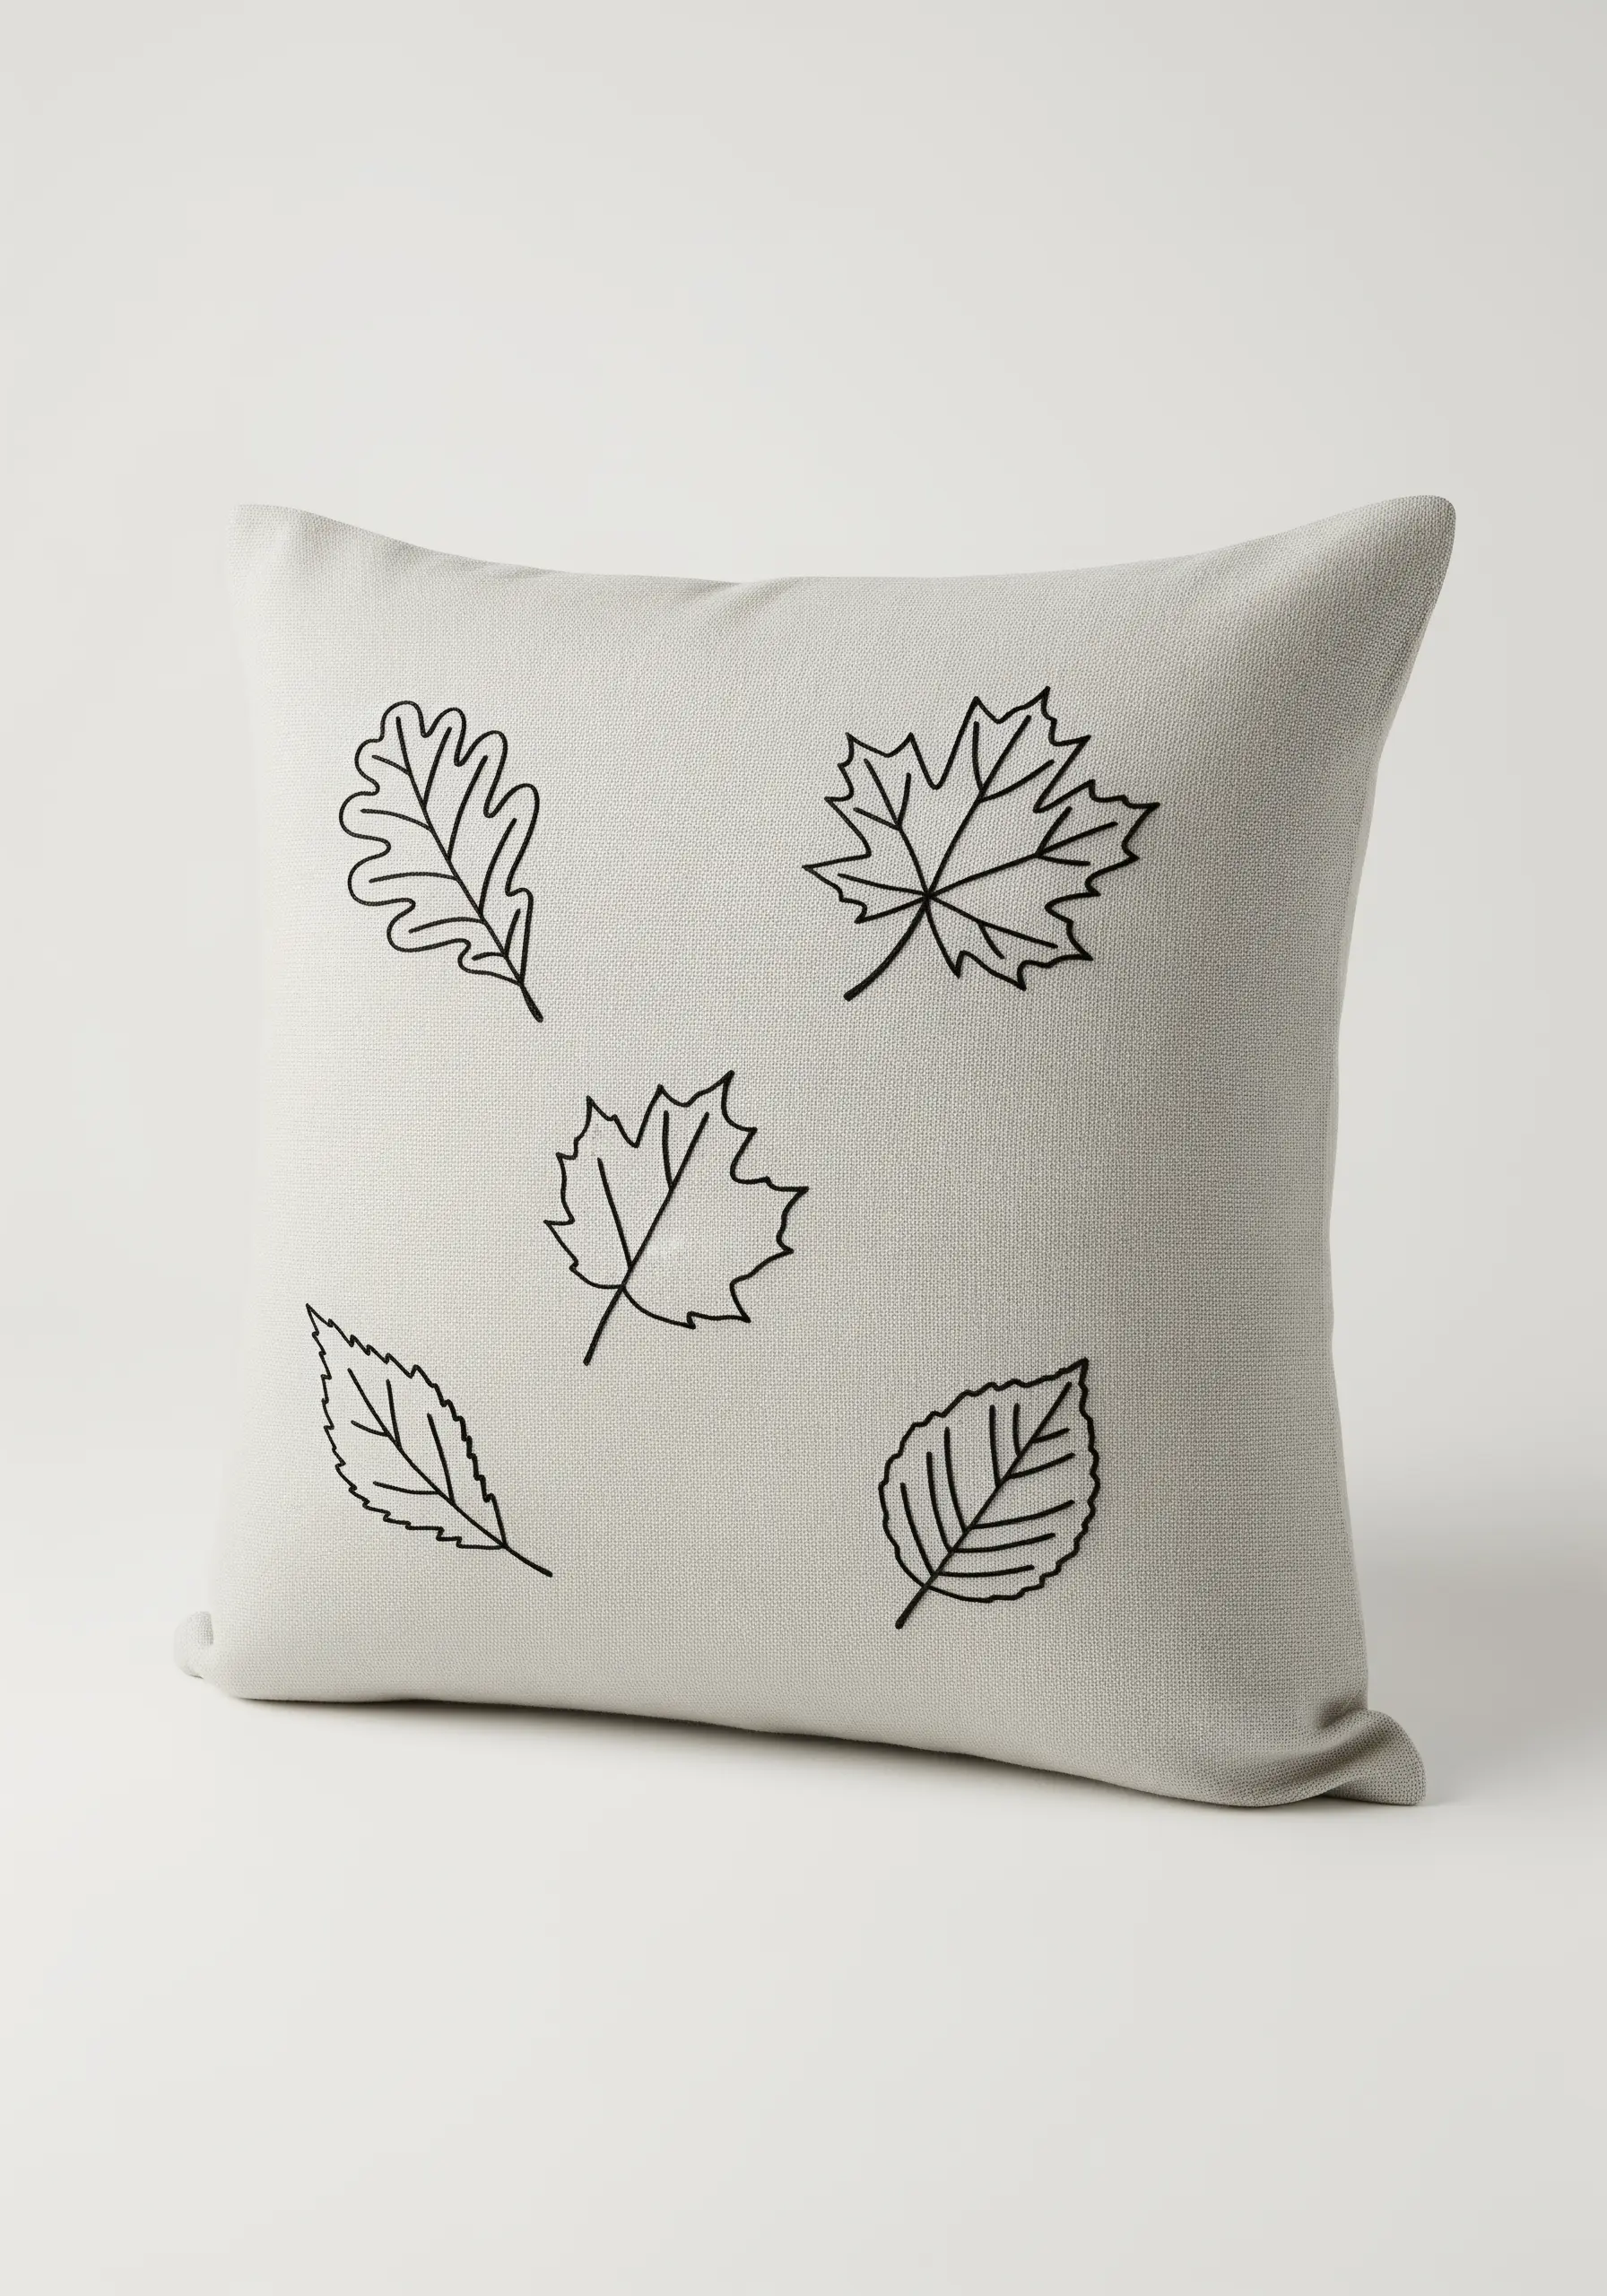
For simple, scattered botanical motifs, the stem stitch offers the perfect balance of grace and efficiency.
It handles both gentle curves and sharp points with ease, making it ideal for outlining a variety of leaf shapes.
Using two or three strands of floss gives the lines enough definition to stand out on linen fabric without appearing heavy. This is the foundation of many minimalist embroidery designs inspired by nature.


