

When you pick up a needle and thread, you’re doing more than just making something beautiful. You are creating a quiet moment, a small sanctuary of focus. And what better theme for that meditative practice than the peaceful, silent expanse of the night sky?
But turning that feeling into stitches that look polished and intentional can feel like a challenge. It’s not about mastering dozens of complex techniques. It’s about making thoughtful choices—selecting the right thread to catch the light, understanding how stitch direction creates texture, or knowing when a single, perfectly placed French knot has more impact than a sky full of them.
These ideas are your guide to precisely that. They are invitations to transform fabric into a canvas for peaceful bedtime vibes, not just by stitching moons and stars, but by infusing each piece with intention, texture, and a quiet, confident artistry.
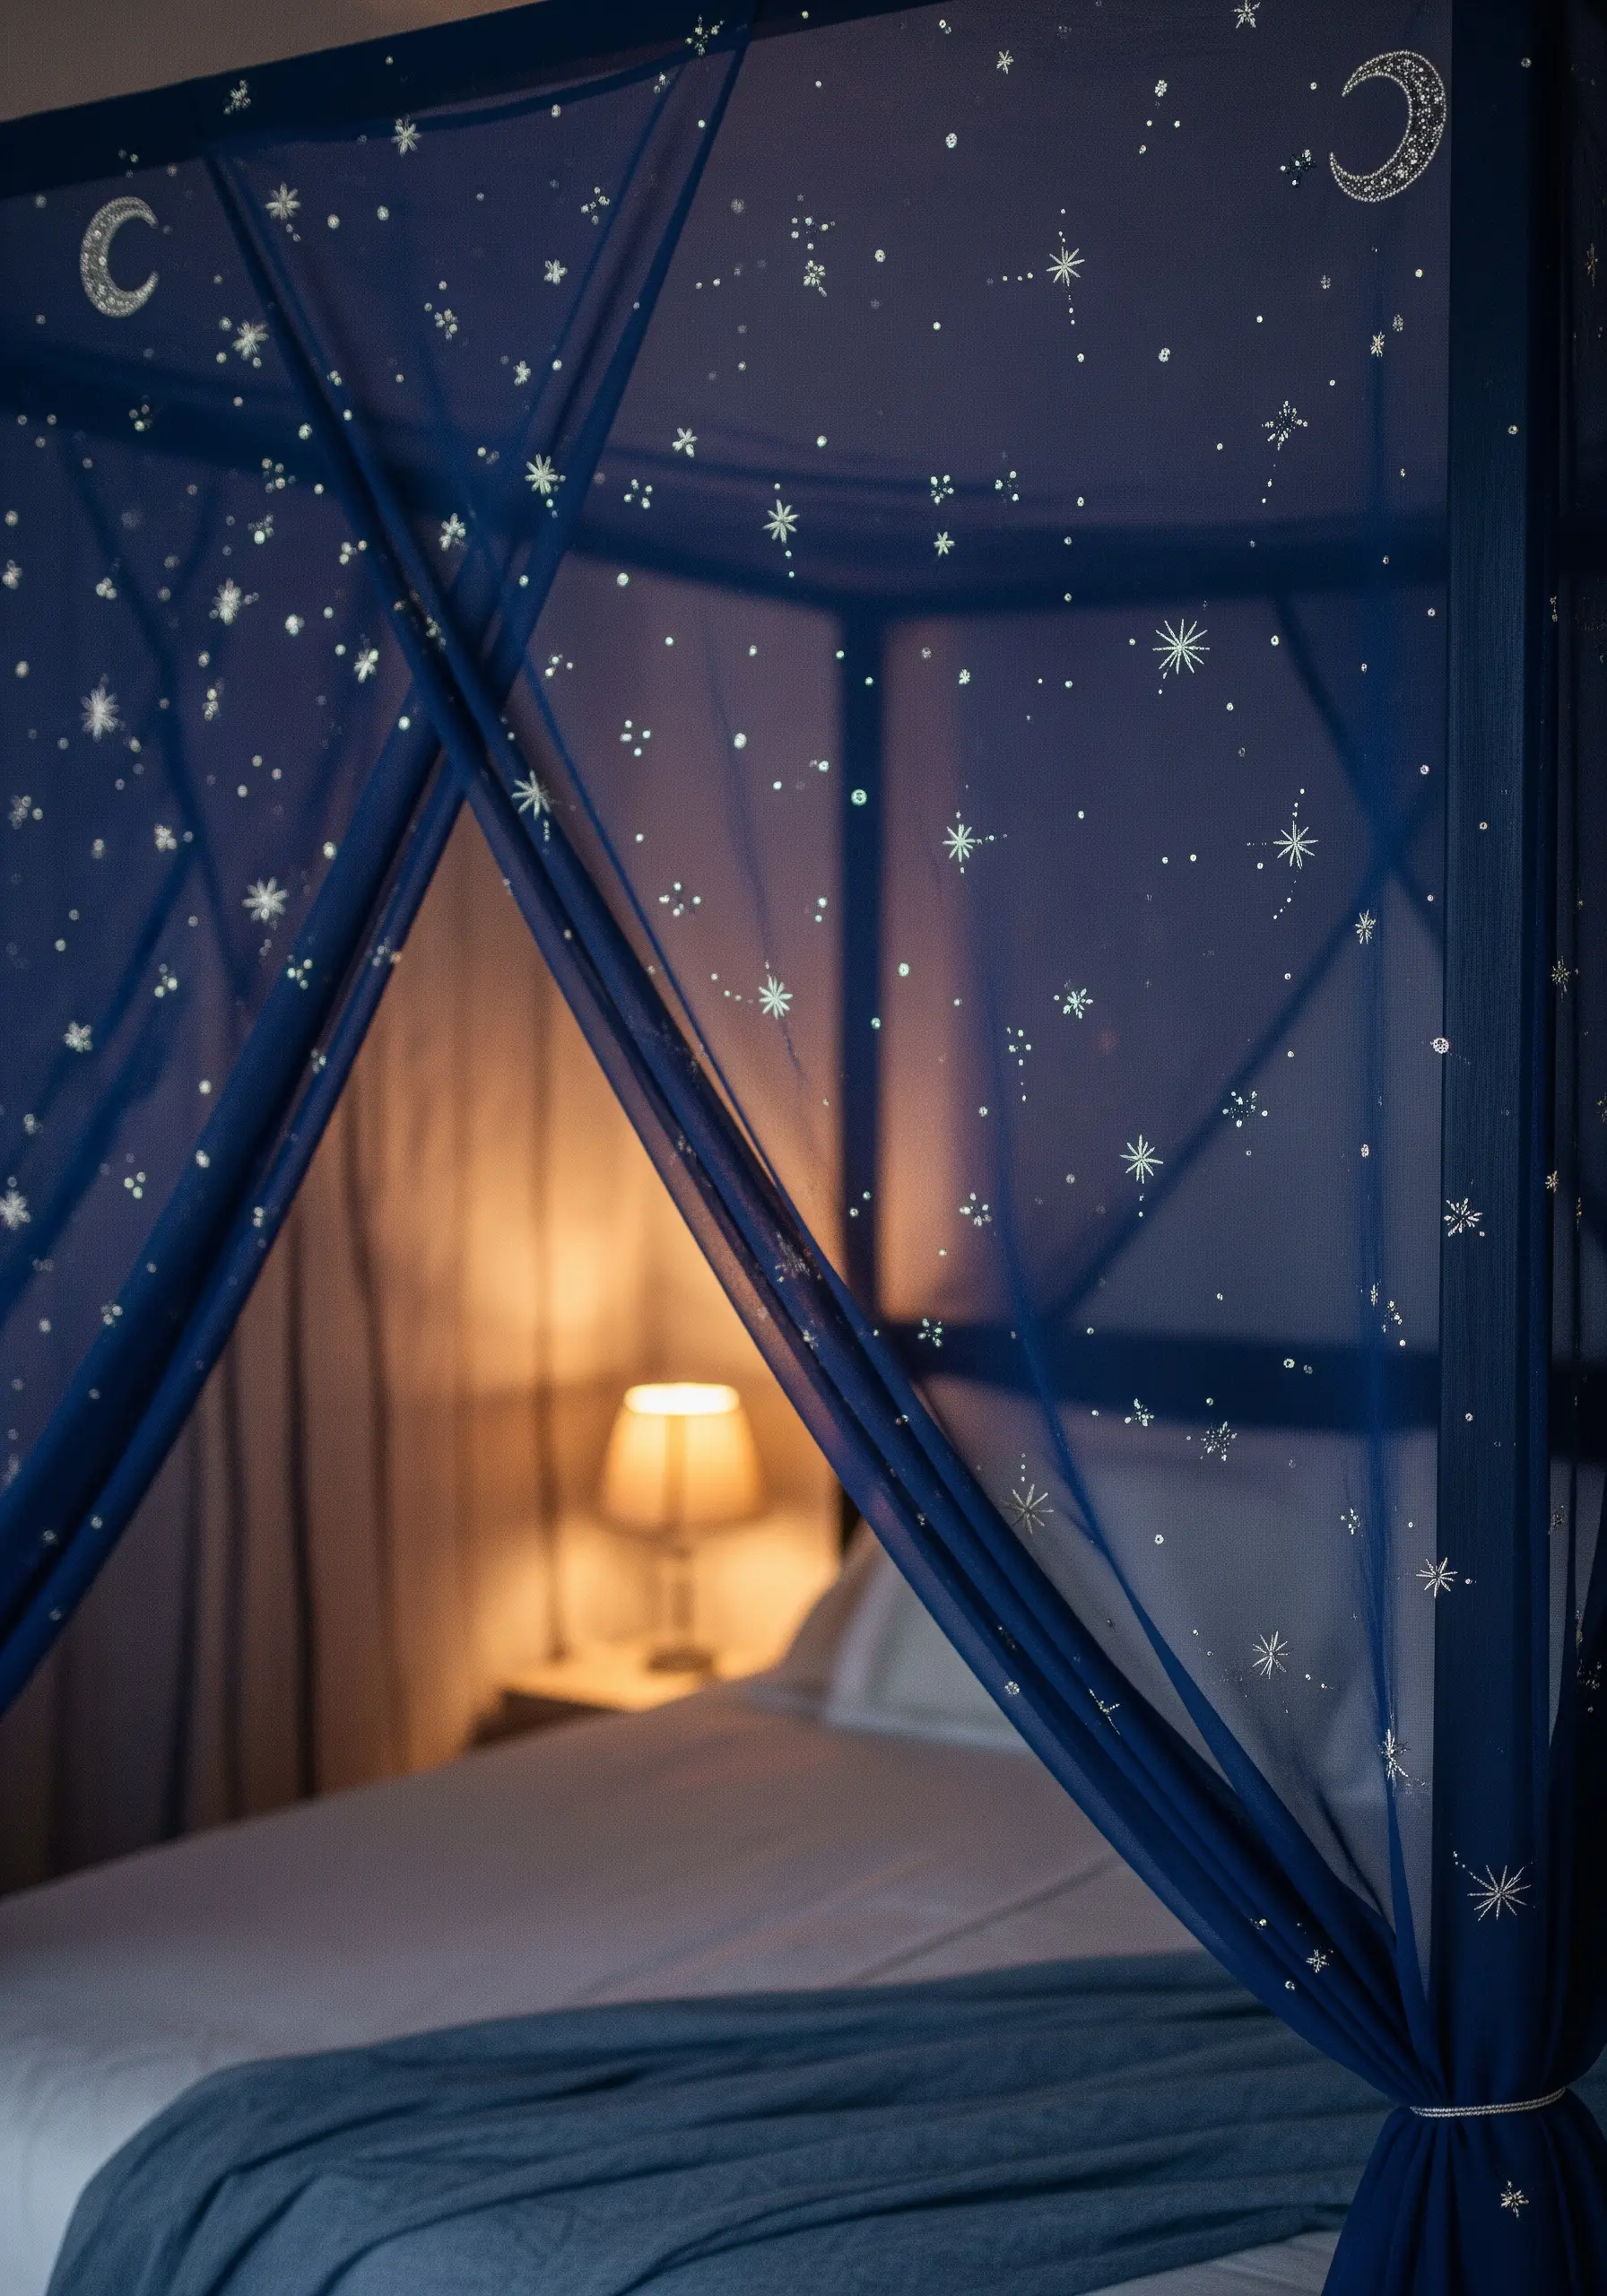
1. The Embroidered Headboard: A Celestial Statement
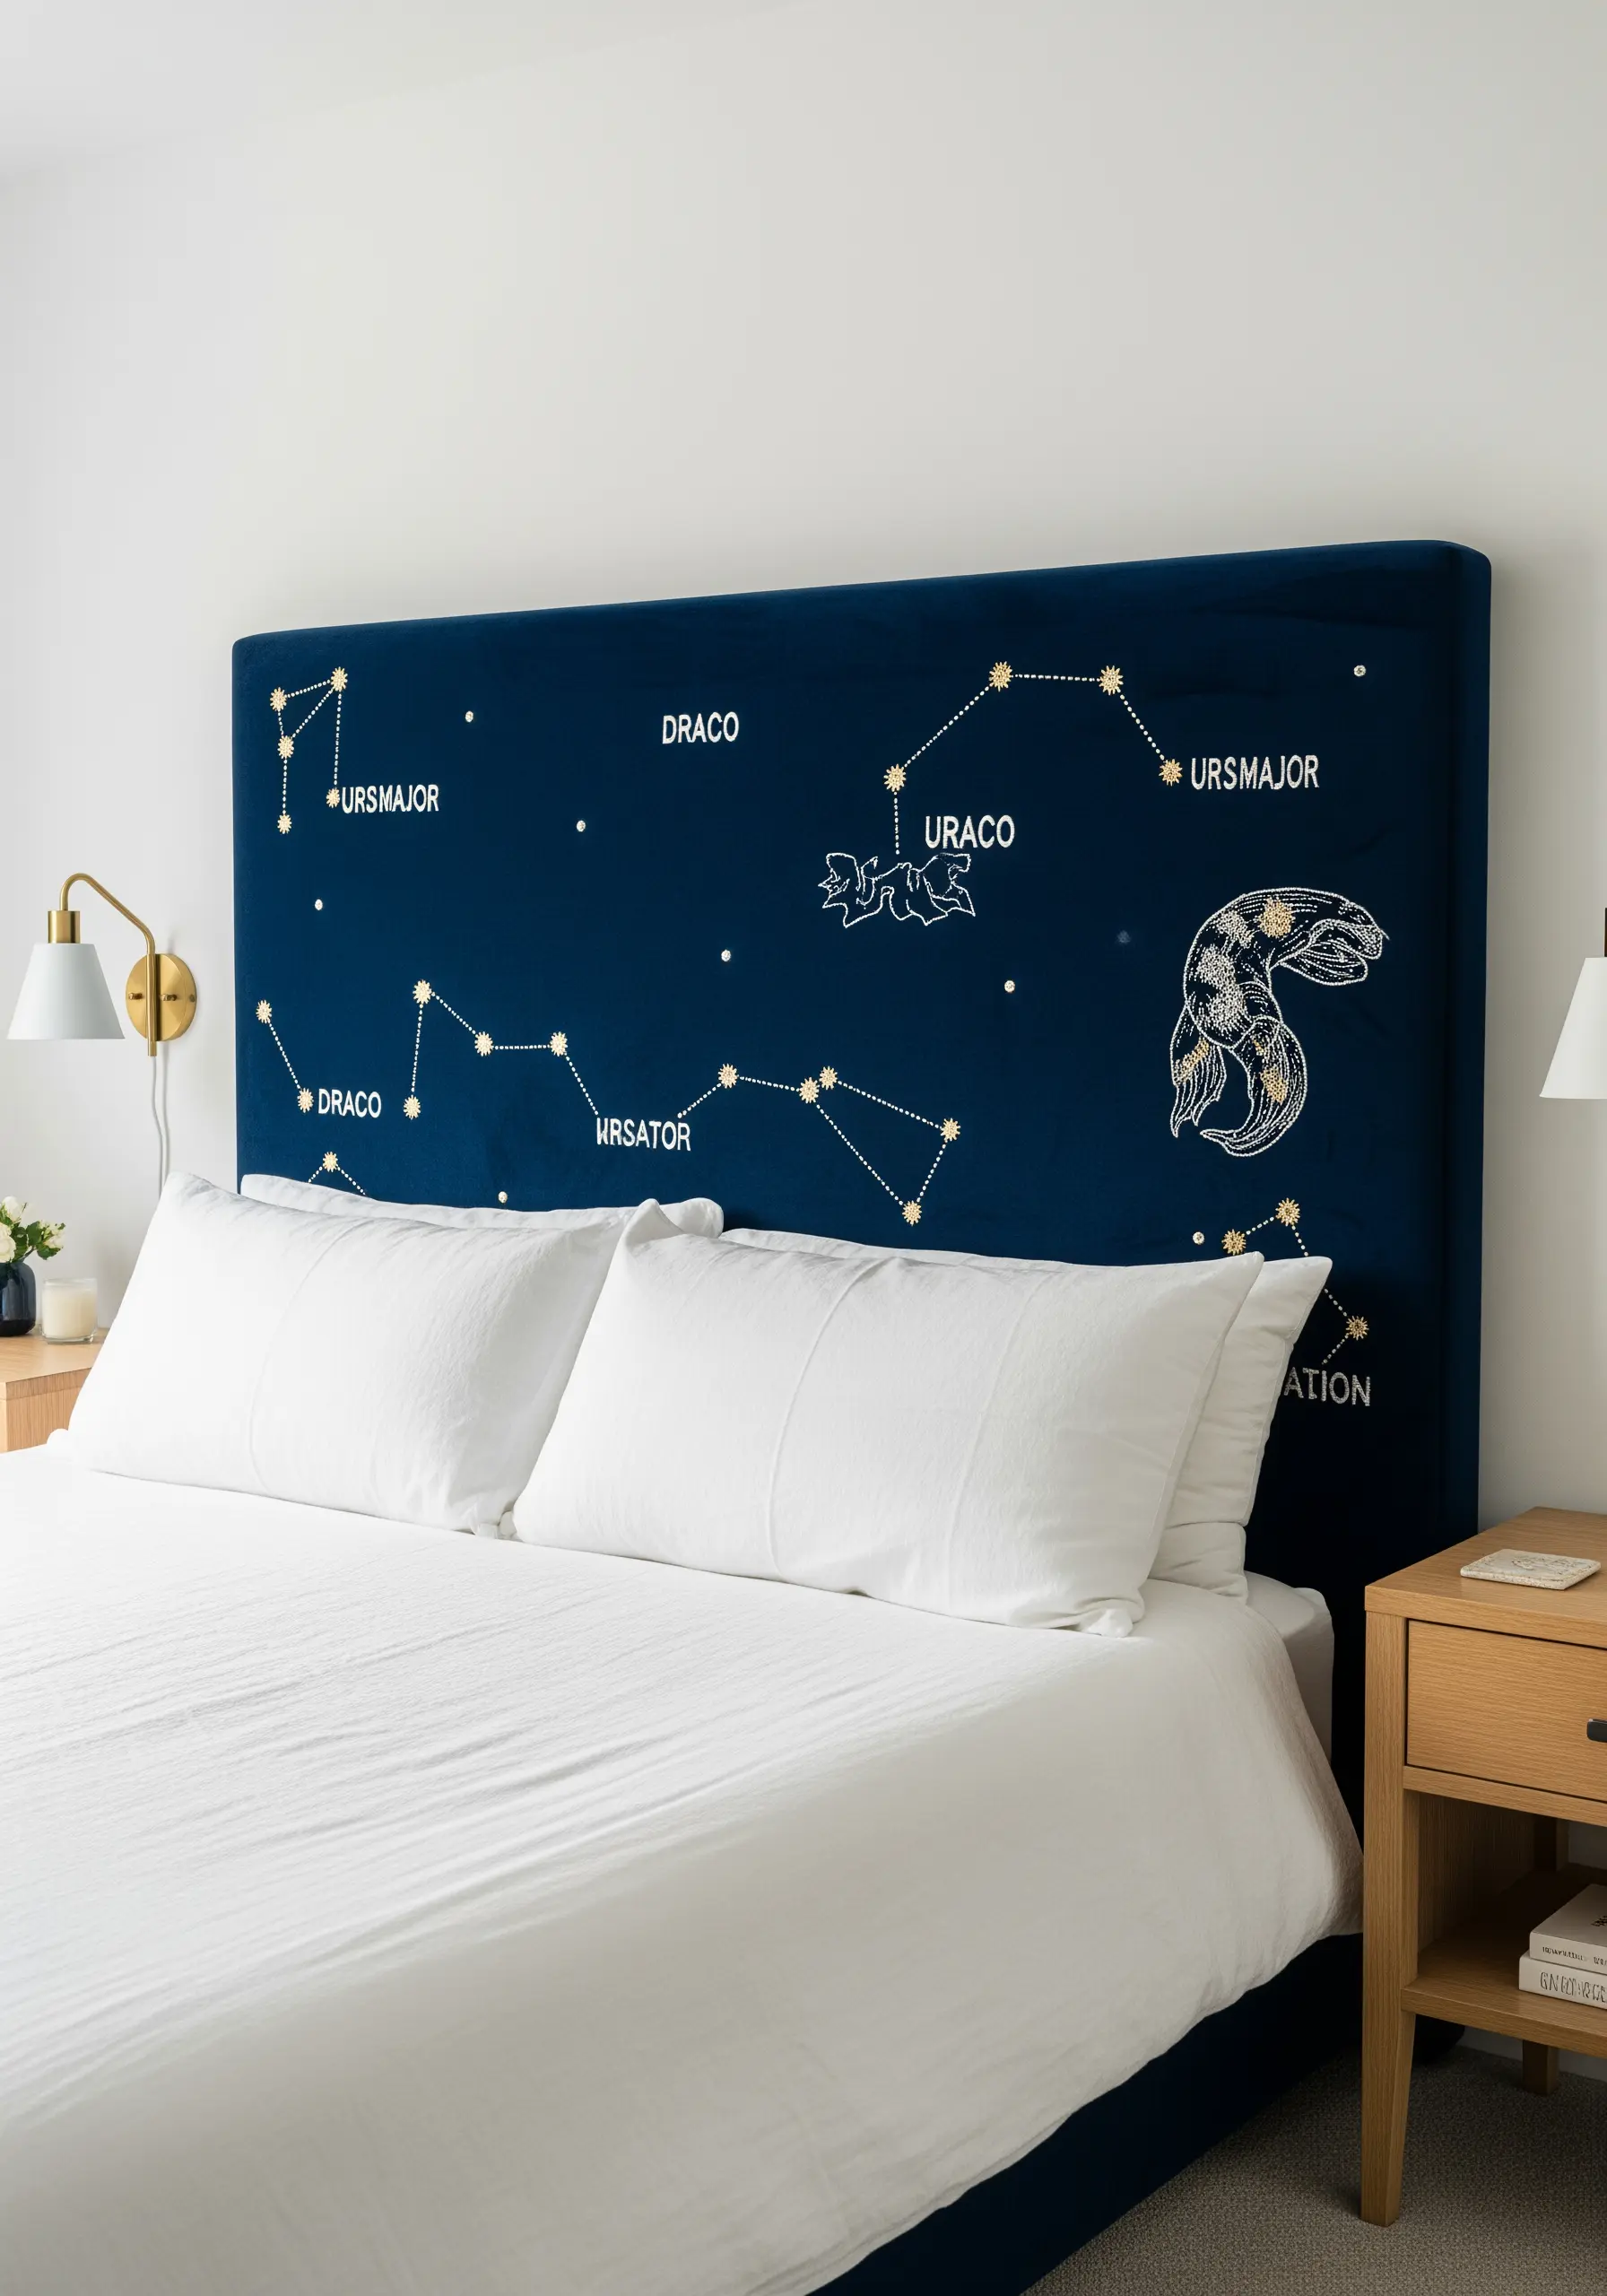
Embroidering on velvet requires a stabilizer to prevent the plush pile from swallowing your stitches.
Use a sharp, fine needle and a slightly longer backstitch to create clean, defined constellation lines that won’t sink into the fabric.
For the stars, use single-strand metallic thread to create delicate French knots or tiny star stitches that catch the light with a subtle shimmer.
Give larger motifs a raised, dimensional look by first creating an underlay of split stitches before covering them with satin stitch—this technique adds depth and luxury, turning your bed into one of those statement embroidery pieces that define a room.
2. Dimensional Moons with Coiled Cording
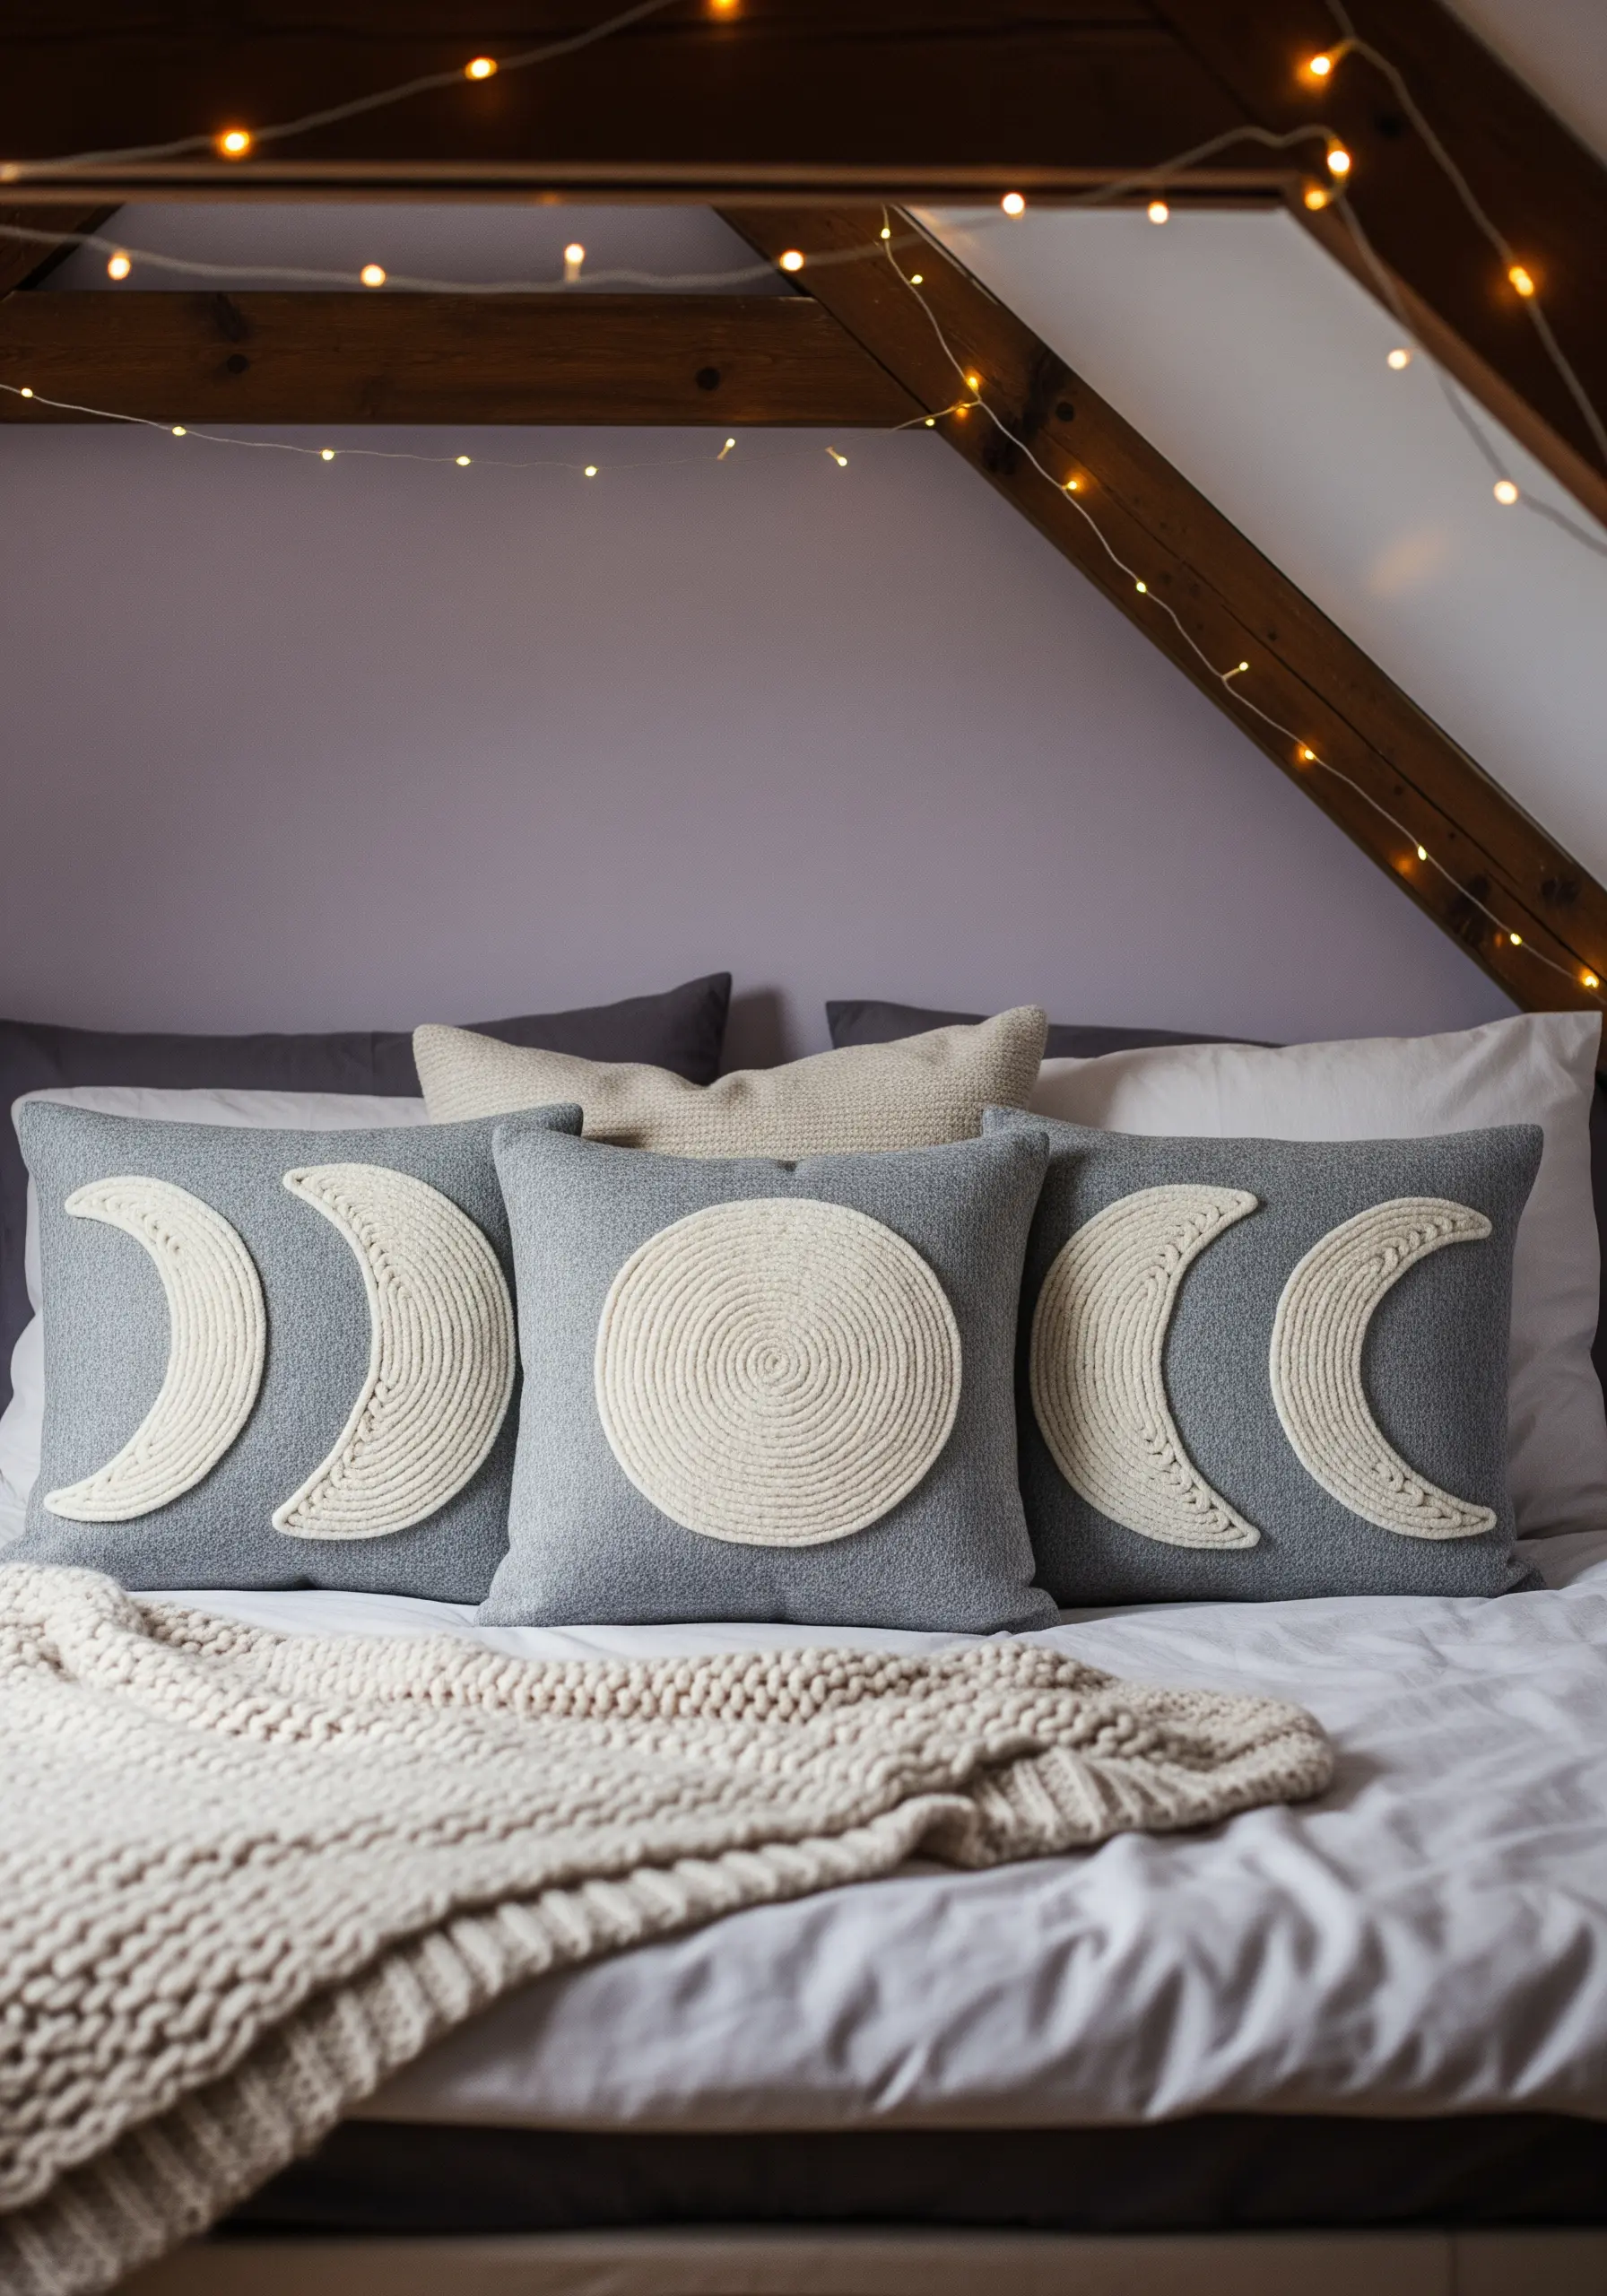
Achieve this high-texture look using couching, a technique where you lay thick cord or yarn on the fabric and tack it down with a separate, thinner thread.
Before you begin, trace your crescent and full-moon shapes onto the pillowcase with a water-soluble marker for a perfect guide.
This method builds a sculptural surface quickly, offering a bold, tactile quality that stands out far more than flat stitches.
It’s one of the best natural texture embroidery ideas for adding instant cozy dimension to home decor.
3. Elevate Printed Fabric with Selective Stitching
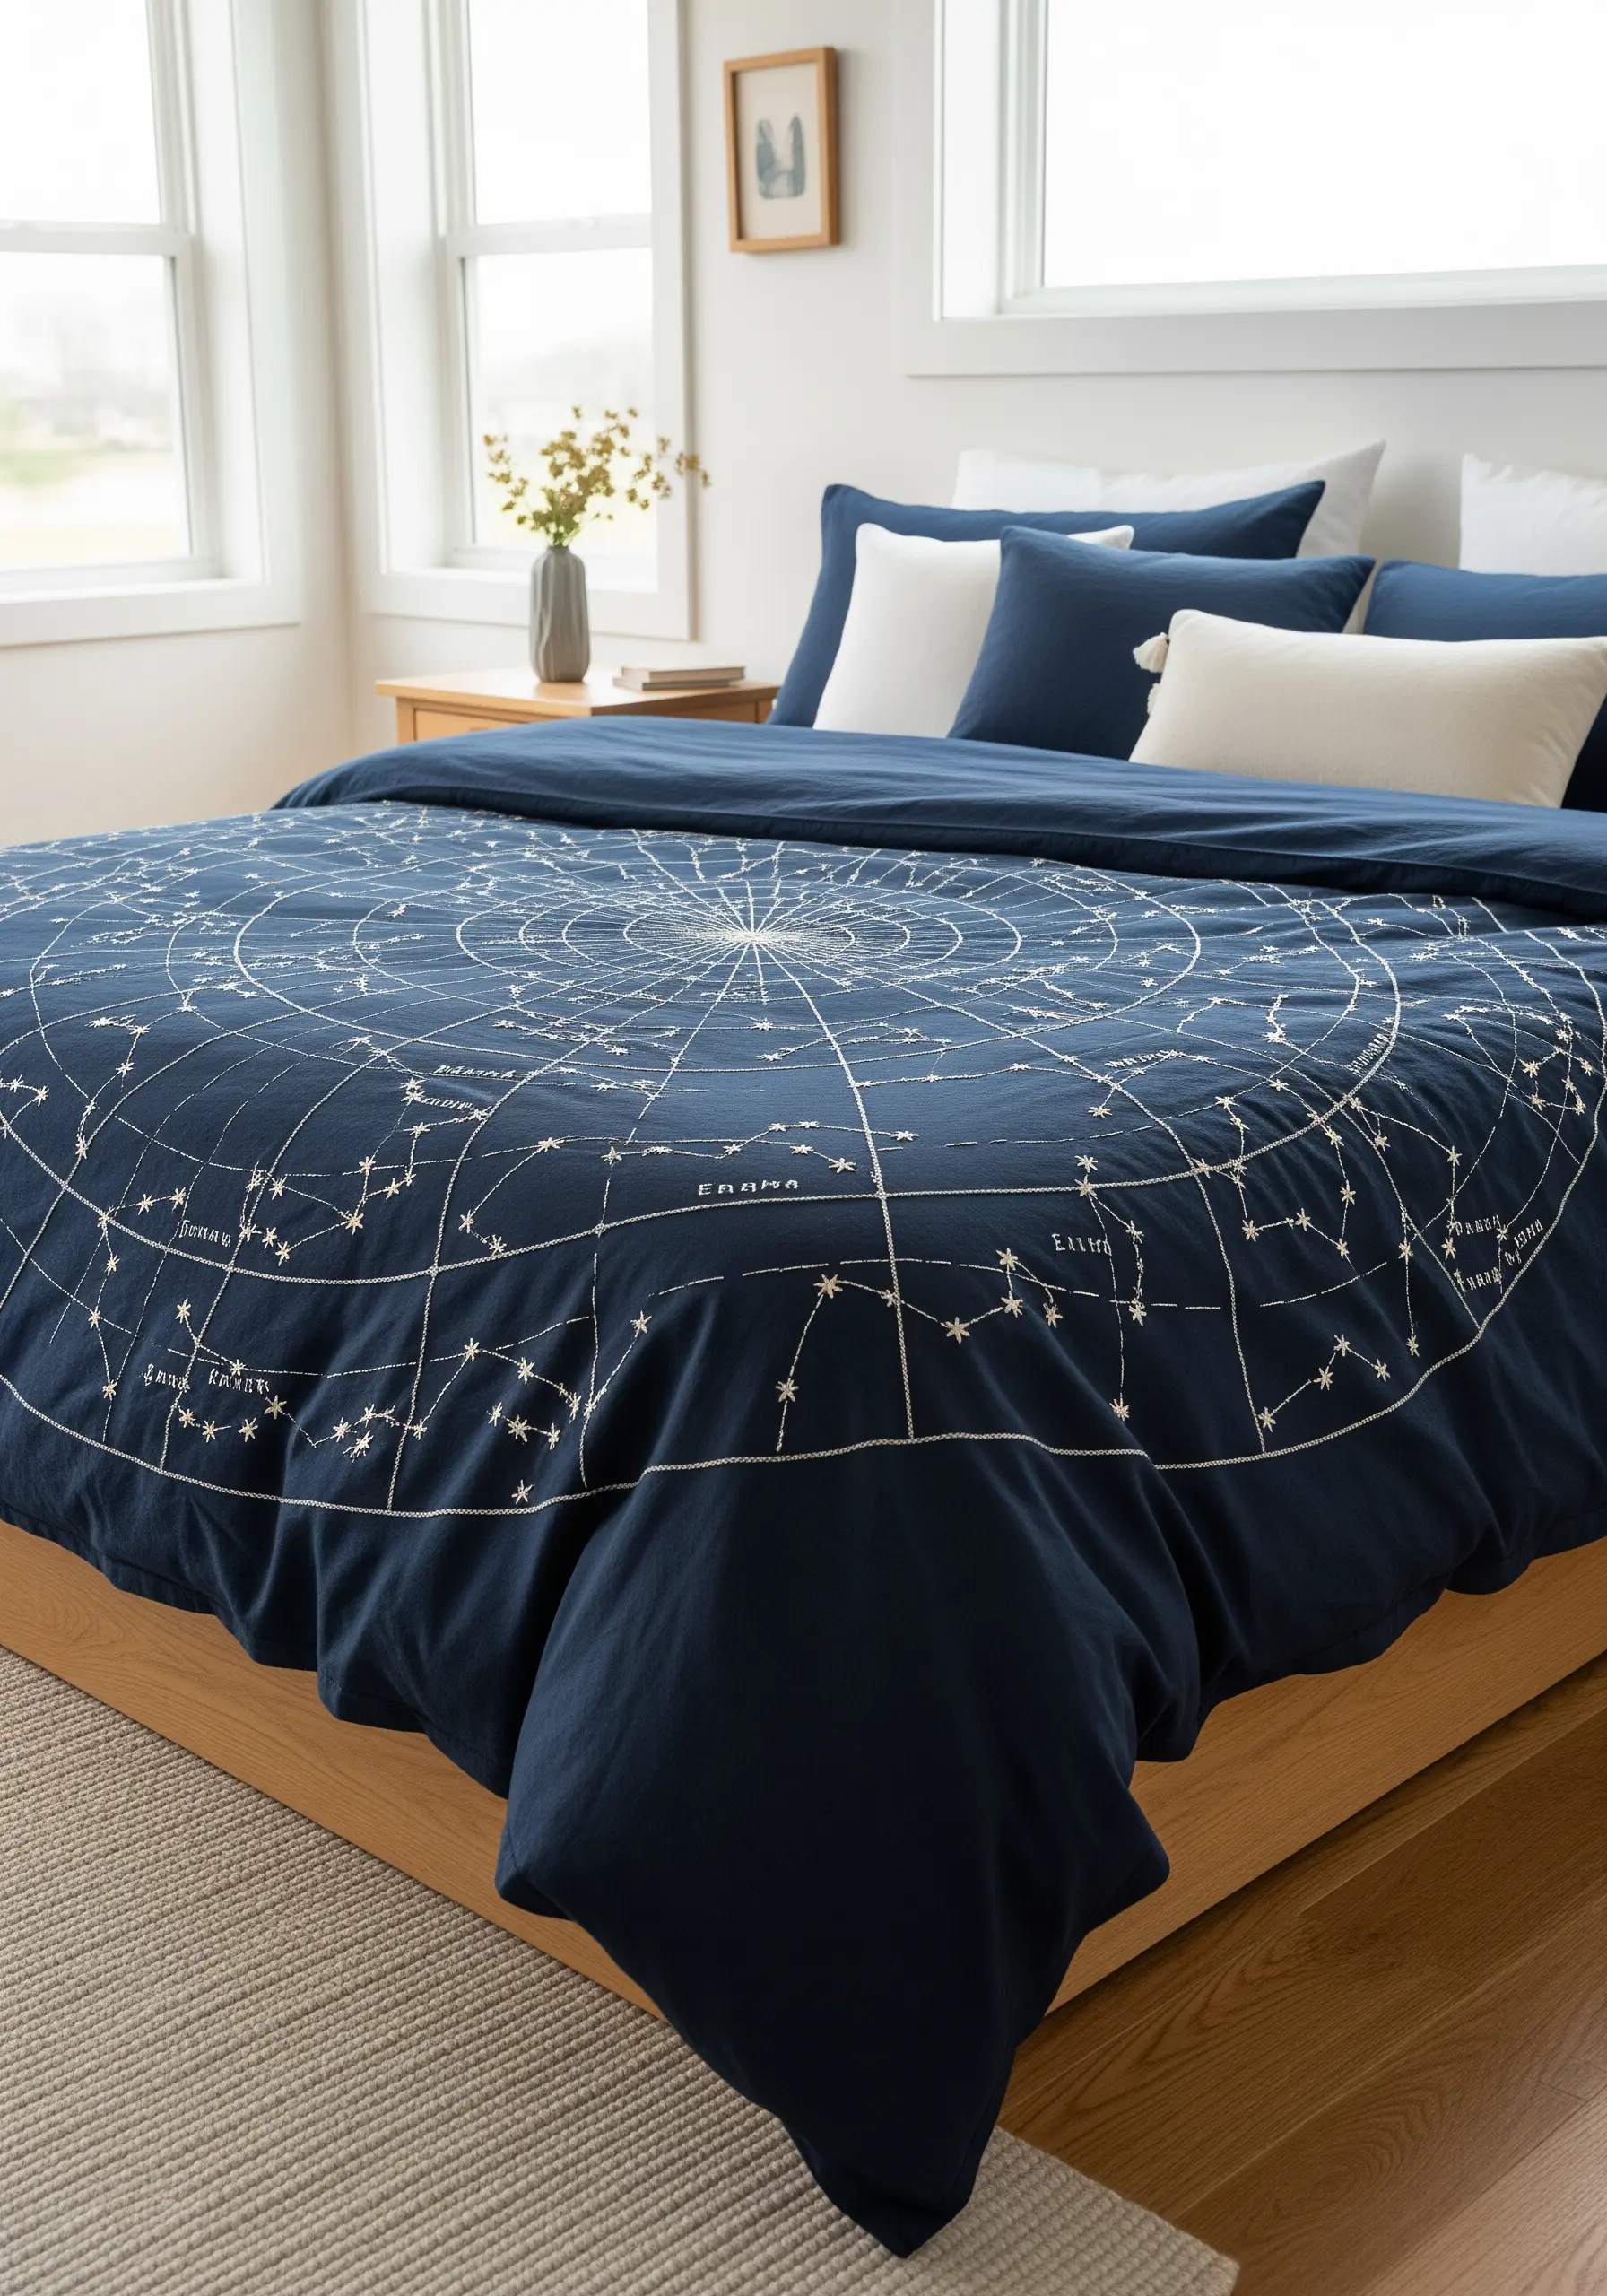
Instead of starting with a blank canvas, use a pre-printed celestial duvet cover as your guide.
Trace key constellation lines with a simple backstitch using a glow-in-the-dark or metallic thread to add a layer of texture and light.
Add French knots to the brightest printed stars to give the flat design a tactile focal point, making the entire piece feel more intentional and handcrafted.
This is one of the most effective creative embroidery projects that transform ordinary fabric from mass-produced to uniquely personal.
4. Stitching a Galaxy with Thread-Painting Techniques
To create a swirling galaxy, use the long-and-short stitch to blend multiple shades of purple, blue, and pink floss, just as you would with paint.
Work with single strands of thread to achieve the softest, most ethereal transitions between colors, giving your nebula a sense of depth.
For the stars, scatter a mix of French knots and tiny straight stitches in white and silver, clustering them densely in some areas and sparsely in others to mimic the randomness of space.
This approach is perfect for creating abstract thread painting with an atmospheric, dreamy quality.
5. Delicate Constellations on Sheer Fabric
When embroidering on sheer fabrics like tulle or organza, always use a water-soluble stabilizer; it provides support and prevents the delicate material from puckering.
Choose a lightweight, single-strand floss or a fine metallic thread, as heavy threads will pull and distort the fabric’s drape.
Simple stitches work best here: tiny star stitches, seed stitches, and delicate French knots will appear to float on the transparent background.
The result is one of those dreamy nature-inspired embroidery designs where the light itself becomes part of your artwork.
6. Integrating Motifs into Chunky Knits
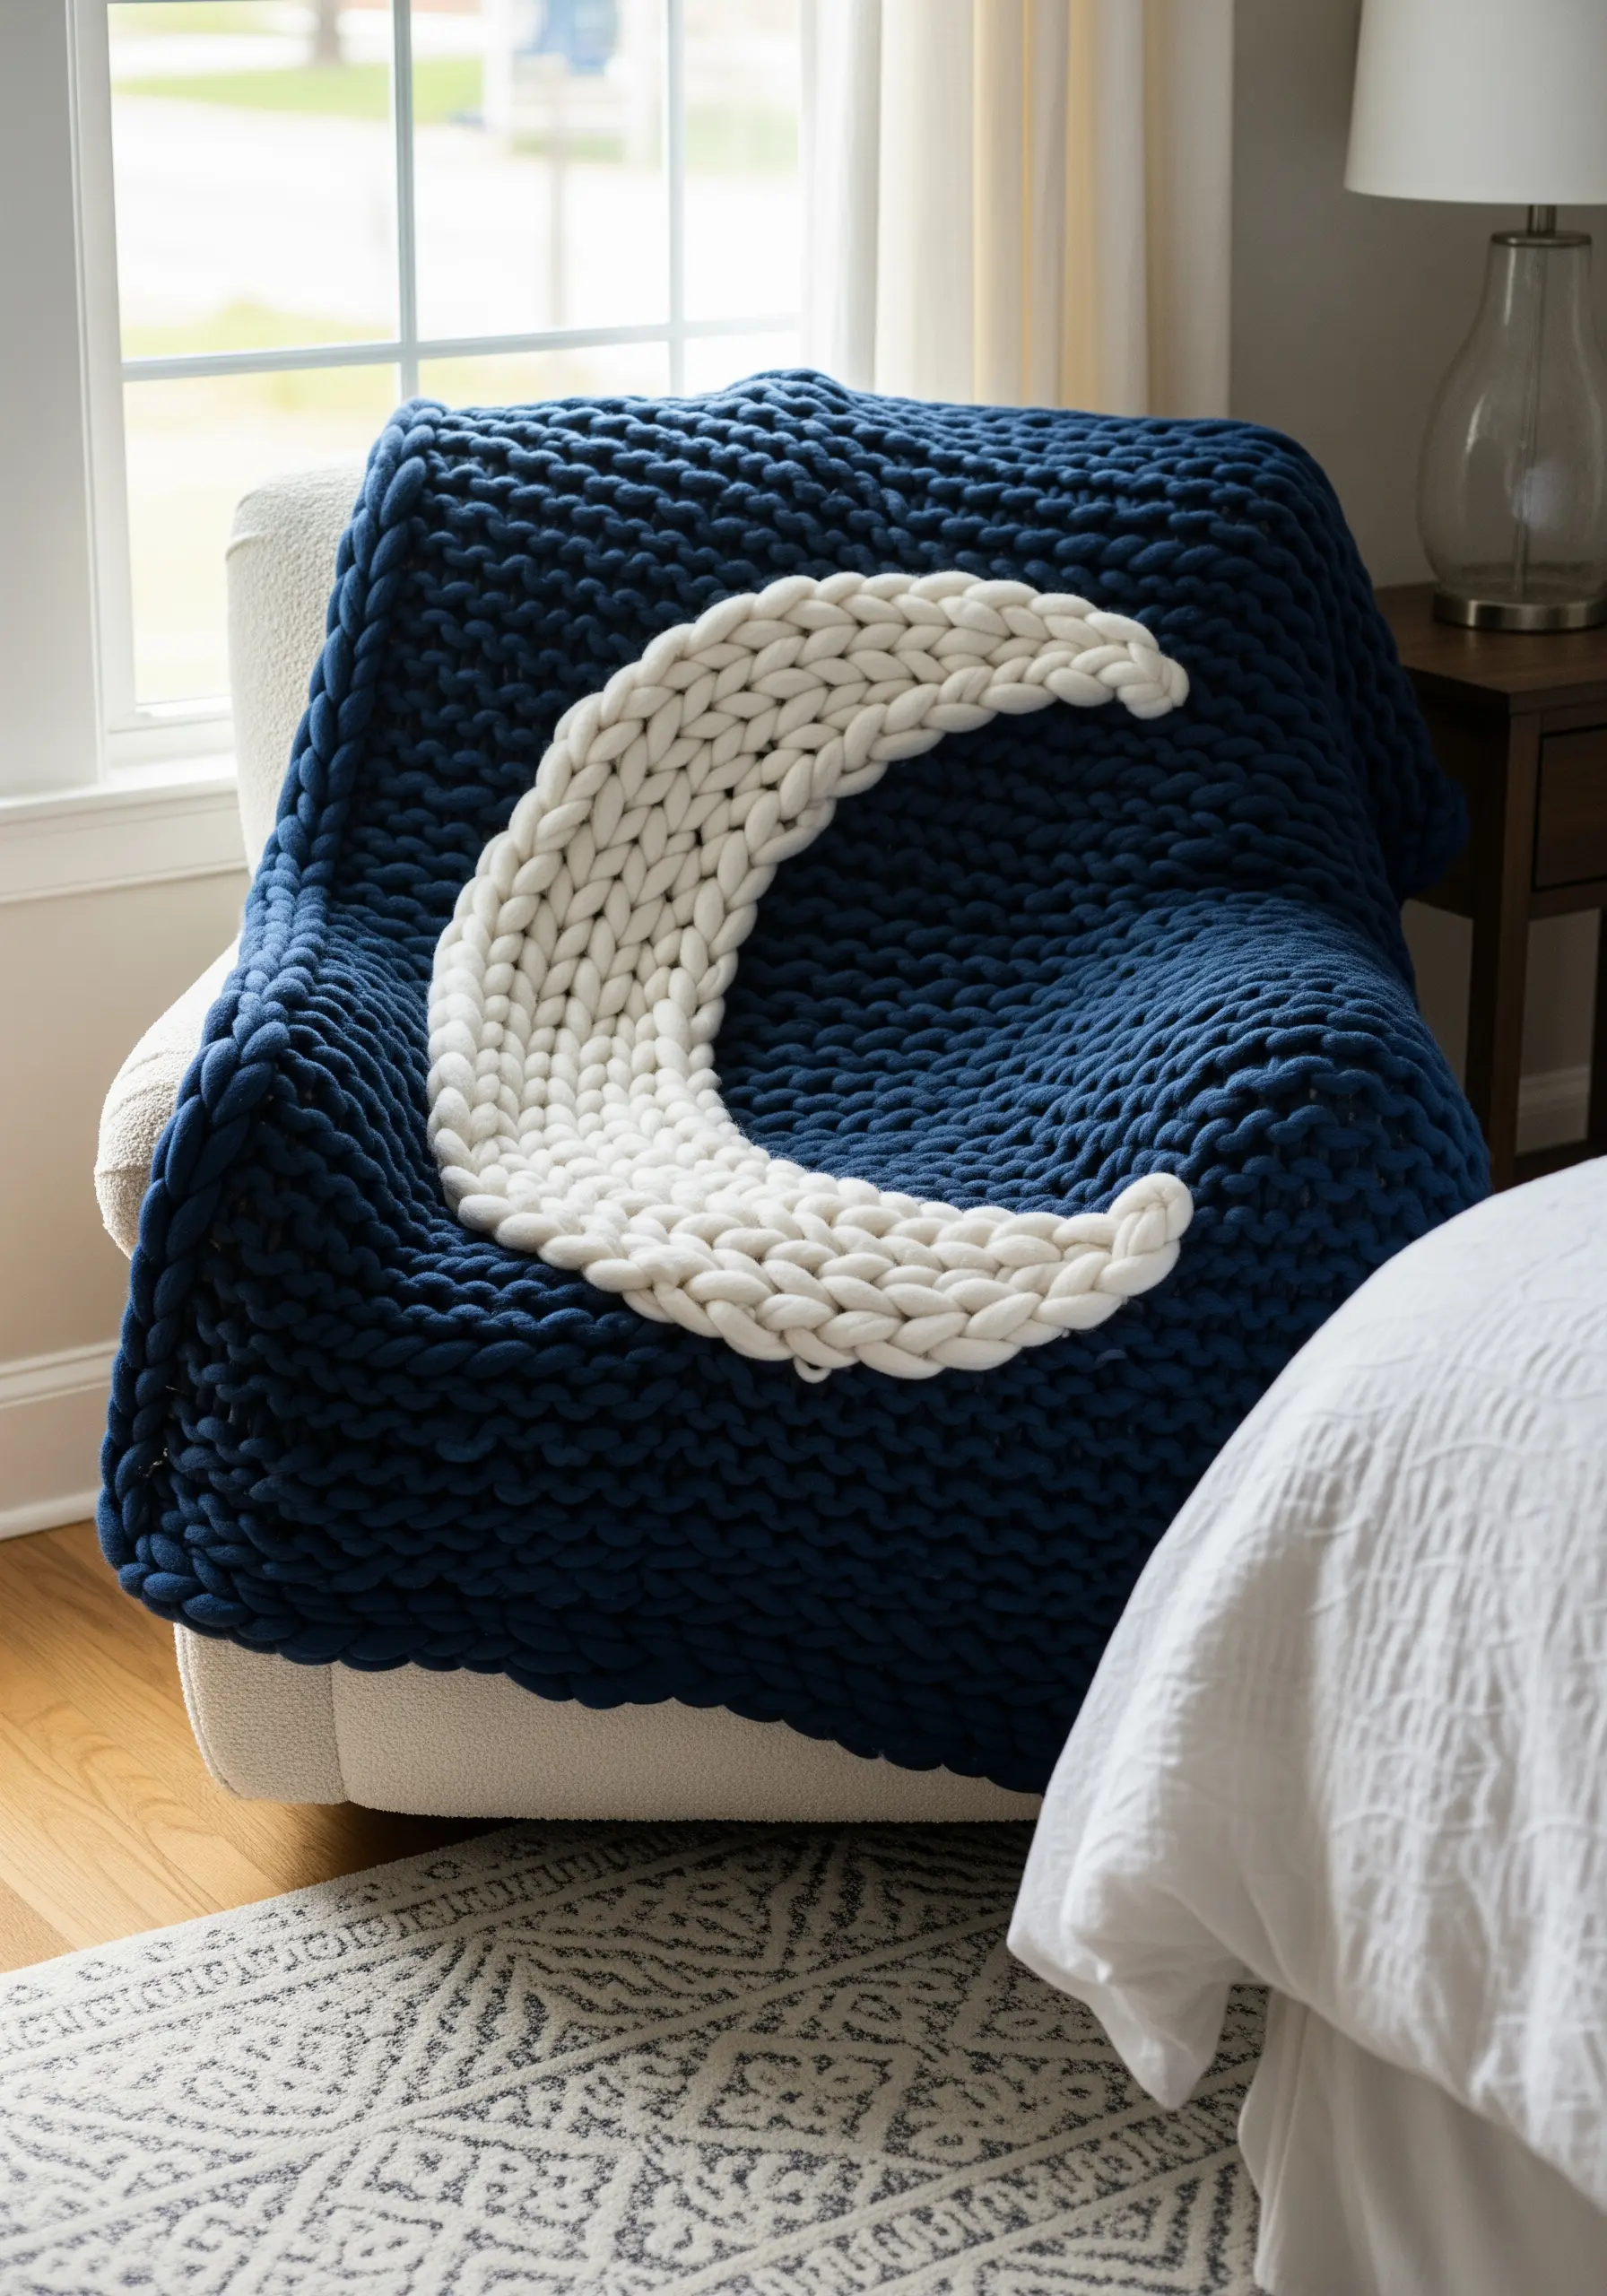
This bold look is achieved not with traditional embroidery but by weaving yarn directly into the existing knit structure.
Use a tapestry needle and matching chunky yarn to work a duplicate stitch, following the path of the loops on the blanket to create a seamless crescent moon.
Alternatively, you can knit the moon shape separately and then carefully appliqué it onto the blanket for a similar plush, integrated effect.
7. A Cohesive Celestial Gallery Wall
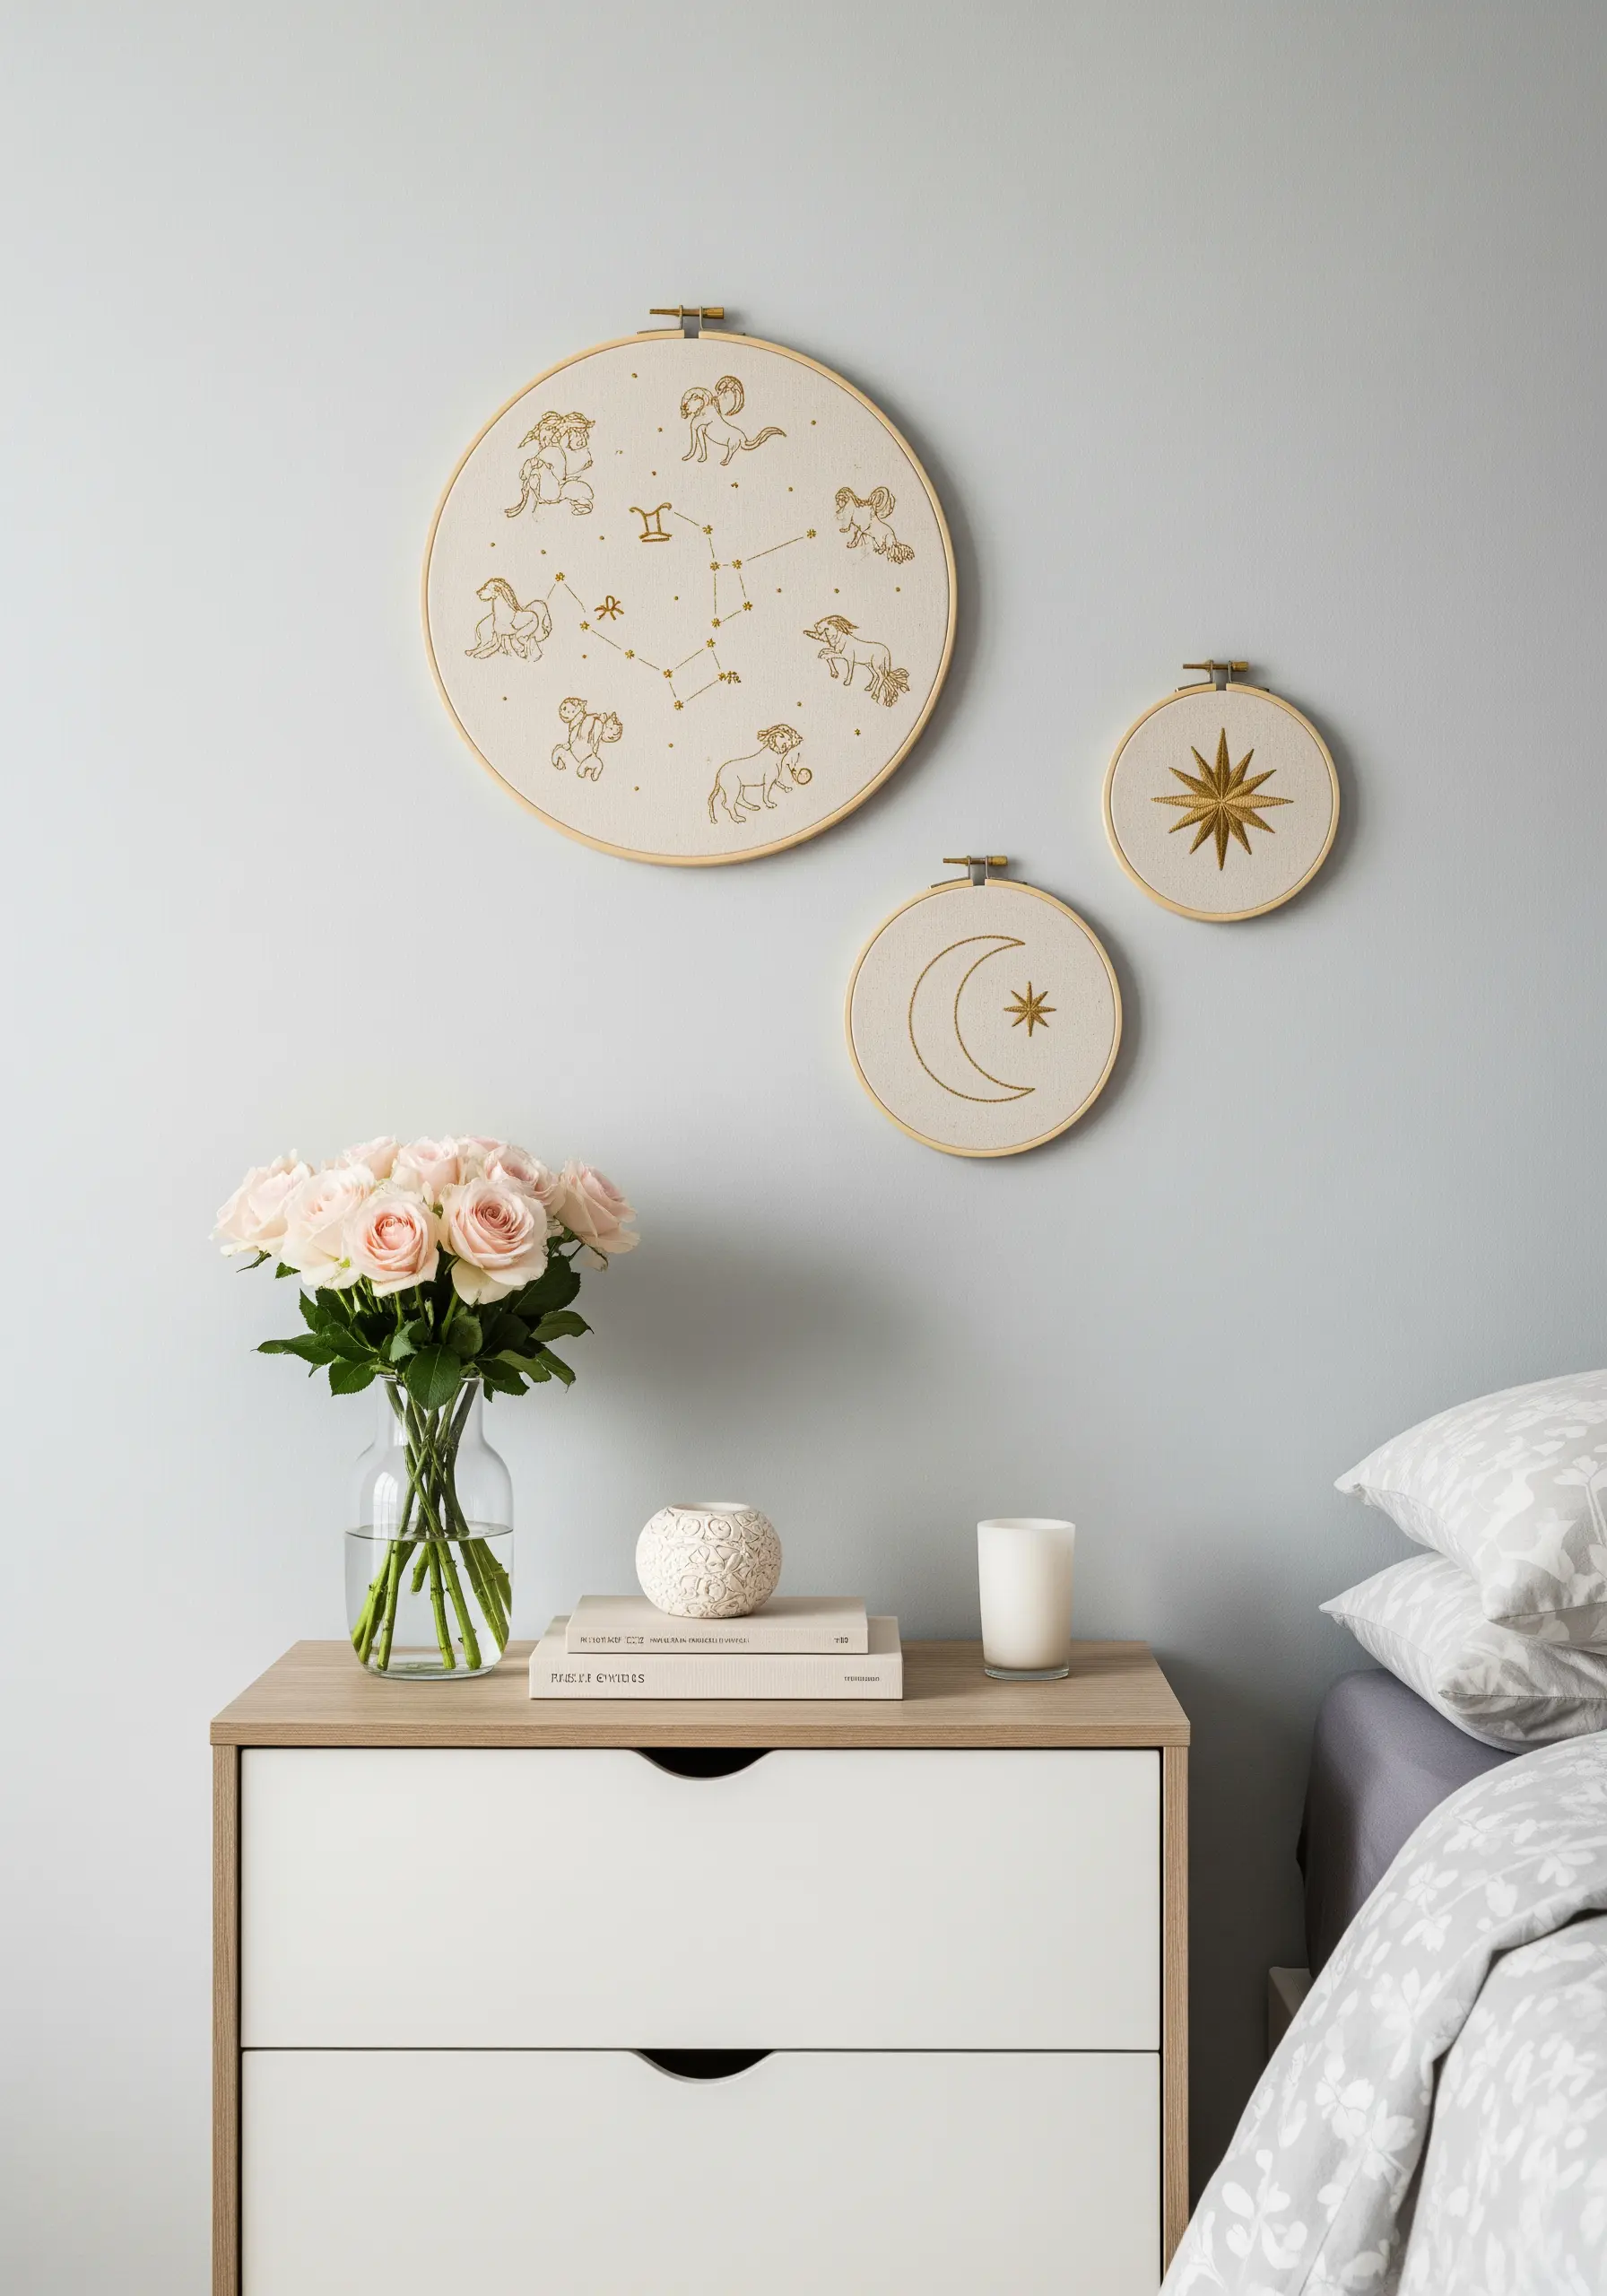
To unify a collection of hoops, establish a strict color palette and consistent line weight across all pieces.
Using a single type of thread—like a gold metallic floss—and a clean backstitch for all outlines ensures the designs feel connected, even with different motifs.
Vary the hoop sizes for visual interest but keep the design density similar so no single piece overpowers the others.
This simple discipline turns individual projects into sophisticated, minimalist stitched art pieces that work together as a collection.
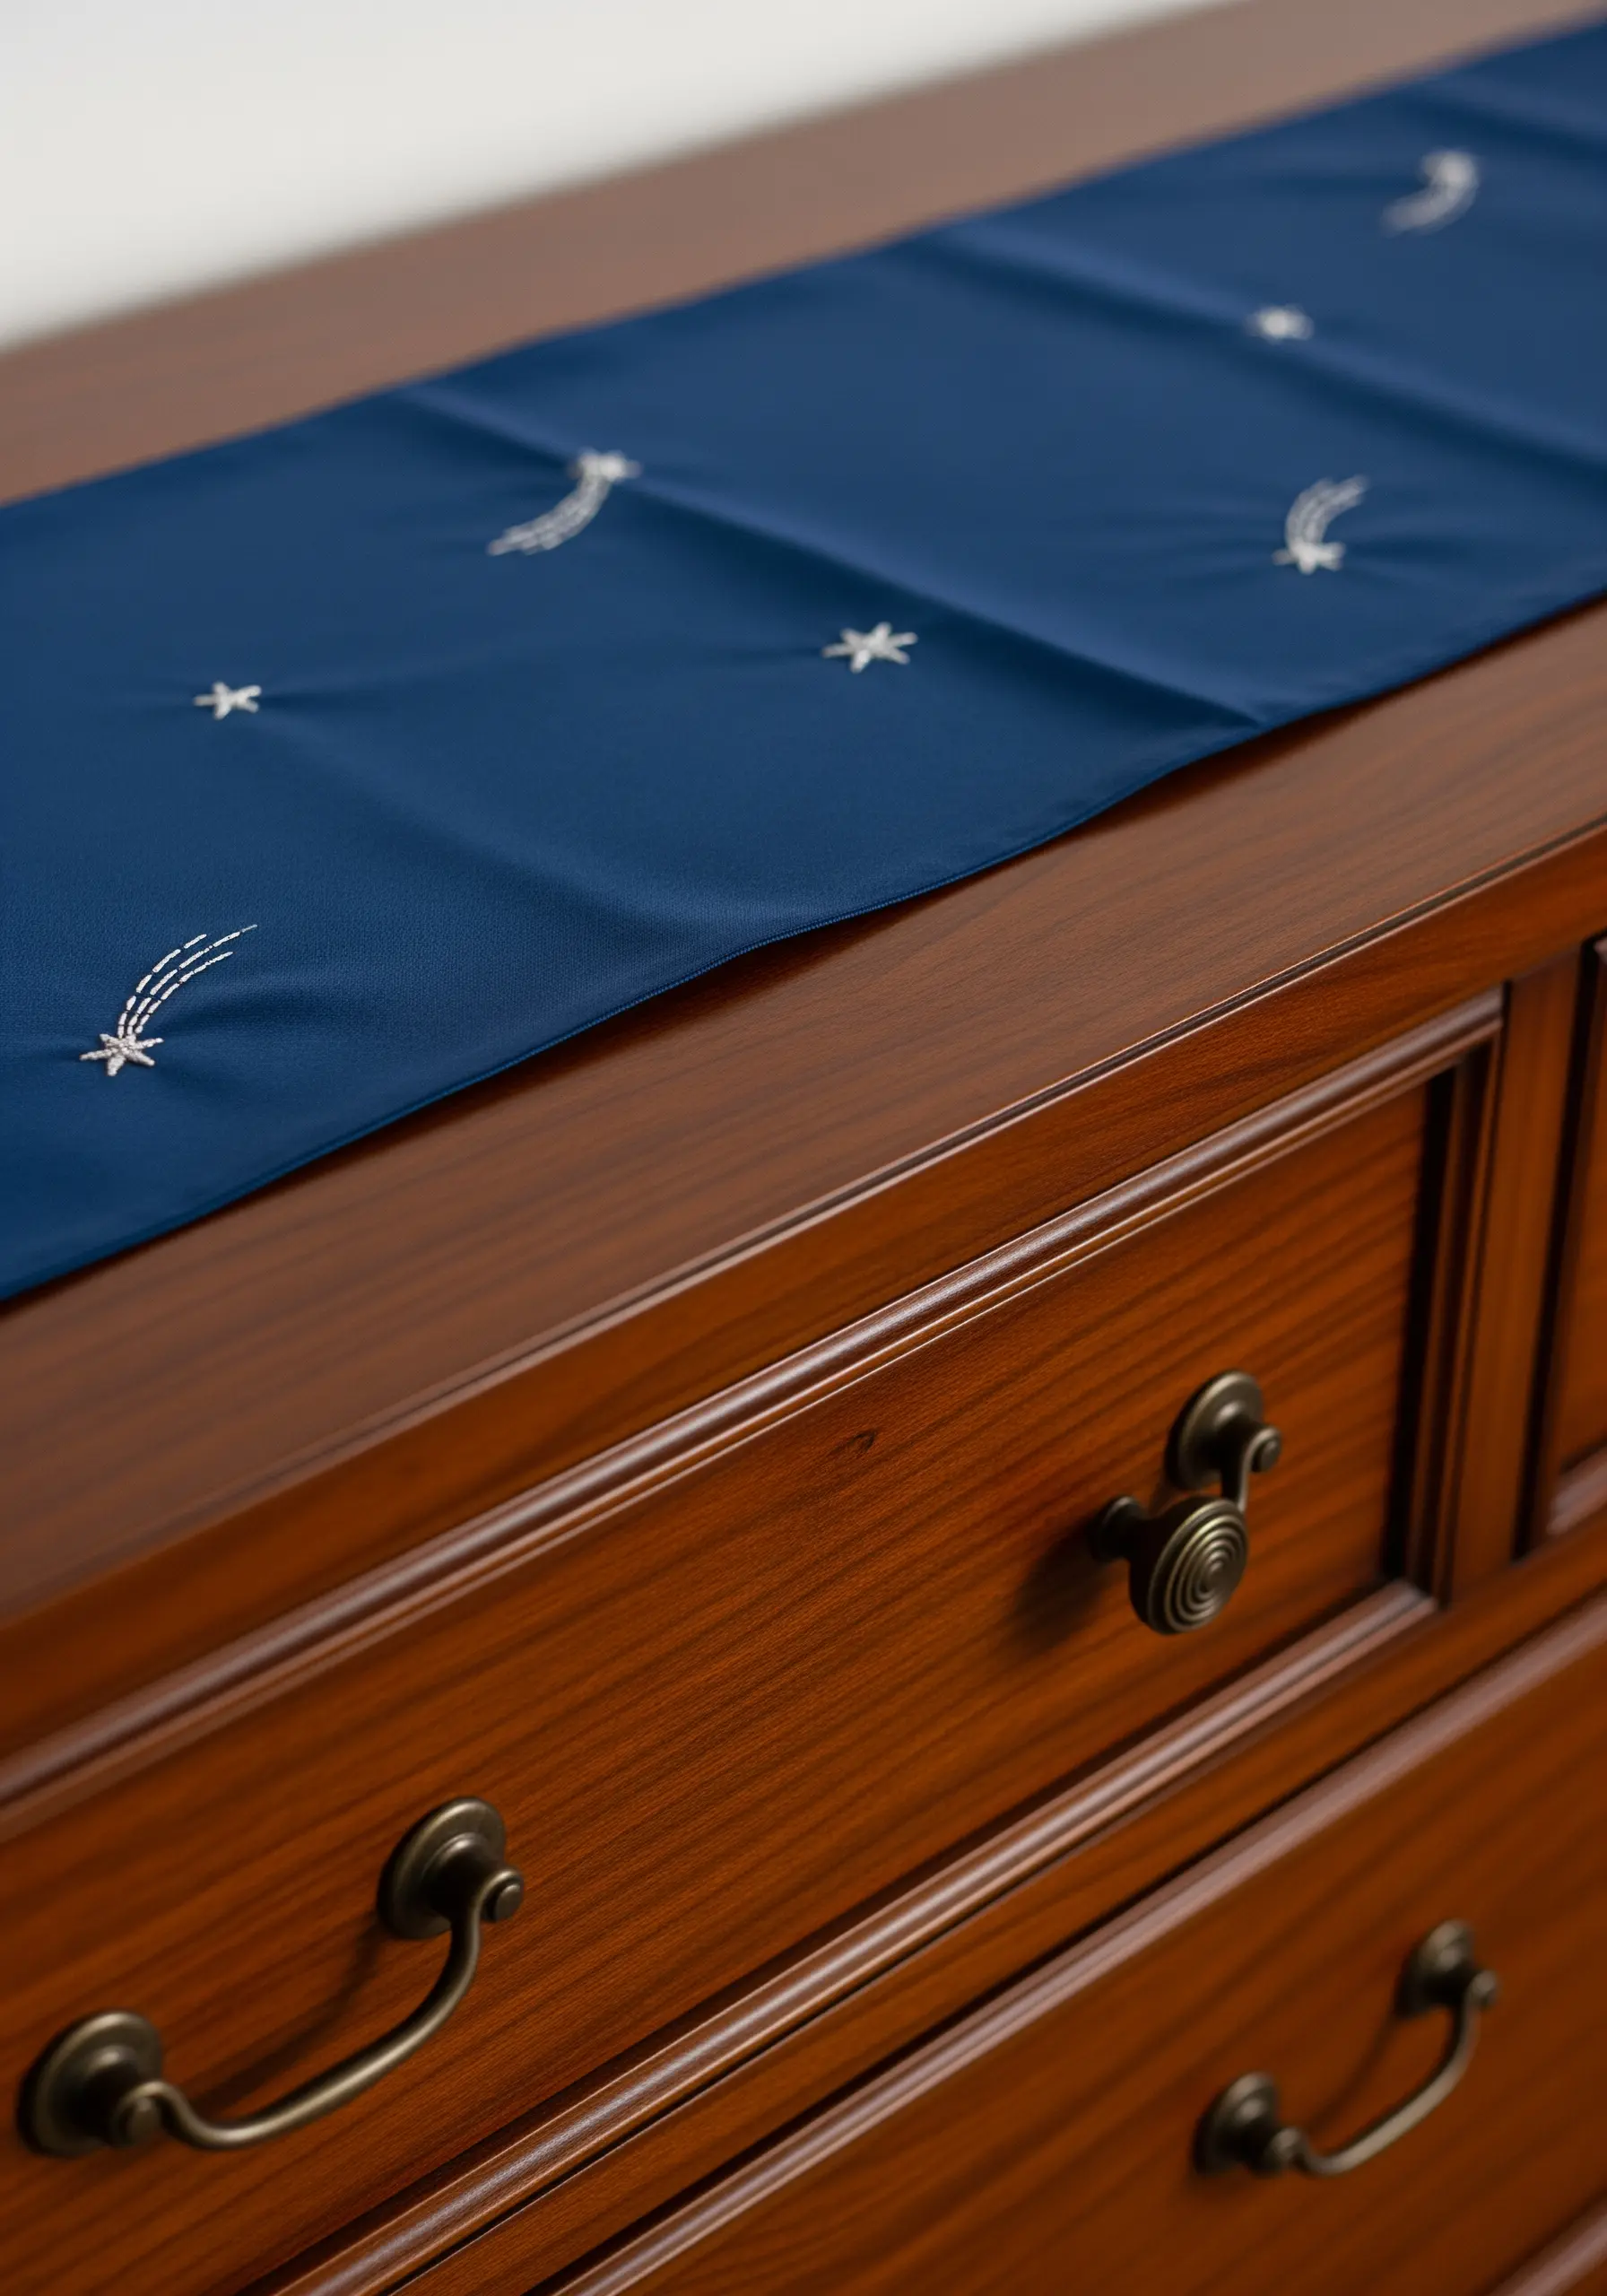
8. The Starfall Curtain: Mastering Gradient Embroidery
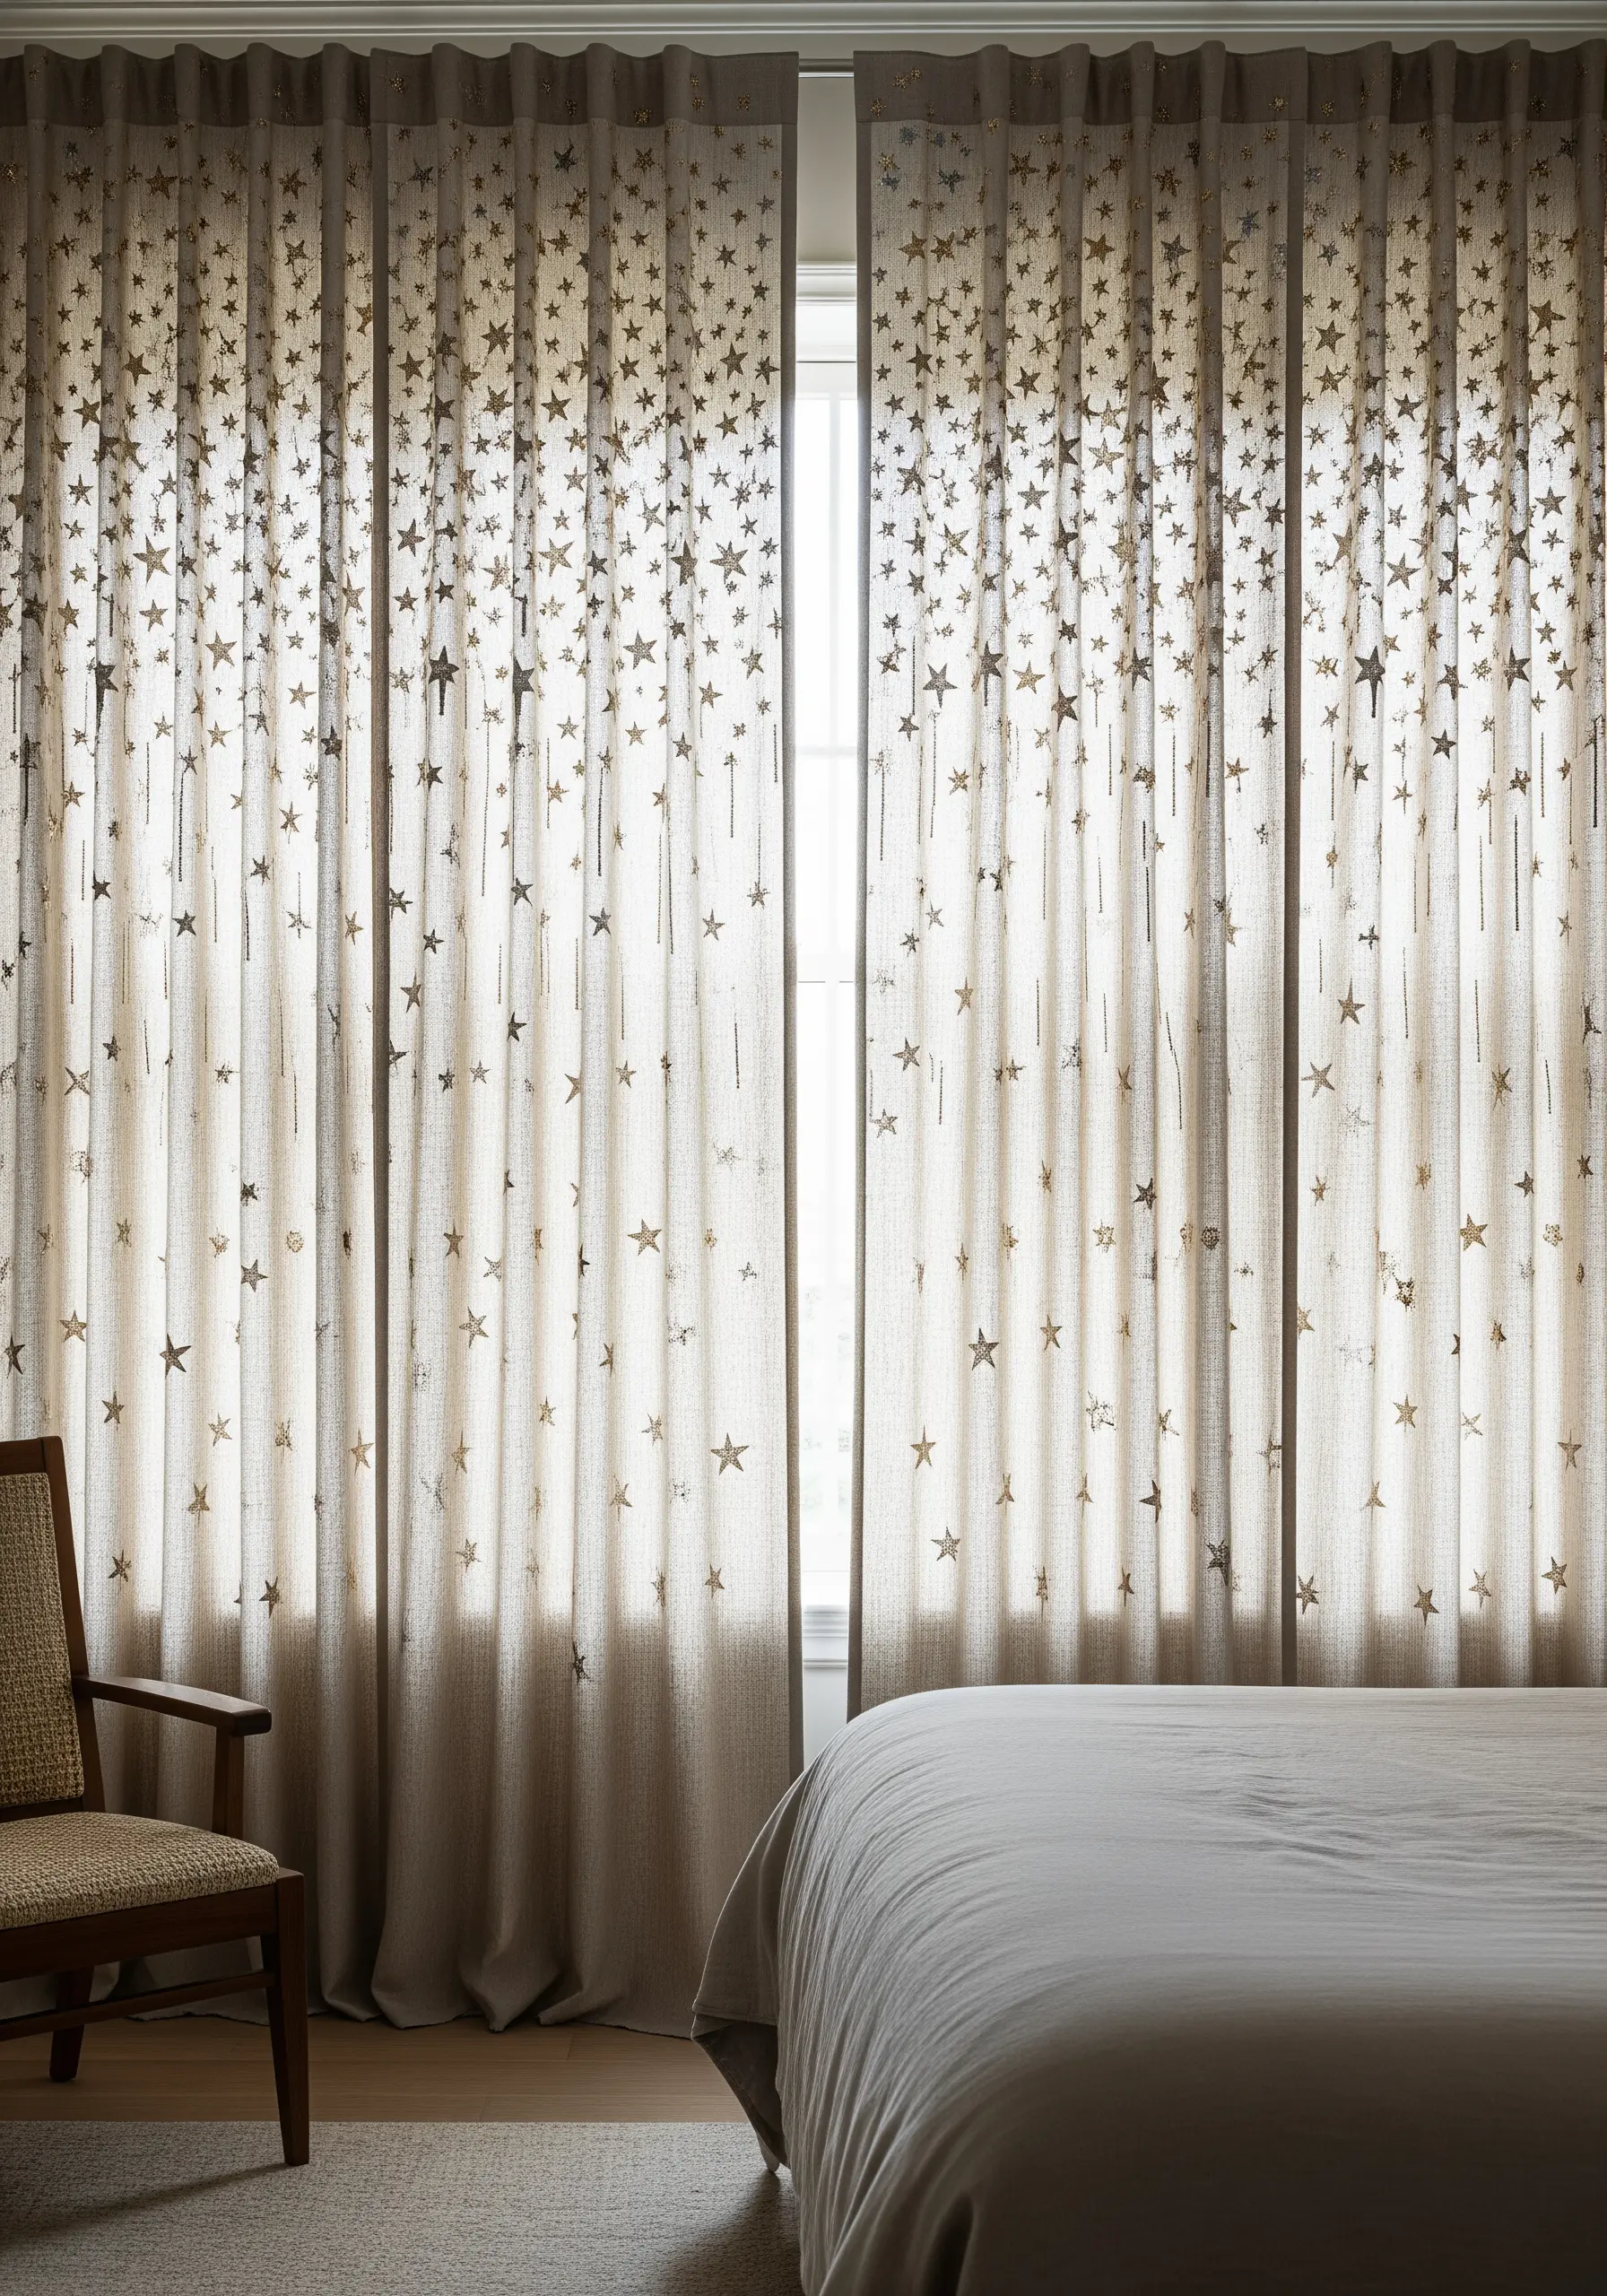
Create a stunning cascading star effect by strategically varying the density of your stitches.
Begin at the top of the curtain with a dense cluster of stars using a bright white or metallic thread.
As you work your way down, gradually increase the space between each star and switch to a slightly less shimmery or darker thread to create a subtle ombre effect.
This is one of the most beautiful gentle gradient embroidery designs, mimicking a natural starfall that draws the eye through the room.
9. Photorealistic Moons with Thread Painting

To achieve this level of realism, you’ll use the long-and-short stitch with a single strand of floss.
Work with a curated palette of grays, whites, and blacks, carefully studying a reference photo to map out the moon’s craters and highlights.
Layer your stitches to blend the shades seamlessly, creating smooth gradients that give the surface a realistic, cratered texture.
This technique allows you to create modern thread portraits that look shockingly realistic, turning your needle into a fine-tipped paintbrush.
10. An Embroidered & Pierced Lampshade for a Starry Glow
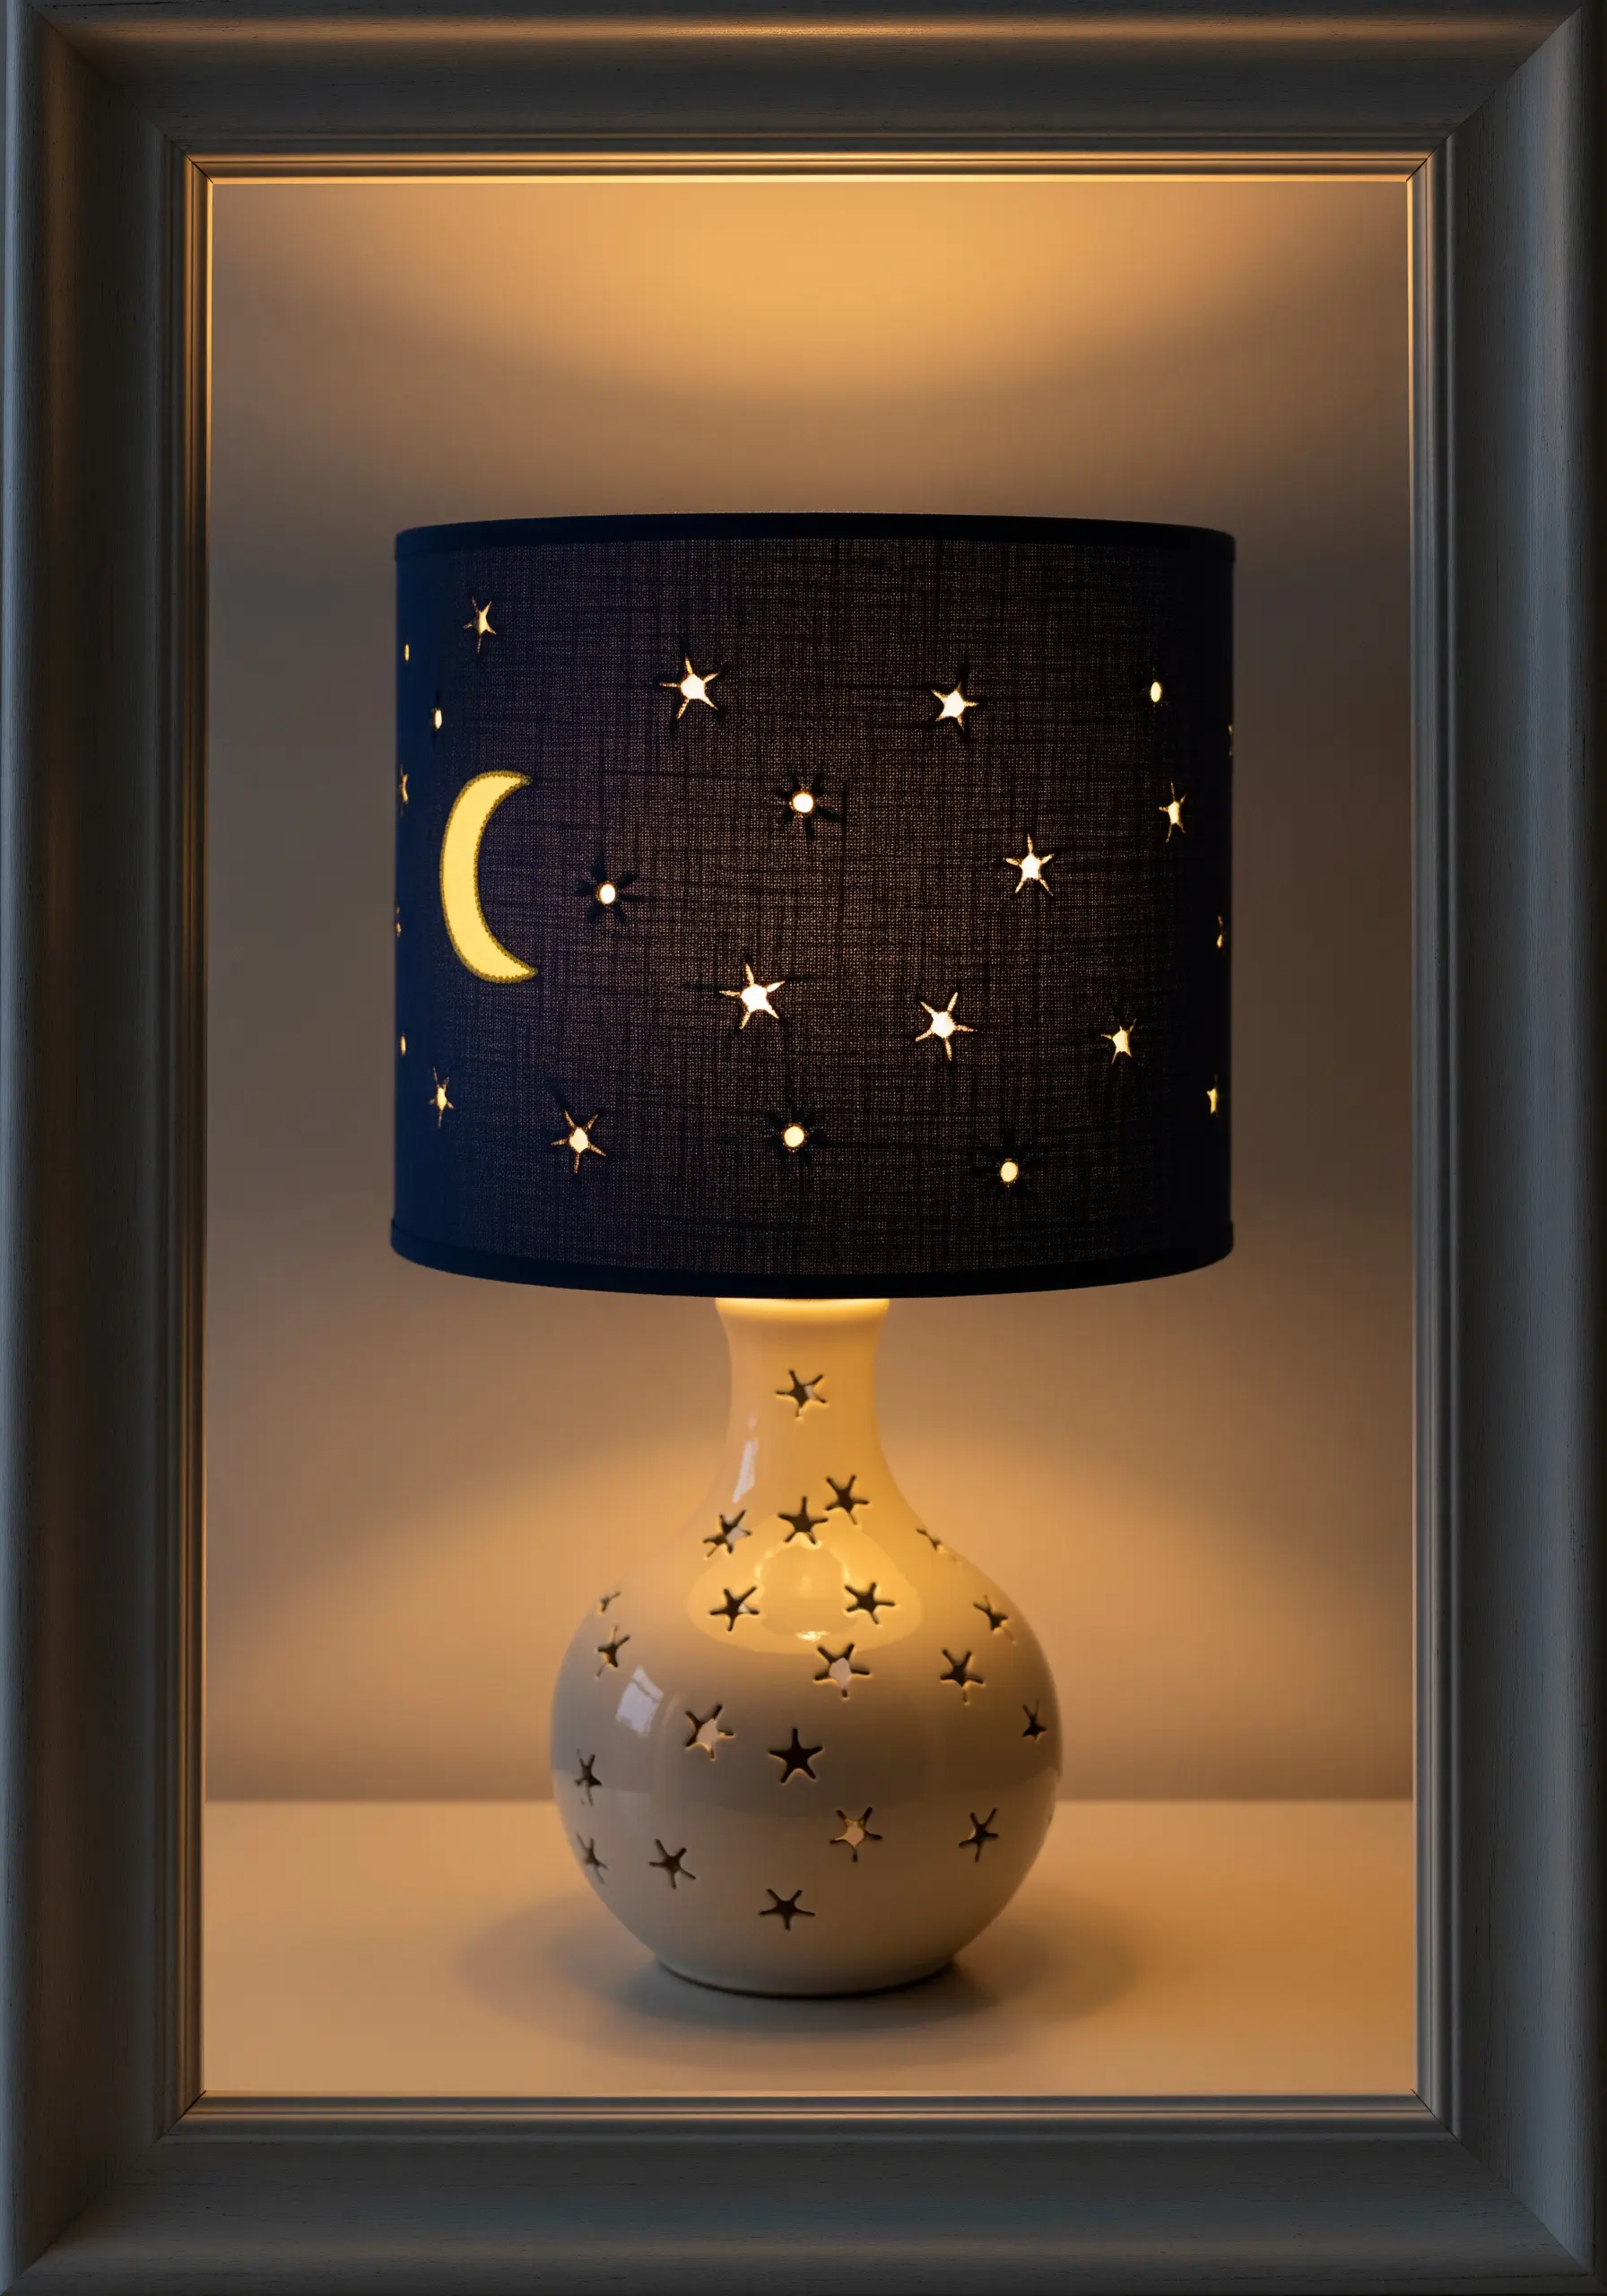
Combine simple embroidery with cutwork to create a lampshade that projects light.
First, stitch your main crescent moon motif onto a sturdy, tightly woven lampshade fabric.
Then, instead of stitching the tiny stars, carefully pierce the fabric with a sharp awl or a large-gauge needle.
When the lamp is turned on, the light will filter through the pinholes, casting a magical, starry glow onto your walls.
11. The Celestial Sampler Quilt
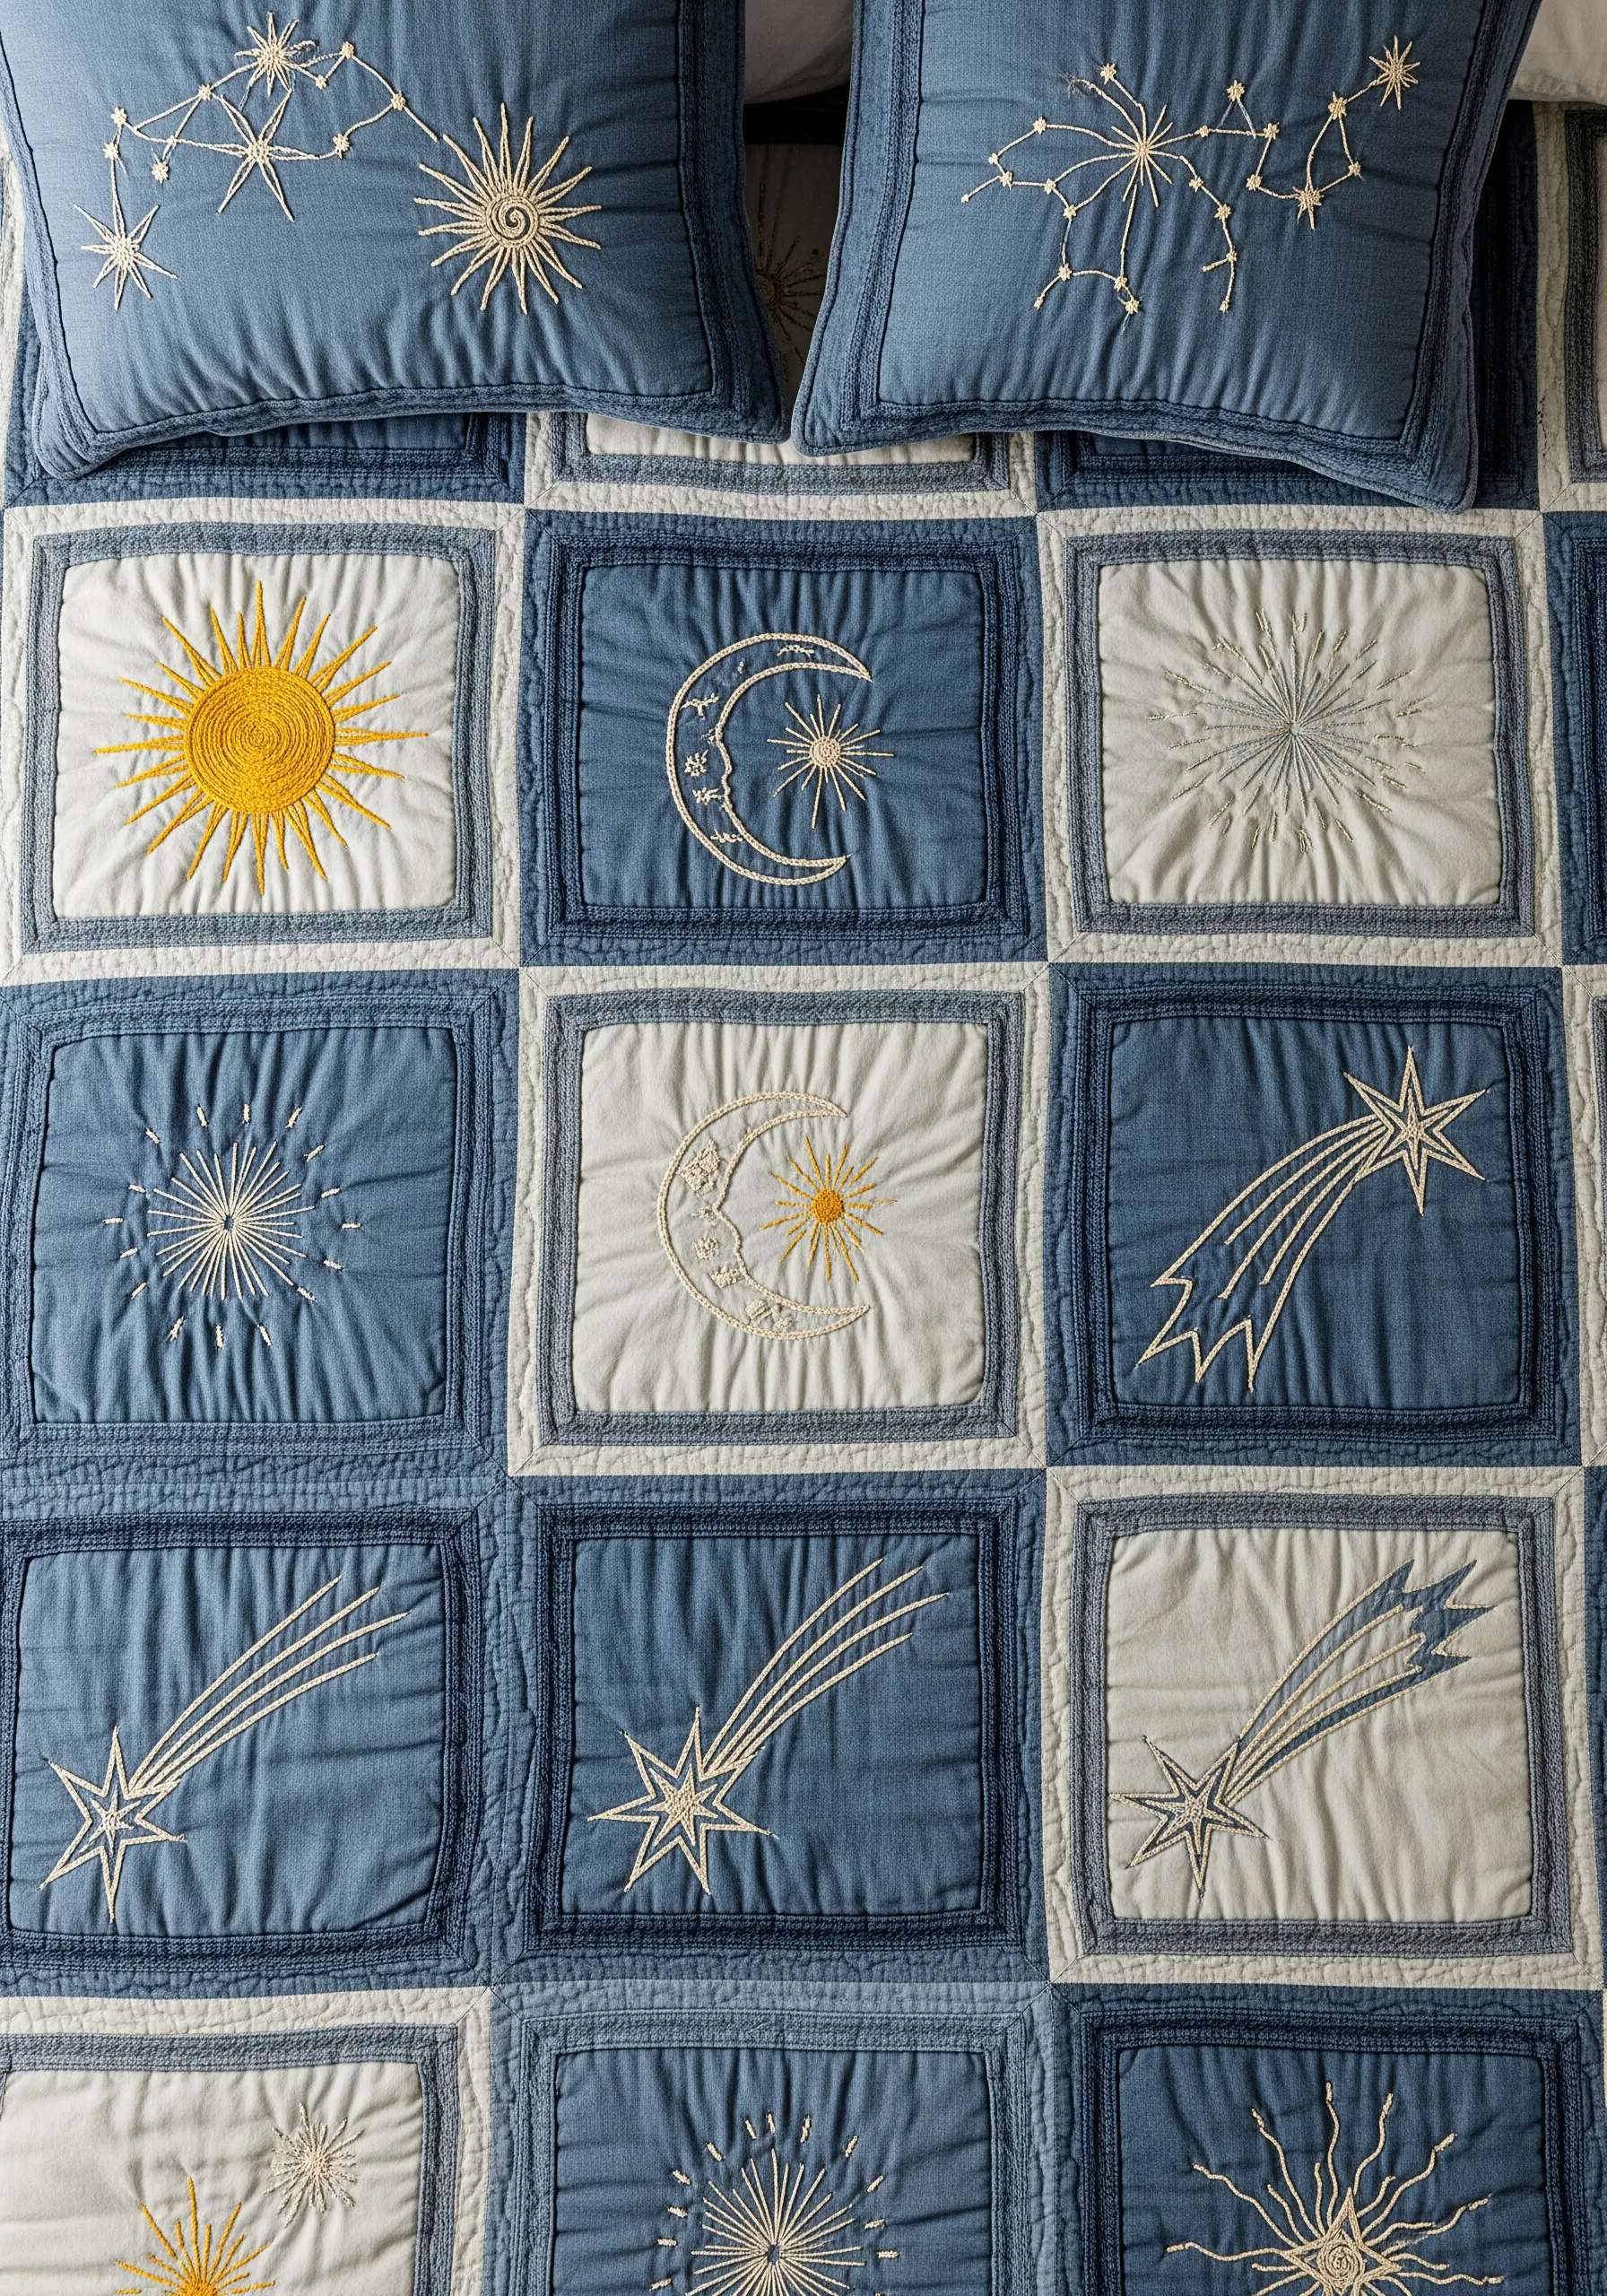
A patchwork quilt offers the perfect canvas to create a sampler of celestial stitches and motifs.
Dedicate each square to a different design: a satin-stitched sun, a backstitched constellation, or a starburst made from radiating straight stitches.
To ensure the final quilt feels cohesive, stick to a limited color palette of blues, creams, and a single accent color like yellow.
Each block becomes one of many cozy embroidery patterns that come together into a stunning heirloom.
12. Embellishing Tufted Furniture with Scattered Stitches

To embroider on a deeply tufted surface, you’ll need a curved upholstery needle to navigate the dense fabric and padding.
Work your star stitches exclusively in the flat areas between the button tufts to ensure they lie flat and remain visible.
Use a high-contrast metallic thread that stands out against the dark velvet, and scatter the starbursts randomly for an organic, night-sky feel.
This is one of the most unexpected ways to use metallic thread to add a touch of bespoke luxury to furniture.
13. Minimalist Motifs for Functional Storage
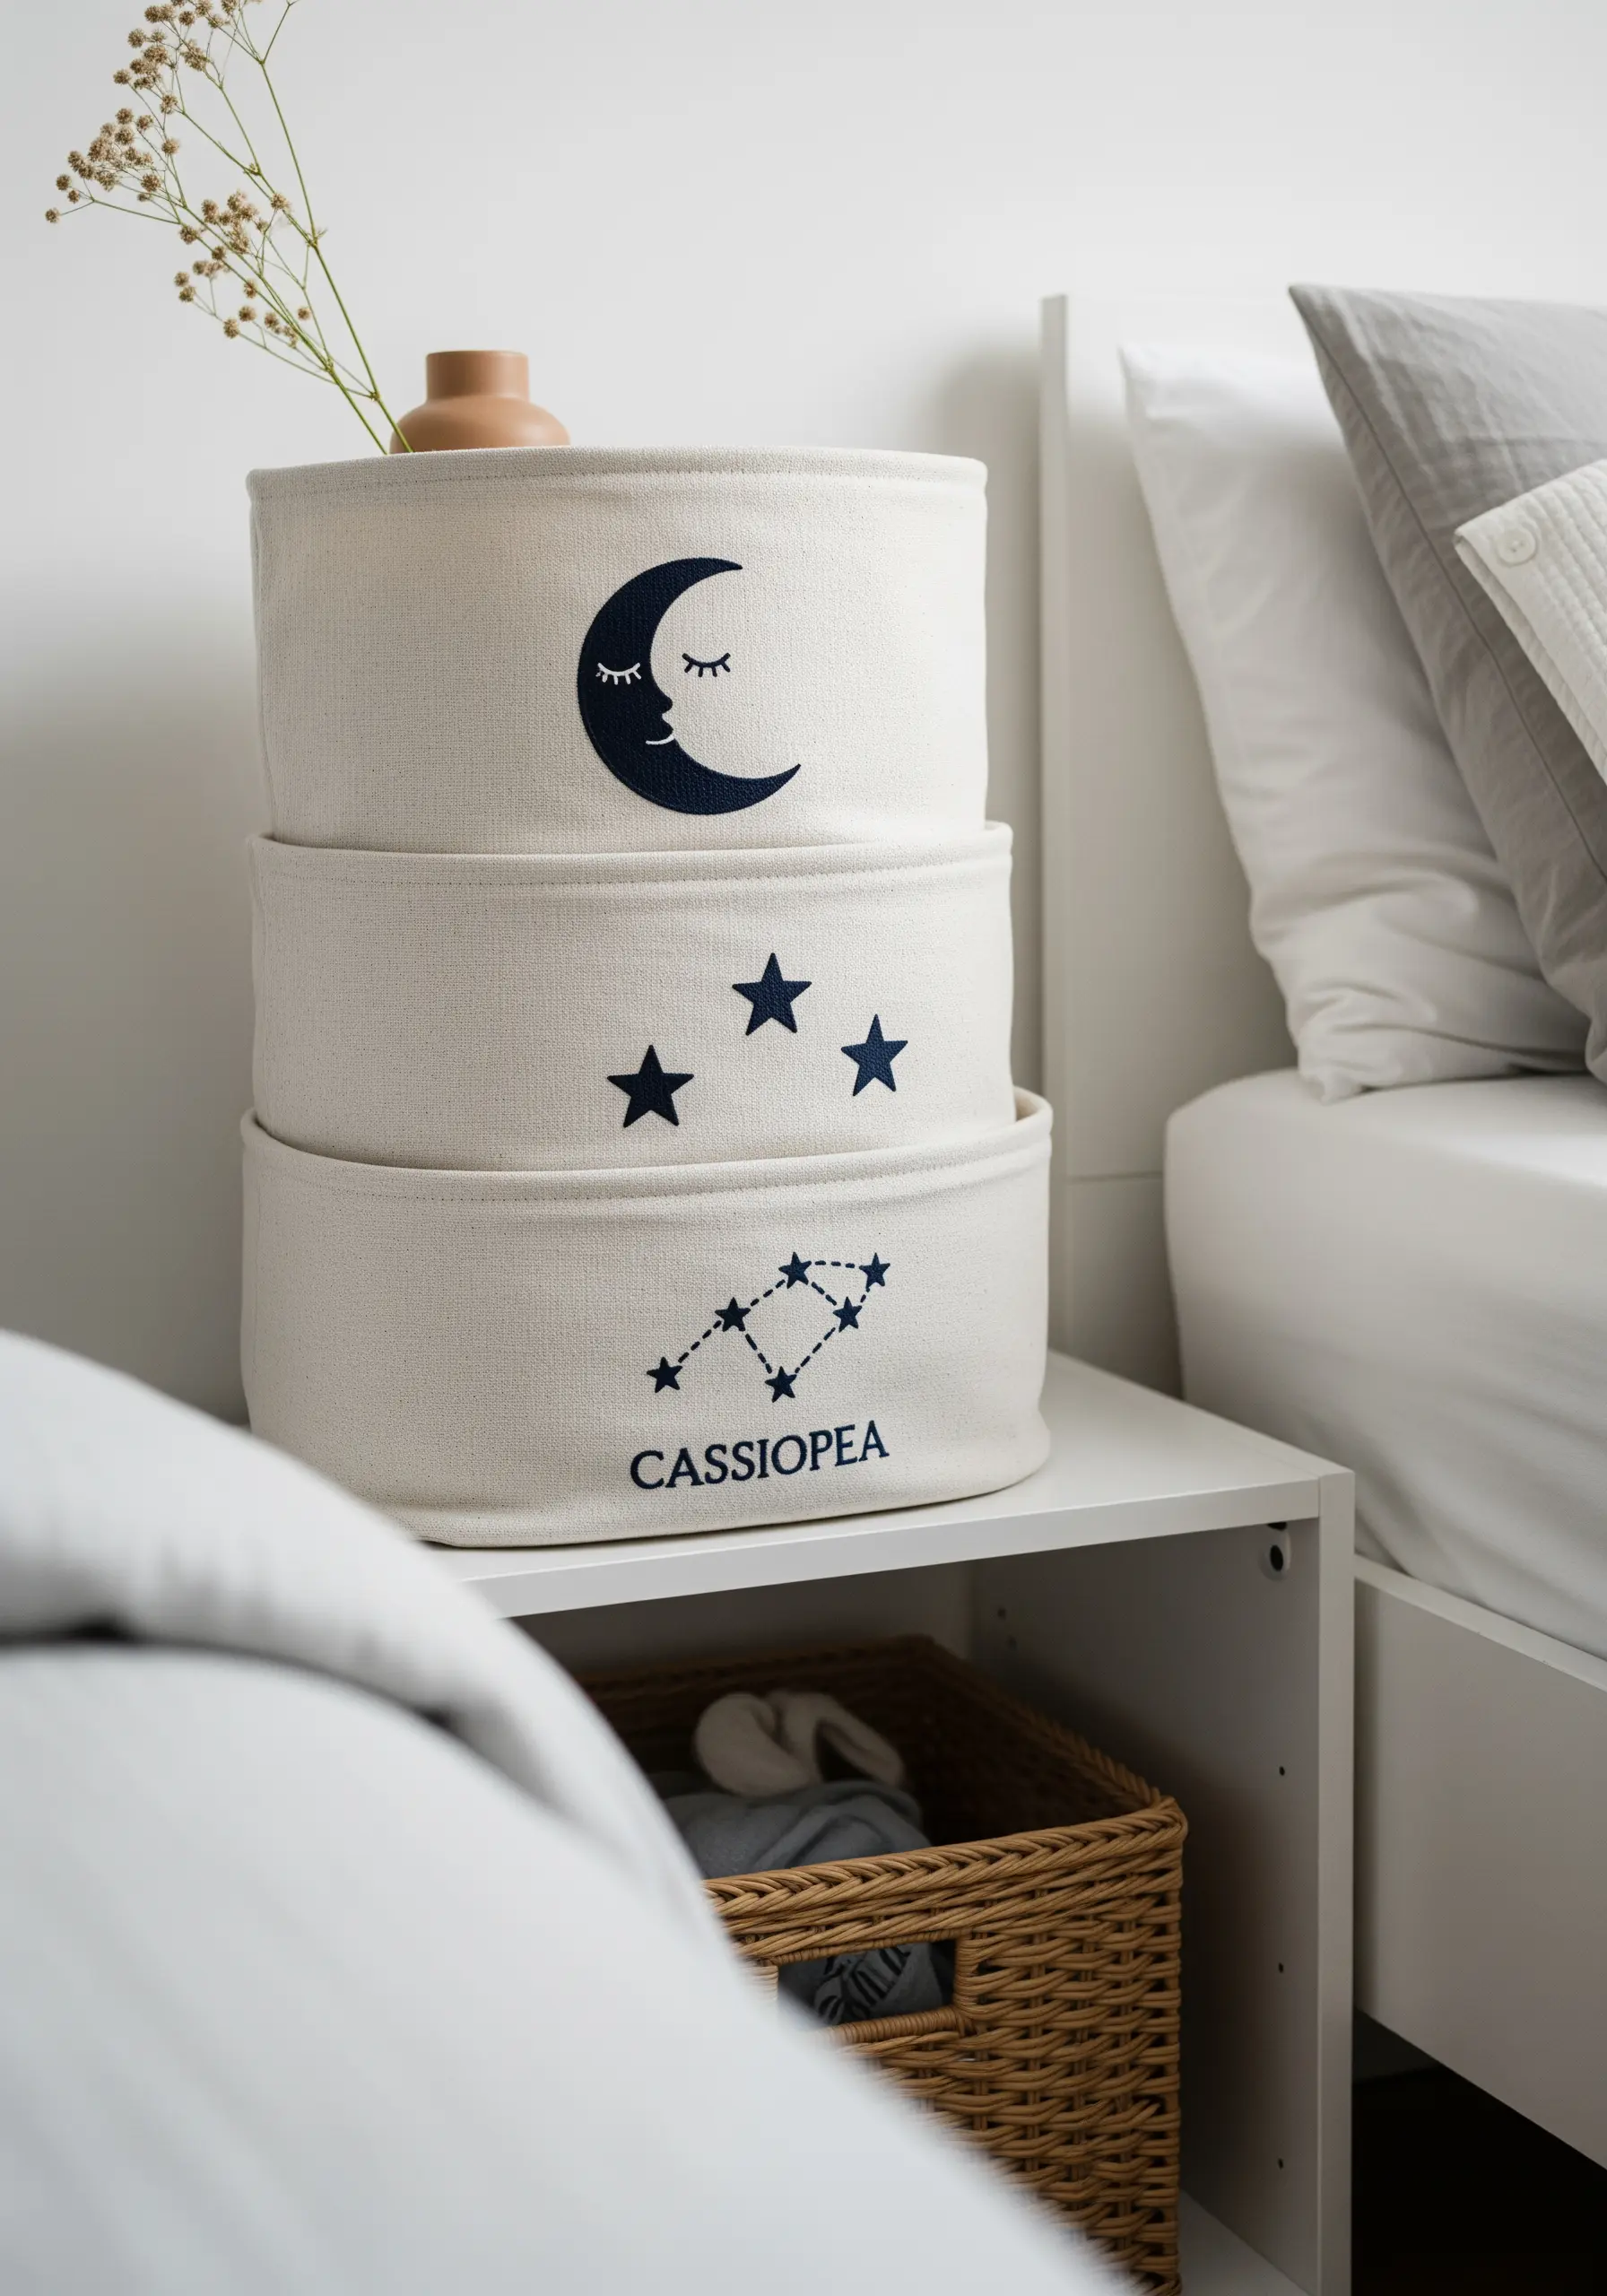
When embroidering on sturdy canvas bins, choose a bold, graphic approach.
Use all six strands of your embroidery floss or a thicker perle cotton to create clean, impactful lines with a simple satin stitch or backstitch.
Pay attention to negative space—a clean, uncluttered composition ensures the design feels modern and serene rather than busy.
These are the kinds of simple embroidery decor ideas that make a big impact with less effort.
14. Crafting a 3D Felt Mobile with Stitch Details

This charming mobile combines basic sewing with decorative embroidery.
Cut your celestial shapes from a quality wool-blend felt. Before stuffing and closing them, add simple details: a few backstitches for sleepy eyes or satin stitches for rosy cheeks.
Use a contrasting thread and a neat blanket stitch to sew the edges of each piece together.
This finishing touch adds a distinctly handcrafted feel that elevates the mobile into a beautiful, personalized keepsake.
15. Combining Elegant Script and Motif in a Single Hoop

For clean, flowing script, use a whipped backstitch, which smooths out the segmented look of a standard backstitch.
To make the moon pop, use a padded satin stitch: create an underlayer of horizontal straight stitches, then cover them with vertical satin stitches. This gives the motif a raised, 3D effect.
This combination of techniques is perfect for creating minimal typography quotes that feel both graphic and soft.
16. Subtle Hand-Stitching for Everyday Organizers

Breathe new life into a store-bought fabric organizer by adding subtle, hand-stitched details.
Using a single strand of contrasting floss, scatter a few simple star stitches or French knots among the printed design.
You can also choose one or two printed constellations and trace them with a fine backstitch to create subtle focal points.
This quick project makes a mass-produced item feel thoughtful and custom-made in under an hour.
17. Capturing Motion with Tapered Straight Stitches
To create the elegant tail of a shooting star, you don’t need a complex stitch.
Use a series of simple straight stitches that gradually decrease in length, starting with the longest stitch nearest the star.
For the star itself, use a brighter or metallic thread and a dense satin stitch or a star stitch to make it the clear focal point.
This technique is a masterful yet simple way to convey movement and direction in your embroidery.
18. A Padded Appliqué Garland for Textured Decor

This tactile garland is made from small, stuffed appliqué pieces.
For each moon phase, cut two identical shapes from felt. On the top piece, create texture with dense French knots or seed stitches.
Place a small bit of batting between the two pieces and neatly sew them together with a blanket stitch around the edge.
Stringing these plush ornaments together results in beautiful handmade art pieces that add instant personality and soft, sculptural shadows to your wall.


