

Have you ever felt that your stitches, while neat, are missing a certain life or movement? You follow the patterns, choose beautiful colors, yet the finished piece doesn’t quite capture the effortless grace you see in nature. This is a common creative hurdle, but it’s one you can overcome by rethinking the role of your thread.
Instead of seeing thread as just a way to fill a shape, I want you to start thinking of it as a sculptural line. Whether you’re pulling it taut in string art or laying it gently on fabric, every single strand has the power to create tension, texture, and flow. The patterns of leaves and branches are the perfect subjects for this exploration because their beauty lies in their organic structure—a structure you can replicate with thread.
These ideas are designed to shift your perspective. You’ll learn how to use color not just for decoration, but to create depth; how to use negative space to define a shape; and how to combine textures to make your work feel truly alive. It’s time to translate the wild, imperfect elegance of the natural world into stitches that are confident, intentional, and uniquely yours.
1. Weeping Willow String Art with Gradated Color

Create a sense of graceful movement by using two or three closely related shades of thread for the draped branches.
Alternate the colors as you string them from top to bottom, allowing them to blend visually and mimic the way light filters through leaves.
The key to the weeping effect is maintaining slightly looser tension in the longer threads, which gives them a natural, subtle curve.
This technique elevates a simple string art concept into a dynamic piece with authentic botanical depth.
2. Layer Foliage for a Lush, Textured Canopy
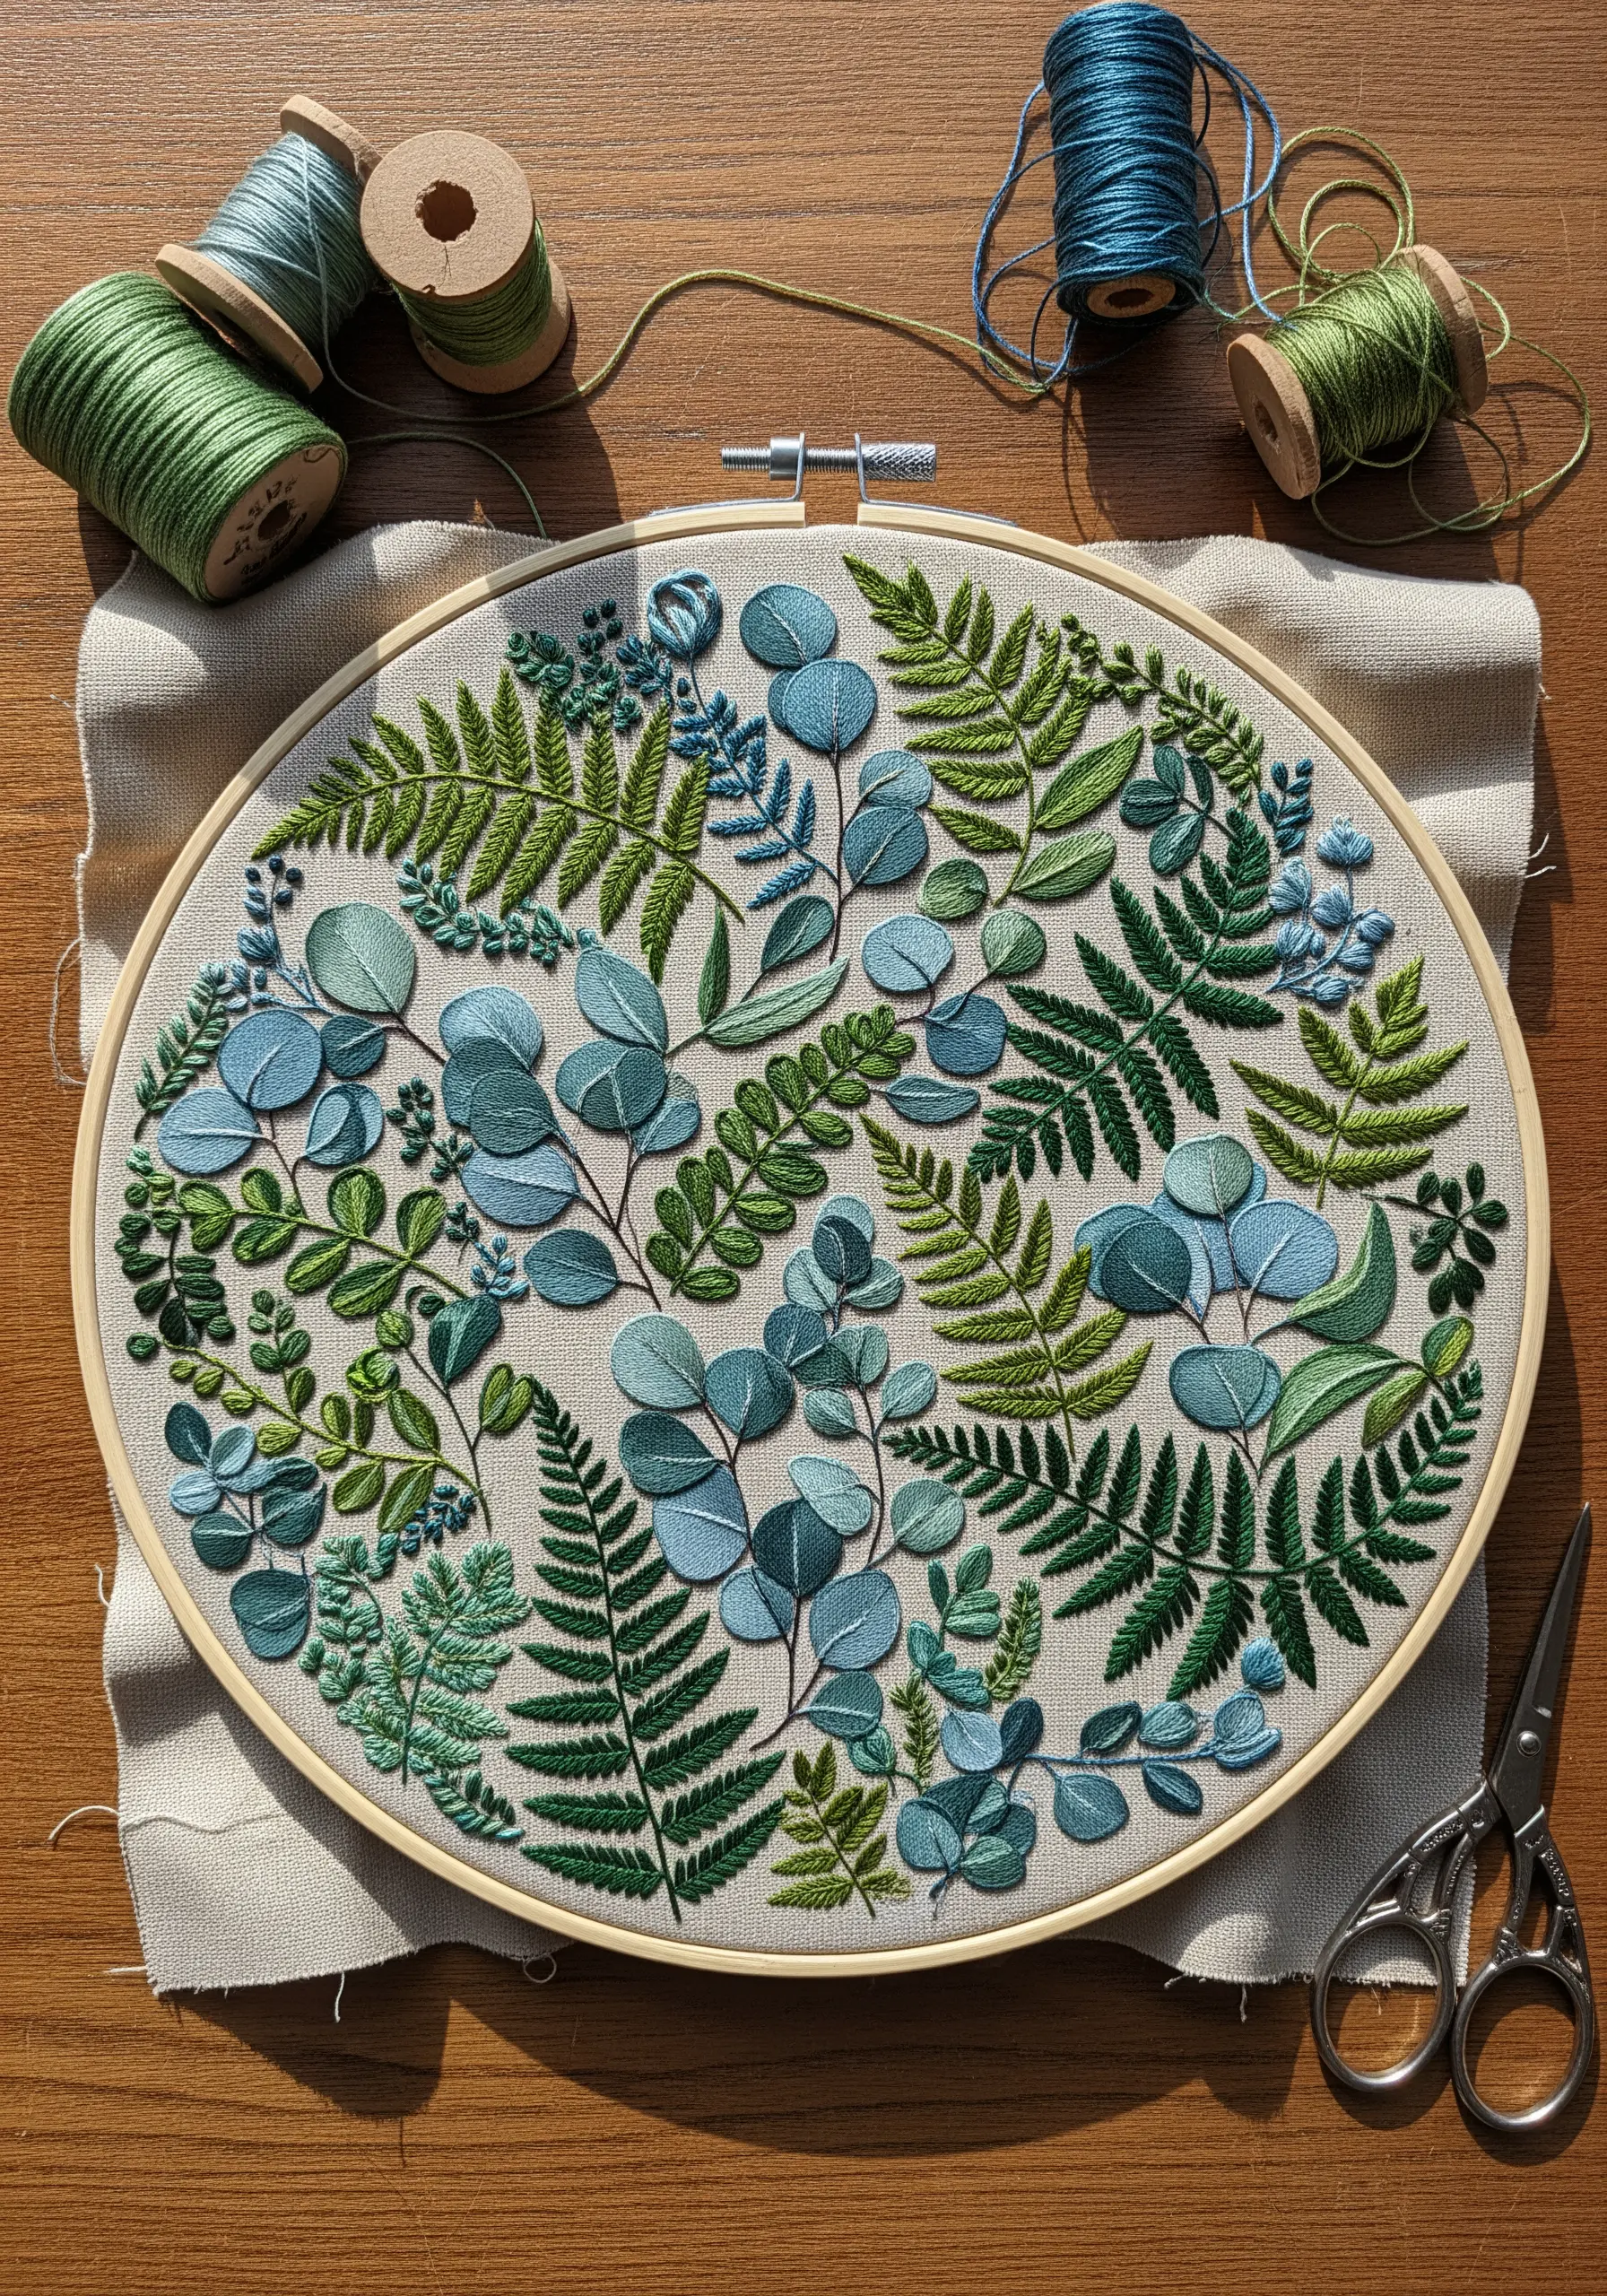
To achieve this dense, garden-like feel, you need to think in layers.
Start by stitching the rearmost elements, like the broad fern fronds, using a flat fishbone stitch or fly stitch for texture.
Next, add the middle layer of eucalyptus leaves using a padded satin stitch to give them dimension and lift them physically off the fabric.
Finish with the smallest sprigs and buds using French knots and single detached chain stitches, tucking them into any remaining gaps.
This layering technique creates a truly immersive hoop that draws the eye inward, making your wildflower thread palettes look like a miniature ecosystem.
3. Scale Up a Single Leaf with Chunky Yarn
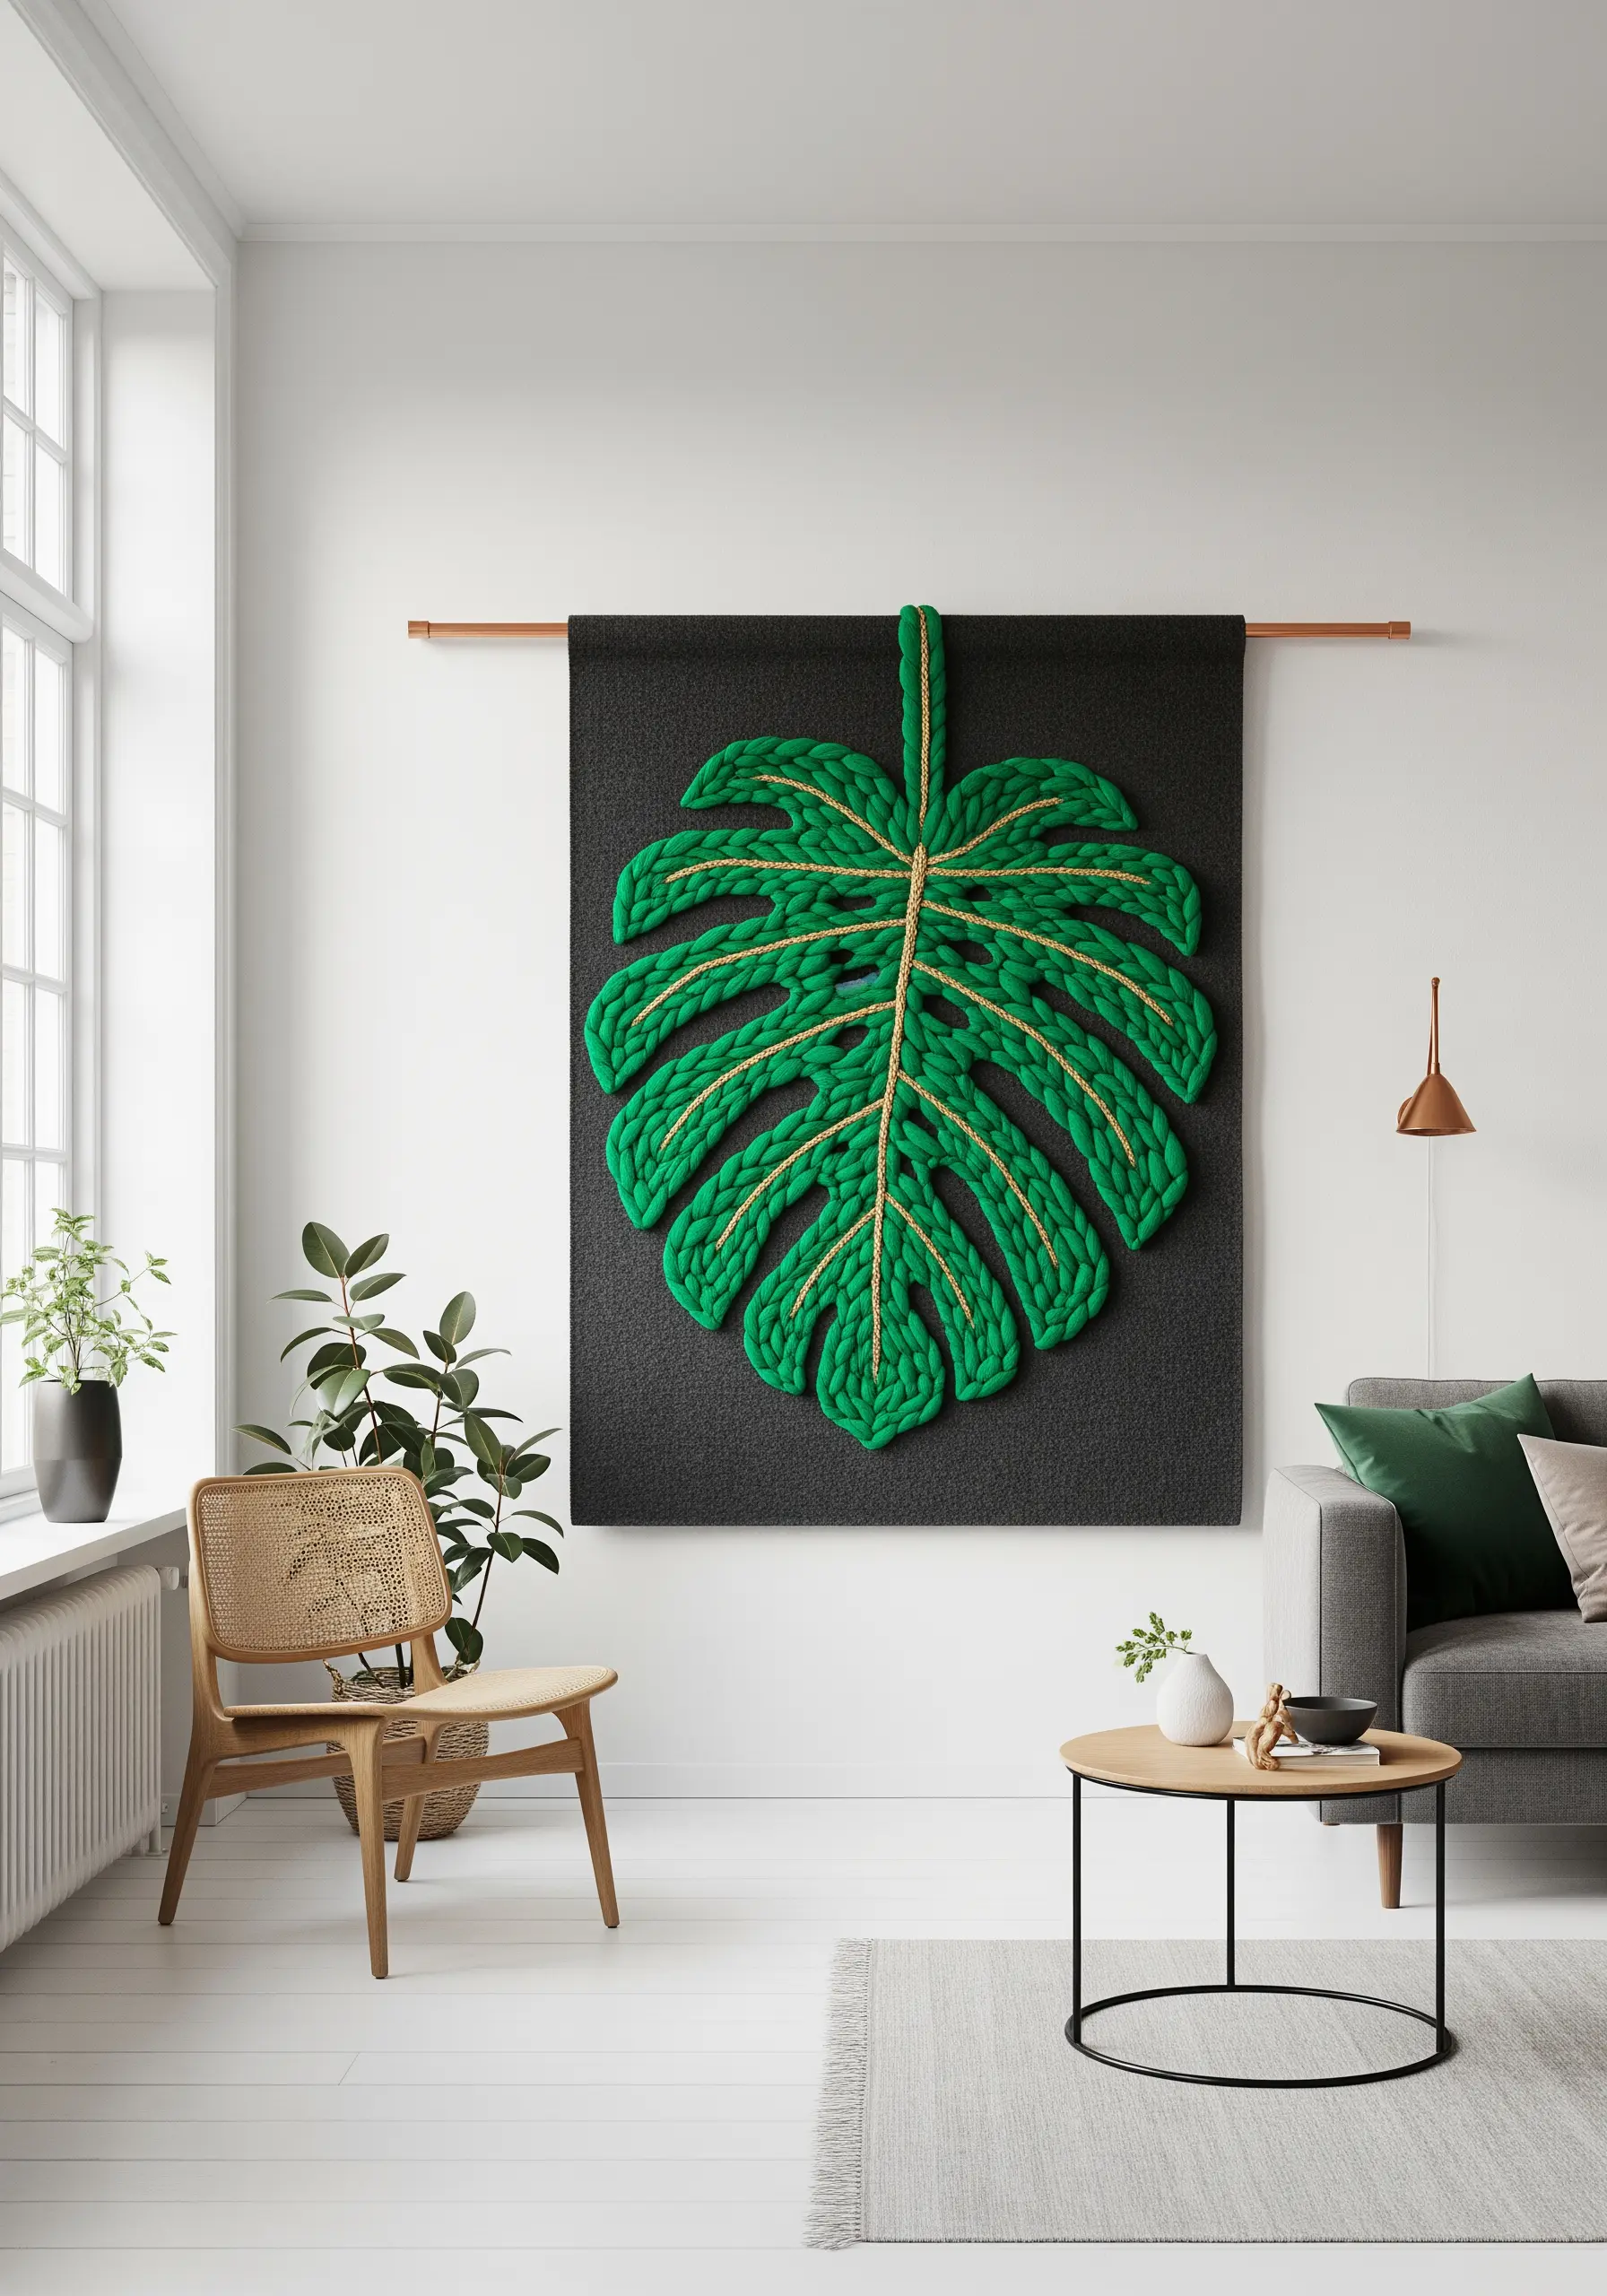
Transform a simple leaf into a dramatic statement piece by swapping fine thread for thick, textural yarn.
To create this look, outline your Monstera shape on a felt or heavy canvas backing and couch thick yarn along the outline and veins.
Couching—tacking down a thicker fiber with a thinner thread—gives you complete control over placement without forcing a bulky yarn through the fabric.
This method is perfect for creating modern embroidered tapestry designs that are bold, fast to complete, and have an undeniable sculptural presence.
4. Tell a Seasonal Story with a Triptych
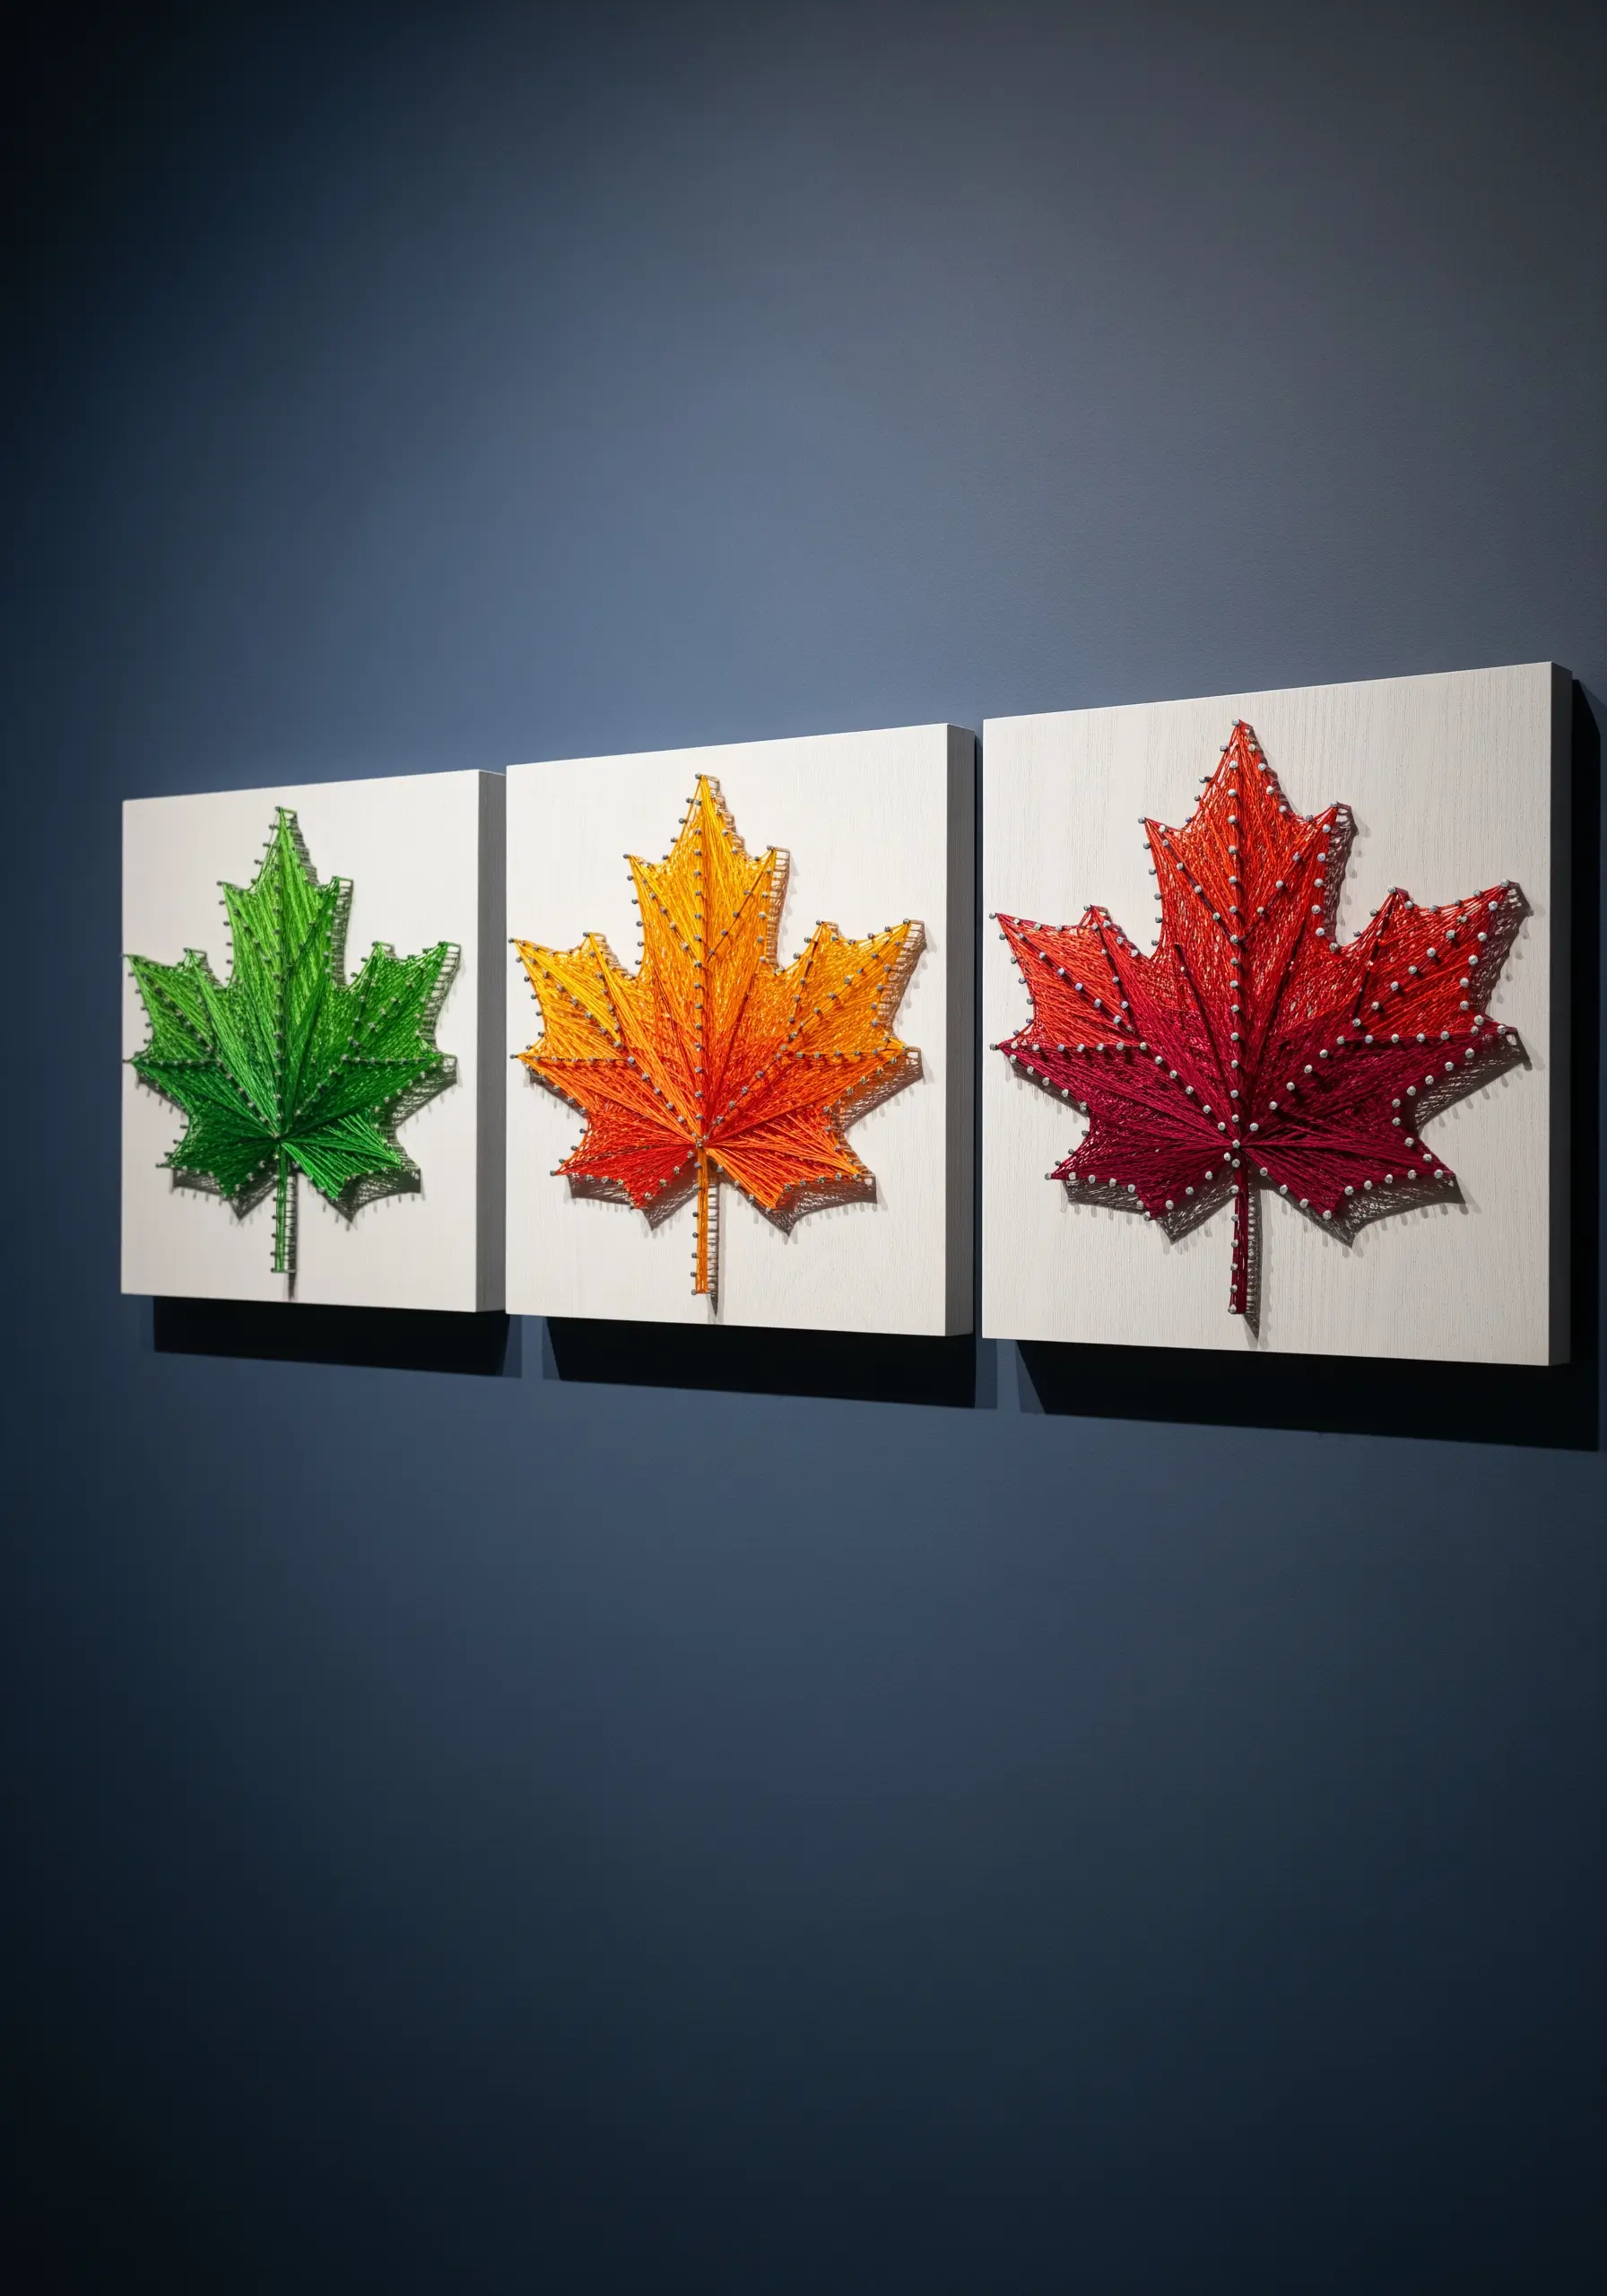
Instead of one large piece, consider breaking your design into a series of three to show progression or variation.
Embroider the exact same maple leaf pattern on three separate canvases, but dedicate each one to a different seasonal palette: vibrant green for spring, warm orange for autumn, and deep crimson for late fall.
This approach turns a simple motif into a narrative, exploring the beauty of transformation.
Displaying them together creates a cohesive and sophisticated framed embroidery wall art installation with minimal extra effort.
5. Master the Elegant Olive Branch Wreath
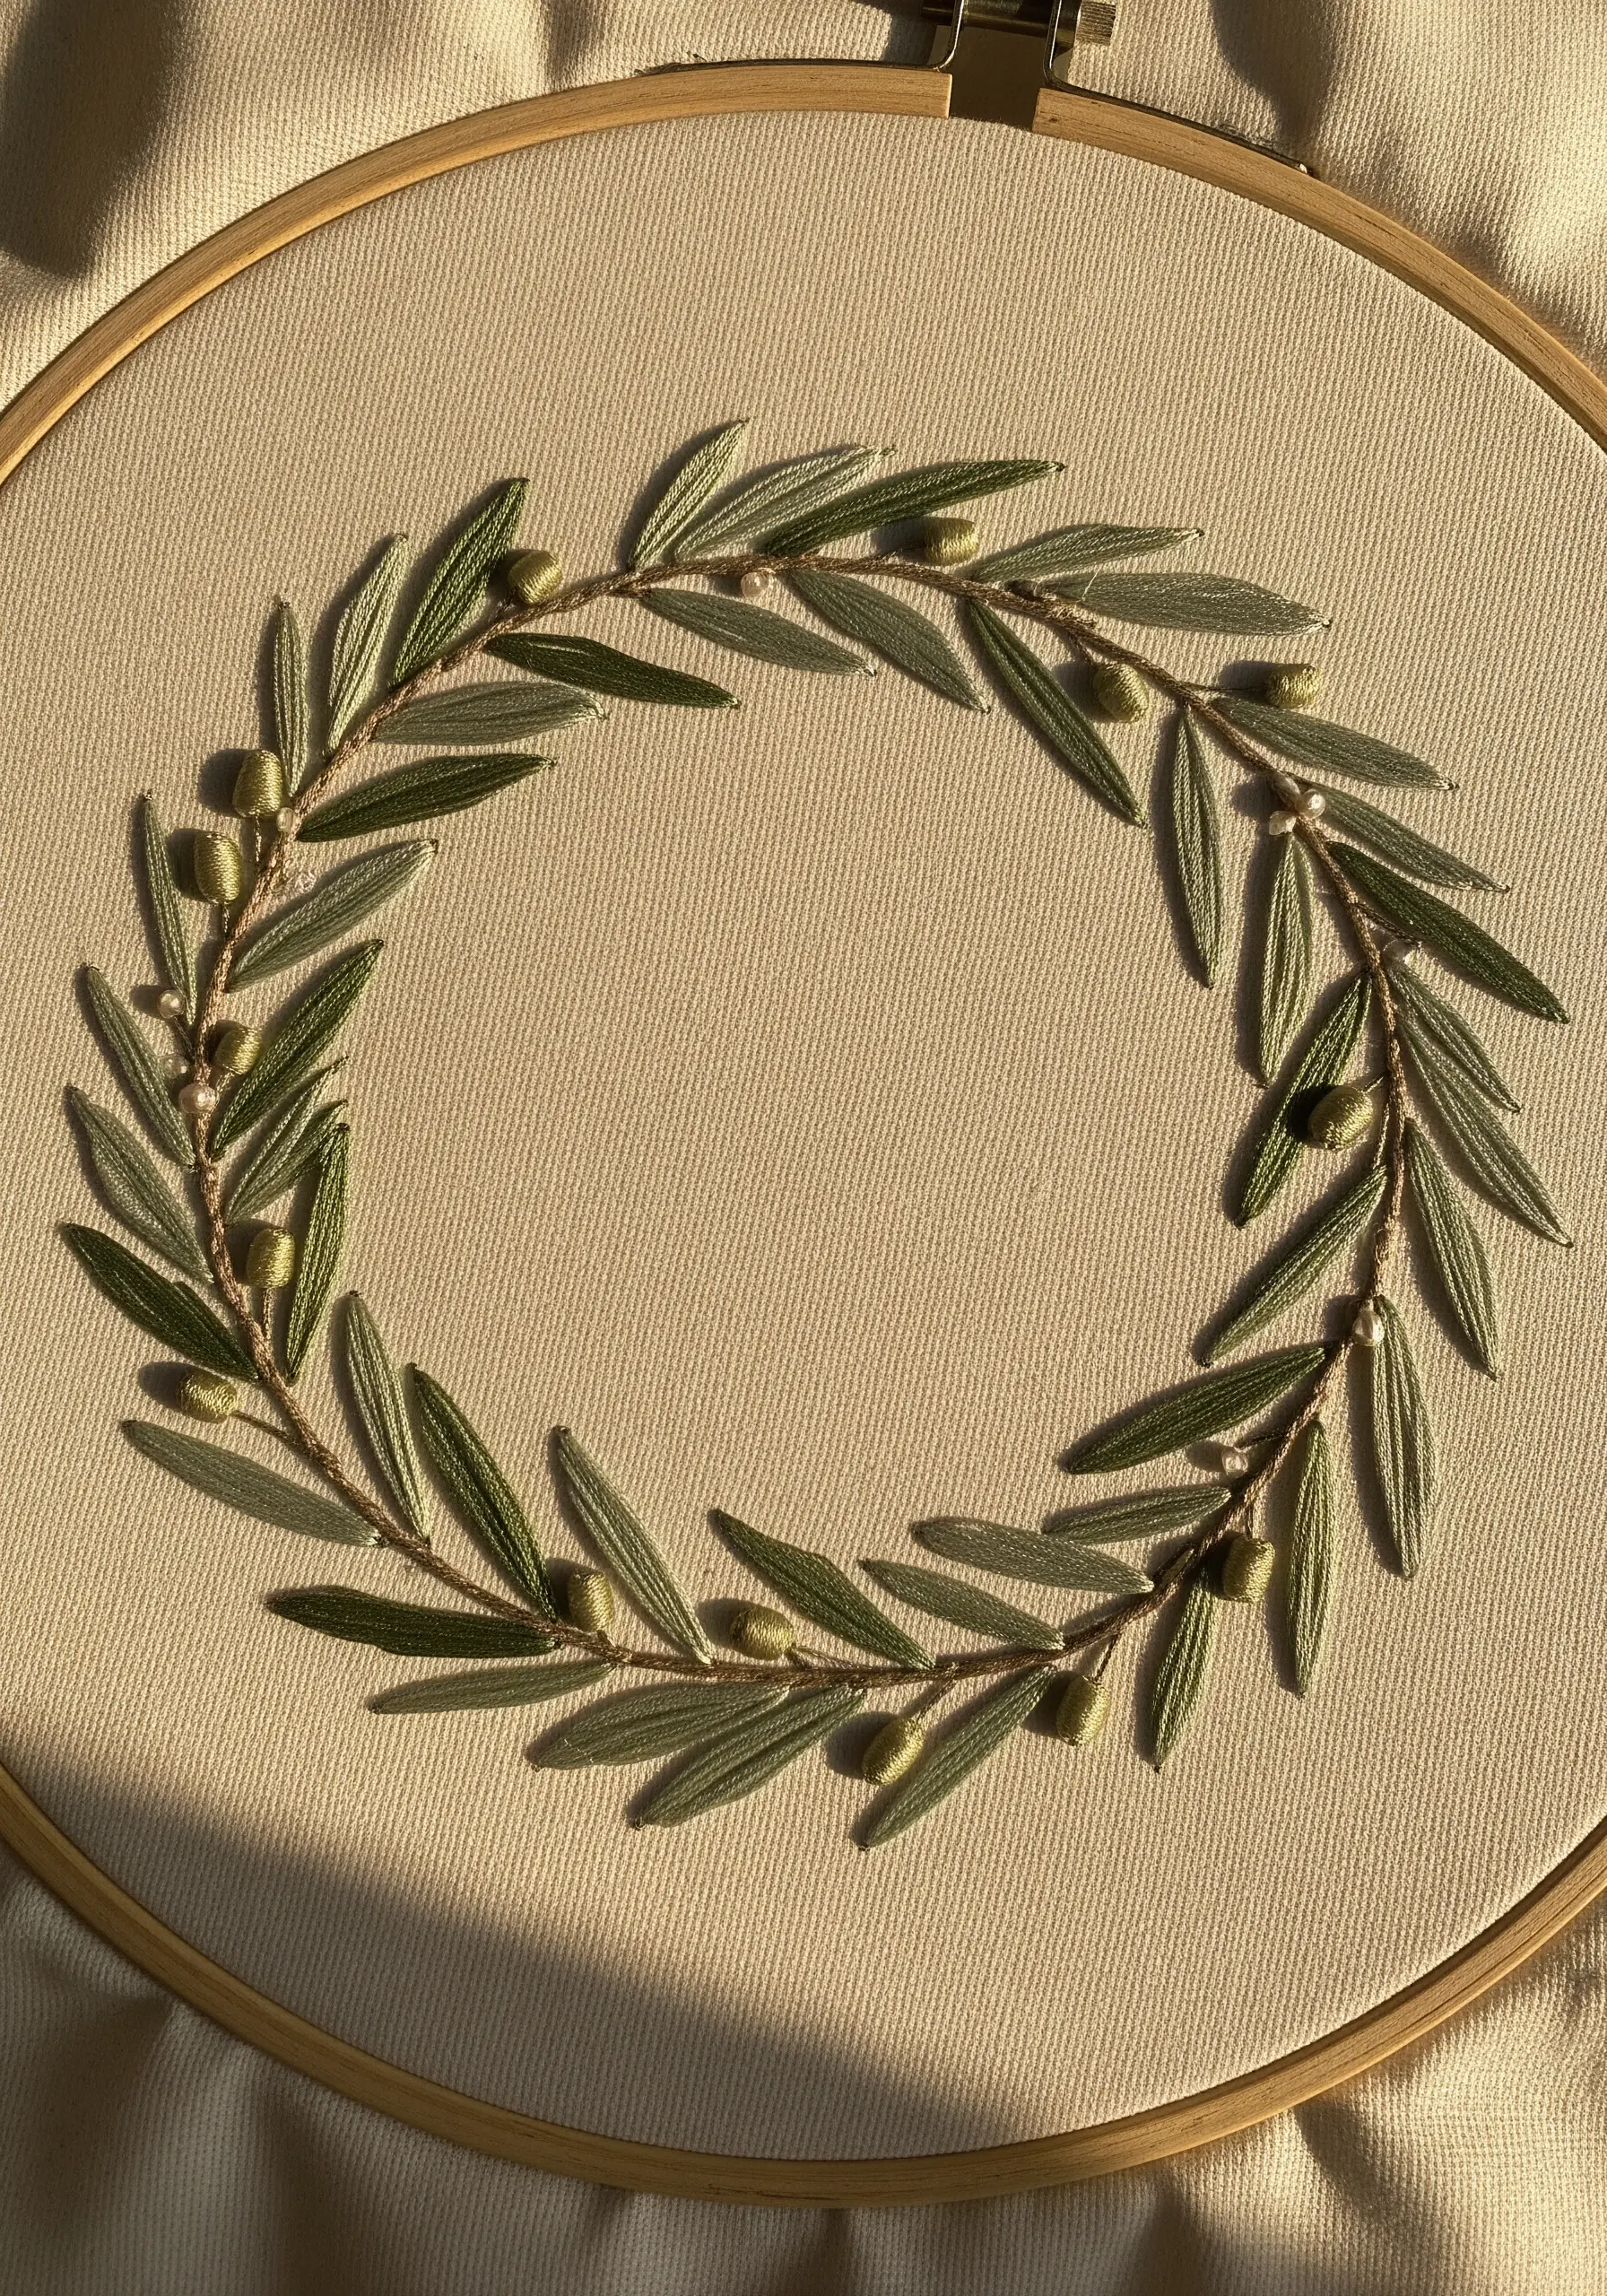
The key to a graceful olive leaf is a perfectly executed fishbone stitch, angled to create a distinct central vein.
Use a single strand of floss for the most delicate and refined appearance, varying the length and angle of each leaf to give the wreath an organic, hand-drawn feel.
For the olives, place plump French knots in clusters of two or three, using a slightly darker, contrasting thread to make them pop.
This combination of sharp leaves and soft, round fruit creates a beautiful textural balance in your hand-stitched flower wreath hoop ideas.
6. Use Negative Space to Define Your Design
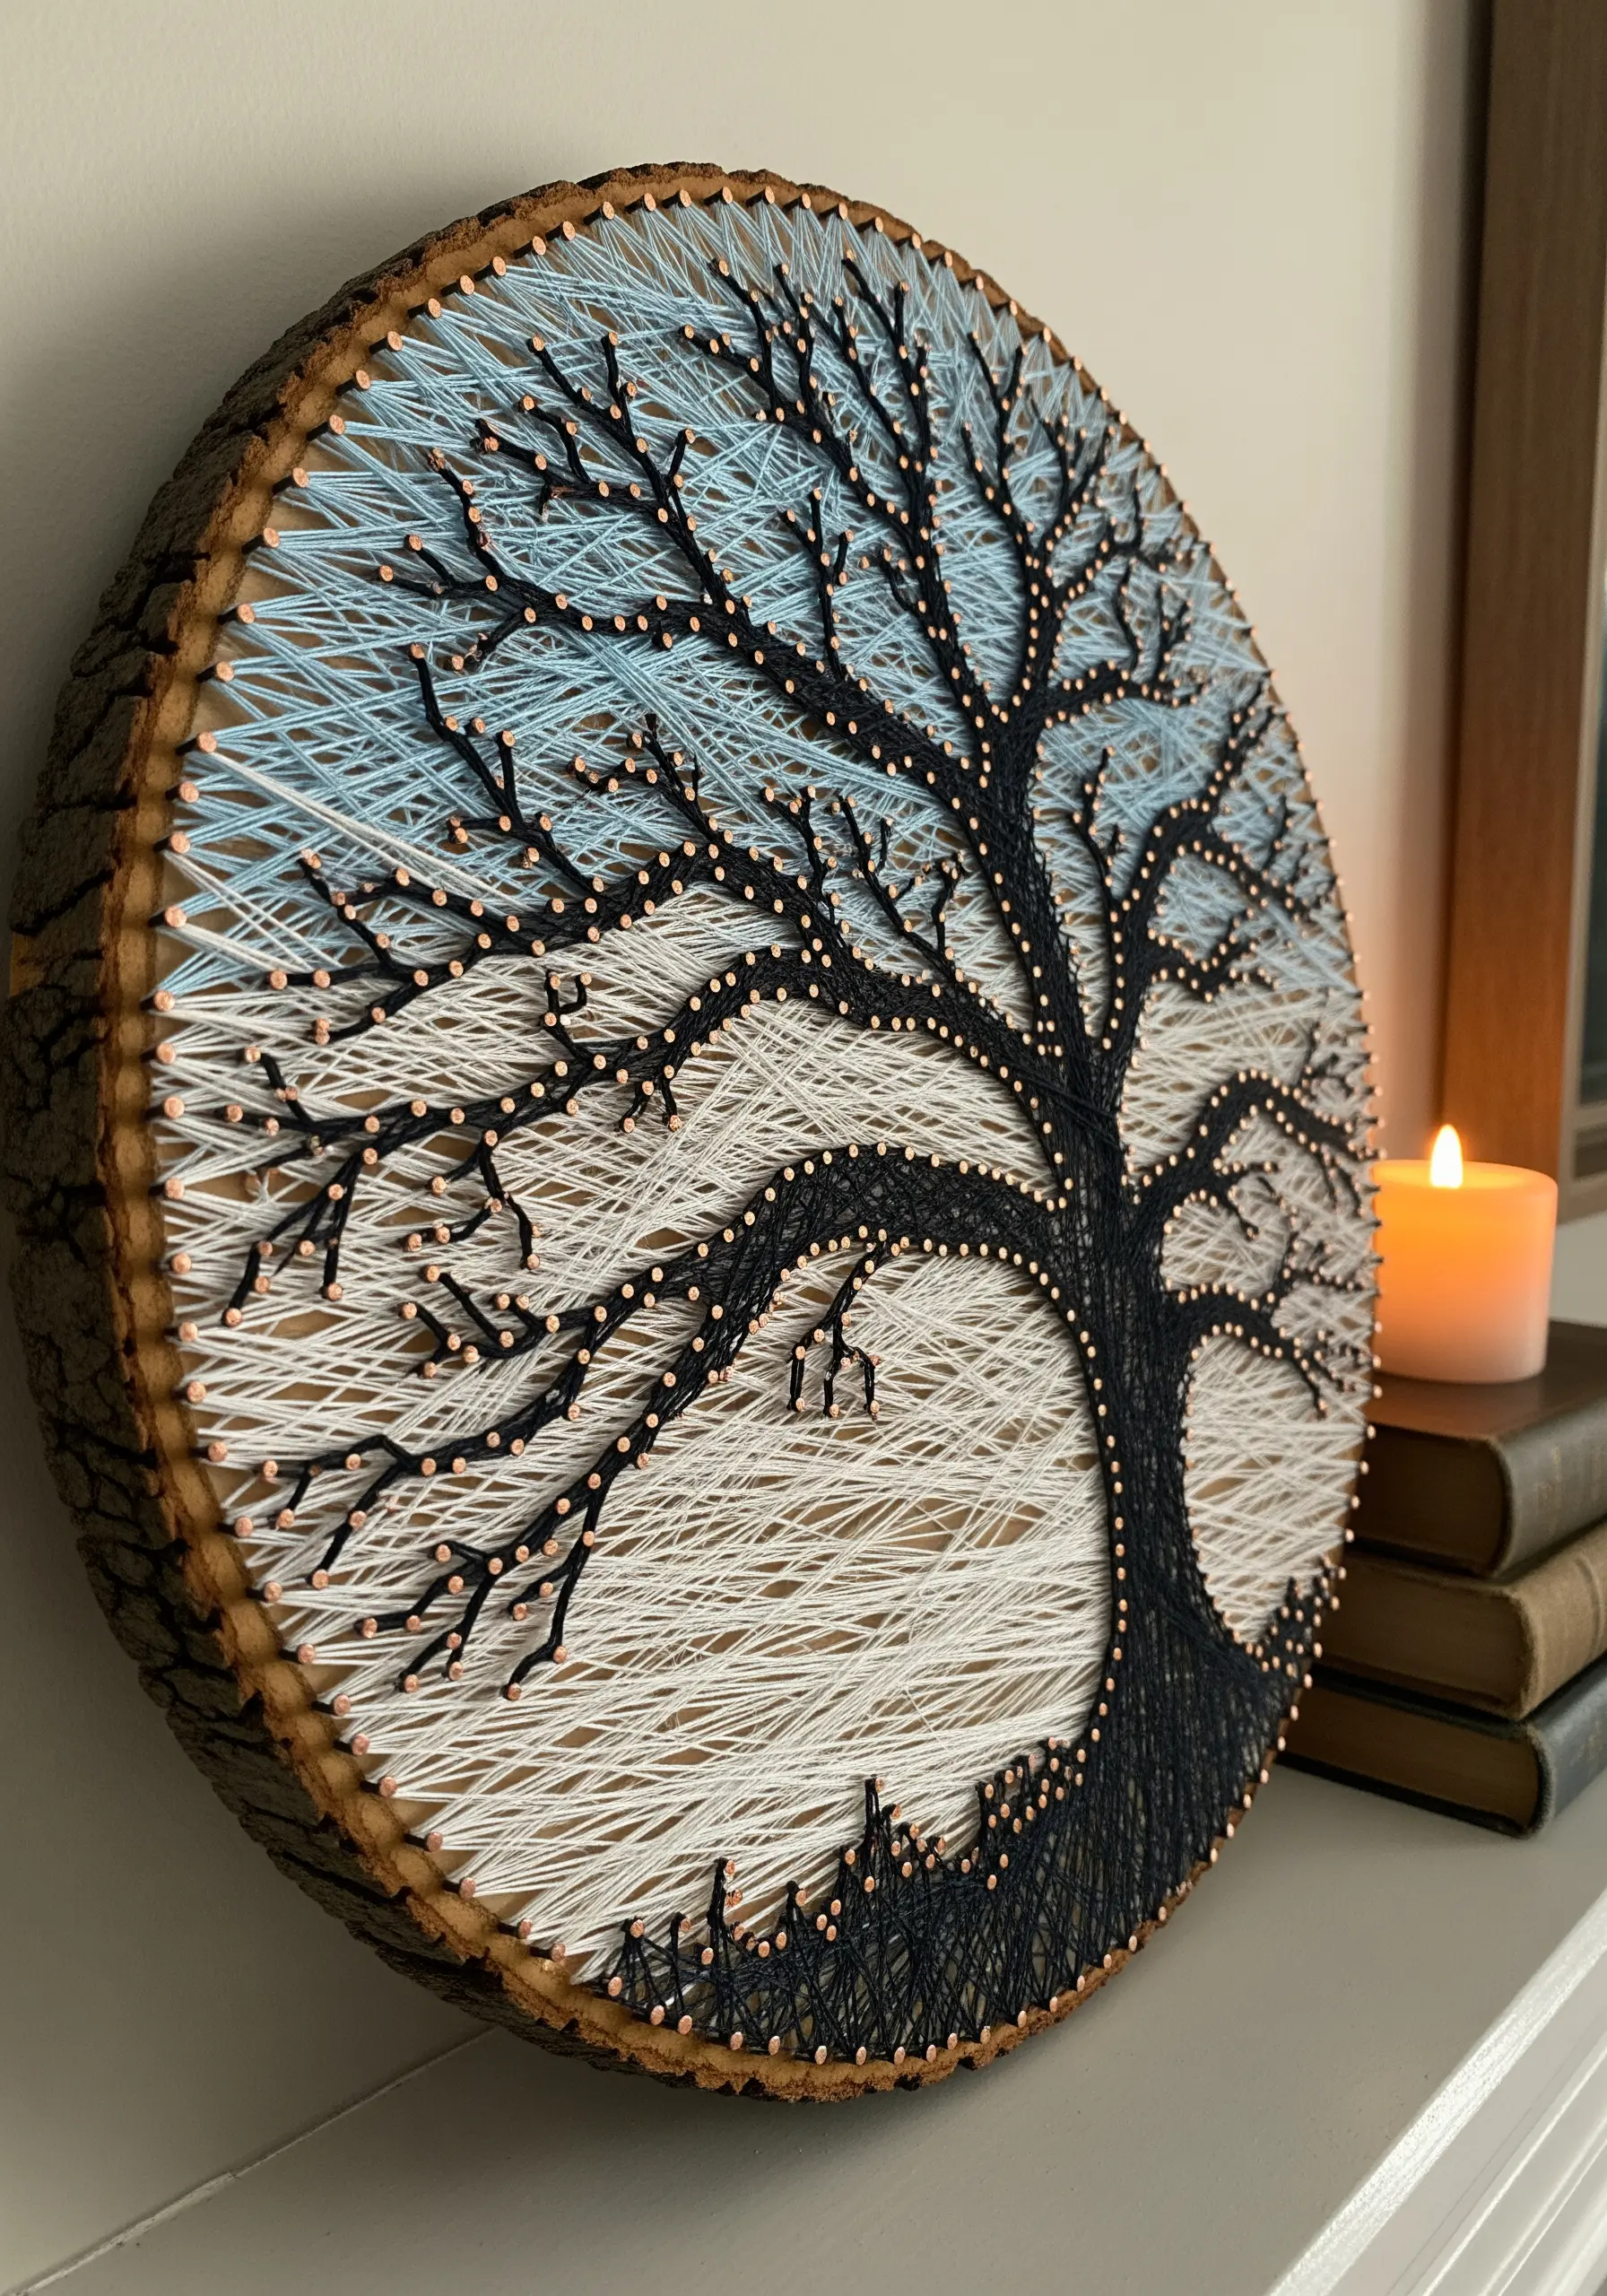
In string art, the empty space is just as important as the thread itself.
For this tree of life, define the sky and ground by filling the background with horizontal lines of white and light blue thread.
This makes the un-stitched area—the tree’s silhouette—the powerful focal point of the entire piece.
You then only need to add the trunk and branches in black, letting the negative space do the heavy lifting of defining the shape.
7. Embroider on Sheer Fabric for Ethereal Effect
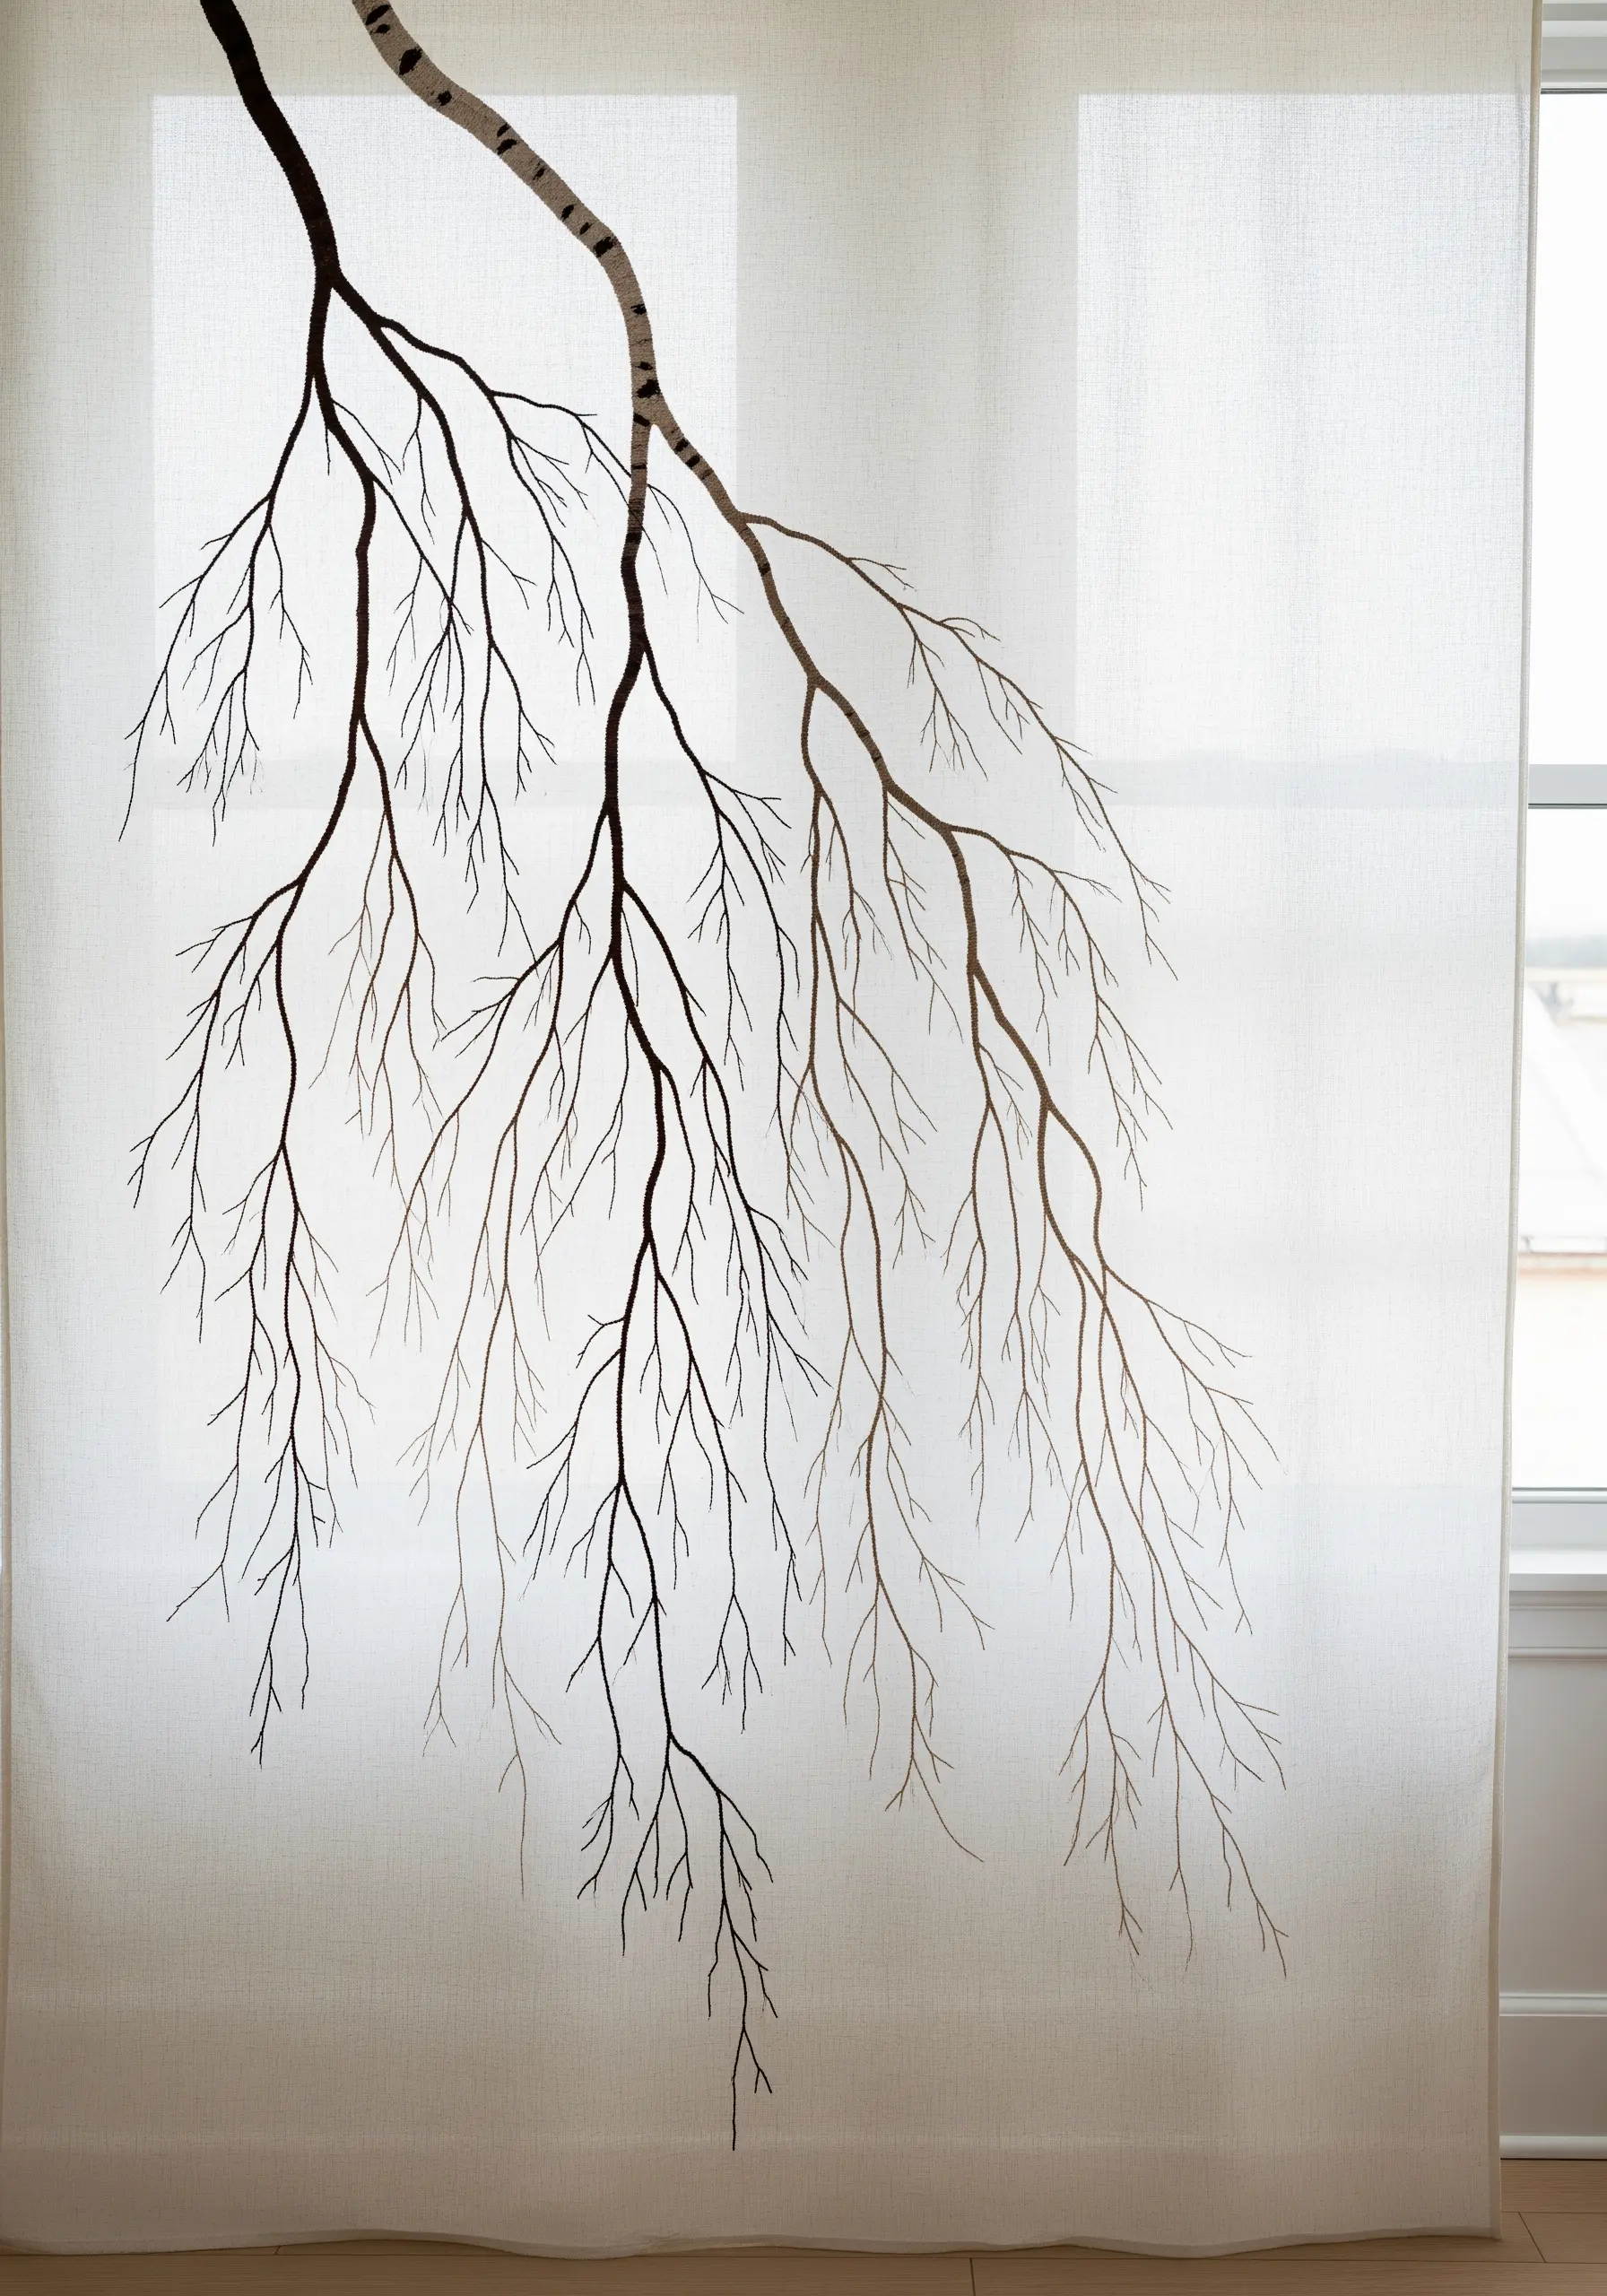
Stitching on transparent or semi-transparent fabric like linen or voile creates a design that seems to float in mid-air.
To prevent puckering on such a delicate base, always use a wash-away or tear-away stabilizer behind your work.
Choose a simple, graphic design like this bare branch, and use a basic backstitch or stem stitch to keep the look light and airy.
This technique is stunning for embroidered curtain & blind ideas, allowing light to pass through and highlight the stitched lines.
8. Add Luxe Detail with Metallic Threads
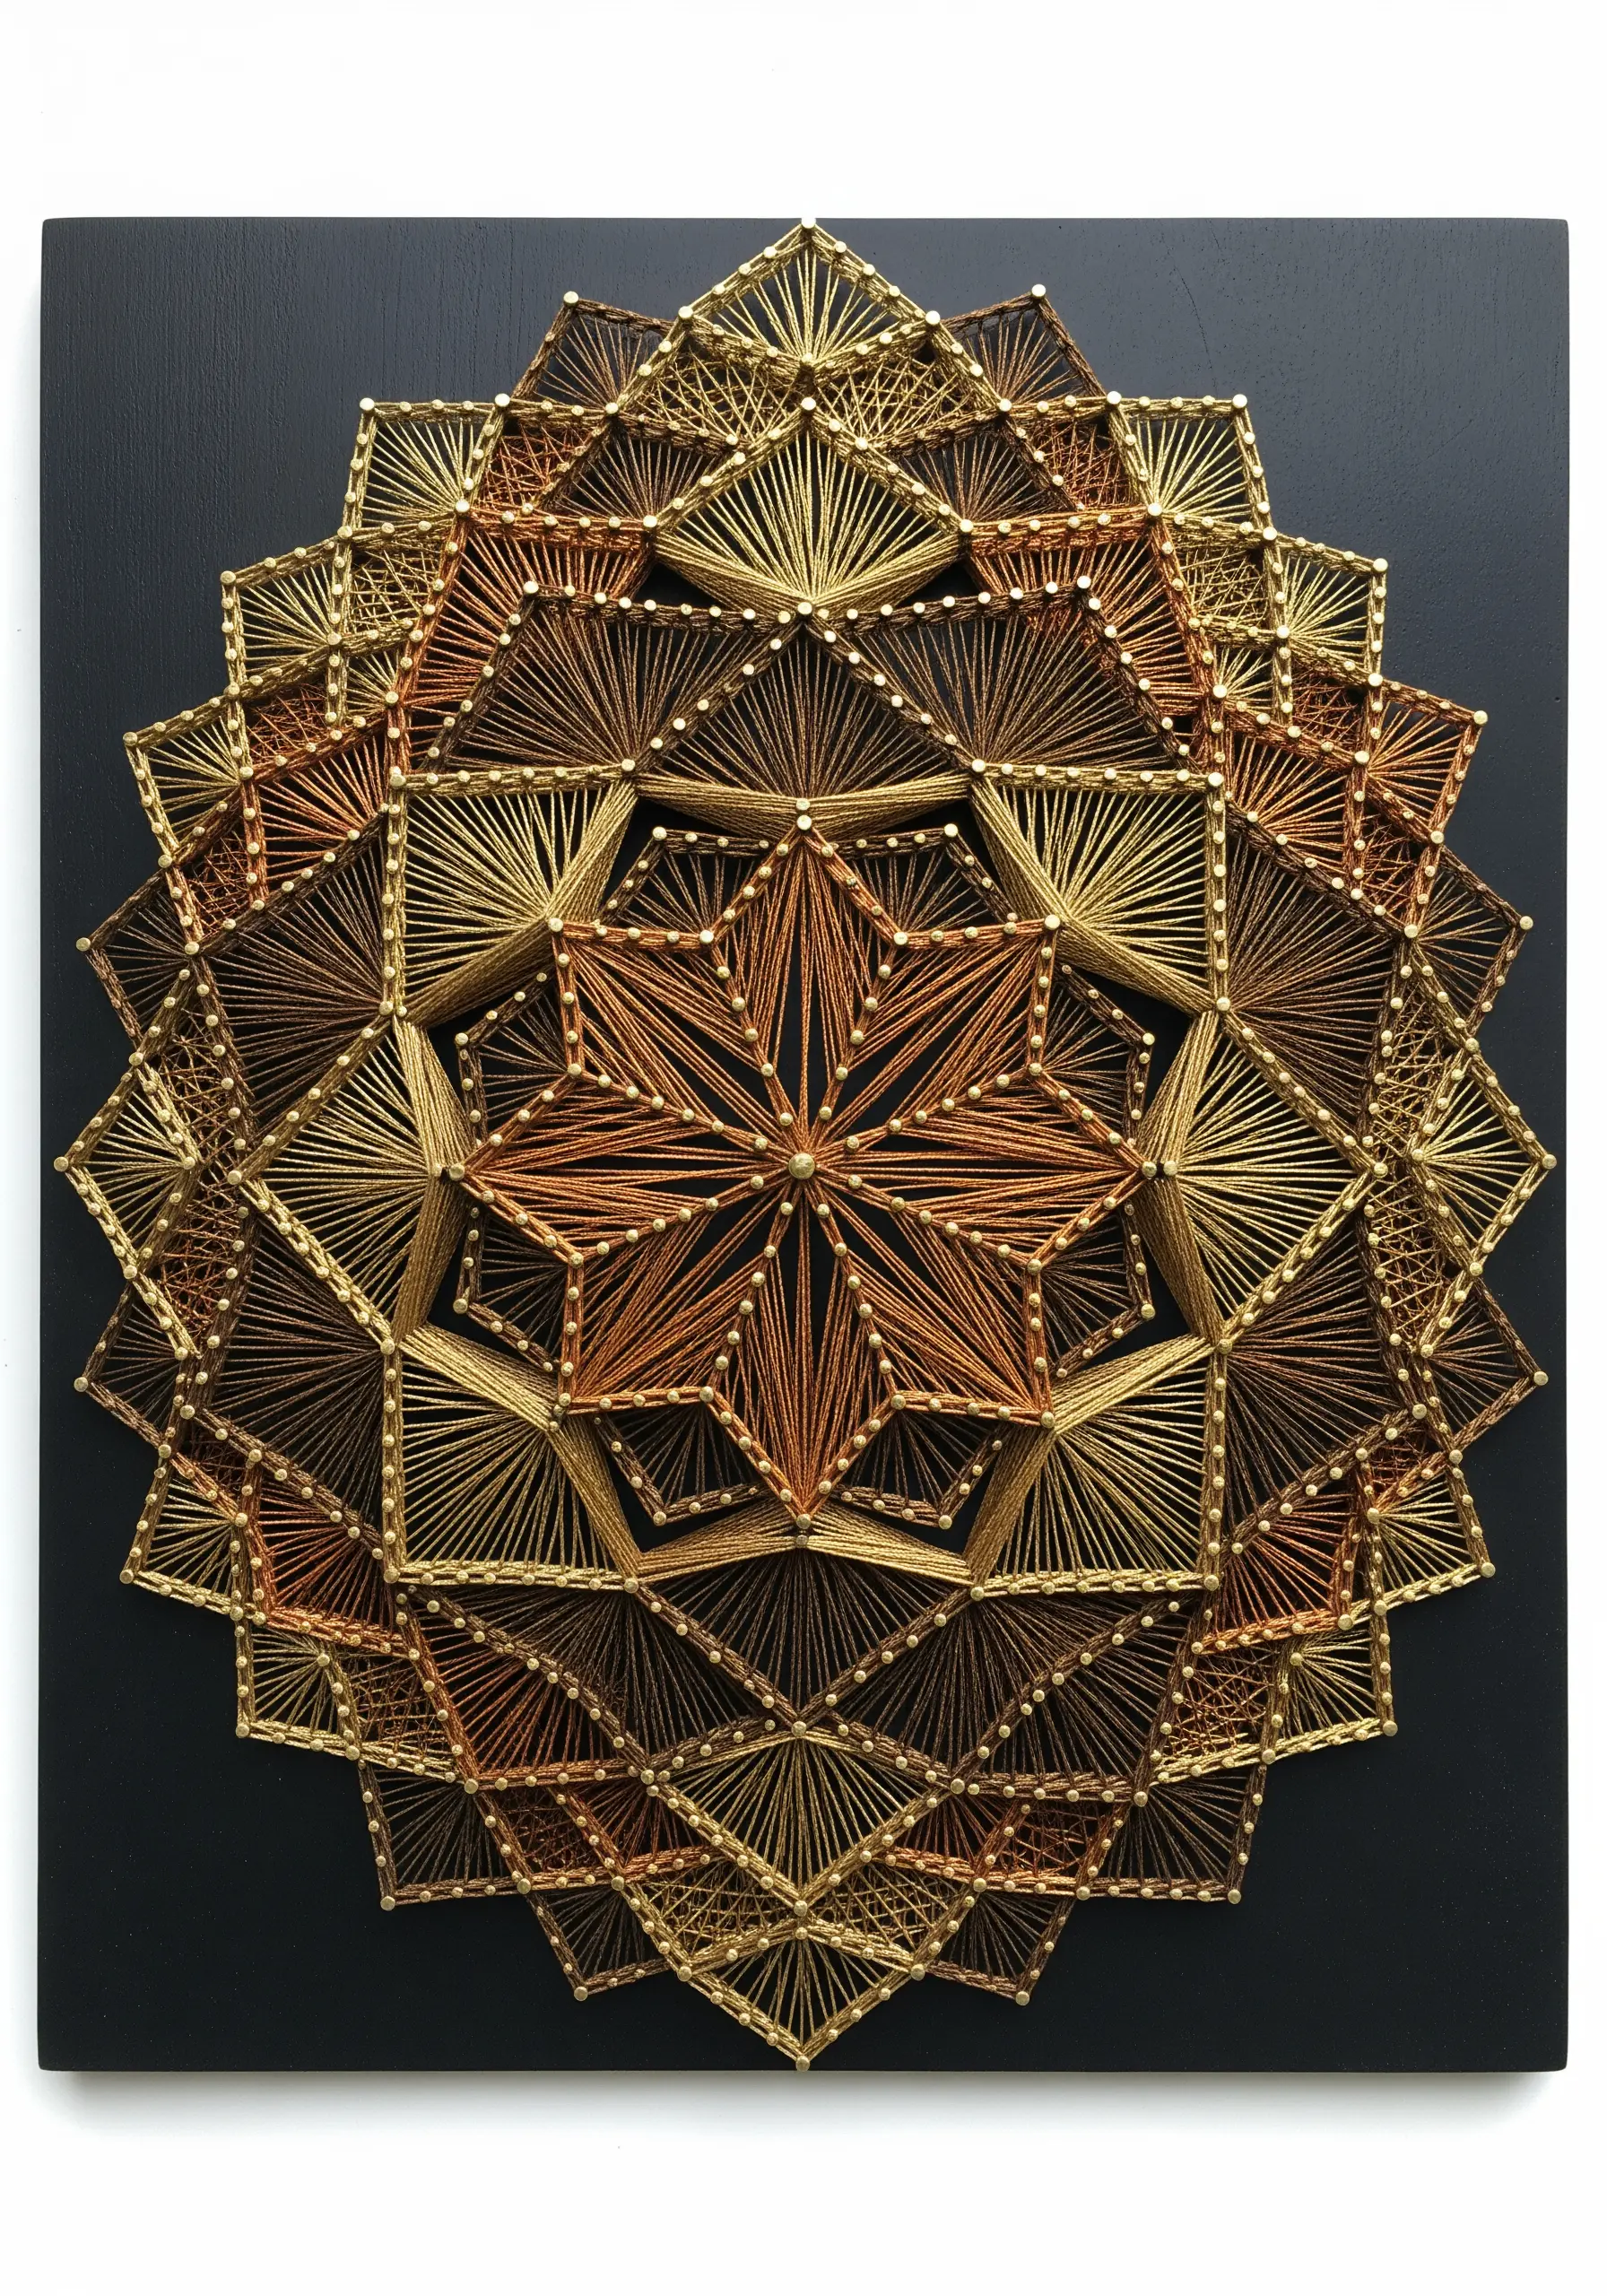
Introduce a touch of opulence to geometric string art by working with metallic threads in bronze, gold, and copper.
To manage these slippery threads, work slowly and ensure each wrap around a pin is secure before moving to the next.
A dark, matte background like black wood or painted canvas will absorb light and make the metallic sheen the undisputed star.
These are some of the most unexpected ways to use metallic thread to create a piece that feels both ancient and incredibly modern.
9. Amplify Color with a High-Contrast Background
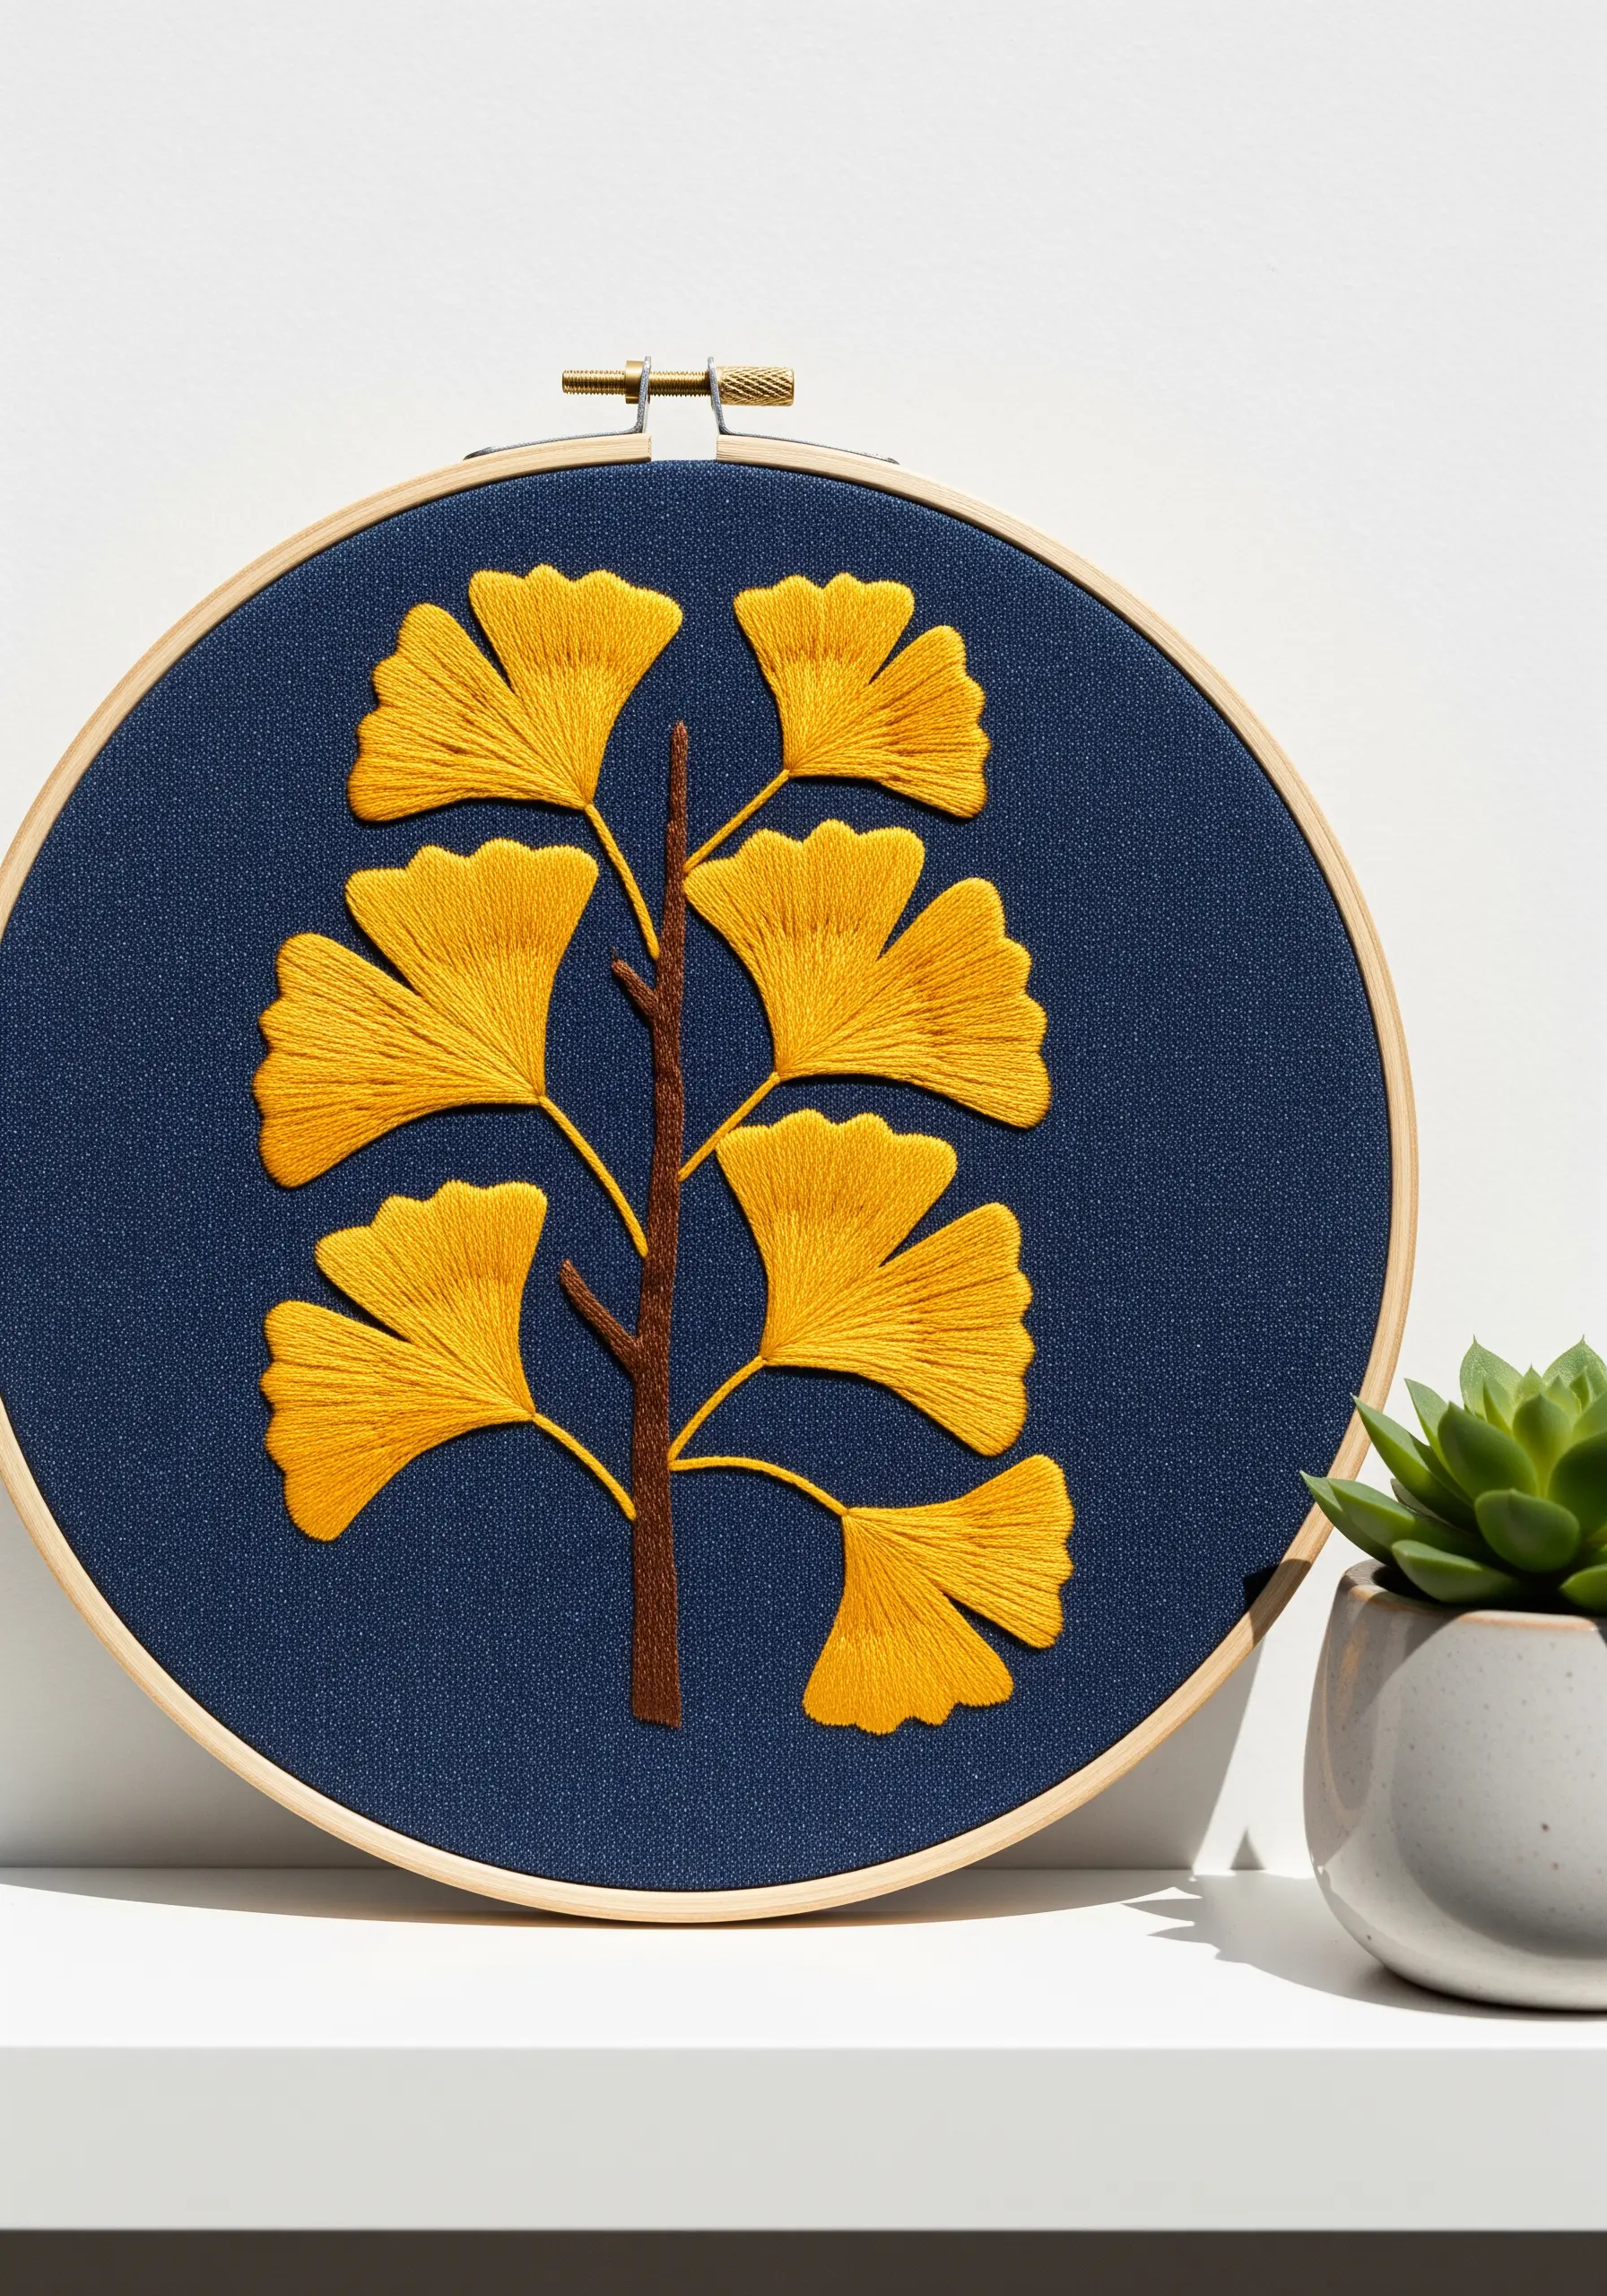
Make a single color feel exceptionally vibrant by pairing it with its complementary opposite or a strong neutral.
Here, the rich golden yellow of the ginkgo leaves appears to glow against the deep navy blue fabric.
This high-contrast approach eliminates the need for complex shading; the power of the color pairing does all the visual work for you.
A smooth satin stitch fill will enhance the effect, creating a solid block of color that feels both bold and beautifully simple.
10. Create Cohesion in a Multi-Panel Piece
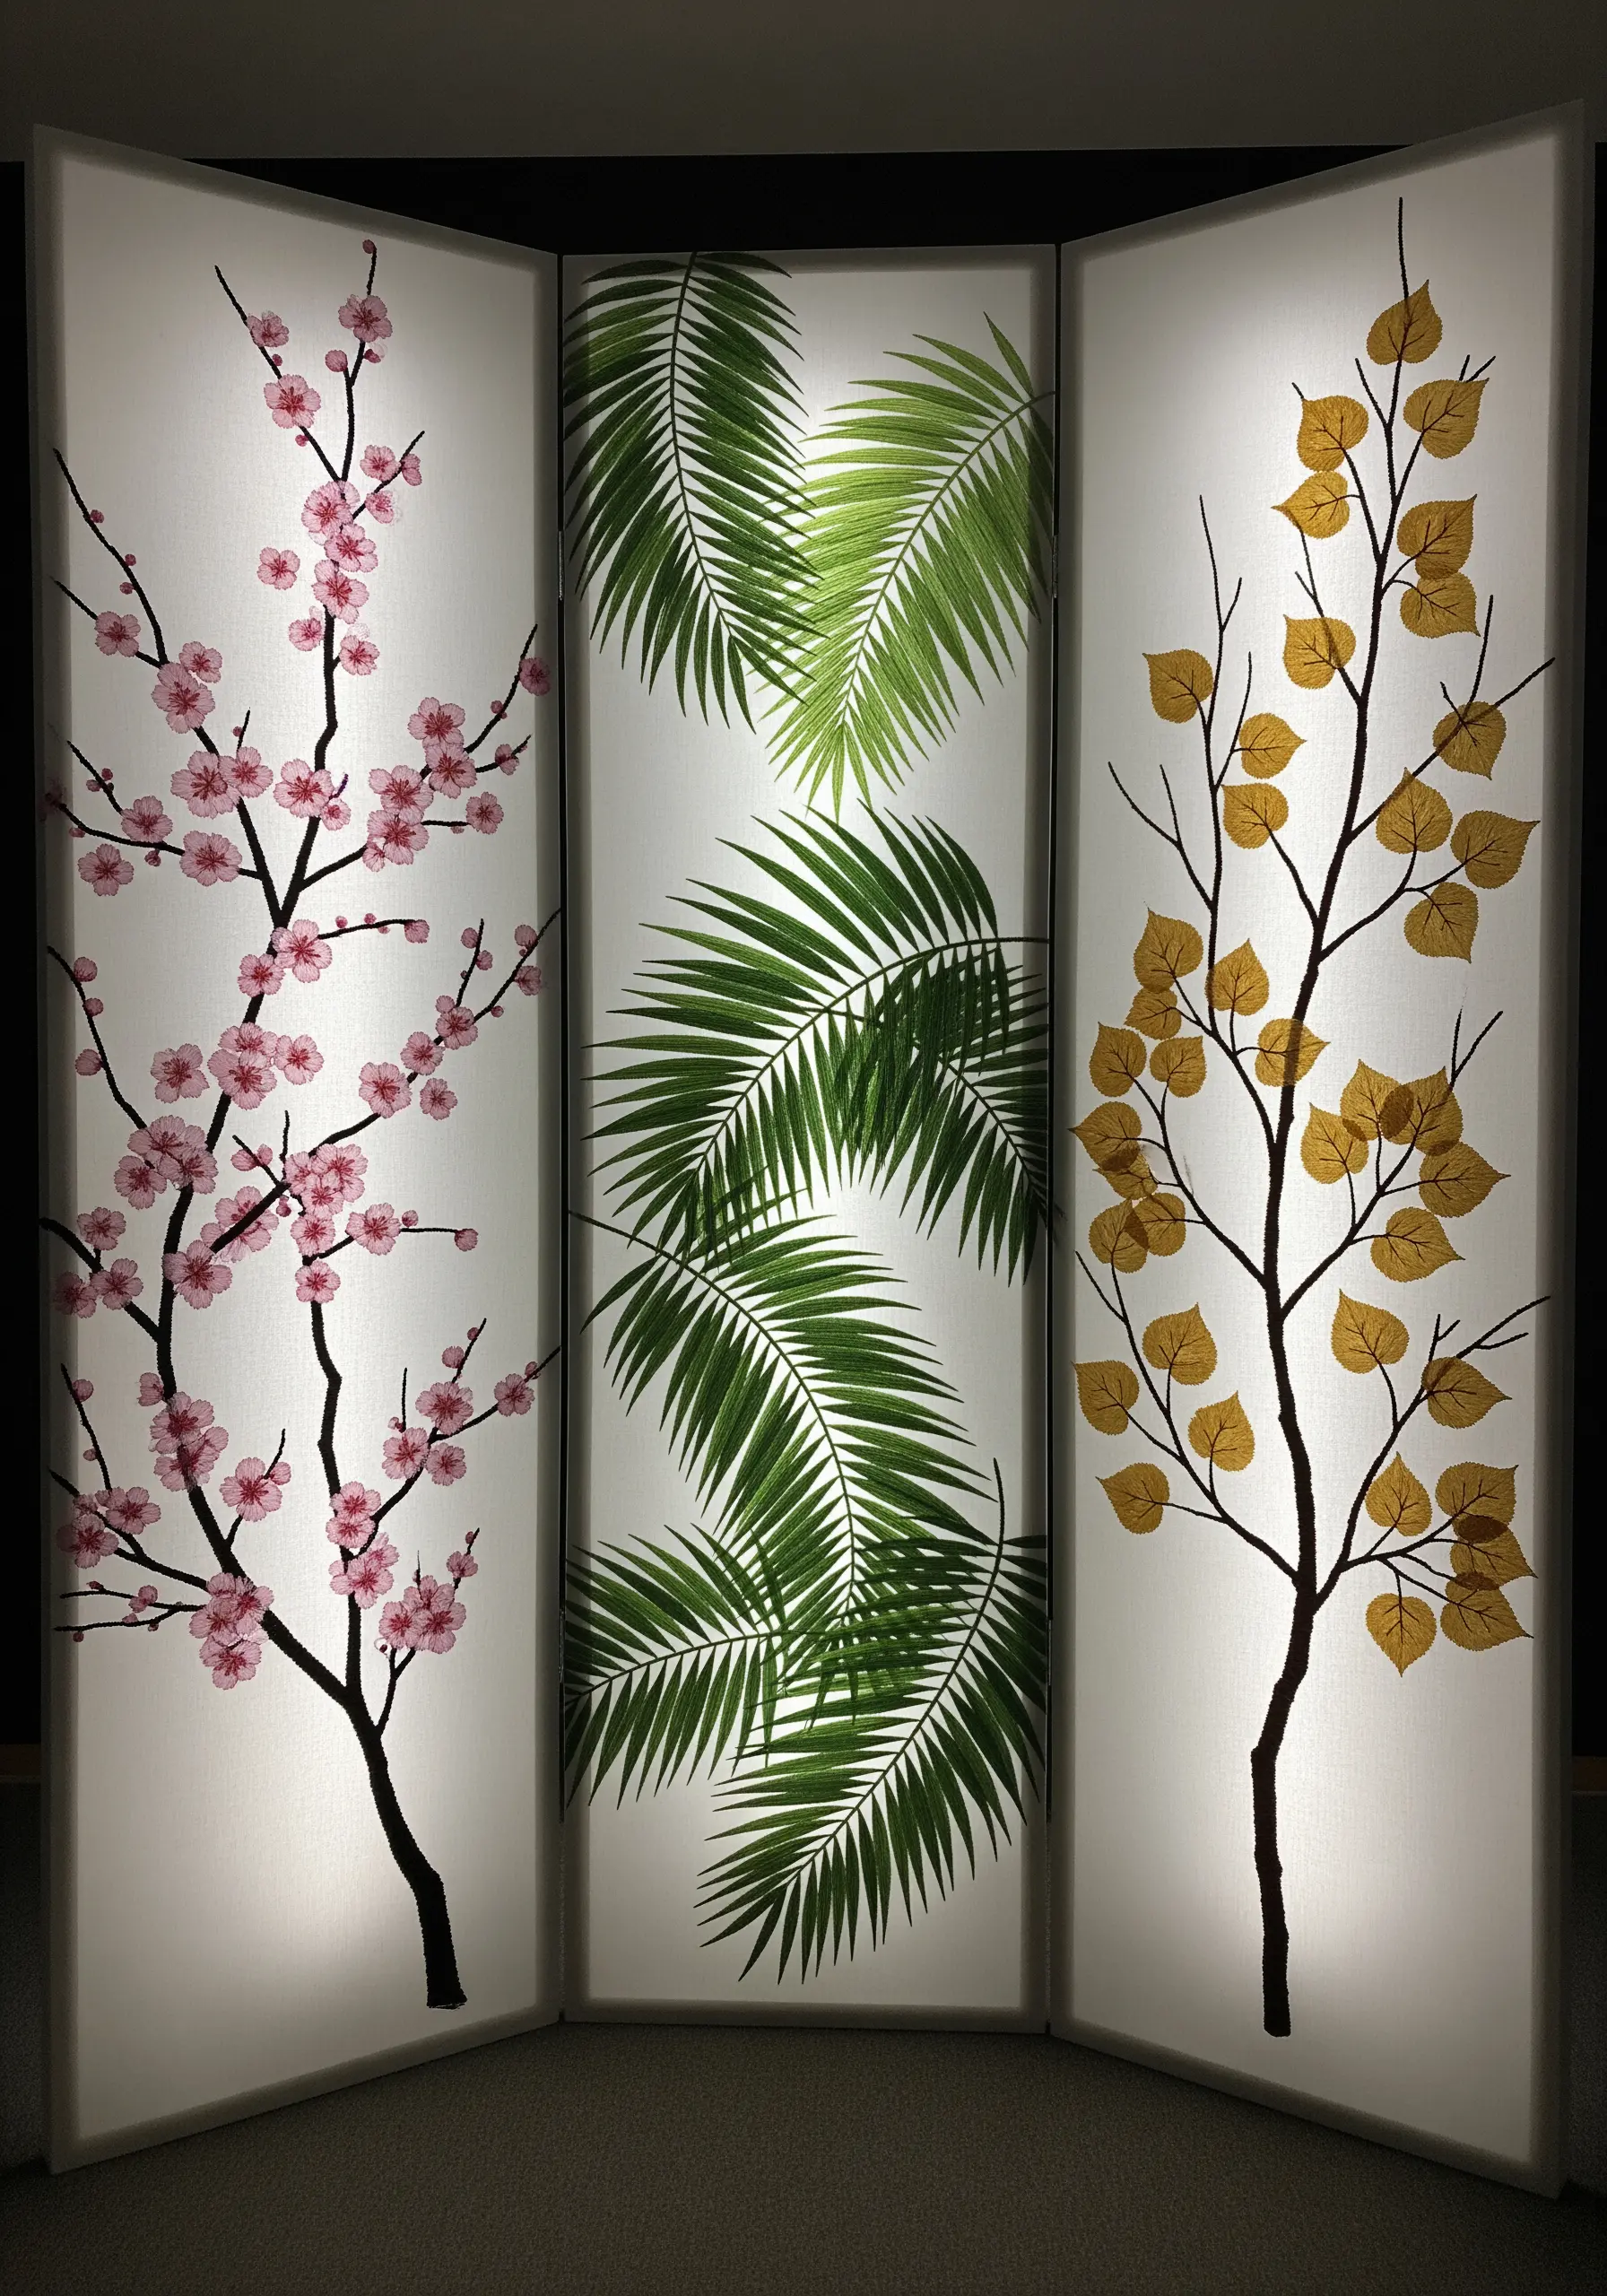
When designing a multi-panel piece like a room divider, unity is key, even with different motifs.
Connect the panels by using a shared visual element, such as the dark, consistently styled tree trunks and branches.
While the foliage—cherry blossoms, palm fronds, and autumn leaves—is distinct, the foundational structure remains the same, telling the viewer these pieces belong together.
This is an excellent strategy for creating an embroidery hoop room divider that feels intentional and harmonious.
11. Stitch Hyper-Realistic Dewdrops with Thread
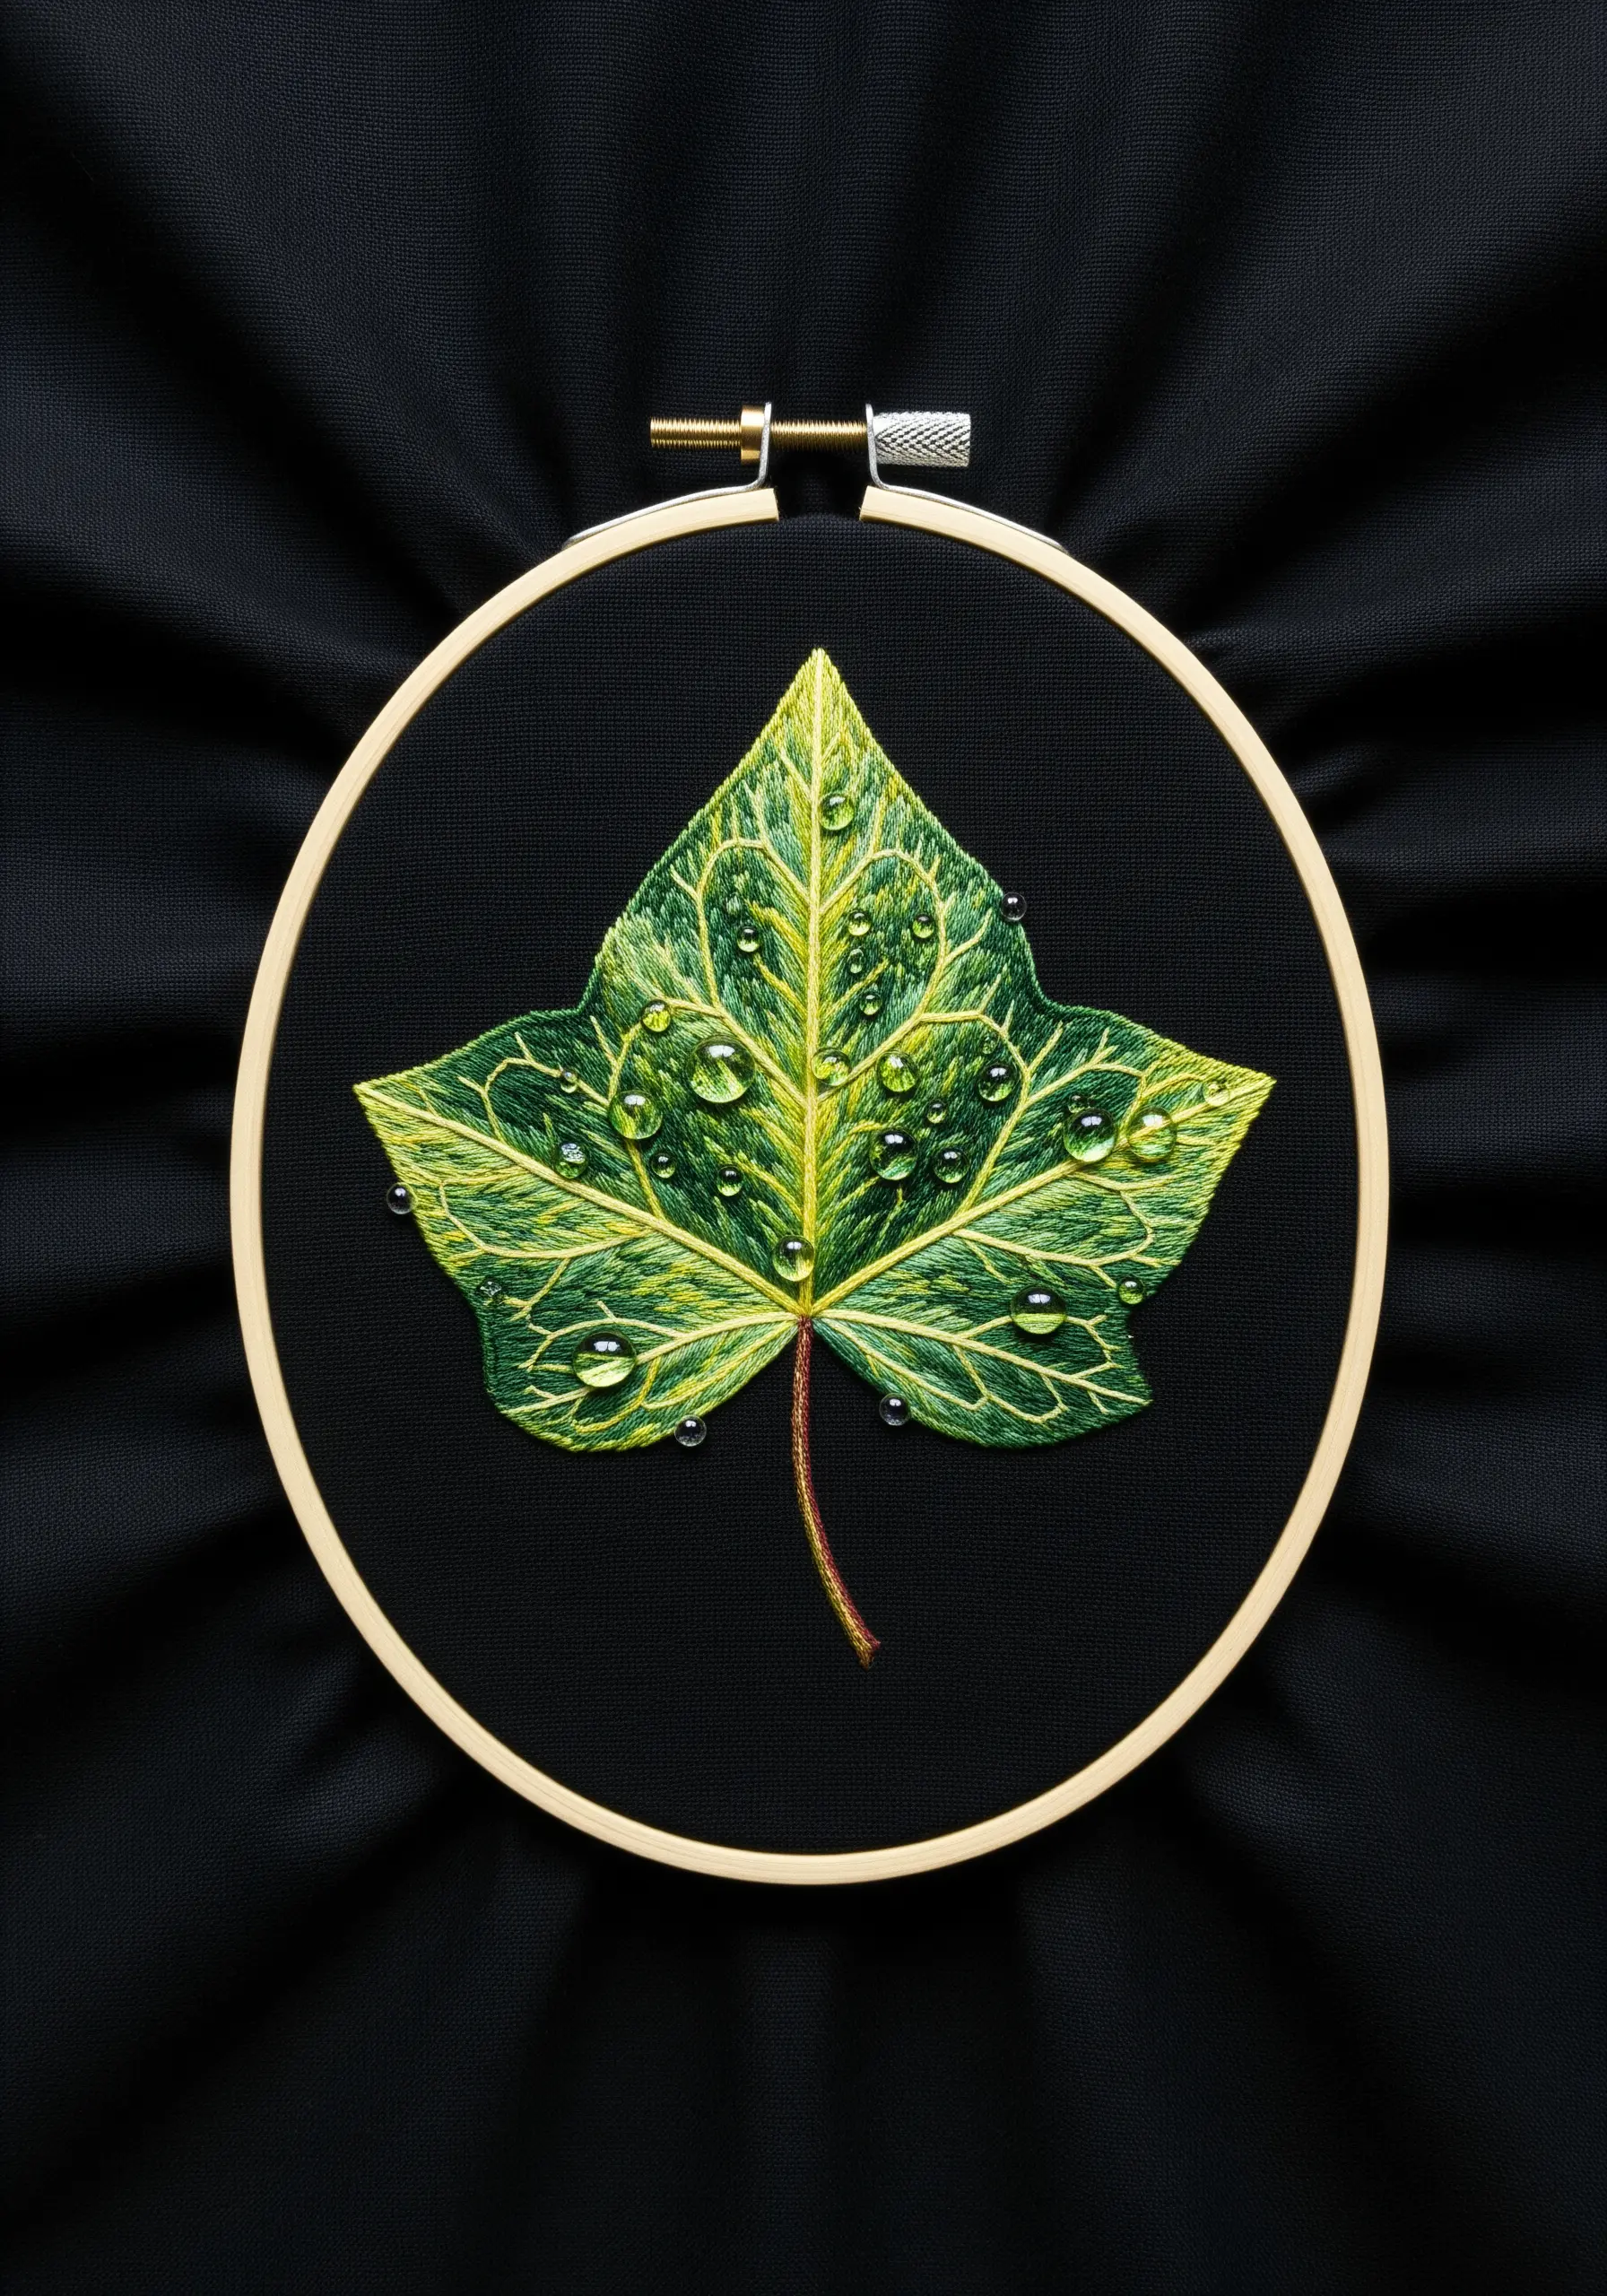
To create the illusion of water droplets, think of them as tiny spheres with a highlight and a shadow.
Use a single strand of white or very pale gray thread to make a small, curved crescent shape for the highlight where light would hit.
Directly opposite, add a slightly larger curve in a darker shade of your leaf’s green to act as the shadow.
This simple combination of light and dark tricks the eye into seeing dimension and moisture, adding a magical touch of realism to your leaf vein details.
12. Use Thread Wrapping for Segmented Texture
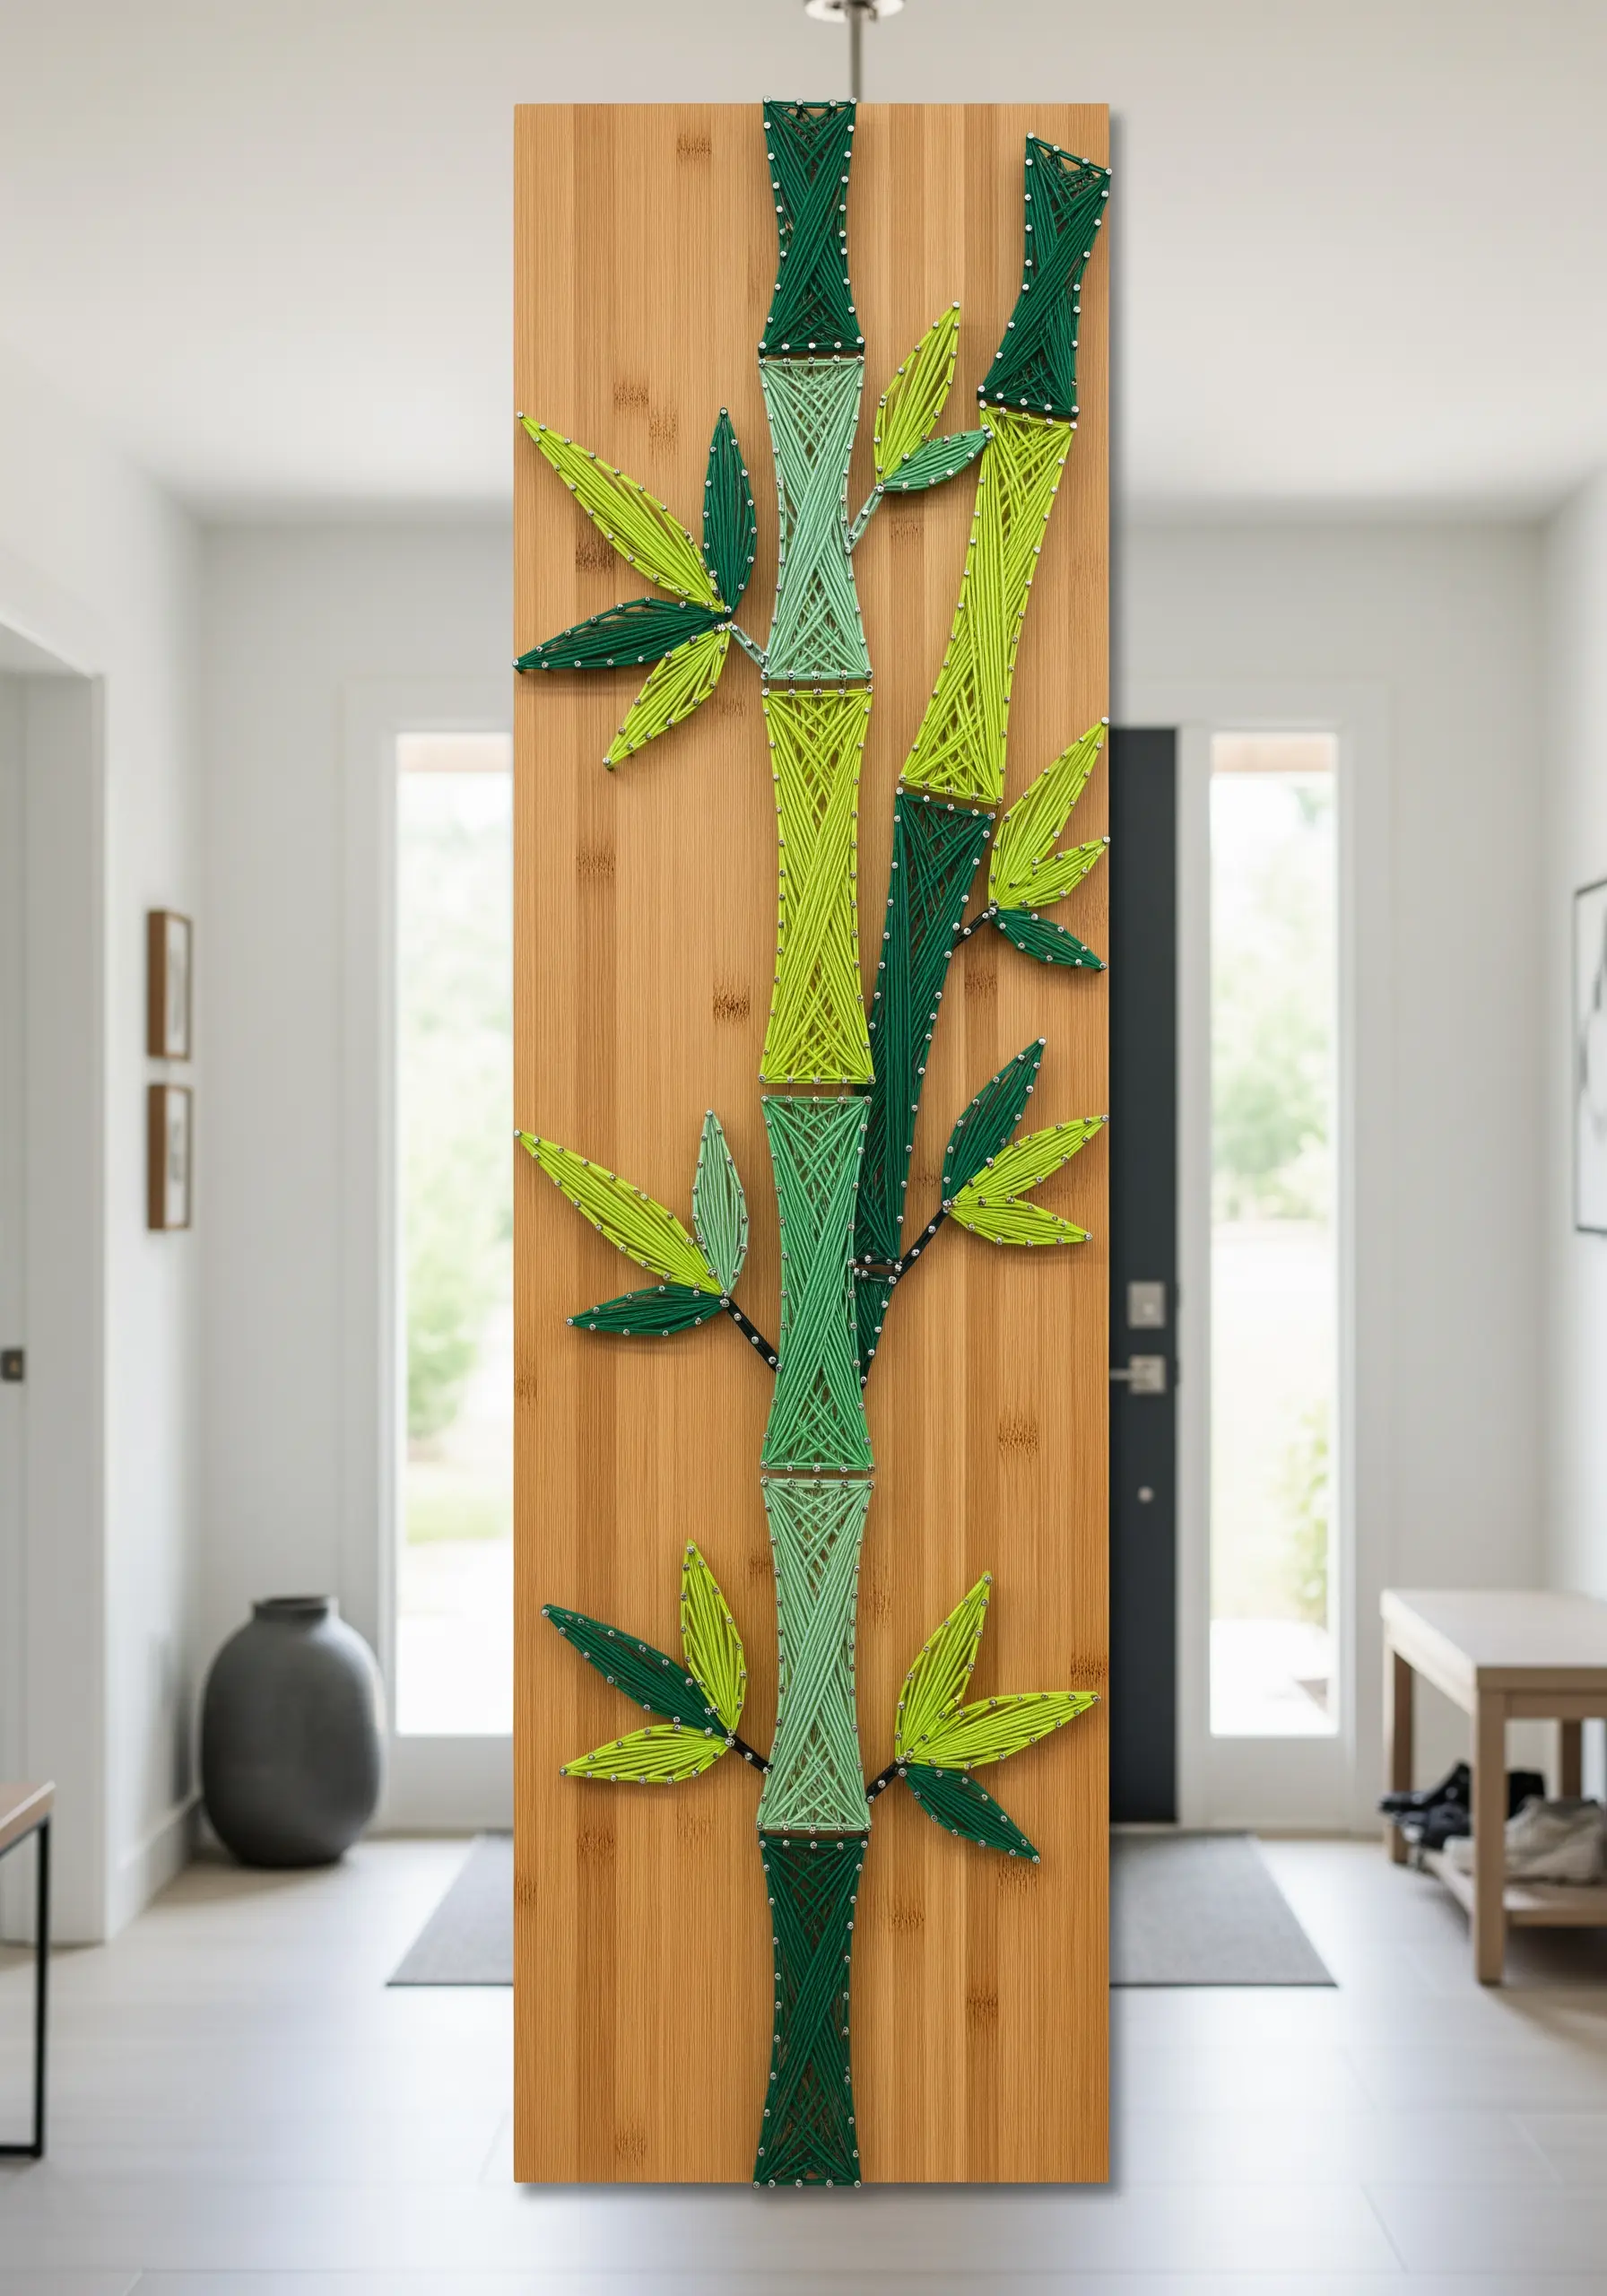
Mimic the distinct segments of a bamboo stalk by using a thread-wrapping technique in your string art.
Outline the main stalks and then wrap your thread horizontally back and forth between the nails, switching colors for each segment.
Contrast this solid, blocky texture with airy, open leaves made from simple V-shapes.
This play between dense wrapping and open space creates a balanced composition that is both graphic and organic.
13. Construct 3D Leaves for Sculptural Embroidery

Take your botanicals off the fabric by creating detached, three-dimensional leaves.
Cut your leaf shapes from a sturdy fabric like felt or cotton canvas and stitch the veins using a simple backstitch.
You can insert a fine wire into the back of each leaf before attaching it to your main branch, allowing you to bend and shape the foliage for a truly lifelike effect.
This mixed-media approach transforms a standard hoop into a dynamic abstract thread sculpt.
14. Accent with Gold for Visual Hierarchy
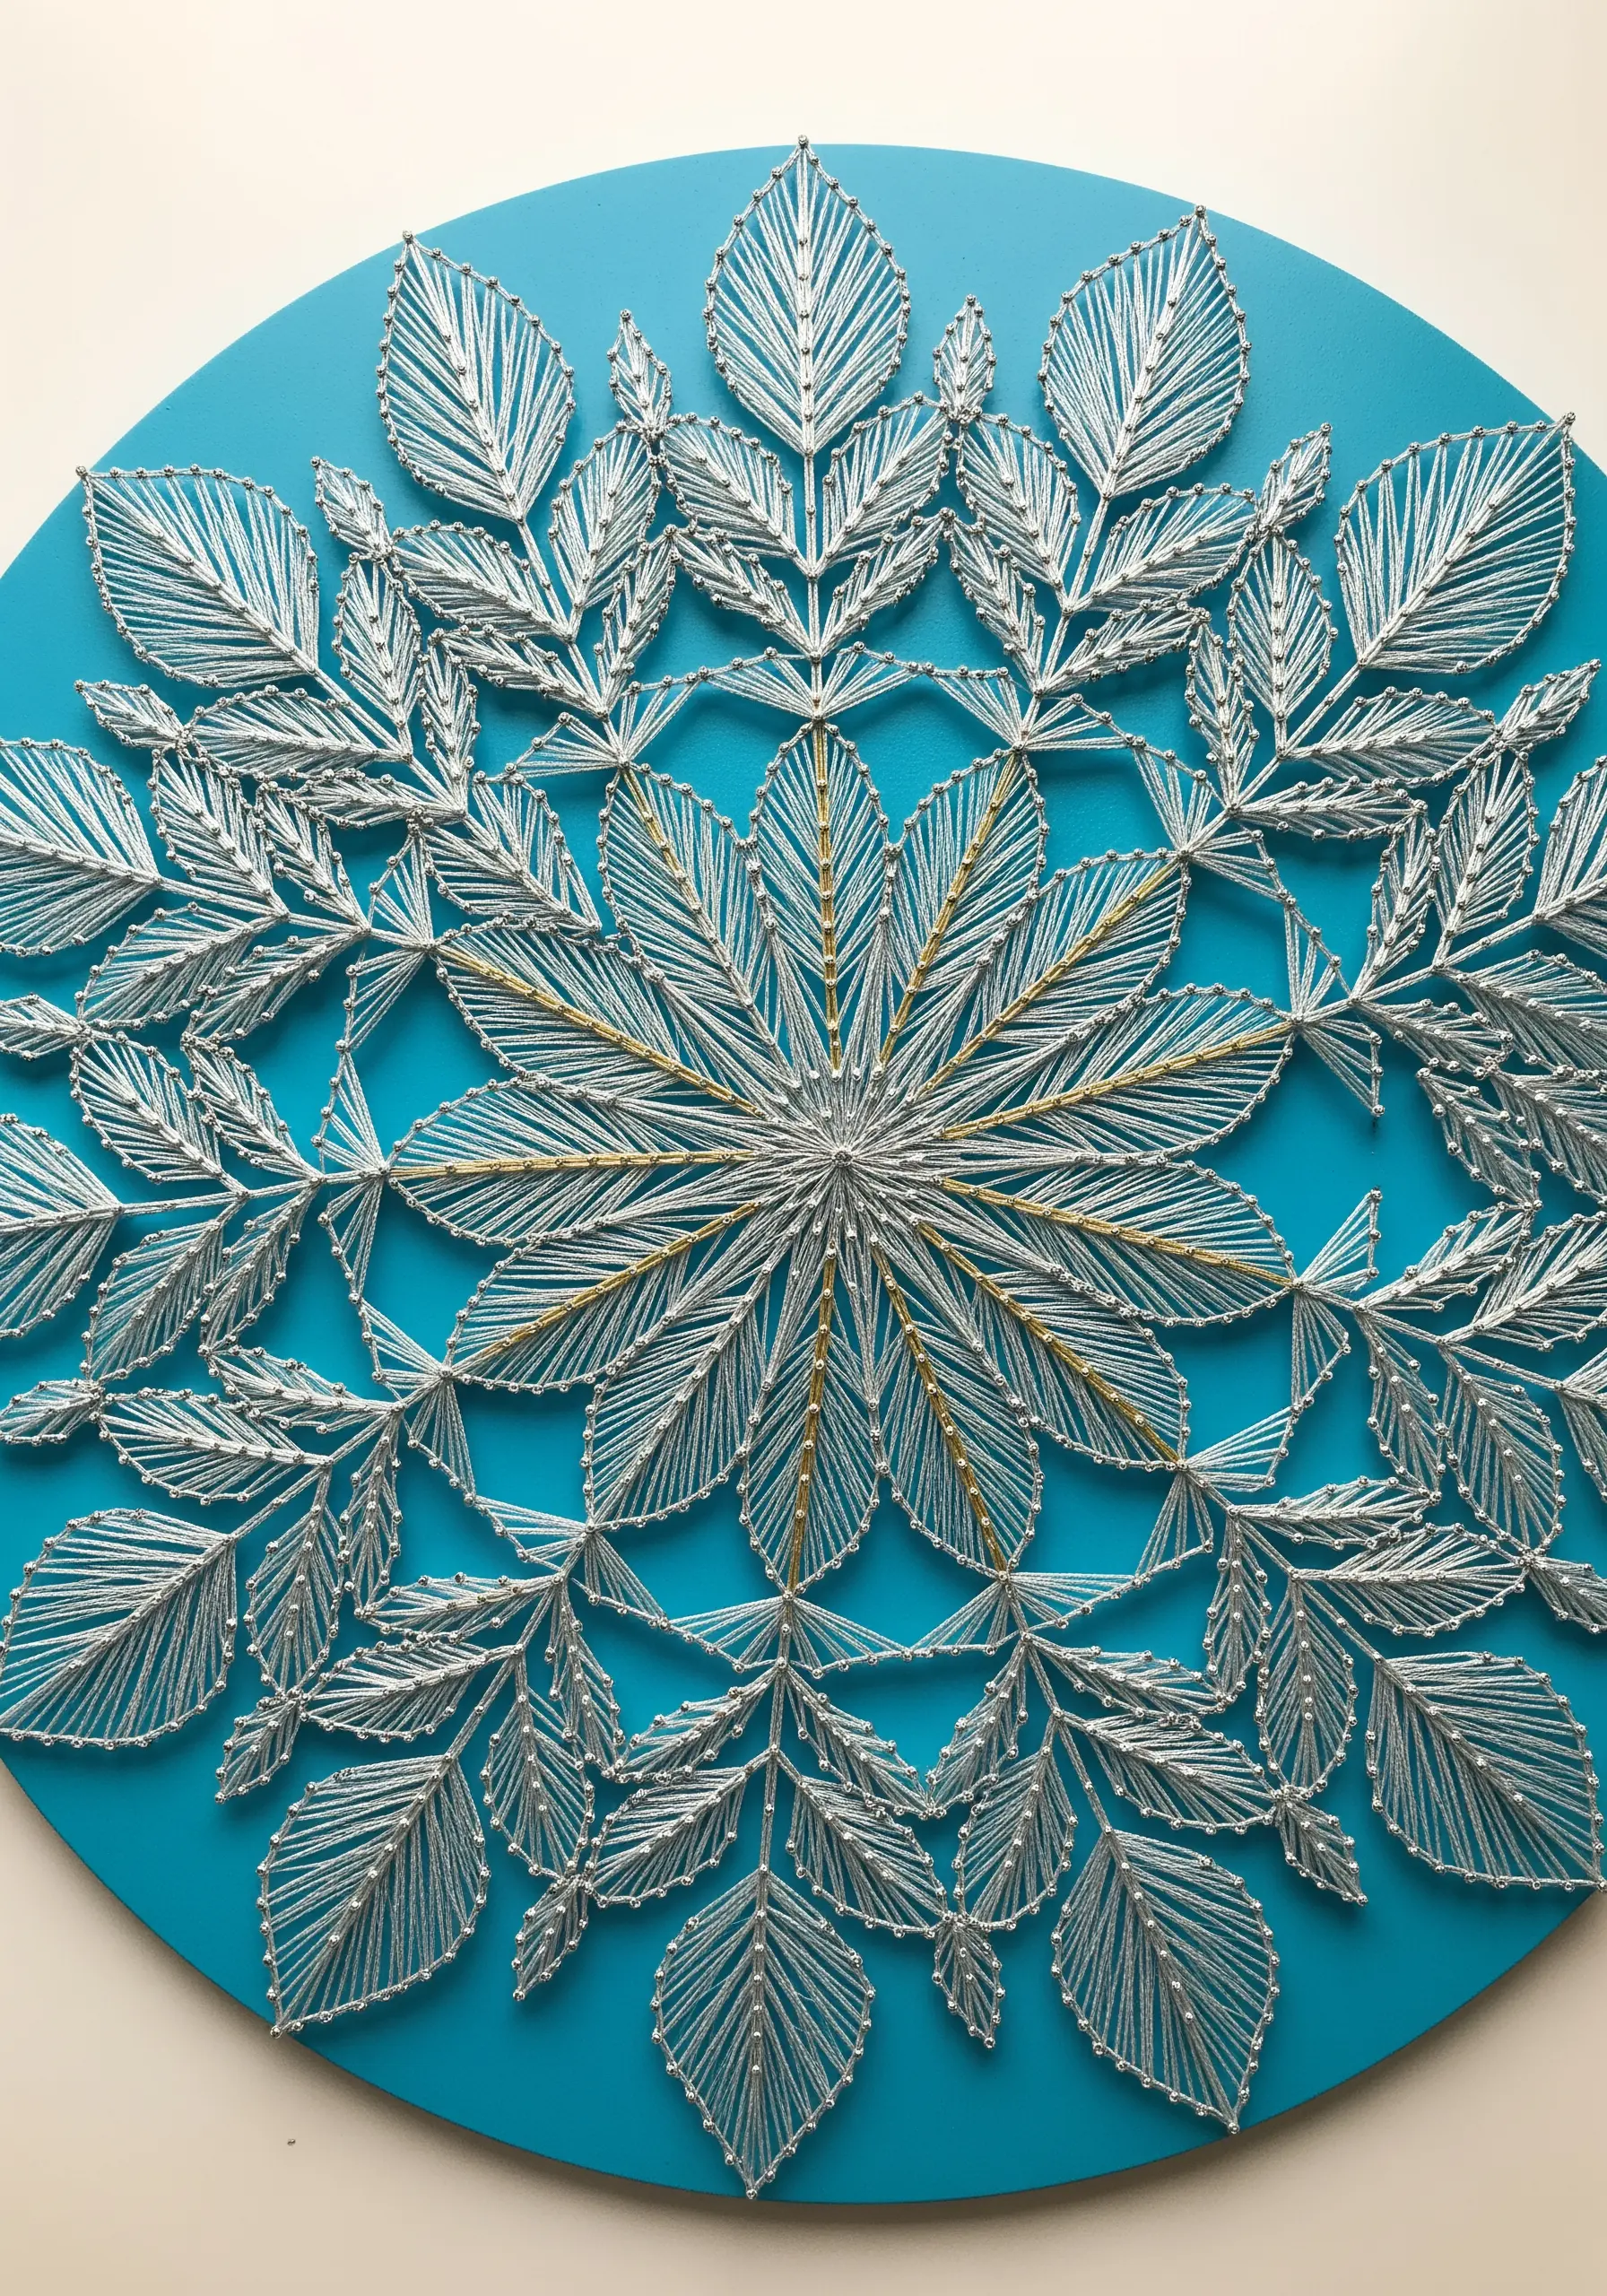
When working with multiple metallic threads, use one as a strategic accent to guide the viewer’s eye.
In this intricate leaf mandala, the entire piece is rendered in shimmering silver thread, creating a cool, uniform texture.
A small amount of gold thread is then used exclusively on the central veins, immediately drawing your focus to the heart of the design.
This simple choice establishes a clear focal point and adds a layer of sophistication.
15. Blend Autumnal Hues with Long-and-Short Stitch
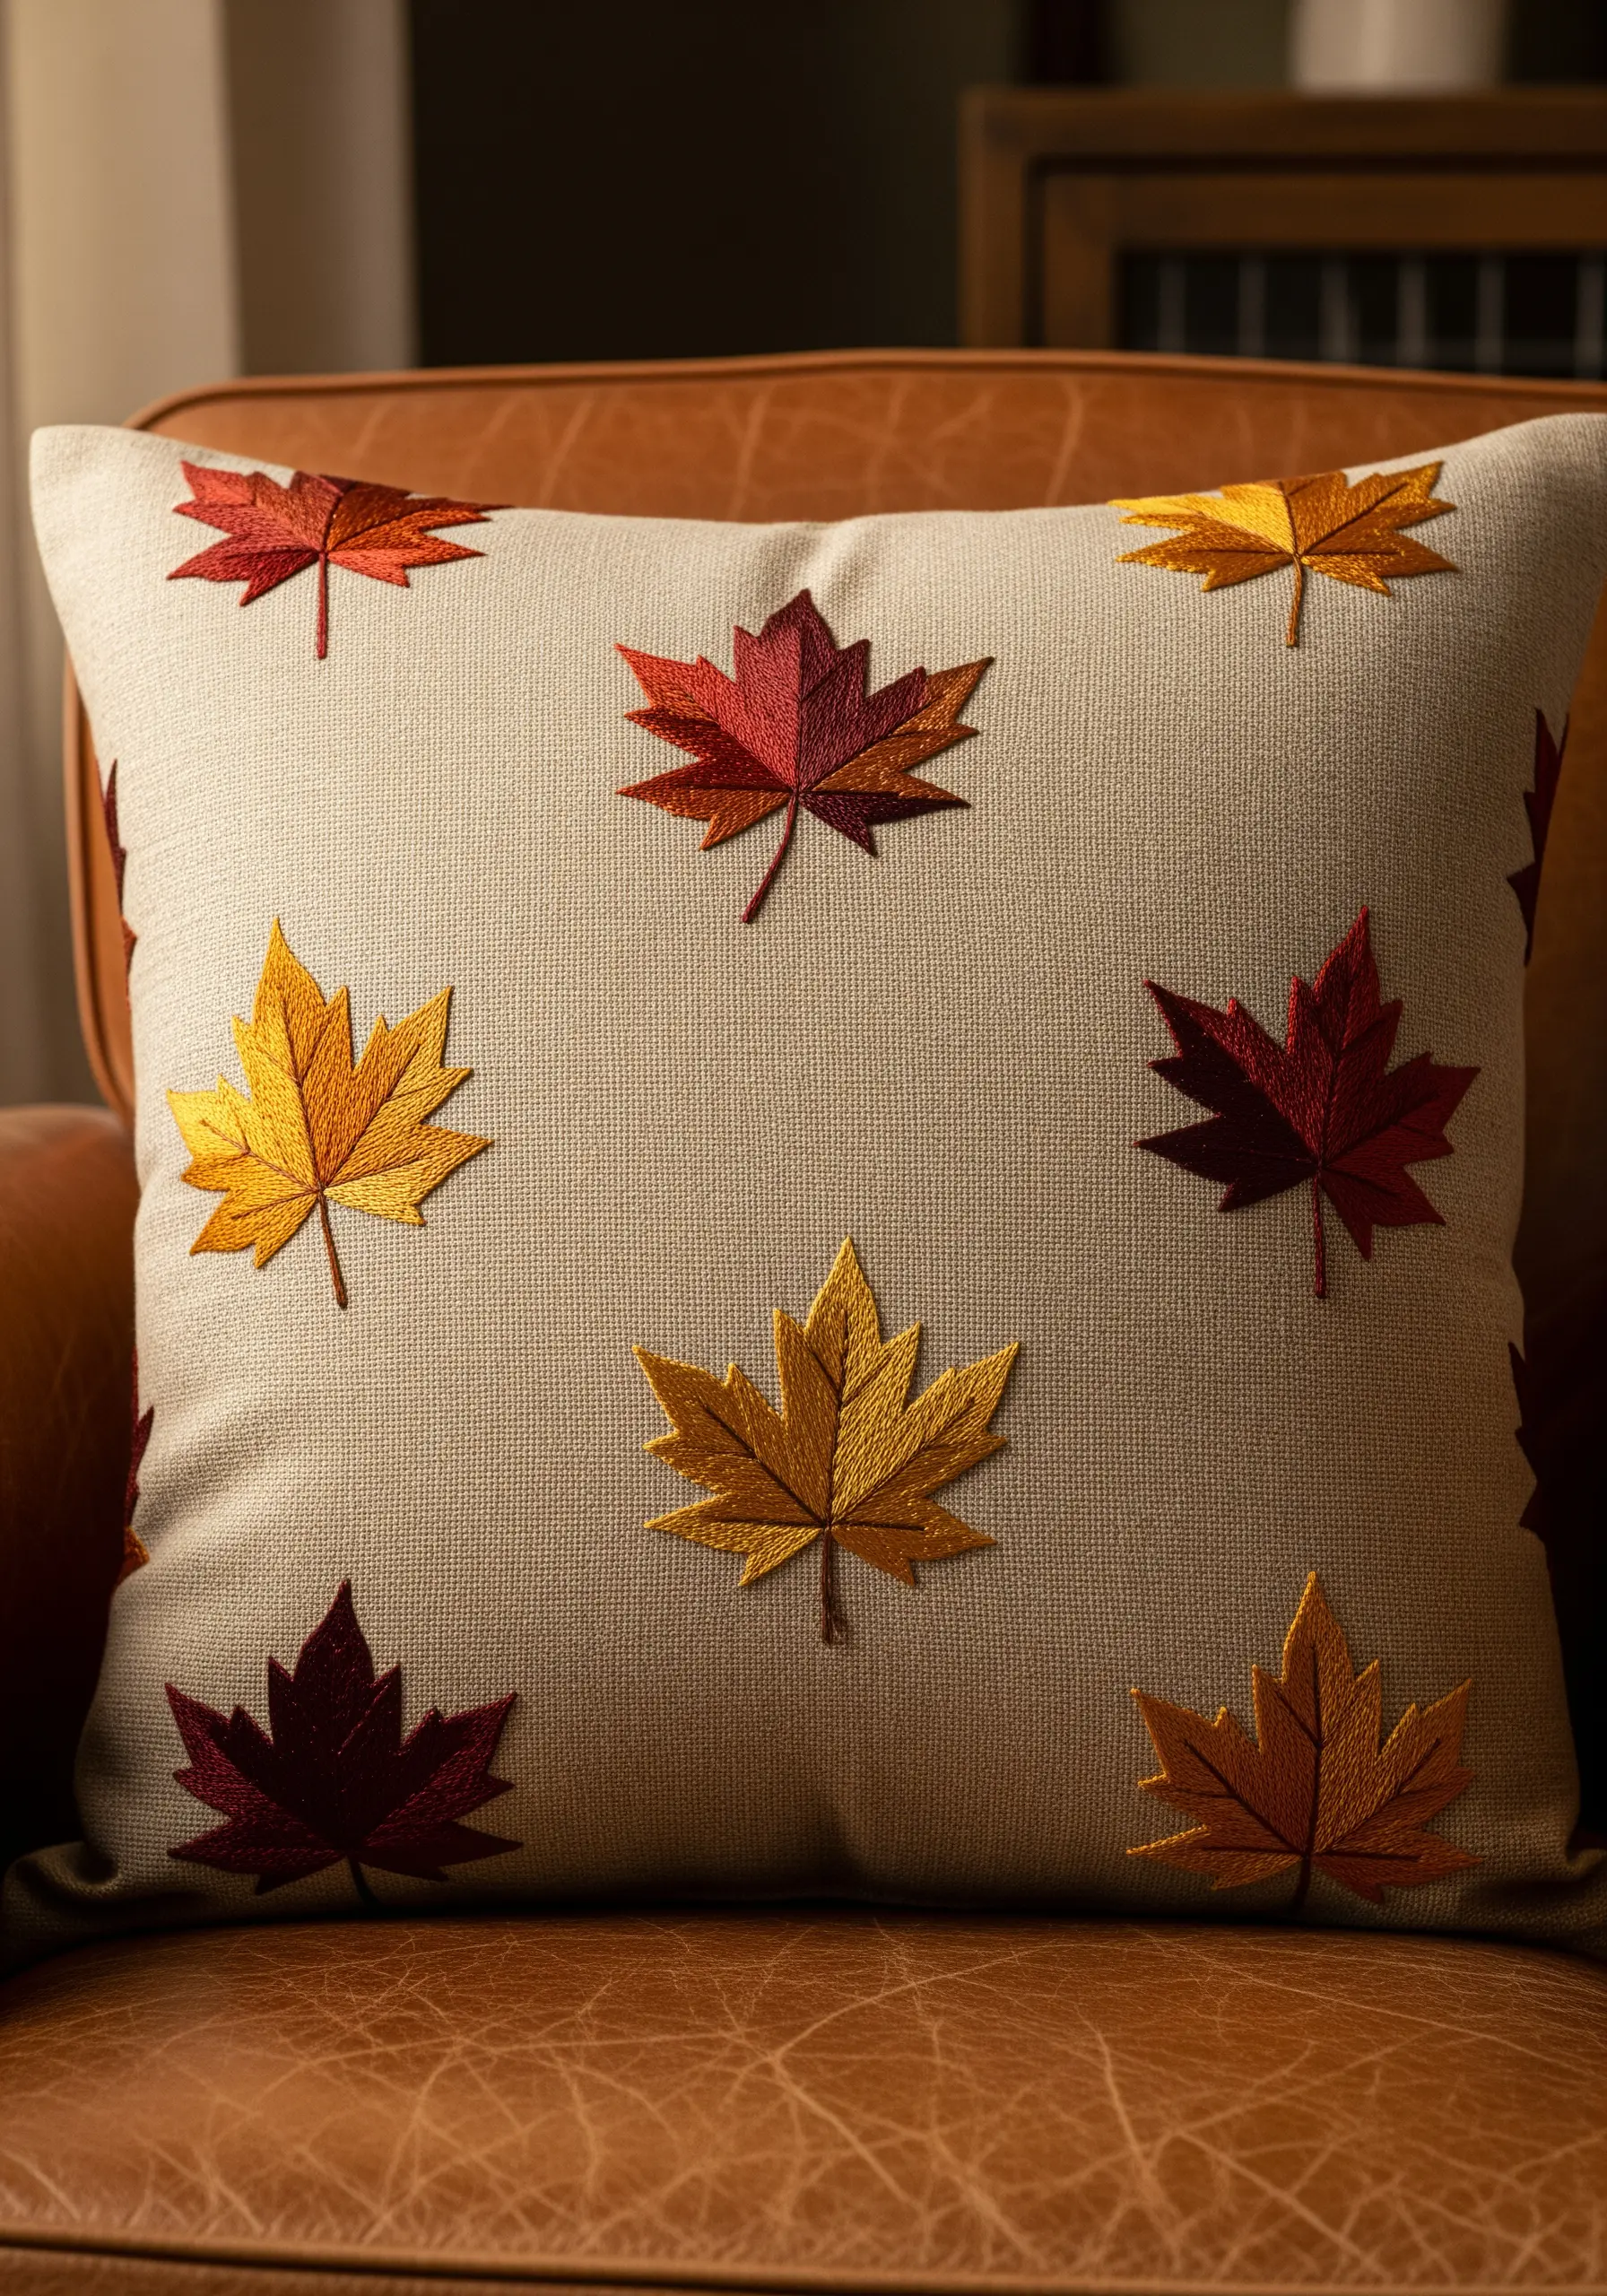
To capture the smooth, painterly transitions of an autumn leaf, the long-and-short stitch is your best tool.
Fill the leaf by working in rows of interlocking straight stitches of varying lengths, introducing new colors gradually with each row.
This technique allows you to blend reds, oranges, and golds seamlessly without creating harsh lines or blocks of color.
It’s perfect for adding subtle elegance to hand-stitched cushion borders and other home textiles.
16. Create Dimension with Padded Appliqué
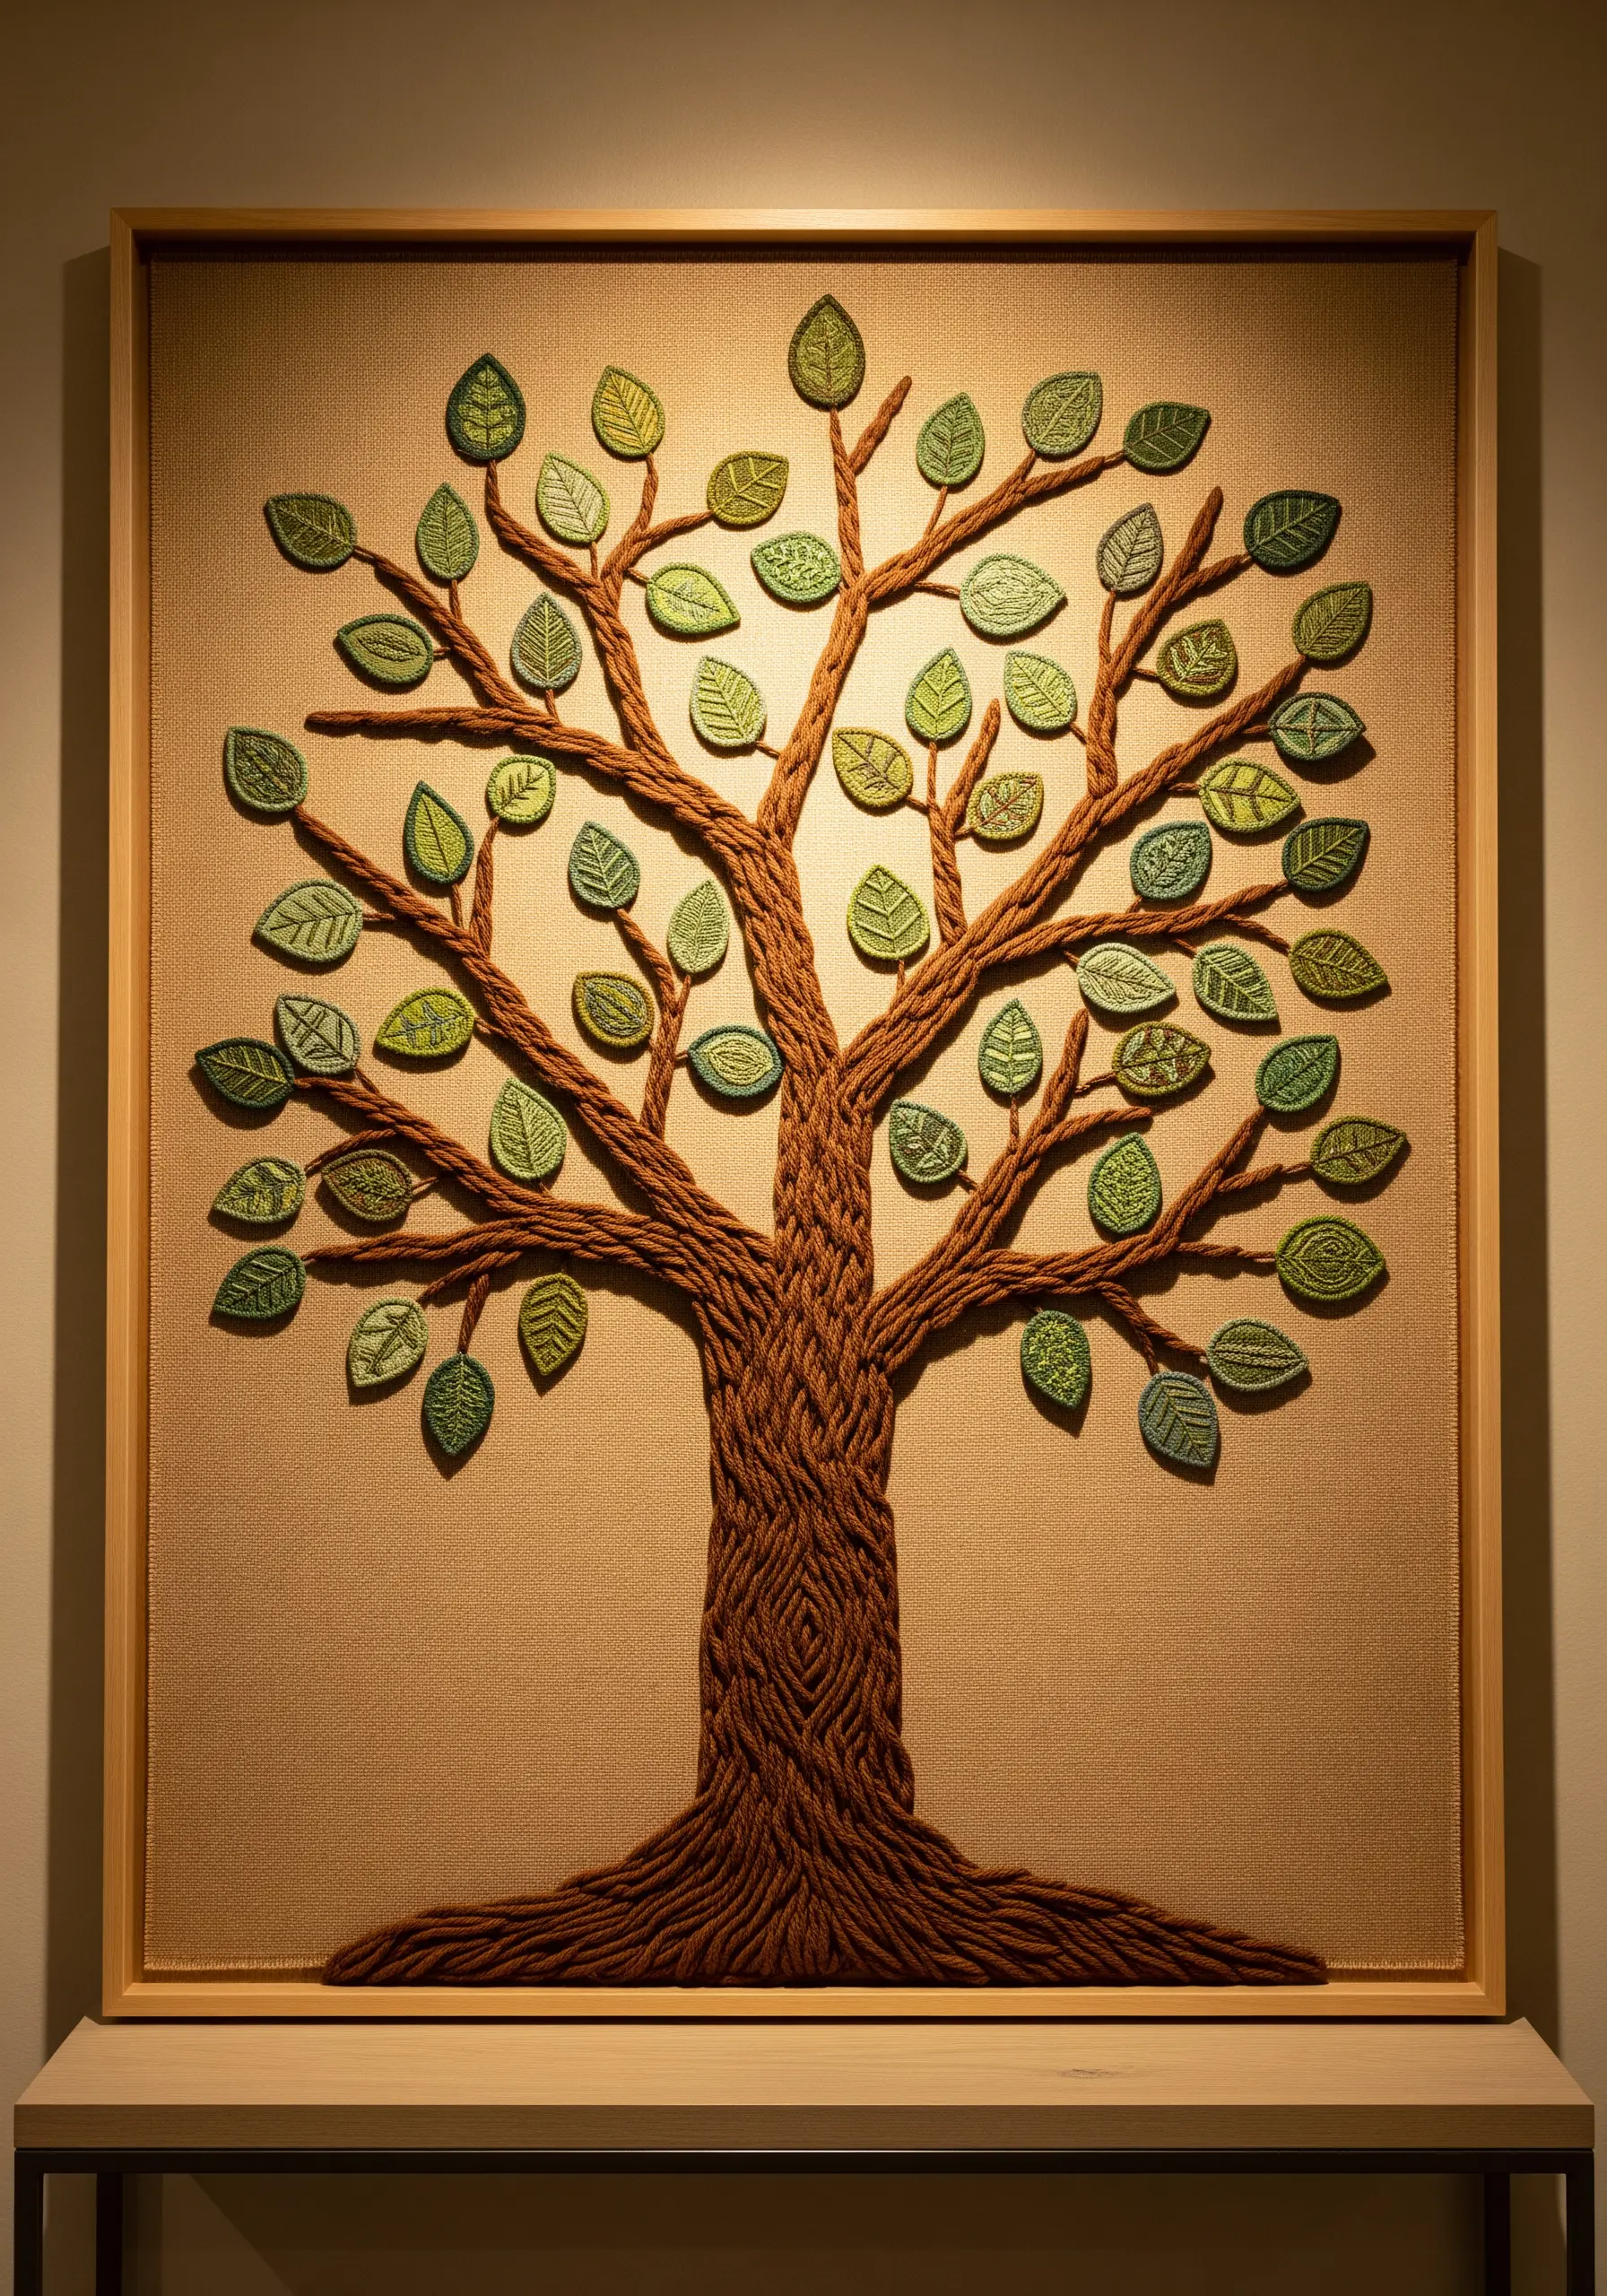
Make elements of your design physically stand out by using padded appliqué for the leaves.
First, wrap the tree trunk and branches with thick yarn or thread to establish a textural base.
Then, cut out your leaf shapes from felt, stitch the vein details, and add a small piece of batting or extra felt to the back before stitching them onto the canvas.
This raises the leaves from the surface, creating shadows and a compelling 3D effect that enriches your nature-inspired embroidery wall decor.
17. Add a Delicate Touch to Paper Goods
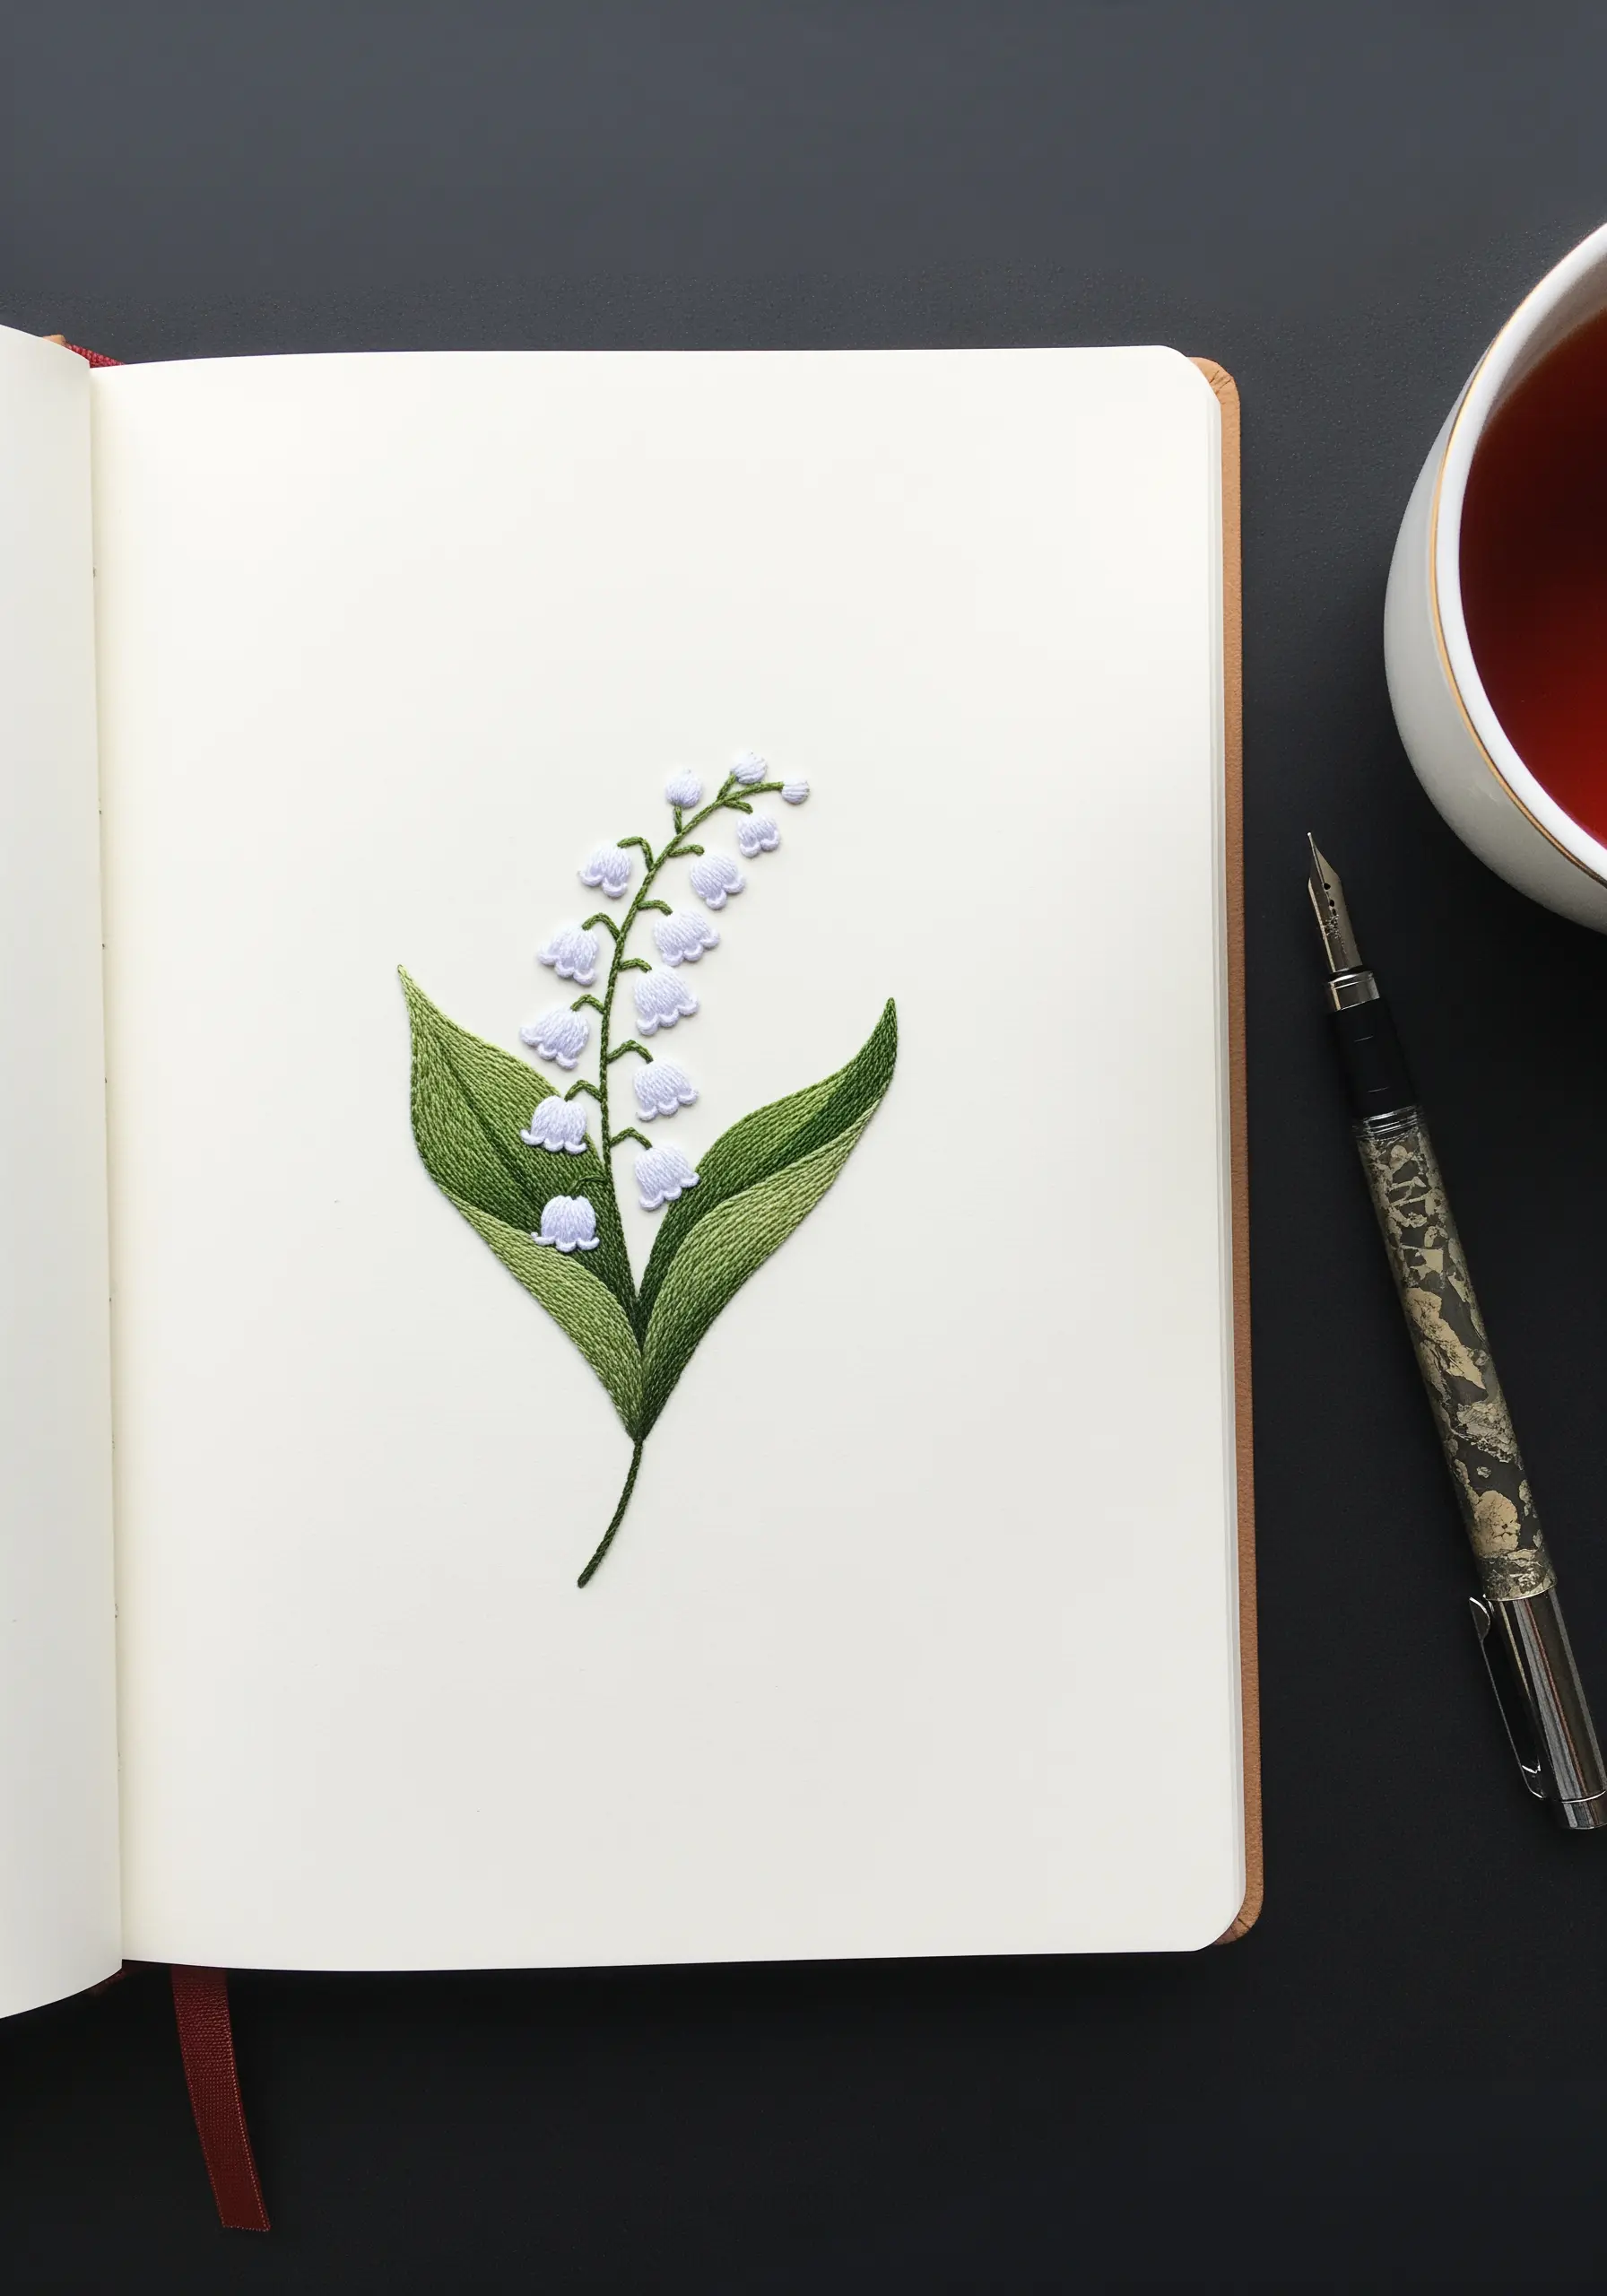
You can embroider on high-quality, heavy-stock paper or journal covers for a uniquely tactile finish.
First, carefully pre-pierce your stitching holes along the design lines with a pin or a sharp awl to prevent the paper from tearing.
Use a fine needle and just one or two strands of floss, pulling each stitch taut but not tight.
This method allows you to create small, sweet embroidery ideas for your journal covers that are both beautiful and durable.
18. Combine a Painted Canvas with String Art
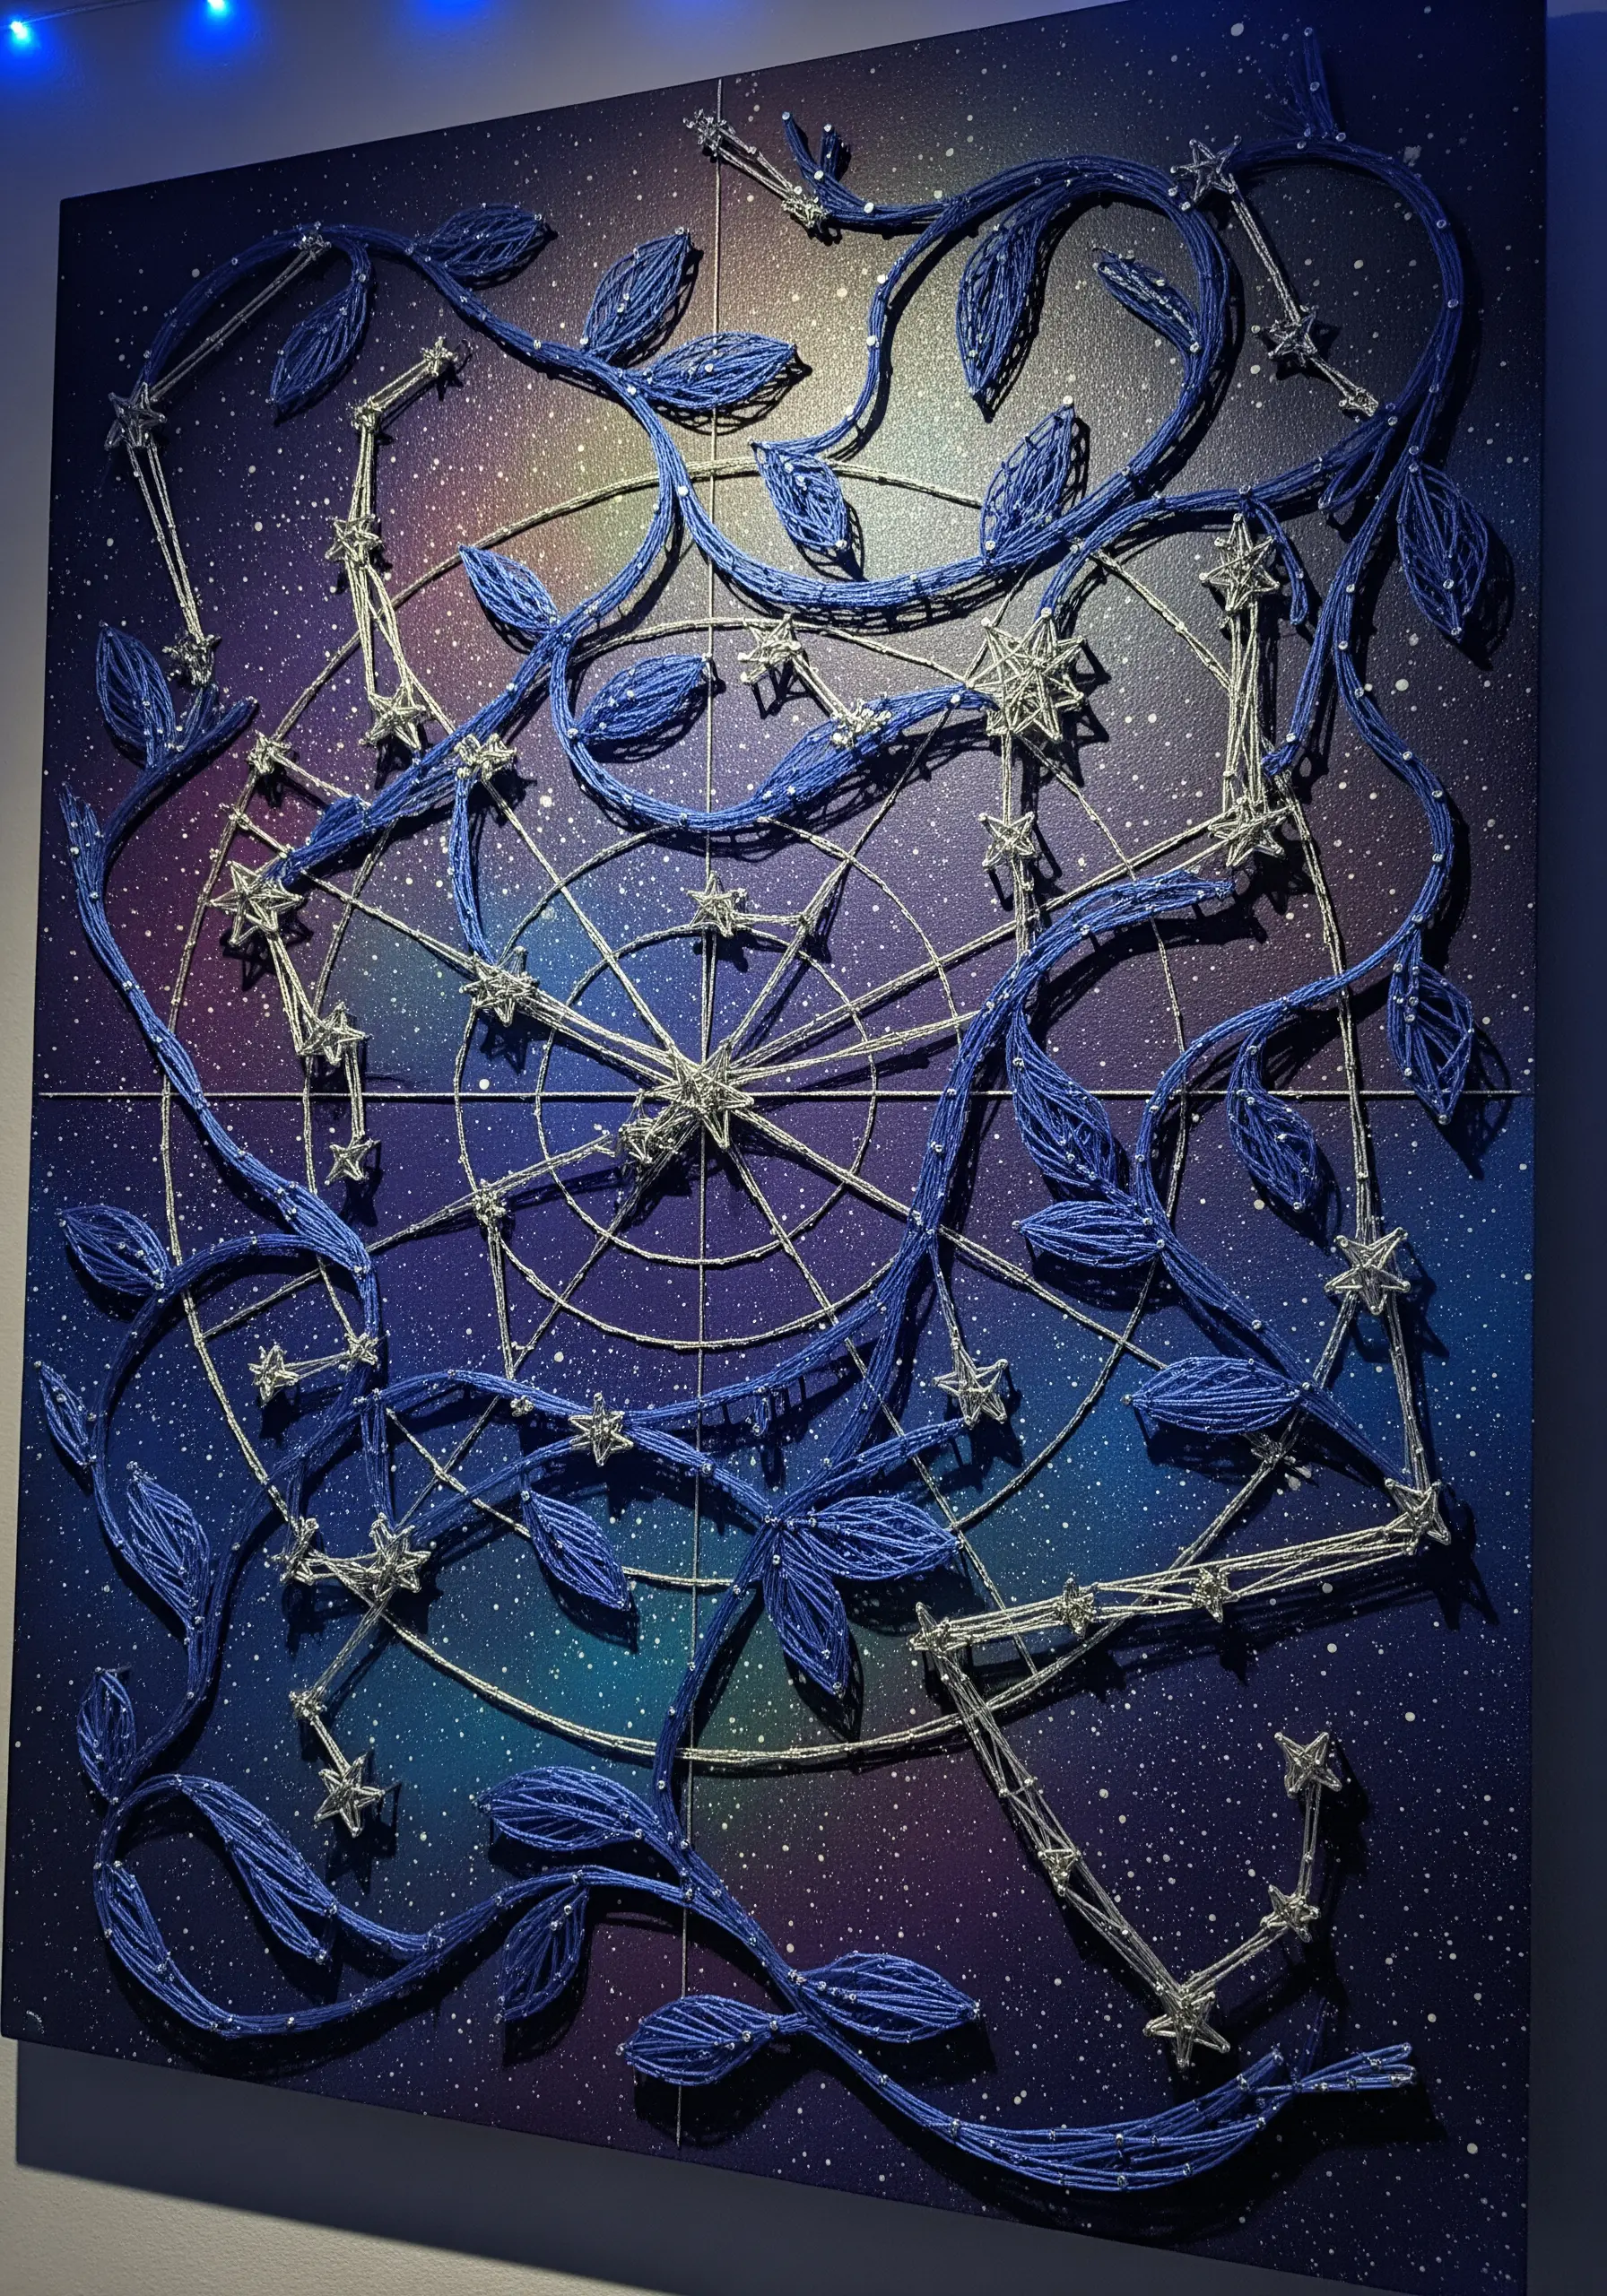
Elevate your string art by working on a pre-painted or printed canvas instead of plain wood or fabric.
A dreamy, celestial background adds an entire layer of narrative and depth to the piece before you even add a single thread.
Plan your string art—like these constellations and wrapping vines—to interact with the painted elements, creating a cohesive mixed-media artwork.
This is a fantastic way to turn a simple string art project into a piece of true DIY art pieces.
19. Choose the Right Stitches for Functional Linens
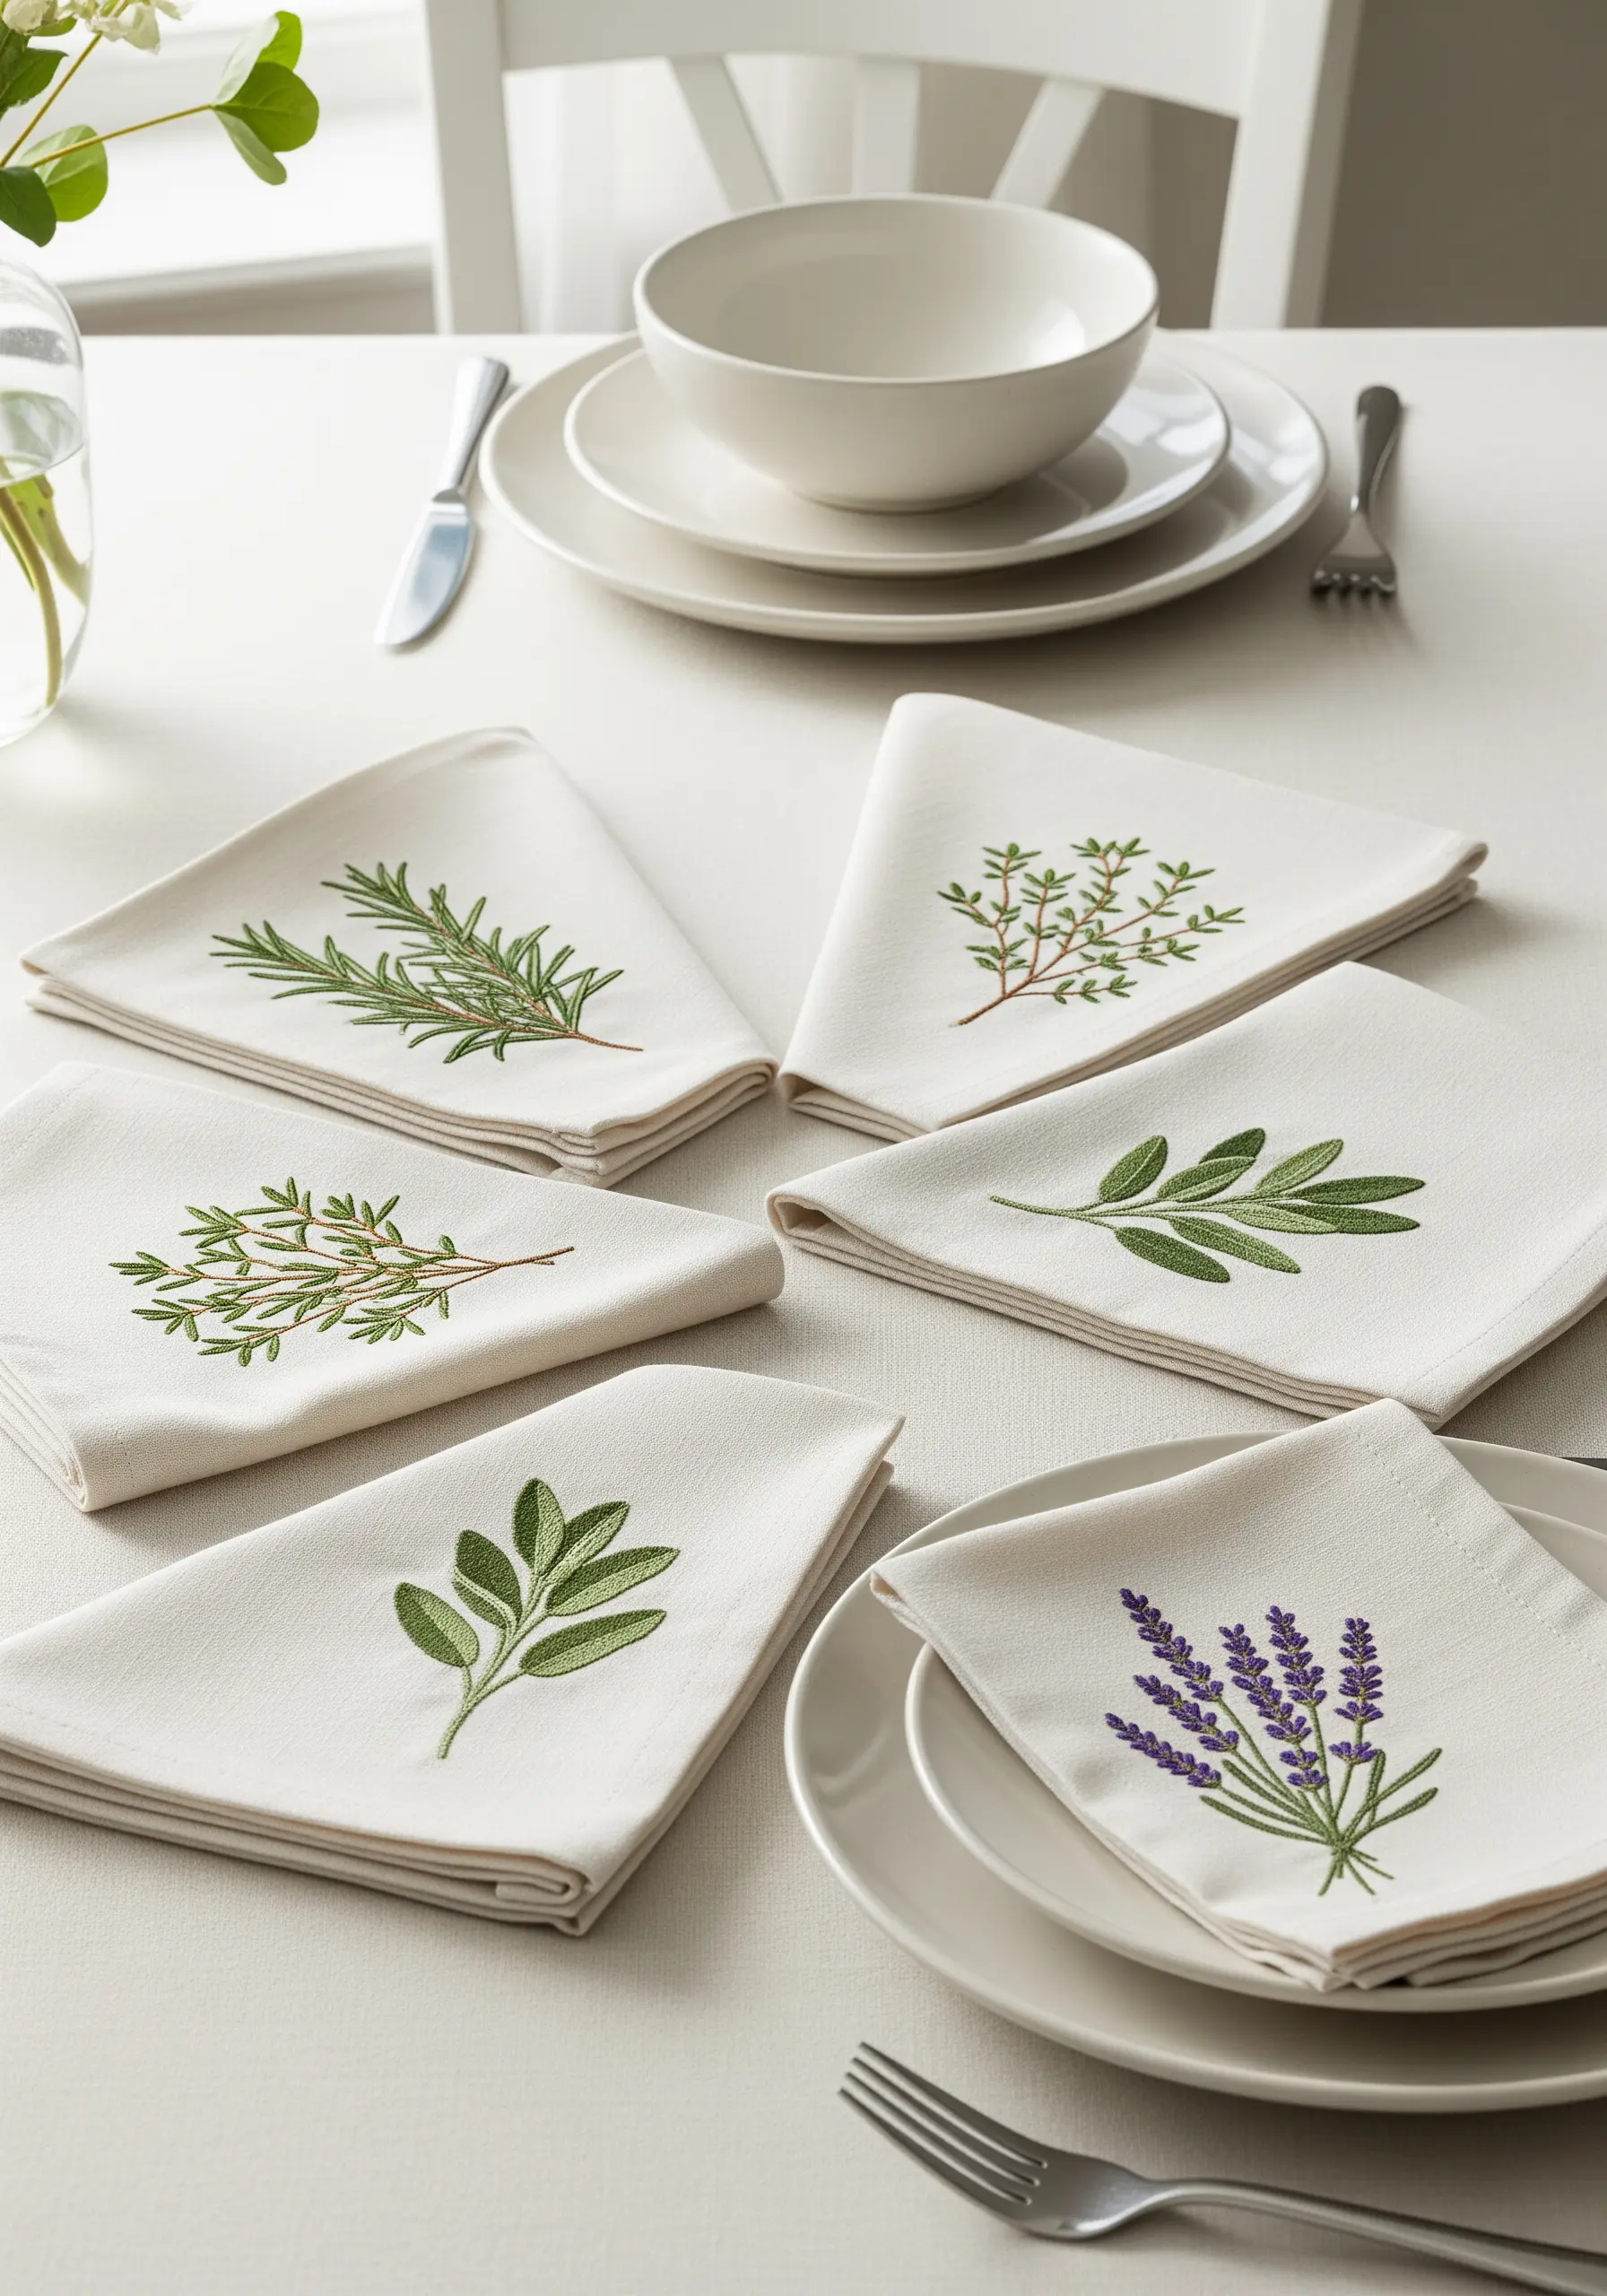
When embroidering items that will be used and washed, like table napkins, durability is as important as beauty.
Opt for sturdy, flat stitches like stem stitch, split stitch, and satin stitch, as they are less likely to snag than looped stitches like French knots or bullion knots.
Always use high-quality, colorfast cotton embroidery floss to ensure your beautiful work doesn’t bleed or fade in the wash.
These simple choices will keep your table linen embroidery motifs looking crisp and elegant for years.
20. Soften Geometric Shapes with Organic Elements

A sharp, geometric shape like a heart can feel static on its own. Soften it by framing it with organic forms.
Create a crisp, geometric heart using a dense string art fill, then surround it with a gentle wreath of leaves.
Use a softer, more open stringing pattern for the leaves to create a clear textural contrast.
This balance between hard and soft, geometric and organic, results in a romantic string art heart pattern that feels both modern and tender.
21. Deconstruct a Leaf into Abstract Color Blocks

Move beyond realism by interpreting a leaf as a collection of bold, graphic shapes.
Instead of blending colors for shading, use a satin stitch to fill sections of the leaf with solid blocks of unexpected color like blue, red, and yellow.
Keep the central stem and veins as a simple black outline to ground the design and maintain the recognizable leaf shape.
This modern approach turns a classic botanical motif into a vibrant piece of color-blocking embroidery.
22. Embellish Furniture with Trailing String Art Vines
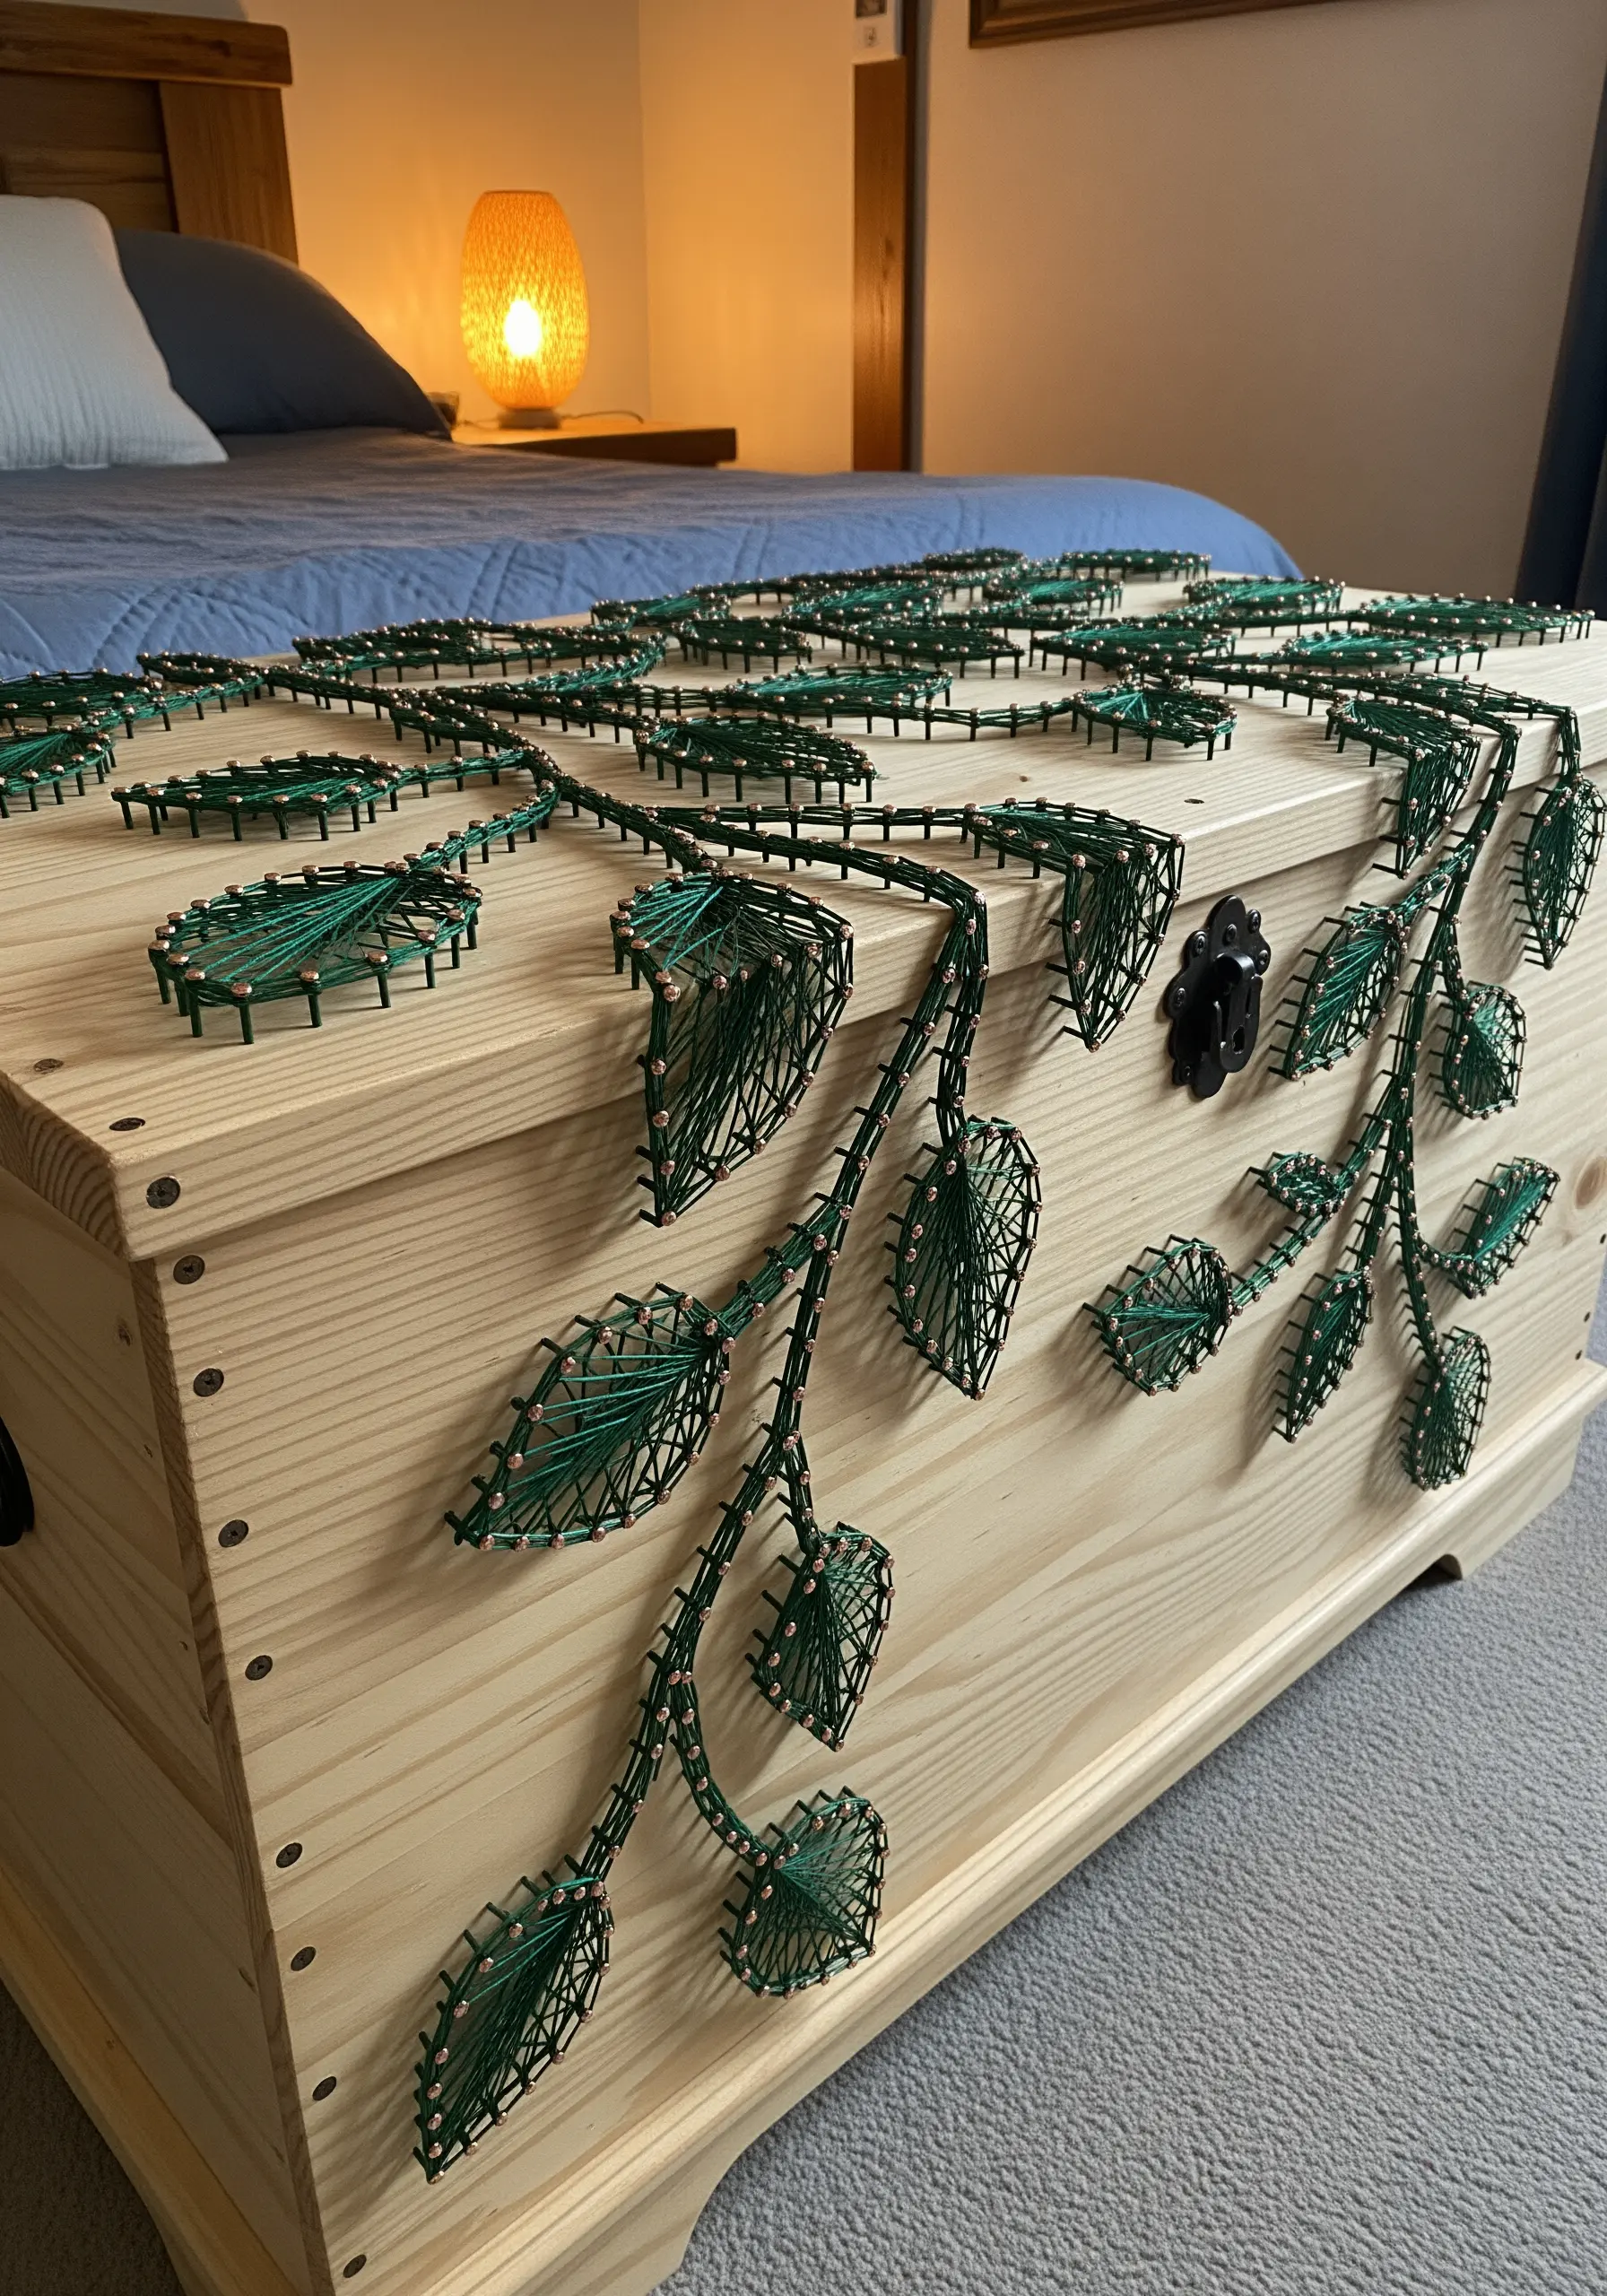
Extend your creativity beyond the canvas by applying string art directly to wooden furniture, like a hope chest or side table.
Use decorative nails or brass tacks that complement the wood tone for a polished finish.
Design a pattern, like these flowing vines, that organically wraps around the object’s corners and edges, making the artwork feel truly integrated with the piece.
This is a stunning way to customize and upcycle furniture with a personal, handmade touch.
23. Create a Leaf Sampler to Perfect Your Stitches
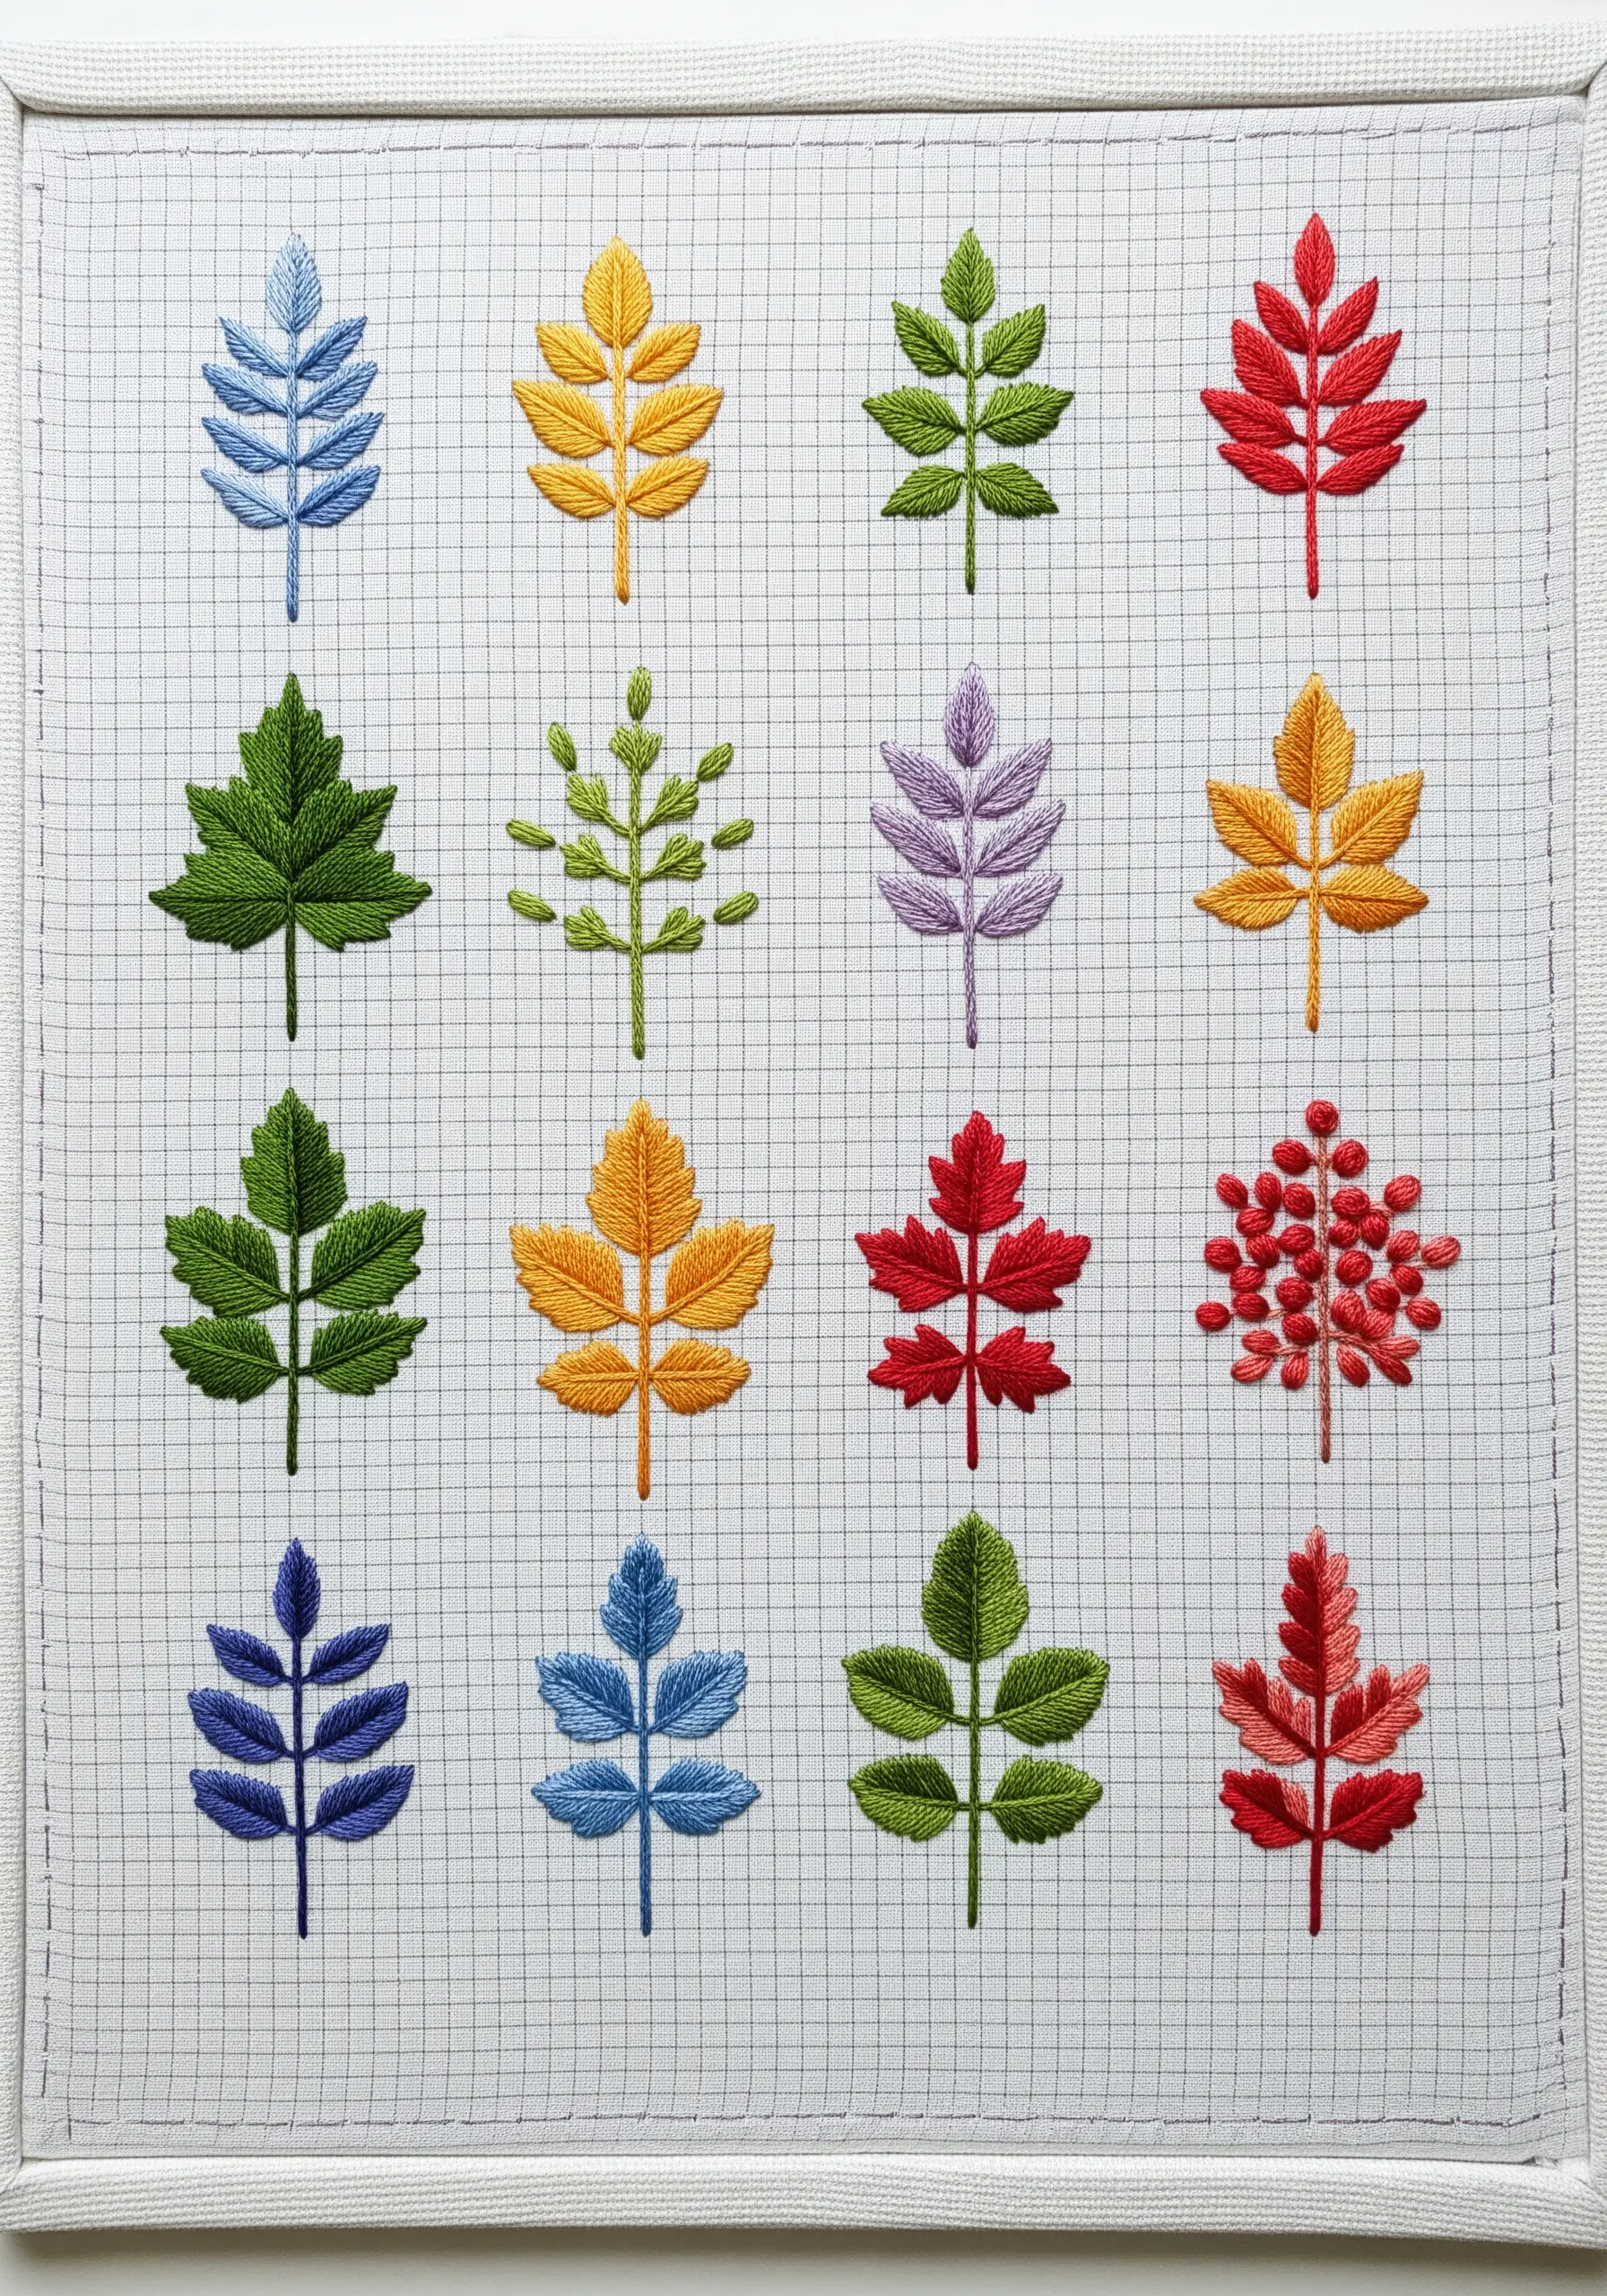
A sampler is a fantastic exercise for building muscle memory and mastering different techniques on a small scale.
Divide your fabric into a grid and dedicate each square to a different leaf type, experimenting with stitches like fishbone, satin, fly, and stem stitch.
This allows you to see how different stitches create unique textures and shapes, providing a valuable reference for all your future minimalist botanical stitch designs.
24. Replicate a Skeleton Leaf with Negative Space
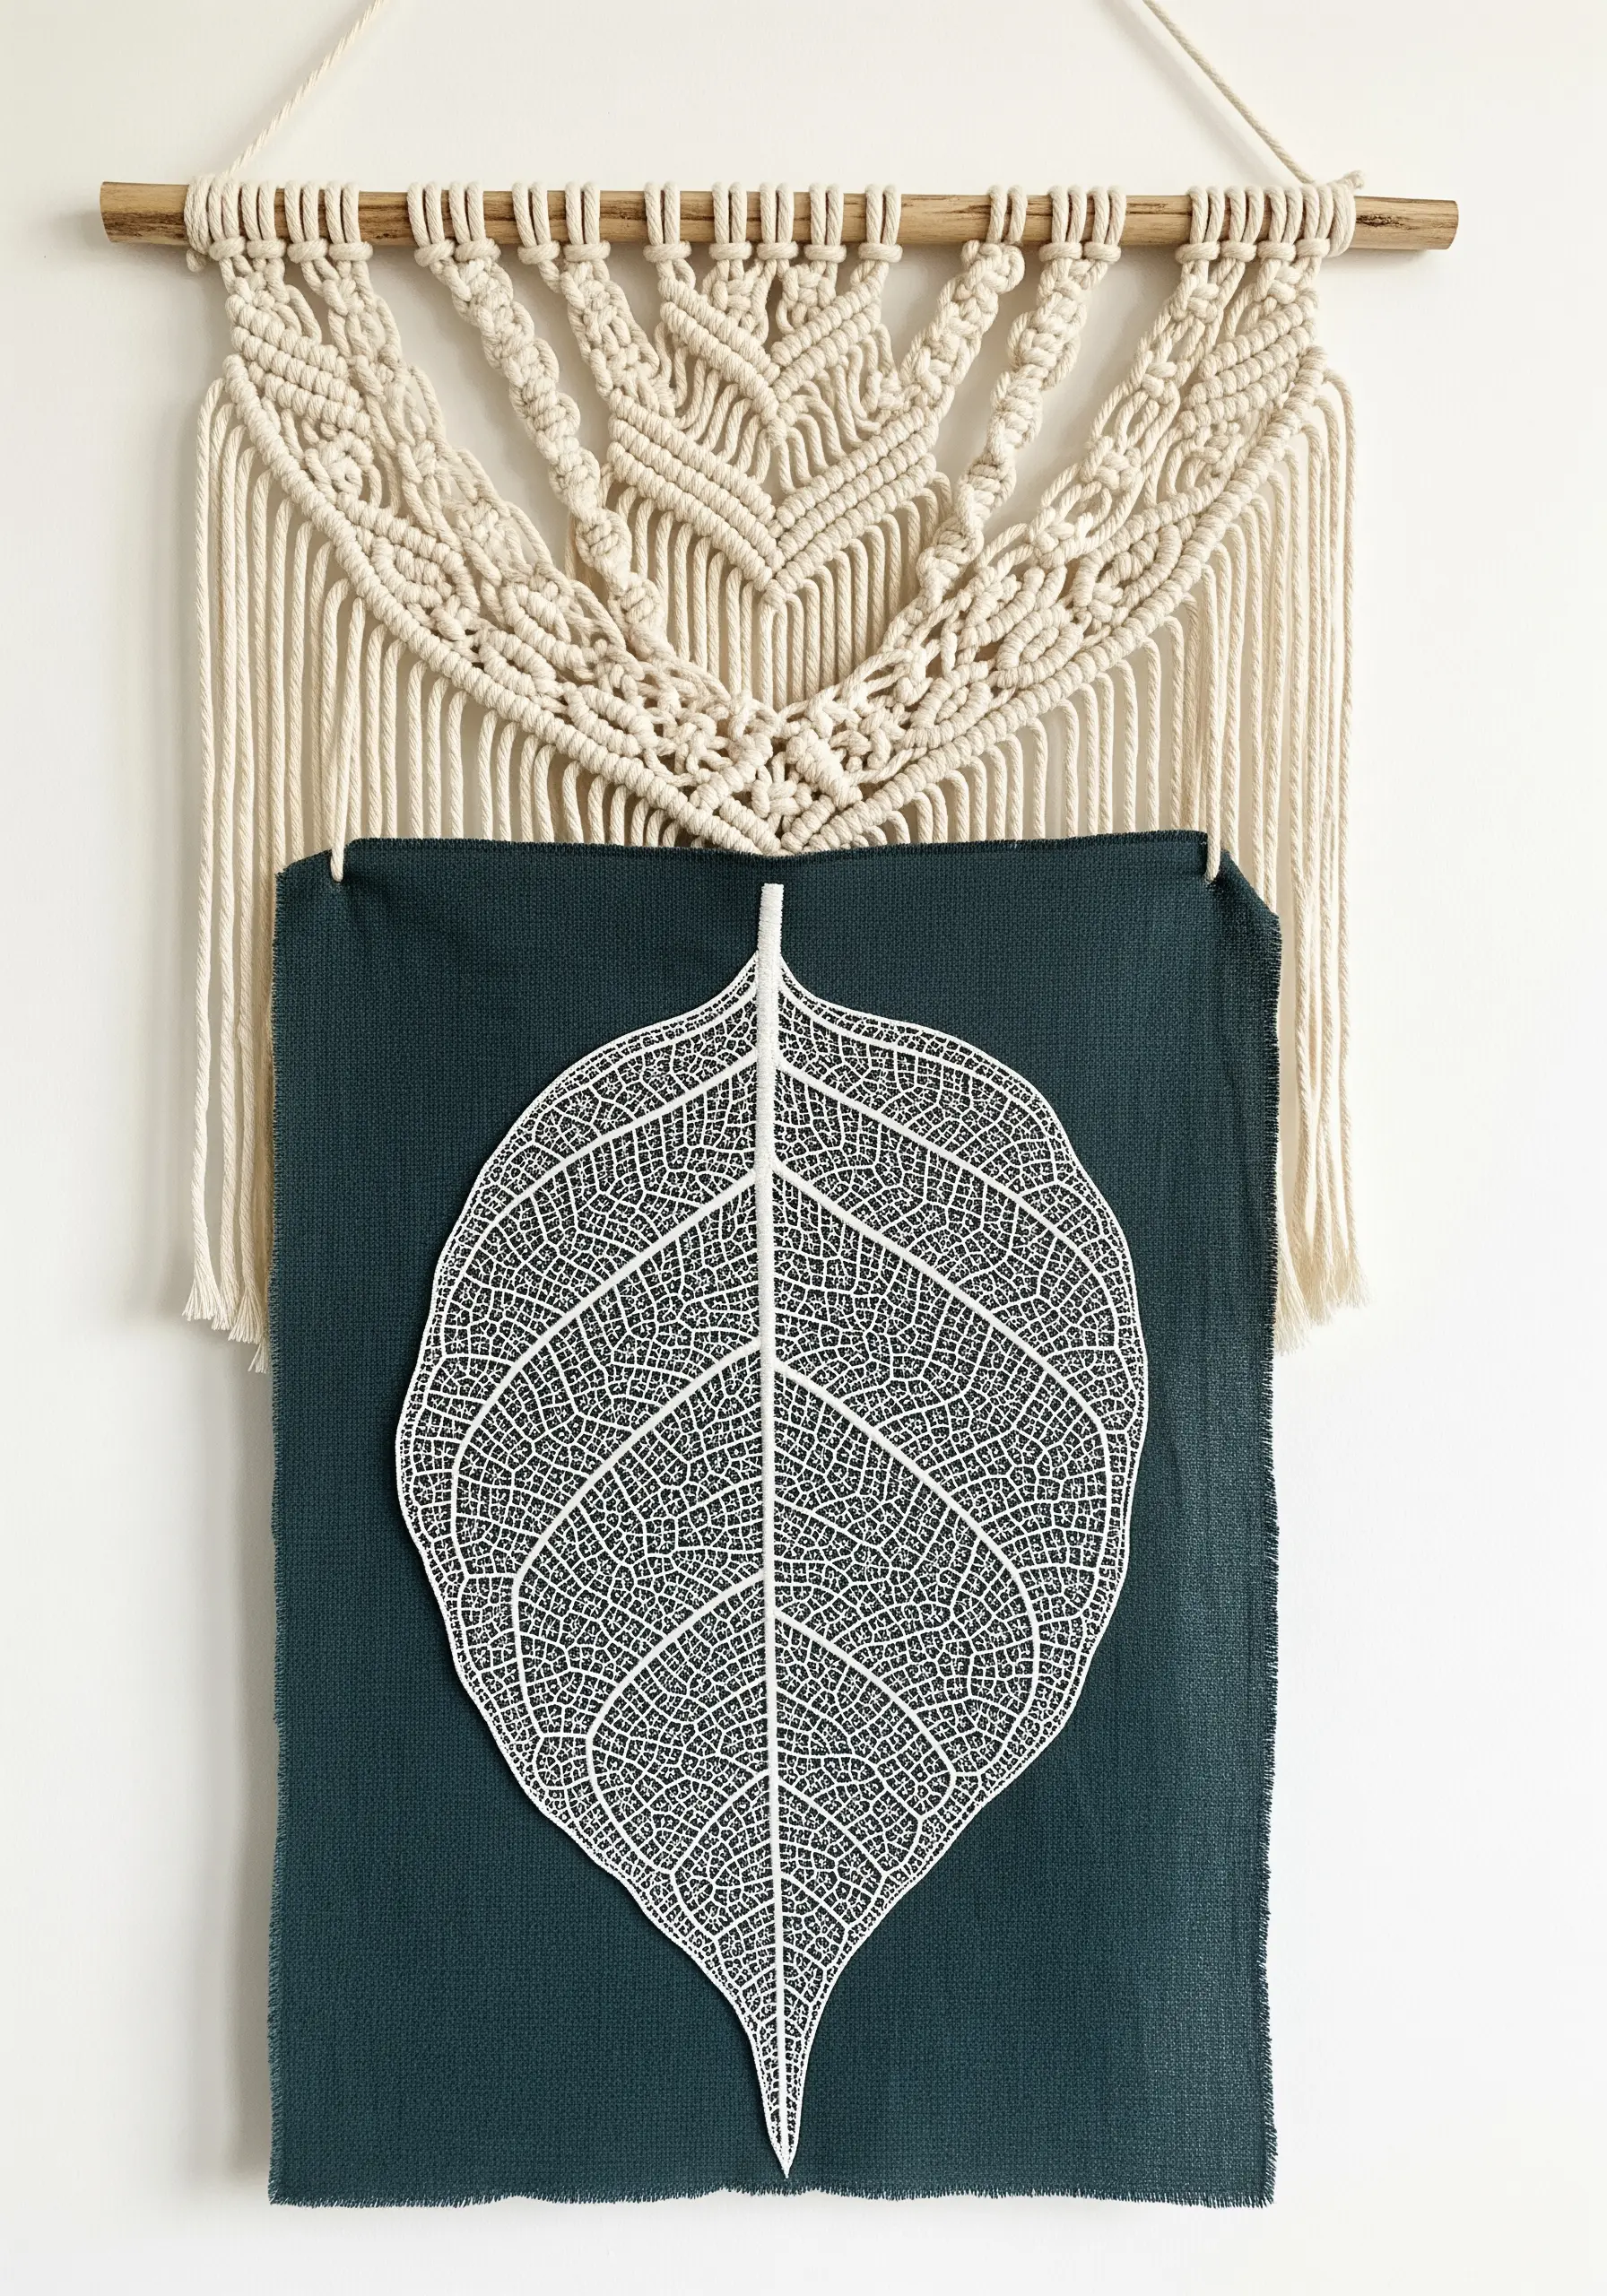
Capture the delicate structure of a skeleton leaf by focusing on what’s not there.
To achieve this intricate, lace-like effect, you can stitch the fine vein pattern onto a sheet of water-soluble stabilizer using a simple backstitch.
Once the stitching is complete, dissolve the stabilizer in water, leaving behind only the thread structure.
Mount the finished thread skeleton onto a contrasting dark fabric to showcase every beautiful, intricate detail.
25. Design a Multi-Panel Birch Tree Installation

Create an immersive, forest-like experience in a hallway or large room by splitting a single scene across multiple vertical panels.
The key to realistic birch bark is inconsistency; use a mix of black and white thread, wrapping it unevenly to create the tree’s signature mottled texture.
Add tiny, bright green leaves as a final touch to introduce a pop of color and a sense of life to the monochromatic trunks.
This technique transforms a simple string art concept into a stunning piece of environmental art.
26. Use Couching to Add Bold, Textured Branches

When you want to use a fiber that’s too thick to pull through fabric—like wool roving or chunky yarn—couching is the perfect solution.
Lay your thick fiber on the surface of your fabric in the desired branch shape.
Then, using a standard needle and embroidery floss in a matching or contrasting color, make small tacking stitches over the thick fiber to secure it in place.
This creates wonderfully bold, touchable organic-inspired embroidery textures with minimal effort.
27. Build Up Dense Pine Needles in String Art
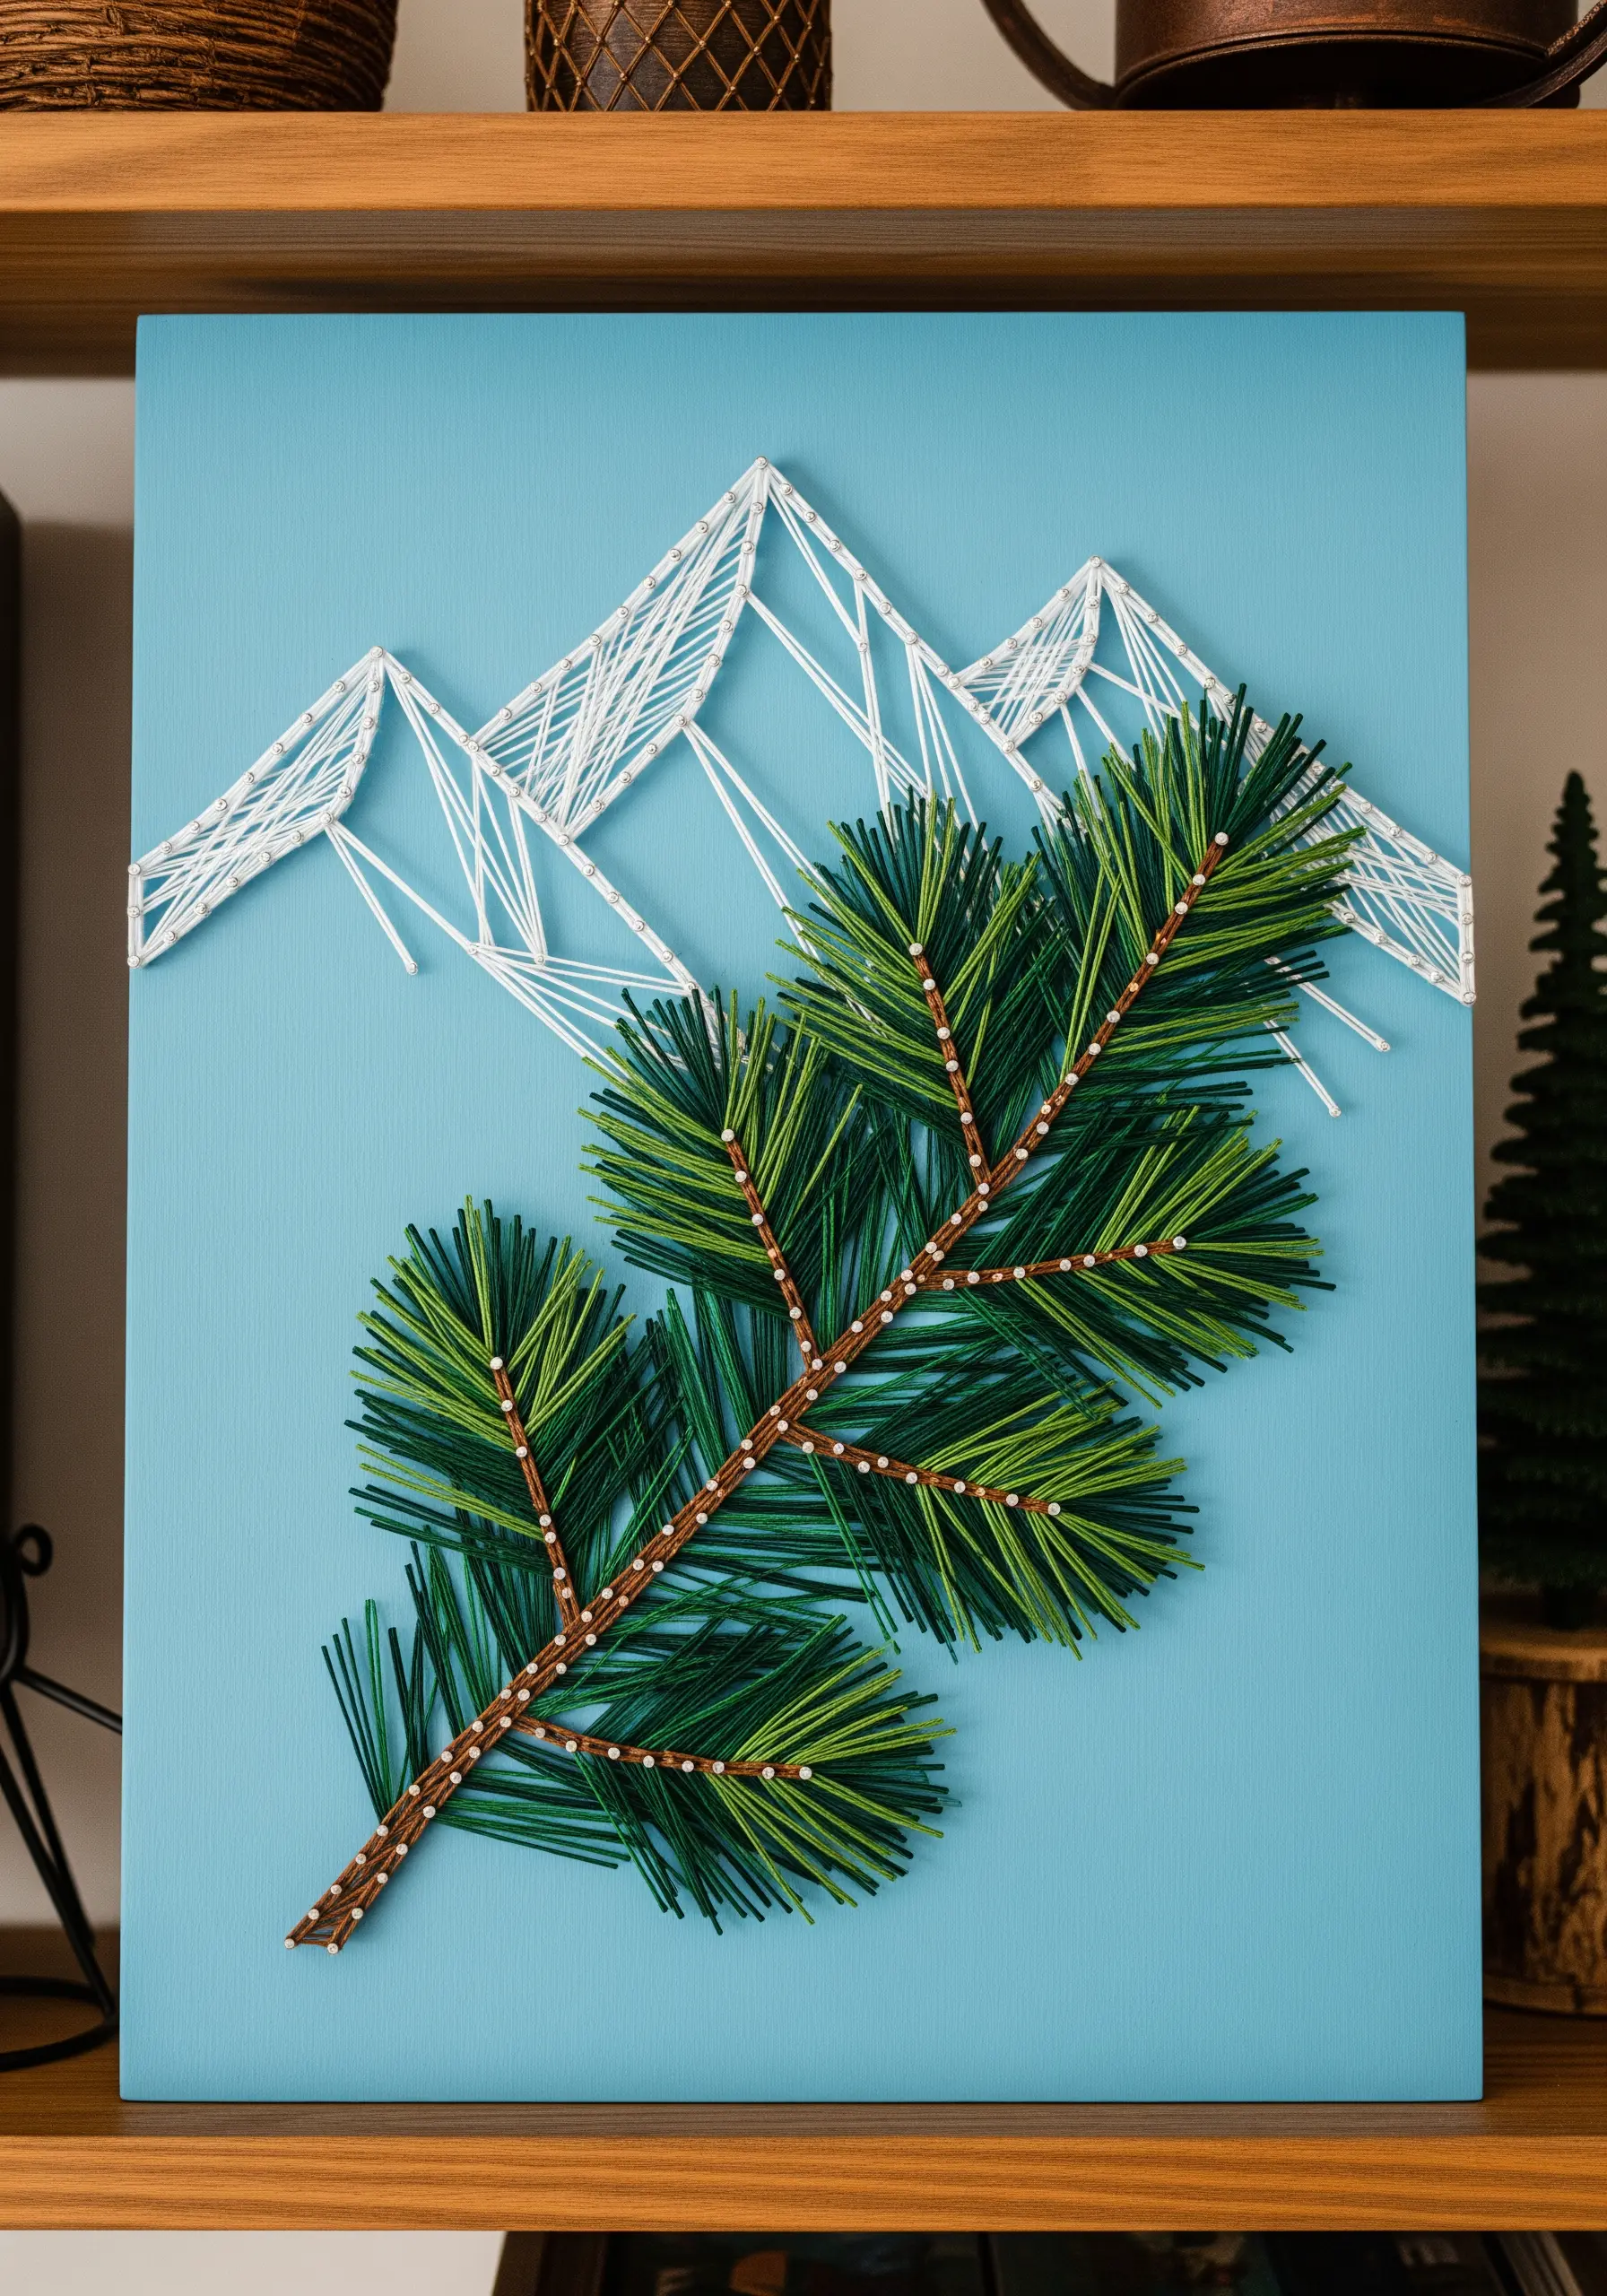
To create the lush, full look of a pine branch, you need to build up layers of thread.
Instead of just a single strand between nails, wrap your green thread back and forth multiple times between the central branch and the outer edge of the needle cluster.
Use several shades of green and overlap them randomly to create natural-looking depth and density.
This technique contrasts beautifully with the clean, simple lines of the mountain backdrop.
28. Consider How Light Interacts with Your Stitches
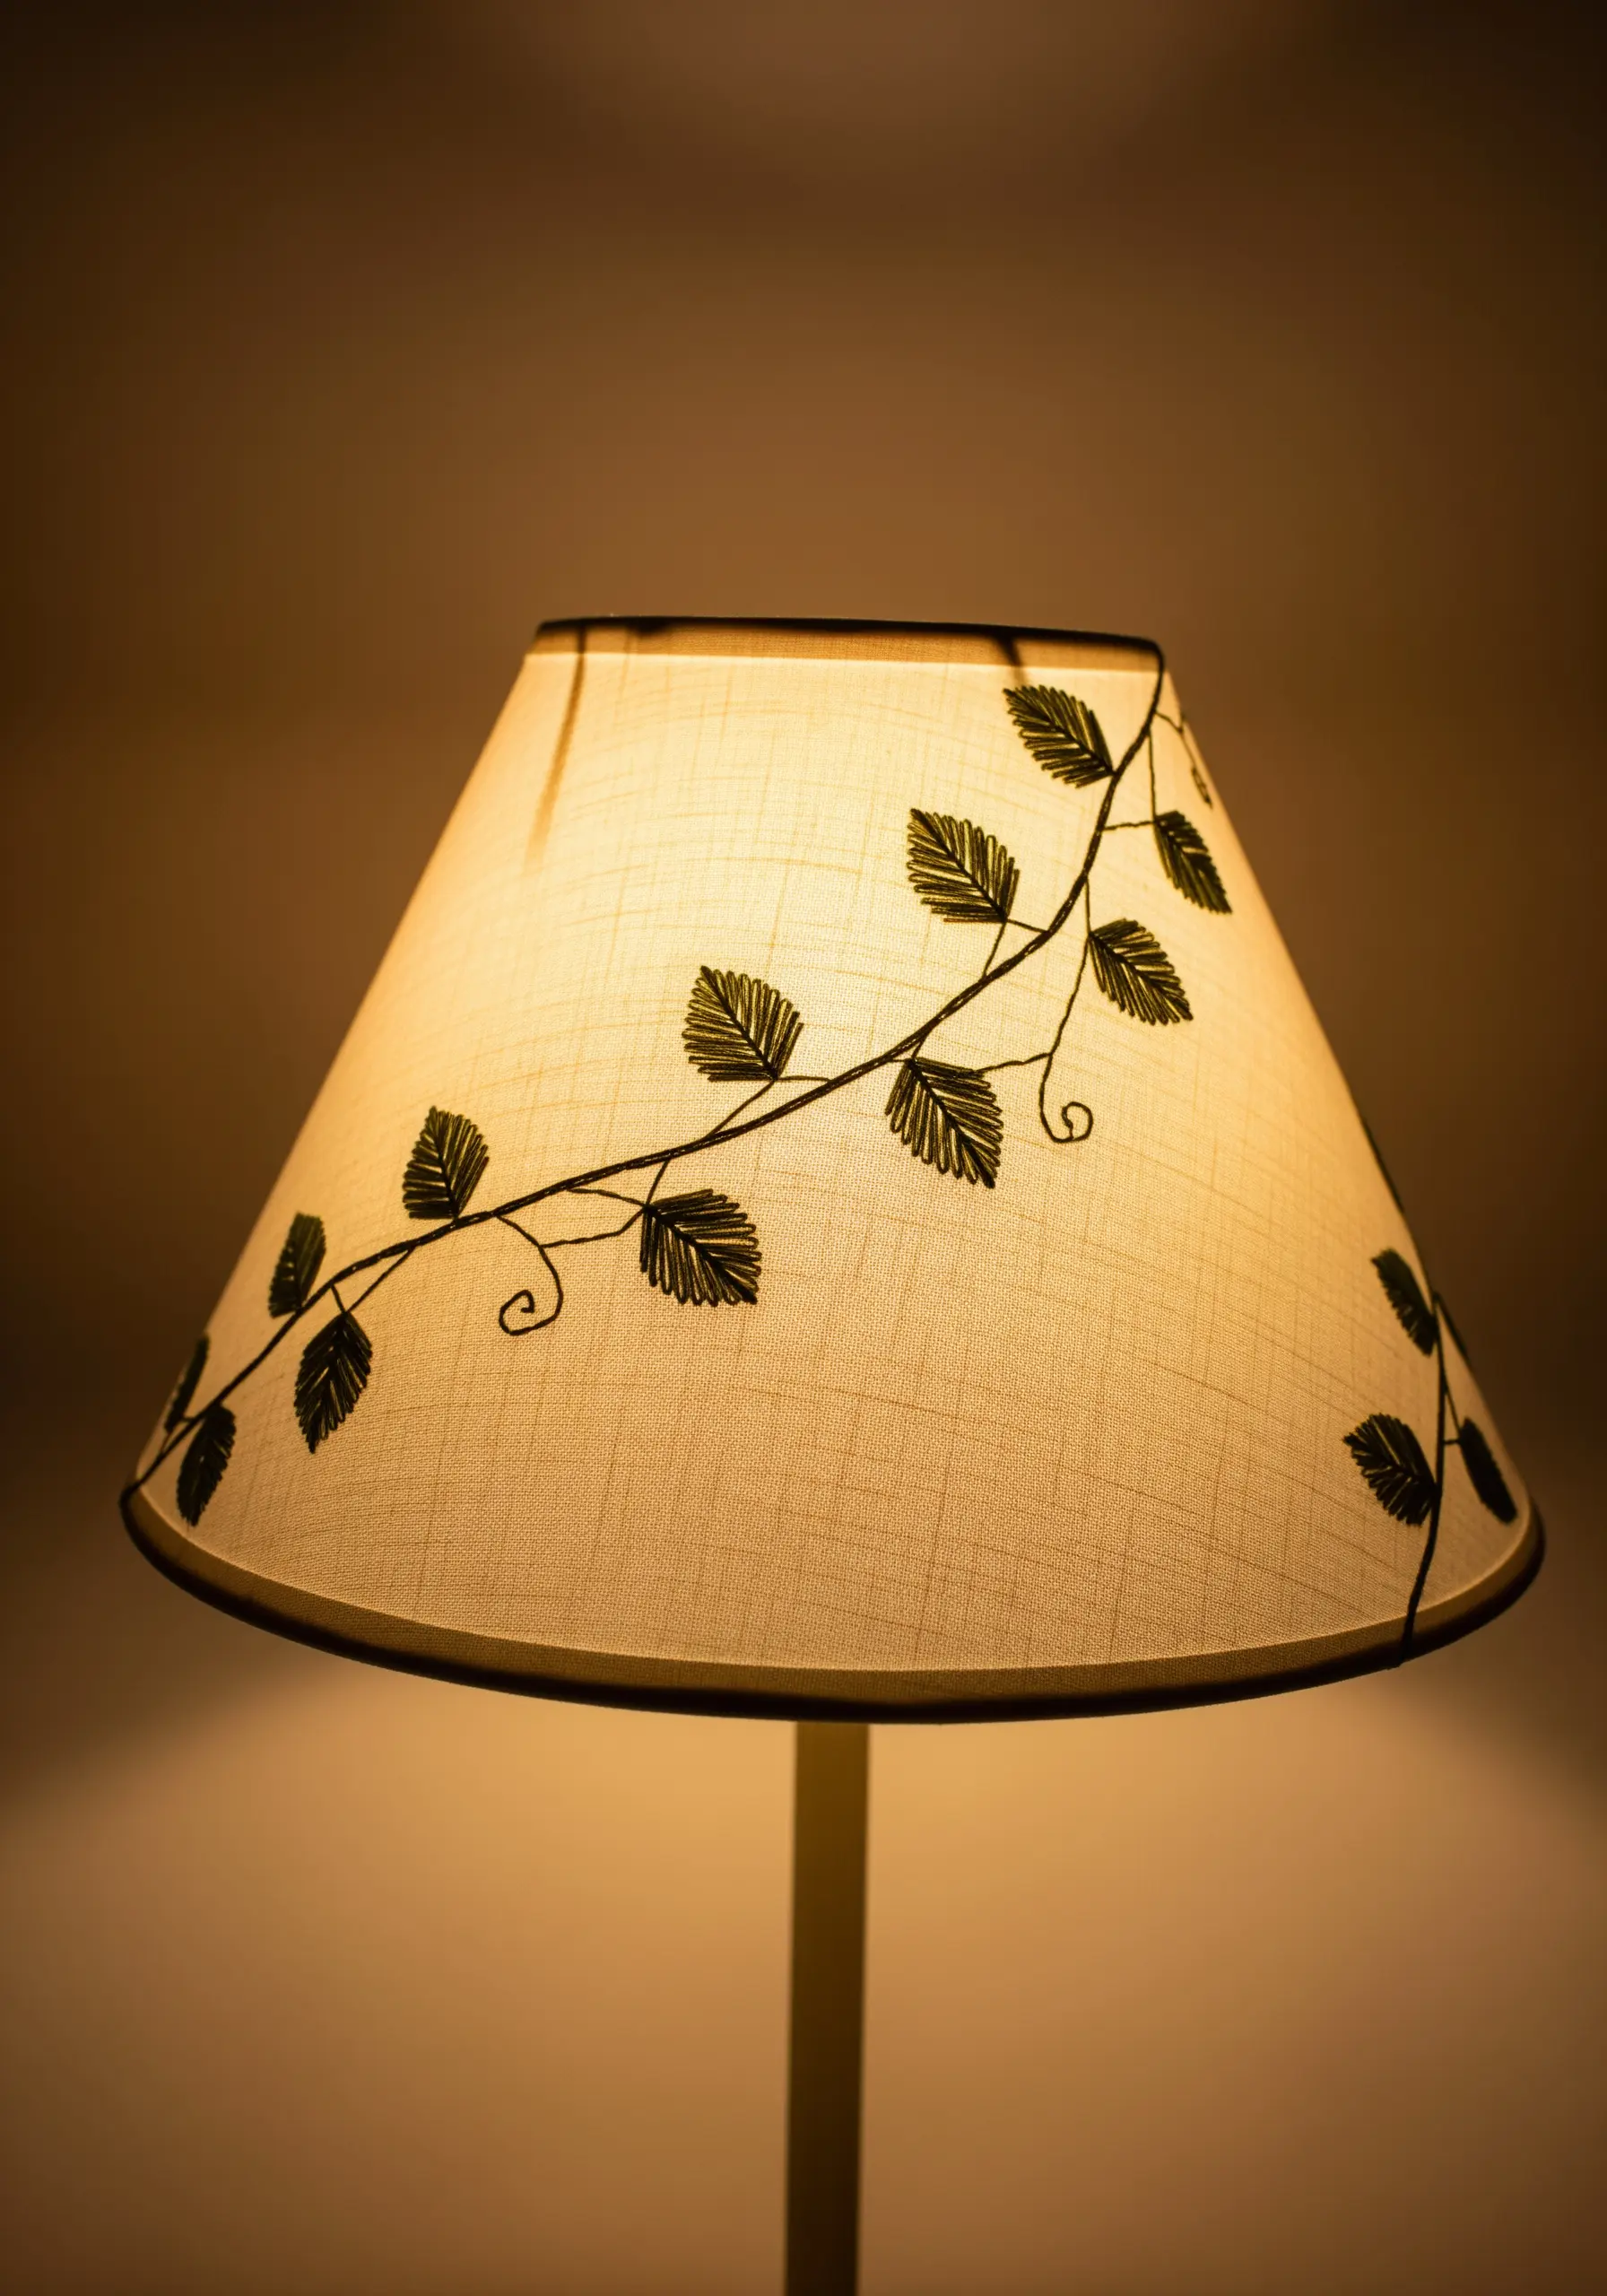
When embroidering on a translucent surface like a lampshade, your design will be viewed both with and without light passing through it.
A simple outline stitch, like the stem stitch used for this trailing vine, creates a clean graphic look when the light is off and a dramatic, glowing silhouette when it’s on.
Ensure your stitches are neat on both the front and back, and use a medium tension to avoid buckling the delicate lampshade material.
29. Secure Your Pattern for Pinpoint Accuracy
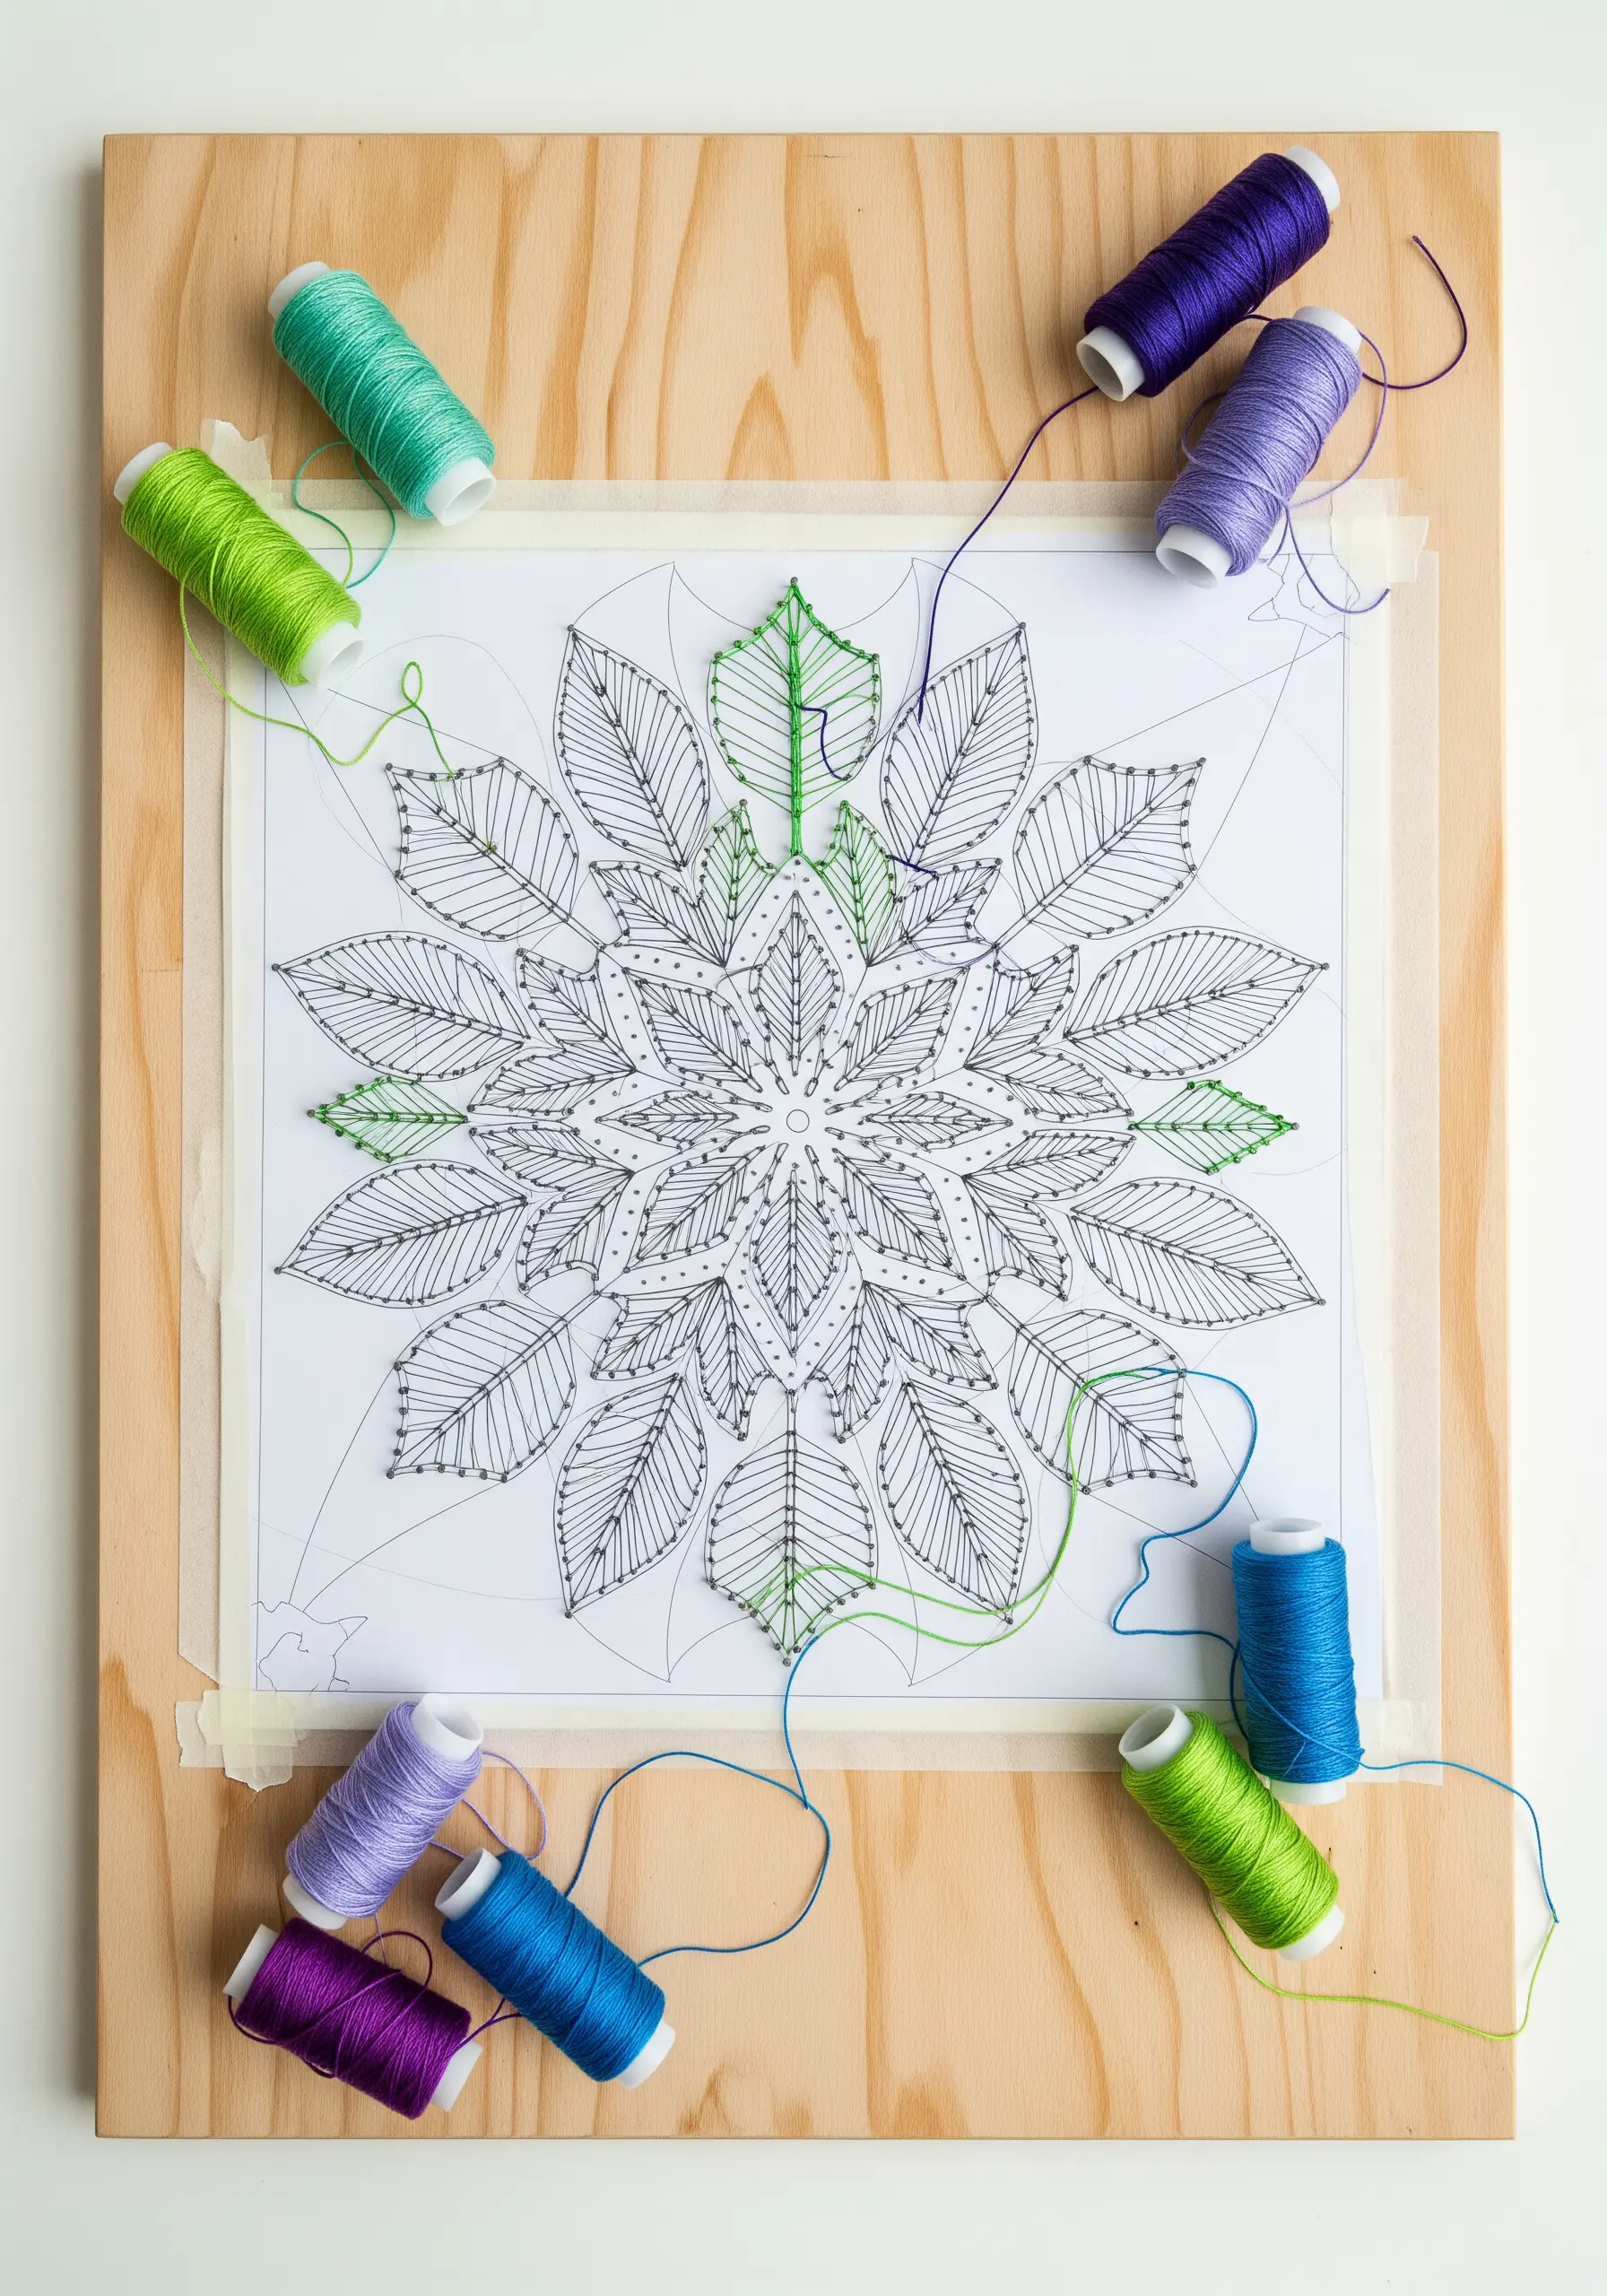
The foundation of clean, precise string art is a pattern that doesn’t move.
Before you begin hammering in your nails, securely tape your paper pattern to all four corners of your wooden board.
This guarantees that your nail placement will be perfectly accurate, which is crucial for achieving sharp points and smooth curves in the final piece.
A stable pattern is the first and most important step toward professional-looking results.
30. Use Variegated Thread for Effortless Color Play
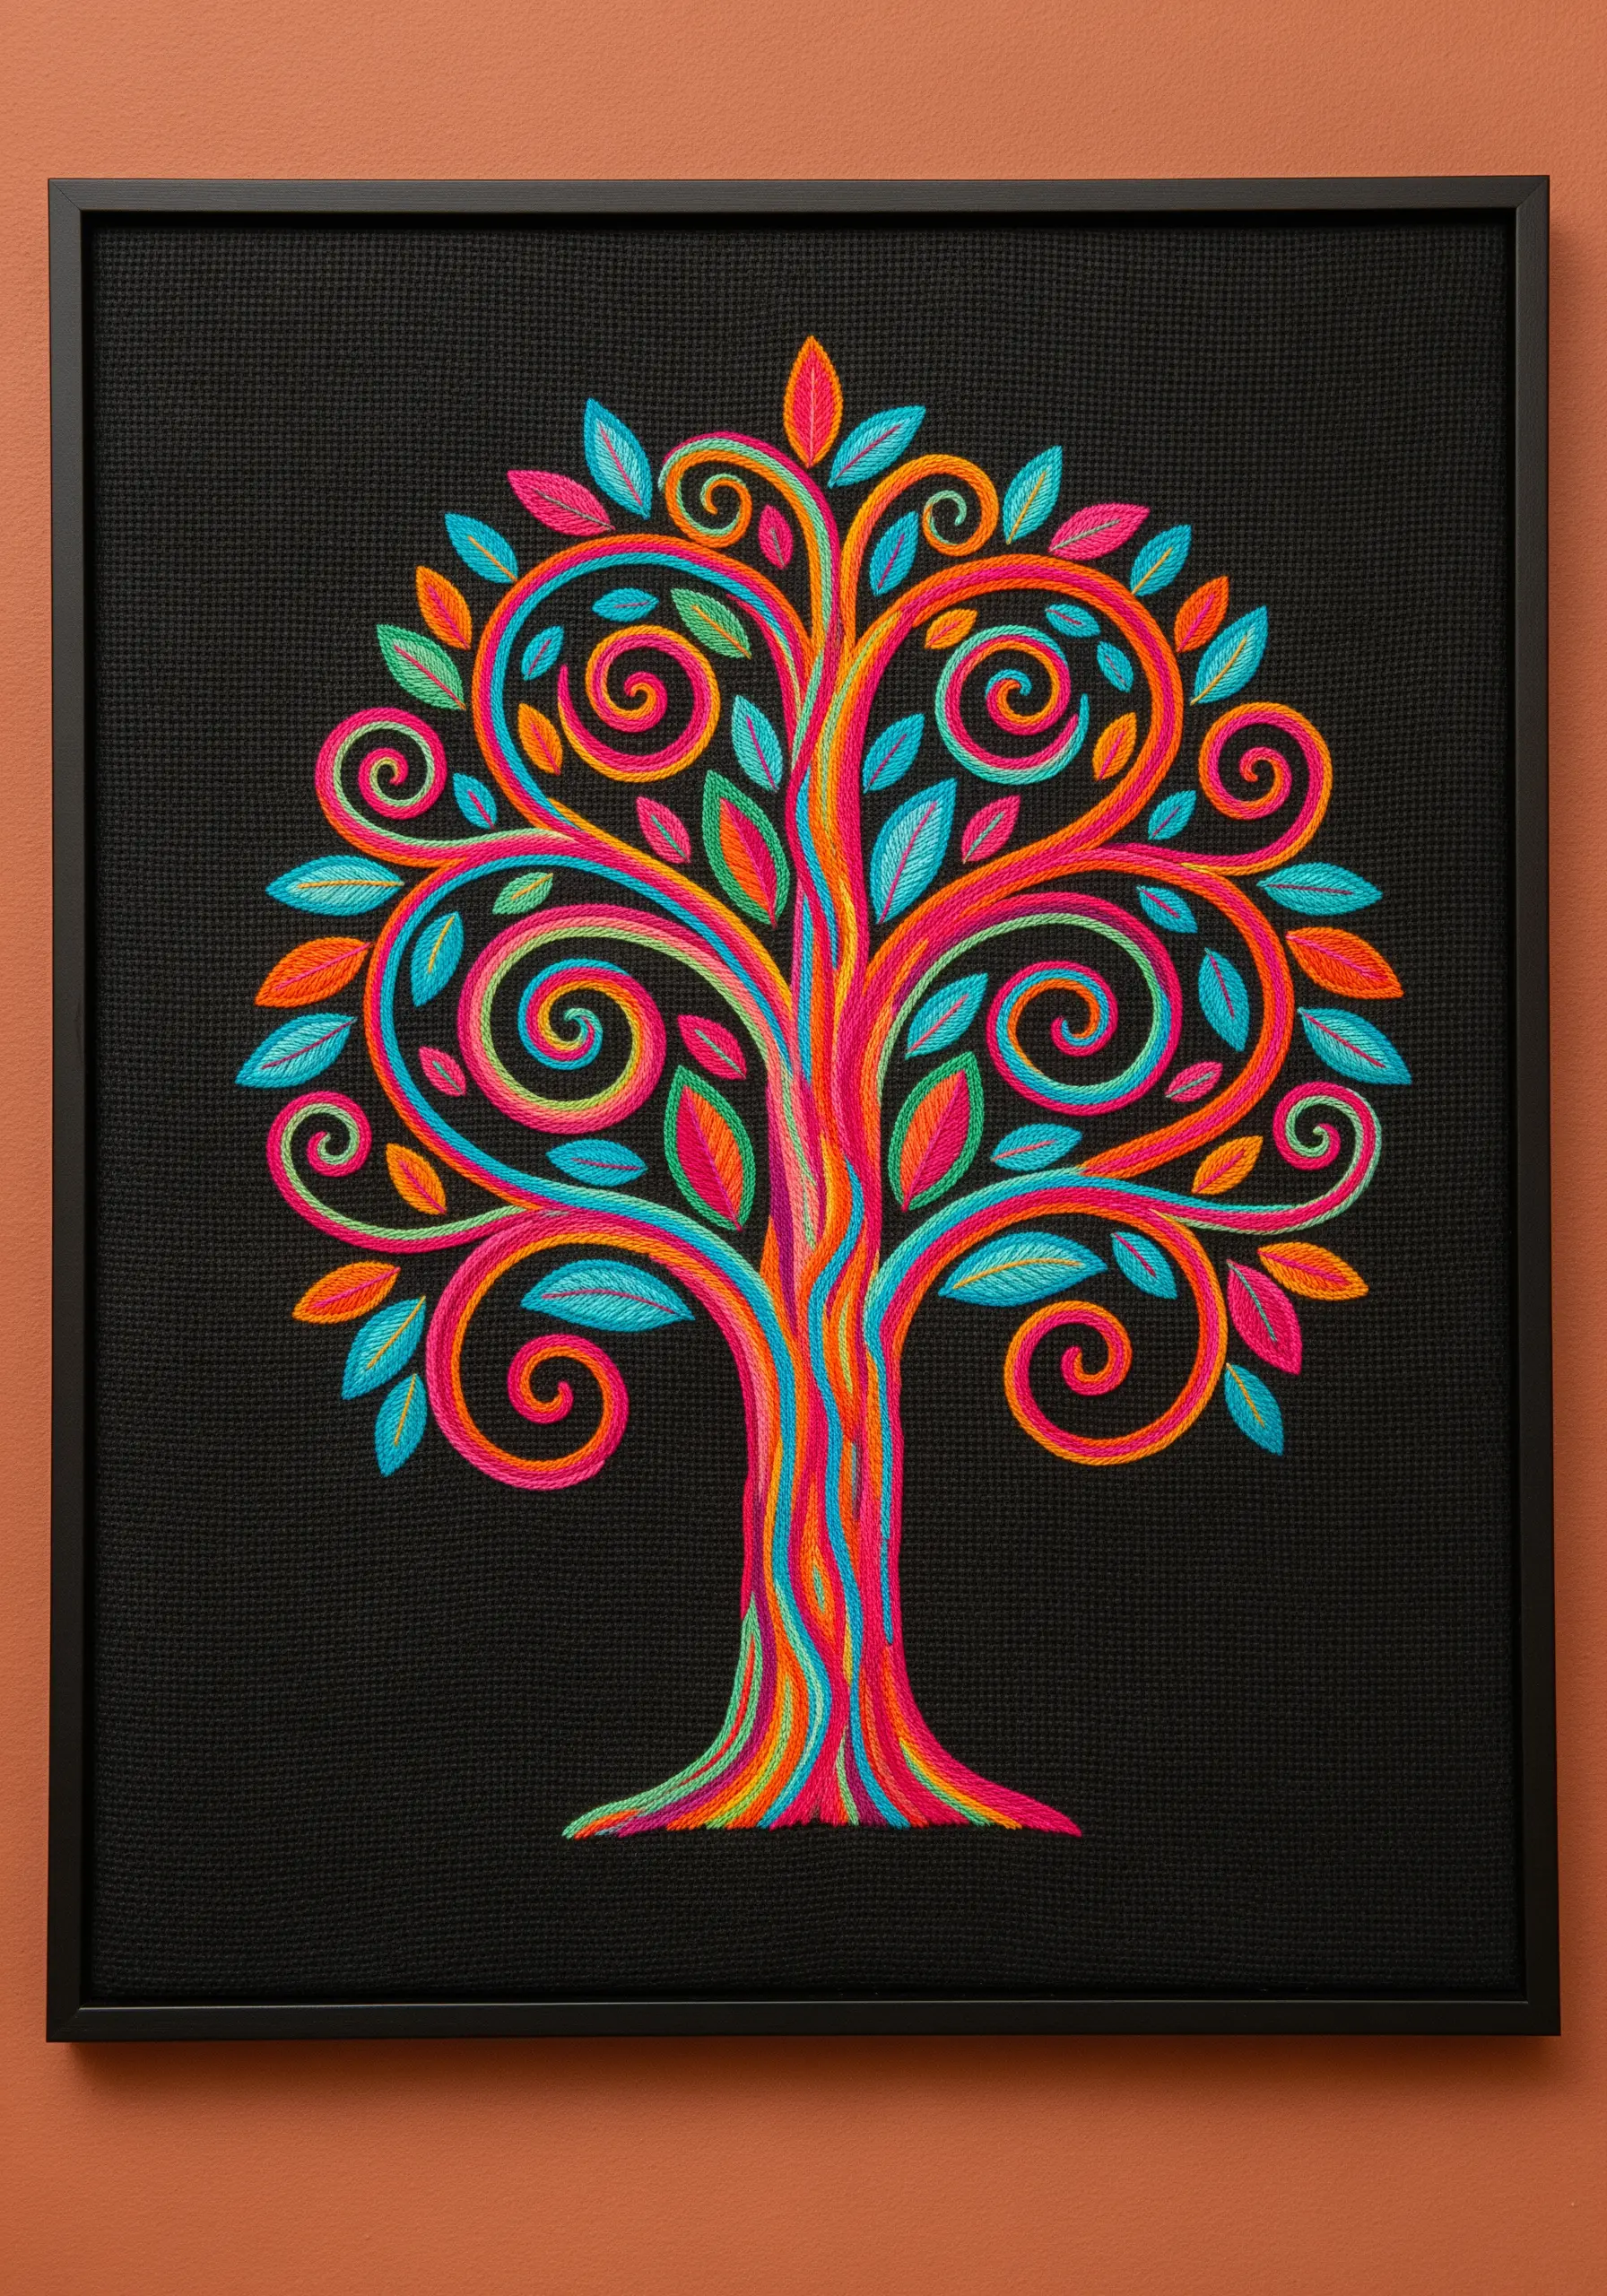
Achieve a vibrant, swirling color effect without constantly changing your thread by using variegated floss.
This type of thread has multiple colors dyed along a single strand, creating automatic, unpredictable color shifts as you stitch.
When used to fill the organic swirls of a Tree of Life, it produces a dynamic, psychedelic effect that feels incredibly complex but is beautifully simple to execute.
Pair it with a solid black background to make those colors pop.
31. Integrate String Art with Architectural Elements
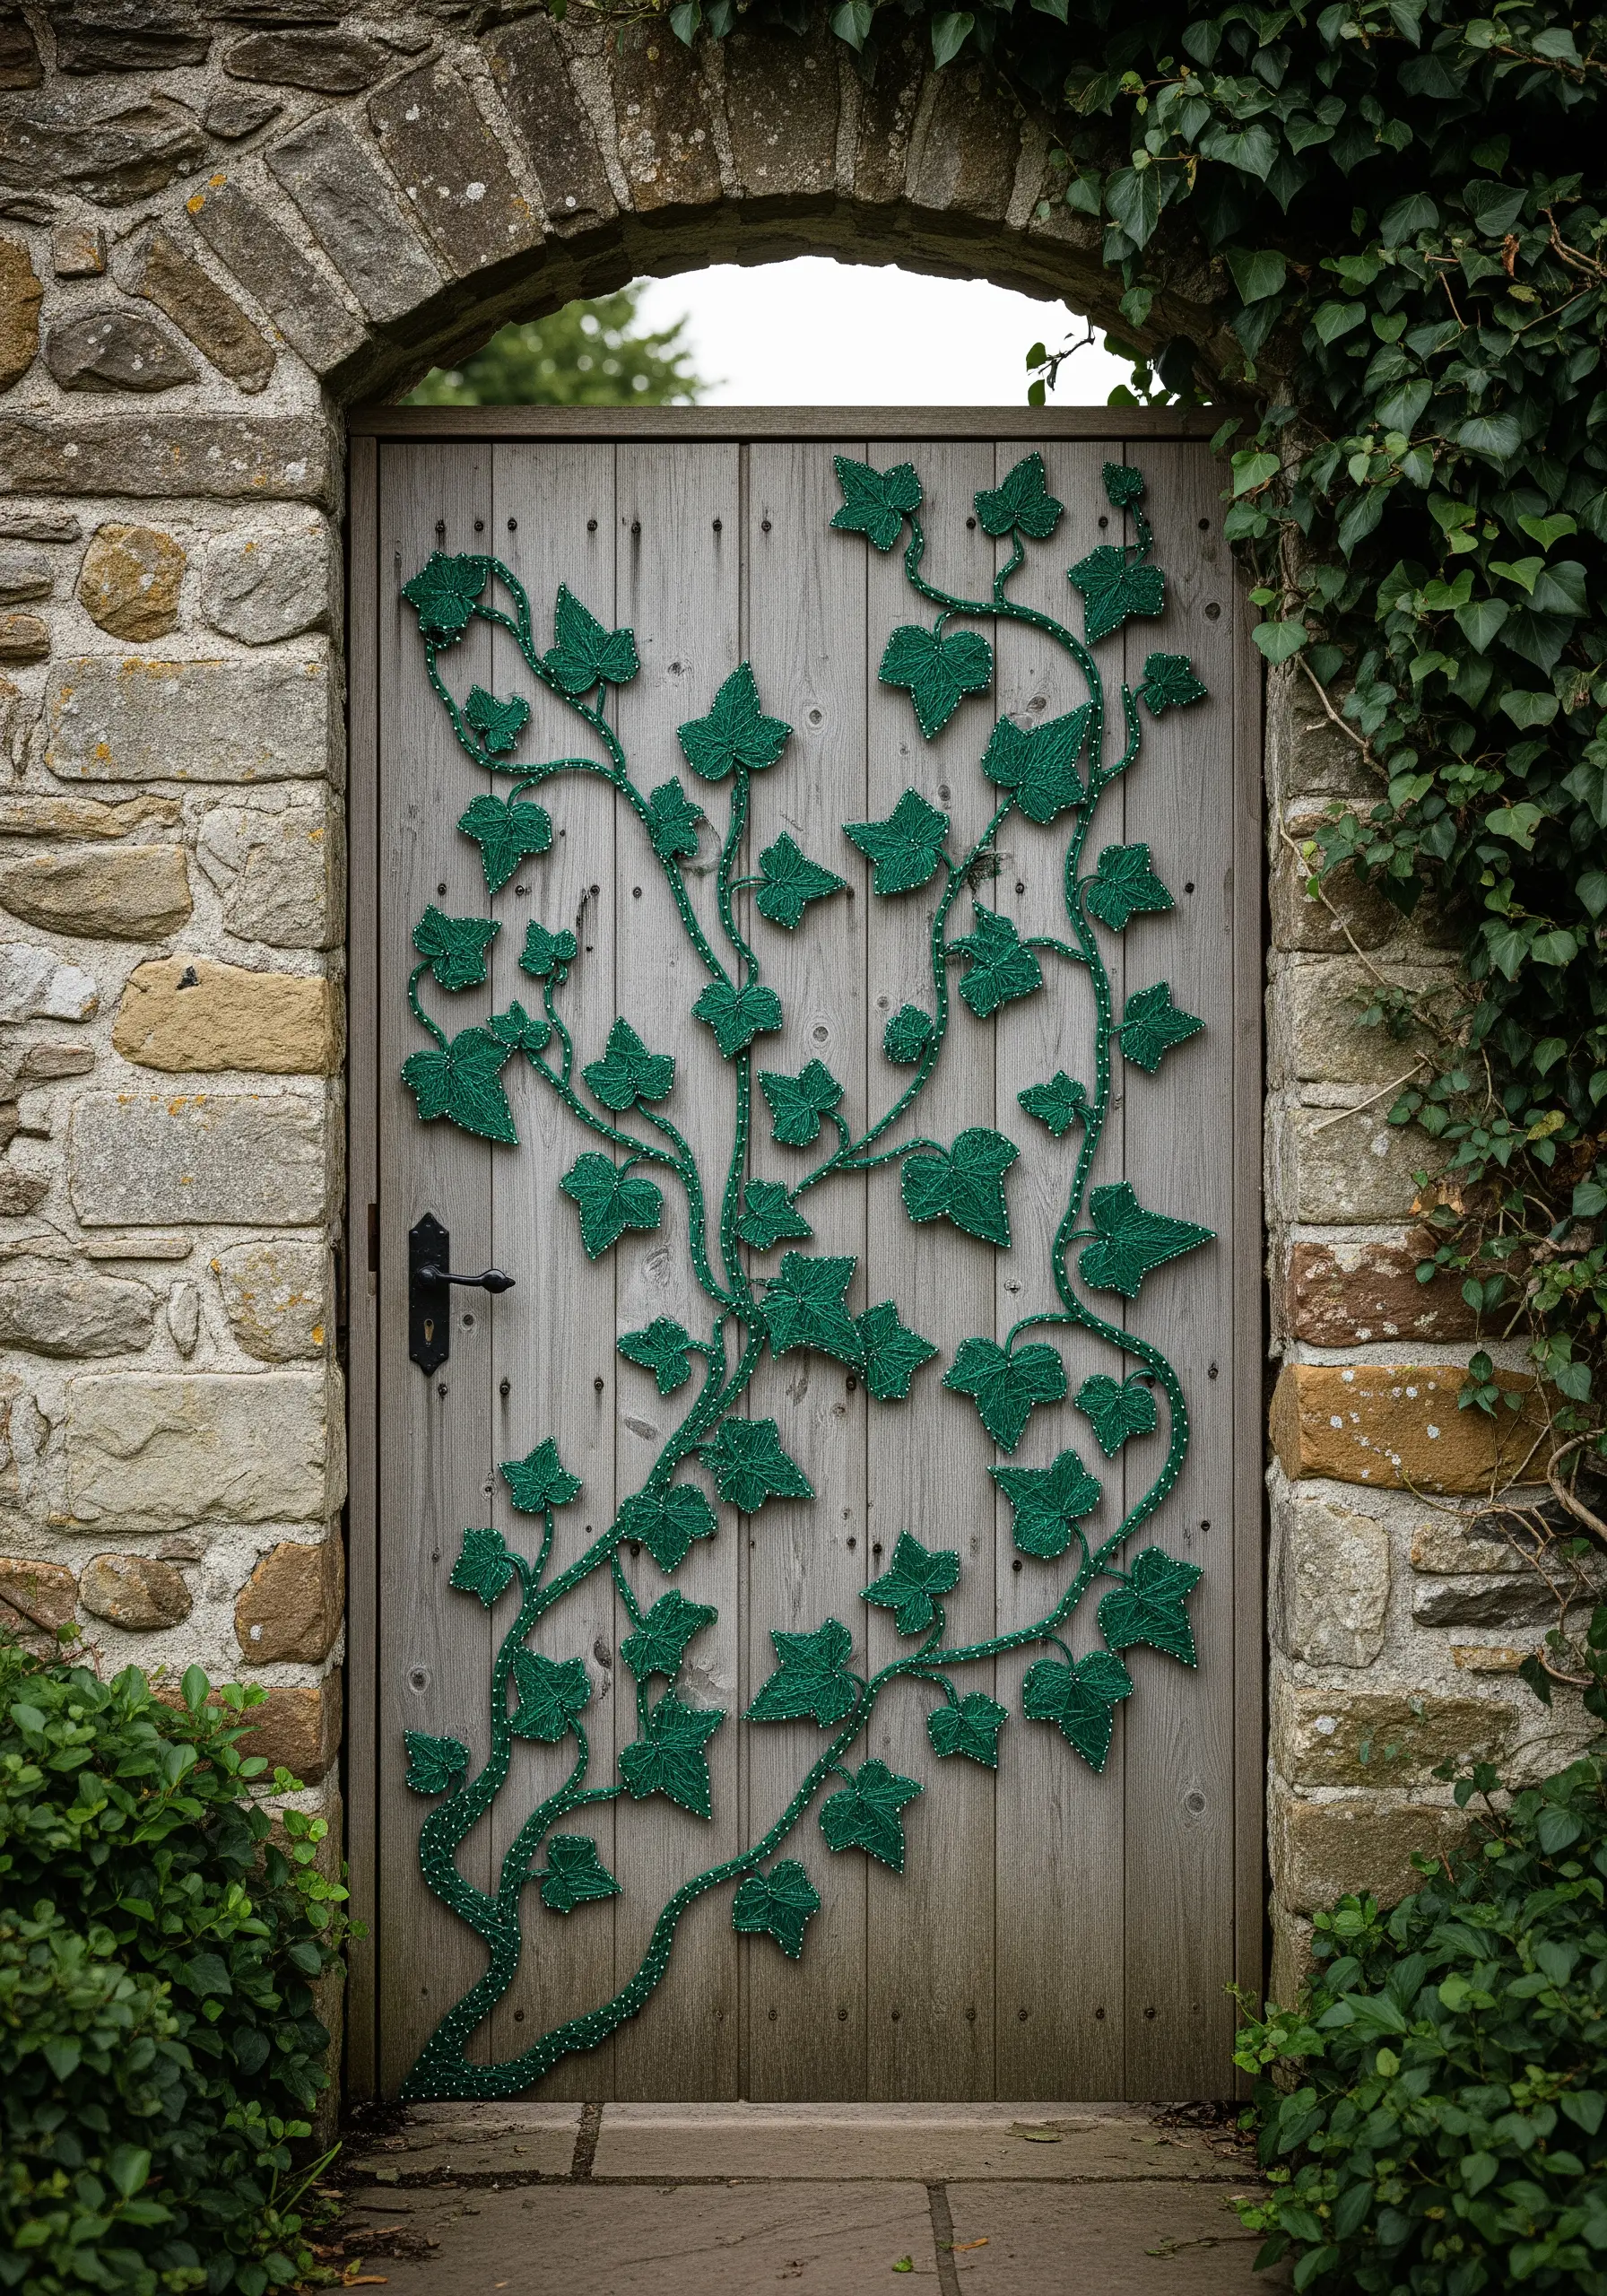
Take your string art outdoors or onto unconventional surfaces by treating architectural features as your canvas.
This trailing ivy design transforms a simple wooden garden gate into a piece of enchanting art that feels perfectly integrated with its stone surroundings.
When working on exterior wood, choose rust-resistant nails and a durable, UV-resistant thread or string to ensure your creation withstands the elements.
32. Combine Organic Botanicals with Geometric Blackwork
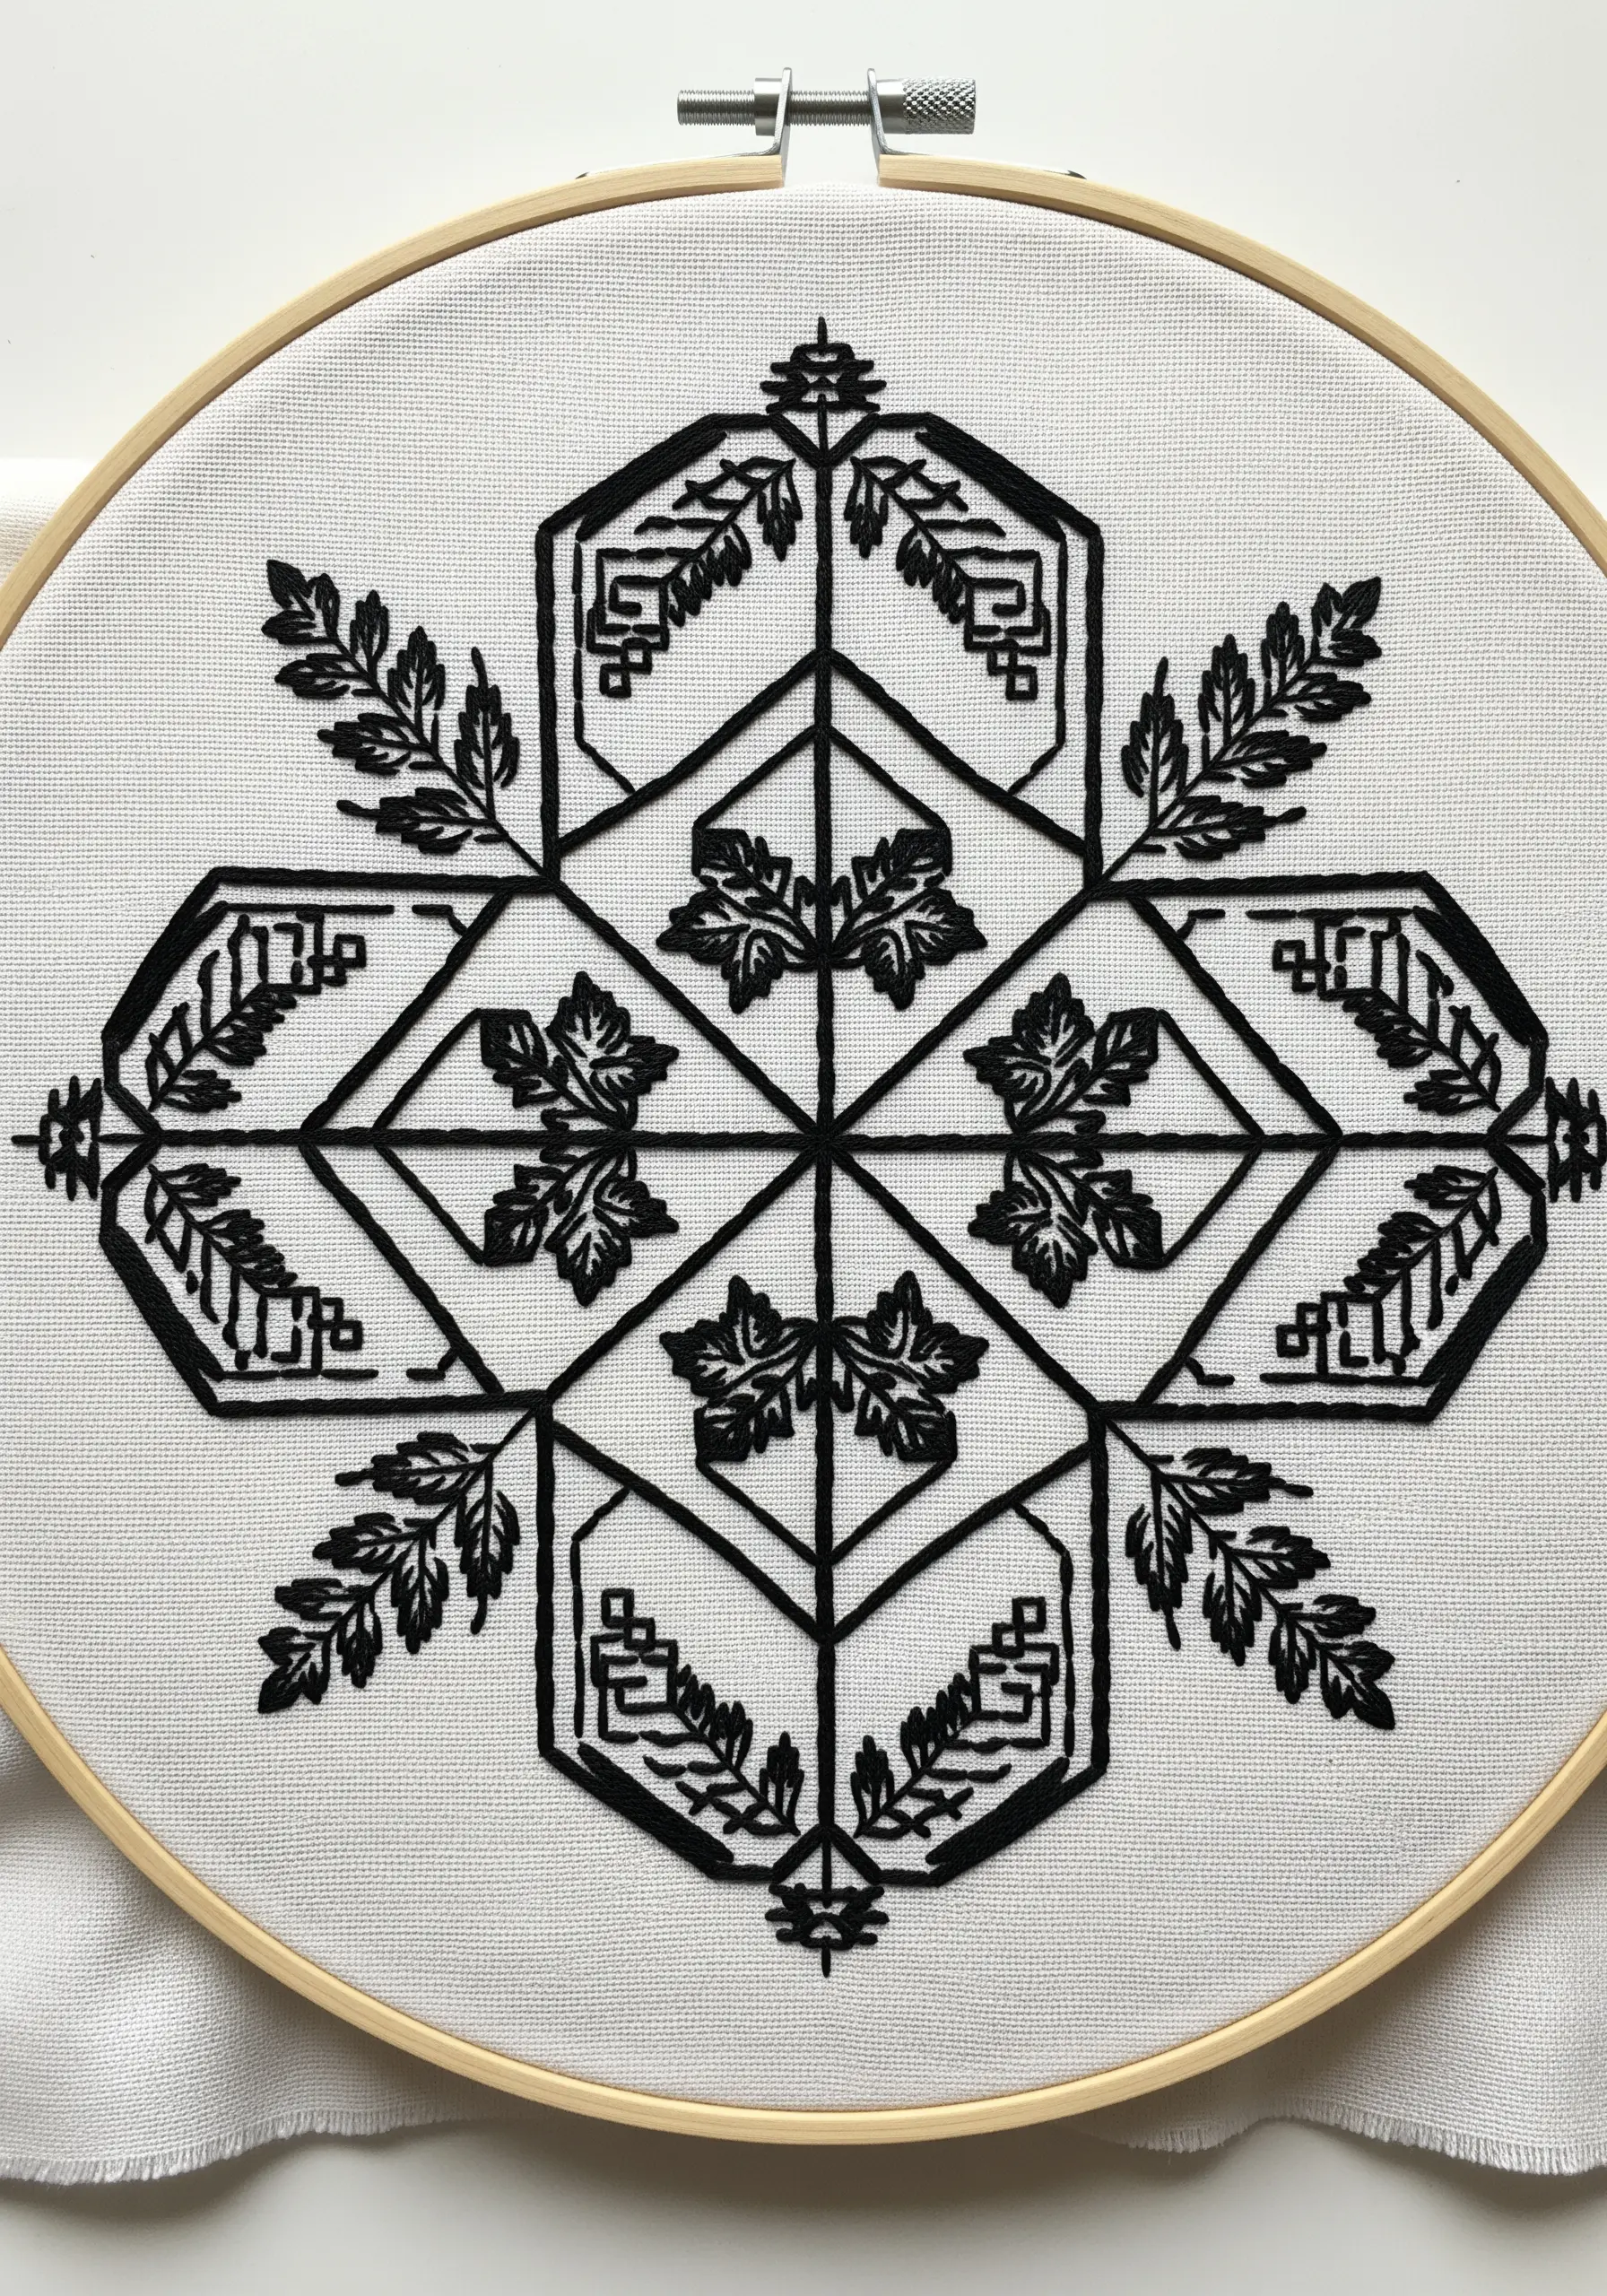
Create a stunning visual contrast by framing soft, natural leaf motifs within a rigid, geometric design.
Blackwork embroidery traditionally uses repeating patterns of straight stitches to fill shapes, creating a texture that looks woven.
By using this technique for the geometric framework and a simpler satin stitch for the central leaves, you create a powerful interplay between two distinct embroidery styles.
The result is a monochrome embroidery wall art piece that is rich in texture and sophistication.
33. Weave in LED Lights for a Glowing Finish
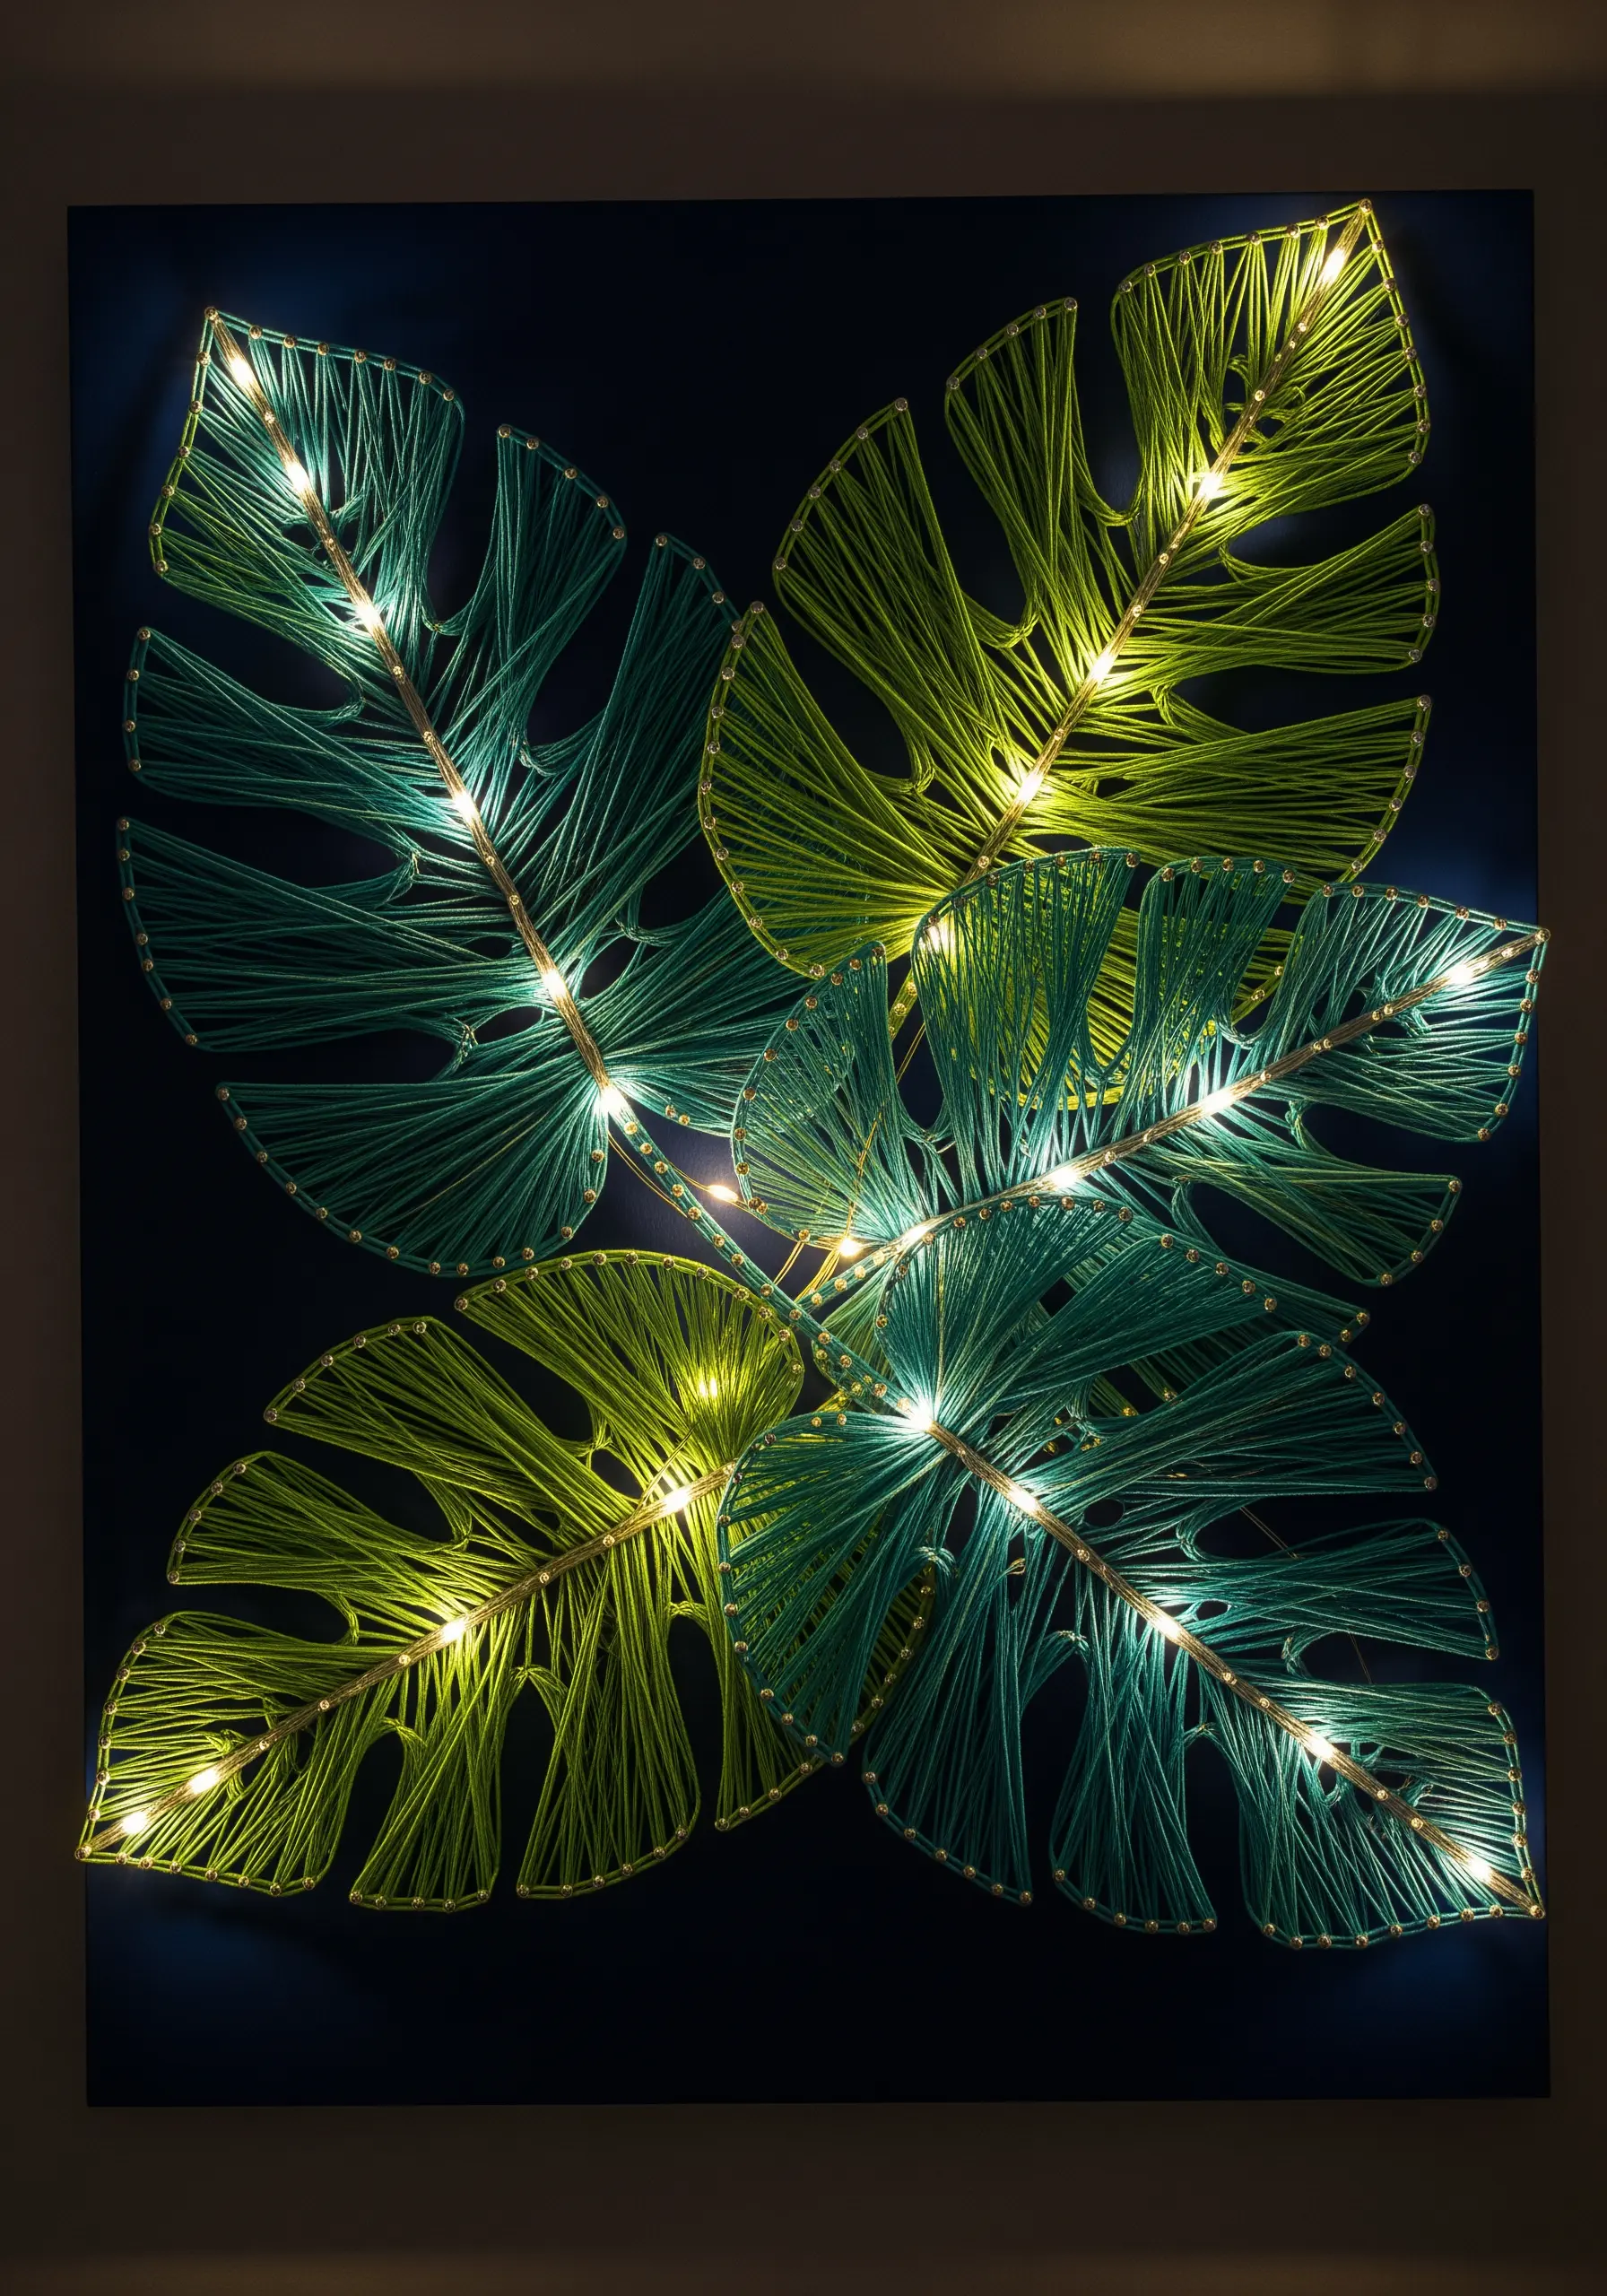
Incorporate a layer of magic into your string art by adding miniature LED fairy lights.
Choose a fine, wire-based light string that is easy to bend and shape.
As you complete your stringing, carefully weave the light string along the central veins or outlines of your design, securing it around the nails just as you would with thread.
This simple addition transforms your botanical art into a captivating lamp that glows from within.
34. Encase String Art in Resin for a Polished Finish
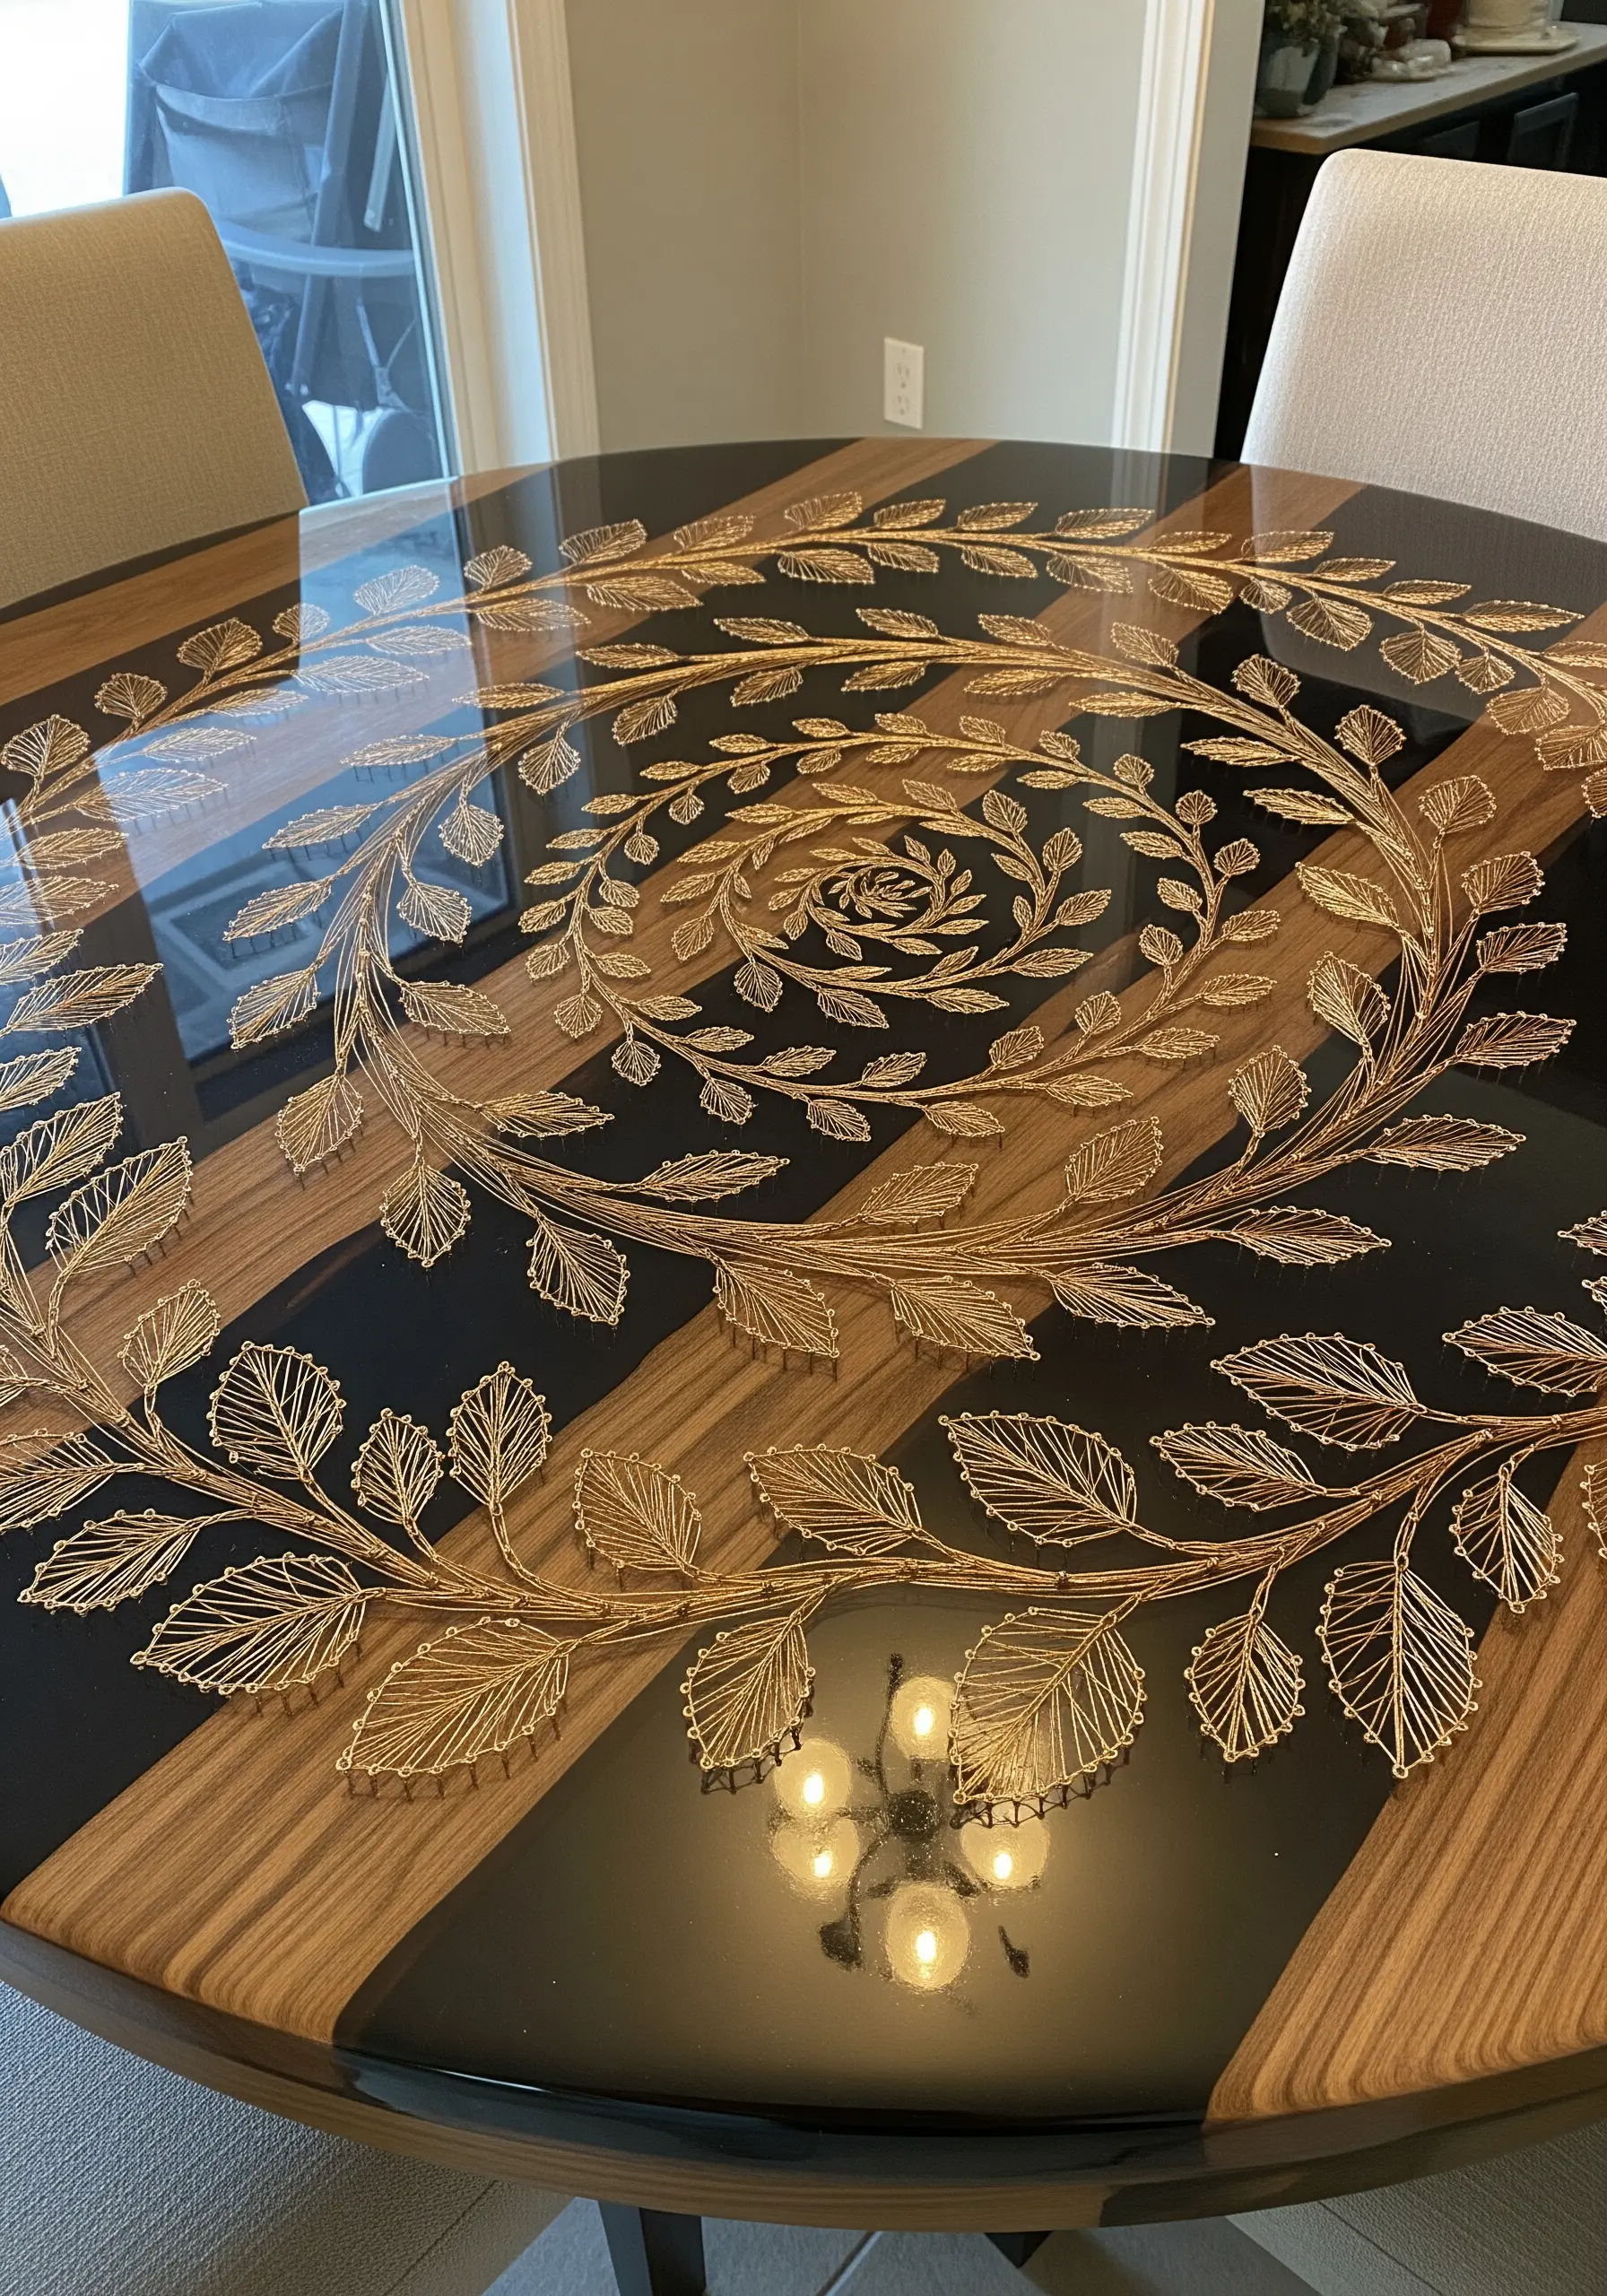
Turn your string art into a permanent, functional surface by embedding it in clear epoxy resin.
This technique works beautifully for tabletops, coasters, or serving trays.
Create your string art directly on the wood surface, then build a temporary dam around the edges and pour the resin slowly to avoid trapping air bubbles.
The resin not only protects the delicate threads but also magnifies their color and texture, creating a durable, glass-like finish.


