

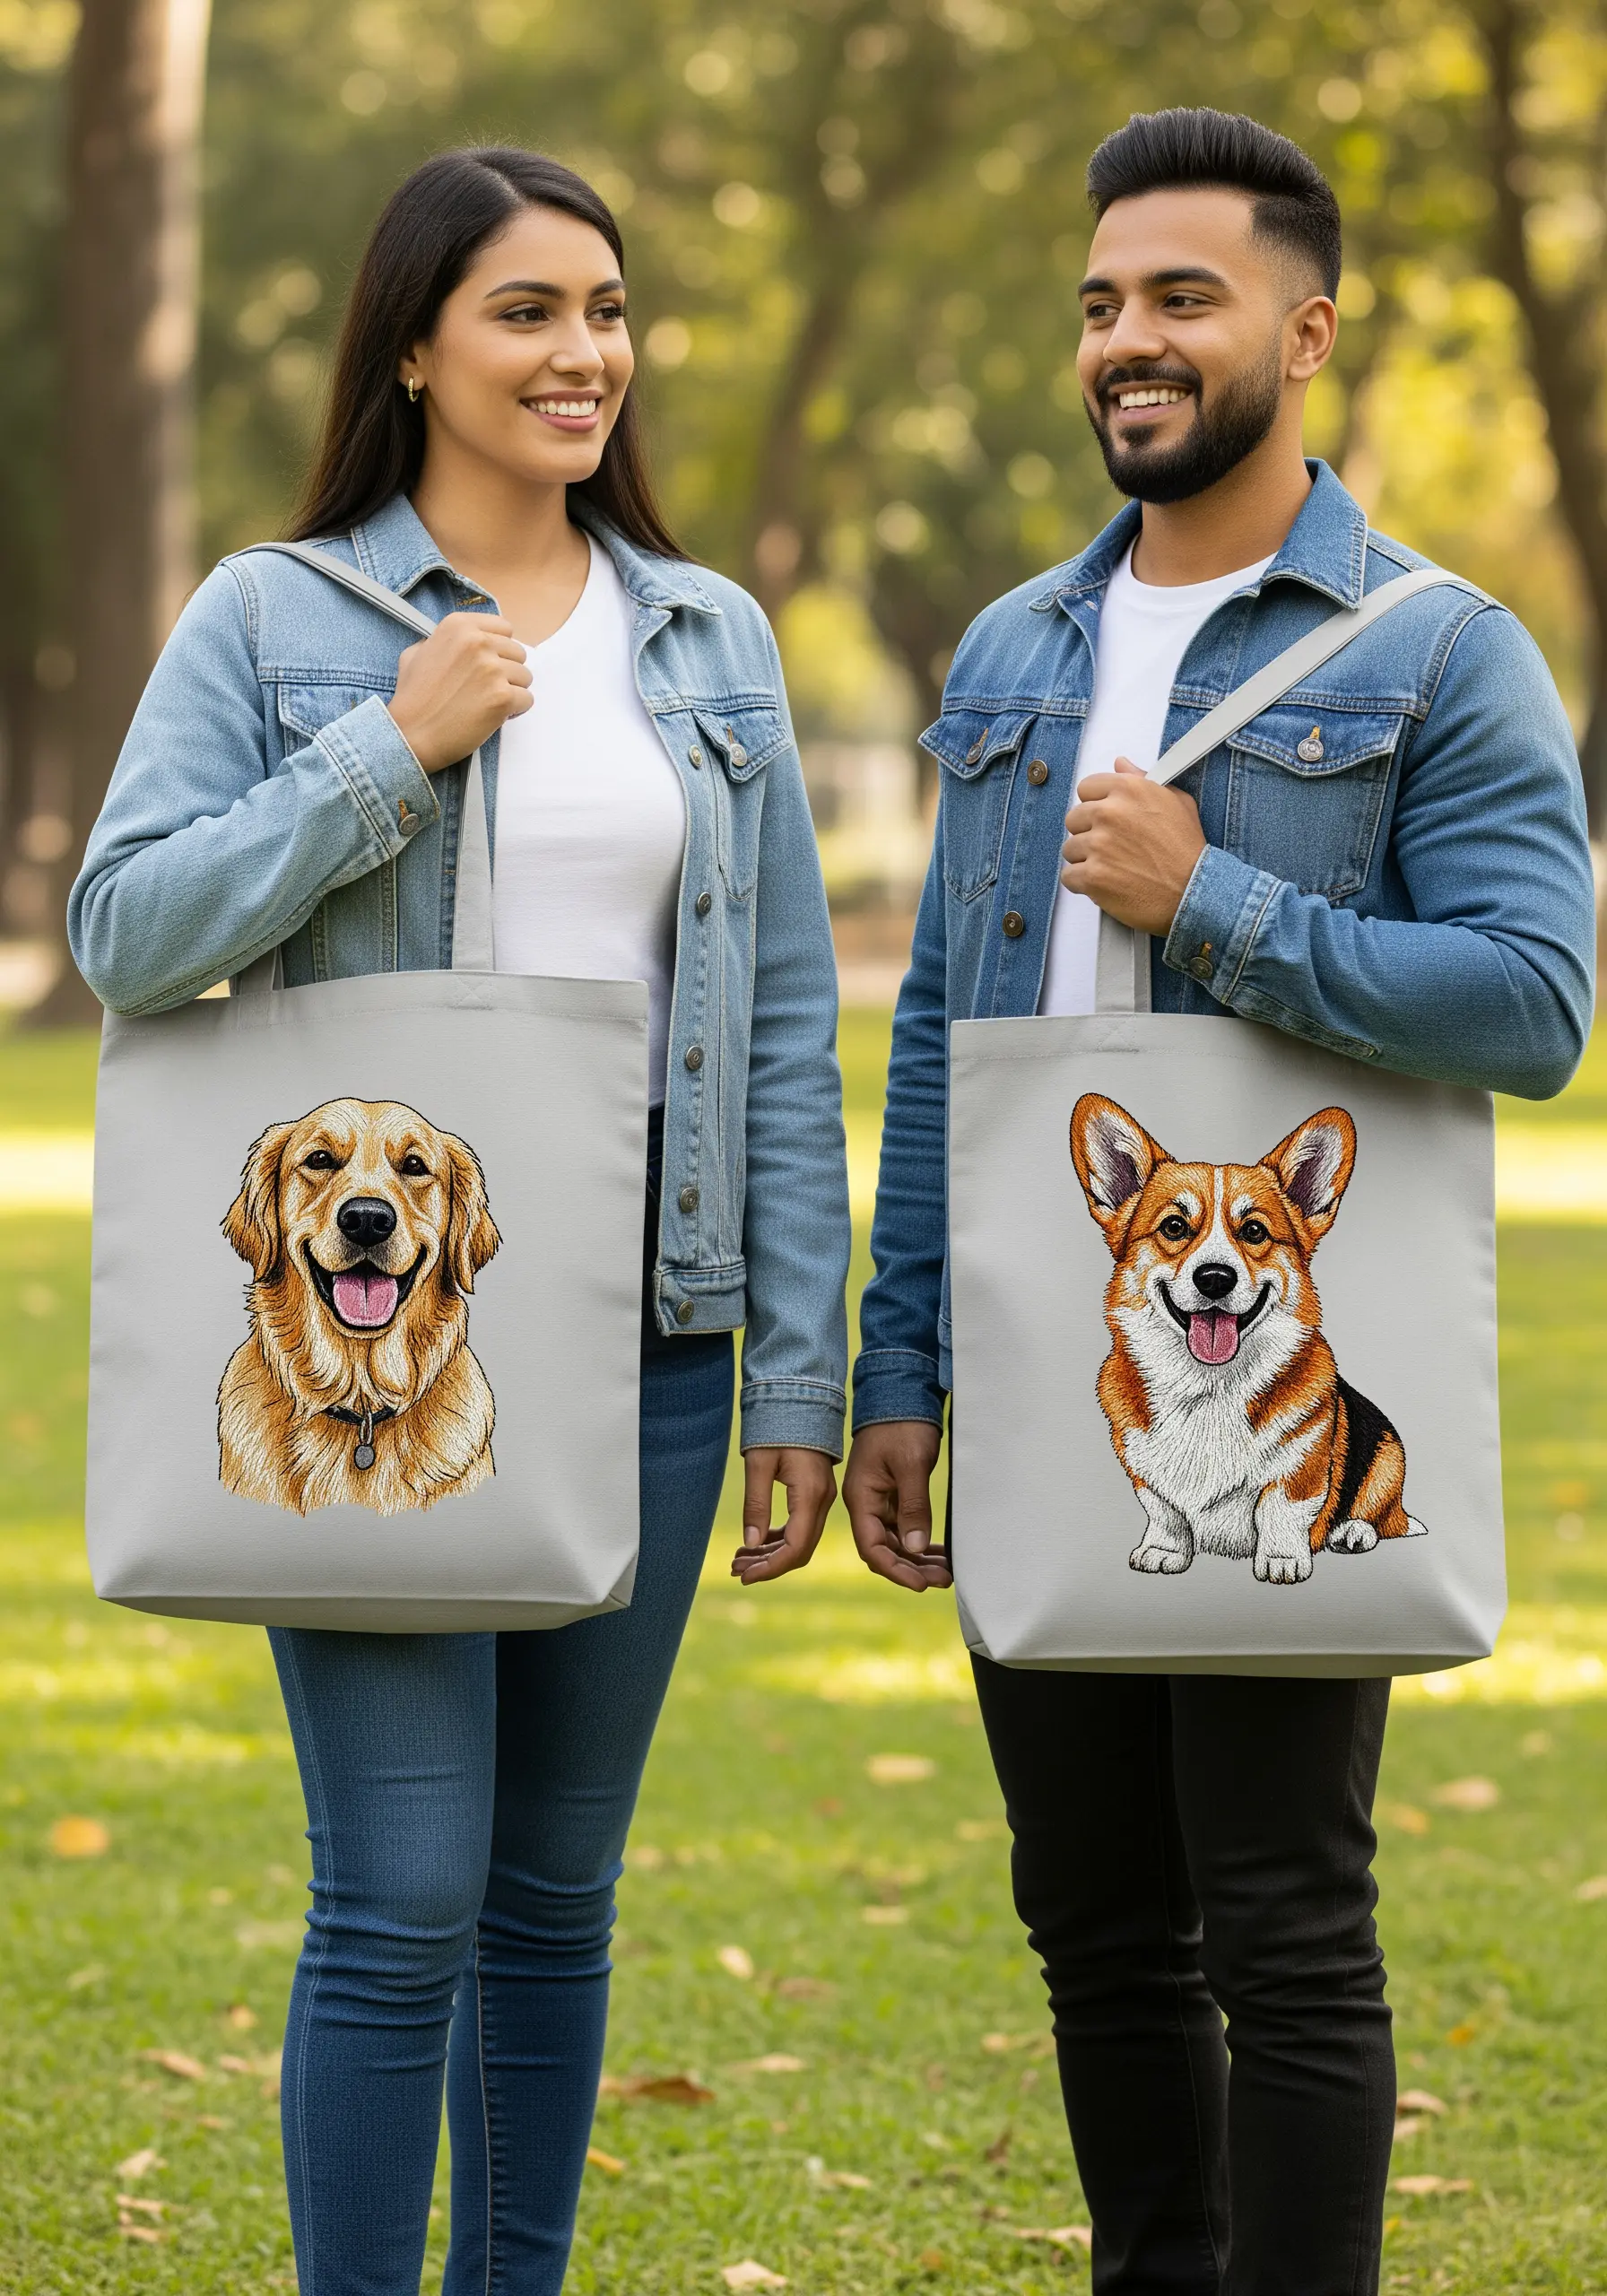
A personalized tote bag is more than just a gift; it’s a story you stitch for someone you love. But how do you move beyond simple outlines and create something that feels truly special, polished, and full of intention?
The secret isn’t in mastering hundreds of complex stitches. It’s in understanding how small adjustments—a change in thread texture, the direction of a stitch, or the layering of simple shapes—can completely transform your work.
Here, you’ll find not just ideas, but the specific techniques that elevate them. Think of this as a quiet conversation about how to make your embroidery speak with clarity and artistry. Let’s create something meaningful, together.
1. Celestial Contrast with Texture and Sheen
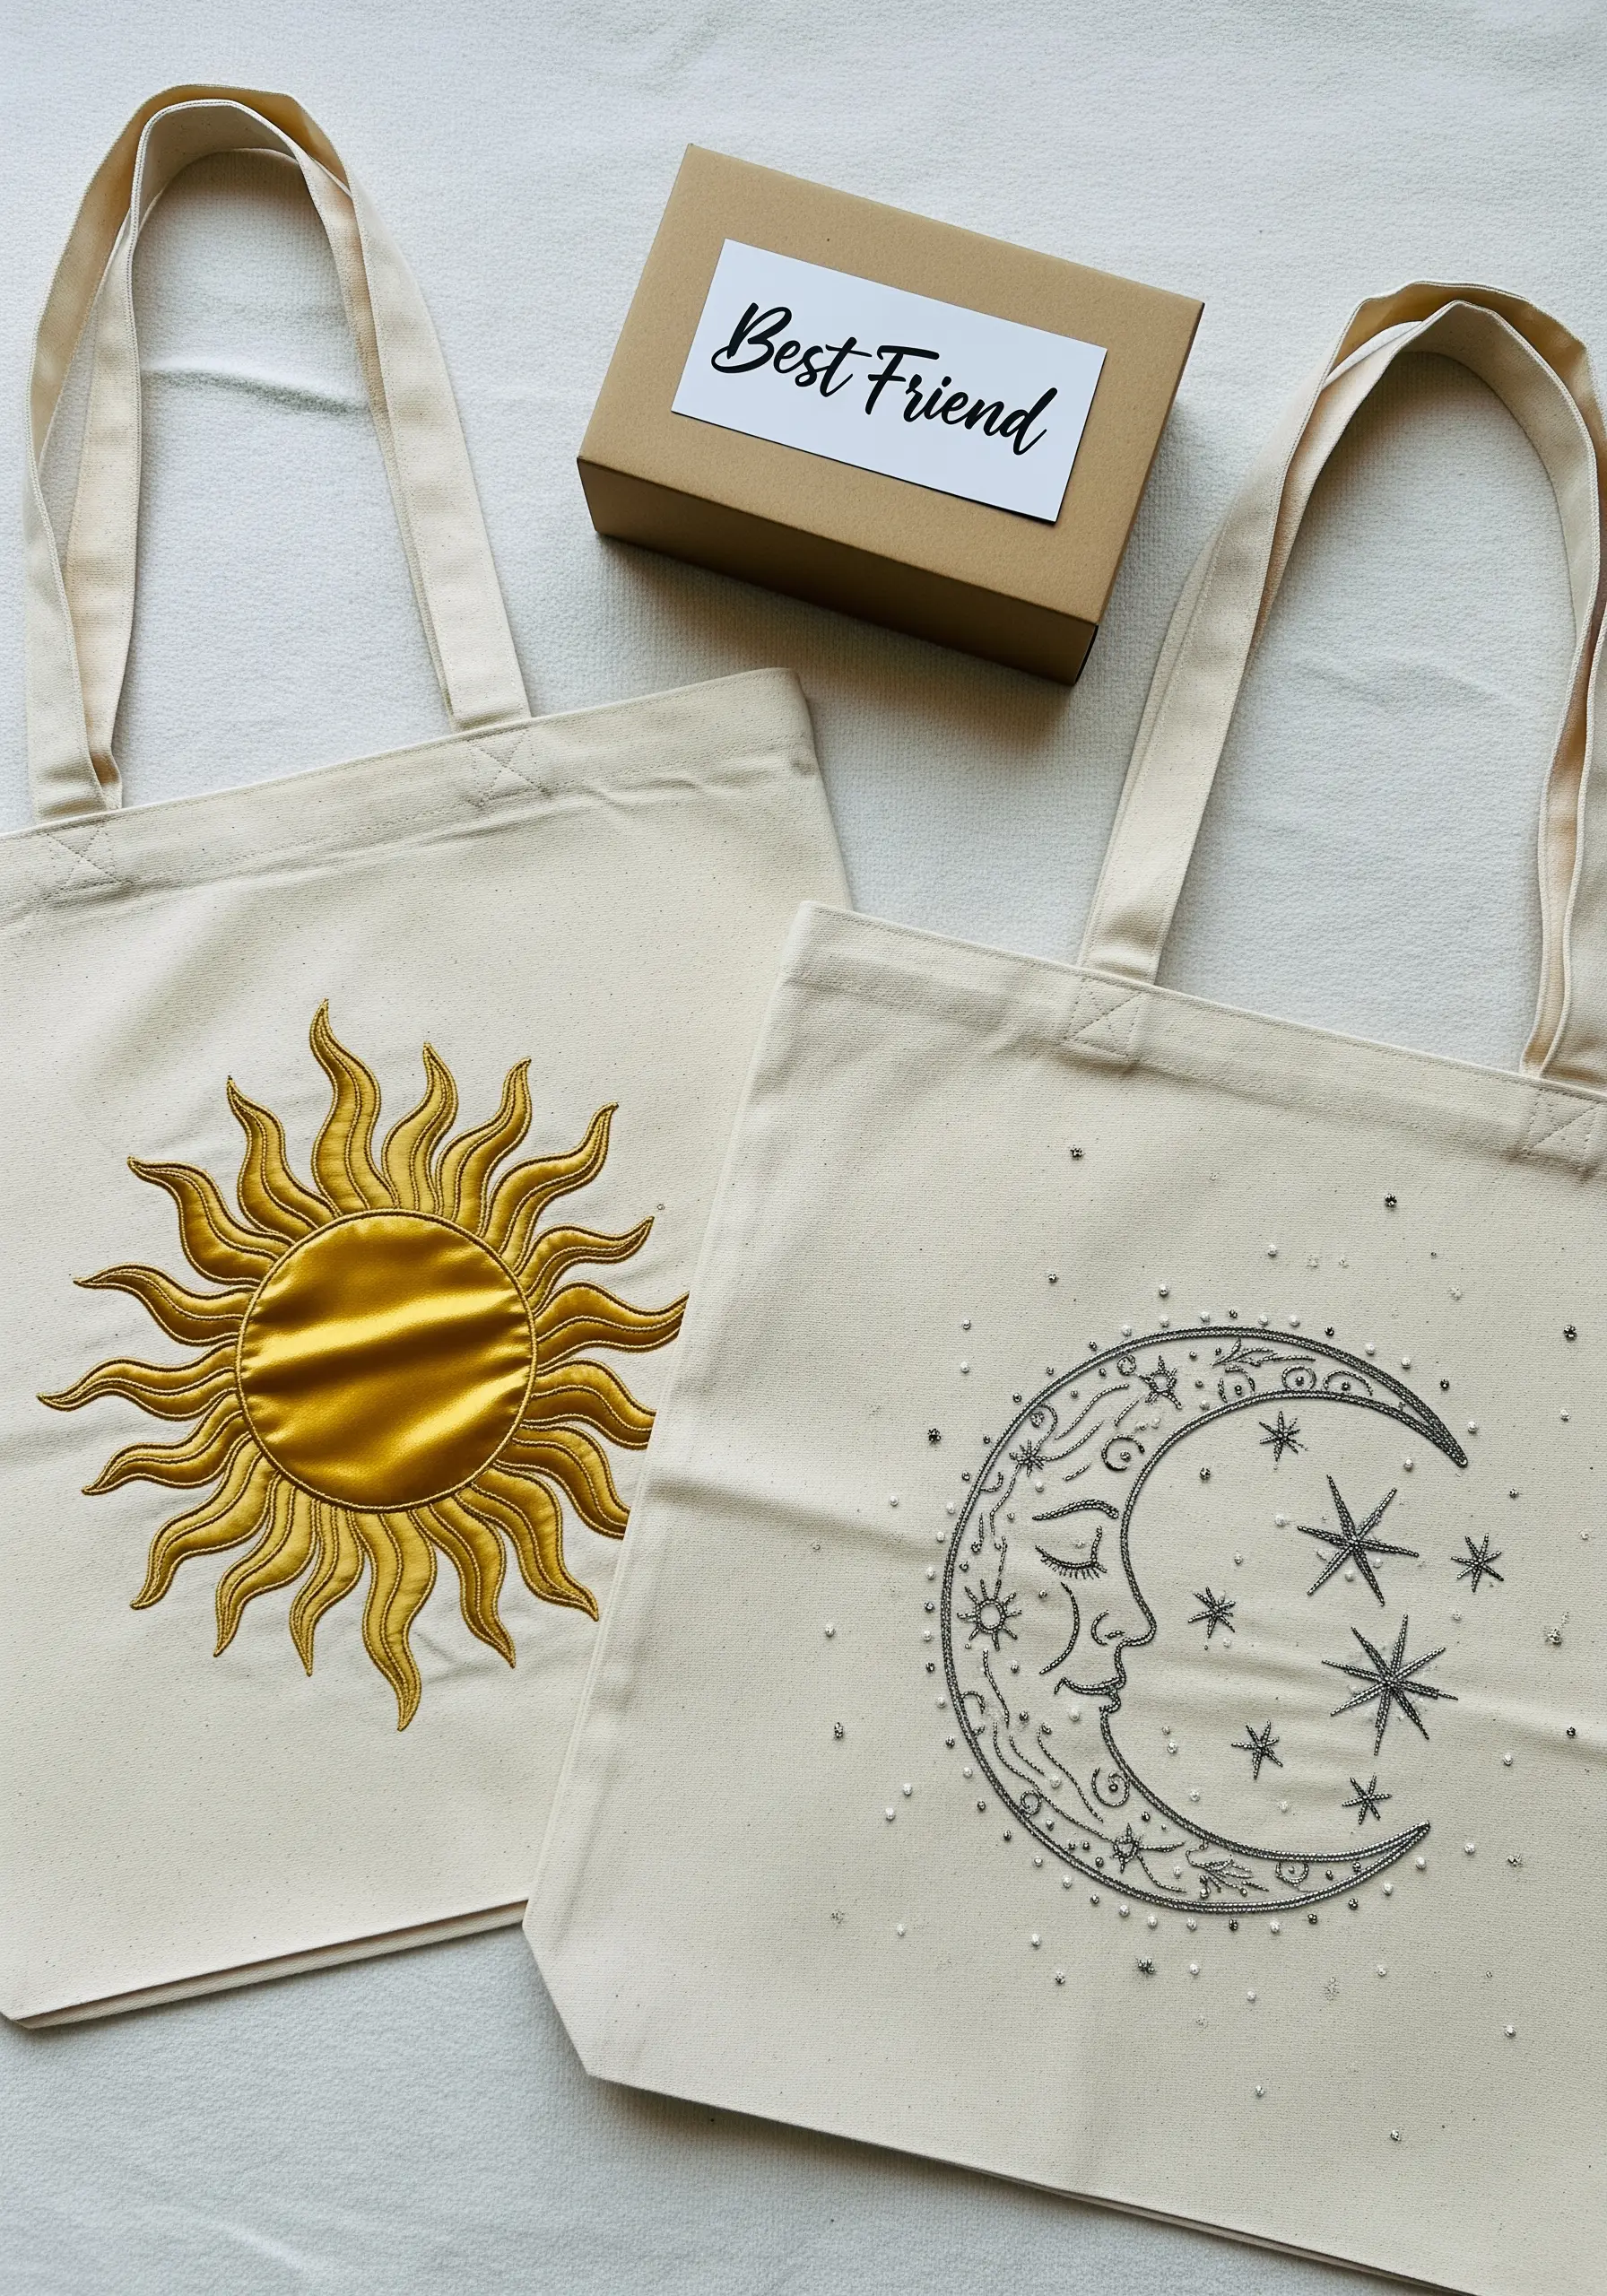
Create a dynamic duo by contrasting textures that reflect the sun and moon.
For the sun, use a padded satin stitch with a high-sheen rayon or silk thread to achieve a raised, liquid-gold effect that catches the light.
For the moon, switch to a cool-toned metallic thread for the outline and fill the surrounding space with scattered seed beads or French knots to mimic a starry night.
This textural difference is what makes the set feel cohesive yet distinct, telling a story through your material choices.
2. The Unbroken Line of Connection
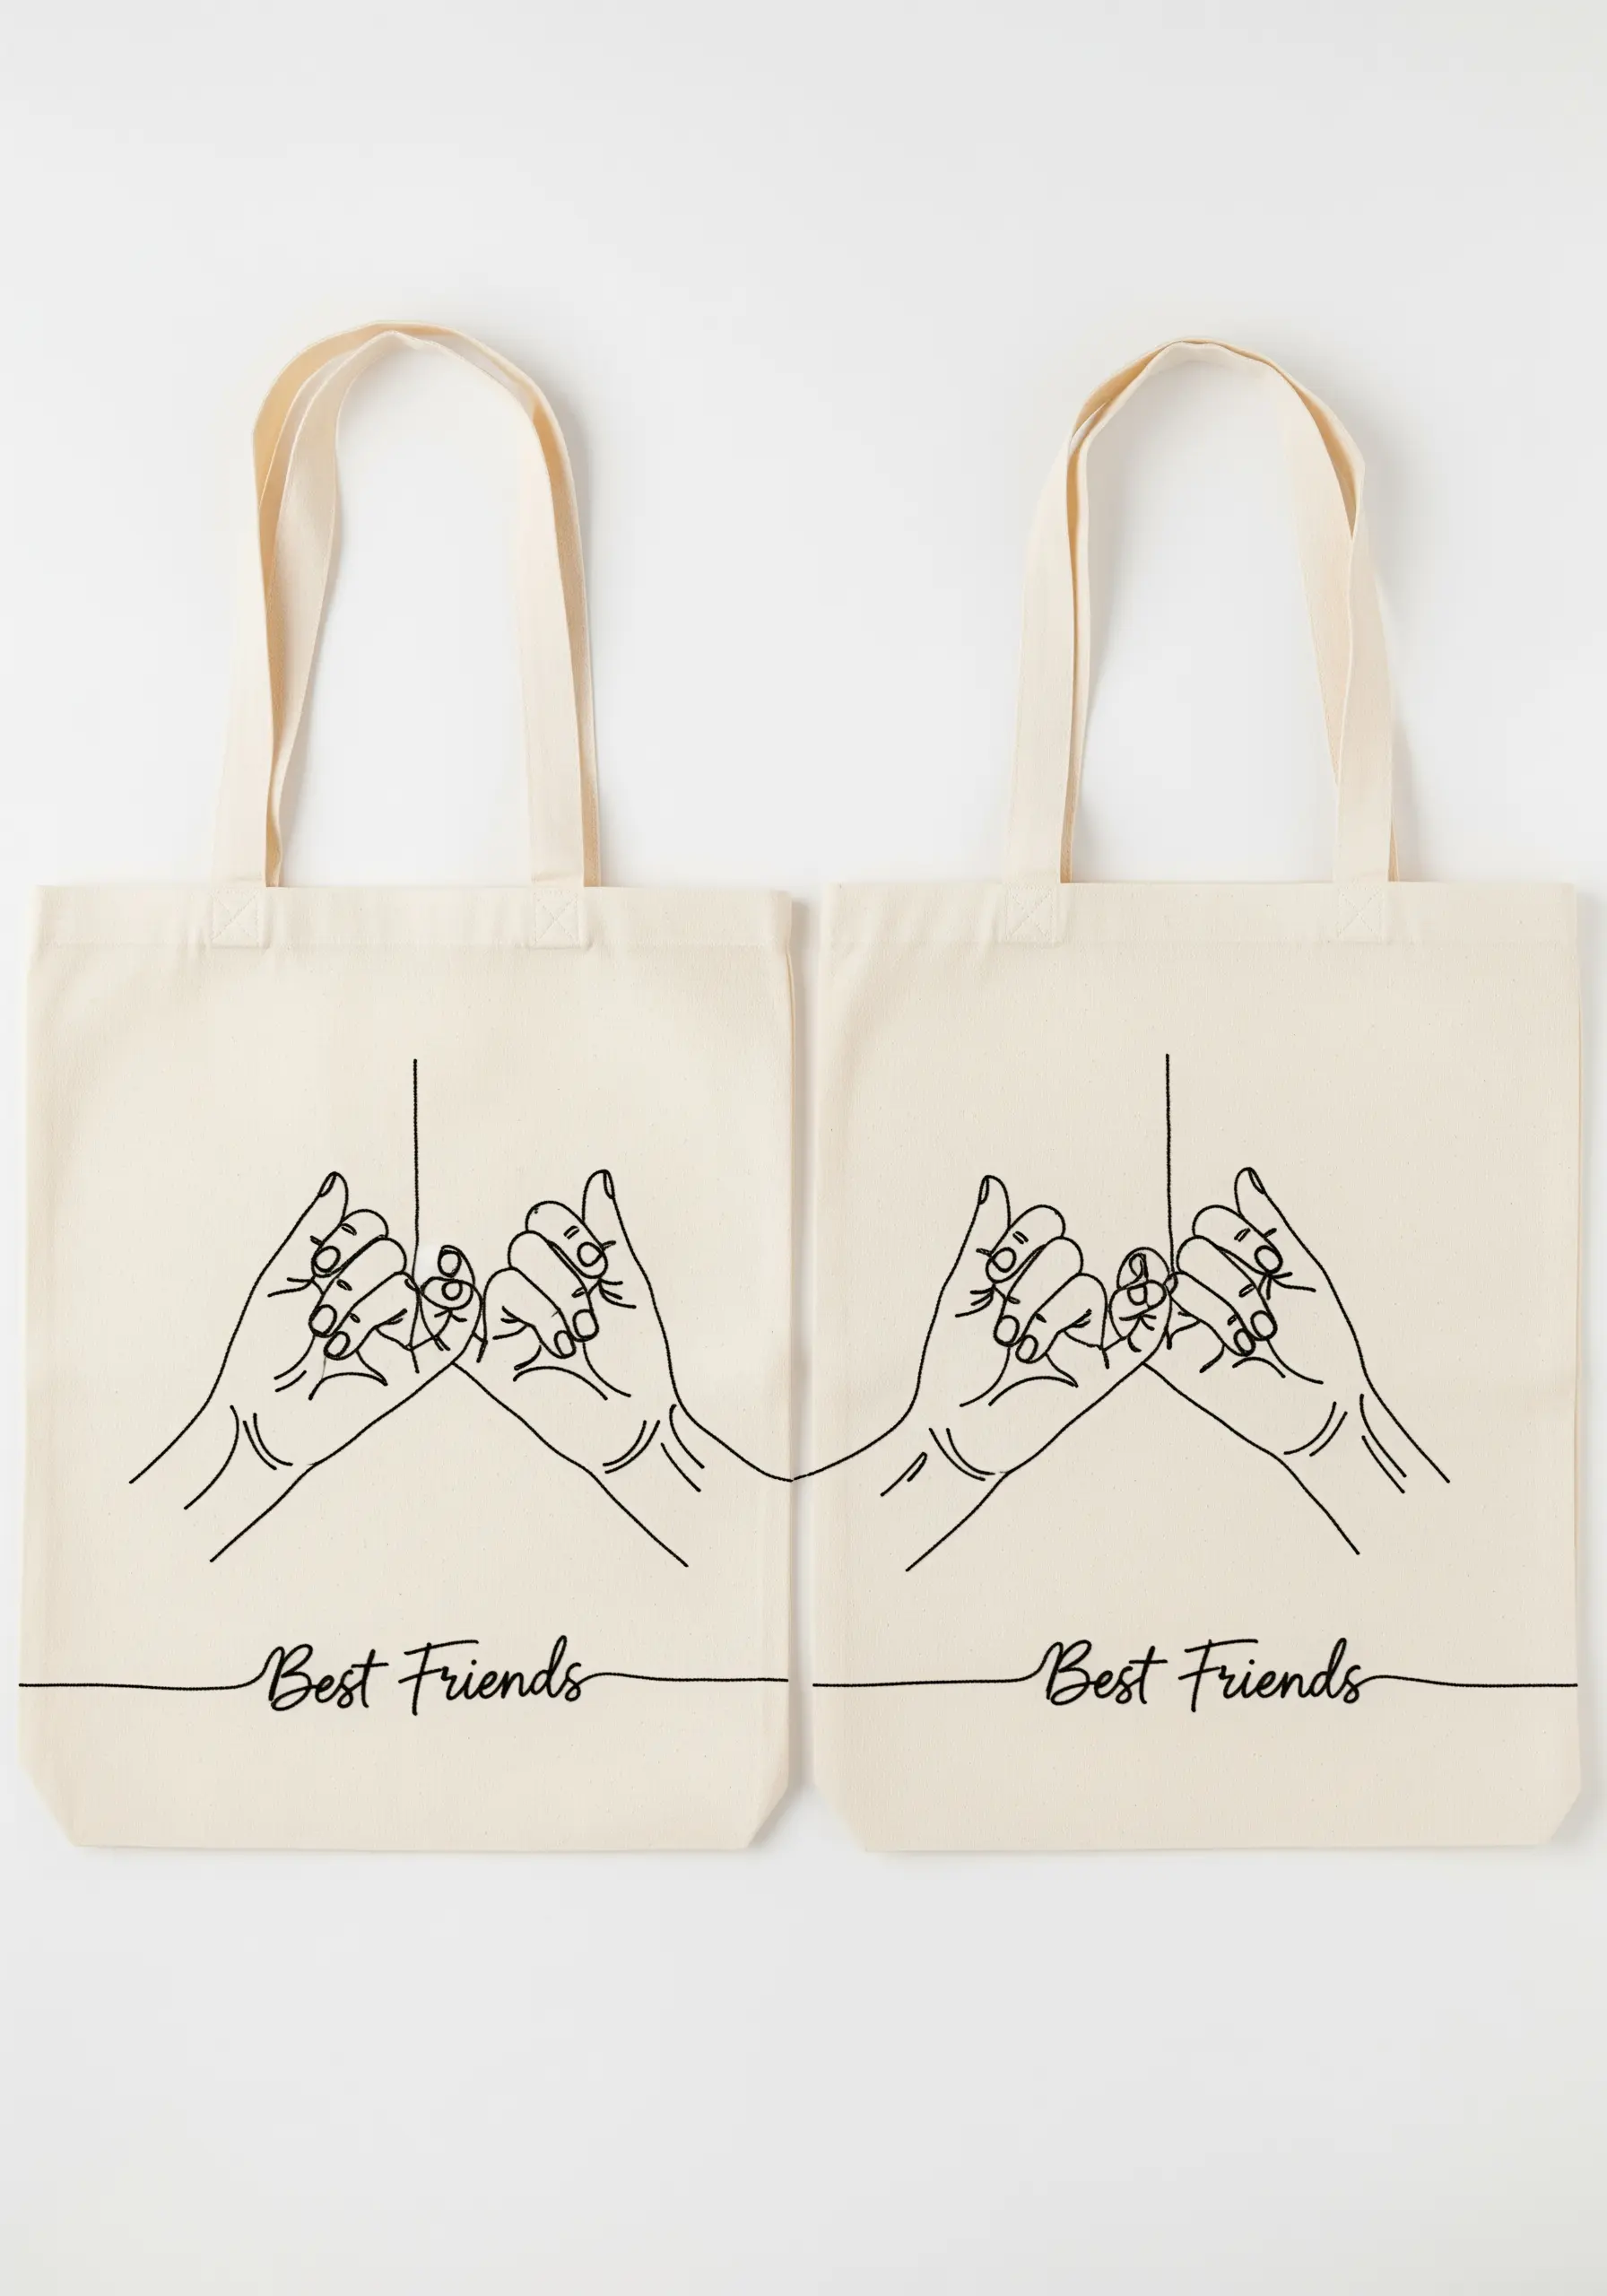
To achieve the fluid, ink-like quality of this pinky-promise design, the key is a consistent, unbroken line.
Opt for a whipped backstitch or a stem stitch using three strands of cotton floss—this smooths out the jagged edges that a simple backstitch can create.
Work slowly and maintain even tension to ensure the line flows seamlessly from one hand to the other, symbolizing a perfect connection.
This technique transforms a simple drawing into a refined piece of line art embroidery.
3. Dimensional Wreaths with Layered Botanicals
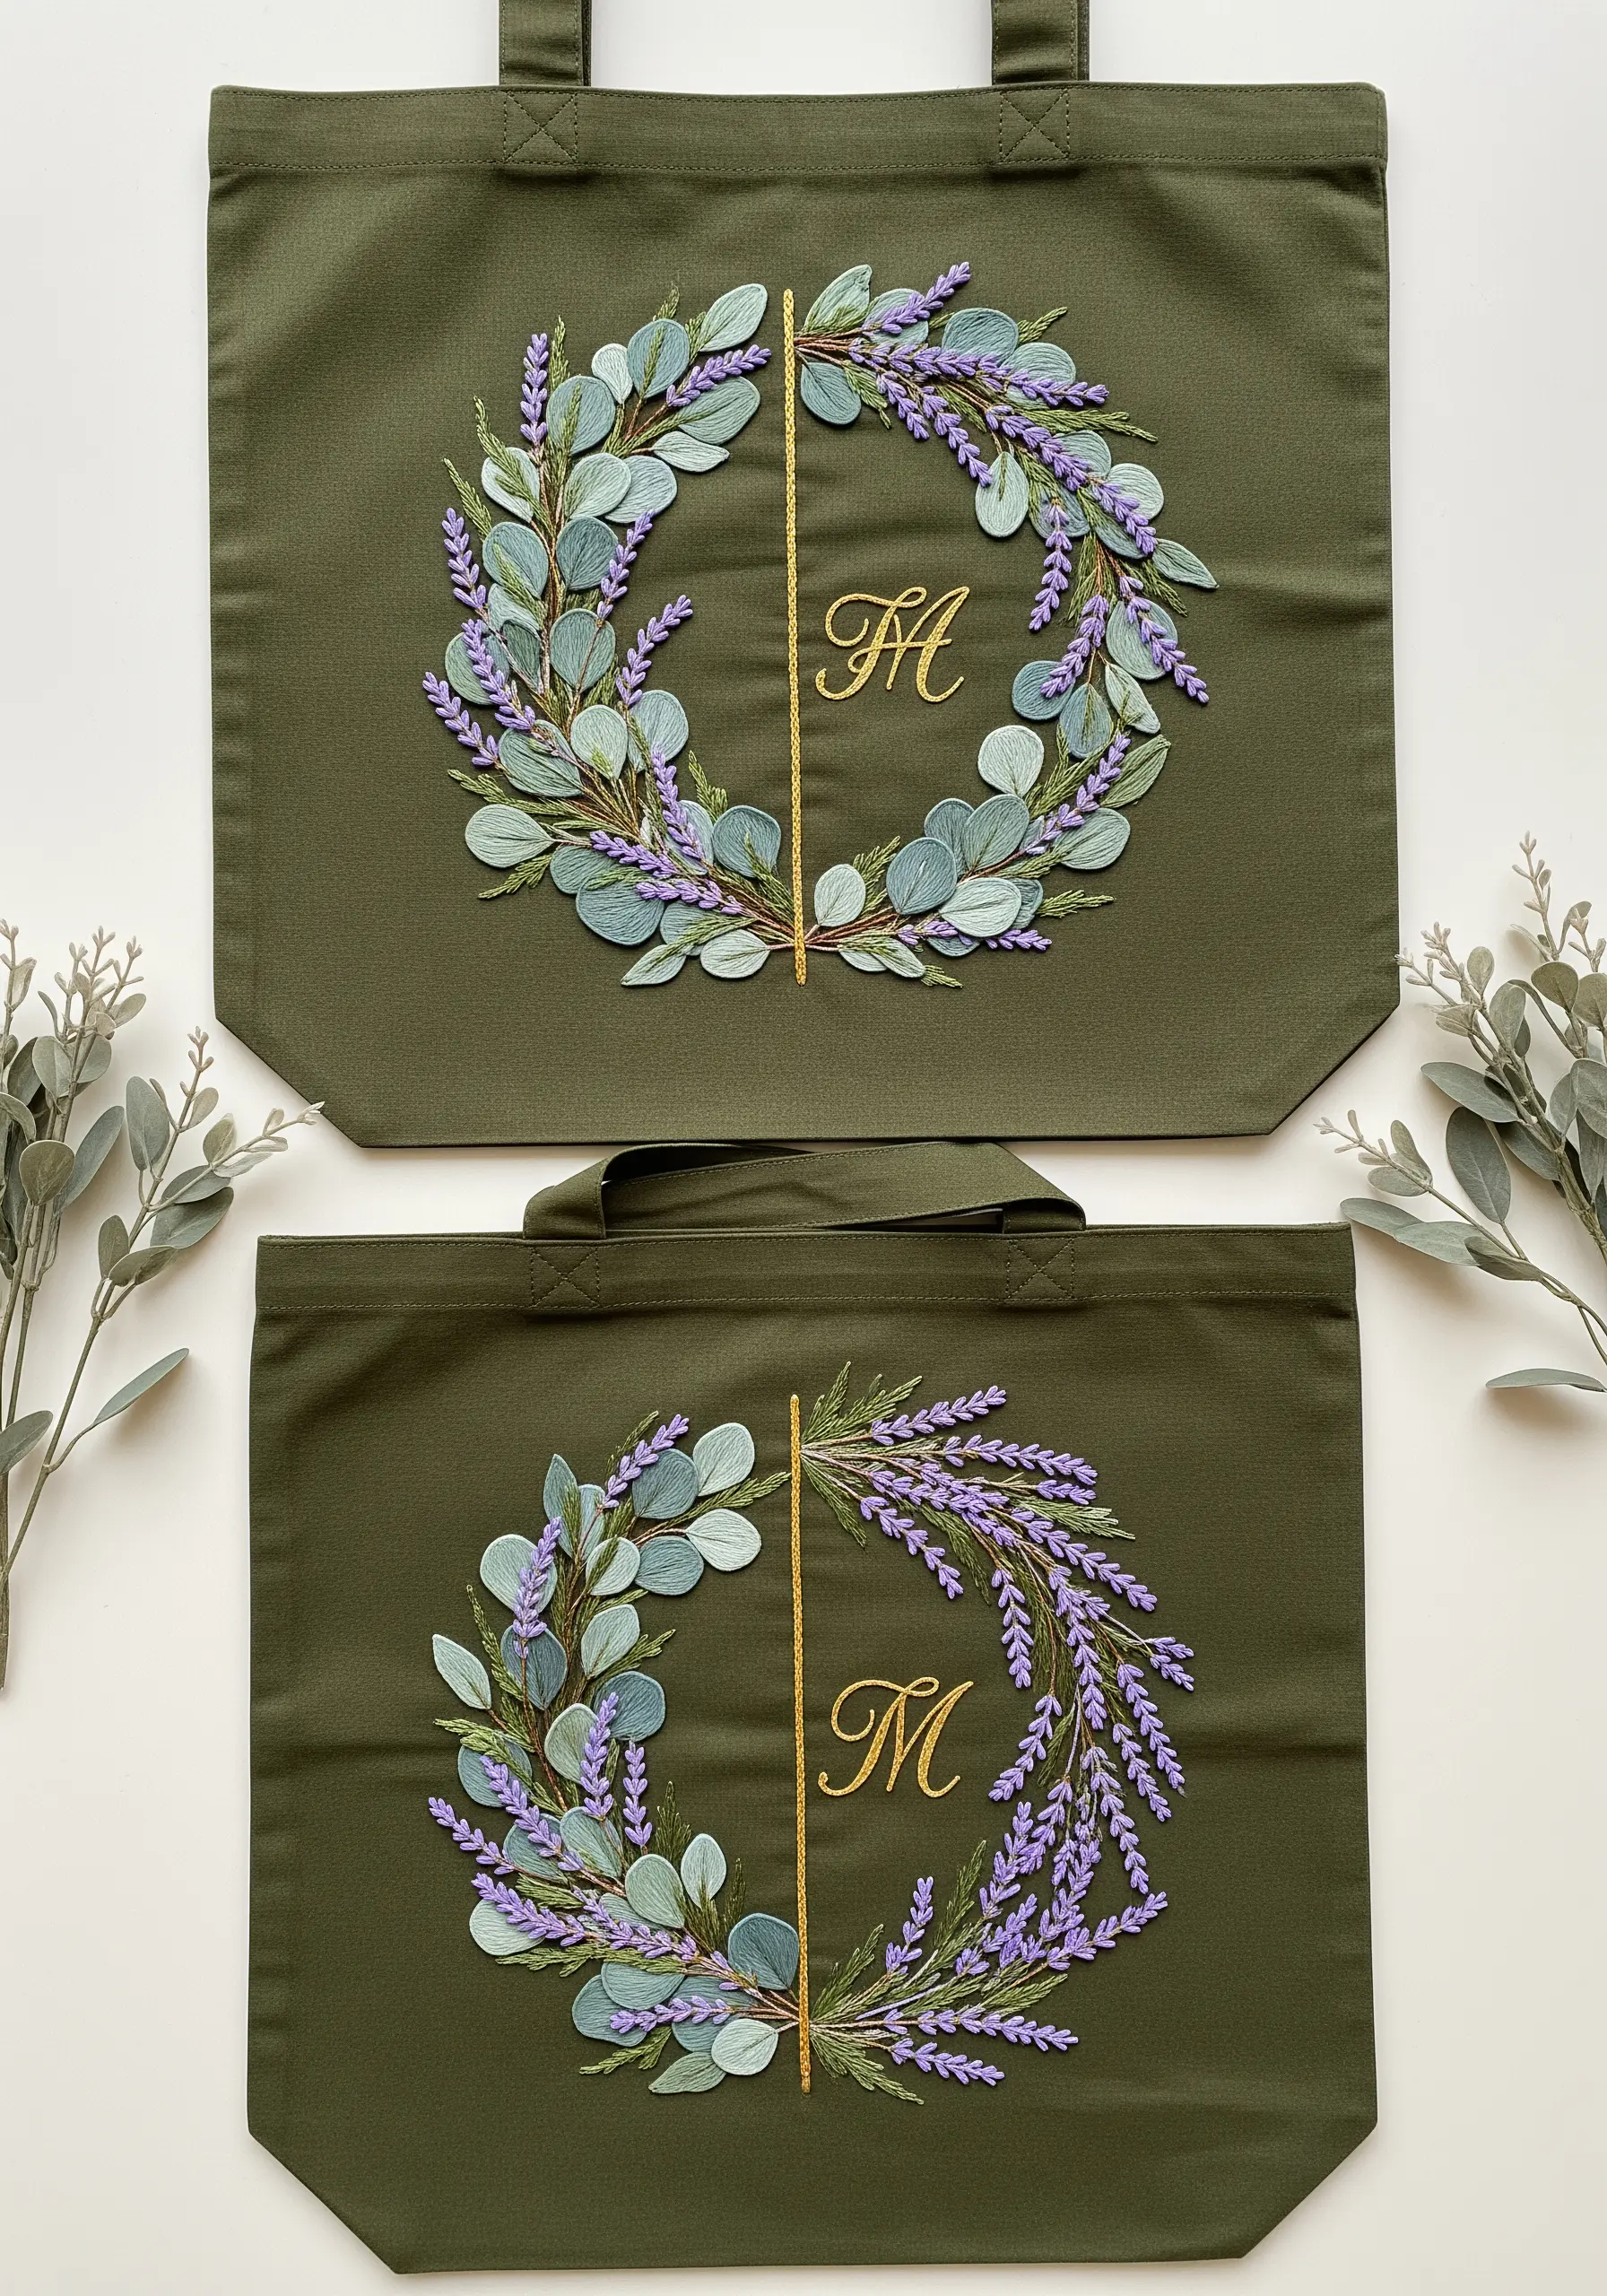
Build a wreath with tangible depth by layering your stitches and textures.
Start with the eucalyptus leaves, using detached chain stitches (lazy daisies) in varying sizes and shades of sage green to create a base layer.
Next, add lavender sprigs using French knots clustered along a straight stitch stem; this makes them pop against the leaves.
Finish with a single, elegant line of metallic thread for the monogram divider, adding a touch of luxury that unifies the design.
4. Stitching Deliciously Realistic Textures

The secret to appetizing food embroidery is capturing its unique texture.
For the croissant, use a long-and-short stitch with three shades of brown to mimic flaky, buttery layers; stitch in the direction of the pastry’s curves.
For the iced coffee, use a clean satin stitch for the plastic cup and single, angled stitches in white to suggest reflection and shine on the ice cubes.
This careful attention to detail makes the motifs look delicious enough to eat.
5. Crisp Appliqué for Long-Distance Love

For clean, bold map silhouettes on dark canvas, appliqué is superior to fill stitching.
Trace your continent shapes onto a lightweight, non-woven fusible web, iron it onto your white fabric, and then cut them out.
Iron the shapes onto the tote bags for perfect placement and crisp edges, then secure them with a tiny, neat backstitch around the border.
The dashed connecting line, stitched with a simple running stitch, adds a delicate, personal touch to the graphic design.
6. Minimalist Constellations on a Night Sky
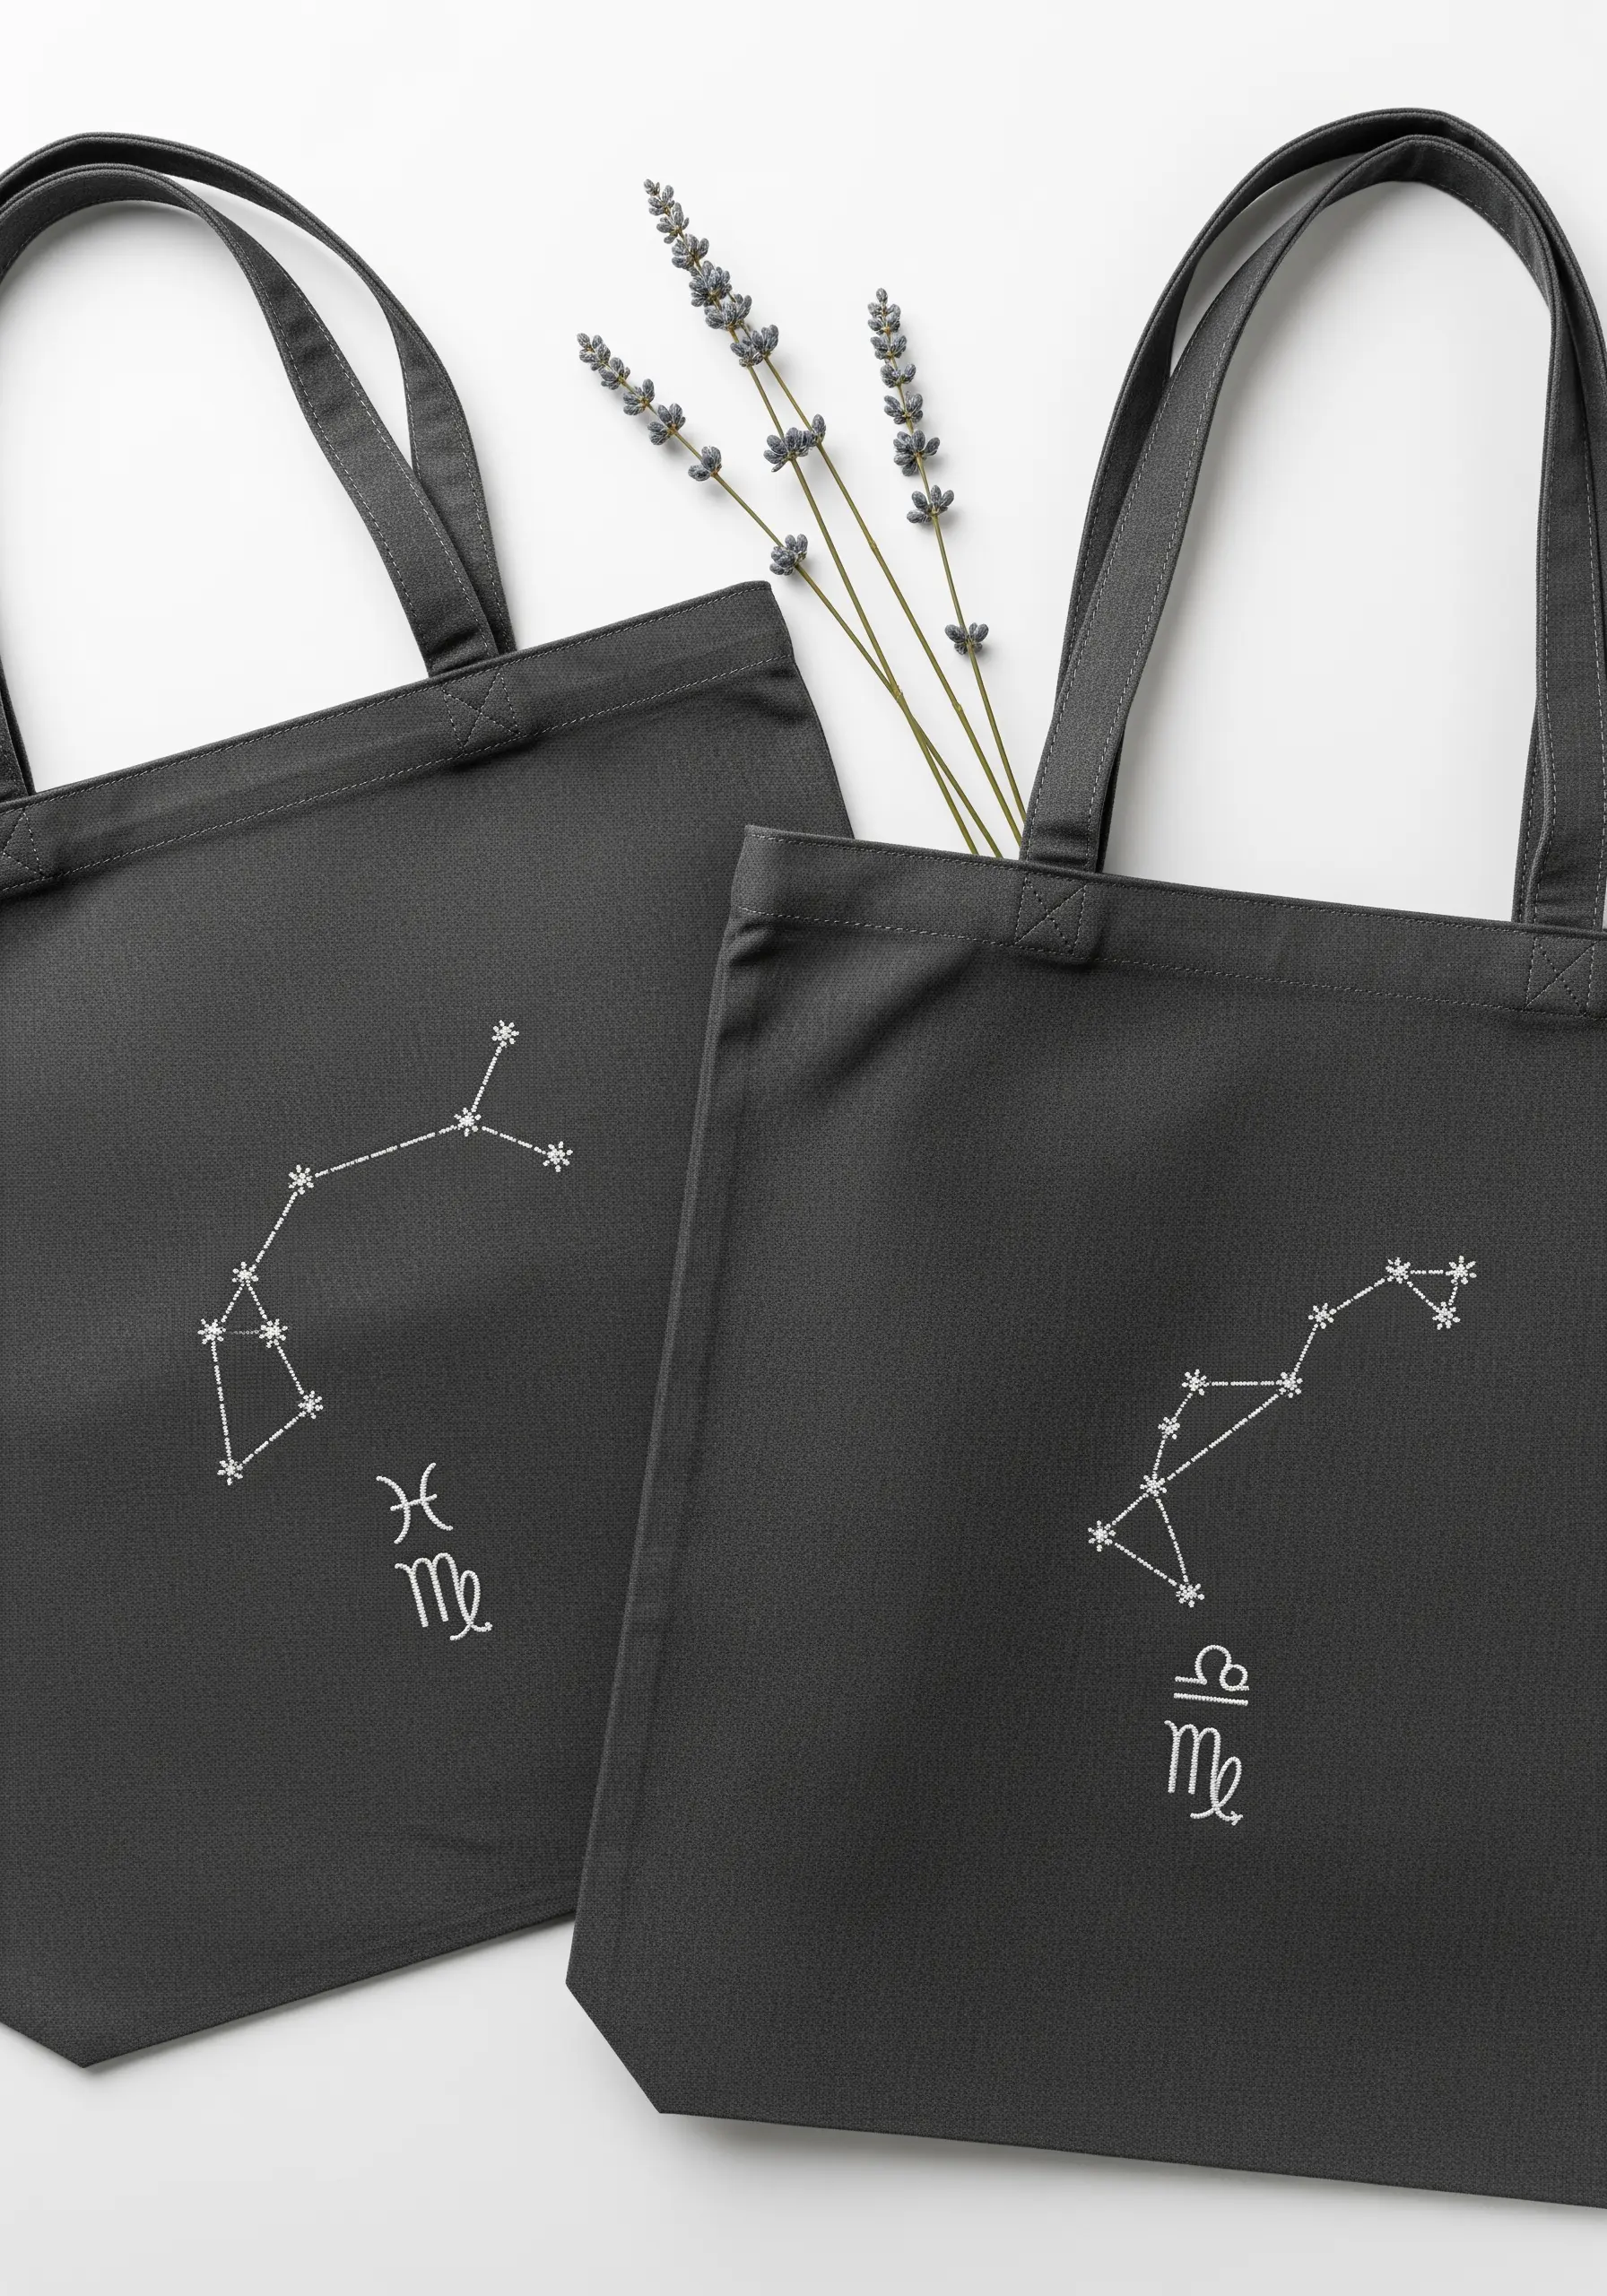
Elevate a simple constellation by focusing on precision and delicate detail.
Use a bright white or silver metallic thread on a dark charcoal or navy tote for maximum contrast.
Stitch the stars using tiny French knots or four-sided eyelet stitches, varying the size slightly to create a sense of distance and depth.
A simple backstitch connects the points, creating a design that is both minimal and meaningful.
7. Balancing Bold Fills with Delicate Lettering

When combining solid shapes and fine text, balance is everything.
For the book spines, use a dense satin stitch to create bold blocks of color. To keep the edges sharp, outline each shape with a split stitch first.
For the tiny titles, switch to a single strand of black floss and use a neat backstitch. This ensures the words are legible and don’t get lost in the vibrant colors.
For the coffee steam, use a fluid stem stitch to create graceful, wispy lines.
8. Perfecting the Curve with Satin Stitch
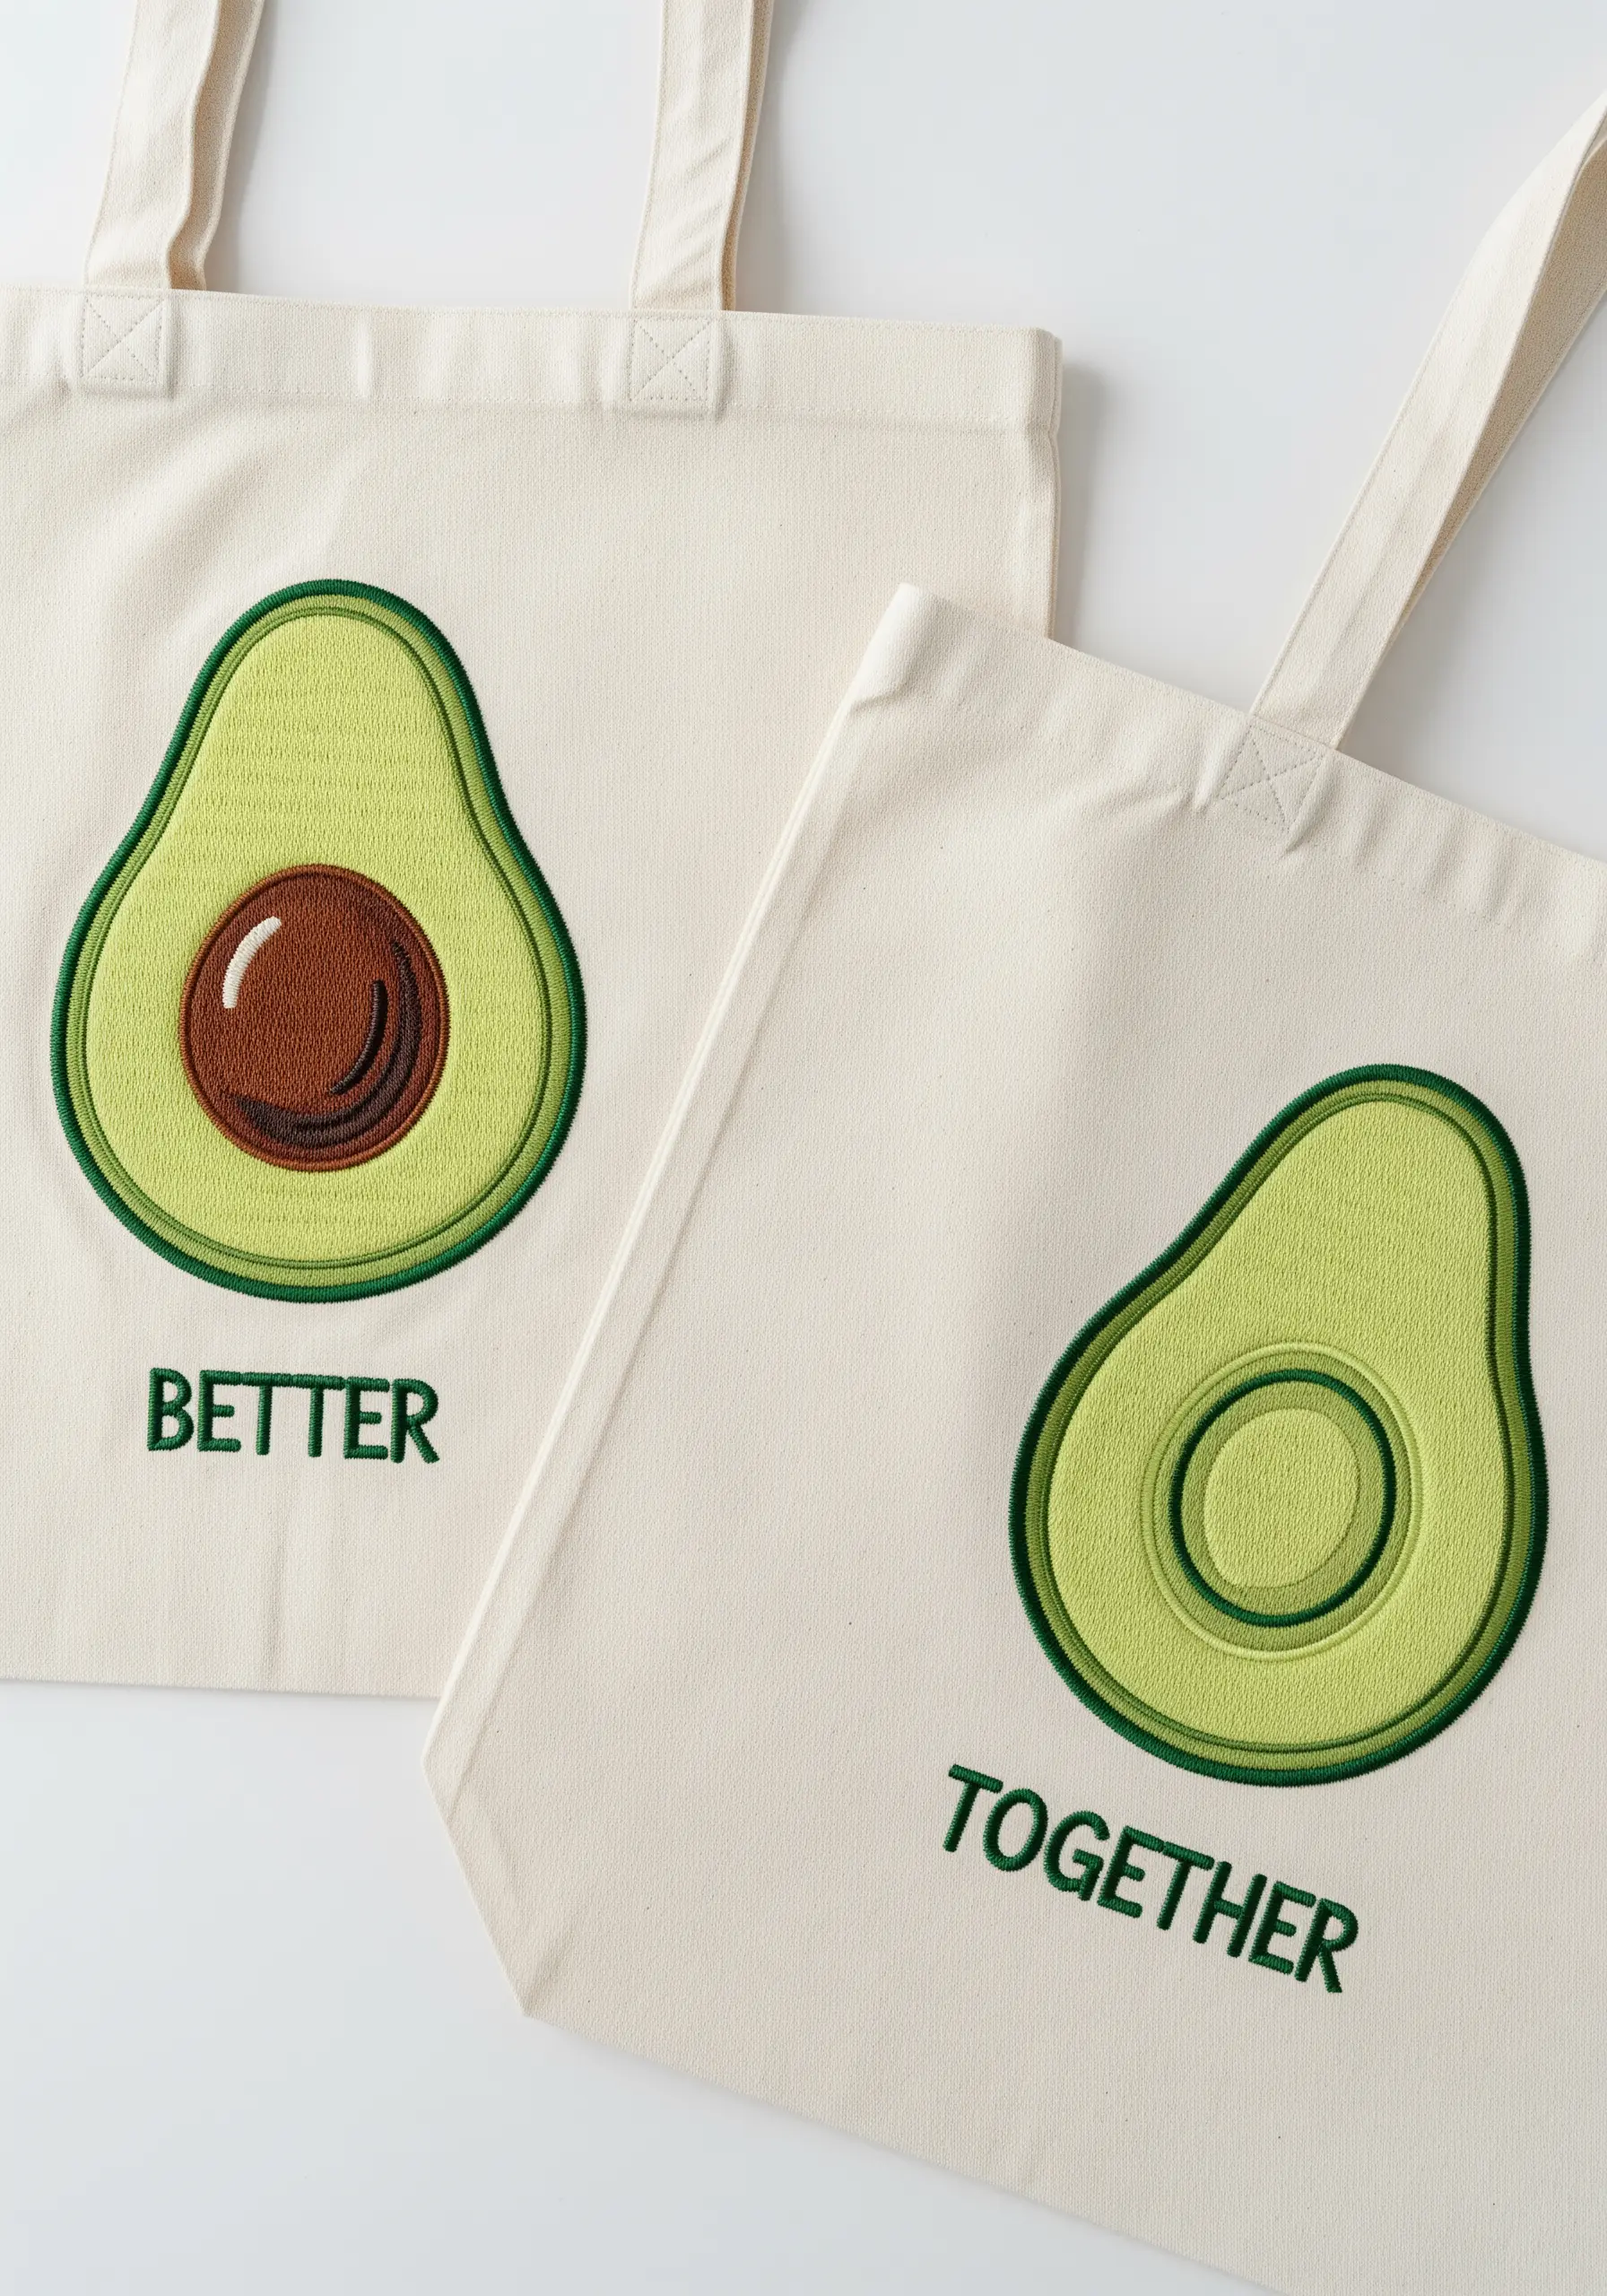
Achieving a flawless satin stitch on a curved object like an avocado requires careful attention to stitch direction.
Imagine lines radiating from the inner curve to the outer edge, and place your stitches along those lines.
For the pit, use a padded satin stitch—a base of small seed stitches—to give it a subtle, rounded 3D effect that makes it stand out.
A clean split stitch outline in a darker green will hide any imperfections and give your shape a polished finish.
9. Capturing Pop Culture with Character

Personalize totes with an inside joke or favorite TV show reference by balancing text and simple icons.
Use a bold, blocky satin stitch for the names to make them the focal point. For the finer details on the teapot and jello mold, switch to a simple backstitch.
This contrast in stitch density ensures the design is easy to read and the icons are recognizable without being overly complex.
10. Retro Pop with Bold Outlines
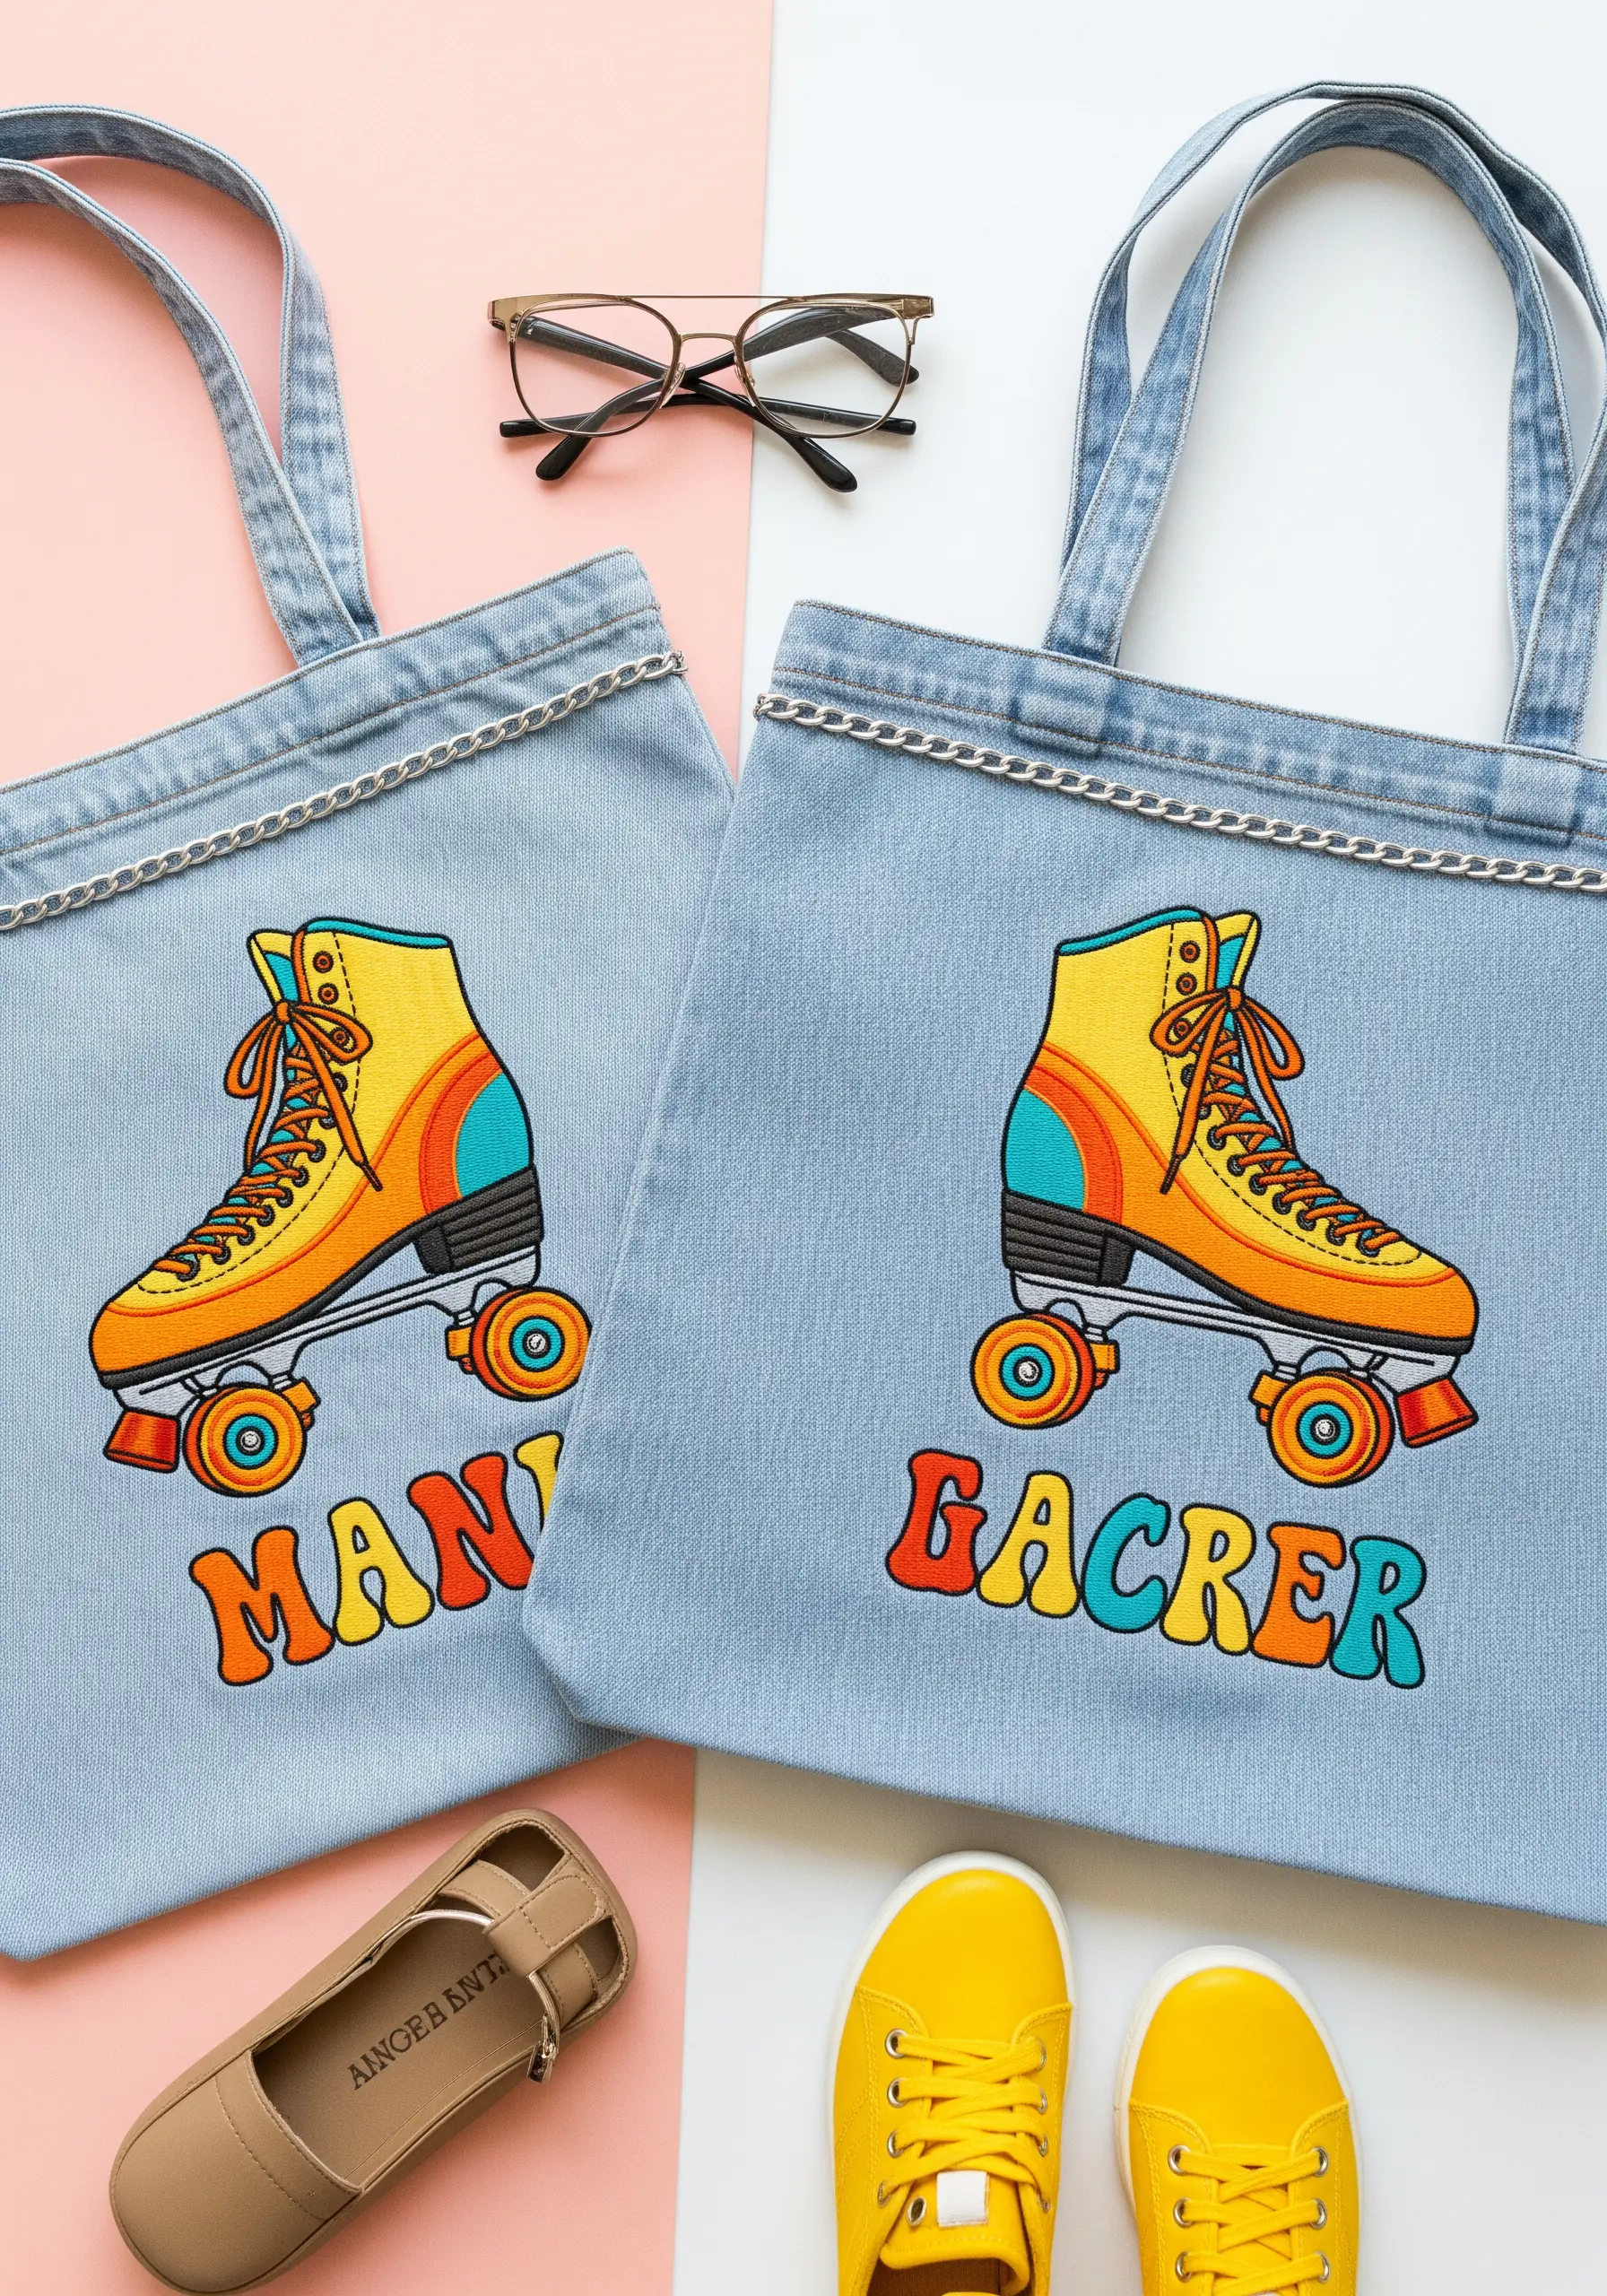
Create a vibrant, retro feel by emphasizing bold, graphic outlines.
After filling in the color blocks of the roller skate with satin stitch, go back and add a thick outline using a chain stitch or a four-strand backstitch in black.
This technique defines each section, makes the colors pop dramatically, and gives the design a clean, cartoon-inspired finish that looks sharp and intentional.
11. Expressive Lines for Adventure
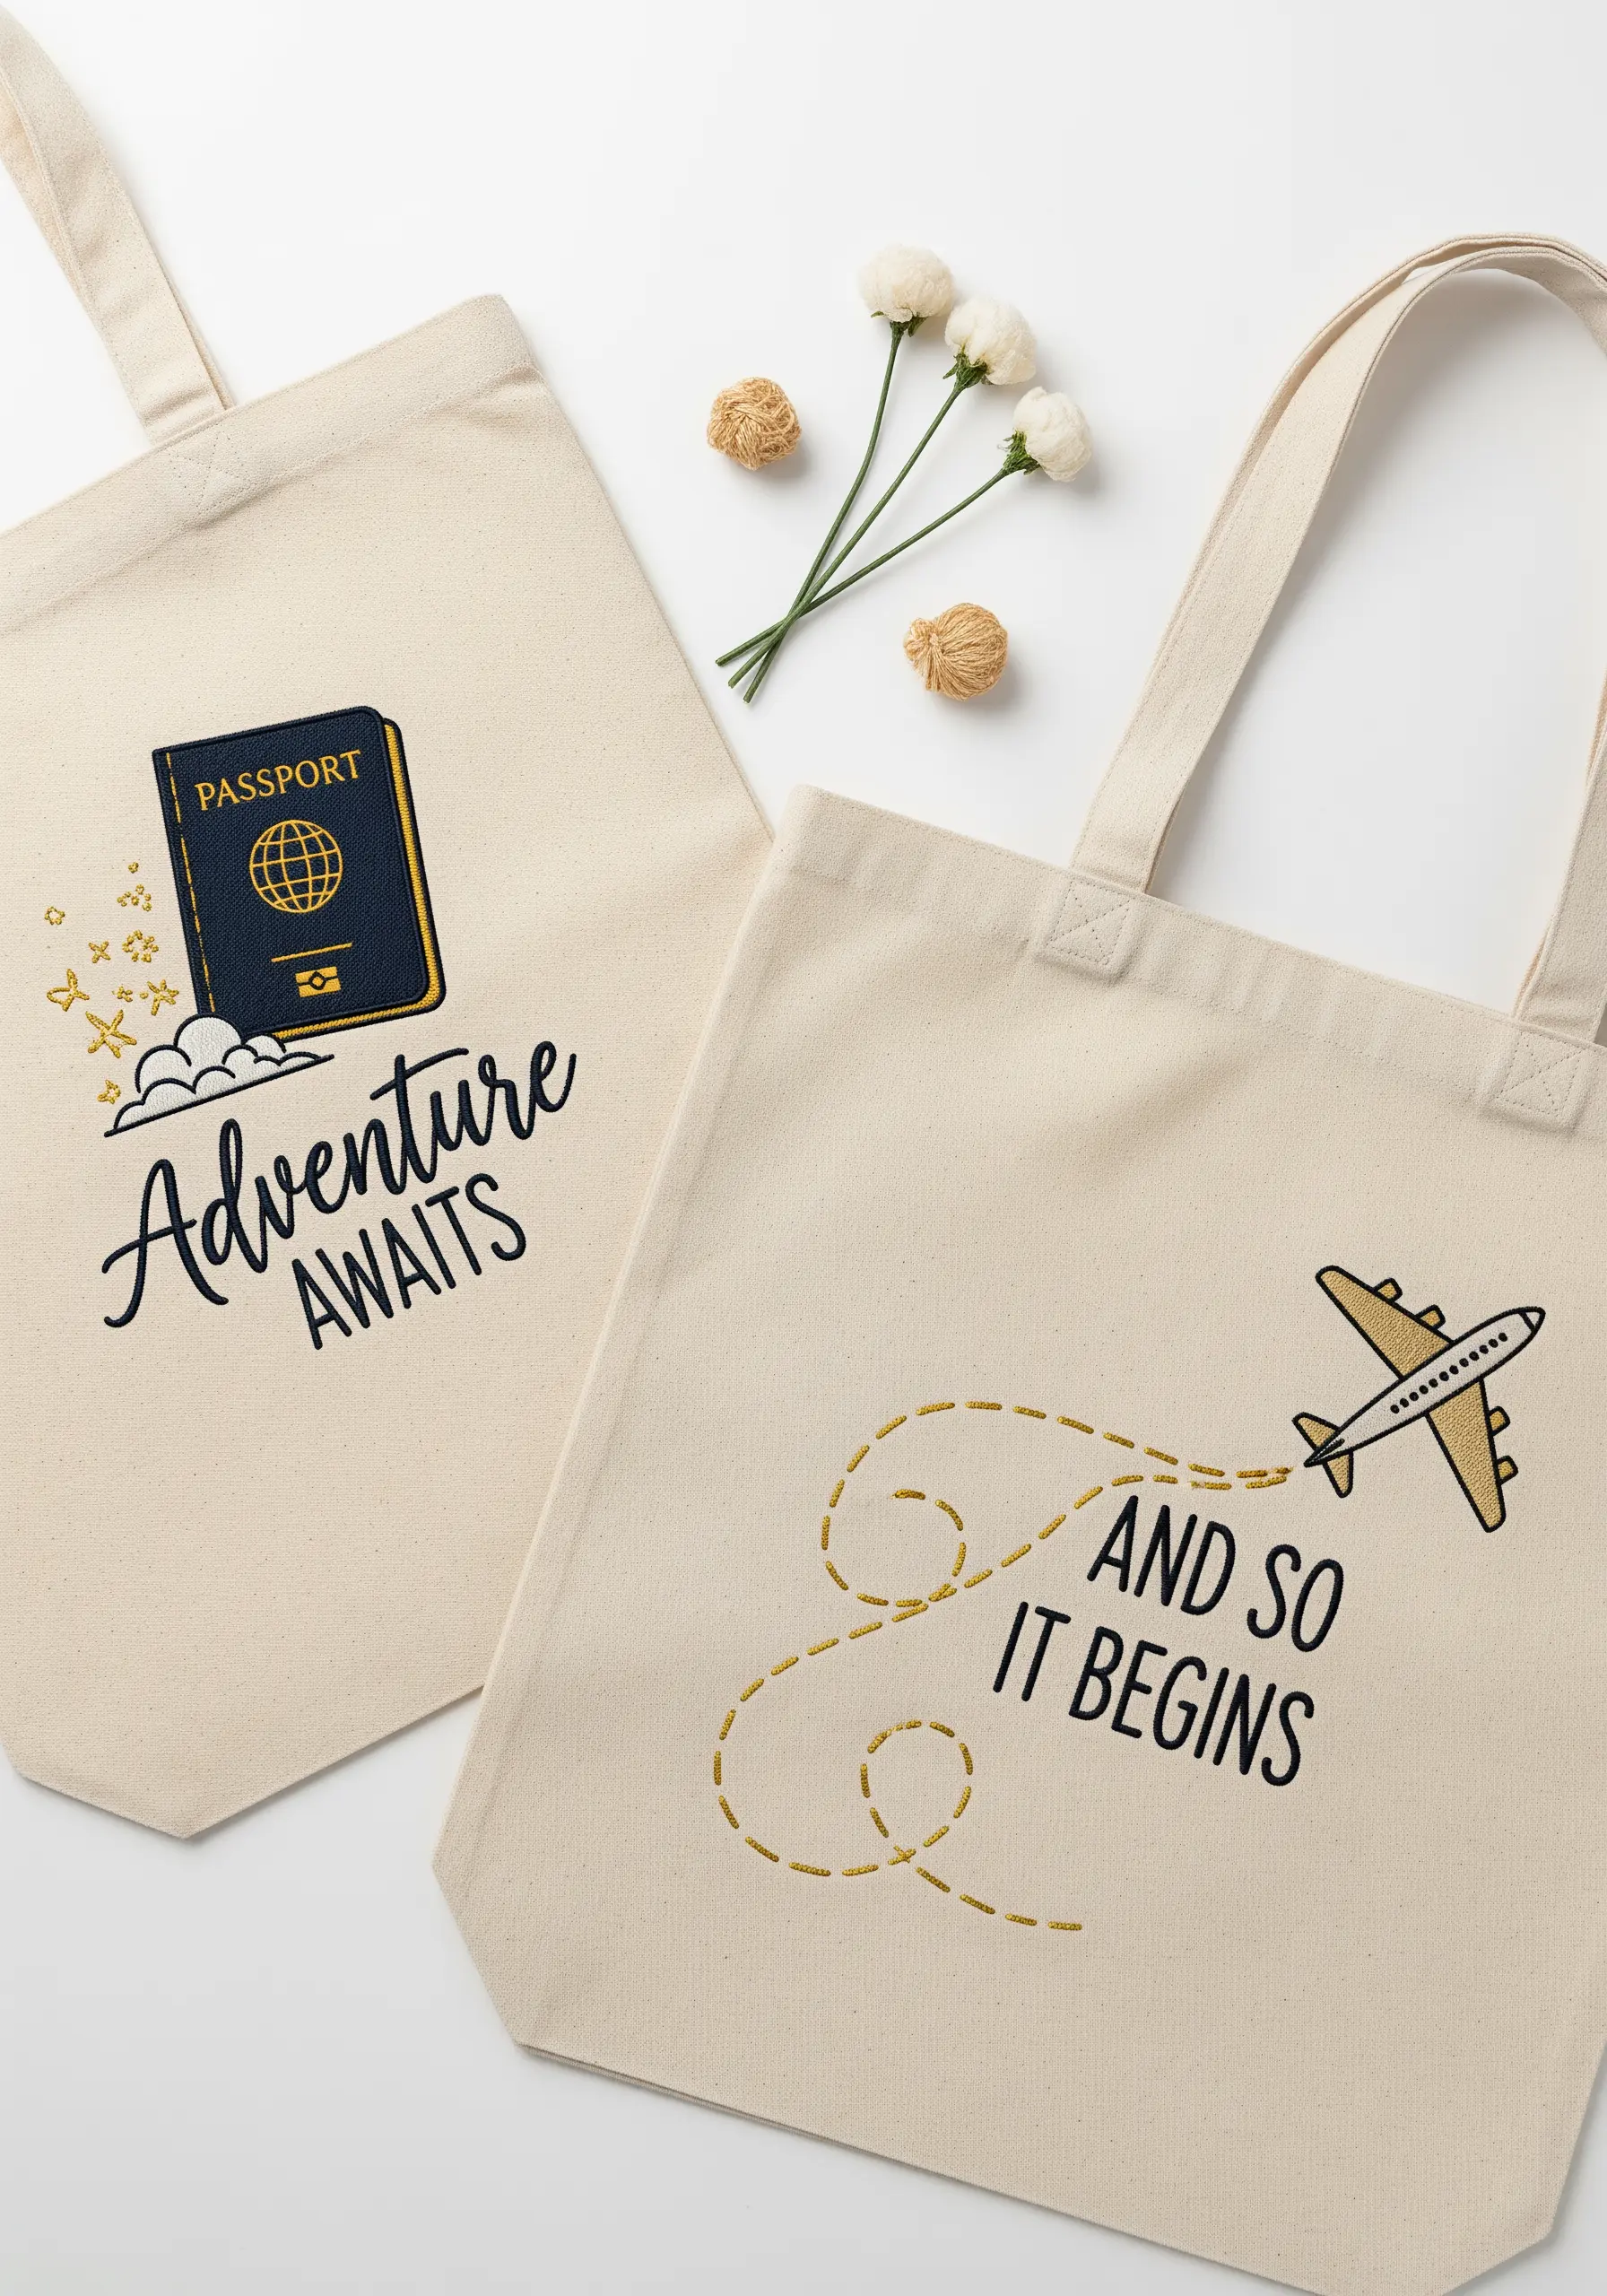
Tell a story of two different journeys by pairing solid and suggestive stitching.
For the passport, use clean satin stitches and precise backstitch for the lettering to give it a solid, official feel.
For the airplane’s flight path, a simple dashed running stitch in a contrasting color creates a sense of movement and whimsy.
This combination of styles makes the design visually interesting and adds a layer of narrative to your gift.
12. The Art of the Continuous Line Portrait
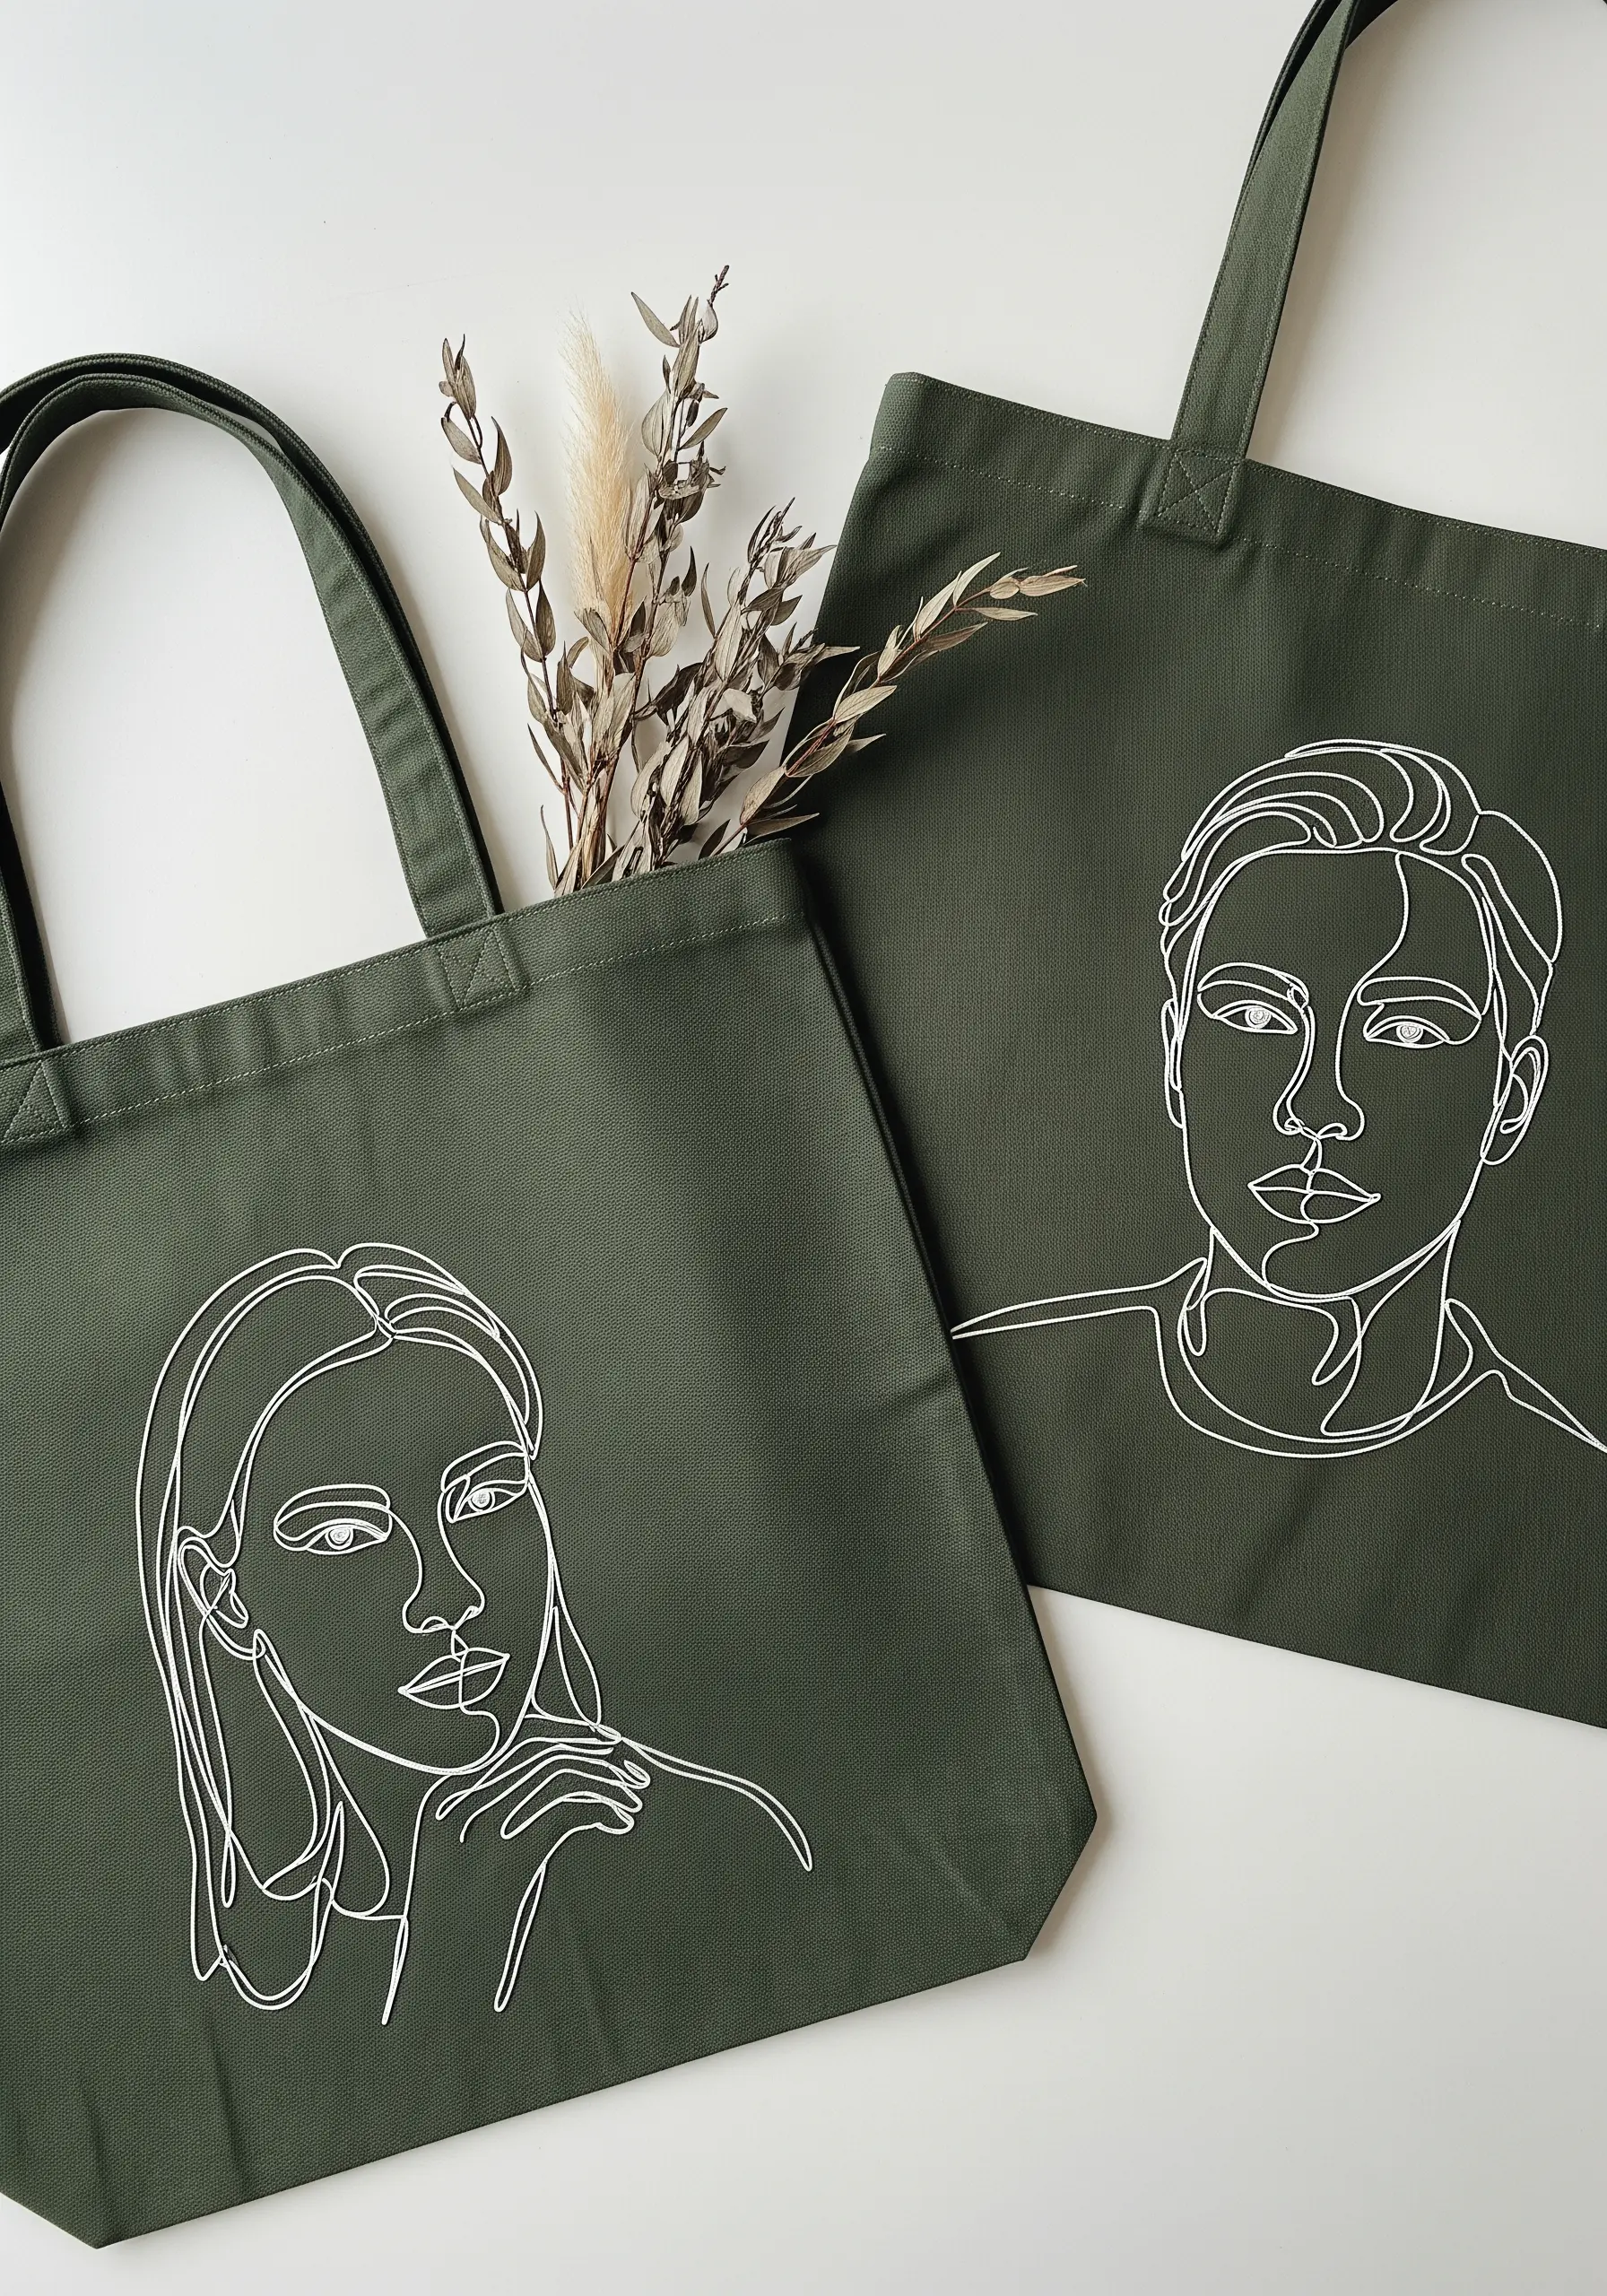
To capture the essence of a single-line drawing, your goal is to minimize visible starts and stops.
Use a stem stitch or a whipped backstitch with two strands of floss, which creates a smooth, cord-like line perfect for these single-line face profiles.
Plan your stitching path before you begin, trying to complete the entire portrait with one continuous piece of thread for the most authentic and artistic result.
13. Capturing Fur with Thread Painting
Bring pet portraits to life by using thread painting techniques to simulate fur.
Use a single strand of floss and the long-and-short stitch, blending multiple shades of a color family—like golds, browns, and creams—to create realistic depth and highlights.
Always stitch in the direction of the fur’s growth. This small detail is the key to transforming a flat image into a portrait with personality and lifelike texture.
14. Creating a Meadow with Floral Lettering

Transform a simple initial into a lush floral field by densely packing tiny stitches.
Use lazy daisy stitches for the daisy petals and single French knots for the centers. For the lavender, use clusters of French knots in shades of purple and lilac.
The key is to overlap the flowers and leaves, filling the entire letter shape without leaving any gaps. This creates a rich, textured tapestry that feels organic and abundant.
15. Painting Landscapes with Directional Stitches
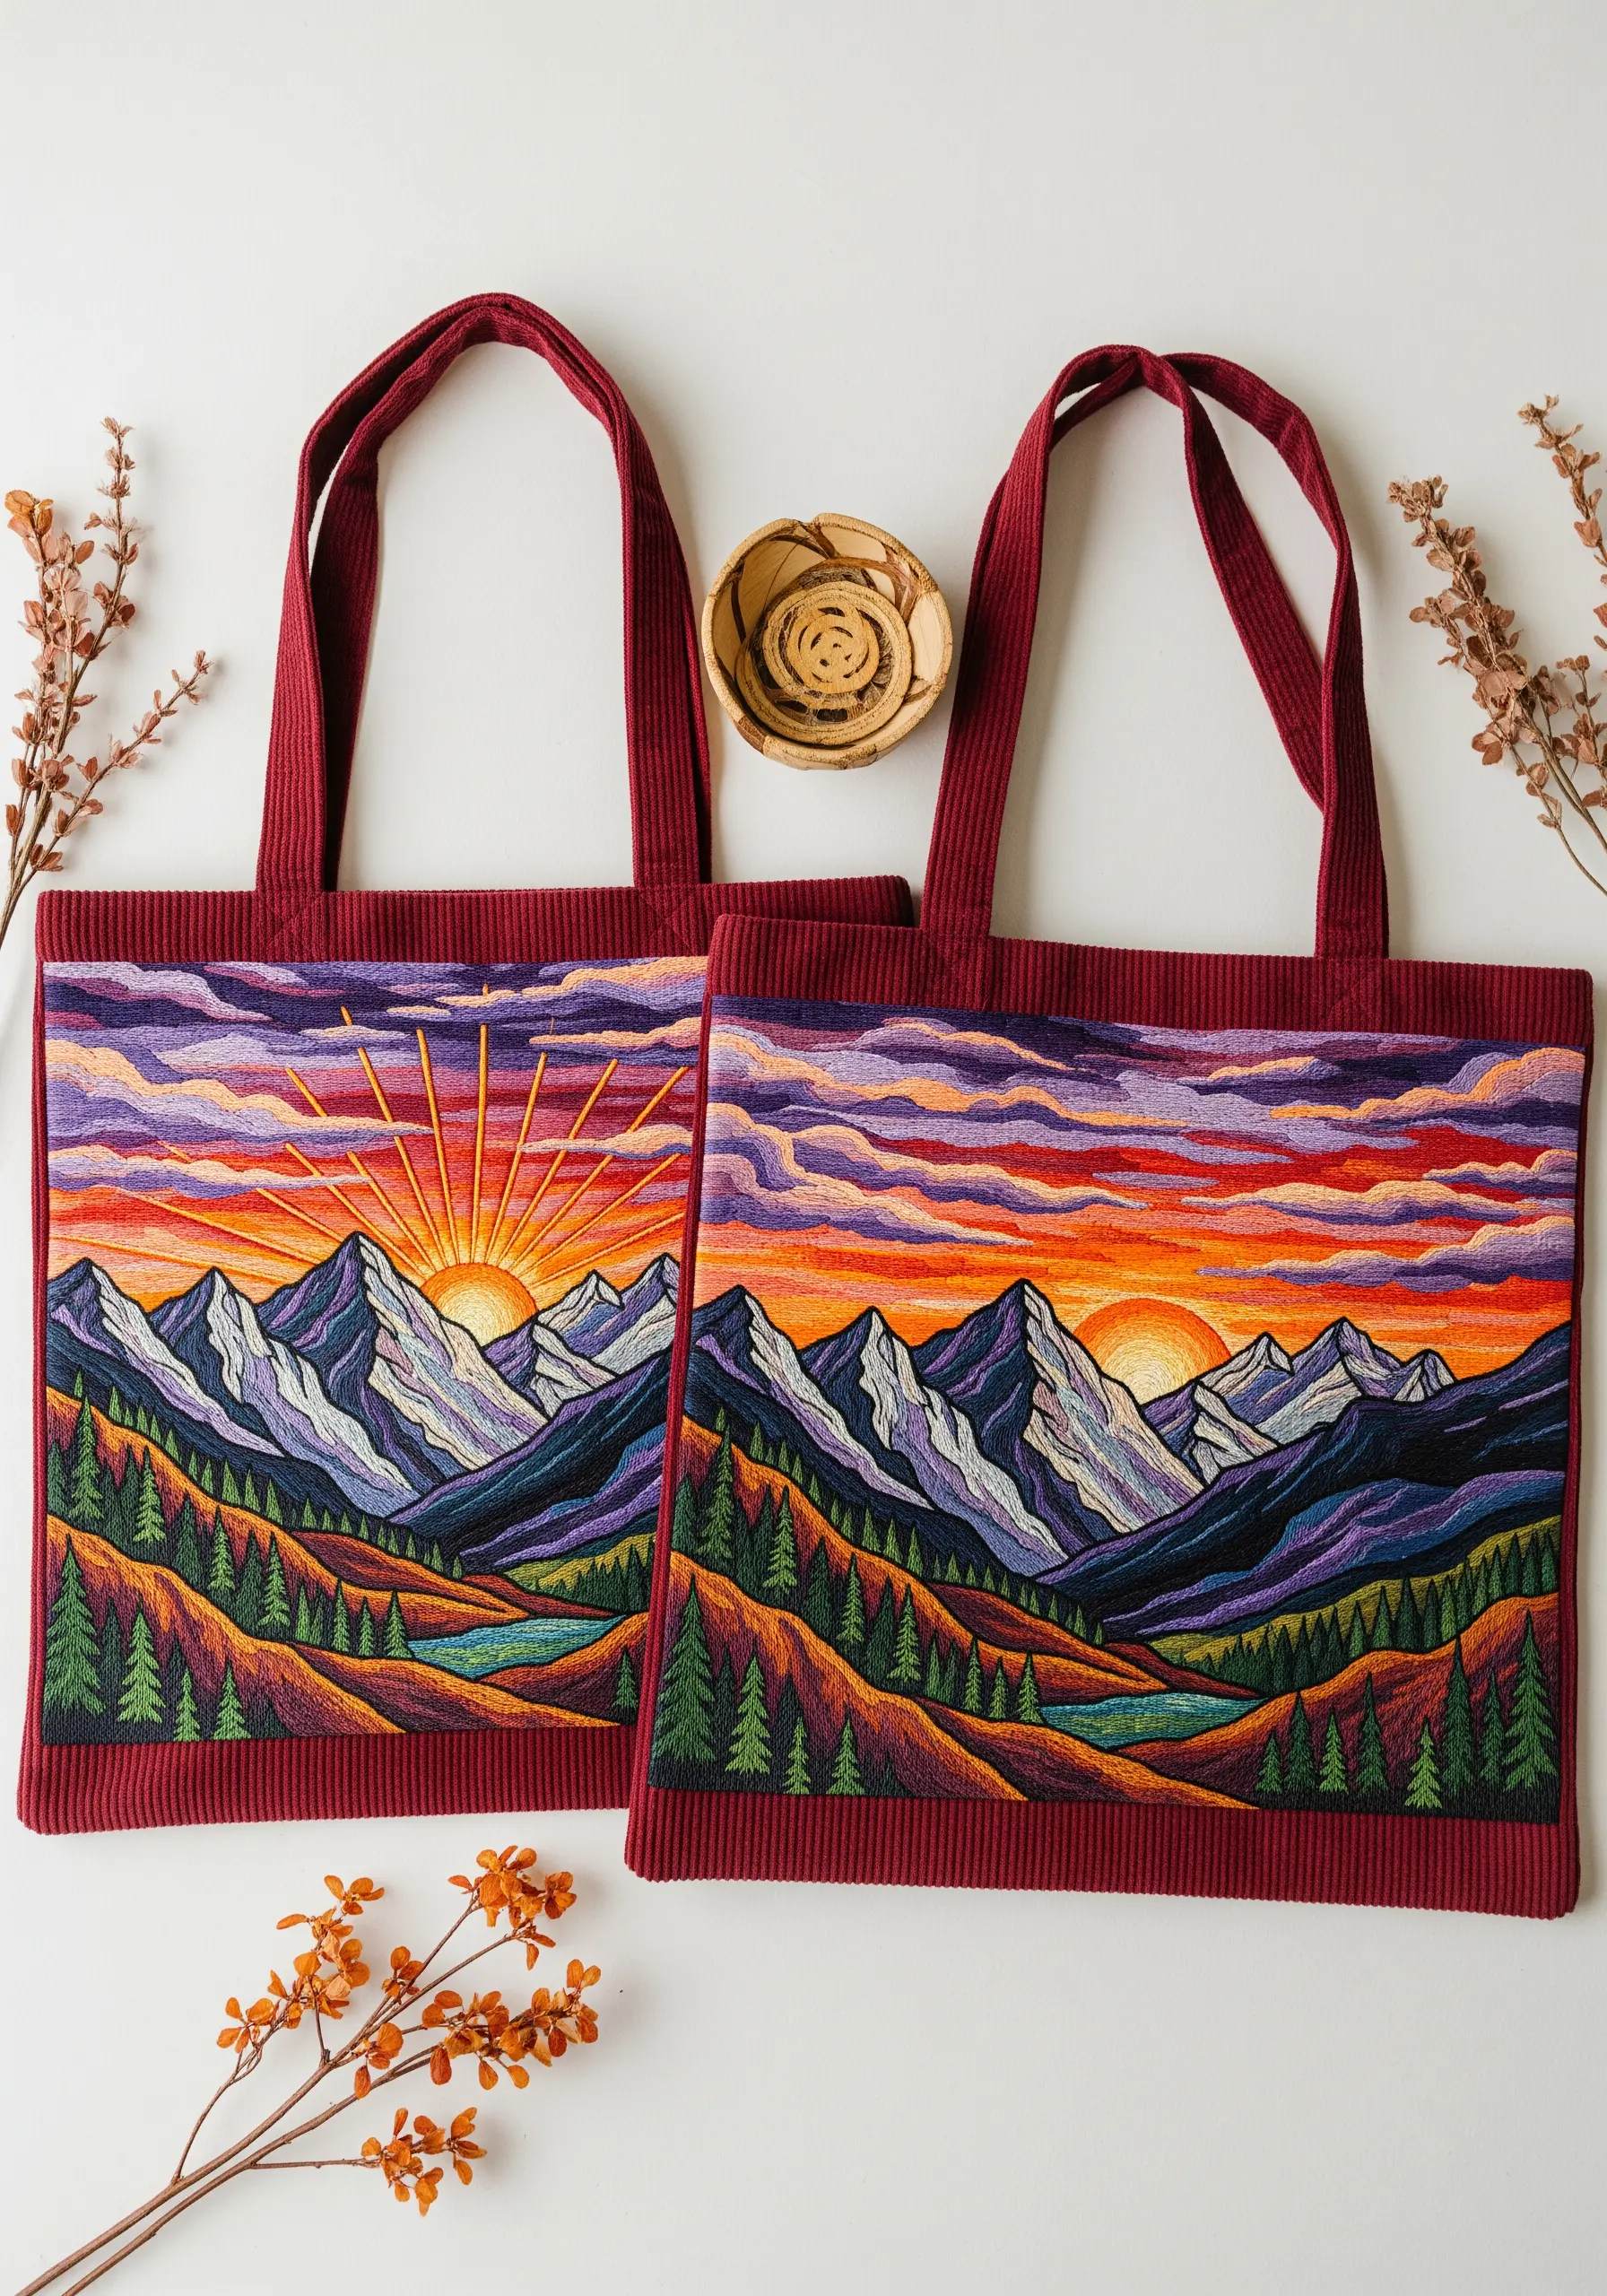
Create depth and movement in a landscape by paying close attention to the direction of your stitches.
For the mountains, angle your satin stitches to follow the natural slopes and peaks. Use darker threads for shadows and lighter ones for sunlit ridges.
For the sky, use long horizontal stitches, blending sunset colors from yellow to purple to create a smooth gradient. This directional approach turns a flat scene into a dynamic vista.
16. Mimicking Crafts with Trompe l’Oeil Stitches

Create a playful nod to other crafts using clever stitch choices.
To simulate a ball of yarn, use a couching stitch to lay down variegated thread in swirling patterns. For the knitted swatch, a series of interconnected chain stitches worked in rows perfectly mimics the look of a knit stitch.
These unexpected embroidery techniques add a layer of wit and charm, celebrating the joy of making.
17. Realistic Leaves Through Shading and Structure

To give a monstera leaf its characteristic depth and realism, focus on subtle shading.
Use a fishbone stitch, which creates a central vein naturally. Work each half of the leaf with two or three closely related shades of green, using a long-and-short stitch technique to blend them seamlessly.
This creates soft highlights and shadows, making the leaf appear three-dimensional and lifelike, just like in these leaf embroidery stitches.
18. Iridescent Effects with Thread and Beads
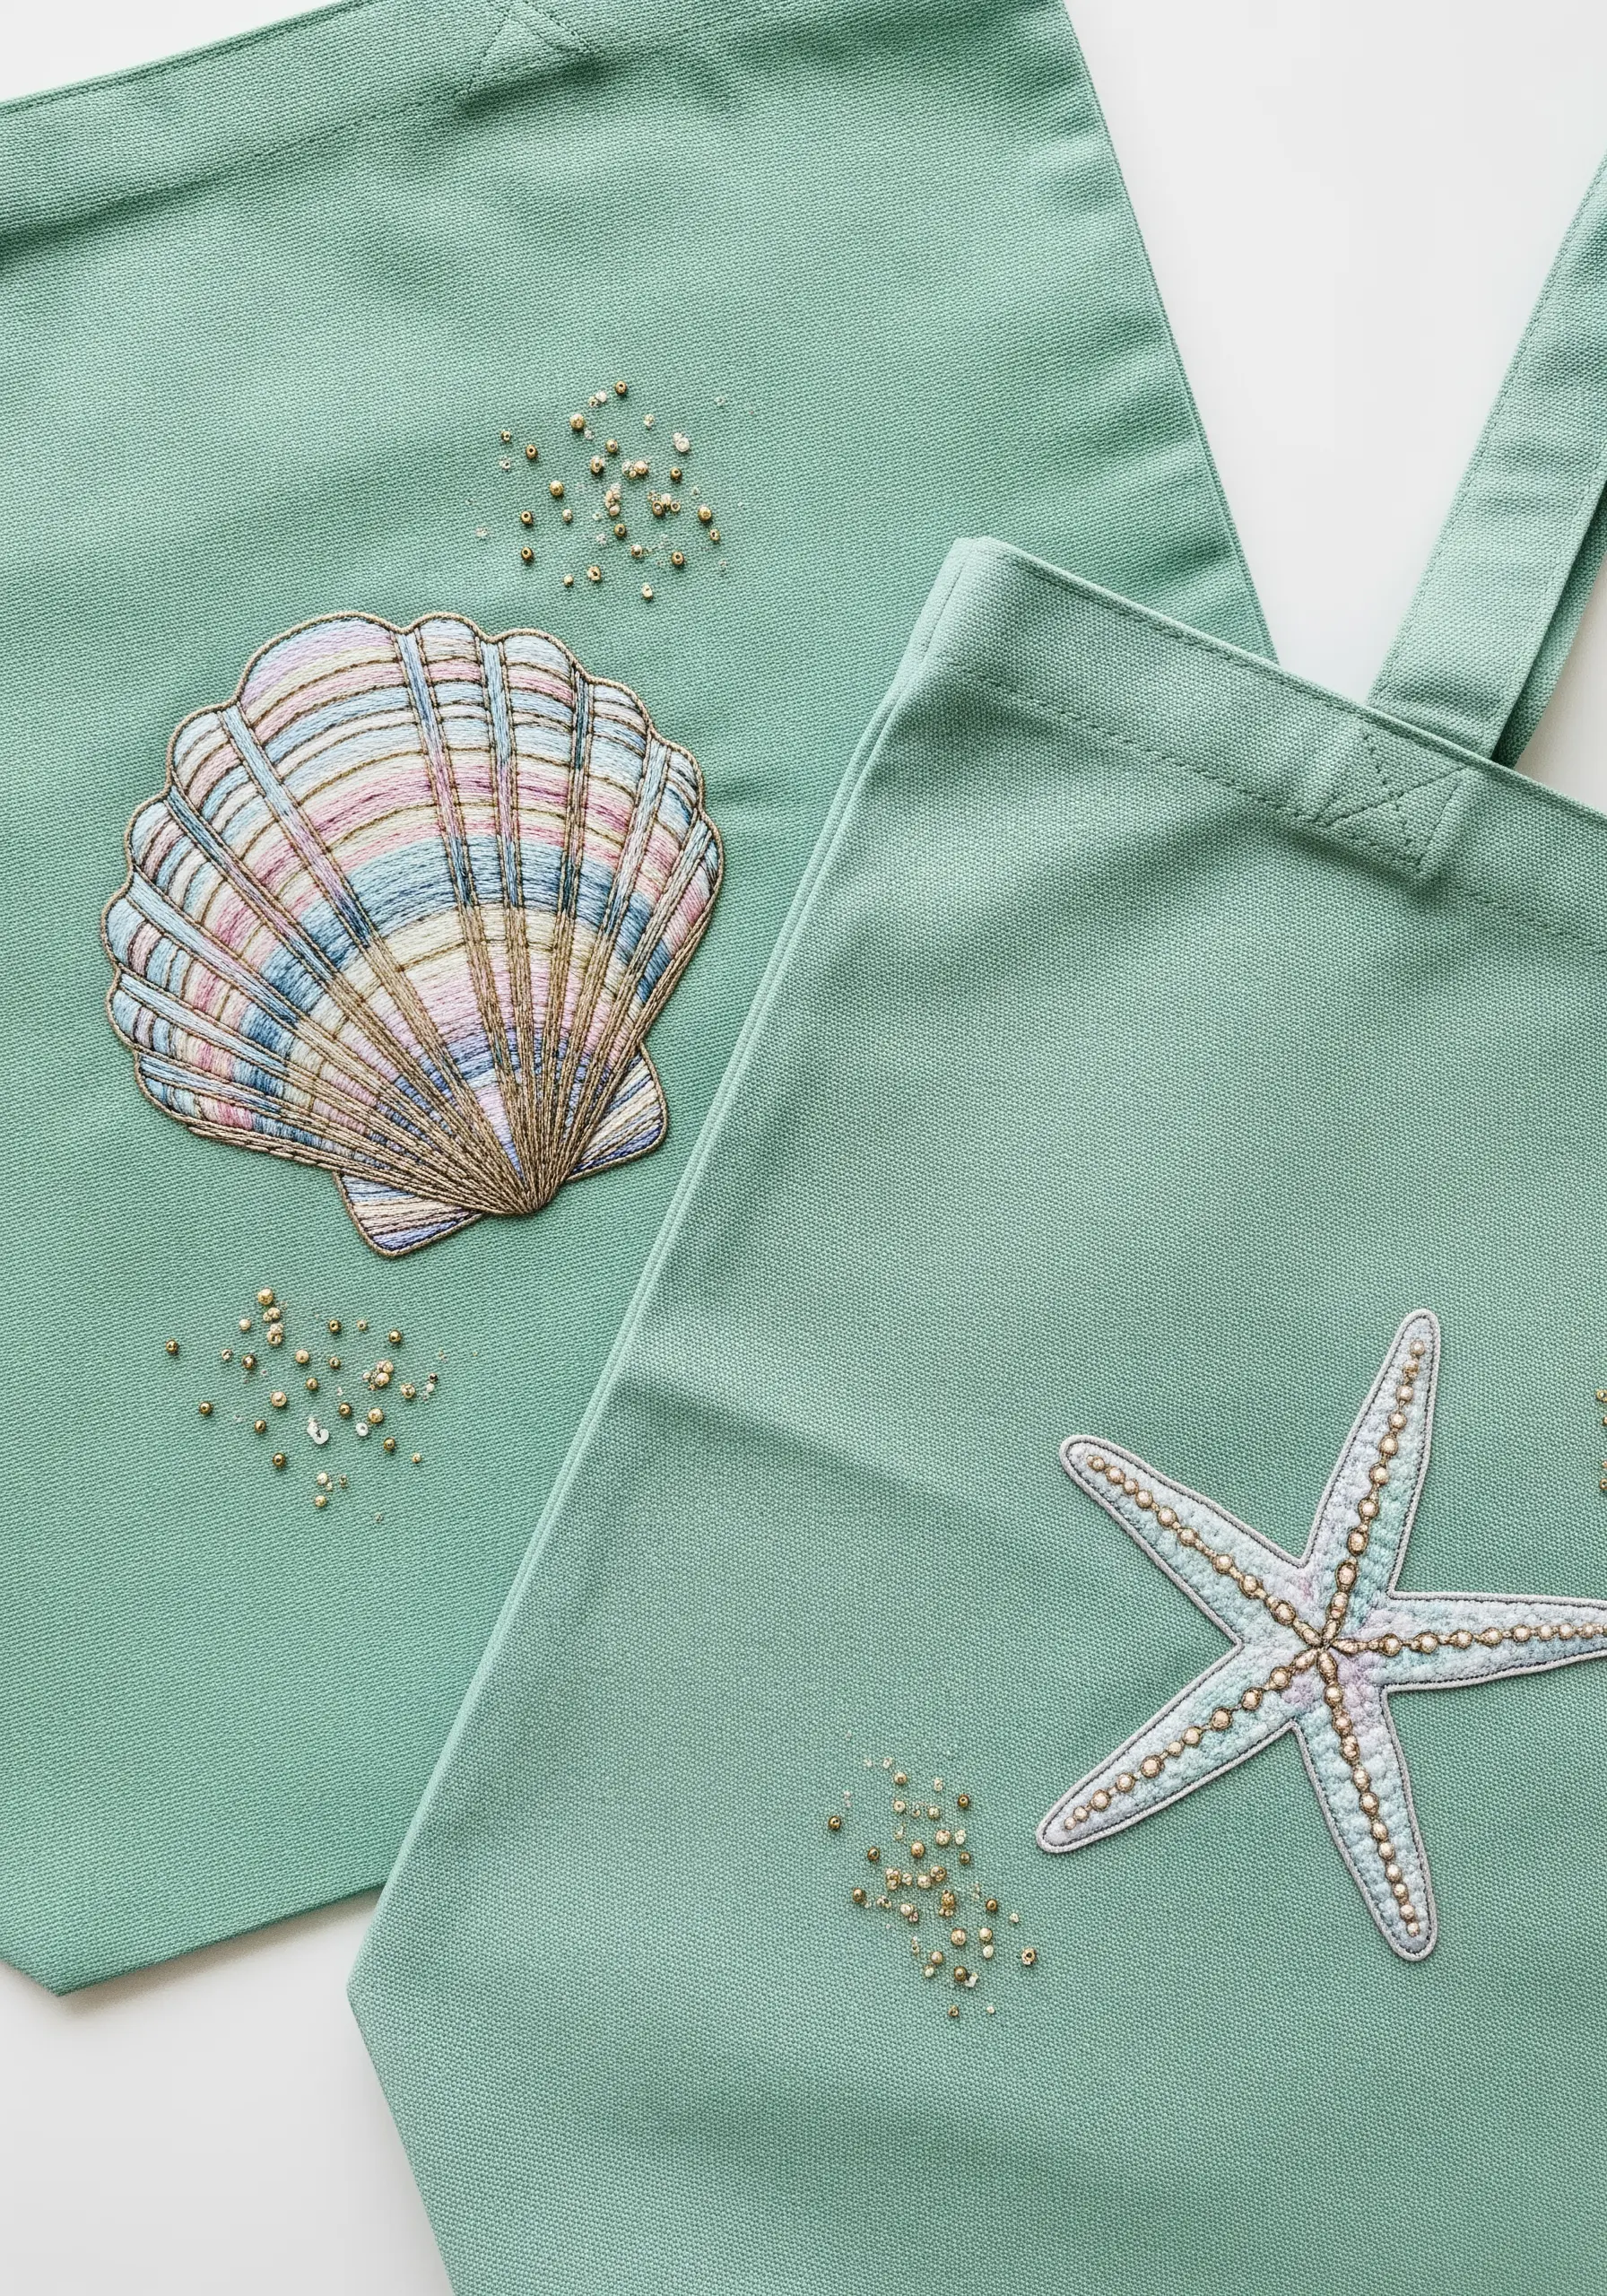
Capture the pearly, iridescent quality of a seashell by combining variegated thread with metallic accents.
Use a satin stitch with a pastel variegated floss to create soft, shifting colors within the shell’s segments. Then, outline each segment with a single strand of gold or silver metallic thread for definition.
A scattered cluster of tiny gold seed beads nearby suggests sparkling sand and completes the dreamy, coastal theme.
19. Sharp Graphics for a Nostalgic Vibe

Recreate the clean, graphic look of a retro cassette tape with precision stitching.
Use a sharp needle and a tight backstitch for all the outlines and lettering to ensure crisp, straight lines. Fill the color blocks with a dense, perfectly aligned satin stitch.
For a design like this, neatness is everything. A stabilizer on the back of your fabric will prevent puckering and help you achieve that flawless, machine-made look by hand.
20. Modern Appliqué with Felt and Texture
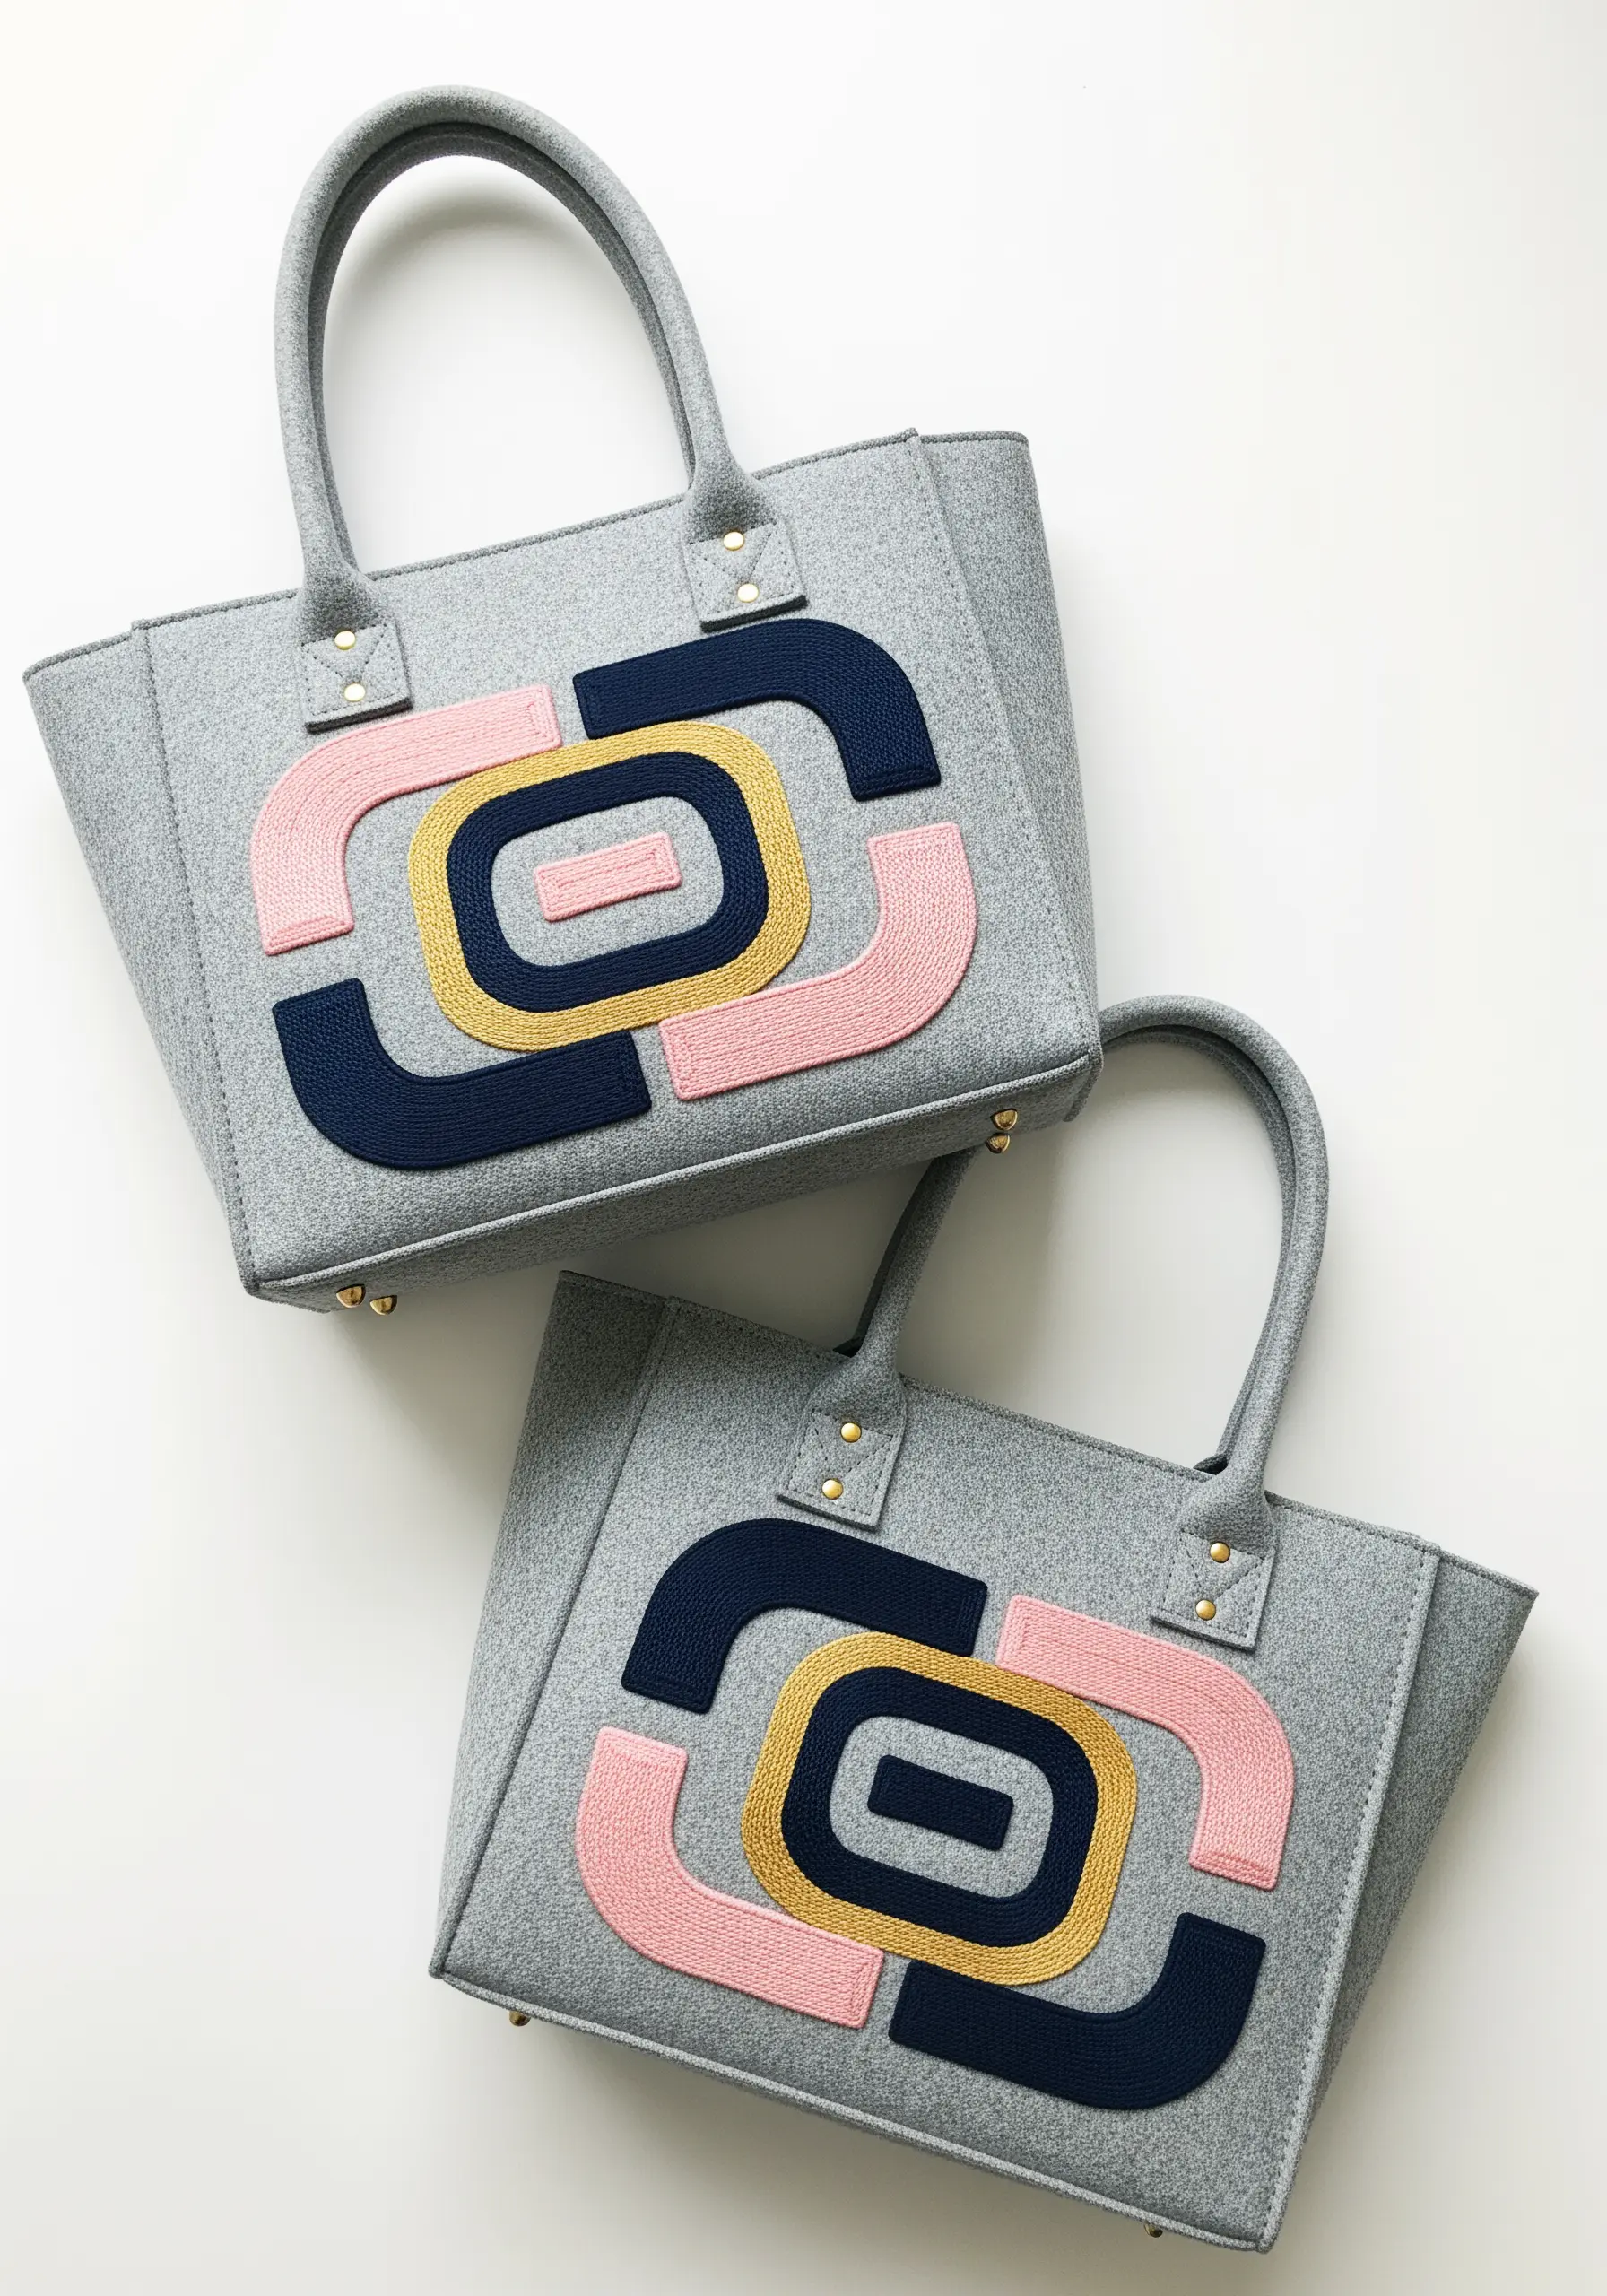
Combine the softness of felt with the precision of embroidery for a modern, high-contrast design.
Cut your geometric shapes from different colors of wool-blend felt. Arrange them on your tote and secure them with a neat blanket stitch or a simple running stitch just inside the edge.
This layered, appliqué technique creates a bold, textural look that is much faster to complete than filling large areas with thread, making it perfect for structured bags.
21. Illustrative Charm for Organic Motifs

Give simple vegetable motifs a rustic, hand-drawn quality with illustrative stitches.
Instead of a solid satin stitch, use a split stitch or stem stitch to fill the shapes, allowing the texture of the stitches to show. Use a slightly darker shade of the same color for outlines and details.
This approach celebrates the imperfections of handwork and gives the design a warm, farmers-market feel that’s perfect for a canvas tote.
22. Crisp Edges for Pastel Puzzle Pieces

To ensure your puzzle pieces fit together visually, each one needs a perfectly crisp edge.
Before you begin the satin stitch fill, outline each piece with a split stitch using the same color floss. This creates a slightly raised border that your satin stitches can tuck into neatly.
This simple preparation step is the professional’s secret to achieving flawless, defined shapes and preventing colors from bleeding into one another.
23. Storytelling Through Intricate Details

Tackle a complex design like a tarot card by breaking it down into small, manageable elements.
Focus on one section at a time—a face, a flower, a symbol. Use a fine, two-strand backstitch for all the linework to keep the details clear and defined.
Reserve your satin stitch for filling in small areas of color. This methodical approach prevents you from feeling overwhelmed and ensures every part of the story is told with clarity.
24. Achieving Delicacy in Line-Based Designs
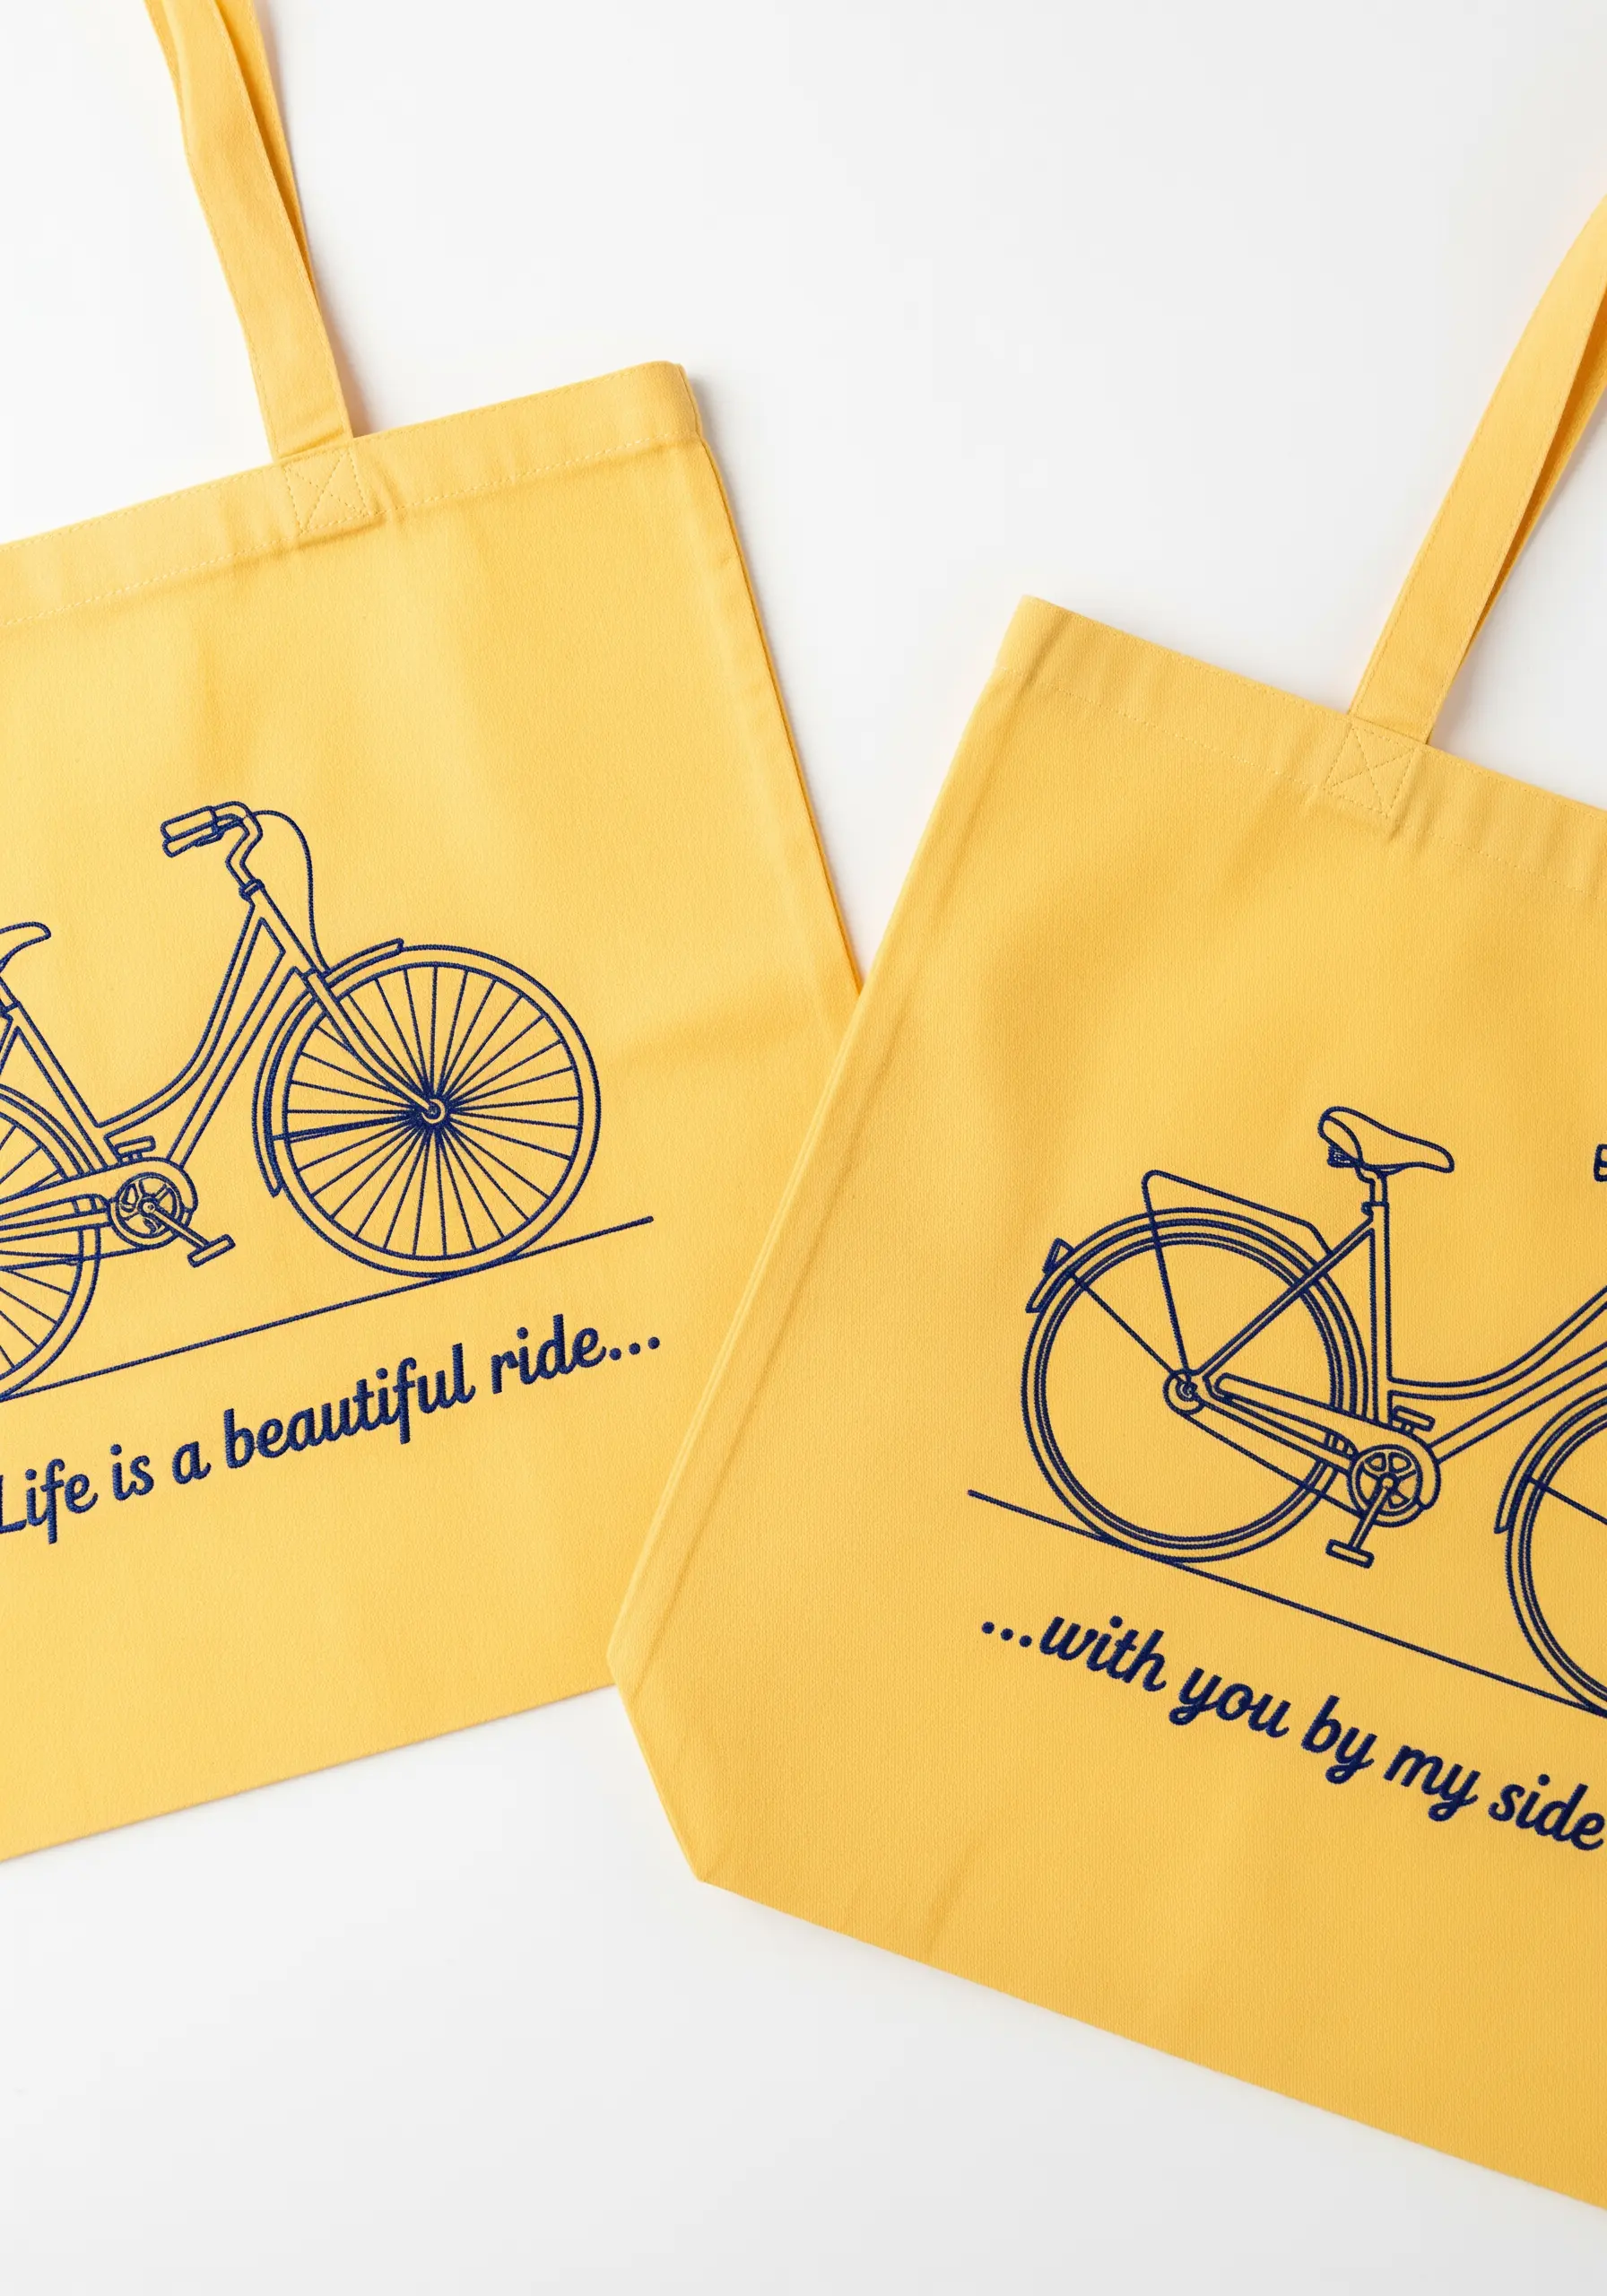
When embroidering a design with many fine lines, like a bicycle, thread weight is critical.
Use two strands of floss for the main frame to give it structure, but switch to a single strand for the delicate spokes and chain.
This subtle shift in thread thickness prevents the smaller details from looking heavy or cluttered, preserving the design’s elegant, airy feel and ensuring every component is clearly visible.
25. Capturing Movement and Whimsy

Create the illusion of a dandelion’s seeds floating on the wind by varying your stitch and placement.
For the main flower, use straight stitches radiating from a central point. For the seeds dispersing across the second bag, use detached chain stitches paired with a short straight stitch ‘stem’.
Stitch these floating seeds at different angles and distances from each other to create a natural, dynamic sense of movement and connection between the two bags.
26. Tiny Stitches for Realistic Food Miniatures
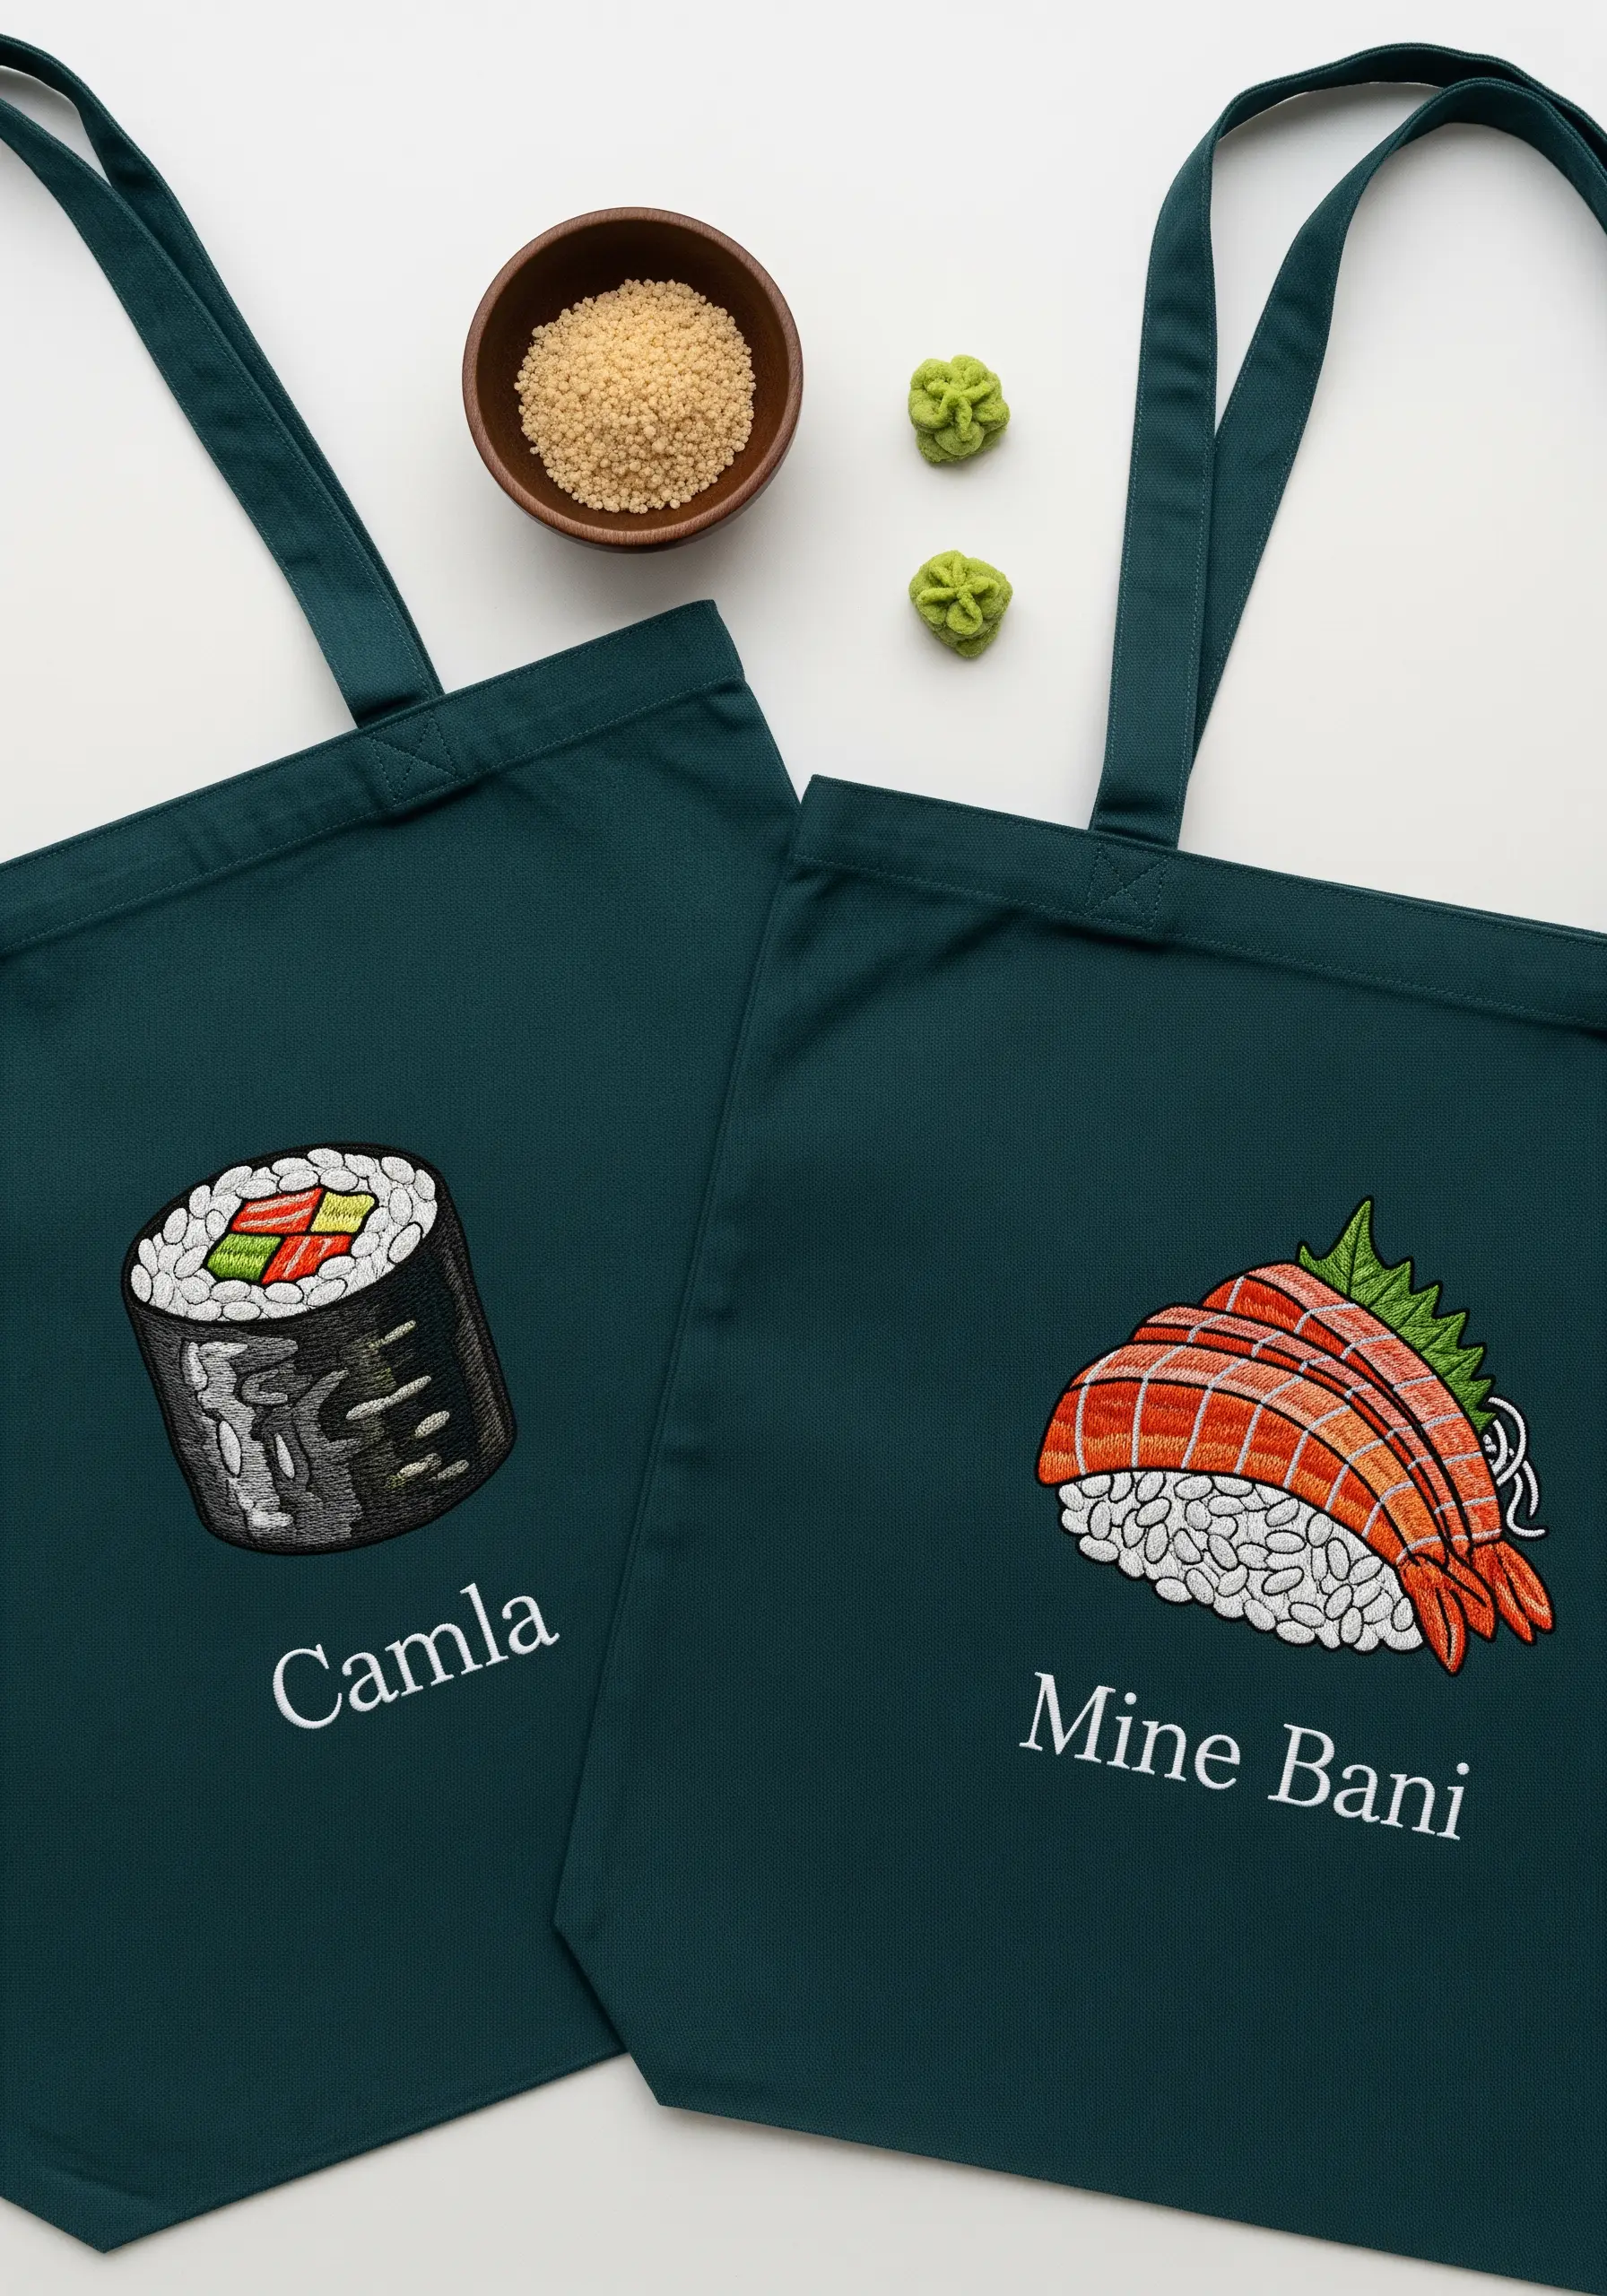
The key to embroidering convincing miniature food is focusing on the tiny textural details.
For the sushi rice, use scattered single French knots in an off-white thread to create its signature bumpy texture. For the salmon, use long-and-short stitches blending two shades of orange, and add thin white straight stitches on top for the lines of fat.
These micro-details are what make the small motifs instantly recognizable and impressively realistic.
27. The Charm of an Illustrative Map
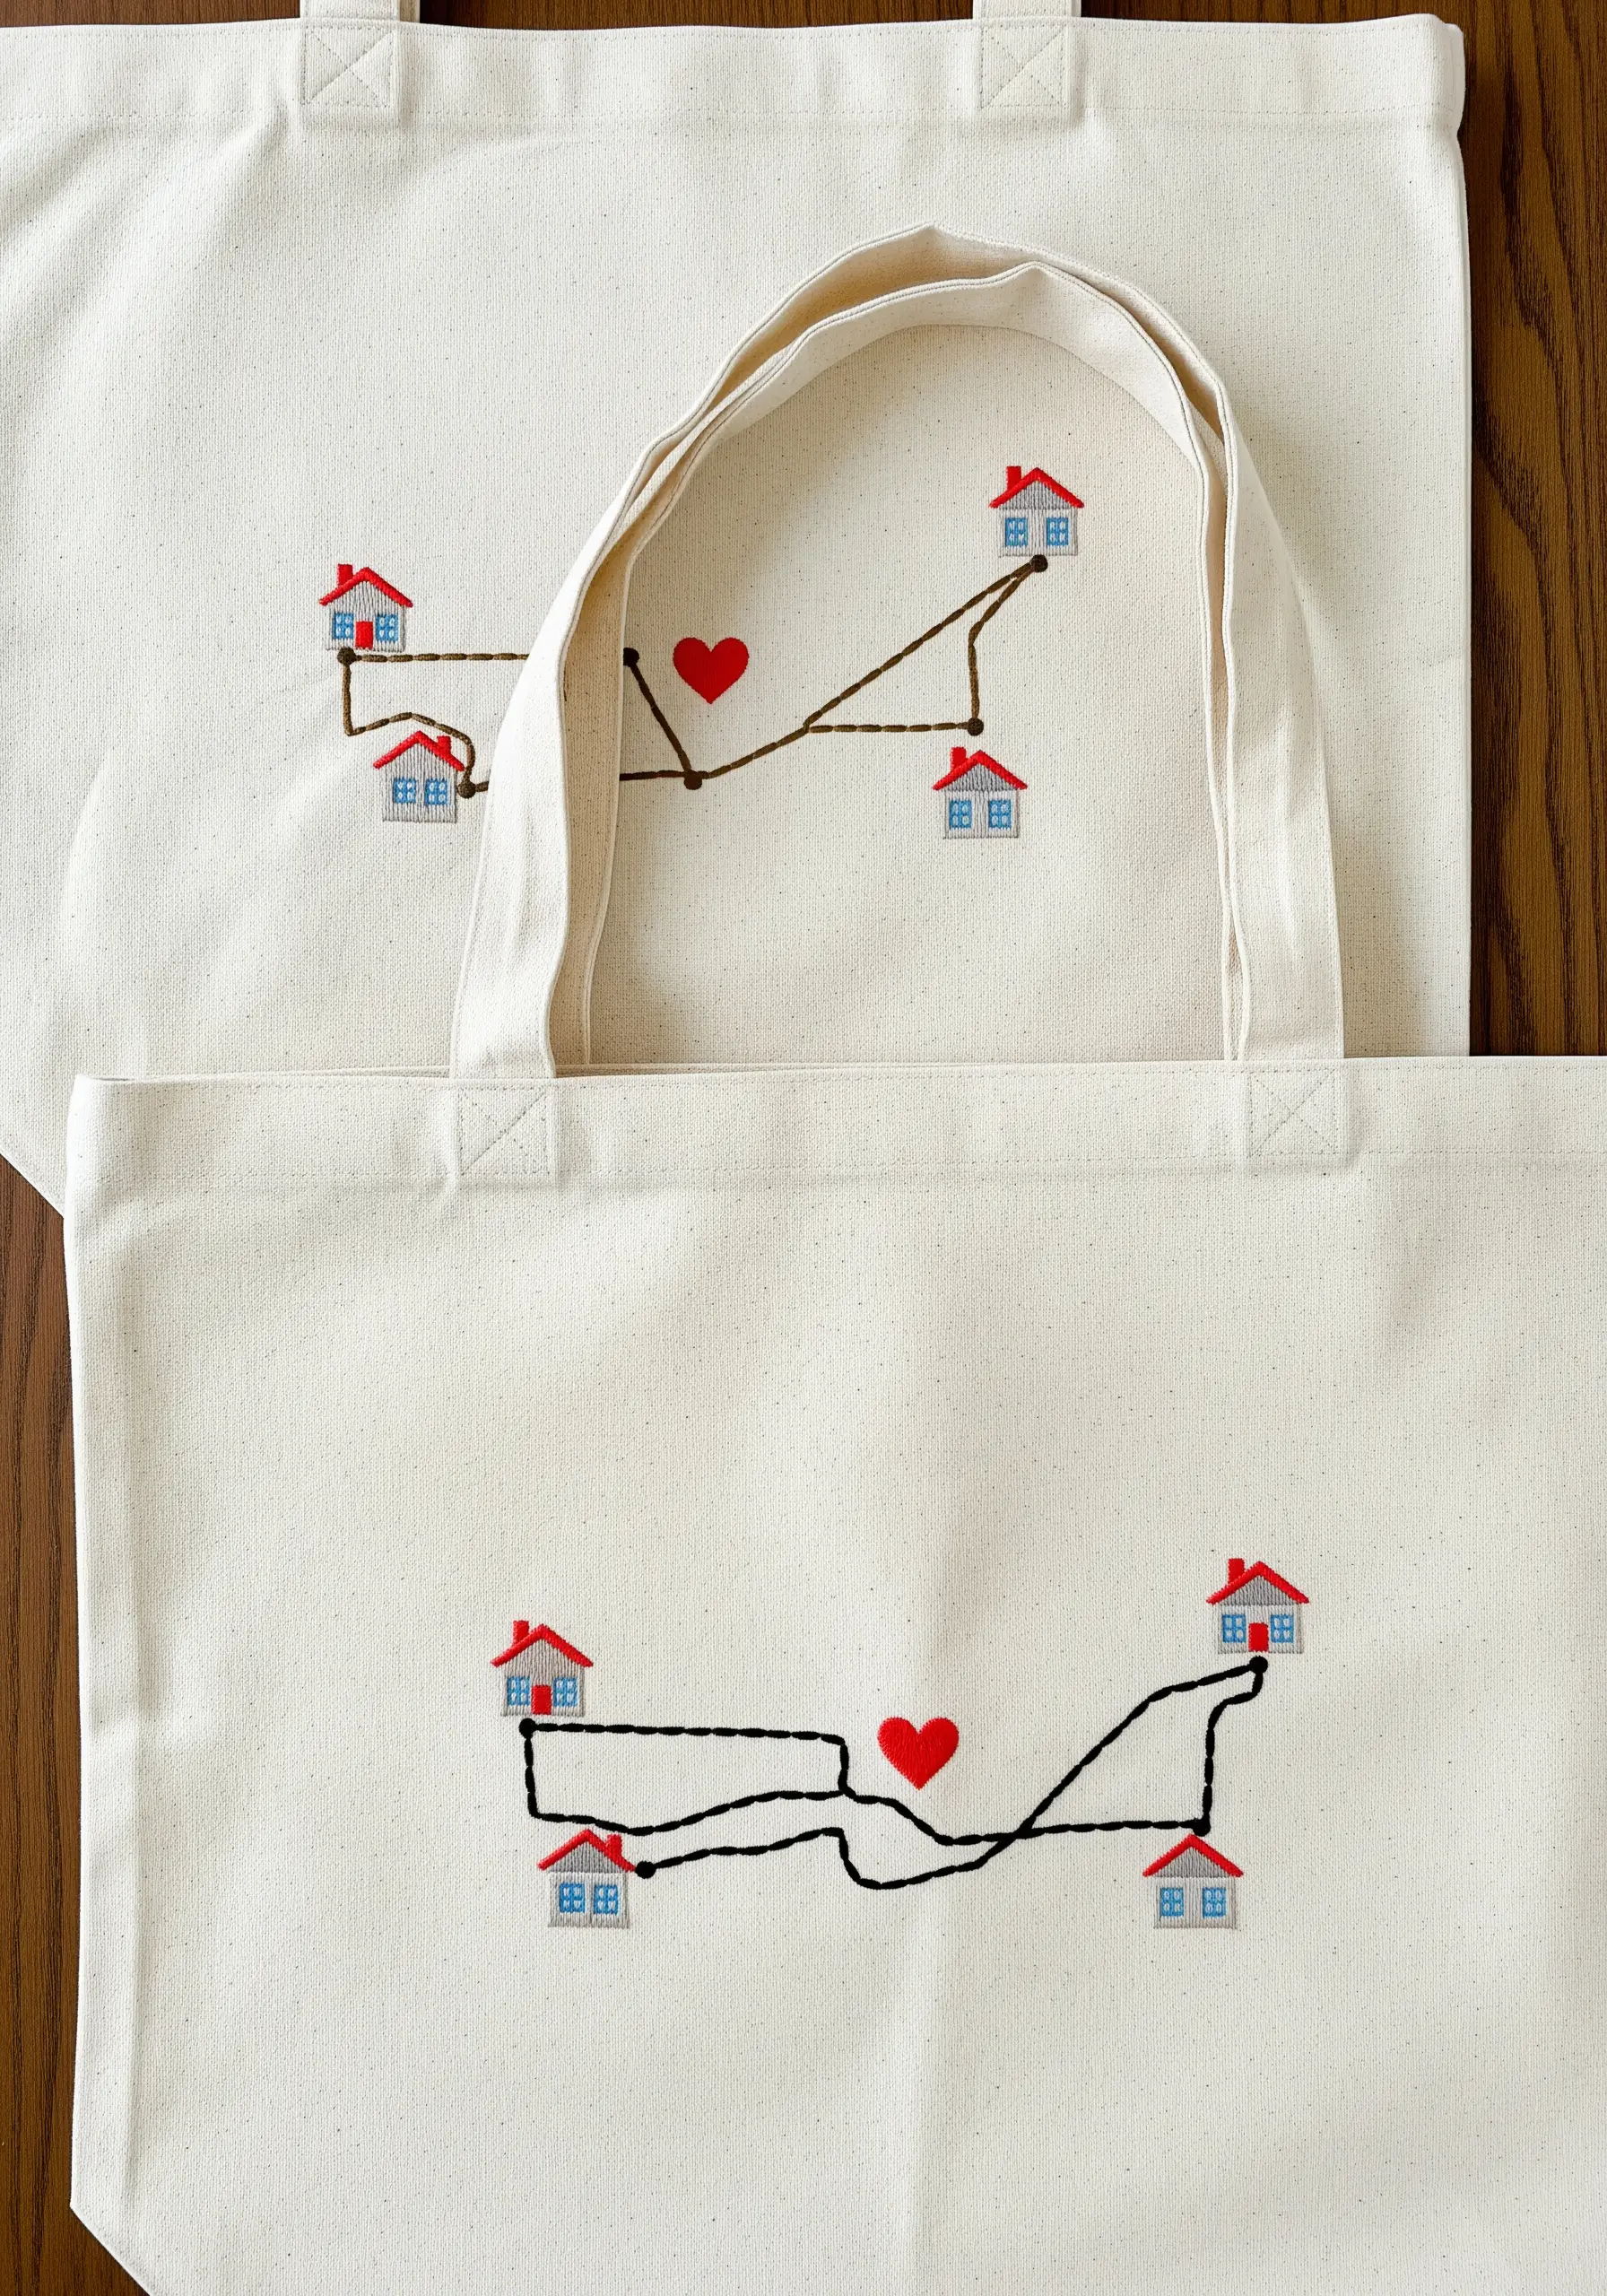
Embrace a charming, hand-drawn aesthetic for a personalized map that connects friends’ homes.
Use a simple backstitch for the connecting paths, allowing the lines to be slightly irregular—this adds to the handmade feel. For the houses, a few straight stitches for the walls and roof are all you need.
The beauty of this design is in its simplicity and personal meaning, proving that you don’t need complex stitches to create a heartfelt gift.


