

To stitch a bird that feels truly alive, you must think like a painter and a sculptor. It isn’t just about placing stitches; it’s about understanding how feathers catch the light, create texture, and convey movement.
Forget generic fills and flat surfaces. The secret to breathtaking realism lies in the direction of your thread, the number of strands you use, and the way you layer color to create shadow and form. A single, well-placed stitch can suggest the softness of down or the sharp edge of a wingtip.
Here, you will find precise, actionable techniques to transform your bird embroidery. We will move beyond the basics and explore how to use thread to sculpt volume, paint with color, and capture the fleeting essence of life in every feather.
1. Capture Iridescent Motion in Hummingbird Wings
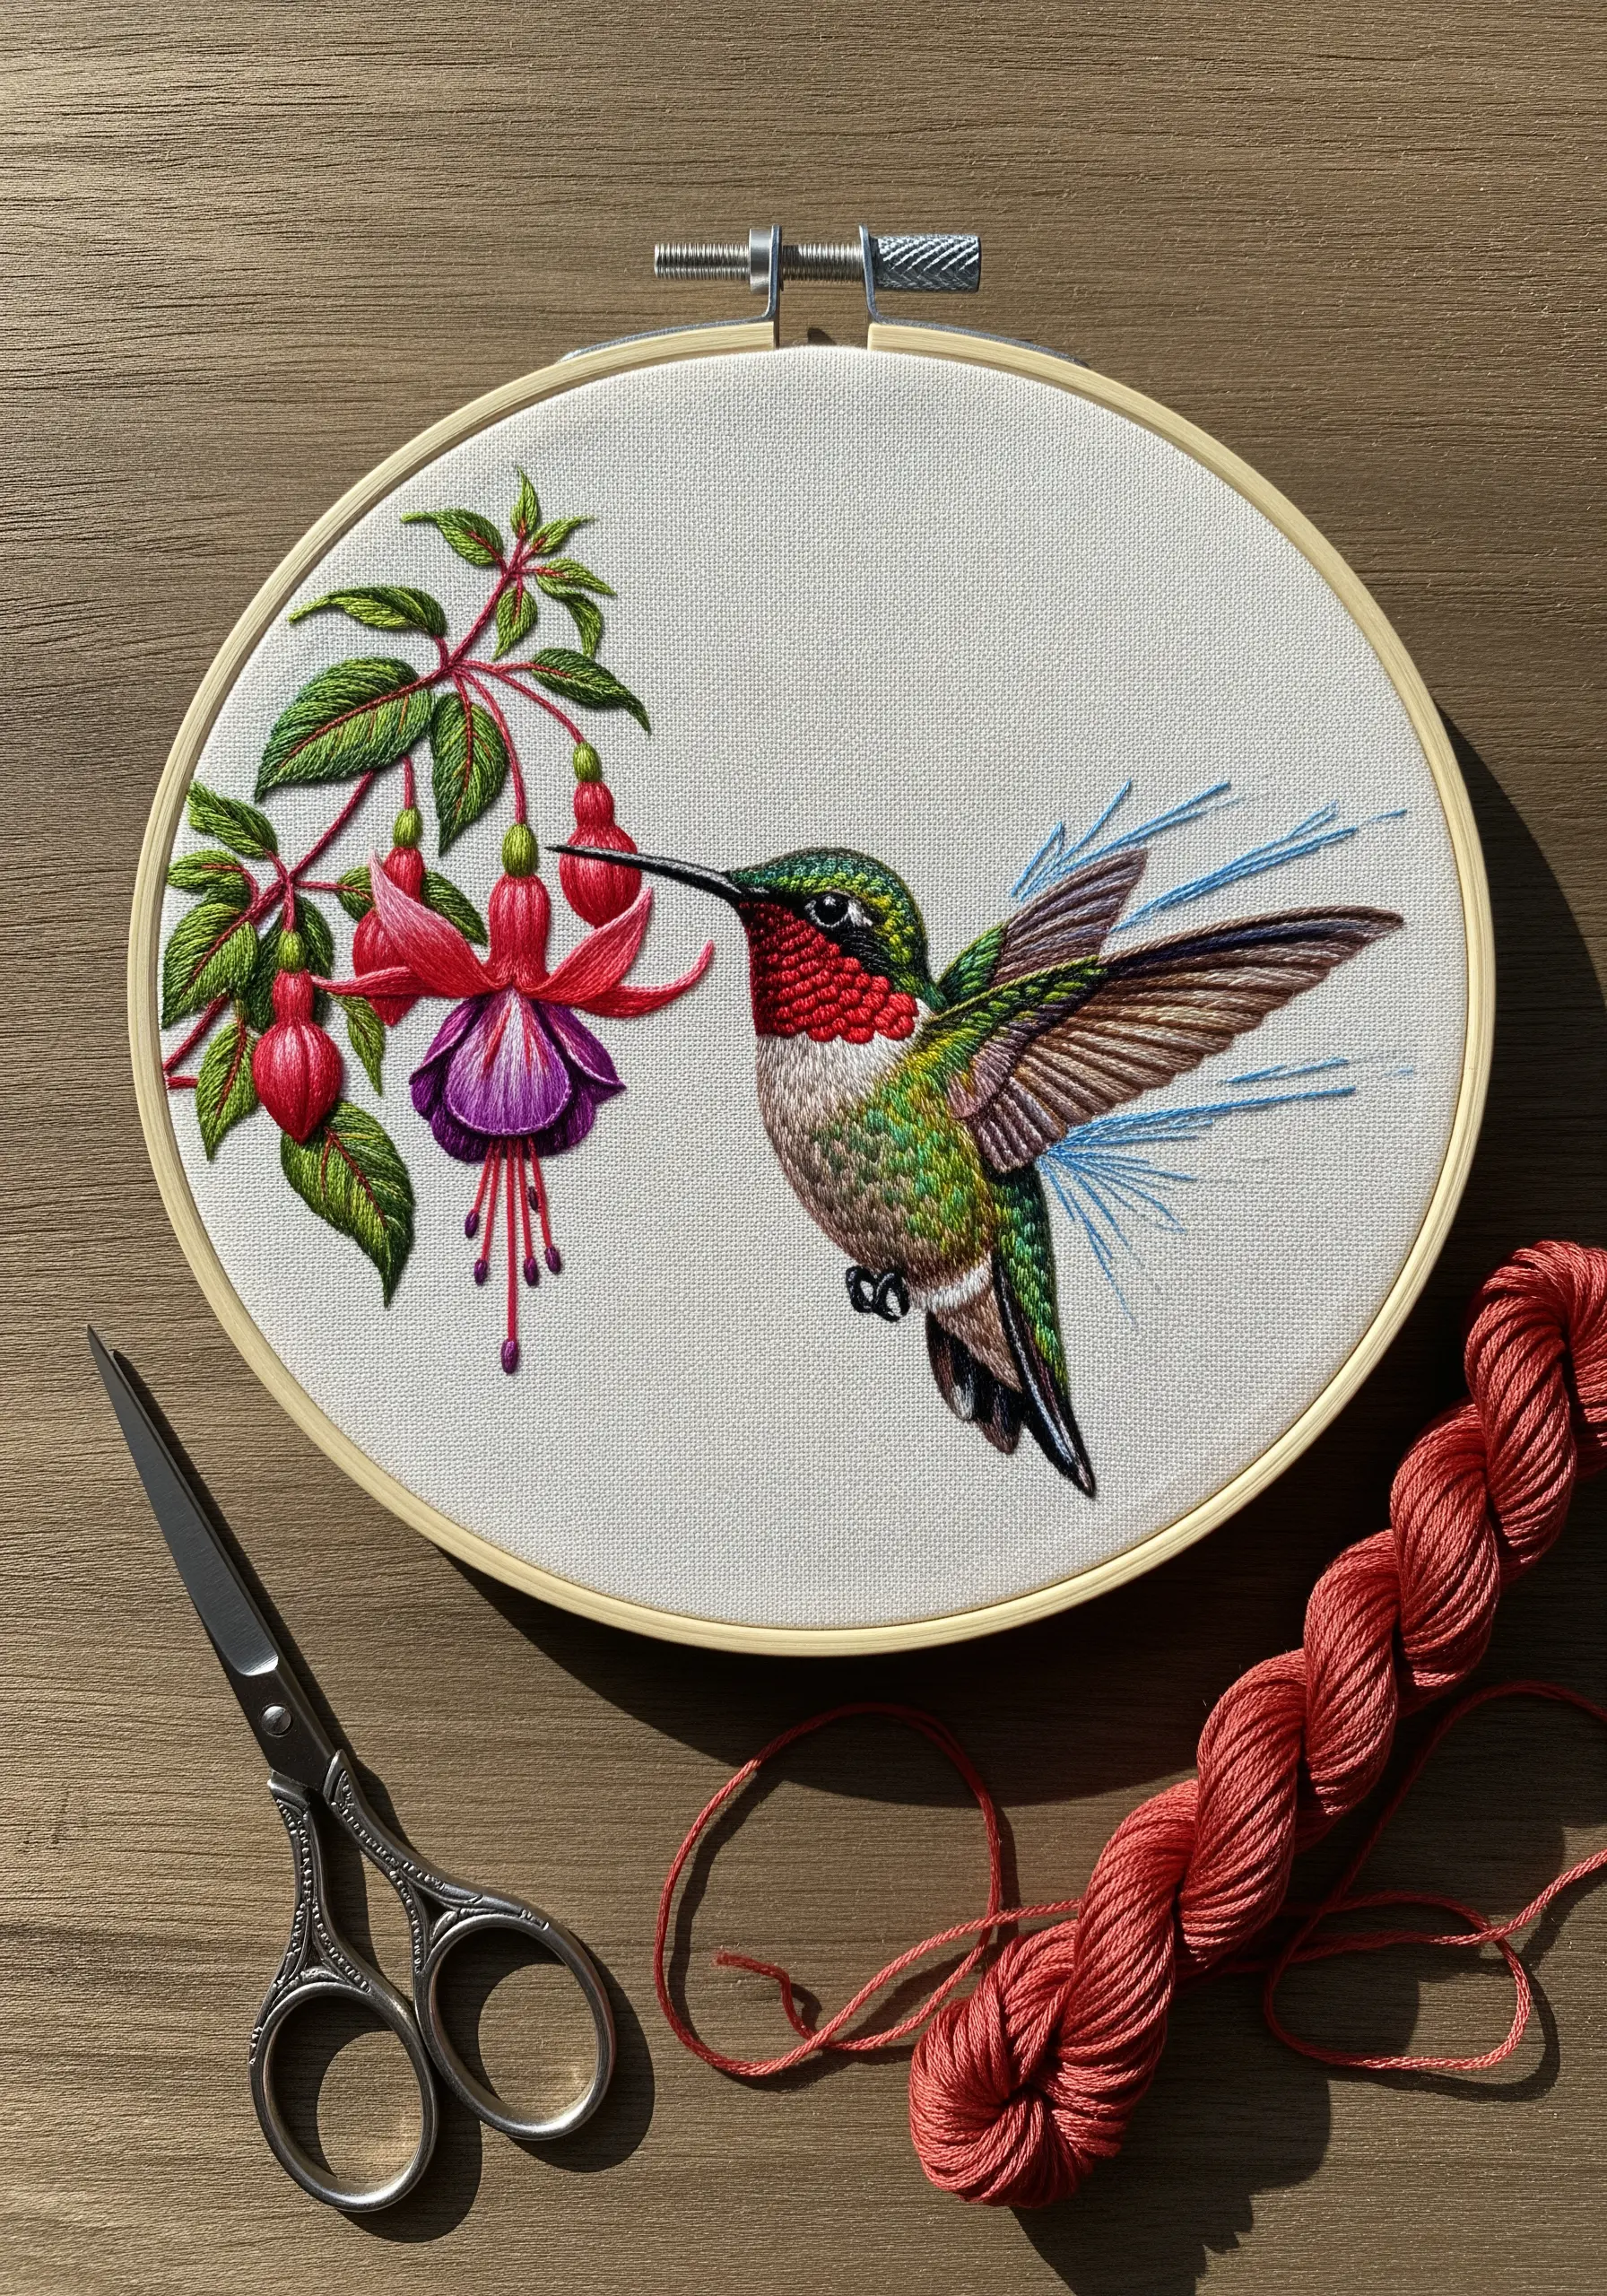
To create the blur of a hummingbird’s wings, don’t stitch the entire wing shape.
Instead, use single, long straight stitches in a contrasting, ethereal color—like a pale blue or silver metallic thread—radiating from the wing’s base.
This technique mimics the way light catches rapid movement, suggesting motion rather than defining a static form.
For the gorget (throat feathers), use single-strand silk or satin floss with short, directional satin stitches to achieve that signature iridescent sheen.
2. Use Thread Painting for a Hyper-Realistic Gaze
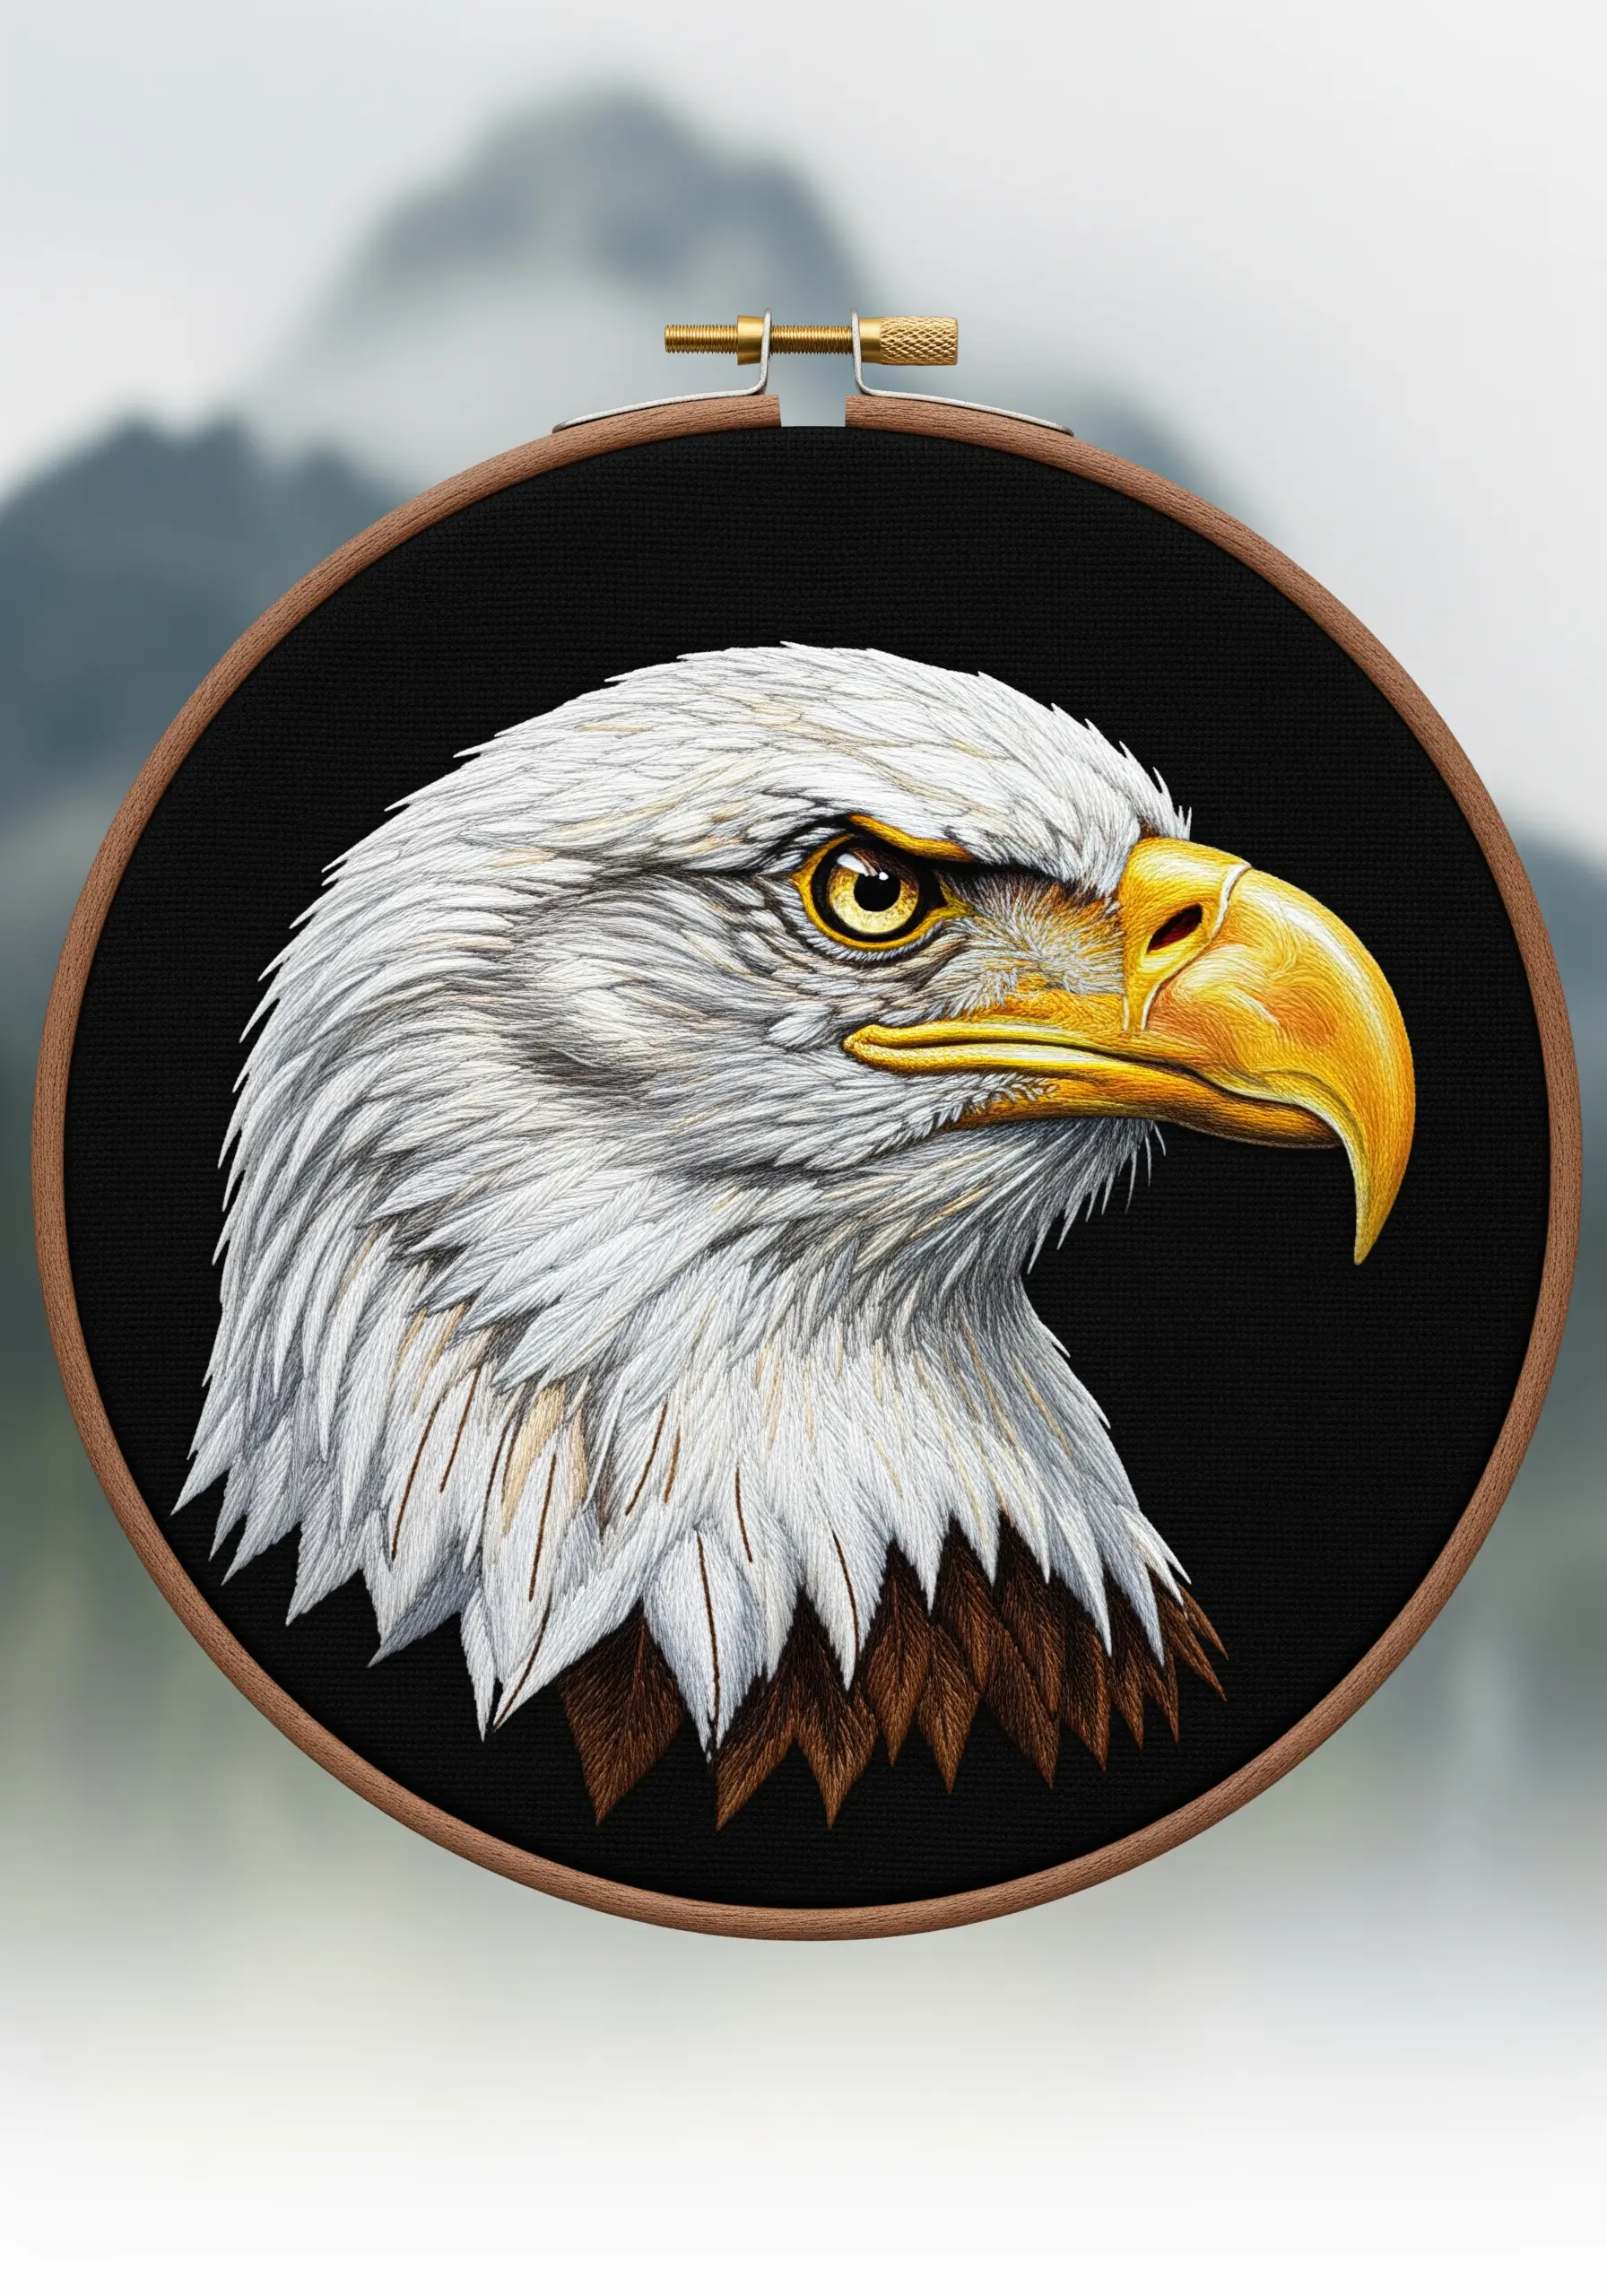
An eagle’s intensity comes from its eyes and the texture of its feathers.
Work with a single strand of thread and use long and short stitch, ensuring your stitches follow the natural direction of feather growth.
Introduce subtle shadows under the brow ridge with a slightly darker grey to create depth.
For the beak, use vertical satin stitches to achieve a smooth, hard surface, blending shades of yellow and ochre to show highlights and create a 3D effect.
Stitching on black fabric makes the white and yellow tones appear more luminous.
3. Map Feather Direction for a Soft, Downy Texture

The key to a barn owl’s soft facial disc is stitch direction.
Before you begin, lightly sketch directional lines radiating from the beak outwards in a heart shape.
Use a single strand of off-white, cream, and pale grey floss, following these lines with long and short stitches.
This method ensures every stitch contributes to the soft, layered, and three-dimensional form, avoiding a flat or overworked appearance.
The subtle color shifts are what create the realism.
4. Achieve Crisp Feather Patterns with a Satin Stitch Underlay
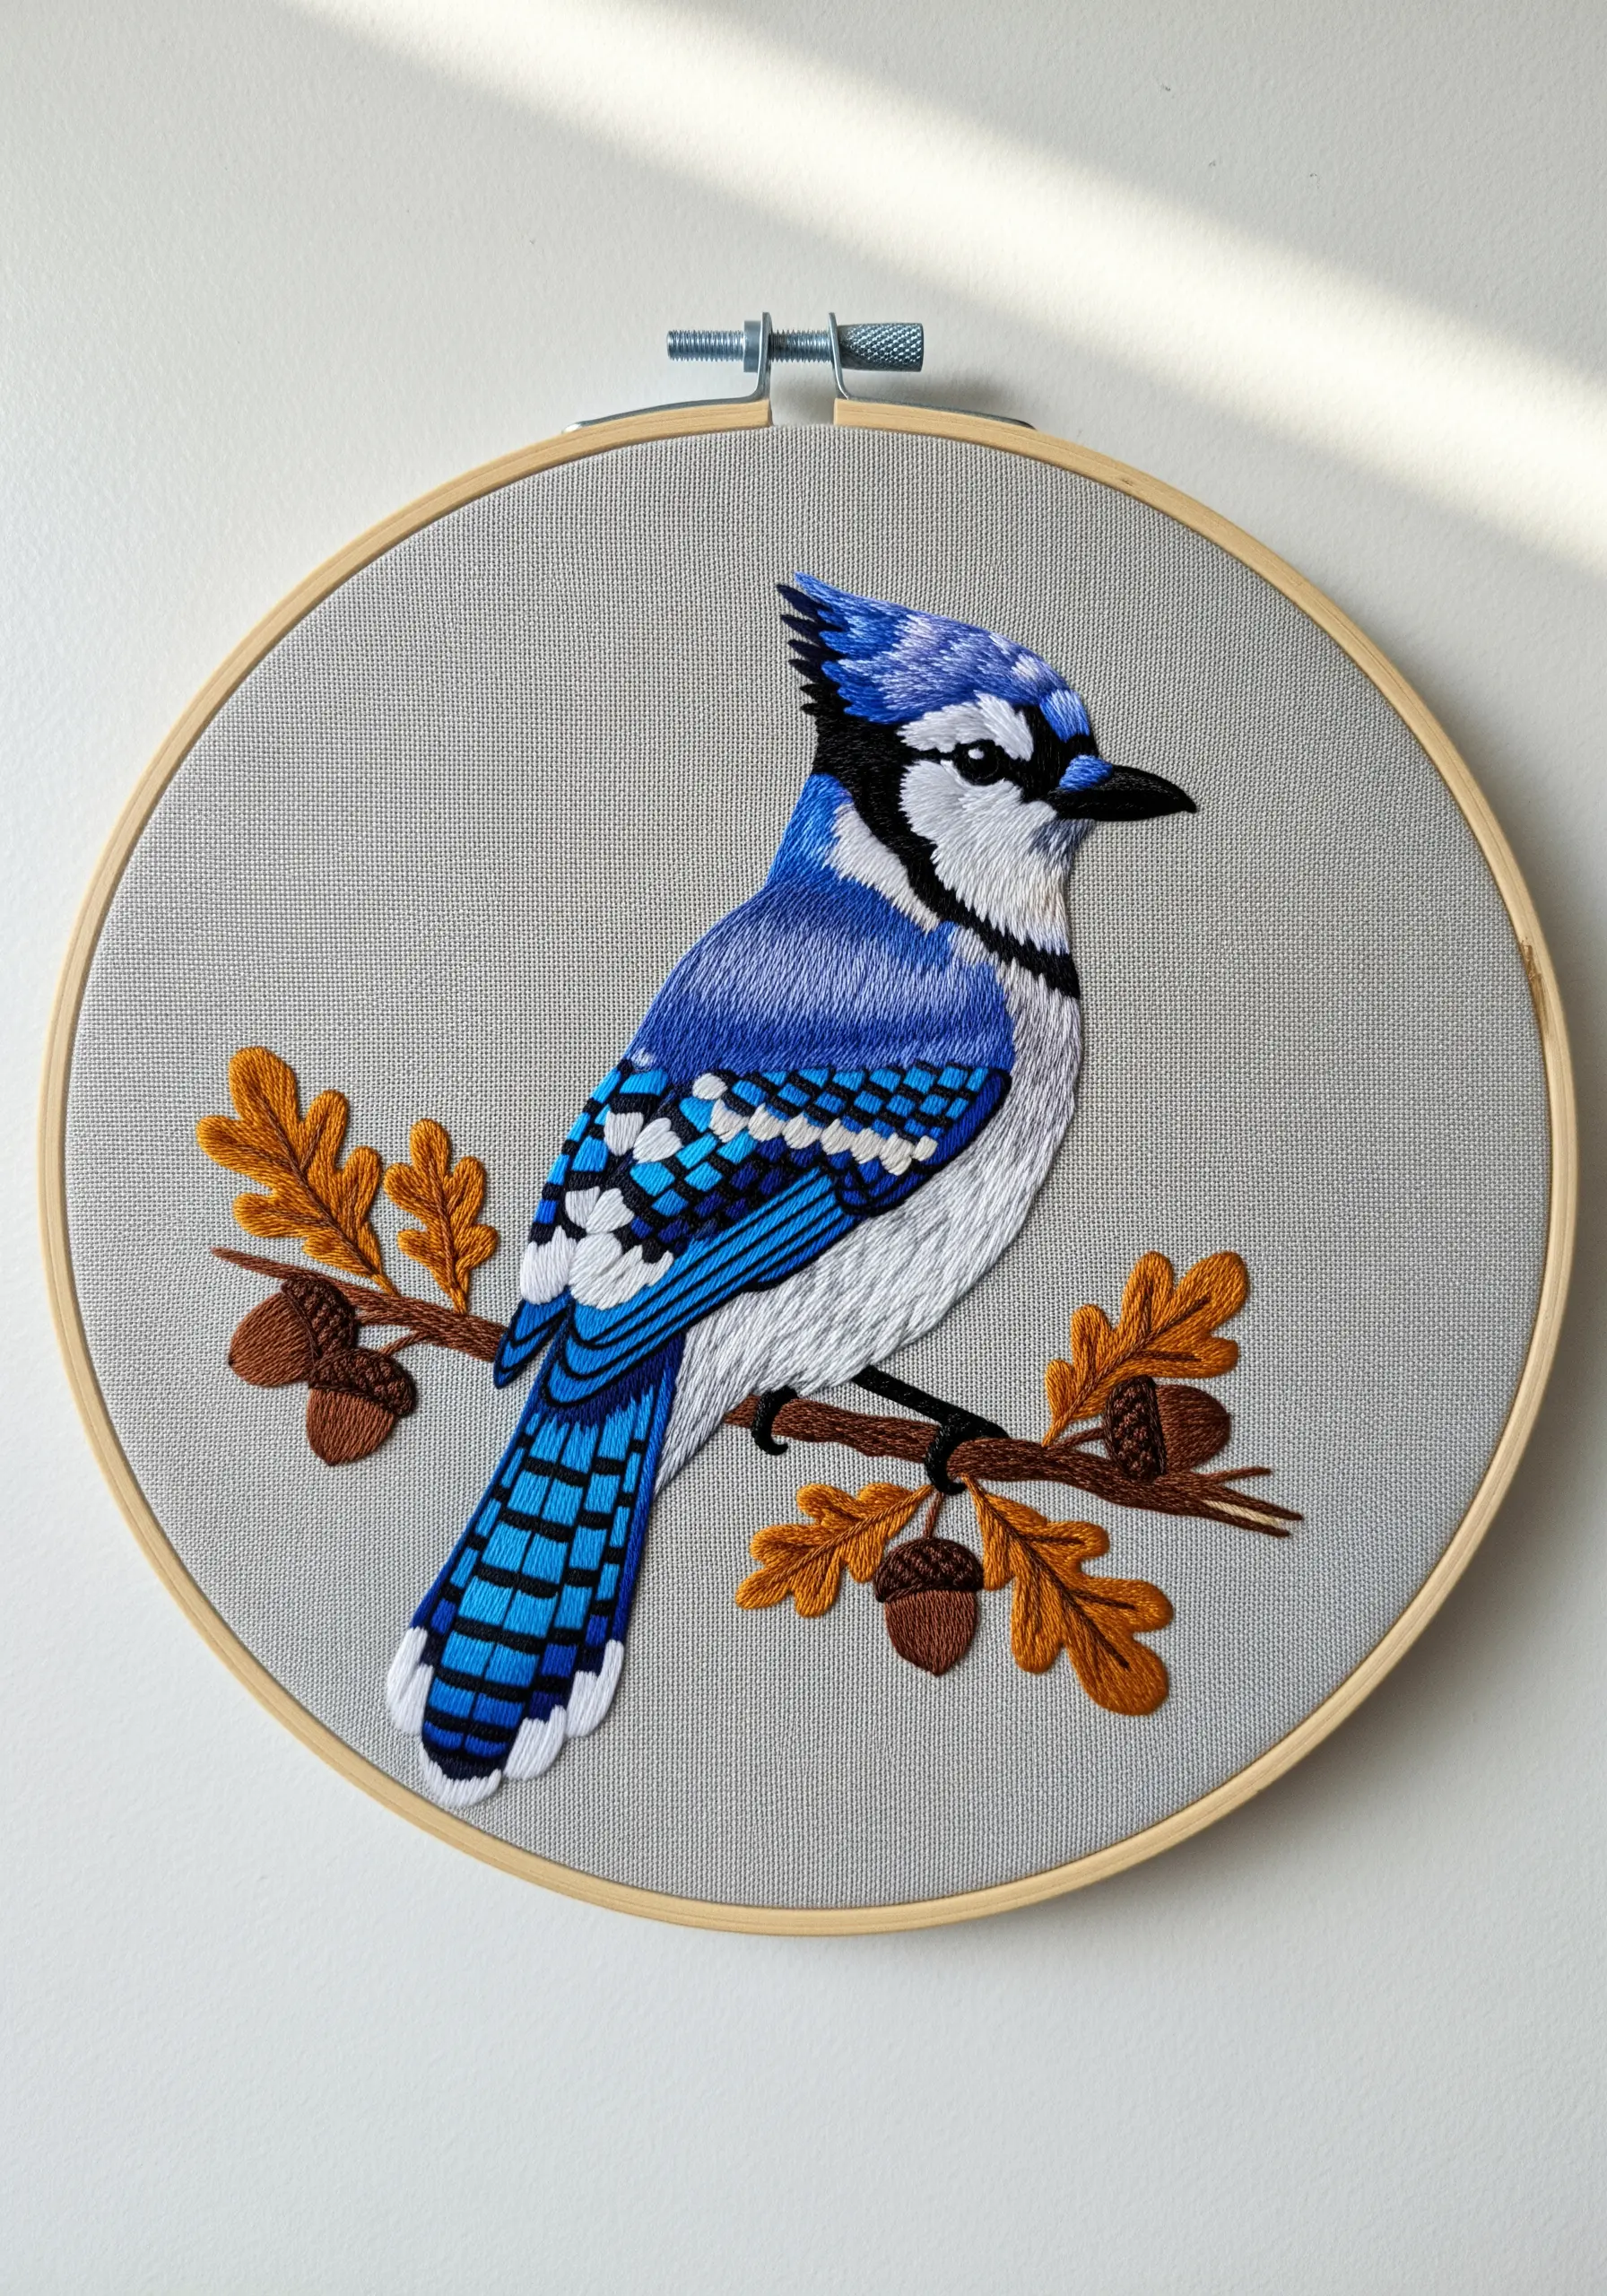
For the bold, graphic patterns of a blue jay, your satin stitch must be flawless.
To achieve a raised, perfectly smooth surface, first outline each color block with a split stitch.
Then, fill the area with a layer of foundation stitches before applying your final satin stitch on top.
This padding technique prevents fabric from showing through and gives the feathers a crisp, defined edge that makes the colors pop.
5. Create Delicate Barbs with Open Straight Stitches
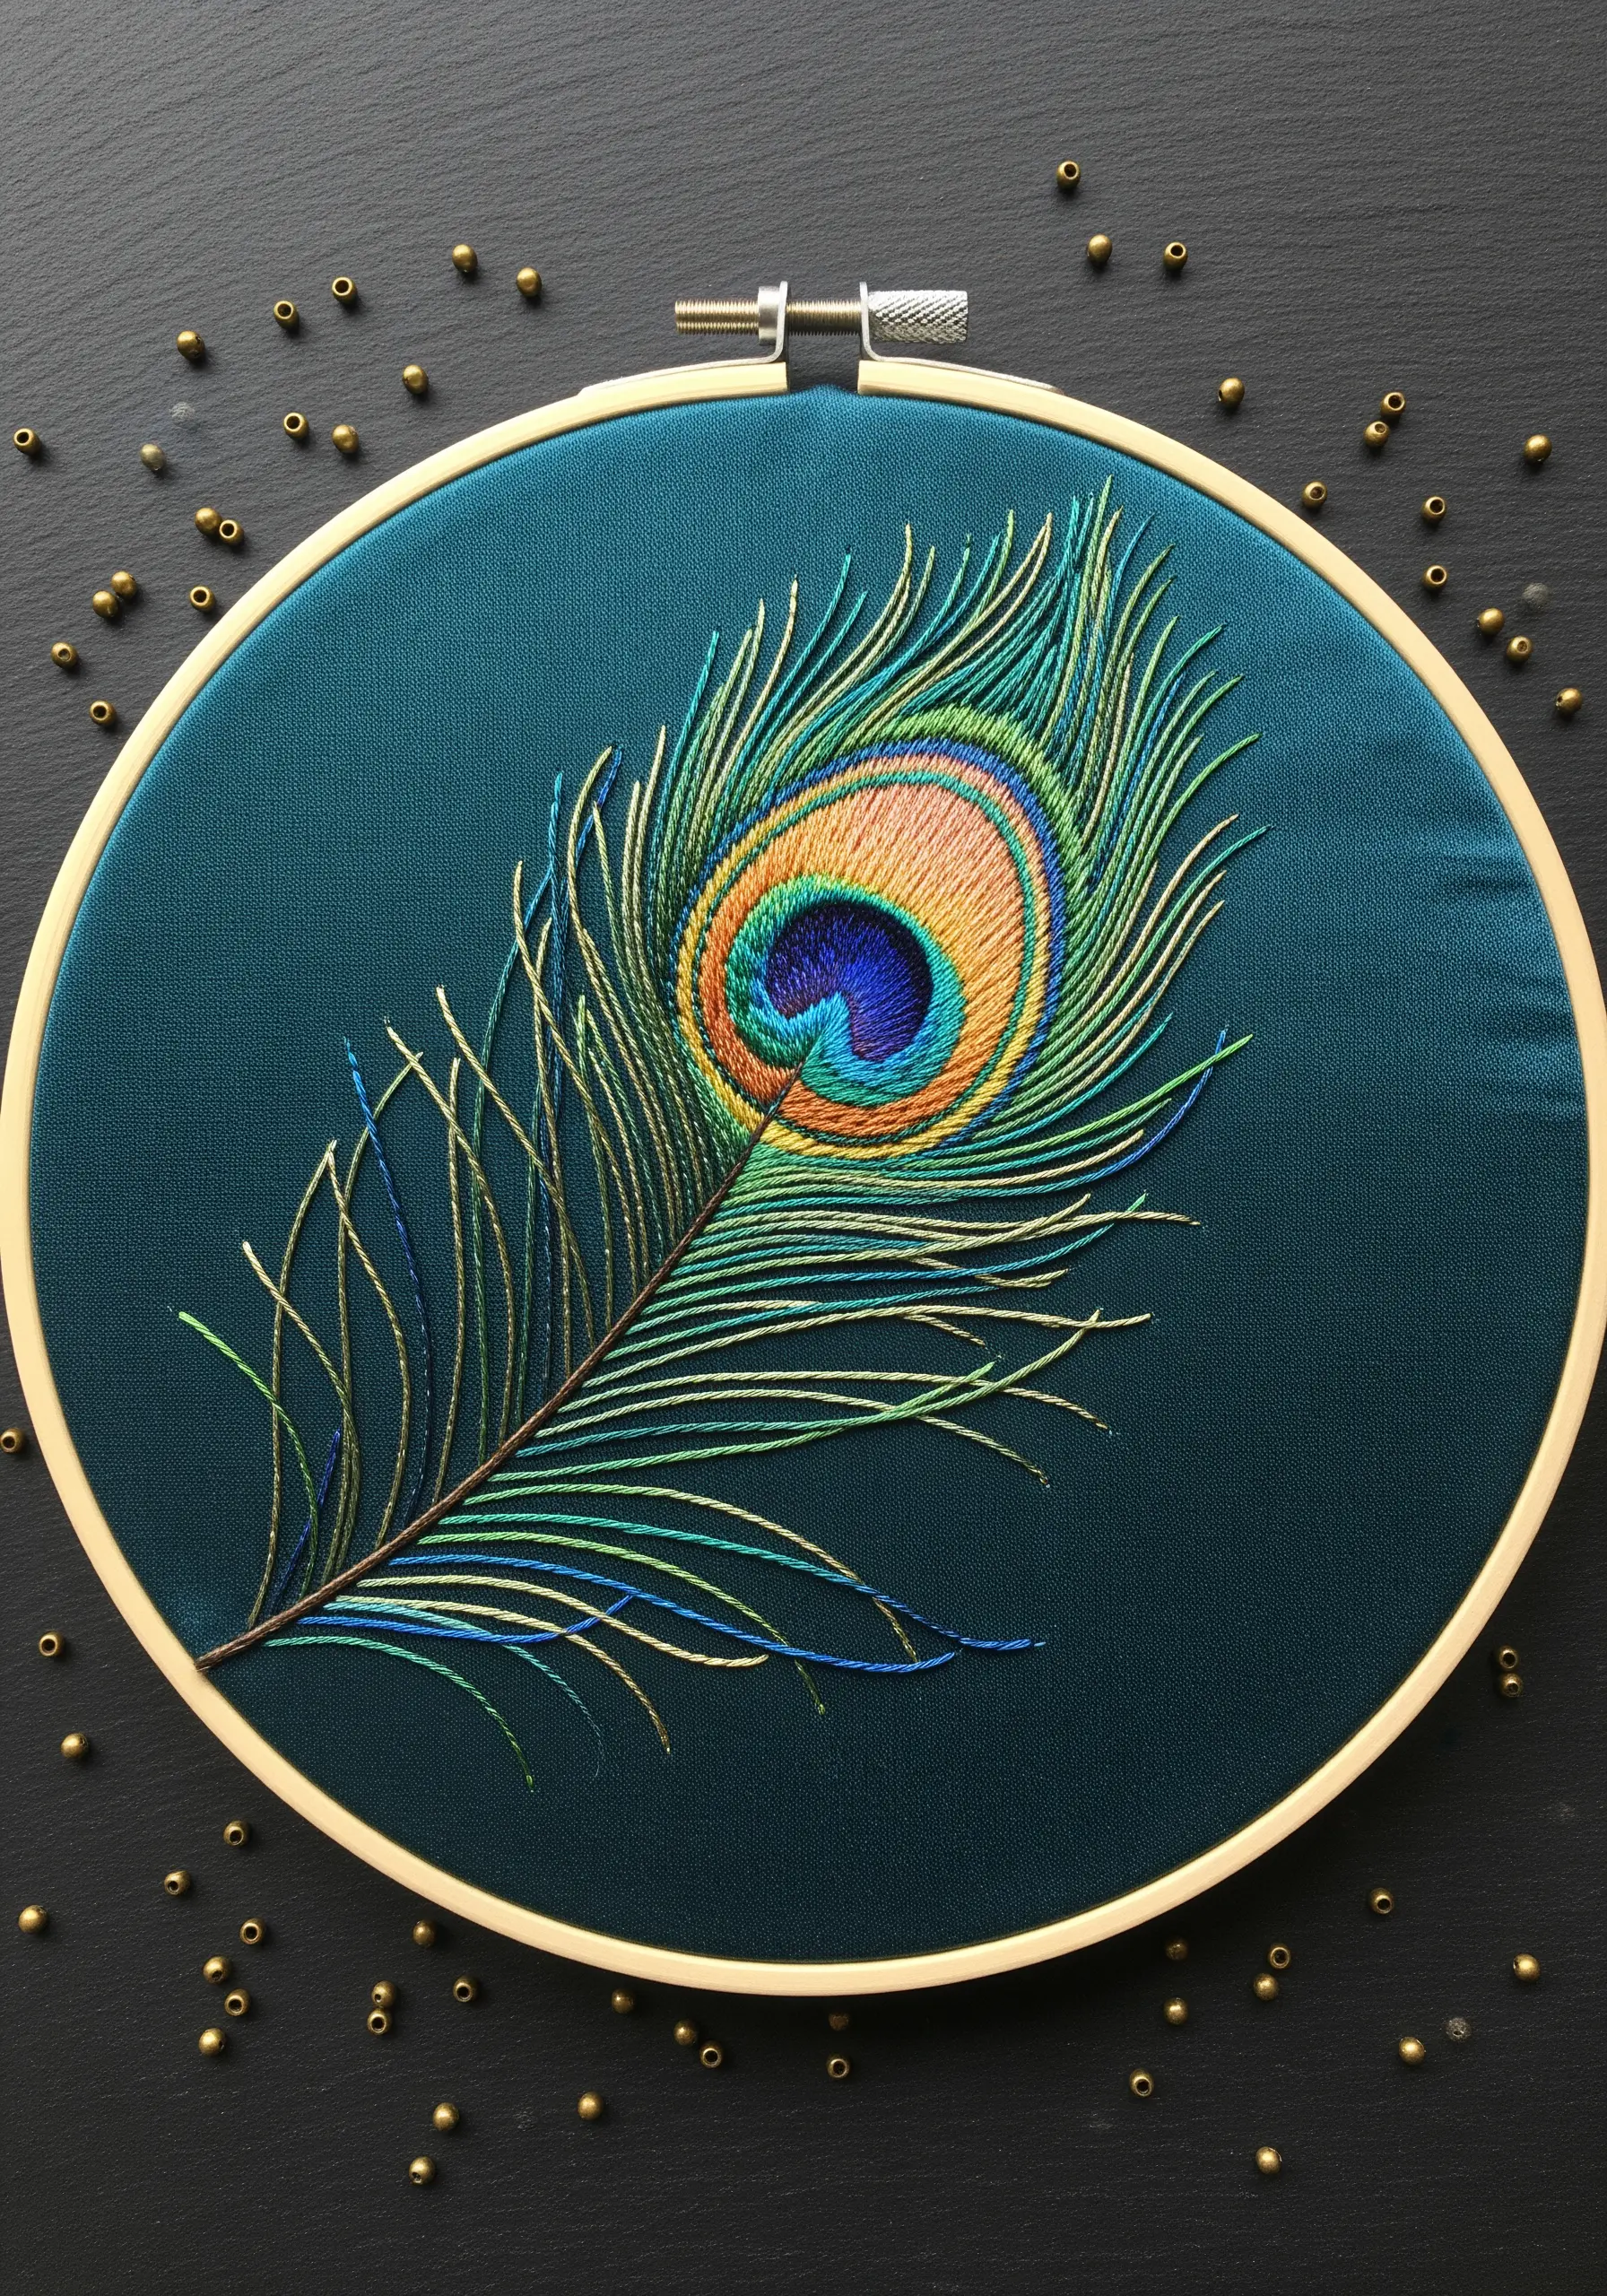
A peacock feather’s beauty lies in its delicate, airy structure.
Instead of packing stitches tightly, use single-strand thread to place individual straight stitches, leaving tiny, intentional gaps between them.
This technique creates the illusion of fine, separated barbs.
For the central eye, use padded satin stitch in concentric circles to build dimension, making it the undeniable focal point of the design.
6. Build Soft Volume with Layered Split Stitch
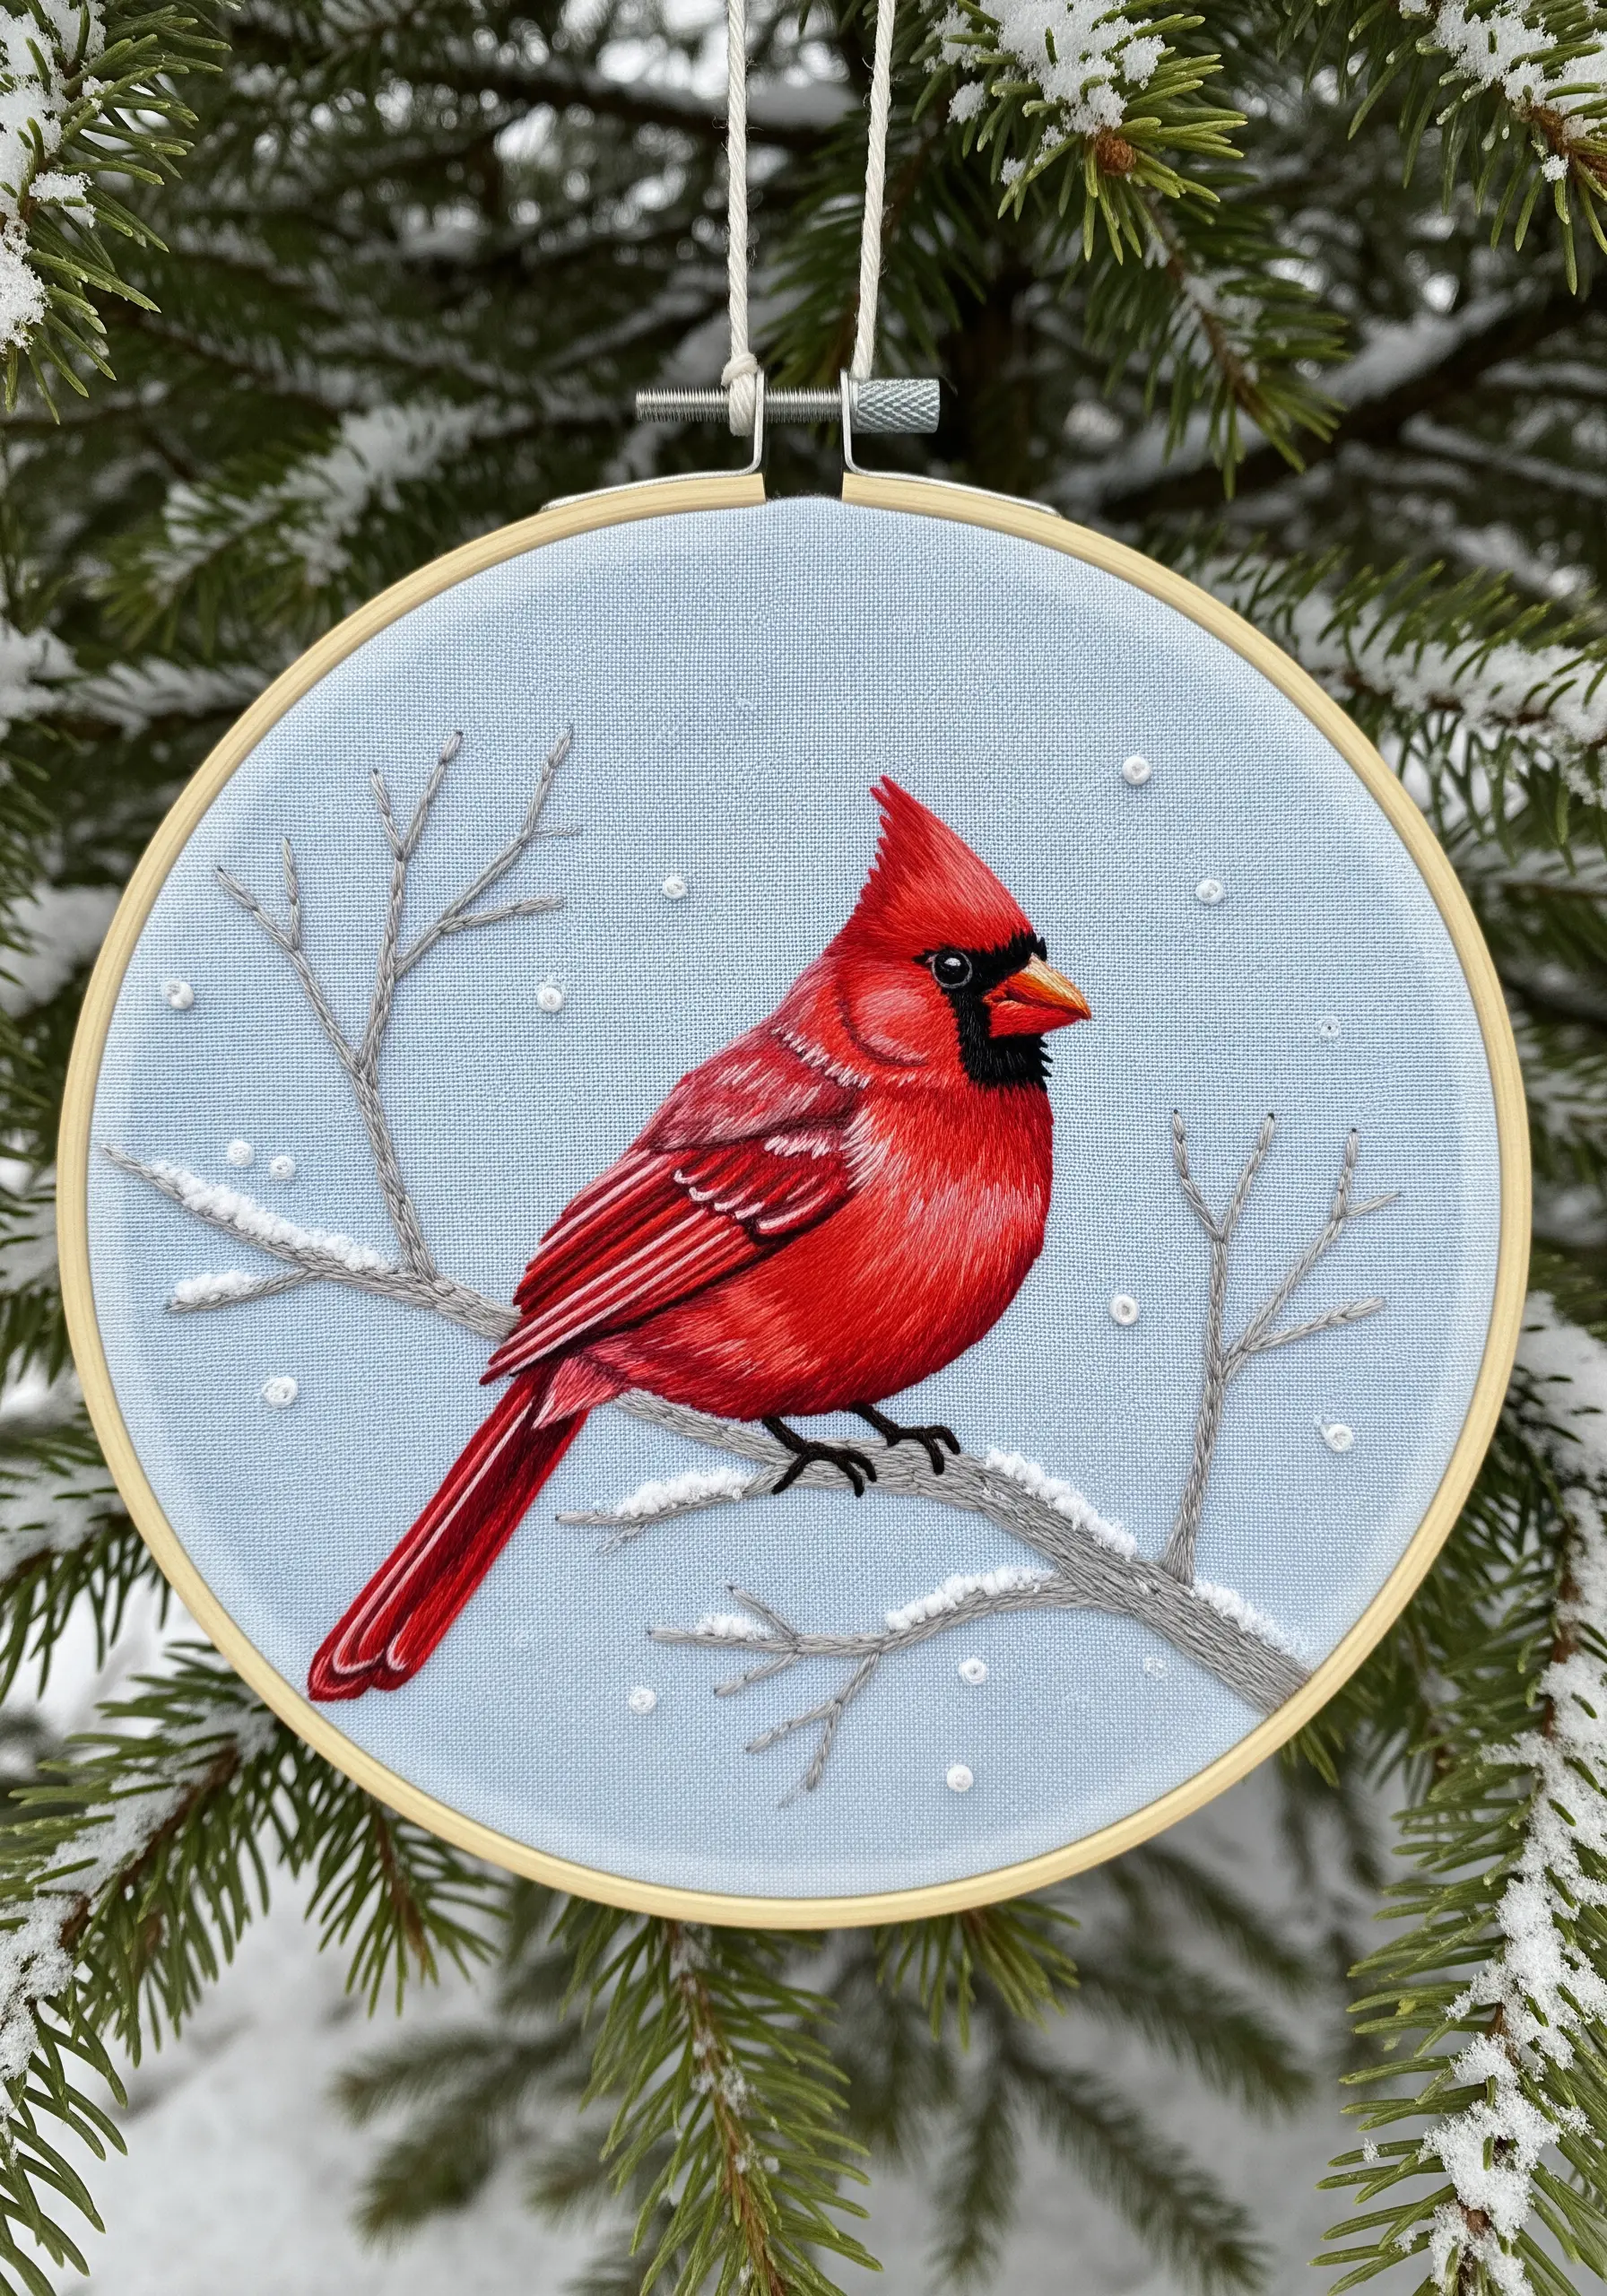
To give a cardinal’s body a soft, rounded appearance, avoid flat satin stitch.
Instead, use a split stitch and fill the entire body, following the contour of the bird.
Work in layers, blending three or four shades of red—a deep crimson for shadows under the wing, a vibrant cherry for the main body, and a brighter red for highlights.
Using just two strands of floss keeps the texture fine and downy, preventing the stitches from looking bulky.
7. Convey Dynamic Action with Directional Stitching

For a bird in motion, like a diving kingfisher, your stitch direction must tell the story.
Angle your stitches sharply downwards along the body and wings to emphasize speed and trajectory.
Use a single strand of thread to blend the fiery orange chest into the brilliant blue back, ensuring the transition is seamless.
A few strategically placed white or metallic silver straight stitches for the water splash adds energy and completes the scene.
8. Define Individual Feathers with Split Stitch Outlines

To prevent the feathers of a snowy owl’s wing from blending into a single white mass, define each one.
Before filling with long and short stitch, outline the top edge of each feather with a single line of split stitch in a slightly darker color, like a pale grey.
This subtle definition creates separation and shadow, making the layered structure of the wing look incredibly realistic and tactile.
This simple step adds immense depth without complicating the fill stitches.
9. Contrast Smooth and Textured Stitches for Realism
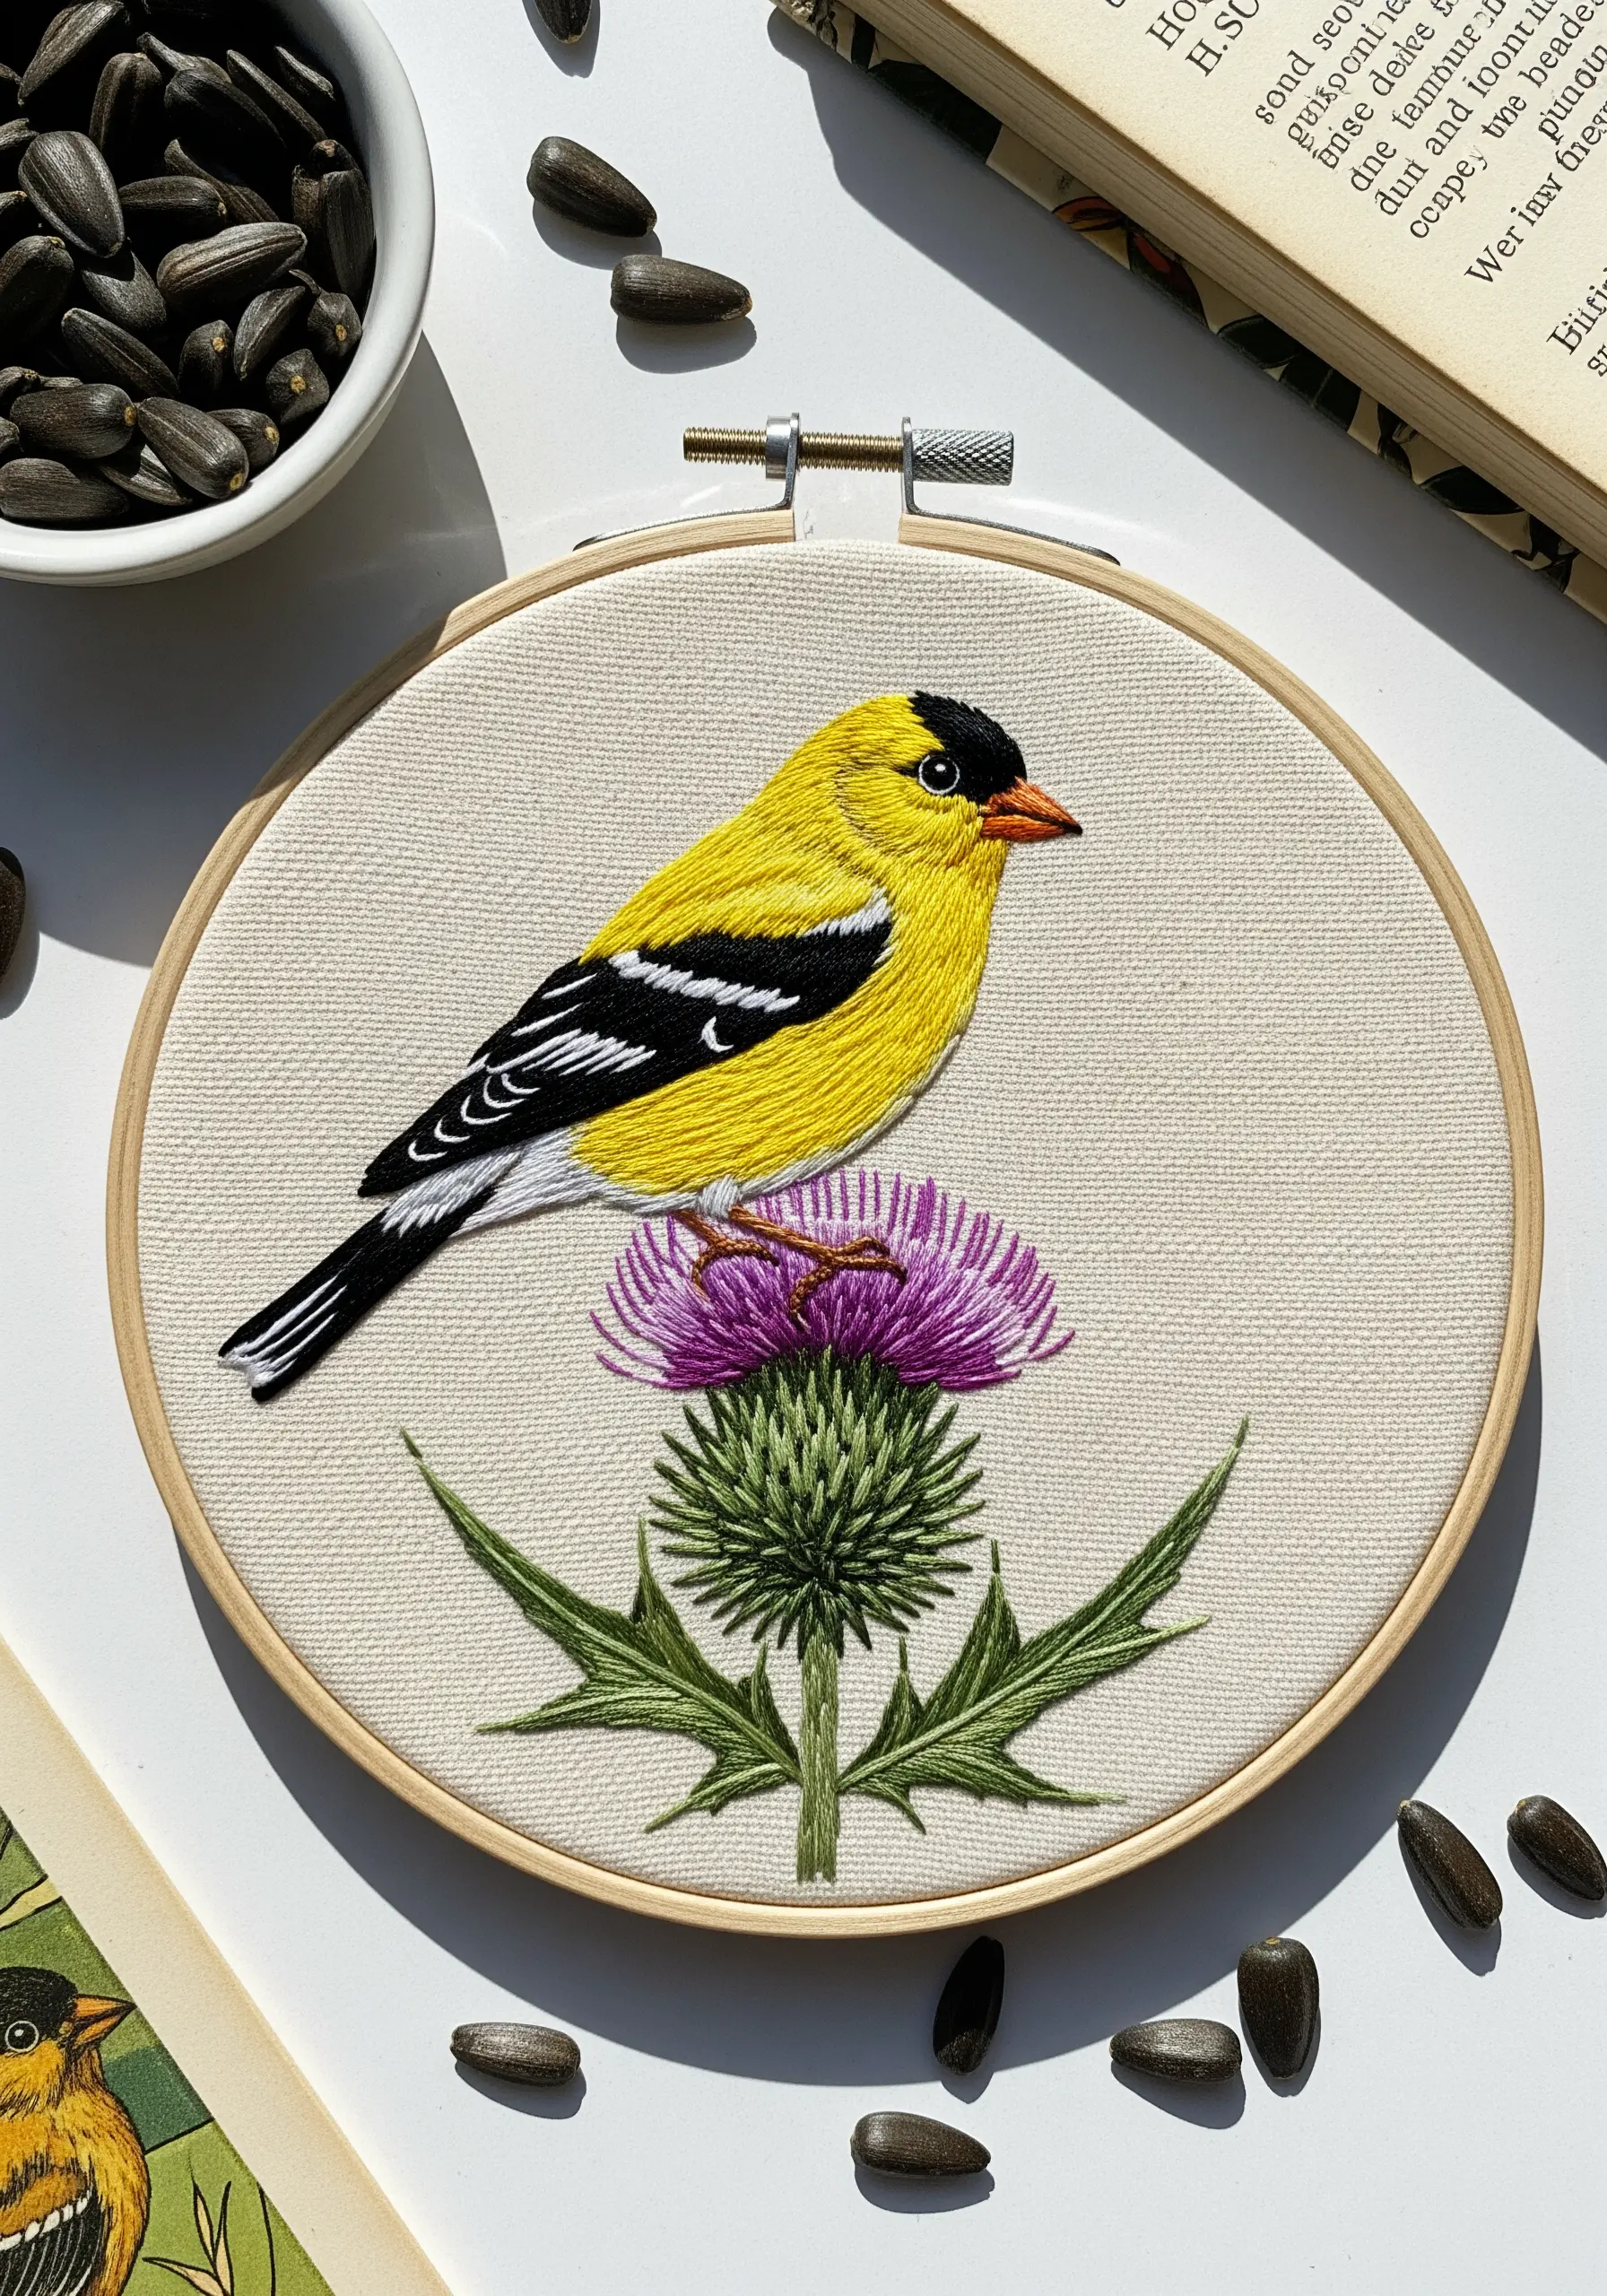
To capture the varied plumage of a goldfinch, you need to vary your stitch textures.
Use a perfectly smooth, dense satin stitch for the solid black and white wing bars to give them a sharp, graphic quality.
In contrast, fill the vibrant yellow body with a softer long and short stitch using a single strand of floss.
This juxtaposition of textures makes the bird feel more lifelike, highlighting the different types of feathers.
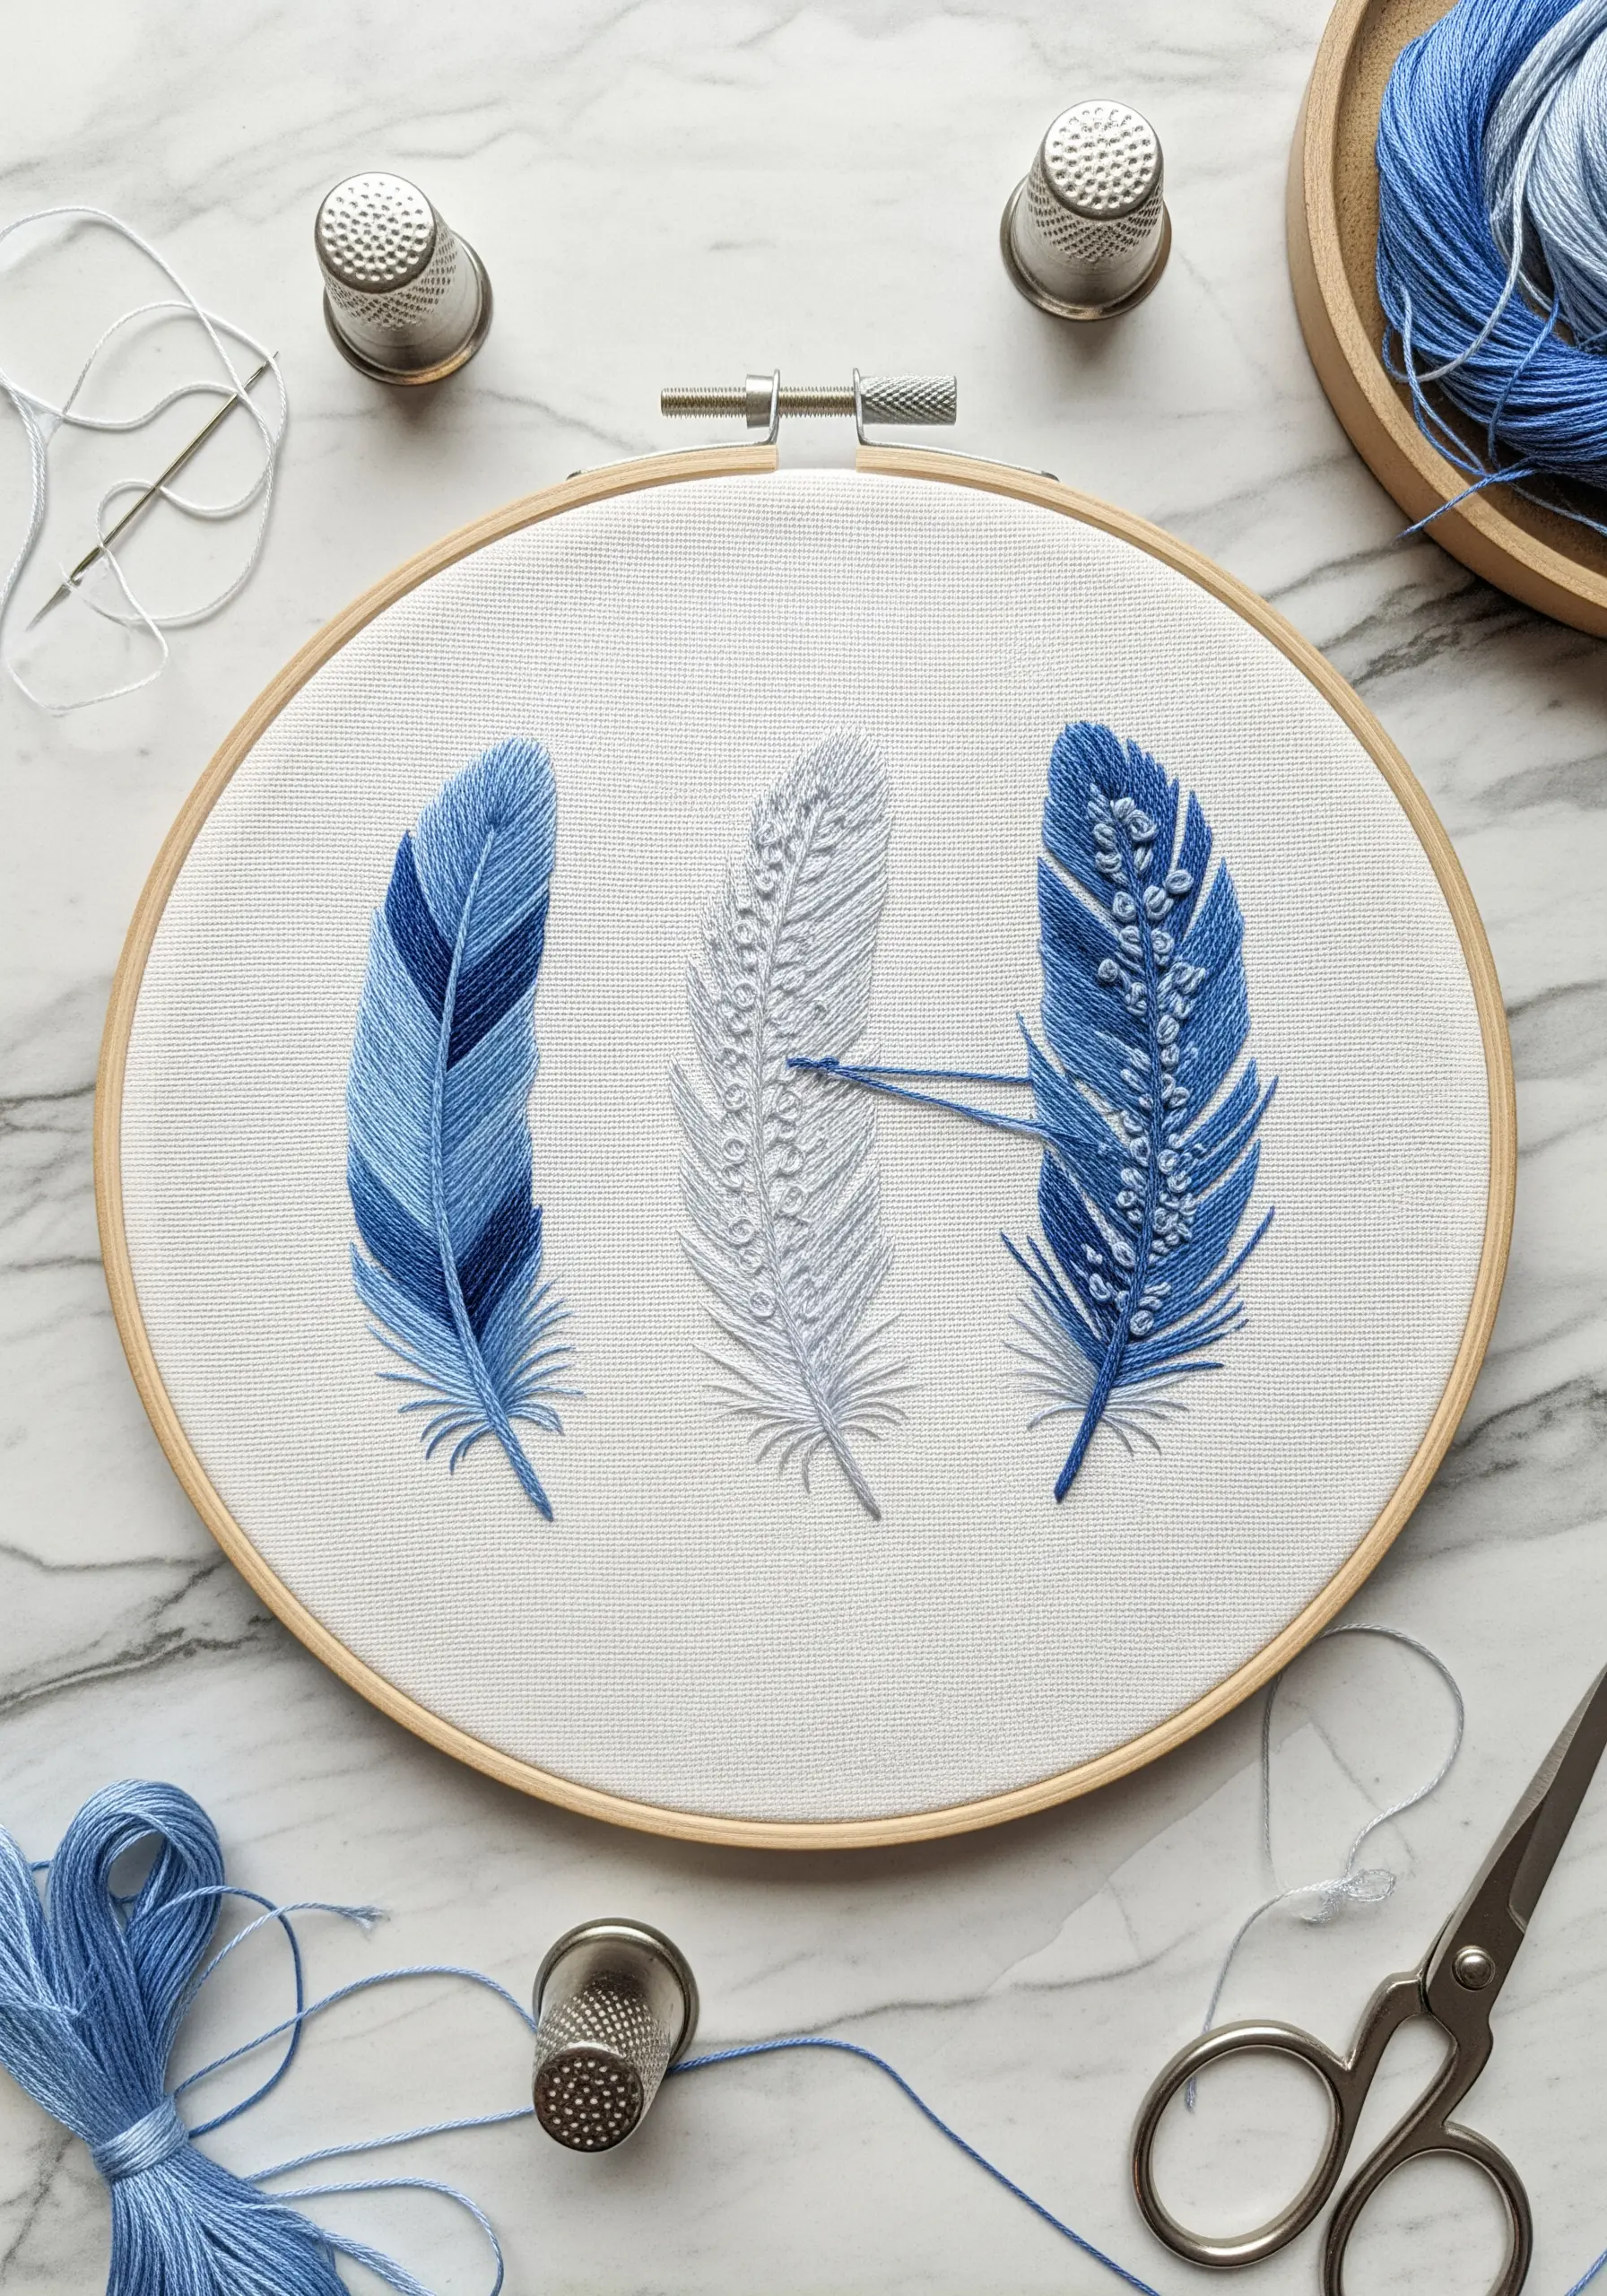
10. Use Variegated Thread for Natural Color Shifts

To create the subtle, complex color play in a single feather, let variegated thread do the work for you.
Choose a thread that includes your desired palette—like blues, greys, and blacks.
Use long, straight stitches or a gentle long and short stitch, allowing the thread’s natural color changes to create organic gradients.
This is one of the most effective ways to create depth in your embroidery using natural textures with minimal effort.
11. Layer Feathers from the Bottom Up for Dimension
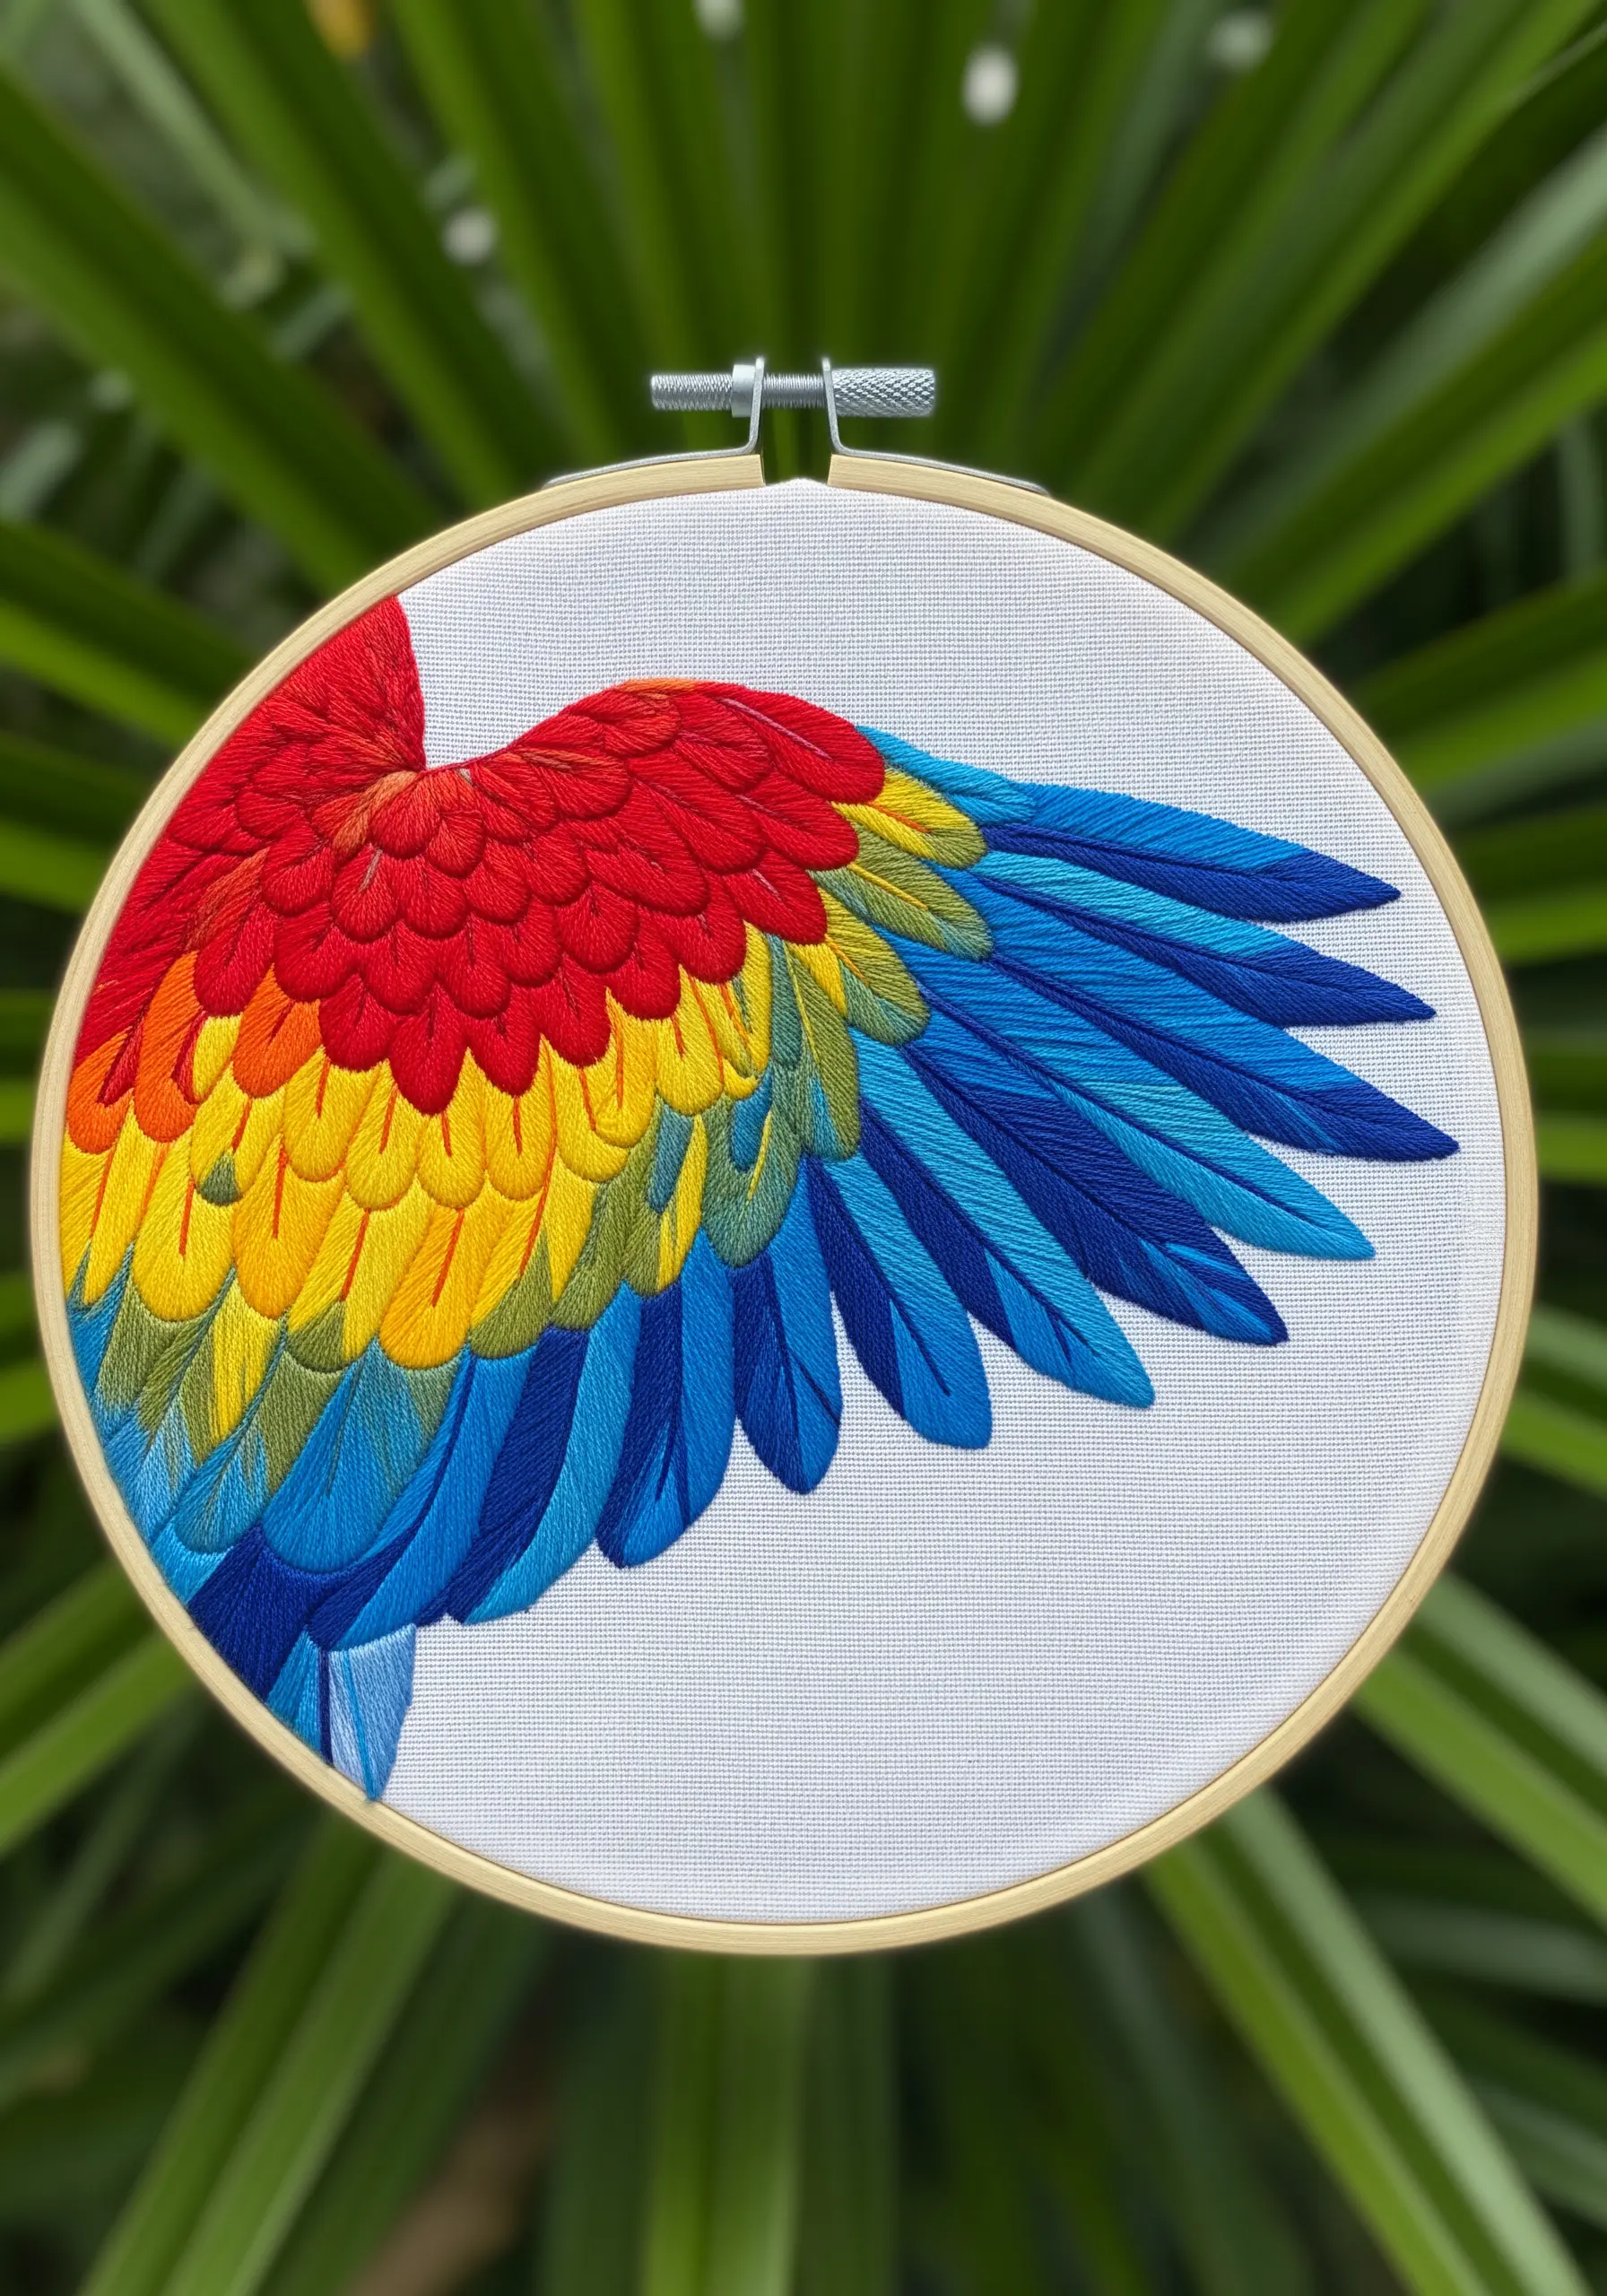
When embroidering a wing, always work from the bottom layer of feathers upwards, and from the outer edge inwards.
Stitch the longest flight feathers first, then slightly overlap the next row on top of them.
This technique physically builds dimension and ensures your stitches naturally create the shadows and highlights seen in a real bird’s wing.
Each new layer of stitches should just cover the starting point of the layer beneath it for a seamless, tidy finish.
12. Use French Knots to Mimic Mottled Plumage

The speckled, iridescent throat of a hummingbird can be difficult to replicate with flat stitches.
Instead, use tiny, tightly packed French knots with a single strand of thread.
Alternate between two or three complementary colors—like magenta, green, and purple—to create a mottled, textured effect that brilliantly catches the light.
This textural technique is far more effective at conveying shimmer than a simple satin stitch would be.
13. Create Intricate Patterns with Turkey Work Tufts
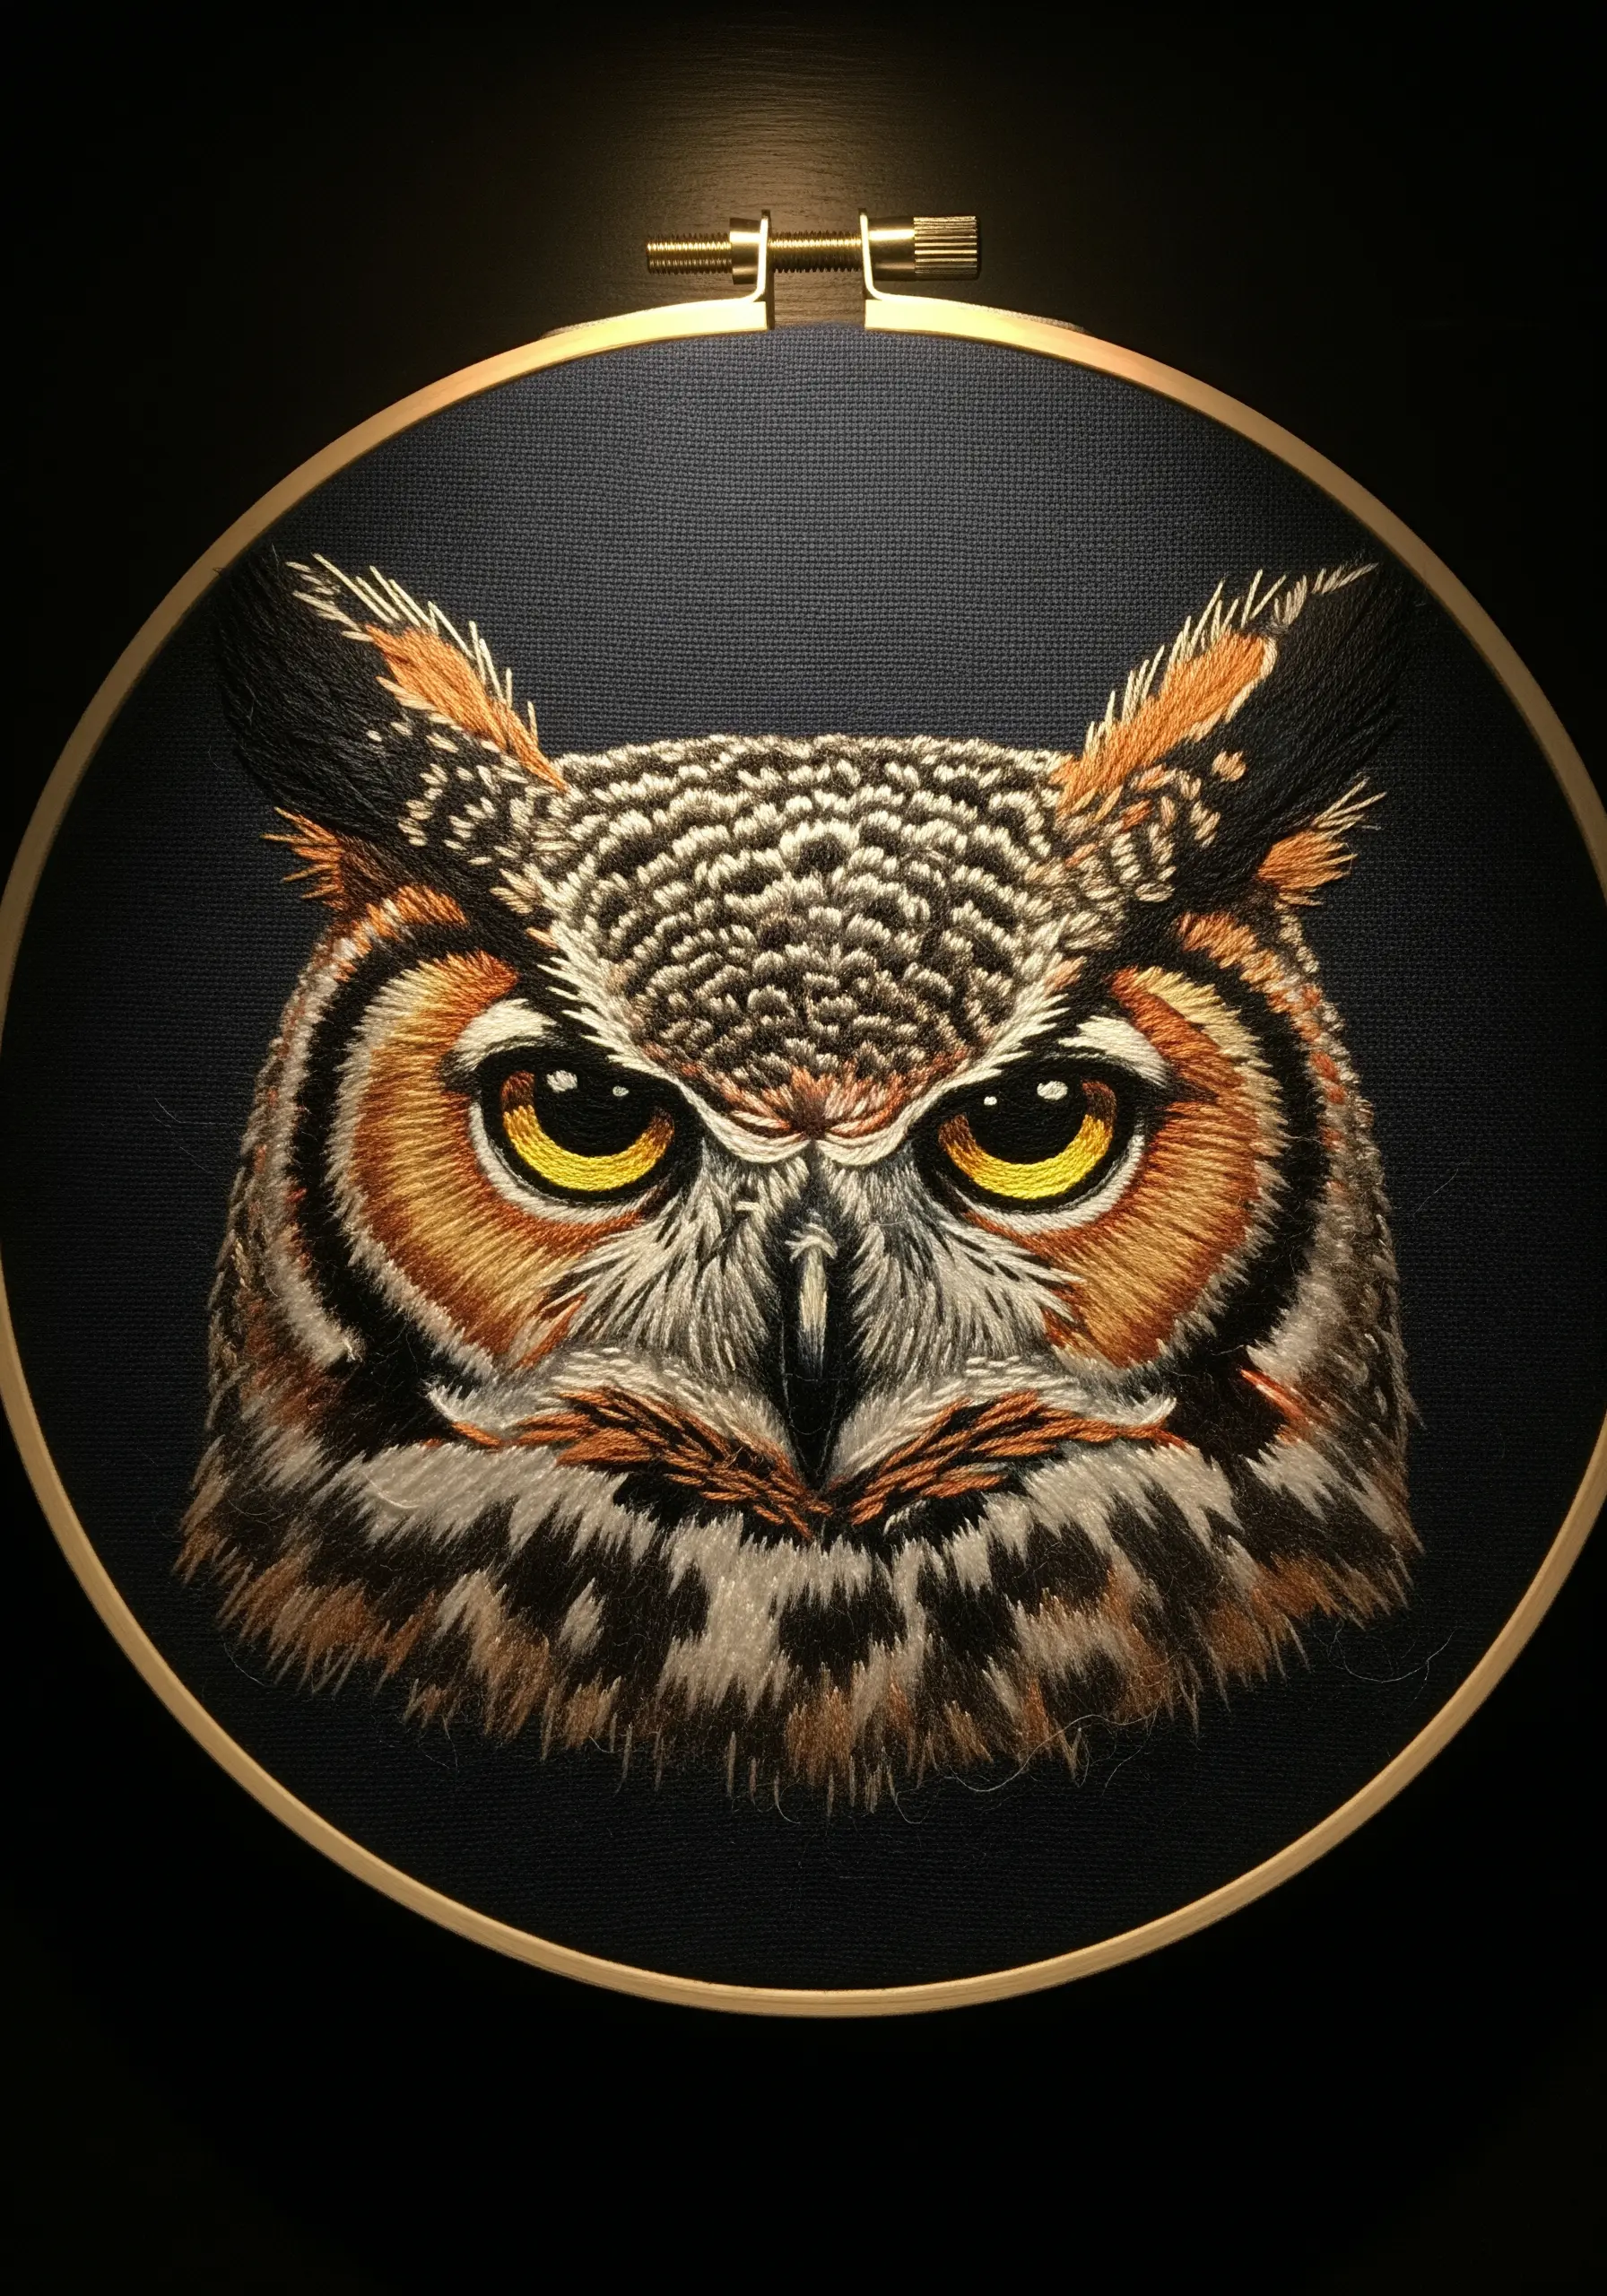
To capture the complex, almost fluffy feather patterns on an owl’s face, use the turkey work stitch.
Create small loops and then snip them close to the fabric, brushing them gently with your finger to create soft tufts.
By varying the colors of the loops according to your pattern, you can build up areas of intricate, soft texture that mimics the downy feathers around the eyes and beak.
This method adds a stunning 3D element to your work.
14. Achieve a Sleek, Glossy Finish on Short Feathers

For birds with short, sleek feathers like puffins, a meticulous long and short stitch is essential.
Use a single strand of floss and ensure your stitches are small and tightly packed, creating an almost seamless, painted surface.
Work in small sections, always directing your stitches away from the eye and beak to follow the bird’s natural contours.
This technique produces a subtle sheen that mimics the natural oils on water birds’ plumage.
15. Add a Touch of Glamour with Metallic Thread
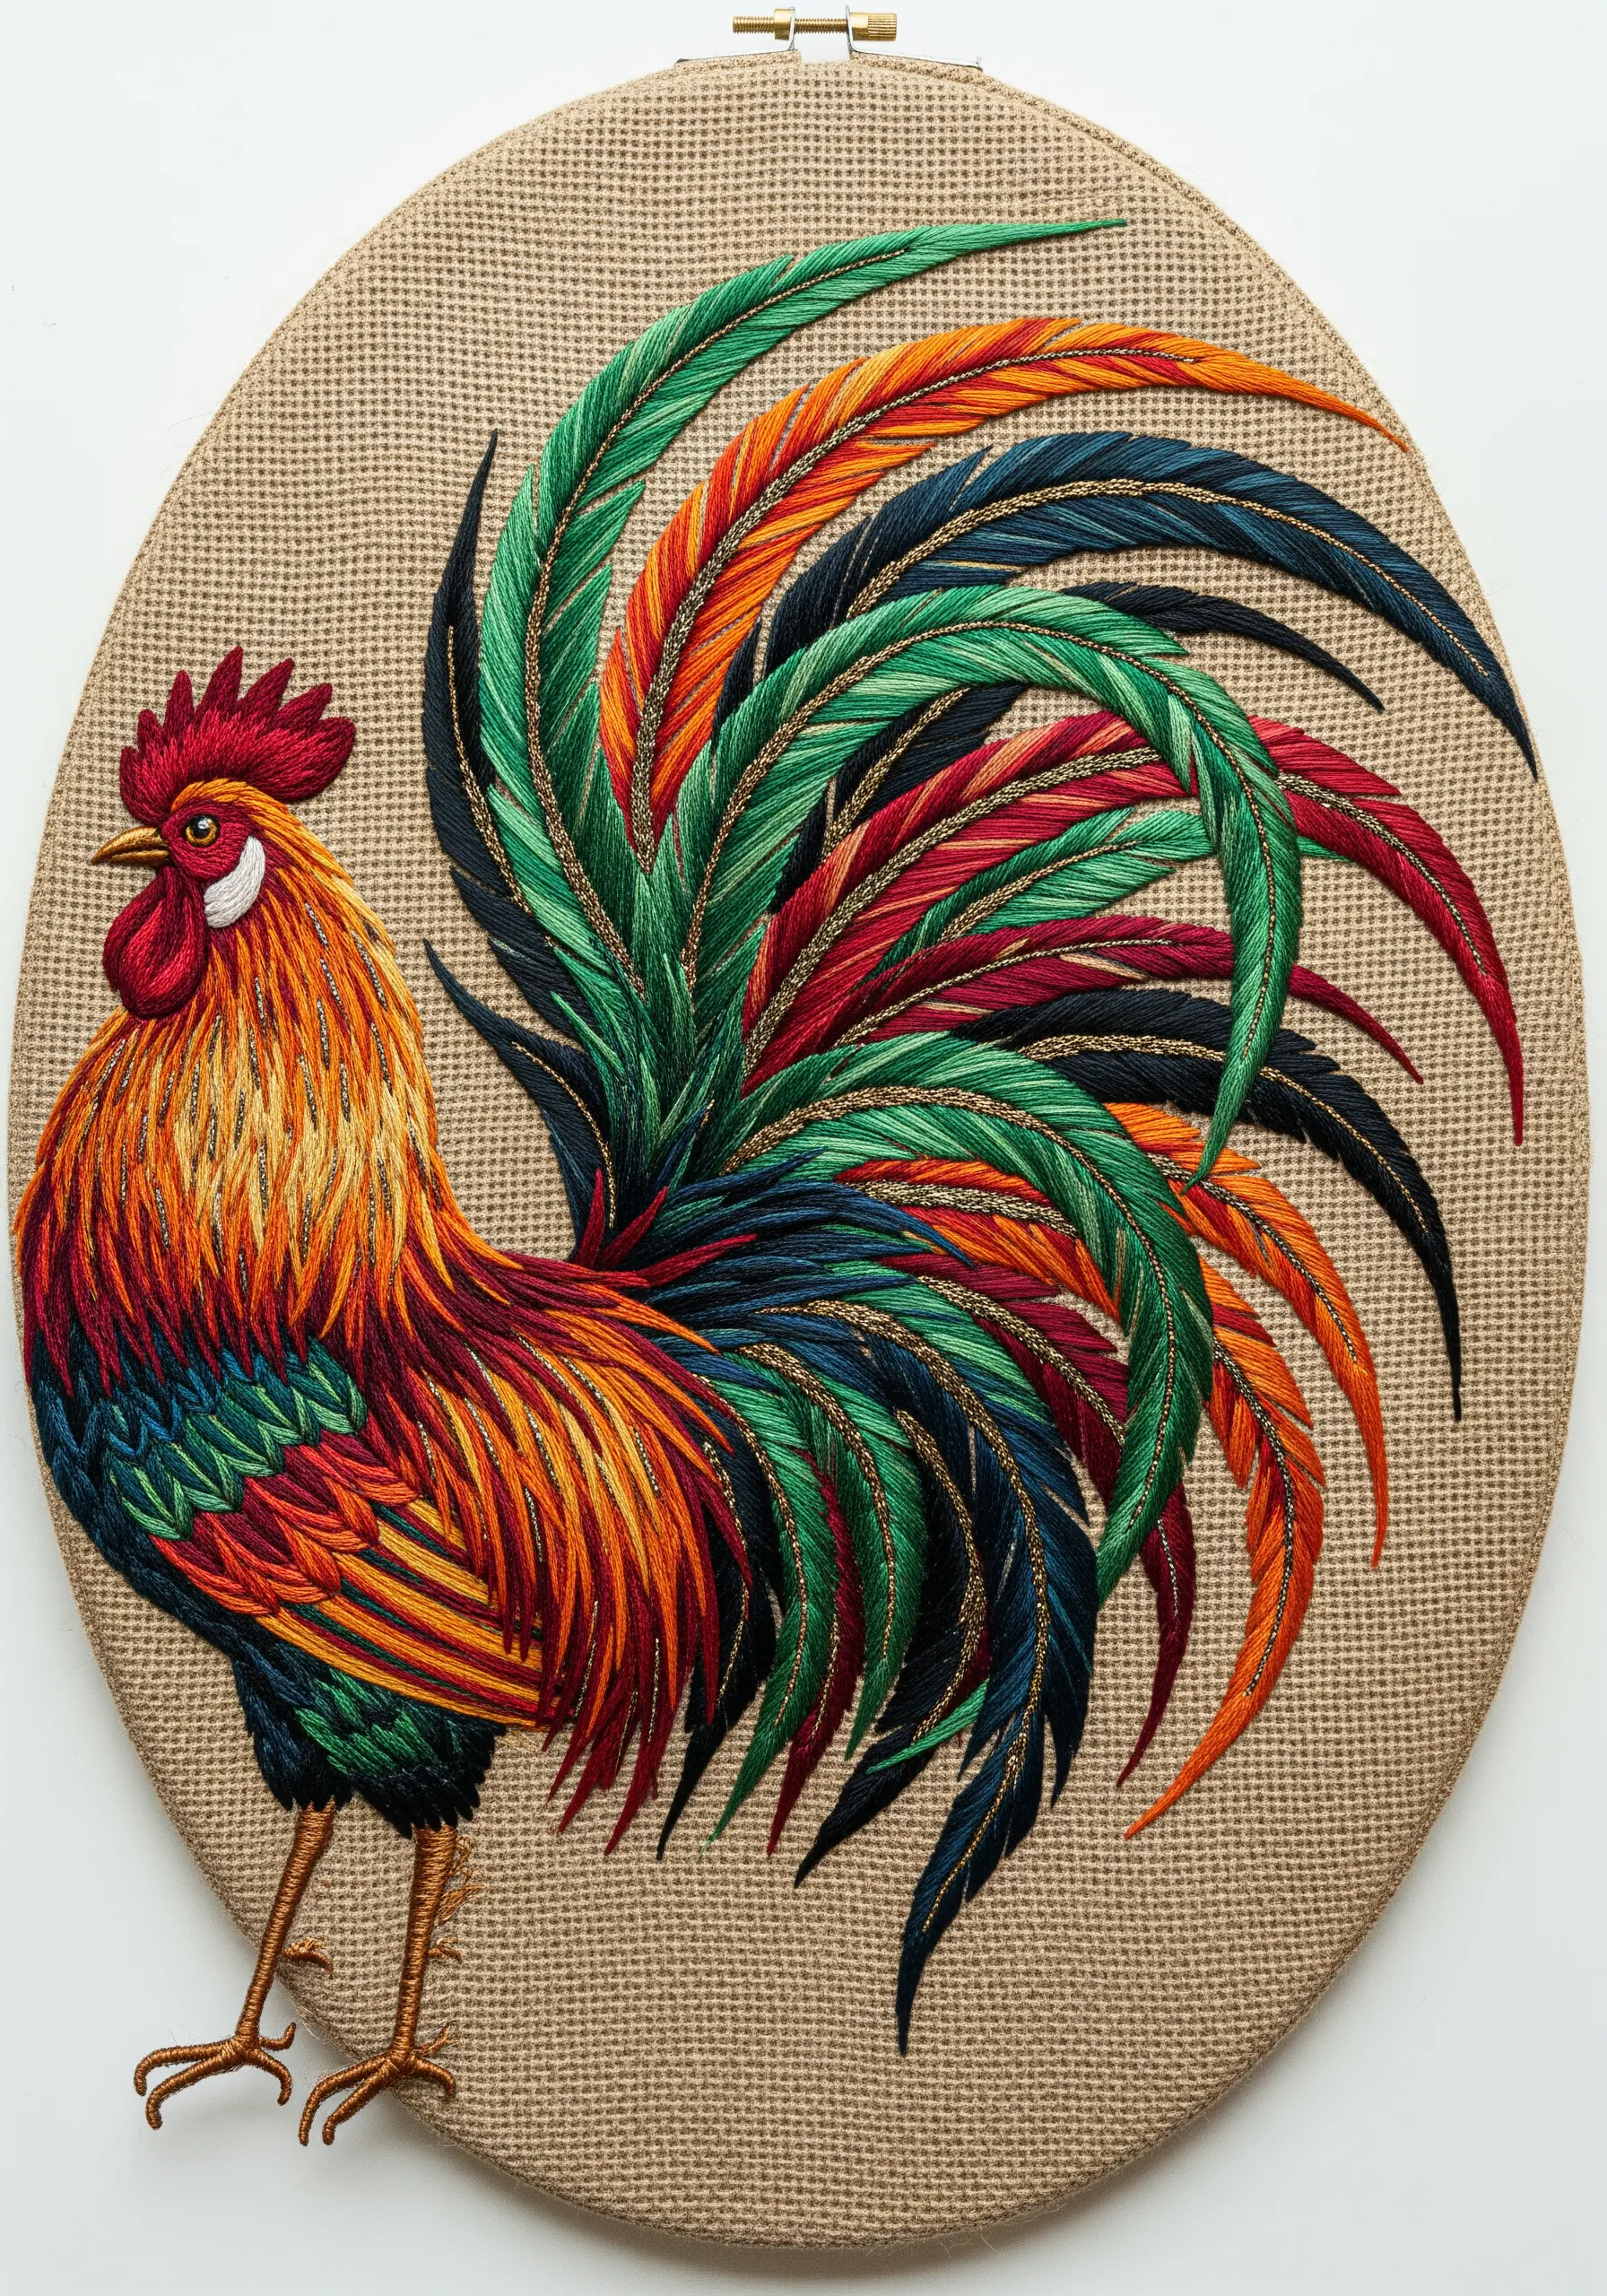
To elevate the vibrant plumage of a rooster, integrate a fine metallic thread along the spine of the longest tail feathers.
Use a single strand of gold or copper blending filament alongside your regular cotton floss.
Stitch it as you would normally; the metallic thread will catch the light and add a subtle, iridescent shimmer that enhances the entire piece without overpowering it.
This works especially well on rustic fabrics like burlap, where the contrast is striking.
16. Suggest Soft Shadows with Grey Underside Stitches
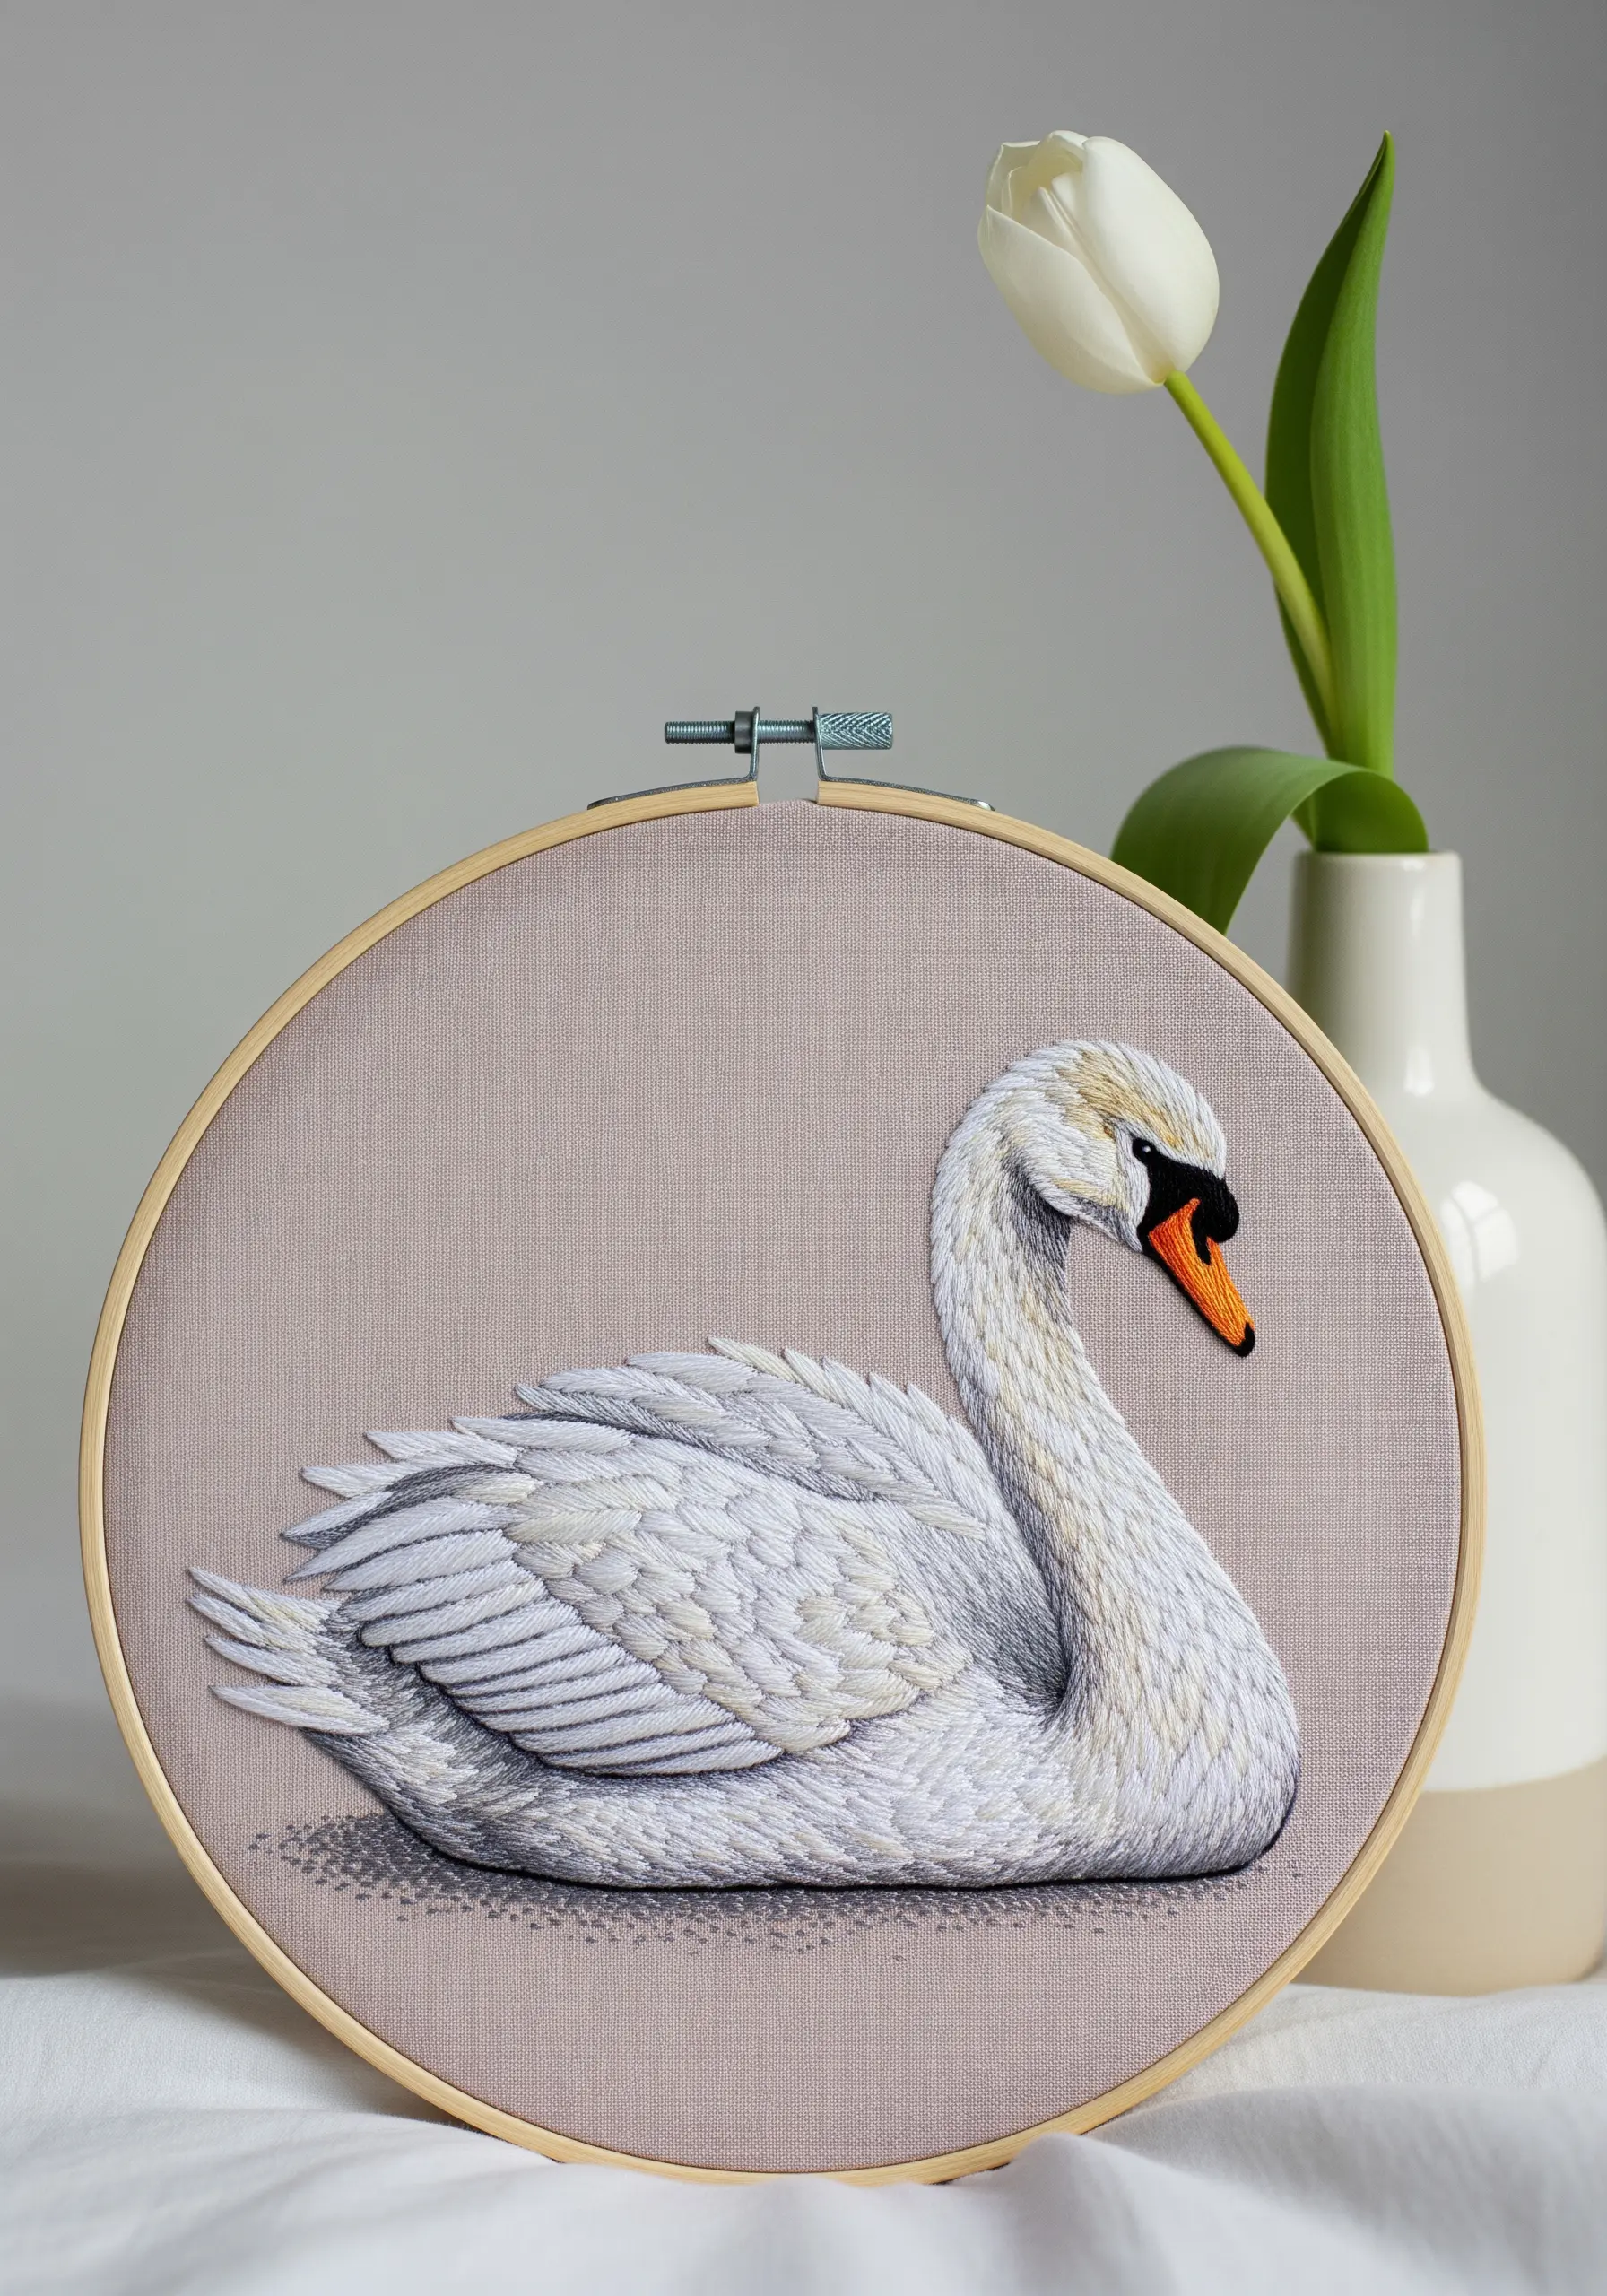
To give a white bird like a swan realistic form and volume, you must stitch the shadows.
Instead of using pure white for the entire body, work in shades of pale grey, silver, and off-white.
Use the darkest greys on the underside of the body and beneath the wing layers.
This use of shading is what turns a flat white shape into a rounded, three-dimensional form that feels soft and real.
Reserve pure white for the topmost highlights only.
17. Blend Bold Colors with Precise Needle Painting
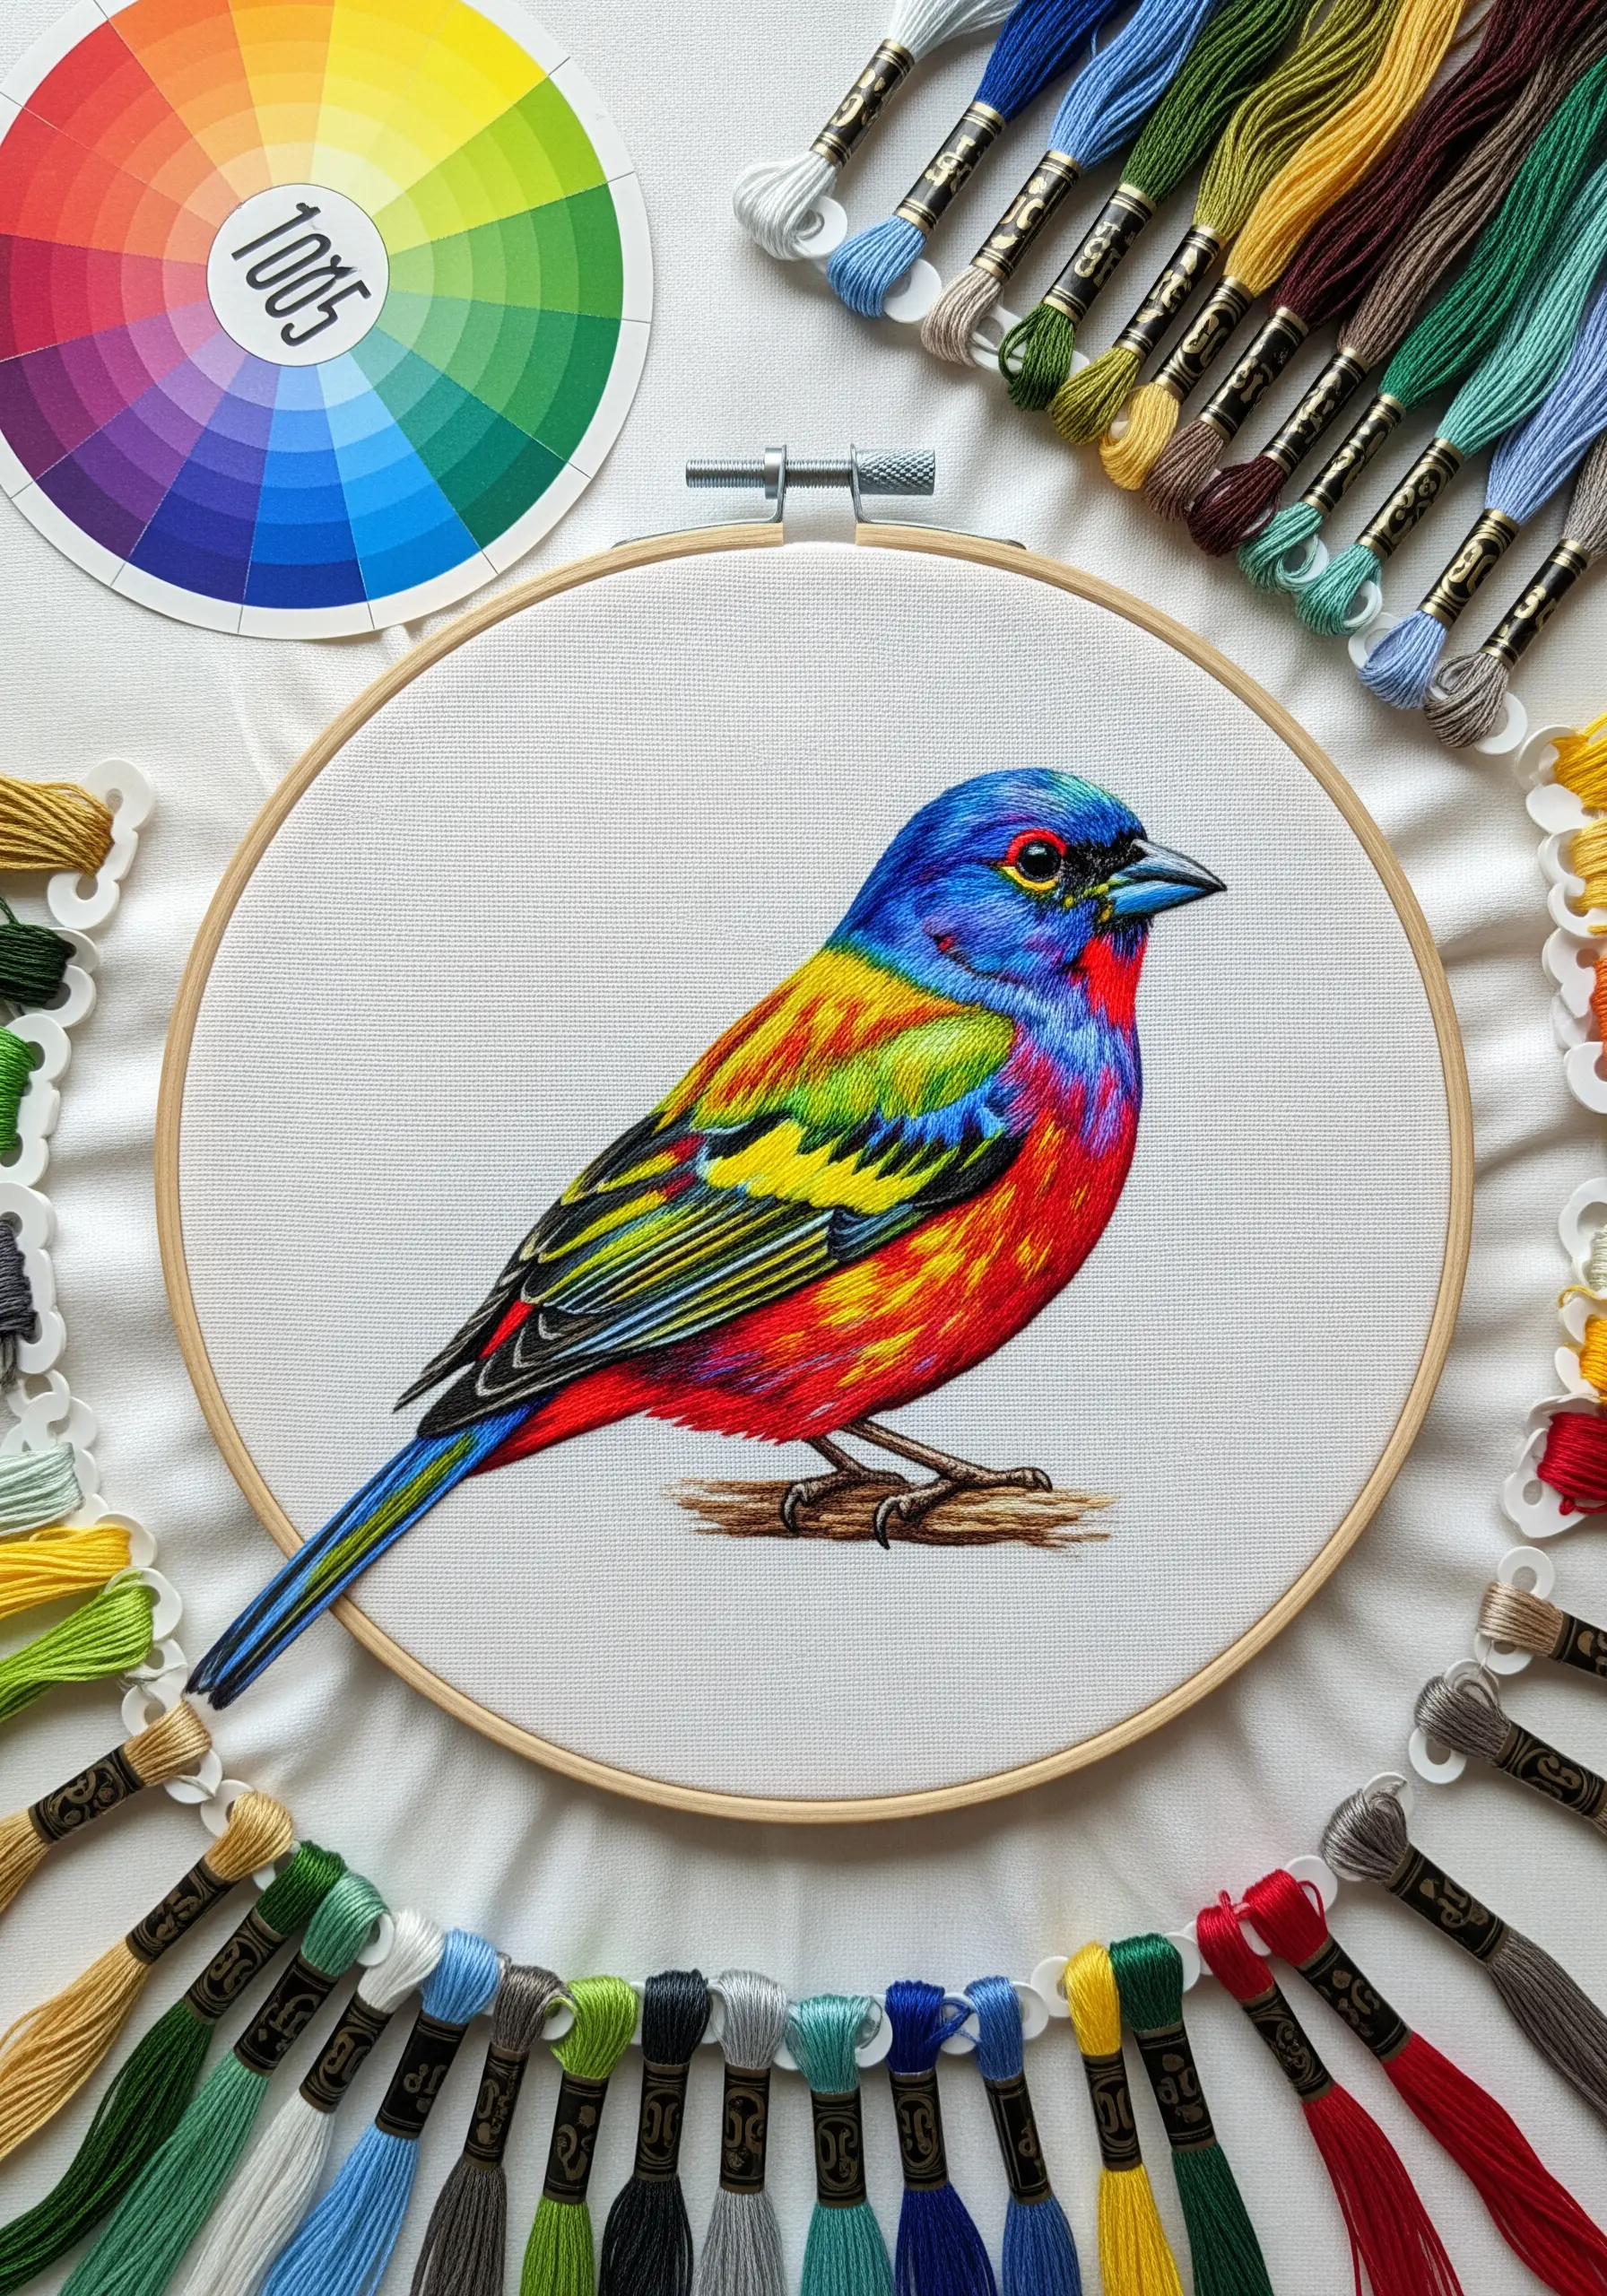
For birds with dramatic, multi-colored plumage like the painted bunting, precise color blending is everything.
Map out each color zone before you start.
Use a single strand of floss and the long and short stitch technique, allowing the stitches of one color area to slightly interlock with the next.
This creates a soft, seamless transition, avoiding hard lines between colors and giving the appearance of feathers that are naturally blended.
This is a true test of contemporary thread painting techniques.
18. Create a Smooth Gradient on a Toucan’s Beak
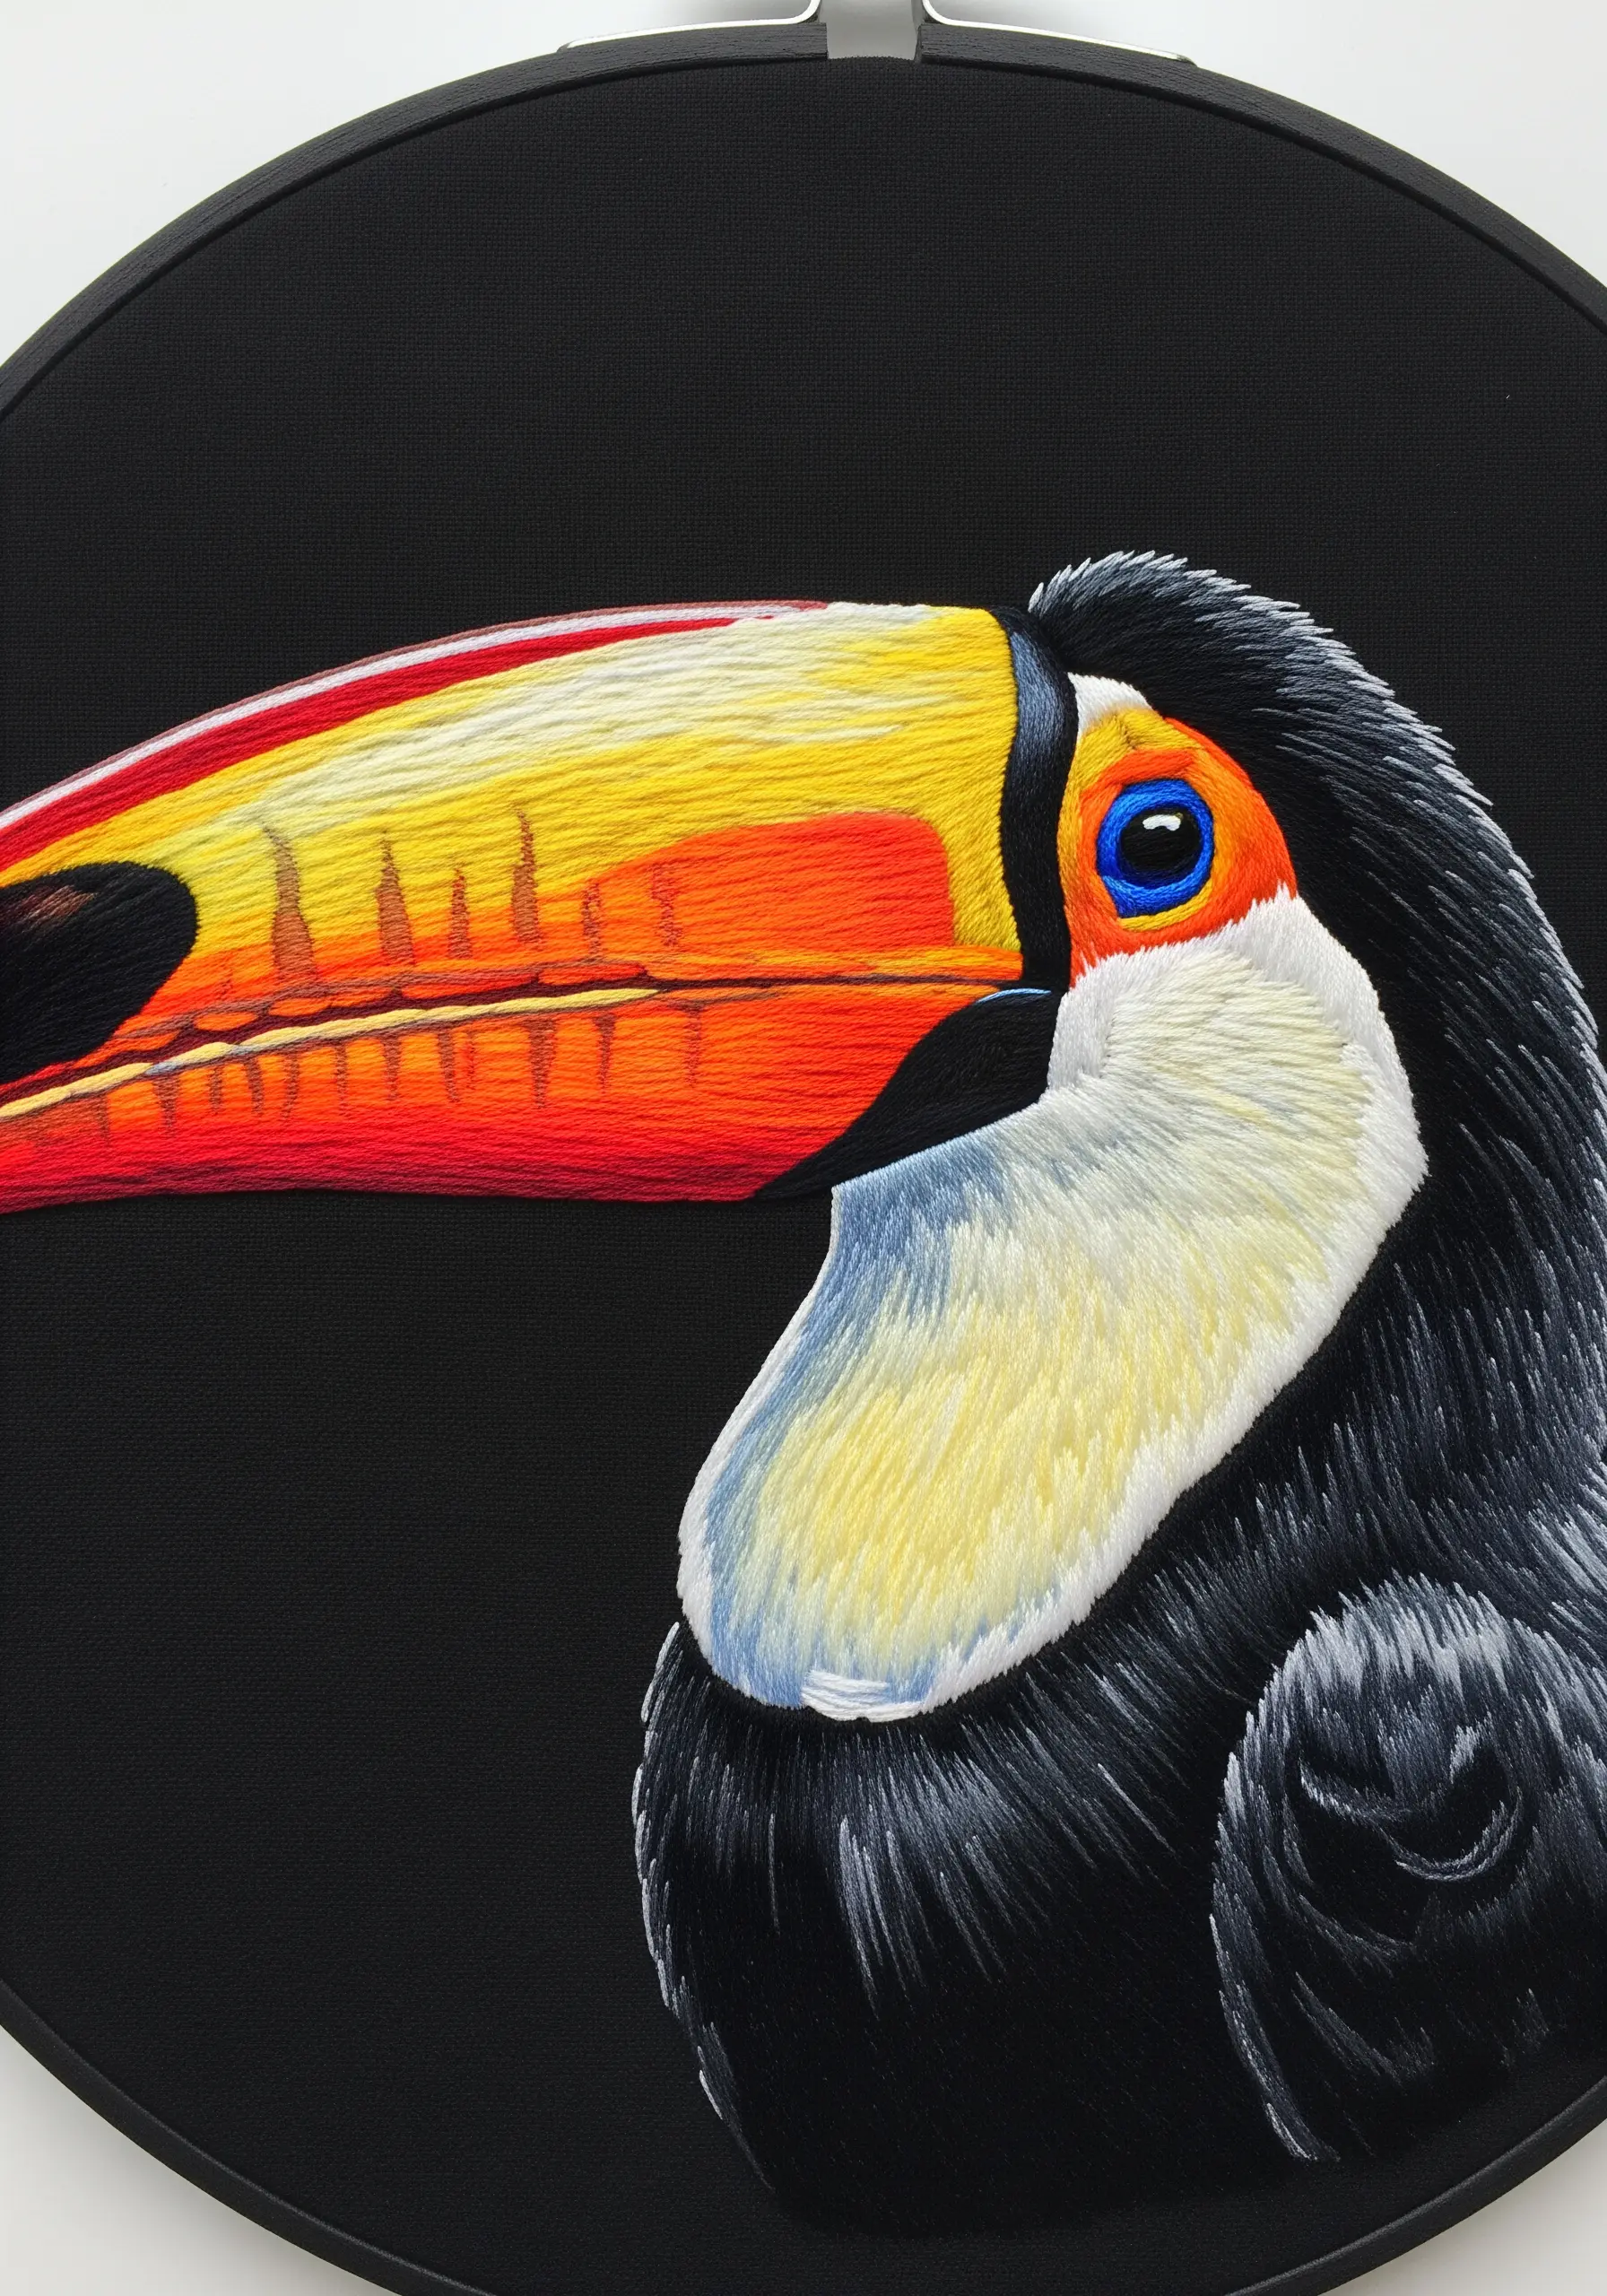
A toucan’s beak is a masterclass in color gradients.
To achieve this smooth transition, use horizontal satin stitches with a single strand of thread.
Start with one color, and as you approach the transition zone, begin introducing single stitches of the next color.
Gradually increase the frequency of the new color’s stitches until you have fully switched over.
This meticulous blending creates a flawless gradient that looks painted on.
19. Integrate Your Bird into a Textured Background
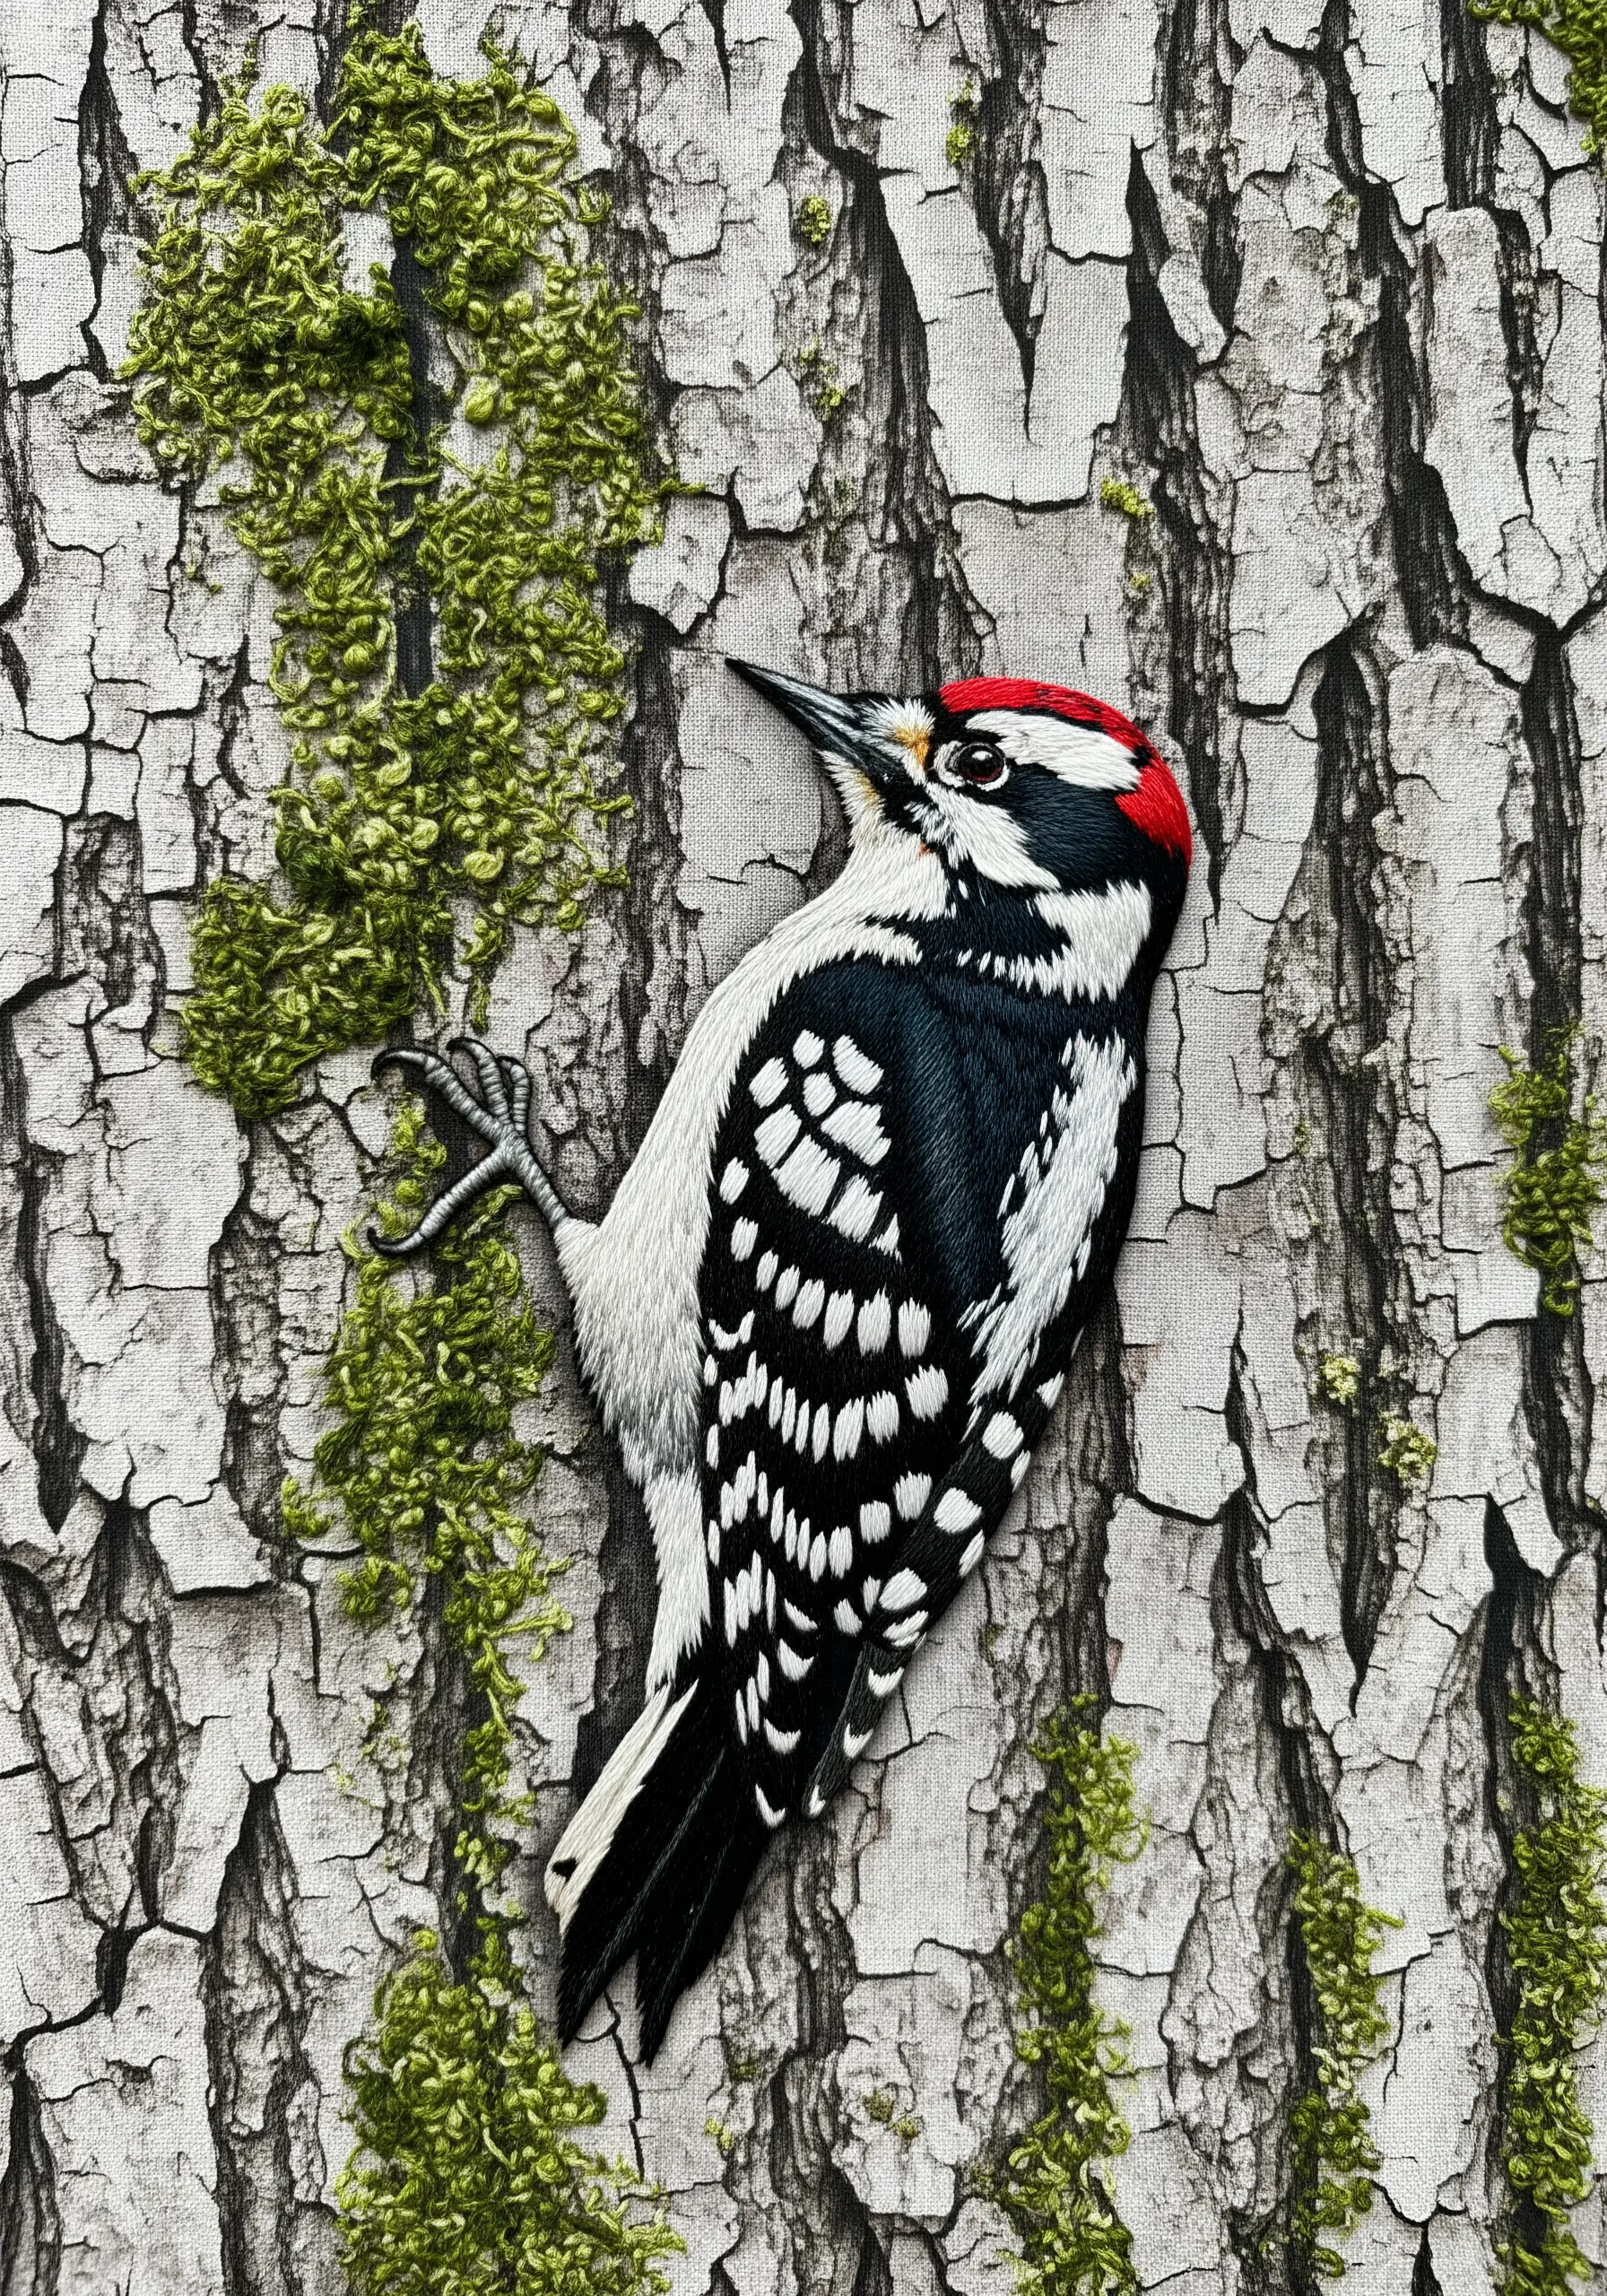
To make your embroidered bird feel truly alive, place it in a realistic environment.
Instead of stitching on plain fabric, use a printed fabric like this tree bark pattern.
Then, add textural elements like moss using French knots or bullion knots with fuzzy, textural yarn.
This mixed-media approach makes the bird appear as if it’s interacting with its habitat, instantly elevating the entire composition from a simple portrait to a narrative scene.
20. Use Directional Satin Stitch for a Silky Sheen

The soft, rosy plumage of a mourning dove has a distinct silky sheen.
You can replicate this by using a long satin stitch, ensuring all your stitches lie perfectly parallel and follow the curve of the bird’s body.
Use a high-quality satin or silk floss, as its natural luster is key to this effect.
The uninterrupted, parallel stitches reflect light uniformly, creating that beautiful, smooth glow that defines the bird’s form.
21. Create Sharp Barred Patterns with Precision
For feathers with bold, graphic patterns like stripes or bars, clarity is paramount.
Use a dense satin stitch for each bar, working all the dark sections first, then filling in the light sections.
Ensure the edge of each stitch meets the edge of the next perfectly, with no fabric showing through.
Outlining each bar with a single backstitch in the same color can also help create an exceptionally crisp and defined edge.
22. Define Feather Tiers with Contrasting Outlines
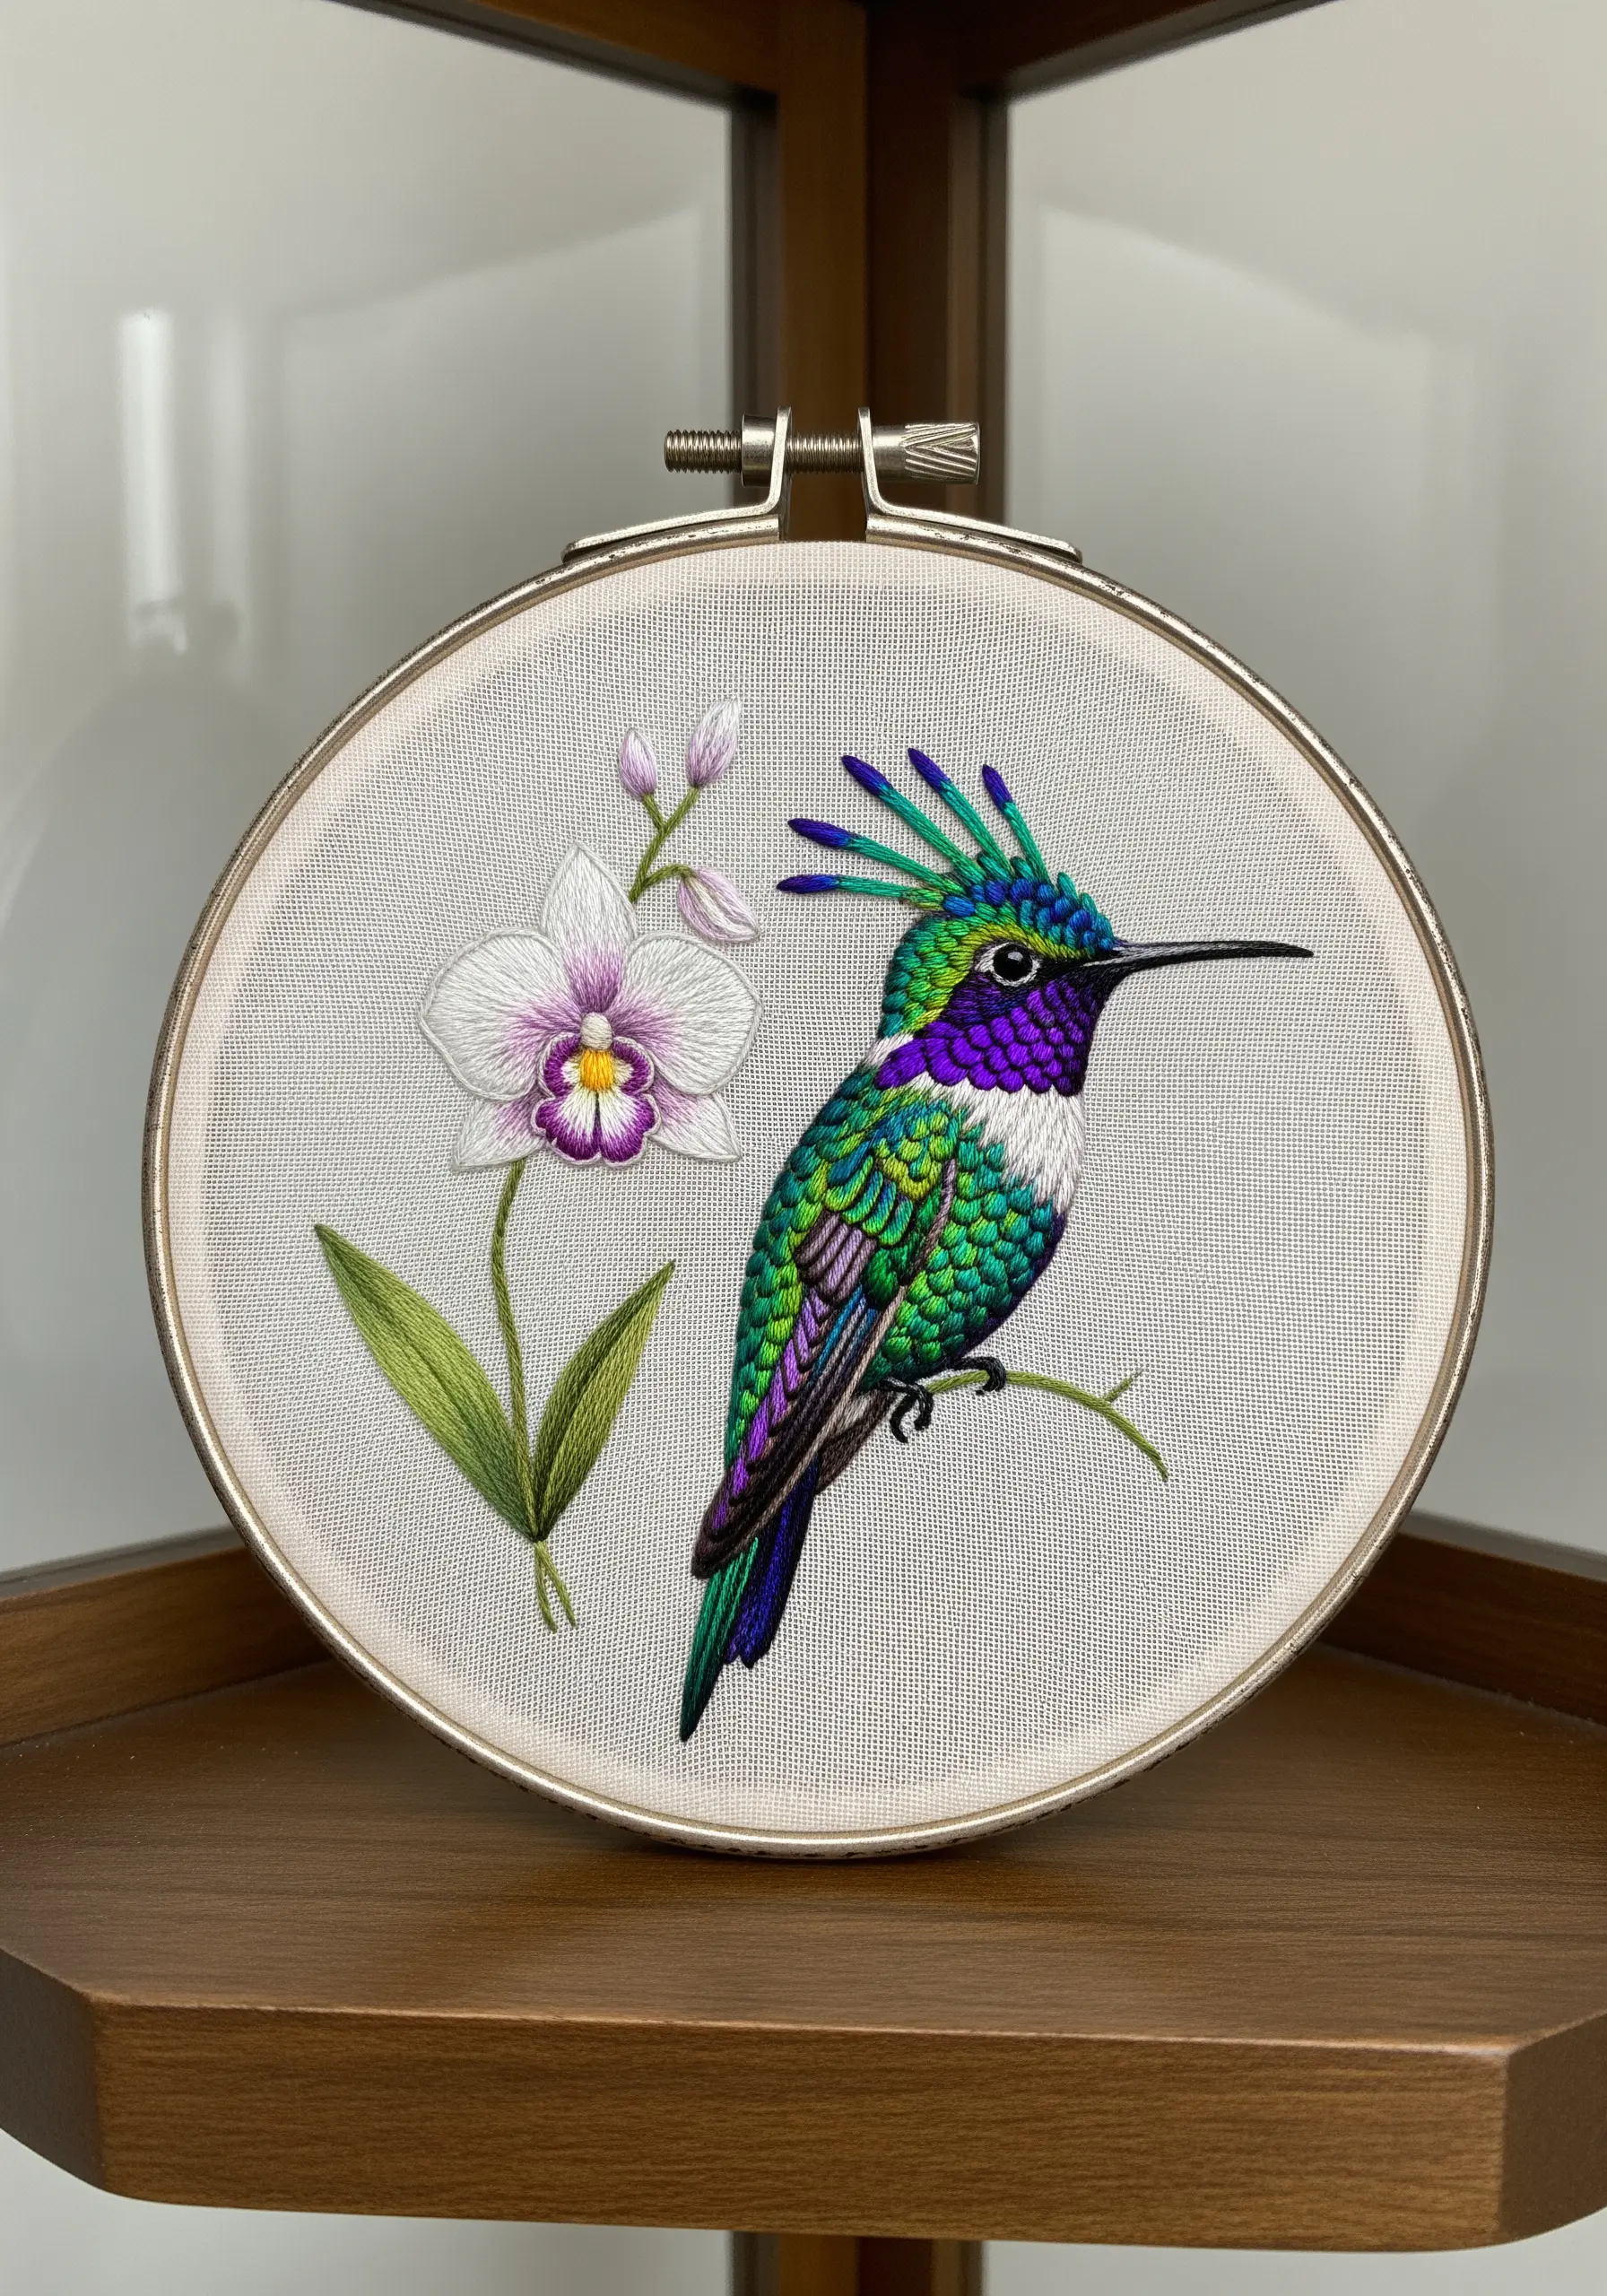
To make the tiered, scale-like feathers on a hummingbird’s neck stand out, outline each individual feather.
Use a single strand of a dark, contrasting color (like black or dark purple) and a simple backstitch or split stitch.
After outlining, fill each small shape with a vibrant satin stitch.
This technique clearly defines the intricate pattern and gives the plumage a structured, jewel-like quality that is visually striking.
23. Layer Long Stitches for Flowing Tail Feathers

For the long, dramatic tail of a pheasant, stitch each feather individually.
Use long and short stitch, starting from the tip of the feather and working your way towards the body.
Let your stitches flow in a gentle curve, mimicking the natural drape of the feather.
Slightly overlapping each feather over the one next to it builds realistic depth and a sense of lush, dense plumage.
Choosing a dark, textured fabric like olive green piqué makes the warm colors appear even richer.
24. Build Fluffy Texture with Open Chain Stitch Loops

To create the soft, fluffy down of a baby chick, use a detached chain stitch (or lazy daisy stitch).
Instead of pulling the loops tight, leave them slightly loose and open.
Work in dense, overlapping layers, starting from the bottom edge and moving up.
This layering of open loops creates a wonderfully tactile, three-dimensional texture that is much more effective than any flat stitch for conveying softness and fluff.
Stitching on a gingham fabric enhances the piece’s charming, gentle feel.
25. Blend Embroidery and Weaving for Water Reflections
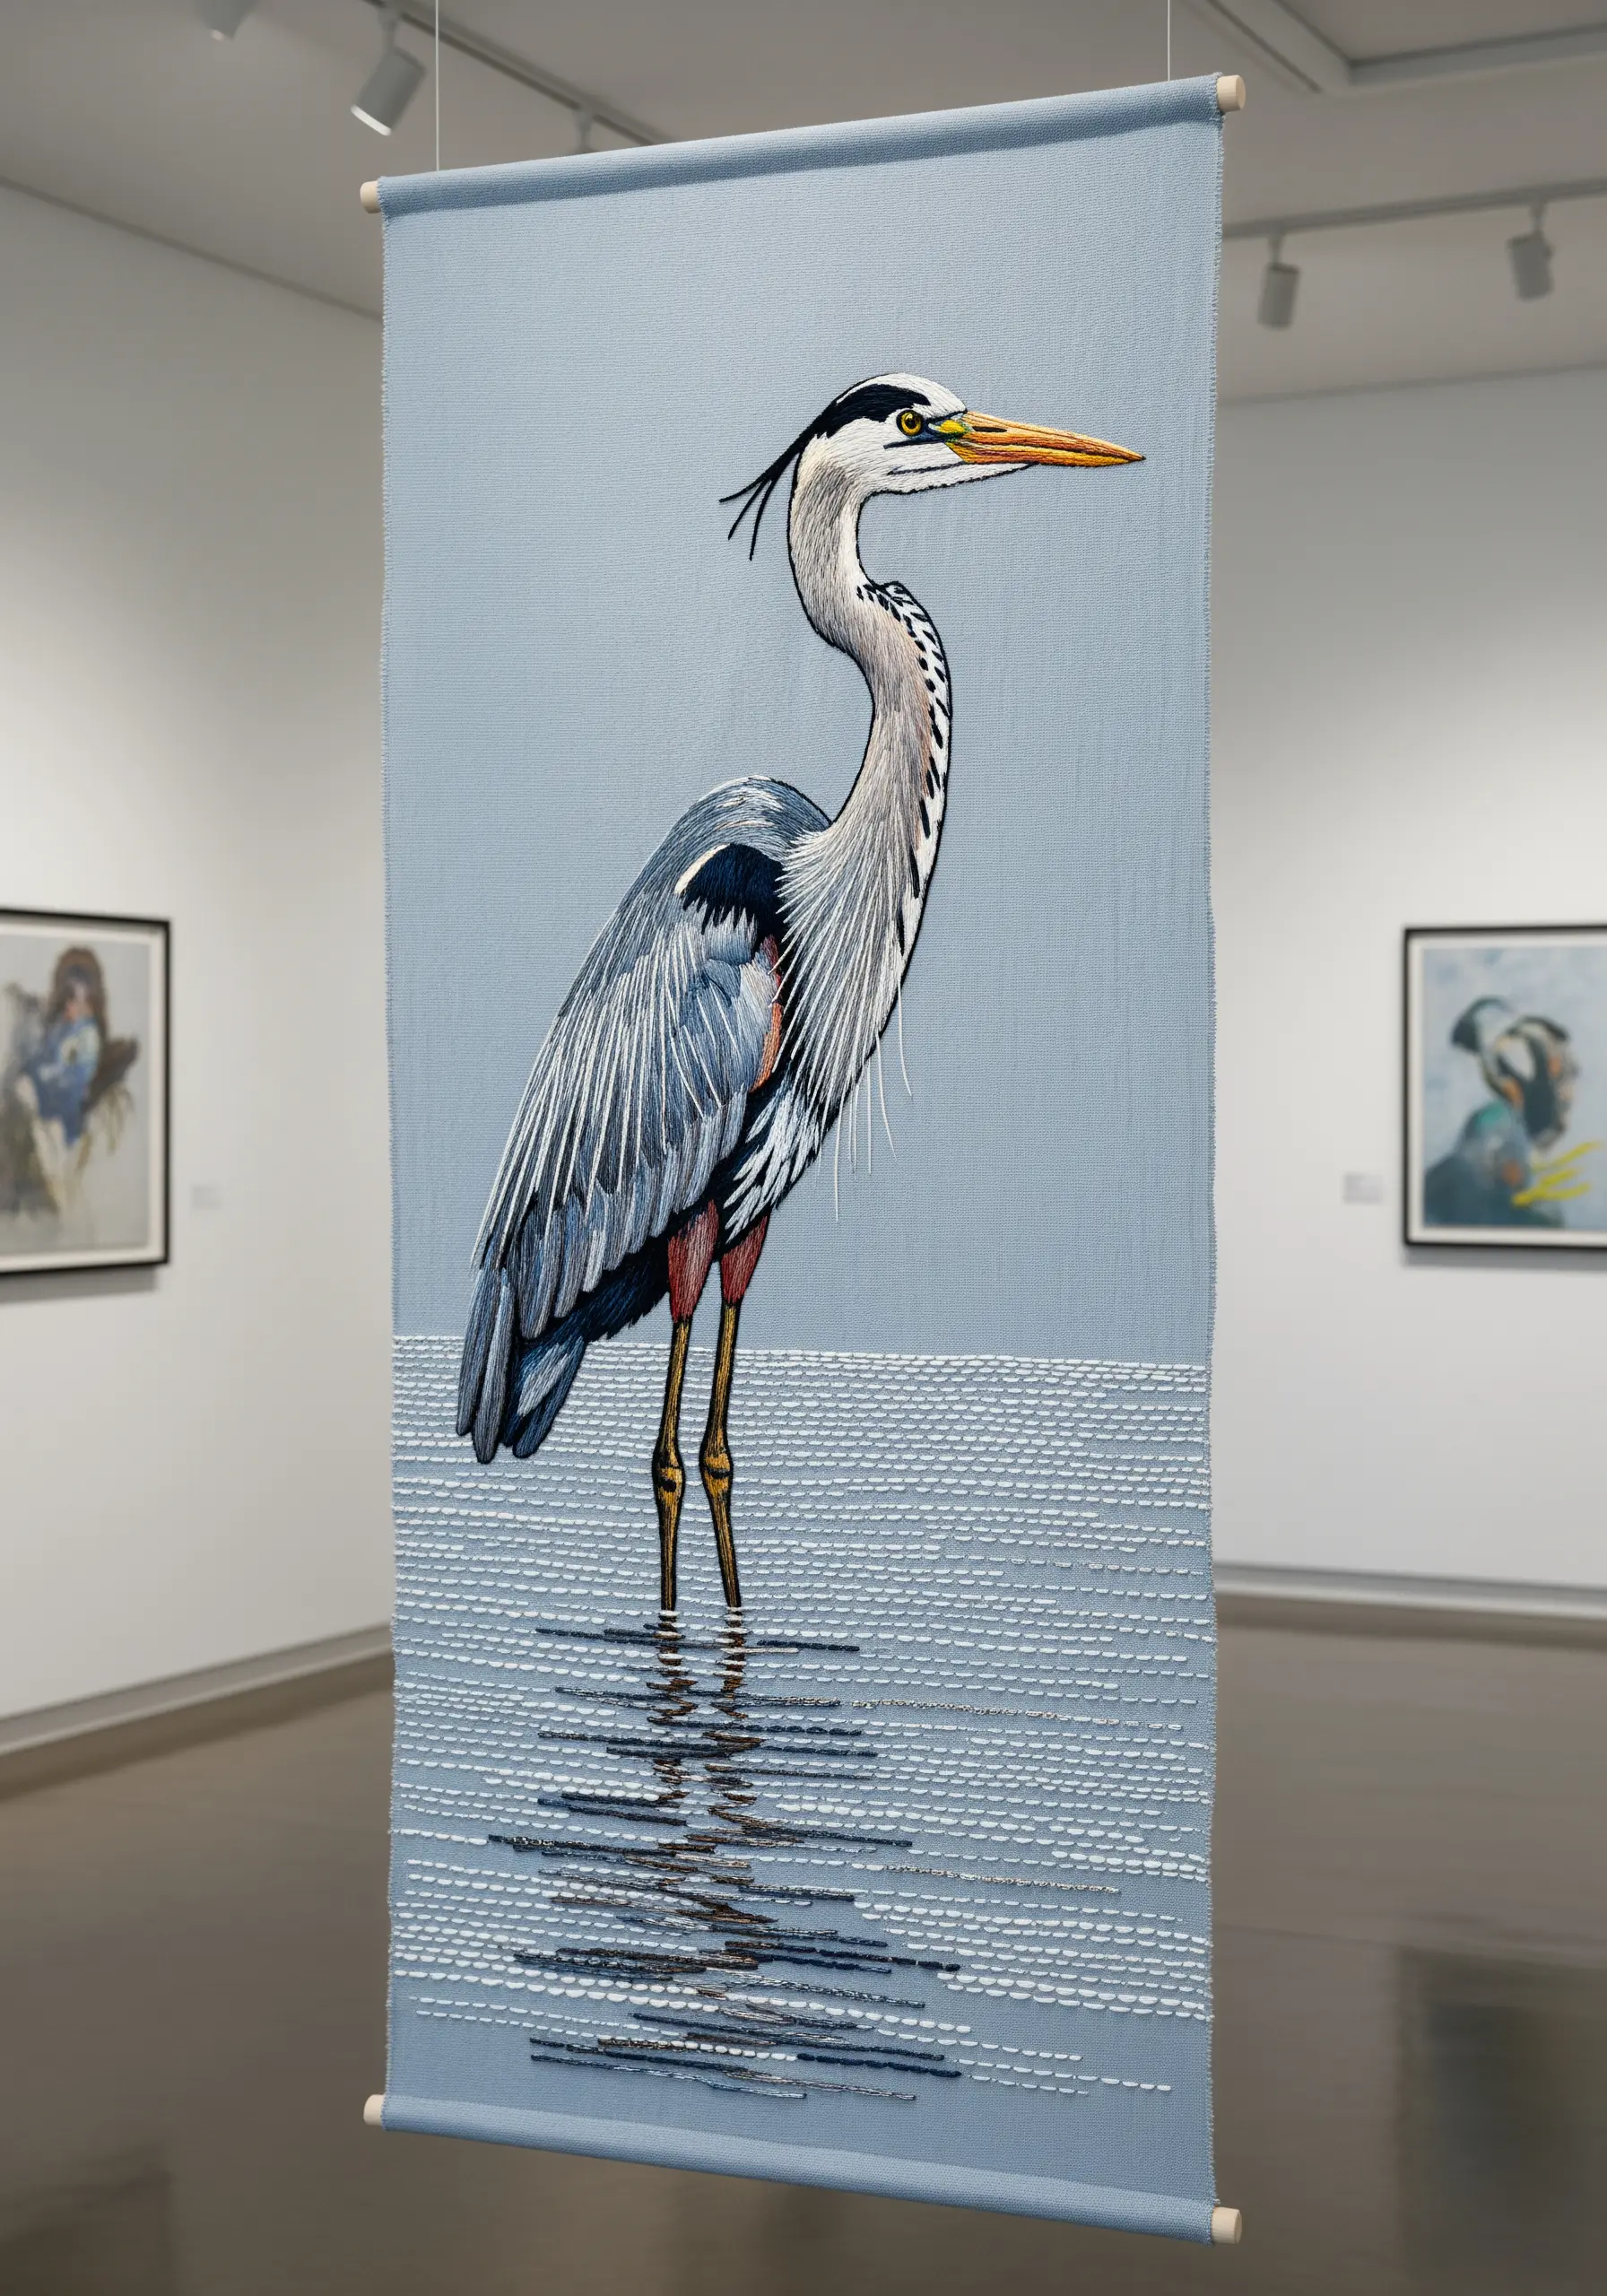
To create the effect of water and reflections, combine traditional embroidery with simple weaving techniques.
First, lay down long, horizontal straight stitches in various shades of blue and grey for the water’s surface.
Then, use a darker thread to weave vertically through these stitches, creating a broken, shimmering pattern that mimics light on water.
This is one of the most inventive stunning mixed-fiber projects that turn ordinary threads into art, adding immense depth and realism to your scene.
26. Use Whispers of Color for Subtle Feathering

For the soft, almost translucent feathers of a flamingo, your color blending must be incredibly subtle.
Use a single strand of floss and introduce darker pinks or corals with just a few sparse, long stitches over a lighter base.
These are not solid blocks of color, but whispers of shading that suggest form and texture.
This minimalist approach to thread painting is what creates that soft, downy look without making the feathers feel heavy or dense.
27. Explore Textural Variations on a Single Motif
To deepen your understanding of feather textures, create a sampler using a single feather shape.
In the first, use smooth, blended satin stitch.
In the second, create a raised effect with tightly packed French knots or colonial knots.
In the third, try a more graphic approach with open fly stitches for the barbs.
This exercise sharpens your skills and reveals how different stitches can completely transform the character of the same design.
28. Achieve a Scalloped Effect with Overlapping Satin Stitch
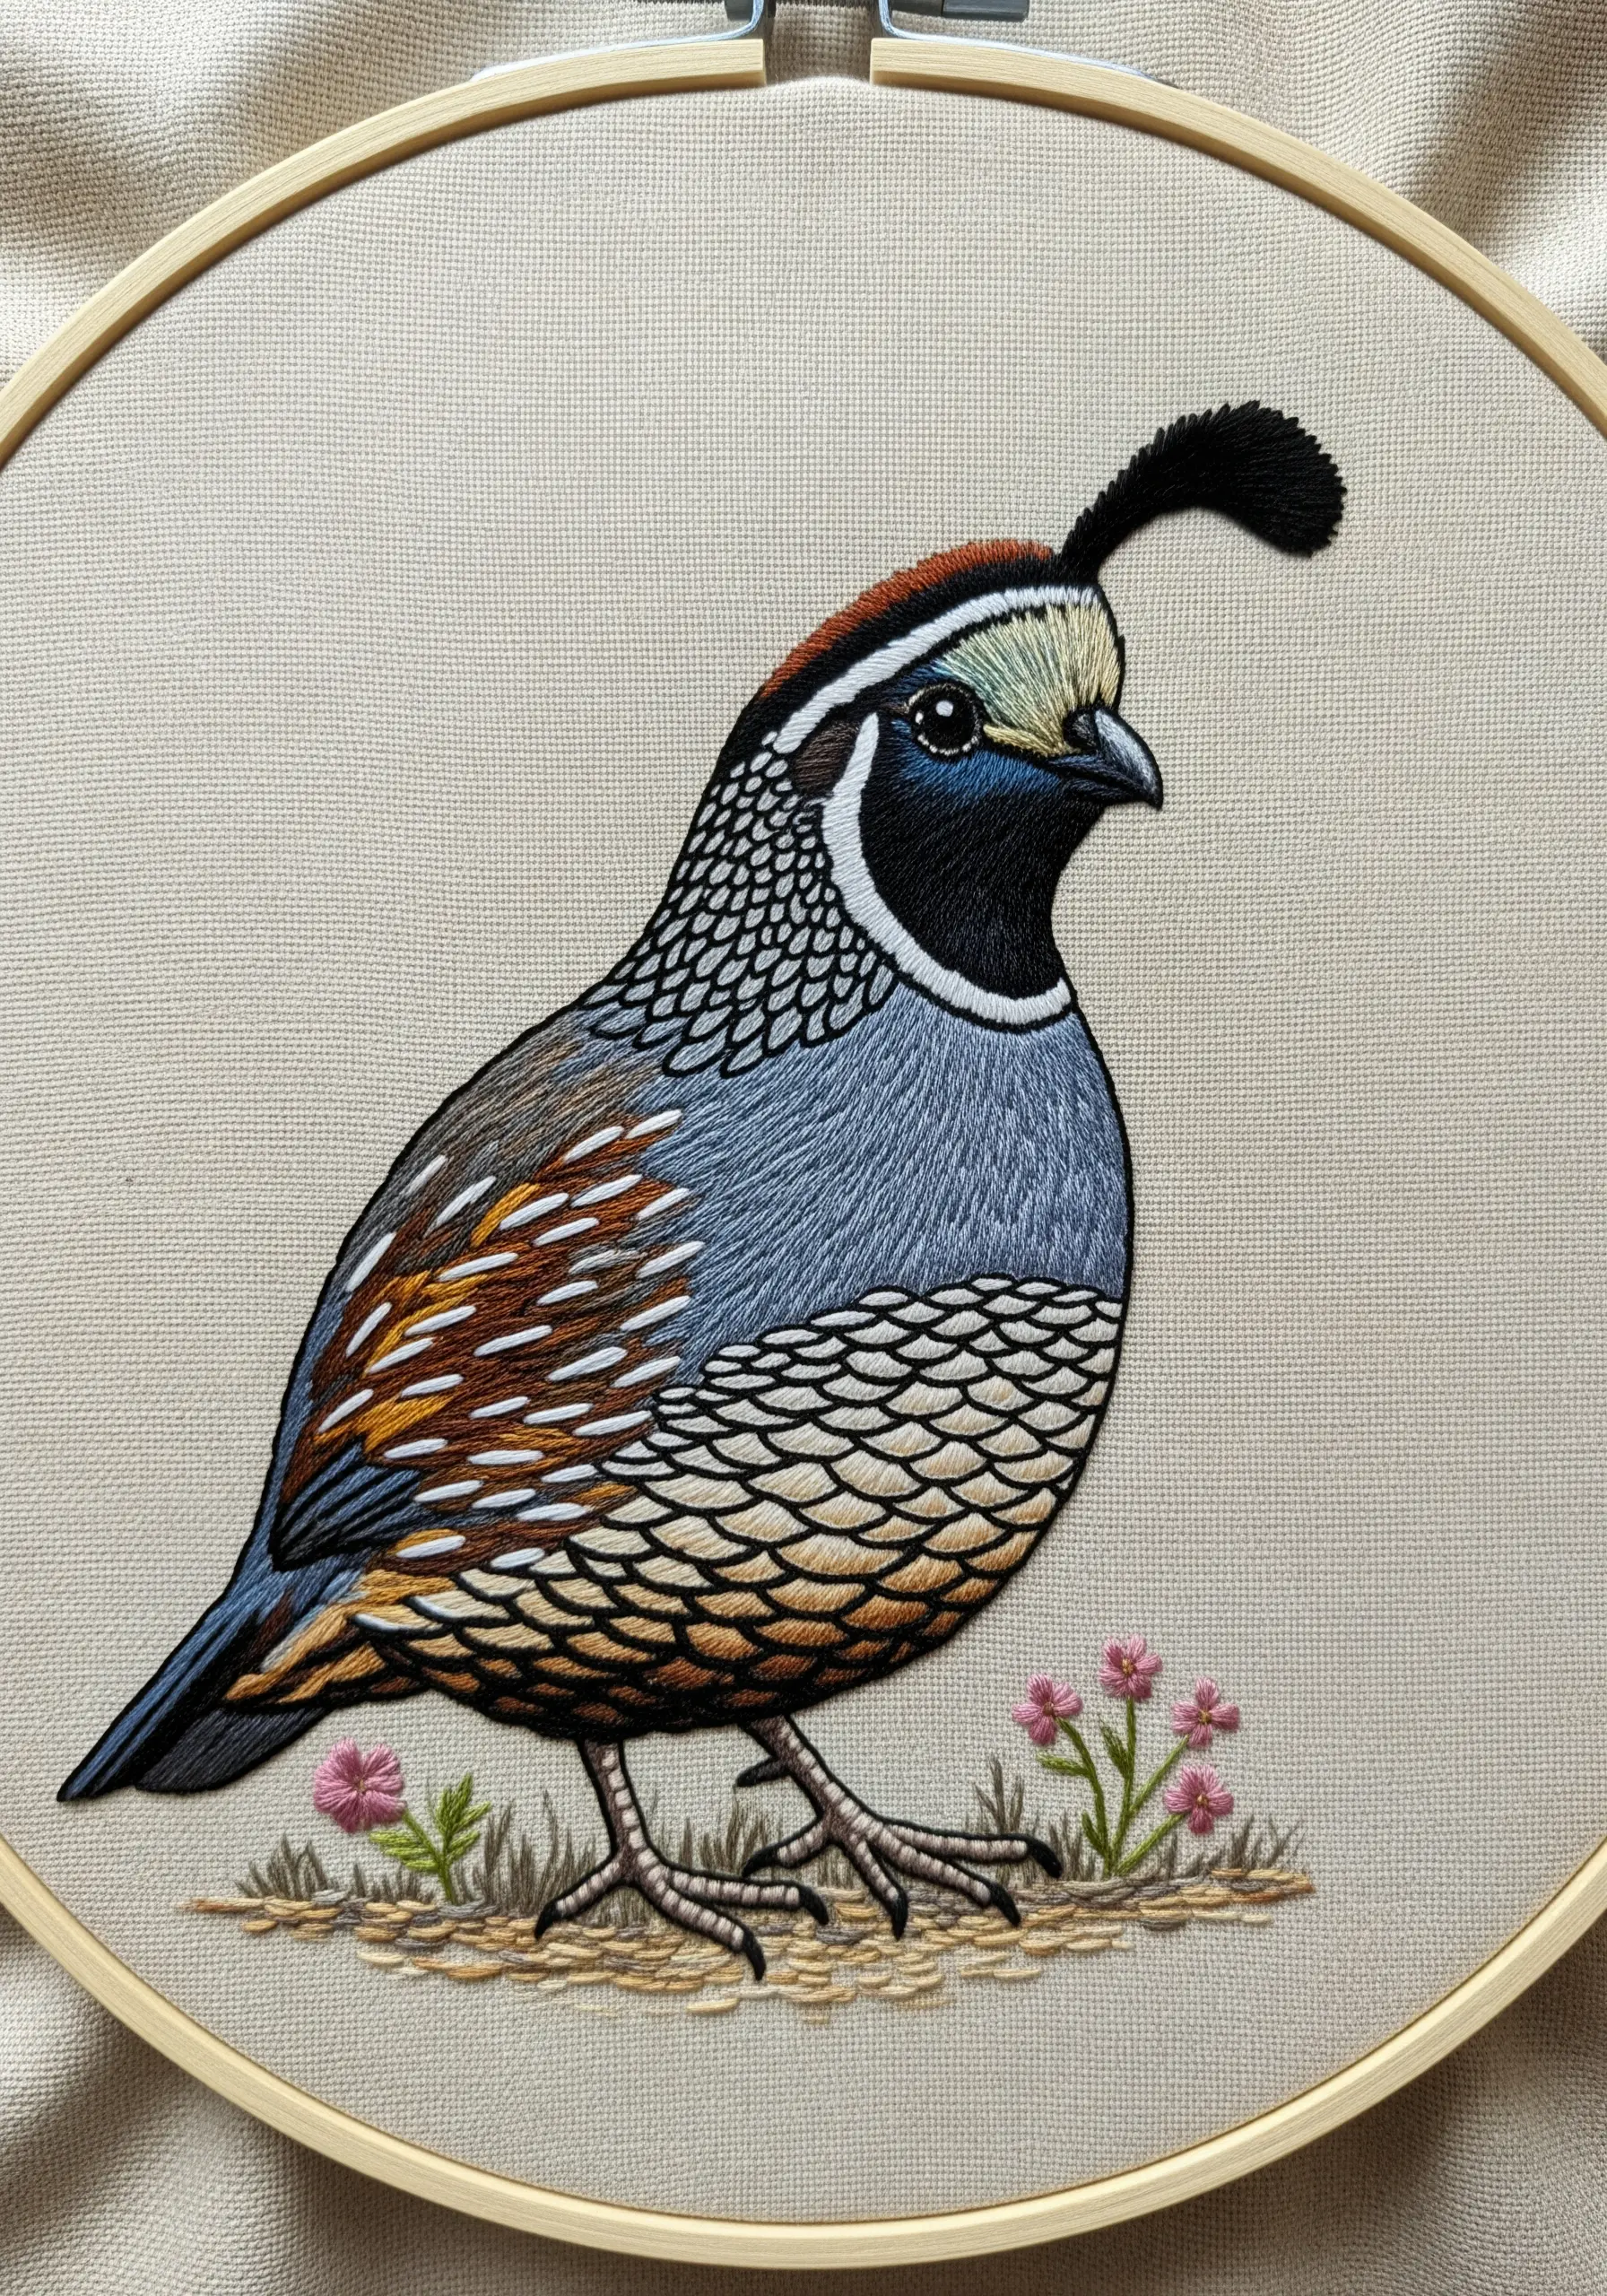
The scalloped feather pattern on a quail is a defining feature.
To create this, work in horizontal rows from the bottom up.
Stitch the lowest row of feather-tips using a dark, arched satin stitch.
For the next row, stitch the lighter feather bodies, allowing the bottom of your stitches to slightly overlap the dark tips of the row below.
This methodical layering builds the pattern perfectly and creates a clean, graphic, and realistic effect.
29. Create an Illusion of Length with Trailing Threads
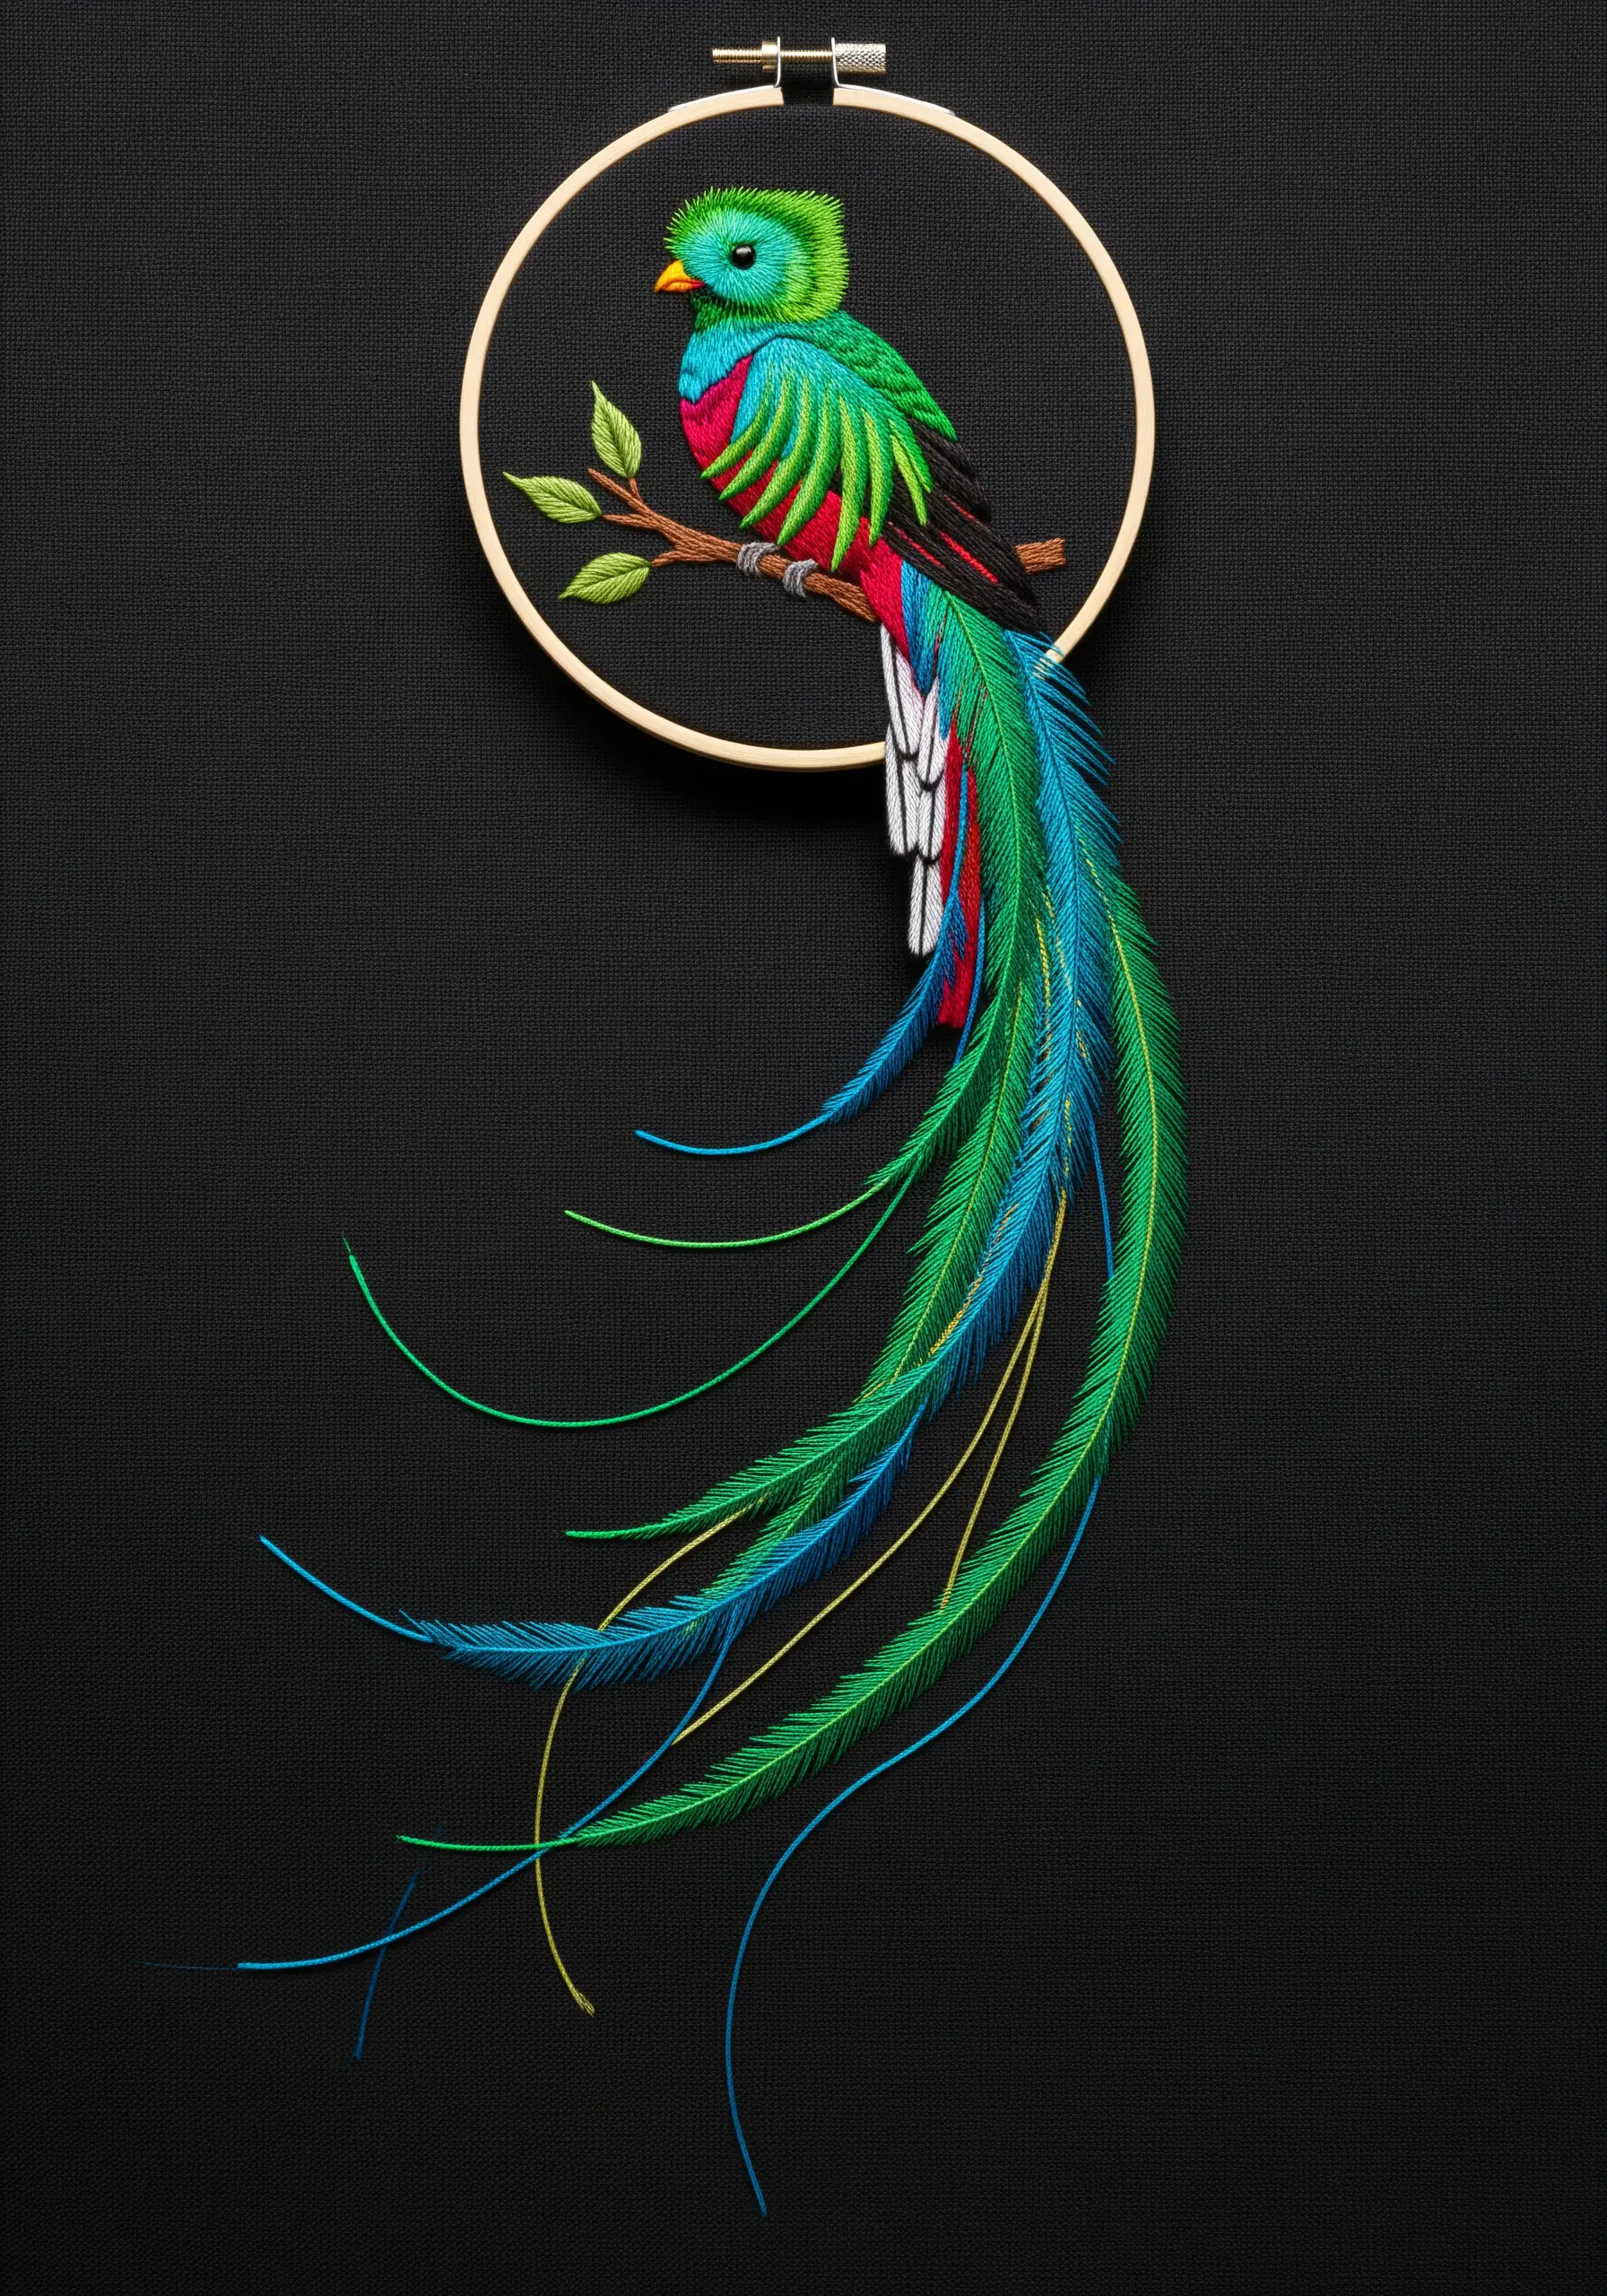
For birds with exceptionally long, fine tail feathers like the quetzal, let your thread extend beyond the main embroidery.
After stitching the body of the feather, allow a few single strands to trail freely off the fabric.
Secure them on the back of the hoop or let them hang, creating a dynamic, three-dimensional effect that conveys incredible length and delicacy.
This technique breaks the boundary of the hoop and brings your artwork to life.
30. Capture a Flock’s Motion with Varied Stitch Density

When embroidering a scene with multiple birds, use stitch density to create perspective and focus.
For the birds in the foreground, use dense, detailed stitching to make them sharp and clear.
For the birds in the background and the reflections, use sparser, simpler stitches—like open backstitch or long straight stitches.
This variation tricks the eye into seeing depth and focuses the viewer’s attention on the main subjects.
31. Create a Soft-Focus Background to Enhance Your Subject
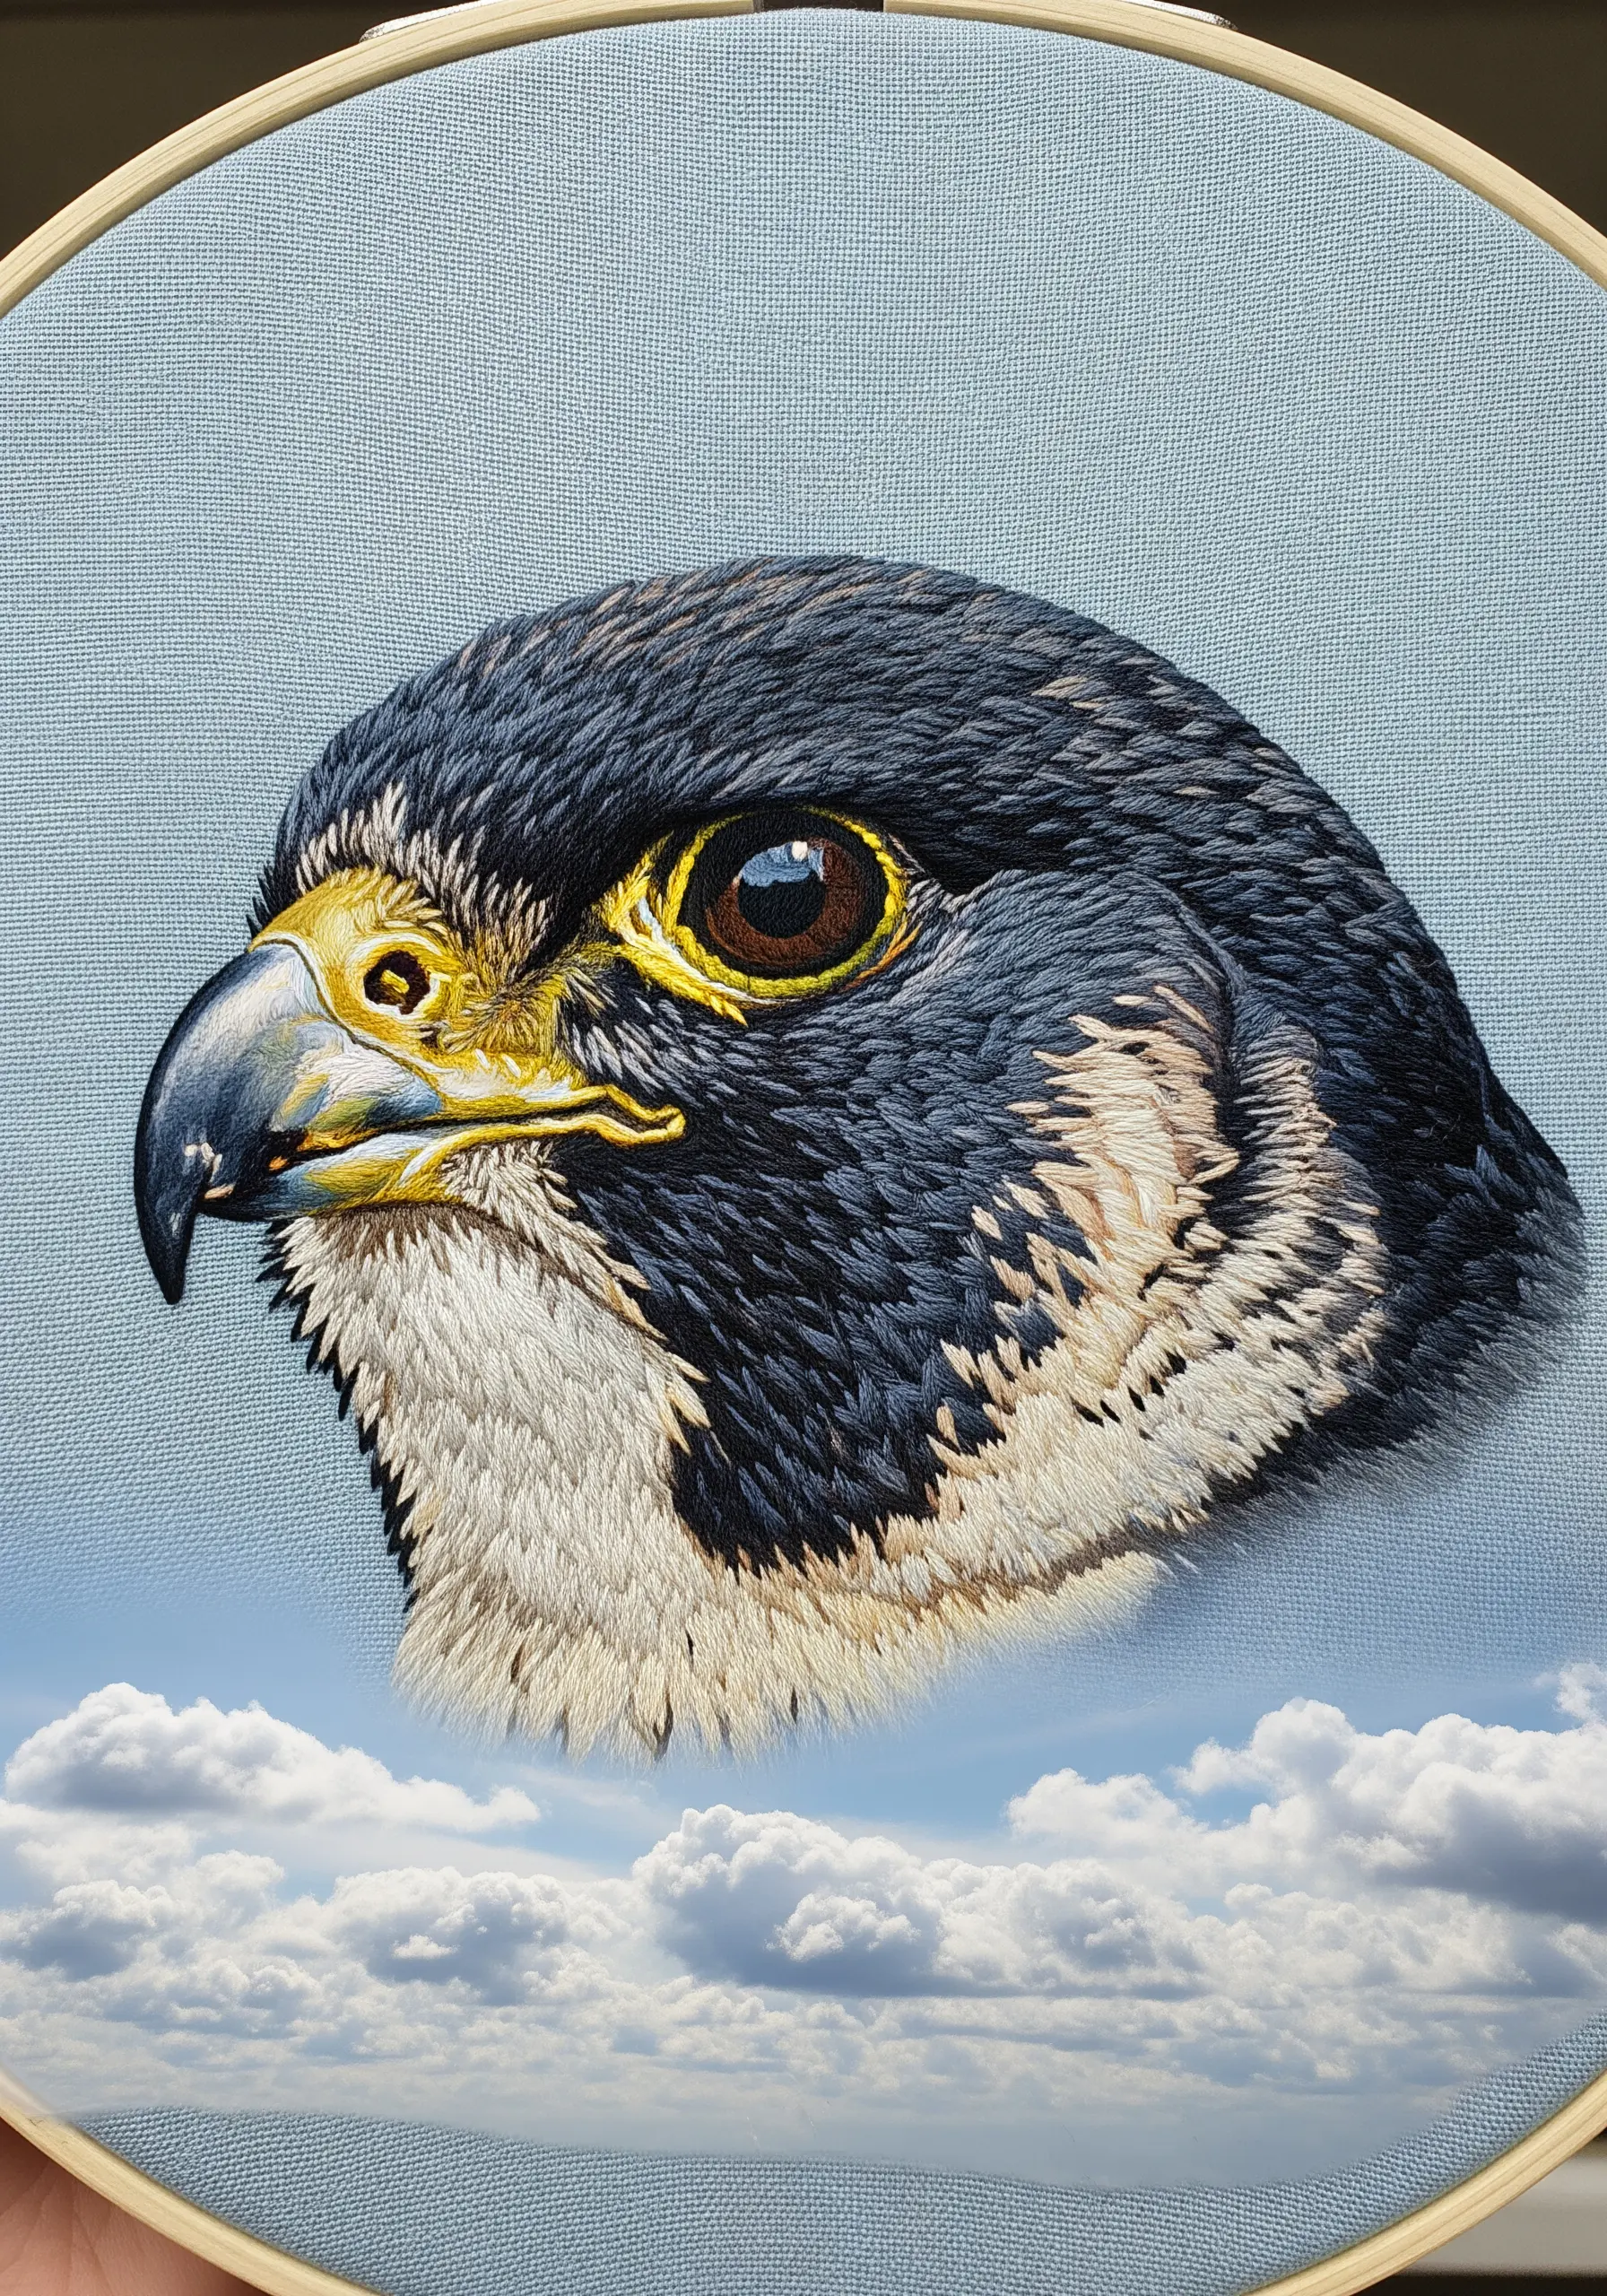
To make your bird the undisputed star, stitch it over a soft-focus, atmospheric background.
You can achieve this by printing a photograph of clouds or a landscape directly onto your fabric before you begin stitching.
The hyper-realistic detail of the thread-painted falcon against the diffuse, photographic background creates a stunning contrast in textures and depth of field.
This mixed-media approach results in a piece that feels both artistic and incredibly lifelike.
32. Achieve a Plump, Rounded Form with Curved Stitches

To give a small, round bird like a robin a plump and three-dimensional feel, every stitch must follow its curves.
Don’t use straight lines. Instead, fill the body with long and short stitches that gently curve around its form, as if you are wrapping the thread around a ball.
This directional work is crucial for the orange breast, where the curved stitches and subtle blending create a soft, full shape that looks ready to hop off the fabric.
33. Use Short, Blocky Stitches for an Abstract, Scaled Effect
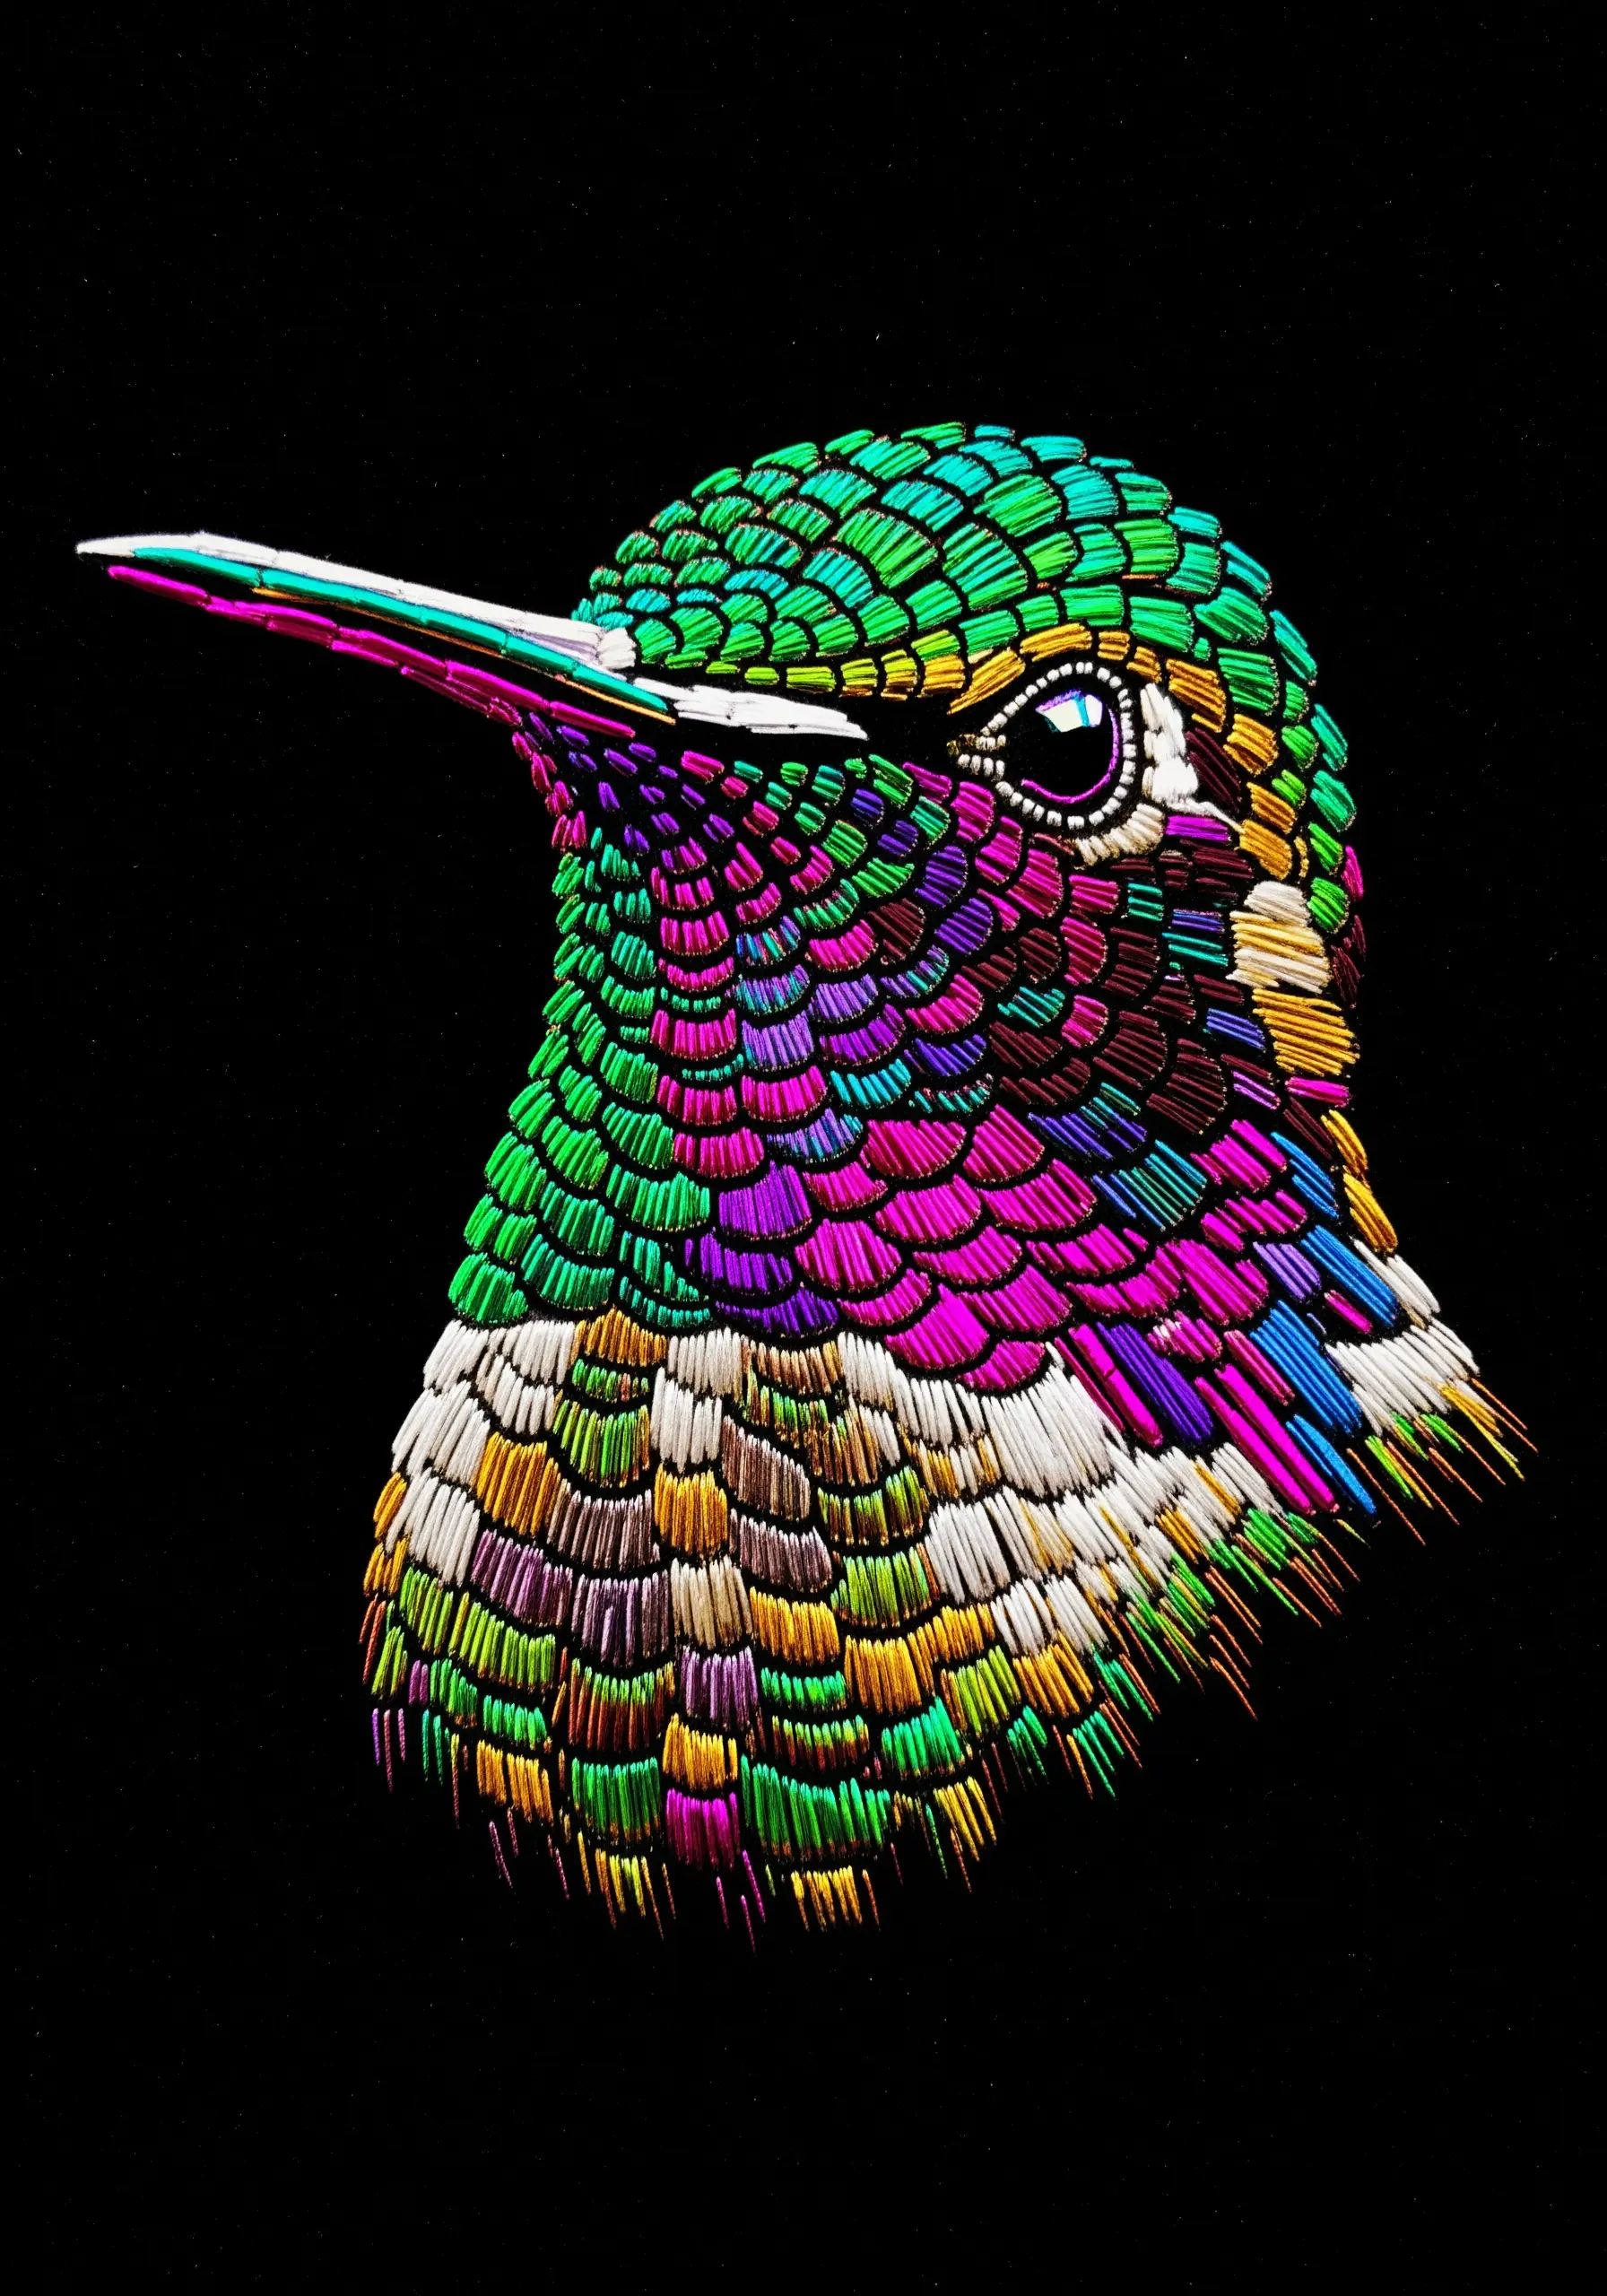
For a more stylized, graphic interpretation of feathers, move away from thread painting.
Instead, use short, straight satin stitches, treating each one like a tiny, individual tile or scale.
Arrange these stitch blocks in neat, overlapping rows, using bold, contrasting colors.
This technique creates a highly textured, almost mosaic-like surface that captures the iridescence of a hummingbird in a completely modern and abstract way.
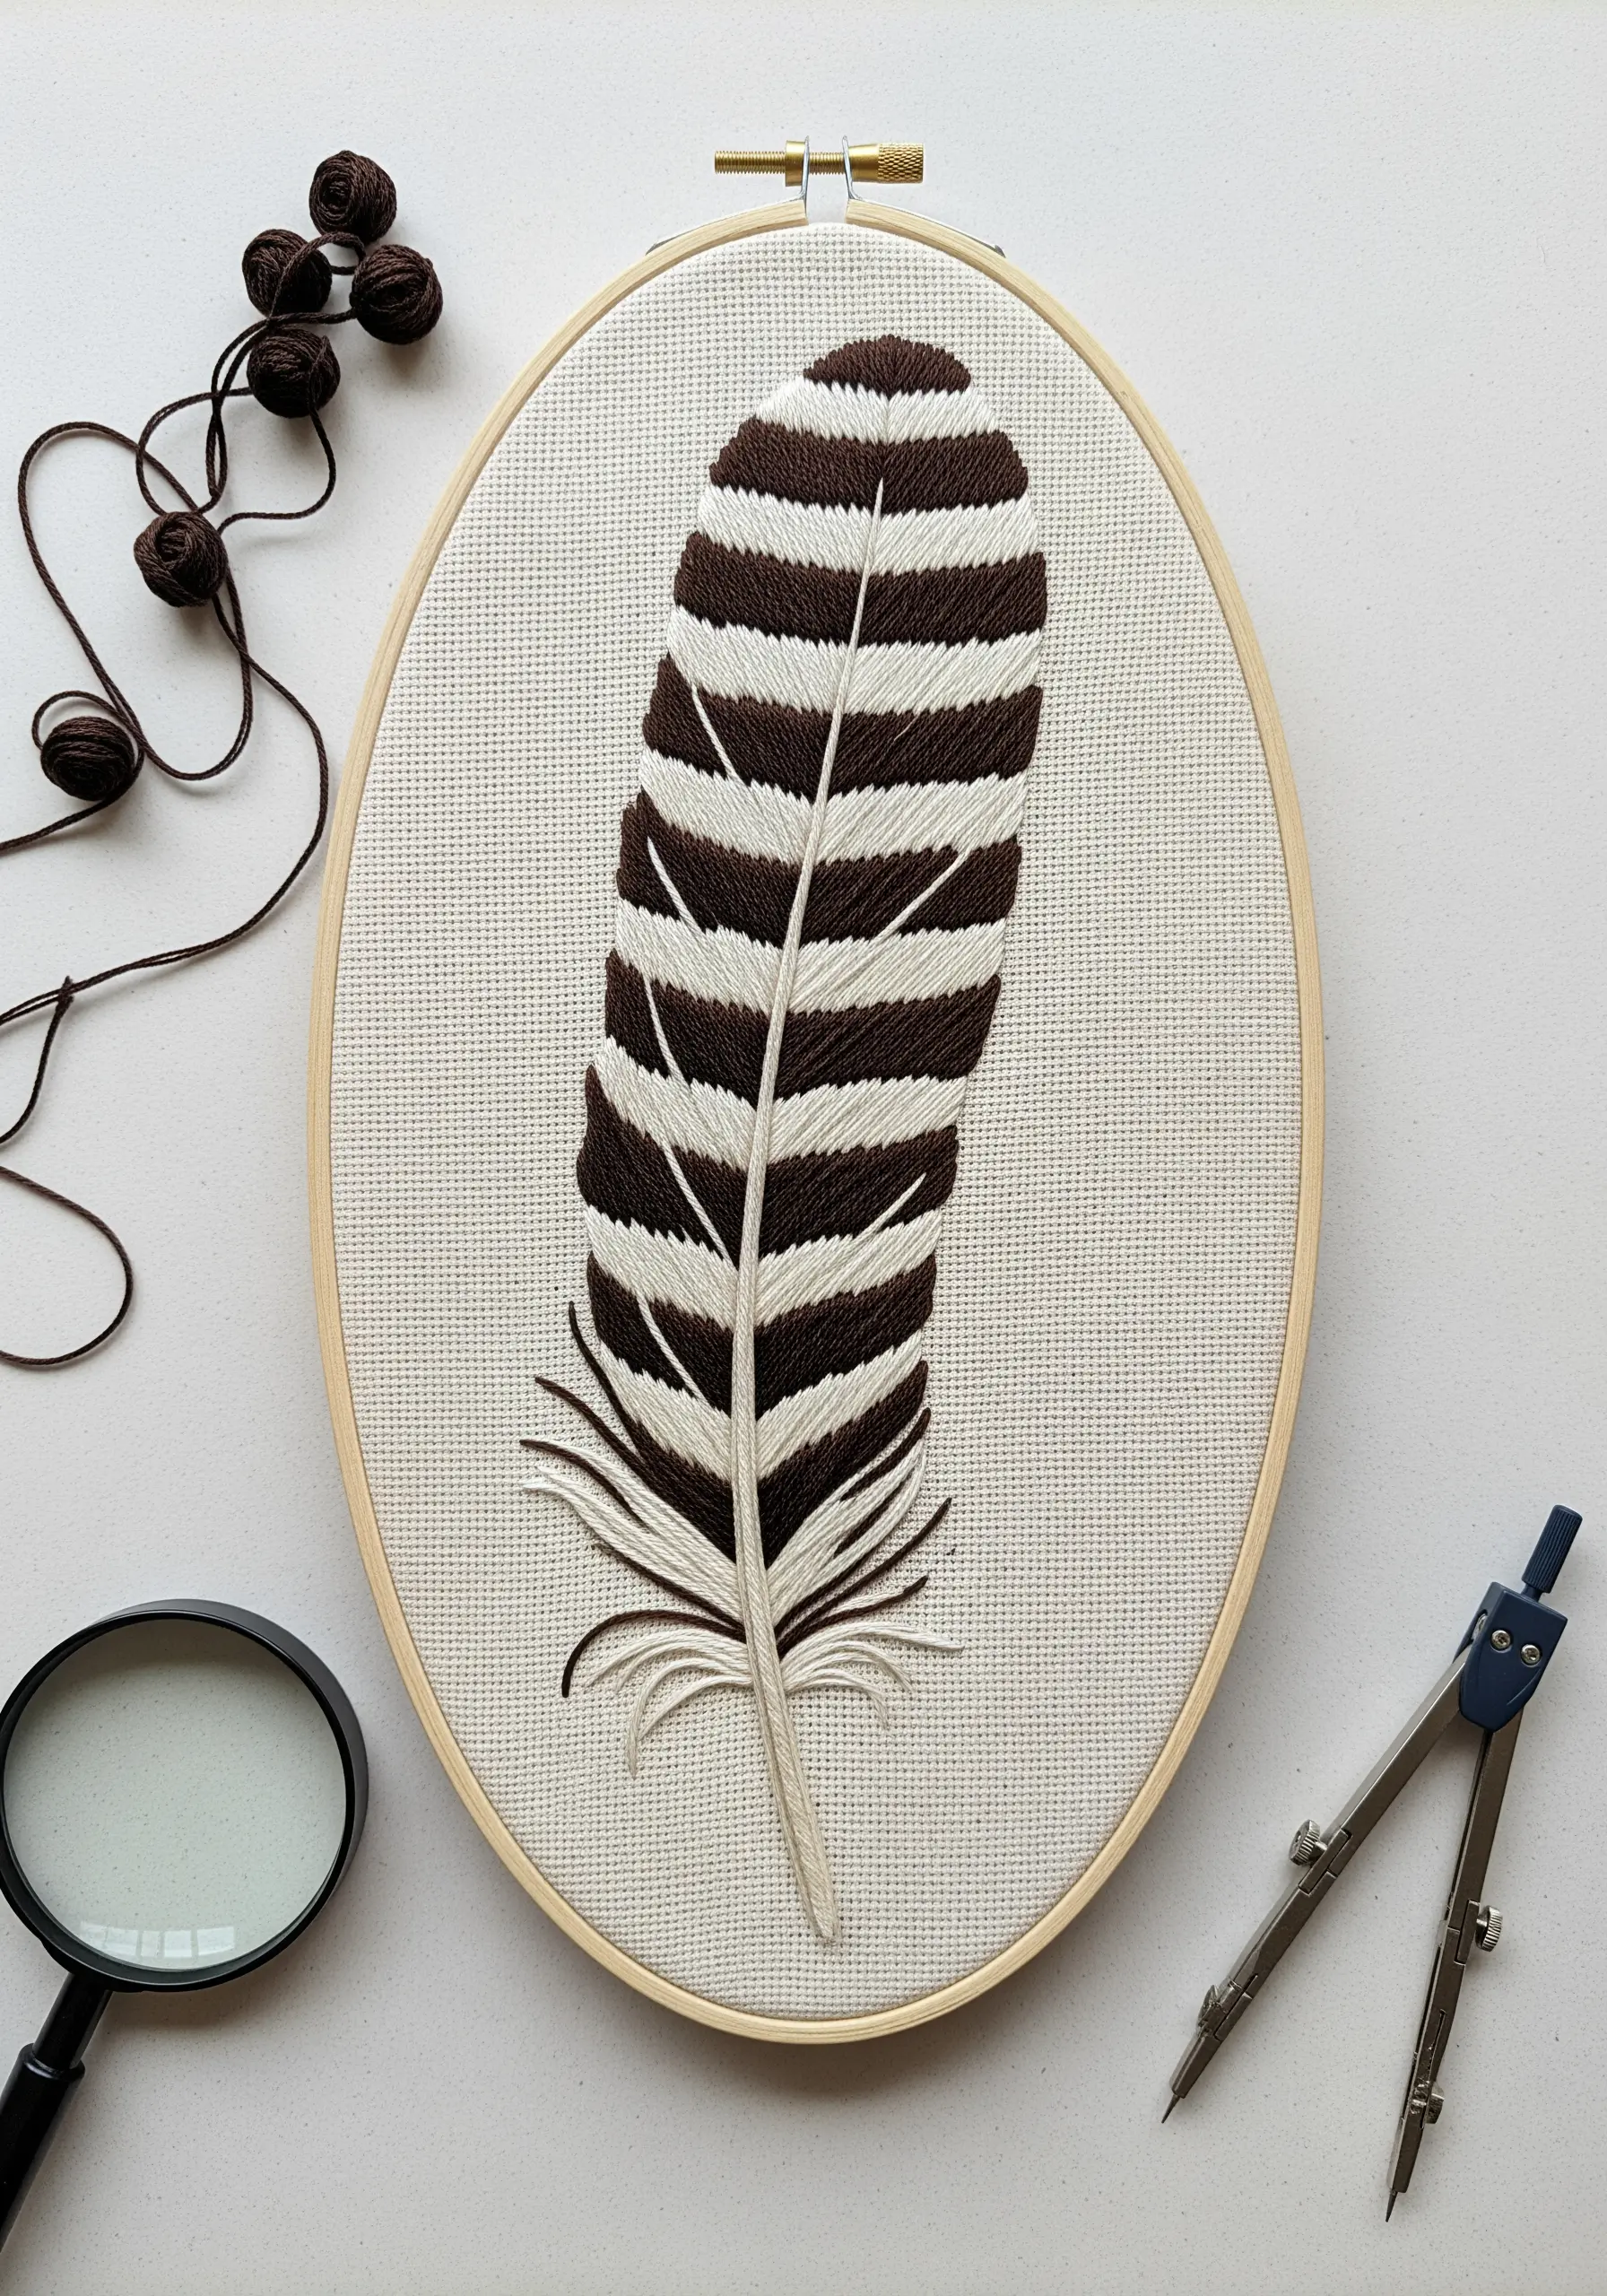
34. Replicate a Pattern Directly from a Real Feather

For ultimate realism, work directly from a reference.
Place a real feather next to your hoop and use it as a guide for color, pattern, and proportion.
Pay close attention to the subtle imperfections—the way the bars are not perfectly uniform, or the soft, downy texture at the base.
Replicating these small details is what will elevate your work from a representation to a truly convincing textile replica.
This method is one of the best nature texture embroidery projects that feel amazingly real.
35. Create a Crown with Radiating Straight Stitches
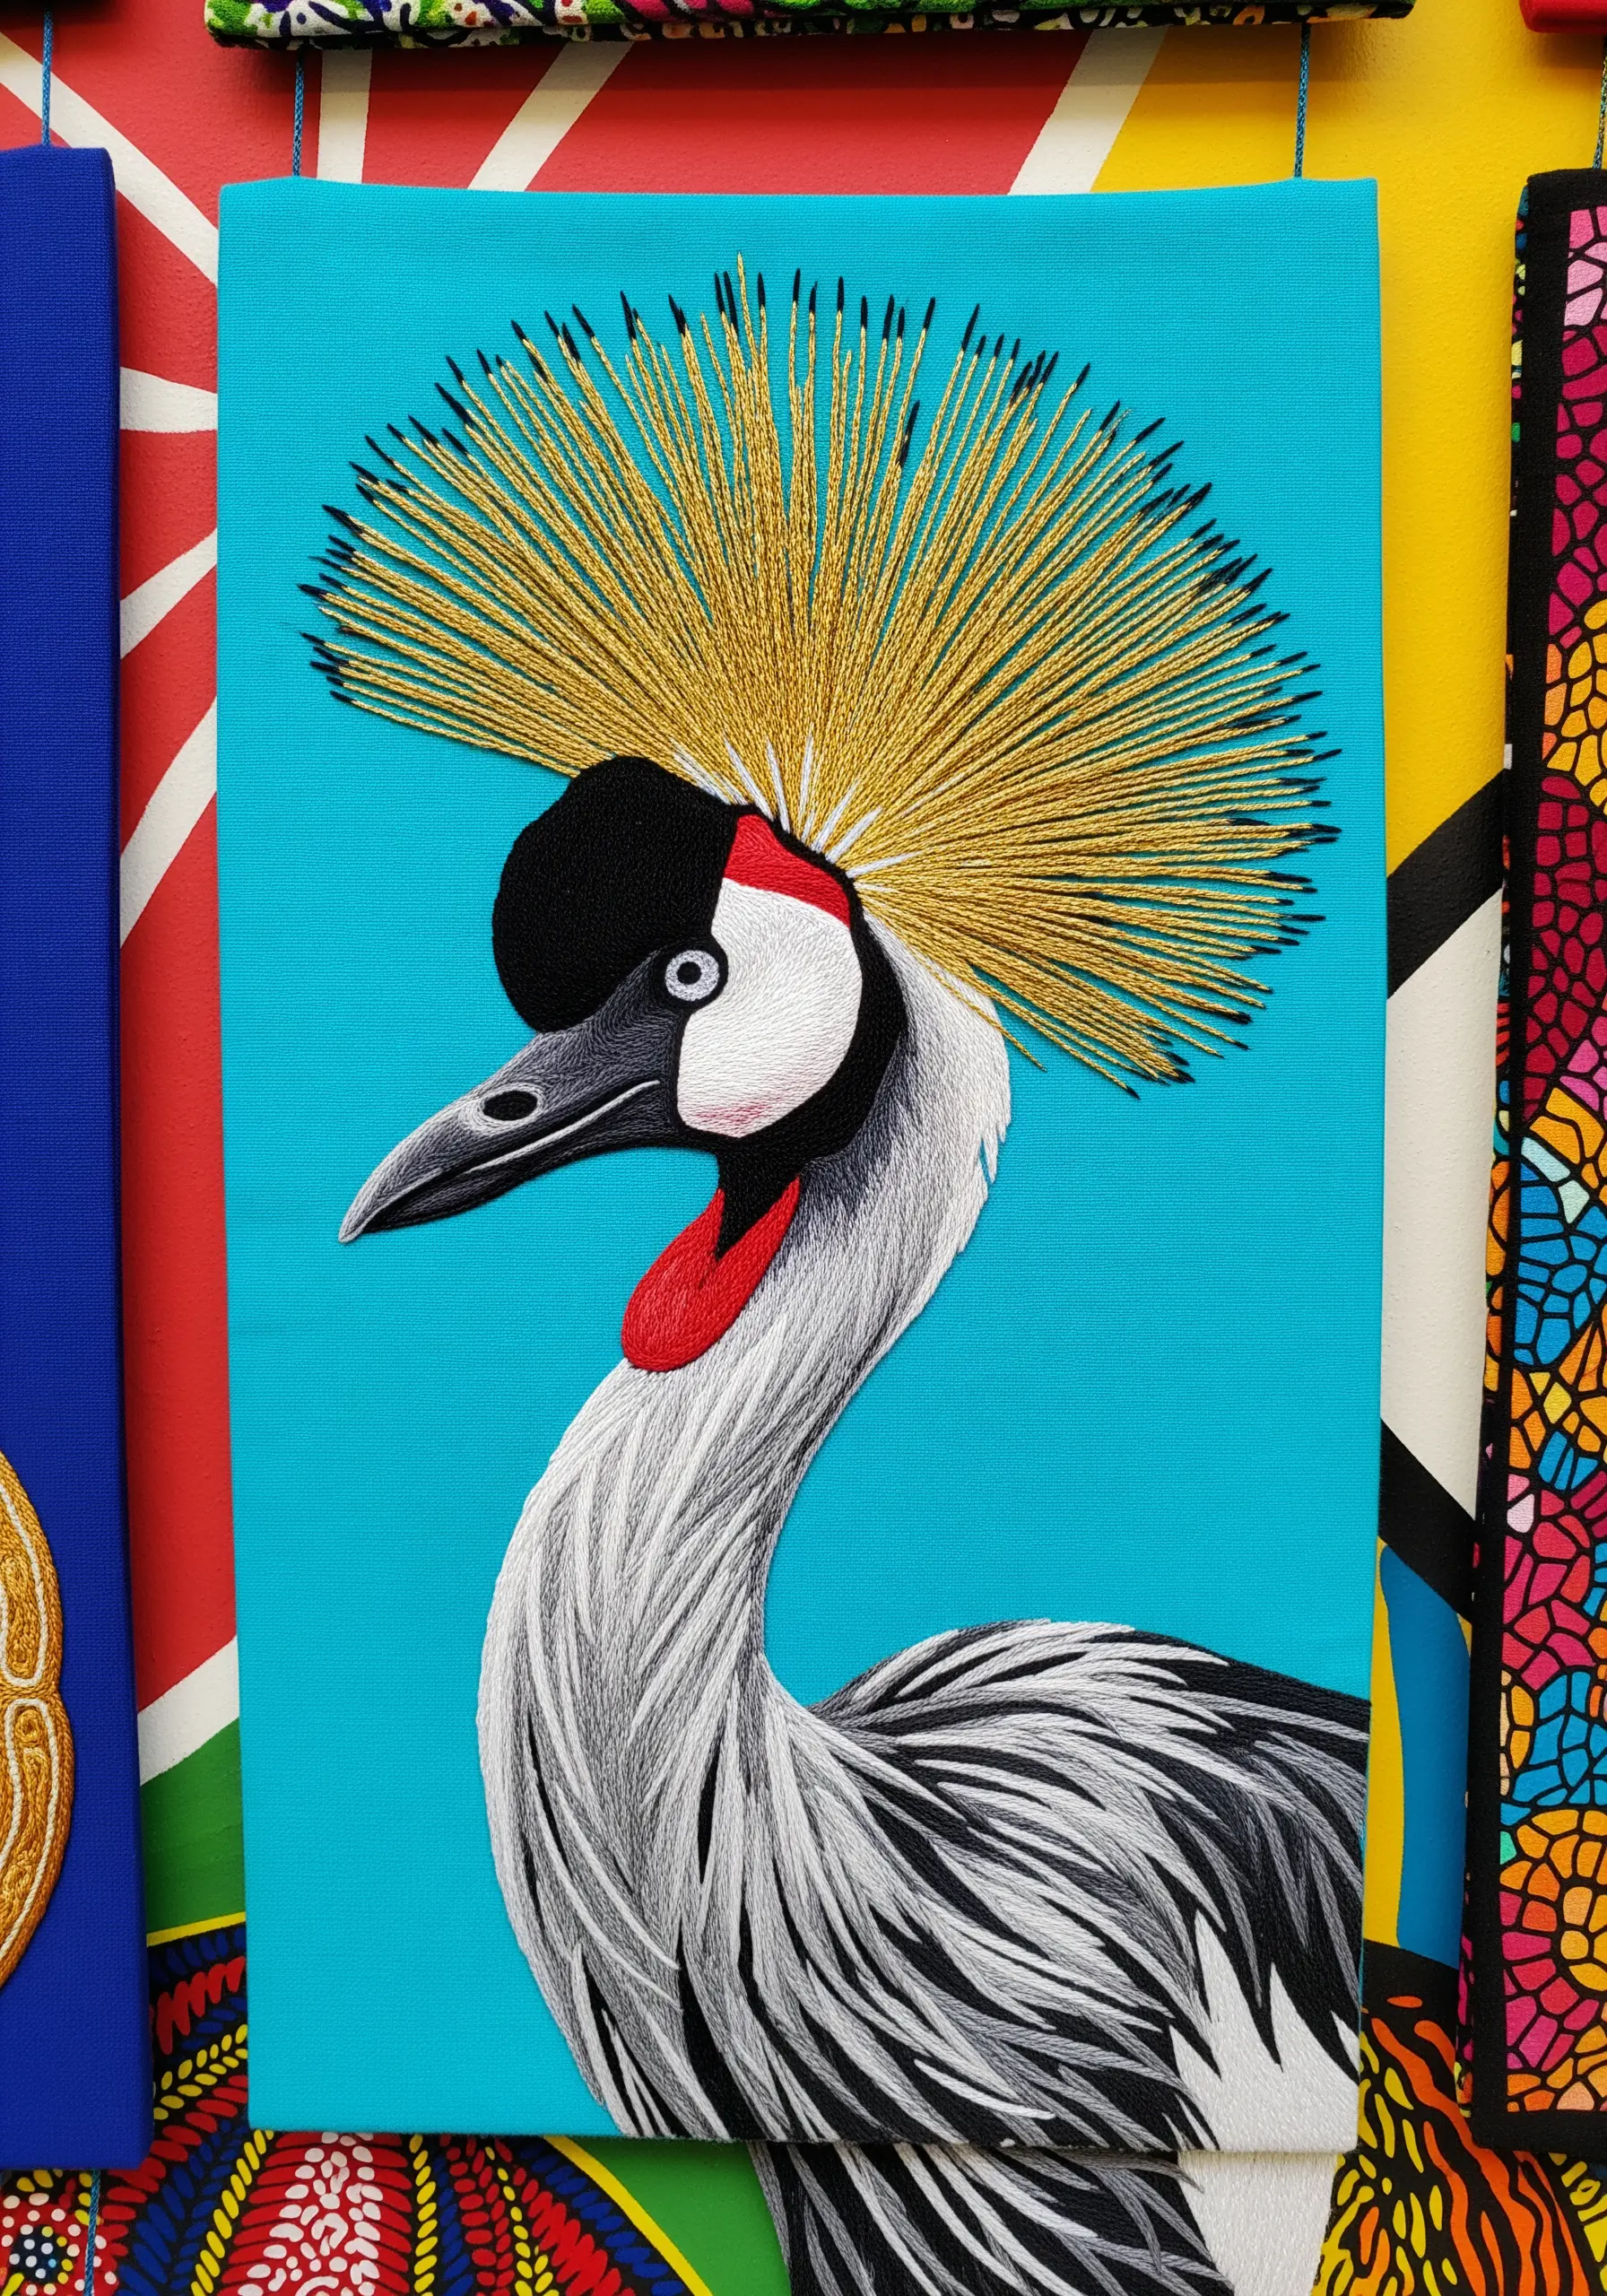
The magnificent crown of a grey crowned crane can be recreated with simple straight stitches.
Use a lustrous gold metallic or silk thread for maximum impact.
Start all your stitches from a single point at the base of the crown and radiate them outwards, varying their lengths to create a natural, explosive shape.
The key is the density; pack the stitches tightly at the base and allow them to spread out at the tips for a full, dramatic effect.
36. Capture a Soft Gaze with Blended, Directional Feathers
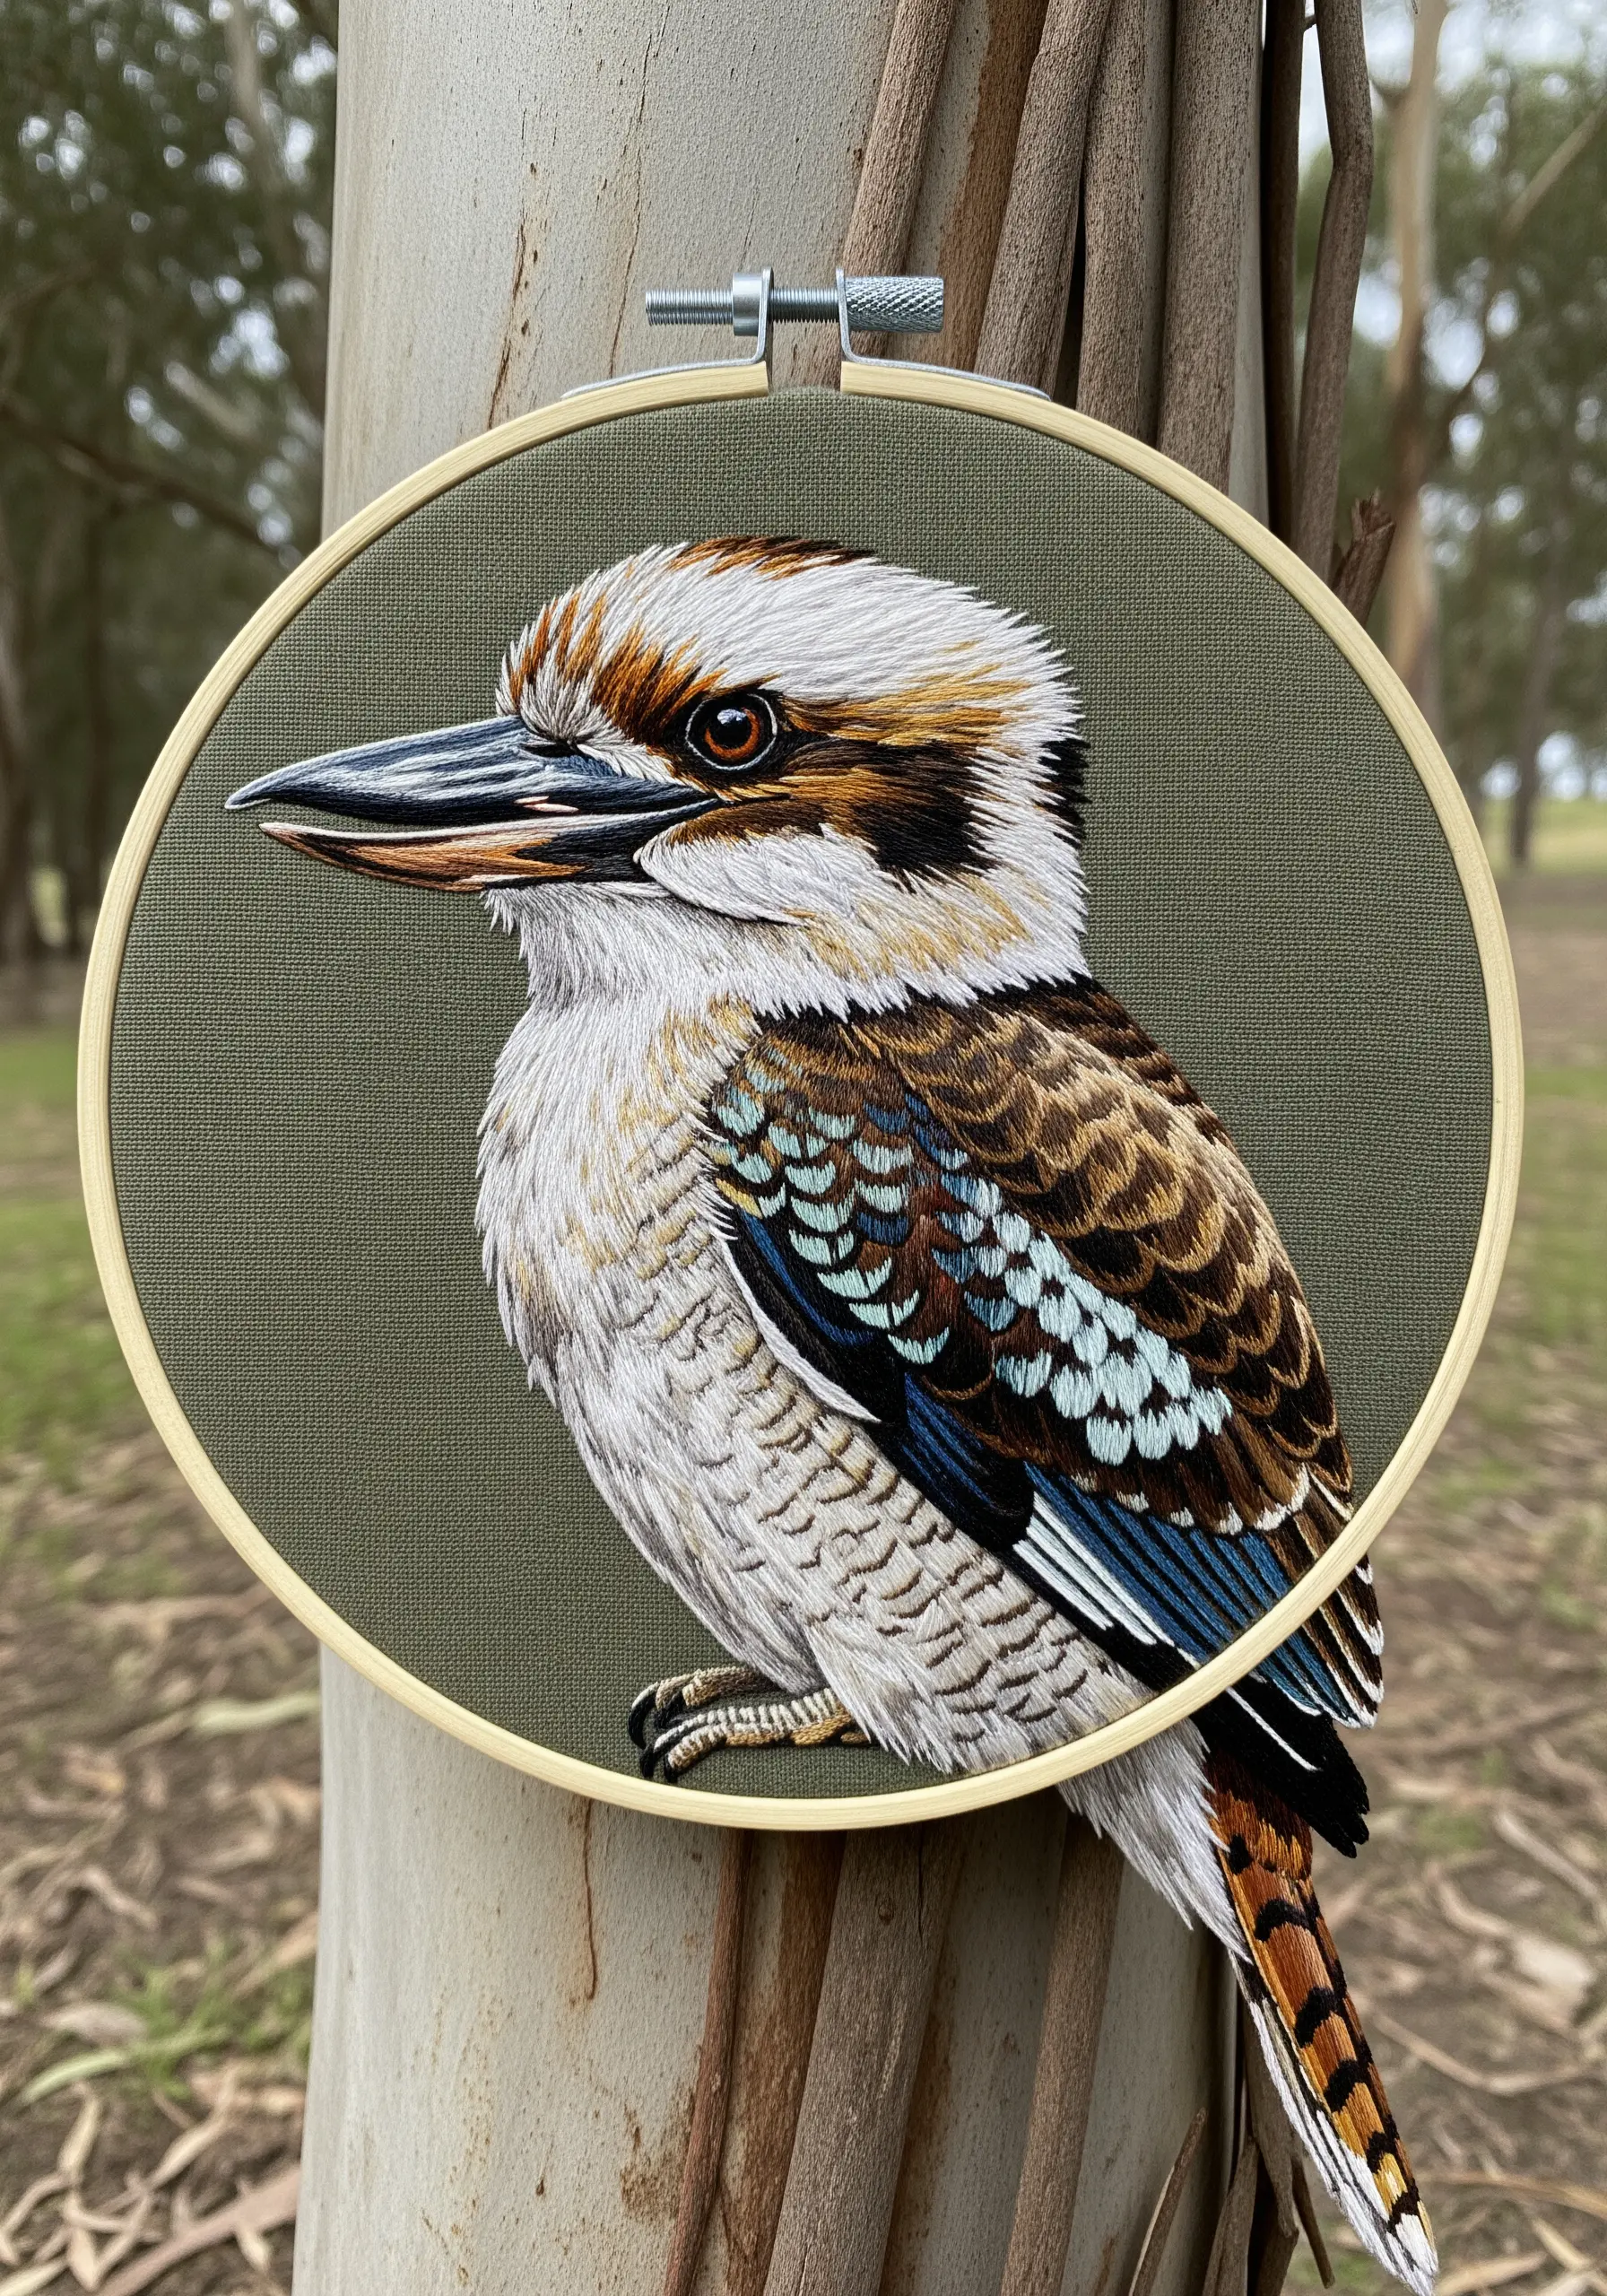
The character of a kookaburra is in its soft, intelligent gaze.
To capture this, the feathers around the eye must be stitched with exceptional care.
Use a single strand of floss and tiny long and short stitches that radiate away from the eye.
Seamlessly blend shades of white, brown, and grey to create the soft, natural markings.
The precision of these tiny directional stitches is what brings the expression to life, making the bird feel present and aware.


