

A simple tote bag is a canvas for connection. With just a needle and thread, you can transform it from a practical object into a deeply personal anniversary or Valentine’s gift—a tangible reminder of a shared story, a special date, or a feeling you both know.
But how do you ensure your stitches feel intentional and your design looks polished? It comes down to small, thoughtful choices in technique. It’s about selecting the right stitch to create a specific texture, knowing when to use a single strand for delicacy or a thick cord for drama, and understanding how color and composition can turn a simple idea into a cherished keepsake.
Here, you’ll find ideas that move beyond basic patterns. We’ll explore how to add dimension with ribbon, create shimmer with metallic threads, and give minimalist lines a sculptural feel. These are not just projects; they are techniques you can learn right now to elevate your work and stitch a gift that truly speaks from the heart.
1. Dimensional Floral Wreath with Ribbon Stitching
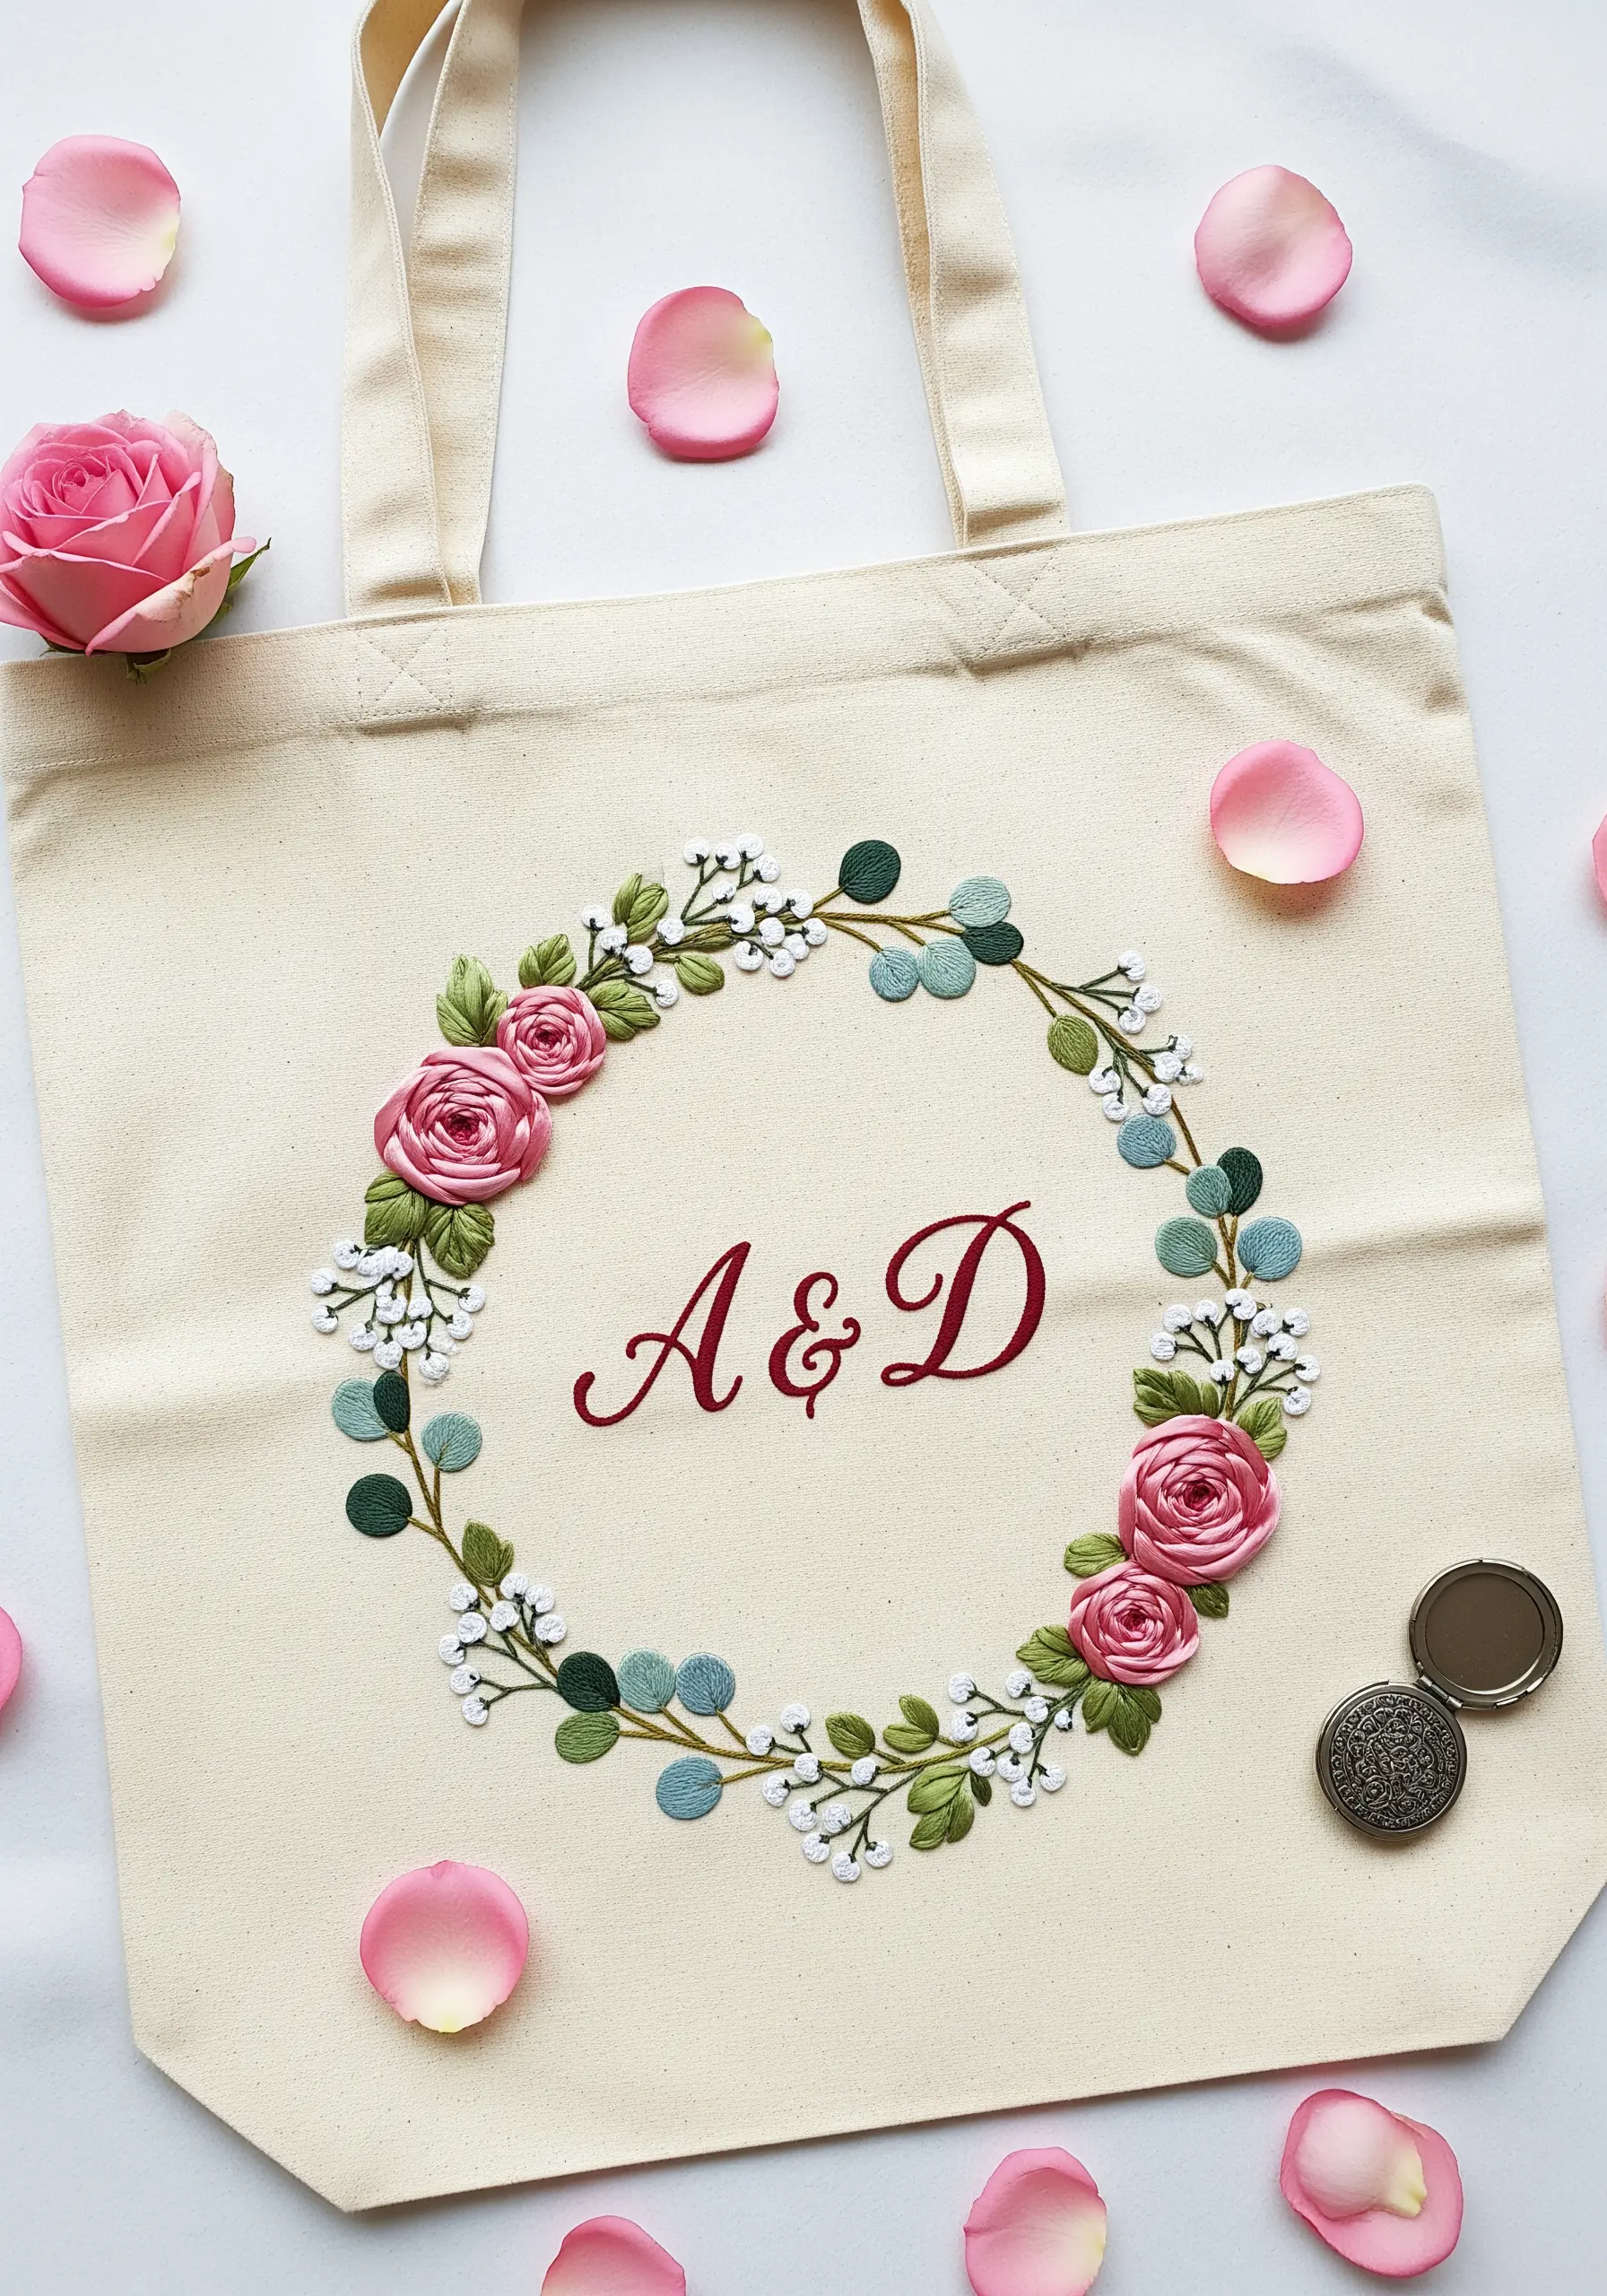
Create plush, lifelike roses by swapping floss for silk ribbon.
Use a simple twisted ribbon stitch or folded ribbon stitch to form the petals, which gives them a natural, three-dimensional volume that standard thread cannot replicate.
Contrast the soft ribbon with crisp, flat-stitched eucalyptus leaves in a muted green, using a fishbone stitch for a defined central vein.
For the delicate white filler flowers, use colonial knots instead of French knots—they are sturdier and create a tighter, more uniform cluster, mimicking baby’s breath.
The initials, stitched in a rich burgundy, anchor the design with classic elegance; a padded satin stitch will give them a subtle lift.
2. Celestial Velvet Constellation
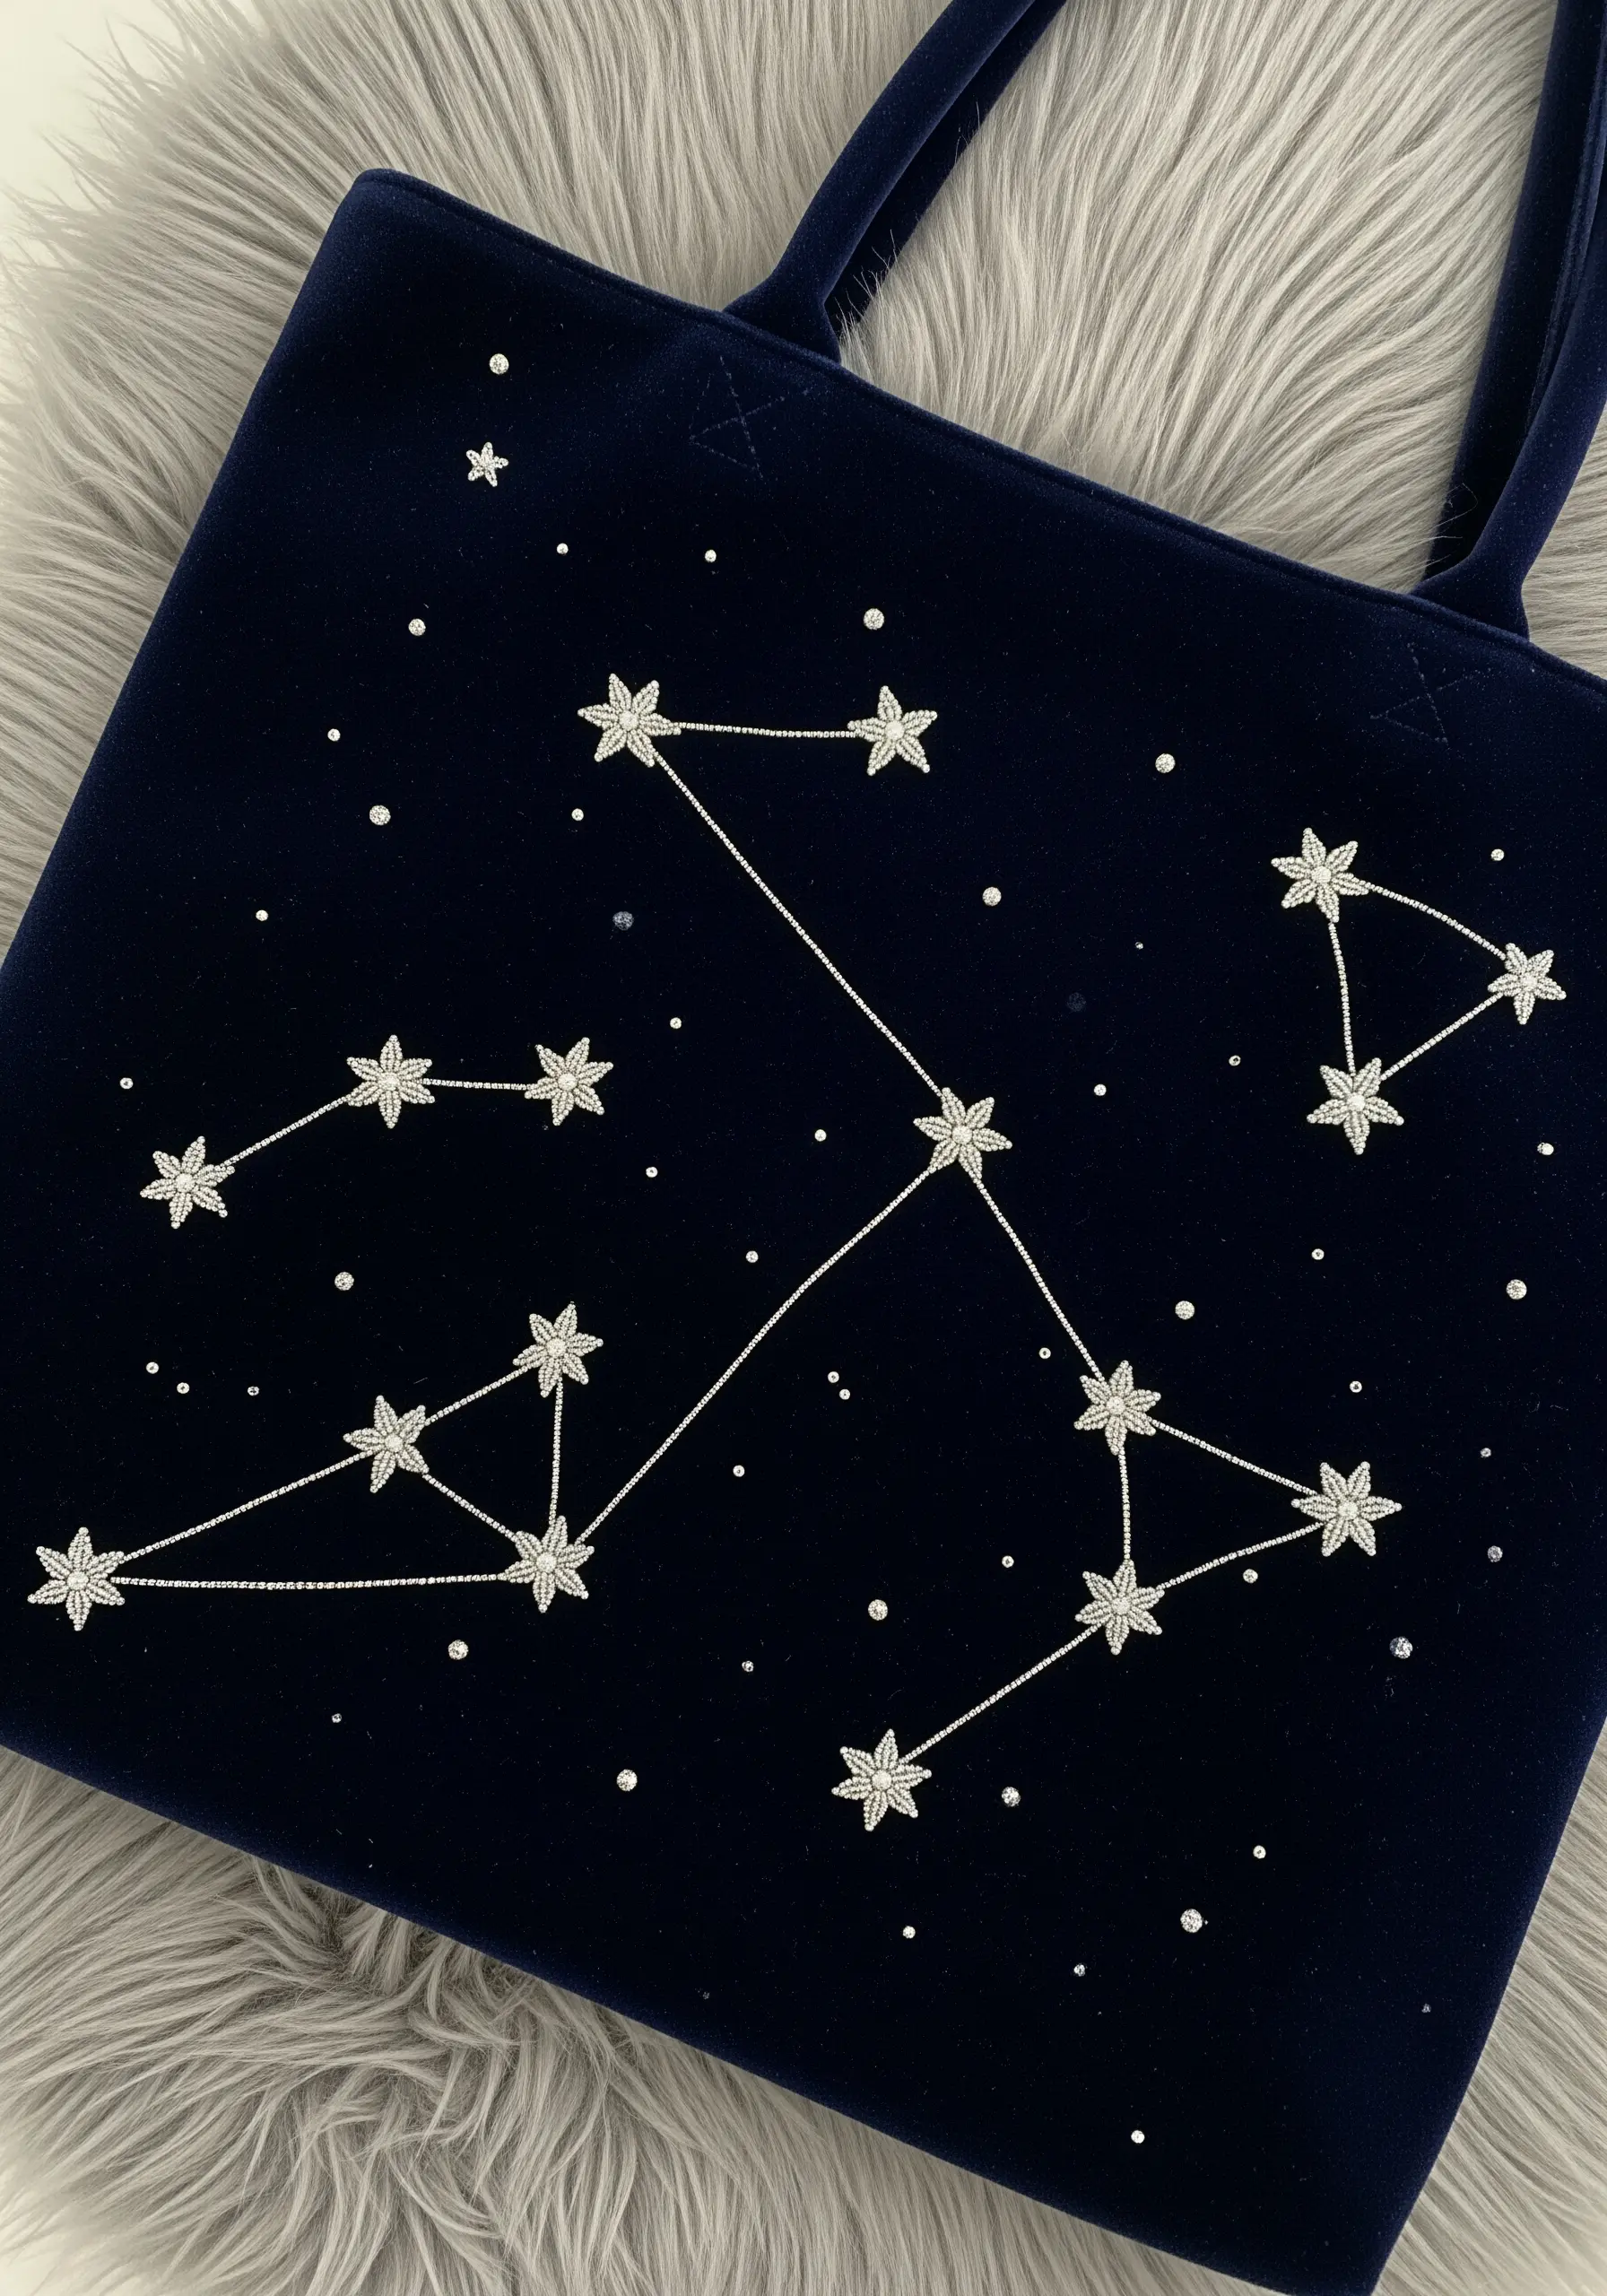
To make your constellations shimmer, choose a fine metallic thread and work on a dark, plush fabric like velvet for maximum contrast.
Before you begin, back your velvet with a lightweight stabilizer to prevent the fabric from stretching and puckering under the tension of the stitches.
Form each star using five straight stitches radiating from a central point, creating a clean, graphic asterisk shape.
For the connecting lines, couch a single strand of metallic thread by tacking it down with tiny, invisible stitches—this technique ensures perfectly straight lines that a backstitch can’t guarantee.
Add tiny seed bead accents for extra sparkle that catches the light beautifully.
3. Minimalist Pinky Promise Line Art
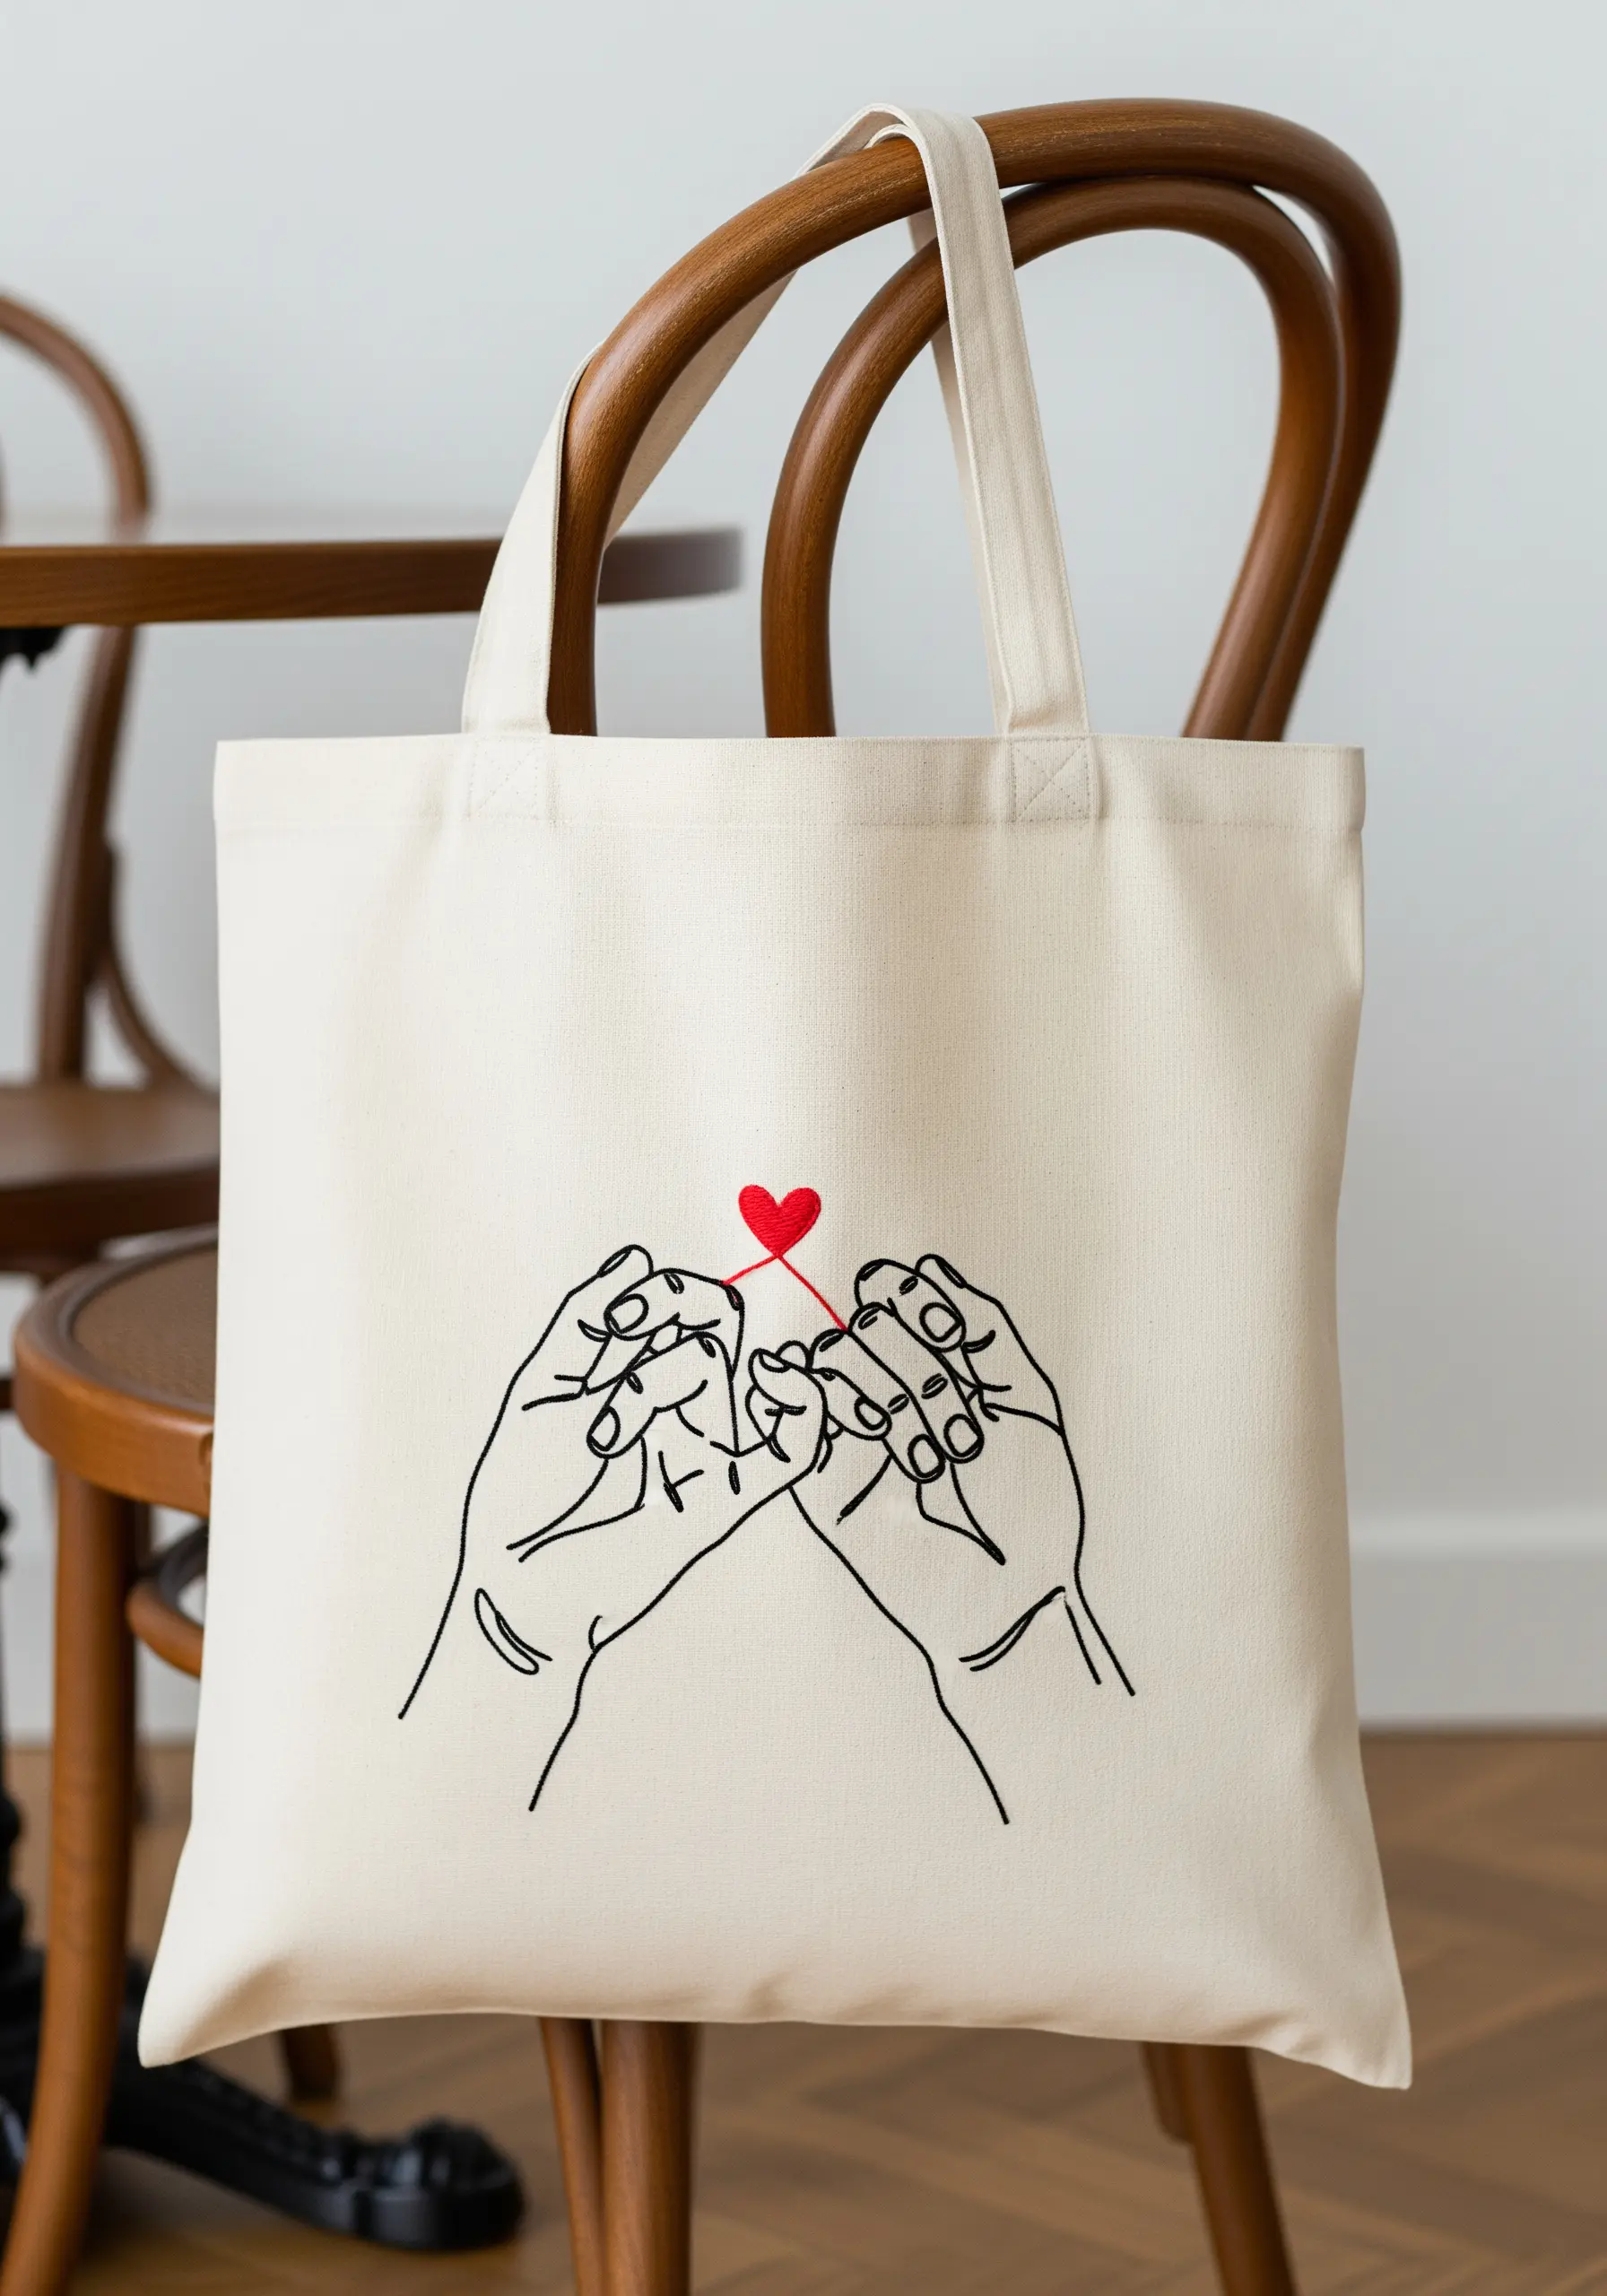
Achieve a clean, continuous line for this delicate design by using a whipped backstitch with three strands of black floss.
This technique smooths out the segmented look of a standard backstitch, resulting in a fluid, ink-like quality perfect for line drawings.
The single pop of red is the focal point; make the heart stand out by filling it with a densely packed padded satin stitch.
To create the padding, first stitch a small satin-stitched square in the center of the heart outline, then stitch your final layer over it for a raised, tactile effect.
This contrast between the flat black lines and the dimensional heart adds a sophisticated, emotional weight to the simple design.
4. Interactive Love Letter Pocket
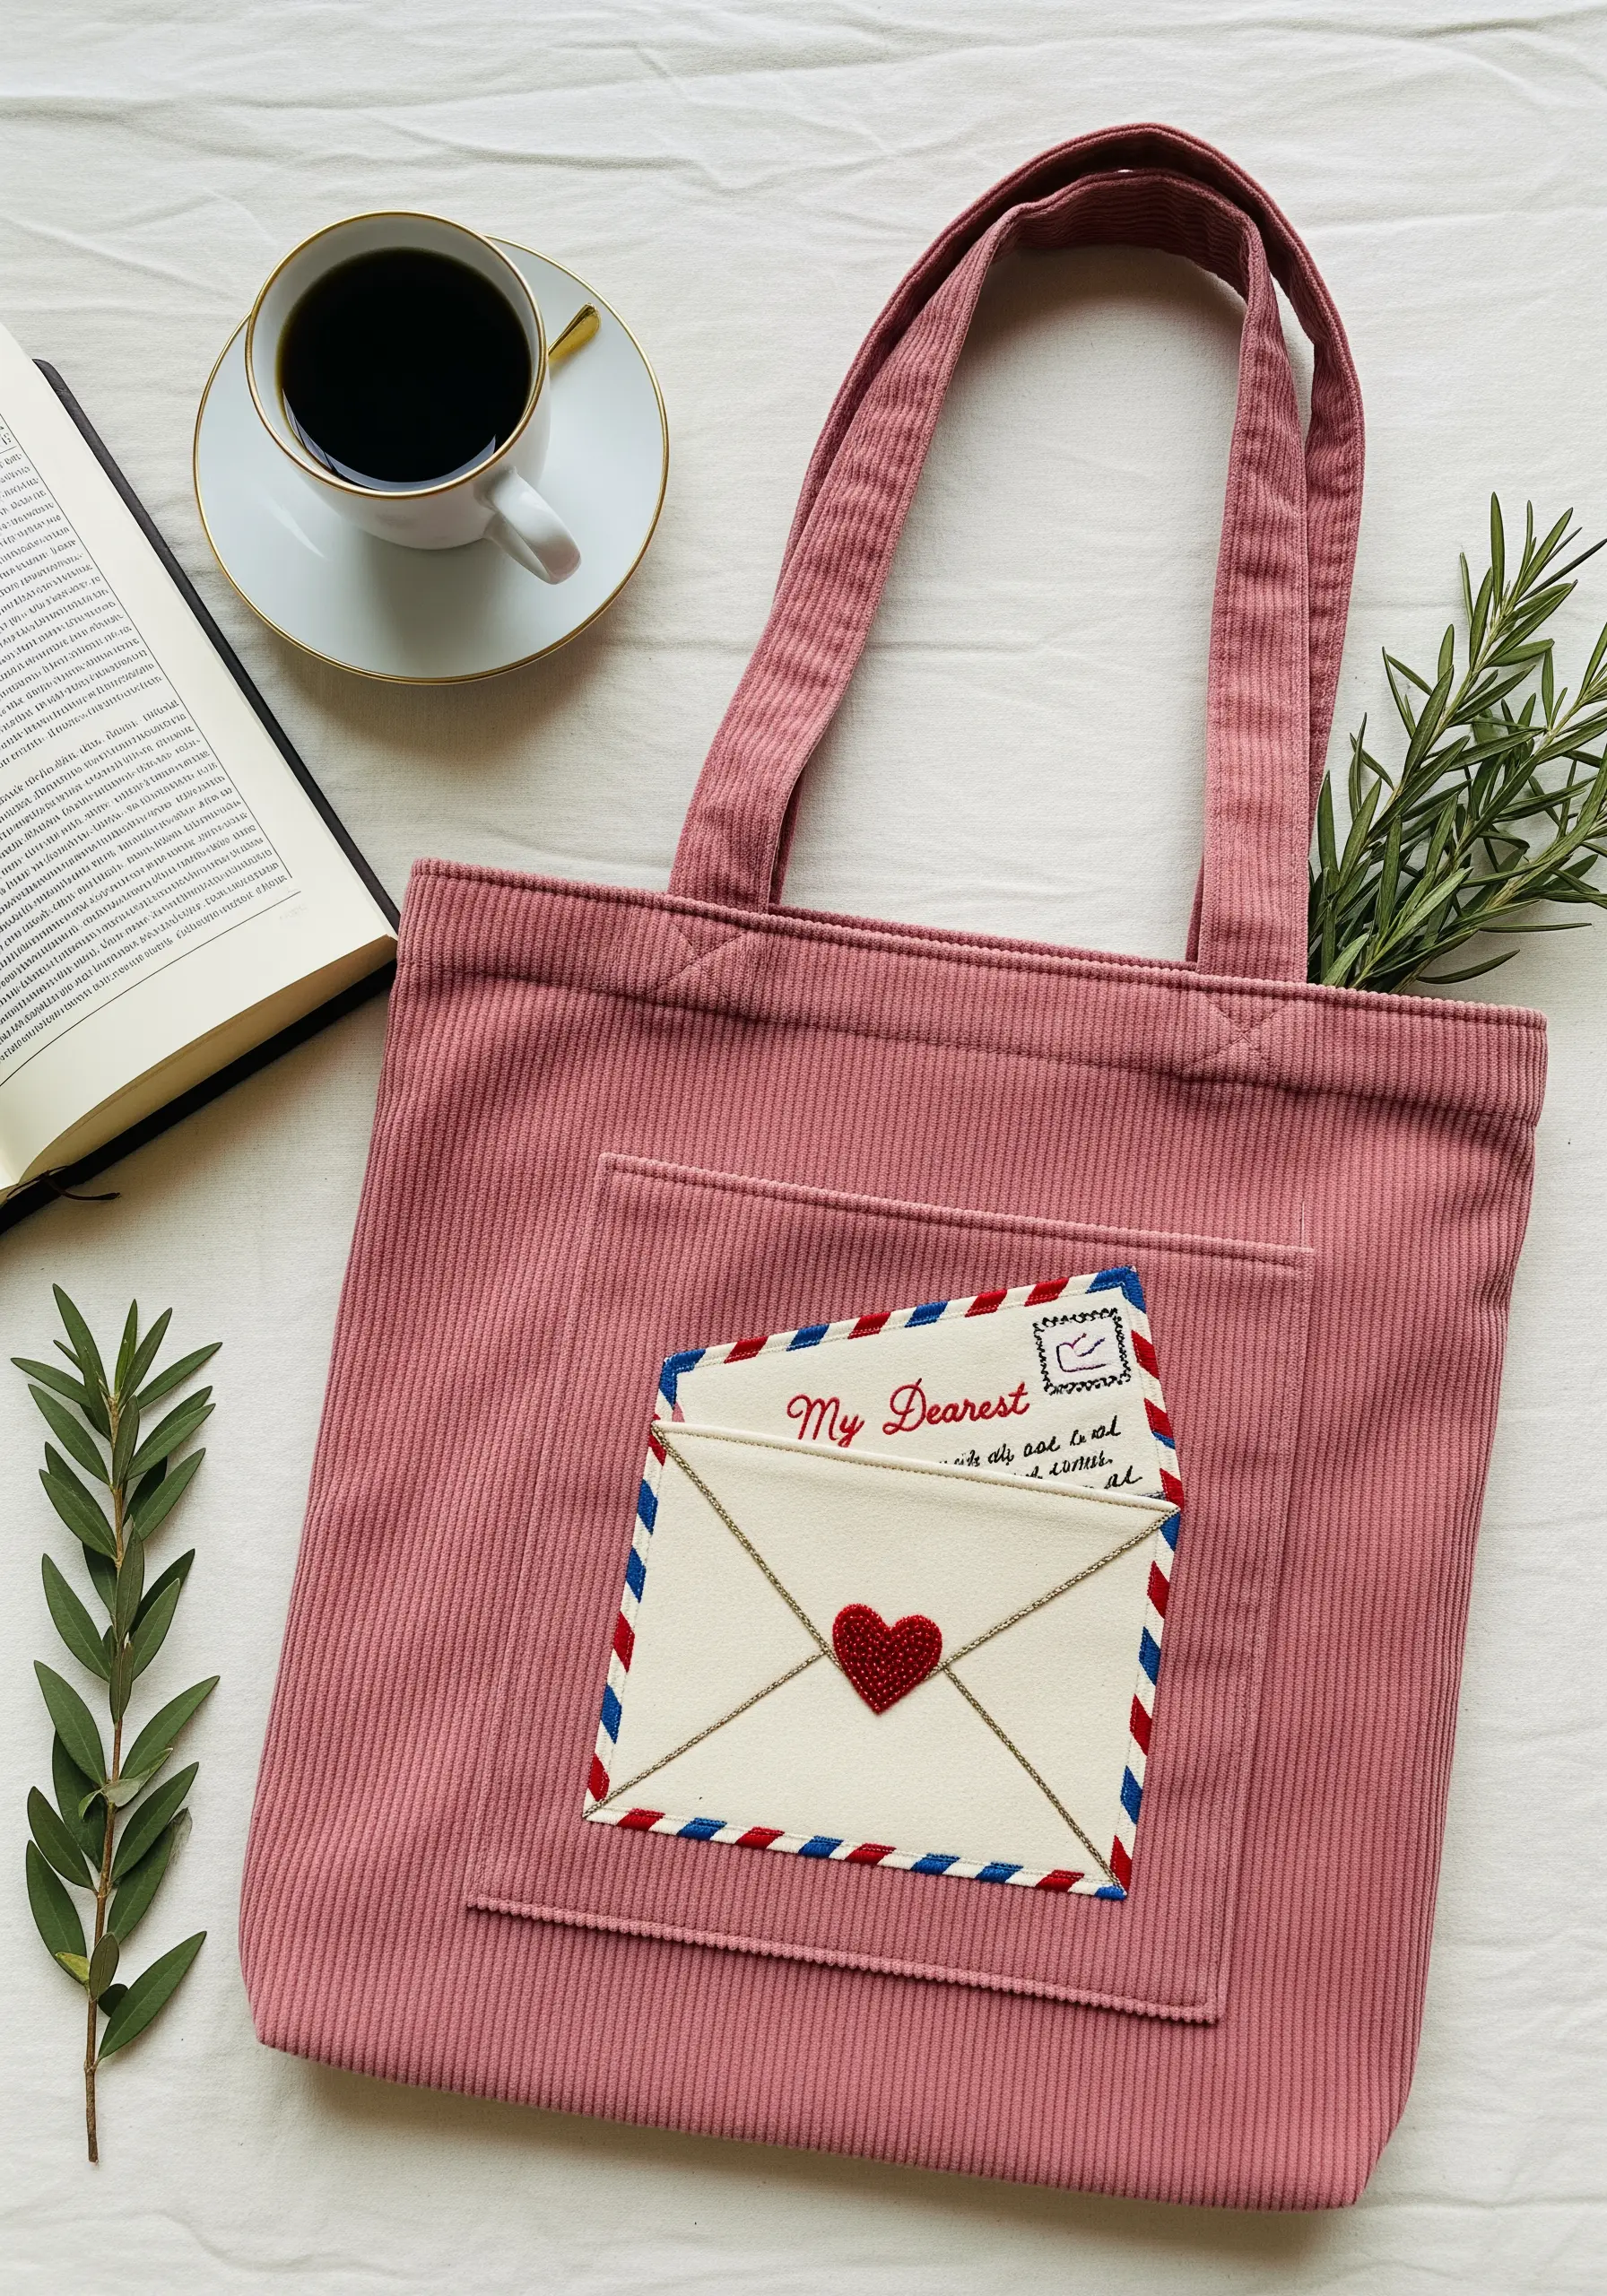
Transform a simple tote pocket into a charming, interactive element by designing it as a love letter.
Use a piece of off-white felt or canvas for the envelope appliqué, which provides a sturdy base that won’t fray.
Stitch the iconic red and blue airmail border using a simple backstitch before attaching the pocket to the bag—this is much easier than stitching it once it’s in place.
For the heart seal, create a dense, velvety texture with tightly packed French knots in a vibrant red; this makes the seal the tactile focus of the piece.
The delicate chain connecting the letter is best done with a fine metallic thread for a touch of vintage elegance.
5. Anatomical Heart in a Floral Burst
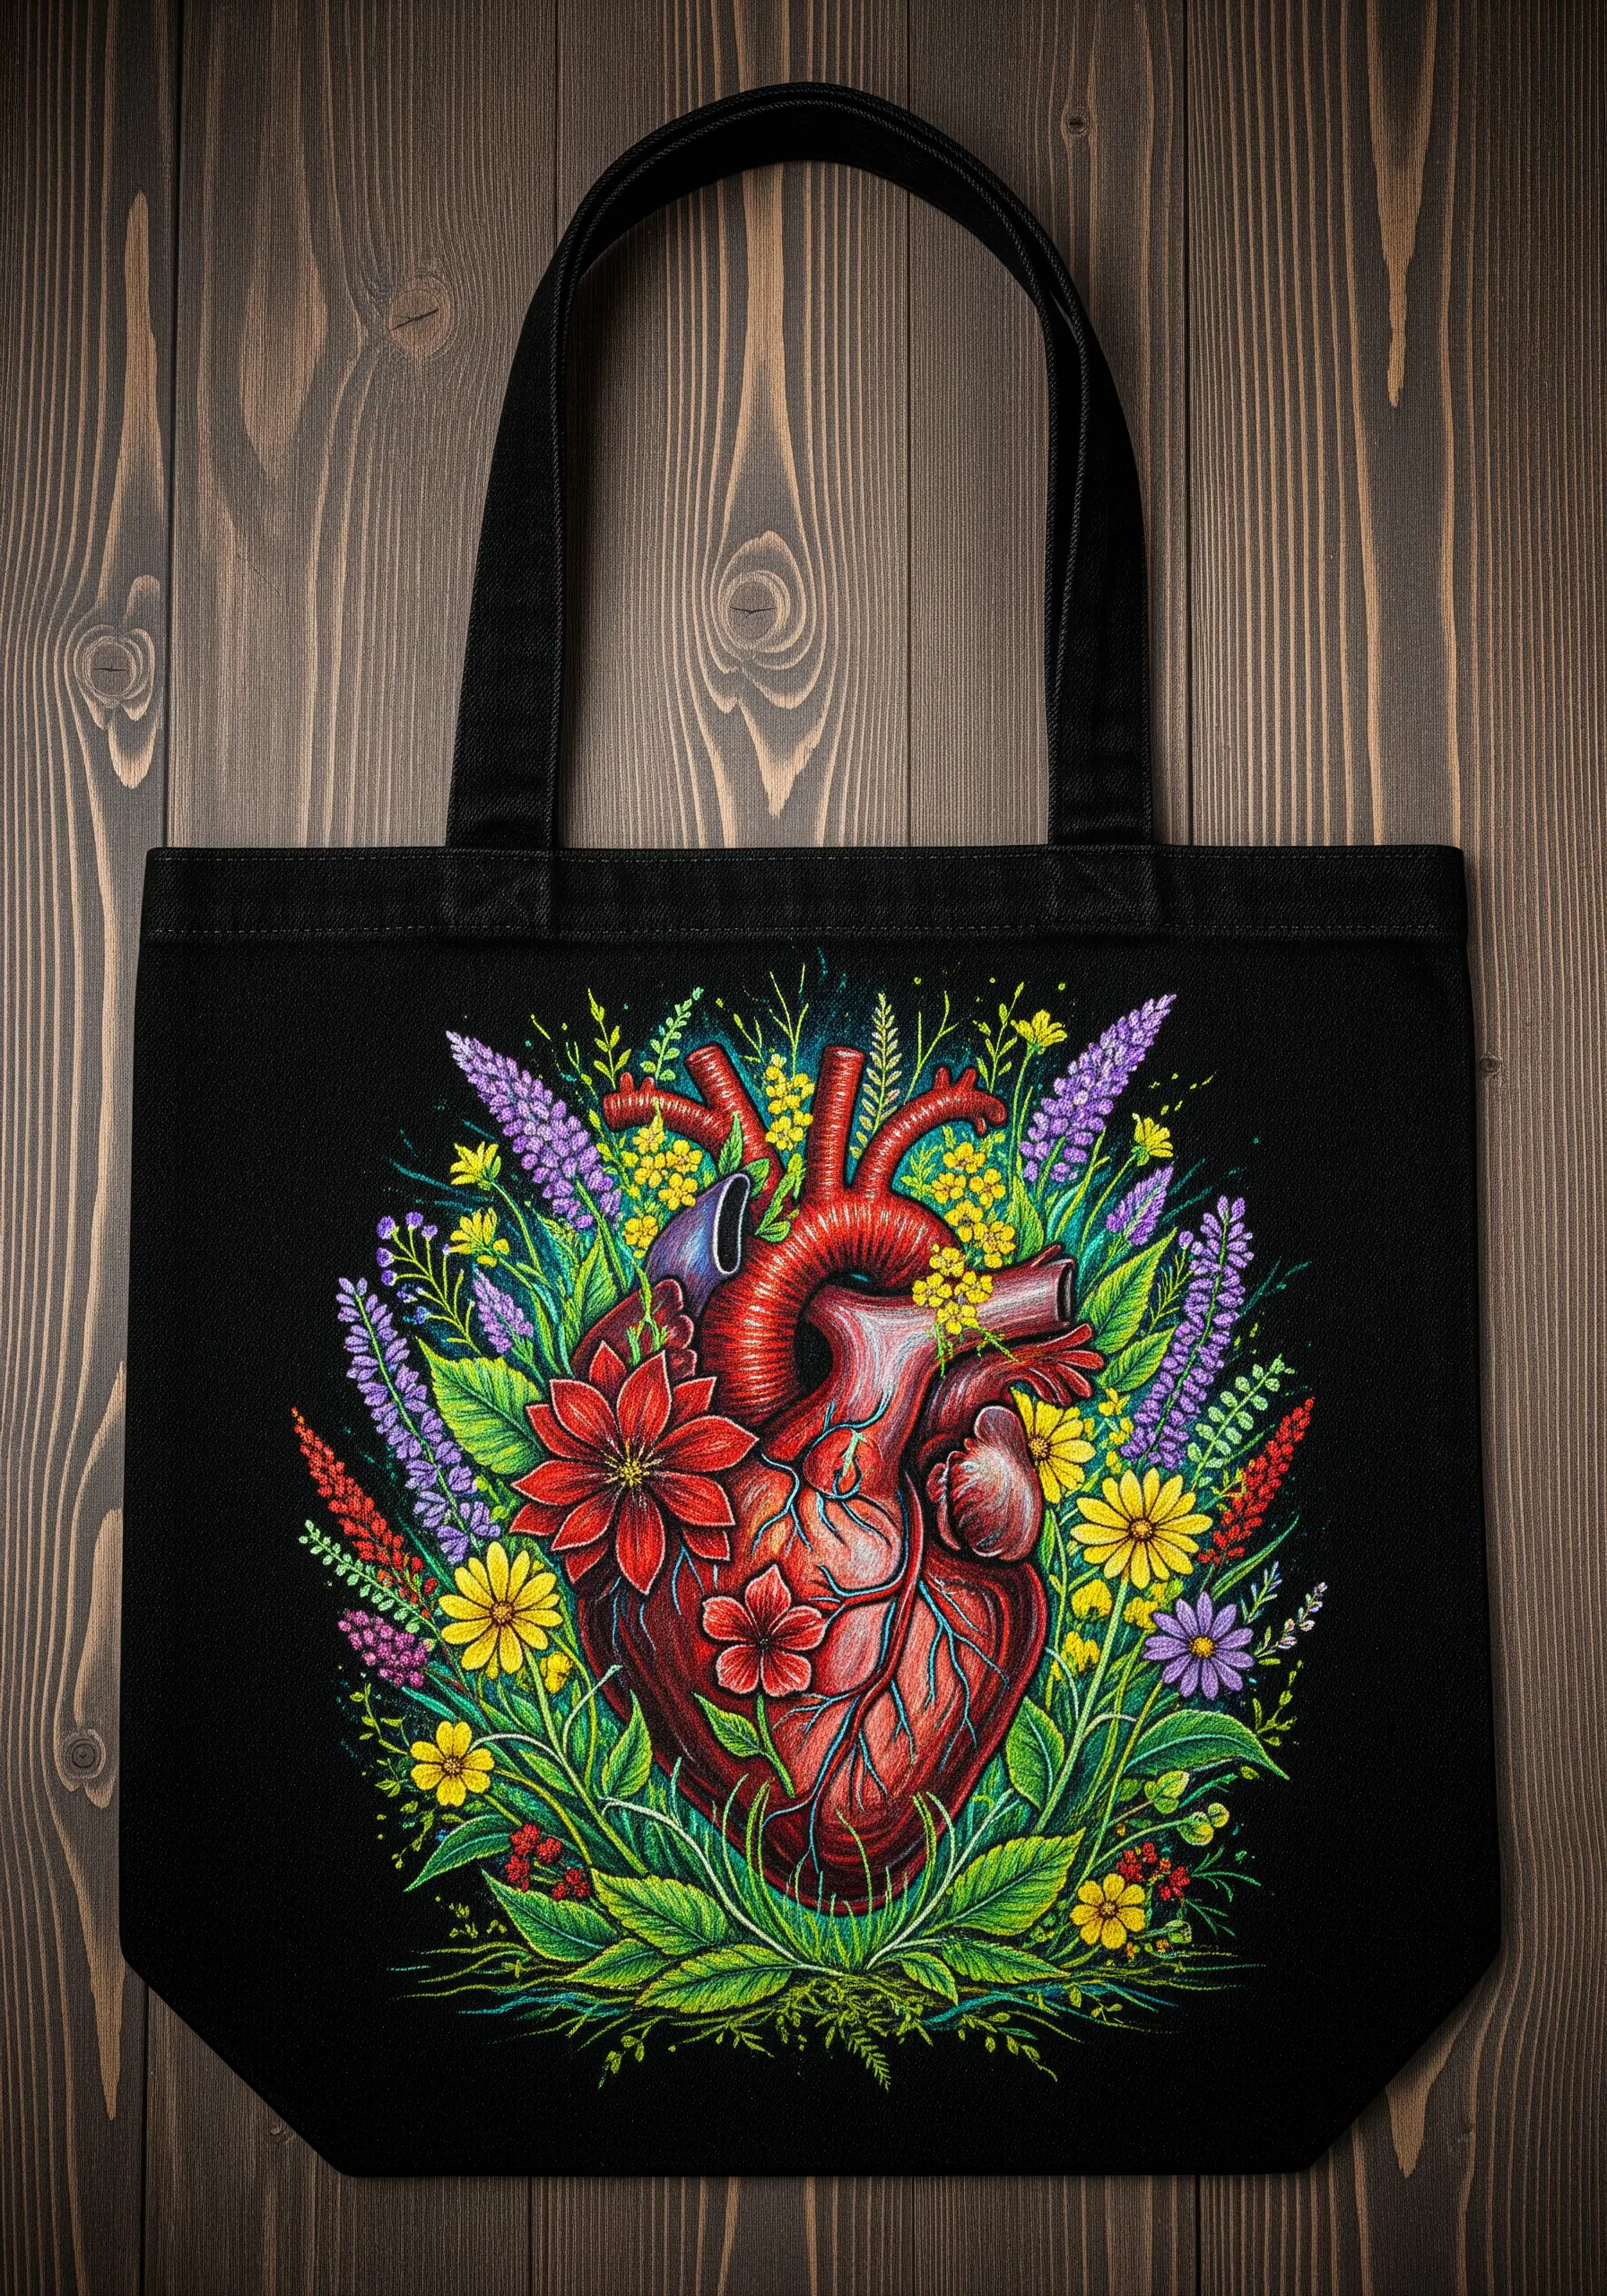
This intricate design relies on thread painting, so organize your floss by color families before you begin to ensure smooth transitions.
Use the long-and-short stitch to blend shades within the heart and flower petals, creating realistic gradients and depth.
Keep your stitches directional, following the natural curves of the muscles and petals to enhance the anatomical and botanical forms.
Define the delicate veins and arteries with a single strand of a darker red in a fine backstitch or split stitch—this adds detail without creating harsh lines.
The high contrast on black canvas makes every color pop, so choose vibrant, saturated threads for the most dramatic effect.
6. Sculptural Line Art Embrace
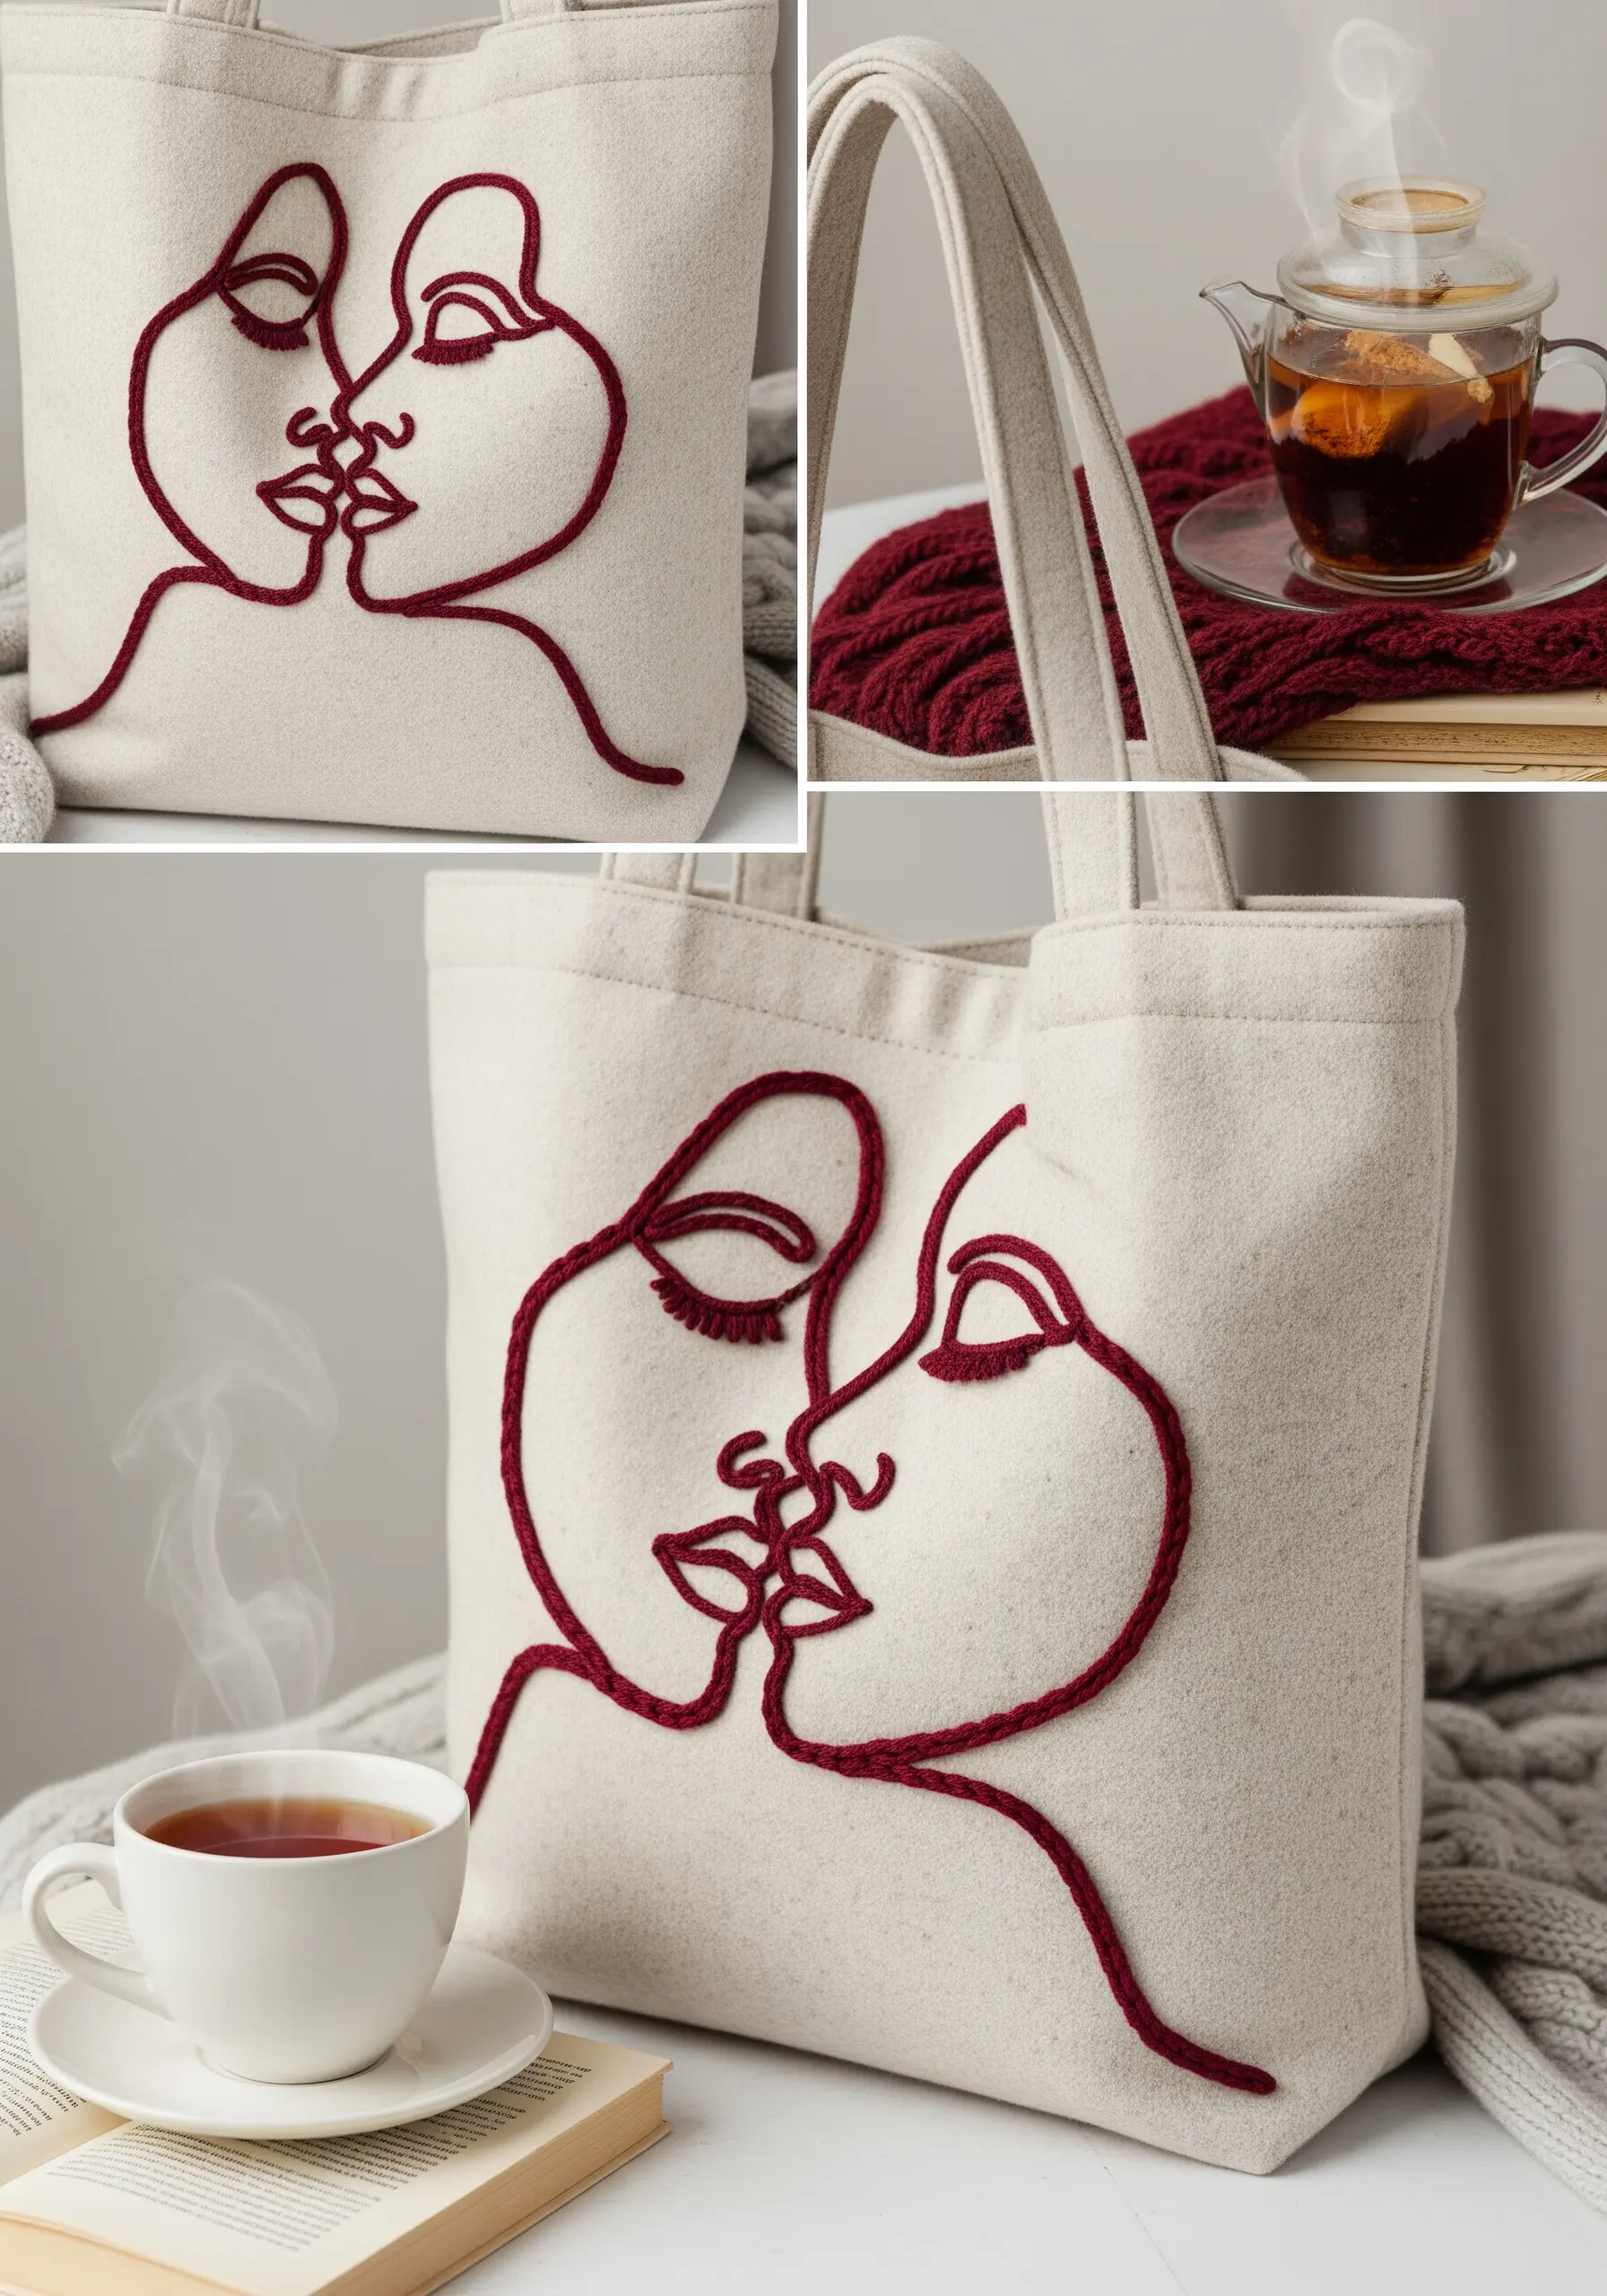
Create this bold, three-dimensional line art using the couching technique for a sculptural effect that is both fast and dramatic.
Lay down a thick strand of yarn or cotton cord along your design lines.
Then, using a single strand of matching embroidery floss, make small, evenly spaced tacking stitches over the cord to secure it to the fabric.
This method produces a perfectly uniform, raised line that has more presence than traditional stitches and works beautifully on heavy fabrics like canvas or felt.
The result is a minimalist design with maximum tactile impact.
7. Delicate Lavender with a Personal Date
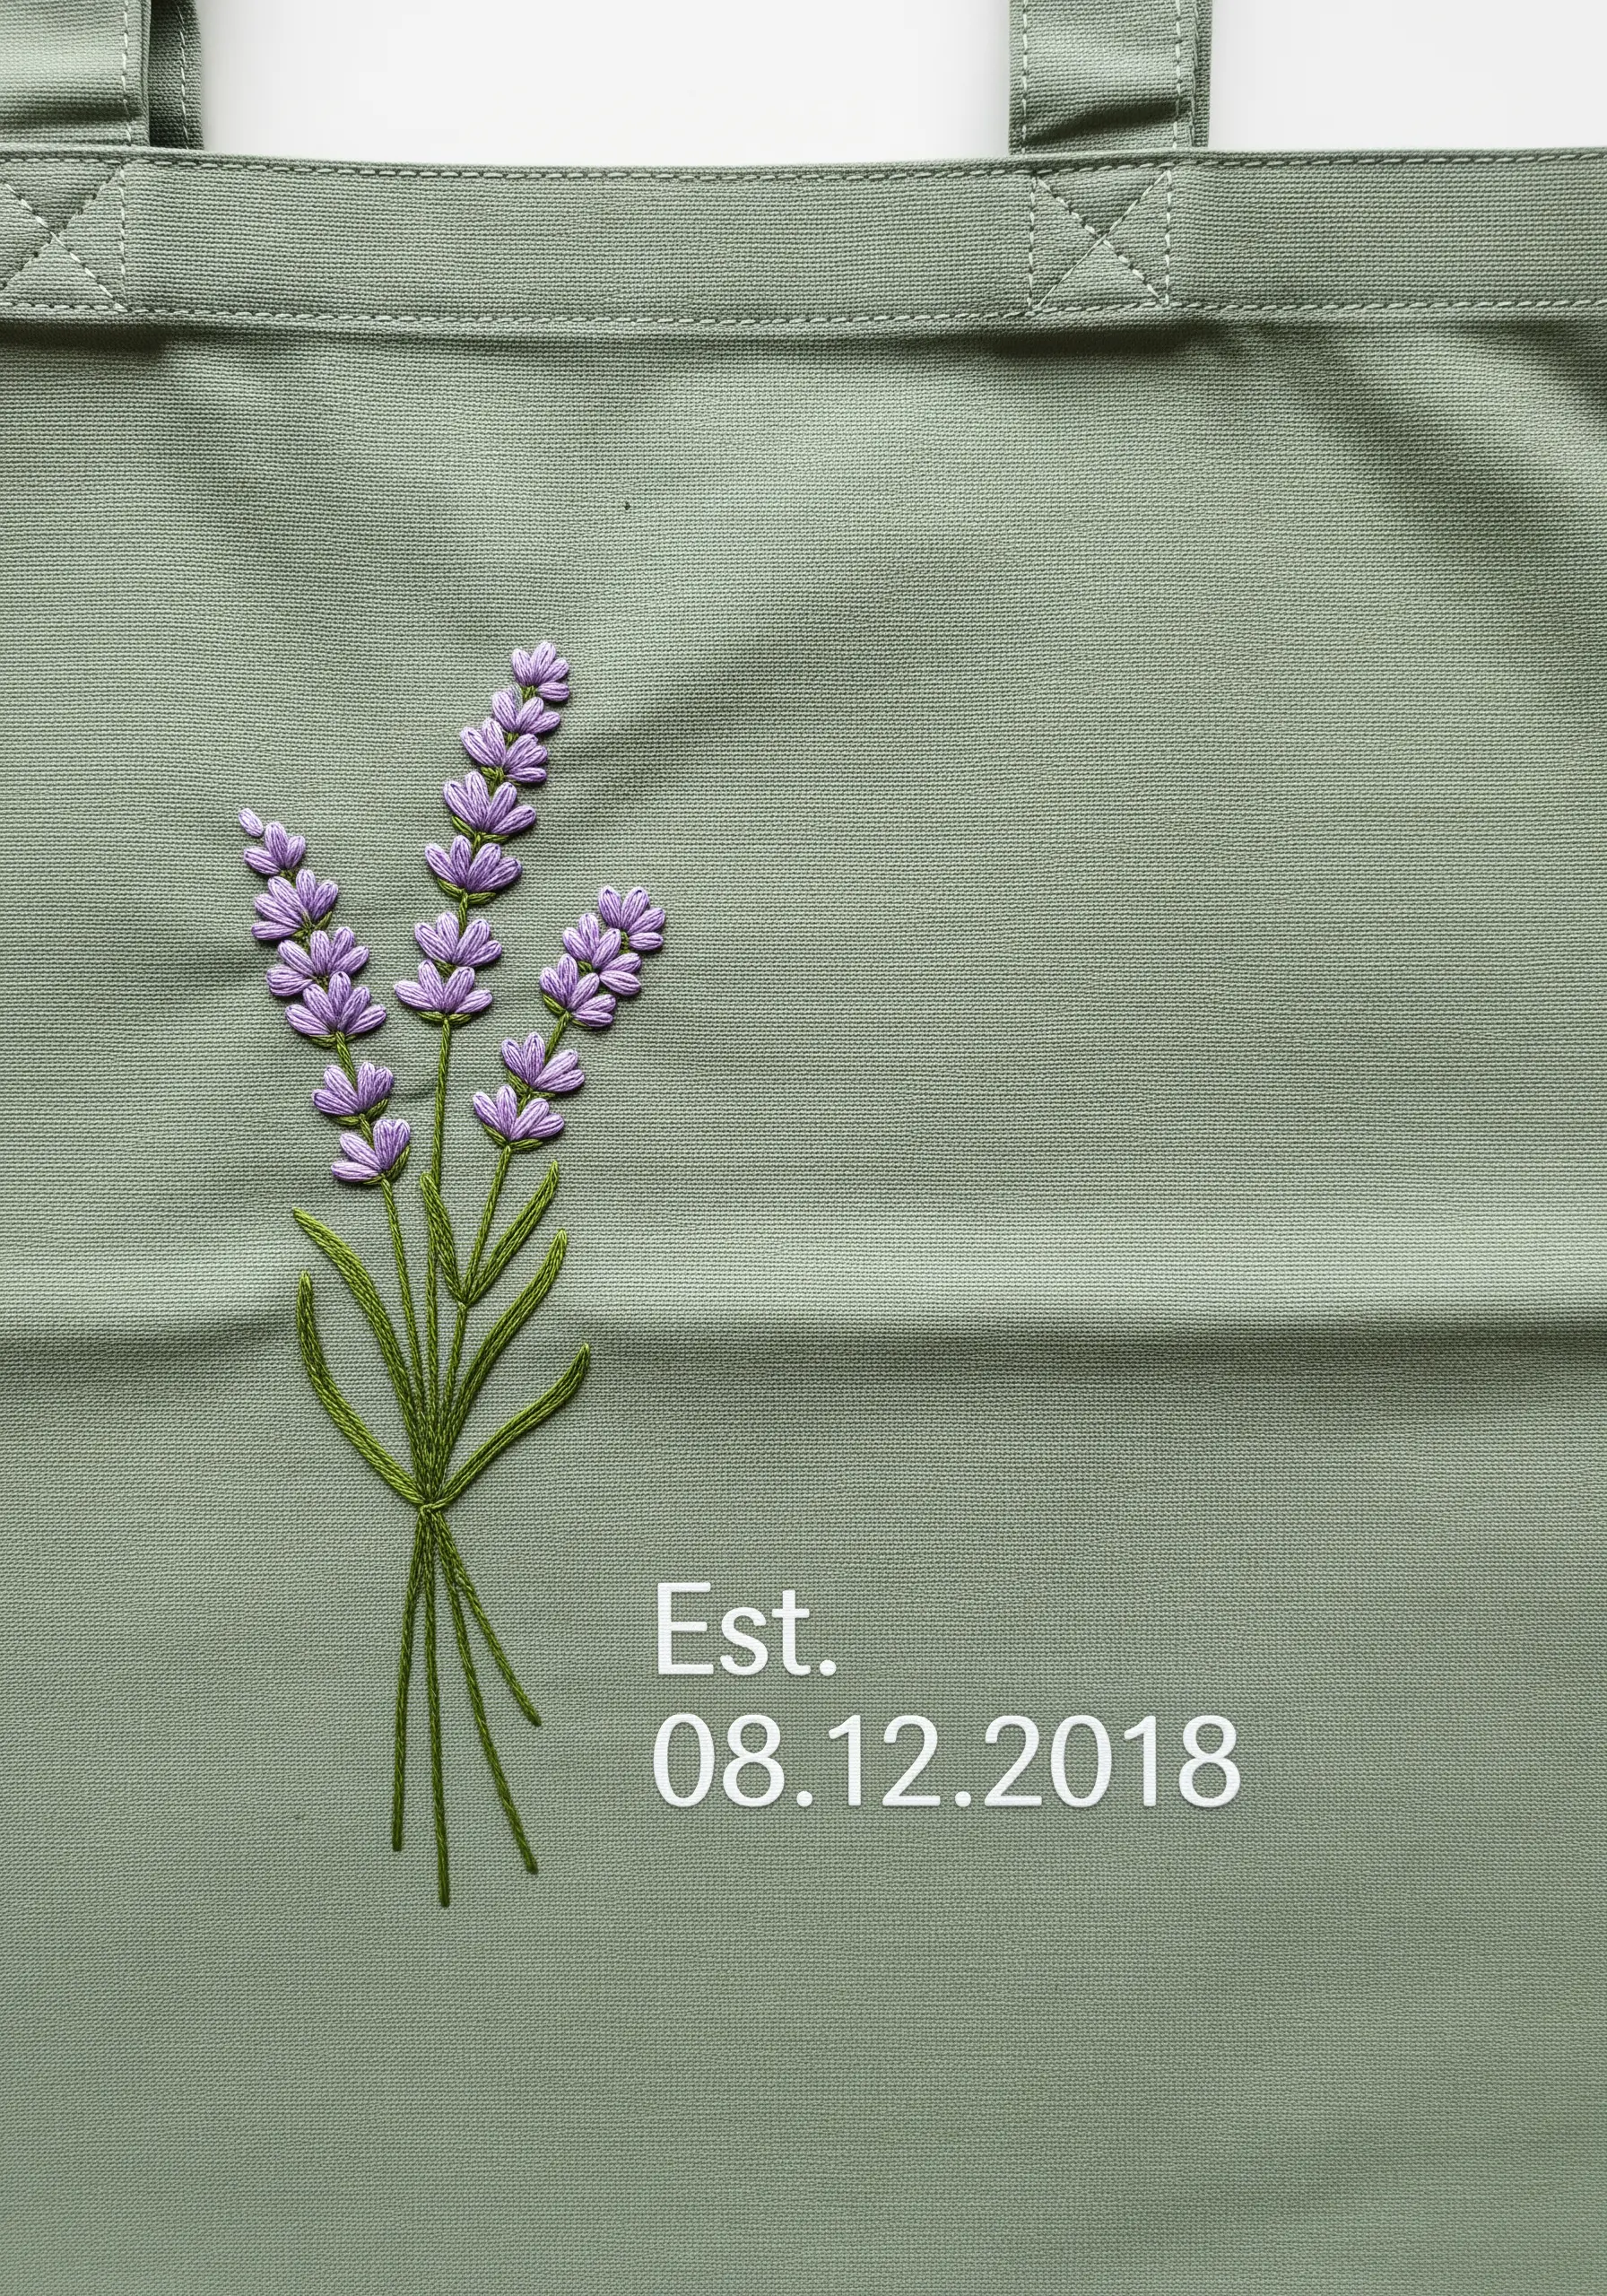
Capture the softness of lavender by using detached chain stitches (lazy daisies) for the individual buds.
To add subtle realism, work with two similar shades of purple floss on your needle at the same time, or alternate stitches between the two colors.
Use a delicate stem stitch for the stalks, ensuring your stitches are small and consistent to maintain a graceful curve.
For the personalized date, use a fine, single-strand backstitch to achieve crisp, legible typography that complements, rather than competes with, the botanicals.
The negative space in this design is key—resist the urge to add more, as the simplicity is what creates its modern, romantic feel.
8. Gilded Lock and Key Motif
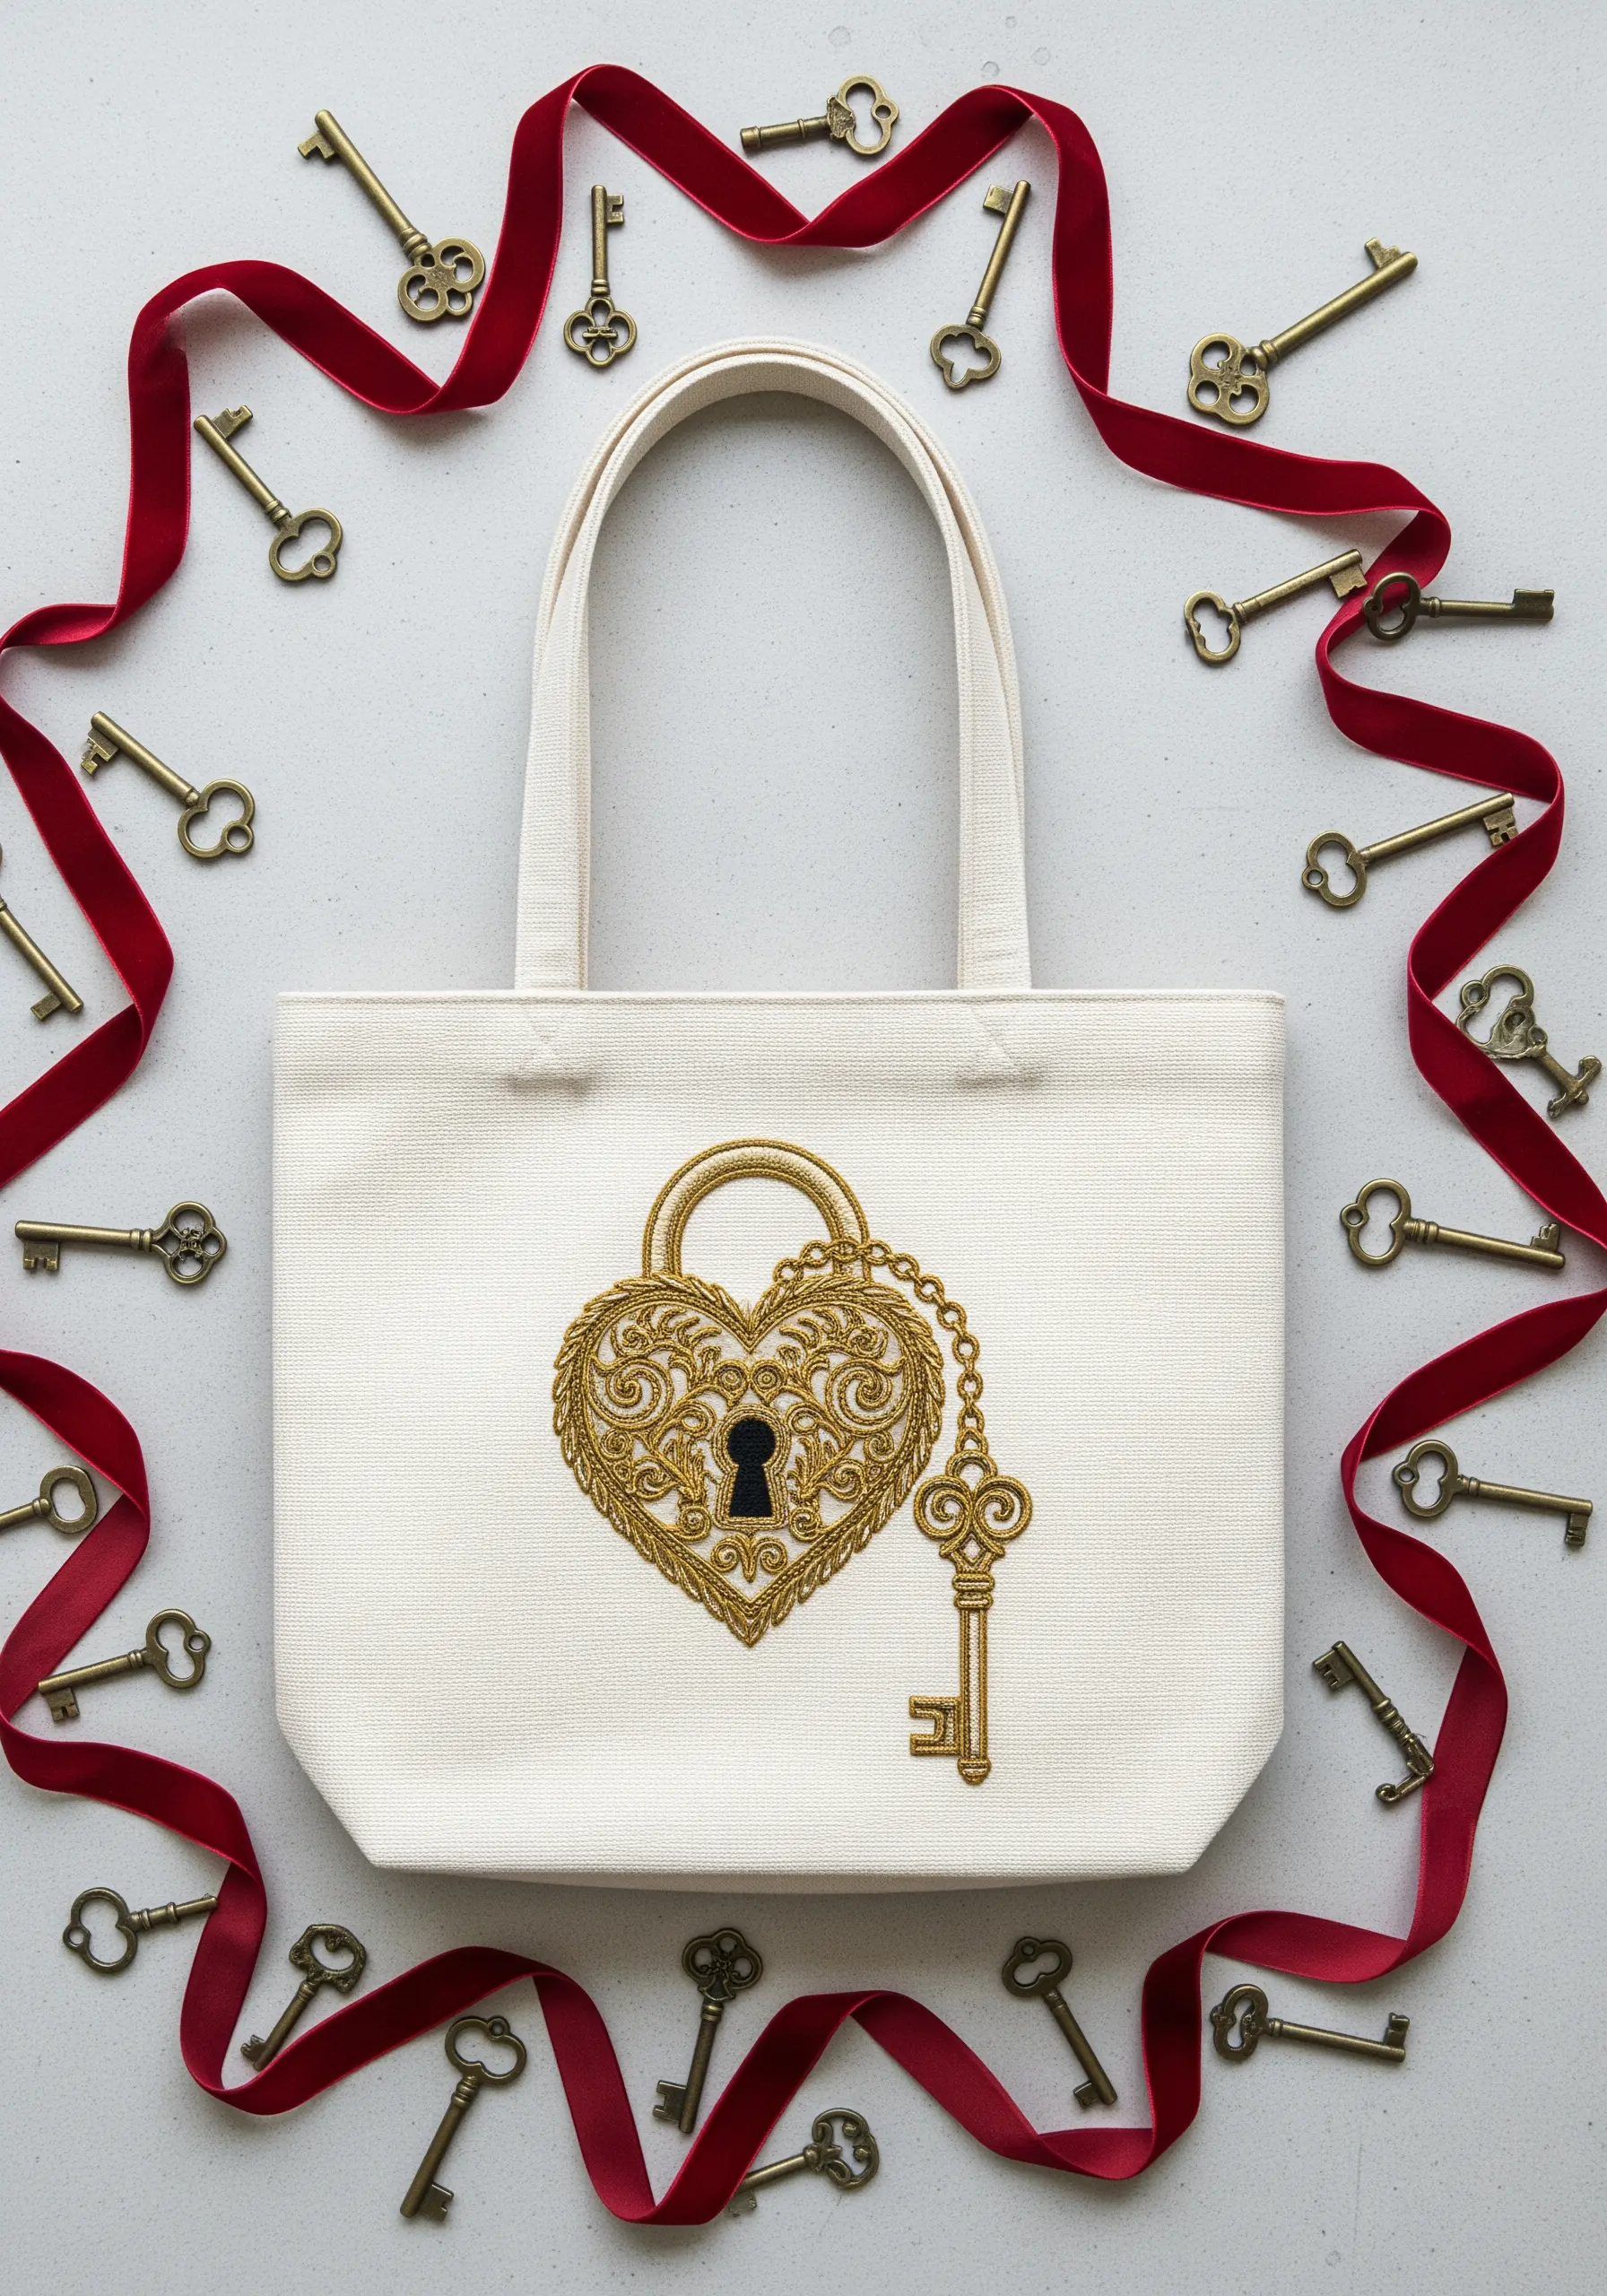
Achieve a truly metallic sheen by using a high-quality gold thread and treating it with a thread conditioner to prevent tangling and fraying.
For the intricate filigree details, outline the shapes with a fine split stitch first. This creates a raised edge that makes your subsequent satin stitches look exceptionally neat and defined.
Fill the larger areas with satin stitches laid at a consistent angle to ensure a smooth, light-reflecting surface.
Incorporate seed stitches—tiny, randomly placed straight stitches—to add texture and break up the solid gold areas, giving the design an antiqued feel.
This technique elevates a simple motif into a piece of embroidered jewelry for your tote.
9. Playful Fox Couple on Felt
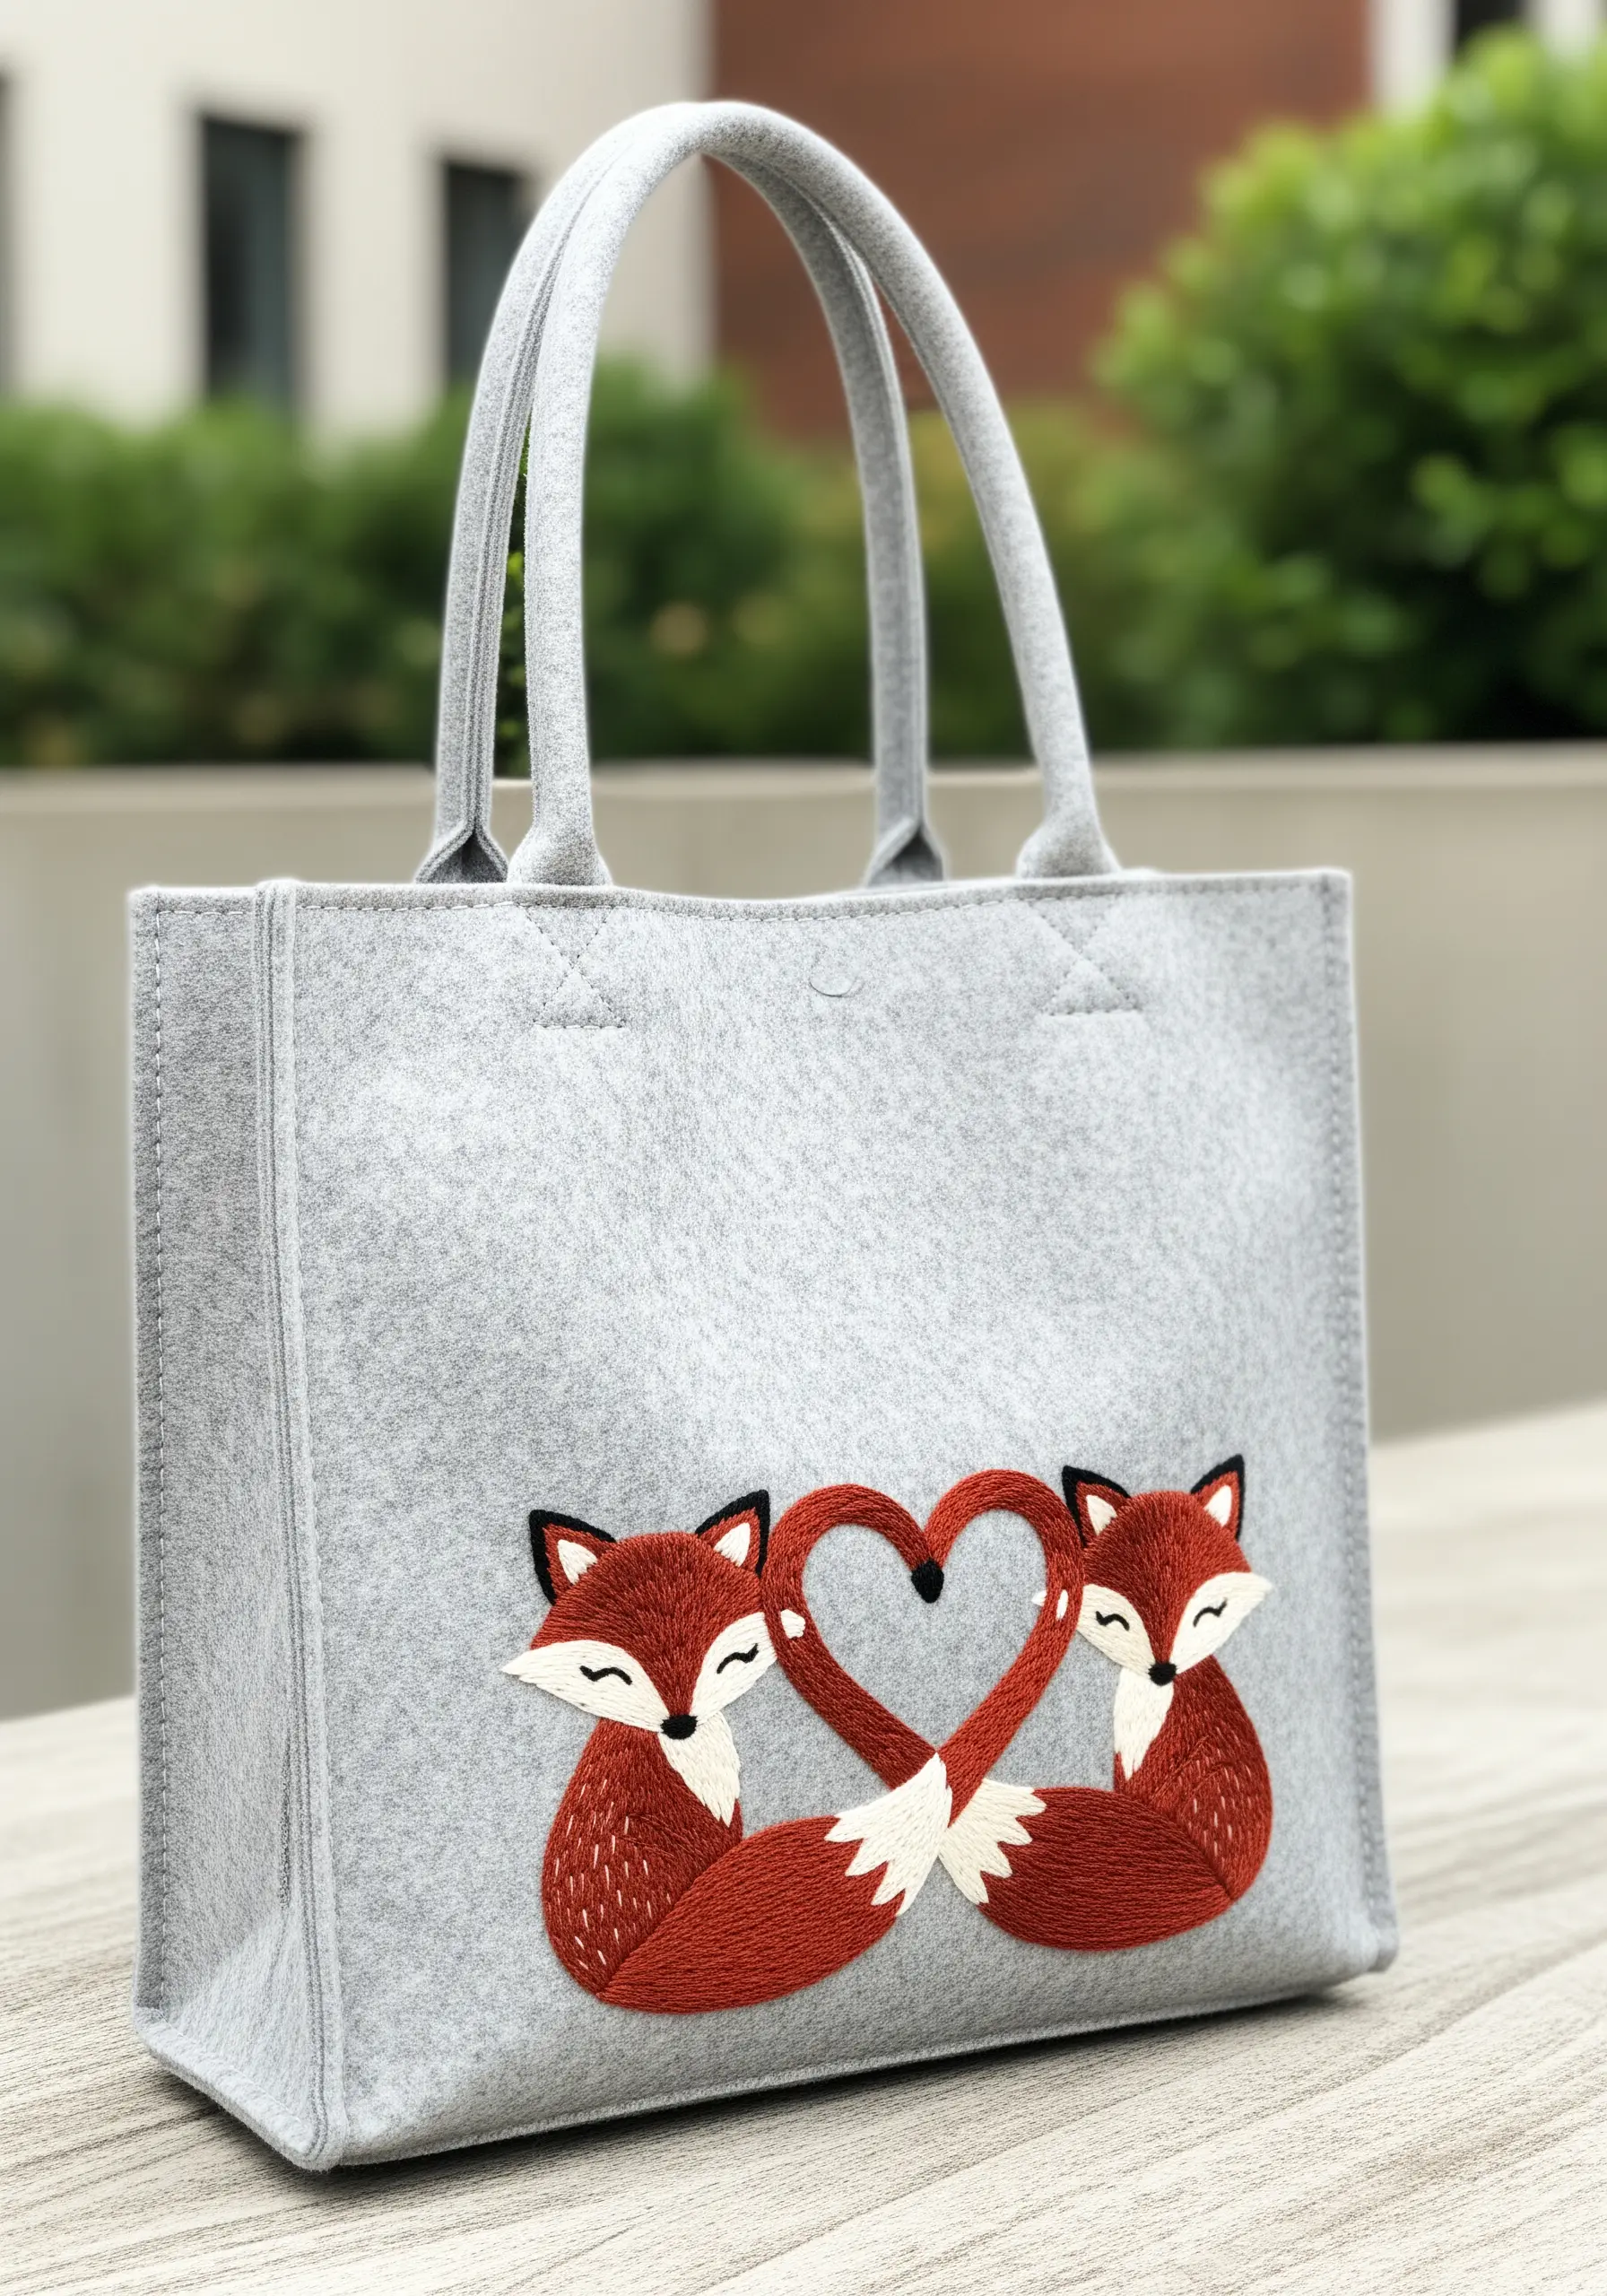
The texture of felt provides a wonderful, stable base for dense embroidery, eliminating the need for a stabilizer.
Use long-and-short stitch to fill the foxes’ bodies, blending shades of rust and cream to create a soft, fur-like appearance.
Define the sharp edges of the ears, eyes, and tail tips with a crisp satin stitch outline in black and white thread—this contrast makes the features pop.
The tails forming a heart is the central element; ensure the curve is smooth by using a stem stitch for the outline before filling it in.
This design’s charm comes from its clean shapes and rich, solid color blocking.
10. Art Nouveau Iris Composition
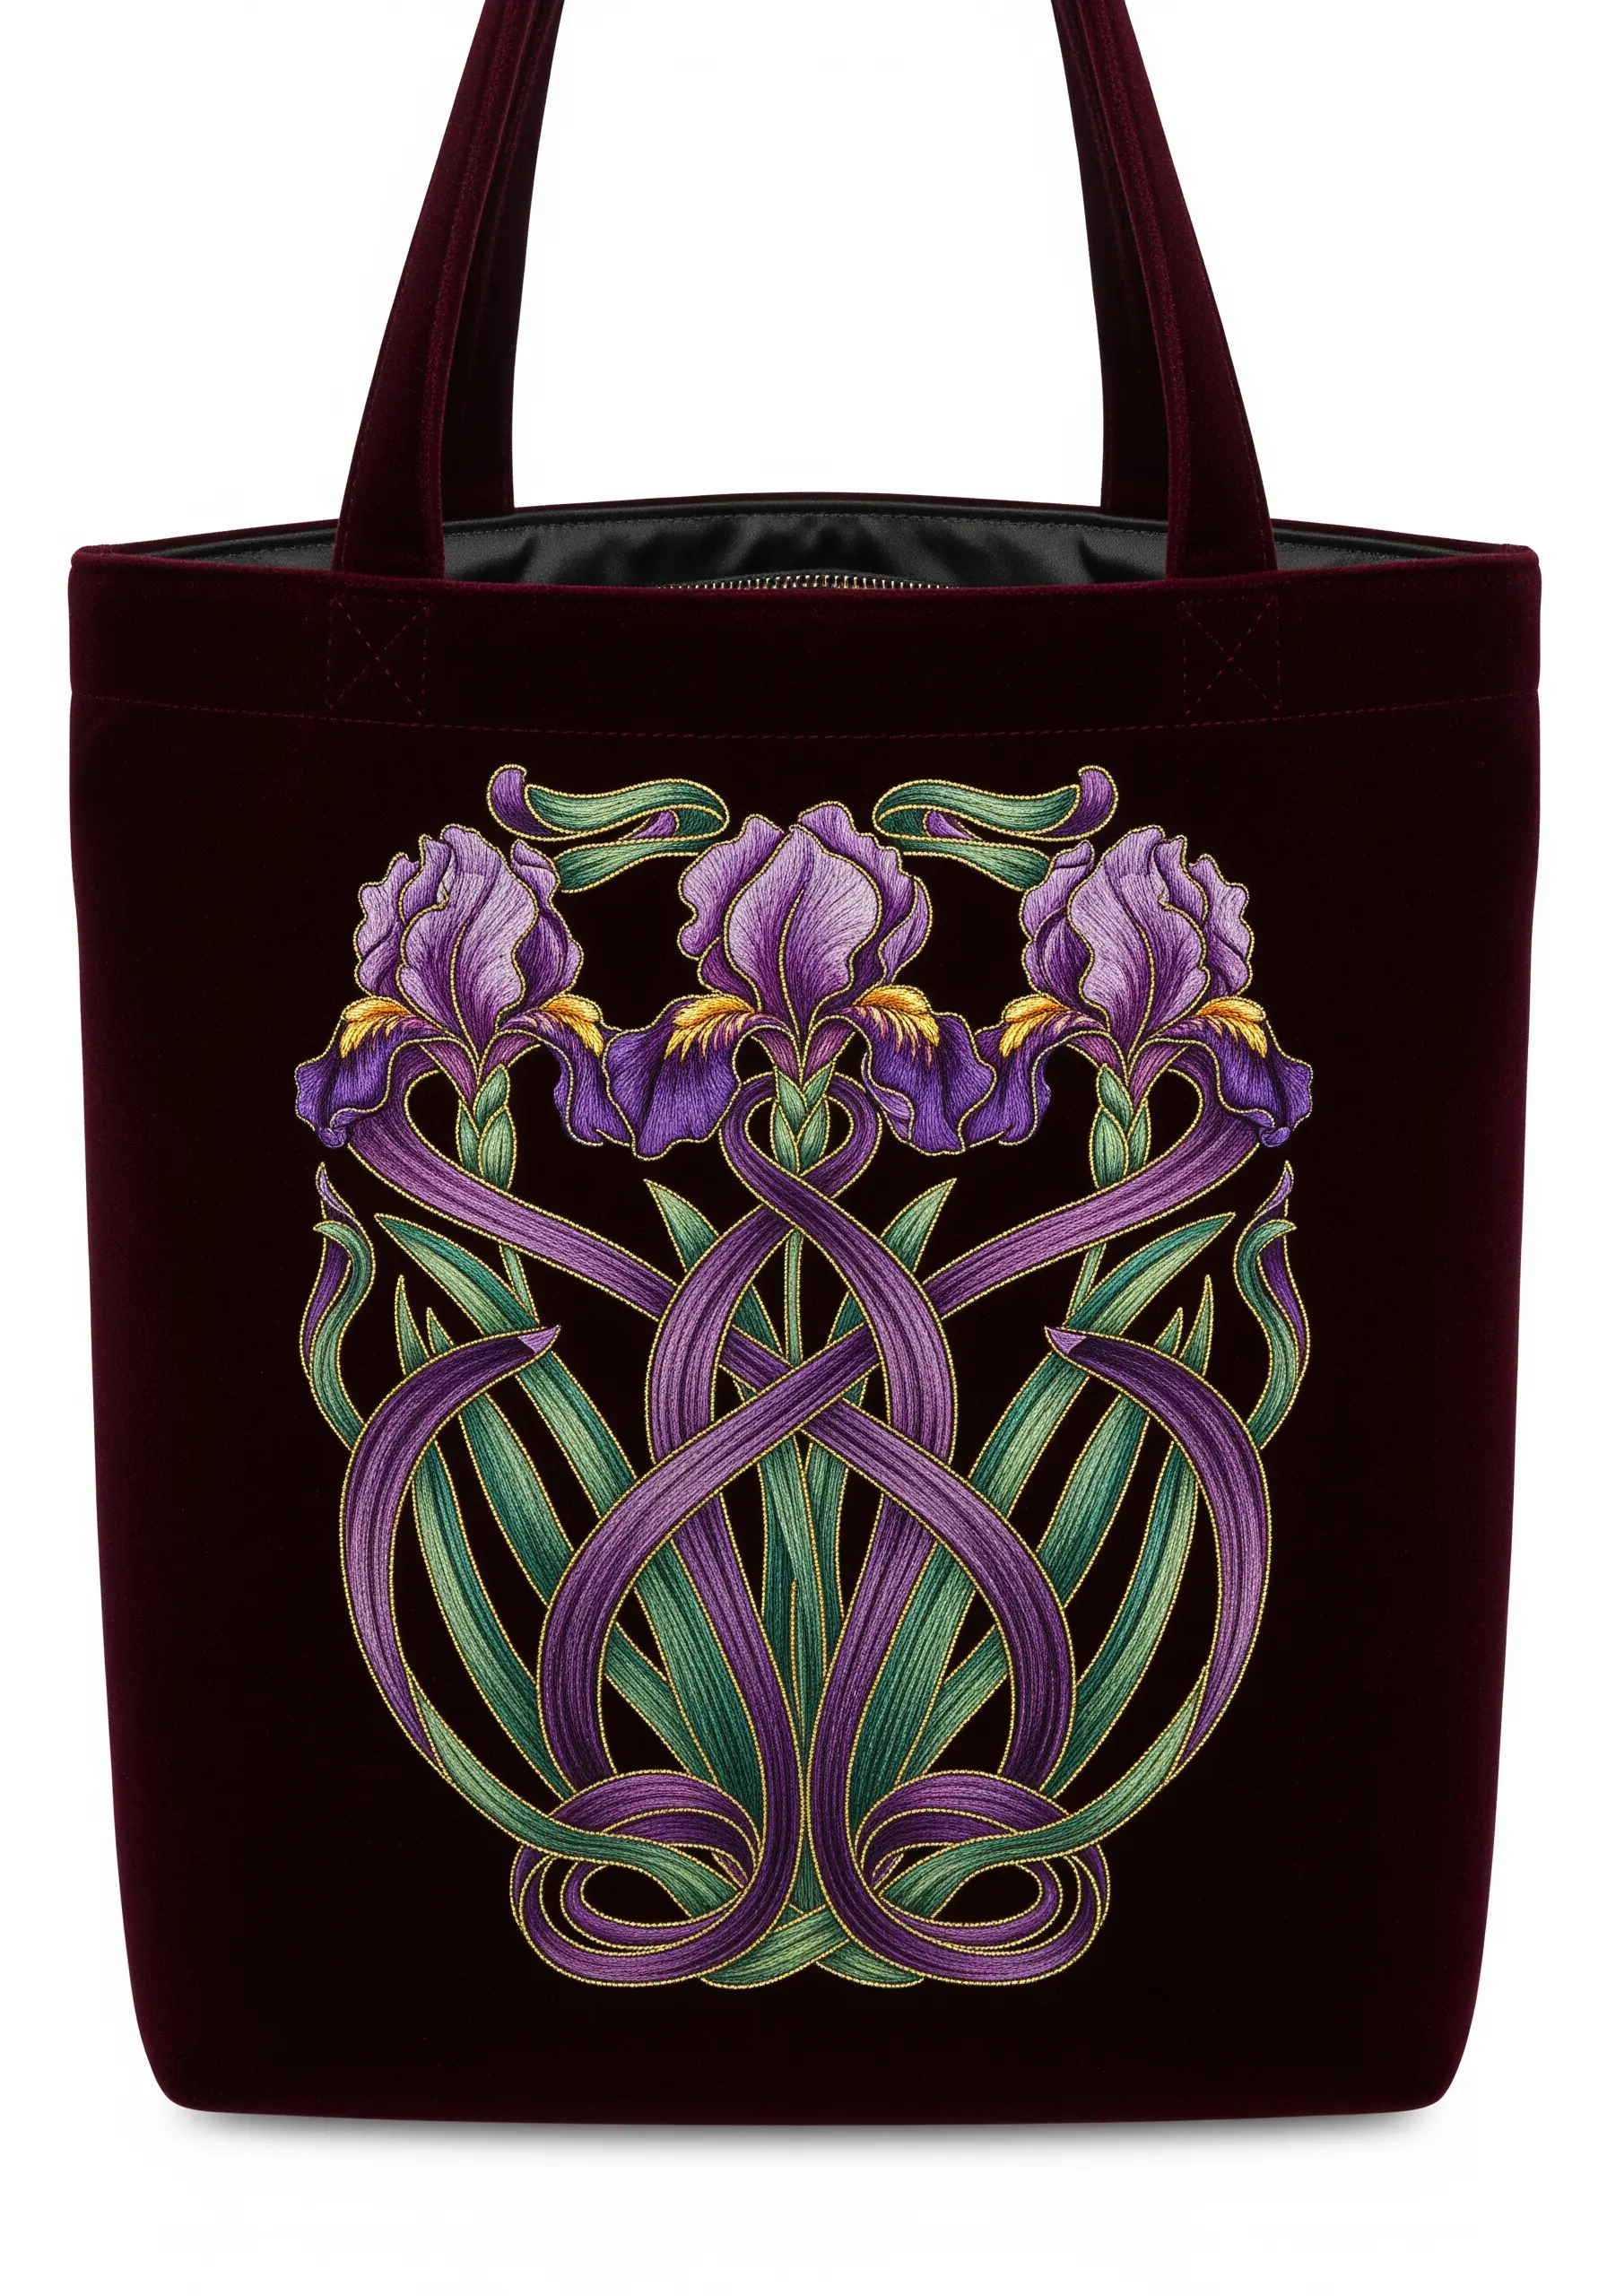
Capture the flowing, organic lines of Art Nouveau by using a whipped backstitch for all outlines.
This creates a smooth, cord-like effect that mimics the style’s iconic ink work.
For the iris petals, use long-and-short stitch to blend purples and violets, ensuring your stitches follow the direction of the petal’s growth for a naturalistic look.
Incorporate a touch of gold metallic thread along the edges of the petals or leaves to add a classic Art Nouveau shimmer.
The deep burgundy velvet of the tote bag enriches the jewel tones of the thread, making the entire composition feel luxurious and timeless.
11. Embroidered Soundwave Message
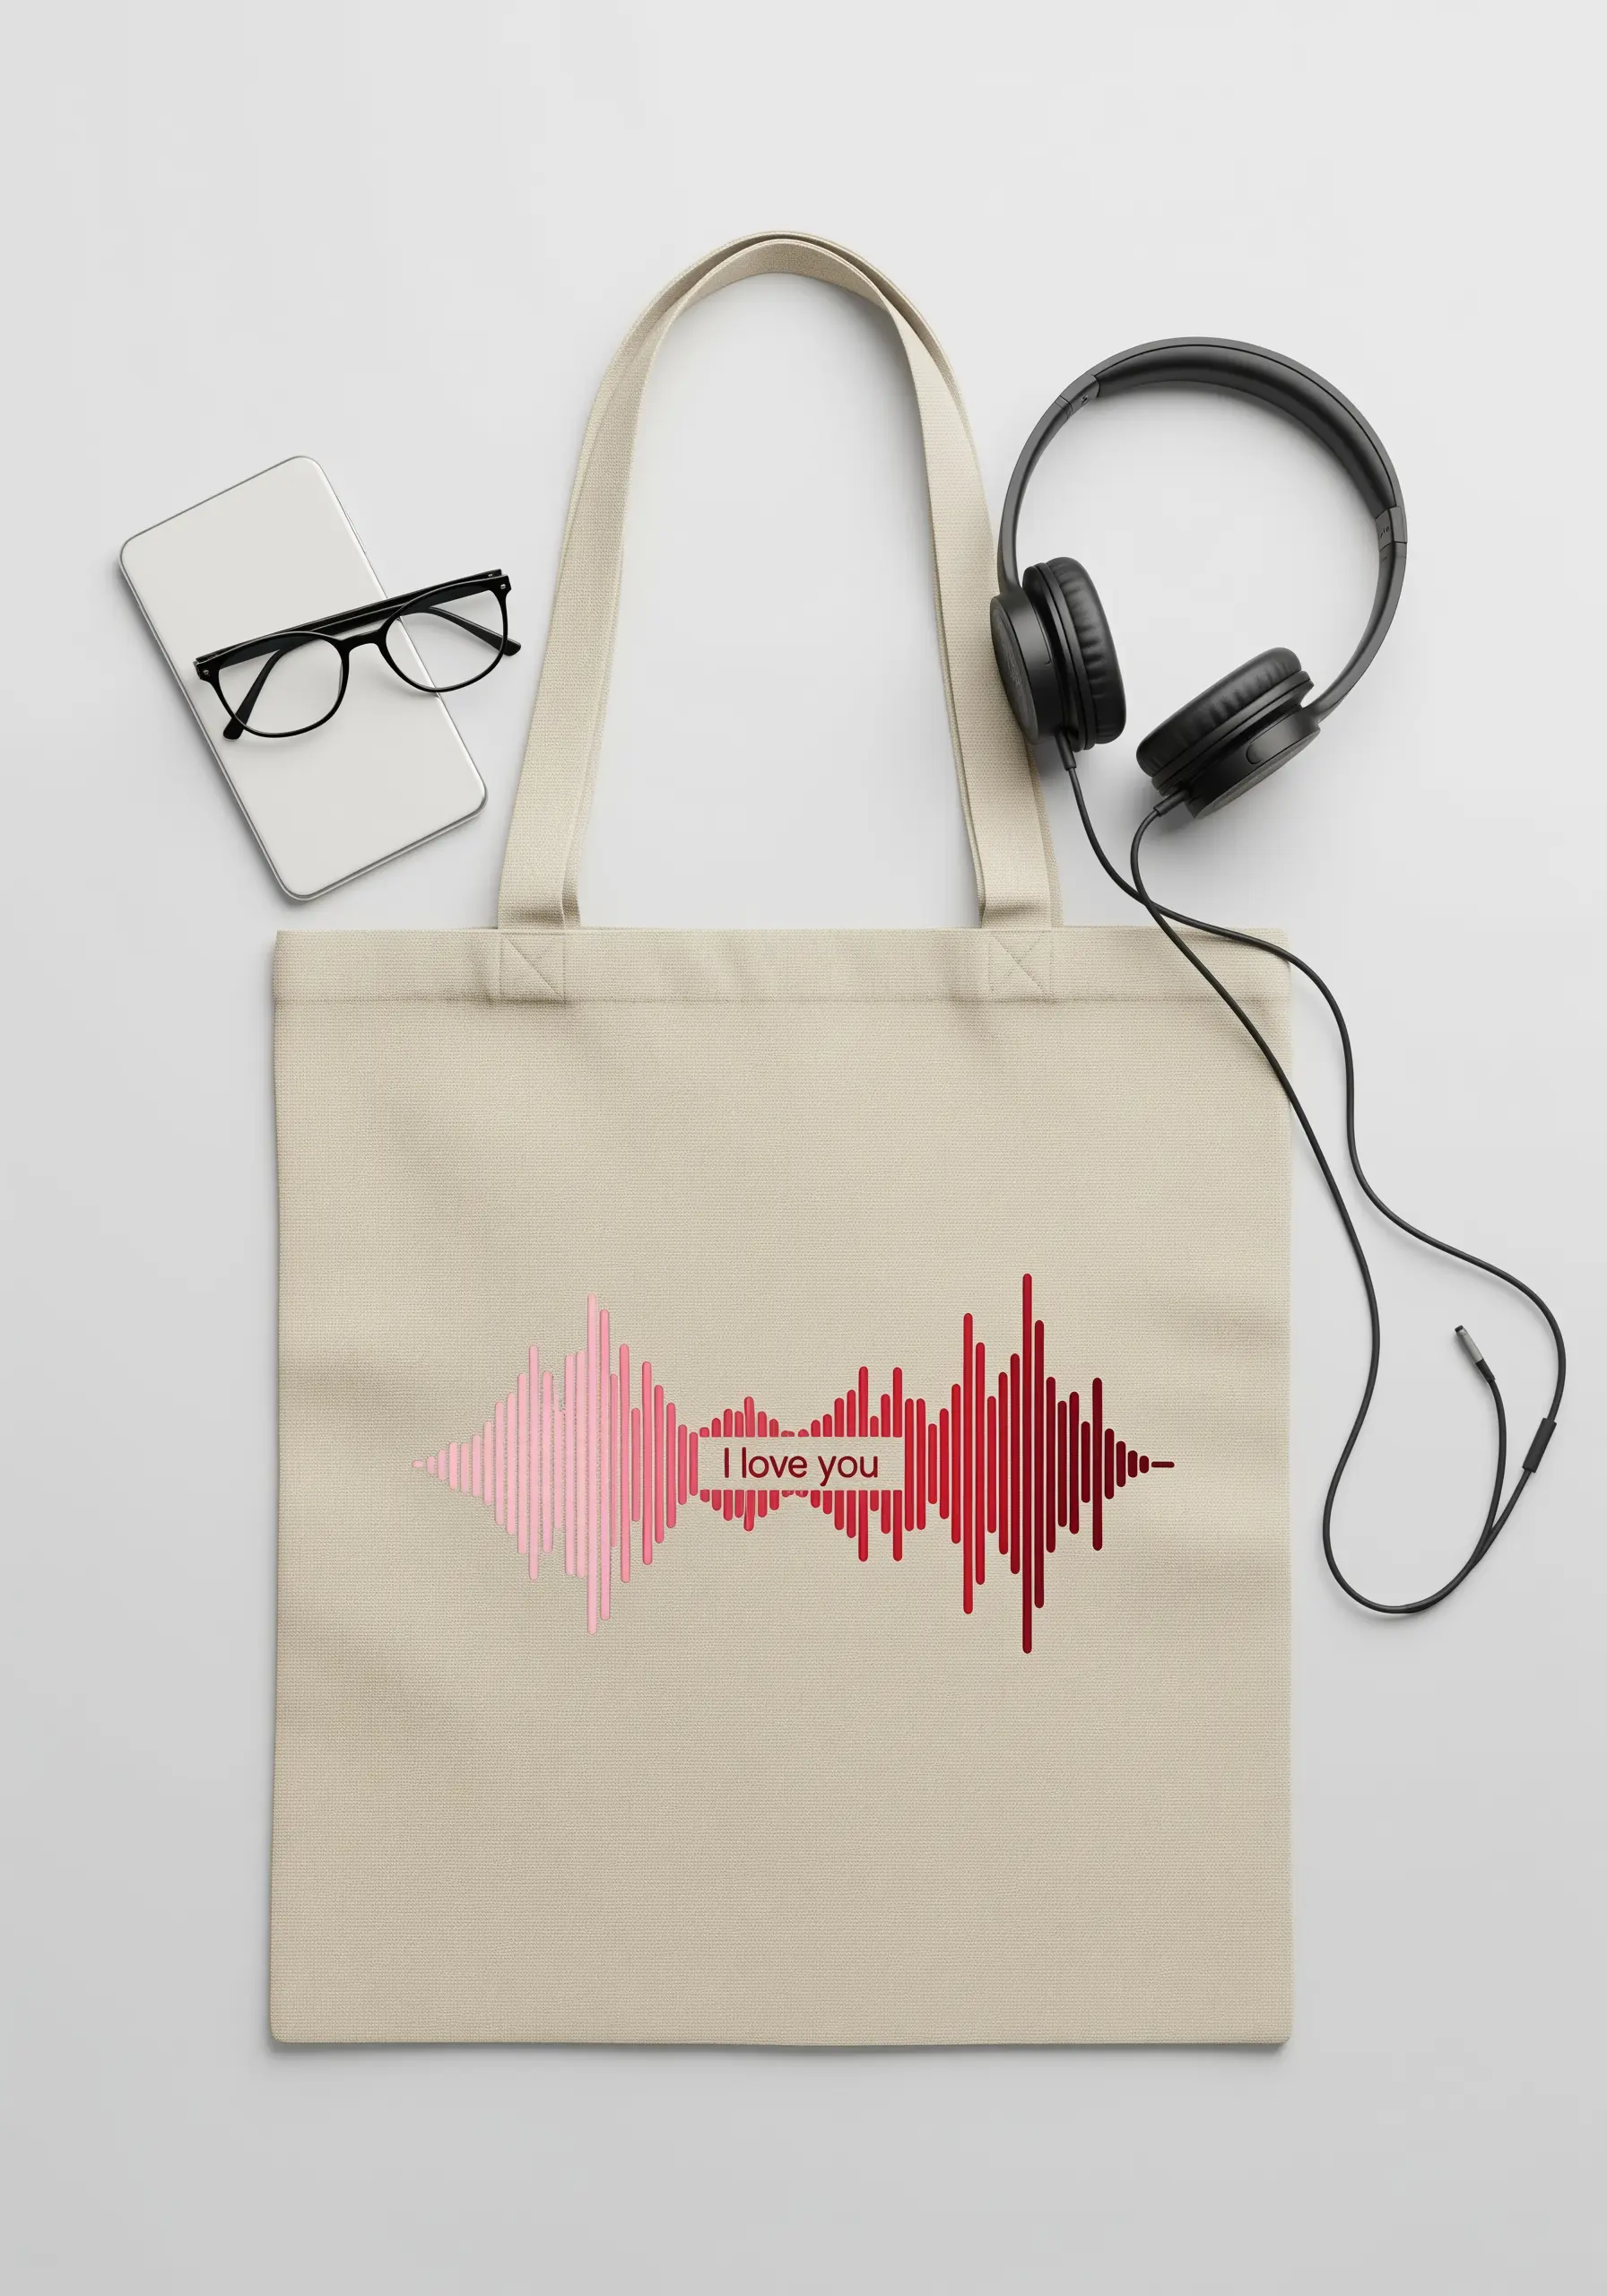
Turn a personal voice message like “I love you” into a unique visual gift by embroidering its soundwave.
Use a free online soundwave generator to create your pattern from an audio clip.
Transfer the design onto your tote and use vertical satin stitches to fill in the bars of the soundwave. This creates a clean, graphic look.
To achieve the gradient effect, map out your color changes before you start. Switch thread colors every few bars to create a smooth transition from pink to red.
This design is a powerful way to make a sentimental message both visible and tangible.
12. Glowing City Skyline Tribute
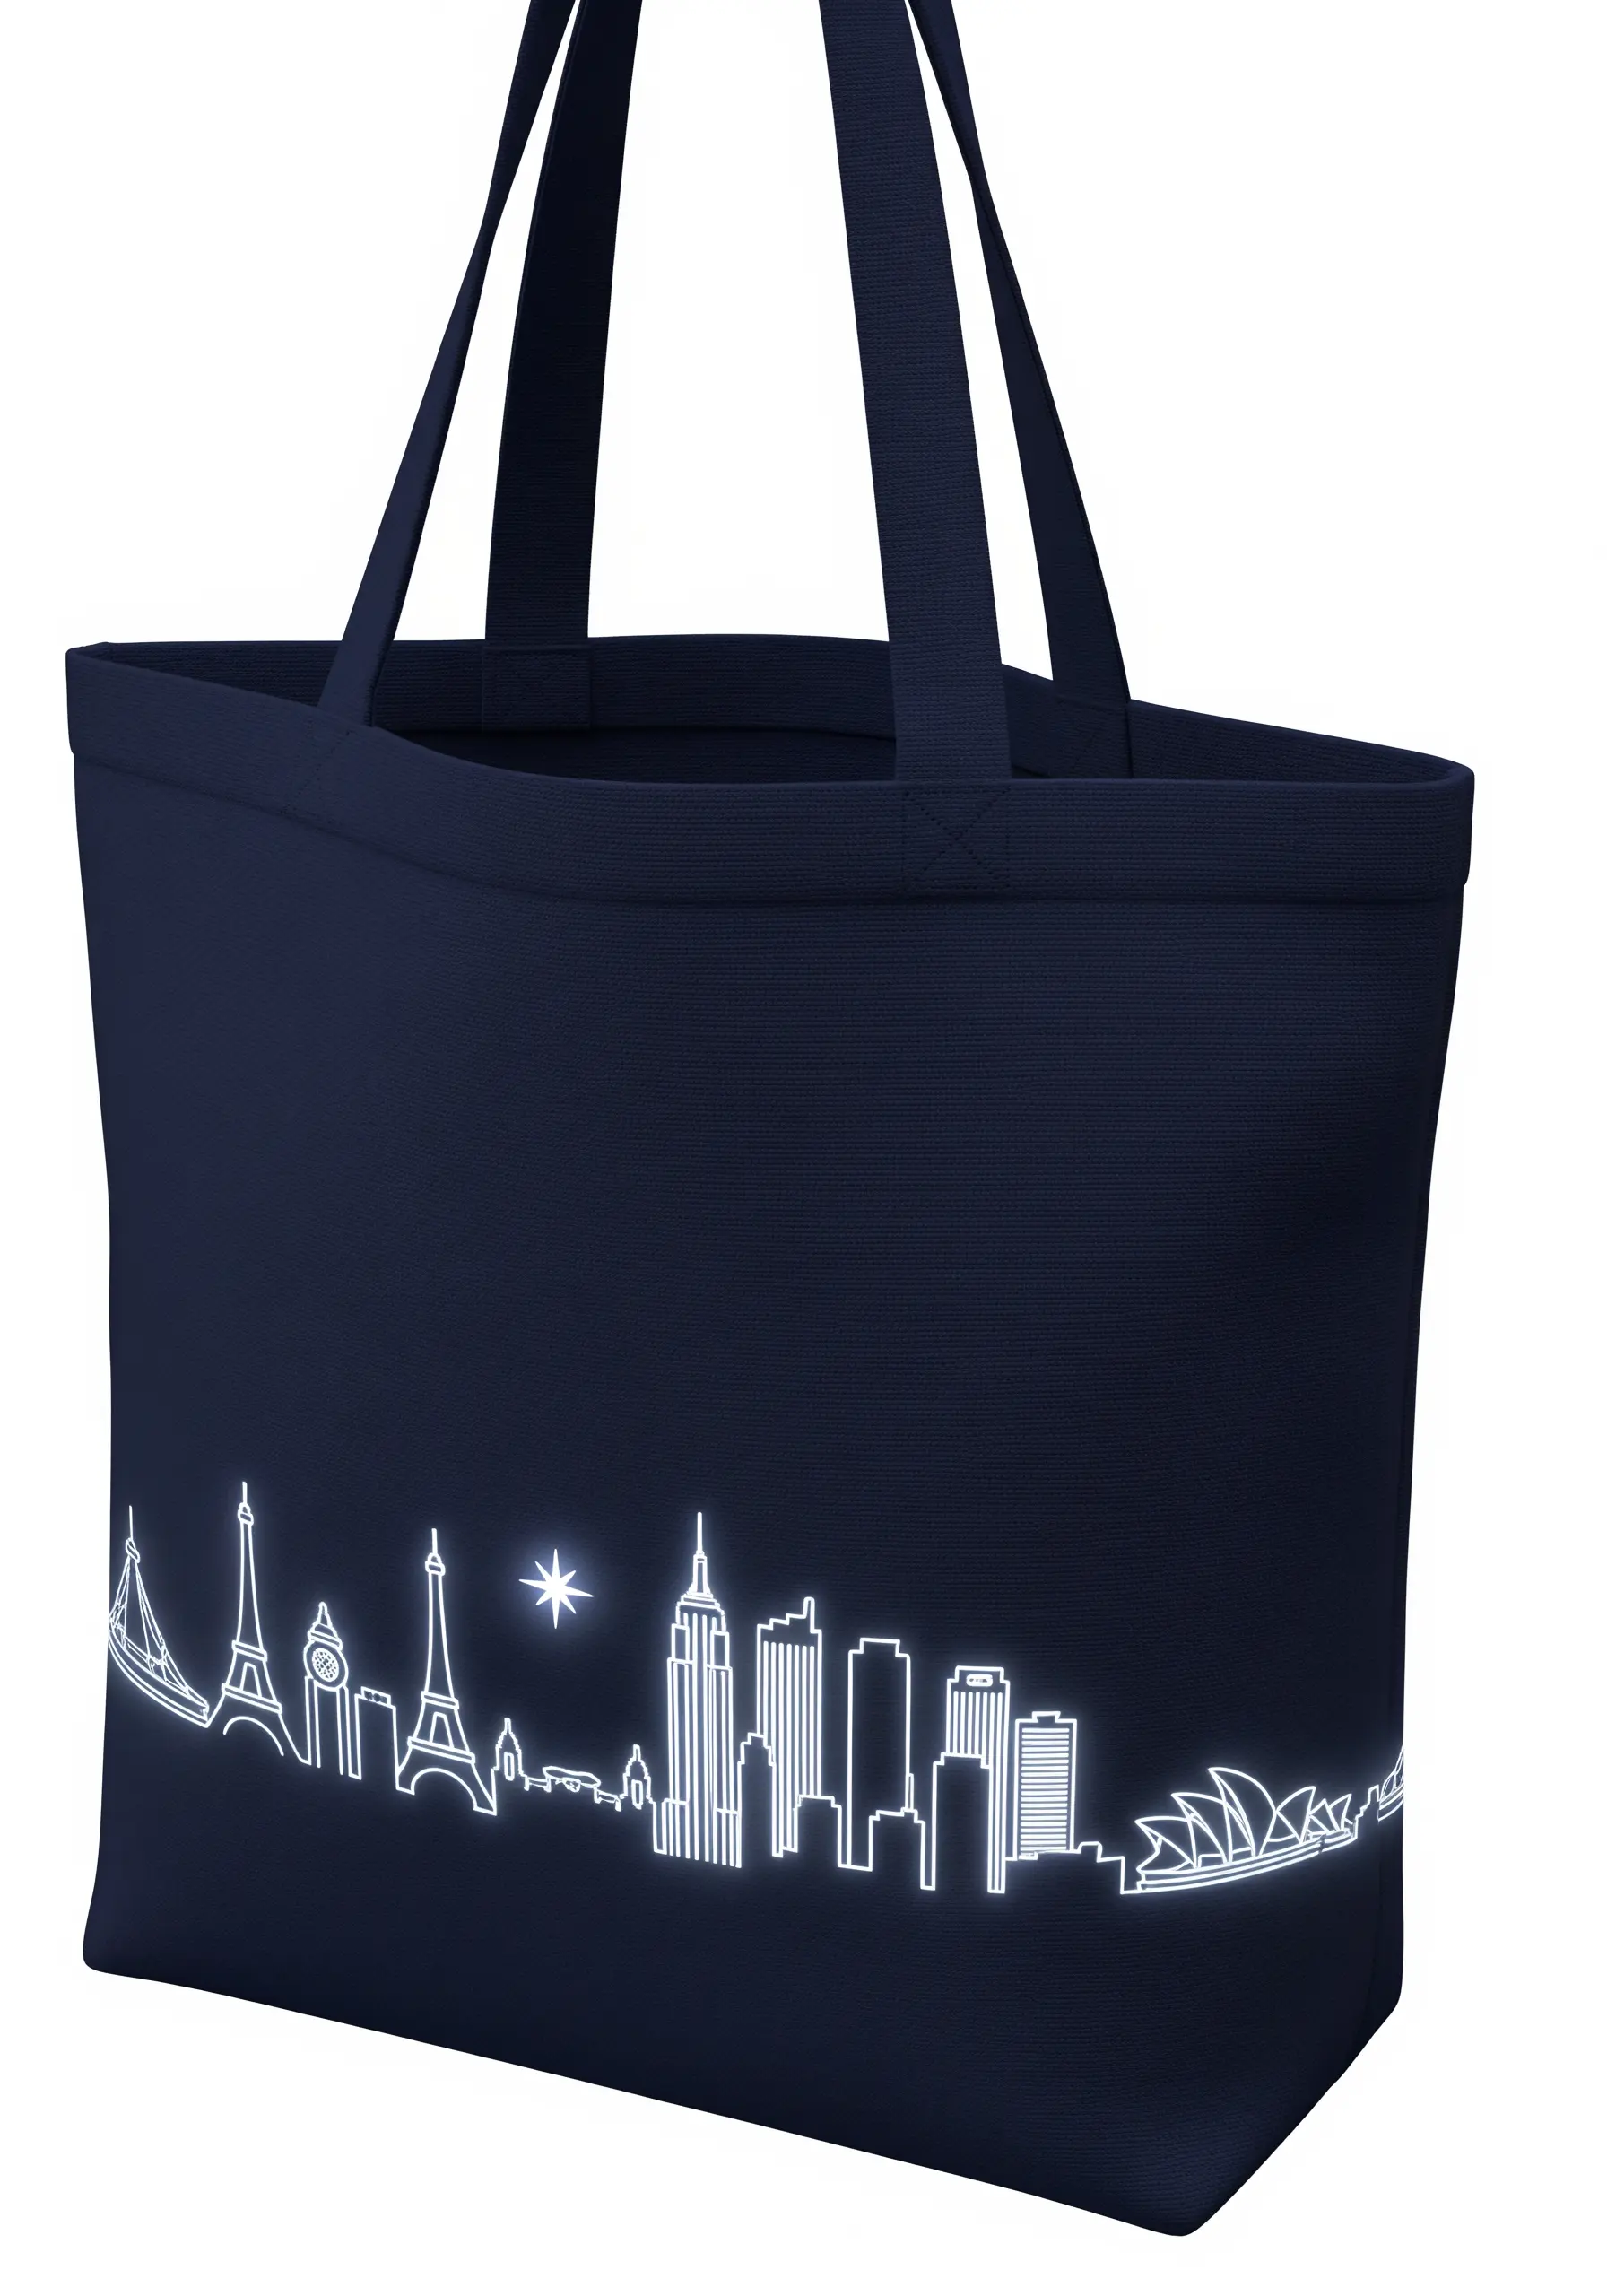
Create a luminous, neon-like effect for a skyline by using a glow-in-the-dark embroidery thread on a dark navy or black tote.
Use a simple backstitch or stem stitch for the outlines of the buildings, keeping the stitch length consistent for a clean, architectural feel.
Before stitching, trace your design with a water-soluble transfer pen to ensure all your lines are sharp and precise.
The magic of this design is its subtlety in daylight and its surprising glow in the dark, making it a truly unique and romantic concept representing a special place.
13. Beaded Pomegranate on Burlap
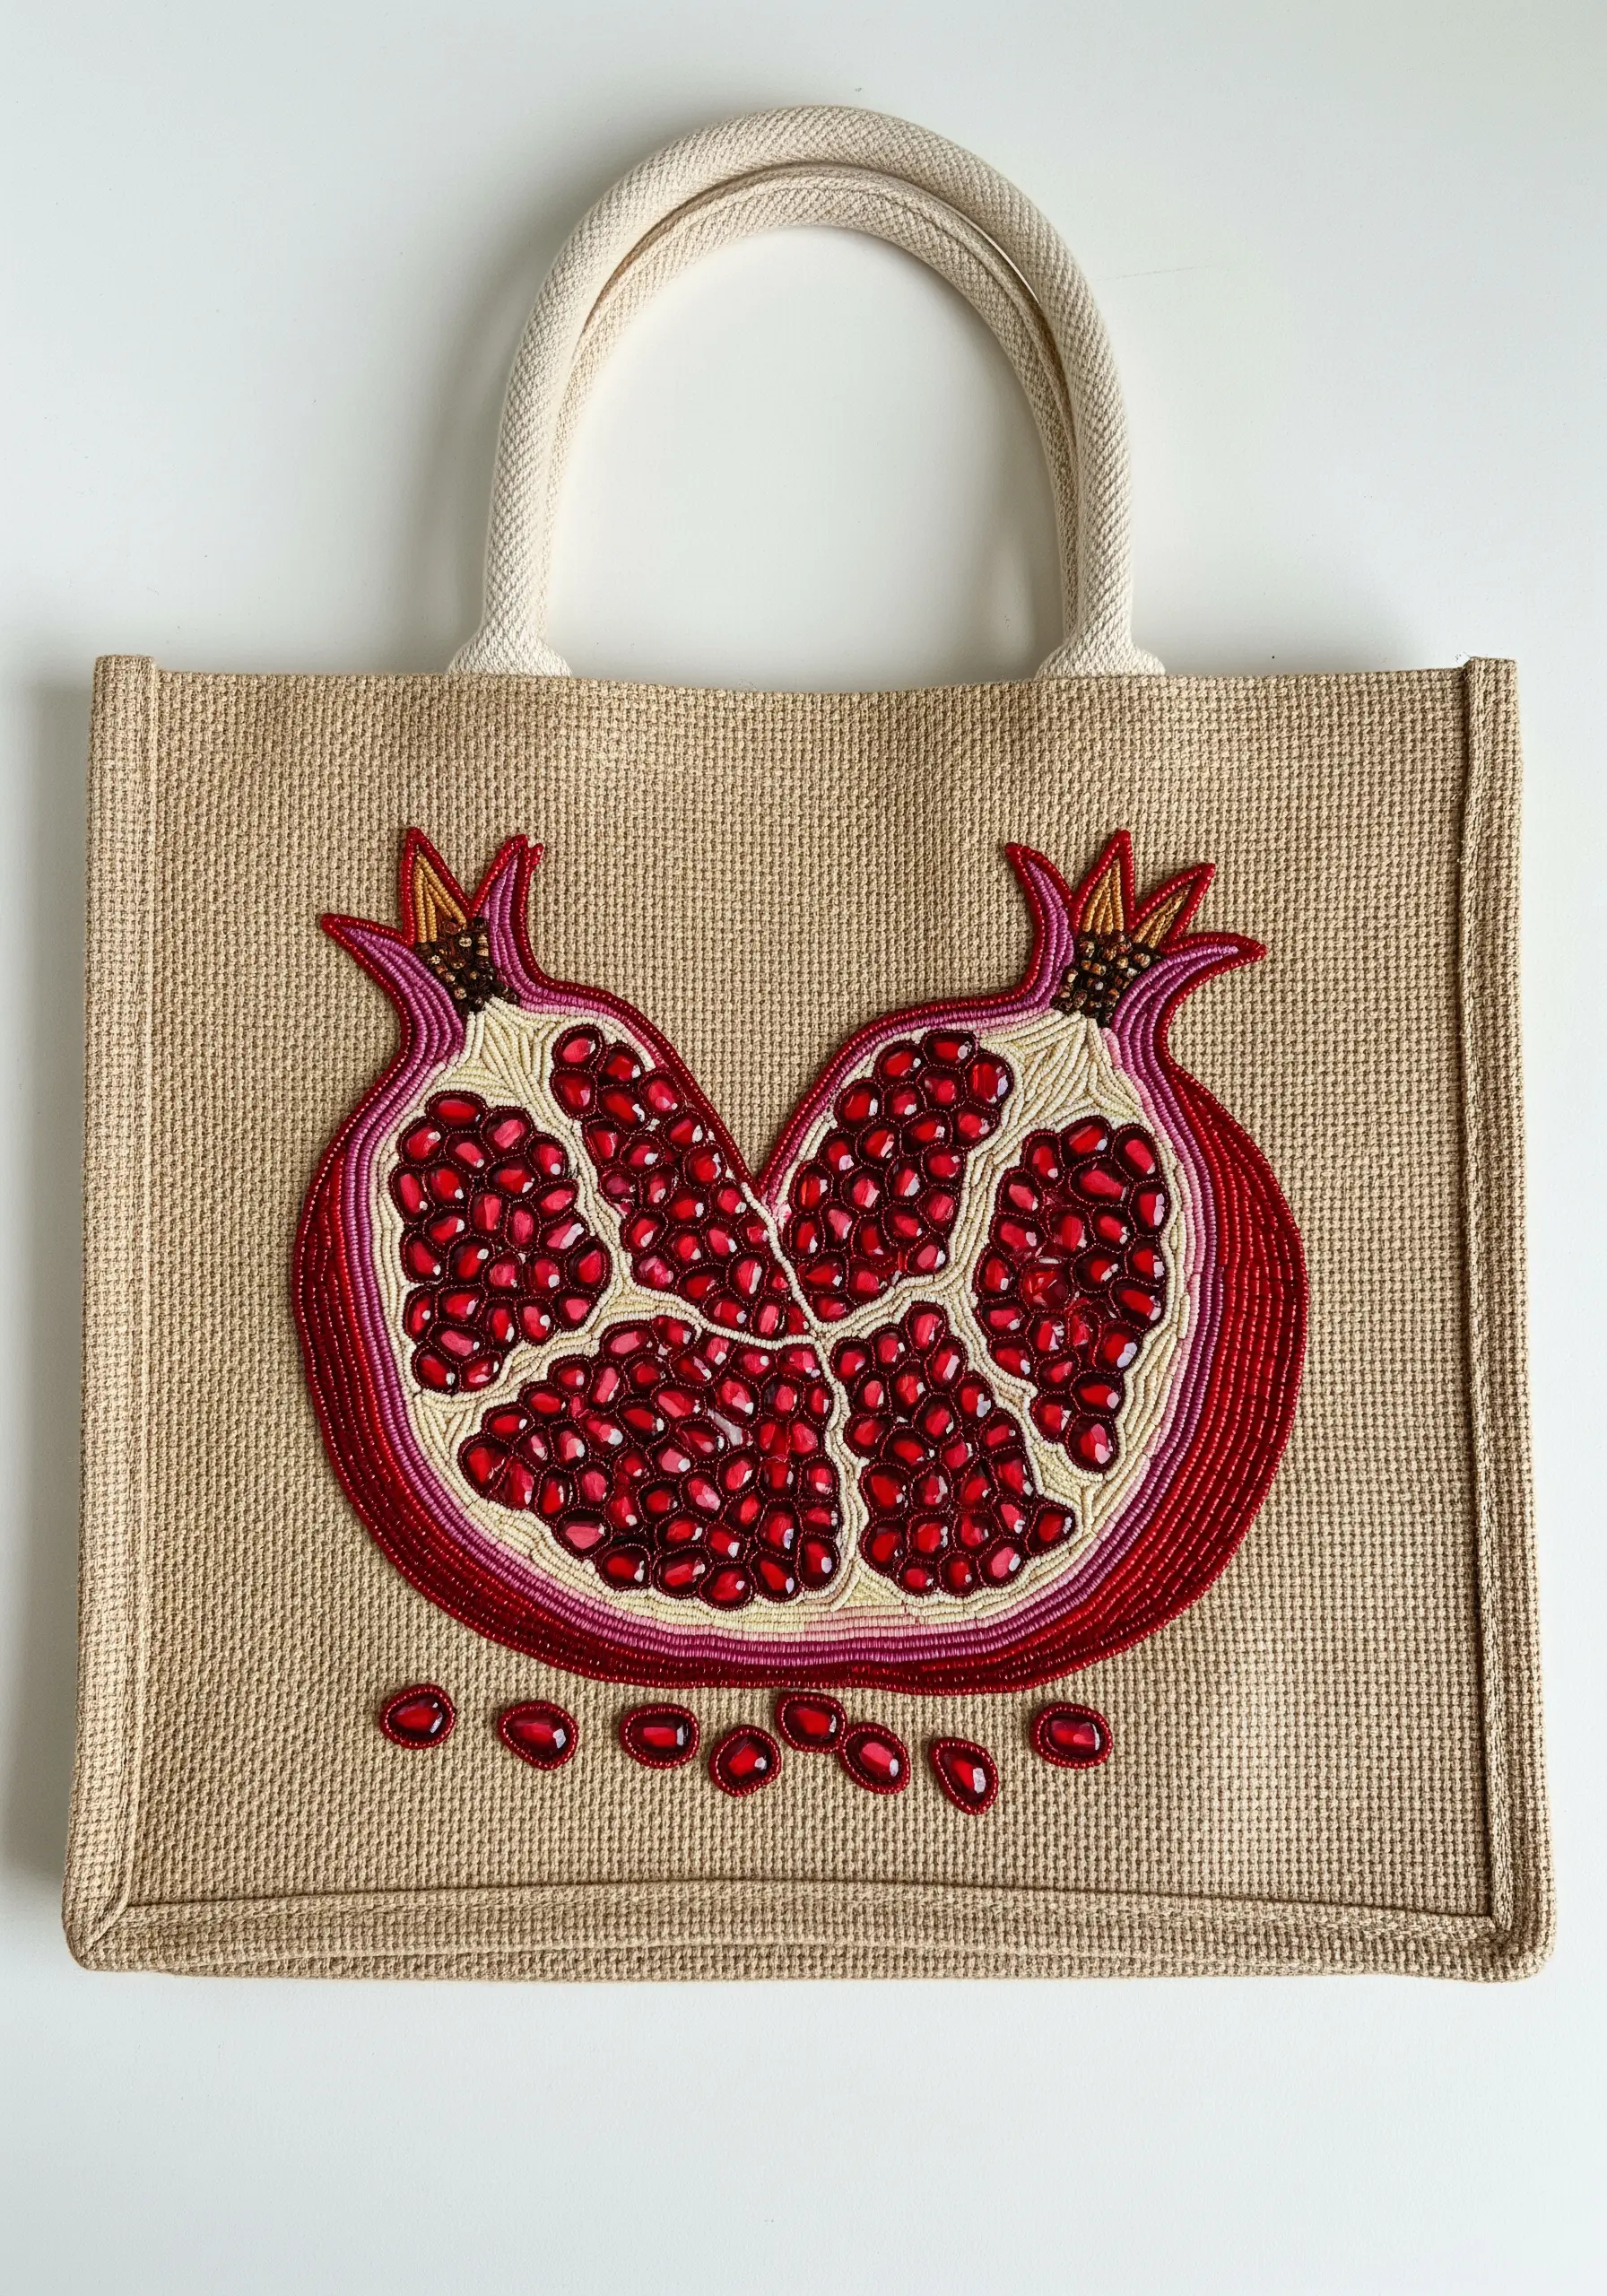
Combine embroidery with beading to give the pomegranate seeds a juicy, gem-like quality.
Outline the pomegranate sections with a heavy chain stitch or couched cord to create distinct, raised borders.
Fill the rind with long-and-short stitch in shades of red and pink for a painterly effect.
For the seeds, stitch down individual red seed beads or small teardrop beads, which catch the light and add incredible texture.
The rustic burlap fabric provides a beautiful, earthy contrast to the glittering beads, making the fruit appear even more luscious.
14. Cherry Blossoms in Satin Stitch
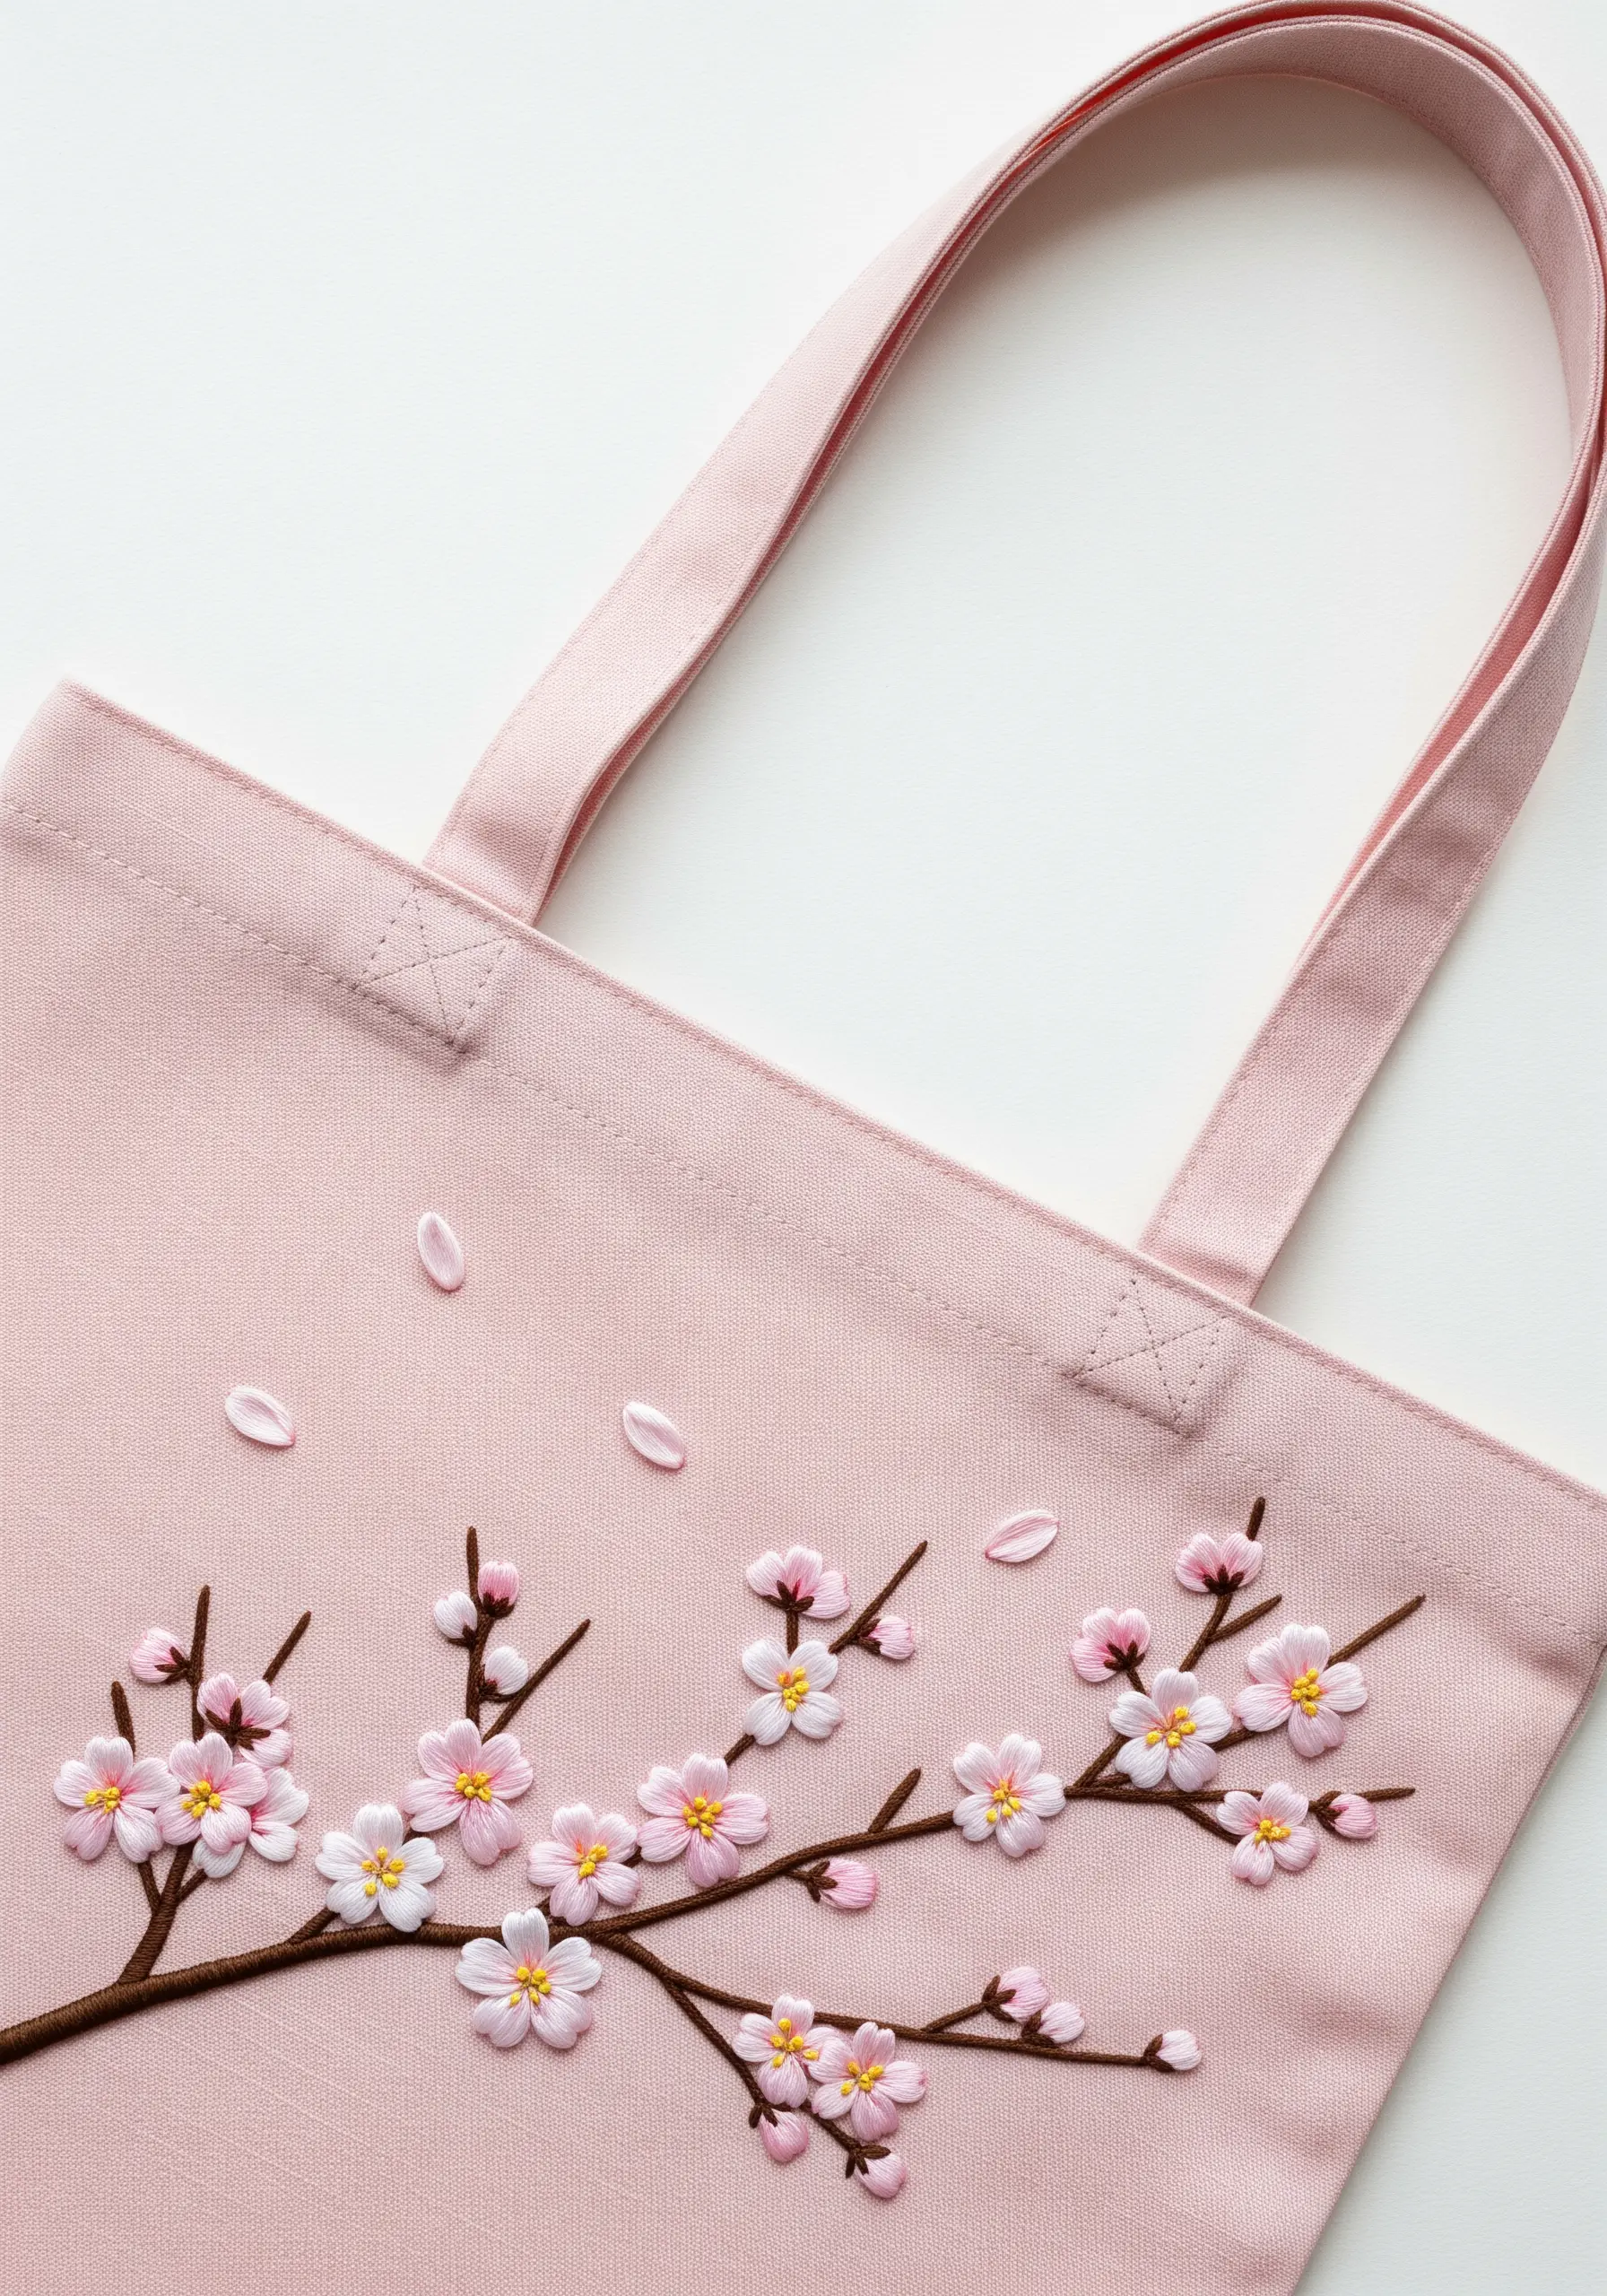
Achieve delicate, dimensional cherry blossoms using a combination of satin stitch and ribbon work.
For the petals, use a pale pink silk ribbon to create detached chain stitches, pulling gently to create a soft, rounded petal shape.
Alternatively, use floss and a standard satin stitch for each of the five petals, angling them toward a central point.
Add a single yellow French knot in the center of each blossom for the stamen.
Use a variegated brown thread for the branches in a stem stitch; the subtle color shifts will give the bark a more realistic, textured appearance.
15. Geometric Blackwork Heart

This striking design uses the principles of blackwork embroidery, where repeating geometric patterns fill a larger shape.
Use a single strand of vibrant red thread on a black canvas for the highest possible contrast.
The entire design is composed of straight stitches (Holbein stitch or backstitch), so precision is key. Use a water-soluble grid stabilizer to keep your lines perfectly straight and your patterns uniform.
The beauty of this technique lies in the intricate, almost maze-like texture created by the simple repetition of lines.
It’s a modern, graphic take on a classic romantic symbol.
16. Minimalist Celtic Love Knot
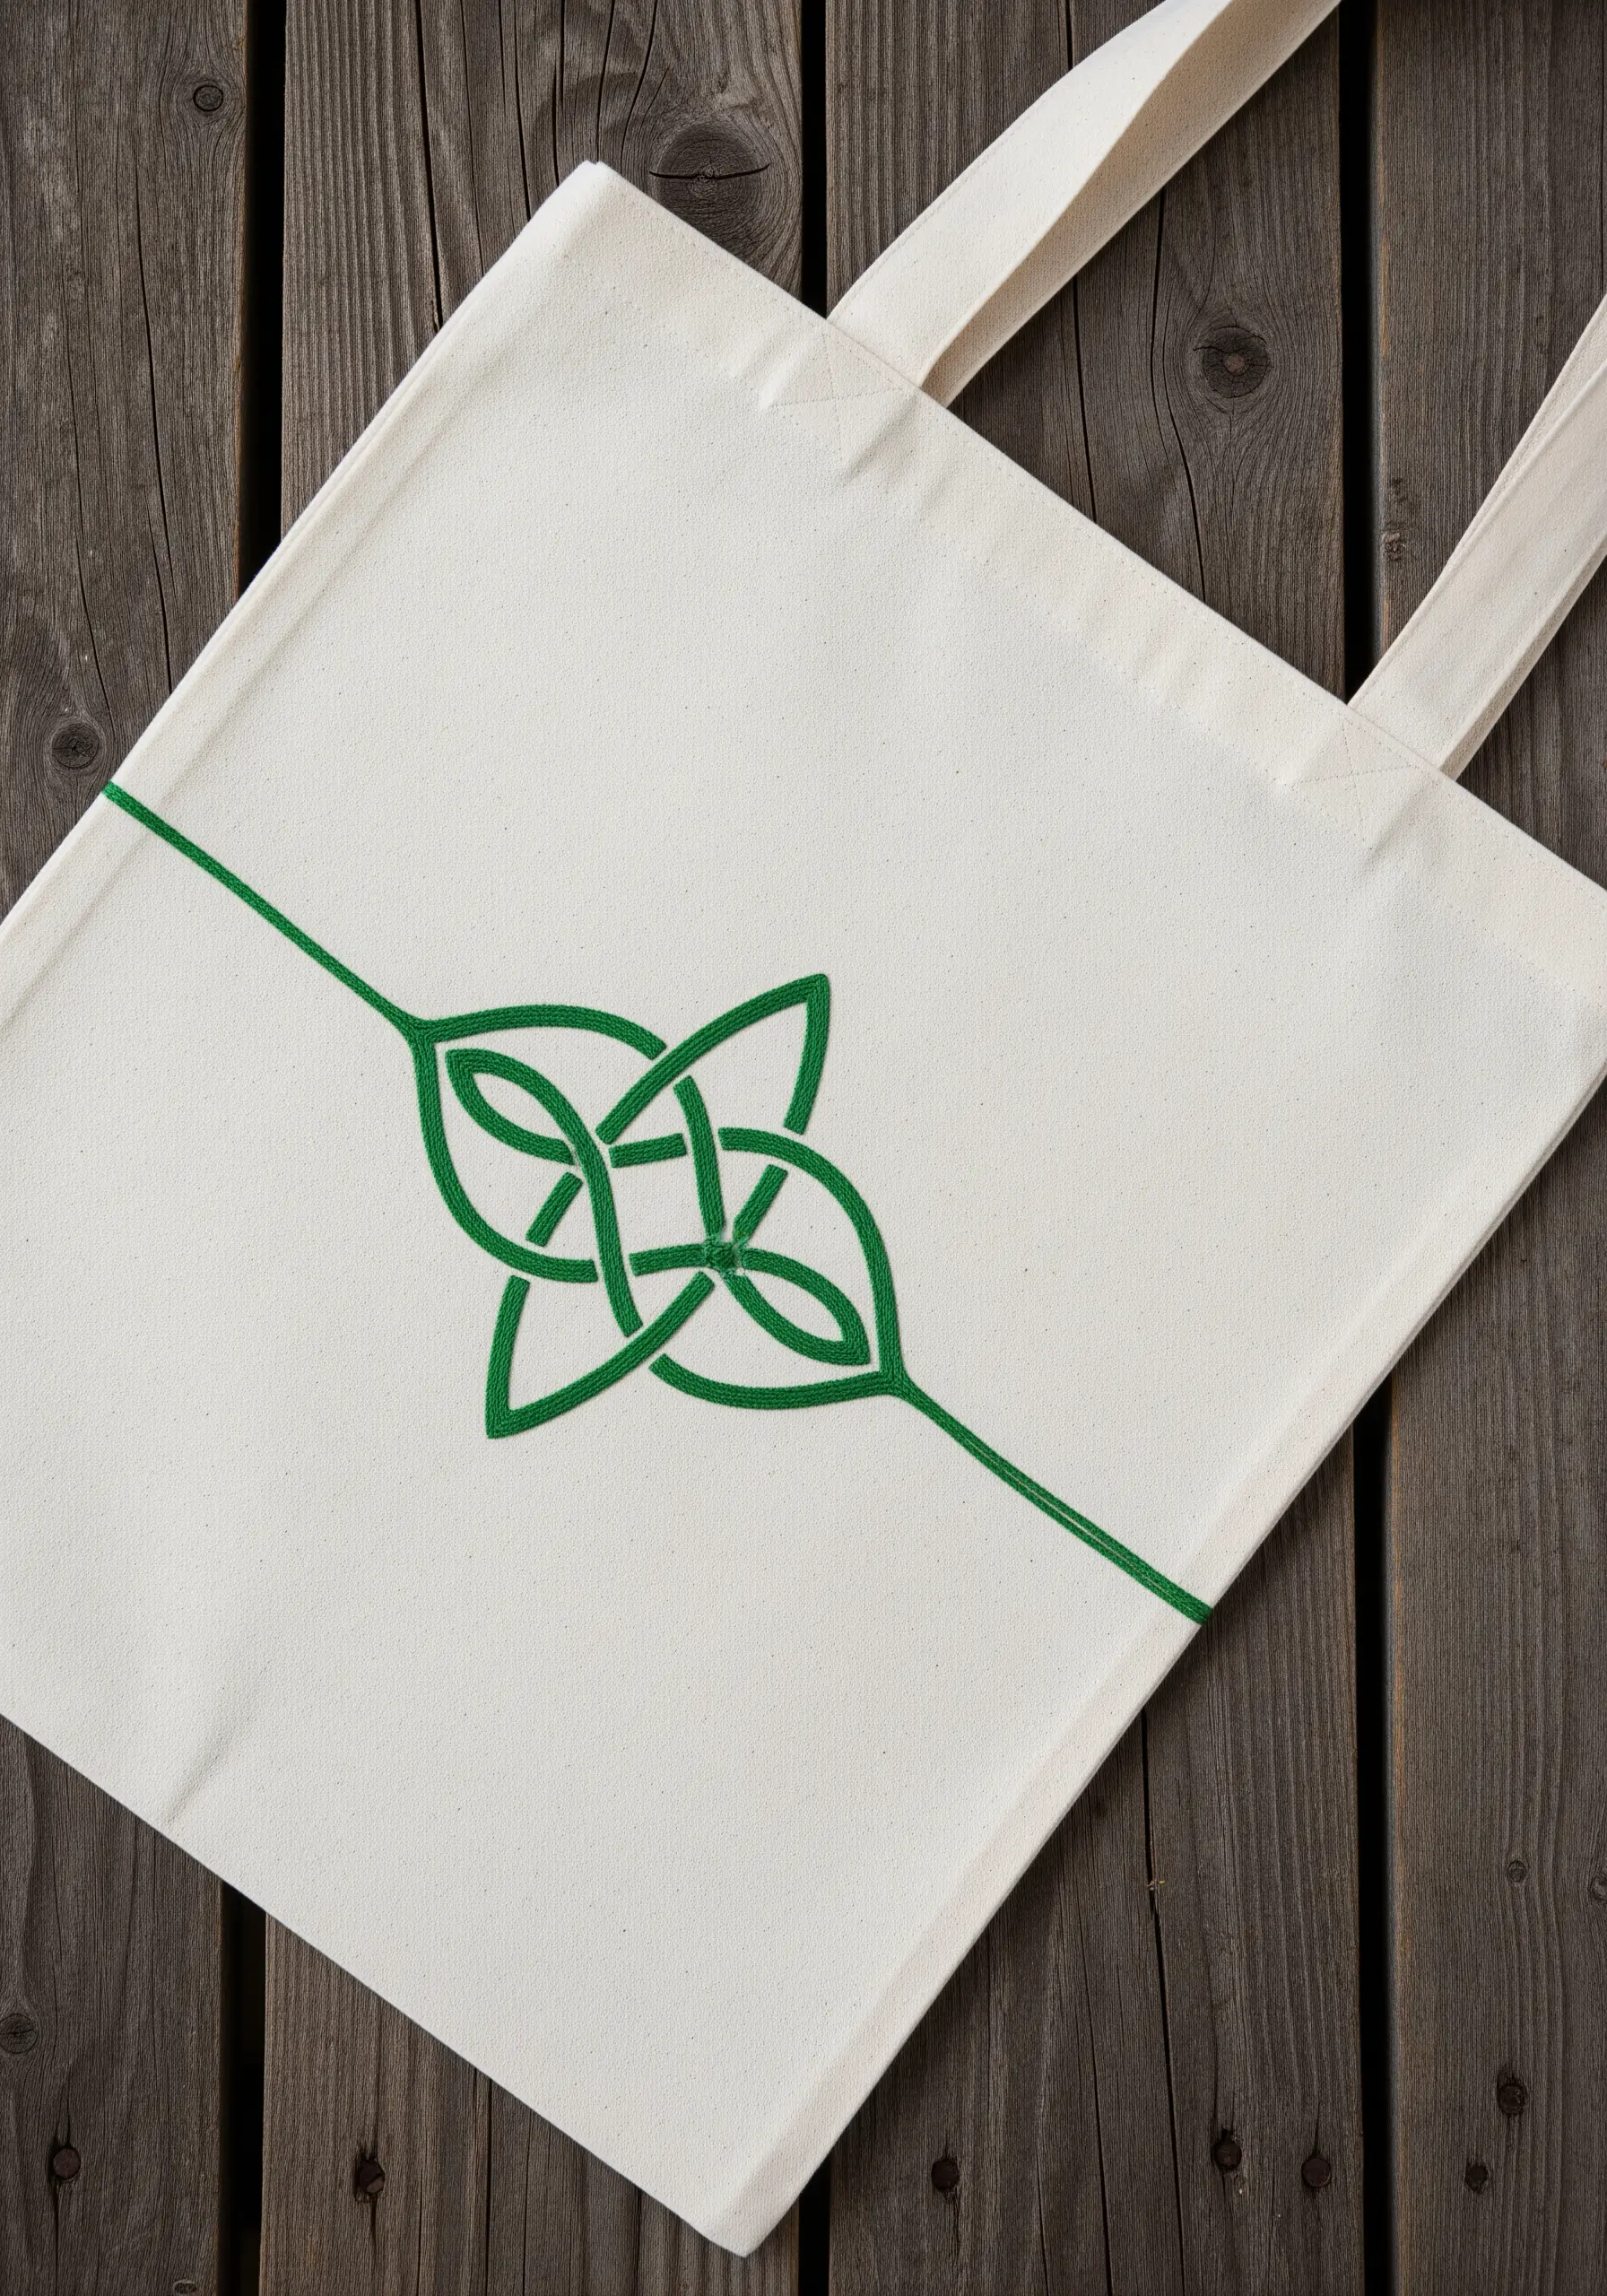
The elegance of a Celtic knot lies in its continuous, unbroken lines. A whipped backstitch is the perfect choice to achieve this smoothness.
First, create the entire knot design using a standard backstitch with three or four strands of floss.
Then, take a new length of the same thread and ‘whip’ it by sliding your needle under each backstitch without piercing the fabric. This covers the segmented look and creates a single, flowing line.
Choosing a bold color like emerald green on a neutral canvas makes the intricate knot the undeniable focus of the piece.
17. ‘Our Adventure’ Nautical Theme
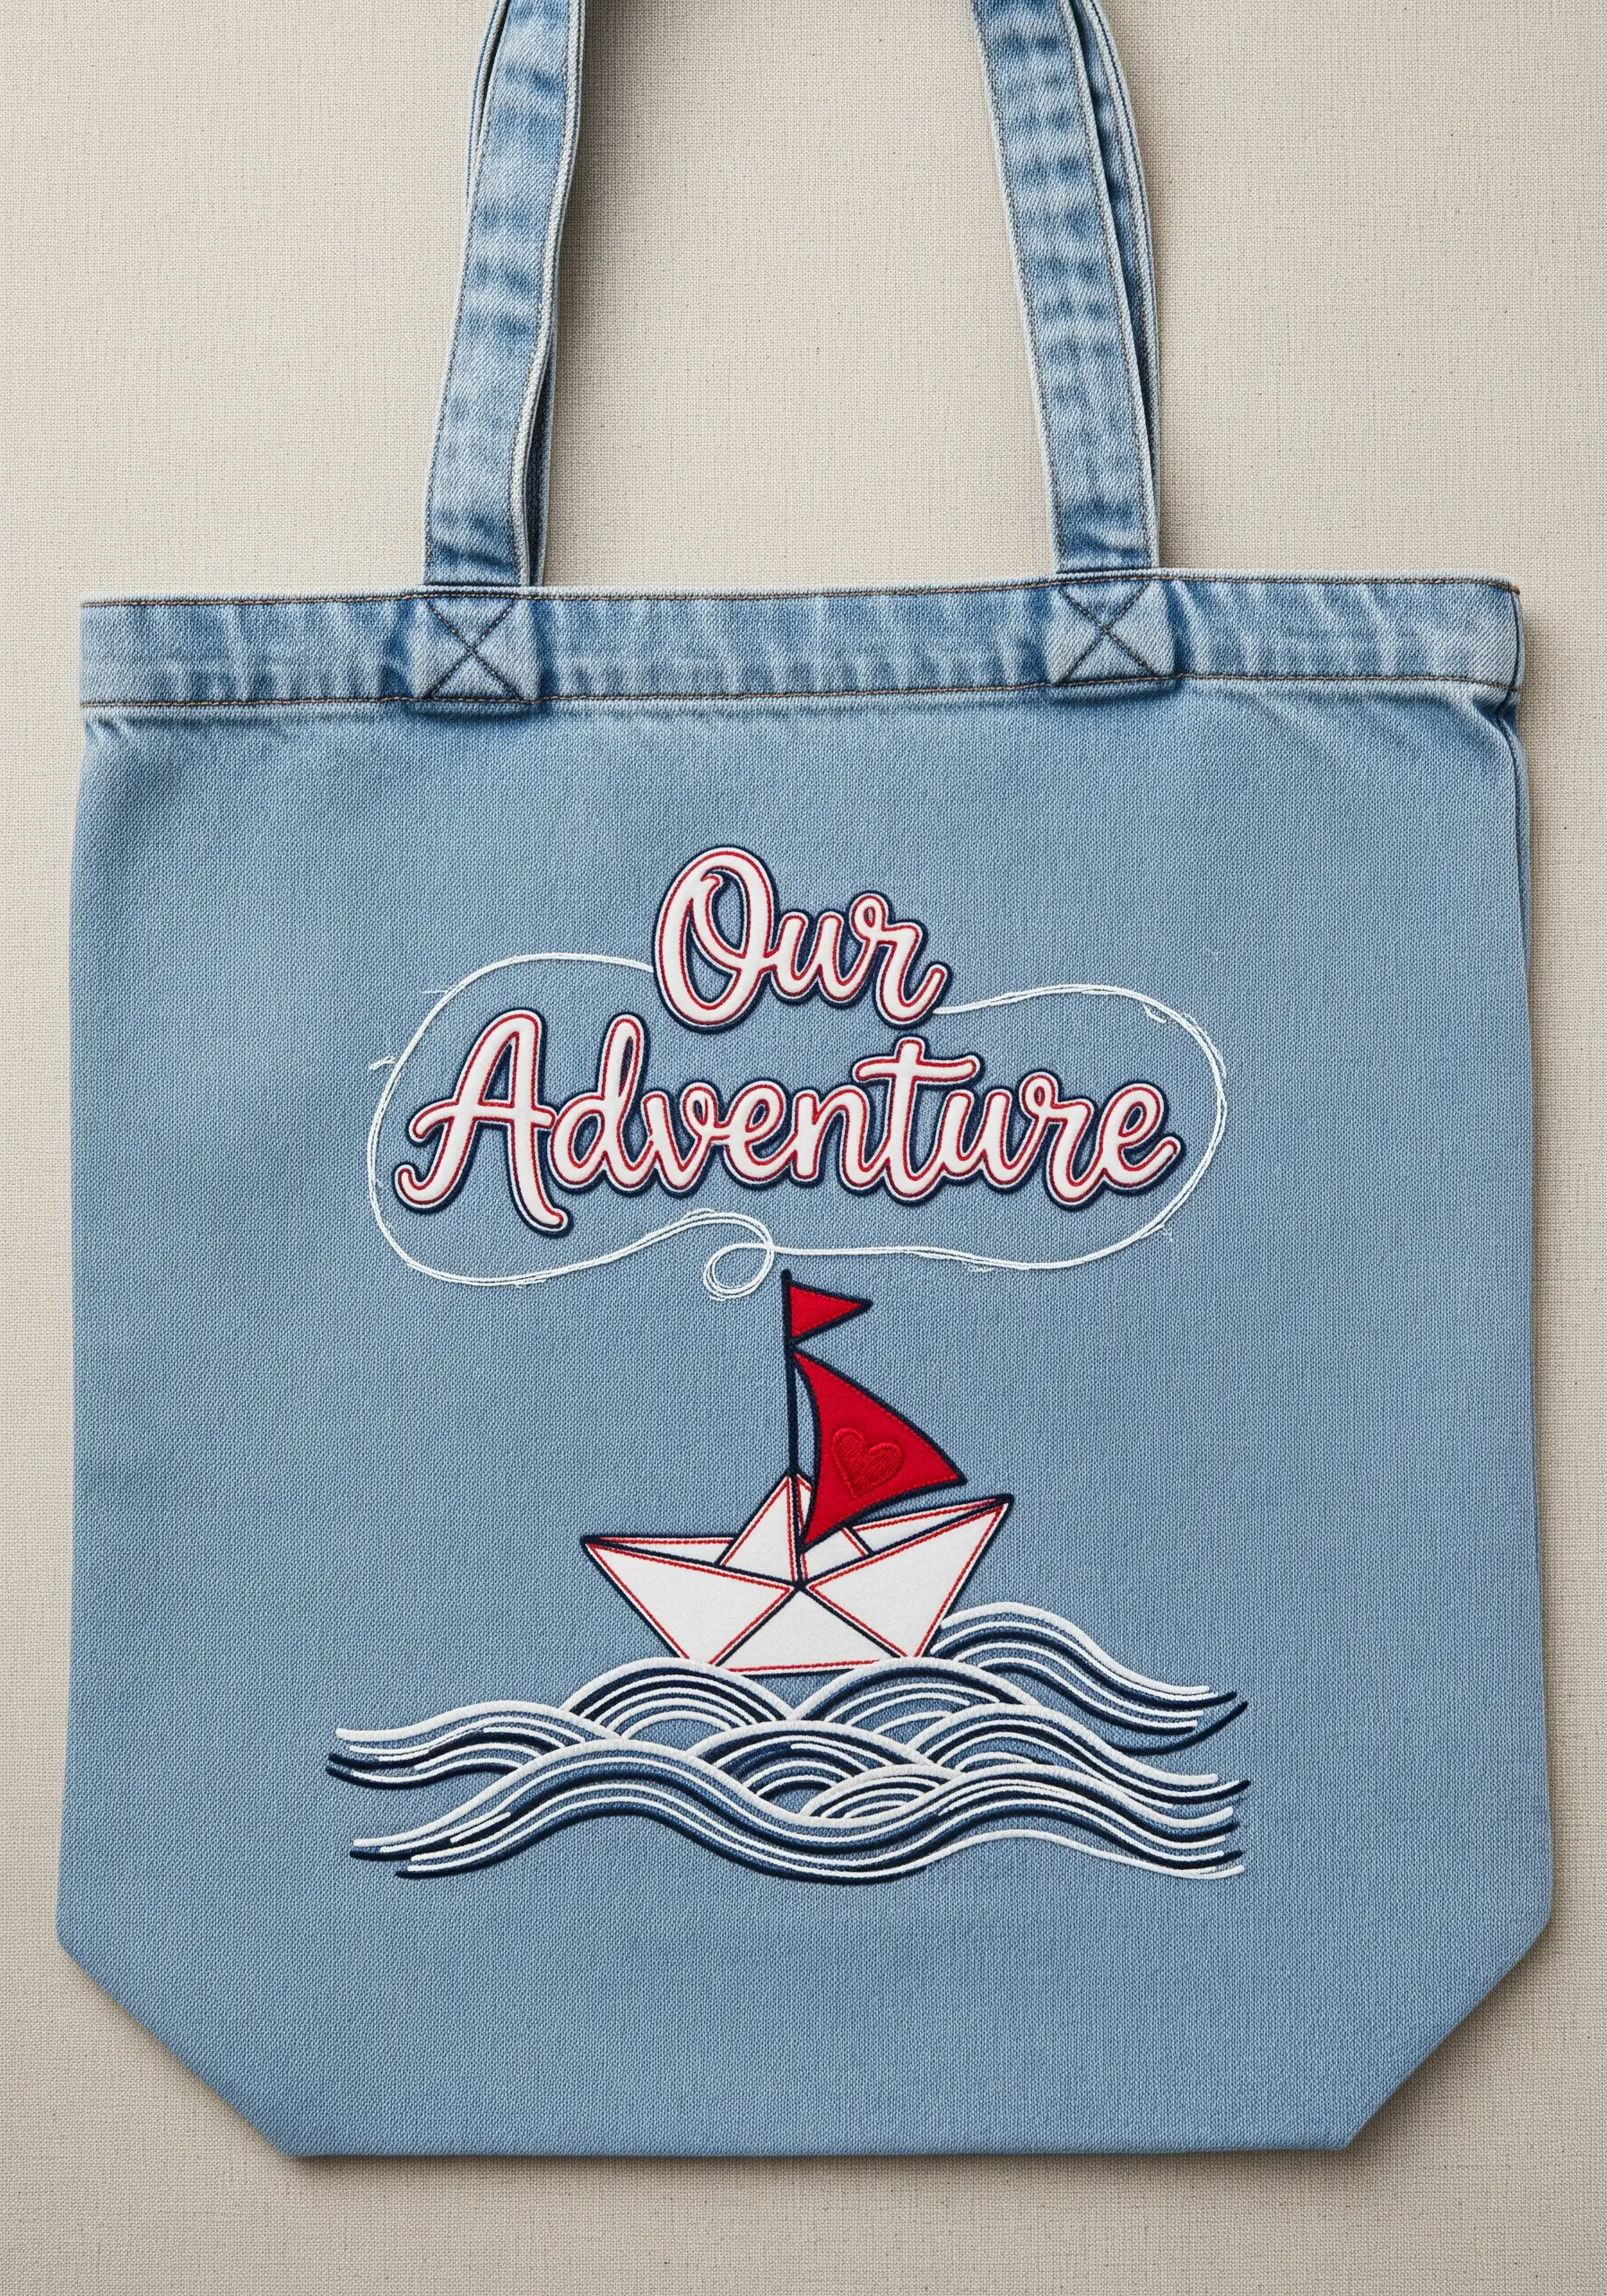
Combine typography and illustration for a charming, story-driven design on durable denim.
For the script lettering, use a padded satin stitch to make the words pop. Outline the letters with a split stitch, then fill the area with horizontal satin stitches before covering it with your final vertical satin stitches.
The paper boat can be a simple appliqué of white cotton fabric, outlined with a black backstitch to mimic ink lines.
Use varying lengths of straight stitch in white and navy to create the stylized waves, giving them a sense of movement.
18. Hyperrealistic Embroidered Moon
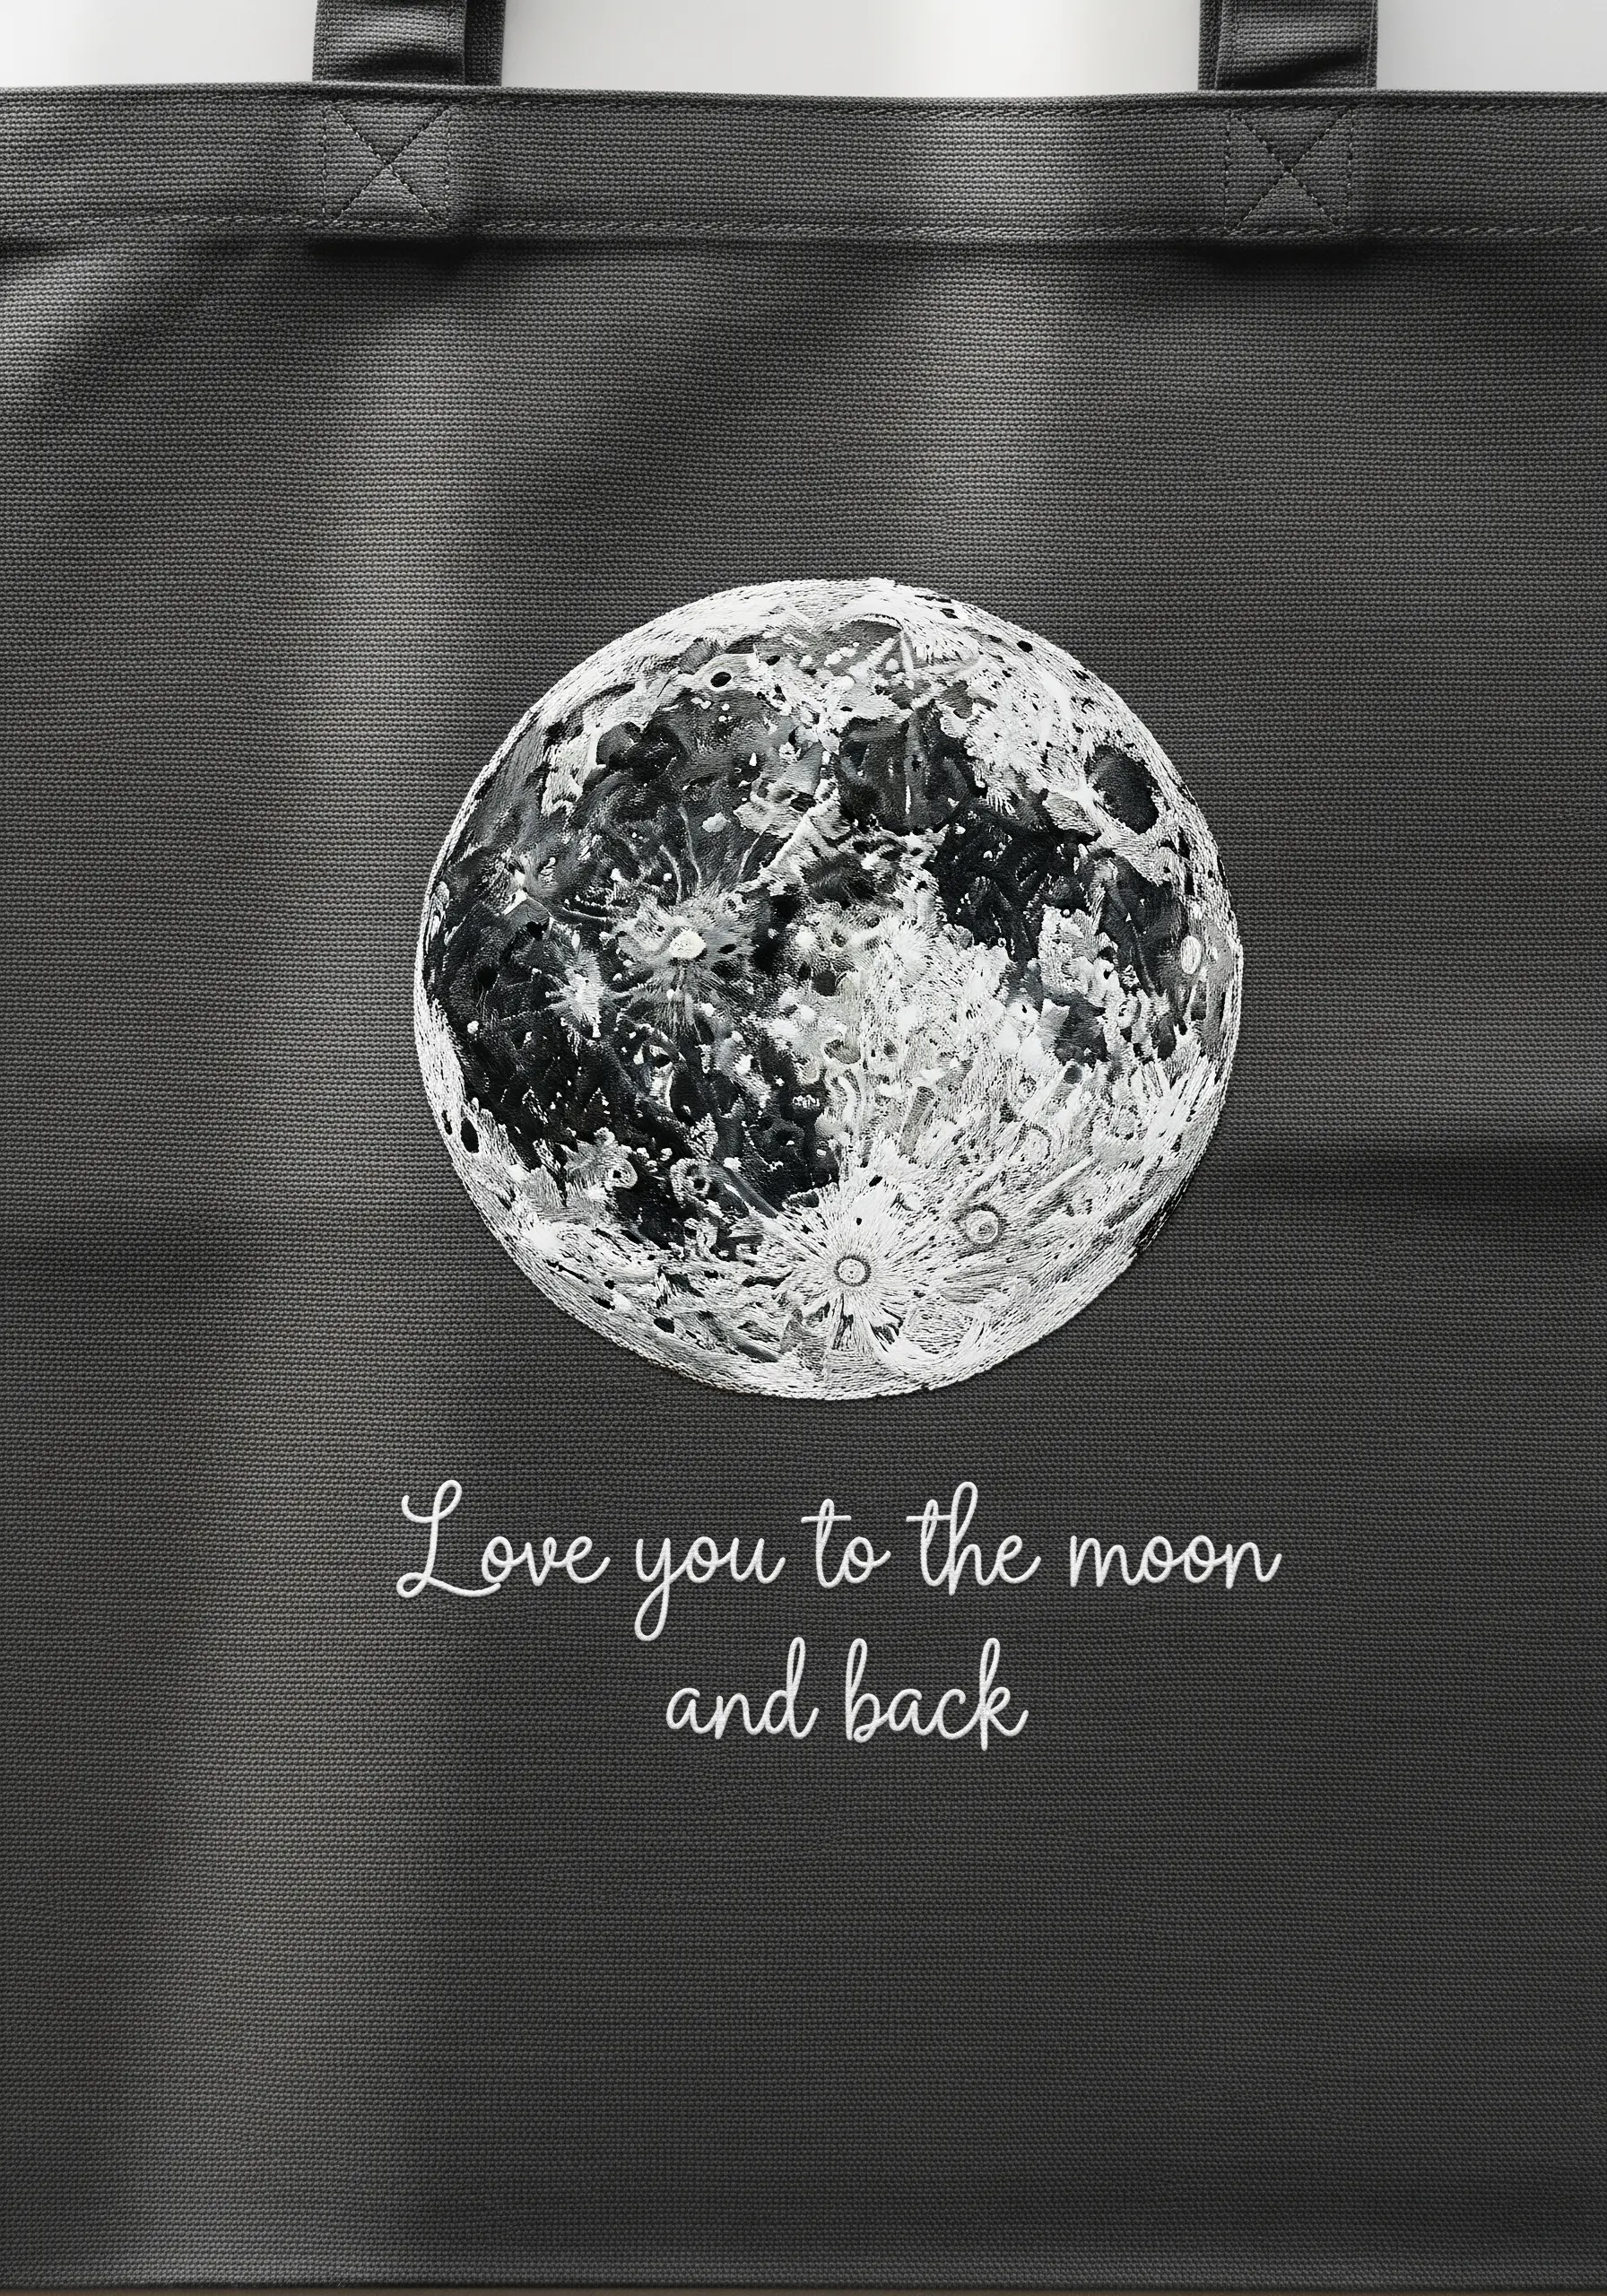
Create a stunningly realistic moon using a technique called thread painting, which relies on dense, layered stitches.
Work in a small hoop and use single strands of floss in various shades of white, grey, and black.
Fill the surface with a chaotic mix of tiny straight stitches, seed stitches, and French knots to mimic the moon’s textured craters and plains.
Overlap your colors organically rather than trying to blend them perfectly; this creates the sharp contrasts and textures seen on the lunar surface.
This is a testament to how abstract stitching can create a realistic result.
19. Morning Coffee for Two
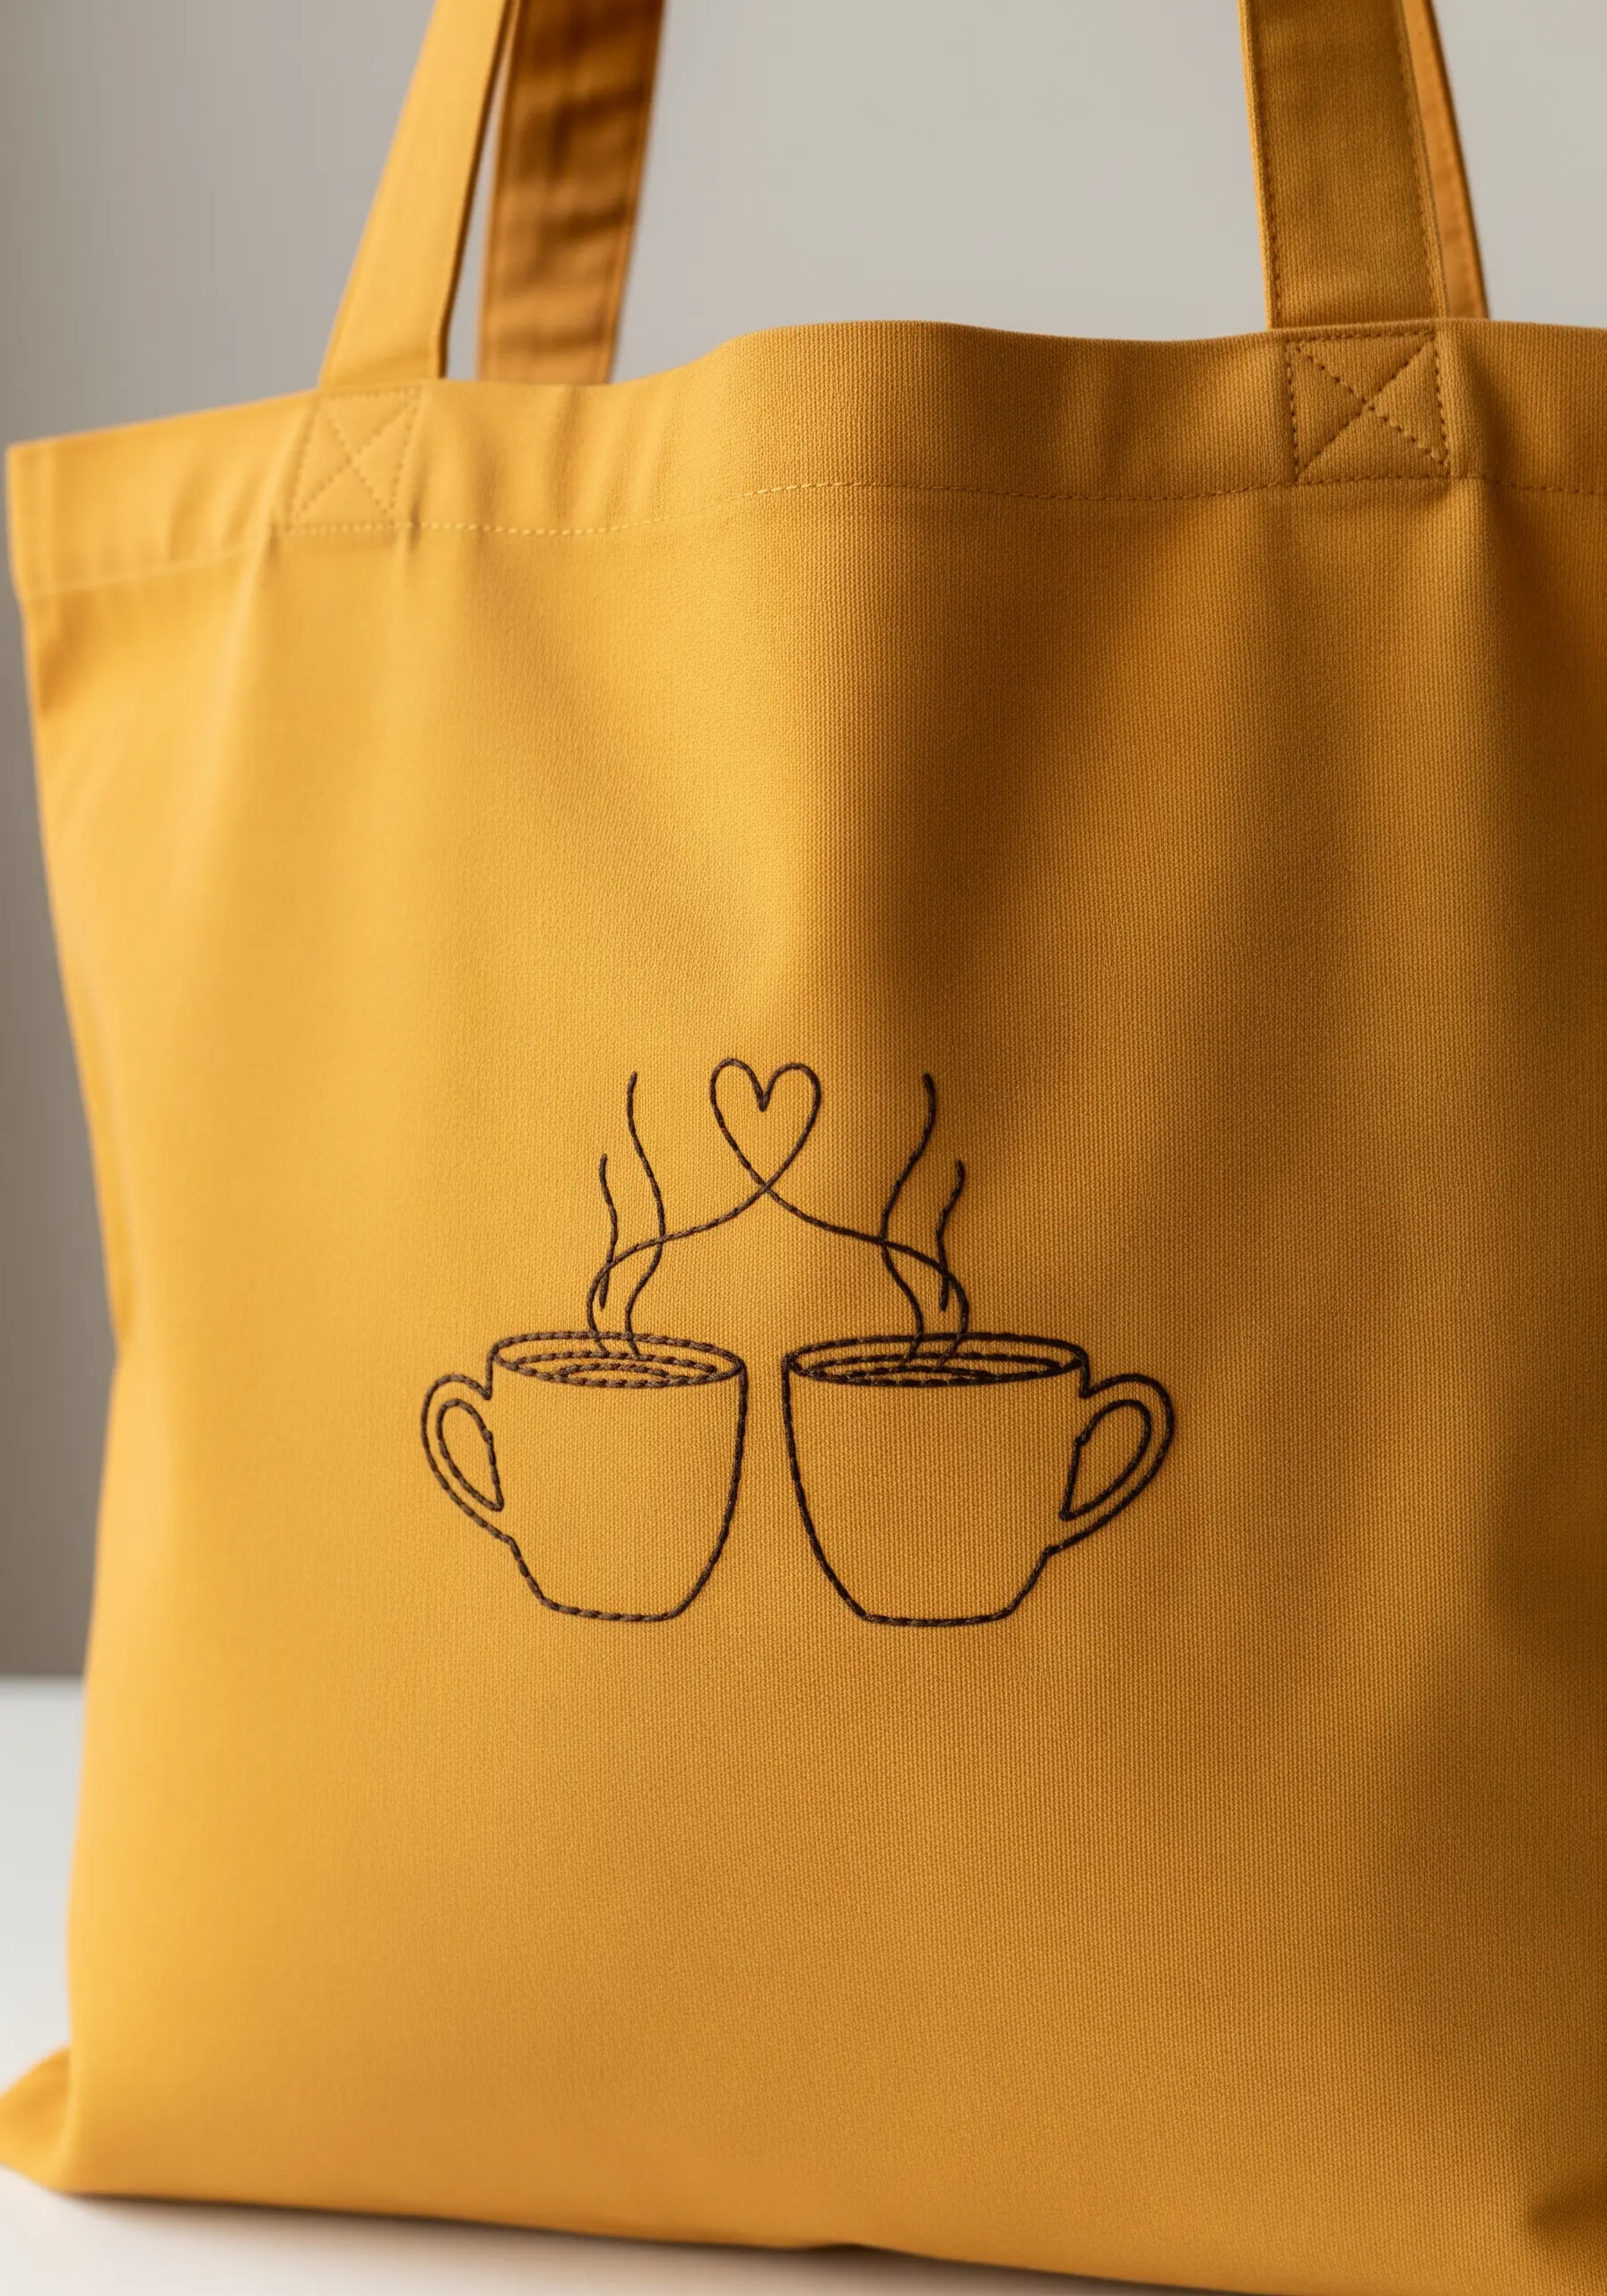
This sweet, simple design is all about clean lines and subtle details. Use a two-strand backstitch for the outlines of the mugs for a delicate, hand-drawn look.
The steam rising to form a heart is the key romantic element; stitch it with a single strand of floss in a stem stitch to give it a fine, wispy appearance.
To suggest the heat of the coffee, fill the top of each mug with a series of short, horizontal straight stitches in a slightly darker shade than the outline.
The mustard yellow tote provides a warm, inviting backdrop that beautifully complements the cozy theme.
20. A Classic Wildflower Bouquet
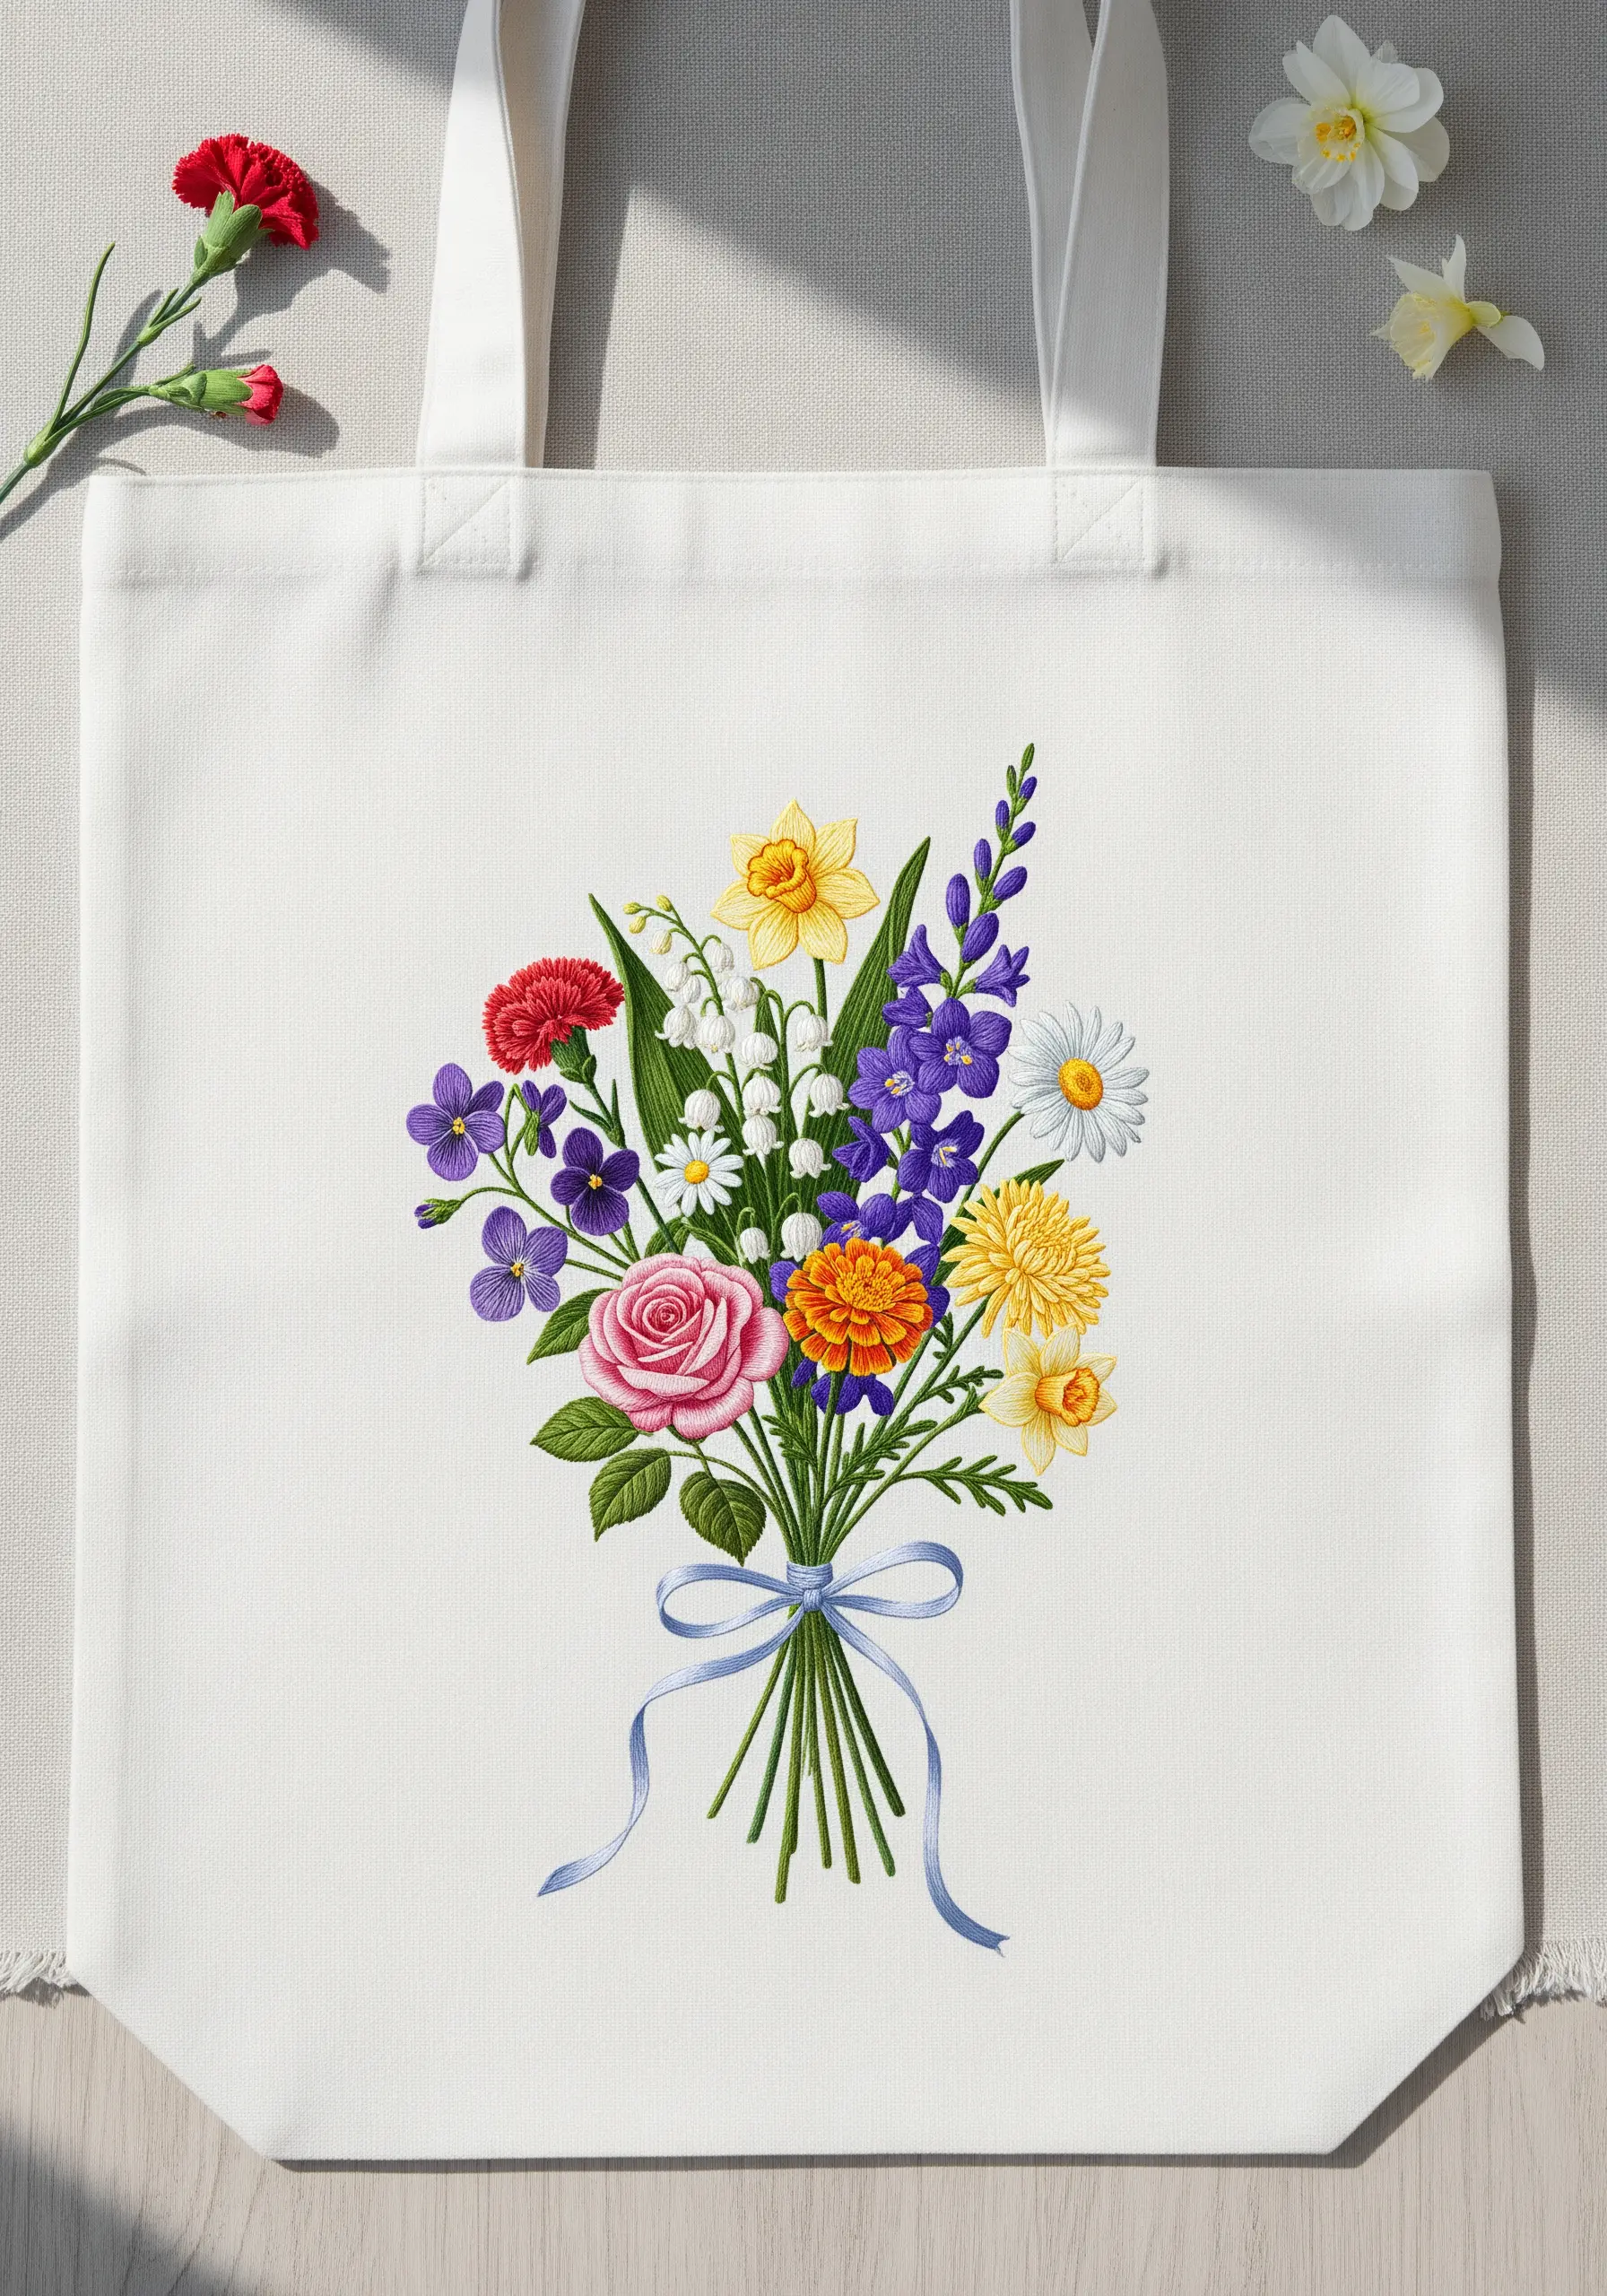
To create a bouquet that feels both classic and vibrant, focus on varying your stitch textures for each type of flower.
Use woven wheel stitches for the roses to create raised, circular blooms, and lazy daisy stitches for the smaller white and purple flowers.
Long, straight satin stitches are perfect for the bell-shaped flowers and the smooth leaves.
Don’t be afraid to mix colors within a single flower to add depth. For example, use a pale yellow center with white satin-stitched petals for the daisies.
Tie it all together with a simple blue backstitched ribbon to ground the composition.
21. Carved Initials in a Tree Trunk
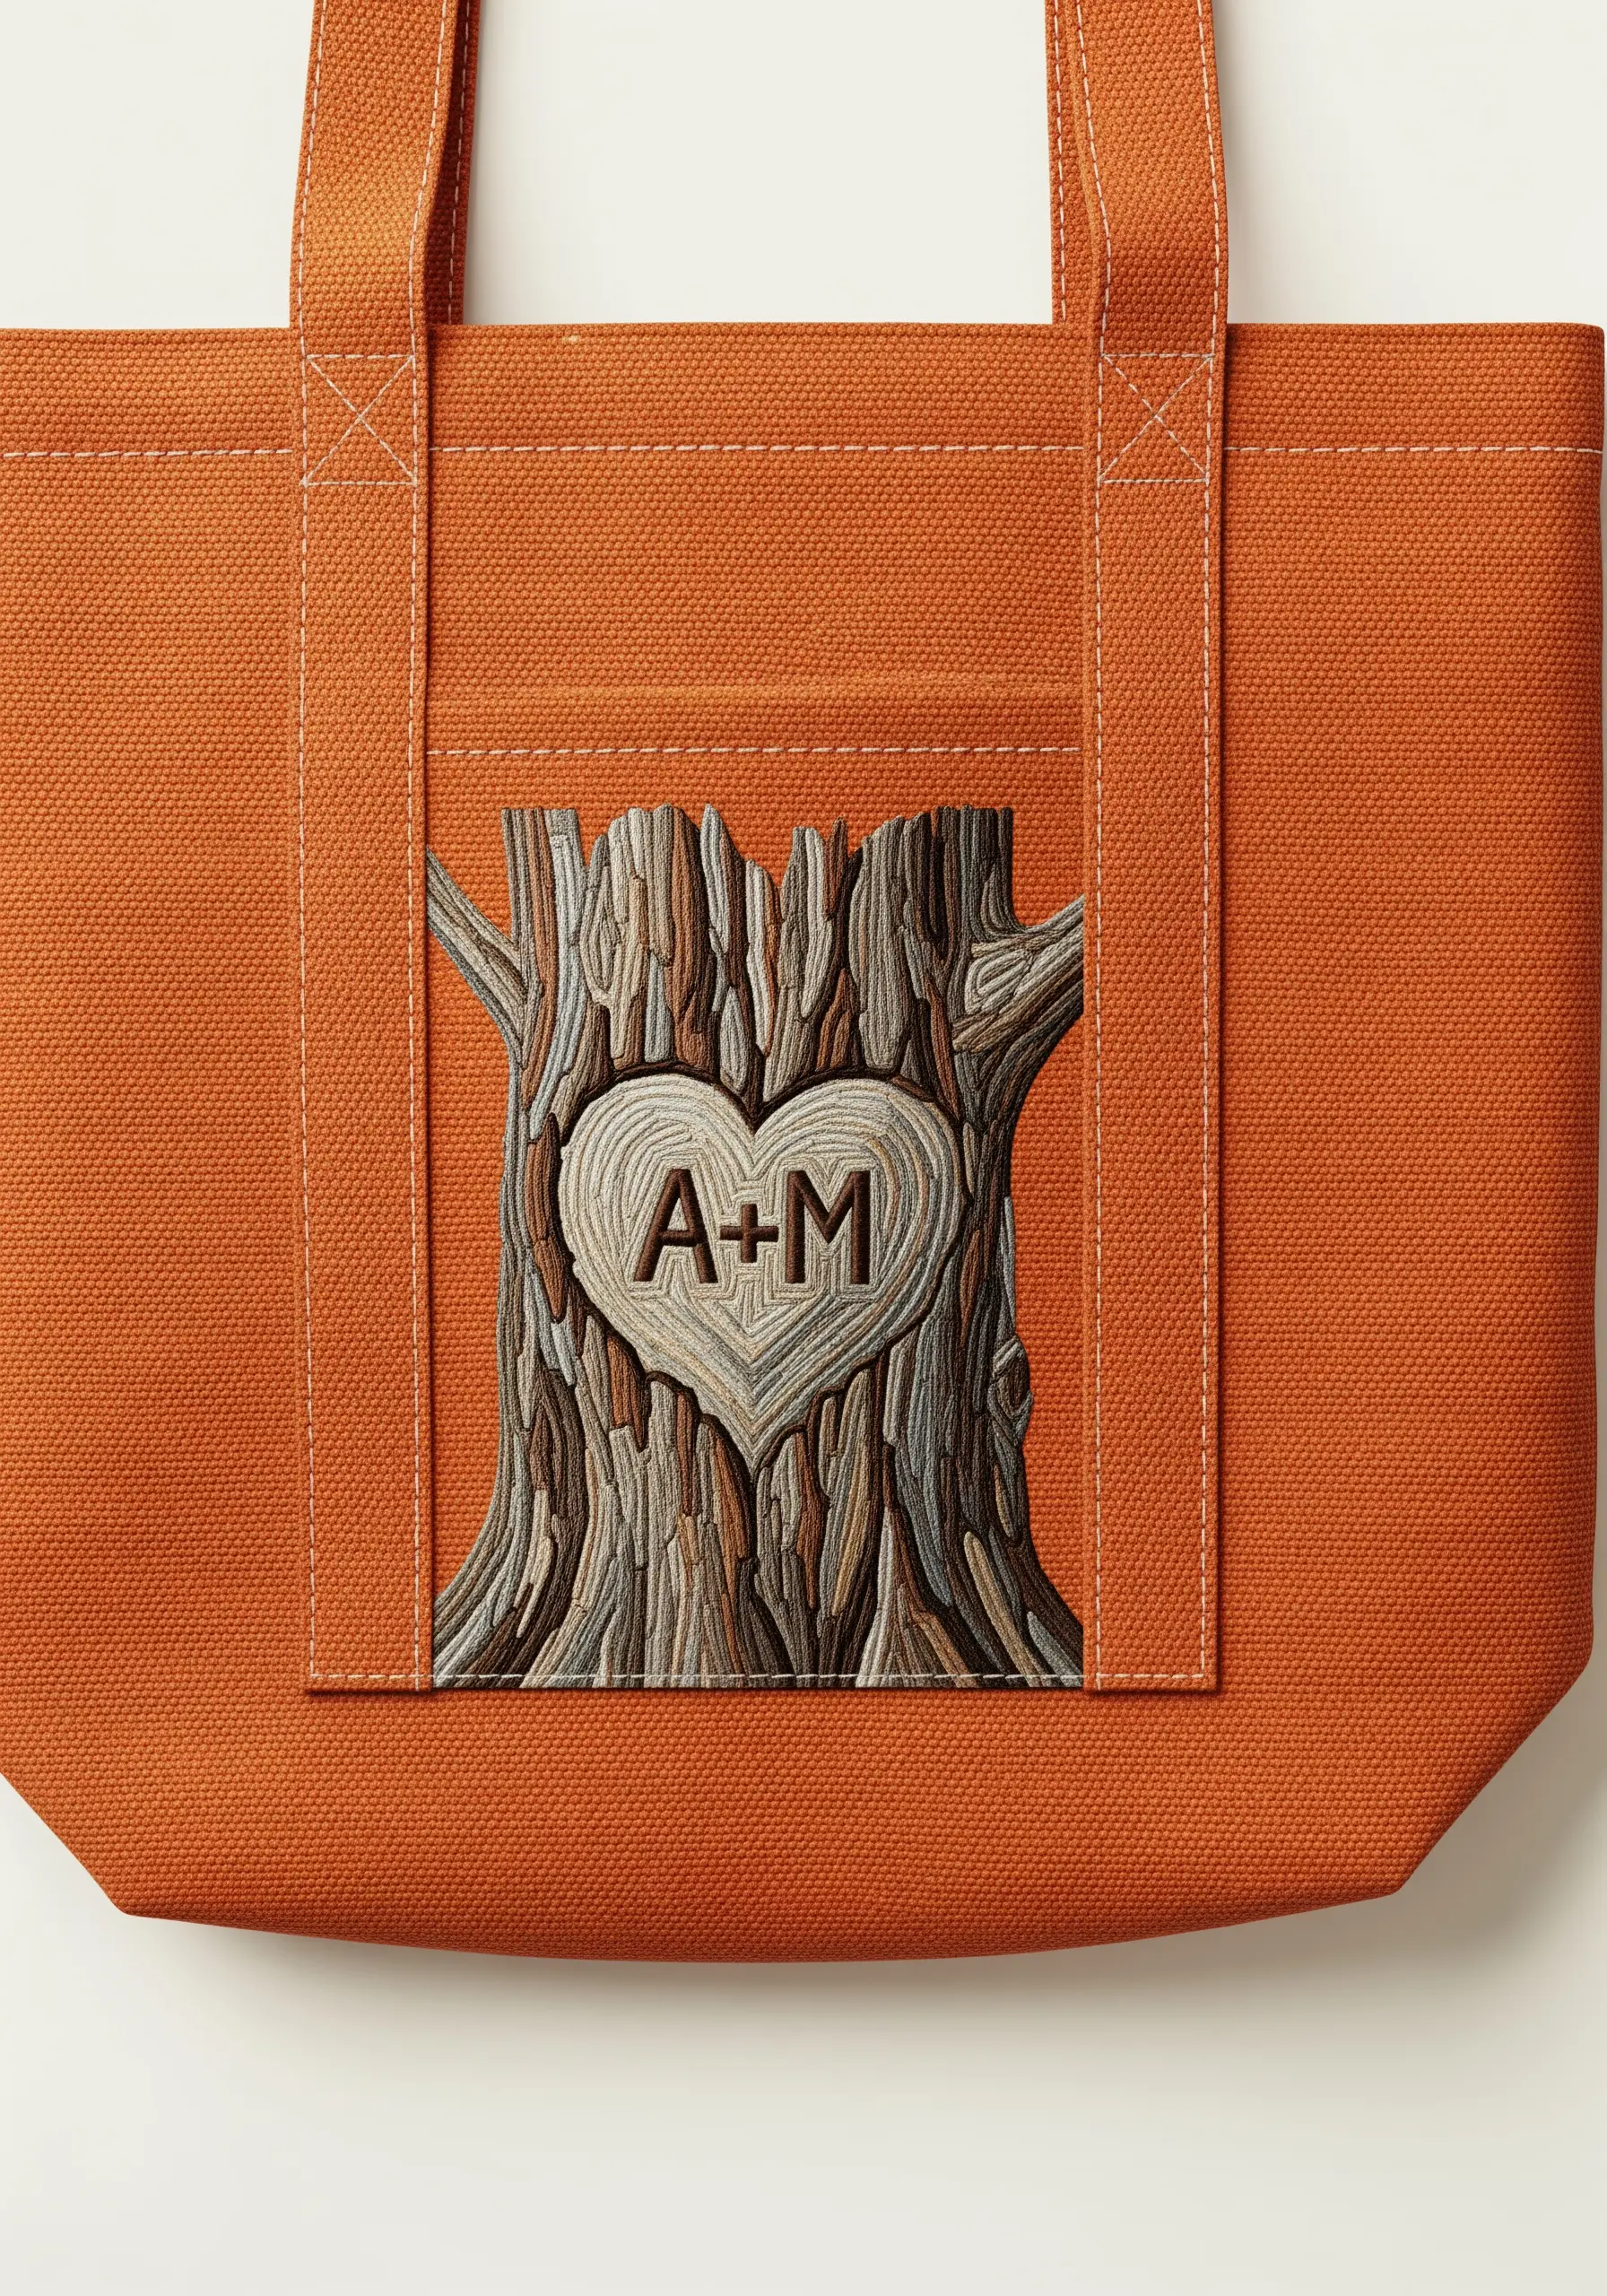
Mimic the texture of tree bark by using vertical long-and-short stitches in a mix of brown, grey, and beige threads.
Vary your stitch direction slightly, angling your needle to follow the organic lines of the bark, which prevents the design from looking too flat or uniform.
For the carved heart, first outline it with a dark brown split stitch to create the illusion of depth.
Fill the heart and initials with satin stitches in a lighter, contrasting wood tone to make them appear freshly carved.
This technique creates incredible realism and is a beautiful way to stitch natural textures.
22. The Shimmering Peacock Feather
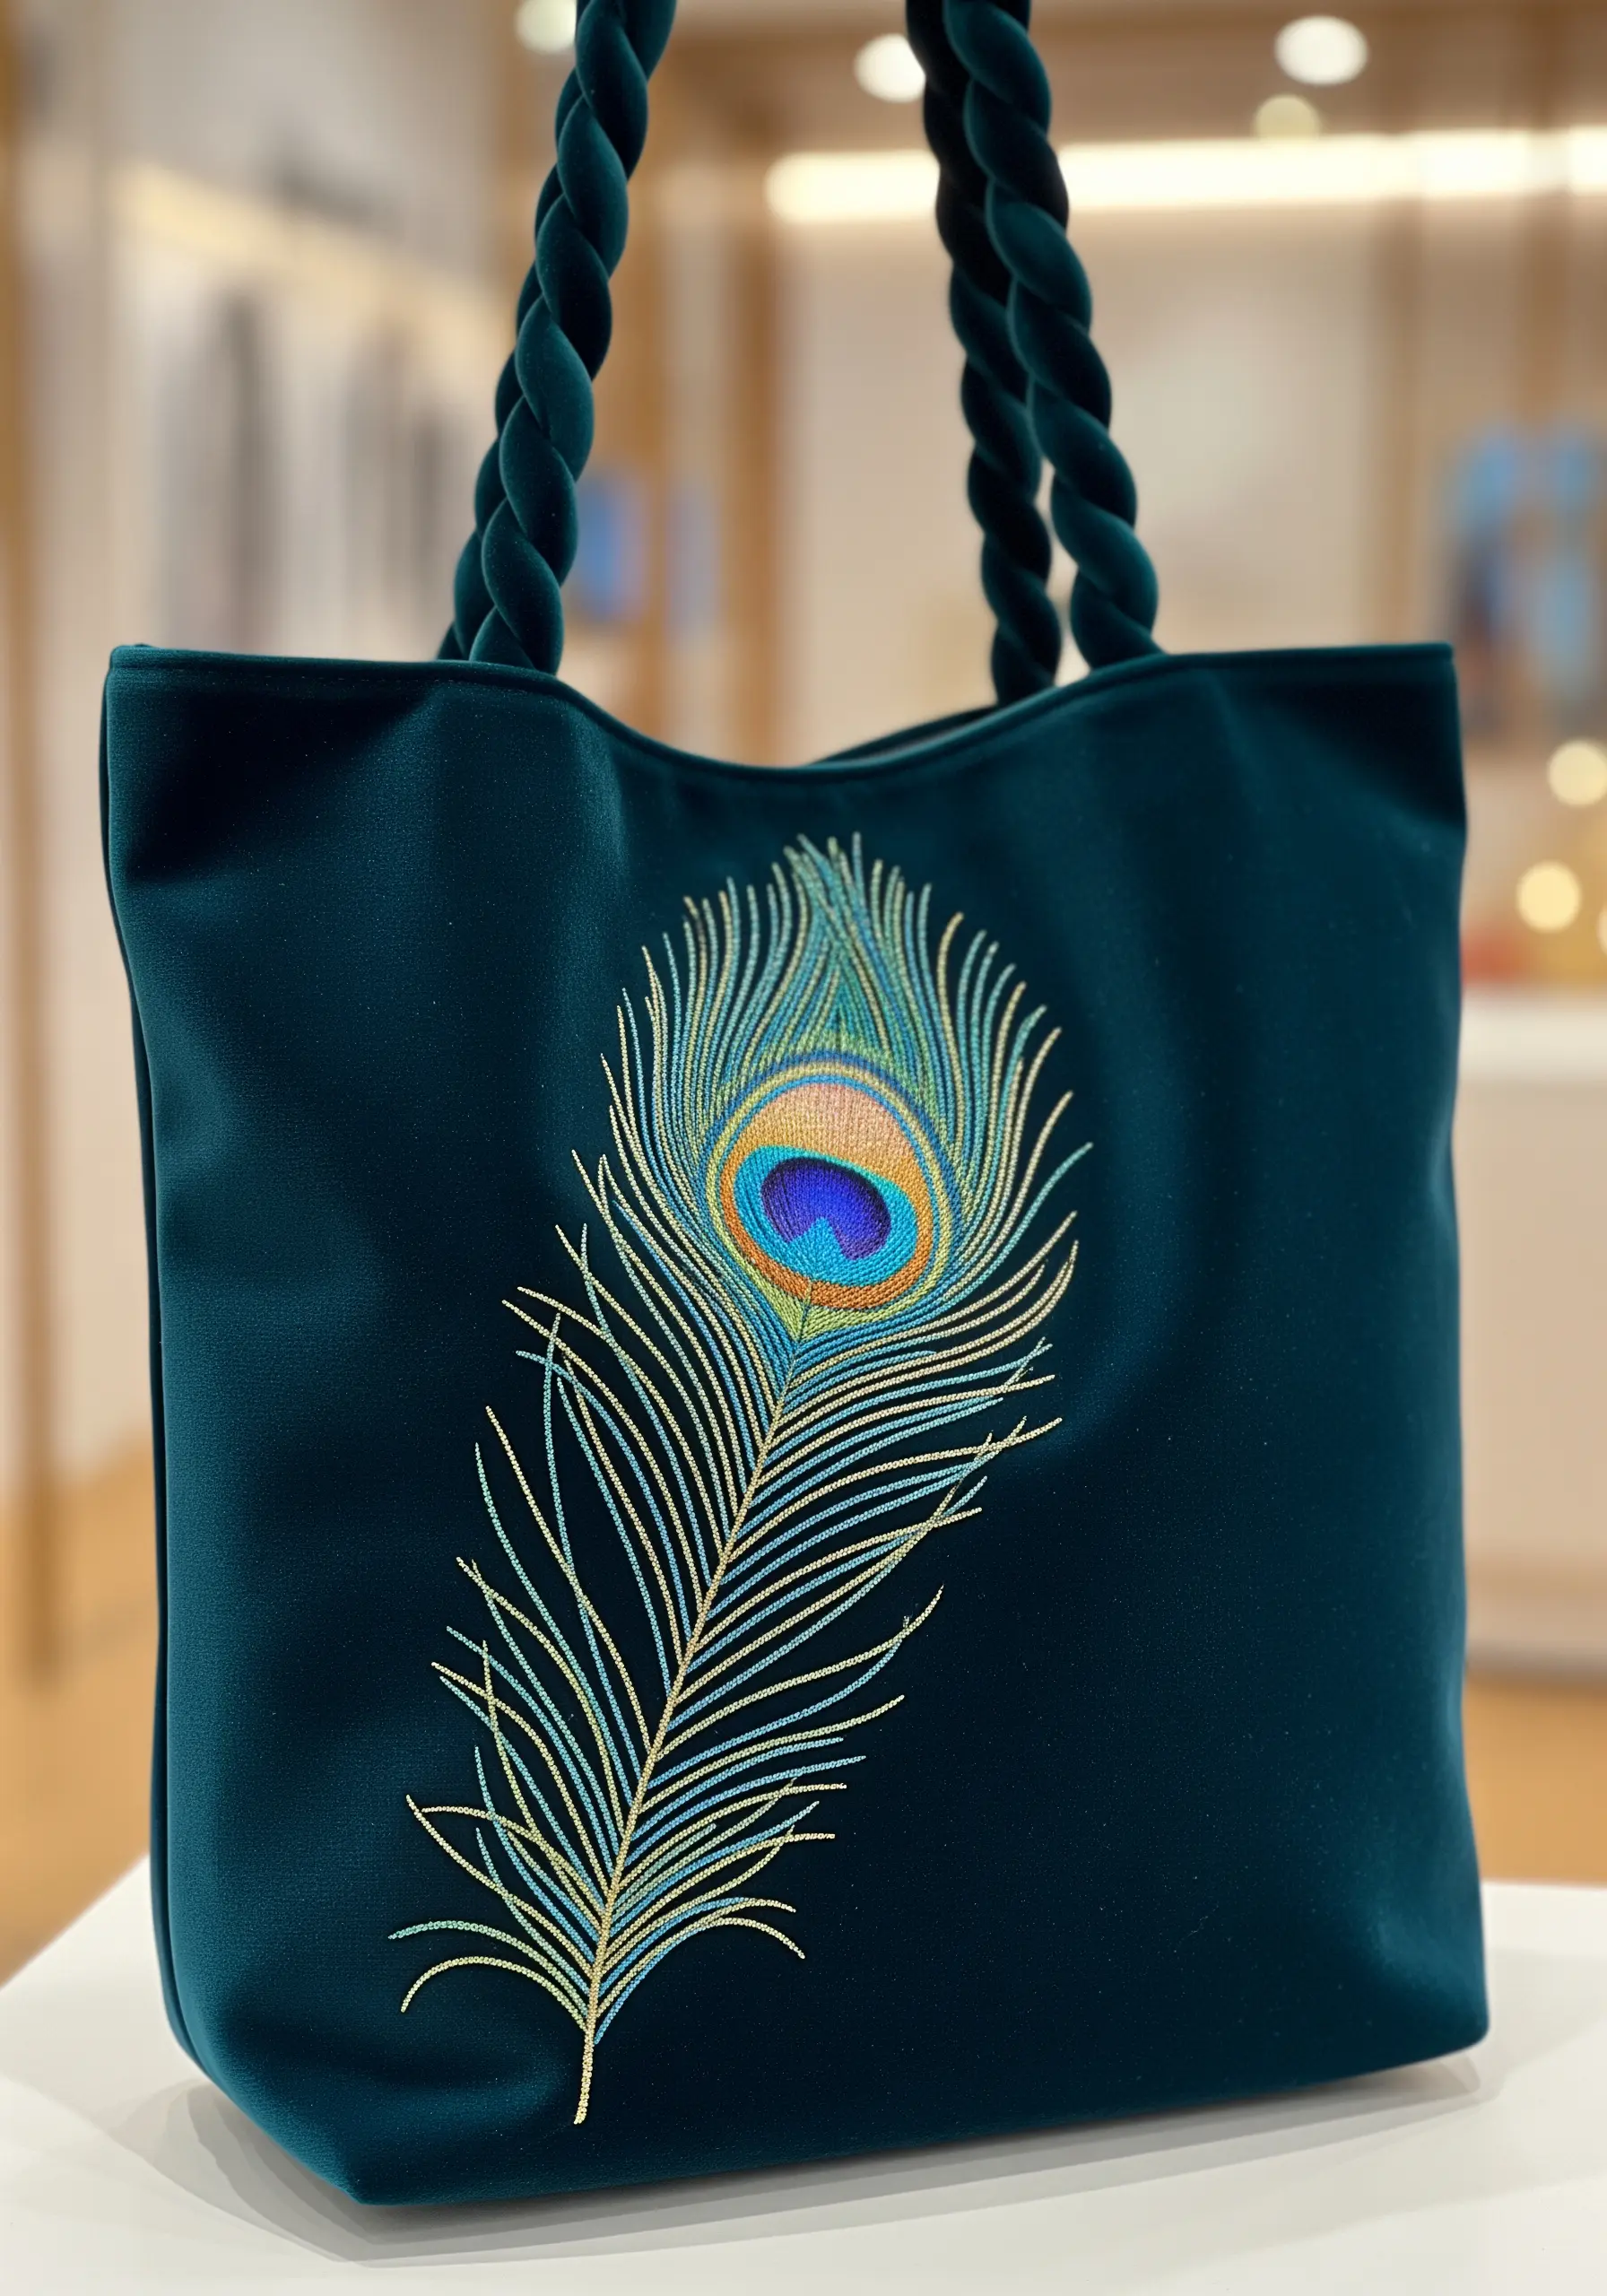
Capture the iridescent beauty of a peacock feather by carefully blending metallic and silk threads.
For the central “eye,” use concentric circles of satin stitch in vibrant blue, turquoise, and gold metallic floss.
The delicate barbs of the feather are created with long, single straight stitches radiating outwards from the central shaft.
To achieve the color-shifting effect, use two different colored strands of floss on your needle at once (e.g., one green, one gold) or use a variegated thread.
Stitching on a dark, rich fabric like teal velvet will make the jewel tones of the feather truly stand out.
23. A Minimalist Map of Paris
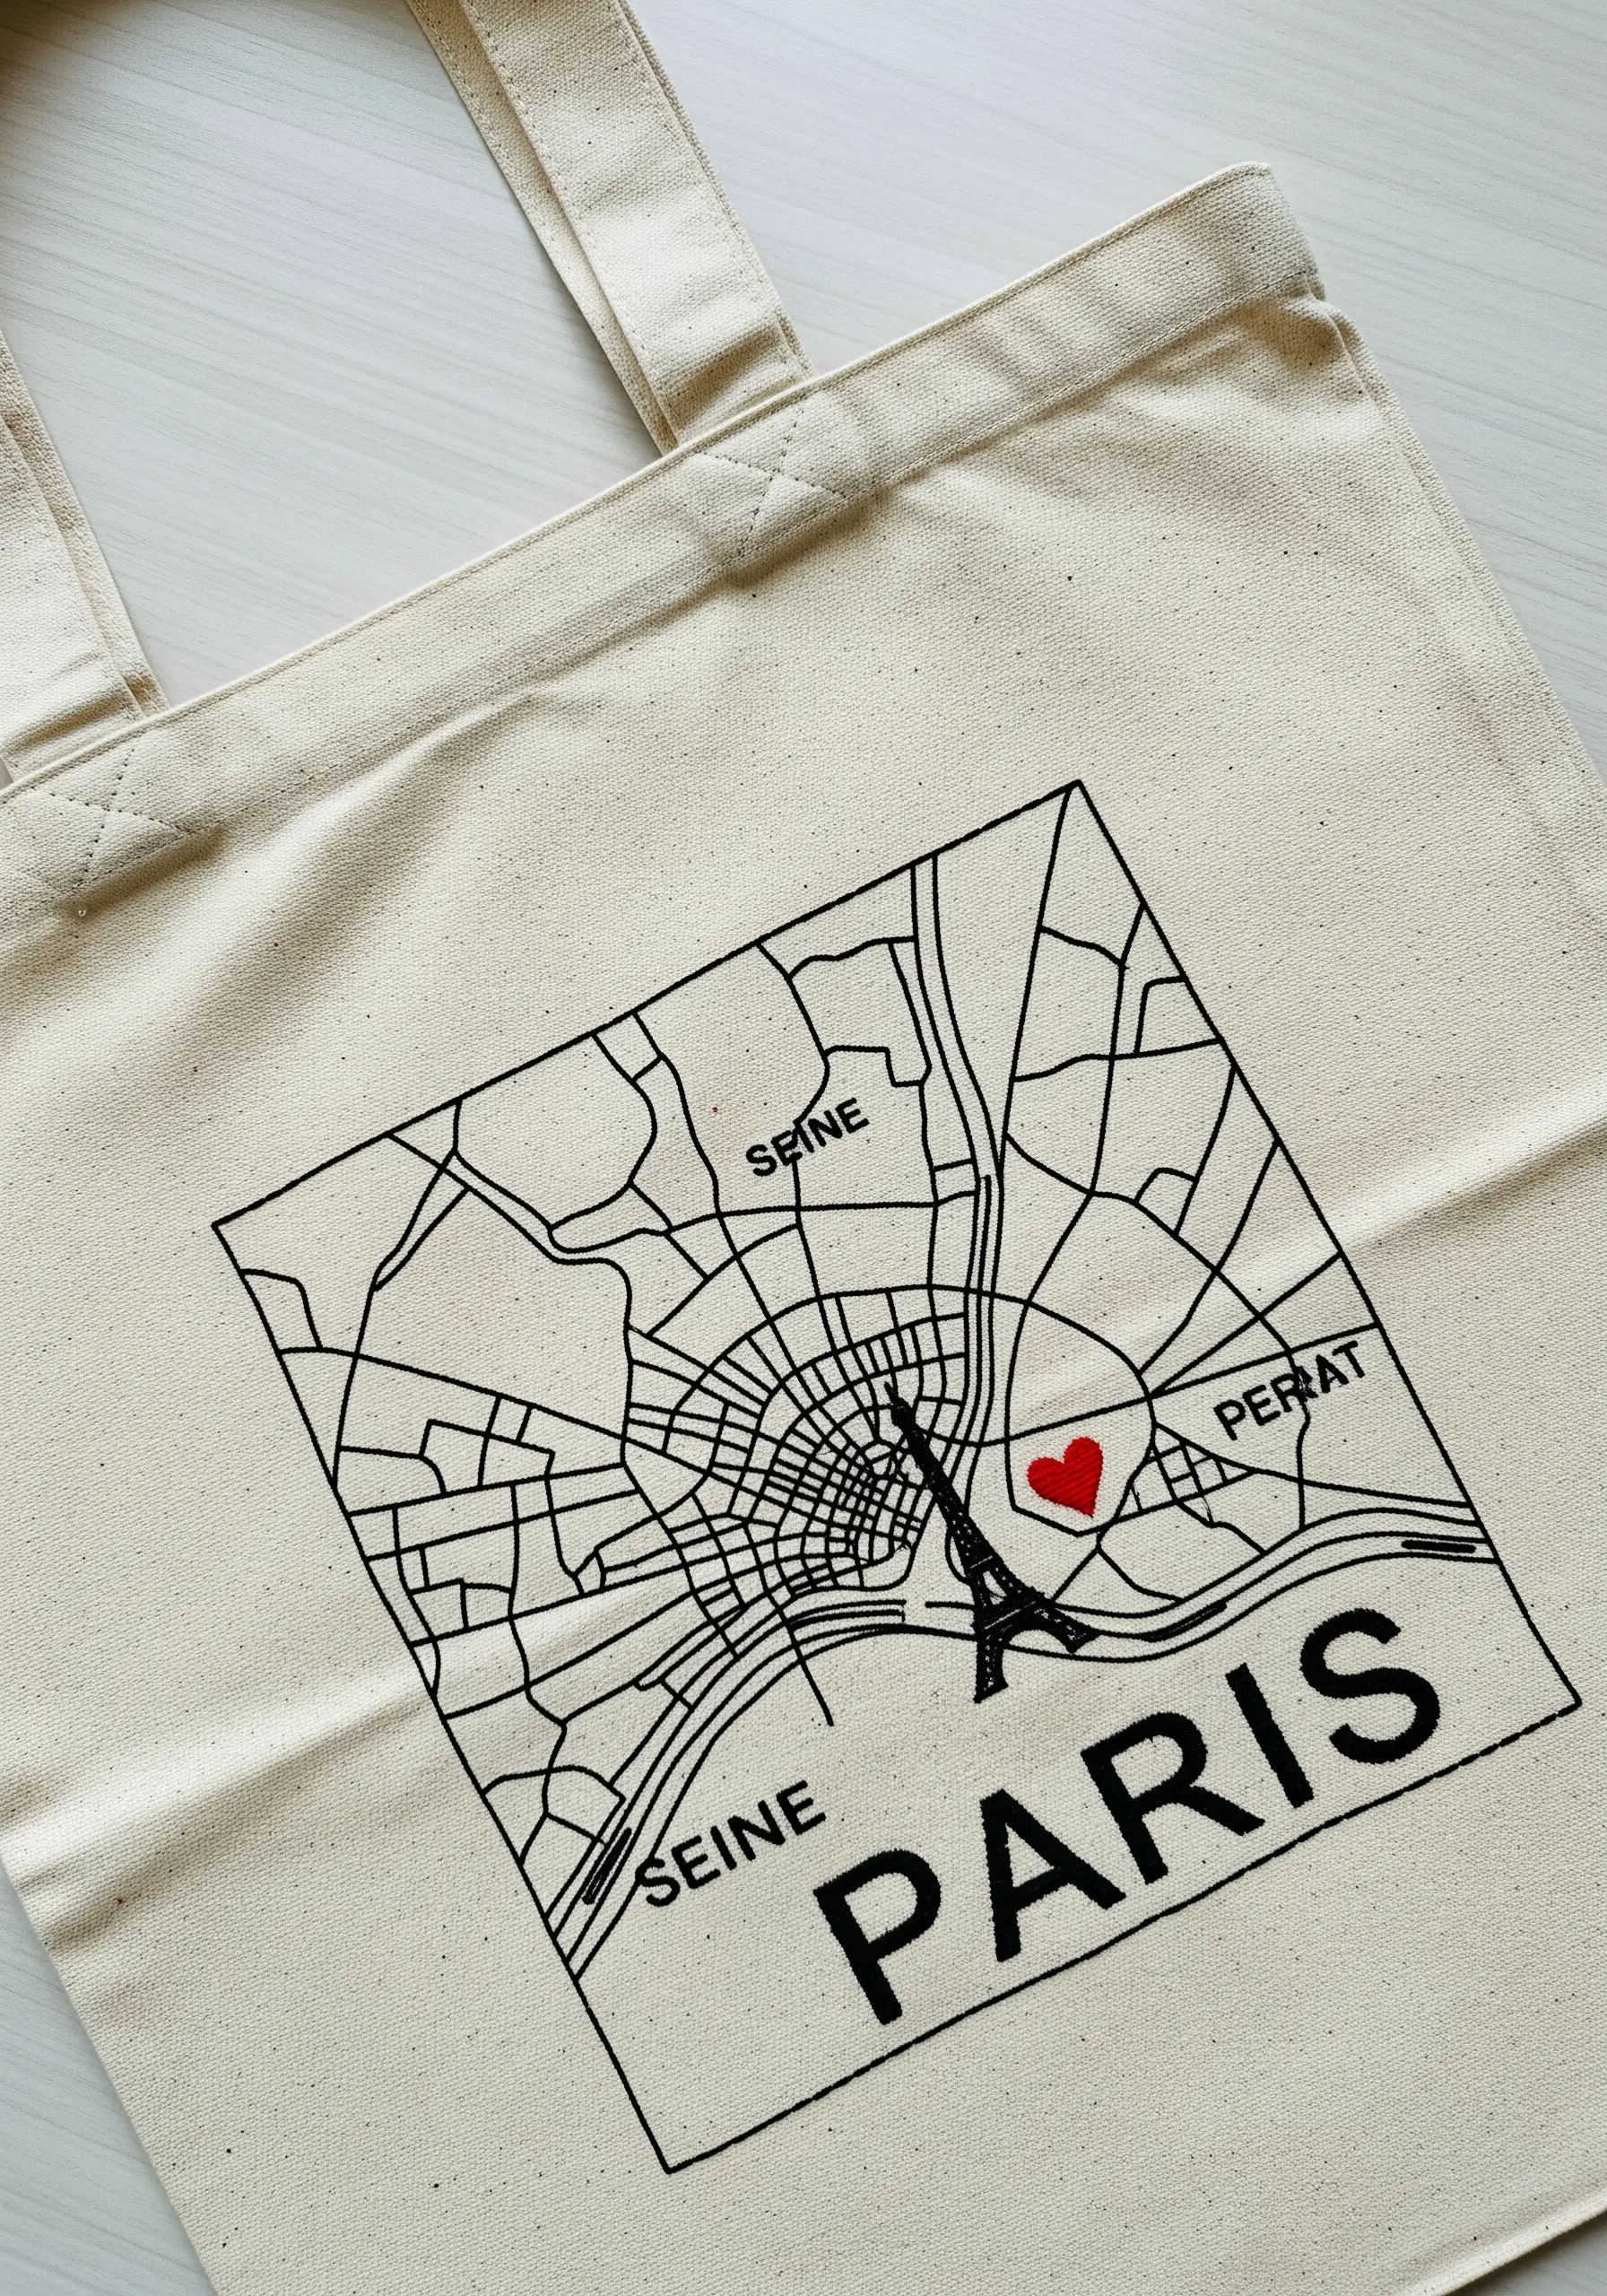
For a clean, graphic map, precision is everything. Transfer your design using a fine-tipped, water-soluble pen for accuracy.
Use a simple backstitch with two strands of black floss for all the streets and lettering. Keep your stitch length short and consistent, especially around curves.
Make the Eiffel Tower the focal point by using a slightly heavier outline, perhaps with three strands of floss.
The single red heart is the romantic anchor. Fill it with a tiny, neat satin stitch to make it stand out against the monochrome lines, marking a special spot.
24. Retro ‘You & Me’ Typography
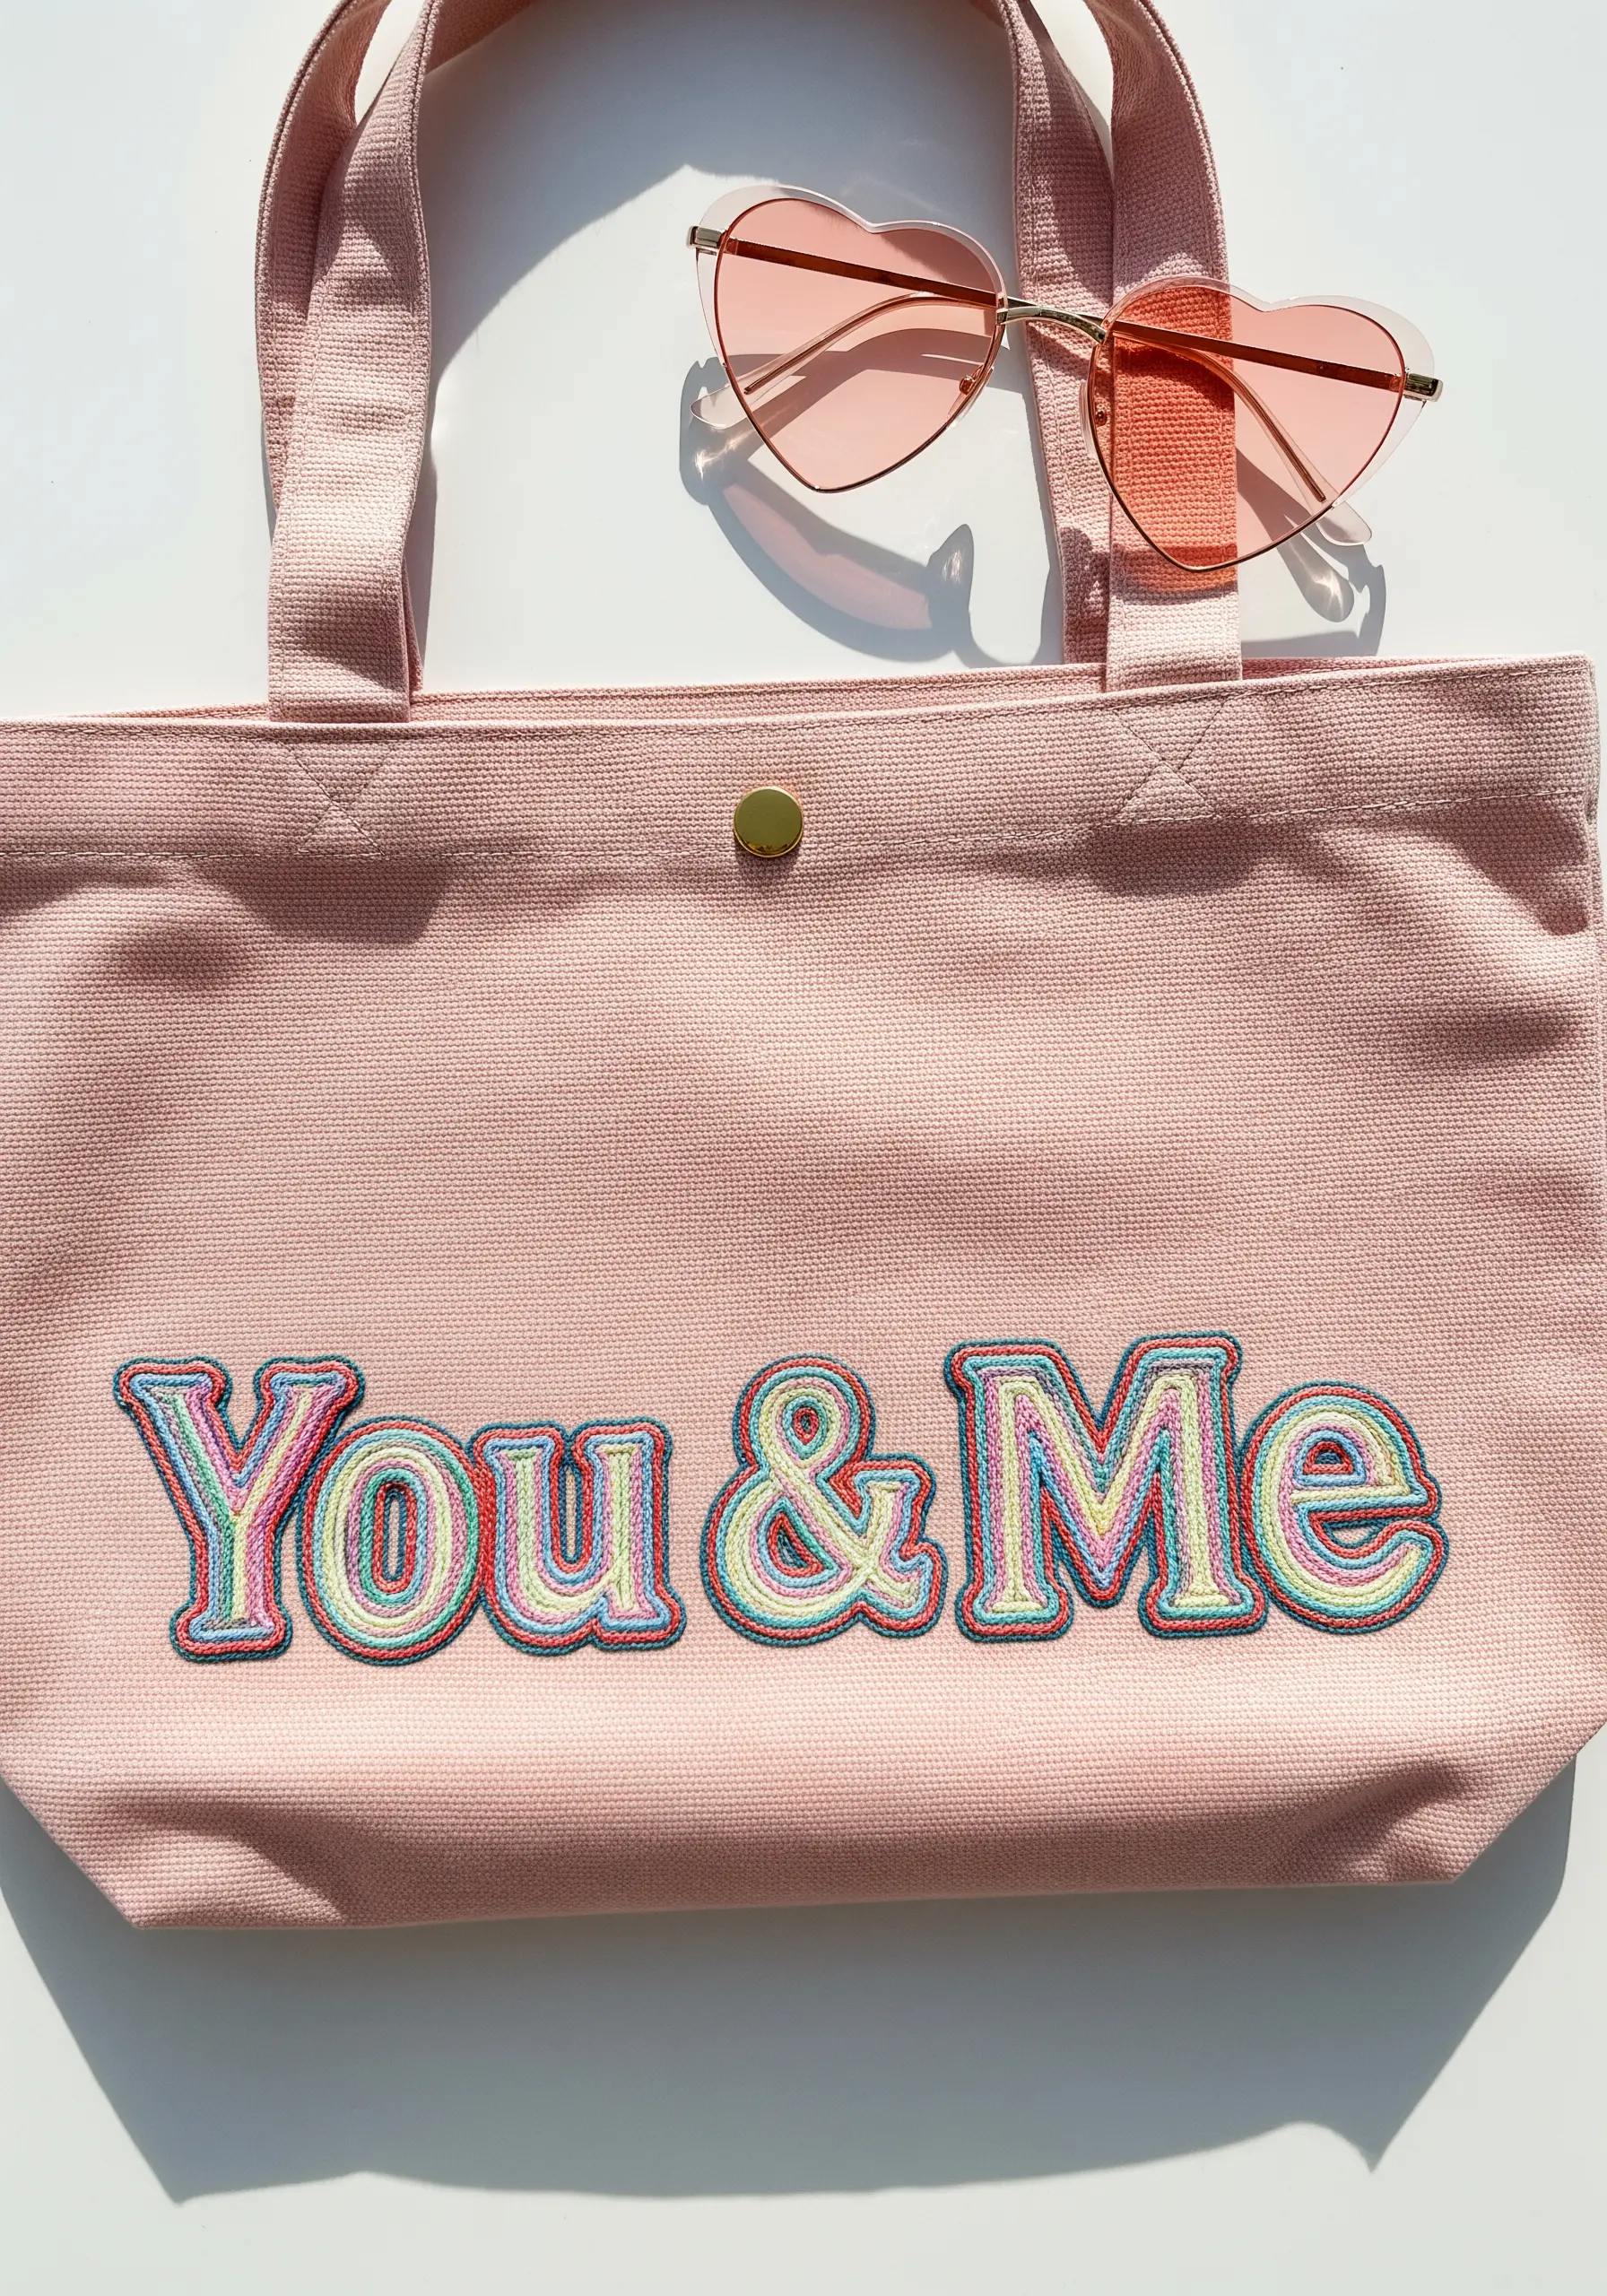
Create this fun, layered retro font by using a whipped backstitch for each colored outline.
Start by stitching the innermost letters with a satin stitch using a variegated rainbow floss. This creates the colorful base.
Then, working outwards, add each outline layer using a different color. A whipped backstitch is ideal here because it creates a smooth, raised, cord-like line that defines each layer clearly.
This technique gives the letters a puffy, almost cartoonish dimension that’s perfect for a playful, retro vibe.
25. Whimsical Fly Agaric Mushroom
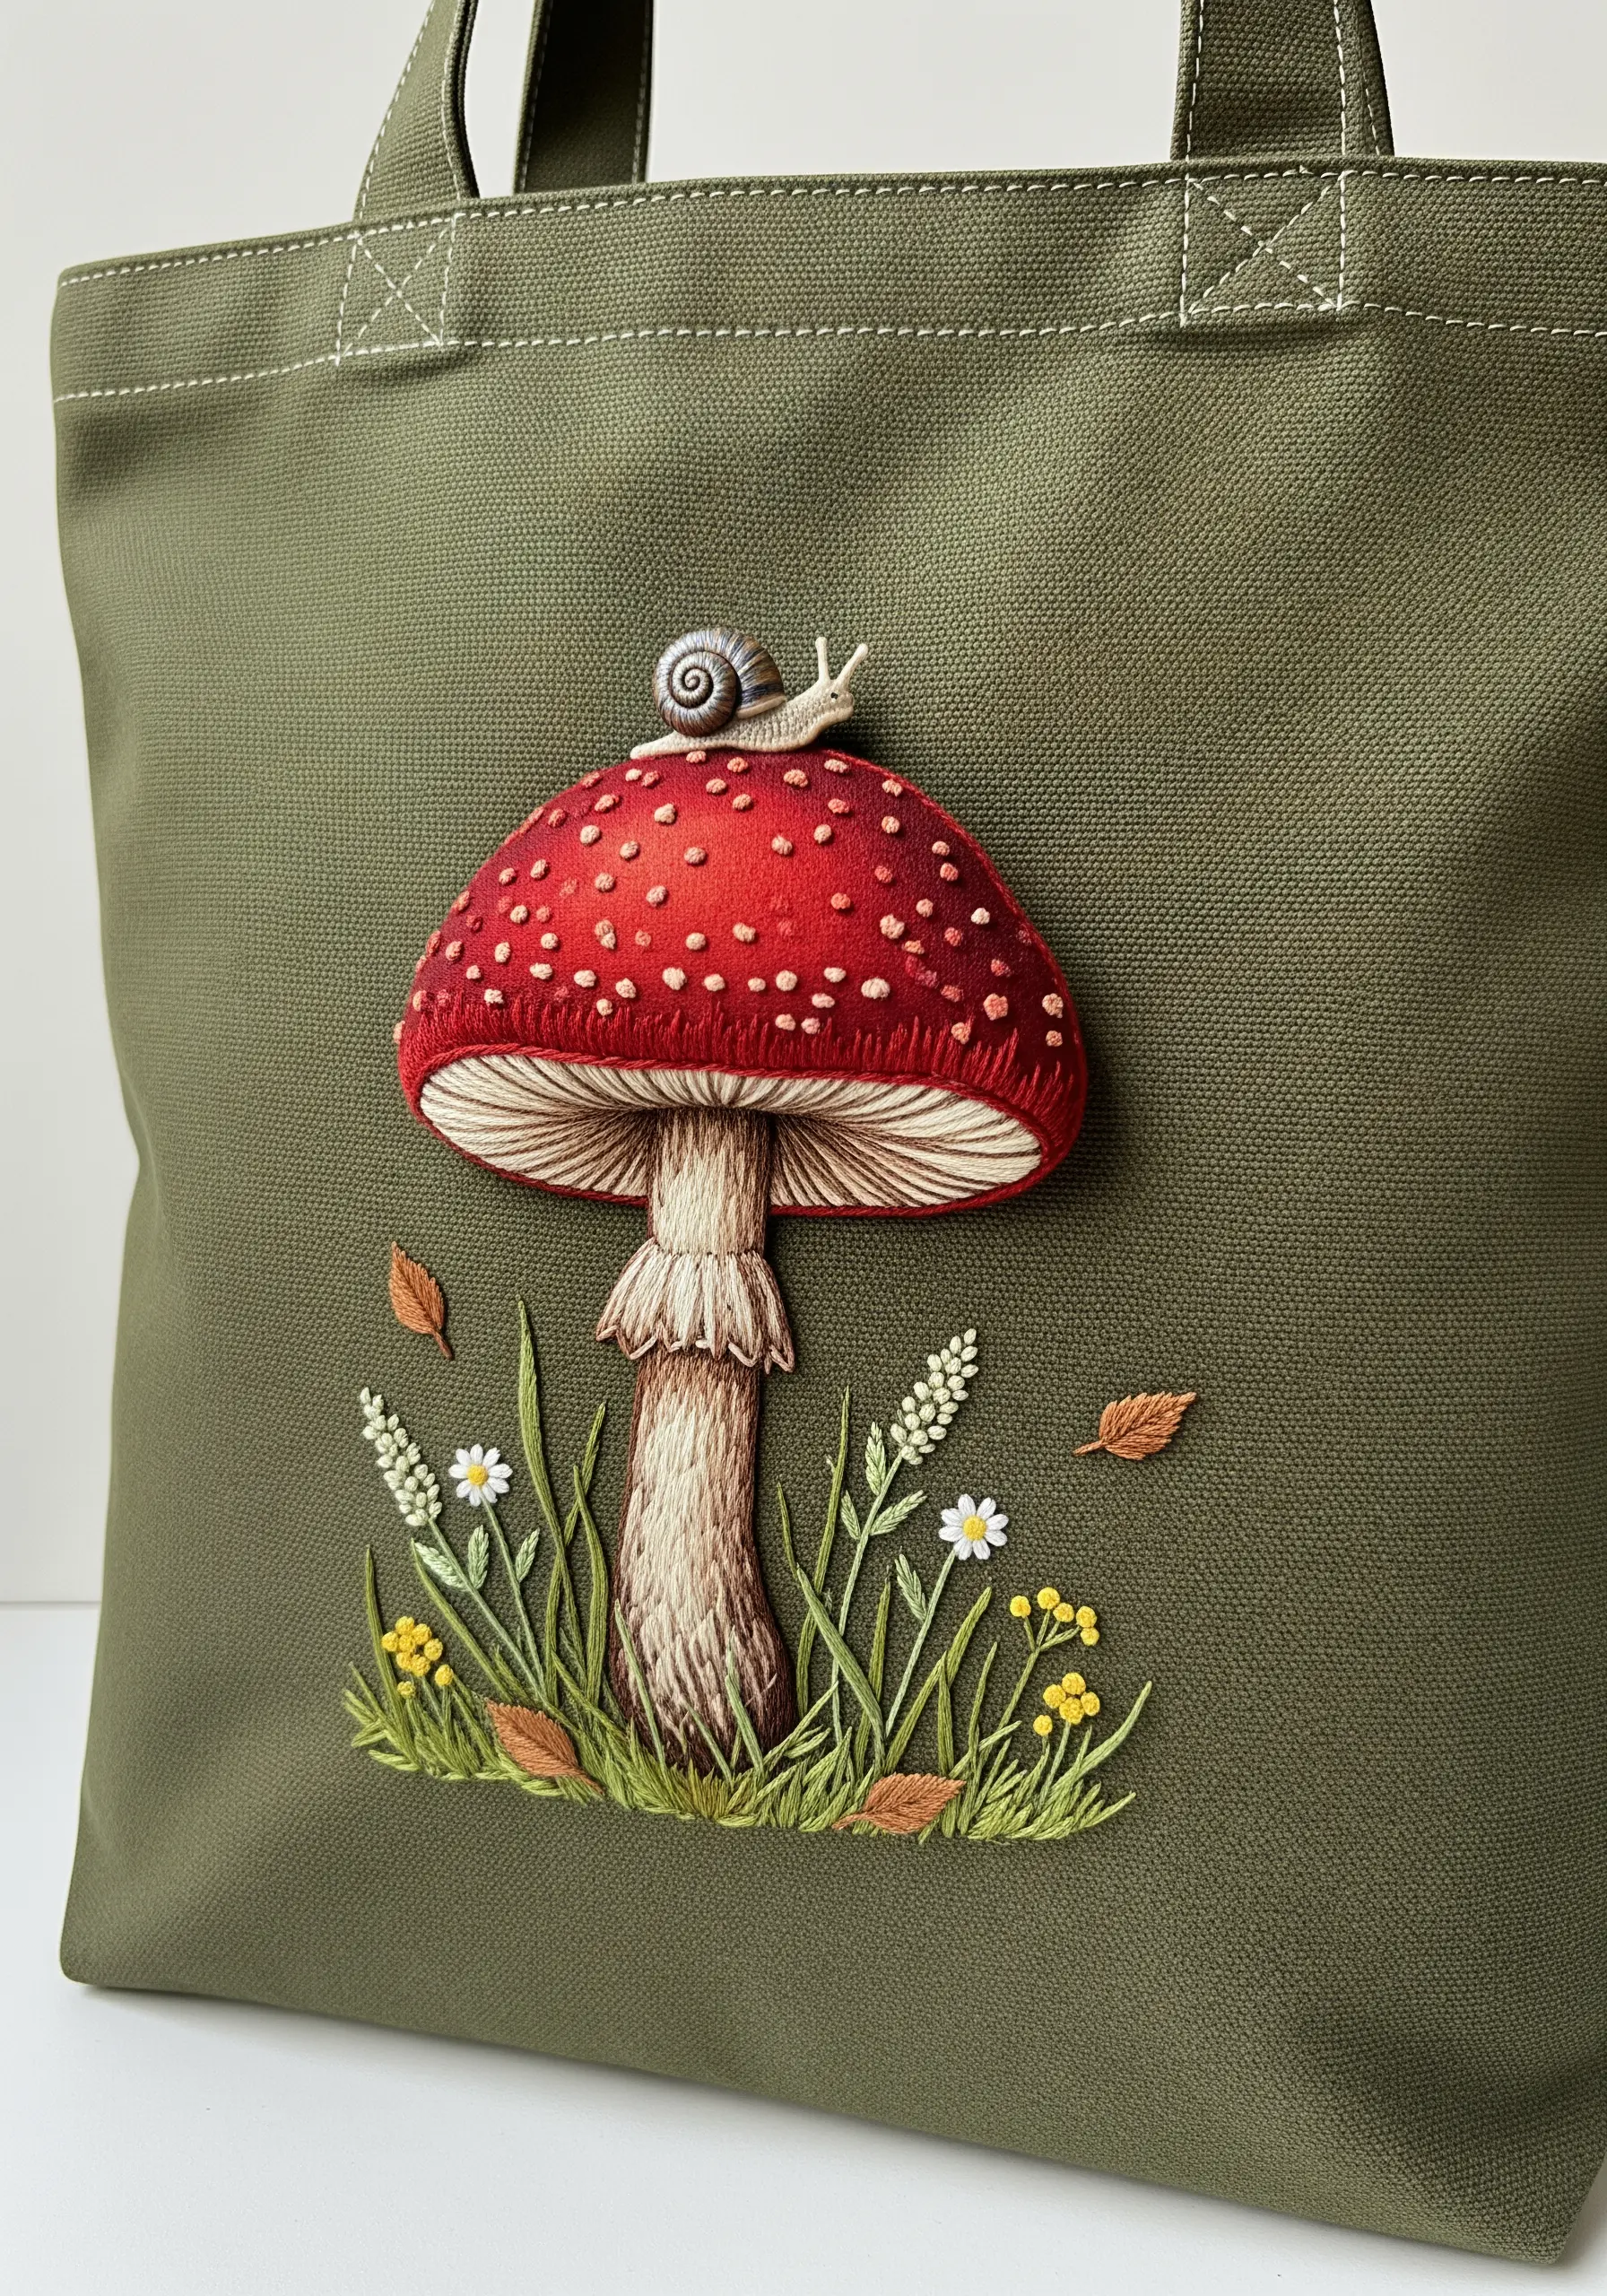
Build a three-dimensional mushroom cap by using a padded satin stitch.
First, create a foundation of horizontal satin stitches, then cover them with your final layer of vertical red satin stitches. This gives the cap a distinct, rounded shape.
The white spots can be French knots or small, randomly placed seed stitches for a more organic look.
For the gills underneath, use vertical straight stitches in a slightly off-white or beige thread, packed closely together to suggest fine texture.
The addition of a tiny, stumpwork snail elevates the piece from a simple embroidery to a miniature woodland scene.
26. Nautical Anchor and Rope Heart
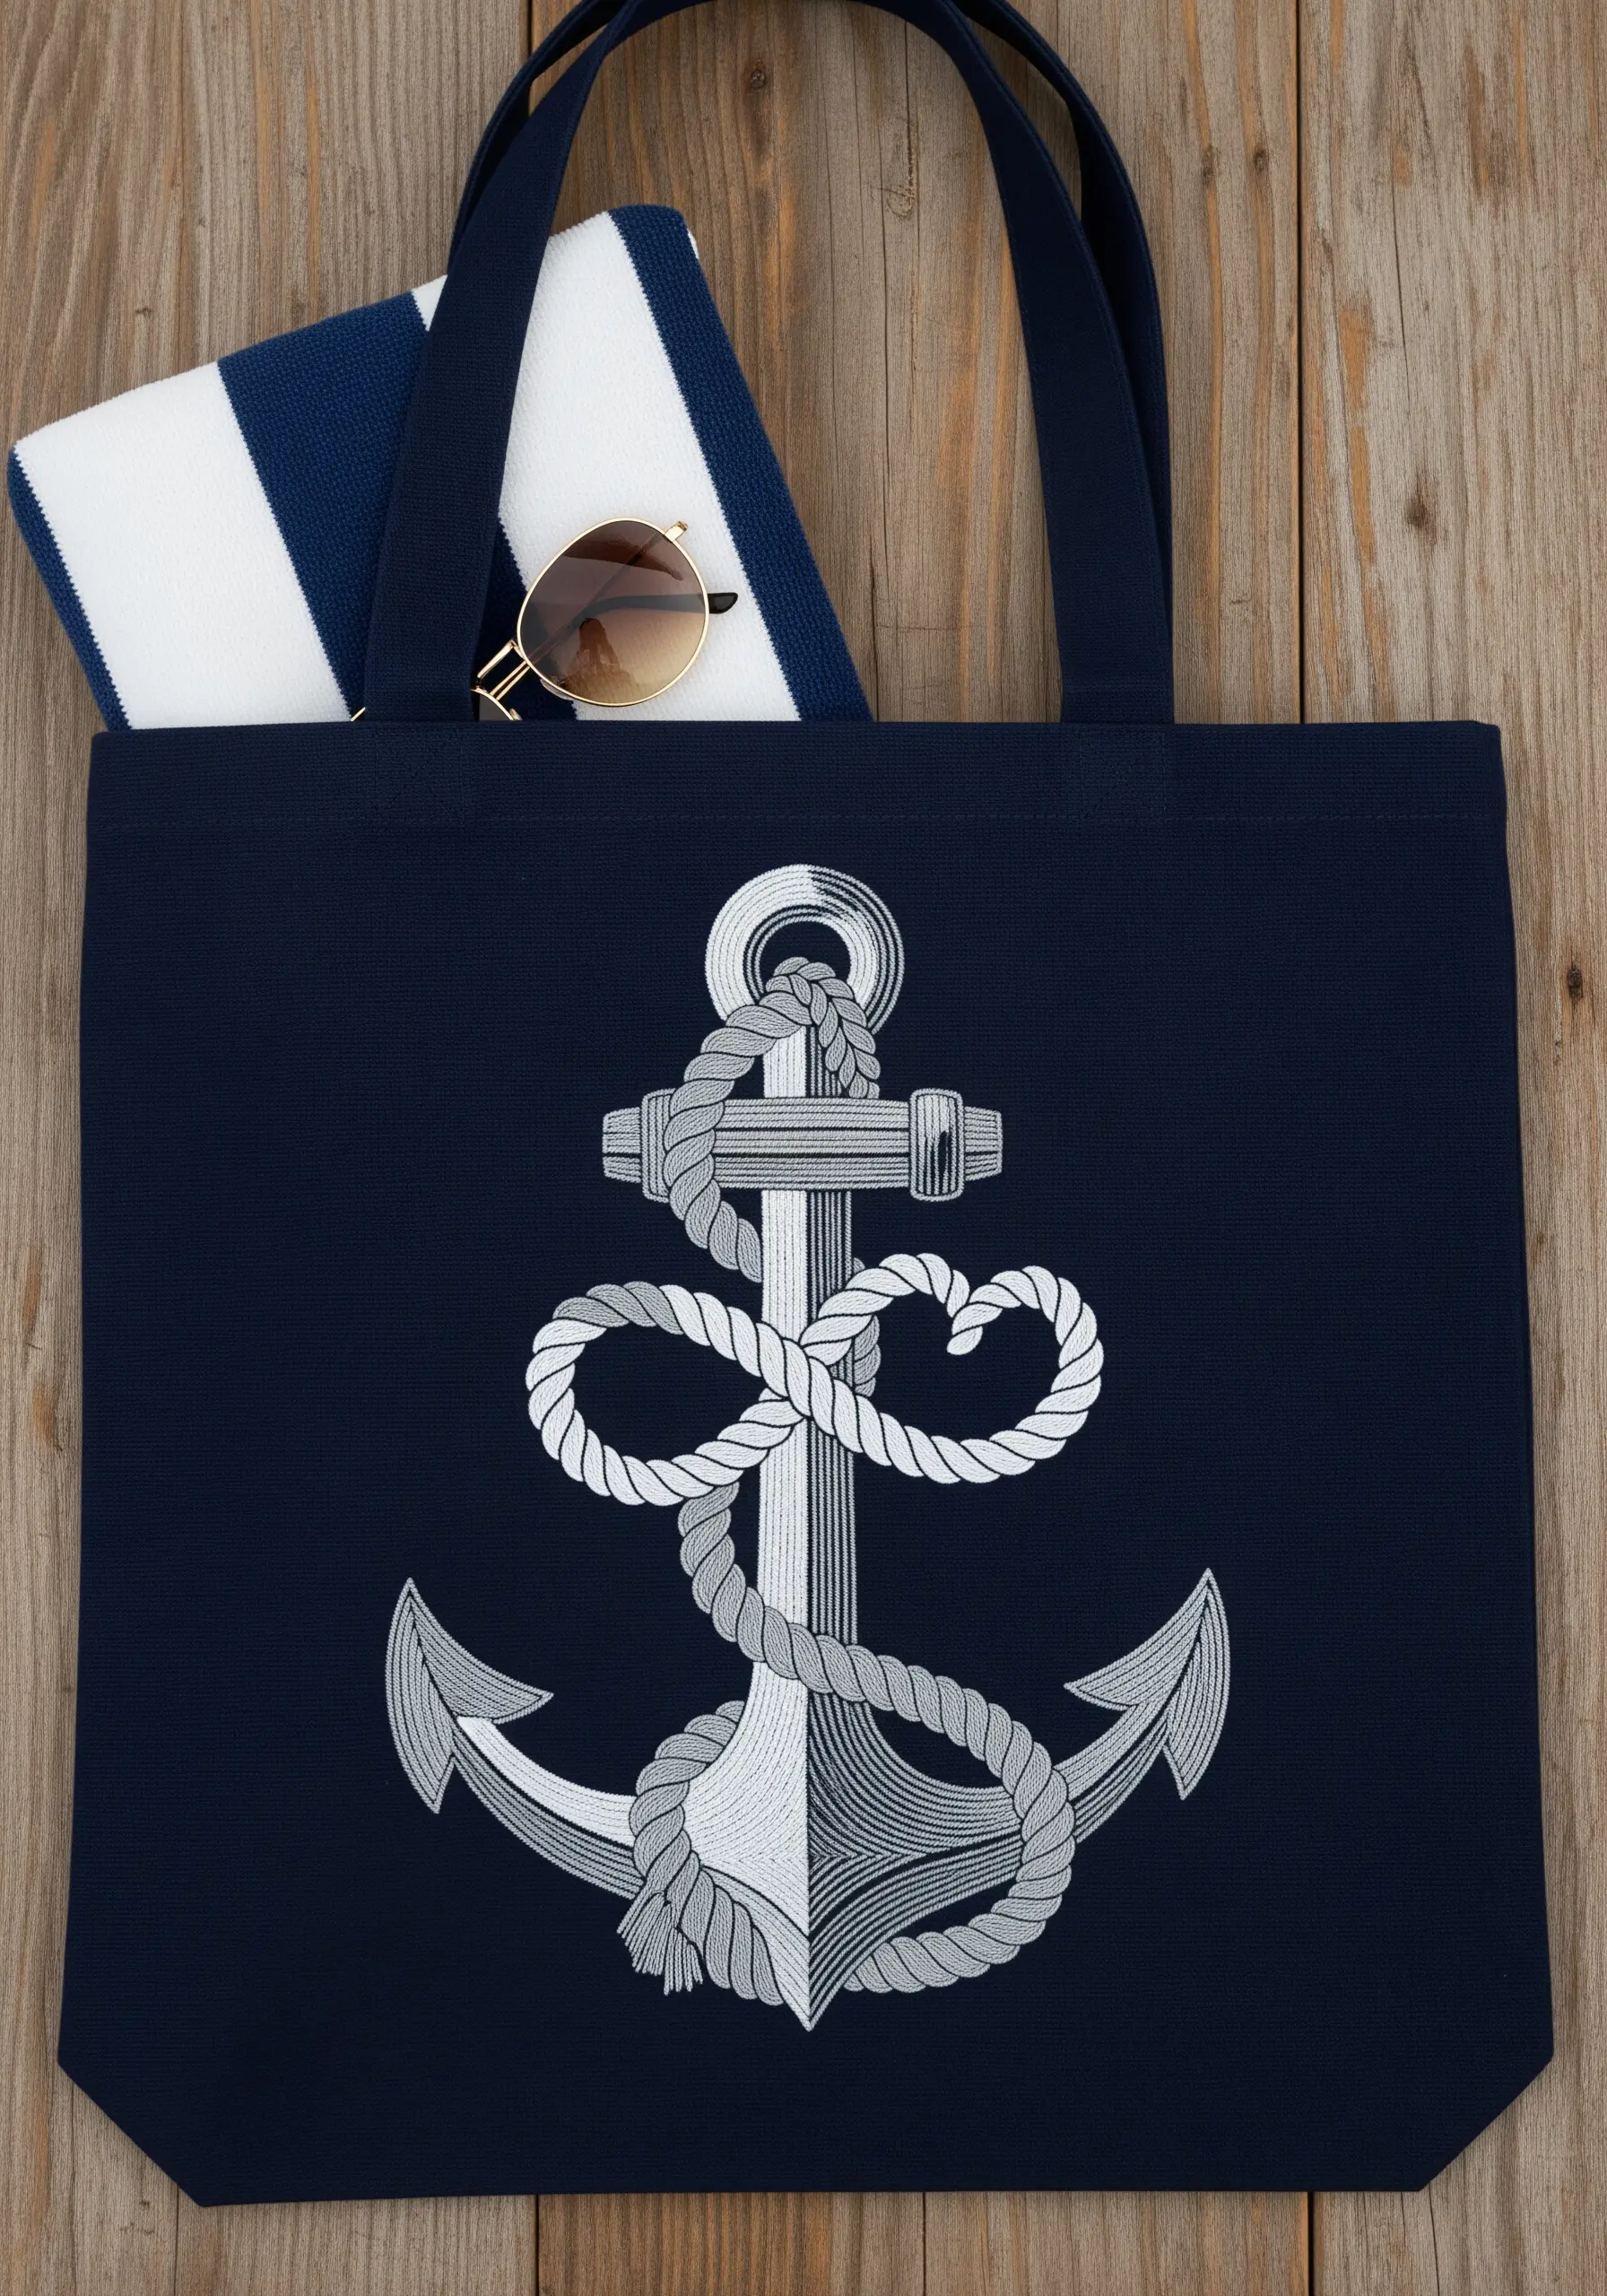
Achieve the look of twisted rope by using a heavy chain stitch or a stem stitch worked with a thick, six-strand floss.
To create the shading effect on the rope and anchor, use two different shades of grey. Work one side of the design in the lighter grey and the other in the darker grey.
Where the rope twists, alternate the colors to enhance the illusion of light and shadow.
This graphic, almost illustrative style relies on clean lines and clever use of simple two-tone shading to create depth and dimension.
27. ‘Better Half’ Avocado Pair

This adorable design is perfect for practicing your satin stitch. To keep the fill smooth and even, outline each avocado section with a split stitch first.
This creates a slightly raised edge that your satin stitches can tuck into, resulting in a perfectly clean border.
For the lighter green flesh, angle your satin stitches diagonally. For the darker green skin, angle them in the opposite direction. This subtle shift in stitch direction adds visual interest.
The heart-shaped pit is the charming focal point; make it extra smooth and plump with a well-executed padded satin stitch.
28. Dandelions Making a Wish
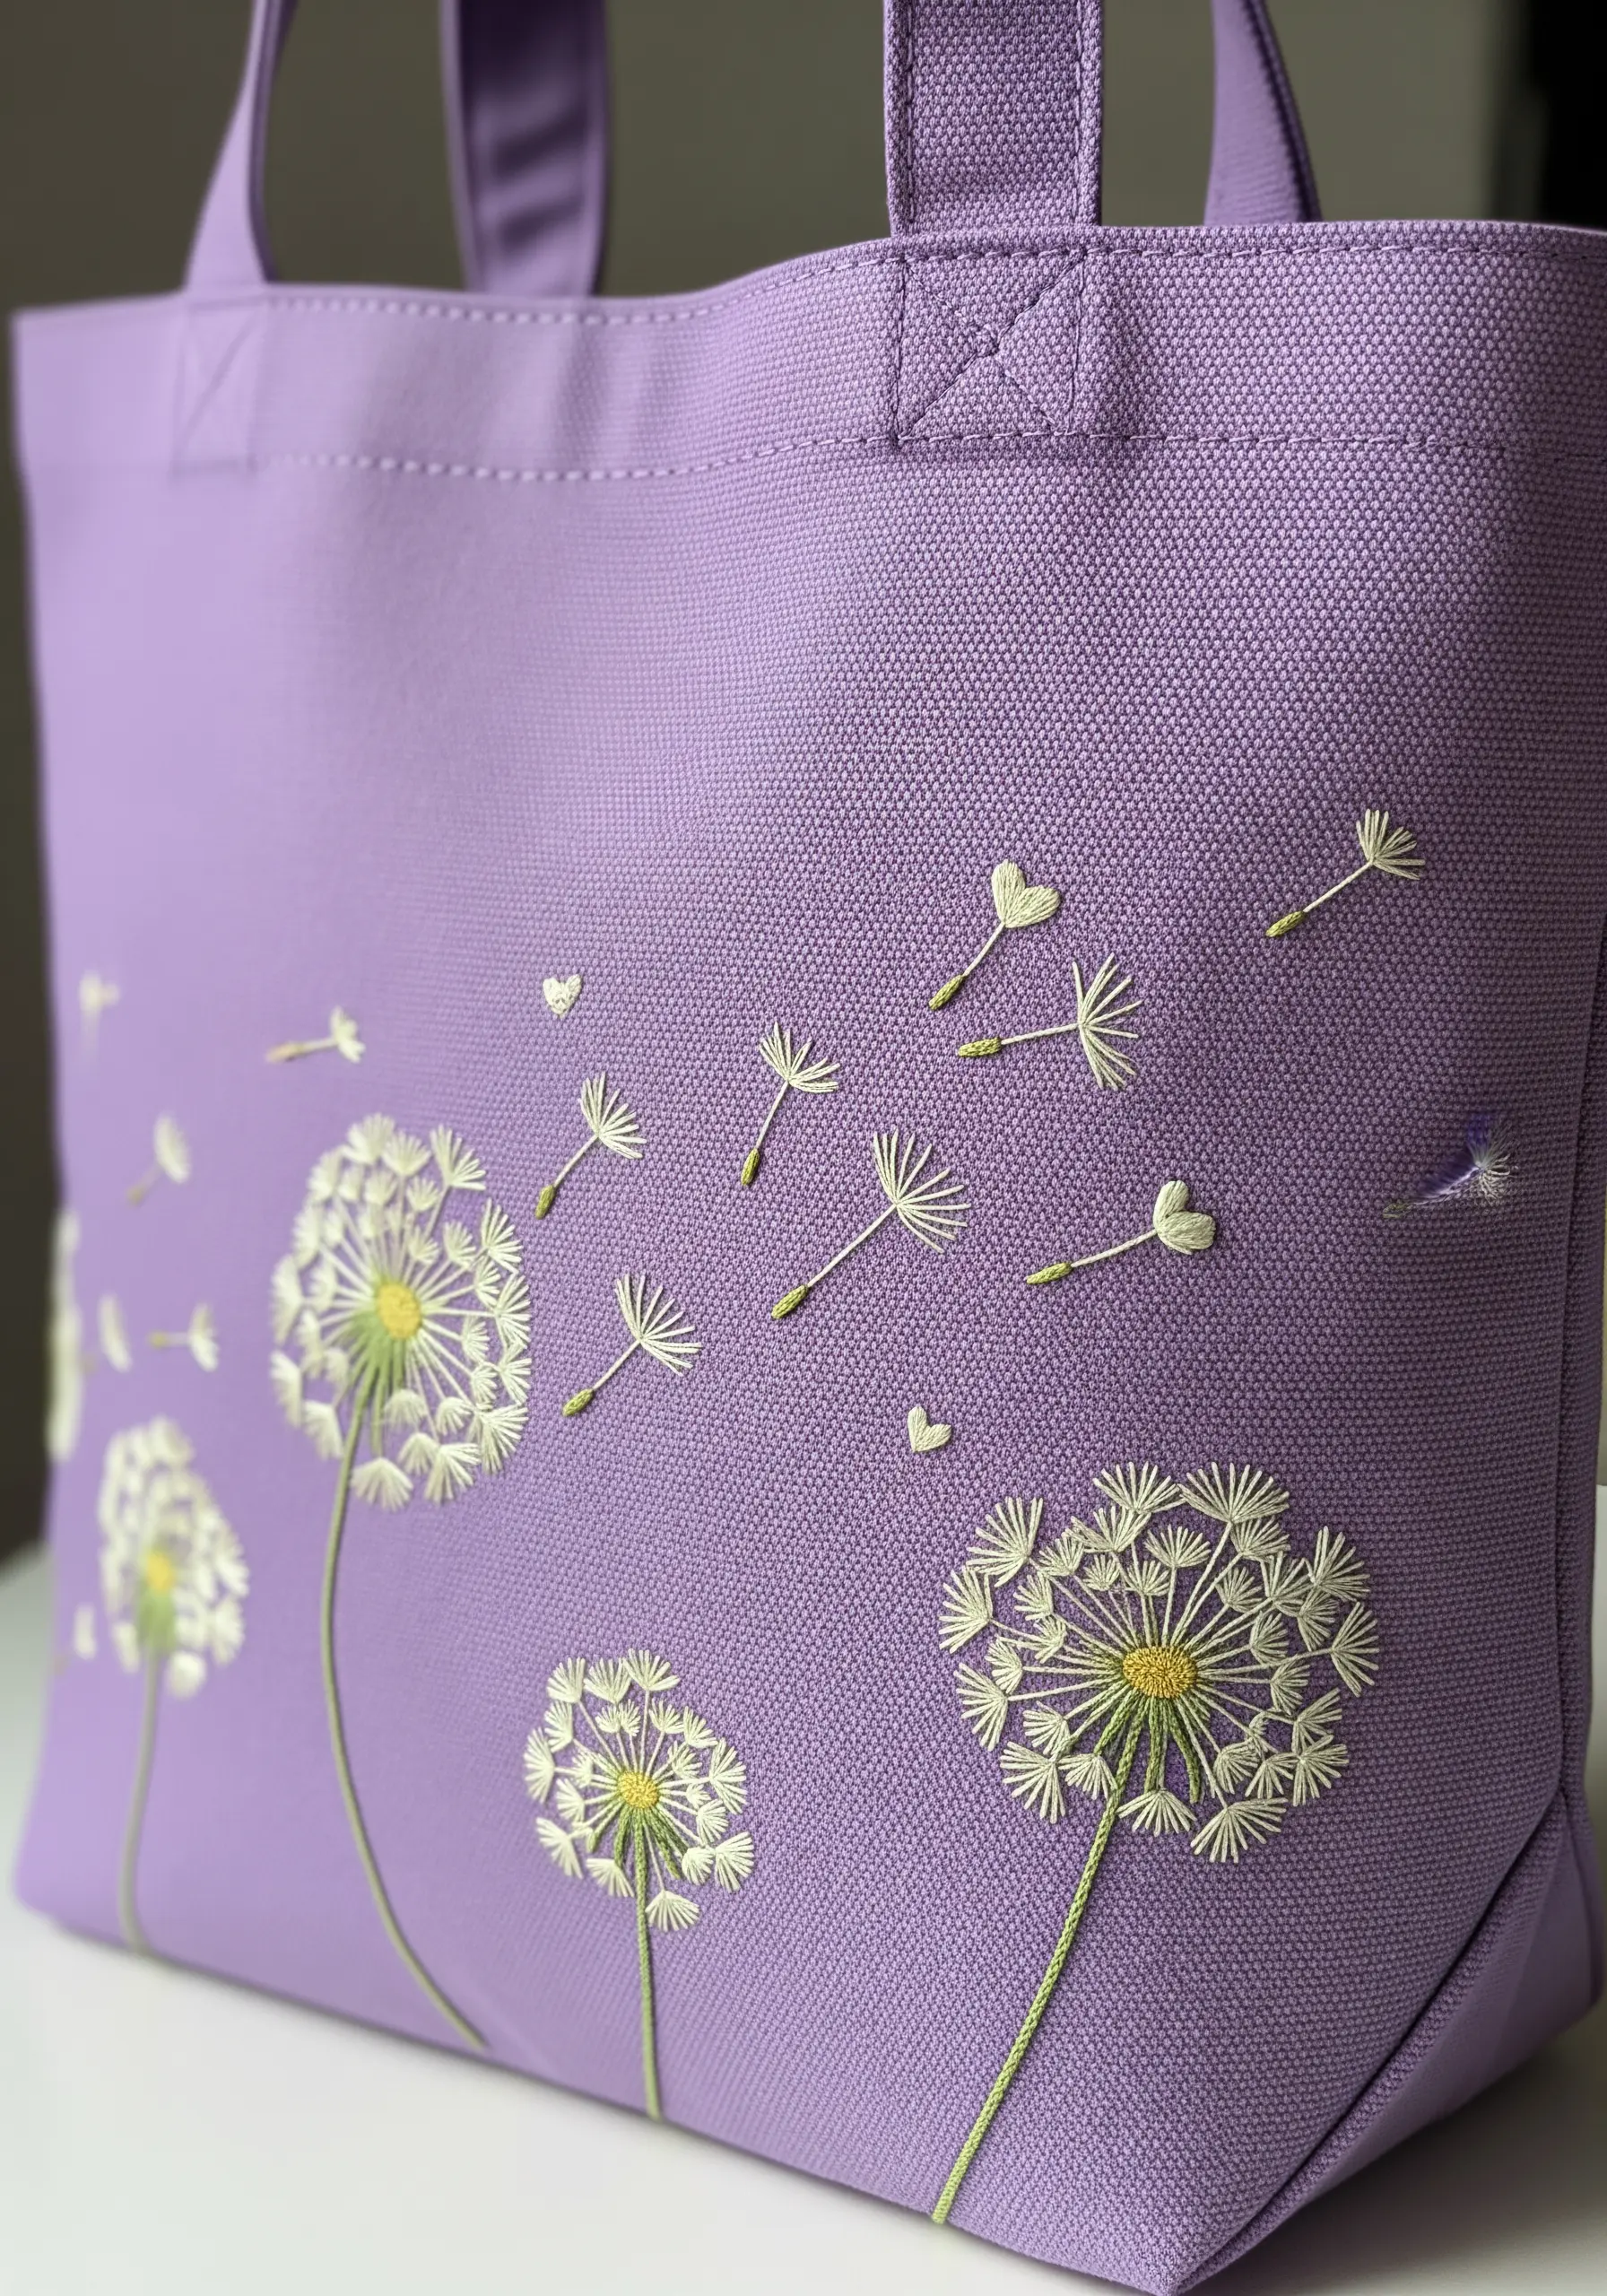
Capture the airy, delicate nature of dandelions with a few simple, well-placed stitches.
The central seed head is a sphere of straight stitches radiating from the center. Add a few yellow French knots to suggest the last remaining petals.
For the floating seeds, use a single straight stitch for the stem and a detached chain stitch (lazy daisy) for the parachute. For the ones with tiny hearts, simply replace the lazy daisy with a heart shape formed by two small straight stitches.
The key to this design is the sense of movement, so scatter the seeds across the bag as if they are truly being carried by the wind.
29. Elegant Golden Ginkgo Leaf
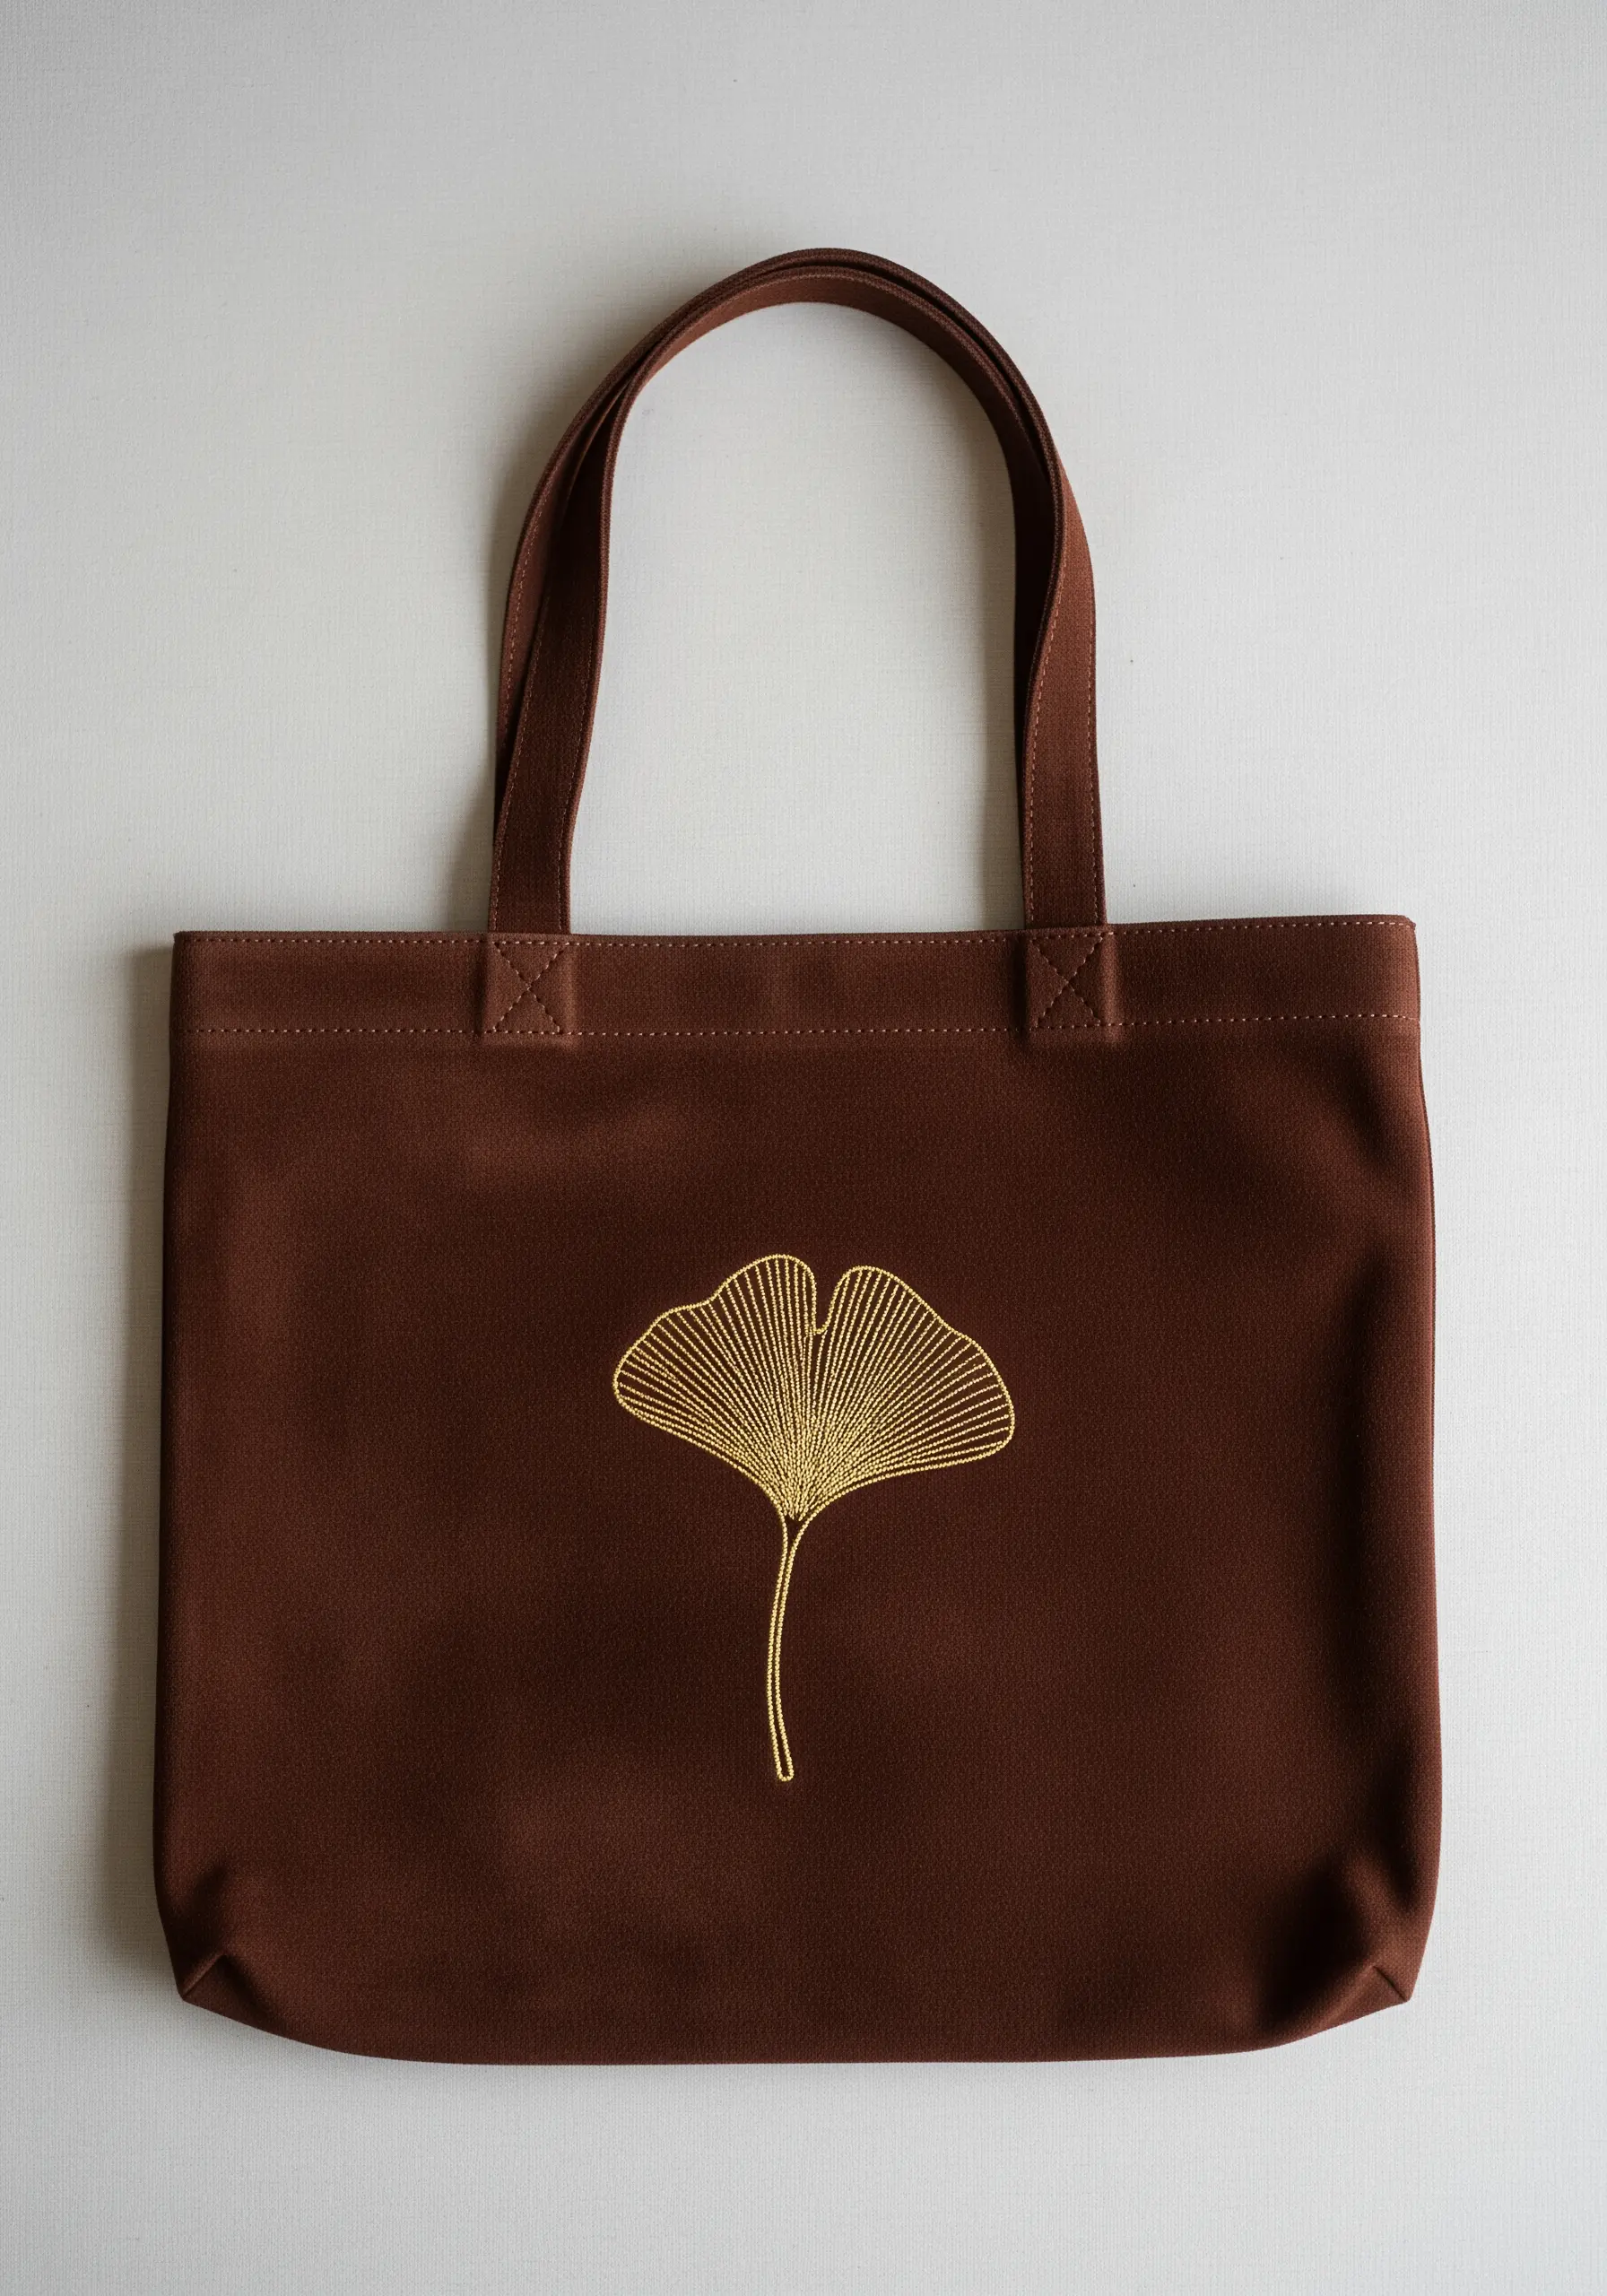
The beauty of a ginkgo leaf lies in its radiating veins. Replicate this by using a fishbone stitch or a long-and-short stitch that fans out from the base.
Use a single color of metallic gold or a rich ochre floss to keep the design minimalist and elegant.
Begin stitching at the top center of the leaf and work your way outwards and downwards, angling your stitches to follow the natural fan shape.
The simplicity of the single motif on the dark brown canvas creates a sophisticated, balanced composition that feels both modern and timeless.
30. Classic Latin ‘Amor Vincit Omnia’
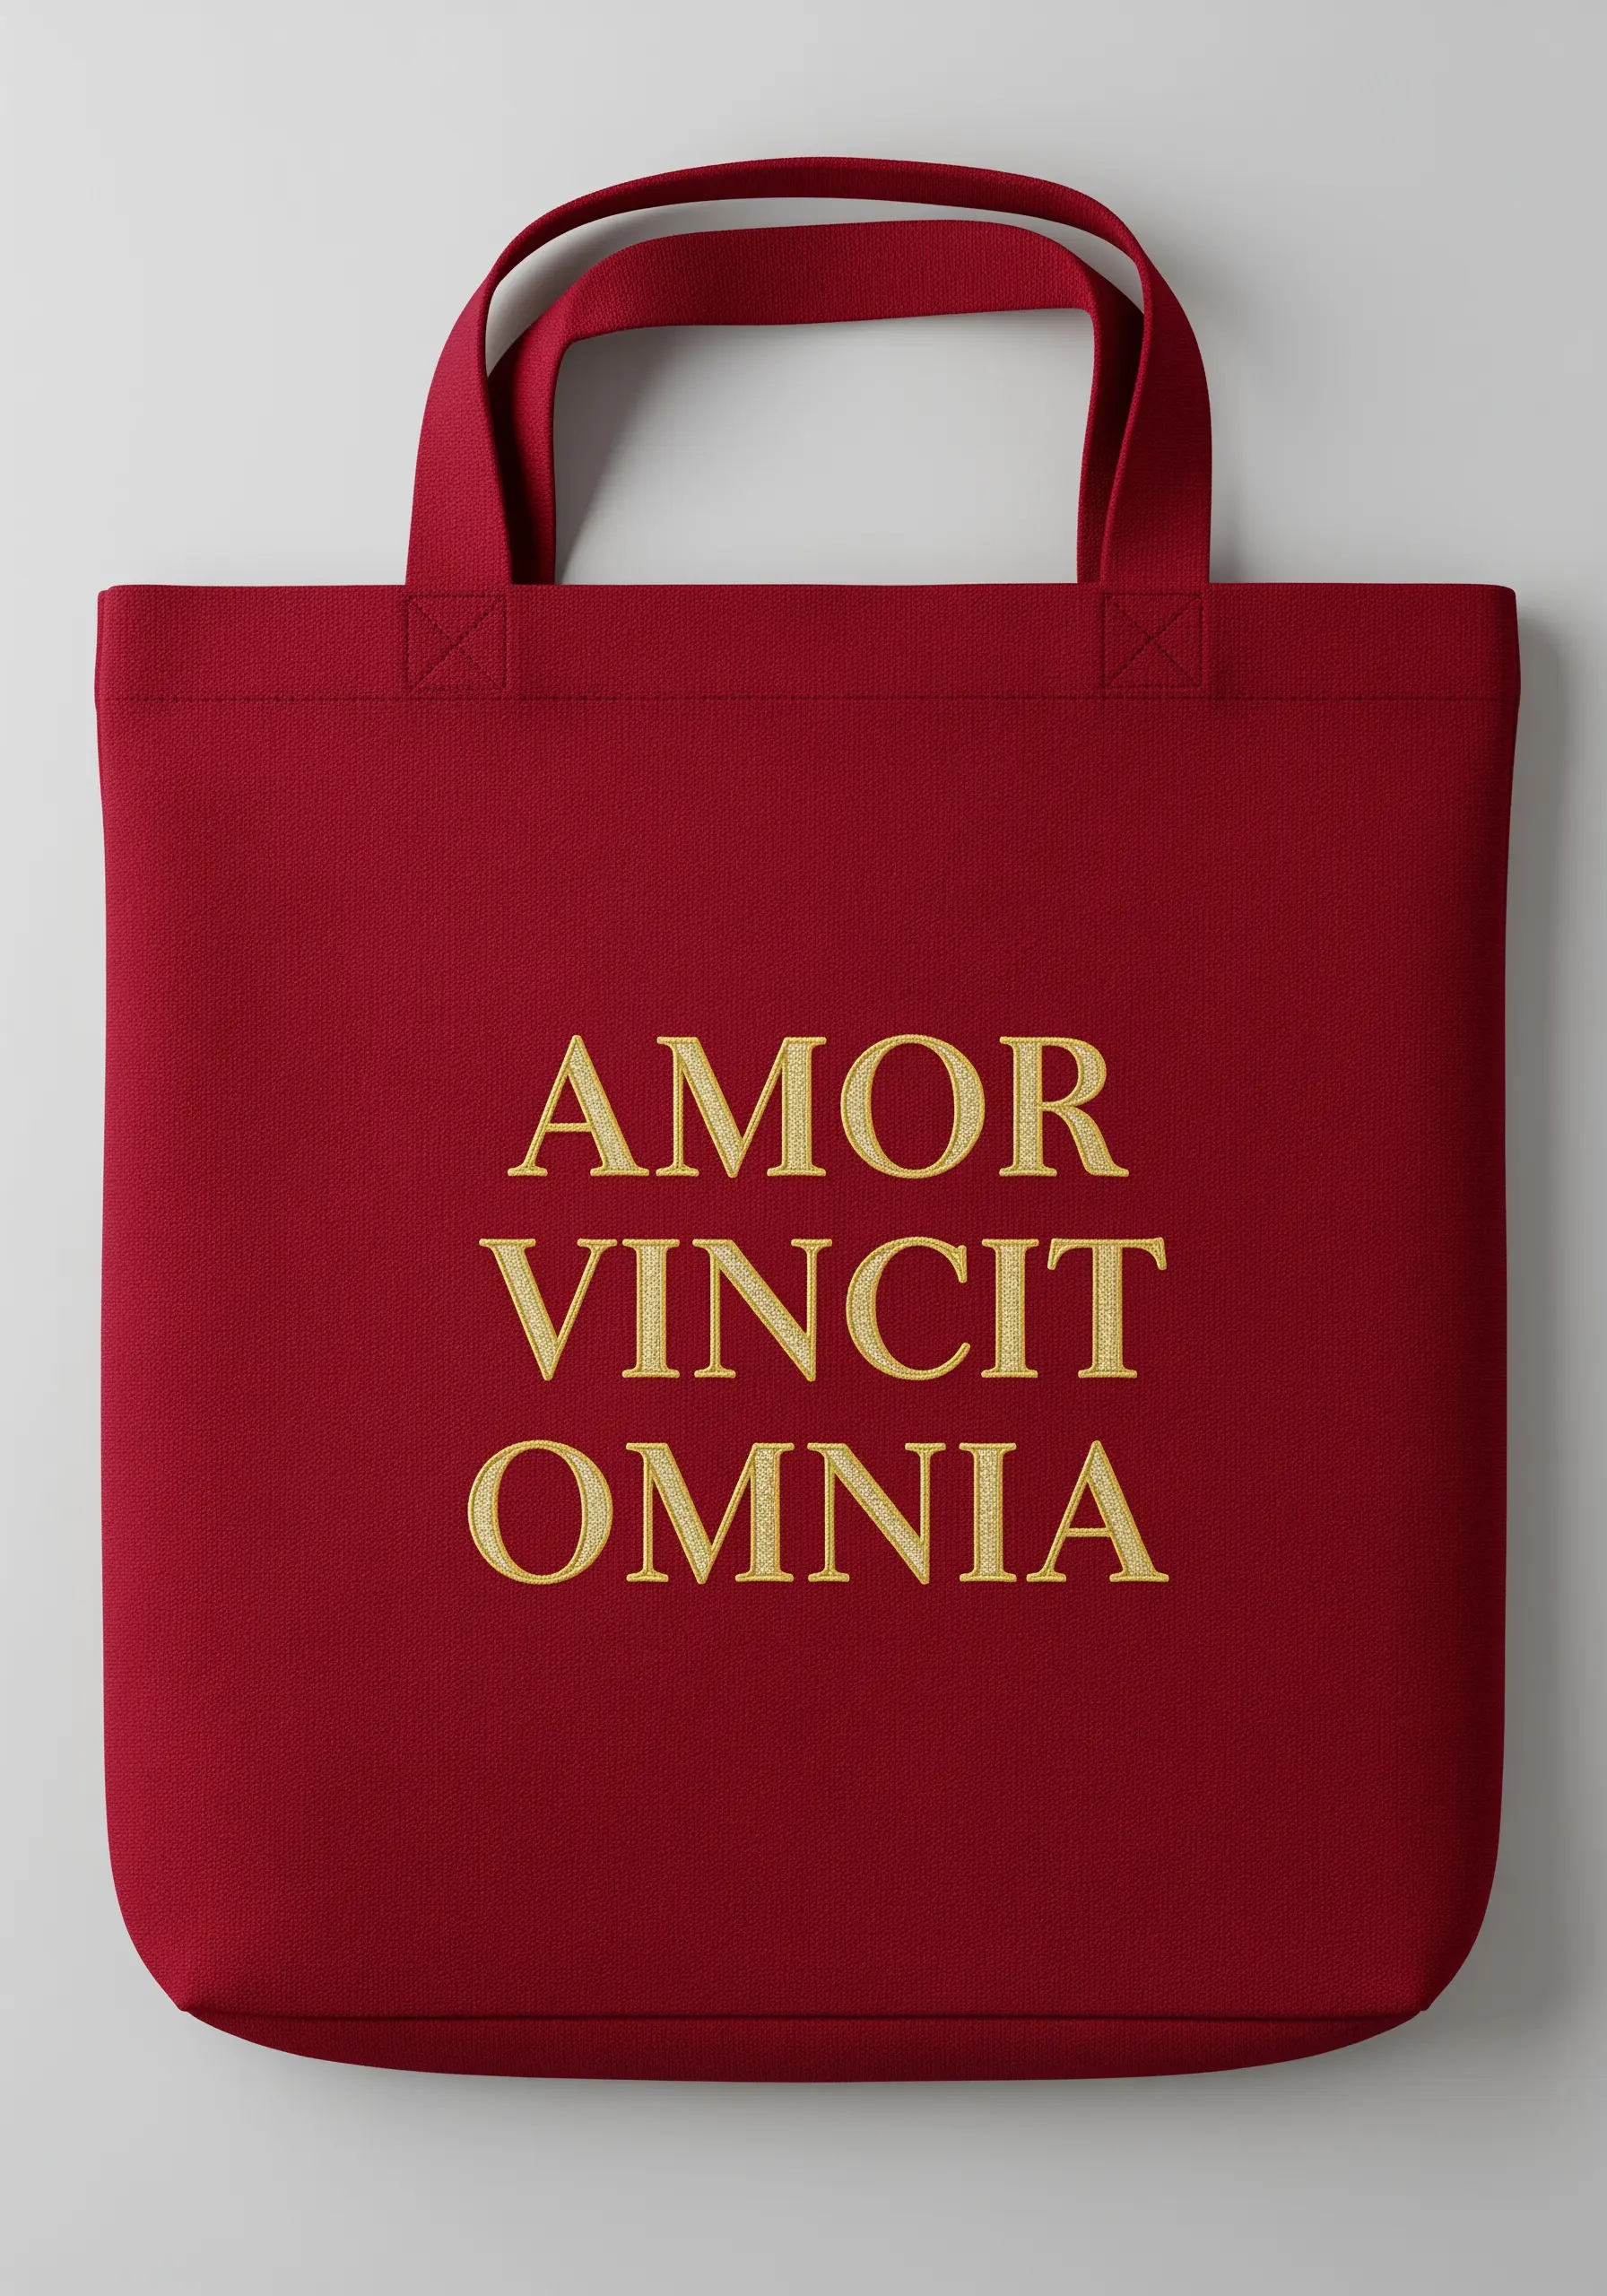
For elegant, serif typography like this, precision is paramount. Use a fine, single-strand backstitch for a crisp, clean finish.
Using a water-soluble stabilizer with a printed grid can help you maintain perfect letter height and spacing.
A high-quality metallic gold thread will give the phrase a timeless, engraved appearance, especially against a rich, saturated color like burgundy.
Take your time with the serifs—the small decorative strokes on the letters. They are crucial for achieving that classic, scholarly look. Make them with single, tiny straight stitches at the end of each main stroke.
31. Tandem Bicycle with Floating Hearts
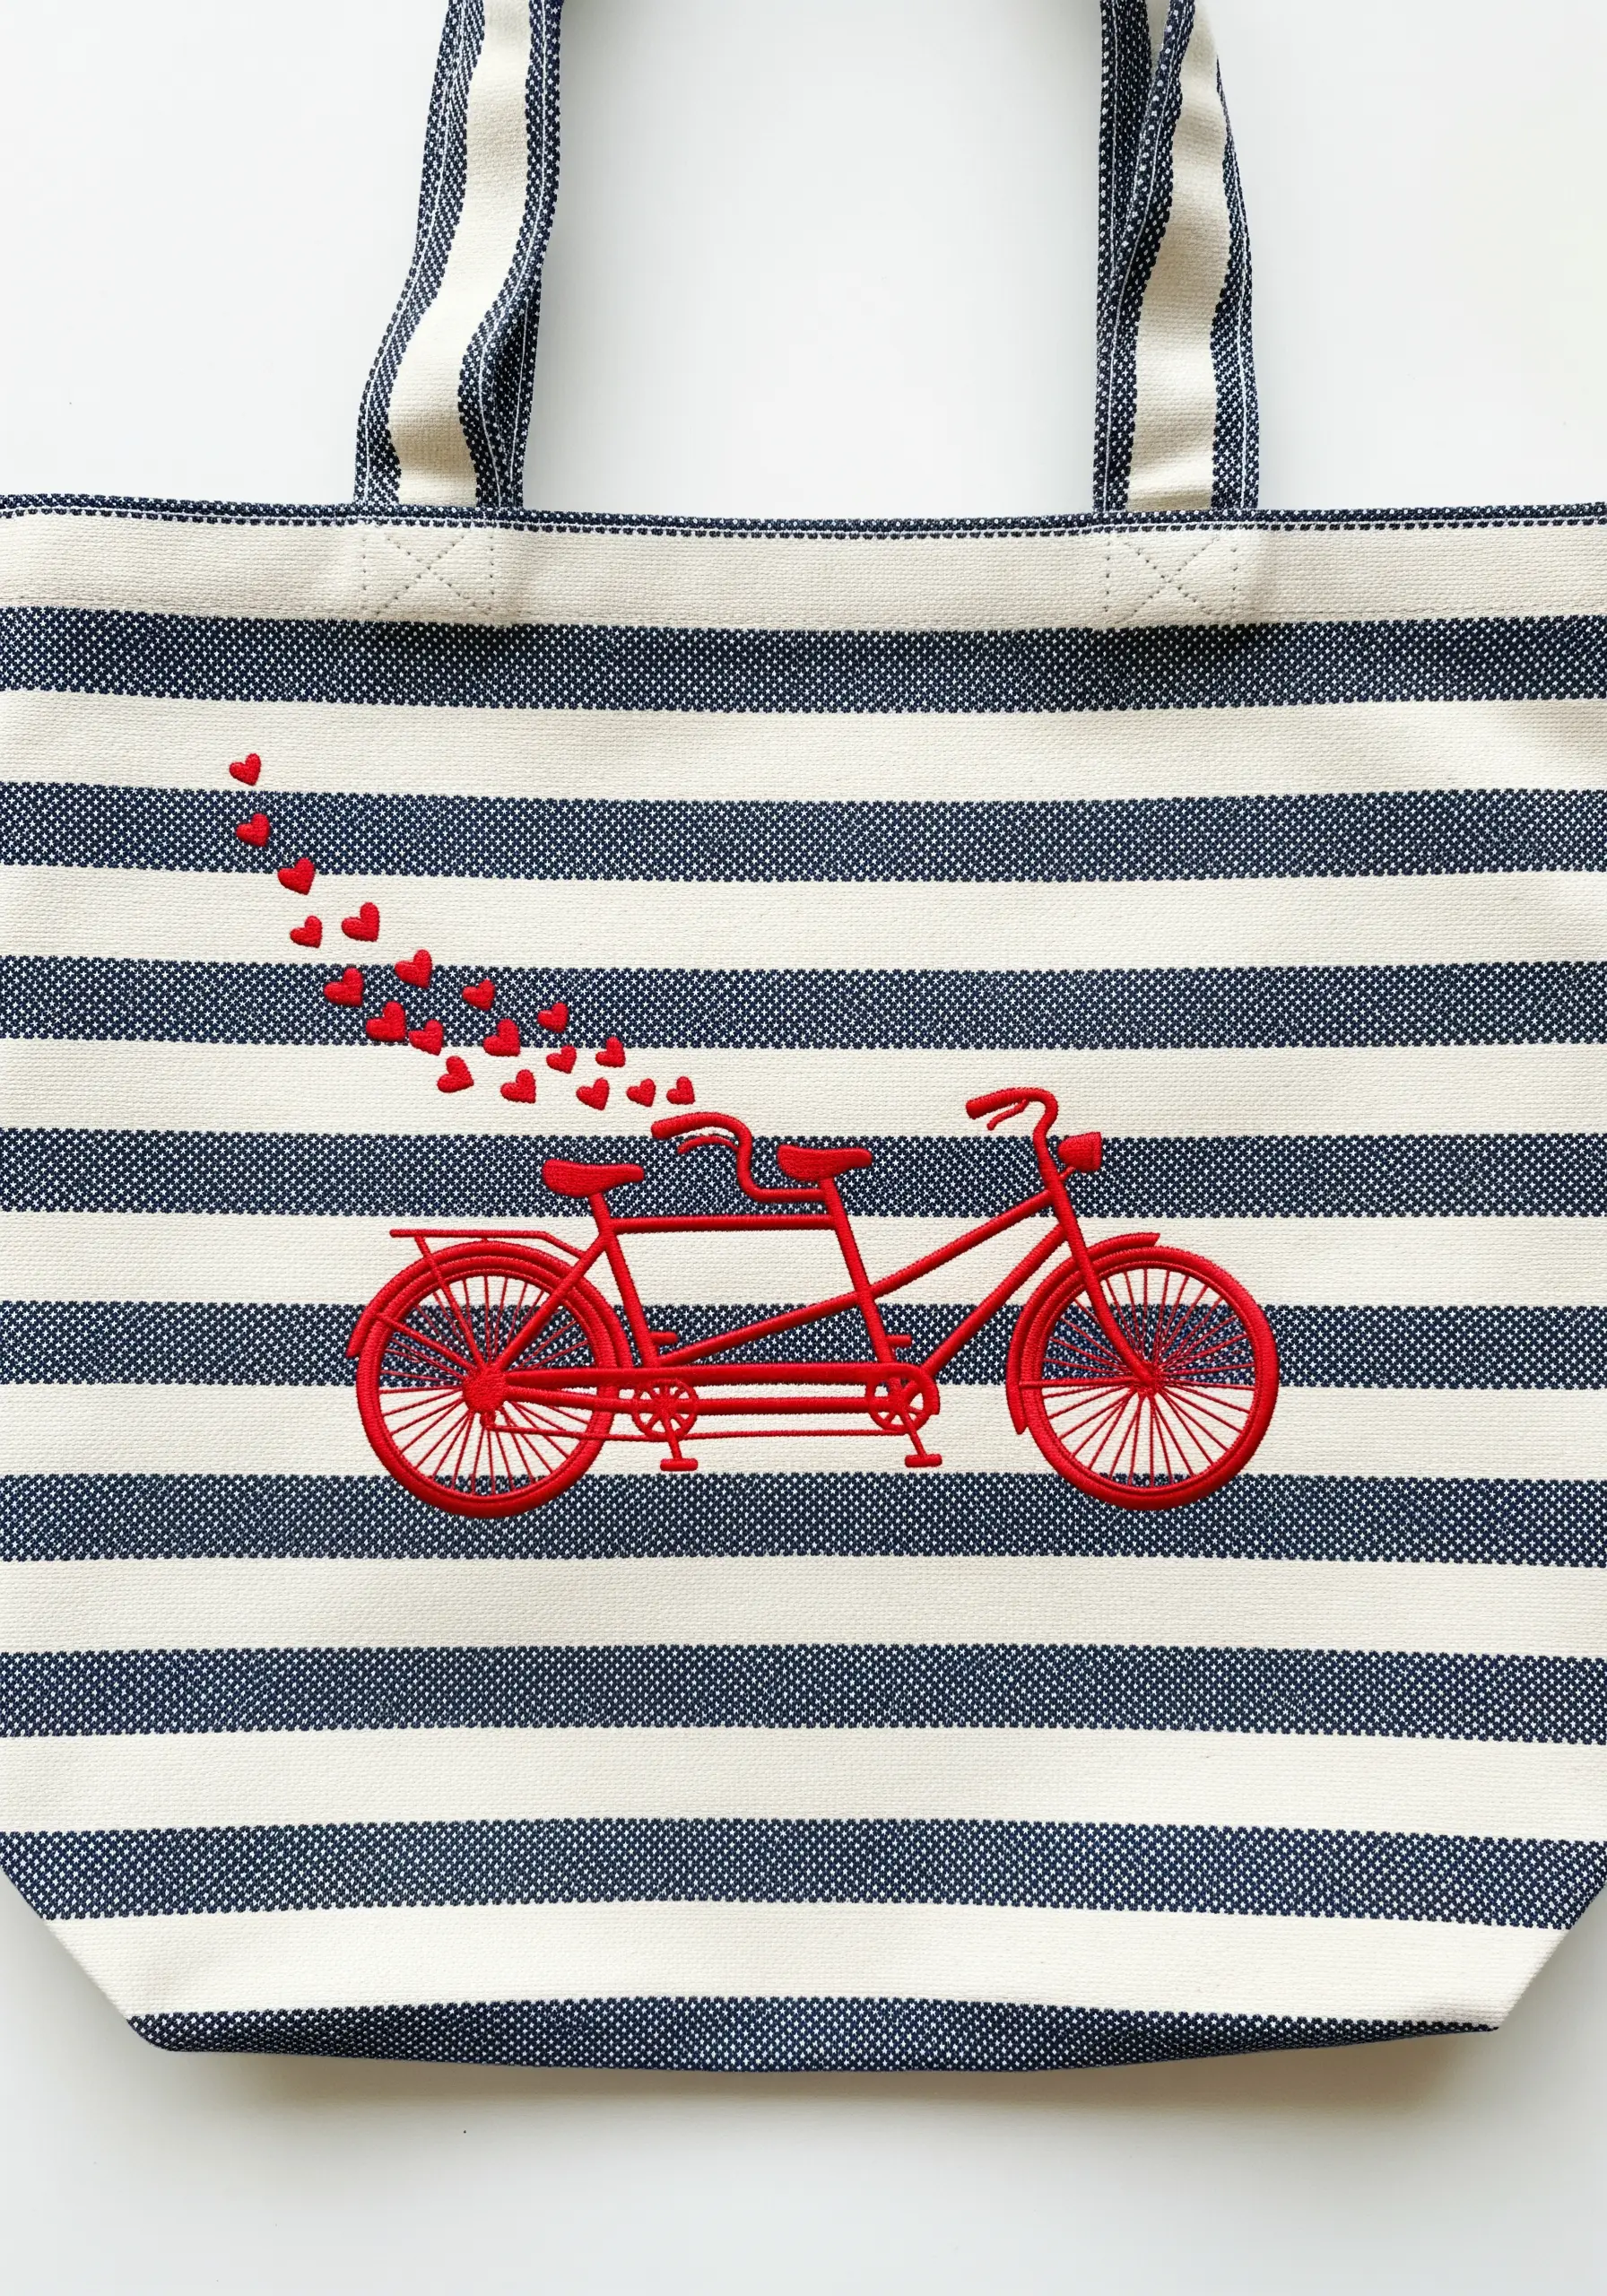
When embroidering on a patterned fabric like stripes, choose a bold, solid color for your motif to ensure it stands out.
Use a simple backstitch or stem stitch with a full six strands of red floss to create a thick, substantial outline for the bicycle.
The tiny floating hearts are a whimsical touch; make them uniform by using two small, angled straight stitches that meet at a point, forming a tiny ‘V’ shape for the top of the heart and a single straight stitch for the bottom.
The solid red creates a powerful graphic image that reads clearly against the busy background.
32. Library Card Pocket for Book Lovers

This charming design is perfect for the book-loving couple. Create the library card as an appliqué patch for a clean, contained look.
Embroider the details on a separate piece of off-white canvas or felt first.
Use a simple backstitch for the text and borders. For the filled-in names, a neat satin stitch will provide a nice contrast to the delicate line work.
Once the embroidery is complete, finish the edges of the patch and sew it onto the tote’s front pocket for a polished, layered effect.
It’s a clever, personal design that tells a story.
33. Hummingbirds and Fuchsia Flower
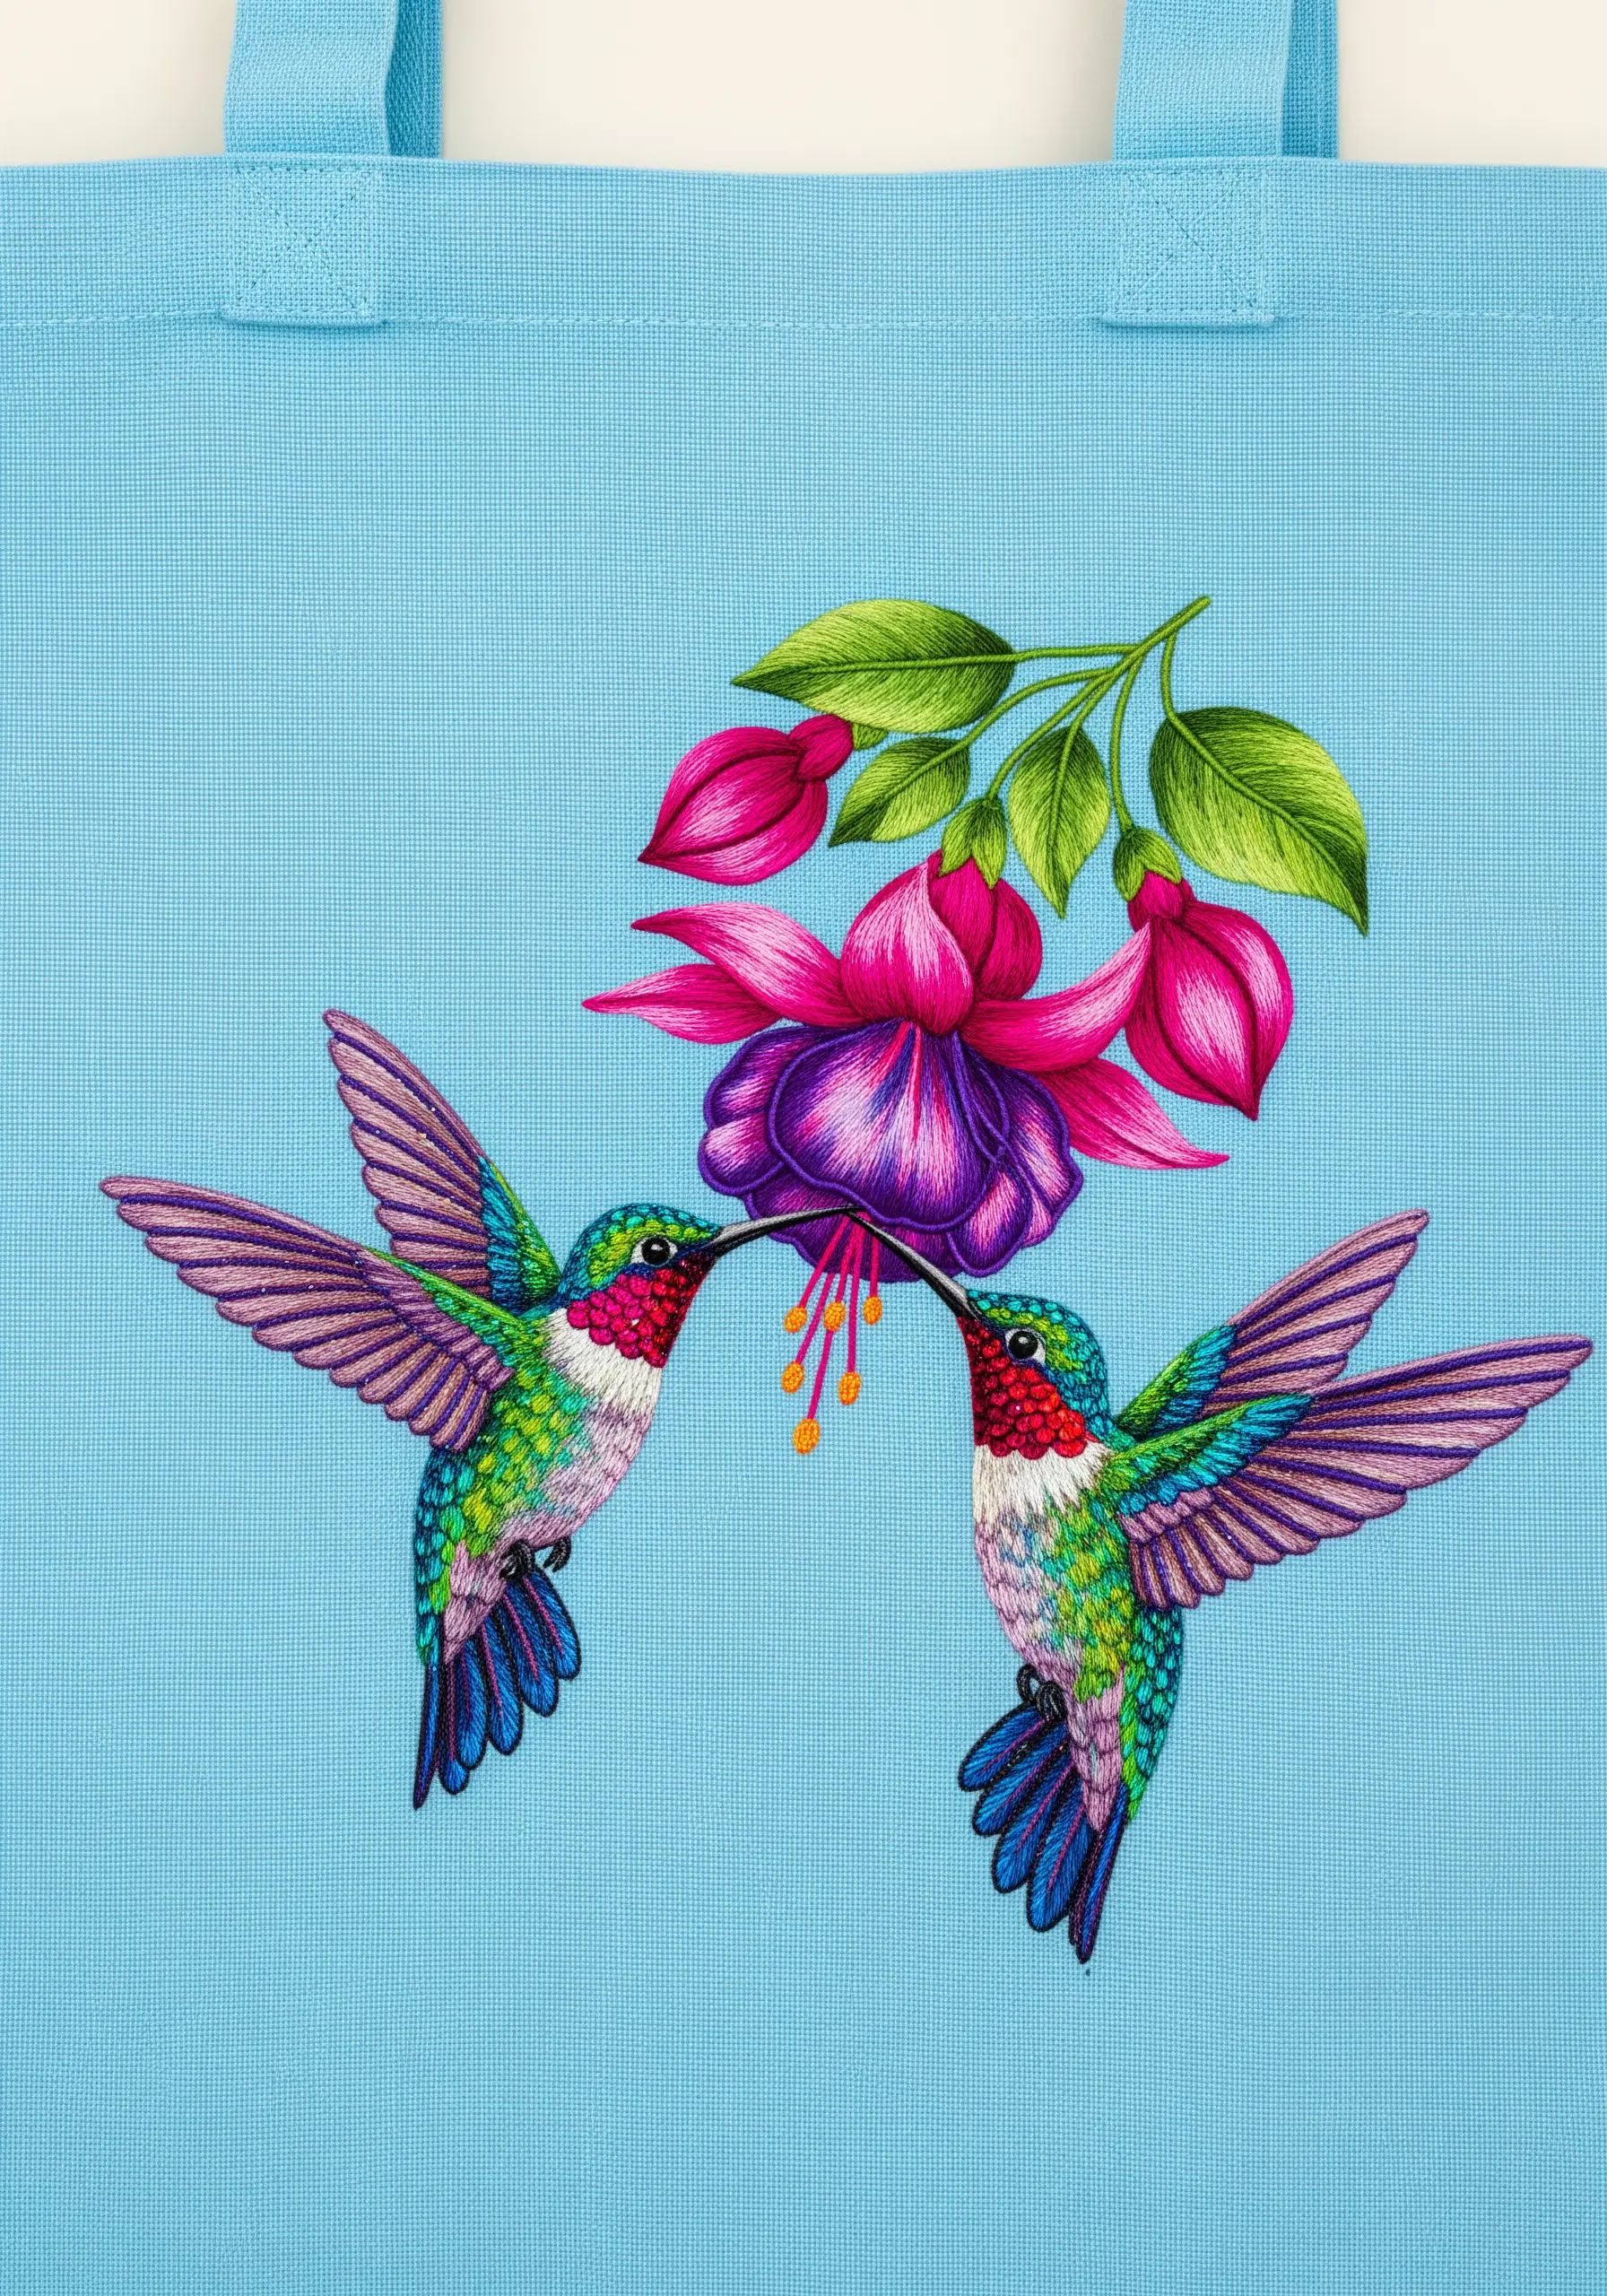
This vibrant scene is a masterclass in thread painting. To achieve the hummingbirds’ iridescent feathers, lay down short, satin stitches using multiple shades of green, blue, and violet floss.
Don’t be afraid to let the colors overlap slightly; this mimics the way light hits their feathers. Use a single strand of thread for the finest detail work.
For the fuchsia flower, use long-and-short stitch to blend the pink and purple petals smoothly.
The key to realism here is directional stitching—ensure your stitches flow in the natural direction of the feathers and petals to create movement and life.
34. Minimalist Moon Phases Arc
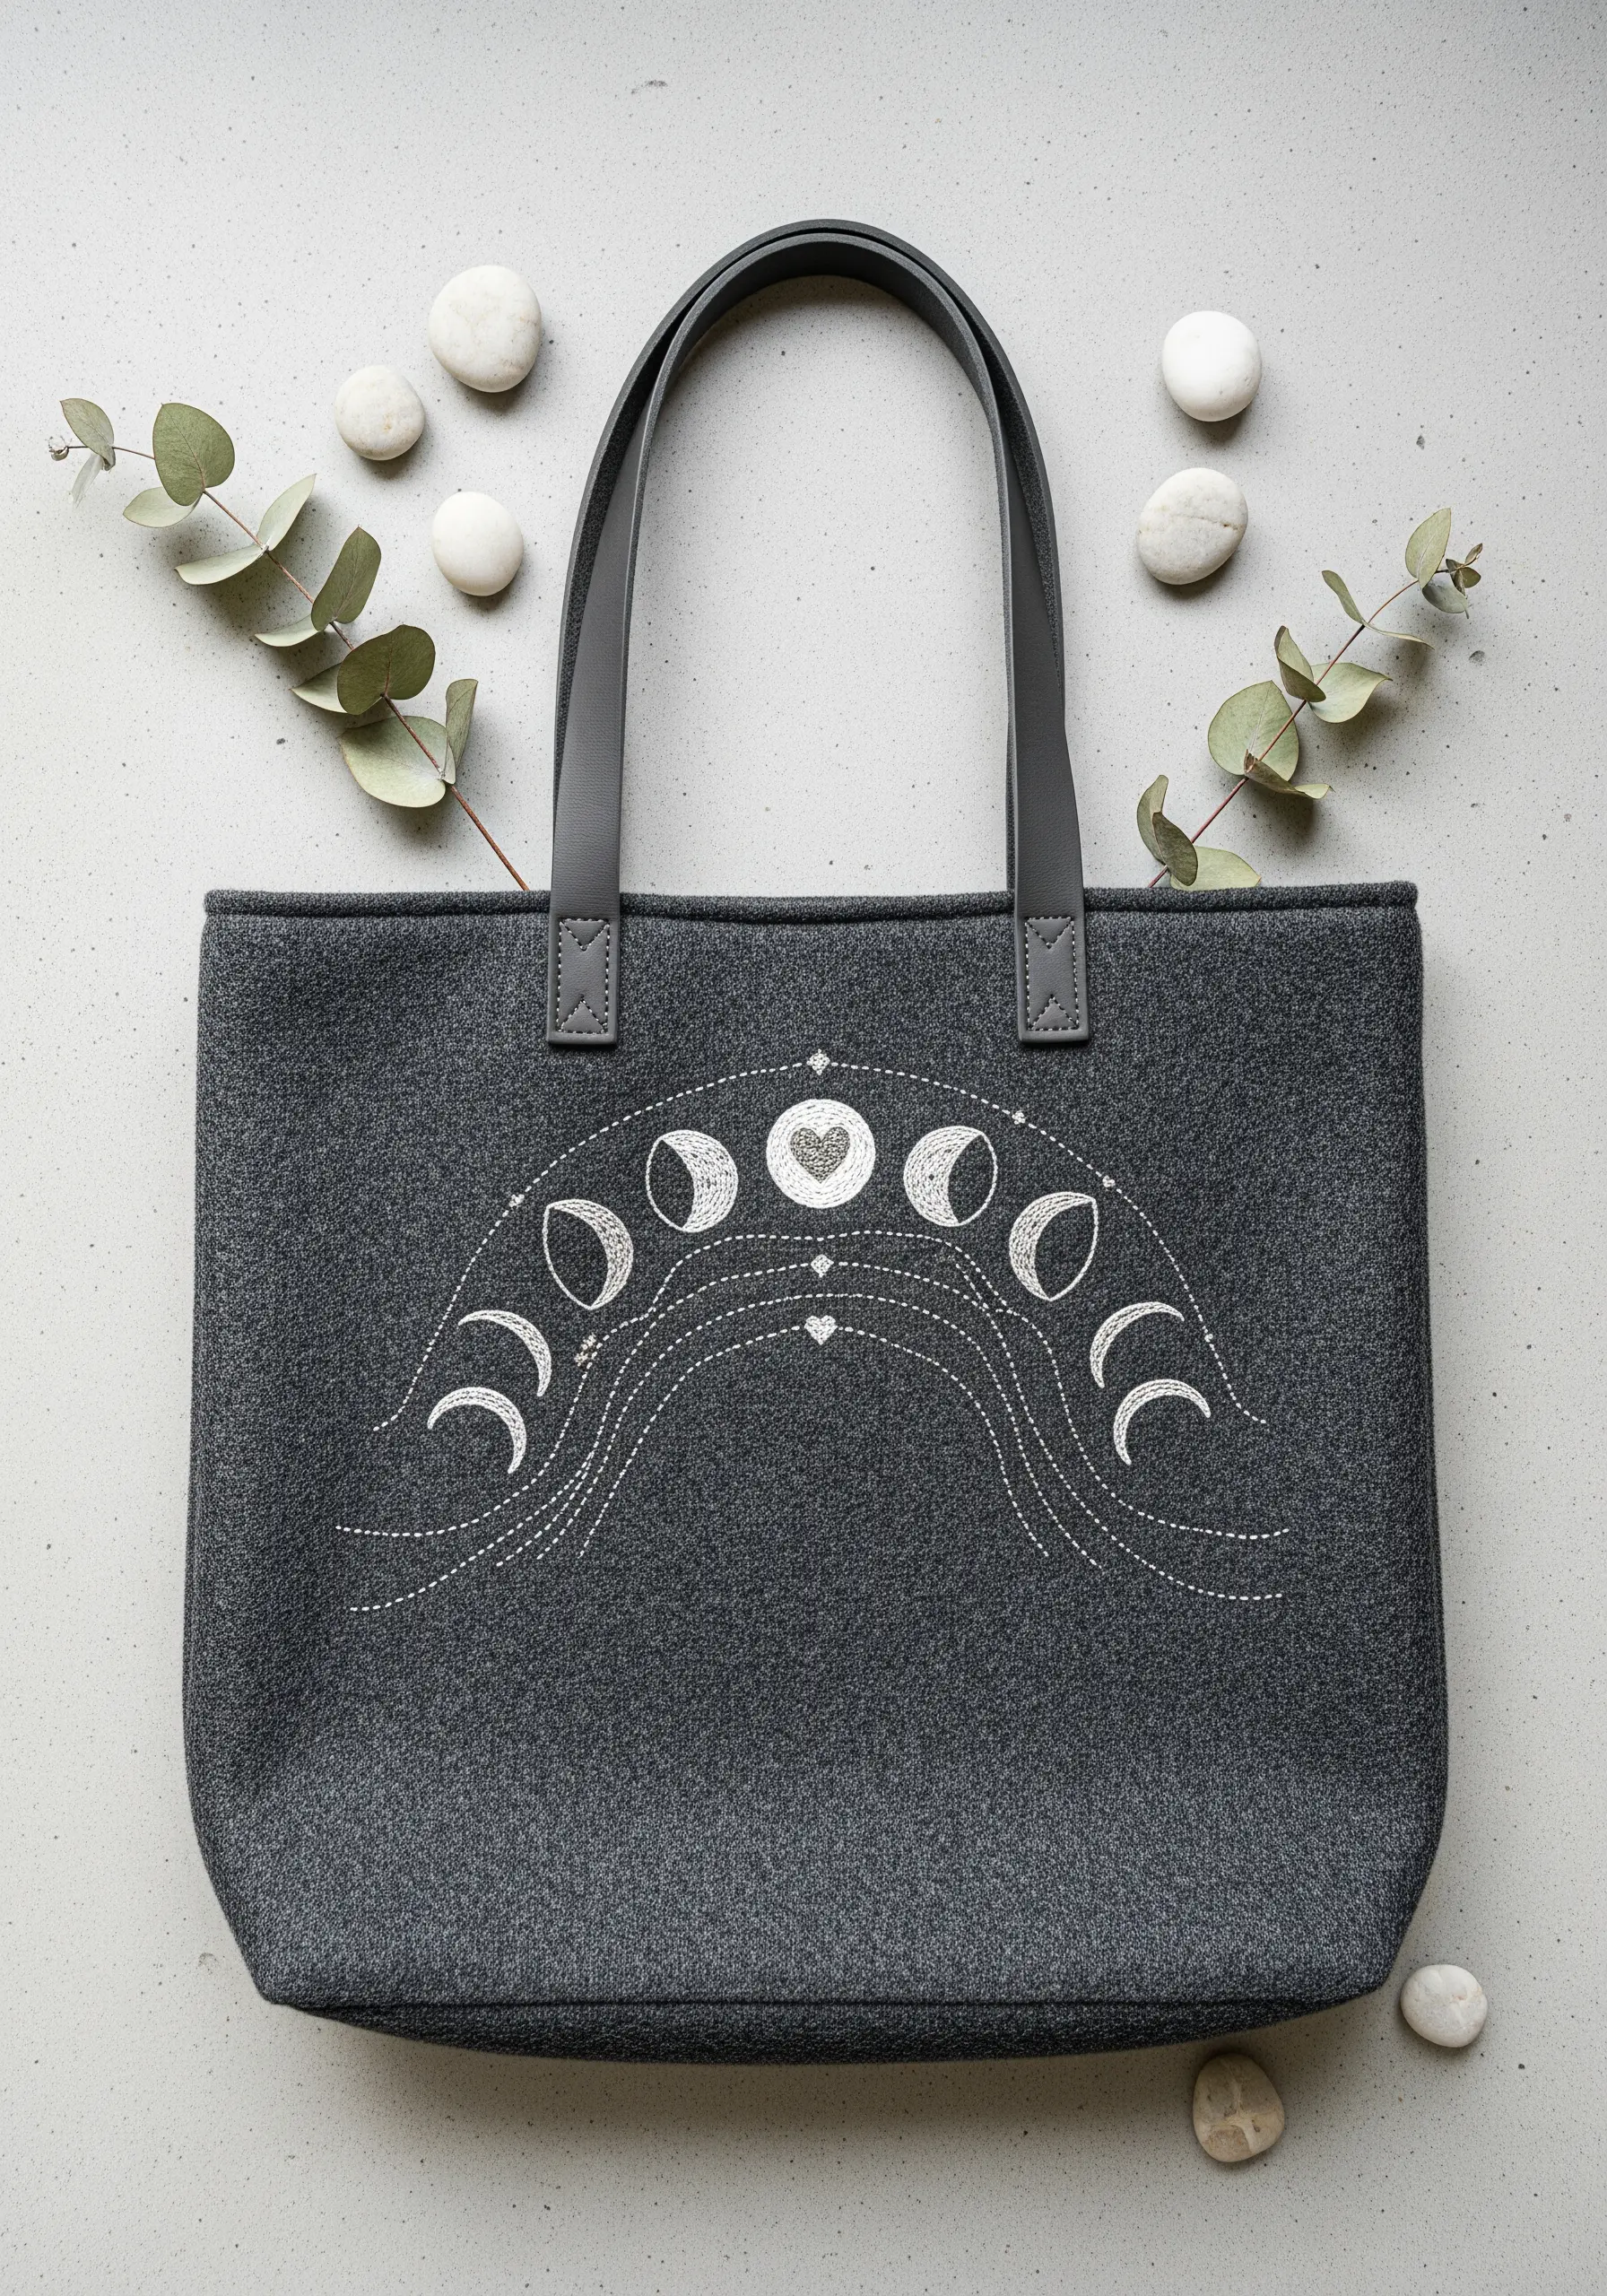
Create this serene, celestial design using simple stitches on a textured fabric like gray felt, which adds its own softness to the composition.
Use a basic backstitch with a white or silver thread for the outlines of the moons and the decorative arcs.
For the textured fill on the full and gibbous moons, use a scattering of seed stitches and French knots. This adds a subtle, crater-like texture without overwhelming the minimalist aesthetic.
The arrangement in a gentle arc gives the design a sense of balance and tranquility.
35. ‘You’re My Cup of Tea’
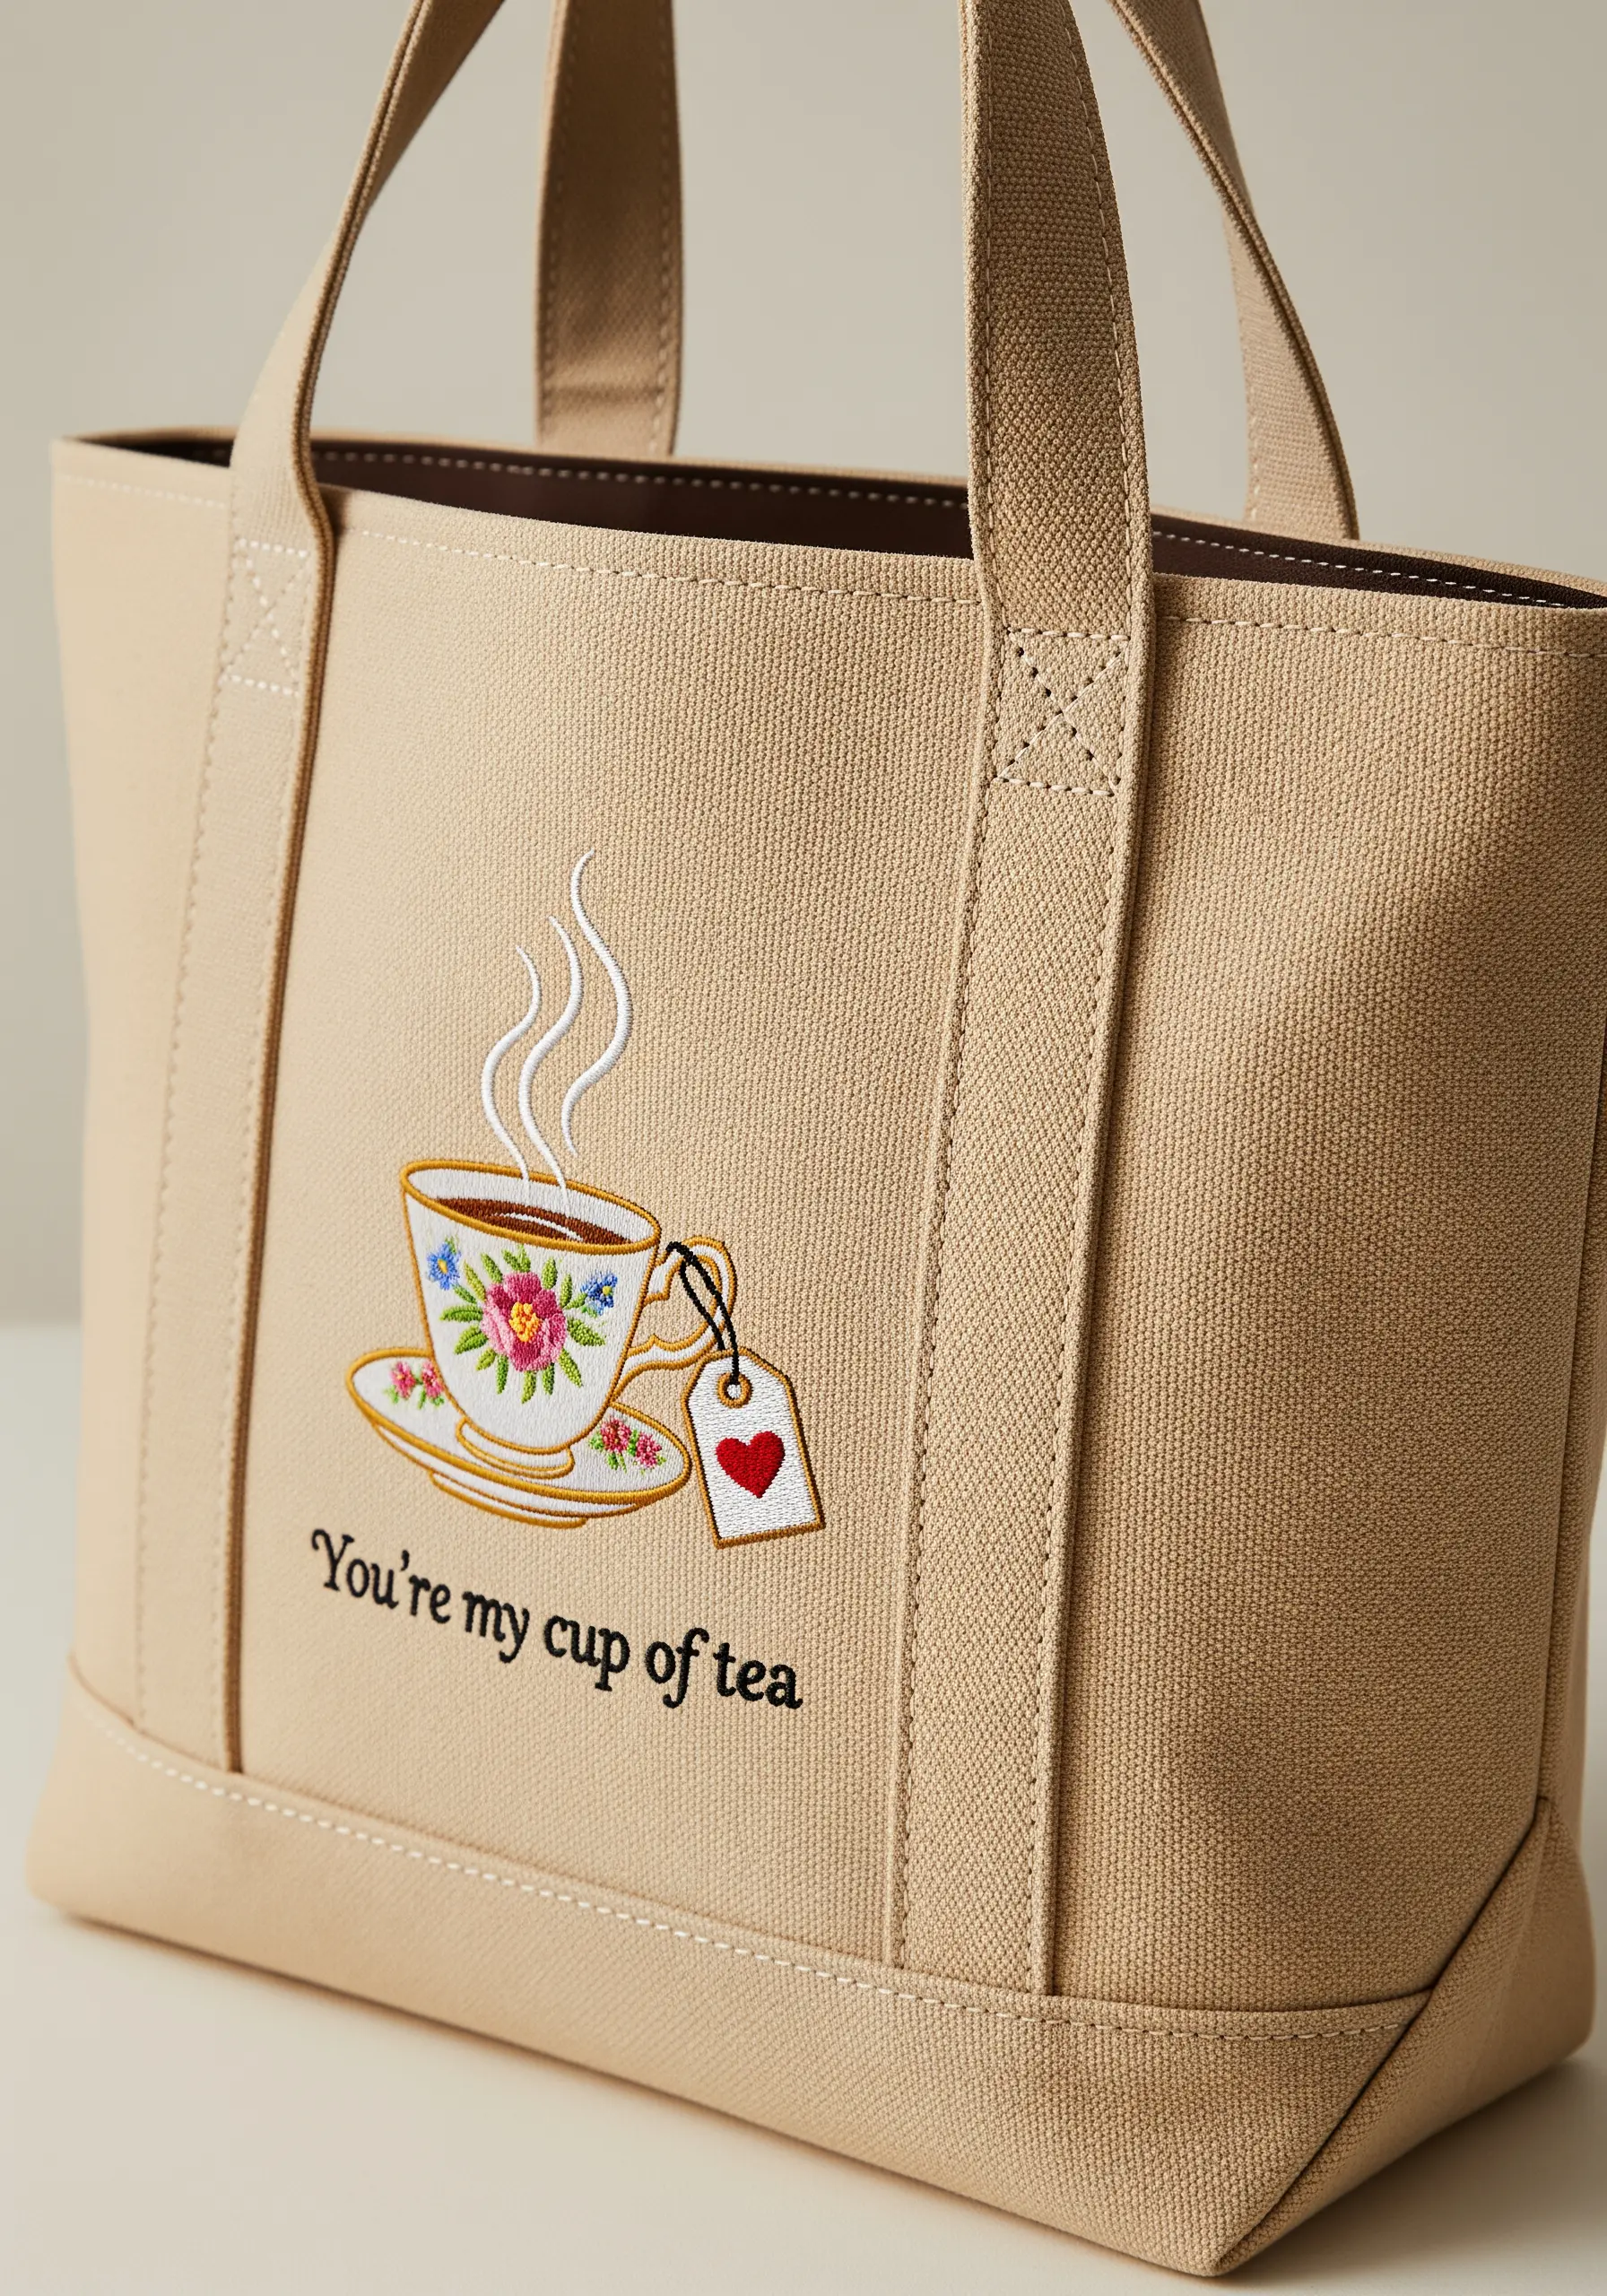
This classic design combines several simple stitches to create a charming and detailed scene.
Use a backstitch for the outlines of the teacup and saucer. For the floral pattern on the cup, use small lazy daisy stitches for the petals and French knots for the centers.
The steam is best rendered with a fine, single-strand stem stitch to give it a delicate, swirling quality.
For the tiny heart on the tag, use two small, angled straight stitches—a simple technique that creates a perfect heart shape every time.
This is a wonderful project for practicing a variety of foundational stitches in one small piece.
36. King of Hearts Playing Card

This graphic design is all about crisp lines and dense, solid blocks of color. It’s an ideal project for a digital embroidery machine, but can be done by hand with patience.
If stitching by hand, outline each color section with a split stitch before filling with a smooth satin stitch. This will keep your edges sharp and your colors from bleeding into one another.
Use a high-quality, high-sheen embroidery floss to mimic the glossy finish of a playing card.
The black outlines are crucial for the design’s integrity, so stitch them last using a precise backstitch to define all the shapes.


