

That collection of fabric scraps you’ve been saving holds more than just color and pattern—it holds memories and potential. Instead of letting them gather dust, let’s turn them into something beautiful and intentional for your walls.
This isn’t about following complex patterns. It’s about combining the comforting, tactile nature of patchwork with the expressive detail of embroidery. You’ll see how layering a simple gingham behind a floral motif or adding a few well-placed stitches can transform simple materials into a piece with story and soul.
These projects are an invitation to slow down, to play with texture, and to create art that feels uniquely yours. Let’s pick up a needle and give those cherished scraps a new life.
1. Stitch a Patchwork Meadow Tapestry
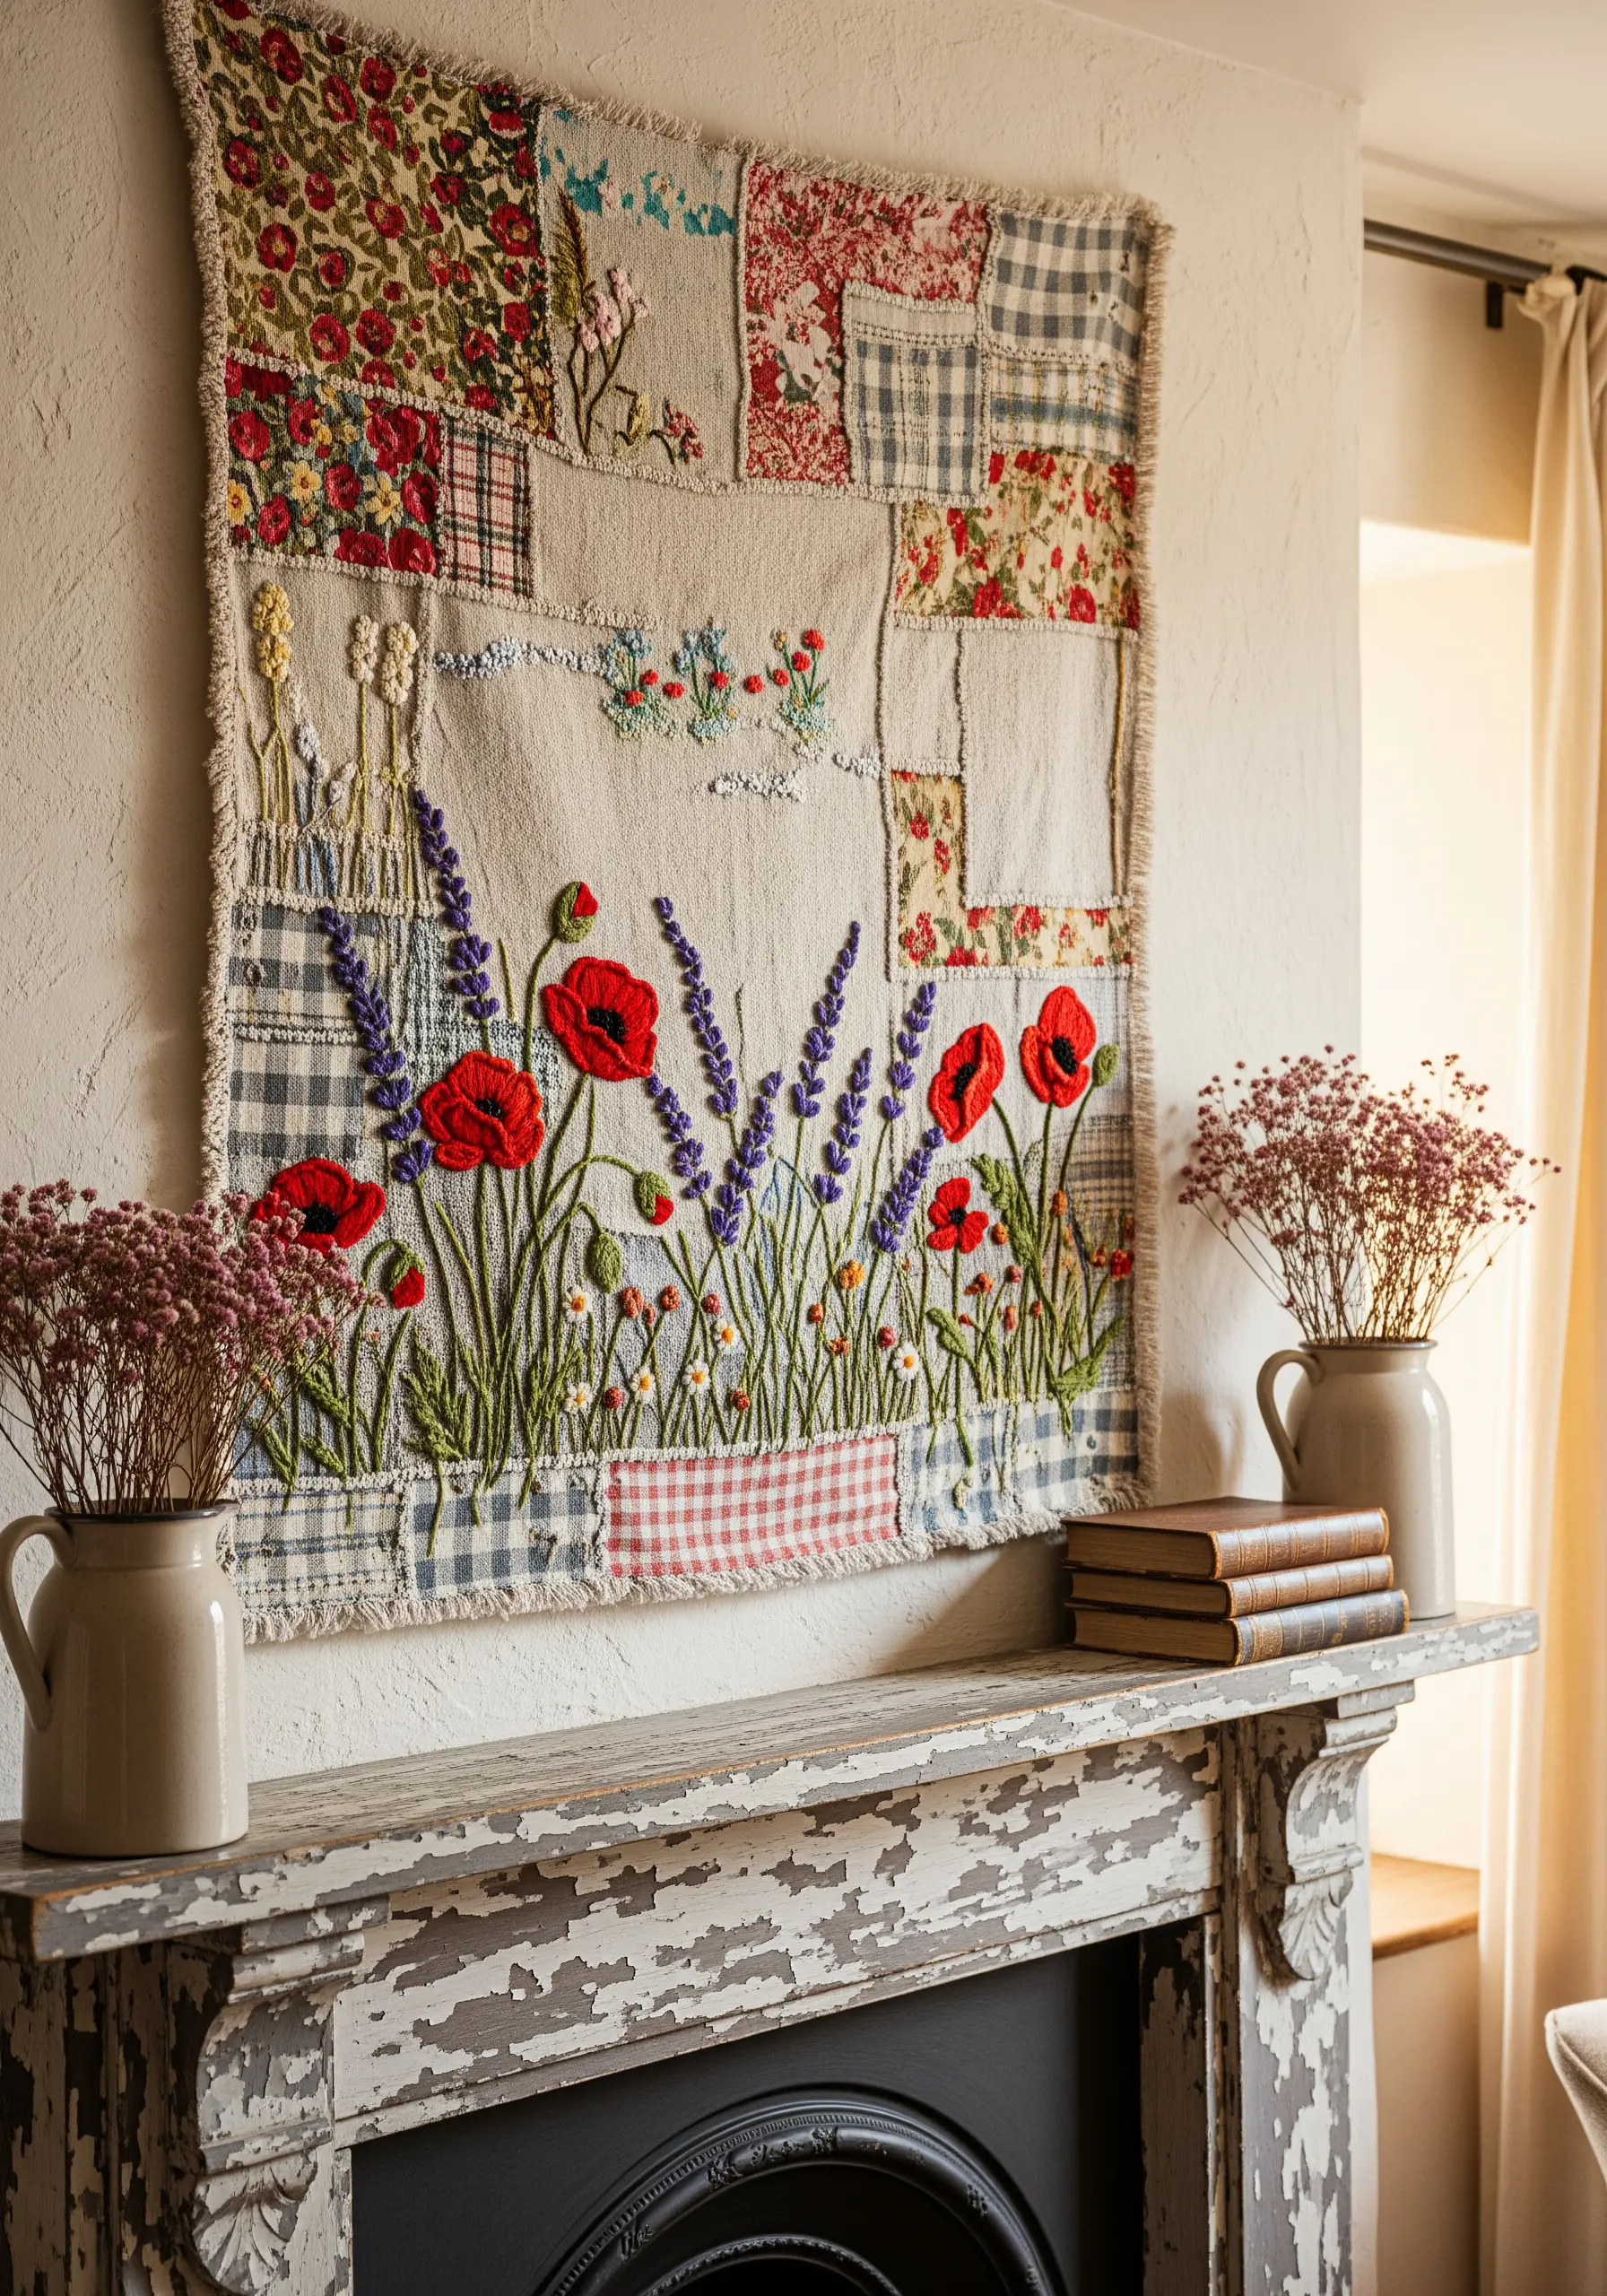
Build your canvas by patchworking together linen, gingham, and floral fabric scraps to create a rustic backdrop.
Don’t hide the seams—celebrate them by stitching over them with decorative running stitches to unify the piece.
For the embroidered meadow, use thicker threads like pearl cotton or multiple strands of floss for the poppies and lavender.
This ensures your floral motifs stand out with bold texture against the patterned fabrics, preventing them from getting lost in the visual noise.
A combination of satin stitch for the petals and dense French knots for the flower centers will create a rich, tactile dimension.
2. Curate a Cohesive Woodland Gallery

To create a polished collection, choose one type of background fabric—like a natural, unbleached linen—for all your hoops.
This simple choice creates immediate harmony, allowing the individual character of each animal to shine.
Use a dense, smooth satin stitch for the main bodies of the animals, ensuring your stitches lay flat and parallel for a clean, graphic look.
Outline your shapes with a single-strand backstitch to create crisp edges. This small detail is what gives your work a professional finish.
Varying the hoop sizes adds rhythm and visual interest, turning a few small pieces into an intentional gallery wall.
3. Design a Botanical Window Banner
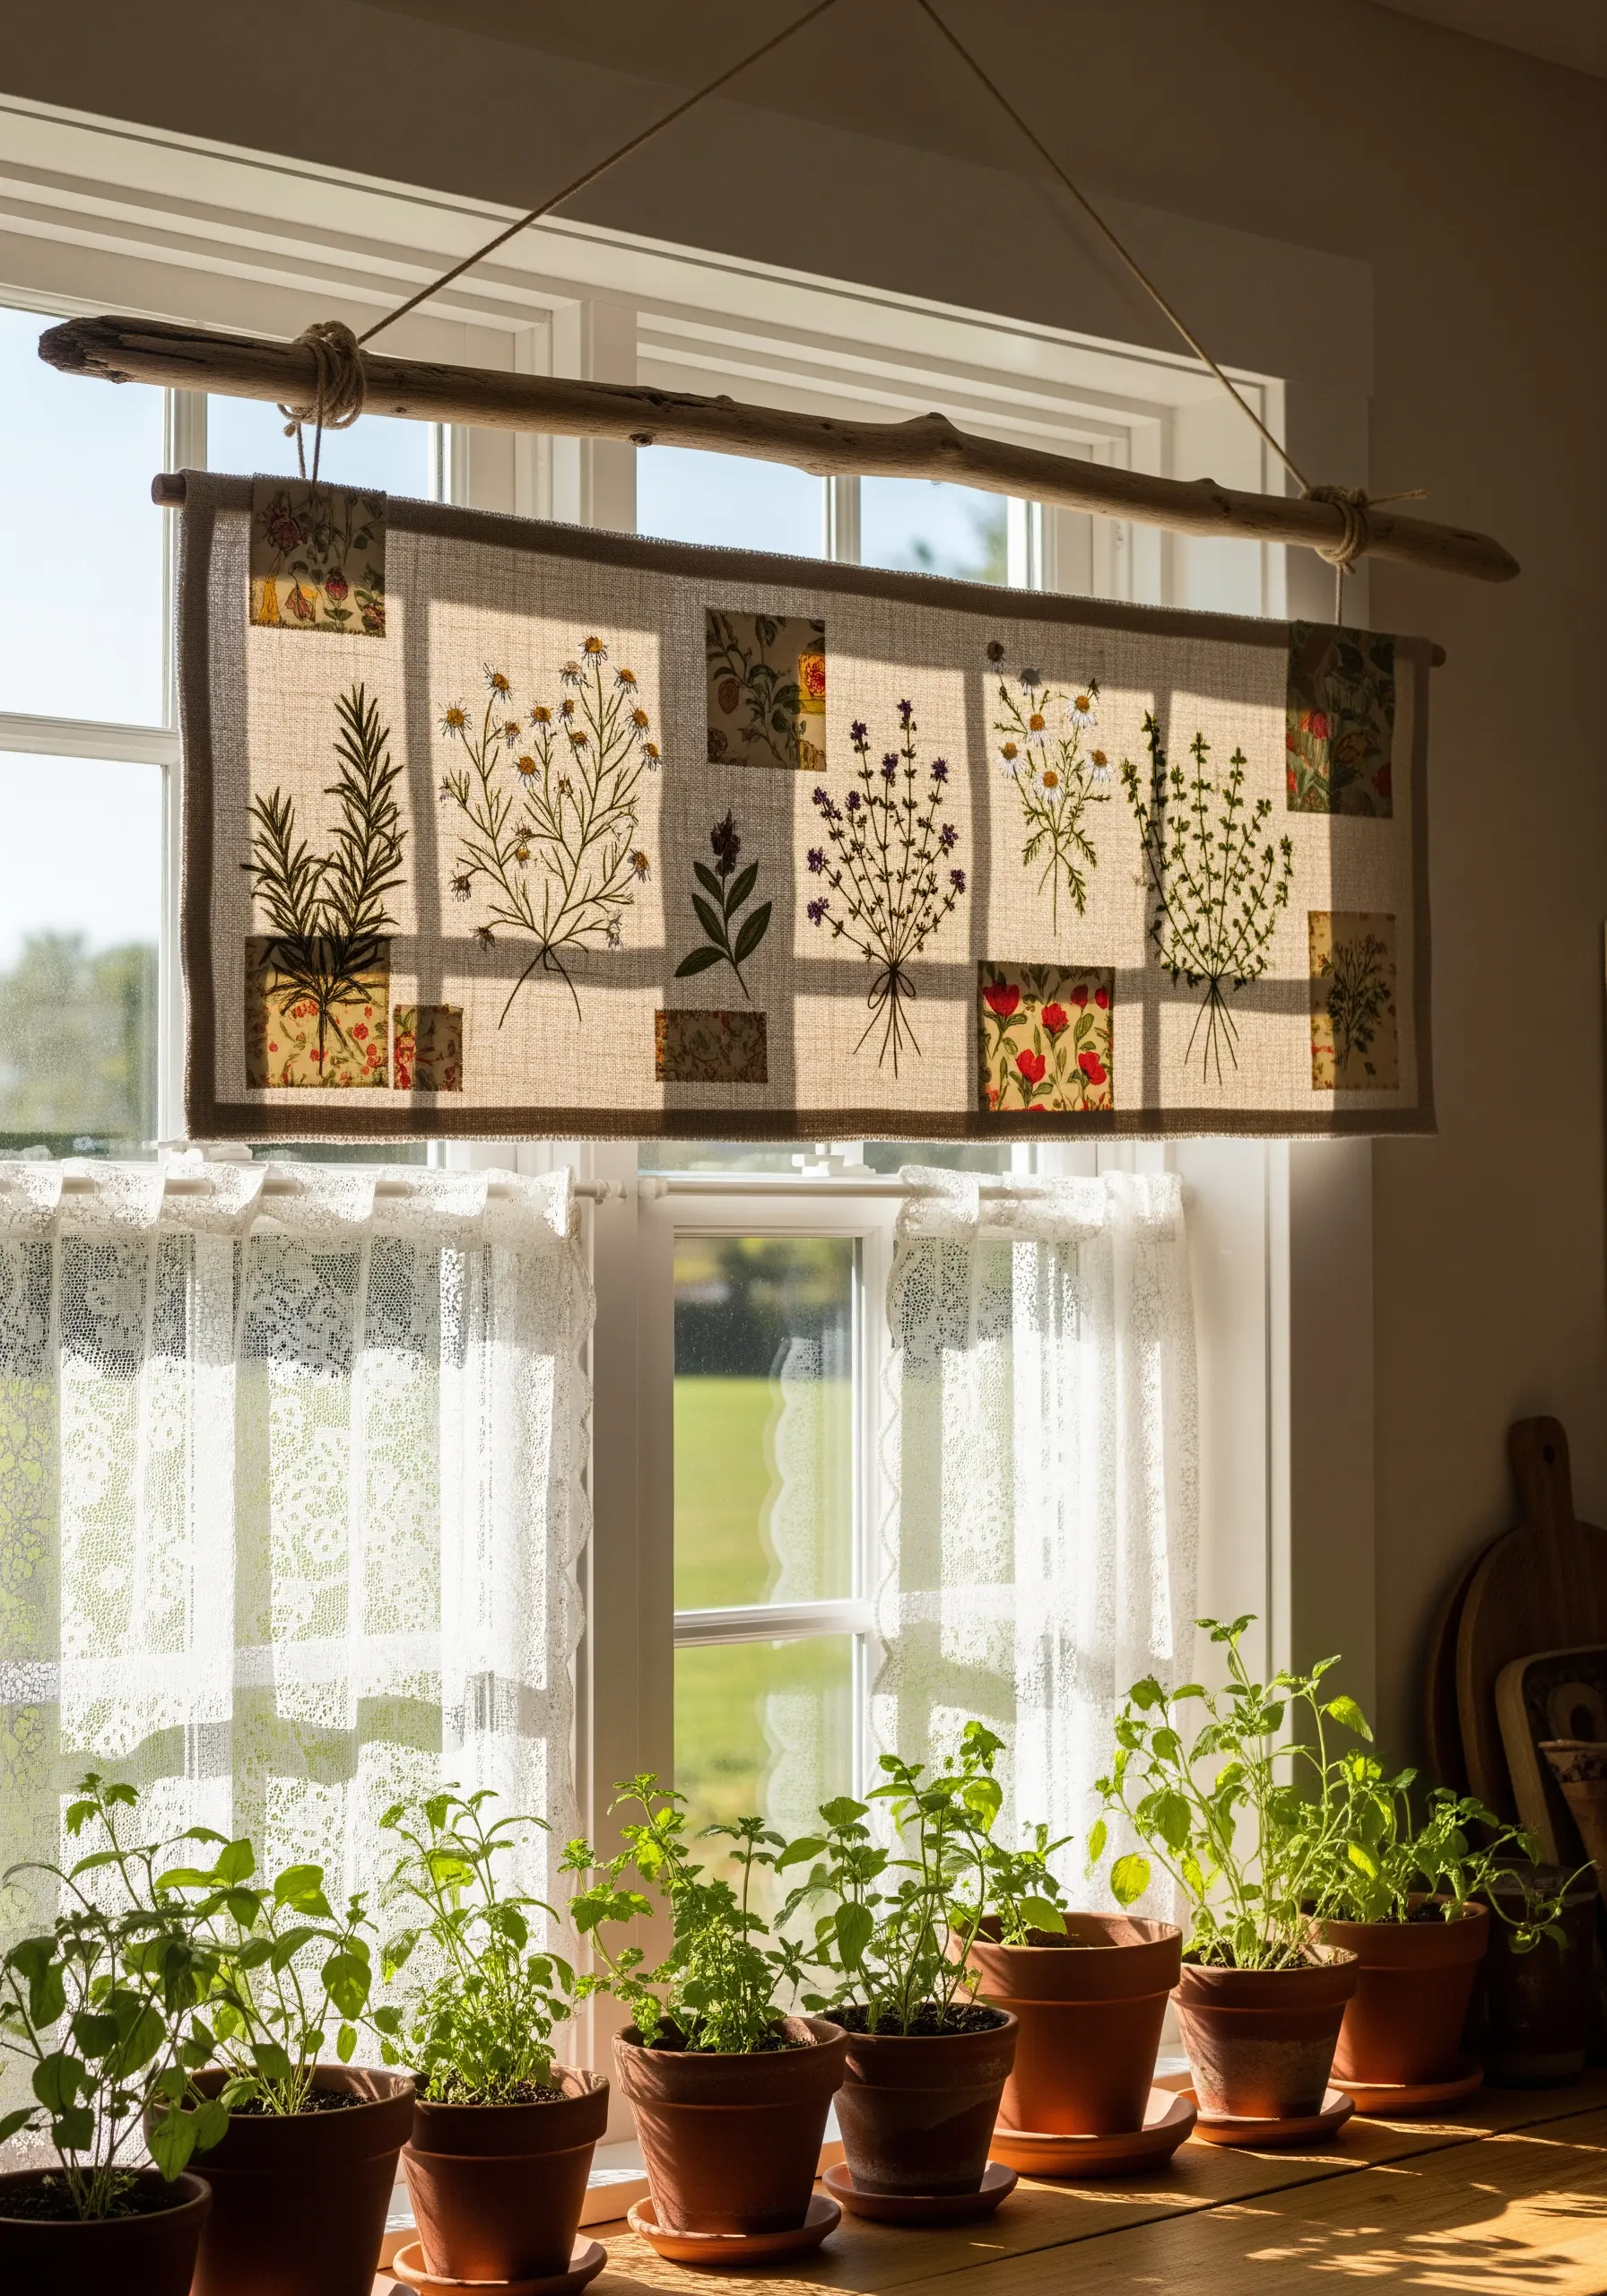
Instead of tackling one large piece, stitch your herbal plant embroidery motifs on individual linen squares.
This modular approach is less intimidating and allows for more precision with each design.
Use a single strand of dark thread to achieve the delicate, illustrative quality of botanical drawings.
Once stitched, frame each square with coordinating floral fabric scraps before sewing the panels together.
Hang the finished banner from a found branch to complete the rustic, natural aesthetic.
4. Frame a Quilted Fabric Sunburst

This design uses fabric scraps to create a powerful graphic statement, even with minimal embroidery.
Arrange strips of patterned cottons—like gingham, calico, and plaid—in a radiating pattern to create a sunburst effect.
Once your top is pieced, use a simple running stitch in a contrasting, heavy-weight thread to quilt along the seams.
This technique, known as big-stitch quilting, adds a layer of hand-stitched texture that feels both rustic and modern.
The frame contains the energy of the design, turning a traditional quilting pattern into a piece of contemporary textile art.
5. Craft a Three-Dimensional Mushroom Garland

Take your embroidery off the hoop and into sculptural form by creating soft, stuffed mushrooms from linen and felt scraps.
For the caps, appliqué small felt circles or add French knots before sewing the pieces together to create the iconic toadstool look.
Use a simple whipstitch or running stitch to assemble the shapes, then stuff them lightly with poly-fil for a soft, rounded form.
This project is a perfect introduction to 3D embroidery wall art, turning simple stitches into charming, tangible objects.
6. Pair Delicate Stitches with Rugged Denim

Elevate your botanical stitching by using unconventional fabrics from your scrap bin, like old denim jeans.
The rugged texture of denim provides a beautiful and unexpected contrast to the delicate nature of a stitched dandelion or fern.
Use a sharp, strong needle to comfortably pierce the thick fabric, and consider using a thimble to protect your fingers.
A simple satin stitch or a fine-lined backstitch will pop against the dark blue, creating a modern, high-contrast piece of hoop art.
7. Build a Landscape with Fabric and Thread

Think of your fabric scraps as paint. Start by cutting and layering different pieces of cotton and linen to form the rolling hills and sky.
Secure these base layers with a few simple tacking stitches or a fusible web.
Then, use embroidery to add detail and unify the composition. Use dense French knots and colonial knots to create the rich, bumpy texture of the tree’s canopy.
This fabric collage embroidery technique transforms leftover materials into a painterly, textured landscape.
8. Balance Bold Lettering with Soft Florals

To make your lettering the hero of the piece, use a stitch that provides weight and definition, like a heavy chain stitch or a whipped backstitch.
This creates a bold, rope-like texture that draws the eye immediately.
Contrast this strong central element with a wreath of softer floral stitches. Use woven wheel stitches for dimensional roses and lazy daisy stitches for delicate chamomile.
This balance between bold lines and soft, textural fills gives a classic design a sophisticated and modern feel.
9. Add Functional Art to Denim Pockets
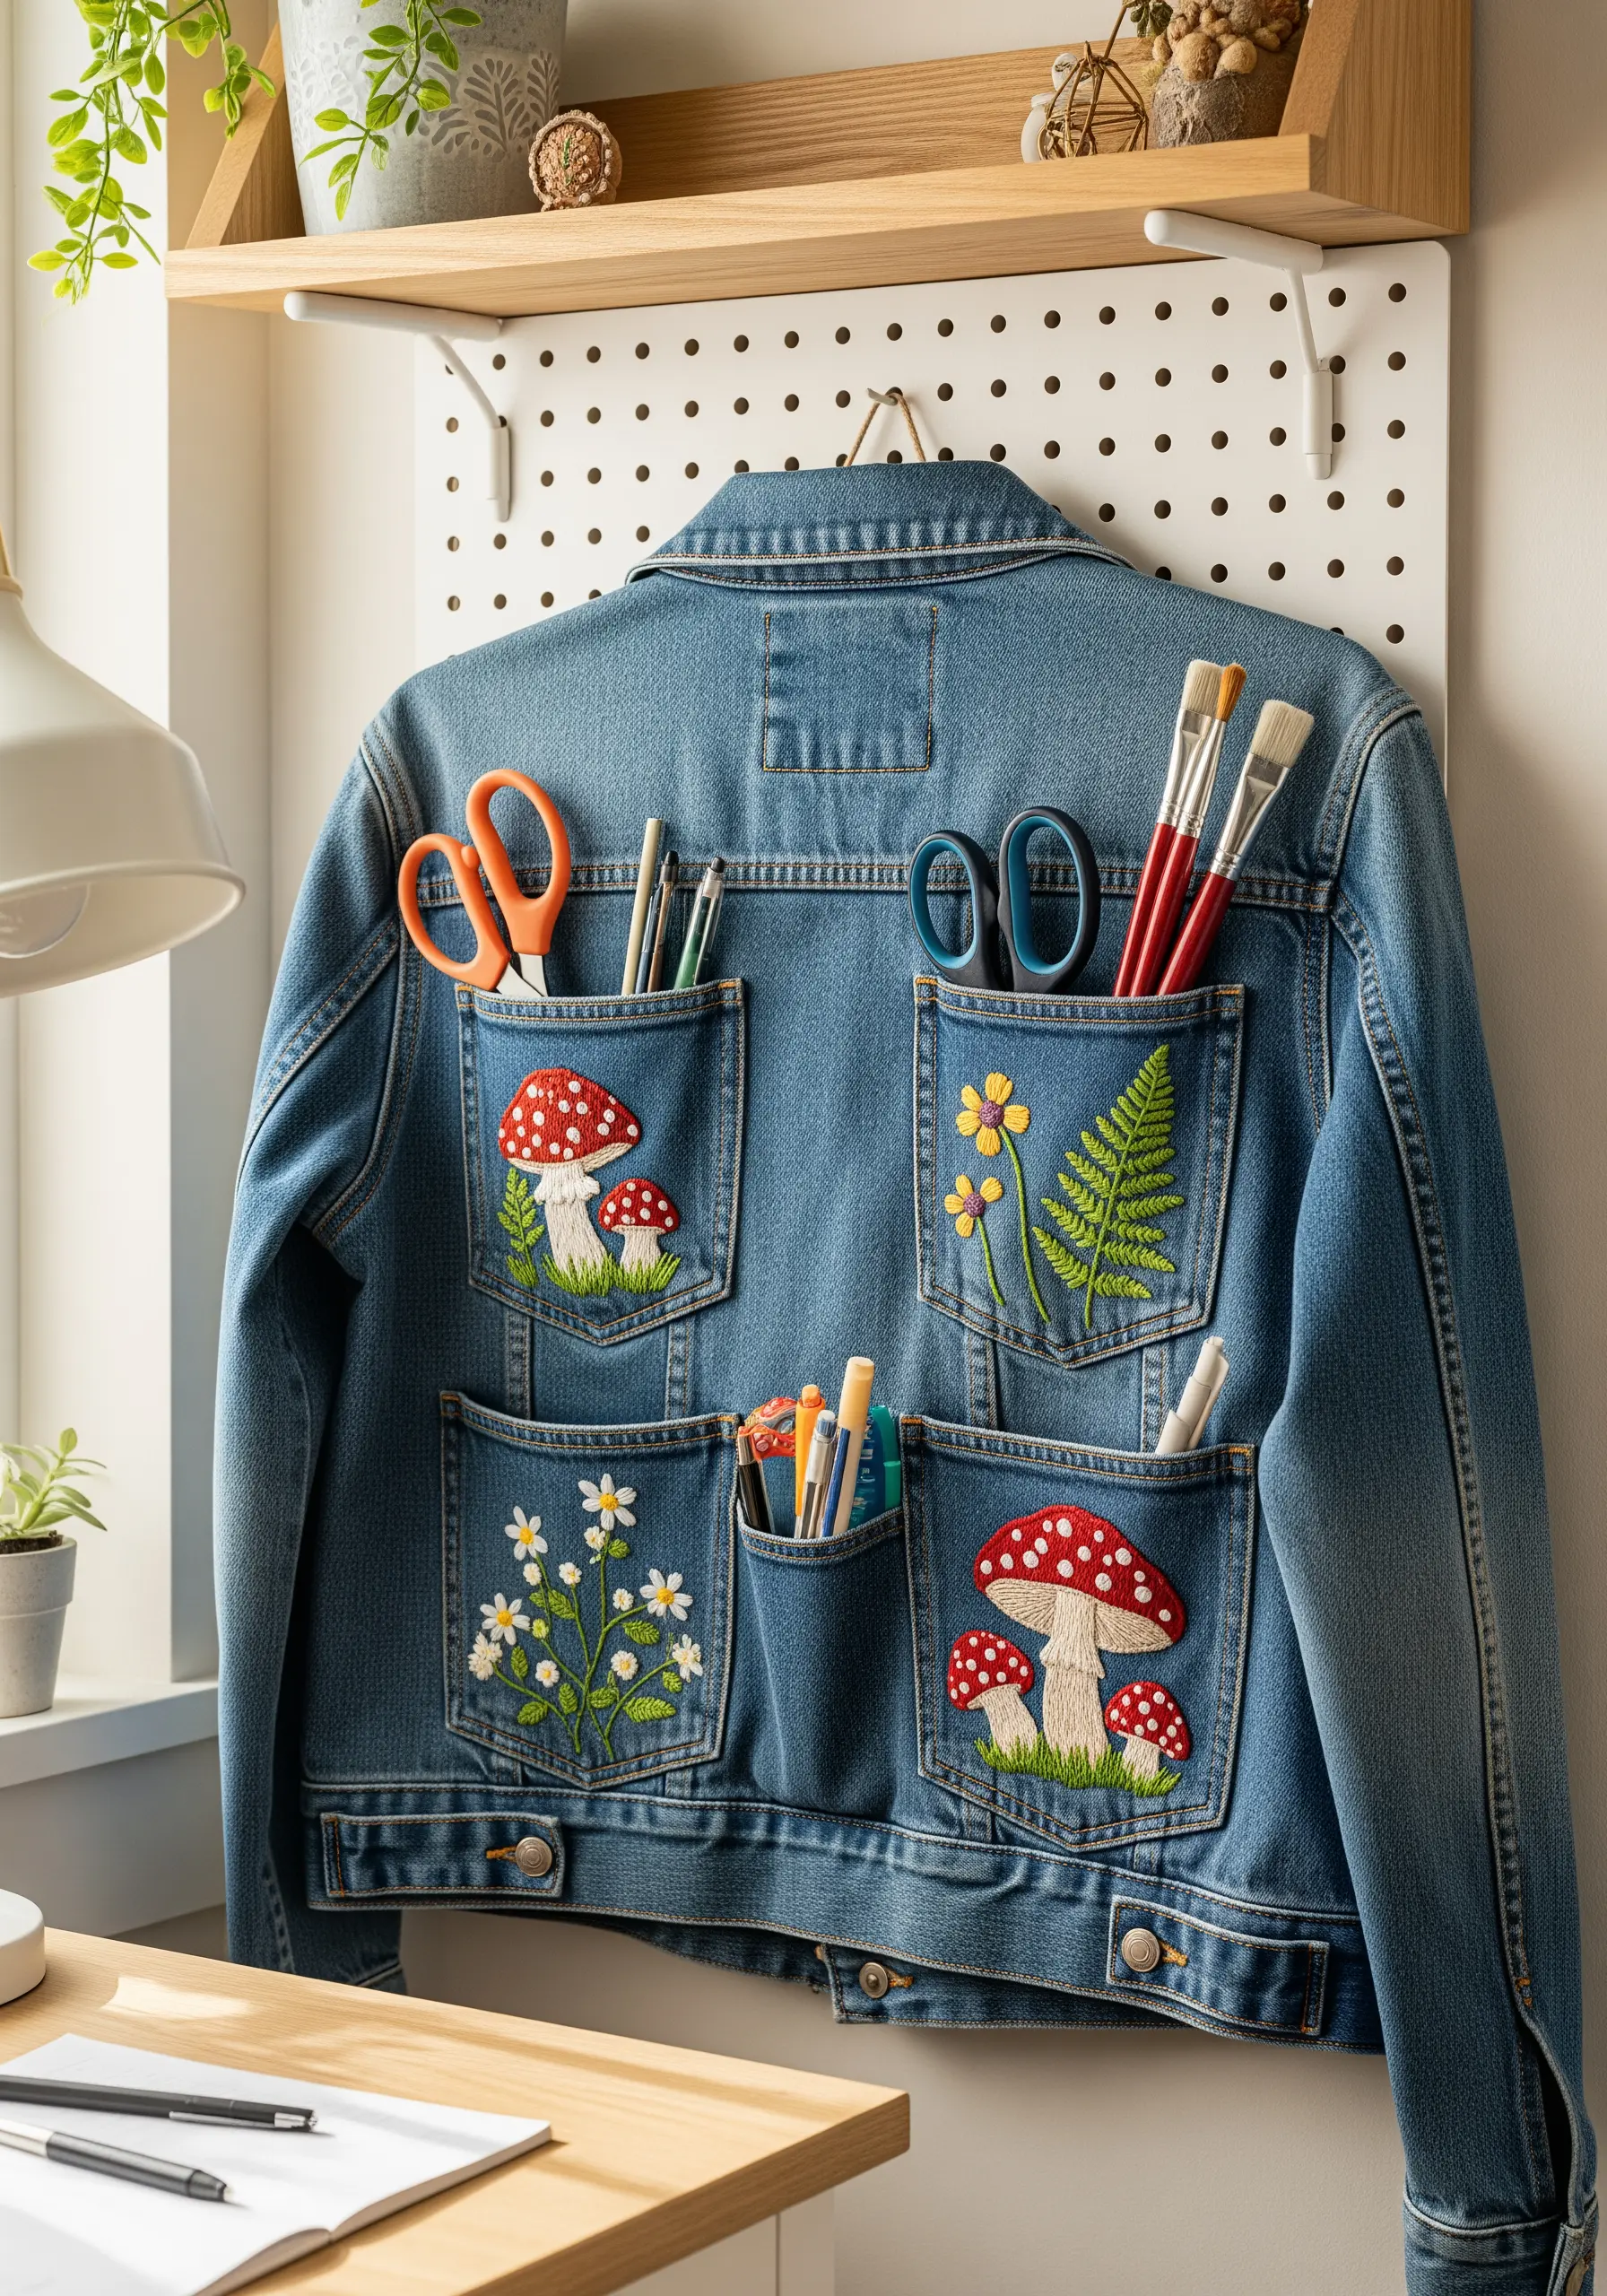
When embroidering on stretchy or heavy fabrics like denim, always use a stabilizer on the reverse side.
This prevents the fabric from puckering and ensures your stitches remain clean and even.
For the woodland motifs, fill the shapes with a simple satin stitch using three or four strands of floss for excellent coverage.
To make the designs truly pop, outline them with a single strand of black backstitch. This simple step adds sharp definition and a professional, illustrative quality.
10. Map a Minimalist Mountainscape with Stitch
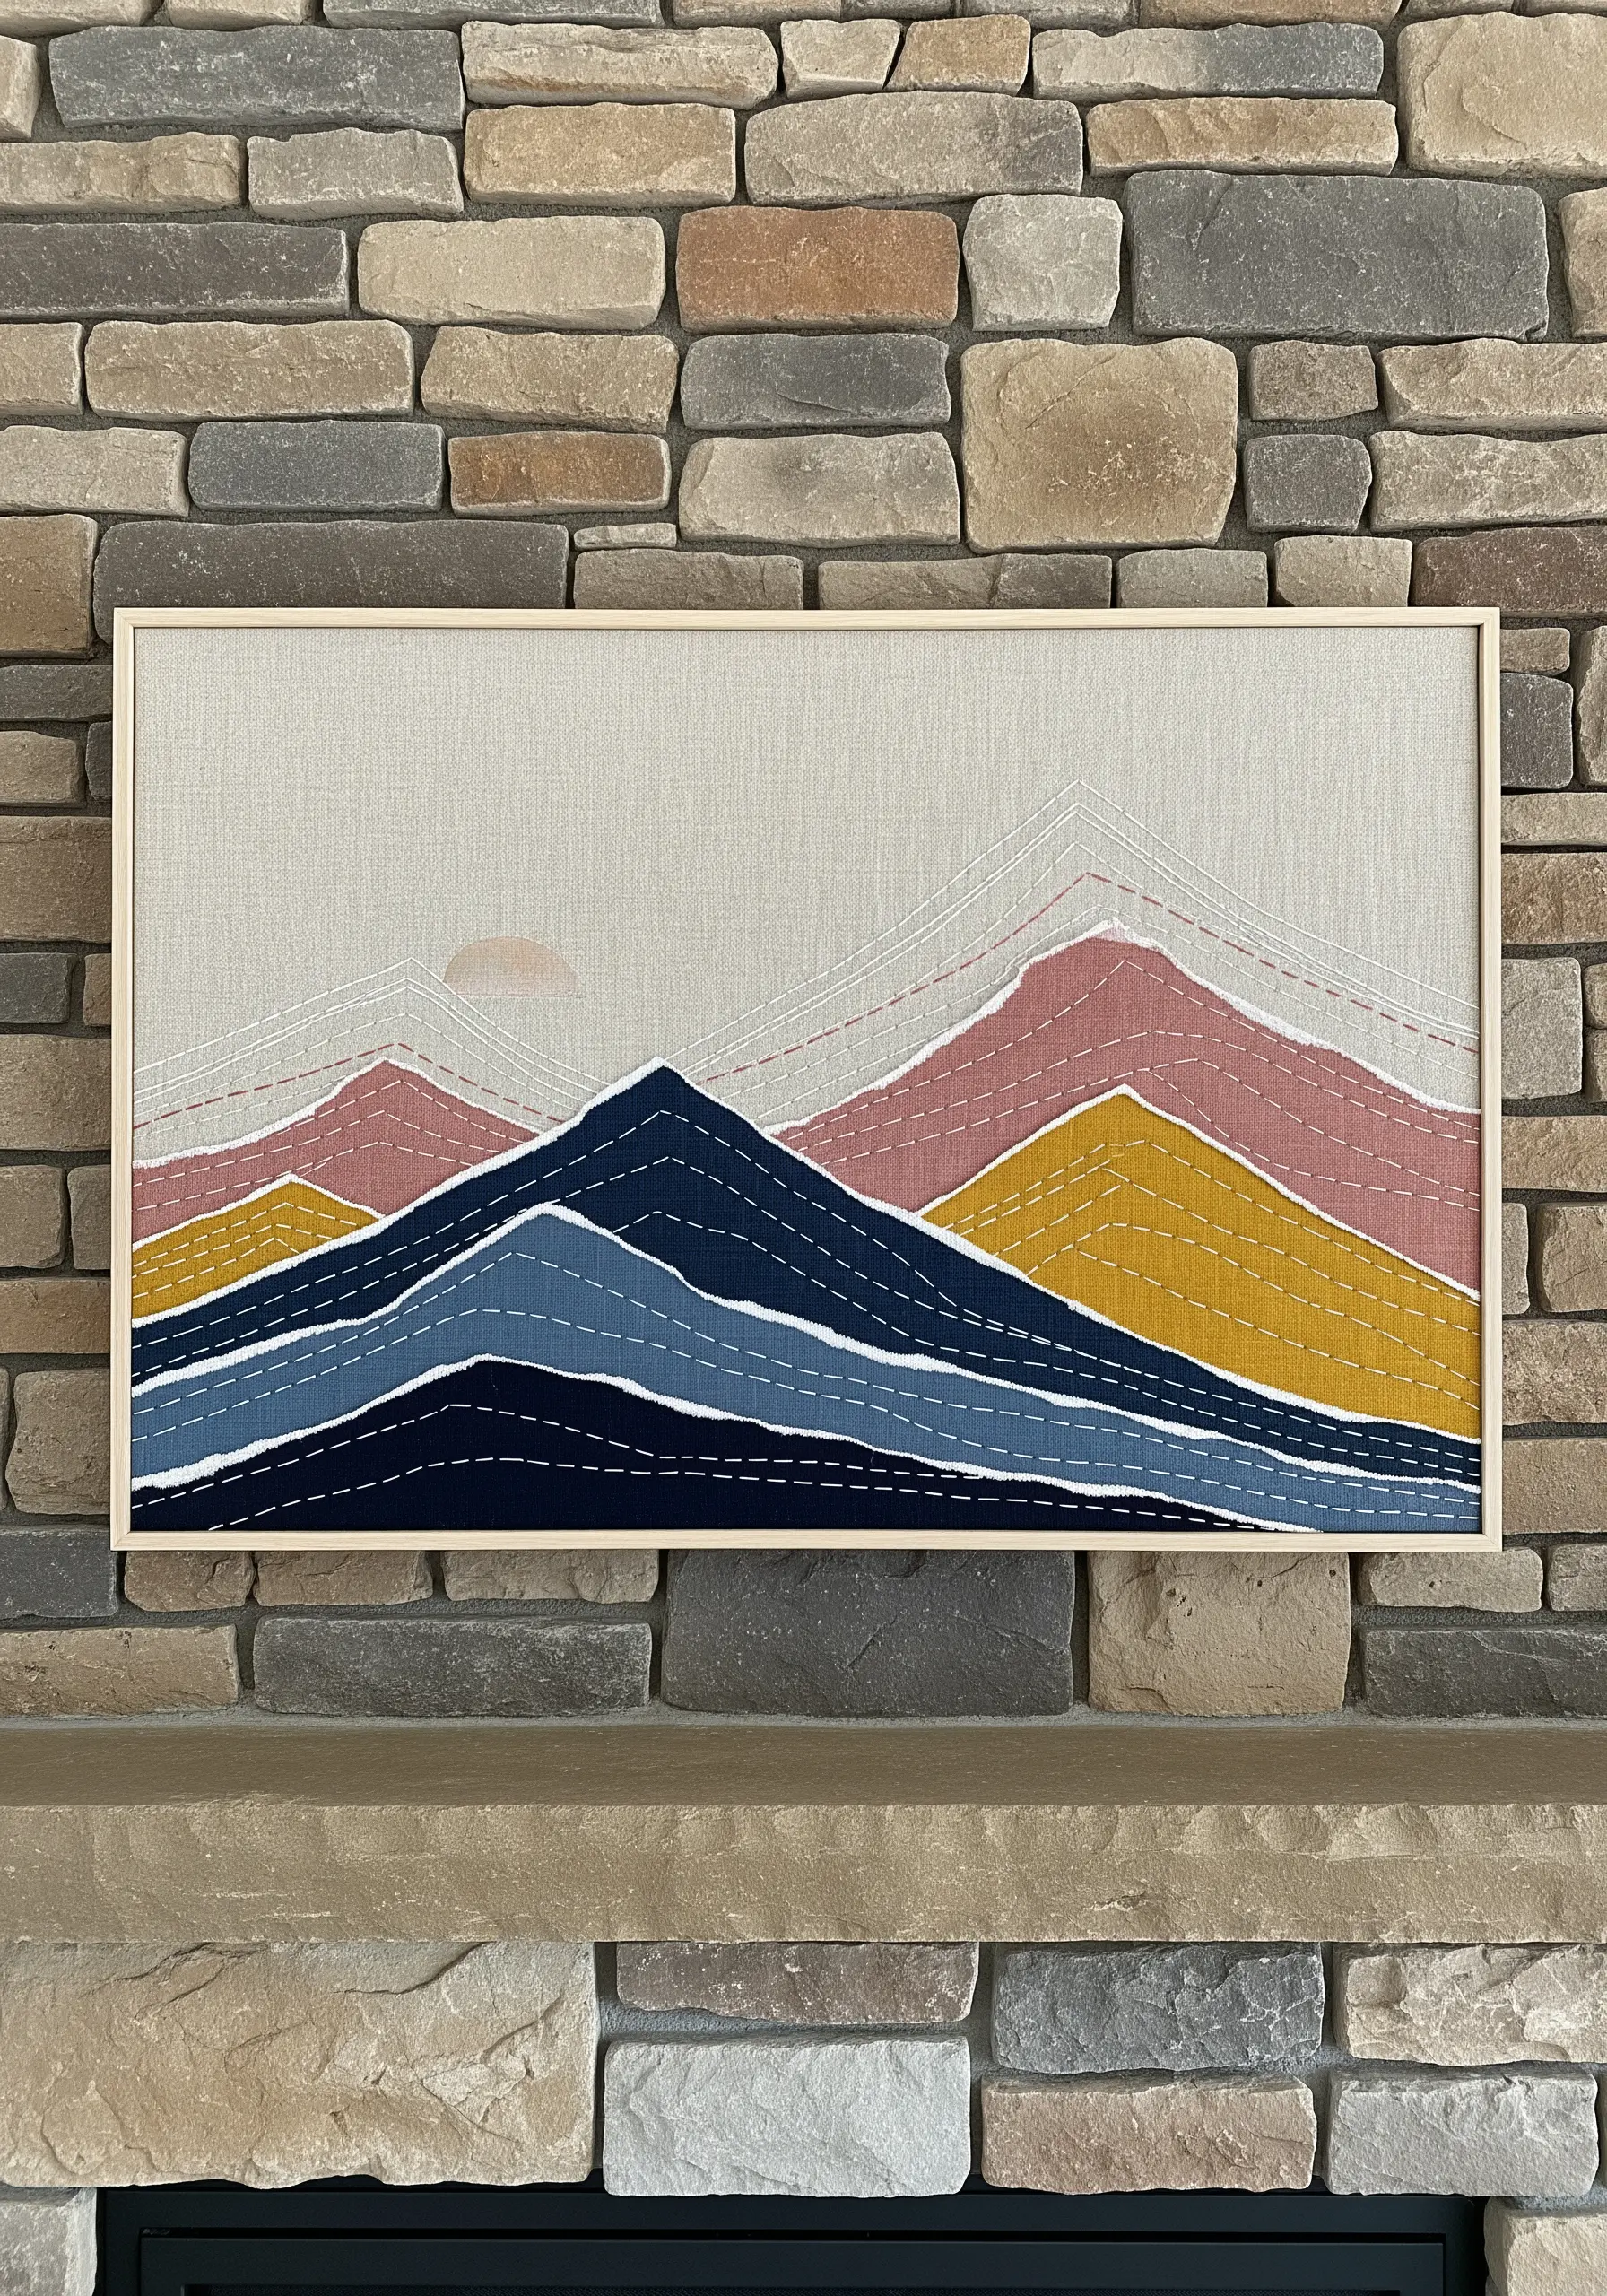
Create a serene landscape by first cutting and layering solid-colored fabric scraps to form the basic mountain shapes.
The true artistry comes from the stitching. Instead of filling the shapes, use a simple running stitch in a contrasting color to add texture and detail.
Vary the direction and density of your stitches on each mountain to suggest light and shadow.
This technique uses line and negative space to create a sophisticated, modern piece that feels both rustic and calm.
11. Unify a Botanical Set with Coordinated Framing

The key to turning a few simple embroideries into a stunning gallery wall is presentation.
Stitch your individual botanical motifs—a sprig of chamomile, a coneflower, a bee—on the exact same type of linen or cotton fabric.
This consistency in the background is the first step toward a unified collection.
Then, choose identical wooden frames for each piece. This coordinated framing elevates the simple stitches, making them feel like a curated, professional-quality exhibit.
12. Illustrate a Village Scene with Appliqué
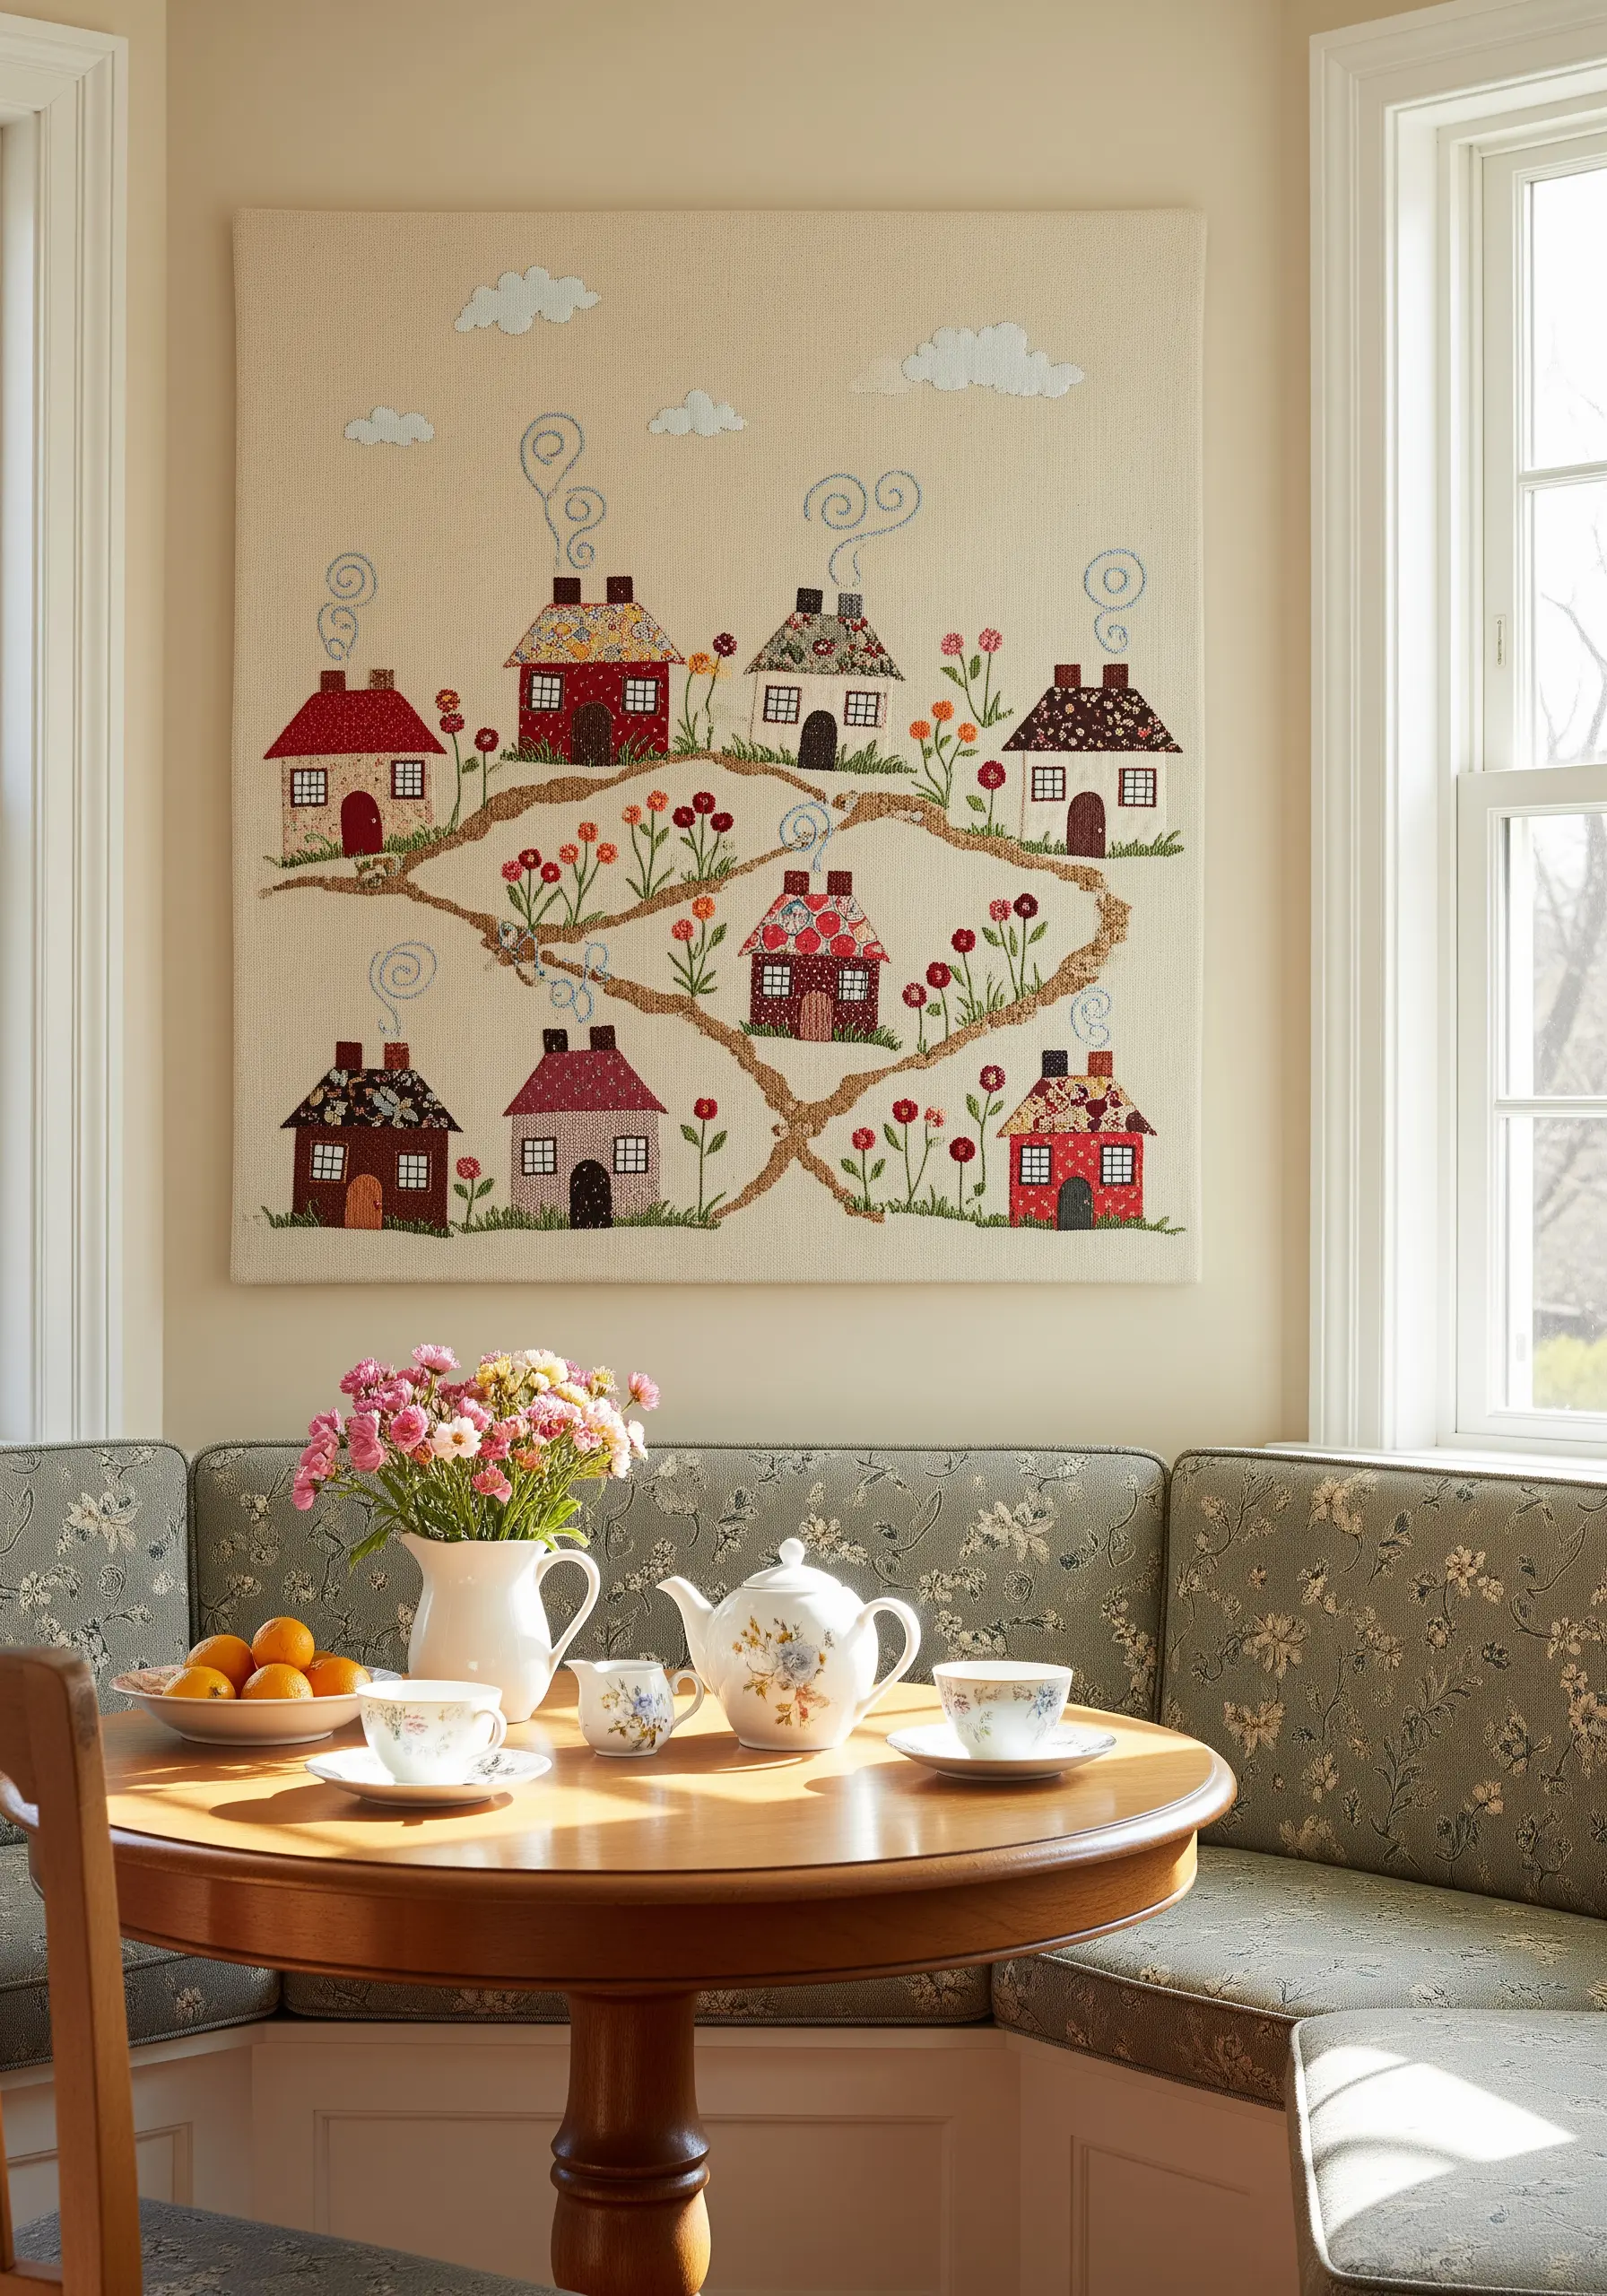
Start by creating your main elements—the houses—from small, patterned fabric scraps using simple appliqué.
The magic that connects these individual pieces is your thread. Use a stem stitch or a backstitch to “draw” the whimsical paths, flower stems, and smoke curling from the chimneys.
This thread-drawing technique weaves all the separate appliqué elements into a single, cohesive narrative.
Add tiny French knots for flowers along the path to introduce pops of color and texture.
13. Create Vertical Flow with a Climbing Vine
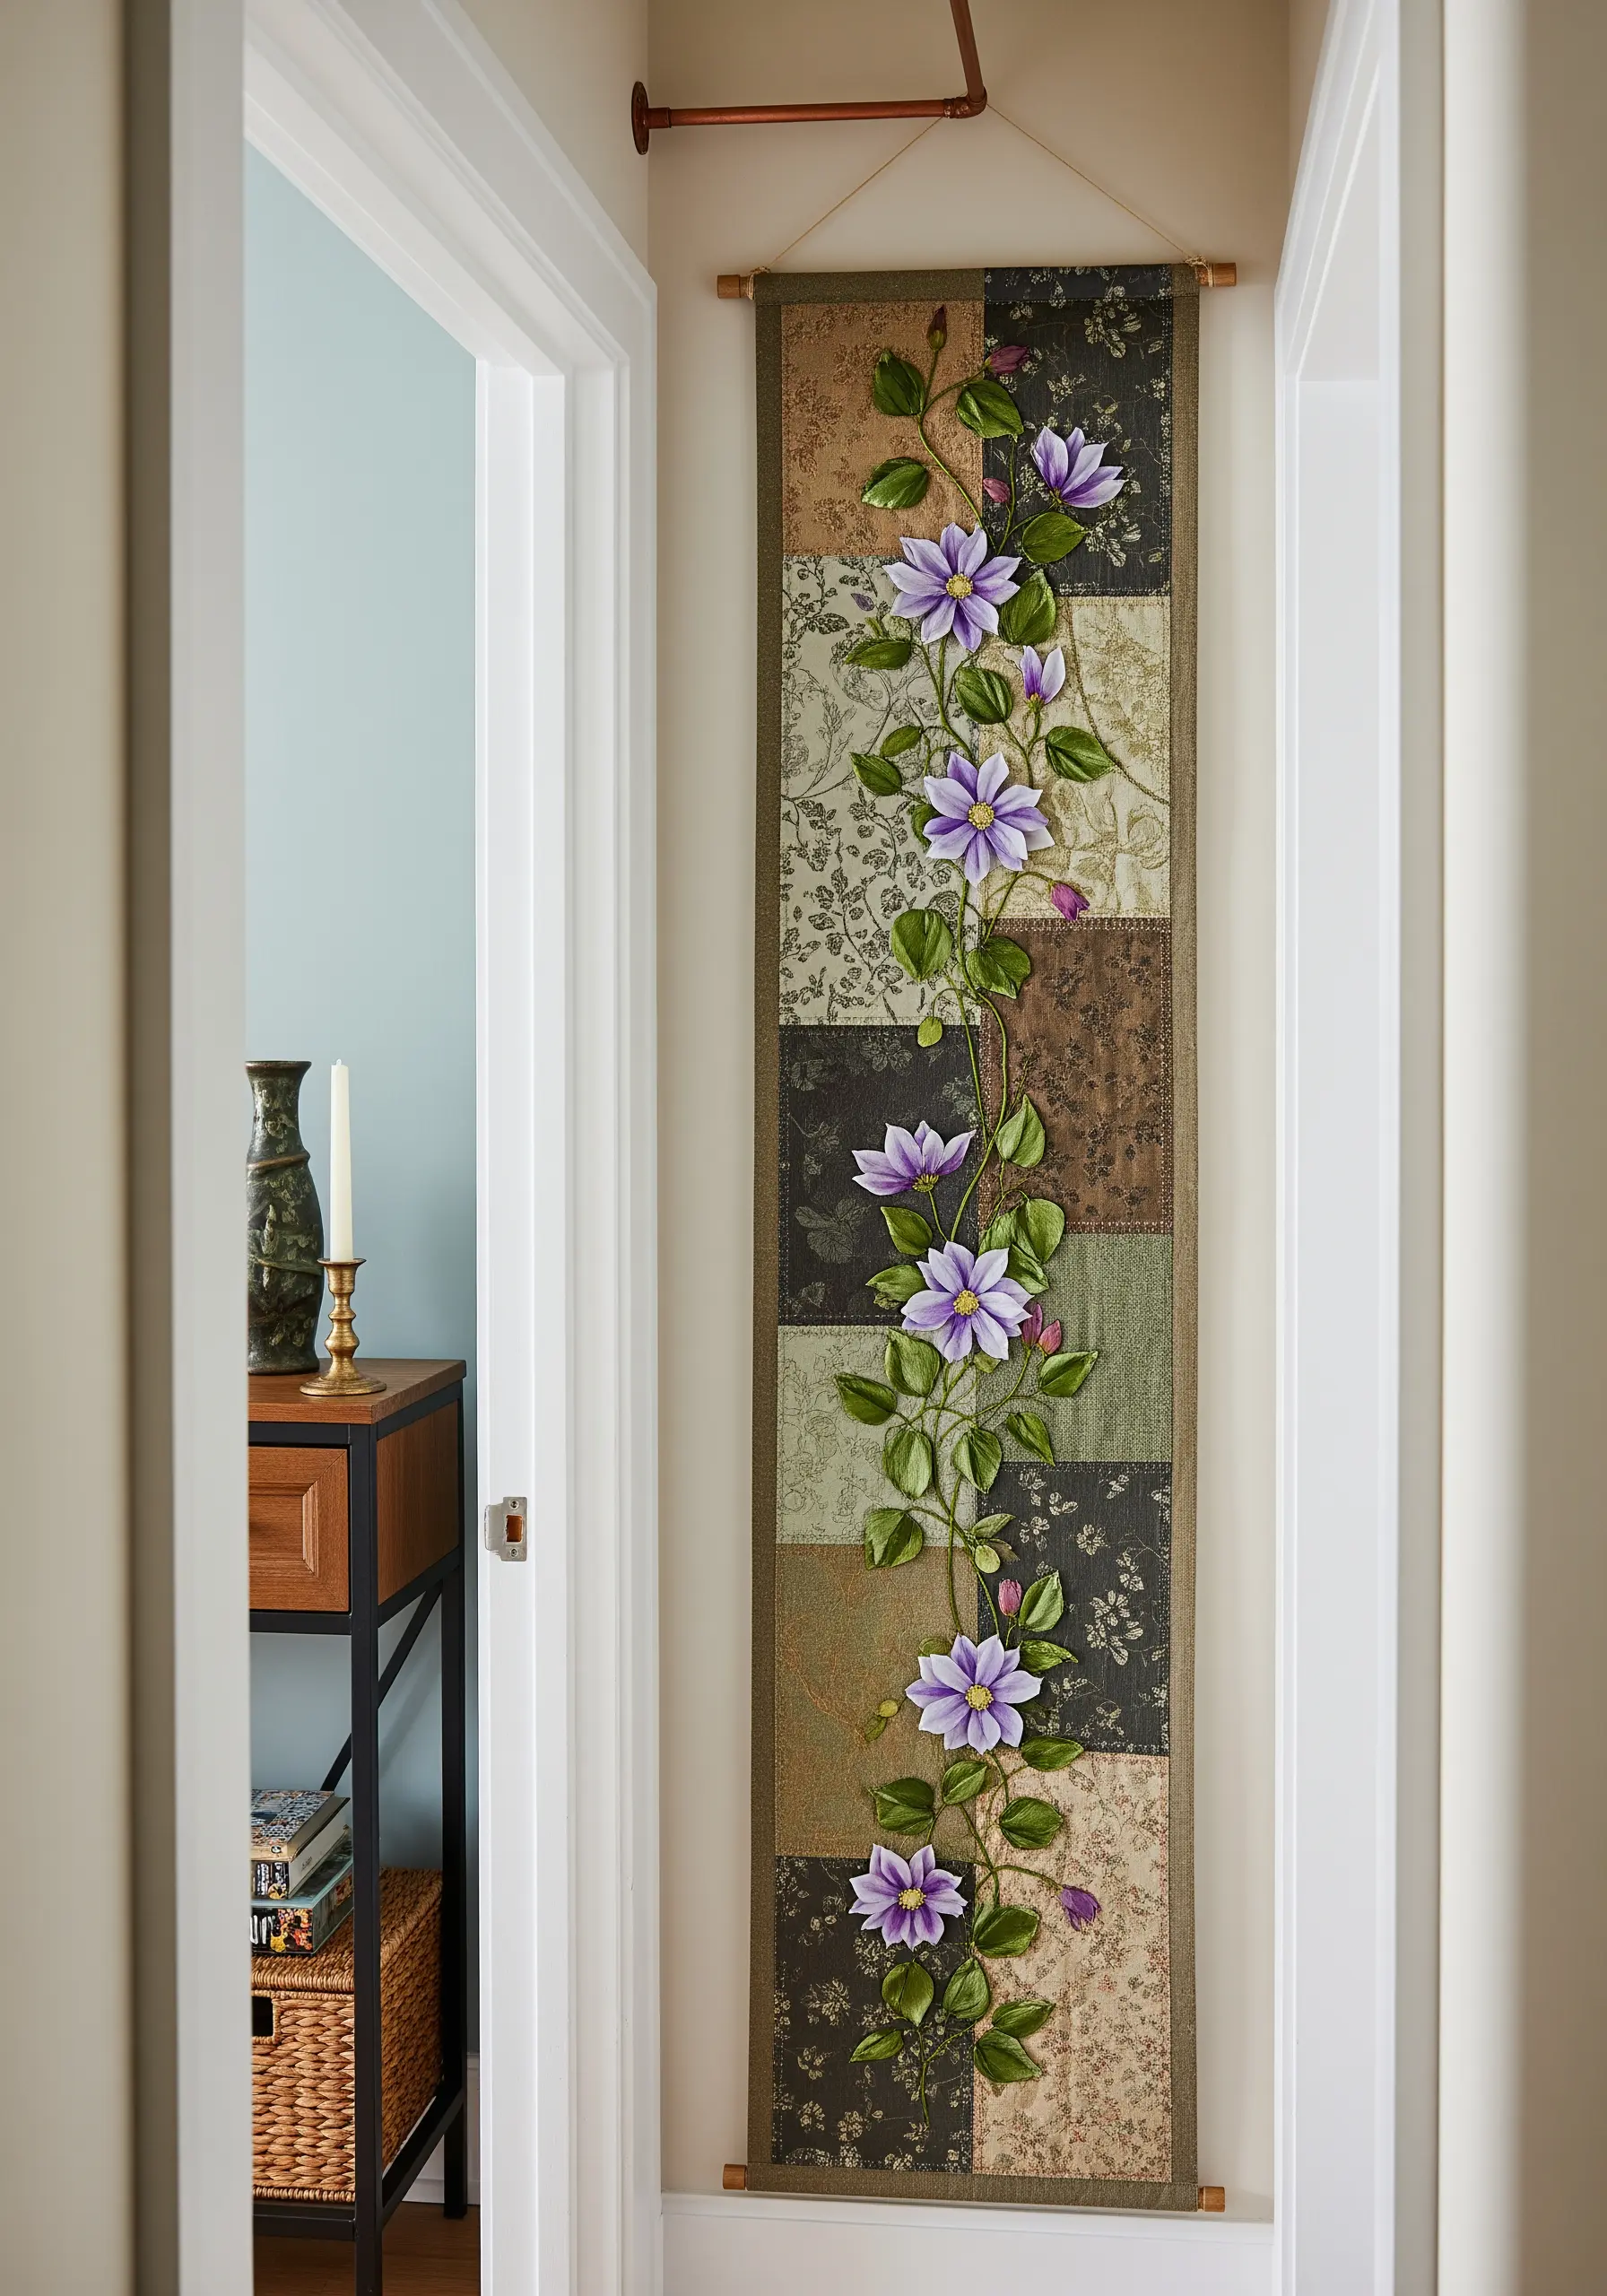
On a long, narrow canvas like a patchwork banner, a vertical composition creates a sense of elegance and movement.
Stitch a single clematis vine that winds its way up the entire length of the piece, drawing the eye upward.
For the petals, use a long-and-short stitch to blend two or three shades of purple together.
This shading technique gives the flowers a soft, realistic gradient and makes them the undeniable focal point against the muted, earthy patchwork.
14. Curate an Embroidered Insectarium
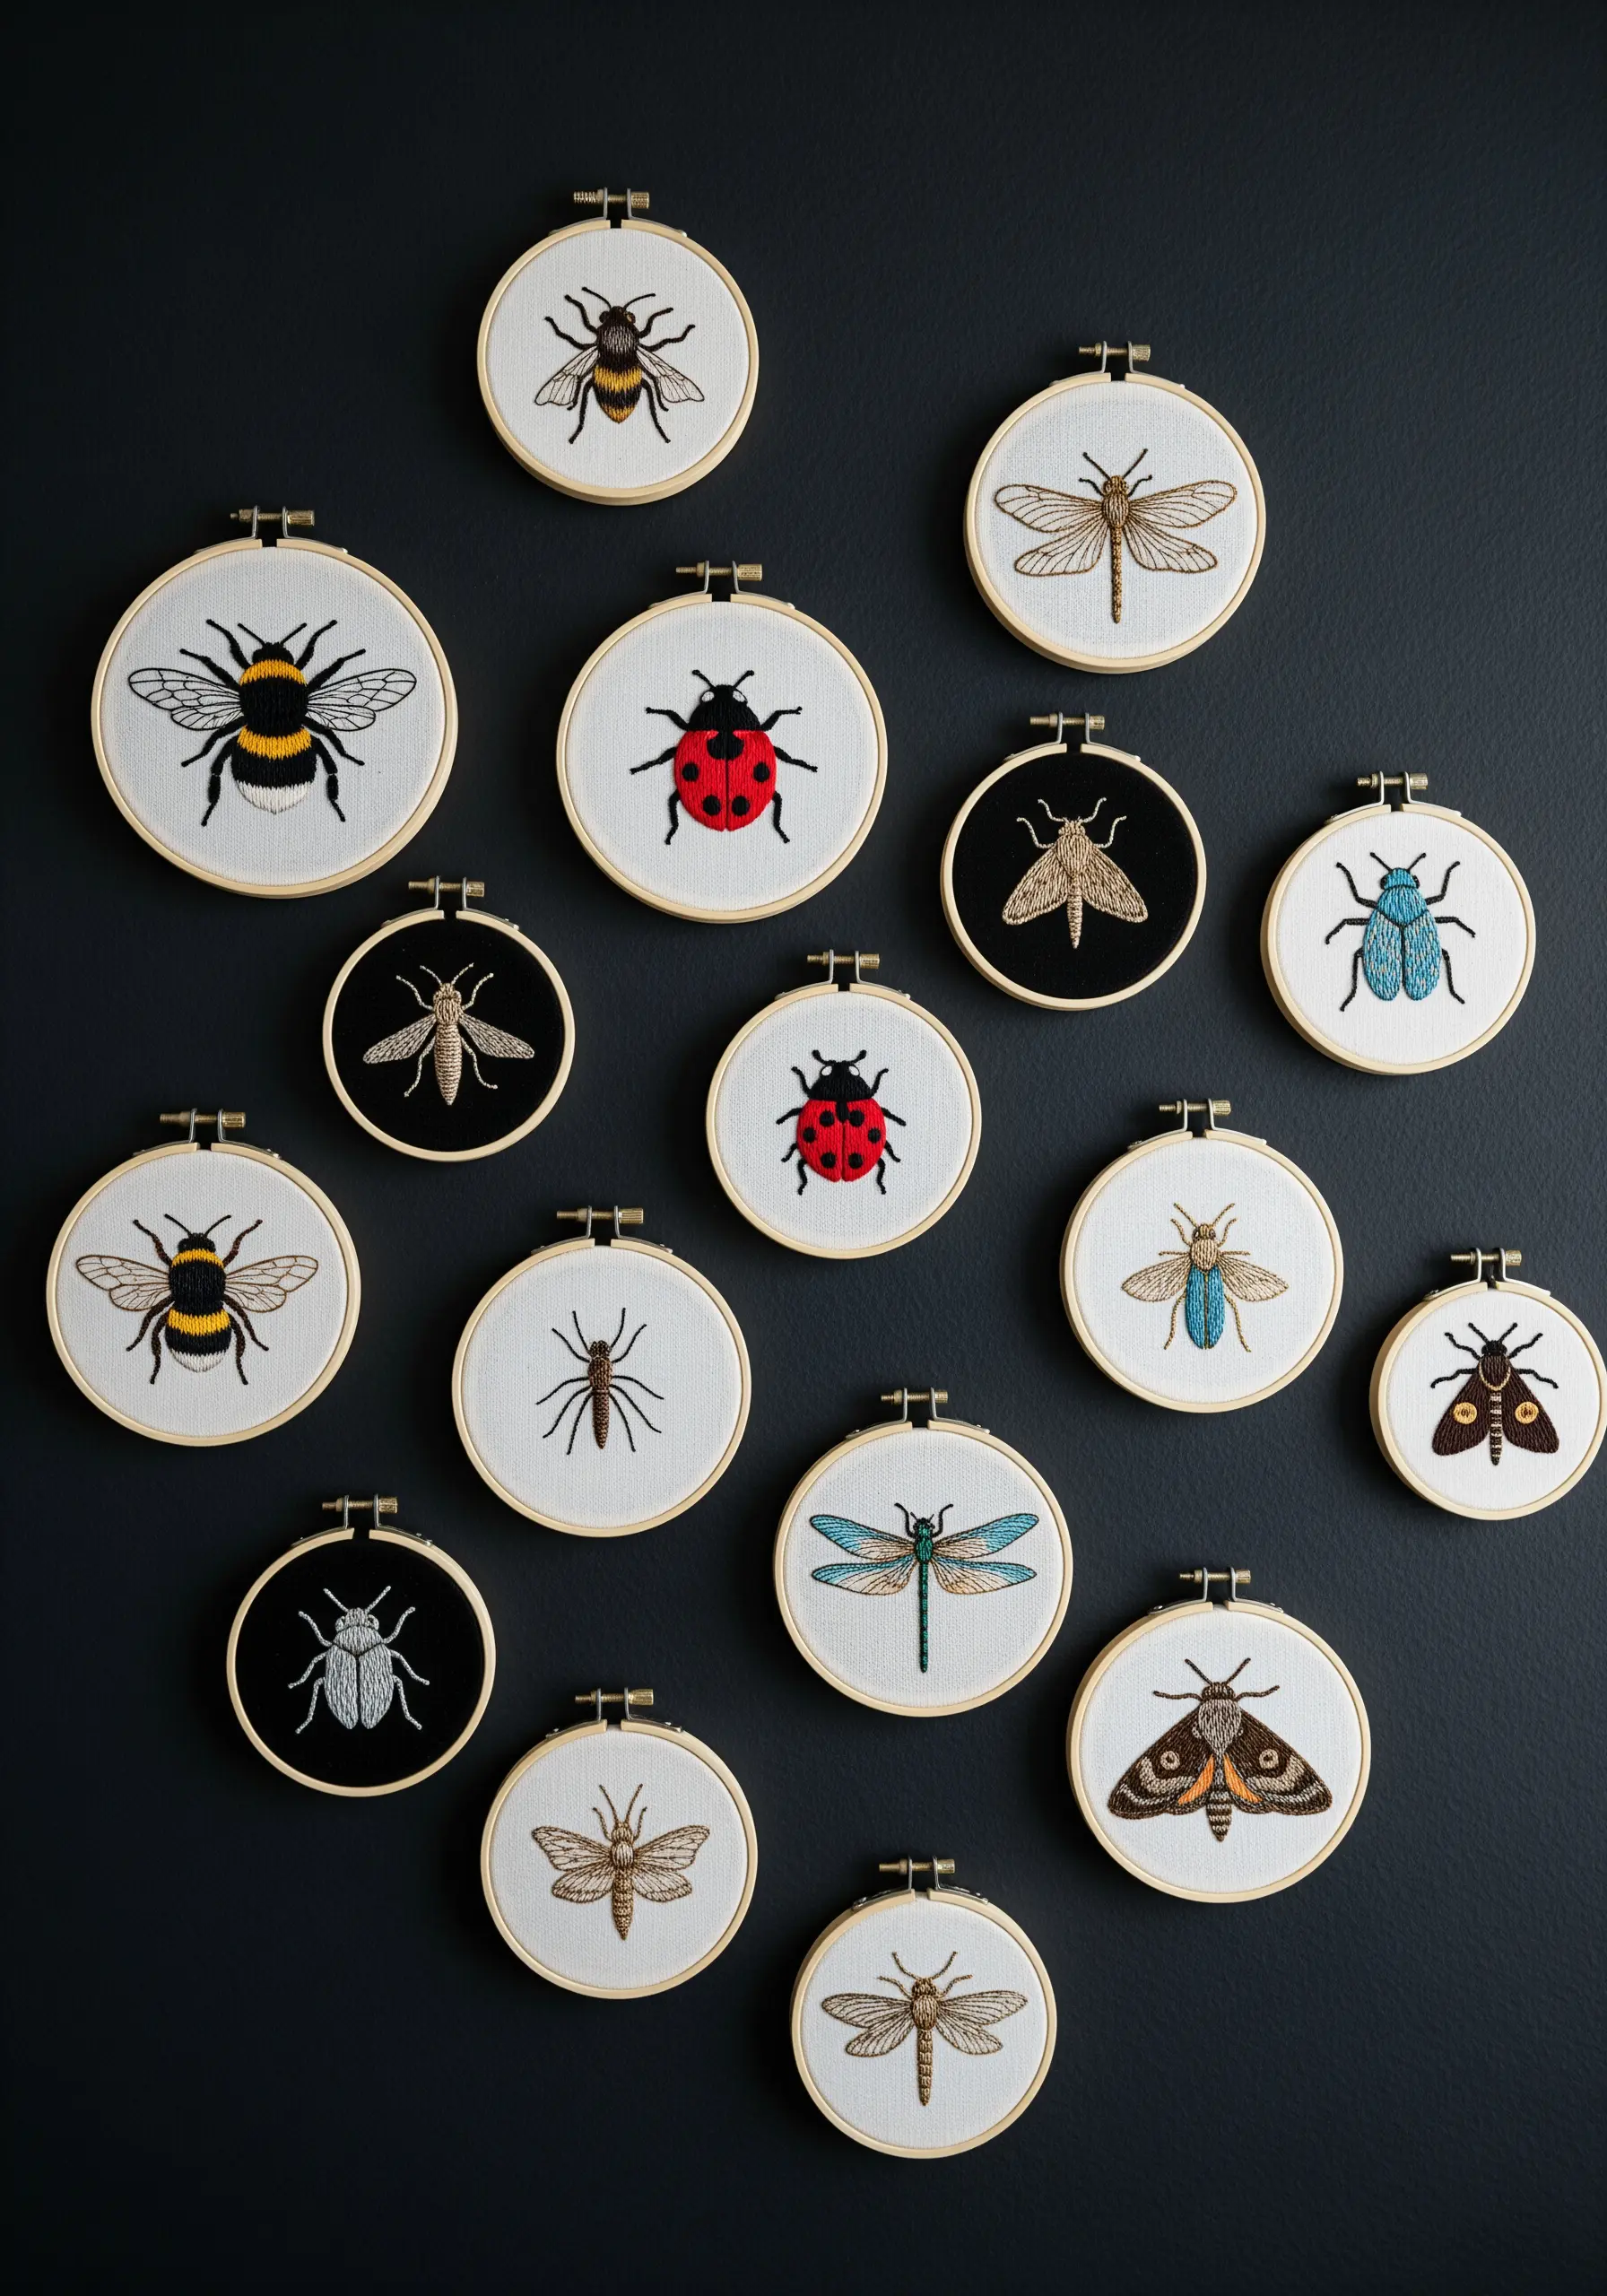
A collection of small, focused pieces often has more impact than a single large one.
Choose a theme, like insects, and dedicate each hoop to a single “specimen.”
Use a very fine, single strand of thread for delicate details like legs and antennae, which requires a precise backstitch or split stitch.
For translucent wings, try using just one or two spaced-out strands of a light-colored or metallic thread in a long-and-short stitch.
Mounting some on black fabric and others on white creates a dramatic, high-contrast display.
15. Map the Moon with a Texture Sampler
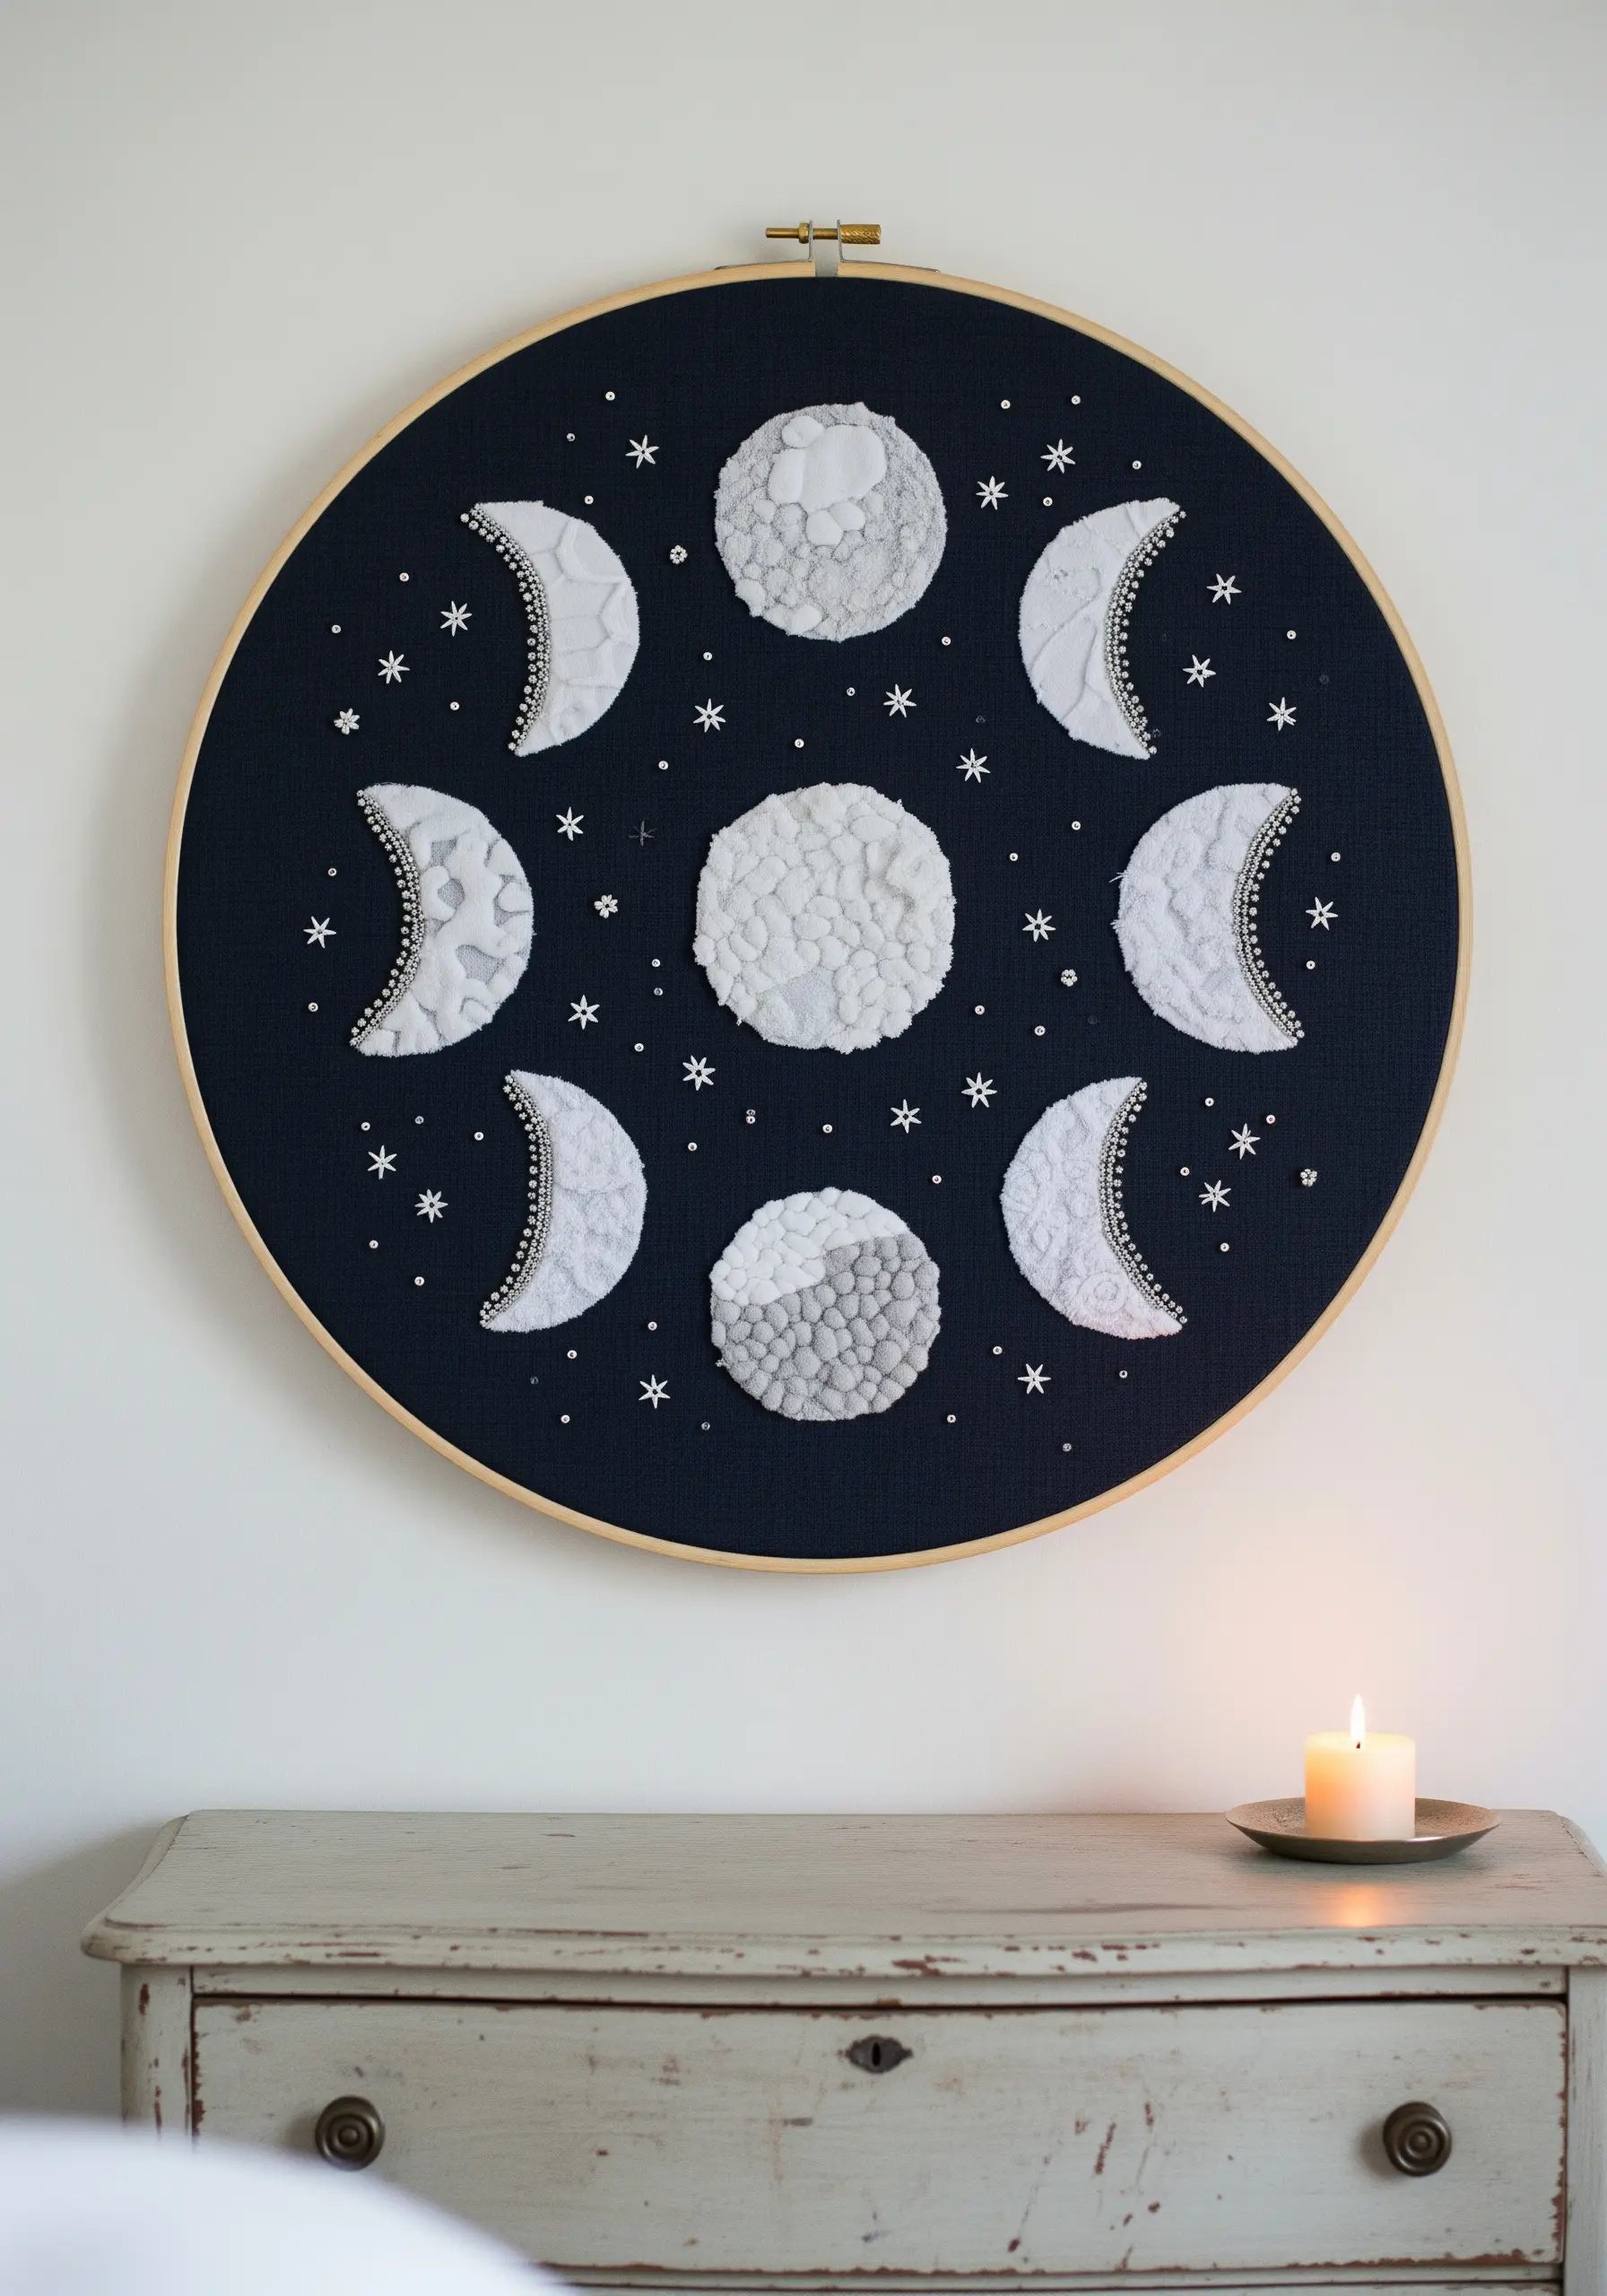
Turn a simple celestial design into a tactile masterpiece by treating each moon phase as a canvas for a different texture.
Fill the shapes with a variety of raised and textured stitches: dense French knots, padded satin stitch, bullion knots, or woven picot stitches.
You can even appliqué small circles of felt or velvet for added dimension.
This approach transforms a graphic pattern into one of the most compelling statement textured embroidery techniques for your wall.
16. Personalize a Classic Kitchen Sampler

Give the traditional alphabet sampler a fresh, cottage-core update by integrating tiny, whimsical motifs from the garden.
Use a classic cross-stitch for the letters to honor the sampler tradition.
Then, bring it to life by adding tiny embroidered carrots, strawberries, and radishes around the letters they represent.
Use simple satin stitches for the fruits and straight stitches for the leafy tops. It’s this blend of classic form and personal detail that creates a future heirloom.
17. Unify a Triptych with a Continuous Line
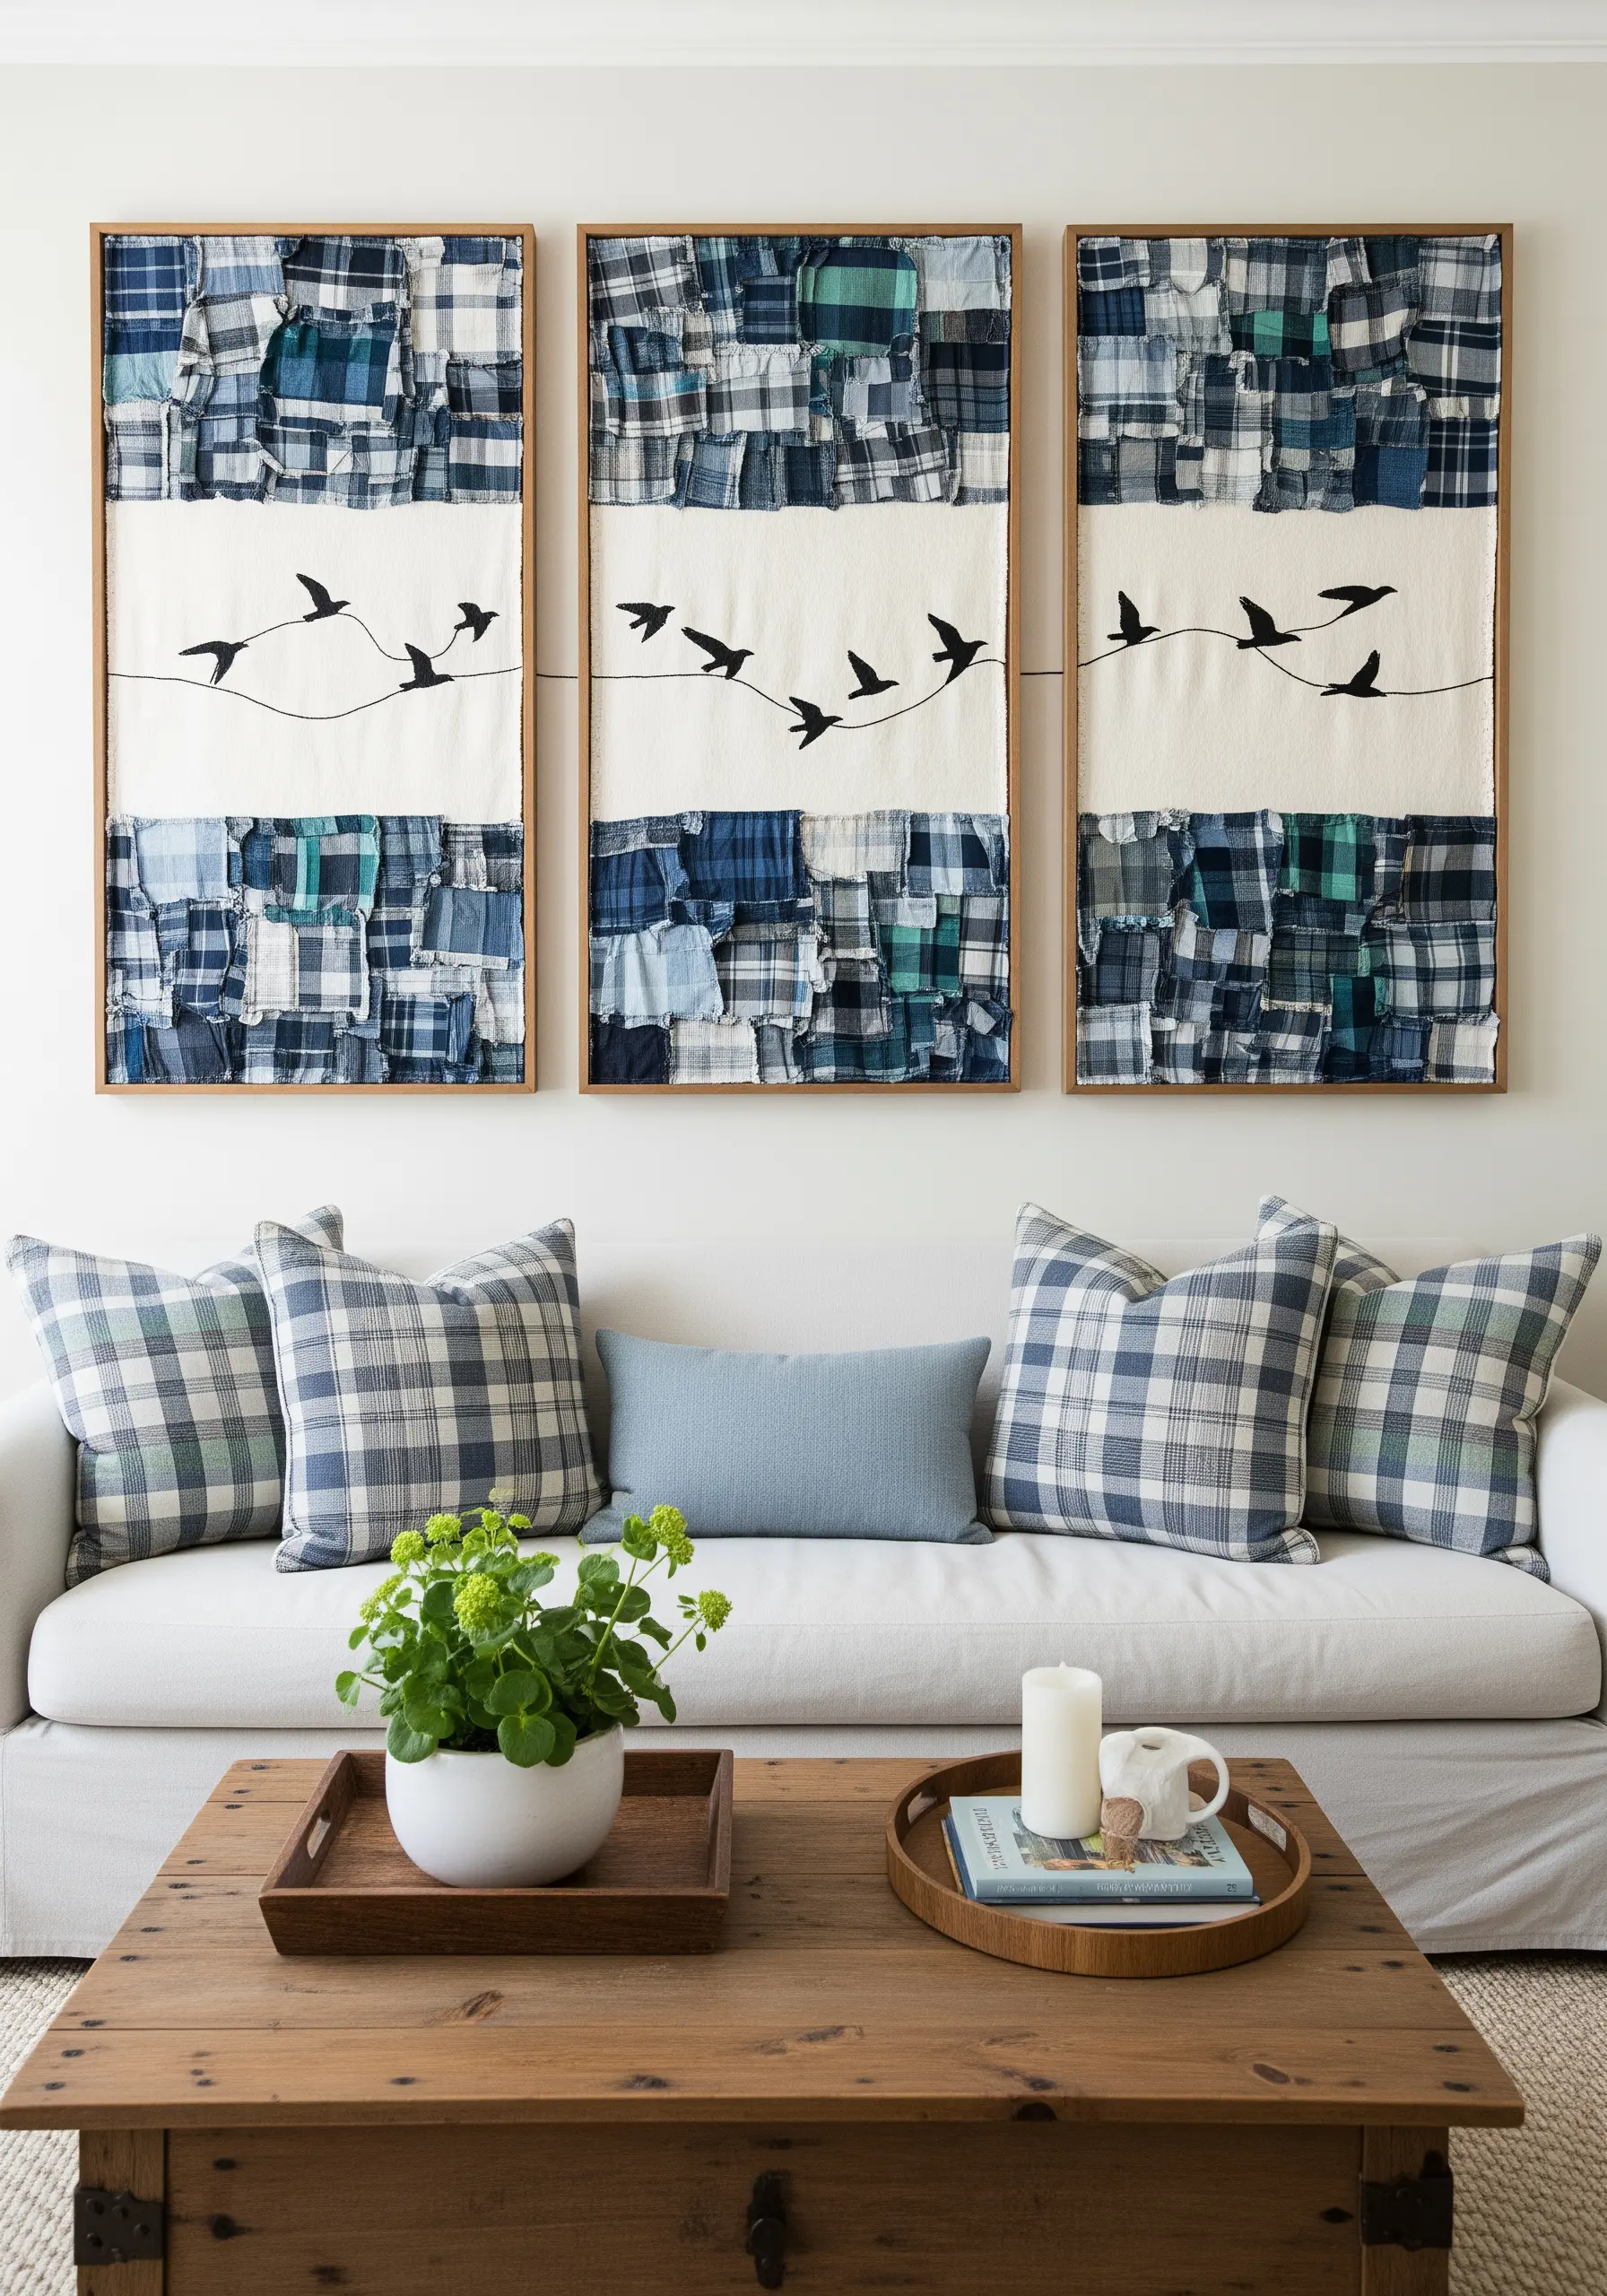
To make a multi-panel piece feel like a single, cohesive artwork, you need a strong visual link that travels across the frames.
Create varied patchwork backgrounds for each of your three panels using scraps of denim and plaid.
Then, stitch a simple silhouette of birds in flight using a single, dark thread. Ensure the line flows seamlessly from one panel to the next.
This technique of drawing with thread across multiple canvases is a sophisticated way to tie a collection together and create a powerful sense of movement.


