

You have the stitches down, and you love the feel of thread and fabric in your hands. But you’re ready to create pieces that feel less like practice and more like art. You want to make something for your walls that feels intentional, polished, and uniquely yours.
The secret isn’t in learning dozens of complicated new stitches. It’s in how you use the ones you already know. It’s about thinking like a designer—considering texture, composition, color, and form to turn a simple pattern into a statement piece.
Here, you won’t find fleeting trends. Instead, you’ll discover simple, strategic adjustments you can make right now to elevate your work. From using negative space to create drama, to choosing a specific stitch to build texture, these ideas are designed to give you that ‘aha’ moment—and the confidence to create wall art you’ll be proud to display.
1. Elevate Landscapes with Unexpected Textures

Introduce a graphic, almost industrial element to an organic landscape by incorporating a motif like a chain.
Use a single, bold color on a neutral linen to create high contrast and a modern feel.
For the mountain outlines, a whipped backstitch will give you a smooth, solid line.
For the chain links, use a heavy chain stitch or couch a thicker, pre-braided cord to give it genuine dimension and weight, making the texture a key part of the design.
2. Create Continuity with a Triptych Design
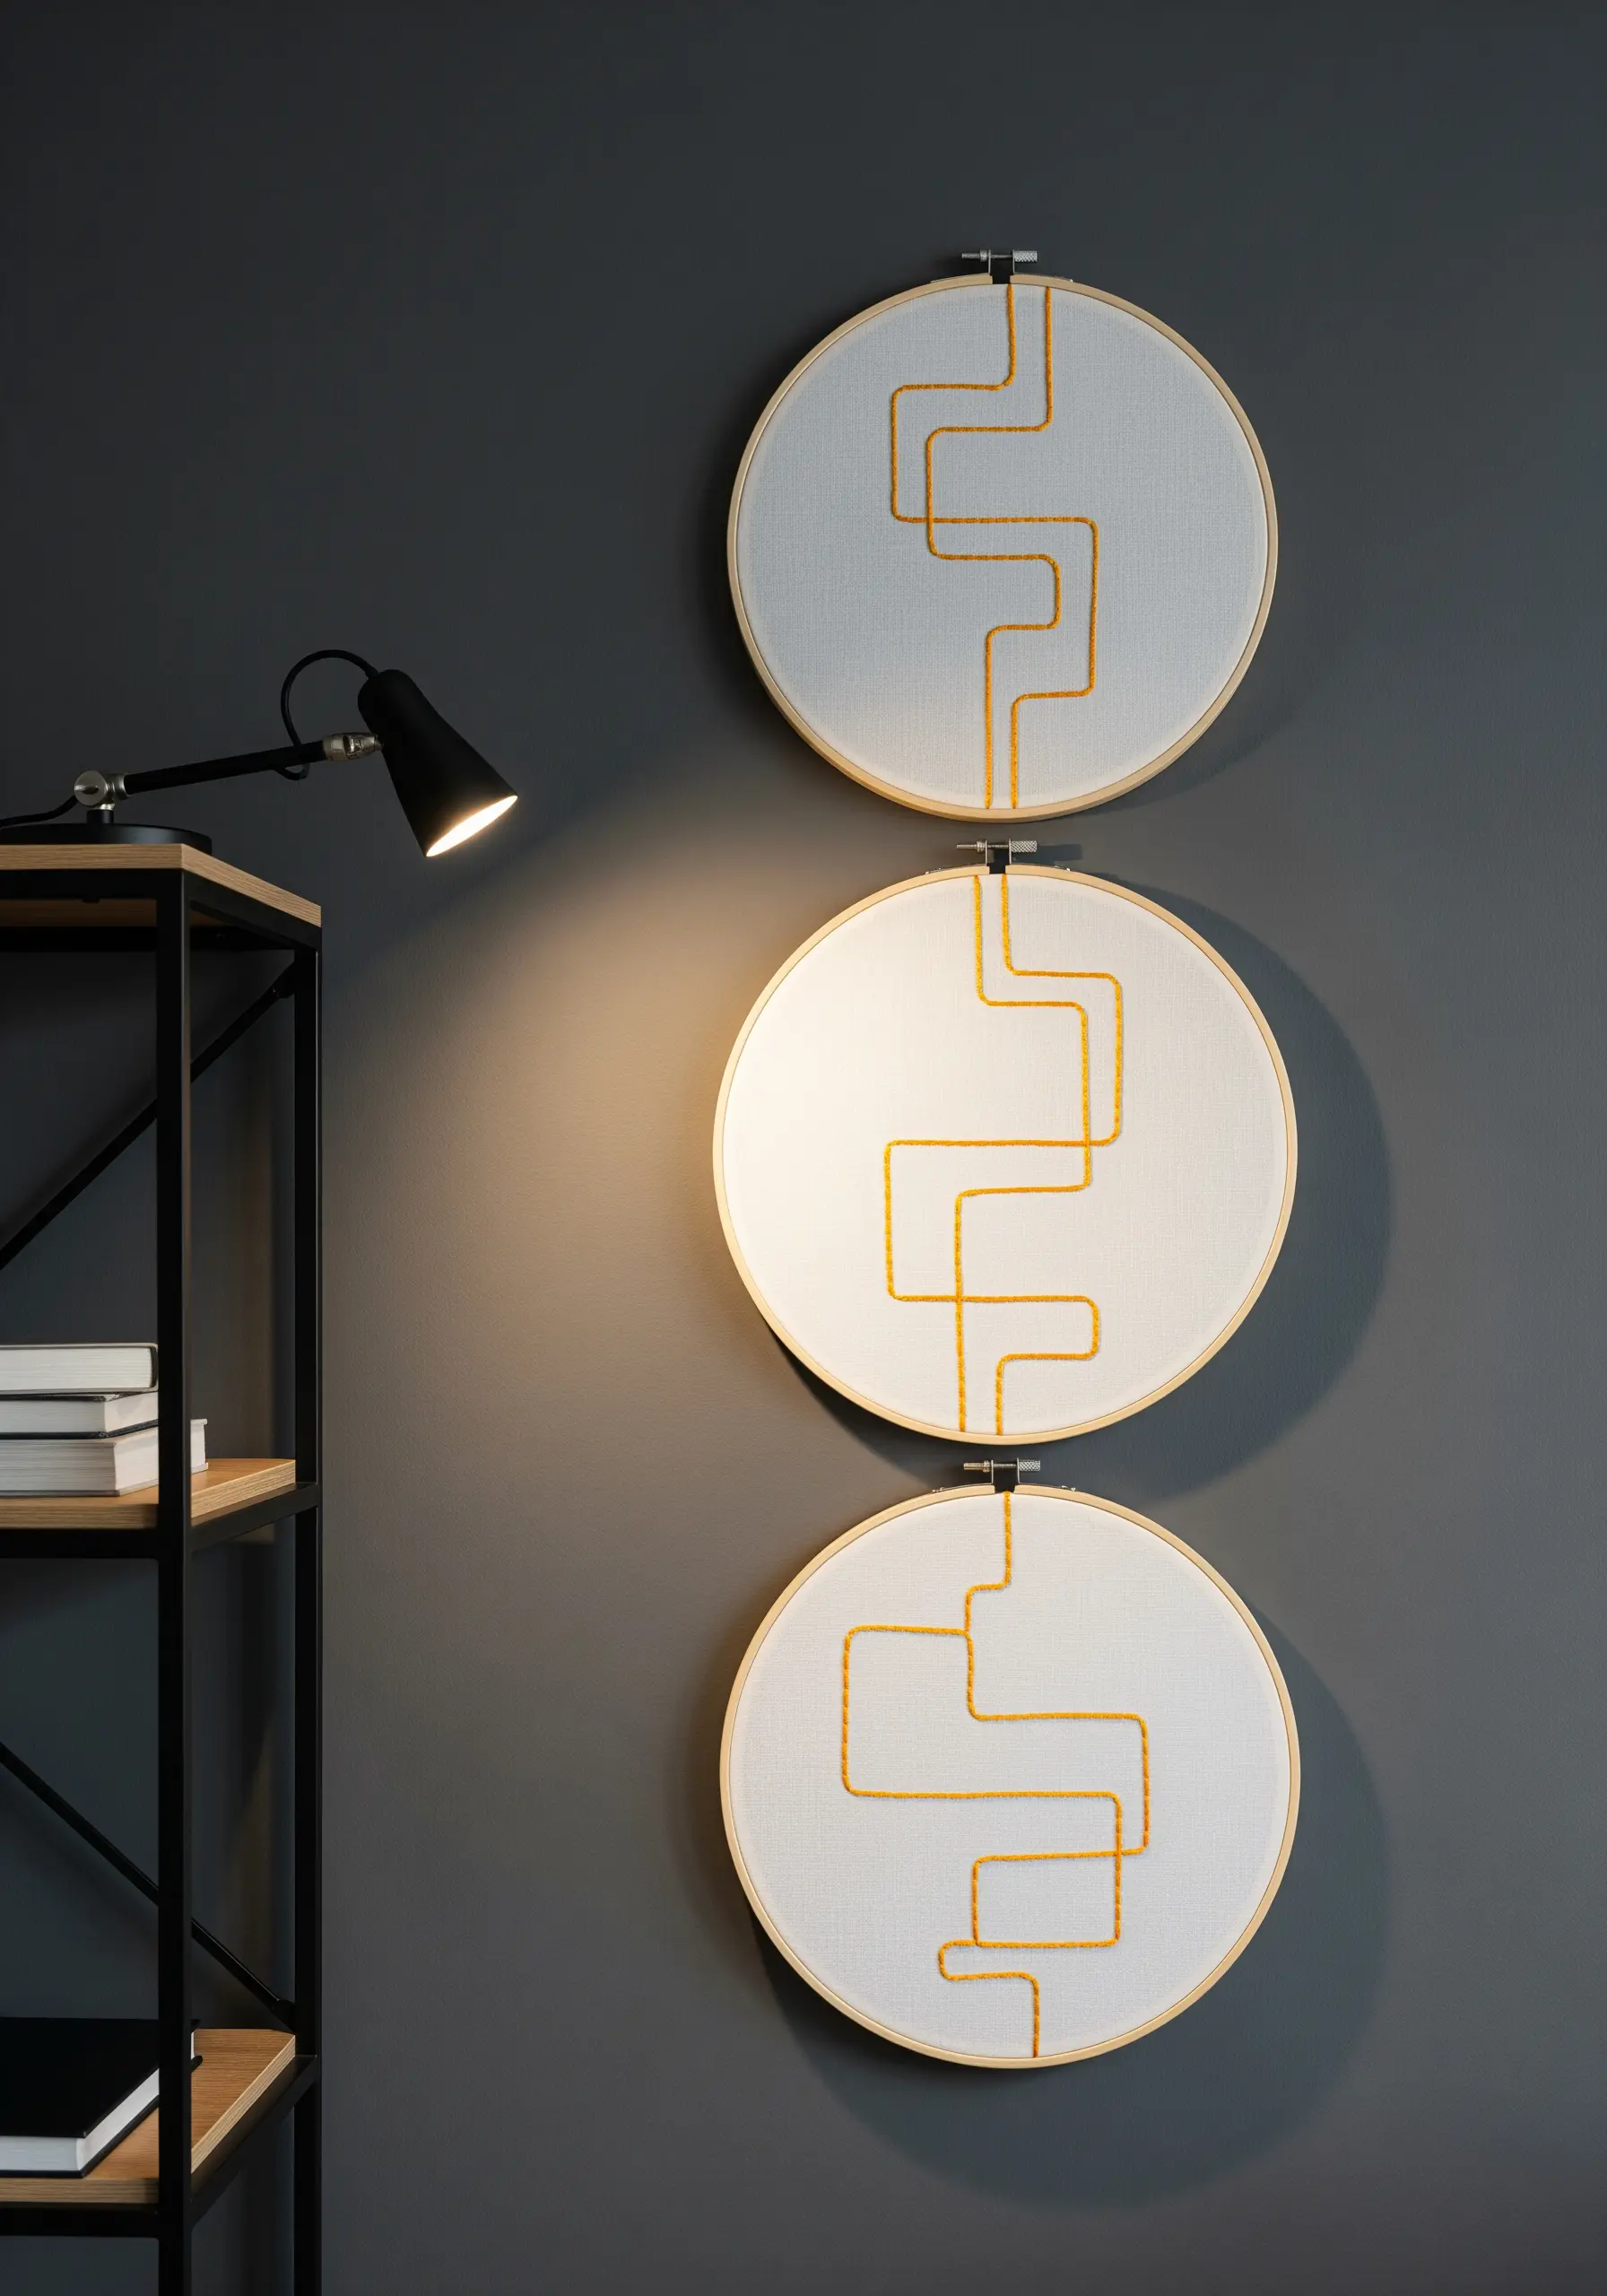
Turn a simple line into a cohesive art installation by stitching it across multiple hoops.
Carefully plan your design on paper first, marking where the fabric will be held in each hoop to ensure the line flows seamlessly from one to the next.
Use a thick thread like pearl cotton or a fine yarn and couch it down for a bold, clean line.
This technique relies on the power of negative space, where the unstitched areas draw attention to the single, connecting element, creating a powerful, minimalist statement.
3. Introduce Bold Texture with Yarn Couching

Move beyond floss to create wall art with dramatic texture and scale.
Braid strands of thick yarn together and then couch them onto a stretched canvas using a strong, coordinating thread.
This method allows you to work quickly and create a high-impact, three-dimensional effect that catches the light beautifully.
Arrange the braided yarn into radiating lines for a sunburst effect, or create abstract swirls for a completely different mood.
4. Map Out Texture with Directional Satin Stitch

Give a simple leaf motif lifelike dimension by dividing it into smaller sections based on its natural veins.
Fill each section with satin stitch, but change the direction of your stitches for each one.
This small adjustment makes the segments catch the light differently, creating a subtle, faceted effect that mimics a real leaf’s texture.
Using three to four shades of the same color will enhance this depth, turning a flat design into a dynamic piece of botanical art.
5. Architectural Precision with Minimalist Stitching

Create a large-scale, sophisticated piece using only the most basic stitch: the backstitch.
The key to making this work is absolute precision. Use a ruler and a water-soluble marker to draw your geometric pattern flawlessly before you begin.
Choose a high-contrast combination, like black thread on natural linen, to emphasize the clean, architectural lines.
The overlapping of simple shapes creates complexity and depth without requiring a single fill stitch, resulting in elegant minimal embroidery wall pieces.
6. Use Negative Space to Create a Floating Effect
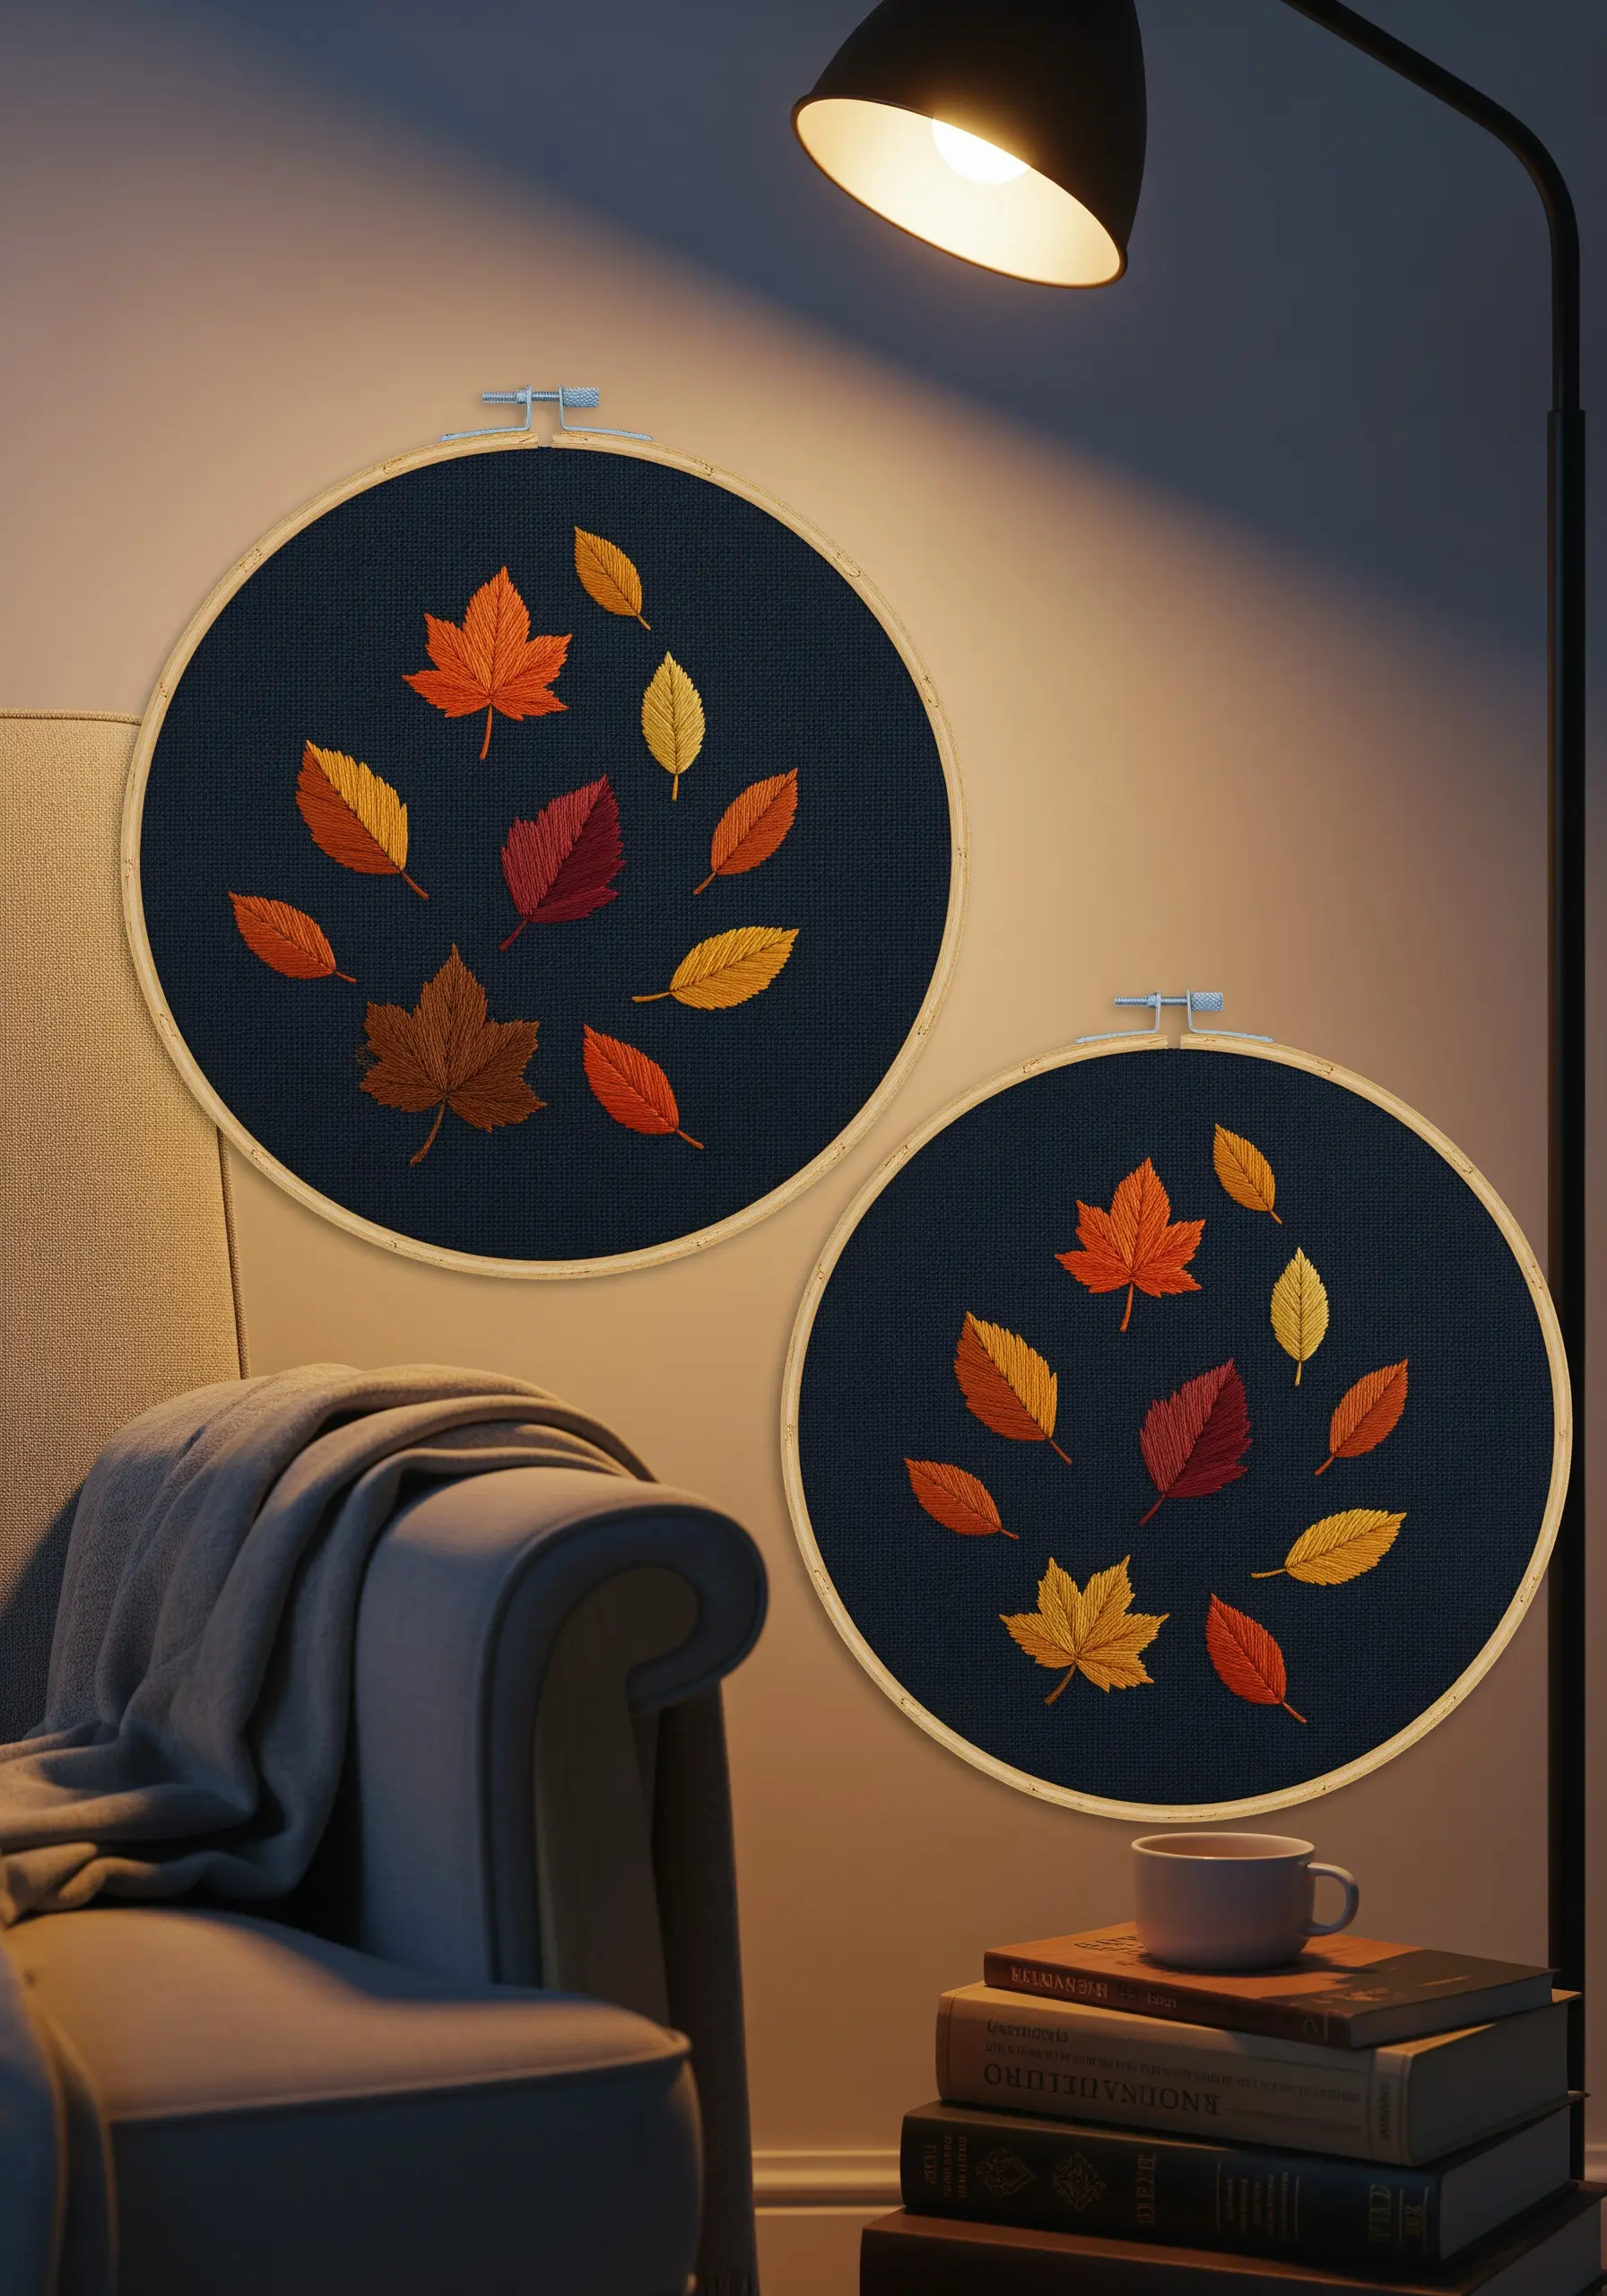
Make your motifs pop by choosing a dark, moody background fabric like navy or charcoal linen.
This high contrast makes vibrant colors appear more luminous and creates a sense of depth.
Arrange your motifs—like these autumn leaves—in a scattered, asymmetrical composition to create a feeling of natural movement.
The unstitched fabric, or negative space, becomes a crucial part of the design, giving the stitched elements room to breathe and making the overall piece feel calm and uncluttered.
7. Curate a Playful Gallery with Pattern Fillers

Create an energetic focal point by grouping multiple hoops filled with simple, repeating patterns.
Instead of intricate illustrations, use basic stitches to create graphic textures: satin-stitched polka dots, backstitched chevrons, or a field of seed stitches.
Tie the collection together with a strict, vibrant color palette—like pink, yellow, and blue—across all hoops.
By varying the hoop sizes and the patterns within them, you can create dynamic vibrant hoop art designs that feel joyful and modern.
8. Build Rhythmic Texture with Chain Stitch Rows

To capture the feeling of movement, rely on a stitch that builds its own texture.
Rows of chain stitch, worked closely together, create a dense, corded surface that resembles knitting or weaving.
This technique is perfect for rendering stylized natural elements like water, wood grain, or clouds.
Use several shades of a single color family or a variegated thread to create subtle gradients that enhance the sense of flow in your abstract thread waves.
9. Capture a Retro Vibe with Satin Stitch Bands

Evoke a specific design era through a thoughtful combination of color, shape, and stitch.
For a mid-century modern feel, select a muted, earthy palette of avocado green, harvest gold, and burnt orange.
To achieve those clean, graphic boomerang shapes, first outline them with a split stitch to create a sharp edge.
Then, fill the shapes with a smooth, wide satin stitch, ensuring your stitches lie flat and even for a polished, printed look.
10. Master the Elegance of Single-Line Art

The beauty of single-line embroidery lies in its unbroken, fluid movement.
Before you stitch, trace the entire design with a pen on paper without lifting it to understand the path your needle needs to follow.
Use a whipped backstitch or a stem stitch to create a smooth, rounded line with no visible gaps.
This minimalist approach transforms minimal food & coffee motifs into chic, gallery-worthy art.
11. Create Soft Sculpture with Braided Yarn

Add a gentle, three-dimensional quality to your work by incorporating braided yarn.
This technique is perfect for creating soft, touchable art for nursery decor.
Simply braid lengths of soft yarn and then couch them onto your fabric, shaping them into arcs, clouds, or letters.
Use a strong, matching embroidery floss for your couching stitches to secure the braids invisibly.
12. Go Architectural with Oversized Couching

Make a dramatic statement by scaling up your materials and your canvas.
Instead of floss, use a thick rope or cord. Instead of a hoop, use a large piece of heavy felt or canvas stretched over a frame.
Lay out your rope in a grid or abstract pattern and use a thick yarn to tack it down with large, visible stitches that become part of the design.
This technique blurs the line between embroidery and sculpture, creating powerful fiber art installations.
13. Embrace Art Deco with Symmetrical Fan Motifs

Capture the glamour and precision of the Art Deco era by focusing on symmetry, repetition, and a touch of opulence.
Choose a rich, dark background fabric like emerald green or black velvet to make your stitches shine.
Use a high-quality metallic thread for the outlines of your repeating fan shapes.
Fill each shape with a perfectly smooth satin stitch, ensuring all stitches run parallel for a uniform, light-reflecting sheen that feels luxurious and timeless.
14. Stitch Your Own Designer’s Color Wheel

Turn a practical tool into a piece of art that celebrates the heart of your craft: color.
This project serves as a perfect exercise for mastering a consistent, smooth satin stitch.
By filling each segment with a different hue, you not only create a vibrant piece of wall art but also a beautiful, tactile reference for your future projects.
It’s a meditative way to explore abstract color psychology and improve your technical skill simultaneously.
15. Capture the Spirit of Wabi-Sabi with an Enso Circle

Embrace the beauty of imperfection by stitching an Enso, or Zen circle.
The goal is not a perfect geometric shape, but an expressive mark that feels alive and spontaneous, like a single brushstroke.
Use a very thick black thread or yarn and fill the shape with dense, irregular seed stitches to create a rough, organic texture.
This approach to minimalist embroidery wall art is a practice in letting go of precision and finding character in the handmade.
16. Craft a Miniature World with Tiny Stitches

Create intricate pieces that invite closer inspection by working in miniature.
Switch from six-strand floss to a single strand to achieve delicate, hair-thin lines for details like glass terrariums or flower stems.
Use the smallest possible stitches: tiny backstitches for outlines, single seed stitches for leaves, and petite French knots for soil or flower buds.
This meticulous work results in precious, detailed tiny hoop embroidery projects that feel like hidden treasures.
17. Map the Cosmos with Delicate Constellations

Create a sophisticated and timeless piece by stitching a celestial map.
Use a single strand of white, silver, or light gold thread on a deep navy or black linen background for stark, elegant contrast.
A simple backstitch is perfect for connecting the stars, while tiny French knots or star stitches can represent the stars themselves.
This project transforms a scientific chart into a piece of art with a sense of wonder and precision, perfect for minimal sky & moon designs.
18. Render Realistic Texture with Fishbone Stitch

Some motifs demand a specific stitch to truly come alive.
For wheat, leaves, or feathers, the fishbone stitch is the perfect choice.
Its overlapping, V-shaped structure naturally mimics the herringbone-like texture of a wheat stalk, creating dimension and a sense of realism that a simple satin stitch cannot achieve.
Pair it with a simple stem stitch for the stalks to let the beautifully textured heads remain the focal point.
19. Define Form with Expressive Contour Lines

Capture the essence of the human form not with detailed fills, but with a single, graceful line.
This style of embroidery relies on the power of suggestion, where the unstitched space is just as important as the stitched line.
Use a smooth stem stitch or whipped backstitch to ensure your line is fluid and unbroken.
A single dark thread on a soft, muted fabric creates a beautiful, high-contrast drawing that feels both classic and contemporary, like these single-line face profiles.
20. Visualize Music with Layered Hoop Art

Break free from a single surface by layering embroidered elements to create physical depth.
First, stitch the background element, like a musical staff, onto a large stretched canvas.
Then, stitch the foreground elements—the musical notes—in individual small hoops.
Finally, mount the finished hoops directly onto the canvas, letting them sit on top of the staff lines for a unique, multi-dimensional effect.
21. Outline with Texture for Playful Nursery Art

For children’s decor, choose stitches that are as fun to look at as they are to touch.
Instead of a simple backstitch outline, use a chunky, raised stitch like a heavy chain stitch or a padded satin stitch.
This gives the character a soft, three-dimensional edge that is visually engaging and friendly.
It’s a simple way to elevate animal-themed patterns into tactile art pieces perfect for a playful space.
22. Paint with Thread Using Fill Stitch Blocks

Approach your embroidery like a painting by blocking in large areas of solid color.
Use a dense satin stitch or long-and-short stitch to fill entire shapes, like the cacti and mesas of a desert landscape.
Don’t worry about subtle blending; the defined edges between color blocks create a bold, graphic style reminiscent of vintage travel posters.
A curated palette of earth-tone patterns will unify the composition and give it a warm, natural feel.
23. Master Fluid Script with Padded Satin Stitch

To ensure your embroidered lettering stands out, give it physical dimension.
First, create a foundation by filling your letters with a layer of underlying straight stitches or an outline of split stitch.
Then, cover this padding with a smooth, even layer of satin stitch, working perpendicular to the foundation stitches.
This simple technique lifts the lettering off the fabric, creating subtle shadows and a professional, high-end finish for your embroidered quote wall hangings.
24. Combine Macrame Cord and Hardware for a Modern Finish

Blend fiber art with industrial elements for a clean, contemporary aesthetic.
Couch a thick material, like macrame cord, onto a heavy canvas to create a bold, geometric shape.
Instead of a traditional frame, stretch the finished canvas between two wooden dowels and use metal grommets for hanging points.
This mix of soft texture and clean hardware results in a polished piece that feels intentional and modern.
25. Create Thematic Sets for Specific Spaces
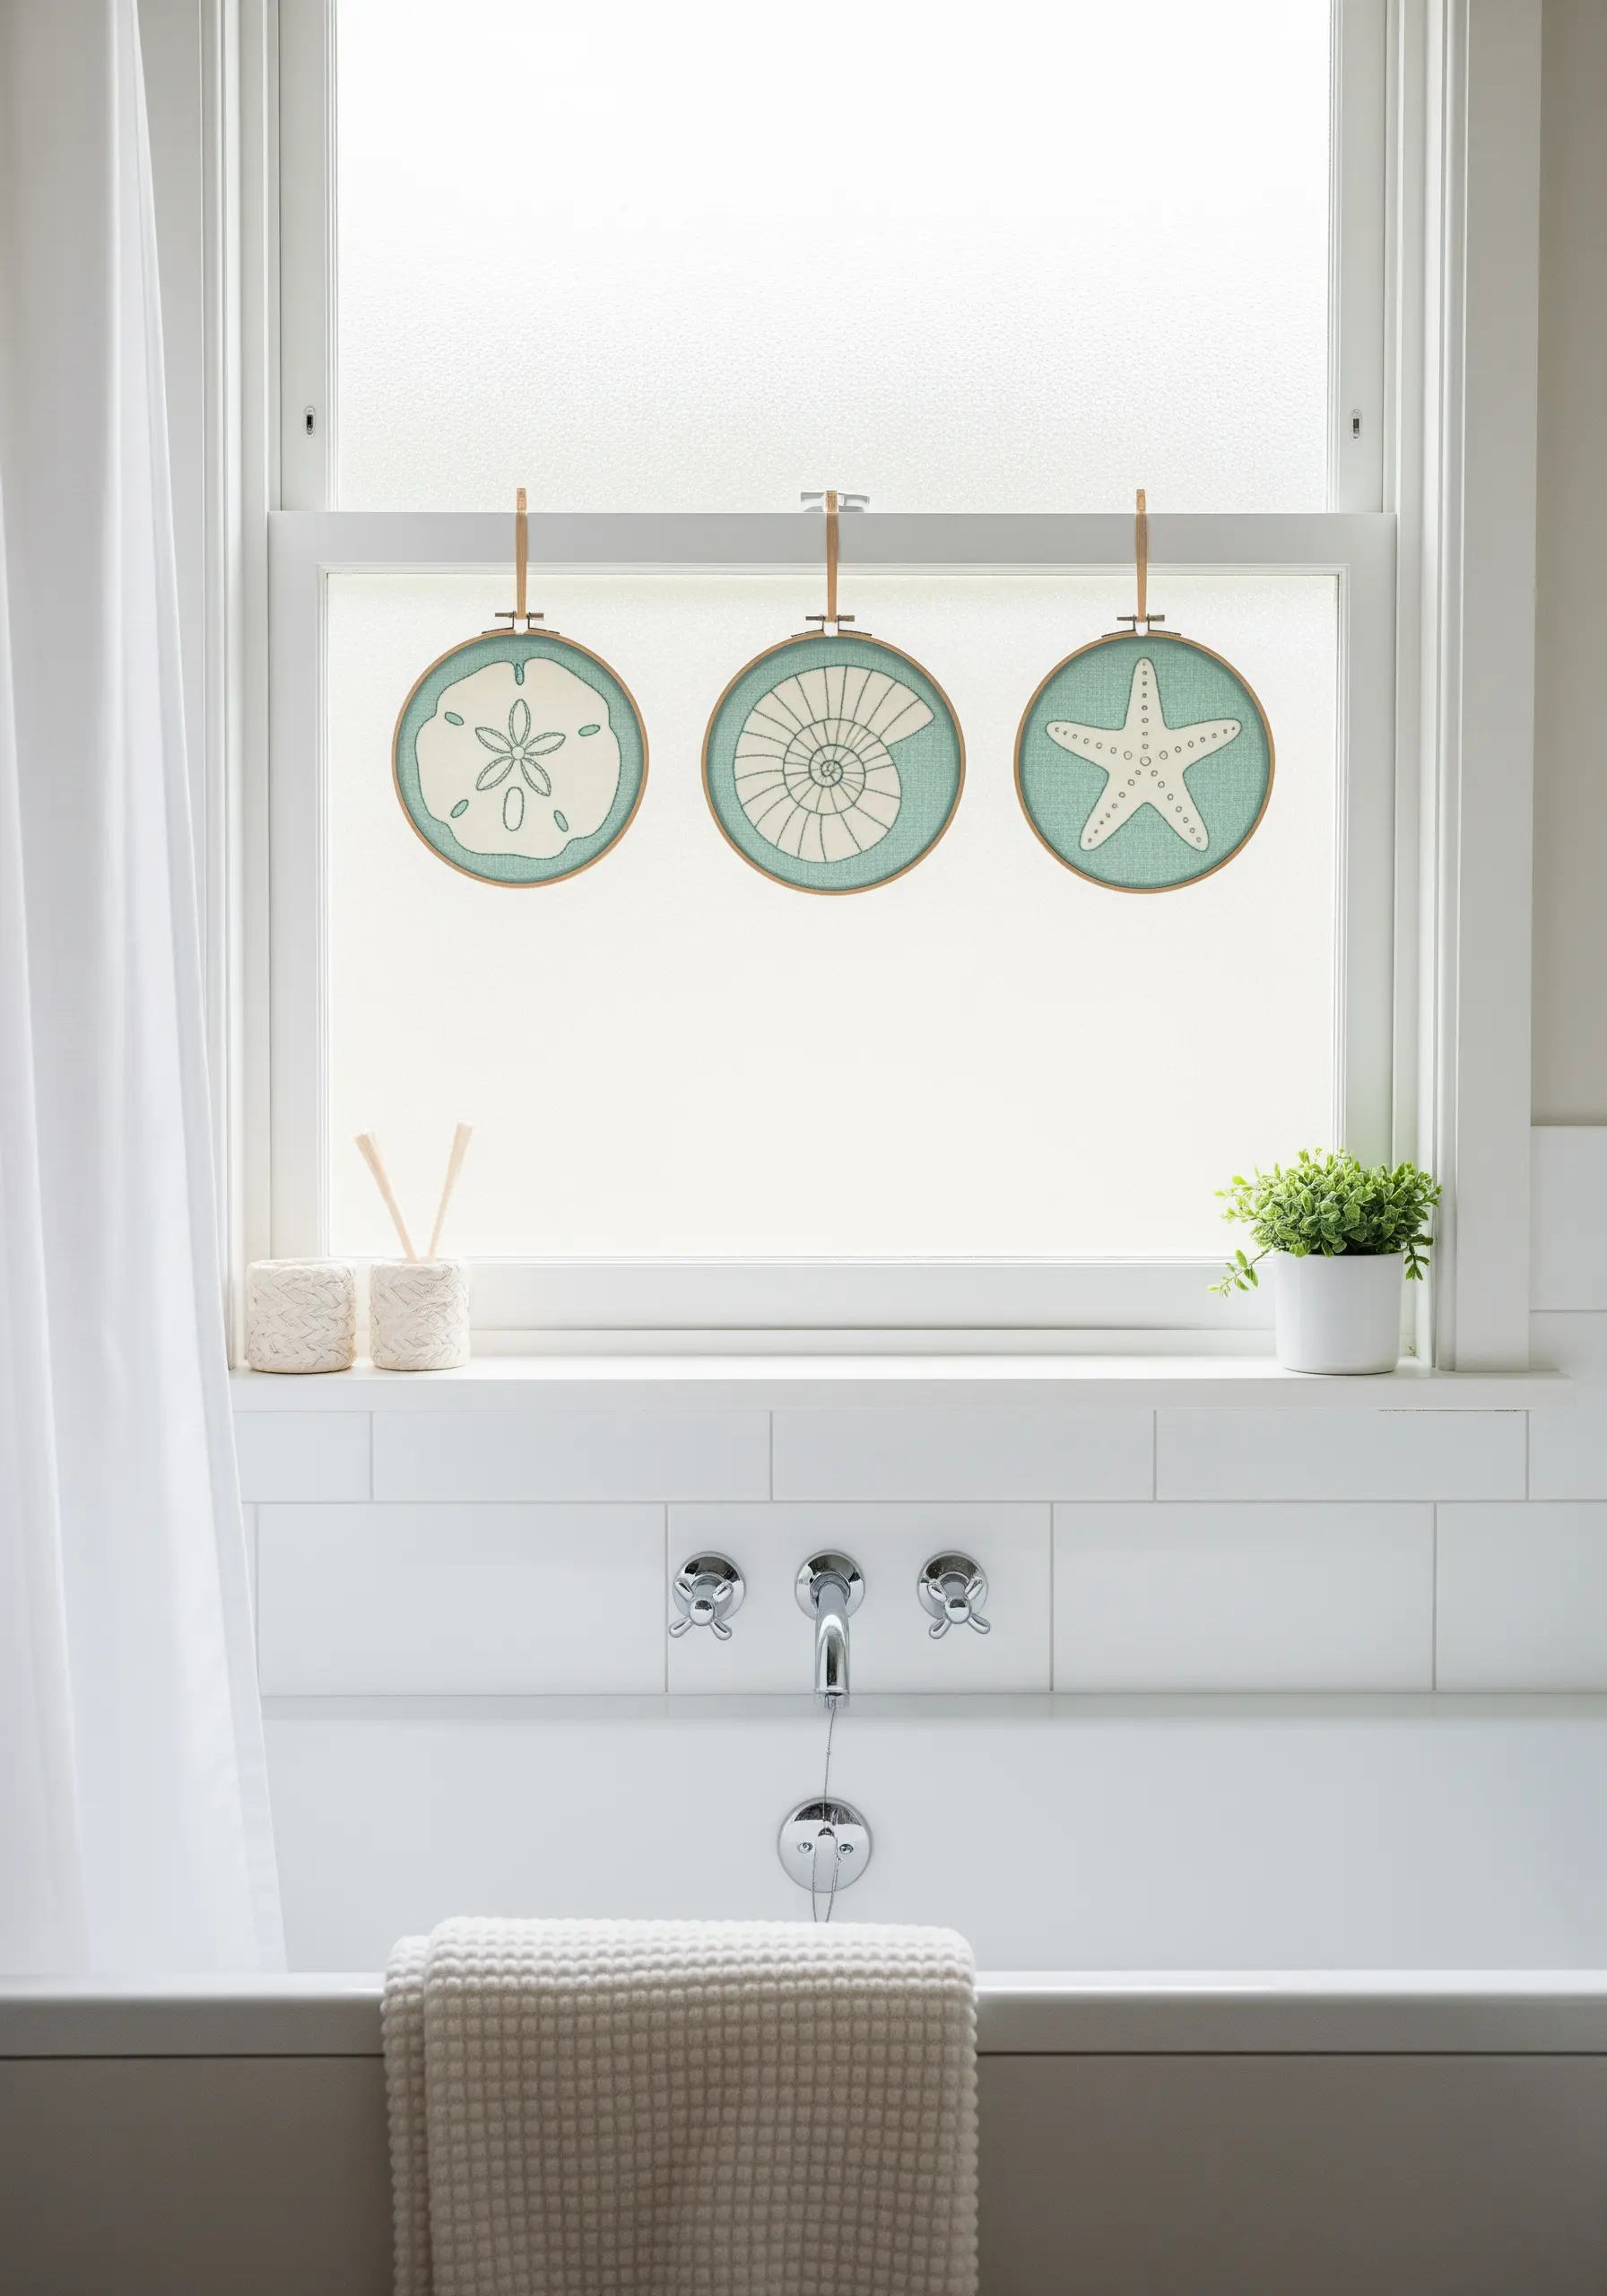
Elevate your decor by creating a small, curated collection of hoops designed for a specific room.
For a bathroom, a trio of simple seashell and starfish motifs creates a serene, cohesive look.
Use a consistent color palette and stitch style across all three pieces to tie them together.
Displaying them as a set transforms simple patterns into a thoughtful, custom design statement, like this coastal theme tiny embroidery art.
26. Achieve Rich Detail with Seed Stitch Filling

When you want to create a rich, jewel-like texture, fill the space with tiny, individual stitches.
Instead of a smooth satin stitch, use hundreds of tiny straight stitches (seed stitch) or French knots packed closely together.
This pointillist-style technique is perfect for rendering the seeds of a pomegranate or the center of a sunflower.
The resulting texture is incredibly tactile and catches the light in a way that feels vibrant and alive, perfect for detailed cultural embroidery motifs.
27. Design for Vertical Space with a Banner

Think beyond the circular hoop and consider different formats for your wall art.
A long, narrow banner is the perfect solution for decorating awkward vertical spaces, like the area between two doors or next to a bookshelf.
Choose a design with a strong vertical orientation, like a climbing vine or a stacked motif, to complement the shape of the banner.
This is one of the best minimalist embroidery decor ideas for creating a serene focal point.
28. Embrace Modern Gridwork with Cross-Stitch
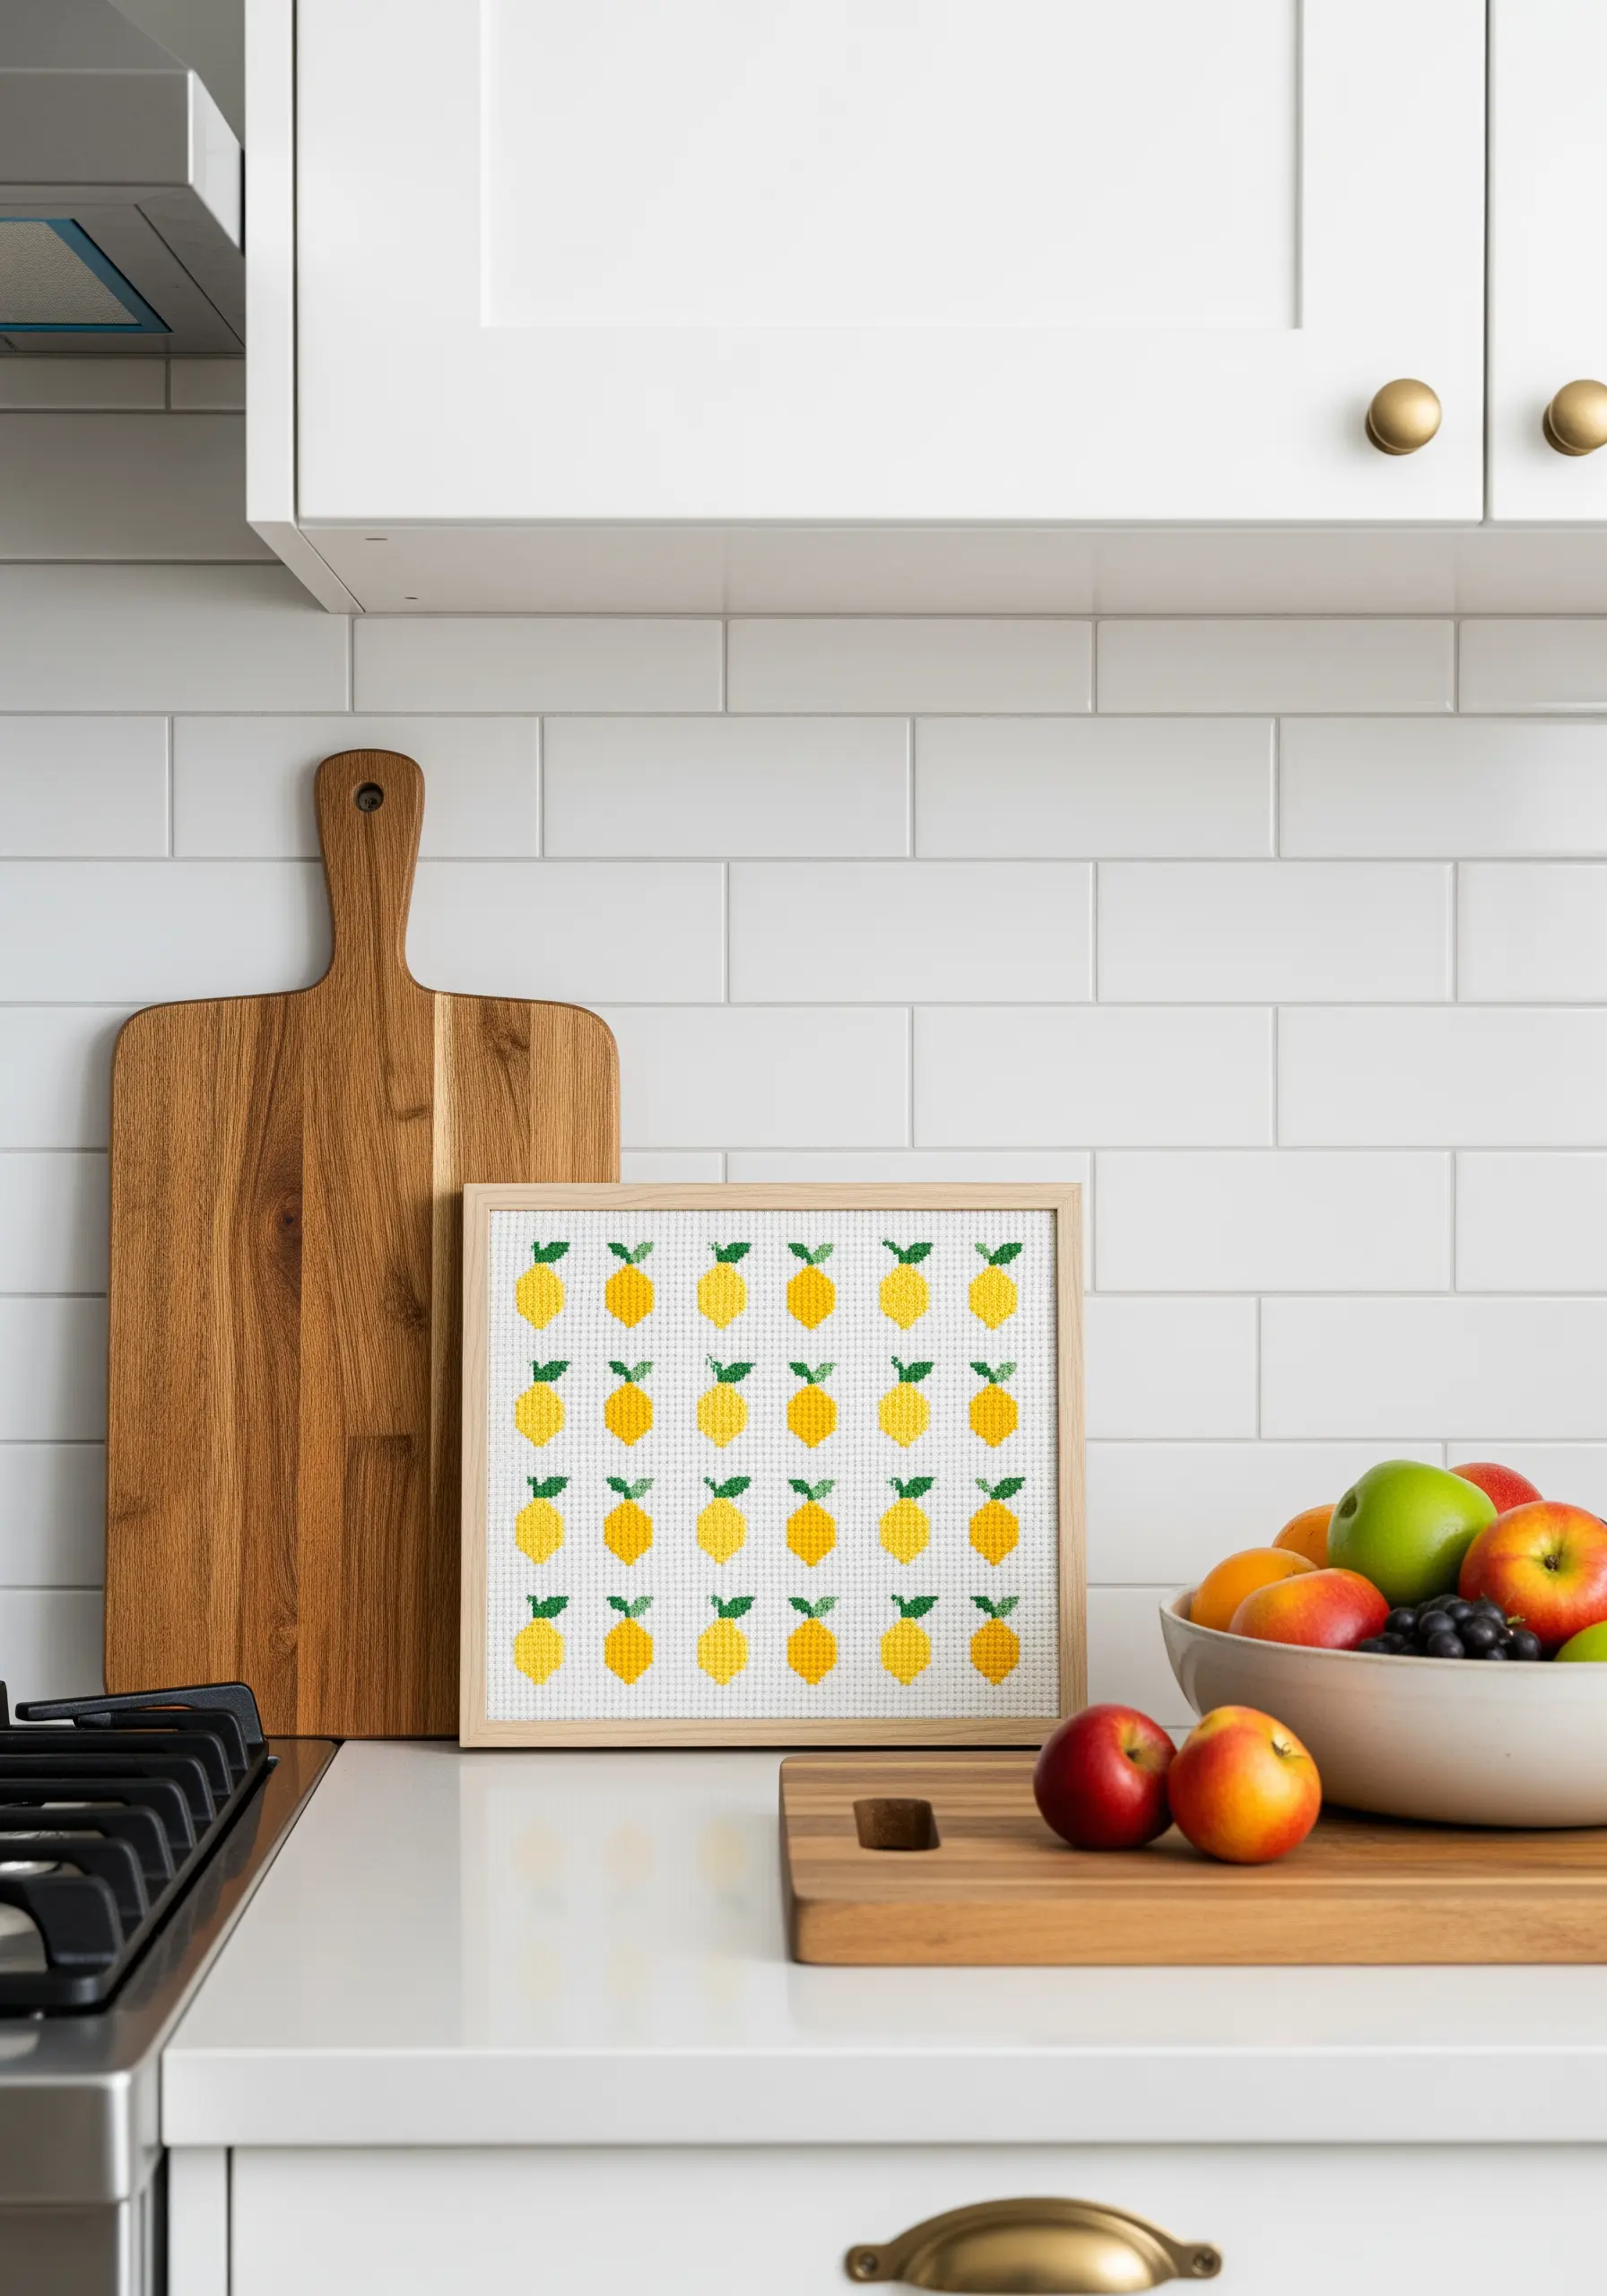
Use the inherent structure of cross-stitch to create fresh, graphic patterns that feel anything but traditional.
A simple, repeating motif arranged in a neat grid becomes a piece of modern pop art.
The pixelated nature of the stitch lends itself perfectly to simplified, iconic shapes.
This clean, organized aesthetic works beautifully for kitchen art and other cute dessert & tea theme decor.
29. Create Sculptural Form by Coiling and Couching

Push your embroidery into the third dimension by working with thick, structural materials.
Take a heavy rope and coil it tightly into a spiral or other abstract shape.
Using a durable needle and strong thread (like a fine waxed cord), couch the rope securely onto a sturdy fabric base stretched in a large, robust frame.
The result is a high-relief, sculptural piece where light and shadow play across the form, creating one of those stunning fiber art installations.
30. Add a Touch of Magic with Glow-in-the-Dark Thread

Incorporate an element of surprise into your work by using specialty threads.
For this firefly design, stitch the bodies and wings in standard black floss.
Then, for the glowing abdomens, switch to a high-quality glow-in-the-dark thread.
Once finished, hold the piece under a bright light to ‘charge’ the thread. In a darkened room, it will emit a soft, magical glow—a simple detail that creates a memorable experience.


