

Your workspace is more than just a desk; it’s a sanctuary for focus and creativity. The simplest way to infuse it with personal, calming energy is through small, intentional touches. A tiny, hand-stitched motif, resting in a hoop by your monitor or pinned to a corkboard, can serve as a quiet anchor in a busy day.
This isn’t about creating vast, complex masterpieces. It’s about elevating your skill through small, manageable acts of making. You’ll discover that the secret to polished, professional-looking embroidery lies not in complexity, but in control—the smoothness of a single curved line, the satisfying texture of a perfectly filled shape, the deliberate choice of color and stitch.
Consider each of these small projects a mindful practice. It’s a five-minute break that reconnects you to the tactile world, away from the screen. Let these motifs be your creative reset button, proving that even the smallest stitch can brighten your space and sharpen your focus.
1. The Art of the Perfect Outline

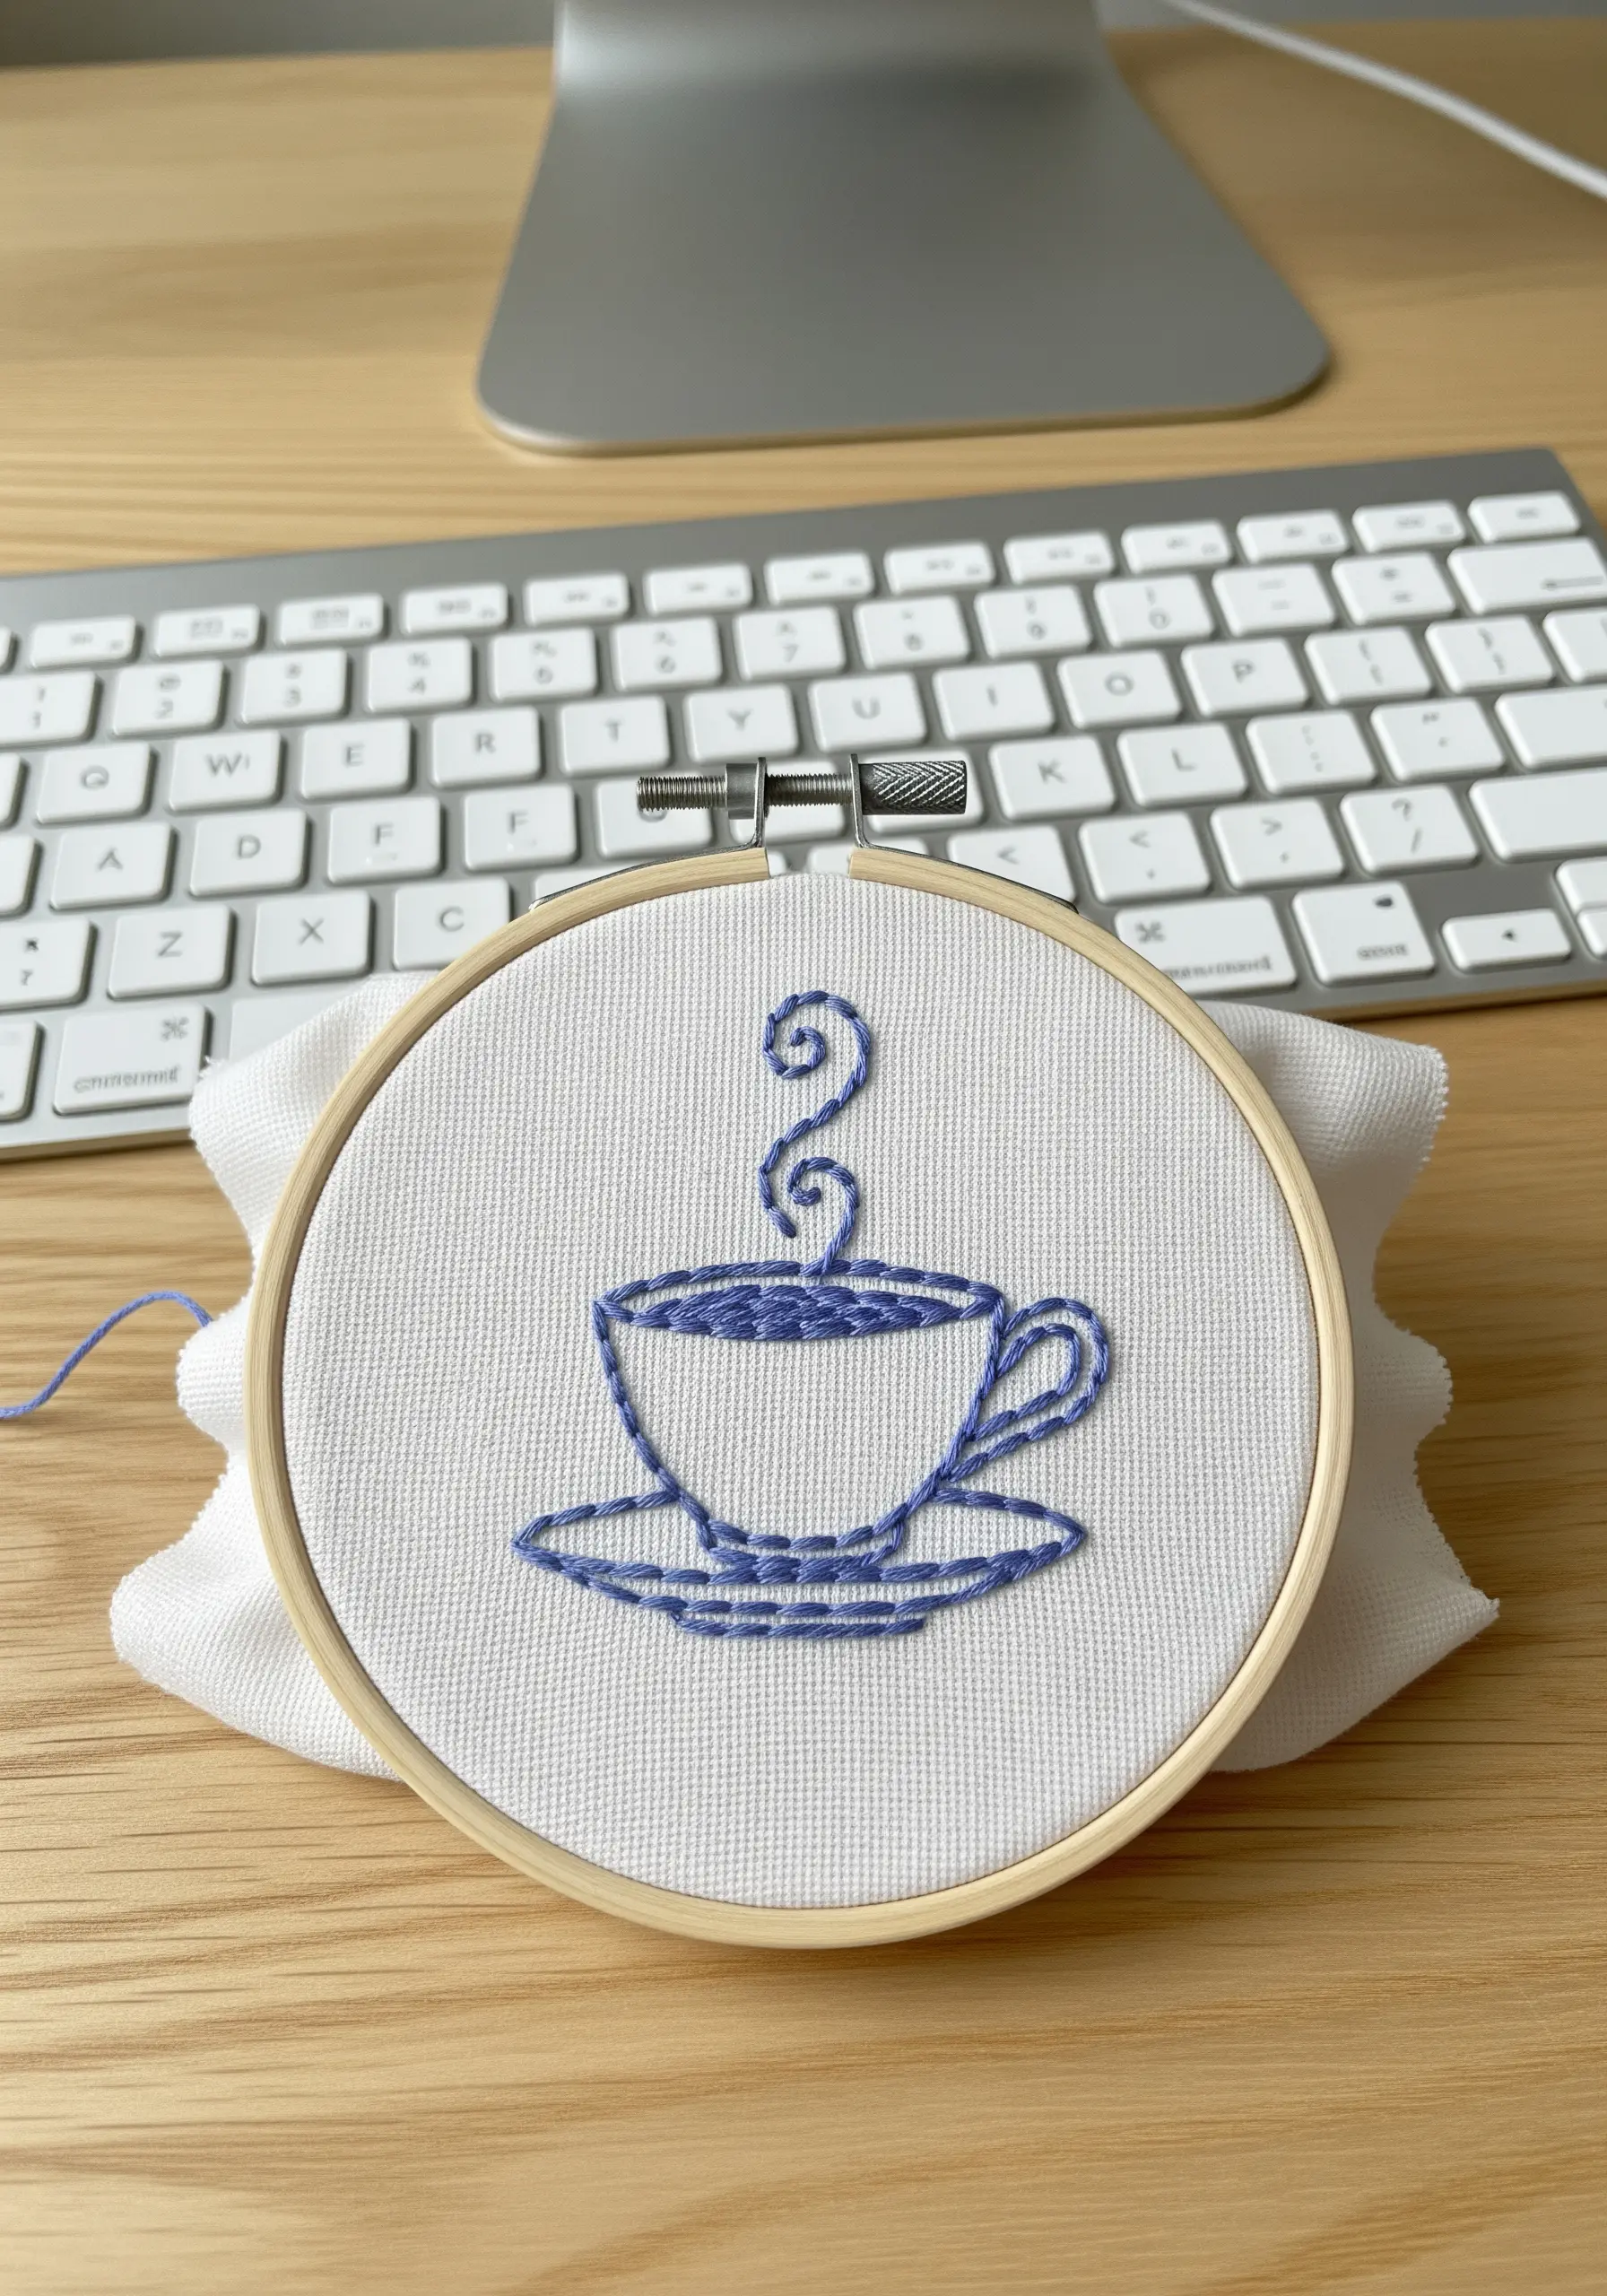
For exceptionally smooth curves on minimalist motifs, use a stem stitch instead of a standard backstitch.
This technique wraps each stitch, creating a seamless, rope-like line that flows beautifully around shapes like this coffee cup.
For the steam, use a single strand of white floss and a simple straight stitch, varying the length and angle to create a sense of delicate, rising movement.
This contrast between a solid outline and light, airy details gives the piece a professional, balanced finish.
2. Layered Satin Stitch for Floral Texture
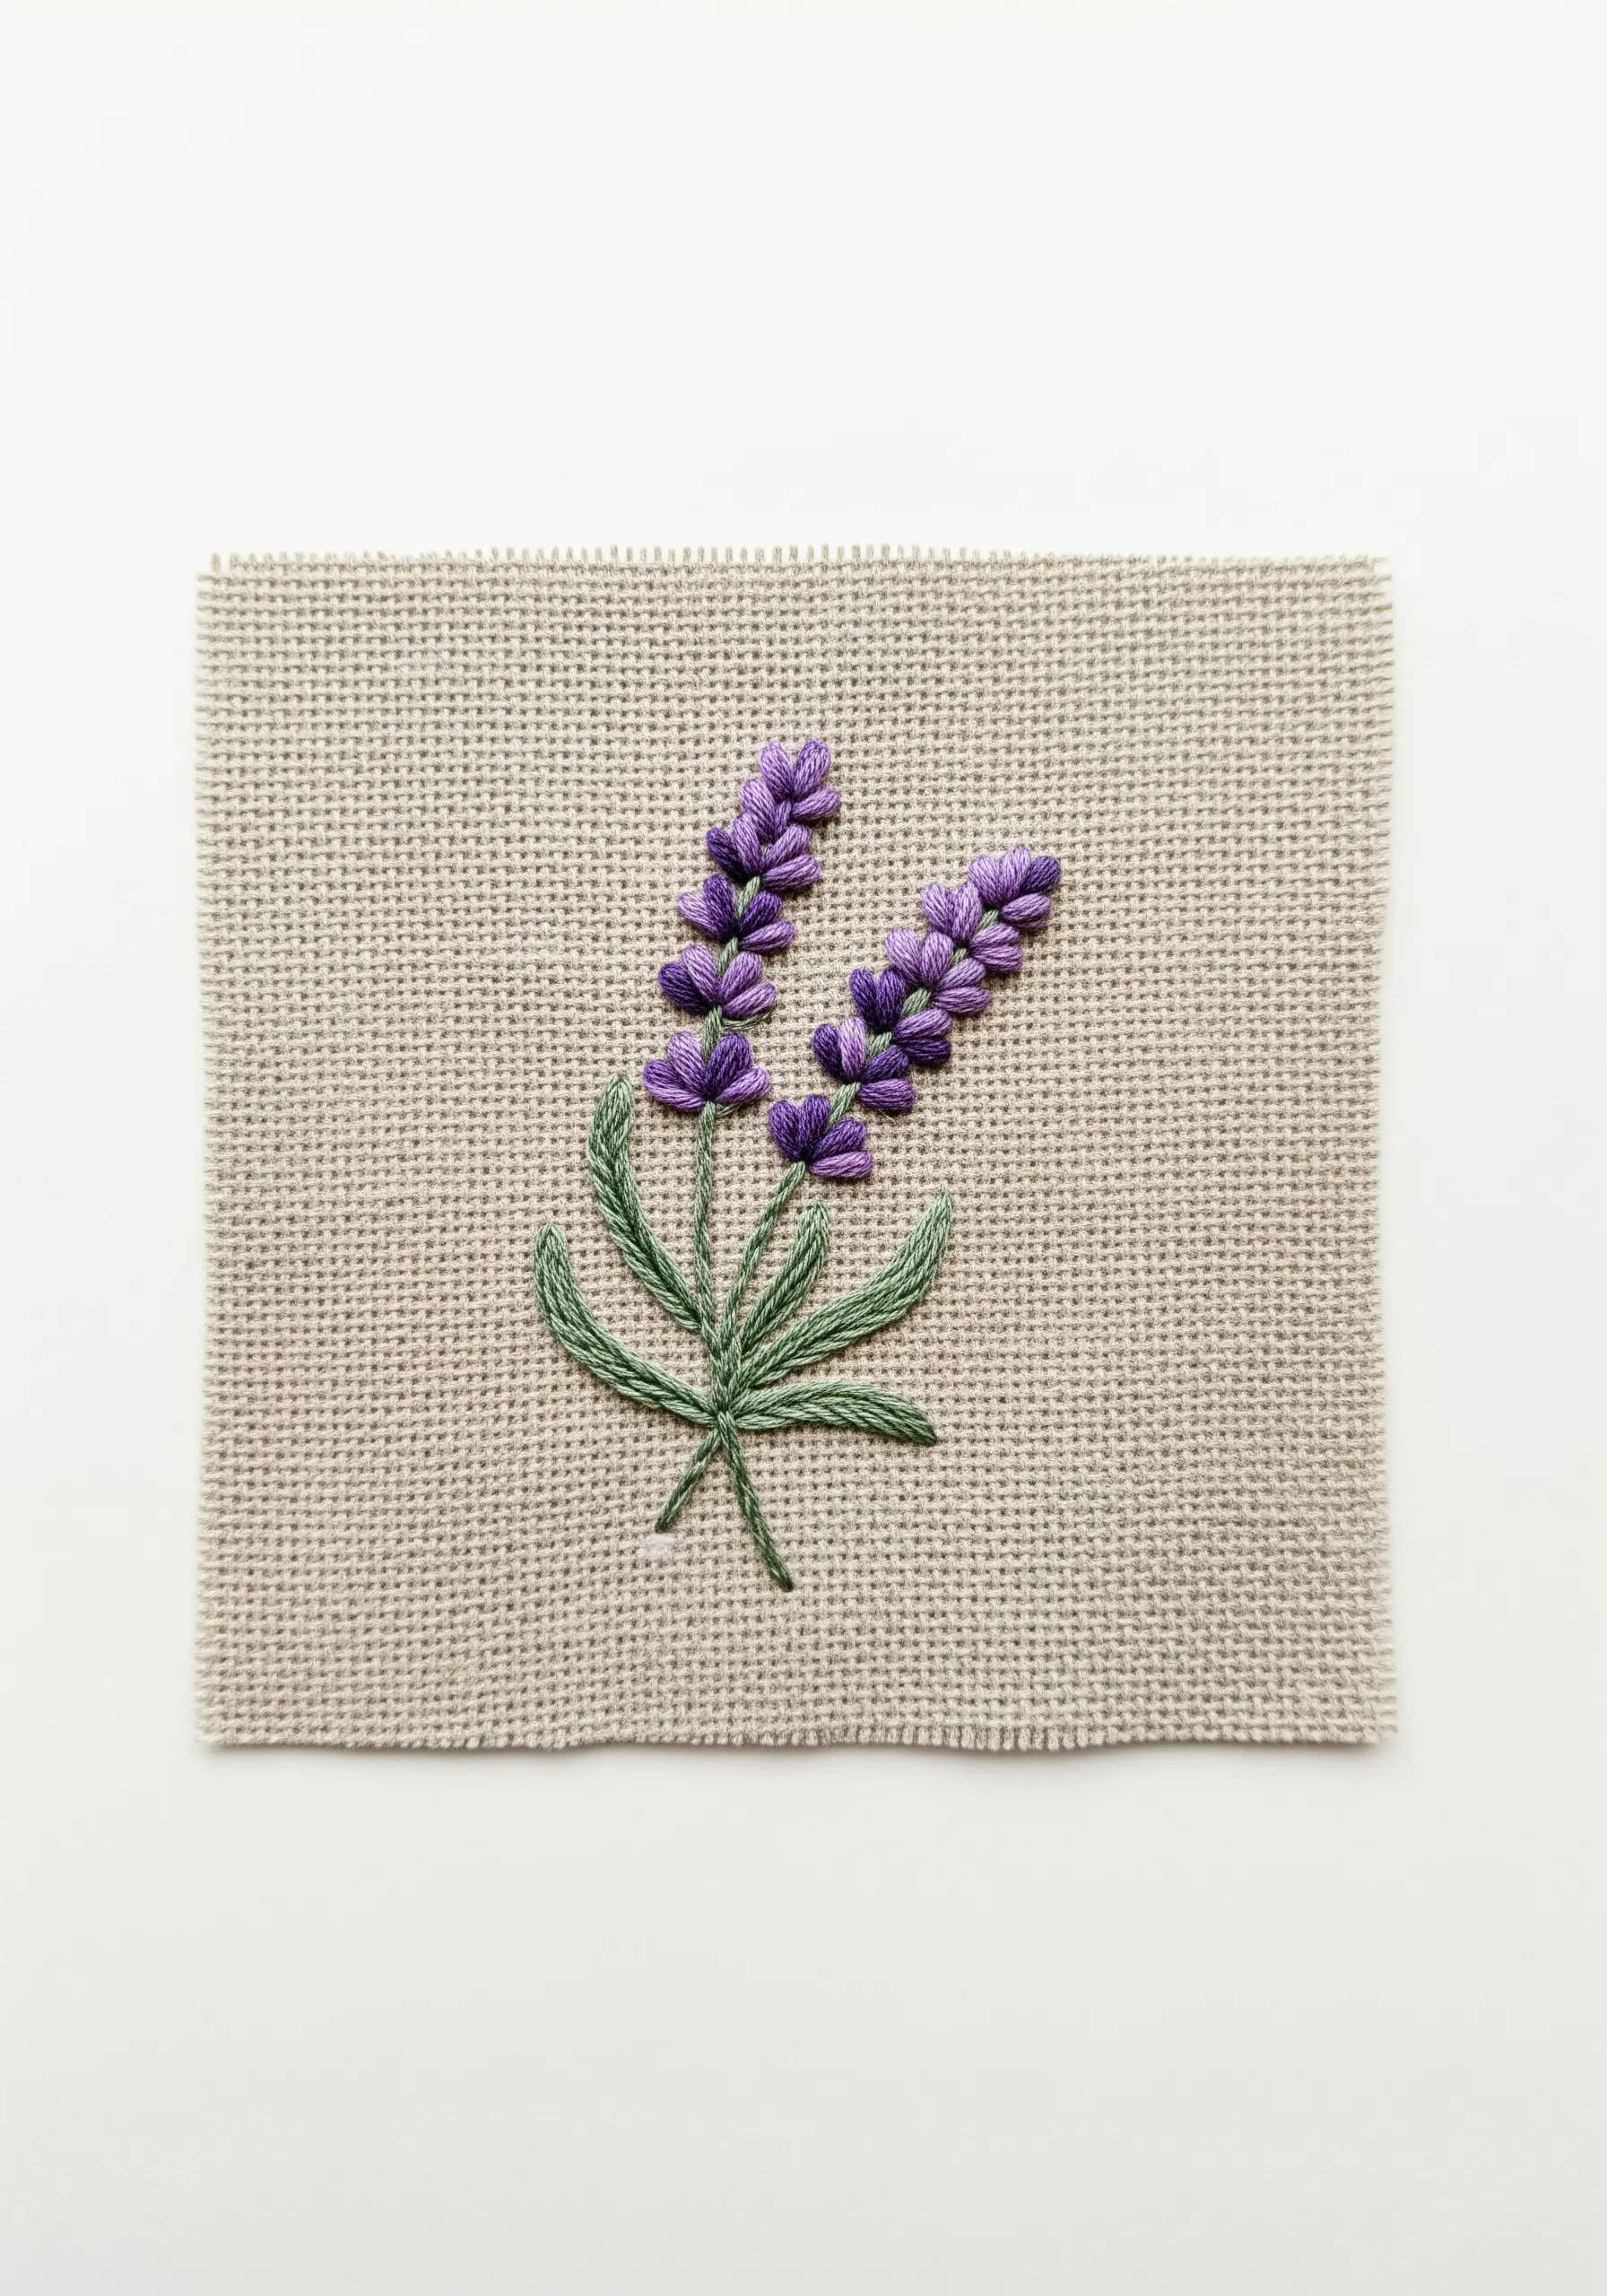
Give your lavender buds realistic depth by using two slightly different shades of purple.
First, fill the shape with angled satin stitches in the lighter shade.
Then, add a few shorter stitches in the darker shade on top, concentrating them at the base of each bud.
This simple layering technique creates dimension and shadow without requiring complex thread painting, making the florals pop against the rustic linen fabric.
These lavender field embroidery ideas add instant calm.
3. Mastering Radial Symmetry with Spiral Fills

To avoid a flat, lifeless center in circular motifs, fill it with a spiral satin stitch.
Start with a single stitch in the very middle, then work your way outward in a spiral, keeping your stitches tight and parallel.
This creates a subtle texture that catches the light beautifully.
For the rays, use single, taut straight stitches of varying lengths to give the sun a dynamic, hand-drawn energy that contrasts with the perfect center.
4. Sculpting Leaves with Directional Stitching

Achieve a realistic sheen on botanical motifs by paying attention to stitch direction.
For this monstera leaf, divide it into sections based on its veins.
Angle your satin stitches outward from the center, following the natural growth pattern.
To create the iconic splits, end your stitches precisely along the pattern line. This sharp use of negative space defines the shape without needing an outline.
5. Creating Bold Graphic Icons
For an ultra-clean, graphic look with no gaps, use a padded satin stitch.
First, outline the entire shape with a precise split stitch using two strands of floss.
Then, fill the shape with a dense satin stitch, using the raised outline as a physical guide for your needle.
This technique creates an exceptionally sharp, slightly three-dimensional edge that makes simple icons look incredibly polished.
6. Using Negative Space as a Design Highlight
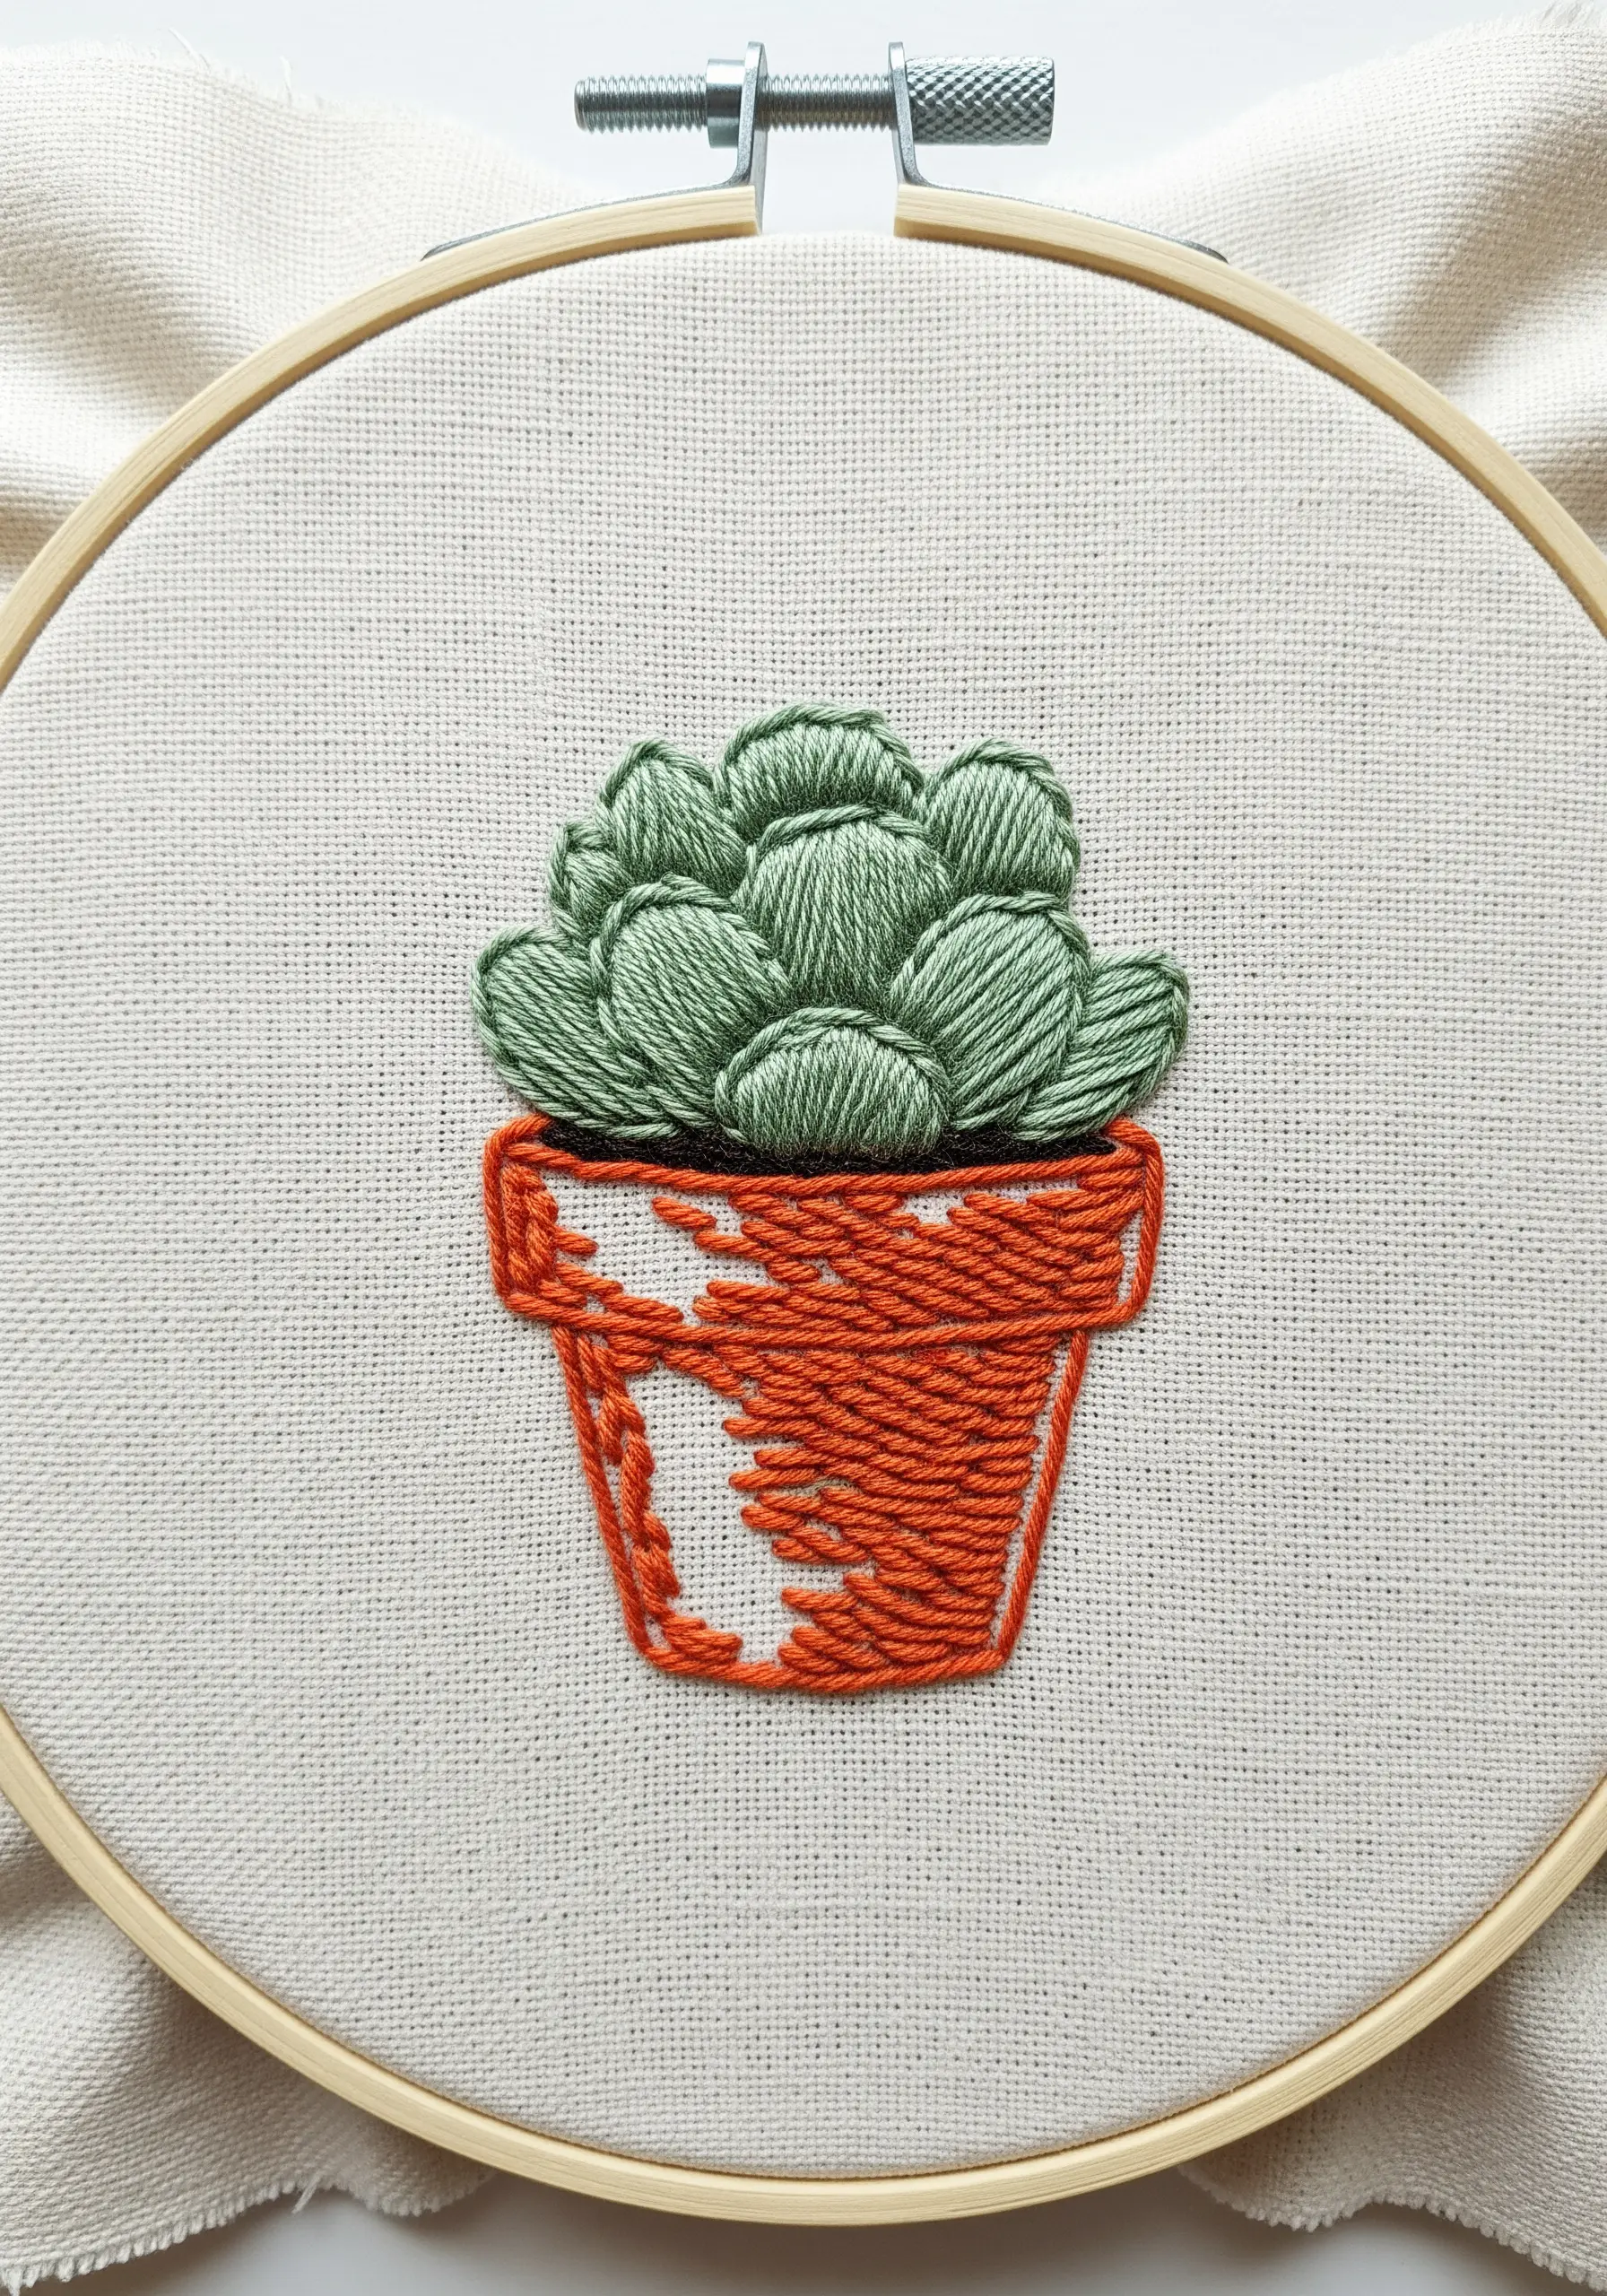
Instead of using another color for highlights, let the fabric do the work.
To create the glossy reflection on this terracotta pot, simply leave a section of the fabric unstitched.
Outline your highlight area first, then fill around it with your satin or long-and-short stitch.
This technique adds immediate visual interest and sophistication, turning a simple fill into a more dynamic composition.
7. Simulating Metallics with Couching

Metallic threads can lose their shine and break when passed through fabric repeatedly.
To preserve their luster, use the couching technique.
Lay your metallic thread on the surface of the fabric and tack it down with tiny, perpendicular stitches using a regular floss in a matching color.
This keeps the metallic thread on top, creating a smooth, uninterrupted shimmer that mimics real metal.
8. High-Contrast Line Art for Dramatic Impact
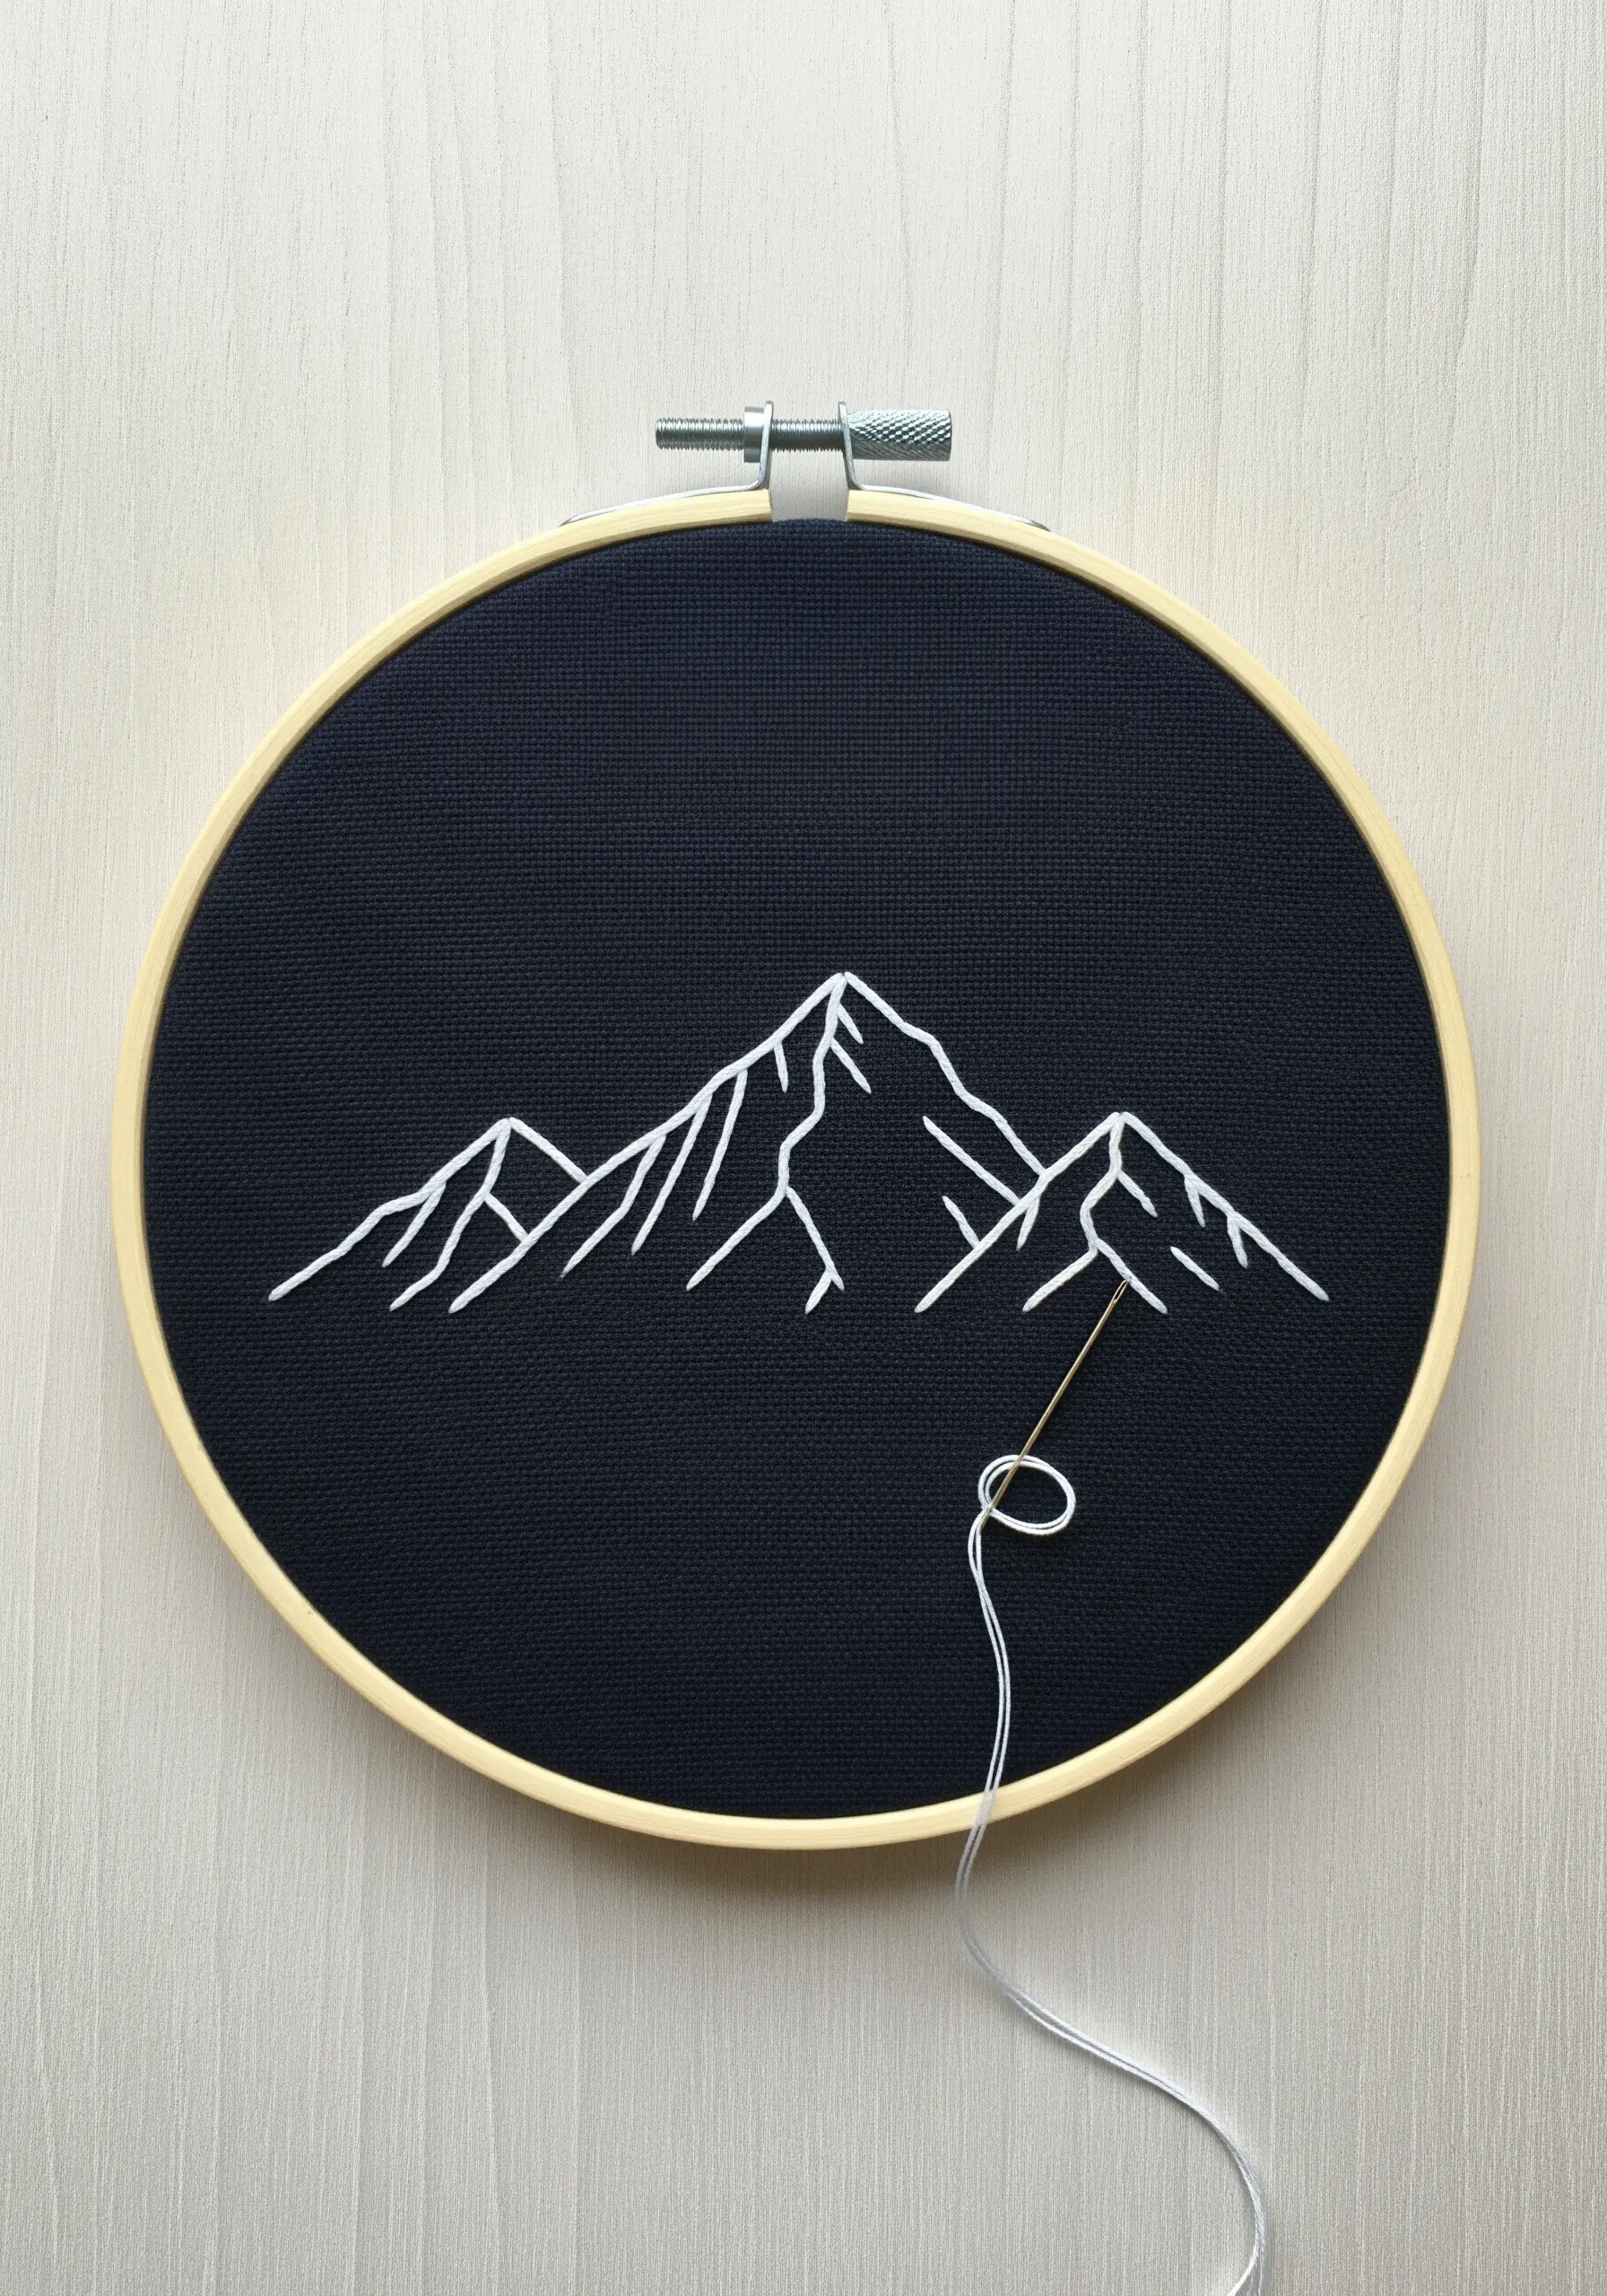
Make a powerful statement by maximizing contrast.
Choose a dark, tightly woven fabric like black cotton or linen, which prevents the fabric’s weave from distracting from your lines.
Use a bright white or off-white floss—just two strands are enough—and a neat backstitch to create a crisp, graphic landscape.
This minimalist approach forces the viewer to focus on the purity of the form itself.
These are the kinds of minimal stitch motifs that have maximum impact.
9. Building Rich Texture with Chain Stitch Fill

For a faster and more textured alternative to satin stitch, fill your shape with rows of chain stitch.
Work in neat, parallel lines, packing them closely together to create a solid field of color.
The resulting texture has a woven, almost knitted appearance that adds dimension and warmth.
Finish with a clean split stitch outline in a contrasting color to define the shape and make the texture pop.
10. Capturing Motion with Thread Gradients

Create the illusion of rolling waves by blending three to four shades of blue using a long-and-short stitch.
Instead of creating harsh lines between colors, allow your stitches to overlap and interlock, creating a soft, painterly transition.
Follow the curve of the wave with your stitches to enhance the sense of movement.
Add textured seafoam last with a smattering of white French knots.
These blue gradients create stunning visual flow.
11. Miniature Thread Painting for Lifelike Detail
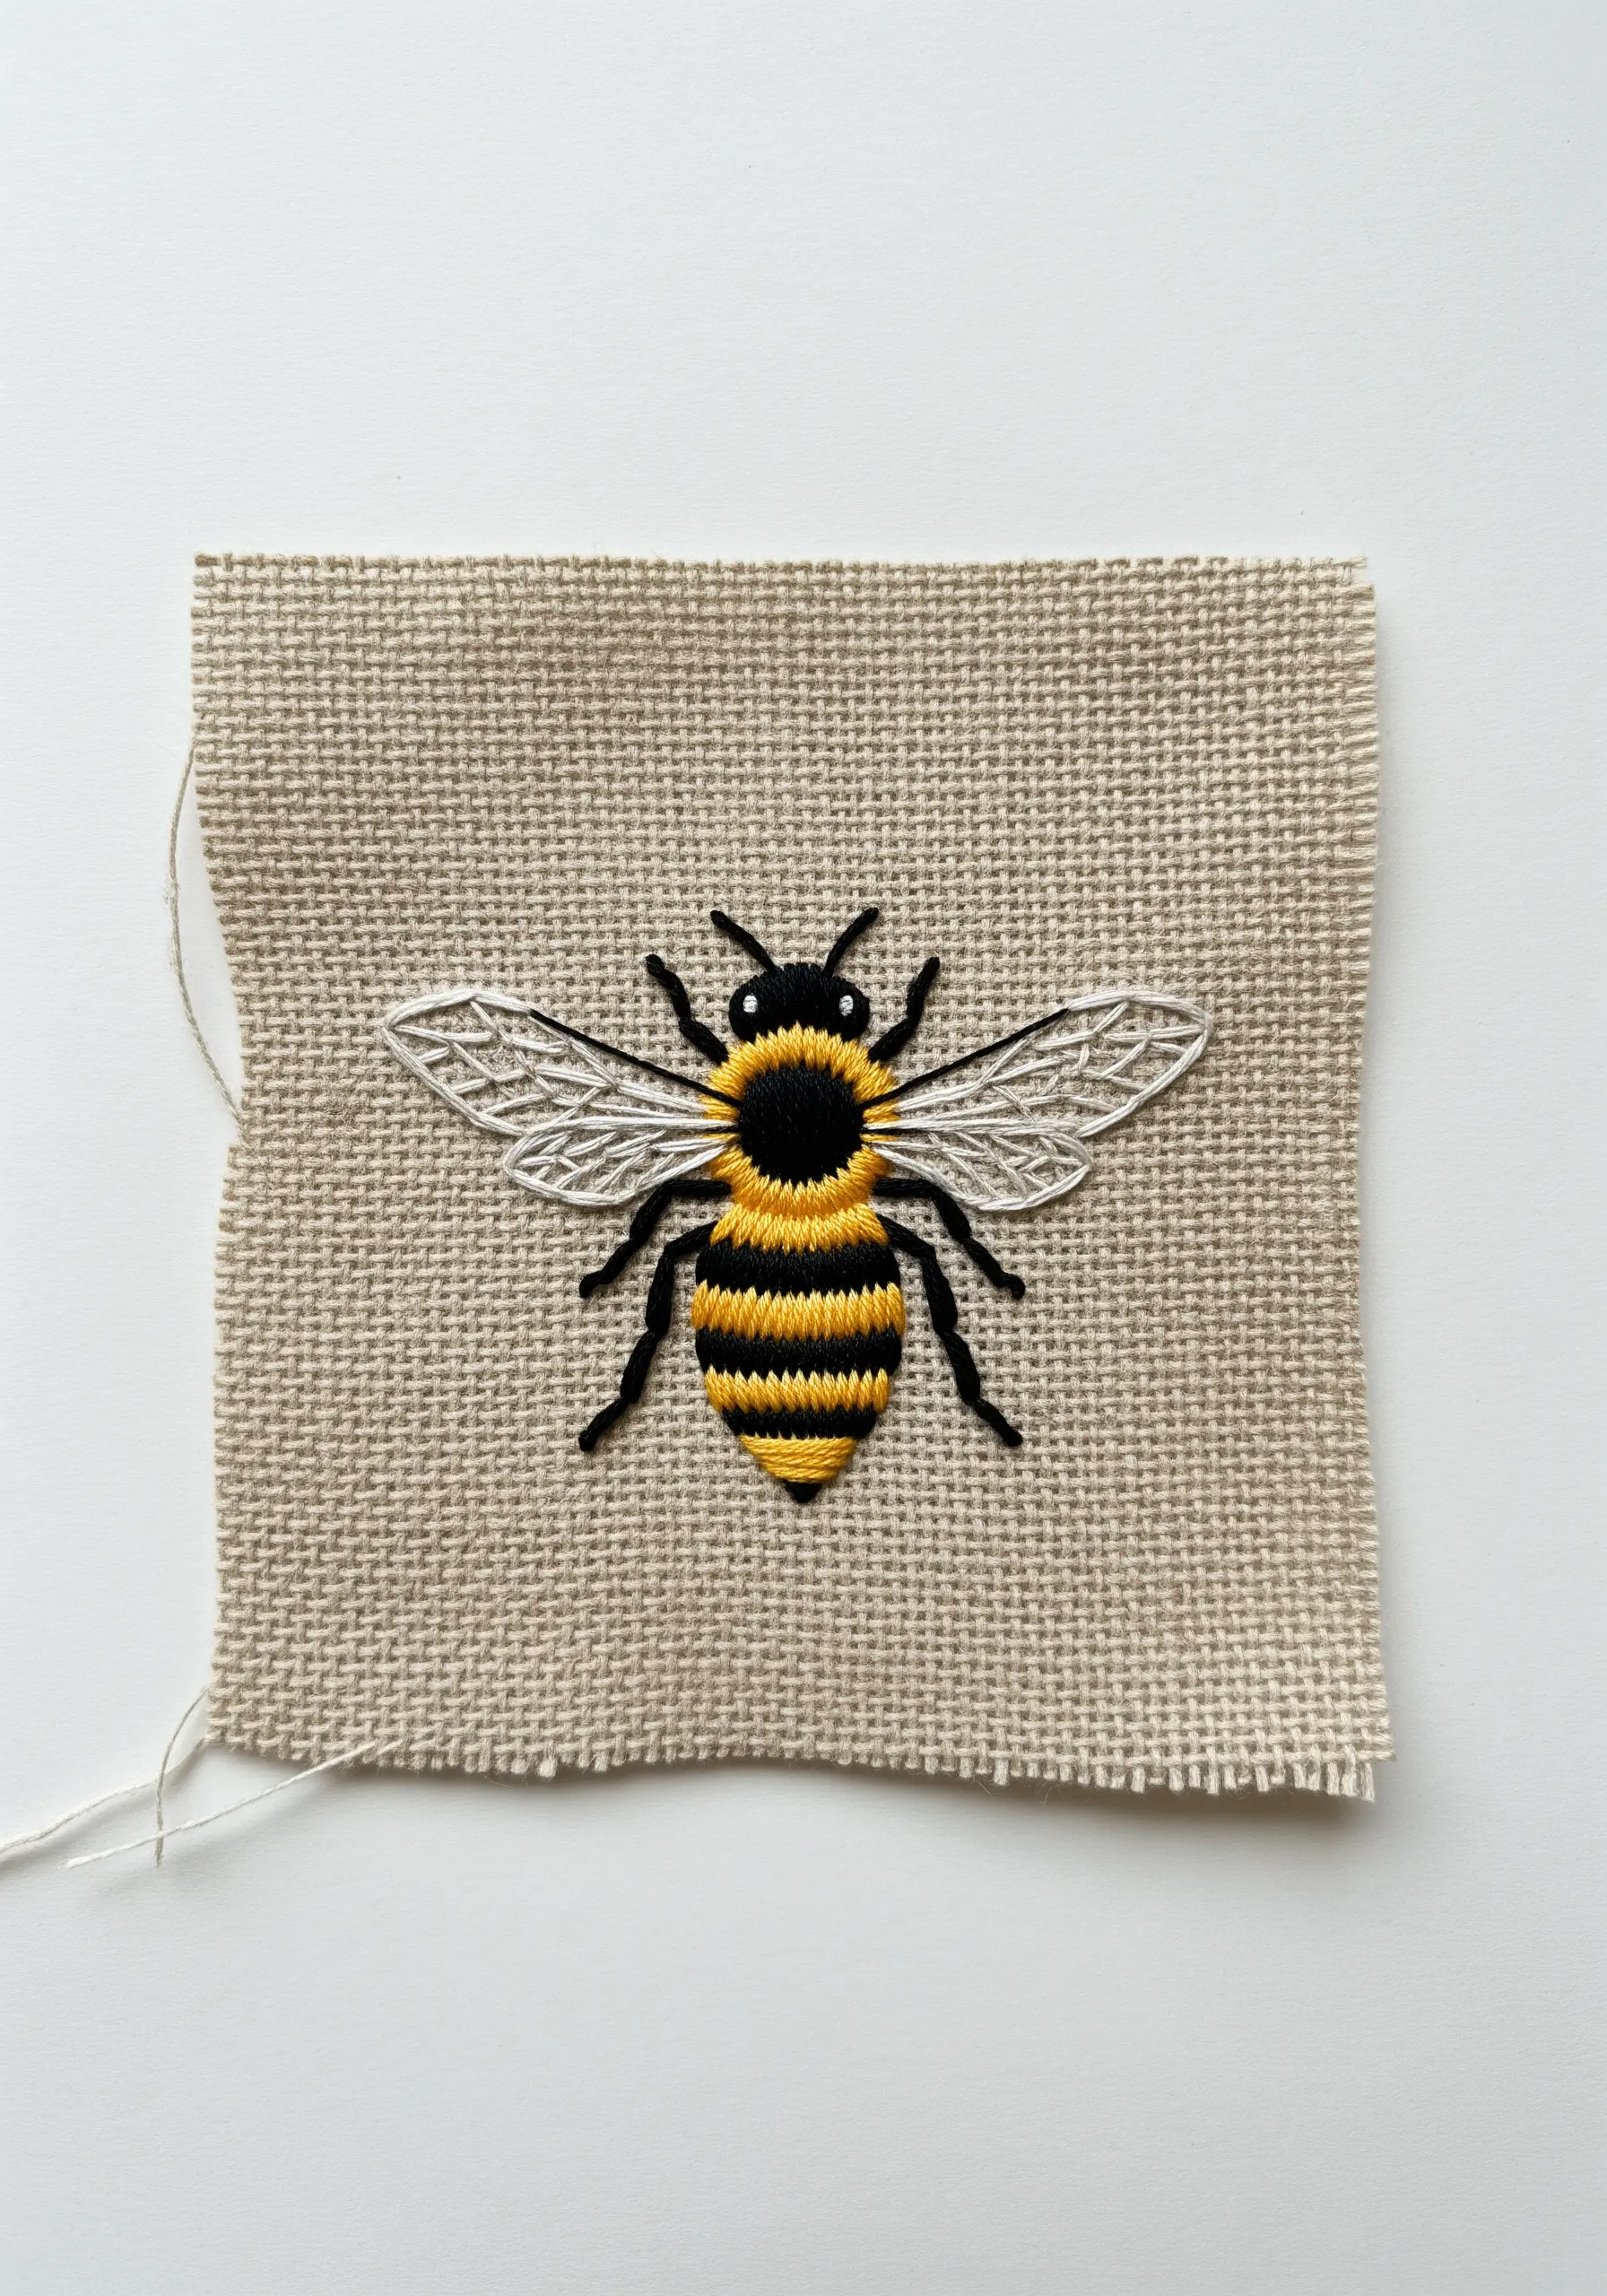
To create the bee’s fuzzy texture, use a single strand of floss and the long-and-short stitch technique.
Slightly blend the edges where the yellow and black stripes meet to create a soft, natural look.
For the wings, create a delicate frame with split stitch, then add just a few straight stitches inside to suggest veins.
This detail gives them a translucent quality without overworking the design.
12. The Elegance of a Single, Fluid Line

When your design is a single continuous line, its quality is everything.
Use a whipped backstitch or a stem stitch to ensure your curves are perfectly smooth, eliminating the segmented look a basic backstitch can produce.
Using three strands of floss gives the line a deliberate, graphic weight that stands out beautifully against the colored fabric.
It’s one of the most effective one line embroidery wall arts you can create.
13. Creating Contrast with Metallic and Matte Textures
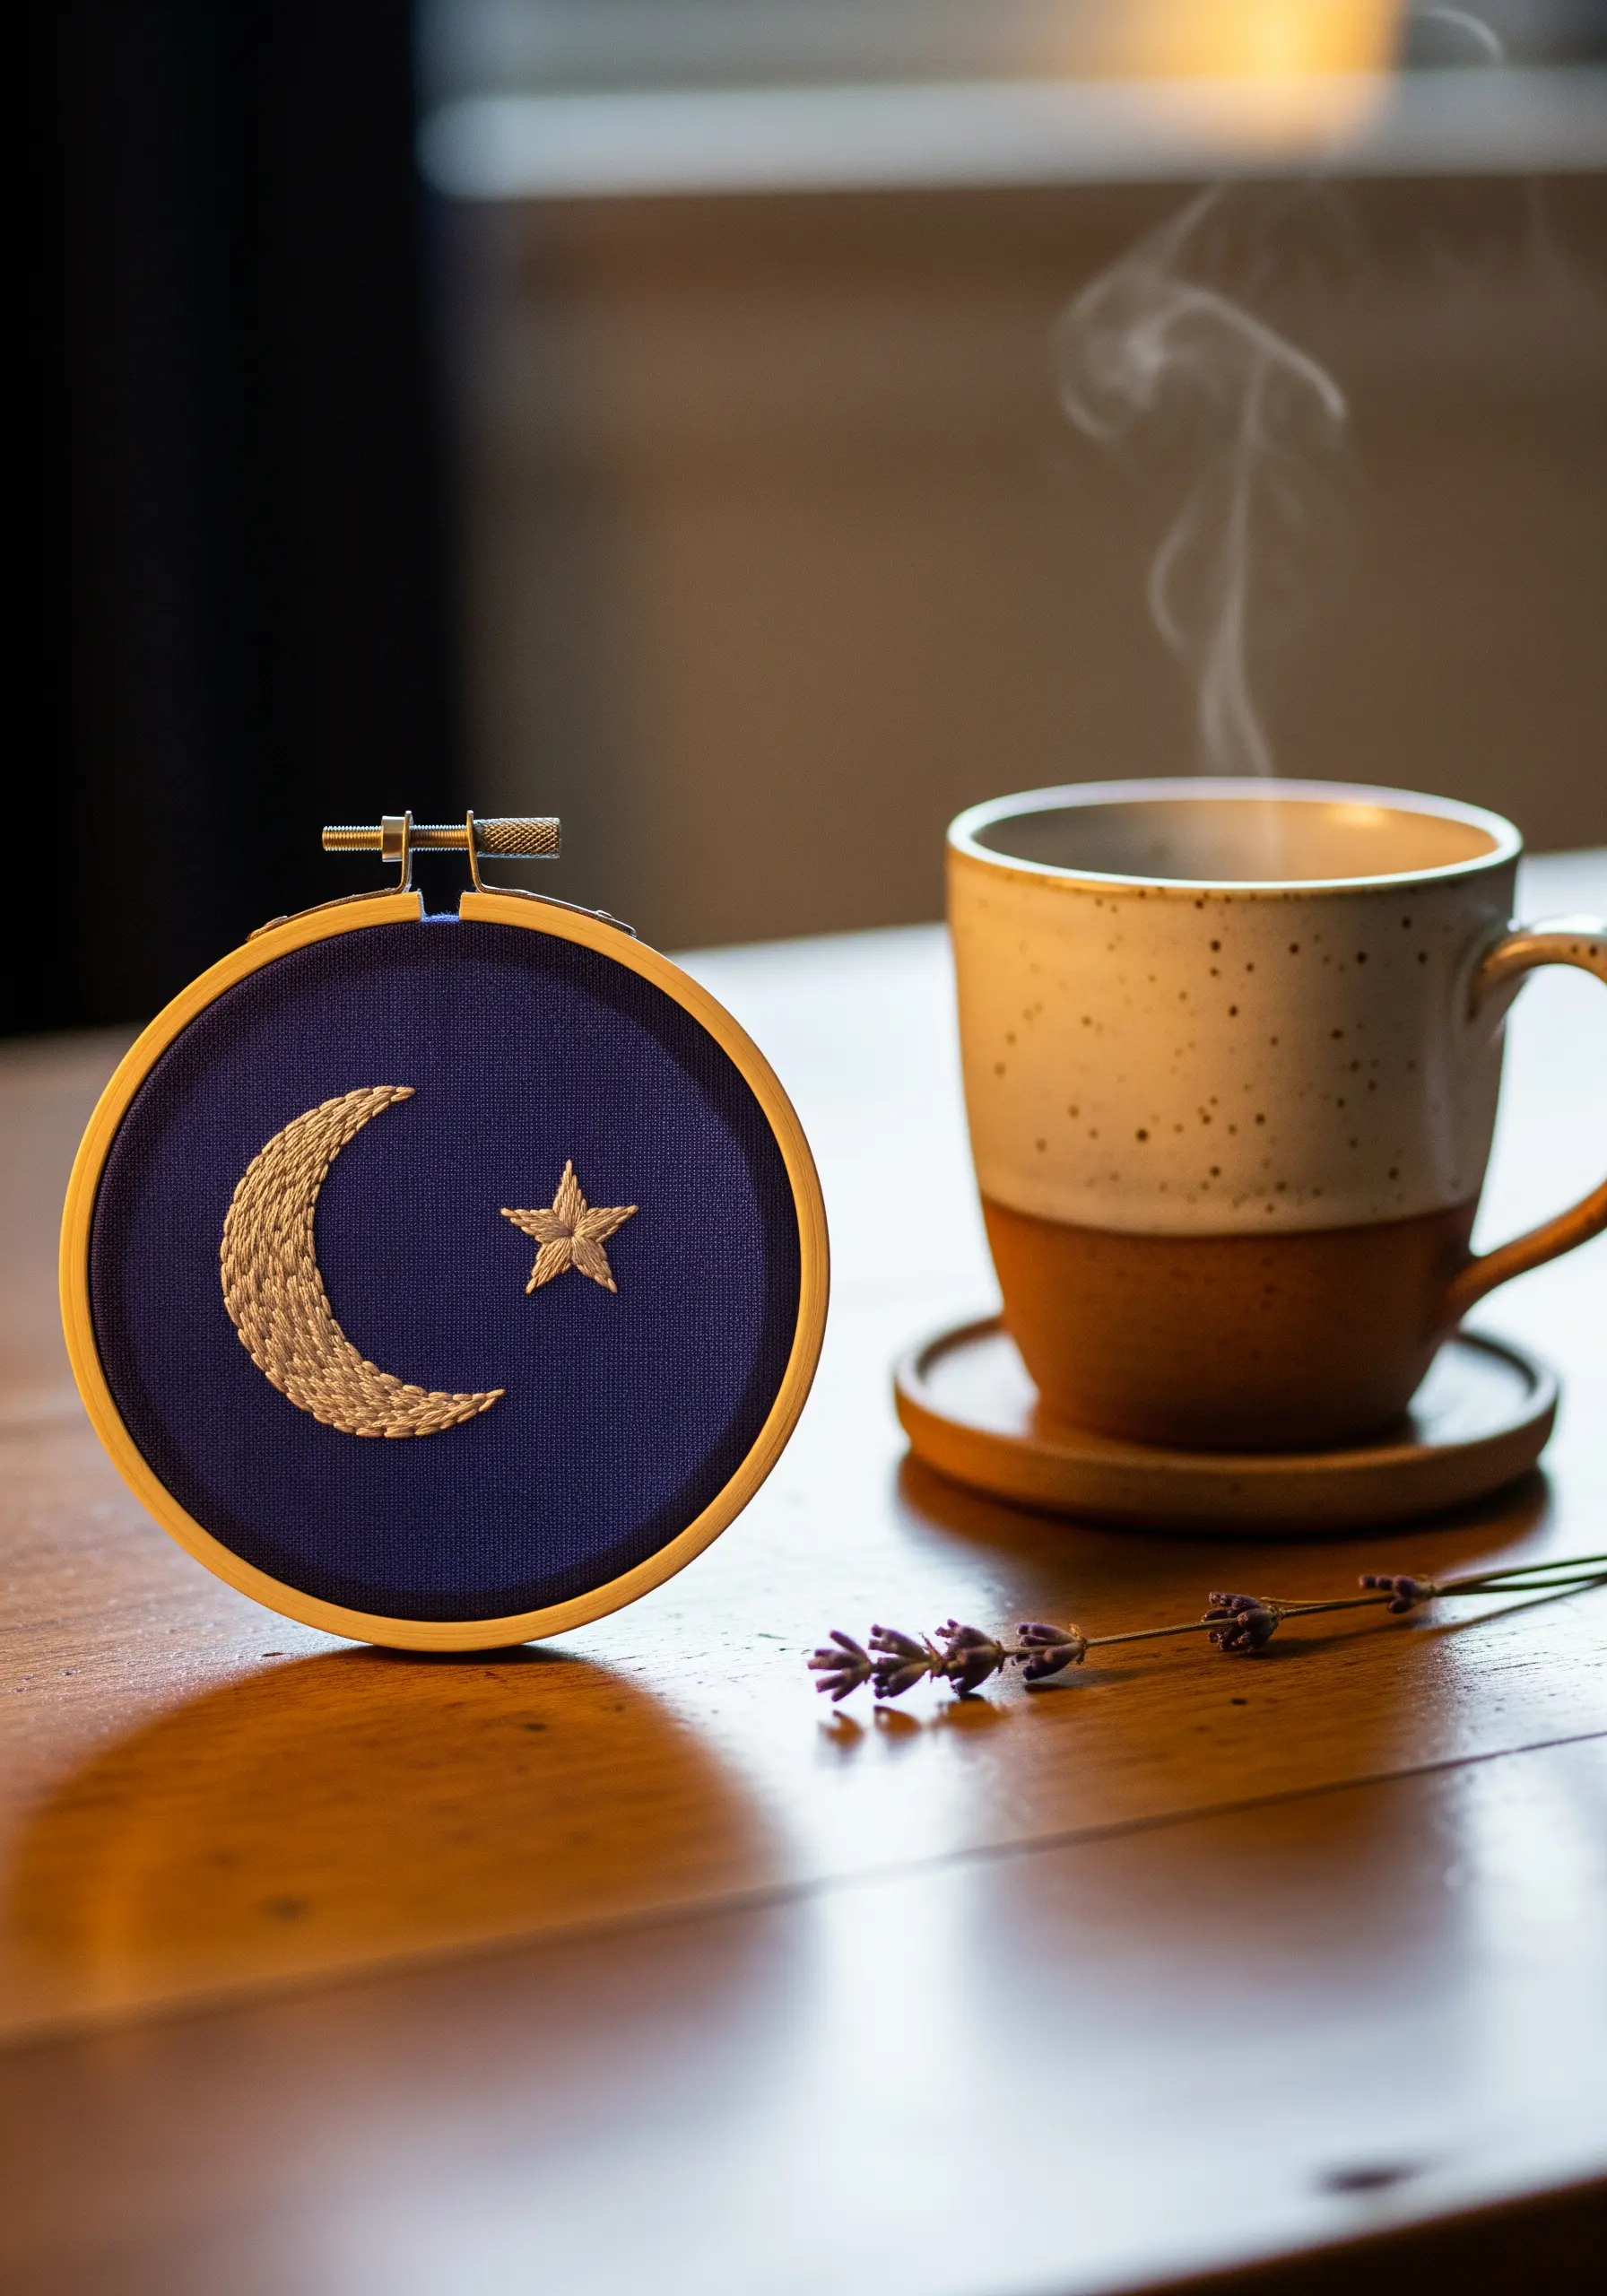
Elevate a simple design by pairing different thread finishes.
Fill the moon with a woven wheel stitch or rows of chain stitch using a matte cotton floss for a soft, tactile surface.
For the star, switch to a bright metallic thread and use sharp, clean straight stitches.
This deliberate contrast between the soft moon and the crisp, shimmering star creates a sophisticated and visually engaging composition.
14. Precision Stitching for Miniature Motifs

When working on a small scale, varying your thread count is crucial for clarity.
Use a single strand of black floss for the book outlines to keep them fine and crisp.
For the colorful fills, switch to two or three strands to achieve a dense, solid satin stitch.
This subtle difference in thread weight defines each element and prevents the tiny design from looking muddy or cluttered.
15. Achieving a Faux Goldwork Effect
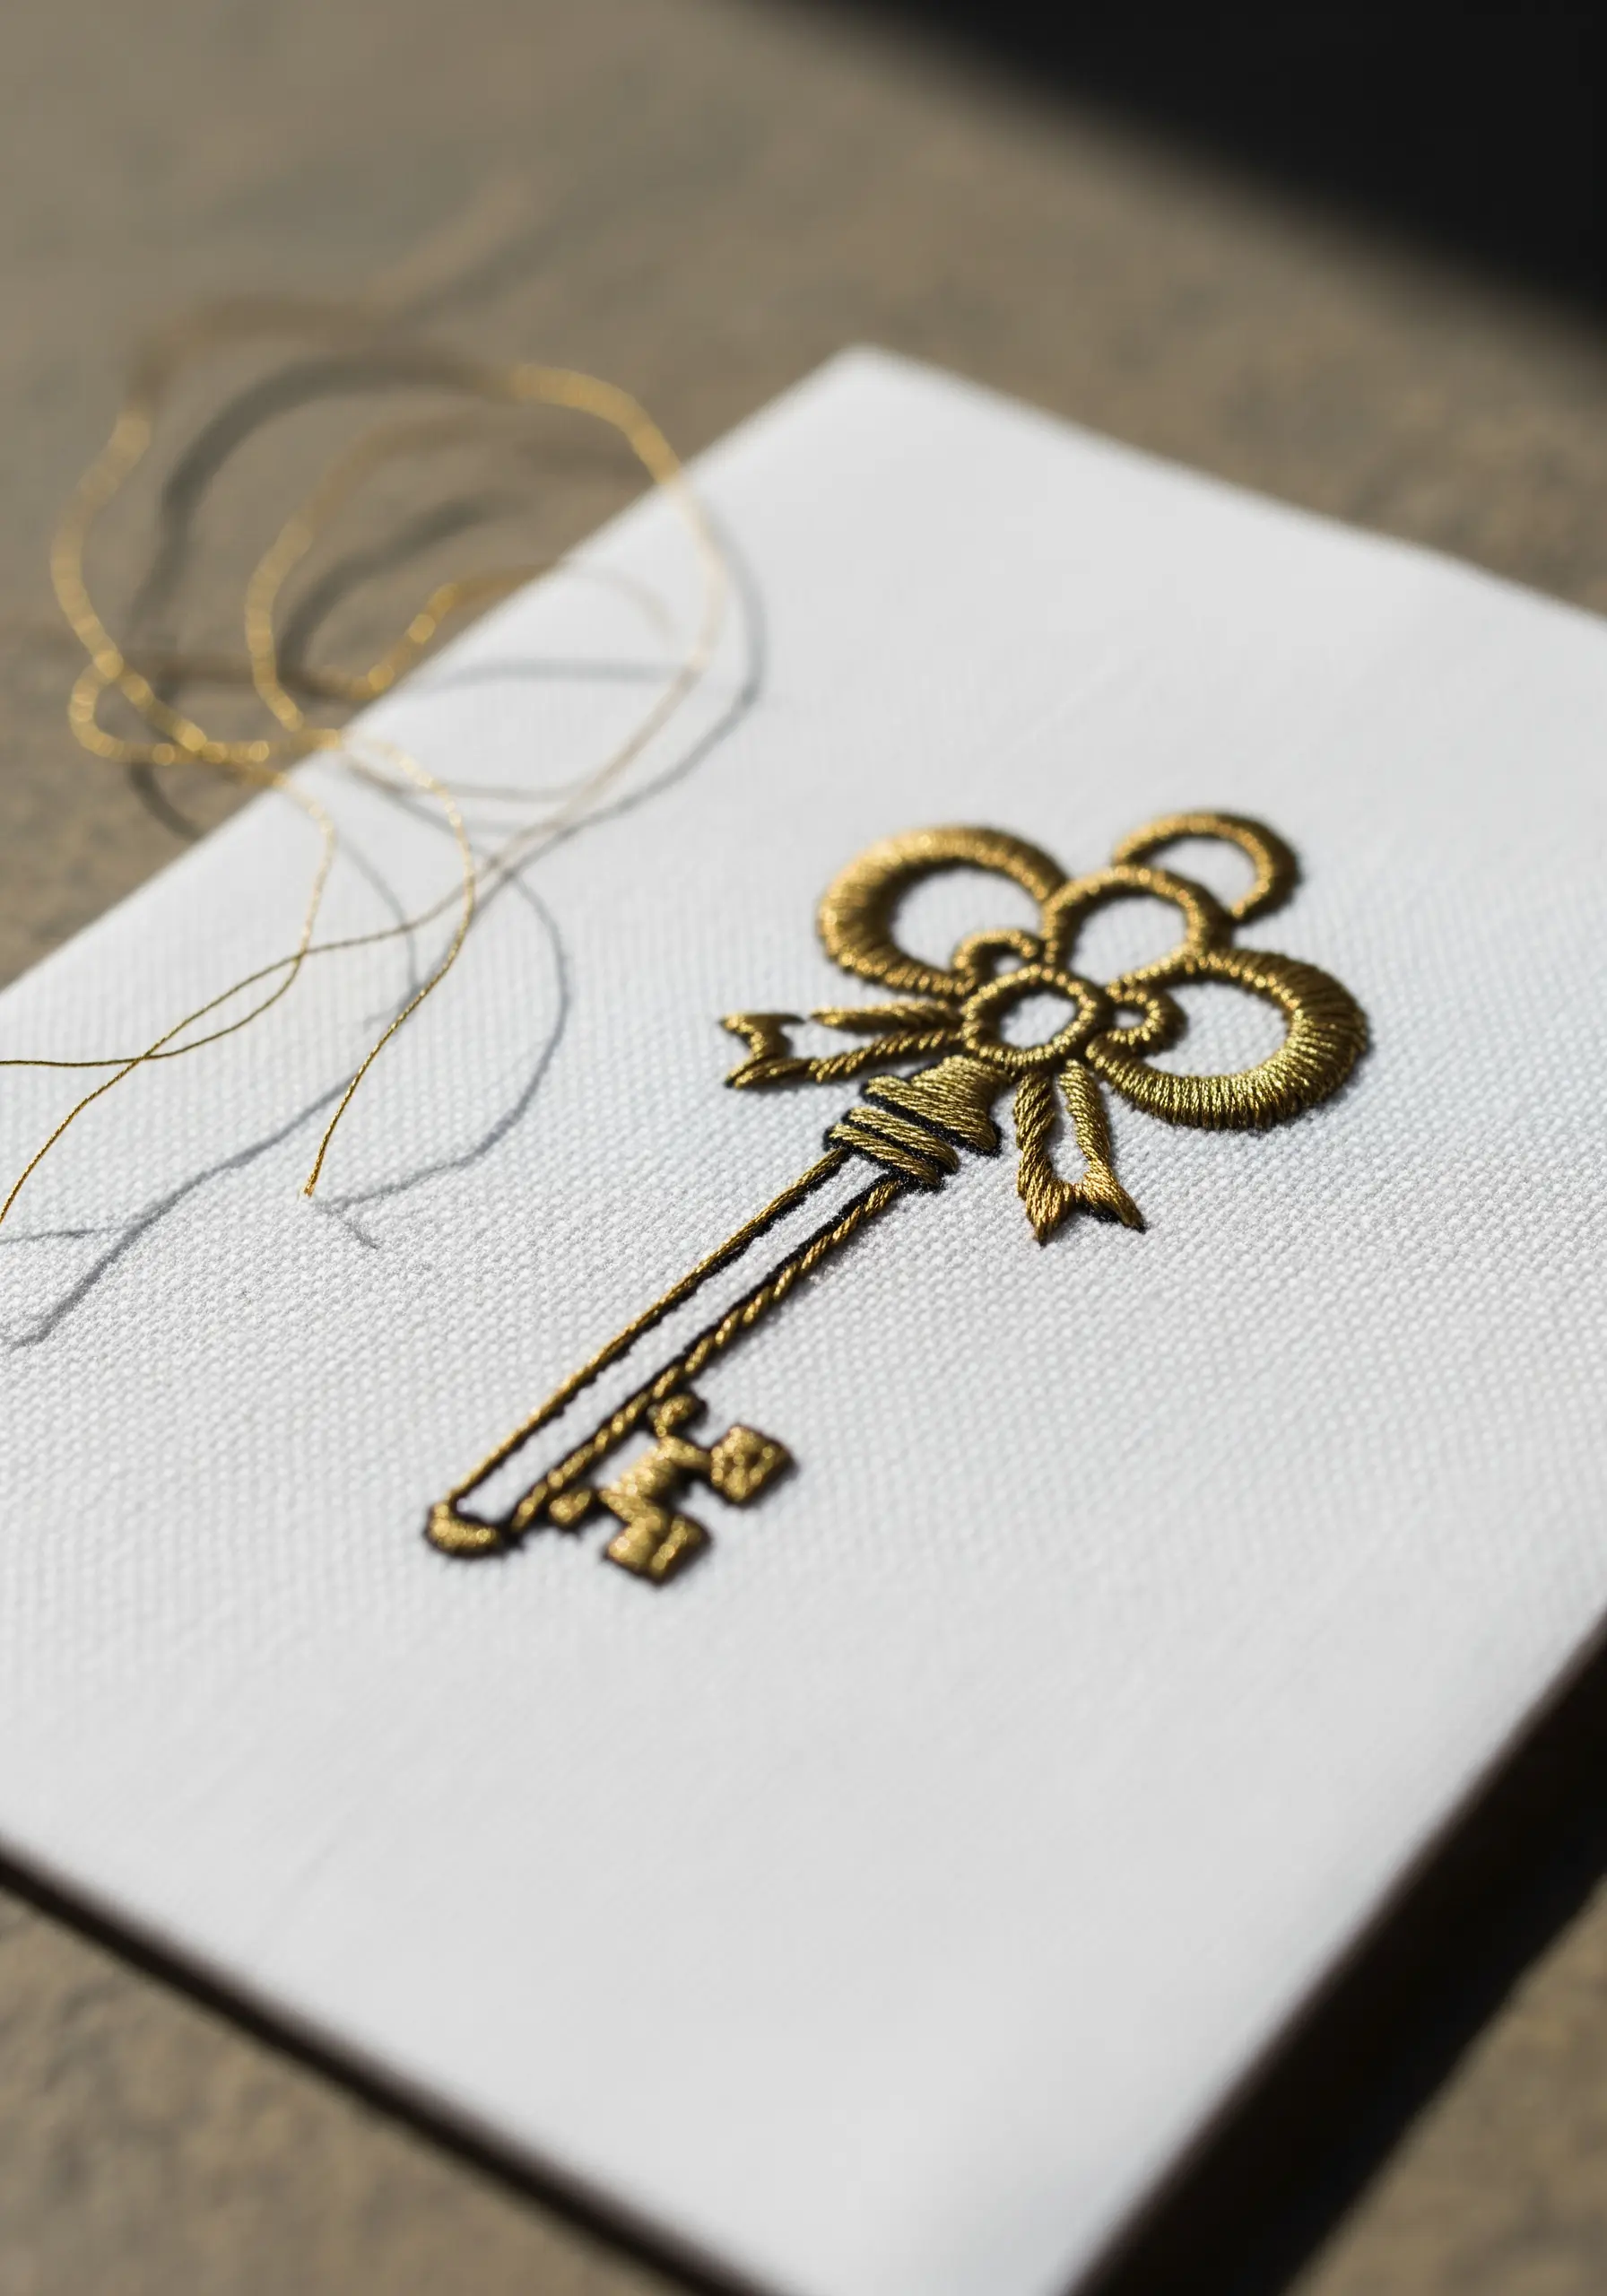
To give this key a raised, three-dimensional quality, use a padded satin stitch.
First, create a foundation of small, horizontal straight stitches within the shape.
Then, cover this padding with your final gold satin stitches, working vertically.
This technique raises the surface, allowing it to catch the light like a small metal sculpture. It’s an easy way to try unexpected ways to use metallic thread.
16. Creating a Focal Point with a Pop of Color
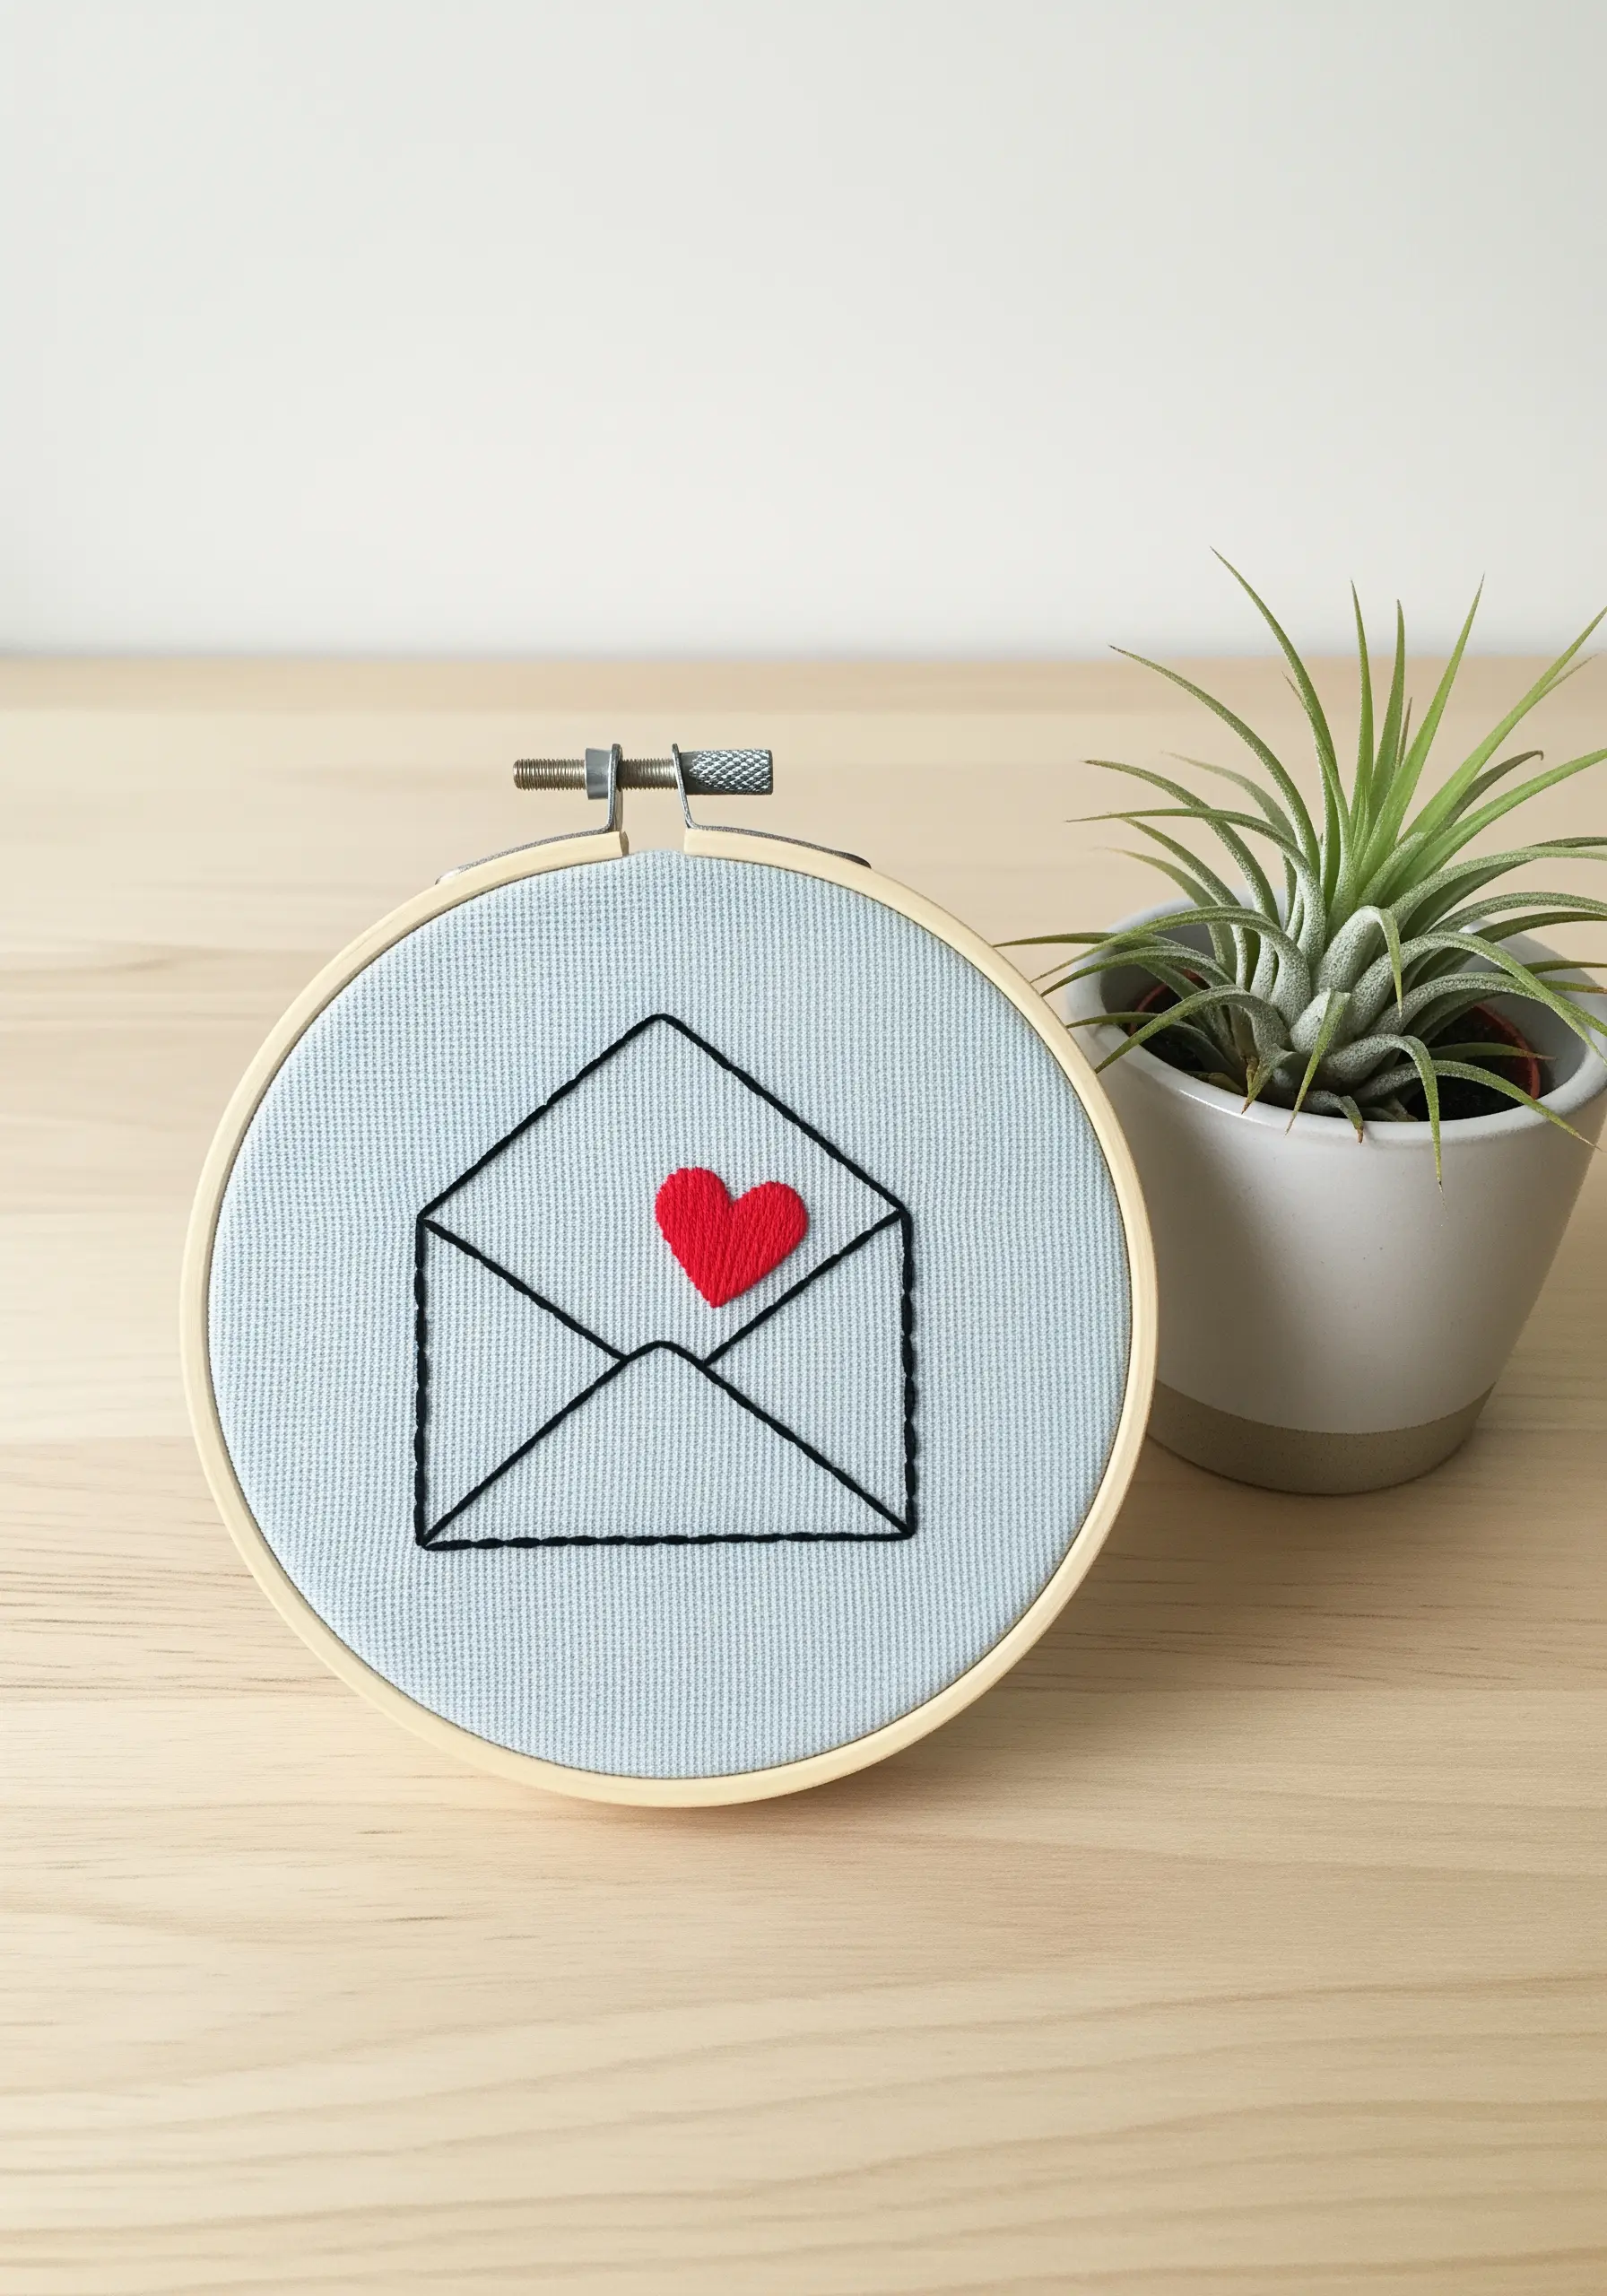
Guide the viewer’s eye by being selective with your color.
Stitch the envelope in a neutral black or grey, using a simple backstitch to keep it graphic and understated.
Then, fill the small heart with a dense satin stitch in a single, bold color like red or pink.
This technique immediately establishes the heart as the focal point, making the simple design feel intentional and emotionally resonant.
17. Stitching Symmetrical Line Art with Precision

For clean, symmetrical motifs like these glasses, transfer your pattern perfectly using a water-soluble stabilizer or a fine-tipped heat-erasable pen.
Use a single strand of floss and a disciplined backstitch, ensuring each stitch is the same length.
Work from the center outwards on symmetrical elements to help maintain balance and prevent distortion of the fabric.
These kinds of minimalist thread art ideas require flawless execution.
18. Capturing Organic Texture with Fishbone Stitch
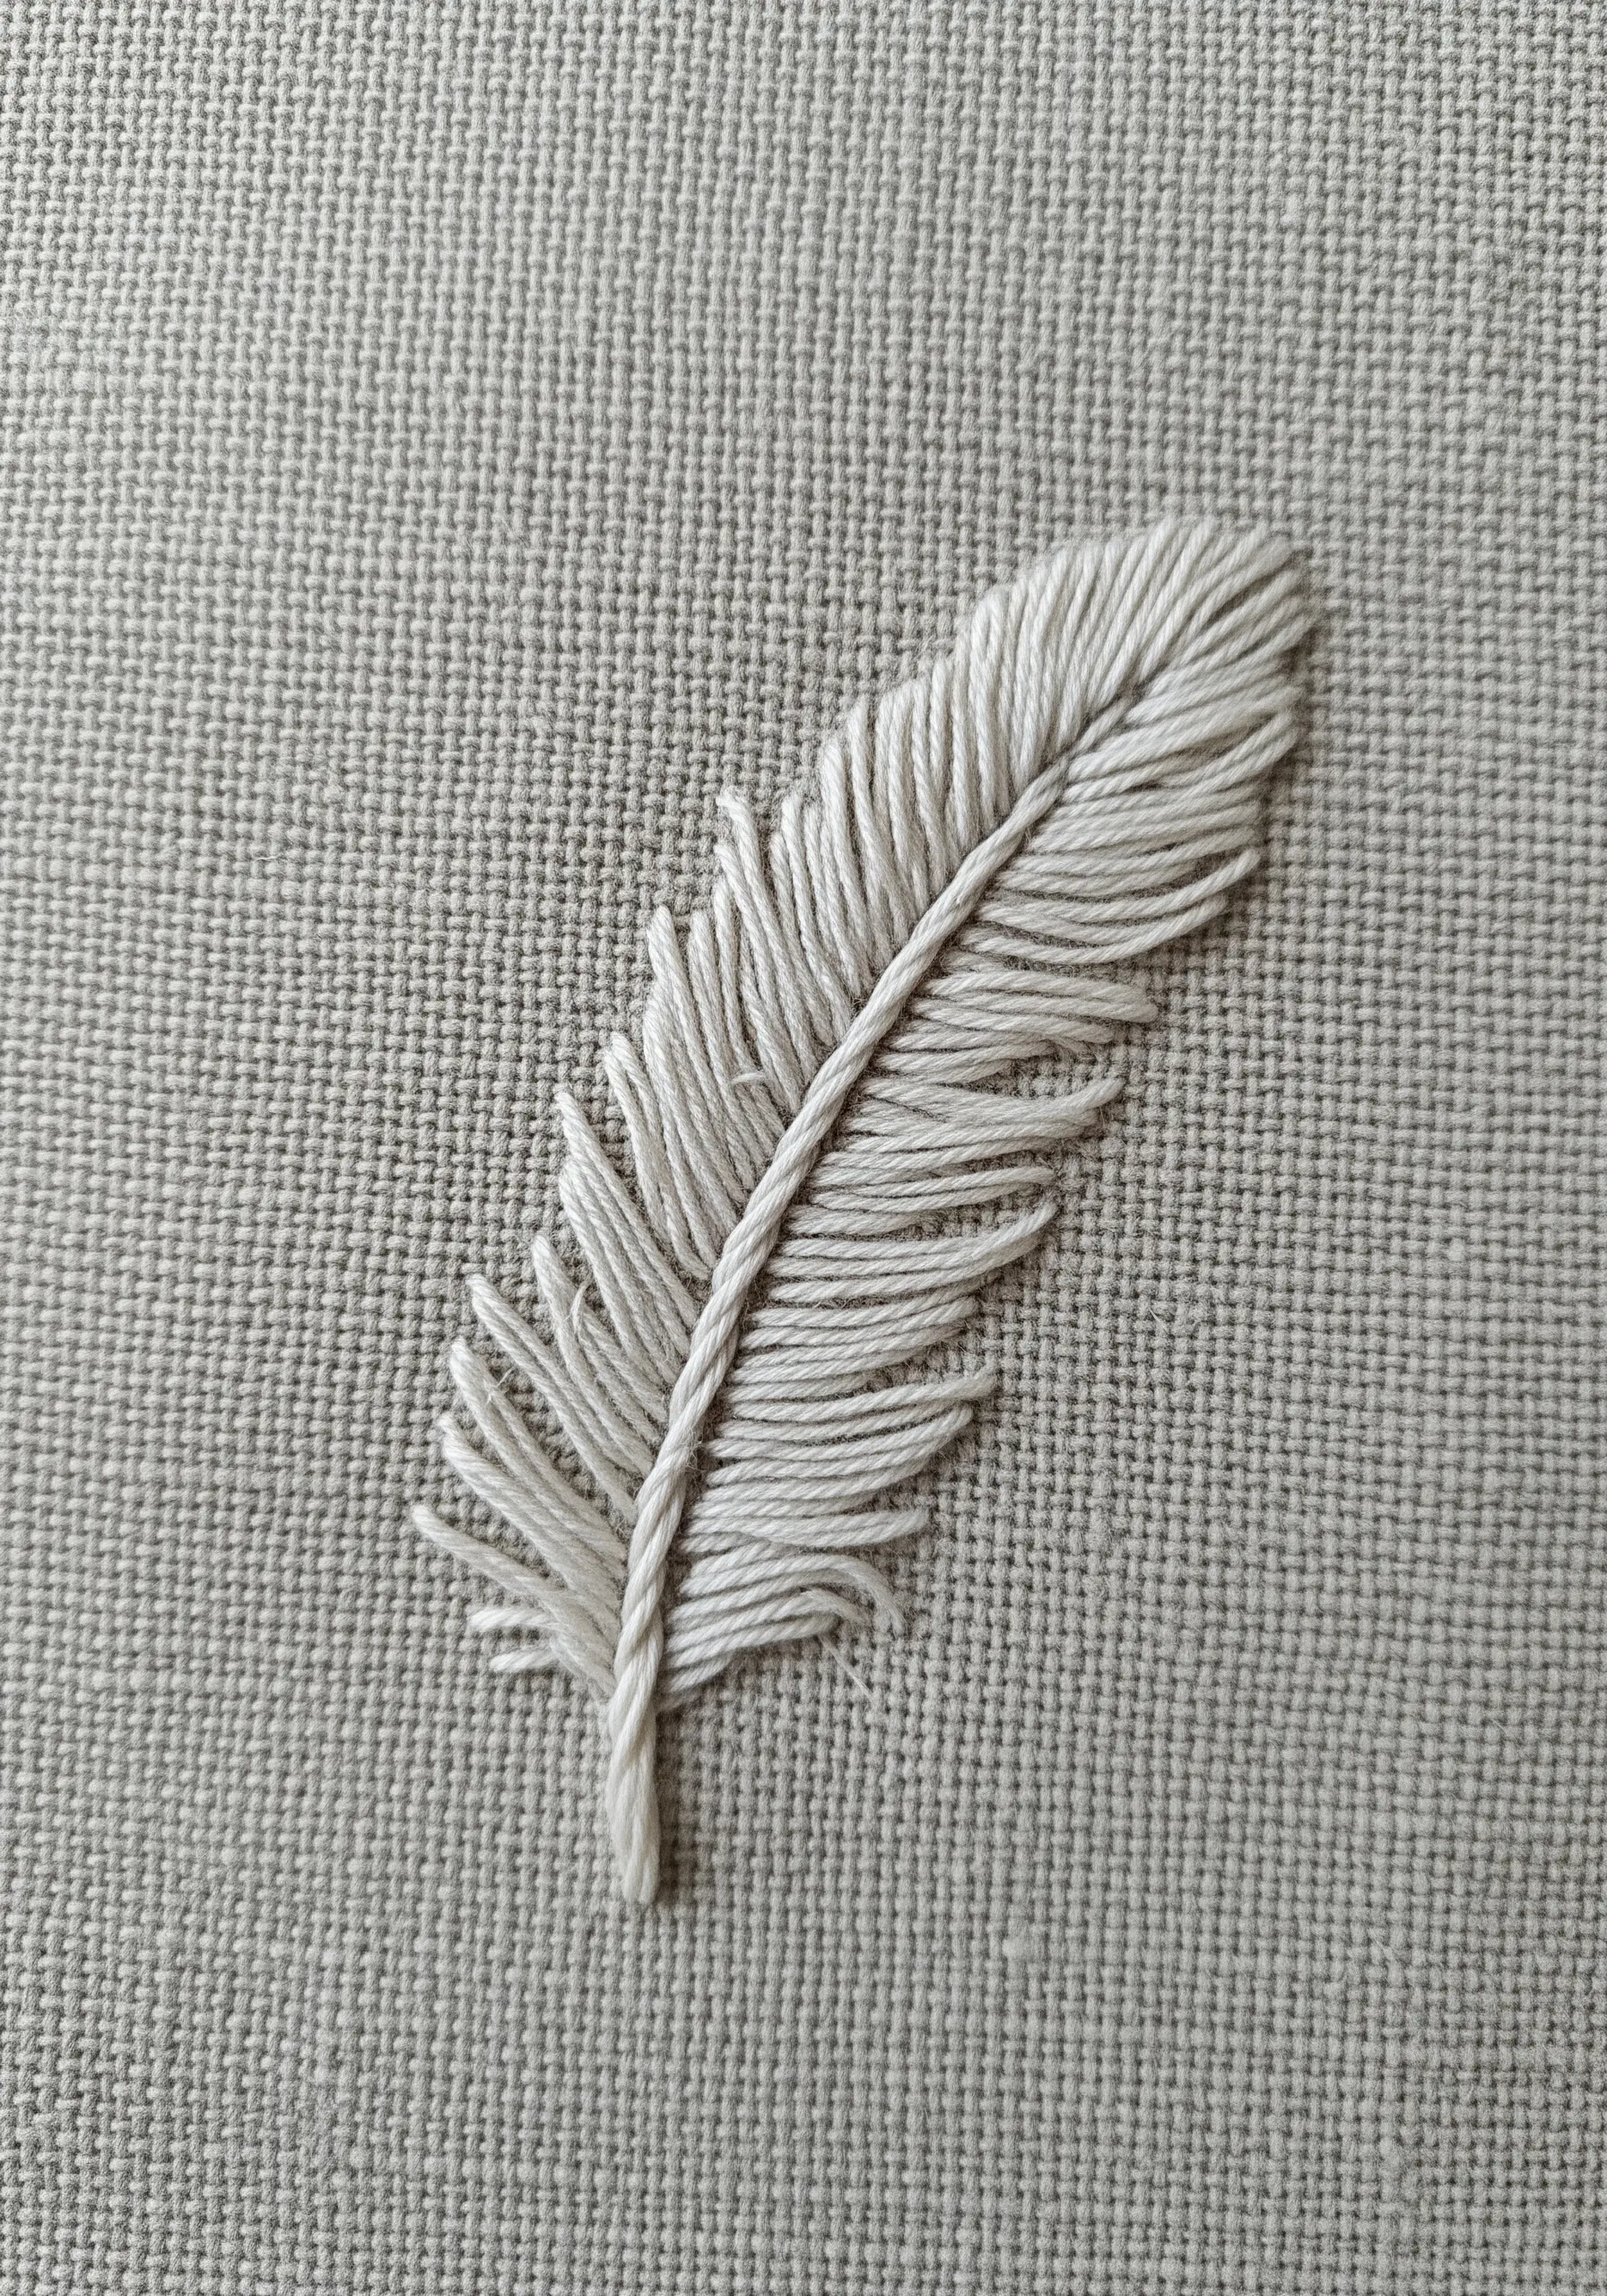
The fishbone stitch is ideal for creating natural-looking leaves and feathers.
Start with a single straight stitch down the center tip, then alternate diagonal stitches from left to right, overlapping them slightly at the center line.
This method intrinsically creates a central vein and angled barbs, perfectly mimicking the structure of a real feather with one simple, repetitive motion.
19. Achieving Expressive Lines with Whipped Stitch
When a design relies solely on linework, make every line count.
First, create a foundation using a standard backstitch.
Then, using the same thread, whip it around each backstitch without piercing the fabric.
This technique conceals the individual stitches, creating a single, solid, and fluid line that gives calligraphic grace to the handle and swirling steam.
20. Creating Dimension with Geometric Fills
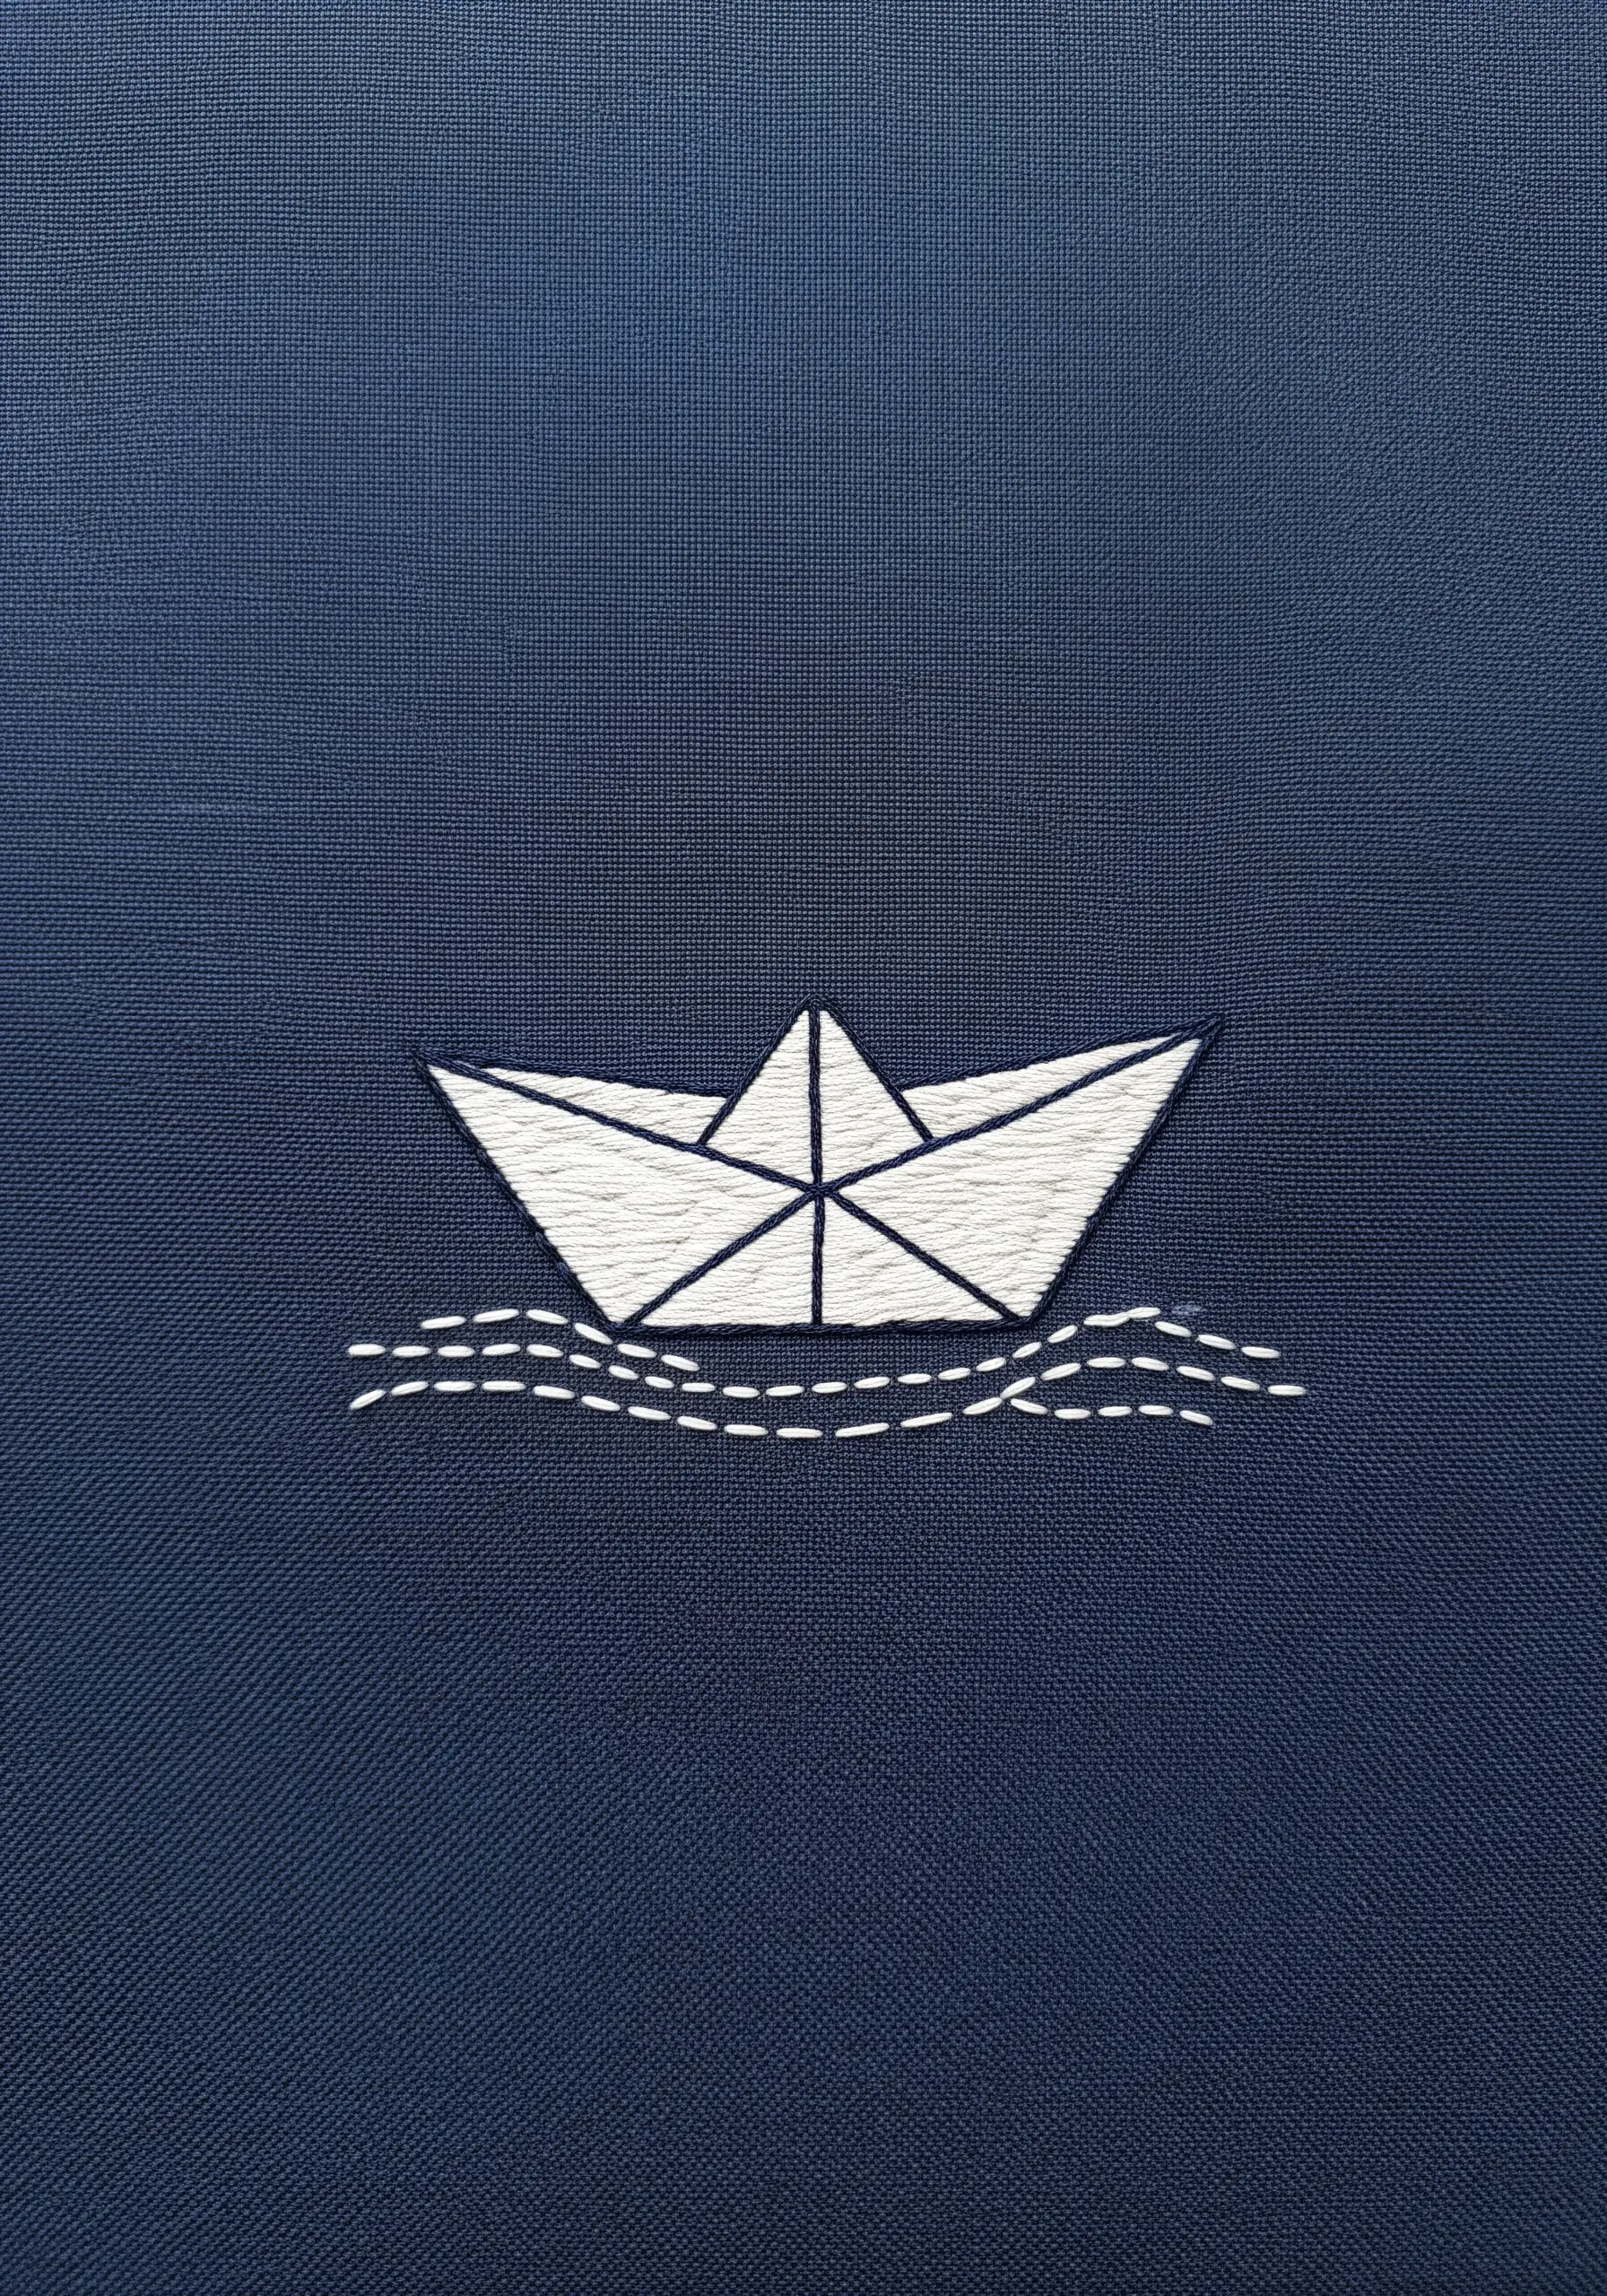
Treat each plane of this origami boat as a distinct shape.
Fill each triangle and quadrilateral with satin stitch, but deliberately change the angle of your stitches for each section.
Even when using the same color, this subtle shift in thread direction causes the sections to catch the light differently, creating the illusion of paper folds and three-dimensional form.
21. Composing with Abstract Color Blocks
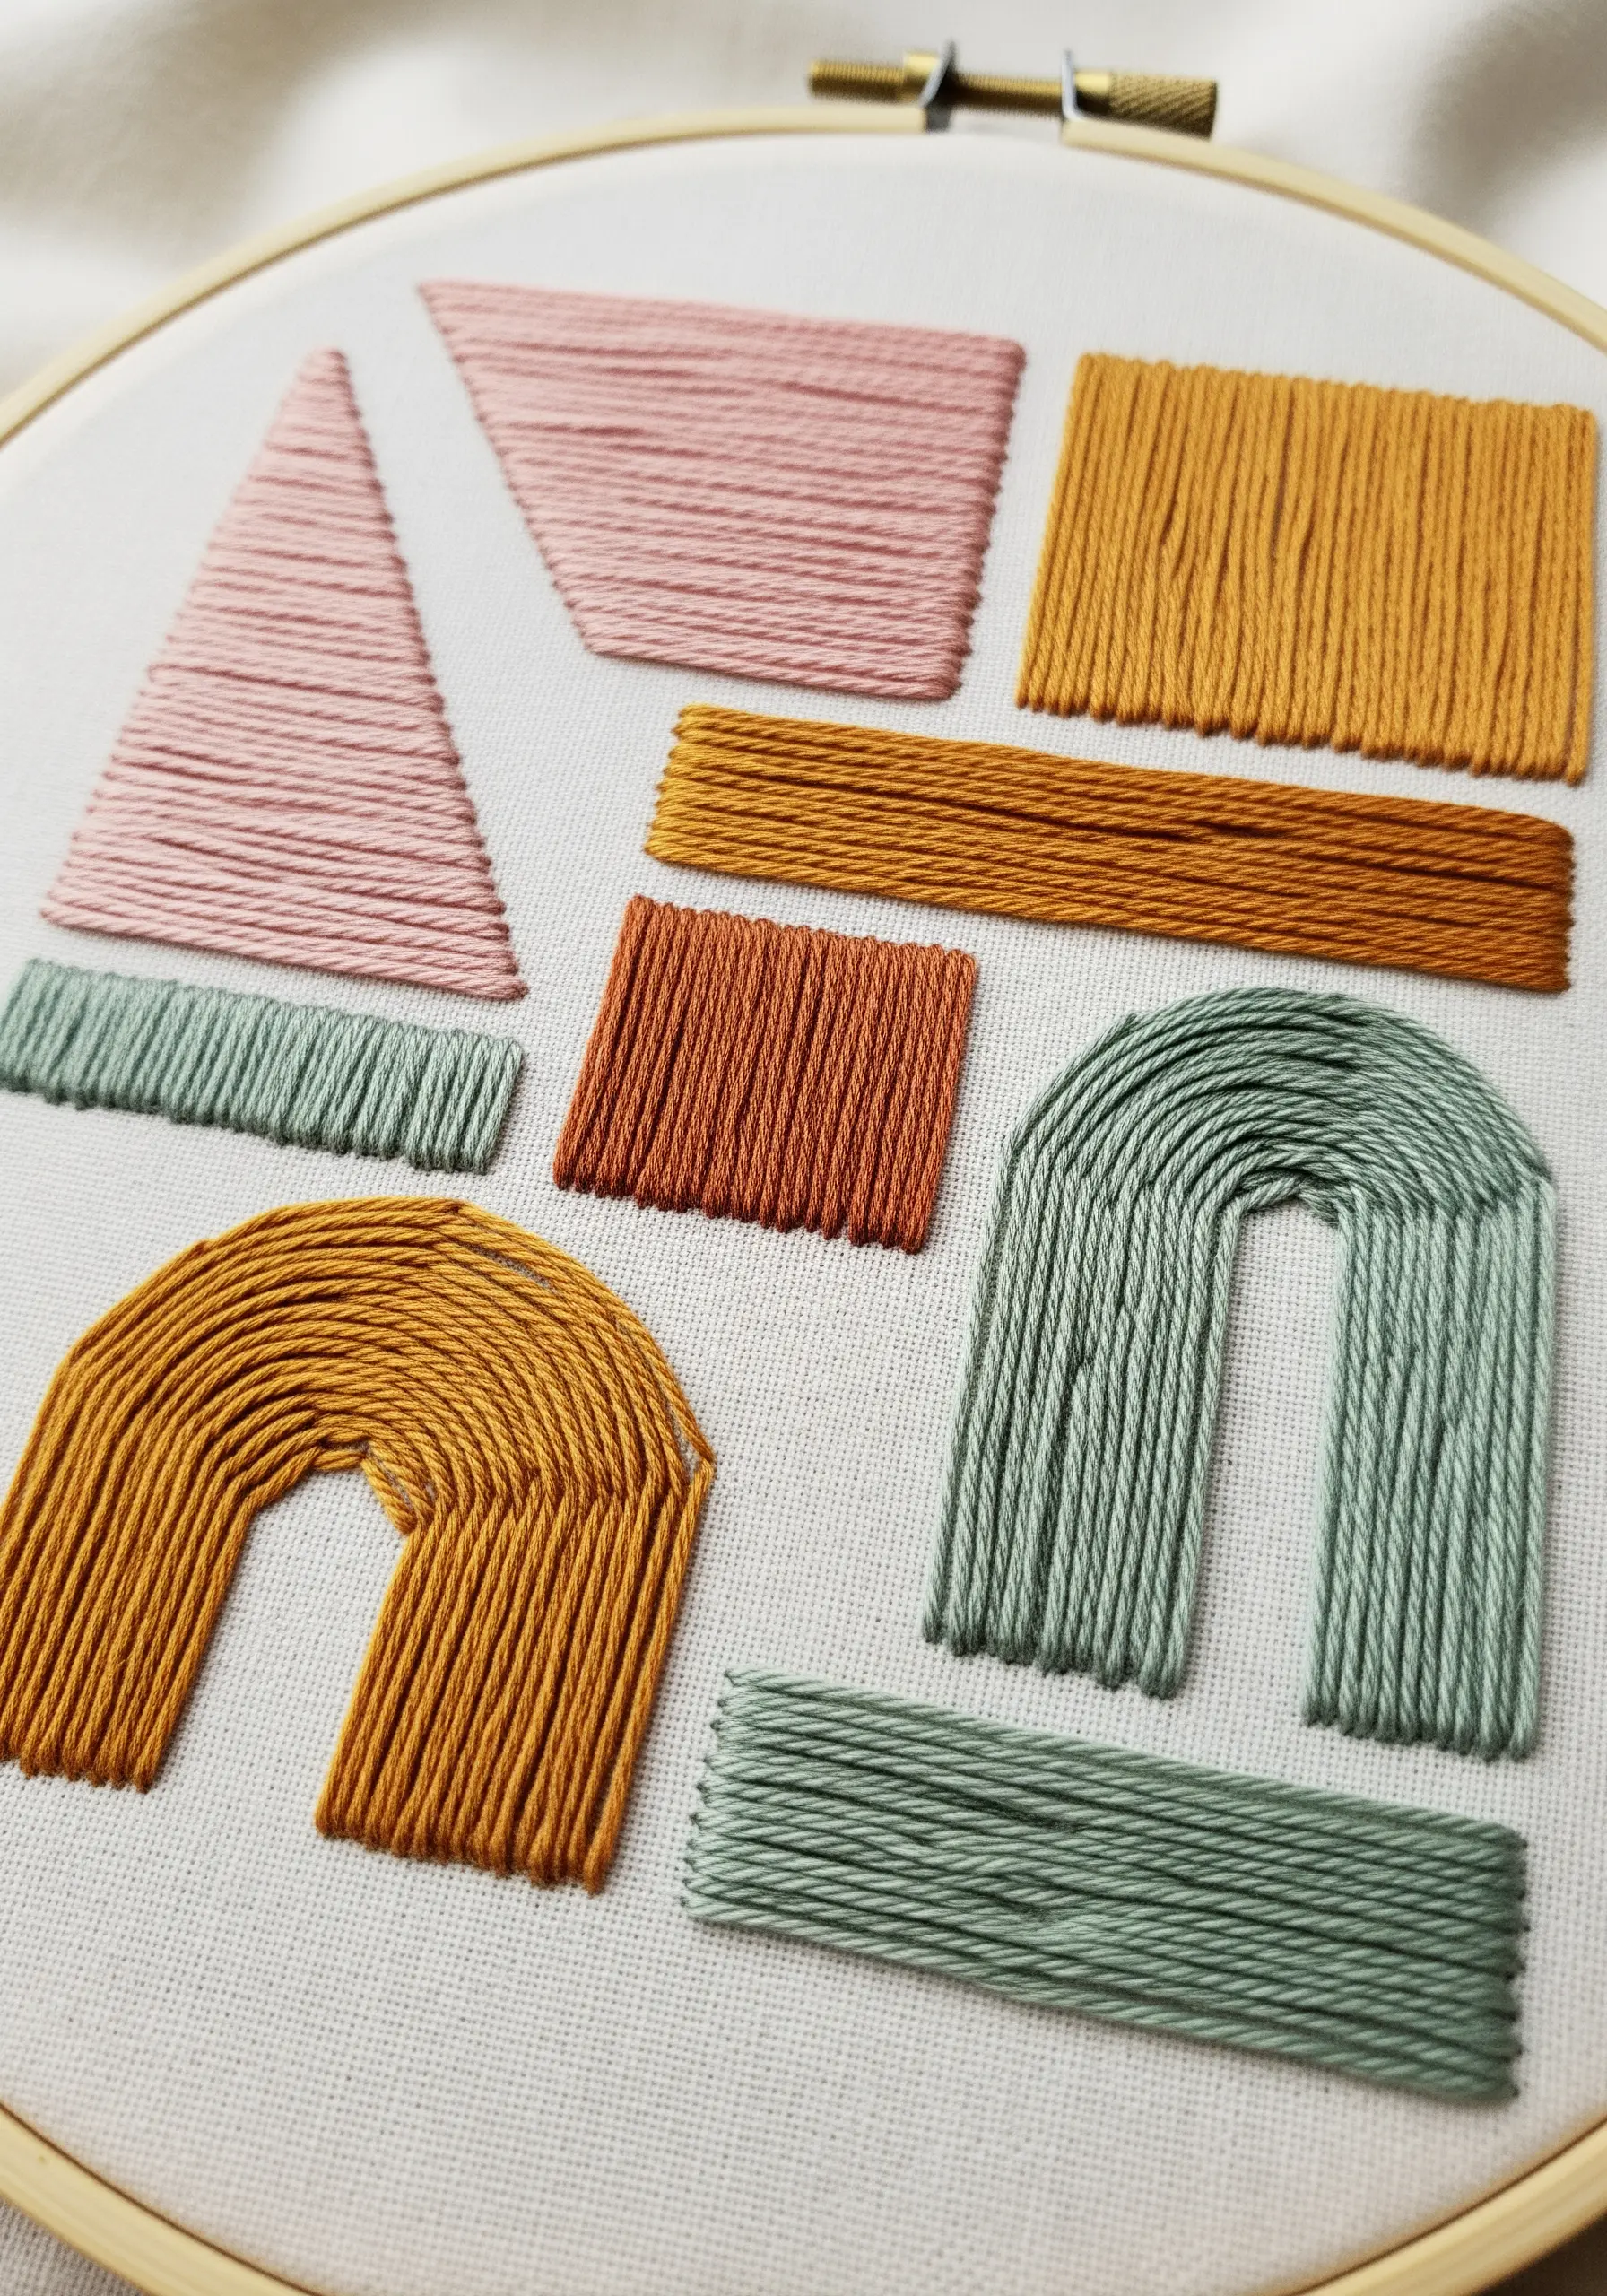
To ensure your abstract shapes have perfectly crisp edges, outline each one with a split stitch before you begin filling.
Fill each block with a dense satin stitch, using the outline as a raised boundary.
For a bold, textural look, use all six strands of your embroidery floss.
The combination of a defined edge and a chunky fill gives these simple forms a satisfying, graphic substance.
This is one of the easiest abstract wall hoop designs to try.
22. The Enduring Charm of Redwork Simplicity
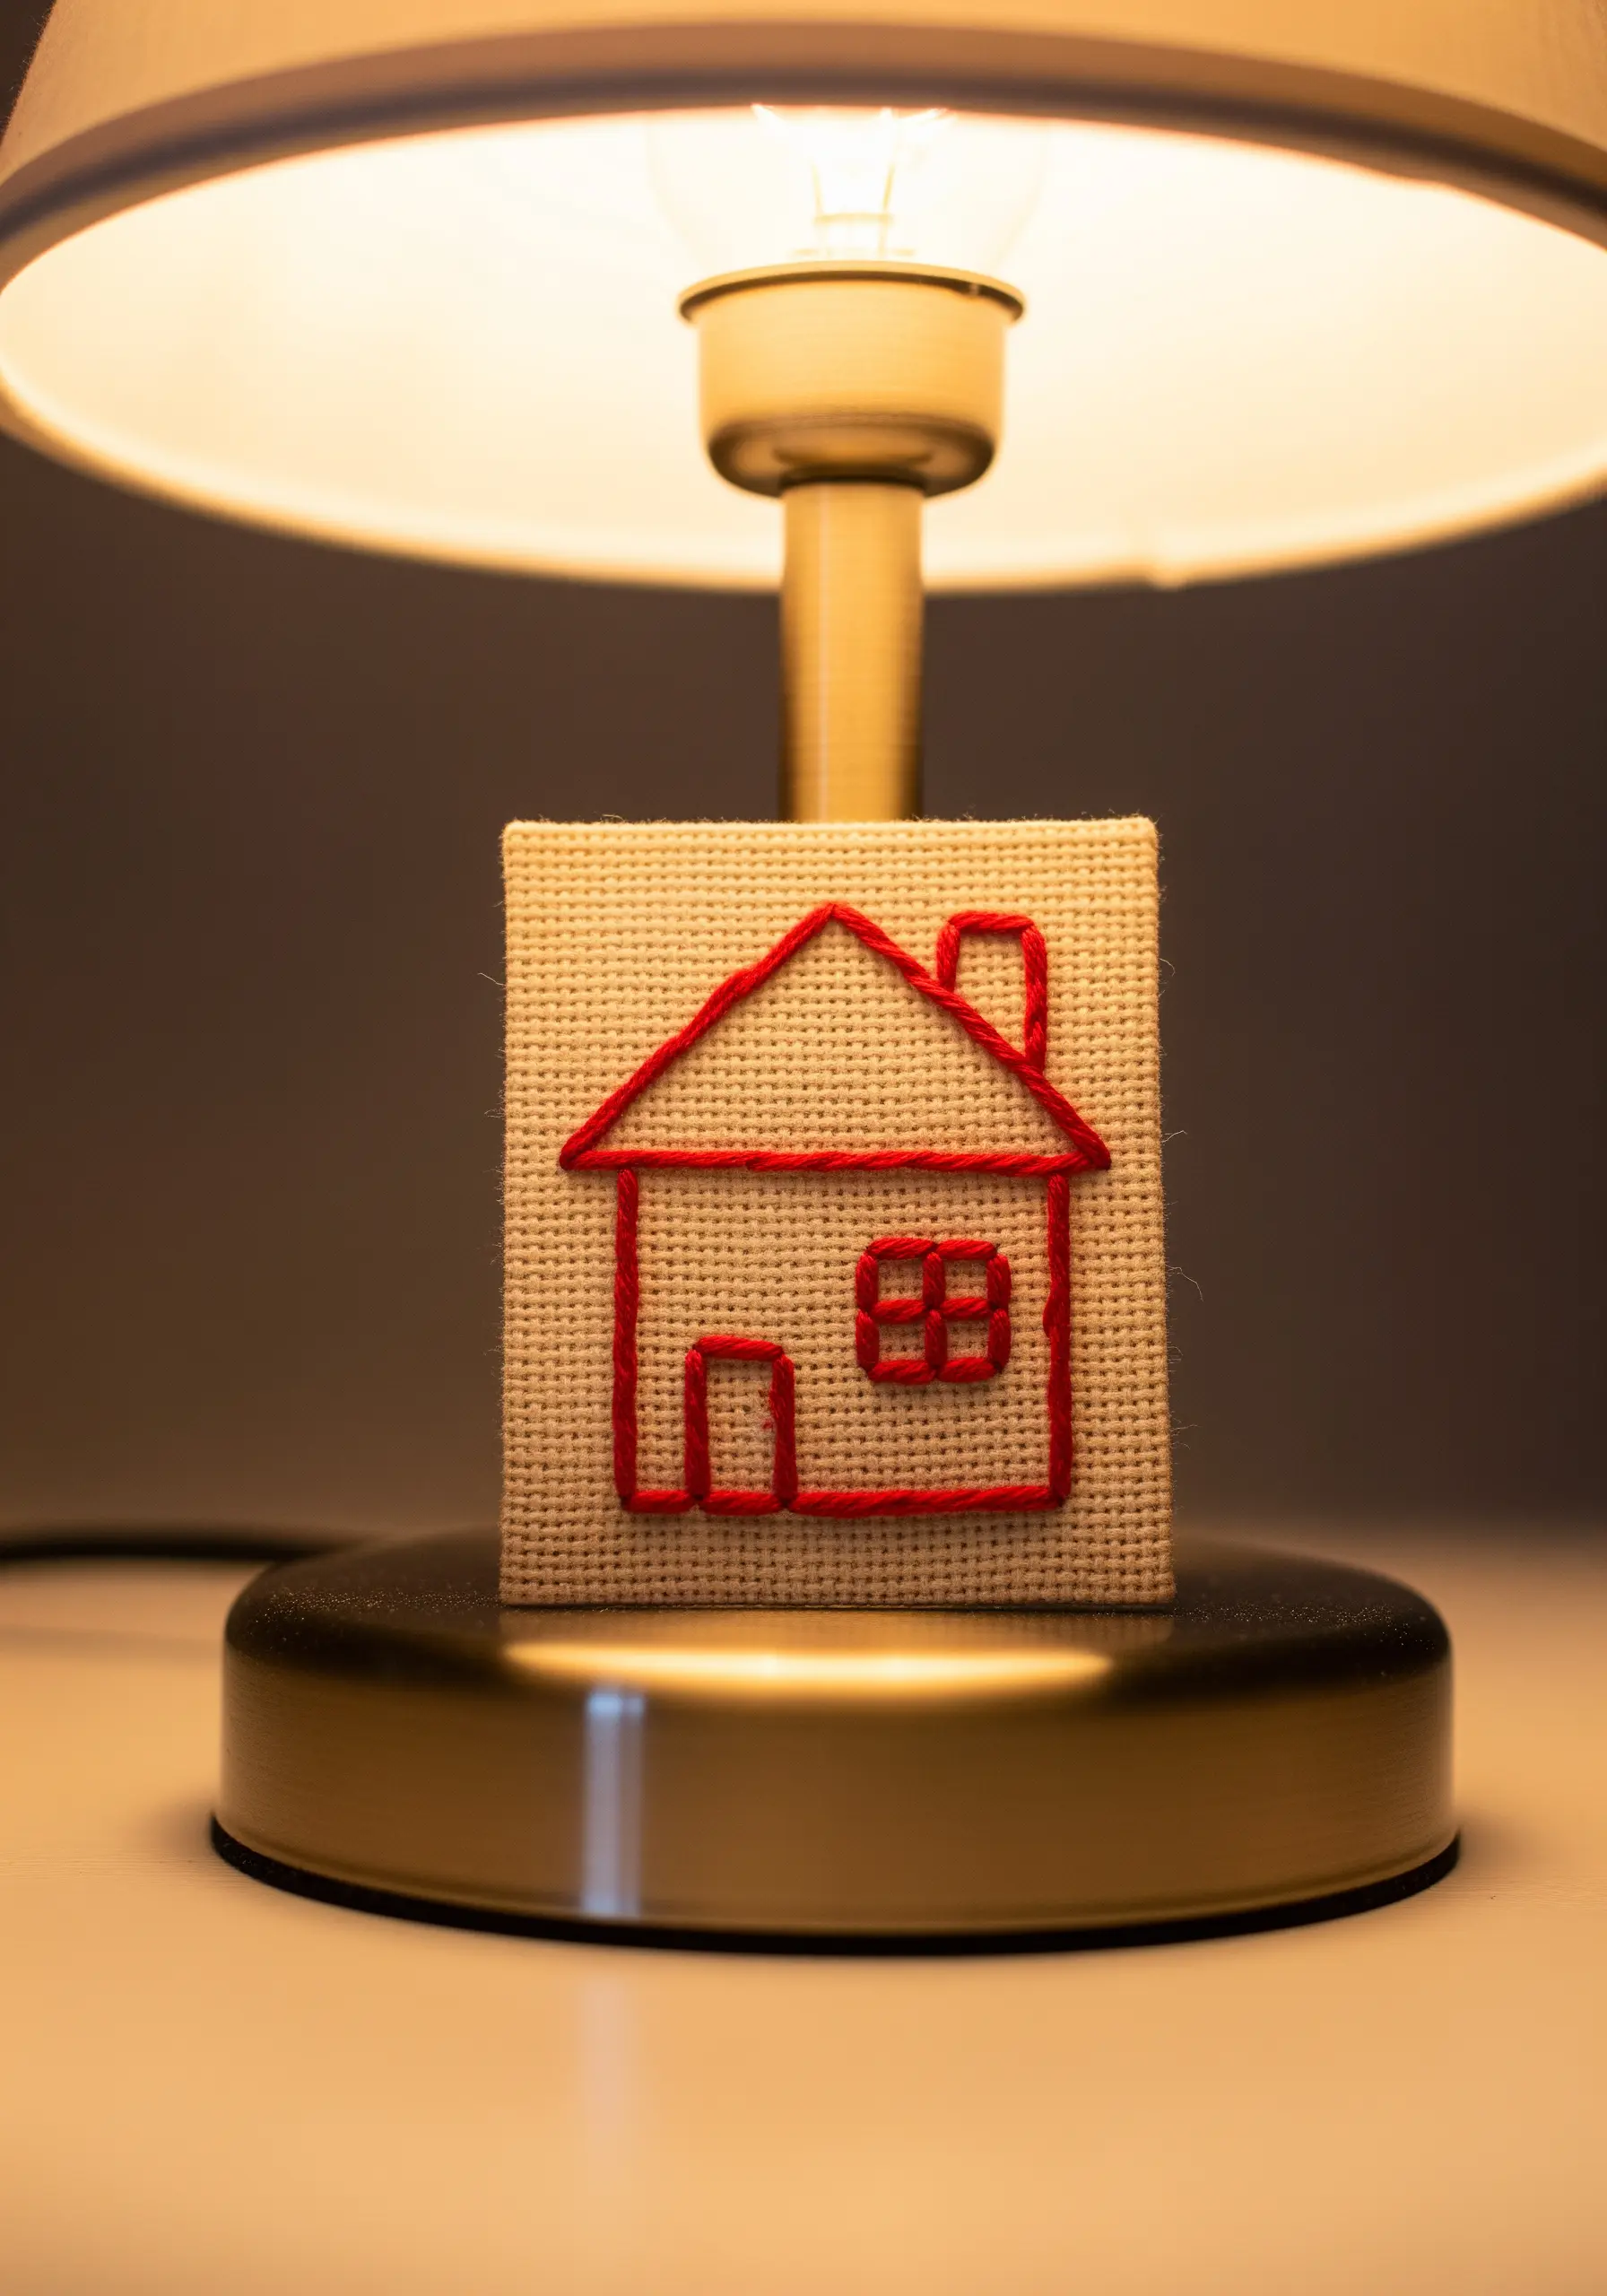
Embrace the elegance of traditional Redwork by stitching a simple design in a single, bold color on a plain background.
Use a backstitch for the main outlines of the house.
For the windowpanes, switch to a simple cross stitch. This subtle change in stitch type adds a touch of texture and visual interest, elevating the simple line drawing into a more considered piece.
23. Mapping the Stars with French Knots and Metallics

For brilliant stars against a dark fabric sky, use a bright white or silver metallic thread.
Form the main stars of your constellation with tight French knots or colonial knots, which offer a rounder, more robust shape.
Connect them with a single, delicate strand of the same thread.
Finally, scatter tiny seed stitches (single, tiny straight stitches) to represent distant stars and add depth to your composition.
24. Capturing Delicate Movement in Thread

To create the ethereal quality of a dandelion, use a combination of stitches.
The central seed head is made with straight stitches radiating from a central point.
For the seeds floating away, use a long straight stitch for the stem and three shorter, fanned-out stitches for the pappus.
By varying their angles and spacing, you create a convincing illusion of them being carried on a gentle breeze.
25. Adding Dimension with Punctual Details

Bring a flat satin stitch to life with small, textural additions.
After filling the cactus body with a smooth vertical satin stitch, add the spines using a contrasting color and texture.
Tiny French knots, colonial knots, or even single detached chain stitches create a raised, spiky effect that instantly adds personality and a touch of realism to the simple shape.
26. Implying Folds with Varying Line Weight
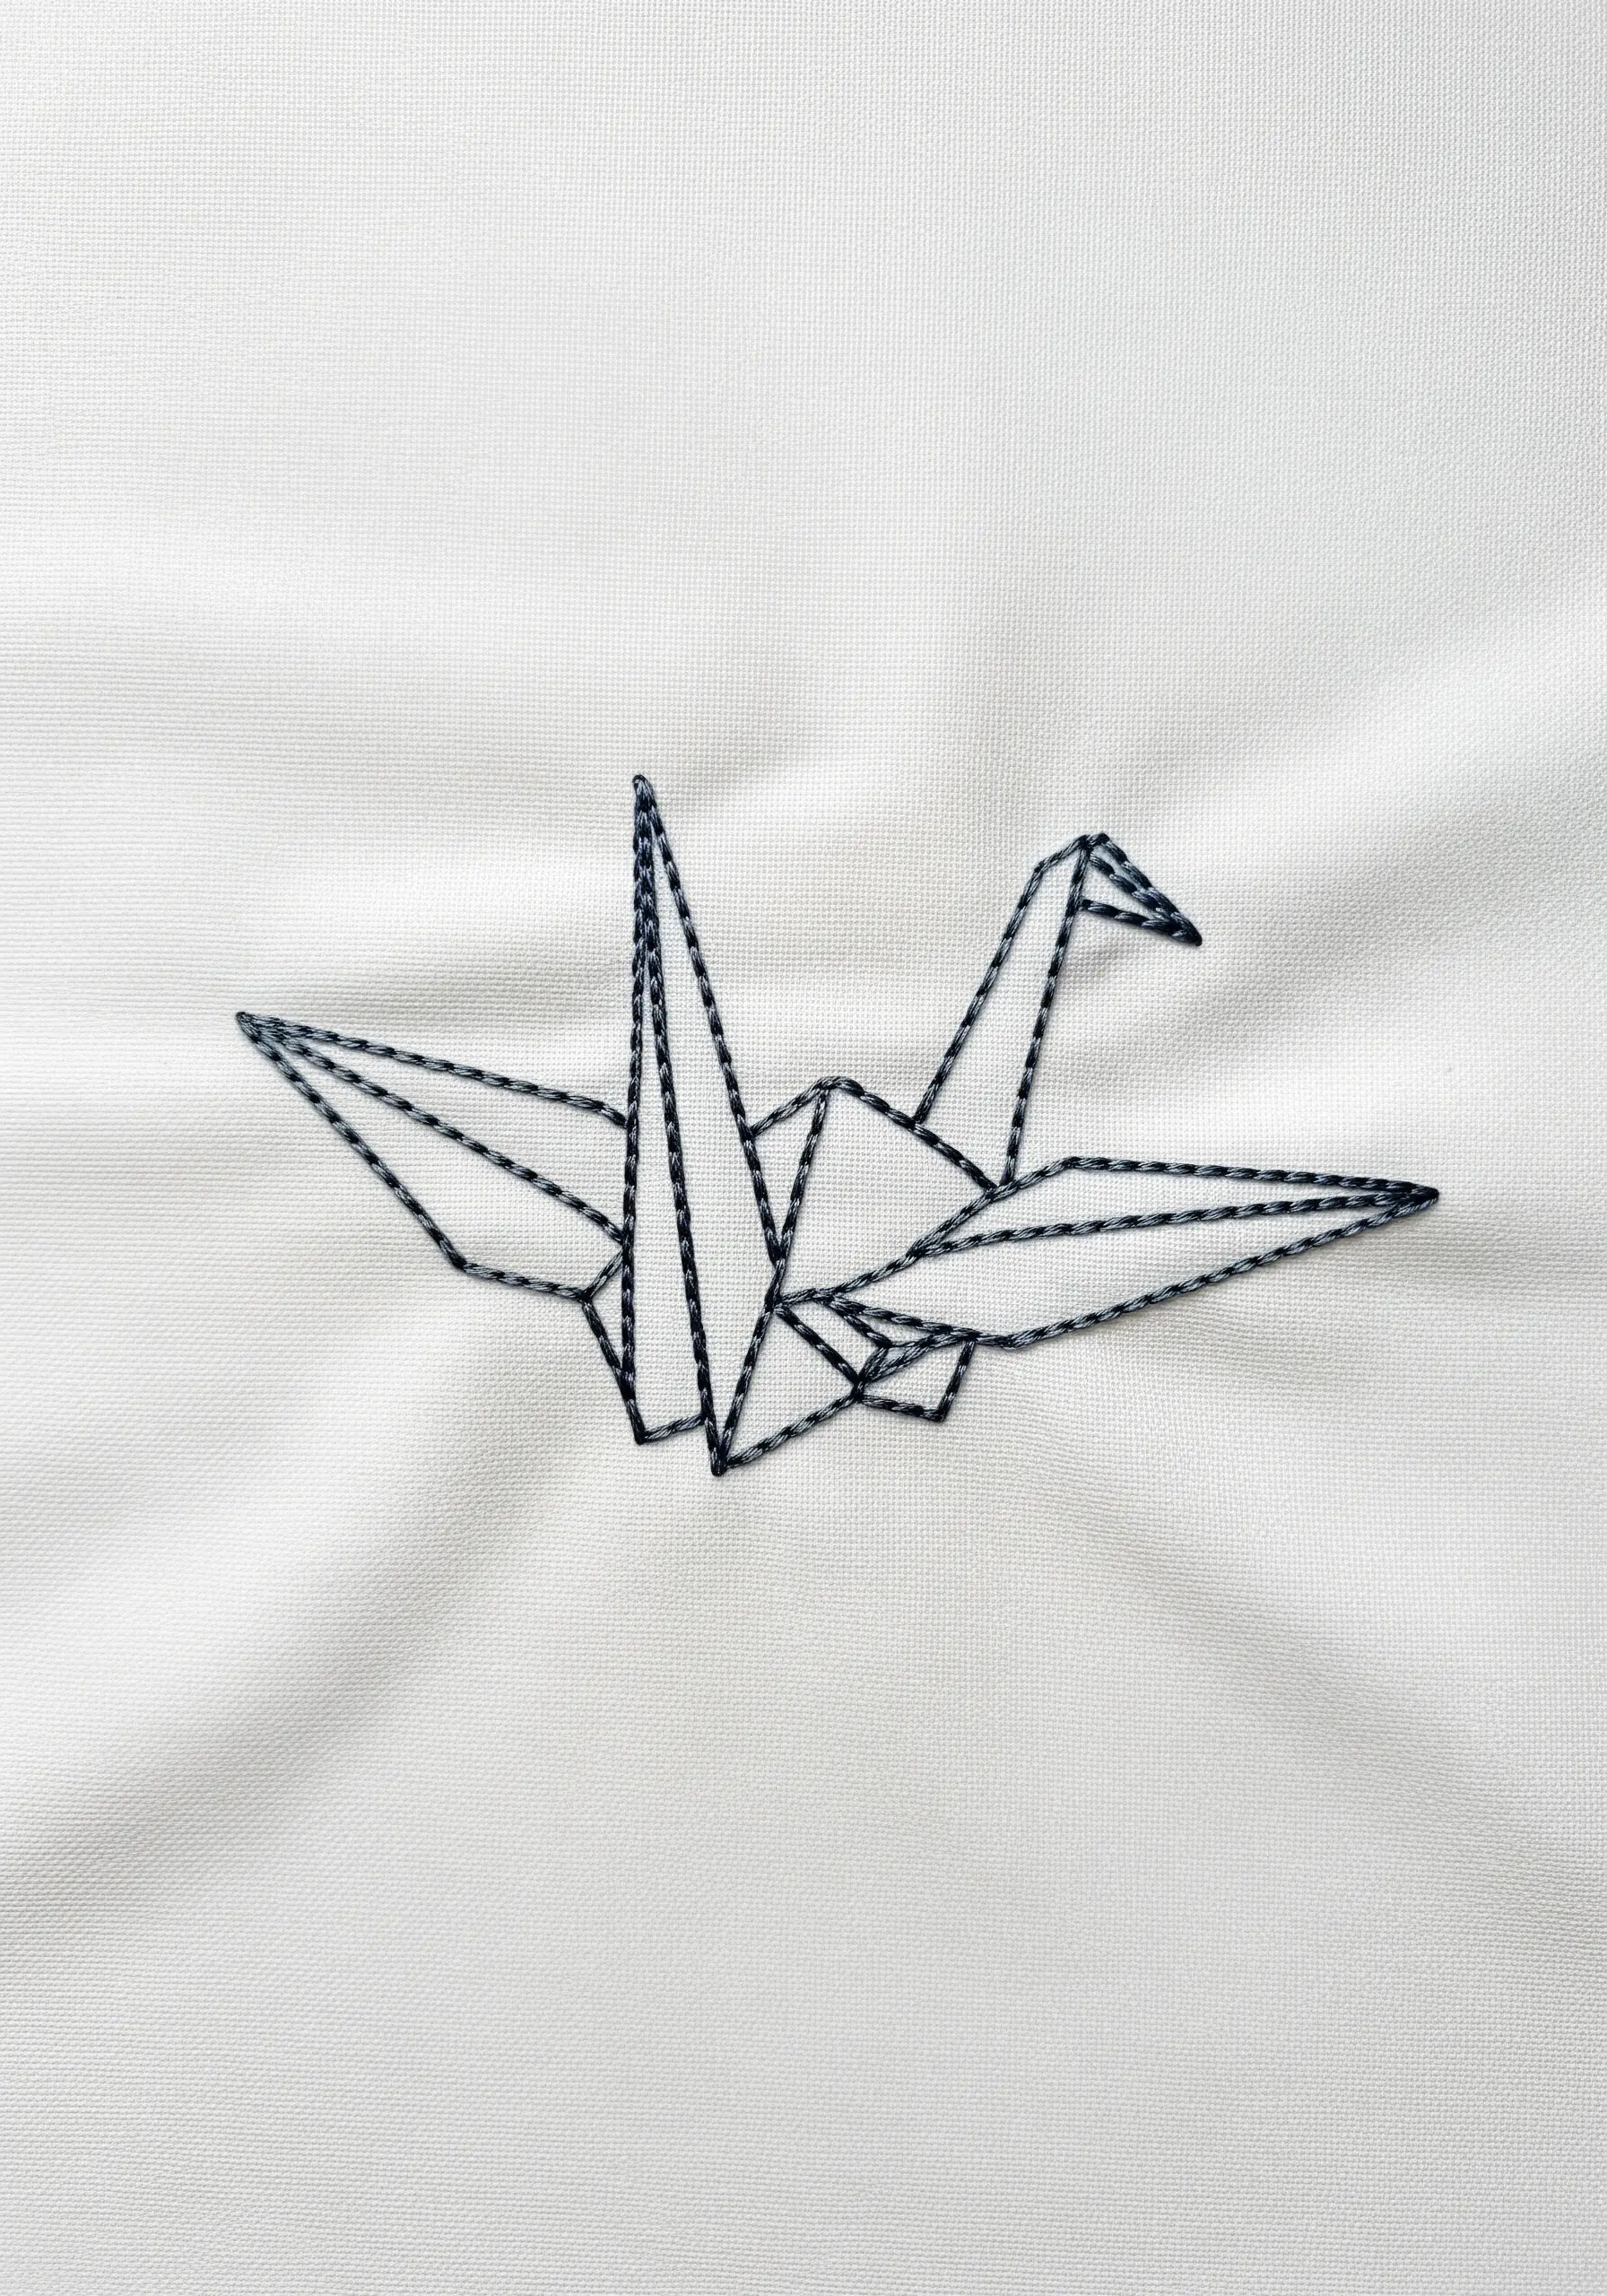
Suggest the crisp folds of origami paper by varying your thread weight.
Use a bold whipped backstitch with three strands of floss for the main outlines of the crane.
For the internal lines that represent folds, switch to a simple backstitch using only a single strand of the same color.
This subtle shift in thickness creates a visual hierarchy, making the design appear layered and three-dimensional.
27. Achieving Precision in Typographic Motifs

For designs that combine sharp lines and lettering, precision is paramount.
Use a fine-tipped, heat-erasable pen to transfer your pattern perfectly before stitching.
Work the straight lines of the compass first to establish the structure.
Then, use a tiny, meticulous backstitch for the letters, ensuring each stitch is perfectly placed for maximum legibility and a clean, professional look.
28. Building Realistic Foliage with Fly Stitch

The fly stitch is perfect for creating delicate, feathery botanicals like this fern.
Create a central stem with a simple backstitch.
Then, work a series of V-shaped fly stitches down each side of the stem, tucking the end of each ‘V’ under the stem itself.
This creates symmetrical leaflets in one efficient movement, resulting in a beautifully organic and textured frond. It’s one of the most useful ways to layer leaf stitching.
29. Crafting Polished, Three-Dimensional Icons
To make a simple graphic pop, give it dimension with padding.
First, fill the shape of the musical note with small seed stitches, creating a slightly raised base.
Then, cover this padding with a dense, smooth satin stitch, working your stitches in the opposite direction.
This technique turns a flat icon into a tactile, button-like embellishment with a highly polished appearance.
30. A Mini-Sampler for Textural Reference
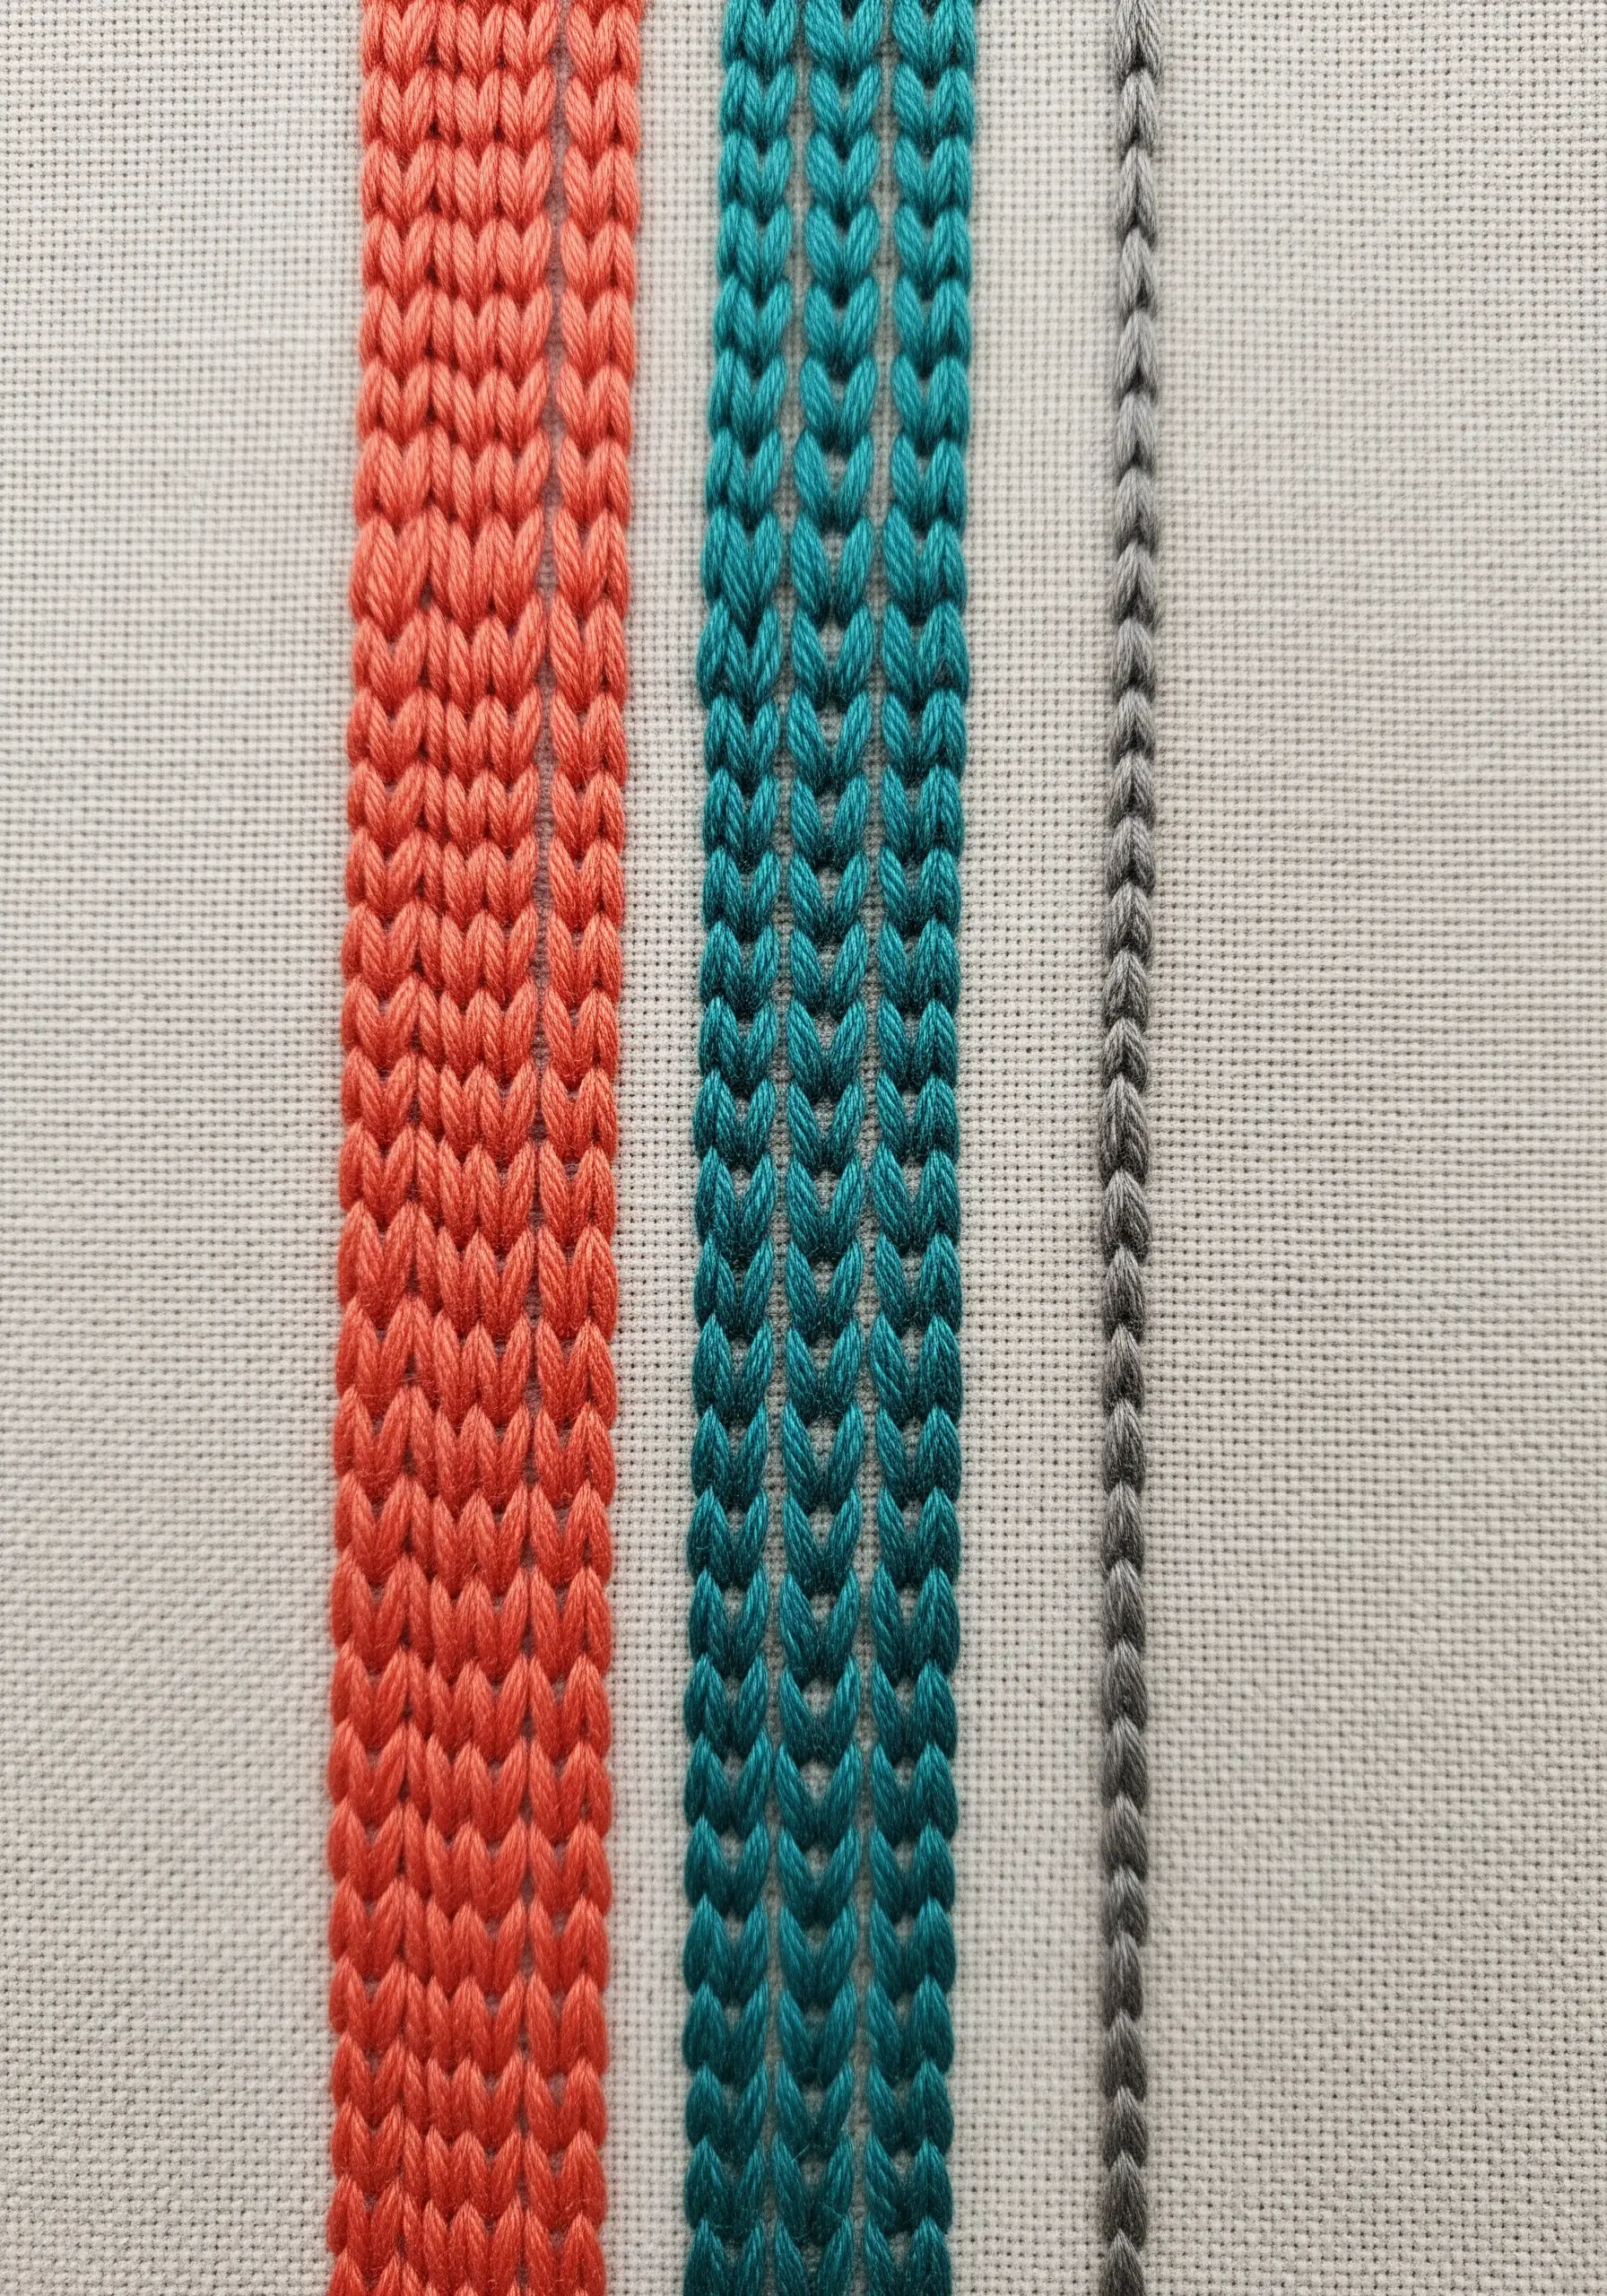
Instead of a pictorial motif, create a small, abstract sampler of decorative line stitches.
Practice a heavy chain stitch (using six strands), a braided chain stitch, a feather stitch, or a chevron stitch in a pleasing color palette.
Pinned to your corkboard, this becomes both a piece of minimalist embroidery art and a practical reference guide for adding texture to future projects.


