
You have likely stared at a corner of your home and felt it needed something—not a renovation, but a touch of warmth that only a handmade object can provide. The difference between a craft project and a piece of decor often lies in a single detail: the tension of a thread, the choice of a bead, or the intentional use of negative space.
In this collection, I am guiding you through small, manageable ornaments that prioritize technique over complexity. These are not just patterns to copy; they are lessons in texture—how to make velvet look regal with gold couching, how to sculpt felt into three-dimensional forms, and how to weave yarn within a hoop to create modern tapestries.
Pick one technique that challenges you. Whether it is the architectural precision of a Temari ball or the organic freedom of needle lace, these small pieces are low-risk experiments that yield sophisticated results. Let’s refresh your space, one stitch at a time.
1. Sculptural felt padding techniques

To achieve this level of dimension, do not rely solely on stuffing; layer your felt pieces in graduating sizes before stitching the top layer.
Use a fishbone stitch for the feathers, ensuring you pull the thread tight enough to create a slight depression in the felt, which catches the light and adds depth.
White-on-white embroidery requires impeccable neatness, so hide your knots between the felt layers rather than on the back.
2. Grouping botanical micros for impact

When stitching small botanicals, reduce your thread count to a single strand to capture the delicate nature of fern fronds and lavender buds.
Contrast is key here; pair the flatness of a satin stitch rose with the raised texture of French knots to keep the eye moving across the composition.
Frame these in small hoop botanical embroidery ideas for your bathroom or vanity to create a cohesive gallery wall effect.
3. Elevating tassels with woven bands
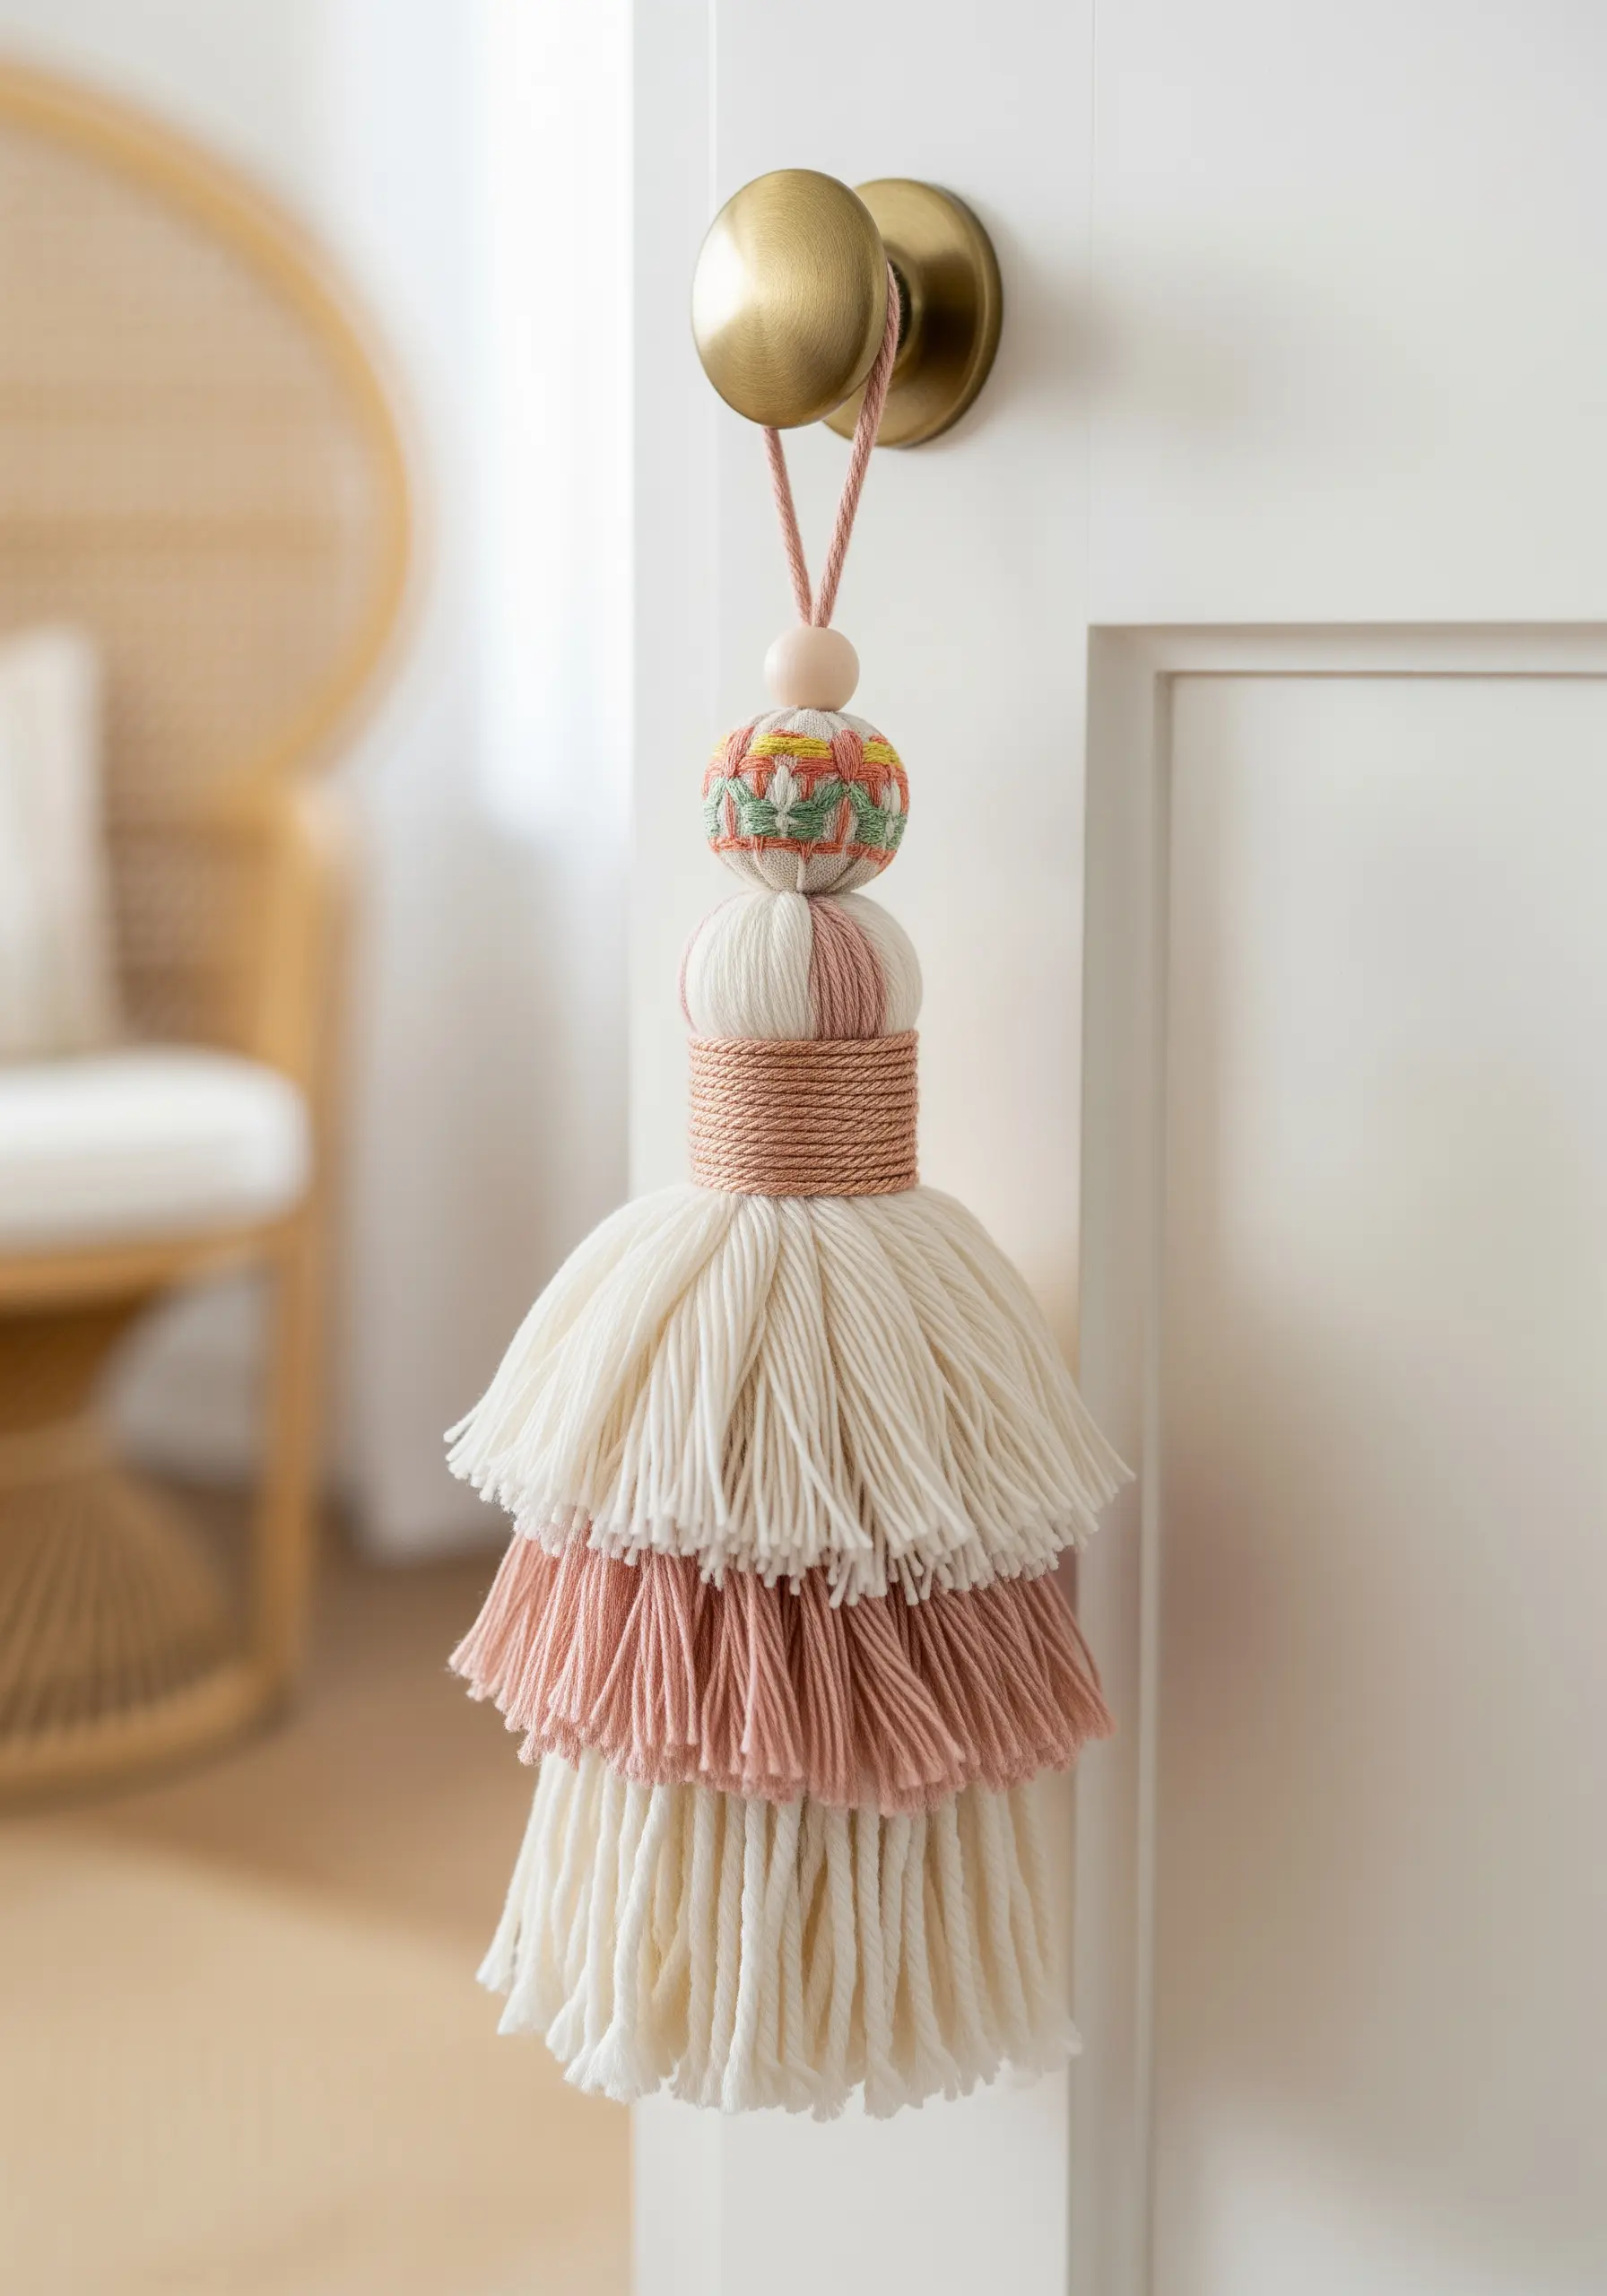
Transform a simple yarn tassel by treating the neck as a miniature canvas for needle weaving.
Wrap the neck tightly with a base thread, then stitch a geometric pattern over it using a tapestry needle to avoid snagging the underlying fibers.
This technique turns a basic soft furnishing accessory into a bespoke design element.
4. Geometric precision on leather surfaces

Embroidery on leather requires pre-punching holes with an awl or a specialized leather needle to ensure even spacing and prevent tearing.
Use a waxed cotton or linen thread, which holds its tension better than standard floss and resists fraying against the tough leather edge.
These unique hand stitched ideas to make your bedroom instagram worthy rely on the tension of the thread to create the visual lines.
5. Working with pile fabrics and beads
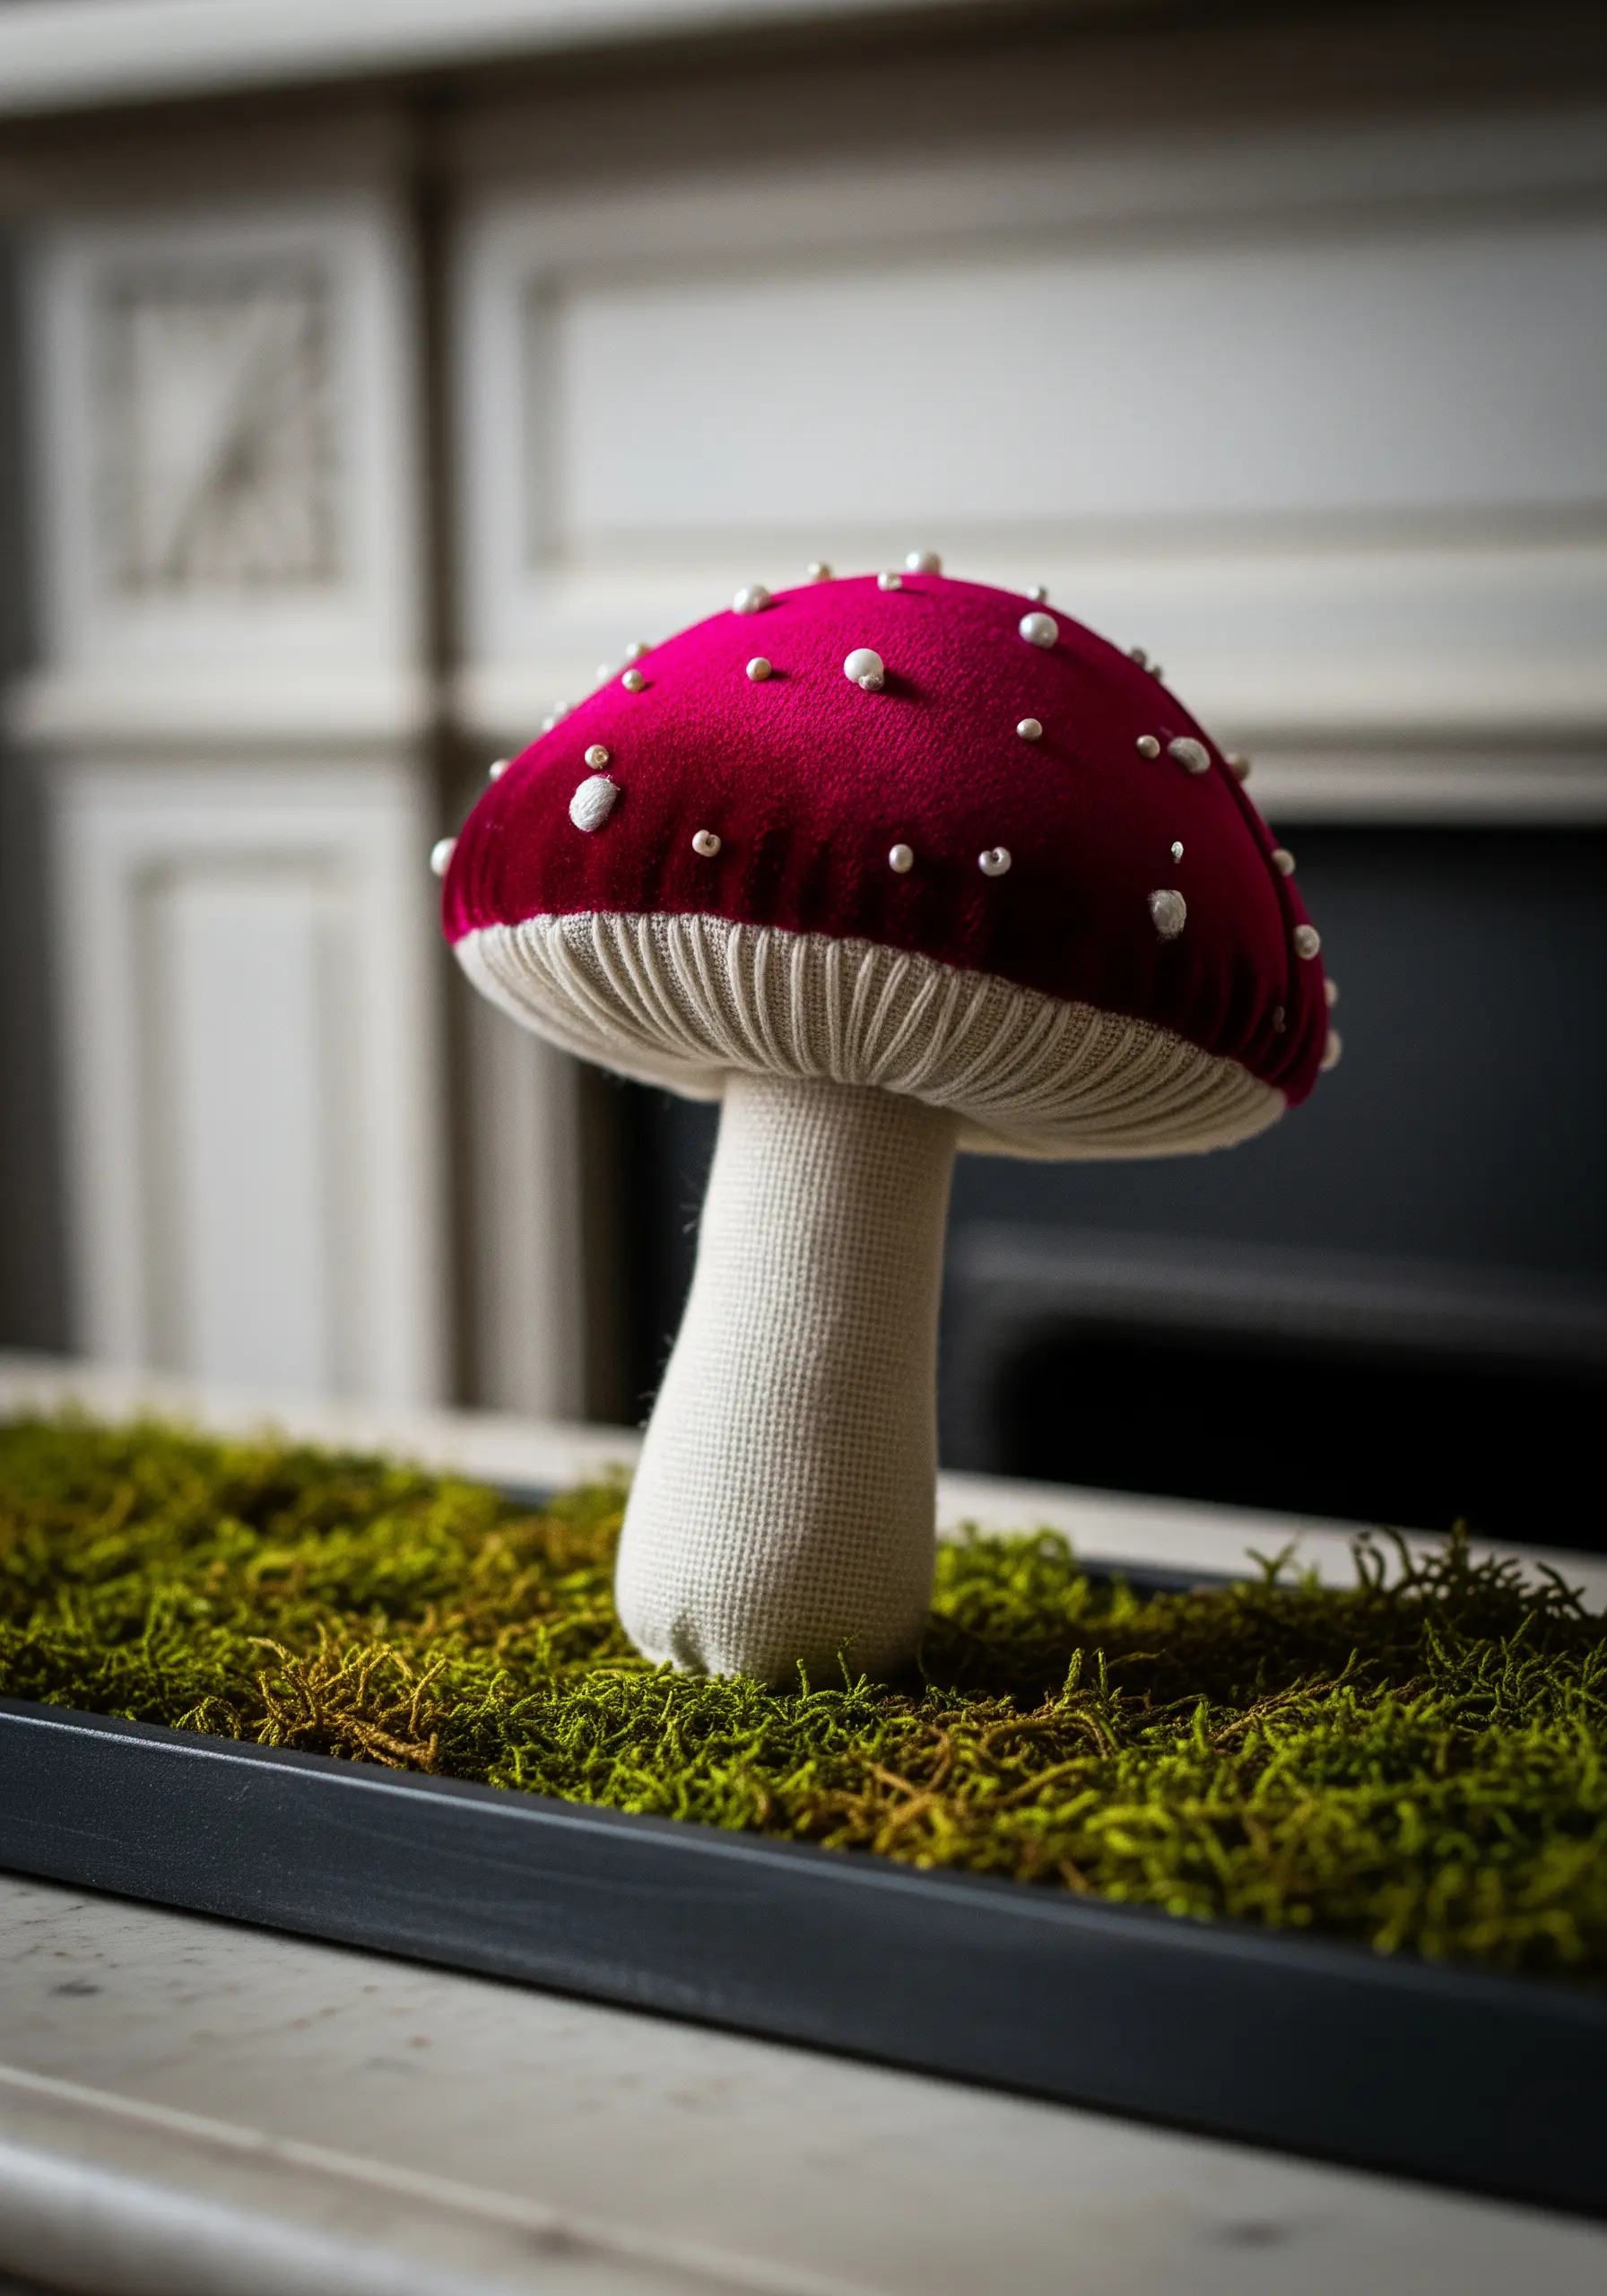
Velvet absorbs light, making it a dramatic background for the sparkle of seed beads and pearls.
When stitching on velvet, use a stabilizer on the back to prevent the fabric from puckering and to keep your beadwork sitting proudly on top of the pile.
The ribbed texture on the stem is achieved by gathering the fabric slightly with a running stitch before stuffing.
6. High-contrast stitching on denim

Denim is an excellent stabilizer for heavy stitching, allowing you to use thicker threads like pearl cotton without distortion.
Use a blanket stitch on the raw edges to prevent fraying while framing the piece with a rustic, handmade aesthetic.
This approach fits perfectly with embroidery wall art hacks to repurpose tablecloths denim curtains creatively.
7. integrating embroidery into patchwork
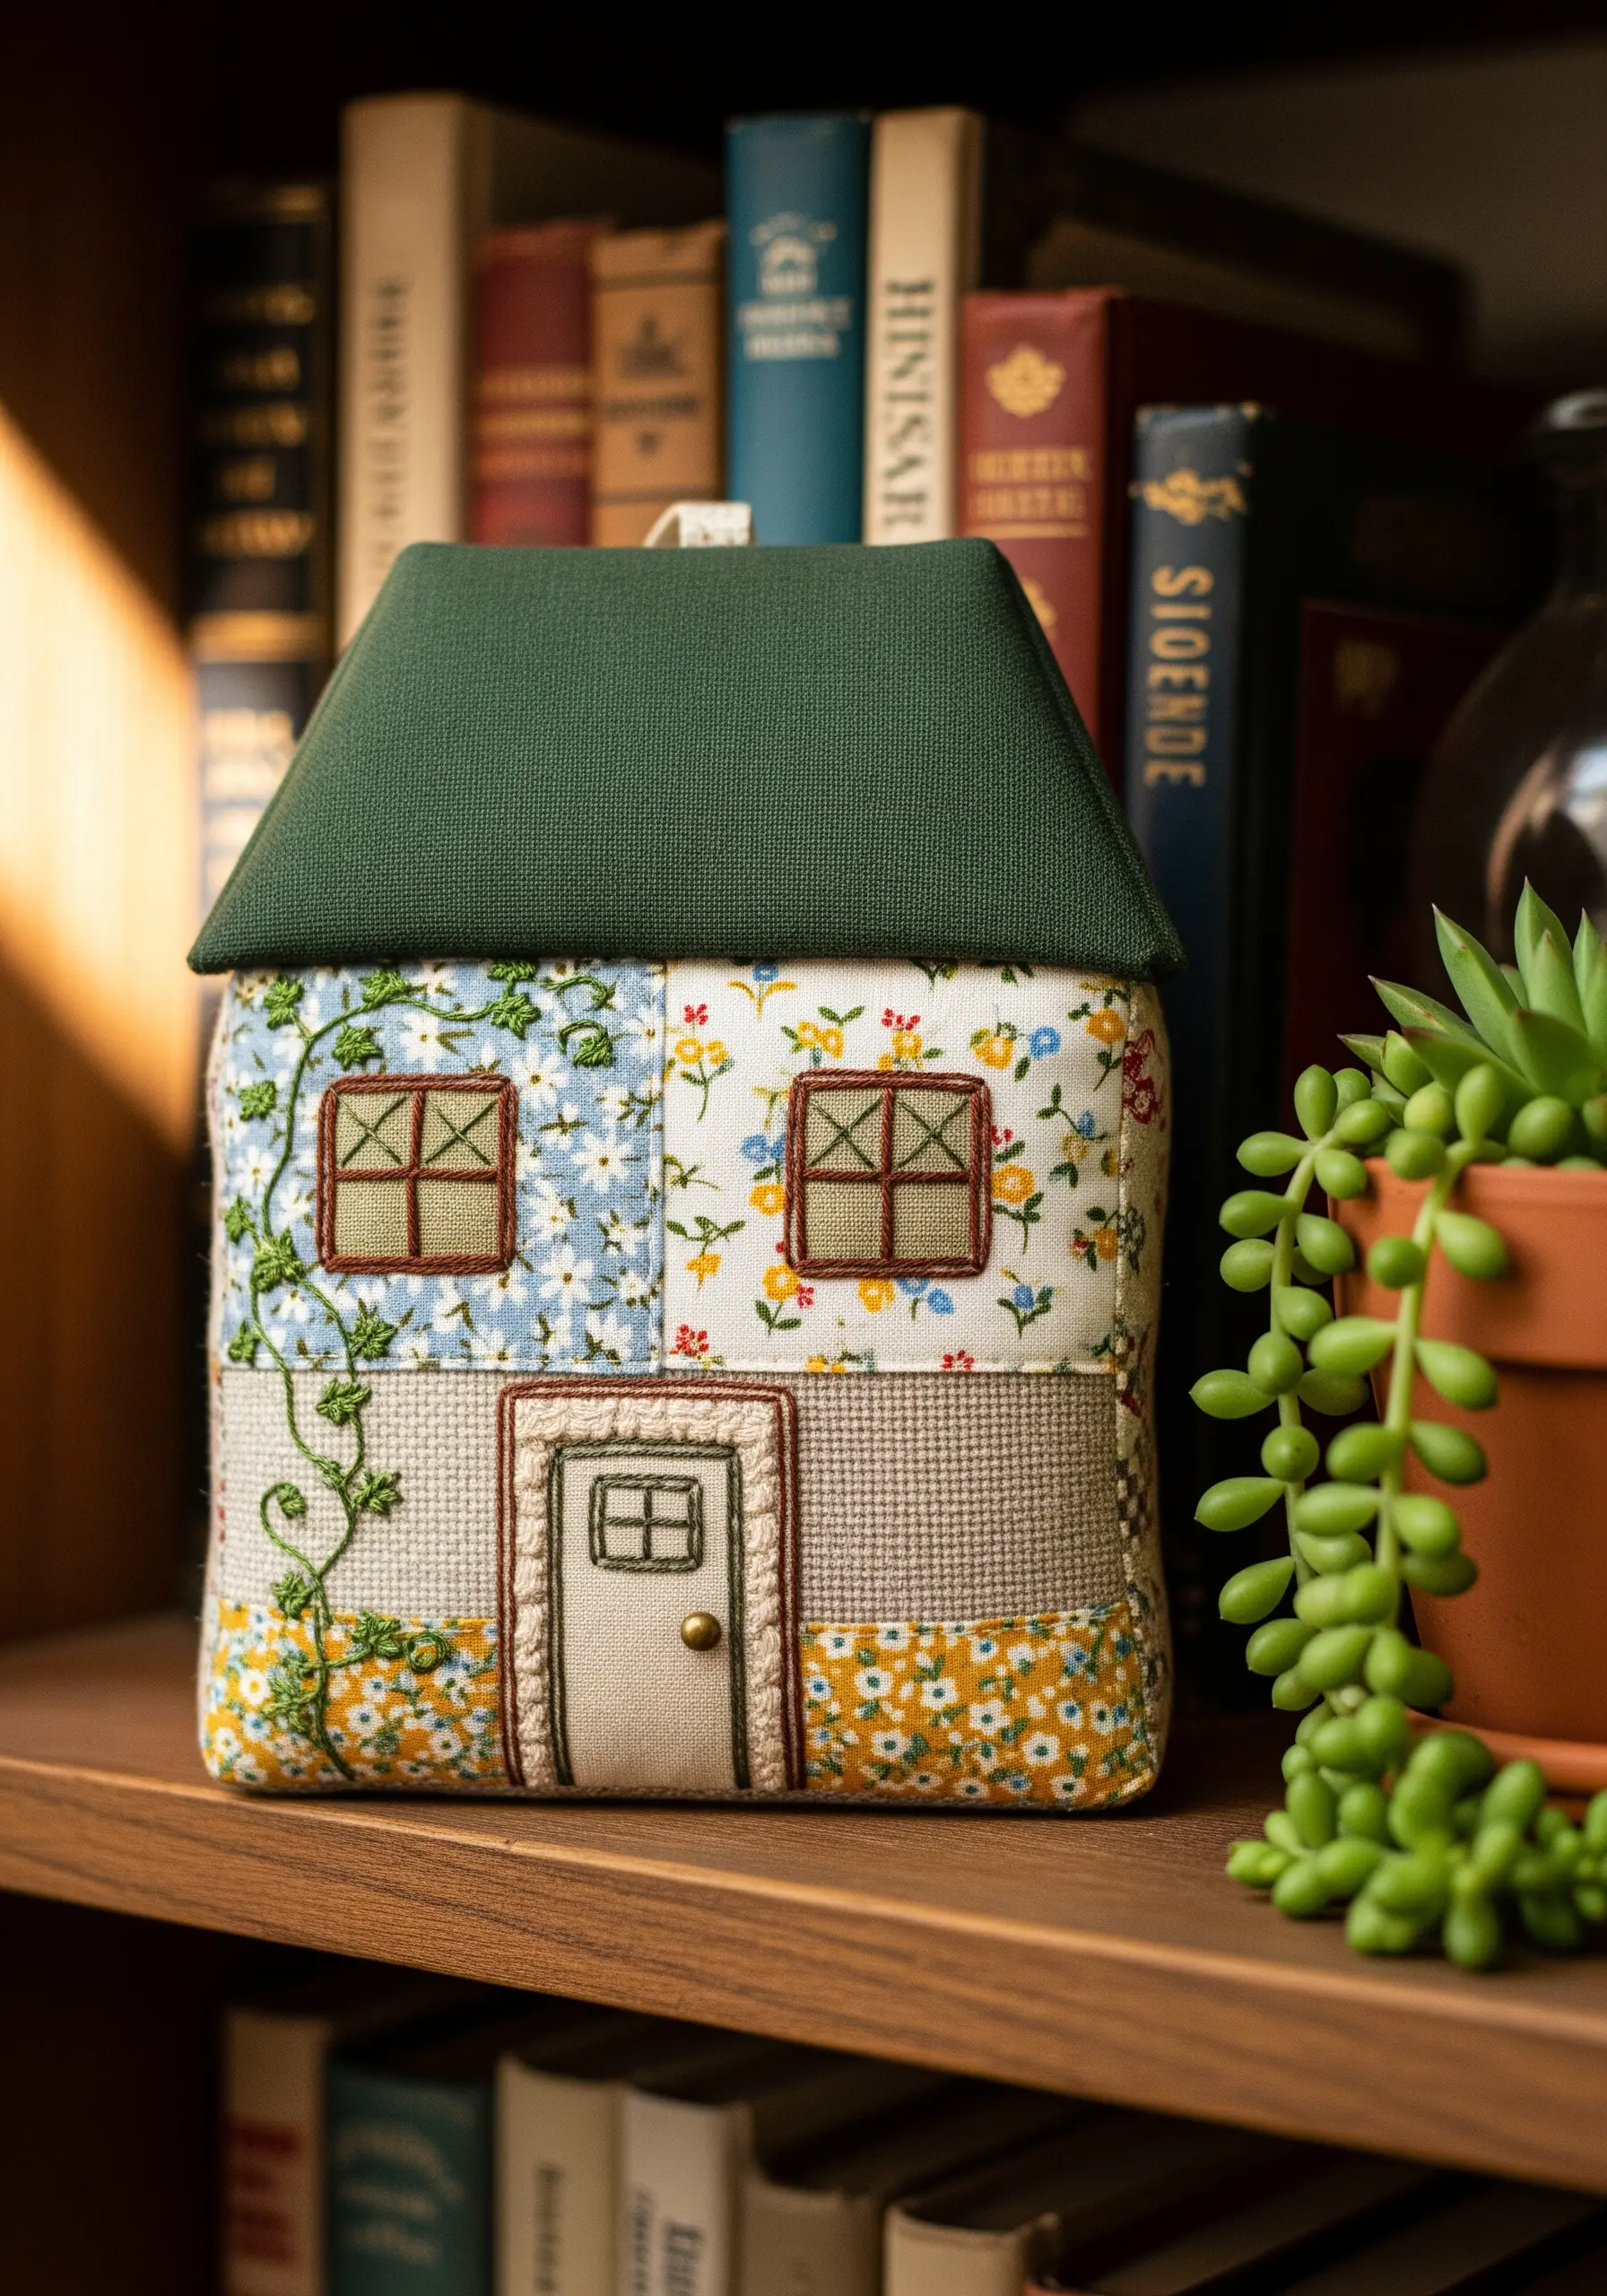
Don’t limit embroidery to plain fabric; stitch directly over seams and patterned cottons to integrate the structure of the object.
Use the ‘ditch’ between patchwork seams to hide your traveling threads, keeping the front of your work clean.
Outline architectural details like windows with a dark backstitch to make them pop against busy floral prints.
8. Structural beading on transparent organza
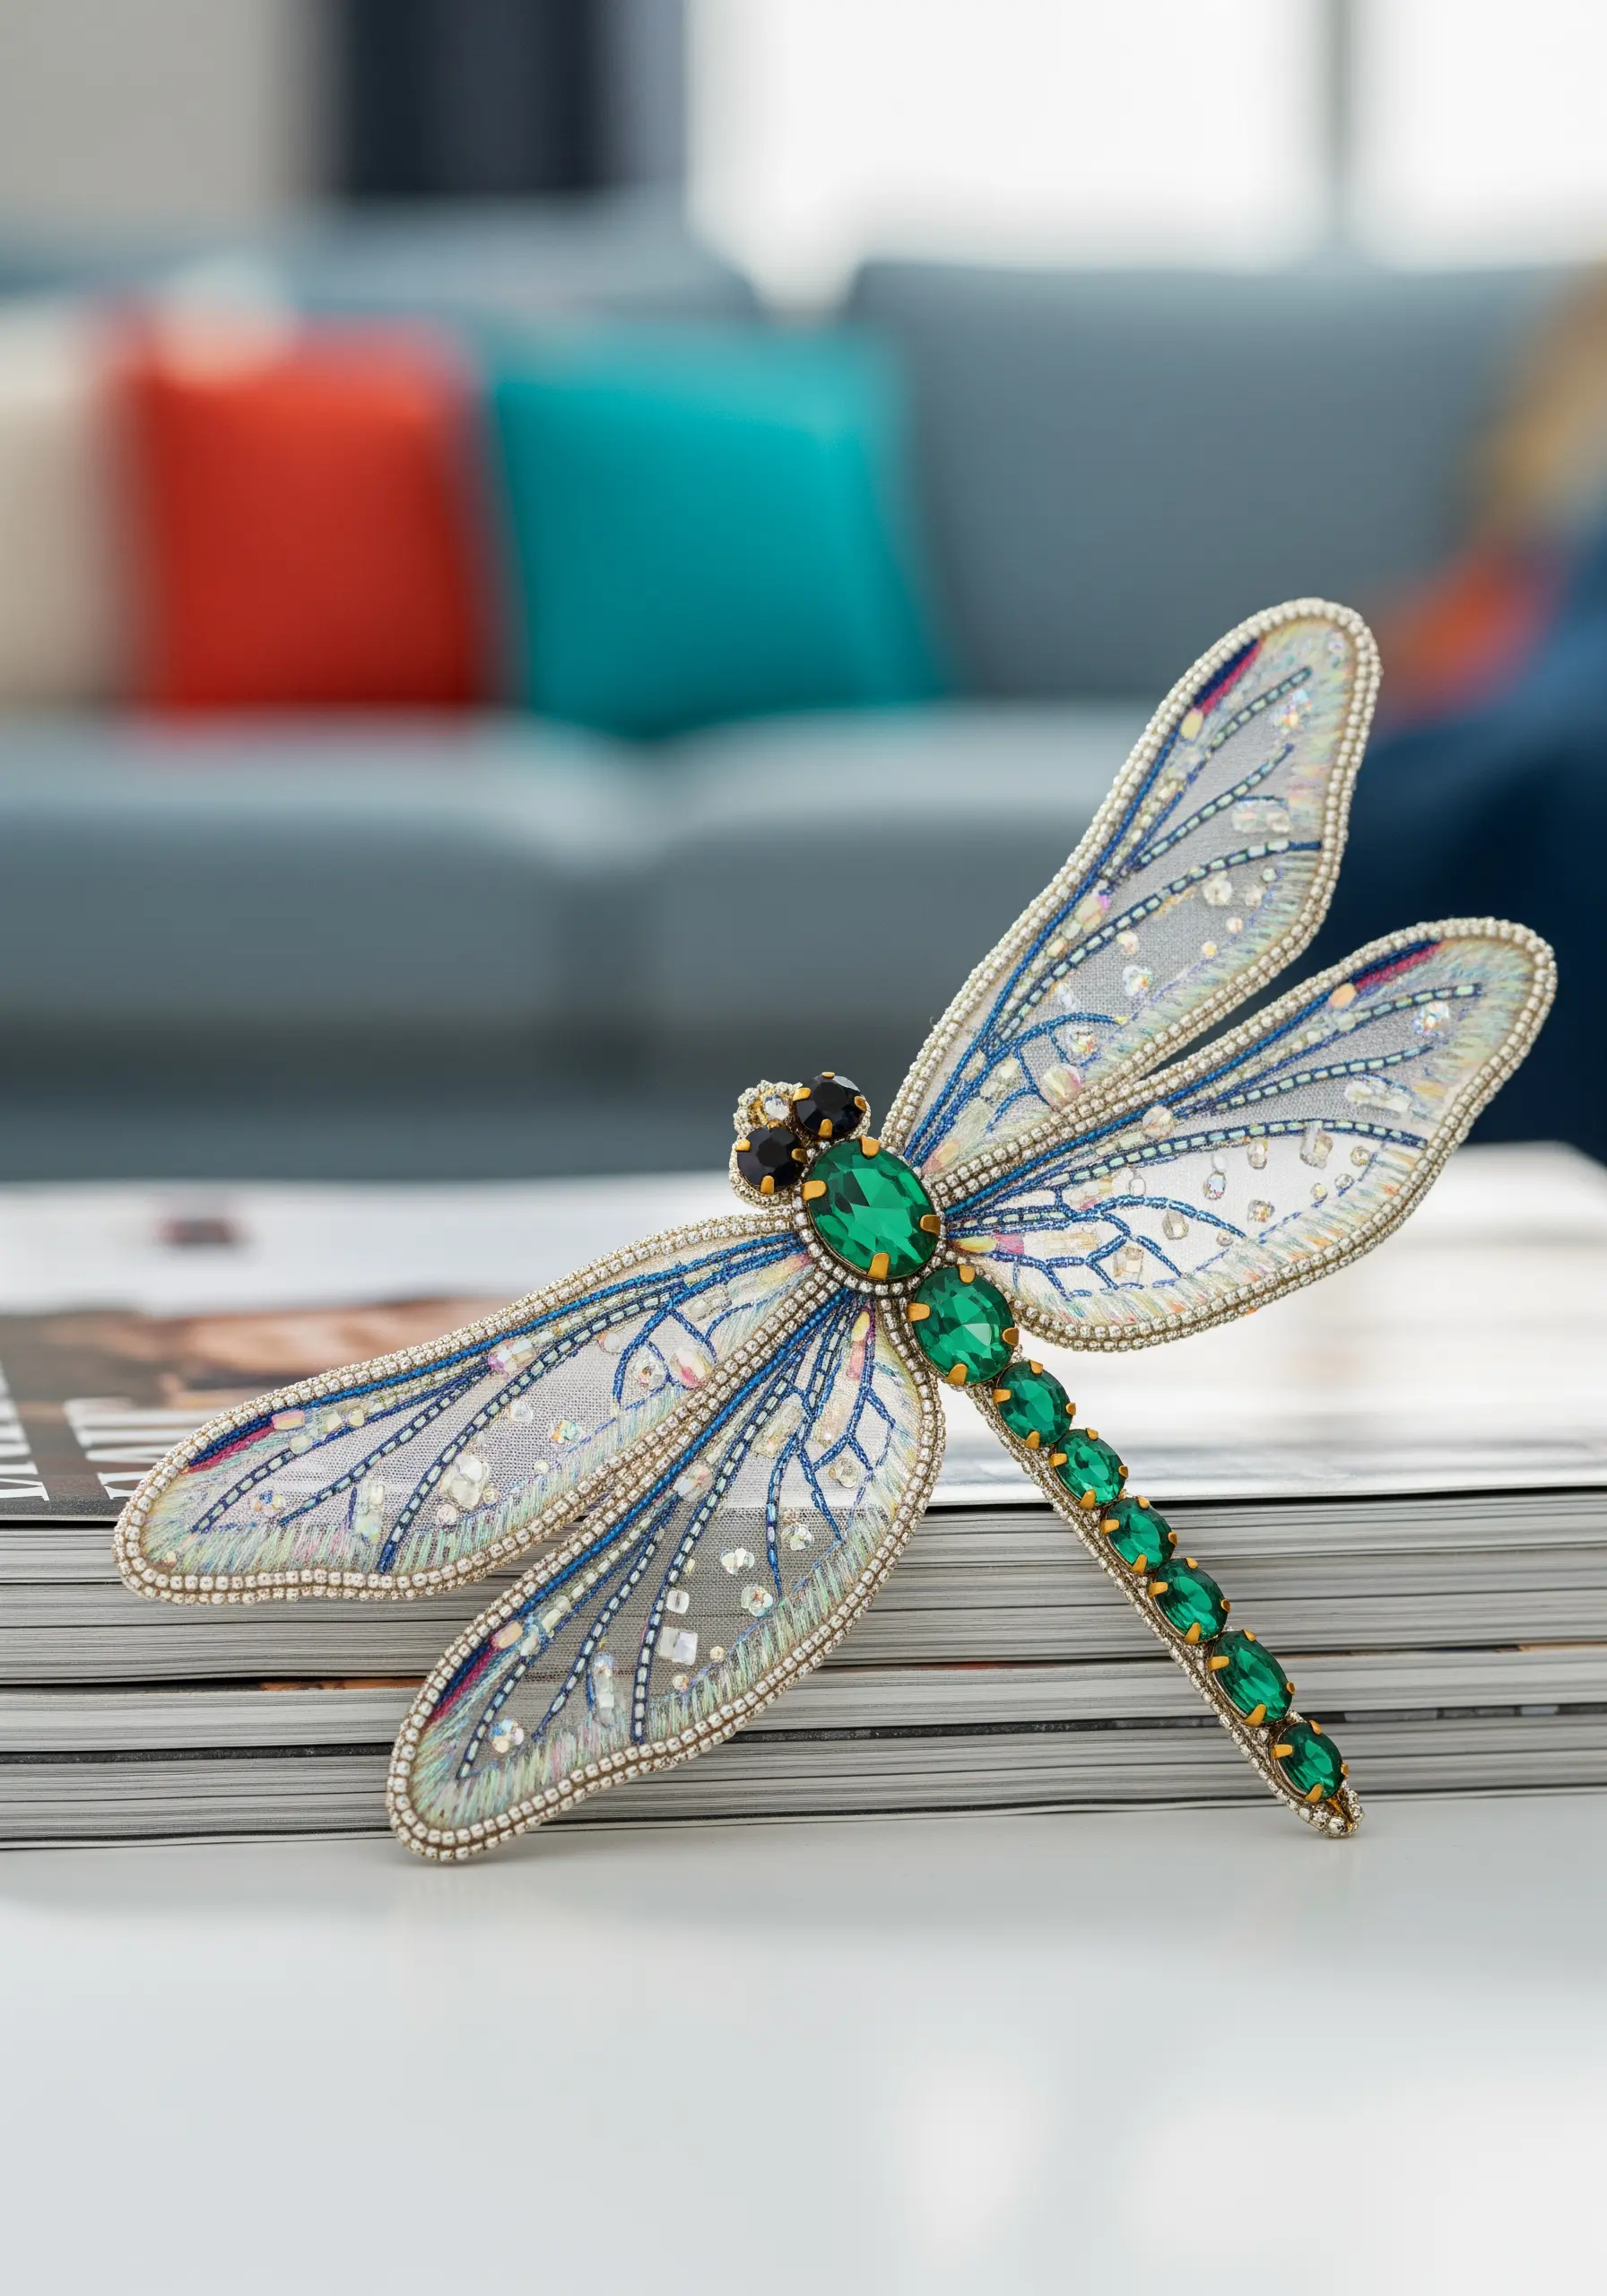
For free-standing embroidery like these wings, you must couch a thin wire along the outline before filling the shape.
Stitch on sheer organza to create the ‘glass’ effect, reinforcing the edges with a tight buttonhole stitch to cover the wire.
This level of detail rivals 3d embroidery wall art pieces that look so real guests will want to touch them.
9. Mixing macrame knots with hoop framing

Move beyond fabric by using your hoop as a loom; warp the threads vertically and weave the sun motif using a tapestry technique.
The fringe is attached using a lark’s head knot directly onto the hoop, merging macrame construction with embroidery aesthetics.
This style is a staple for those seeking organic handmade pieces to complete your minimalist home.
10. Geometric division on spherical surfaces
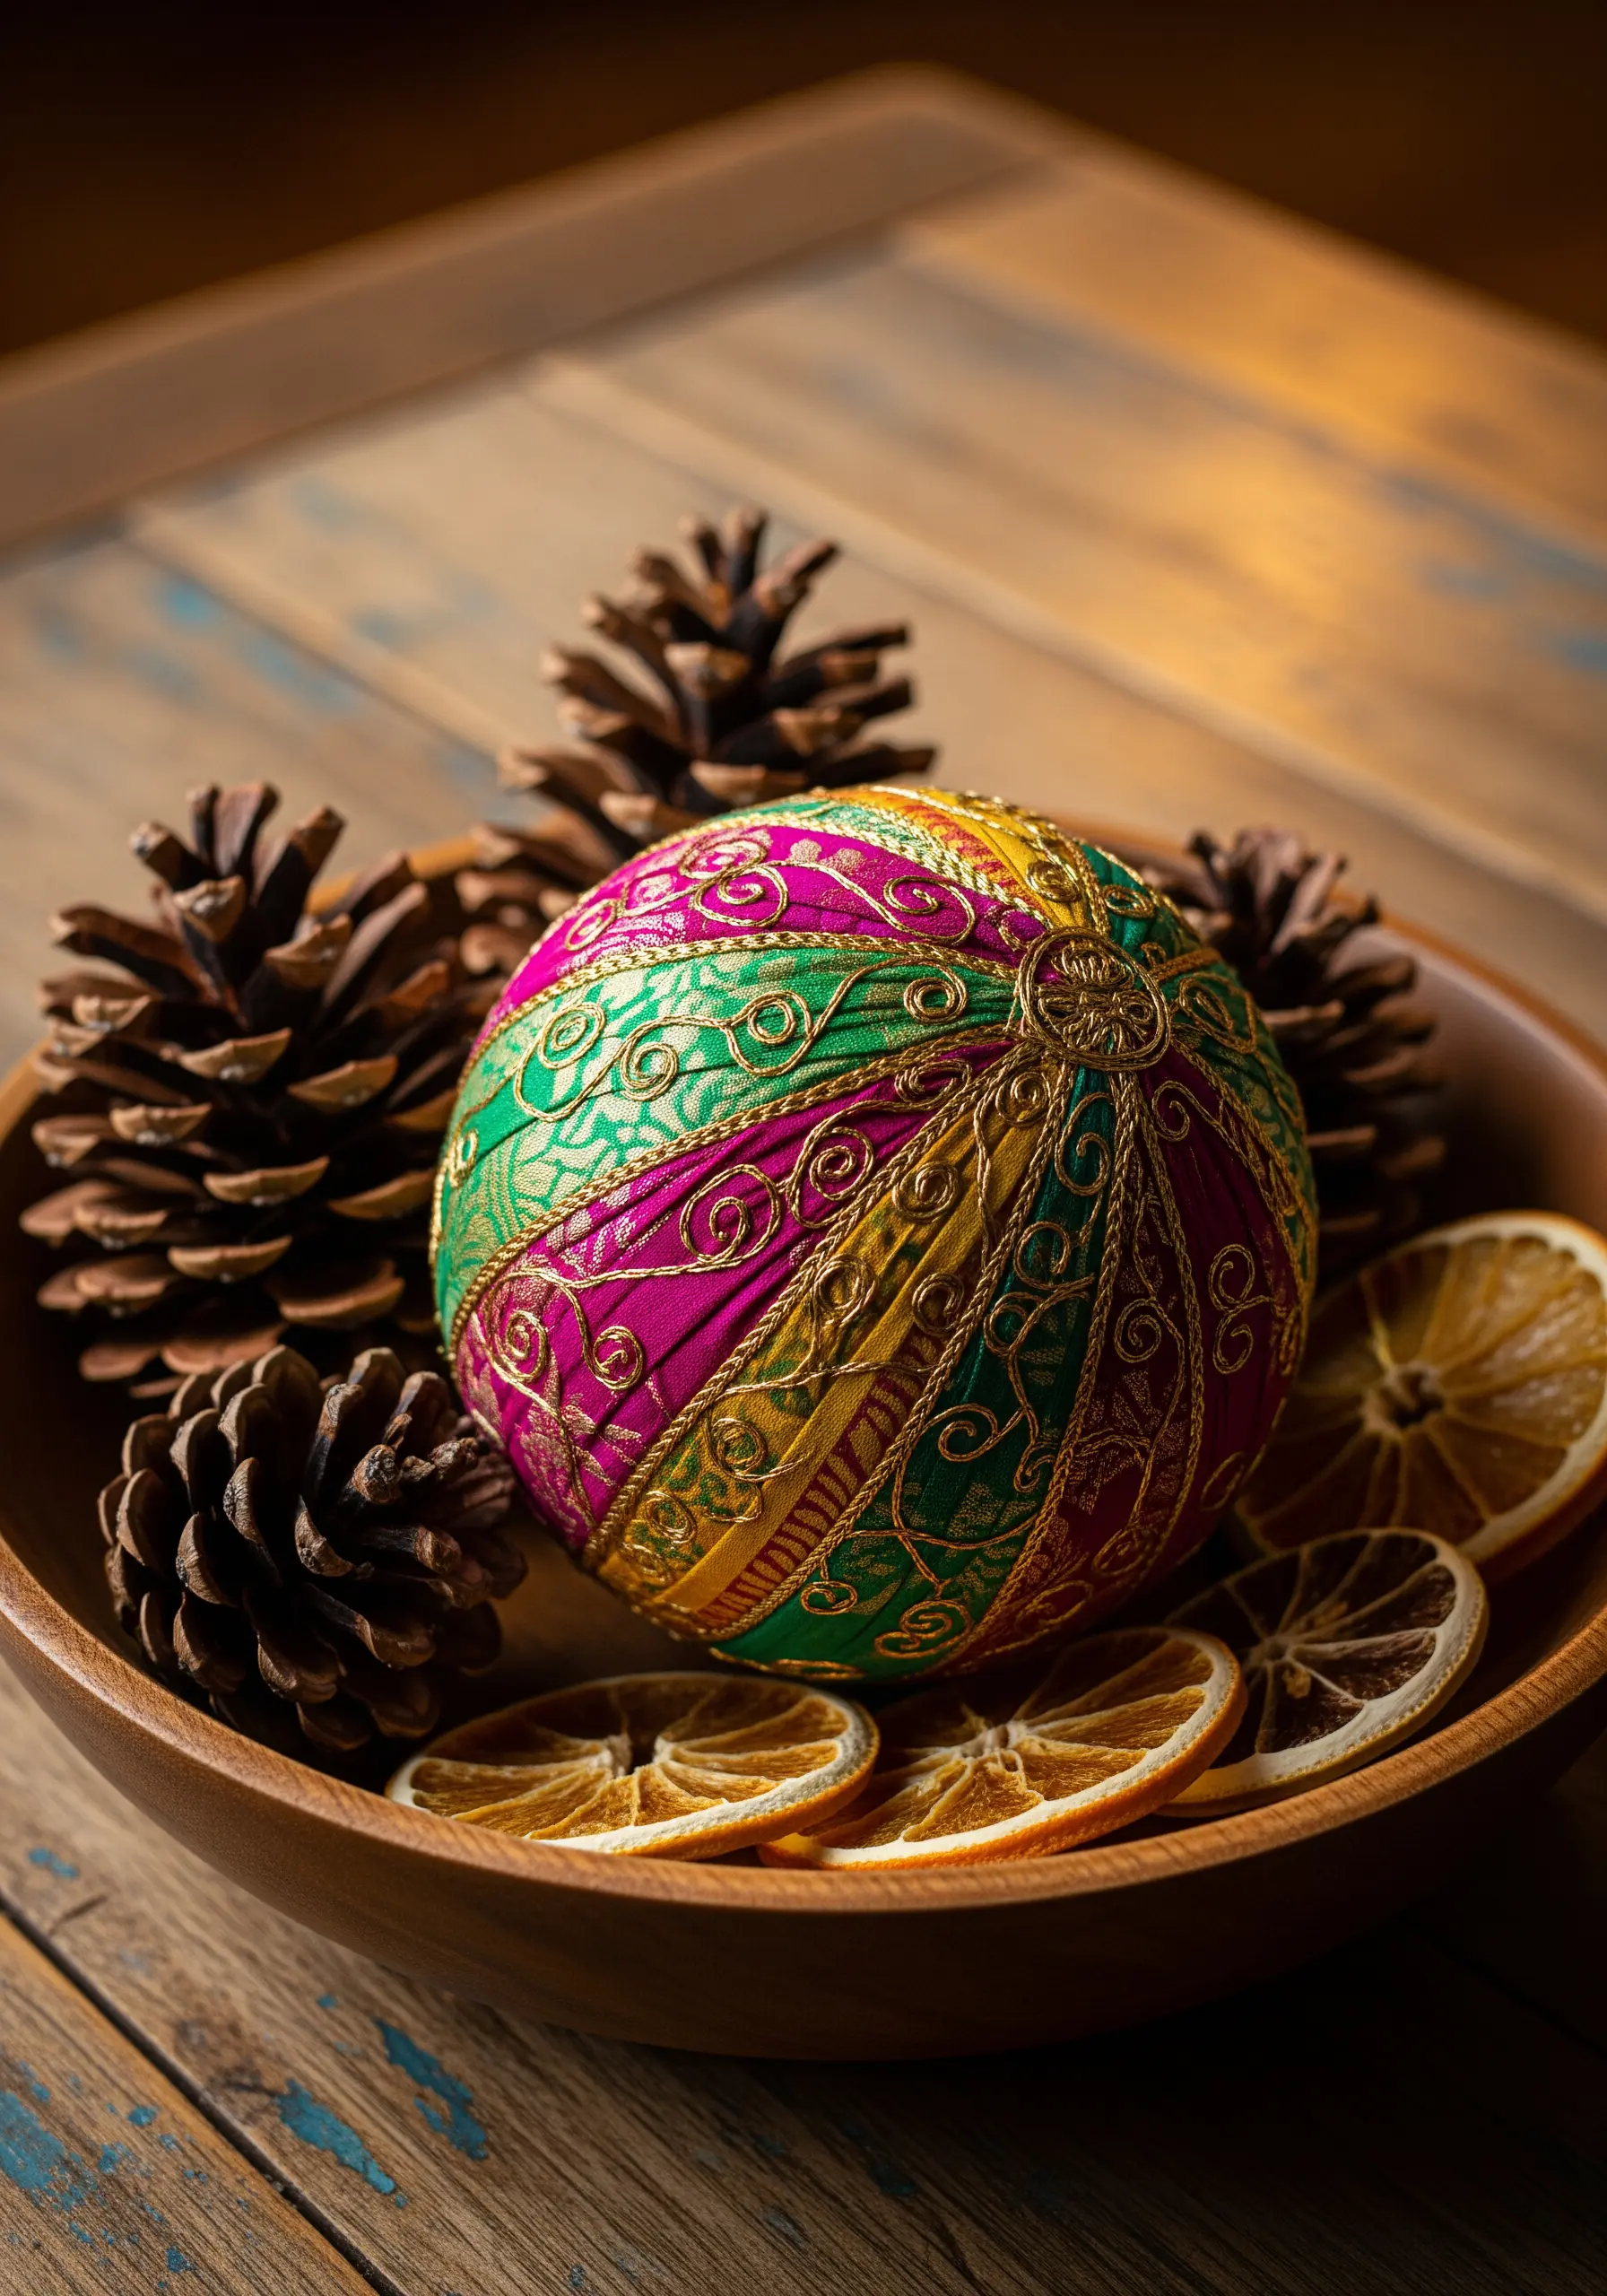
Temari balls rely on precise mathematical division; use pins to mark your poles and equator before laying down the metallic guideline threads.
Maintain high tension on your wrapping thread to ensure the foundation is solid enough to support the decorative interlace stitches.
The metallic gold thread isn’t just decoration—it physically separates the color zones.
11. Heirloom lace attachment techniques
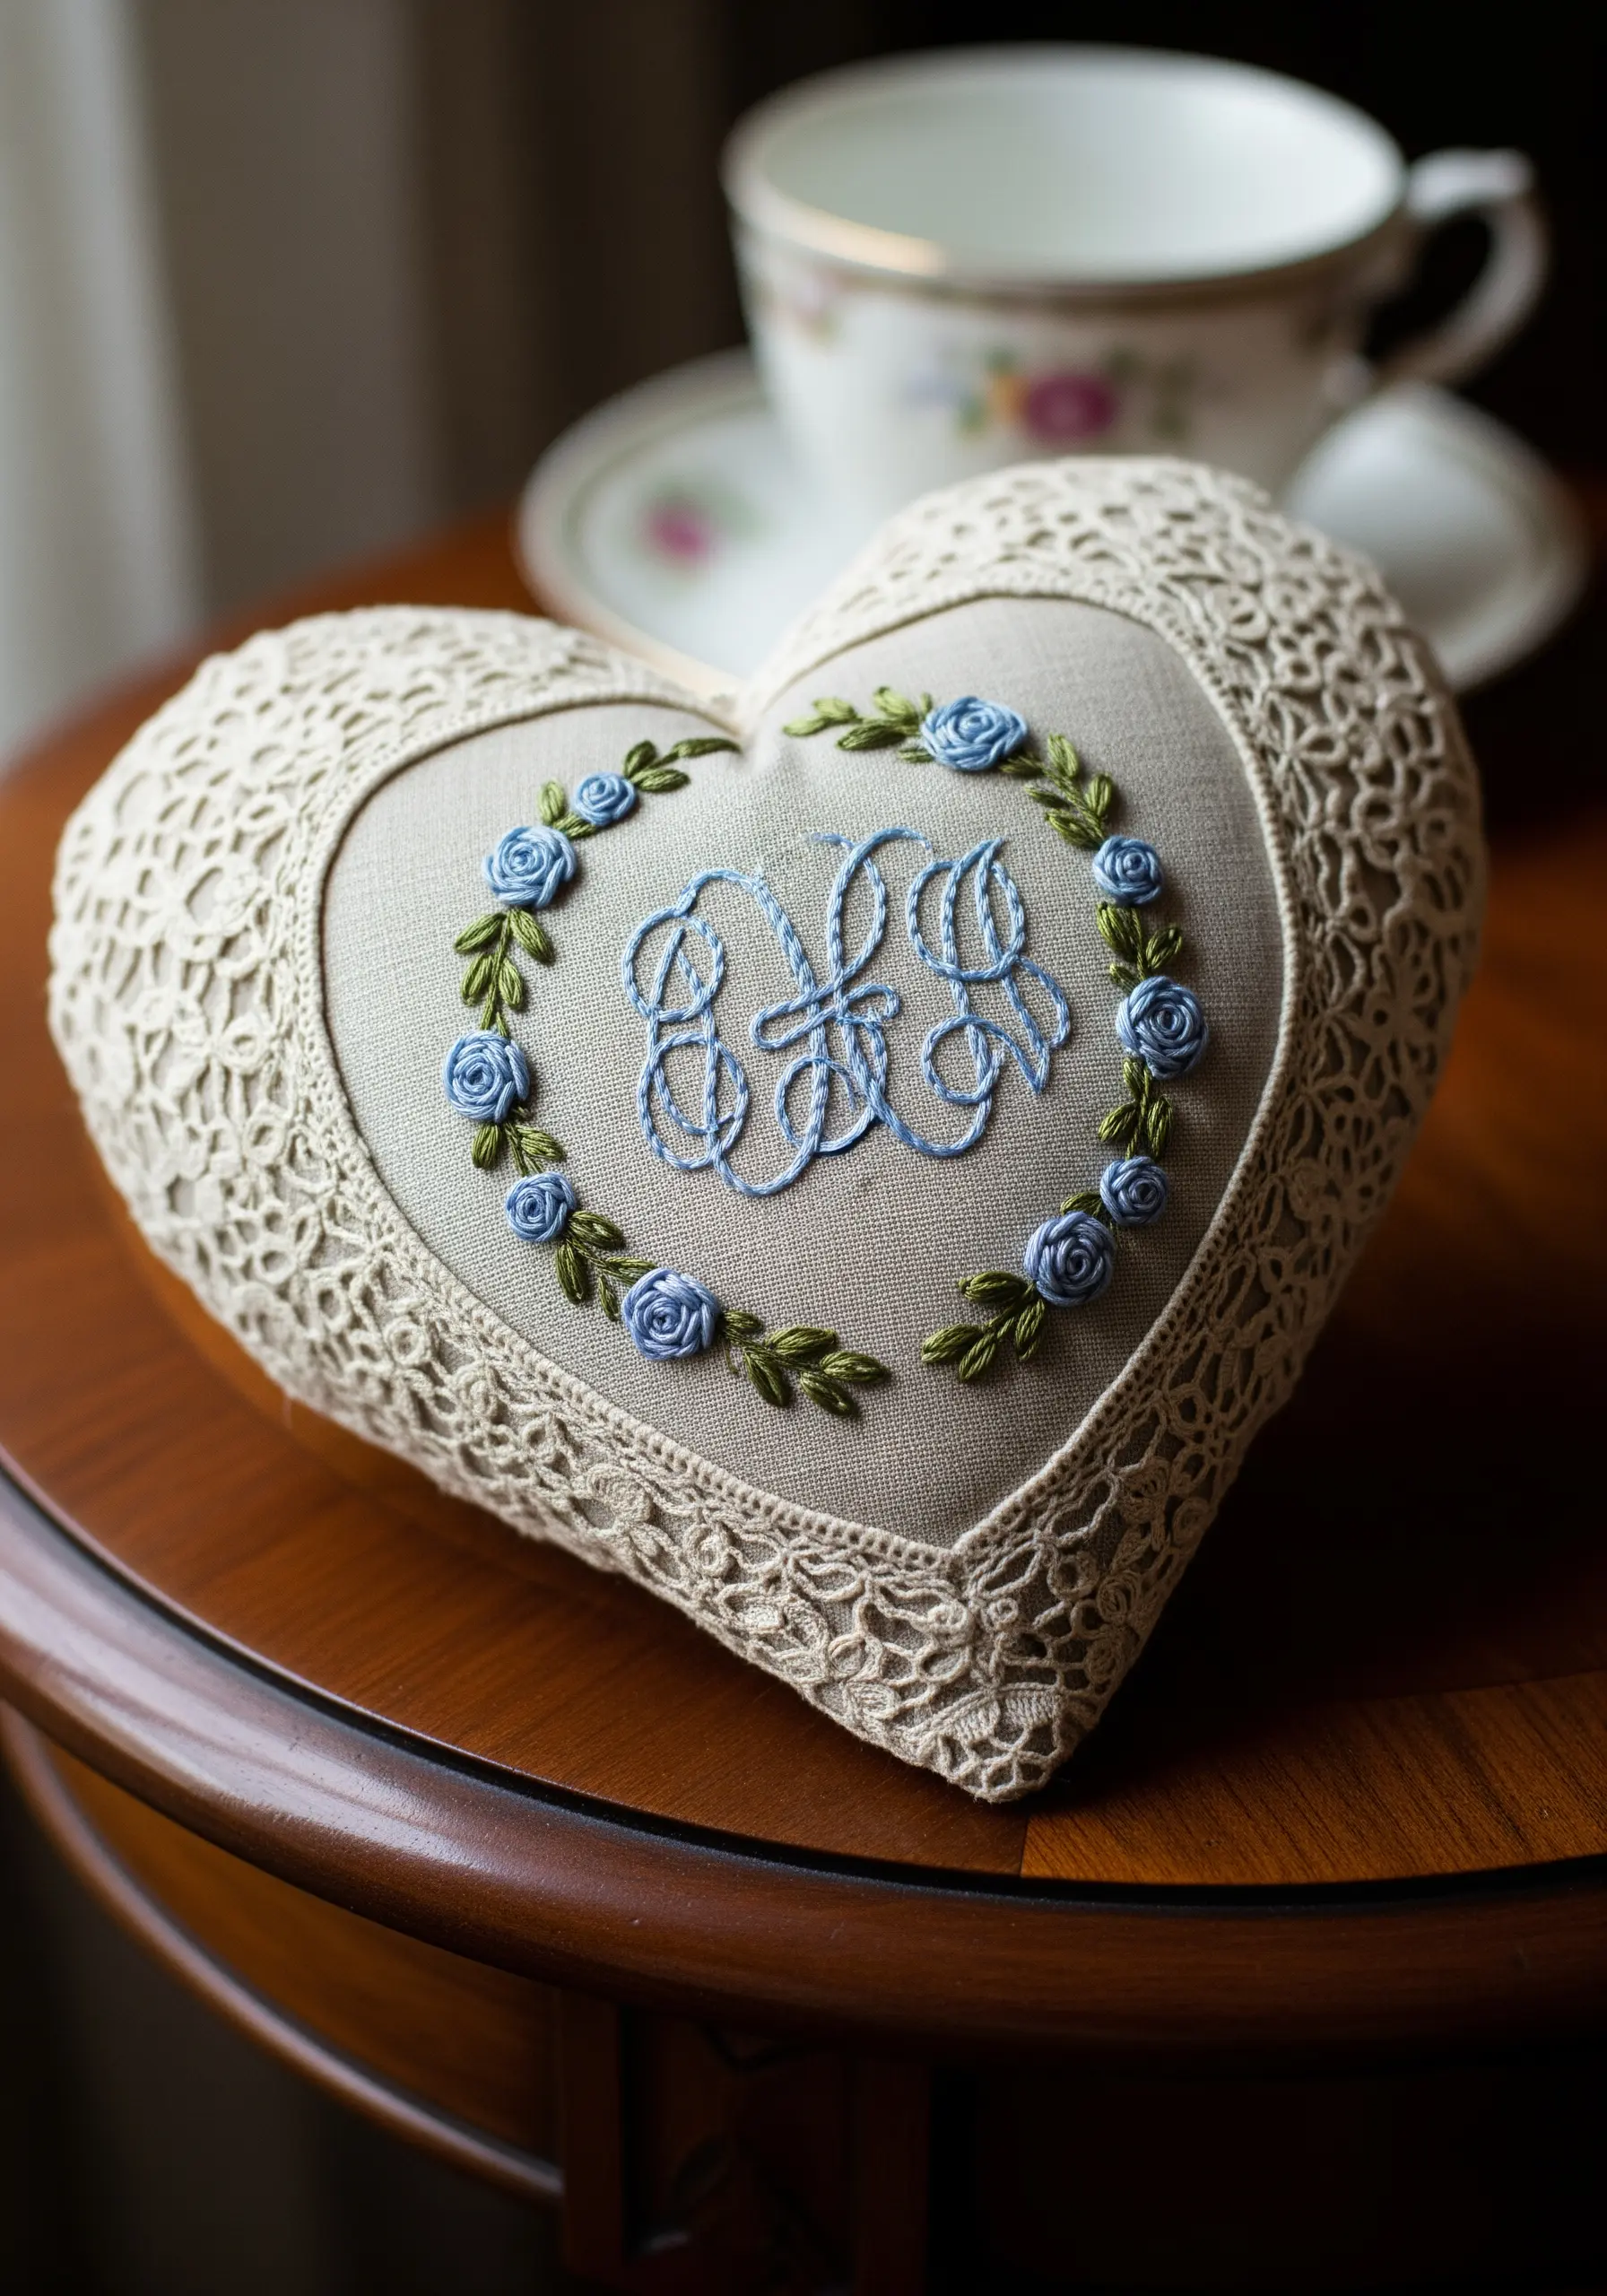
When attaching heavy lace to linen, hand-baste it first to ensure the corners miter perfectly without bulk.
The monogram should be padded with satin stitch to match the visual weight of the surrounding lace texture.
Projects like this are classic handmade embroidery gifts that will be treasured forever.
12. Symmetry in folk art motifs
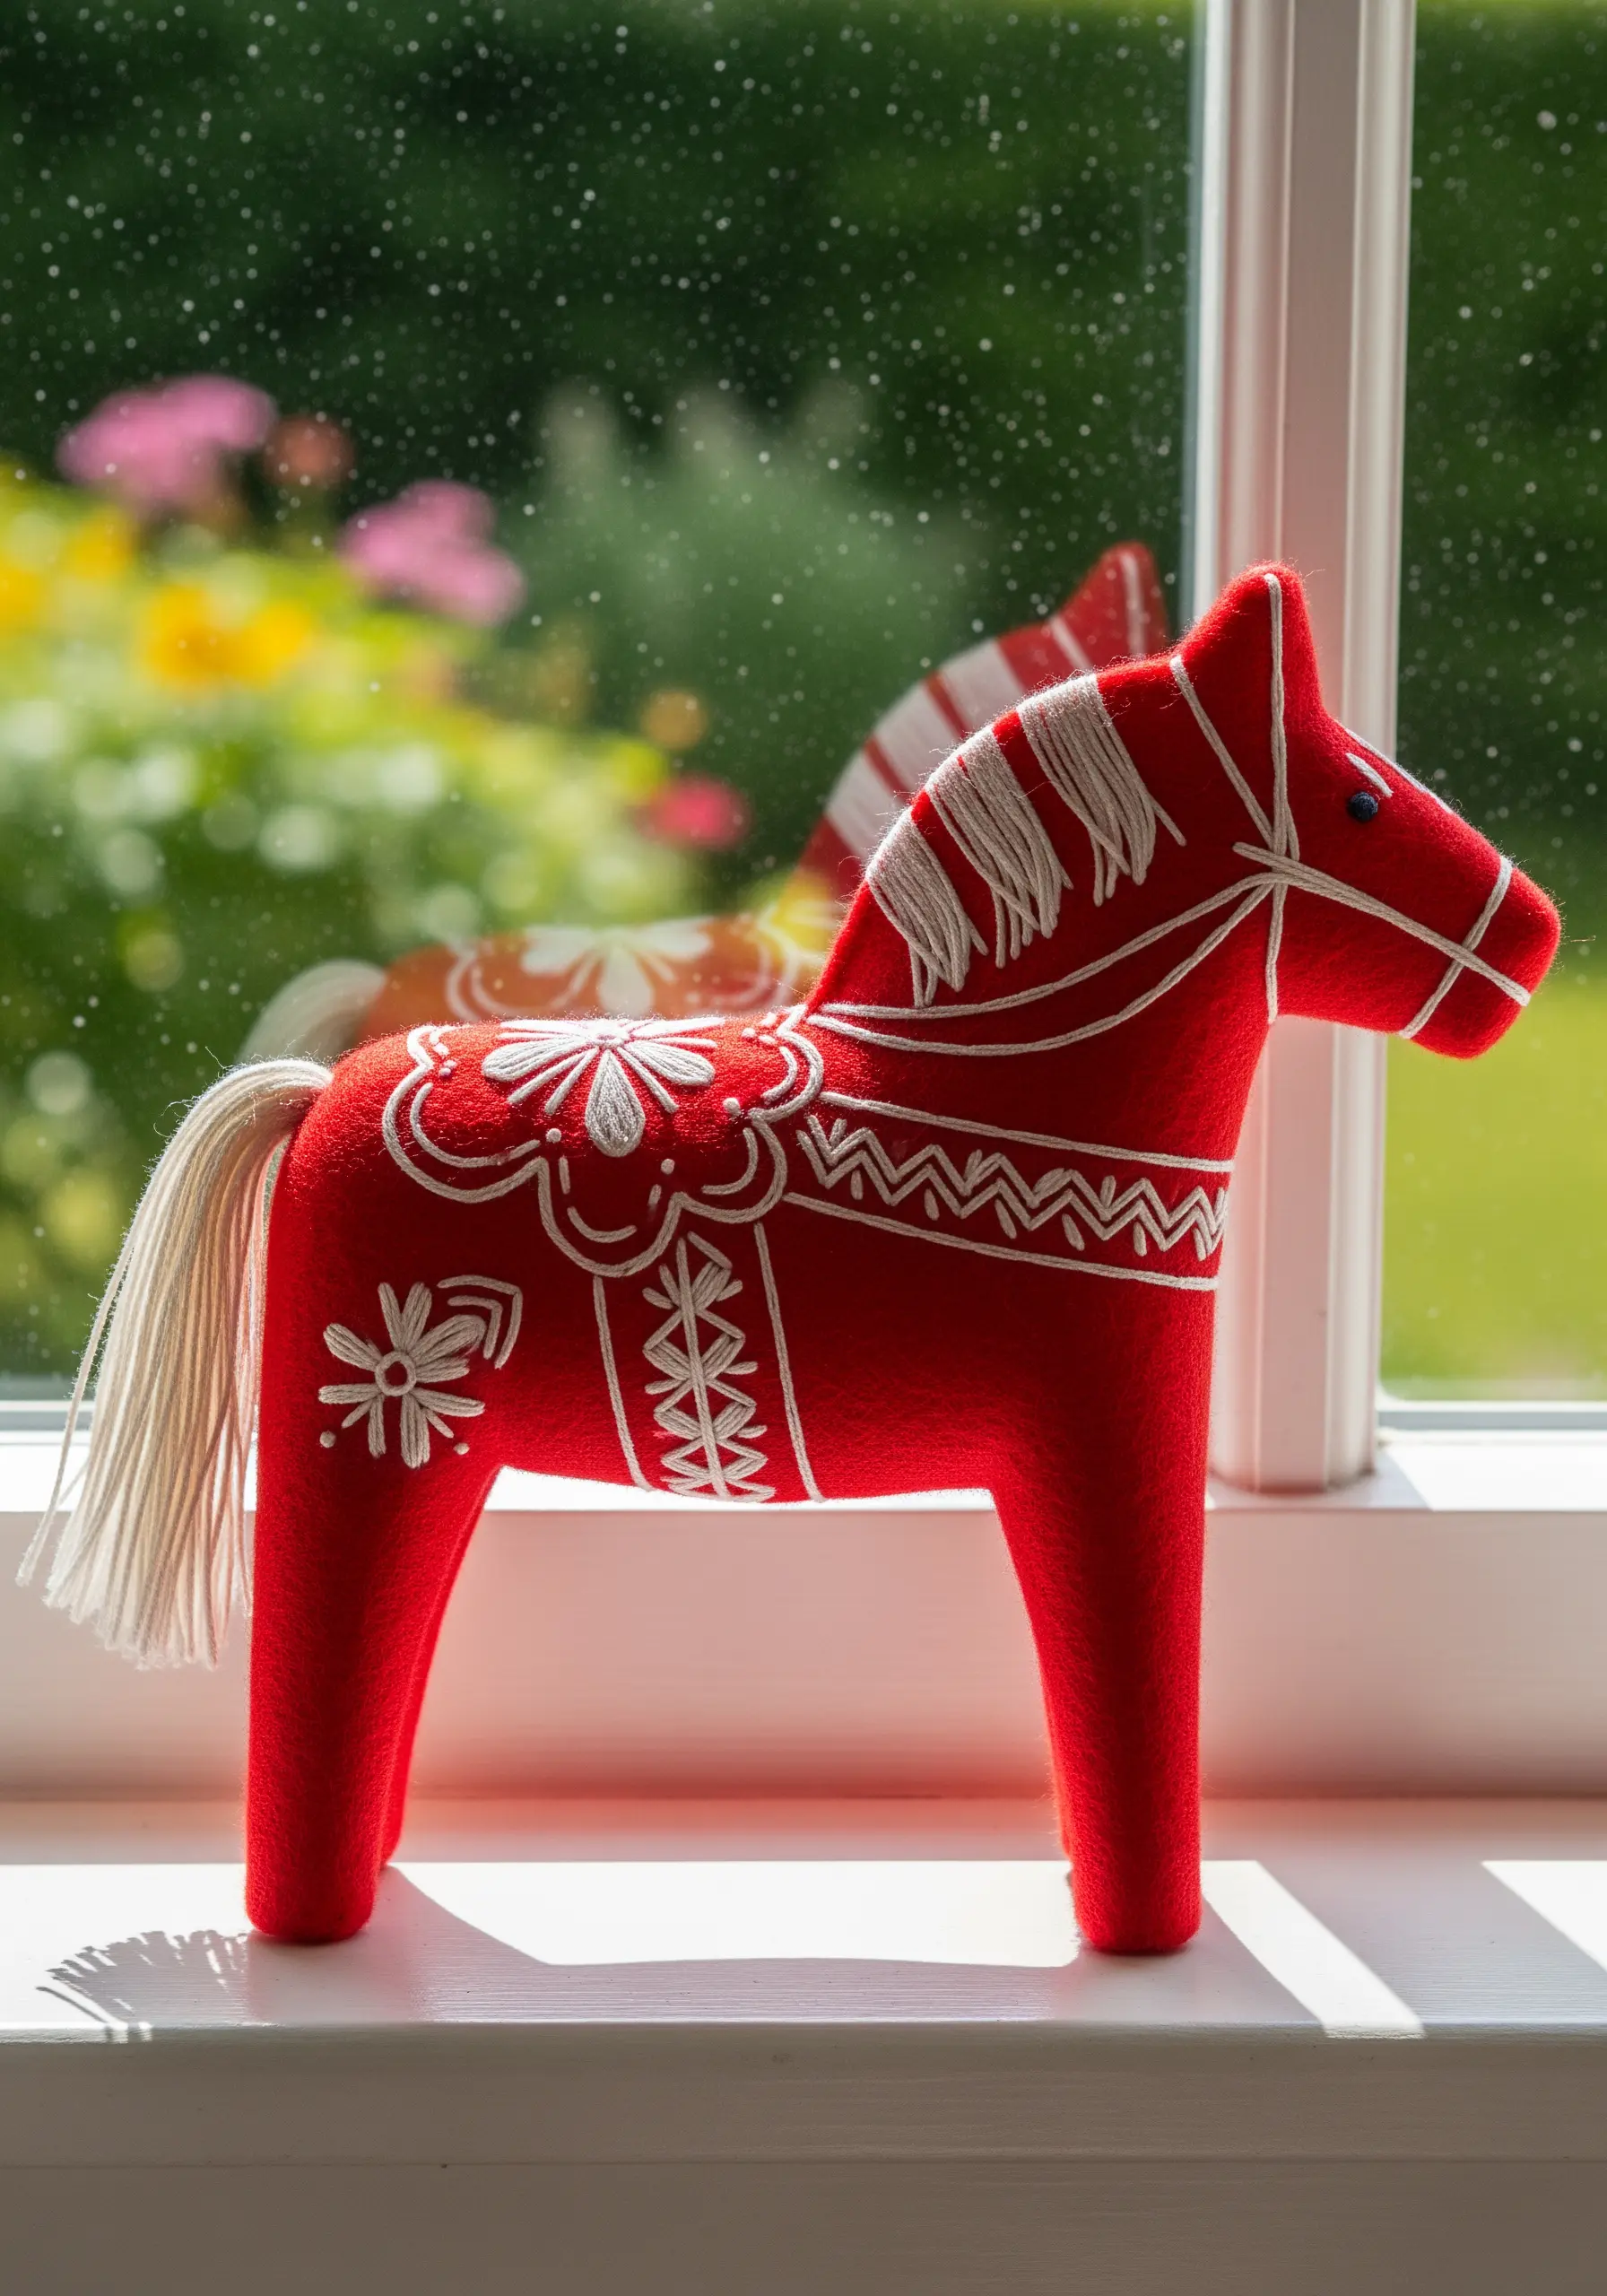
The charm of this Dala horse lies in the uniform size of the lazy daisy stitches; mark your fabric with a water-soluble pen to ensure symmetry.
Use a chain stitch for the mane to create a continuous, rope-like texture that mimics hair better than a straight stitch.
Red felt with white thread offers the highest visual contrast for distinct pattern readability.
13. Couching metallic threads for definition
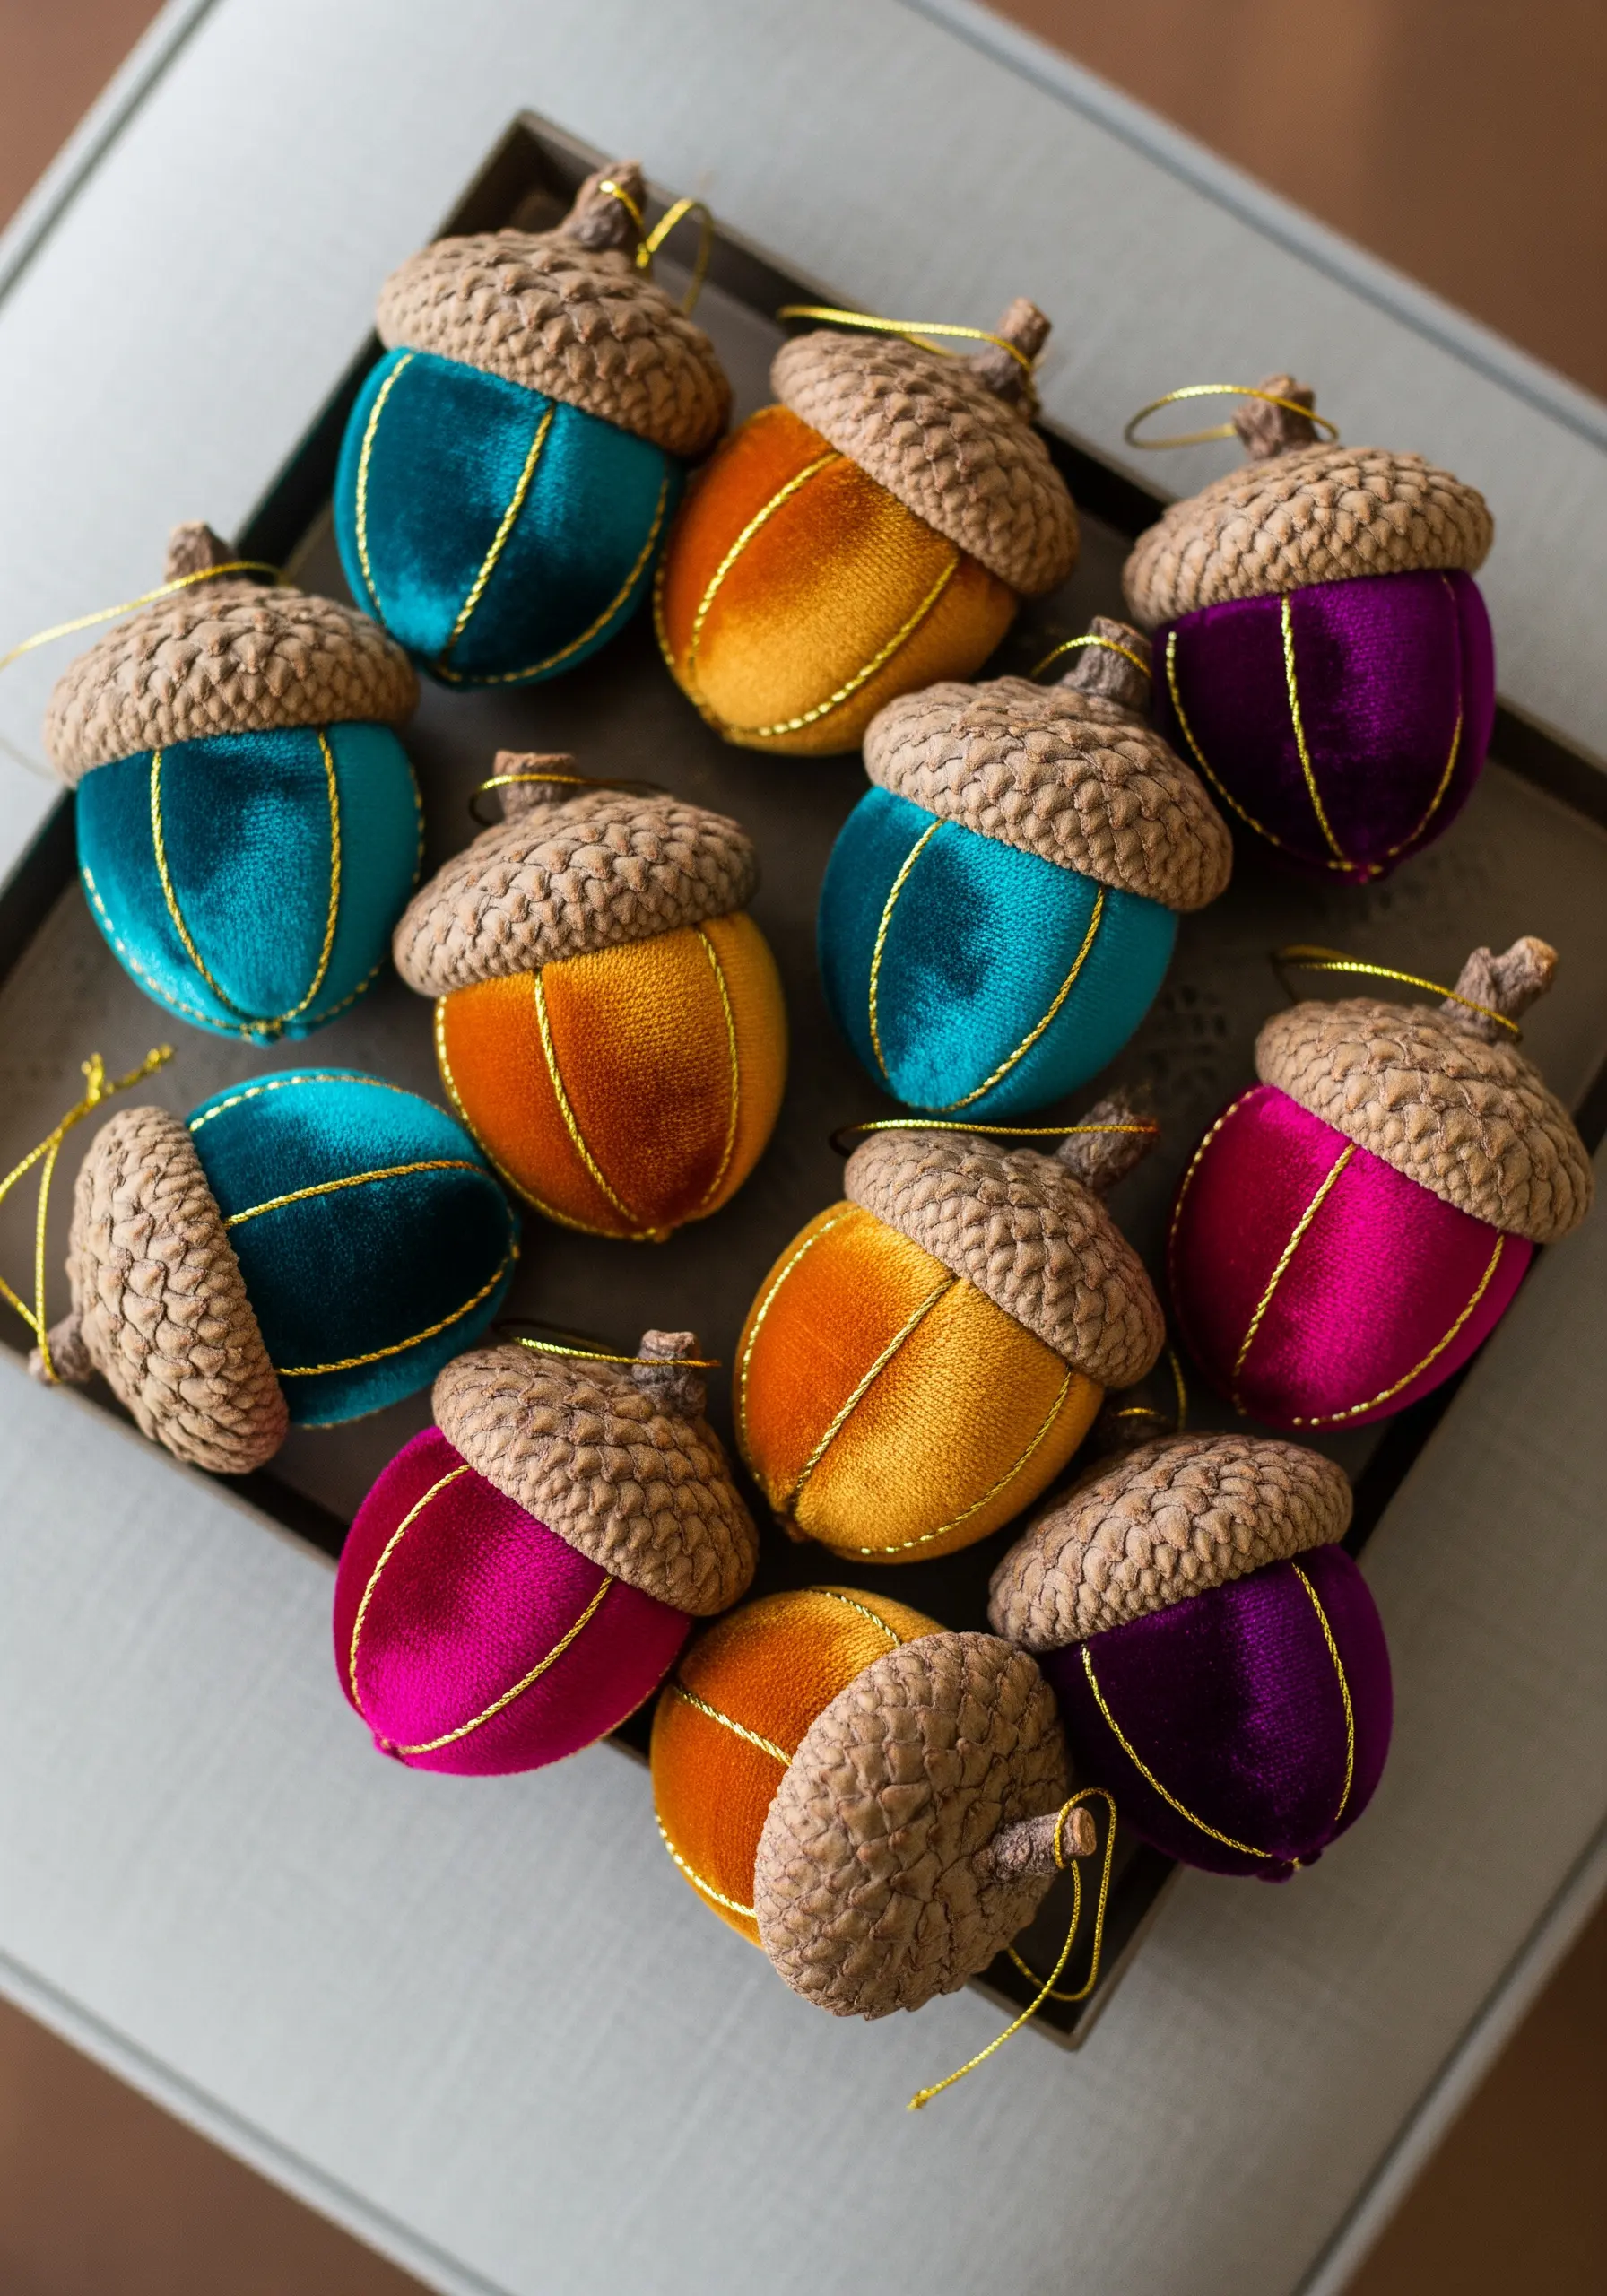
To define the segments of the acorn, couch a thick gold cord over the velvet rather than stitching through it, which can bury the thread.
The velvet cap is created by gathering a circle of fabric, a technique that relies on strong upholstery thread to prevent snapping under tension.
These are perfect small embroidered decor items that make any space cozy.
14. Creating volume with turkey work

The fuzzy texture on the bee’s body is achieved with Turkey work (or Ghiordes knot), which is stitched in loops and then cut and trimmed.
Sculpt the thread with sharp embroidery scissors to create the rounded abdomen shape.
Combine this with stumpwork wings for a piece that belongs in a collection of handmade sculptures that combine modern design with craft.
15. Blanket stitch as a structural edge

When constructing felt garlands, the blanket stitch serves two purposes: decorative framing and compressing the layers for durability.
Keep your stitch spacing identical by using the width of your needle as a measuring guide between entry points.
Layering multiple colors creates a rigid structure without needing cardstock stiffeners.
16. Advanced geometric layering
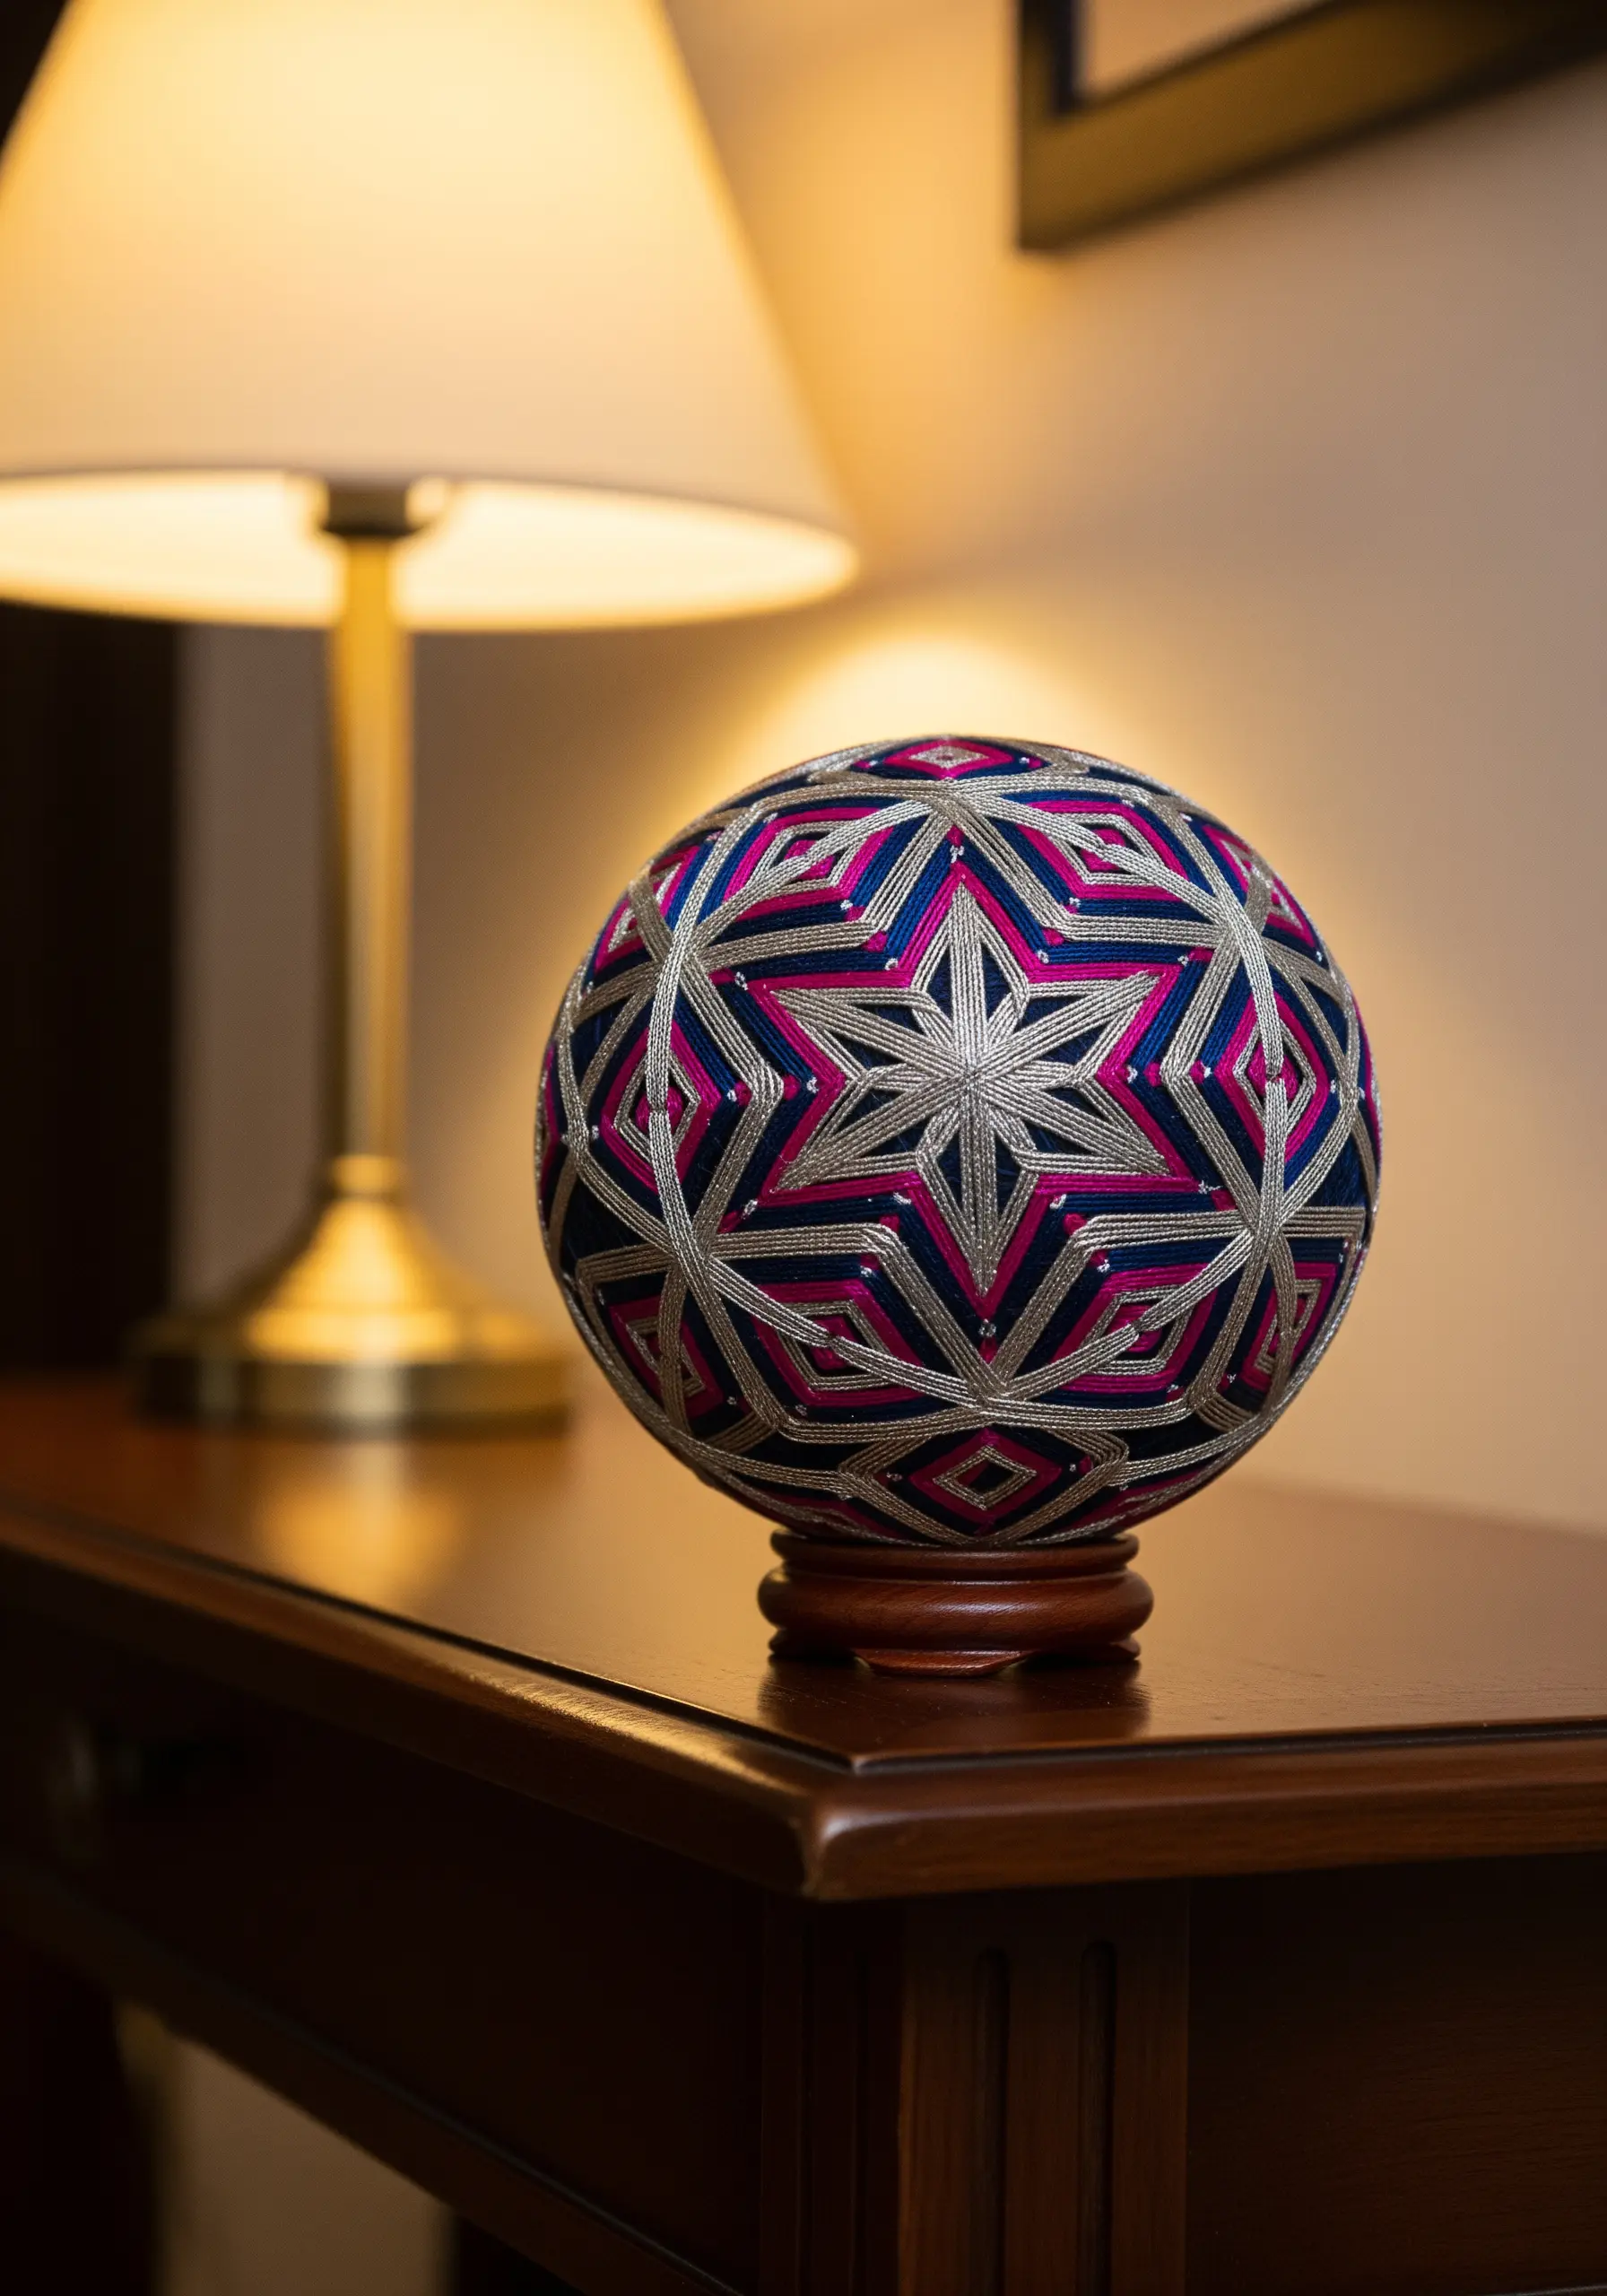
This intricate pattern is built by layering threads in a specific sequence; if you cross threads out of order, the geometric star loses its sharpness.
Use a thimble, as pushing the needle through multiple layers of wrapped thread requires significant force and control.
Such precision makes for diy art objects that will impress your friends and family.
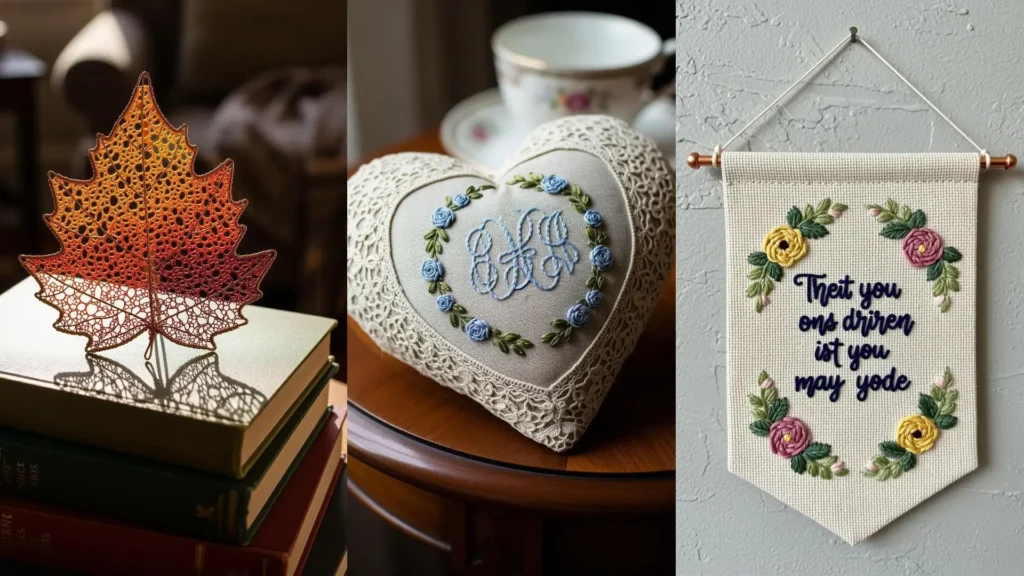
17. Text spacing and banner finishing
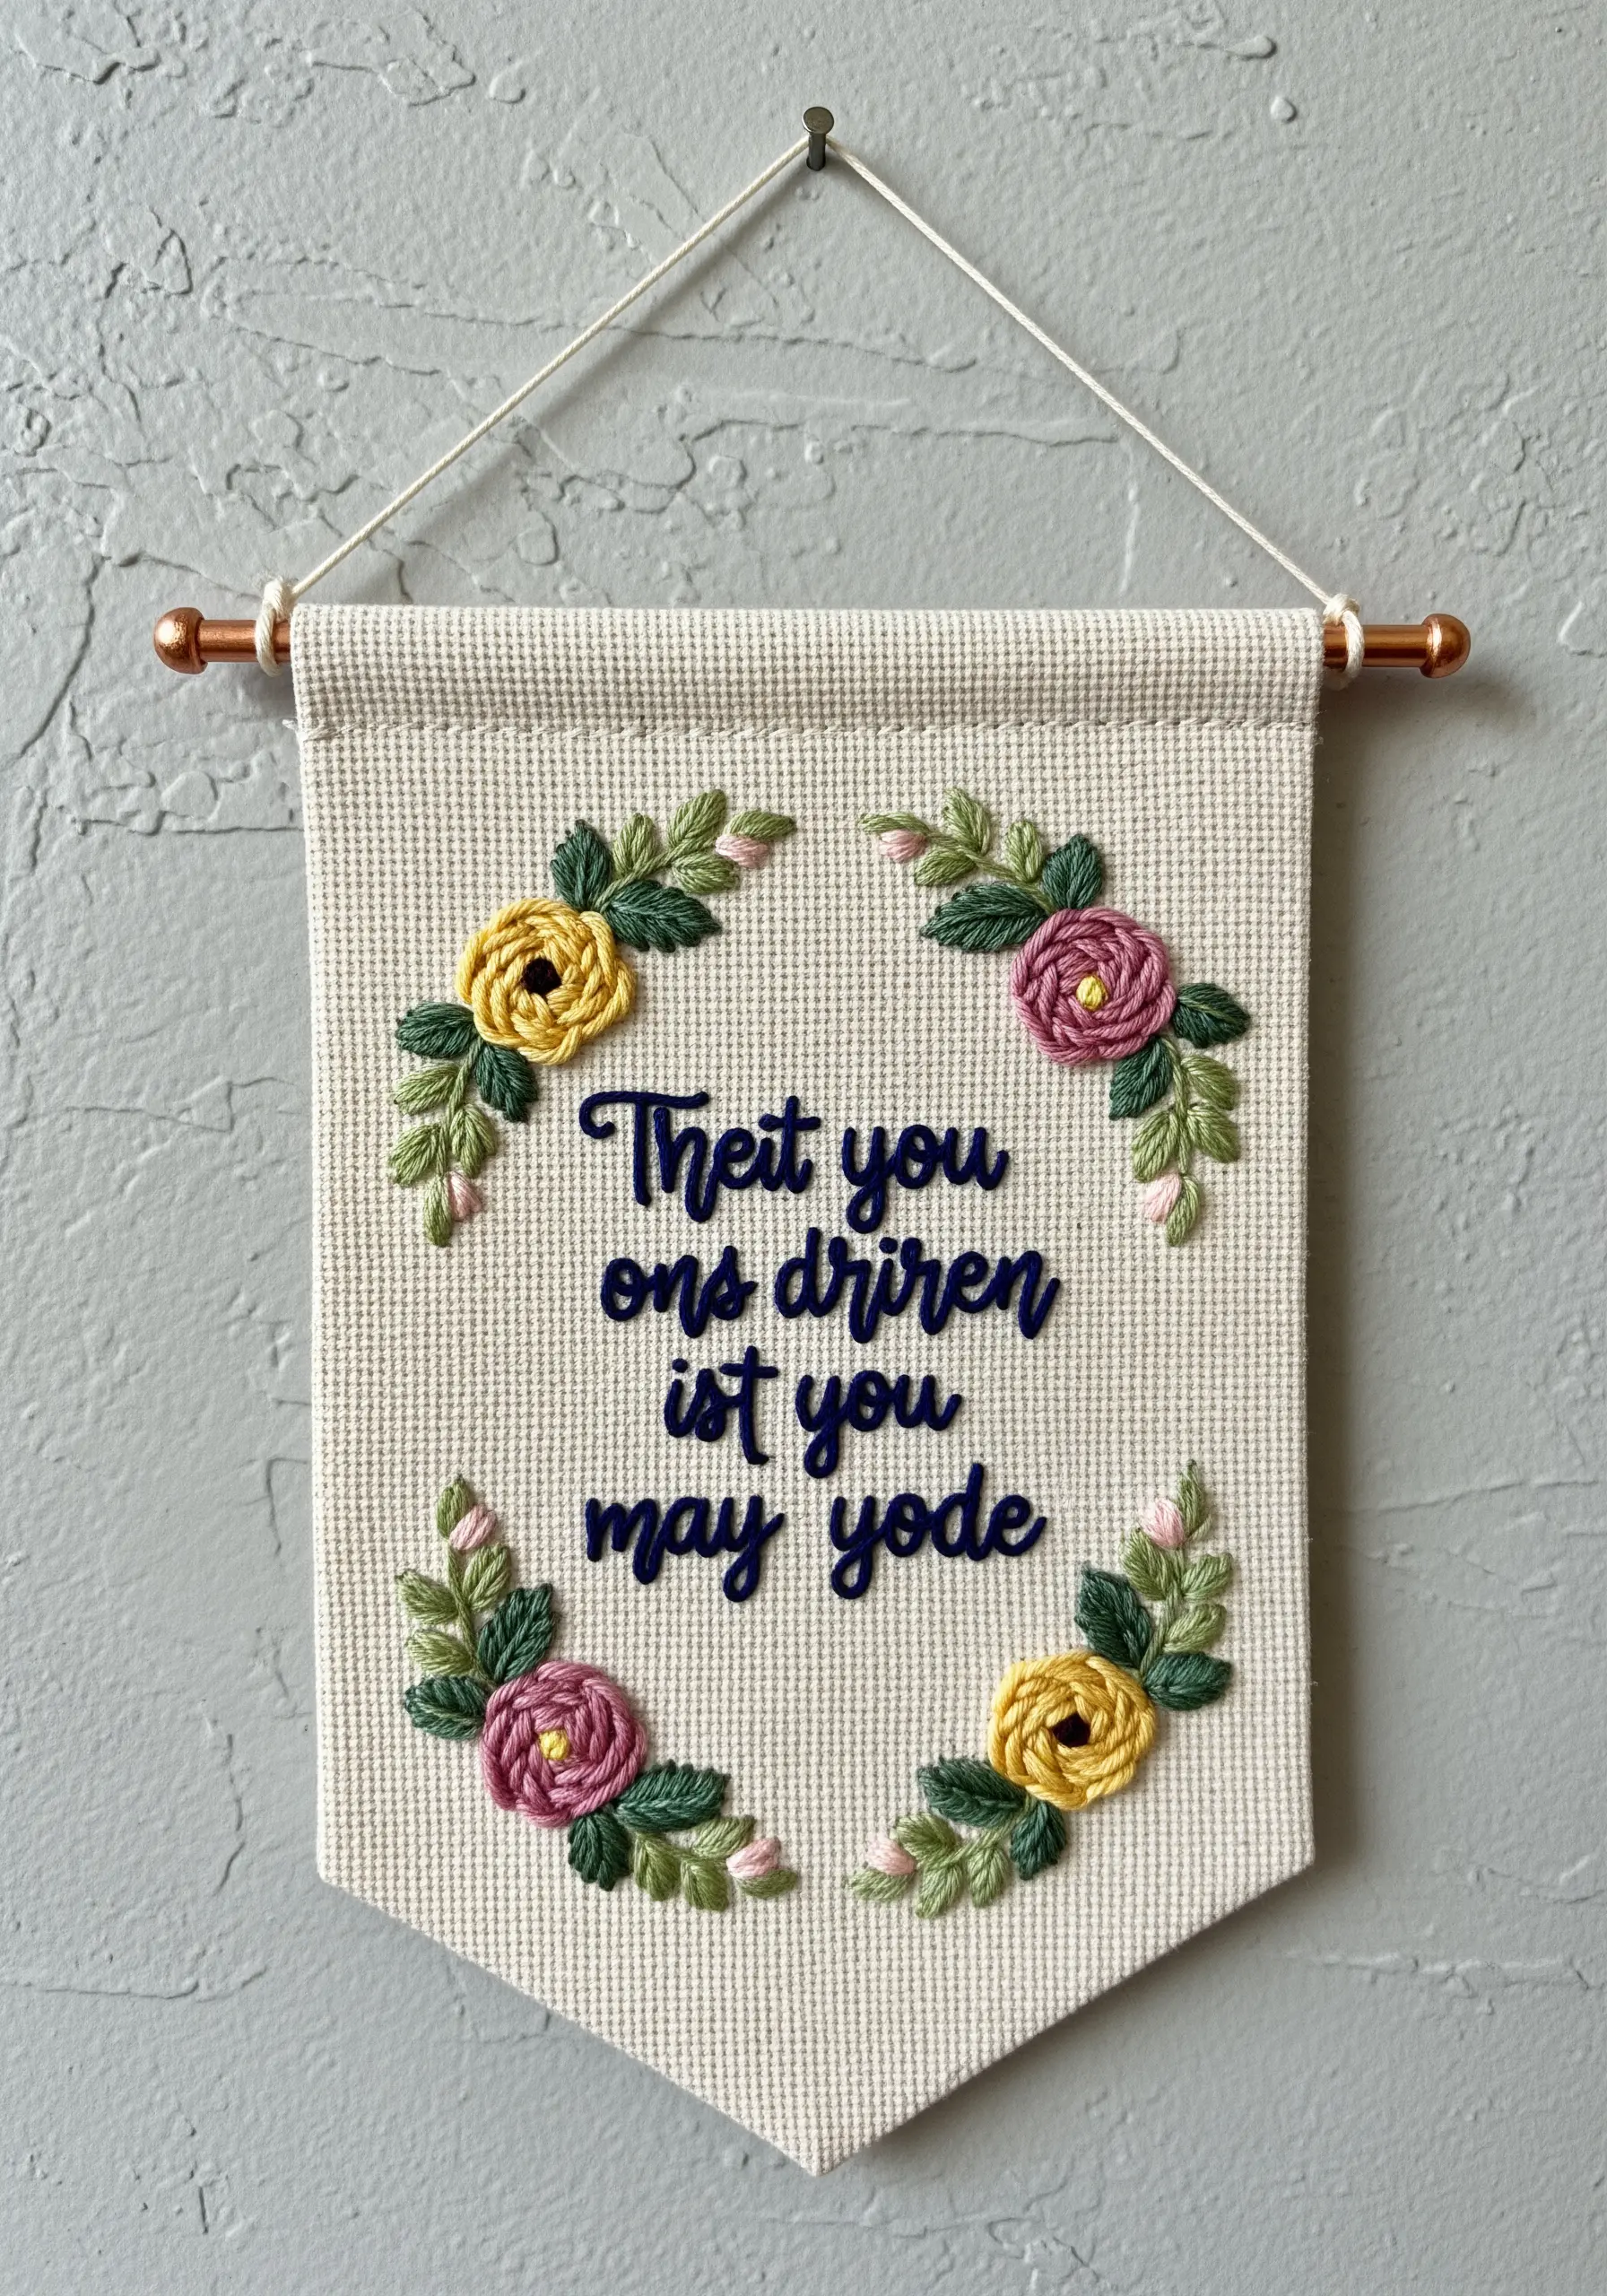
For legible lettering, prioritize the negative space between letters as much as the stitches themselves; crowded satin stitch becomes unreadable.
Finish the banner edges by folding the fabric back and whipping the edge, or using a fusible interfacing for a crisp, no-sew finish.
This style is ideal for inspirational quote embroidery wall hangings that motivate you daily.
18. Needle lace on wire armatures

This transparency is achieved by stitching detached buttonhole stitches over a wire frame, creating a fabric-like mesh without a ground fabric.
You must maintain consistent tension; too loose and the leaf sags, too tight and the wire distorts.
This technique connects beautifully with ways to embroider natural textures that wow your friends.
19. Sashiko-inspired geometric density
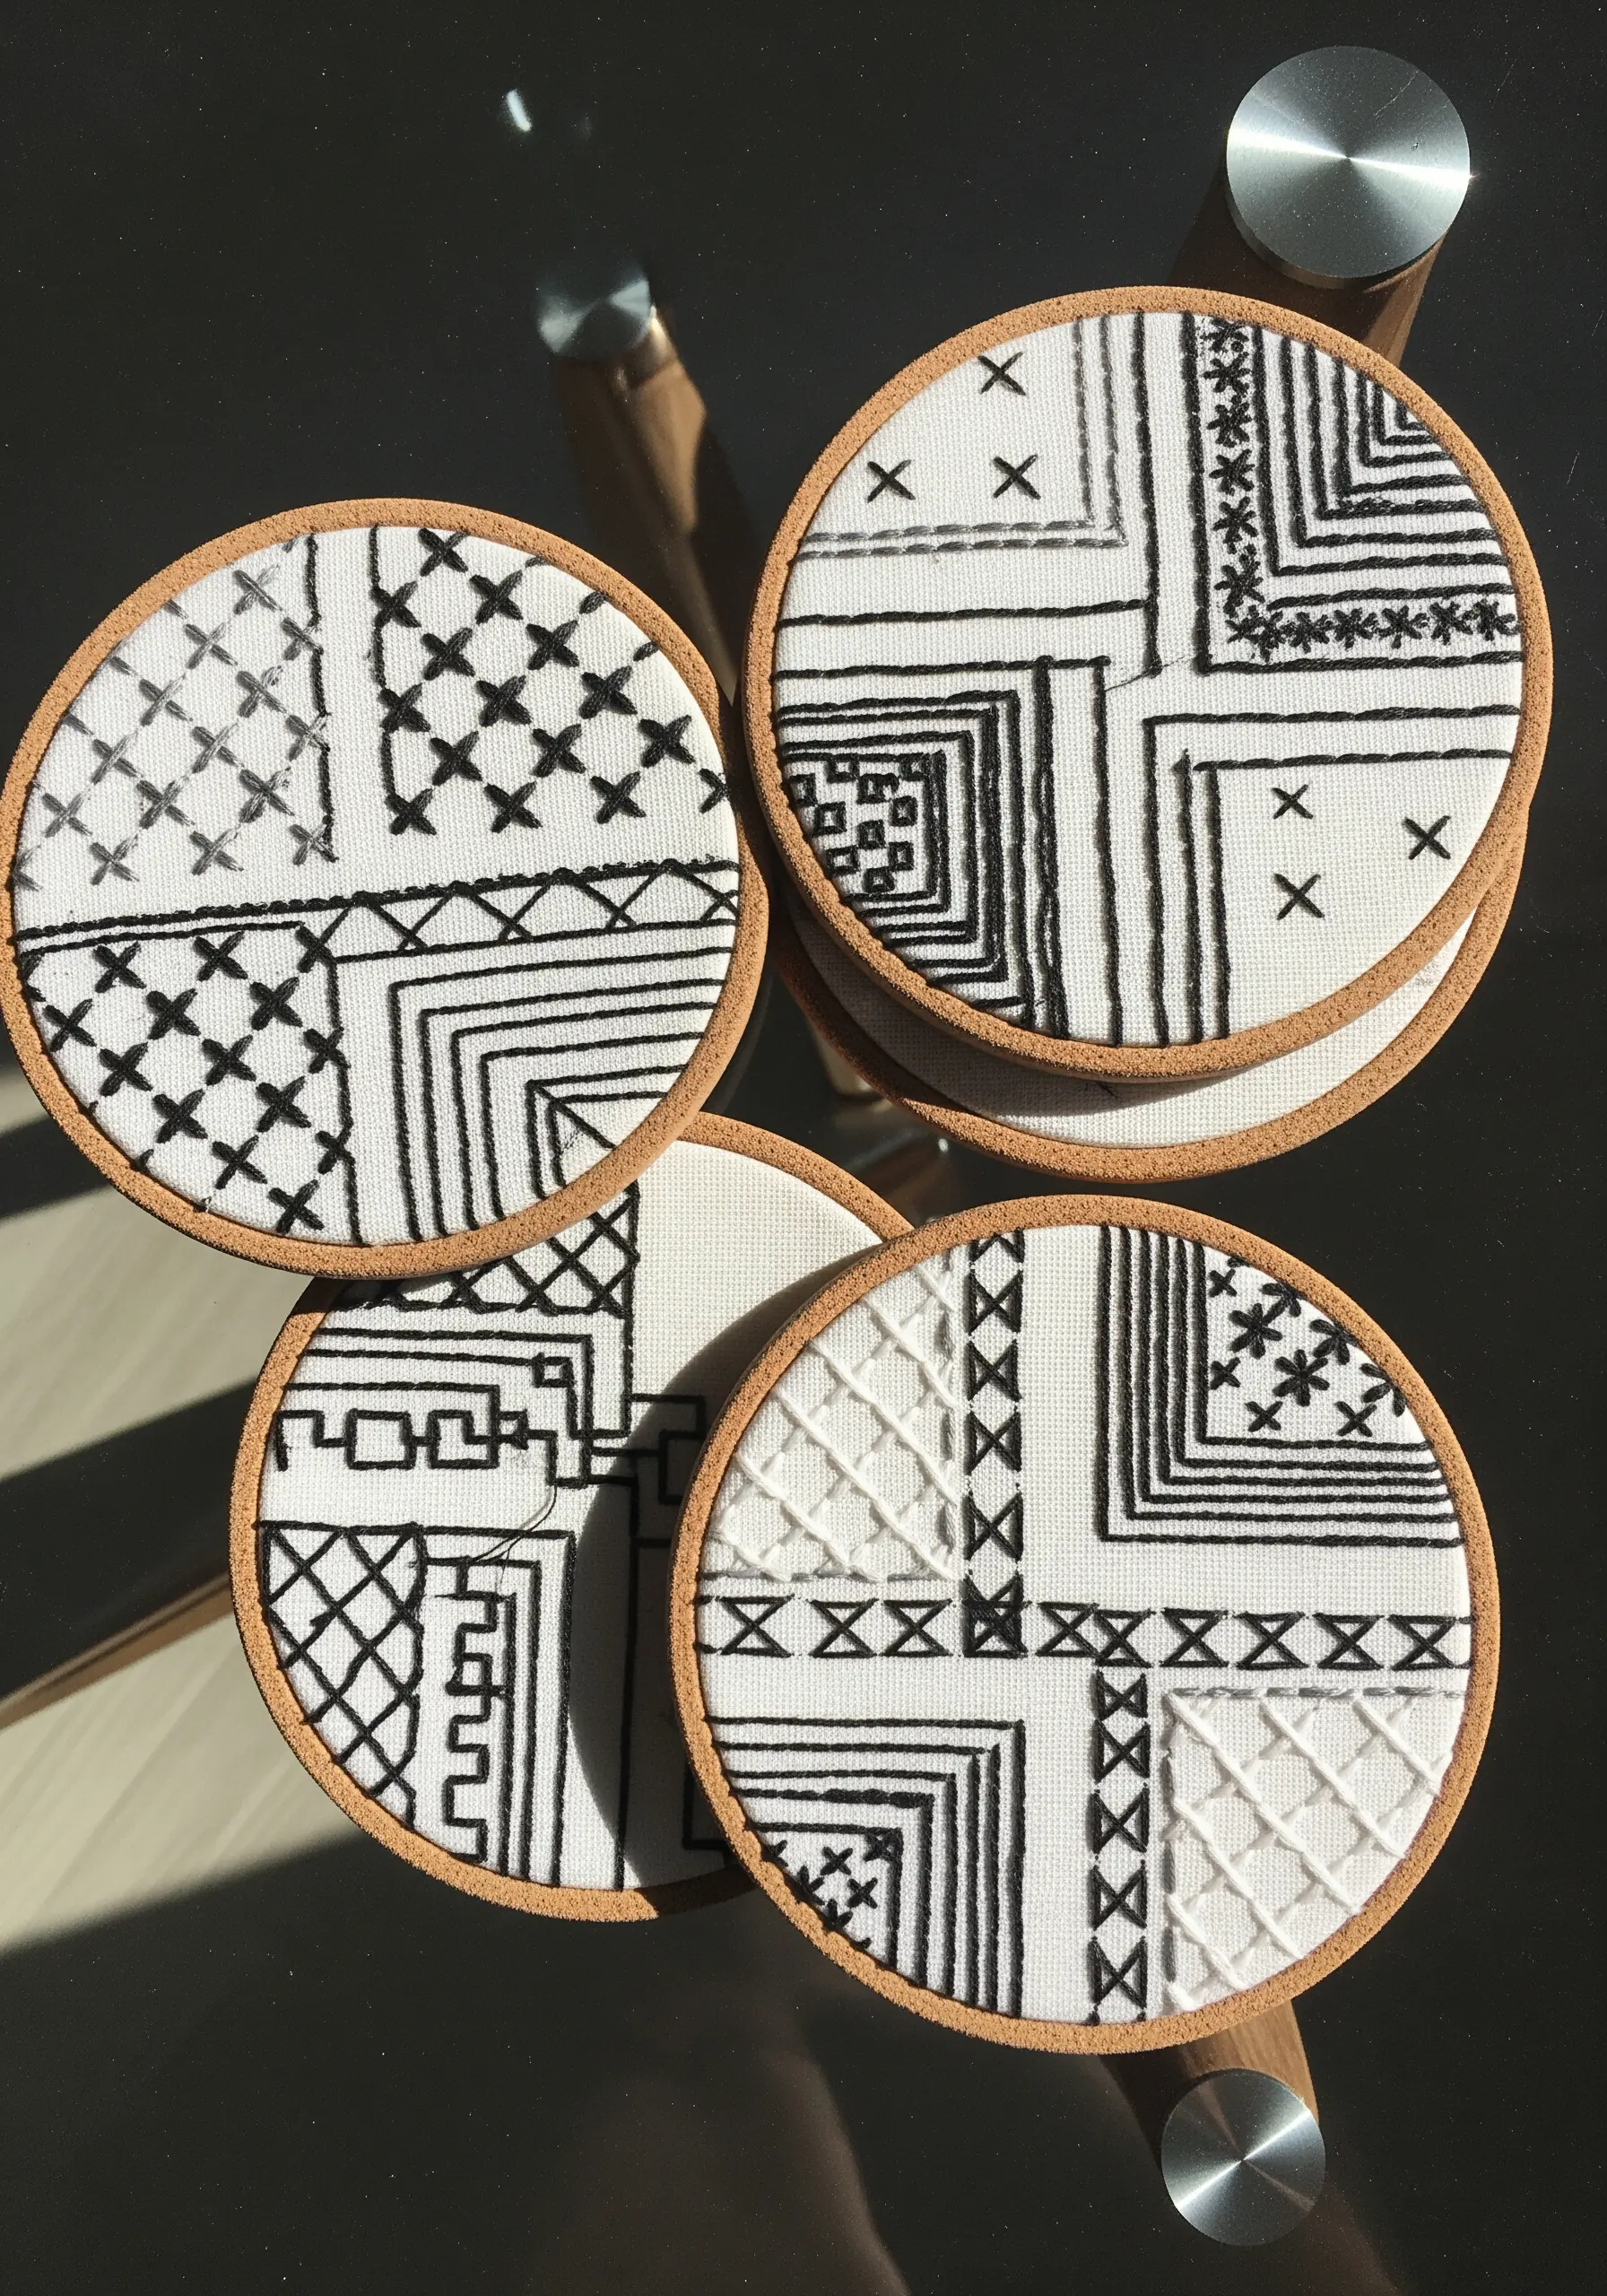
Simulate the look of Sashiko by using a single weight of black cotton pearl thread on a high-contrast white ground.
The key to these geometric fills is consistent stitch length; a running stitch that varies in length will destroy the optical illusion of the pattern.
These make excellent handmade embroidery gifts that will make you look like a pro.
20. Sculpting form with running stitch
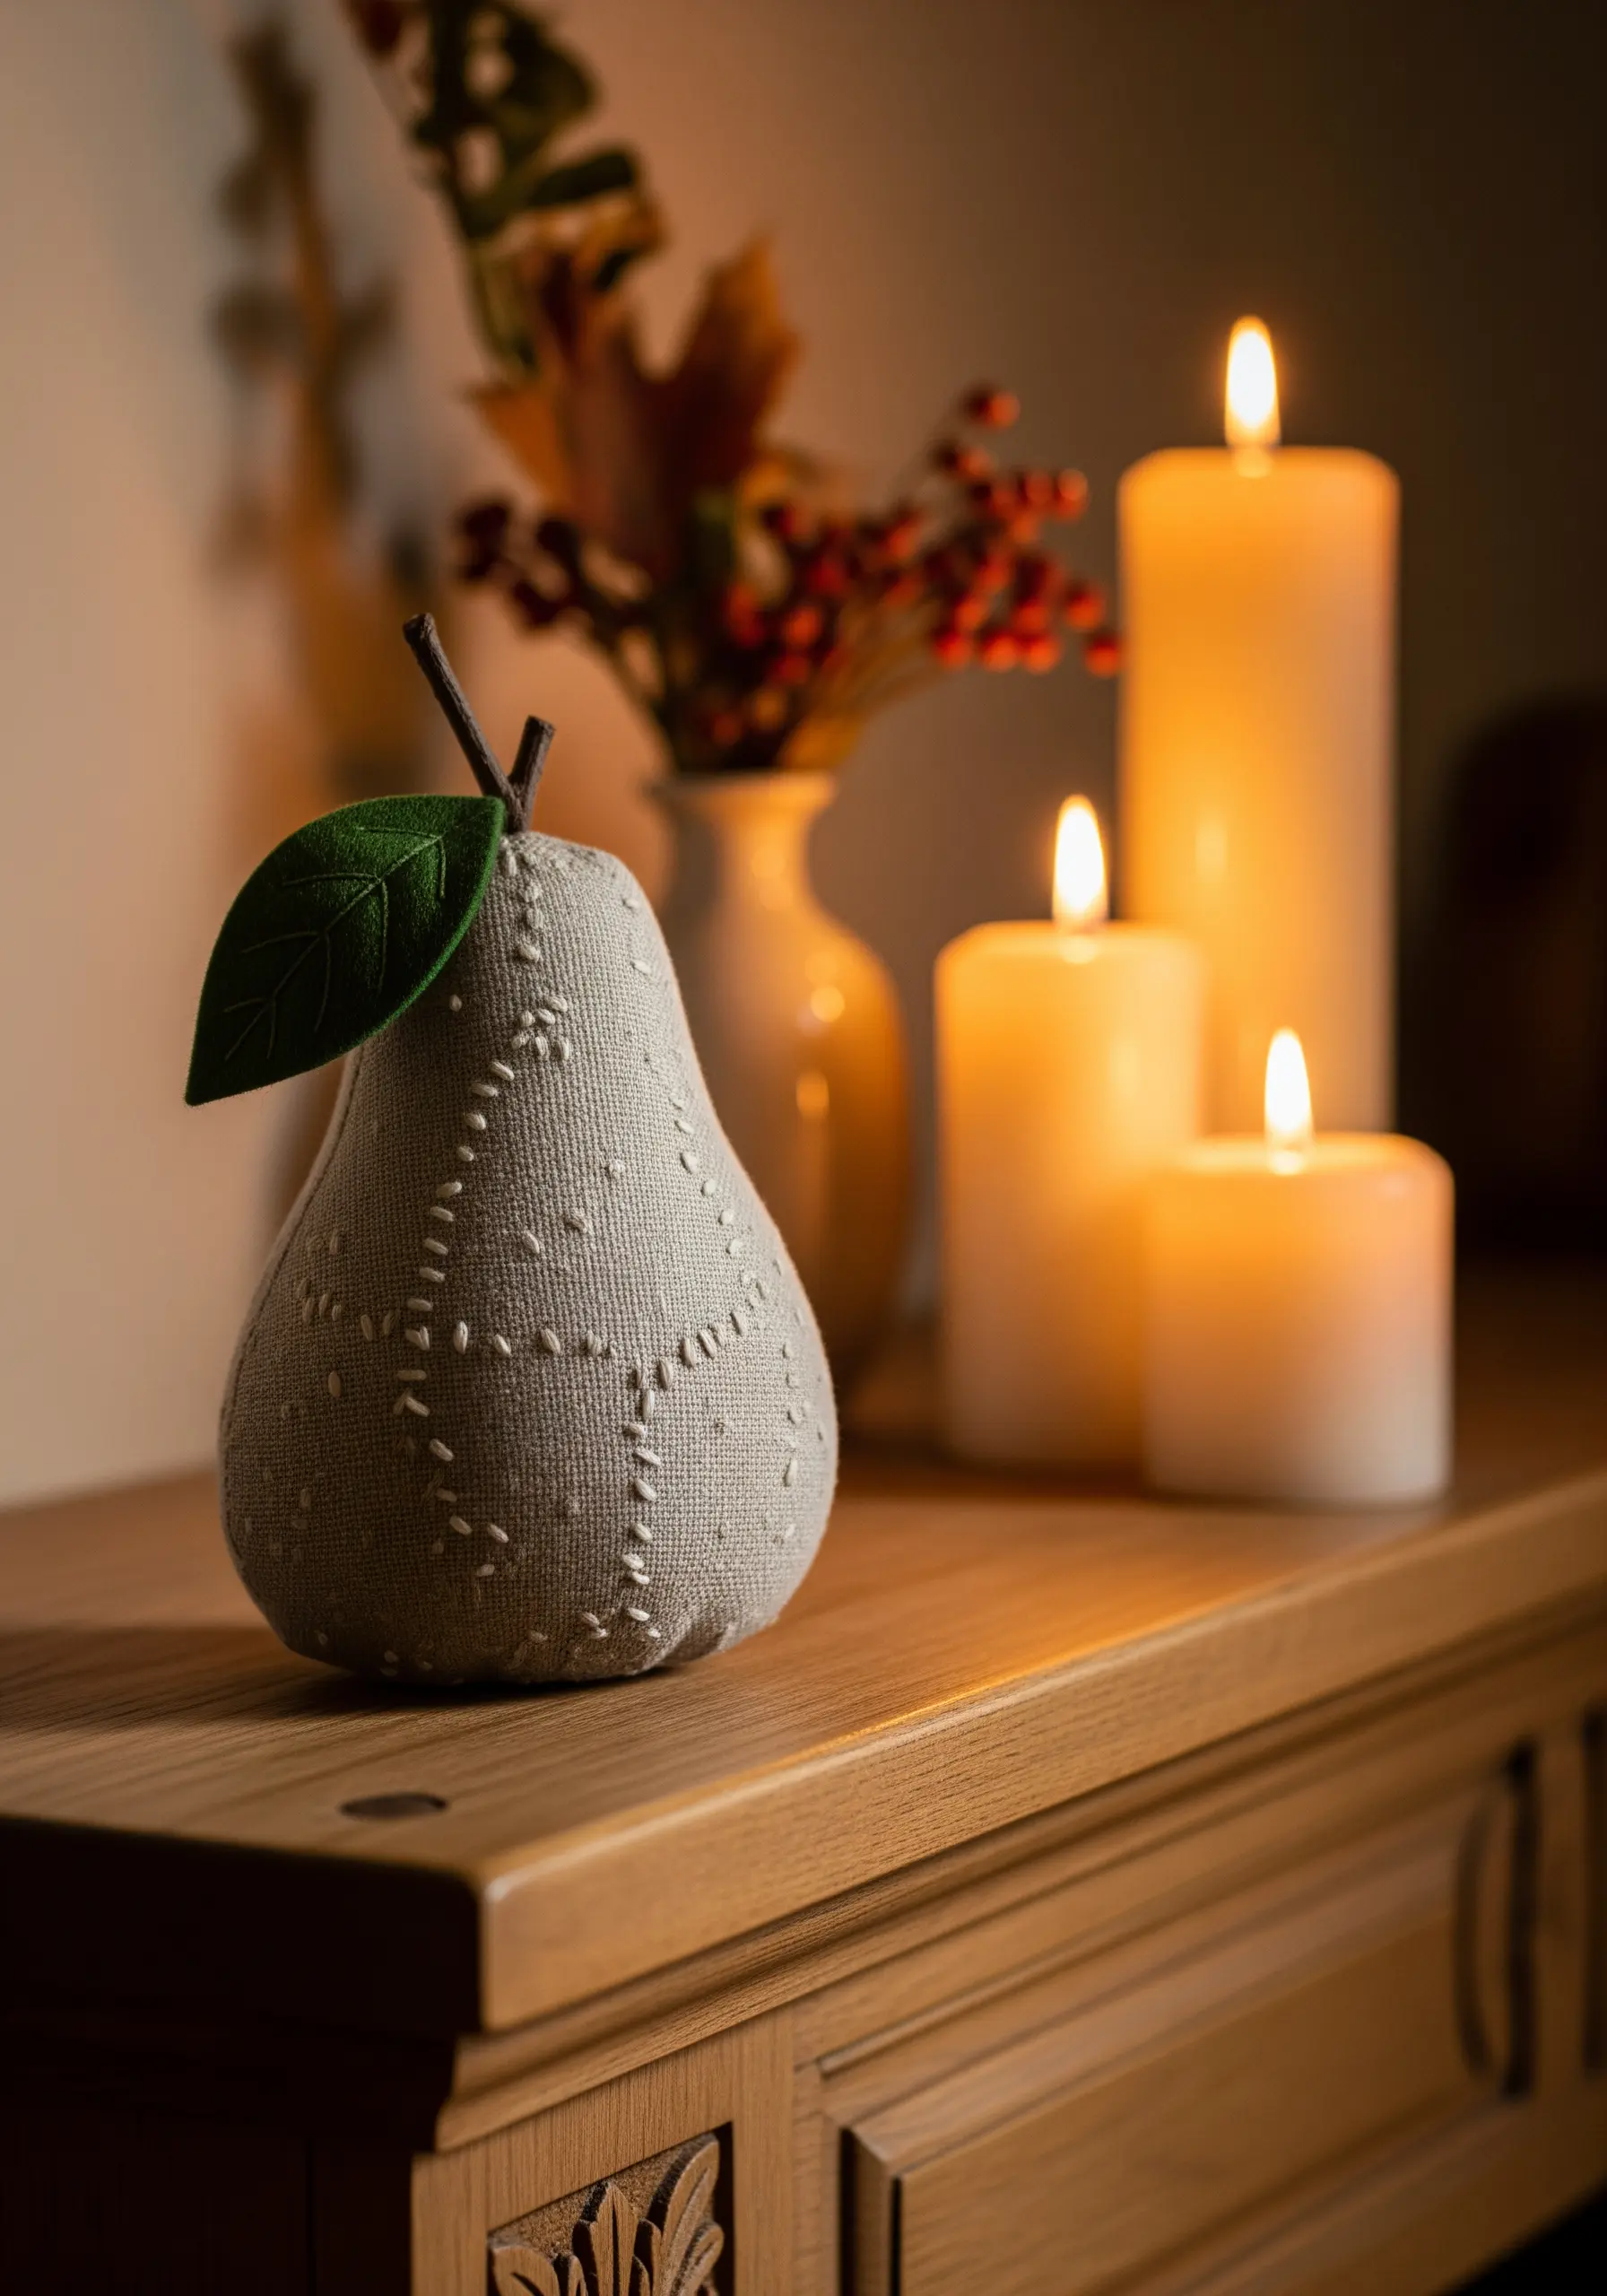
Use simple running stitches in varied directions to contour the fabric, visually suggesting the curvature of the pear.
The stitches act like hatching in a drawing, creating shadow and density where the lines are closer together.
This fits perfectly into diy embroidery projects that give a cozy minimalist feeling.
21. Ribbon embroidery on velvet

Silk ribbon embroidery demands a chenille needle with a large eye to open a hole in the velvet without damaging the pile.
Keep your ribbon tension loose; if you pull too tight, the roses will look like knots rather than soft, blooming petals.
This technique creates romantic embroidery patterns perfect for couples bedrooms.
22. Central spine stability for feathers

When making fabric feathers, the central backstitch spine is functional, not just decorative—it anchors the two fabric layers together.
Fray the edges deliberately after stitching to soften the silhouette and mimic natural feather barbs.
Hang these as dreamy embroidery designs to add a touch of romance to your bedroom.
23. Directional beading for iridescence

To replicate a beetle’s shell, sew your sequins in overlapping scales (imbrication) starting from the bottom and working up.
Change the angle of your beads on the legs to mimic the jointed structure of an insect.
This precision transforms materials into diy art objects that look expensive but are surprisingly easy.
24. Seam embellishment variations
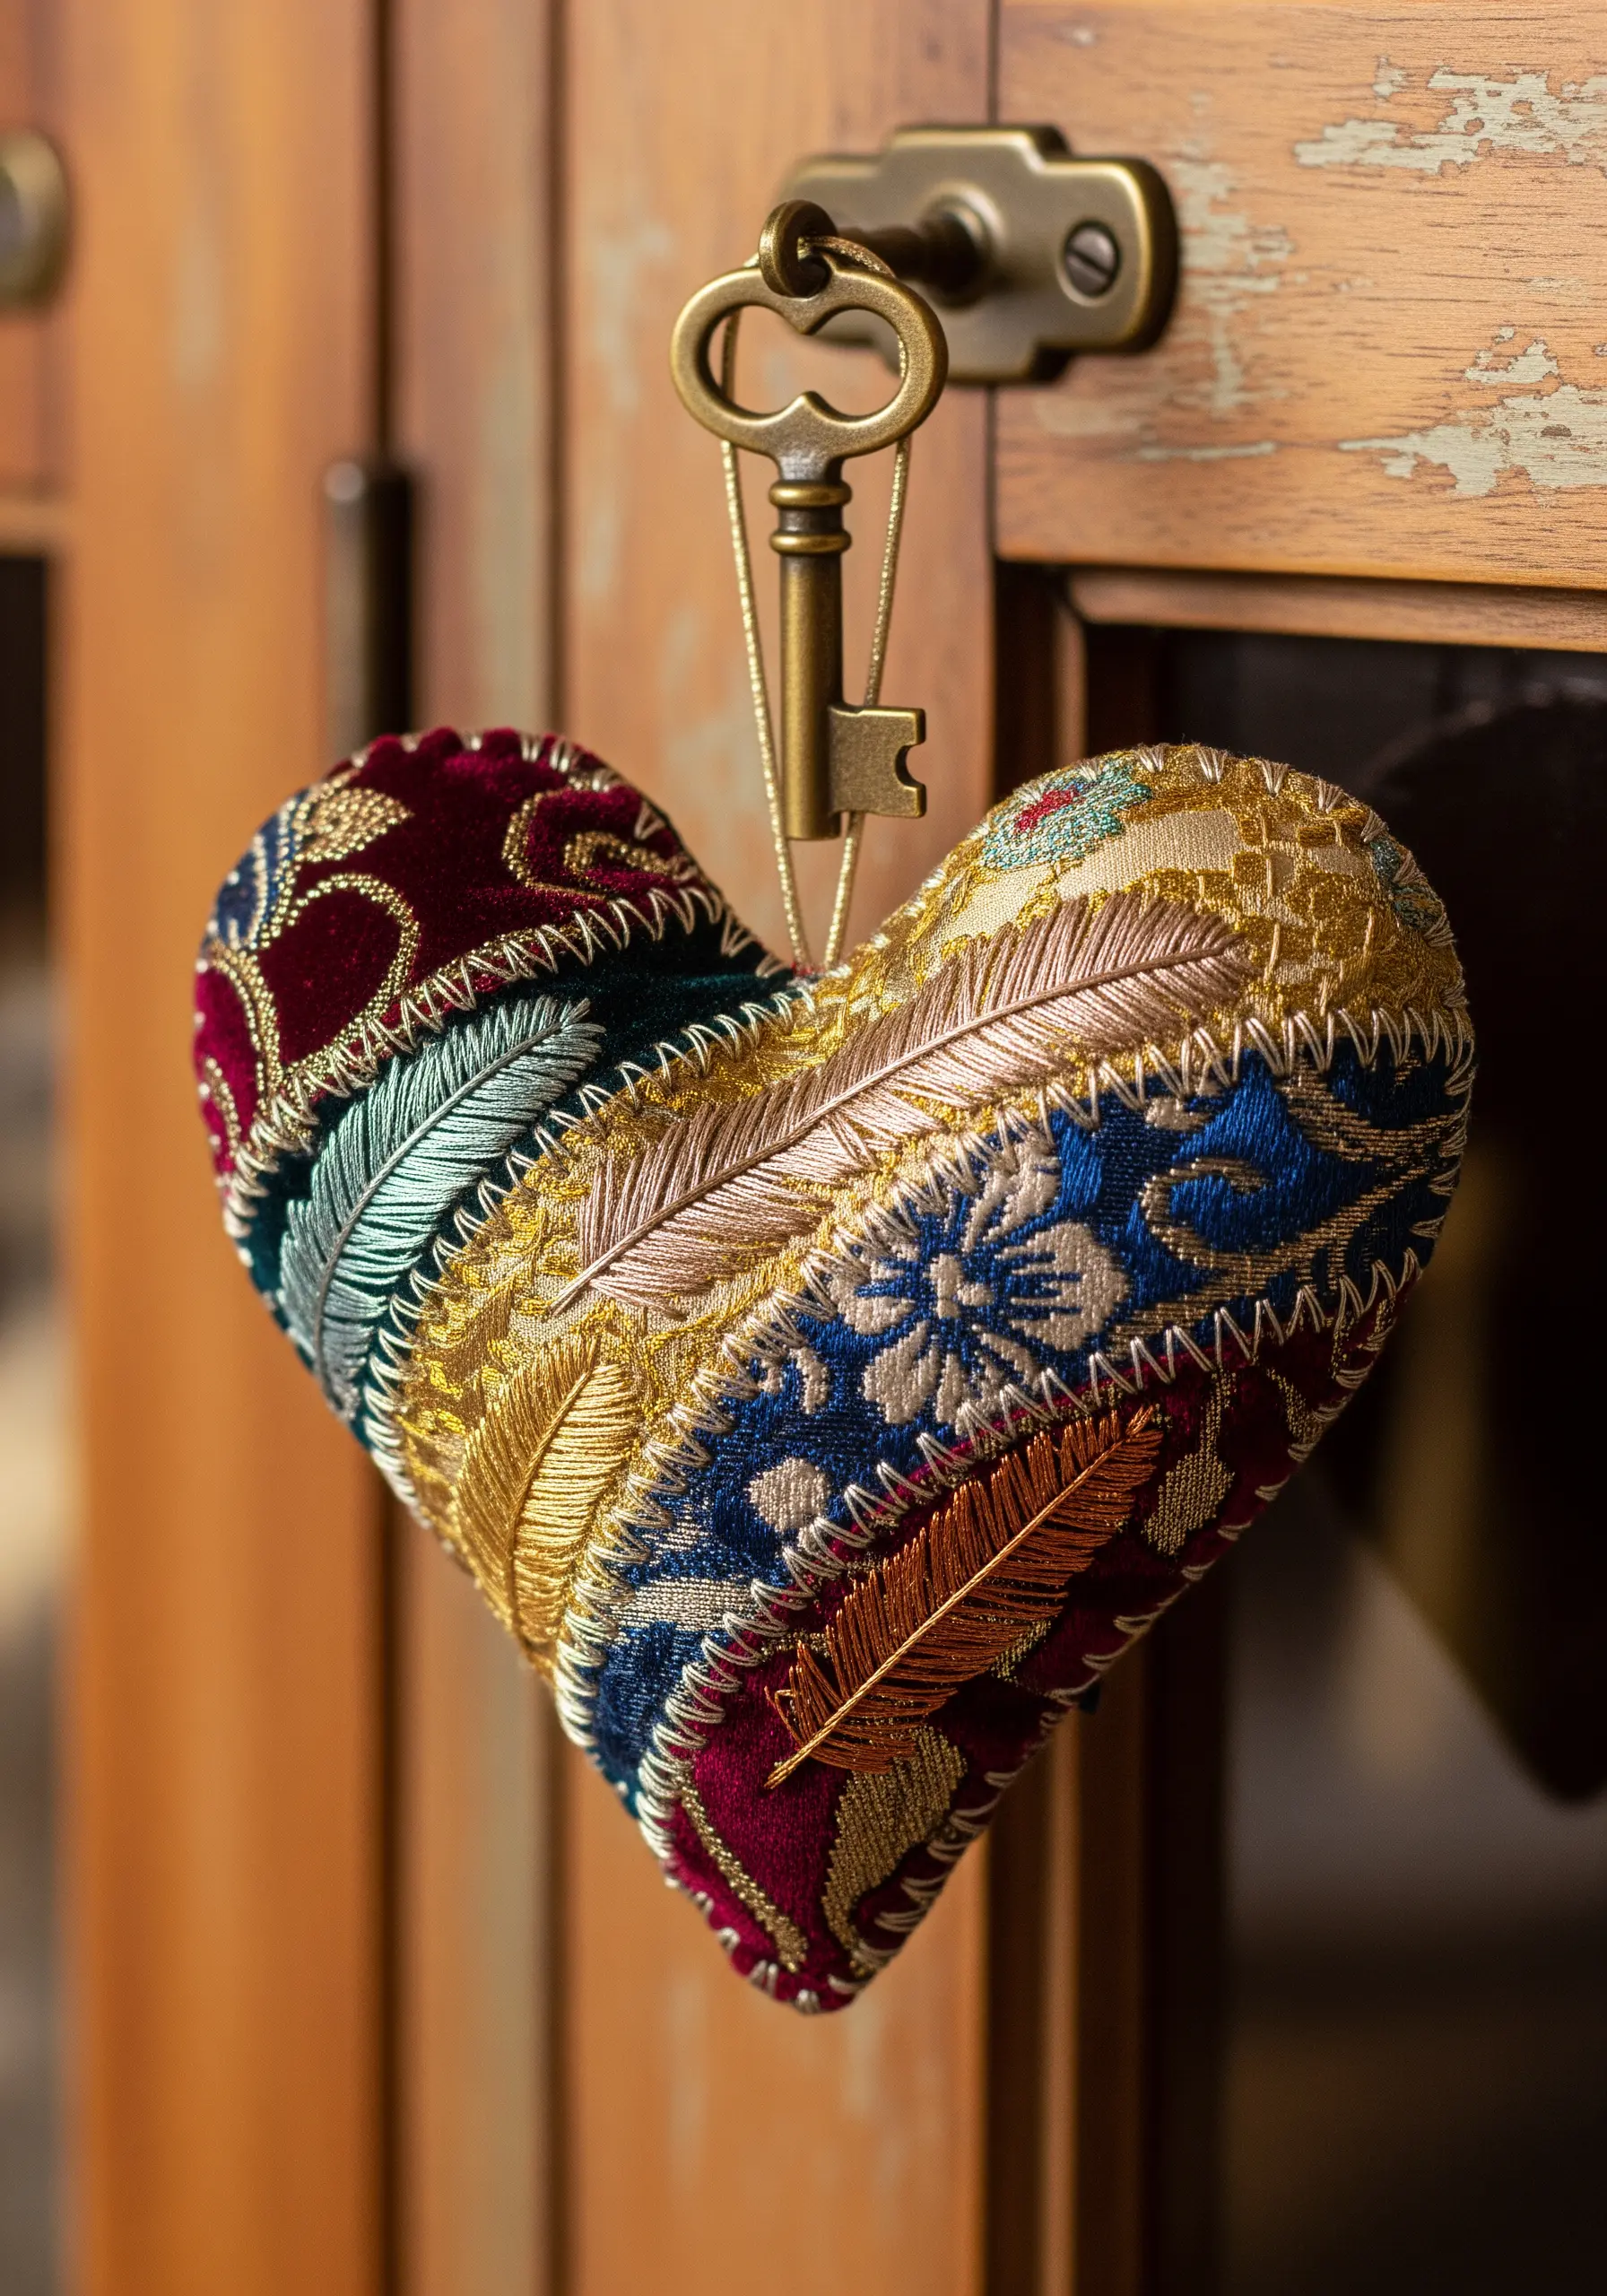
In crazy quilting, the embroidery serves to flatten the seams; vary your stitches—feather, herringbone, and cretan—to keep the eye engaged.
Use metallic or variegated threads to bridge the disparate fabric colors and textures into a cohesive whole.
This fits the aesthetic of vintage inspired fabric collage embroidery ideas.
25. Shaping curves with clipped seams
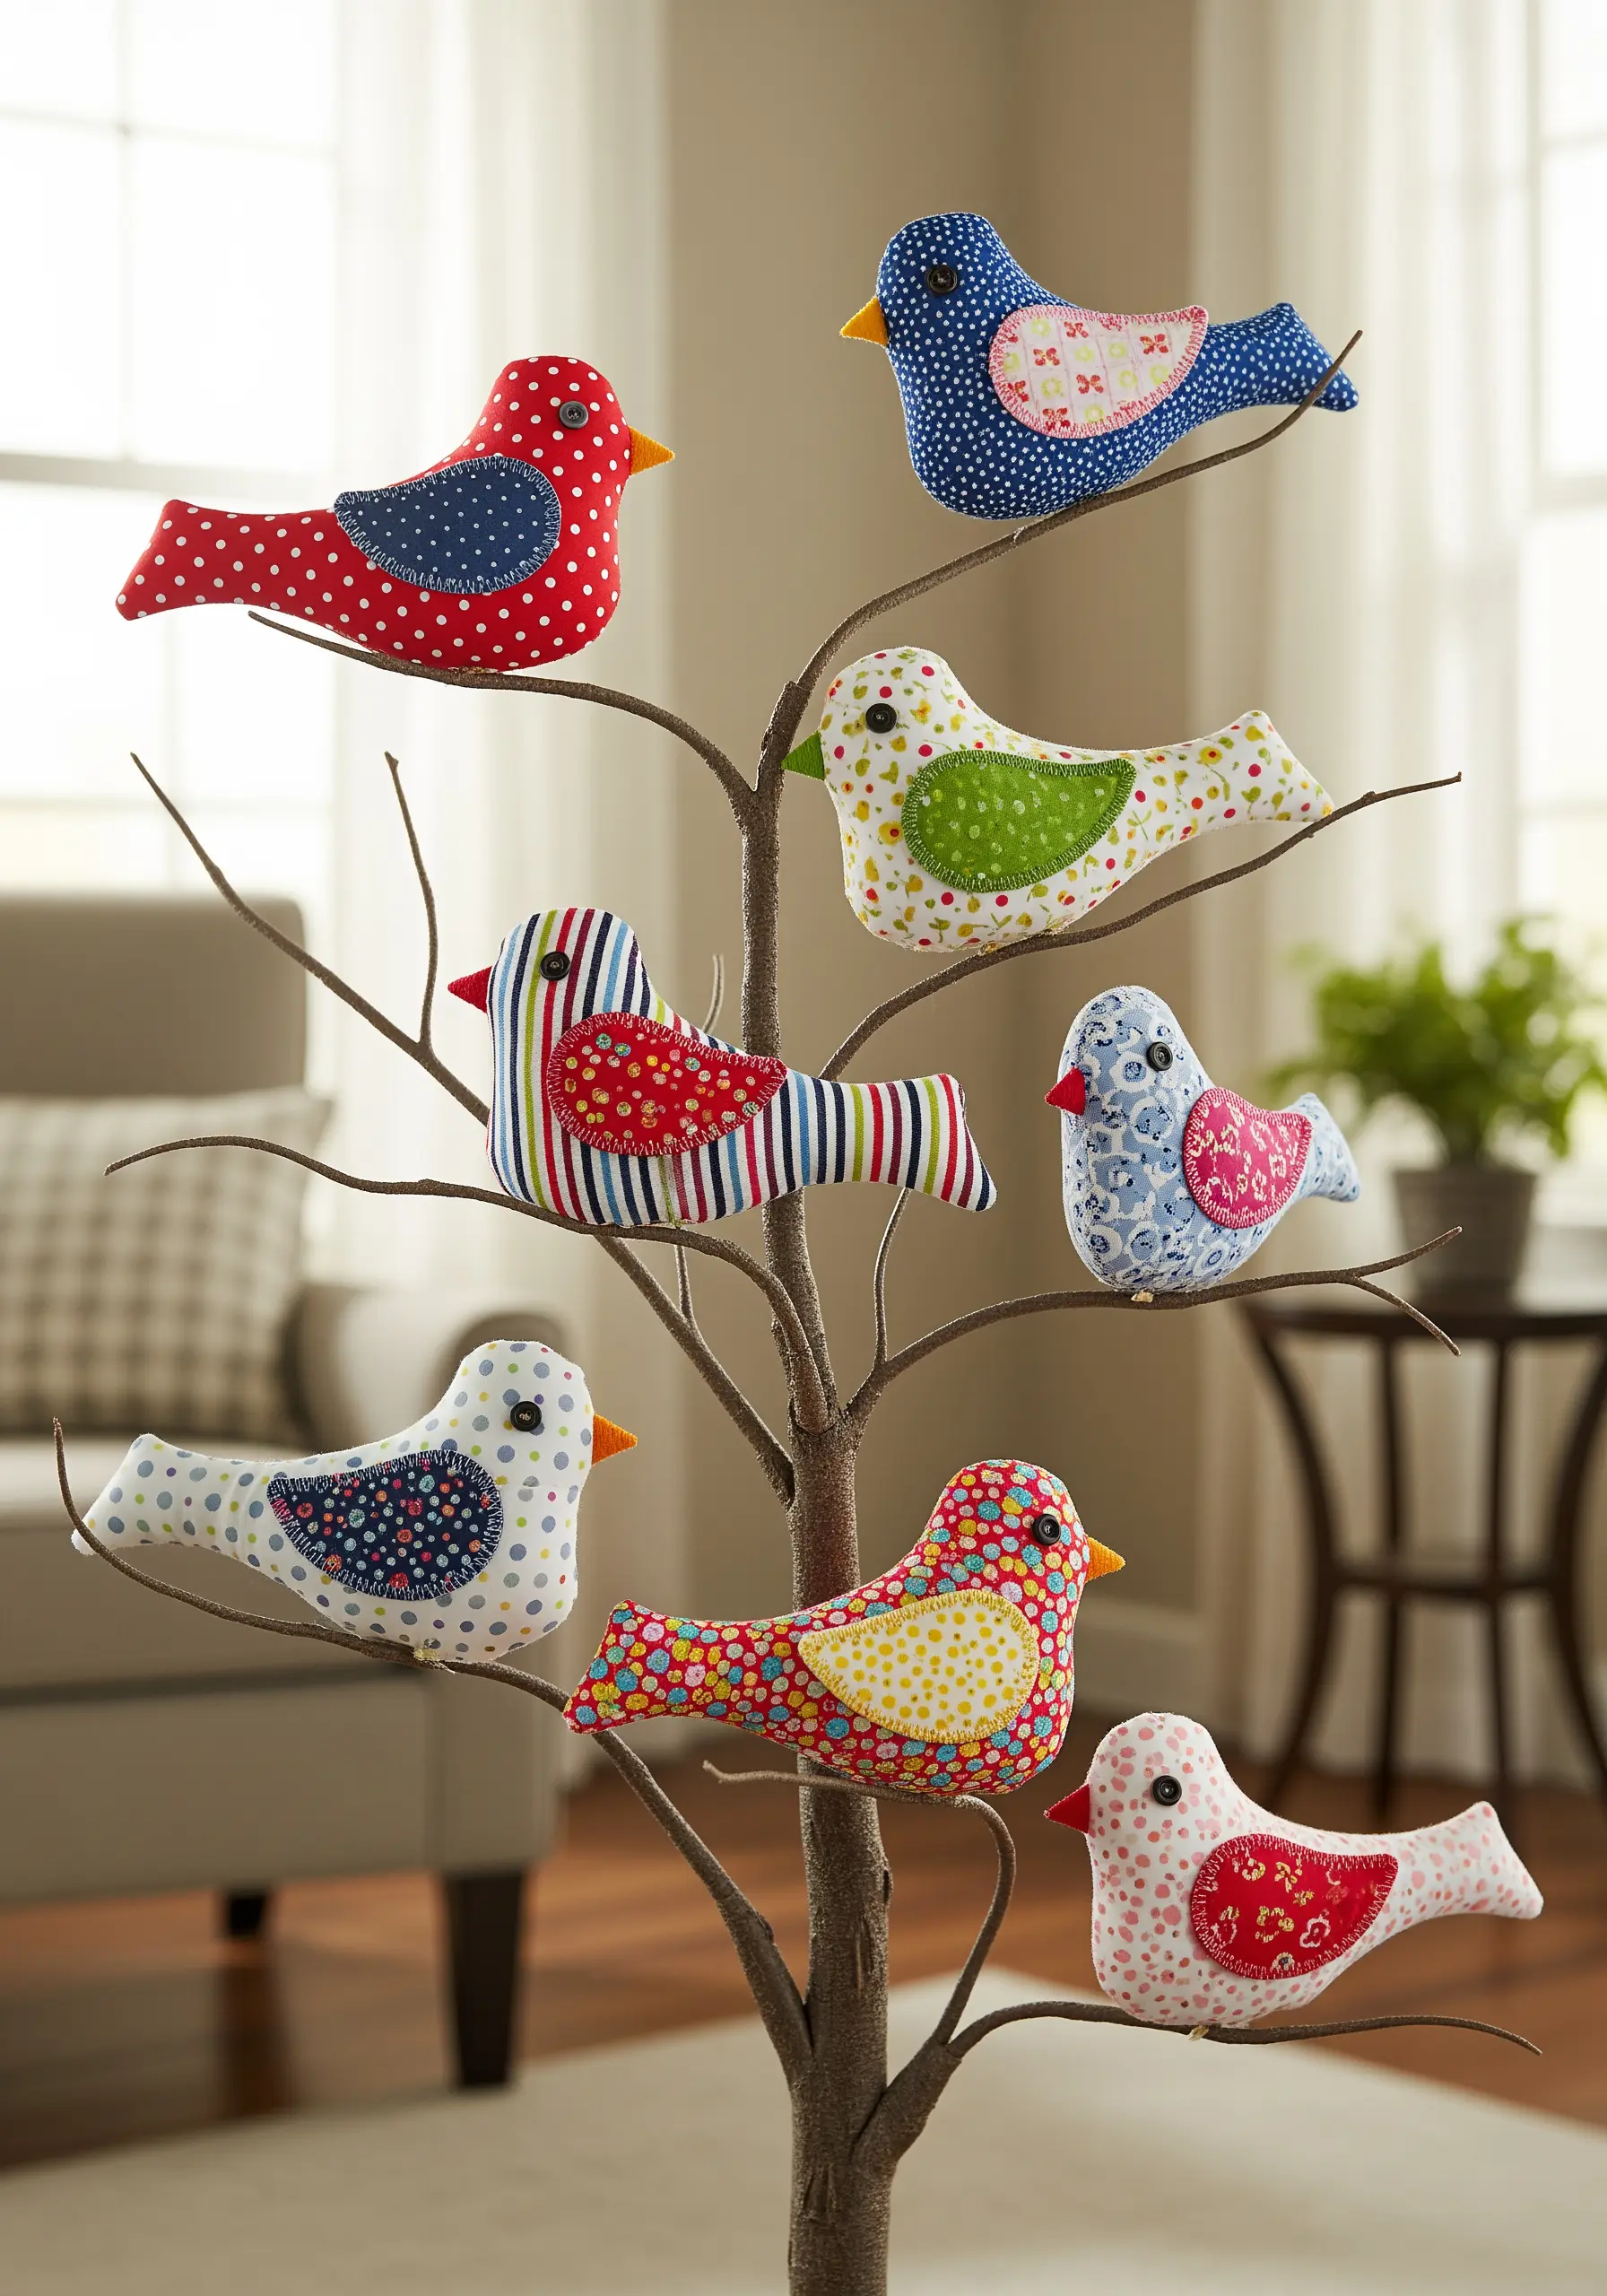
For smooth curves on these birds, you must clip your seam allowances before turning the fabric right side out.
Use a simple blanket stitch on the beak insertion point to secure the felt without adding bulk that would distort the face.
These are delightful handmade miniature crafts that add charm instantly.
26. Tension control on 3D objects

When covering a stone, crochet or stitch your lace slightly smaller than the object, then stretch it over for a fit that won’t slip.
Use a strong cotton thread that can withstand the tension required to pull the lace taut against the smooth surface.
This is a unique take on mixed media techniques for embroidery lovers who crave unique art.
27. Goldwork couching density
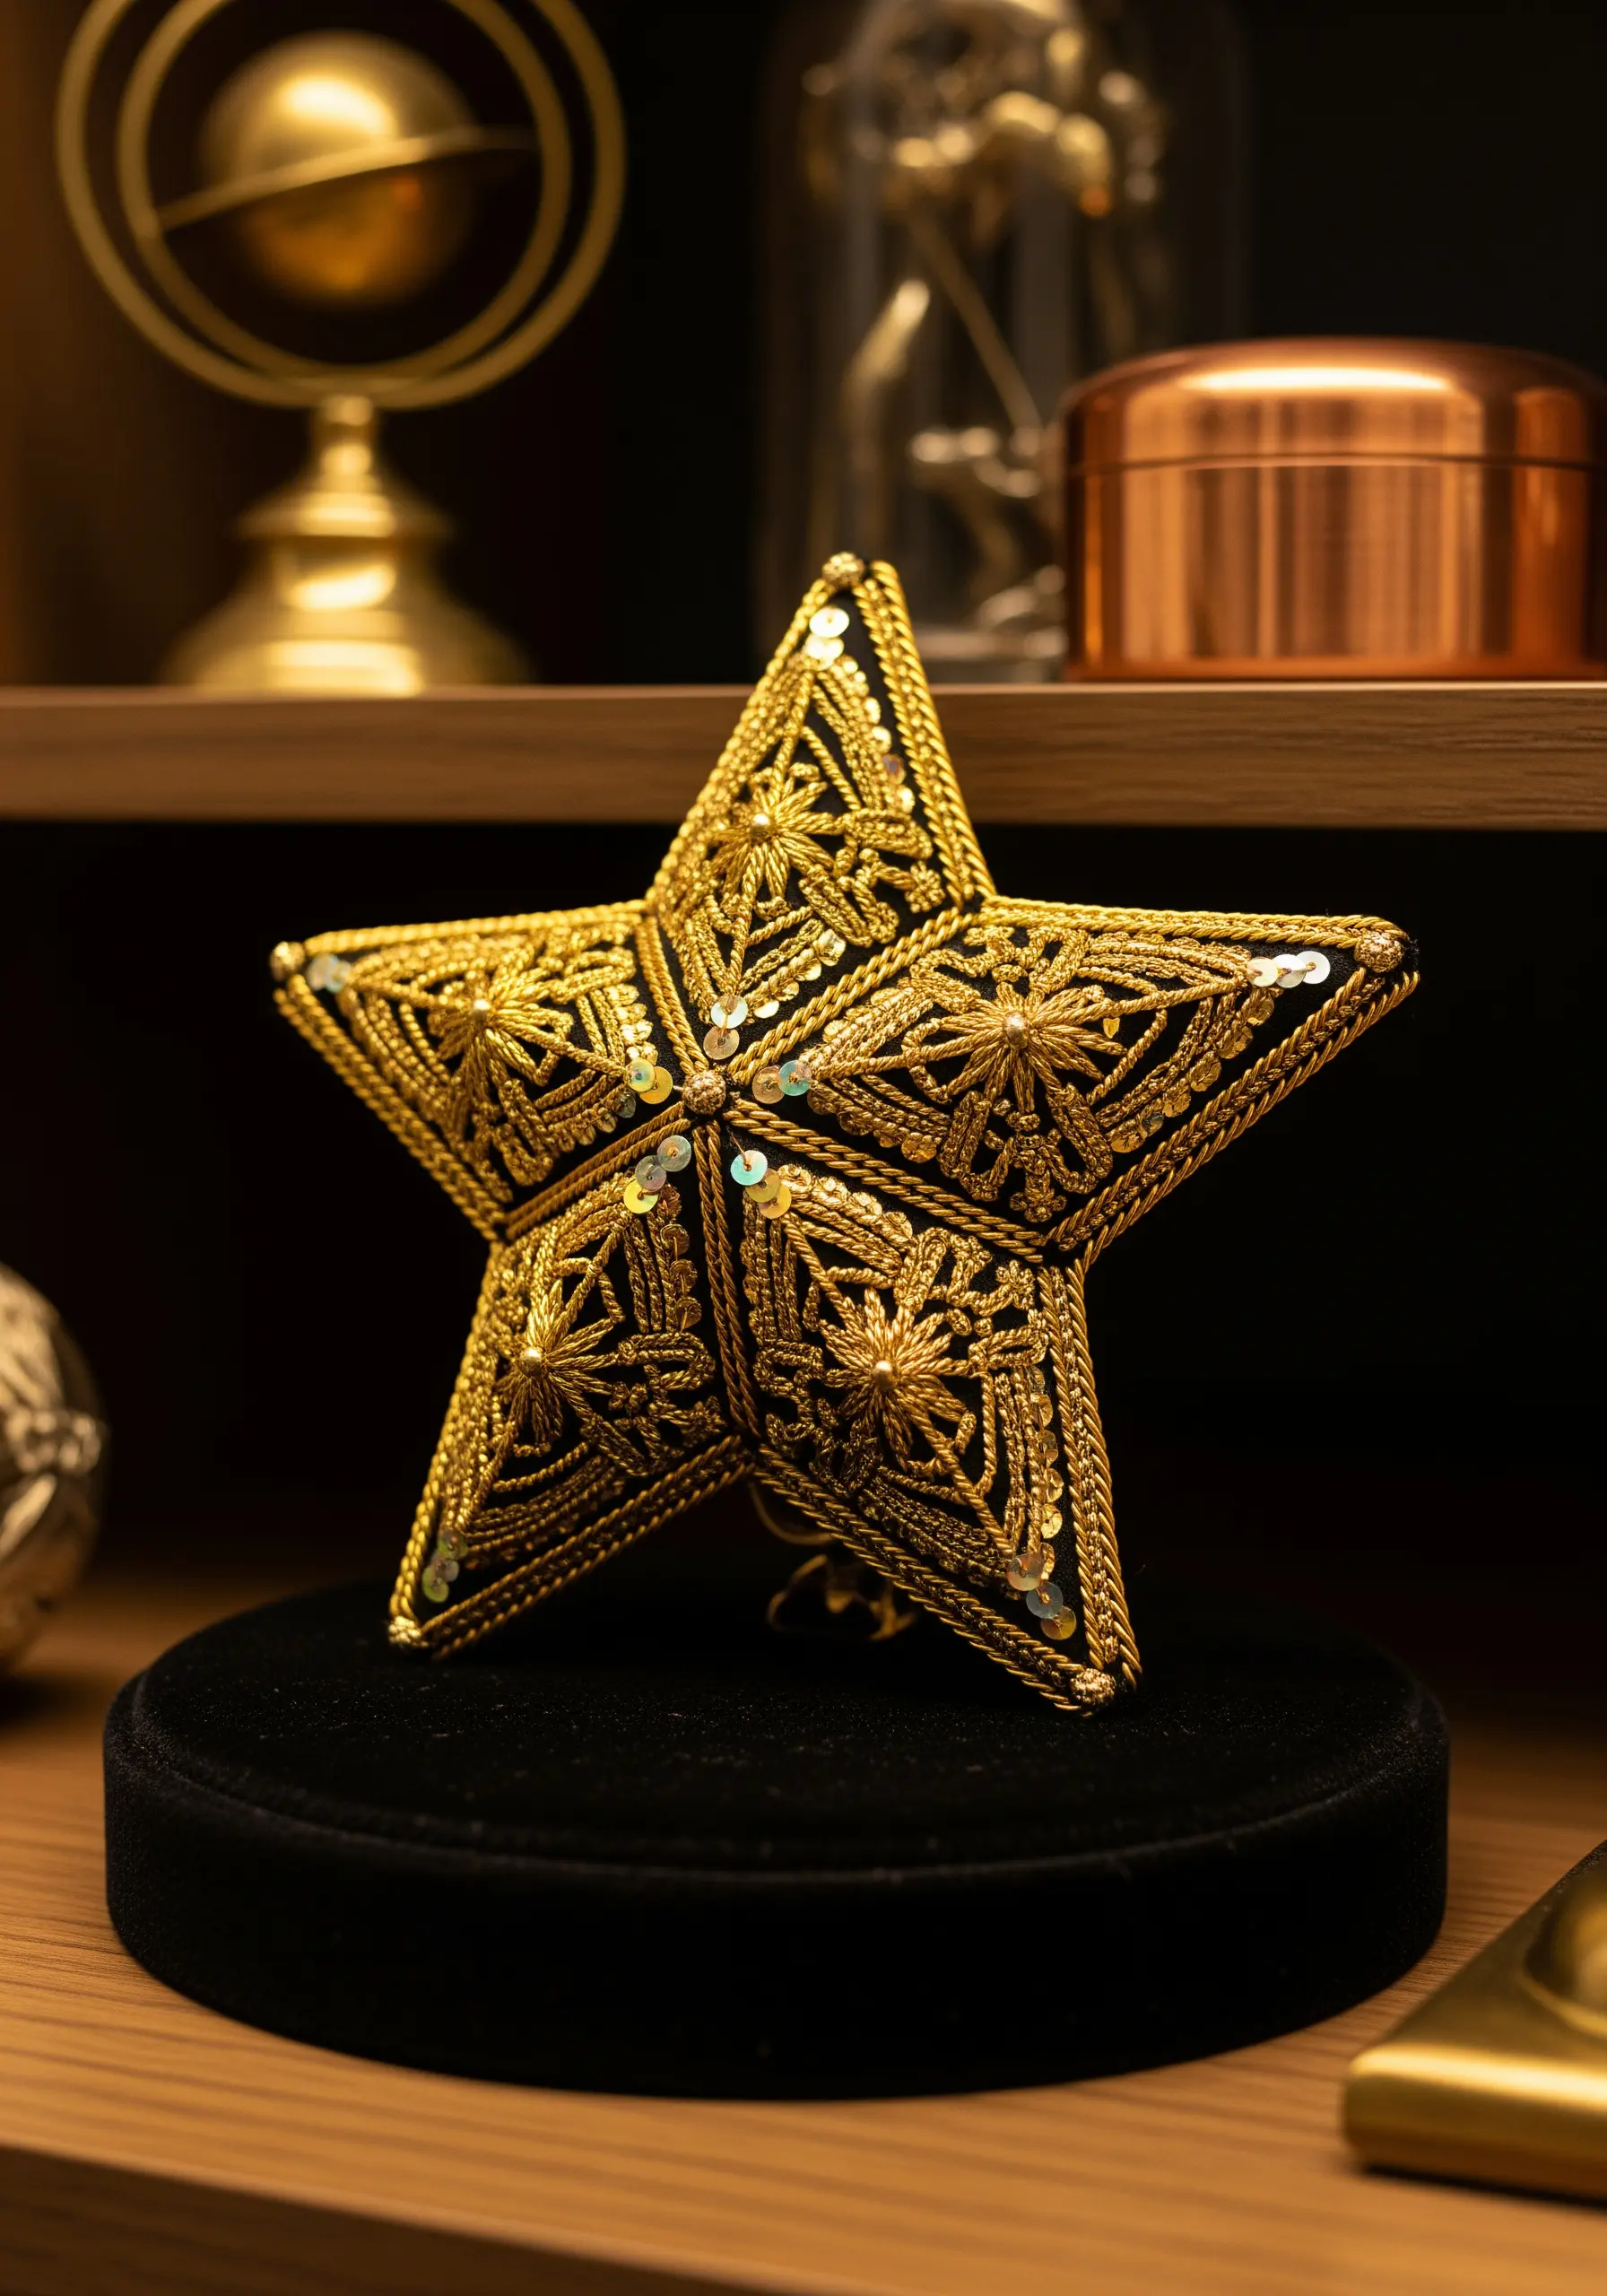
This star achieves its luxury look through density; couch your gold cord in tight, concentric patterns to cover the background fabric entirely.
Use a matching yellow thread for the couching stitches to make them invisible, or a contrasting color to add a secondary pattern.
Perfect for minimal gold accent embroidery designs that add elegant sparkle.
28. Texture contrast in weaving
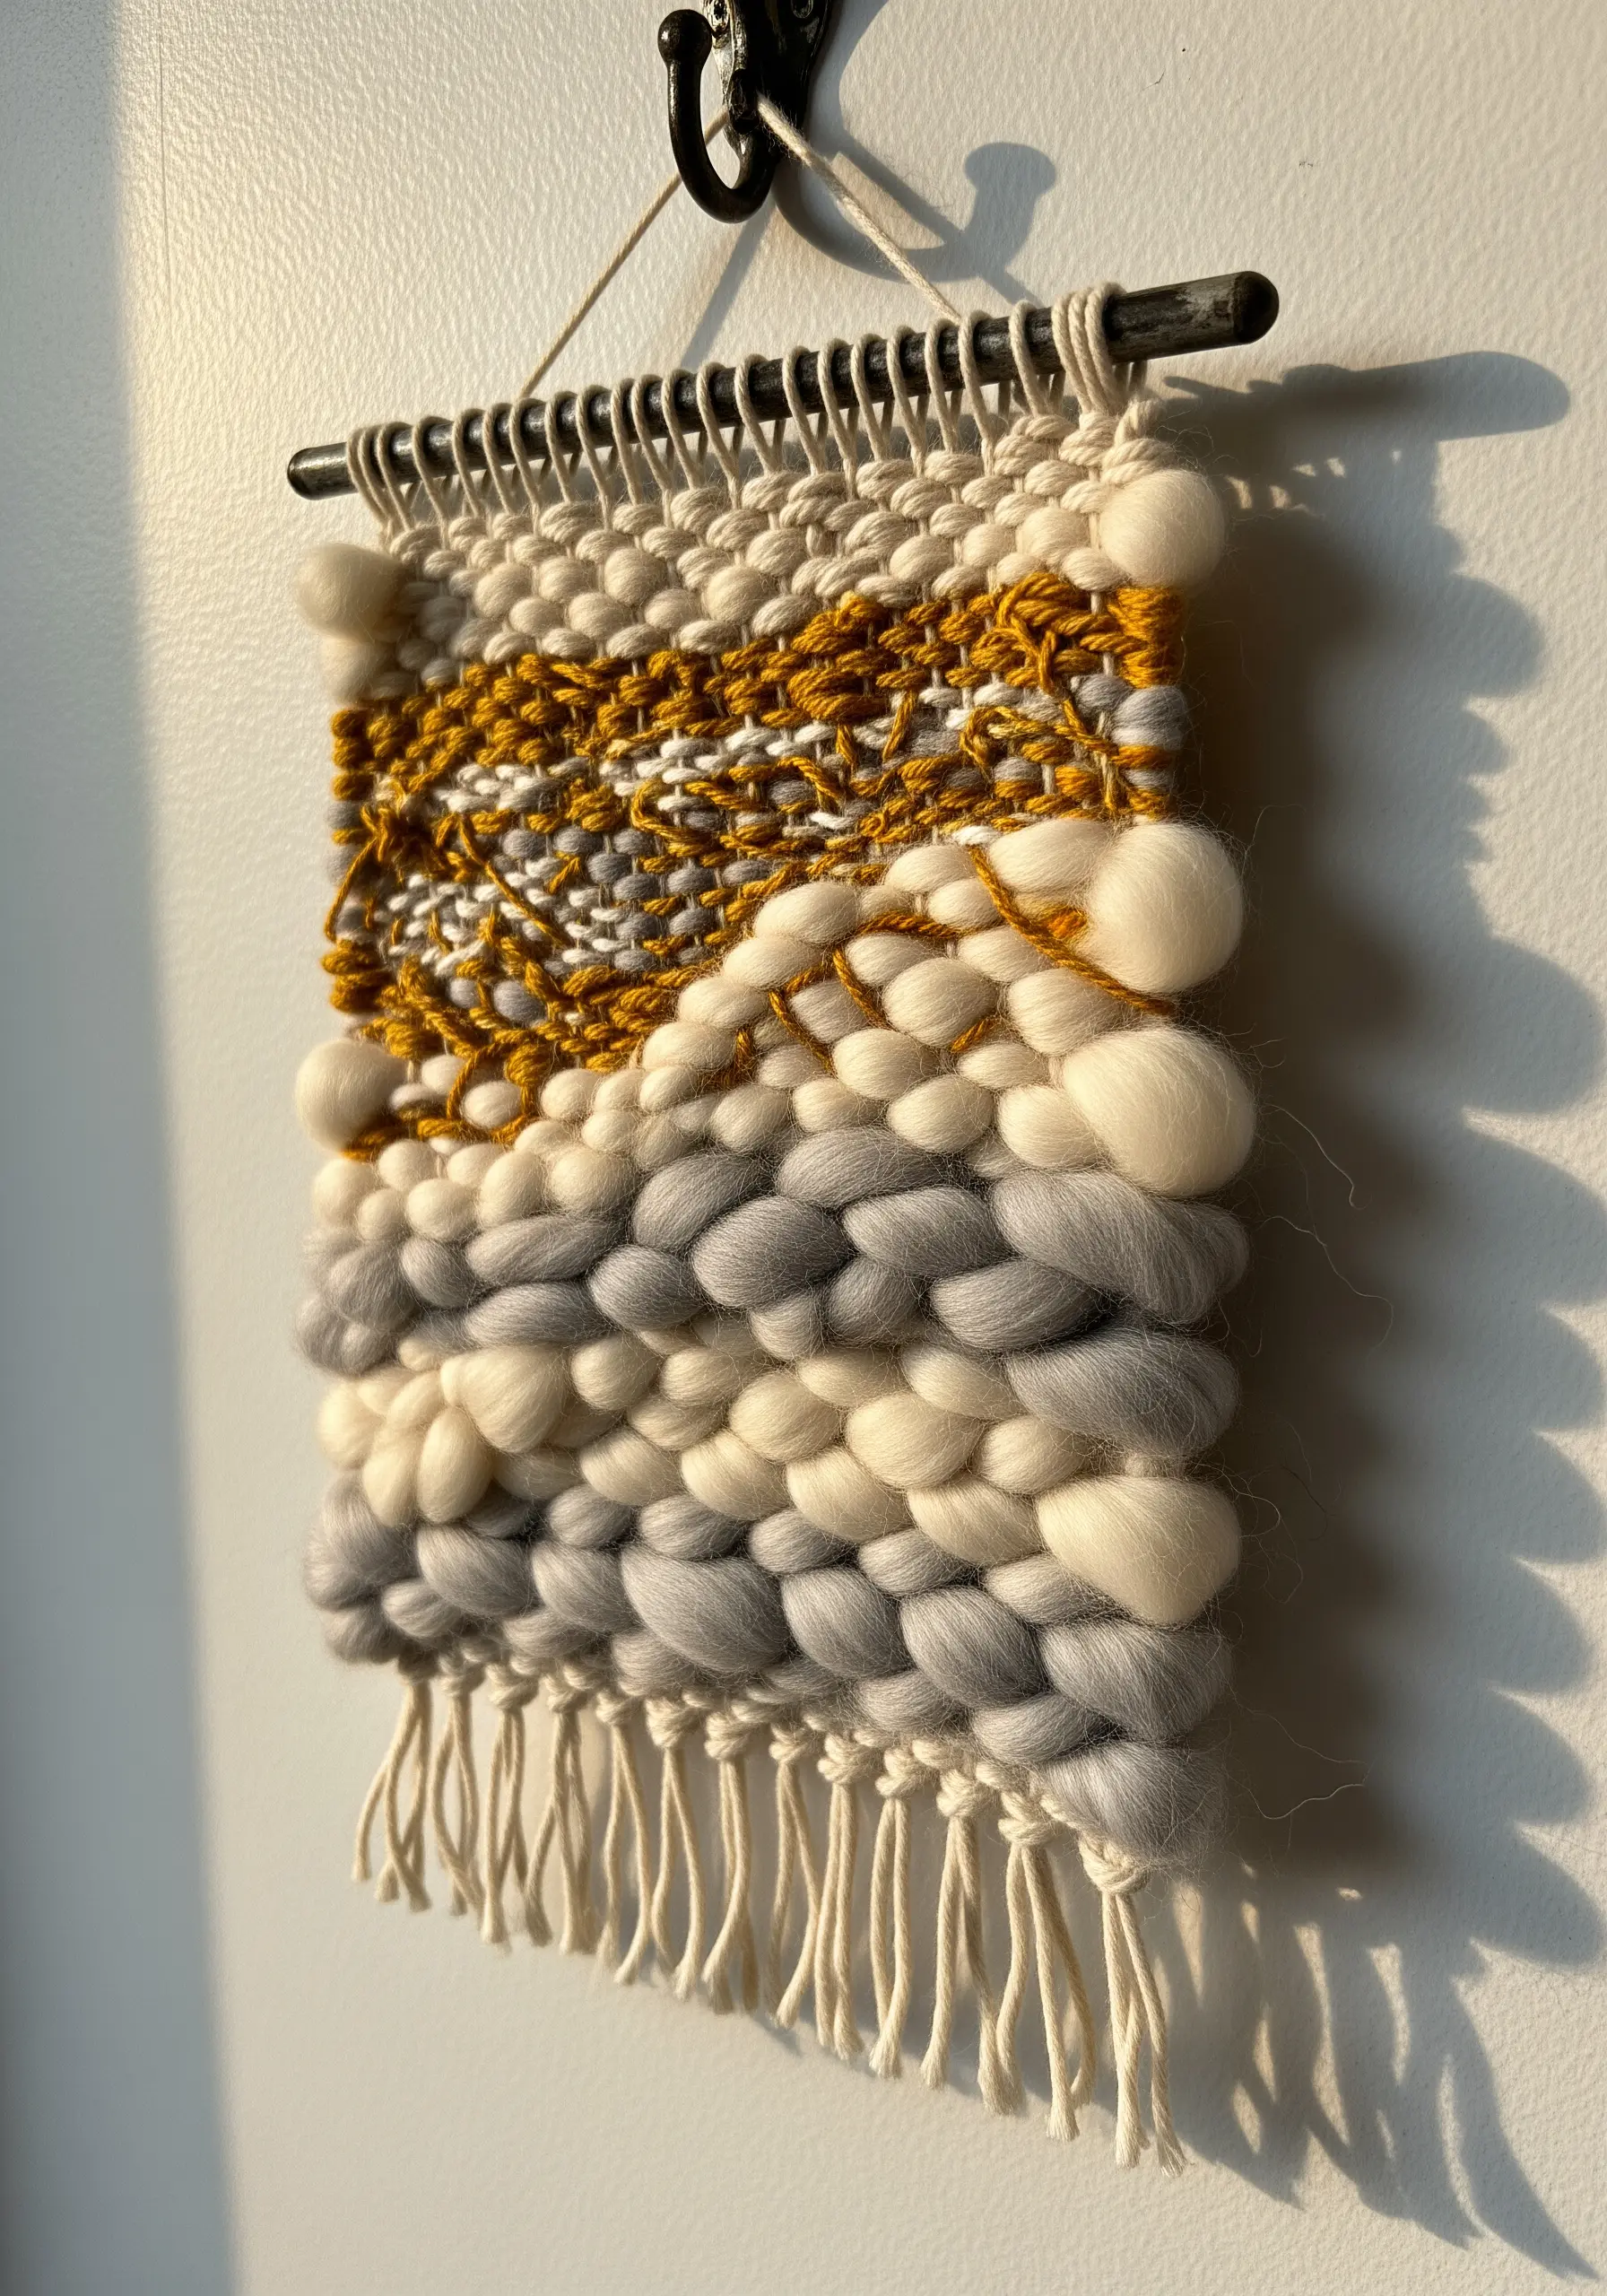
Create visual interest by alternating between thick, unspun roving and tightly spun yarn to create peaks and valleys in the weave.
The rya knots (fringe) at the bottom should be trimmed at an angle to soften the transition from the heavy weaving to the wall.
See more in textured yarn wall art techniques that will elevate your space.
29. Needle sculpting for dimension

The pumpkin’s segments are created by passing a strong thread through the center of the stuffed form and pulling tightly to indent the felt.
Use a long doll needle to penetrate the stuffing without losing your thread end inside the fiberfill.
These techniques are essential for seasonal framed embroidery pieces to refresh your home decor.
30. Enhancing painted fabric with stitch

Paint your gradients onto the fabric first, then use embroidery only for the veins and structural outlines to keep the wings feeling light.
Use a split stitch for the black outlines; it creates a solid, continuous line that looks like a pen stroke.
This combines well with butterfly moth embroidery patterns that feel like they could take flight.
31. Negative space definition
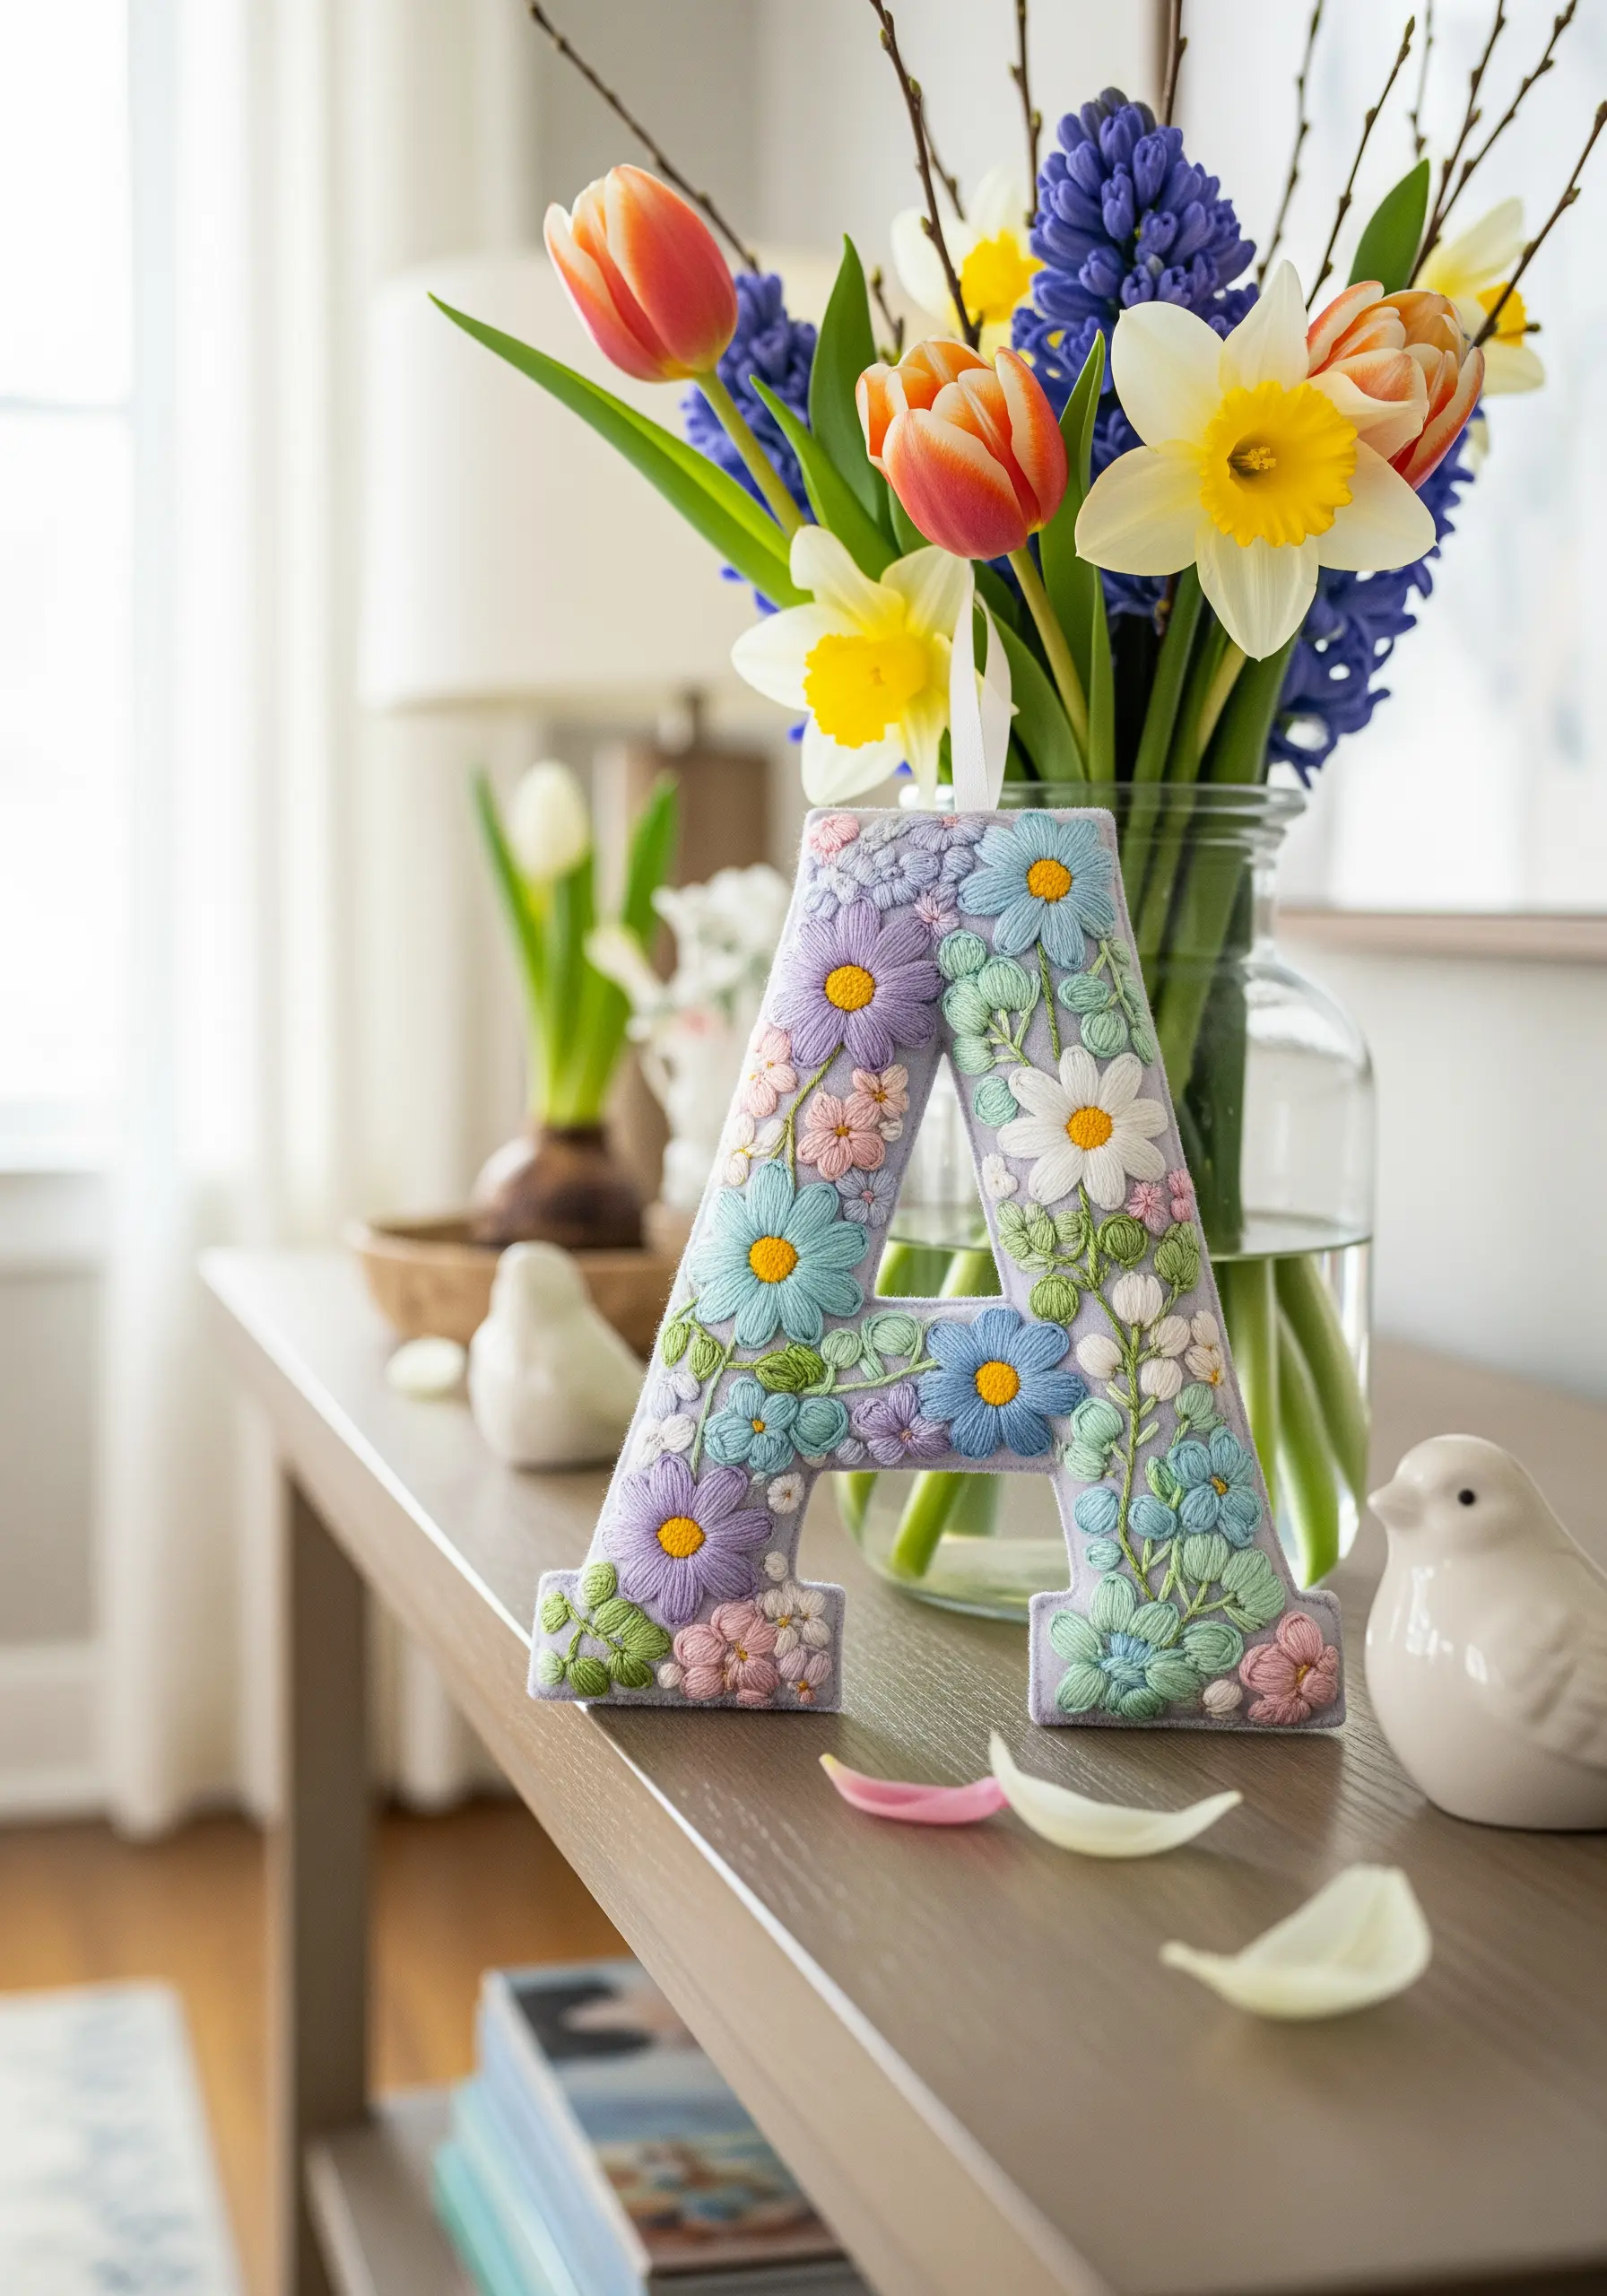
Define the letter ‘A’ not by outlining it, but by filling the interior densely with florals, allowing the edge to be defined by the petals.
Vary the scale of your flowers; large woven wheels anchor the shape, while small French knots fill the awkward gaps.
Try this for floral embroidery wall frames that bring garden magic indoors.
32. Stitching on delicate mesh
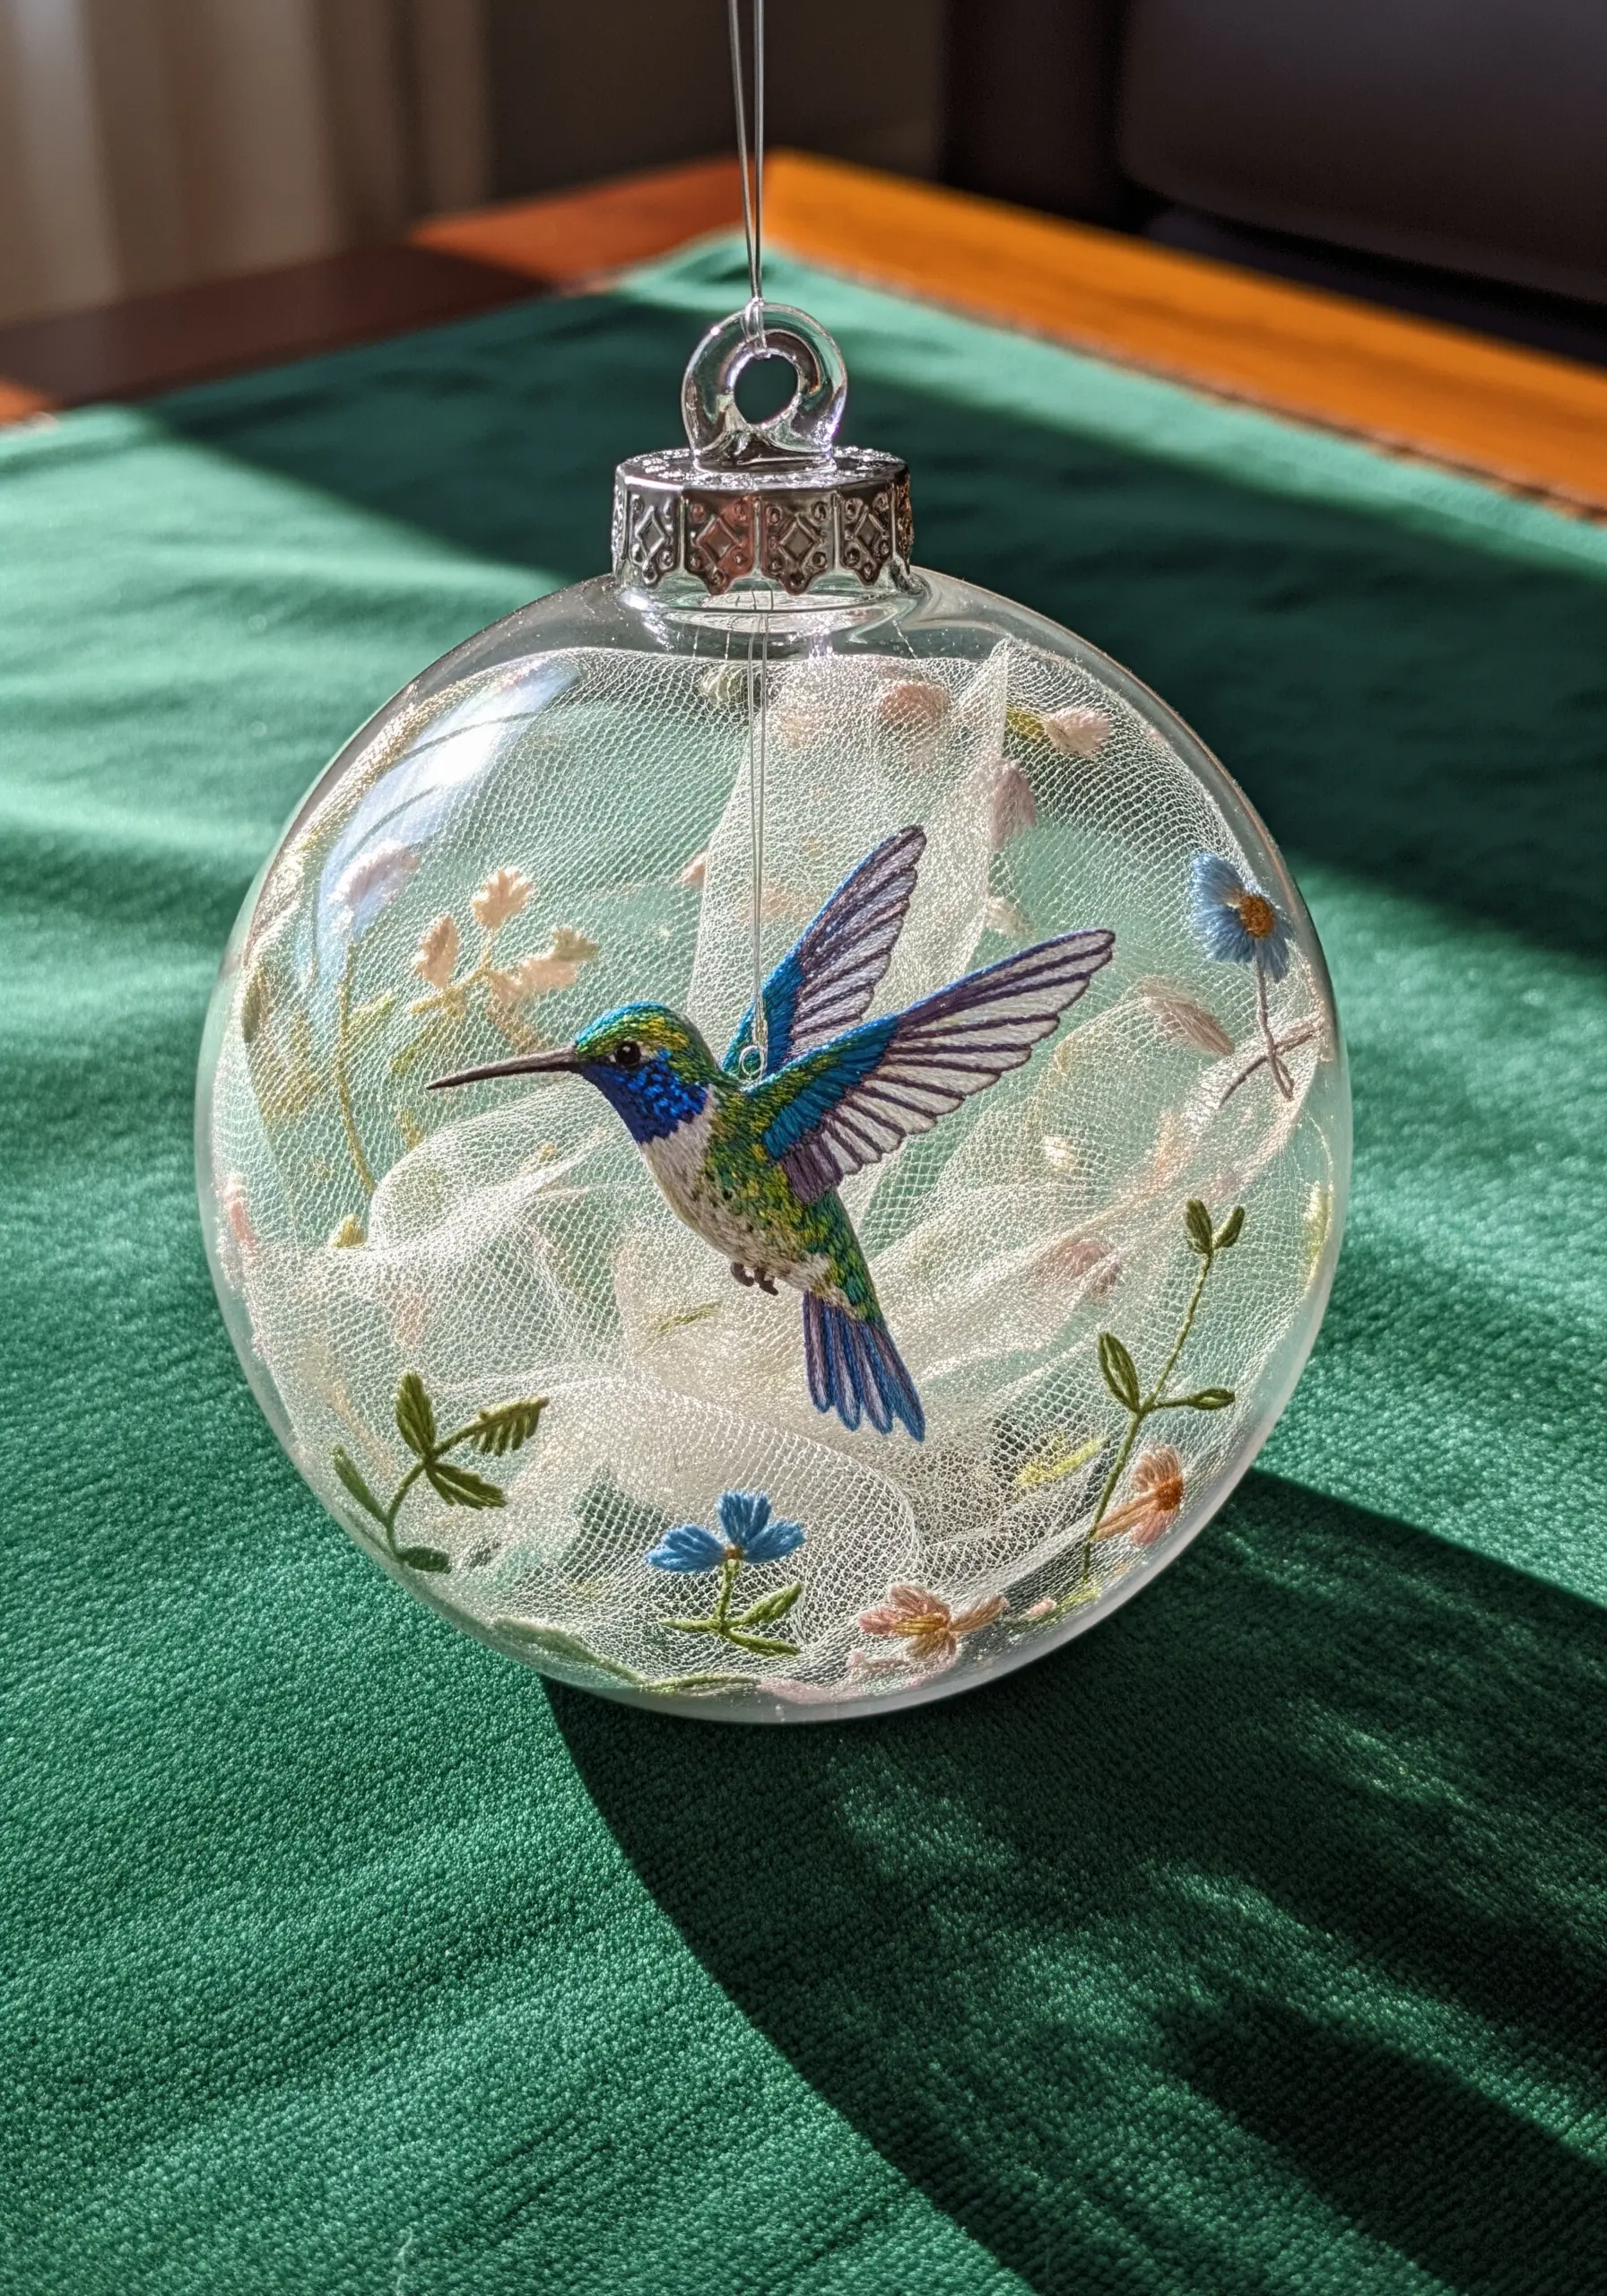
When embroidering on tulle or mesh, you must use a water-soluble stabilizer to prevent the needle from tearing the delicate grid.
Avoid heavy satin stitches that pull the mesh; opt for light long-and-short stitching to paint the bird’s feathers.
This creates modern thread illusion techniques that make flat fabric look deep.
33. Rustic texture wrapping
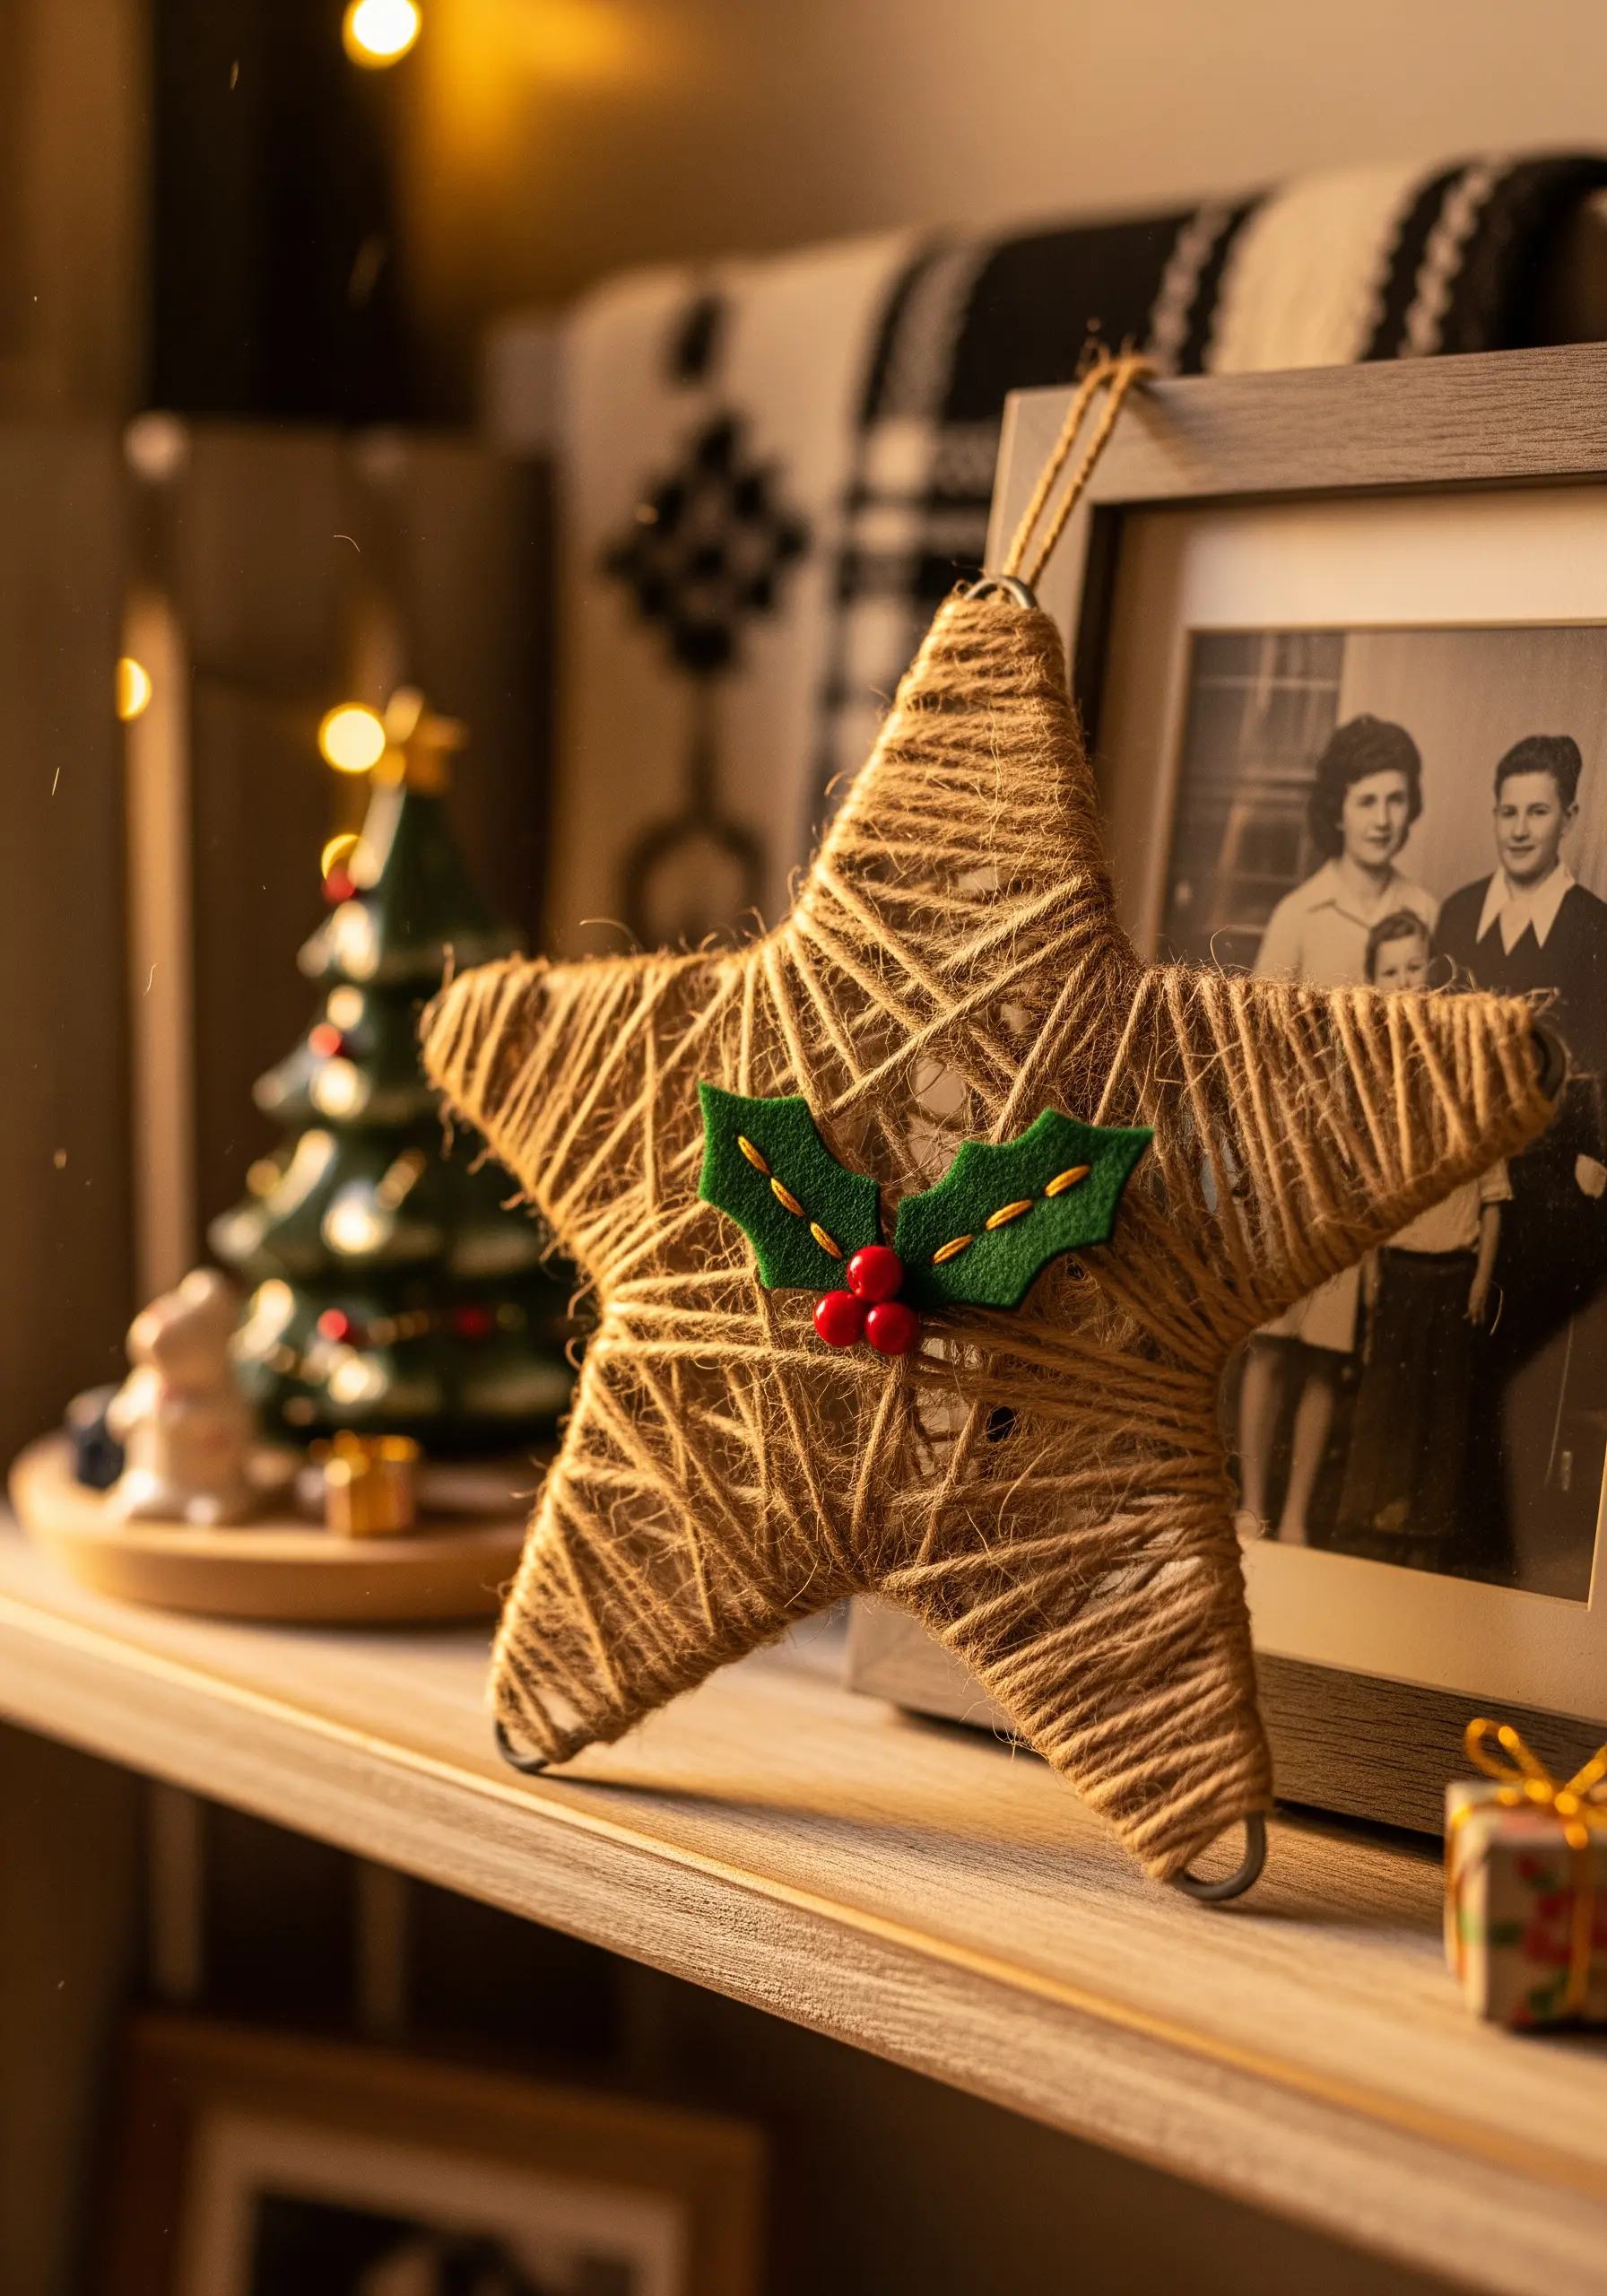
For this star, the technique is wrapping, not stitching; keep the twine strands parallel and flat to avoid bulky, uneven overlaps.
The felt holly leaves add a necessary soft texture to contrast against the rough, scratchy jute twine.
A perfect entry for rustic stitch art projects to turn old fabric scraps into cottage core wall magic.


