
It’s easy to feel like your embroidery has hit a plateau—the stitches are neat, the pattern is followed, but it lacks that certain something. That spark of artistry. Often, the distance between a nice piece and a truly captivating one isn’t about learning dozens of complex new stitches. It’s about learning to see.
It’s about understanding how a simple shift in thread direction can mimic the shimmer on water, or how combining a glossy thread with a matte one can create astonishing depth. It’s about treating your needle less like a tool for filling in shapes and more like a paintbrush for sculpting with texture and light.
Here, you’ll find ways to push beyond the pattern. These are not just crafts; they are miniature studies in texture, dimension, and material. They invite you to slow down, observe the world more closely, and then translate that beauty into thread with intention and confidence.
1. Sculptural Landscapes with Textured Stitches
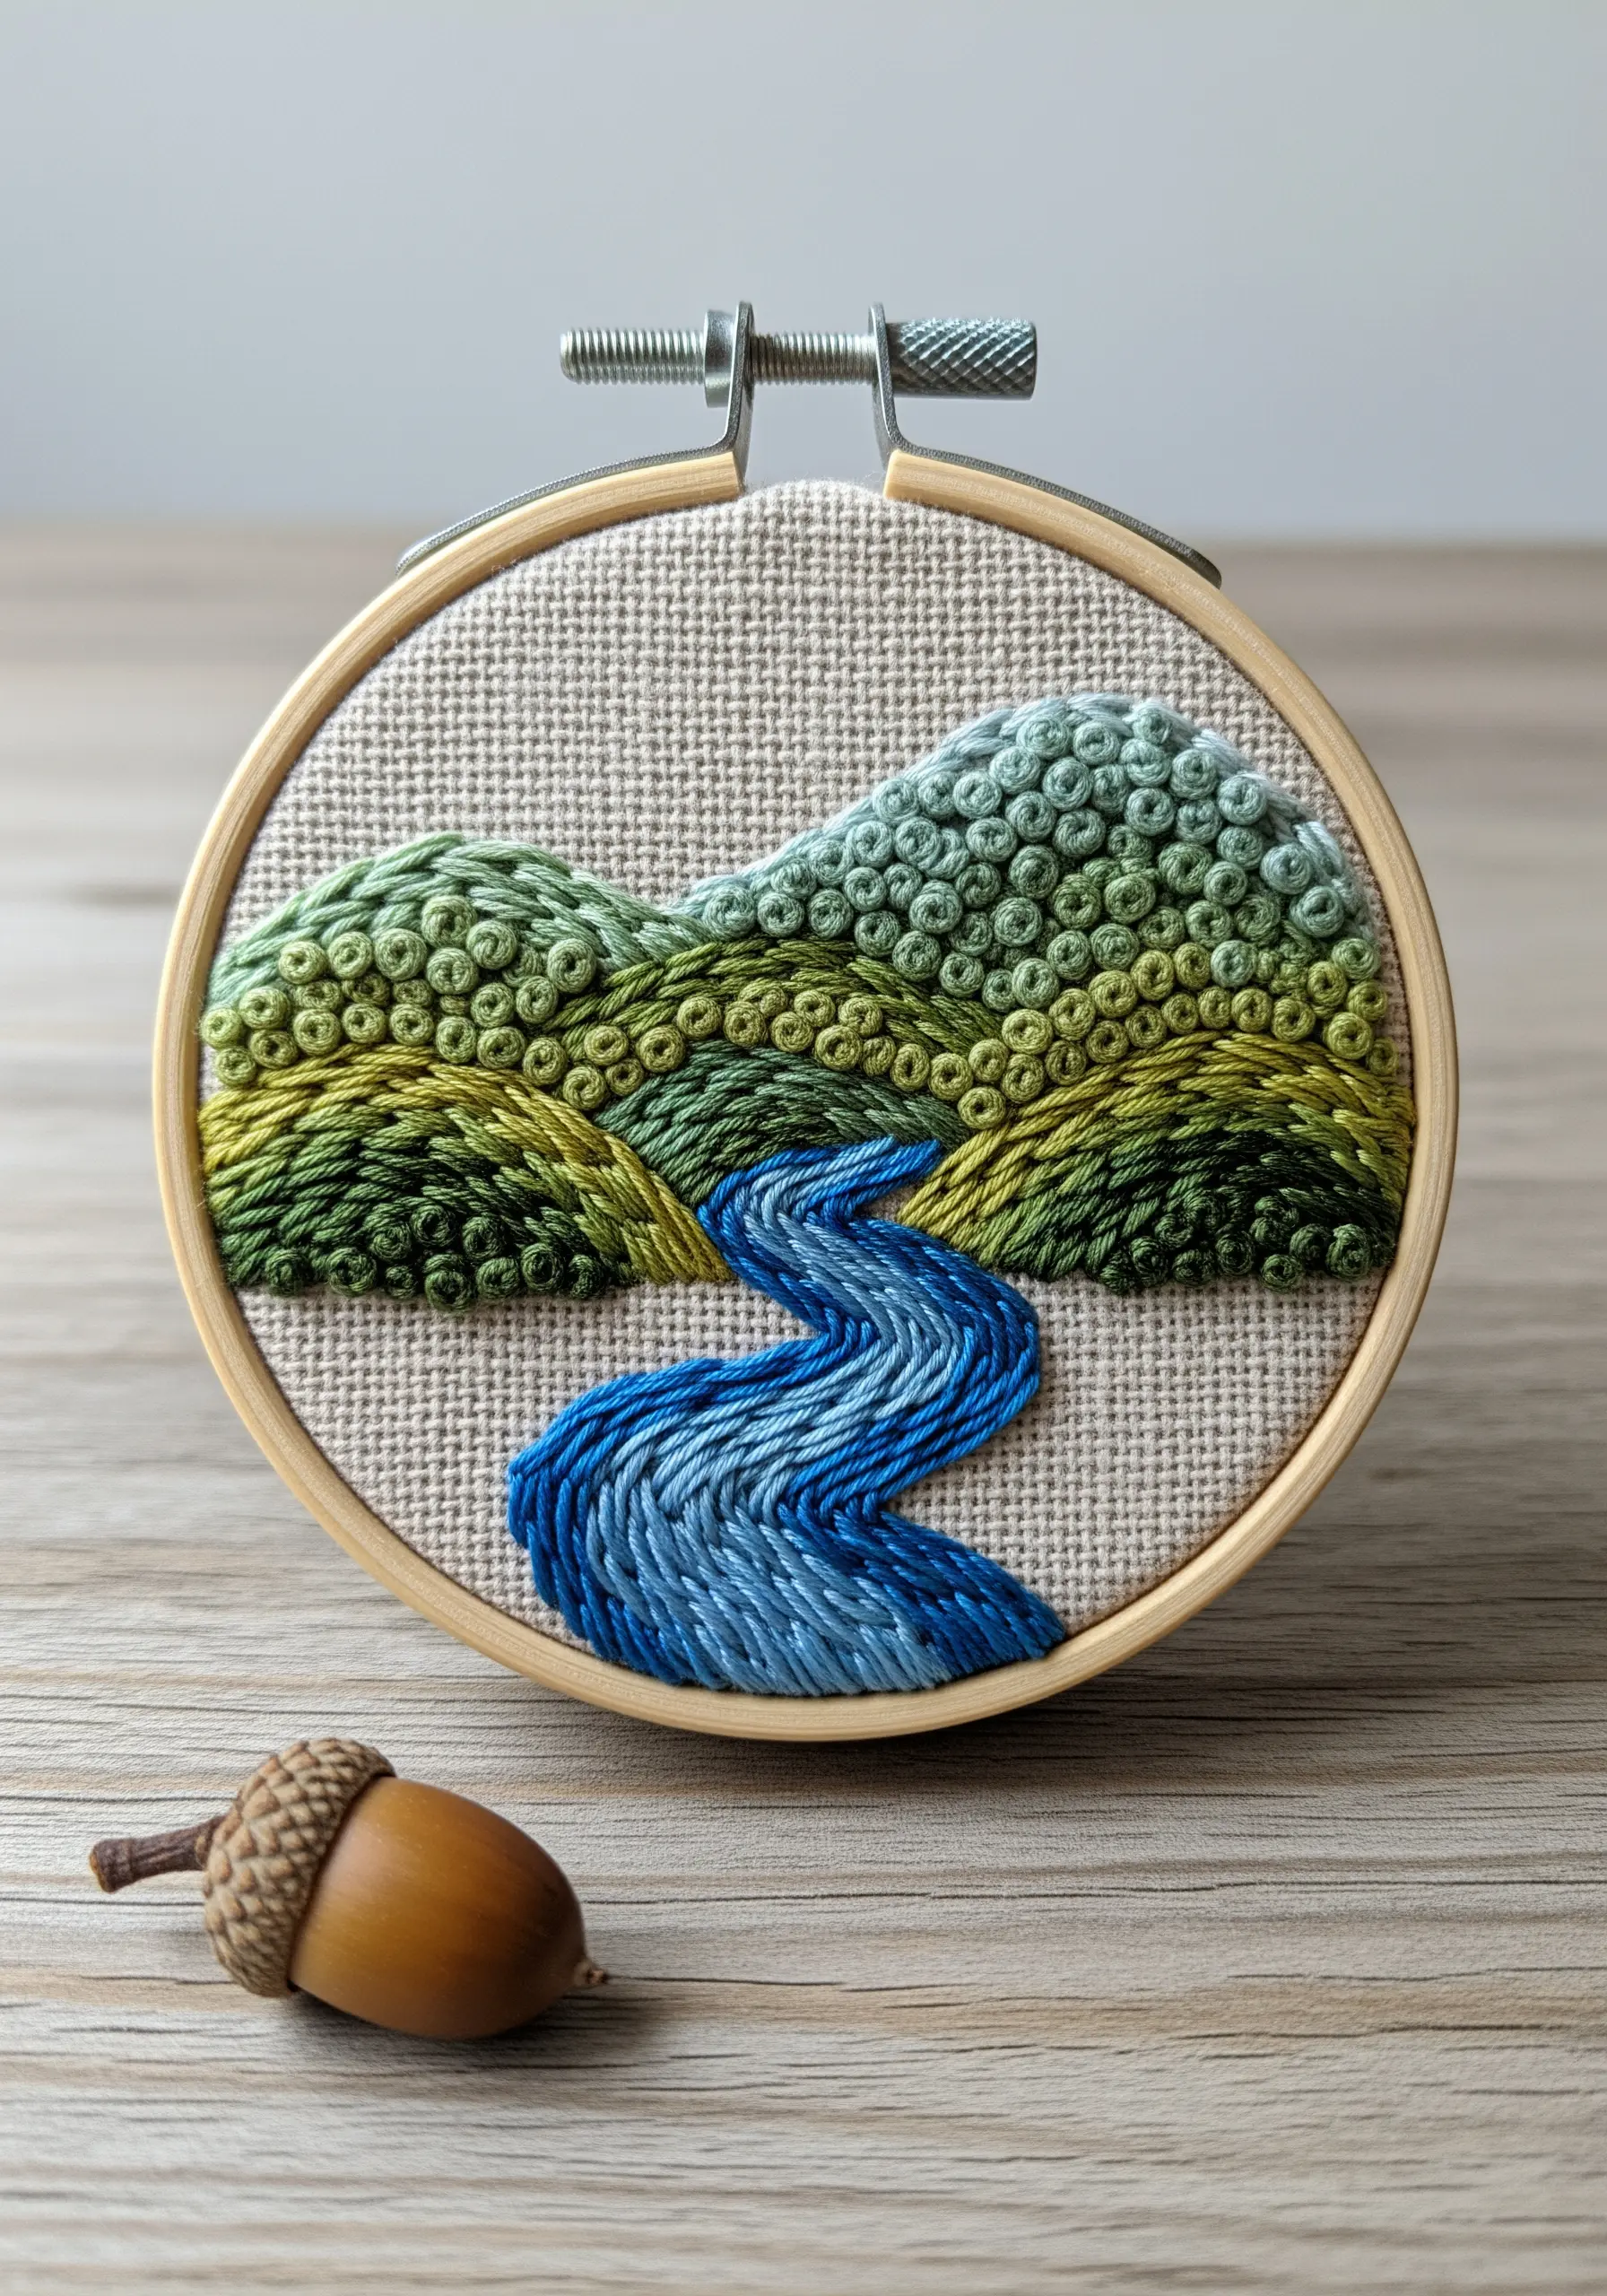
Create painterly depth in your landscapes by assigning different stitches to each natural element.
Use dense French knots for rolling hills or treetops, varying the thread colors slightly to suggest light and shadow.
For water, fill the area with a directional satin stitch, letting the smooth, parallel threads mimic the flow and reflection of a river.
This combination of textures transforms a flat image into a tactile, three-dimensional scene, even in a miniature hoop art design.
2. Achieving Realistic Fur with Thread Painting

To capture the softness of animal fur, move beyond basic stitches and embrace thread painting with a single strand of floss.
Use the long-and-short stitch, blending several shades of a color to create a realistic, gradient effect that mimics natural fur.
Always follow the direction of hair growth with your stitches—angling them around the curve of a back or down a tail.
For an extra fluffy, 3D texture, use the Turkey stitch and trim the loops to your desired length, perfect for creating cute animal embroidery hoops.
3. Crafting Miniature 3D Botanicals for Jewelry
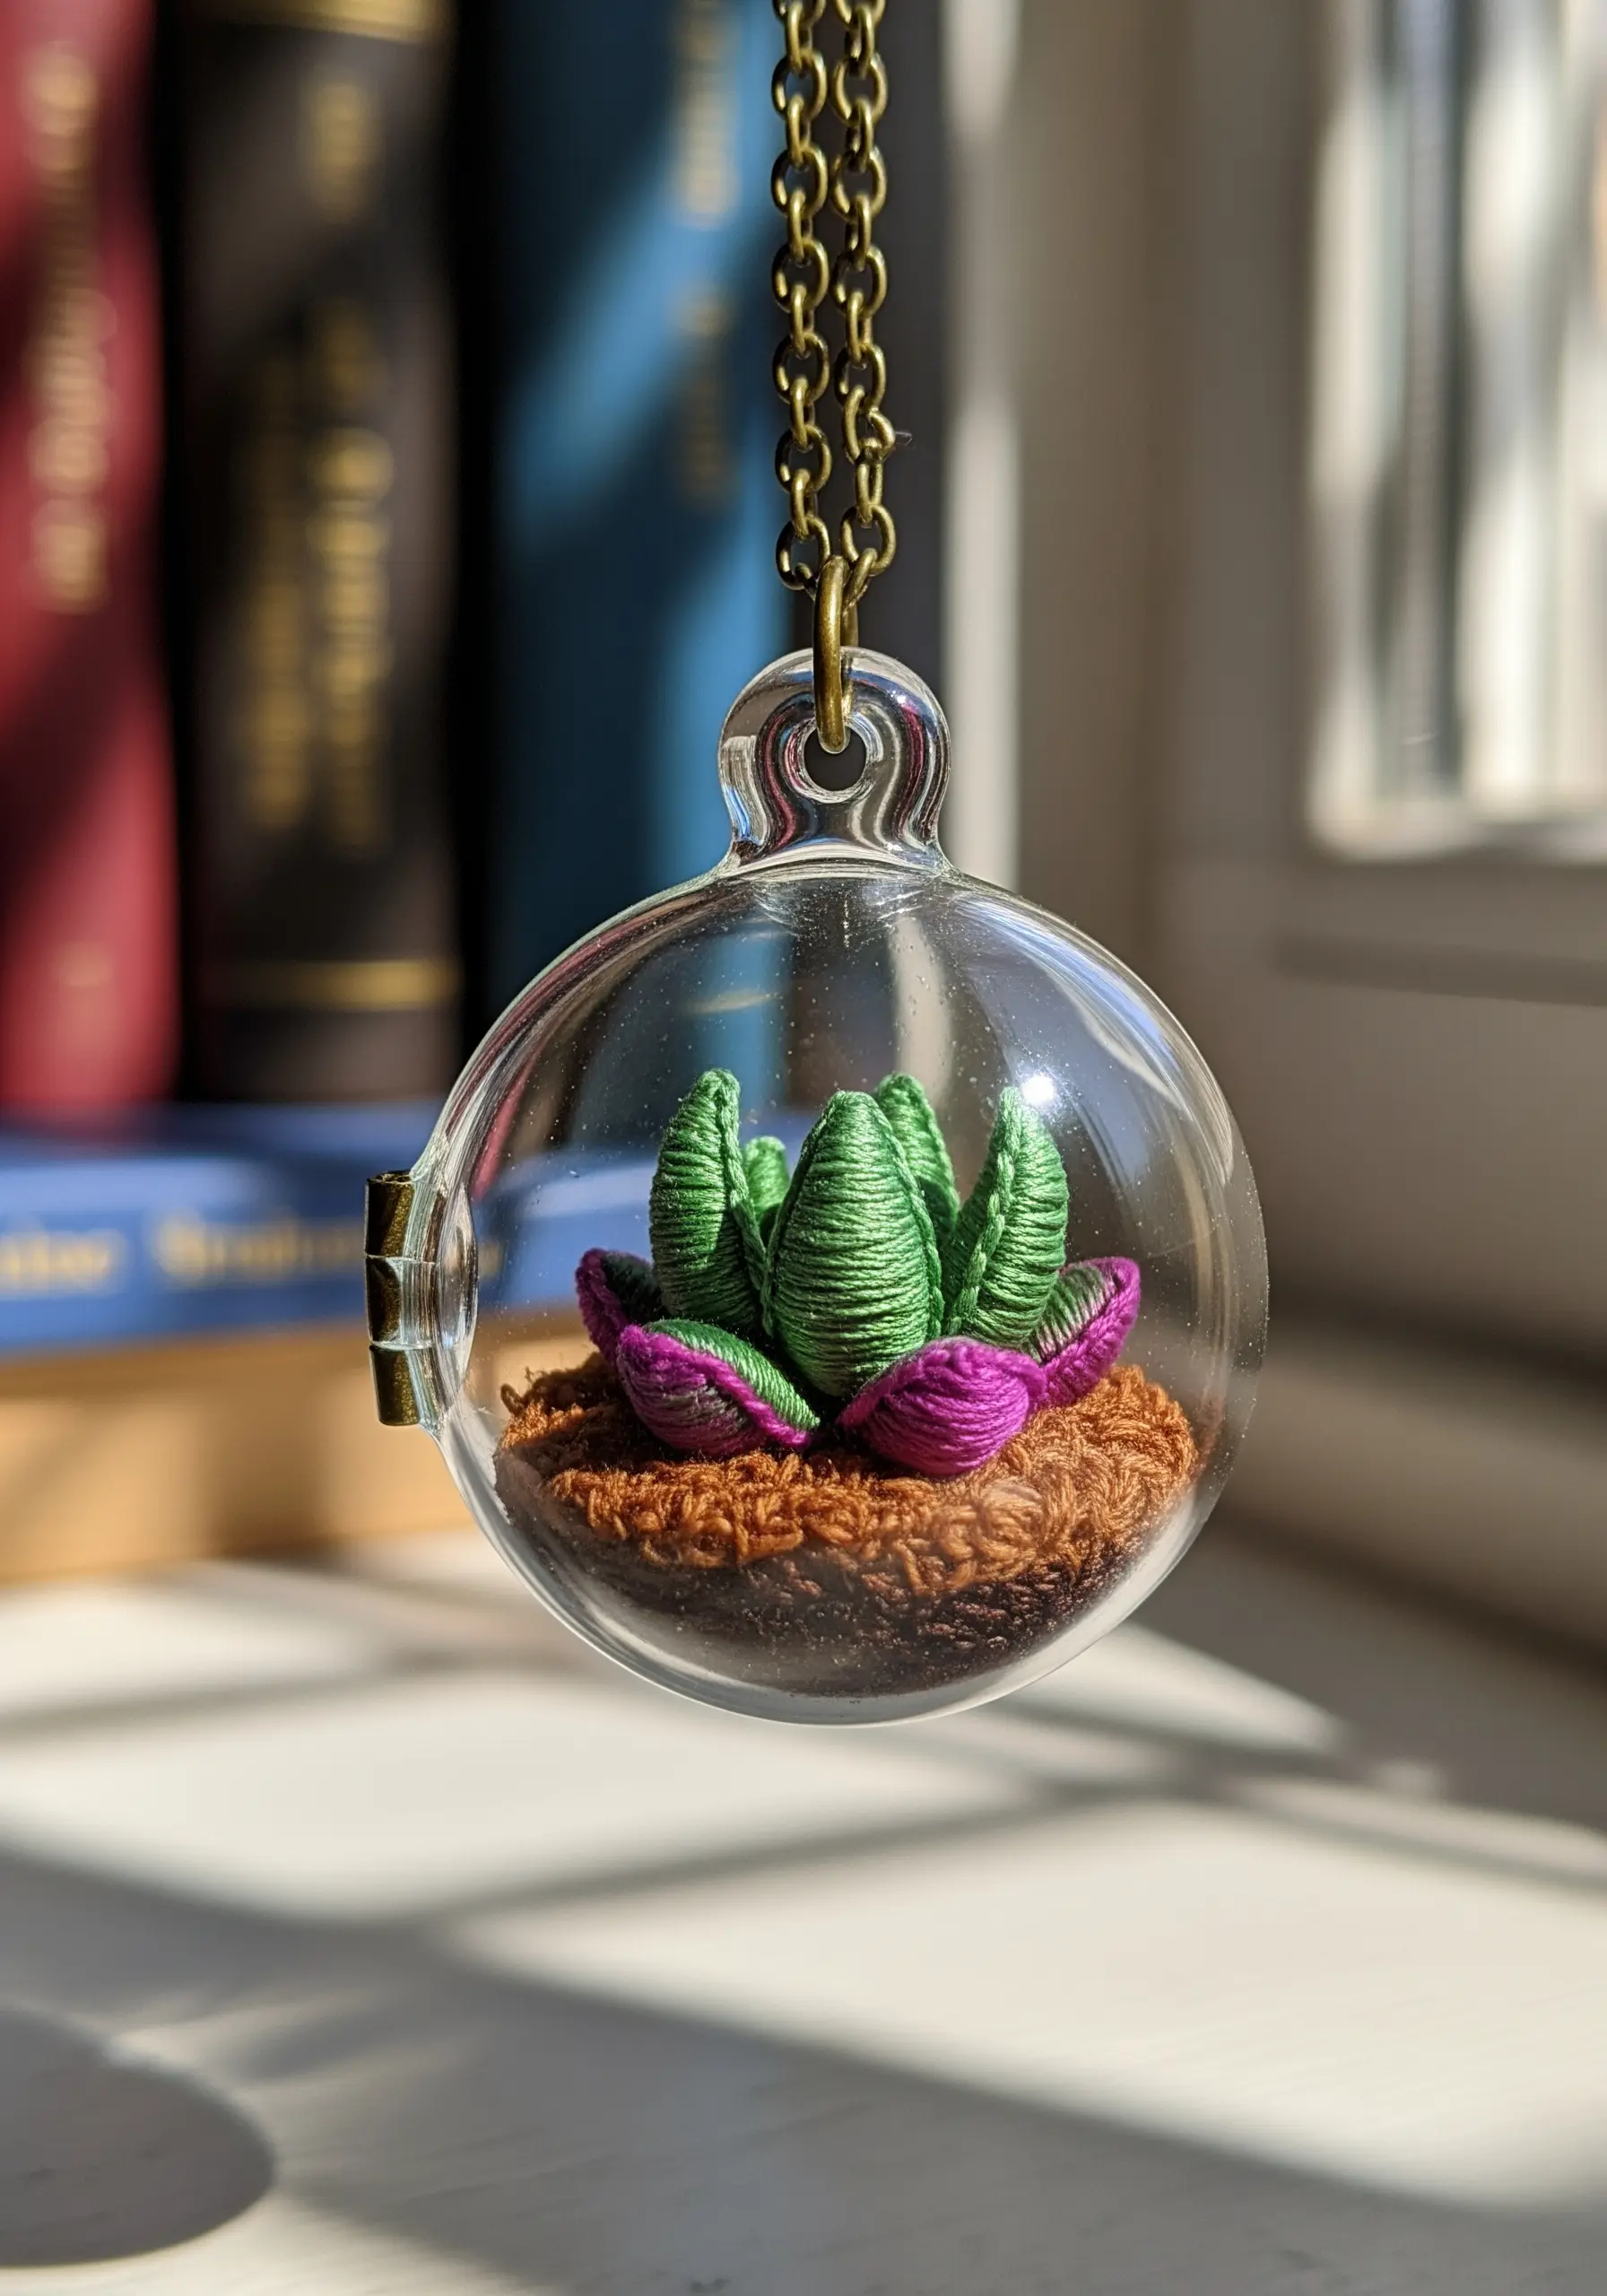
Take your embroidery off the fabric with stumpwork techniques to create tiny, three-dimensional sculptures.
For succulent leaves, wrap fine wire with thread, shape it, and fill the center with a padded satin stitch.
Create each petal or leaf individually on a scrap piece of fabric before cutting it out and assembling the final plant.
Encase your creation in a miniature glass locket or bell jar to craft a piece of wearable art that protects your delicate stitching.
4. Luxe Embellishments on Velvet Surfaces
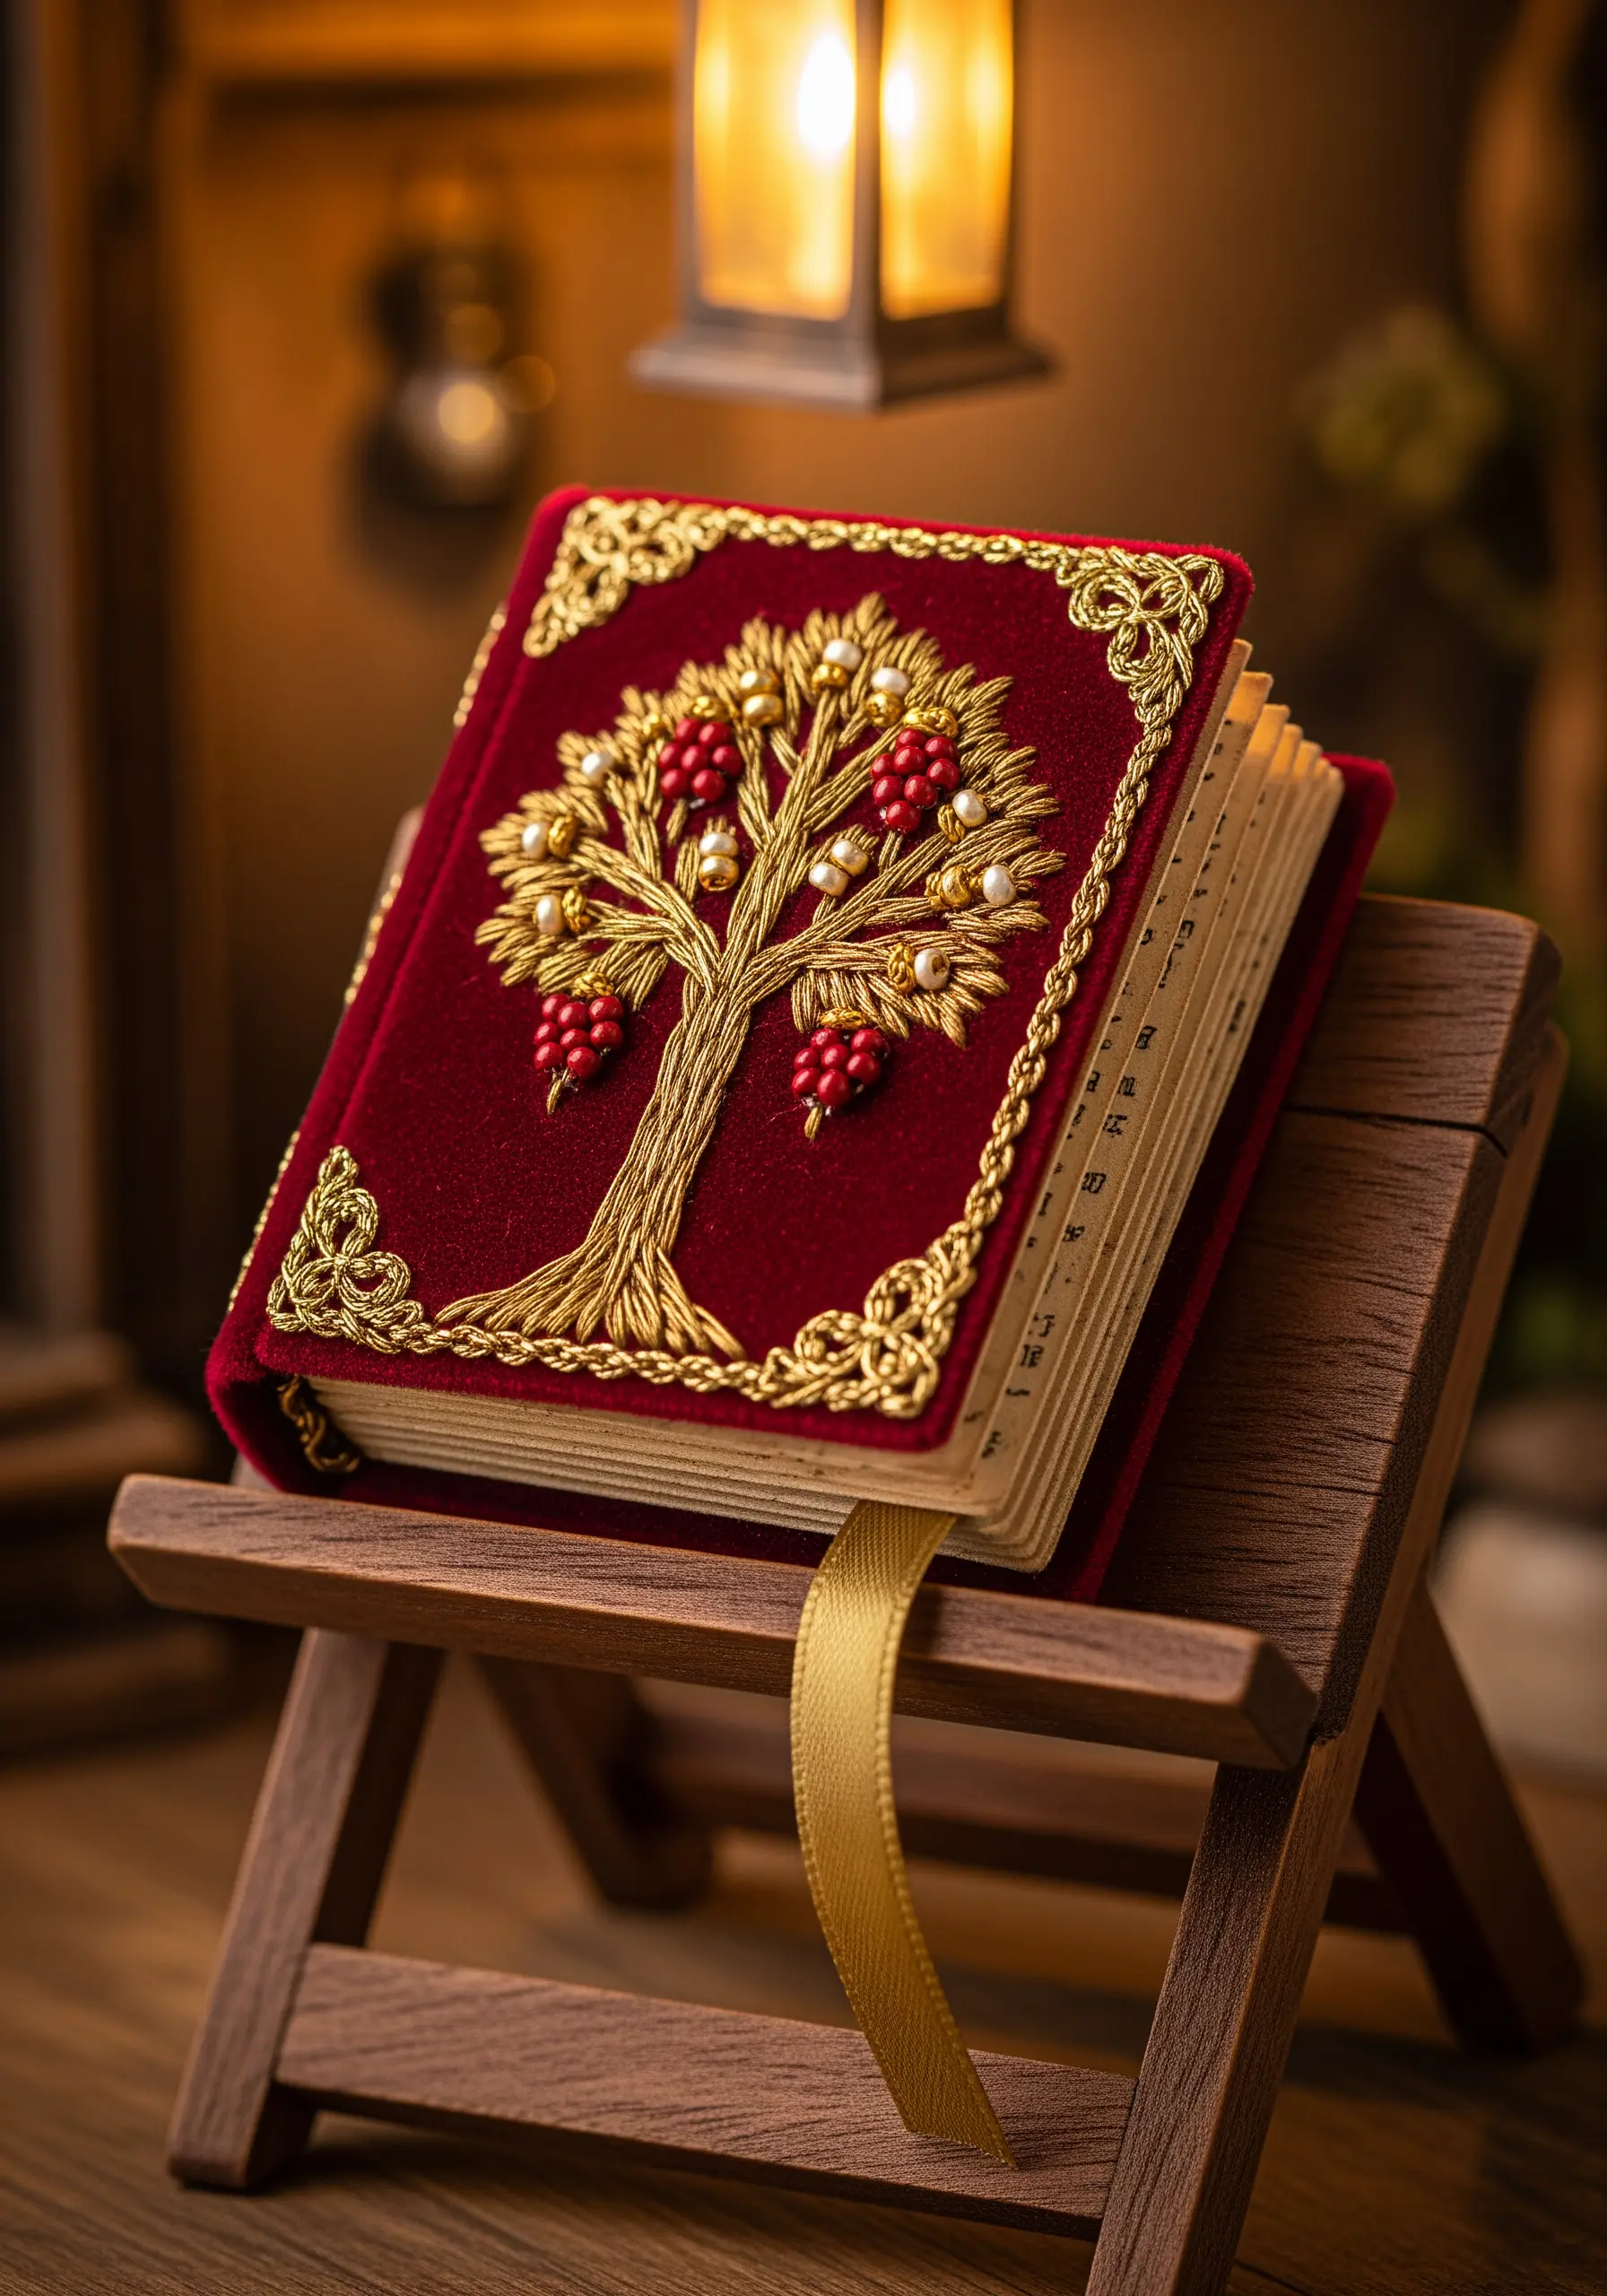
Embroidering on velvet offers a luxurious finish, but the fabric’s pile requires a specific approach.
Always use a stabilizer on the back to prevent your stitches from sinking into the fabric and disappearing.
Instead of trying to pull delicate metallic thread through the thick material, use couching: lay the metallic cord on the surface and tack it down with a finer, matching thread.
Intersperse your threadwork with small pearls or beads to add texture and catch the light, creating an heirloom-quality finish for your creative embroidery projects.
5. Sculpting with Thread in Miniature Dioramas

Build tiny, freestanding objects by thinking like a sculptor, not just a stitcher.
For mushroom caps, create a padded satin stitch over a small, stiff felt circle to give it shape and dimension.
Use thread-wrapped floral wire for the stems, which allows you to bend and position them realistically.
Assembled in a thimble or nutshell, these elements come together to form tiny narrative scenes full of charm.
6. Recreating Paint Textures with Dimensional Stitches
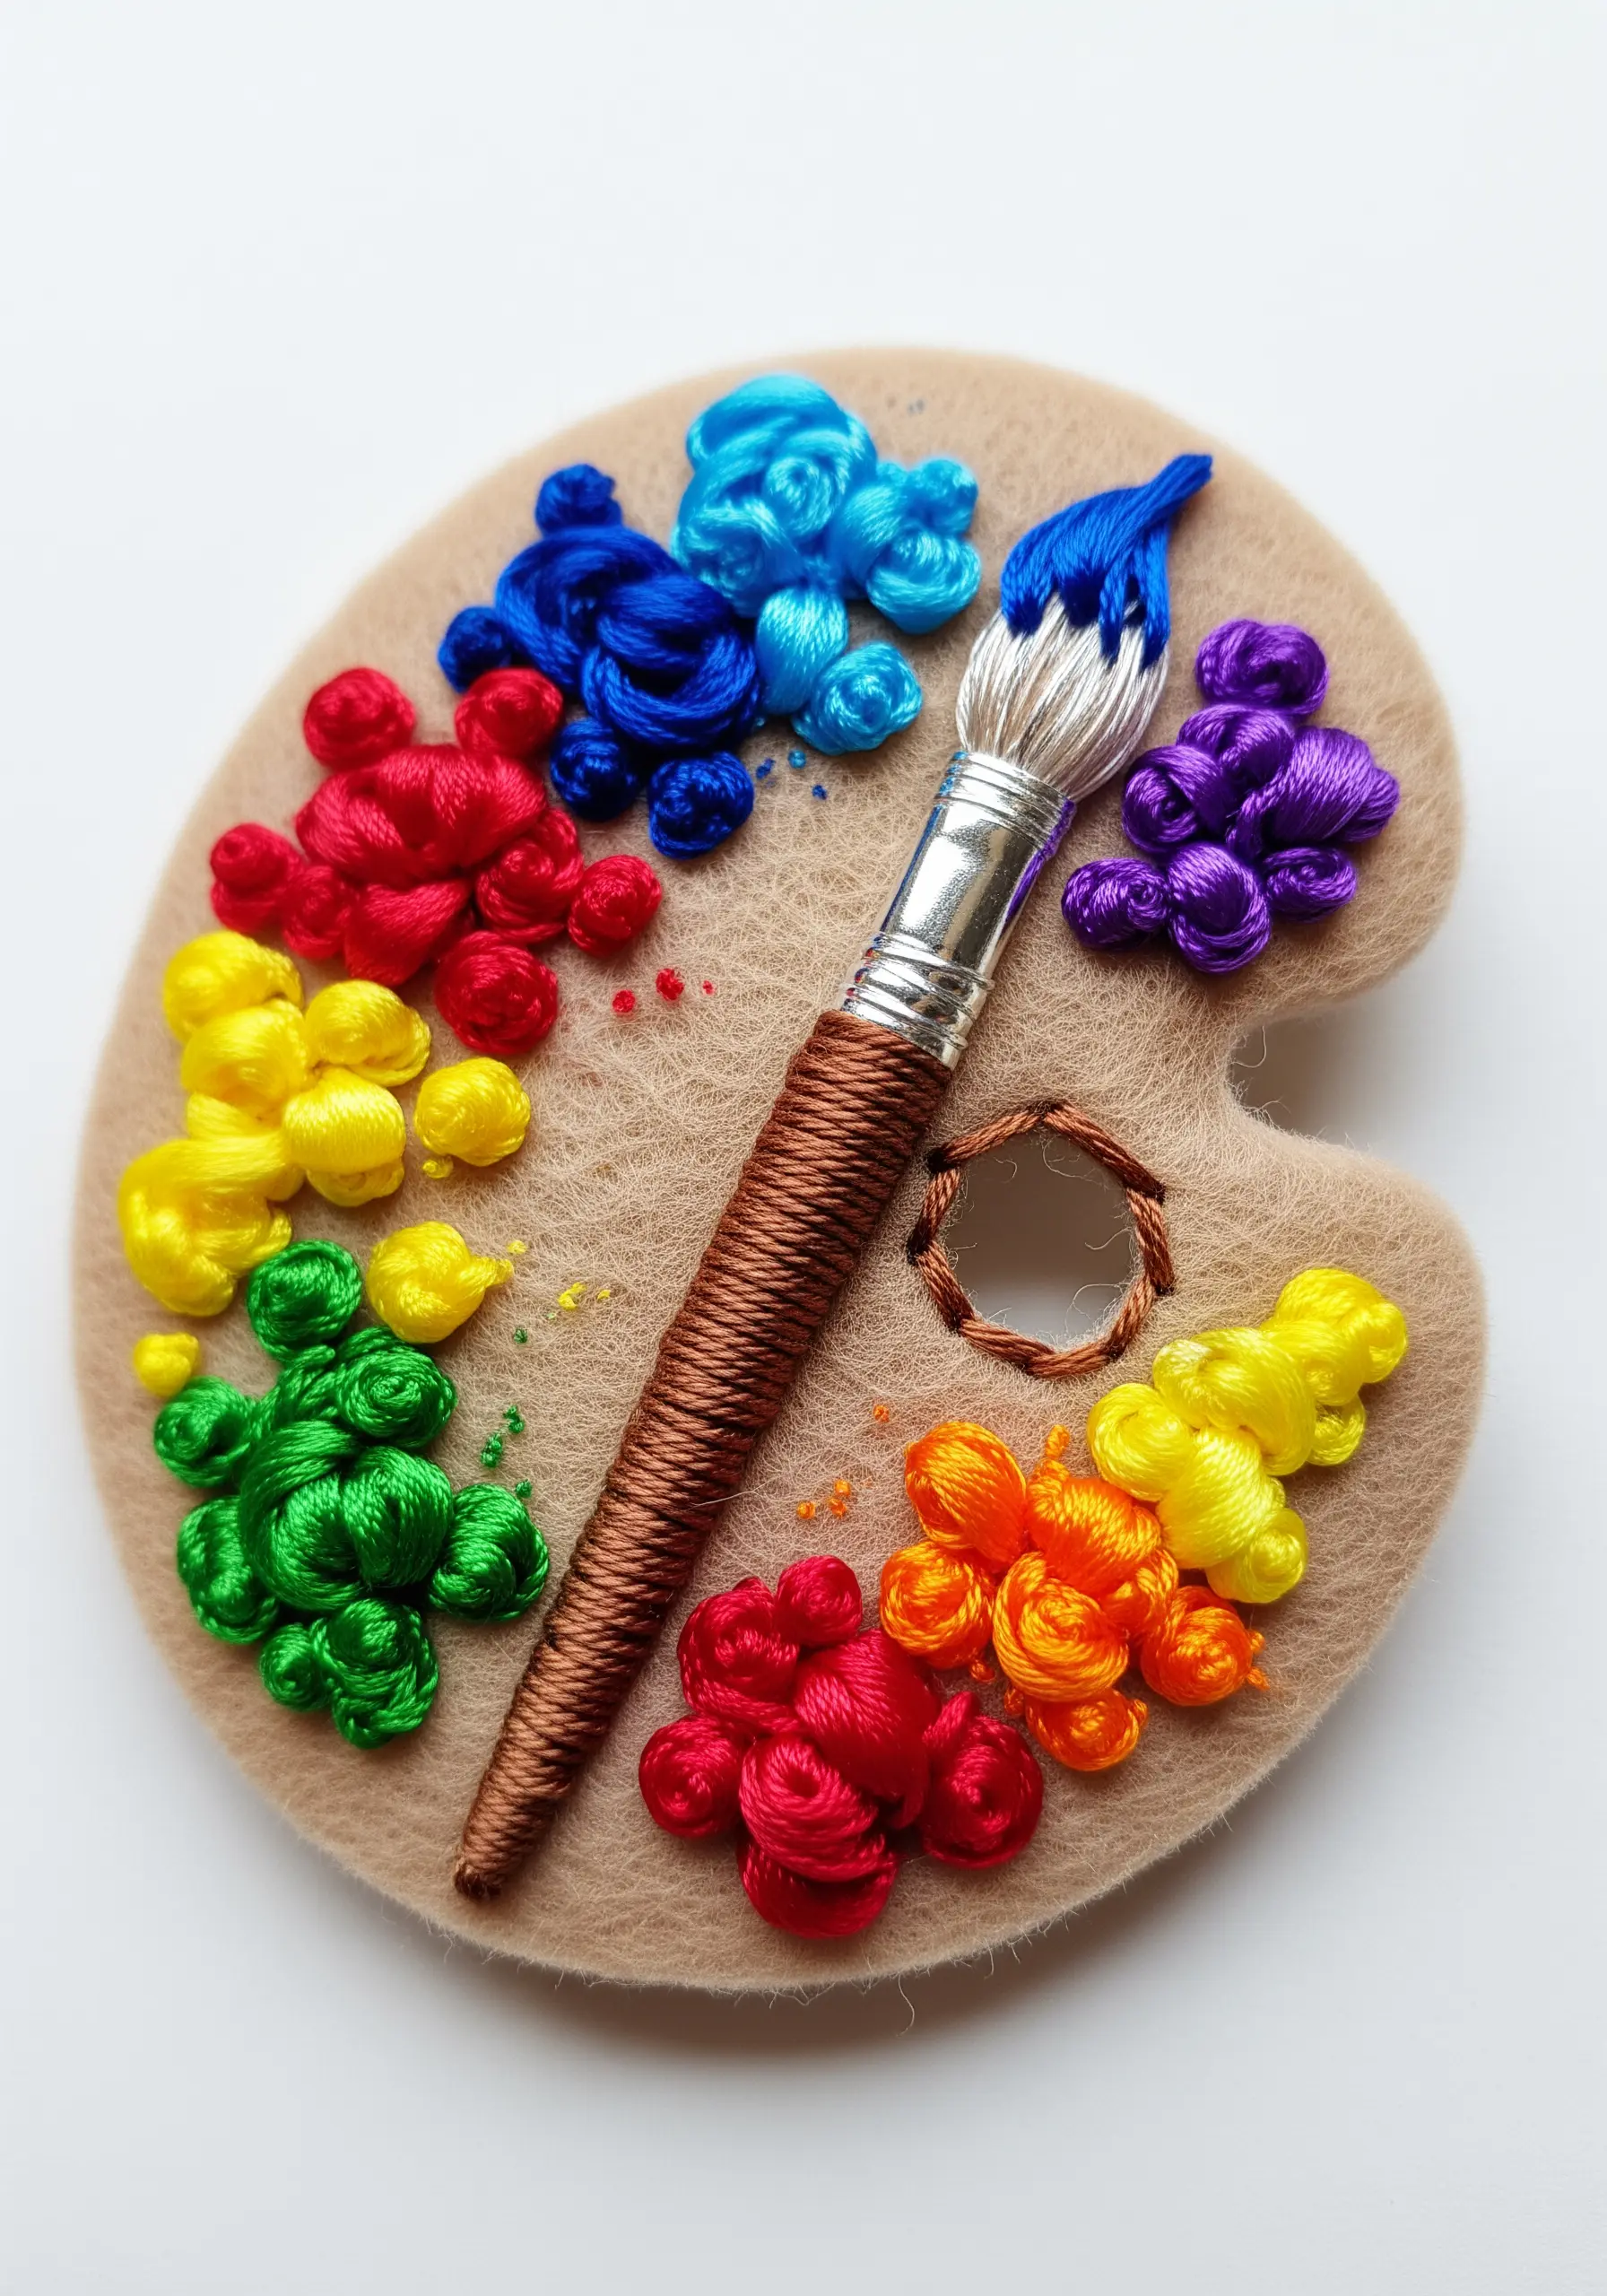
Mimic the thick, glossy texture of oil paint by using dimensional stitches and the right type of thread.
Choose high-sheen rayon or silk floss to give your “paint” a wet, lustrous appearance that standard cotton can’t replicate.
Instead of flat stitches, build up texture with tightly packed French knots, bullion knots, or woven wheel stitches.
This technique allows you to create abstract shapes and motifs that have a compelling, sculptural quality on any surface.
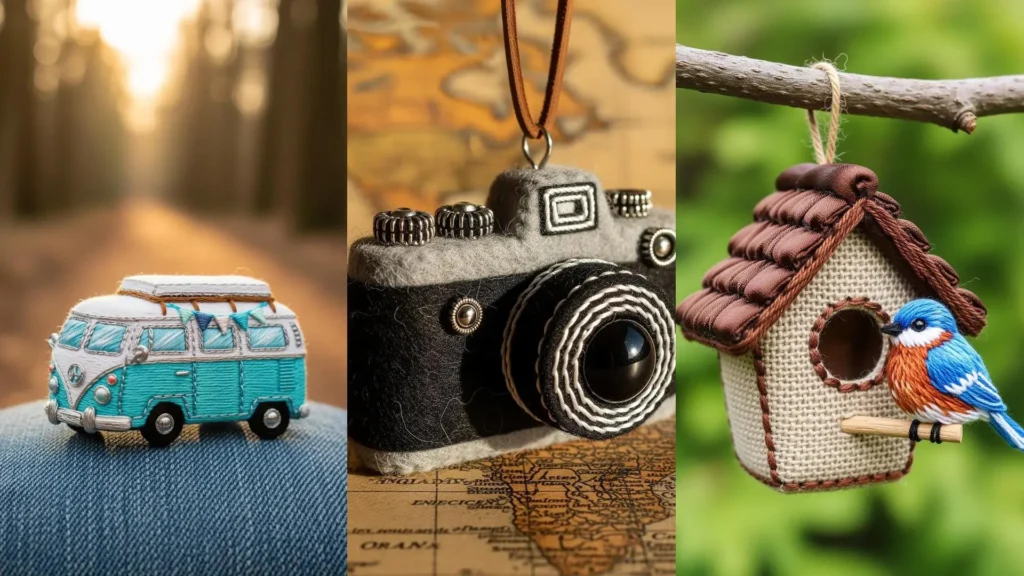
7. Precision Stitching on Felt Appliqué

Combining felt appliqué with embroidery adds instant dimension, but the key to a polished look is precision.
Use a sharp needle and just one or two strands of floss to keep your stitches delicate and prevent overwhelming the soft texture of the felt.
A scattered seed stitch is perfect for creating a cake’s crumb texture, while a single, perfectly placed French knot can become a raspberry seed.
These fun and tiny embroidery designs rely on small, consistent stitches for their charm.
8. Engineering 3D Embroidered Ornaments
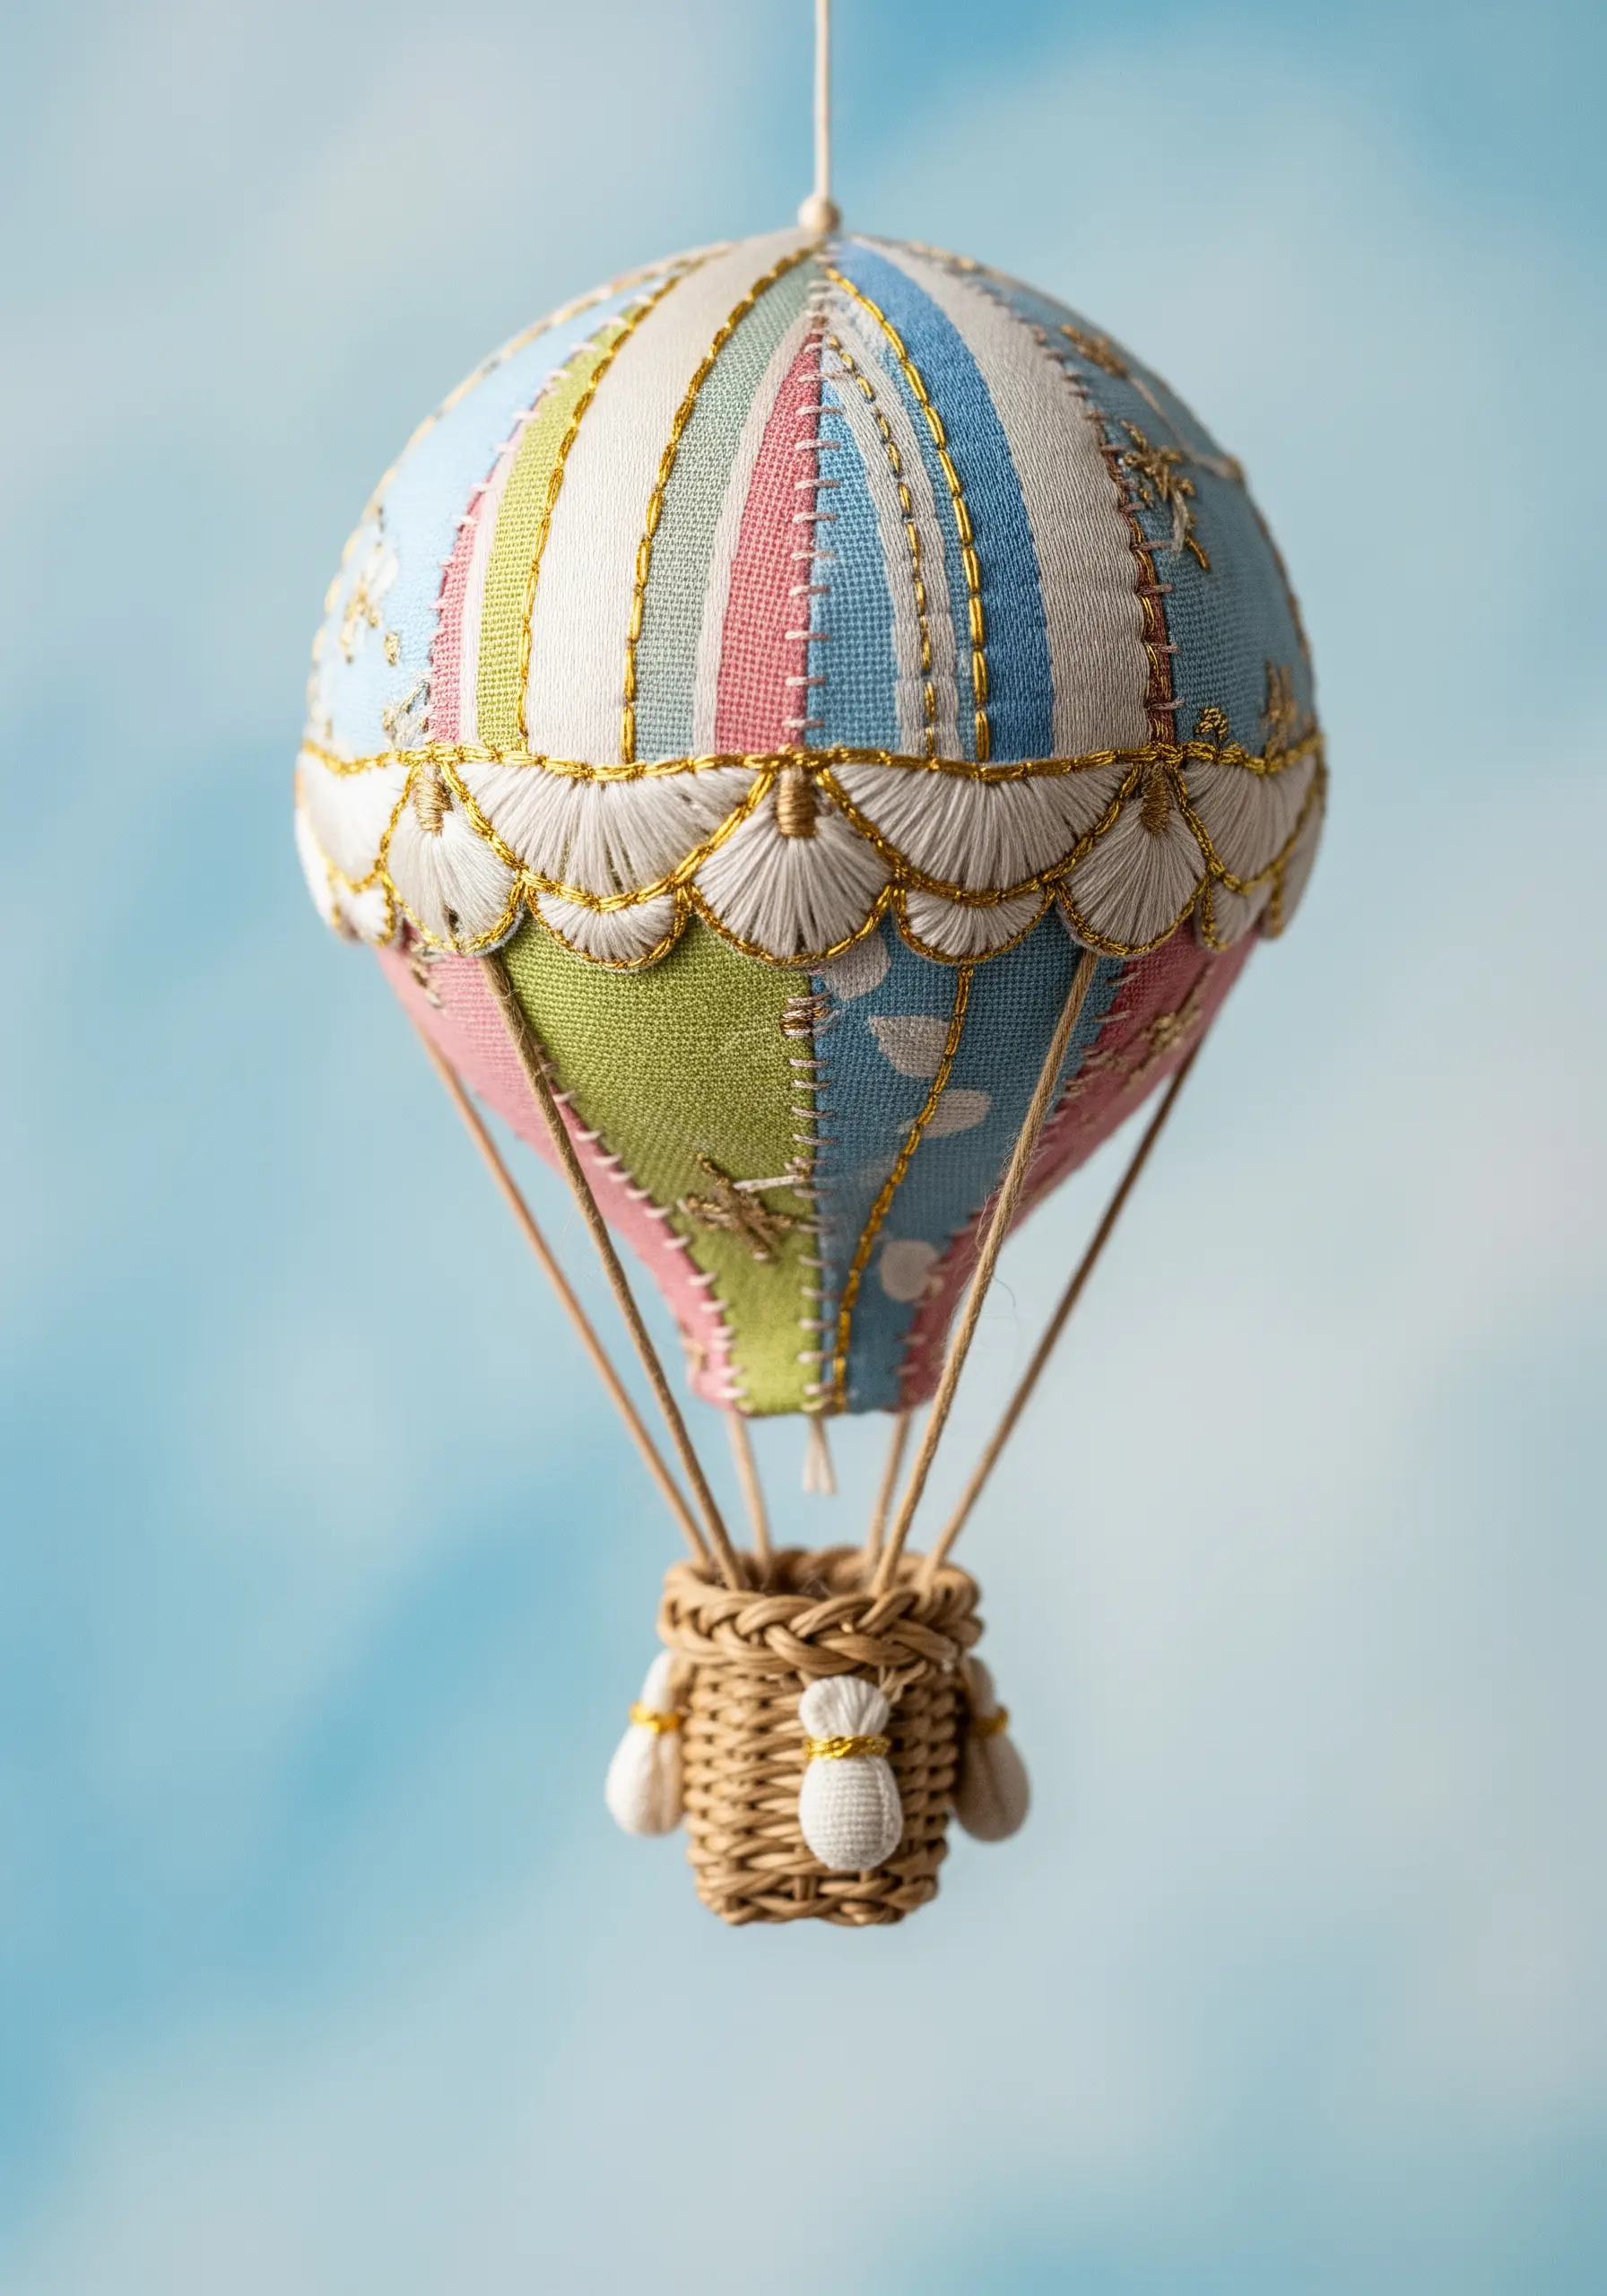
Move your embroidery into the third dimension by thinking like a pattern maker.
To create a spherical object like a hot air balloon, first embroider your design onto several flat fabric panels, known as gores.
Once the stitching is complete, carefully cut out the panels and sew them together, stuffing the form lightly with batting as you go.
Finish with details like contemporary metallic thread designs to define seams and add a touch of sparkle.
9. Lifelike Thread Painting for Insect Wings
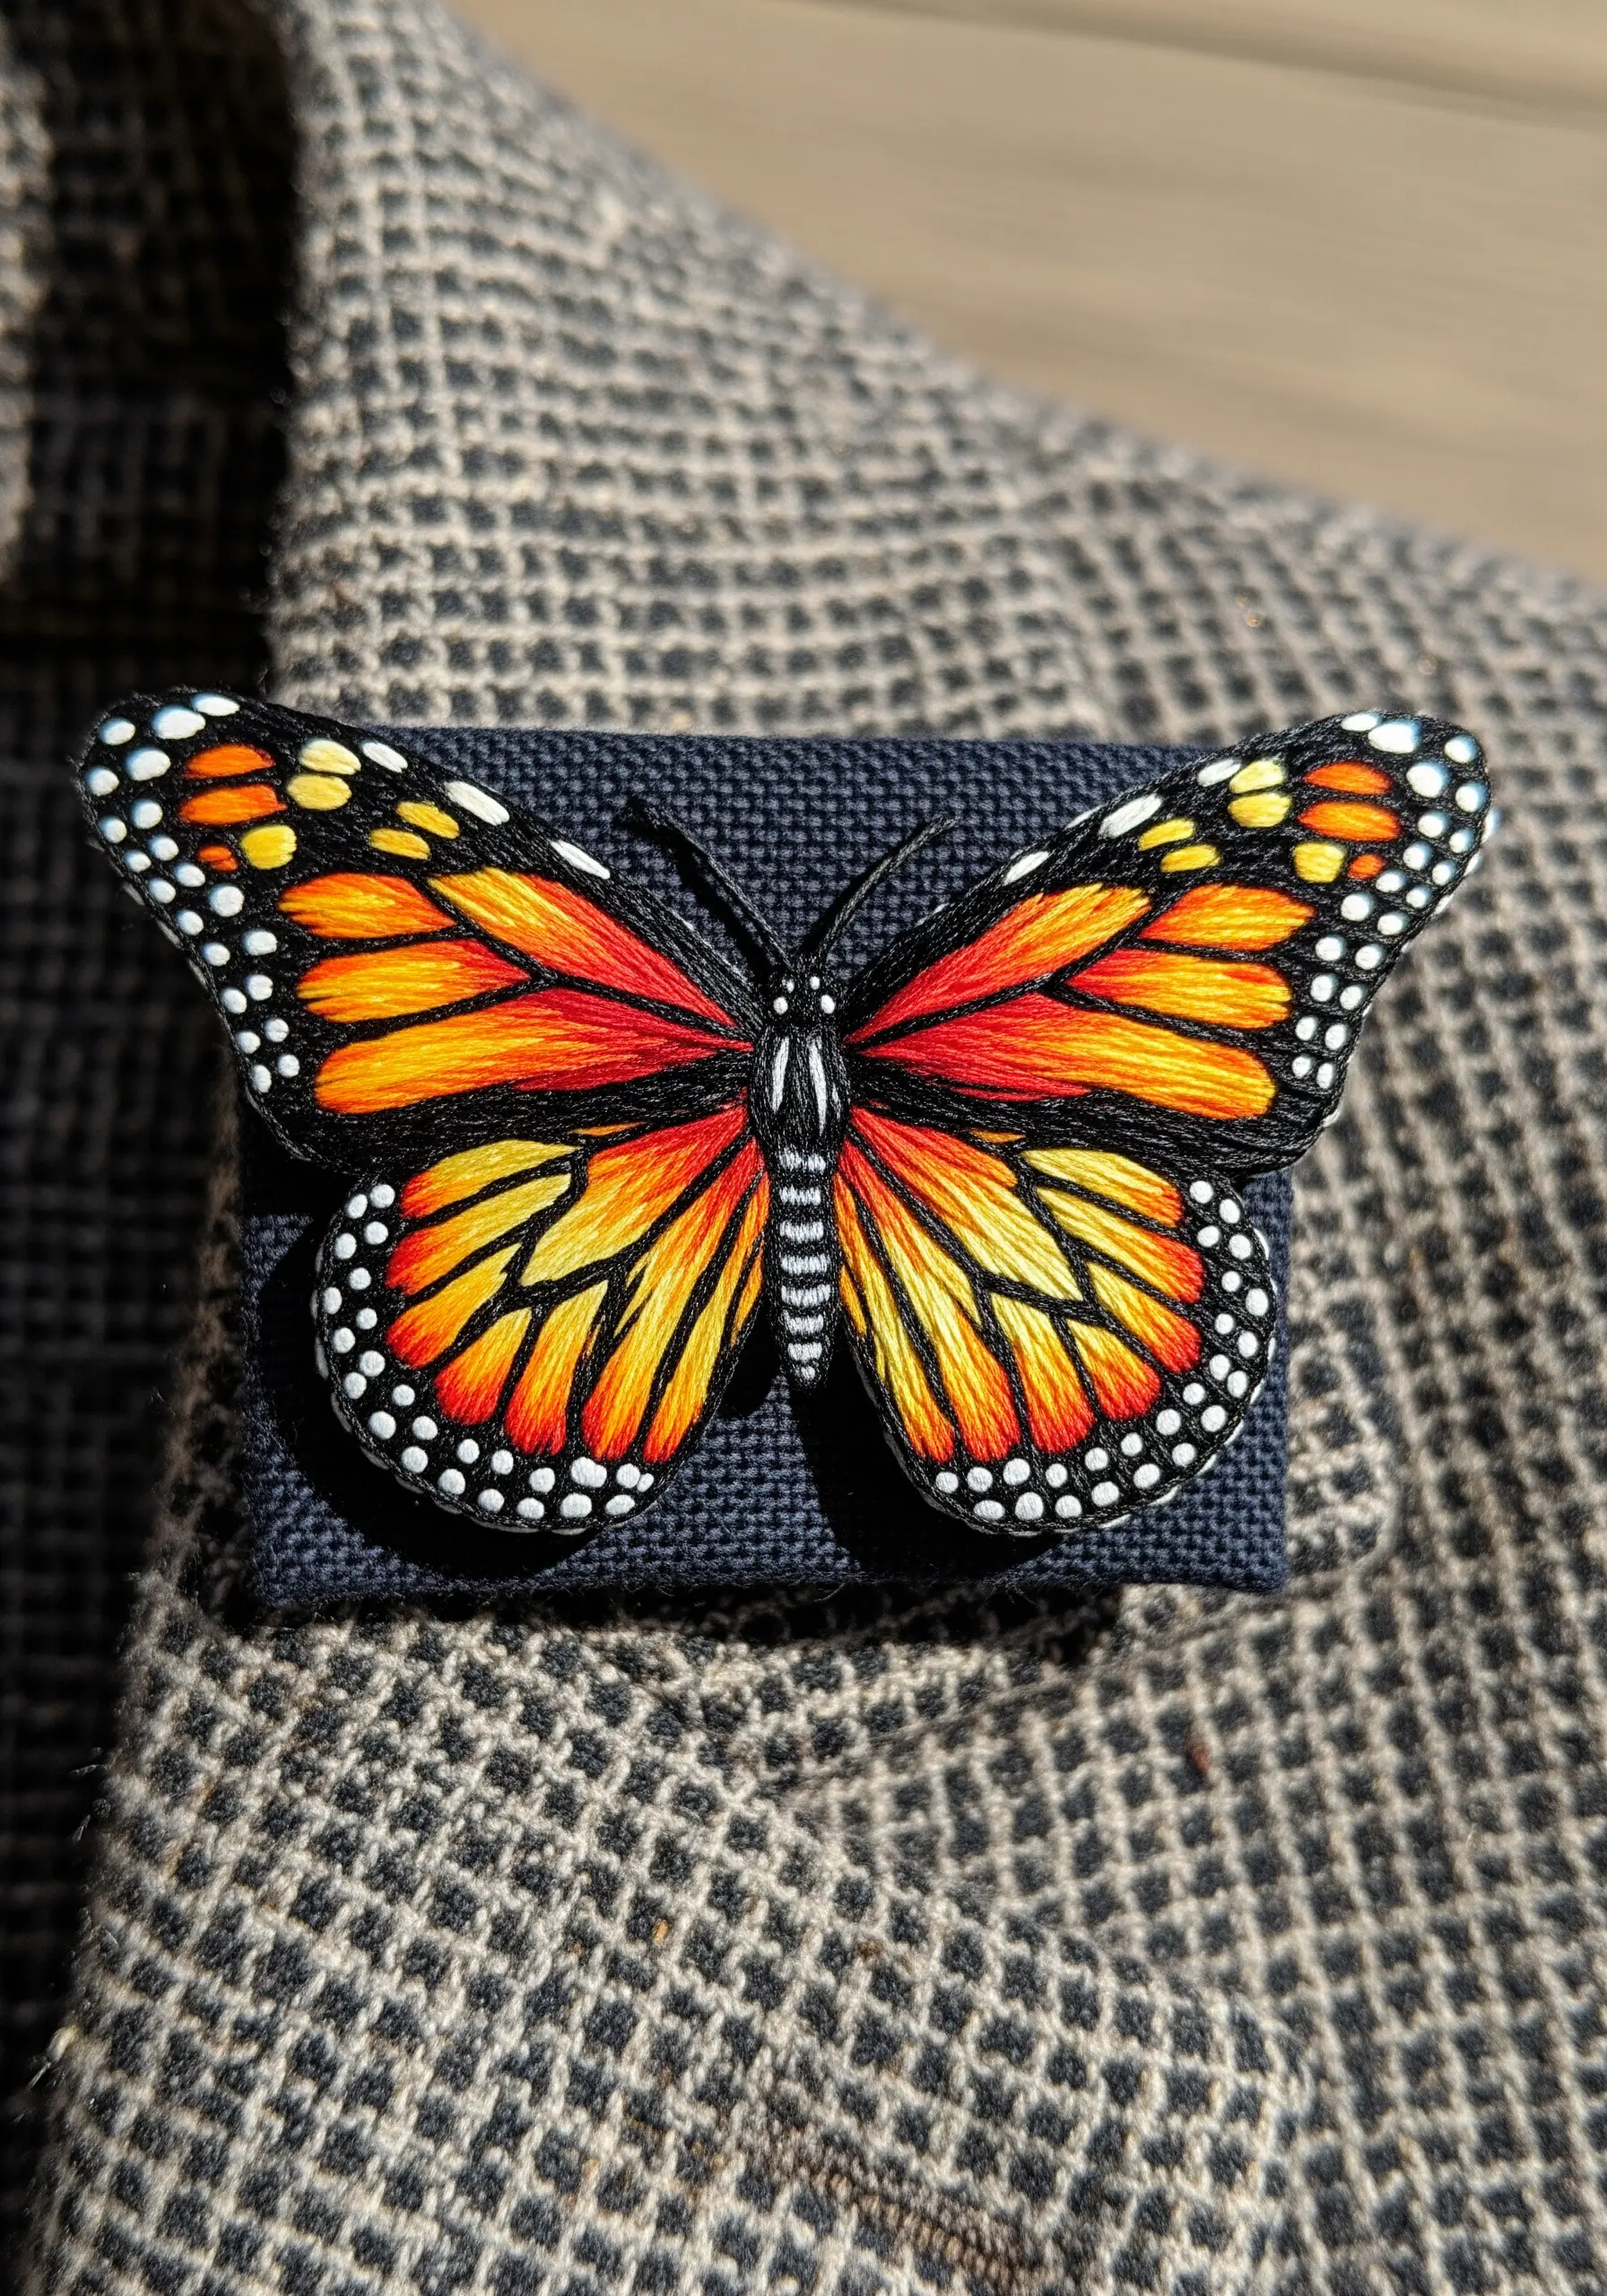
To achieve the photorealism required for a monarch butterfly’s wings, thread painting is essential.
Work with a single strand of embroidery floss and use long-and-short stitches to blend colors seamlessly, creating imperceptible gradients from orange to yellow to black.
Stitch direction is everything; ensure your stitches follow the natural lines of the wing’s cells for a convincing effect.
For a clean, freestanding look, stitch onto a layer of organza backed with a water-soluble stabilizer, then trim away the excess for statement textured embroidery.
10. Mixed-Media Seascapes in Found Objects
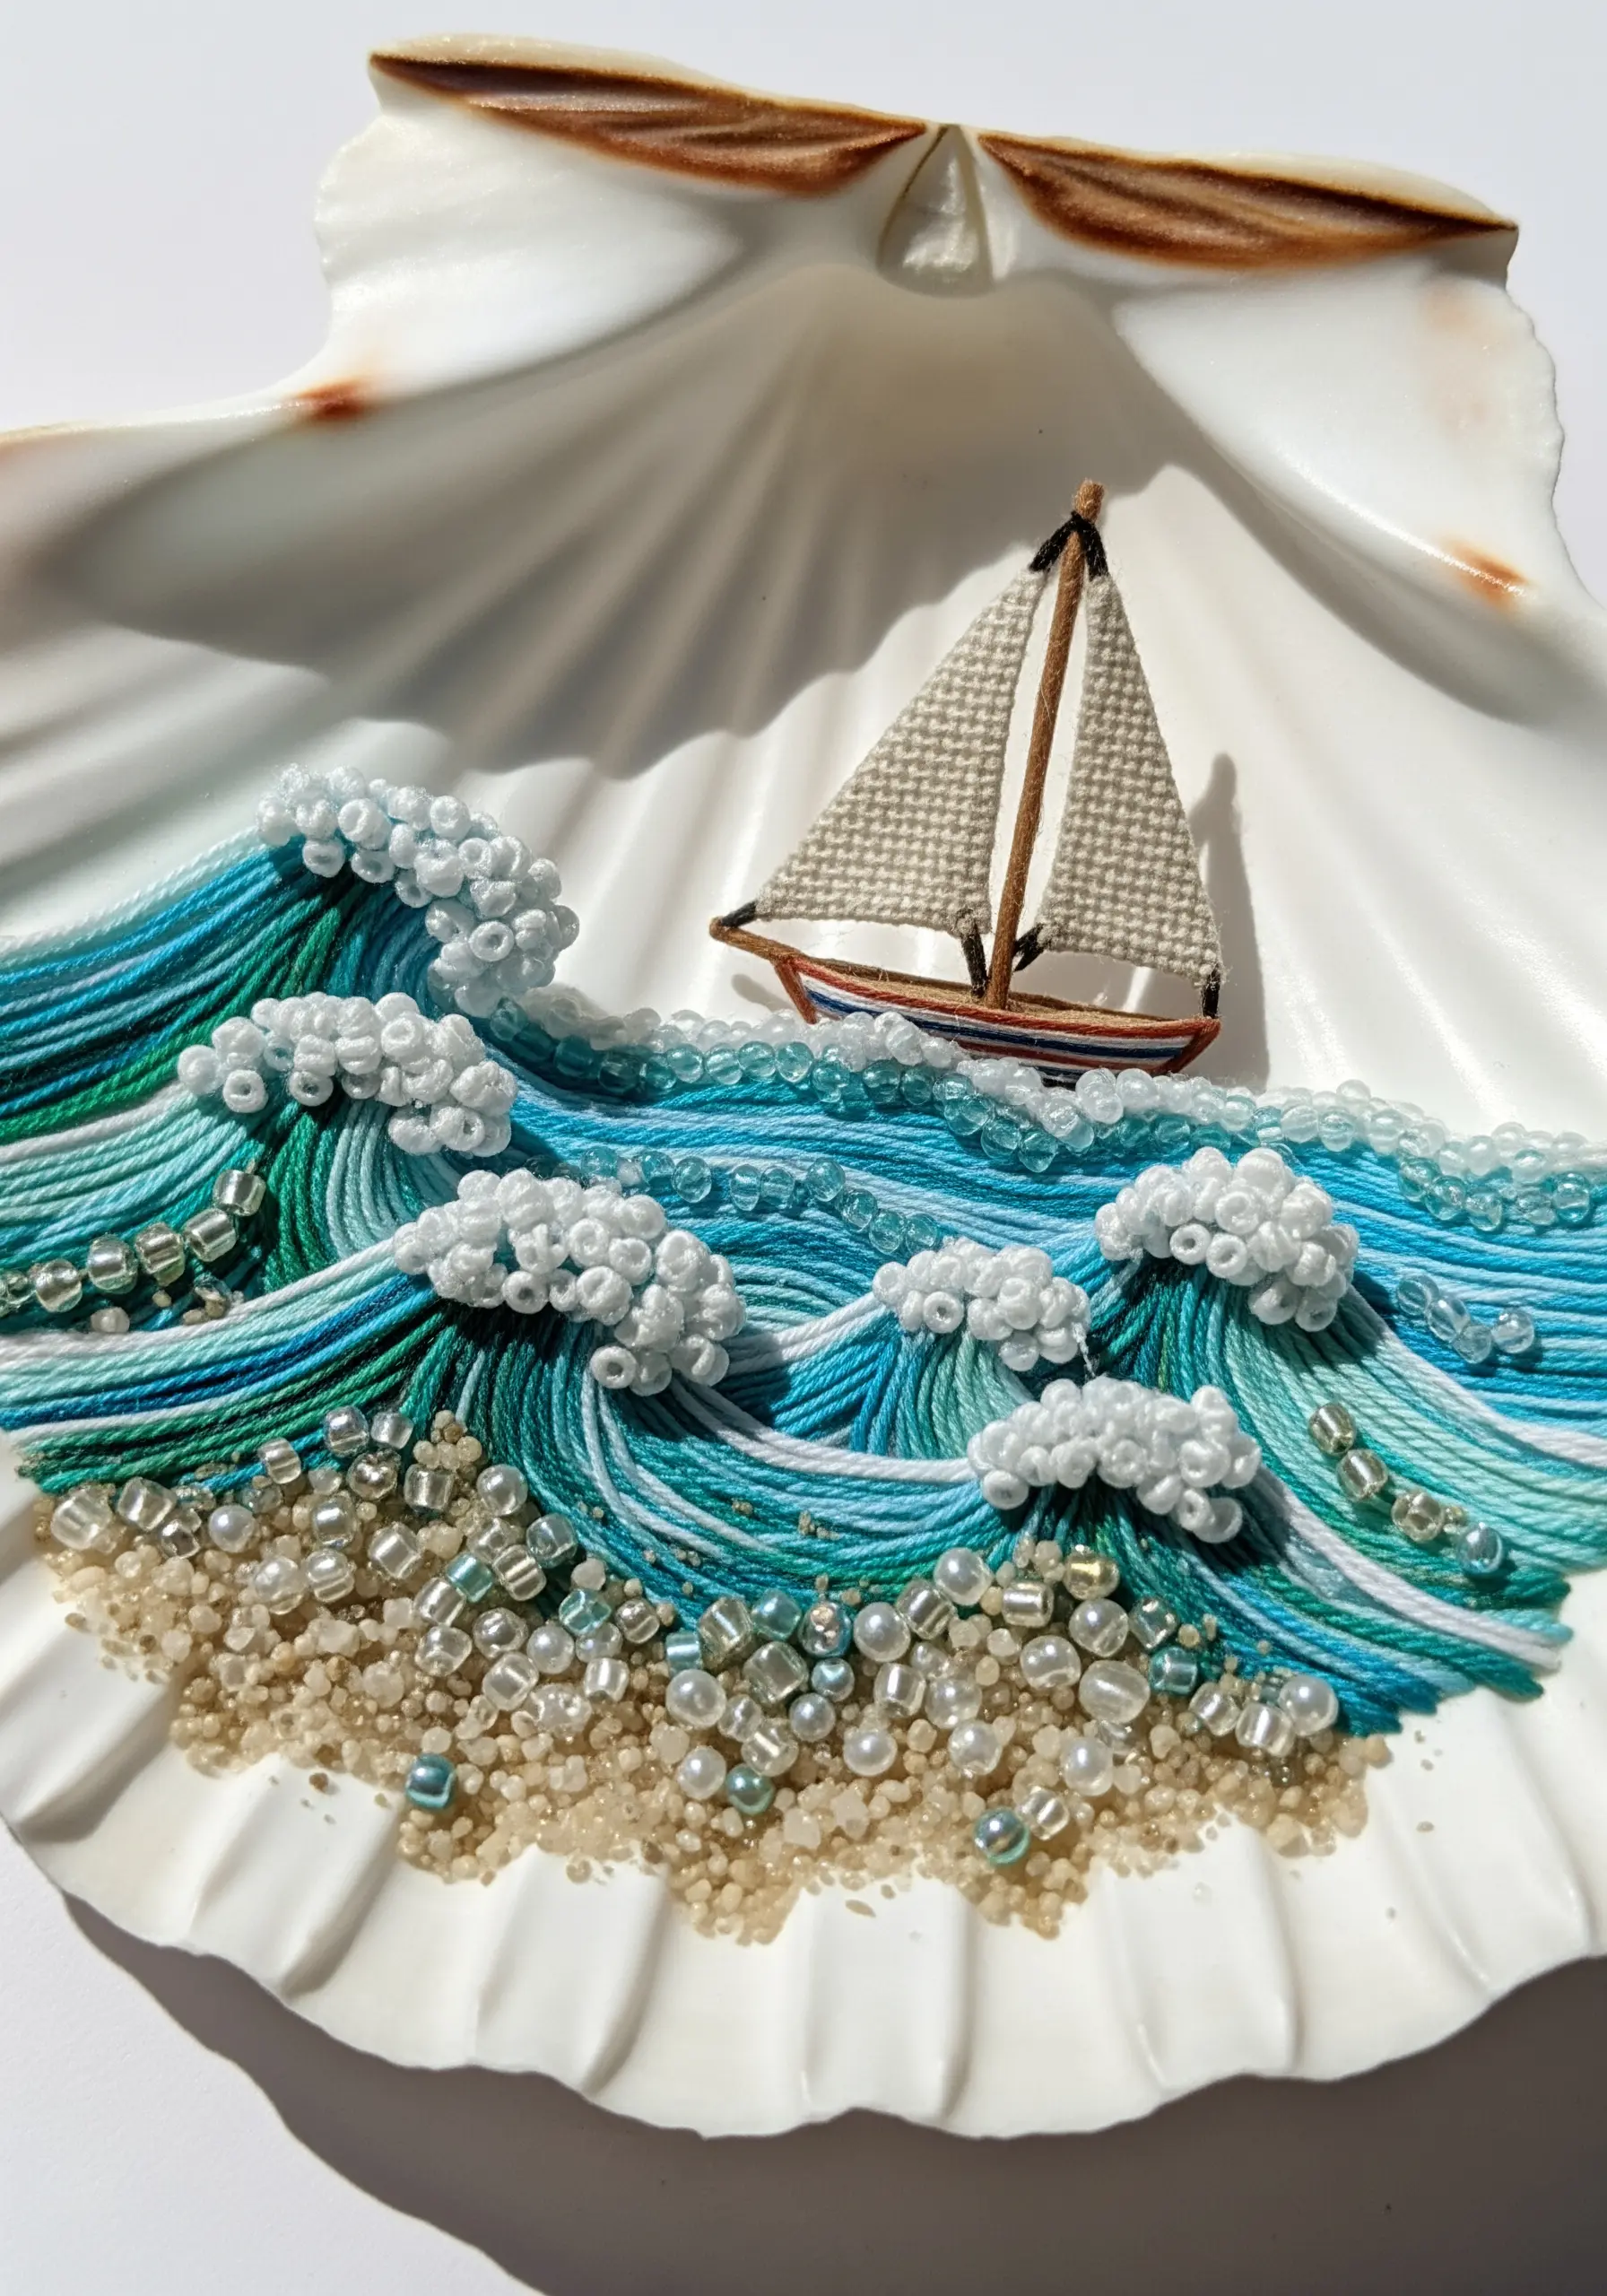
Elevate your embroidery by using a natural, unconventional canvas like a seashell.
Couch down multiple strands of variegated blue and green thread to create the flowing lines of ocean waves, allowing the thread to build up dimension.
Incorporate tiny seed beads and French knots to represent sea foam and the texture of a sandy shore, blending materials for a richer effect.
This approach transforms a simple stitch project into a piece of coastal-inspired embroidery that tells a story.
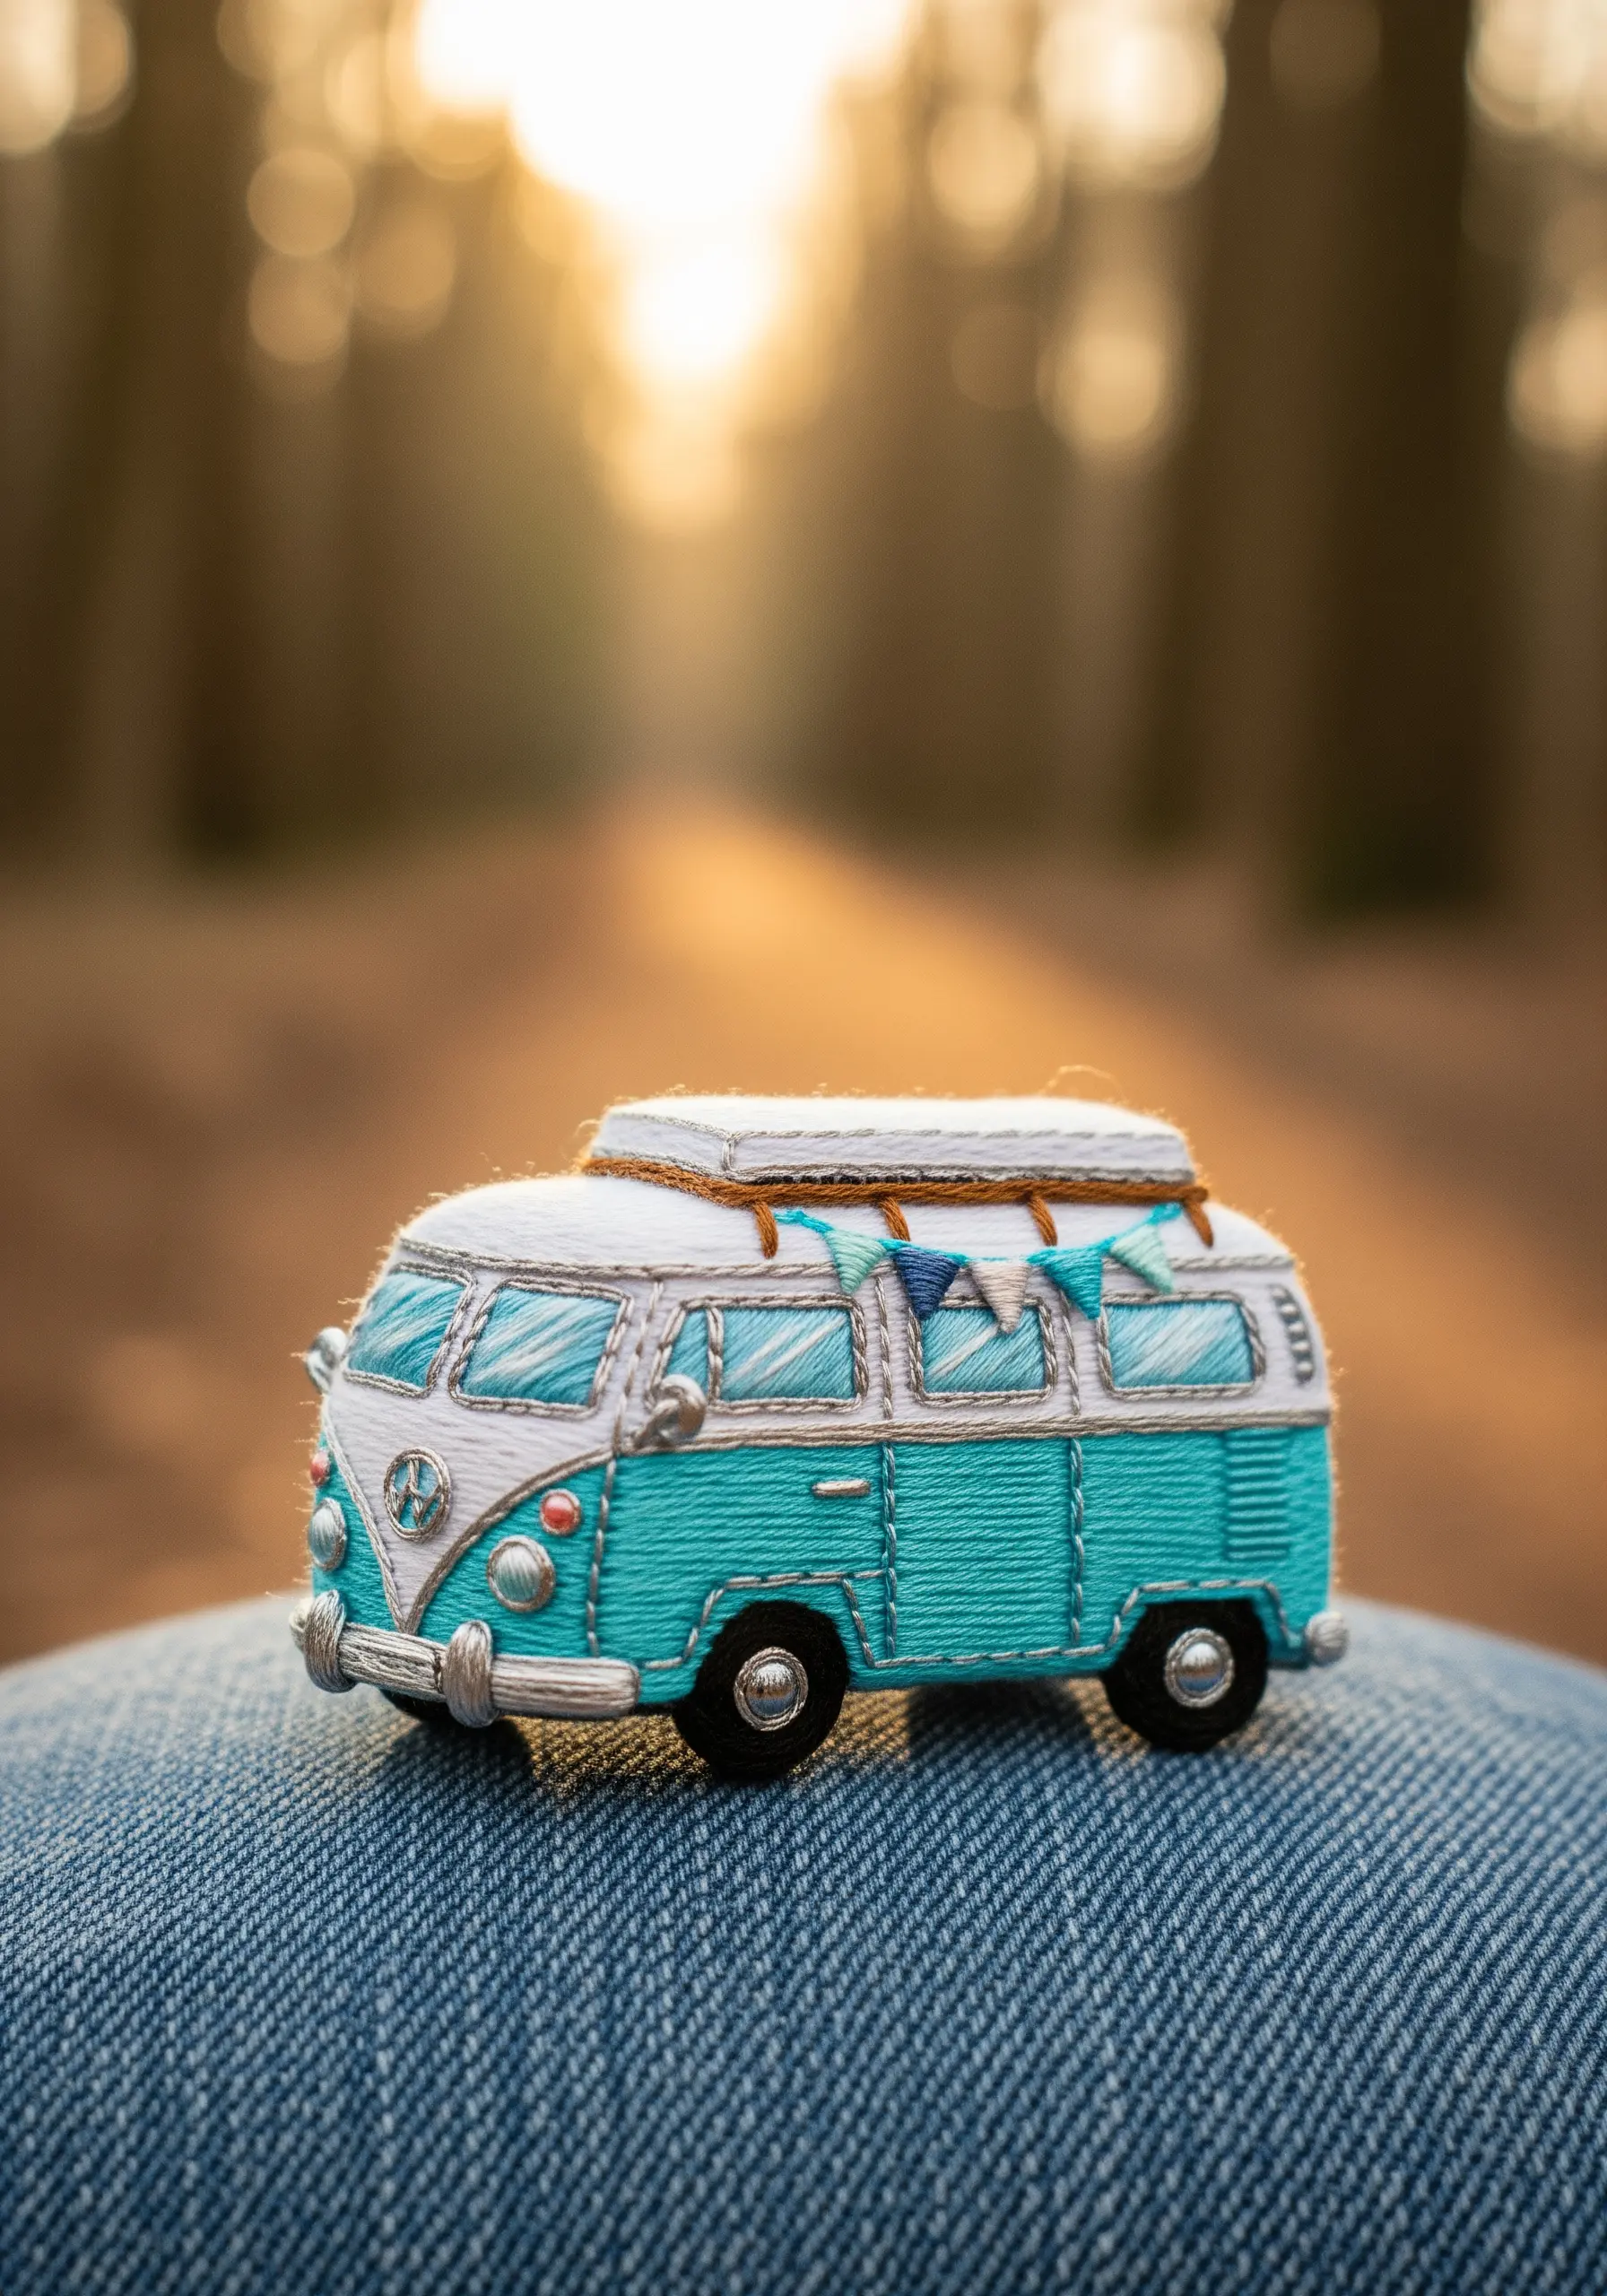
11. Upholstery Embroidery on a Miniature Scale

Integrating embroidery into miniature furniture adds a layer of bespoke, handcrafted charm.
Choose a tightly woven fabric for your upholstery to ensure your small stitches have a stable foundation and appear crisp.
Use delicate stitches like a single-strand stem stitch or split stitch for details like vines or monograms, so they complement the piece rather than overwhelm it.
Always complete your embroidery on the flat fabric pieces before you begin the miniature assembly—it’s far easier than stitching on a finished object, making these tiny artistic home touches achievable.
12. Surface Stitching on 3D Wrapped Forms
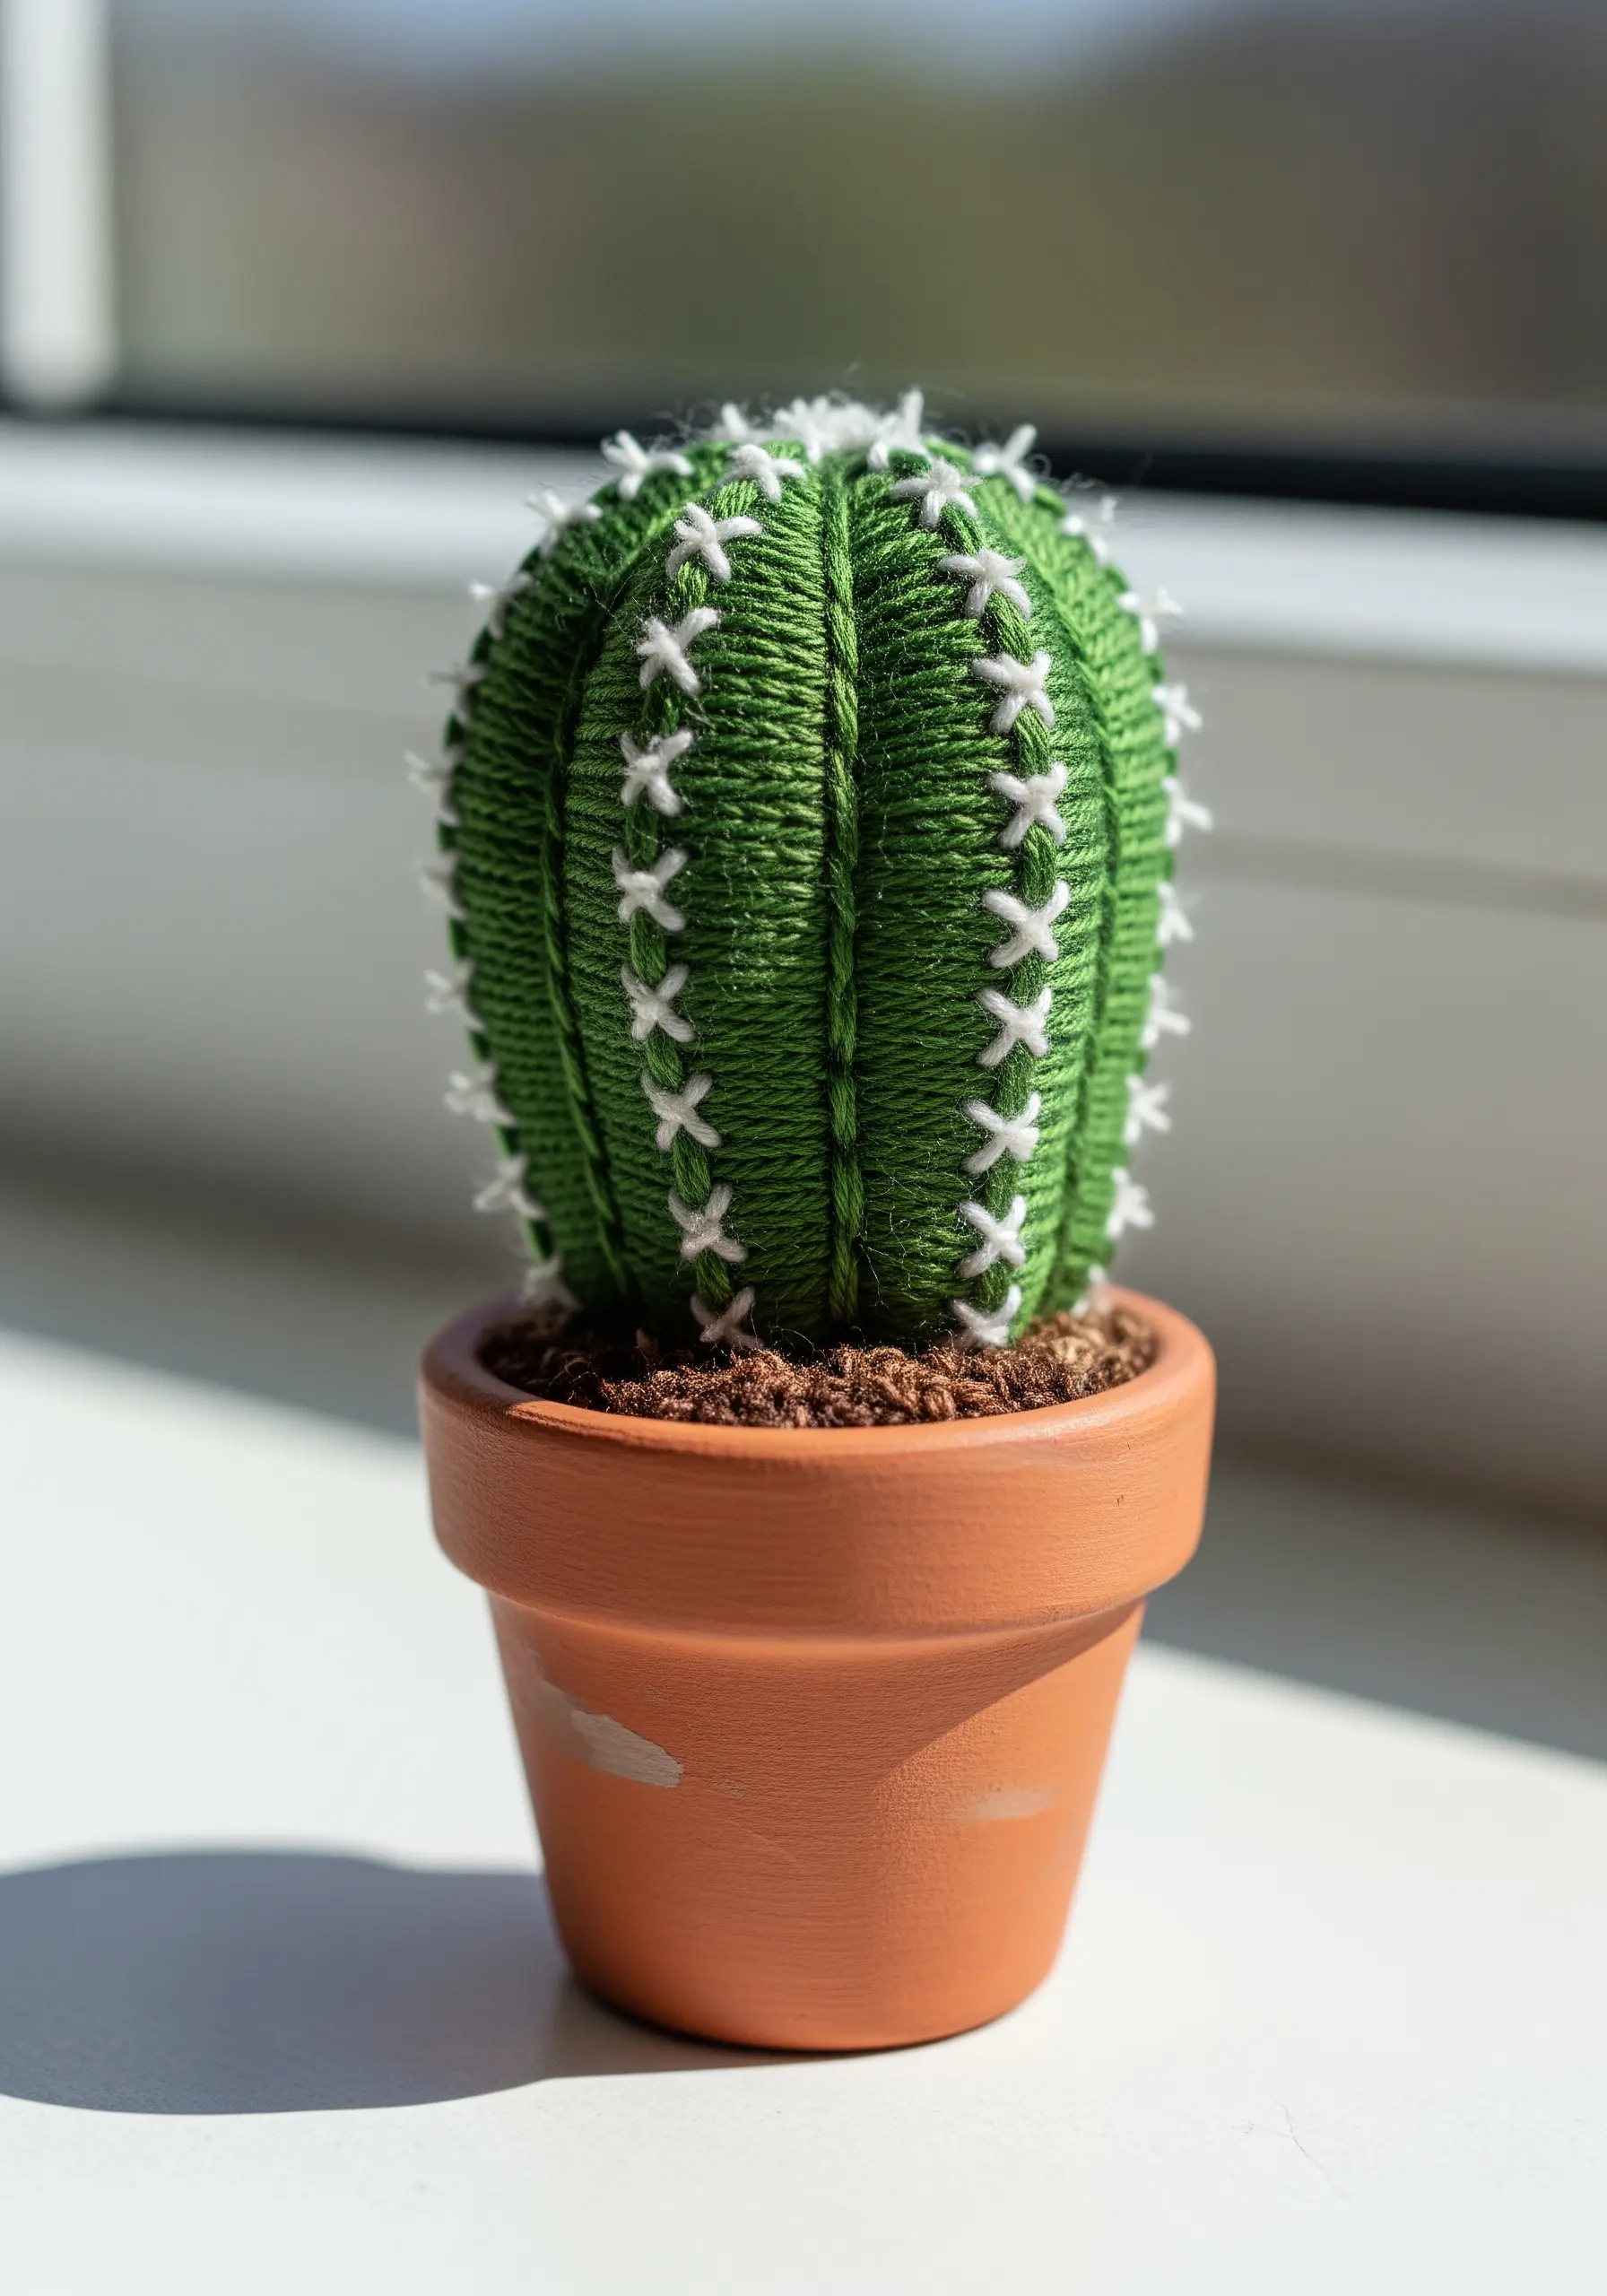
Create sculptural miniatures quickly by building a base form and adding details with surface embroidery.
Shape your object—like a cactus—from felt, batting, or even clay, then tightly wrap it with yarn or multiple strands of embroidery floss until the base is completely covered.
You can then add decorative details directly onto the wrapped surface using simple stitches.
A few well-placed straight stitches or crosses become cactus spines, instantly adding character and turning your form into a finished piece of organic handmade art.
13. Crafting Realistic Insects with Mixed Materials

To capture the varied textures of an insect, you must combine different materials and techniques.
For the fuzzy body of a bee, use chenille thread or a plush yarn applied with the Turkey stitch, which creates soft, trimmable loops.
For the delicate, translucent wings, embroider the veins with a fine grey or metallic thread onto sheer organza or a water-soluble stabilizer.
Once the stabilizer is dissolved or the organza is trimmed away, you’re left with delicate, freestanding wings, perfect for your mixed-fiber creations.
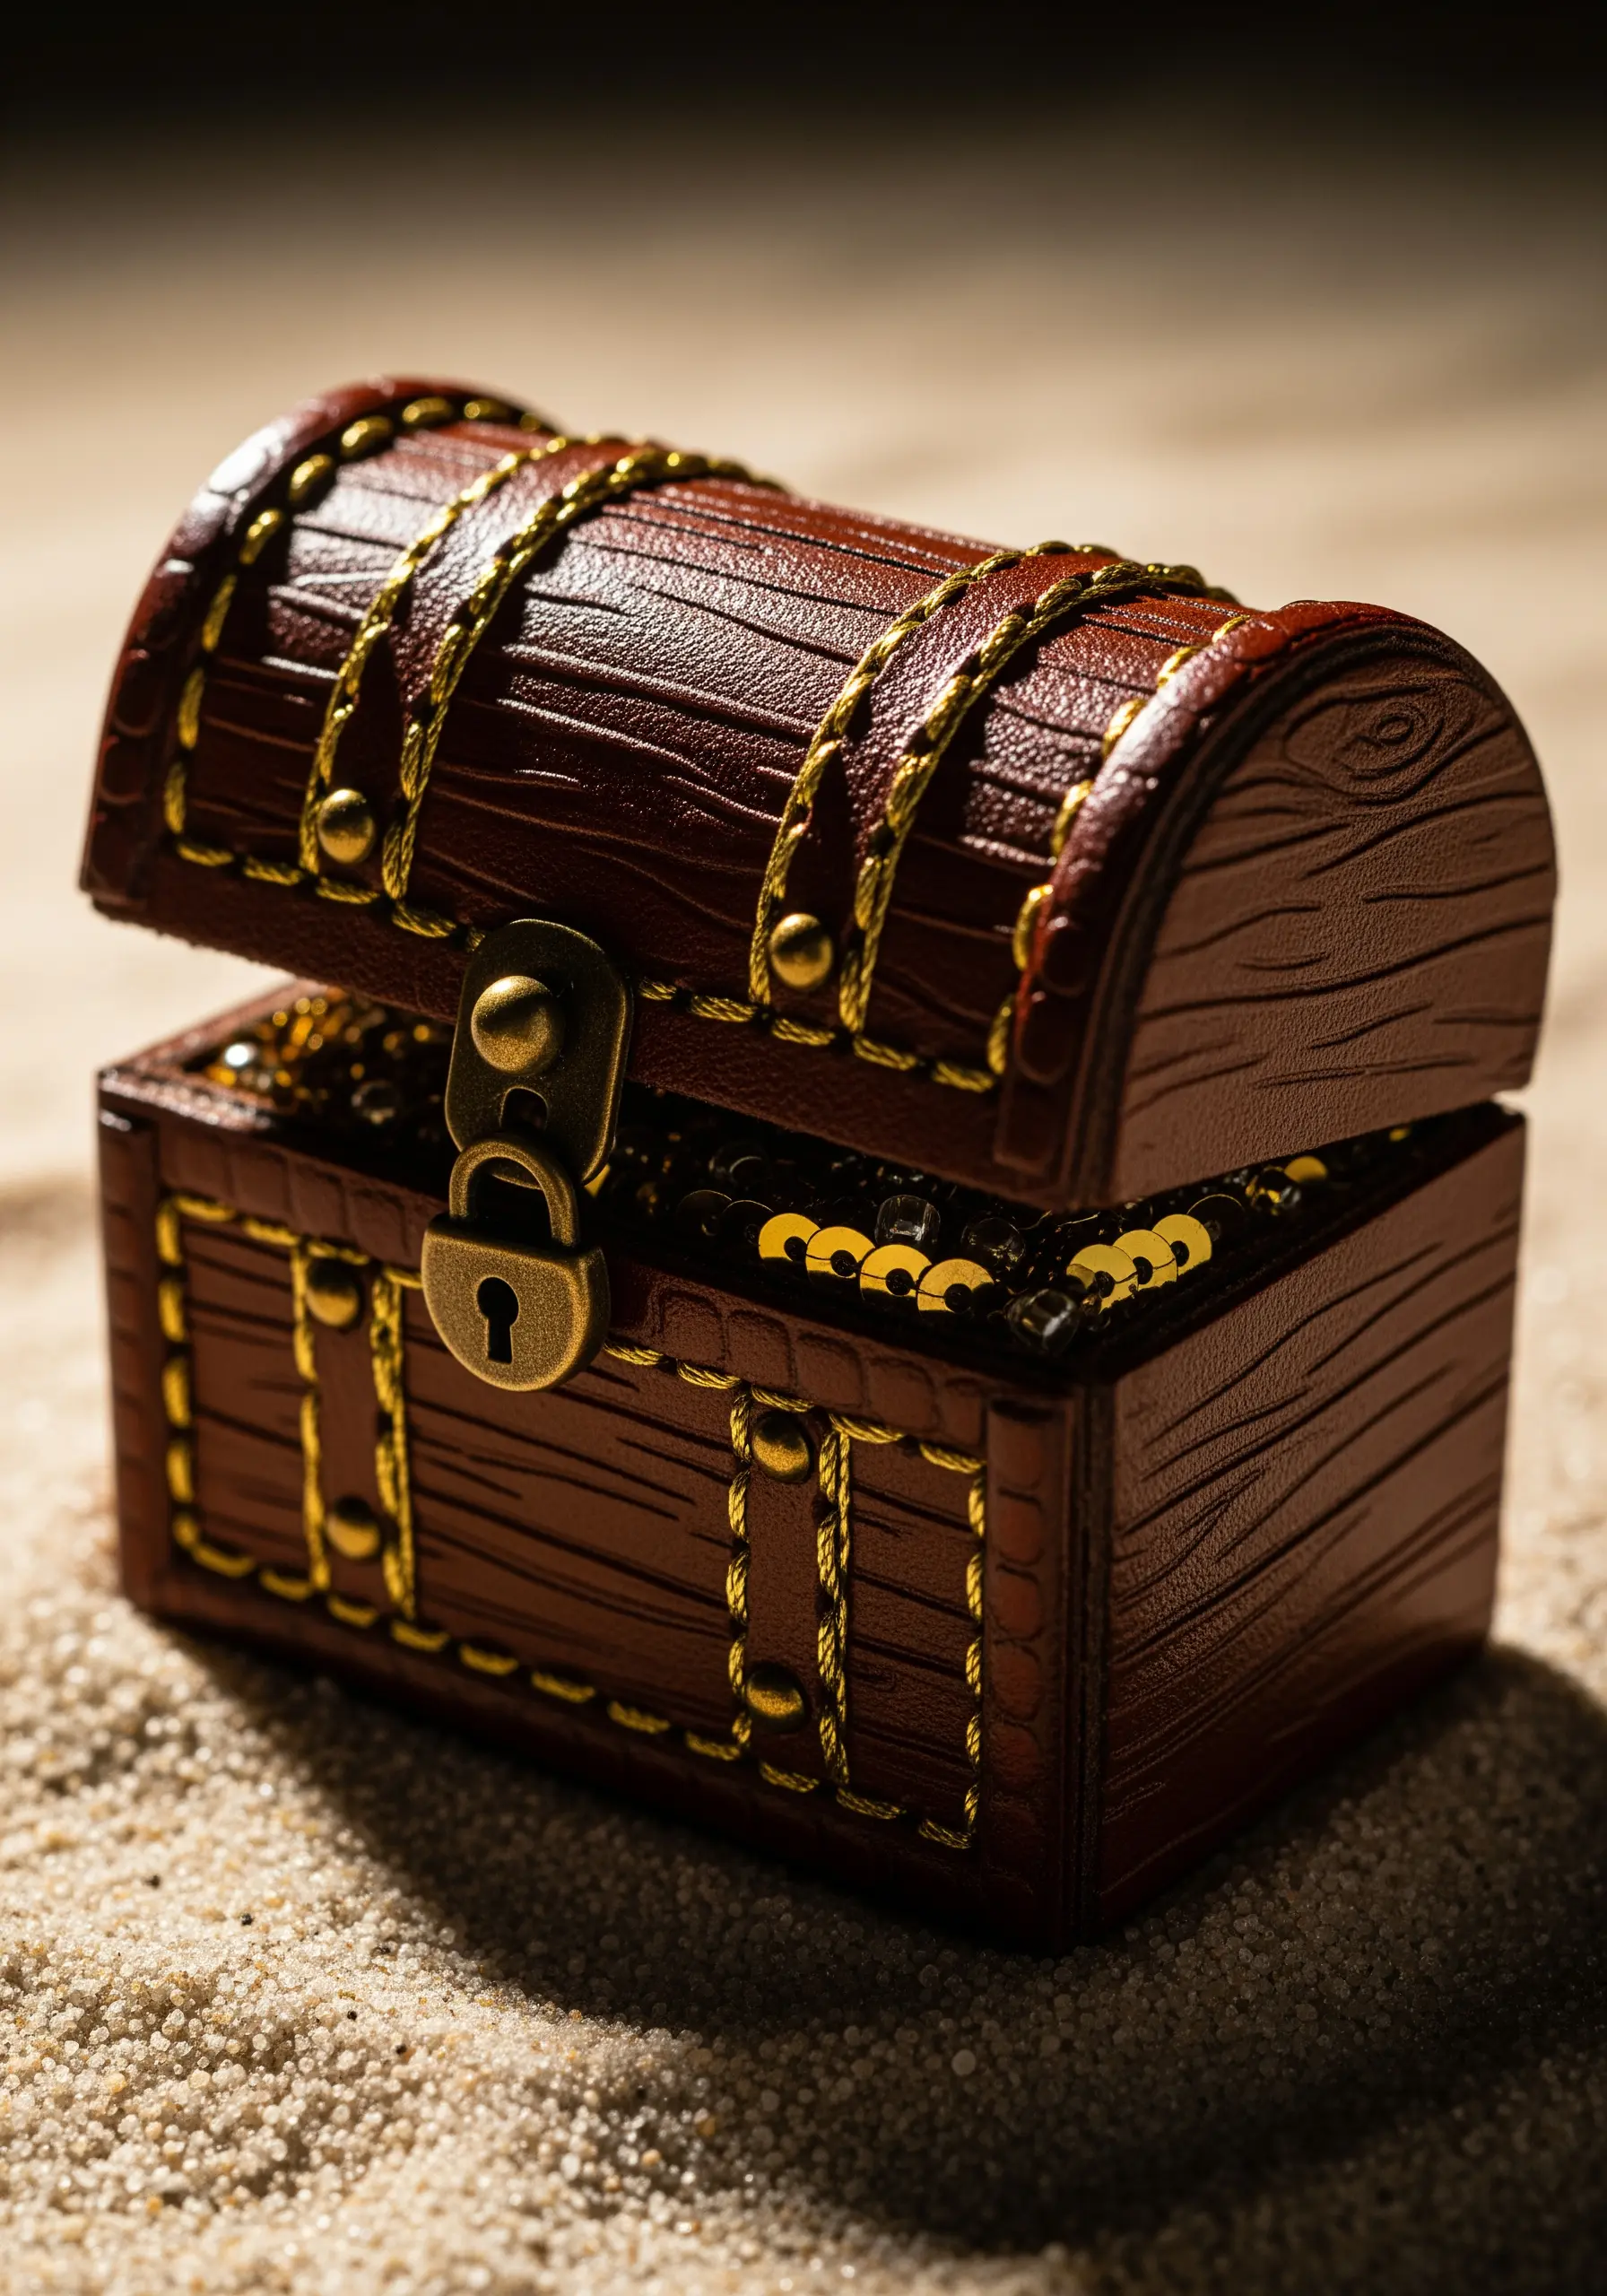
14. Designing Dimensional Patches with Mixed Media
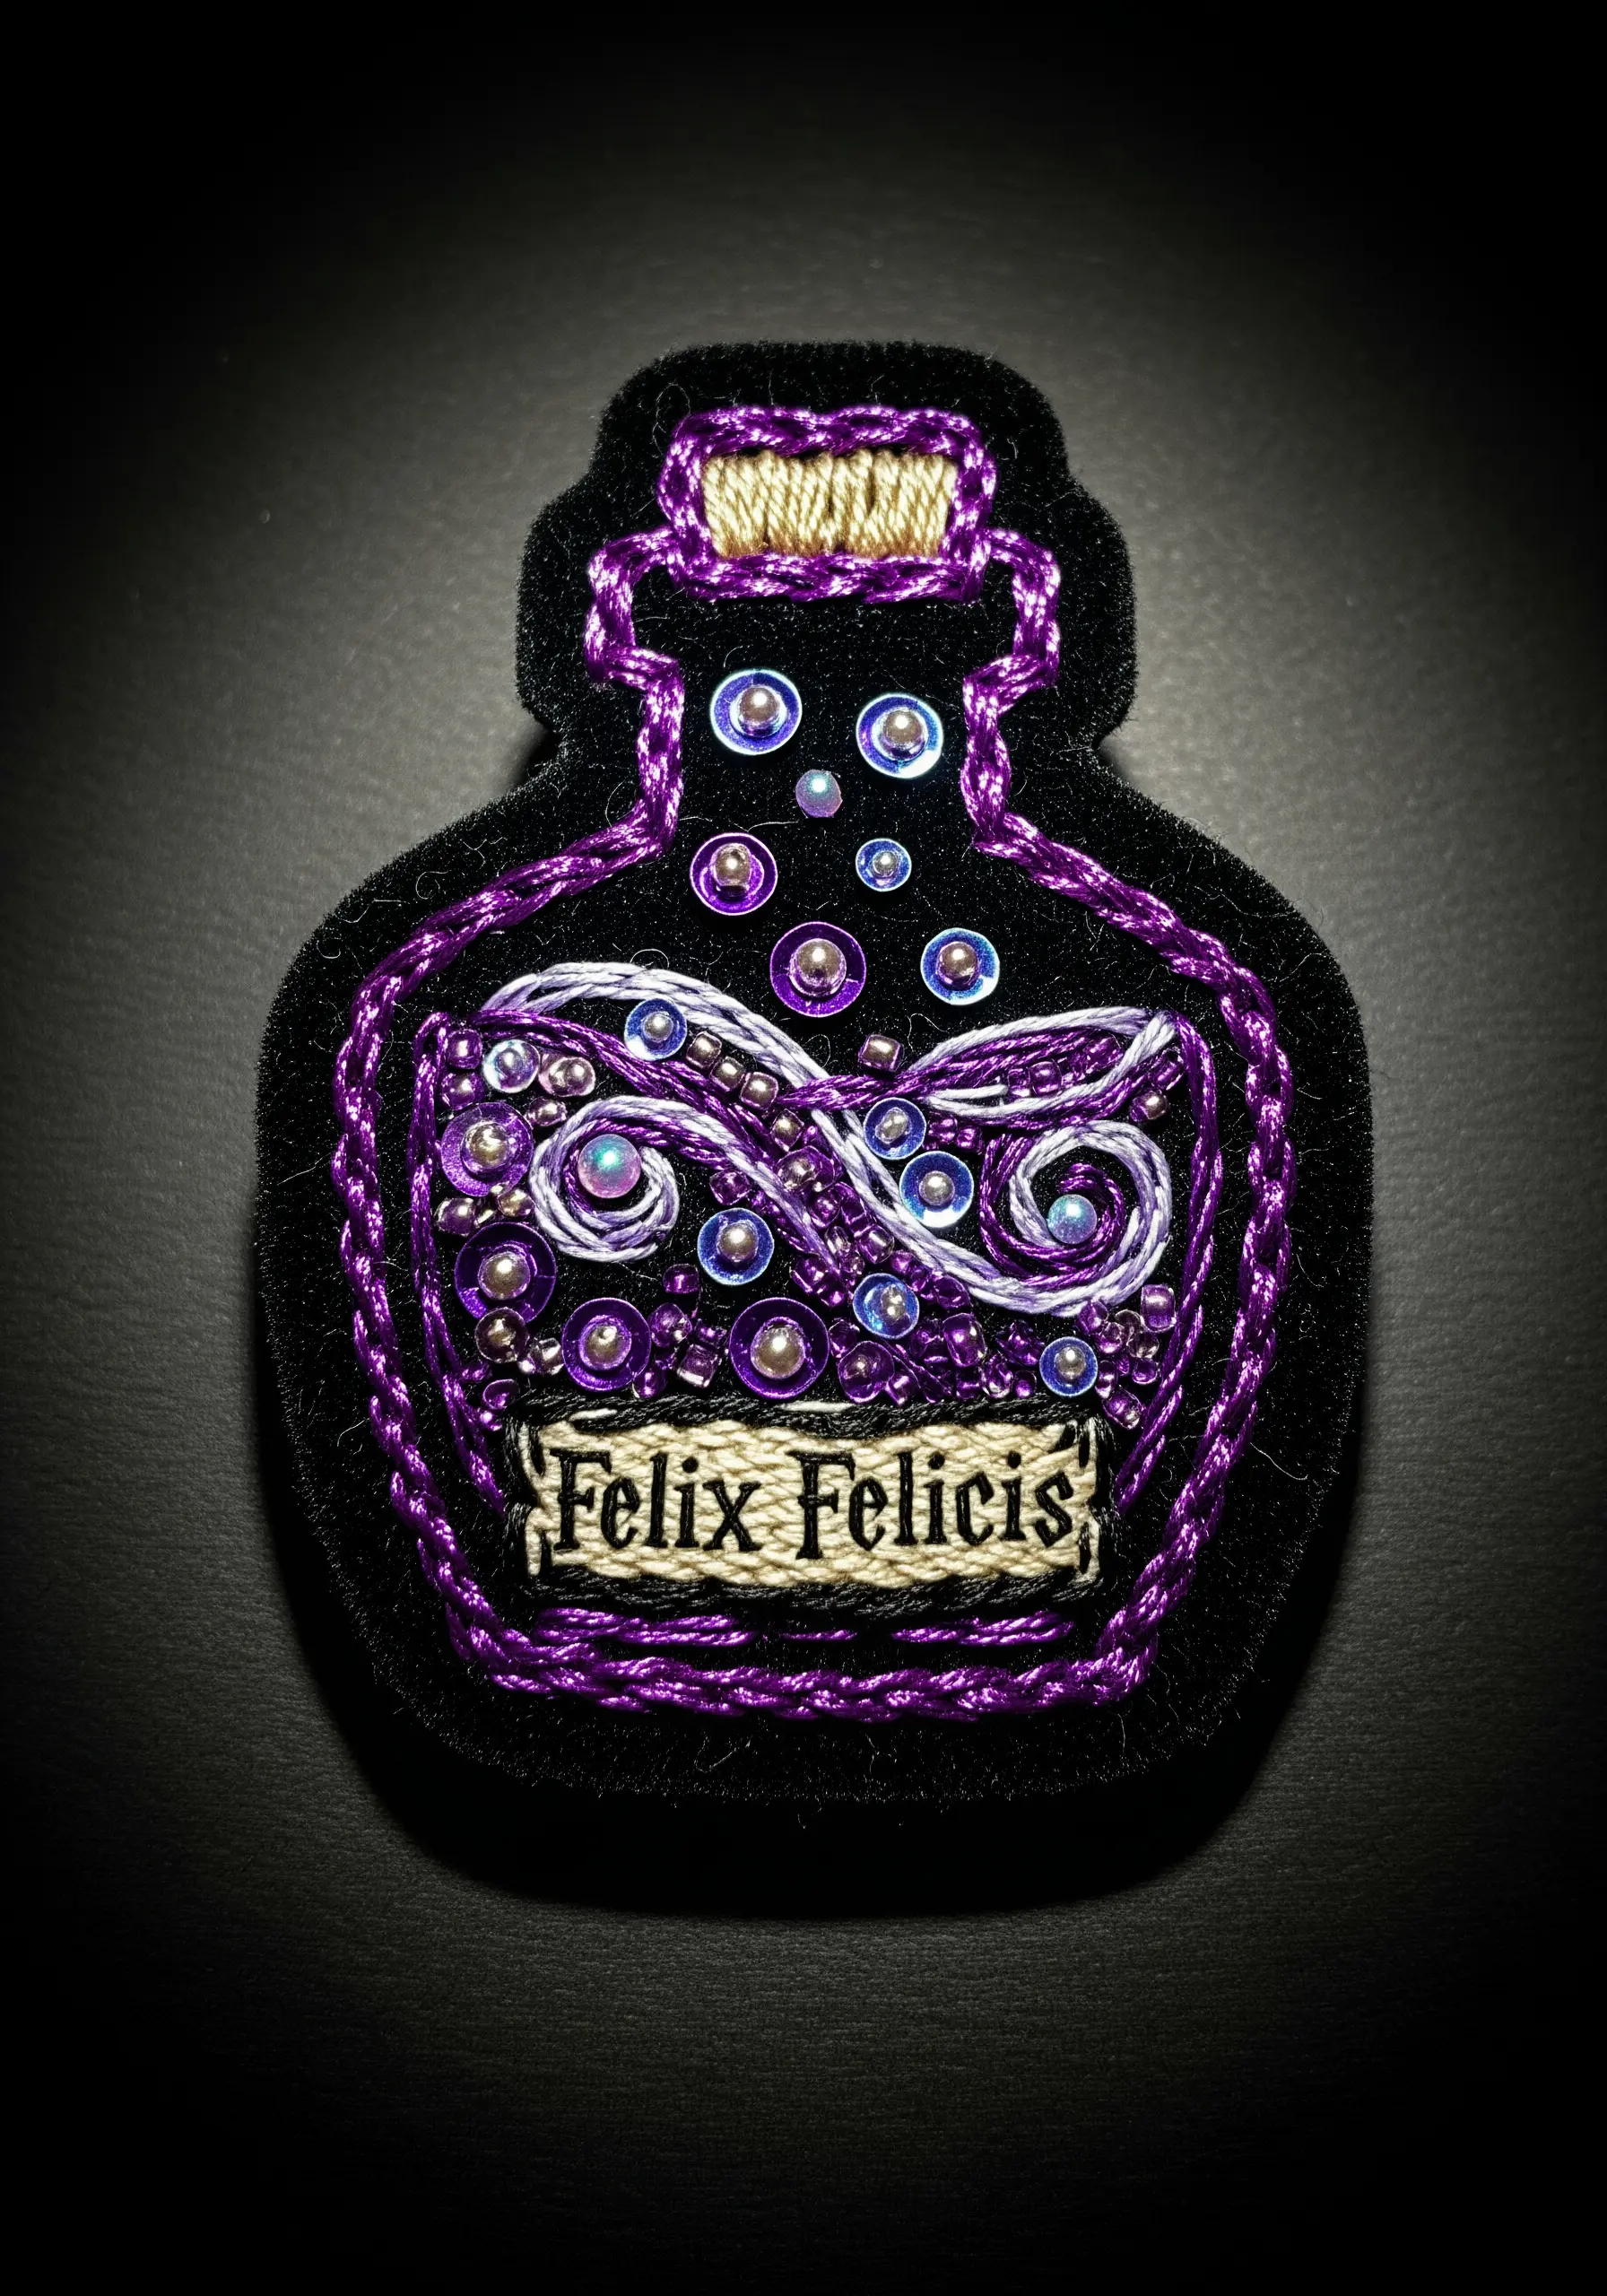
Create tactile, eye-catching patches by layering textures on a sturdy felt base.
Start by outlining your main shapes with a raised stitch, like a whipped backstitch, to give them definition.
Fill enclosed areas with a dense field of seed beads or sequins to create sparkle and a bubbly, potion-like effect.
The contrast between the matte finish of the felt, the soft sheen of the thread, and the glossy beads makes the final piece dynamic and engaging, ideal for mixed media embroidery crafts.
15. Mapping the Stars with Metallic Threads
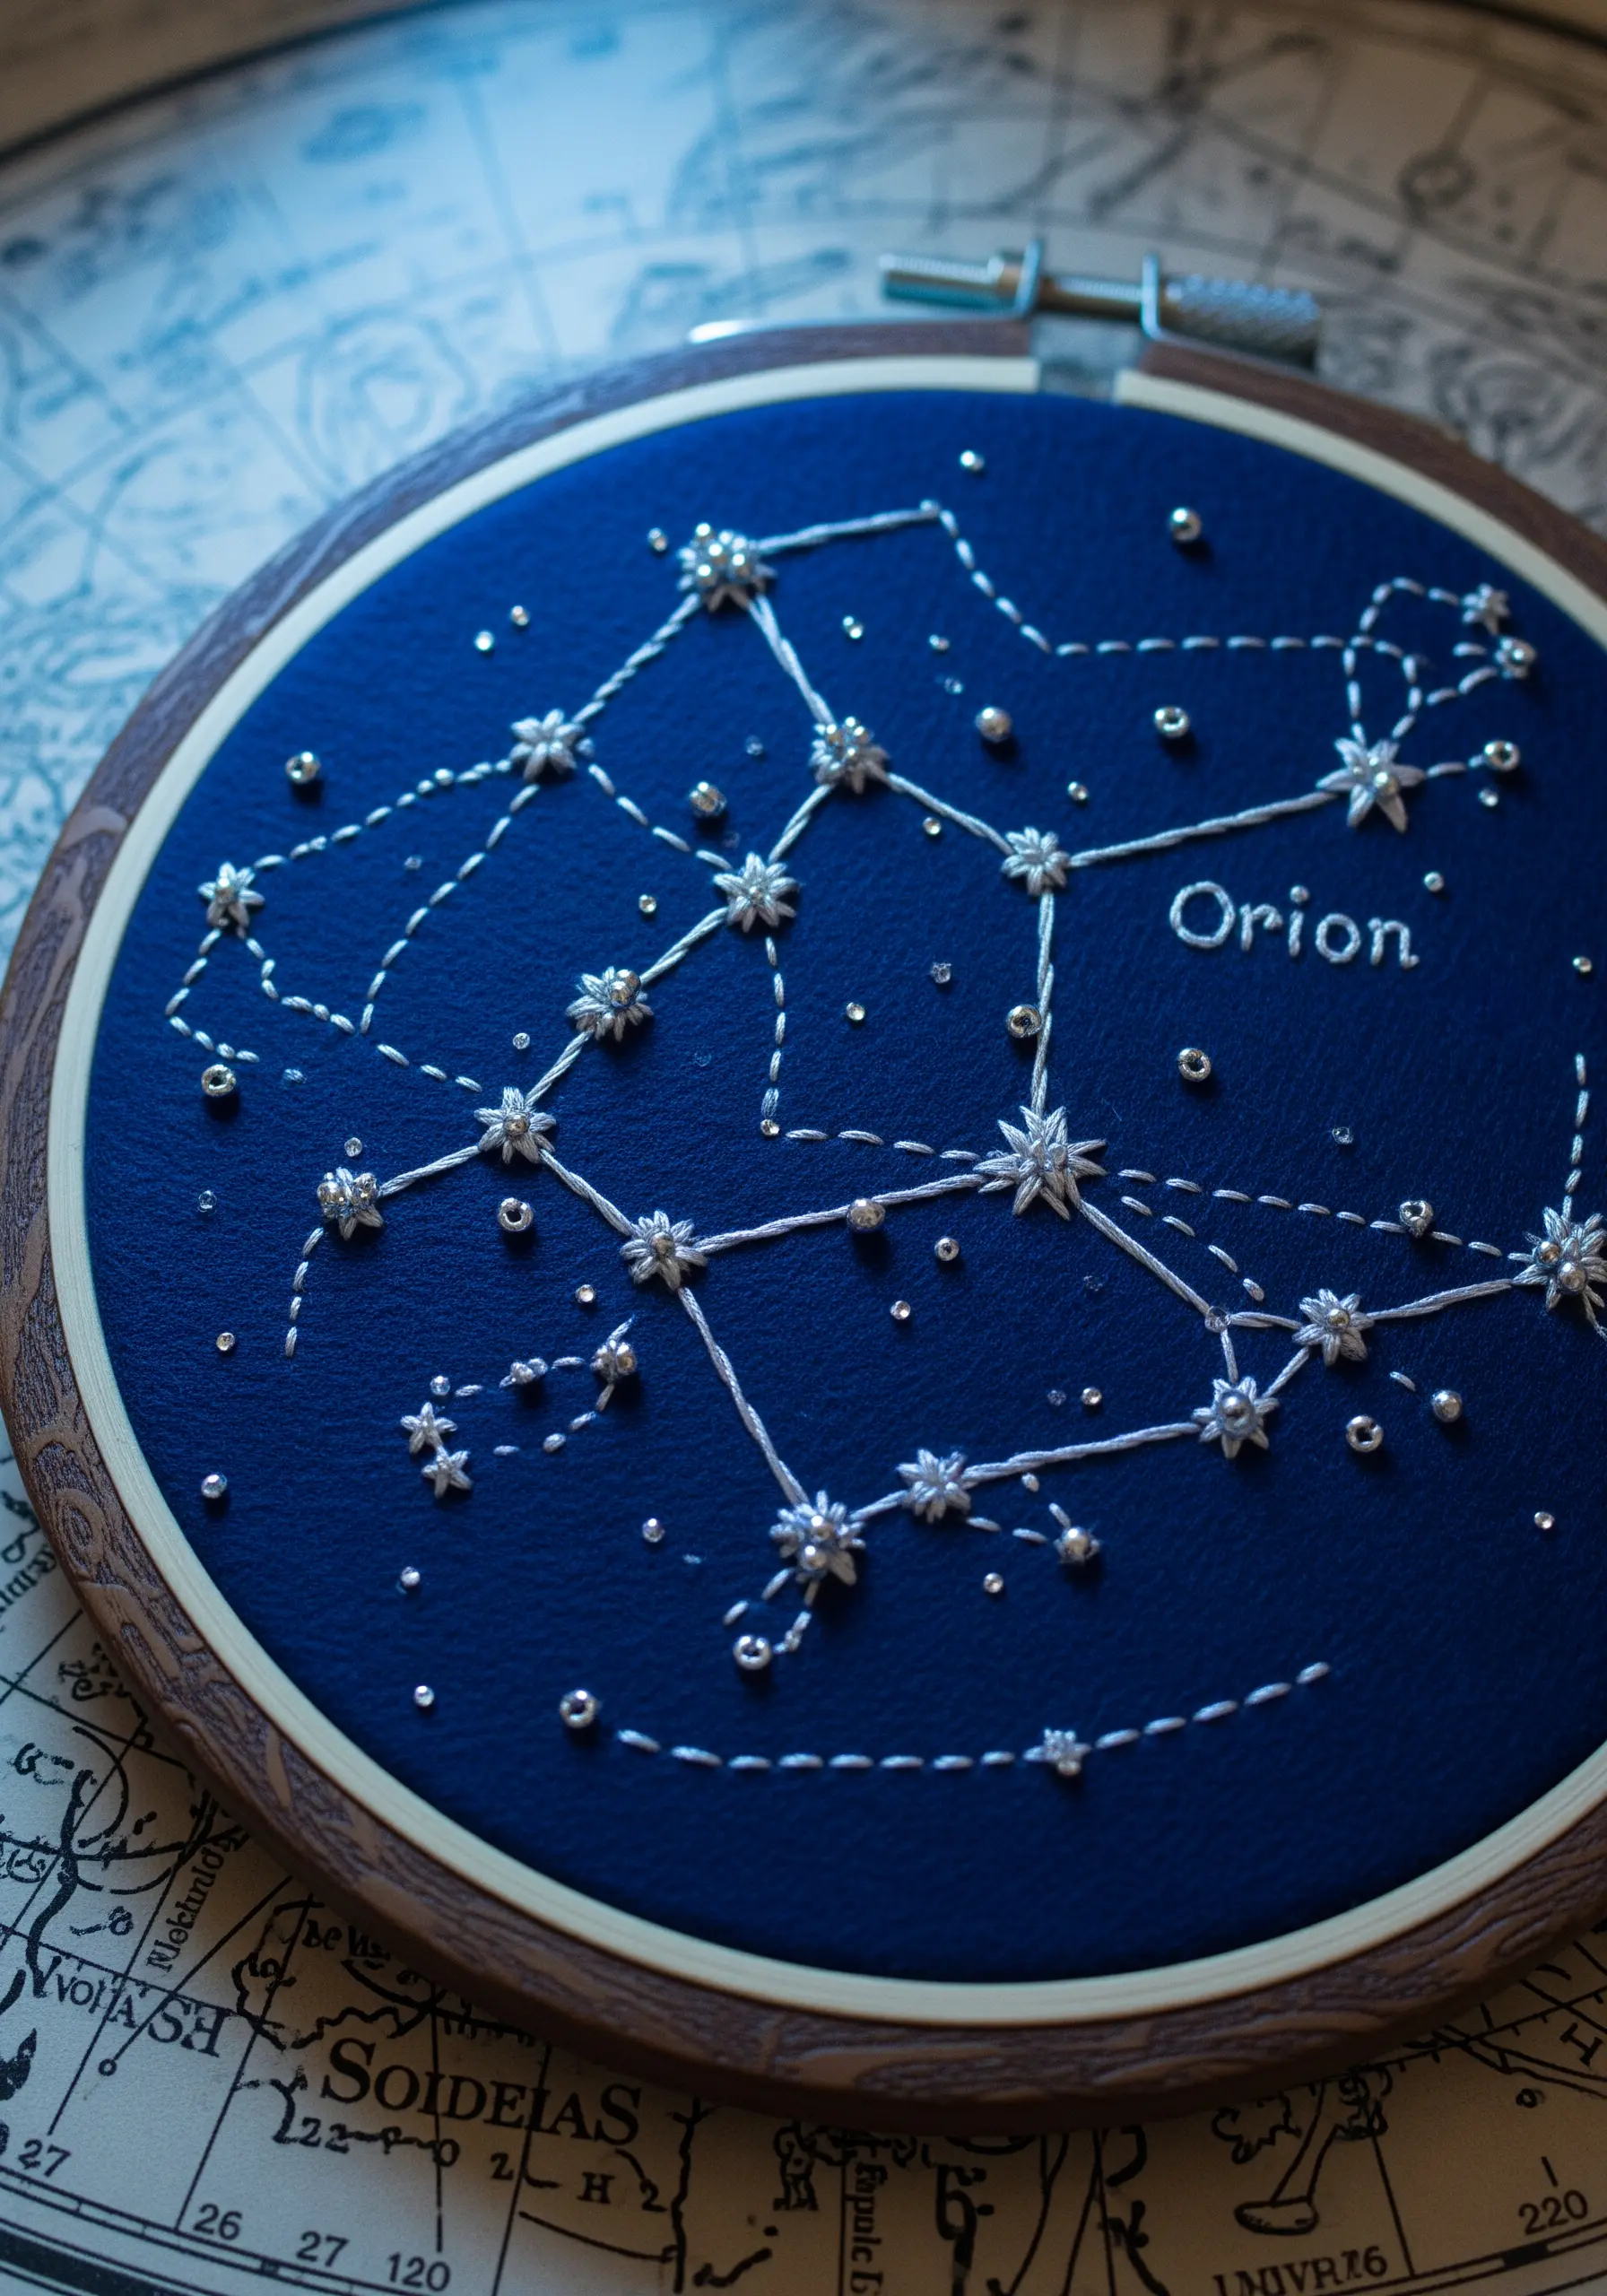
Bring the night sky to life by stitching constellations on dark, high-contrast fabric.
Navy blue or black felt provides a perfect backdrop that makes metallic silver or gold threads appear to glow.
To prevent snagging and breakage, use a thread conditioner like beeswax and a needle with a larger eye when working with metallics.
Use a combination of star stitches, French knots, and tiny seed beads for the stars to create varied brightness in your celestial hoop art.
16. Architectural Embroidery: Building with Stitches
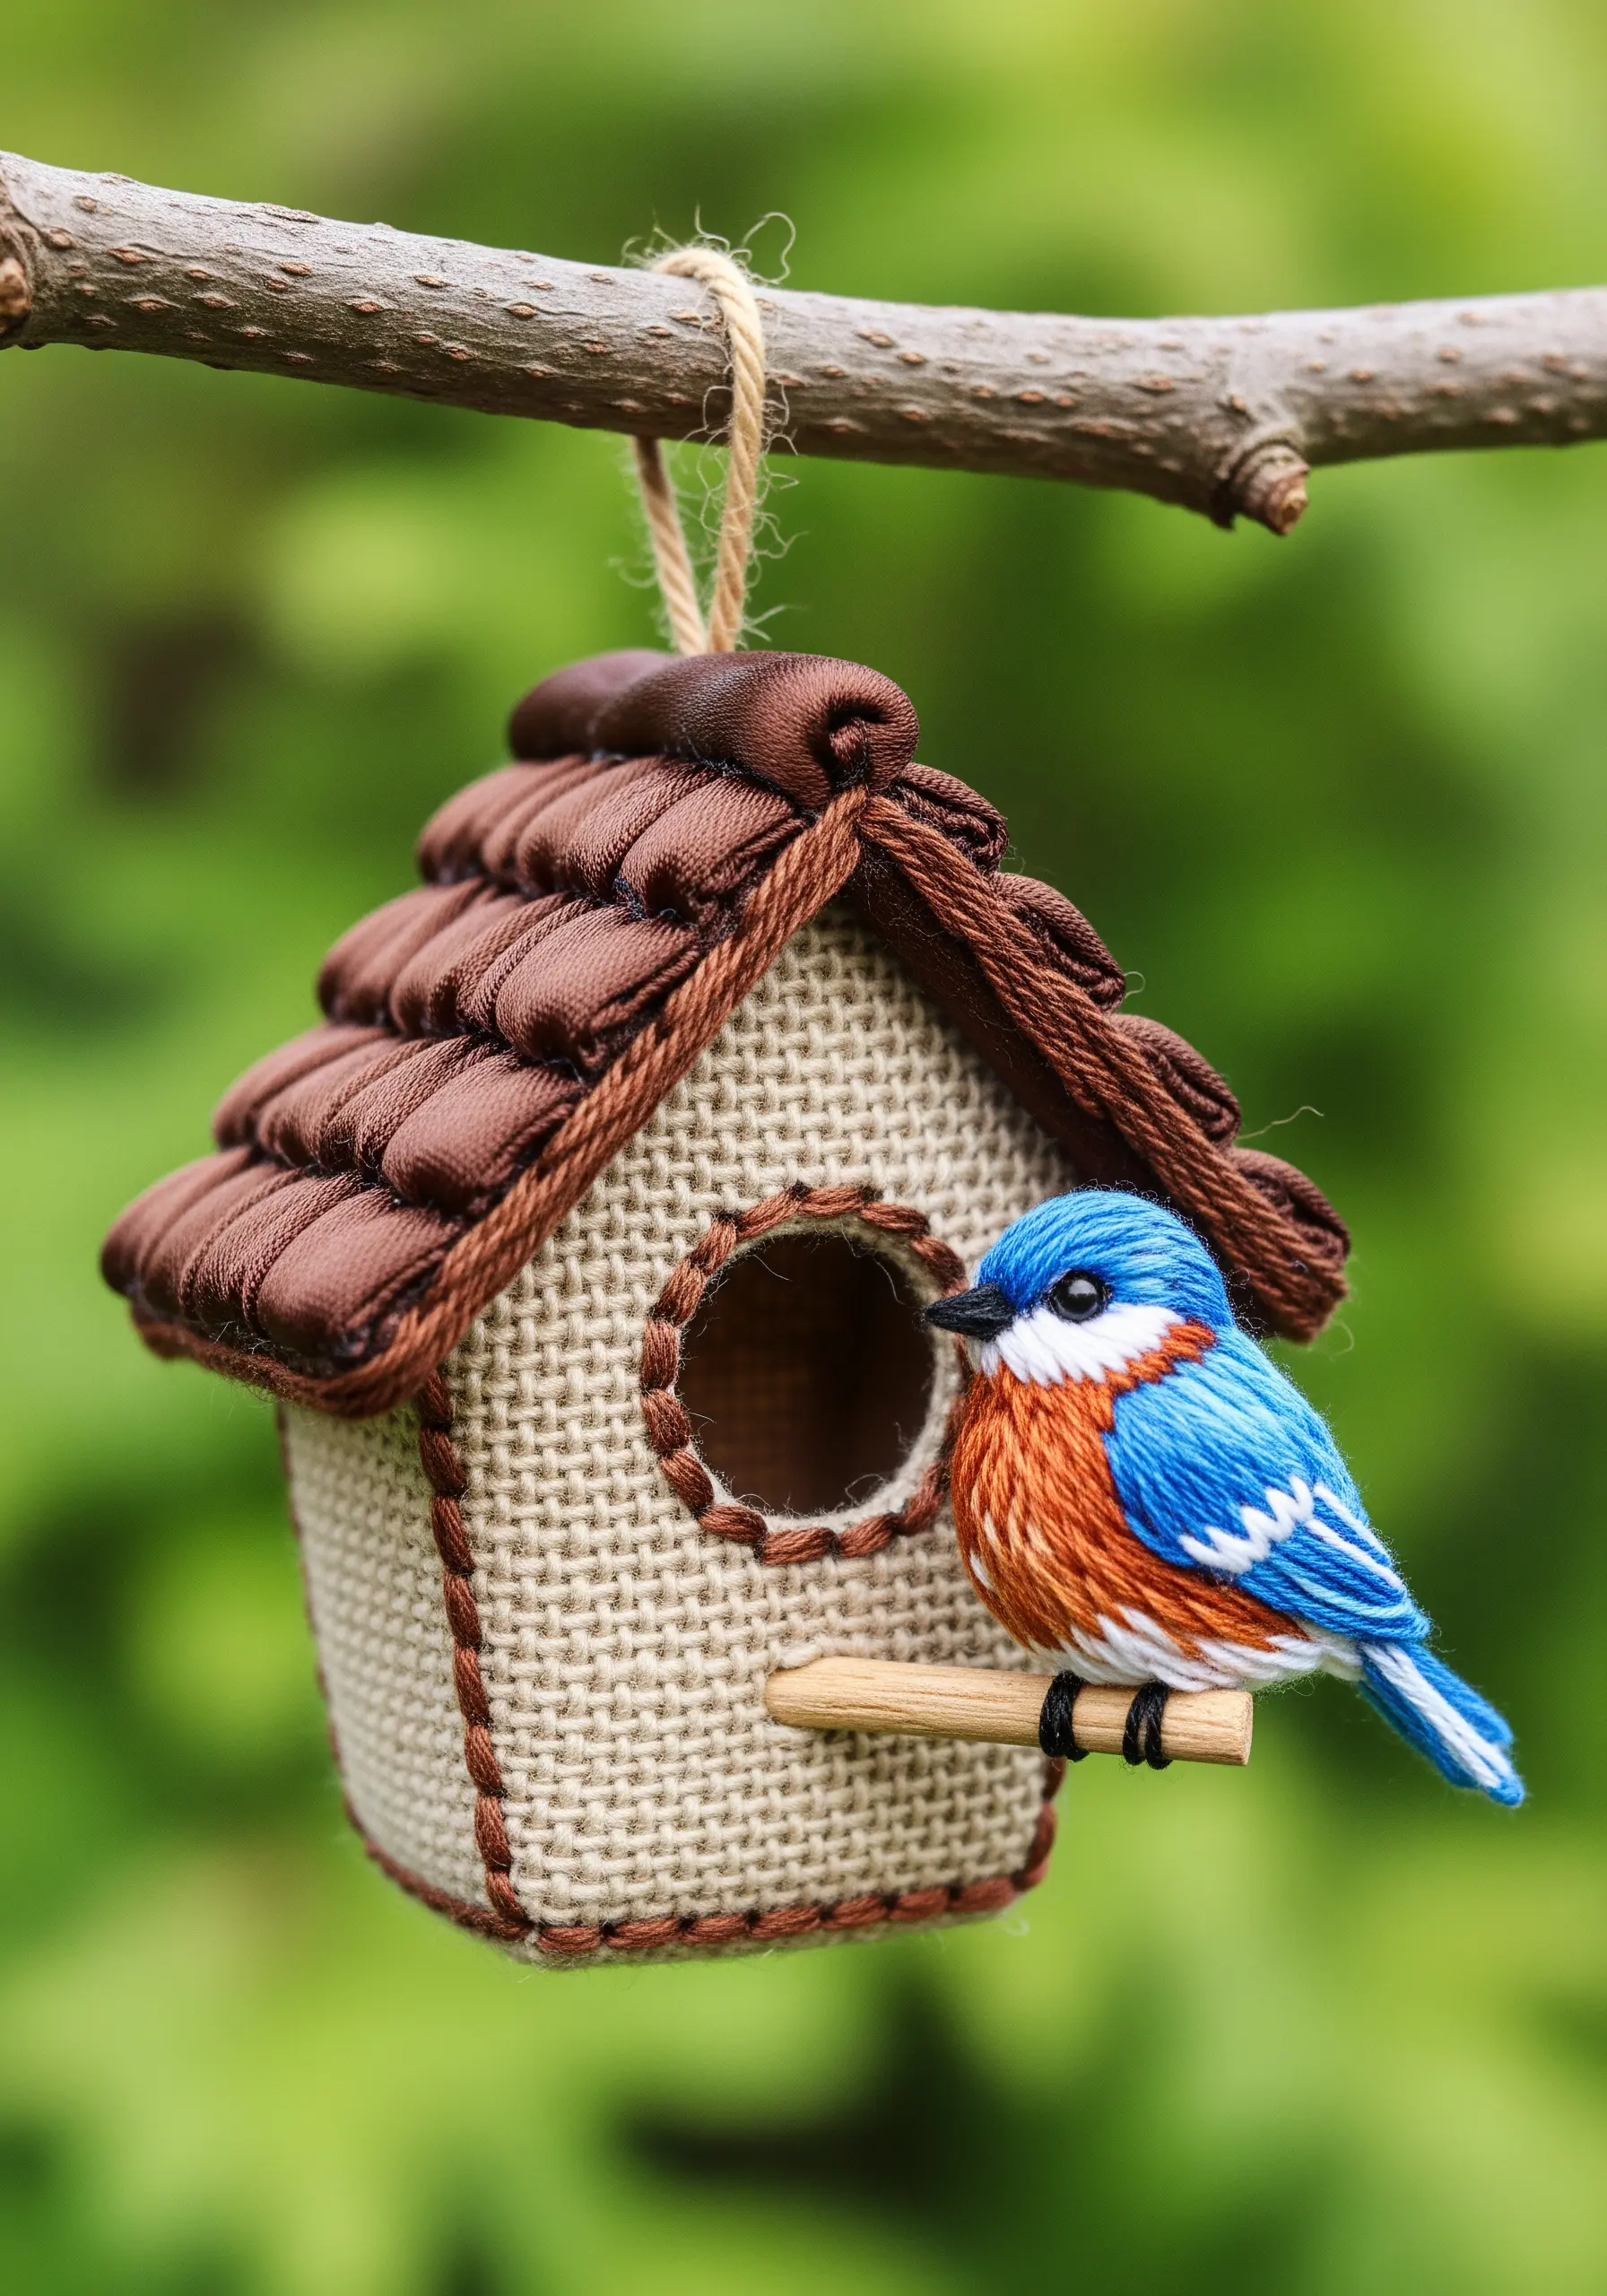
Construct charming 3D objects by using stiff, grid-based fabric as your building material.
Burlap, Aida cloth, or plastic canvas provides the necessary structure for pieces like a miniature birdhouse.
Embroider your details onto the flat panels first, then cut them out and assemble the structure by joining the edges with a simple whipstitch.
For added texture, weave ribbon through the fabric grid to create a tiled roof, one of many ways to embroider fabric structurally.
17. Beading for Hyperrealistic Miniature Textures
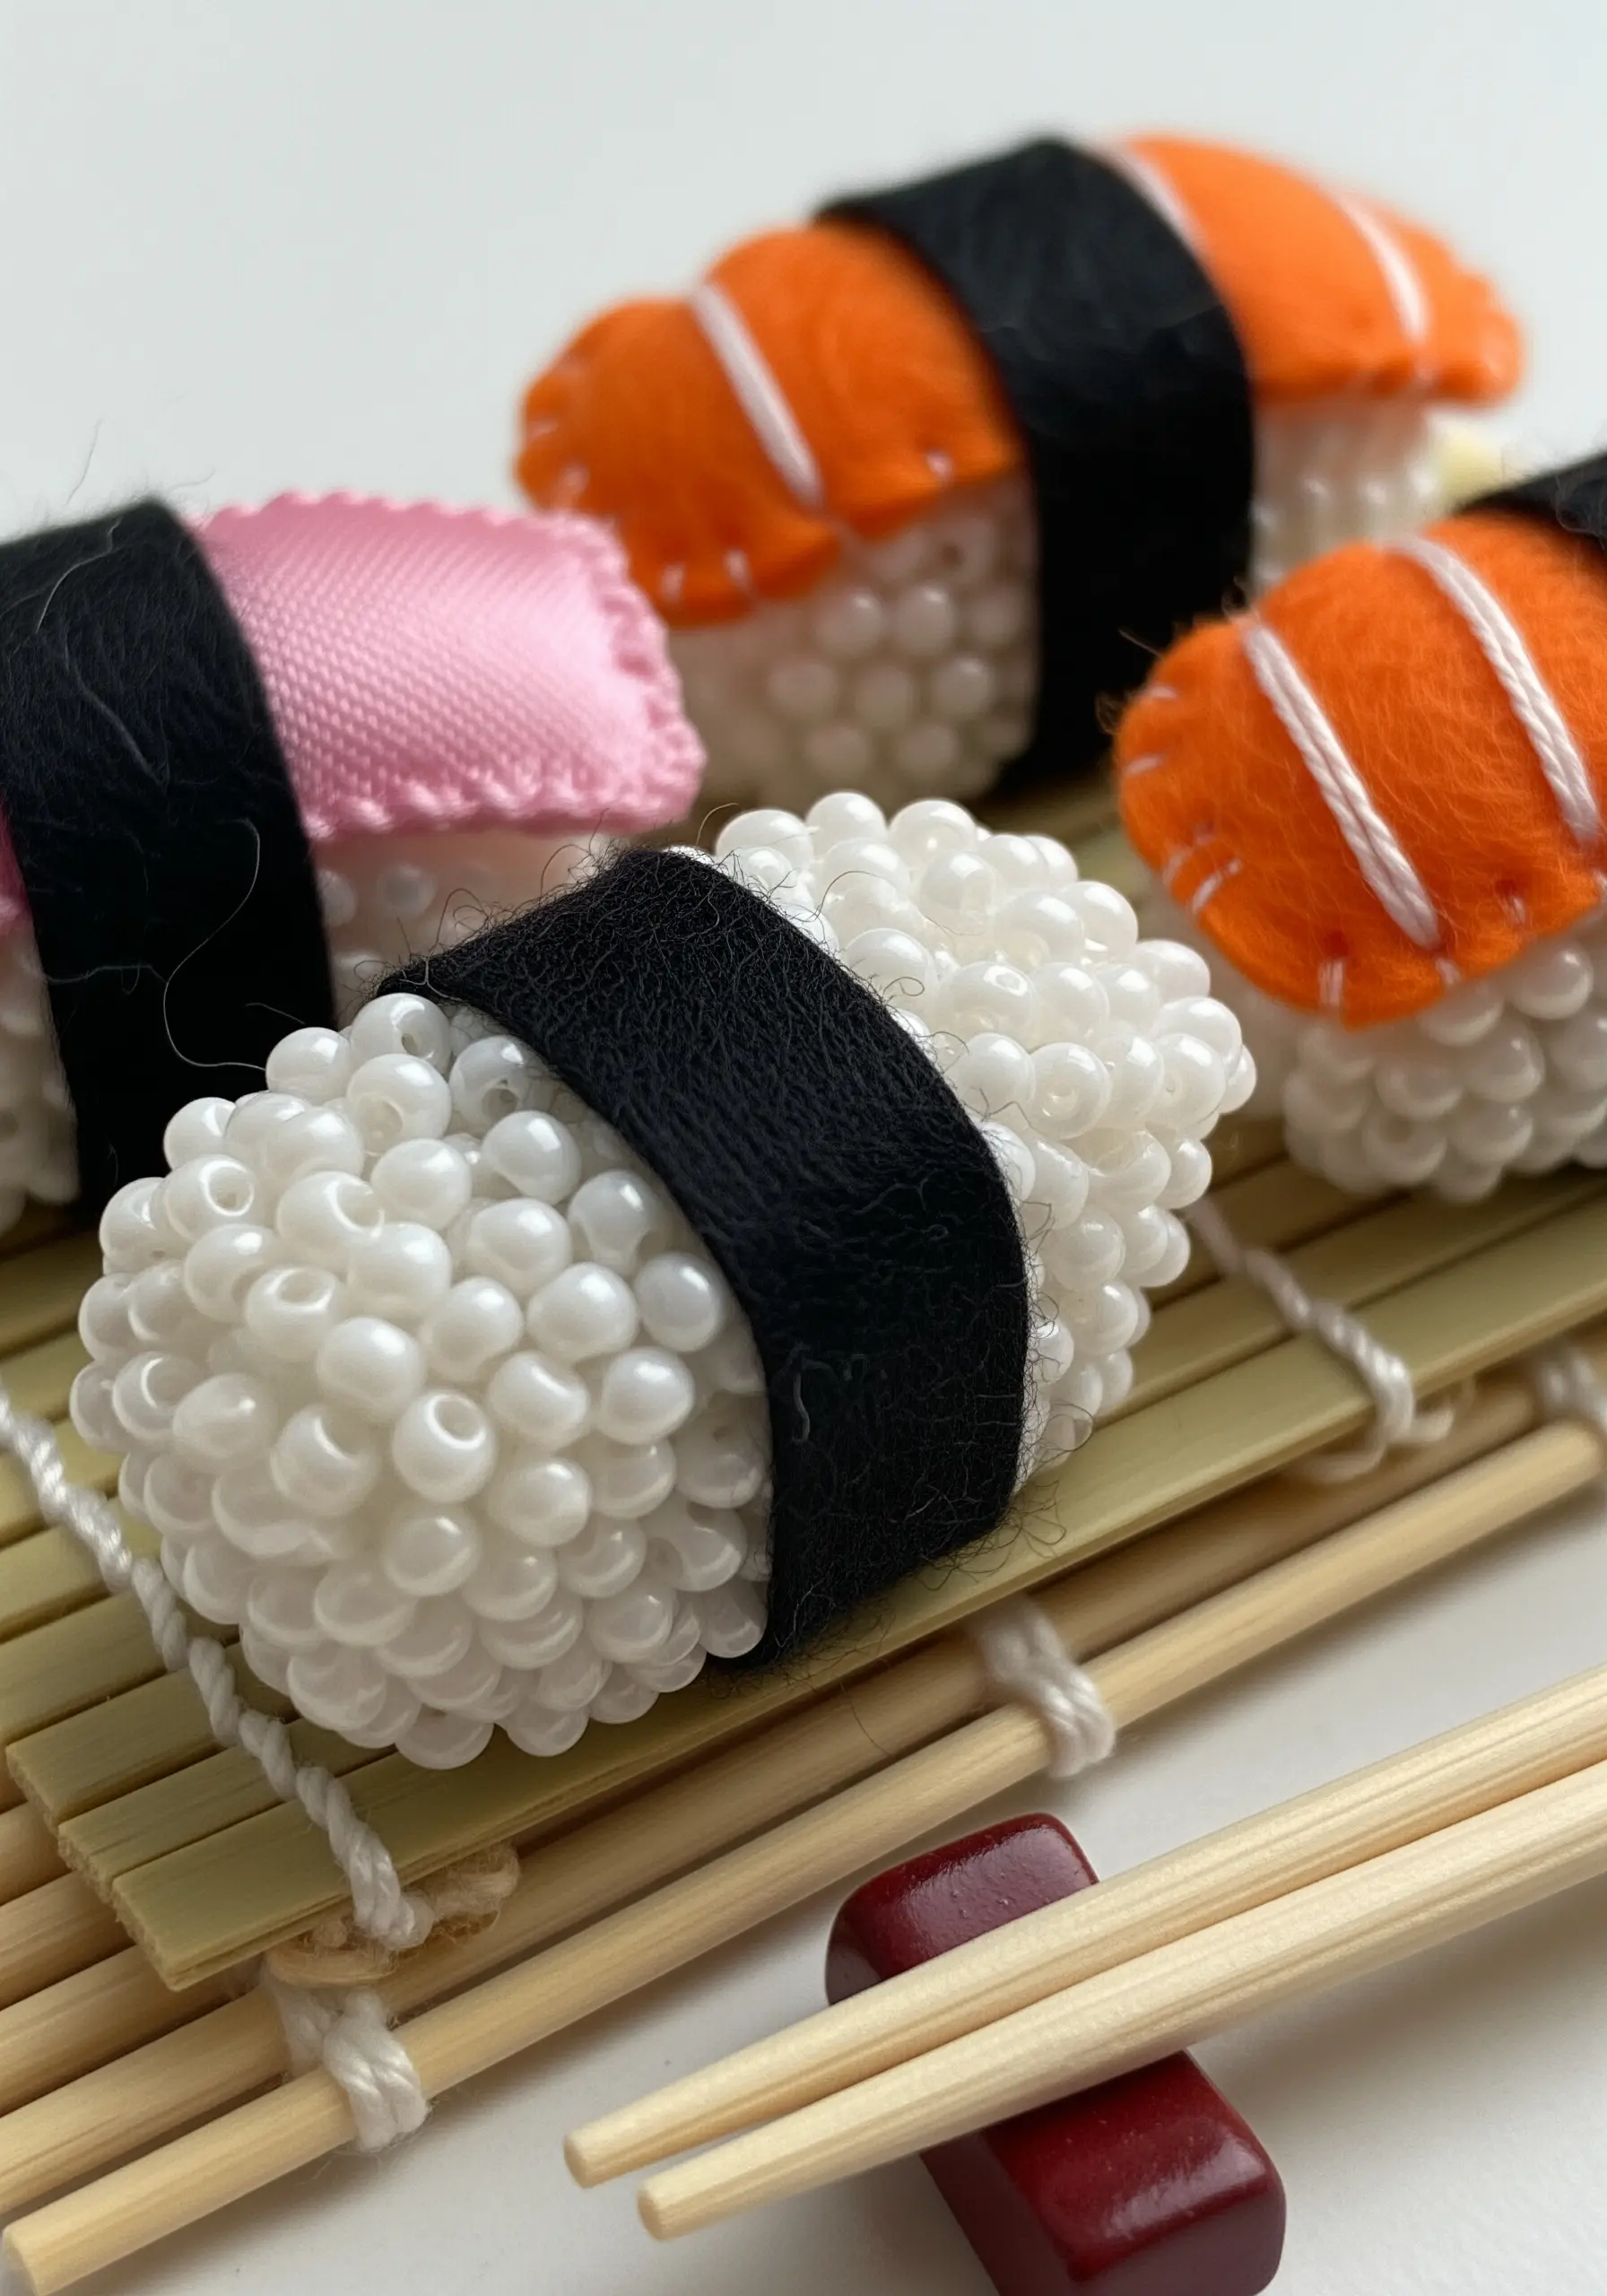
When recreating certain textures on a miniature scale, thread isn’t always the best choice.
To achieve the distinct, slightly translucent look of sushi rice, use tiny white or pearlescent seed beads instead of French knots.
Stitch them on densely, allowing them to cluster organically for a more realistic effect.
The textural contrast between the hard, glossy beads and the soft felt or fabric used for the other elements is what sells the illusion in these delightful mini-gifts.
18. Mimicking Natural Textures with Directional Stitching
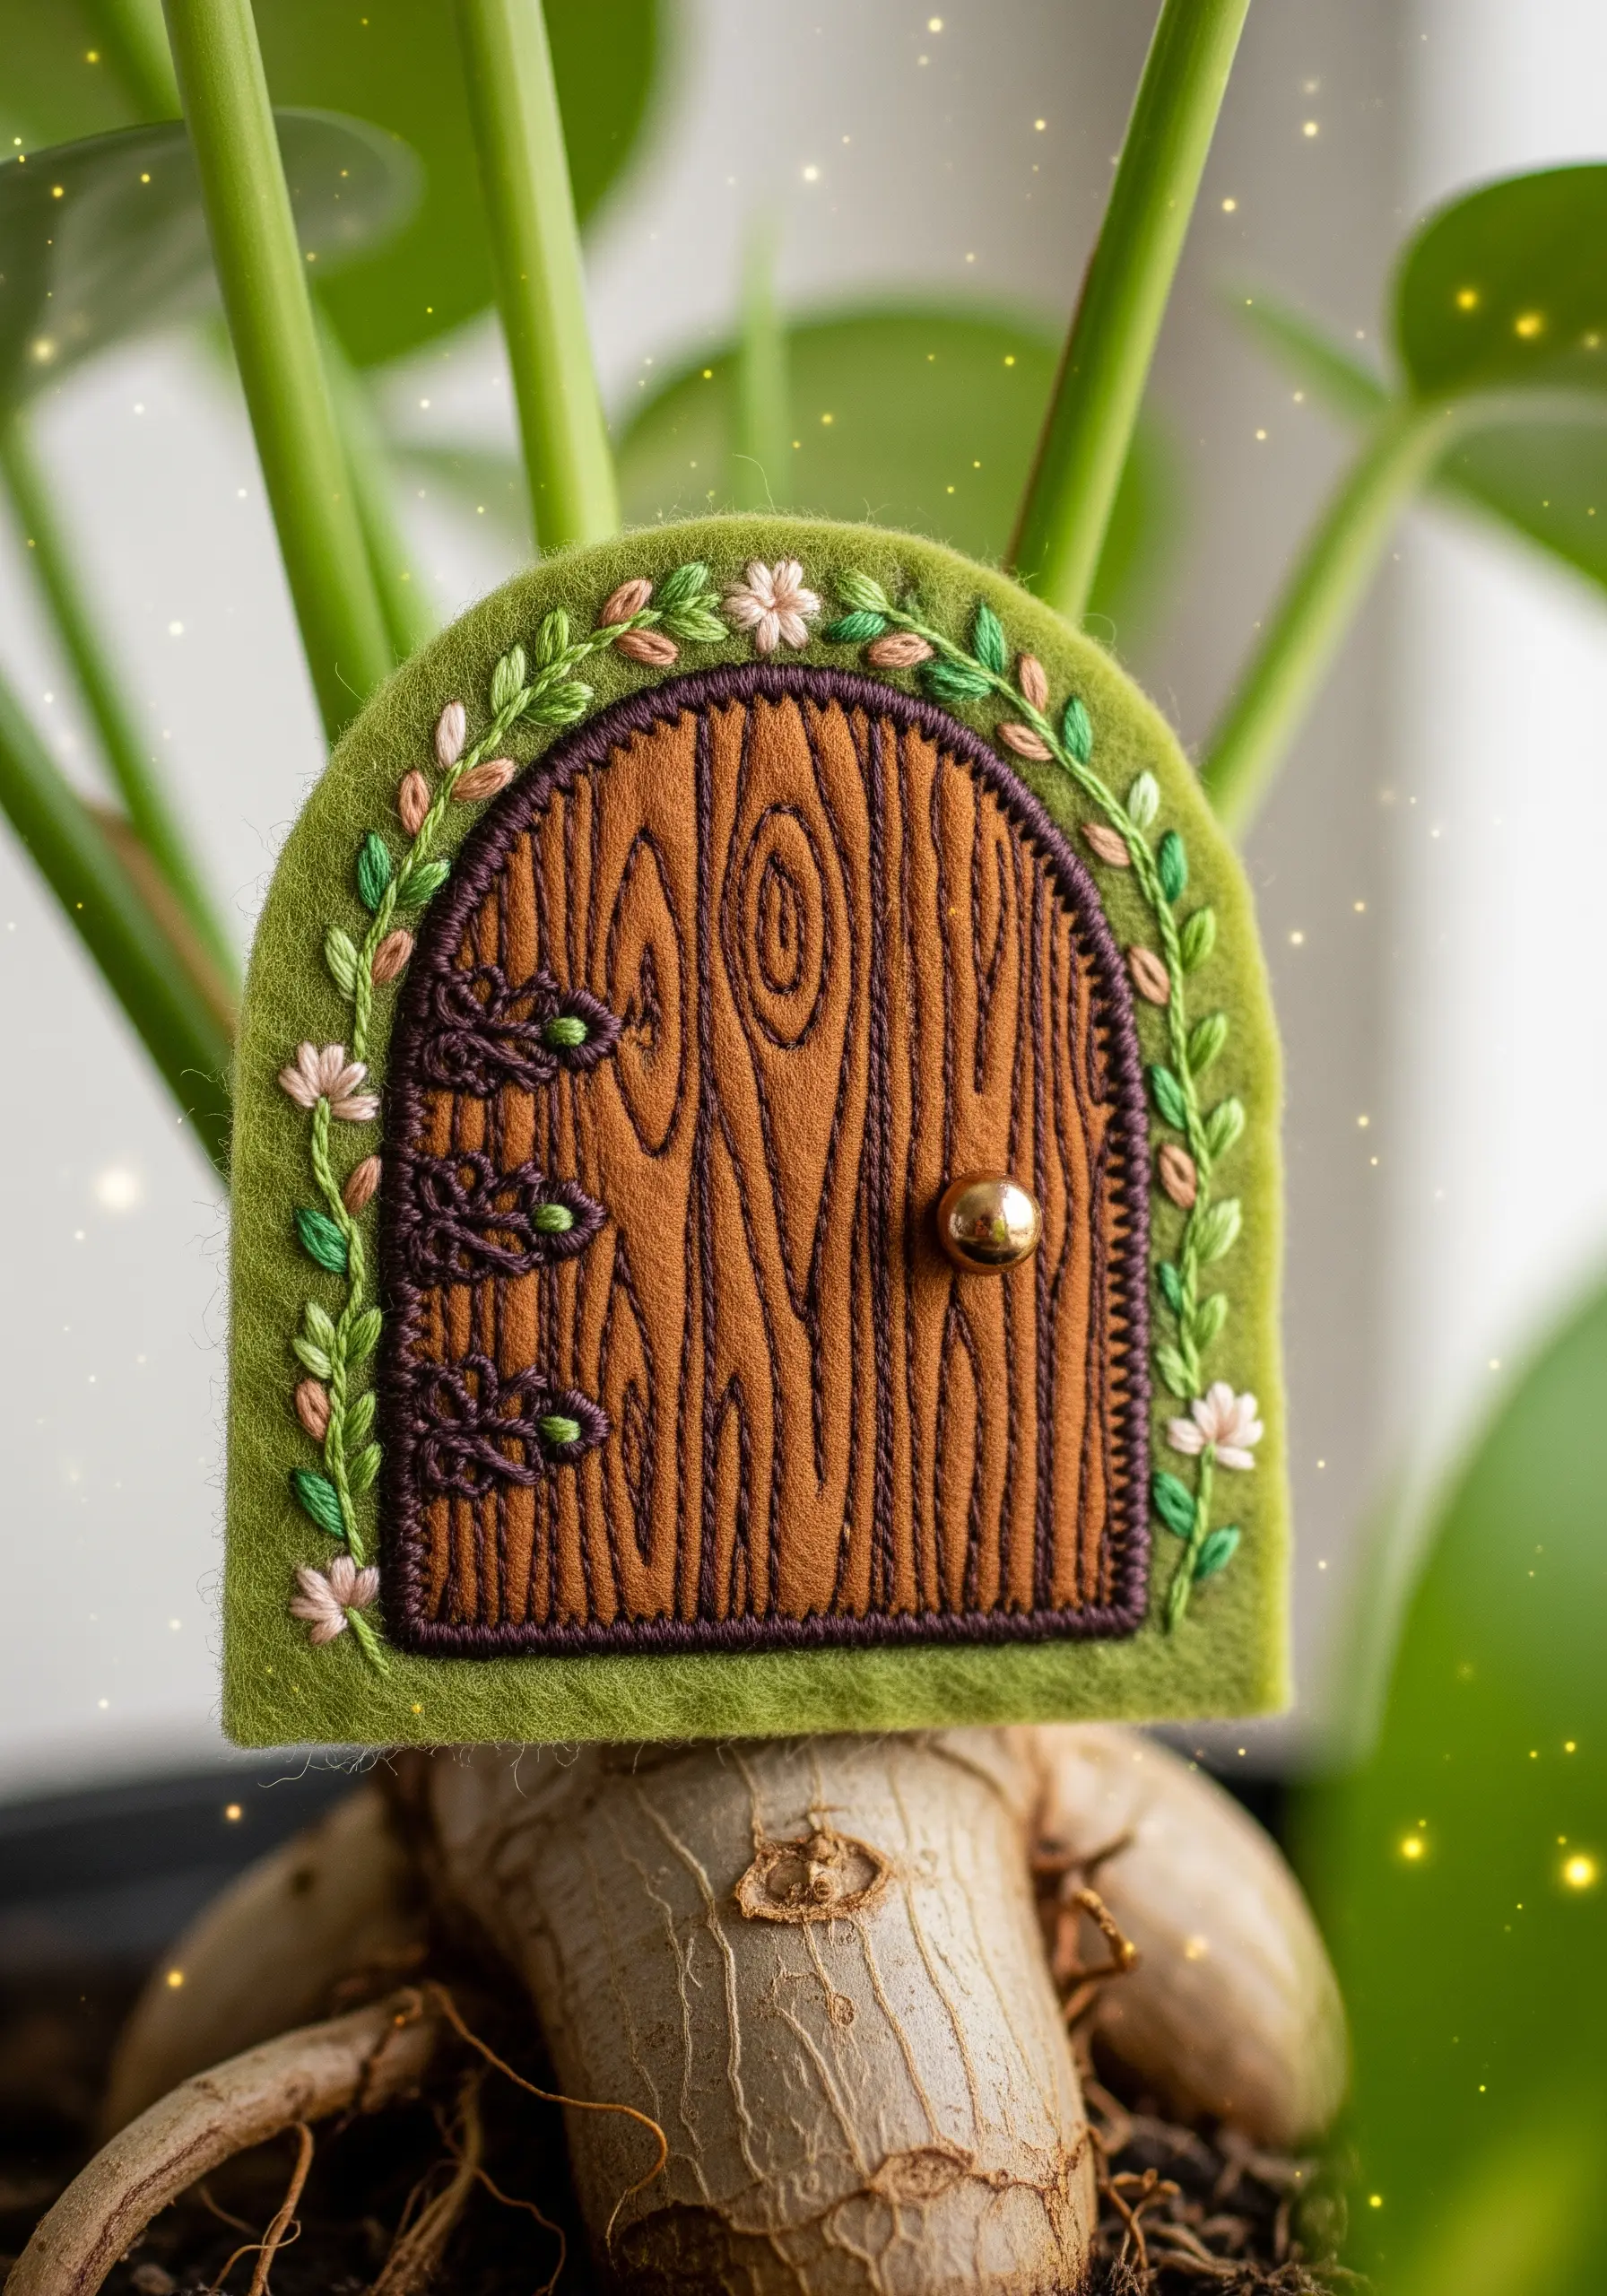
You can replicate the organic look of wood grain using nothing more than a few shades of brown thread and strategic stitching.
Fill the area with long, straight stitches, laying them down in the direction of the grain.
Vary the shades of brown randomly and allow for slight, natural-looking wobbles in your lines—perfectly straight stitches will look artificial.
This technique adds incredible realism to nature-inspired framed embroidery designs.
19. Combining Fabric Textures for Playful Miniatures

Create more engaging and tactile miniatures by intentionally pairing fabrics with contrasting textures.
For an ice cream cone, use a soft, fluffy material like shearling or fleece for the scoop—its texture does most of the visual work for you.
Contrast this by stitching a clean, geometric lattice pattern onto smooth felt for the cone.
This thoughtful combination of materials makes the finished piece more visually and physically interesting, a great starting point for fun fabric crafts.
20. Applying Metallic Cords with Couching
When you want to add a bold metallic line to a surface that’s difficult to stitch through, like faux leather or thick felt, couching is the ideal technique.
Simply lay your decorative cord or thick metallic thread on the surface of your project.
Then, using a second, finer thread, make small, evenly spaced tacking stitches over the cord to secure it in place.
This method allows you to add robust details without piercing the cord itself, perfect for tiny embroidery projects that need a touch of shine.
21. Advanced Thread Painting for Iridescent Effects
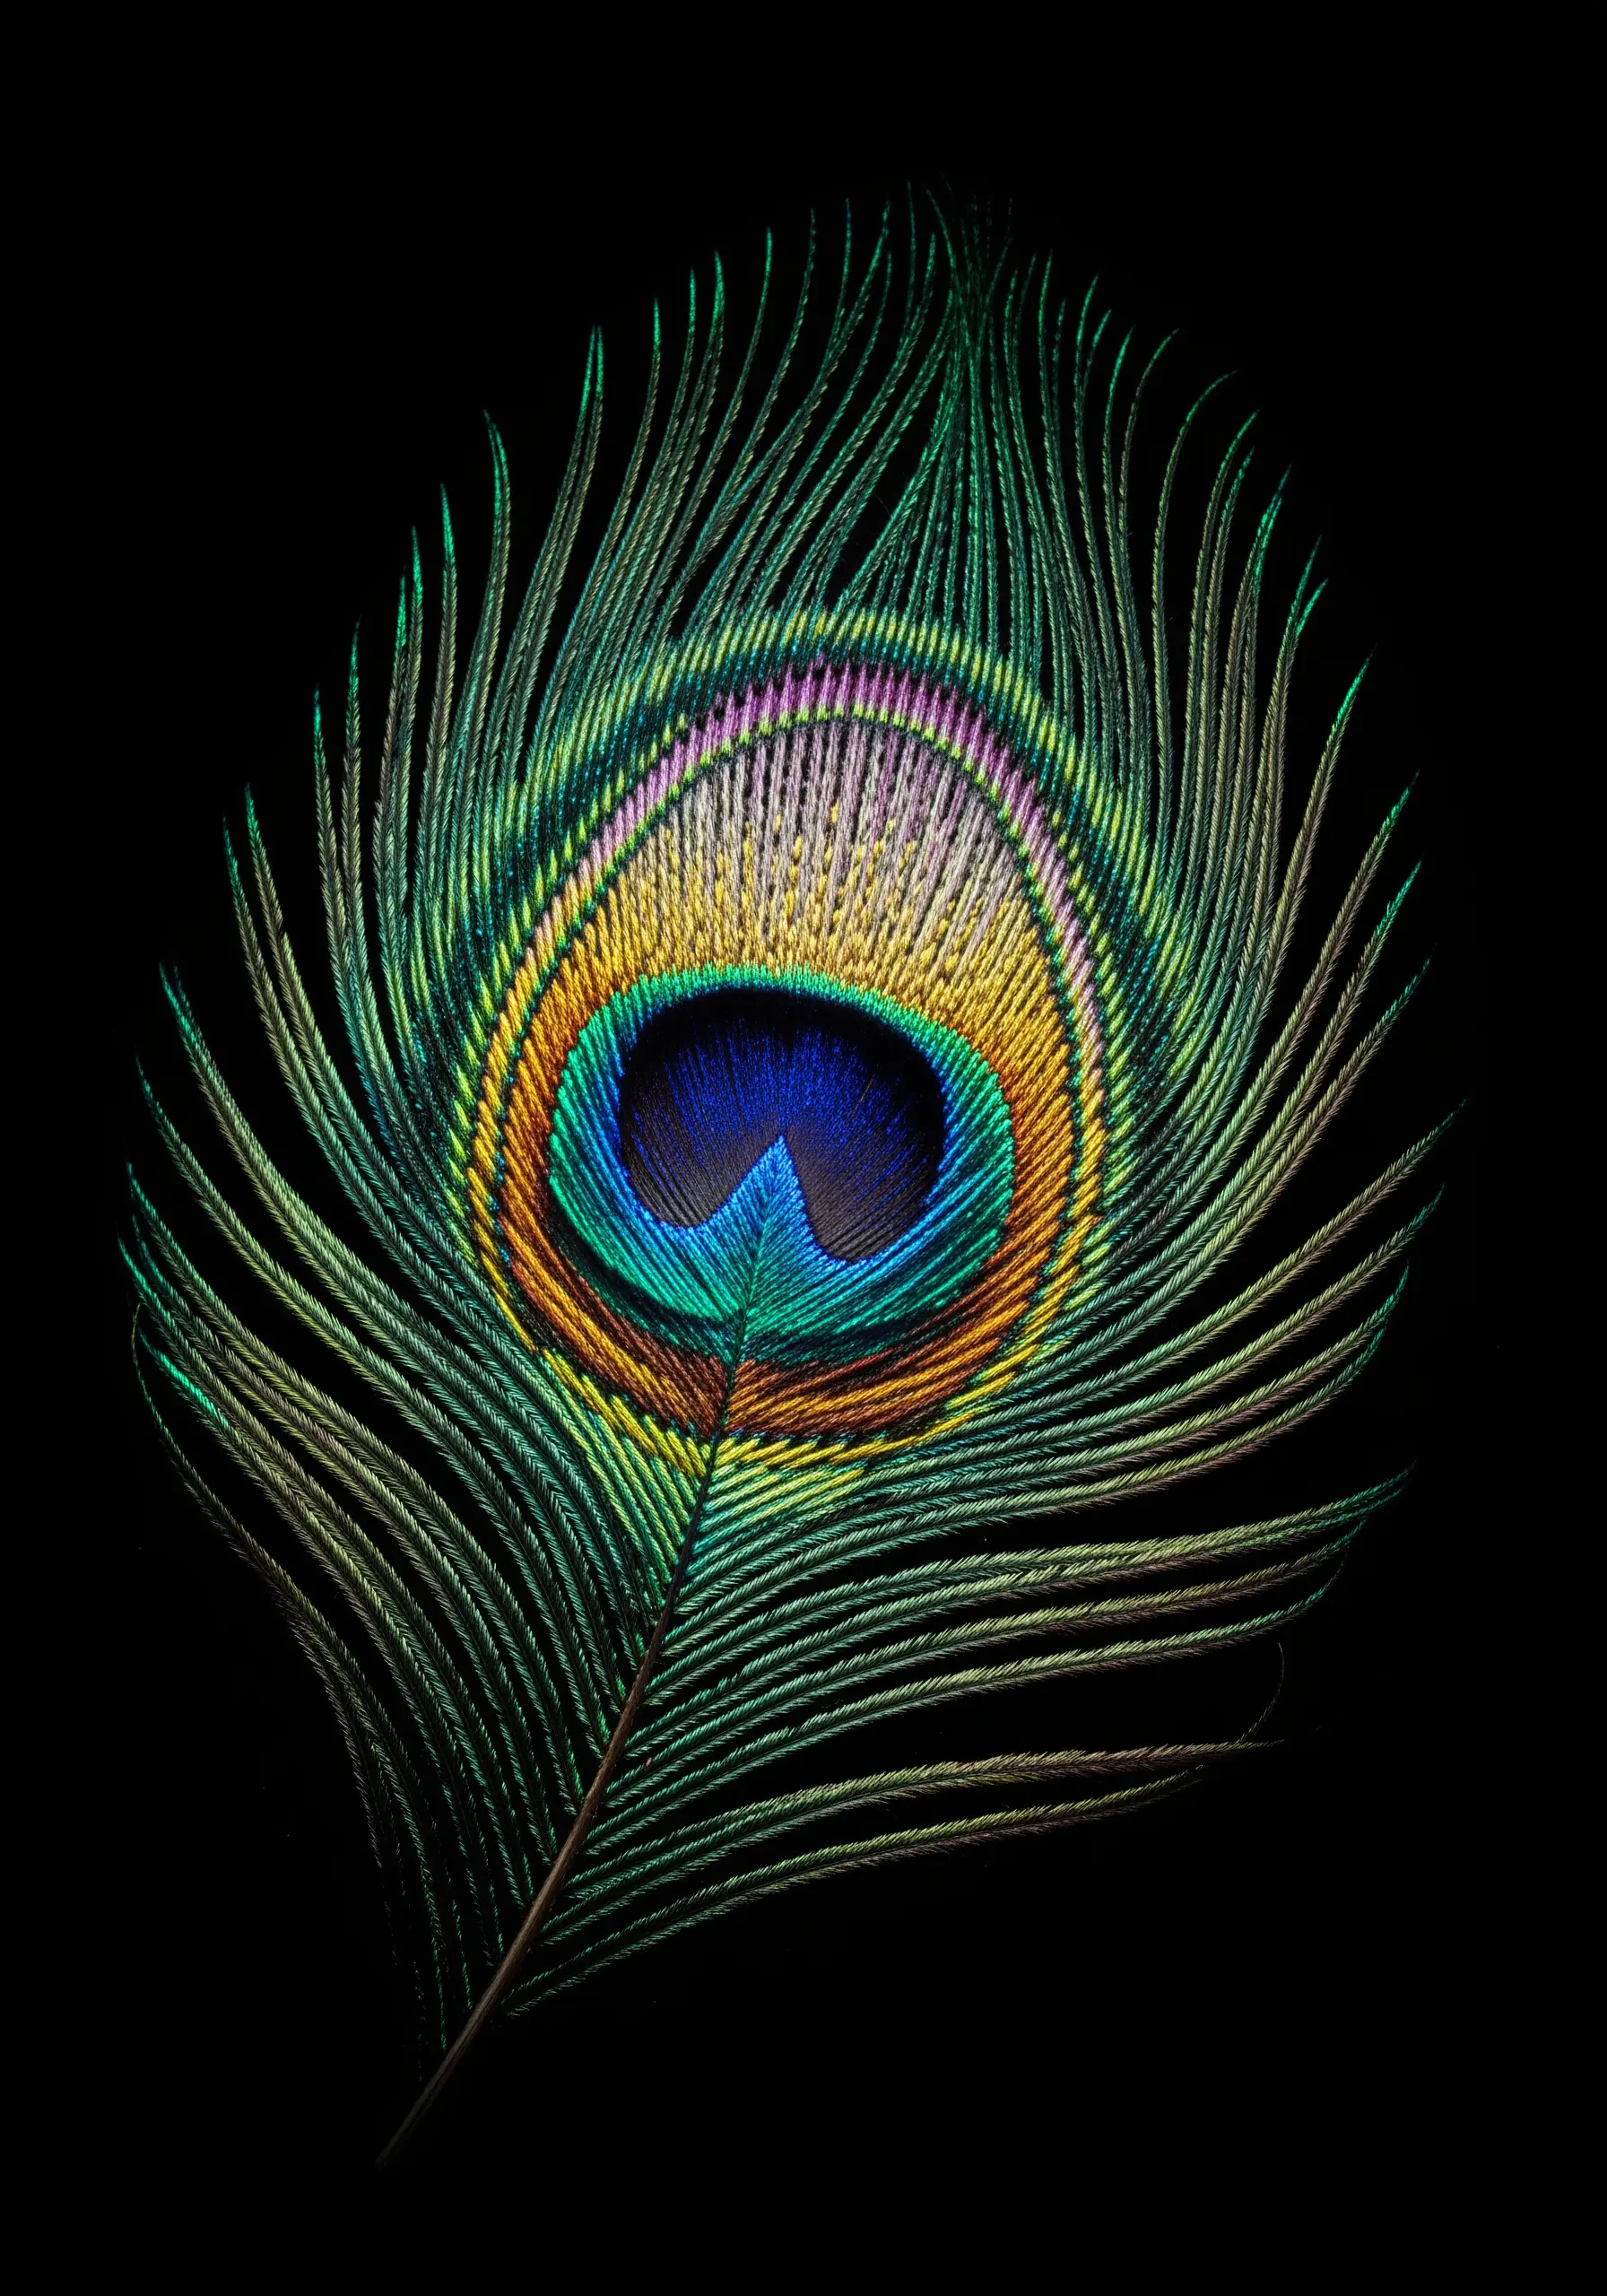
To capture the shimmering, color-shifting quality of a peacock feather, you need to master subtle color blending.
Use single strands of high-sheen silk or rayon floss, as their natural luster is key to creating an iridescent effect.
Blend dozens of shades of blue, green, gold, and turquoise using the long-and-short stitch, ensuring your stitches radiate outwards from the center, mimicking the feather’s natural structure.
This meticulous process turns thread into a photorealistic study of light and color, elevating your organic thread art.
22. Creating Embroidered Spherical Objects

For perfectly round 3D objects like planets or ornaments, start with a spherical base.
Use a small styrofoam, cotton, or wooden ball as your form. Tightly and evenly wrap the sphere with your base color of embroidery floss until it is completely covered.
Once your base is secure, you can add details directly onto the surface using simple stitches like backstitch or tiny French knots.
This method gives you a smooth, consistent shape to work on, making it easy to craft handmade art pieces for a mobile or display.
23. Structured Lettering with Beads and Thread
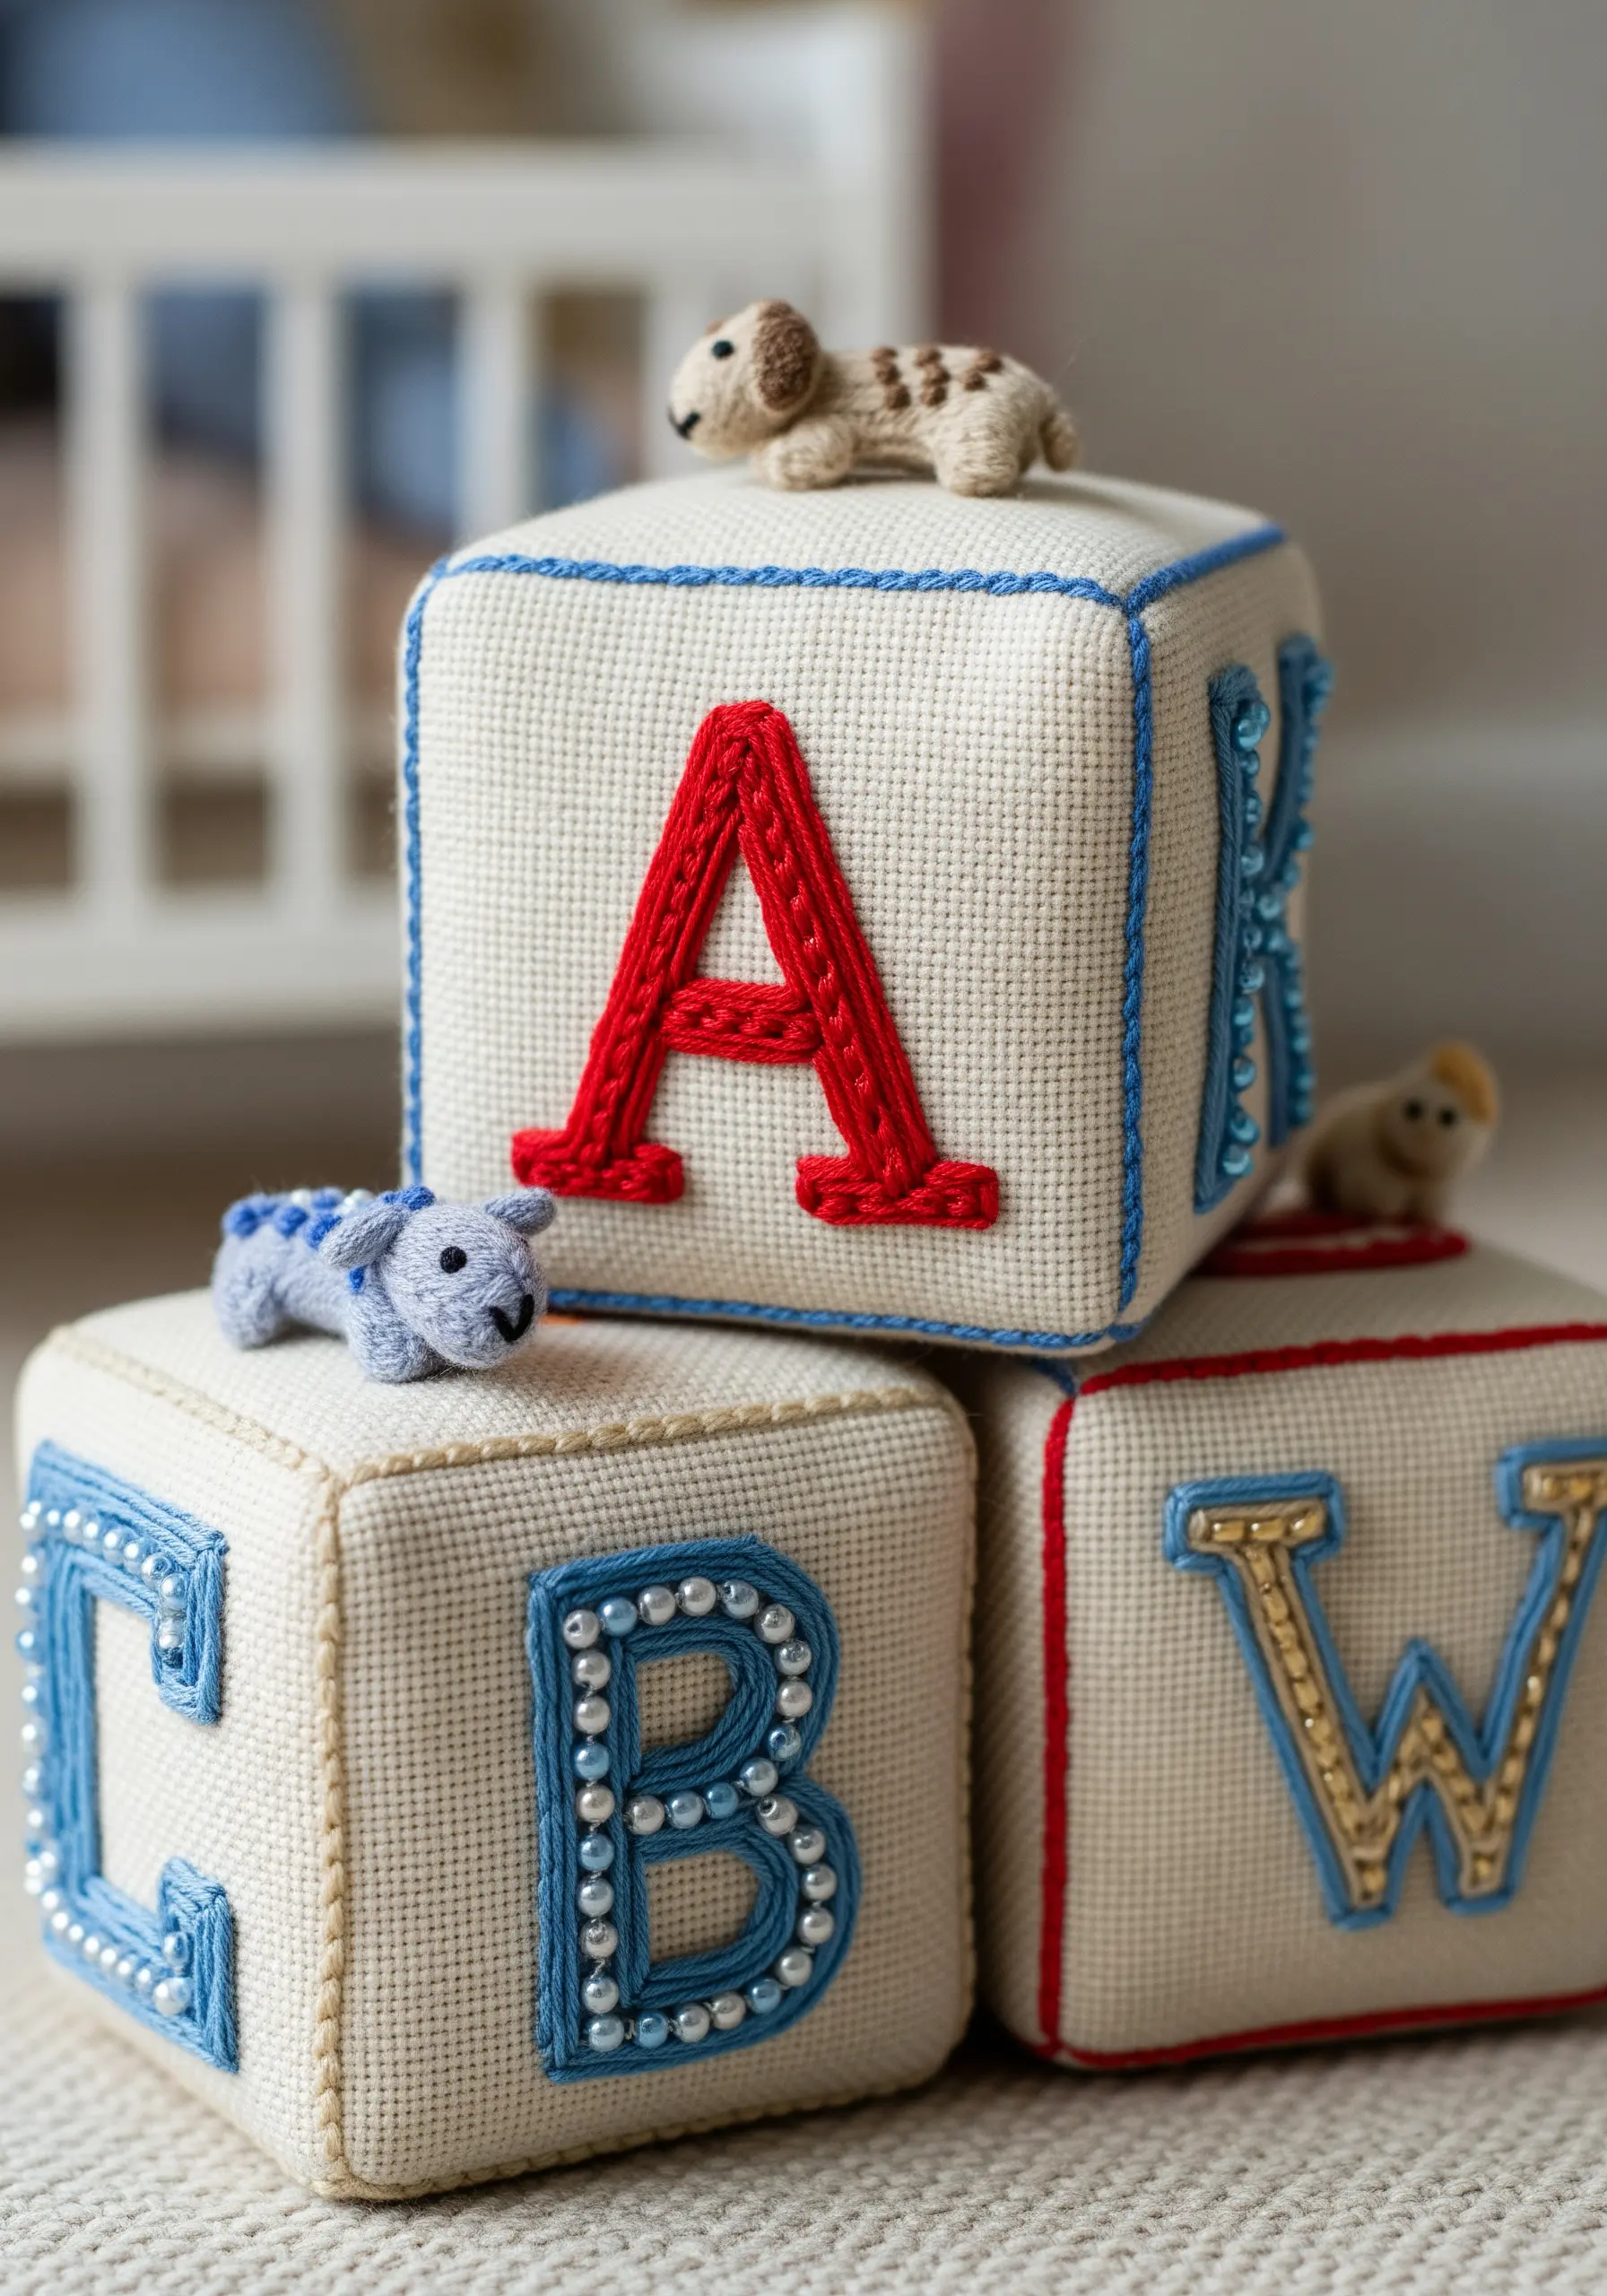
When creating embroidered lettering, use a fabric with a visible grid, like Aida cloth or canvas, to ensure your stitches are uniform and your lines are crisp.
Outline your letters with a simple backstitch for clean definition.
For the filling, you can use a smooth satin stitch, or for a more playful and tactile finish, fill the letters with densely packed seed beads.
The combination of thread and beadwork adds textural interest, making it perfect for nursery stitch art.
24. Assembling Miniature Worlds in Mixed Media

The most charming miniatures often come from combining textiles with unexpected, non-fabric elements.
Construct the body of your object with felt, then add fine details with thread—use a couched stitch with metallic floss for the silver accents on a gumball machine.
Incorporate a tiny found object, like a jewelry-making glass orb, to create a window into your scene.
Filling the orb with tiny beads adds movement, sound, and a sense of wonder to your creative mixed-media embroidery projects.
25. Precision Satin Stitch for Sharp Details
On a miniature scale, a clean satin stitch is crucial for a polished, professional look.
To avoid jagged or uneven edges, first outline the entire shape you intend to fill using a split stitch or backstitch.
This creates a slightly raised border that your satin stitches can tuck up against, giving you a perfectly crisp and defined edge.
Always work with a single strand of floss for miniatures to maintain scale and detail, a key technique for all your small embroidery ideas.
26. Whipped Cream Effects with Knots and Beads
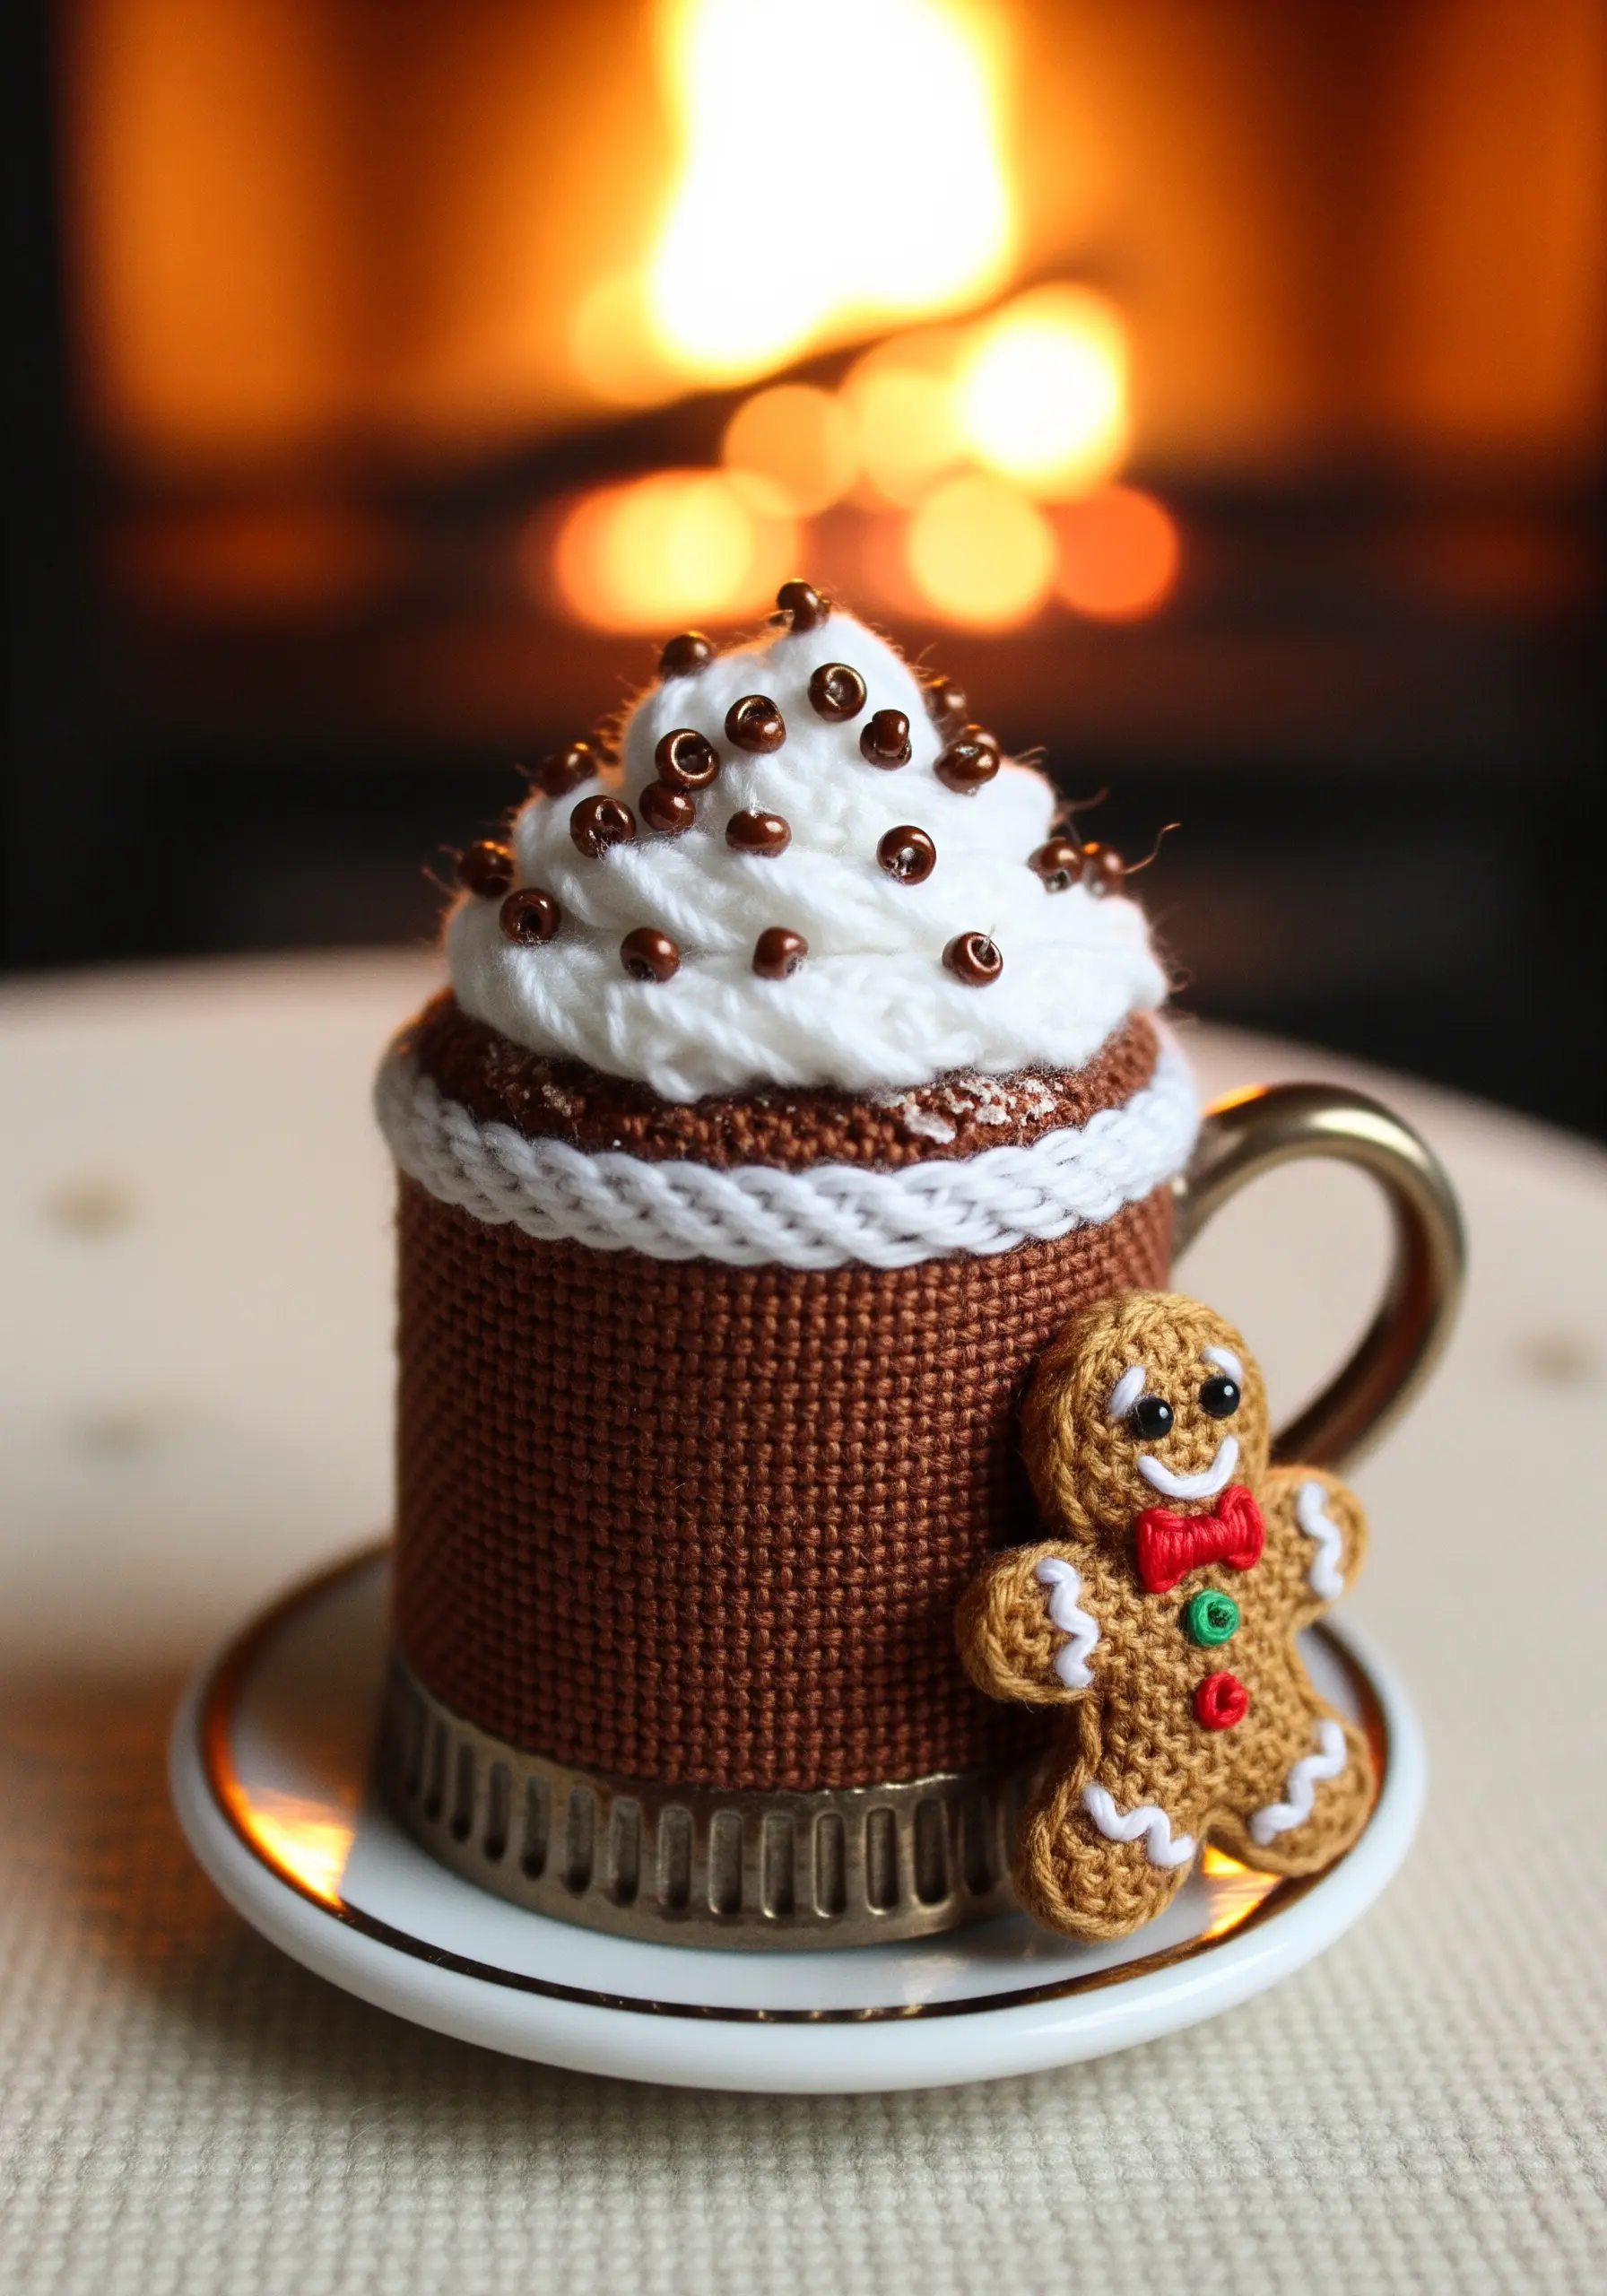
To create the soft, fluffy texture of whipped cream, rely on dimensional stitches that build volume.
Tightly cluster white French knots or small bullion knots on top of your piece, varying the tightness slightly to create an organic, piled-up look.
For a final touch of realism, scatter a few tiny brown or black seed beads over the top to serve as chocolate sprinkles.
This layering of texture is what makes cozy embroidery patterns so inviting.
27. Layering and Stitching for Mechanical Details
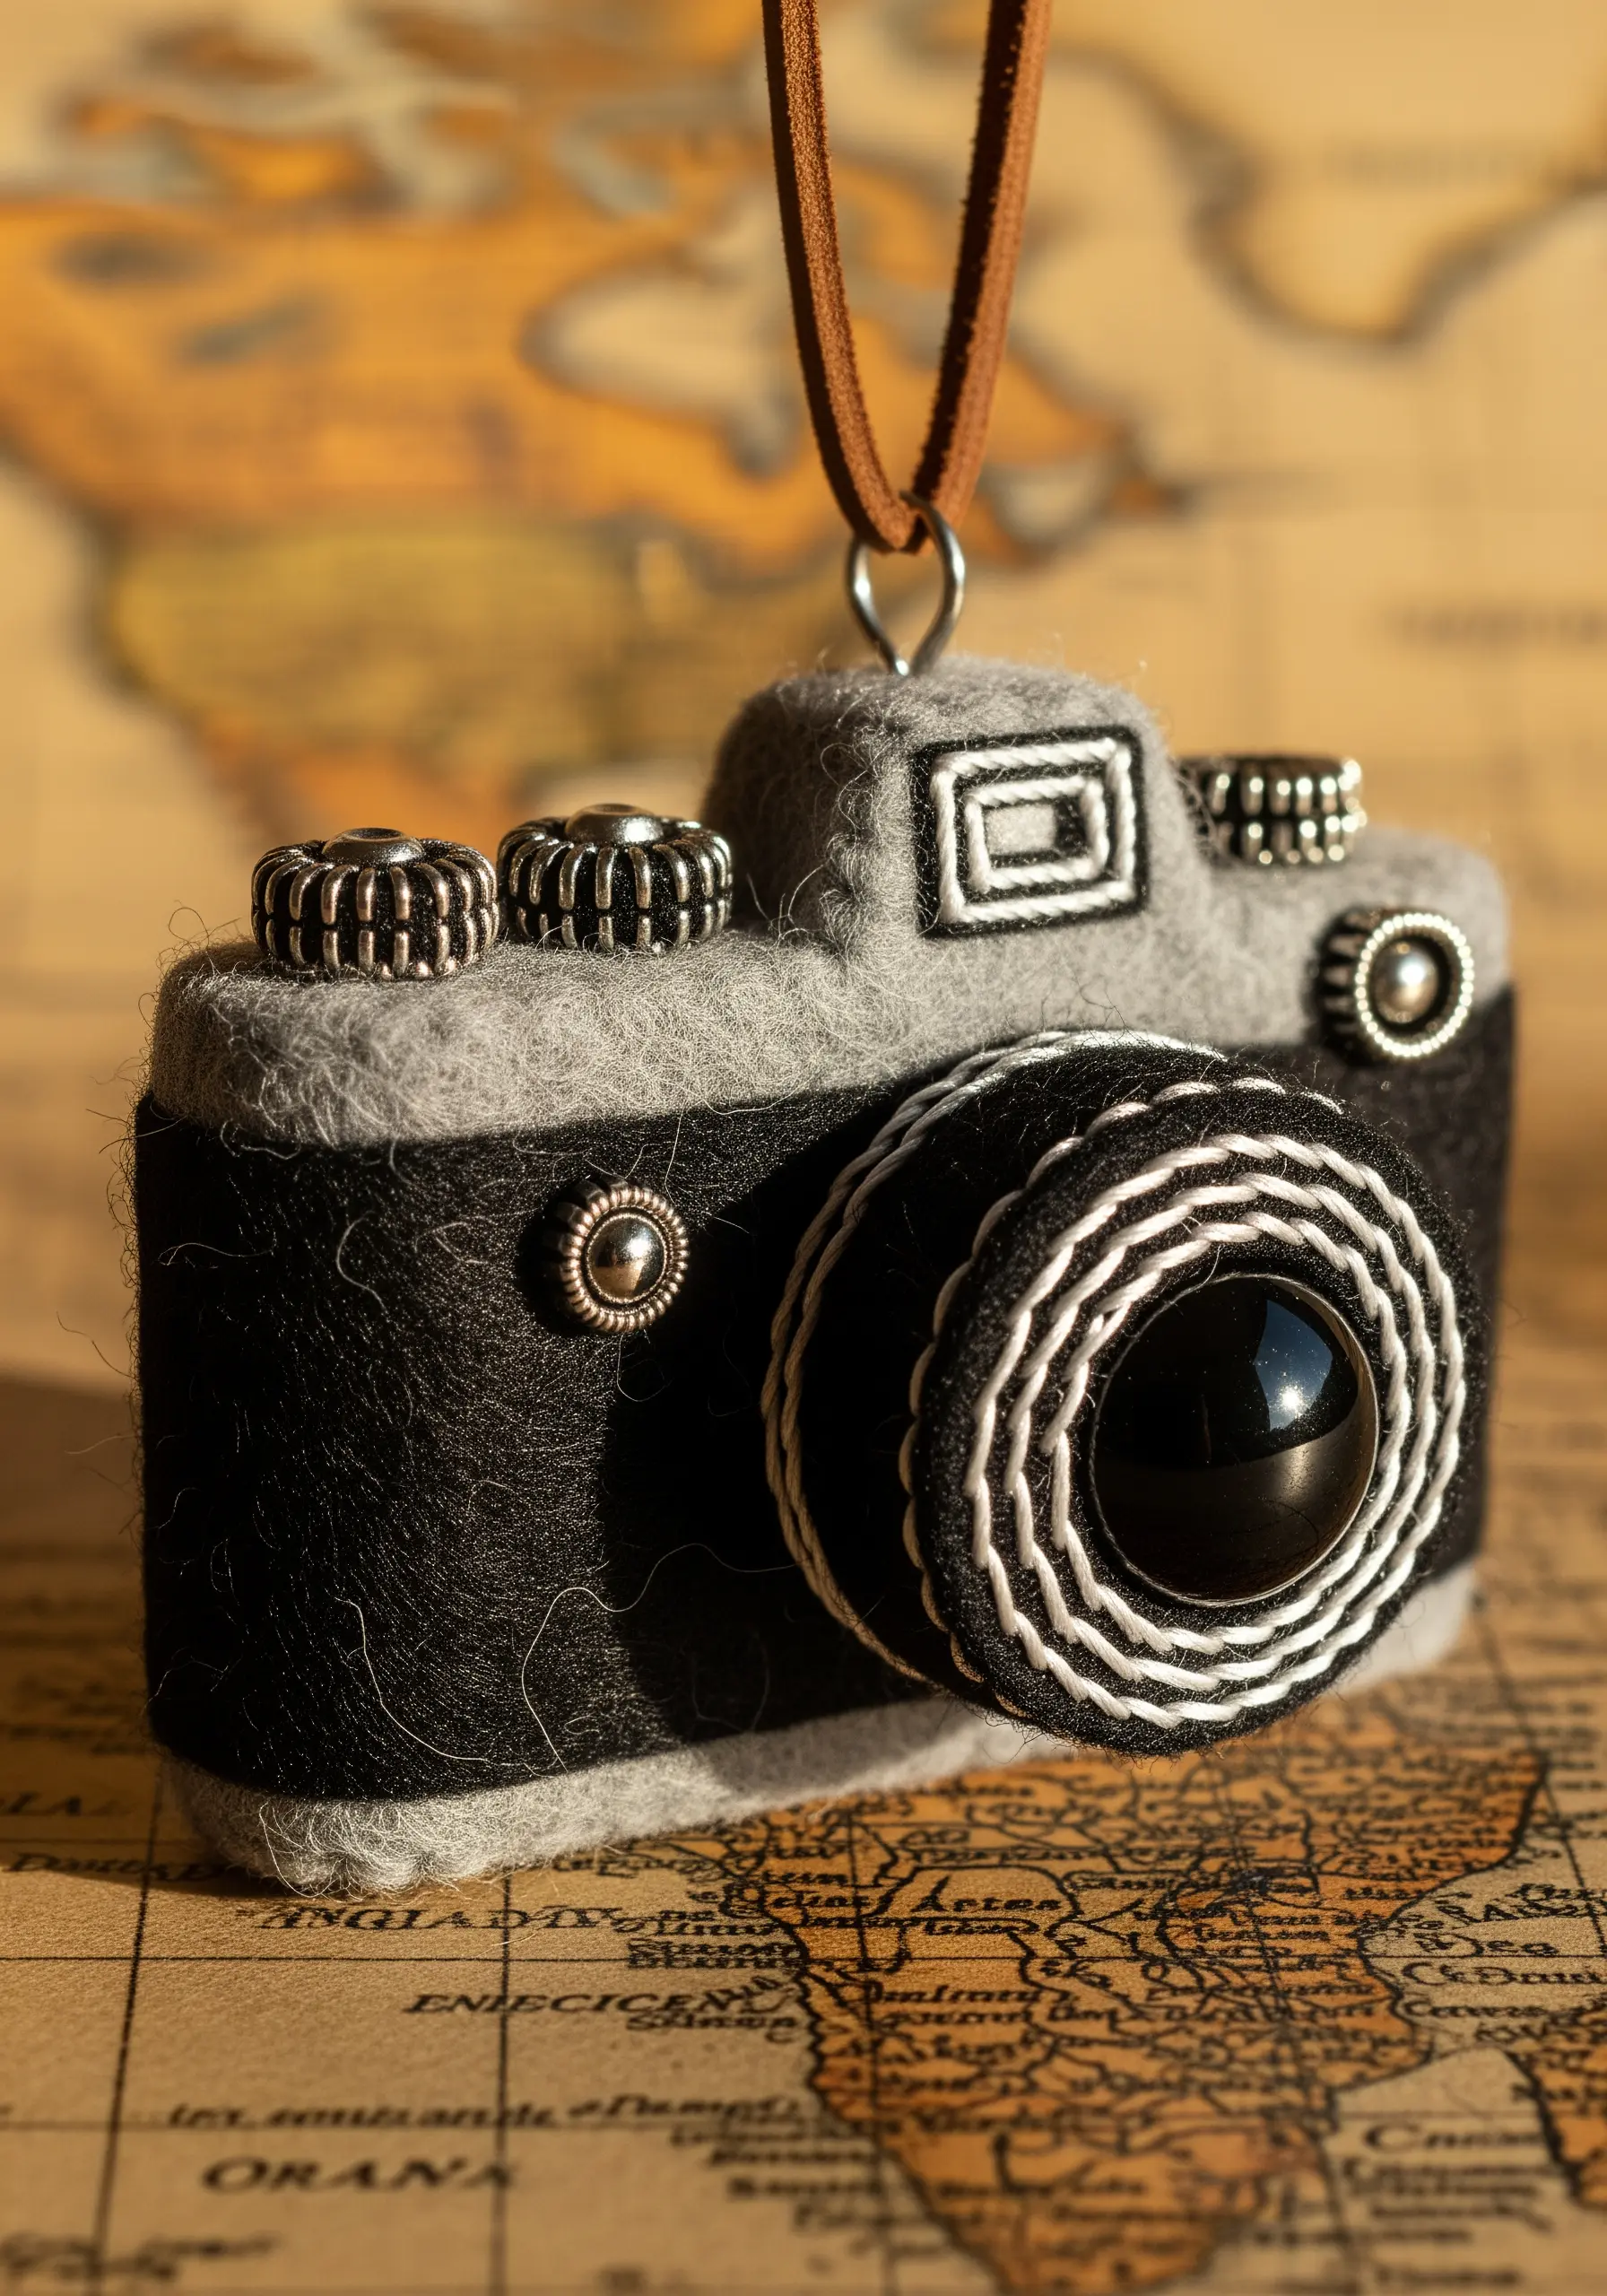
Replicating the clean lines and distinct parts of a mechanical object like a camera is easy with layered felt.
Cut your main components from different colors of felt and layer them to build the basic form.
Use thread to add the fine details: concentric circles of a simple backstitch create a convincing lens, while tiny French knots or metallic seed beads can stand in for buttons and dials.
This technique turns soft materials into sharp, structured artistic objects.
28. Sculptural Coiling with Wrapped Cord
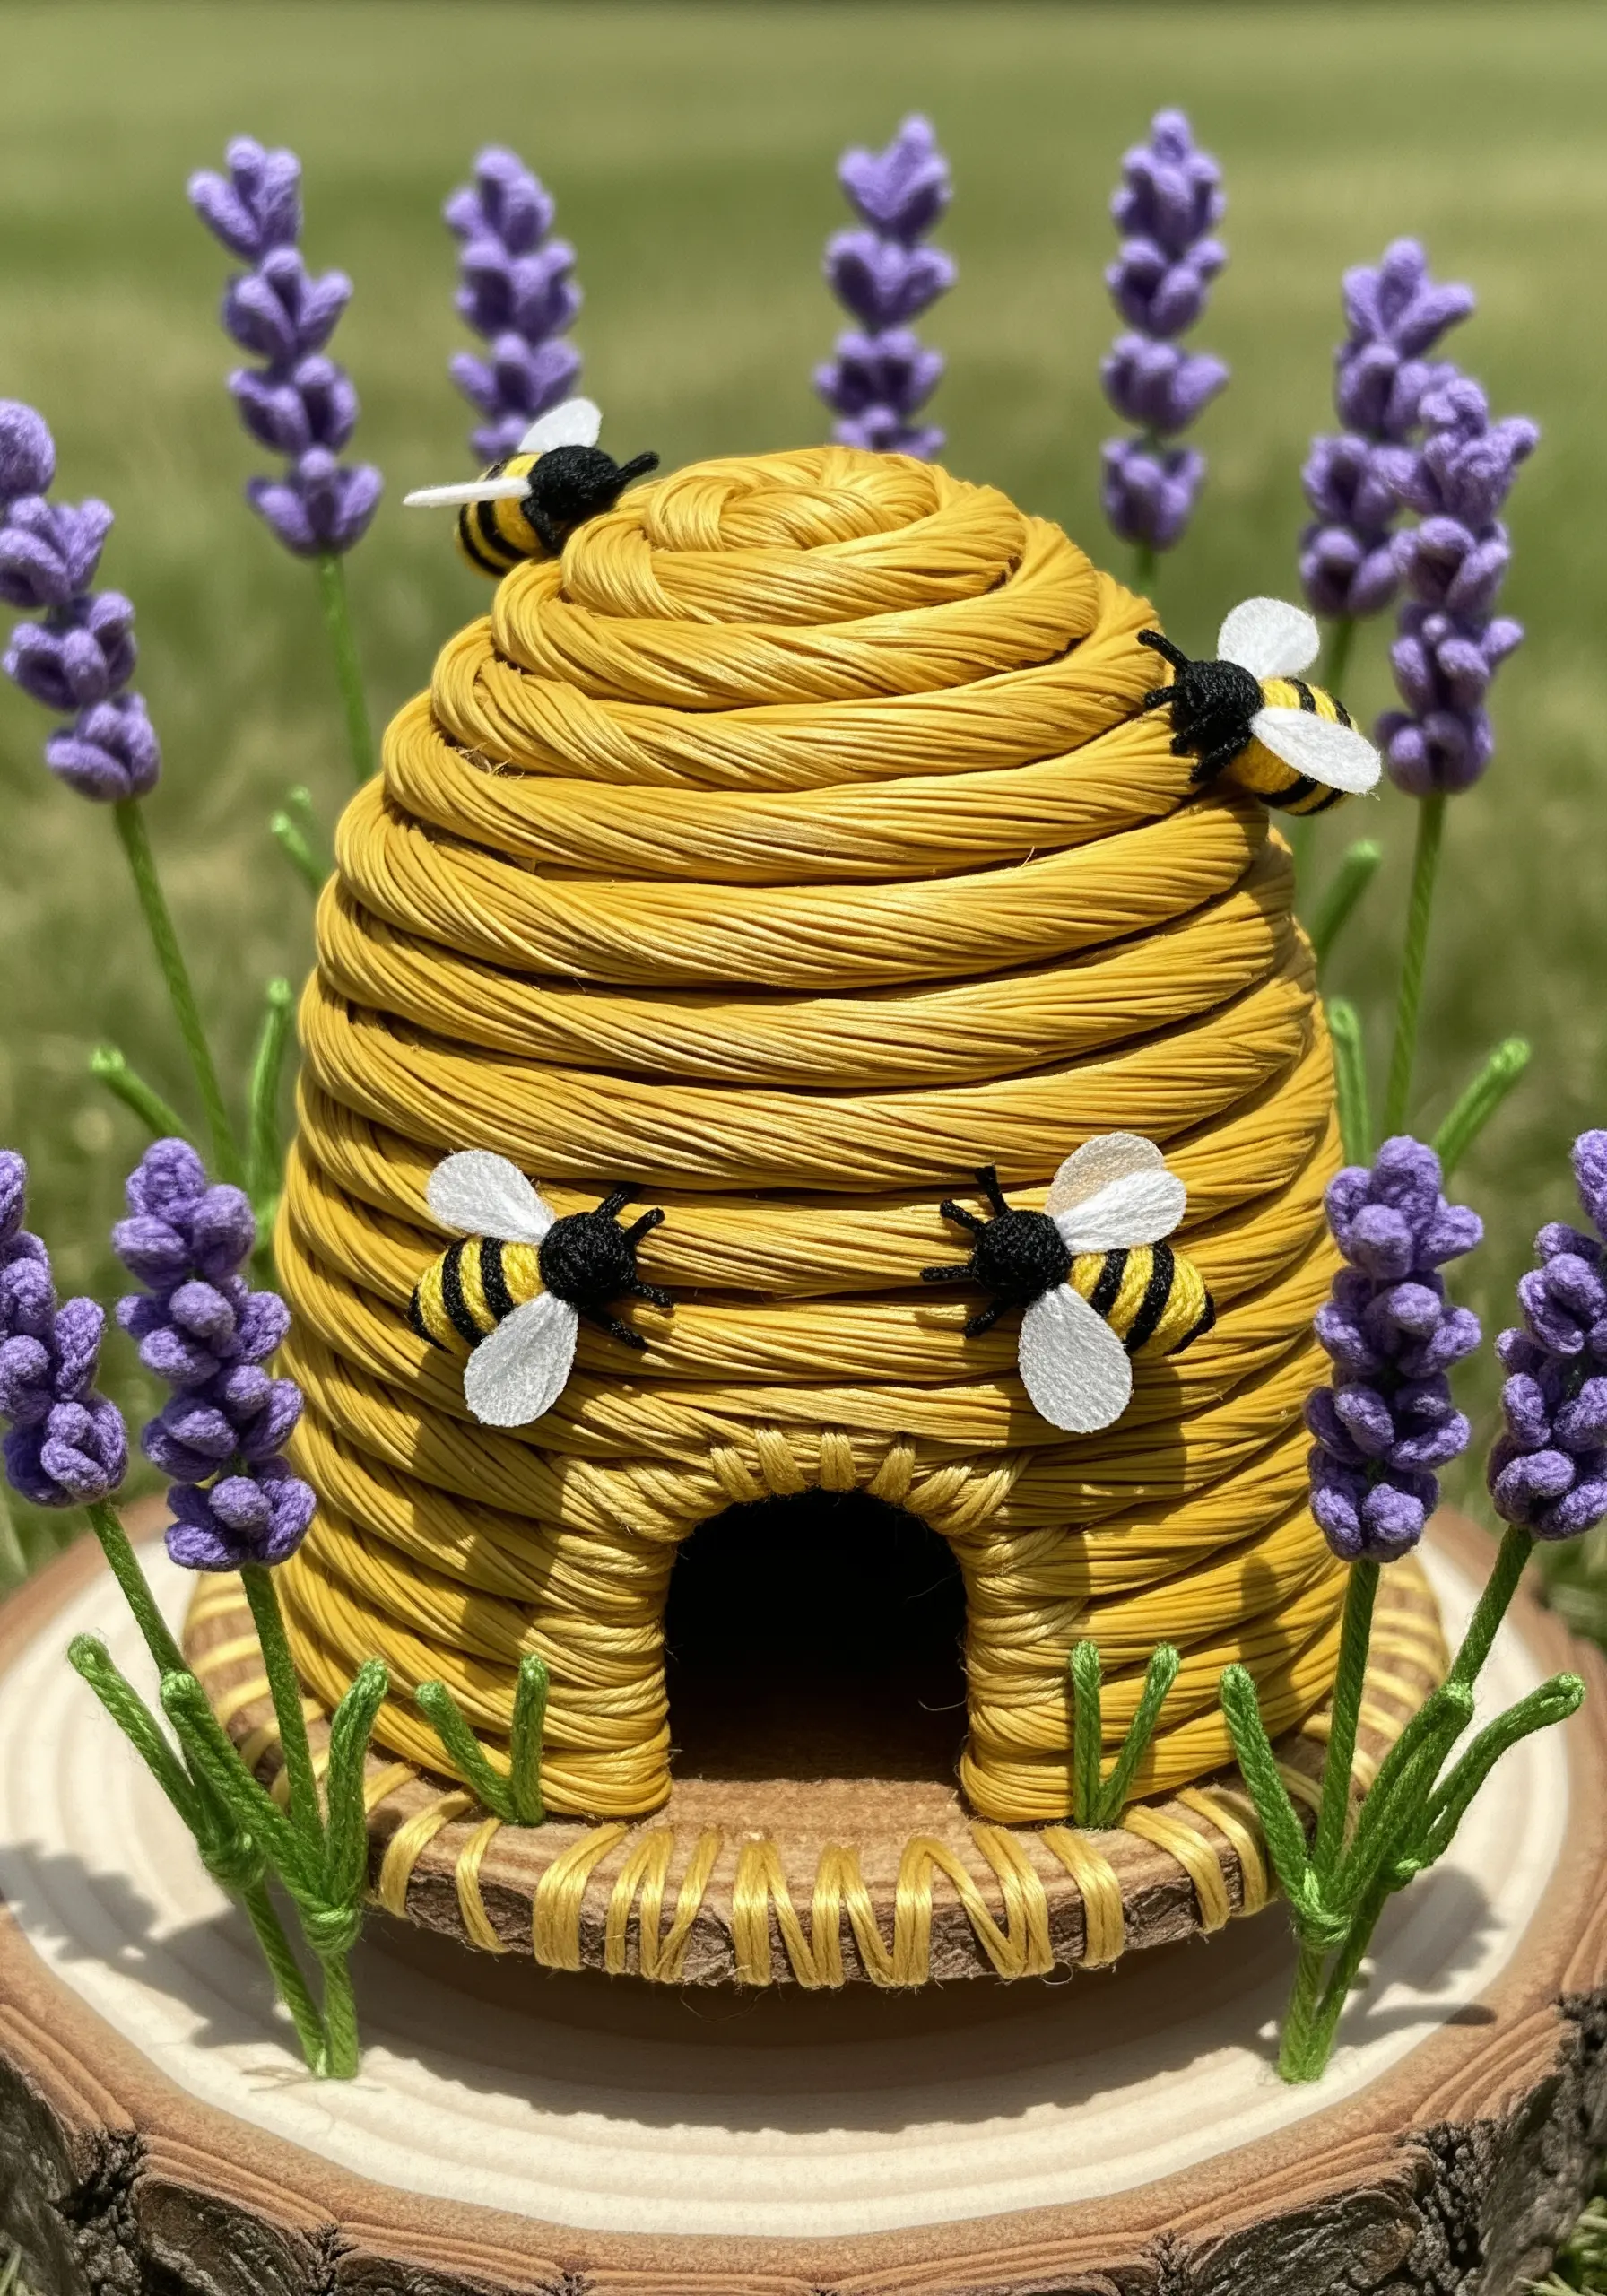
For sturdy, hollow forms like a beehive or basket, use the coiling technique to build your structure from the ground up.
Start by tightly wrapping a thick cord, piece of rope, or even a bundle of yarn with your chosen color of floss or raffia.
Begin coiling the wrapped cord into your desired shape, using a needle and matching thread to discreetly stitch the coils together as you work.
This method produces strong, self-supporting shapes perfect for lavender-inspired embroidery designs and other 3D scenes.


