

Think of your bathroom or vanity not just as a functional space, but as a small sanctuary. The botanical embroidery hoops you create for it can be more than just decoration; they are tiny, stitched meditations that bring a touch of nature and handcrafted calm into your daily routine.
Here, you won’t find overly complex patterns. Instead, I want to show you how small adjustments in technique—the way you angle a stitch, the number of threads you use, or how you layer your colors—can transform a simple motif into a refined piece of art.
Each of these ideas is designed to be a quiet success. They are small enough to finish in an afternoon, yet they offer a chance to focus on the details that truly elevate your work. Let’s stitch a little moment of peace.
1. Padded Satin Stitch for Plump Eucalyptus
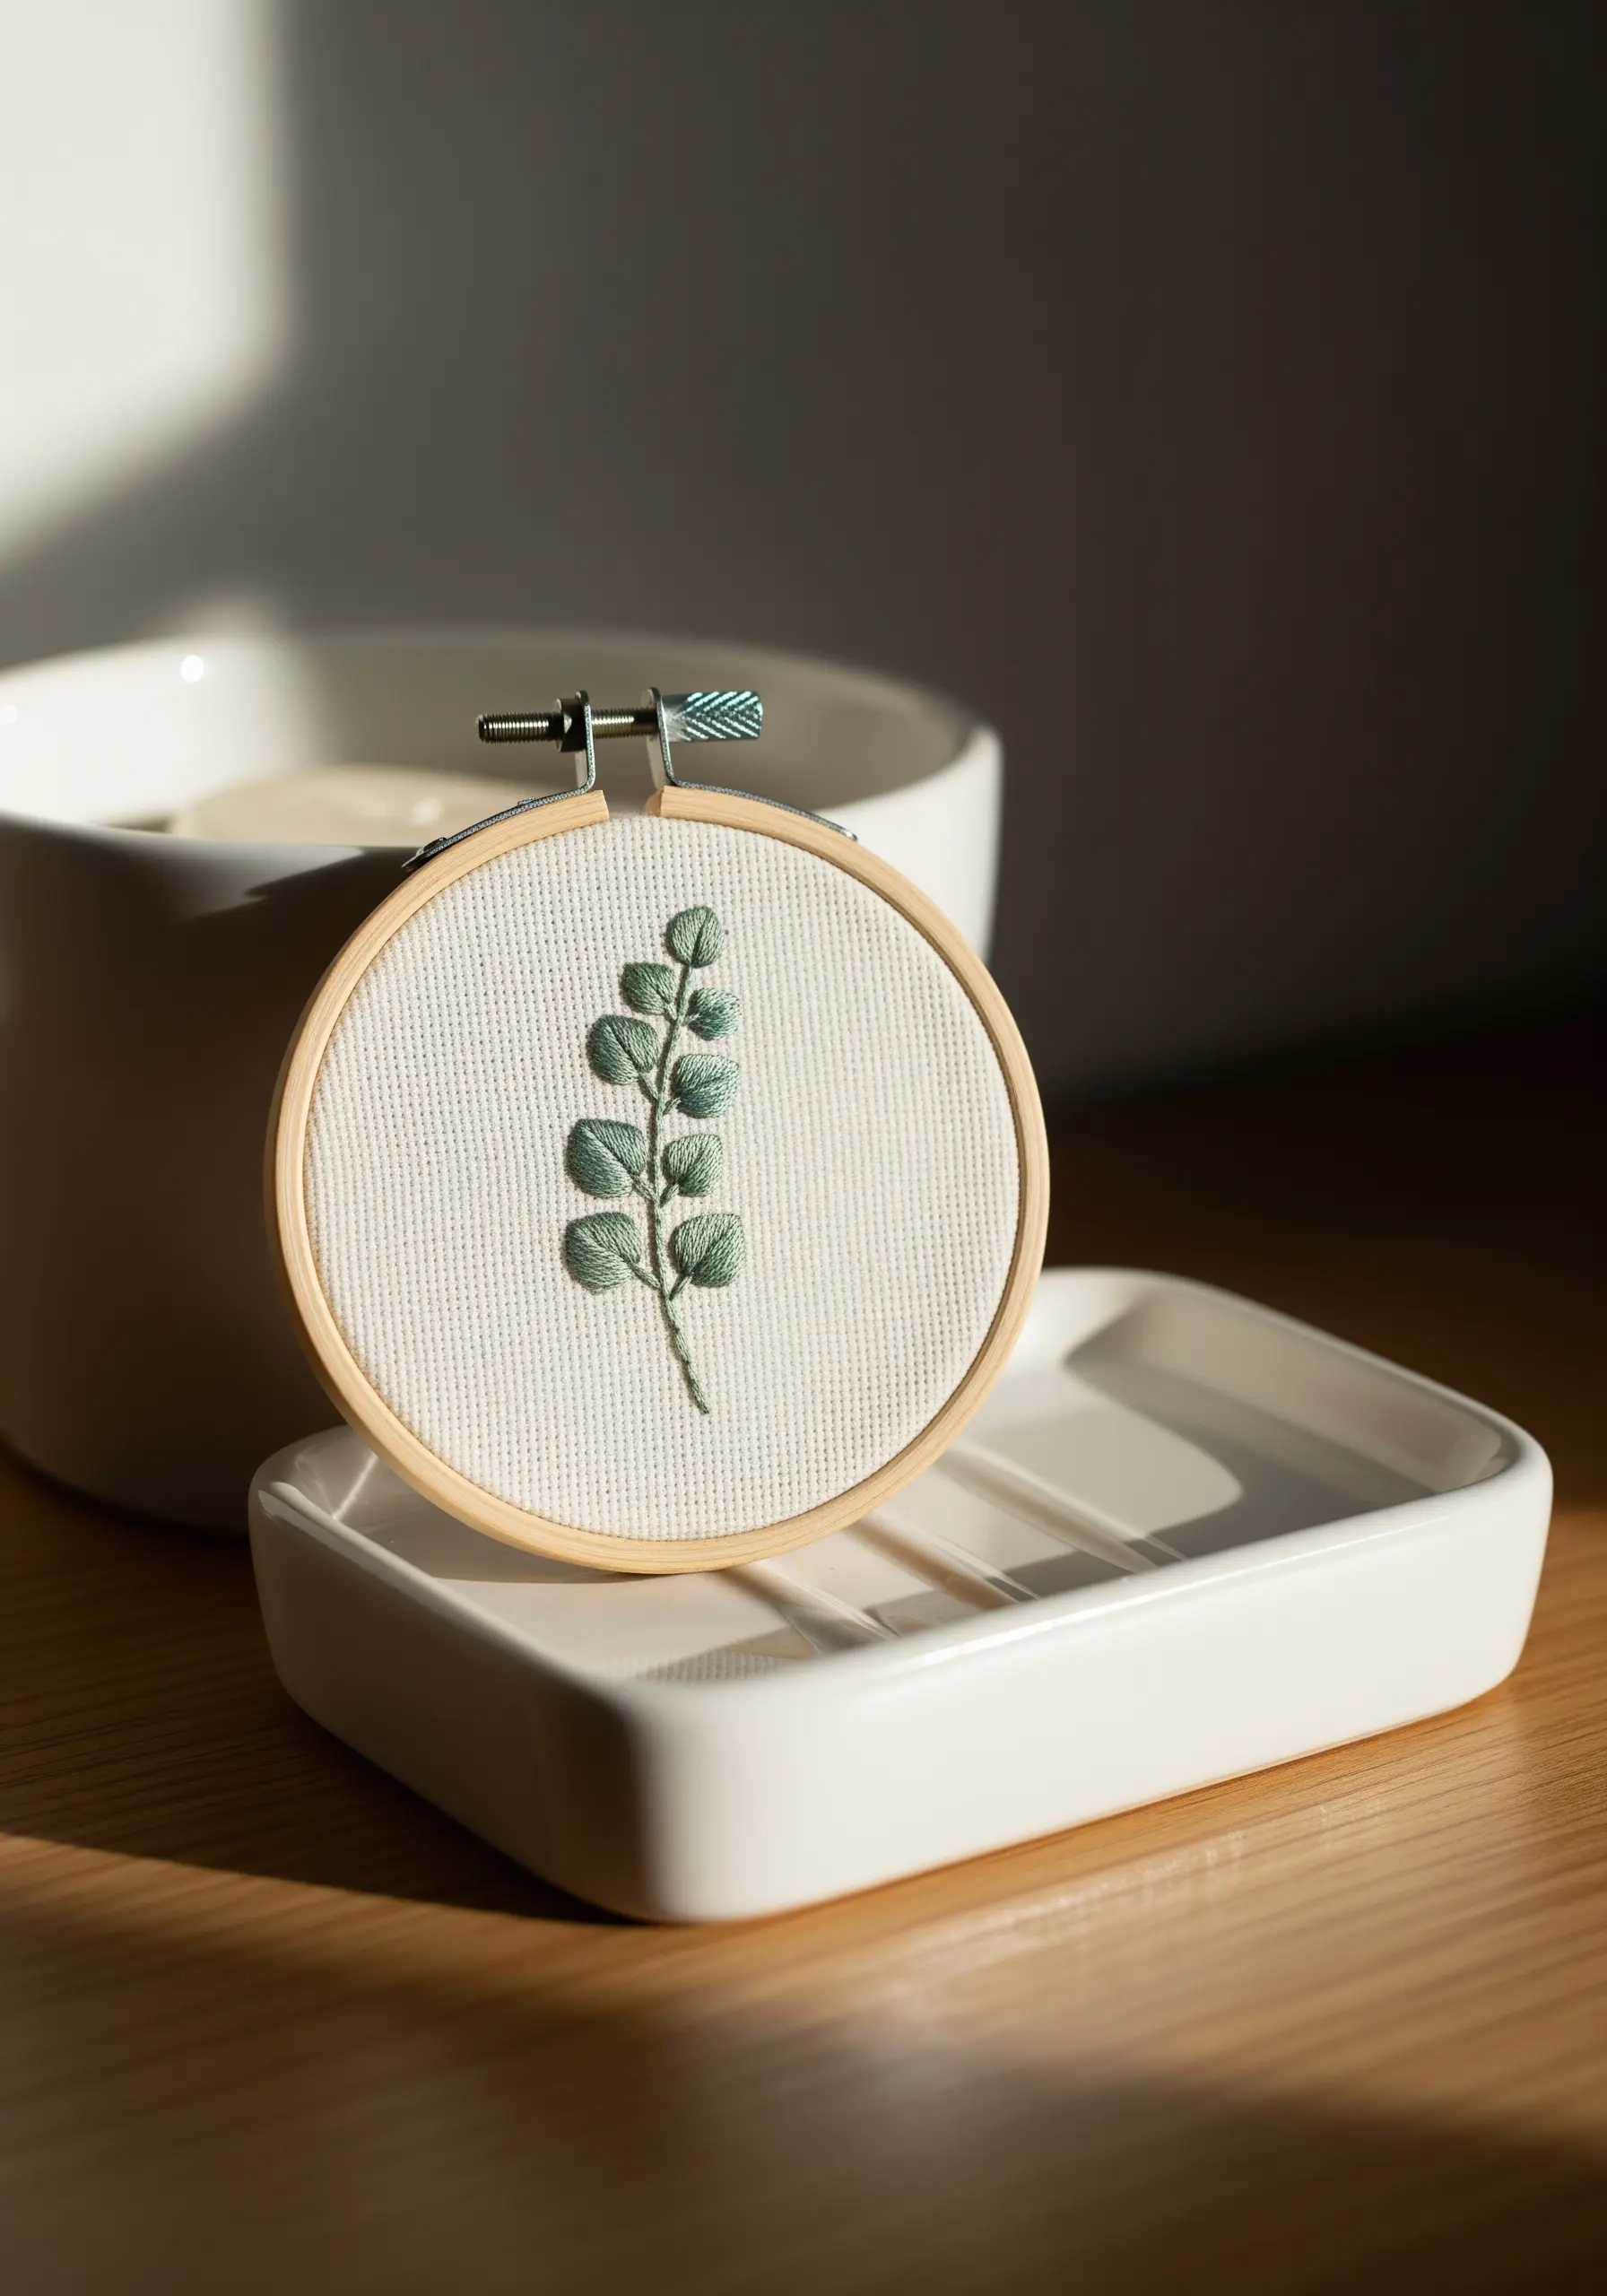
To achieve these rounded, dimensional leaves, use a split stitch to create a small oval base.
Then, cover that base with satin stitches worked in the opposite direction.
This padding technique lifts the thread off the fabric, creating soft shadows and a plush, tactile quality that feels incredibly refined.
Work the stem last with a simple stem stitch, using one fewer strand of thread to keep it delicate.
2. Radiating Stitches for a Graphic Ginkgo Leaf

The beauty of this ginkgo leaf lies in its perfect, fan-like geometry.
To replicate this, use a single anchor point at the base of the leaf and work long, straight stitches that radiate outwards to the scalloped edge.
This ensures every stitch follows the leaf’s natural growth pattern, creating a beautiful sheen as the light hits the threads.
A bold, single color on a neutral fabric turns a simple leaf into one of the most striking minimalist hoop art patterns perfect for modern apartment walls.
3. Clustered French Knots for Realistic Lavender
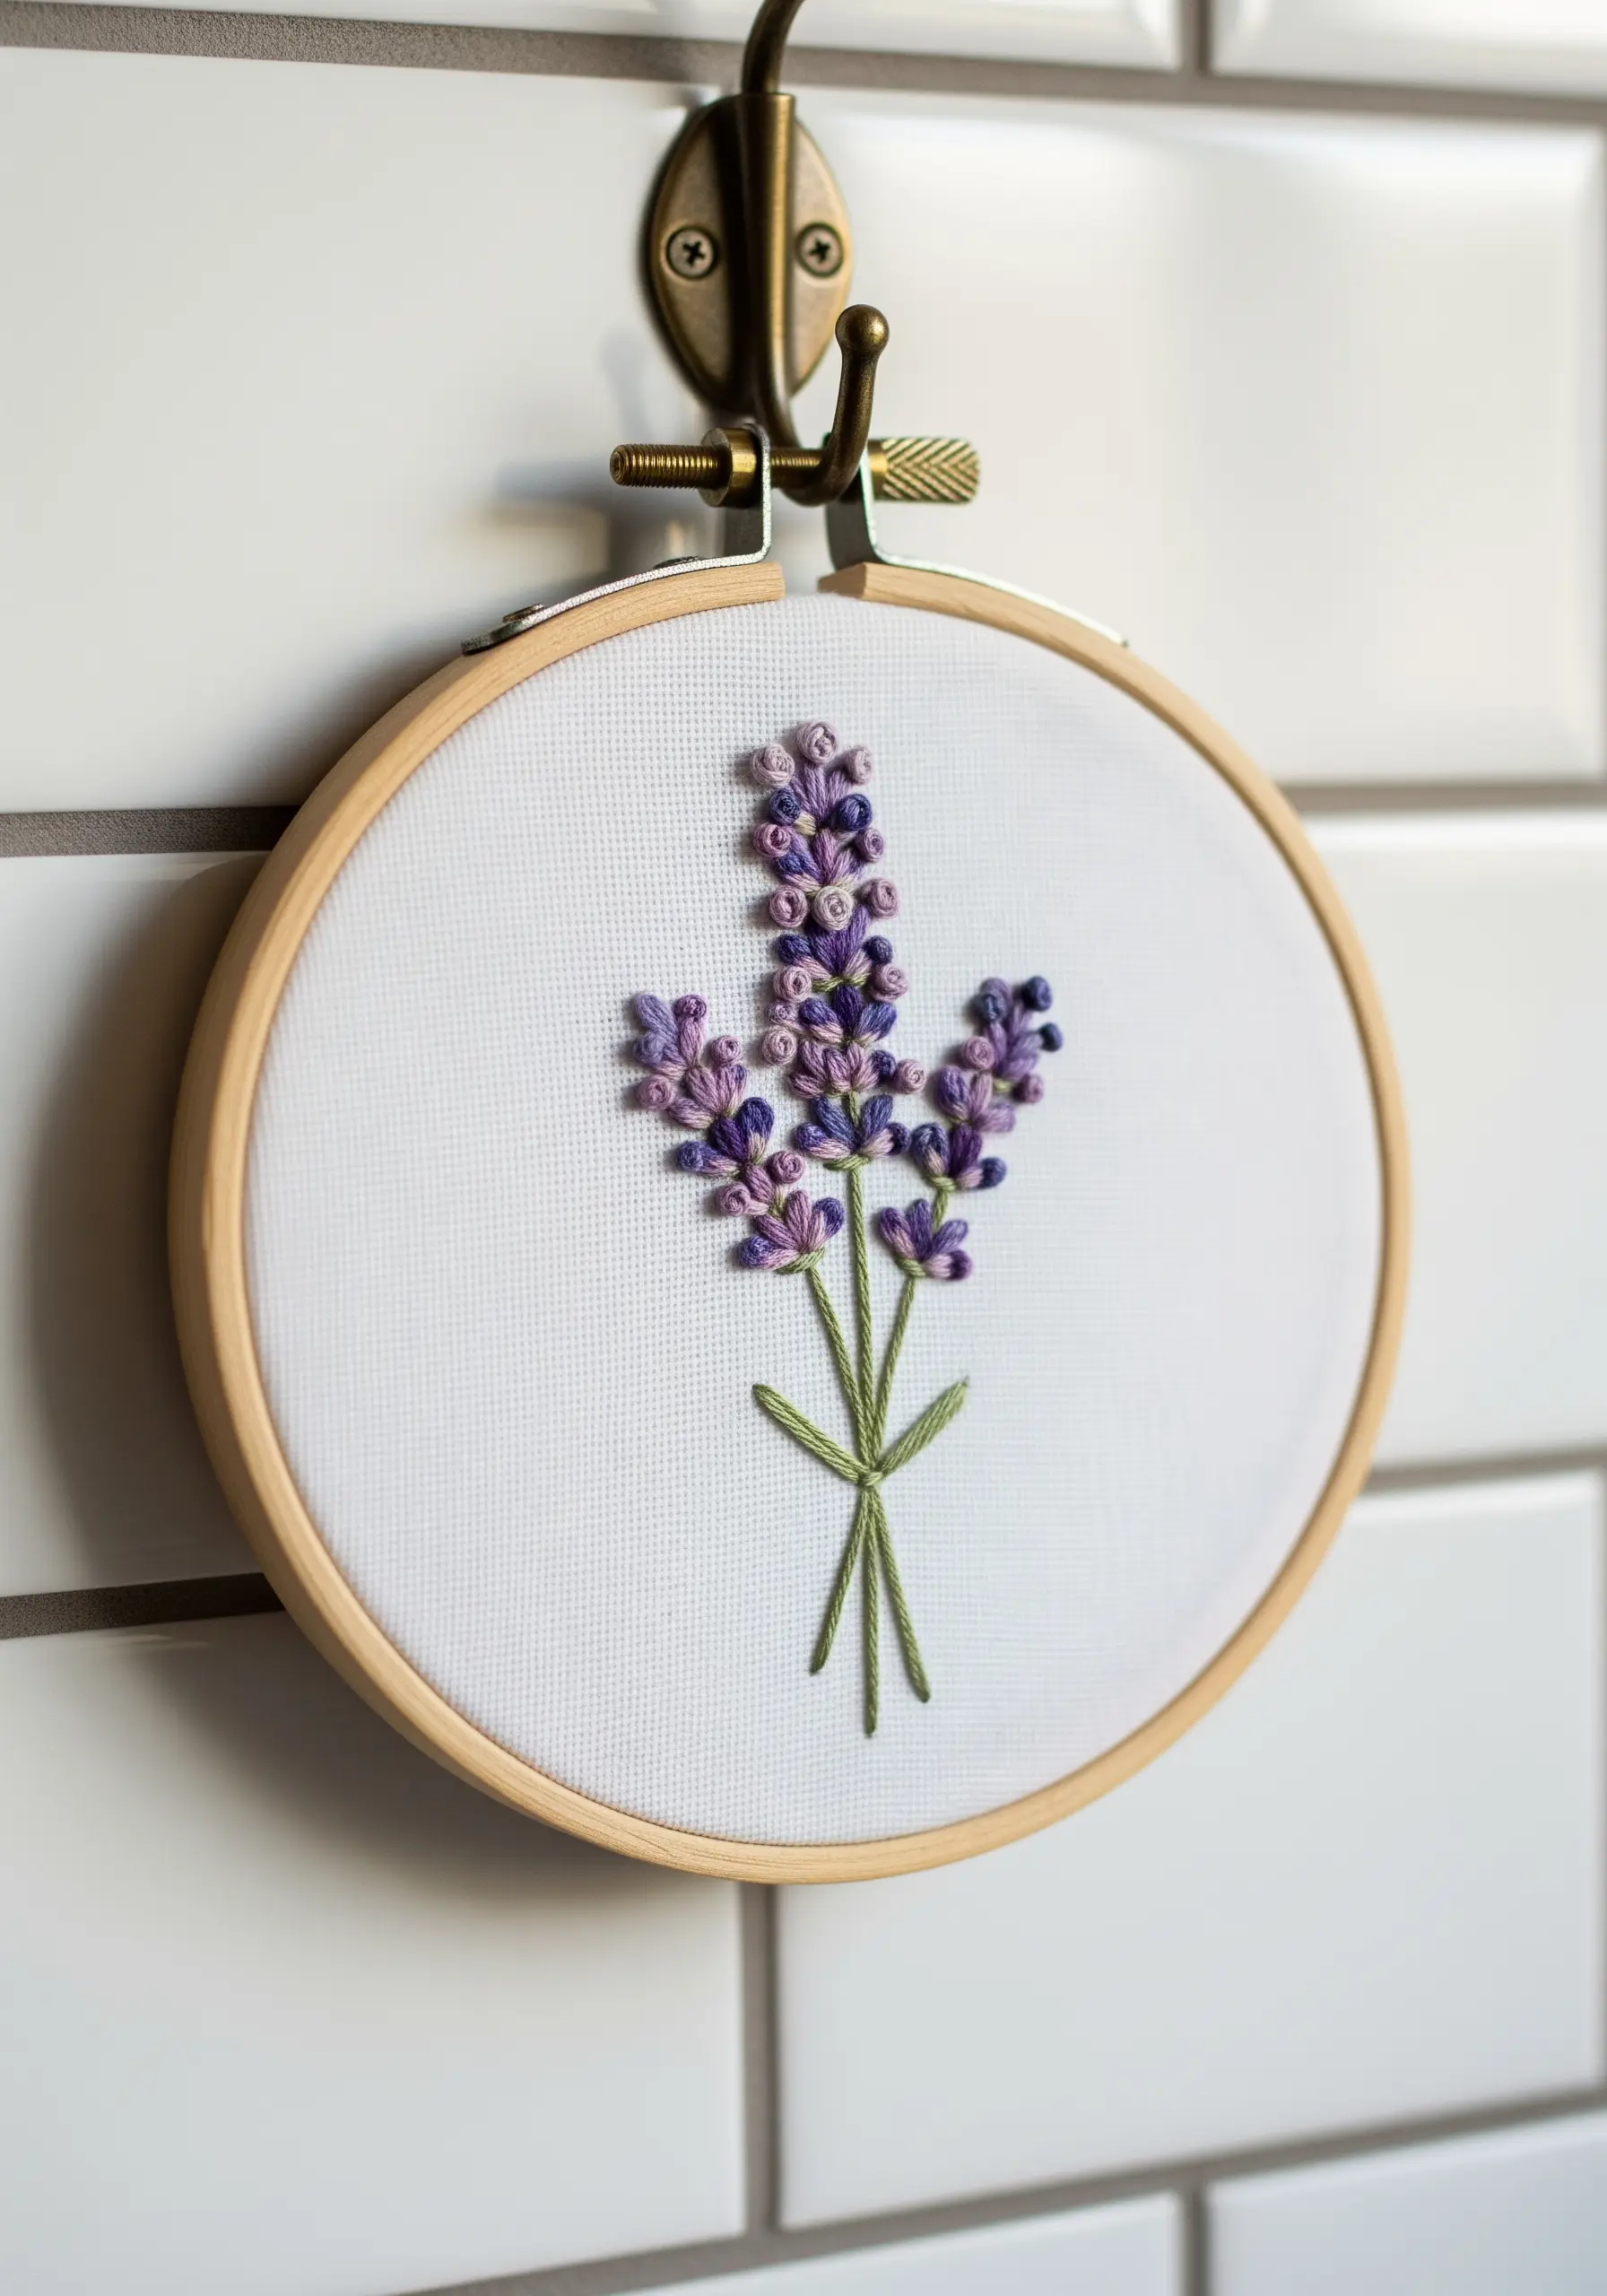
Create the iconic texture of lavender by clustering French knots of slightly different sizes and shades.
Use two or three similar tones of purple floss, wrapping the thread once for smaller buds and twice for larger, fuller blossoms.
Stagger their placement along the stem instead of lining them up perfectly; this irregularity is what makes the final piece look organic and alive.
Keep the stems thin and elegant with a single-threaded backstitch.
4. Negative Space and Clean Fills for Monstera

This monstera leaf is defined by its iconic splits, making negative space your most powerful tool.
First, outline the entire leaf shape, including the inner cutouts, with a sharp split stitch to create a clean boundary.
Fill the sections with a directional satin stitch, keeping all your stitches angled uniformly for a smooth, cohesive sheen.
Add the central vein last using a simple backstitch directly on top of your fill, which gives it definition without adding bulk.
5. Layered Stitches for a Dimensional Succulent

To build the complex shape of a succulent, you need to think in layers.
Begin by stitching the petals at the very back, then work your way forward, allowing the stitches of the front petals to slightly overlap the ones behind them.
Use a long-and-short stitch to blend shades of green and mint, creating soft gradients.
The sharp terracotta and white outlines, worked in a single thread, add a graphic, illustrative quality that makes the soft fills pop.
6. Repeated Fly Stitches for Elegant Ferns
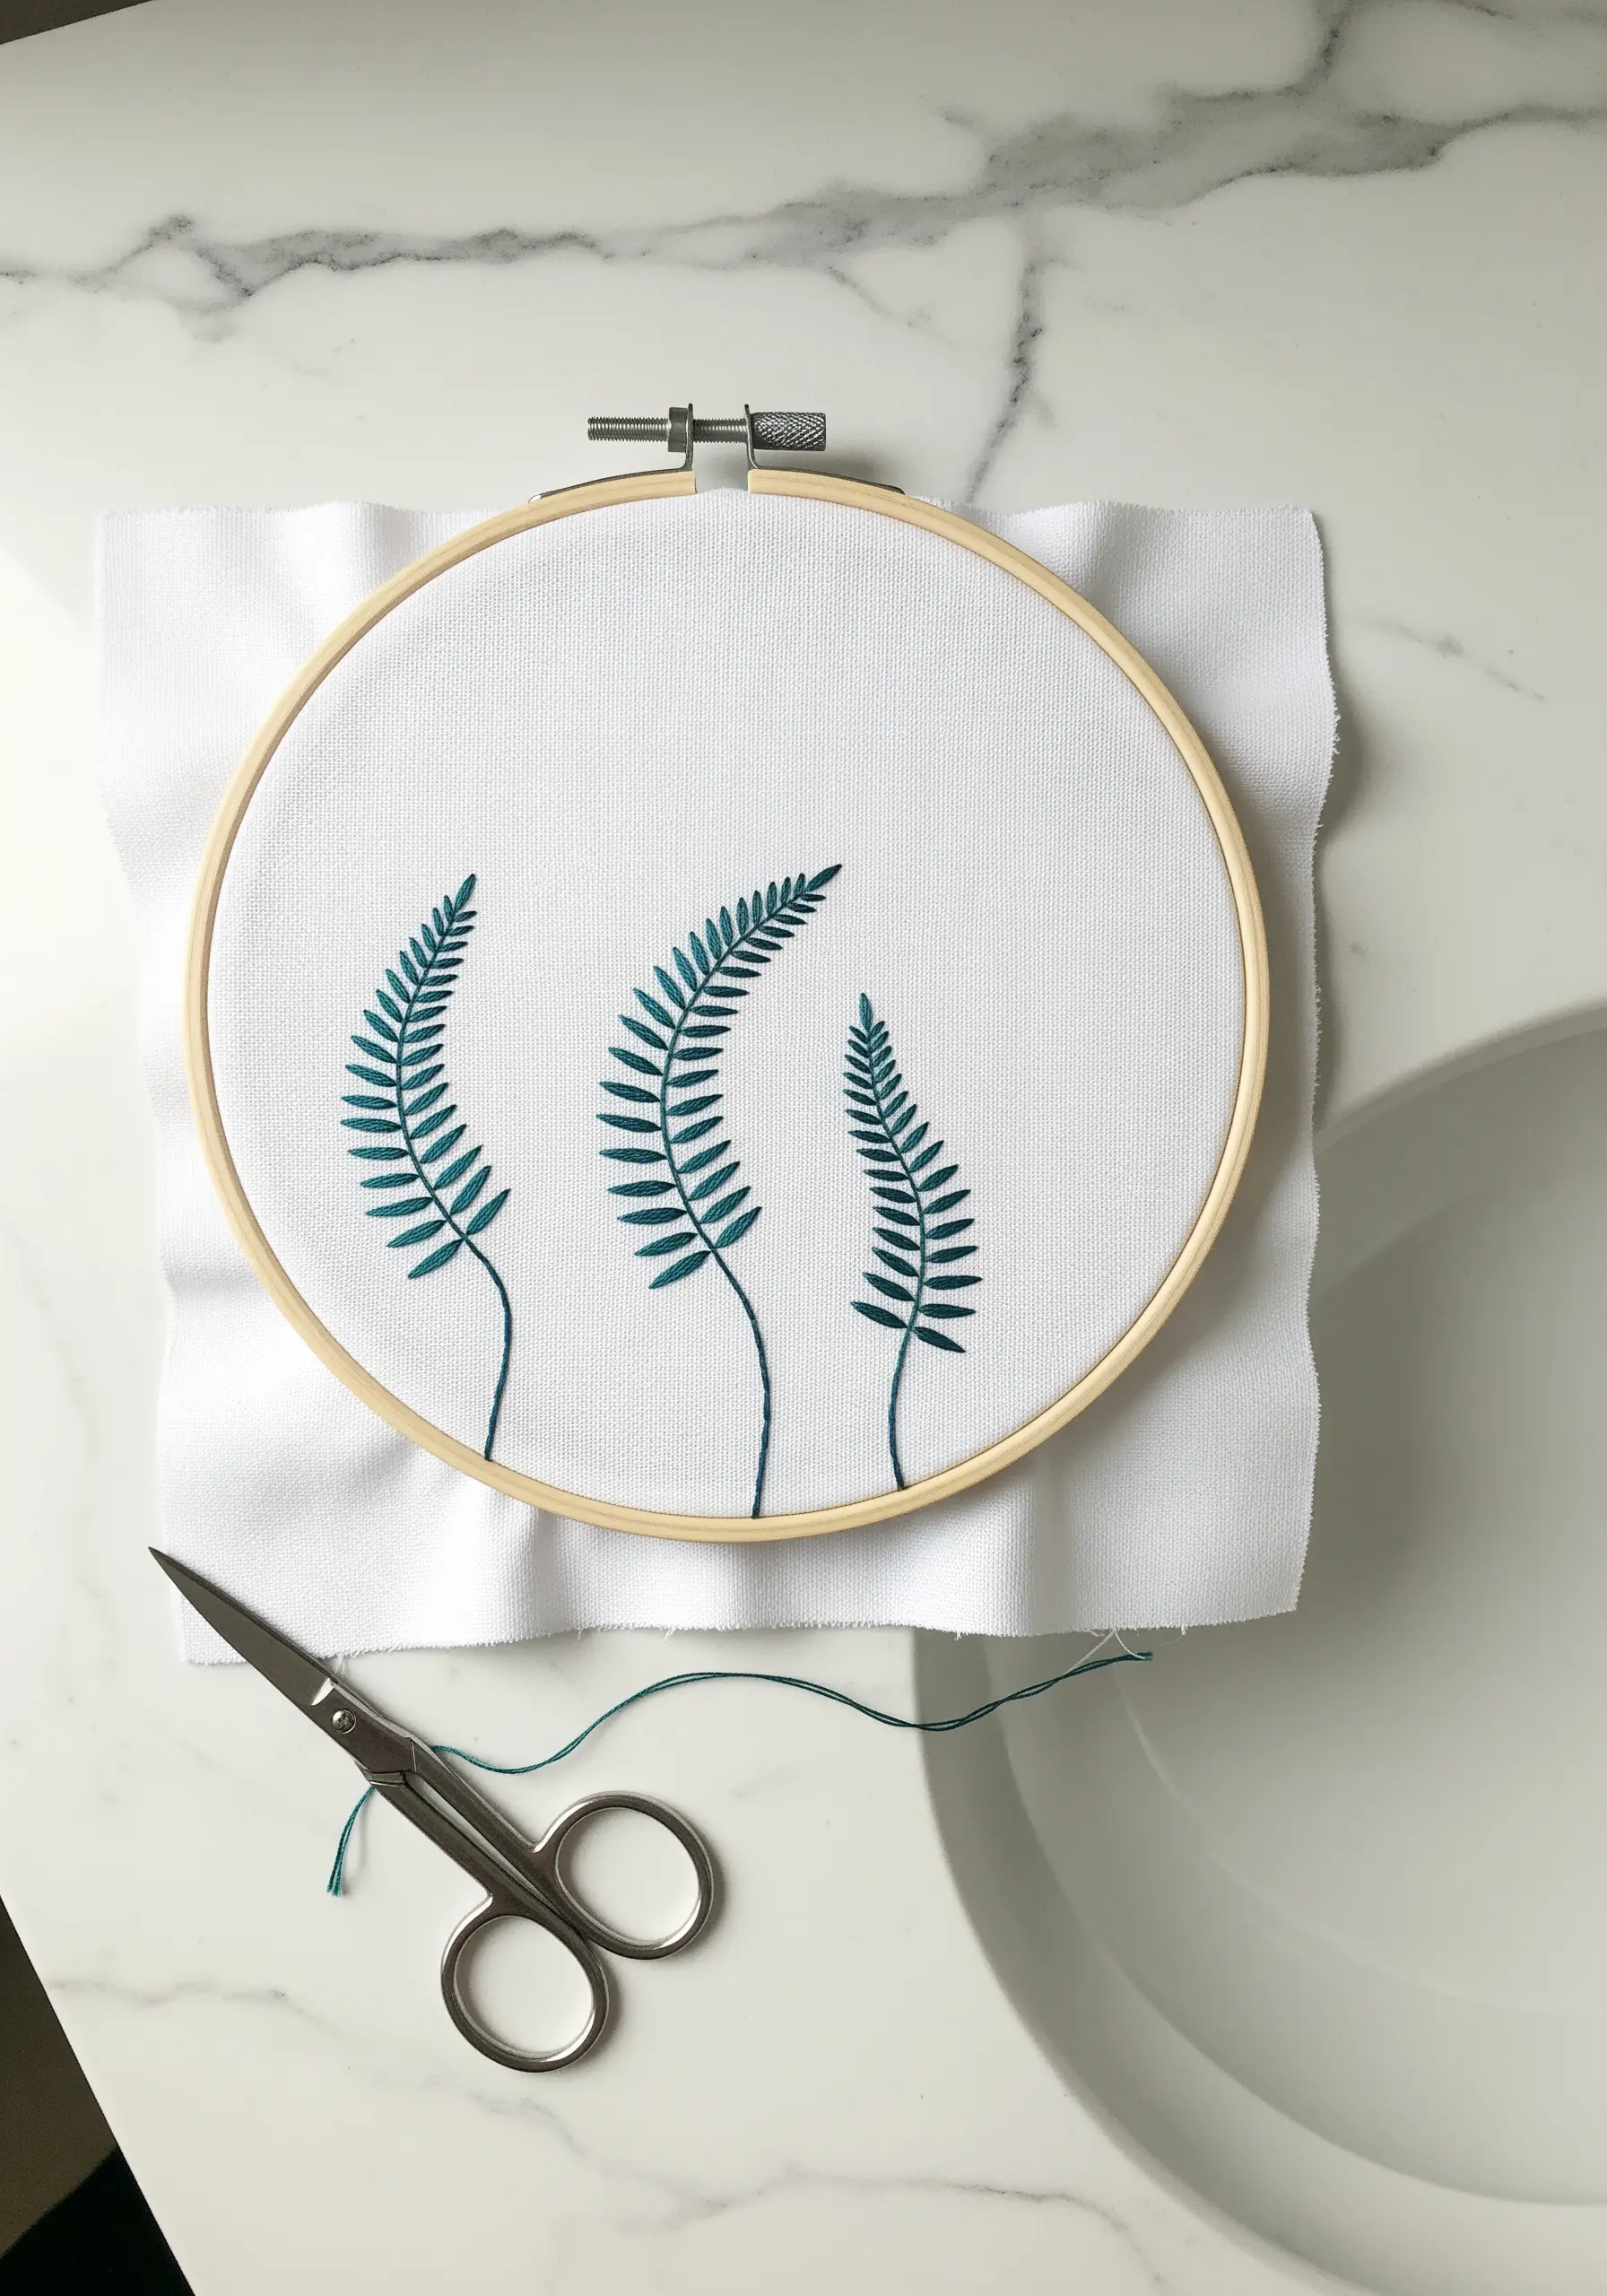
Achieve the delicate structure of a fern frond with a simple, repeated fly stitch.
Work from the top of the frond downwards, using the central stem line as your guide.
Keeping the angle and length of your stitches consistent is key to achieving this clean, rhythmic pattern.
These delicate leaf embroidery stitches are perfect for creating an airy, minimalist design that feels both modern and natural.
7. Padded Petals for Chamomile That Pops

Make your tiny chamomile flowers stand out by giving their petals a subtle lift.
Before you stitch the white petals, create a small satin-stitched base underneath where each flower will be.
Then, stitch the final petals in detached chain stitch over that base, which pushes them forward and adds dimension.
This is how you can use tiny floral motifs to fill empty spaces and create a focal point.
8. Composing with Texture and Balance

This trio of daisies demonstrates the power of composition.
Arrange your flowers in a gentle visual triangle rather than a straight line to create a more dynamic and natural-looking layout.
For the petals, use a straight satin stitch, pulling each stitch taut to create those clean, graphic rays.
The centers are filled with dense French knots, providing a highly textured focal point that contrasts beautifully with the smooth petals.
9. Turkey Stitch for a Fluffy Cotton Boll

To capture the soft, fluffy texture of a cotton boll, the turkey stitch is your best friend.
Work the stitch in a tight circle, leaving the loops long.
Once finished, carefully snip the tops of the loops and fluff the threads with your needle tip to create a soft, downy puff.
This high-texture element contrasts beautifully with the sleek satin stitch of the brown husk, making it one of those organic texture embroidery designs that add life to any room.
10. Open Weave Fabric as a Design Element
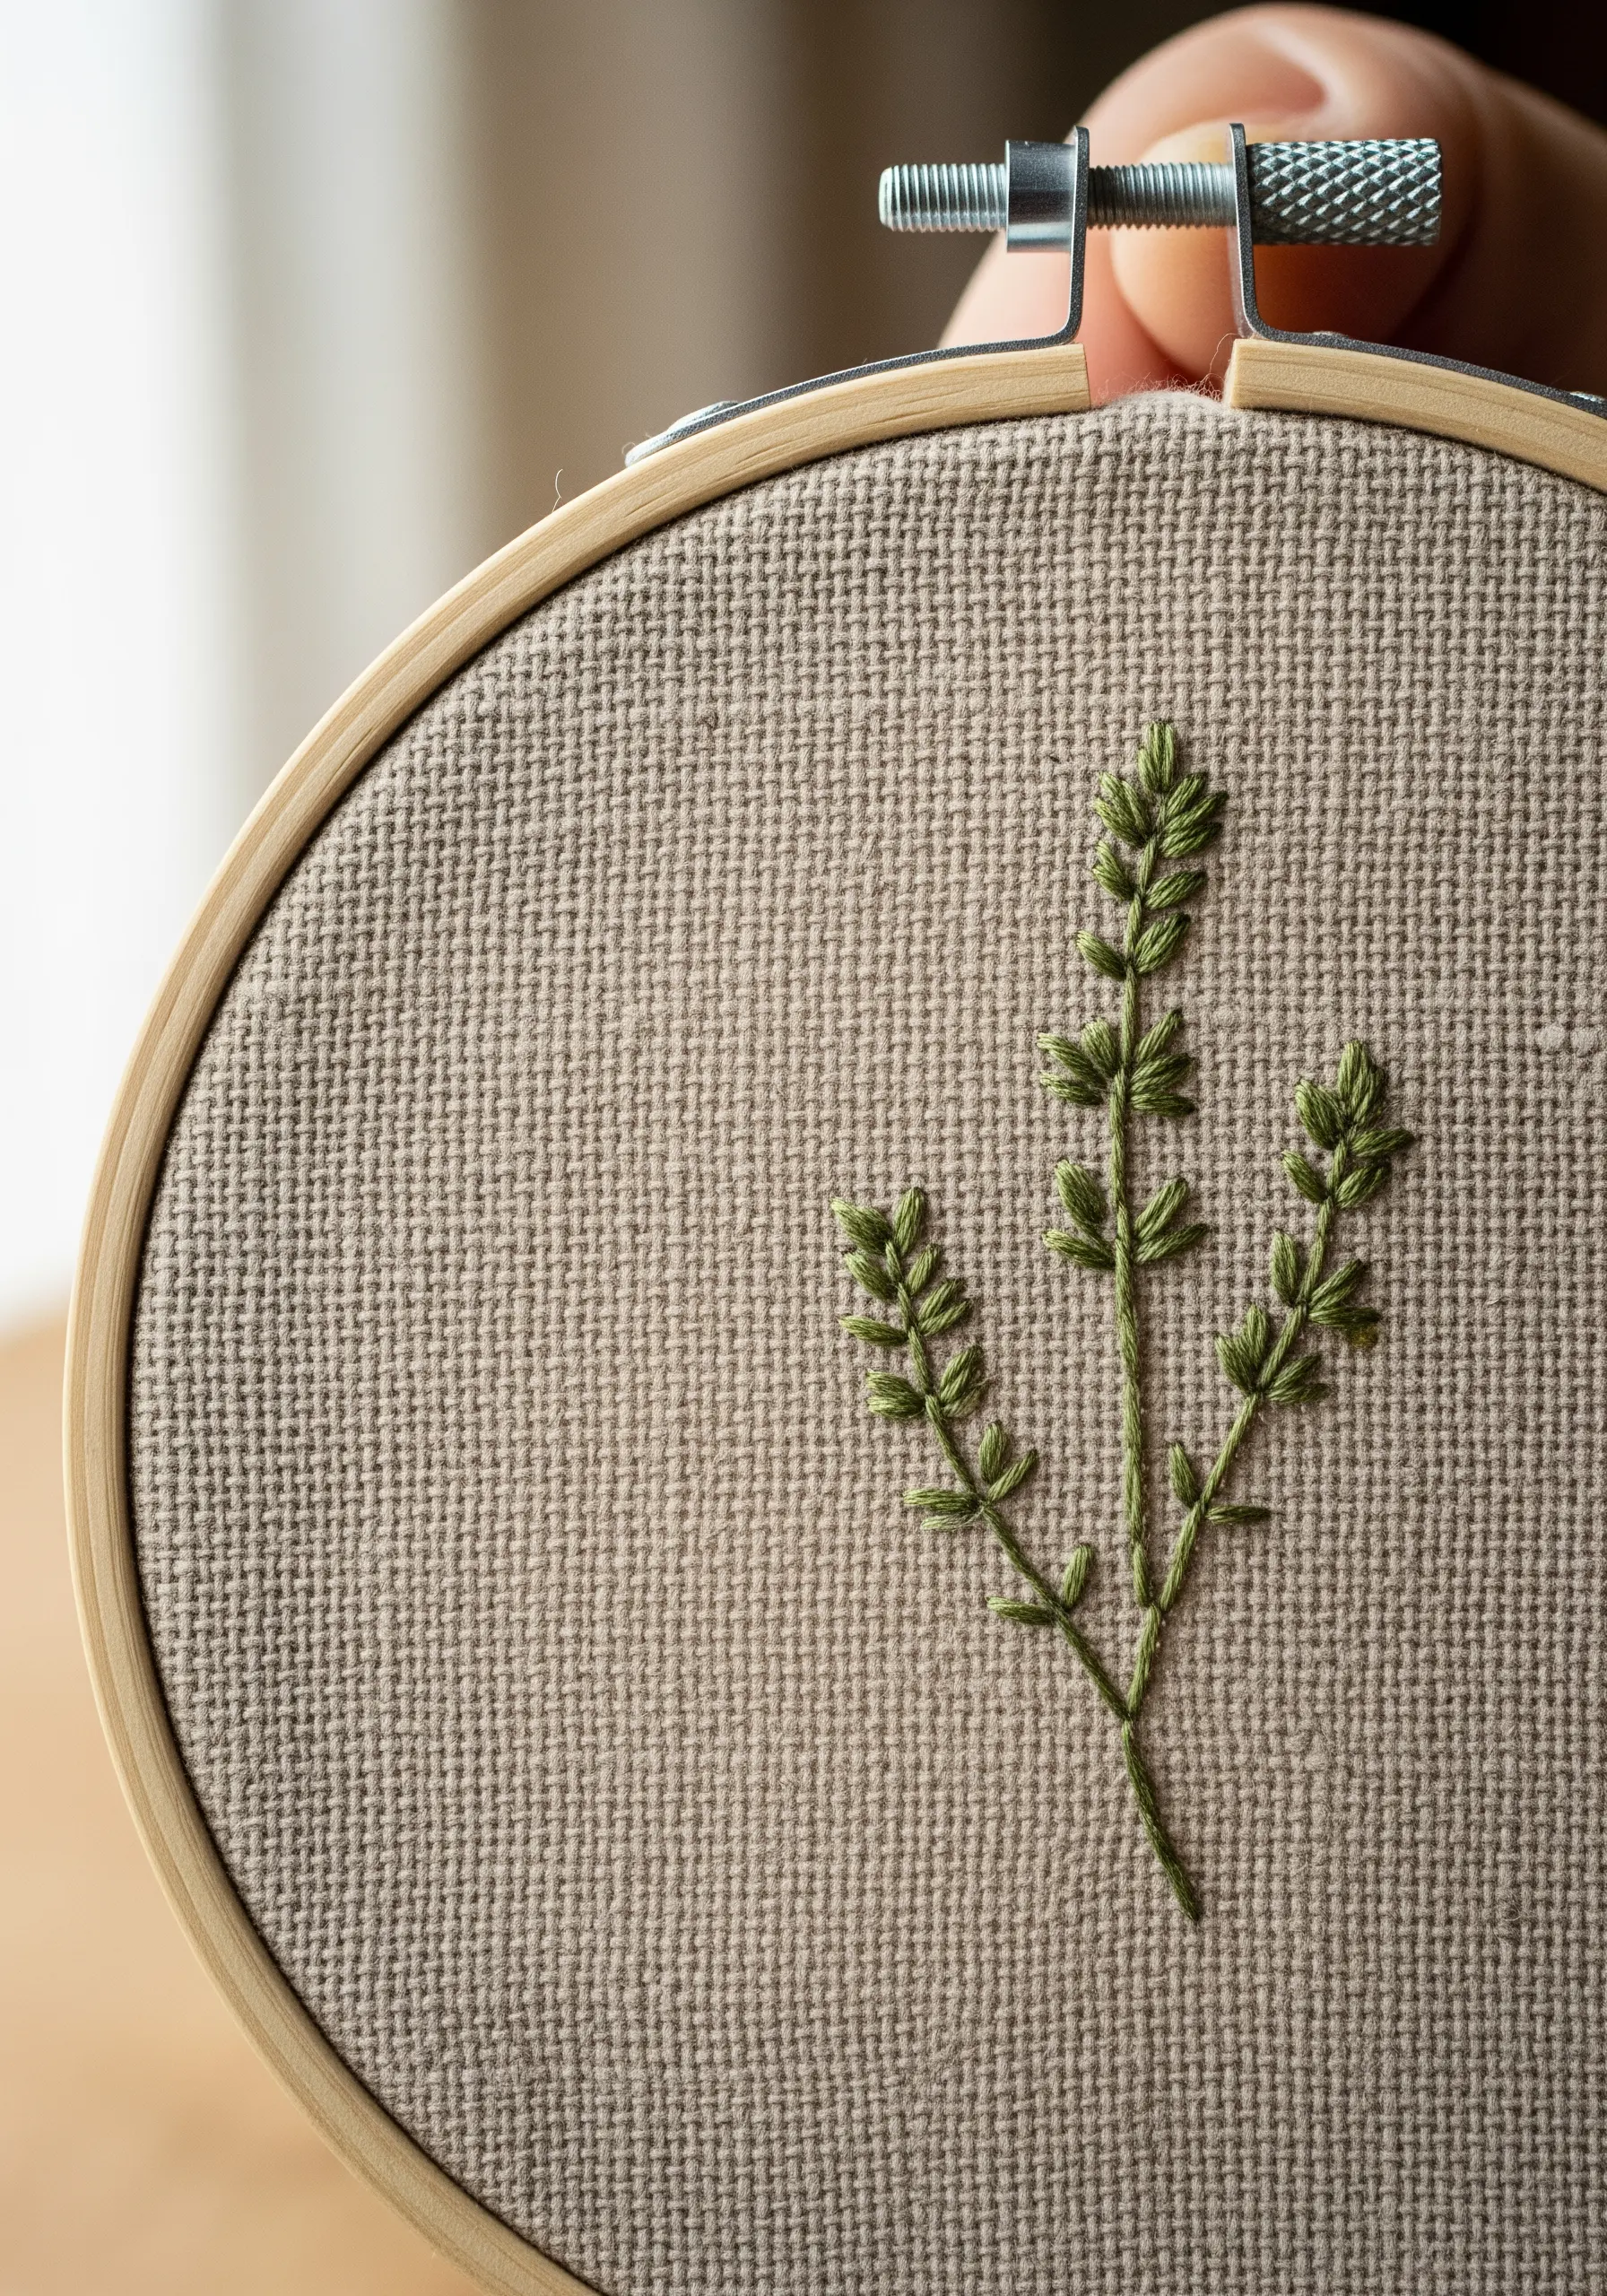
When working with a fabric that has a prominent, open weave, let that texture become part of your design.
Use minimal stitches—like the fly stitch and backstitch here—and a single strand of thread to create a light, airy botanical sketch.
The simplicity of the stitching allows the fabric’s natural grid and texture to show through, creating a piece that feels rustic, grounded, and effortlessly elegant.
11. Architectural Lines for a Dandelion Clock
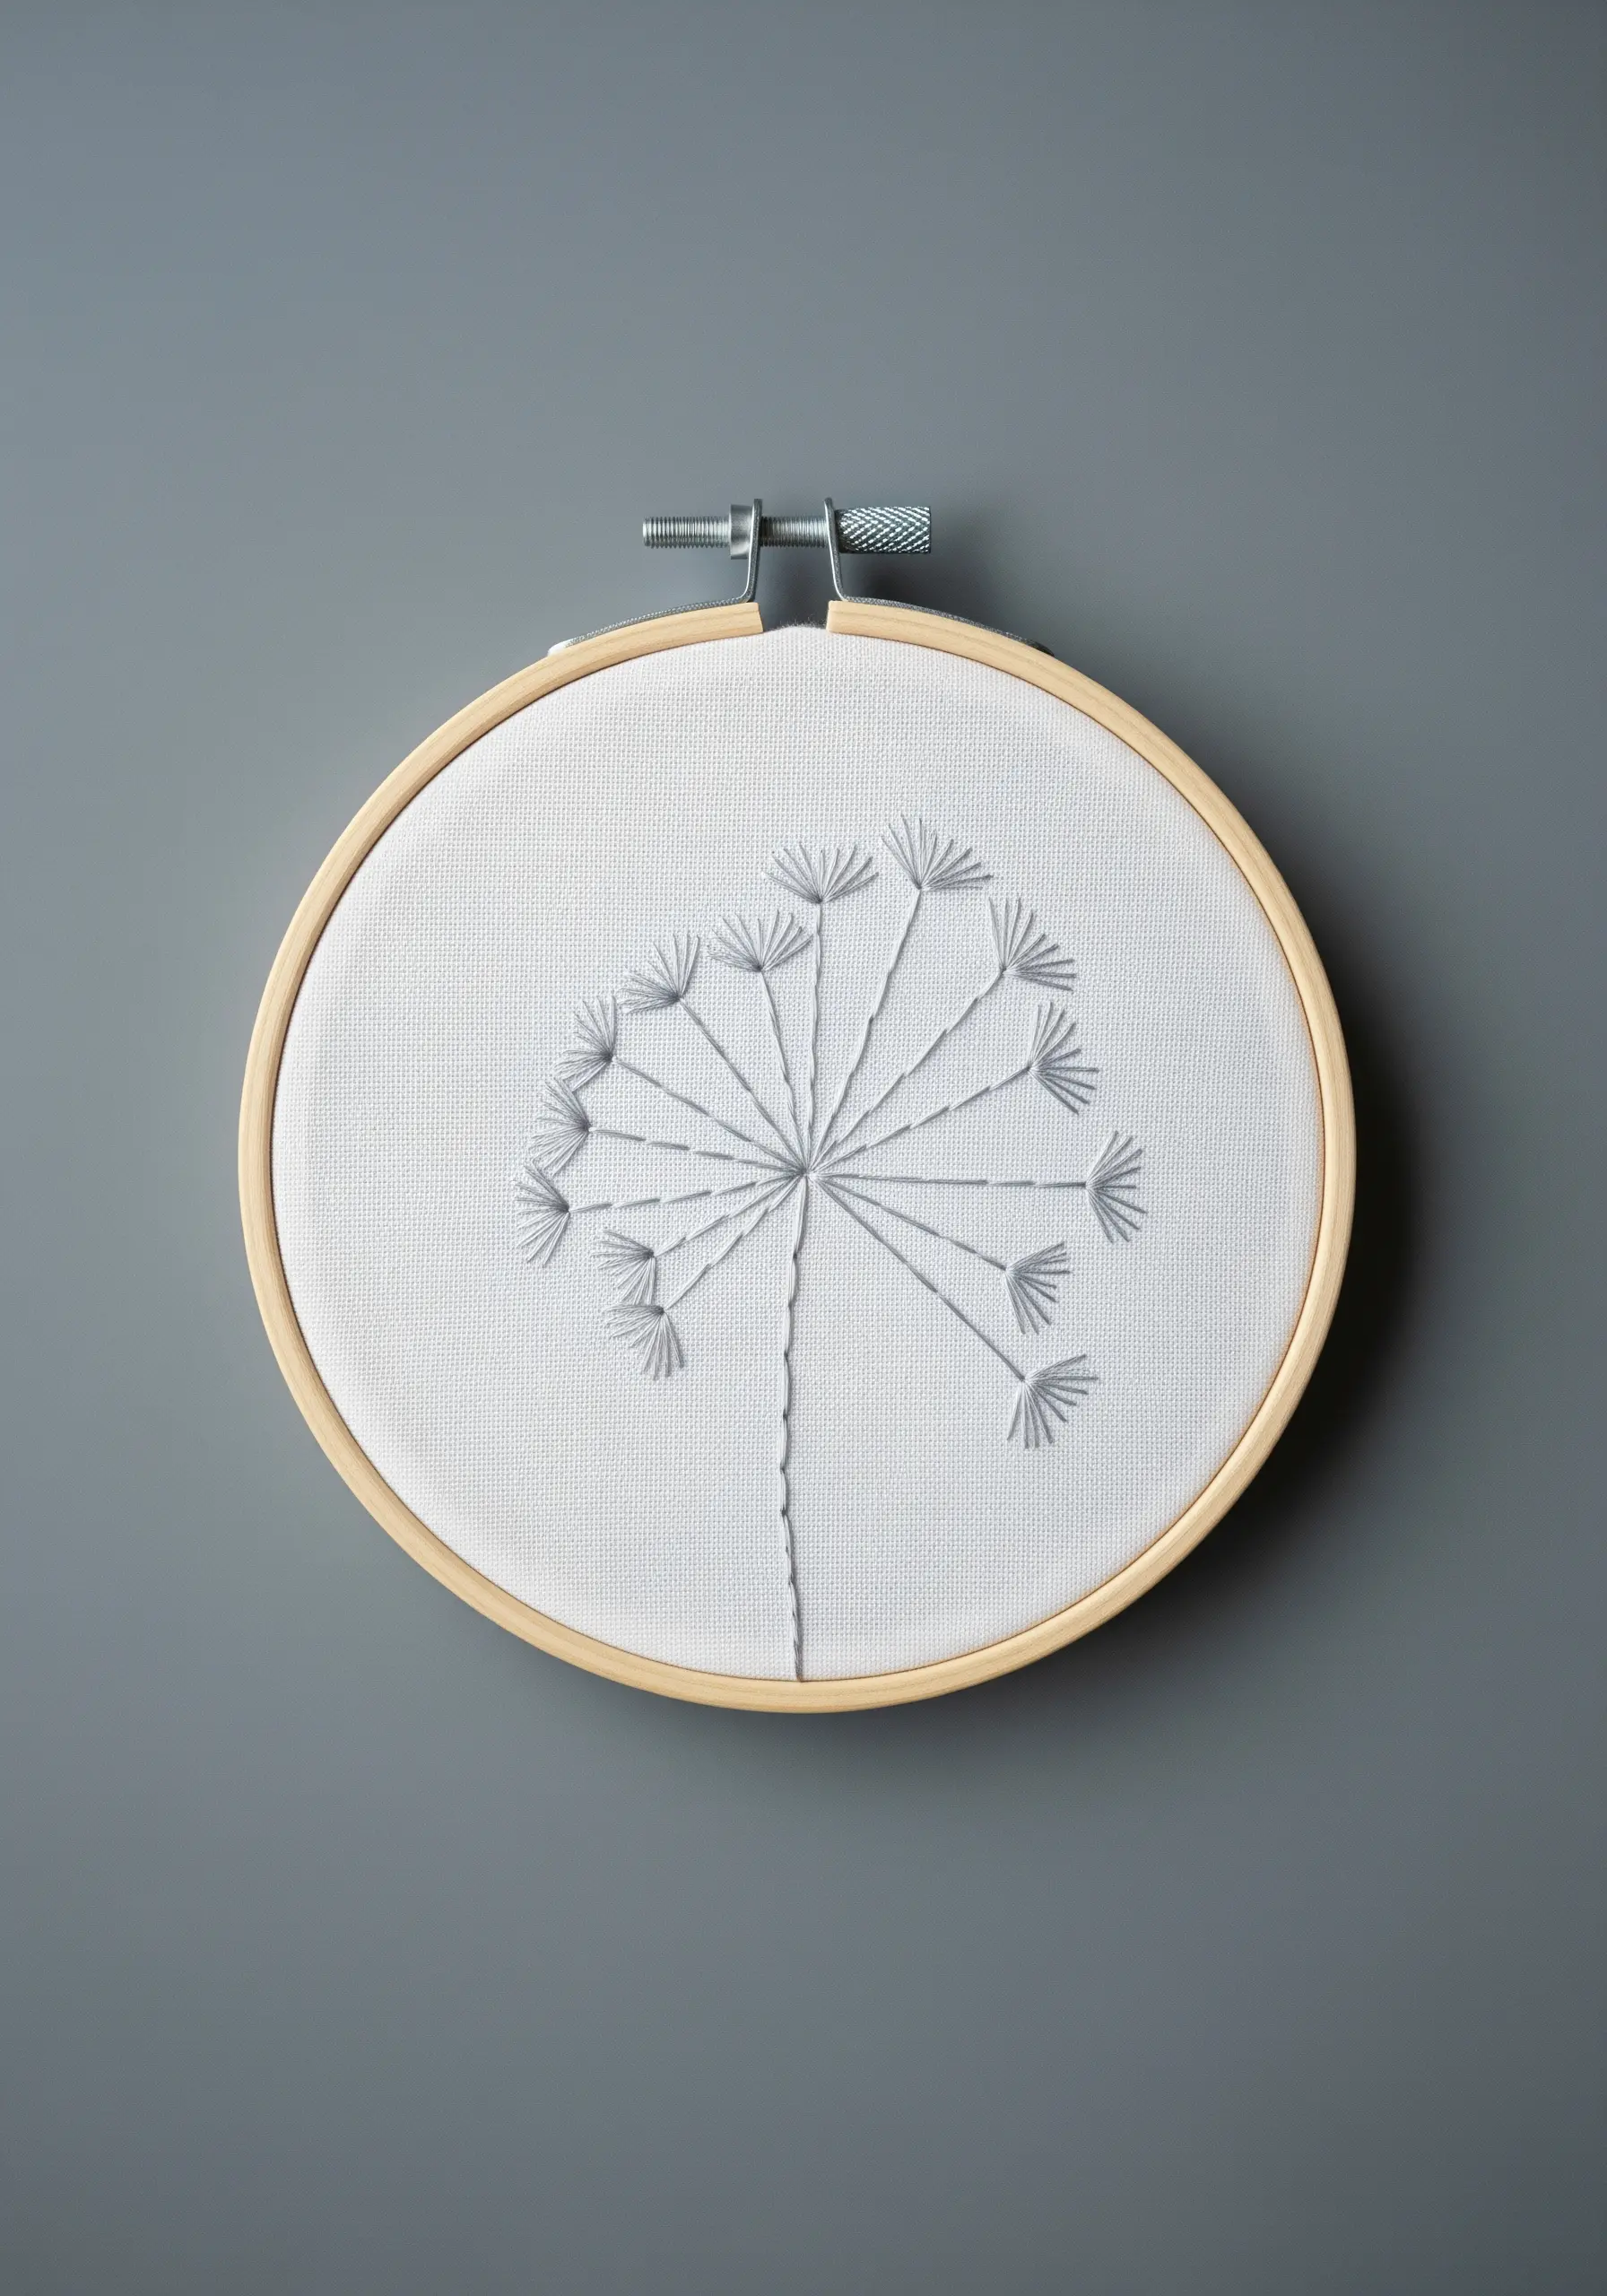
This minimalist dandelion head is an exercise in precision and restraint.
Use a water-soluble marker to draw faint guidelines radiating from the center to ensure your straight stitches are perfectly placed and symmetrical.
The tiny clusters at the end of each line are small V-shaped straight stitches.
Stitching this in a single, muted color like grey or off-white on a crisp background creates a sophisticated, architectural feel.
12. Monochrome Leaves with Textured Fills
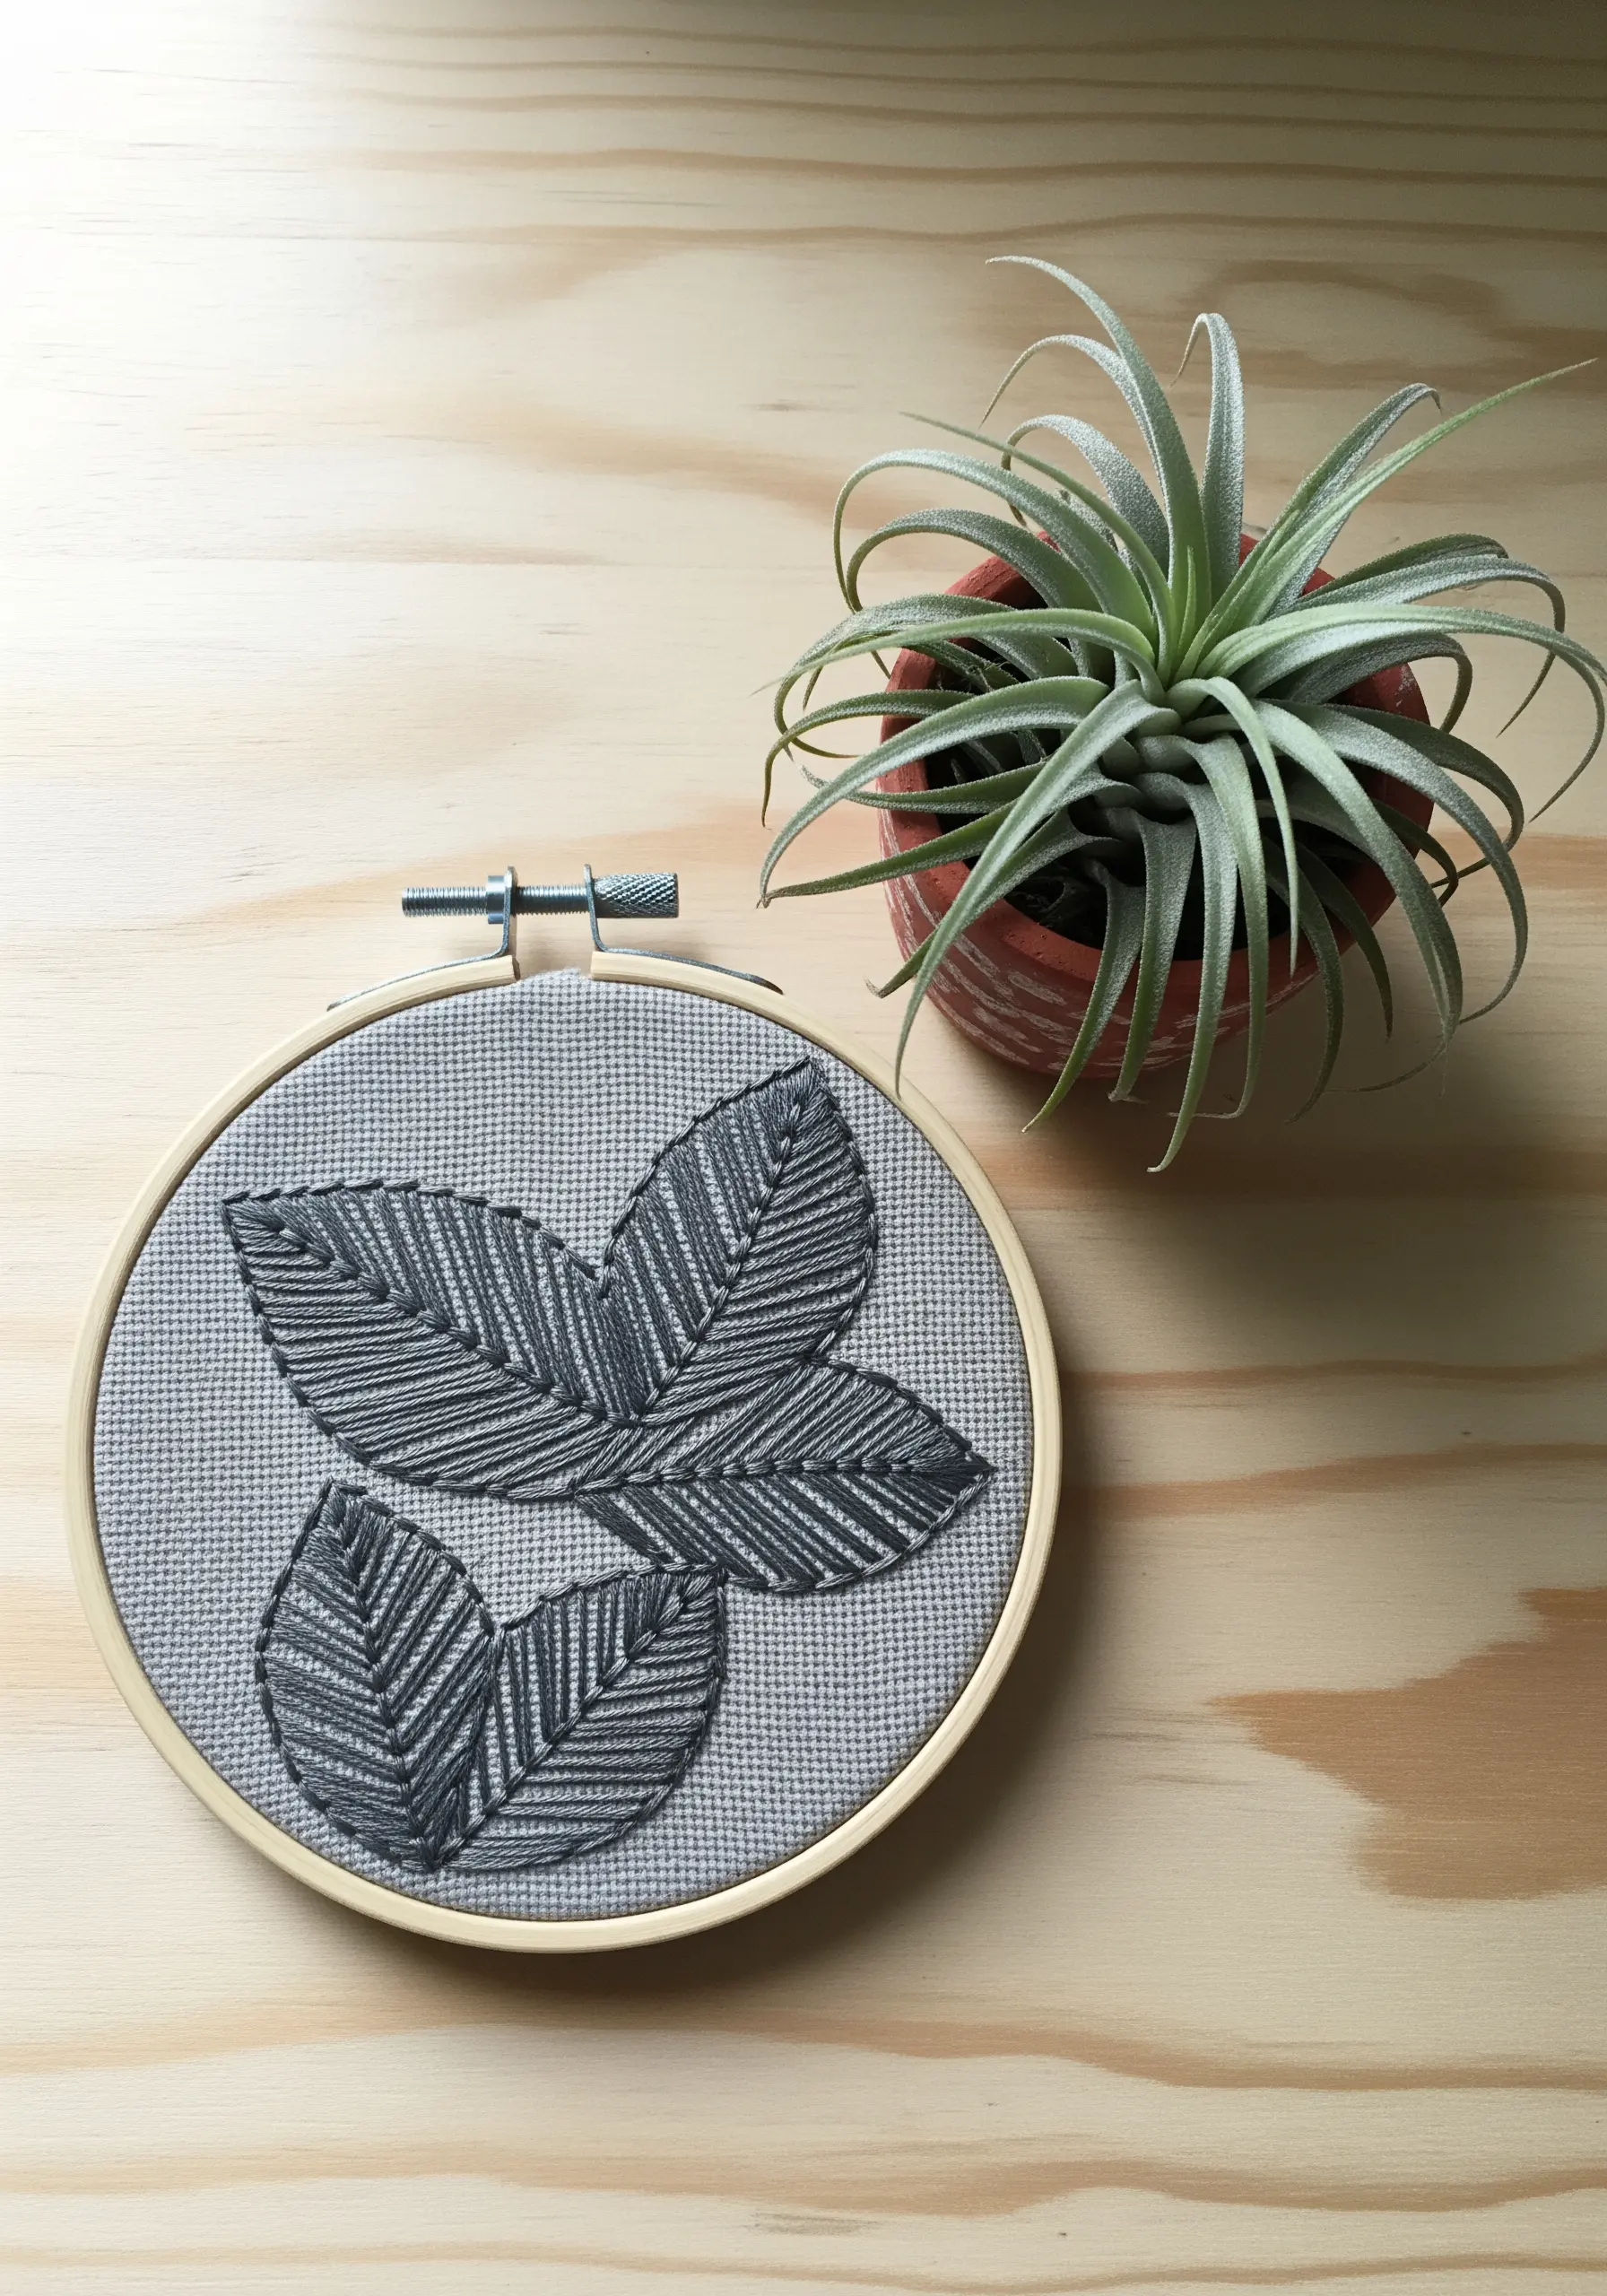
Explore the relationship between texture and light by stitching a design entirely in one color.
Use a fishbone stitch to fill the leaves; this stitch naturally creates a central vein and angles the threads to catch the light differently.
Outline the shapes with a simple backstitch to give them crisp definition.
These subtle tone-on-tone embroidery techniques create a design that is understated yet incredibly sophisticated.
13. Color Blending for a Lively Ivy Vine

Bring an ivy vine to life by blending two or three shades of green within each leaf.
Use one strand of a lighter green and one strand of a darker green in your needle at the same time.
As you fill the leaf with satin stitches, the colors will mix randomly, creating a natural, variegated effect that mimics real foliage.
A simple stem stitch in a medium green ties it all together with a sense of fluid movement.
14. The Expressive Power of a Single Line
You don’t need complex fills to create a beautiful botanical; sometimes, a single, elegant line is all it takes.
Use a three-strand stem stitch or a whipped backstitch to create a line with substance and smoothness.
This technique elevates a simple sketch into a finished piece of minimalist line art nature embroidery.
The texture of the linen-blend fabric adds a rustic warmth that contrasts beautifully with the clean linework.
15. Delicate French Knots for Baby’s Breath

To capture the airy, cloud-like quality of baby’s breath, the key is to keep your stitches small and delicate.
Use just one or two strands of white floss and wrap your needle only once to create tiny, tight French knots.
Cluster them at the ends of thin, branching stems made with a single-strand backstitch.
This is one of the most effective tiny bathroom embroidery art projects that bring spa vibes to your vanity.
16. Creating a Pine Bough with Straight Stitches
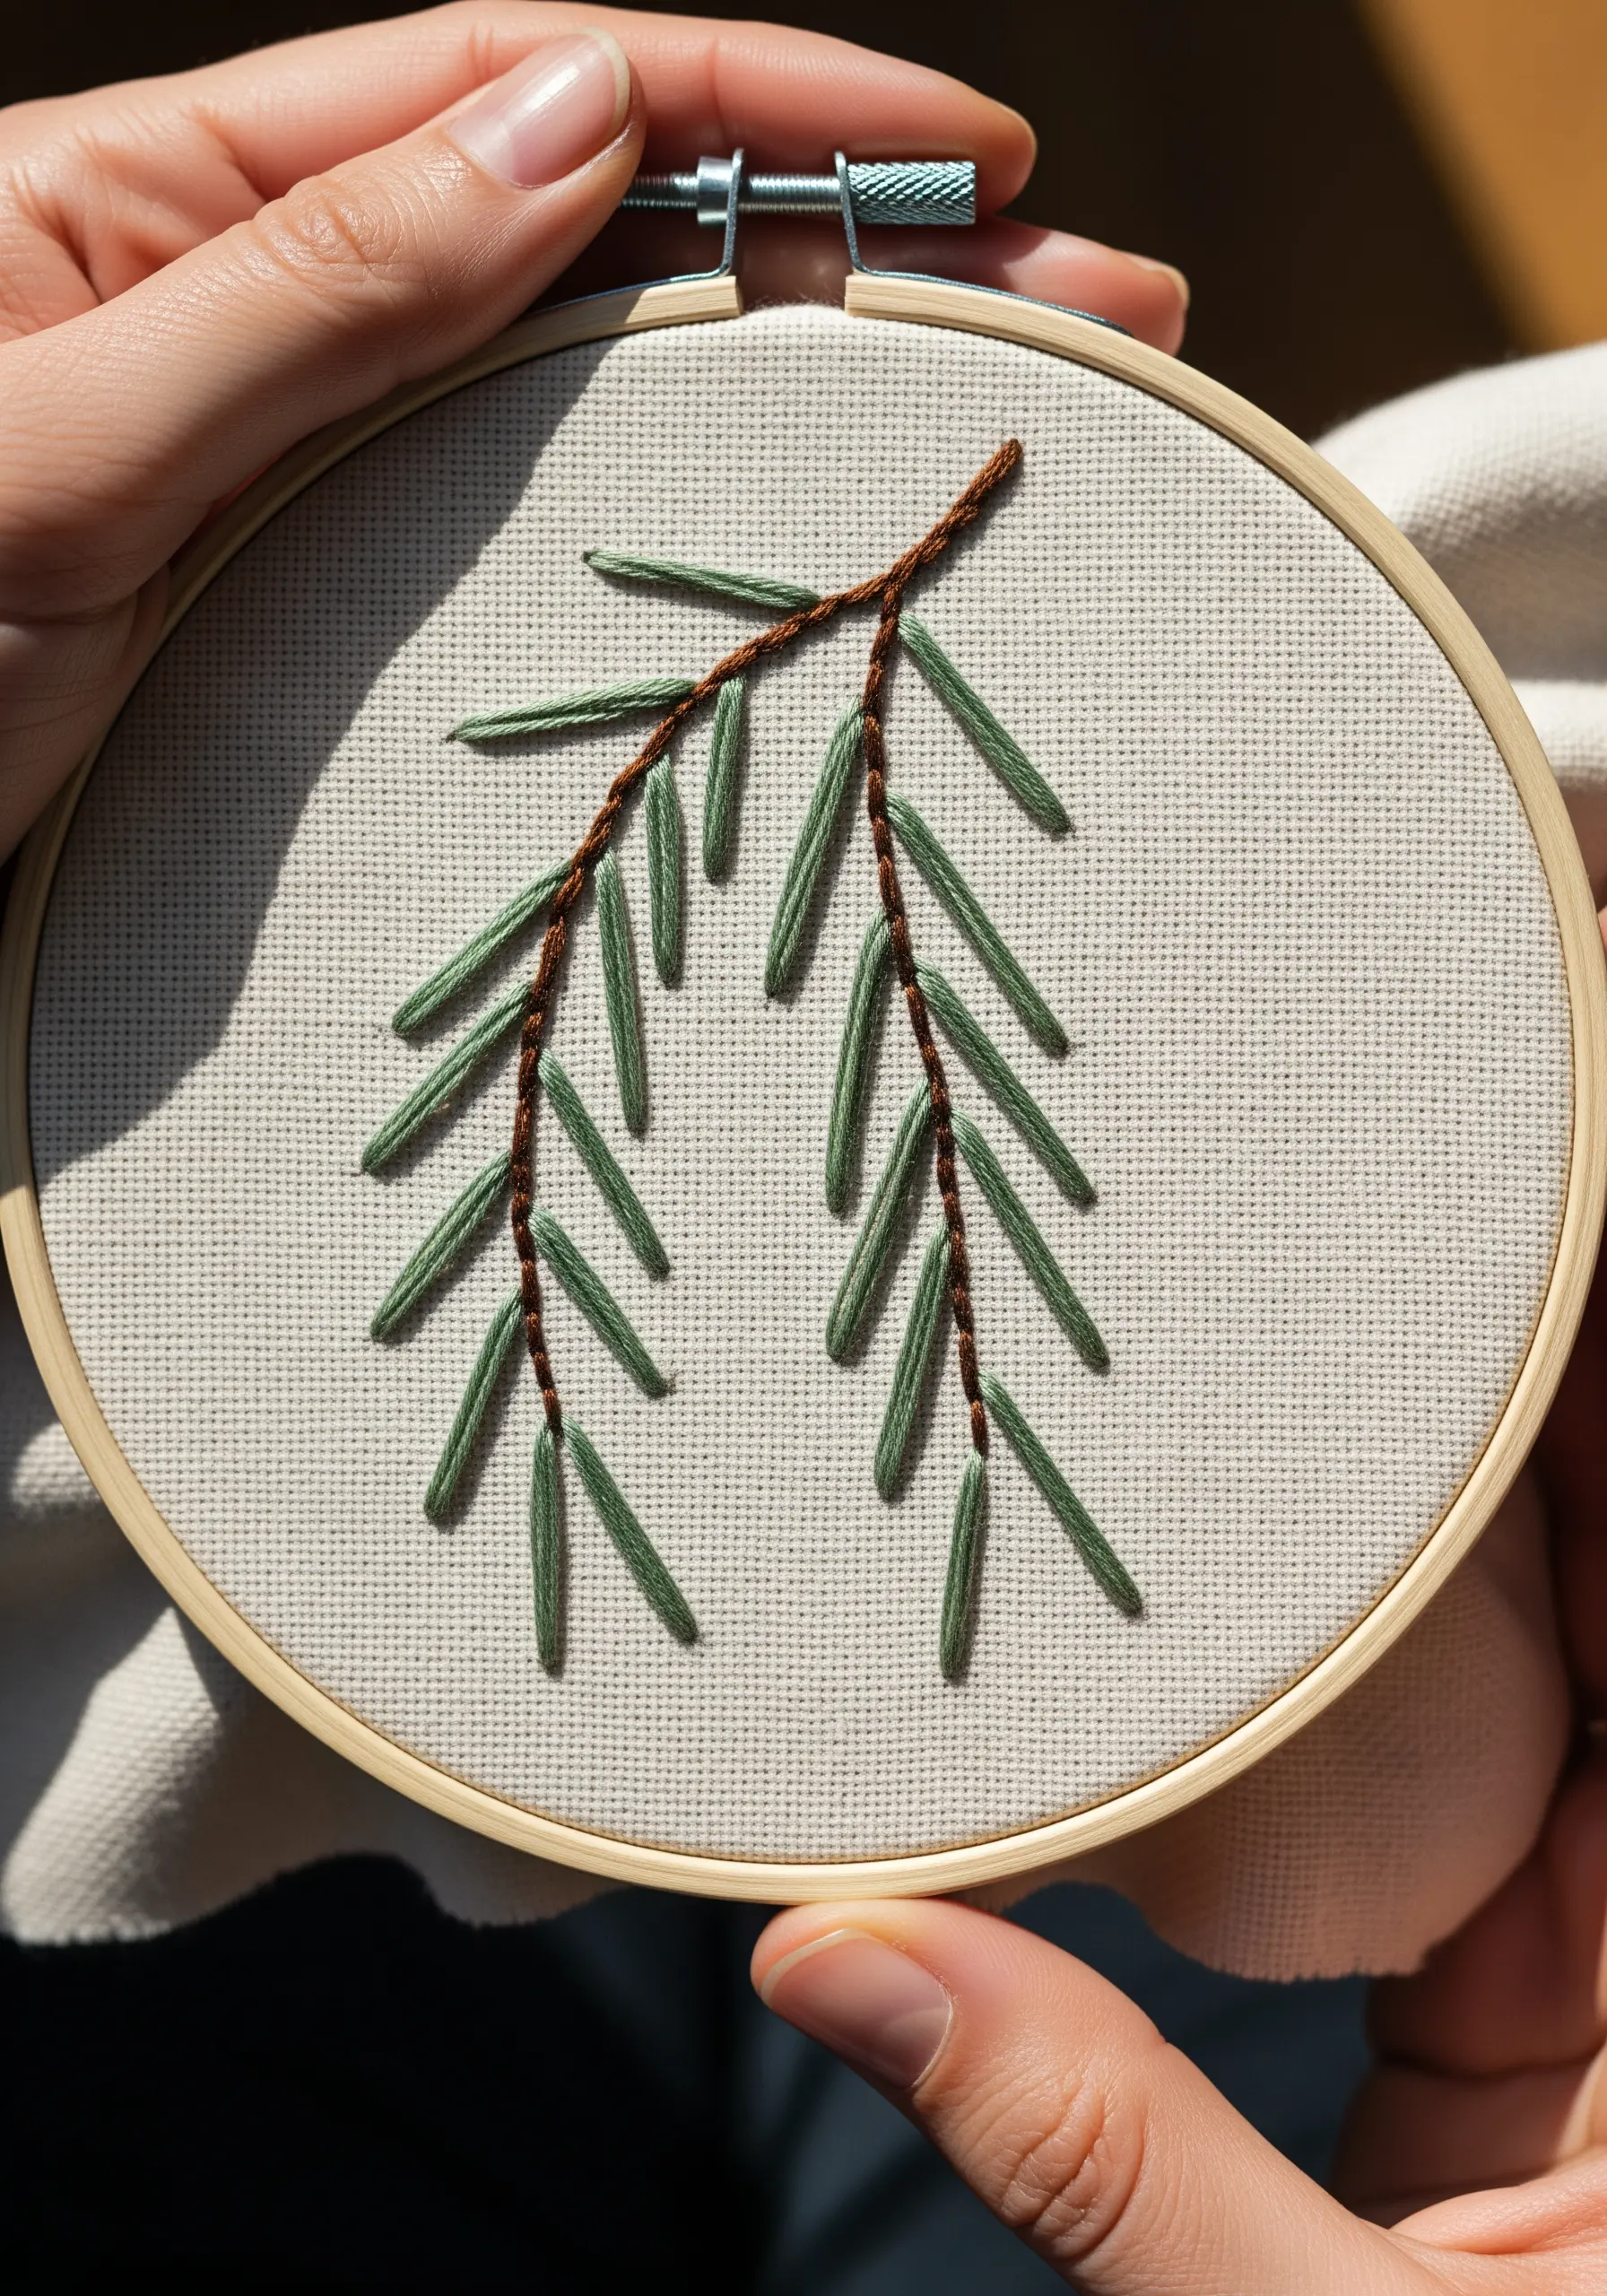
This minimalist pine bough is a perfect example of how simple stitches can be incredibly effective.
First, create the branch using a stem stitch in a contrasting brown.
Then, add the needles using simple straight stitches, angled slightly downwards.
Vary the length and angle of the needles just slightly to avoid a stiff, unnatural look. This subtle imperfection is what gives the design its organic charm.
17. Stylized Poppy with Radiating Line Work
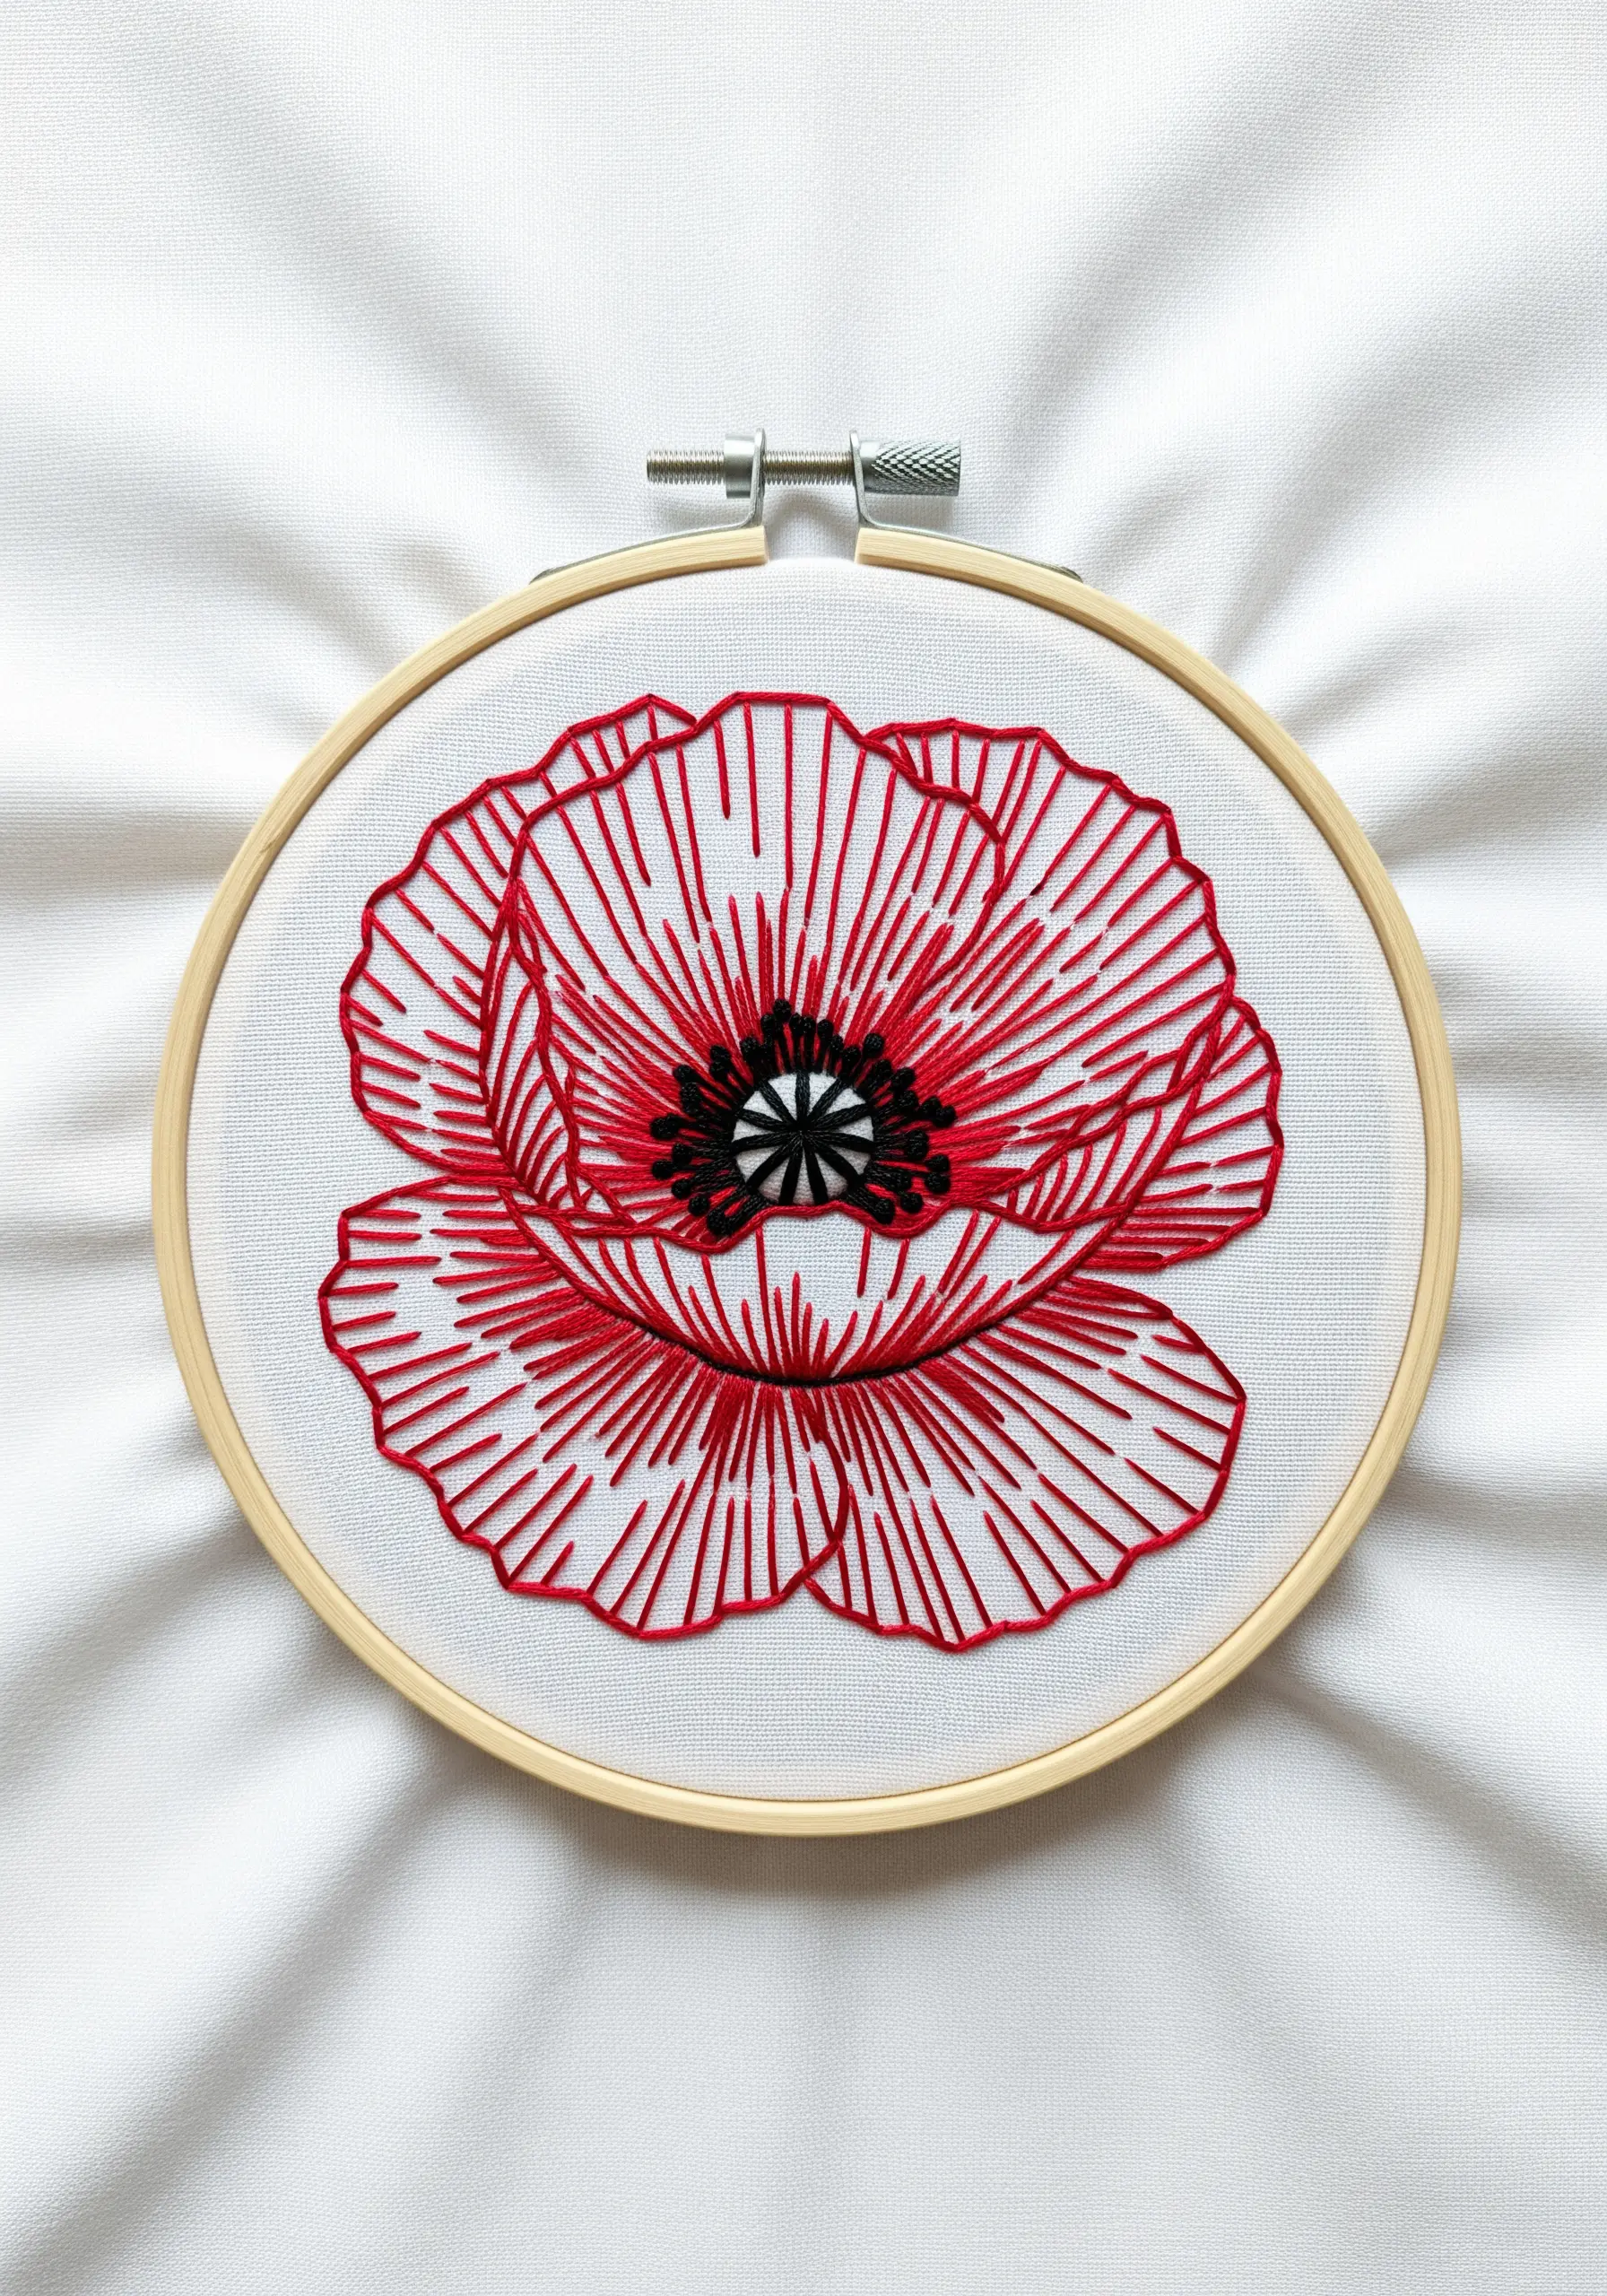
This poppy design uses line work not just for the outline, but also for texture and shading.
Instead of a solid fill, use long straight stitches that radiate from the dark center to the petal edges.
This technique suggests the delicate, paper-like texture of poppy petals while keeping the overall design light and graphic.
A dense, black satin-stitched center creates a bold point of contrast that anchors the entire piece.
18. Flawless Satin Stitch for Velvety Sage

The secret to a perfect, glass-smooth satin stitch is preparation.
First, outline your leaf shape with a tiny split stitch. This raised edge will act as a guide and prevent your fill stitches from pulling unevenly.
Lay your satin stitches at a slight angle, keeping them parallel and very close together for complete coverage.
Add the central vein last with a single backstitch—it’s the final detail that brings the leaf to life.
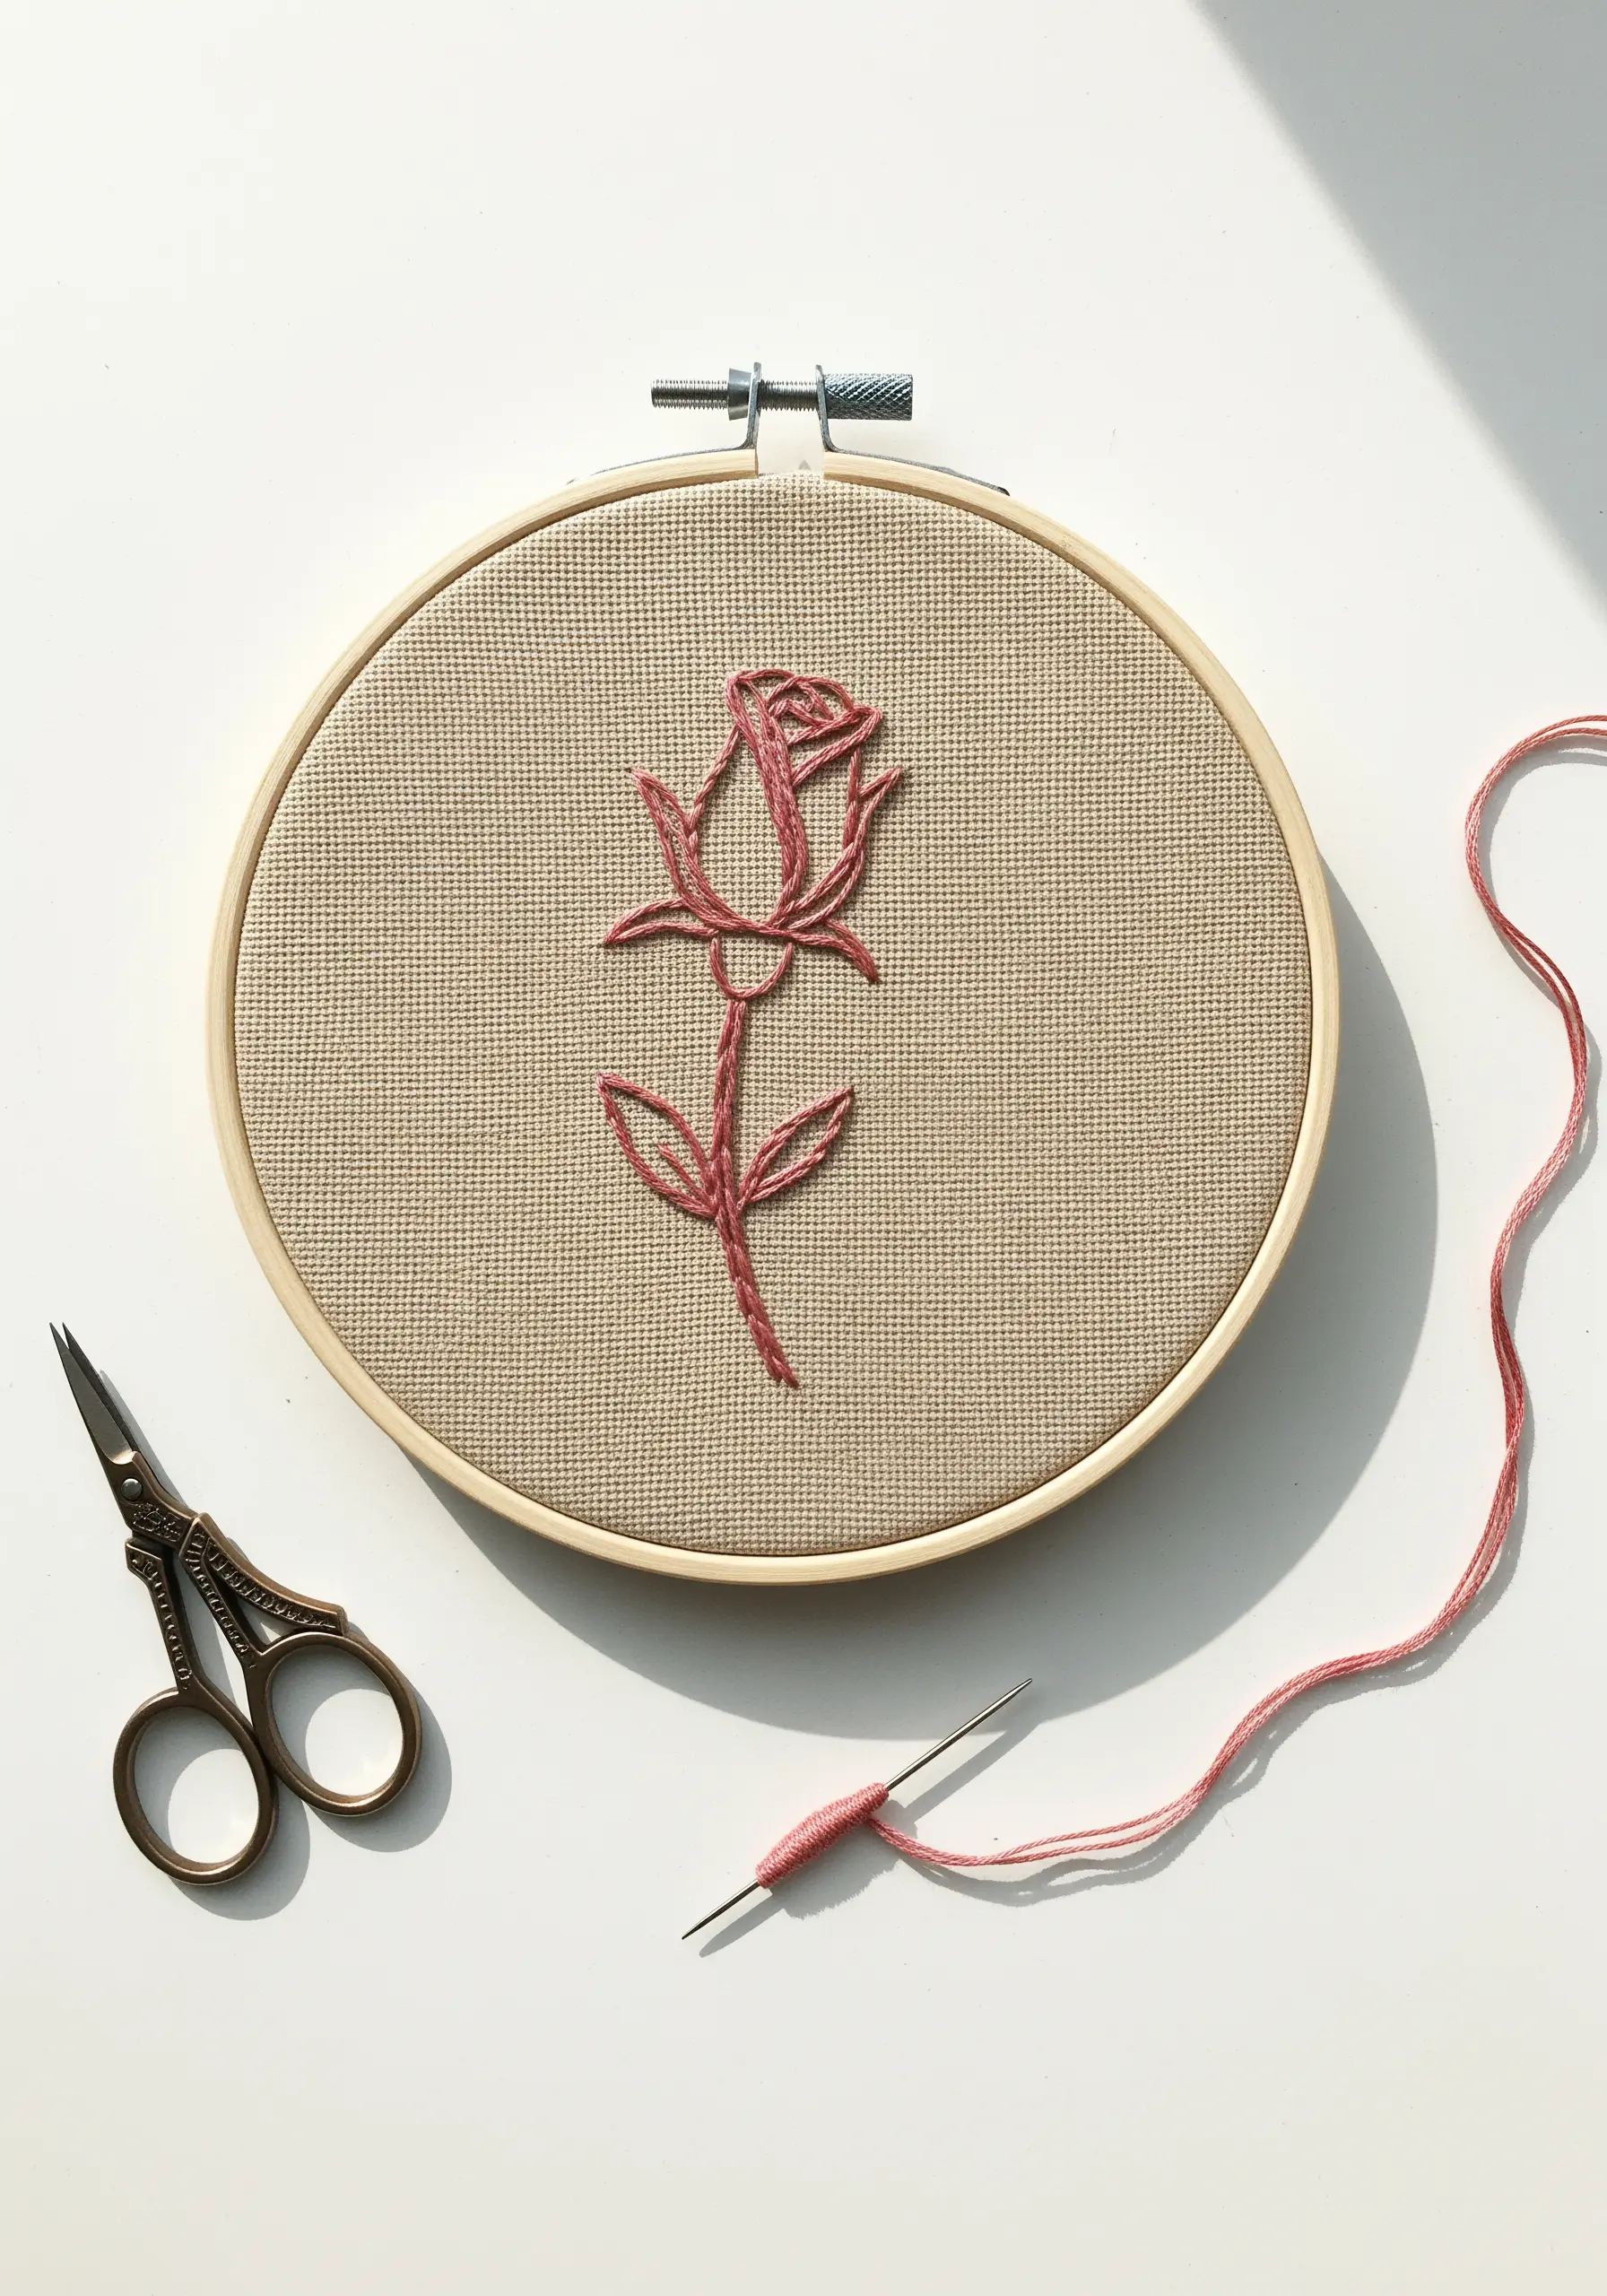
19. Overlapping Lines for a Dimensional Tulip
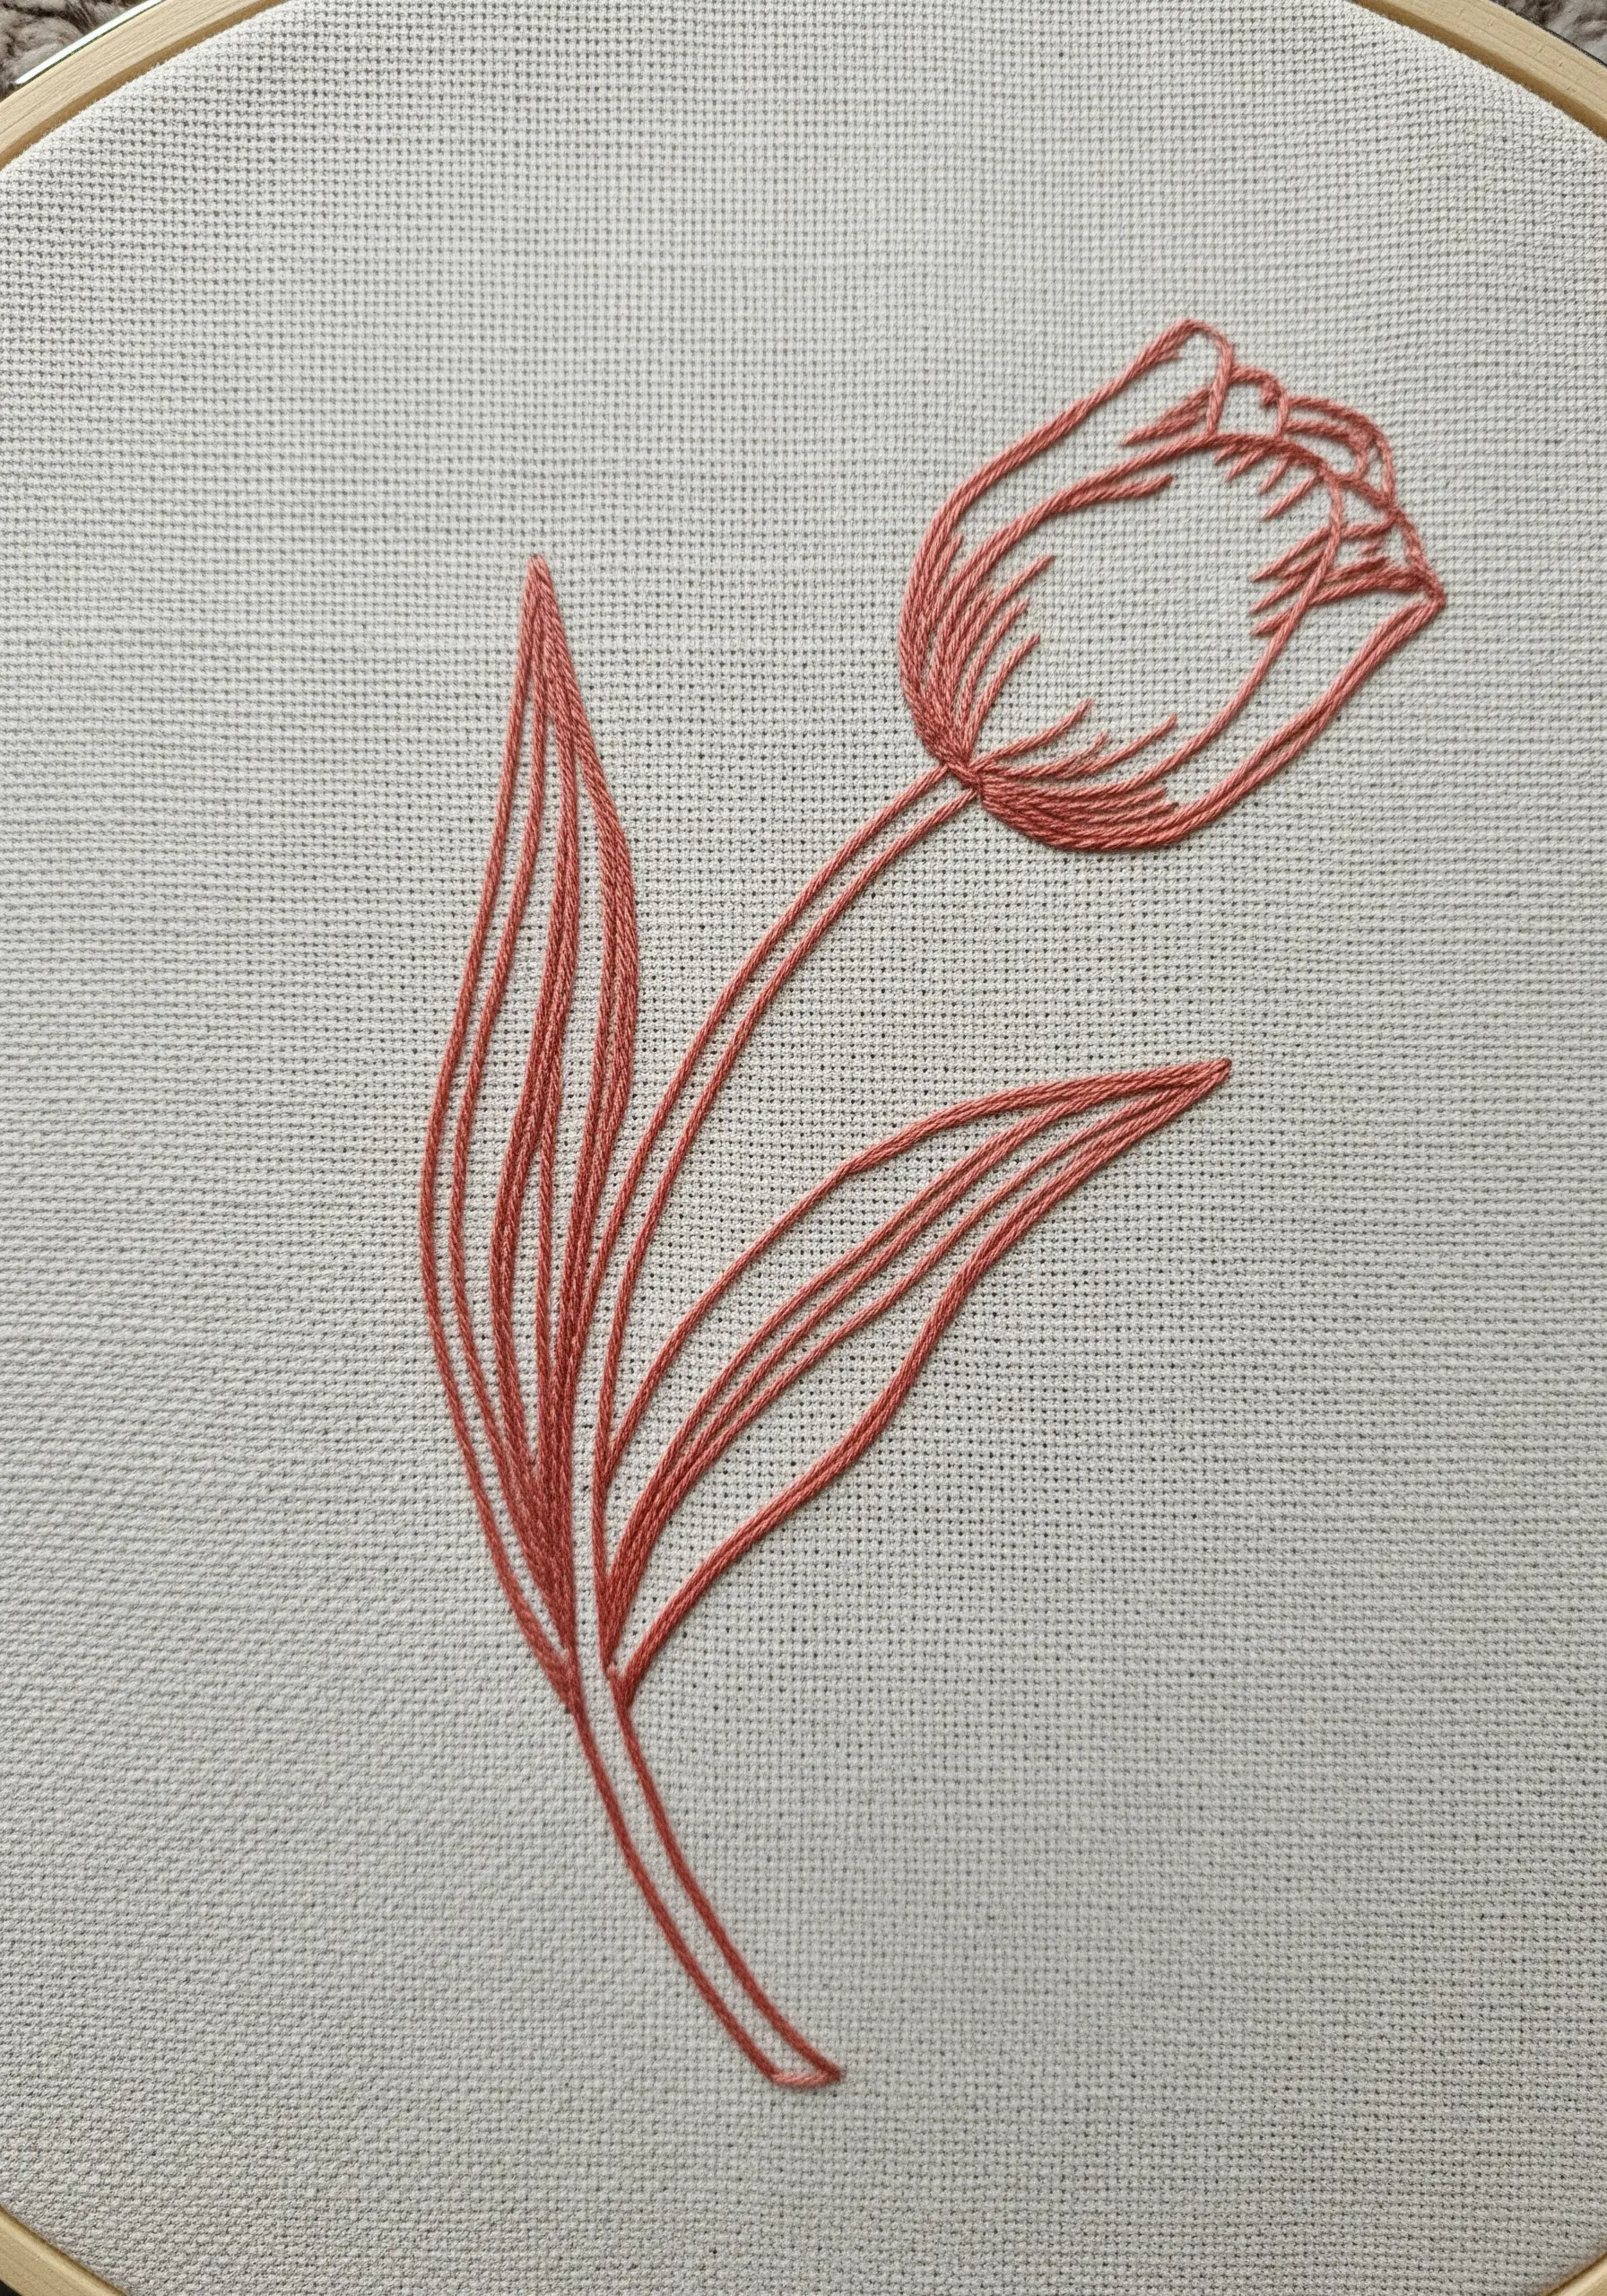
Create a sense of depth and form in a line-art floral by strategically overlapping your stitches.
Notice how the lines defining the front petals are stitched over the lines for the back petals.
This simple technique instantly tells the eye which part of the flower is closer, giving the flat design a subtle, three-dimensional quality.
Use a smooth stem stitch to maintain a consistent, flowing line throughout the piece.
20. A Playful Wildflower Color Study

Turn a simple design into a vibrant composition with a playful but considered color palette.
Choose three or four complementary colors and distribute them thoughtfully throughout the bouquet.
This design uses basic stitches—lazy daisy for petals, French knots for centers—making it one of those perfect small embroidery ideas you can finish in under an hour.
It’s an excellent way to practice your stitches while creating something cheerful and bright.
21. Graphic Lily Pad with Vein Detailing

For a modern, graphic take on a botanical subject, focus on the lines rather than the fill.
First, establish the outer shape with a clean backstitch.
Then, add the veins with straight stitches that radiate from the center but stop just short of the outline.
This technique emphasizes the leaf’s structure and creates a light, airy design that feels minimalist and contemporary.
22. Two-Tone French Knots for Budding Branches

Capture the delicate moment of new growth by using two colors in your French knots.
Hold one strand of light green and one strand of off-white thread together in your needle.
When you create the knot, the two colors will twist together to create a soft, mottled effect that perfectly mimics a tiny, emerging bud.
Pair these textured buds with a smooth, whipped backstitch for the branch to create a lovely textural contrast.
23. Layered French Knots for a Bonsai Canopy
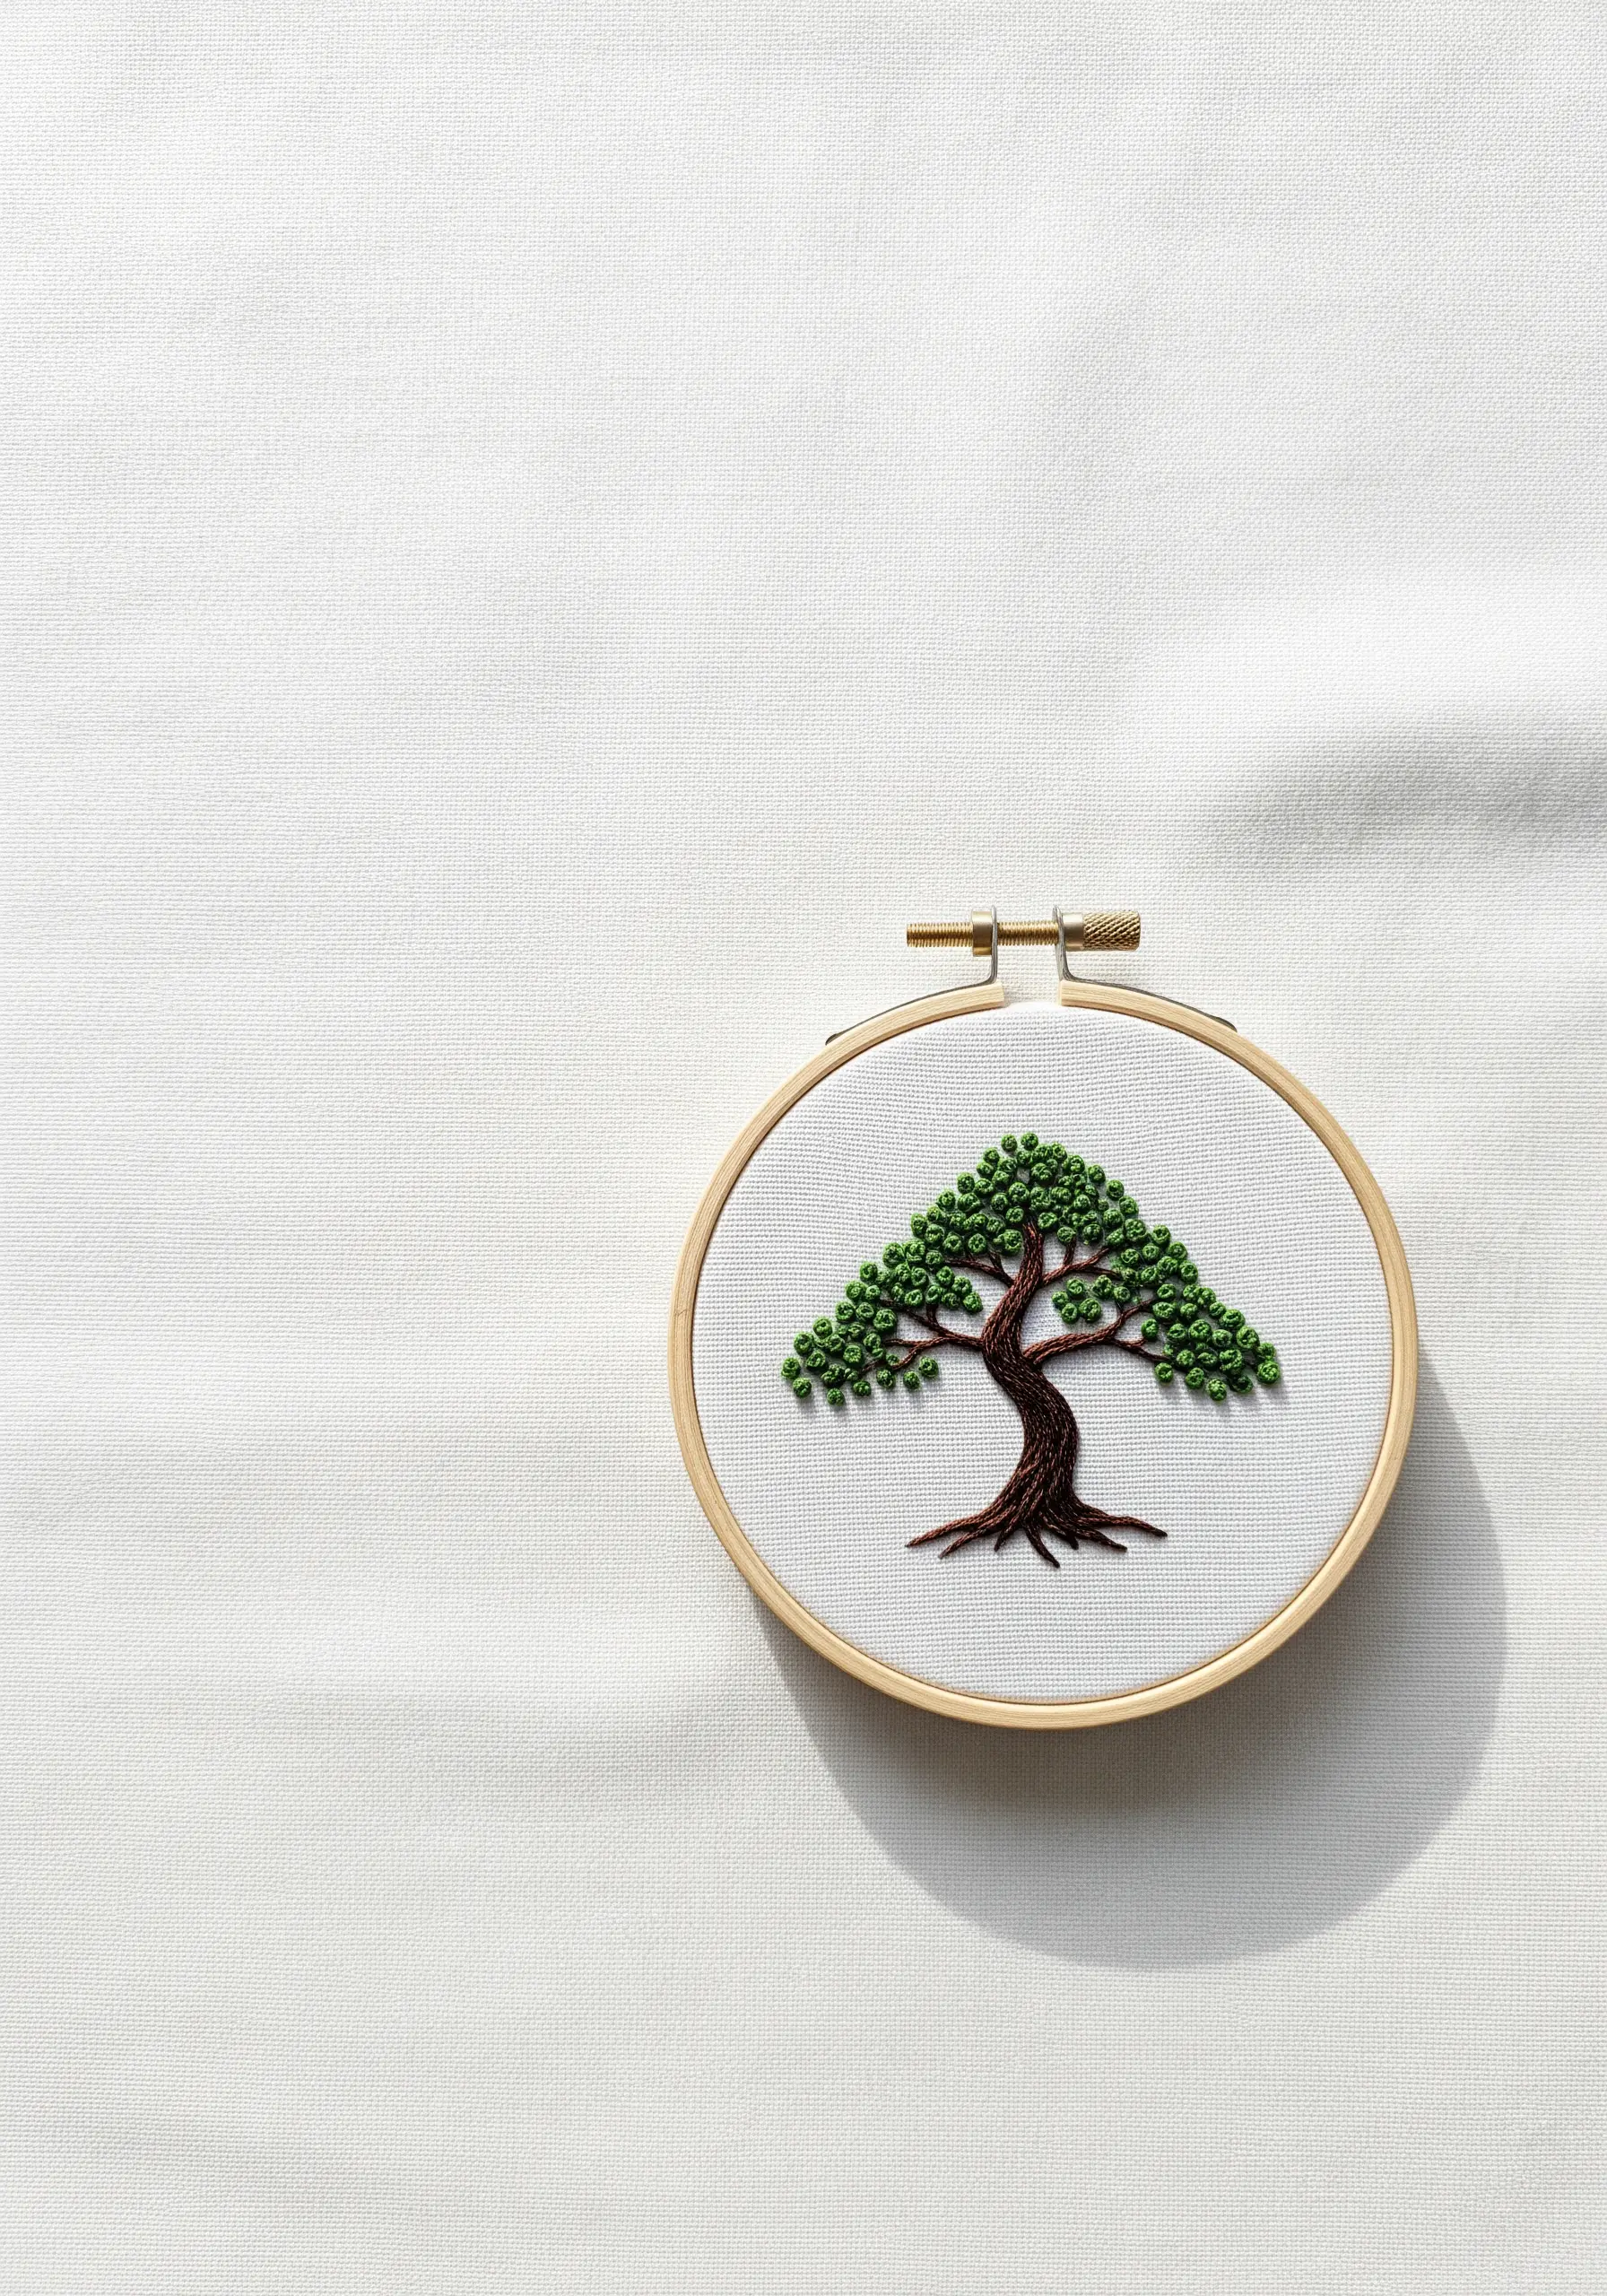
To build the dense, sculptural canopy of a bonsai tree, use layered French knots in multiple shades of green.
Start with a base layer of knots in your darkest green.
Then, add more knots on top in medium and light green shades, concentrating the lightest color where the sun would hit.
This layering technique creates realistic depth, shadow, and dimension, turning simple dots into a lush, textured treetop.
24. Fishbone Stitch for a Repeating Leaf Pattern
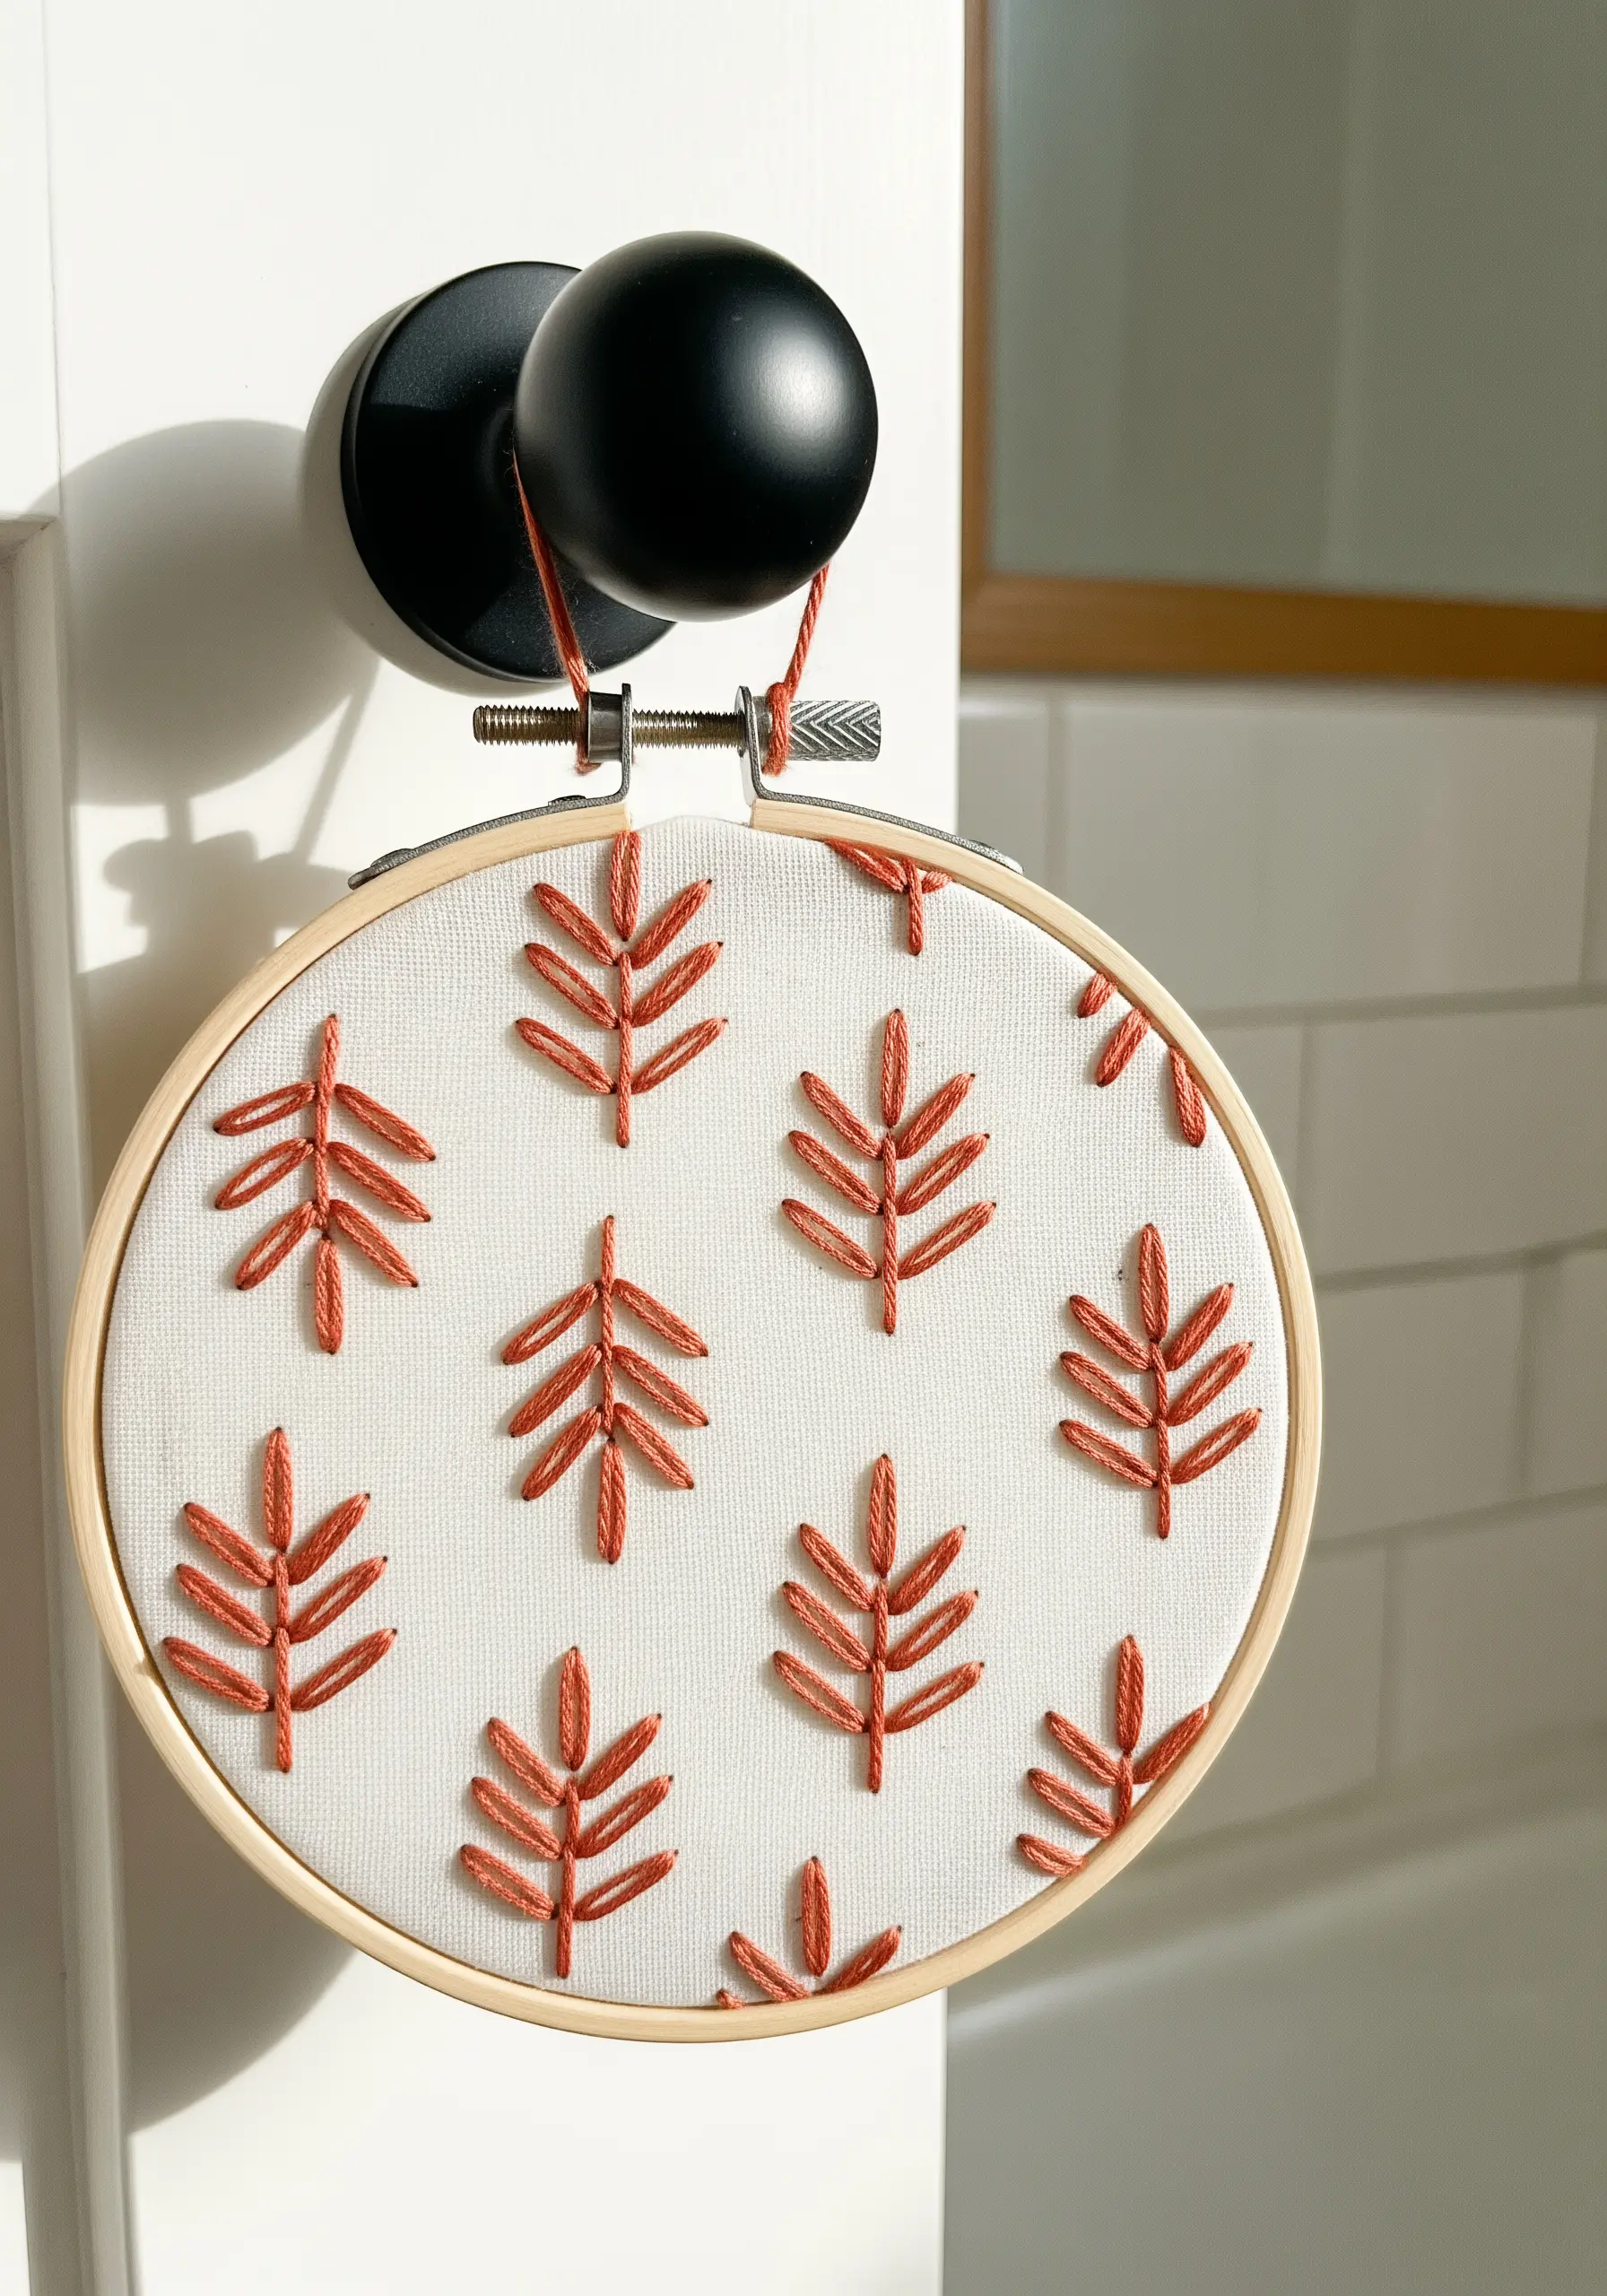
When creating a repeating pattern, choose a stitch that is both beautiful and efficient, like the fishbone stitch.
This stitch fills the leaf shape and creates the central vein simultaneously, making it perfect for batch-stitching multiple motifs.
Use a disappearing ink pen and a small template to ensure your leaves are evenly spaced for a polished, professional finish.
A variegated thread in autumnal tones adds subtle color variation without needing to switch floss.
25. Stacked Lazy Daisy for a Wheat Stalk

The humble lazy daisy (or detached chain stitch) is perfect for creating the textured grains of a wheat stalk.
Work the stitches in two parallel, slightly offset rows, stacking them tightly from the bottom up.
This creates a plaited, dimensional effect that looks far more complex than it is.
Finish with a few long, delicate straight stitches at the top for the awns, using a single strand of floss to keep them wispy.
26. High-Contrast Blackwork for Bold Botanicals

Make a powerful statement with the simplest of materials: black thread on white fabric.
Use a three- or four-strand backstitch or stem stitch to create a bold, graphic line that stands out.
The key to this style is precision—focus on smooth curves and sharp points.
This high-contrast approach strips the design down to its essential form, celebrating the pure, elegant silhouette of the leaves.


