

Let’s set aside the idea that abstract embroidery is complicated. At its heart, it is simply a conversation between color, texture, and the quiet space of a neutral background. It’s about letting the thread itself do the talking, without the constraints of a perfect outline.
You already have the skill. What you’re looking for now is intention—a way to make your color choices feel deliberate, your gradients look seamless, and your finished pieces feel like complete, cohesive works of art. It’s not about learning a hundred new stitches, but about mastering the few that let color flow like paint.
Here, you will find techniques that bridge the gap between craft and art. Each one is a small adjustment in approach that yields a significant, visible improvement. This is your invitation to stitch with more confidence, to see color differently, and to create pieces that truly resonate.
1. Create Topographical Gradients with Thread Painting
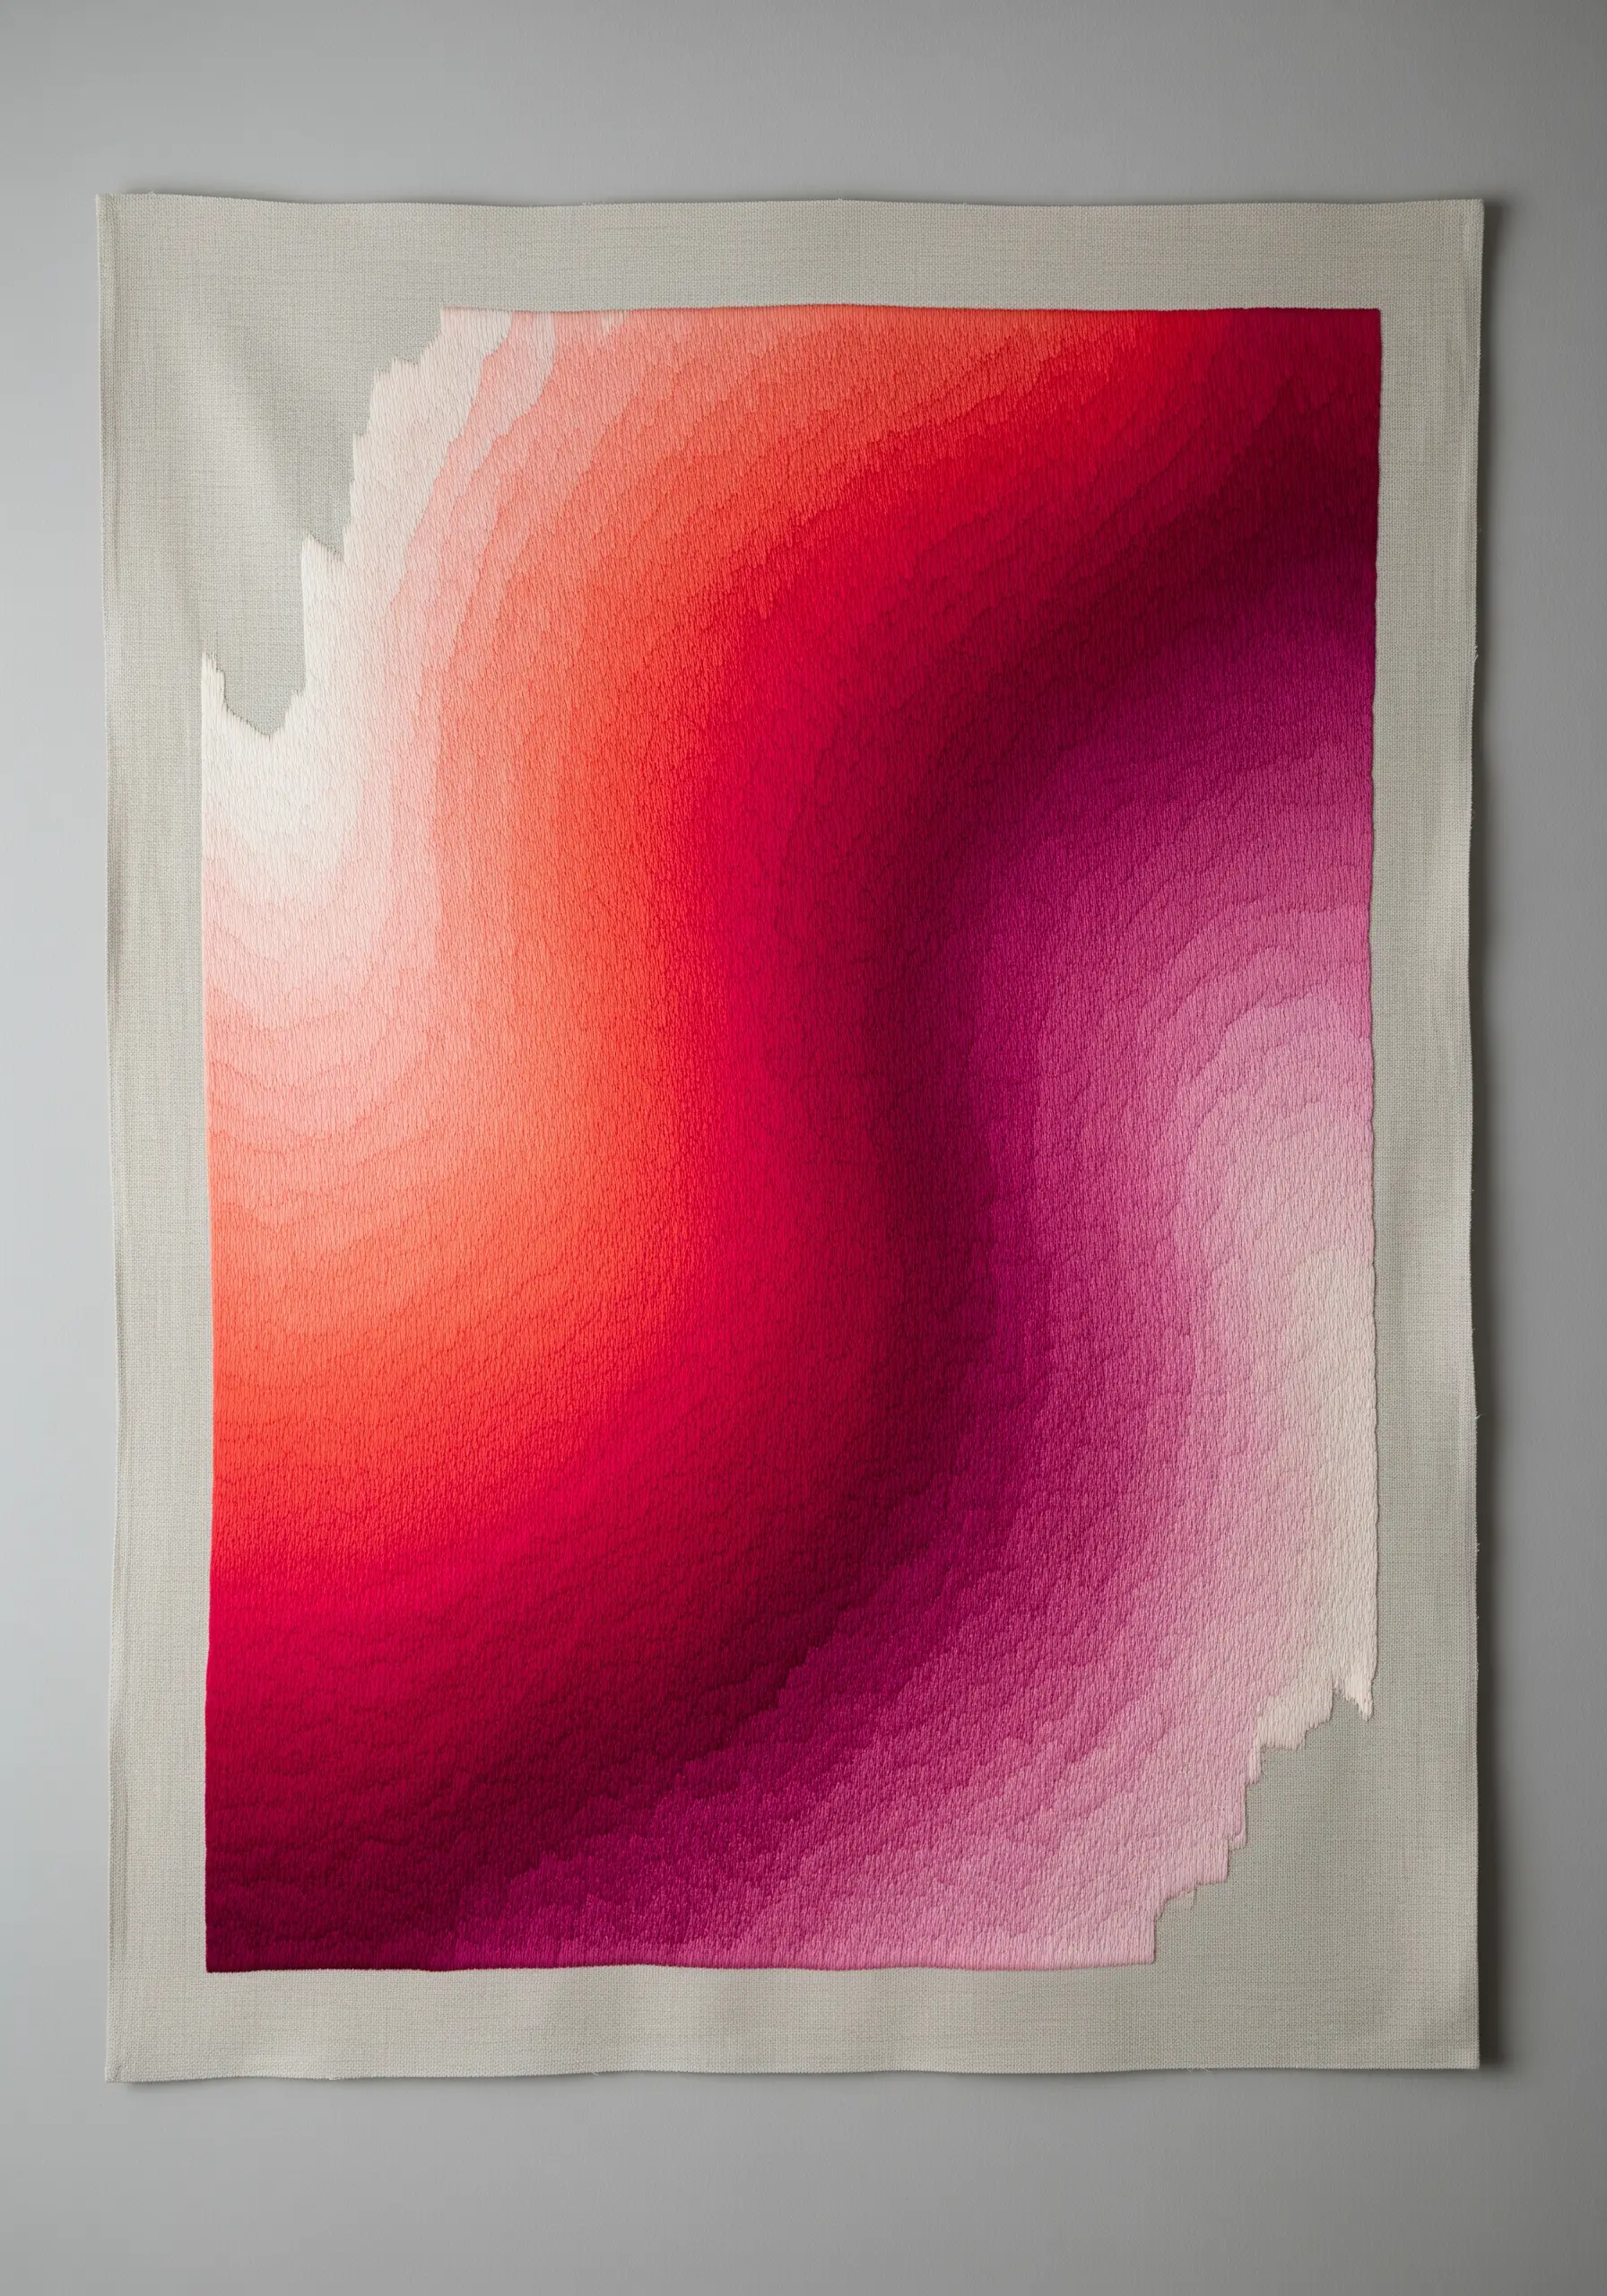
To achieve this painterly, map-like effect, use single-strand floss and the long-and-short stitch.
Think of your color fields as elevation lines on a map, stitching each band of color to nestle perfectly against the last.
The key to a seamless blend is to slightly vary the length of your stitches where two colors meet, allowing them to interlock subtly.
Consider leaving the edges of your stitched area irregular and unfinished; this creates an organic, textural contrast against the clean lines of the neutral fabric, turning the piece into one of the most beautiful embroidered textile wall hangings.
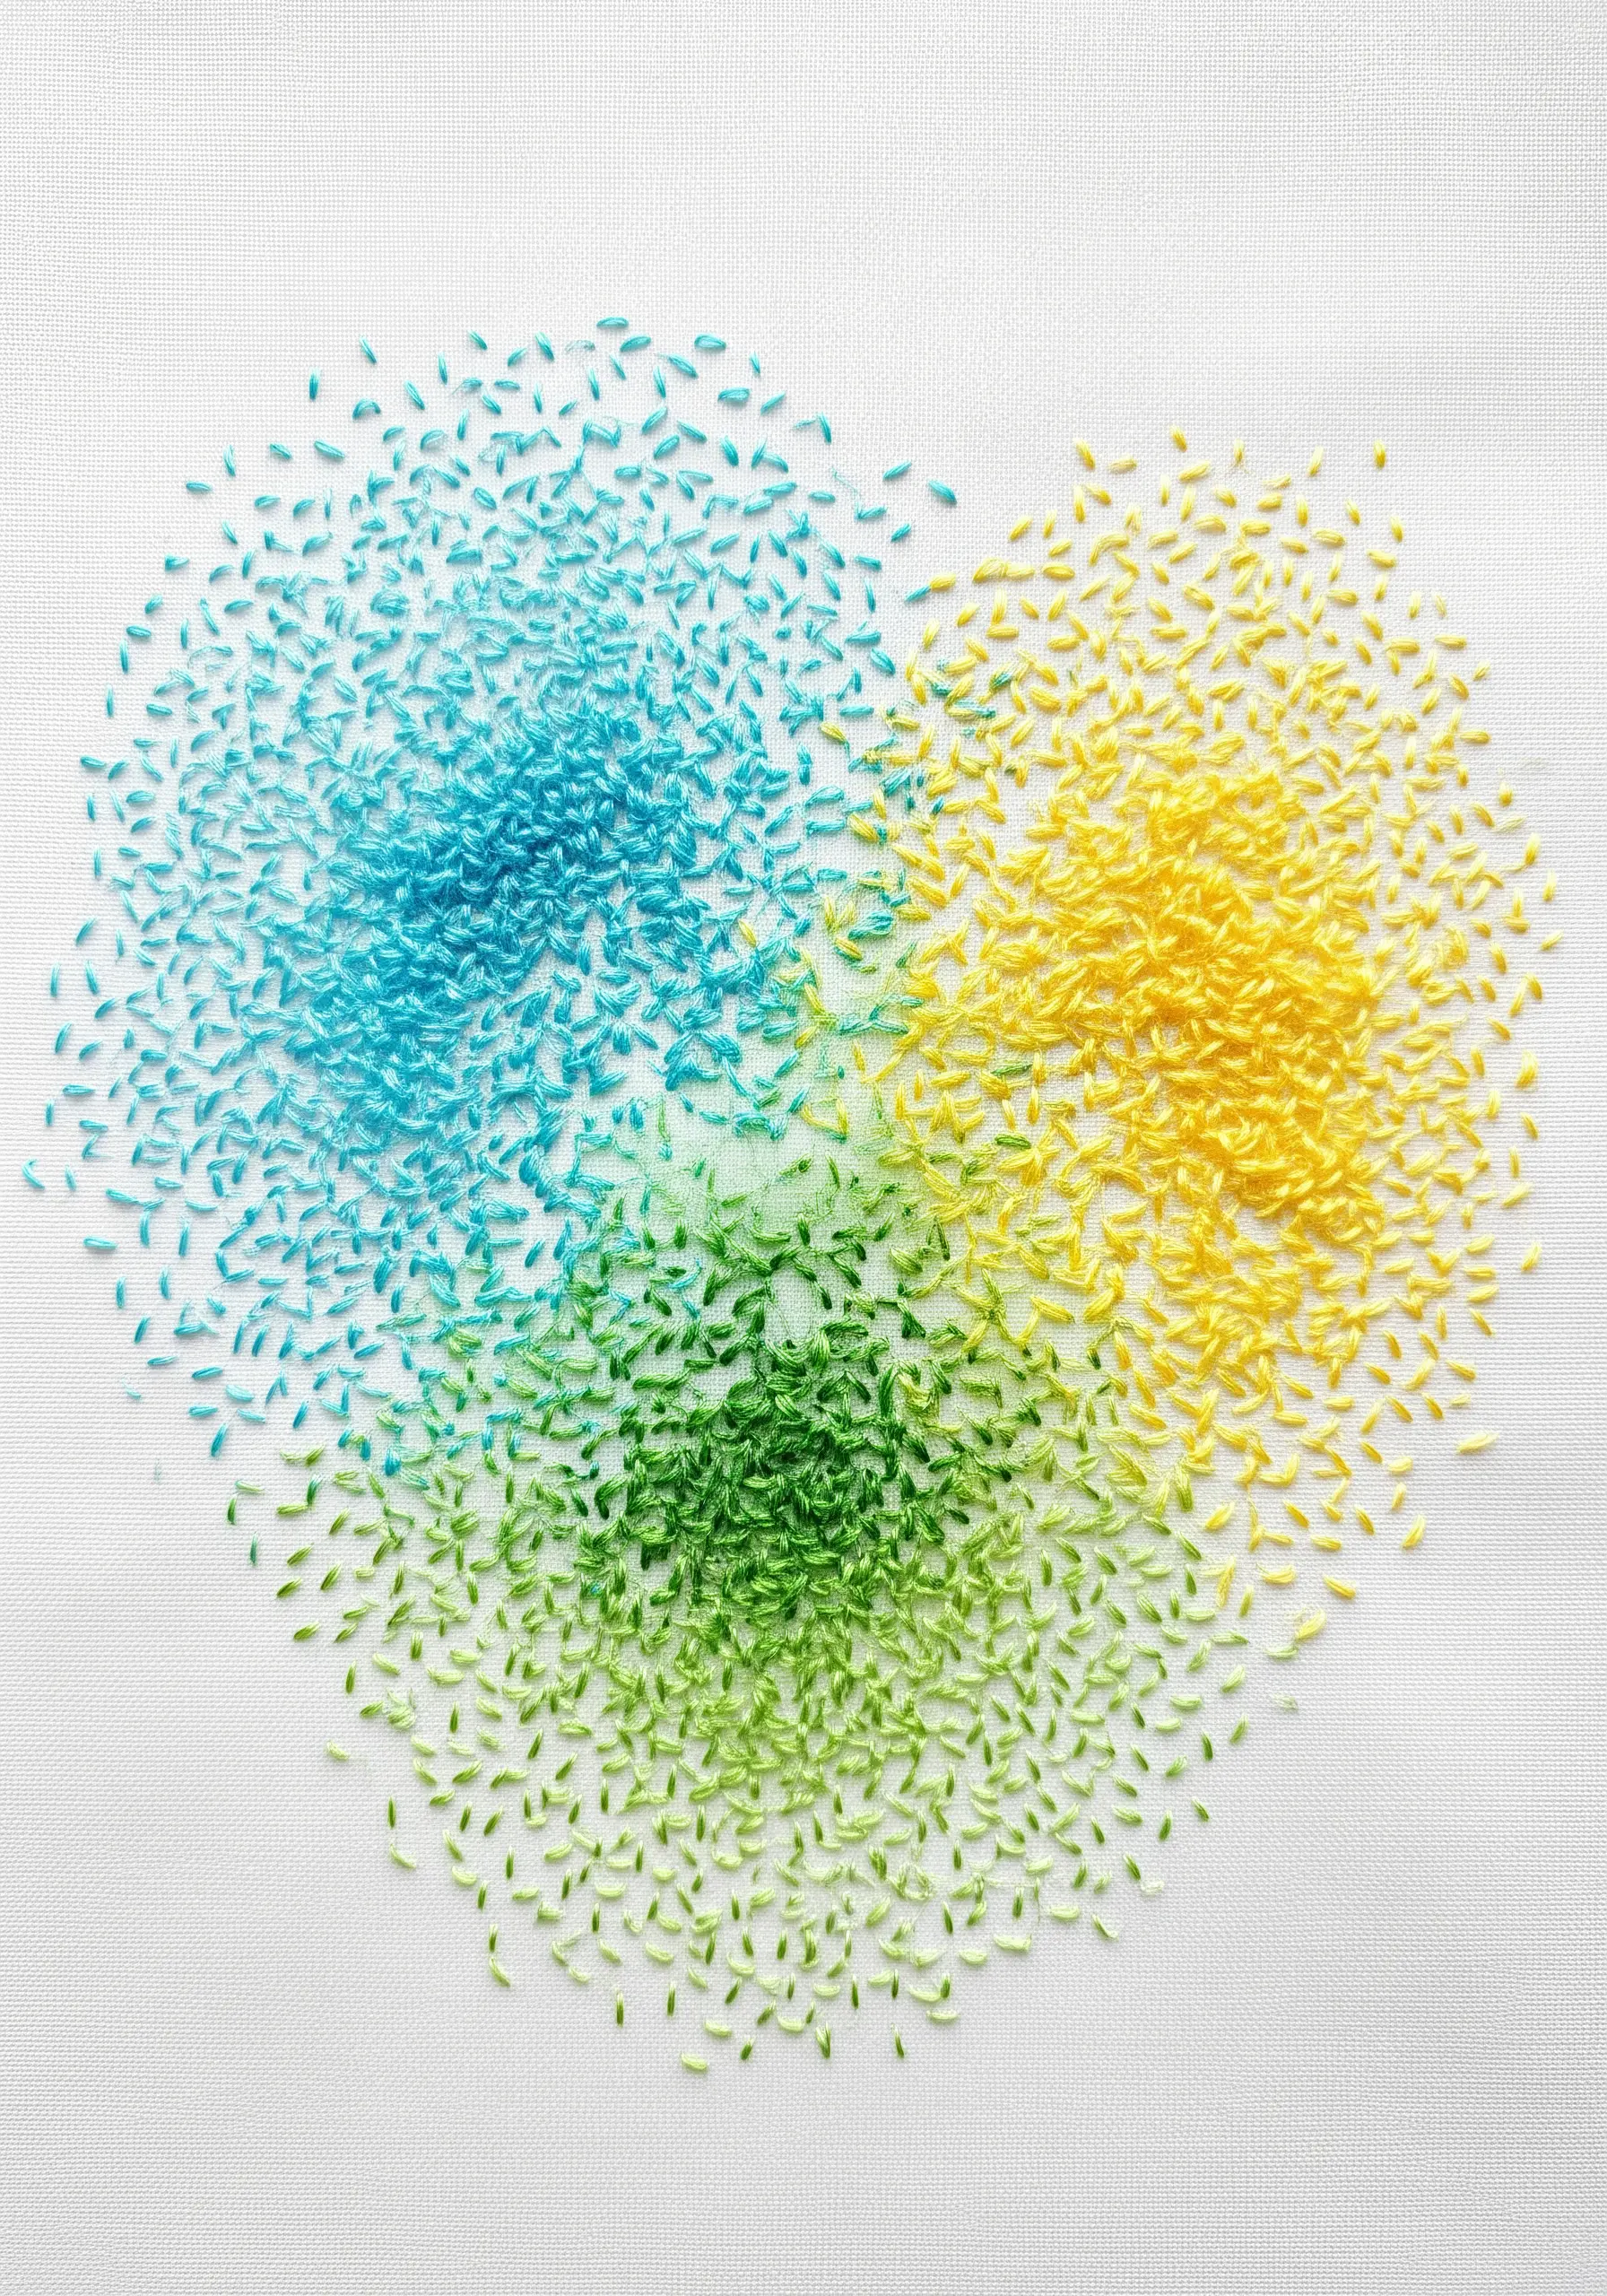
2. Build Tactile Fields with Clustered Knots
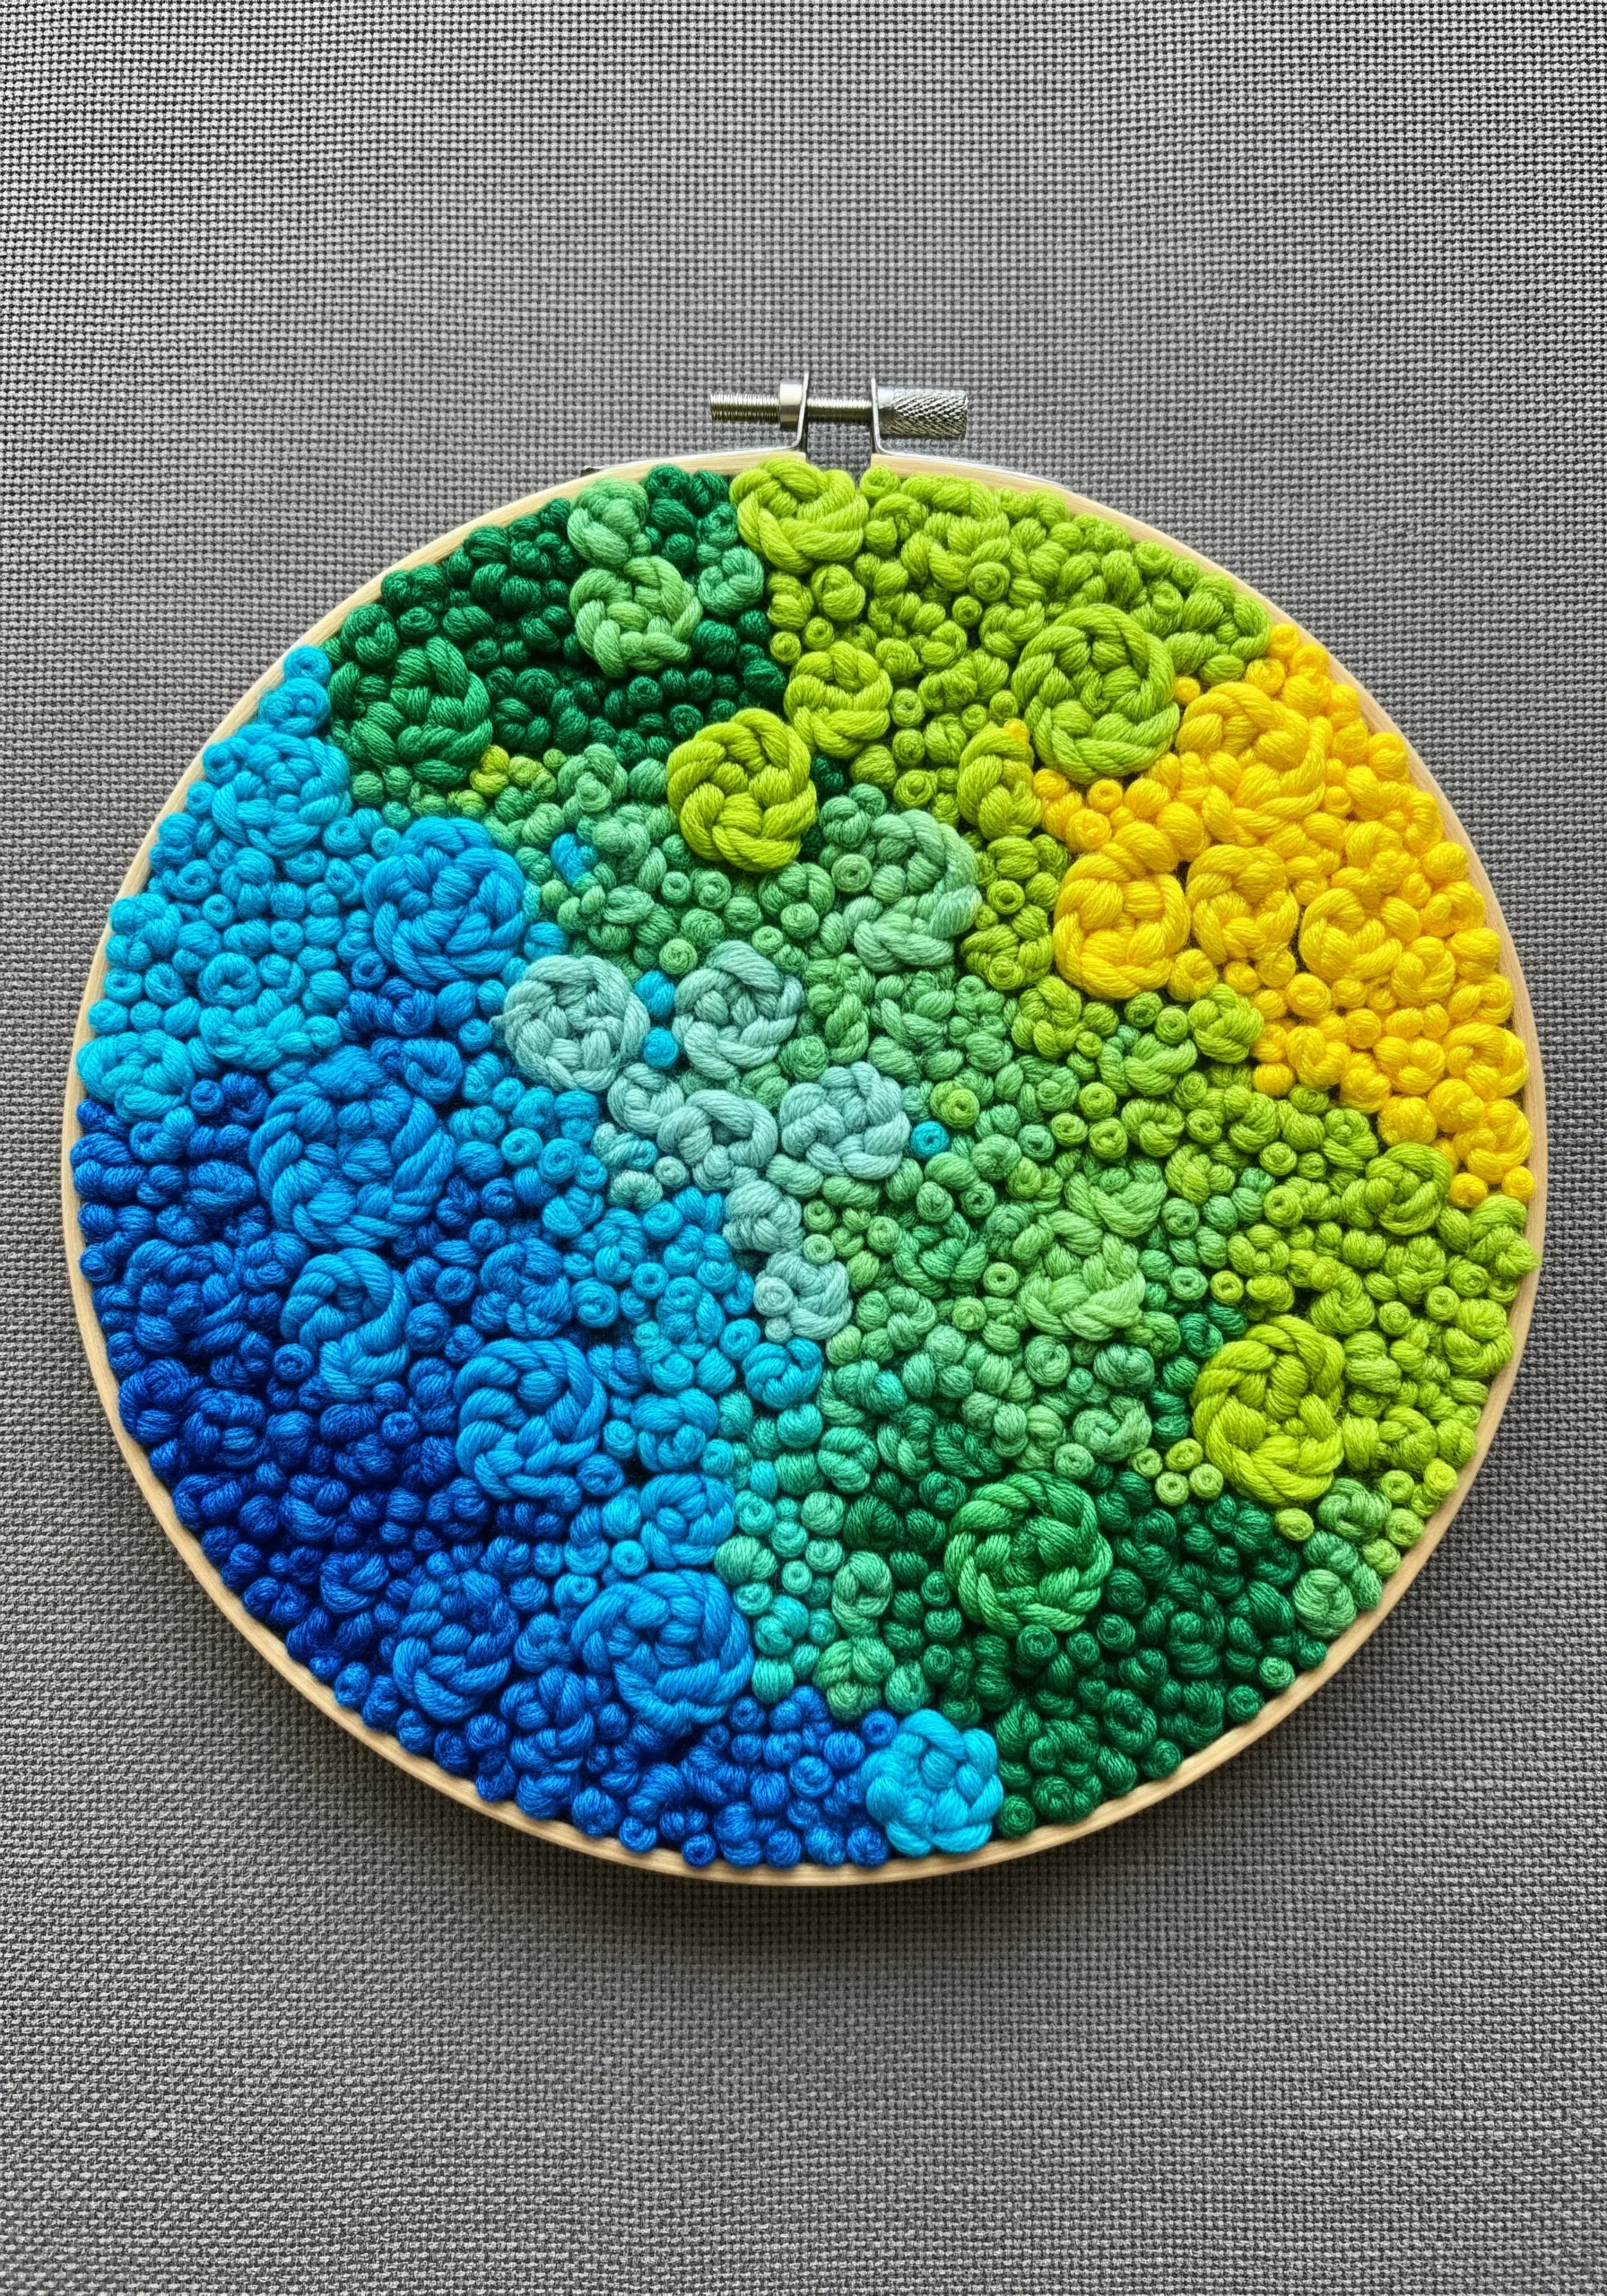
Move beyond flat surfaces by creating dense clusters of French knots or bullion knots.
To build this coral-like texture, vary the size of your knots by adjusting the number of times you wrap the thread around the needle.
Group your colors into distinct zones—blues, greens, yellows—but allow them to intermingle at the borders to create a natural, mossy transition.
This technique is perfect for abstract hoop art concepts where the tactile quality is as important as the visual blend.
3. Use Wrapped Cording for 3D Color Blocking
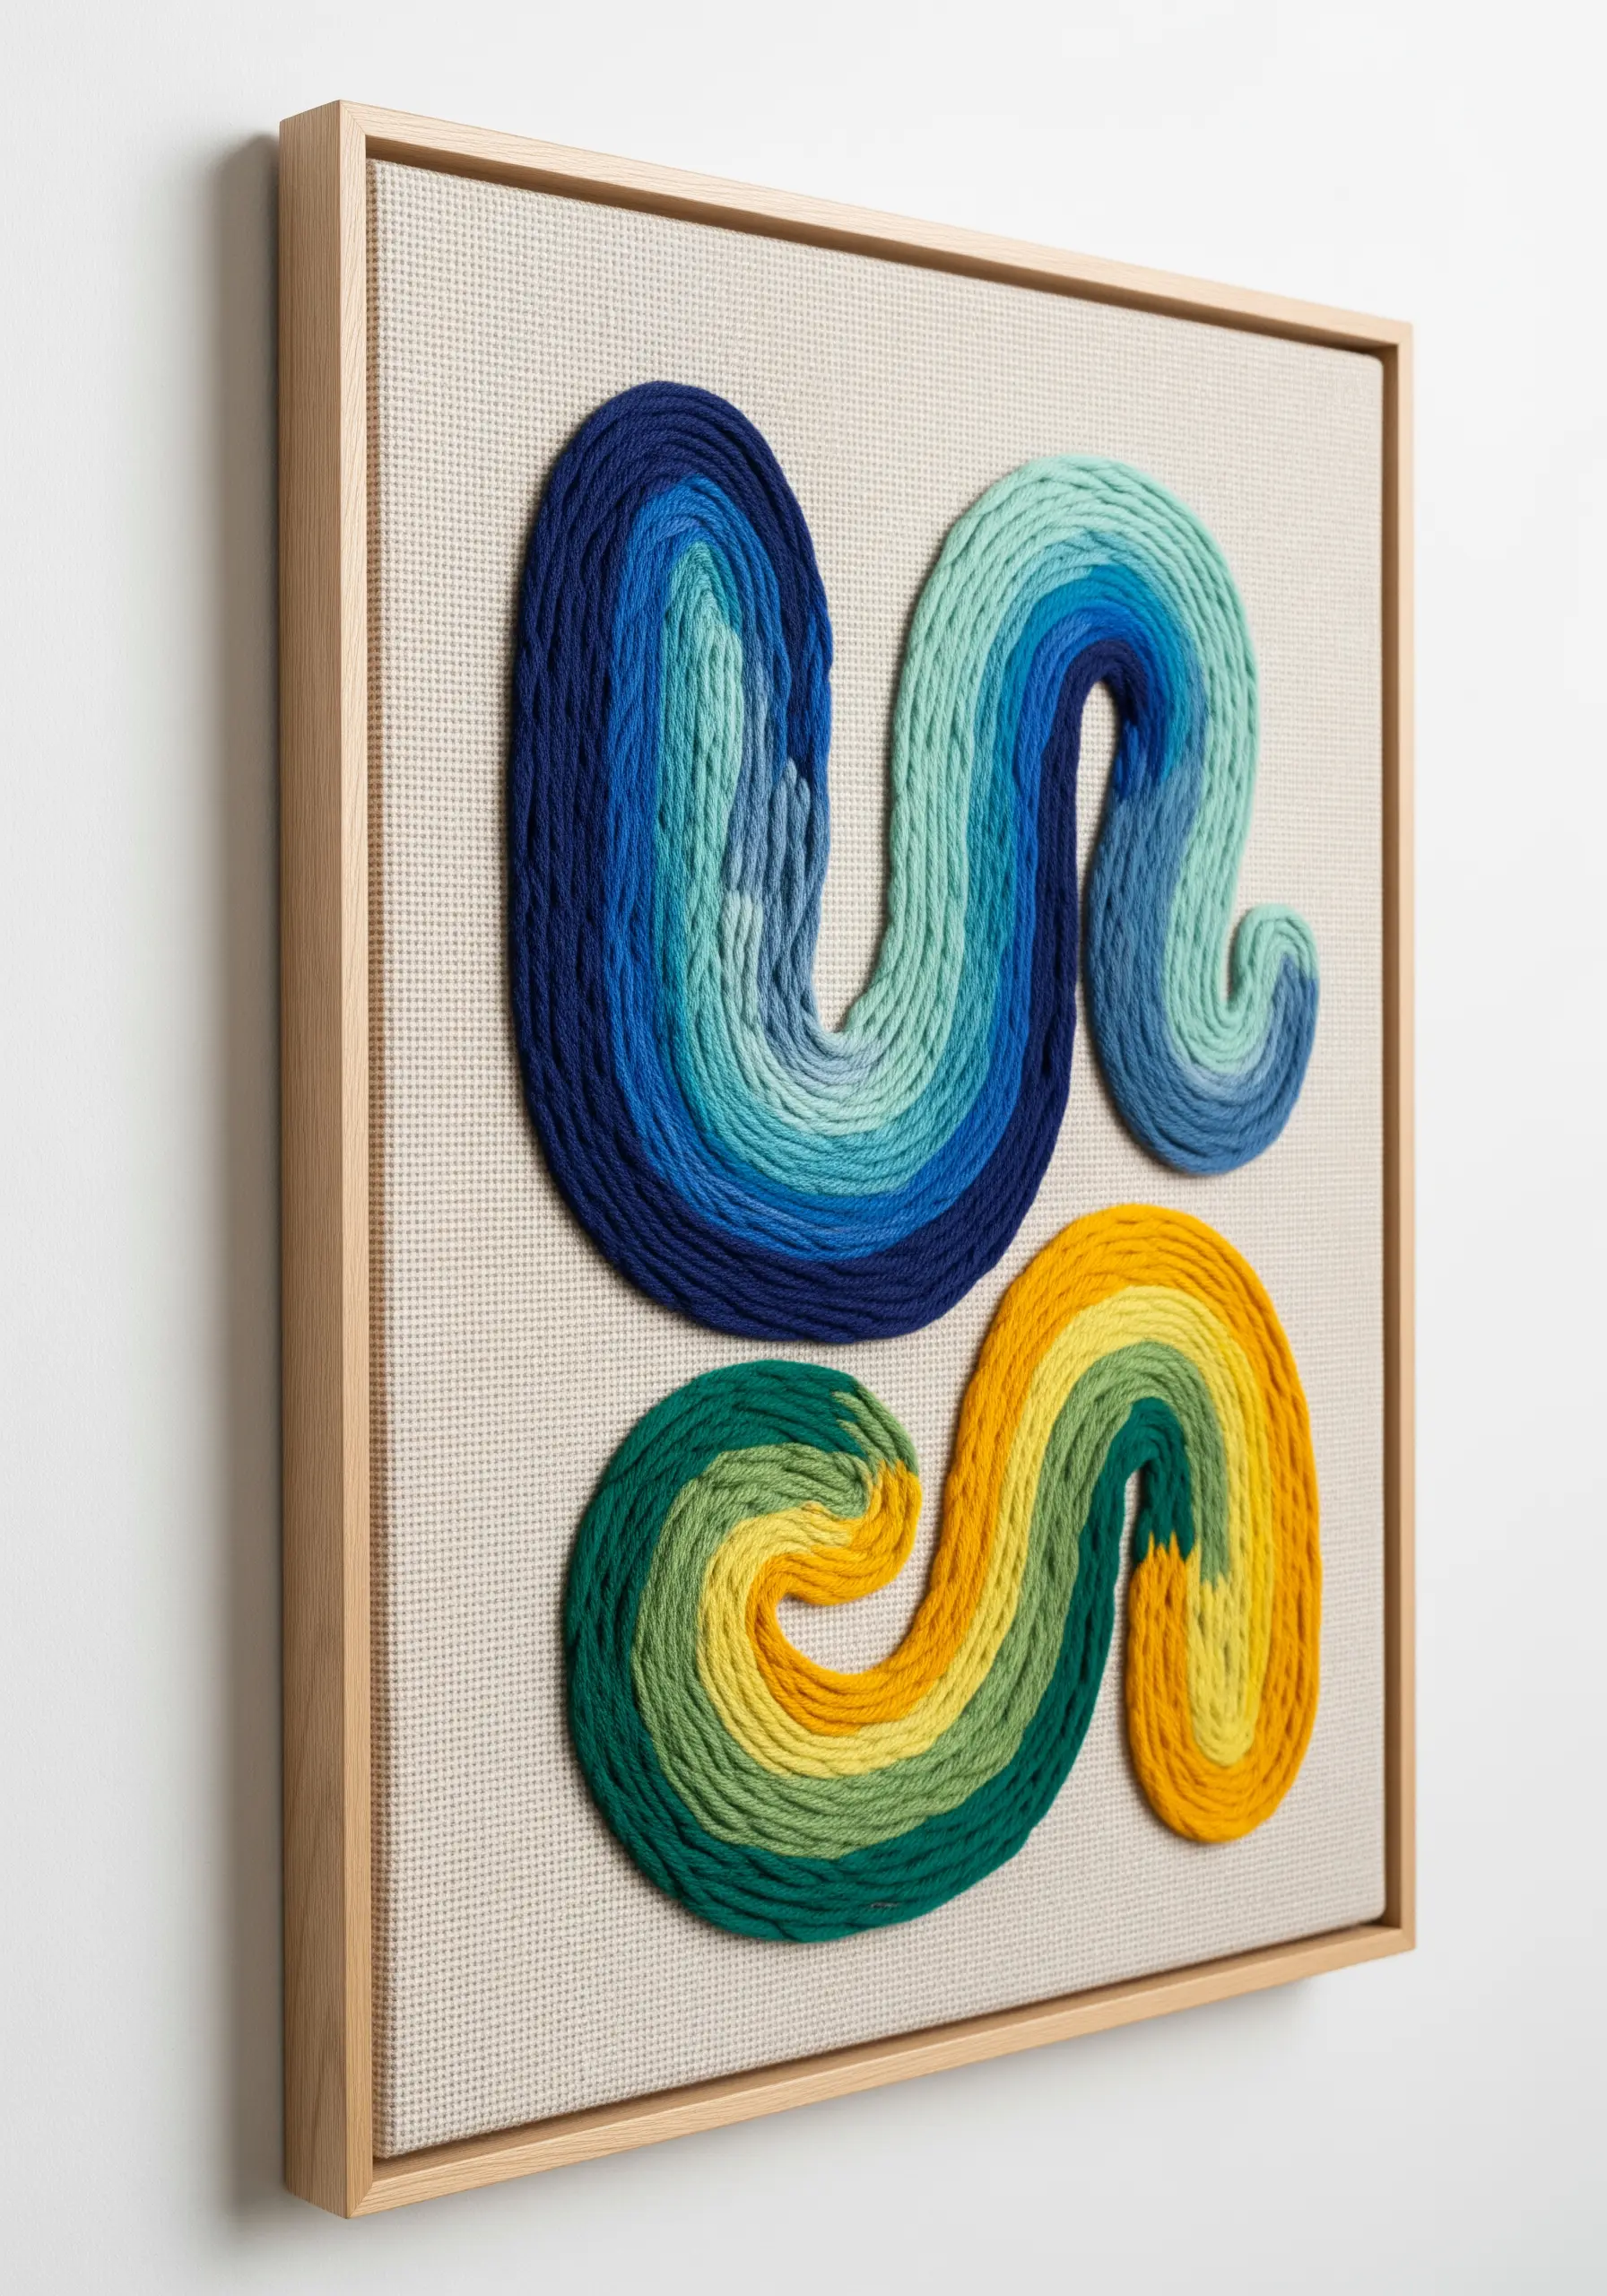
Elevate your design off the fabric by wrapping thick cording or yarn with embroidery floss.
First, couch your cording onto the canvas to create your abstract shape.
Then, using a blunt tapestry needle, wrap your chosen floss colors tightly around the cord, switching shades to create bold, graphic gradients.
This method transforms simple lines into sculptural elements, making your handmade art objects pop with dimensional color.
4. Achieve Optical Blending with Overlapping Fields
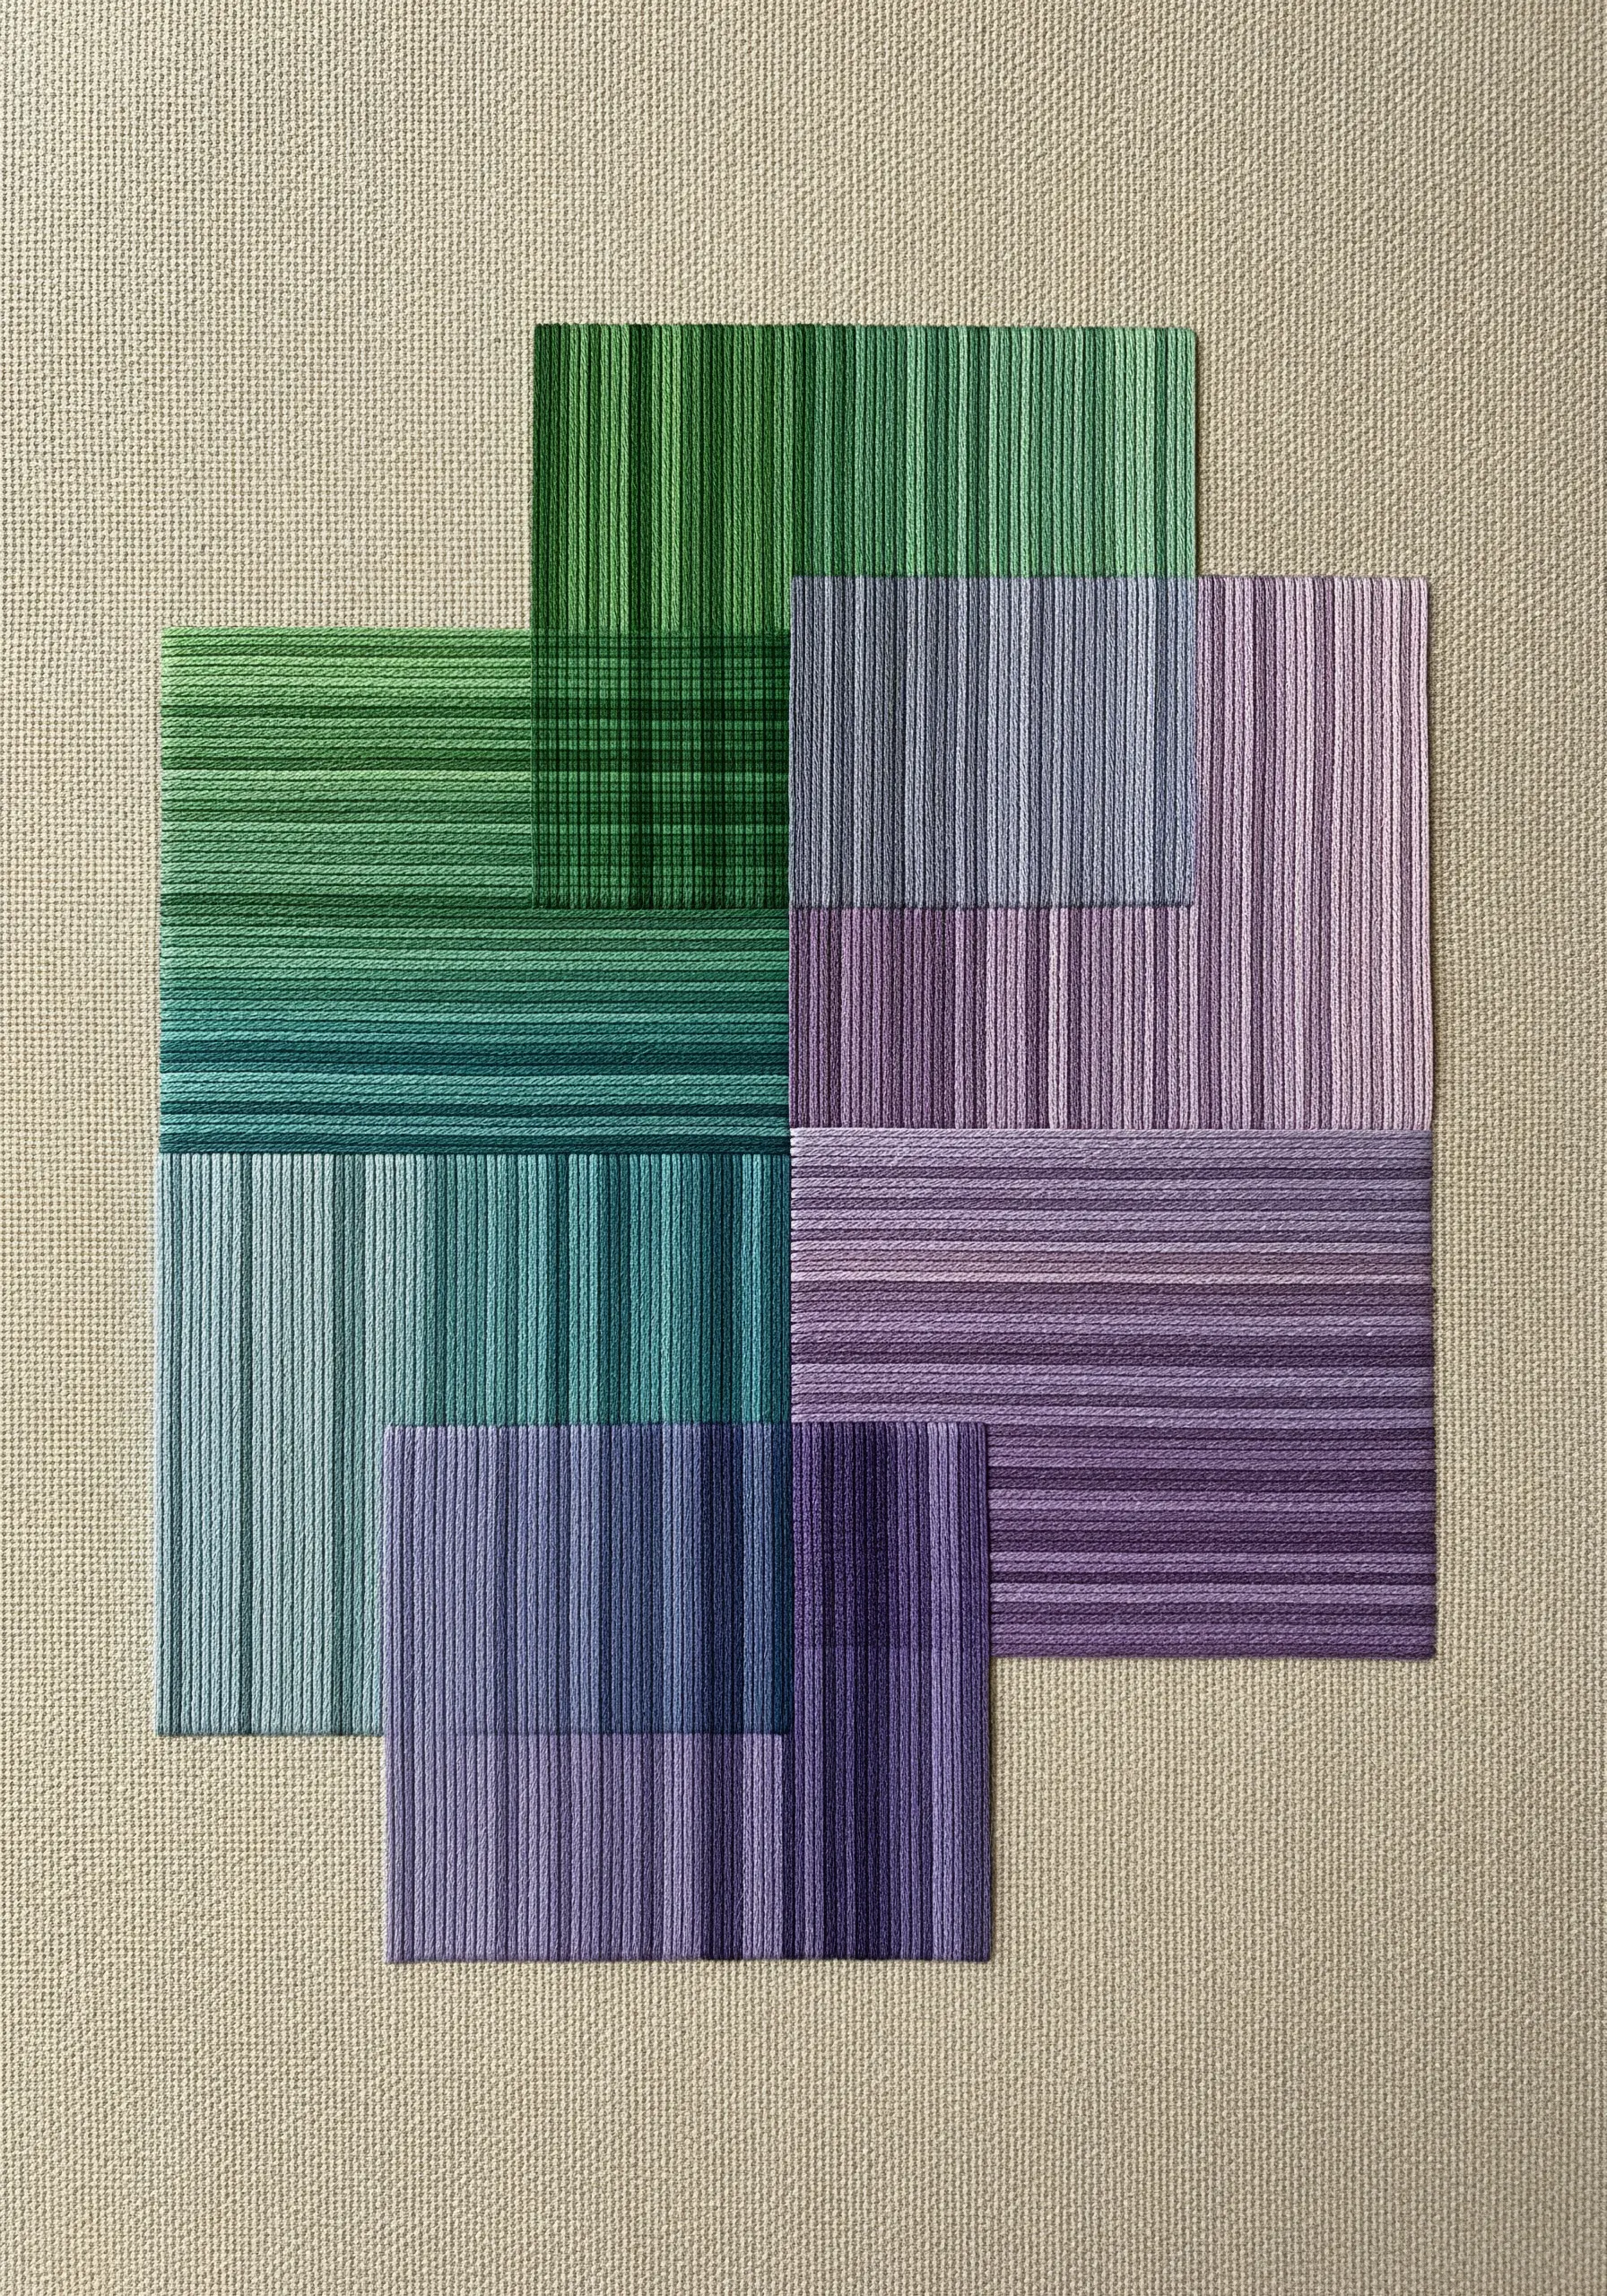
Create the illusion of transparency and blended color by stitching thin, parallel lines that overlap.
Fill geometric shapes with vertical or horizontal satin stitches, using a consistent number of strands for each block.
Where the shapes intersect, the threads from both colors will be visible, tricking the eye into seeing a new, mixed hue.
This is a sophisticated way to explore color theory, resulting in abstract fabric collage embroidery ideas with a clean, graphic feel.
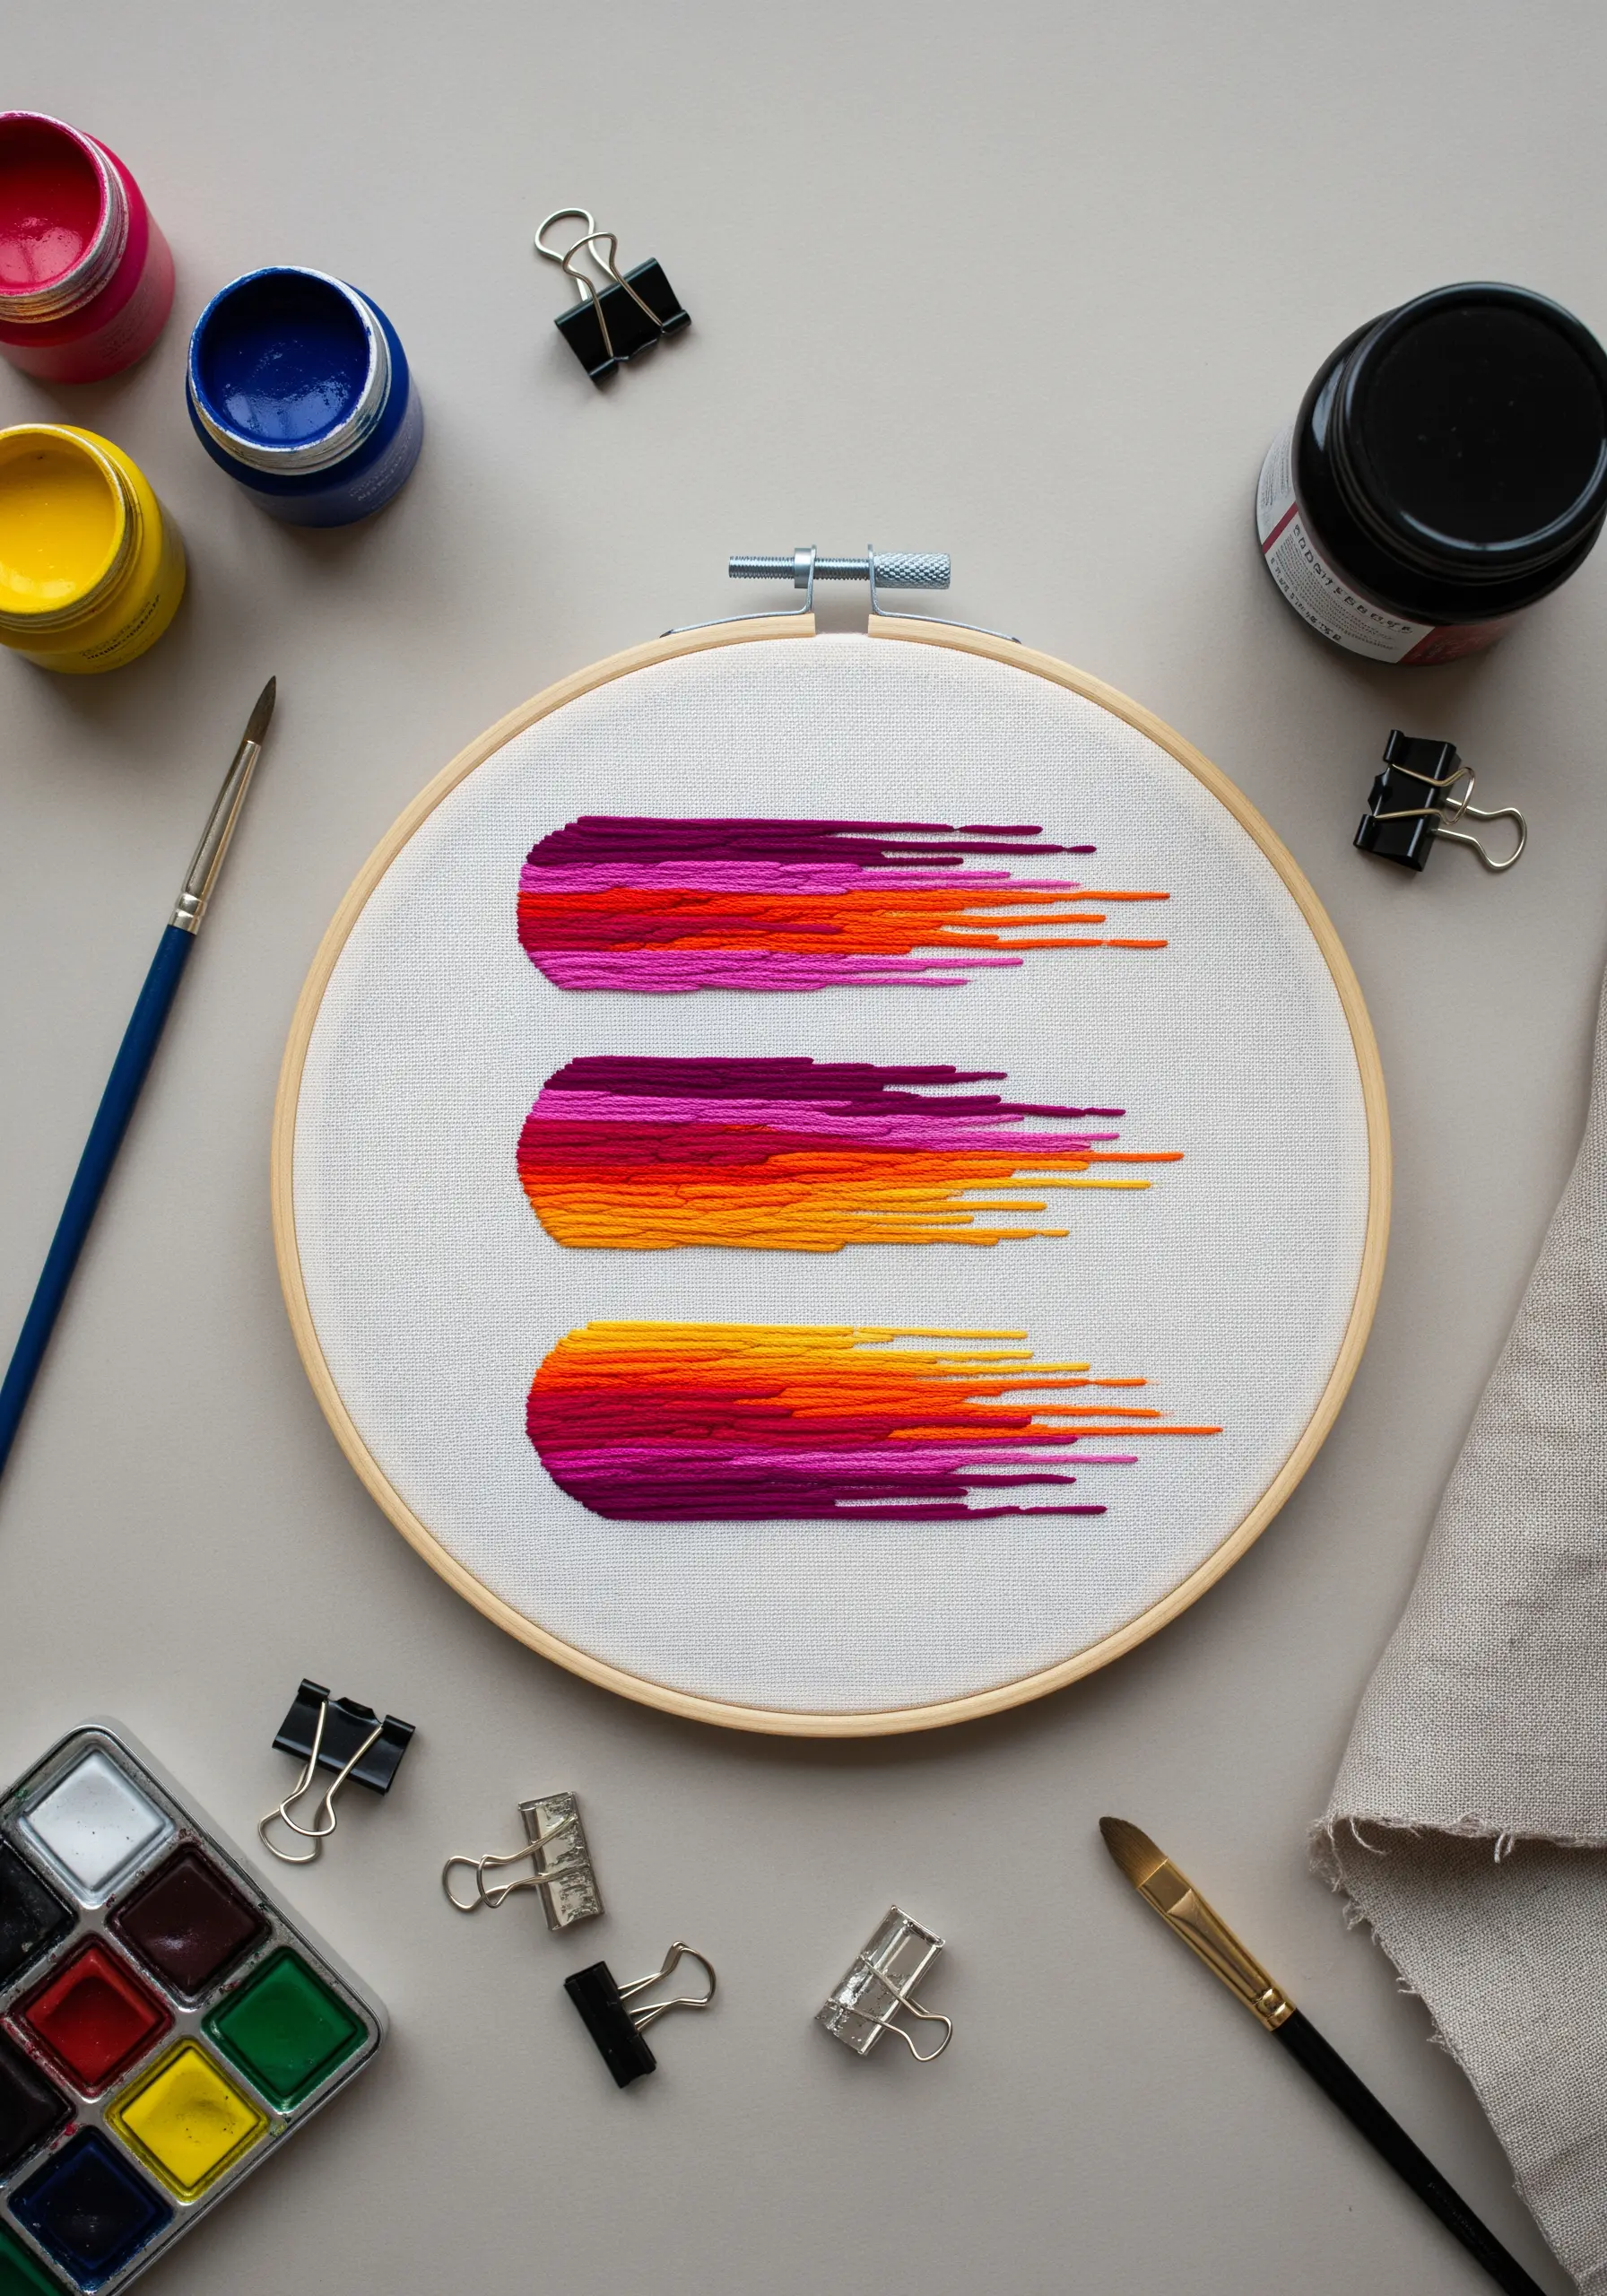
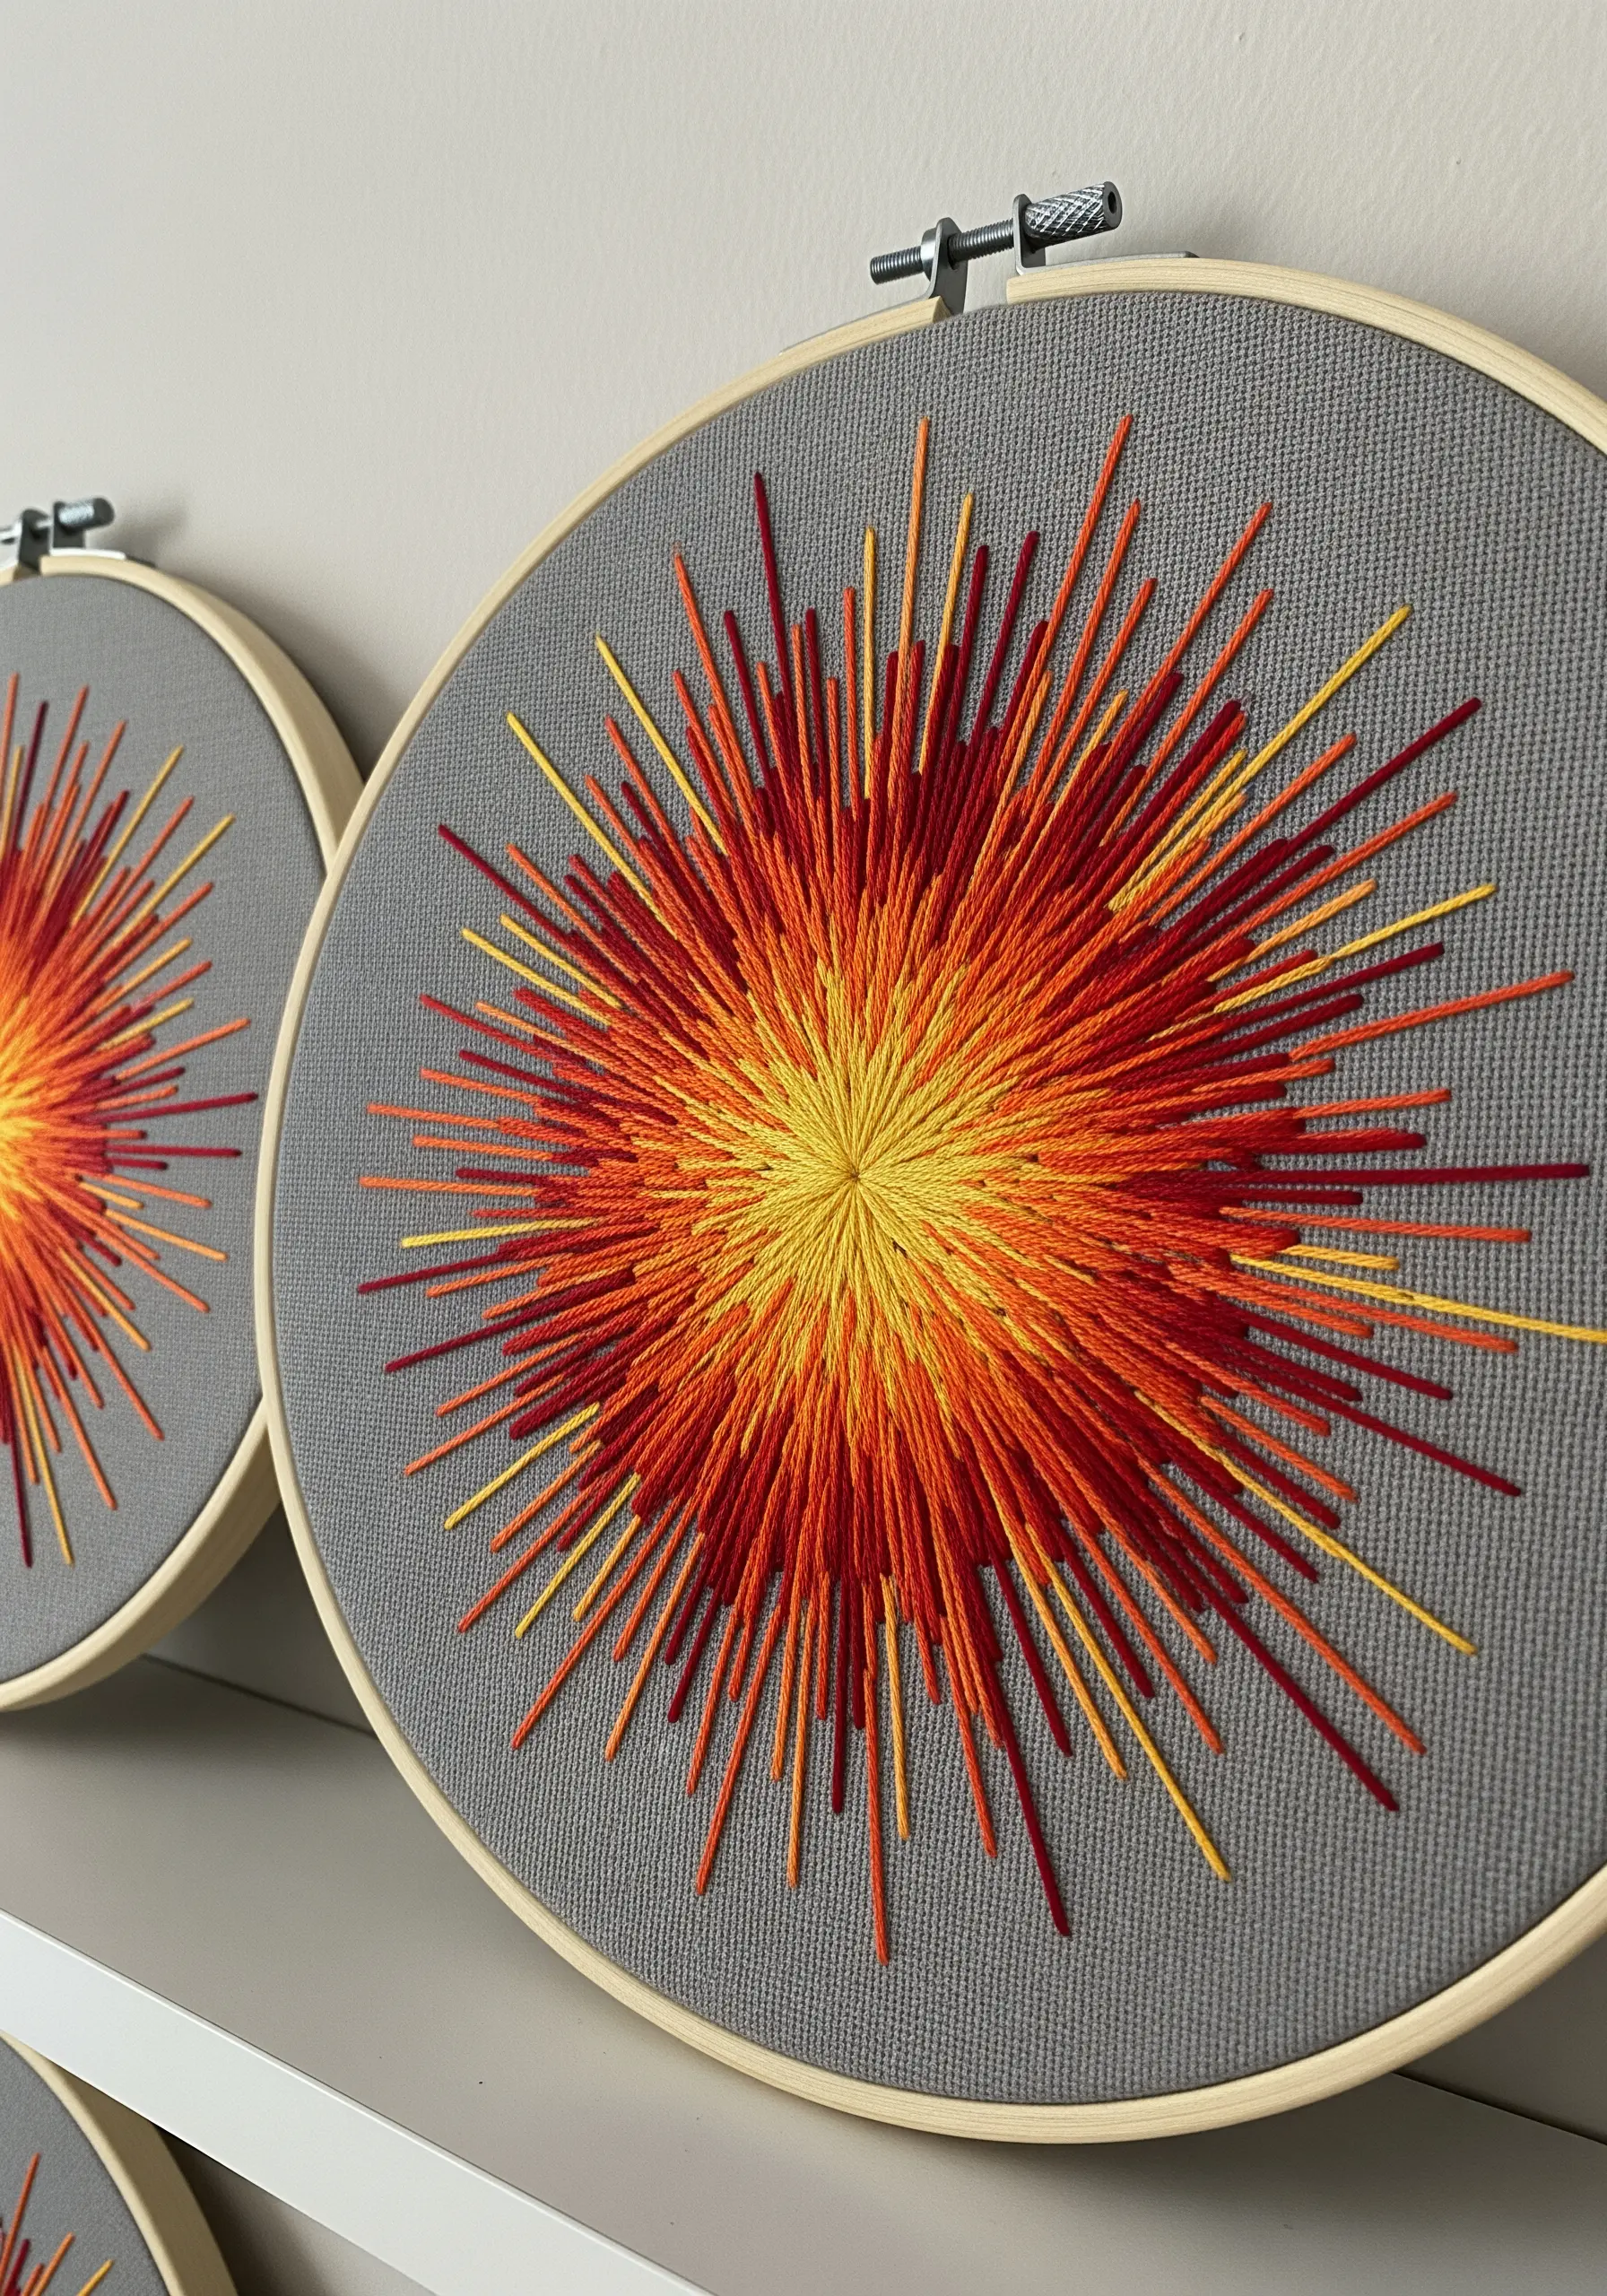
5. Stitch Radiating Lines for Dynamic Energy

Capture a burst of energy by stitching straight stitches that radiate from a central point.
The magic is in the variation: use a mix of long and short stitches to avoid a uniform, static look.
Group your colors—warm oranges blending into hot pinks, then cool purples—to create a sense of light and heat dissipating from the center.
This controlled chaos makes for powerful wall hoop art ideas that draw the viewer in.
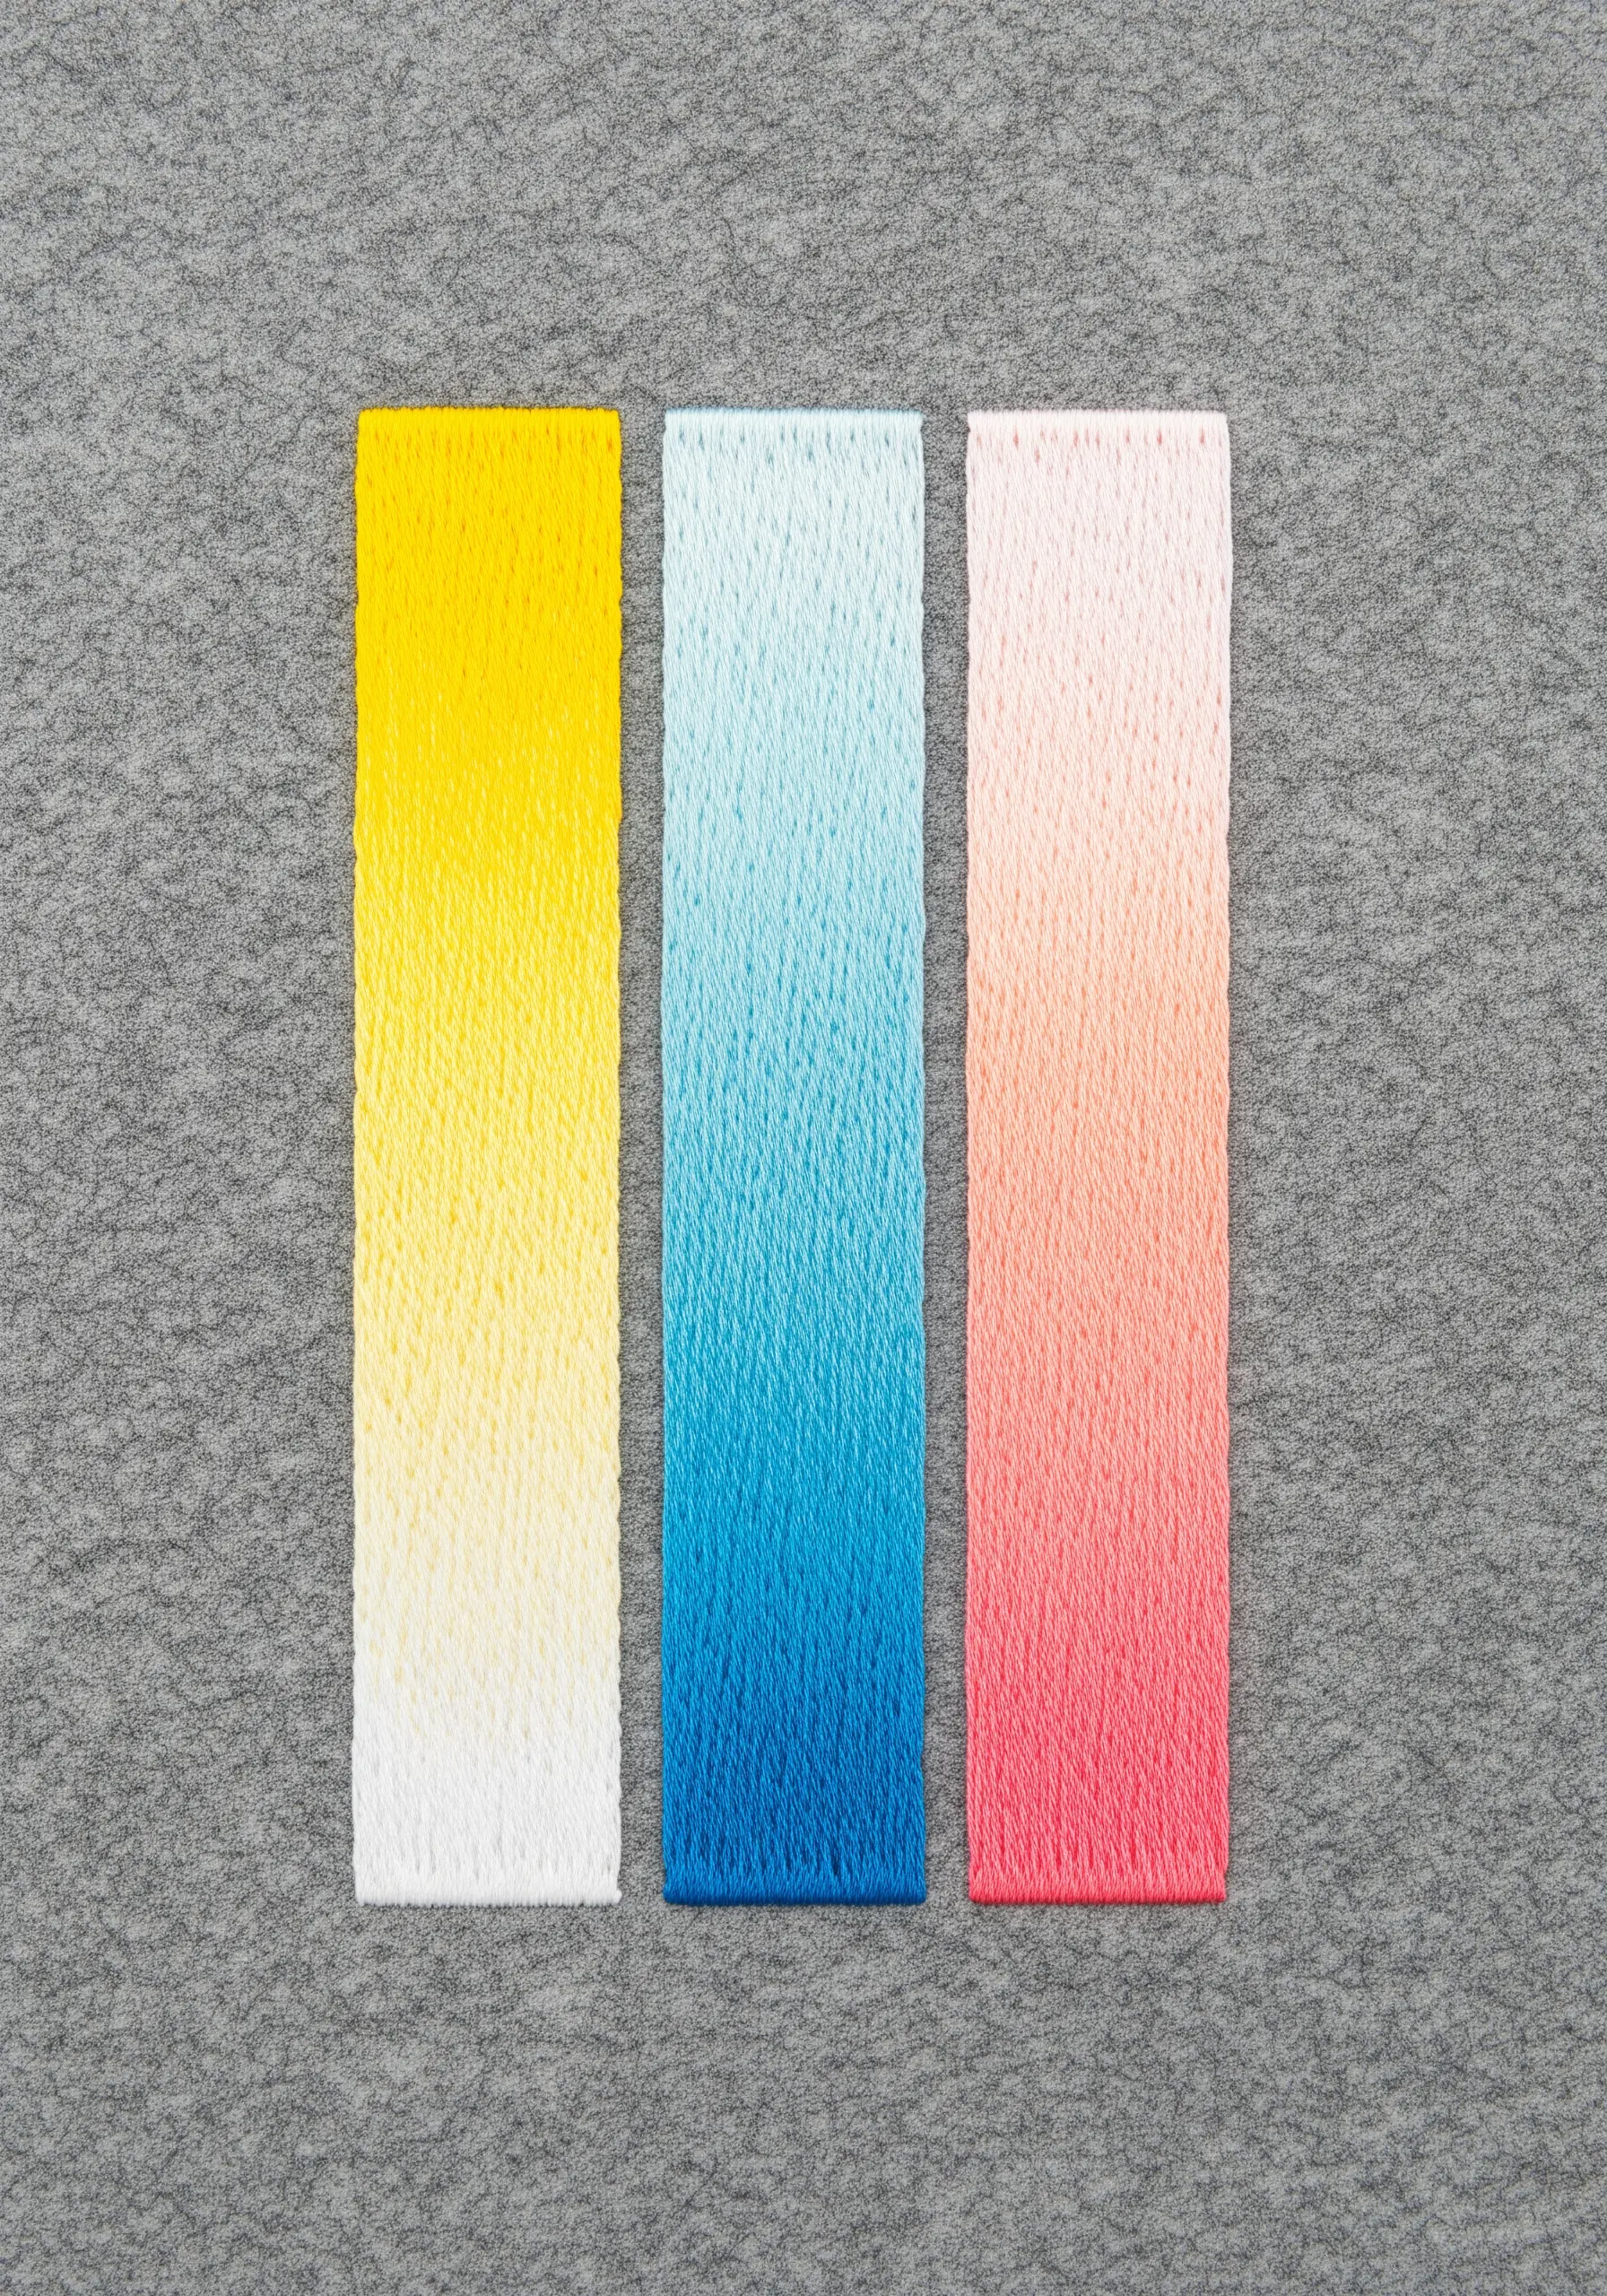
6. Explore Color Stories with a Triptych
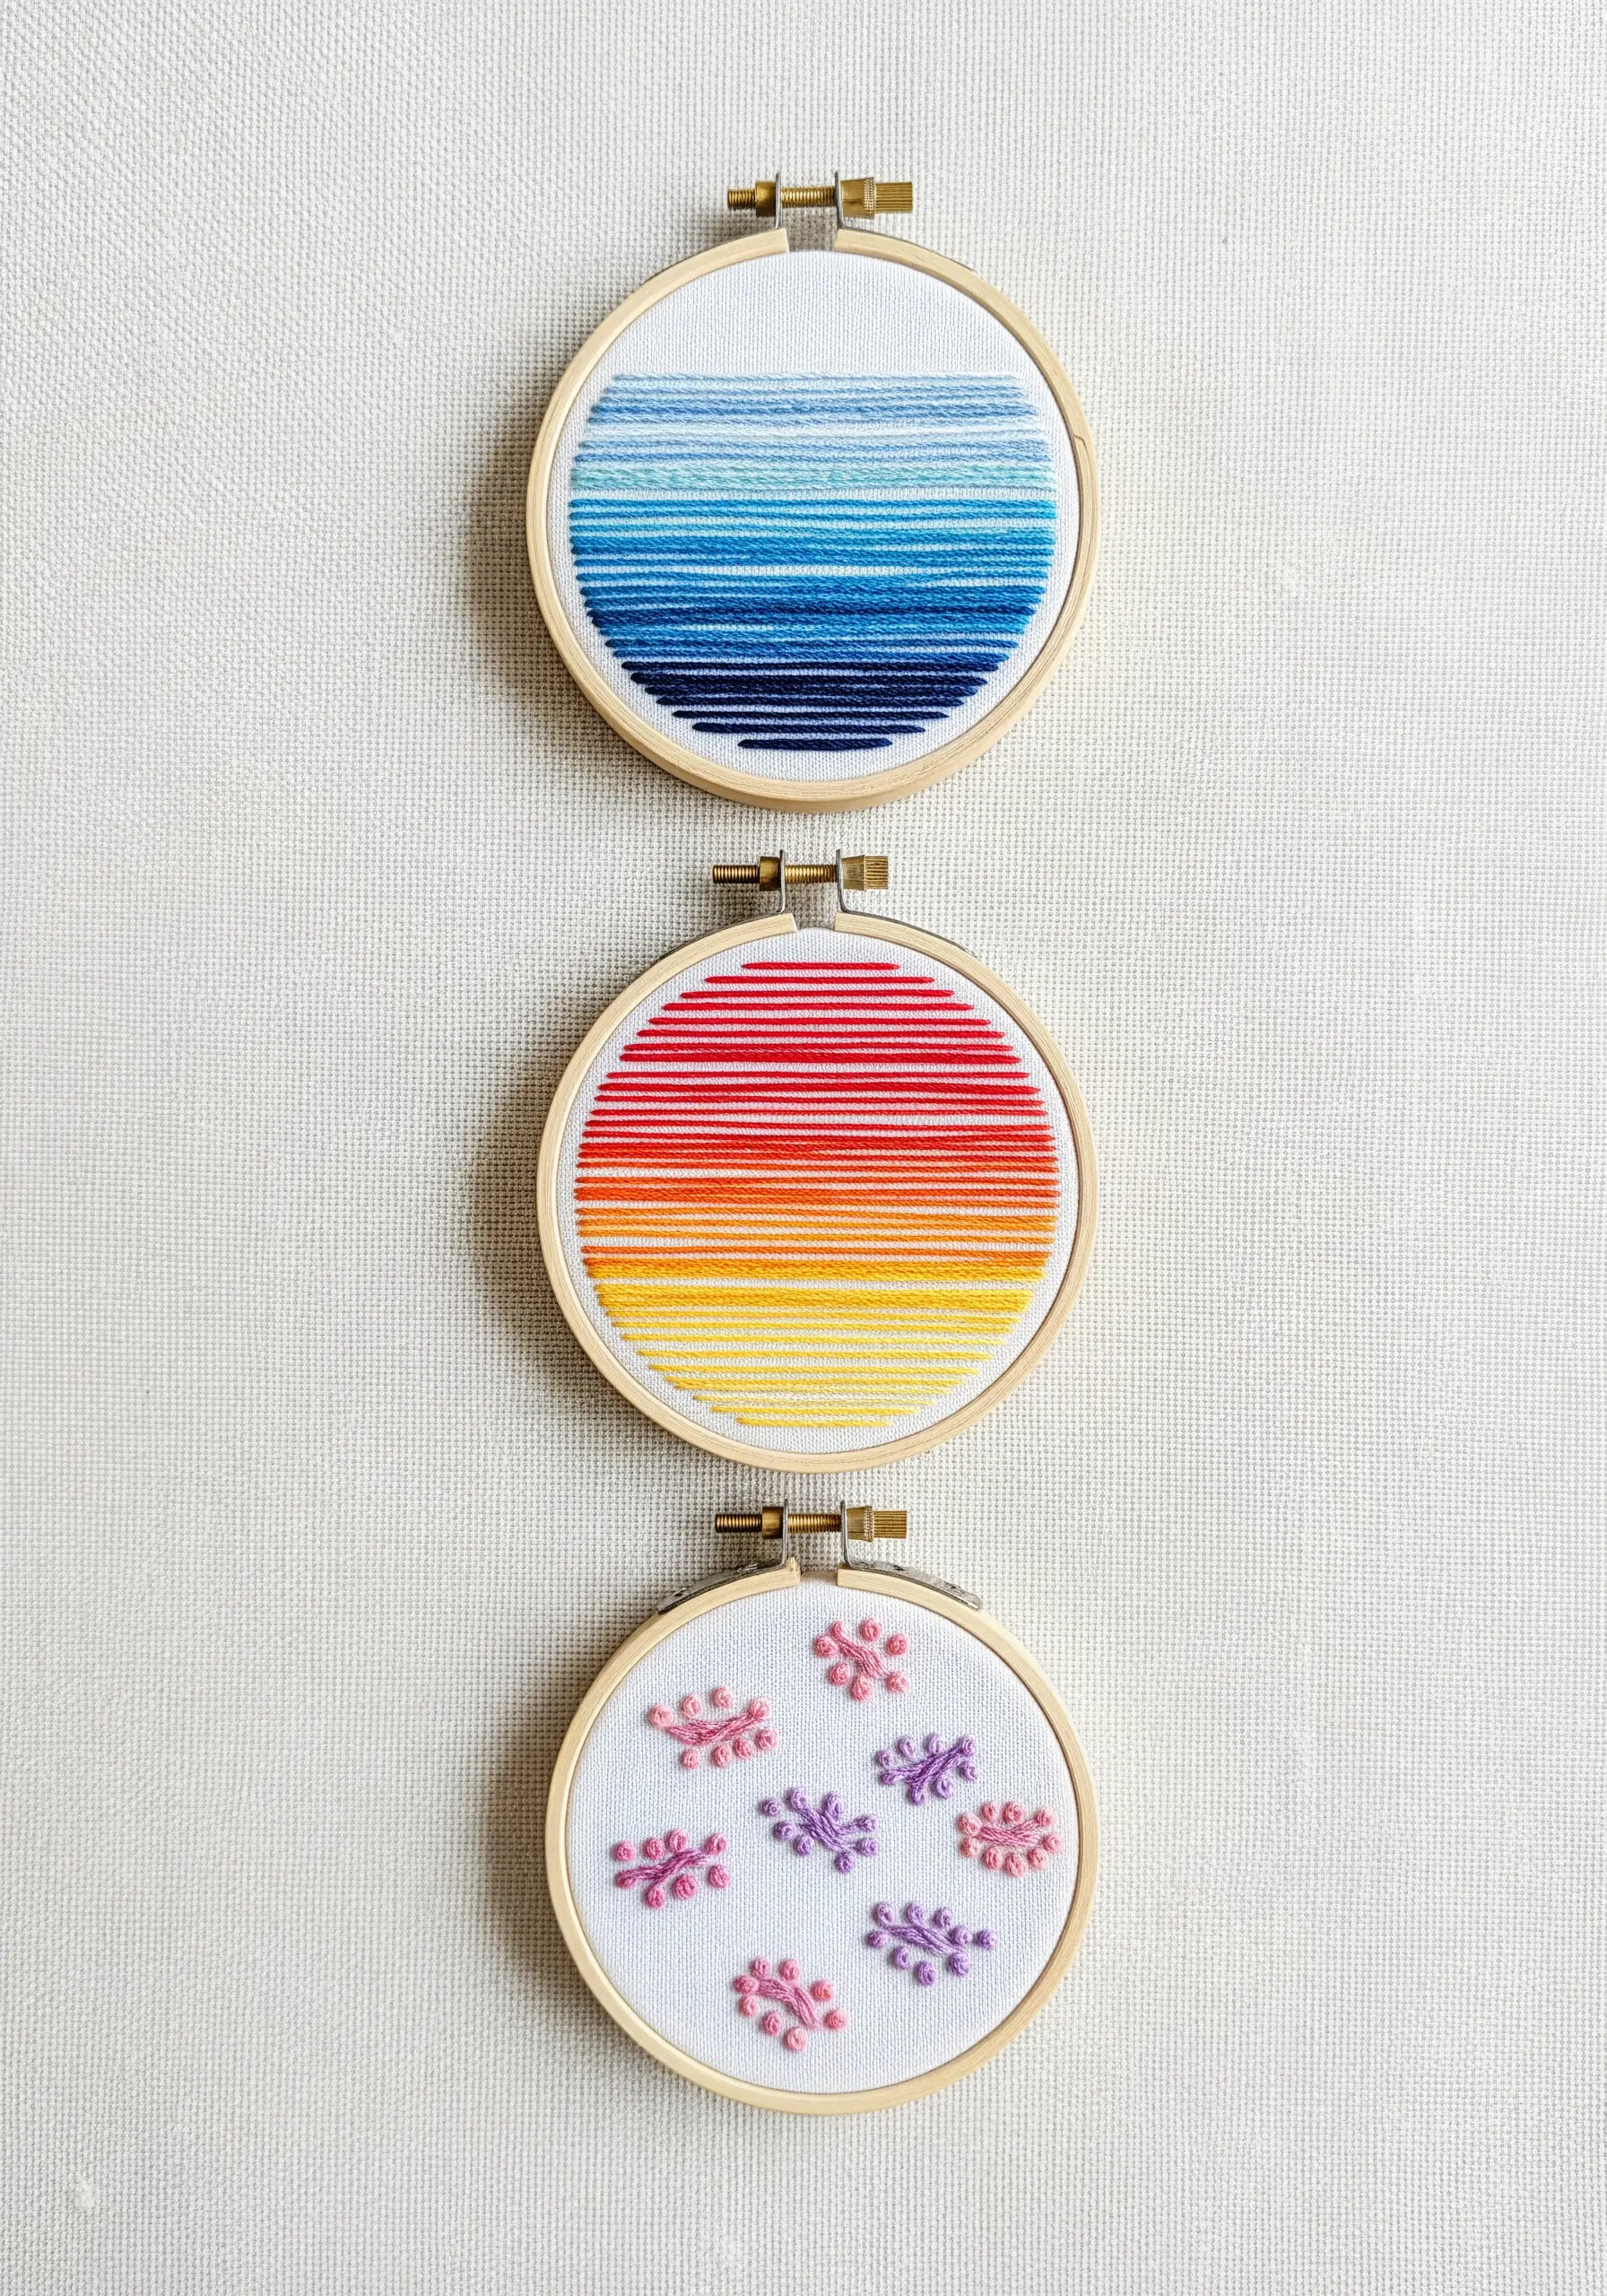
A single technique can tell multiple stories when you create a series.
Use simple horizontal satin stitches to fill small hoops, focusing entirely on the color transition.
Dedicate each hoop to a different gradient—a cool ocean sunrise, a fiery desert sunset, or a soft floral palette.
Displayed together, these small hoop embroidery ideas create a cohesive narrative and demonstrate your command of color harmony.
7. Weave Interlocking Lines with Couching Stitch
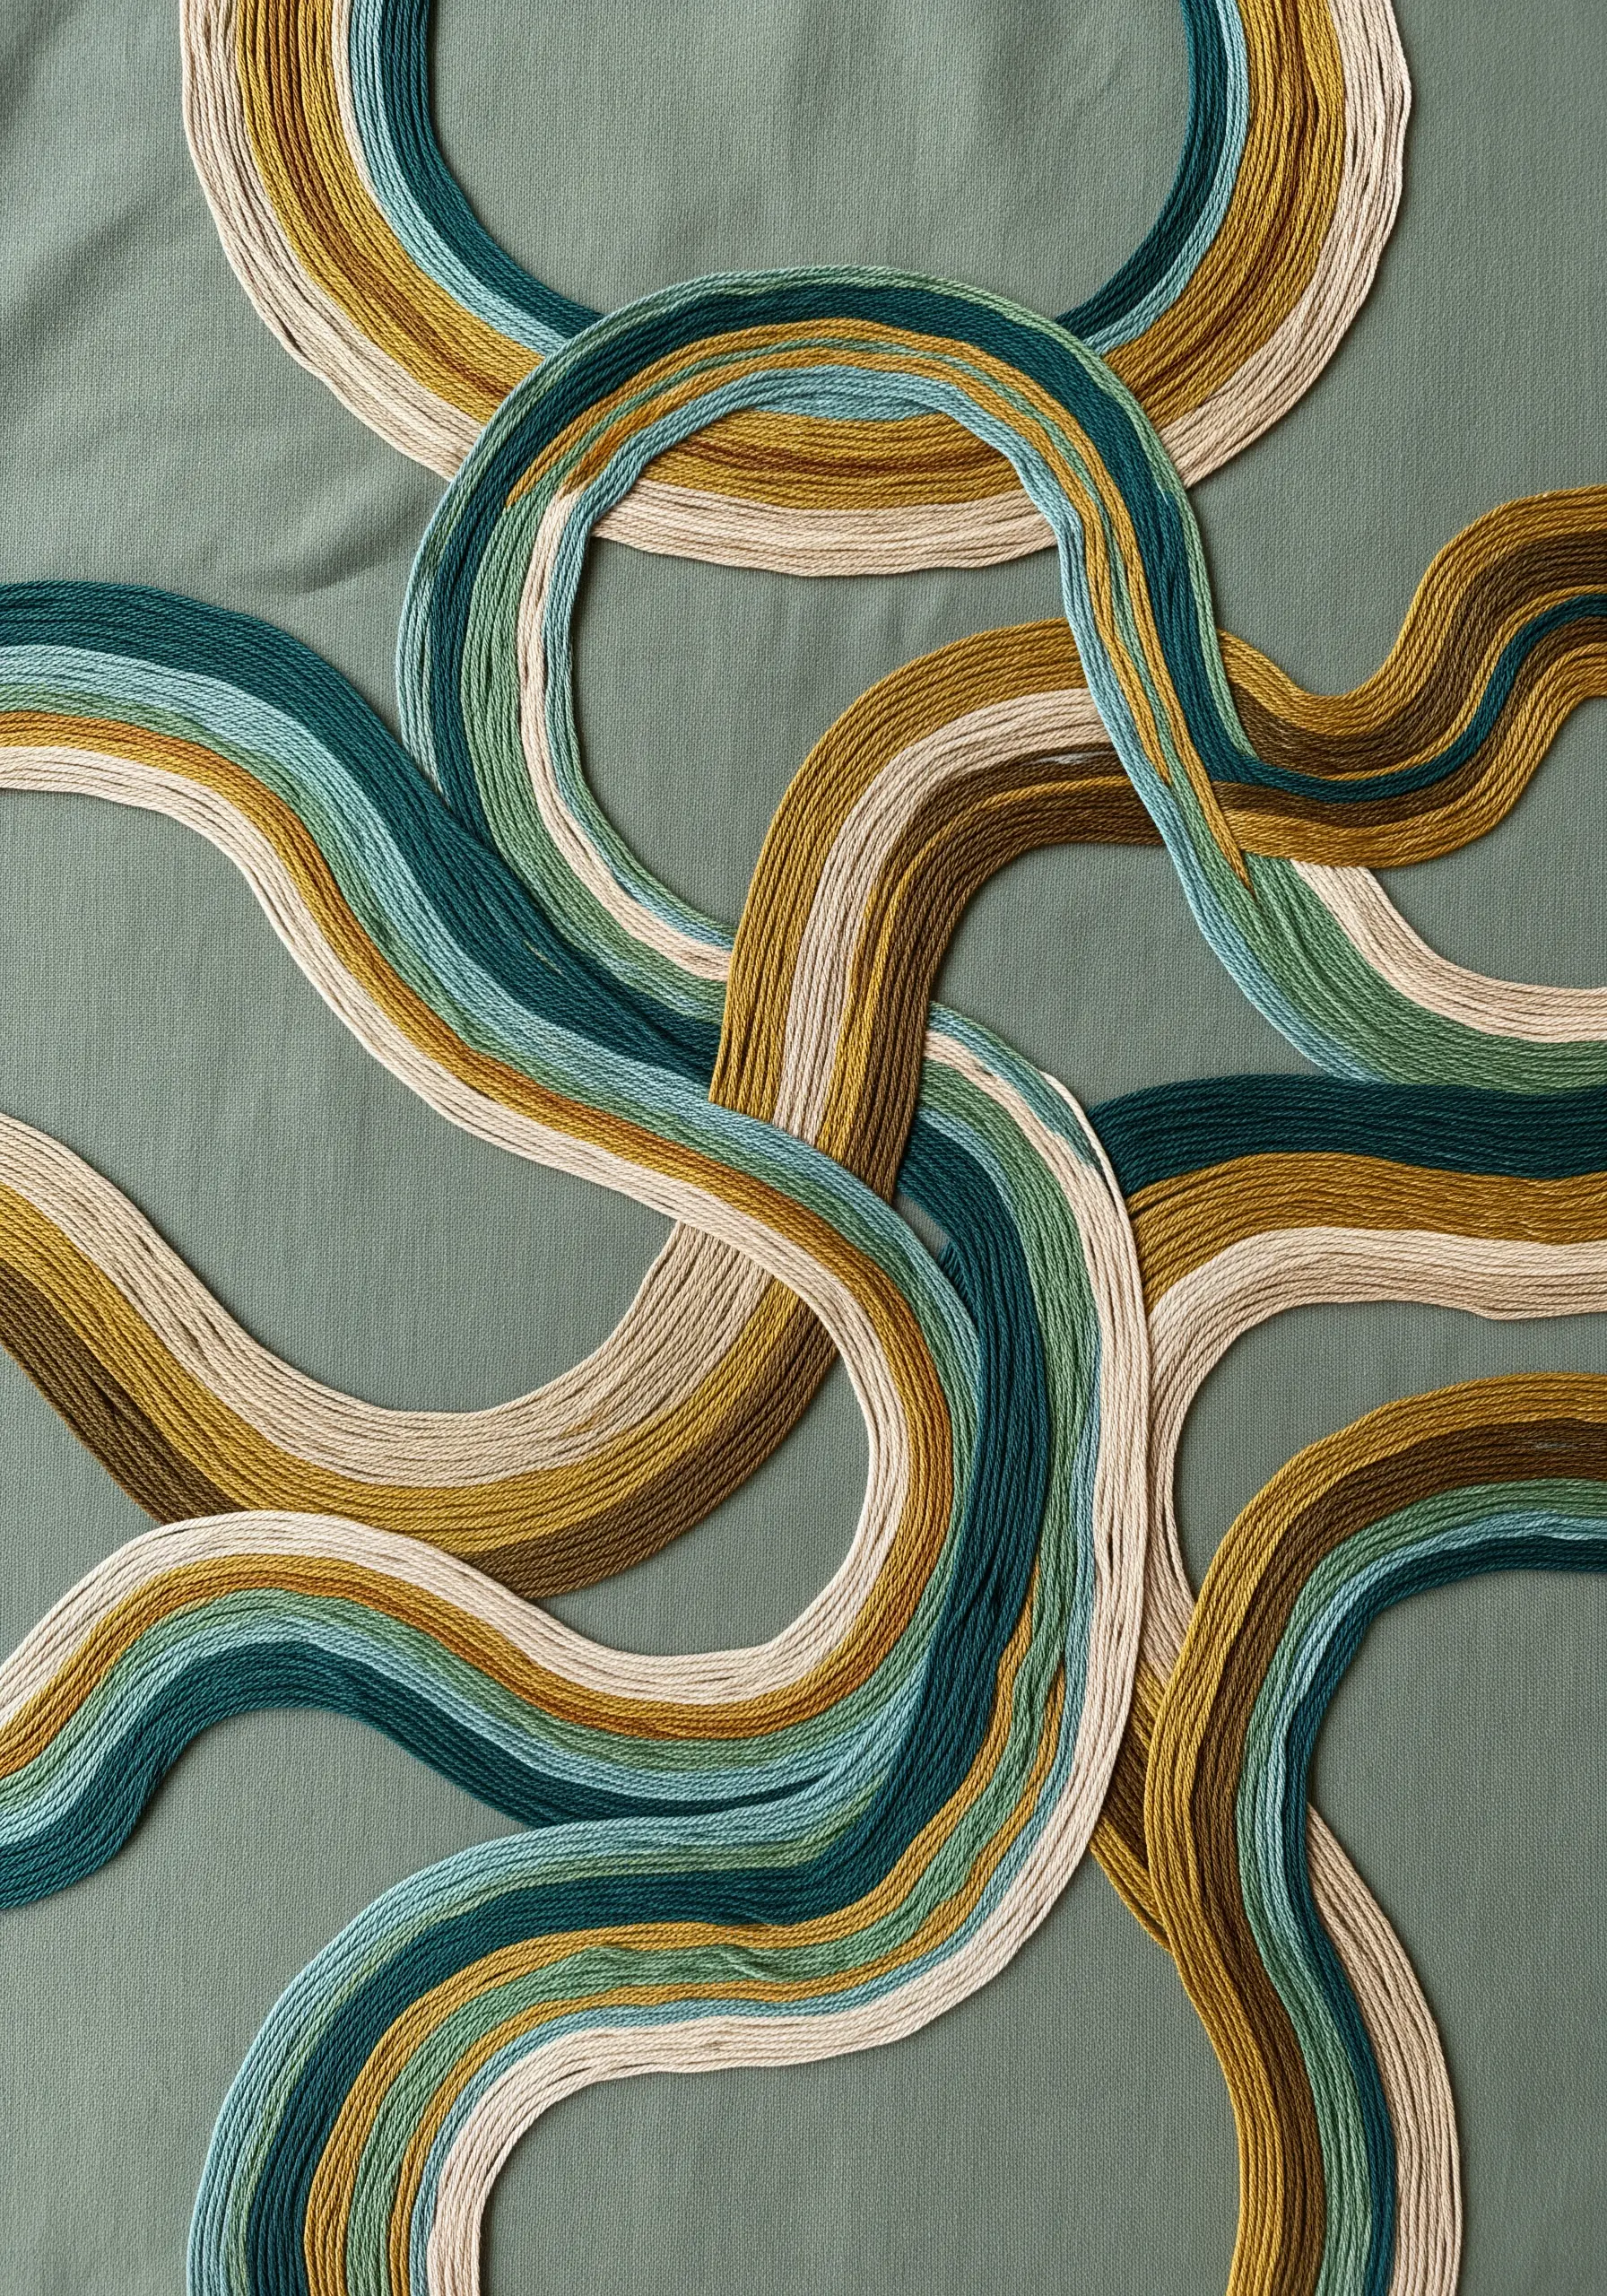
Create a sense of rhythm and movement by couching down bundles of thread in flowing, organic lines.
To achieve the woven effect, plan your paths so that one bundle physically passes over another, securing it with tiny, nearly invisible stitches in a matching color.
Use analogous colors (like greens, blues, and browns) to create a harmonious composition that feels both complex and calming.
This method adds depth and is perfect for large-scale stunning embroidered wall hangings.
8. Layer on Sheer Fabric for a Watercolor Effect

Stitch on organza or another sheer fabric to create ethereal, overlapping color fields.
When you layer the sheer fabric over a solid background or even another piece of stitched fabric, the colors blend visually, mimicking the transparency of watercolor paint.
Add sparse, delicate stitches like seed stitch on top of the shapes to provide a subtle texture that grounds the airy composition.
It’s one of the most clever ways to combine fabric and thread for stunning art.
9. Build Digital Textures with Layered Grids
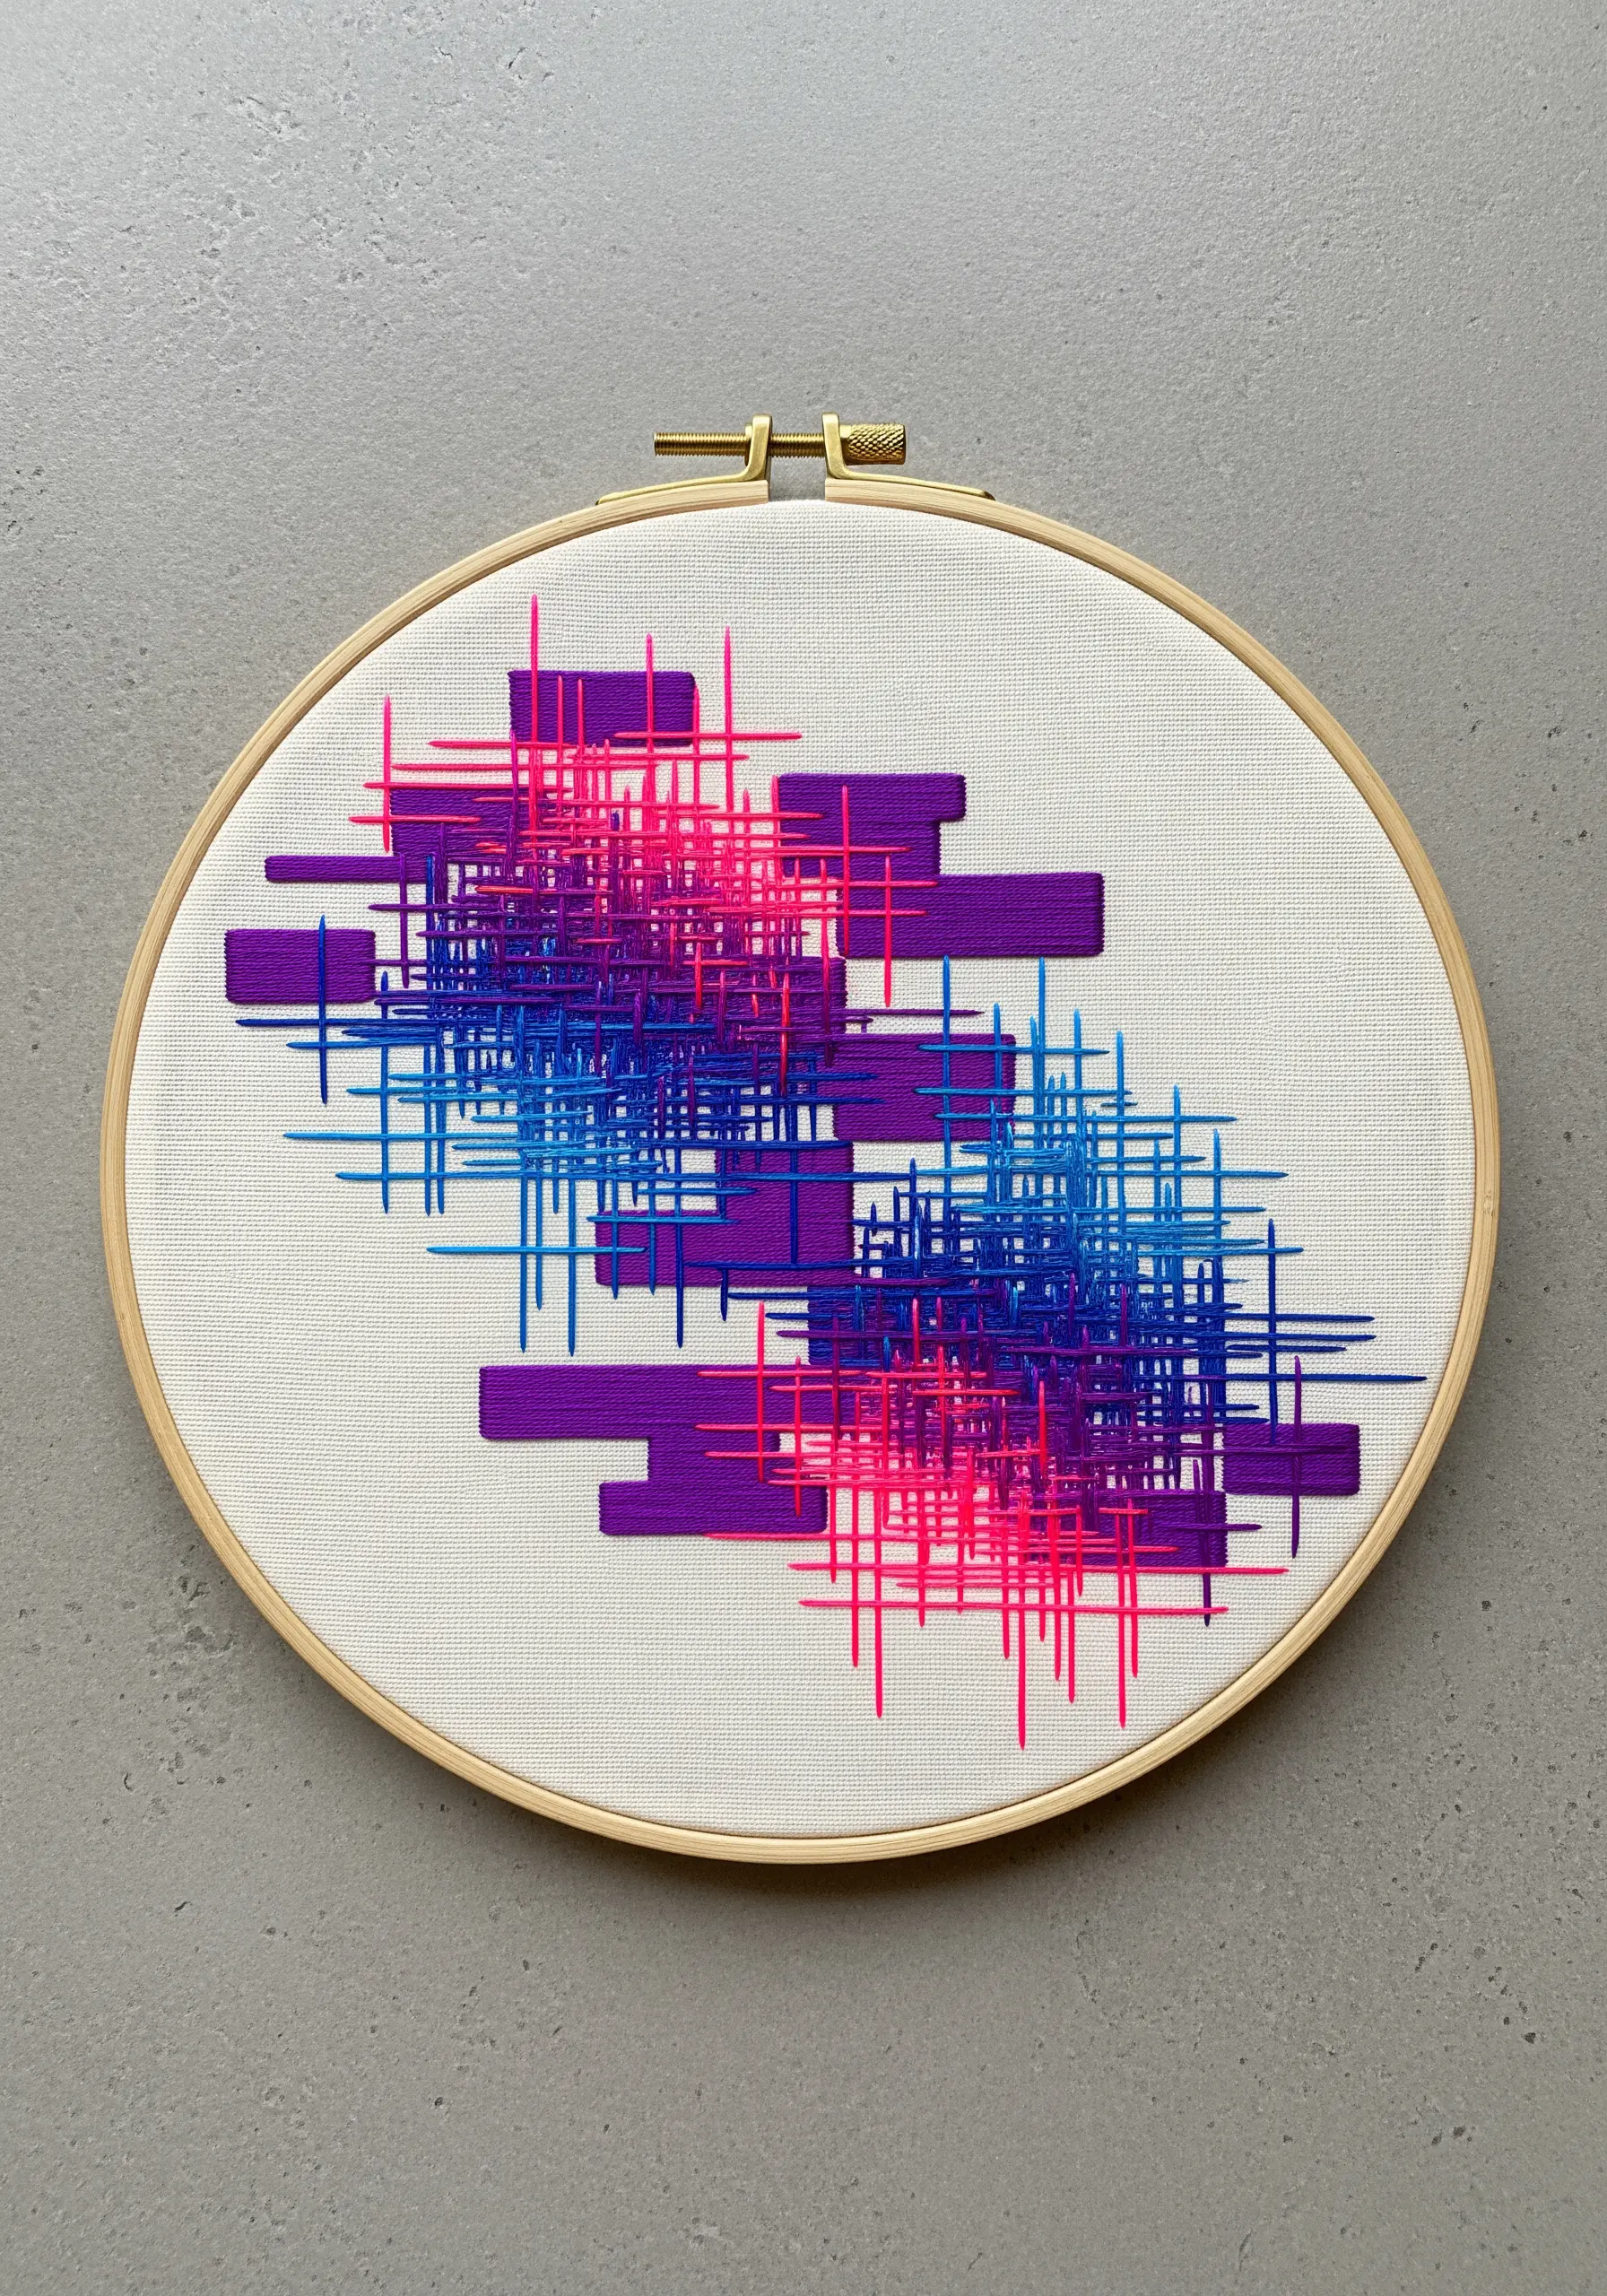
Create a modern, almost pixelated texture by layering straight stitches in a grid-like formation.
Start with a base of solid, horizontal satin stitch blocks in a dark color like purple.
Then, stitch over them with intersecting grids of vibrant pink and blue, allowing the colors to mix optically where they cross.
This technique turns thread into a graphic element, ideal for abstract embroidery stitches with a contemporary edge.
10. Master Blends with a Technical Sampler
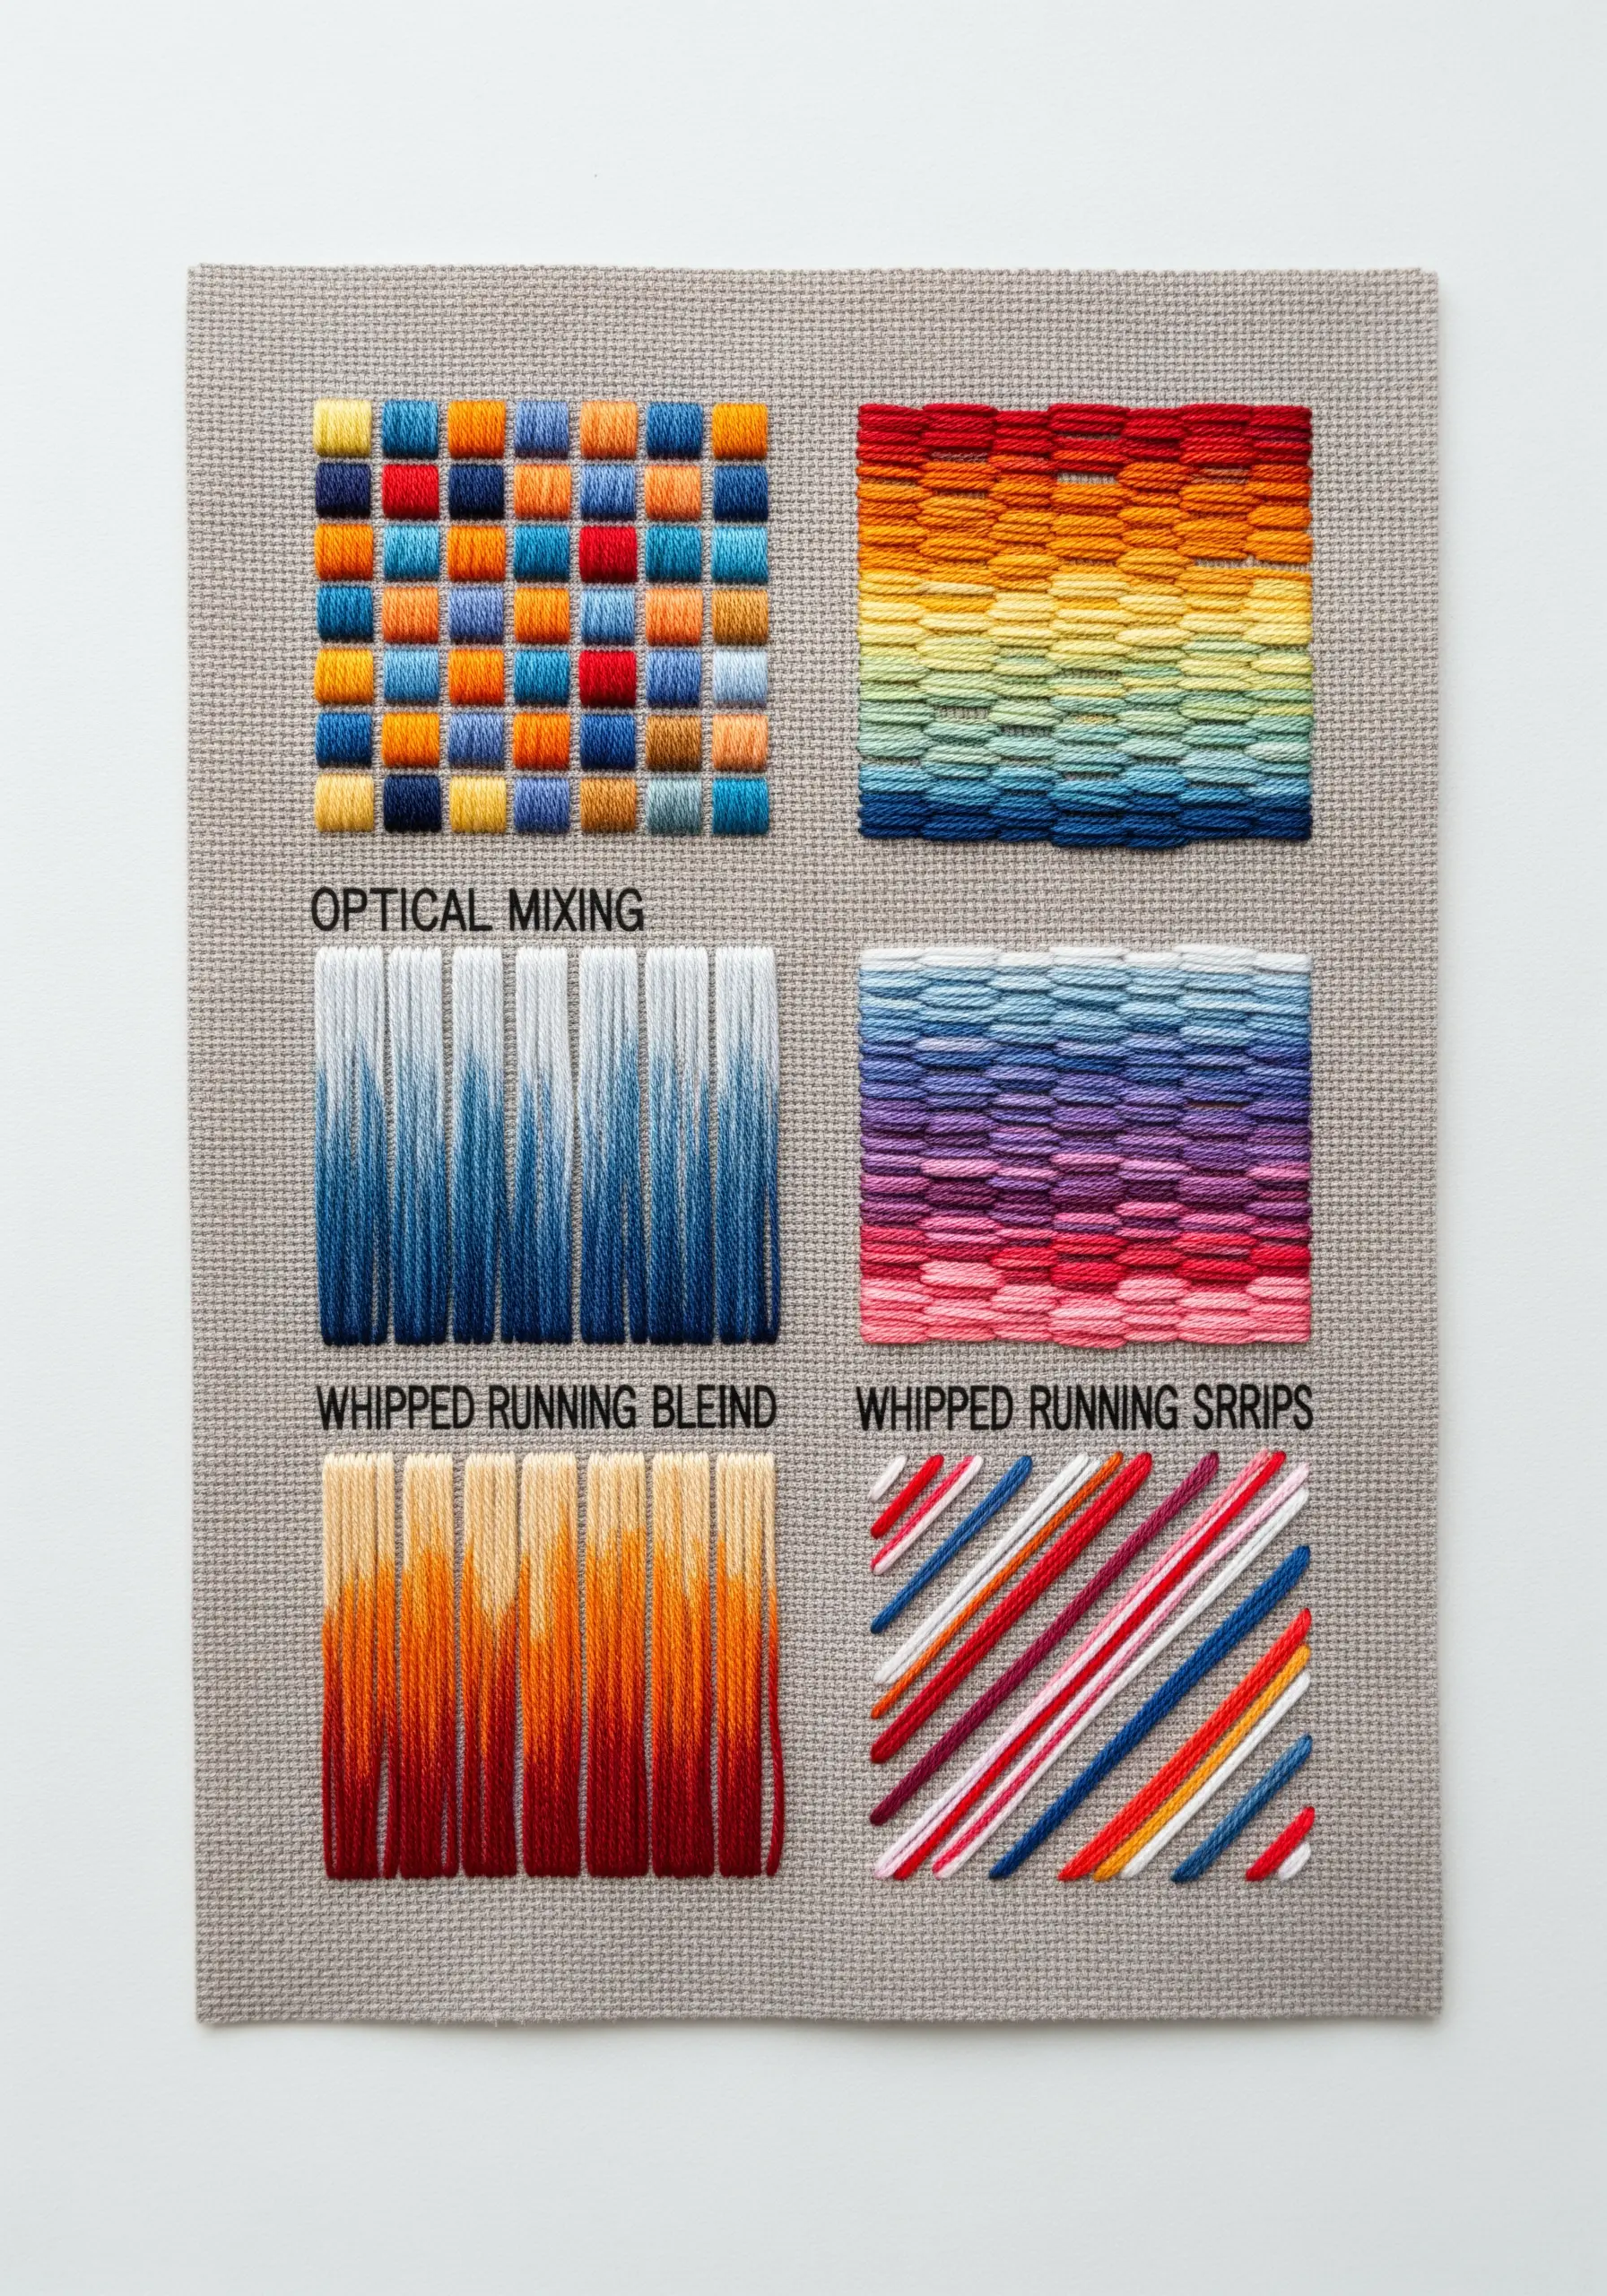
Dedicate a single piece to practicing and perfecting different blending techniques.
Divide your fabric into sections to experiment with optical mixing (checkerboard satin stitch), whipped running stitch gradients, and variegated thread effects.
Labeling each technique helps you build a personal reference guide for future projects.
This disciplined practice is the fastest way to elevate your work, making even simple embroidery patterns look professional.
11. Create Luminous Spirals on a Dark Background

Make your colors radiate by stitching a vibrant spiral on a dark, neutral fabric like black or navy linen.
Use a textured stitch like a chain stitch or a heavy backstitch, spiraling outwards from a bright, warm center (like yellow and orange) to cooler, darker edges (pinks, purples, and blues).
The high contrast with the background fabric makes the colors appear to glow, creating a stunning focal point for modern thread art techniques.
12. Construct Faceted Color with Wrapped Shapes

Build geometric, gem-like patterns by wrapping thread around a base structure.
Start by creating a grid of hexagons with a simple backstitch outline.
Then, fill each shape by wrapping floss from the outer edge to the center, changing colors in concentric rings.
This technique creates a beautifully faceted surface, turning simple geometry into texture-rich thread art ideas.
13. Perfect the Seamless Satin Stitch Gradient
The key to a flawless, paint-like gradient is the long-and-short stitch, a variation of the satin stitch.
Instead of stitching a solid block, work in rows of alternating long and short stitches.
For the next color, bring your needle up through the stitches of the previous row, interlocking the threads seamlessly.
Using a single strand of floss is crucial for achieving these watercolor-style embroidery patterns without any bulk or obvious lines.
14. Explore Off-Canvas Thread Installations
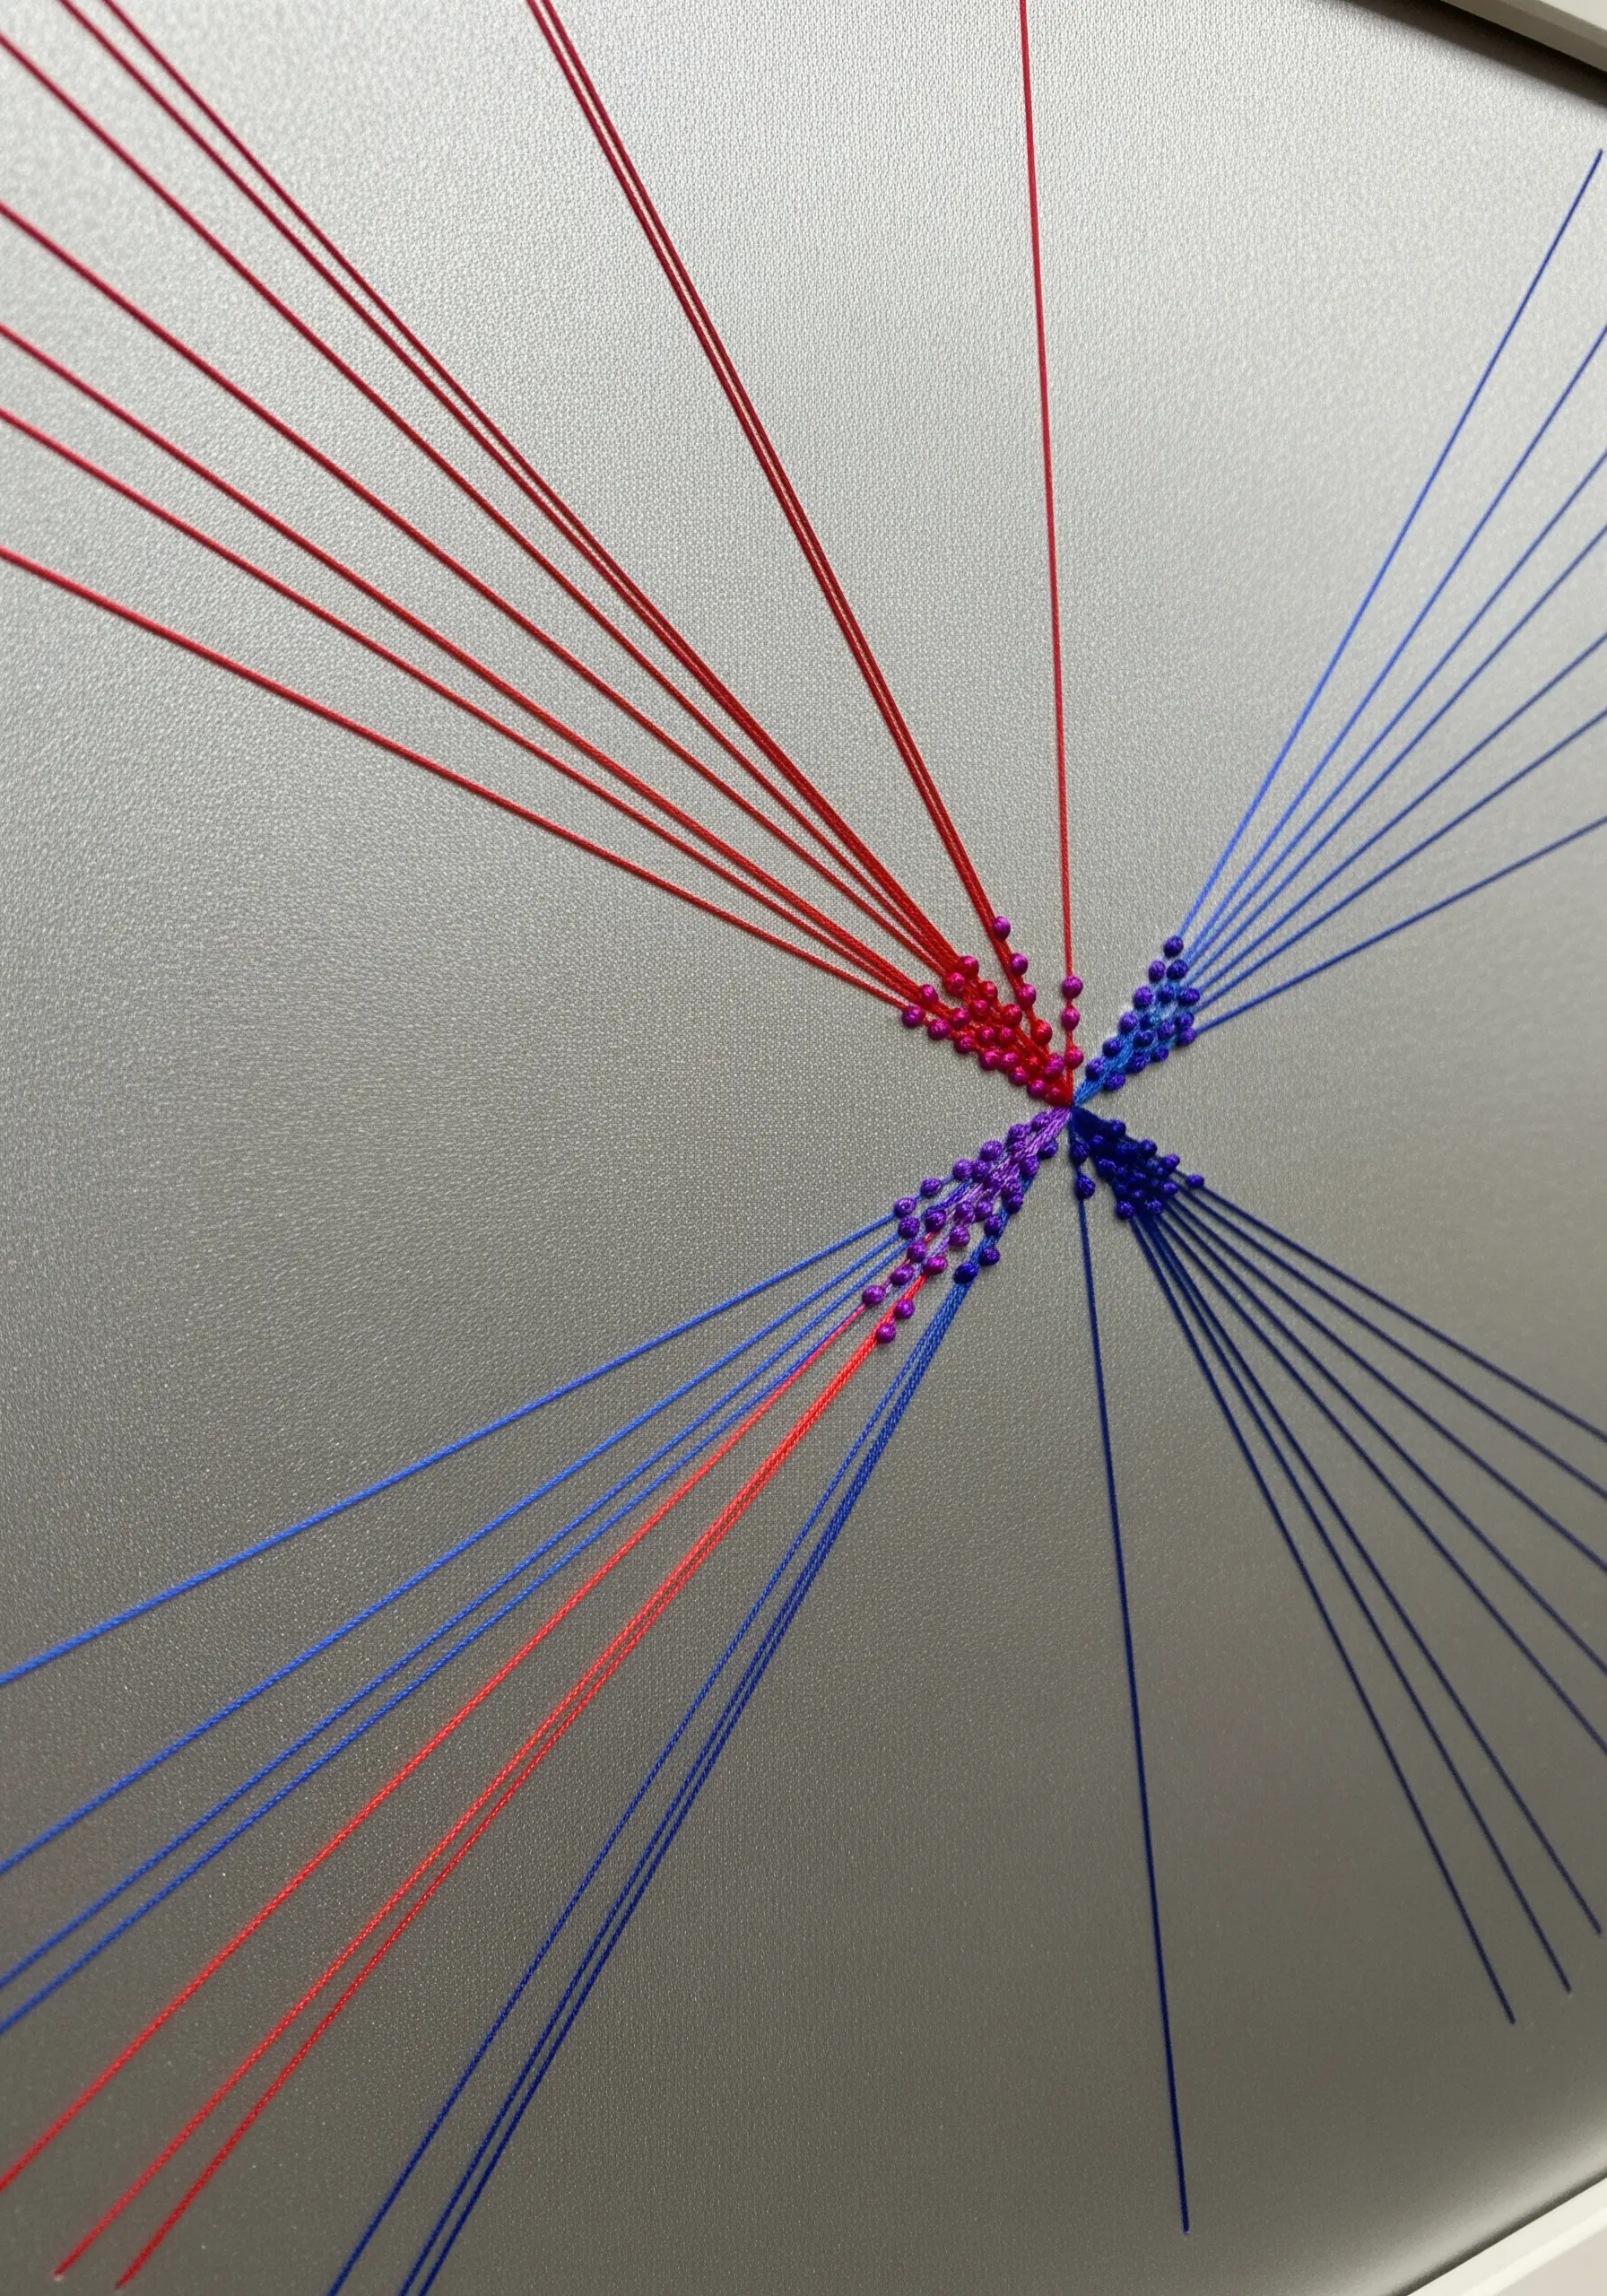
Take your stitching into the third dimension by creating string art directly on a board or wall.
Use small pins or nails as anchor points and stretch thread between them to form geometric lines and shapes.
Color blending occurs visually where threads of different colors converge and cross, creating new focal points of intense color.
This is one of the most compelling fiber art installations combining modern art and classic embroidery techniques you can try.
15. Blend Colors with Textural Stitch Bands
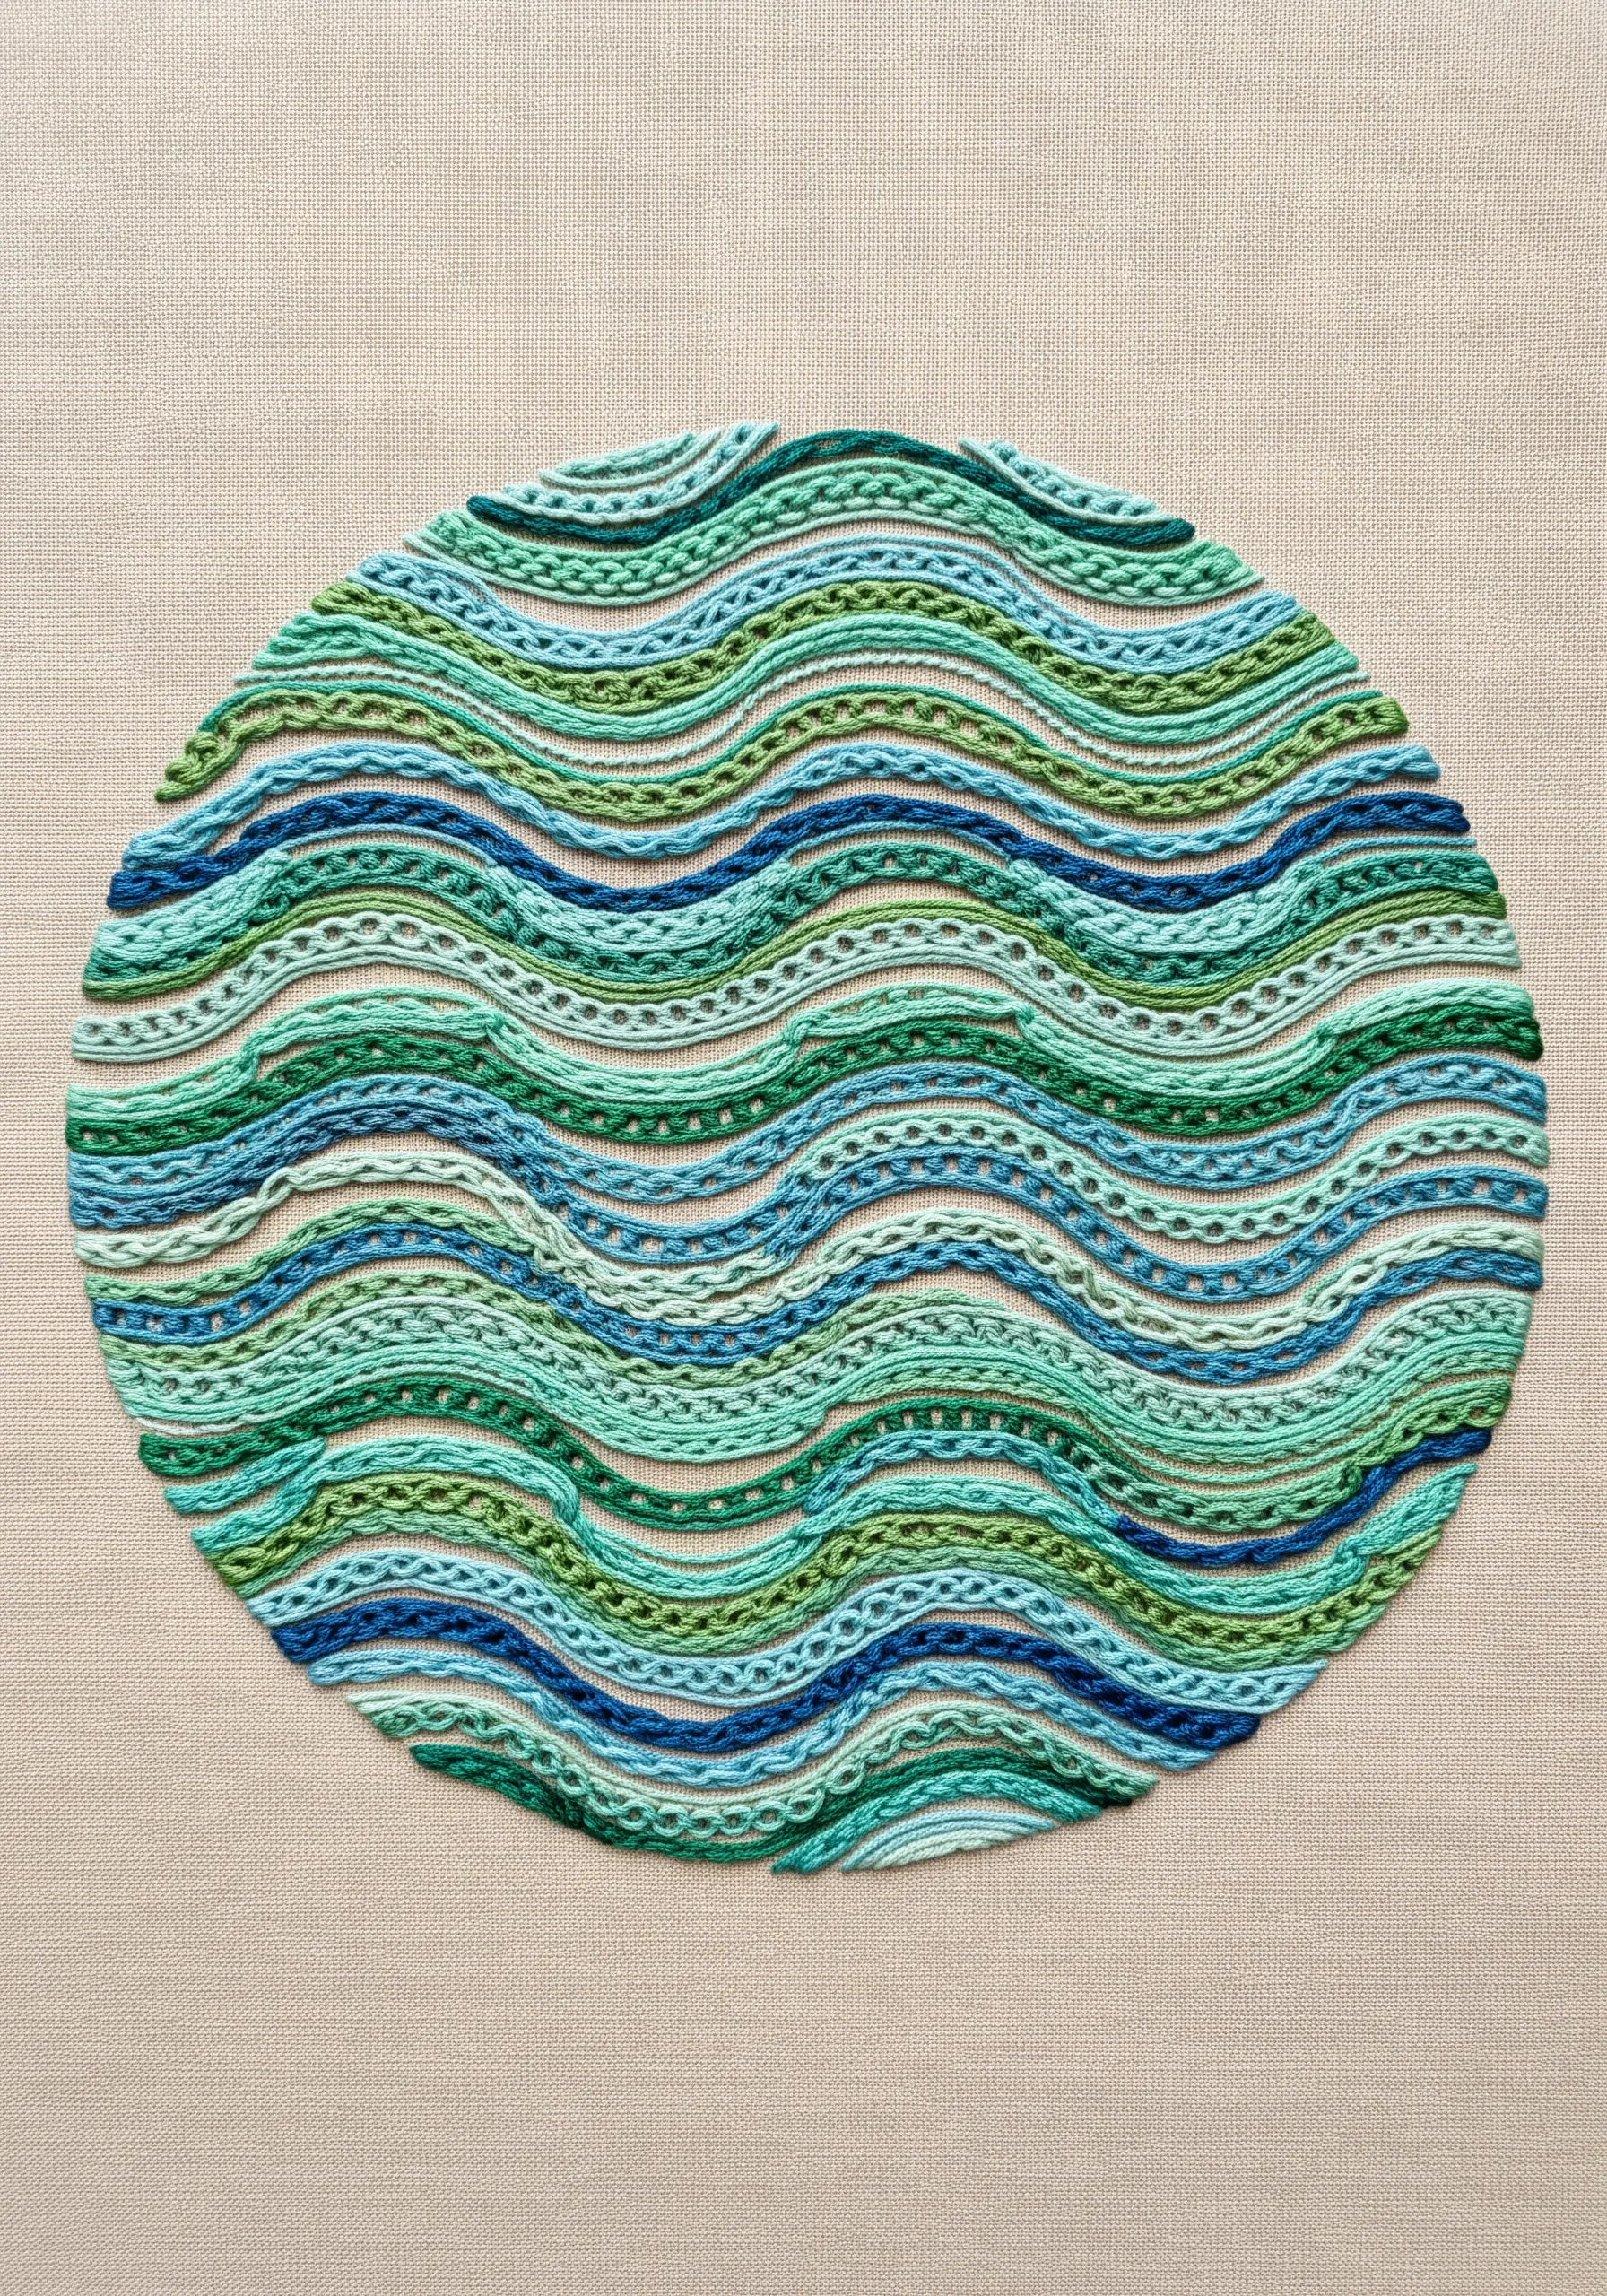
Create an abstract composition that feels like geological strata by alternating rows of different stitches.
Combine open stitches like the blanket stitch or fly stitch with denser ones like the chain stitch or split stitch.
By varying both the stitch type and the thread color in each wavy band, you build a piece with incredible depth and tactile interest.
This approach elevates simple motifs into captivating nature texture embroidery projects.
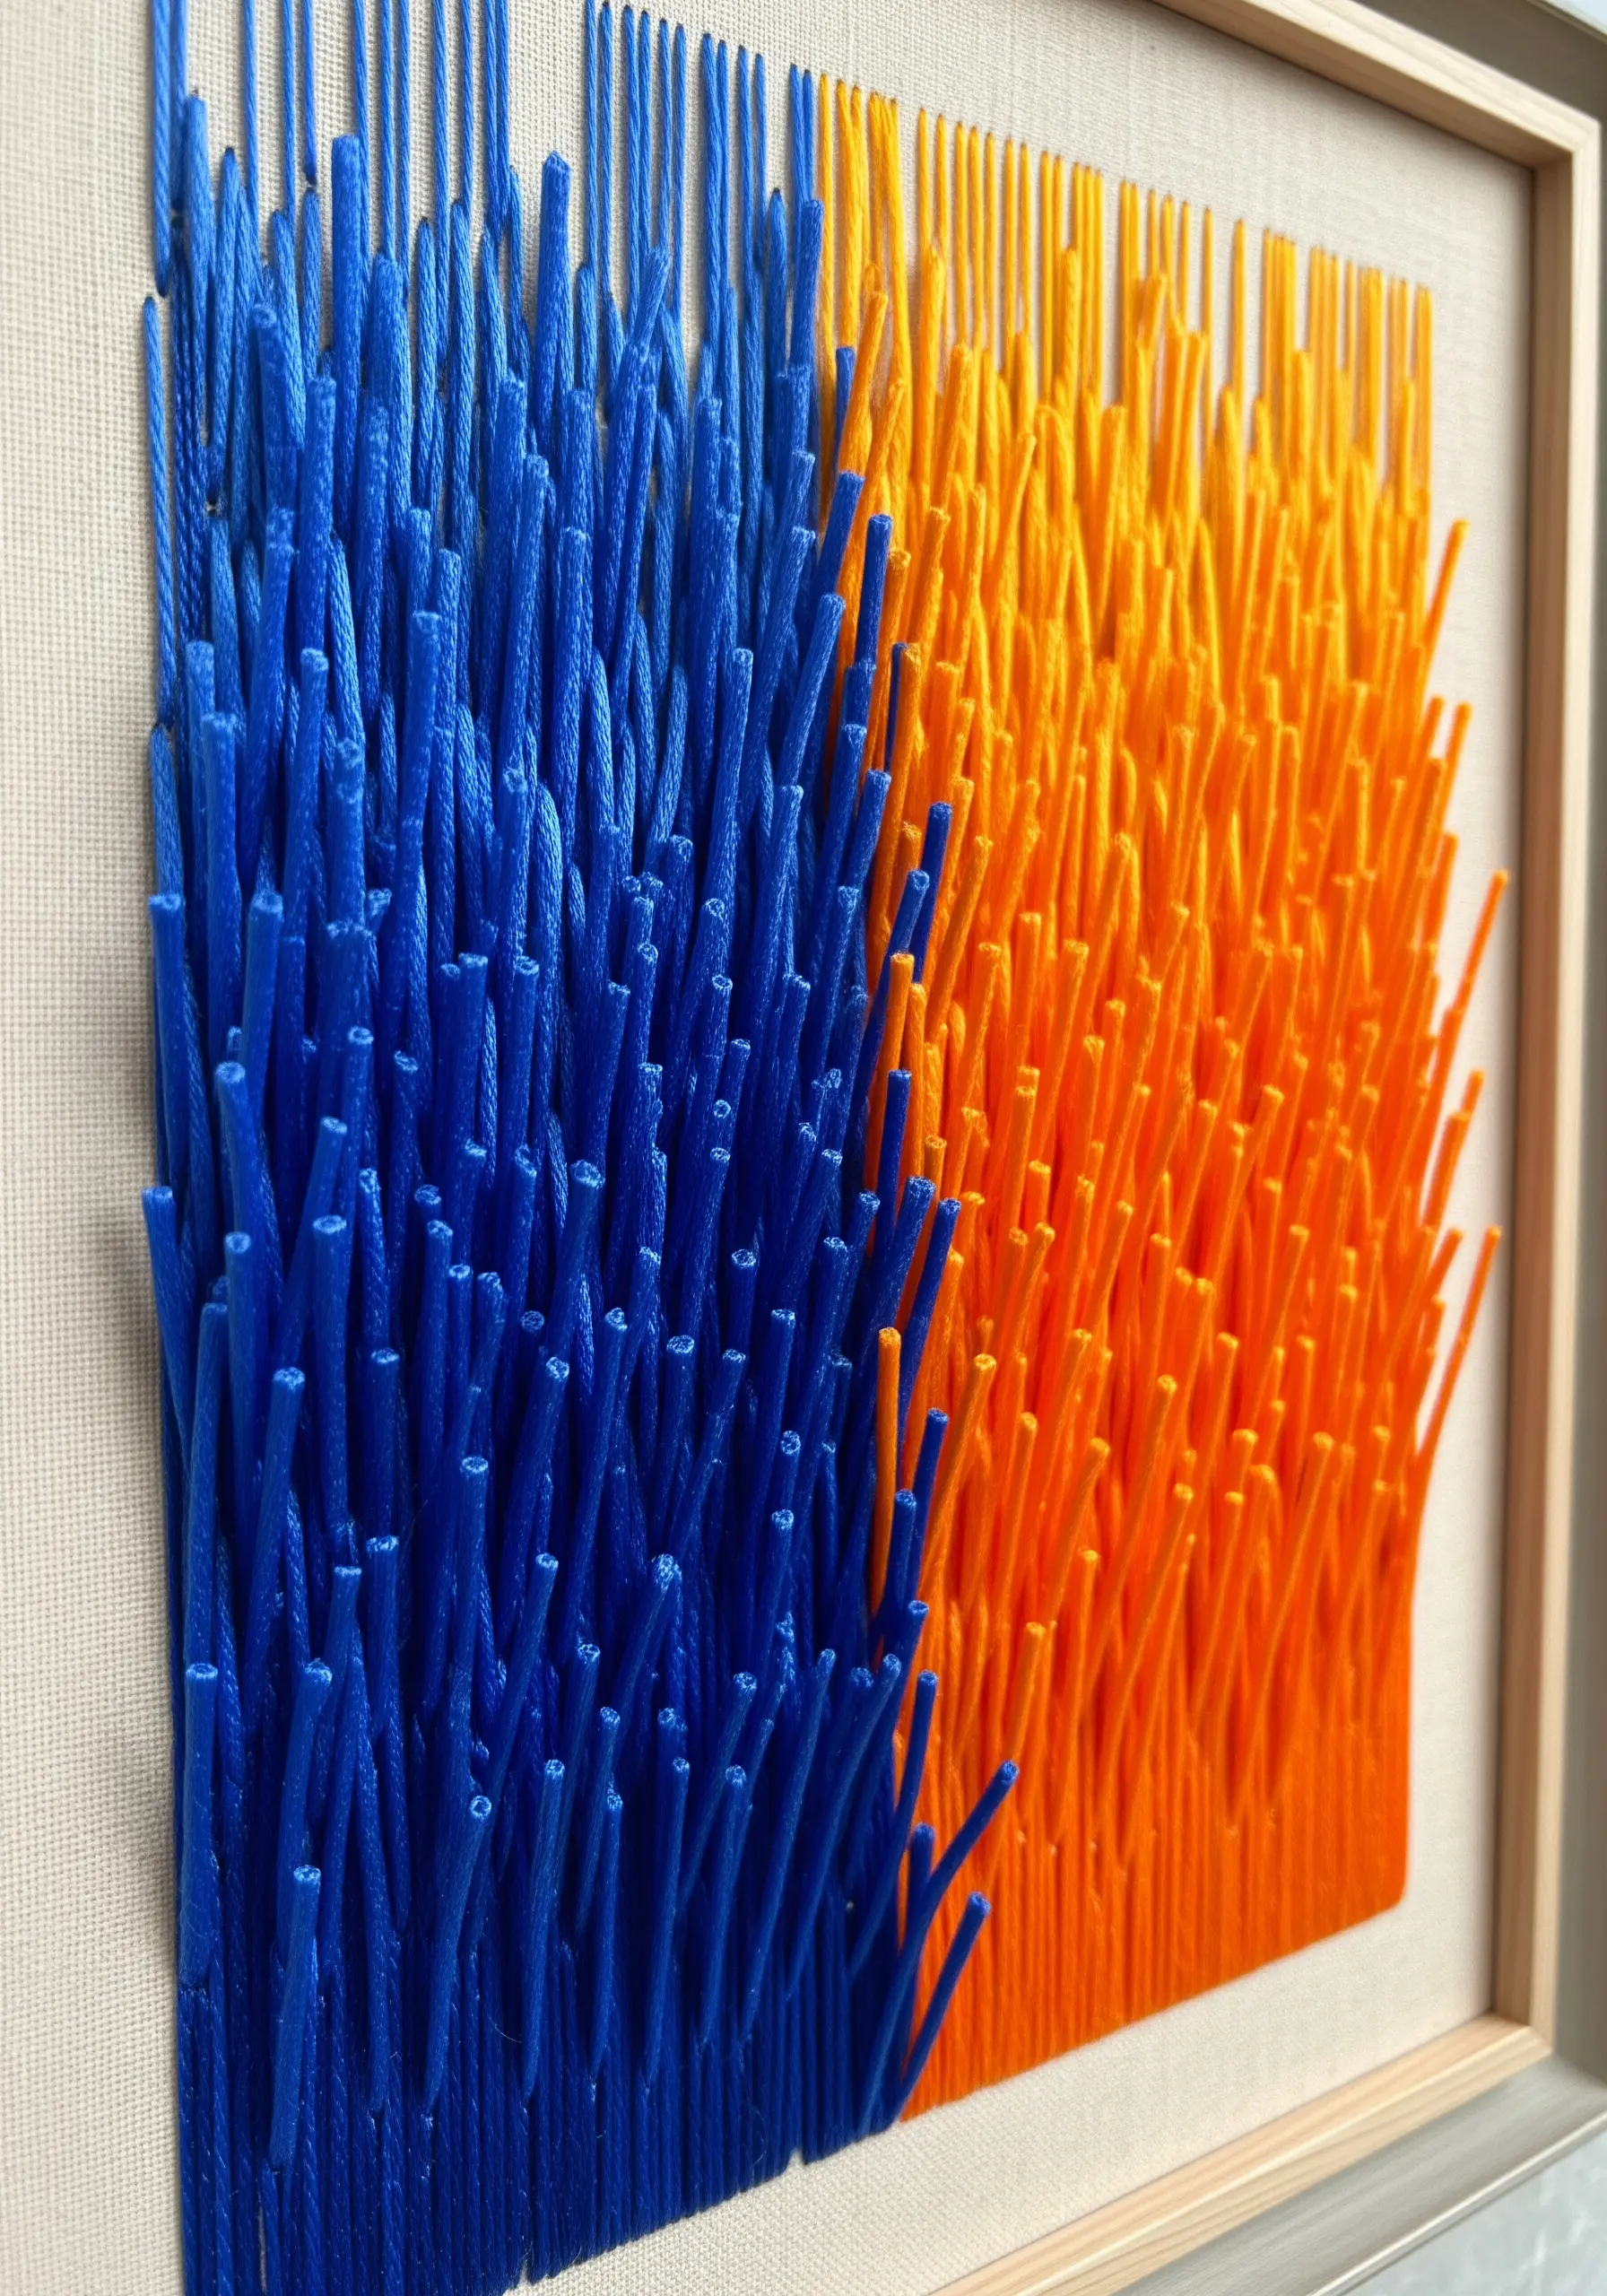
16. Create Dynamic Tension with Shattered Color

Juxtapose complementary colors like orange and blue to create a visually arresting design.
Fill irregular, shattered shapes with directional satin stitch, making sure the stitch direction varies between adjacent pieces to enhance the fragmented look.
Unify the composition with a meandering, vine-like outline in a dark, grounding color, which acts like kintsugi—the art of repairing broken pottery.
This method is perfect for abstract concept art embroidery ideas that convey energy and emotion.
17. Achieve Flawless Radial Gradients
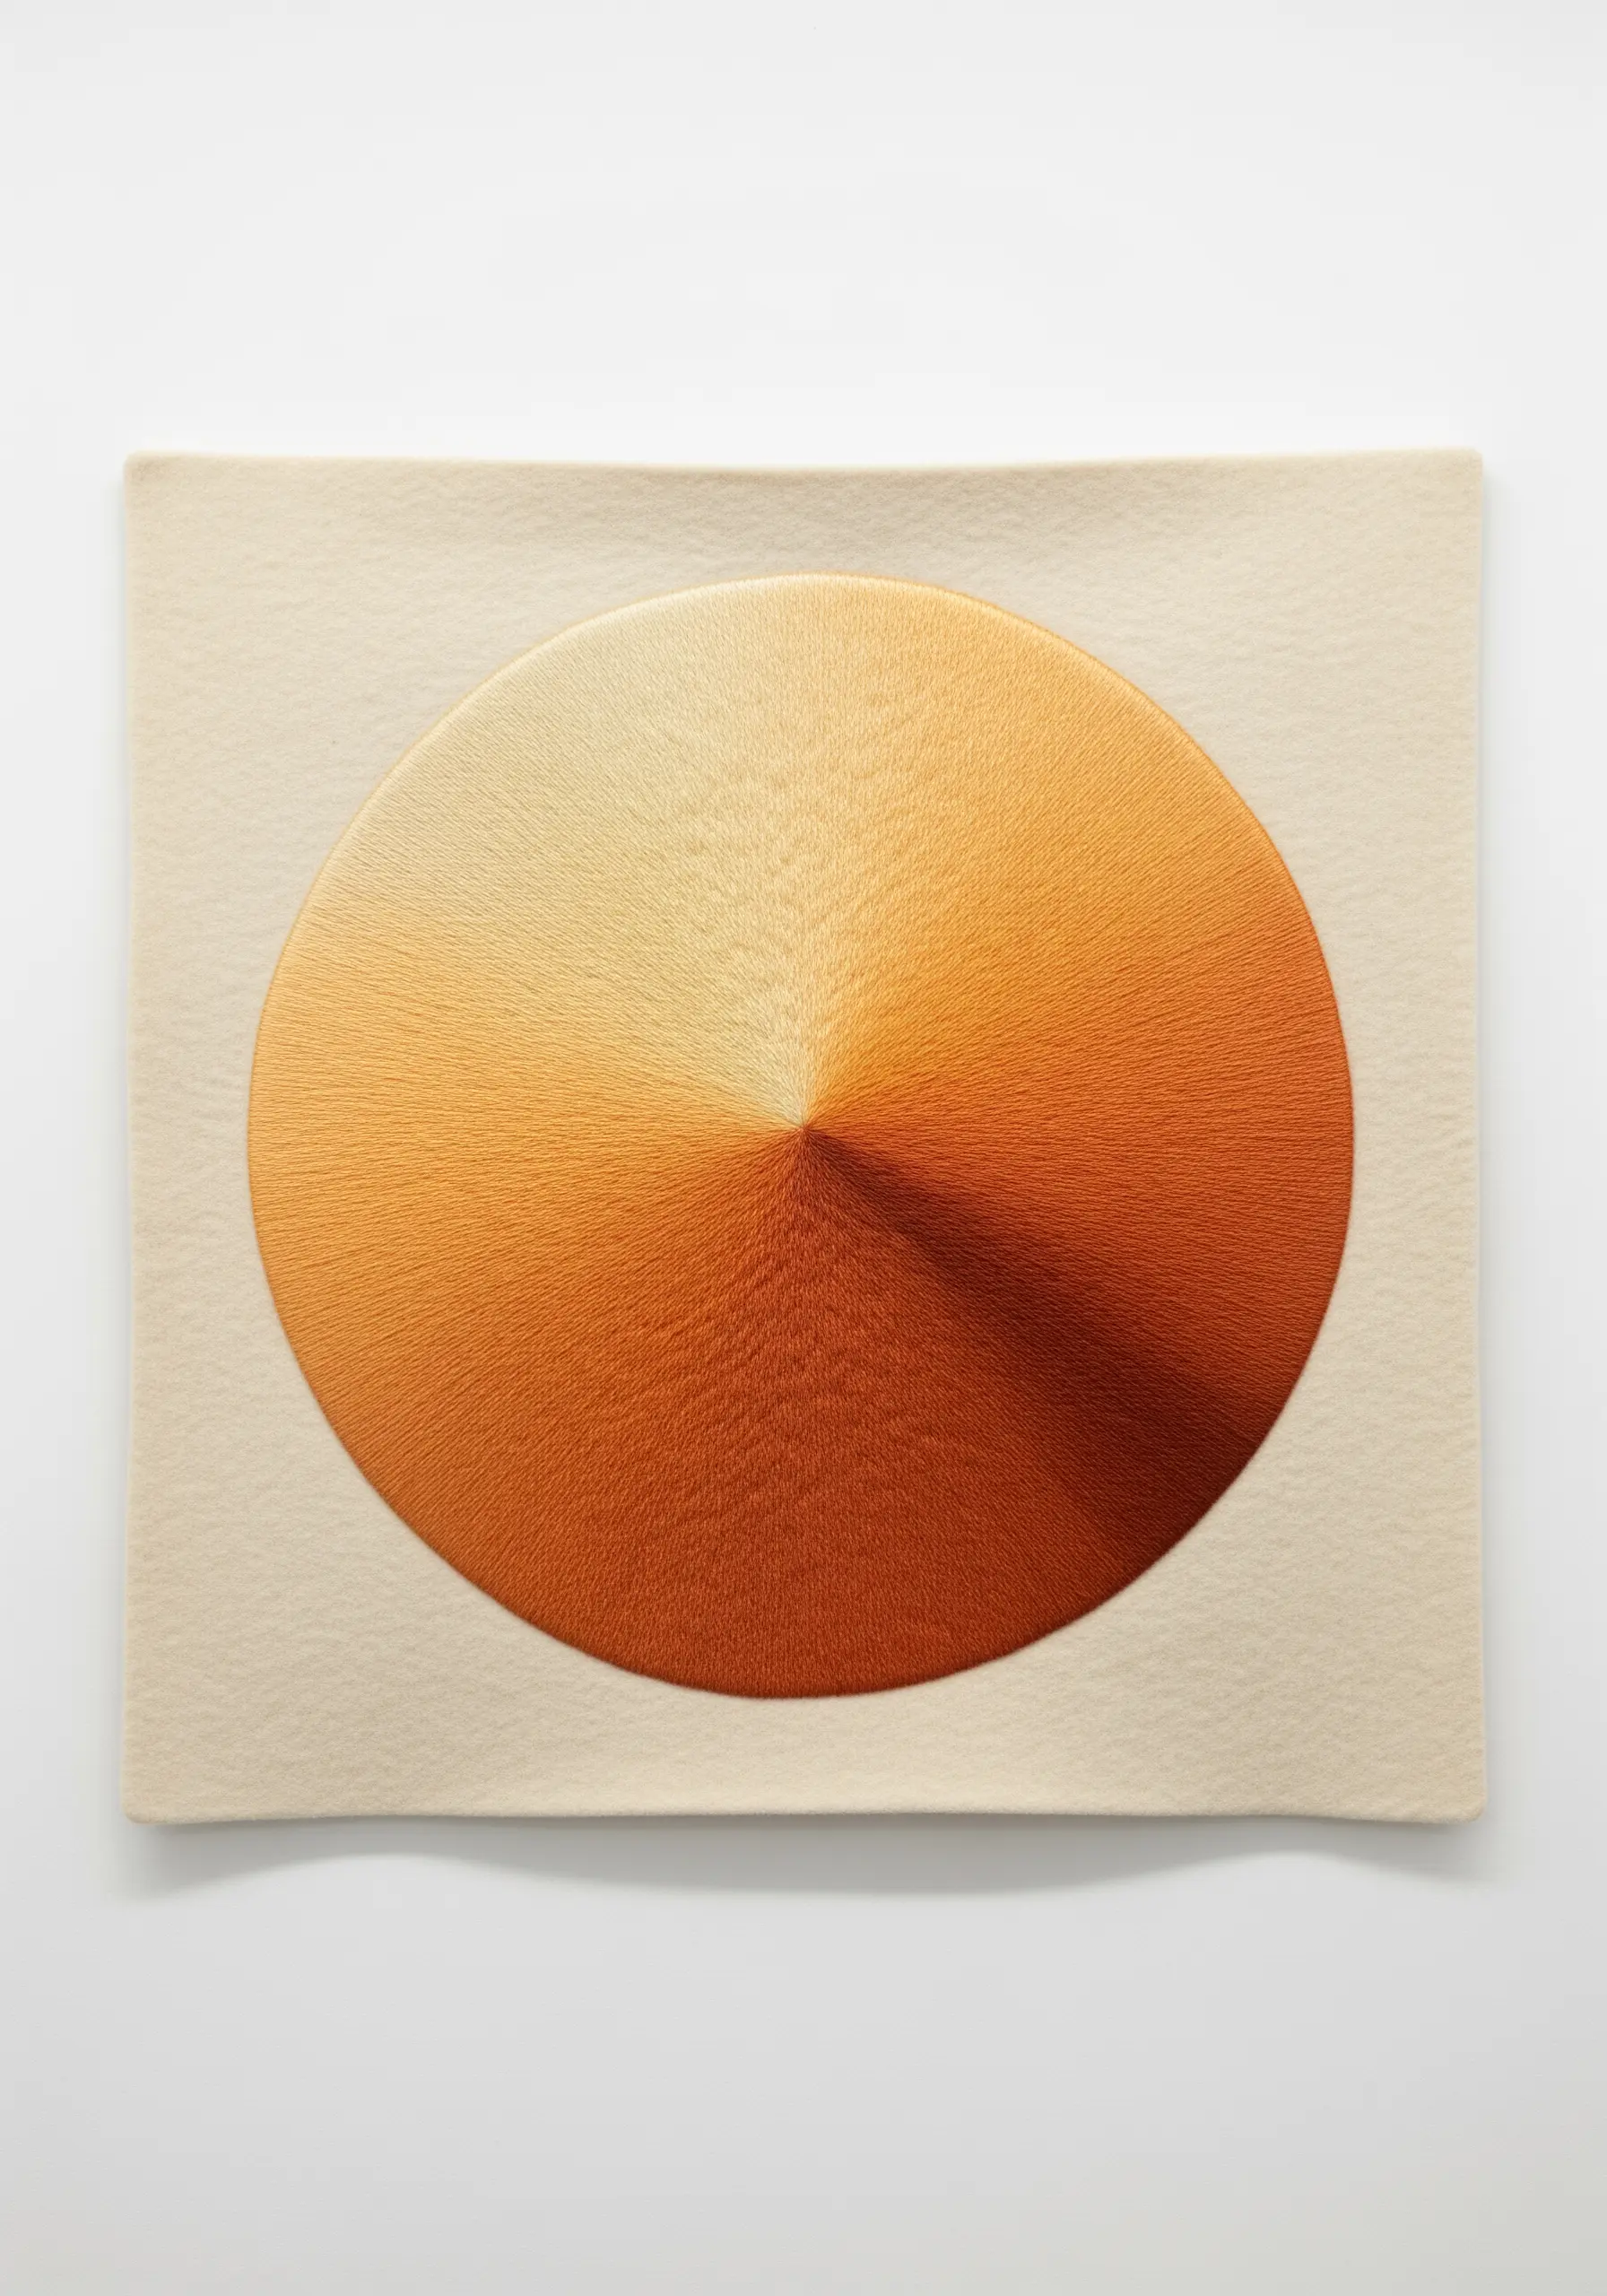
To create this mesmerizing conical effect, every single stitch must radiate perfectly from a central point.
Use a fine needle and single-strand floss to ensure your stitches can be placed with absolute precision.
Maintain consistent, firm tension on each stitch to create a smooth, reflective surface that catches the light.
This demanding technique results in modern minimal mandala embroidery ideas with an almost metallic sheen.
18. Mimic Painterly Brushstrokes with Thread
Translate the energy of a painter’s brushstroke into your embroidery.
Use horizontal satin stitches to create solid blocks of color, but leave the ends ragged and uneven, as if dragging a dry brush across canvas.
Blend multiple shades within each stroke to give it depth and movement.
This technique turns your needle into a brush, perfect for abstract color blend stitch ideas that feel expressive and dynamic.
19. Use Pointillism with Seed Stitches
Create soft, ethereal color blends using the pointillist technique with tiny seed stitches.
Instead of filling an area solidly, scatter small, individual stitches, varying the density of each color to create transitions.
Where two colors meet, intersperse the stitches to create a gentle, mixed effect.
This is a wonderfully meditative process, ideal for calming DIY embroidery projects with a soft, dreamy finish.
20. Stitch Organic Shapes Inspired by Nature
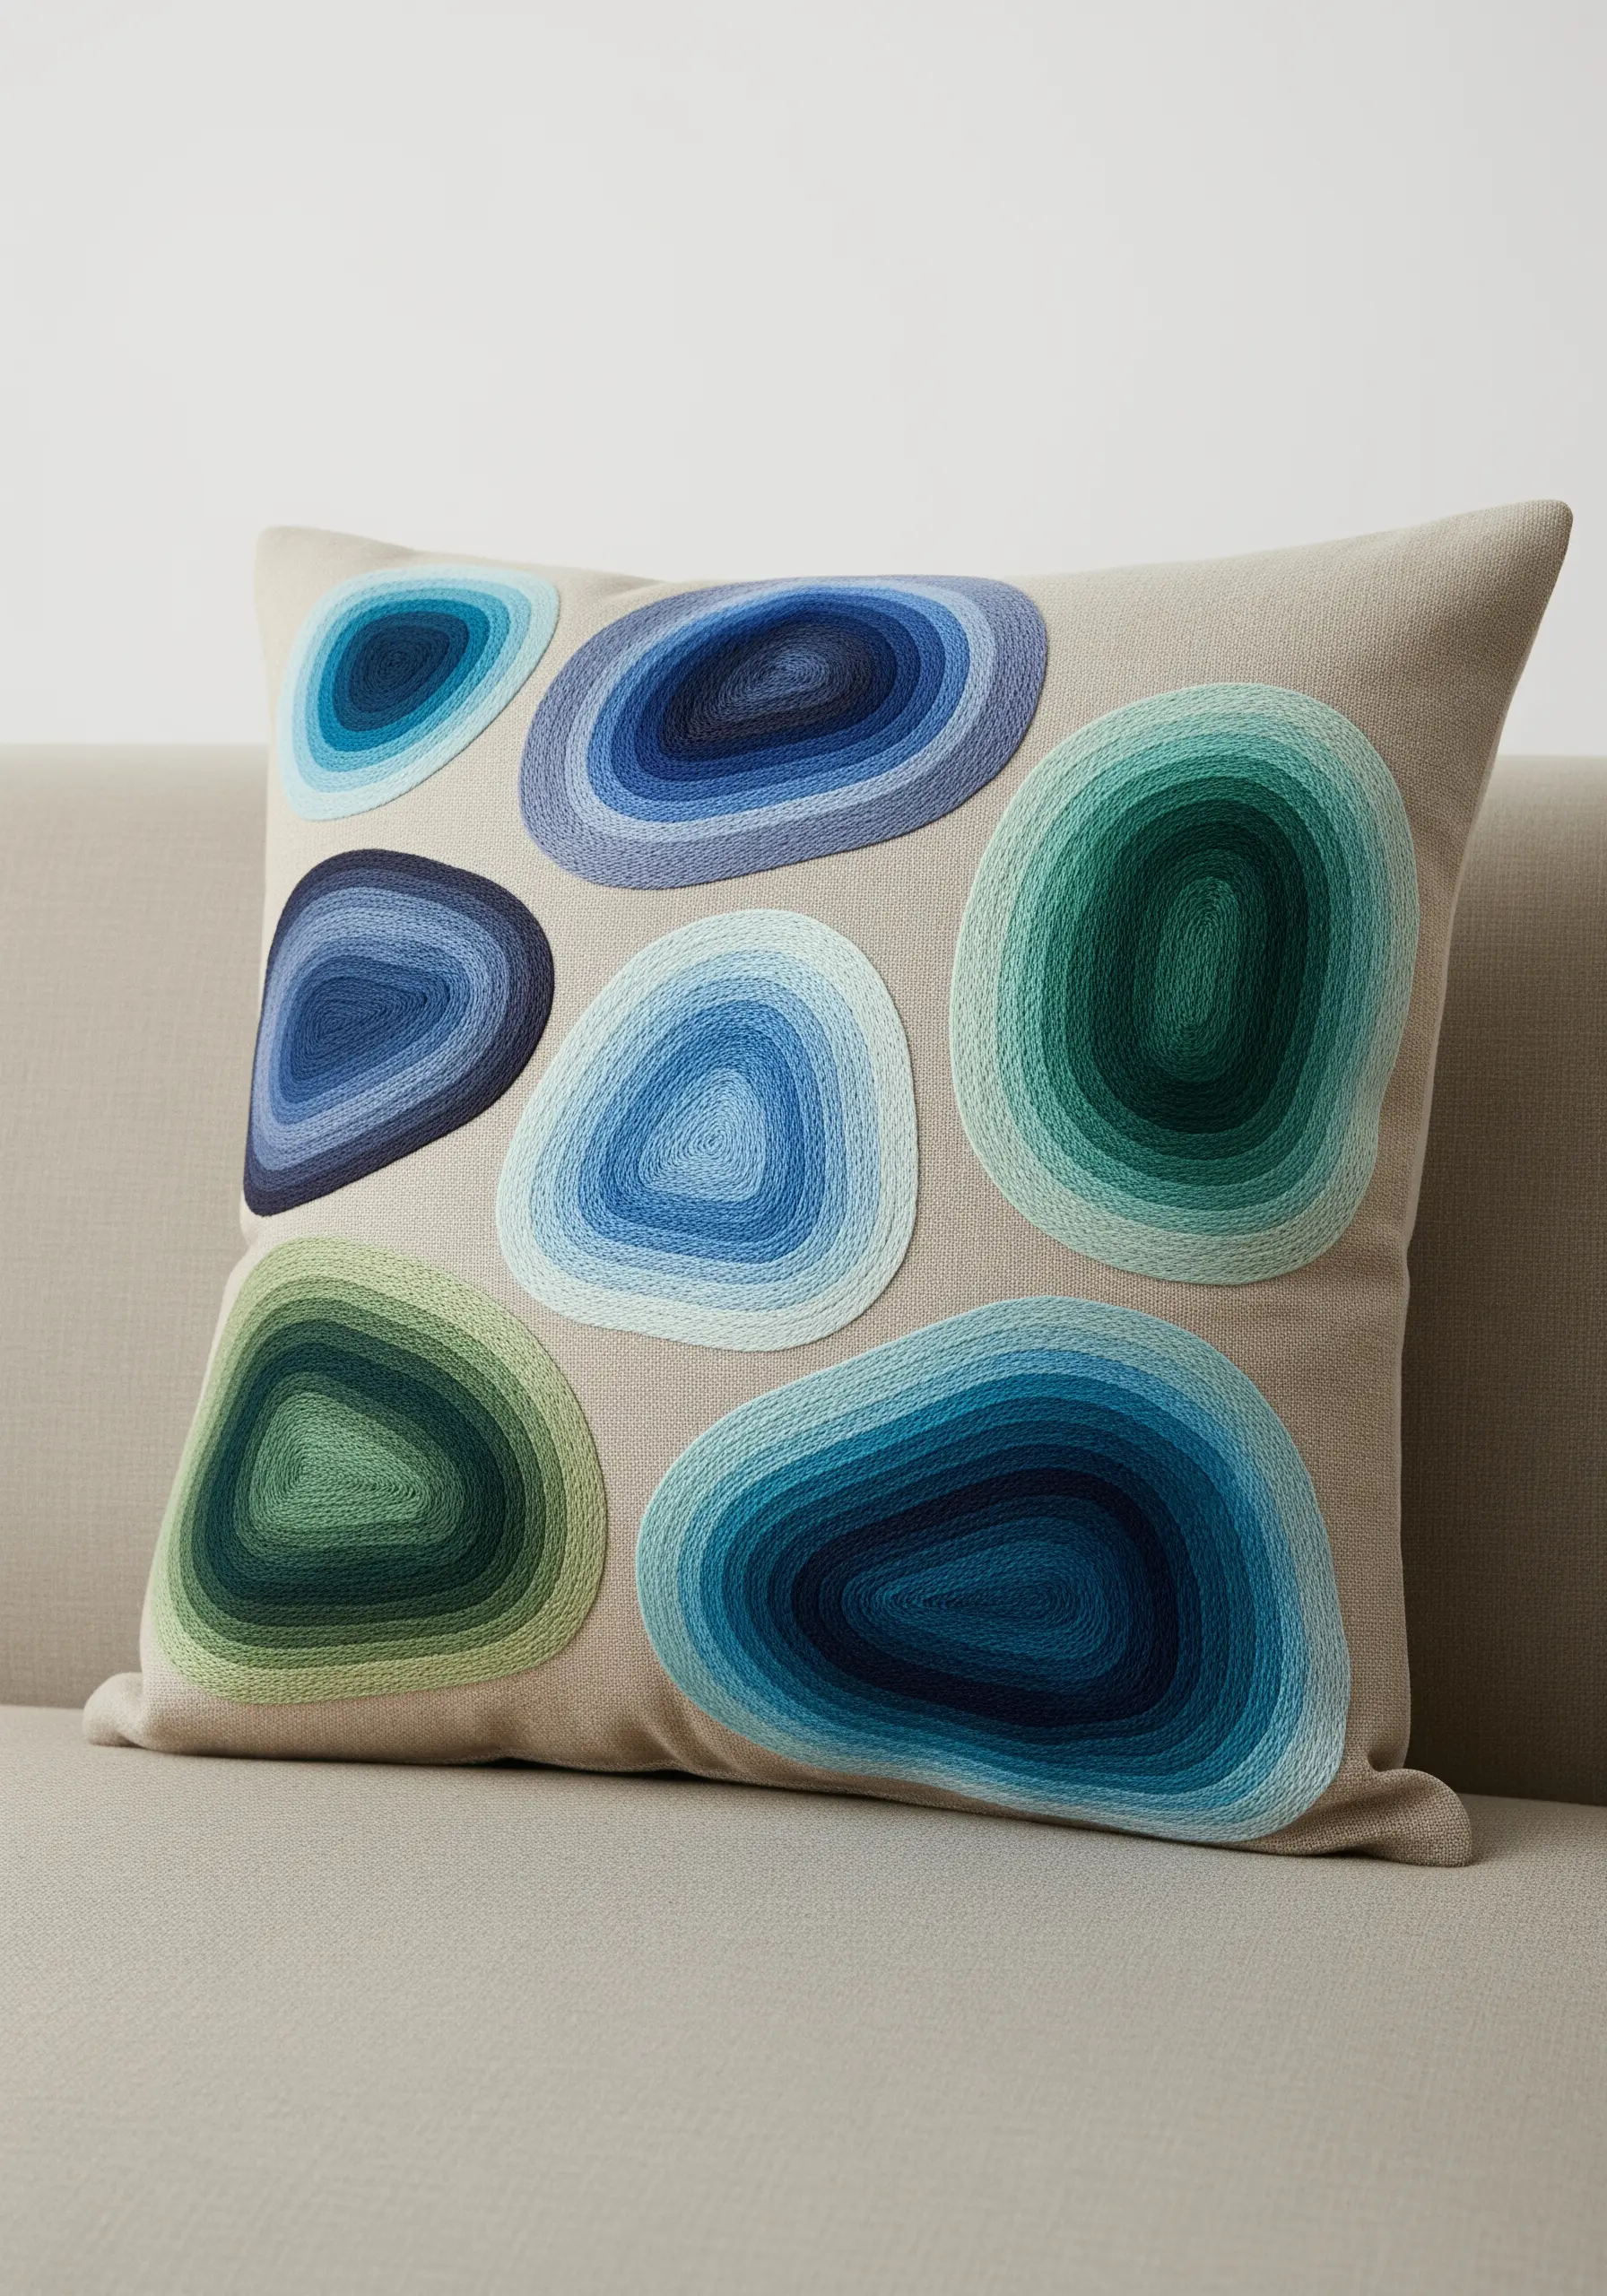
Look to natural forms like agate slices or smooth stones for abstract inspiration.
Outline your organic shapes and fill them with concentric rings of satin stitch or backstitch.
Group your colors in cool or warm palettes to mimic geological layers.
This technique is wonderfully adaptable for embroidered pillow covers, adding a touch of sophisticated, nature-inspired art to your home.
21. Create Graphic Movement with Bargello Stitch

Bargello, or Florentine stitch, is a counted-thread technique that uses upright stitches arranged in a mathematical pattern to create stunning geometric designs.
By changing your thread color with each row or section, you can build mesmerizing waves, flames, or diamonds.
The structured nature of the stitch makes it perfect for creating clean, diagonal gradients that pop against a dark background.
Explore it for abstract optical illusion stitches that feel both vintage and modern.
22. Contrast Flat and Textured Stitching
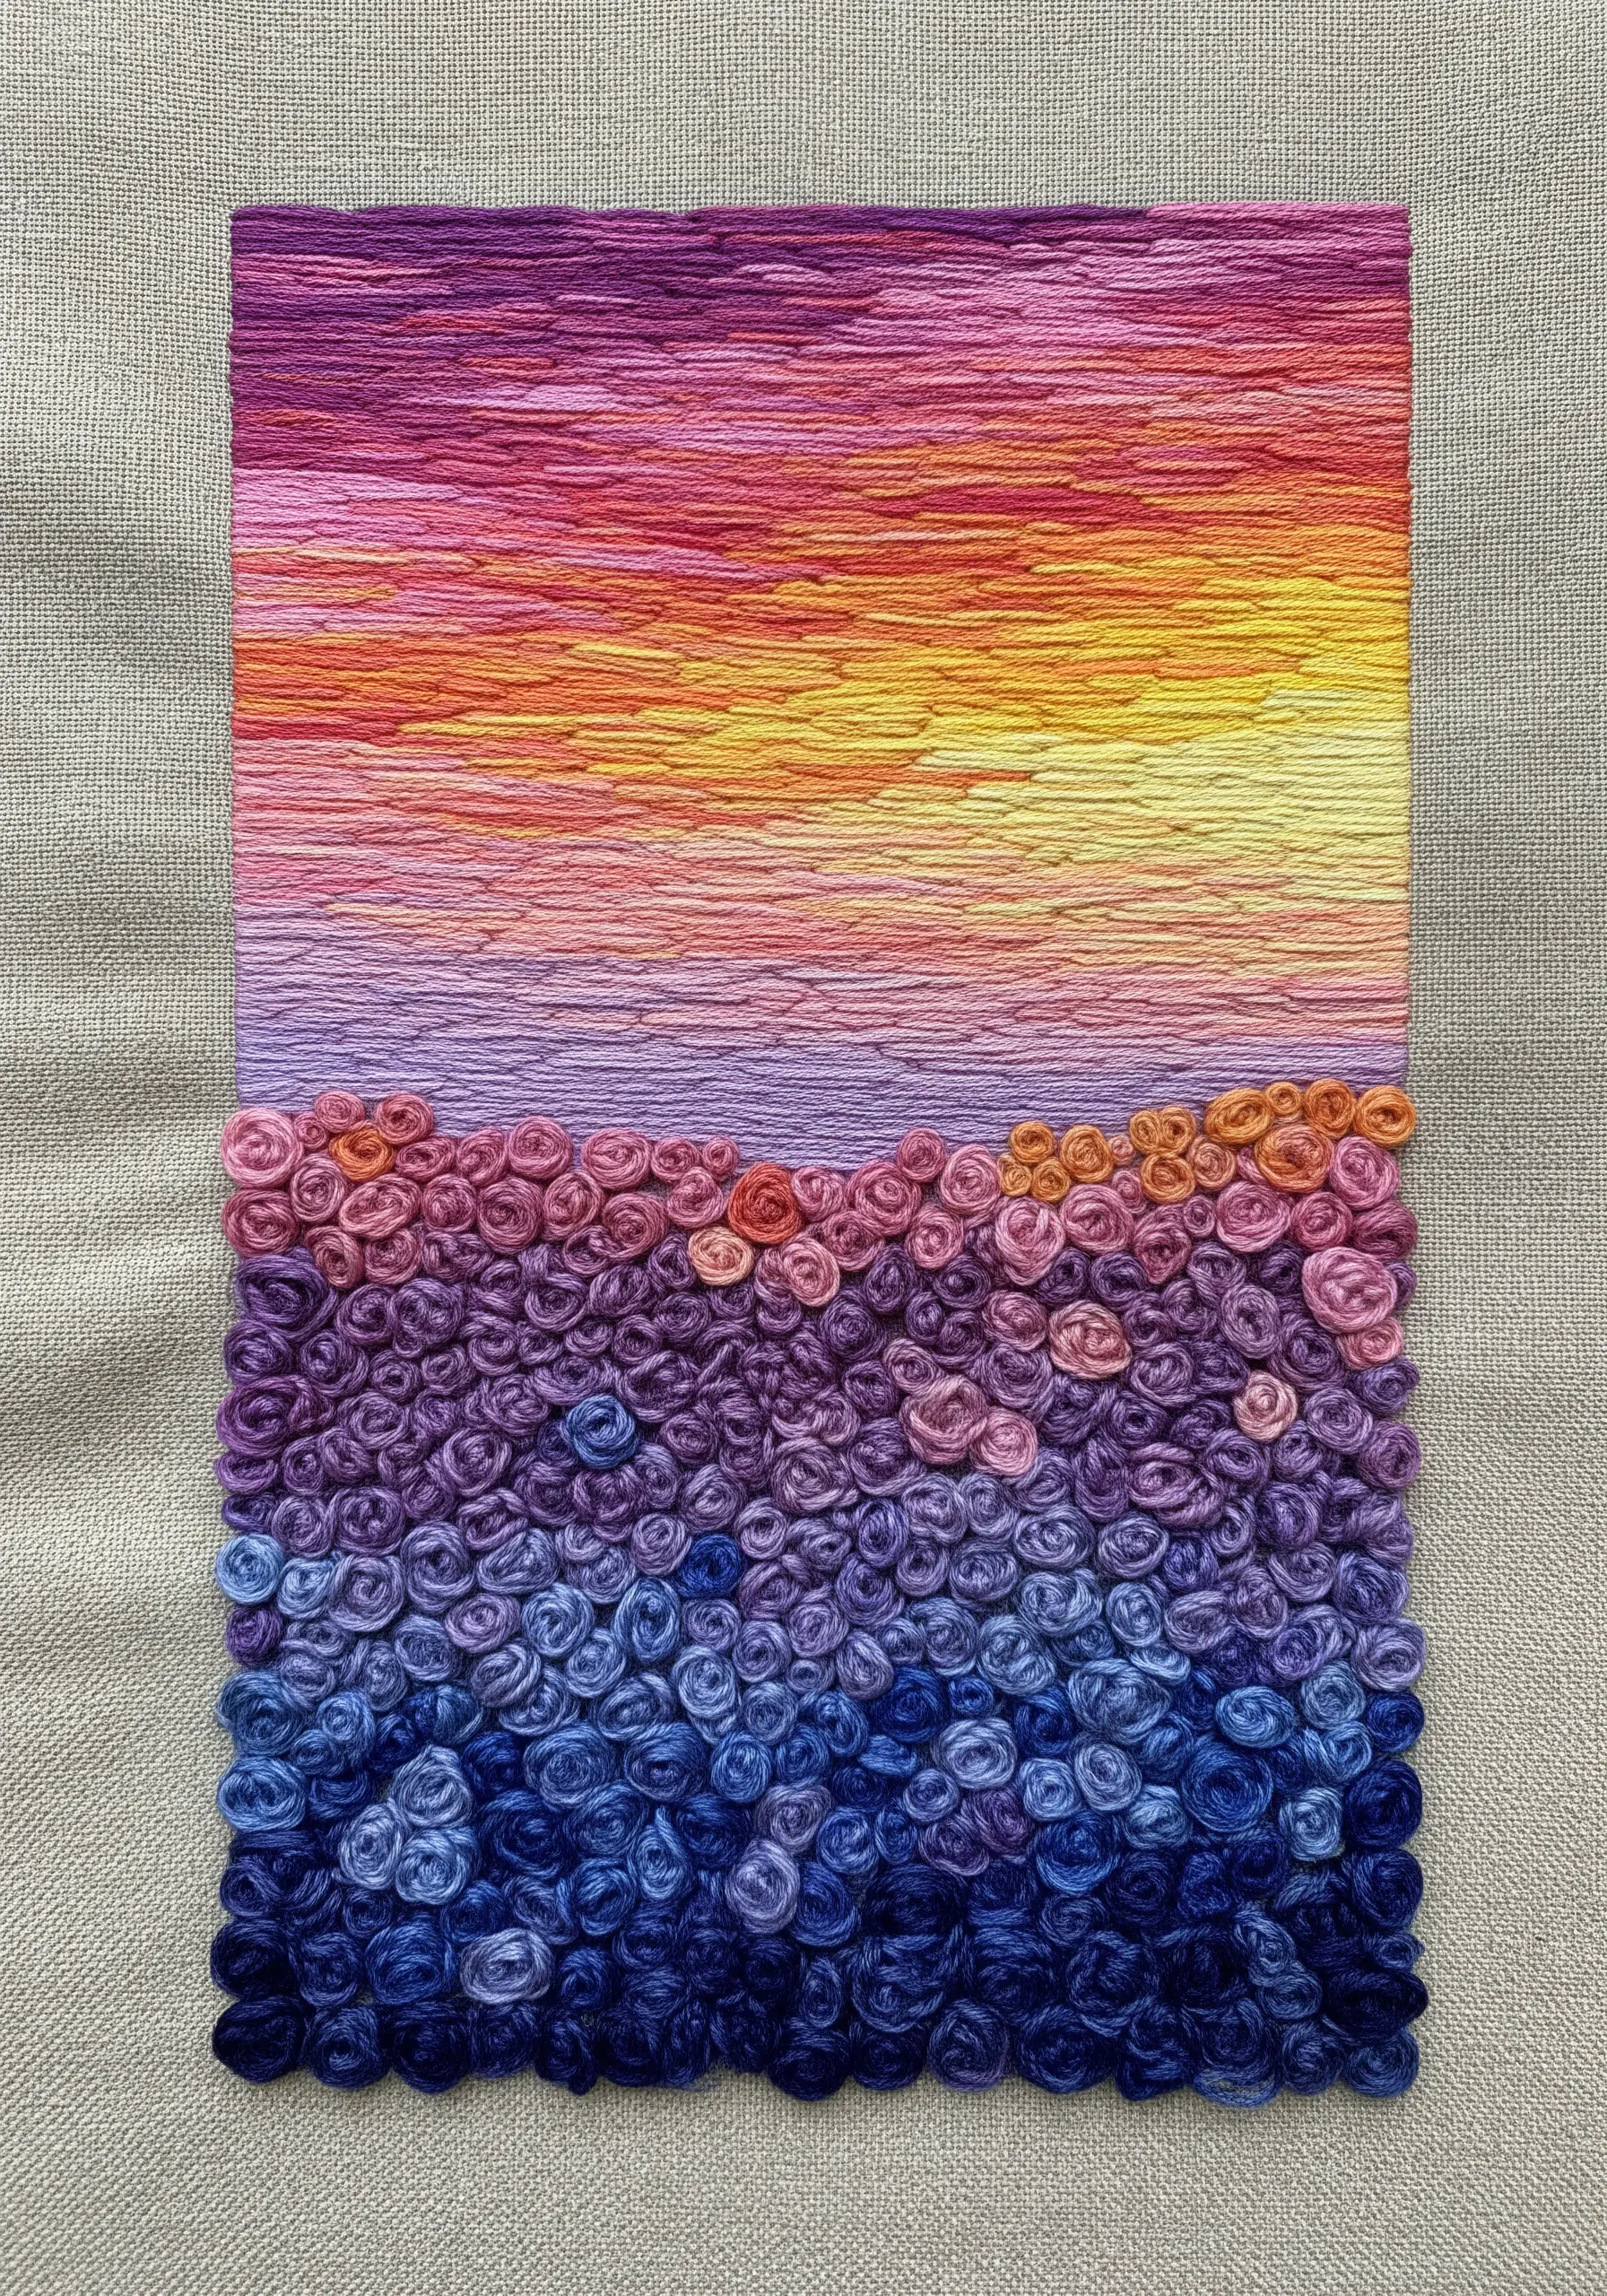
Create a powerful abstract landscape by combining two dramatically different stitching textures.
Use flat, horizontal satin stitches or darning stitches to represent a calm sky, blending sunset colors smoothly.
For the foreground, switch to dense, high-texture French knots or bullion knots in deep, cool colors to represent a field or water.
This contrast is what gives the piece its incredible depth and makes for truly memorable gorgeous mixed-fiber textures.
23. Amplify Warm Colors on a Cool Neutral Fabric
The color of your background fabric is not just a canvas; it’s an active participant in your design.
To make warm colors like reds, oranges, and yellows appear exceptionally vibrant, stitch them onto a cool neutral like a charcoal gray or dusty blue linen.
The cool undertone of the fabric pushes the warm hues forward, making them feel more energetic and luminous.
This simple choice can transform your vibrant hoop art designs.
24. Visualize Color Theory with Overlapping Circles
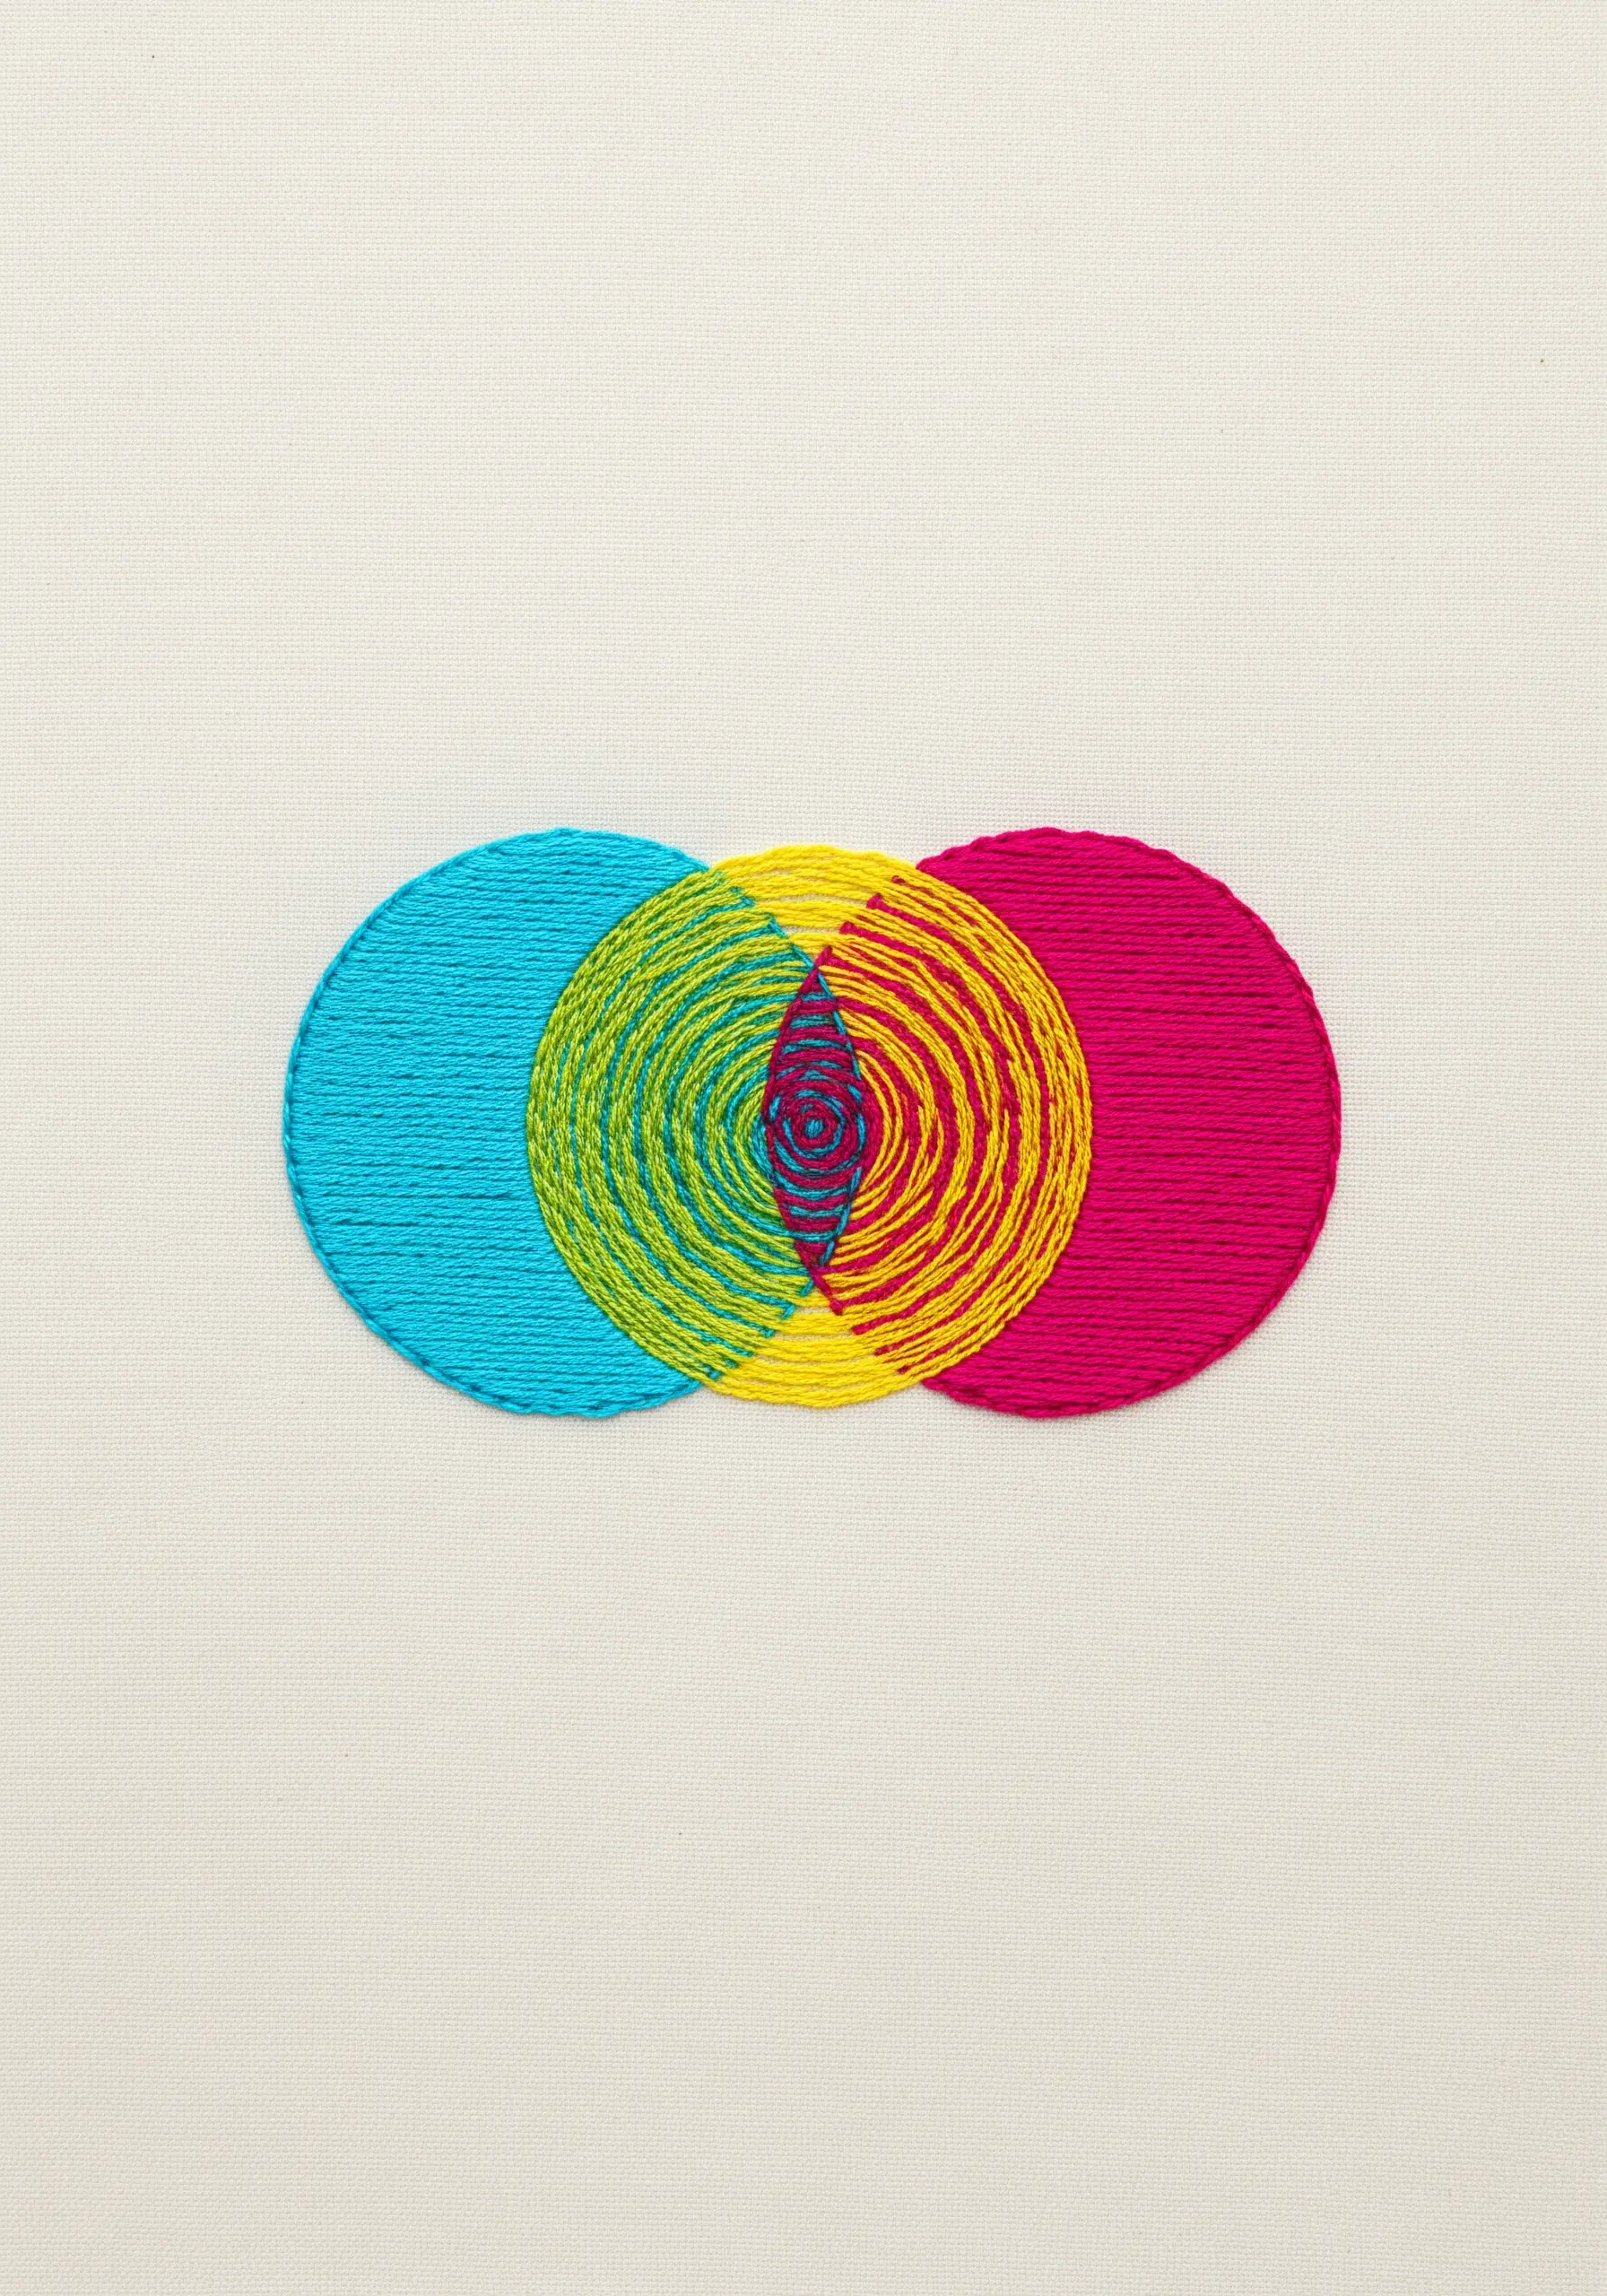
Turn a classic Venn diagram into a sophisticated piece of abstract art.
Stitch two solid circles in primary colors like cyan and magenta using a spiral backstitch or satin stitch.
In the overlapping section, create the illusion of the secondary color (in this case, purple) by alternating your stitches or using a thinner thread to weave the two colors together.
It’s a smart, graphic way to play with contemporary rainbow blend stitches.
25. Pair Smooth Stitches with Rustic Fabric

Create a beautiful textural dialogue by pairing a smooth, lustrous stitch with a coarse, open-weave fabric.
Use a dense satin stitch to create a flowing, river-like shape with a rich color gradient.
When stitched on a rustic background like burlap or Aida cloth, the smoothness of the floss is amplified, creating a striking contrast that highlights the beauty of both materials.
This contrast is key to many high-impact DIY fabric crafts.
26. Design a Textural Sampler as a Work of Art
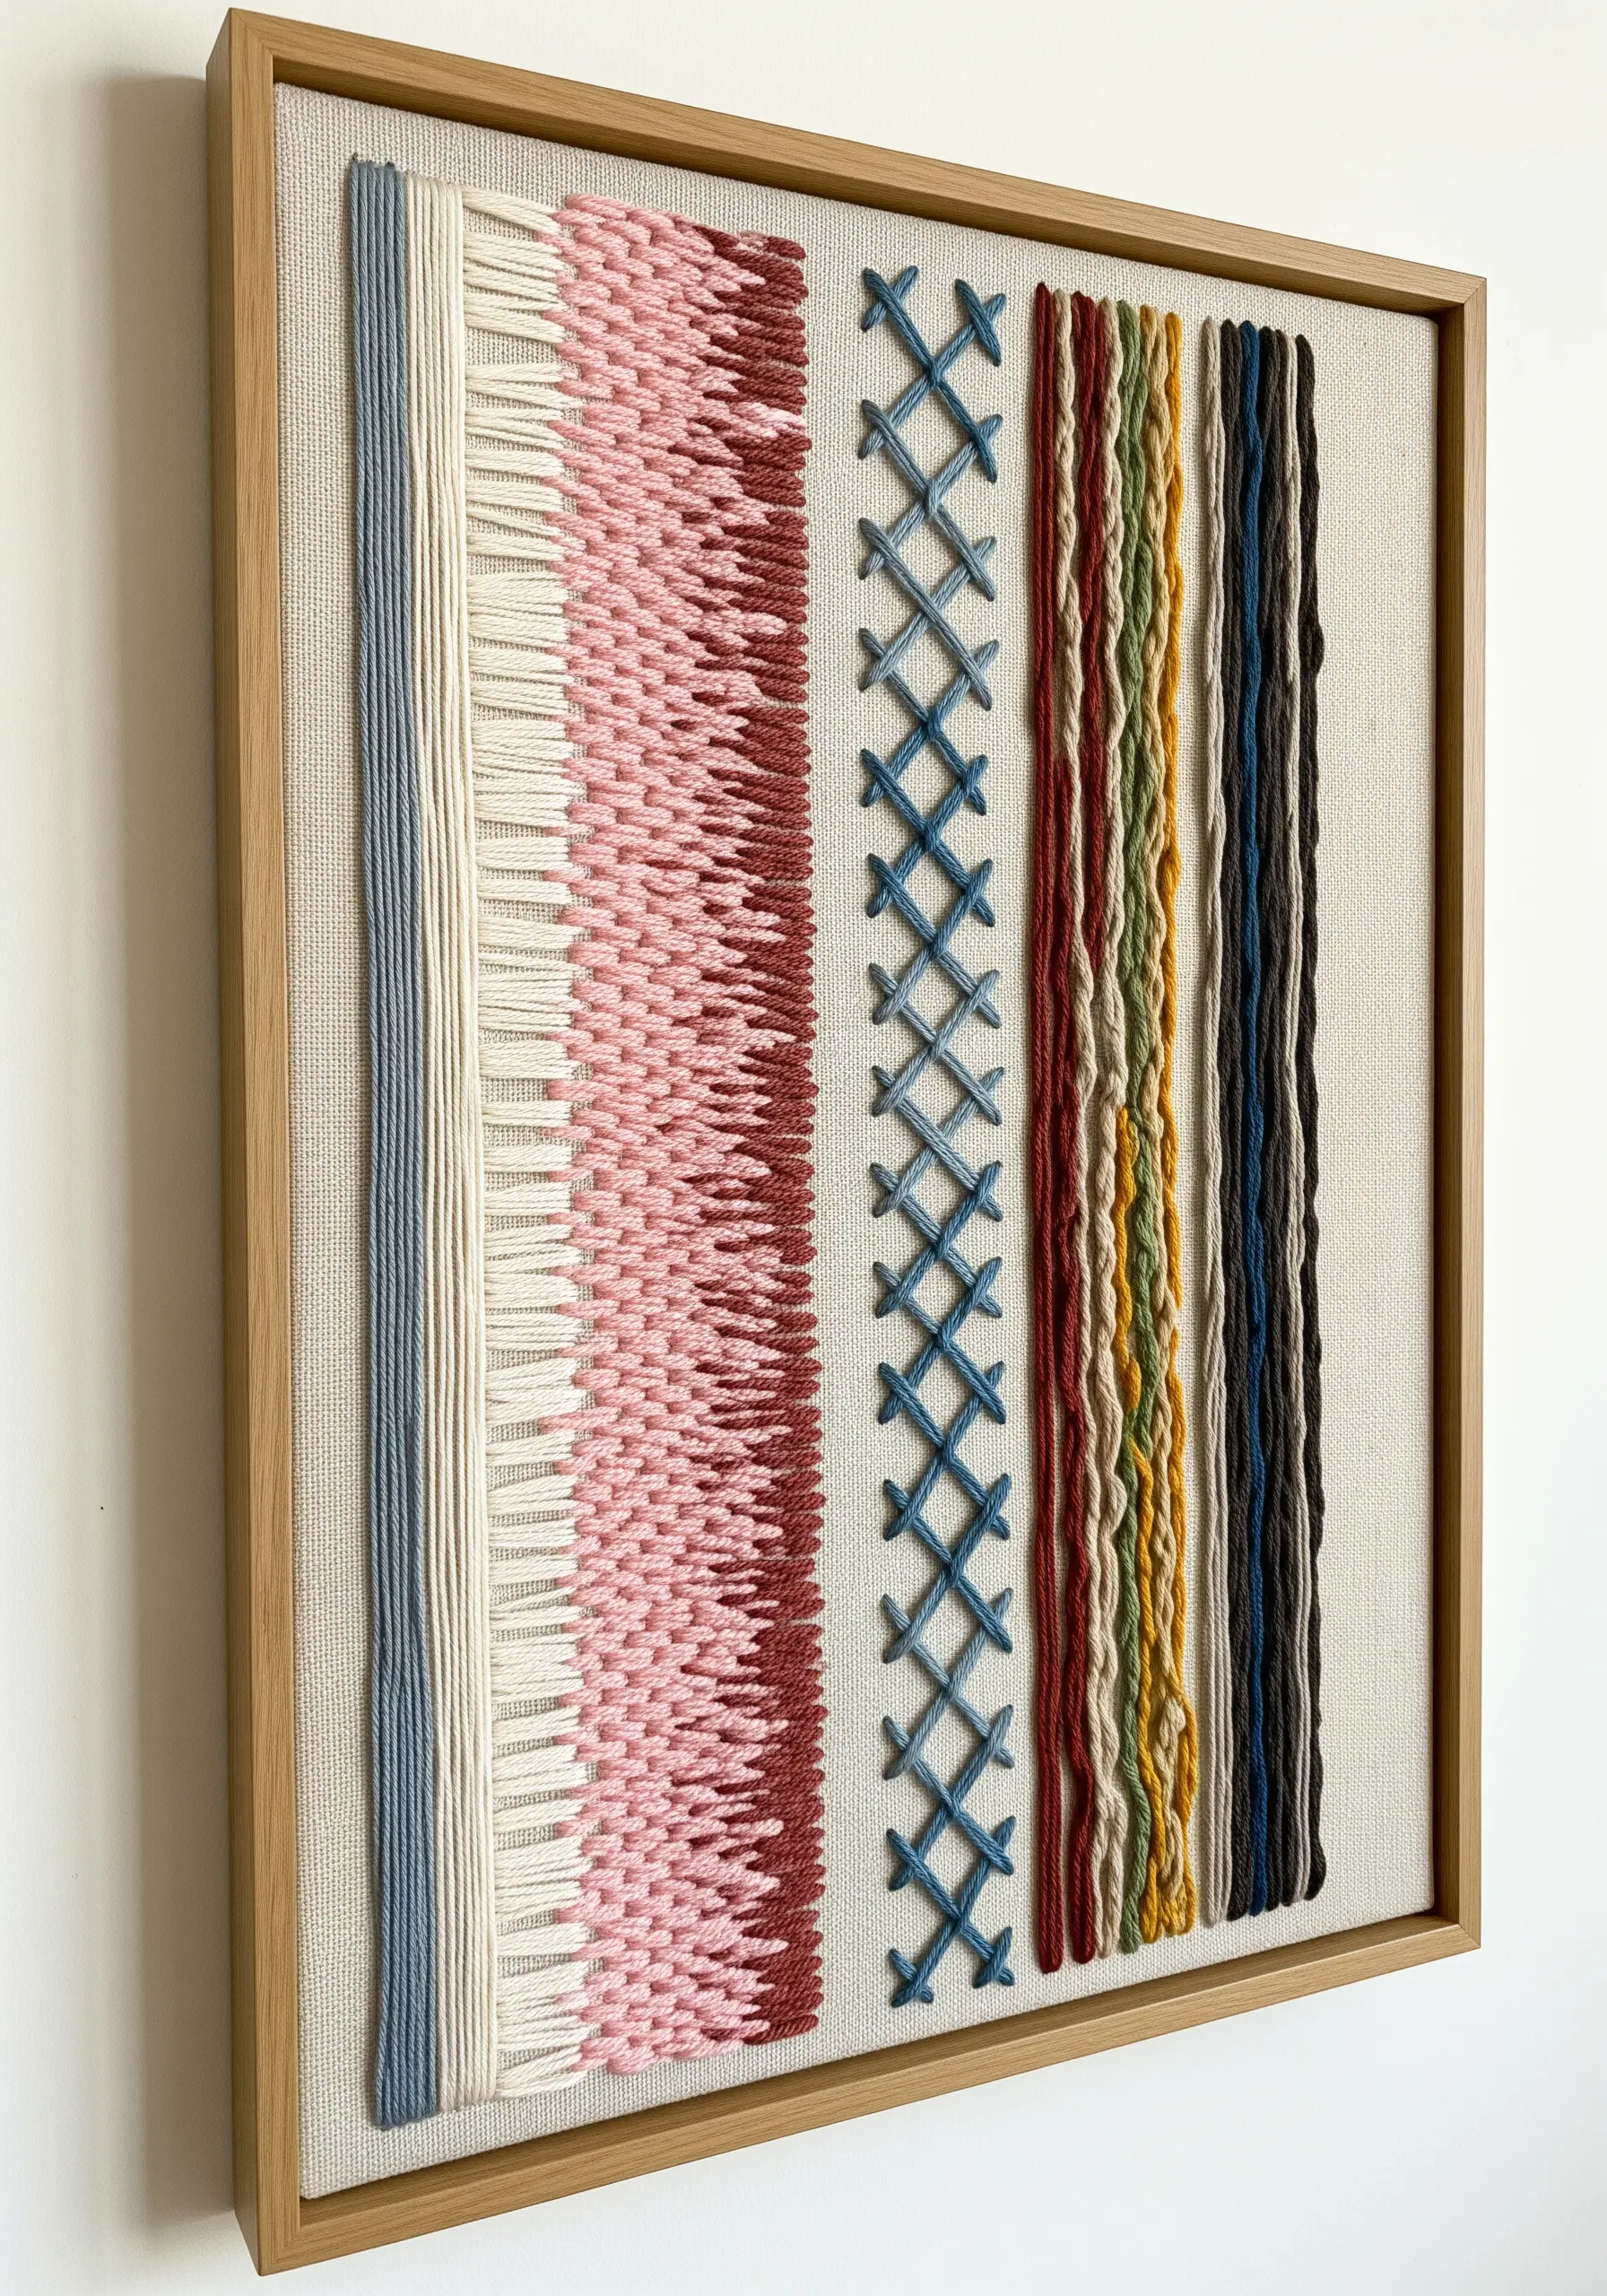
Instead of a practice piece, design your stitch sampler as a finished artwork.
Divide your canvas into vertical bands and explore a different stitch or color family in each one.
Combine linear stitches like whipped backstitch, dimensional ones like woven picot, and graphic ones like cross-stitch.
This not only builds your skills but results in a beautiful, framed piece that showcases your versatility and becomes one of your favorite minimal DIY embroidery pieces.
27. Use a CMYK Palette for a Graphic Pop
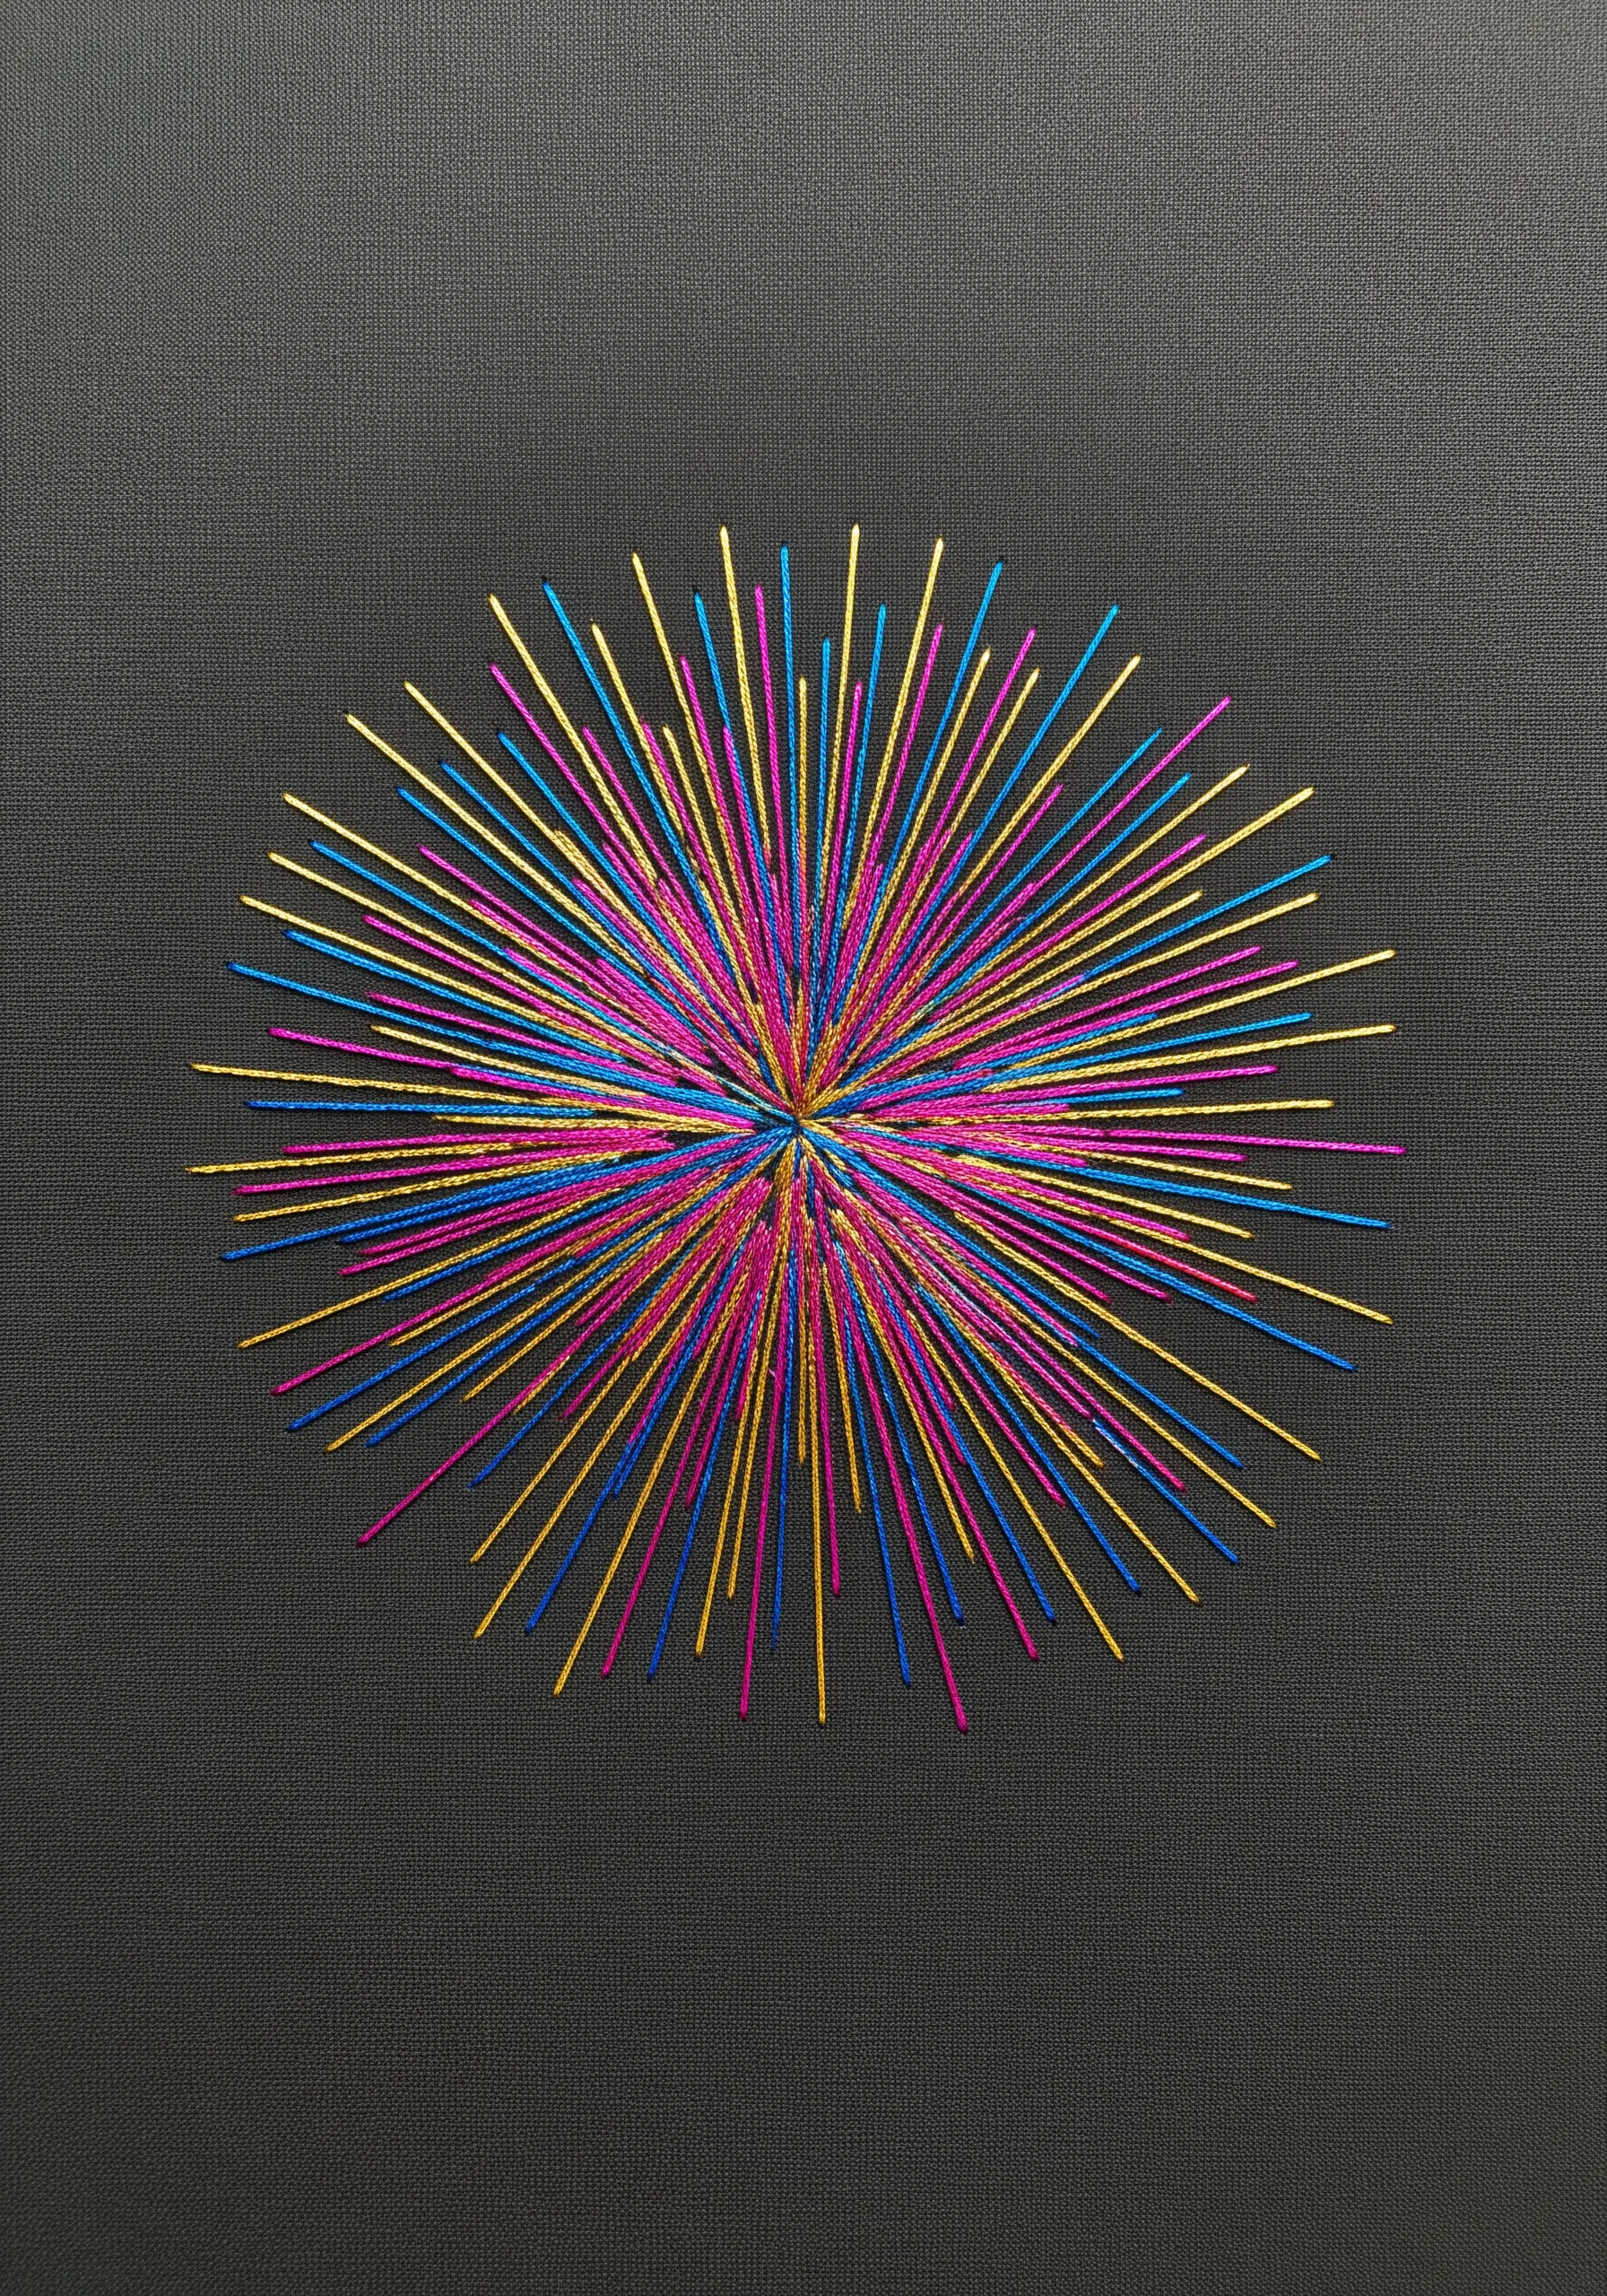
For a bold, high-impact design, limit your palette to the printing colors of Cyan, Magenta, Yellow, and Key (Black).
Use these pure, vibrant hues in a starburst or geometric pattern, allowing them to overlap and mix visually.
The result is an energetic, graphic piece that feels both contemporary and retro.
This color strategy is perfect for iconic pop art stitch motifs on dark backgrounds.
28. Build Form with Layered Straight Stitches
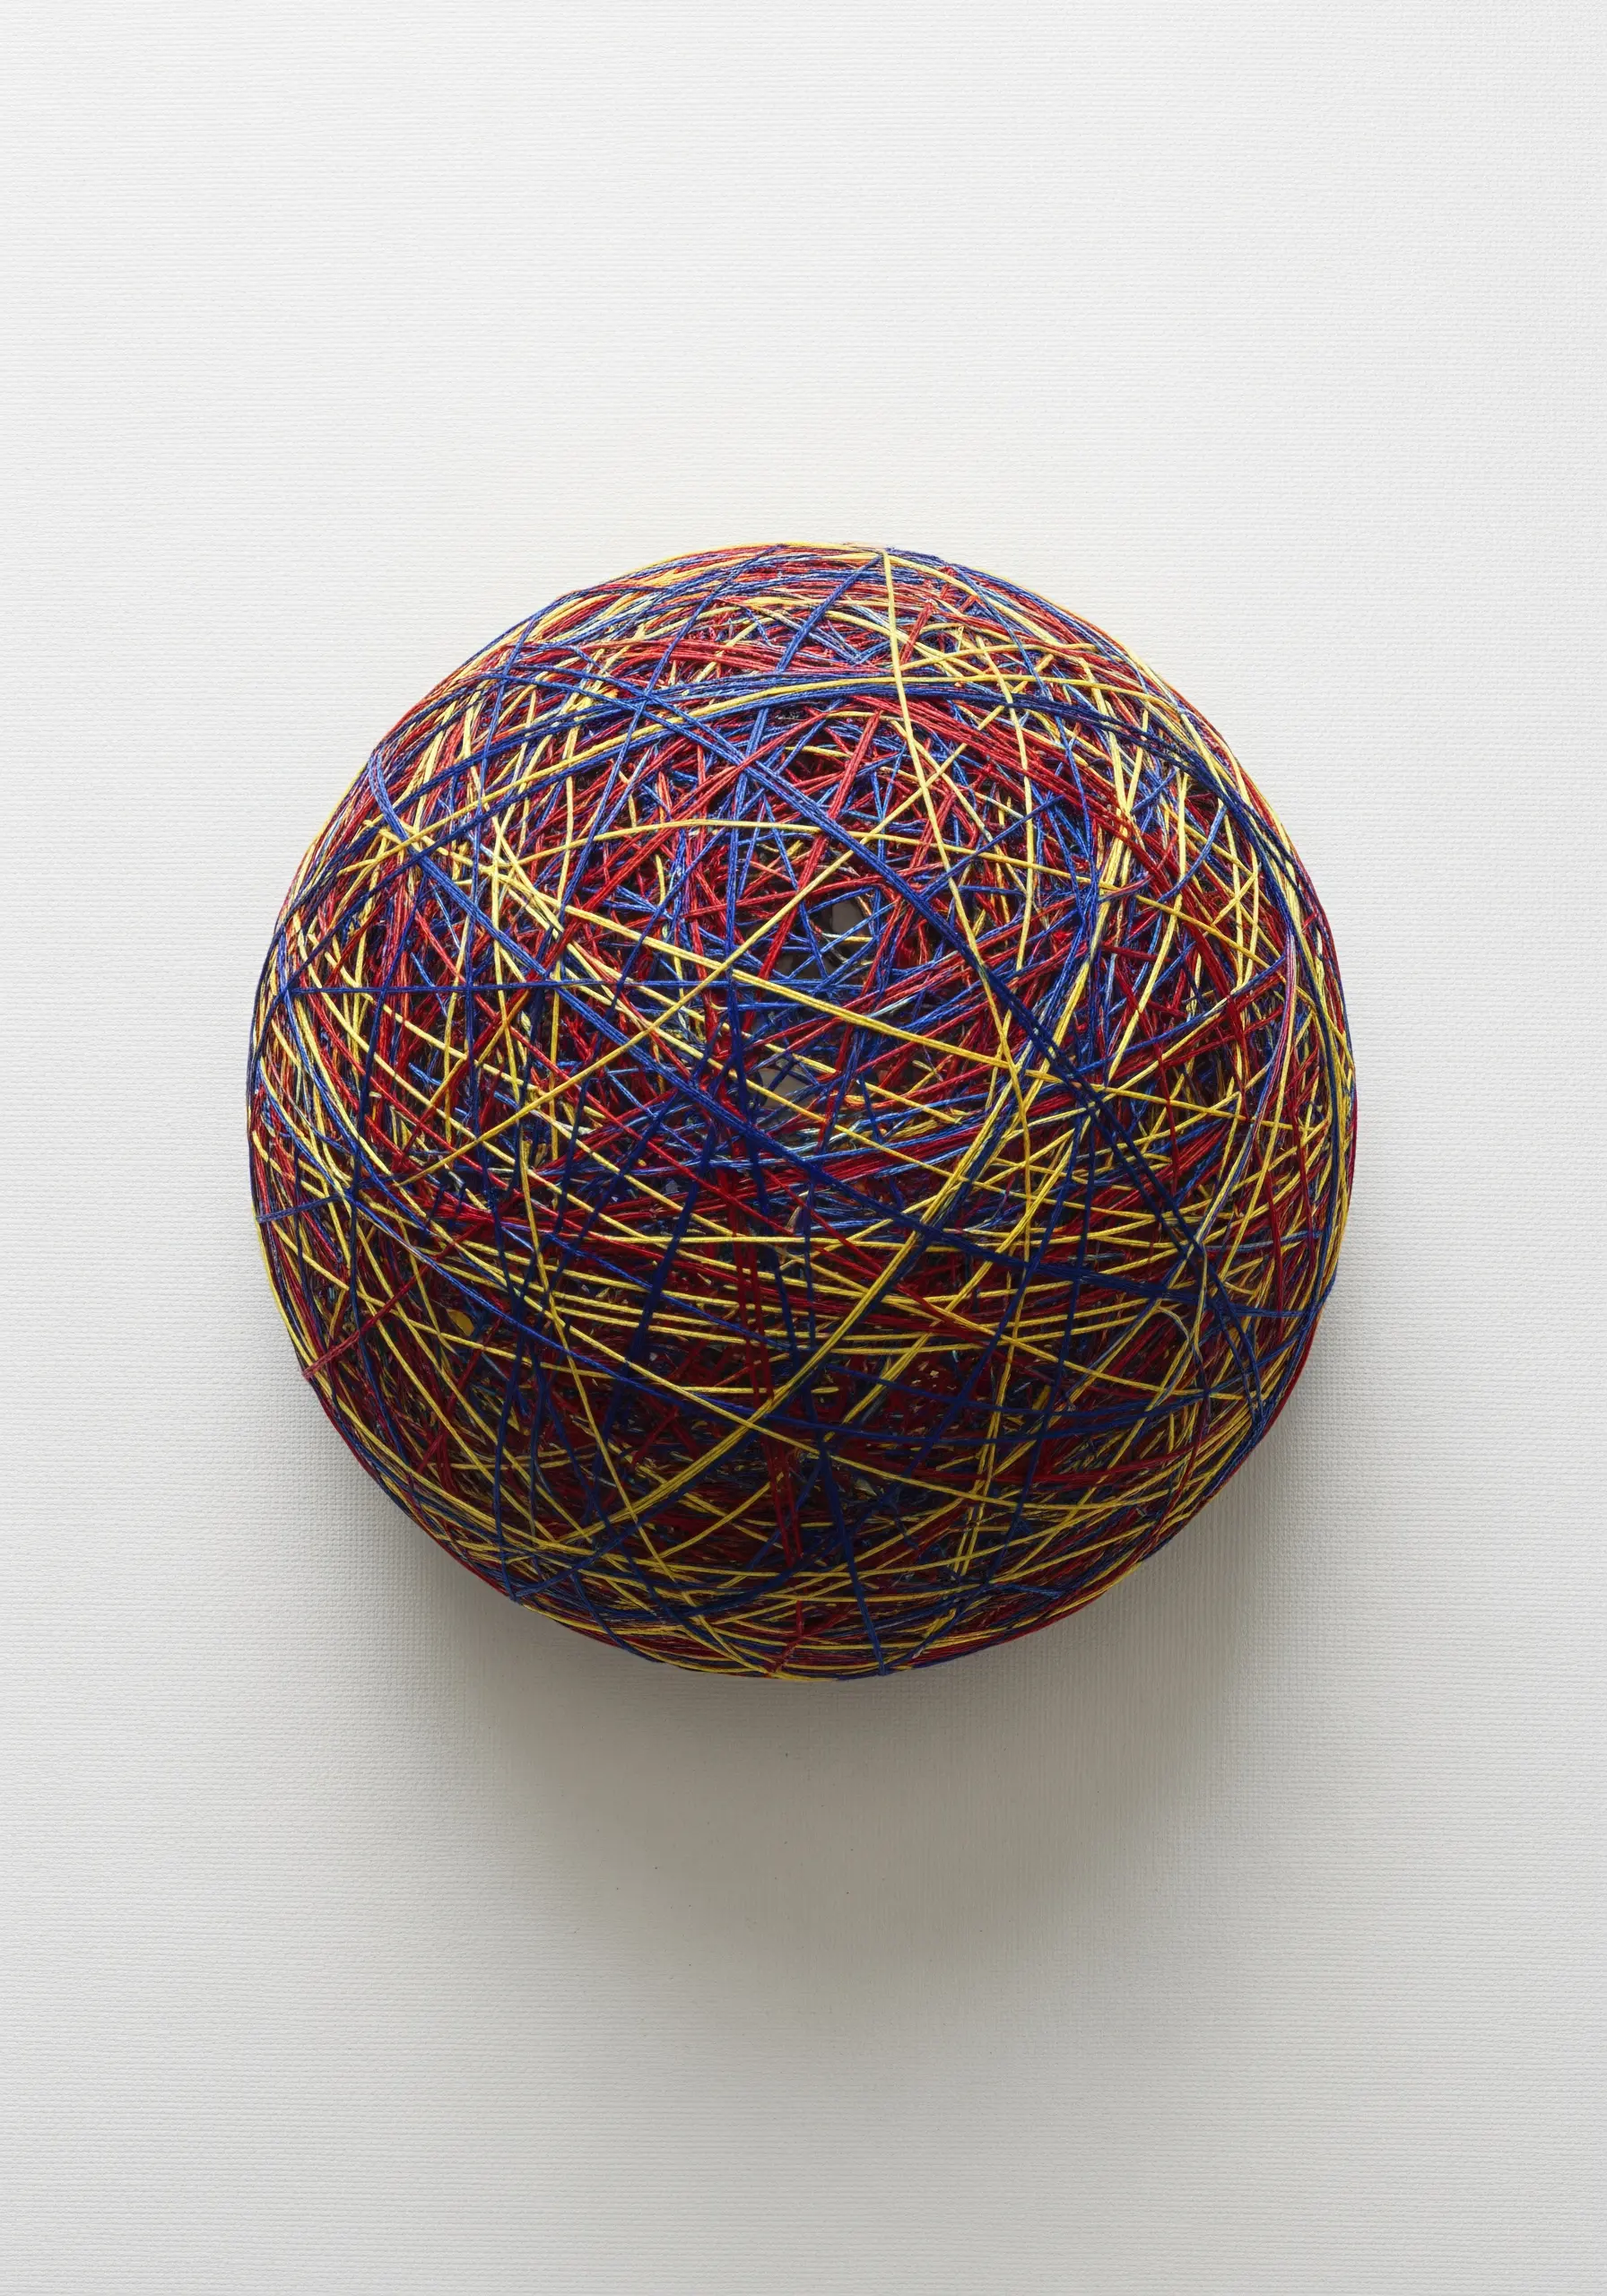
Create the illusion of a three-dimensional sphere using only layered straight stitches.
Start by filling a circular shape with random stitches, constantly changing the direction and color.
As you build up layers, the intersecting threads create a dense, woven texture that gives the shape volume and form.
It’s a meditative technique that transforms simple lines into one of your most engaging unique handmade objects.
29. Sculpt with Padded Stumpwork and Seed Stitch

For truly sculptural embroidery, use the stumpwork technique.
Cut your desired shape from felt or cotton batting and secure it to your fabric.
Then, completely cover the padding with tiny, dense seed stitches or French knots, blending your colors as you go.
This creates a raised, pebble-like surface with a soft, tactile quality, turning your stitching into stunning fiber art installations.
30. Capture Gestural Energy with Couching
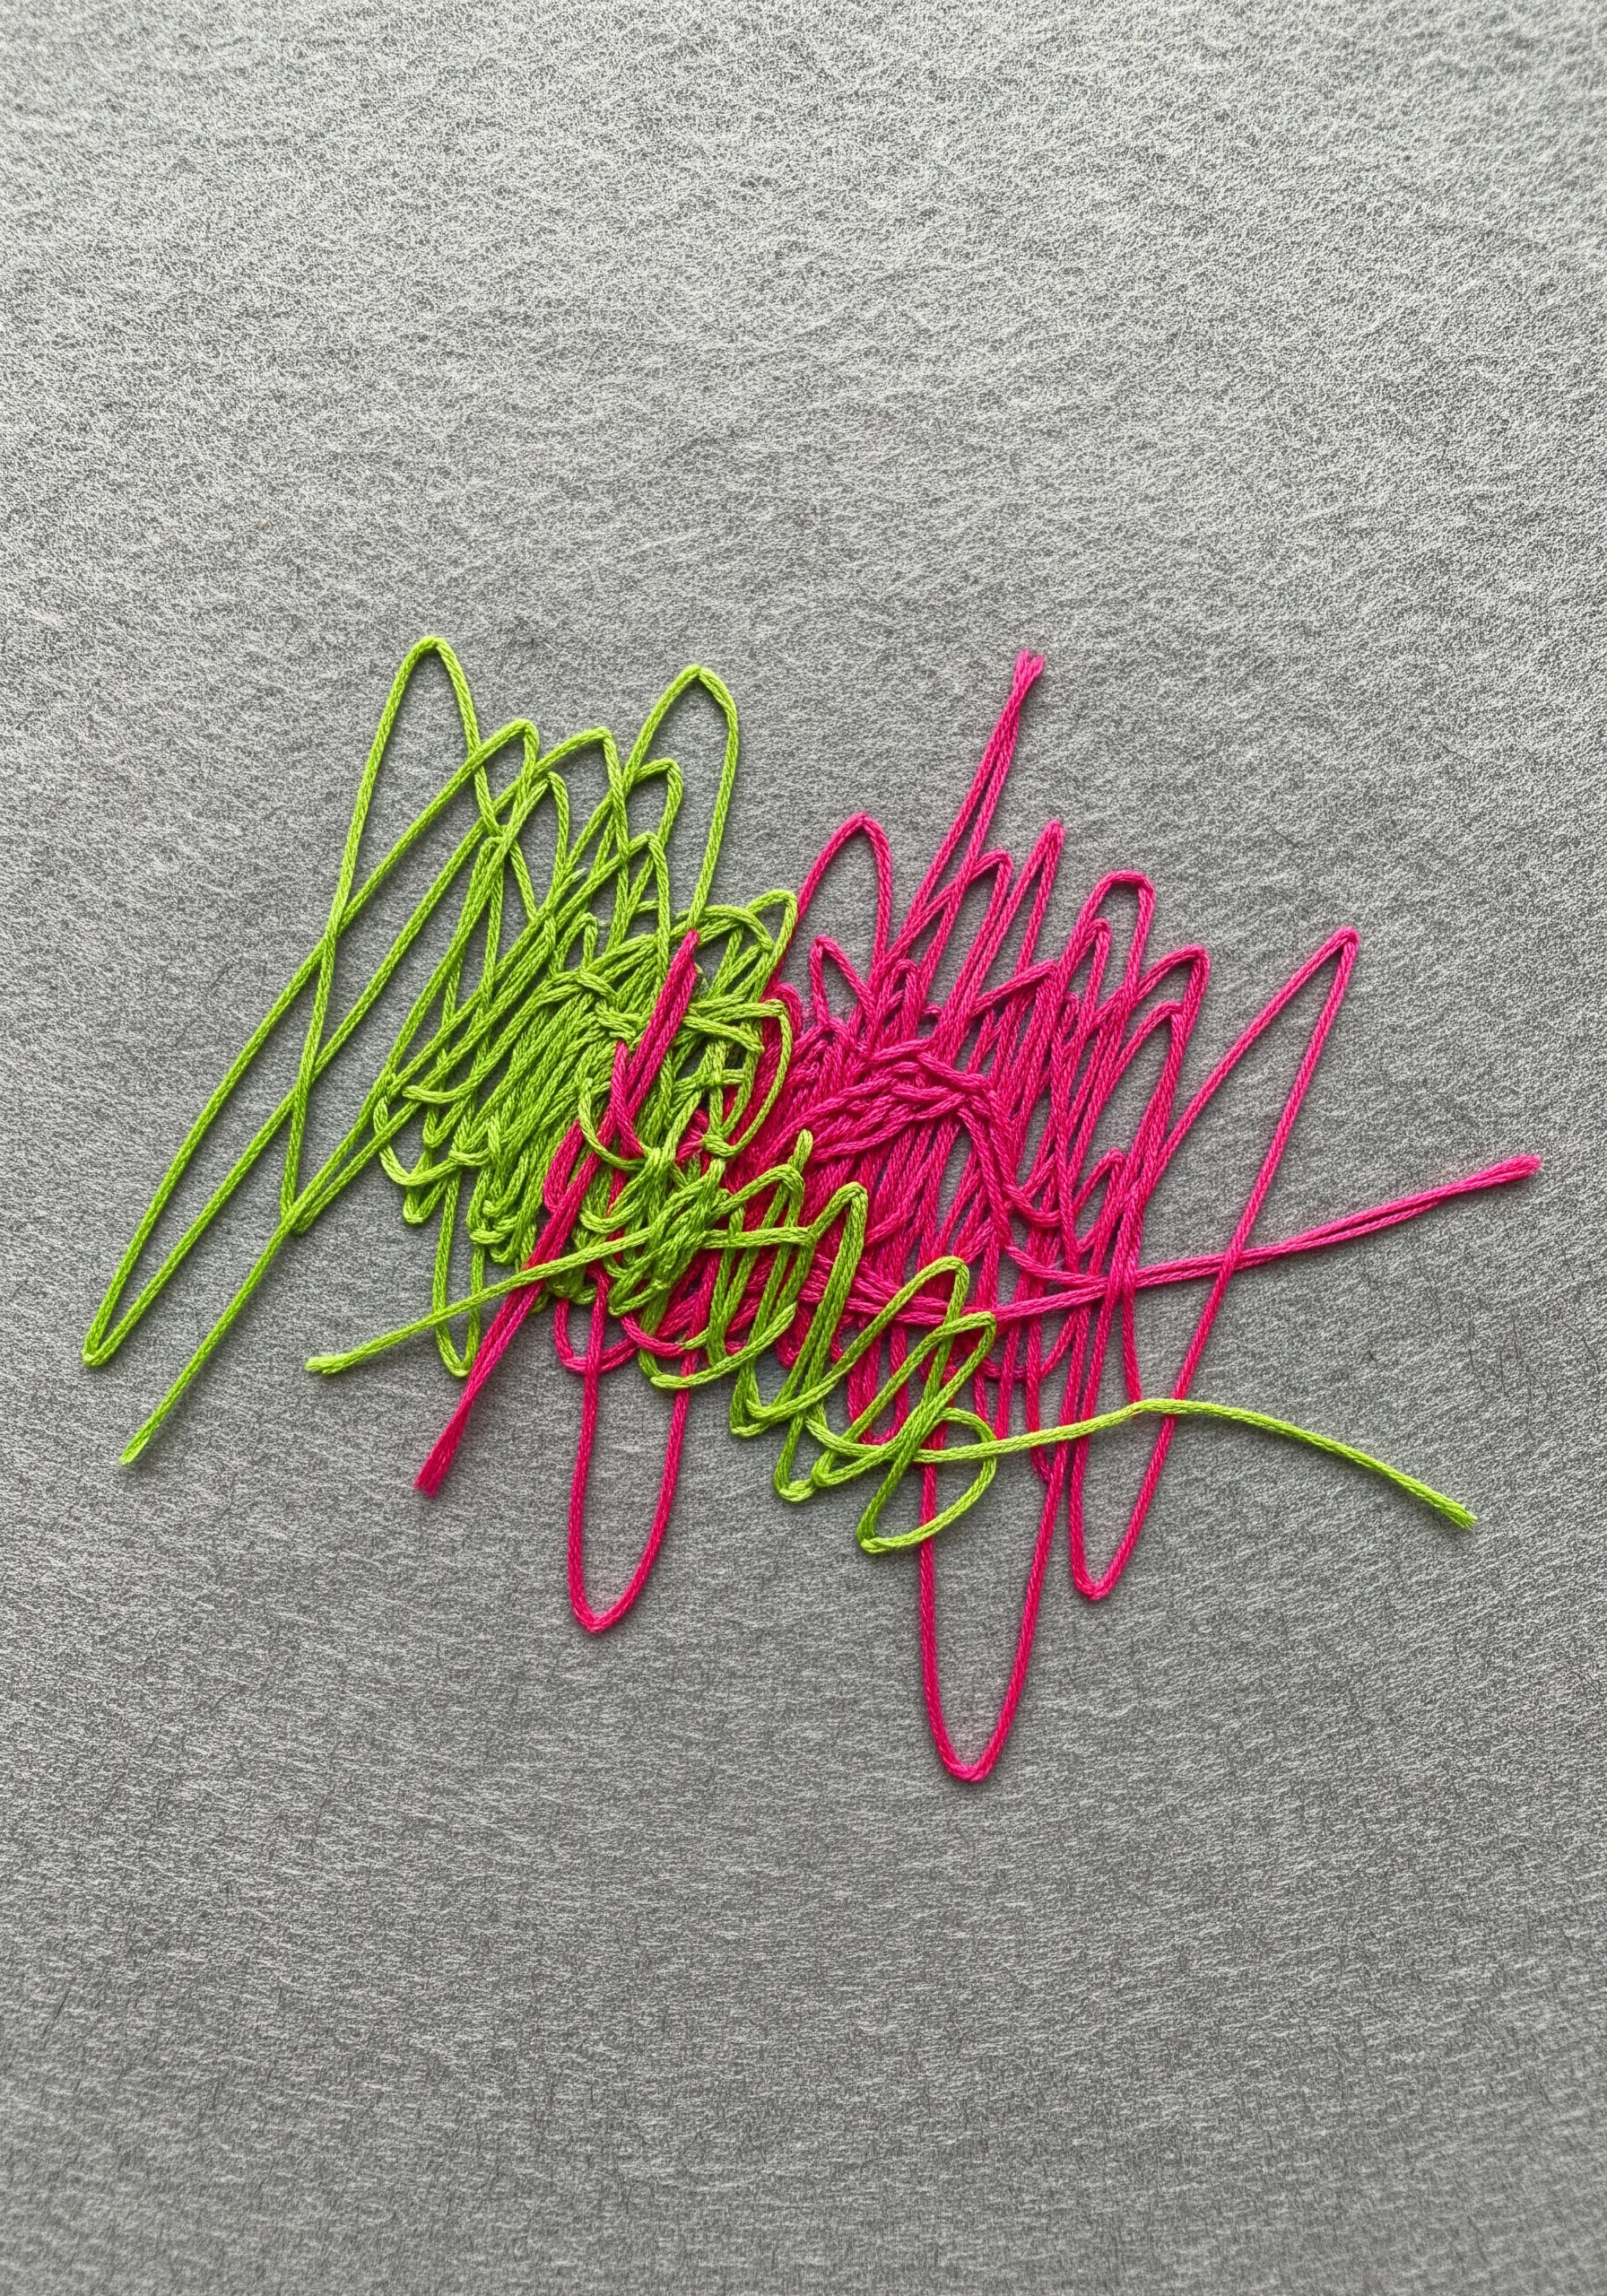
Embrace chaos and movement by creating free-form scribbles with thread.
Lay down loose, gestural loops of a thick thread or yarn, like perle cotton, directly onto your fabric.
Then, use a single strand of matching or contrasting floss to tack down the loops with tiny, discreet couching stitches.
This technique allows you to work quickly and expressively, capturing a raw energy often lost in more precise stitches and is perfect for abstract thread splatter-inspired projects.
31. Create Rhythmic Gradients with Chevron Stitch
The chevron stitch creates a beautiful, braided texture that is perfect for rhythmic color transitions.
Work in horizontal rows, changing your thread color for each new row to build a seamless gradient.
The inherent zigzag pattern adds a layer of graphic interest that a simple satin stitch block lacks.
This is an excellent choice for modern geometric thread art ideas that feel structured yet soft.
32. Sculpt a Plush Surface with Turkey Work
Create a dense, brush-like texture using the turkey work stitch, also known as the ghiordes knot.
This stitch creates loops on the surface of the fabric, which you can then trim to your desired length.
By packing the stitches tightly and using distinct color blocks, you can create a plush, 3D effect that begs to be touched.
This method is ideal for unexpected fiber art installations where texture is paramount.
33. Blend Color Within Geometric Cells
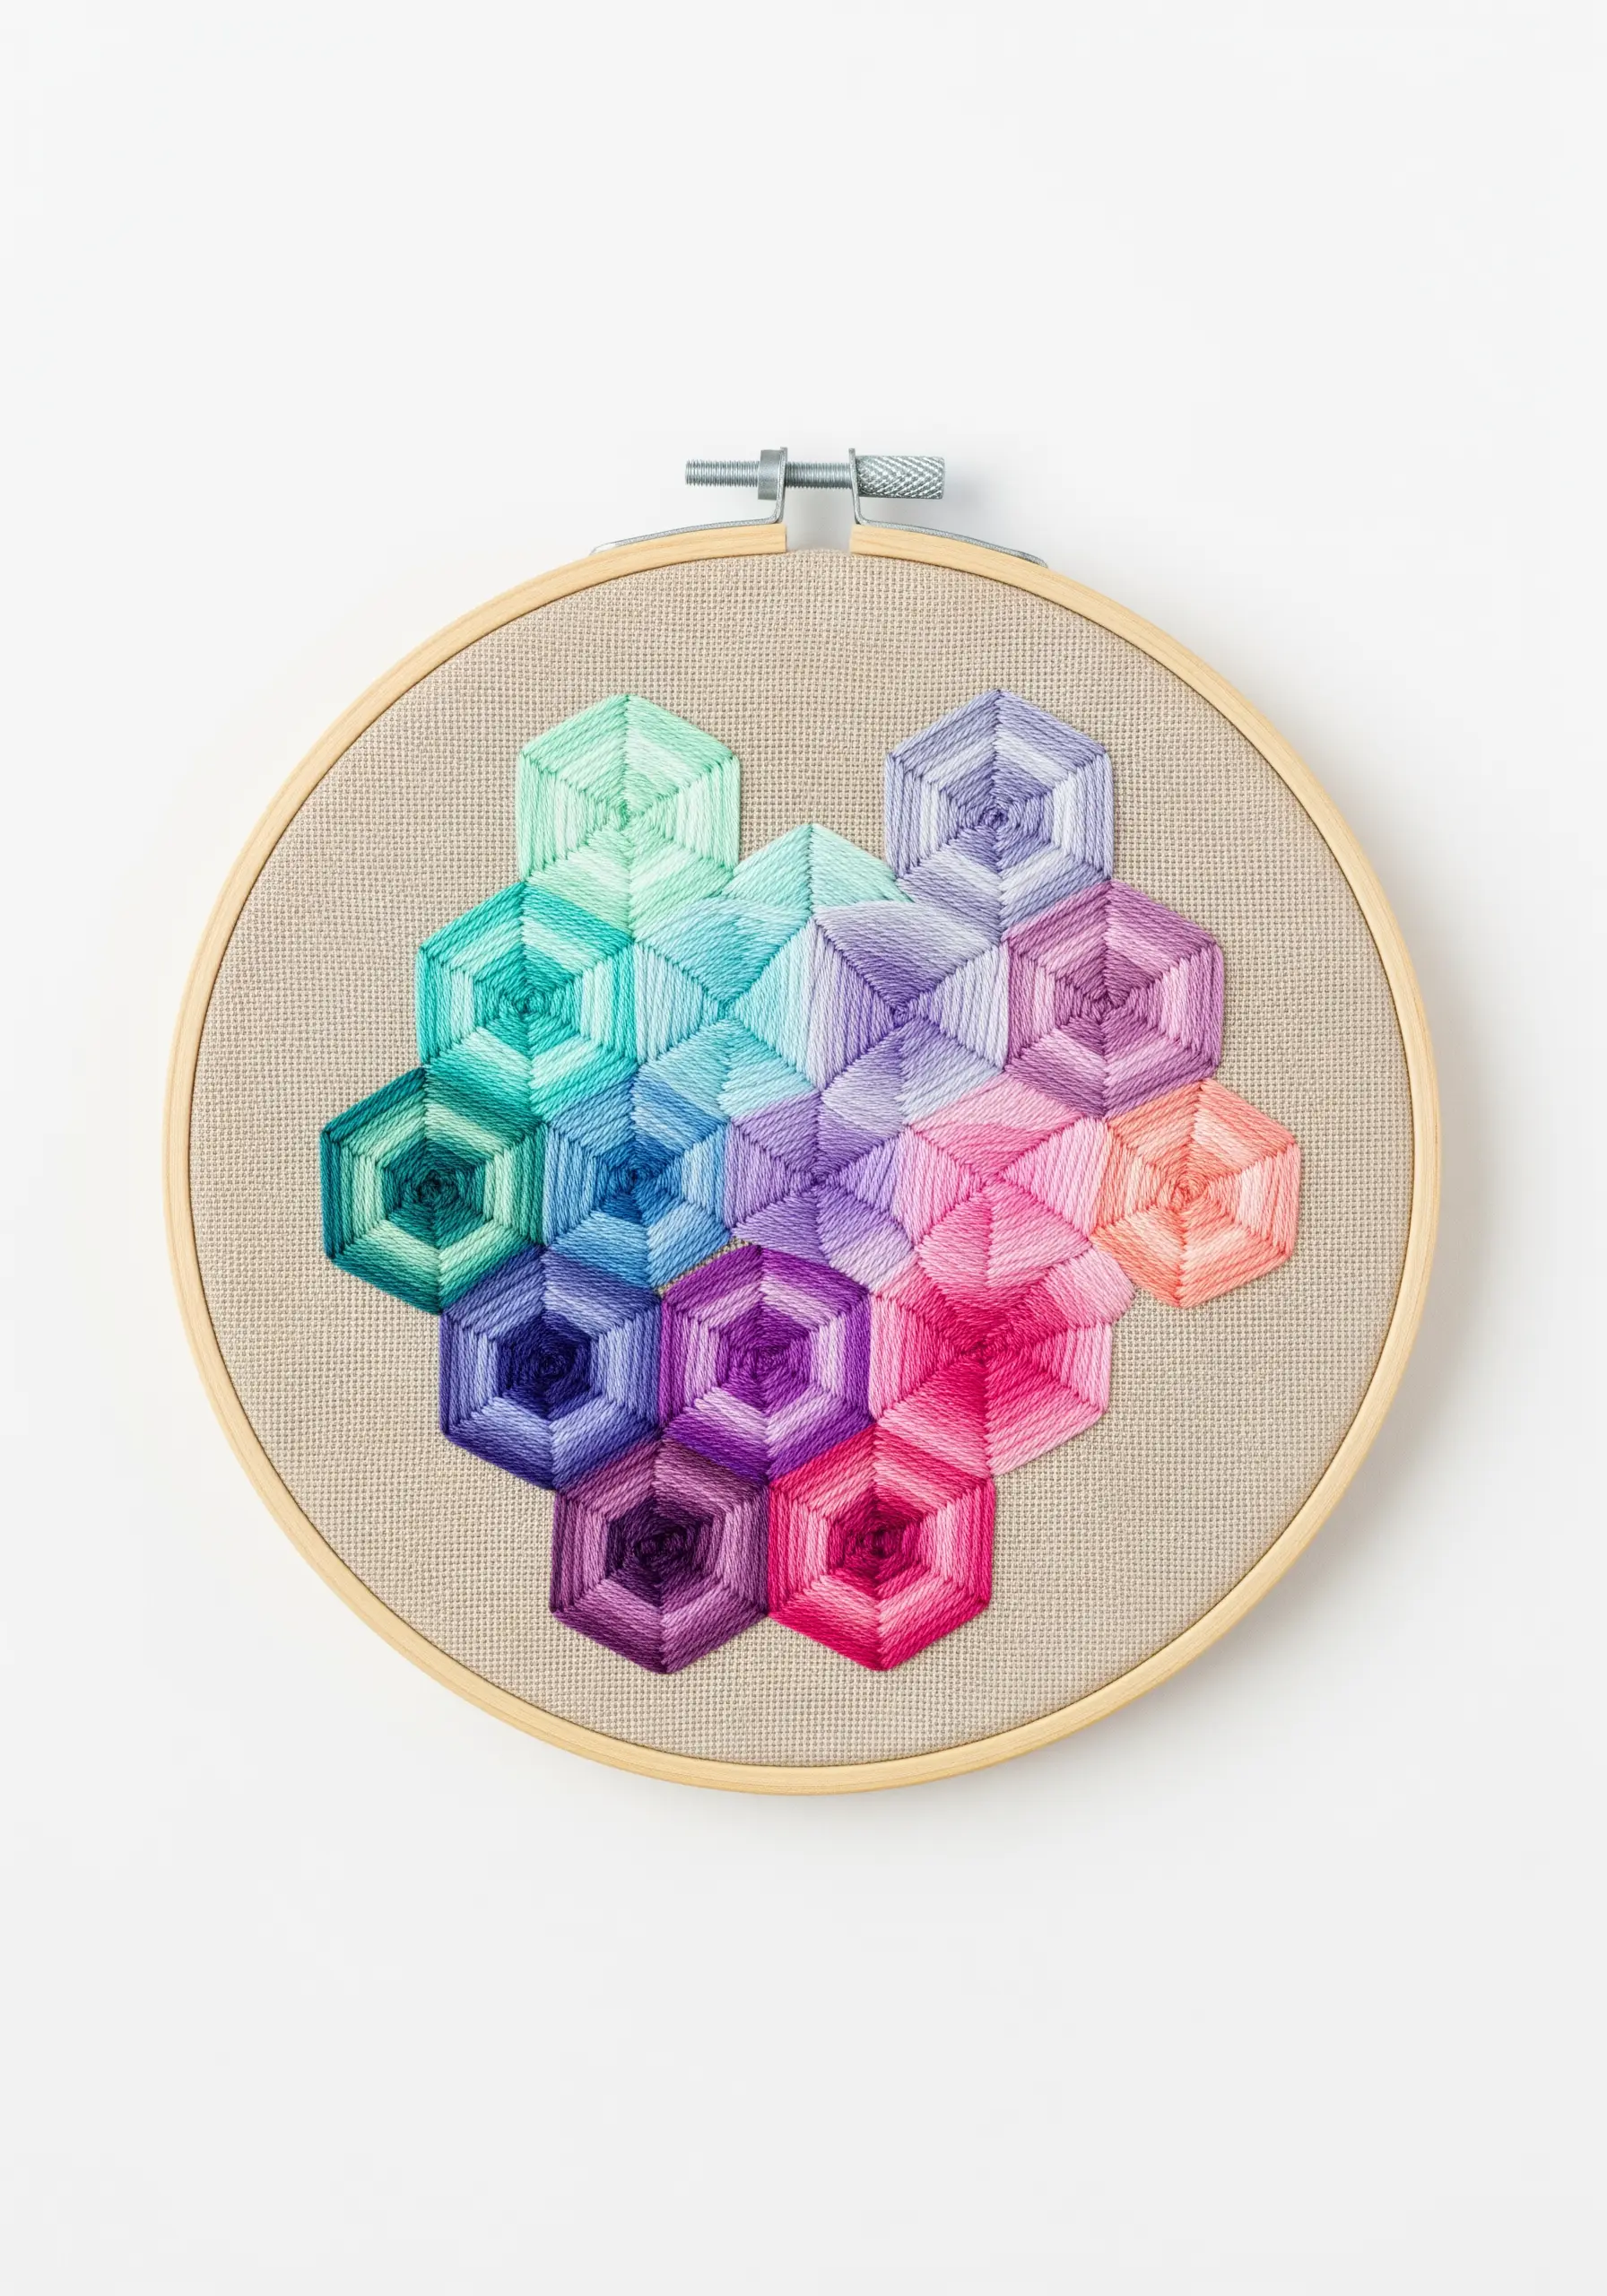
Give a classic honeycomb pattern a modern twist by blending colors within each individual hexagon.
Use satin stitches that radiate from the center of each shape to the outer edges.
Start with one color in the middle and gradually introduce new shades as you work your way out, creating a stunning kaleidoscopic effect.
It’s a beautiful way to organize color in embroidered mandala wall art designs.
34. Create a Glowing Orb on a Dark Canvas
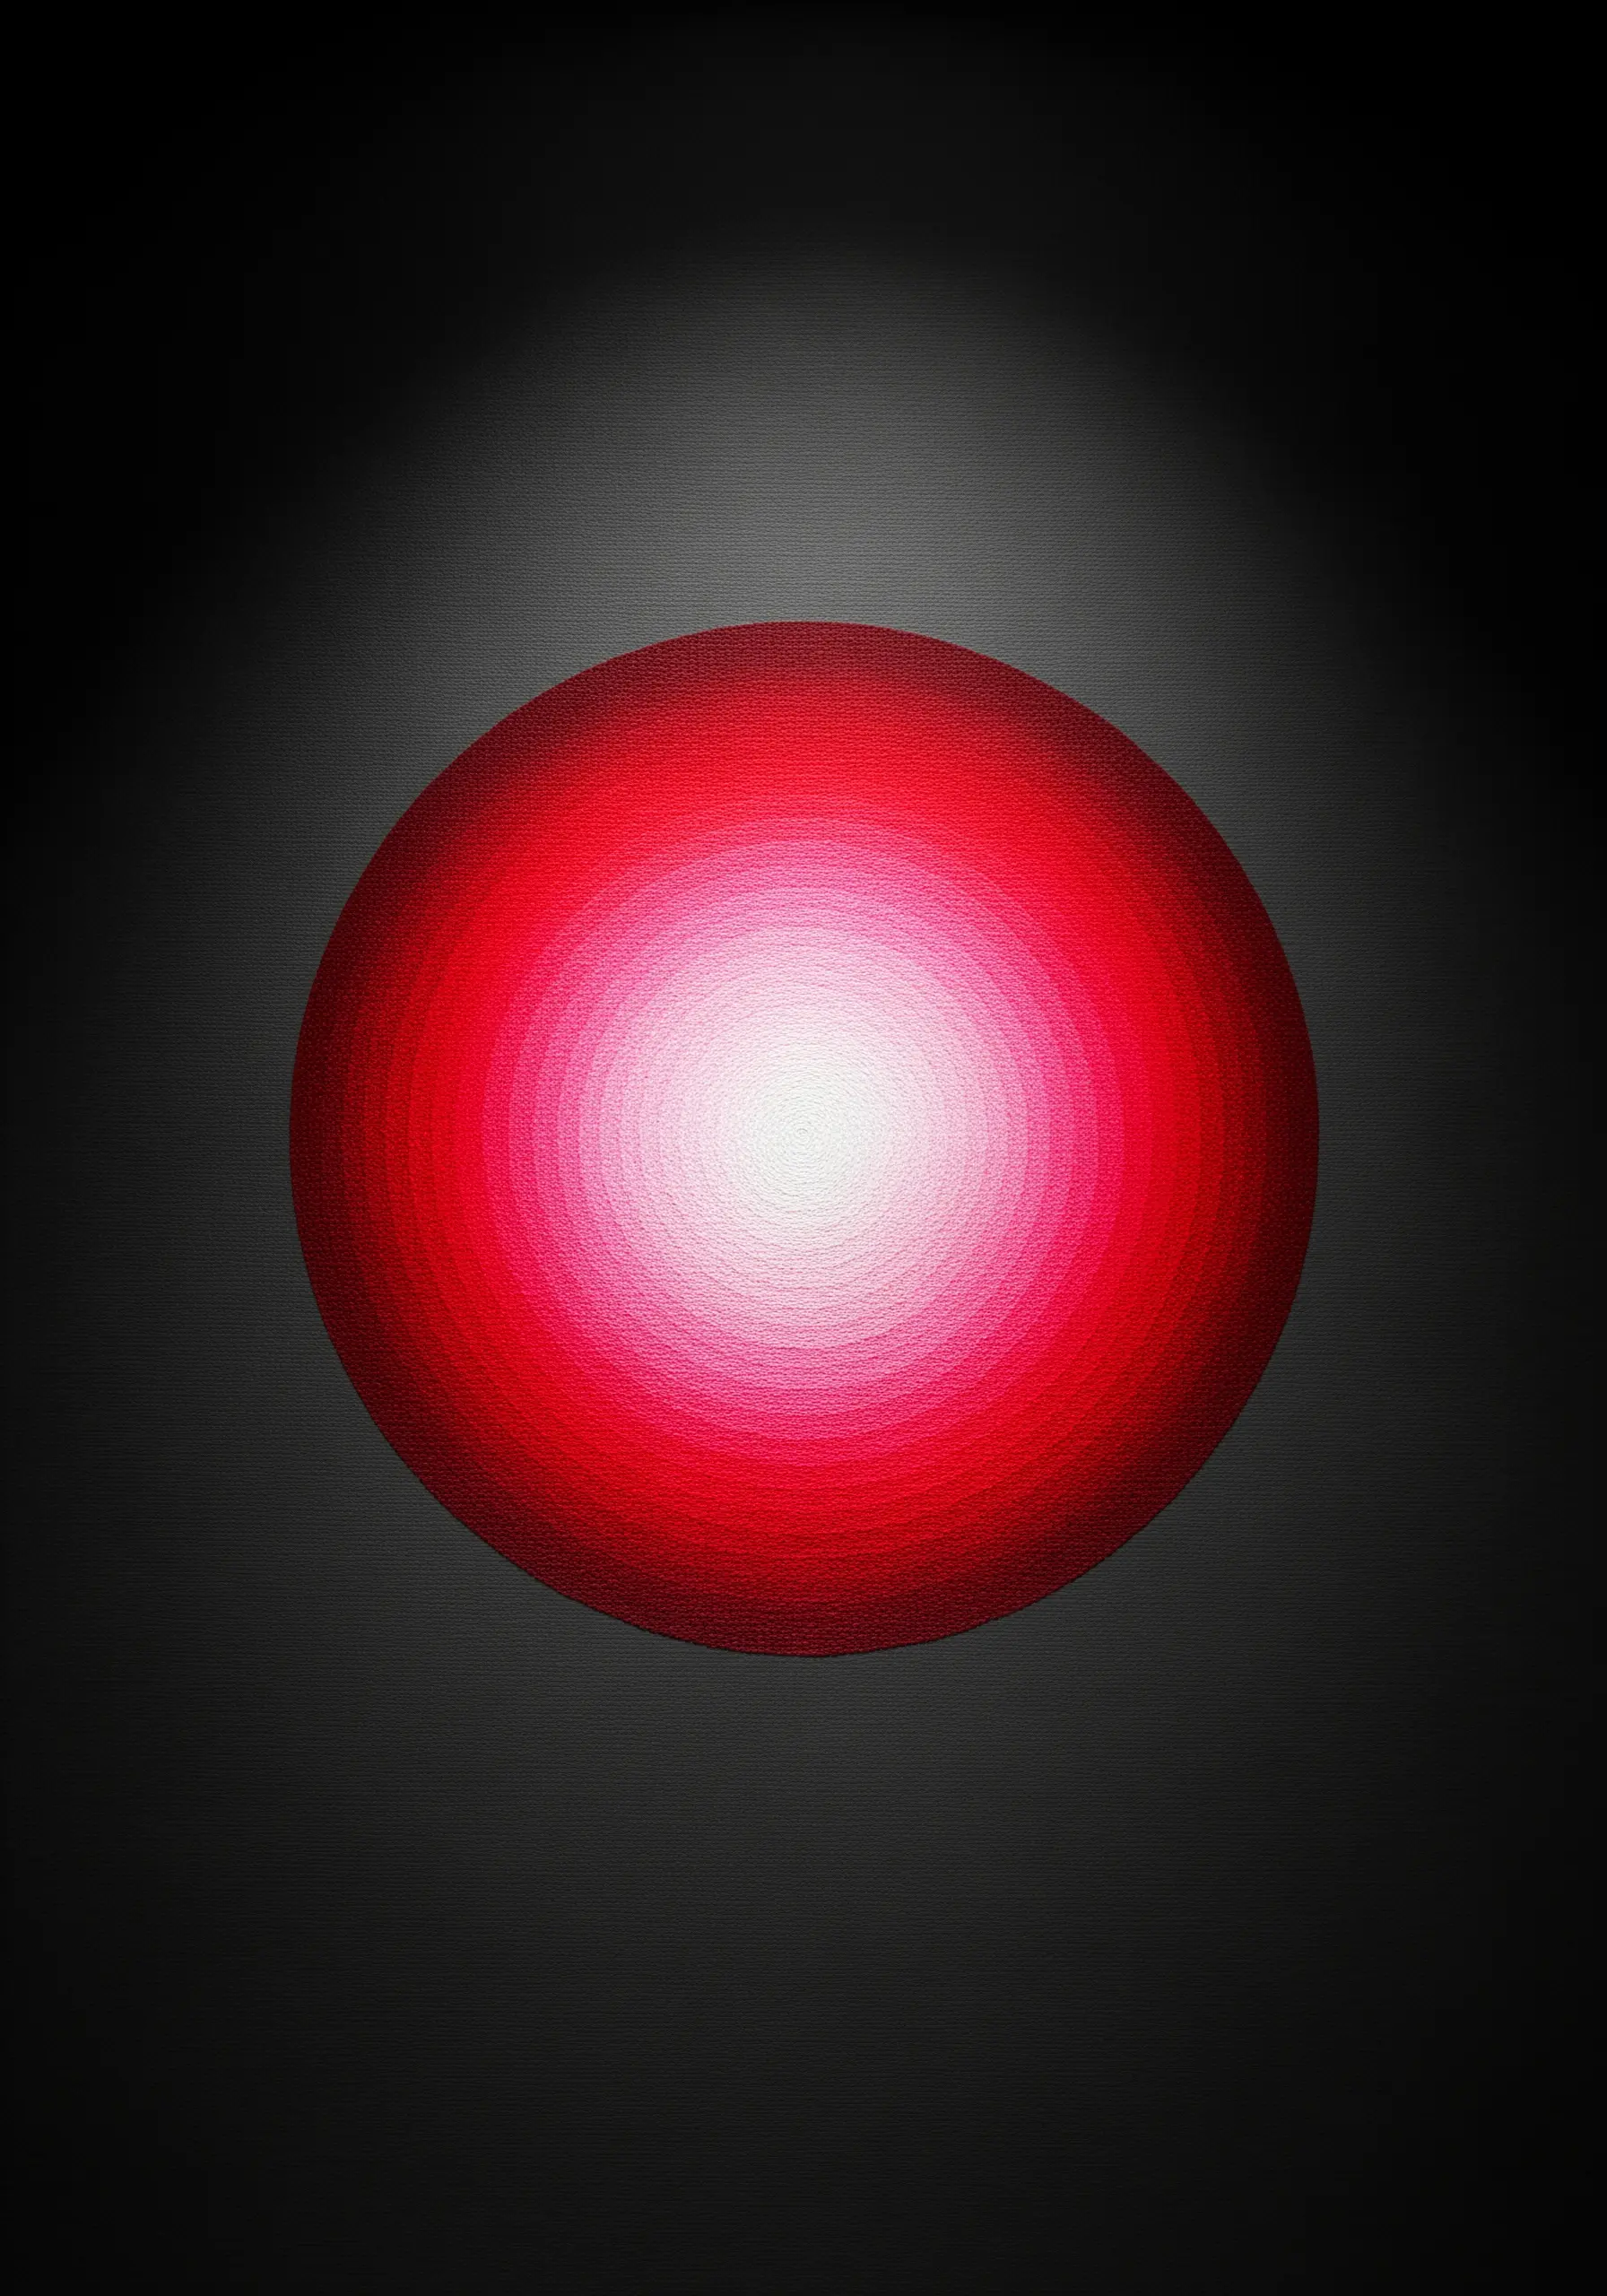
The simplest way to create the illusion of light is through high contrast and careful color placement.
On a black or very dark fabric, stitch concentric circles of satin stitch, placing your lightest, brightest color at the very center.
Gradually work your way outwards with progressively darker shades of the same hue.
The dark negative space absorbs light, forcing the eye to the bright center and creating a powerful glowing effect in your abstract metallic thread projects.


