You have the hoops, the threads, and a love for the quiet focus of stitching. Yet, when you finish a piece, you might feel that something is missing—a sense of cohesion that turns individual projects into a truly personal statement in your home.
An accent wall is the perfect canvas to bridge that gap. It’s not about stitching more, but about stitching with intention. It’s about understanding how color, texture, and arrangement can work together to tell a story that is uniquely yours, transforming a plain wall into a cozy, beautiful focal point.
This is where small shifts in your technique make all the difference. By focusing on a unified color palette, varying your hoop sizes with purpose, or choosing stitches that add specific textures, you can elevate your work from a collection of pretty objects to a cohesive work of art. Let’s explore how you can do that, right now.
1. Curate a Cohesive Desert-Inspired Gallery
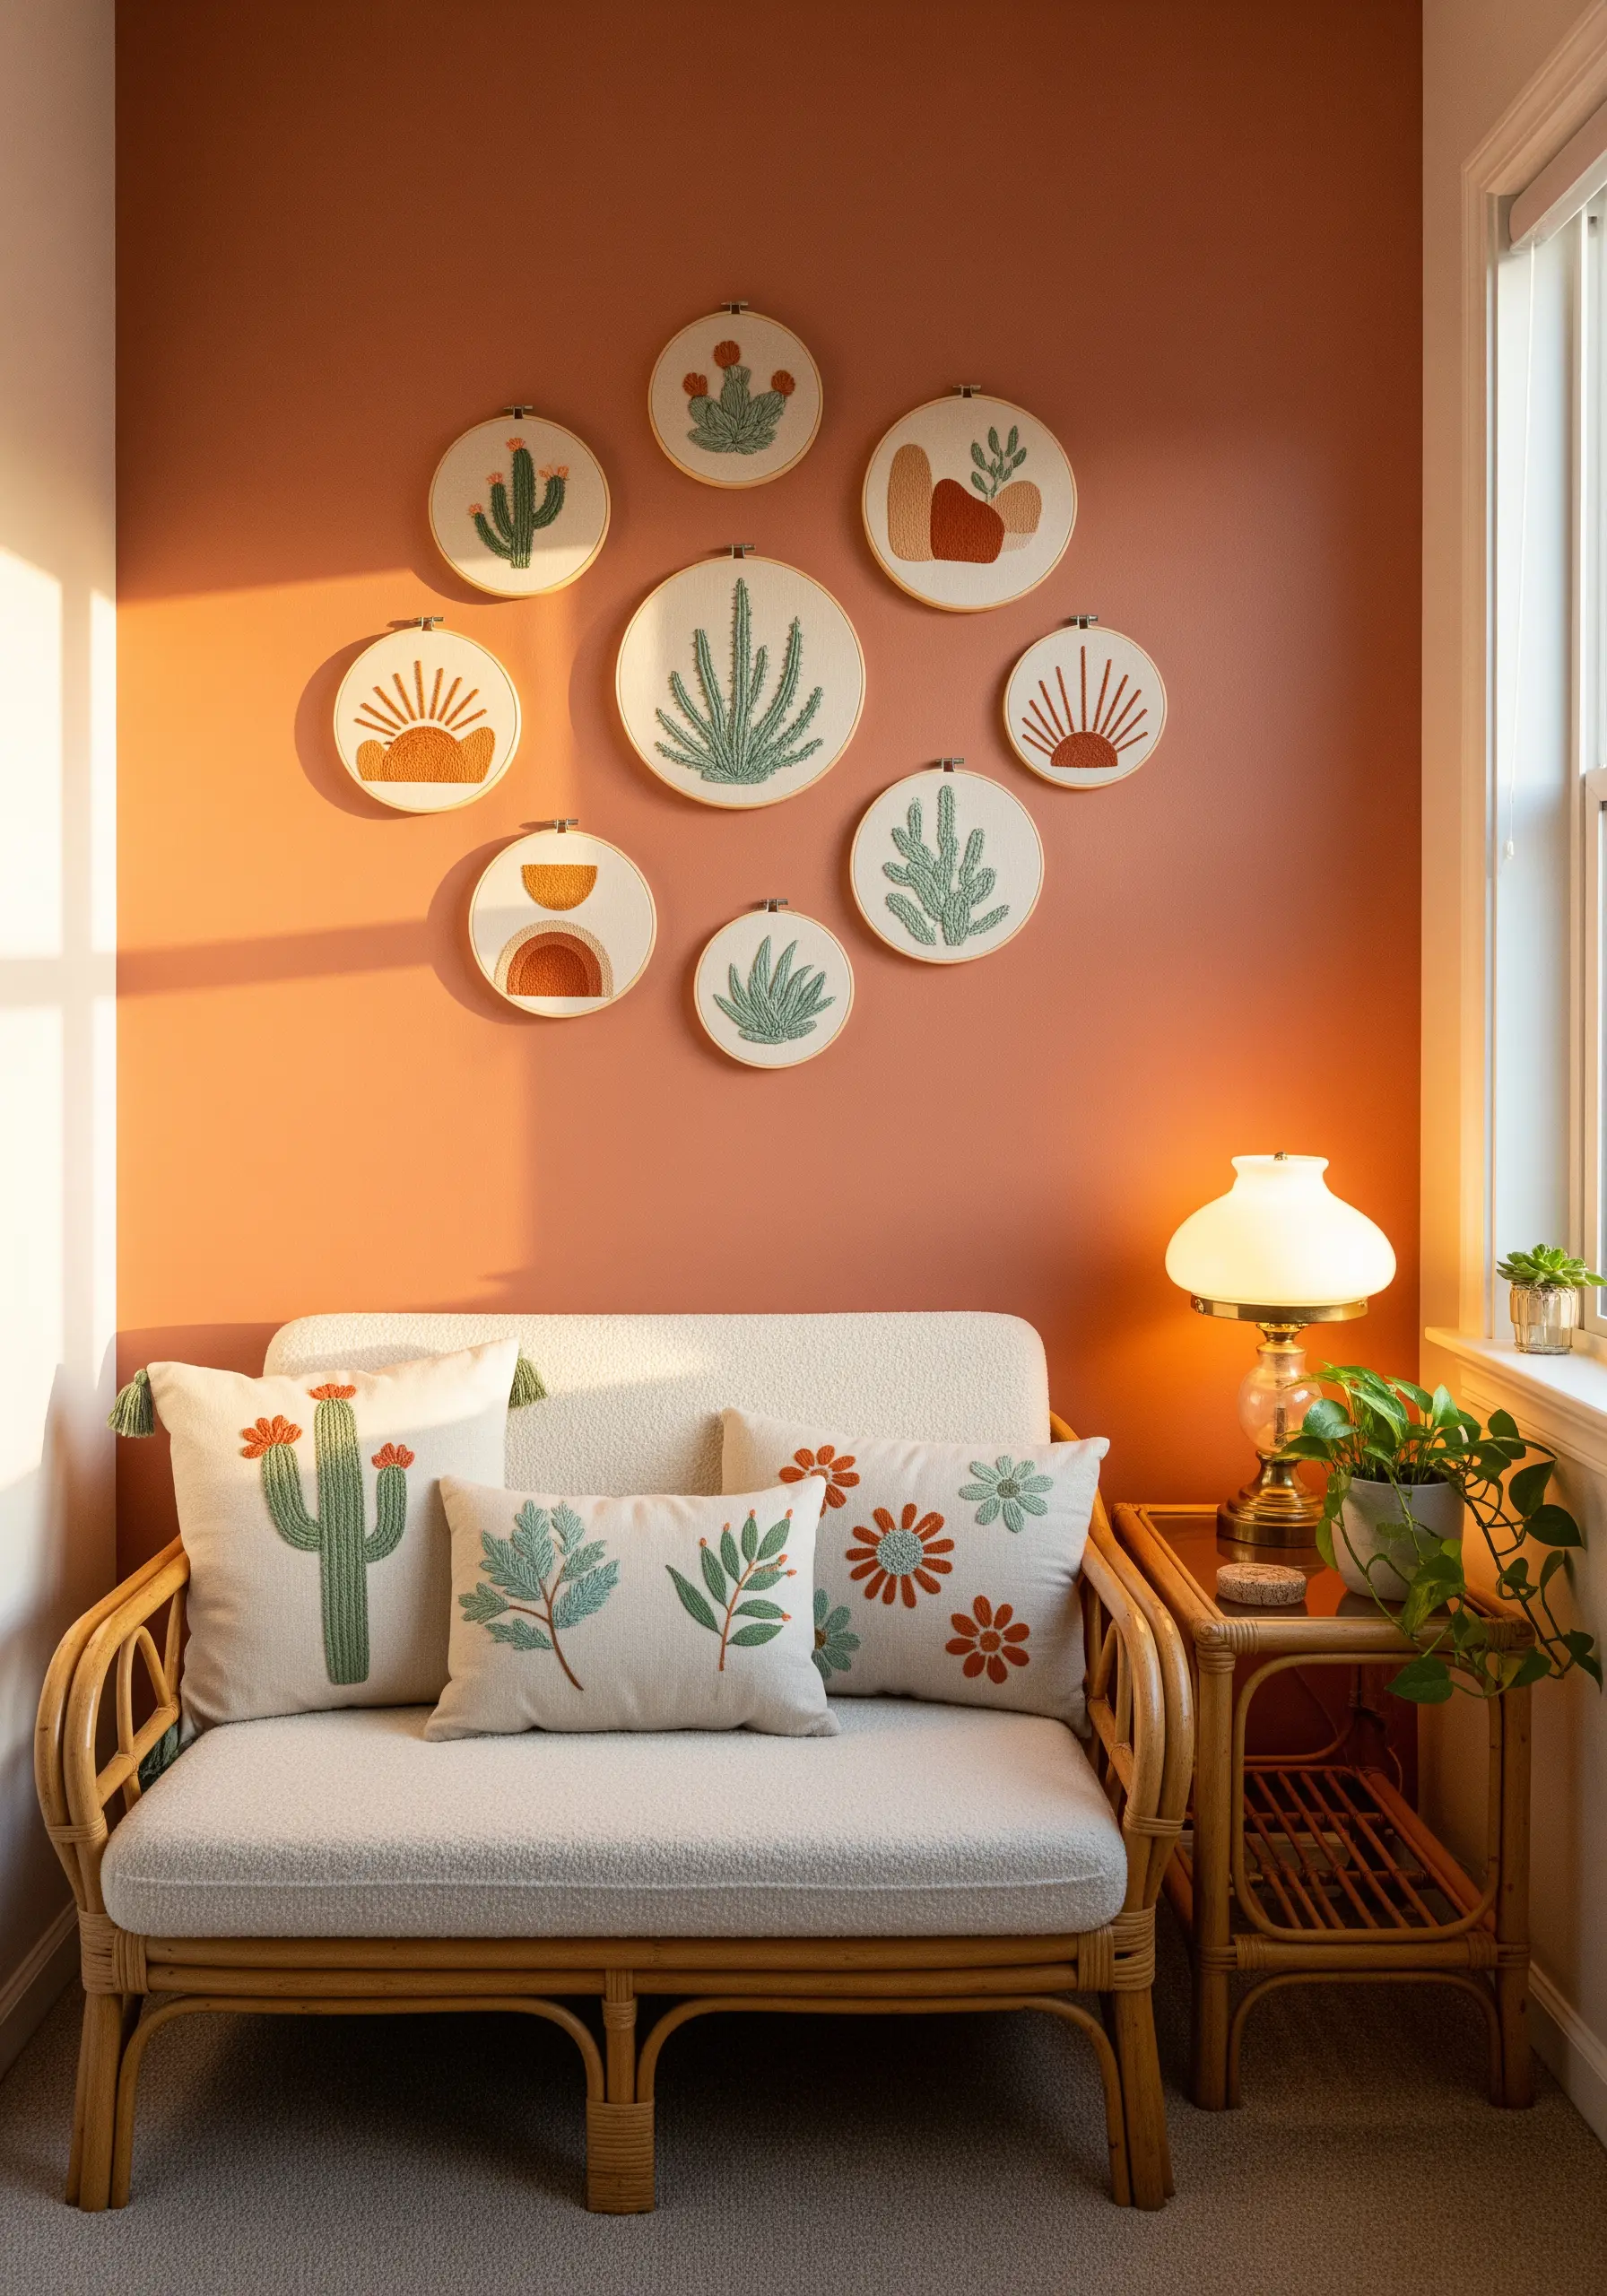
To create a gallery wall that feels intentional, not random, commit to a unified color palette across all your hoops.
Use just three or four key colors—like terracotta, sage, and cream—to tie disparate motifs together into a single, cohesive story.
Vary the textures within this limited palette by using dense satin stitch for solid shapes and a simple backstitch for delicate outlines.
Finally, arrange your hoops in an organic, flowing cluster rather than a rigid grid to enhance the relaxed, boho feel.
2. Build a Storybook Woodland Nook
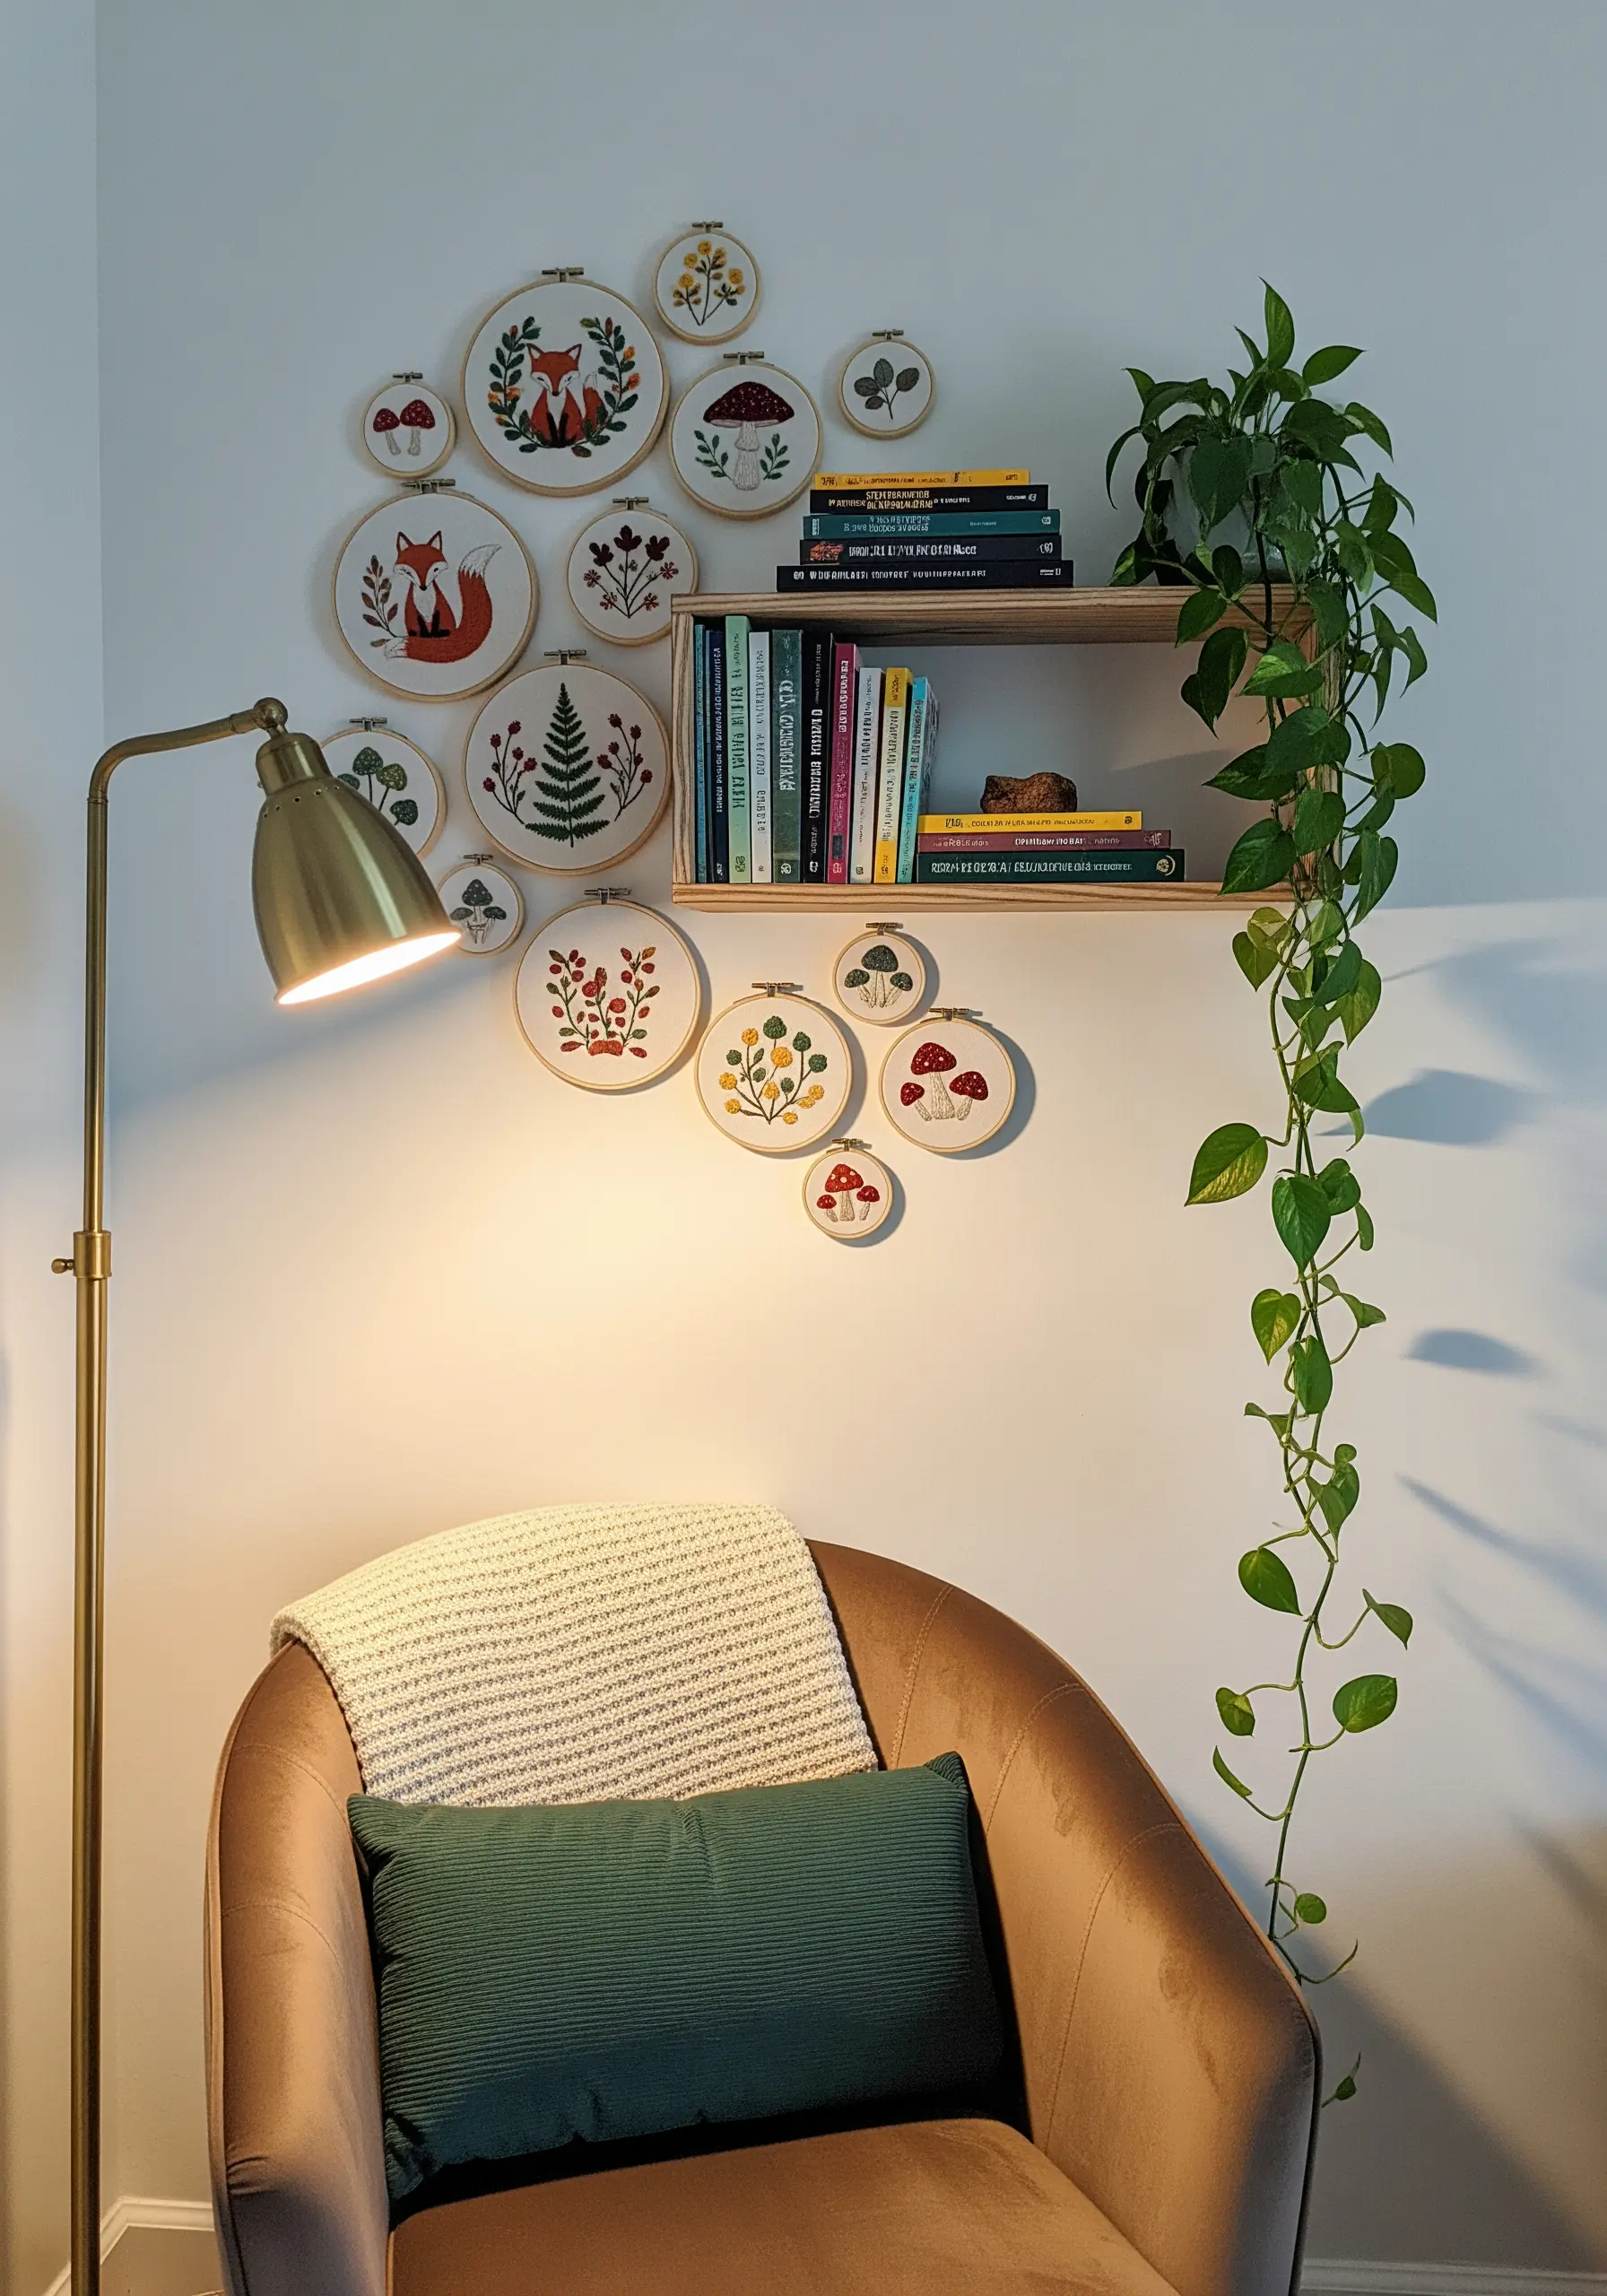
To create this charming, clustered look, vary your hoop sizes dramatically—from tiny two-inch hoops to larger six-inch pieces.
Anchor your composition around a central element, like a floating shelf, and let the smaller hoops appear to ‘grow’ from it organically.
For the motifs, combine bold satin stitch fills for a fox’s body with delicate detached chain stitches for fern leaves and French knots for textural berries.
This mix of stitch styles adds narrative depth and visual interest to your woodland scene.
3. Elevate Line Art with Minimalist Framing
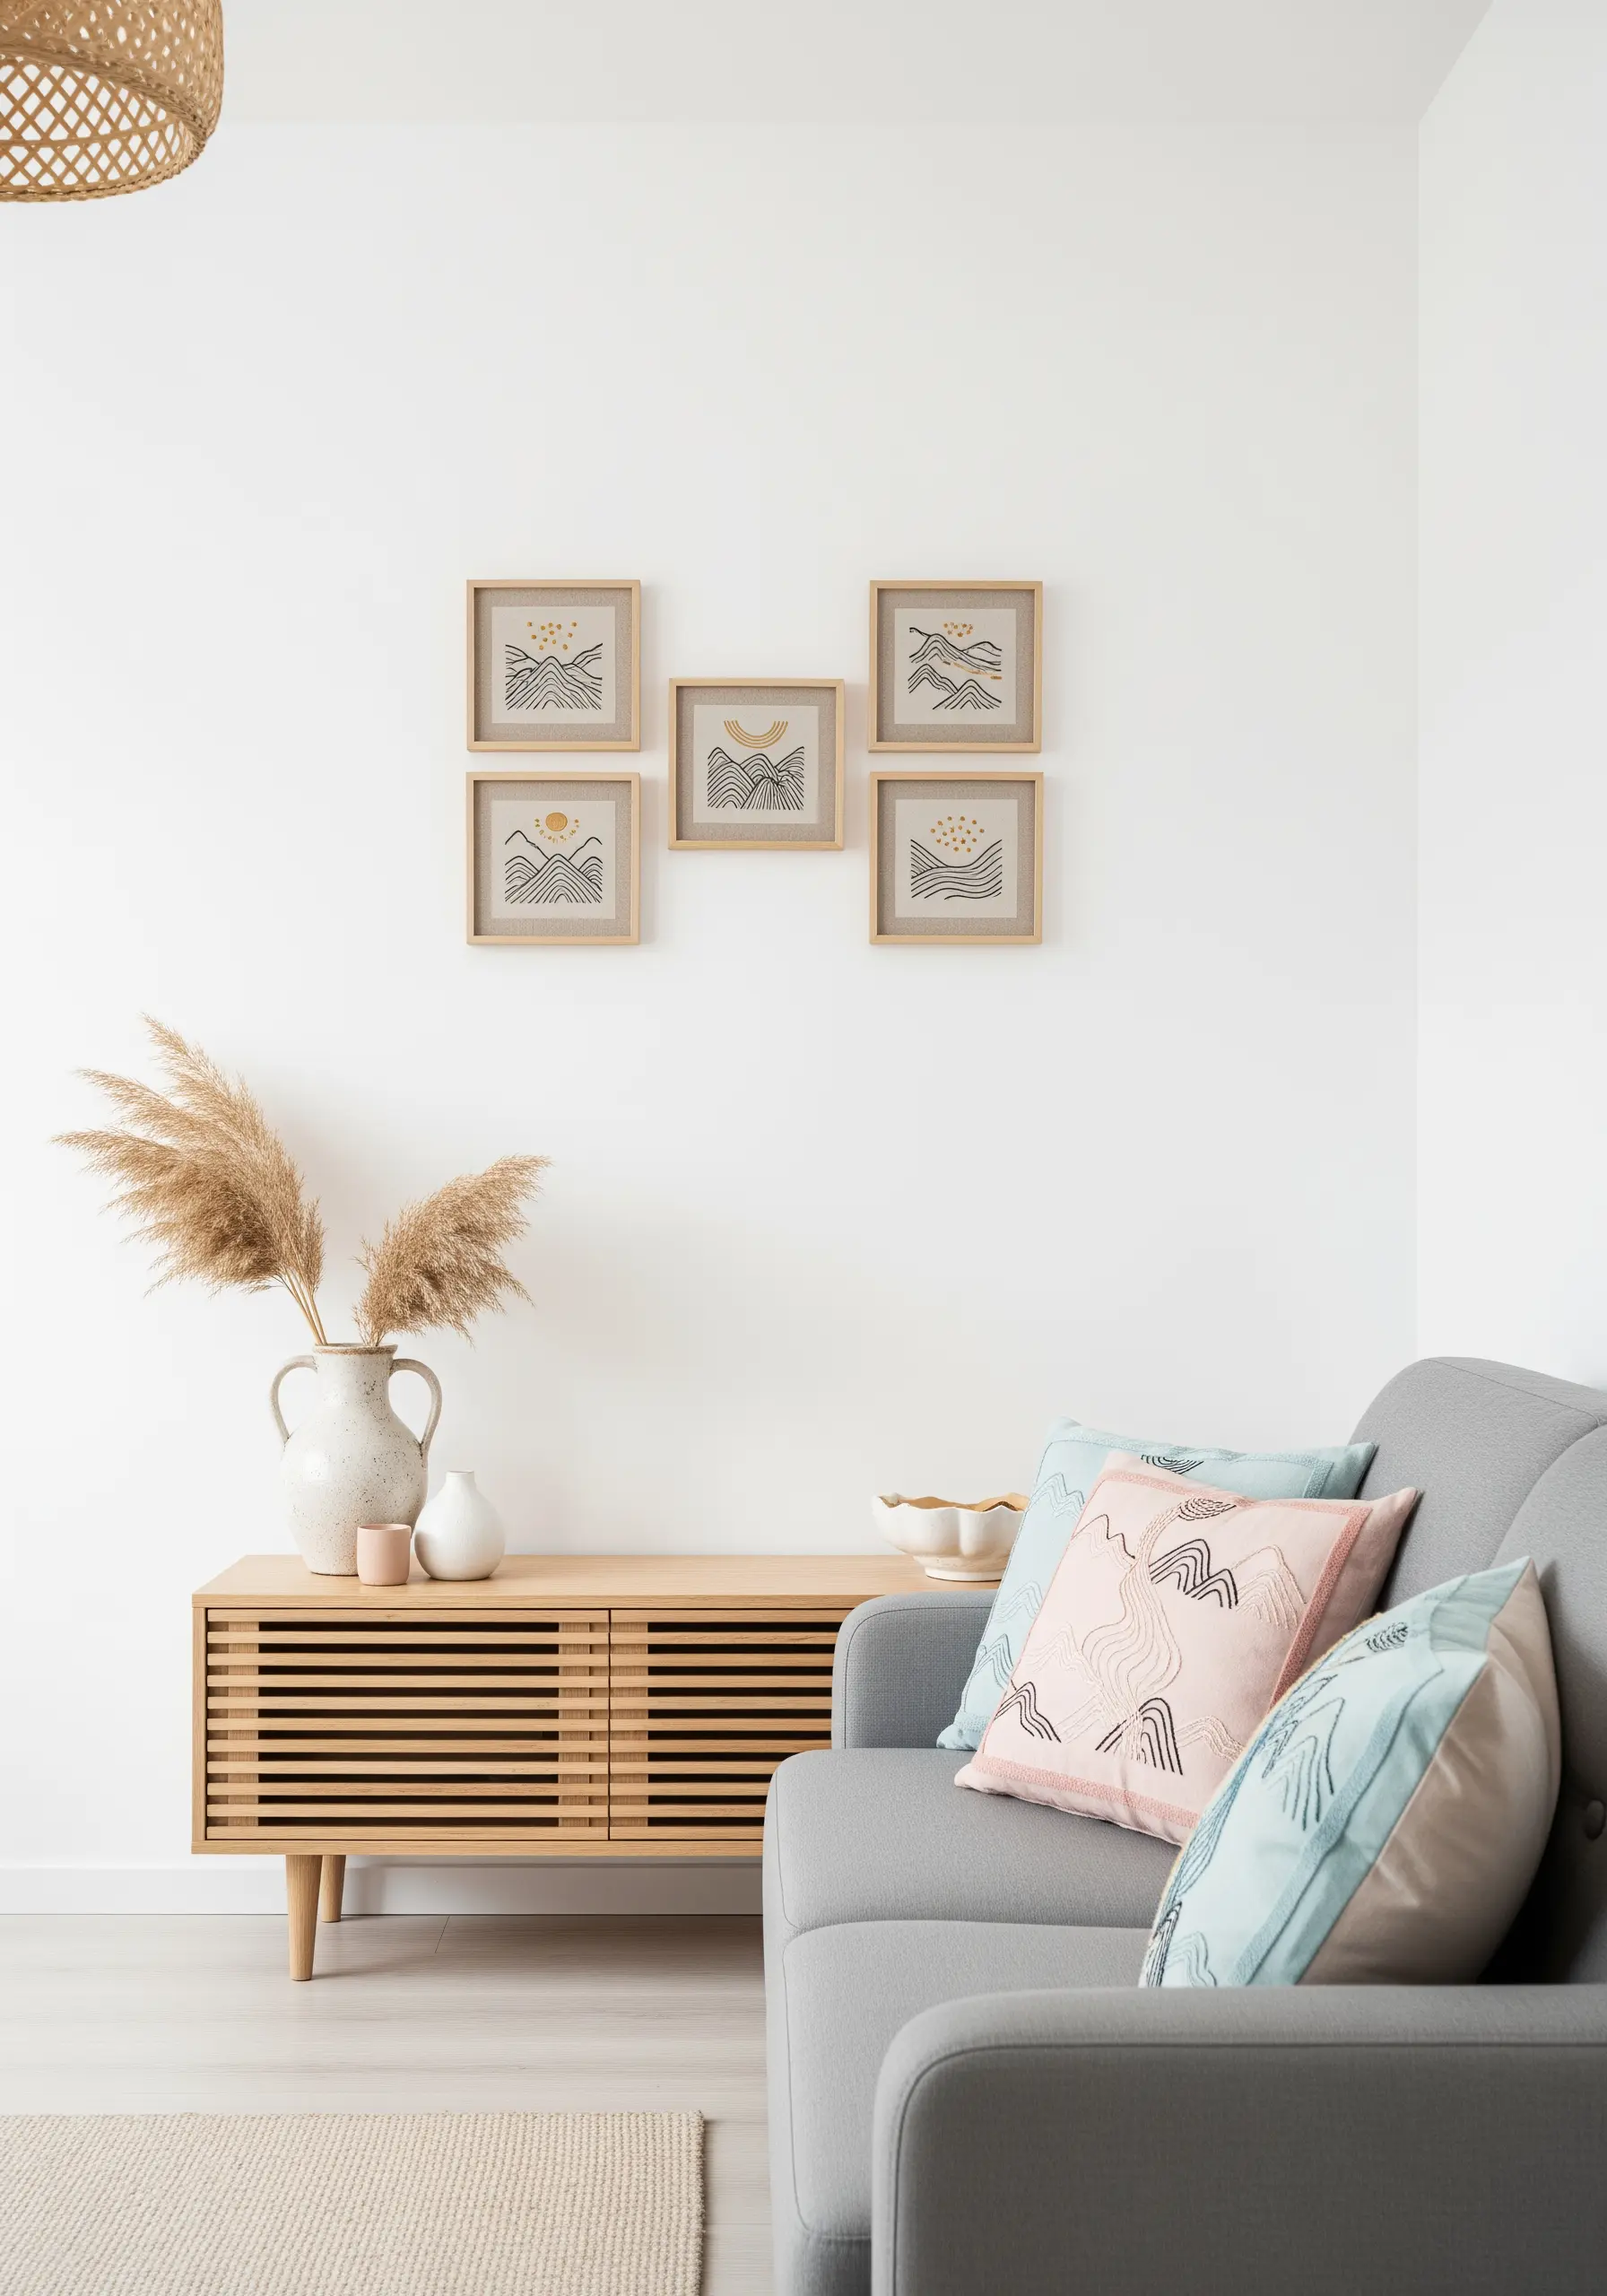
Transition your work from craft to art by mounting your finished pieces in simple, light-wood frames.
This finishing touch instantly elevates minimalist embroidery wall art, giving it a polished, gallery-ready presence.
Use a single strand of black floss to achieve crisp, delicate lines, and add a small pop of contrast with a single, satin-stitched sun.
The key to this aesthetic is negative space; allow the unstitched fabric to breathe and become an integral part of the composition.
4. Stitch a Meditative Mandala Centerpiece
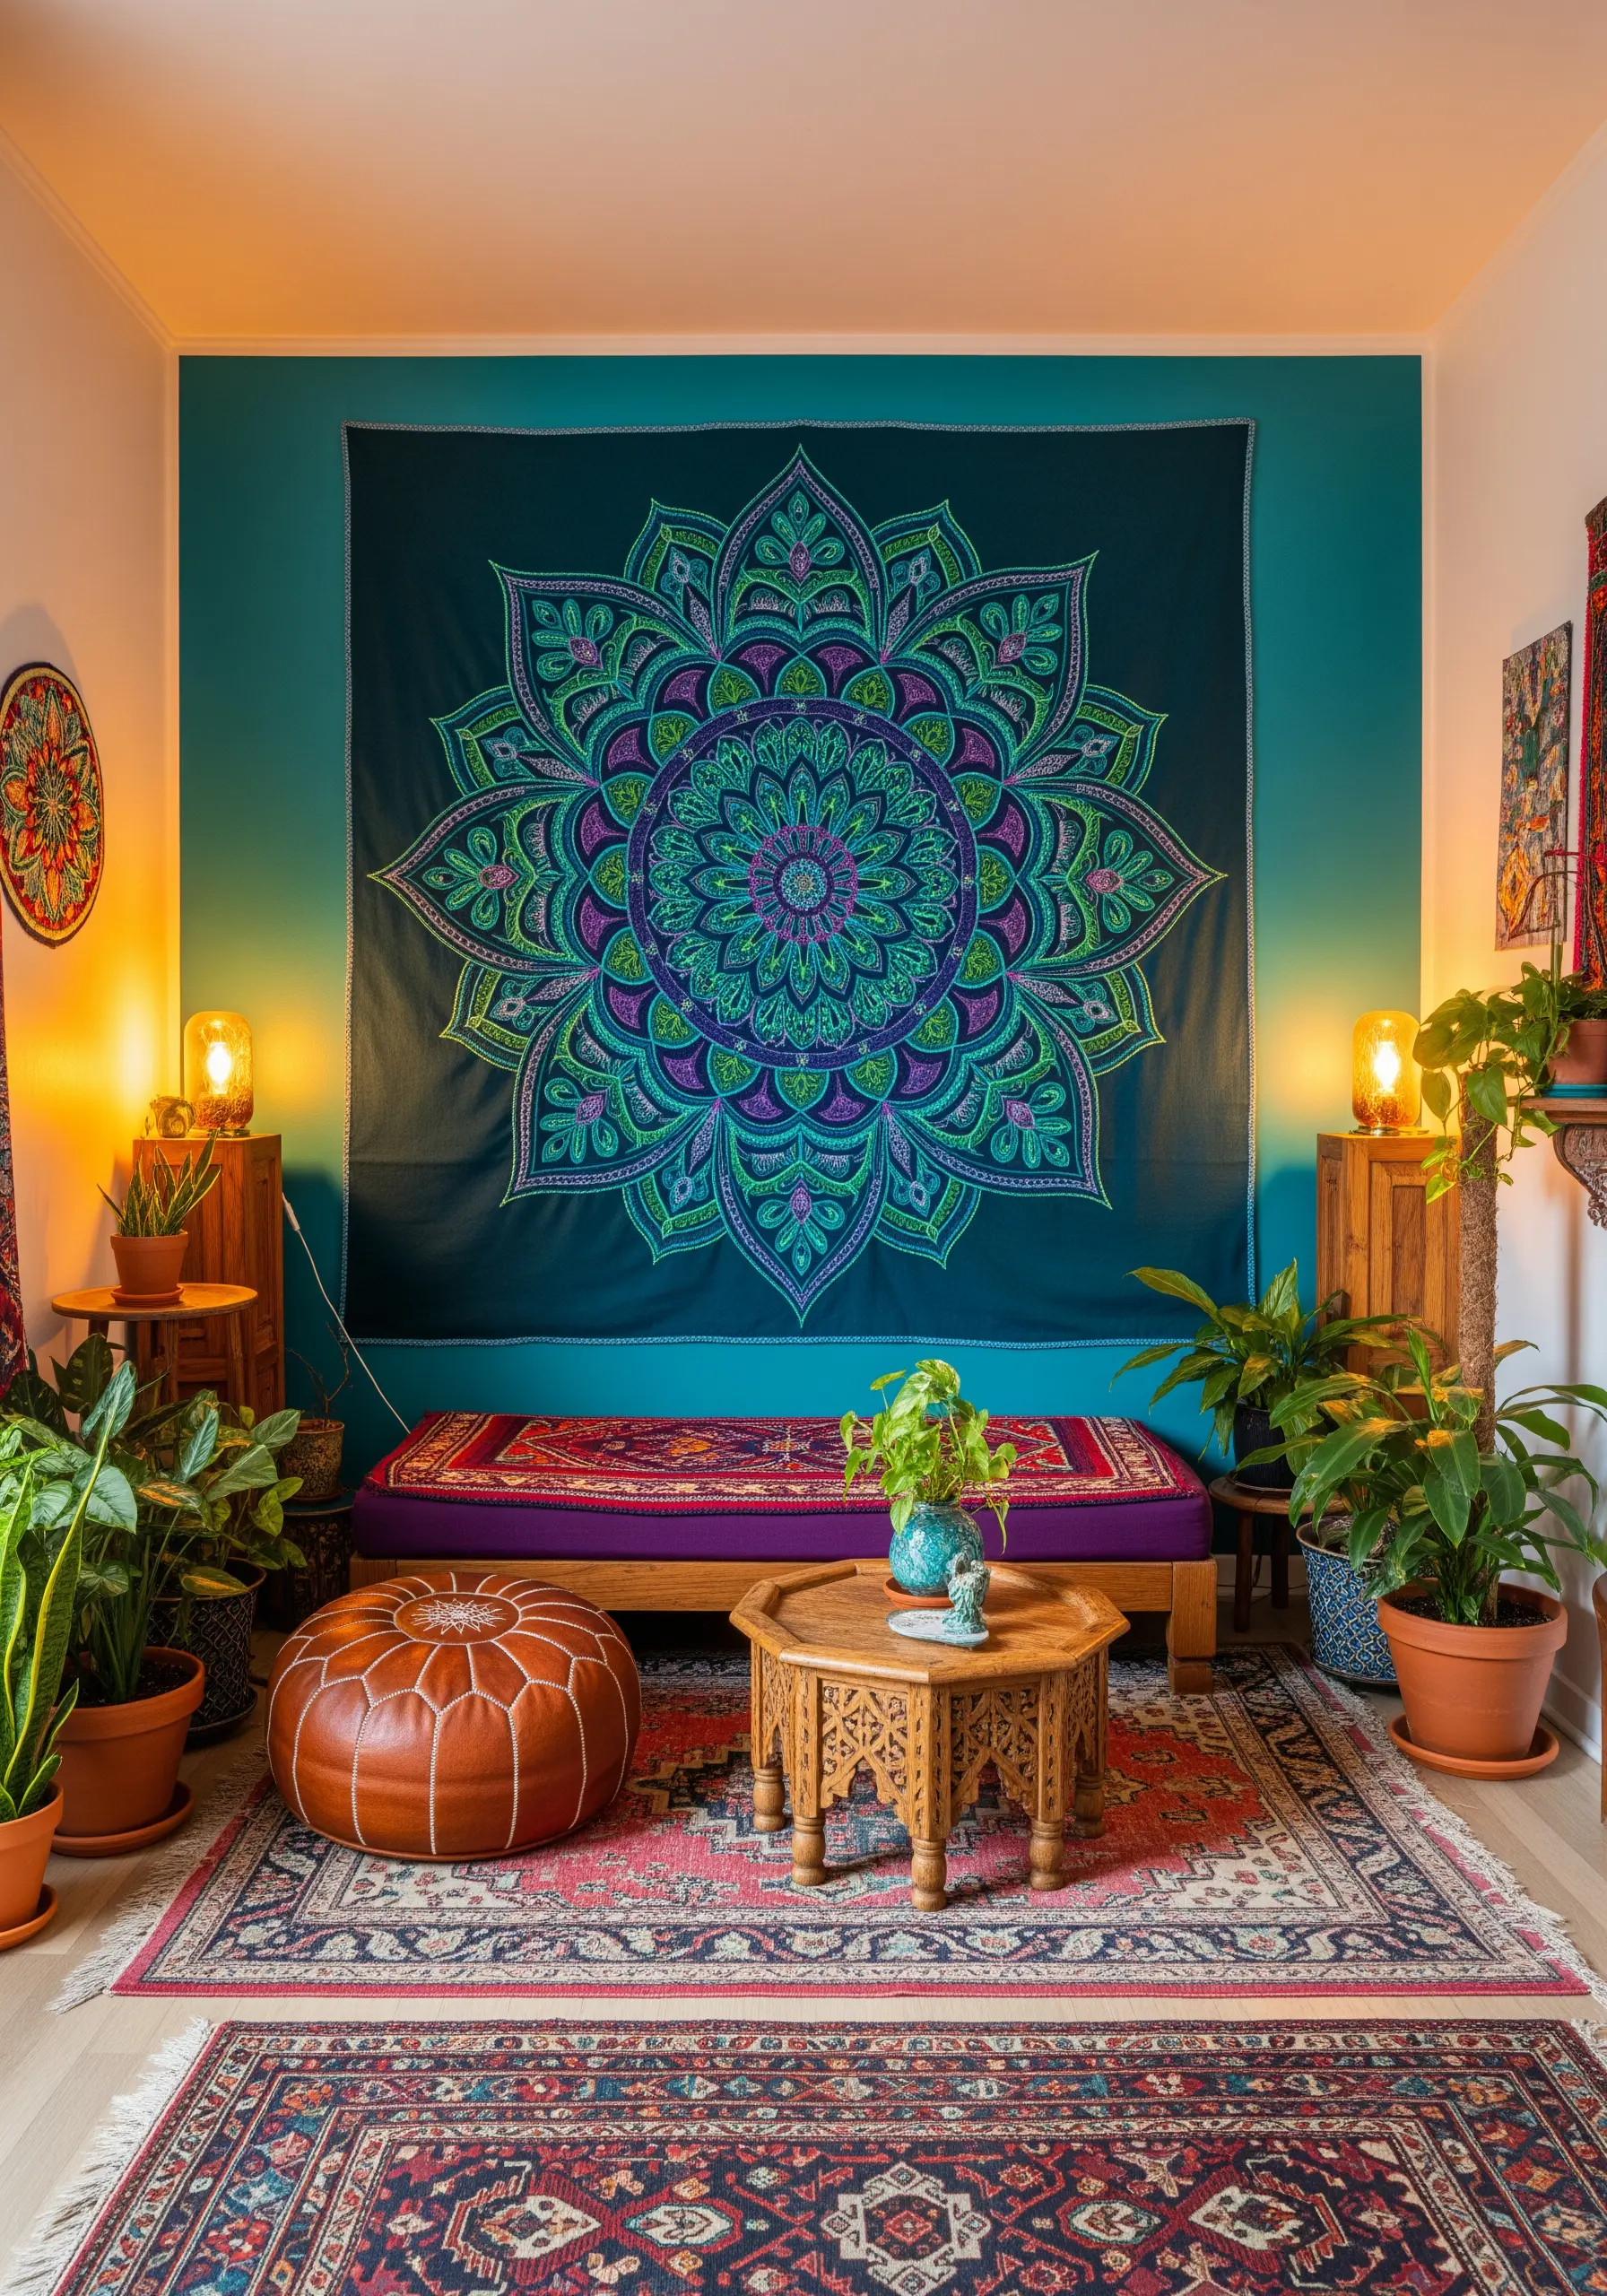
To create a large, impactful piece without spending months on it, focus on outlining rather than filling.
Transfer a mandala pattern onto a large square of dark cotton and use a simple backstitch to trace the intricate patterns.
Choose a variegated thread in jewel tones like purple, teal, and green. This will create a stunning, subtle color gradient throughout the piece with a single strand, mimicking a more complex design with minimal effort.
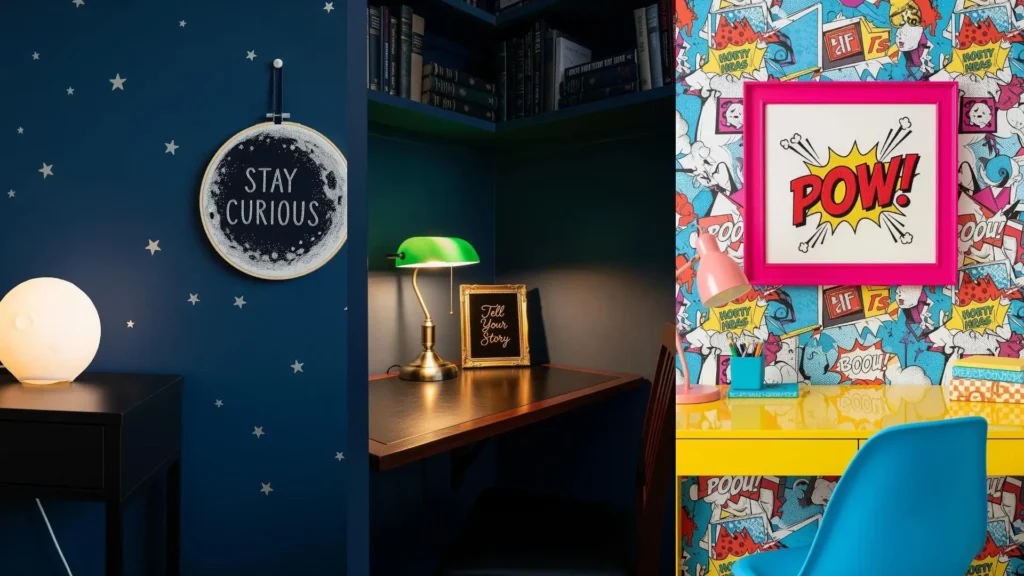
5. Craft a Celestial Mobile with Natural Elements
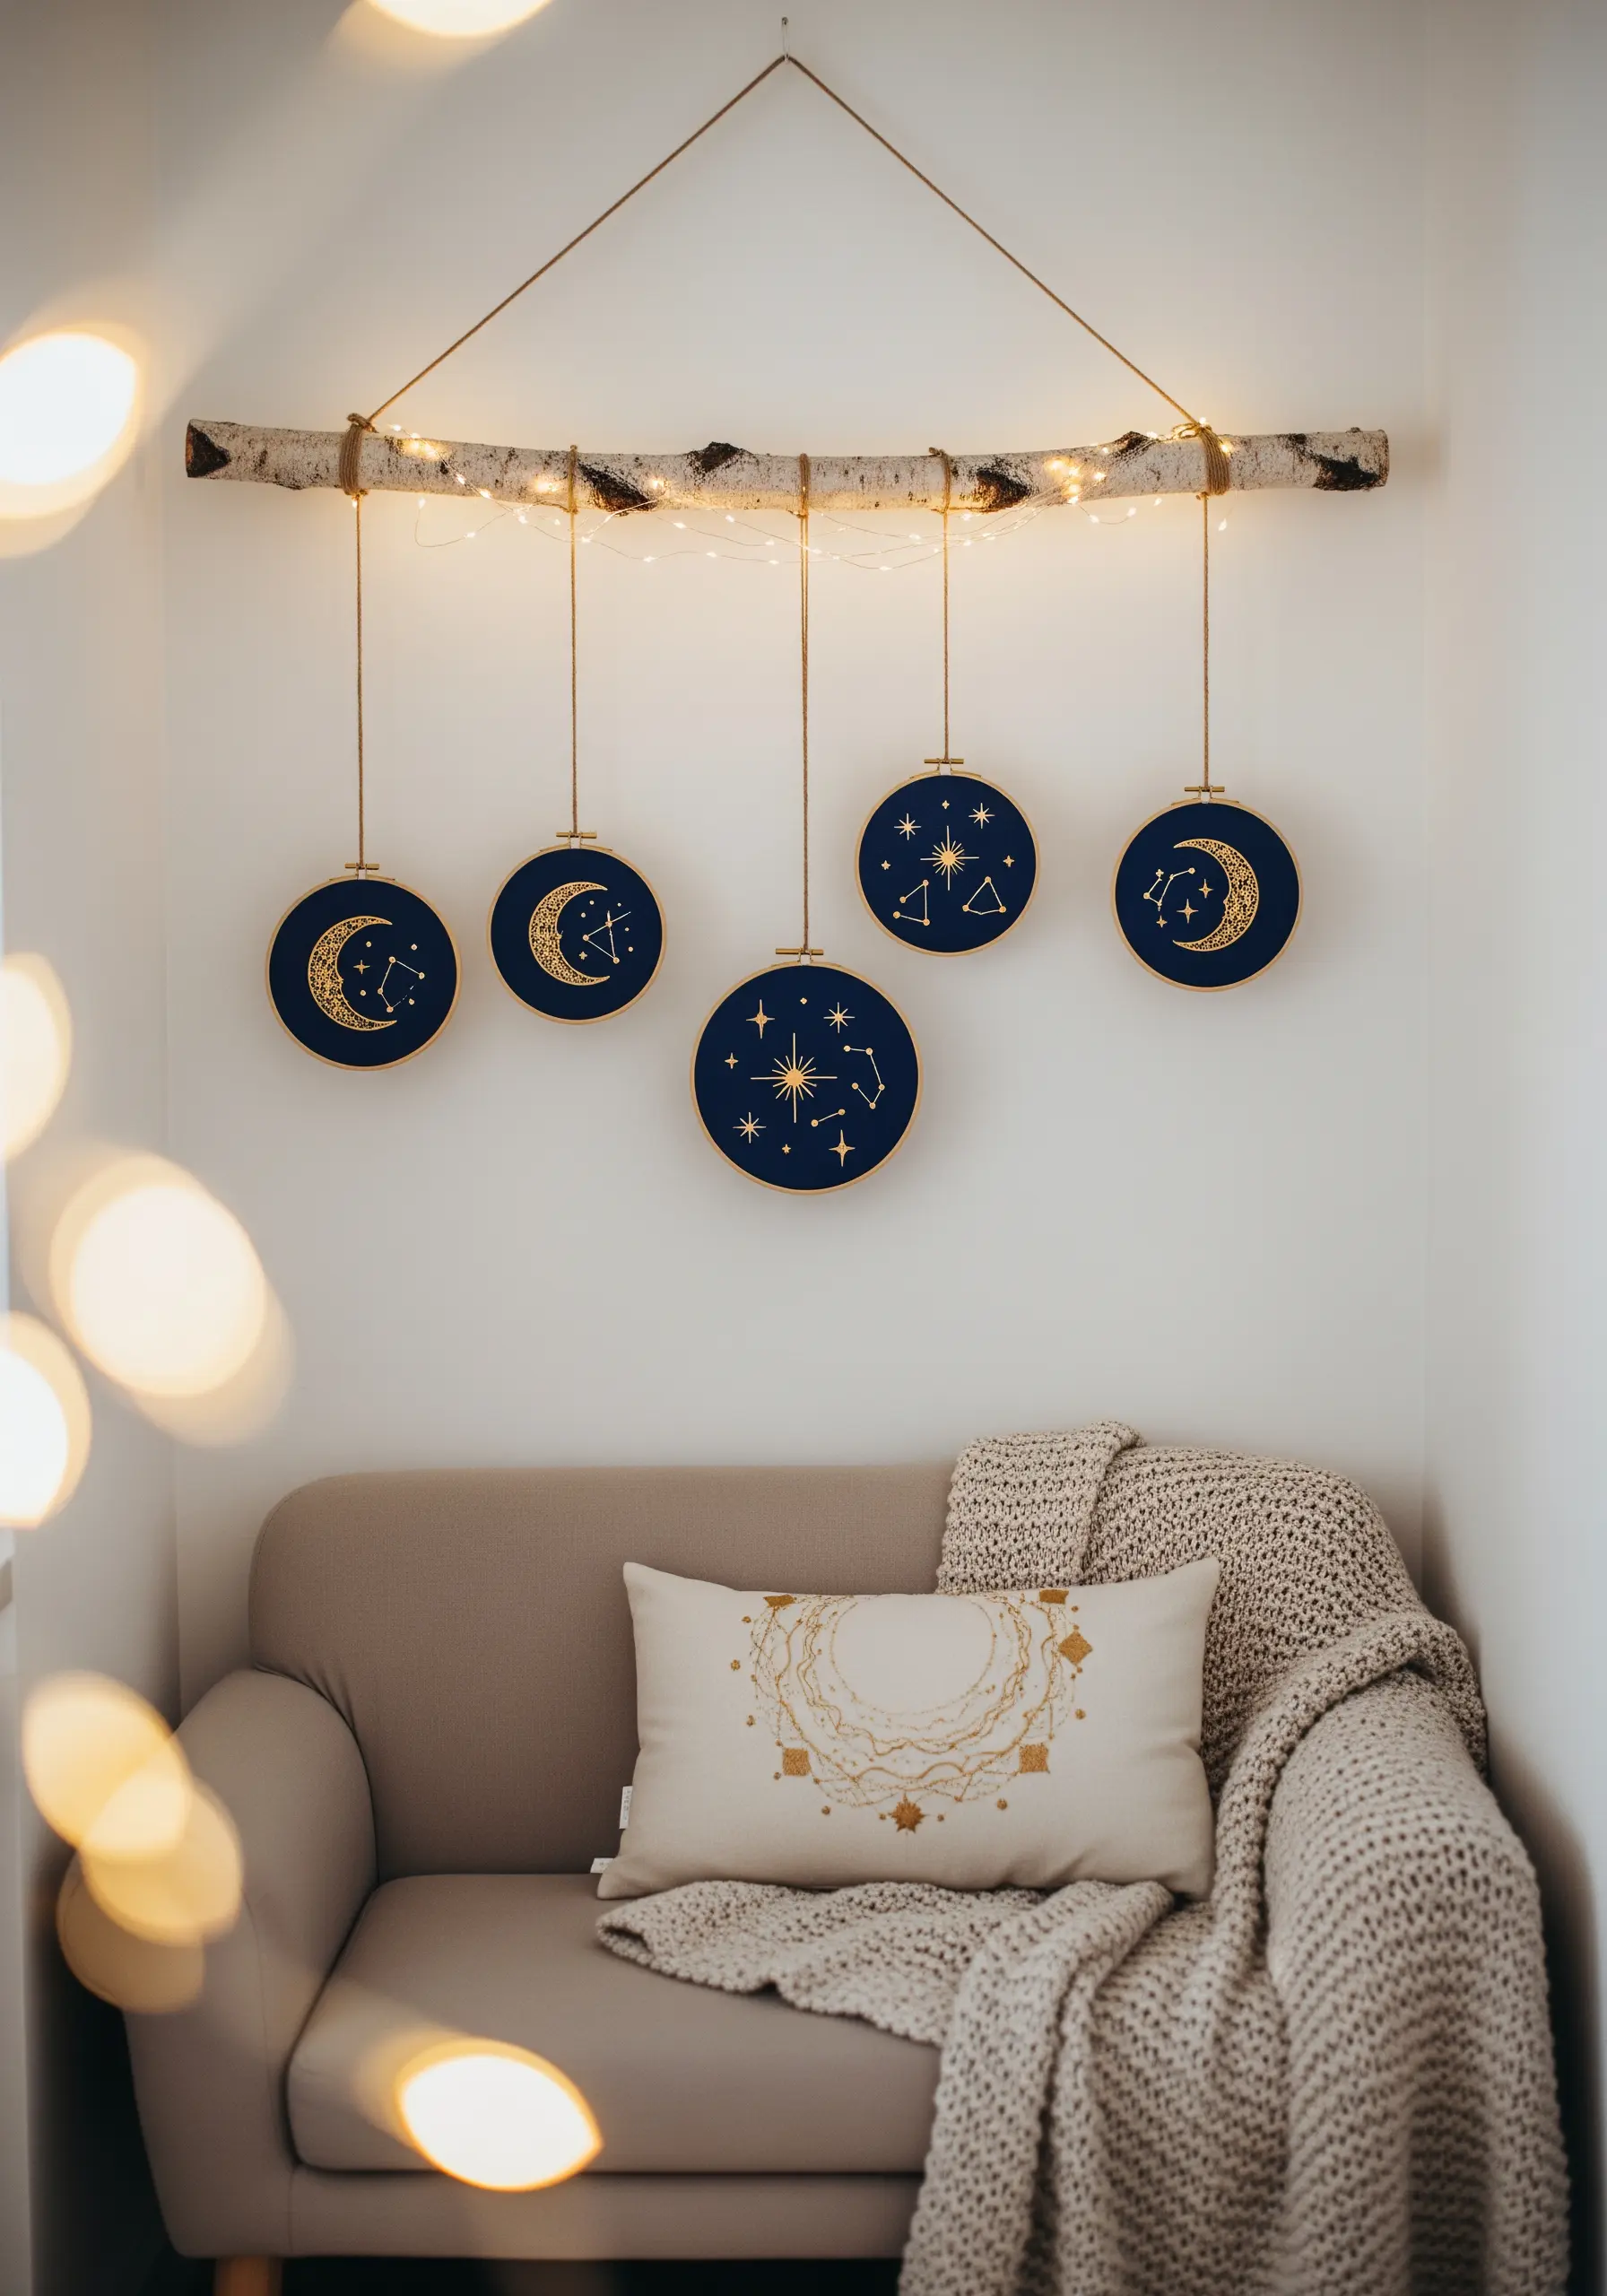
Let your metallic threads shine by stitching celestial motifs on a dark navy or black linen background.
To prevent the frustration of fraying, work with shorter lengths of metallic floss—about 12 inches is ideal—and consider using a thread conditioner.
Hang the finished hoops at varying lengths from a found birch branch to create a rustic, magical mobile.
This is one of the most effective bedroom embroidery accents that will make guests stop and stare, blending handmade art with nature.
6. Design a Modern Geometric Grid

Create a powerful graphic statement by limiting your palette to just three high-contrast colors, such as black, terracotta, and cream.
For perfectly straight lines and sharp corners, use a disciplined stem stitch or split stitch.
Fill the geometric shapes with a dense satin stitch, ensuring every stitch lies in the same direction for a smooth, light-reflecting finish.
Arranging the hoops in a clean, orderly grid amplifies the modern, architectural feel of the designs.
7. Stitch a Serene and Breezy Coastal Collection
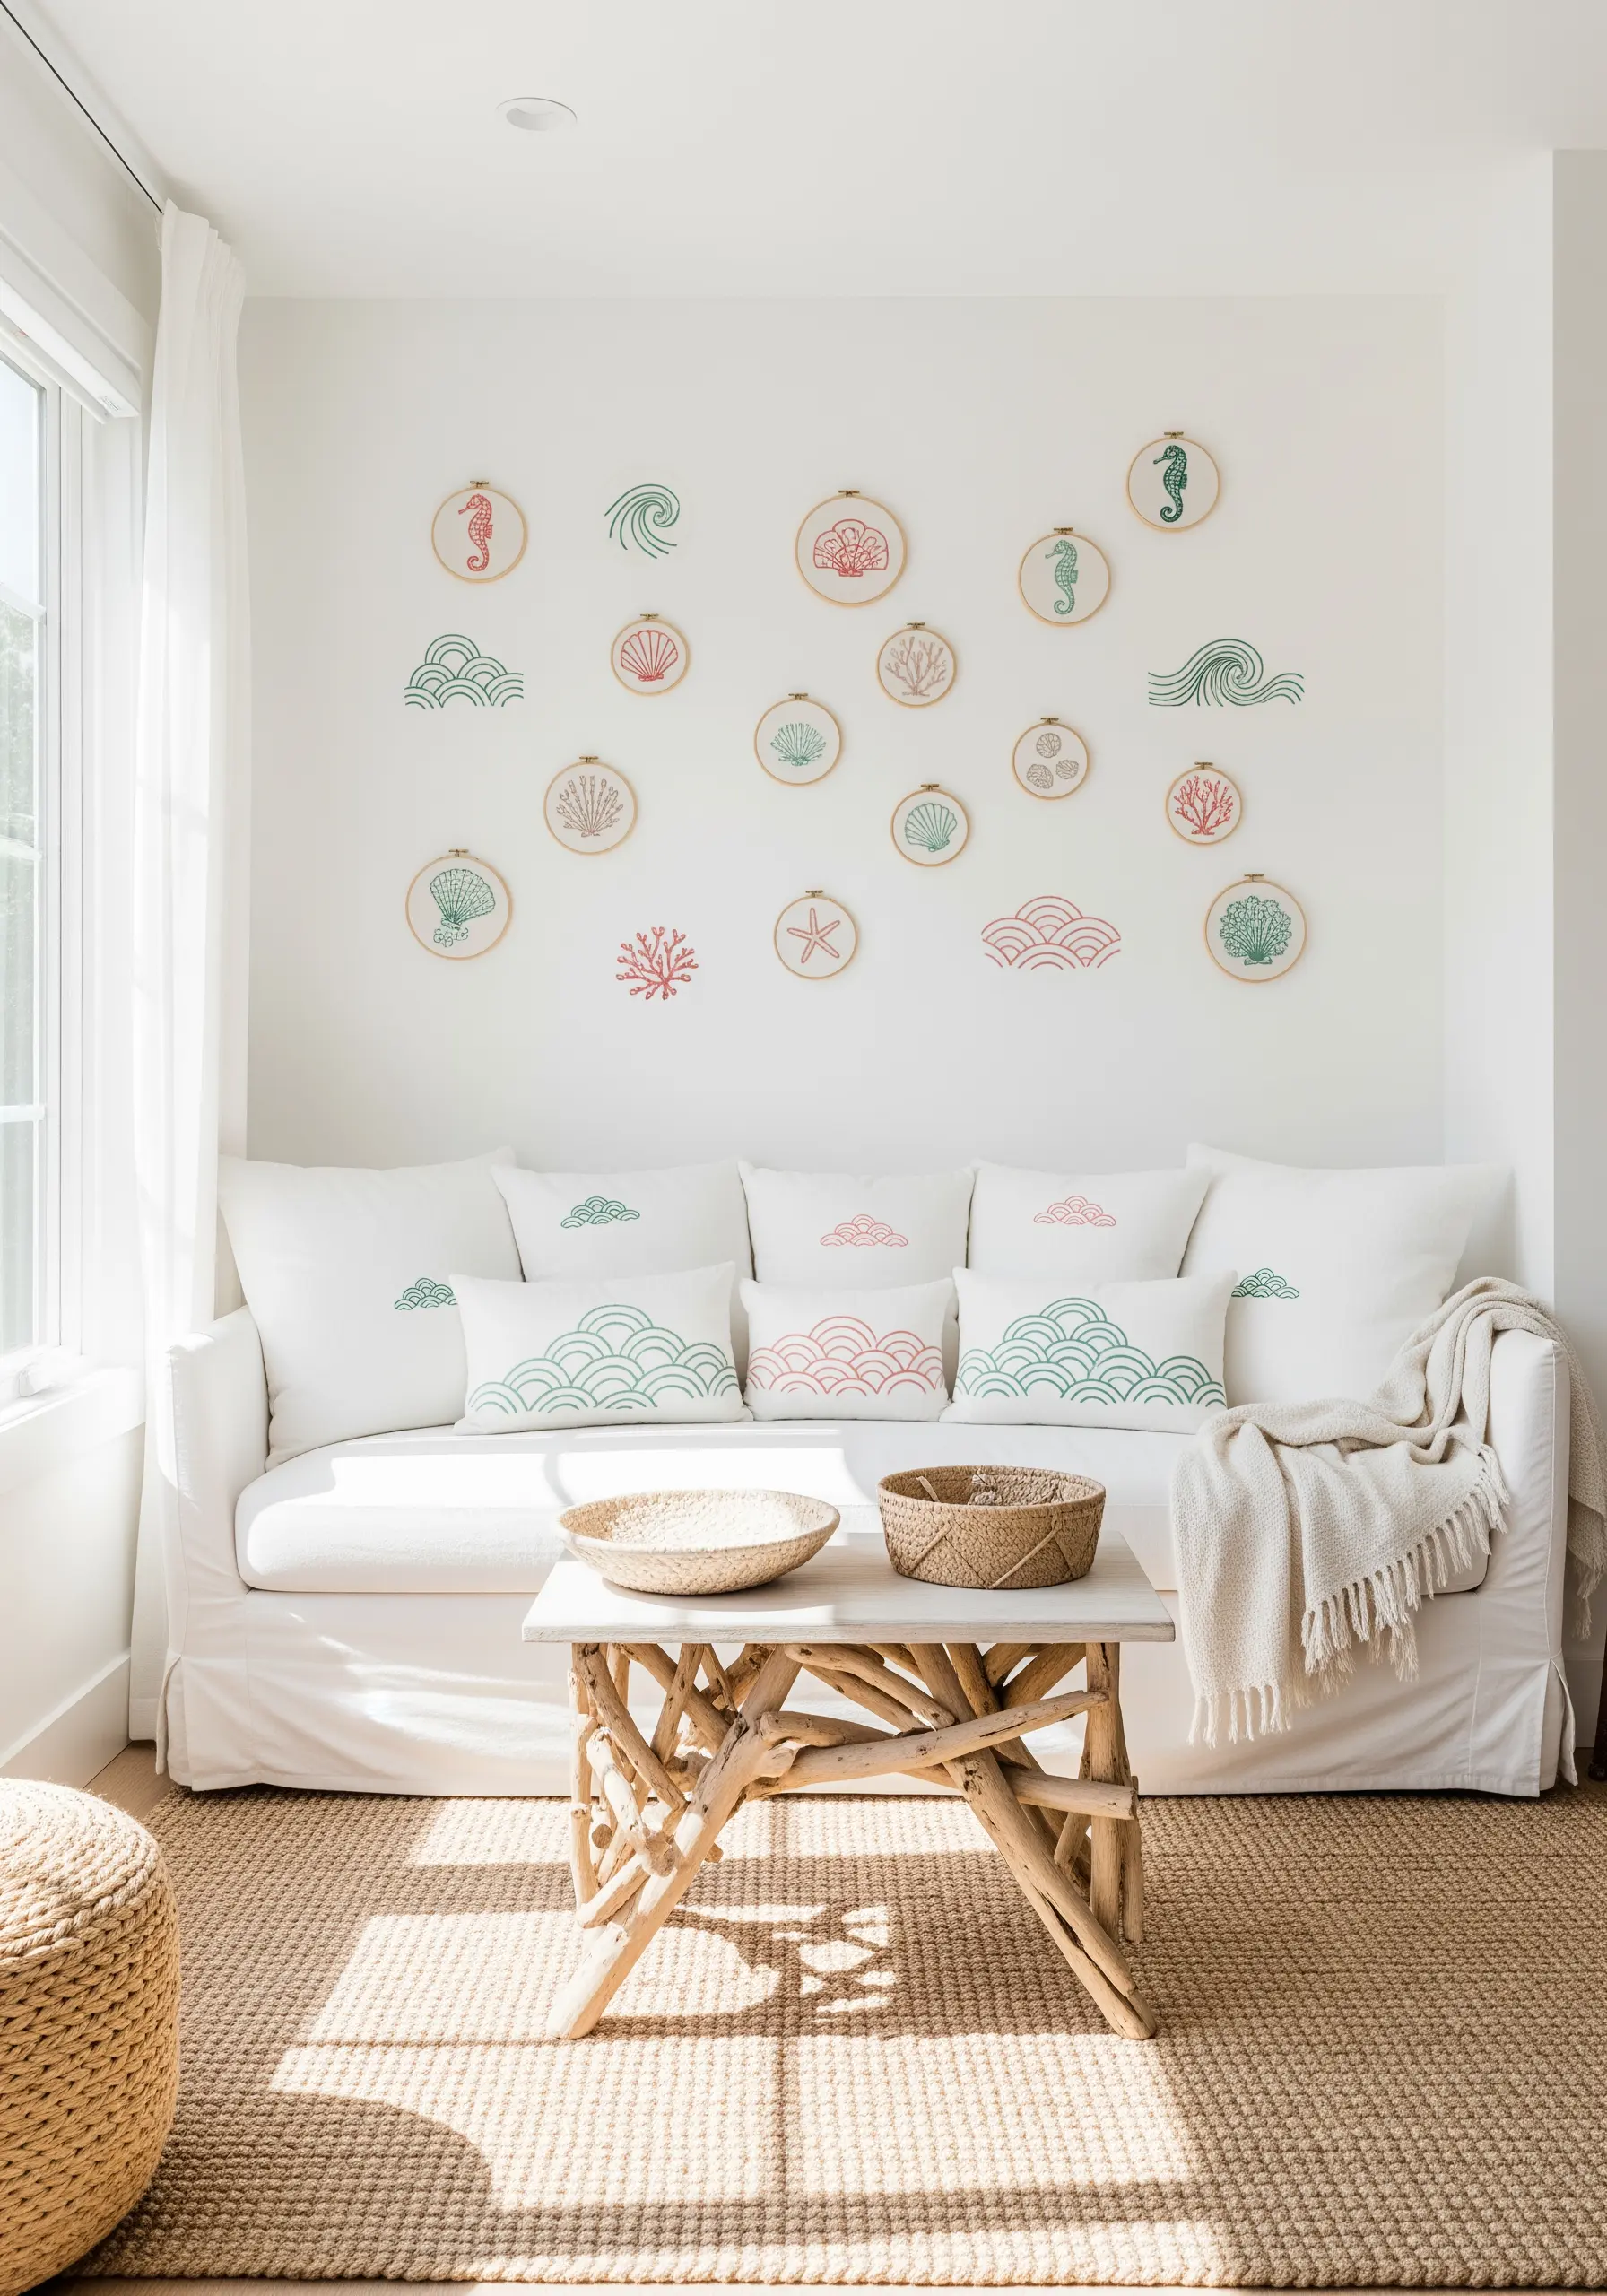
Evoke a calm, coastal atmosphere by using a soft, sun-bleached color palette of coral, seafoam green, and sandy beige.
For the wave motifs, use rows of chain stitch or Japanese darning stitch to create a sense of texture and movement.
When stitching the tiny details on shells and seahorses, switch to a single strand of floss and use precise seed stitches. This allows for delicate shading without overwhelming the minimalist design.
8. Create a Textured Lunar Phase Wall Hanging
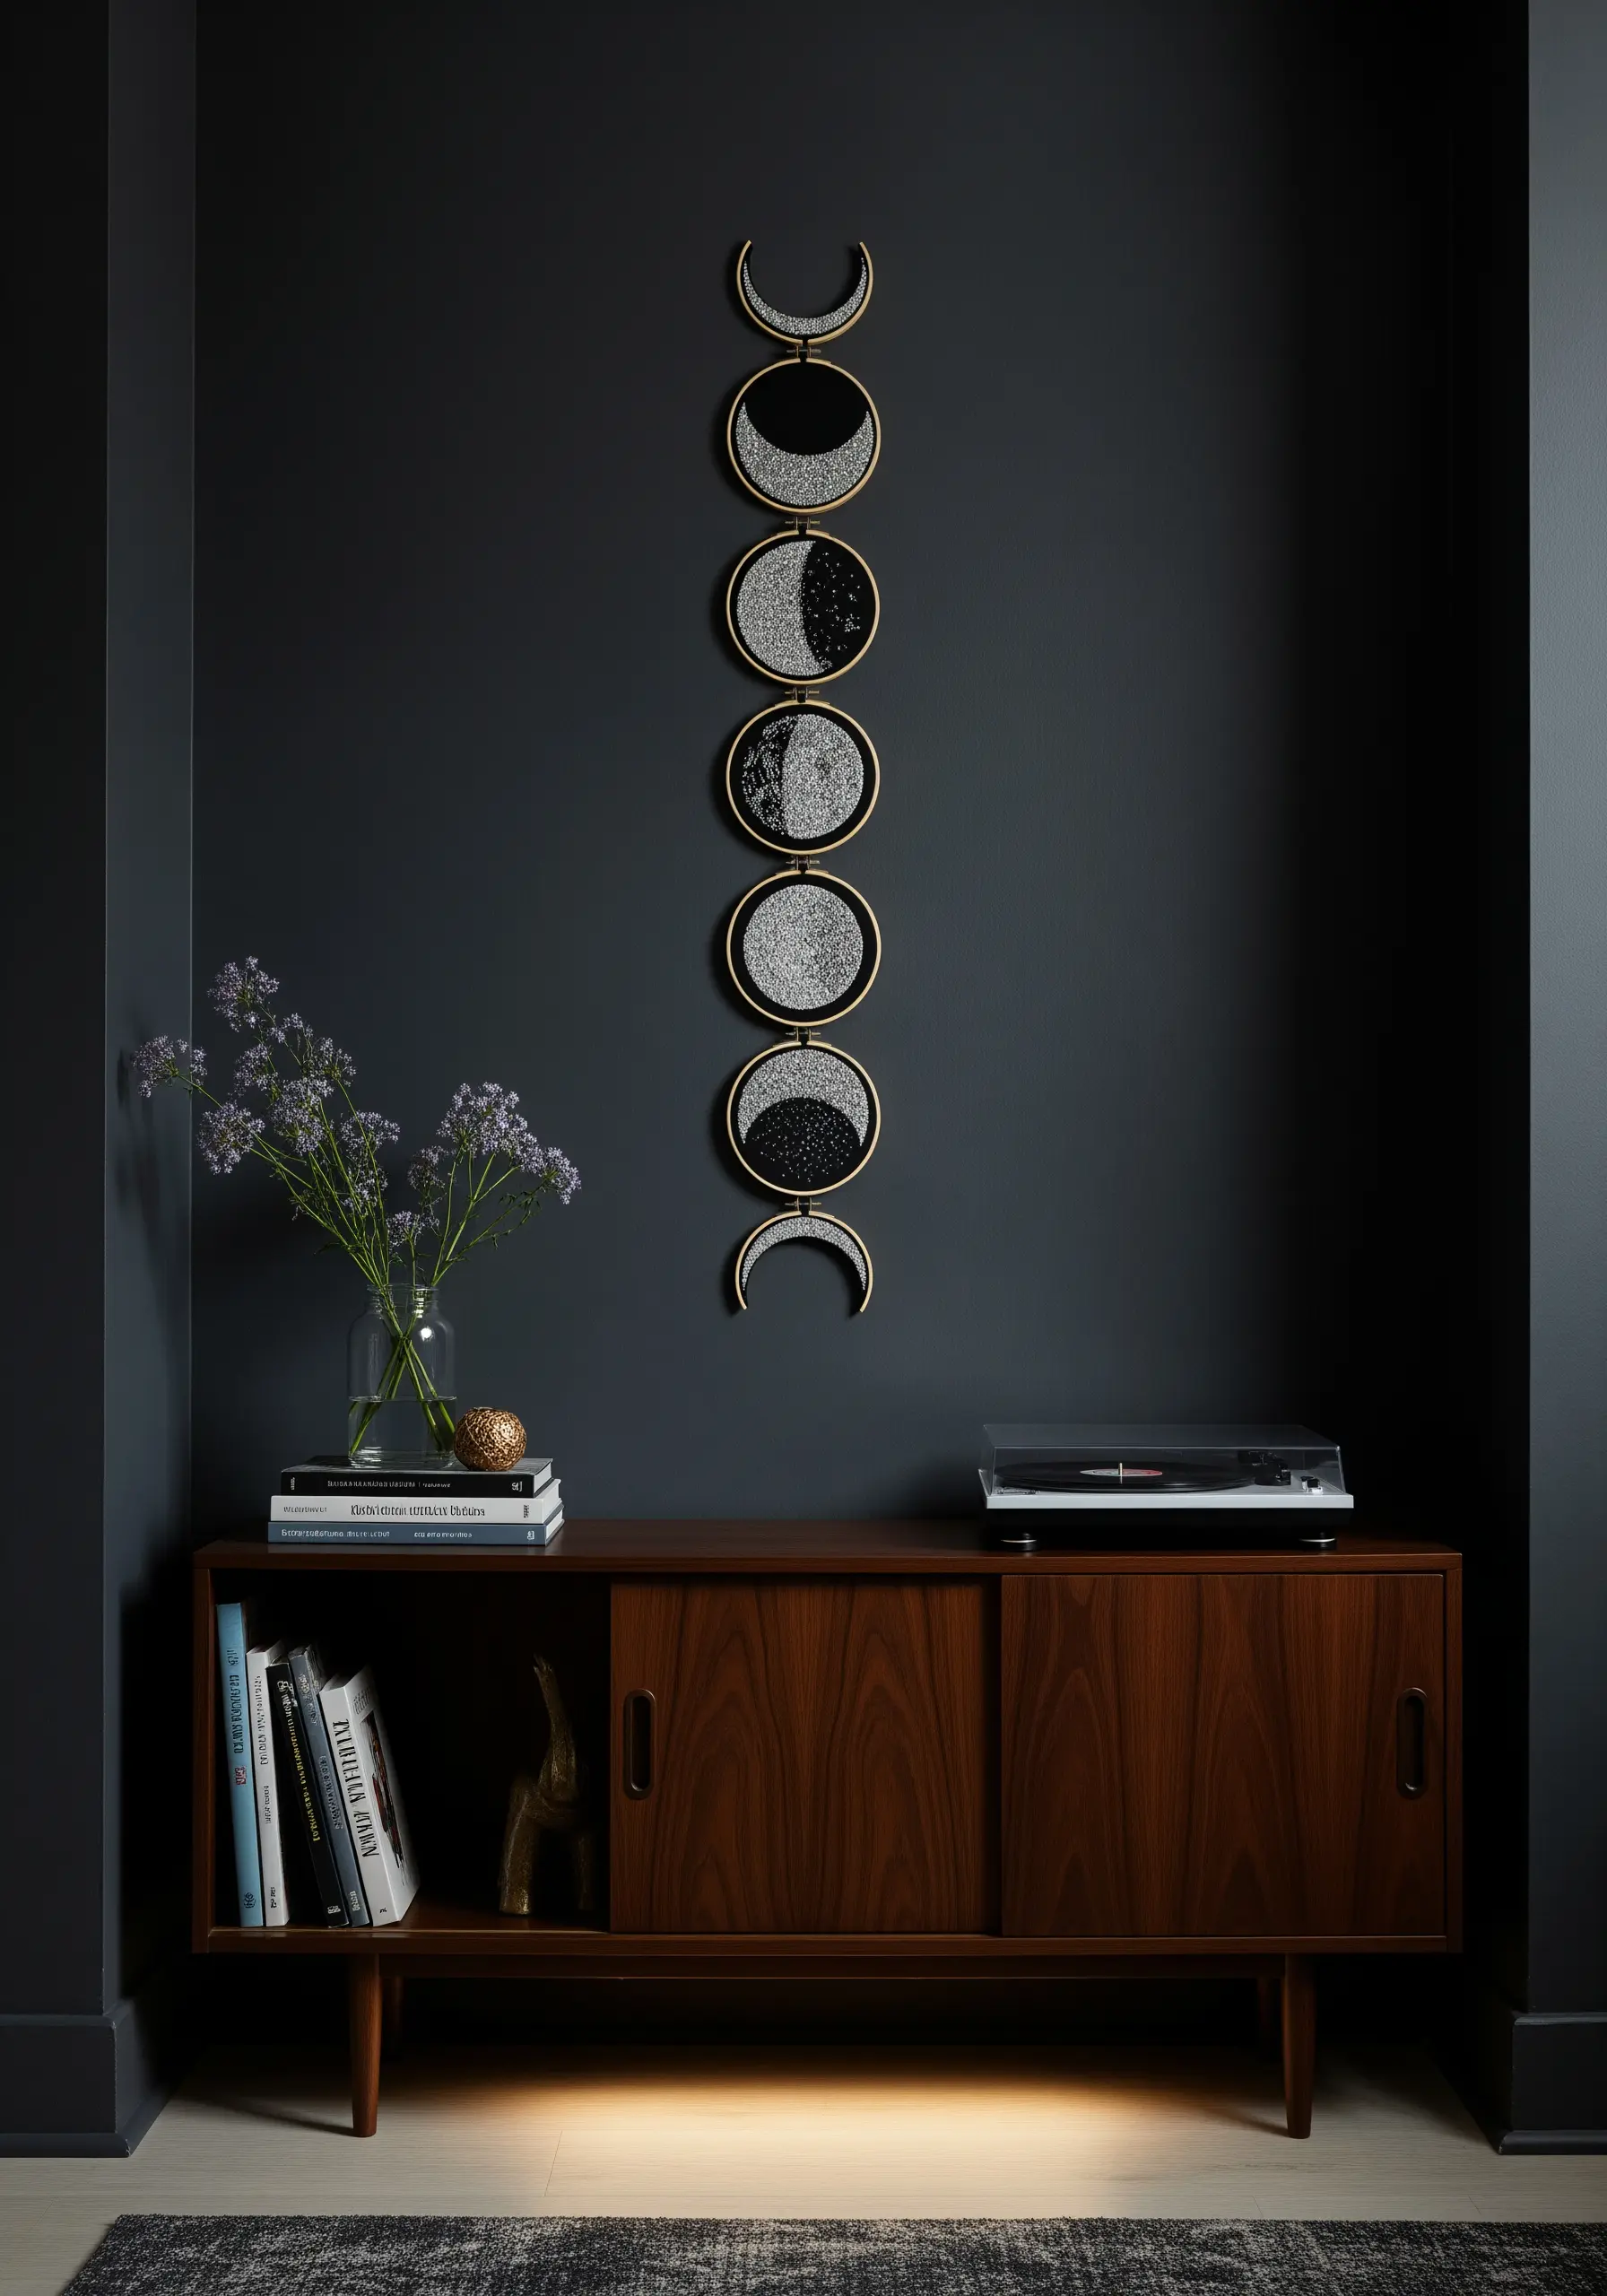
This vertical display is a masterclass in texture. To mimic the moon’s cratered surface, fill the illuminated sections with dense French knots using a white or silver thread.
For the shadowed areas, create a subtle, tone-on-tone effect with black satin stitch on black fabric.
Connect the hoops vertically with small metal chains or stitched connectors to achieve a sleek, modern finish that contrasts beautifully with the tactile stitching.
9. Cultivate a Wildflower Embroidery Garden
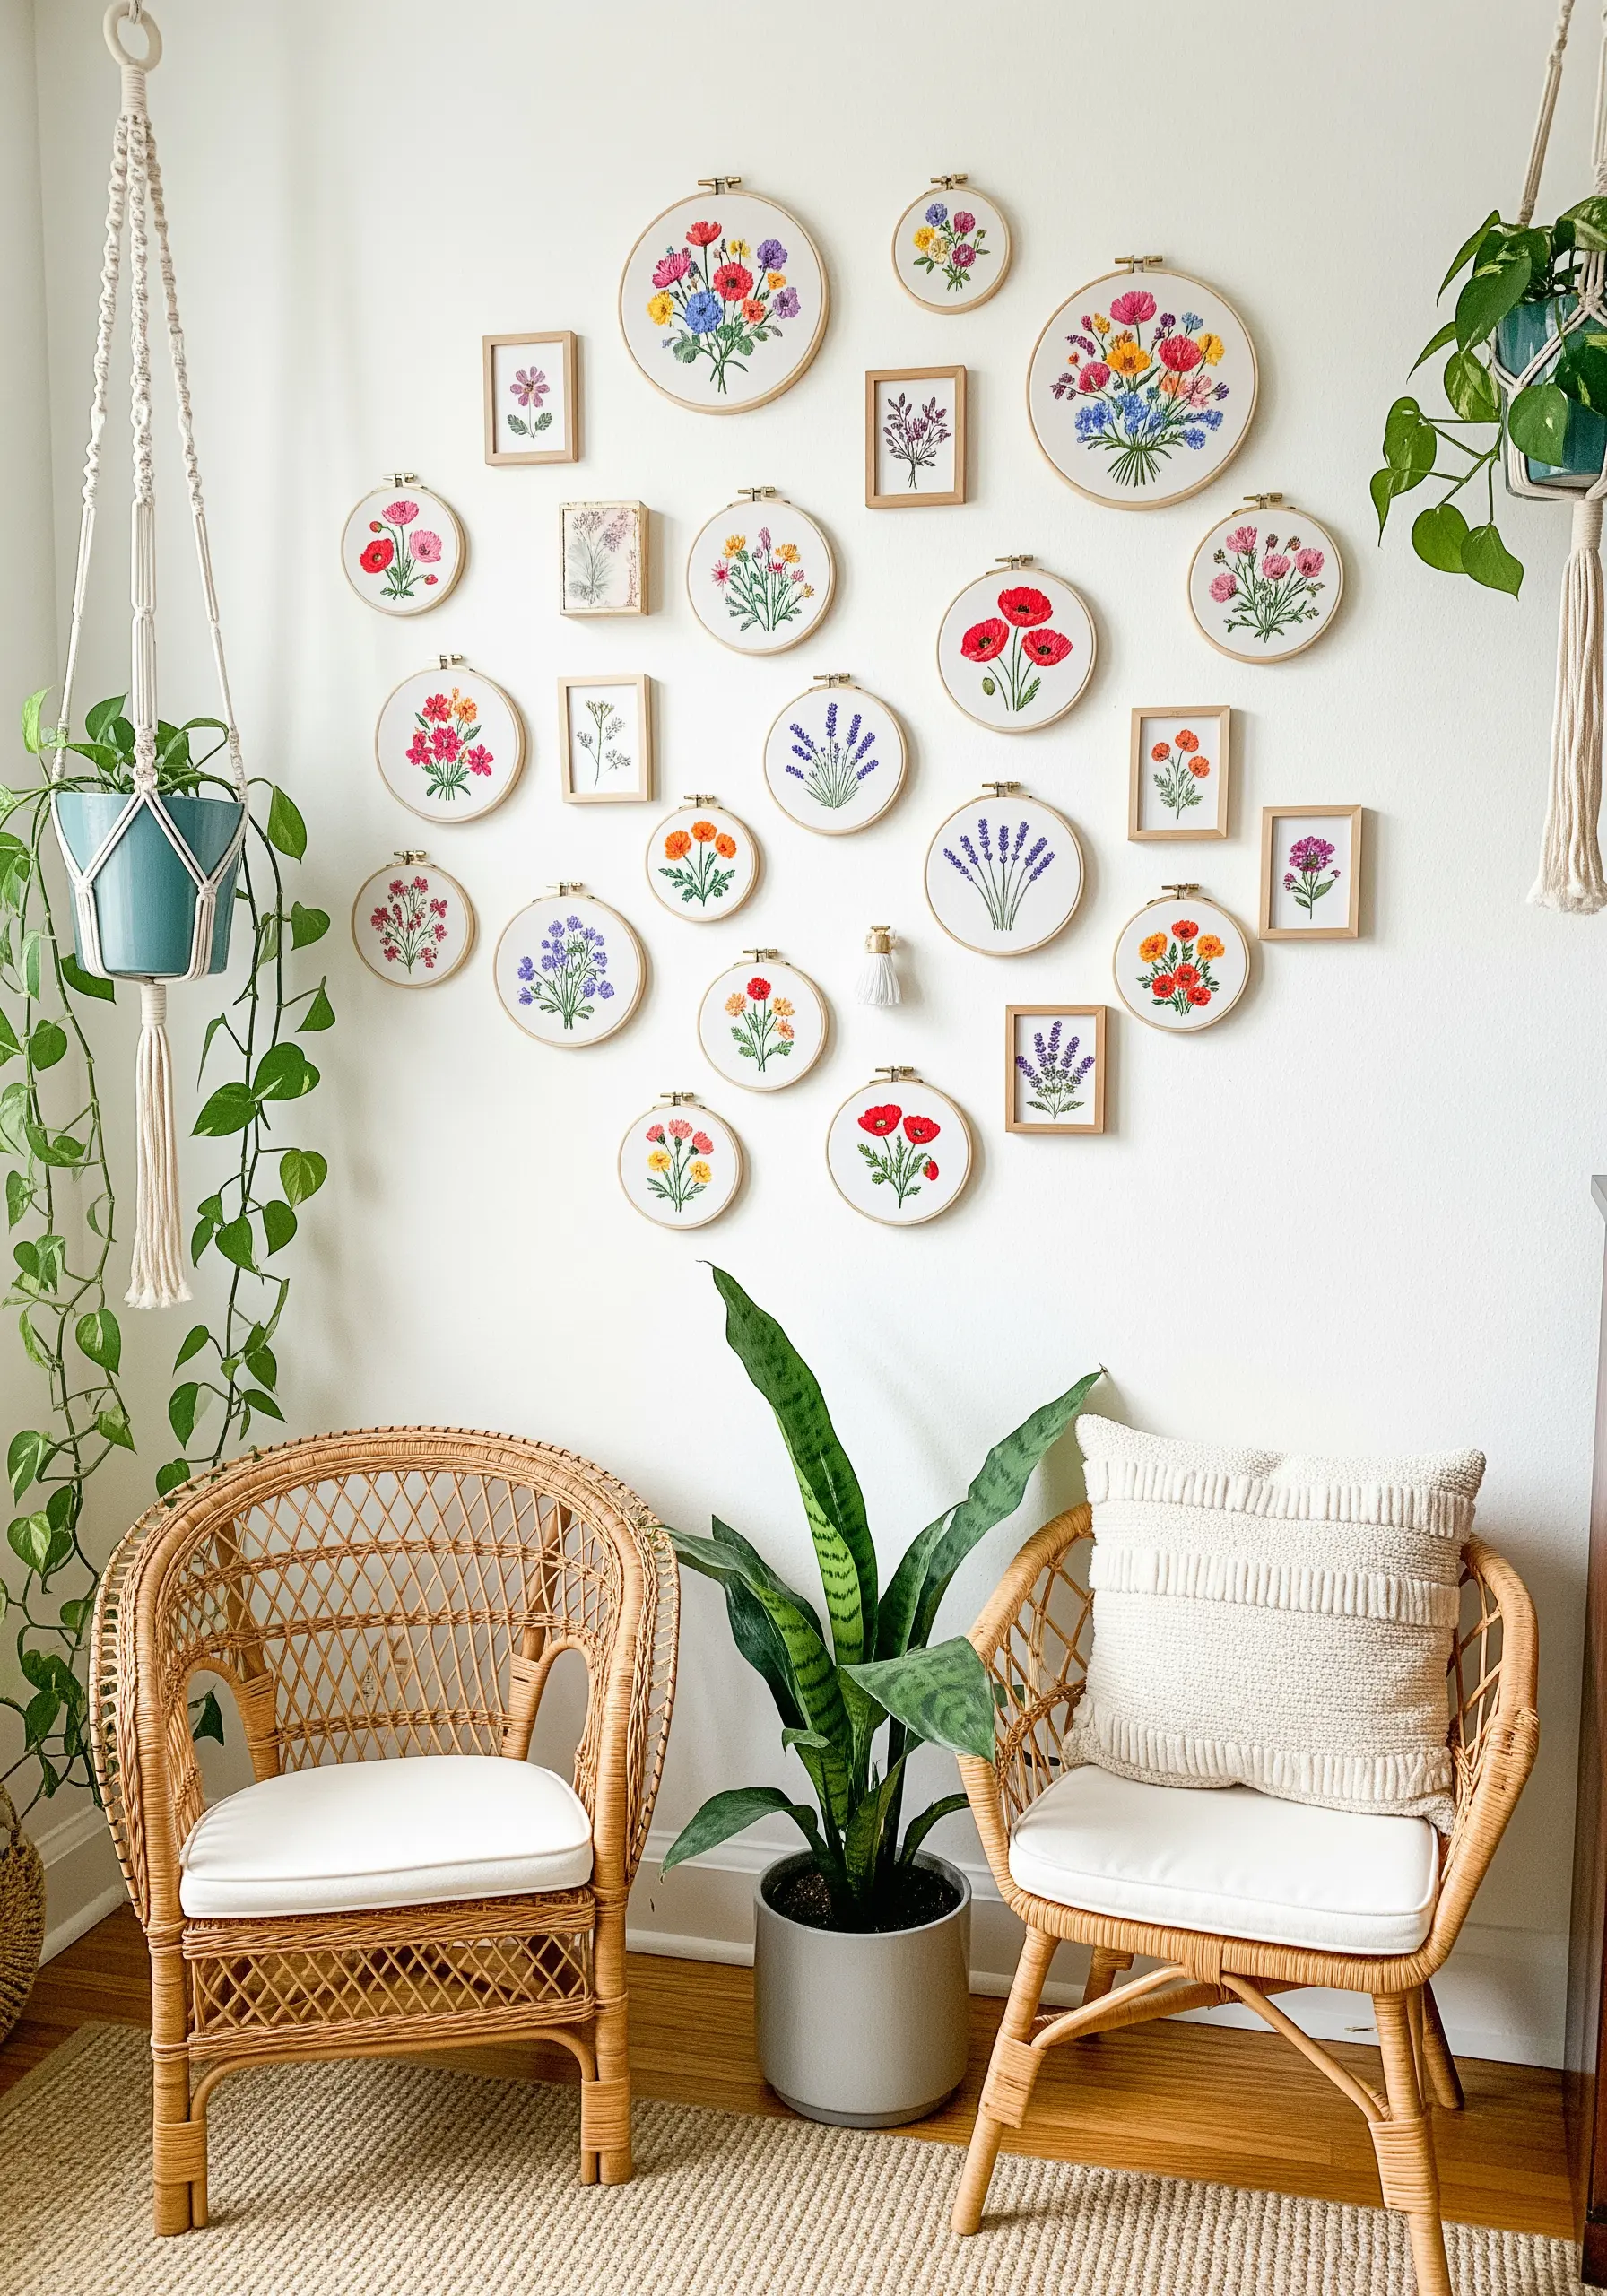
To give your floral gallery wall a dynamic, collected-over-time feel, mix your display methods.
Combine traditional round hoops with small, simple wooden frames to add visual depth and break up the uniformity.
Bring your flowers to life by varying your stitches: use woven wheel stitches for roses, lazy daisy stitches for simple petals, and long satin stitches for lavender. This adds incredible nature texture to your wall.
10. Stitch a Retro ’70s Inspired Corner
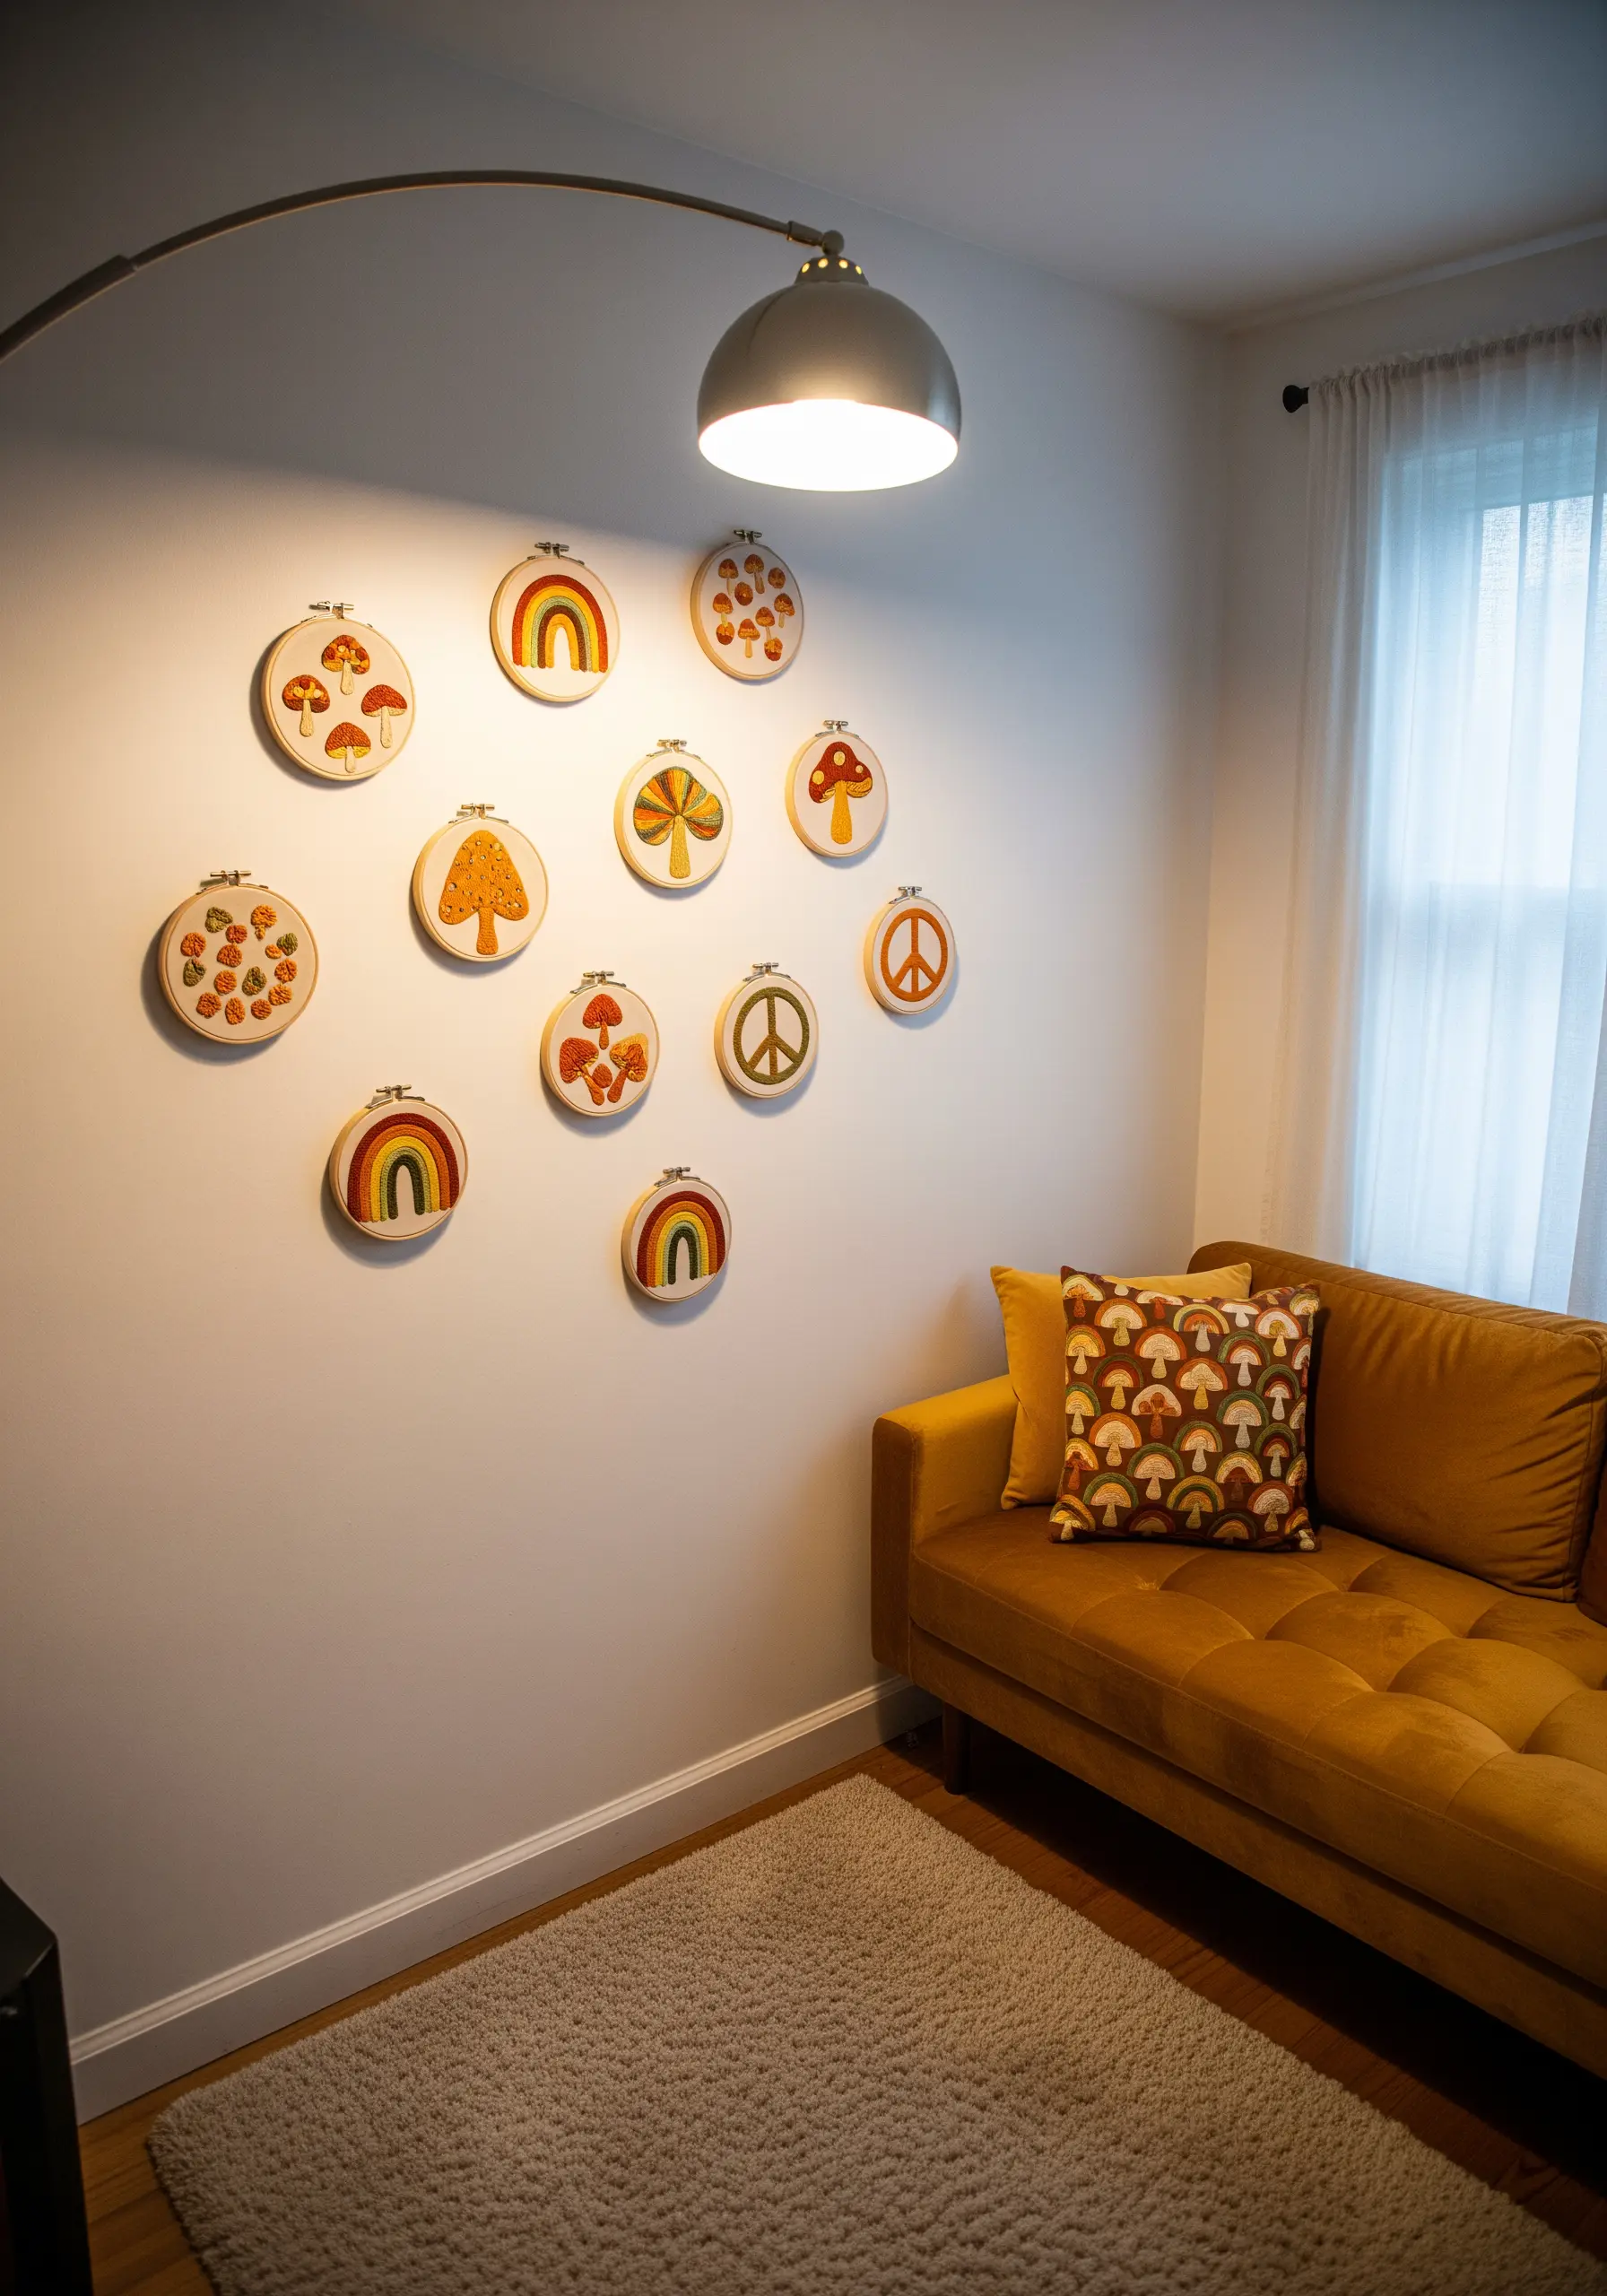
Channel a groovy, nostalgic vibe with a warm and earthy color palette of mustard yellow, burnt orange, and avocado green.
To give your rainbow motifs a raised, three-dimensional quality, use a padded satin stitch.
Simply create a foundation of small straight stitches or a split stitch outline within the shape, then cover it completely with your final satin stitch. This simple trick adds professional-level dimension and impact.
11. Create a Statement Willow Tree Banner
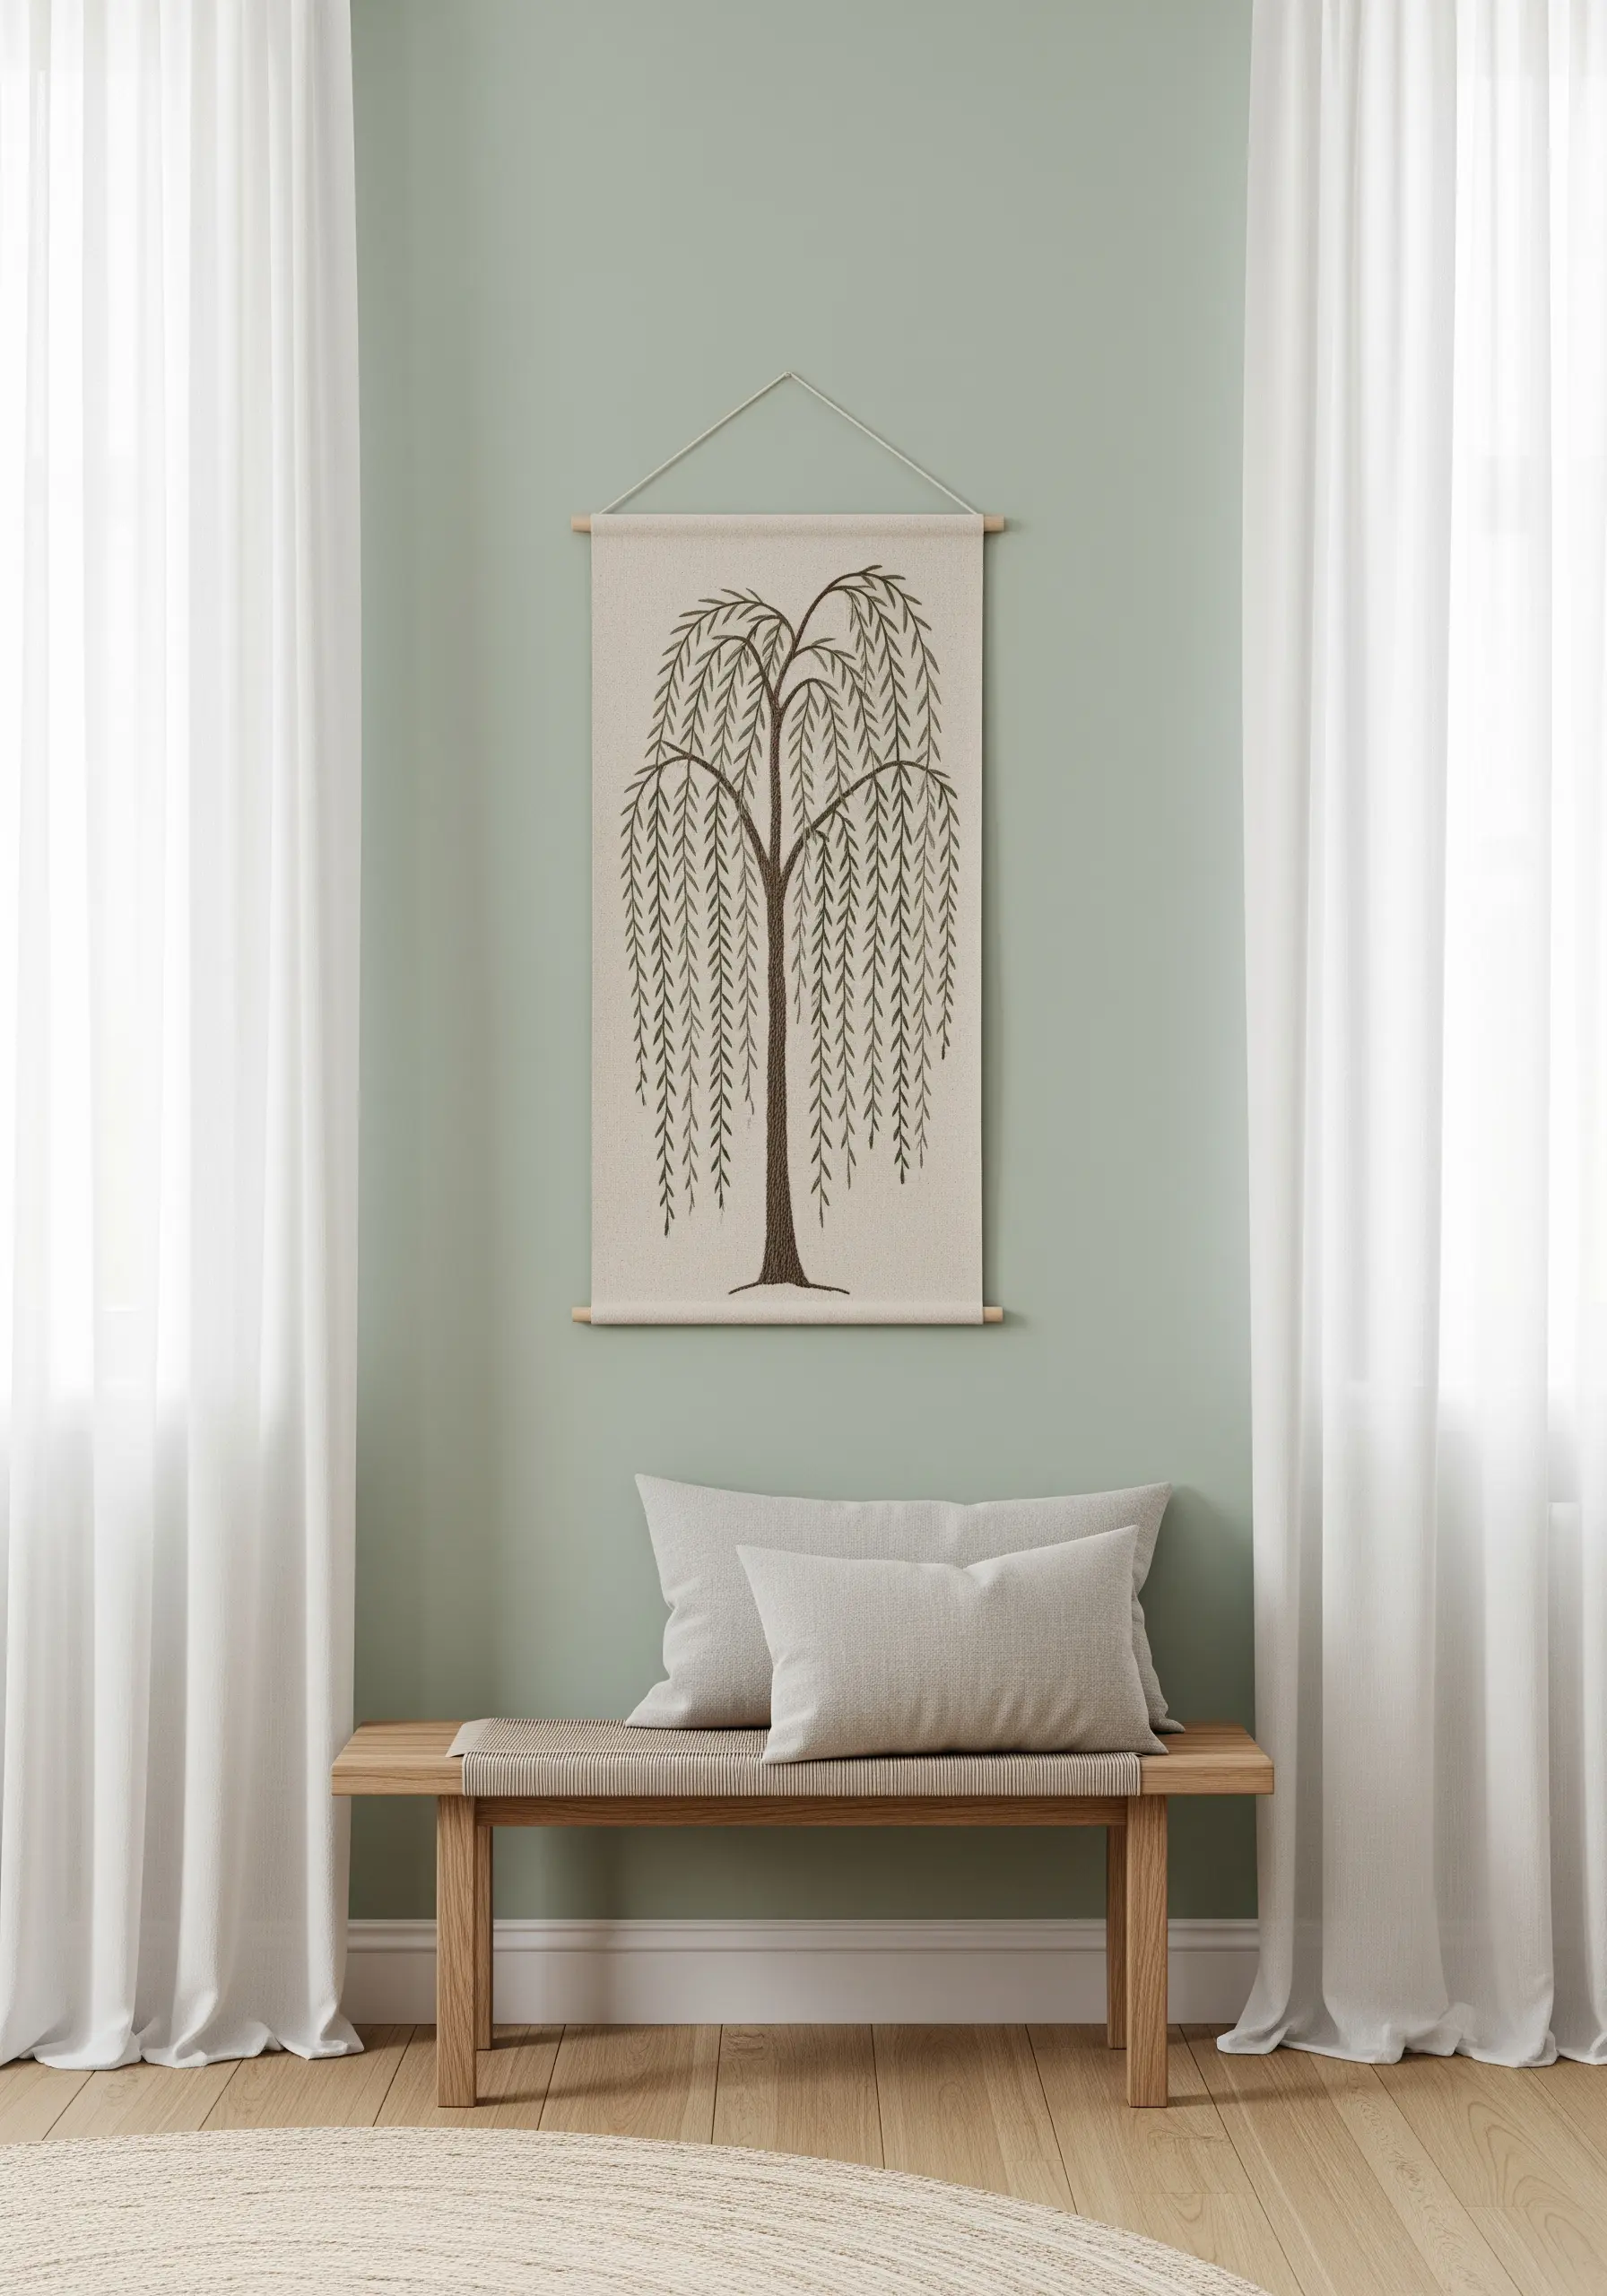
For a single, dramatic motif, move beyond the hoop and create a fabric wall banner.
Choose a heavy-duty linen or canvas that can support the weight of the thread without puckering.
Stitch the tree trunk with a textured chain stitch fill. For the iconic weeping branches, use single-strand straight stitches, allowing the threads to drape with a natural, gentle curve.
12. Blend Stitched Art with Living Greenery
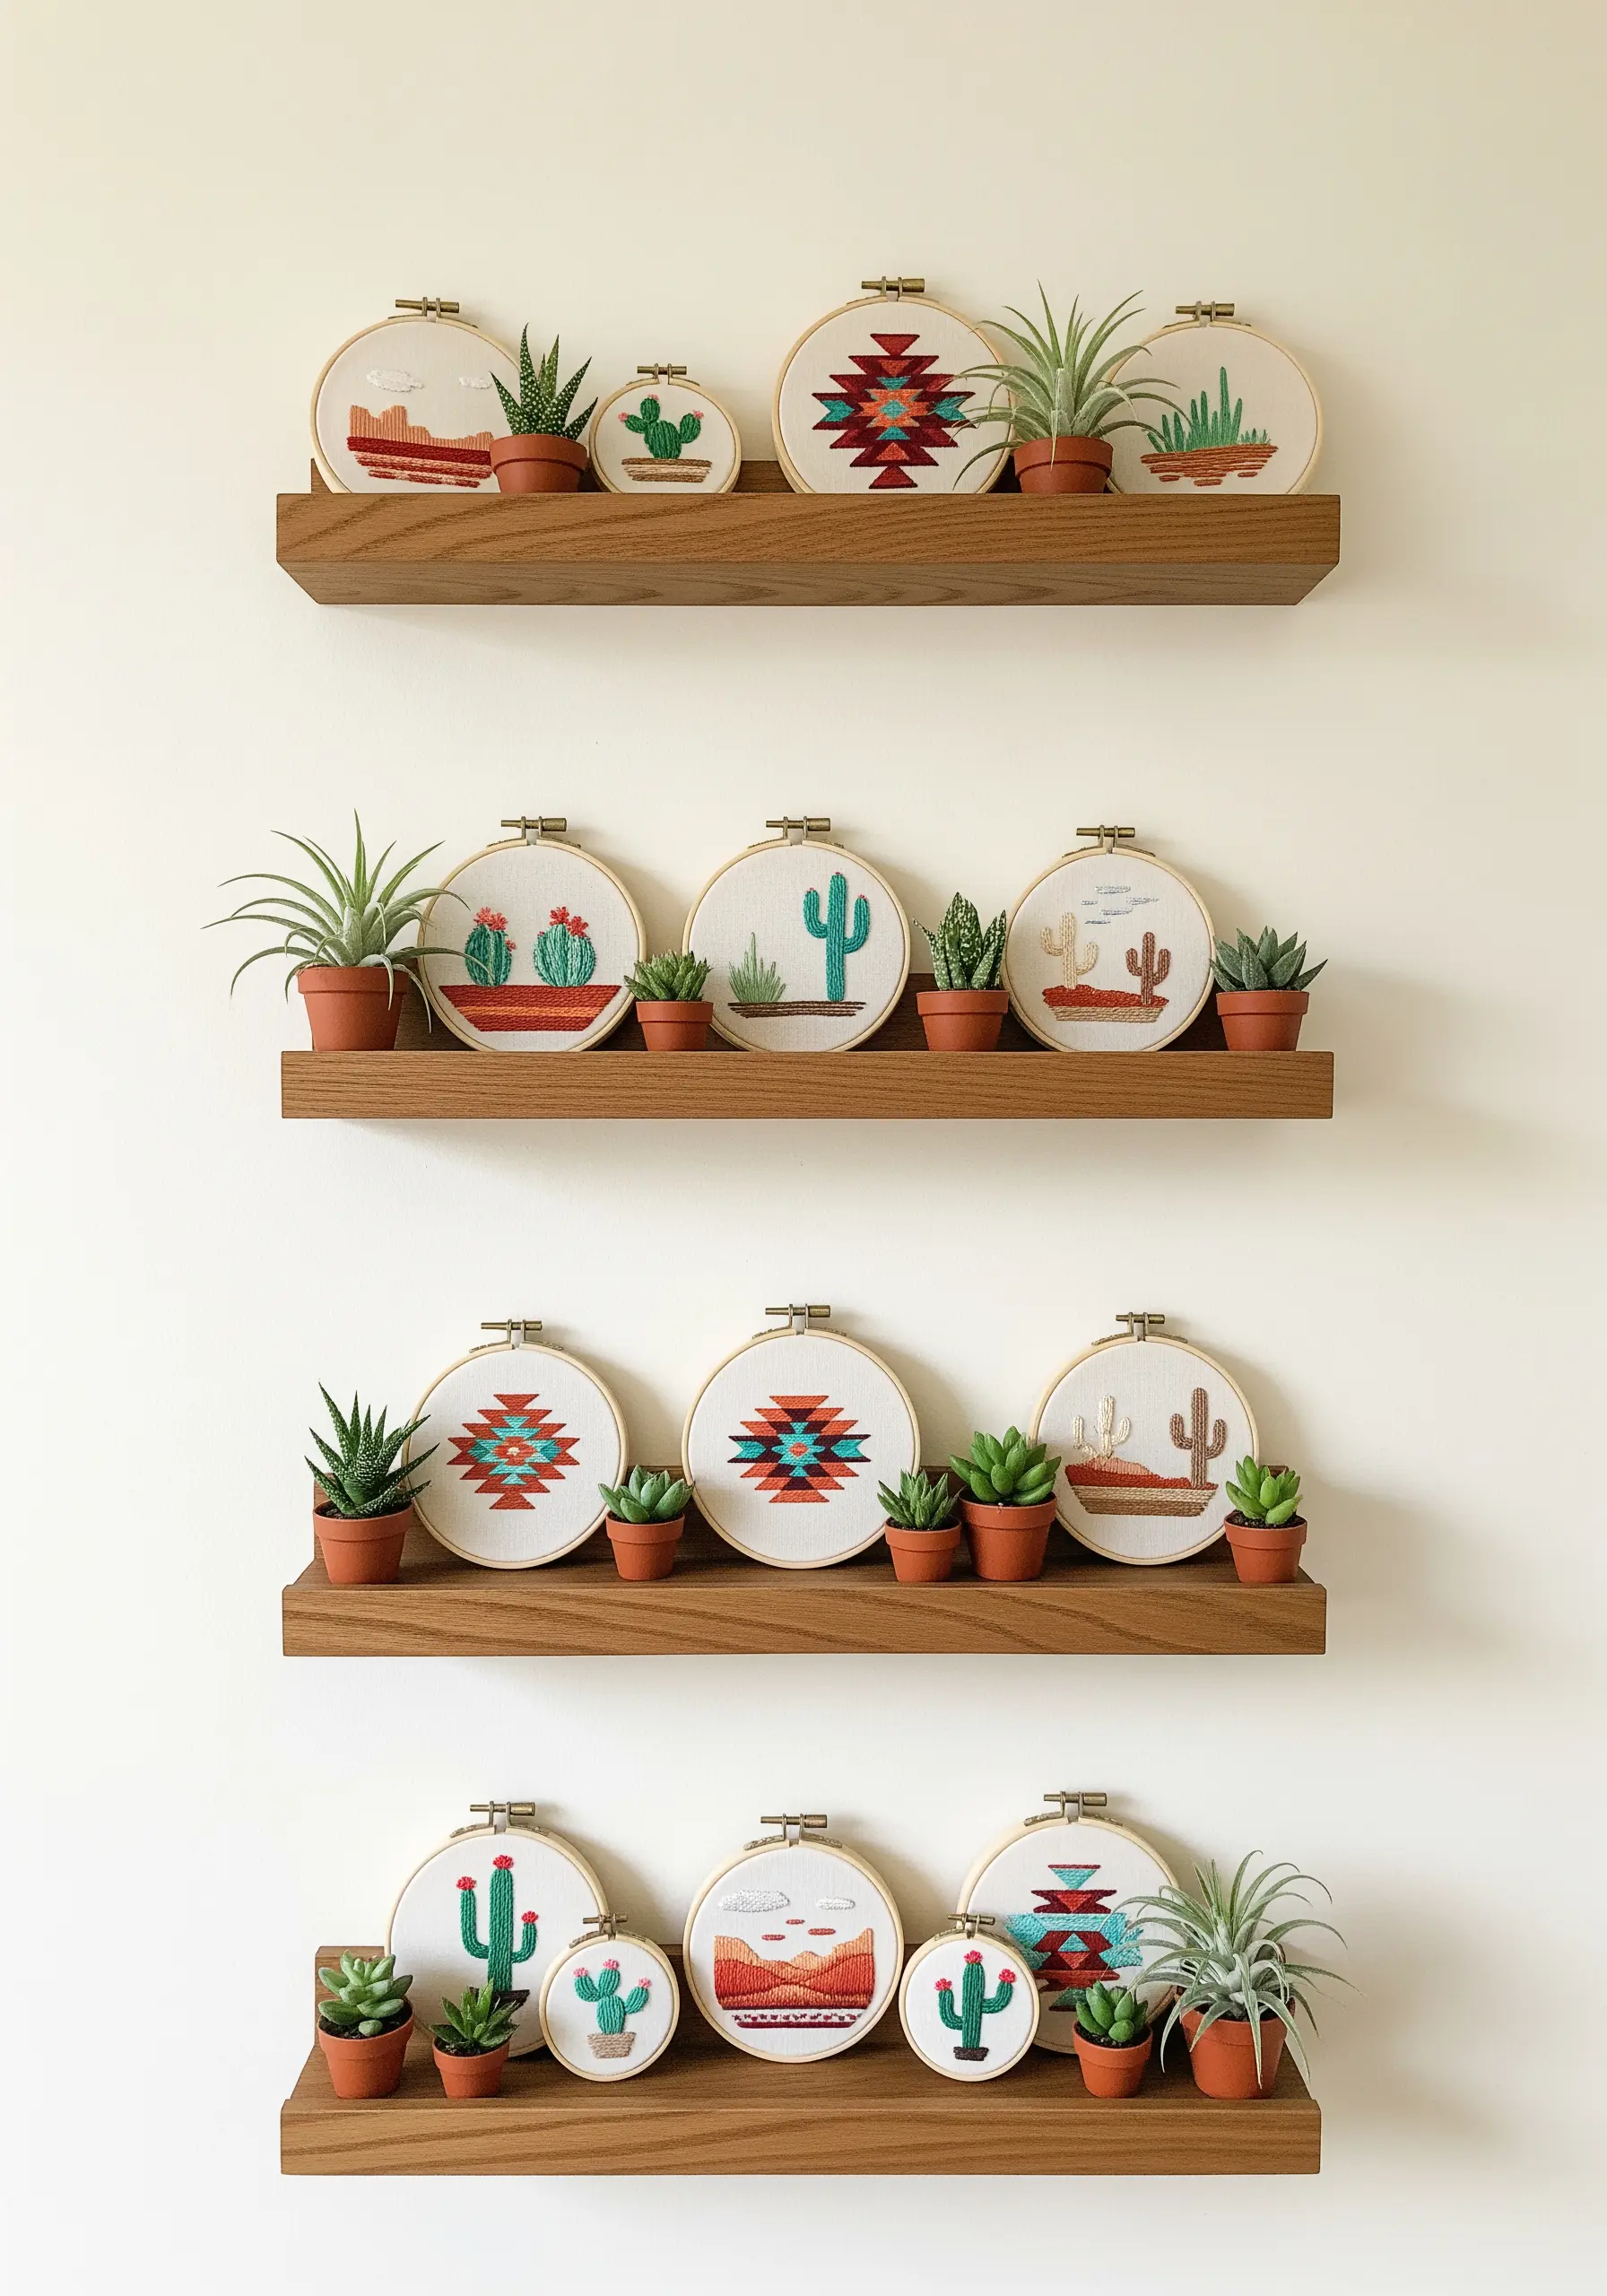
Create a vibrant, multi-dimensional display by alternating your embroidered hoops with small potted succulents on floating shelves.
To achieve the woven, rug-like textures in Southwestern patterns, use a combination of satin stitch blocks and long-armed cross stitch.
This pairing of stitches beautifully mimics the look of traditional weaving, adding an authentic and tactile quality to your work.
13. Integrate Stitched Notes into Your Library
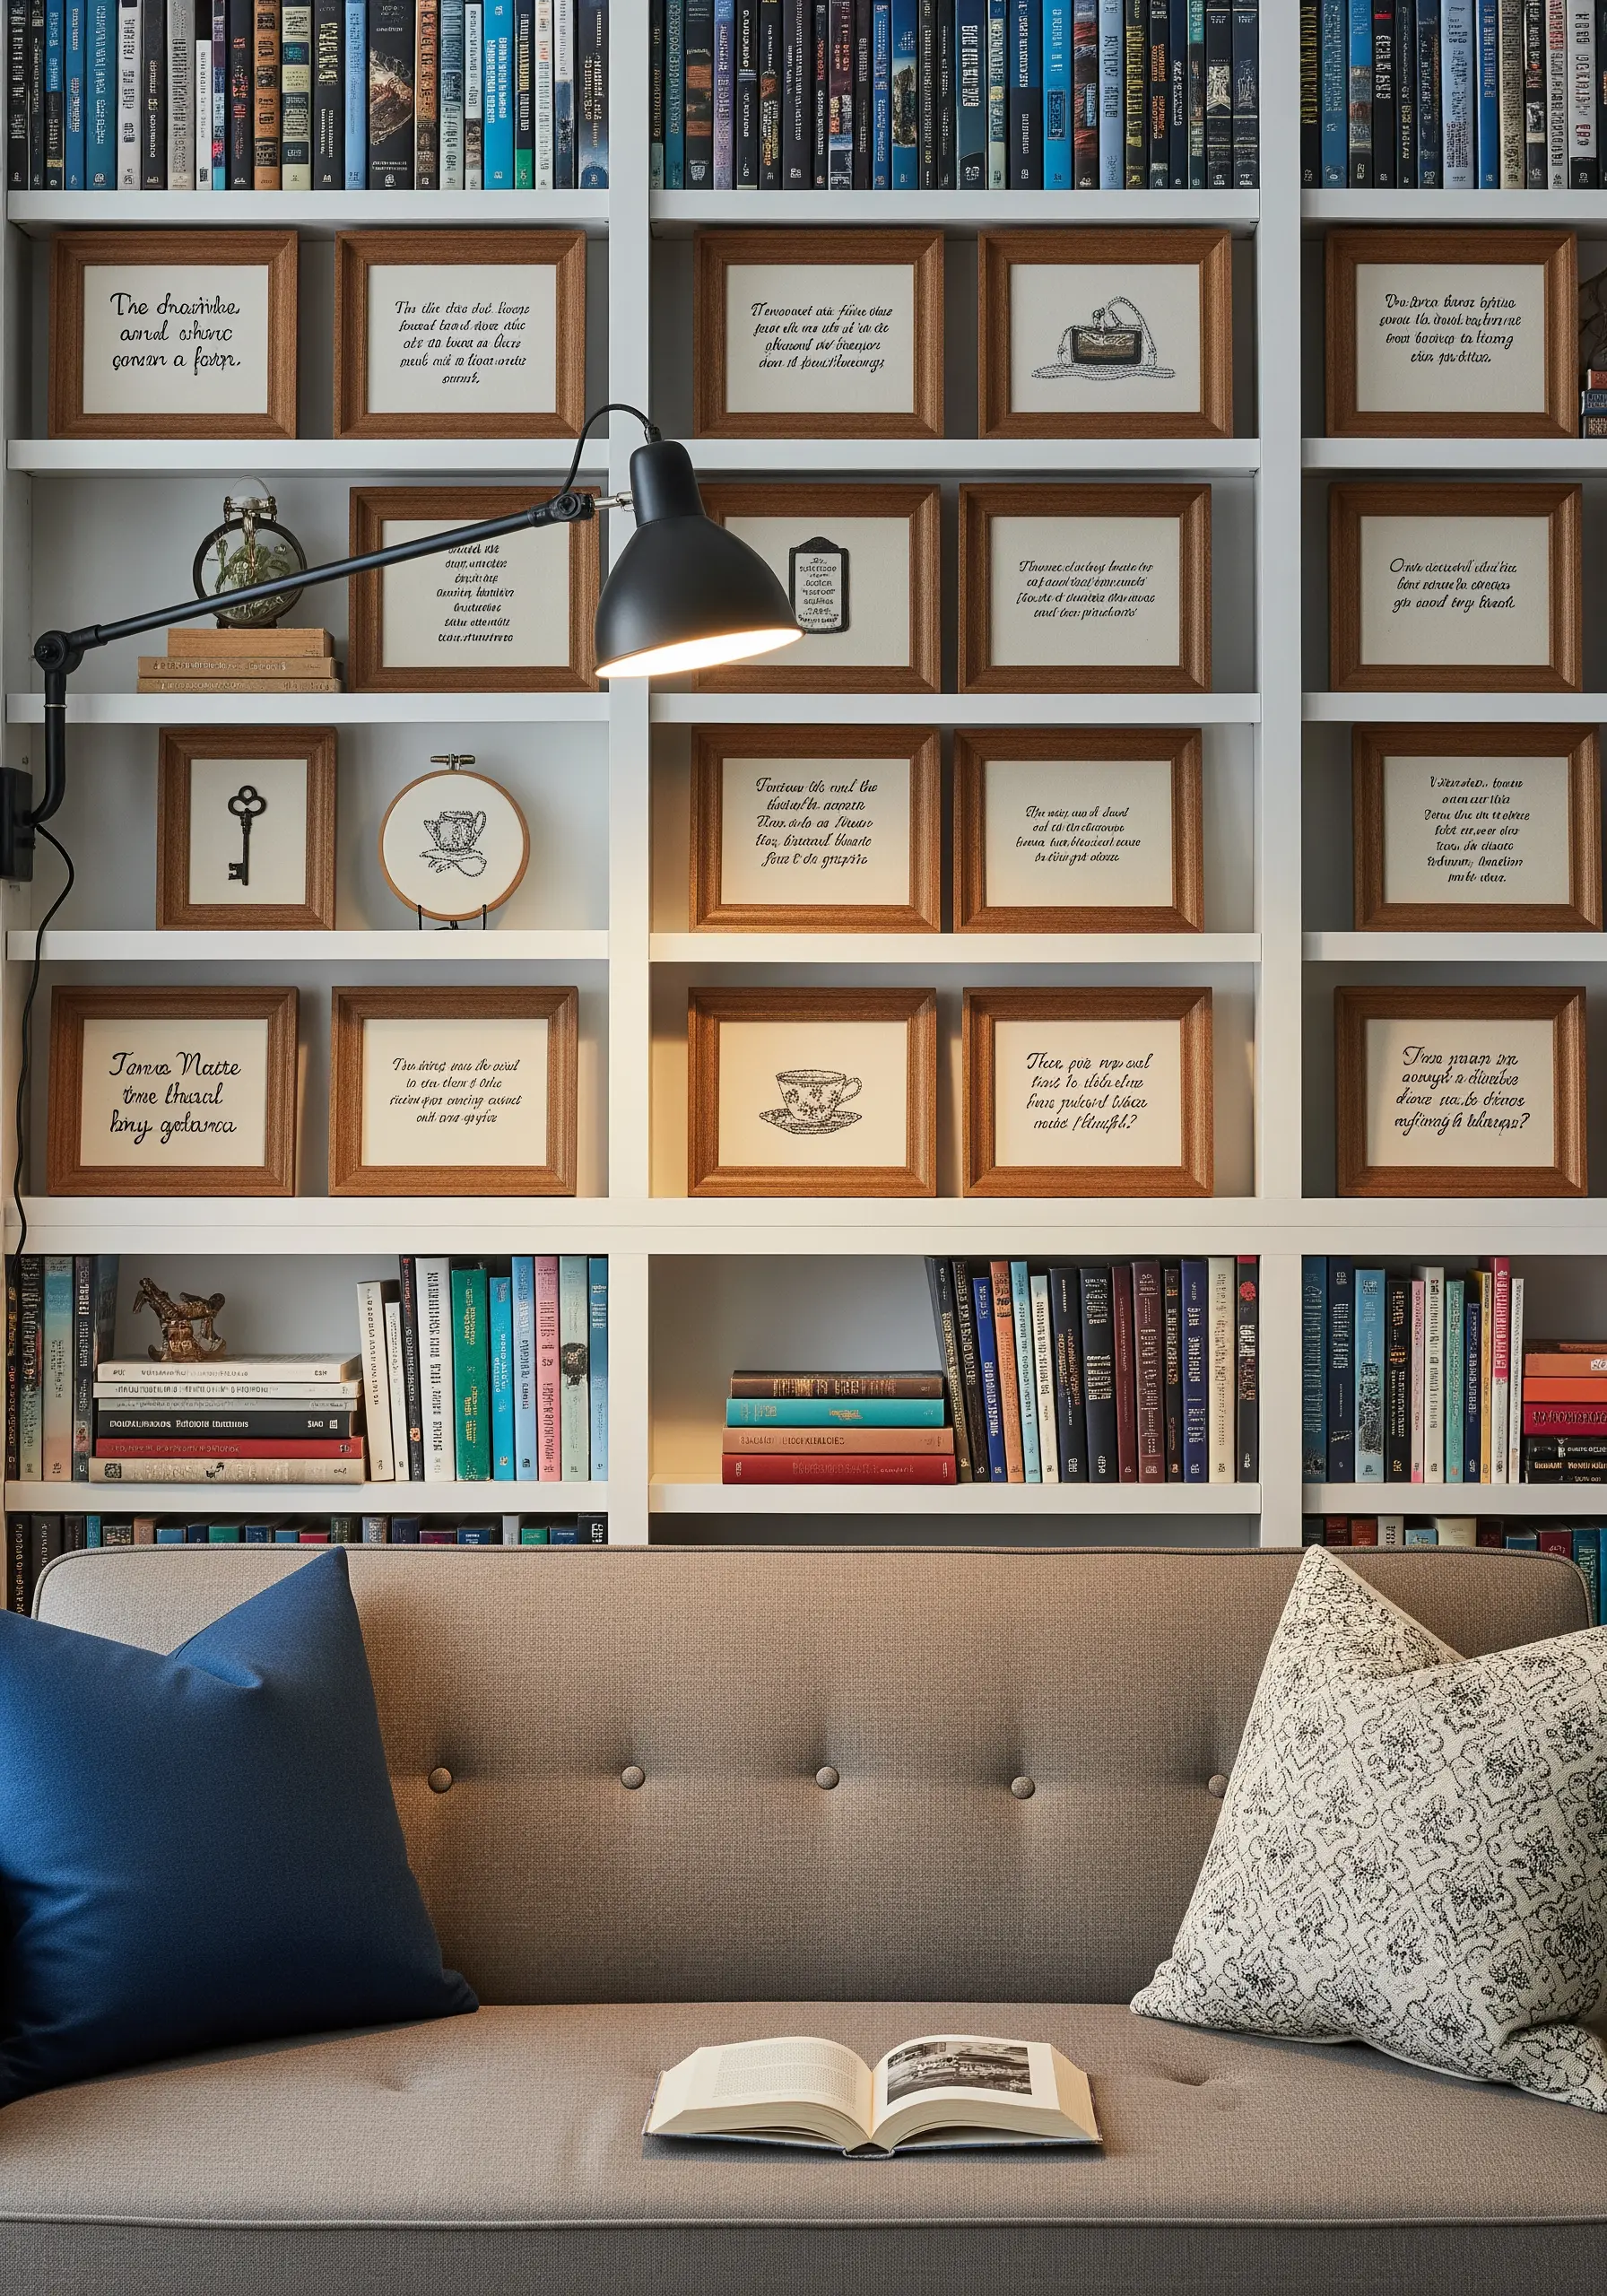
Transform your bookshelf into a personal gallery by tucking small, framed embroidery pieces among your books.
For stitching legible text, a whipped backstitch or a tiny chain stitch creates a clean, solid line that looks more refined than a simple backstitch.
Pair a favorite quote with a simple motif, like a teacup or key, to create meaningful art. These also make for unique DIY embroidery presents for fellow readers.
14. Weave Rich Texture into Your Embroidery Wall
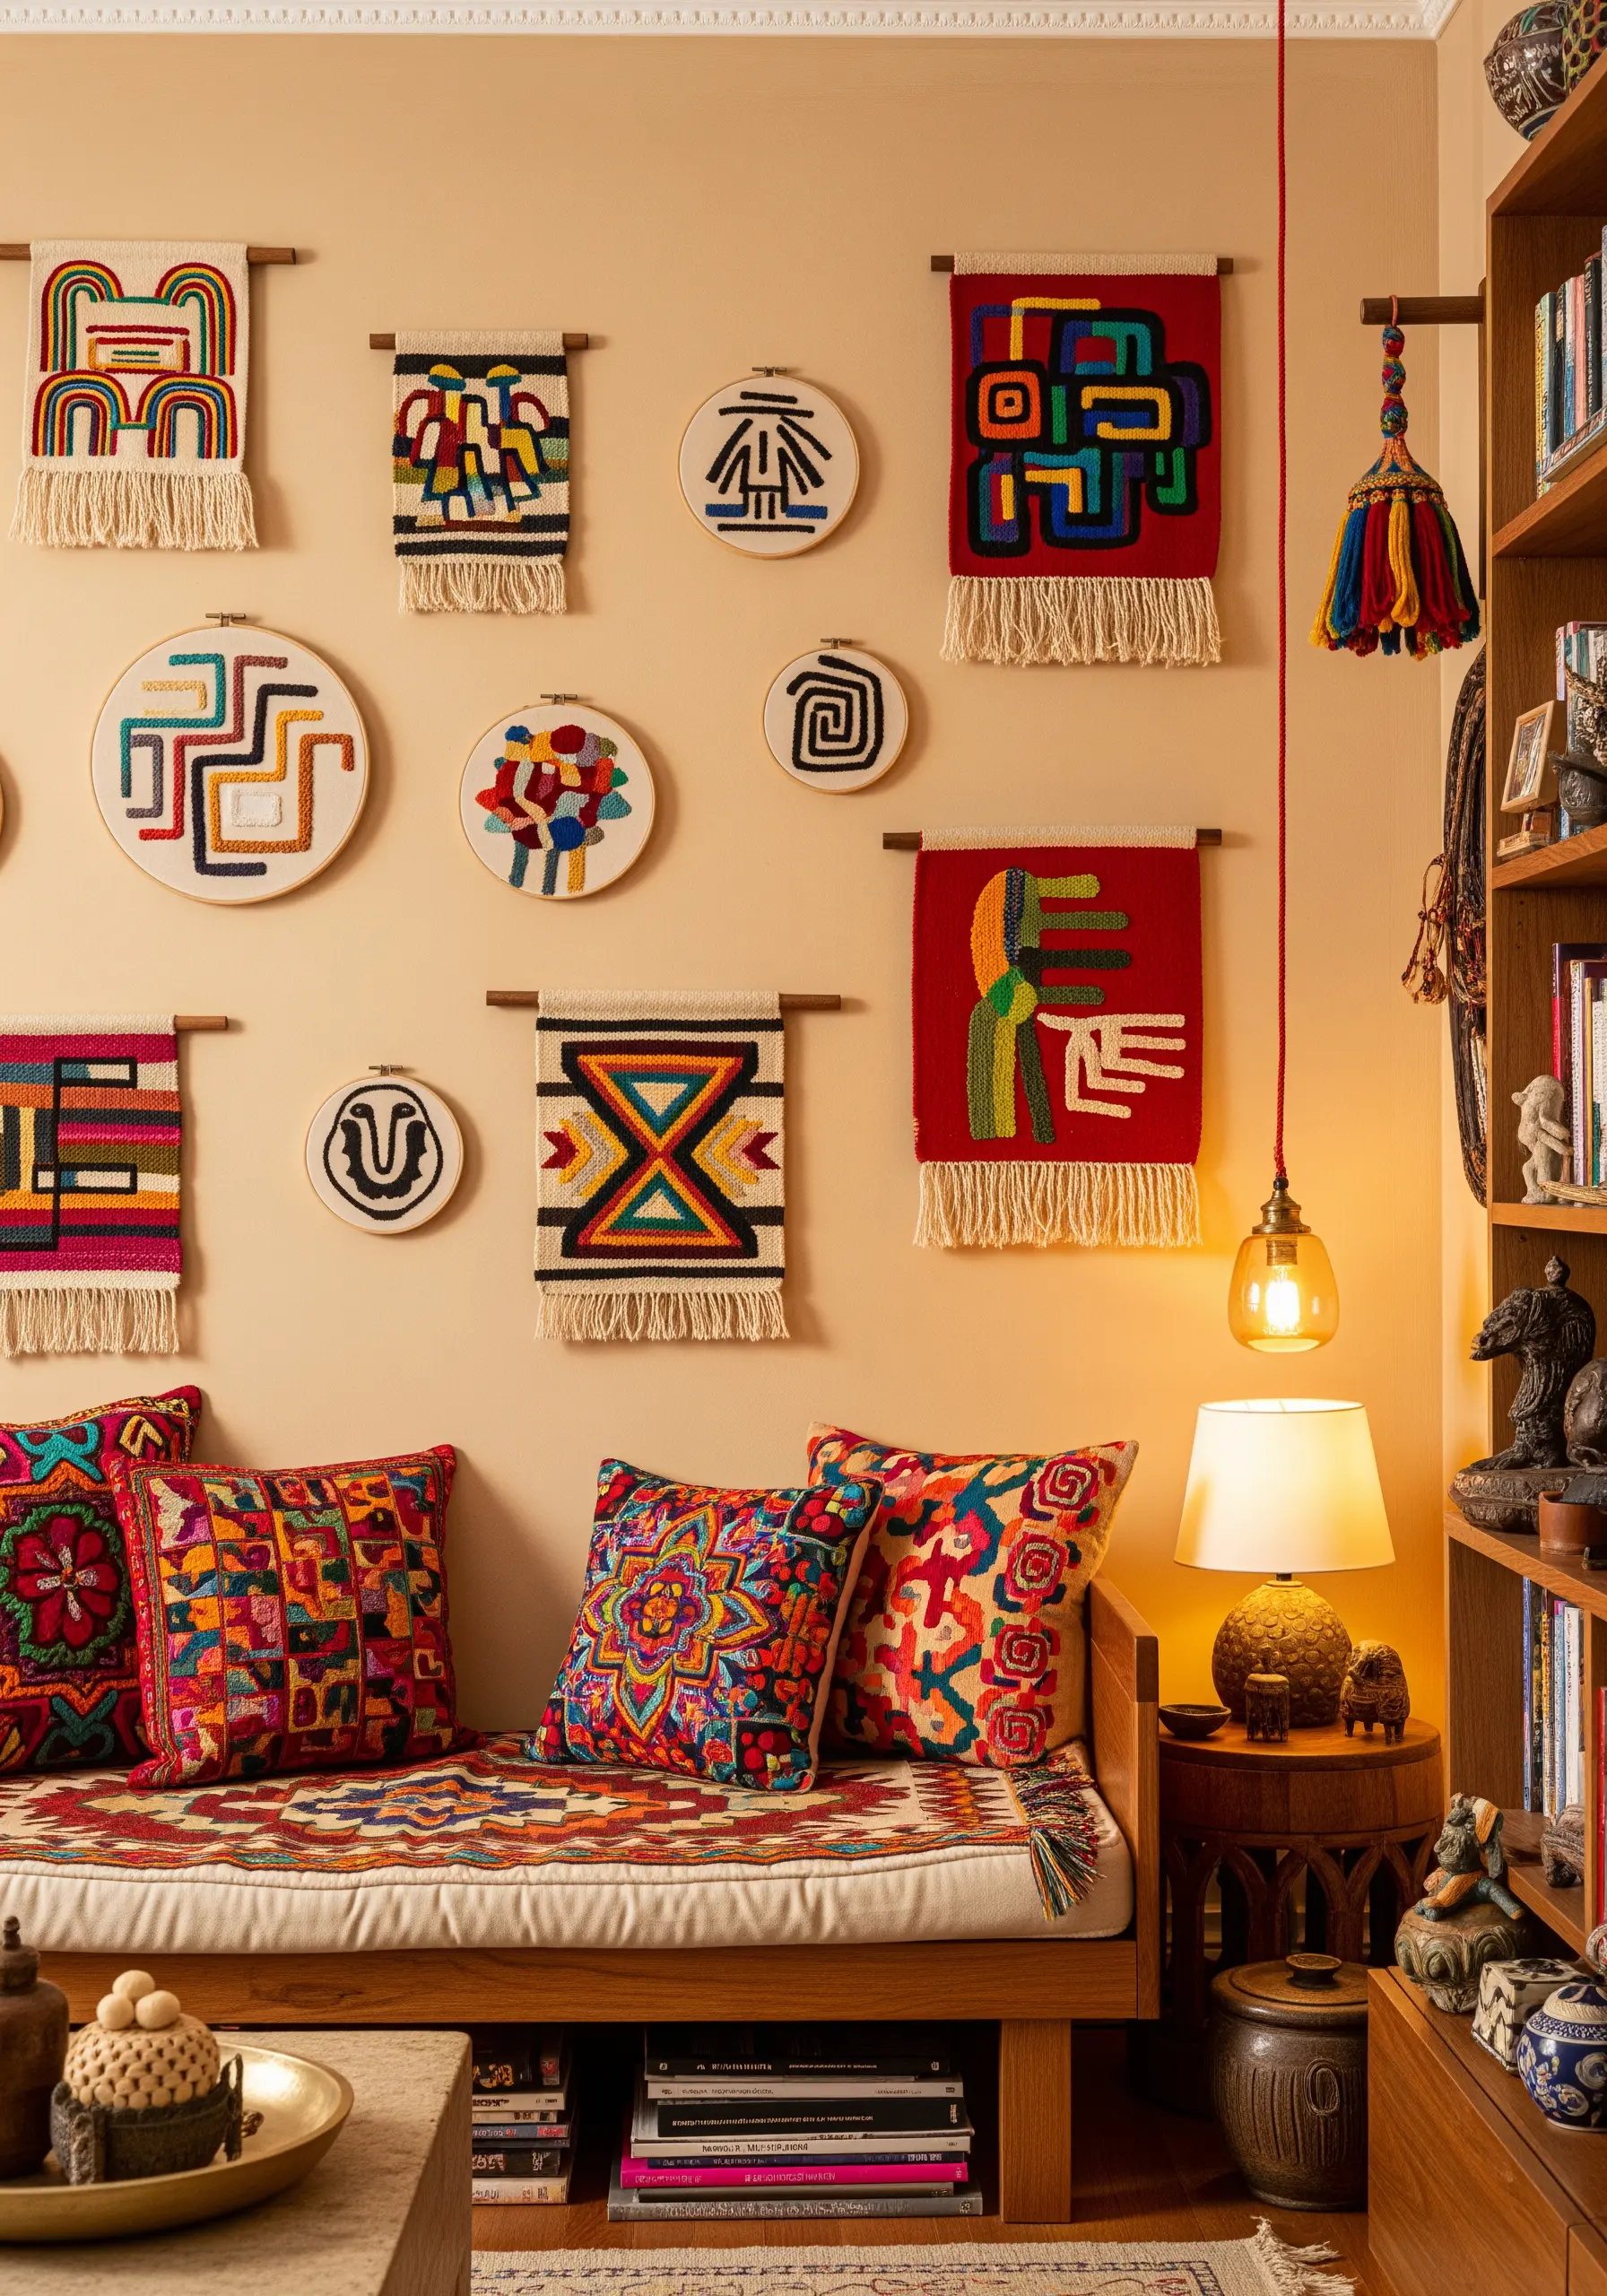
Expand your gallery beyond embroidery by incorporating small woven tapestries and other fiber art.
To create a cohesive look, introduce weaving techniques directly into your hoop.
Try couching—laying down thick yarn and securing it with small stitches—or weaving floss through a grid of long straight stitches. This adds bold, tactile lines that beautifully complement the other woven pieces.
15. Stitch a Playful Gallery of Abstract Shapes

When working with abstract embroidery, the goal is flawless execution of form and color.
To ensure your satin-stitched shapes have perfectly crisp edges, first outline each shape with a split stitch.
This simple preparation acts as a ‘dam,’ preventing your fill stitches from pulling the fabric or creating uneven edges. It’s a professional technique for a much cleaner finish.
16. Capture Moody Landscapes on a Rustic Wall
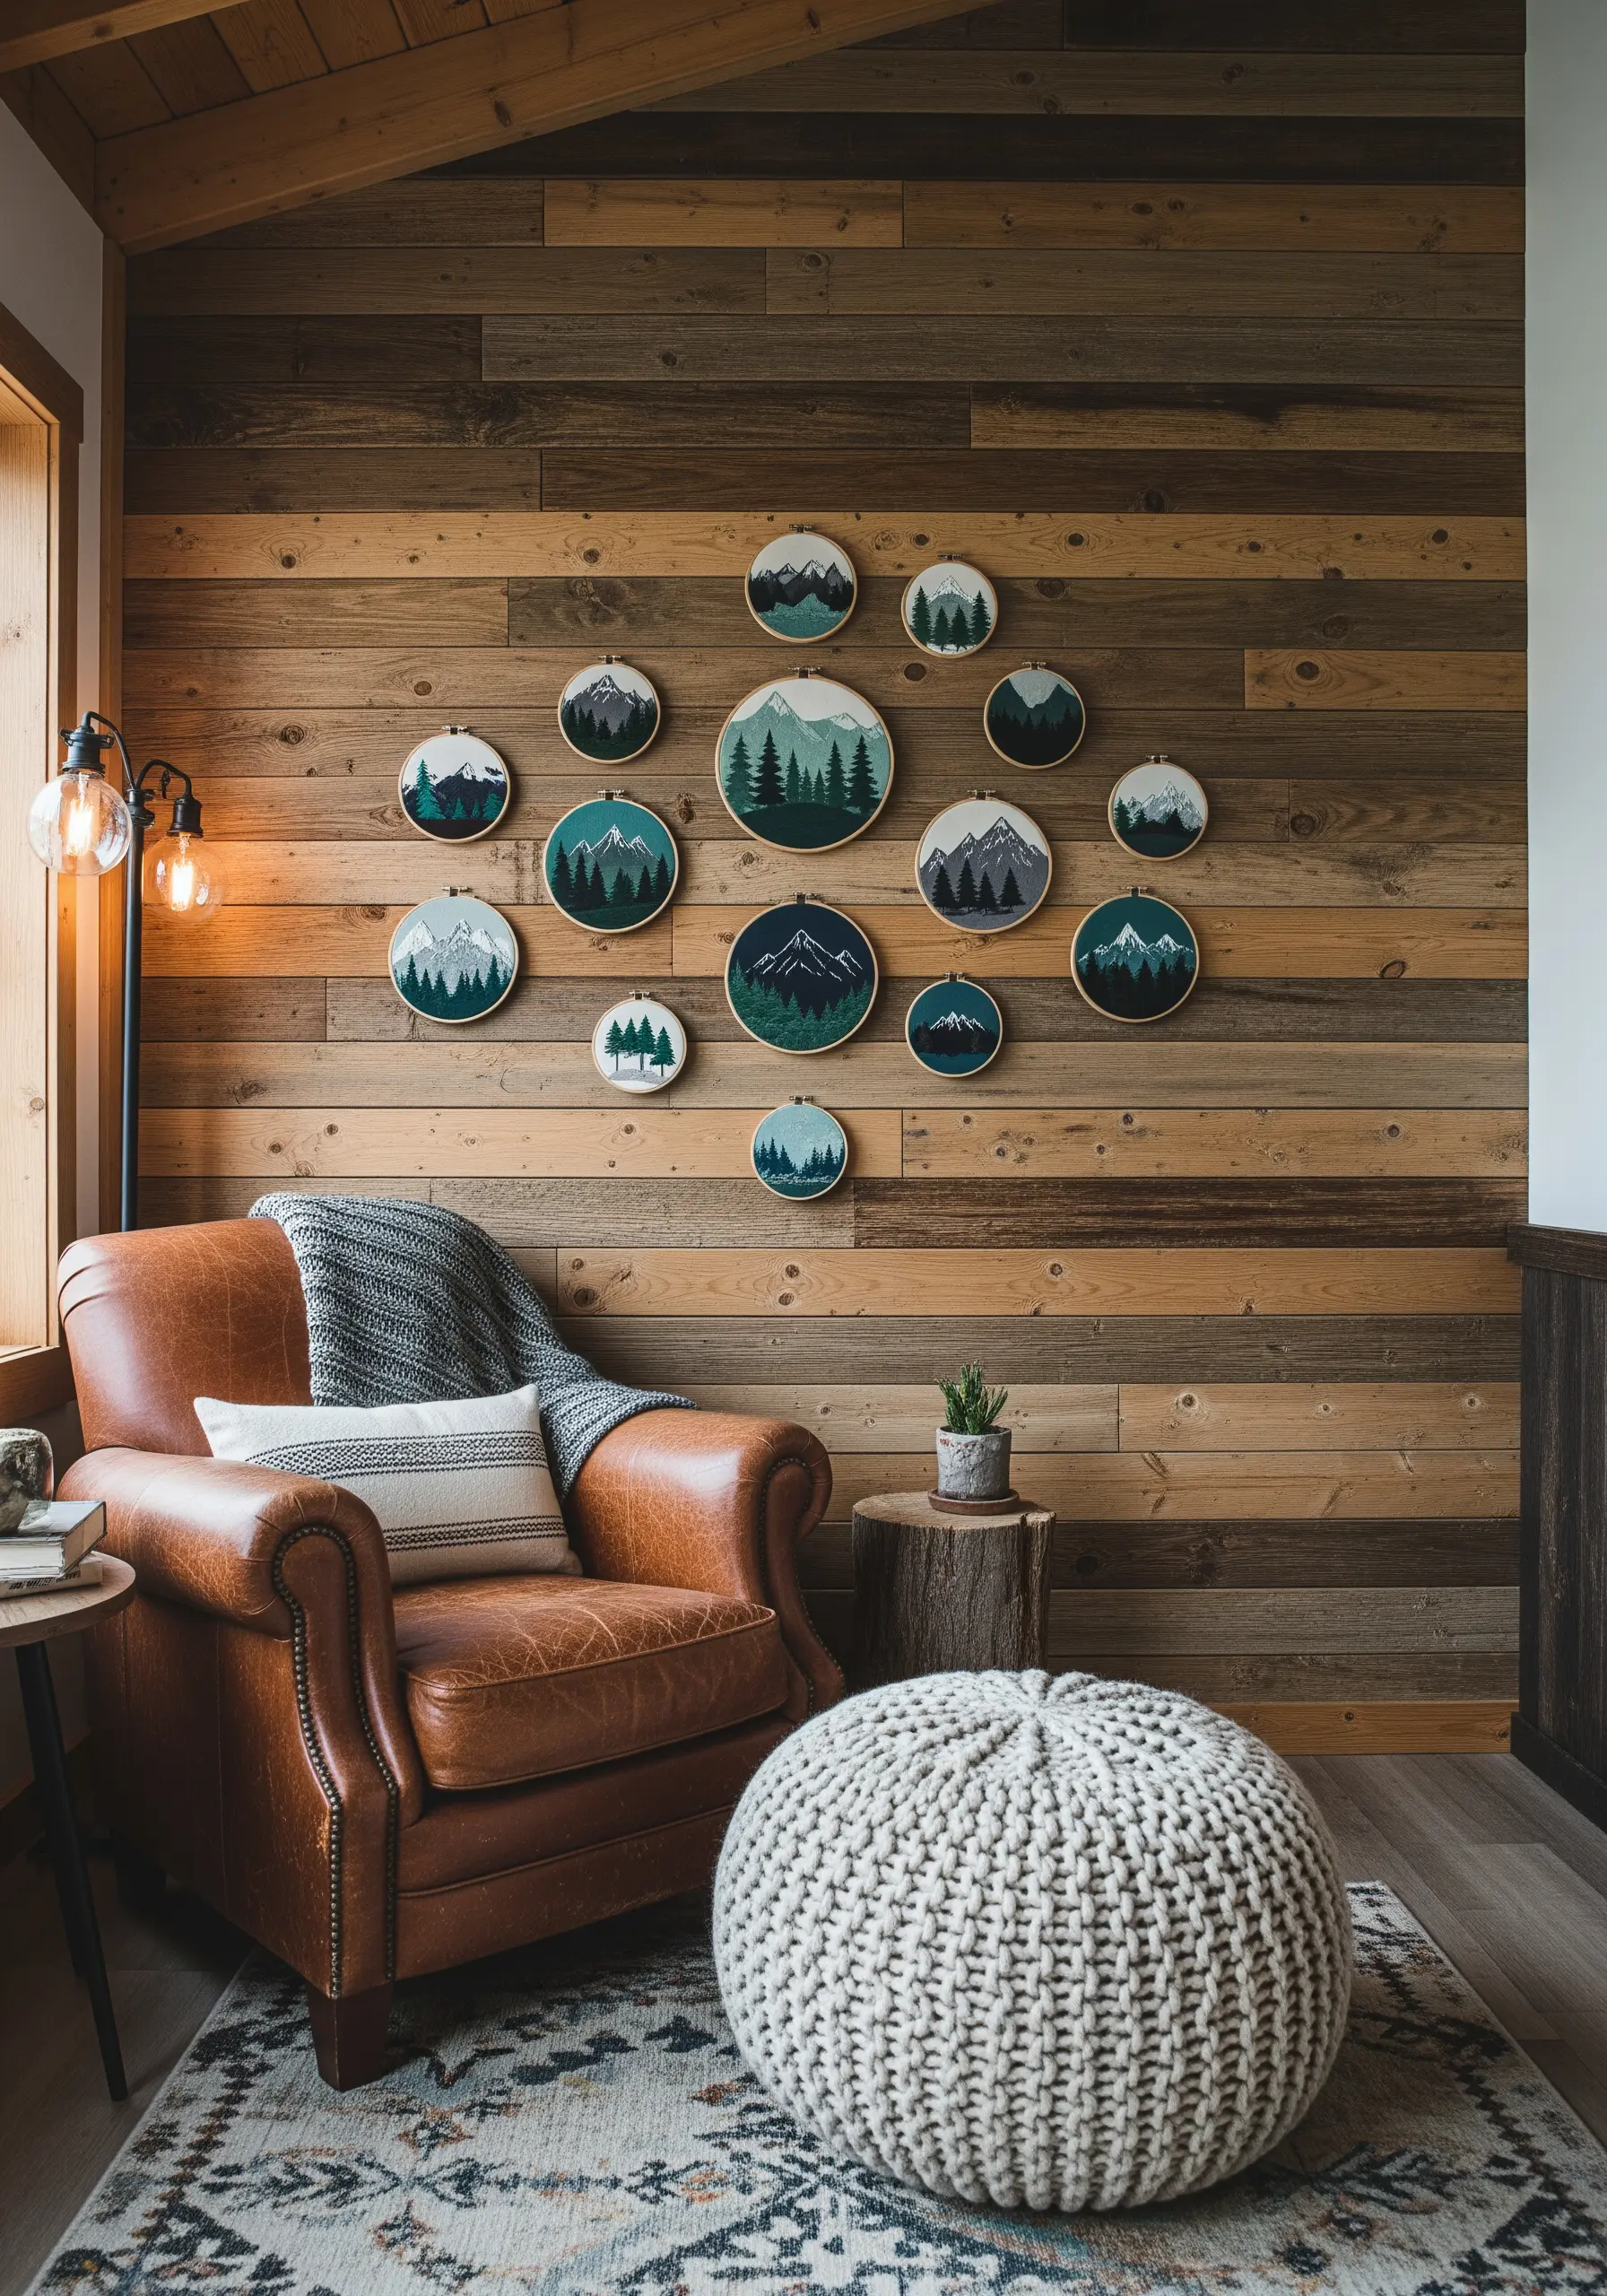
To create a convincing illusion of atmospheric depth in your landscapes, think in layers of thread and texture.
Use a single strand of white floss for distant, snow-capped mountains. For the closer forest, switch to two or three strands of a darker green and use dense French knots or seed stitches to create a textured canopy.
This contrast in thread weight and stitch density is the secret to creating perspective in these nature calm stitching projects.
17. Design an Elegant Floating Floral Wreath Display
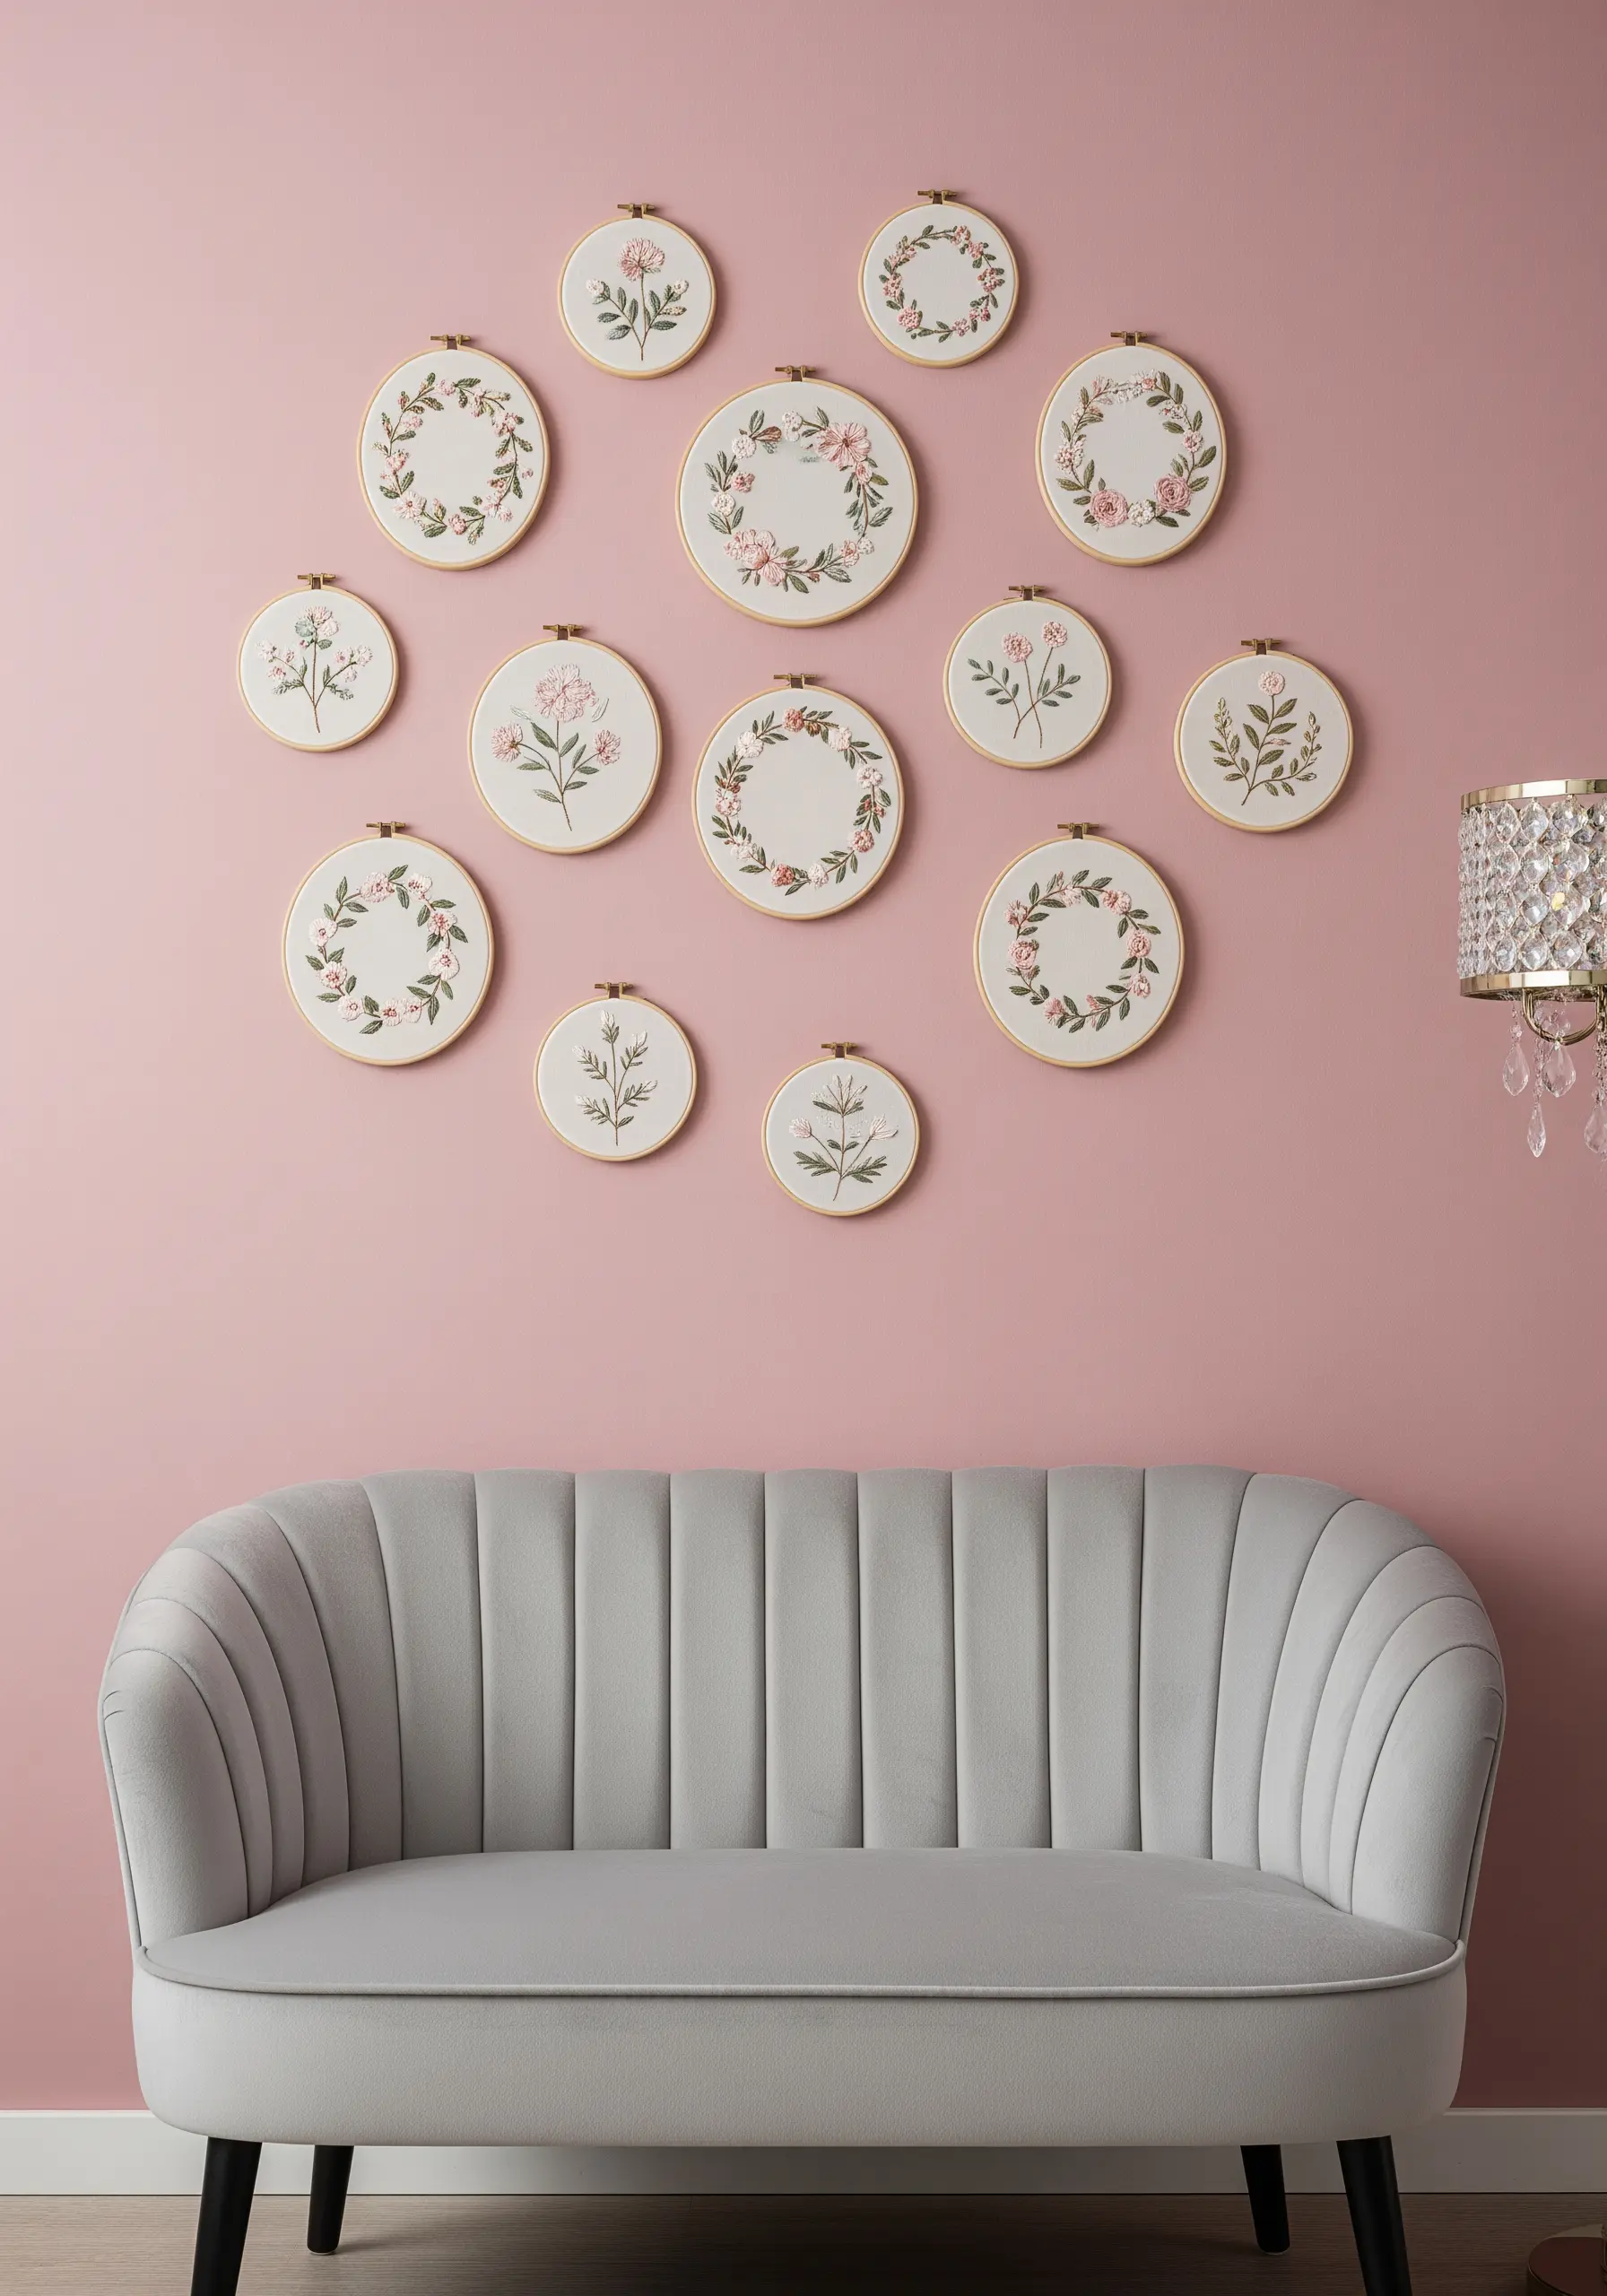
For a soft, romantic aesthetic, allow your designs to breathe by embracing negative space.
Instead of filling the entire hoop, stitch partial wreaths or light, scattered sprigs.
Use tiny lazy daisy stitches for delicate petals and French knots for flower centers, keeping the scale small and refined.
This less-is-more approach results in an elegant, airy composition that feels sophisticated and light.
18. Stitch a Sophisticated Architectural Skyline Grid
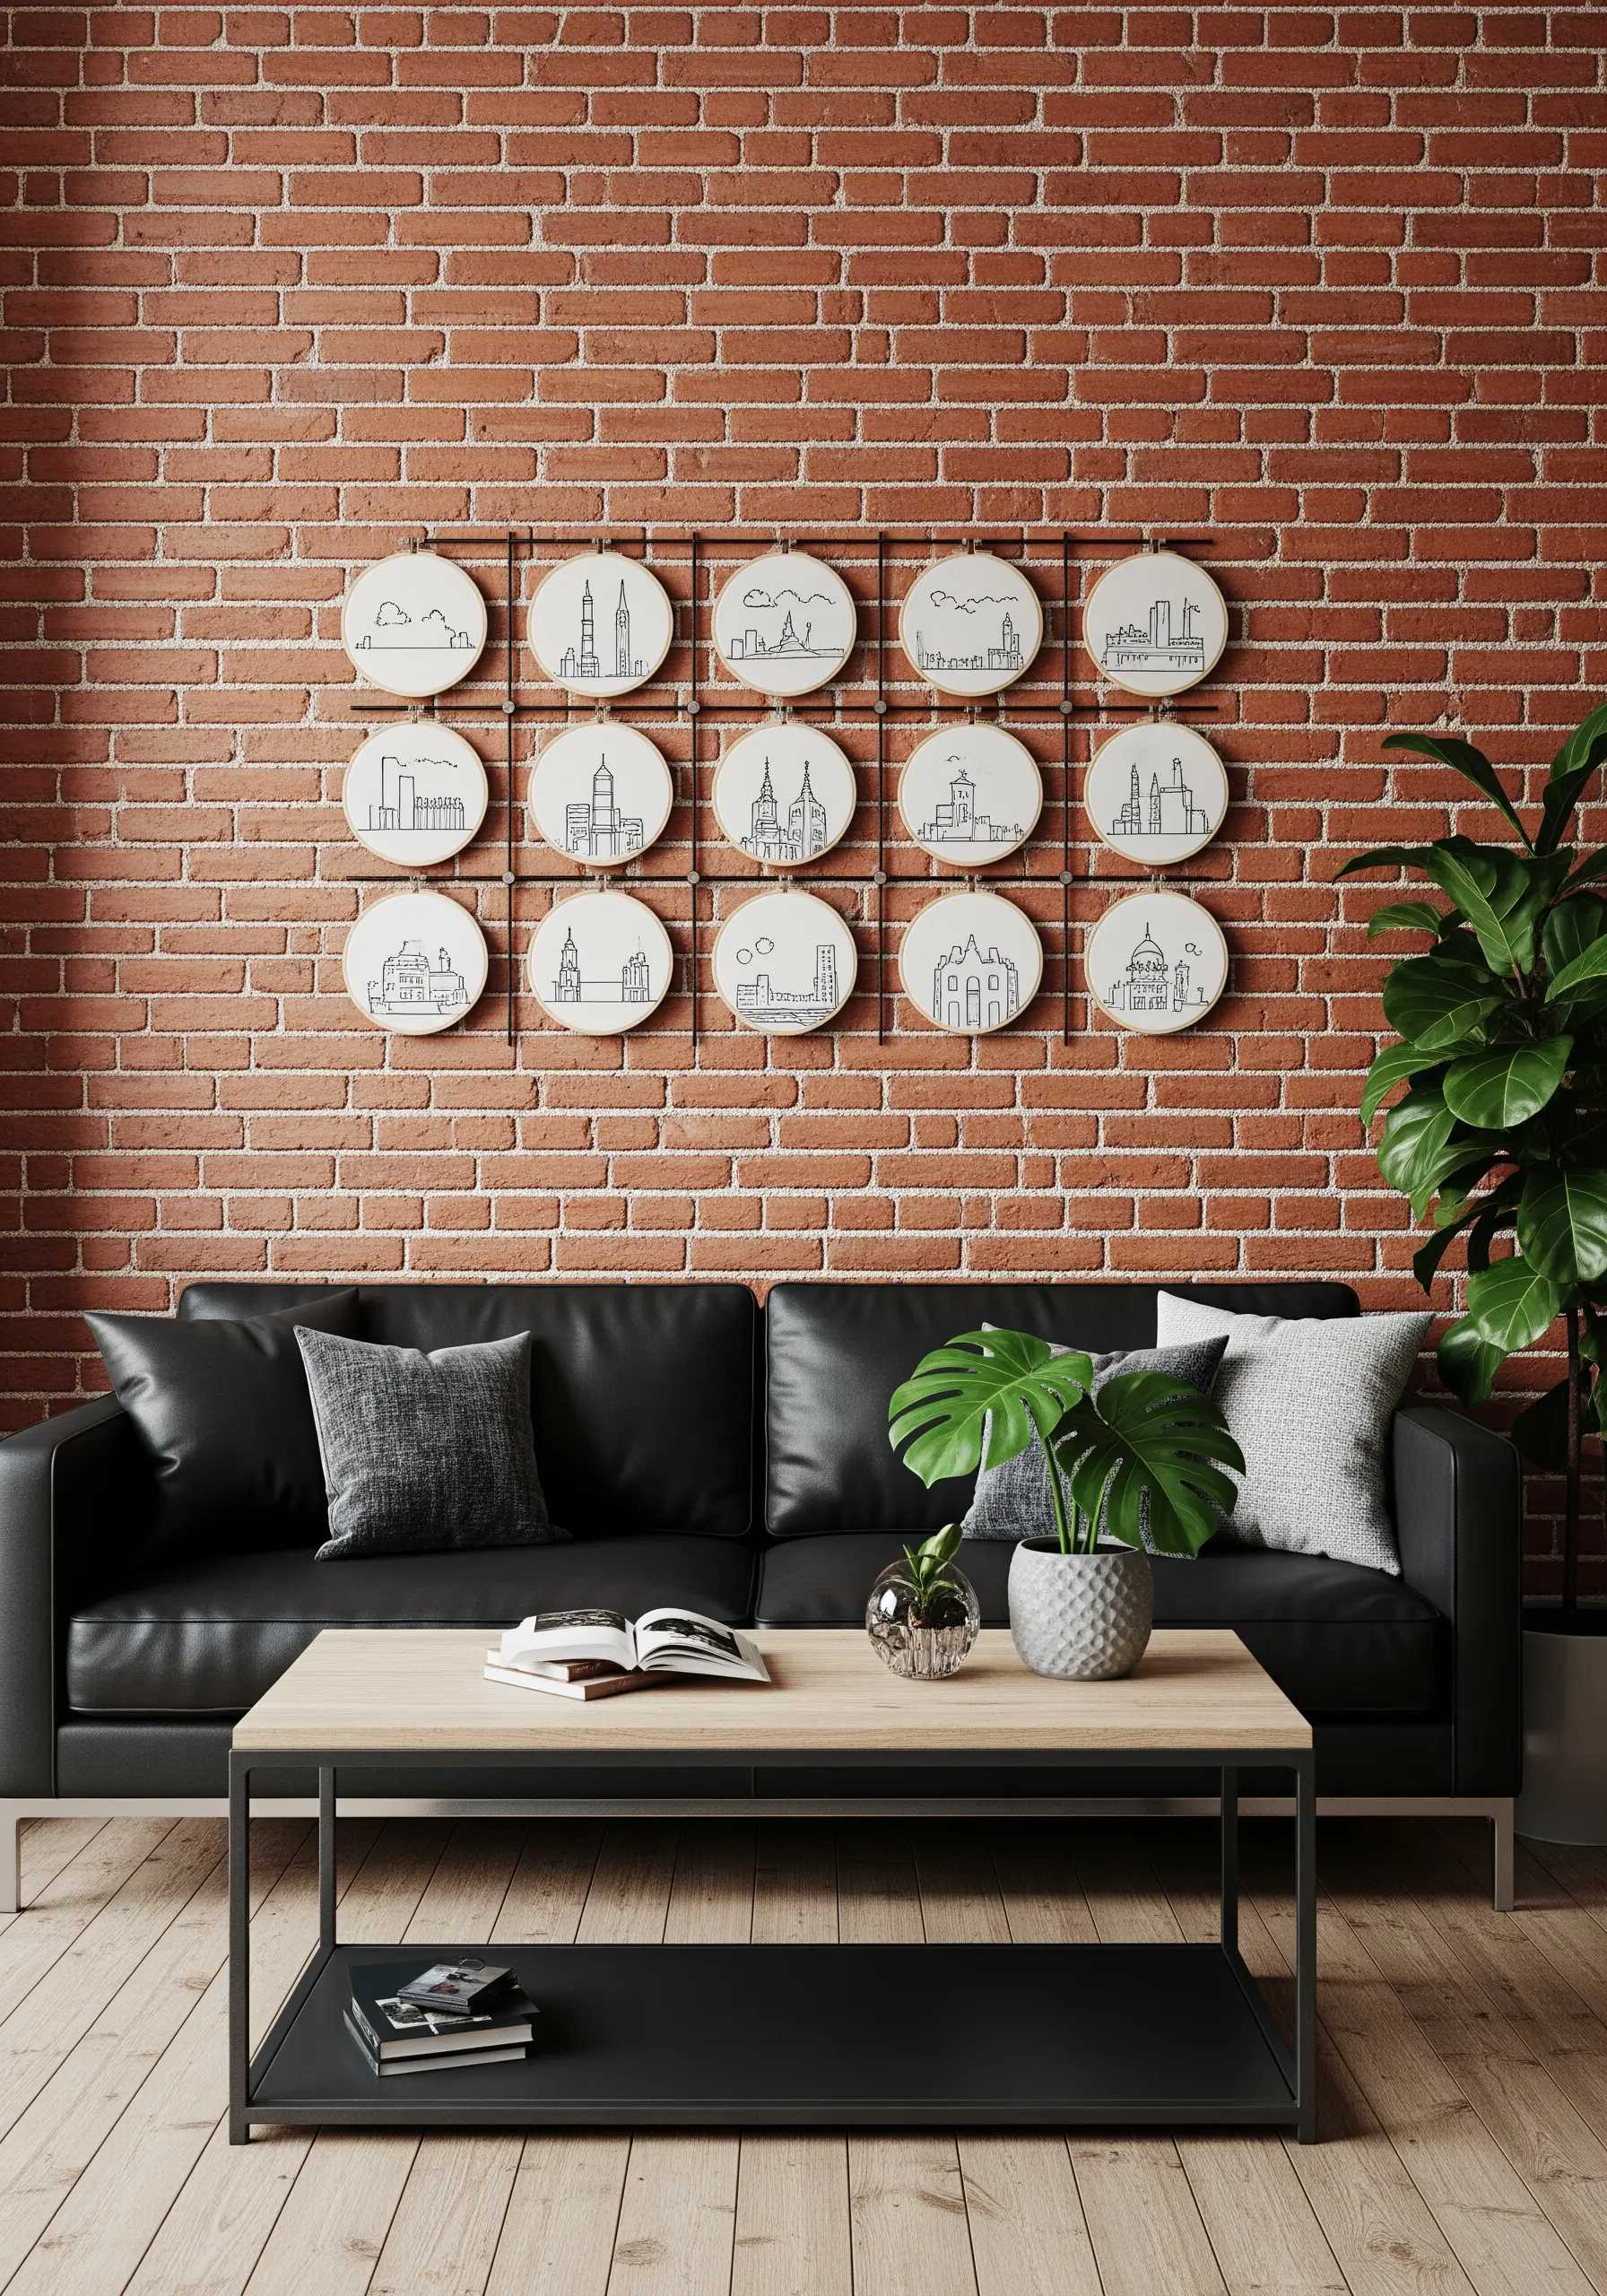
Transform simple skyline drawings into a modern art installation with the power of repetition and precision.
Use a single strand of black thread on a light, neutral fabric, and commit to one stitch—either a small, even backstitch or a stem stitch—for all your lines.
This stitch consistency is what makes these architectural designs look so sharp. Mounting them in a precise grid creates a stunning final display.
19. Create a Calm Corner with Japanese-Inspired Motifs
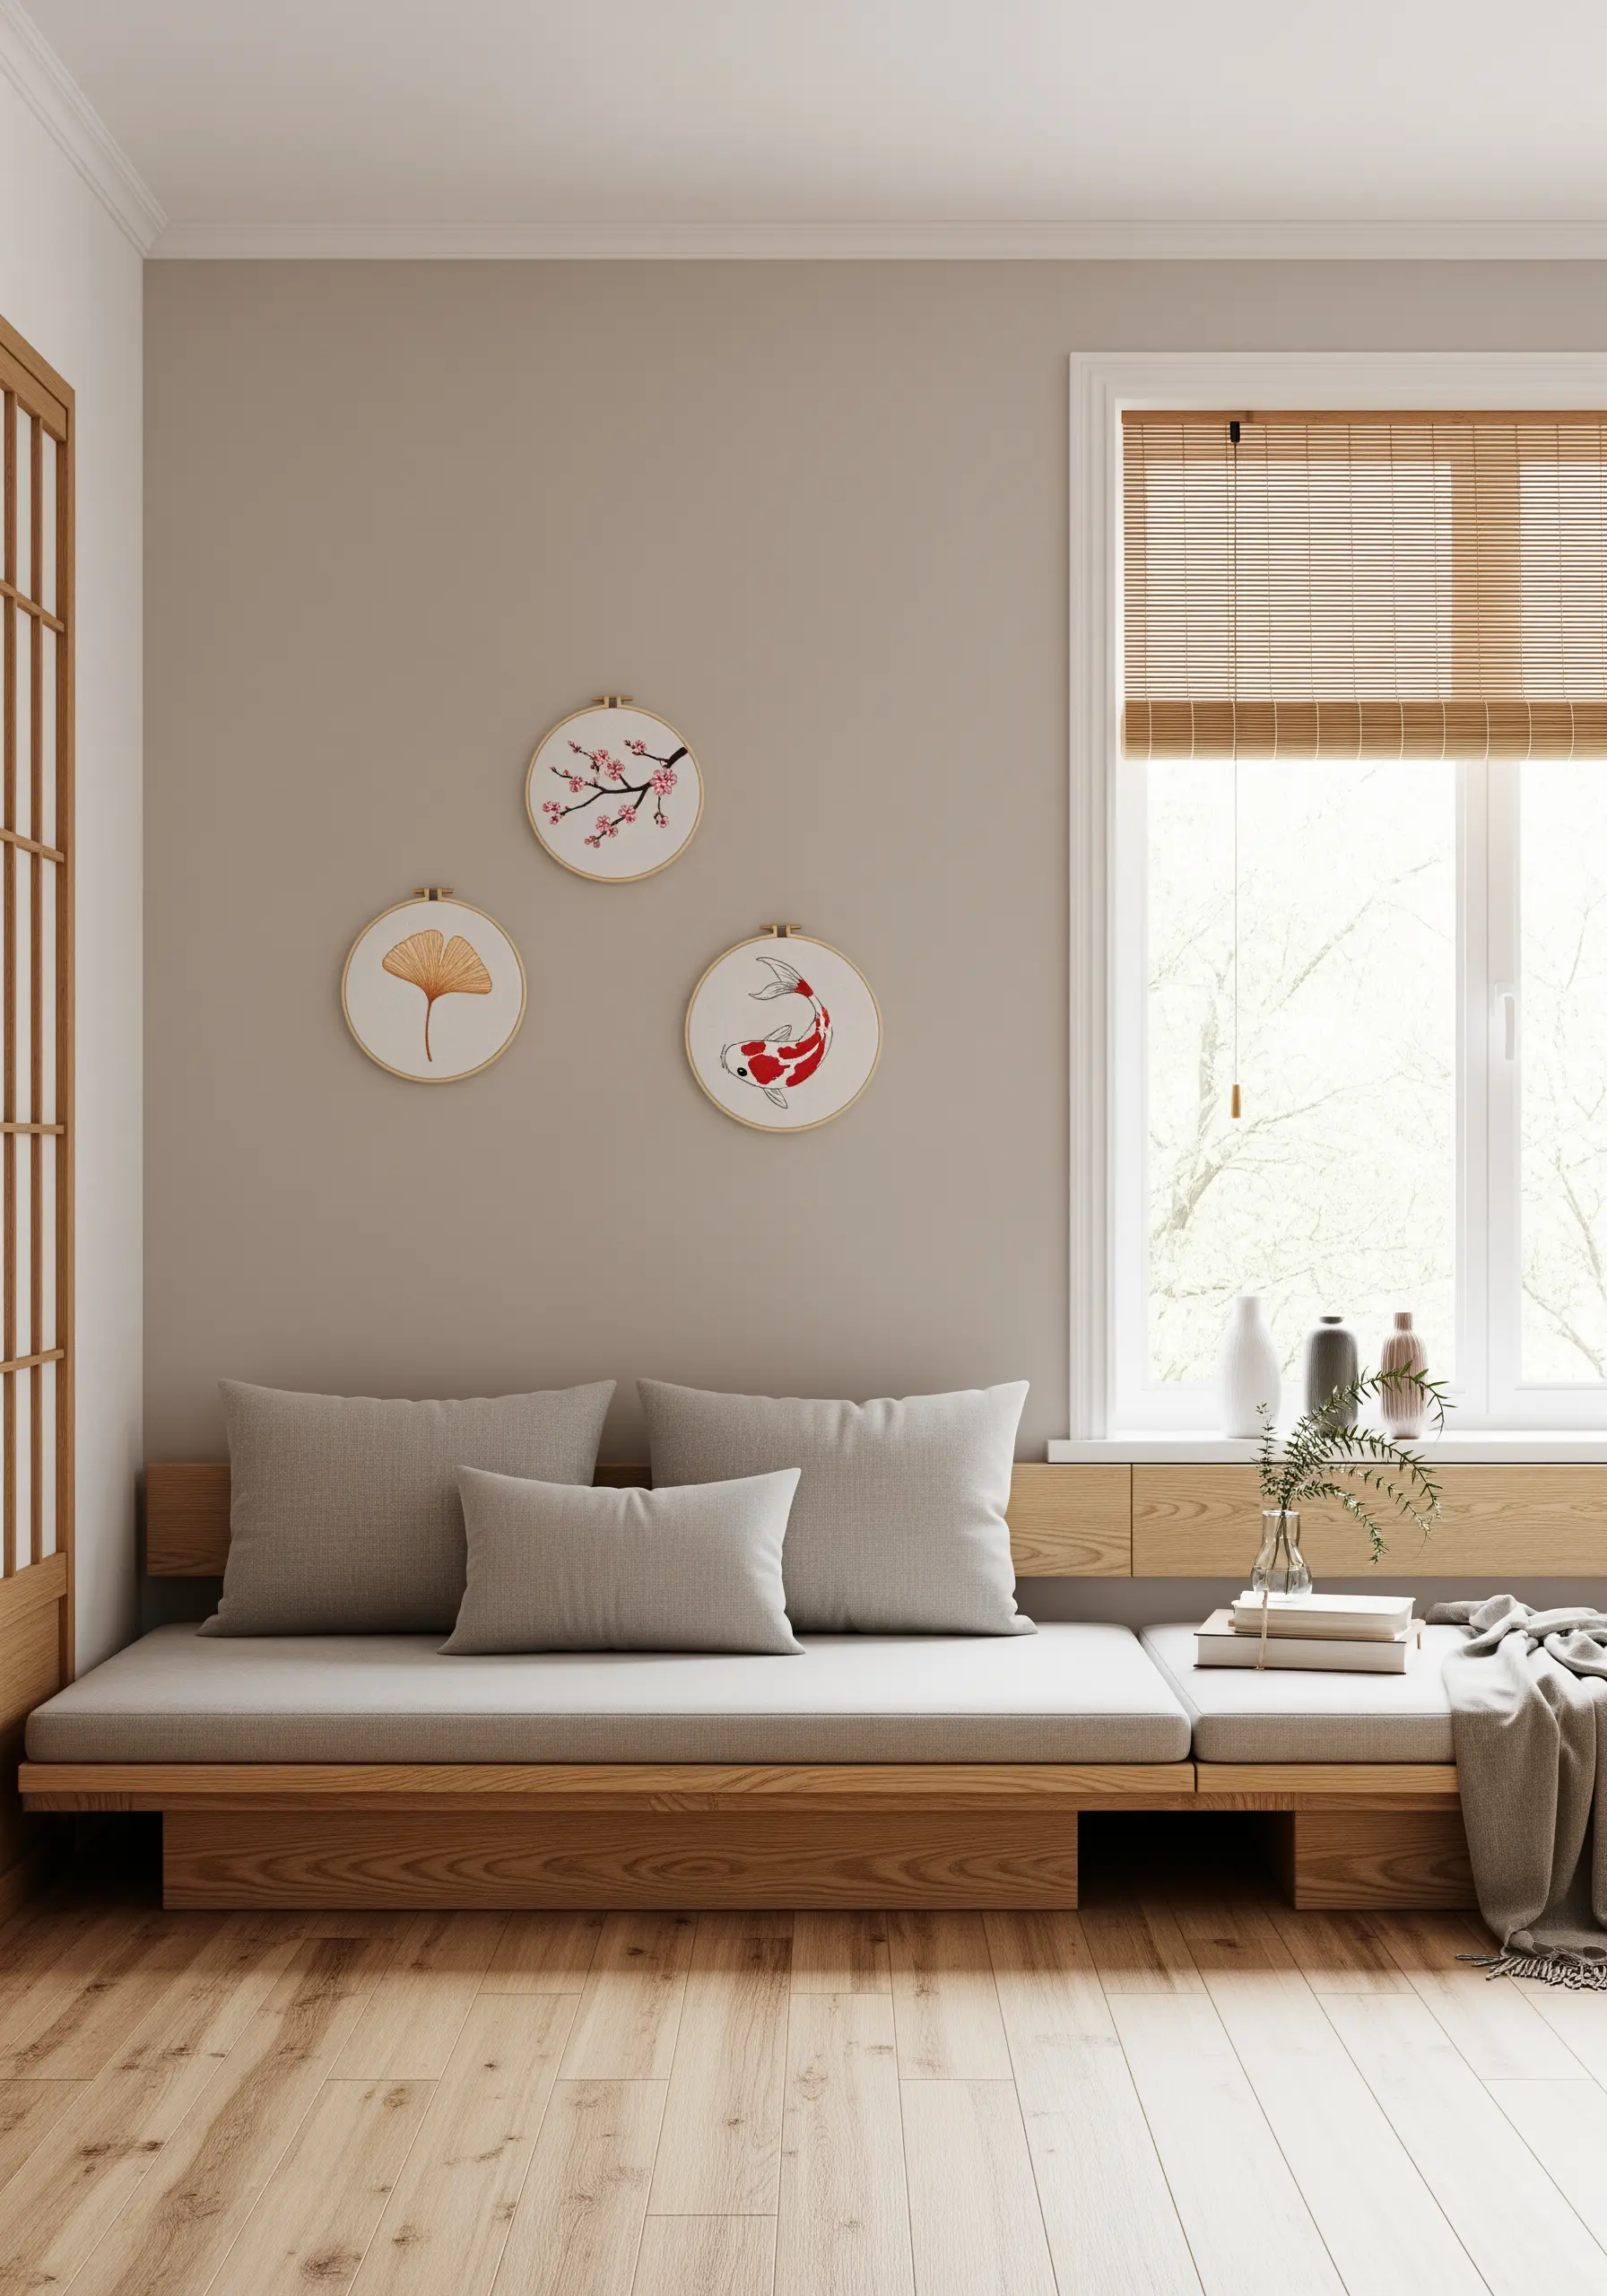
Capture the serene essence of Japandi style by focusing on clean lines and natural forms.
For the scales of a koi fish, use an overlapping fishbone stitch to create beautiful texture and a sense of movement.
Limit your color palette to just a few harmonious tones, such as coral red, muted gold, and black, against a neutral background. This creates a balanced and peaceful composition.
20. Craft a Cozy and Textural Autumn Harvest Display
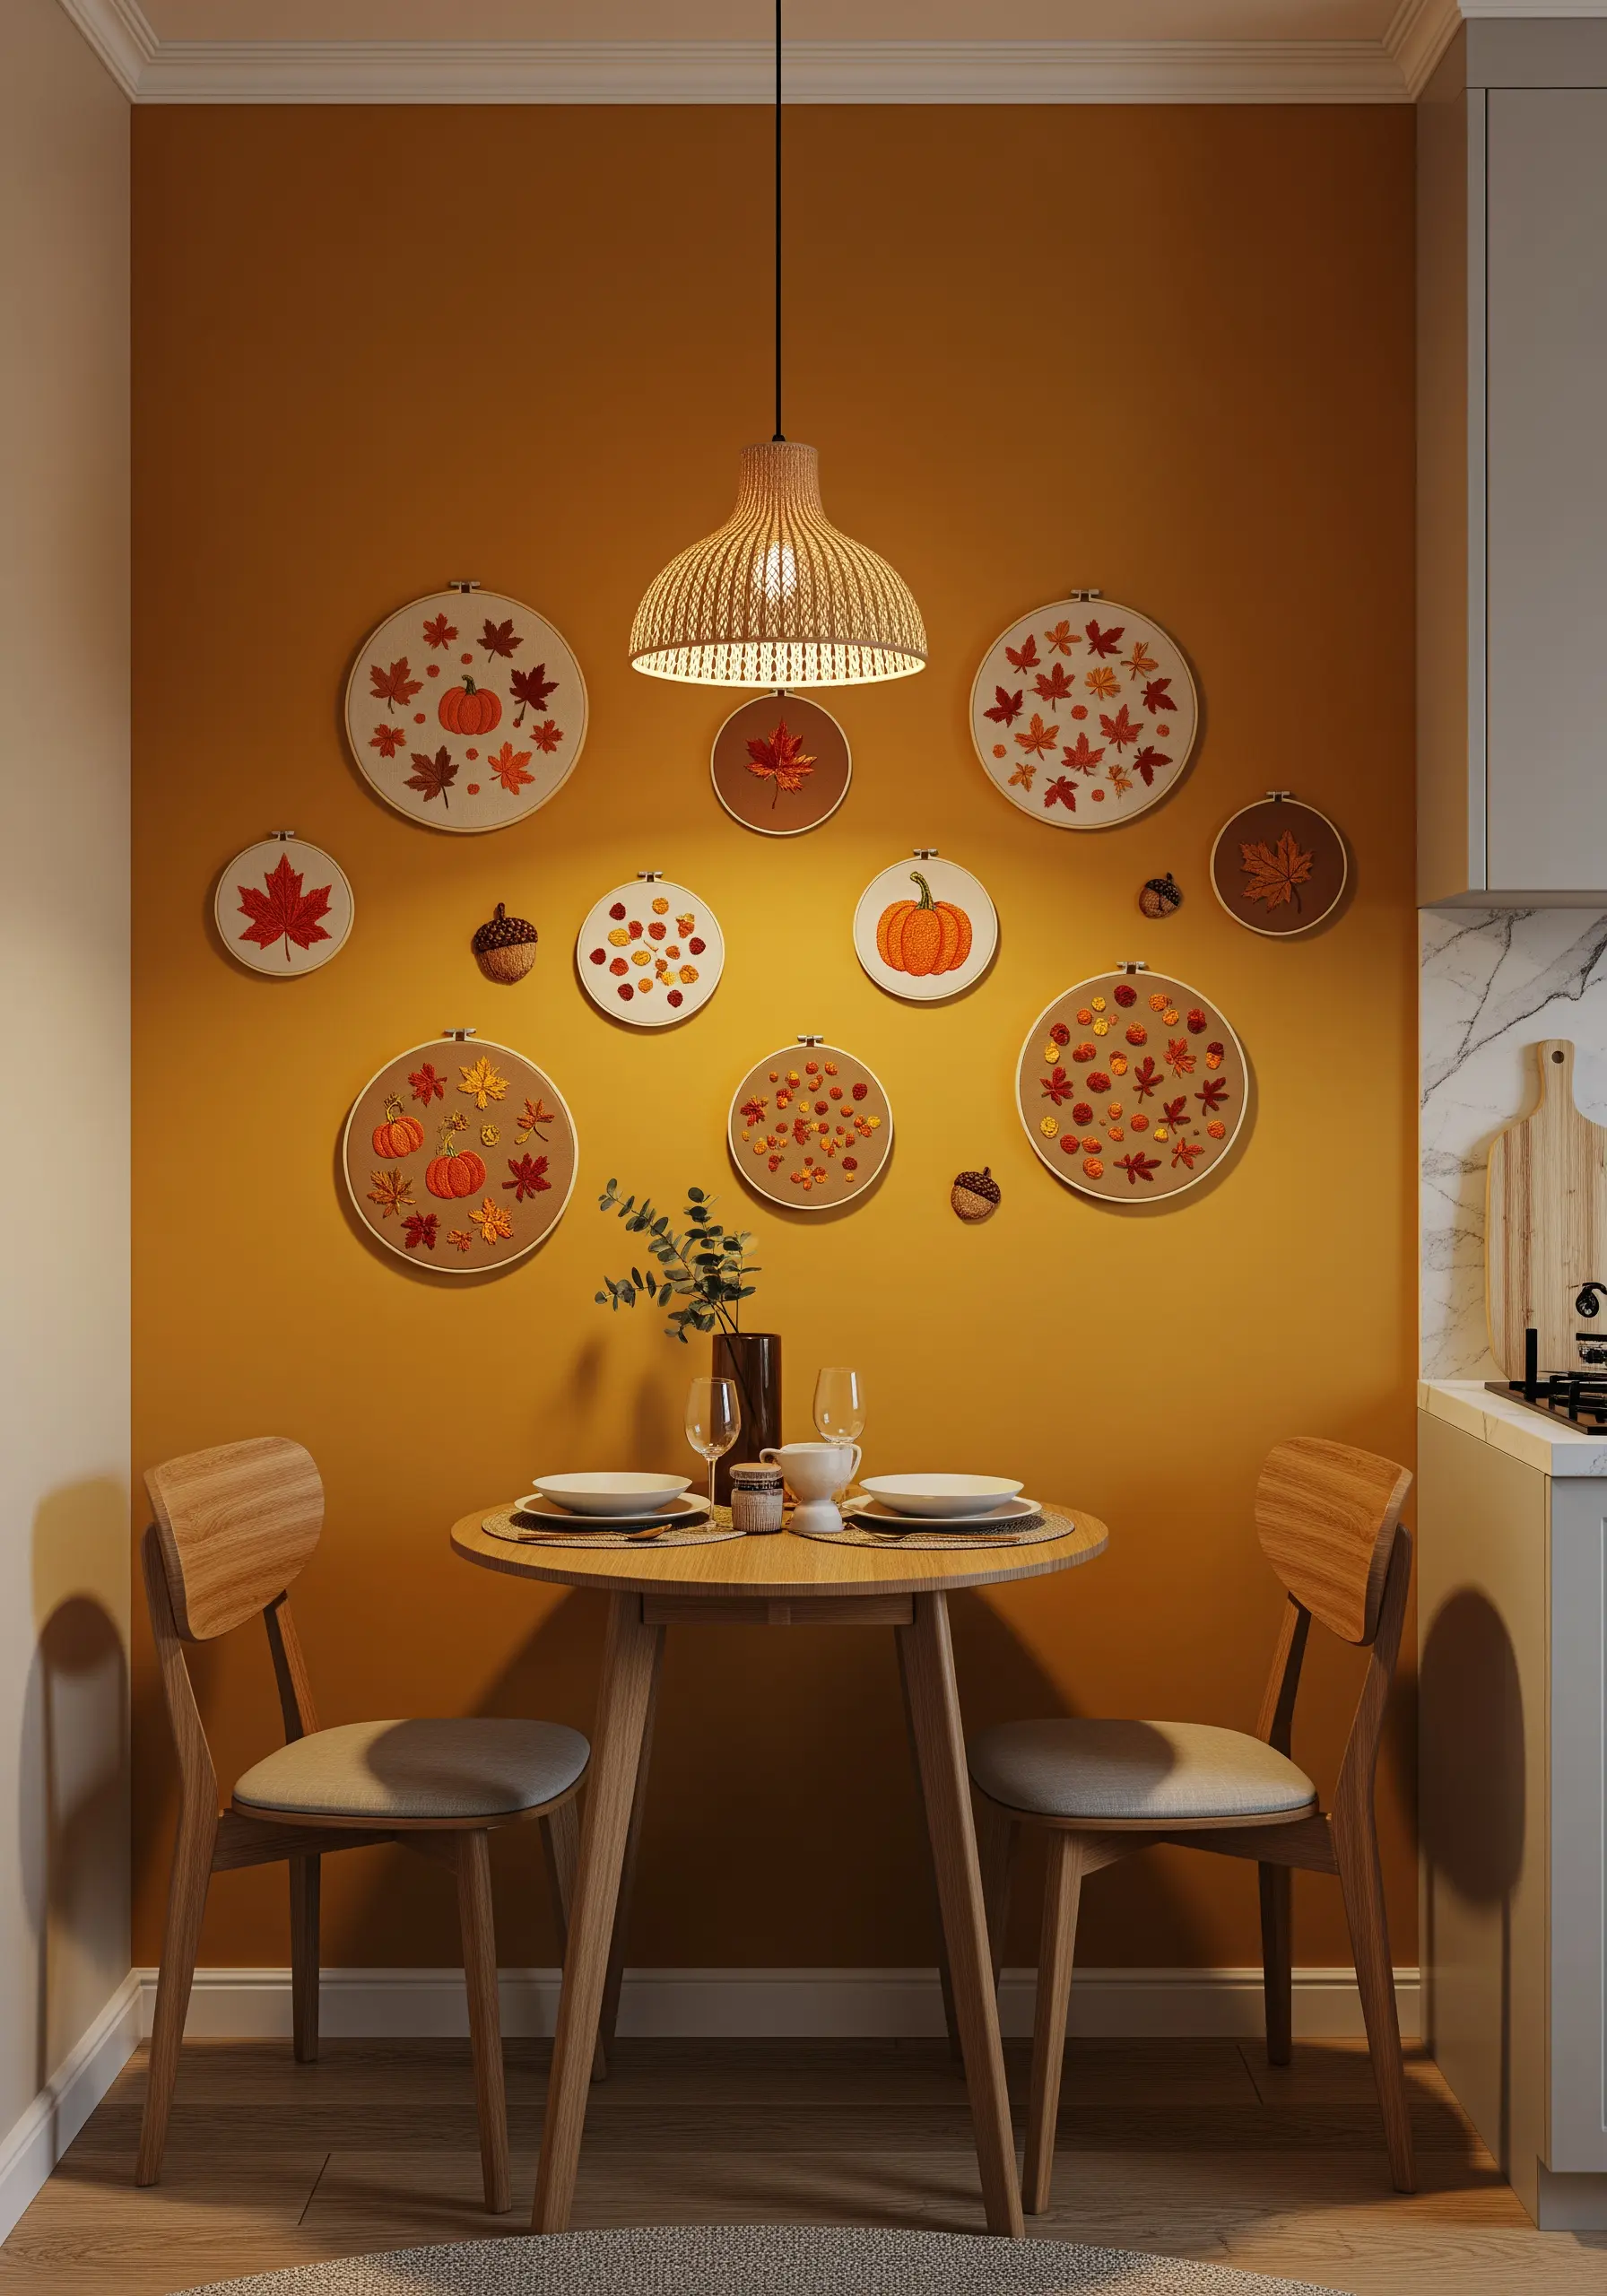
To give your autumn leaves a realistic, organic texture, avoid a flat satin stitch.
Instead, use a fishbone stitch for the body of the leaf and then add a single backstitched vein down the center in a slightly darker color for depth.
For pumpkins, stitch vertical lines of chain stitch packed closely together to mimic their natural ridges. These small textural details elevate your work from simple shapes to recognizable forms.
21. Chart a Celestial Zodiac Map on Your Wall
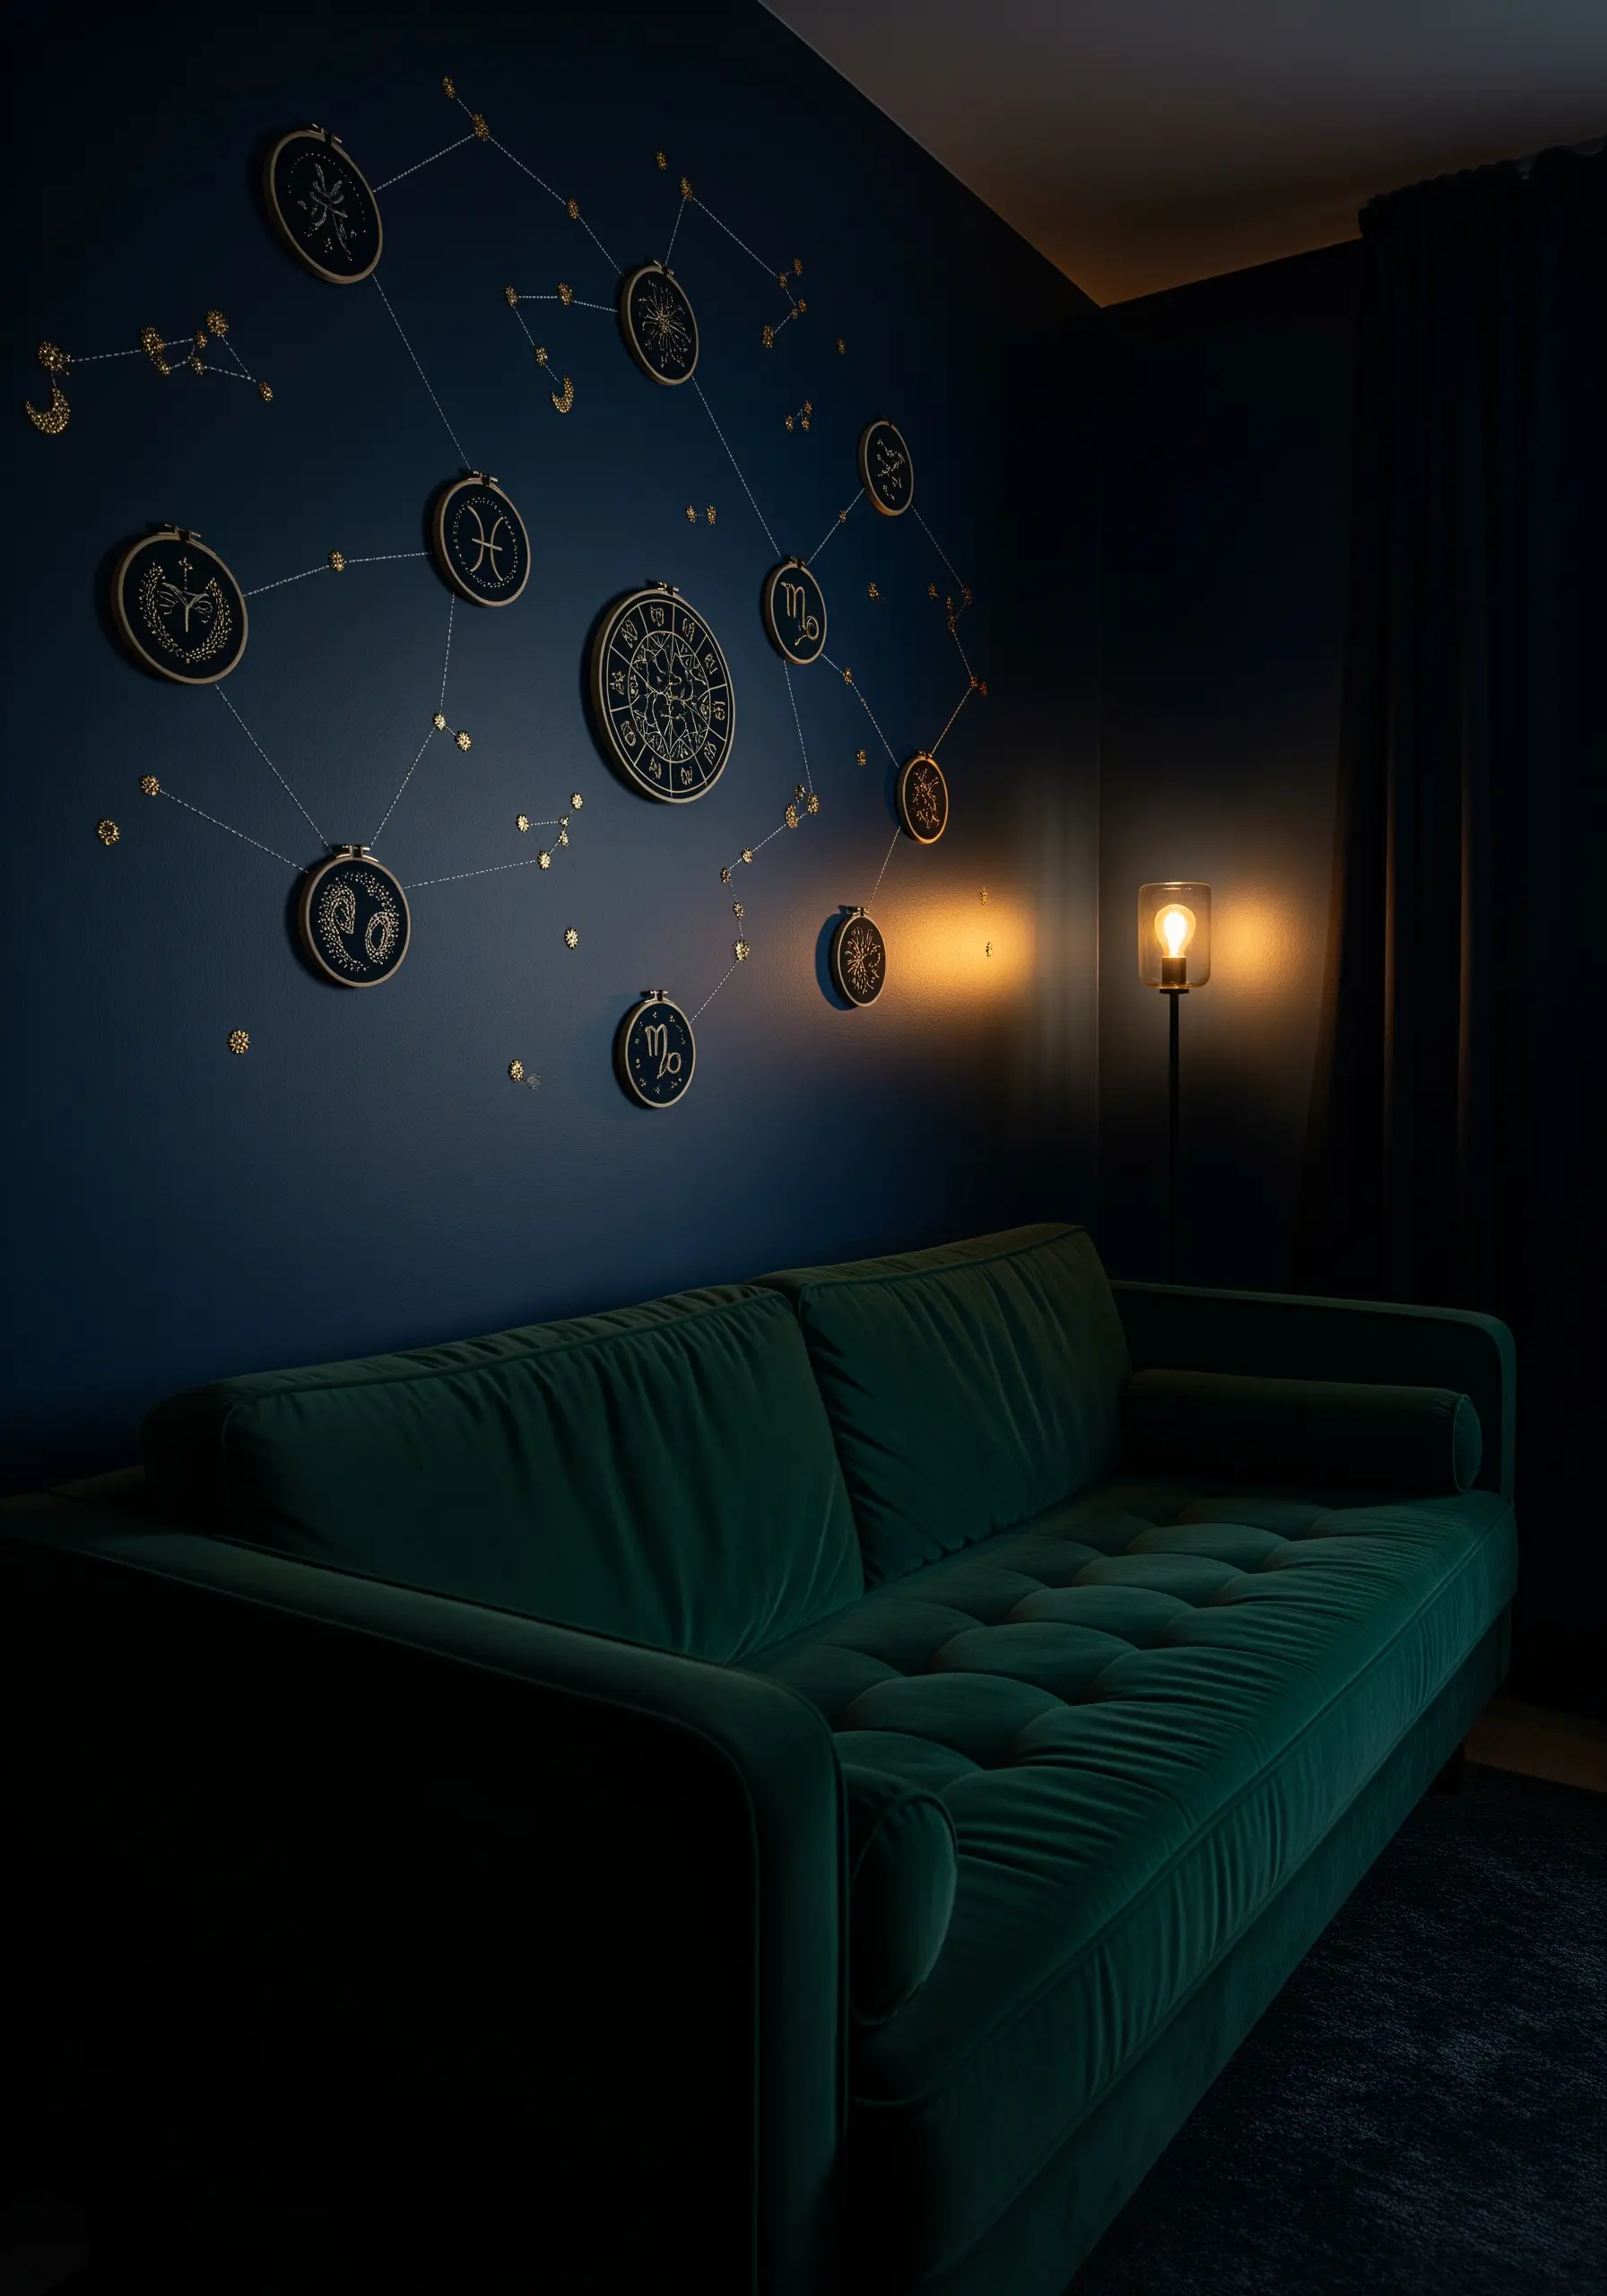
Create a dramatic and personalized display by stitching the zodiac constellations on navy blue linen with a metallic gold or silver thread.
Use tiny French knots or star stitches to represent the stars, and connect them with a clean, simple backstitch.
Take the concept further by connecting the finished hoops on the wall with a fine gold cord, plotting out a larger celestial map that tells a personal story.
22. Stitch a Zesty and Vibrant Citrus Gallery
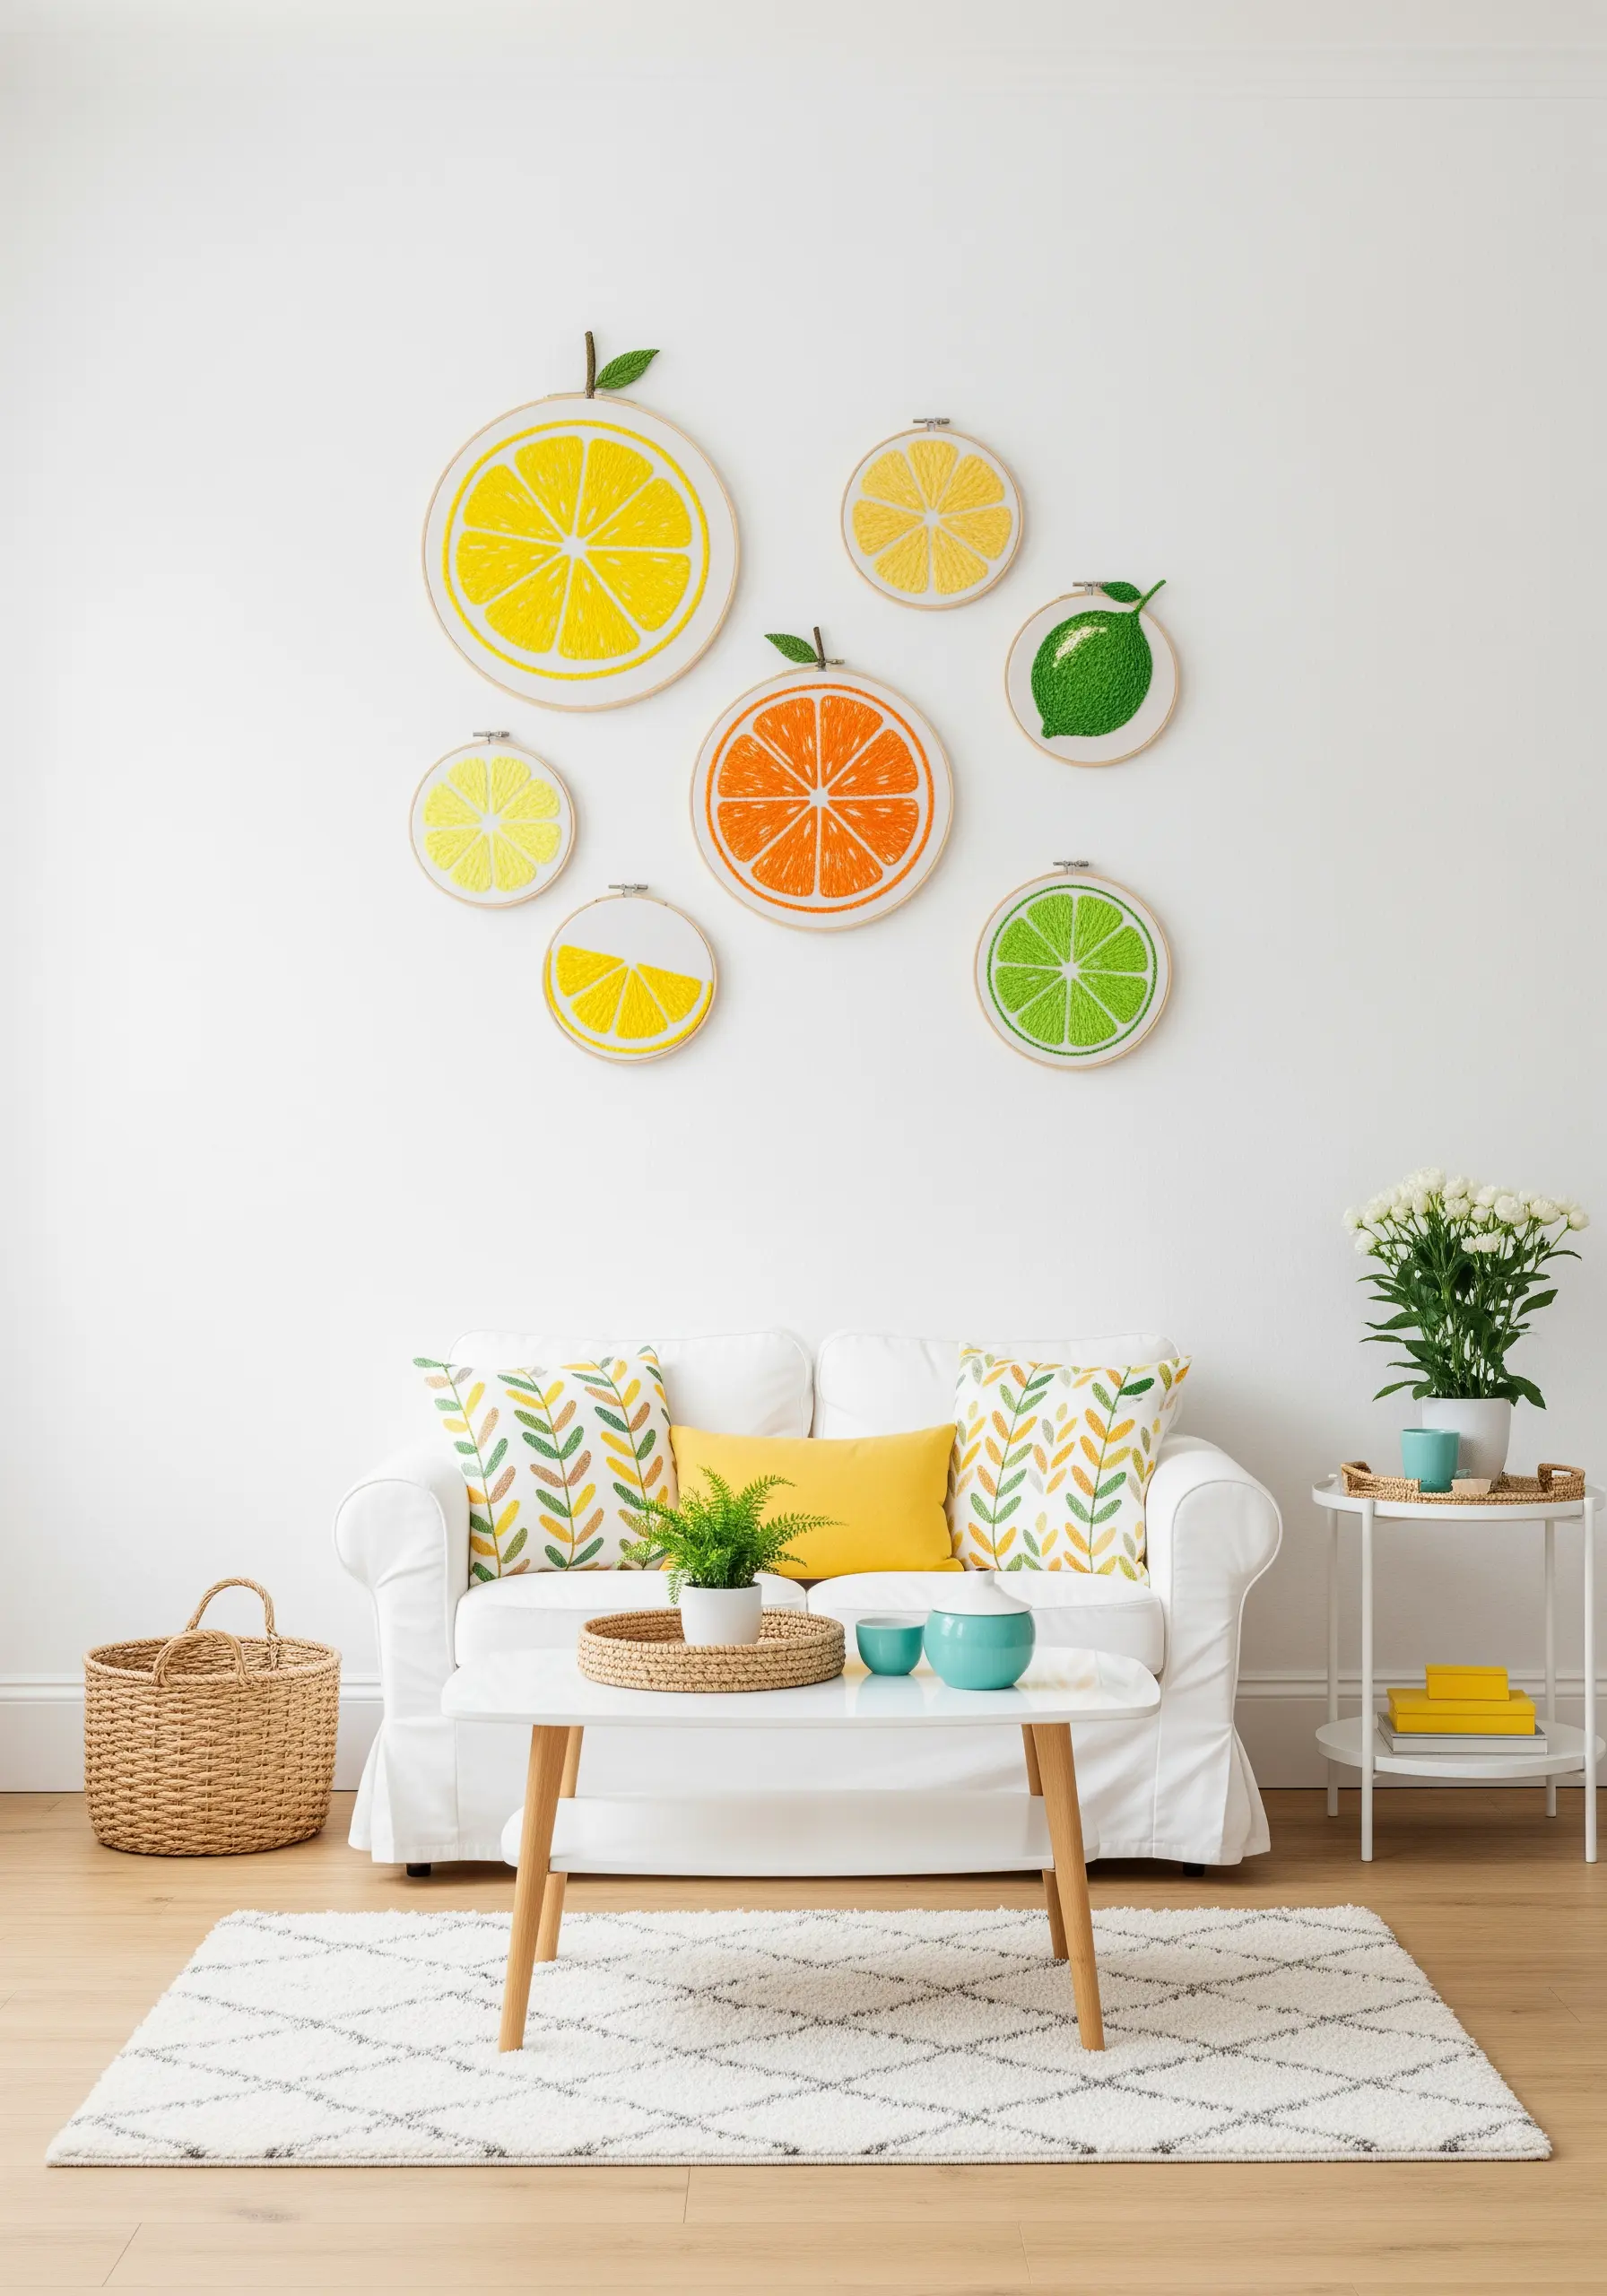
The secret to creating the juicy, segmented look of citrus slices lies in your stitch technique.
Use a long-and-short stitch for the fruit’s pulp, blending two shades of yellow or orange to create a subtle, realistic gradient.
For the segment walls, use a single, crisp line of whipped backstitch in white. This sharp separation is what makes the fruit look so incredibly vibrant and true to life.
23. Combine Macrame and Embroidery for Boho Texture
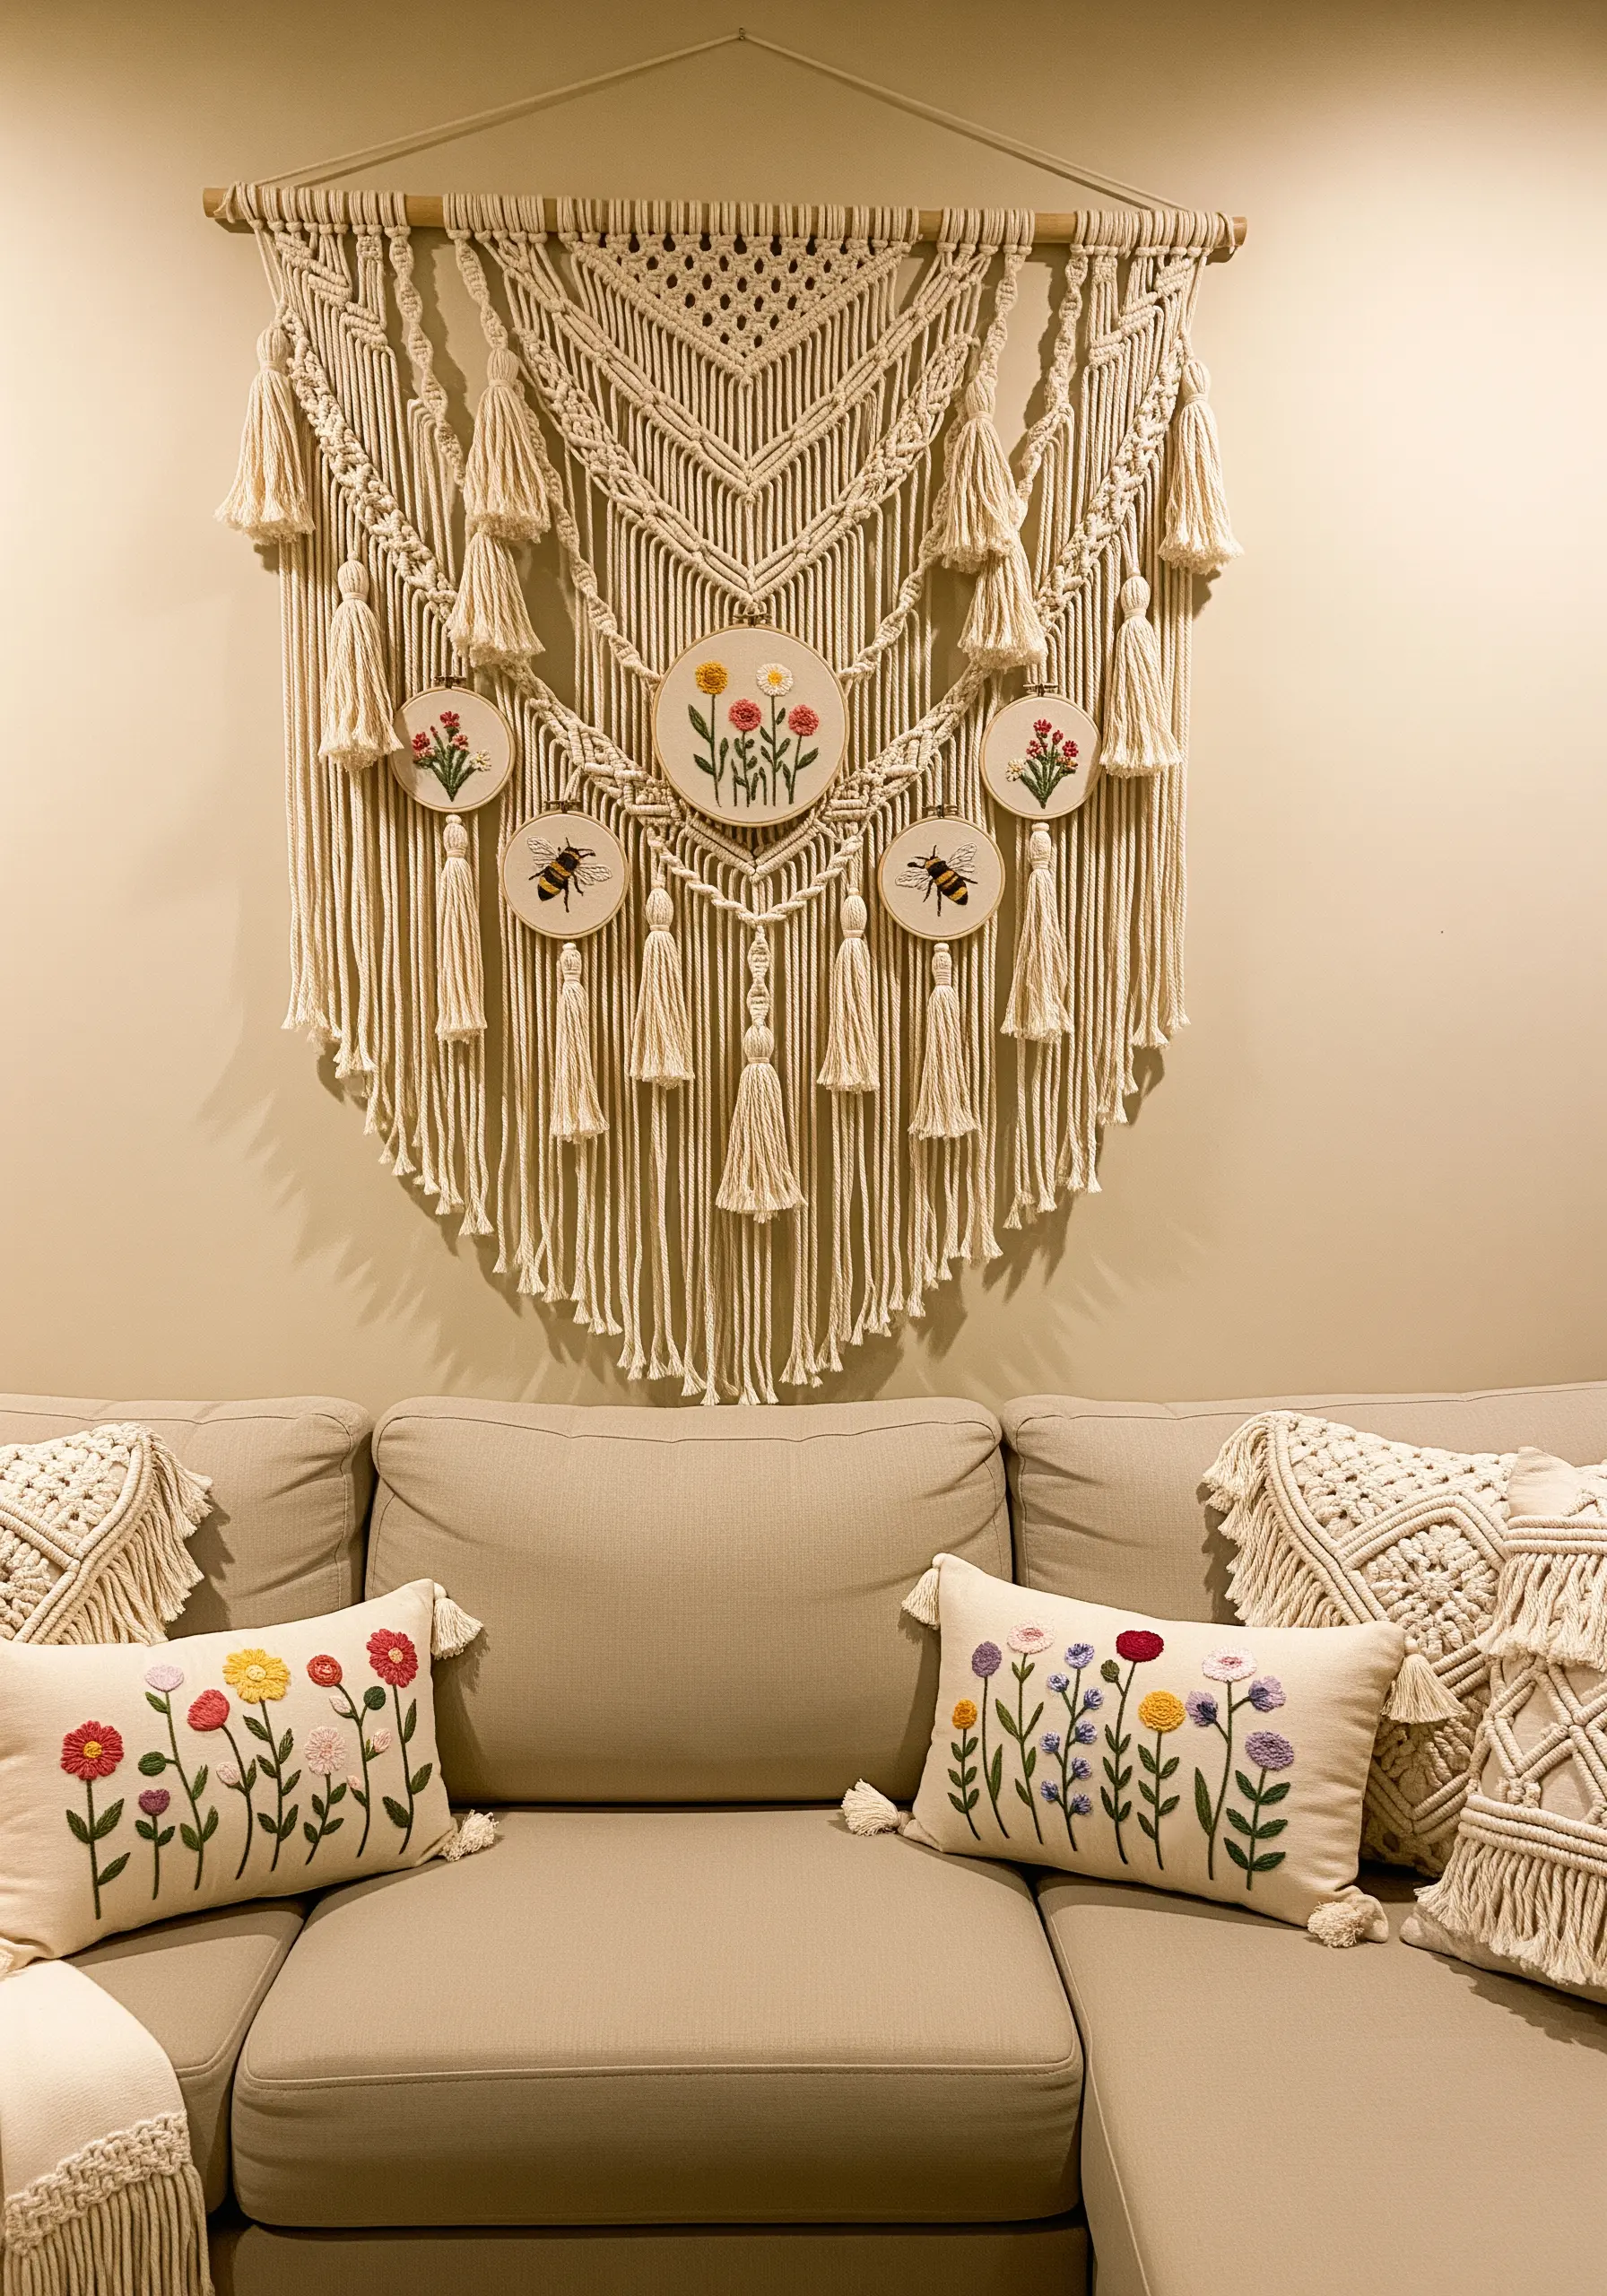
Integrate your embroidery into a larger macrame piece for a beautiful blend of fiber arts.
Once your floral or bee motifs are stitched, simply tie the hoops into your macrame design using lark’s head knots.
Choose a neutral, cream-colored cord for the macrame; this allows the vibrant colors of your embroidery to stand out as the focal point.
The result is one of those stunning mixed-fiber creations inspired by nature that feels both handmade and highly designed.
24. Achieve Punch-Needle Texture with Classic Stitches
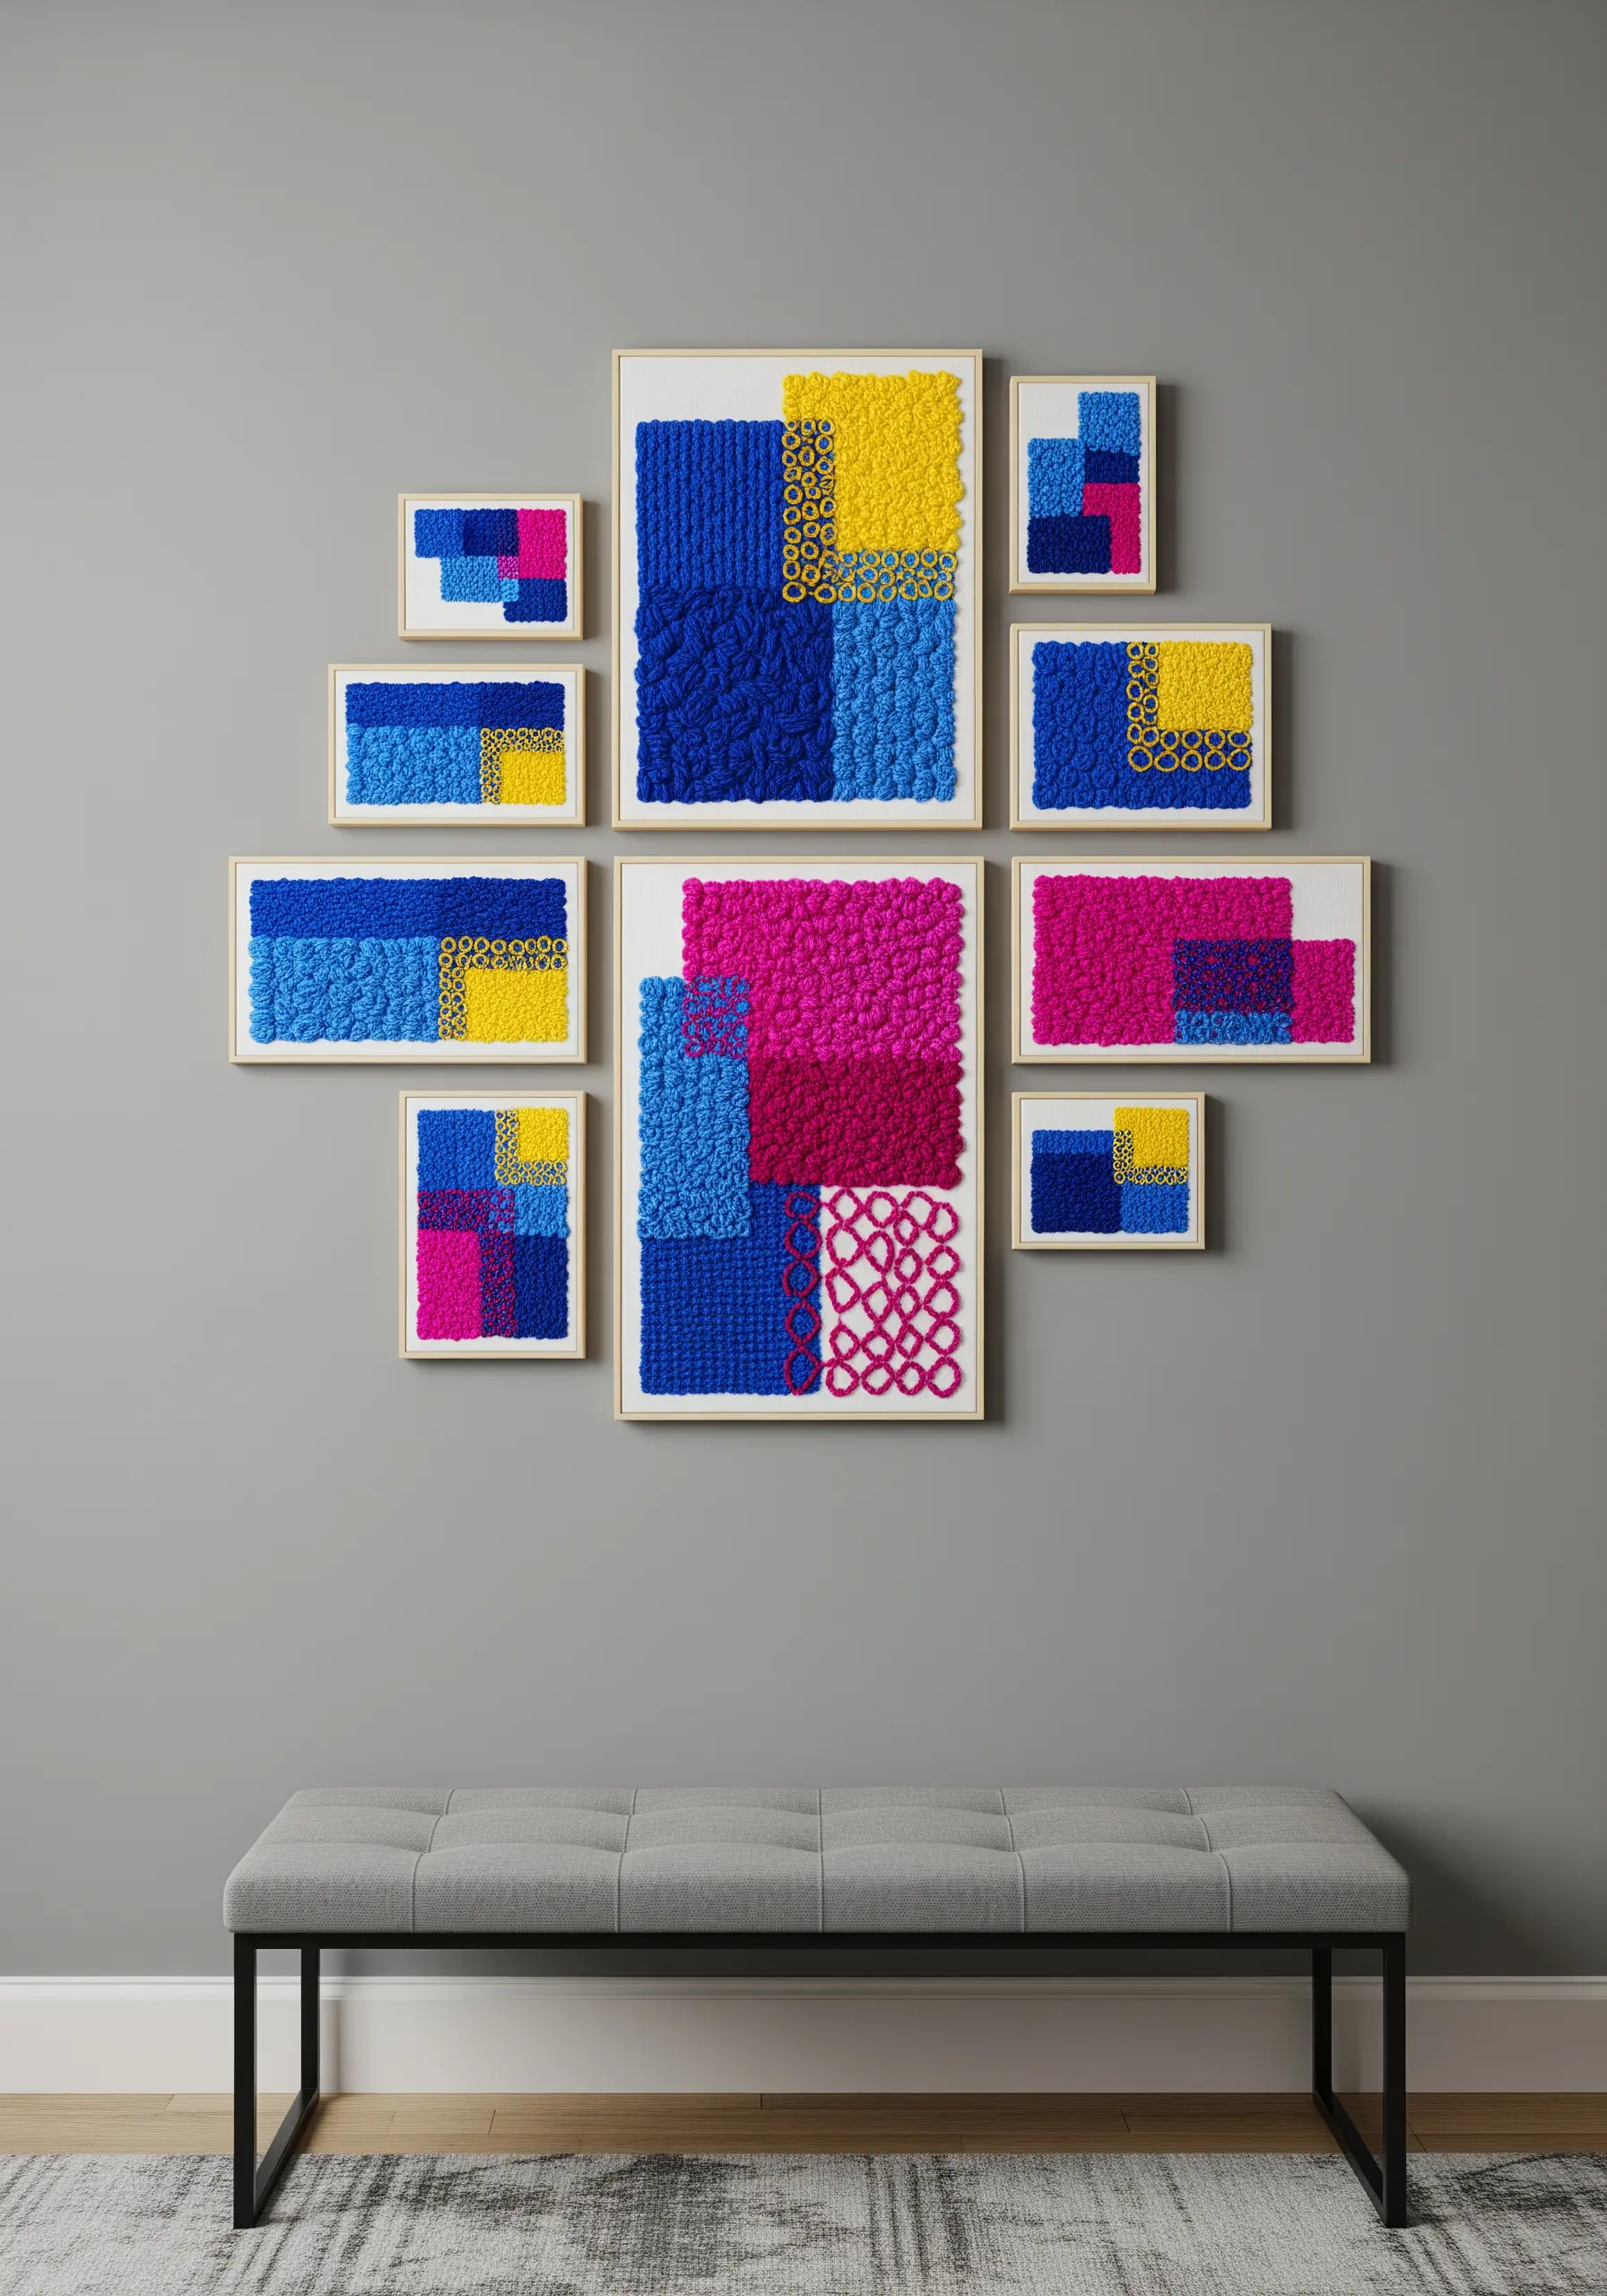
You can mimic the lush, high-pile look of punch needle with just a standard needle and thread.
Map out blocks of color and fill them entirely with dense French knots, using a thick 6-strand floss or even pearl cotton for more volume.
For a looped effect, try the turkey stitch, but leave the loops intact instead of trimming them. This is a fantastic way to explore high-texture fabric collage without special tools.
25. Forage a Whimsical Forest Floor Mushroom Collection
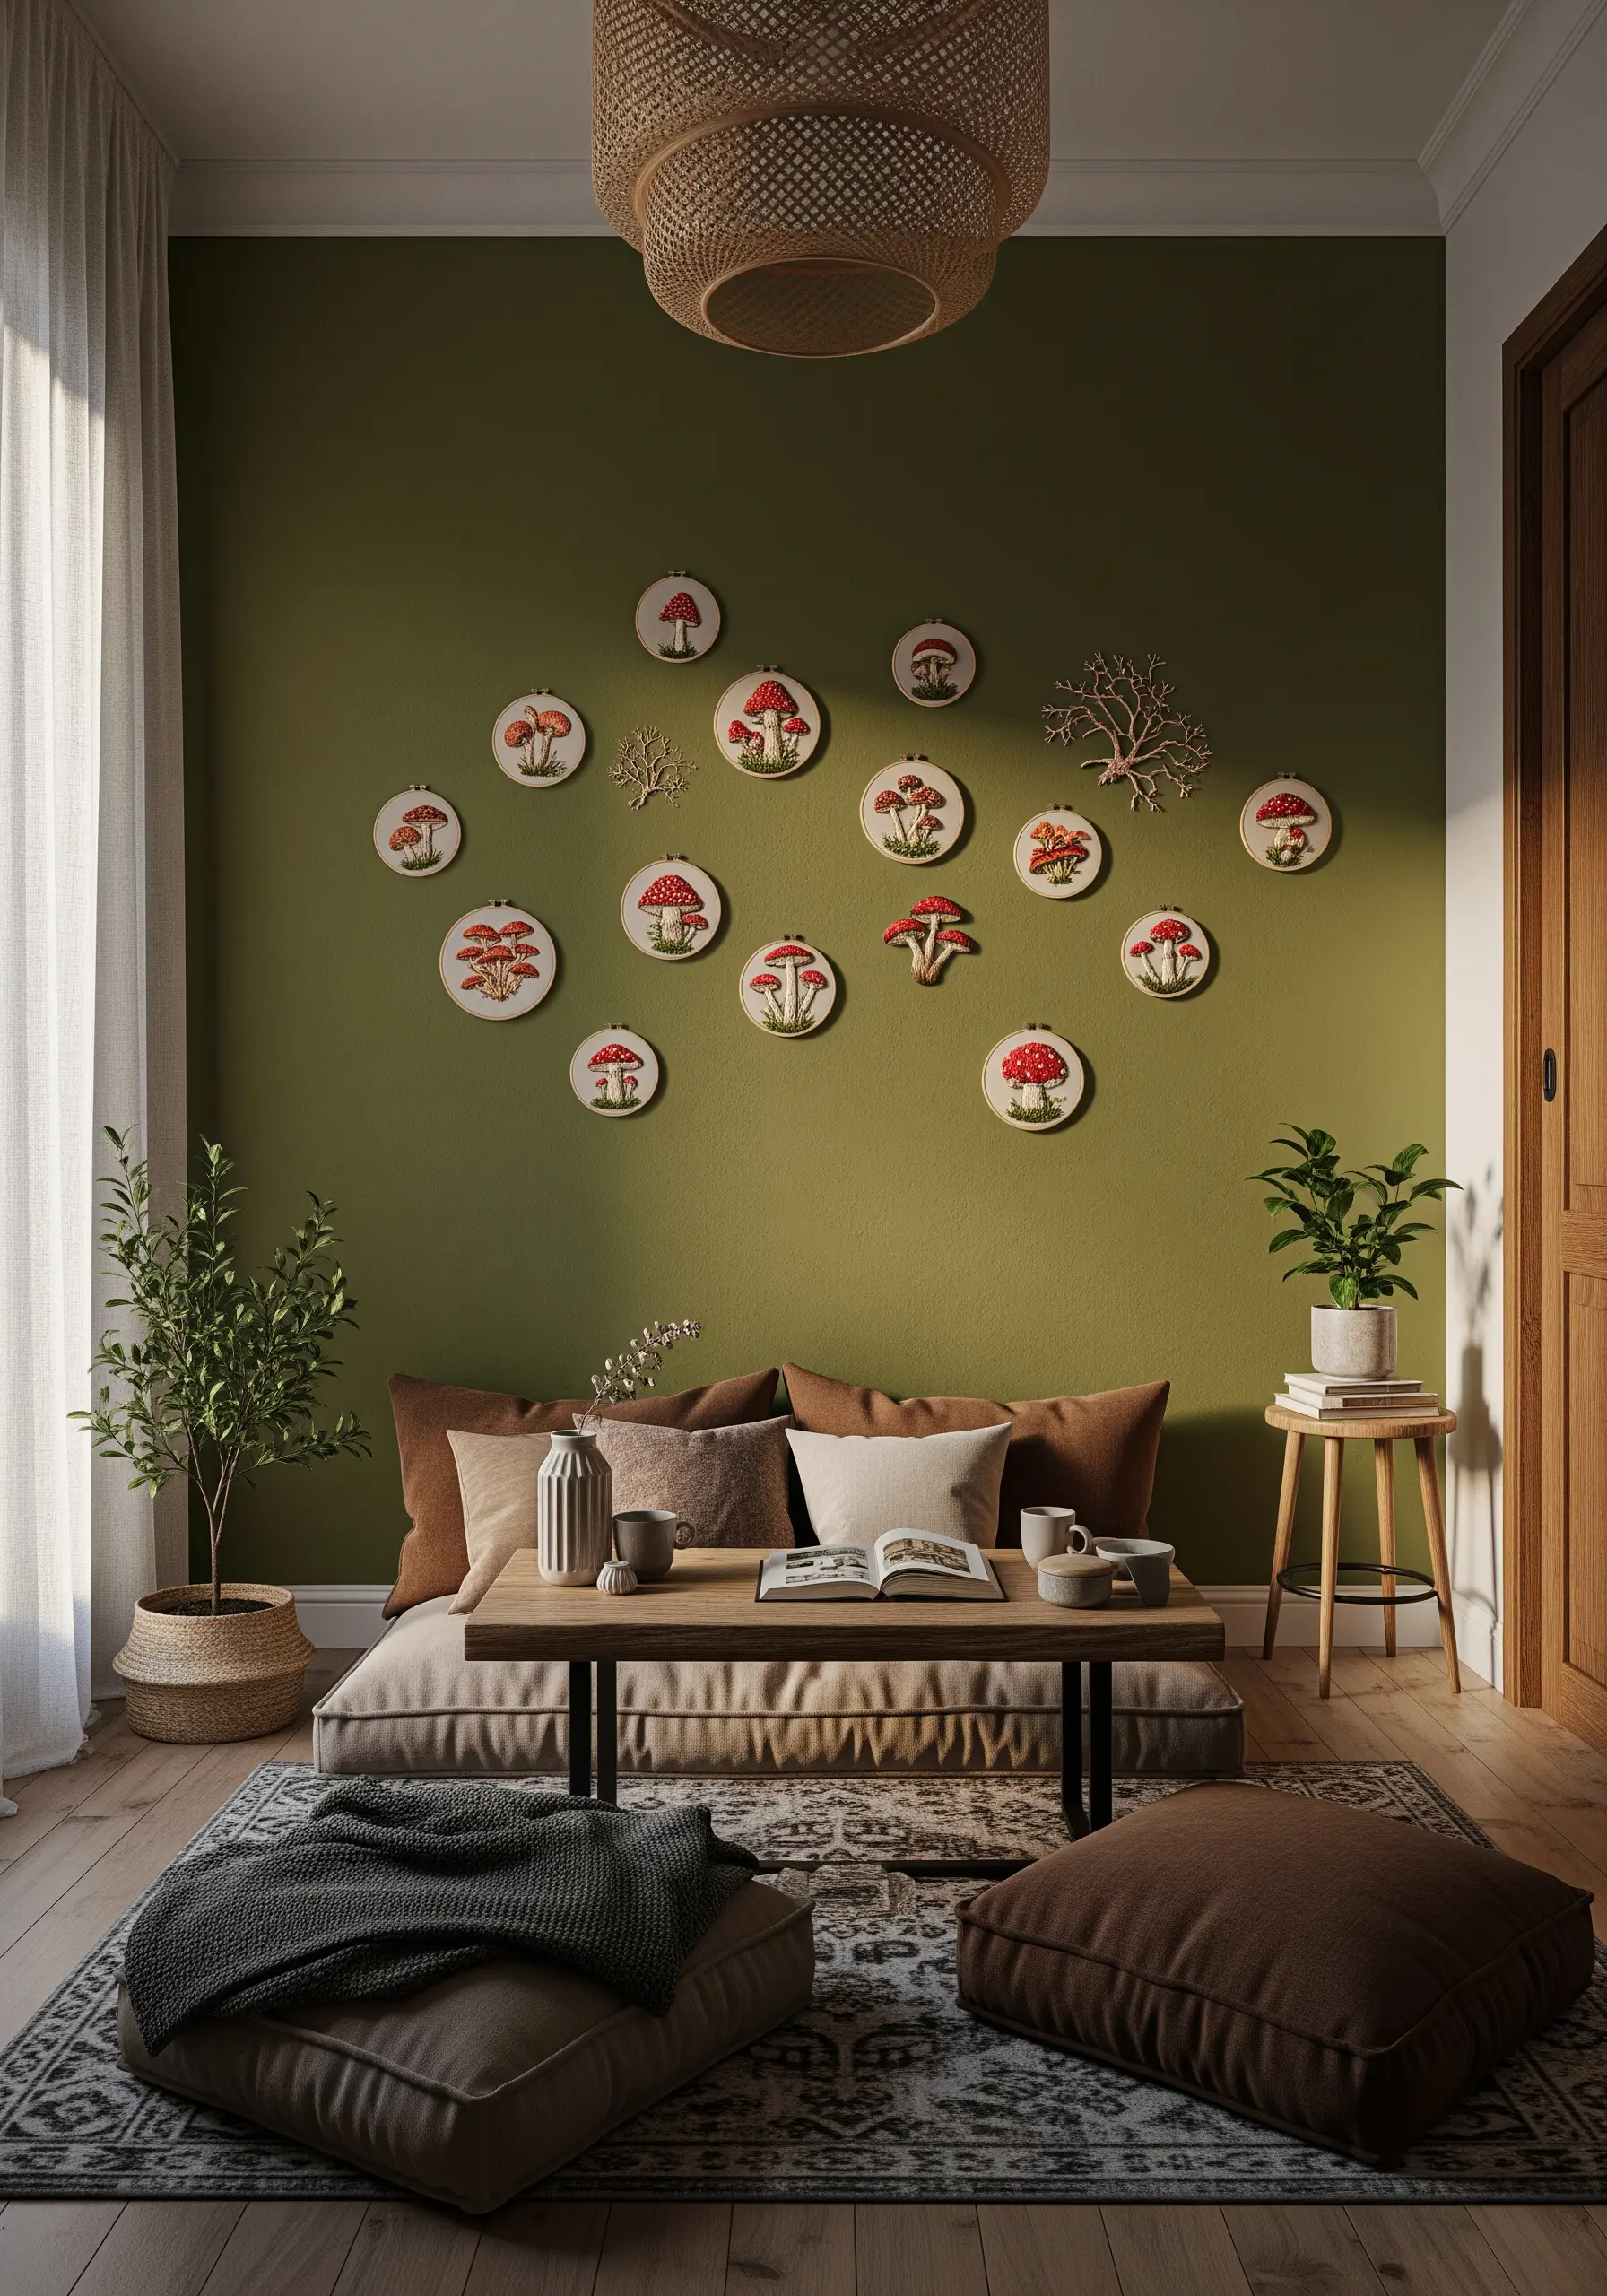
Give your embroidered mushrooms realistic dimension with specific stitch choices.
For the iconic spots on a toadstool, use a raised satin stitch—achieved by padding the area with a few small straight stitches first.
To create the delicate gills underneath the cap, use rows of vertical straight stitches placed very close together. This simple detail adds a surprising level of realism and character.
26. Design a Cascading Floral Vine Installation
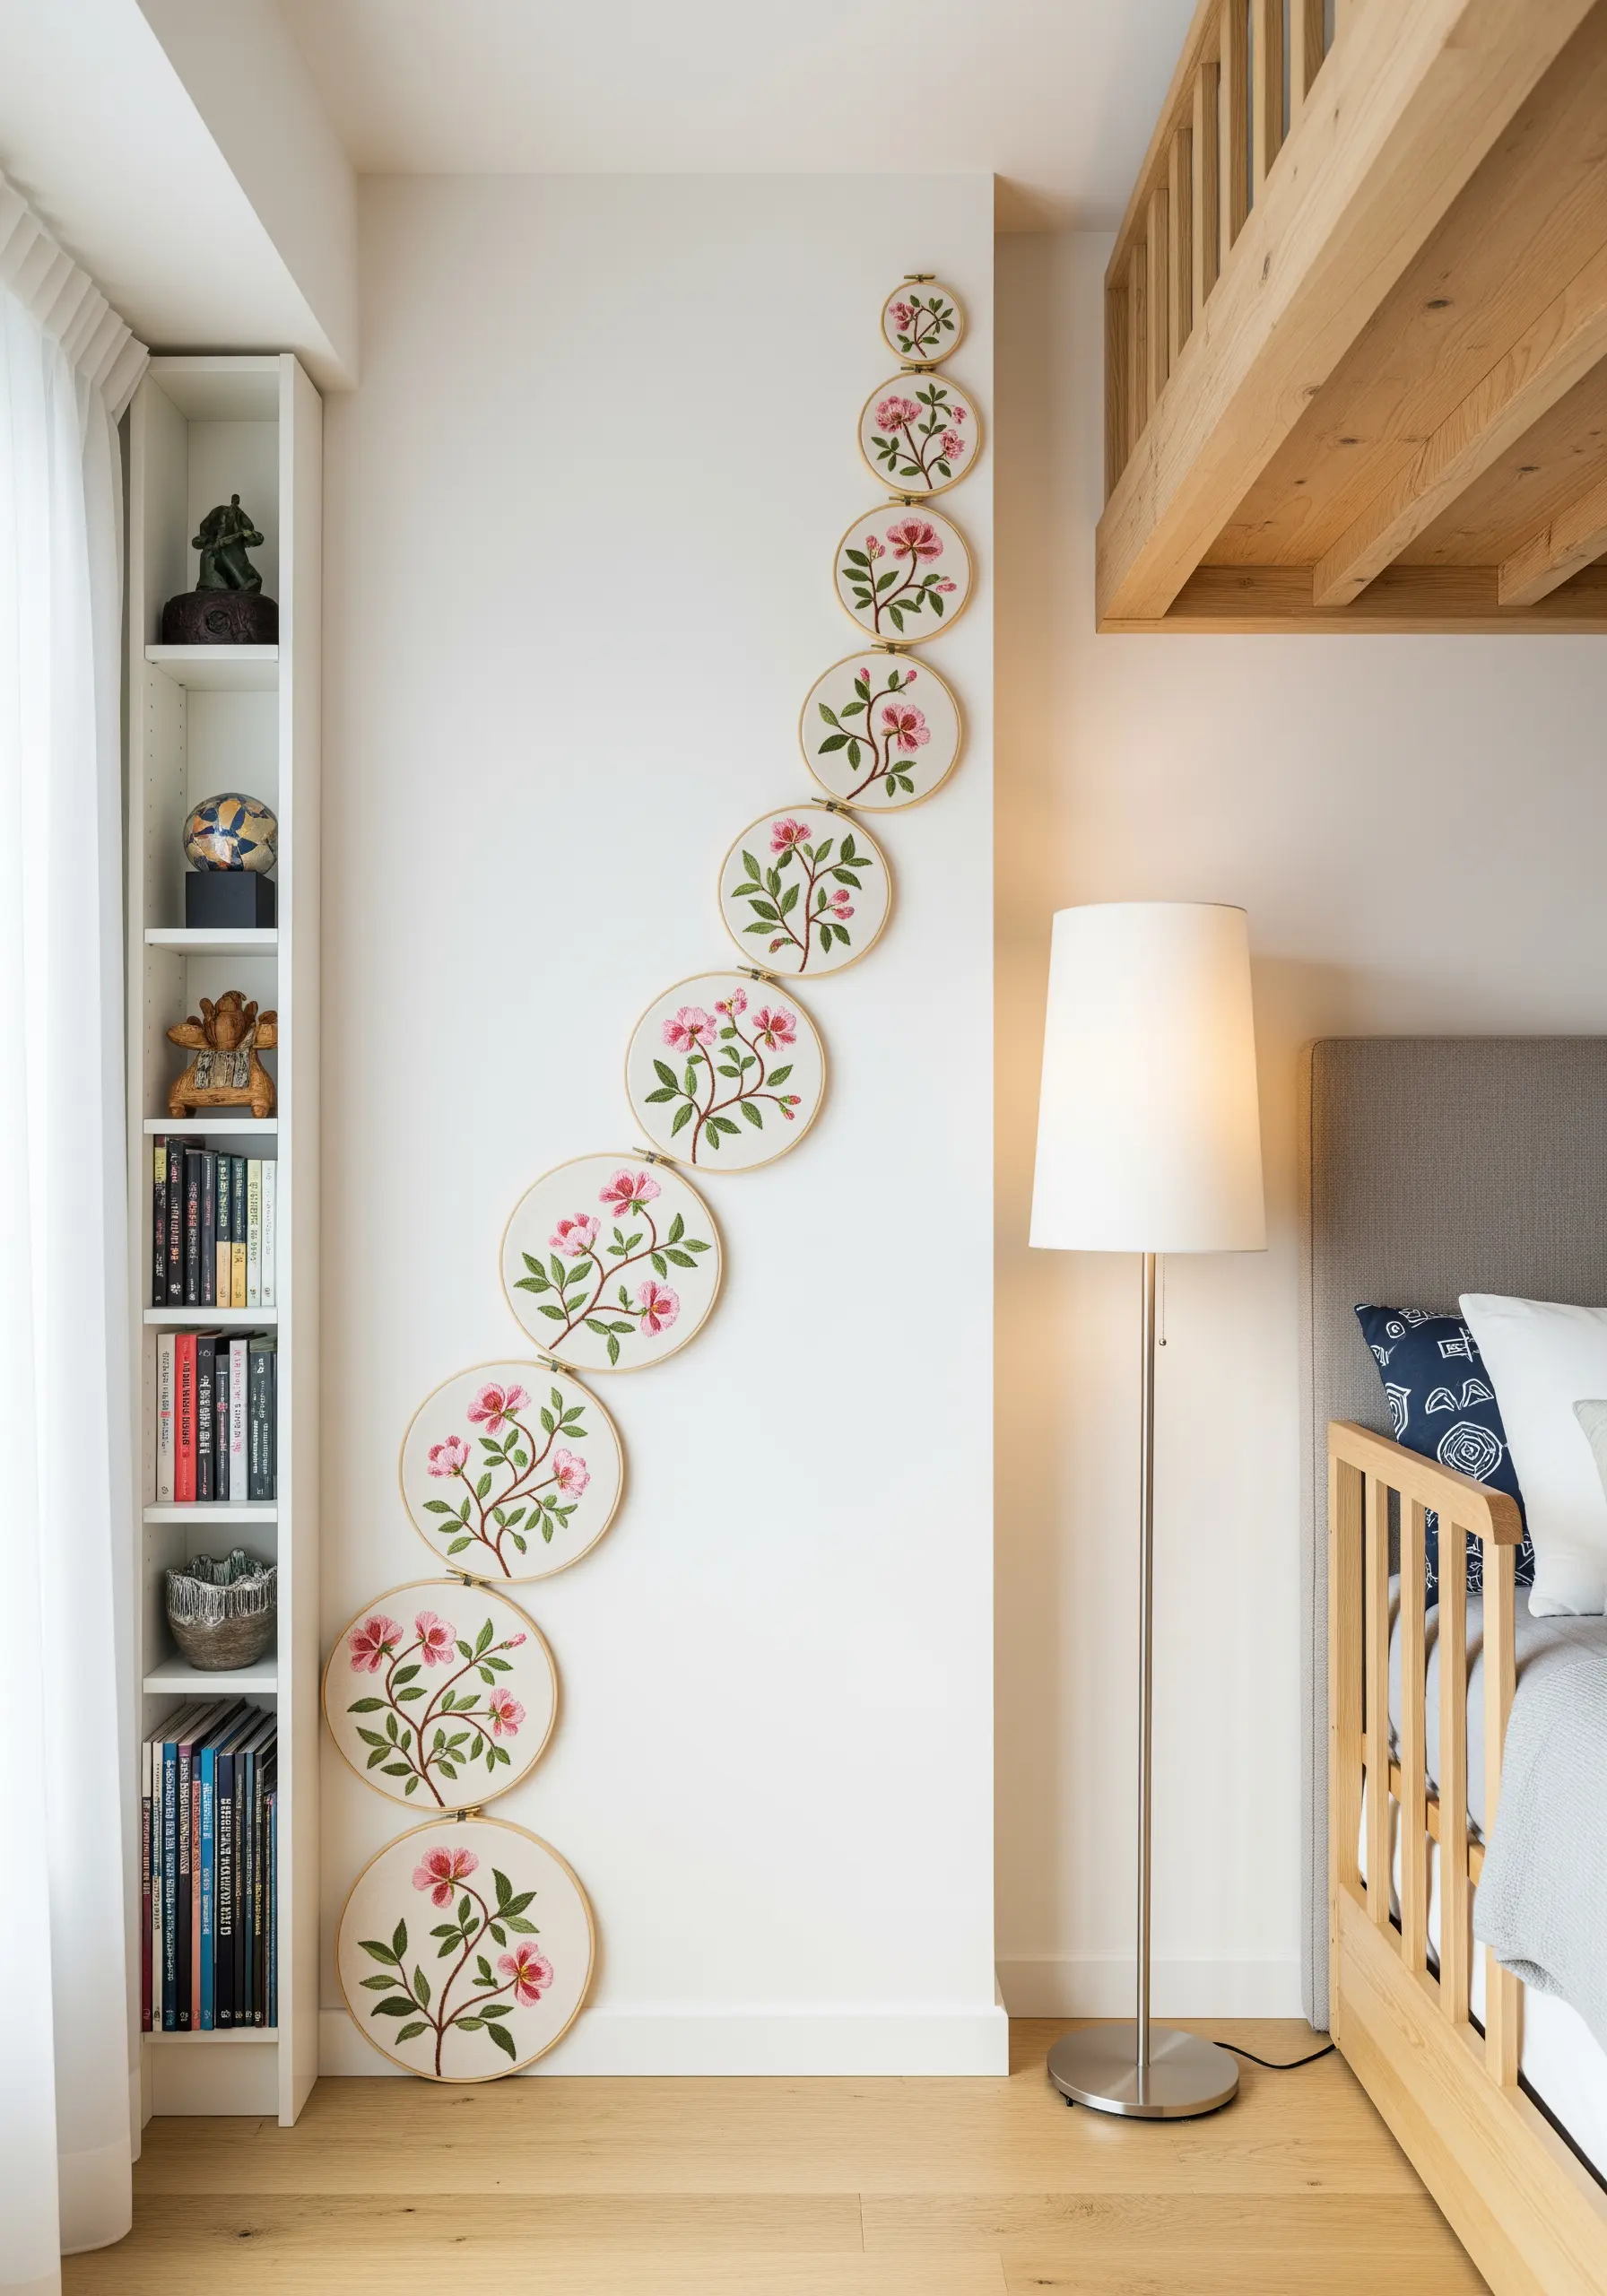
This dynamic arrangement is perfect for a narrow wall, drawing the eye up or down with its graceful flow.
To create the illusion of a single, continuous vine, strategically plan your compositions.
Design your motifs so that a branch appears to exit the bottom of one hoop and reappear at the top of the hoop below it. This simple trick unifies the individual pieces into one cohesive work of art.
27. Map Your Travels with Stitched Mementos
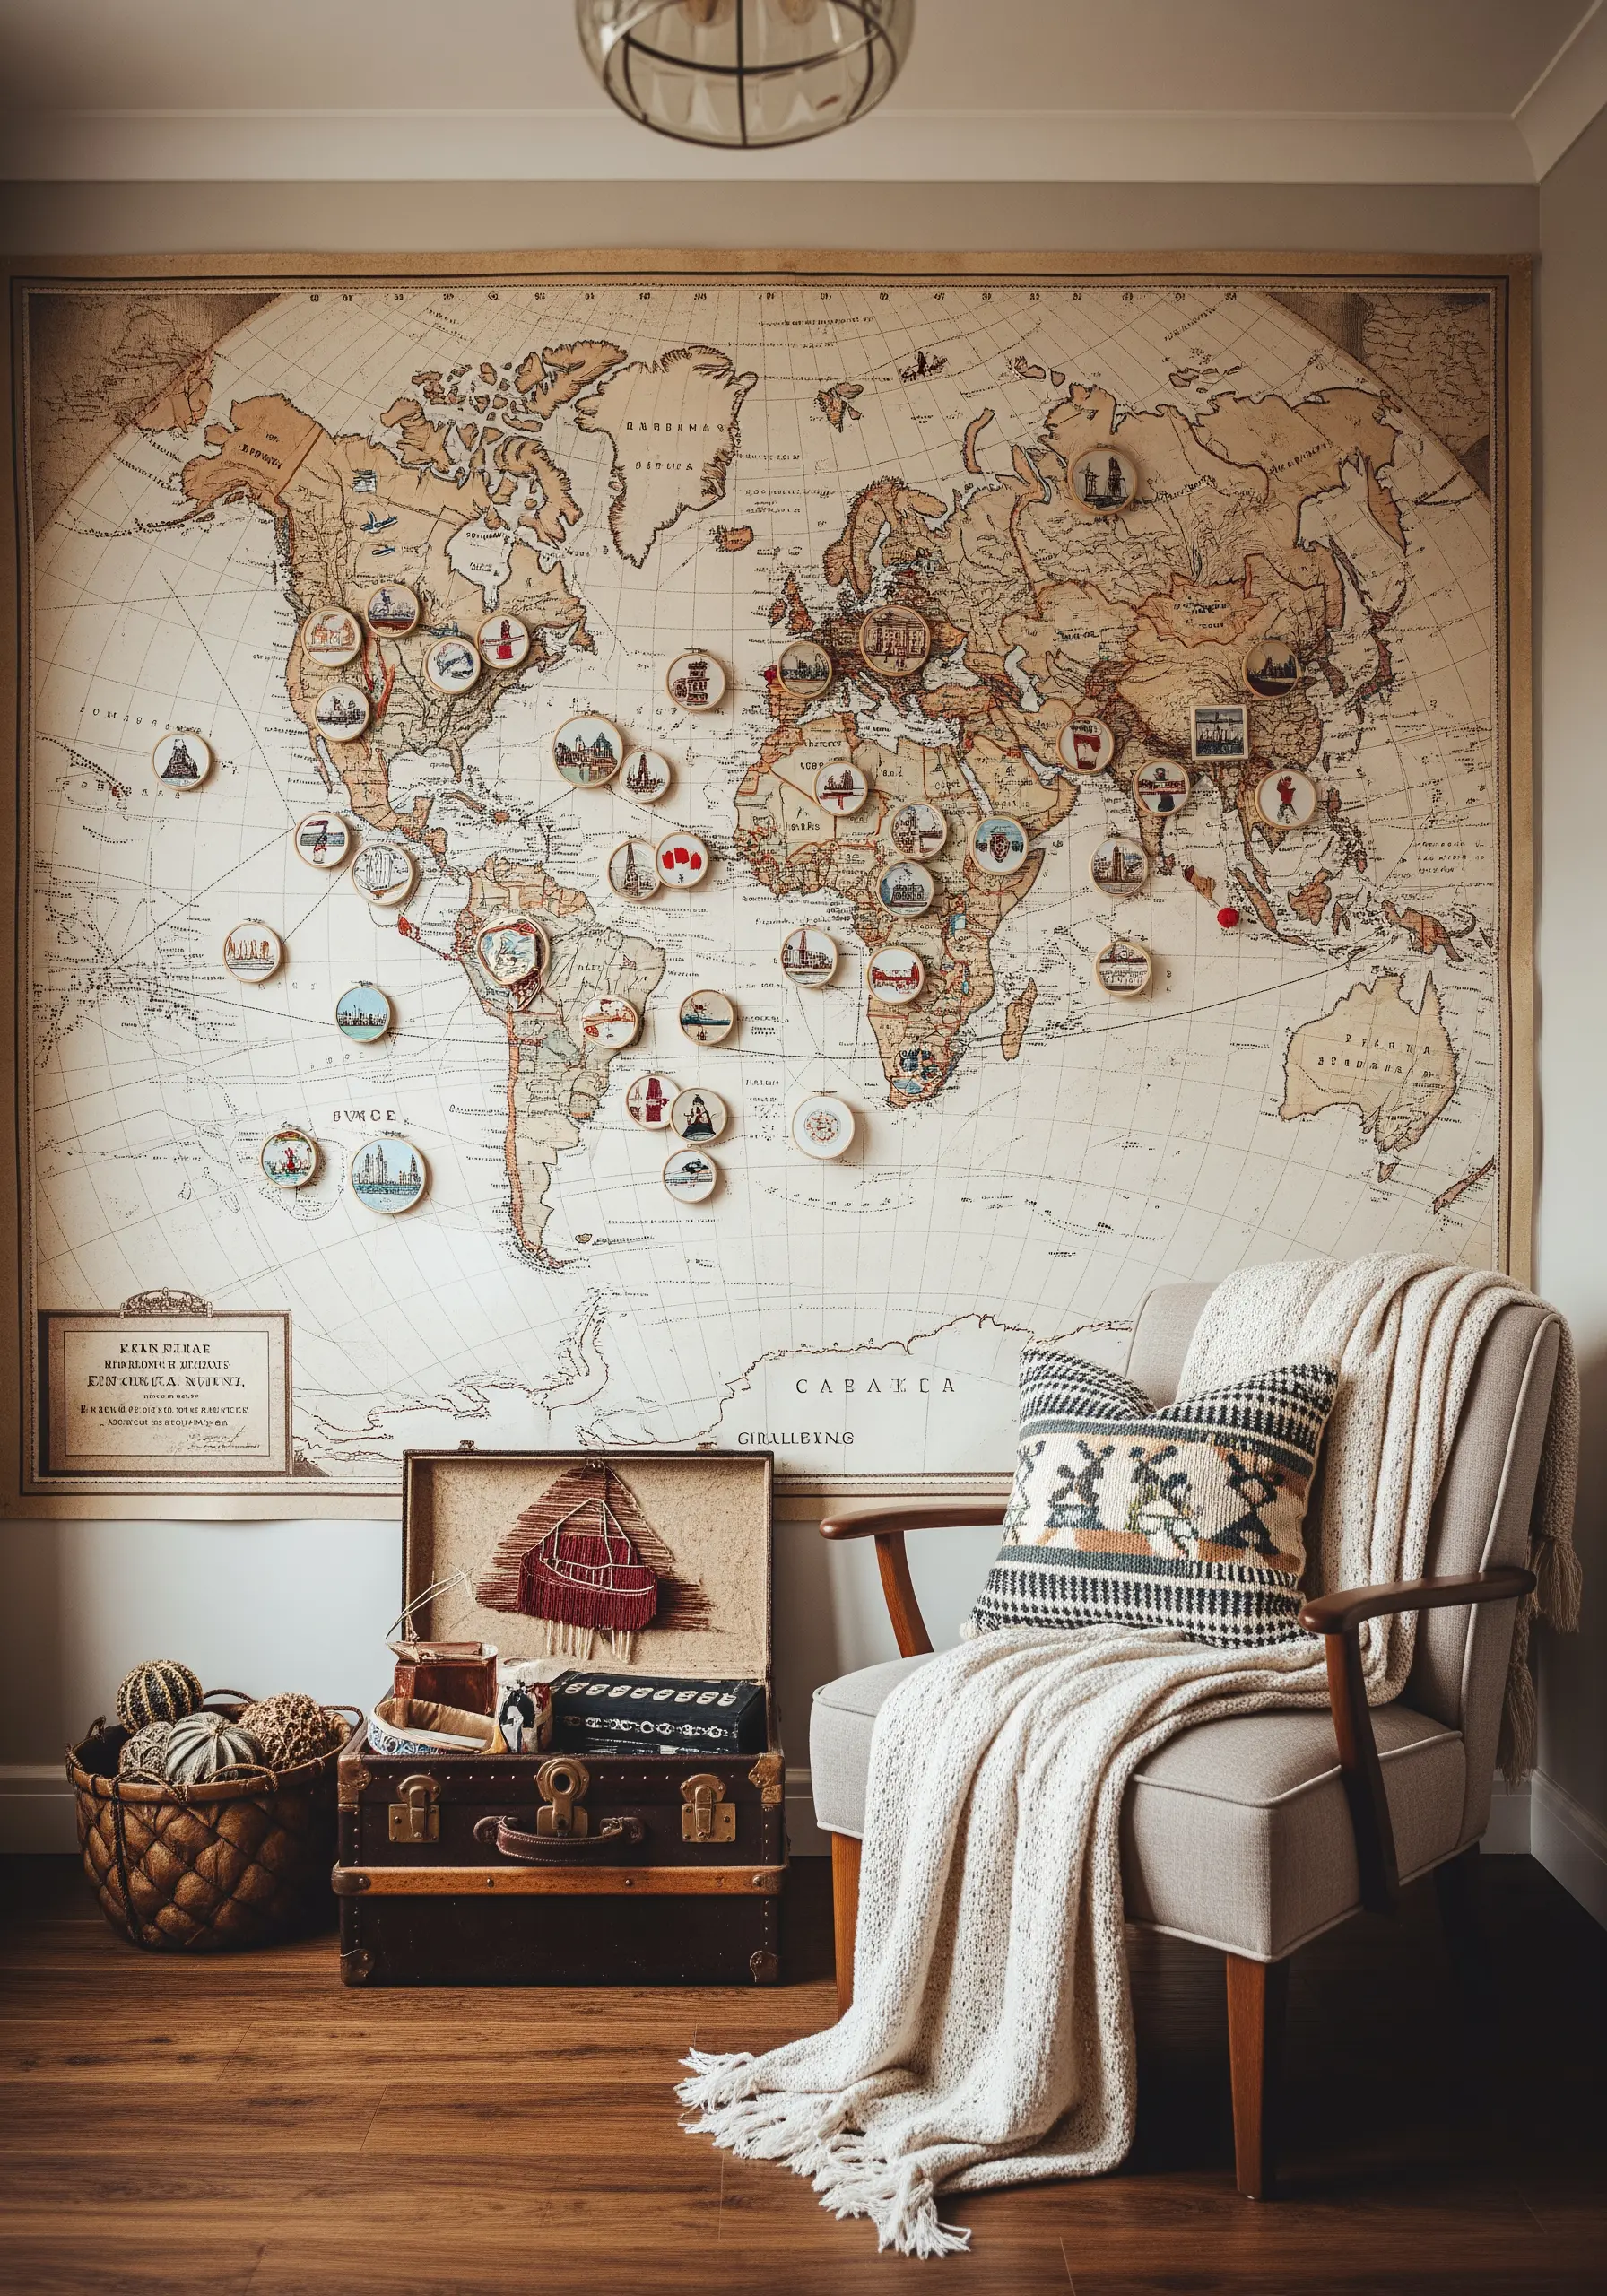
Create a living piece of art that documents your adventures. Start with a large, printed fabric map as your canvas.
For each place you visit, stitch a tiny, symbolic motif—a landmark, a flower, an icon—in a miniature hoop.
Pin the finished hoop to its corresponding location on the map. This transforms your wall into a beautiful, visual travel diary and is a modern take on travel-inspired string art maps.
28. Explore Minimalist Tone-on-Tone Textures
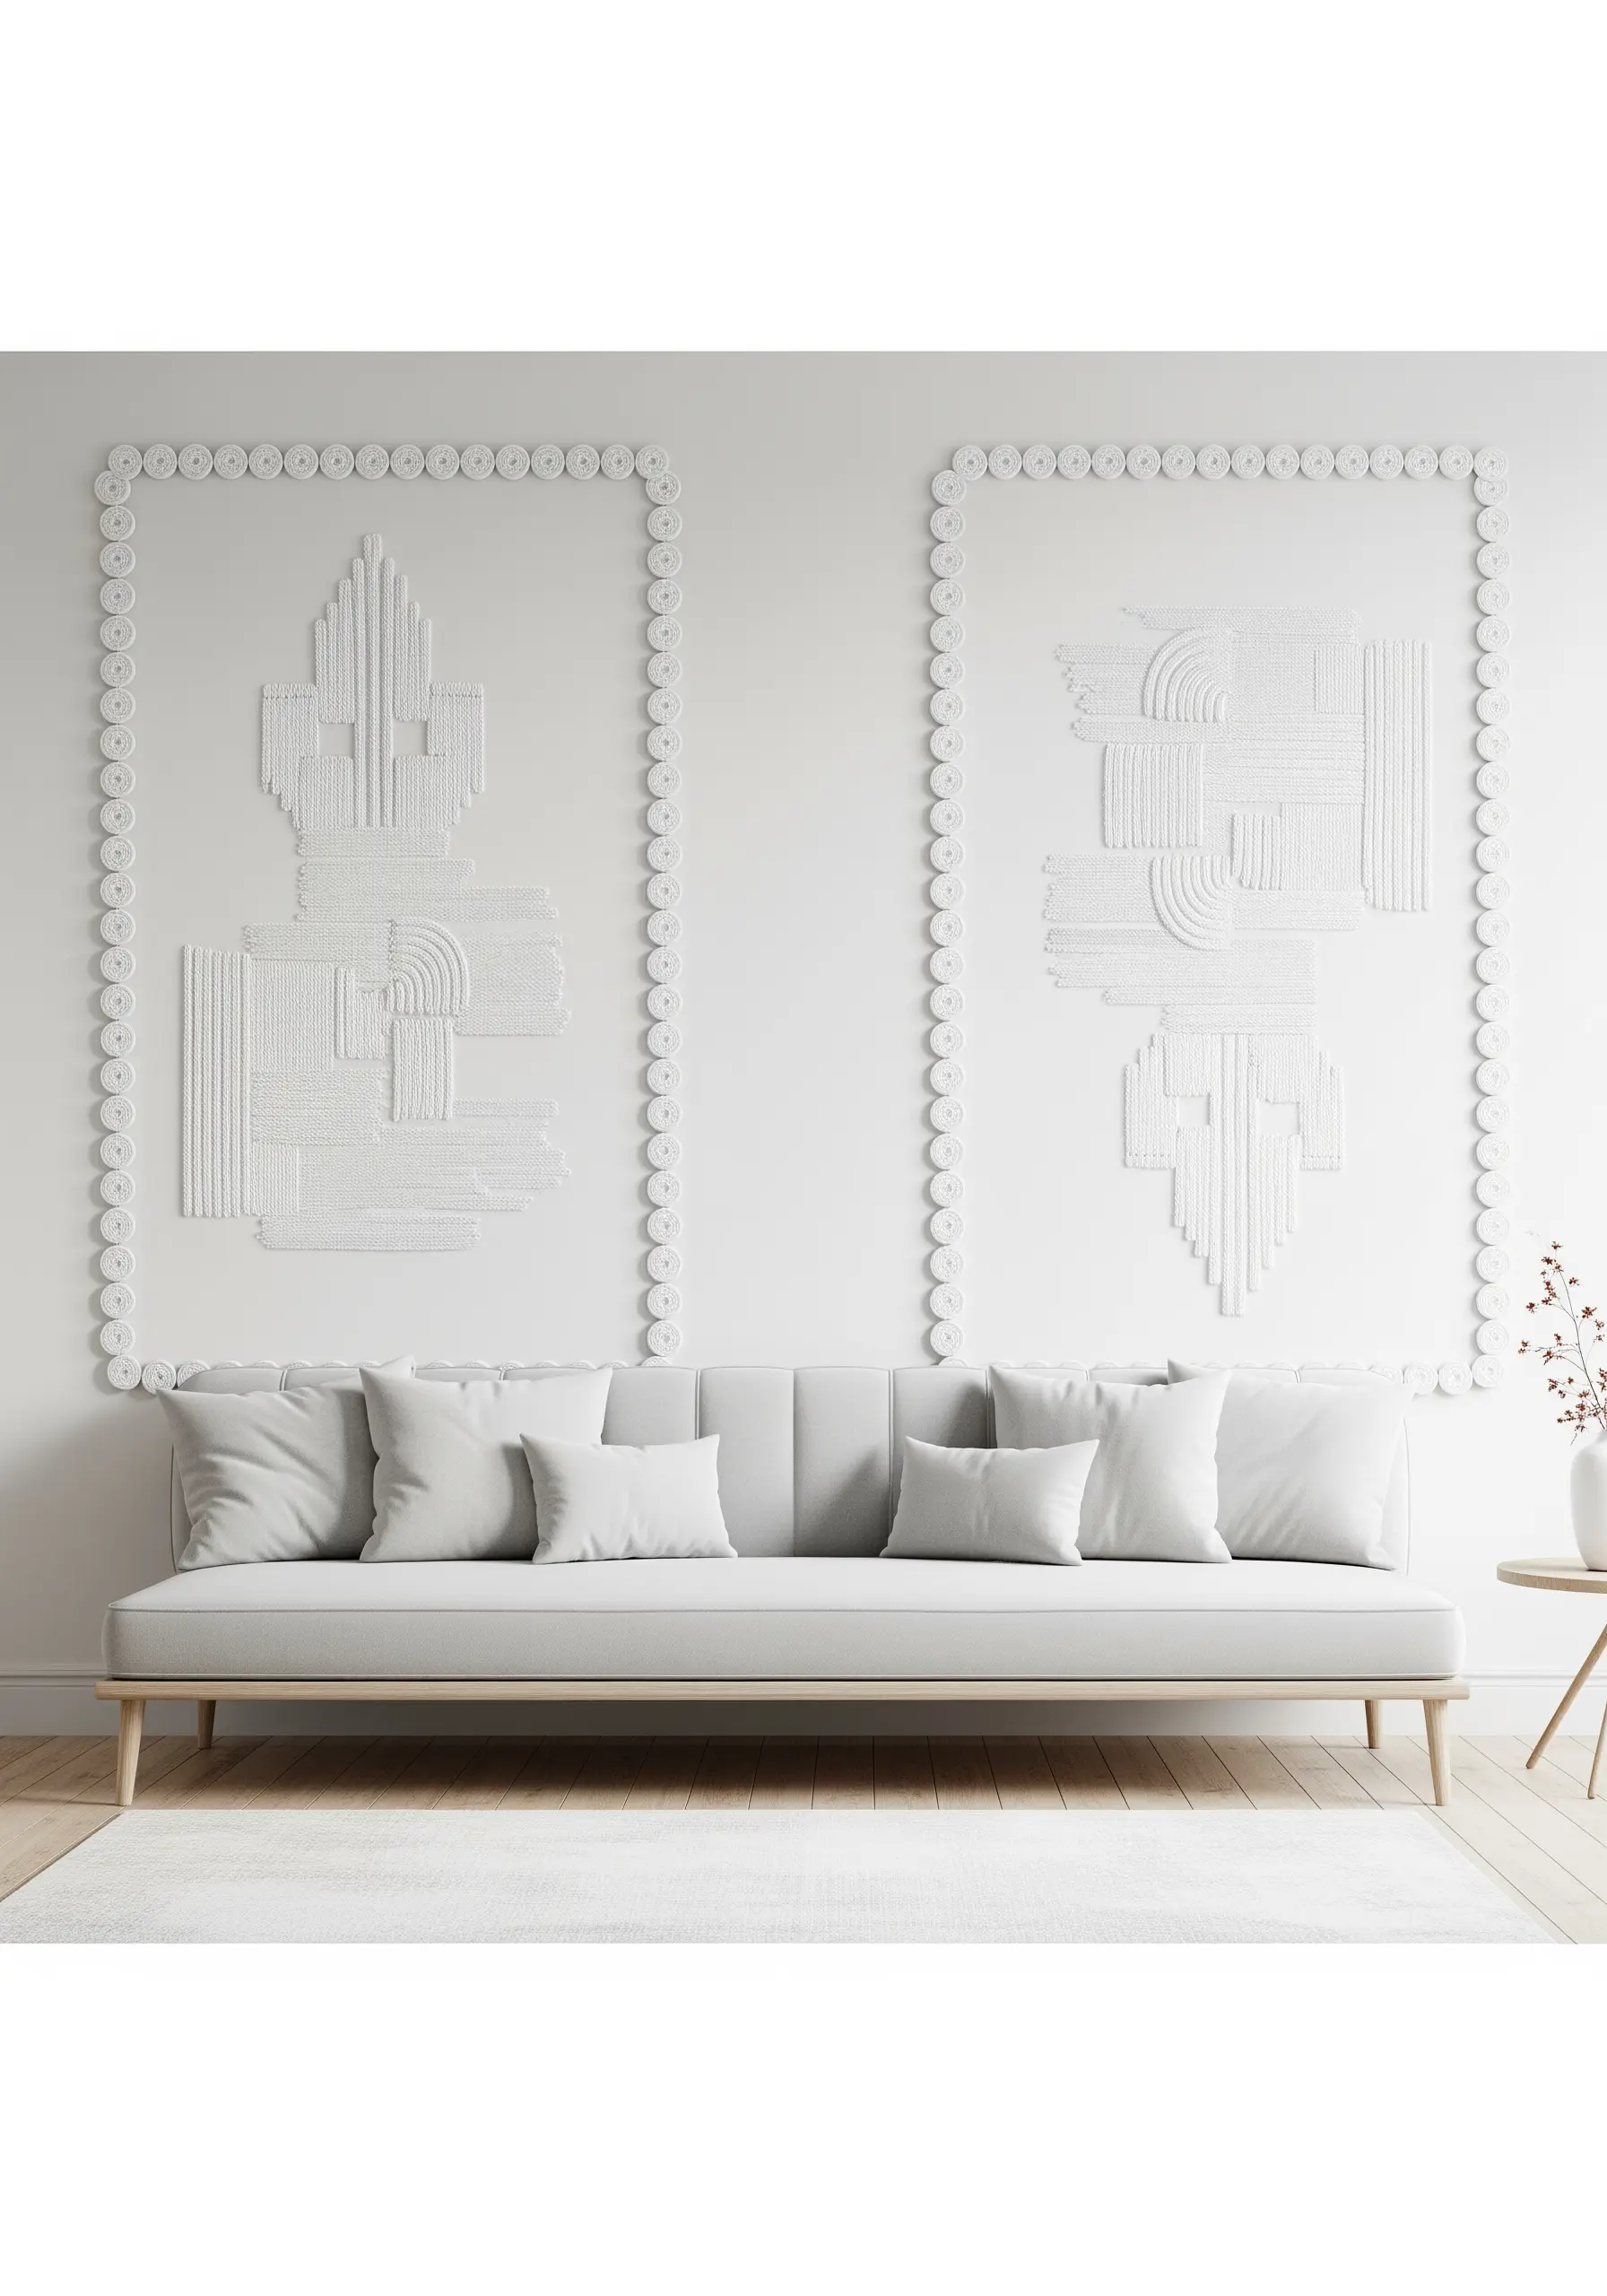
Create a sophisticated, high-impact statement by using only one color of thread on a matching fabric, such as white-on-white or cream-on-cream.
The art here is created not by color, but by the interplay of light and shadow across different textures.
Fill a single hoop with a variety of stitches—raised chain stitch bands, dense satin stitch blocks, and clusters of French knots. The result is one of those quietly beautiful organic embroidery designs.
29. Stitch Timeless and Charming Folk Art Florals
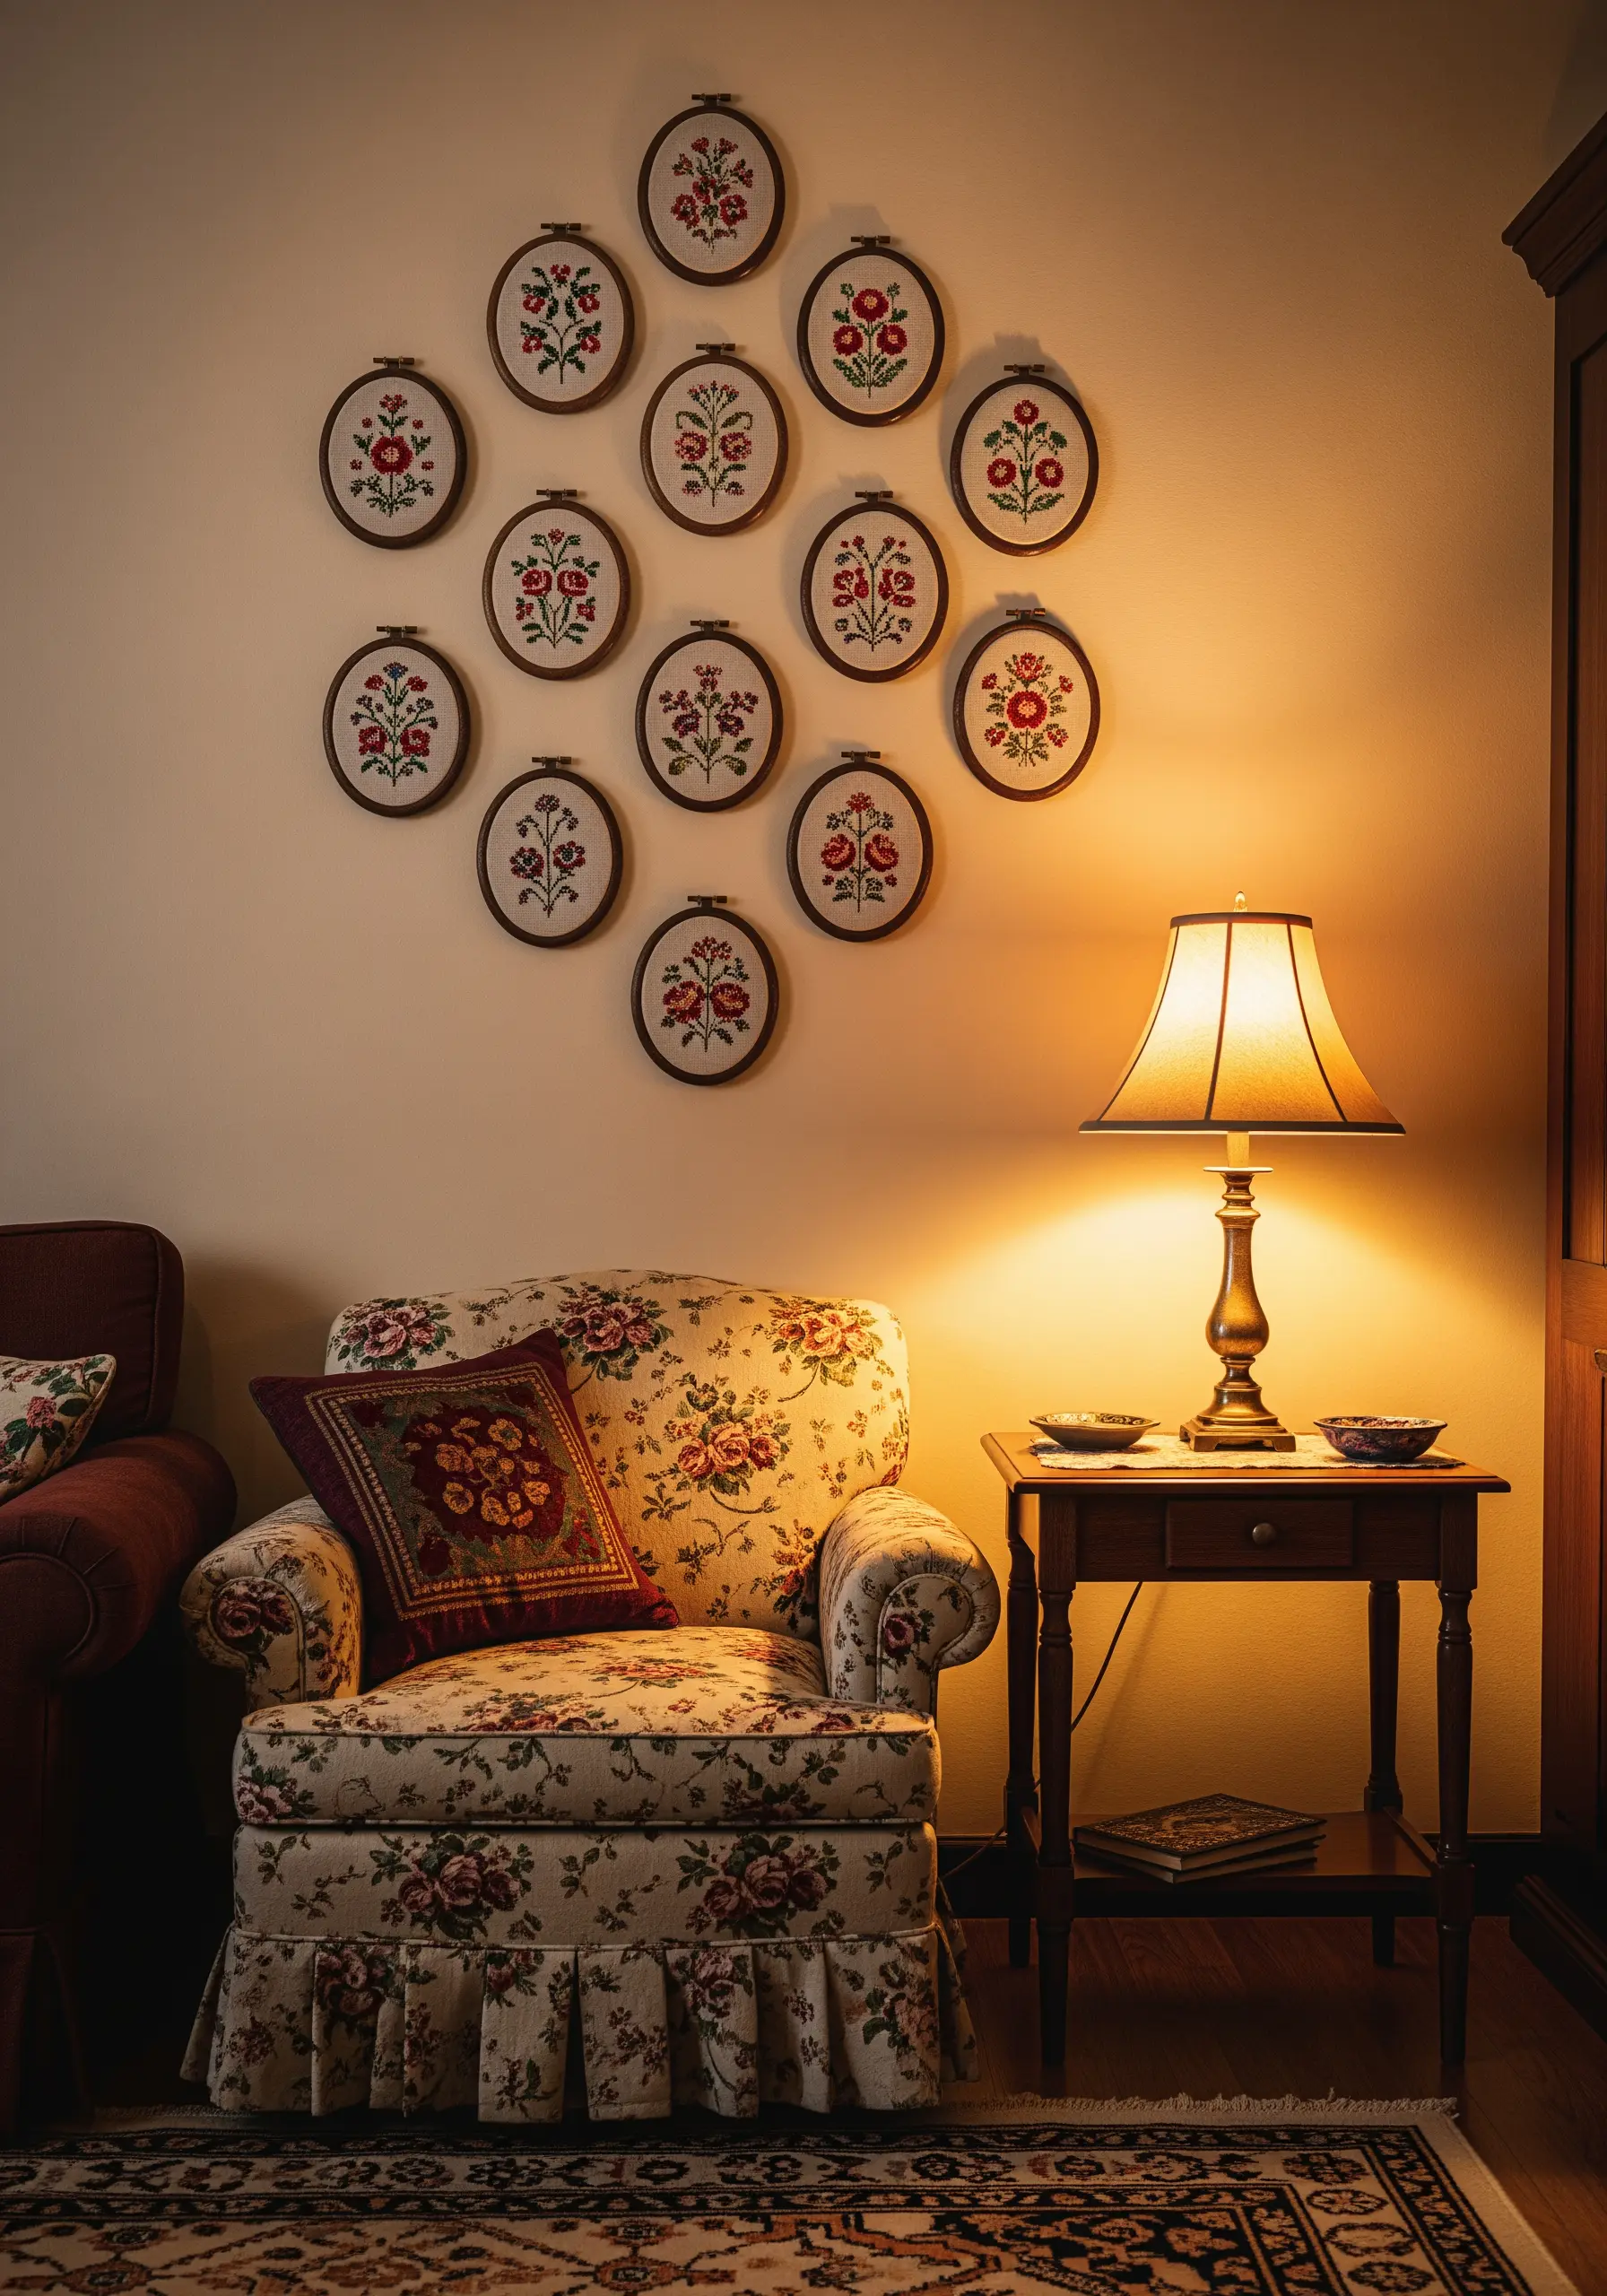
Capture the enduring charm of traditional folk art by focusing on symmetry and a limited, high-contrast color palette.
Use bold reds, navy blues, and greens on a cream background for a classic look.
The key stitch for this style is a perfectly flat, uniform satin stitch, used to create graphic flower petals and leaves. These are wonderful mini embroidery designs inspired by vintage patterns that always feel fresh.
30. Create a Vibrant Tropical Aviary
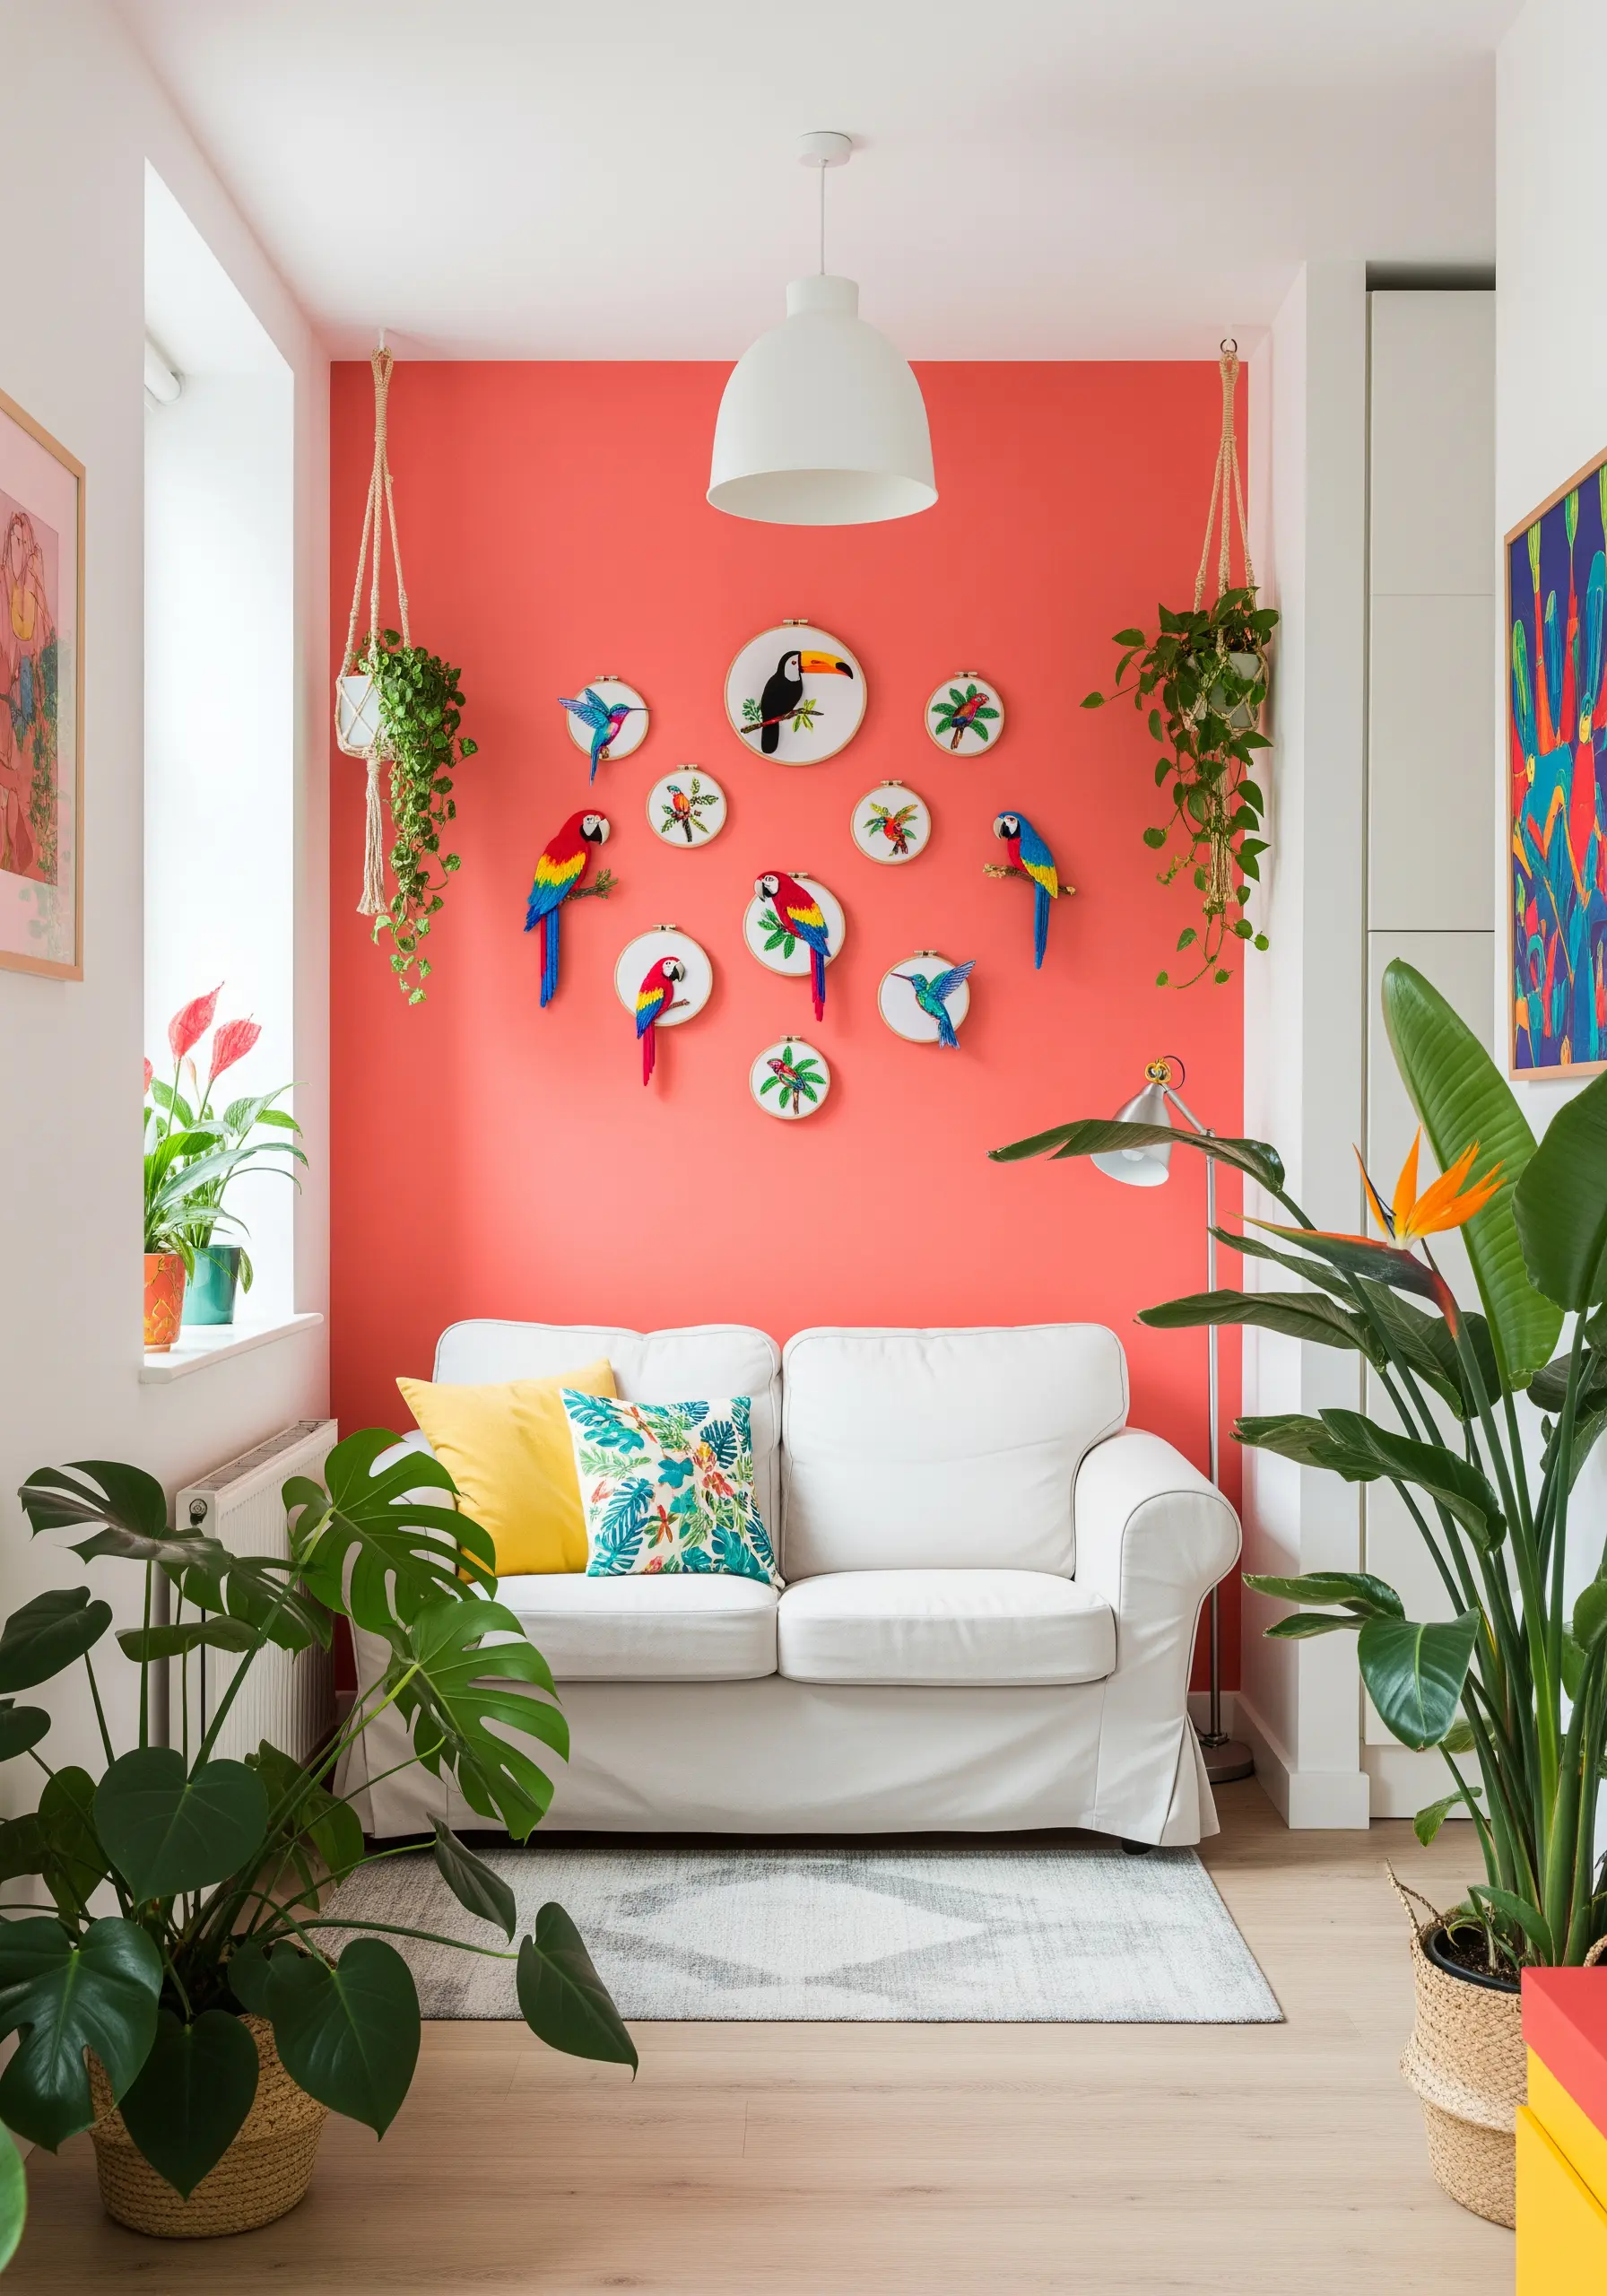
To capture the brilliant, iridescent quality of tropical bird feathers, choose your thread wisely.
Use a silk or rayon floss, which has a much higher natural sheen than standard cotton embroidery floss.
Employ the long-and-short stitch to blend bright colors seamlessly on the bird’s body and wings. These colorful tropical bird embroidery stitches create a painterly, luminous effect that brings your work to life.
31. Stitch a Minimalist Horizontal Herb Garden
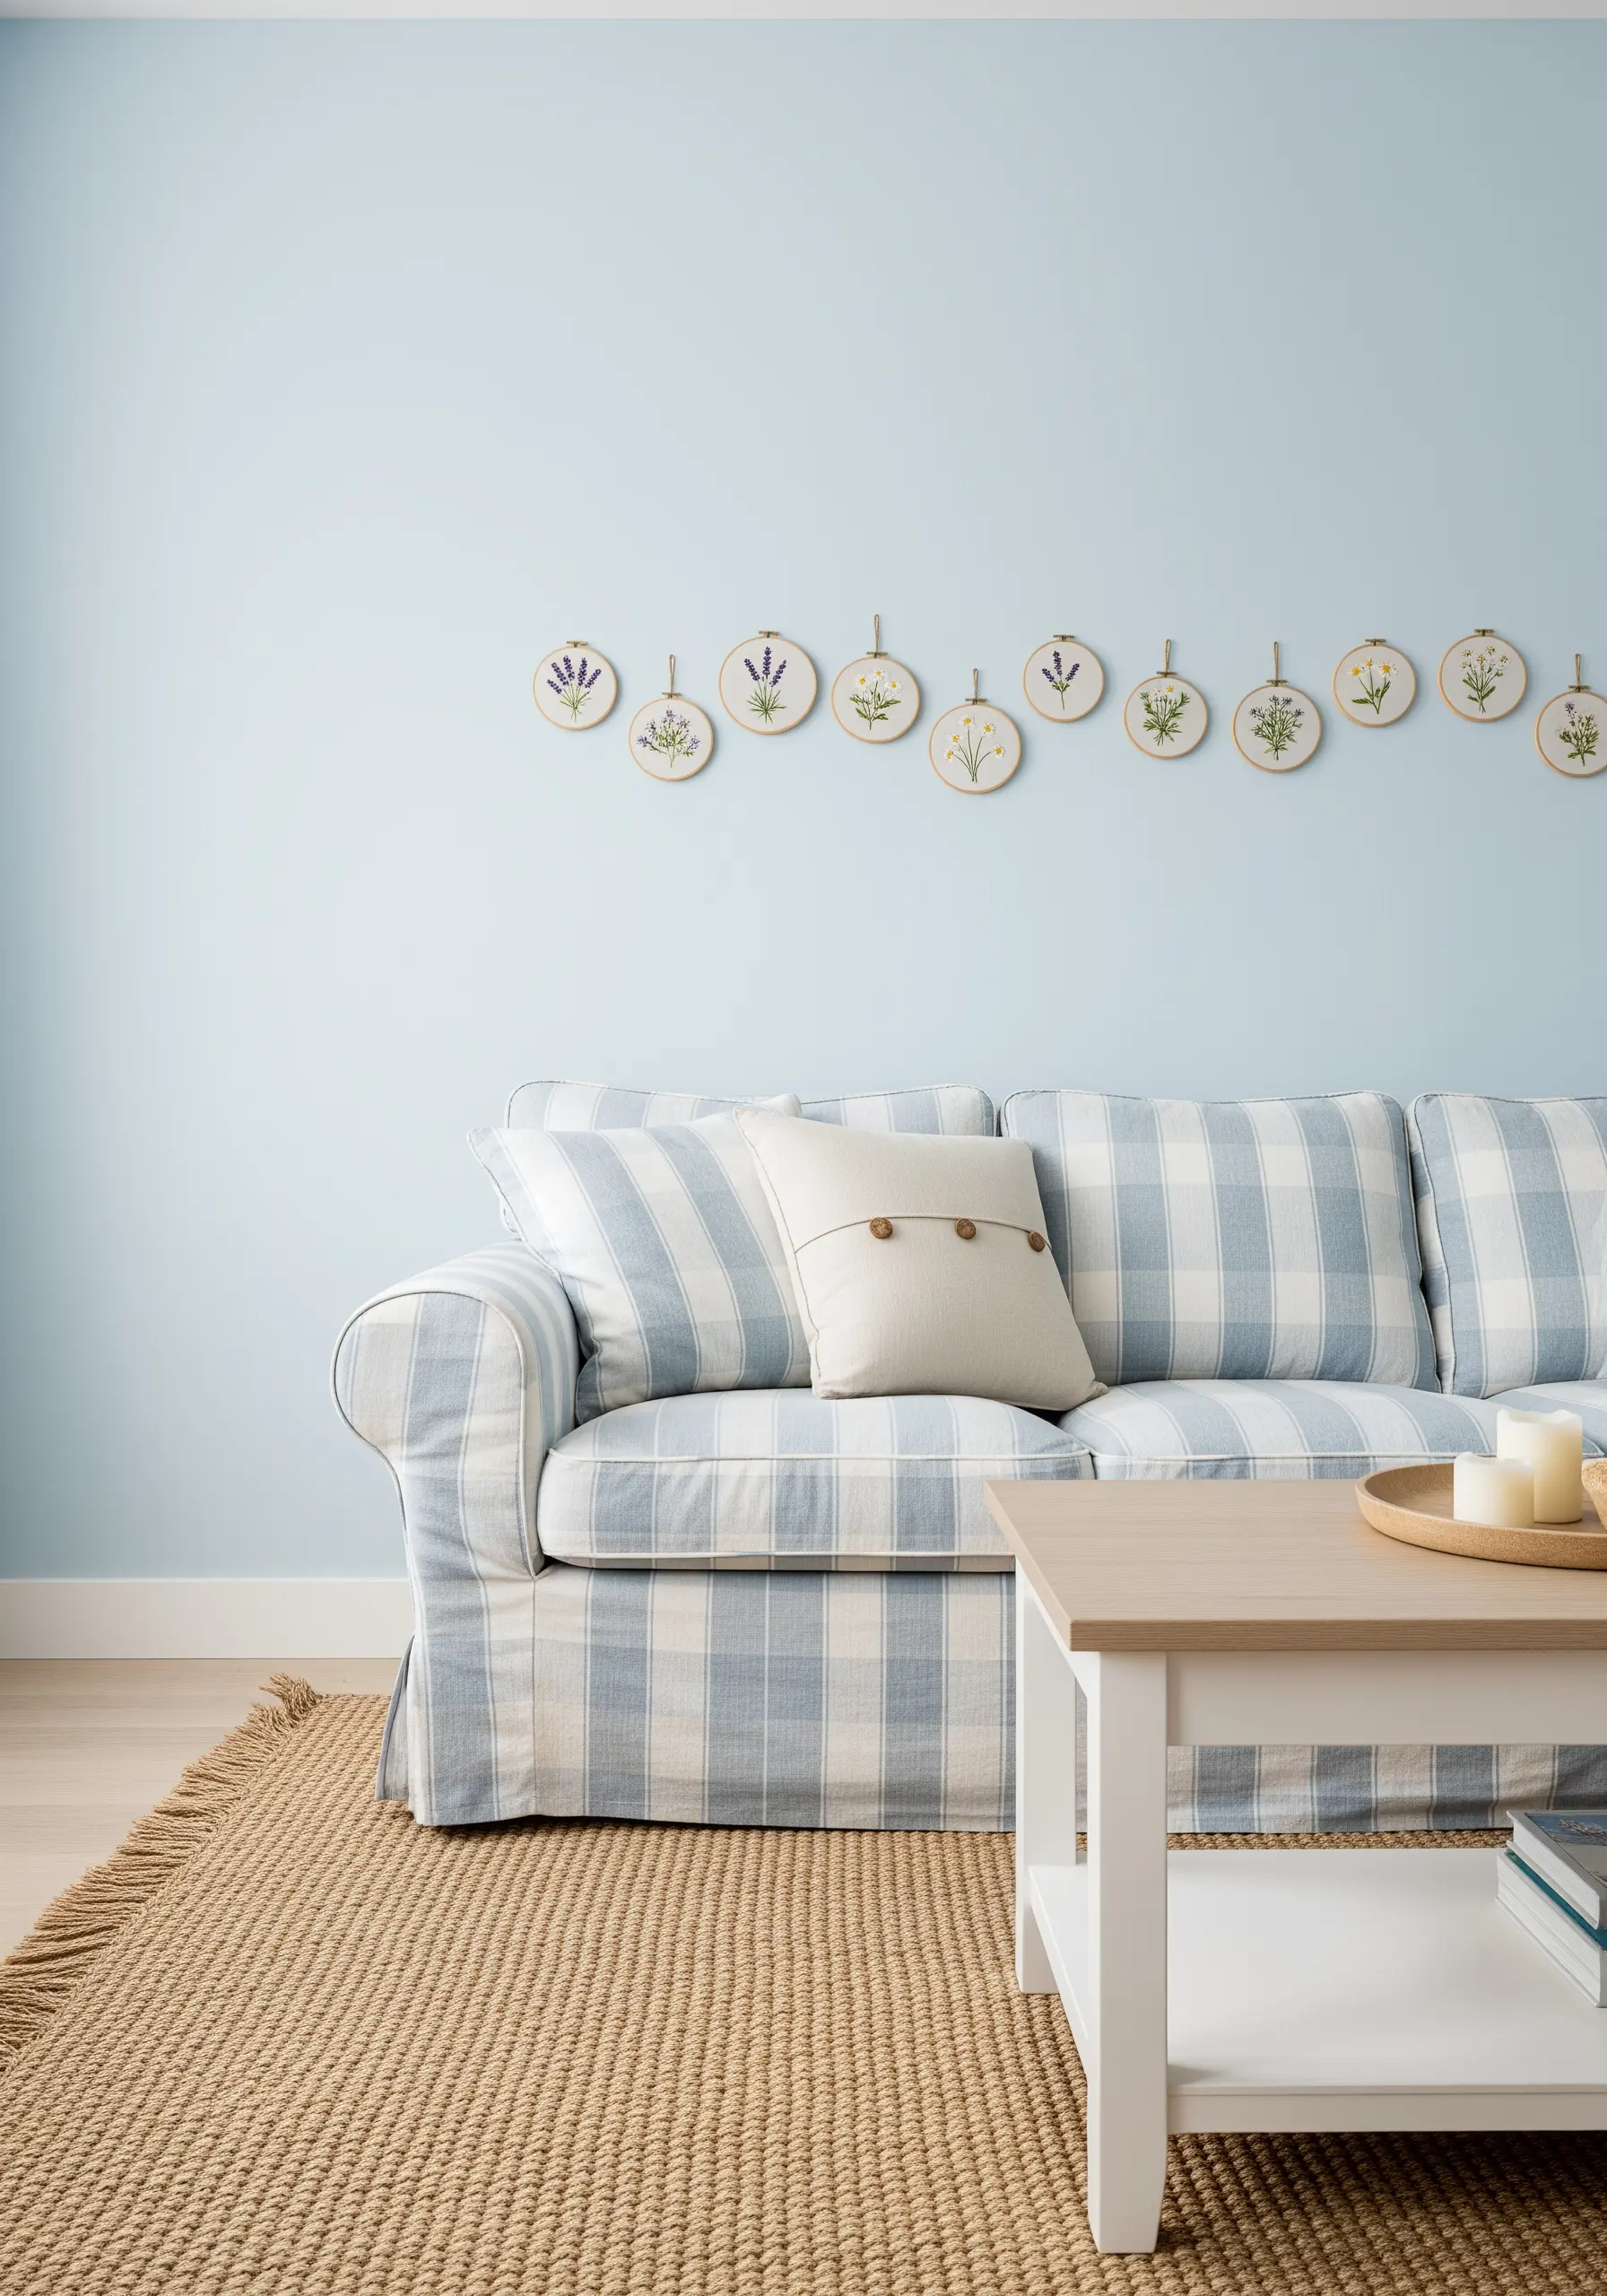
For a simple, calming accent above a sofa or console, stitch a horizontal row of delicate botanicals.
The power of this display comes from rhythm and repetition. Keep each design minimal—a single sprig of lavender or a stem of chamomile per hoop.
Use a fine, single strand of floss for these delicate line art embroidery ideas, and space the hoops evenly to create a serene and orderly line.
32. Emulate a Painting with a Realistic Centerpiece
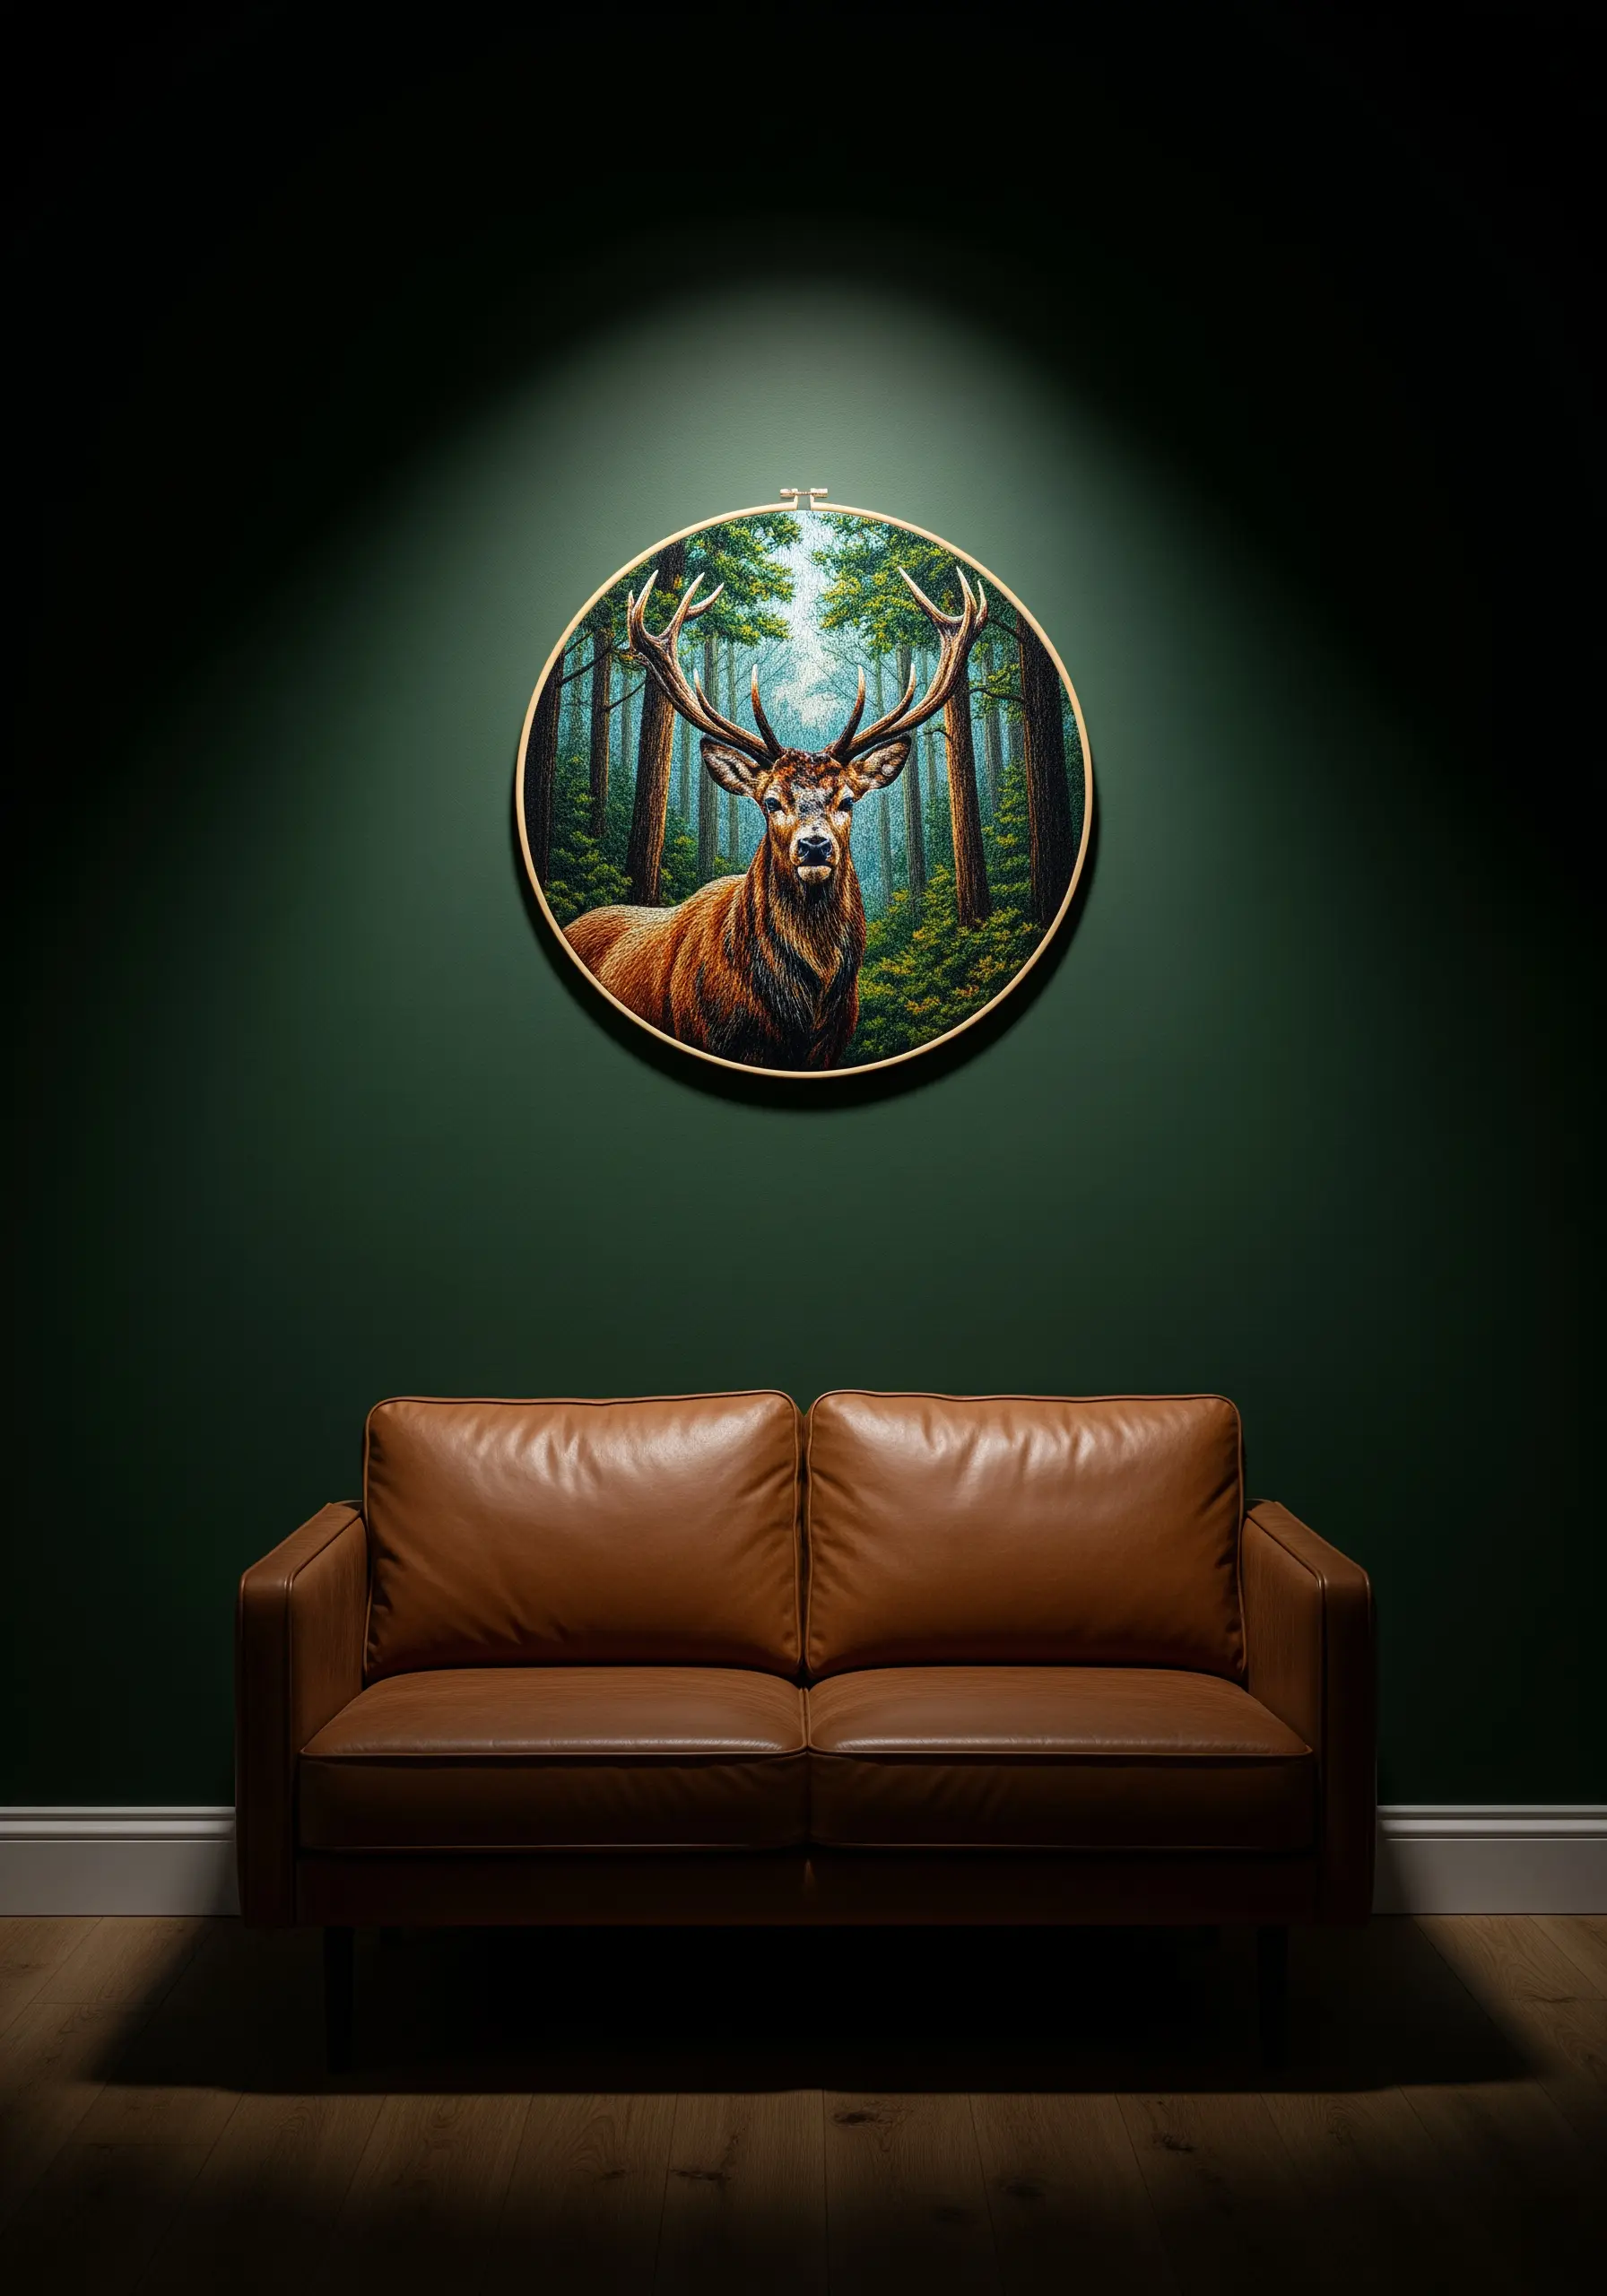
To tackle a realistic animal portrait, you will use a technique called thread painting, which is an advanced form of the long-and-short stitch.
Work with only a single strand of floss at a time, using dozens of similar shades to create subtle gradients that mimic the look of fur or feathers.
Always begin with the darkest shadow areas and gradually work toward the highlights to build a convincing sense of depth and form. The result is a breathtaking work of art.
33. Curate a Cozy Café-Inspired Corner
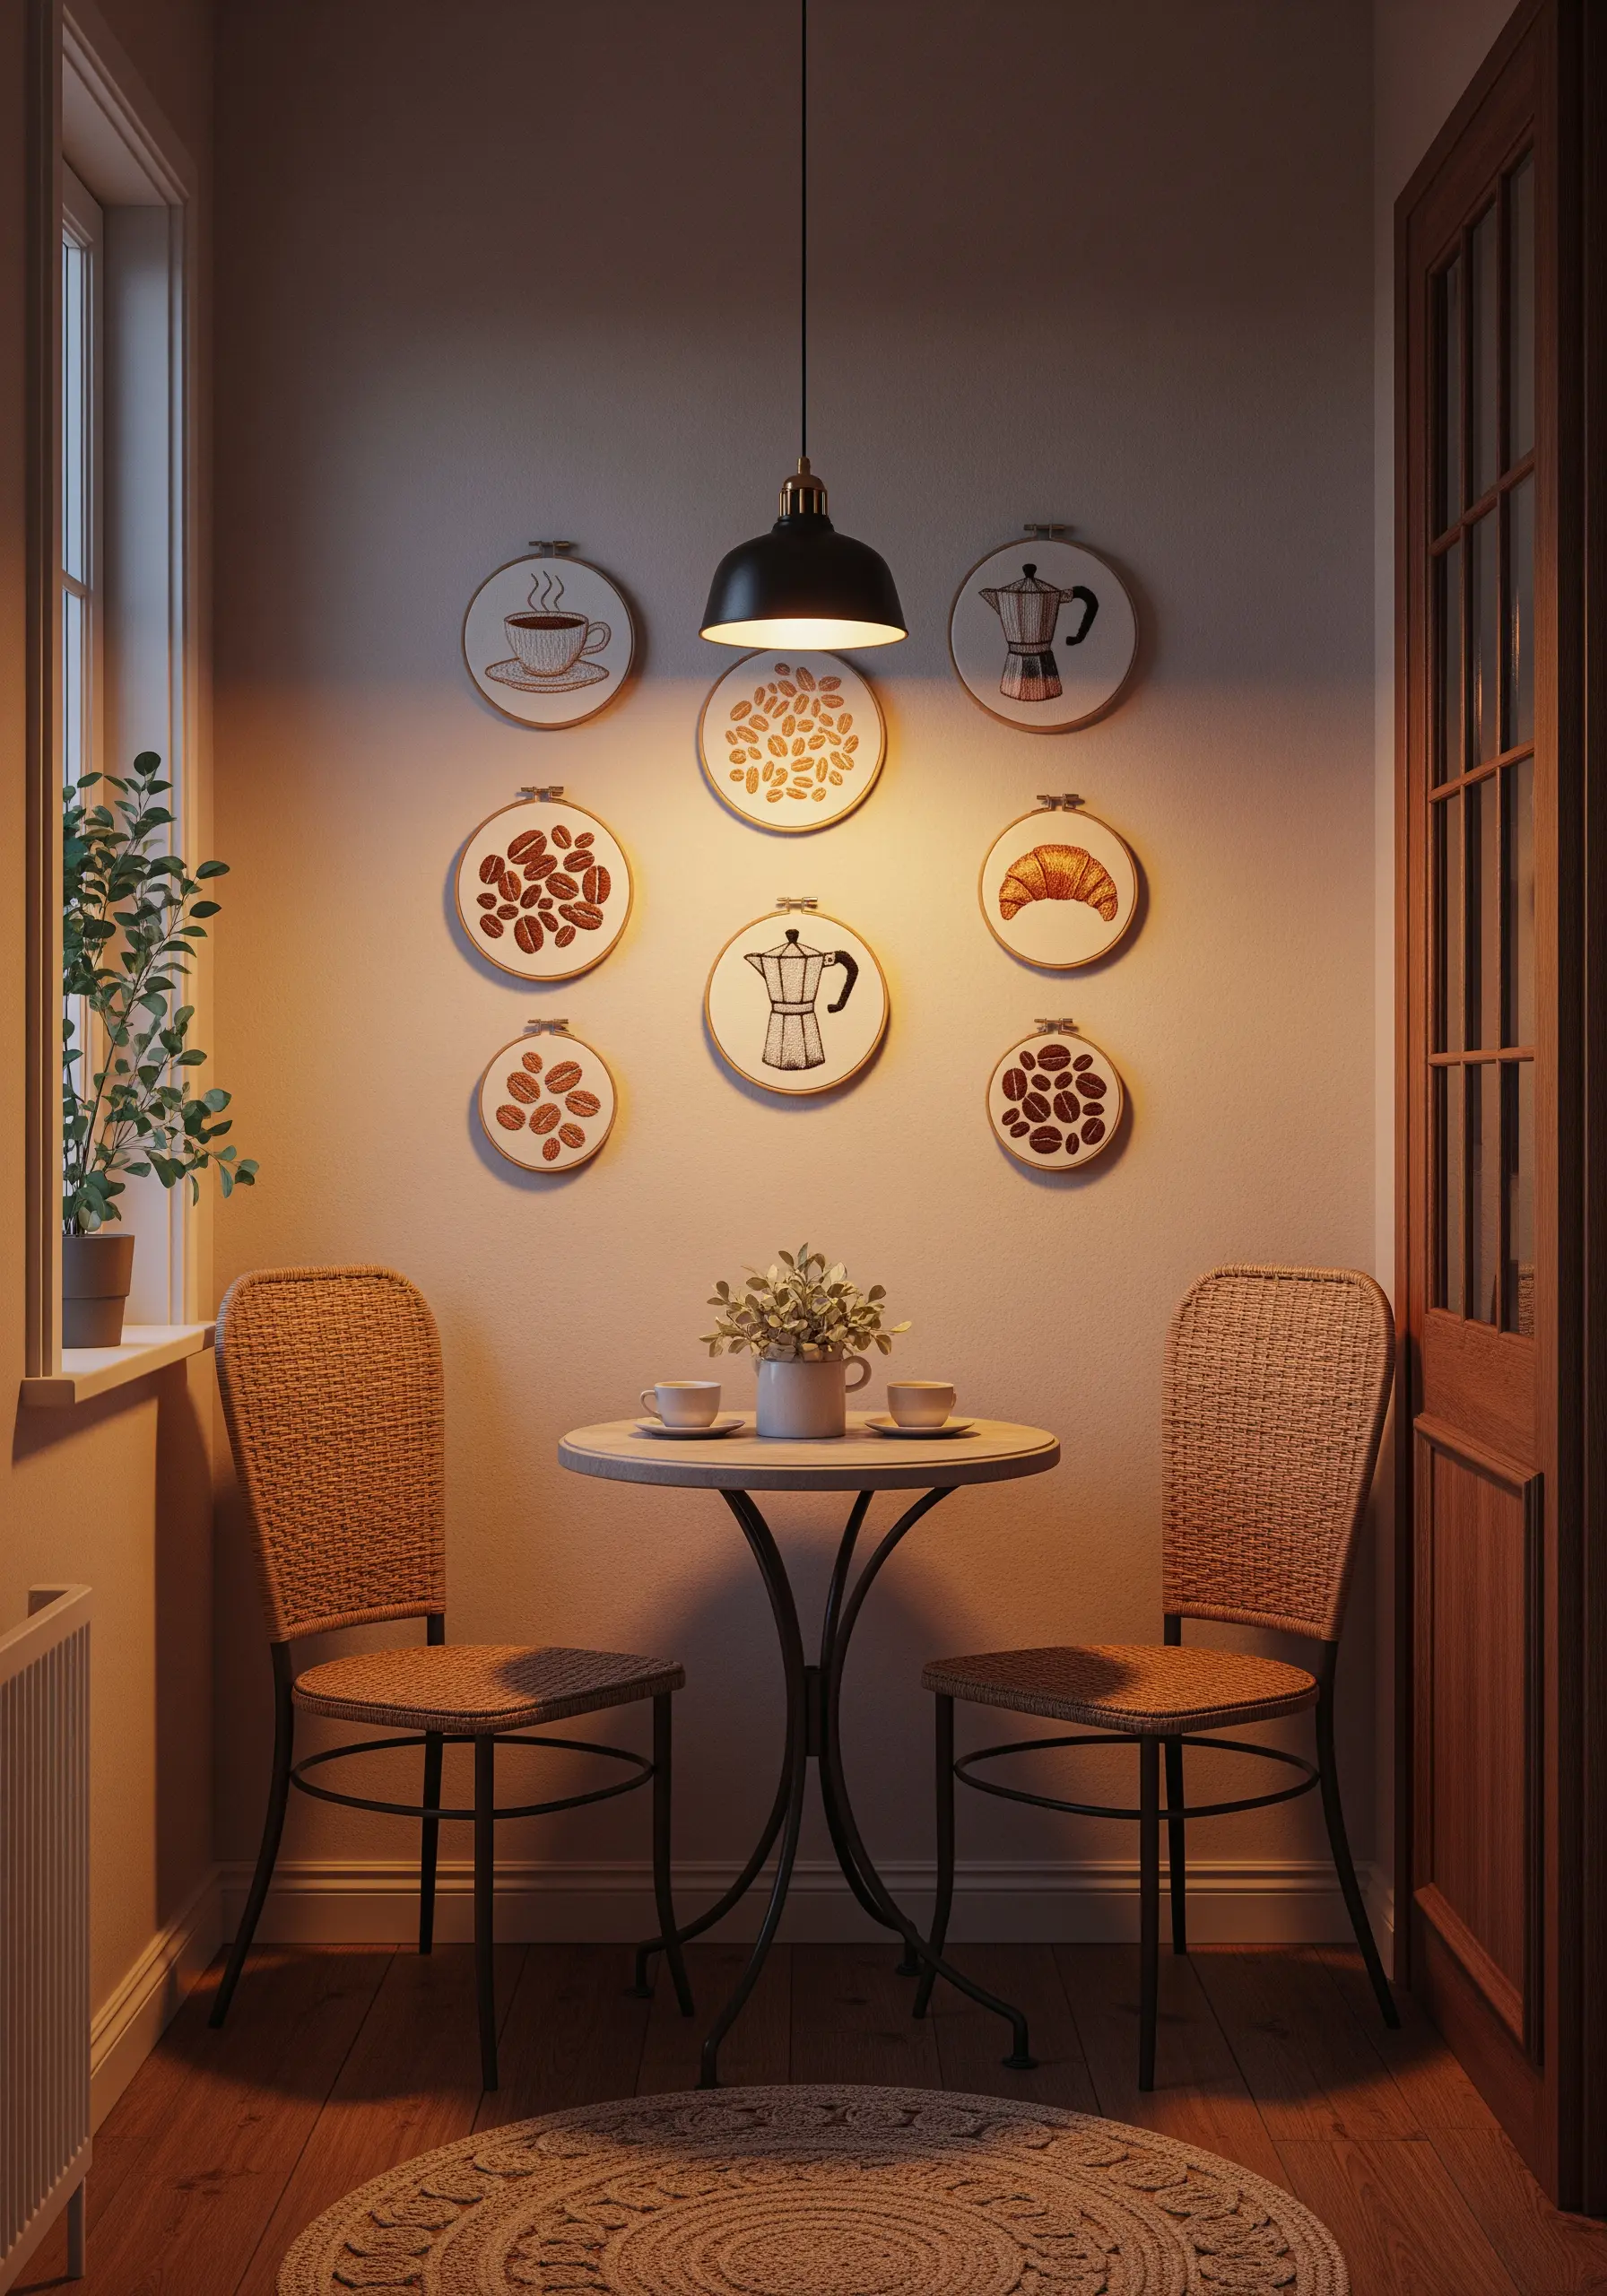
Design the perfect nook for your morning ritual with these charming café motifs.
To give the crema on an espresso a foamy texture, use a light scattering of French knots in a shade slightly lighter than the coffee base.
For the metallic sheen of a Moka pot, couch a strand of silver metallic thread with a matching gray cotton floss. This technique tames the fussy metallic thread while still delivering a beautiful, reflective quality to these minimal food & coffee motifs.