

A handkerchief is more than just a piece of fabric; it’s a small canvas, an invitation to practice precision and intention. The beauty of working on such a small scale is that every single stitch matters. It’s an opportunity to transform a simple motif into a refined piece of art.
Forget thinking of these as just ‘quick’ projects. Instead, see them as moments to perfect a single technique. How can you make a satin stitch perfectly smooth? How can a few carefully placed knots create realistic texture? How can changing the weight of your thread create an illusion of depth?
Here, we’ll explore tiny patterns that teach powerful lessons. You will learn not just what to stitch, but how to stitch it with the thoughtful details that elevate your work from handmade to heartfelt, polished, and truly personal.
1. The Dimensional Bee
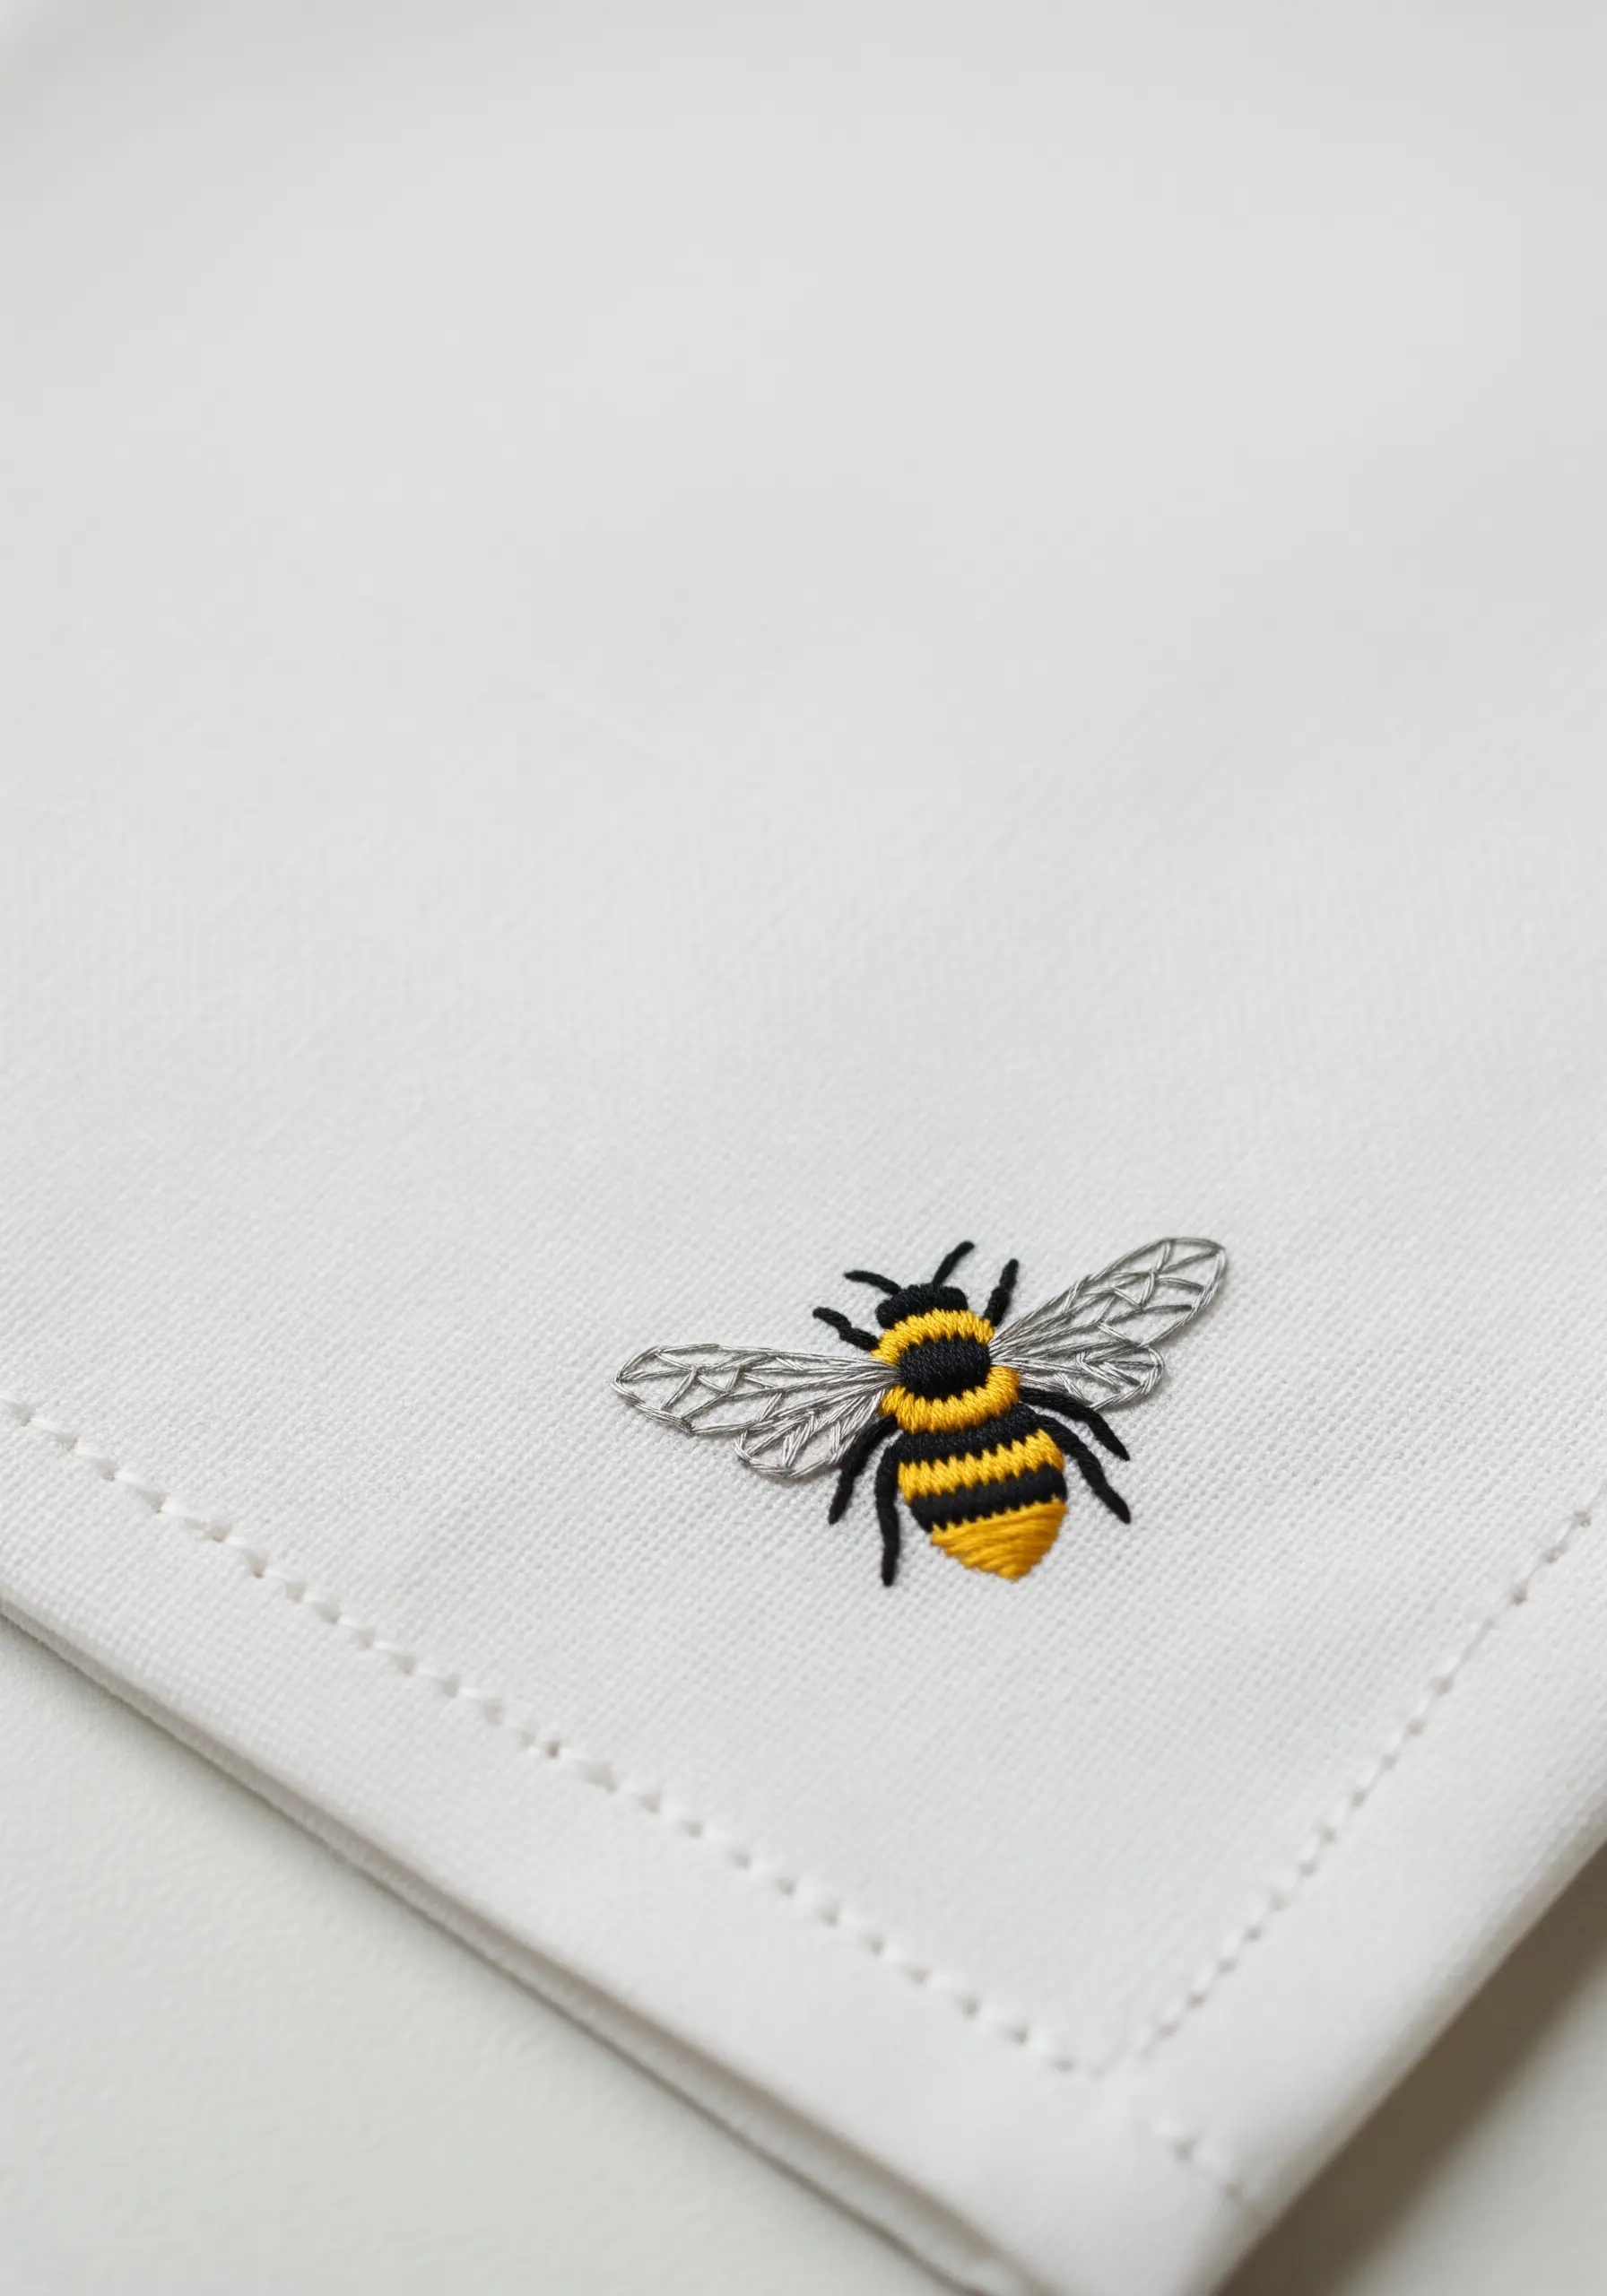
To give your bee a plump, rounded body, slightly pad the area with underlying straight stitches before covering it with a smooth satin stitch.
For the wings, use a single strand of light gray or silver thread to create a delicate, translucent effect that contrasts beautifully with the solid body.
This tiny but impactful motif becomes a small study in texture, transforming a simple insect into a piece of detailed art.
This is one of those tiny embroidery projects that makes a big statement.
2. Textured Lavender Sprigs
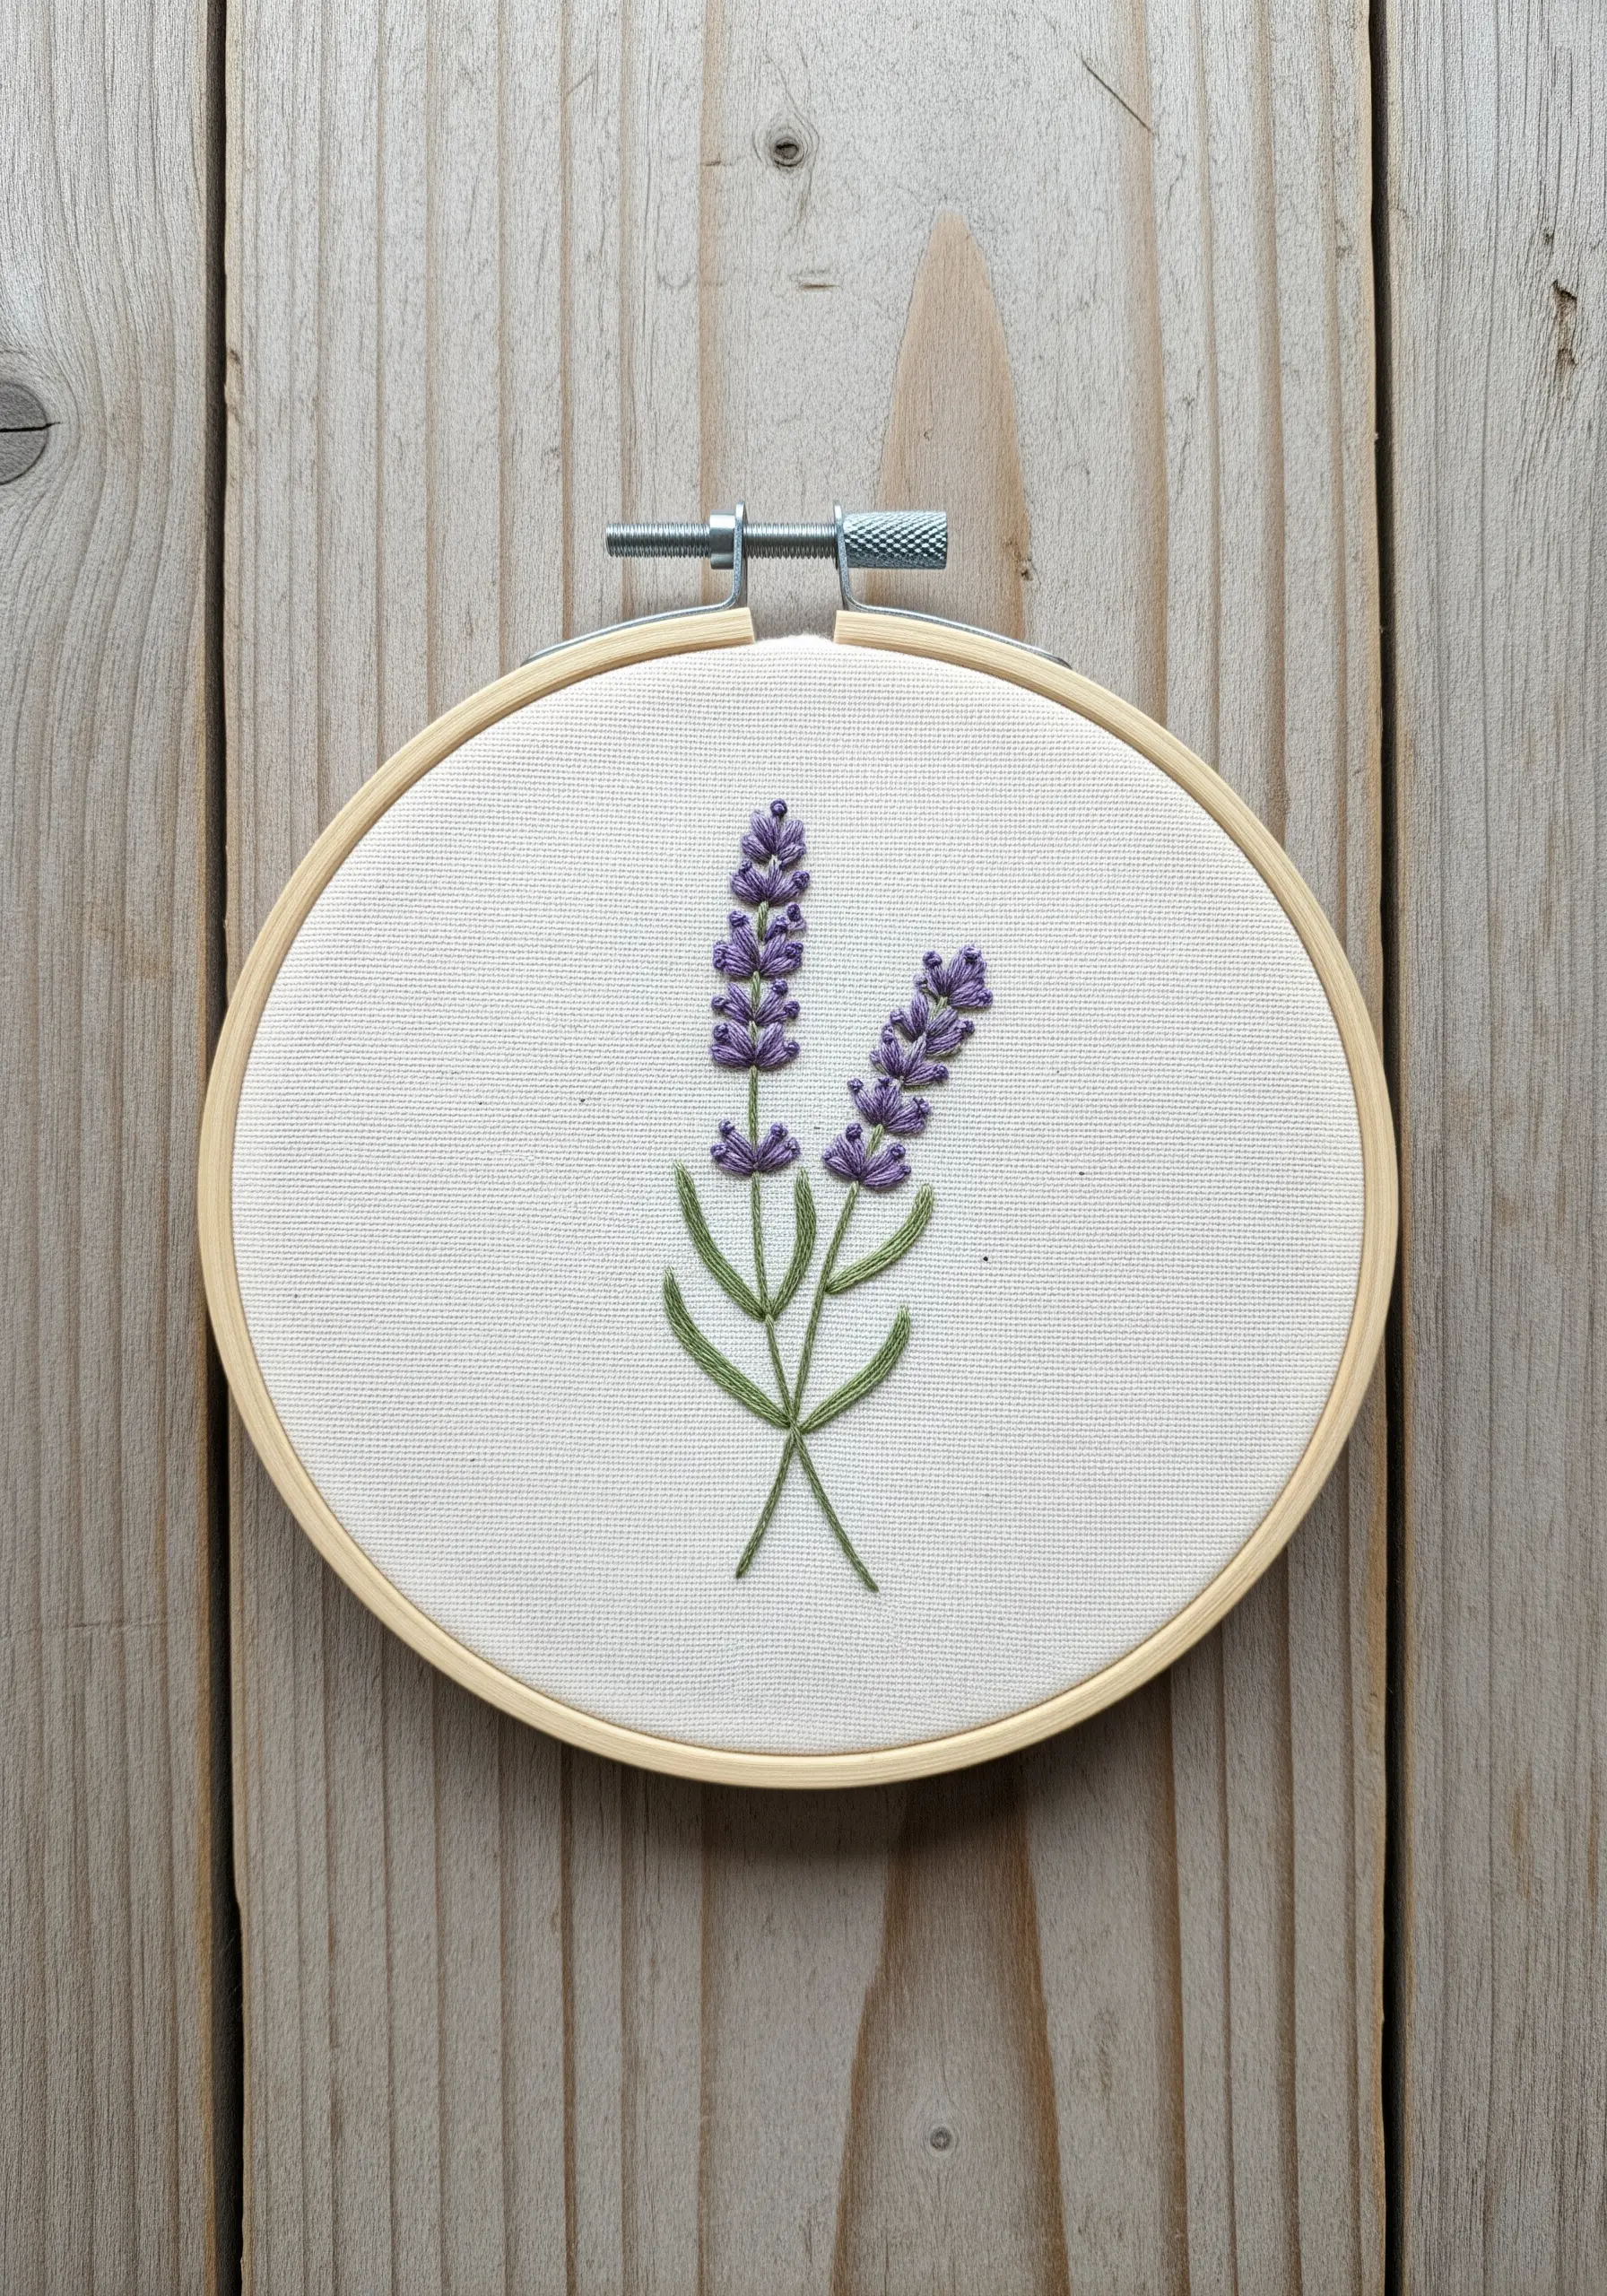
Use French knots for the lavender buds, varying both the tightness and the number of wraps around the needle to create a naturally uneven, clustered texture.
Incorporate two or three closely related shades of purple, scattering them randomly to give the blossoms depth and prevent them from looking flat.
Keep the stems delicate with a simple two-strand stem stitch, allowing the textured buds to remain the clear focal point.
3. Minimalist Mountain Range
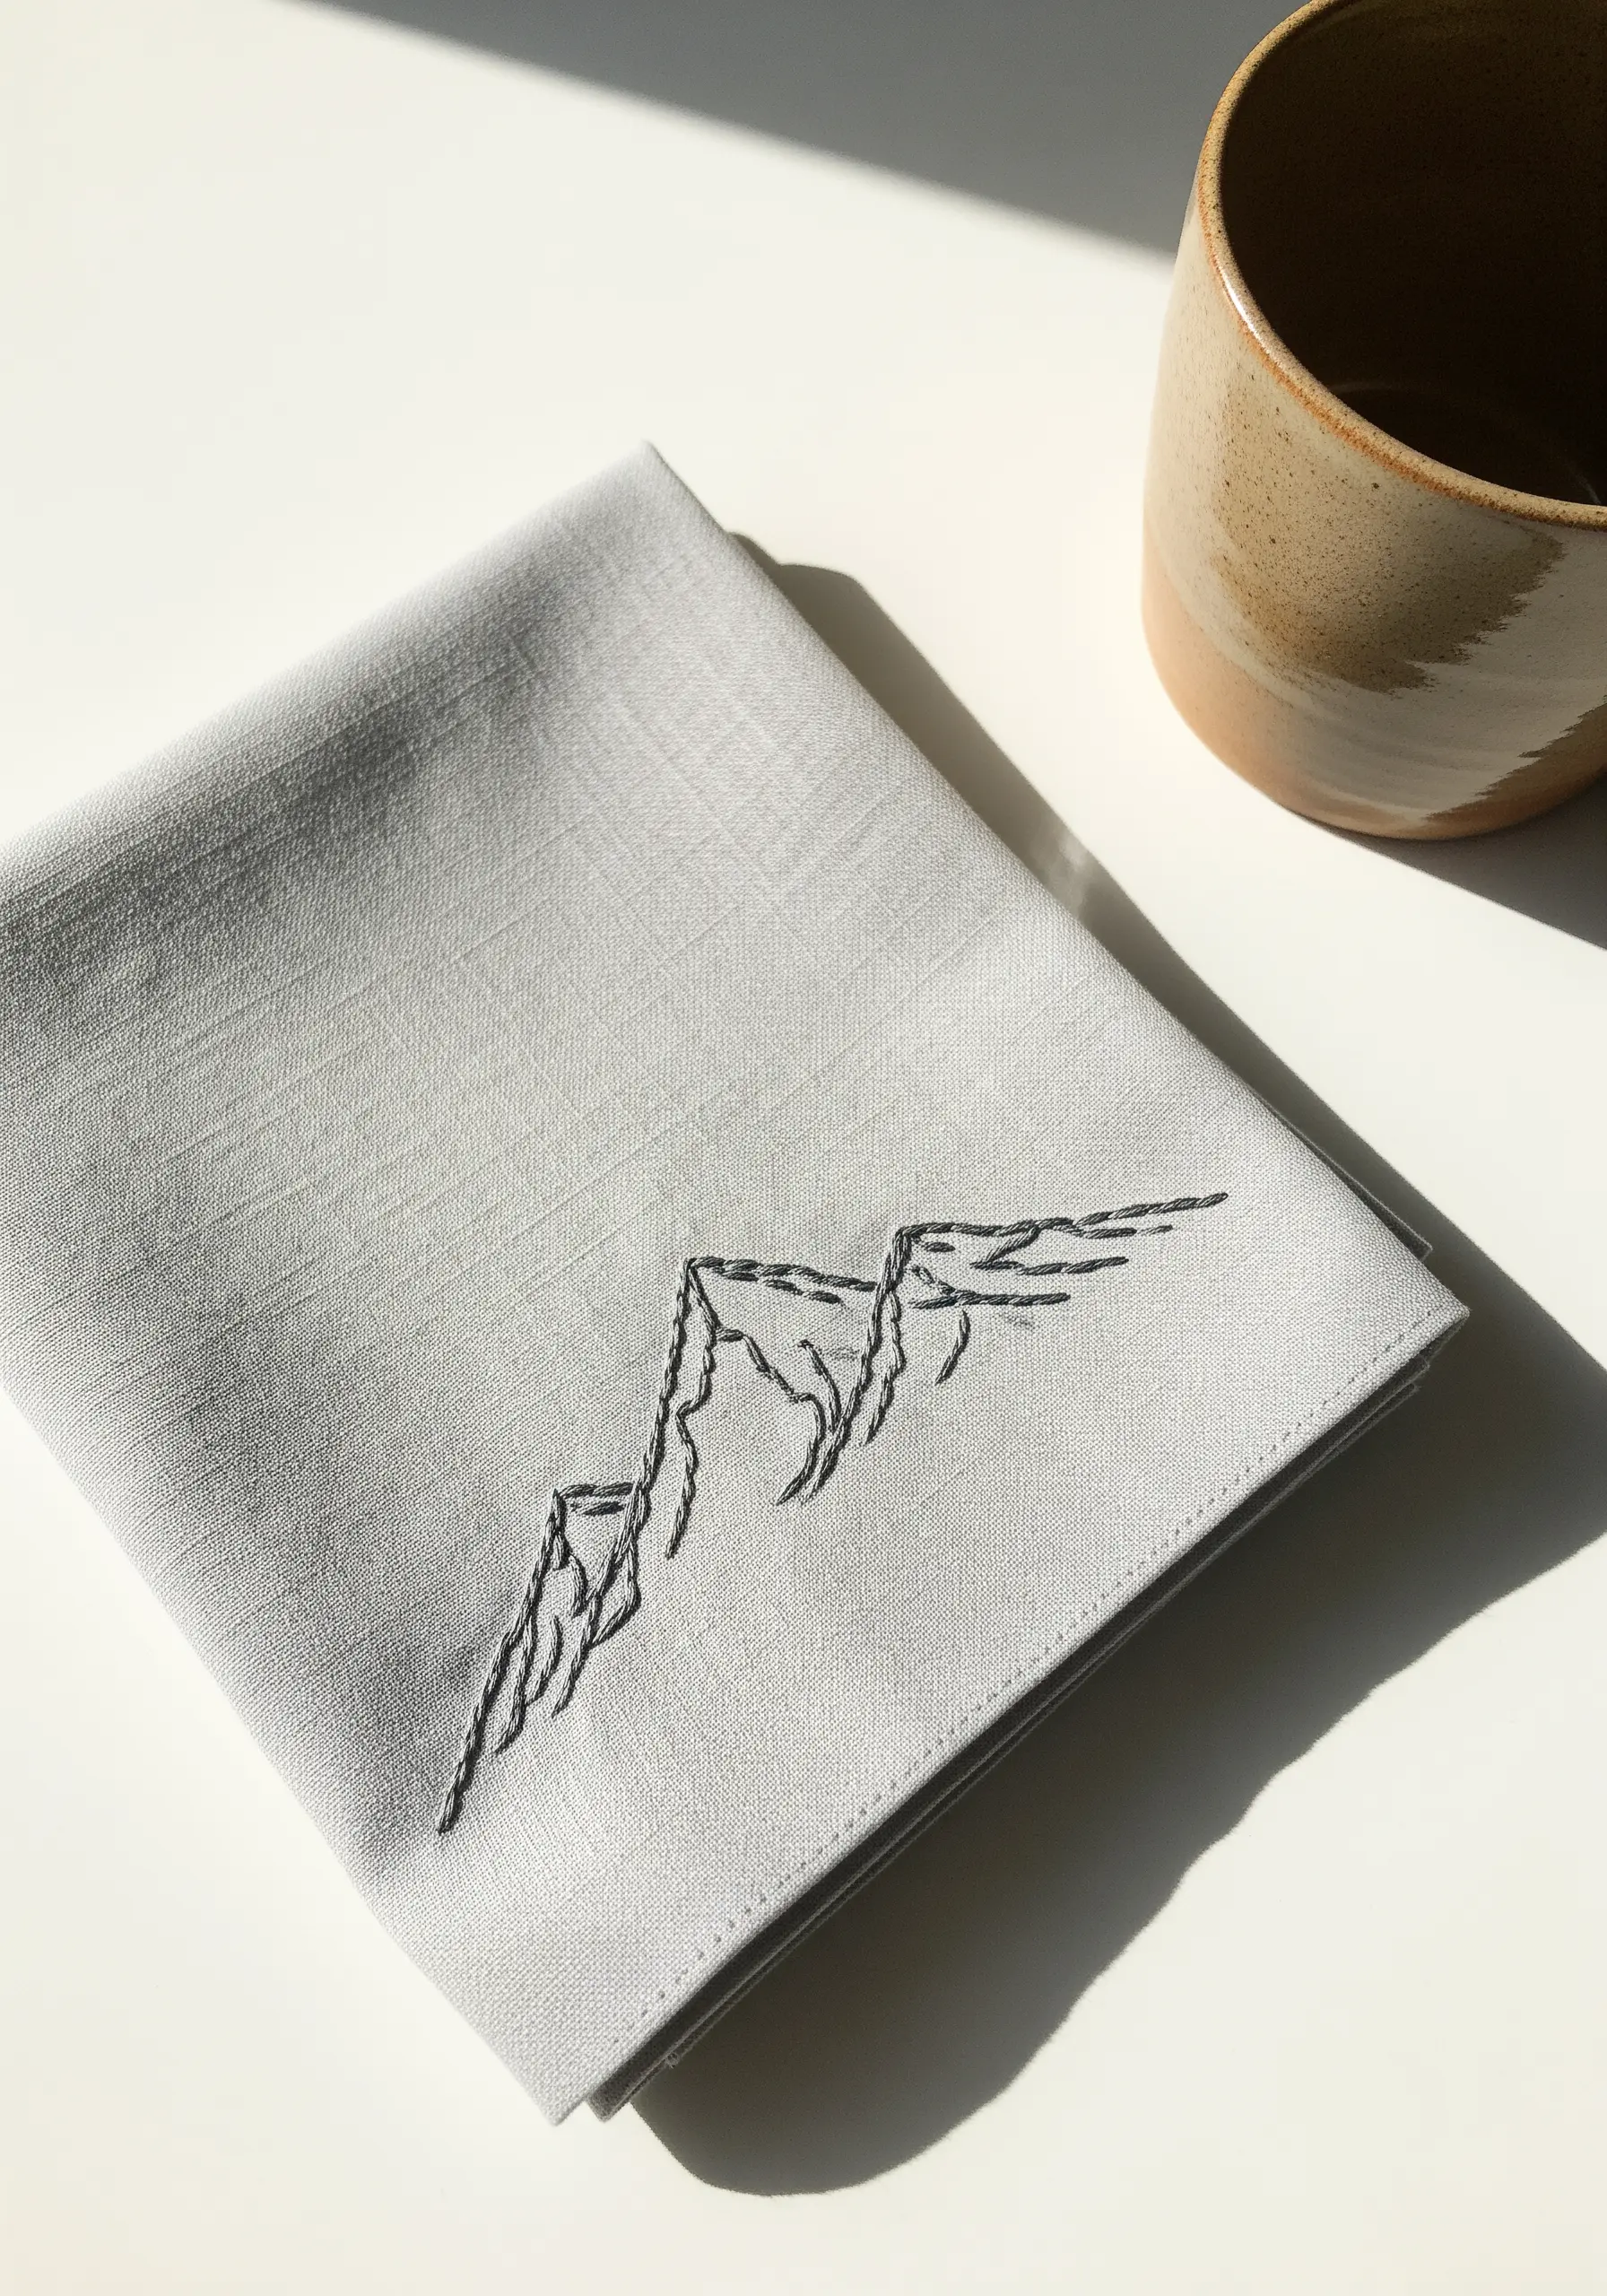
Create a sense of atmospheric perspective by adjusting your thread weight—use two or three strands for the foreground peaks and a single strand for those in the distance.
Instead of uniform stitches, vary the length of your backstitch to mimic the rugged, uneven lines of a natural rock face.
This technique turns a simple outline into a landscape with depth, all without adding a single color.
4. Delicate Lazy Daisy Florals
The lazy daisy stitch is perfect for creating quick, charming petals, but the secret to a refined look is in the tension.
Keep the loops slightly loose to give the petals a soft, rounded shape rather than a tight, pointed one.
Anchor the design with a single, tight French knot in a contrasting color, which adds a pop of dimension and draws the eye to the flower’s center.
5. Celestial Night Sky Motif
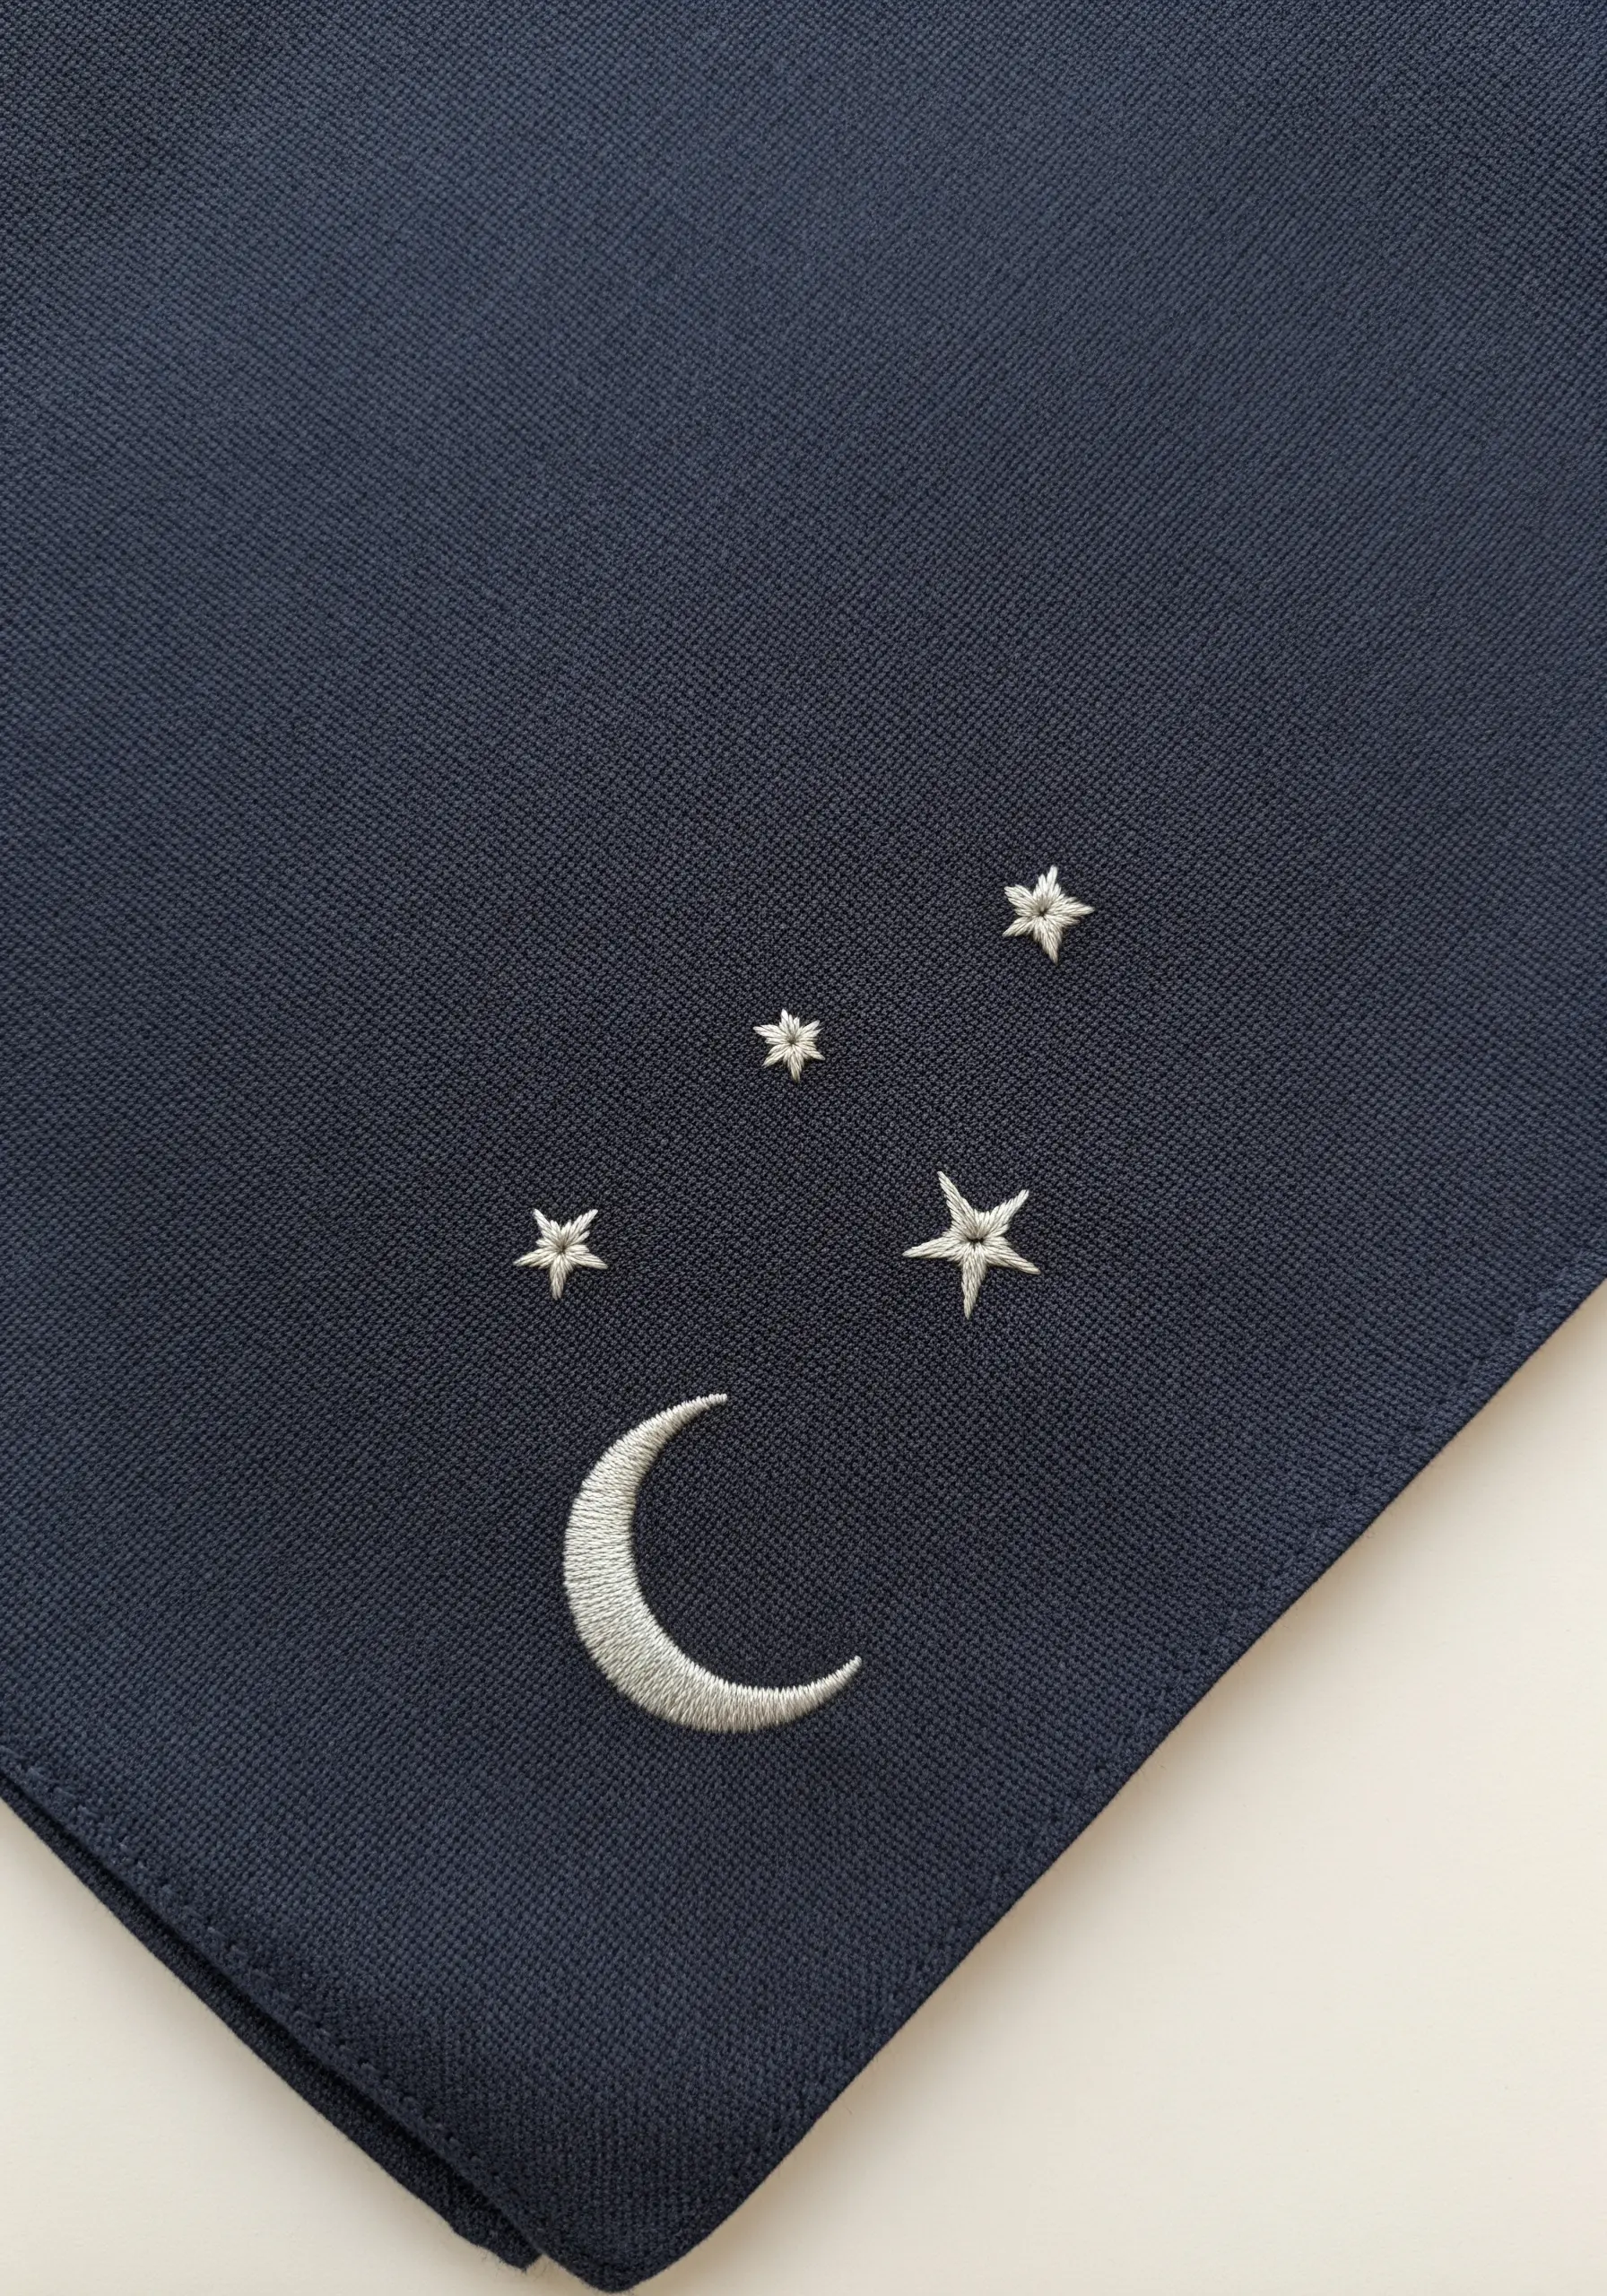
To ensure your satin stitch looks sharp and raised on dark fabric, first create a foundation by outlining the shape with a split stitch.
This raised edge provides a clean boundary for your satin stitches to fill, preventing them from sinking into the fabric’s weave and blurring.
For the stars, a simple star stitch or a cluster of straight stitches provides a crisp, geometric sparkle that complements the smooth crescent moon.
6. Elegant Satin Stitch Ginkgo
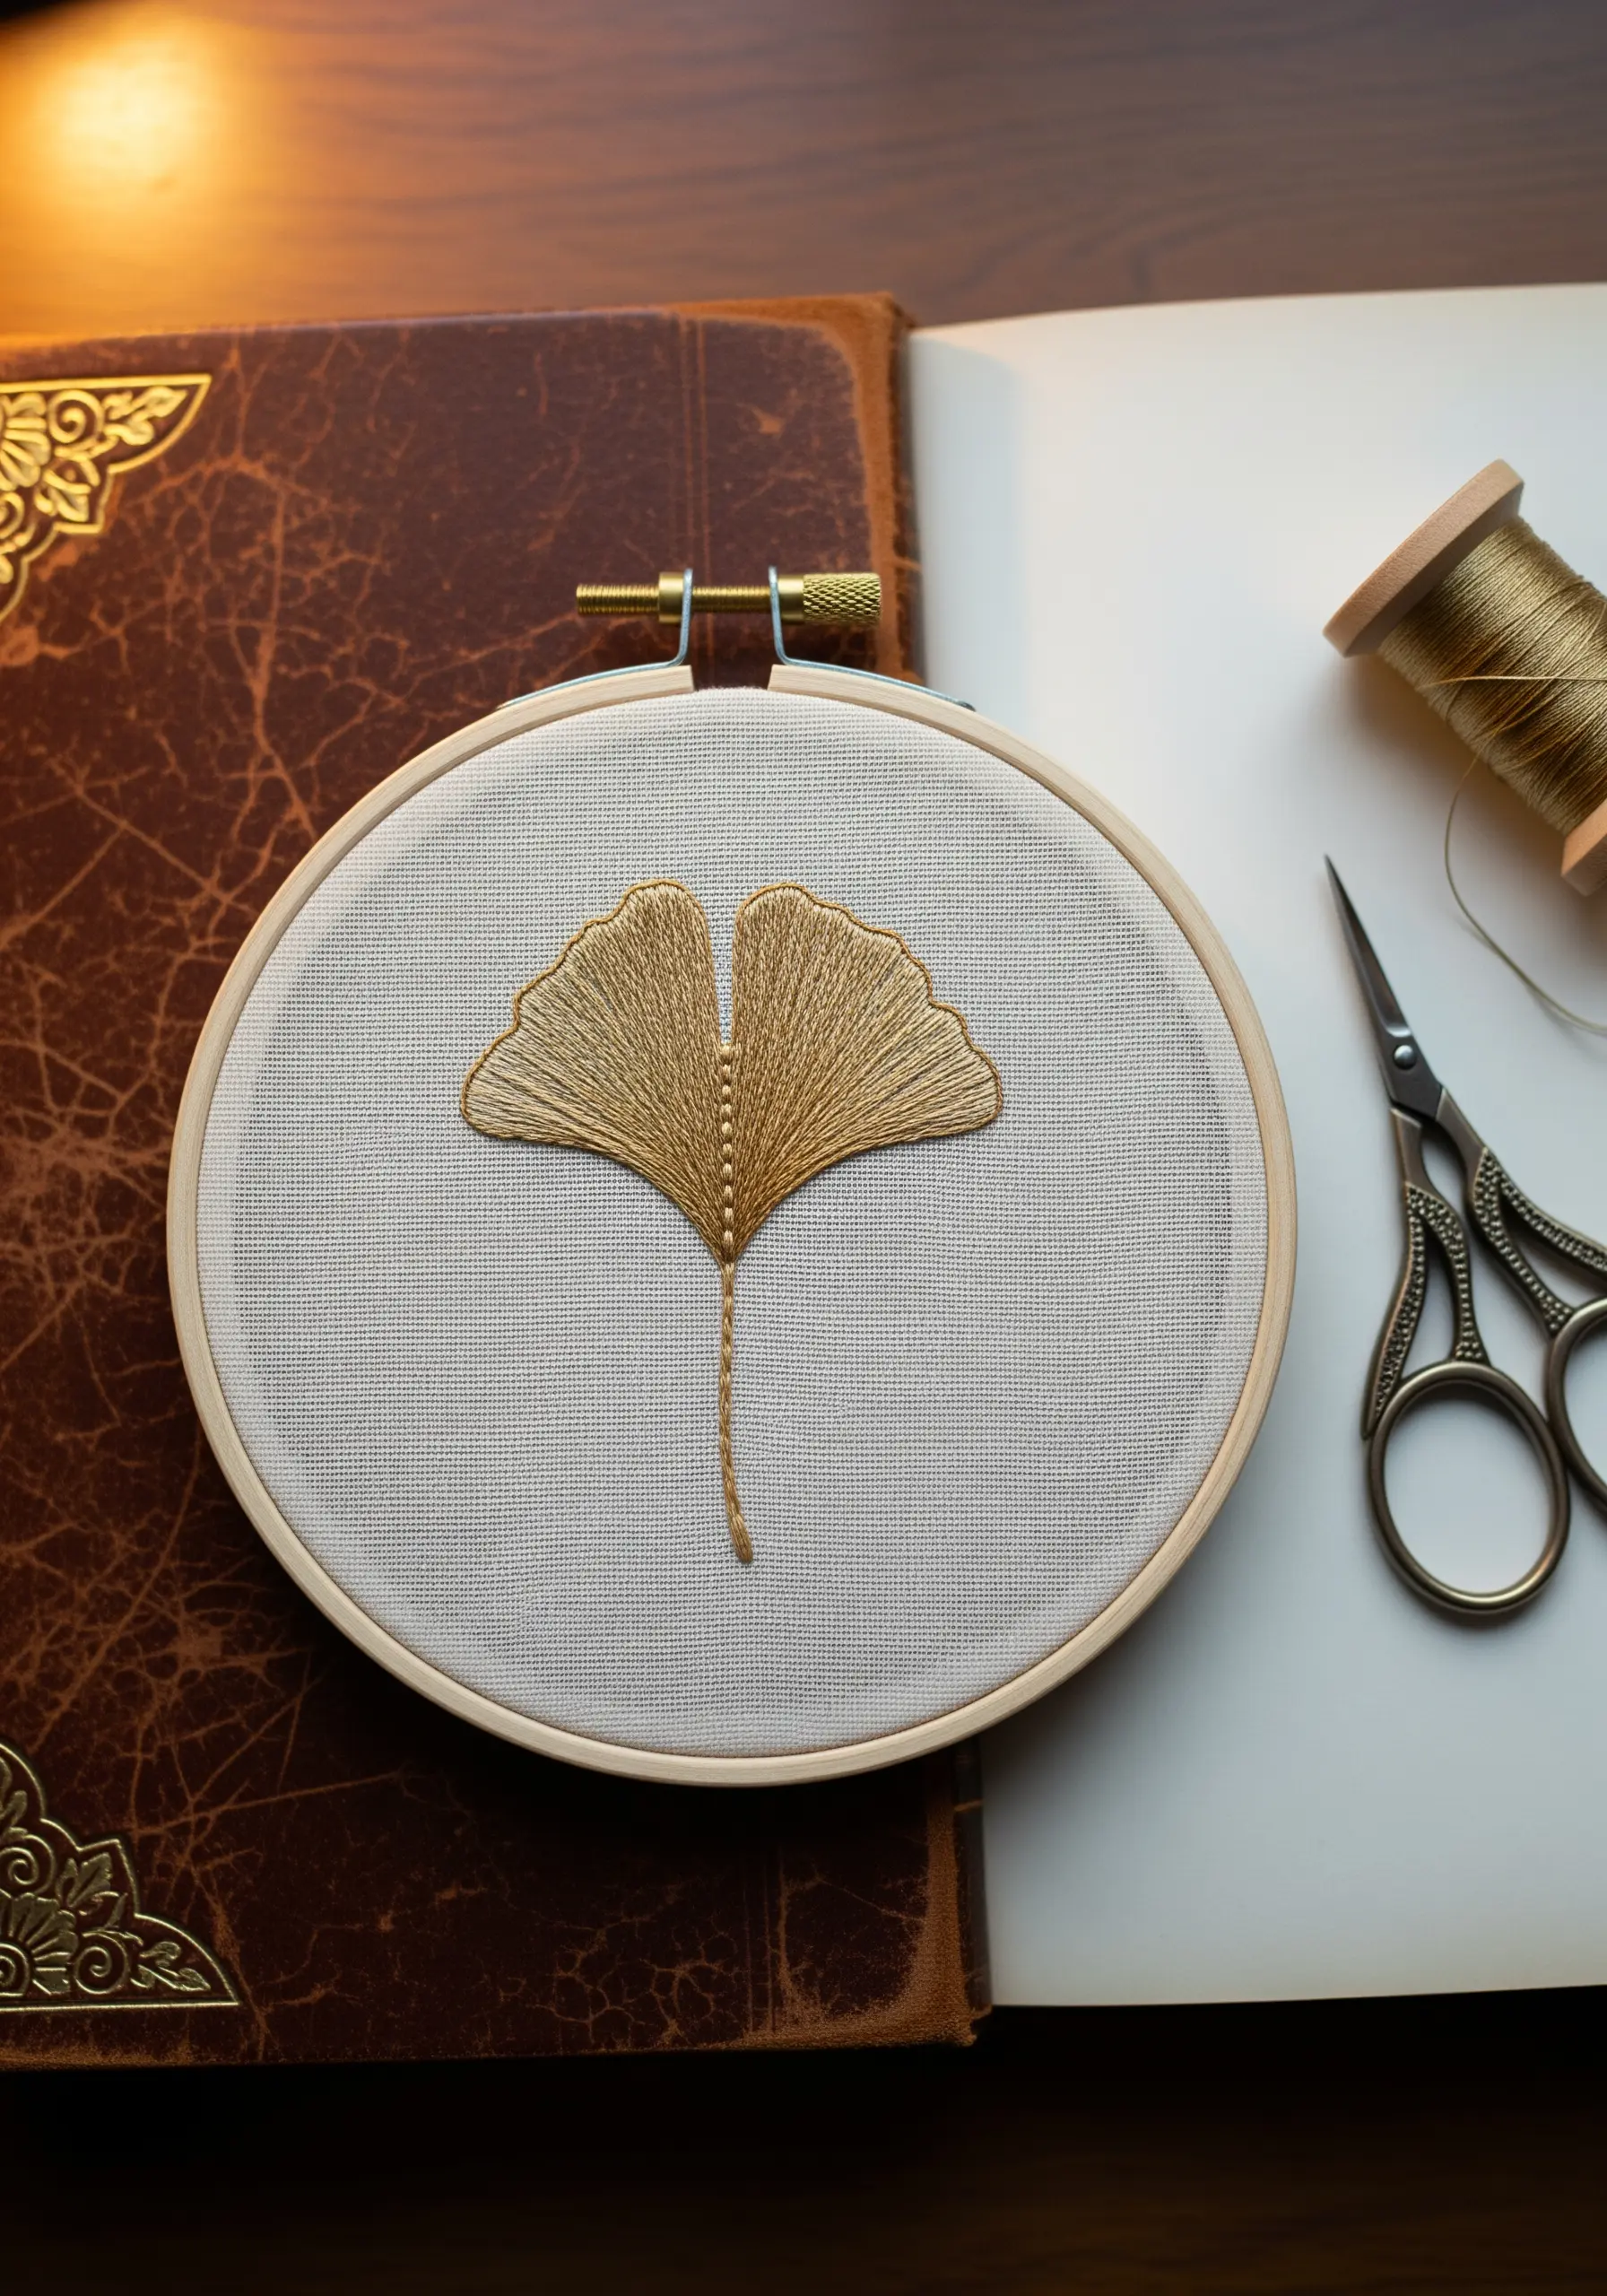
The visual flow of this design depends entirely on the direction of your satin stitches.
Begin stitching from the central vein and angle your stitches diagonally outwards, following the natural lines of the ginkgo leaf.
This approach creates a beautiful play of light across the threads, giving the flat object a sense of form and life.
Finish with a clean split stitch for the stem to ground the delicate leaf.
7. Geometric Honeycomb Lines
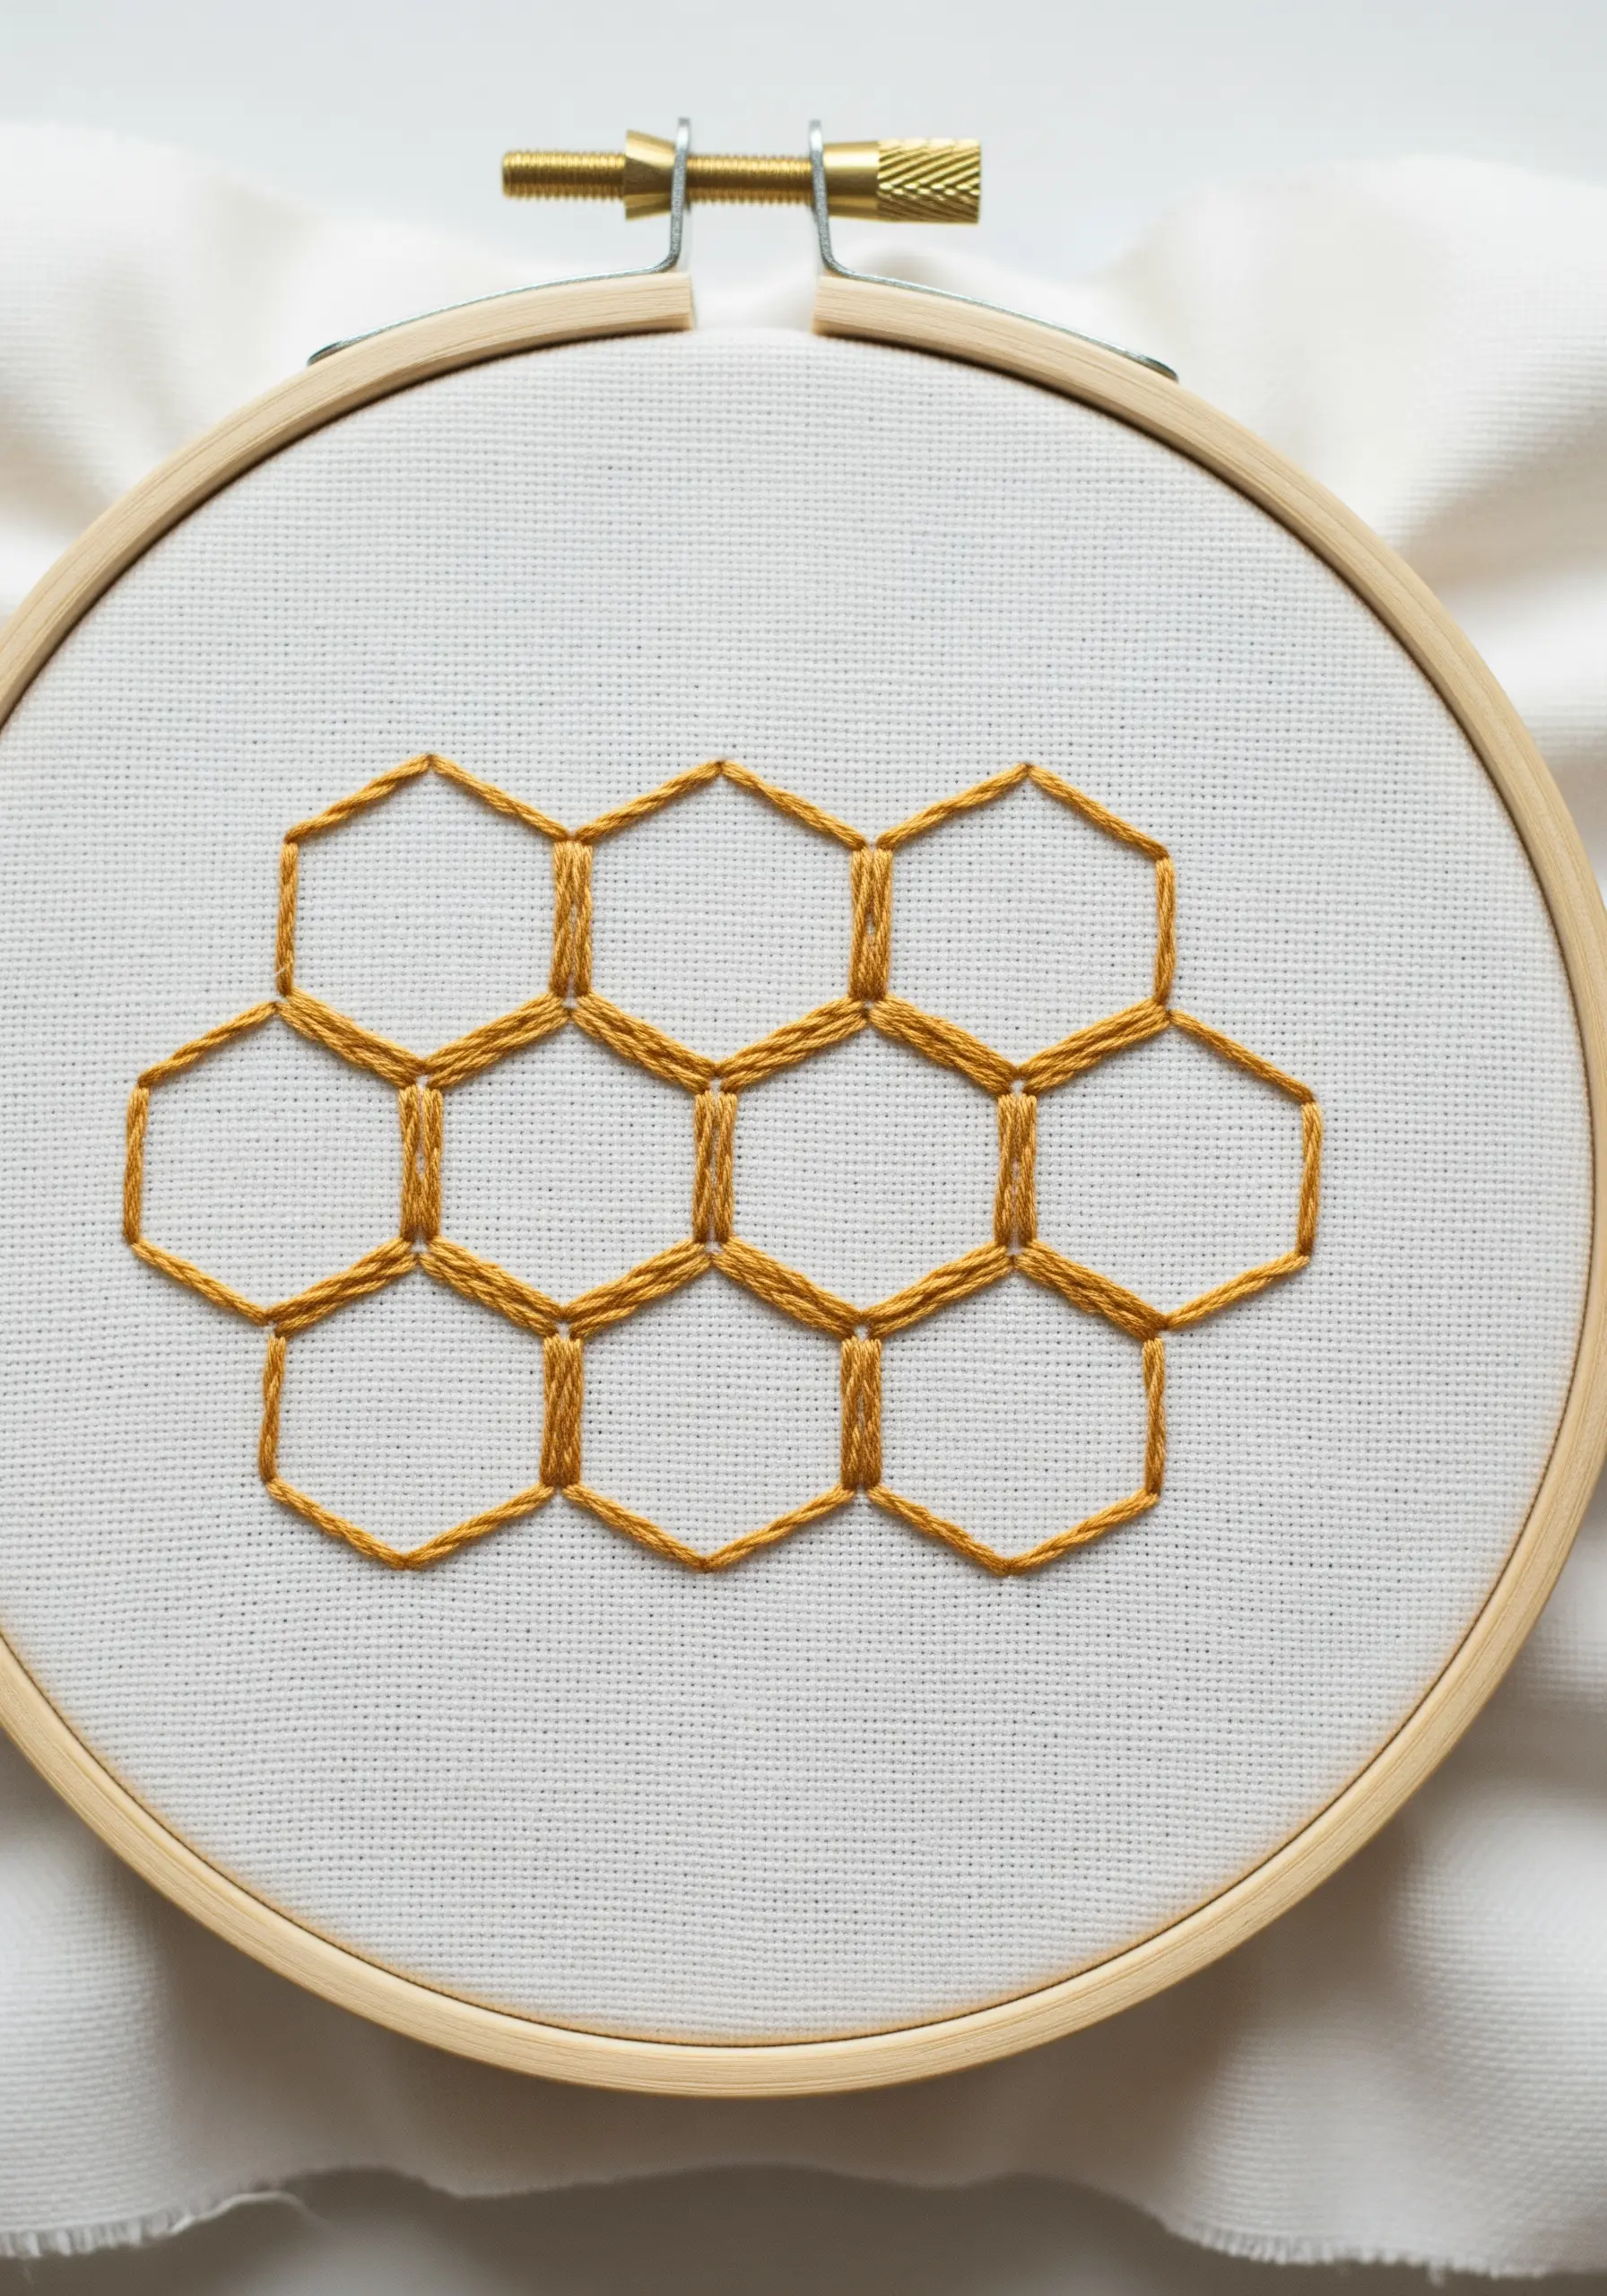
For clean, sharp geometric patterns, precision is everything.
Use a backstitch and focus on maintaining perfectly uniform stitch lengths throughout the design.
To elevate the lines into something bolder and smoother, try a whipped backstitch—it wraps the initial stitches, eliminating gaps and creating a single, fluid line.
8. Paper Boat on the Water
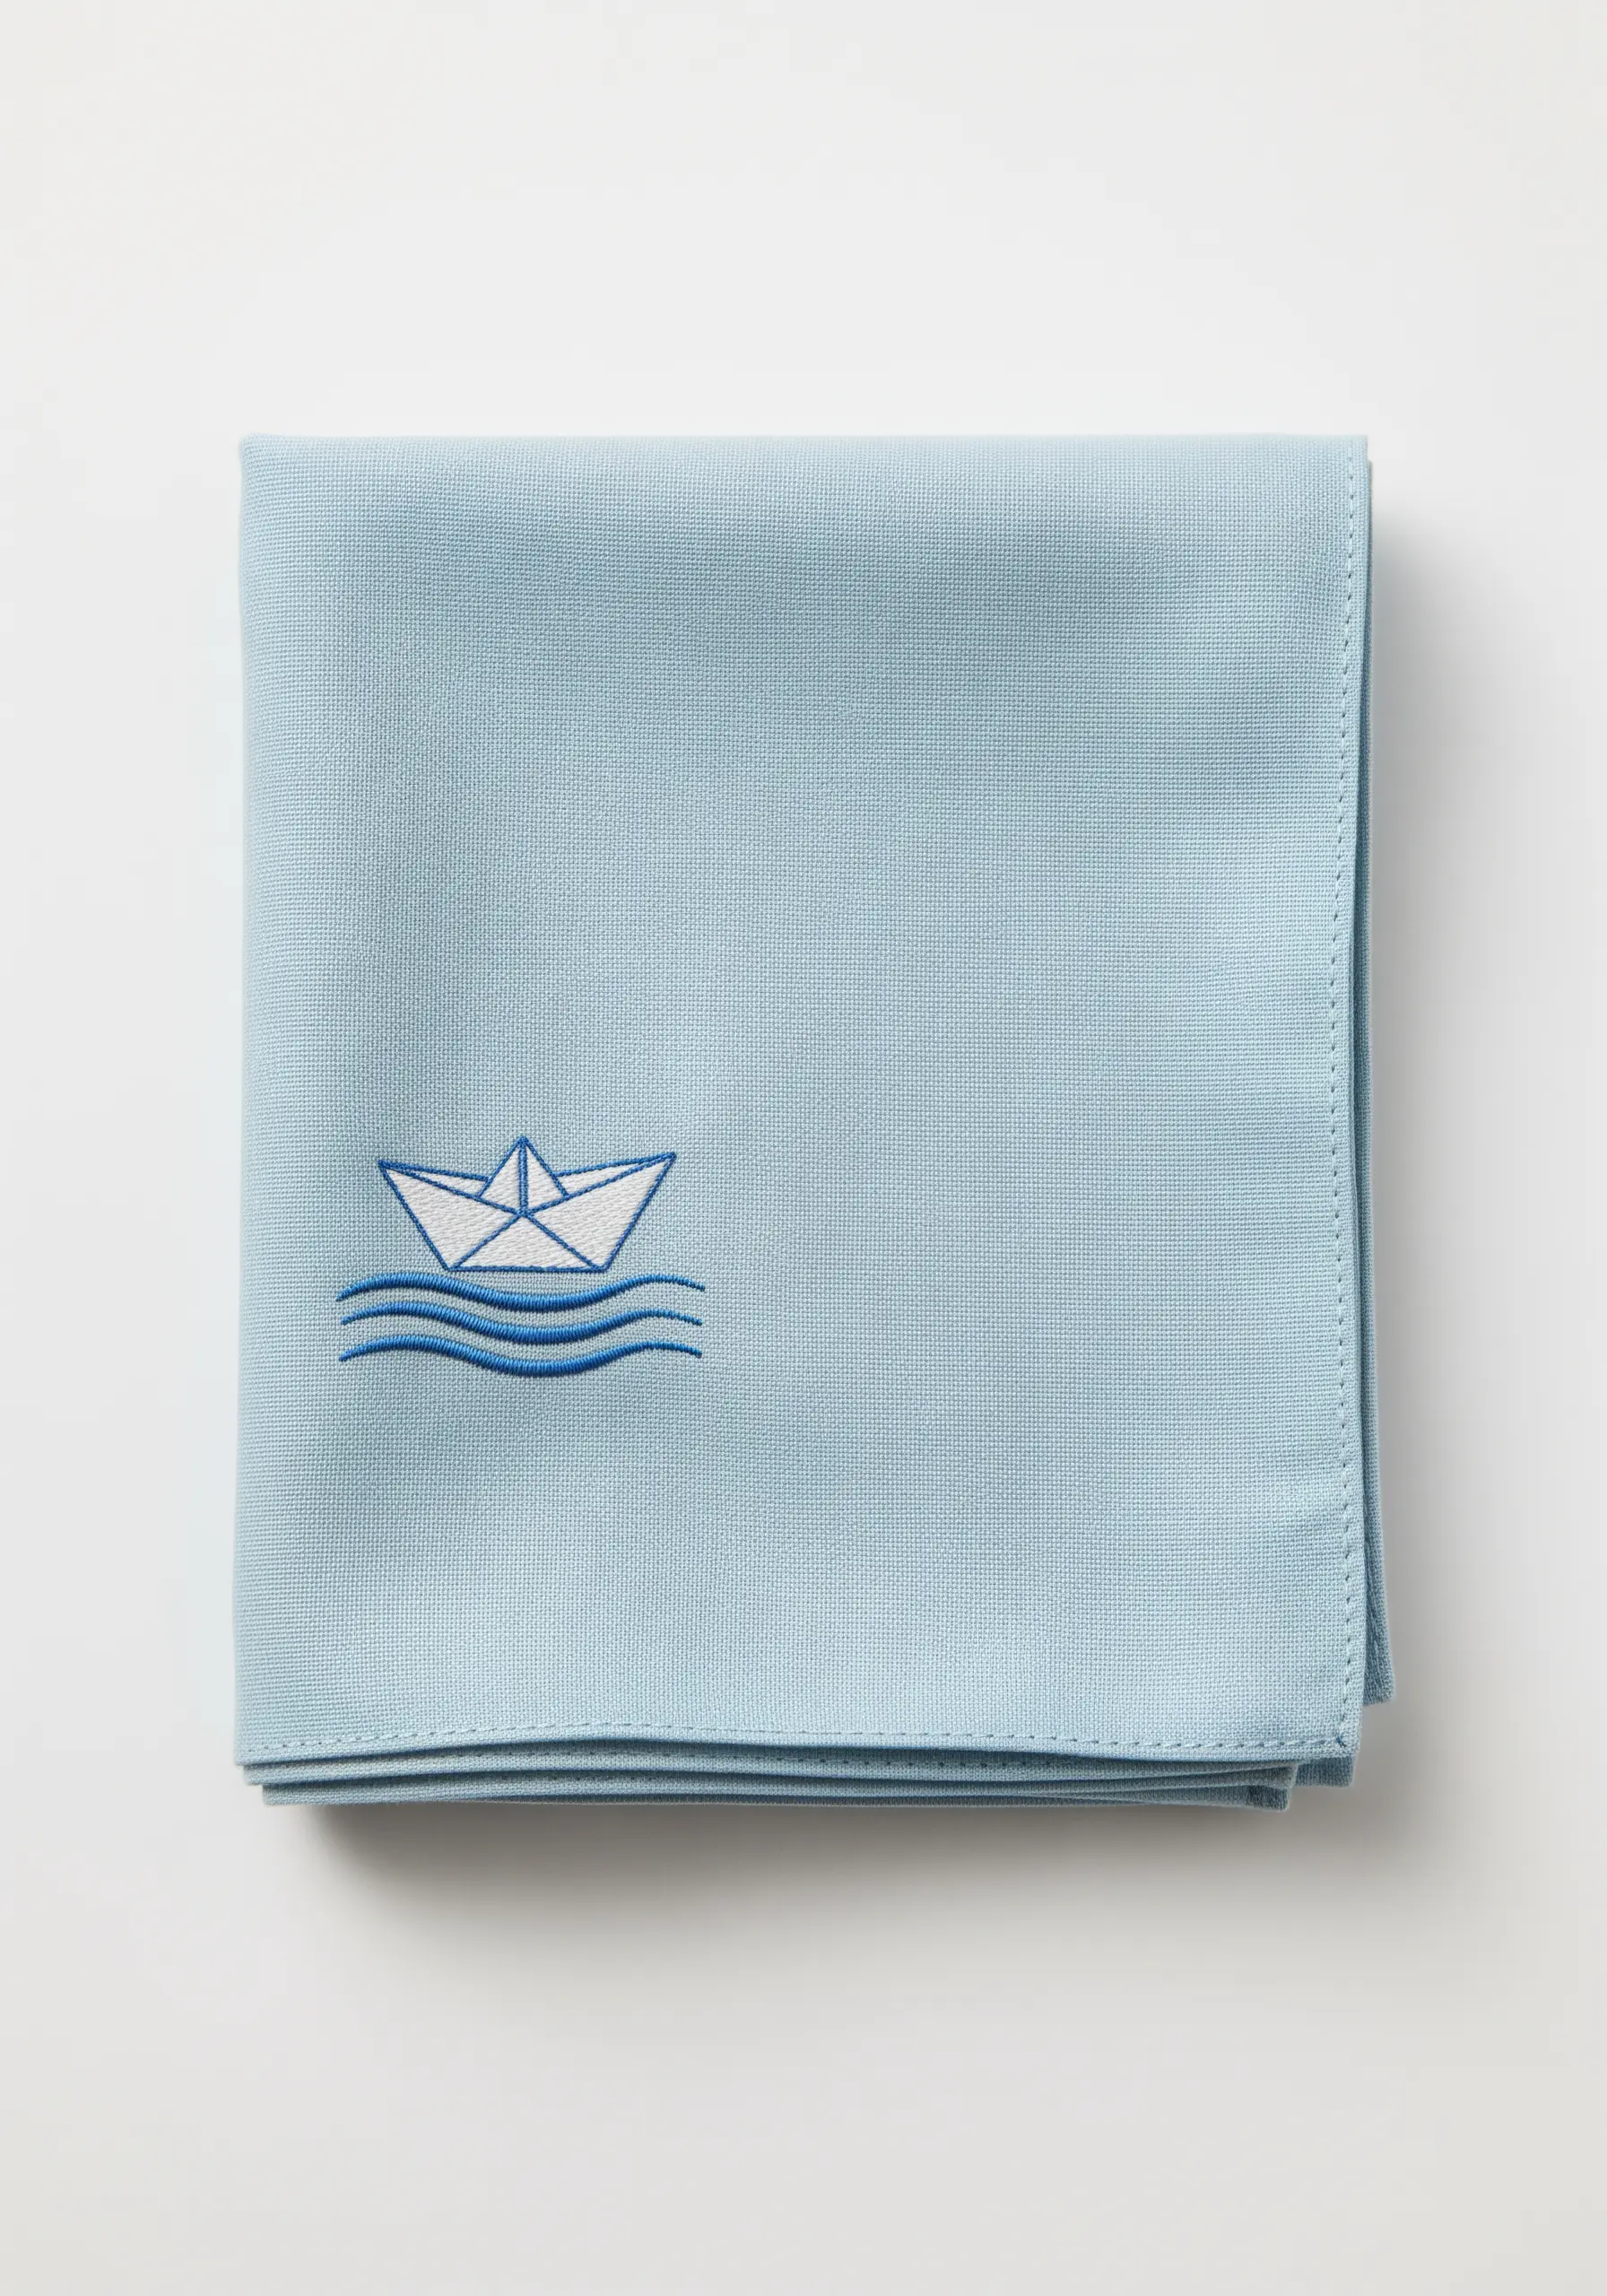
This design is a masterclass in using negative space; the white of the handkerchief becomes the body of the paper boat.
Use a crisp two-strand backstitch for the outlines to ensure they are defined and clear.
By stitching the waves in a slightly darker blue than the boat’s shadow, you create a subtle distinction that adds depth and grounds the simple motif.
9. Soft Eucalyptus Branch
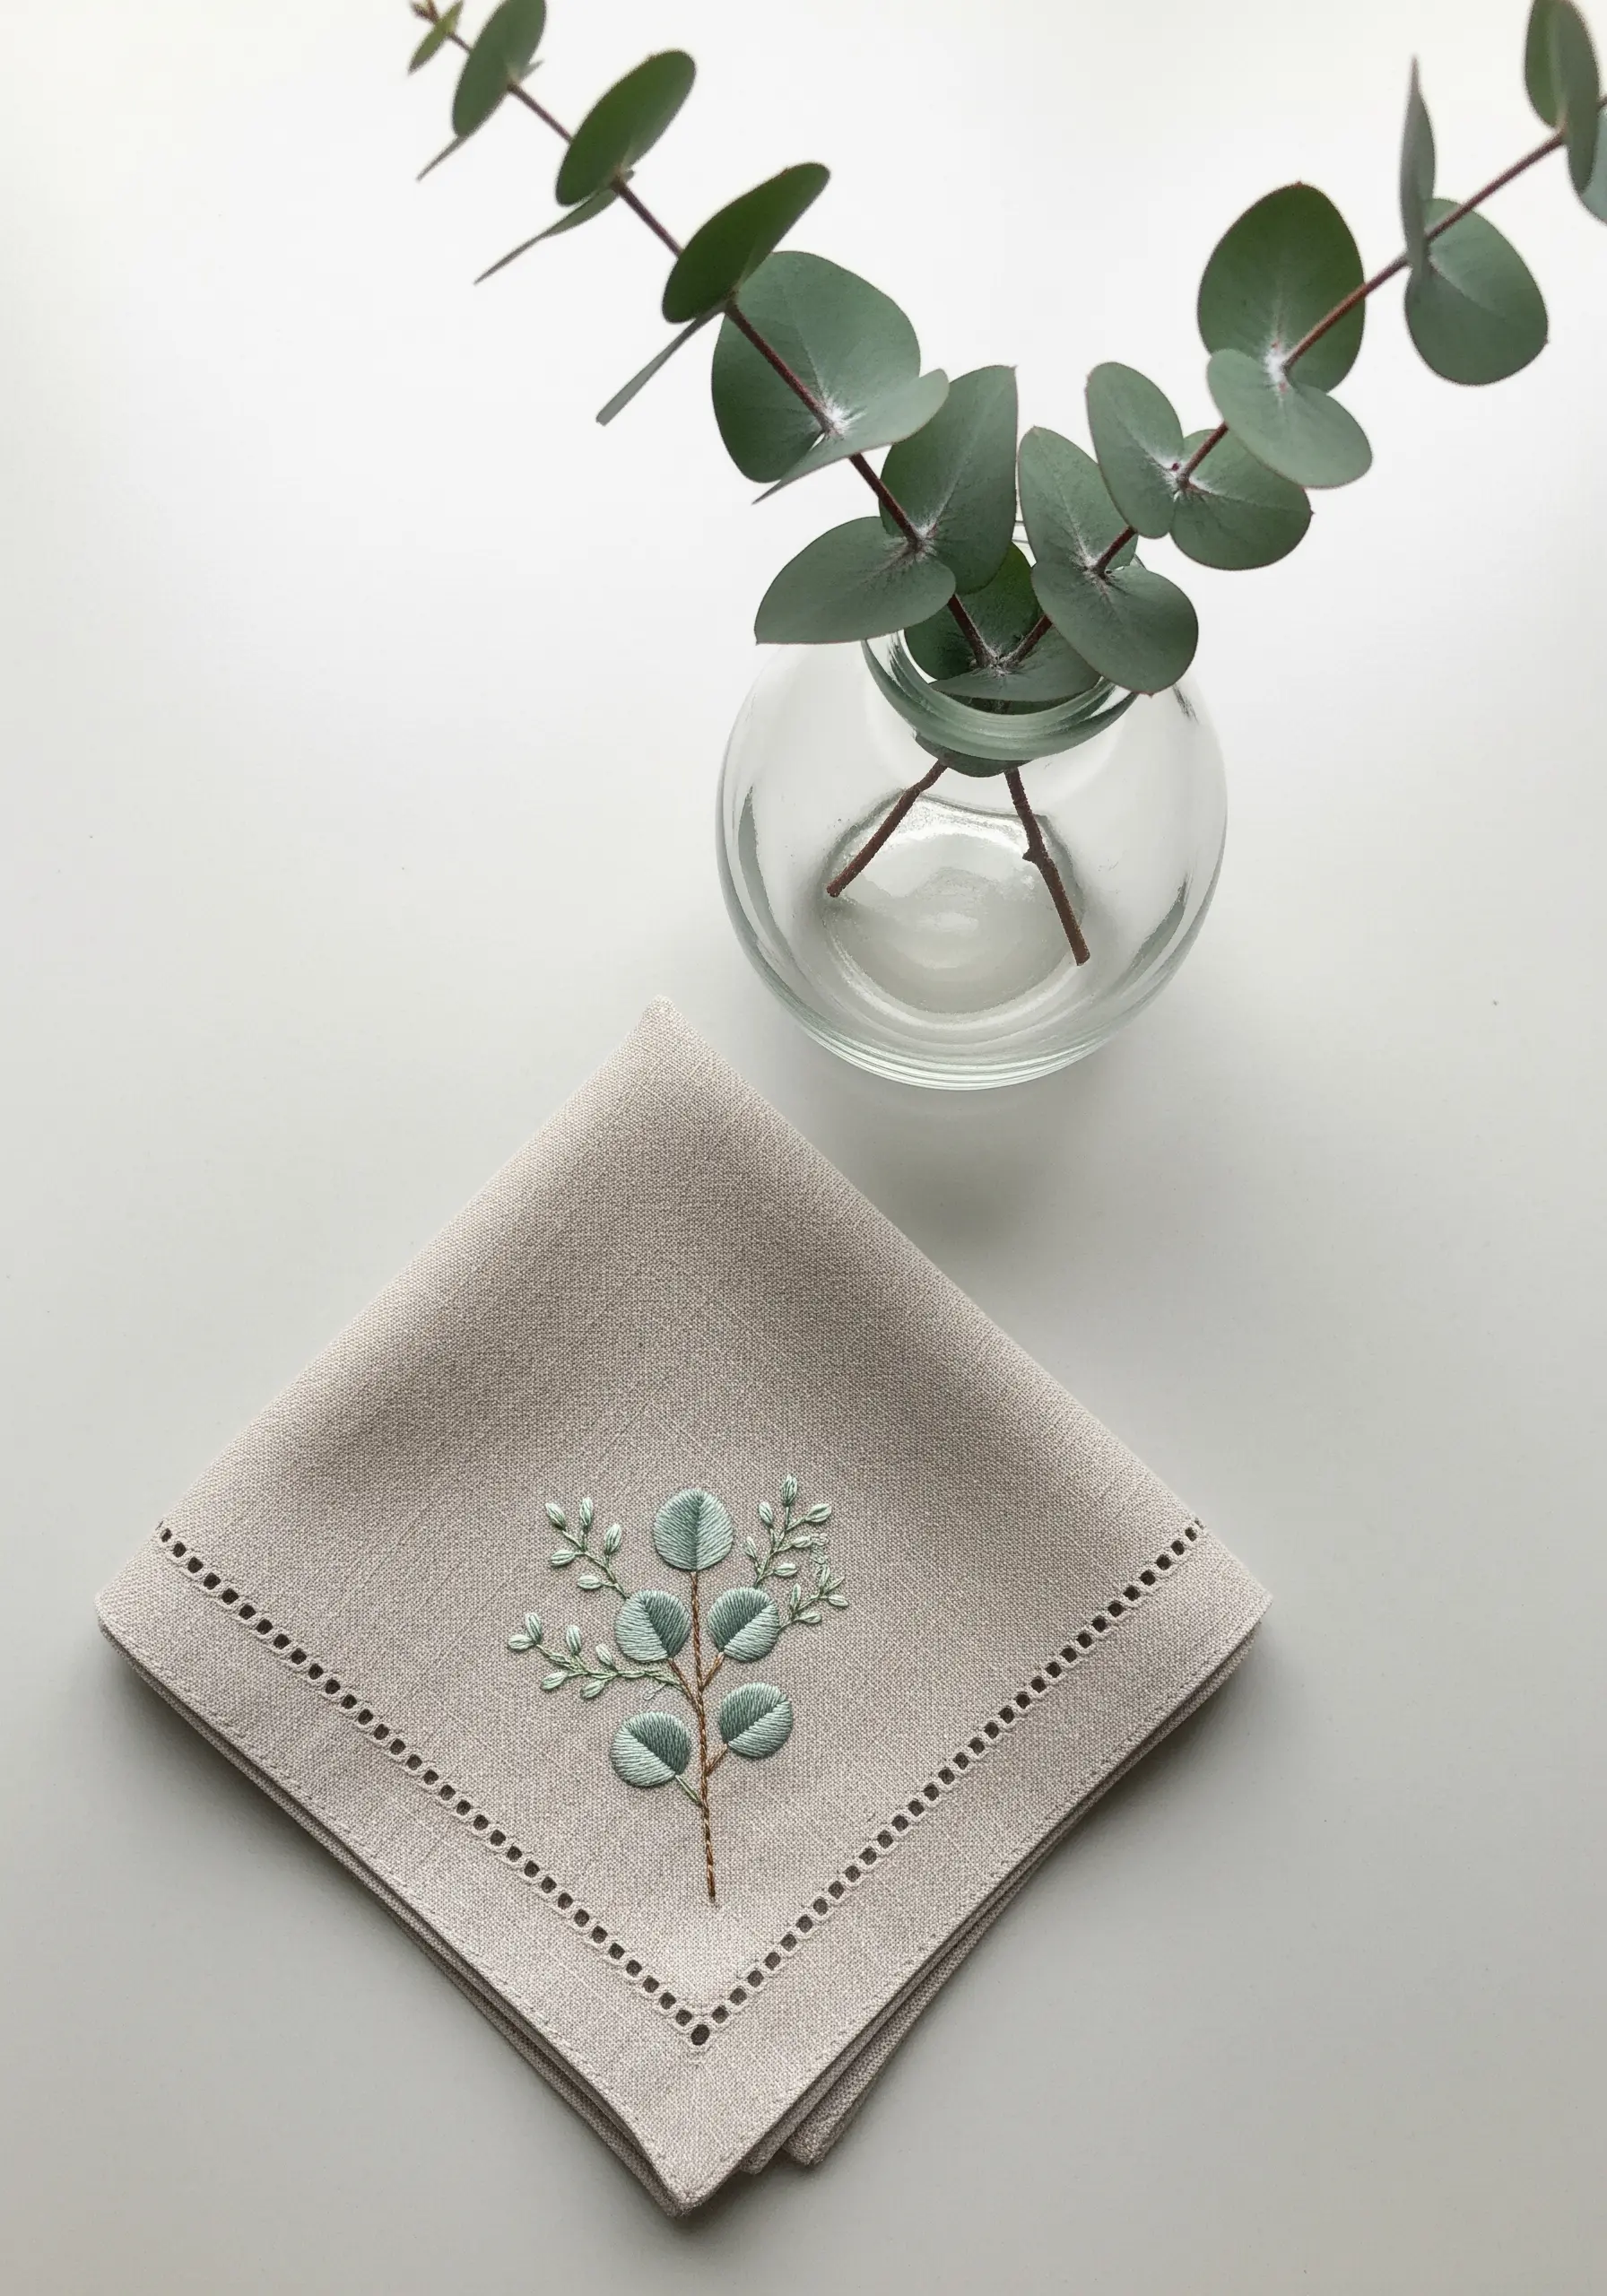
To create soft, realistic leaves with a matte finish, use a fishbone stitch rather than a satin stitch.
The overlapping, angled nature of fishbone stitch creates a central line and a more organic texture.
Incorporate two similar shades of muted green-blue, alternating them randomly to give the leaves a natural, variegated appearance.
10. Woven Strawberry Texture
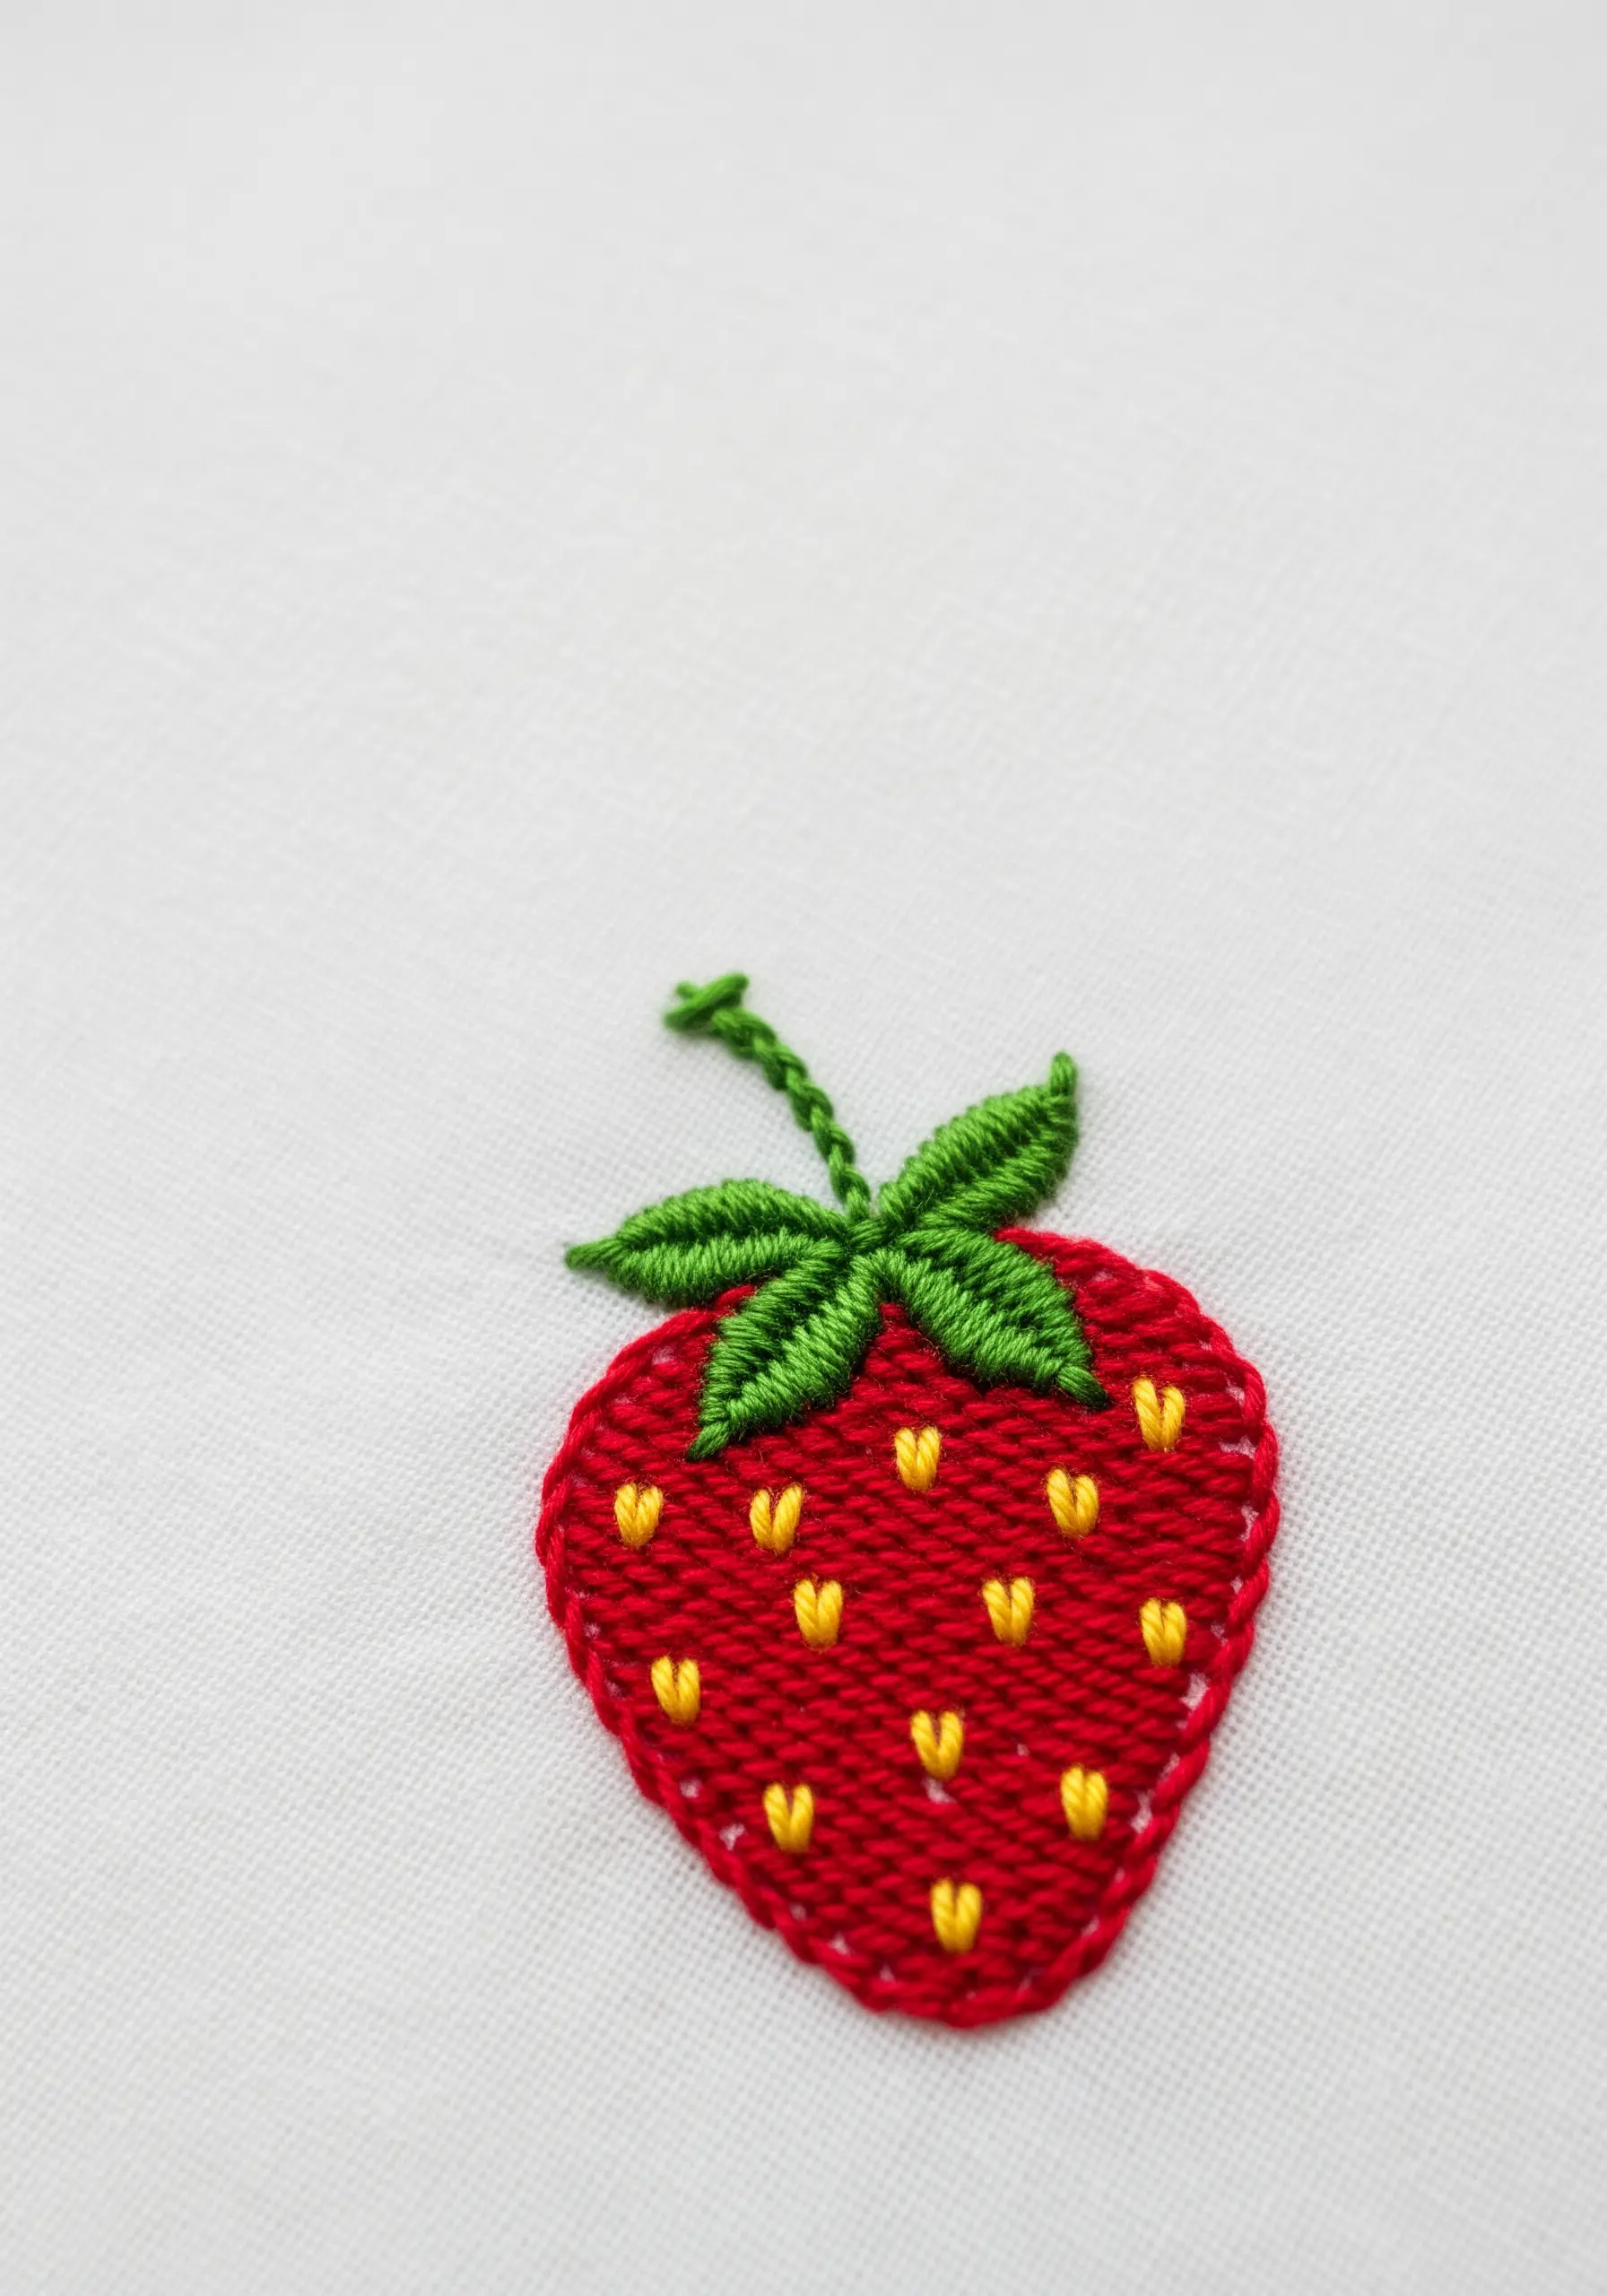
Move beyond flat fills by using a woven wheel stitch for the body of the strawberry.
Create a foundation of straight-stitch ‘spokes’ and then weave your thread over and under, building a raised, tactile surface that begs to be touched.
Add tiny yellow seed beads or French knots on top to complete the realistic, multi-dimensional effect.
11. Whispers of a Dandelion

The key to capturing the dandelion’s airy quality is thread weight and stitch direction.
Use a single strand of white floss for the floating seeds, stitching each parachute with just a few tiny, fanned-out straight stitches.
Cluster French knots in shades of ivory and pale beige at the center to create a dense, textural core from which the seeds disperse.
12. A Simple Constellation
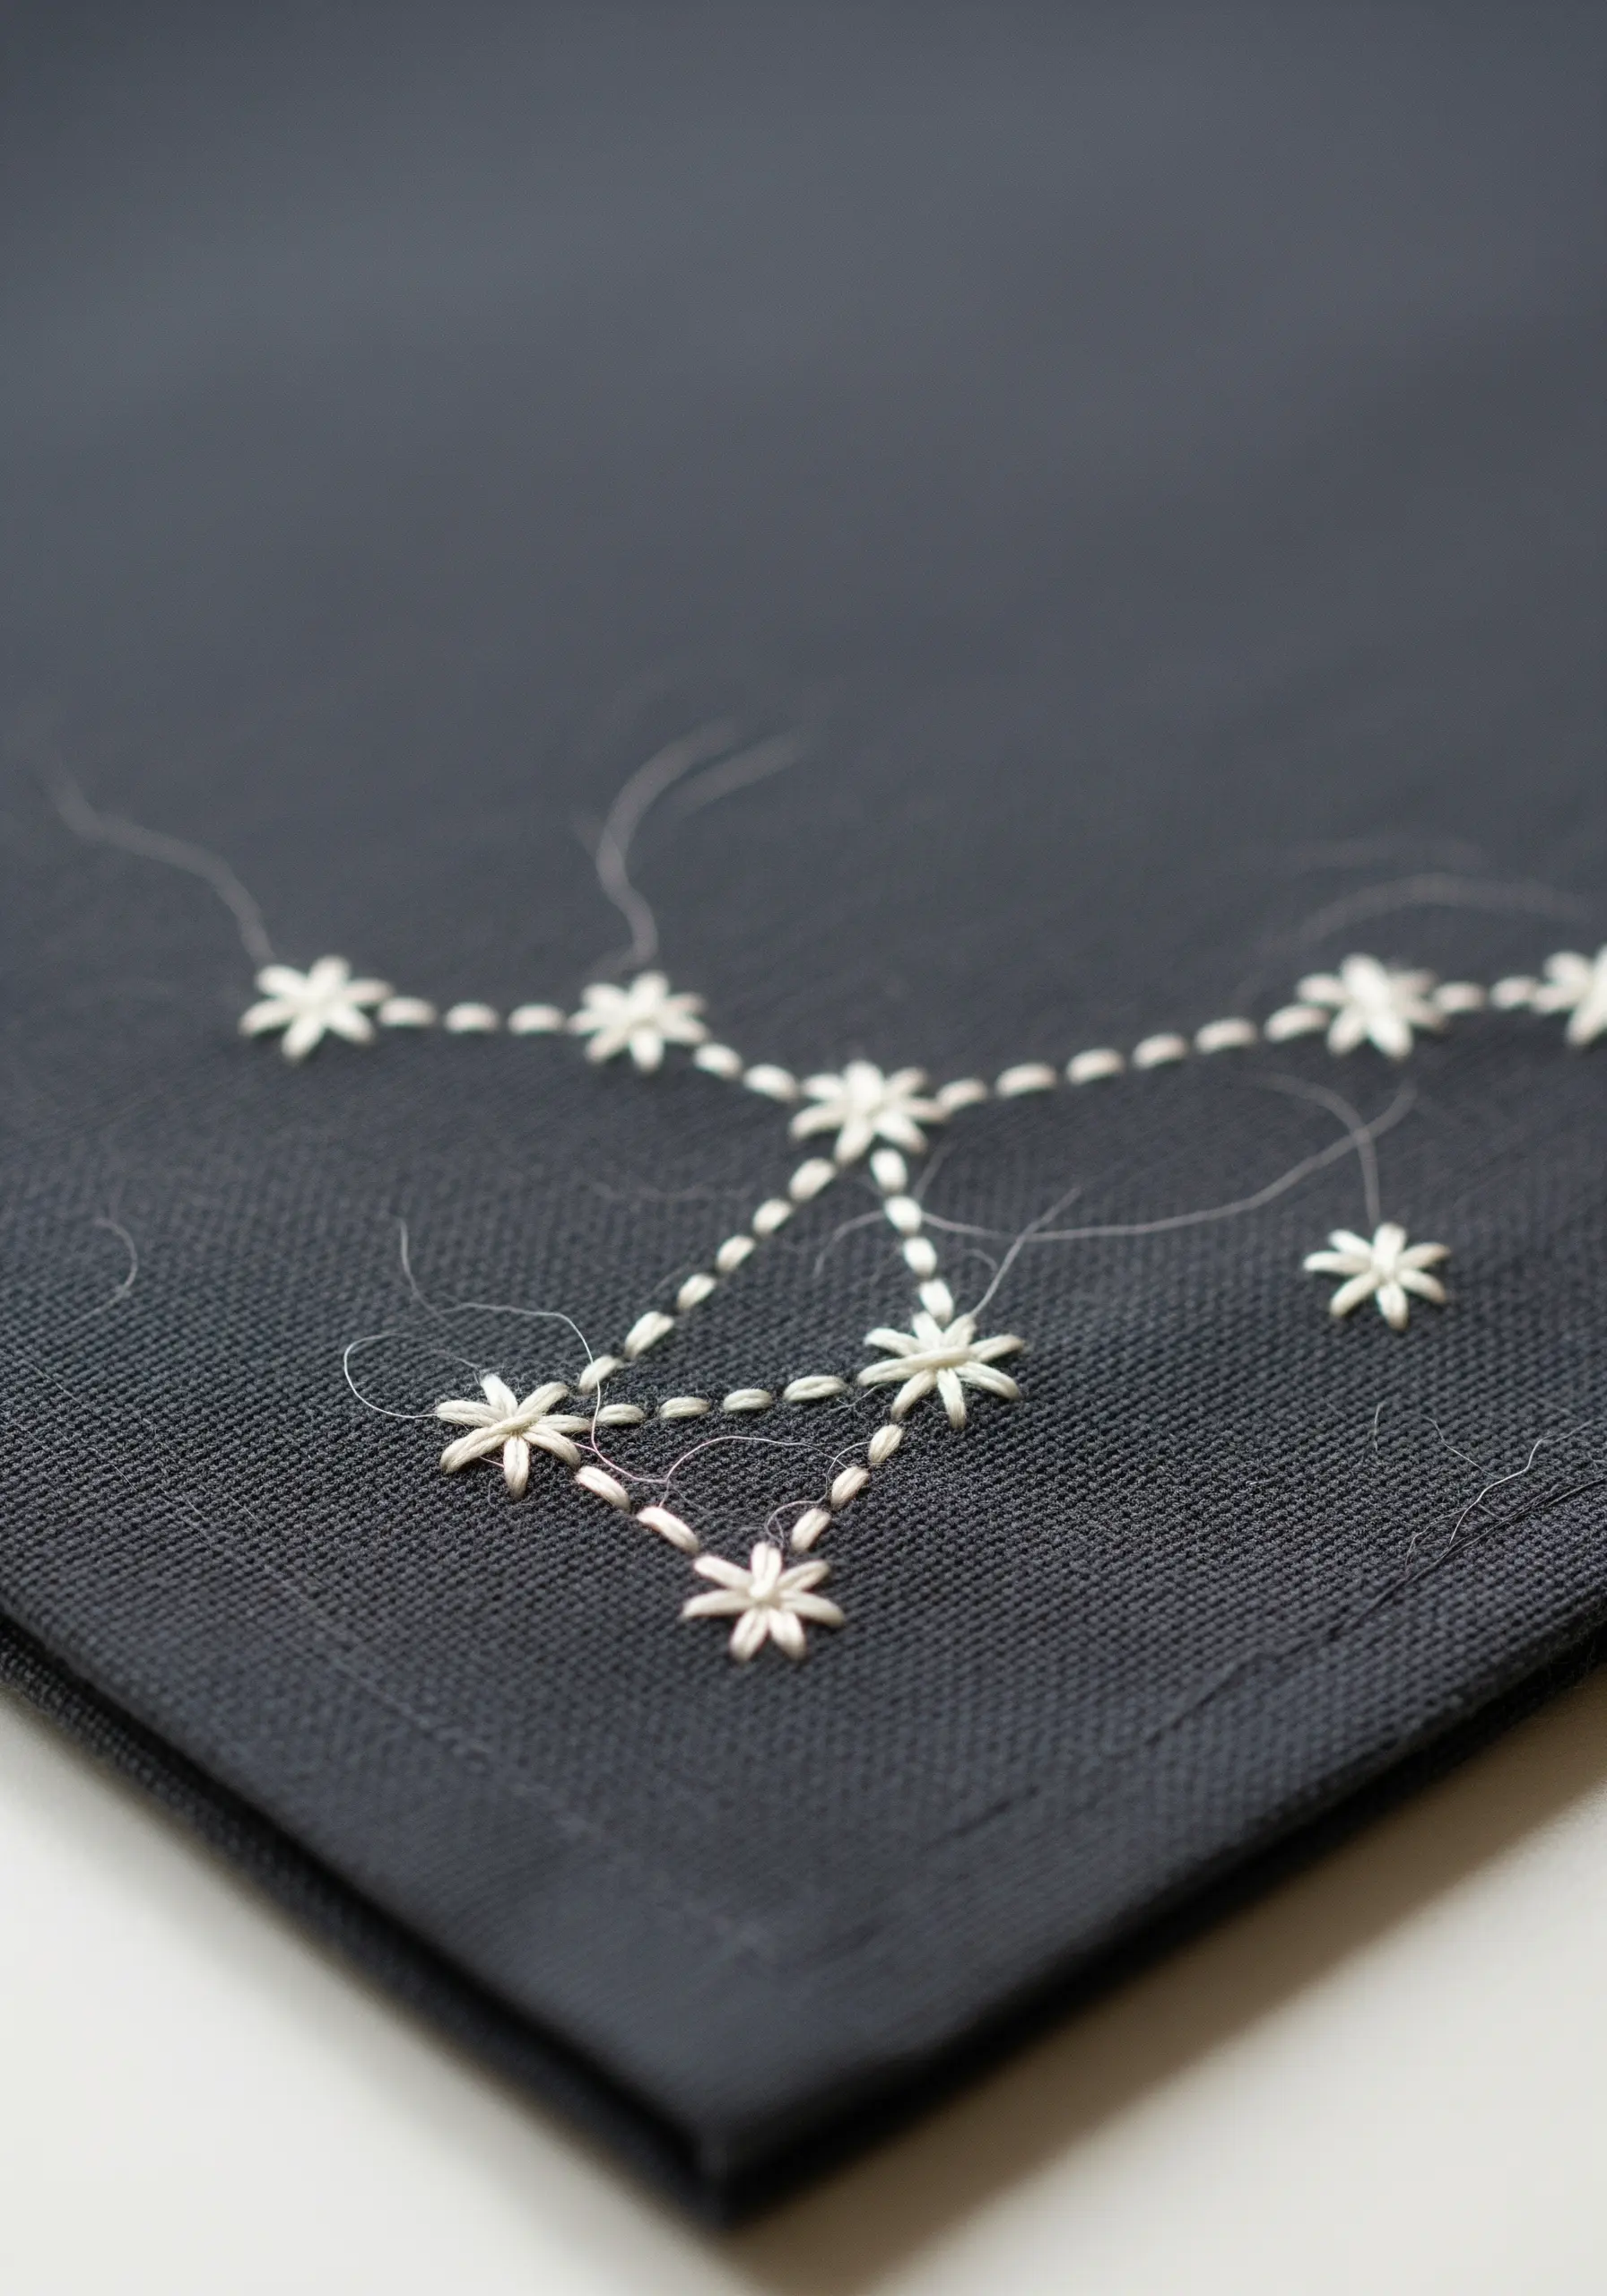
Create a clear visual hierarchy in your celestial design by varying the thread count.
Use a delicate, single-strand backstitch for the connecting lines so they appear faint and atmospheric.
For the stars themselves, switch to a two or three-strand star stitch, making them the distinct focal points of the composition.
This contrast is what makes the design feel intentional and balanced.
13. Elegant Teacup Outline
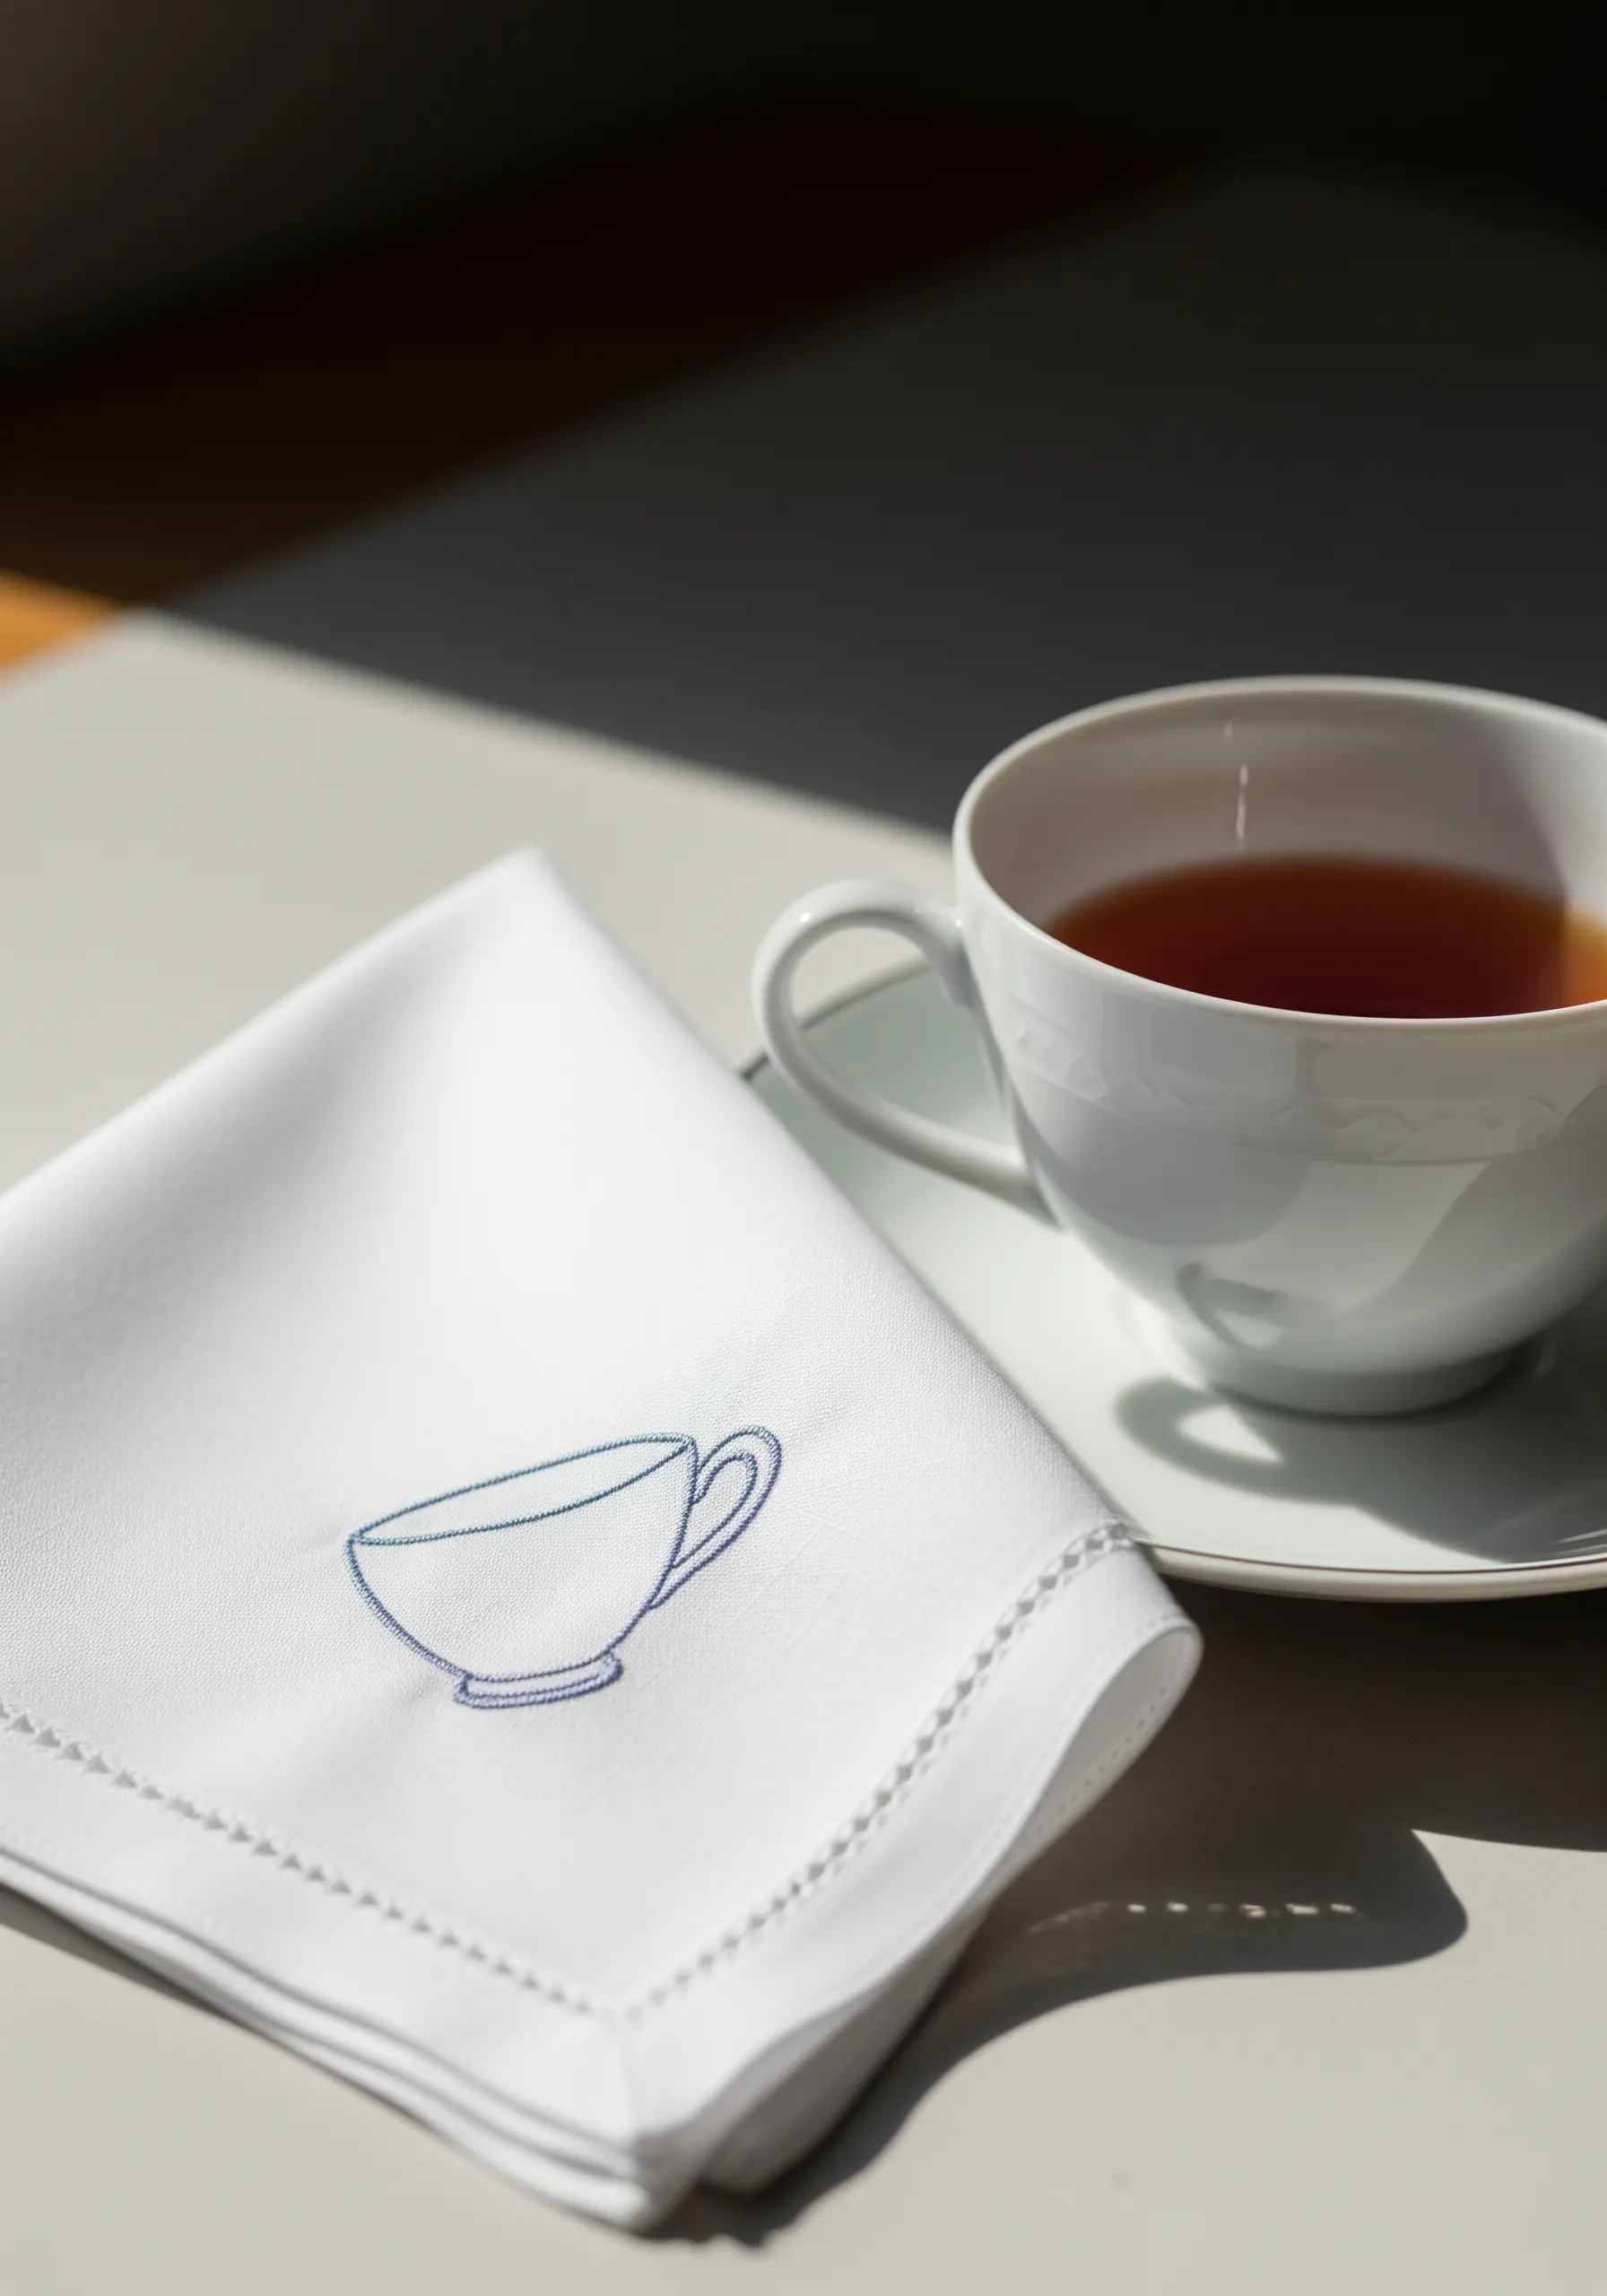
When executing a one-line design, the smoothness of your curves is paramount.
A stem stitch is the ideal choice, as its overlapping nature creates a fluid, rope-like line that flows beautifully around bends without breaking.
For an even more seamless appearance, consider a whipped backstitch, which completely conceals the individual stitches for a truly continuous outline.
14. Woodland Mushroom Details
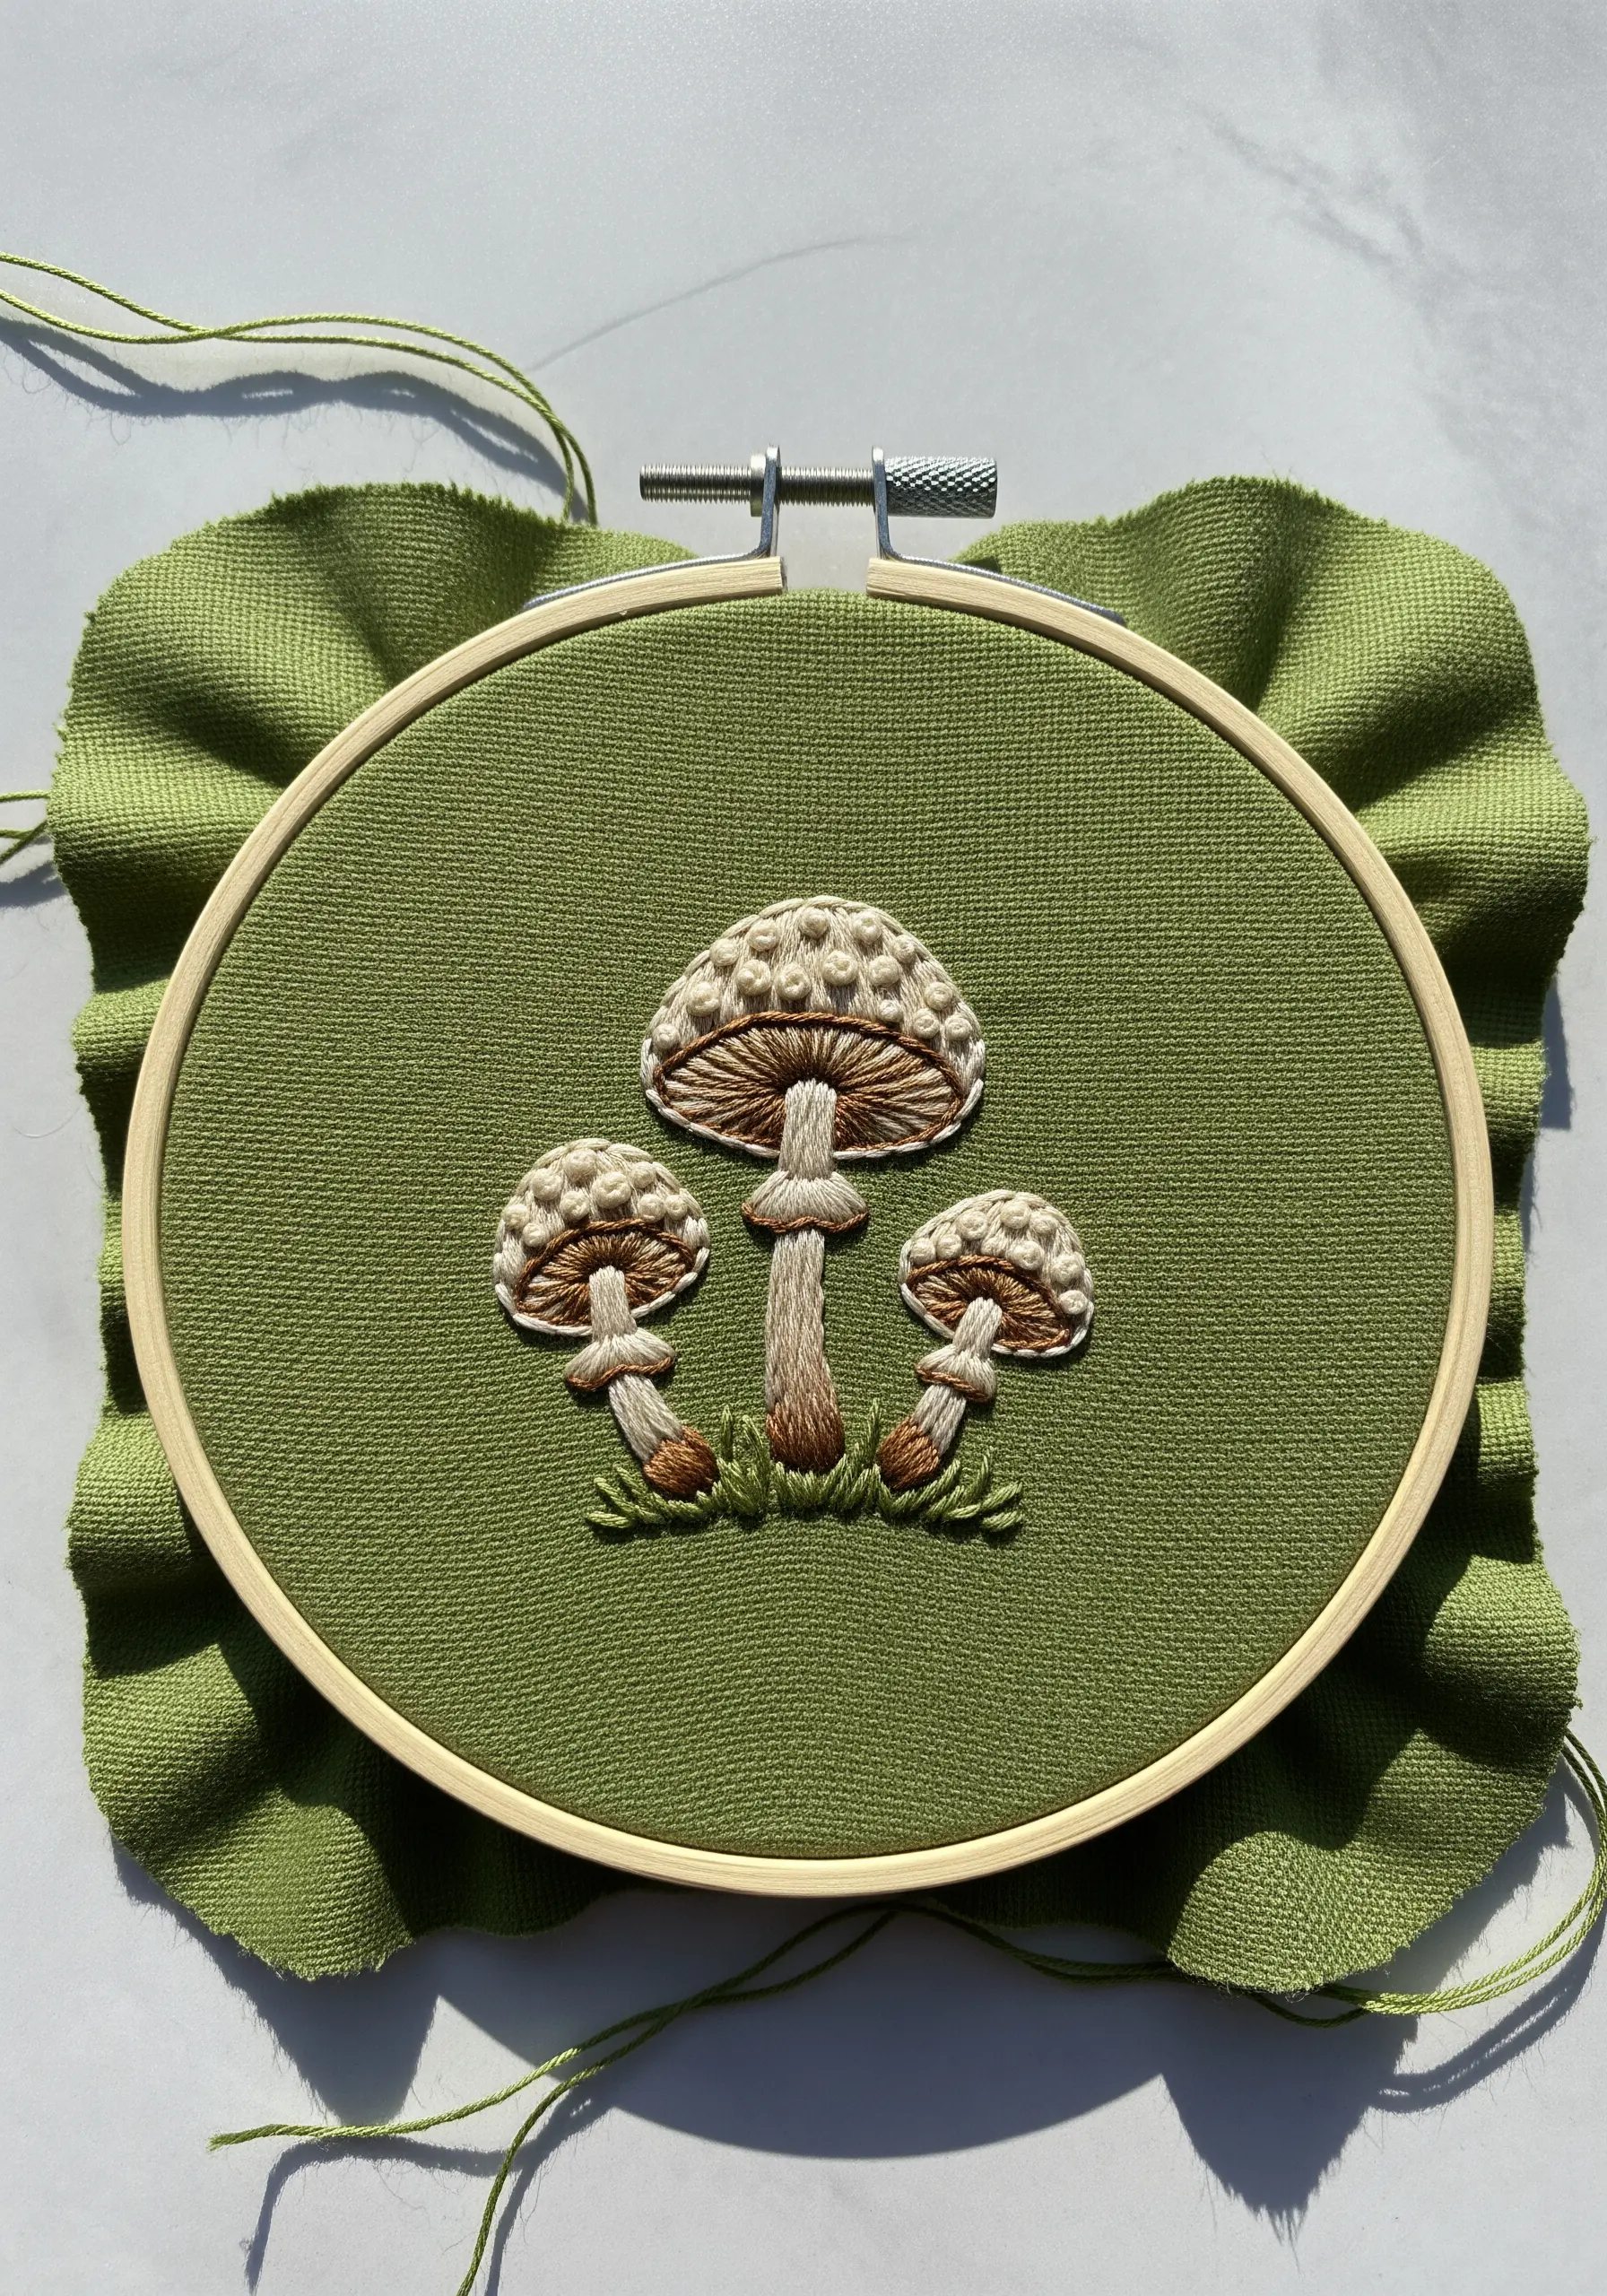
Build realistic texture on the mushroom caps by stitching a base of satin stitch, then adding scattered French knots in a lighter color on top.
Suggest the delicate gills underneath with tiny straight stitches radiating out from the stem—this creates an illusion of depth.
Use two shades of brown on the stems, placing the darker color along one edge to create a shadow that makes them appear rounded.
15. Verdant Olive Branch

To create leaves with a defined central vein, treat each leaf as two separate sections.
Fill each half with angled satin stitches that meet in the middle, creating a subtle line and natural-looking dimension.
For plump, rounded olives, use a padded satin stitch: fill the shape with a base of small horizontal stitches, then cover them completely with vertical satin stitches for a raised, 3D effect.
16. Autumnal Maple Leaf Gradient
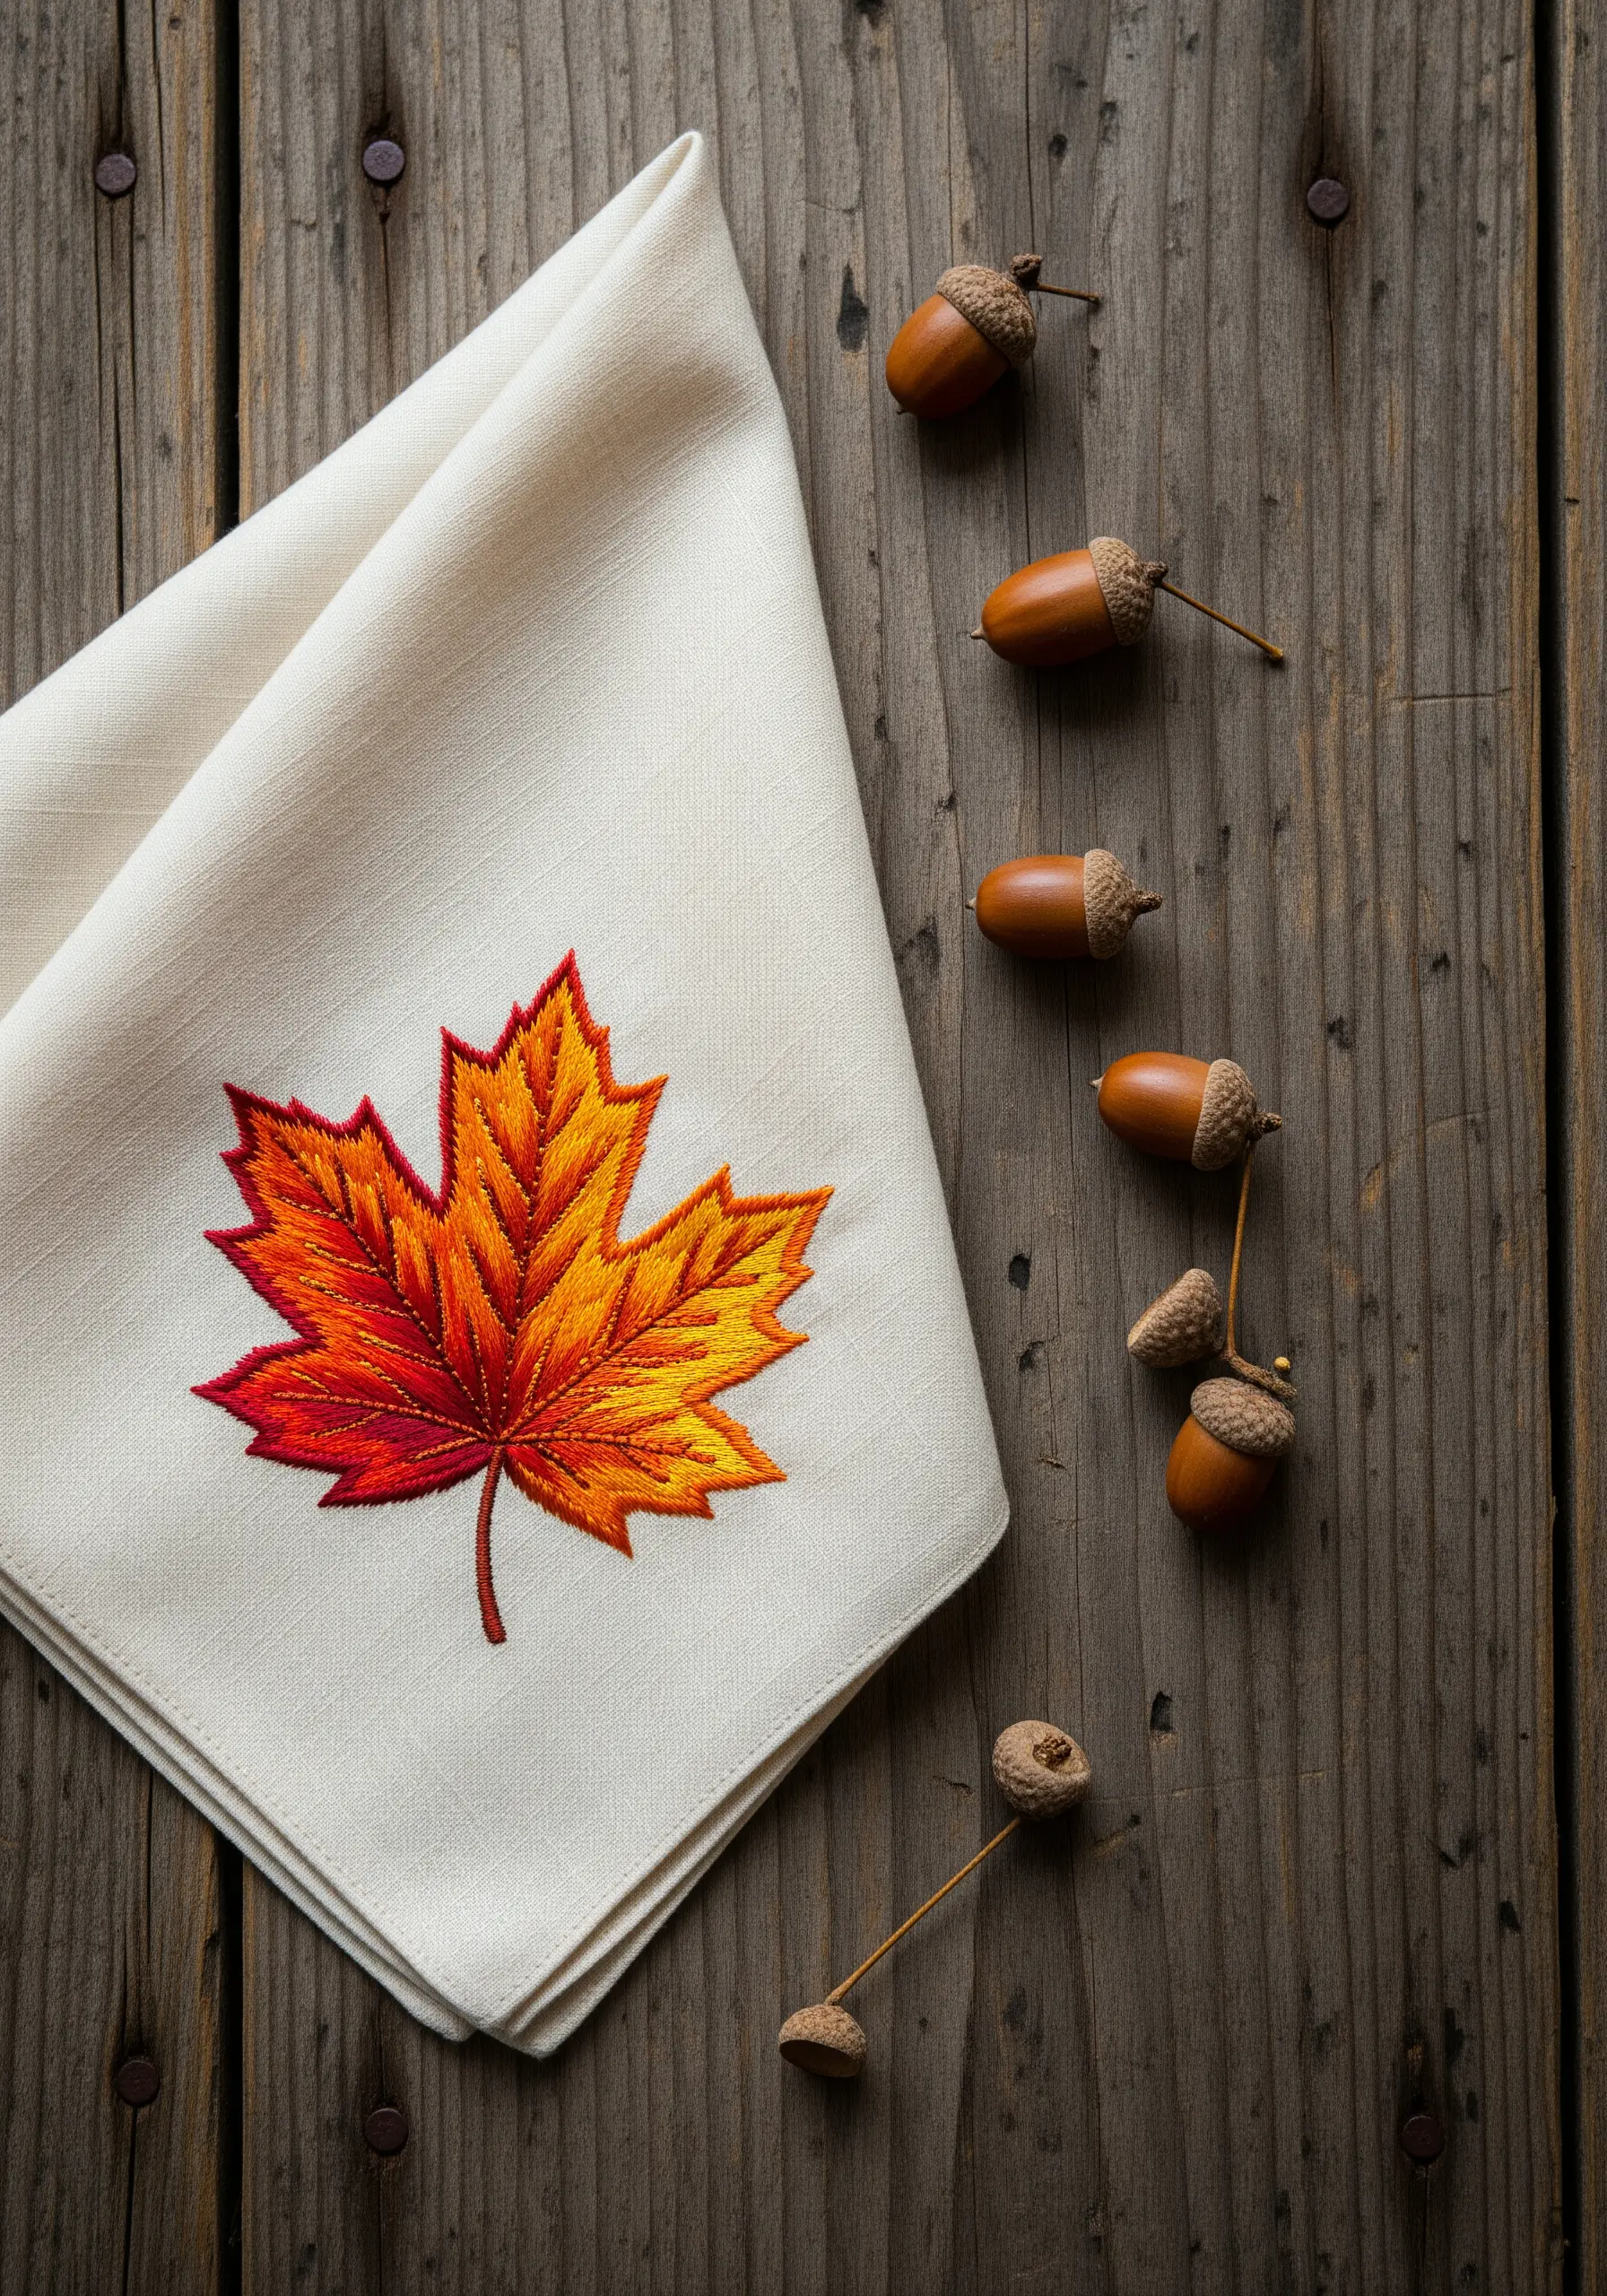
This vibrant, painterly effect is achieved through thread painting, a technique centered on the long-and-short stitch.
Work in small sections, blending one color into the next with interlocking stitches of varying lengths.
Start with the lightest yellow at the tips, gradually working in orange and then deep red toward the center. This creates a seamless transition that a standard satin stitch cannot replicate.
17. Stylized Woven Sun

Create a powerful textural focal point with a woven wheel stitch for the sun’s center.
This stitch builds a raised, spiraling knot that immediately draws the eye.
Contrast this dense center with simple, clean straight stitches for the rays. Varying the length of the rays will give the motif a more dynamic, energetic feel.
18. Luminous White Feather
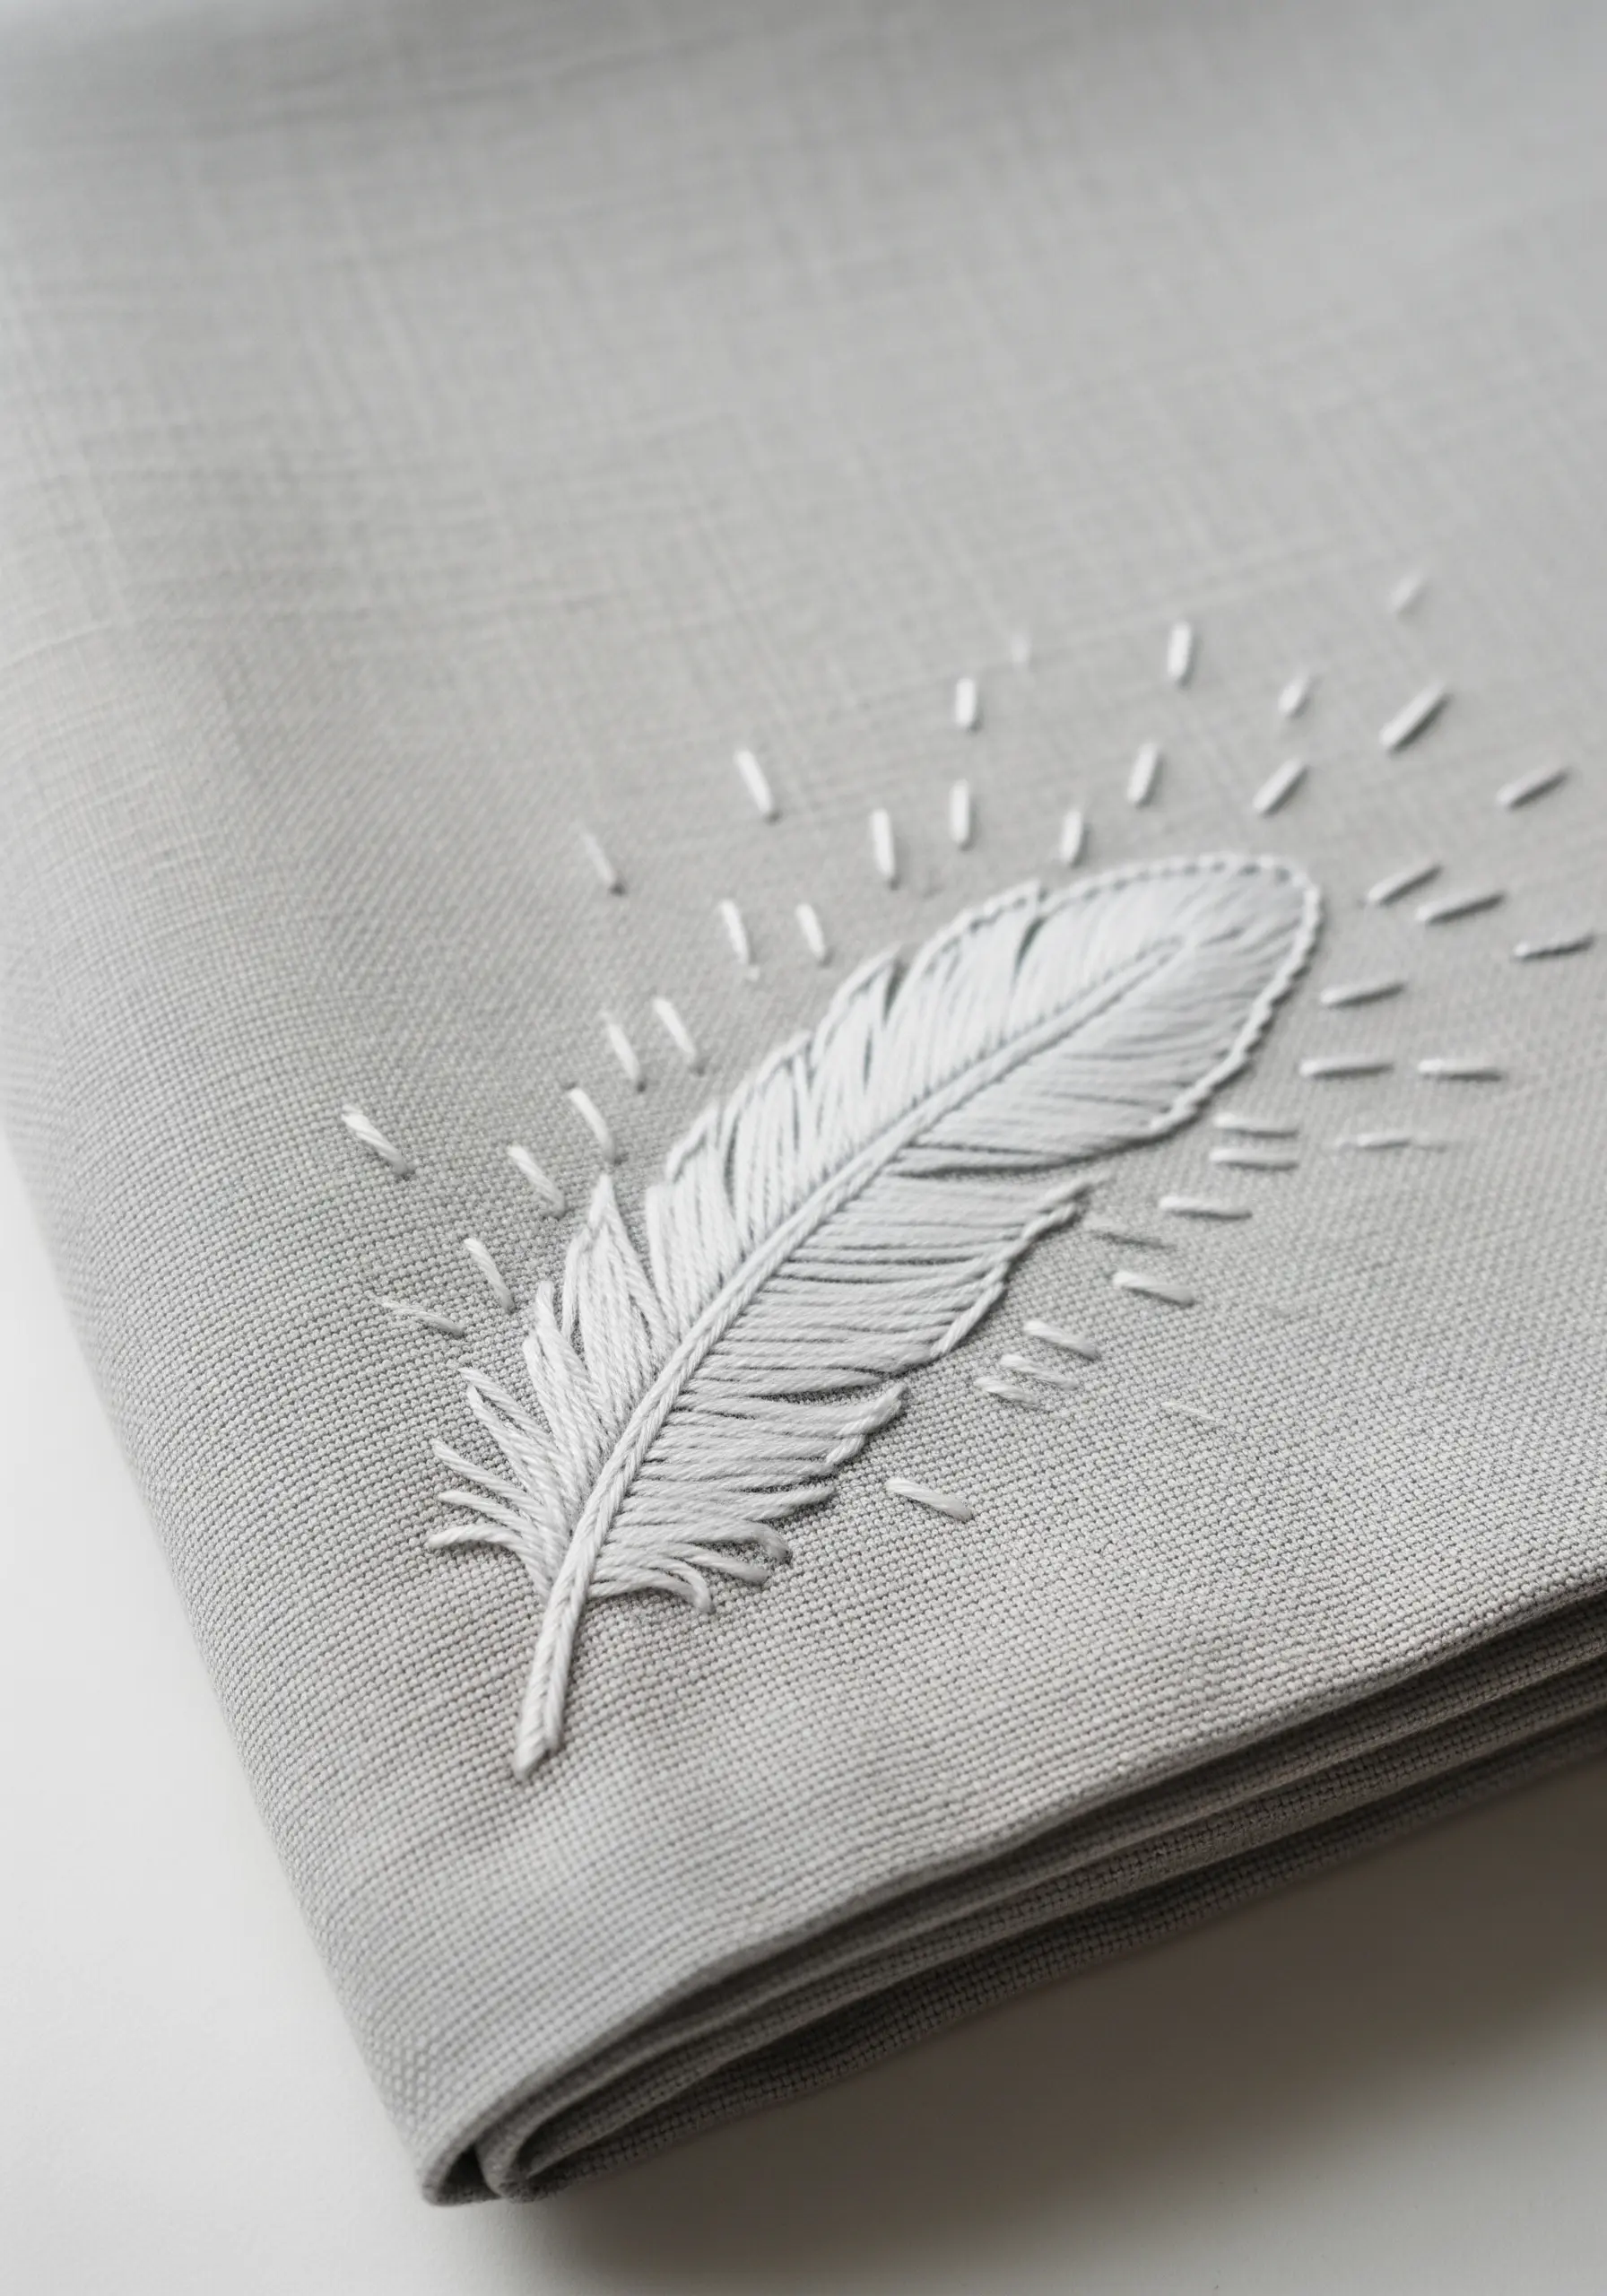
The fishbone stitch is perfectly suited for creating the soft, interlocking barbs of a feather.
The angled, overlapping stitches naturally form a central spine and give the feather a soft, organic texture.
Define the central quill with a single, sharp line of split stitch to provide structure. The radiating straight stitches add a touch of magic and light.
19. Geometric Crystal Outline
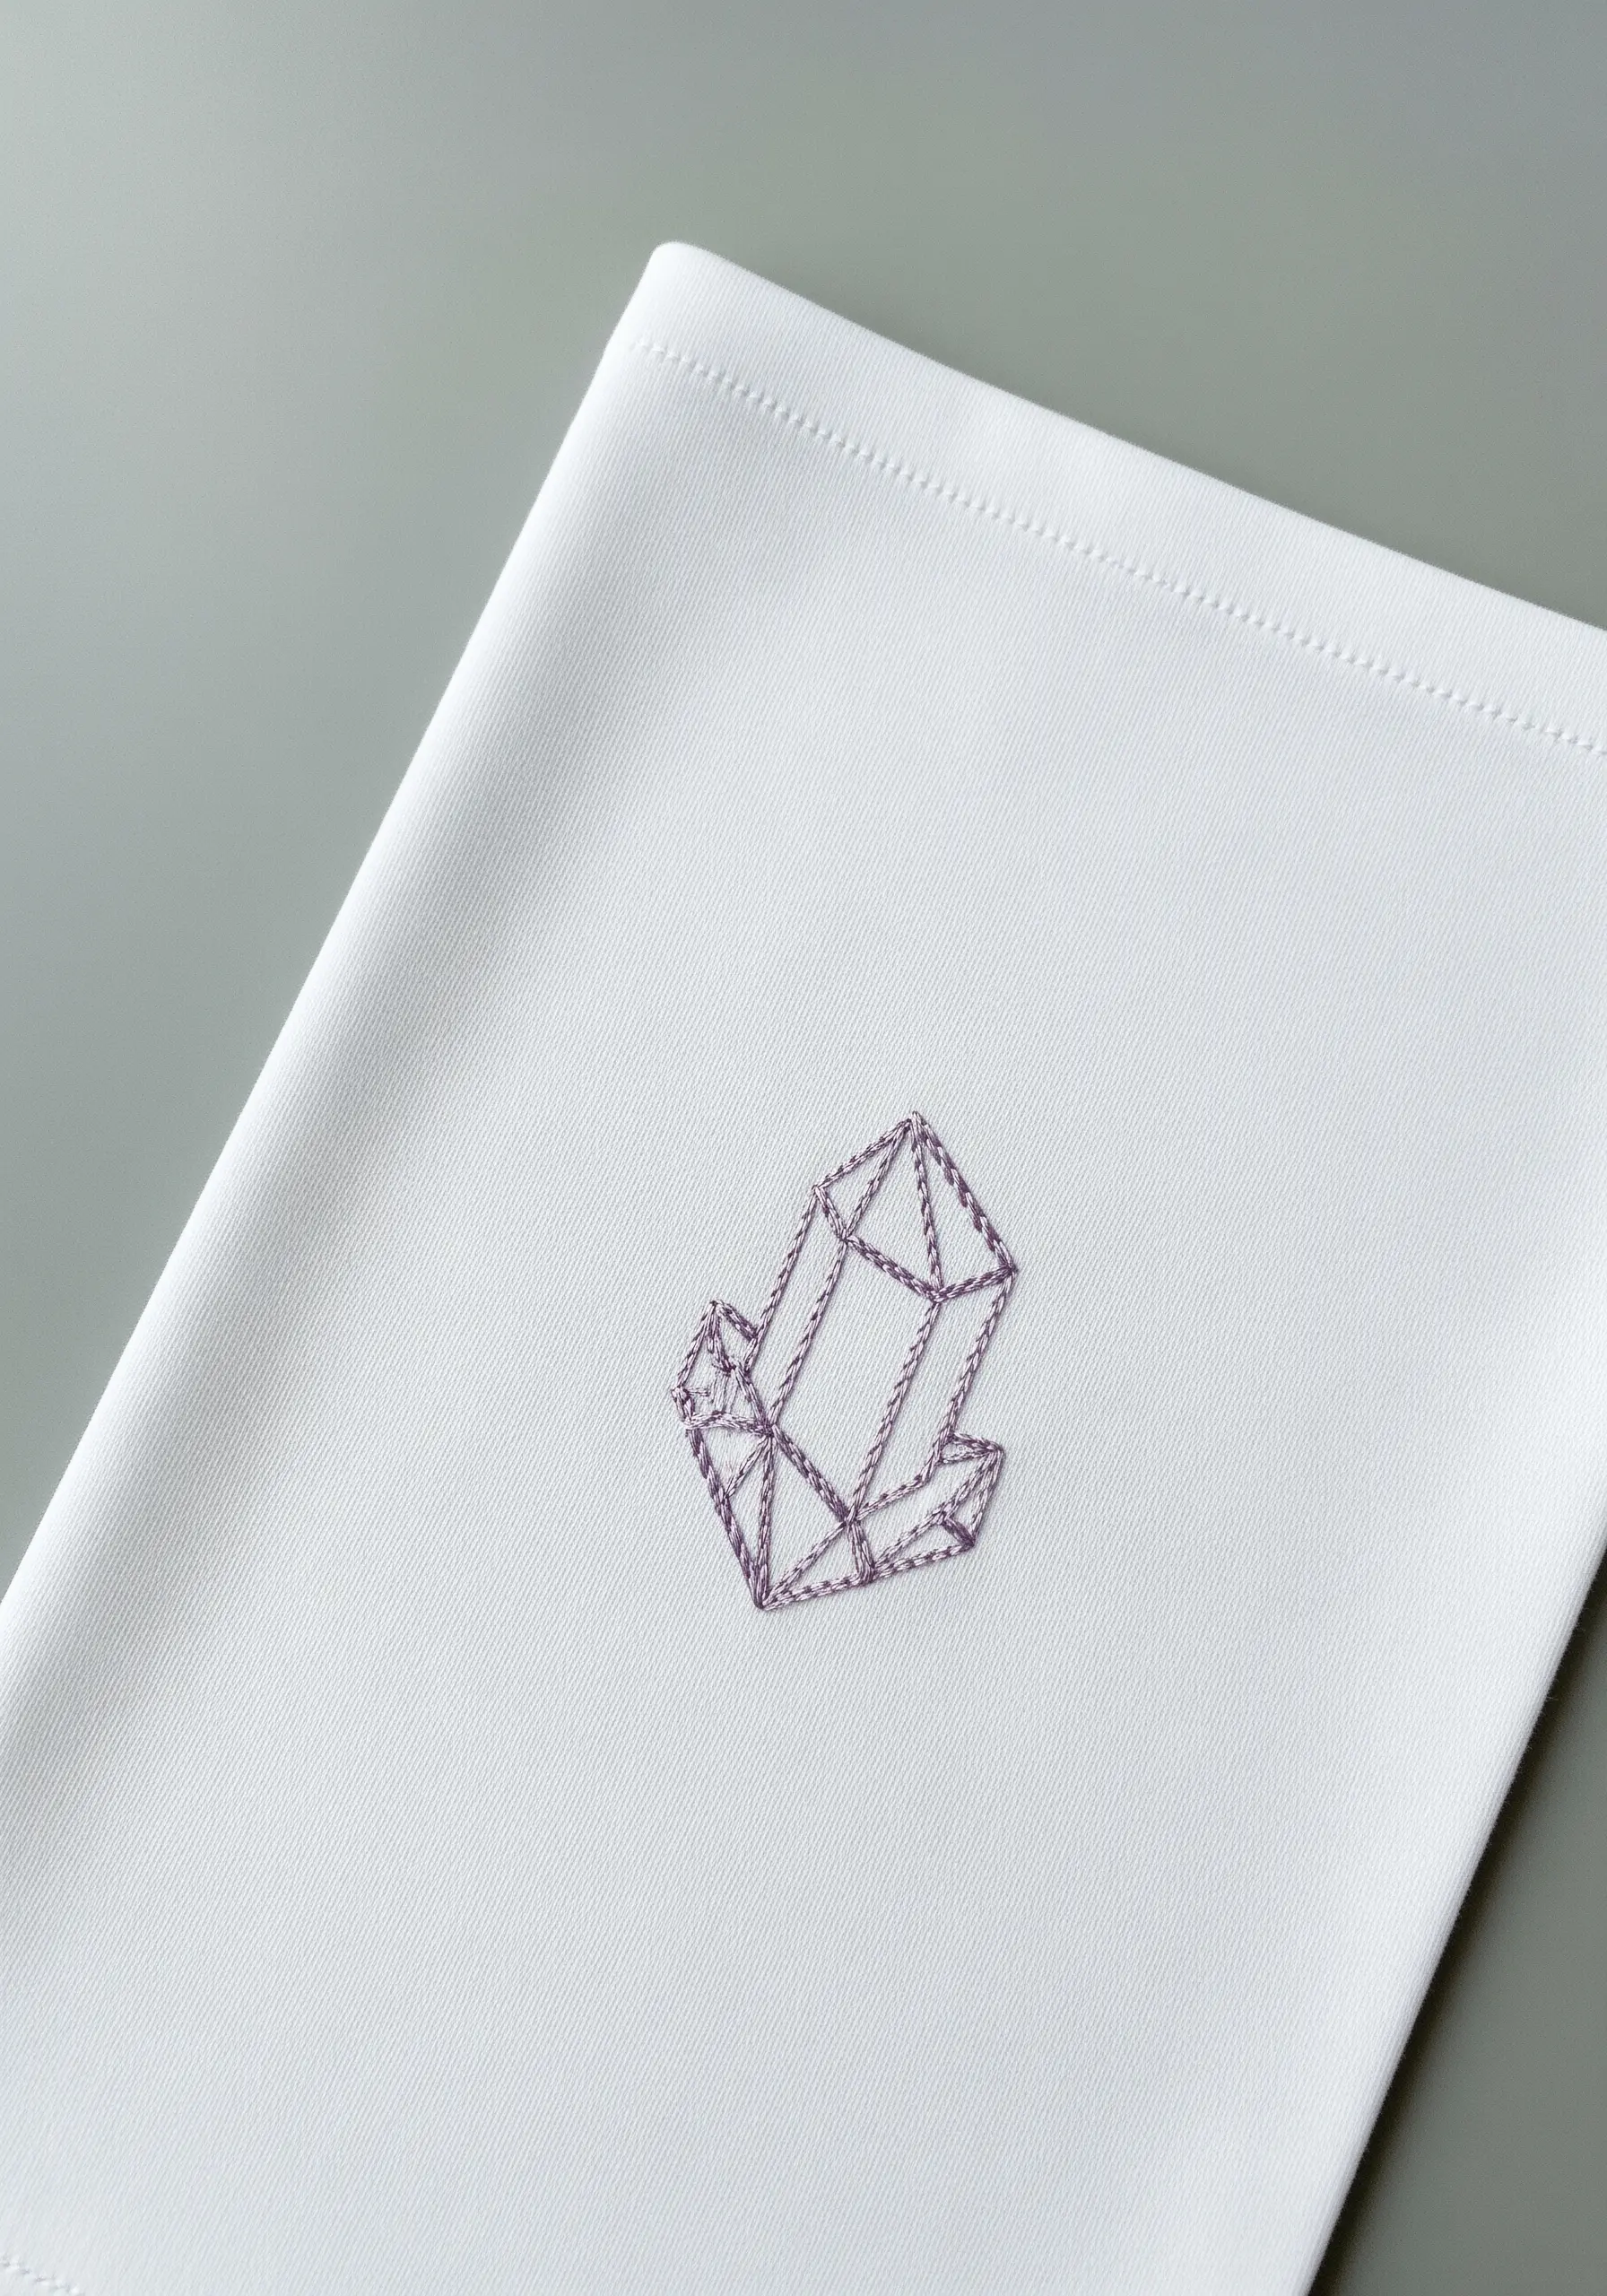
The success of this sharp, geometric design rests on absolute precision.
Use a backstitch and maintain a consistent stitch length throughout the entire piece.
To achieve perfectly crisp corners, ensure your stitch ends exactly at the point of intersection before you change direction. This technical focus is what makes the final result look so polished and intentional.
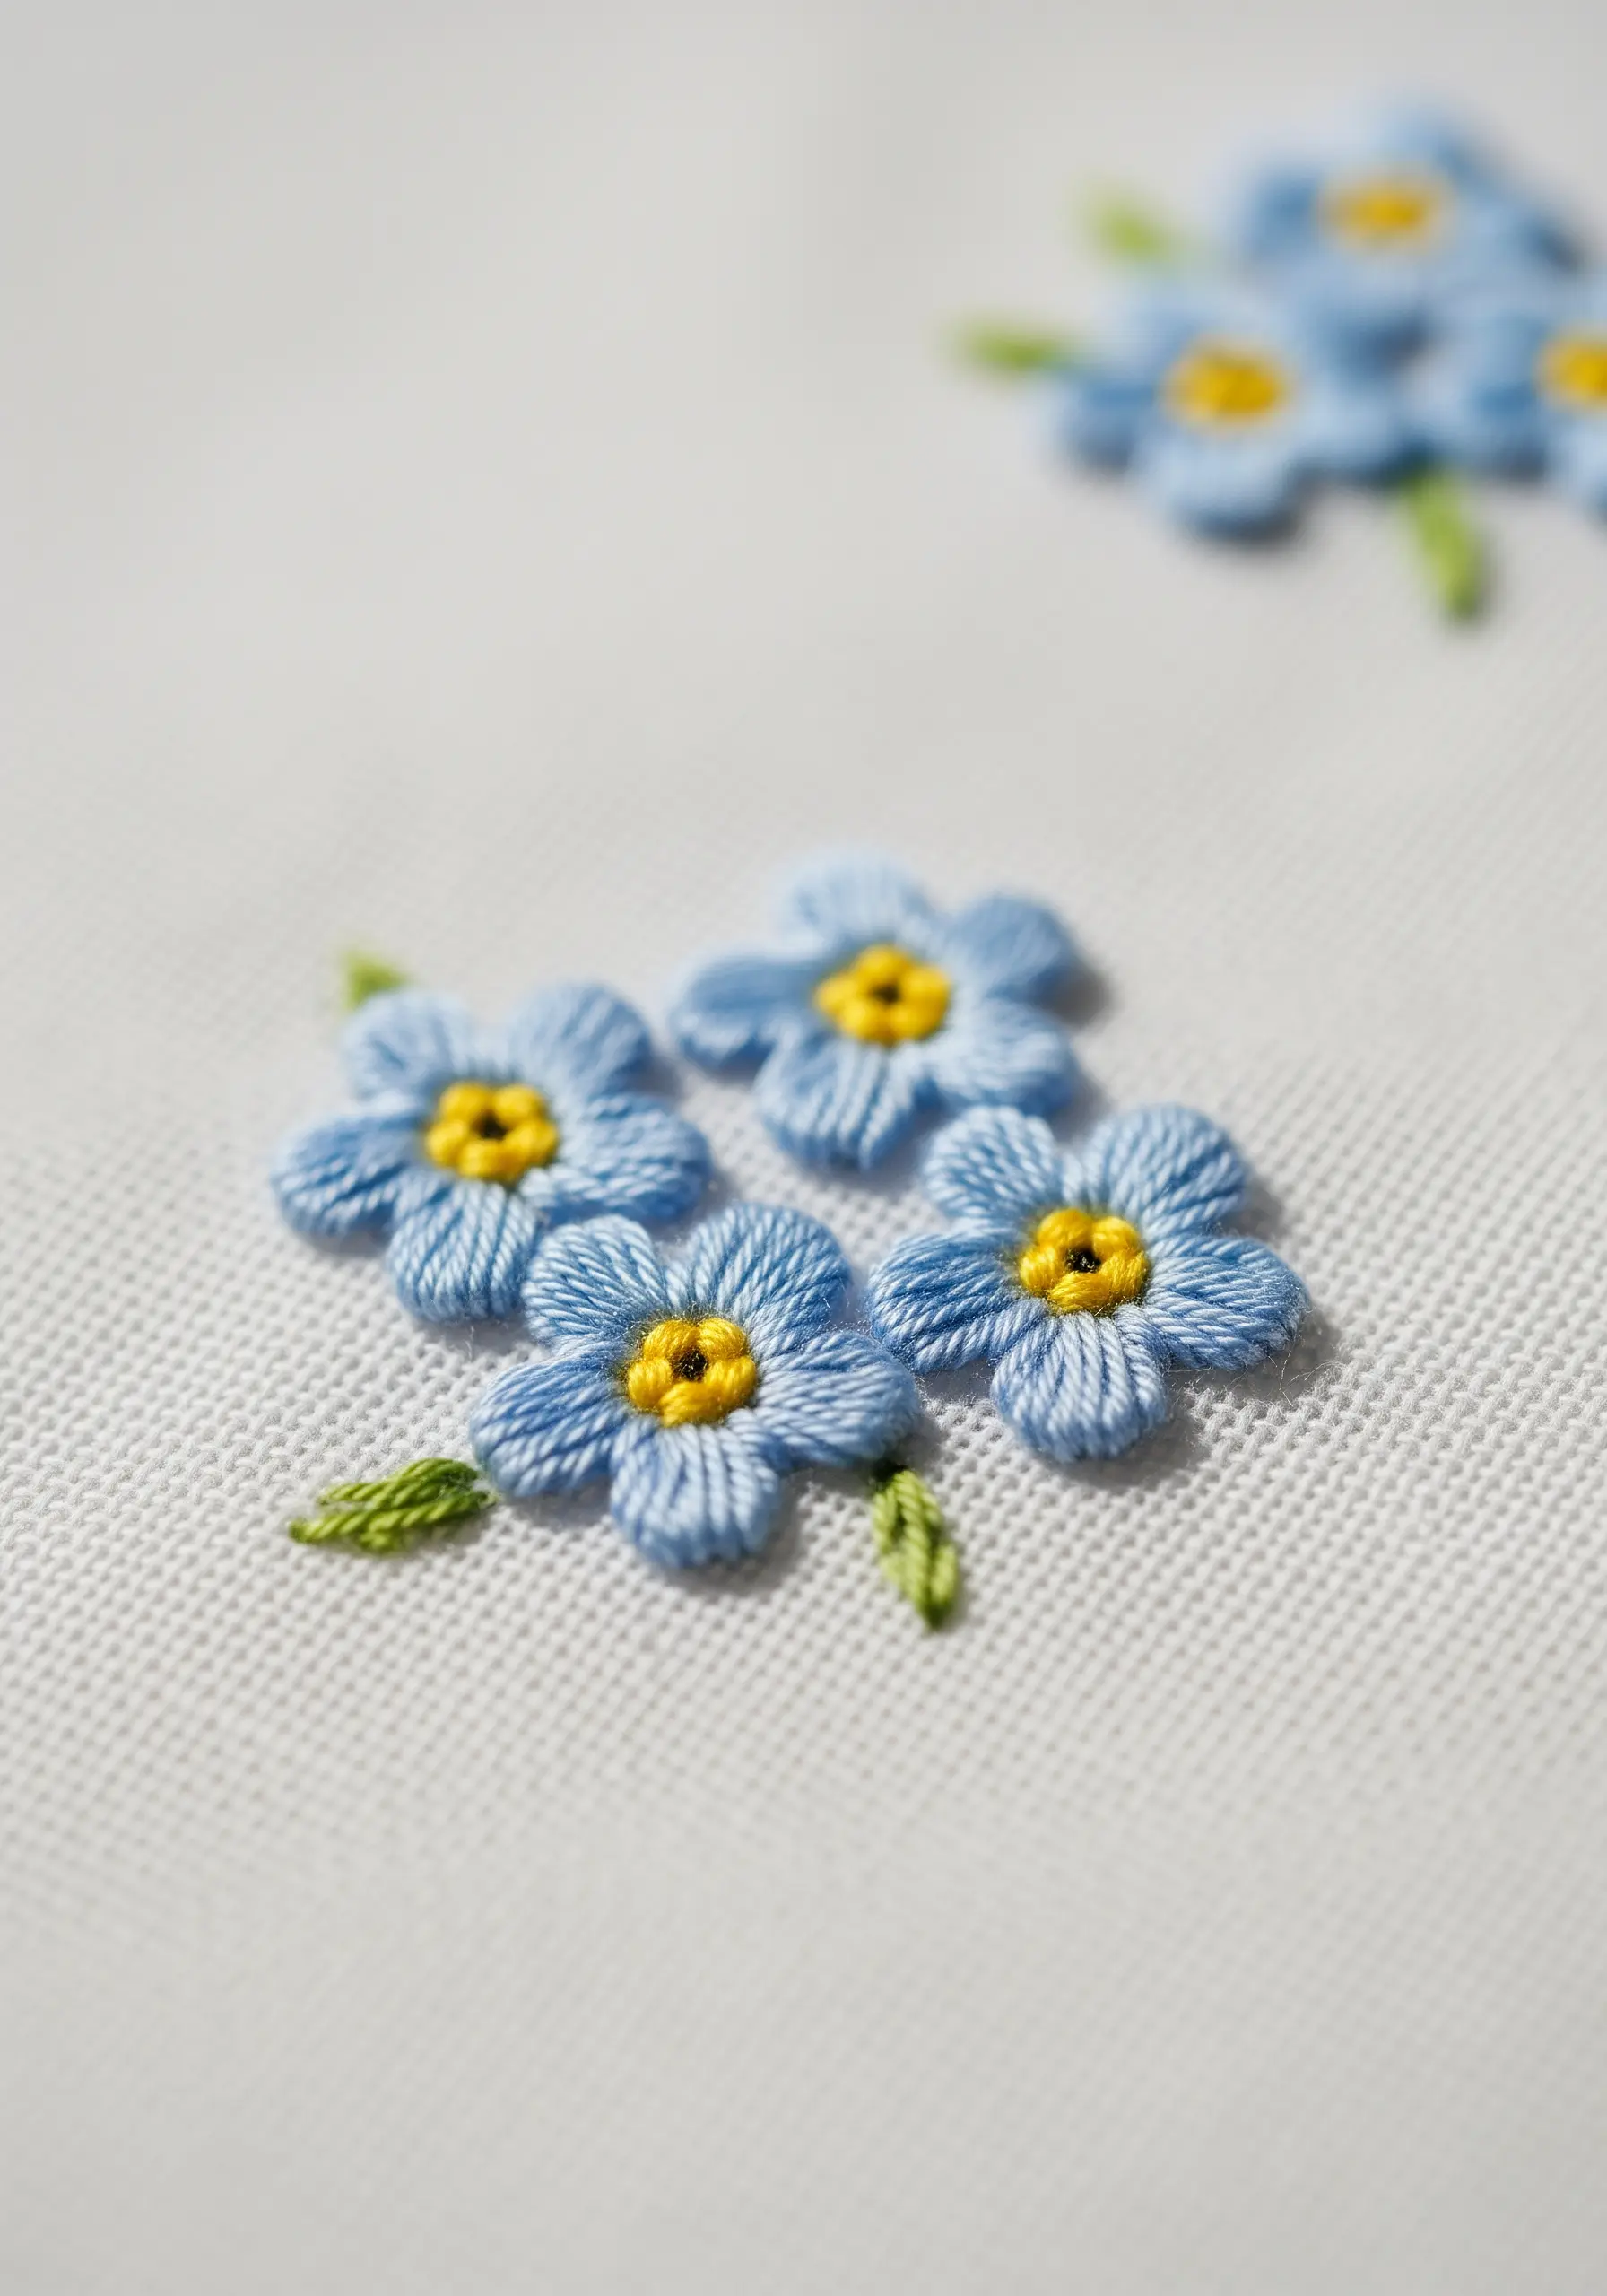
20. Classic Satin Stitch Daisies

For exceptionally smooth satin stitch petals, the secret is to use fewer strands of floss—two is often ideal for small-scale work.
Keep your stitches parallel and very close together, but avoid overlapping them, as this creates bulk.
Create a dense, pollen-like center by packing French knots tightly together, using a slightly thicker thread or an extra wrap around the needle to make them pop.
These are classic small floral embroidery patterns that always look elegant.
21. Abstract Hummingbird
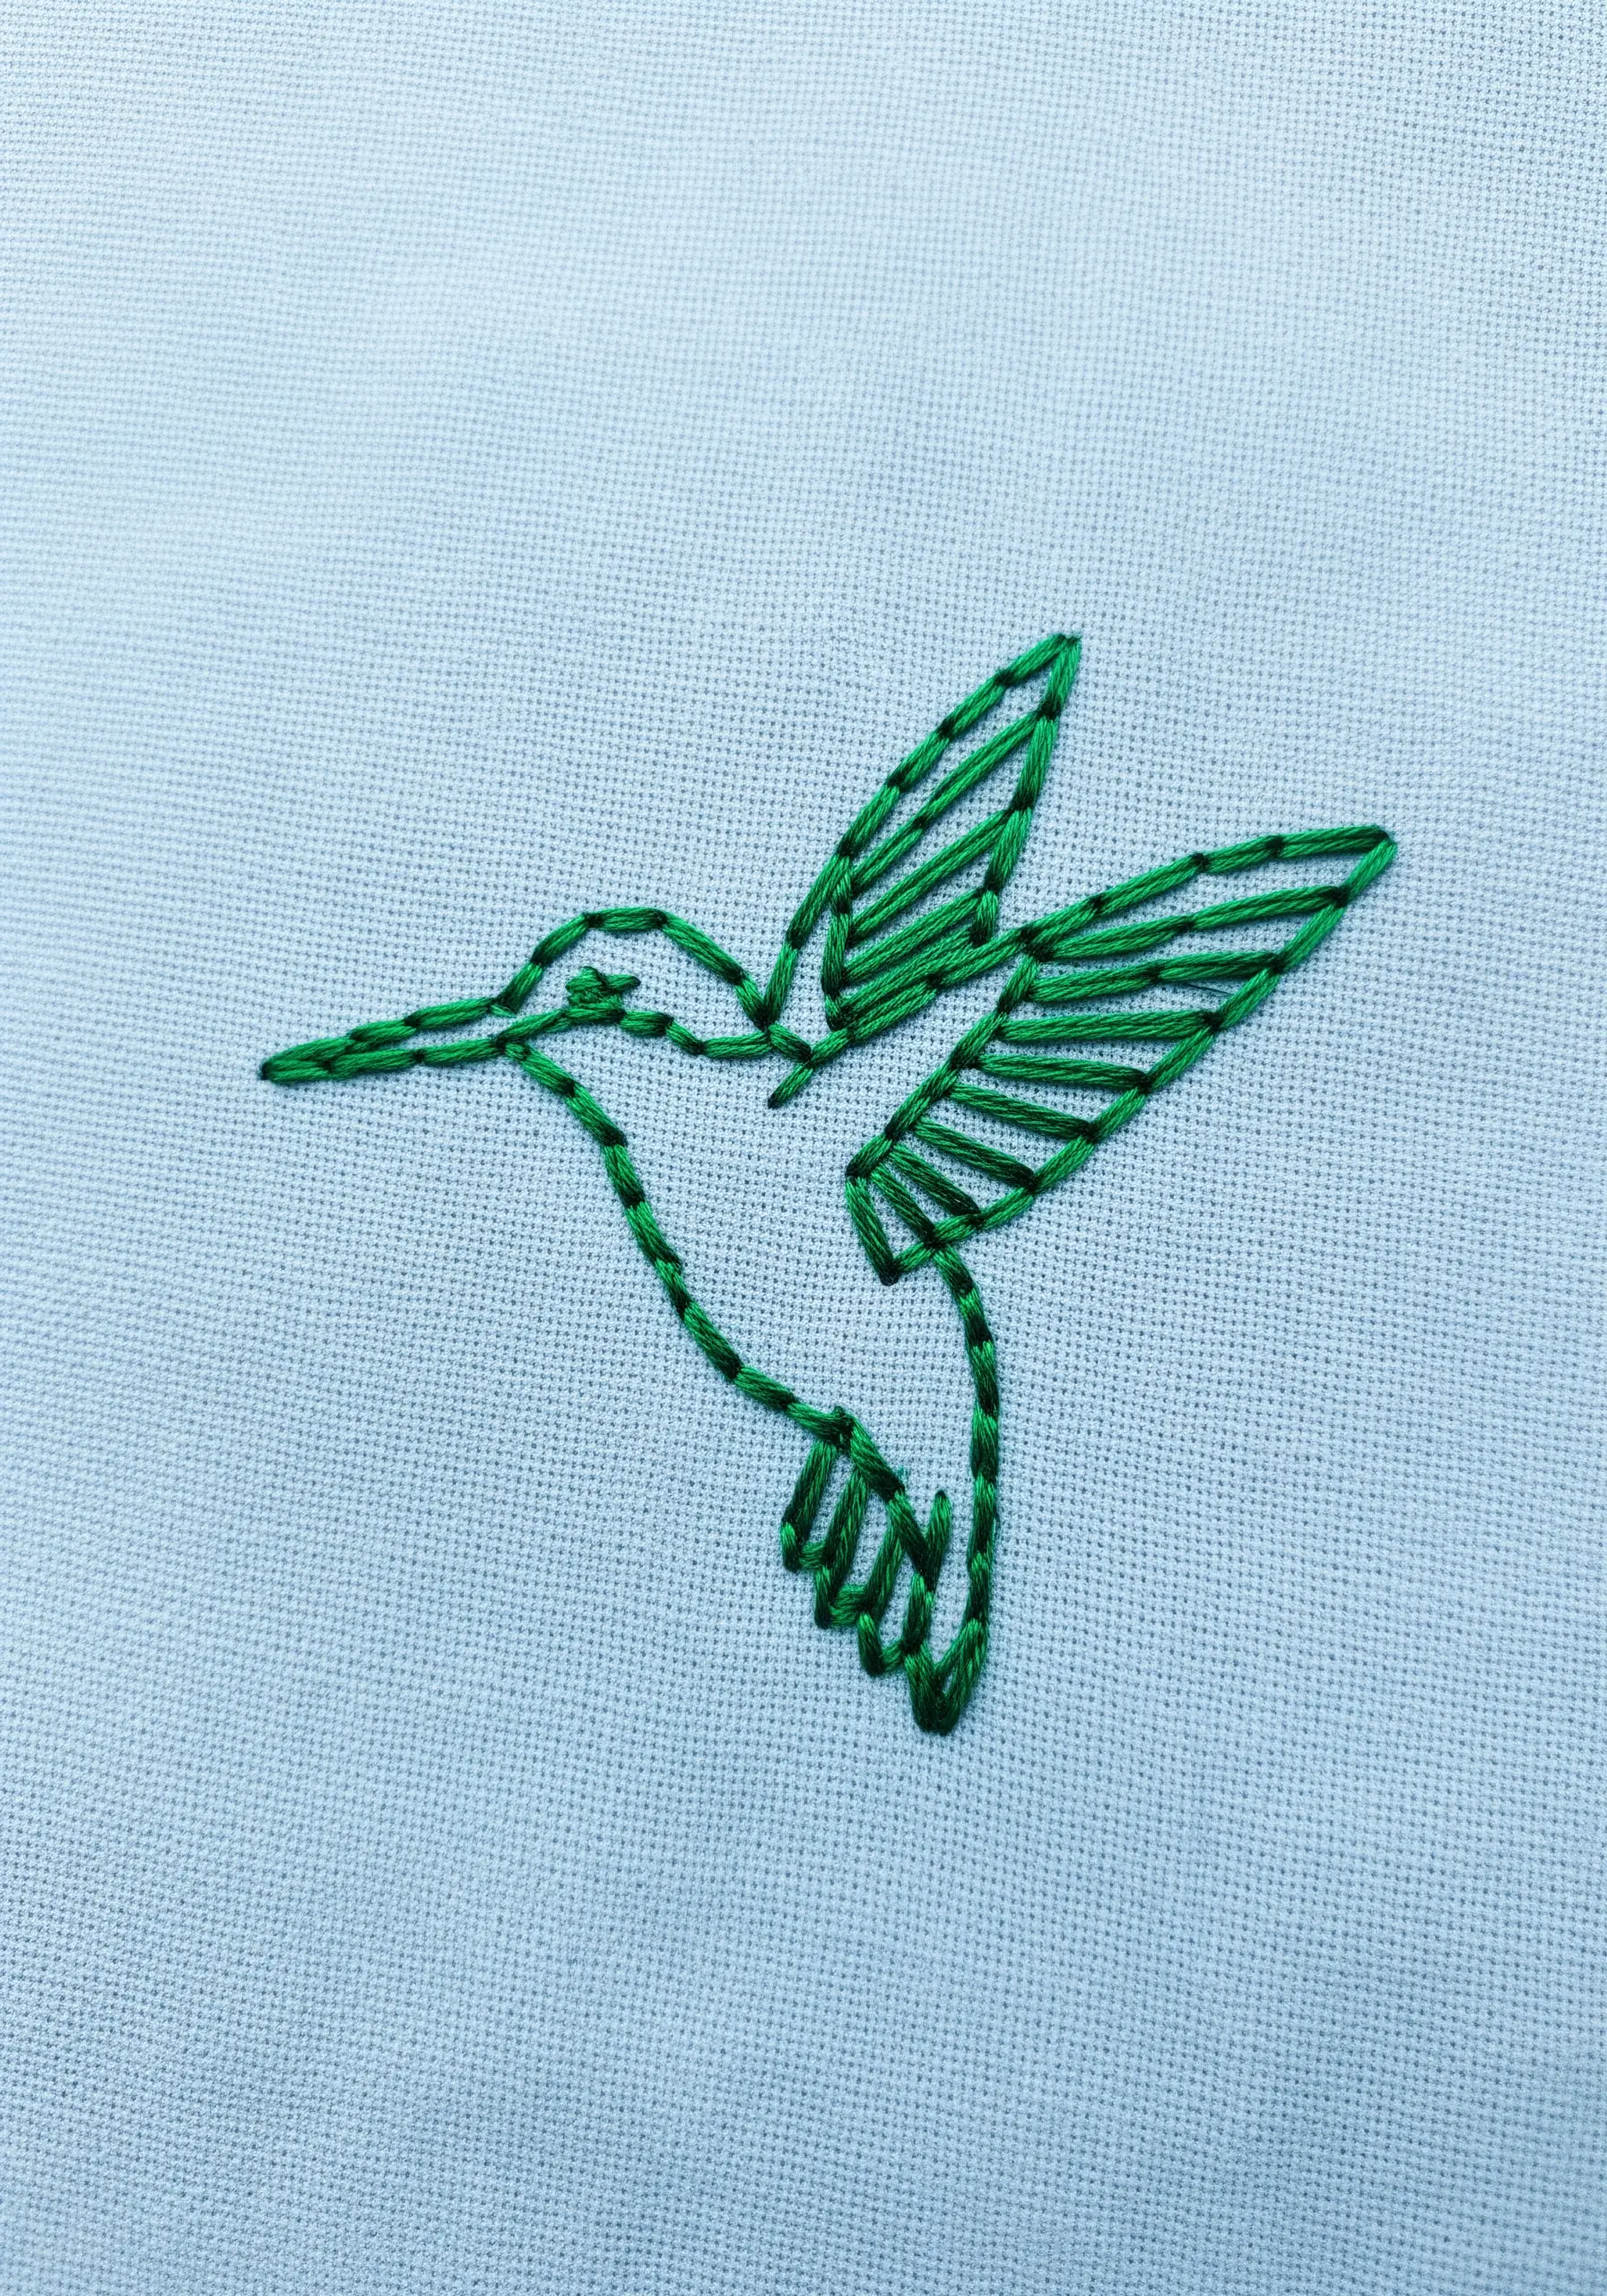
Capture the feeling of rapid movement by using an open fill stitch for the wings.
Instead of a solid fill, use spaced-out straight stitches or an open fishbone stitch to suggest form and texture without adding visual weight.
This technique creates an airy, ethereal quality, keeping the focus on the bird’s dynamic silhouette.
22. Three-Leaf Clover with Gradient
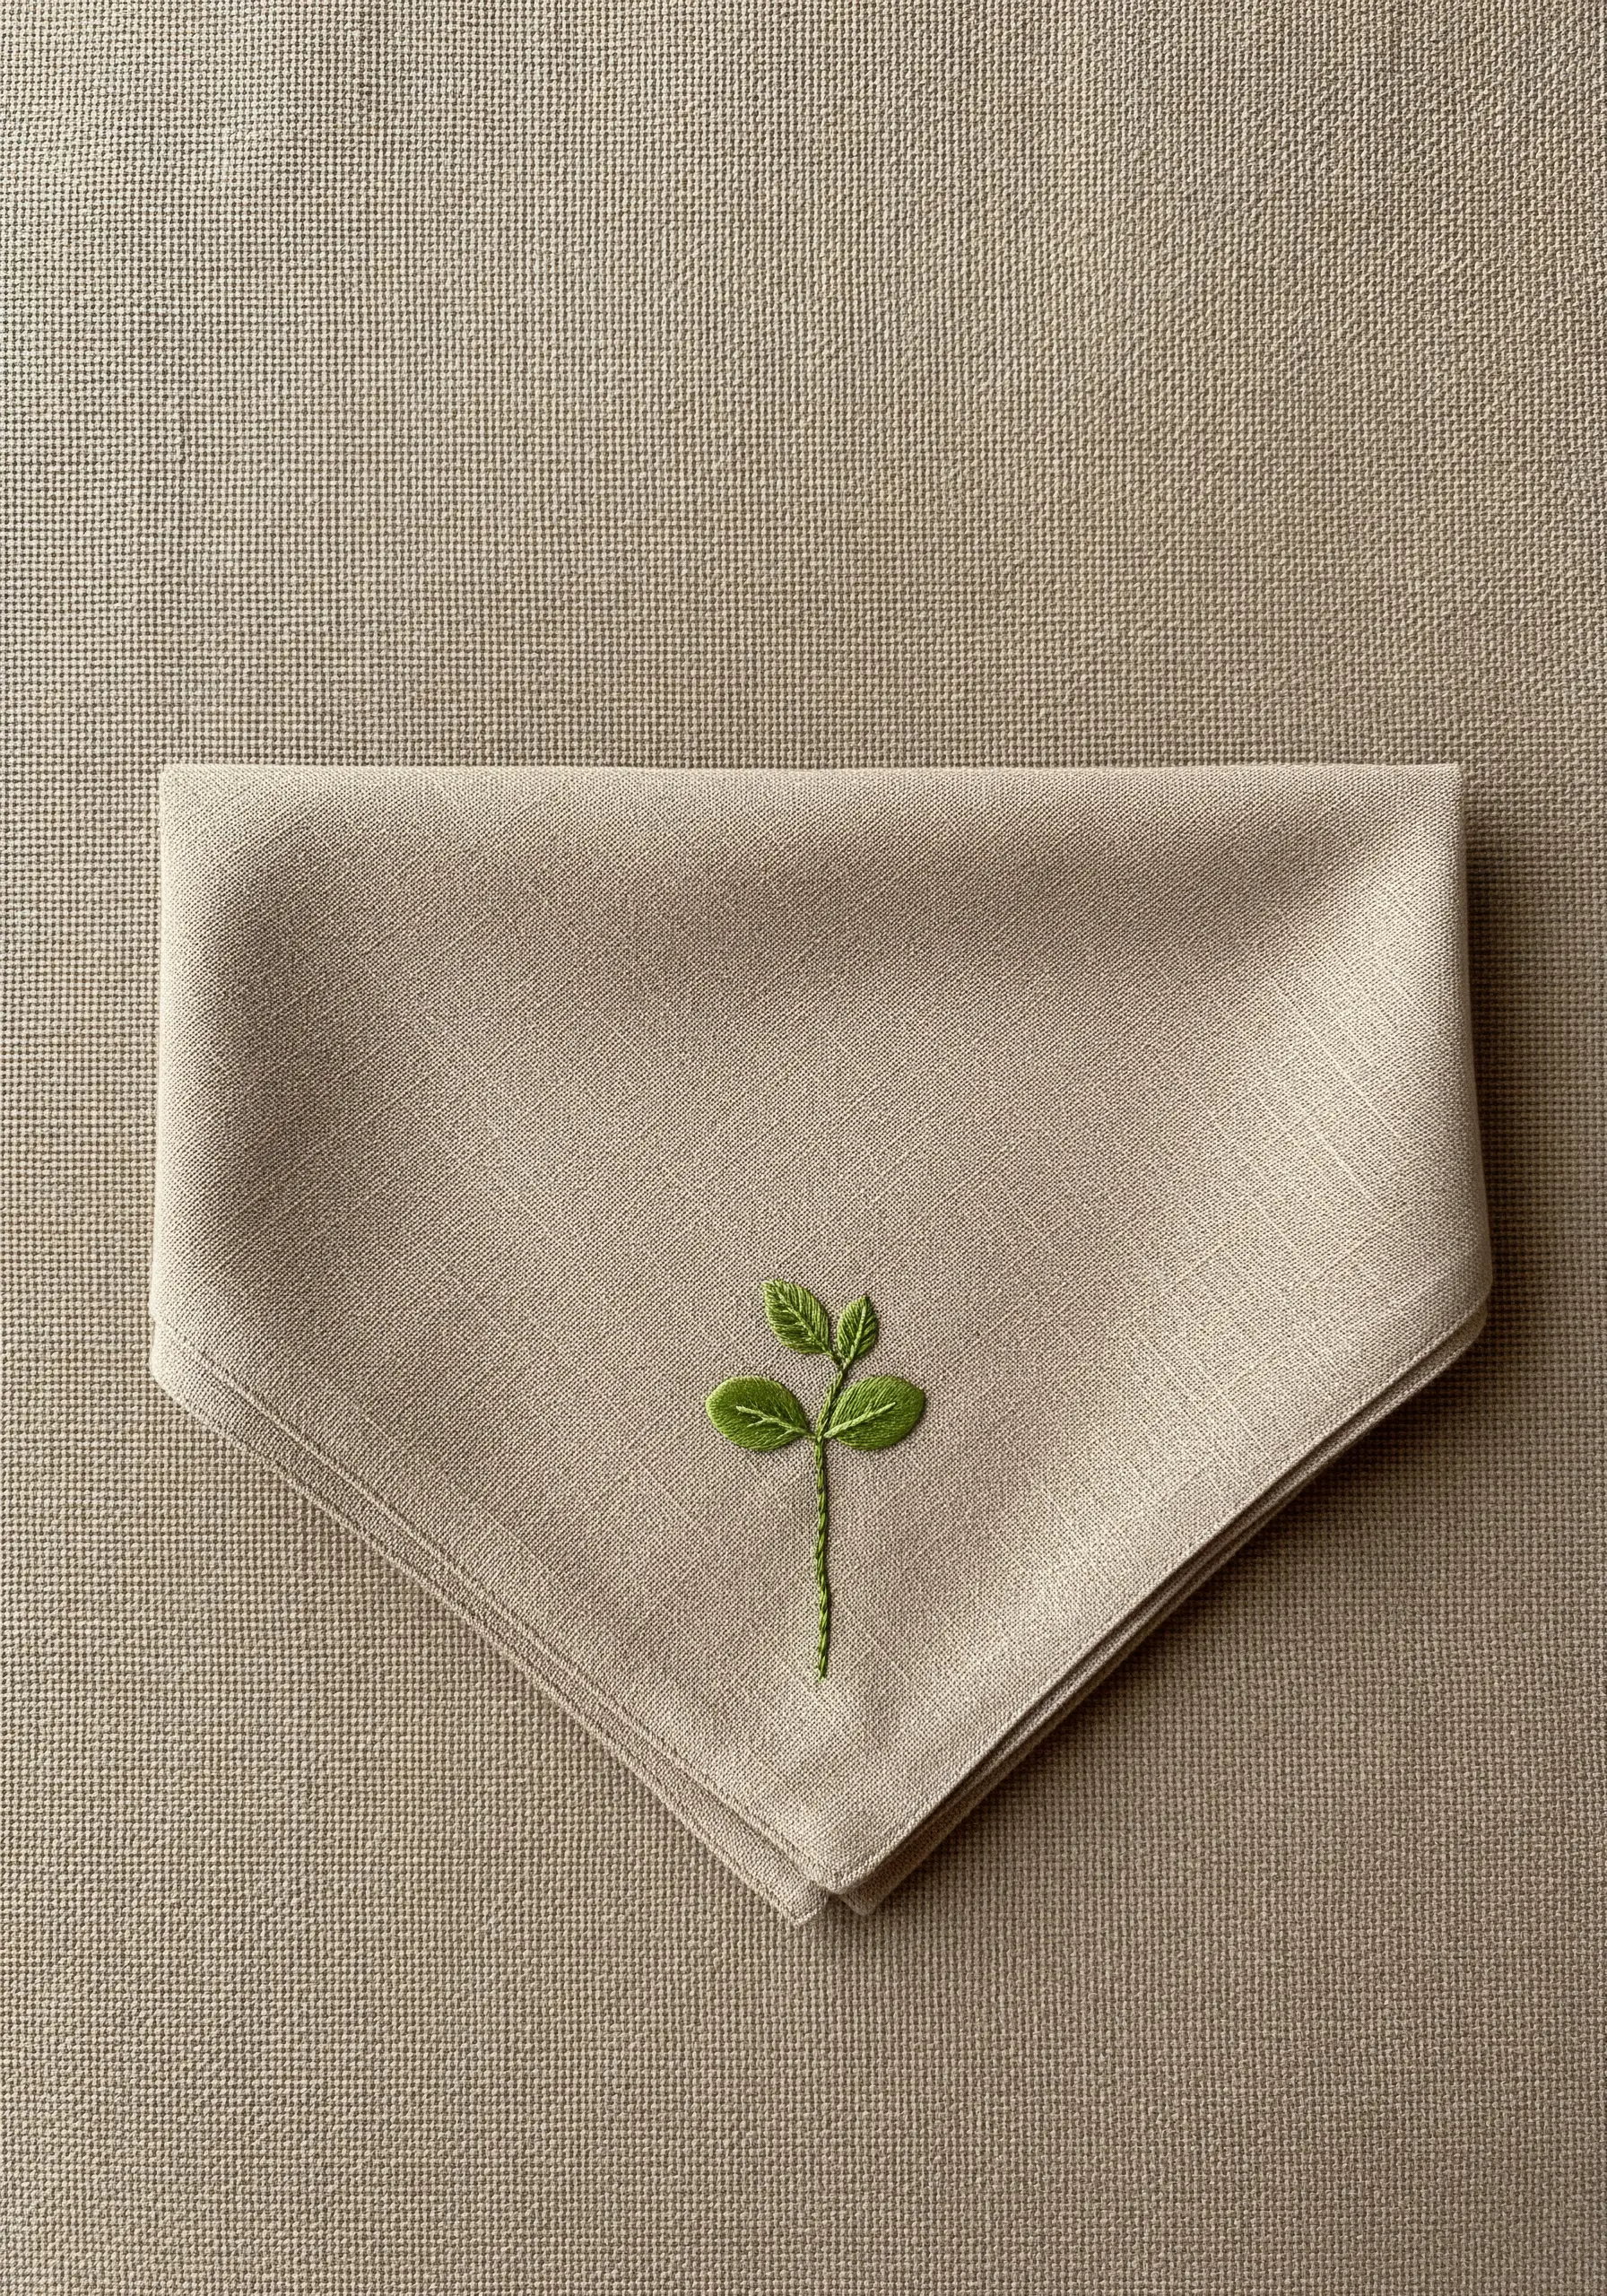
Even in a tiny motif, subtle shading adds remarkable depth and realism.
Use two or three shades of green and a long-and-short stitch to blend them smoothly within each leaf.
Work from the lightest shade at the outer edge to the darkest shade near the stem. This simple detail elevates the clover from a flat icon to a living botanical element.
23. Nautical Corner Sailboat

This design brilliantly integrates a decorative border with the main subject.
Start with a simple running stitch along the edge of the handkerchief, then allow that same line to flow seamlessly into the outline of the sailboat and waves.
This thoughtful composition creates a cohesive piece where every element feels connected and intentional.
24. Ornate Golden Key
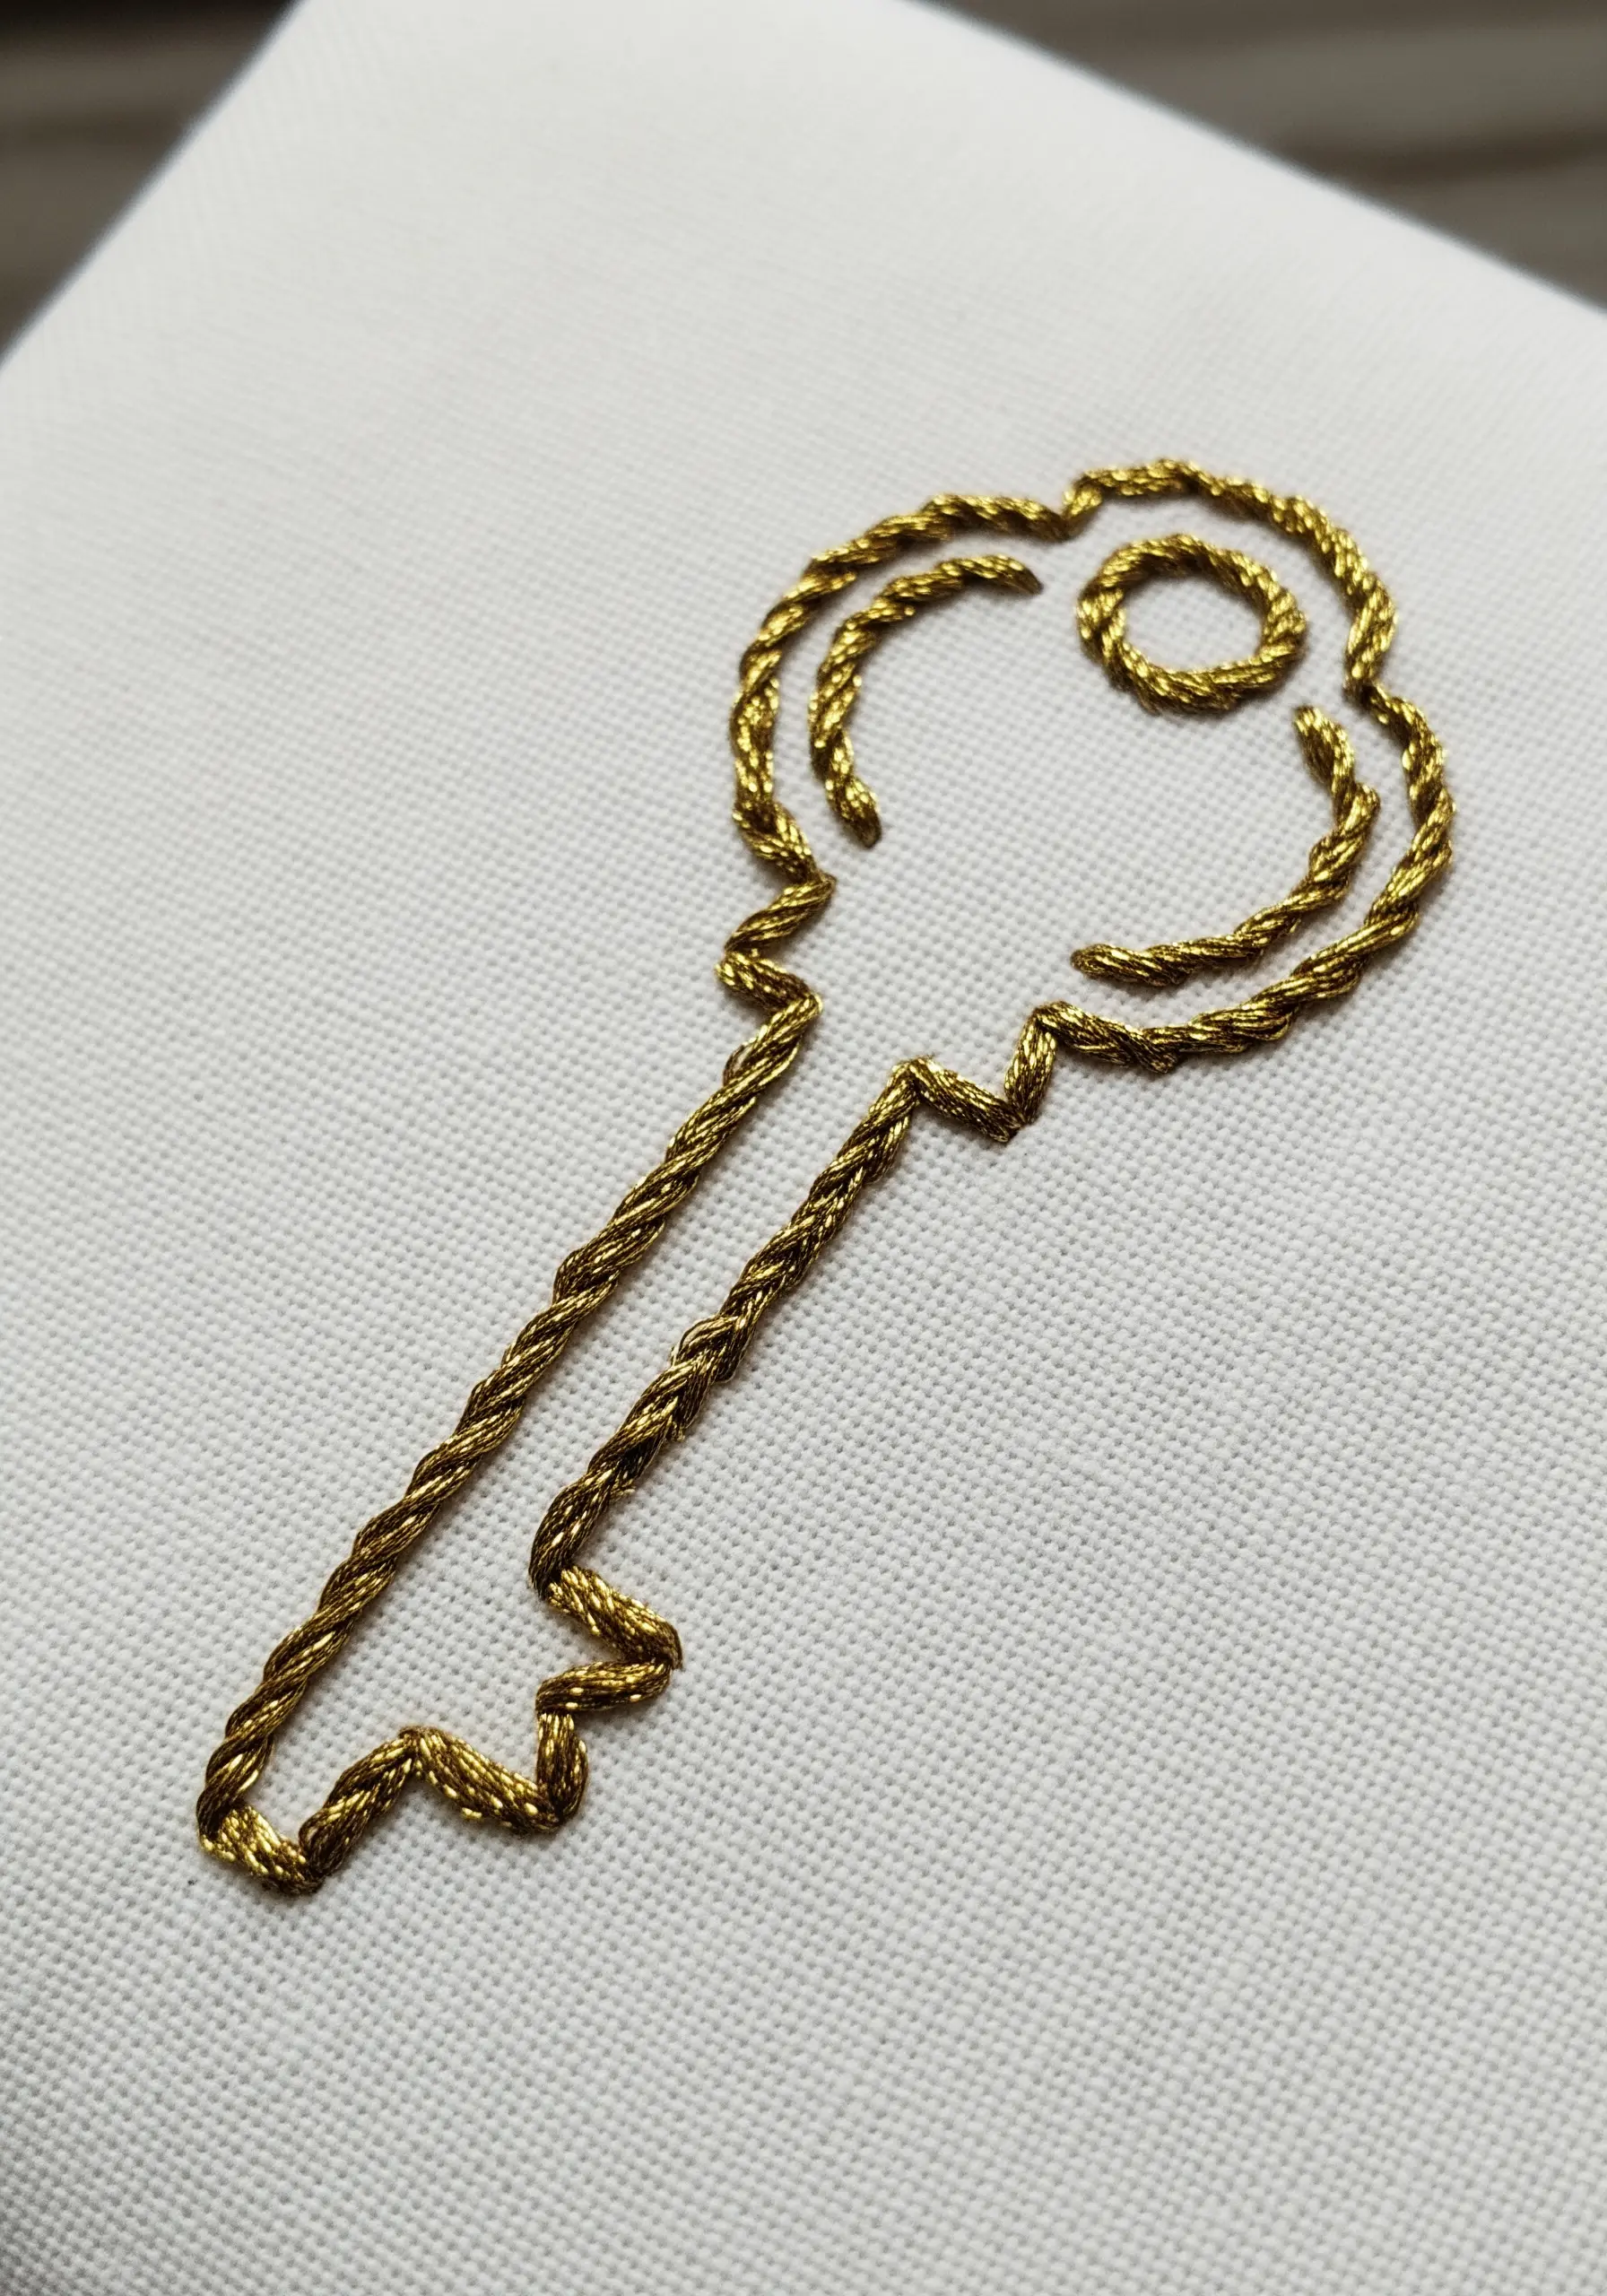
When you want an outline to have more presence and texture than a simple backstitch, choose the chain stitch.
Its linked, rope-like structure is perfect for creating bold, decorative lines that feel substantial and ornate.
Using a metallic thread enhances this effect, turning a simple outline into a piece of stitched jewelry for your fabric.


