

Your tote bag is more than just an accessory; it’s a canvas waiting to hold your summer memories. But how do you move beyond simple patterns to create something that feels truly special, polished, and personal?
The secret isn’t in finding more complex designs, but in mastering the small techniques that elevate any idea. It’s in the choice to use a whipped backstitch for a cleaner line, to add a scattering of beads for texture, or to blend threads with a long-and-short stitch to capture the perfect sunset gradient.
These 20 ideas are designed to give you that technical confidence. Each one focuses on a specific method or material choice that will make a visible difference in your work. Here, you’ll find the skills to turn a simple canvas tote into an intentional, beautifully crafted piece of art that tells your story.
1. The Layered Thread Sunset

Create a dense, paint-like sunset by laying long strands of thread across the fabric and securing them with tiny, perpendicular couching stitches.
This technique allows you to blend colors seamlessly, as if you are painting with fiber—simply lay different shades next to one another.
For the water’s reflection, couch down a single strand of metallic silver or pearlescent thread in wavy lines to mimic the shimmer of light on the ocean.
The texture of the couched sky contrasts beautifully with the flatter sea, adding both visual and tactile depth to your design.
2. Seashells with Realistic Thread Painting

To give your seashells realistic dimension, use the long-and-short stitch, also known as thread painting.
Work with a single strand of floss to blend shades of cream, tan, and soft pink, which allows for subtle, smooth color transitions.
Always follow the natural curves of the shell with your stitches; this directionality is key to creating a convincing 3D effect.
Finally, scatter a few tiny French knots in a sandy color around the shells to ground them in their environment, adding a delicate finishing touch.
3. Fireflies in a Glow-in-the-Dark Jar
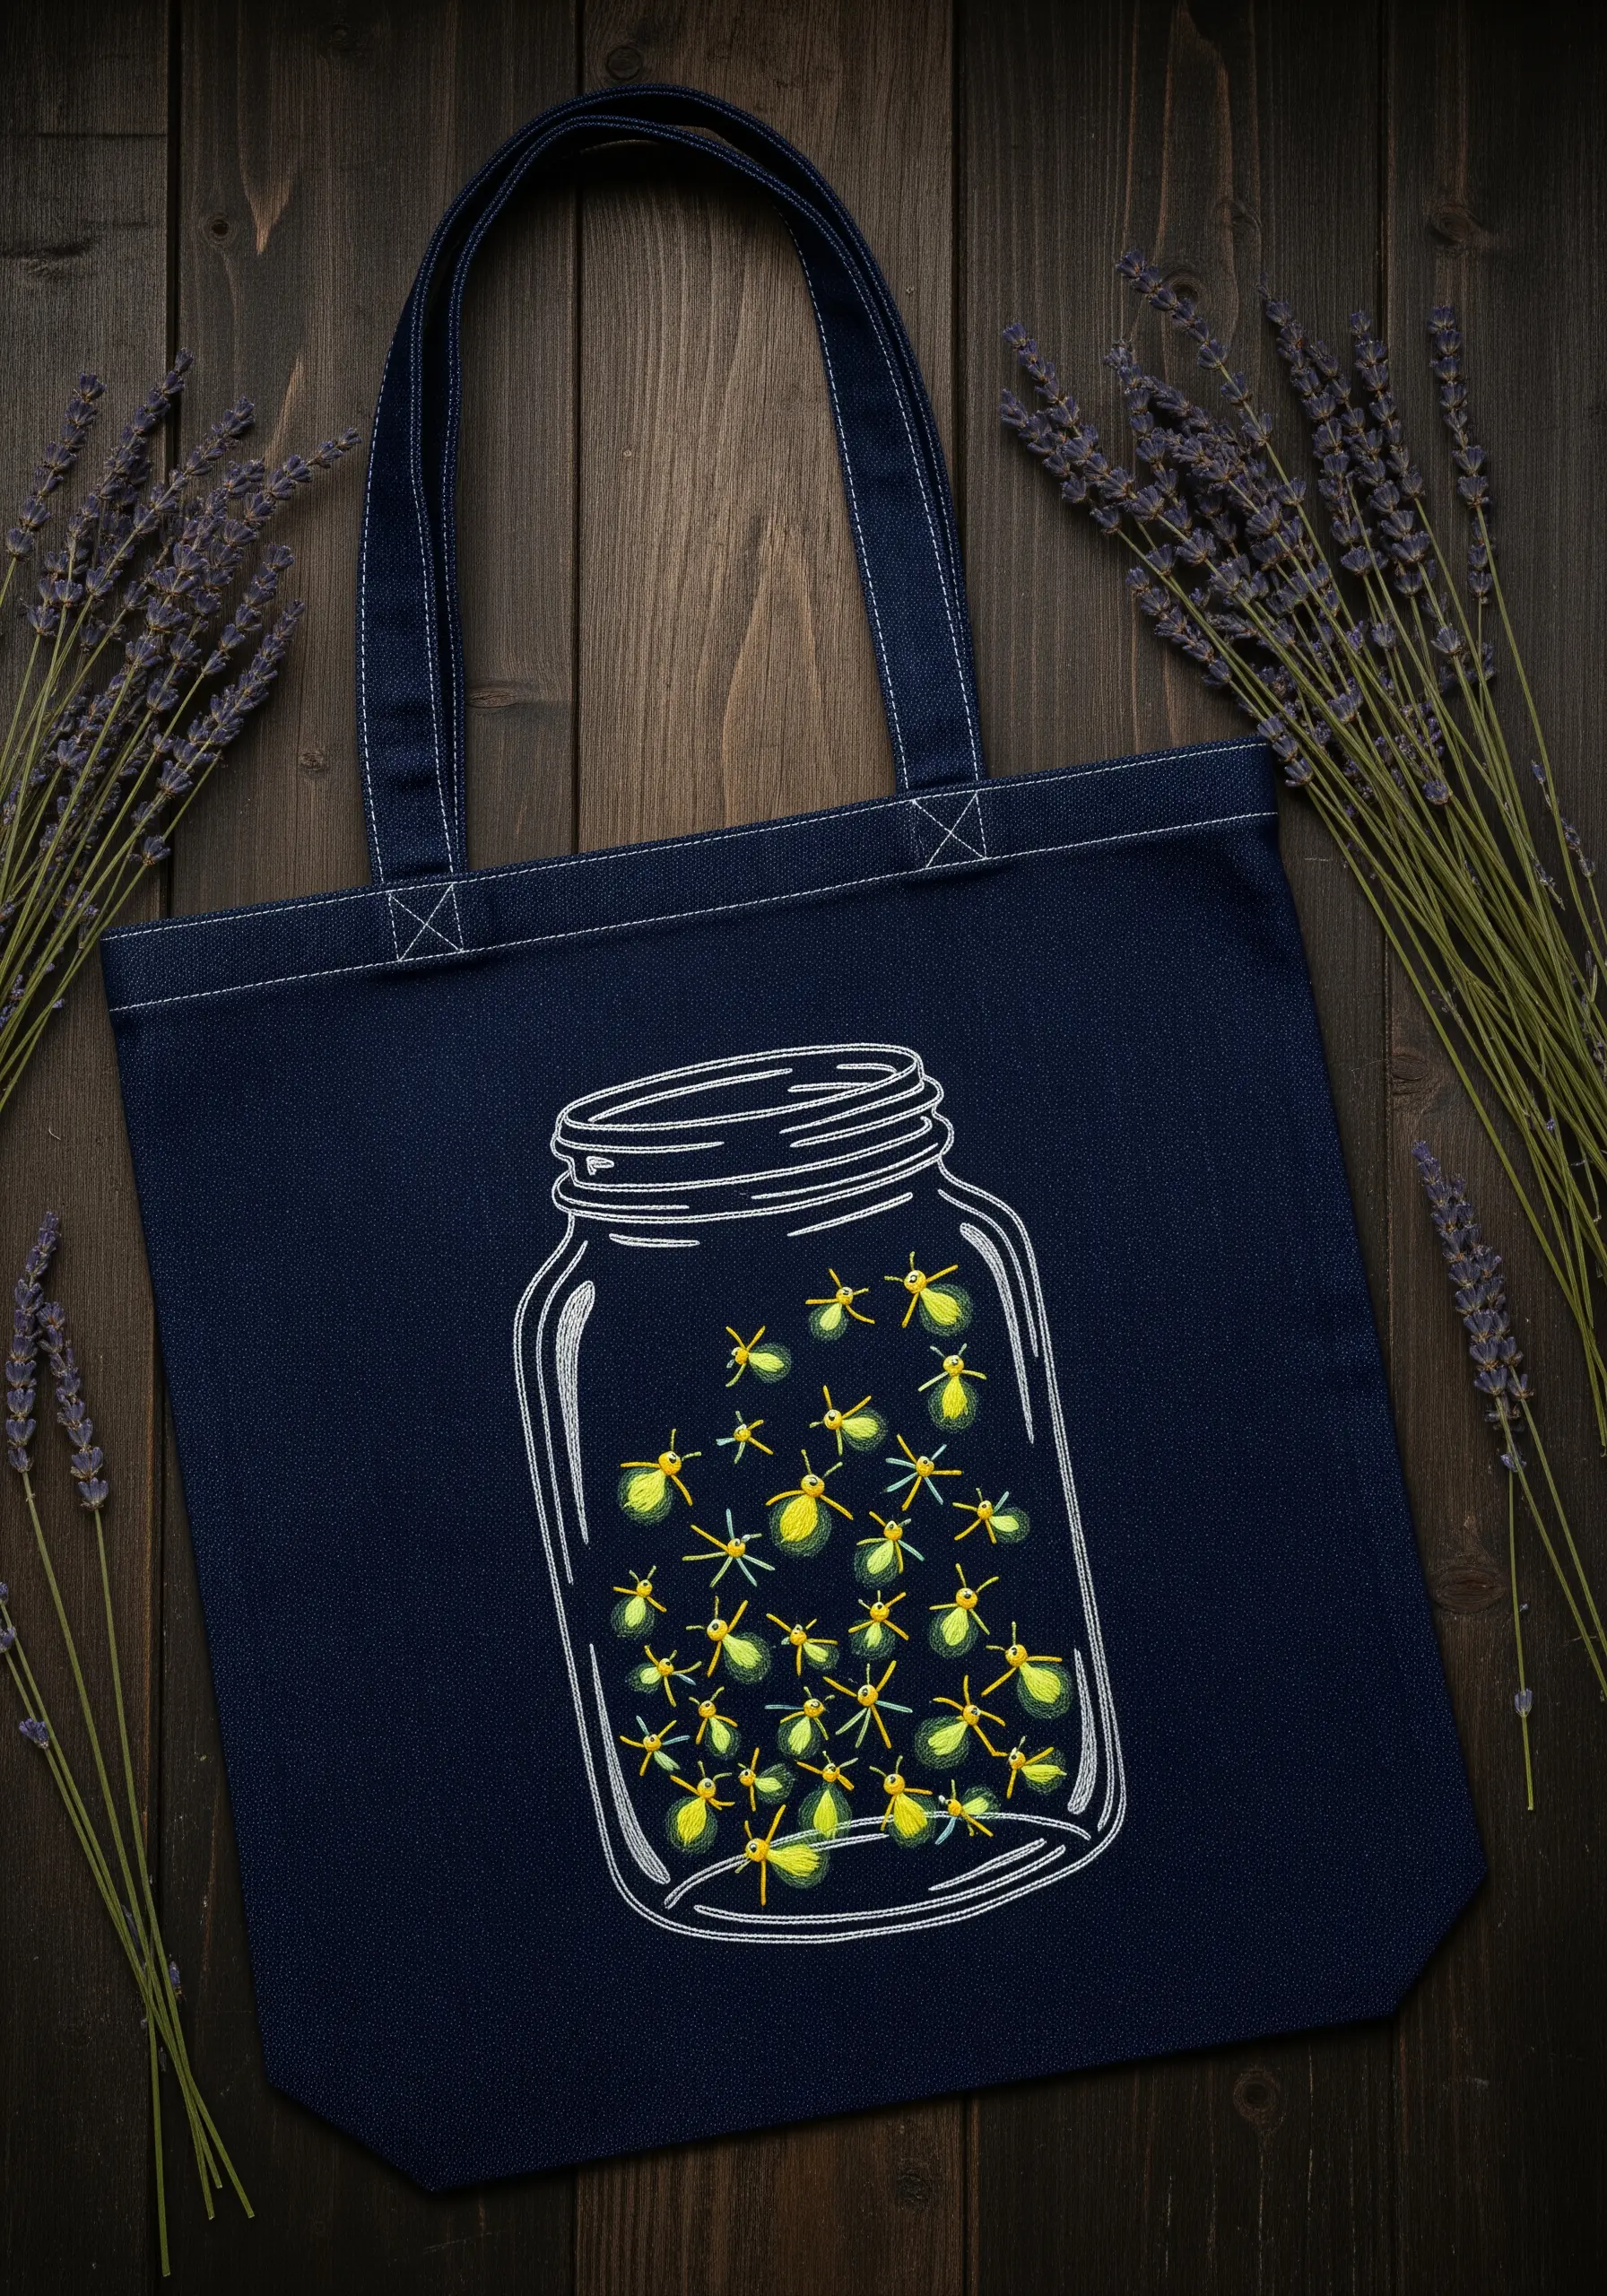
Elevate a simple line-art design by choosing a thread with unique properties.
Use a crisp white or silver backstitch for the jar’s outline to make it stand out against a dark denim tote.
For the fireflies themselves, switch to a glow-in-the-dark embroidery floss. A few simple straight stitches or a single French knot for each bug is all you need.
This choice transforms the tote from a daytime accessory into a piece with a hidden, magical element that reveals itself in the dark.
4. The Vibrant Satin Stitch Hibiscus

Achieving a smooth, flawless satin stitch on a large area like a flower petal requires preparation.
Iron a cut-away stabilizer onto the inside of your tote bag before stitching to prevent the fabric from puckering under the tension of dense stitches.
Vary the angle of your satin stitches slightly in each petal to catch the light differently, creating a subtle, natural-looking sheen.
For the monstera leaves, use a fishbone stitch. This technique creates a beautiful central vein and ensures the stitches on either side angle outward realistically.
5. Minimalist Sunset with a Whipped Backstitch
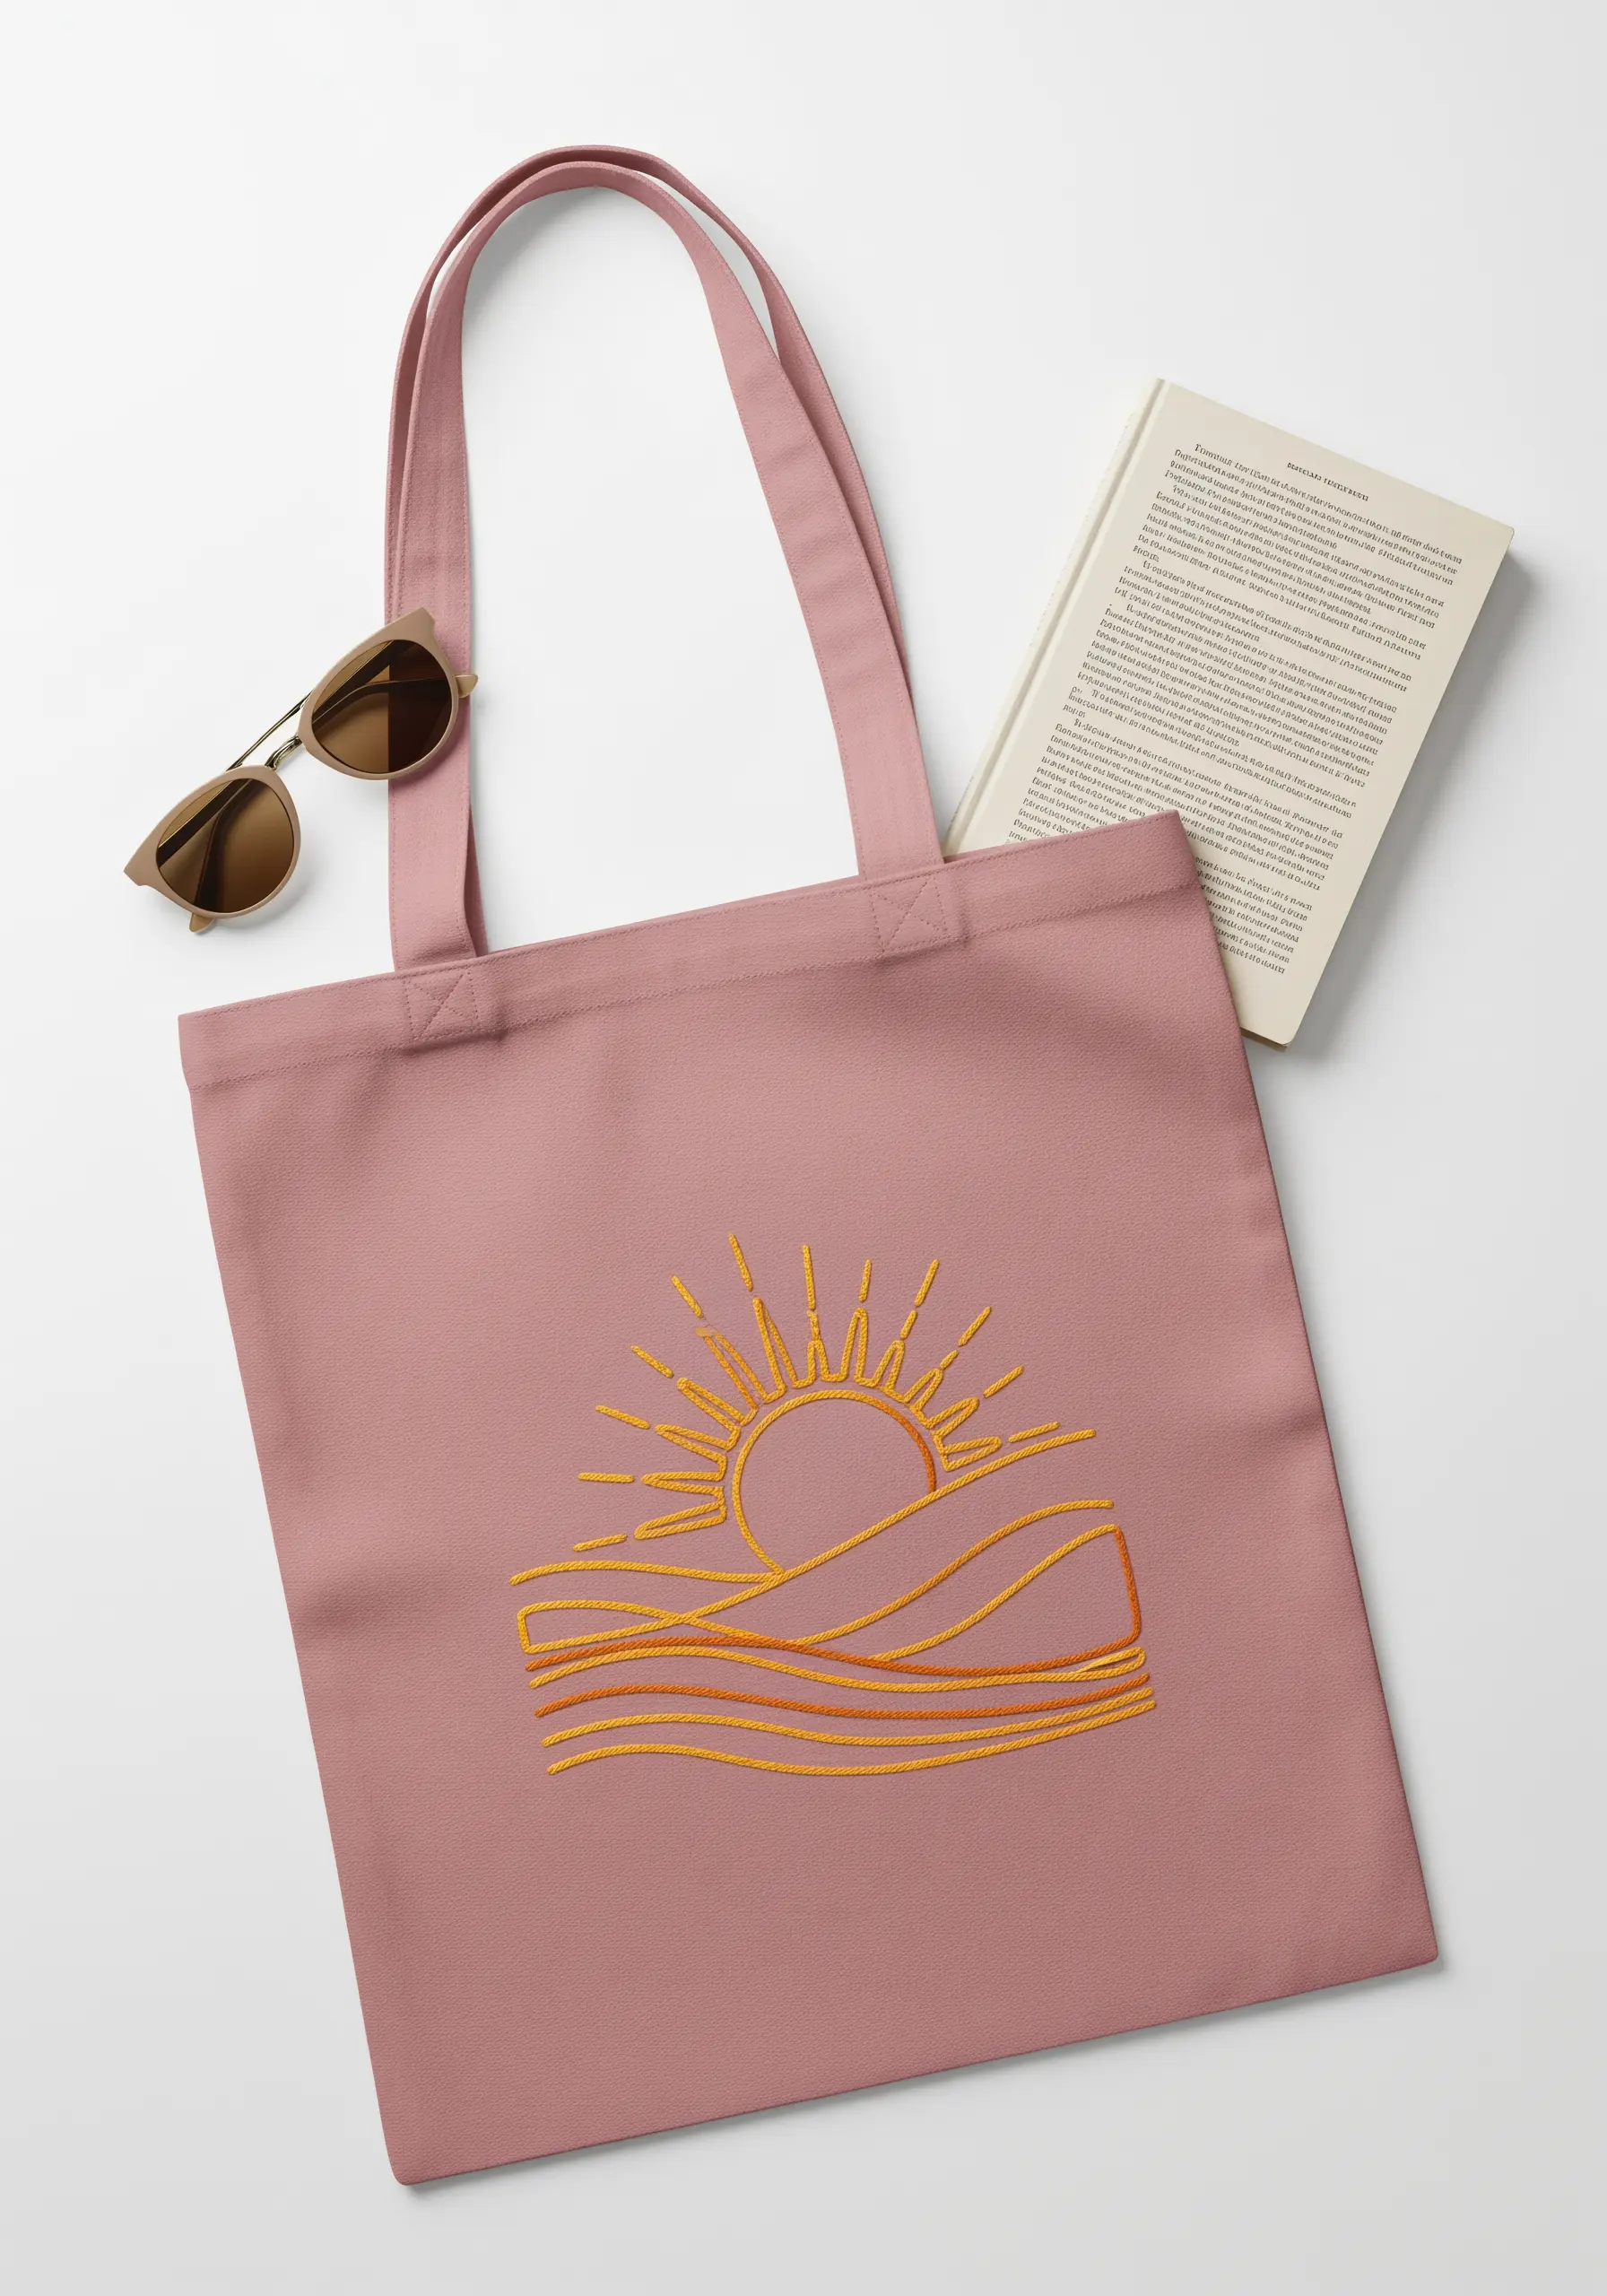
For clean, impactful line art, the quality of your stitch matters more than its complexity.
Instead of a standard backstitch, create your outlines using a whipped backstitch. First, make a line of backstitches, then whip a second thread around them without piercing the fabric.
This technique creates a solid, raised line that looks more like a smooth cord than a series of individual stitches.
It gives minimalist embroidery ideas for modern crafters a polished, graphic quality that stands out, even with a simple design.
6. A Mixed-Media Message in a Bottle
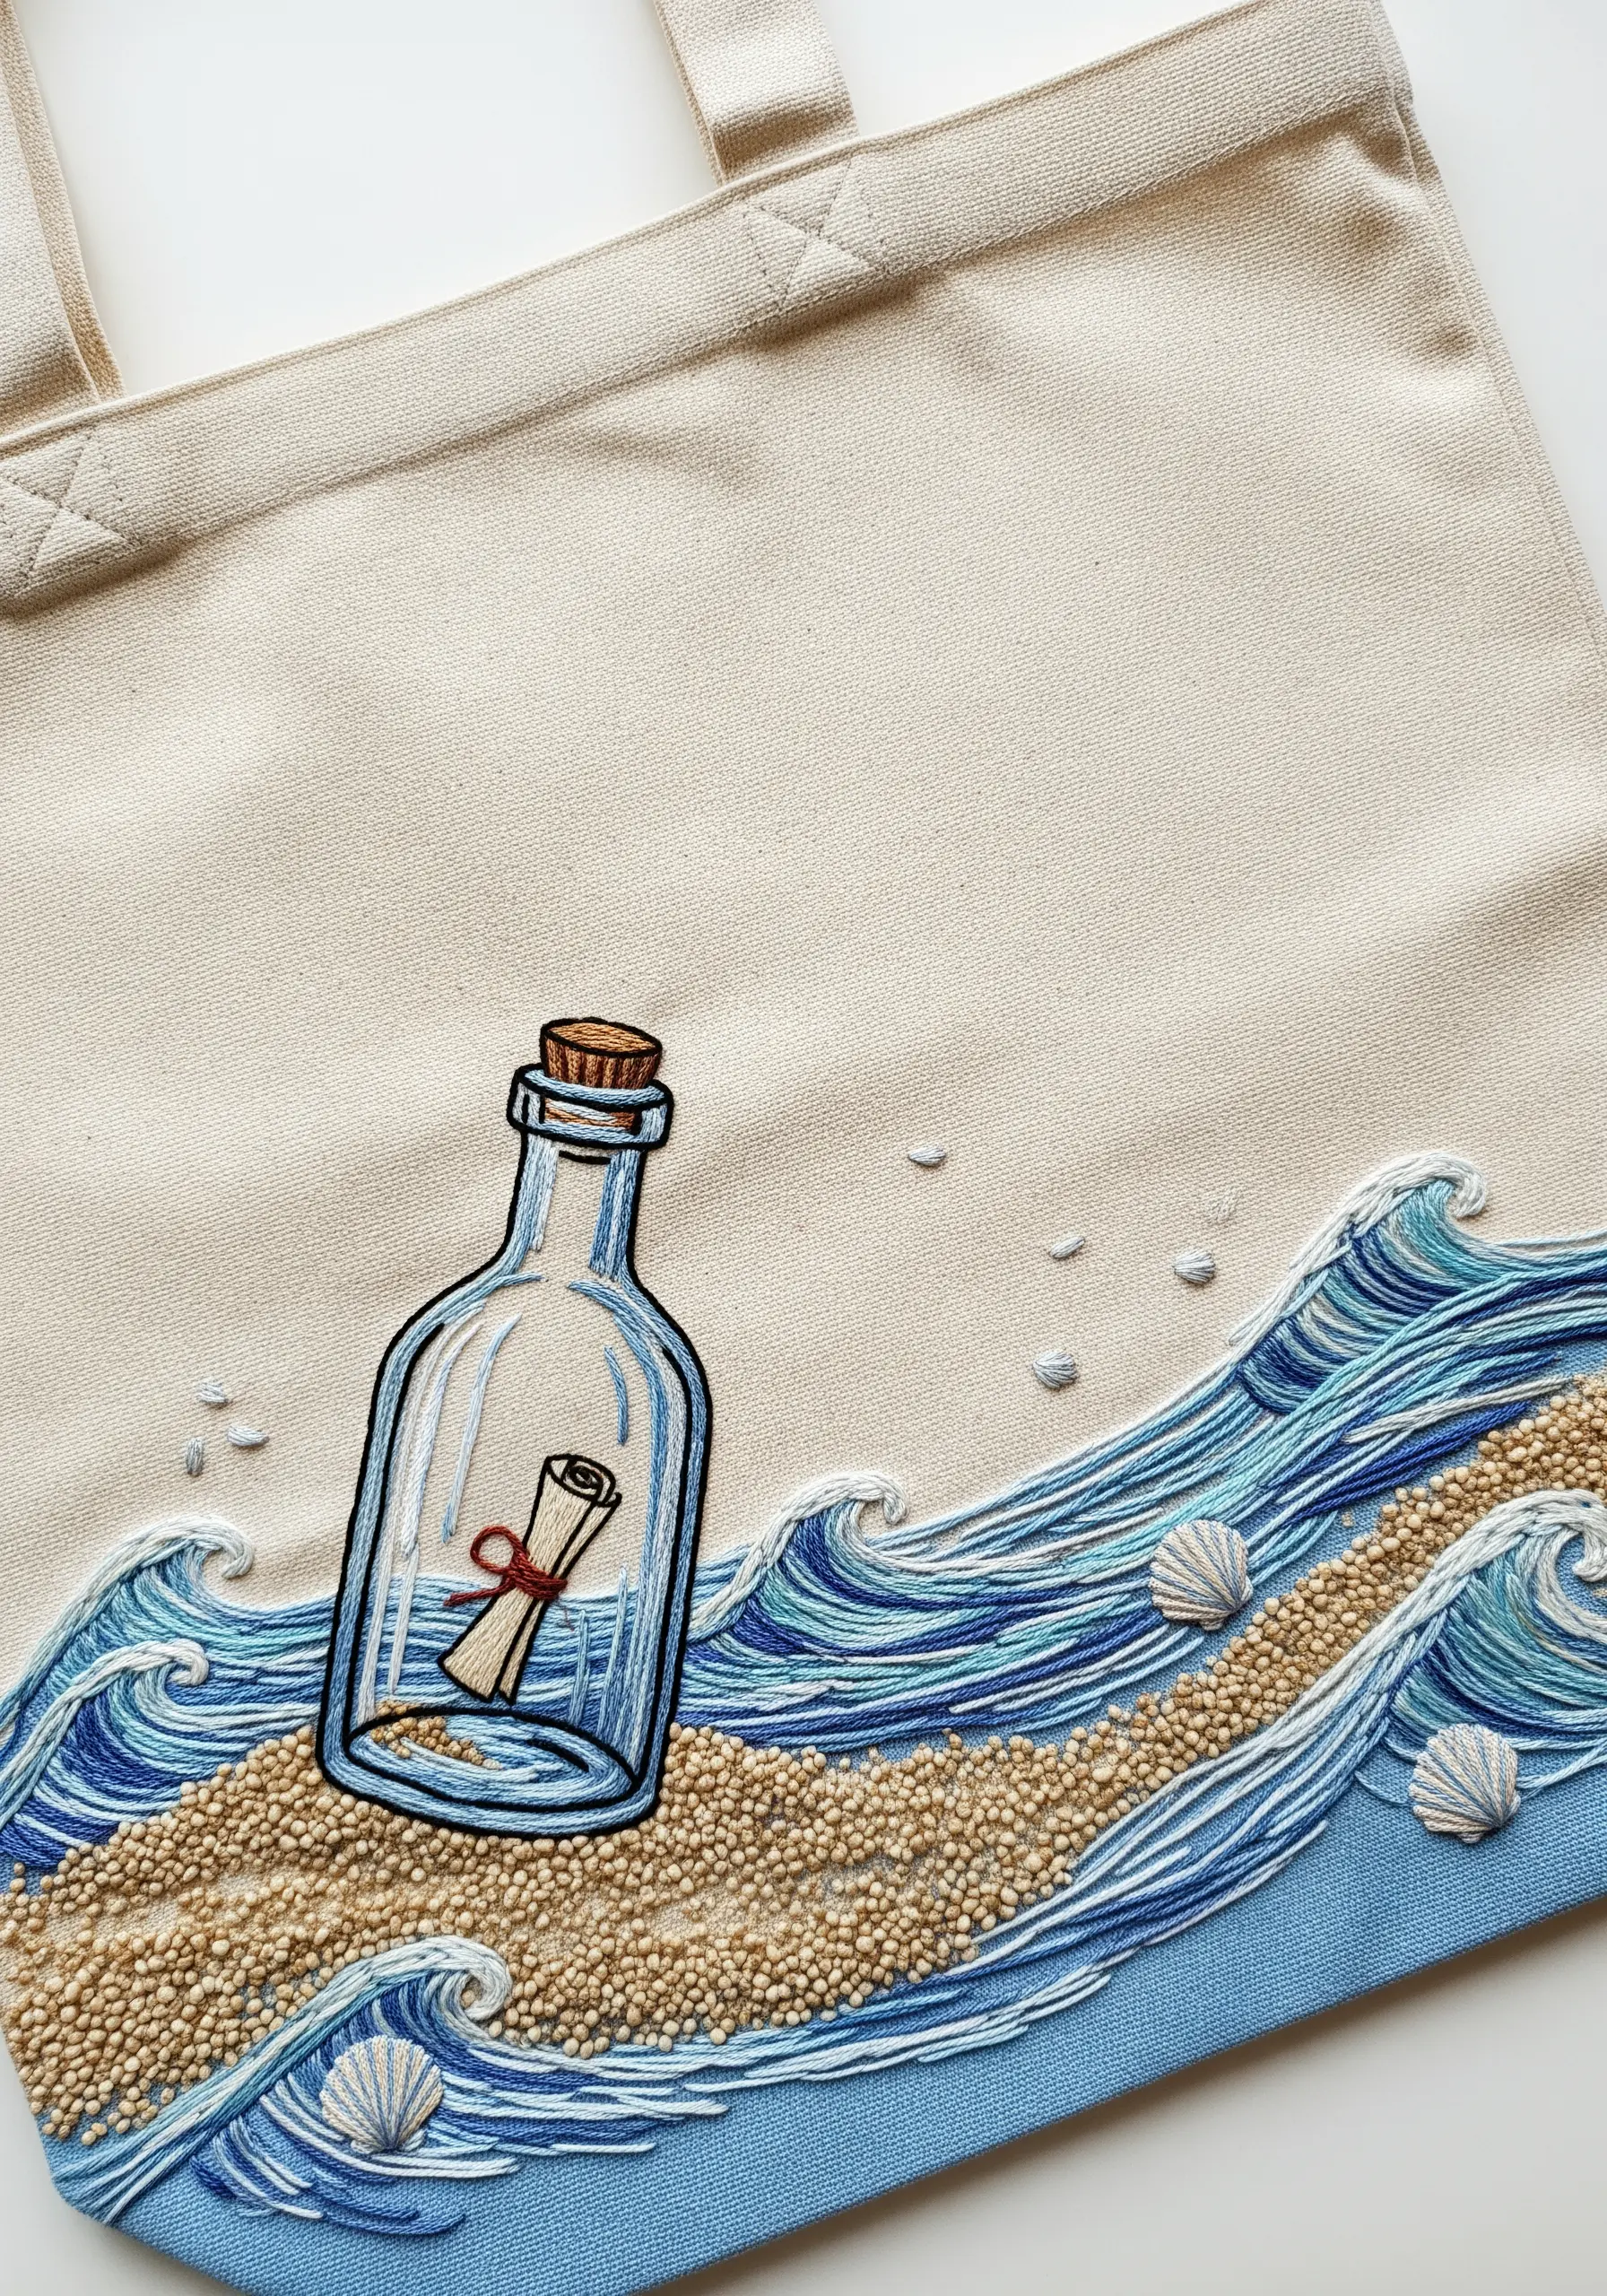
Combine embroidery with beading to introduce compelling textures that invite touch.
Create the sandy shore by filling the area with sandy-colored seed beads, either by sewing them on individually or by couching long strands of pre-strung beads.
For the waves, layer several shades of blue floss using long, flowing straight stitches, and top the crests with white French knots for sea foam.
This mixed-media technique transforms a flat image into a dynamic, multi-dimensional scene.
7. The Sunset Ferris Wheel Silhouette
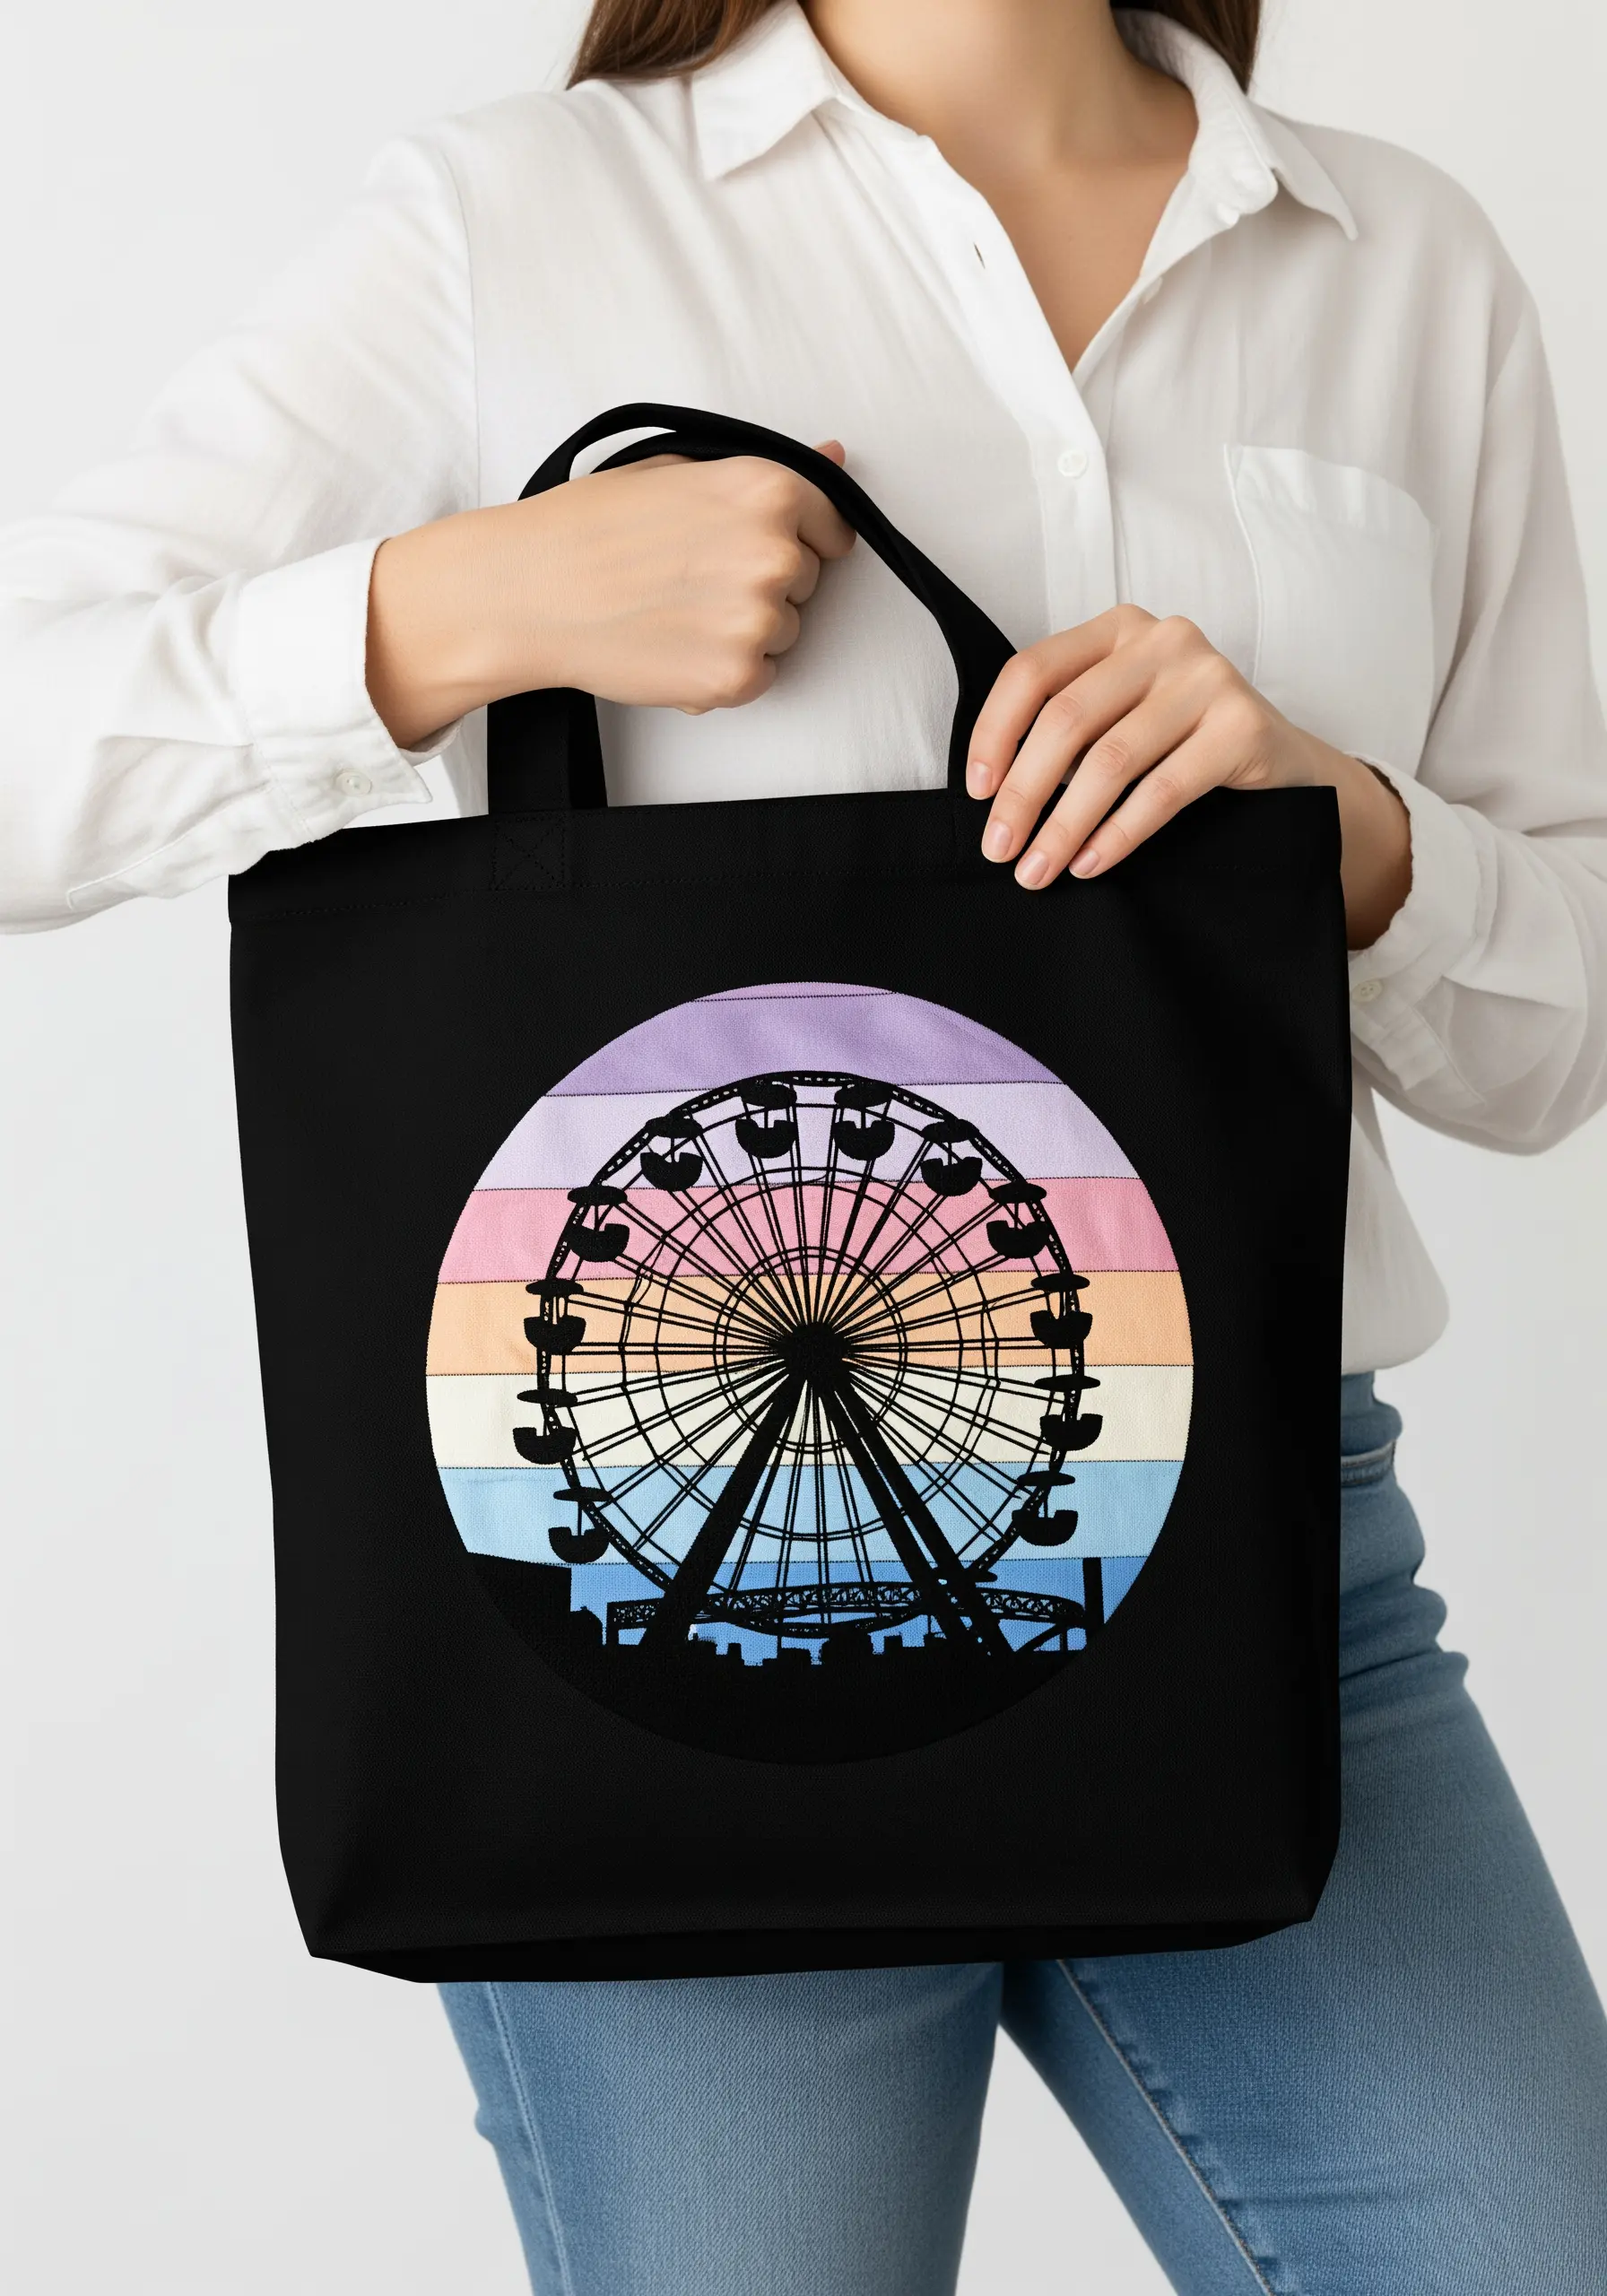
For designs that combine bold color fields and sharp silhouettes, fabric appliqué is your most effective tool.
Begin by cutting strips of pastel-colored fabric for the sunset and applying them to the tote bag using an iron-on adhesive like Heat’n Bond.
Secure the edges with a simple running stitch, then embroider the black ferris wheel silhouette directly on top using a dense satin stitch or a bold, two-strand backstitch.
This method creates incredibly crisp edges and vibrant color blocking that would be difficult and time-consuming to achieve with thread alone.
8. A Scattered Starfish Pattern

Create a sophisticated, natural-looking pattern by scattering your motifs instead of centering them.
Give your starfish a bumpy, realistic texture by filling them with a dense collection of French knots and a few colonial knots for variation in size.
For the sand dollars, use a small circle of satin stitch and add the classic five-petal pattern with tiny, single straight stitches.
This asymmetrical composition feels more organic and modern than a single, centered design, turning the entire tote surface into your canvas.
9. The Multi-Texture Popsicle
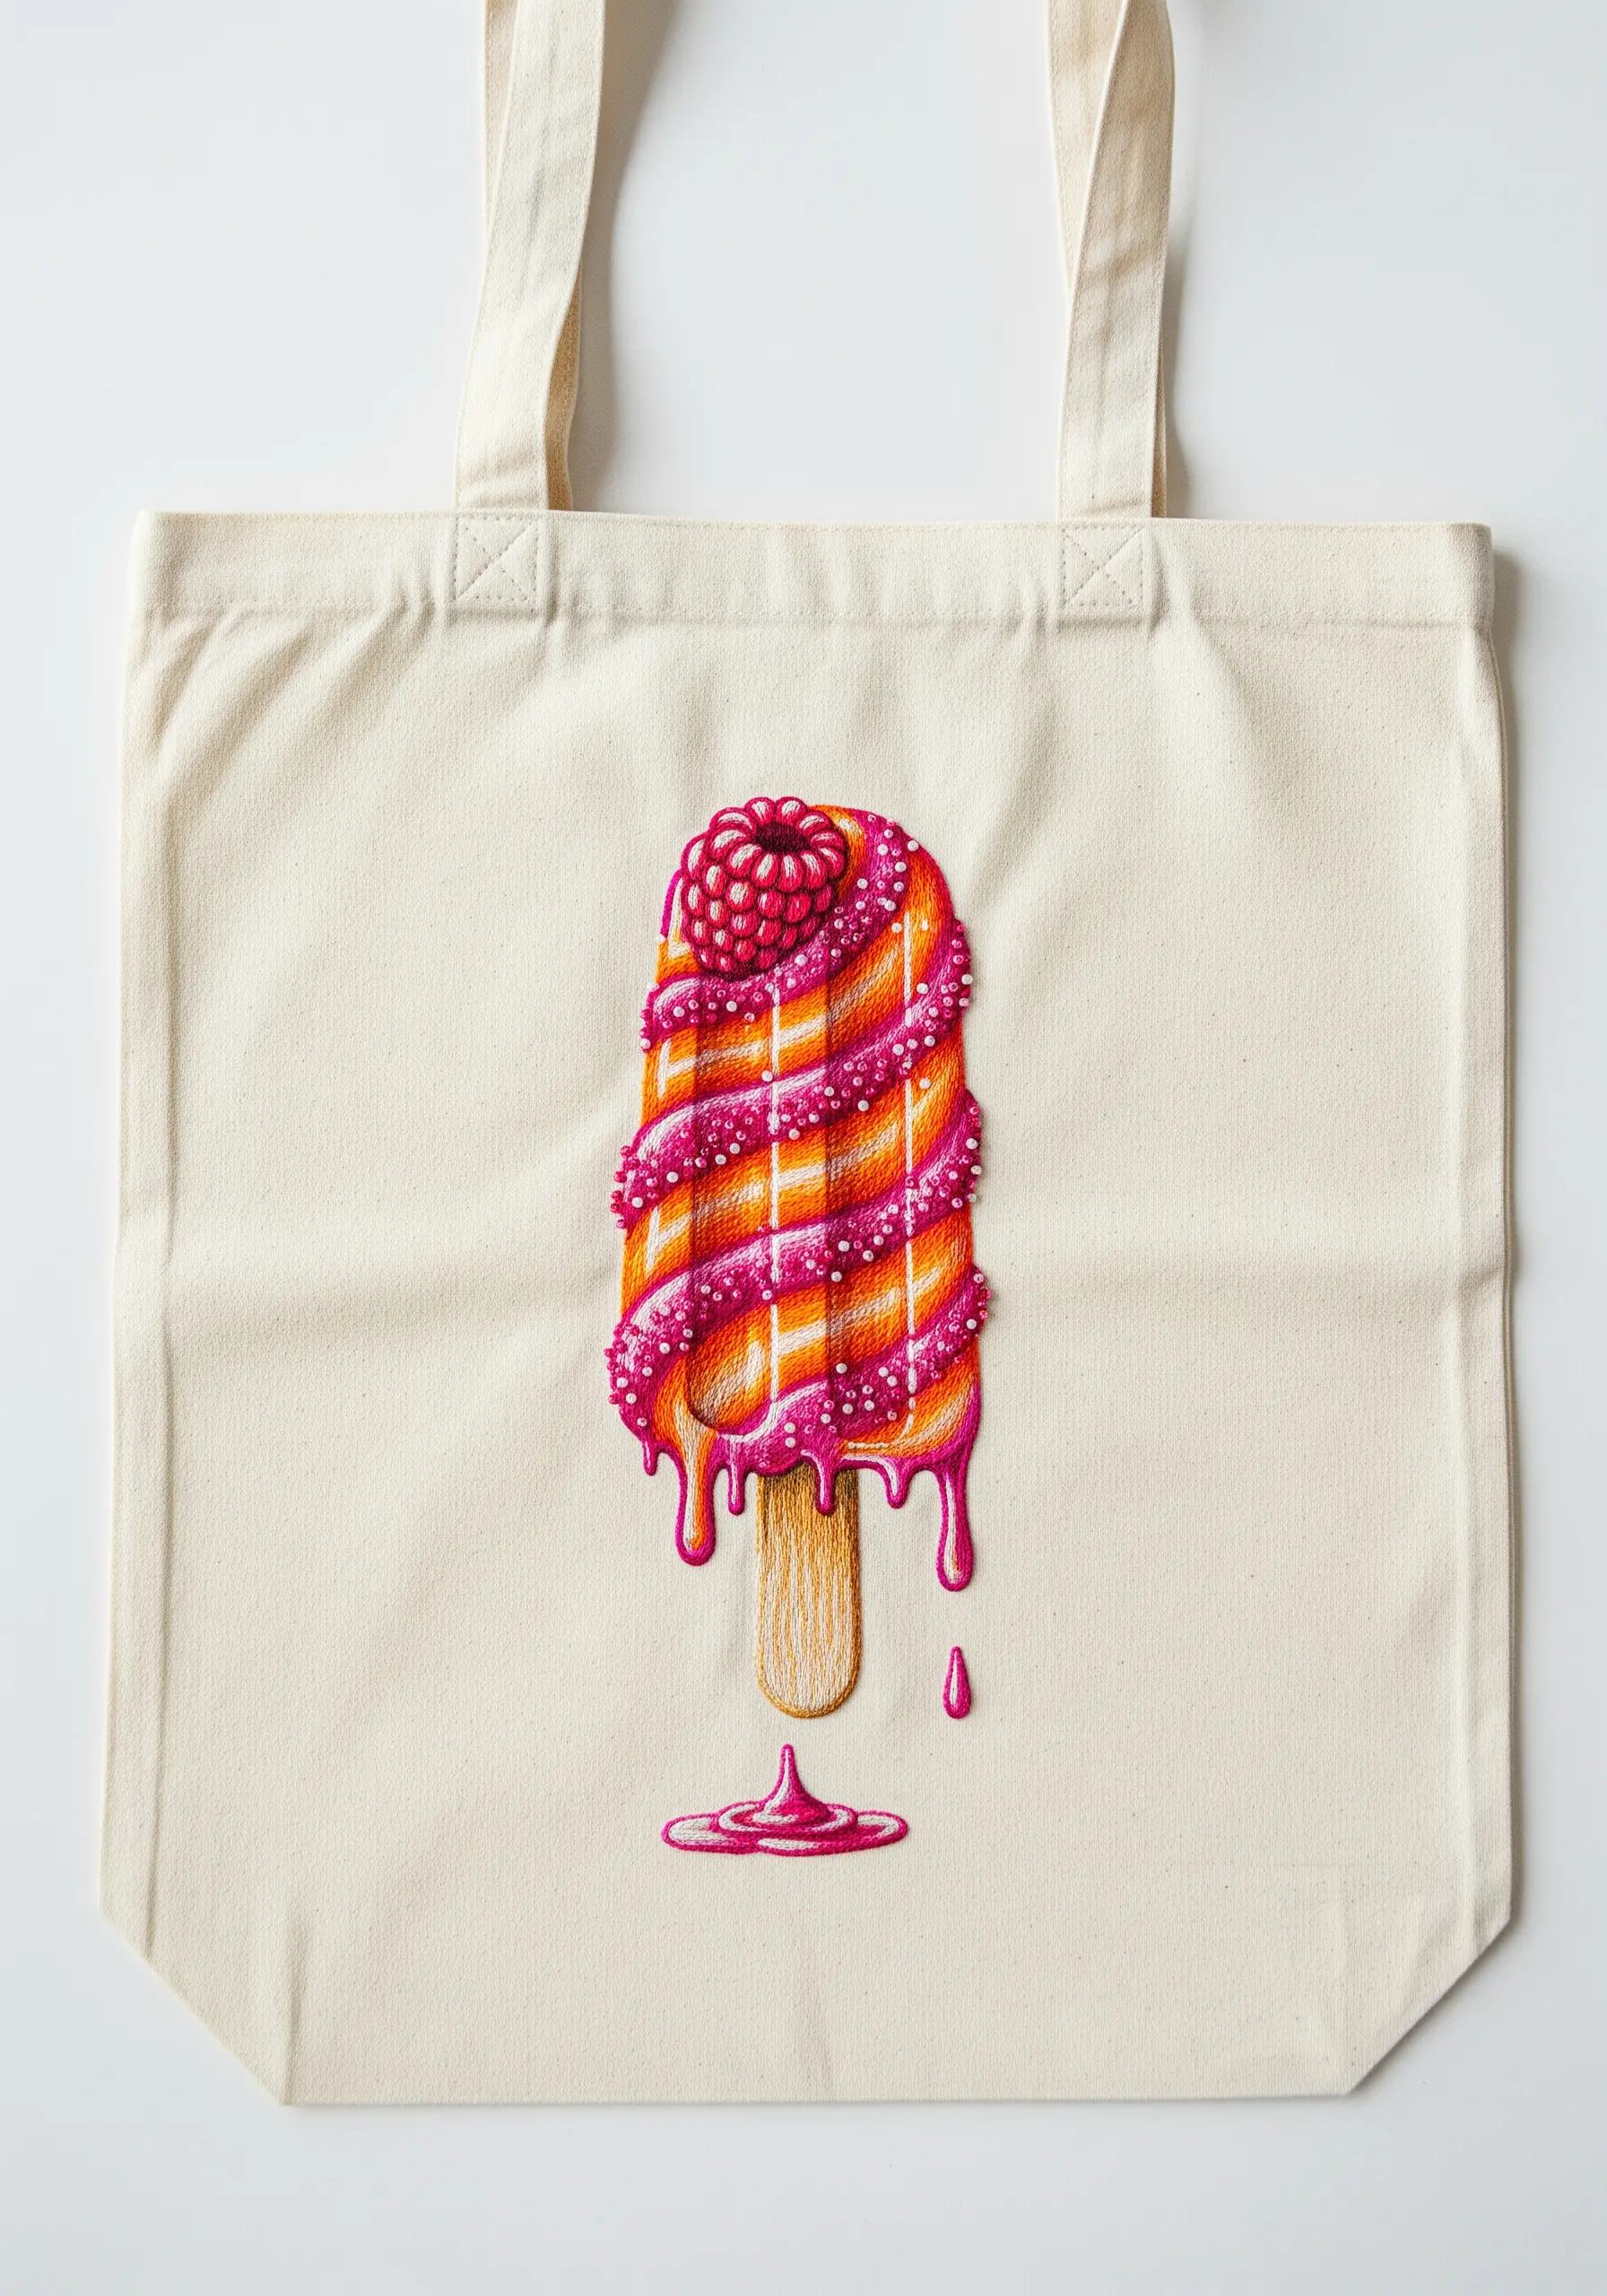
This design is an excellent study in conveying different textures through stitch choice.
Use a smooth, directional satin stitch for the main body of the popsicle, blending threads to create a gradient effect.
For the glistening sugar or sprinkles, cover the area in colorful French knots, which stand up from the fabric and catch the light.
This contrast between the flat satin stitch and the raised knots makes the different elements of the design distinct and visually interesting.
10. The Dynamic Beach Bonfire

To capture the flickering movement of fire, avoid uniform stitches.
Create the flames by layering long, slightly chaotic straight stitches in shades of yellow, orange, and deep red.
Vary the length and angle of each stitch to mimic the unpredictable nature of a real flame. Don’t be afraid to let them overlap.
For the tiny stars in the night sky, use a single French knot with a metallic gold thread to add a subtle, elegant sparkle that completes the scene.
11. The Symmetrical Seashell Mandala
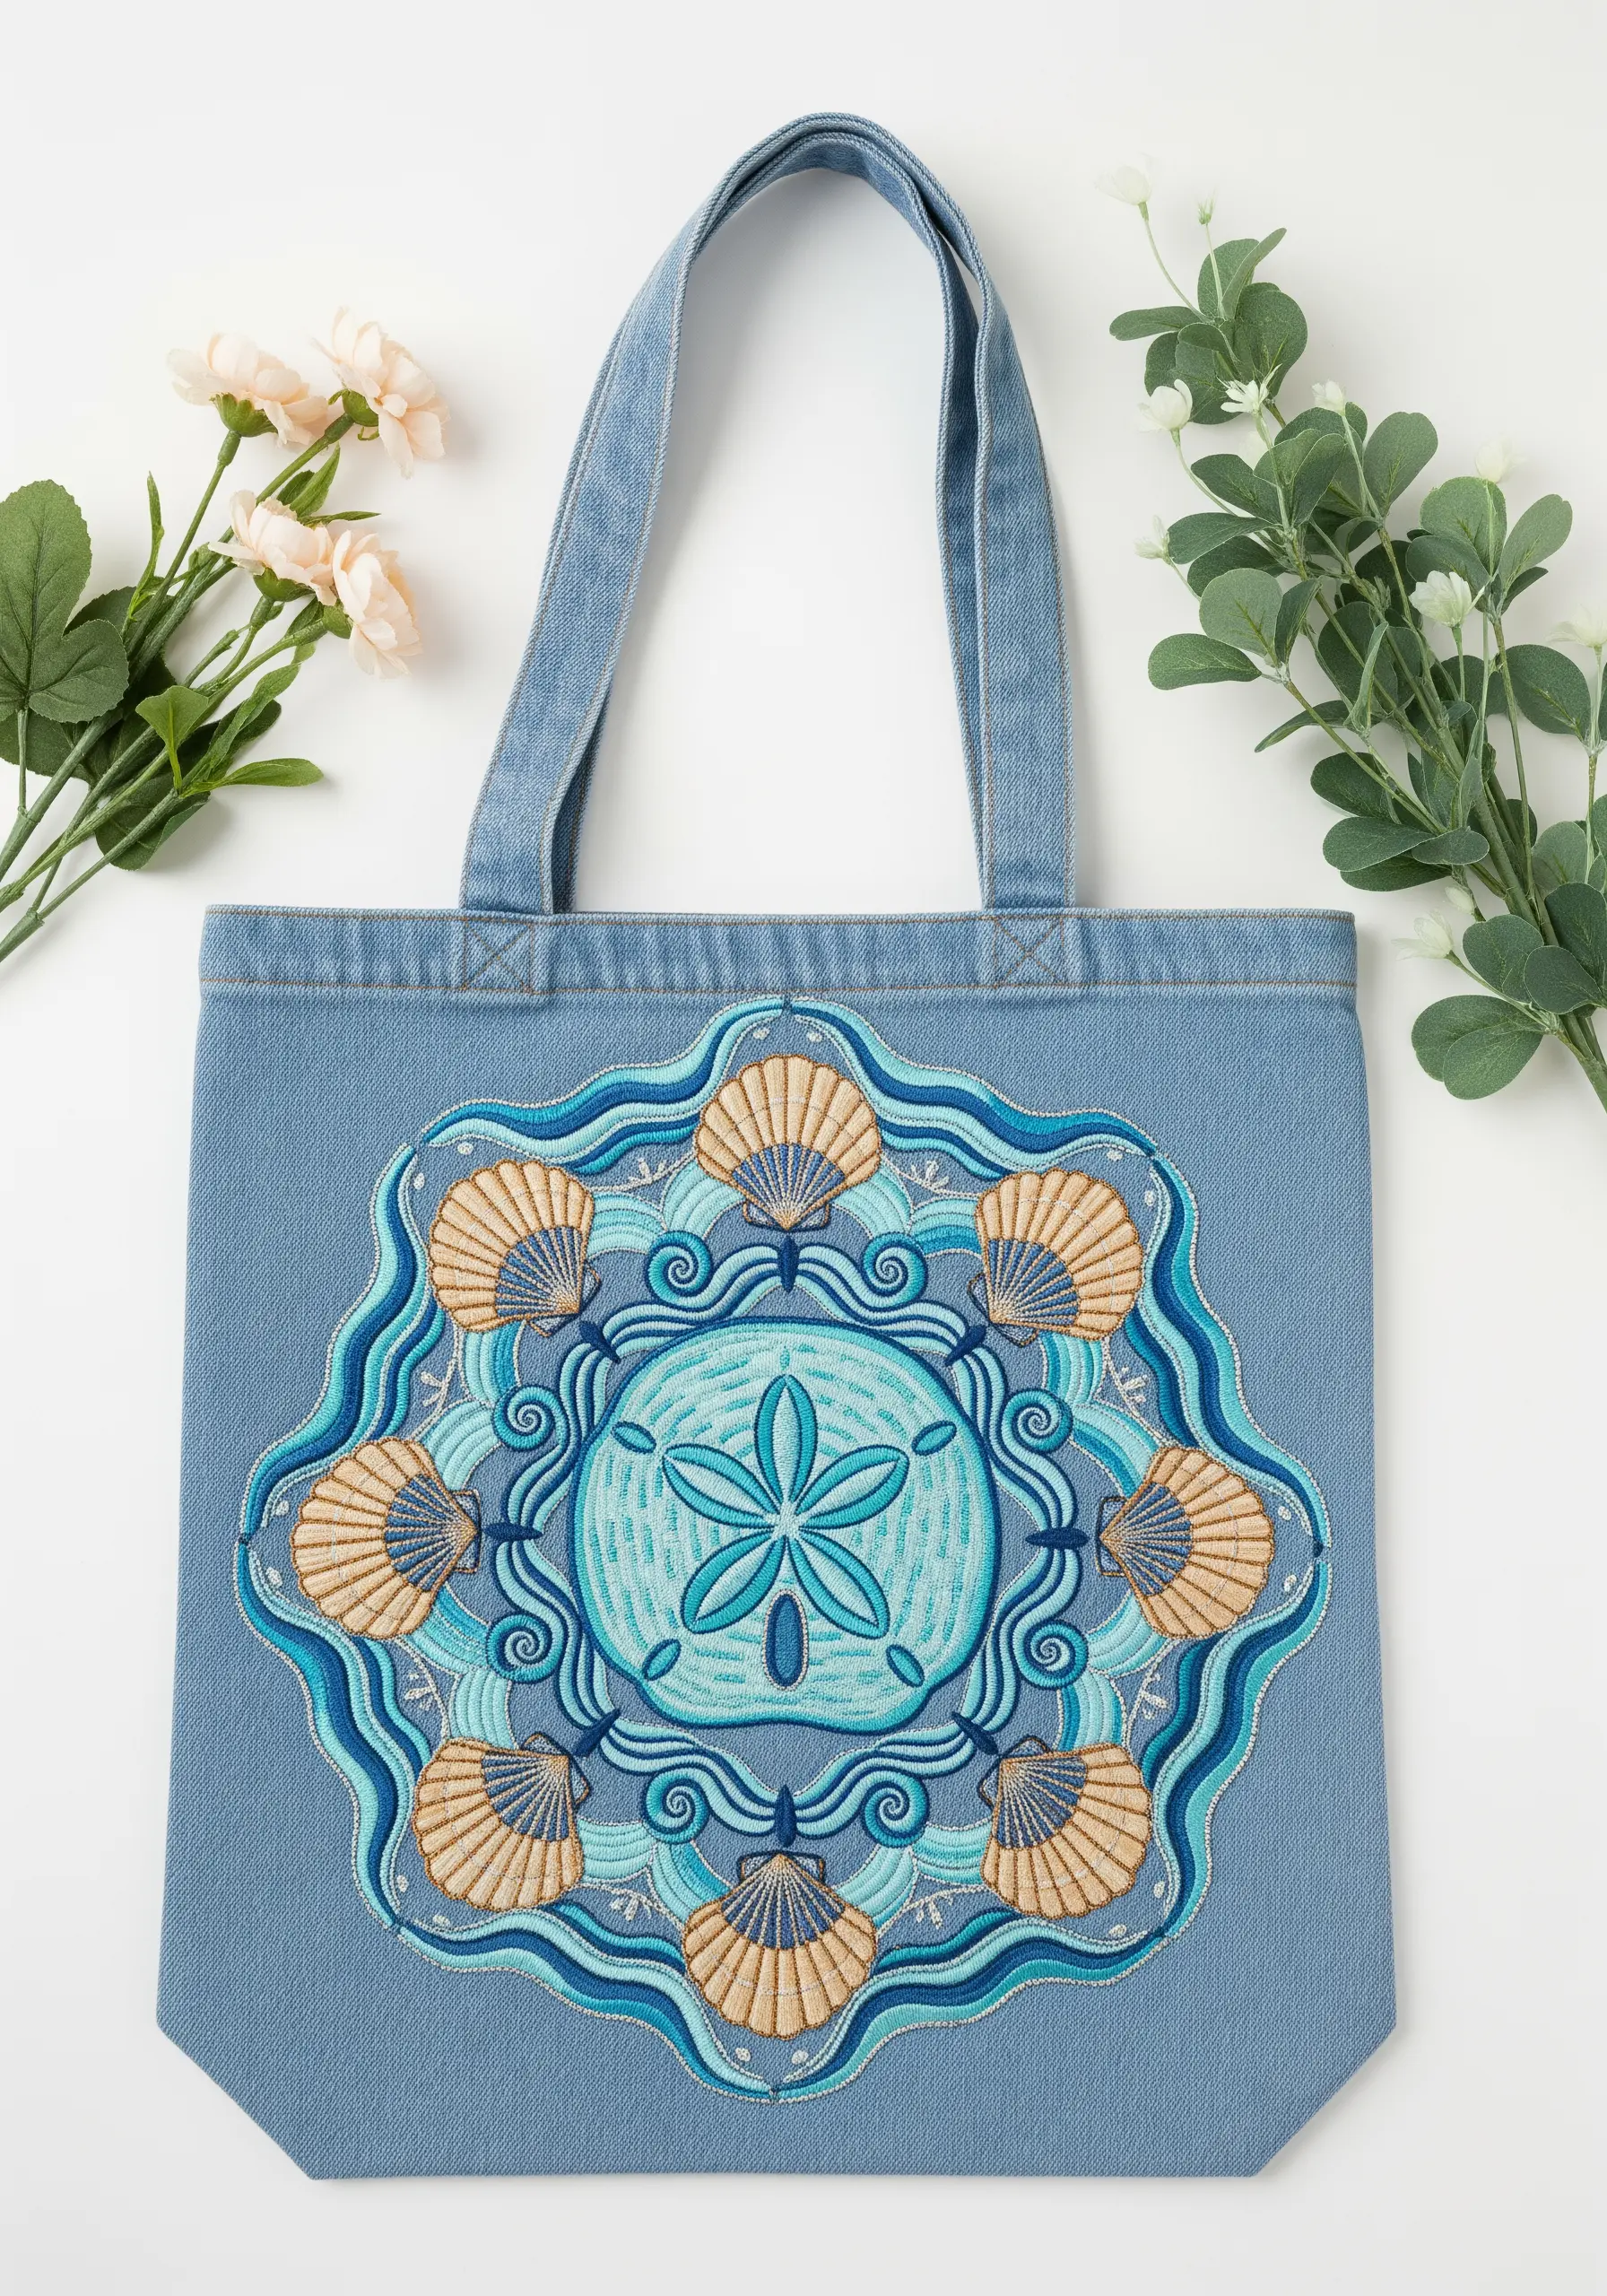
For intricate, symmetrical designs like a mandala, precision is everything.
Transfer your pattern using a water-soluble stabilizer; you can print directly onto it, stick it to your tote, stitch through it, and then dissolve it with water, leaving only your perfect stitches.
Vary the stitches you use for different sections—alternate between satin stitch, chain stitch, and backstitch—to add textural interest to the repetitive pattern.
This approach guarantees a clean, professional result for any calming meditative embroidery.
12. Bold Palm Leaves on Woven Straw
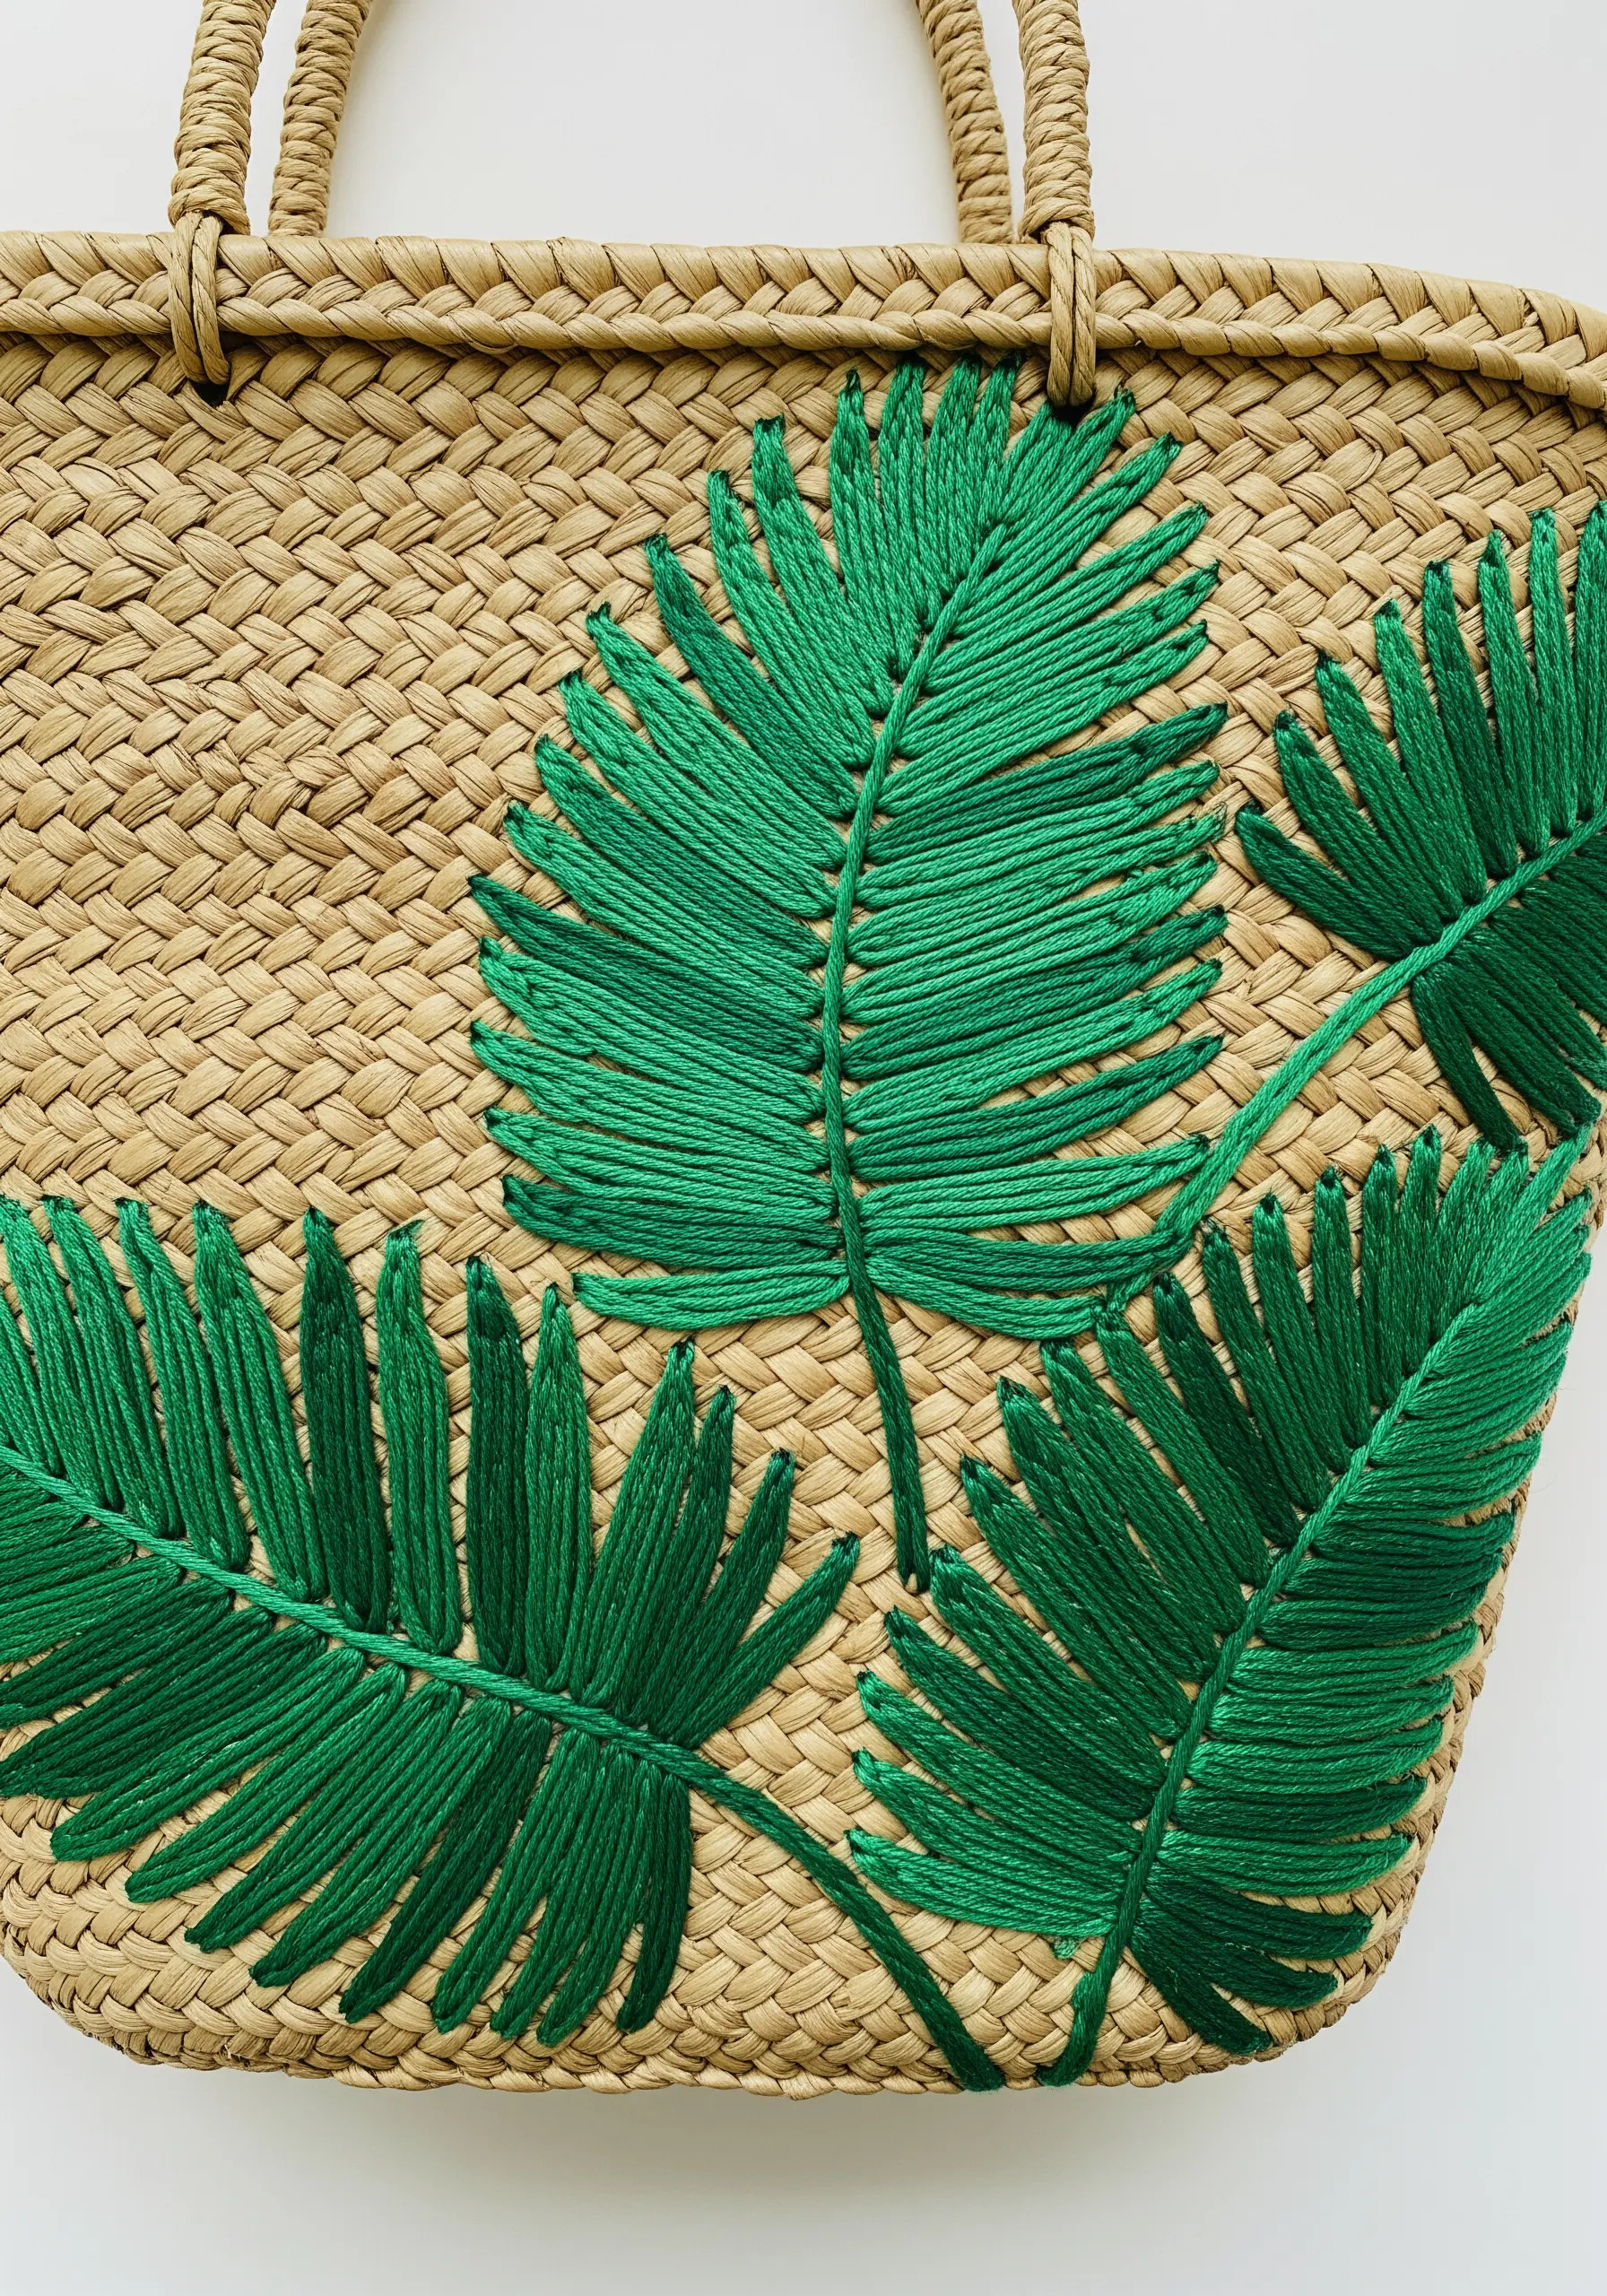
Embroidering on a heavily textured surface like a straw bag requires a change in materials.
Opt for a thicker thread, such as tapestry wool or all six strands of embroidery floss, to ensure your stitches don’t get lost in the bag’s weave.
Use a blunt-tipped tapestry needle, which will find its way between the straw fibers rather than splitting and damaging them.
Simple, bold stitches like a fishbone stitch or a wide satin stitch are most effective for these tropical leaf embroidery designs.
13. The Customizable Travel Patch Collection

Create a flexible, evolving design by stitching your motifs as individual patches.
Embroider your summer memories onto separate pieces of sturdy felt or canvas, then cut them out, leaving a small border.
Finish the edge of each patch with a tight, clean satin stitch border. This gives them a classic, polished look.
You can then arrange and sew them onto your tote, and continue to add new patches from future adventures.
14. The Ethereal Nautilus Shell

This design demonstrates the power of restraint and negative space.
Use a single strand of variegated thread for the main outlines; the subtle color shifts will add depth without any extra effort.
For the delicate inner shading, fill small sections with sparse seed stitches using a fine white or silver thread.
By allowing the tote’s fabric to show through, you create an airy, translucent quality that makes the shell feel delicate and light.
15. The Retro Road Trip
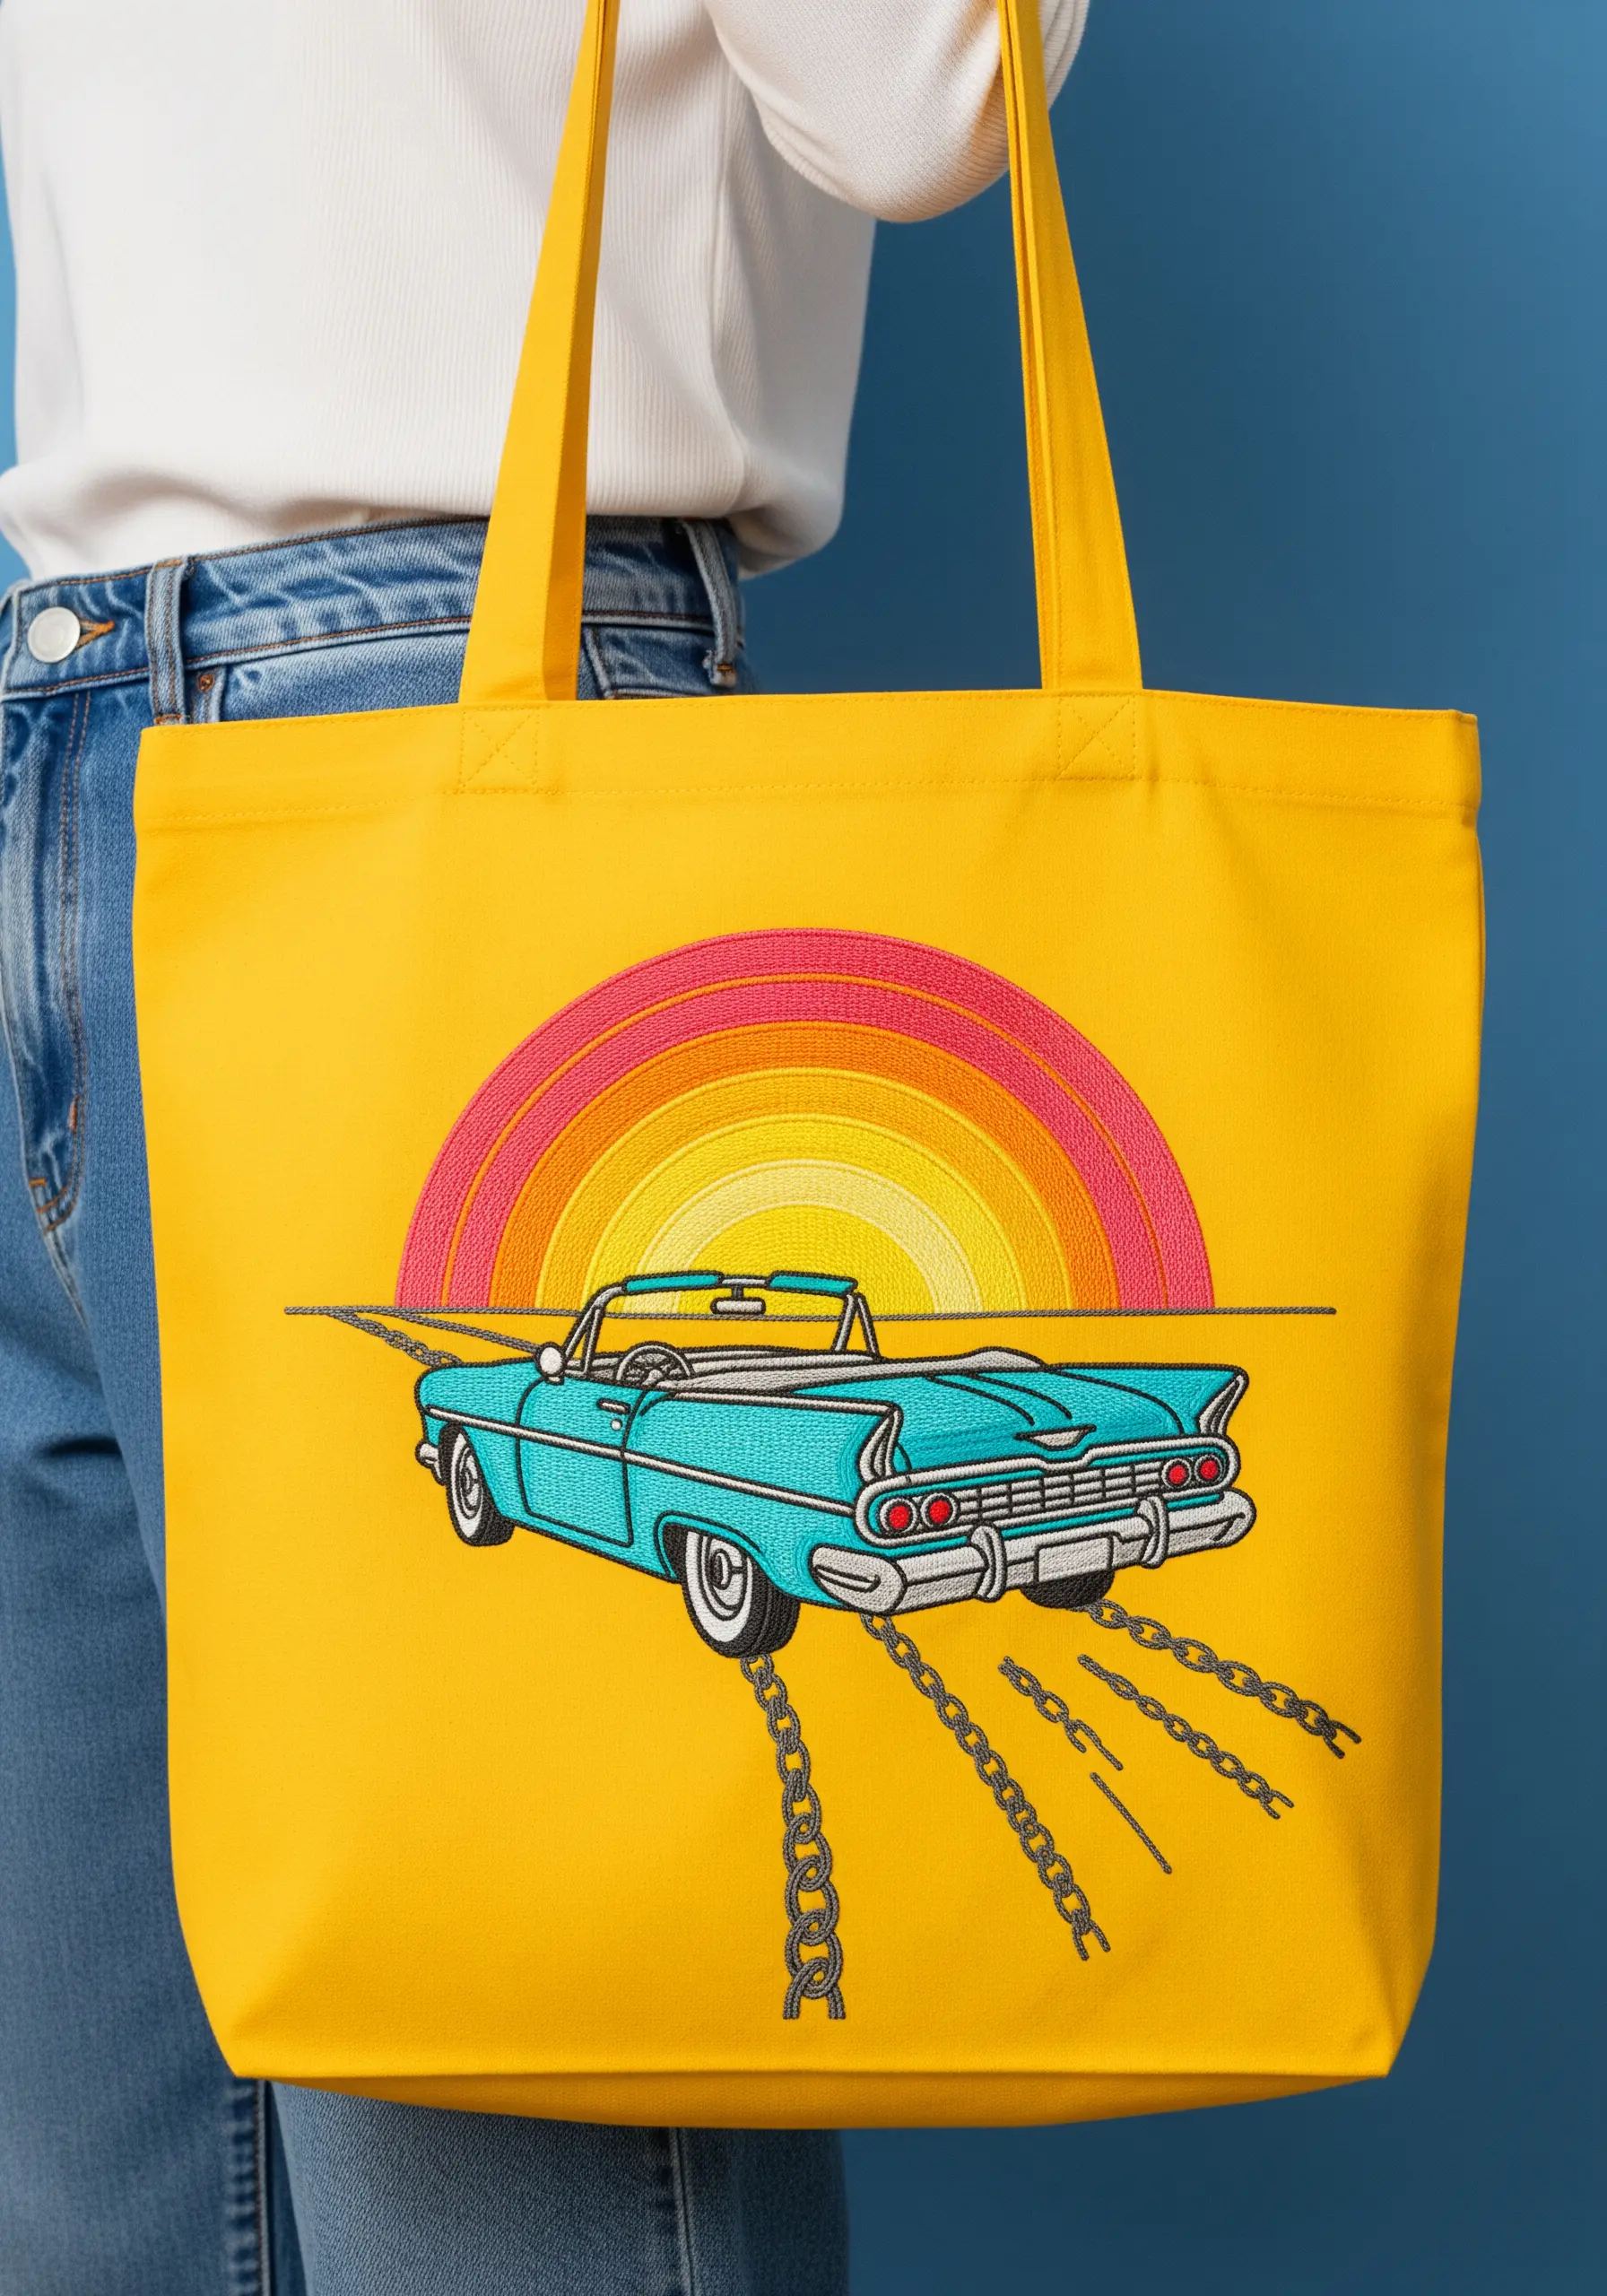
Achieve a clean, graphic illustration style by prioritizing your linework.
Use a consistent two-strand stem stitch or backstitch for every outline in the design. This creates a uniform, bold edge that defines each shape clearly.
Fill the colored sections with a directional satin stitch, ensuring your stitches all lie flat and parallel.
The key to this retro aesthetic is crispness and consistency, so maintaining even tension on your fabric is crucial for a smooth result.
16. The Textural Coral Garden
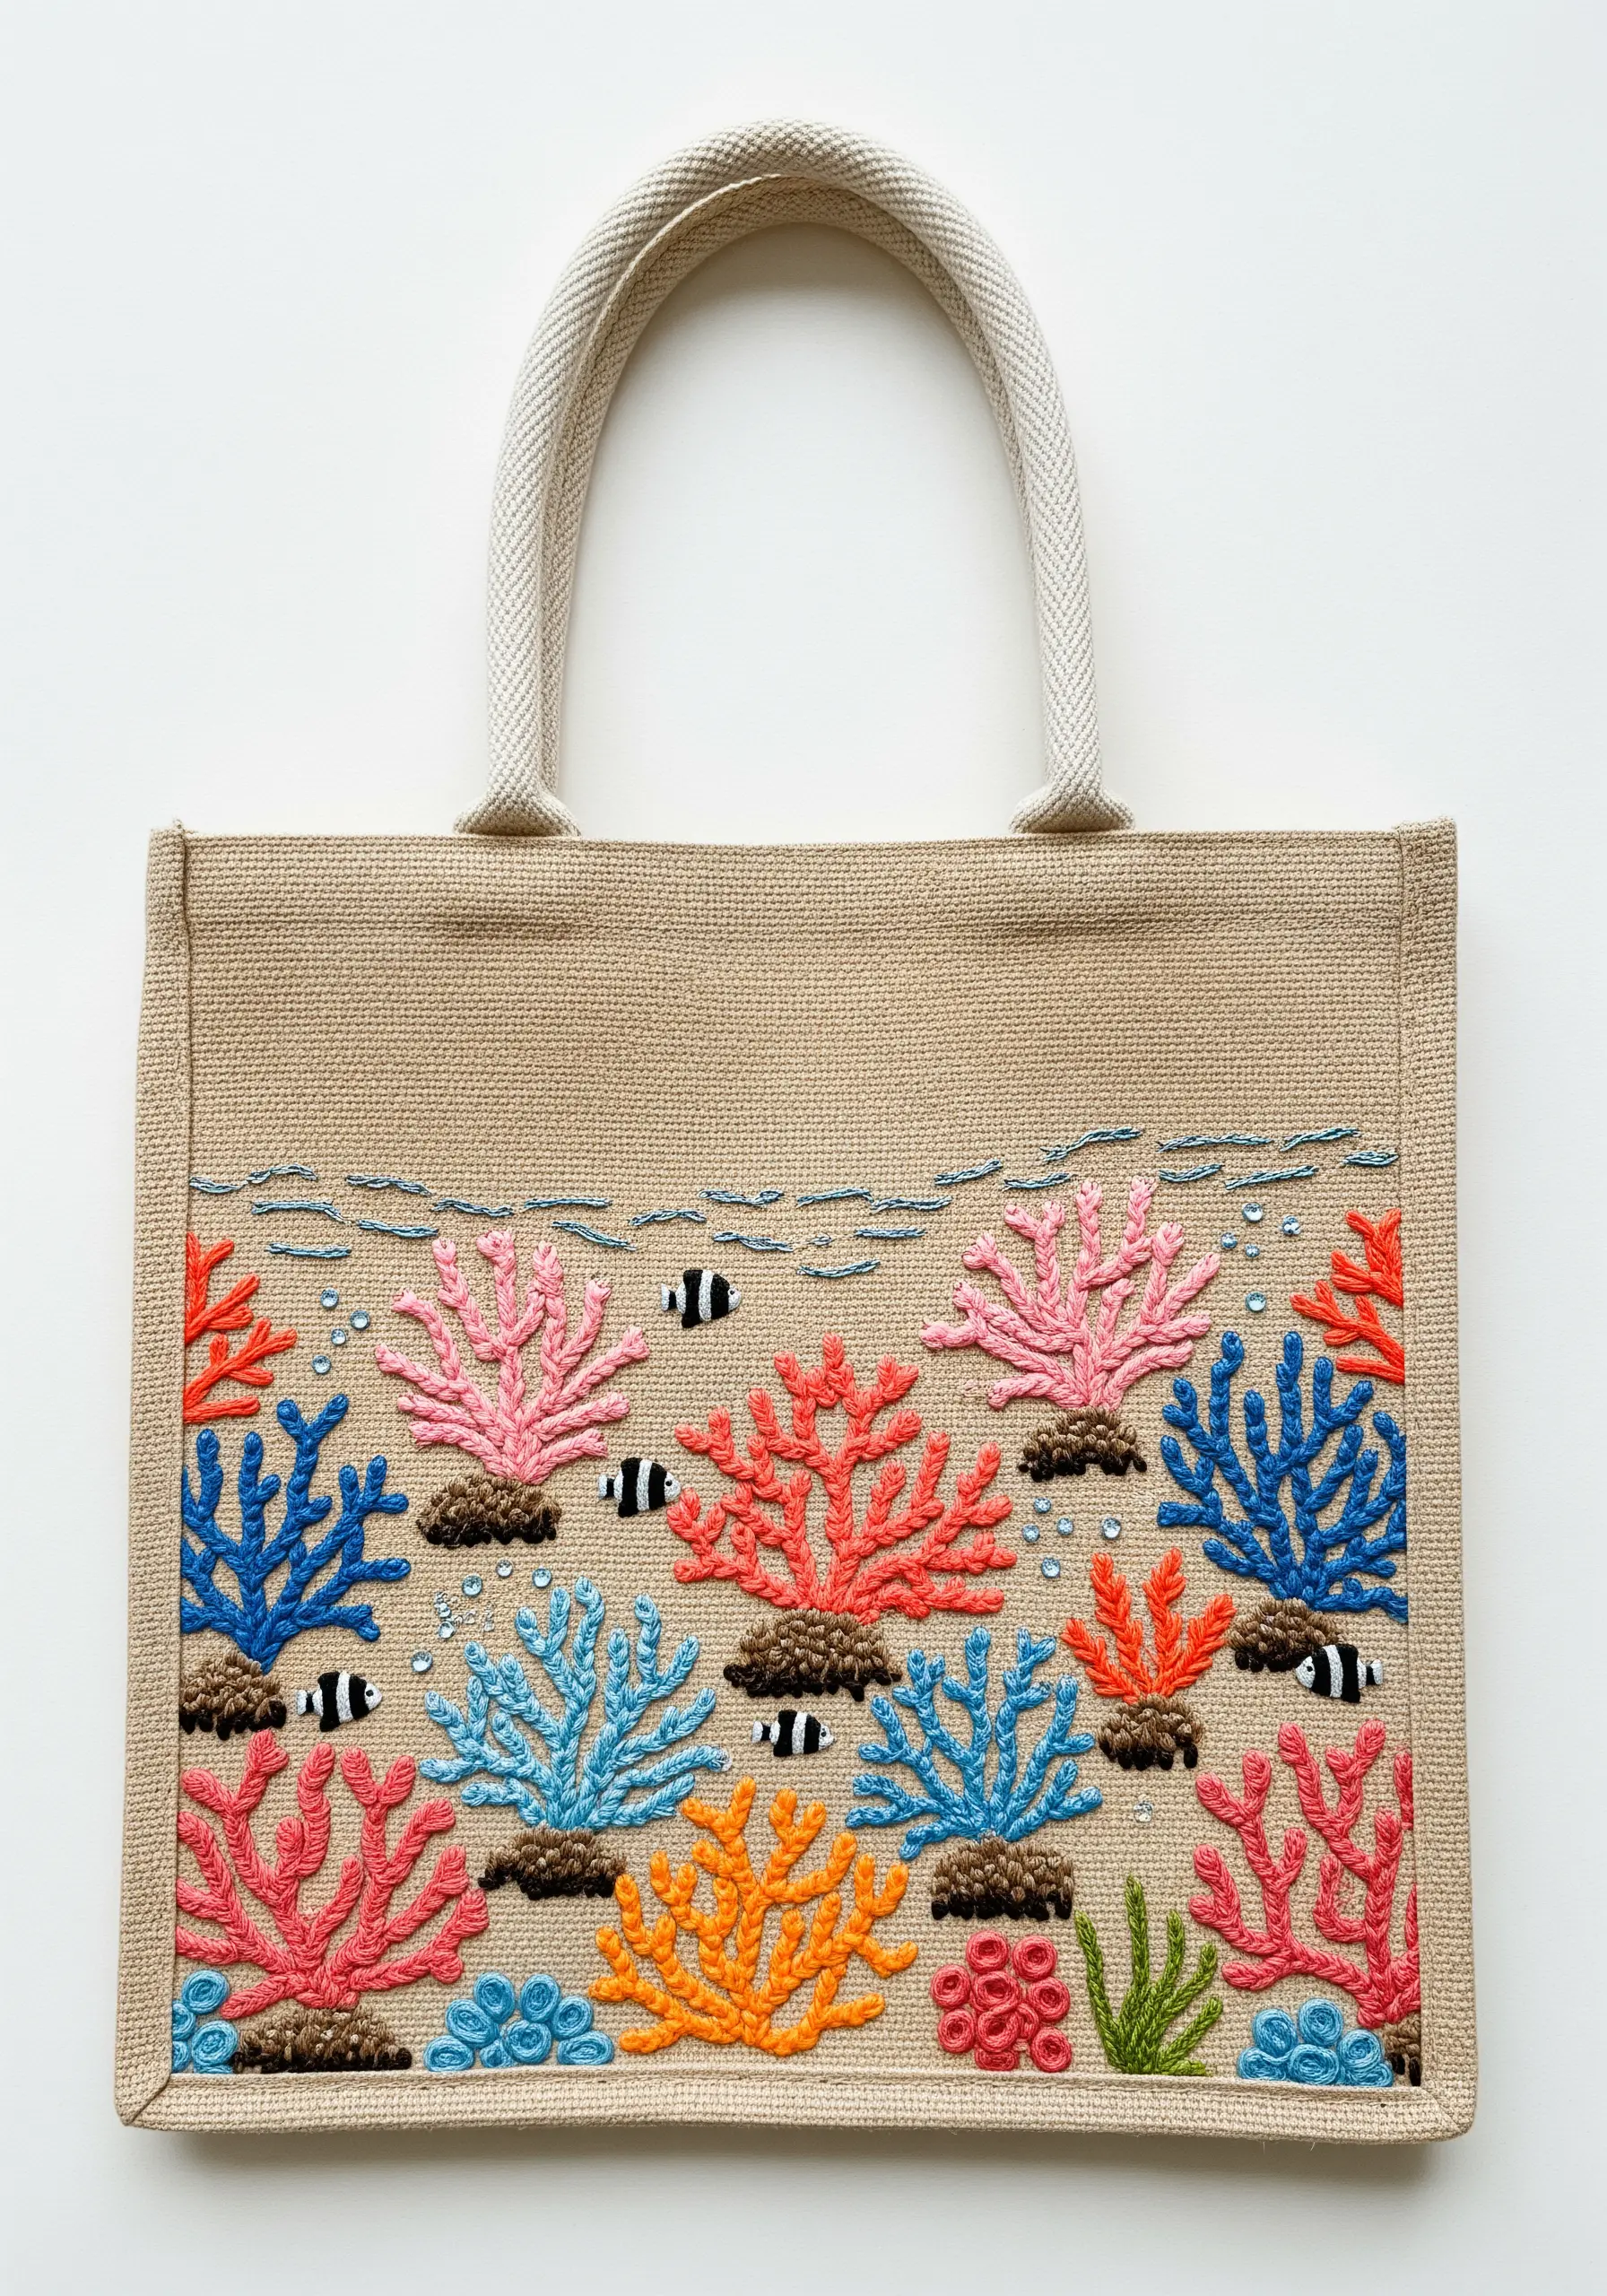
Build a vibrant underwater world by assigning a different textural stitch to each type of coral.
Use bullion knots for tube-like coral shapes and dense clusters of French knots for brain coral.
Pistil stitches—essentially a French knot with a long tail—are perfect for creating the delicate tentacles of sea anemones.
This combination of varied, dimensional stitches makes the scene come alive, offering a rich tactile experience that a simple satin stitch could never achieve.
17. The Geometric Sunburst
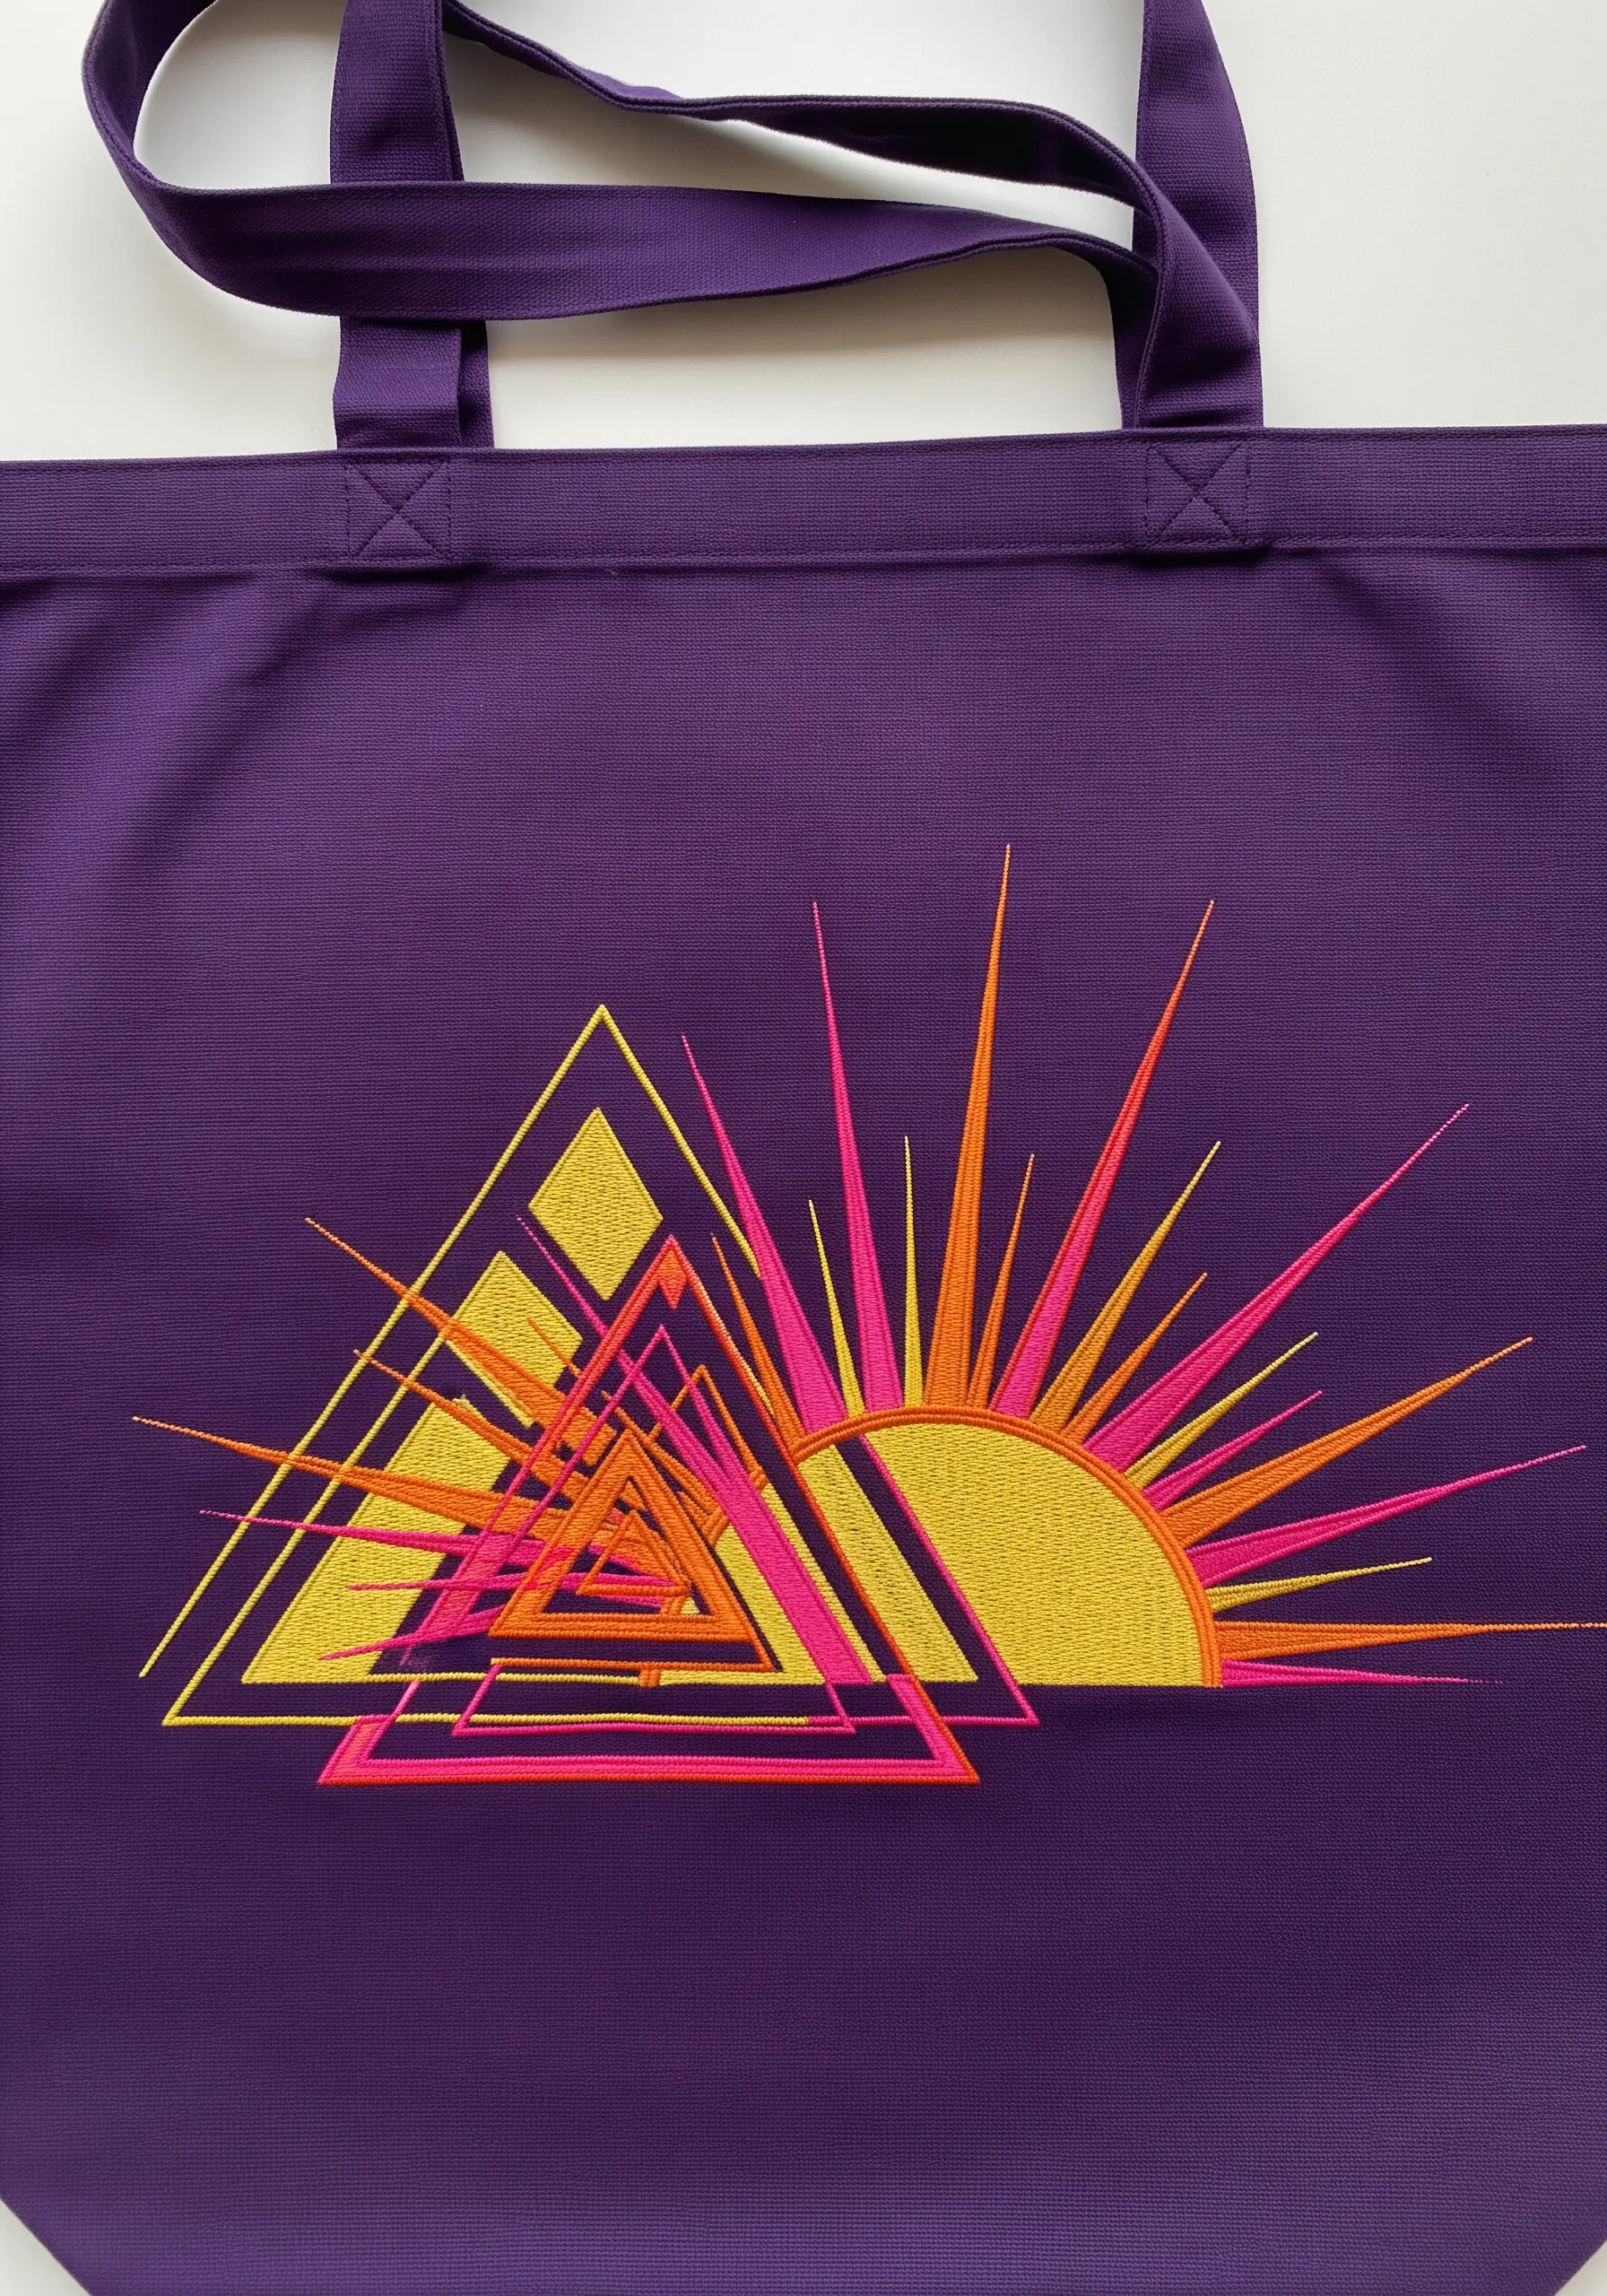
For designs that feature sharp, geometric shapes, a strong foundation is key to a polished result.
Before you begin your satin stitch, first outline each triangle with a split stitch. This creates a slightly raised edge for your satin stitches to rest against.
When you stitch over this foundation, your edges will be perfectly crisp and defined, giving the entire piece a professional, graphic quality.
This technique elevates any geometric embroidery pattern from simple to stunning.
18. The Asymmetrical Wildflower Spray
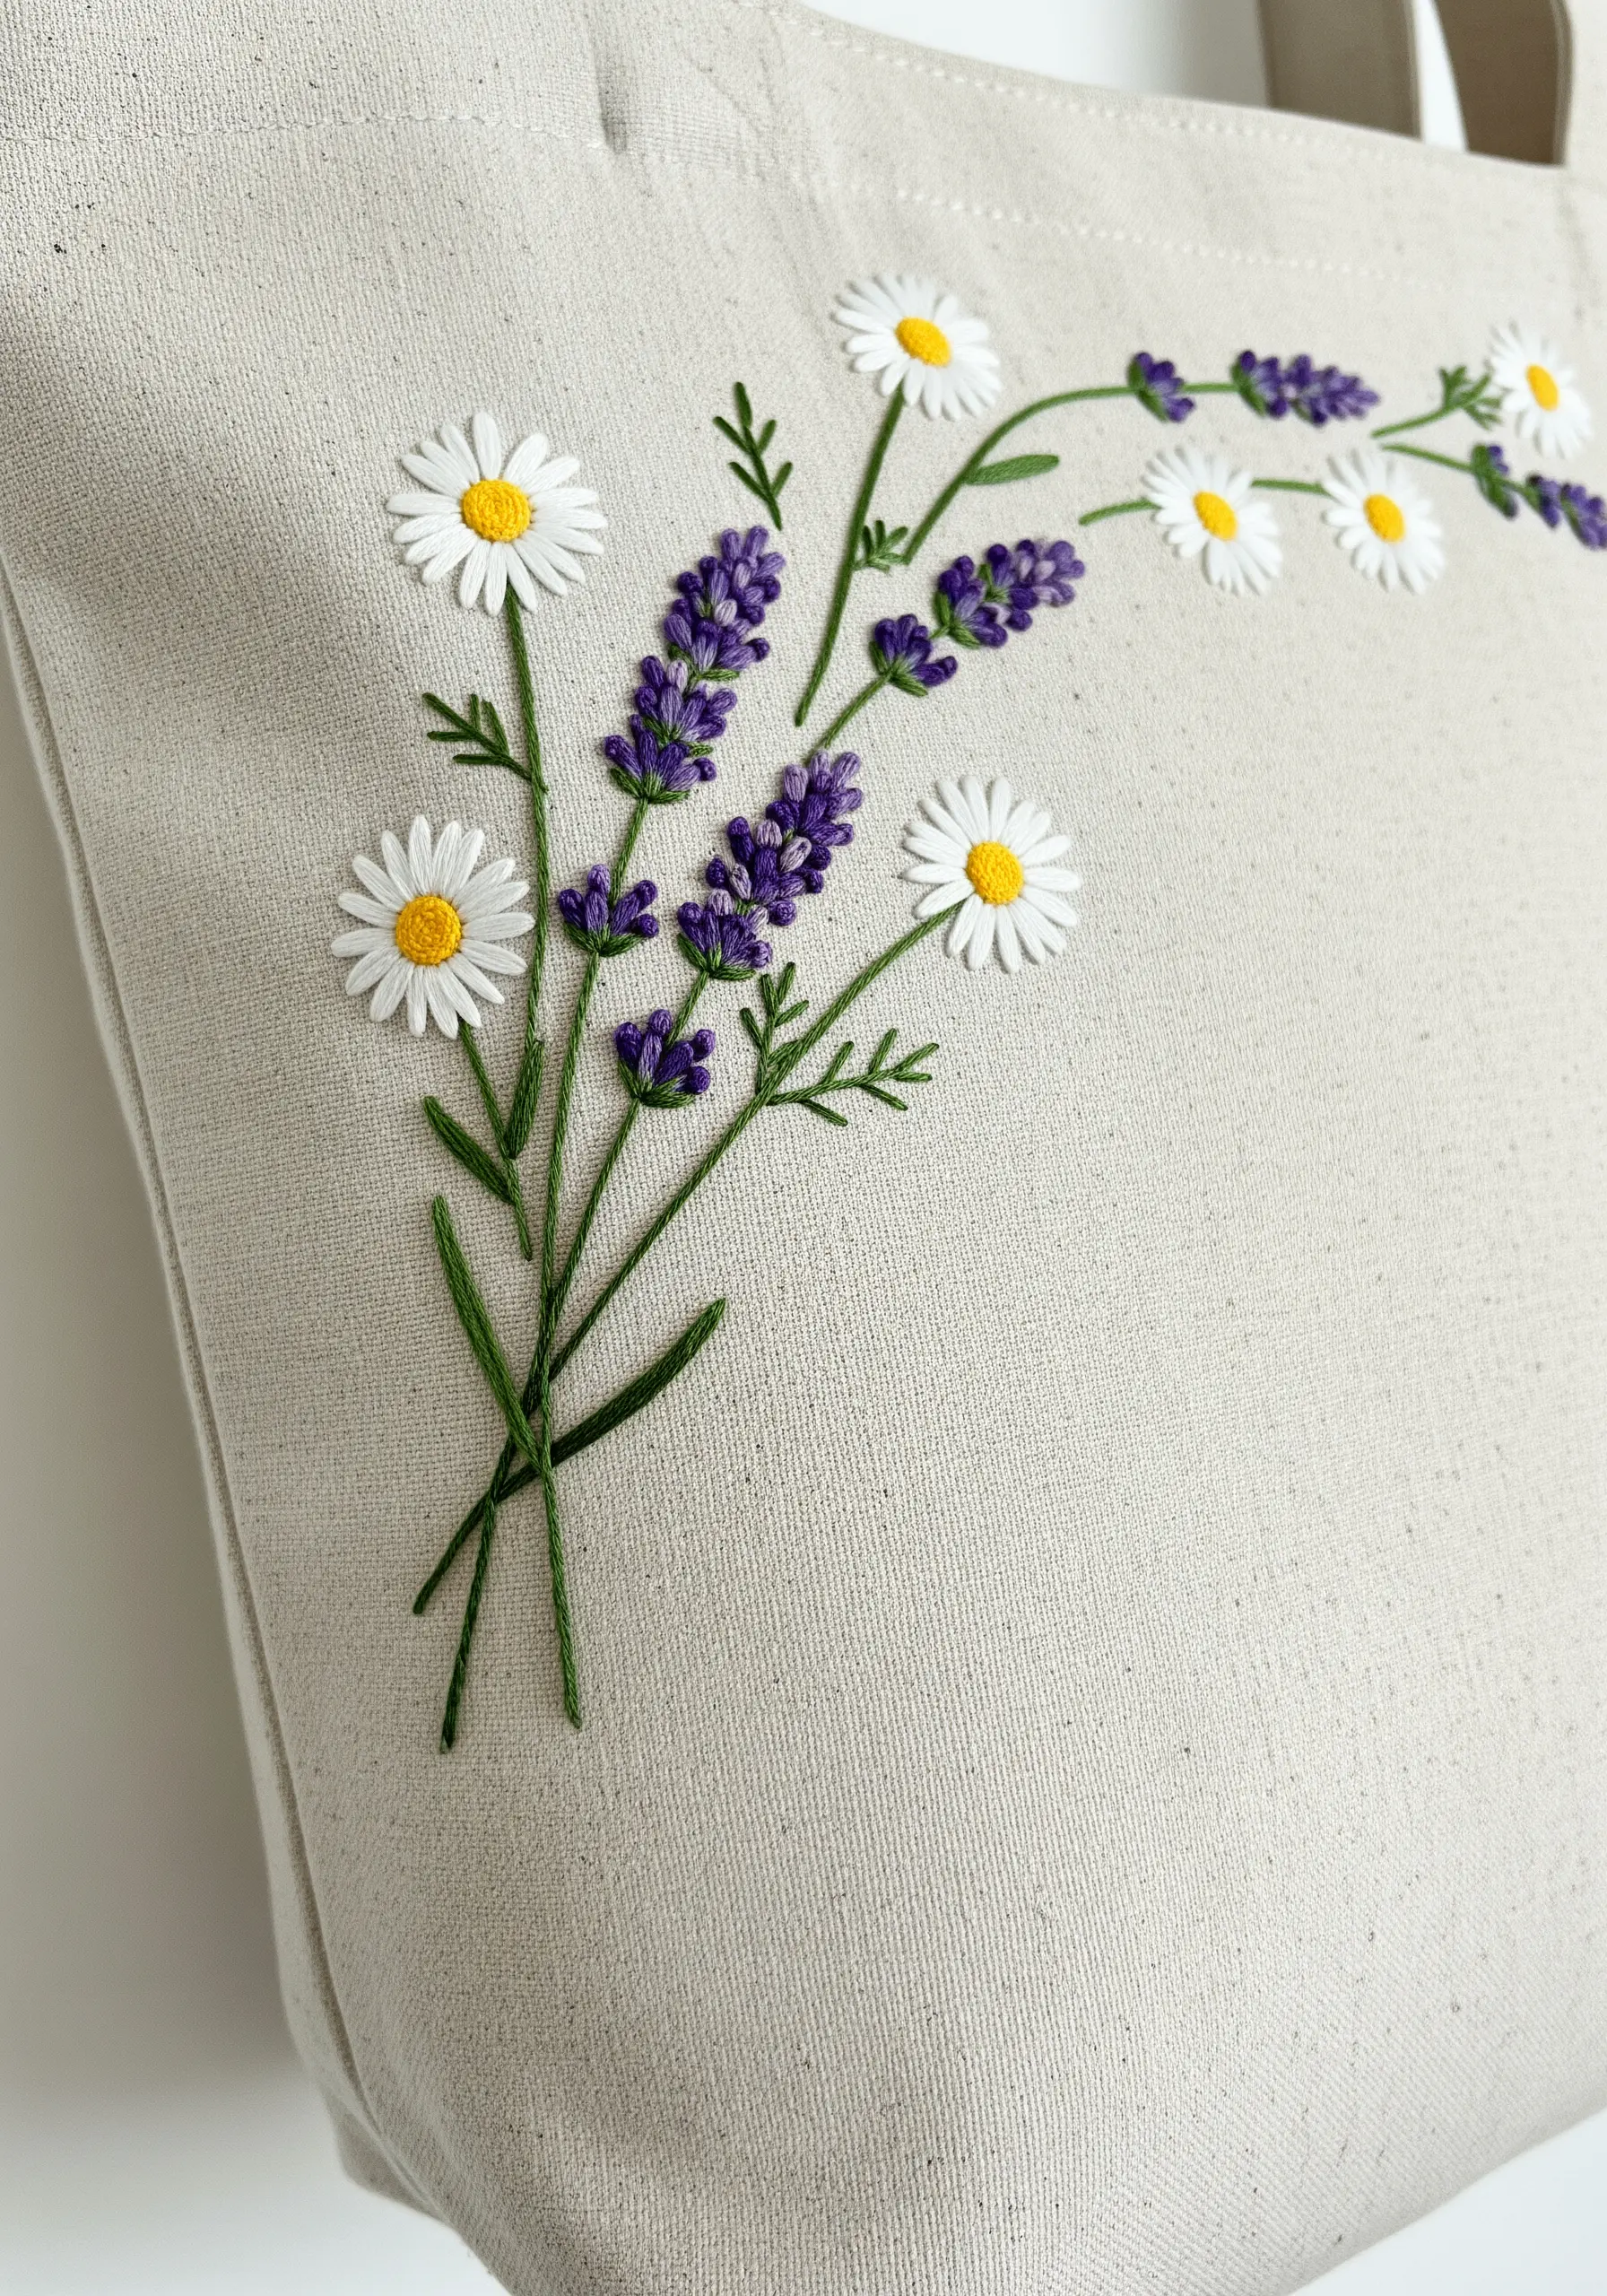
Create a more modern and natural floral arrangement by placing it asymmetrically on your tote, perhaps trailing from a corner or handle.
For the daisy petals, use the detached chain stitch, also known as the lazy daisy. A single stitch creates a perfect, lopped petal shape.
For the lavender buds, cluster tiny French knots or short, angled straight stitches along the top of the stem.
Using two or three different shades of green for the stems and leaves adds a layer of subtle realism to your wildflower embroidery.
19. The Nautical Compass Rose
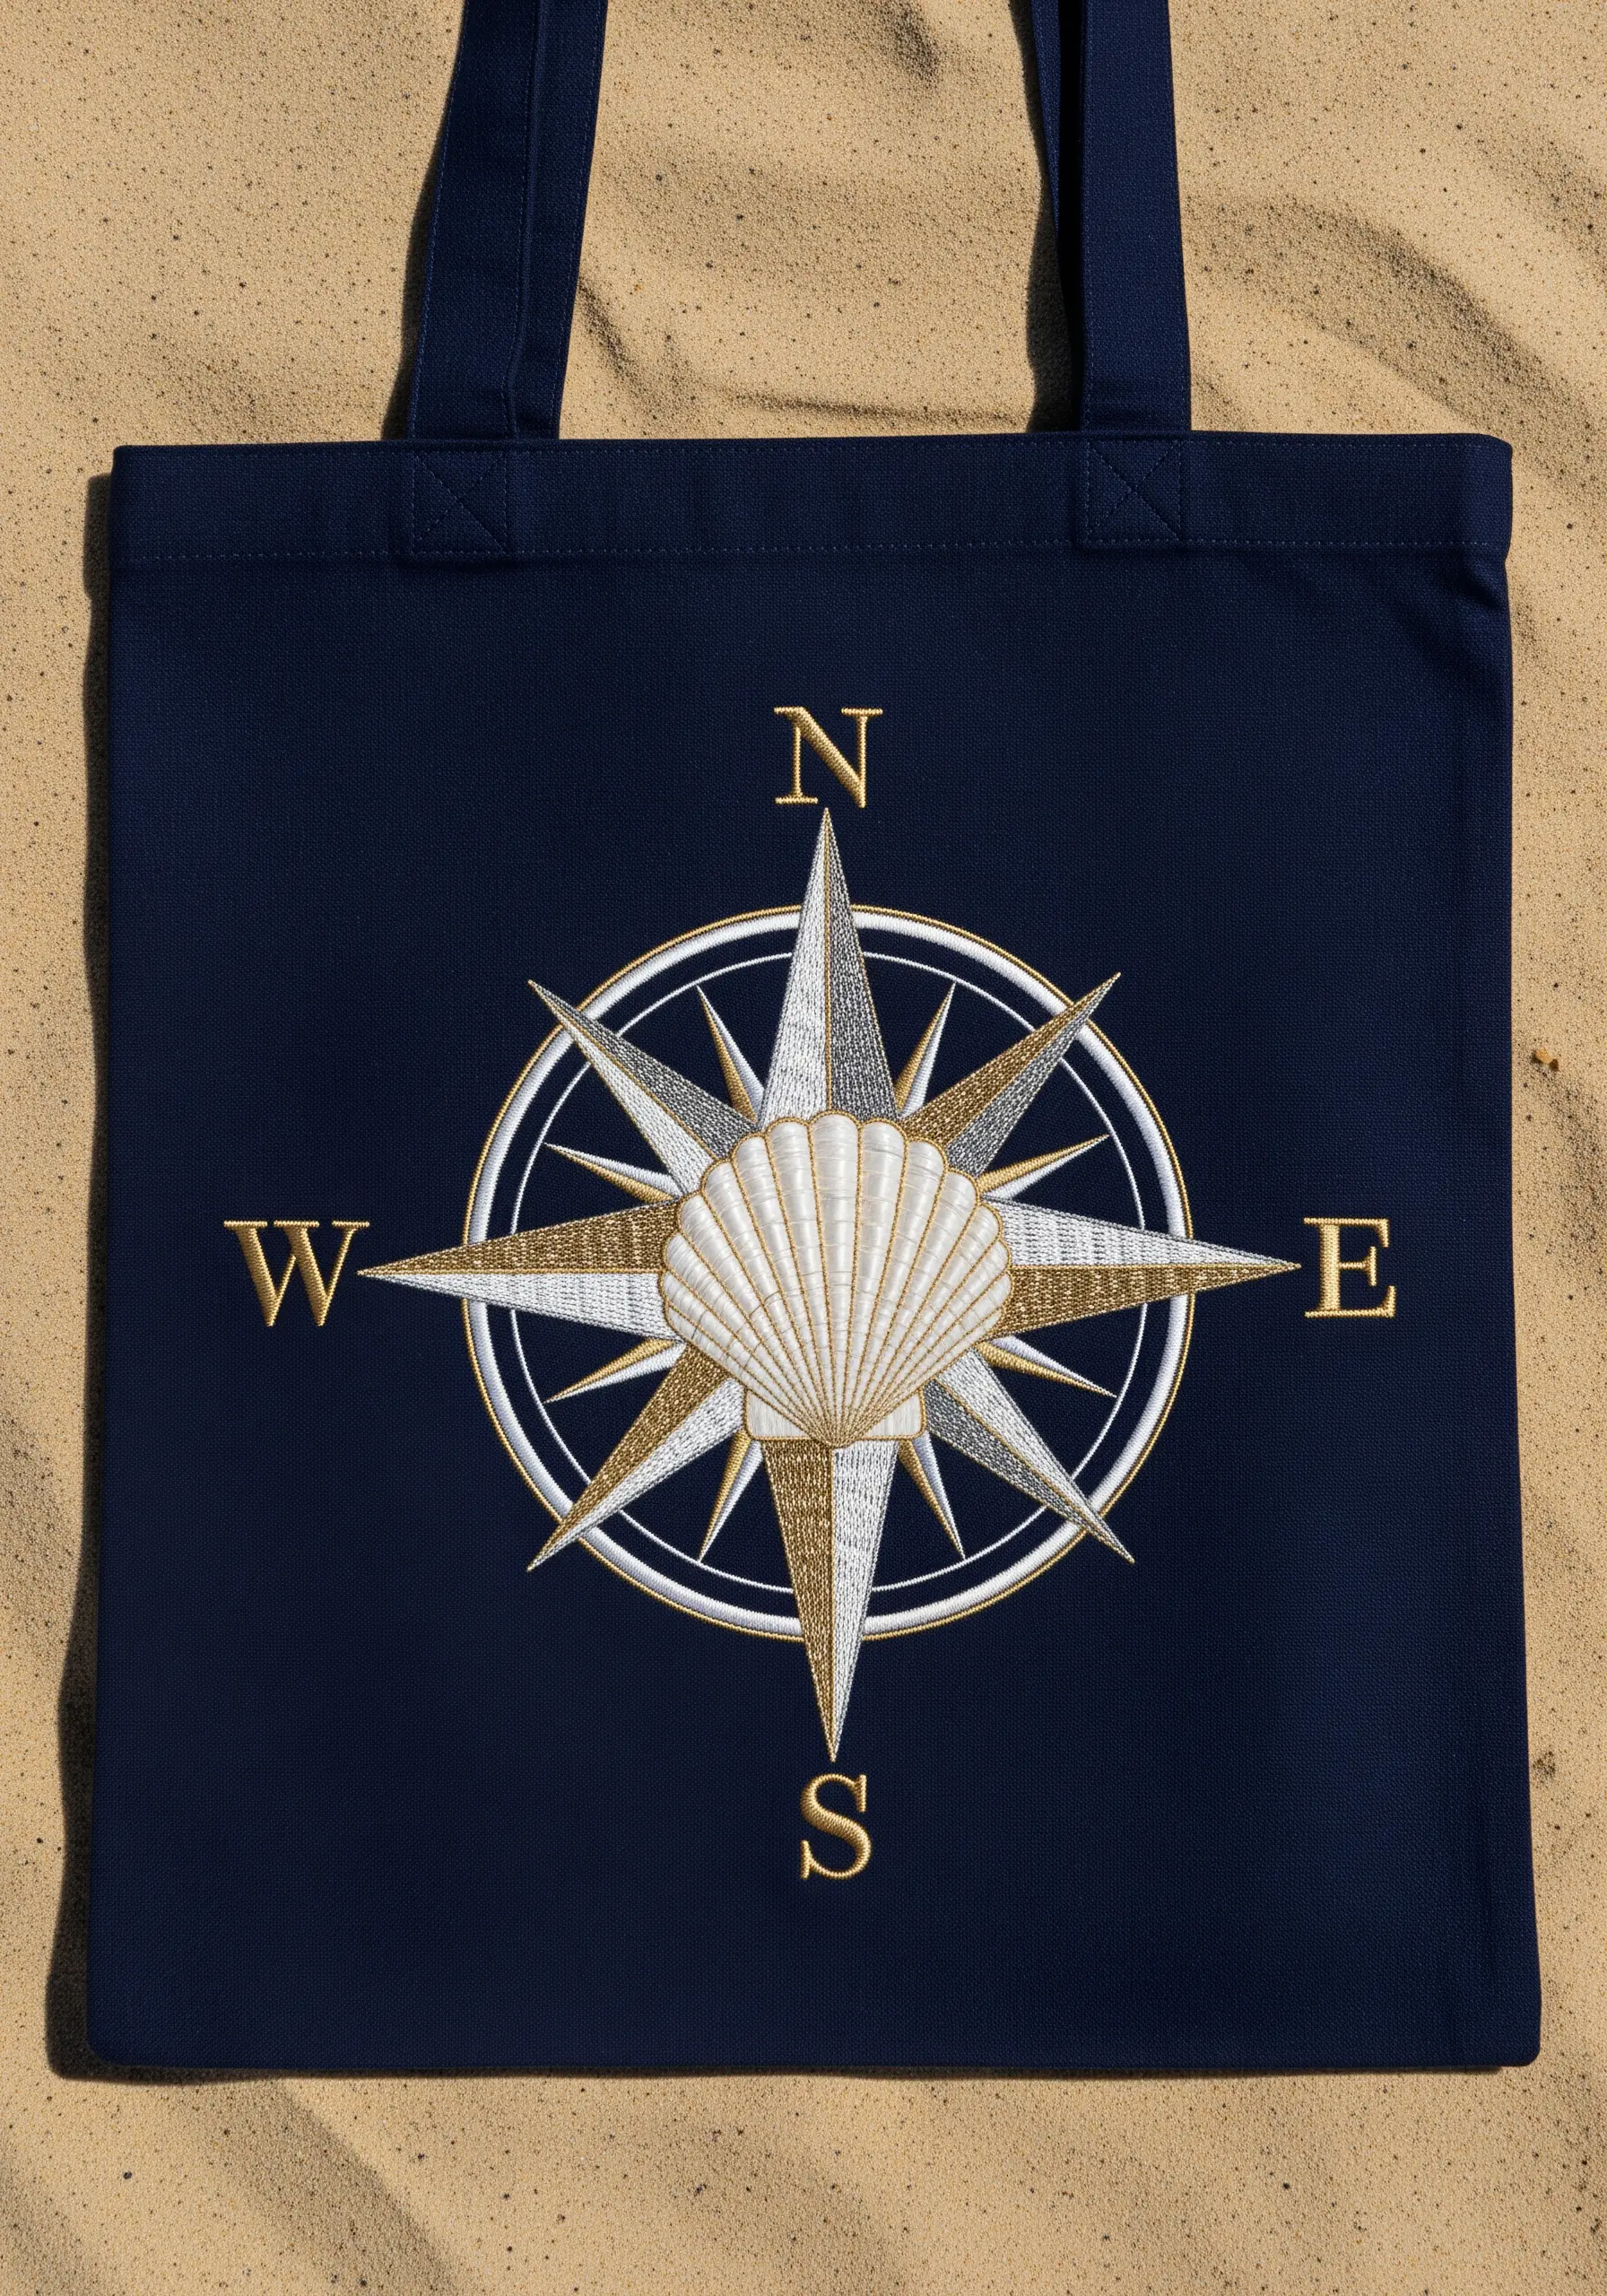
Introduce a touch of luxury into your design by pairing matte cotton floss with shimmering metallic thread.
Use a classic six-strand cotton floss for the central seashell motif, stitched in a clean satin stitch.
For the compass points and lettering, switch to a bright gold metallic thread. The contrast in sheen immediately draws the eye and makes the design feel more dynamic.
Pro tip: Use shorter lengths of metallic thread (no more than 12 inches) to prevent it from snagging and tangling as you stitch.
20. The Cresting Wave Script
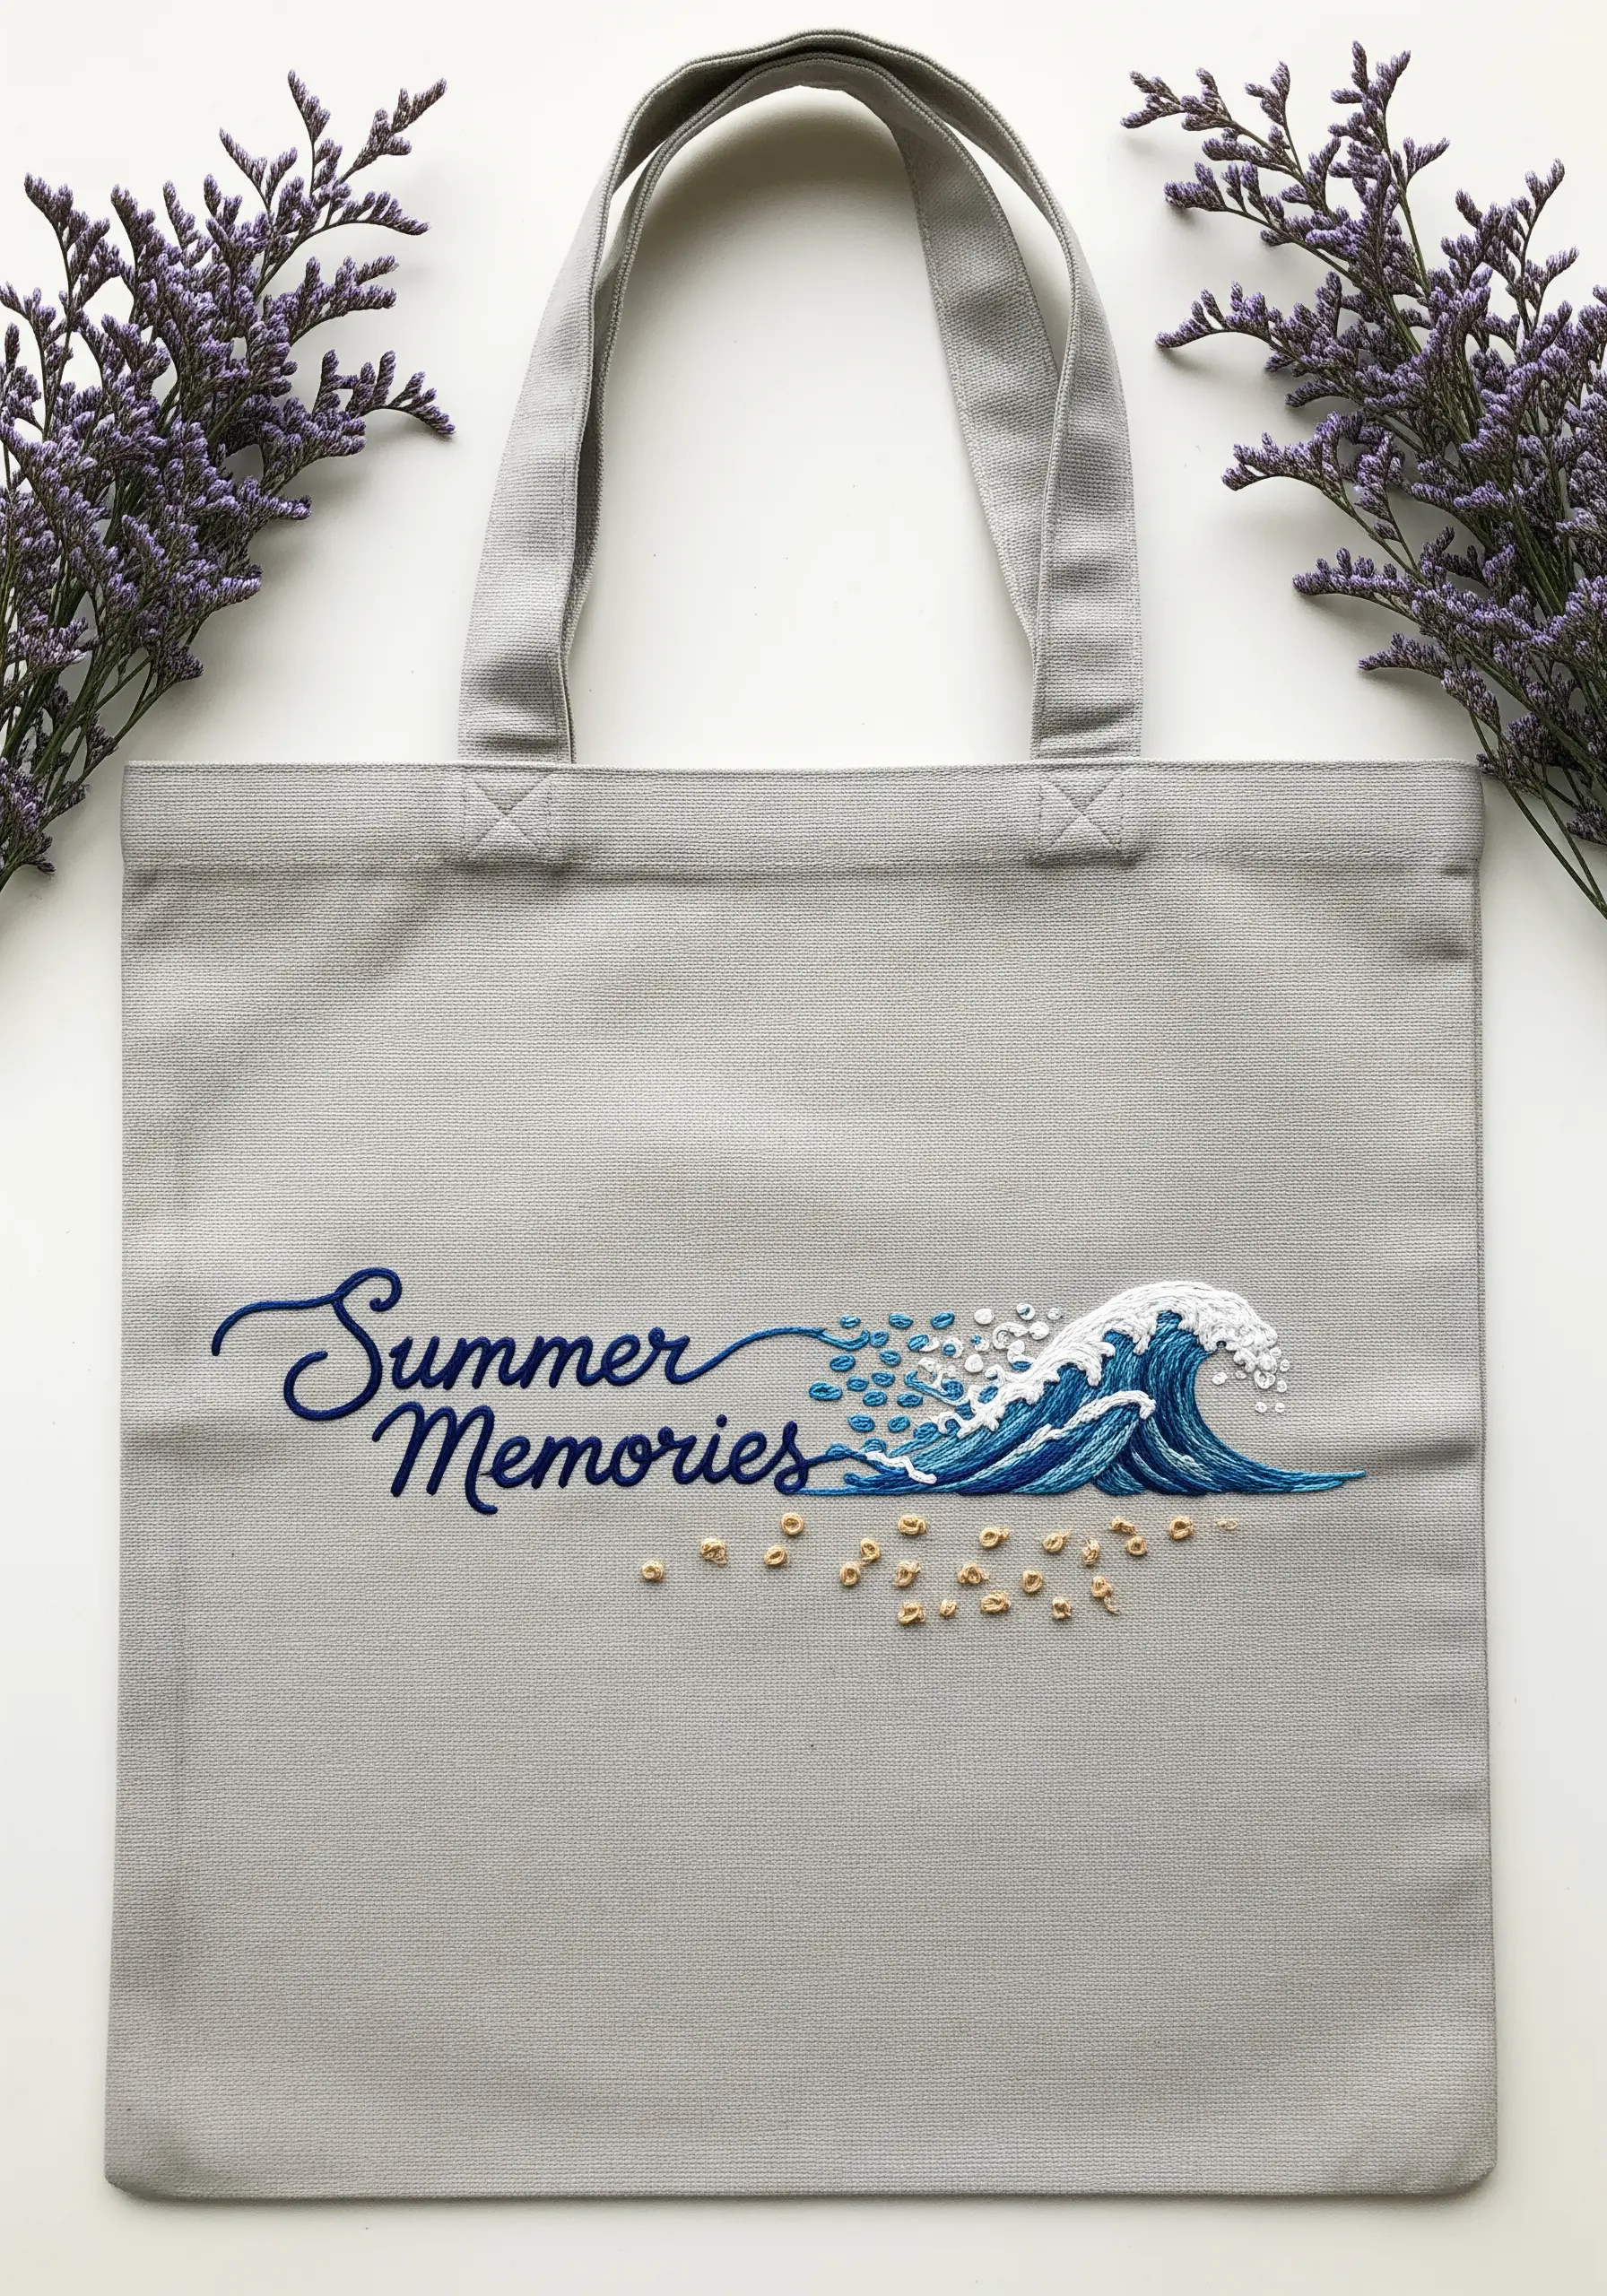
For elegant, flowing script, the stem stitch is your best choice. It creates a smooth, rope-like line that beautifully handles the curves of cursive lettering.
Create the breaking wave with directional satin stitches in shades of blue and turquoise, angling them to suggest movement.
Add a spray of white French knots along the crest of the wave for sea foam, and scatter a few gold seed beads below to represent sunlit sand.
This design beautifully merges typography and illustration, perfect for capturing the feeling of your favorite beach-themed tote bag embroidery designs.


