

Sometimes, the most profound creative moments happen in the small spaces—on a train, in a quiet café corner, or during a lunch break. A tiny hoop and a single thread can be a powerful antidote to a busy day, offering a pocket of calm you can carry anywhere.
Think of these small projects not as lesser versions of large ones, but as focused studies in technique. A four-inch hoop invites you to perfect the curve of a single line, master the tension of a French knot, or blend two colors into a seamless gradient.
Here, every stitch matters. You’ll discover that working small doesn’t limit your creativity; it refines it. Let these travel-sized ideas become your portable studio, a place to practice intention, and create something beautiful, one stitch at a time.
1. Minimalist Mountain Range
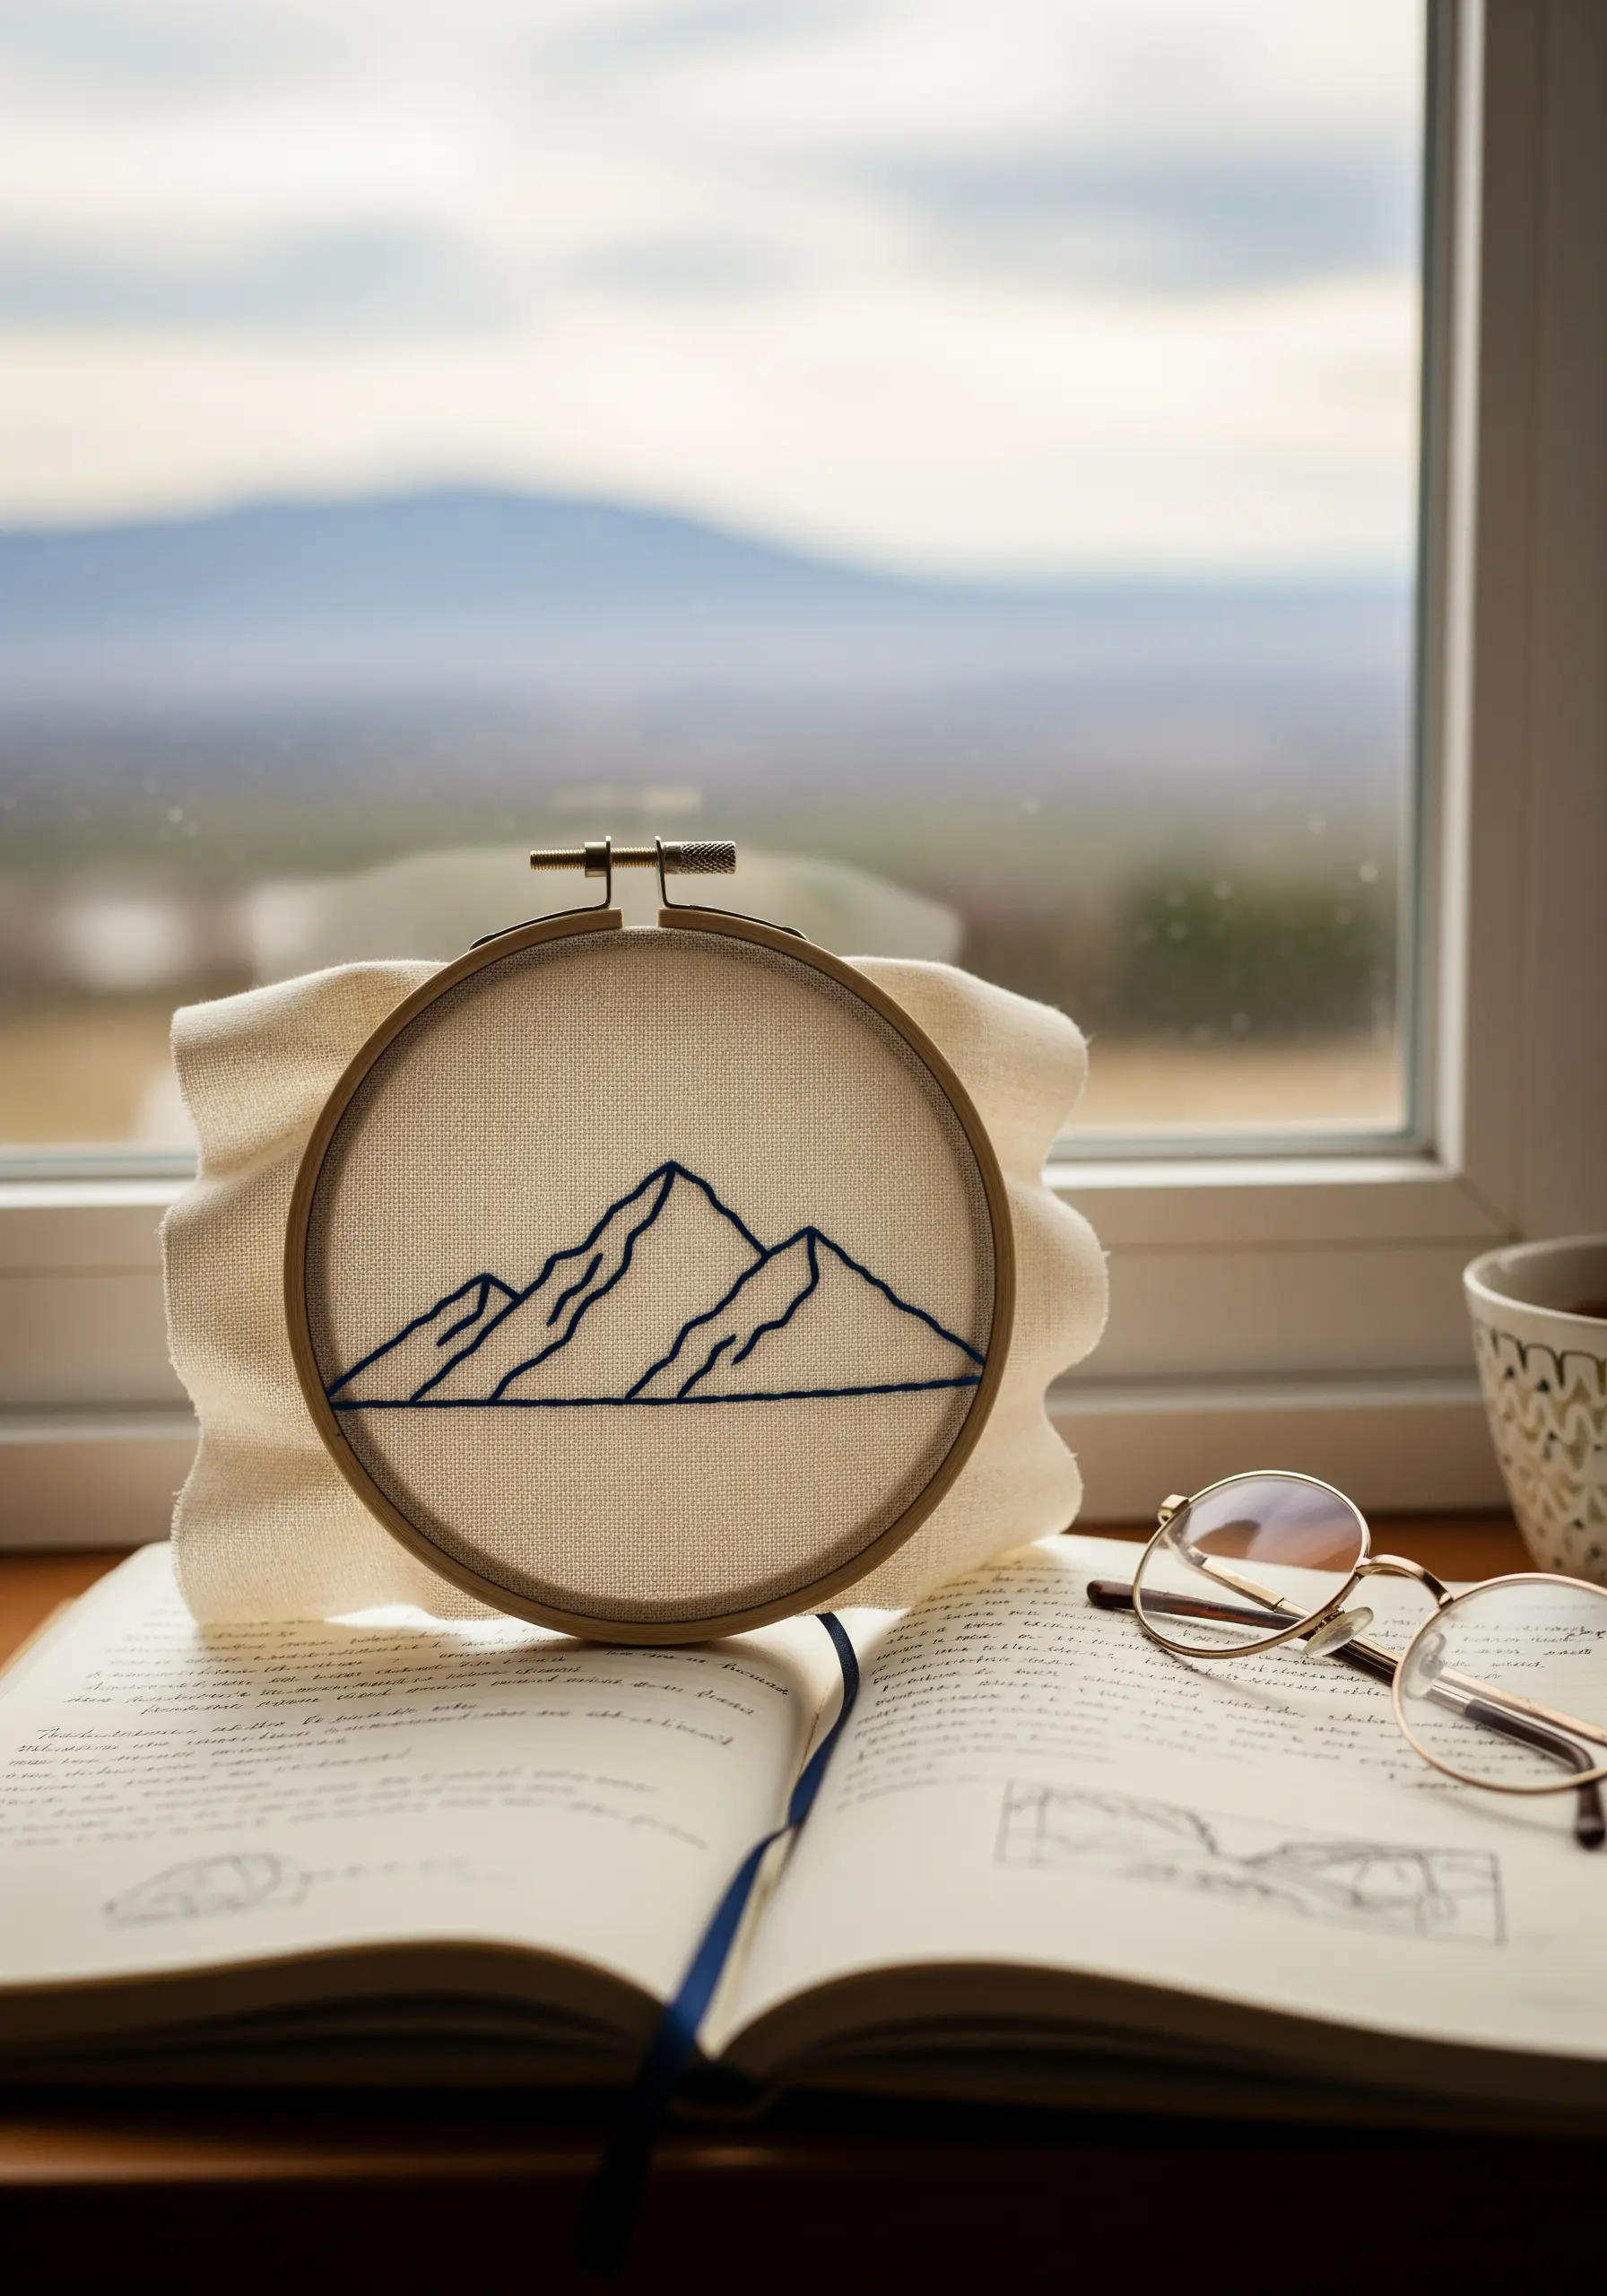
Capture the essence of a landscape with a clean, continuous line.
Use a three-strand backstitch to give your outline a solid, graphic presence that stands out against the fabric.
For a more delicate feel, switch to a single strand of thread and a stem stitch, which creates a slightly twisted, rope-like line perfect for subtle details.
The power of this design lies in its use of negative space; resist the urge to fill the sky, allowing the simple form to command attention.
2. The Paper Plane’s Path
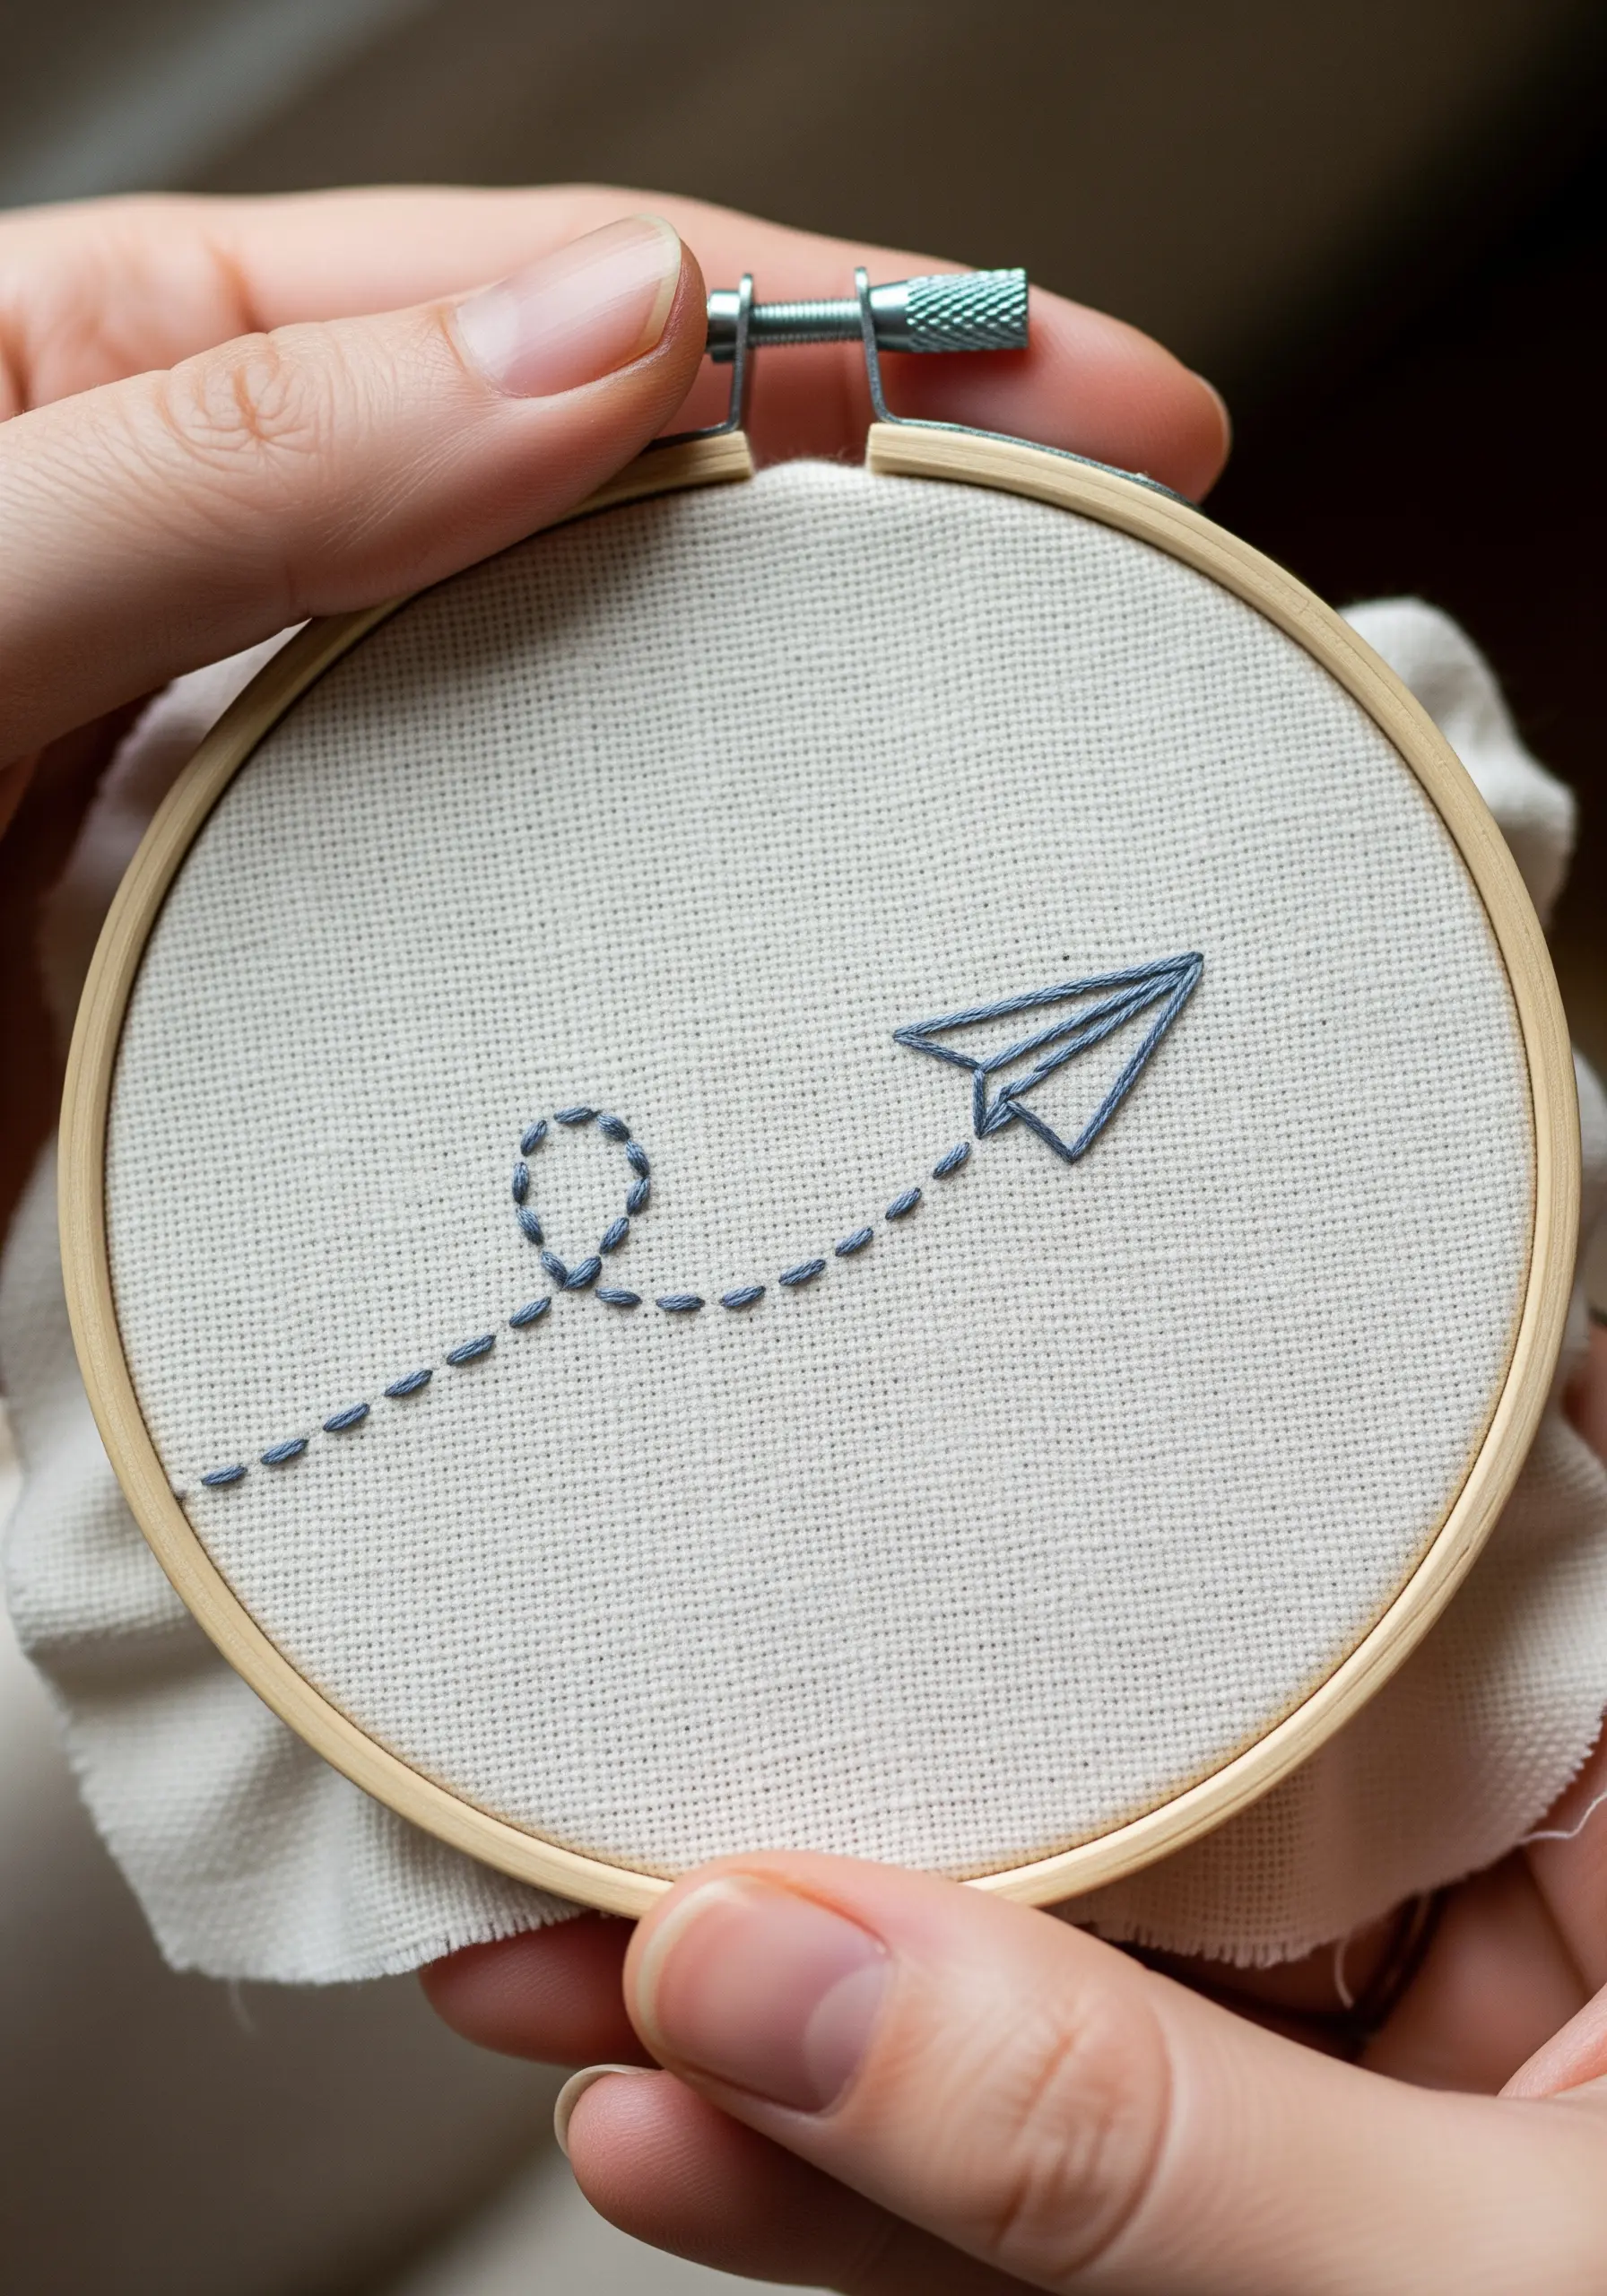
Create a sense of movement by combining two different stitches.
Use a precise backstitch for the sharp, folded lines of the paper plane itself, ensuring each angle is crisp.
Then, switch to a simple running stitch for its flight path. Varying the length and spacing of these dashes gives the illusion of a whimsical journey across the fabric.
This contrast in stitch style—solid versus broken—is what tells the story and guides the viewer’s eye.
3. Textured Lavender Sprigs
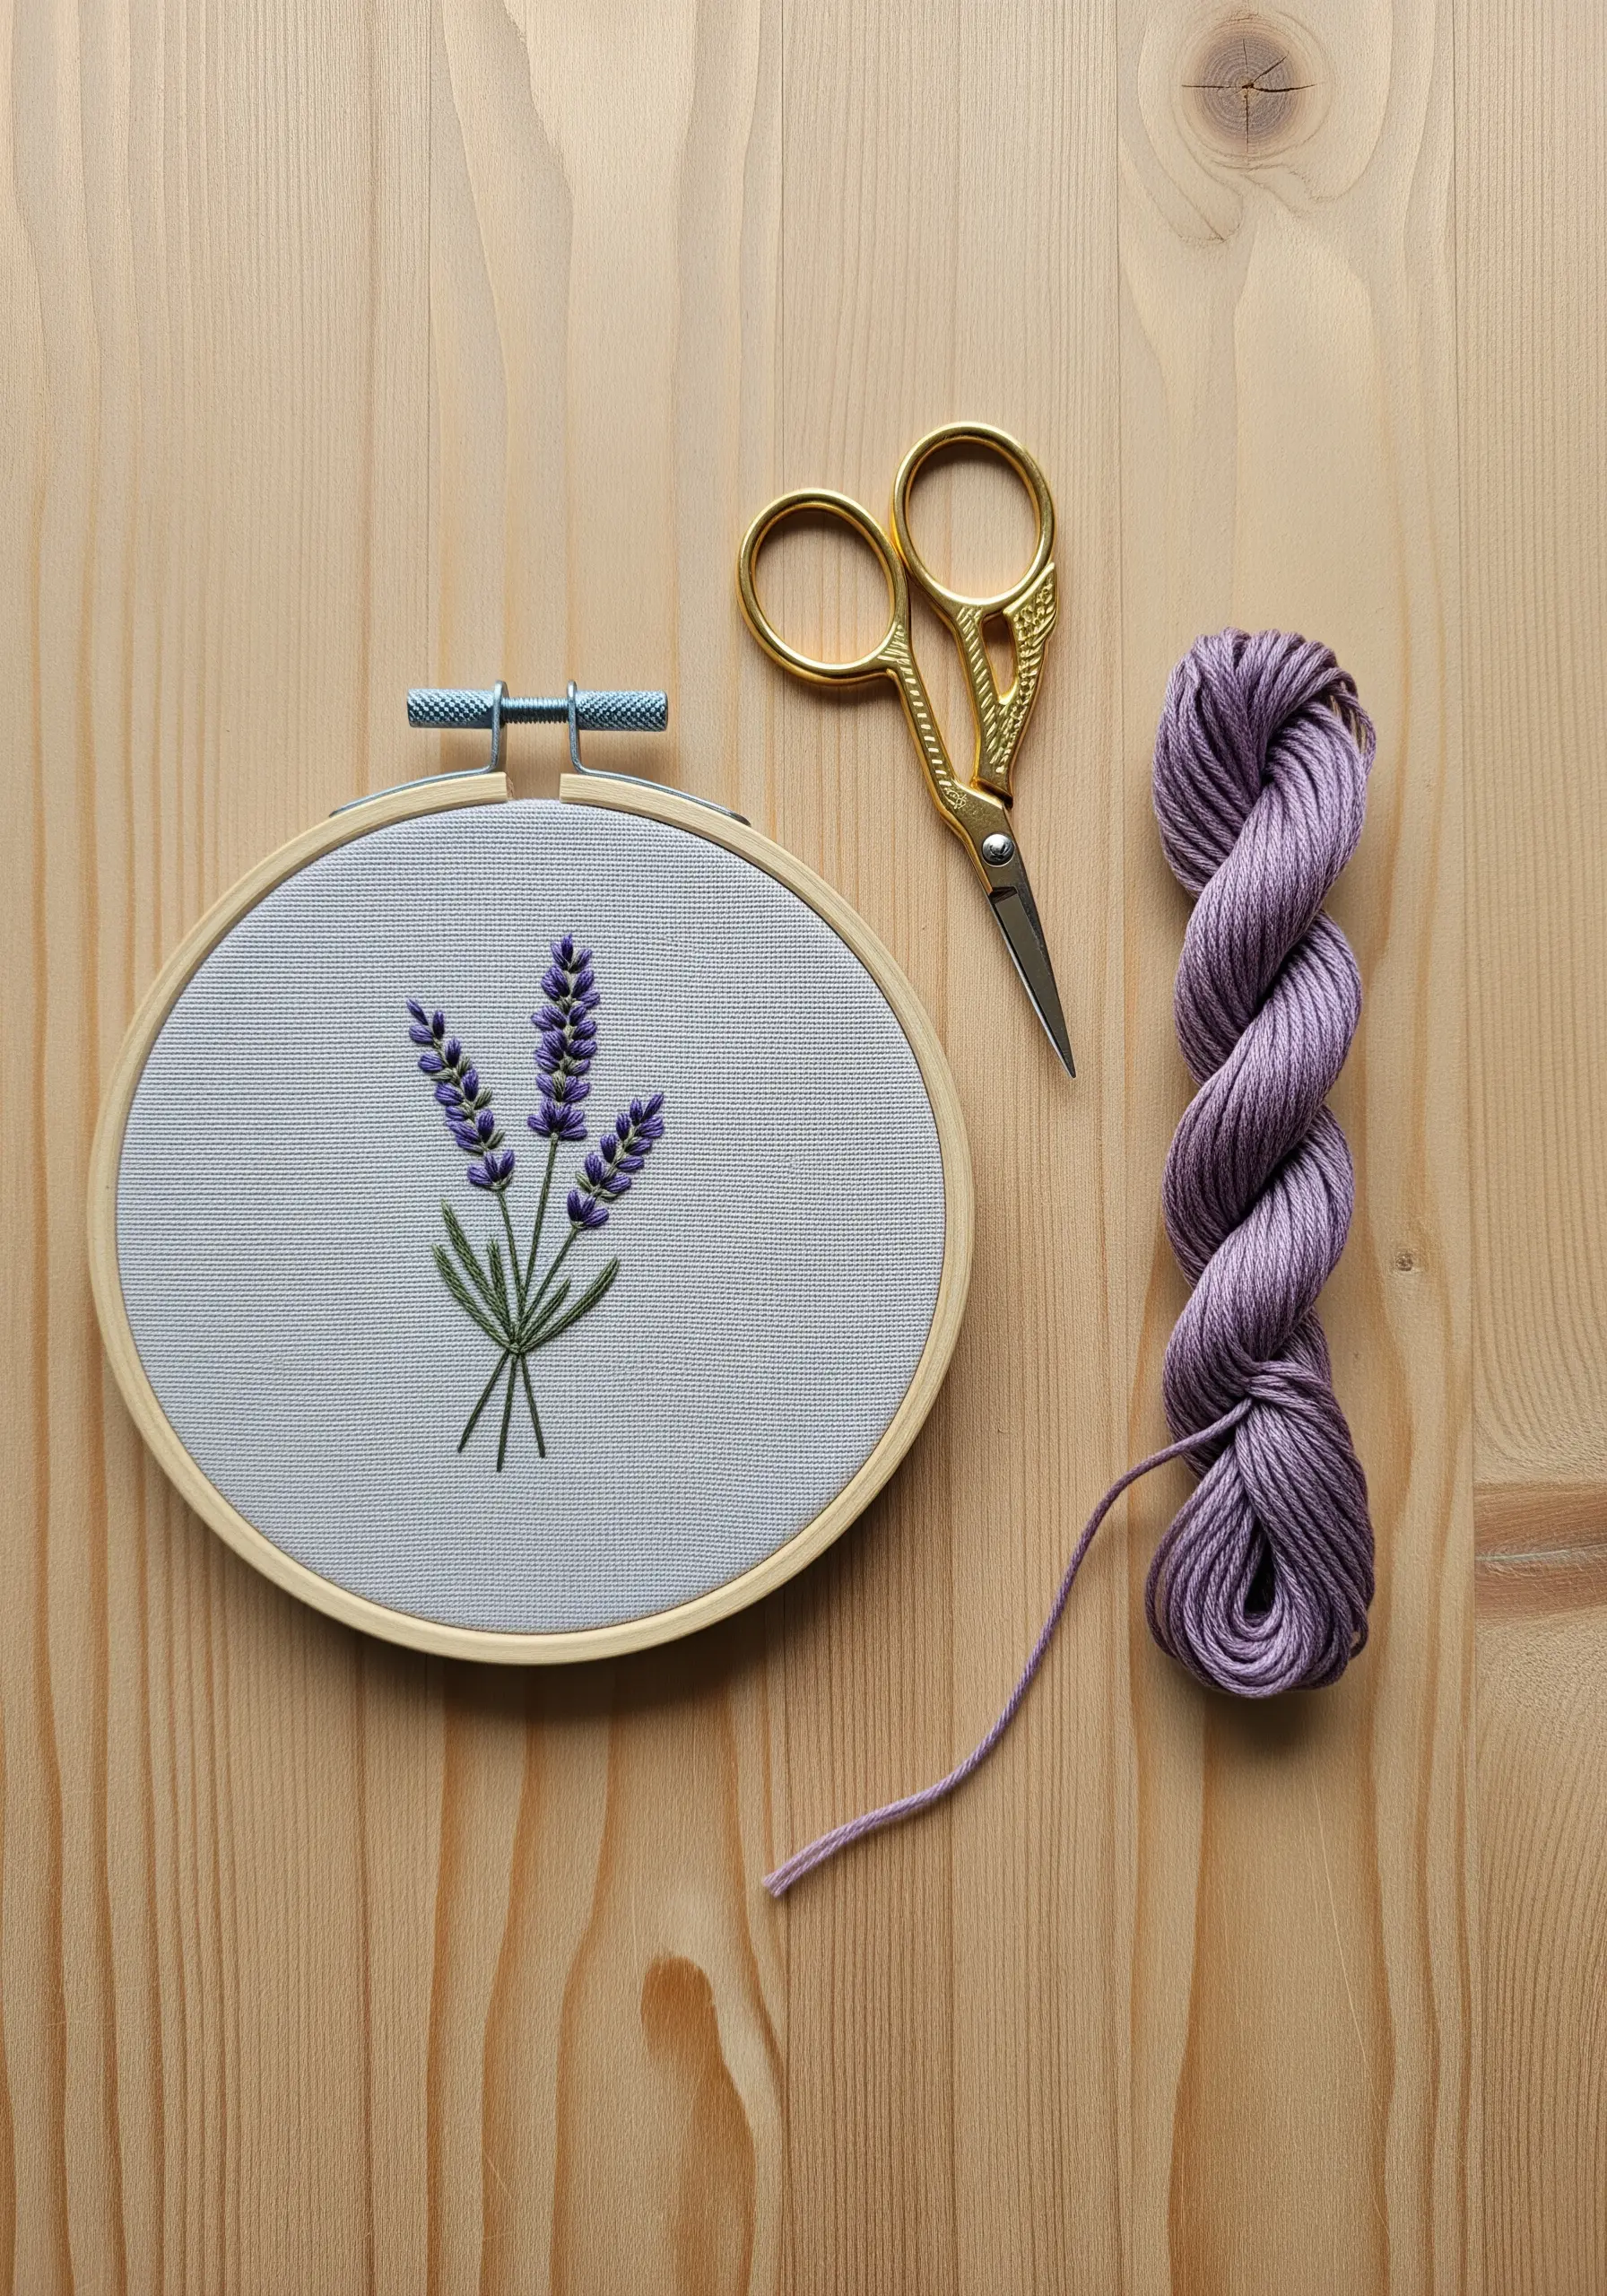
Build realistic floral texture by layering simple, classic stitches.
Use a single, straight stitch for the central stem of each sprig to create a strong foundation.
For the lavender buds, work detached chain stitches (lazy daisies) in a tight cluster, using two or three slightly different shades of purple thread to create depth.
Finish with a sharp fishbone stitch for the leaves, which gives them a natural, veined appearance that complements the rounded buds.
4. Color-Blocked Sailboat
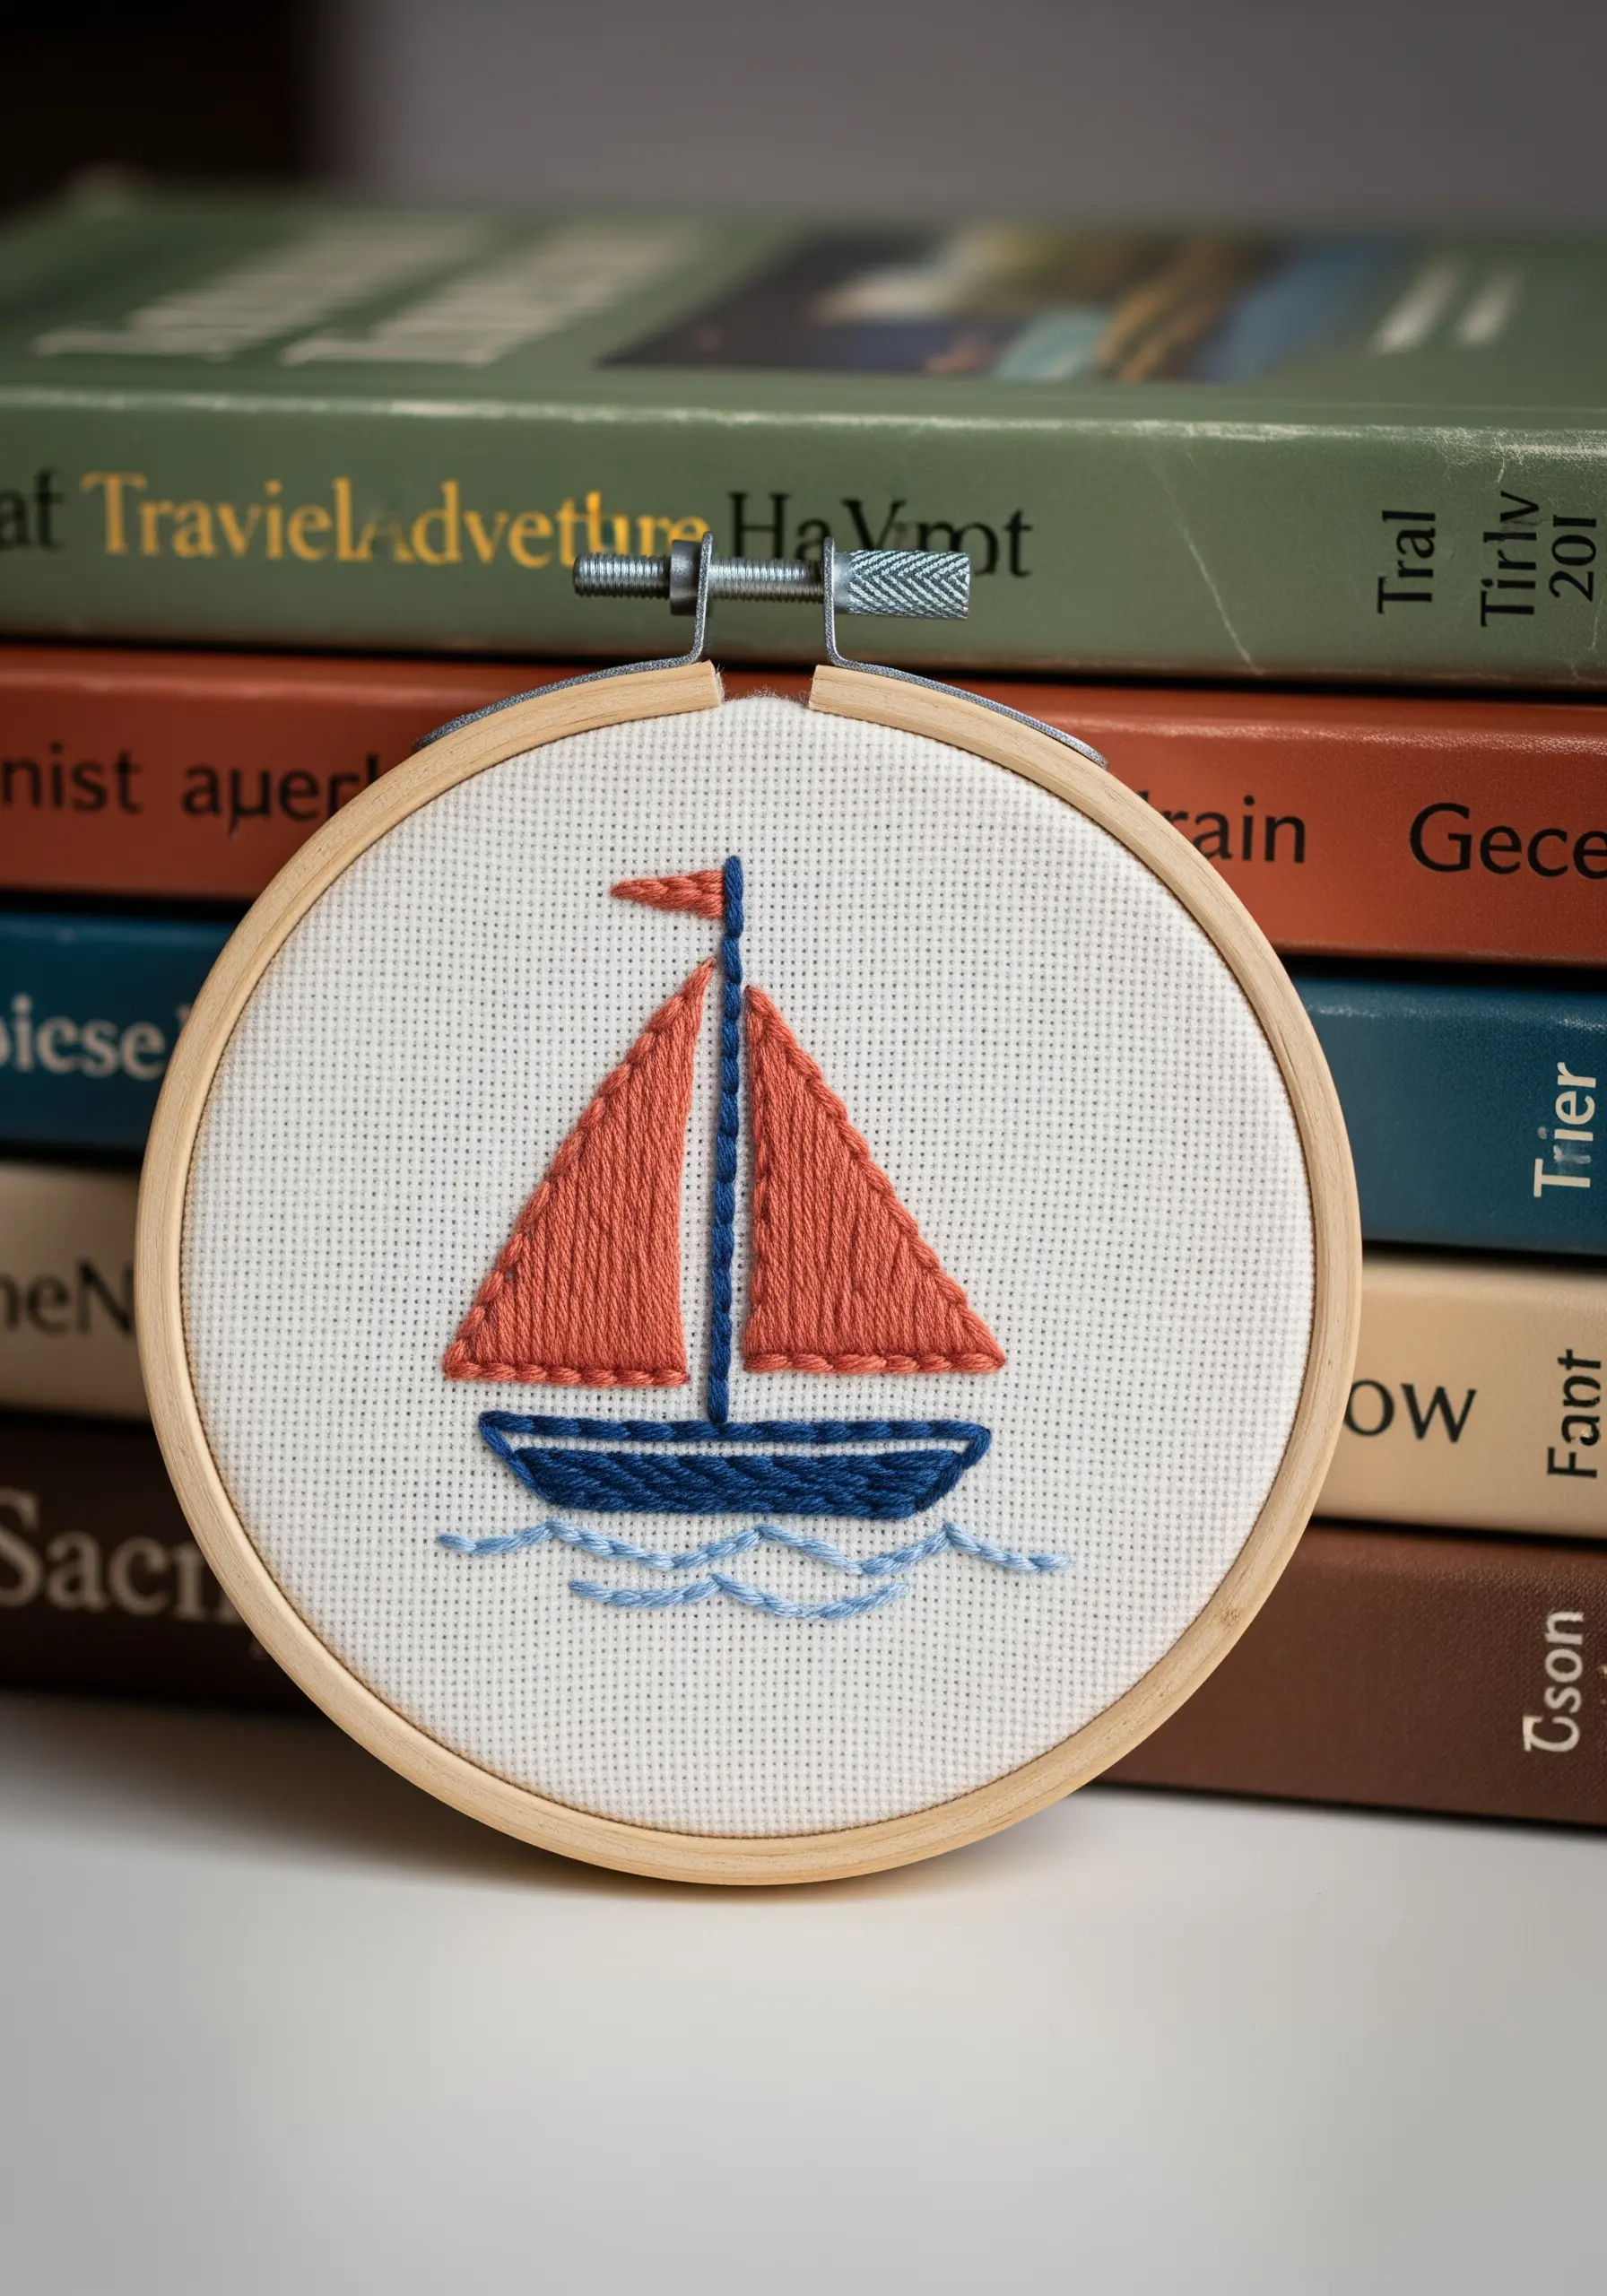
Use satin stitch not just as a fill, but as a directional tool to create shape and dimension.
Stitch the sails with vertical satin stitches to emphasize their height and catch the light beautifully.
In contrast, fill the boat’s hull with horizontal satin stitches to ground it and give it a sense of stability.
For the water, use a lighter blue thread and simple, wavy backstitches to suggest gentle movement without distracting from the main motif.
5. A Bee with Dimensional Wings
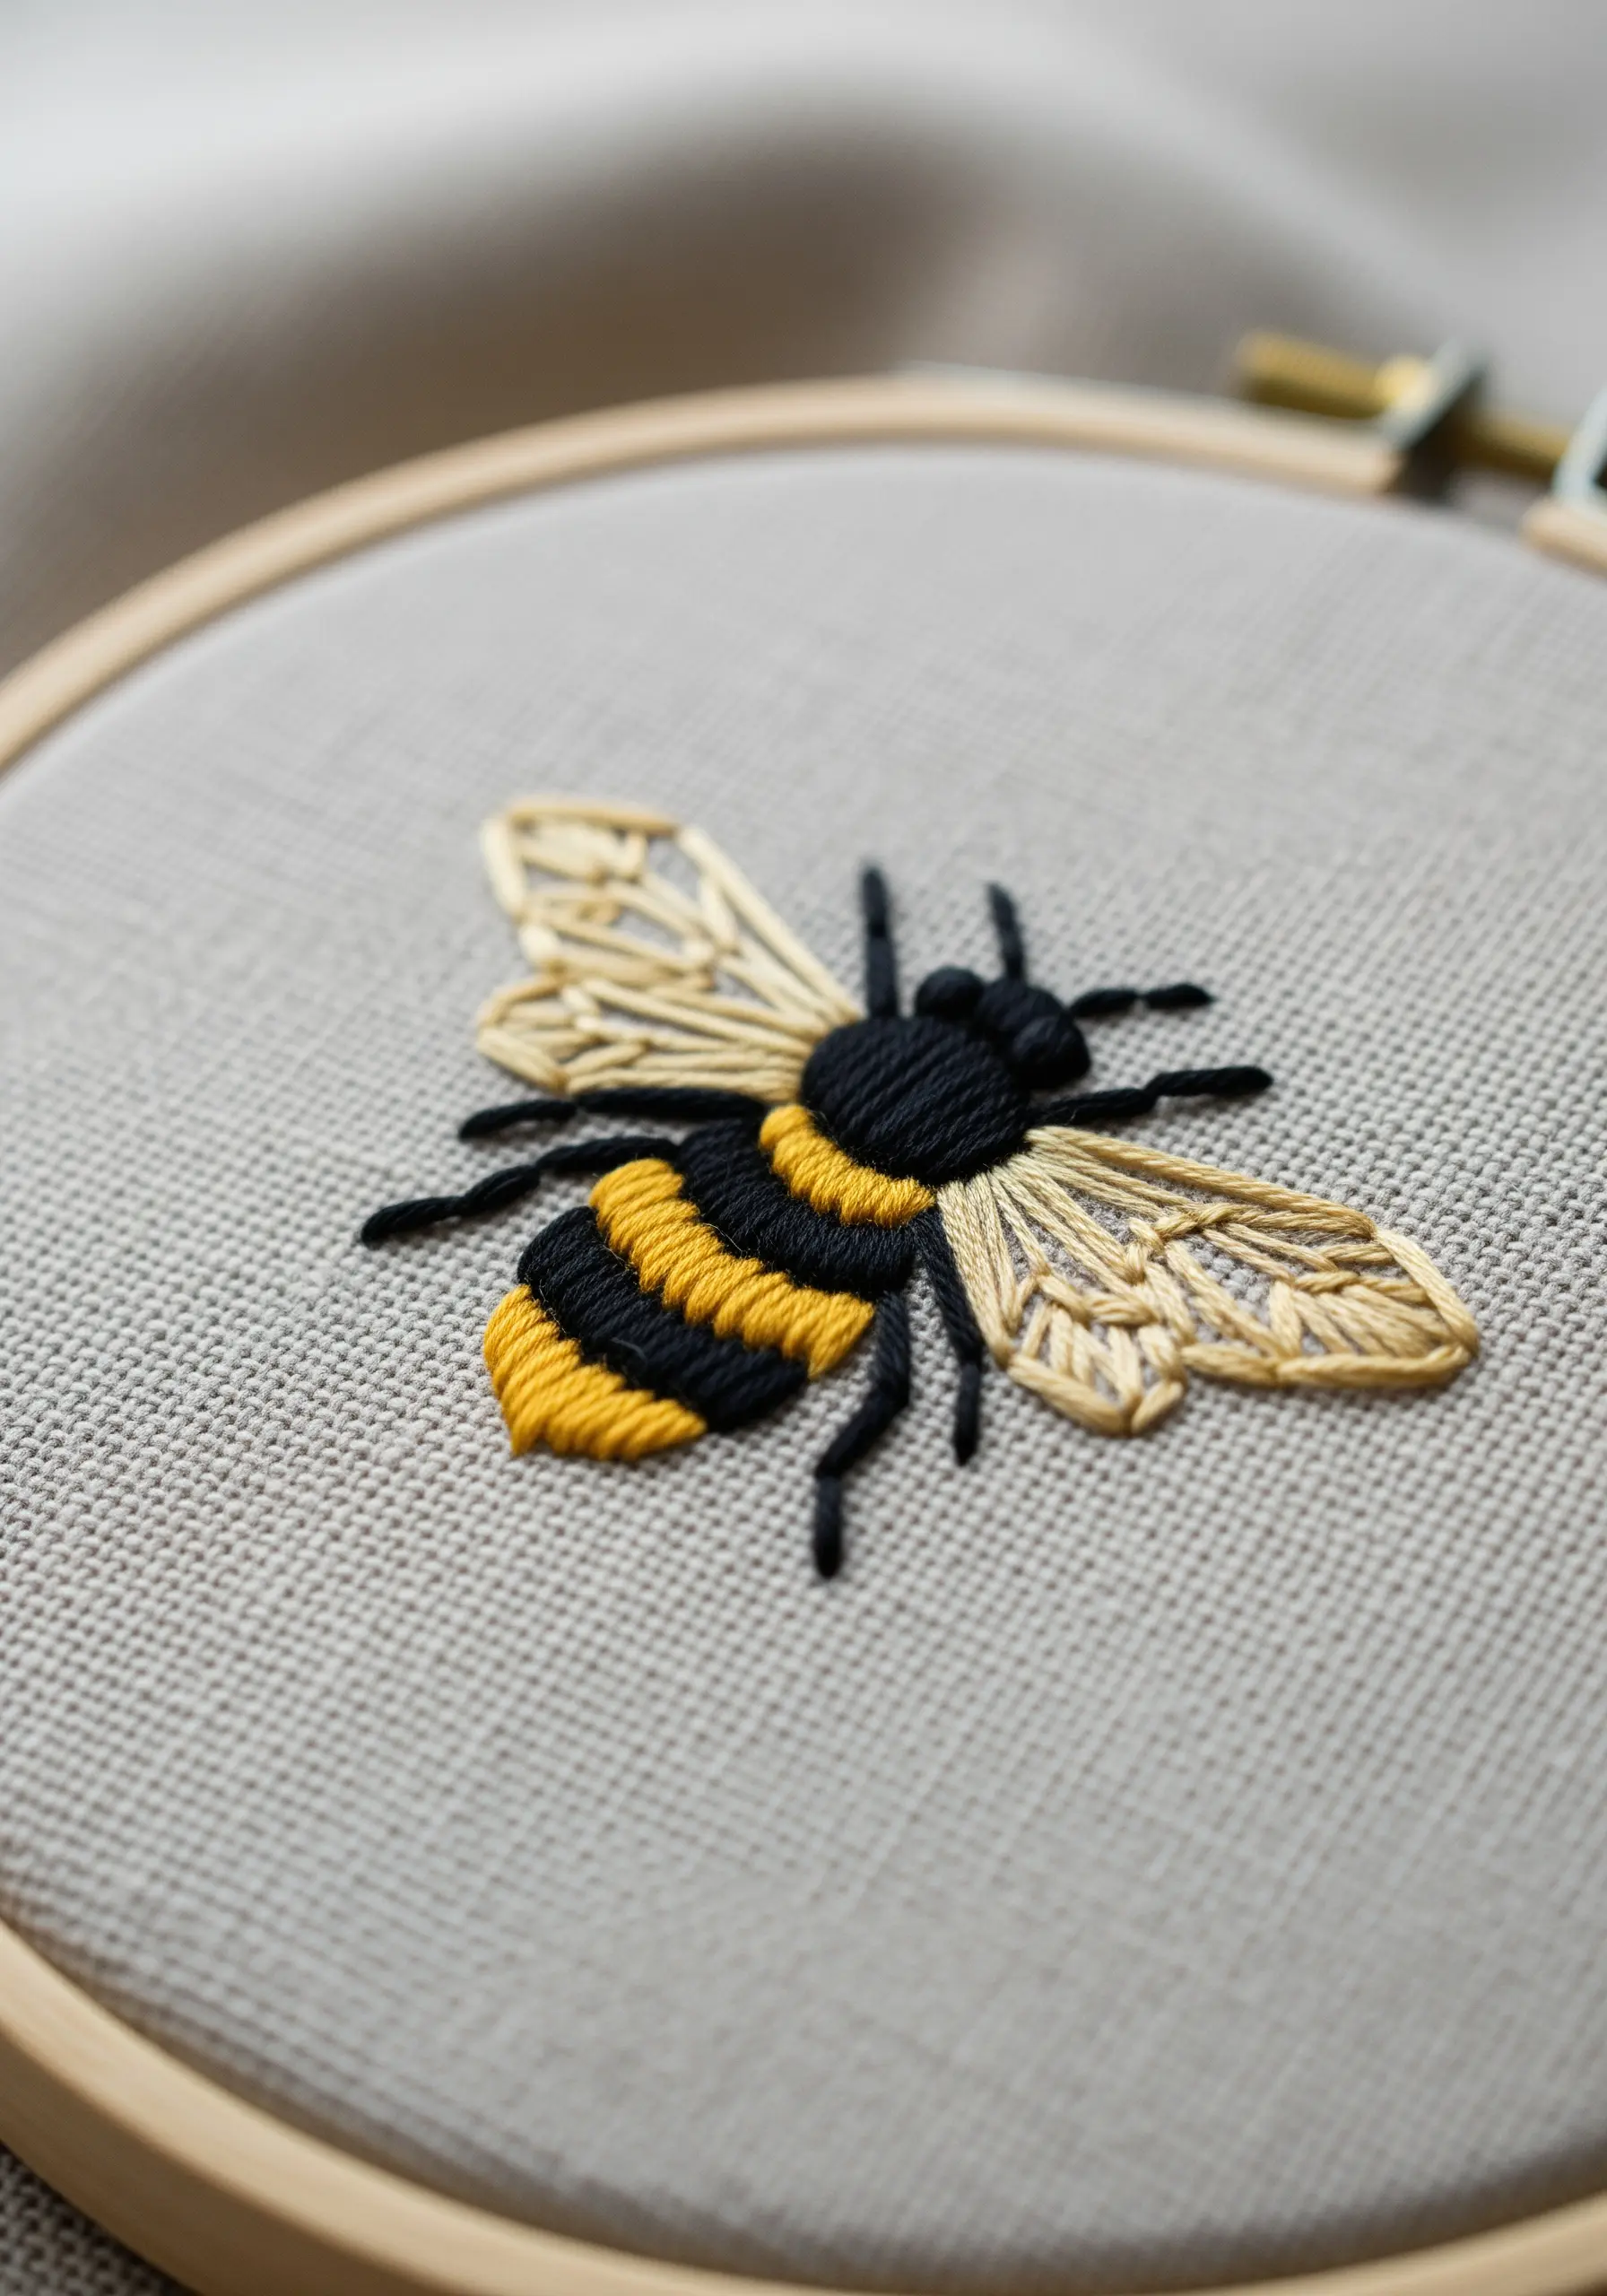
Elevate a simple insect motif by focusing on realistic textures and details.
Work the body with dense, alternating bands of black and yellow satin stitch for a smooth, solid finish.
For the delicate, transparent wings, outline them with a single strand of black thread, then fill with an open ‘thread painting’ technique using long, sparse stitches in a bone or off-white color.
This creates the illusion of veining and transparency, making the bee feel much more lifelike.
6. The Precision Compass Rose

Achieve razor-sharp points and perfect symmetry by focusing on your stitch foundation.
Transfer your design with a fine-tipped, heat-erasable pen for maximum accuracy.
Use a backstitch with a short, consistent stitch length, which allows you to navigate sharp corners and tight curves flawlessly.
For an even crisper line, especially on the fine points of the star, reduce your thread to just two strands. This prevents bulkiness and keeps the final result elegant and sharp.
7. The Symmetrical Fern Frond

Replicate the delicate structure of a fern by using a stitch that builds itself symmetrically.
The fishbone stitch is ideal for this. Each stitch crosses over the central line, automatically creating the look of a main stem with leaflets branching off.
To ensure the frond tapers elegantly, gradually shorten your stitches as you work your way to the tip.
Using a single, vibrant green thread on a neutral fabric makes the intricate, natural pattern the true focus of the piece.
8. Woven Crescent Moon
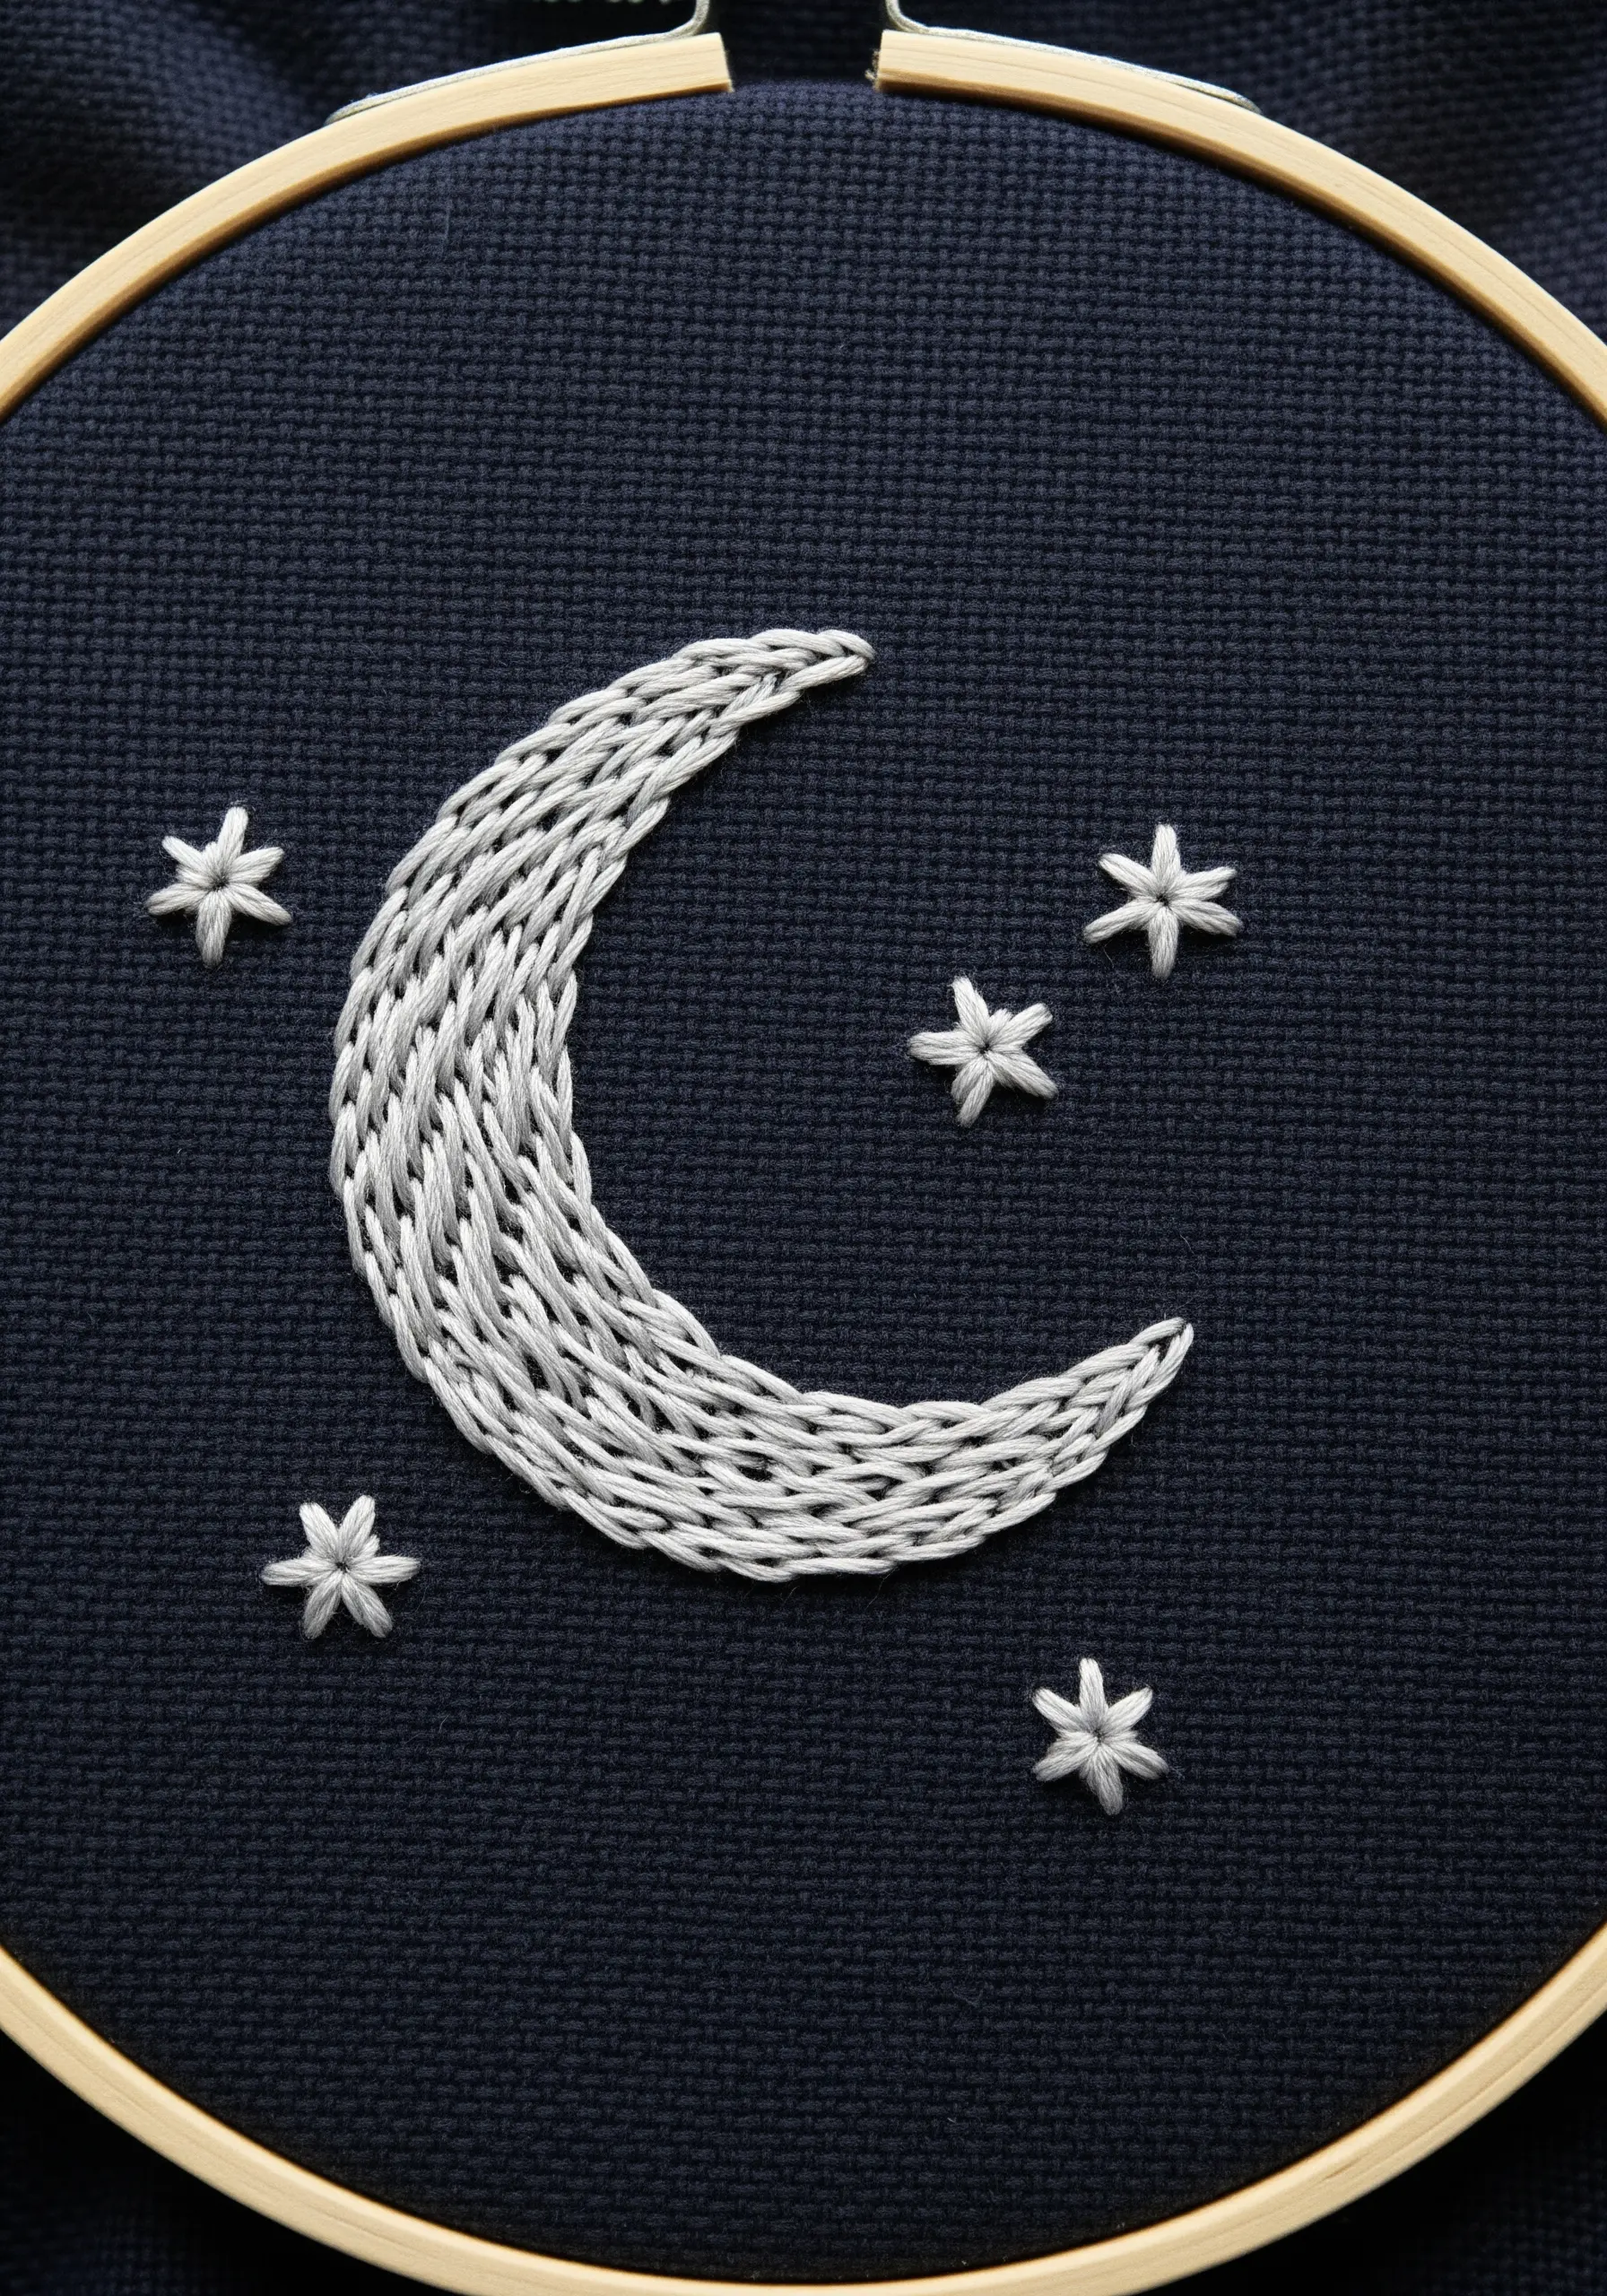
Instead of a flat satin stitch, give your celestial motifs a dynamic, woven texture with a chain stitch fill.
Outline the crescent shape first with a split stitch to create a firm edge.
Then, fill the shape with rows of chain stitch, working them tightly together so no fabric shows through.
The interlocking loops of the chain stitch catch the light differently than straight stitches, giving the moon a shimmering, almost sculptural quality against a dark fabric background.
9. Radiating Ginkgo Leaf

Capture the organic, fan-like structure of a ginkgo leaf using only straight stitches.
Begin by stitching the central vein and stem with a simple stem stitch.
Then, work long straight stitches radiating outwards from the base of the leaf. Don’t worry about perfect uniformity; slight variations in length and angle will make it look more natural.
This design is a beautiful exercise in thread tension—keep your stitches smooth and flat, but not so tight that they pucker the fabric.
10. The Striped Hot Air Balloon
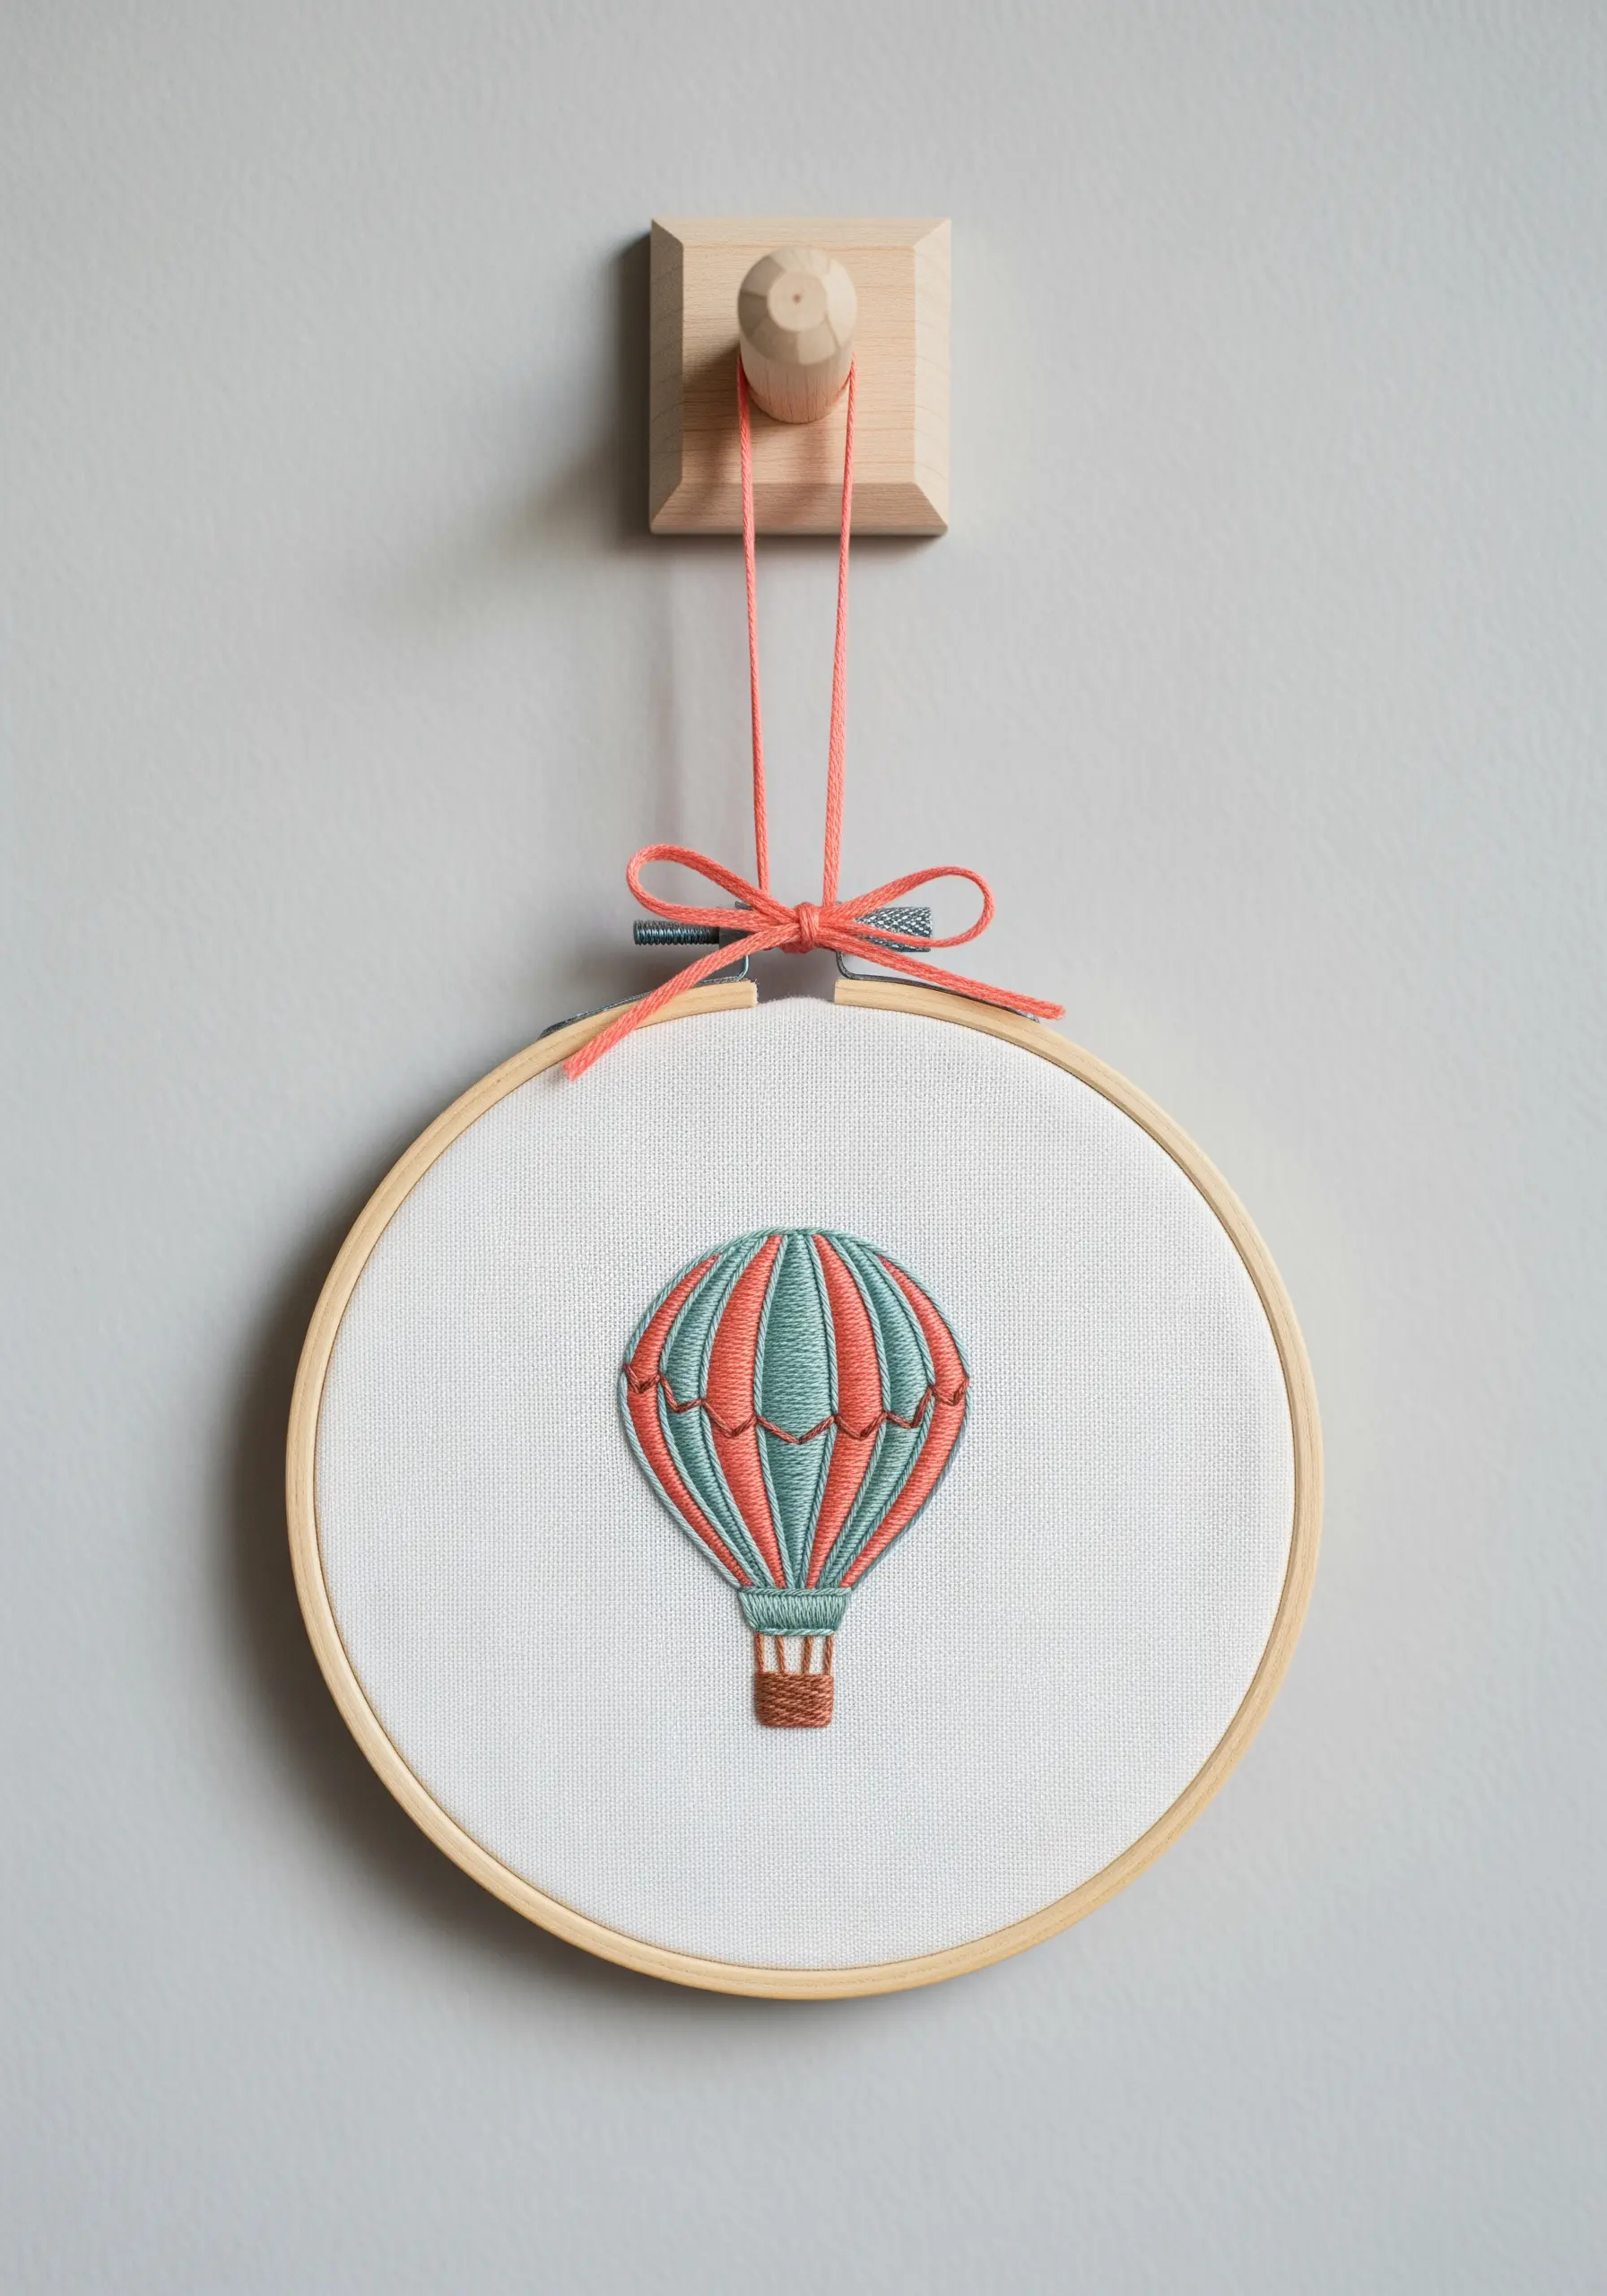
Create clean, defined color panels using satin stitch bordered by a sharp outline.
First, stitch the dividing lines of the balloon’s panels with a dark-colored backstitch. This creates a container for your fill stitches.
Next, carefully fill each panel with satin stitch, keeping your stitches angled consistently within each section.
The pre-stitched outlines act as a guide and a boundary, ensuring your satin stitch edges are crisp and professional, giving the balloon a neat, illustrative look.
11. Gradient Ocean Waves
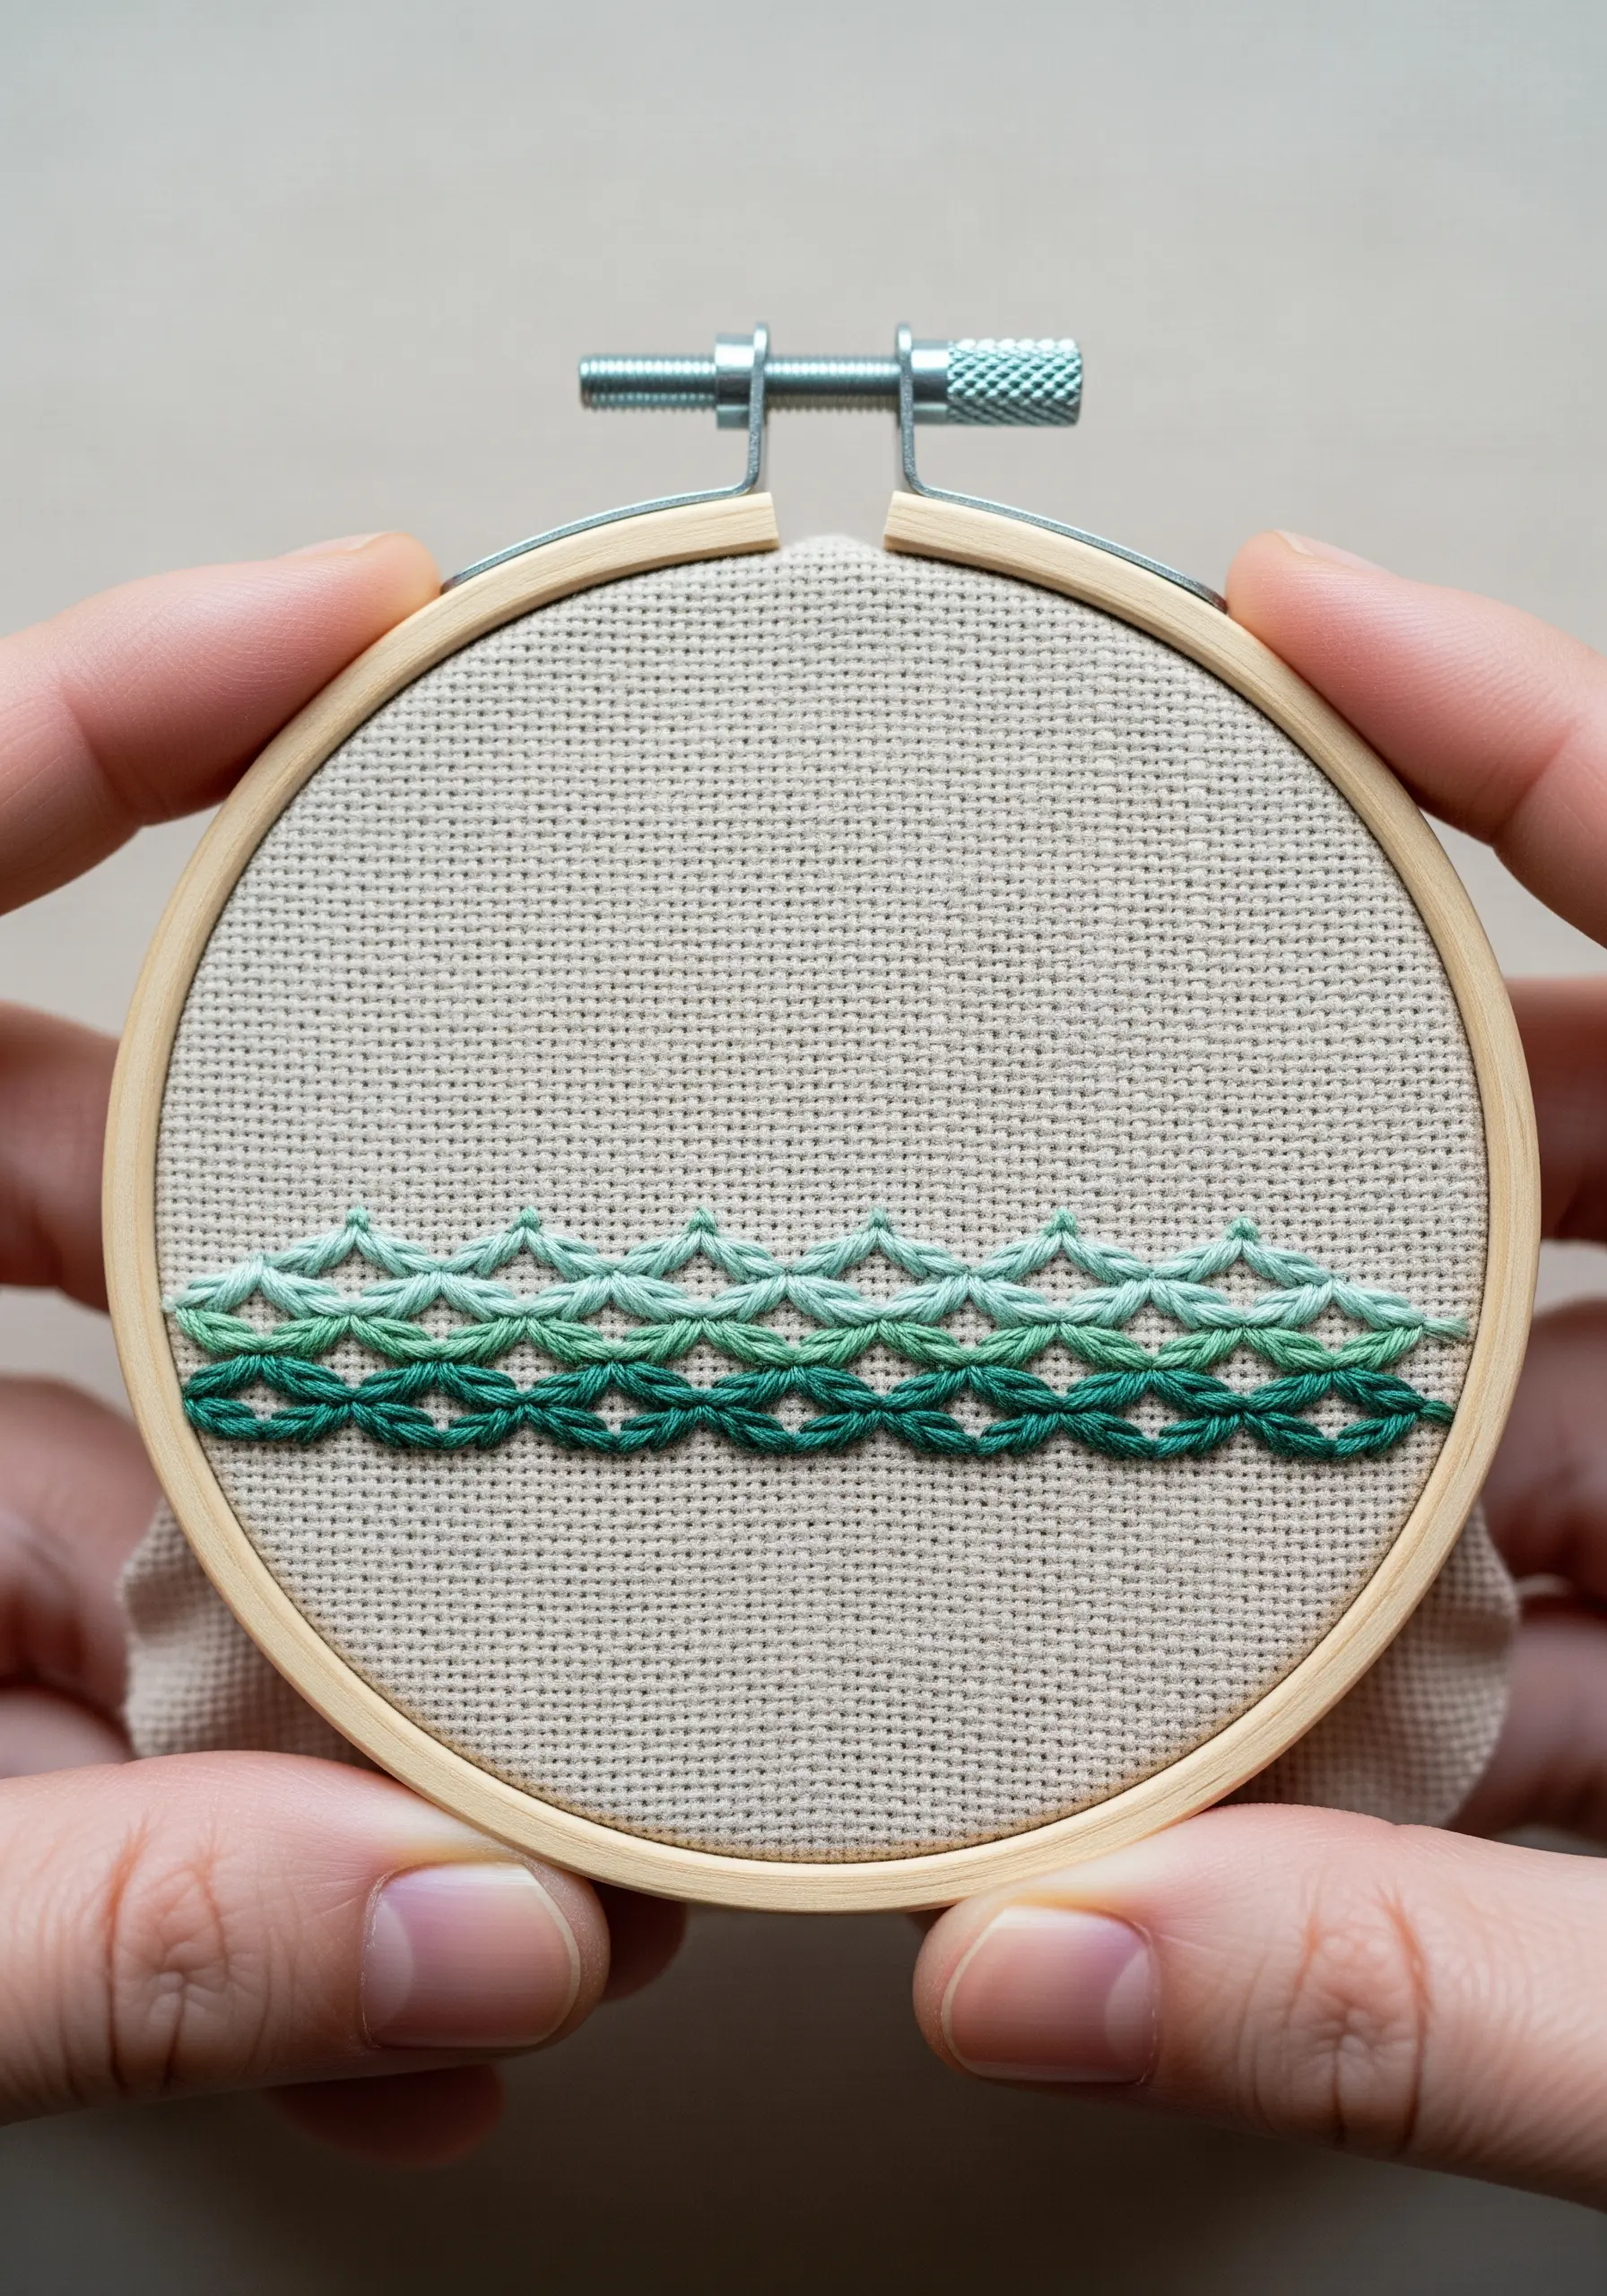
Create a stunning ombré effect by stitching repeating rows in a gradient of colors.
This pattern uses the closed cretan stitch, worked in horizontal lines across the fabric.
Start with your darkest thread color at the bottom. For each subsequent row above, switch to a slightly lighter shade of the same color.
This simple technique creates a sophisticated gradient effect that looks complex but is remarkably easy to execute, perfect for representing water or hills.
12. A Steaming Coffee Cup
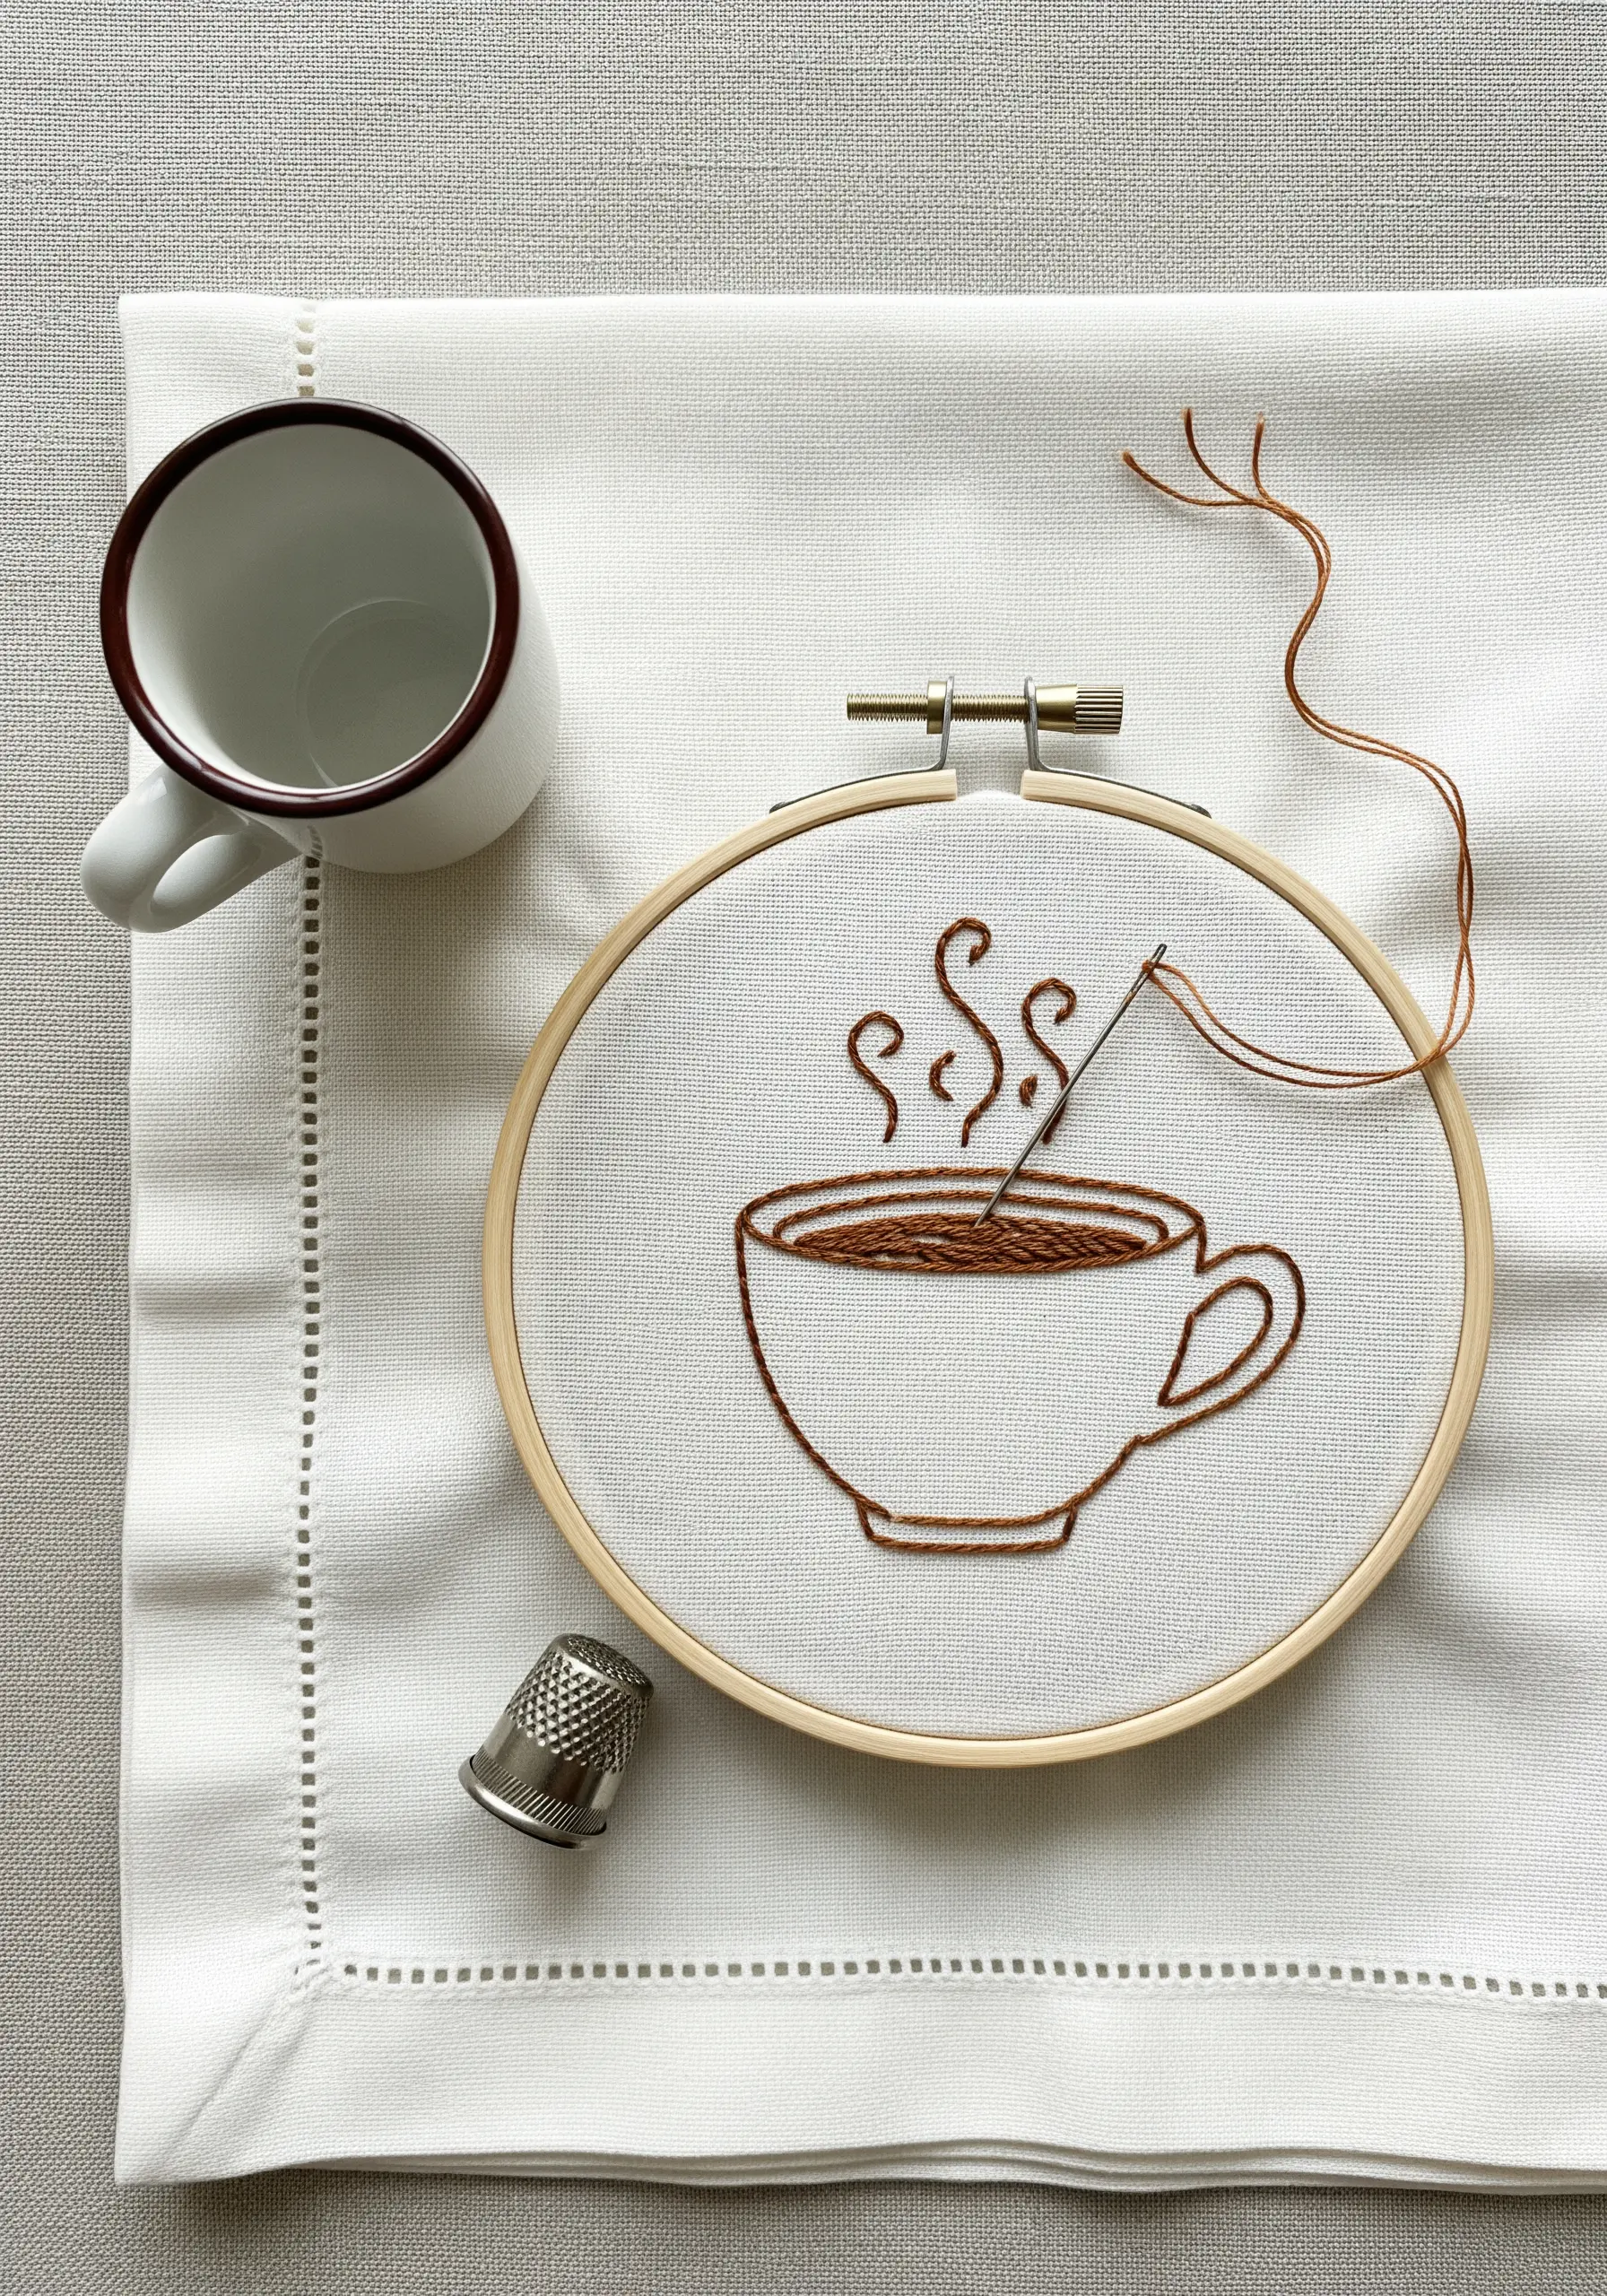
Convey different qualities—like solidity and ethereality—by adjusting your thread count.
Use three strands of floss and a backstitch for the solid outline of the cup and saucer, giving them weight and presence.
For the delicate steam rising from the cup, switch to a single strand of the same color.
Stitching the steam with this finer thread makes it appear light and almost transparent, a simple adjustment that adds a layer of realism and charm.
13. Allium Flowers in French Knots
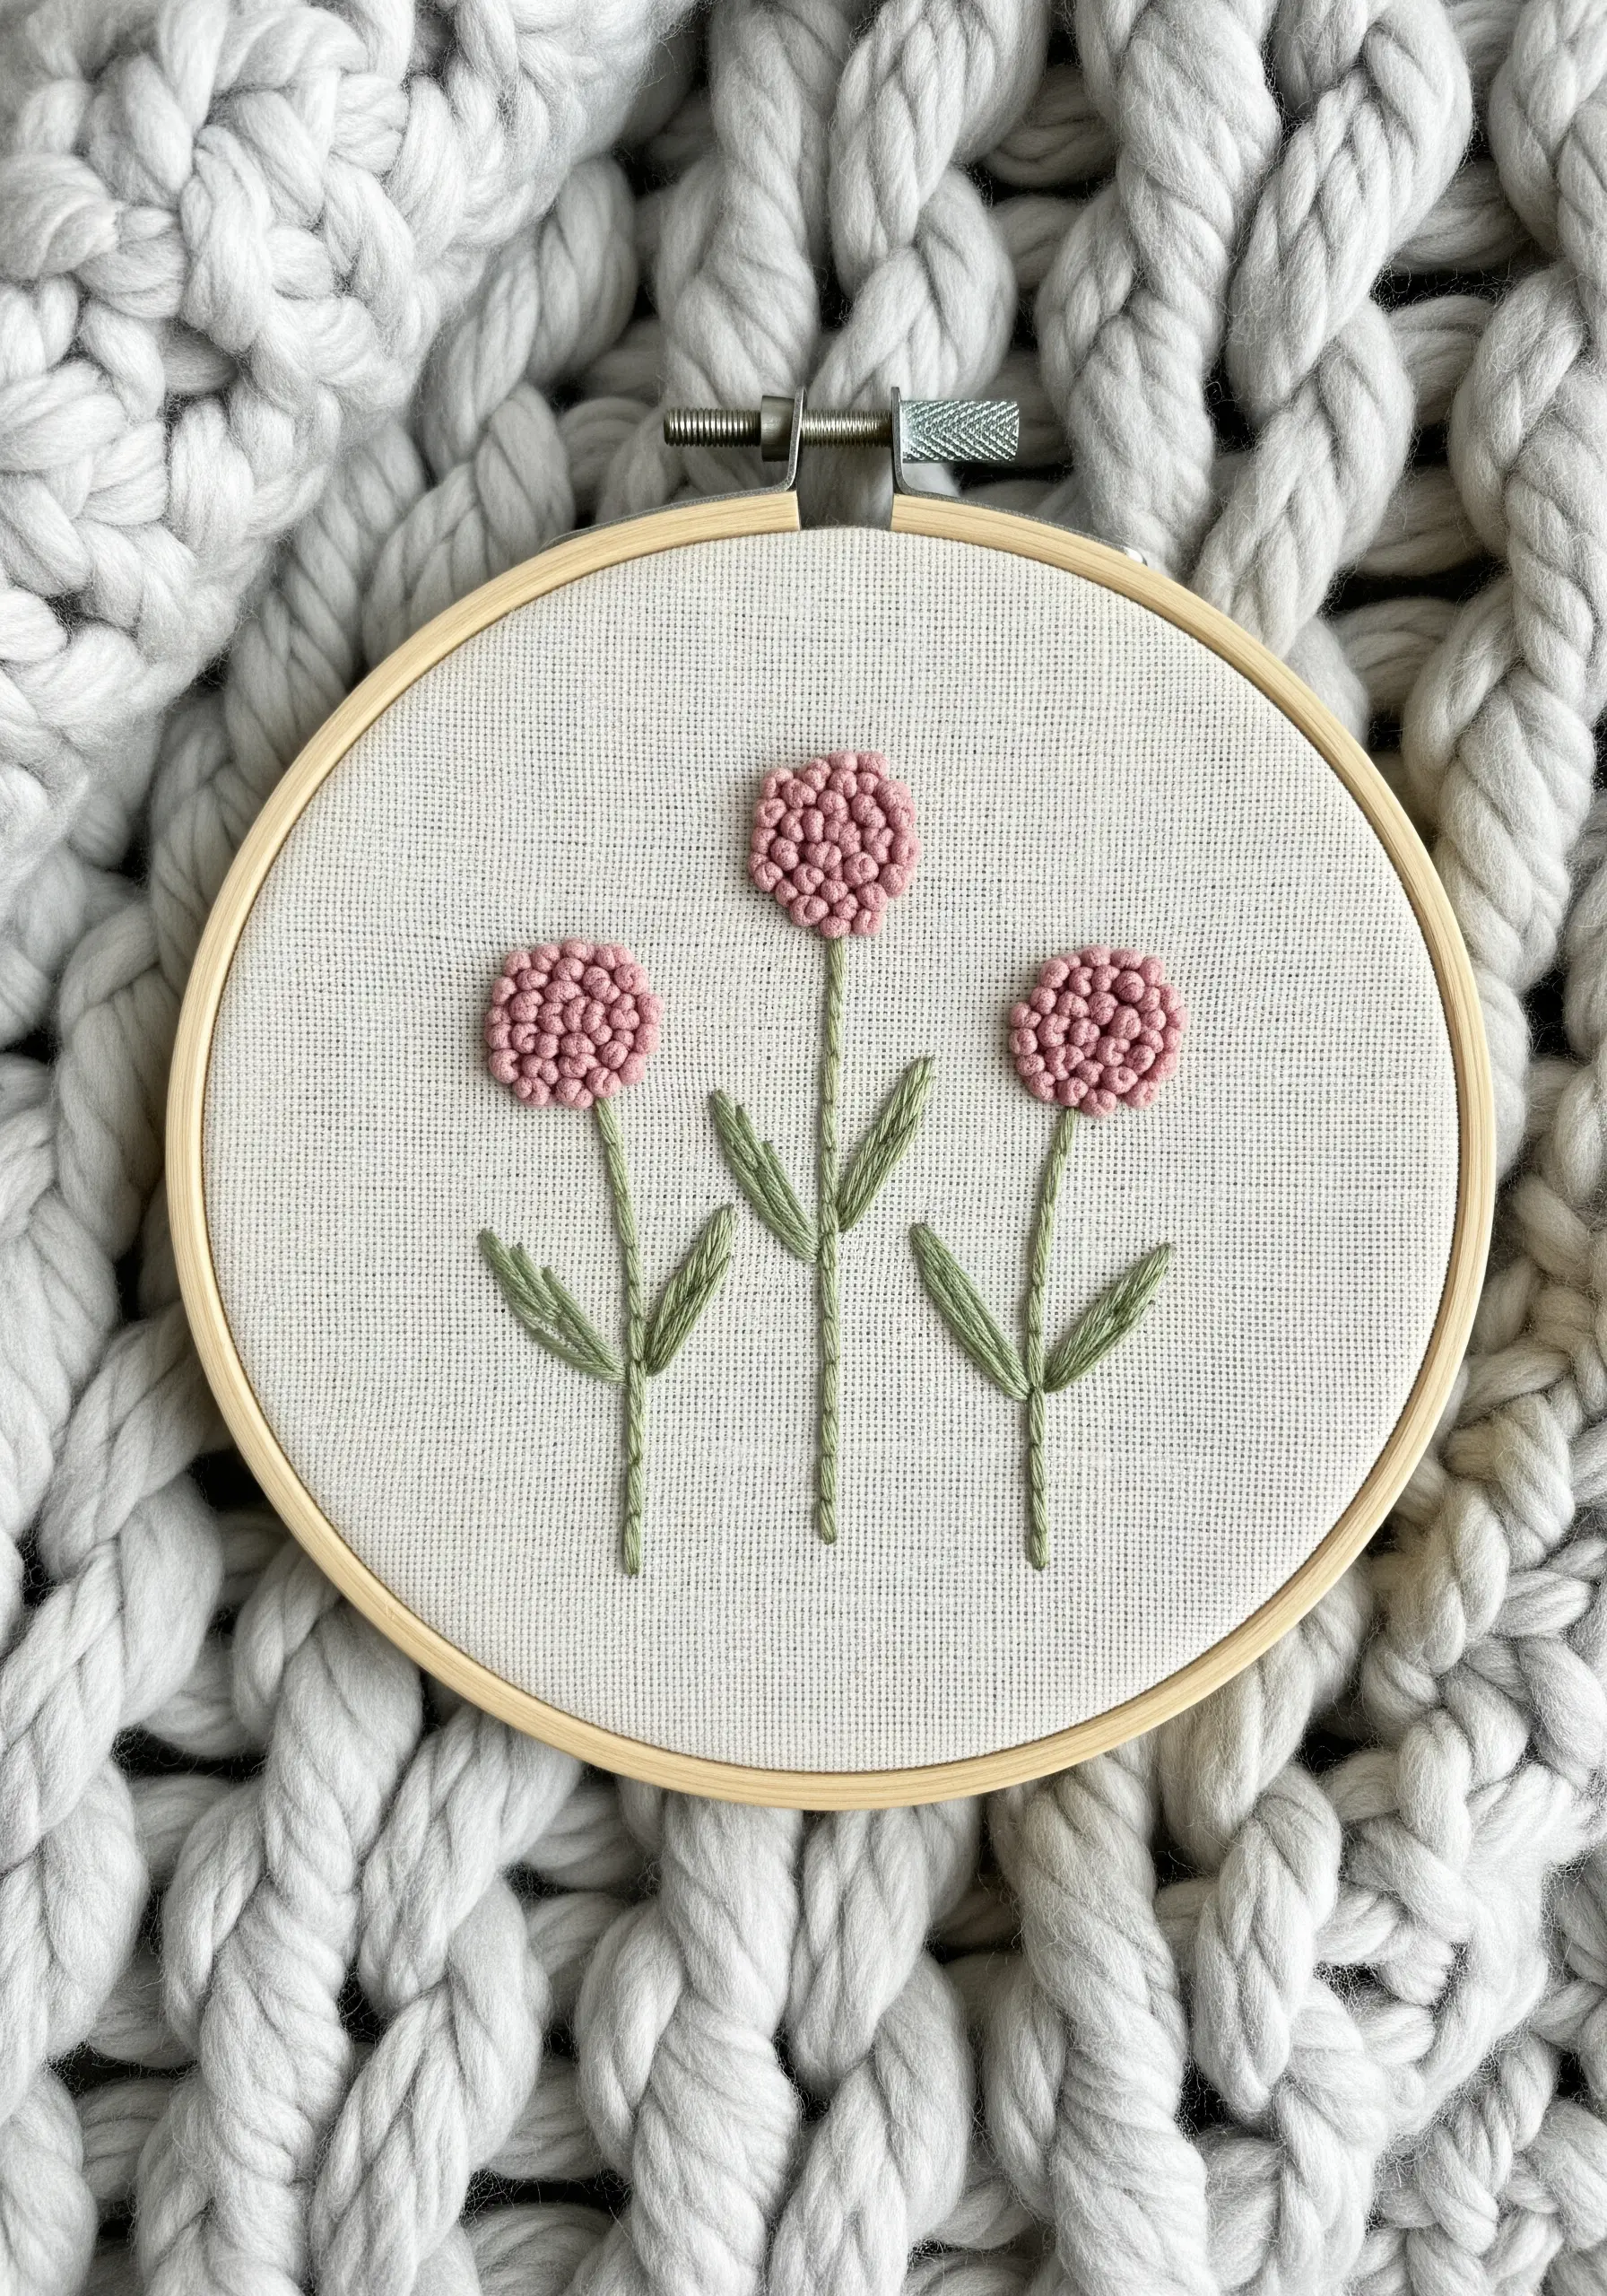
Move beyond lines and fills by creating entire shapes out of textural knots.
Outline a circle for each flower head, then fill it completely with tightly packed French knots. For a dense, plush look, use three or four strands of floss and wrap the thread twice around your needle for each knot.
The resulting bobbled texture is highly tactile and captures the spherical shape of an allium bloom perfectly. Pair it with simple stem-stitched stems to let the texture shine.
14. Celestial Constellation
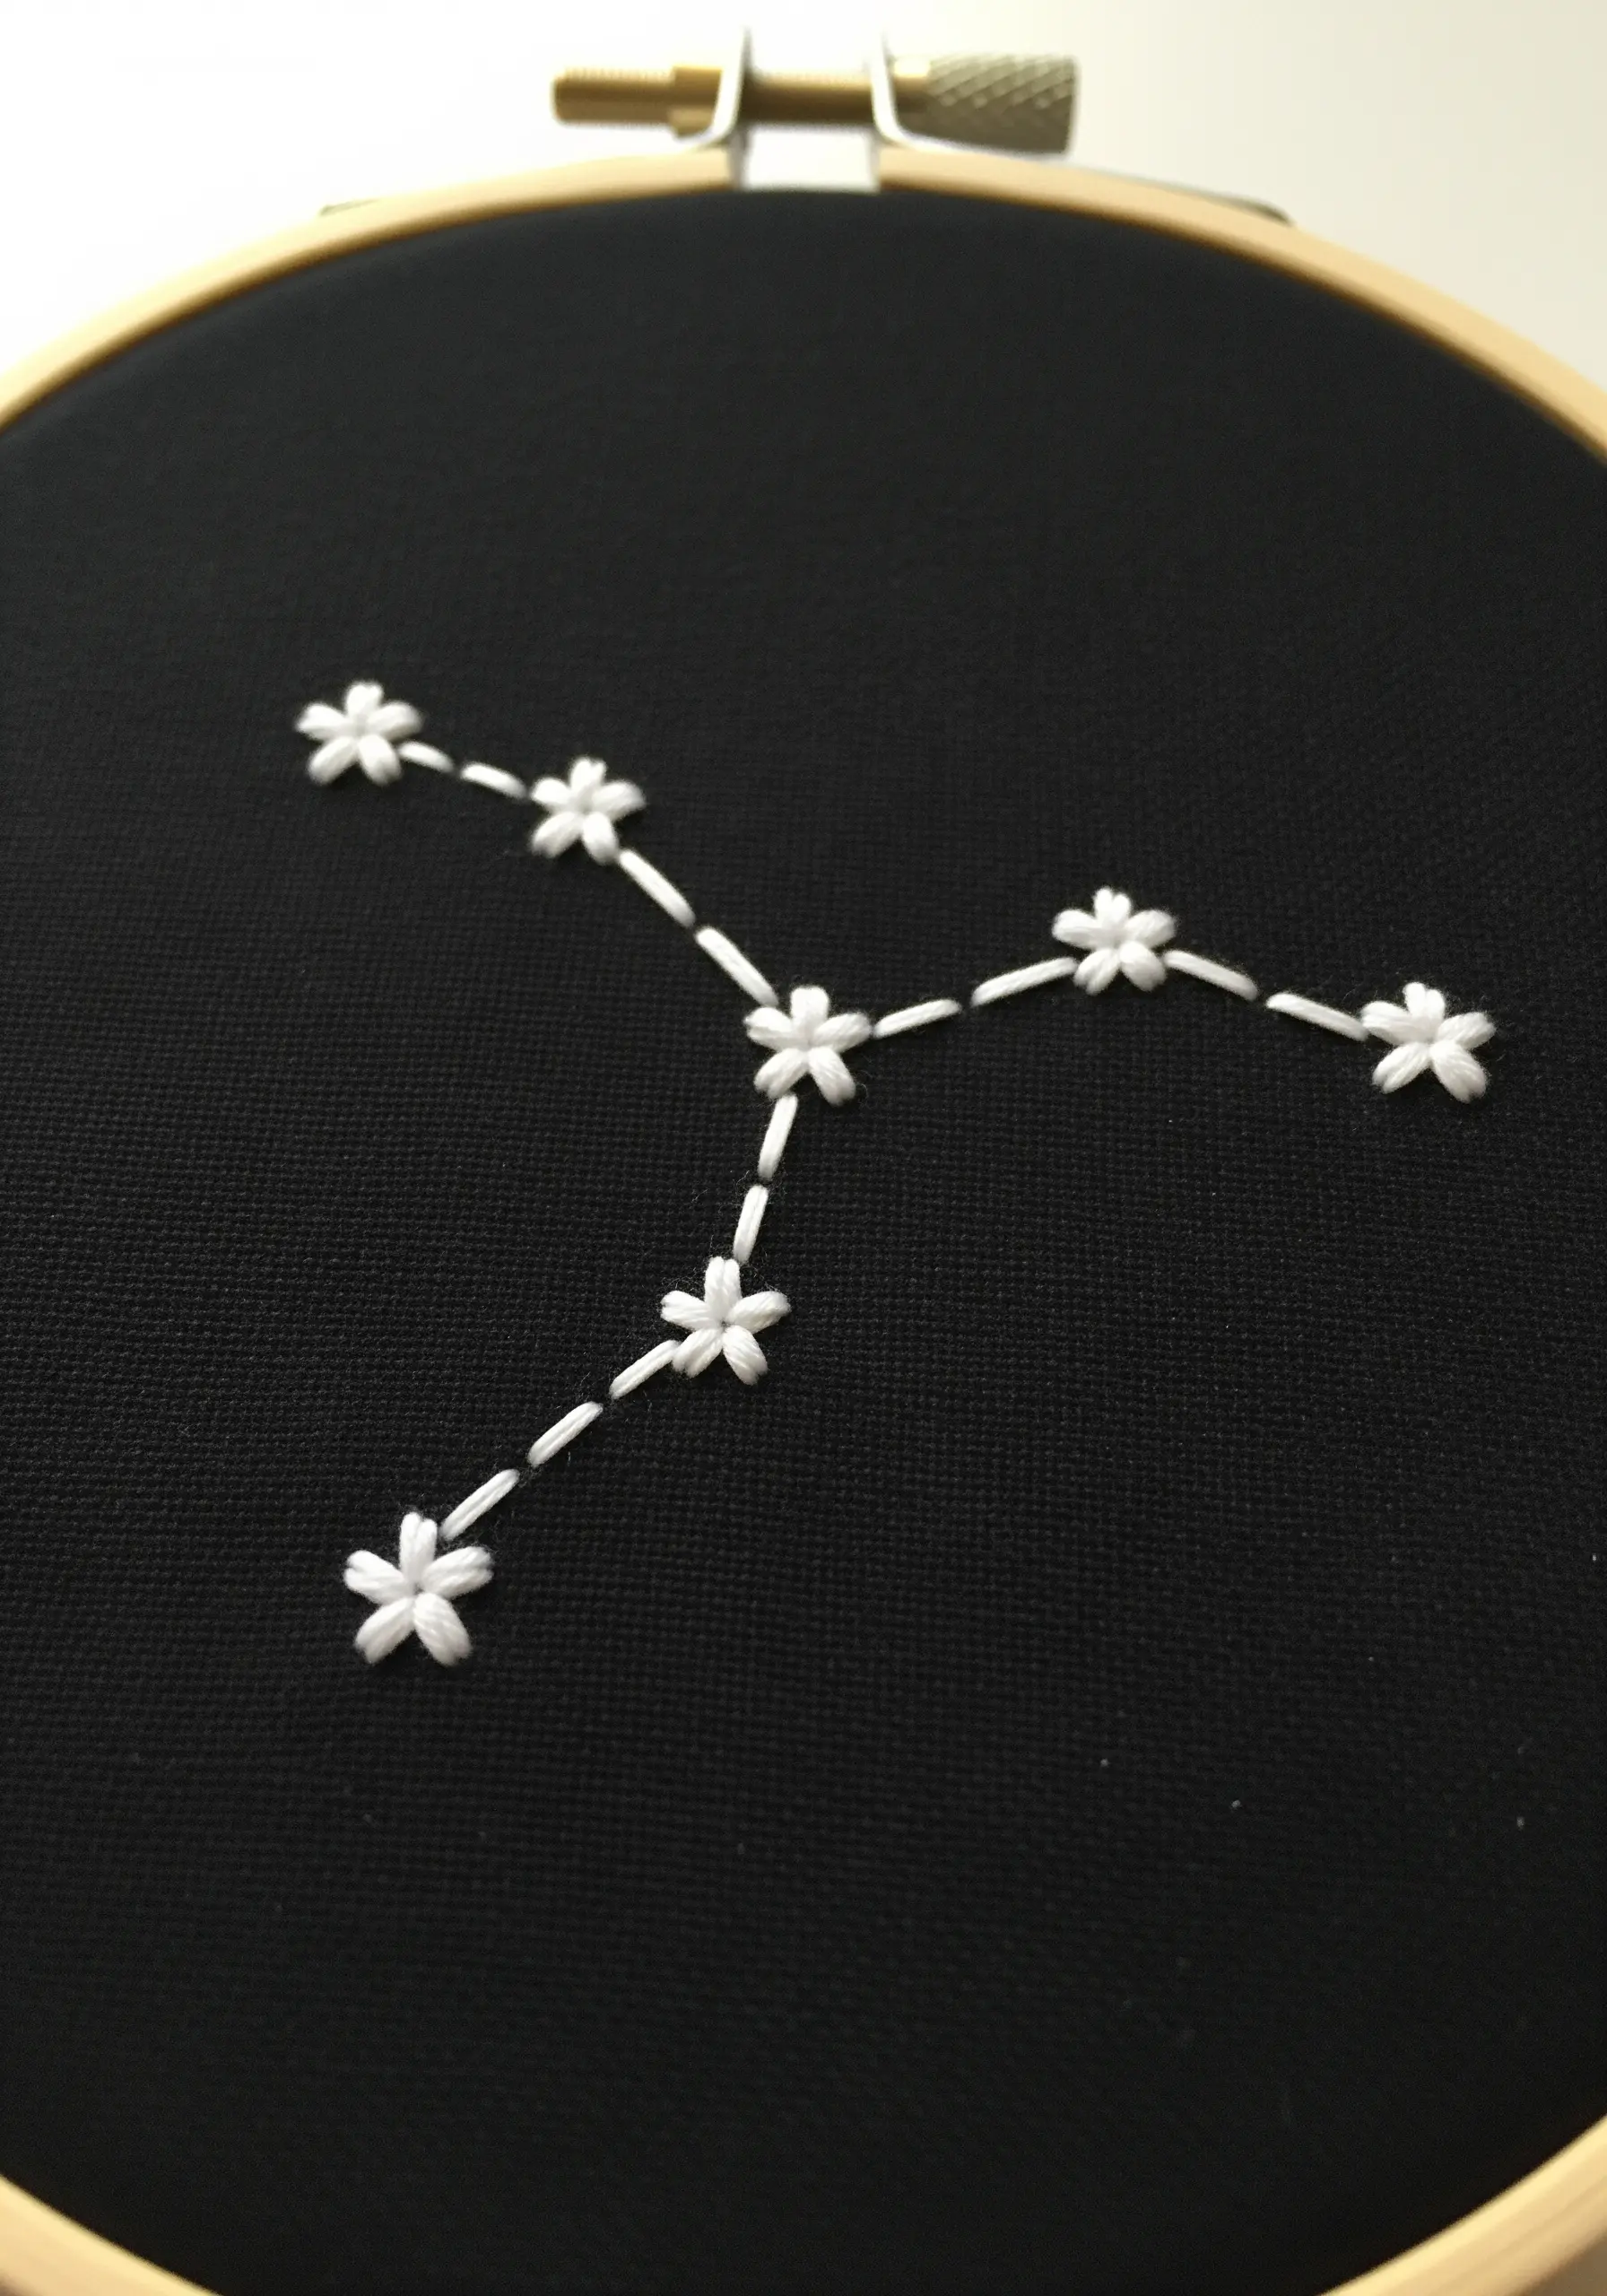
Make your stitches pop by choosing a high-contrast palette of dark fabric and bright white thread.
For the stars, use a lazy daisy stitch with five or six petals to create tiny, stylized blossoms. This is more visually interesting than a simple knot.
Connect them with a neat, single-strand backstitch to keep the lines sharp and delicate.
Working on black or navy fabric allows the white thread to shine, turning a simple design into a striking piece of minimalist art.
15. The Intricate Bicycle
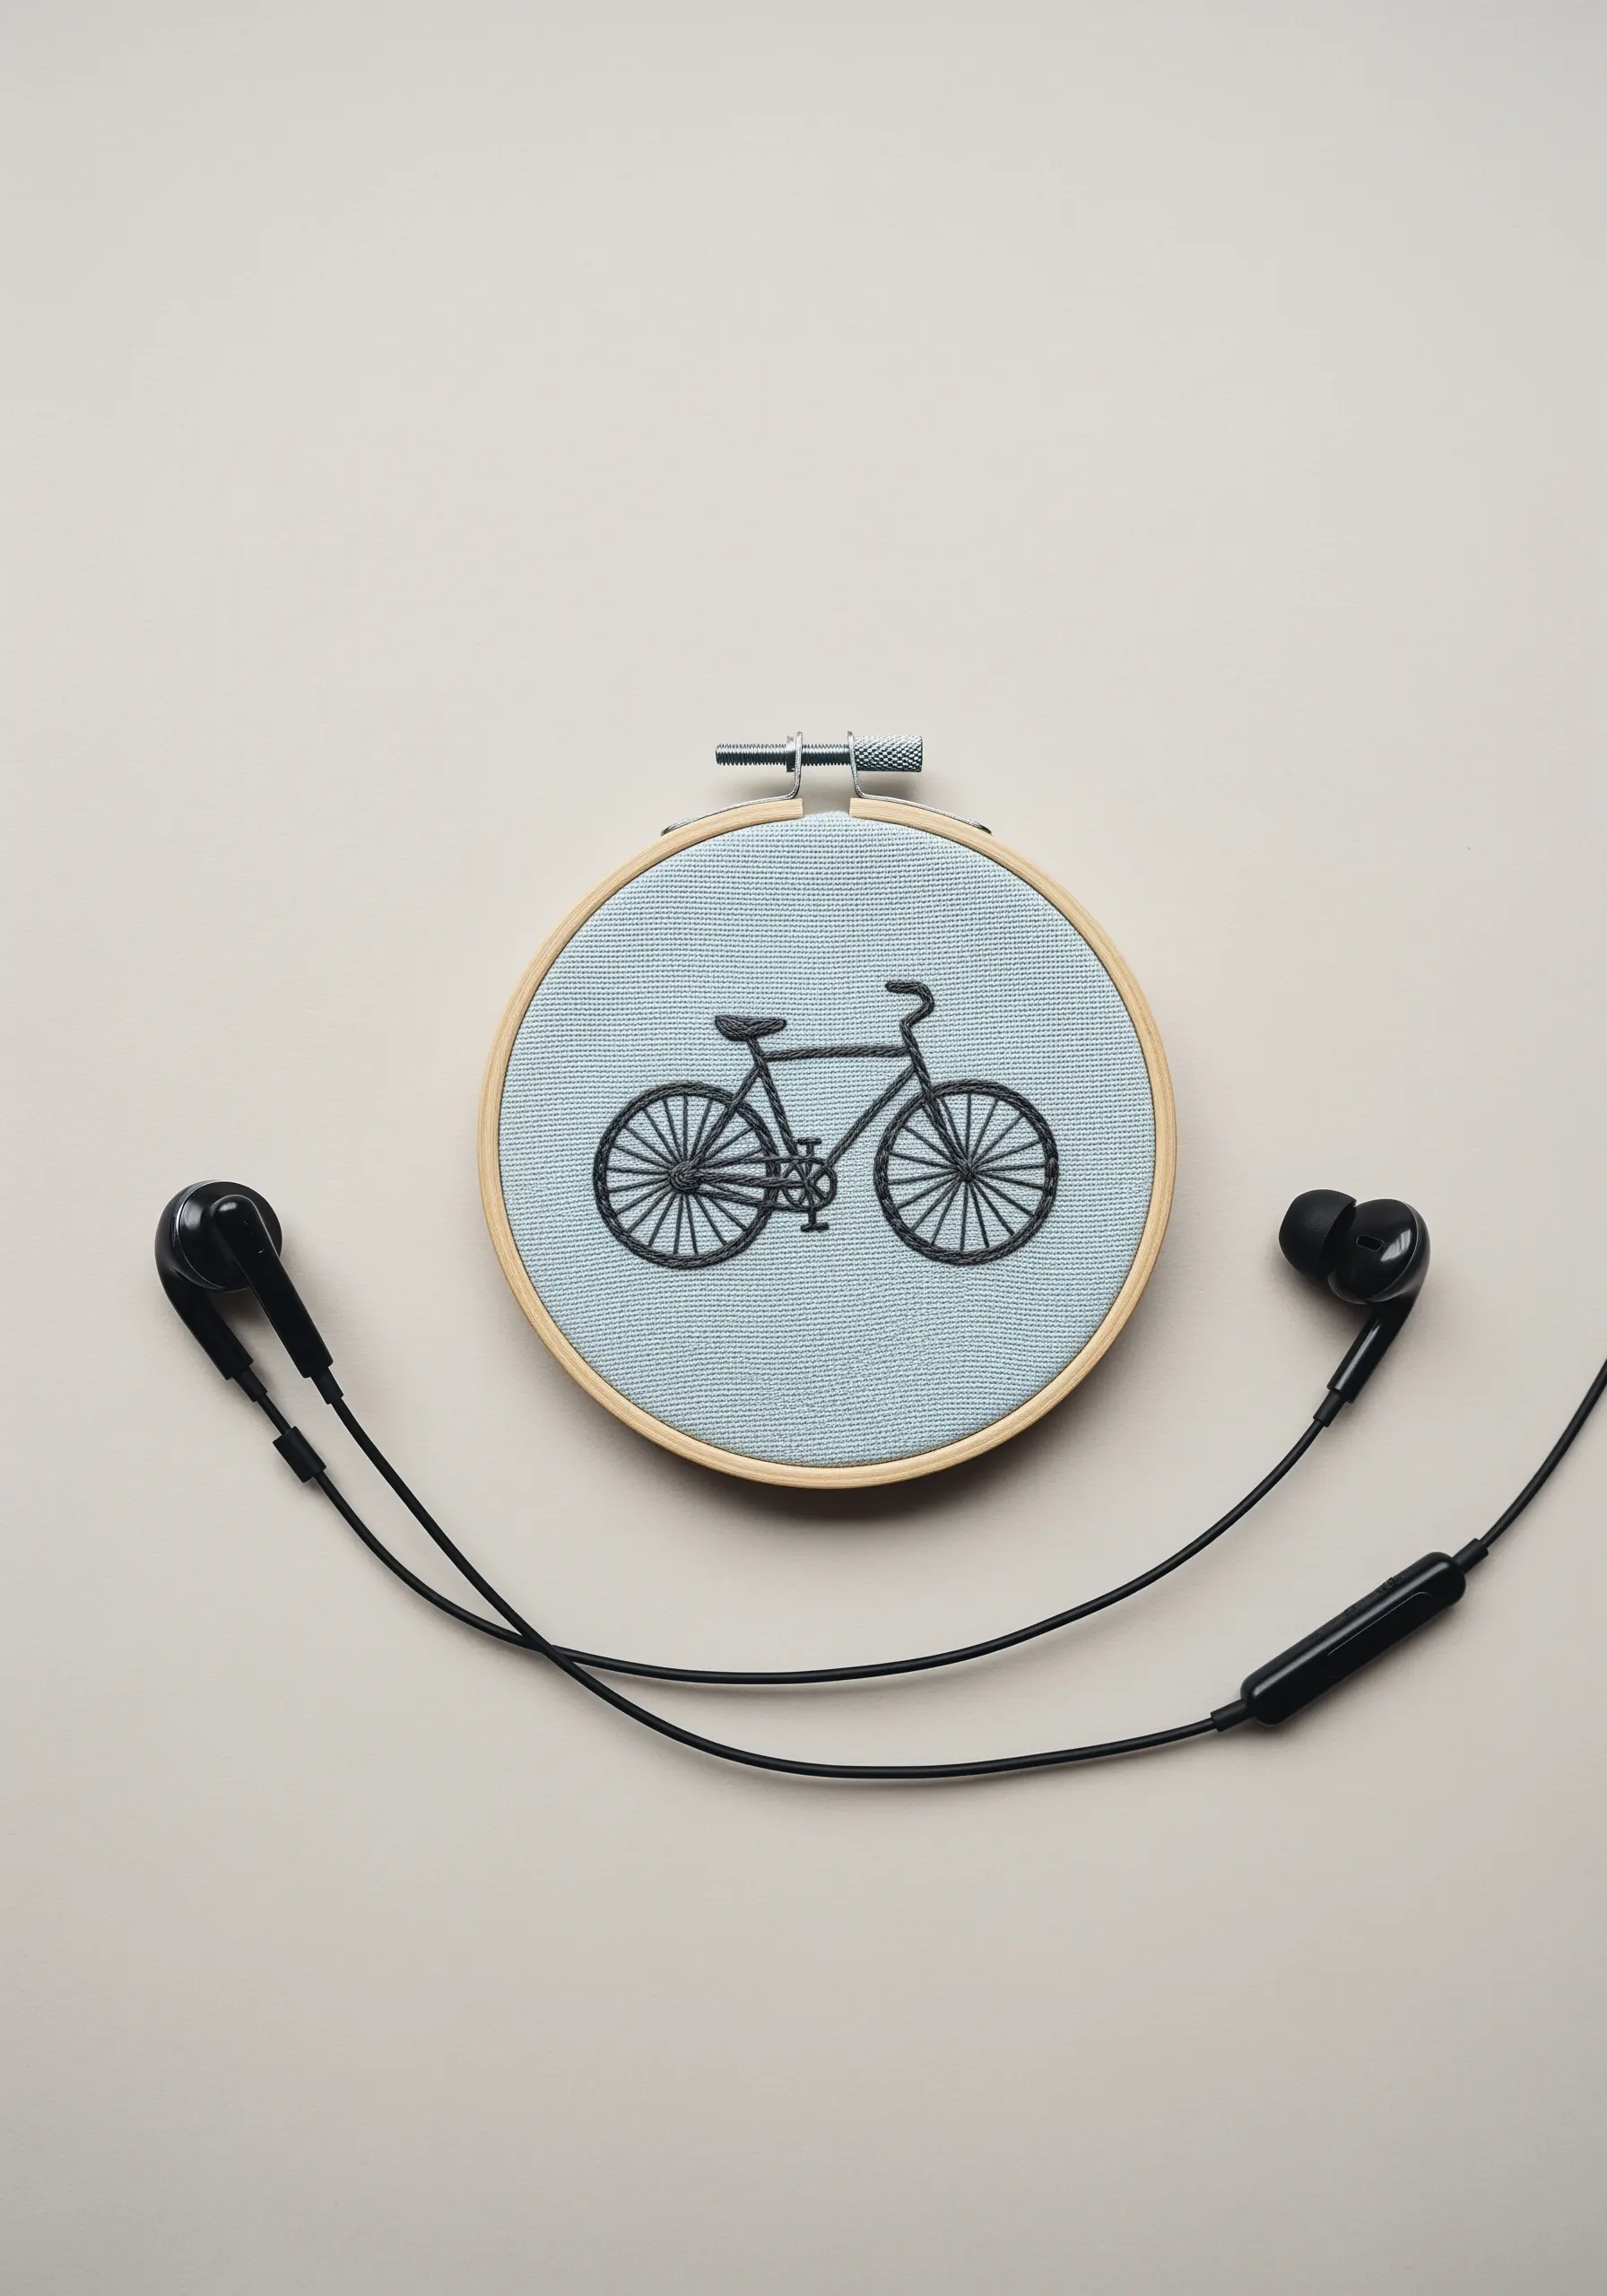
For designs with fine, detailed lines, precision is everything. Choose your stitch and thread count wisely.
Use a single strand of floss for the entire piece to maintain a delicate, illustrative quality. This is especially important for the thin spokes of the wheels.
To create perfectly smooth curves for the wheels and frame, use a whipped backstitch. The wrapping motion of this stitch smooths out the jagged edges of a standard backstitch, resulting in a clean, continuous line.
16. The Split-Leaf Monstera
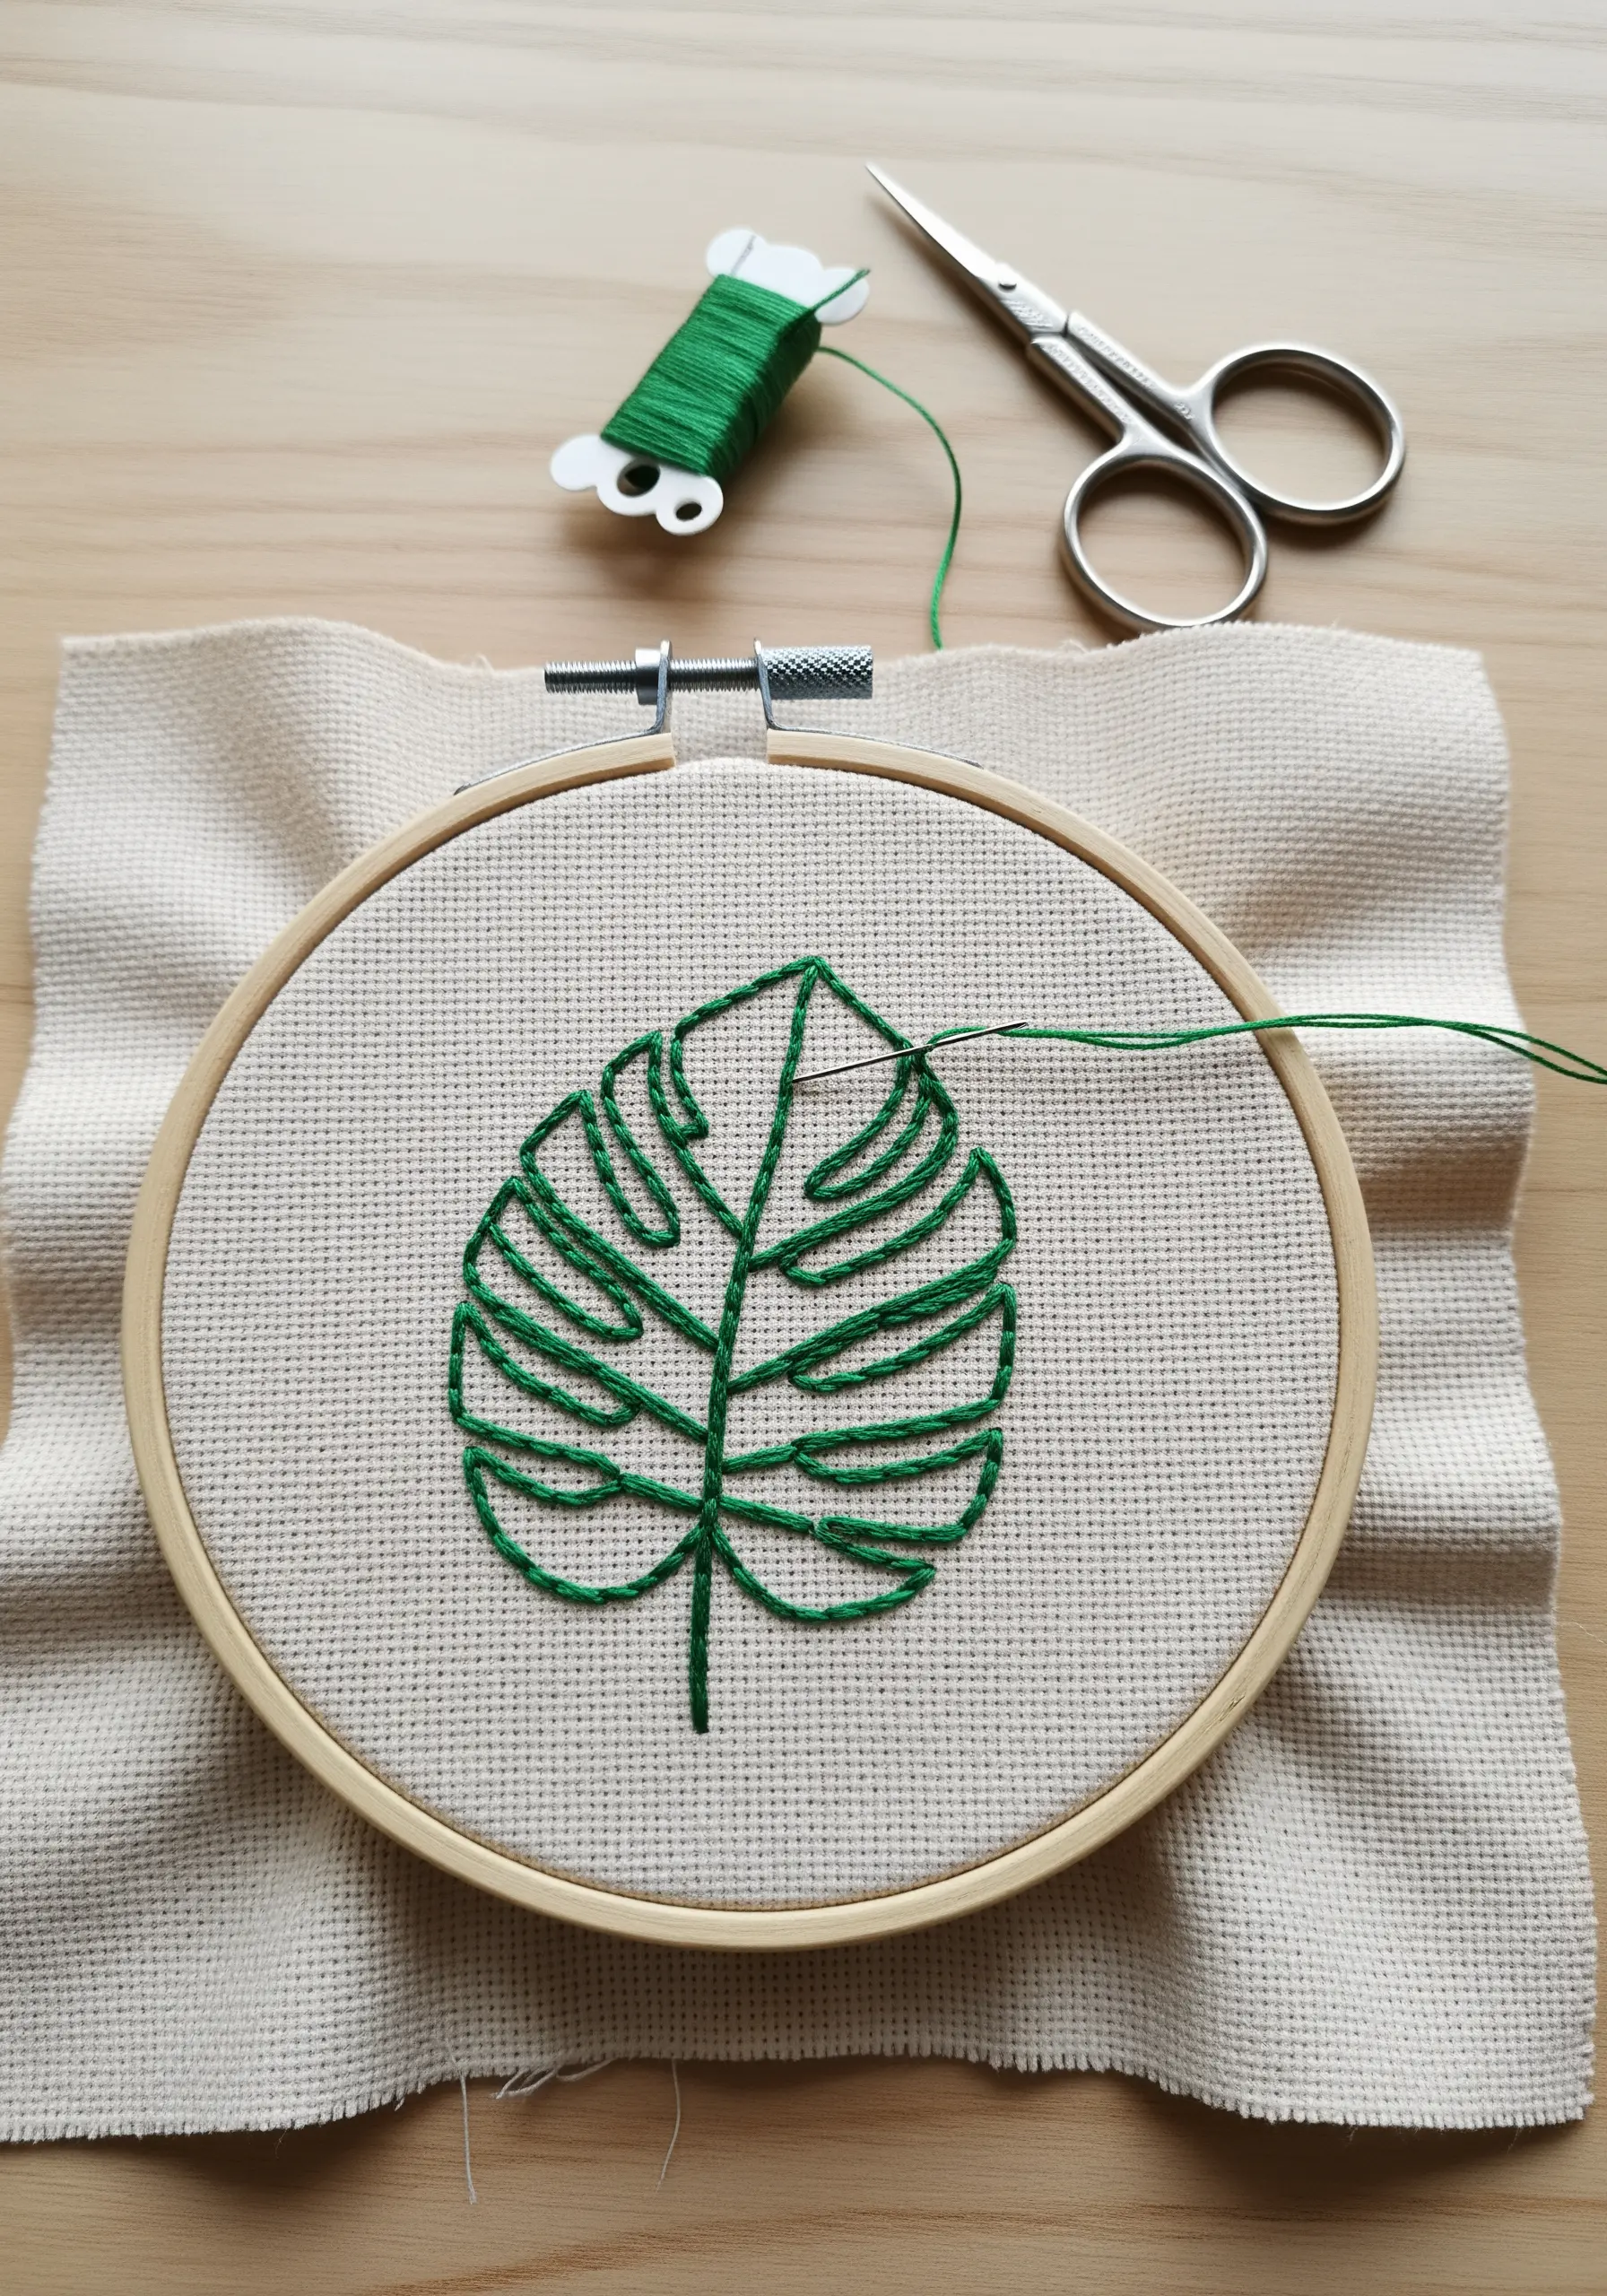
Capture the iconic look of a Monstera leaf by focusing on negative space, not just filled shapes.
Use a backstitch to create the outer shape and the central vein first. This provides the framework.
Instead of filling the entire leaf, stitch the individual sections, leaving gaps of unstitched fabric where the natural splits would occur.
This open-fill approach is faster than a full satin stitch and results in a more graphic and recognizable botanical design.
17. A Simple Sunburst Motif
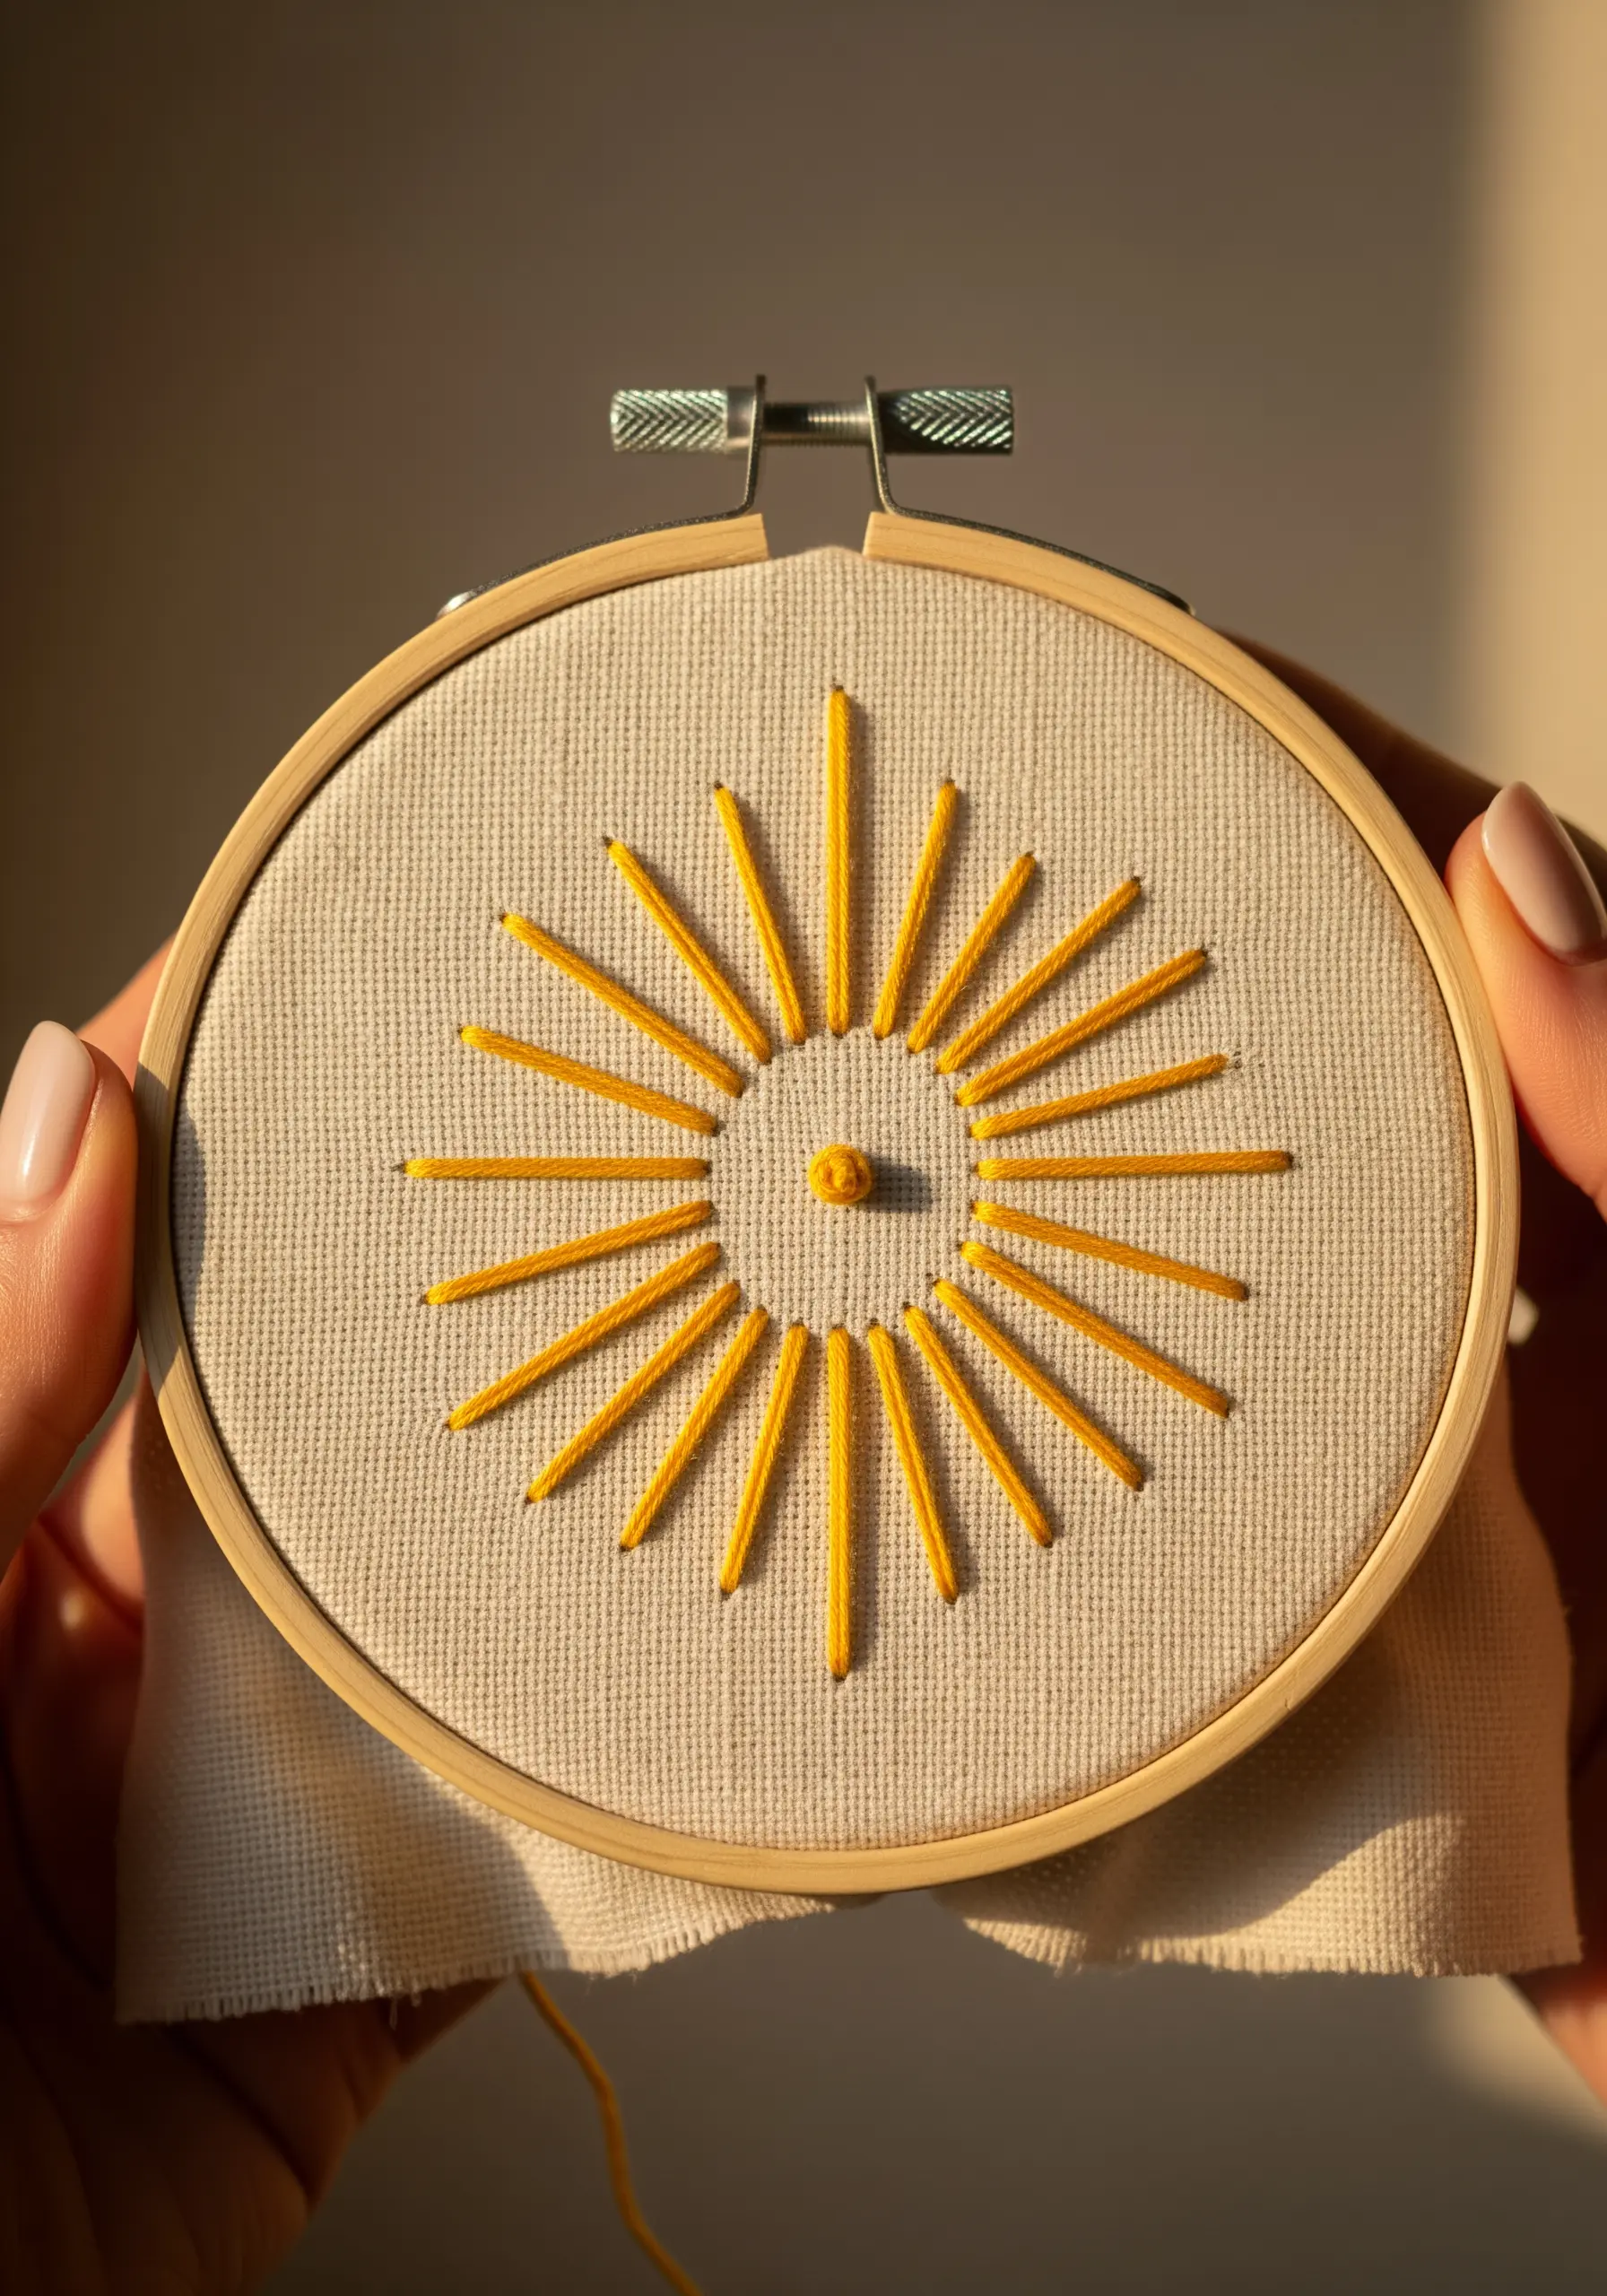
Create a dynamic, radiating pattern using only the most basic stitch: the straight stitch.
Start by making a single French knot in the center to anchor your design.
Using a ruler and a fabric marker, lightly draw guidelines radiating out from the center to ensure even spacing.
Vary the length of your straight stitches for a more organic, sun-like effect. This project is a perfect meditation on stitch tension and placement.
18. Shaded Toadstool Mushrooms
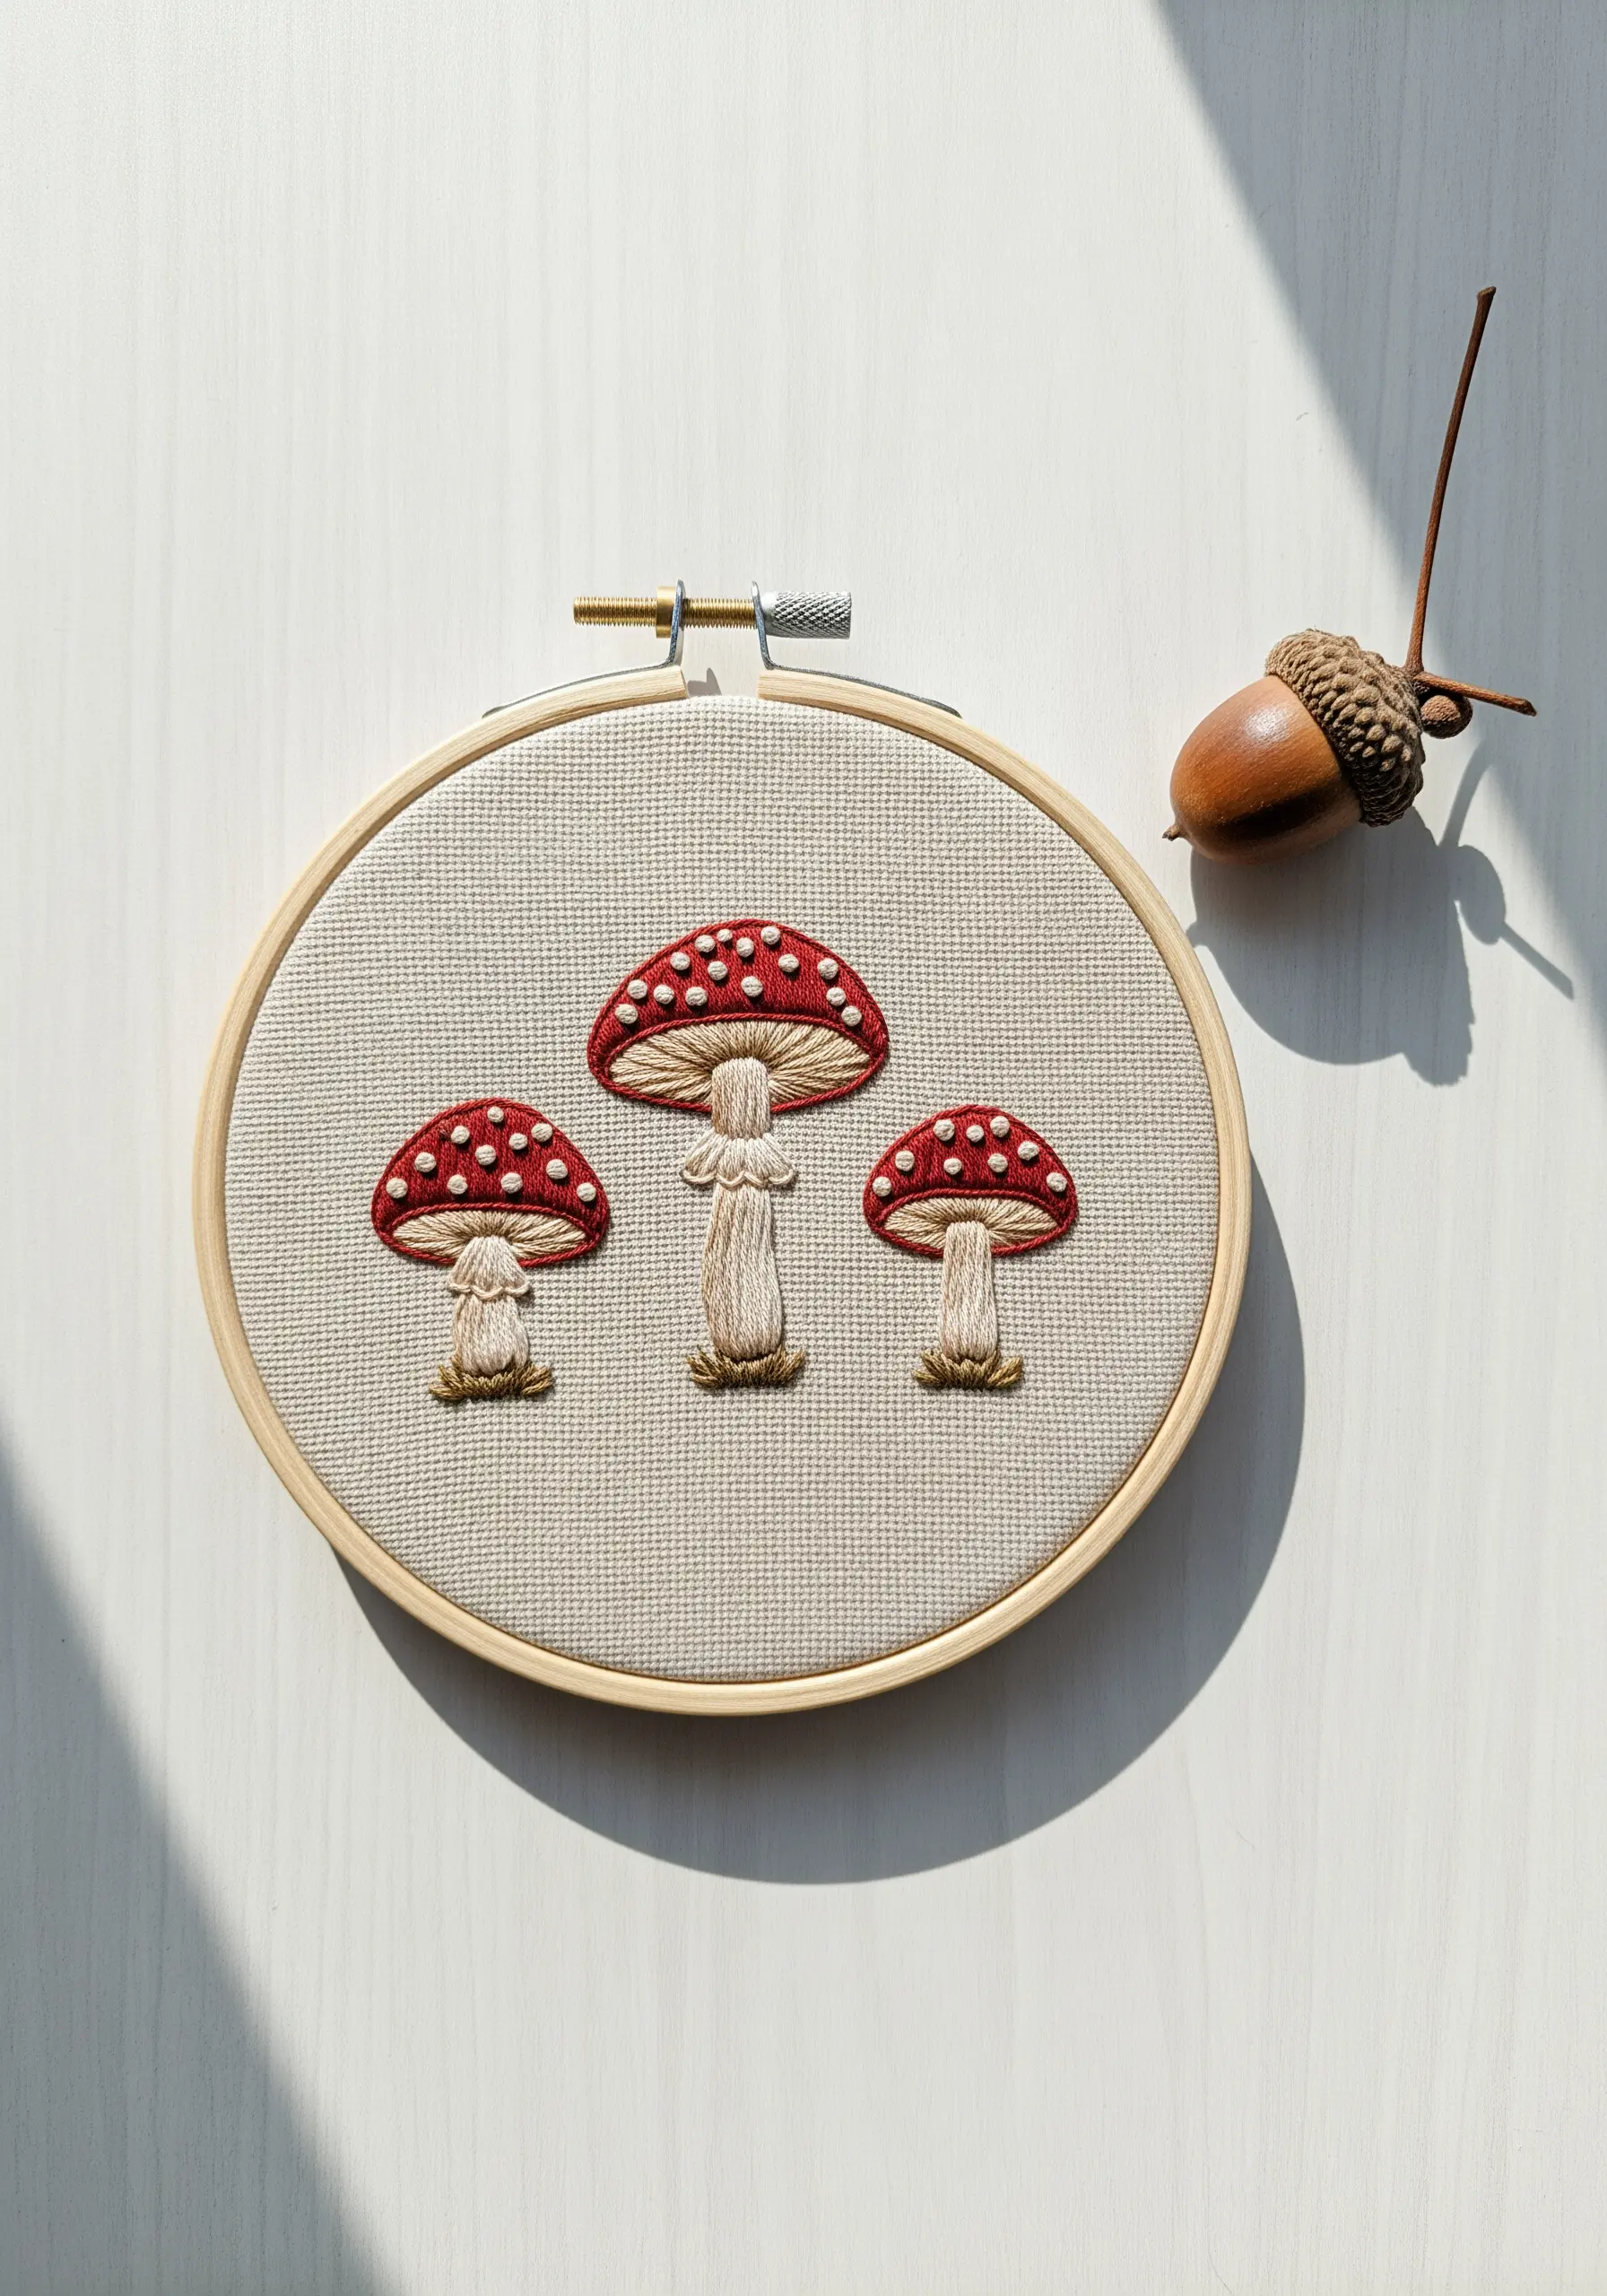
Bring small motifs to life with subtle color blending using the long-and-short stitch.
For the mushroom caps, use two shades of red. Fill the shape with interlocking long and short stitches, allowing the colors to mix naturally rather than creating hard lines.
Use tiny, single-strand seed stitches in off-white for the spots to add a delicate texture on top.
This technique, often called thread painting, adds a surprising amount of realism to even the smallest designs.
19. Abstract Grid with Knots
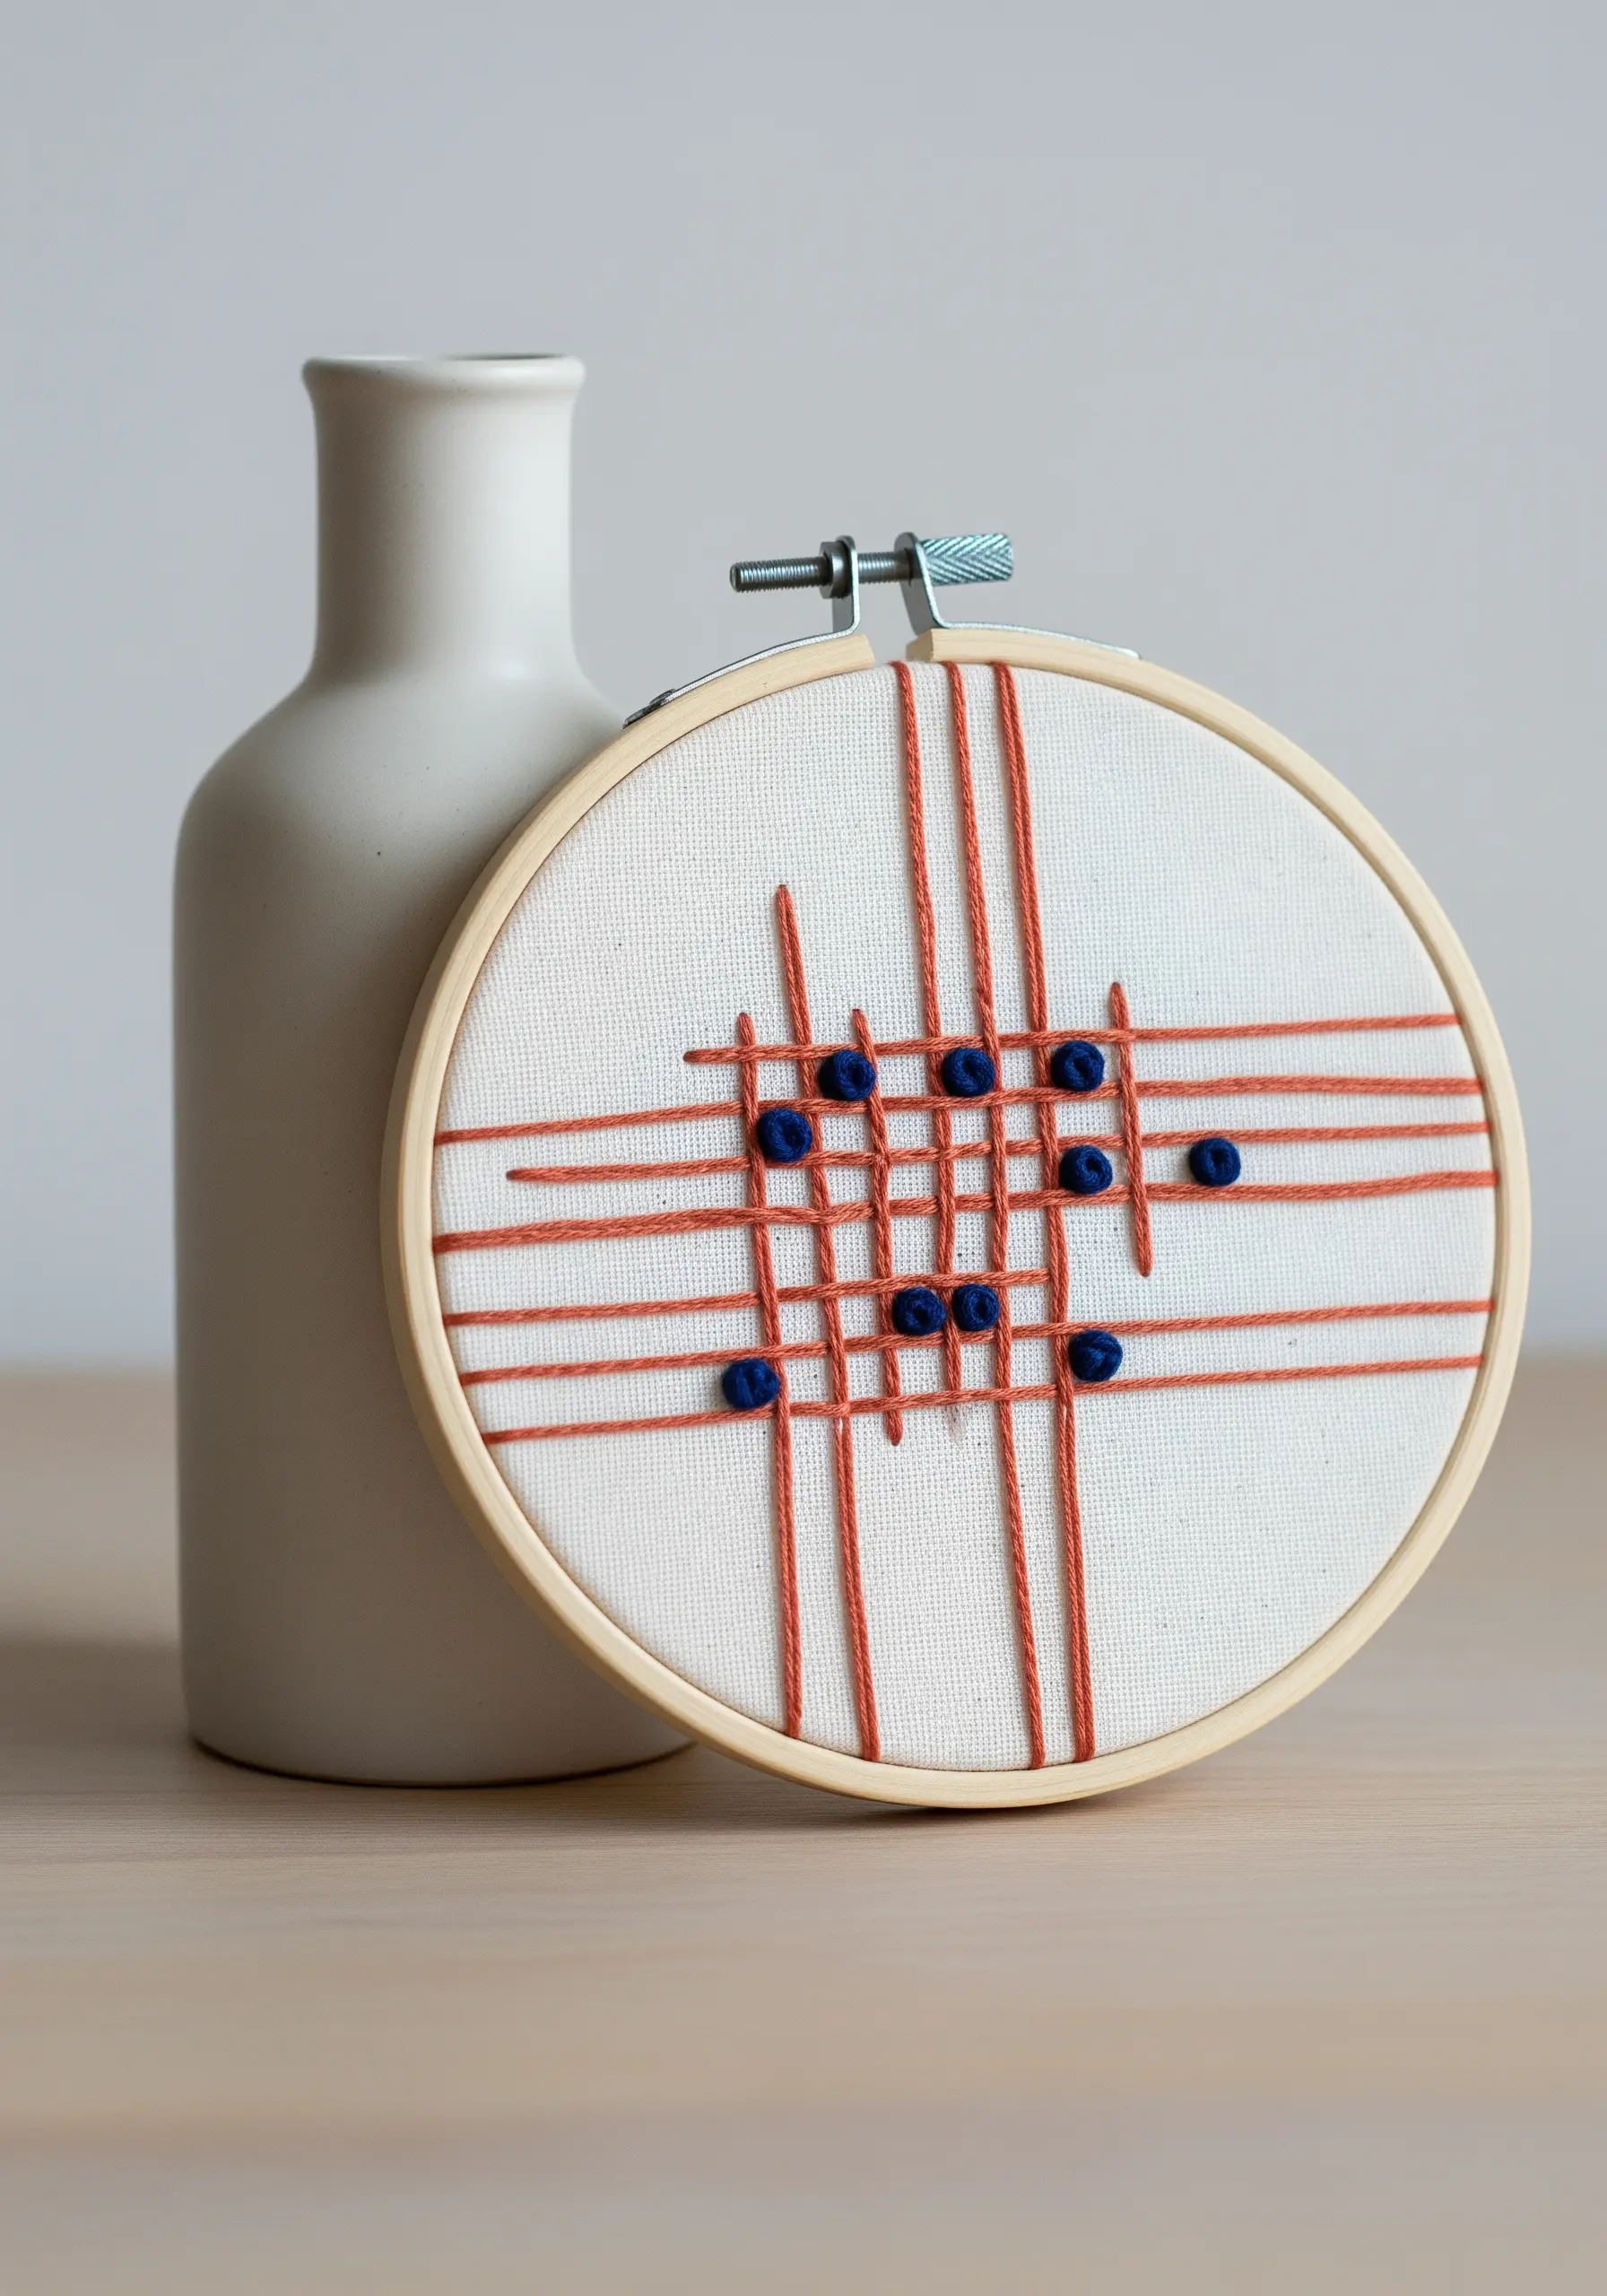
Explore modern, geometric composition by combining straight lines with textural elements.
Lay down a grid of long straight stitches, allowing them to overlap. Use a thicker thread, like a pearl cotton, to give the lines more presence and a slight sheen.
Then, at the intersections or in a deliberate pattern, add contrasting colonial knots or French knots. This juxtaposition of smooth lines and raised dots creates a visually engaging piece of abstract art.
20. The Softly Shaded Feather
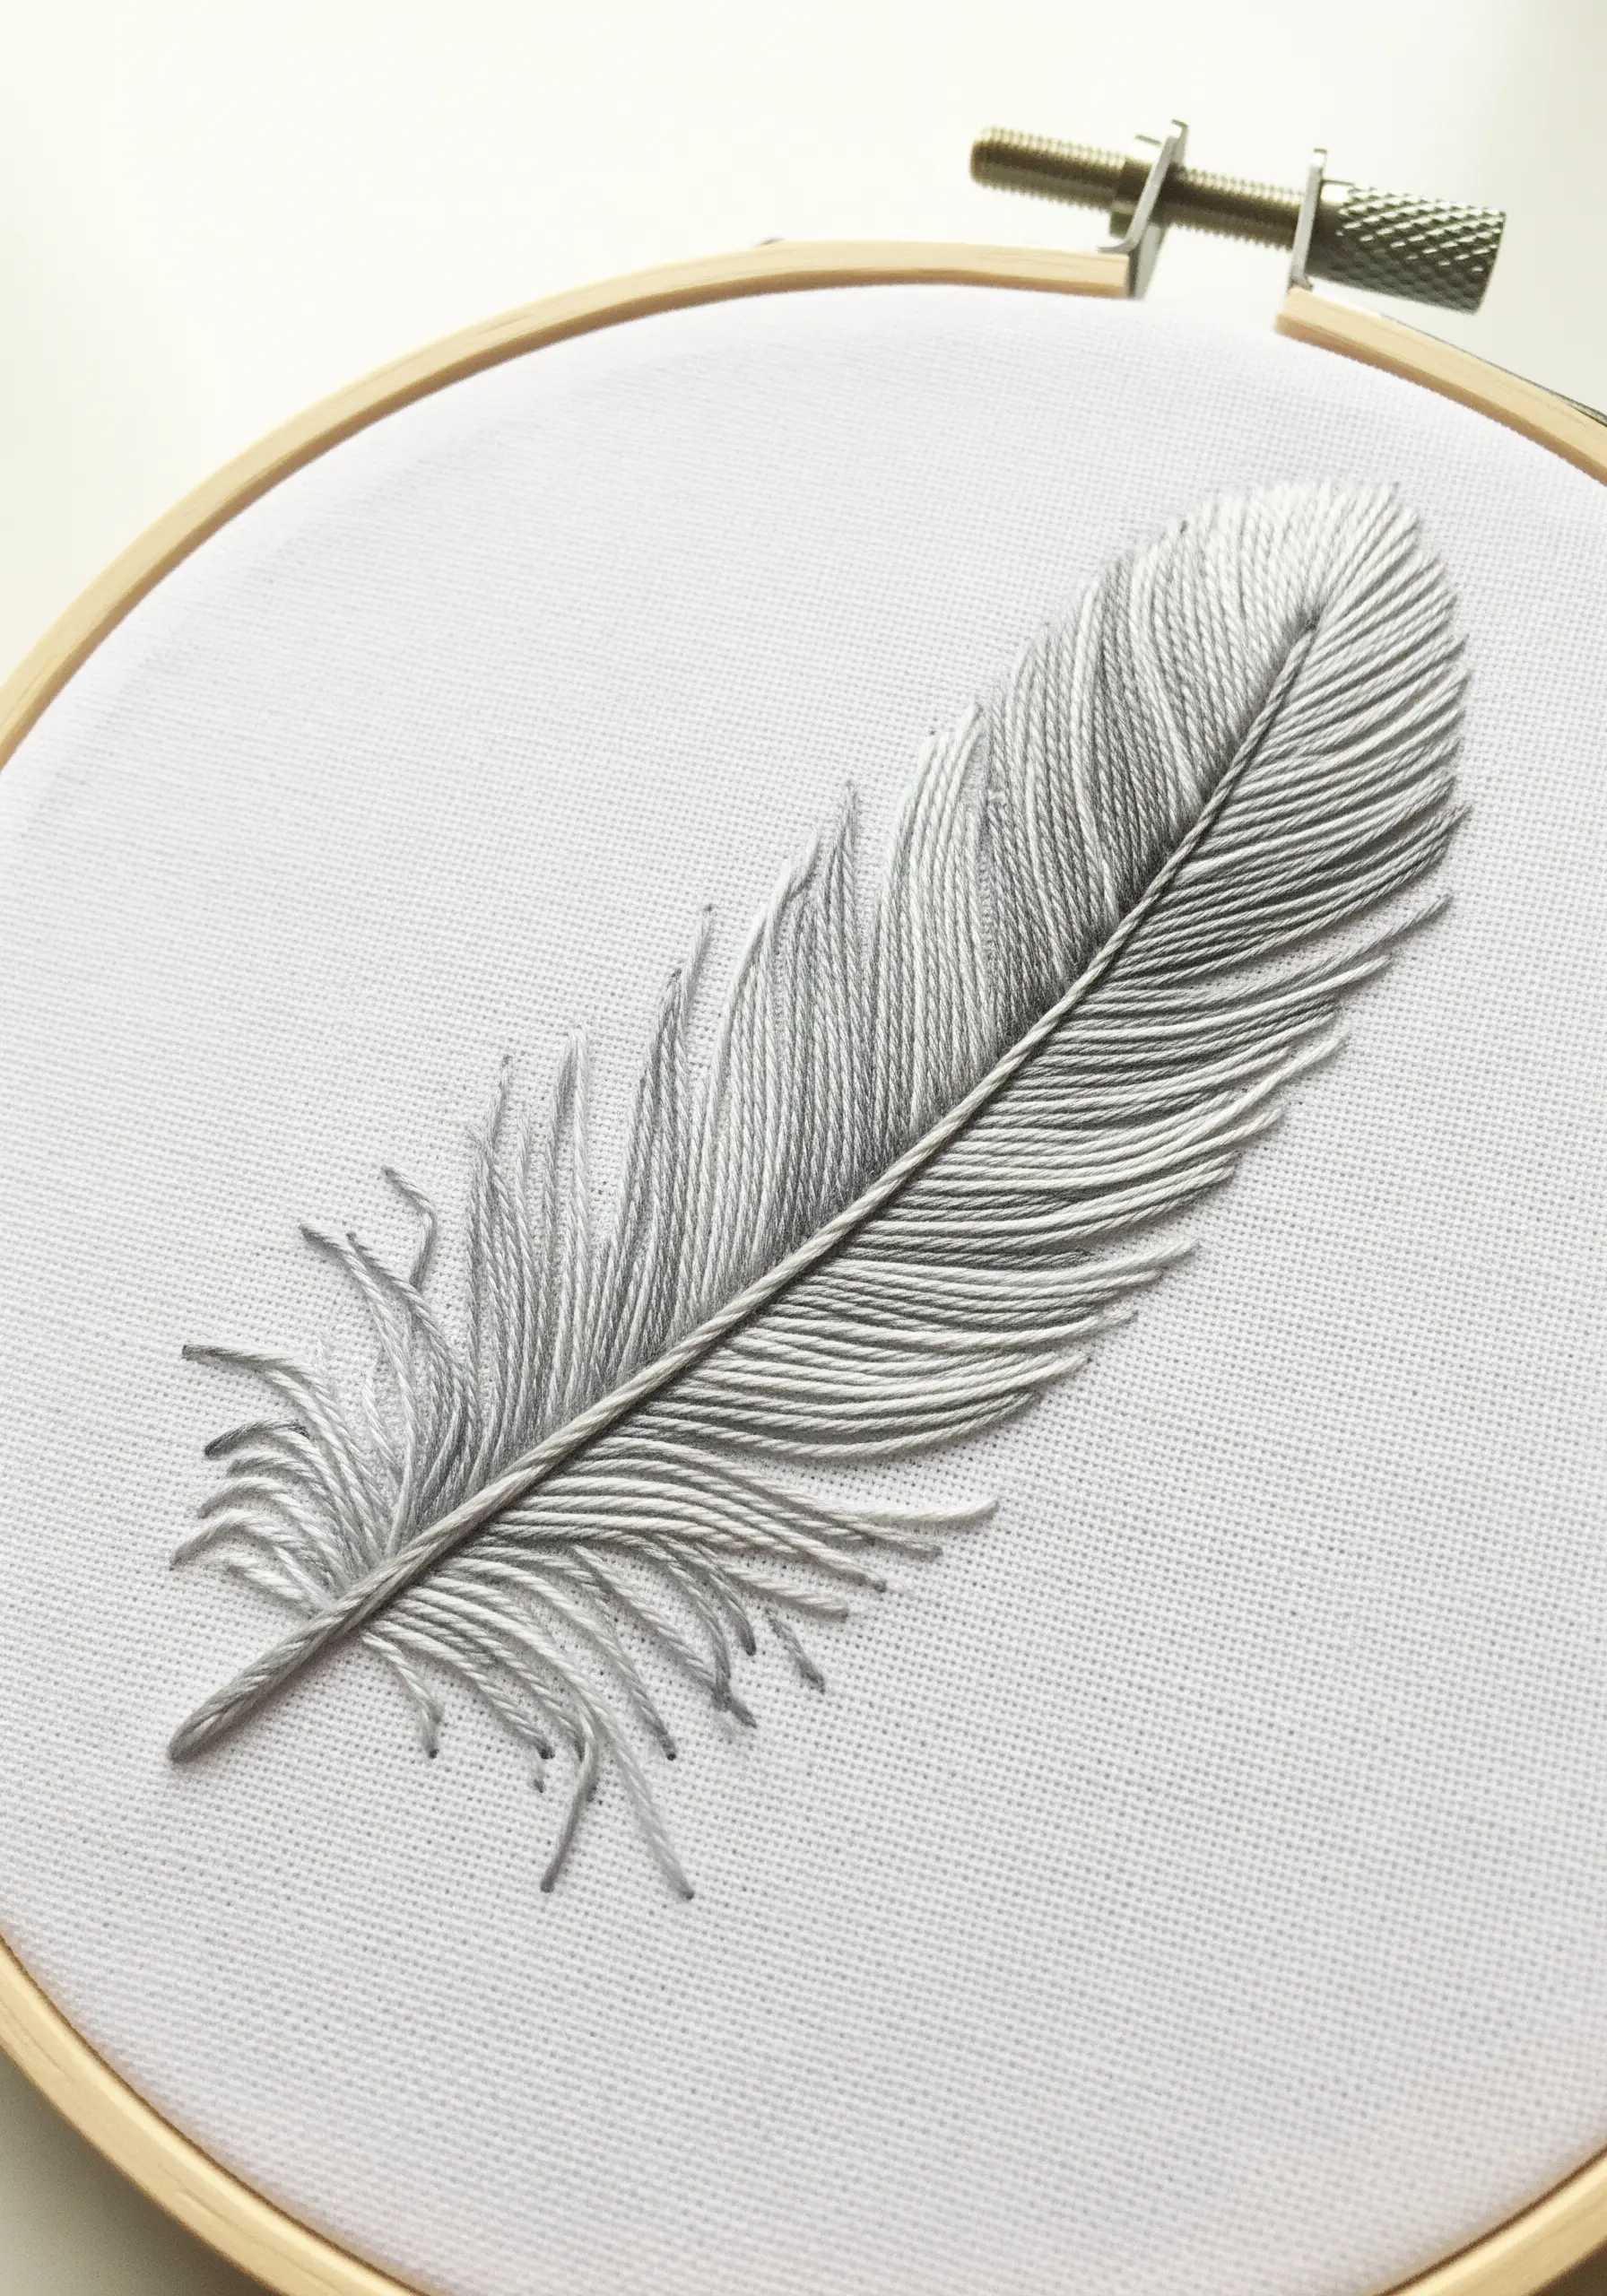
Mimic the delicate structure of a feather by paying close attention to the direction of your stitches.
First, create the central shaft with a narrow line of split stitch.
Then, fill the body of the feather with long, dense satin stitches, angling them up and away from the central shaft, just as they would grow on a real feather.
For the wispy ends, use a few detached, single straight stitches. This directional stitching is what creates the illusion of softness and light.
21. An Ornate Vintage Key

Give a simple outline a sense of weight and importance by using a raised, decorative stitch.
A heavy chain stitch, worked with three or four strands of thread, is perfect for creating a bold, almost rope-like line.
For an extra touch of luxury, use a metallic or copper-colored thread. The sheen of the thread combined with the texture of the chain stitch will make the key look like a dimensional, forged object resting on the fabric.
22. The Classic Traveler’s Suitcase
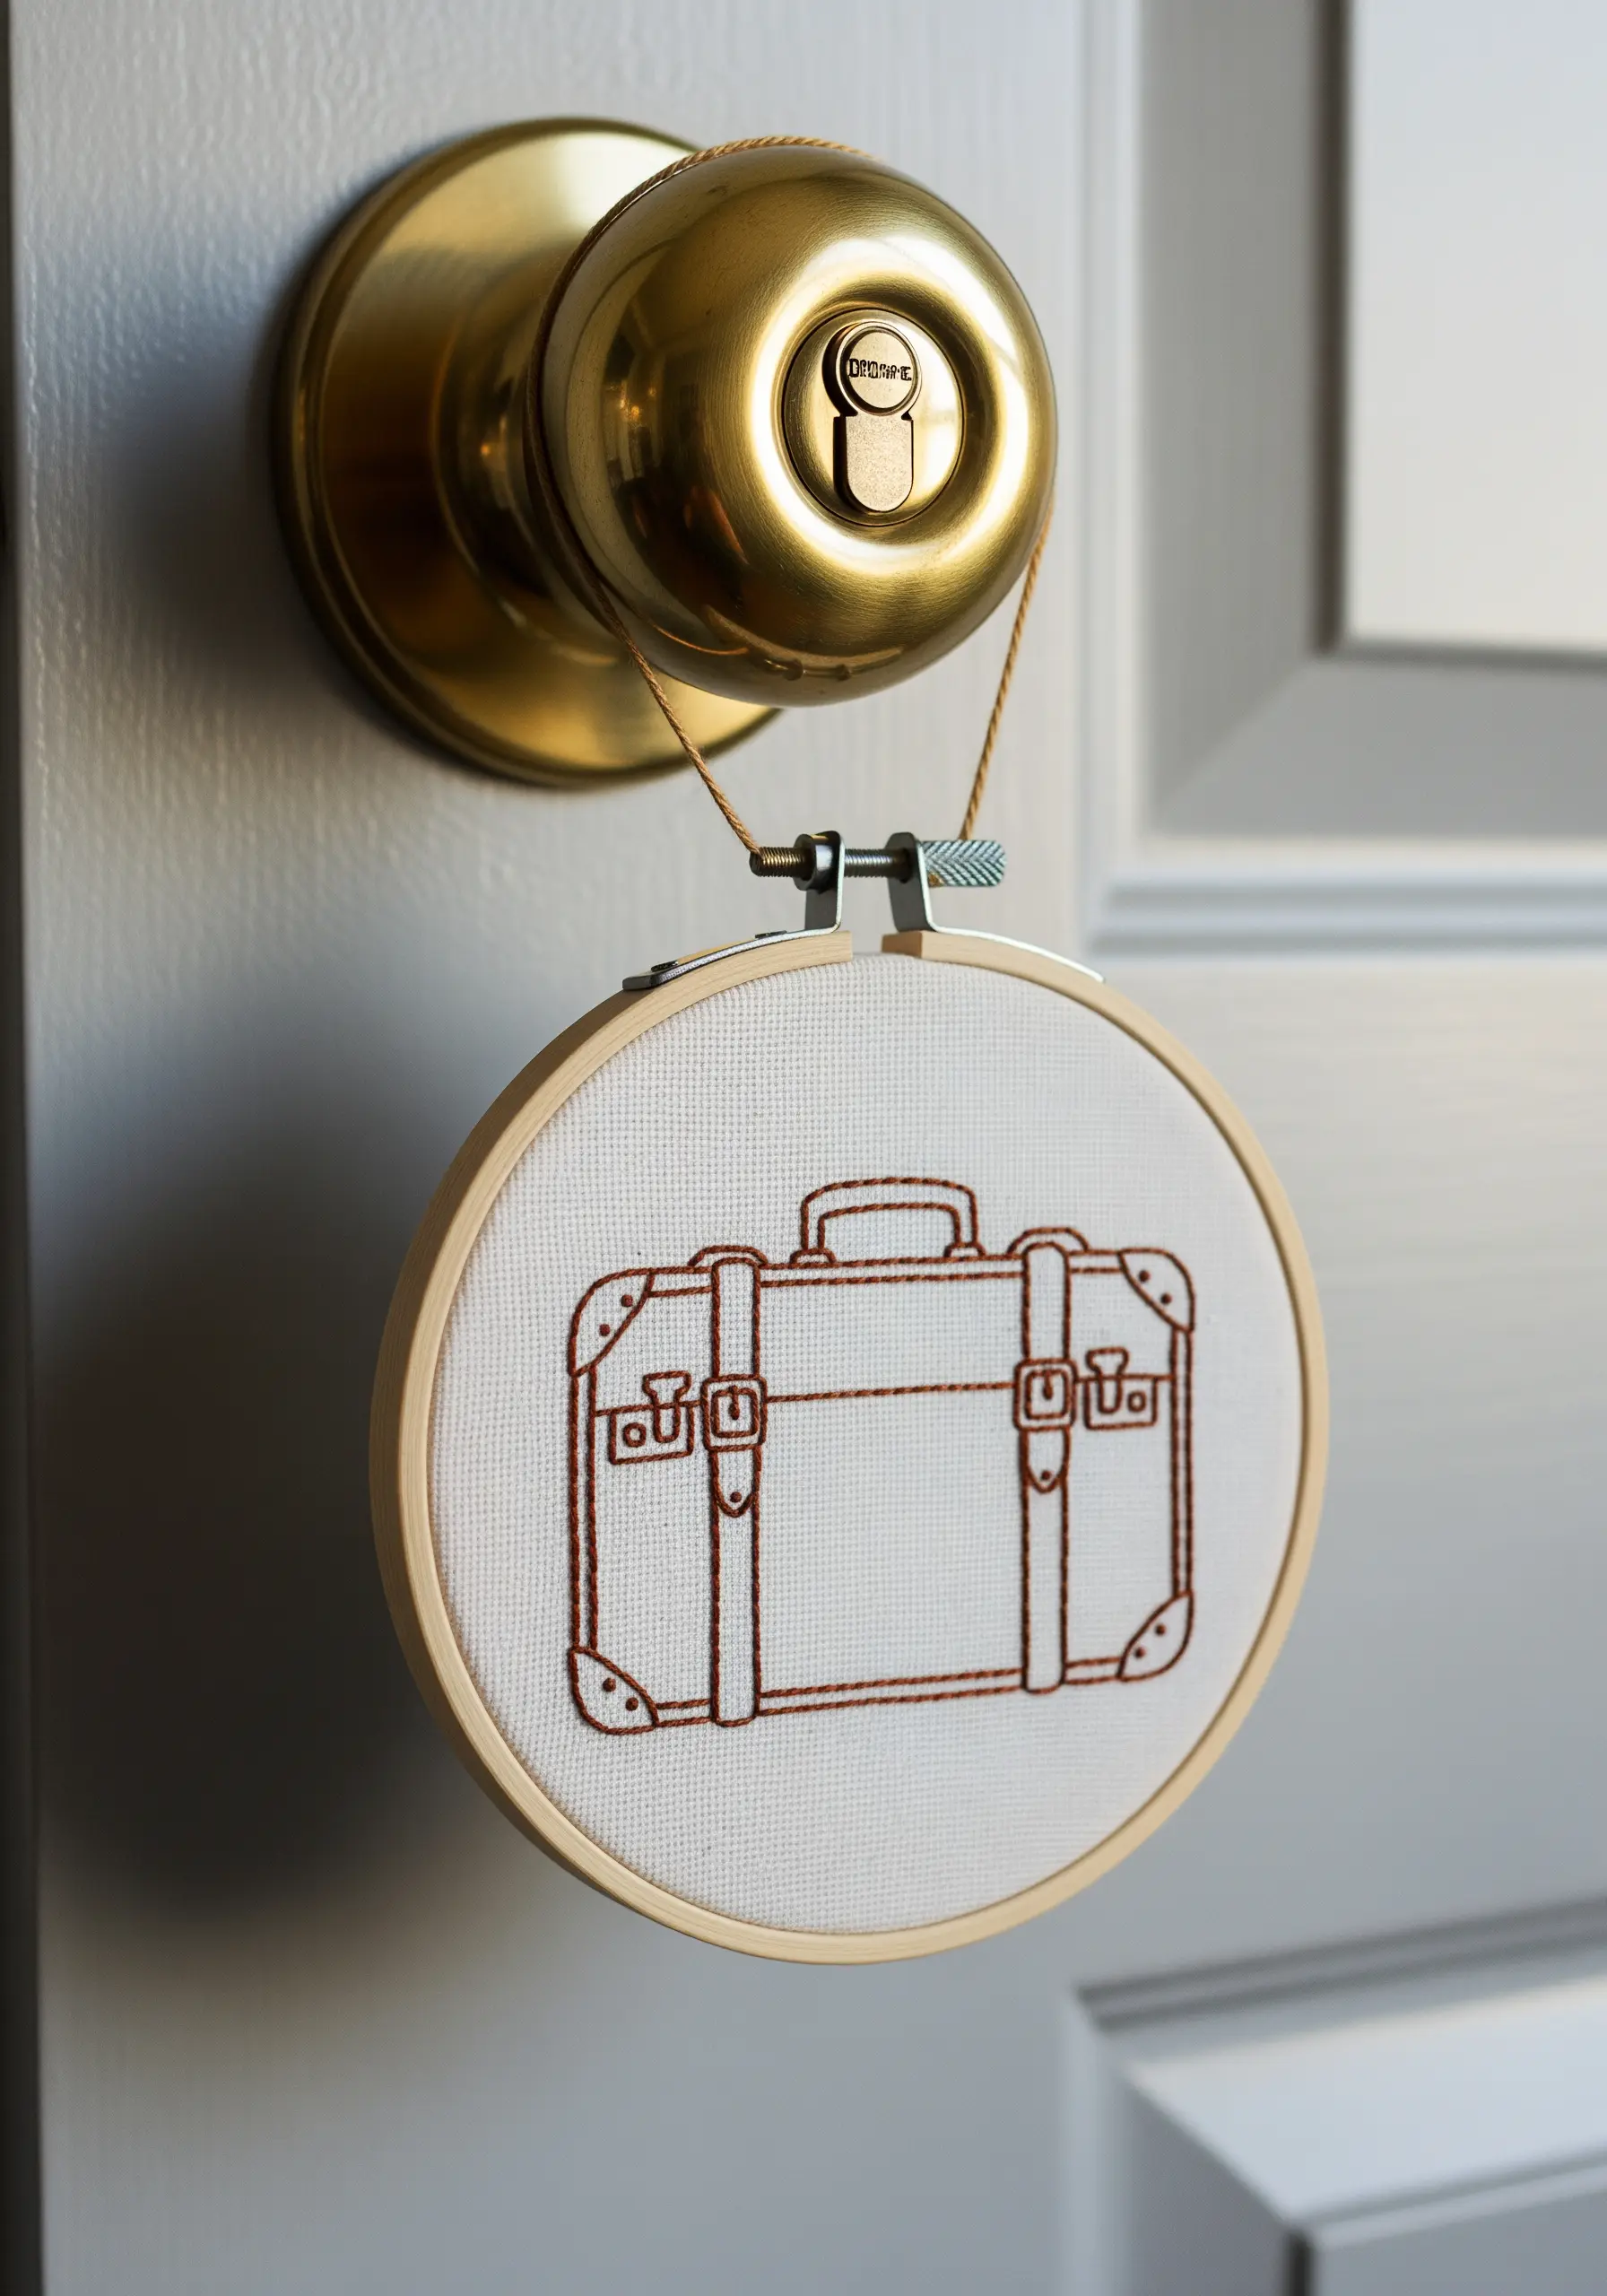
Achieve a clean, illustrative style by treating your embroidery like a line drawing.
Use a consistent two-strand backstitch for all the outlines to create uniform line weight, just like drawing with a fine-tipped pen.
Focus on keeping your stitches small and even, especially around corners and on the small details like buckles and straps.
This approach transforms a simple object into a charming, stylized icon perfect for a travel-themed project.
23. A Minimalist World Map
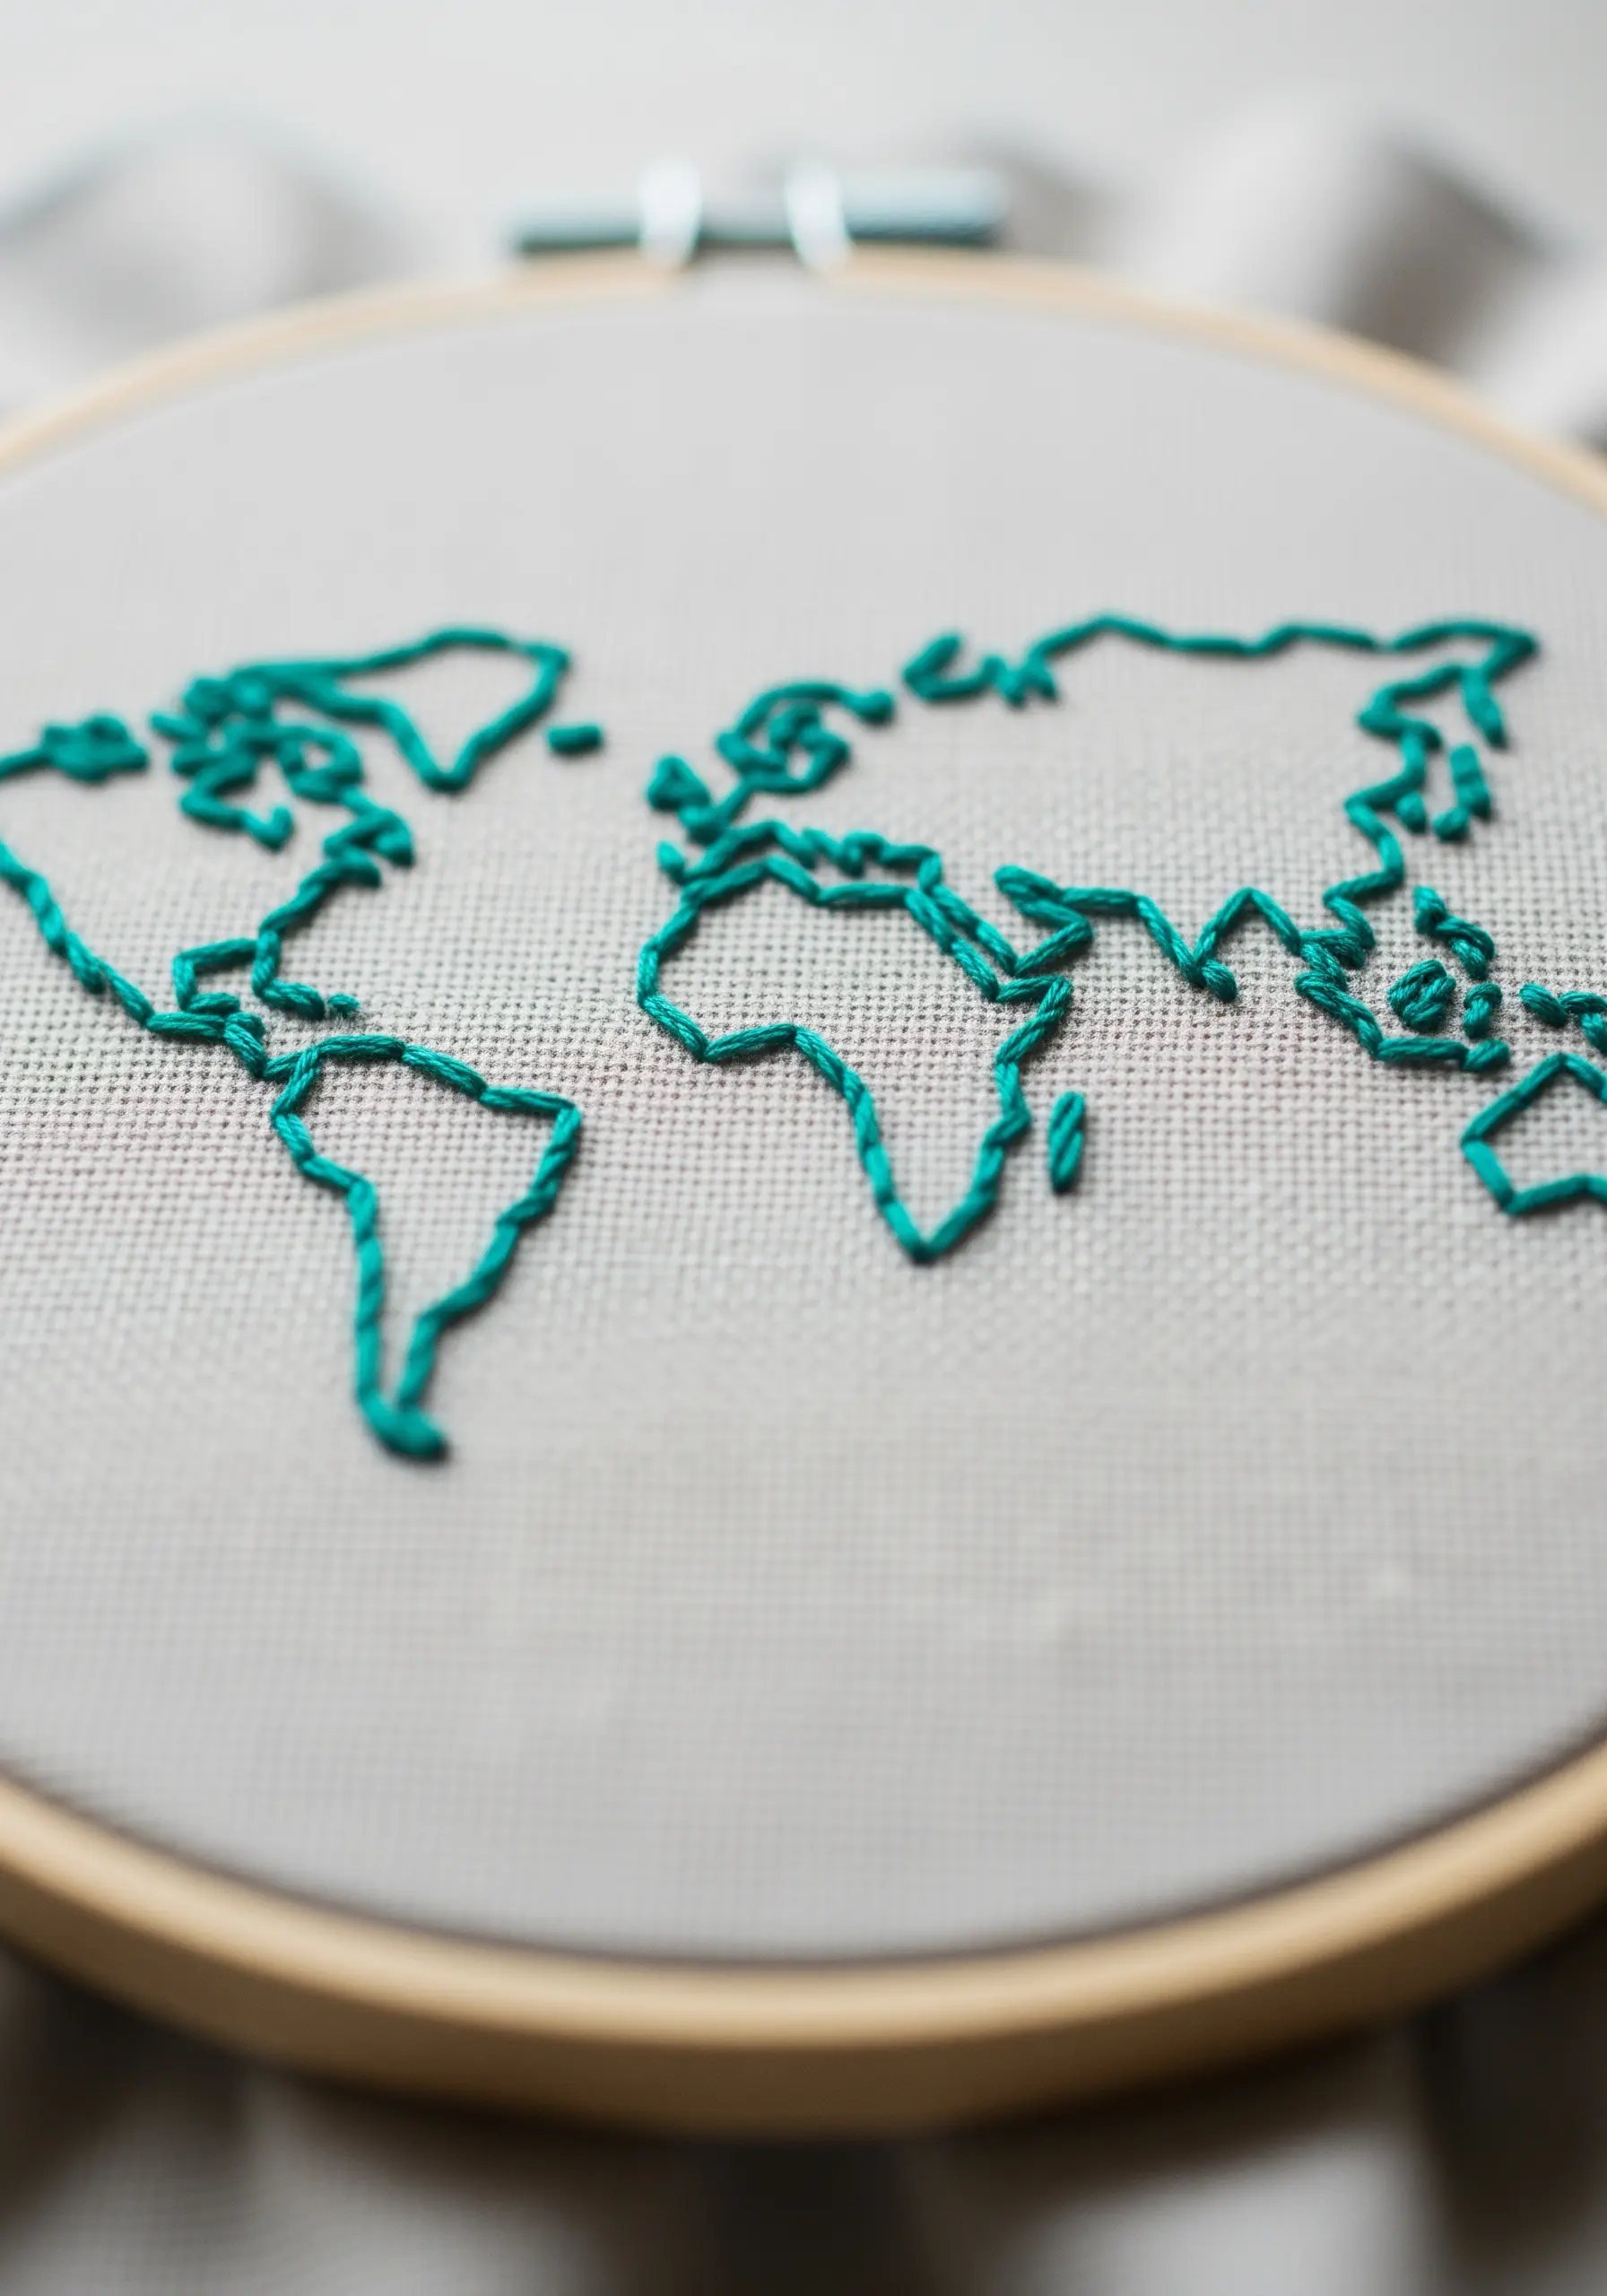
When tackling intricate outlines like coastlines, the key to success is a short stitch length.
Using a backstitch or stem stitch, keep your individual stitches very small—no more than a few millimeters long.
This allows you to navigate the tight curves and jagged edges of the continents with precision, preventing the lines from looking blocky or angular.
It requires patience, but the result is a fluid, accurate, and recognizable map.
24. A Cozy Curled-Up Fox
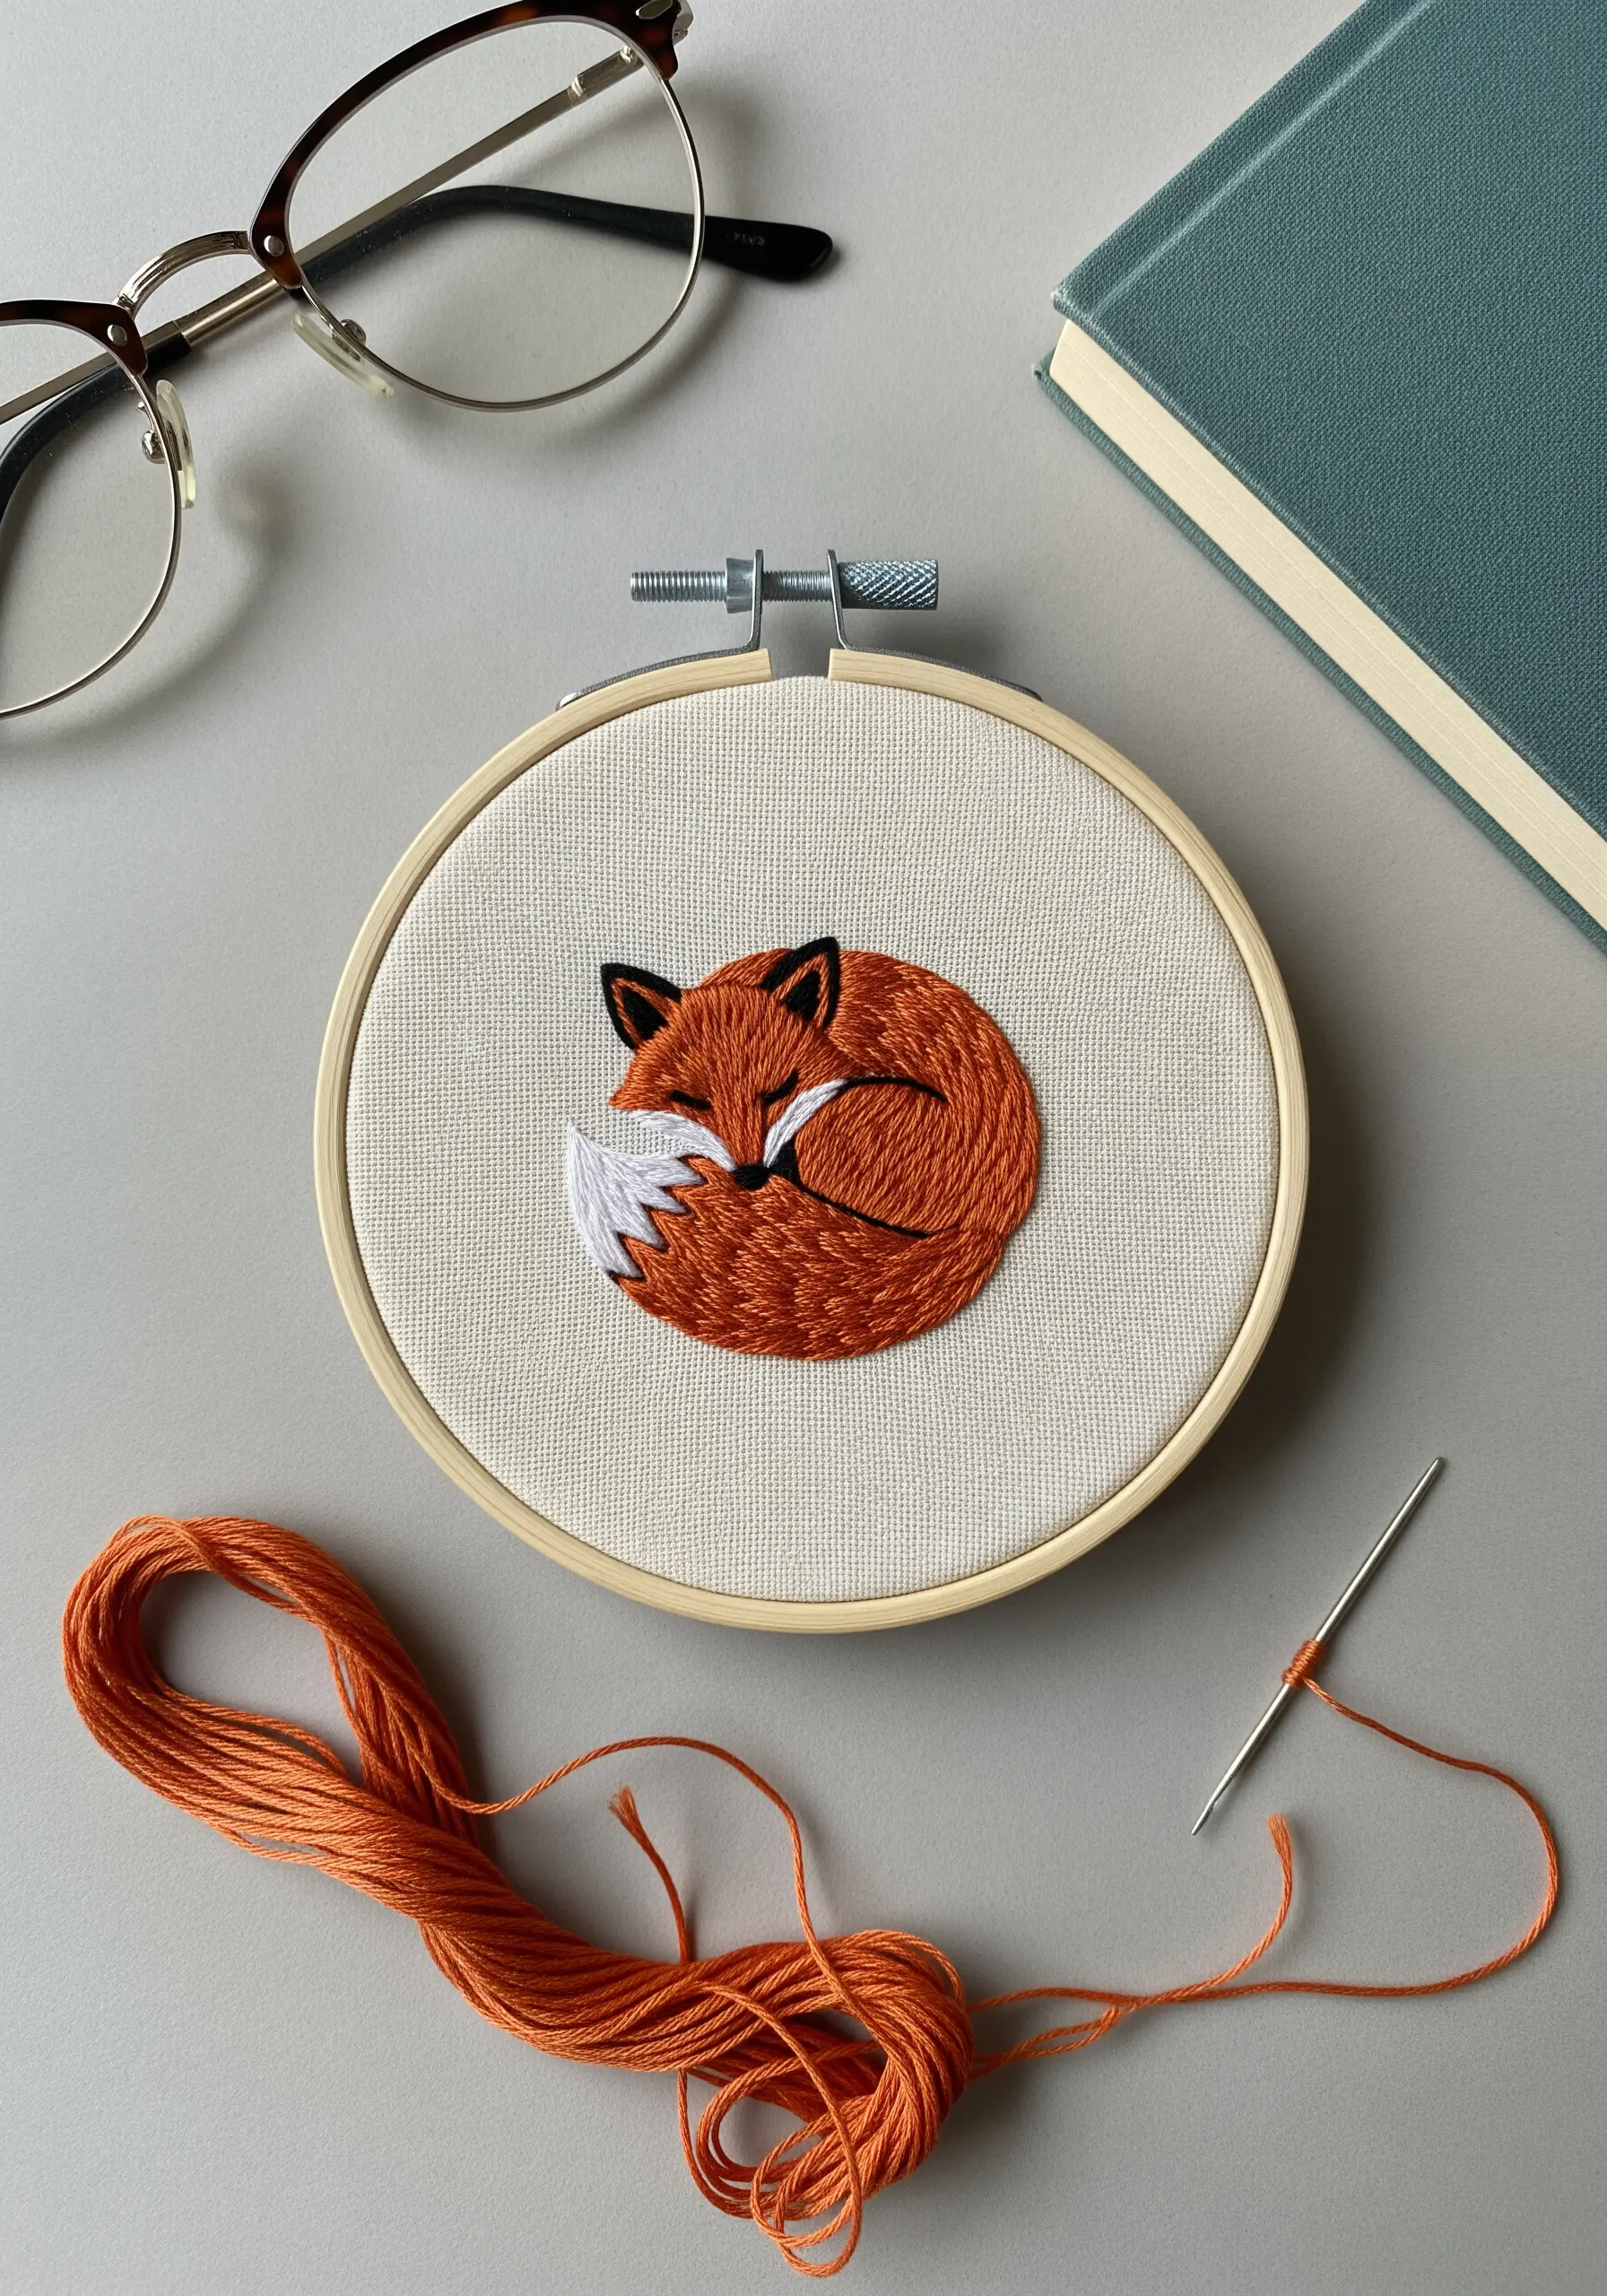
Create the illusion of soft fur by using directional long-and-short stitch.
Fill the fox’s body with stitches that follow the direction the fur would naturally grow, curving around its shape.
Use two or three shades of orange to add highlights and shadows, blending them gently where they meet.
For the fluffy white tail tip, make your stitches slightly longer and less dense to create a softer, wispier texture compared to the body. This is a perfect introduction to the art of thread painting.


