
Sometimes, the desire for a vacation isn’t about a place, but a feeling—a deep breath of warm air, a vibrant color that awakens the senses. You can capture that exact feeling with a needle and thread.
These tropical botanical ideas are more than just patterns; they are invitations to explore the language of thread. You’ll learn how to use color not just to fill a space, but to create light. You’ll see how changing the direction of a single stitch can turn a flat leaf into a living sculpture.
Forget about perfection and focus on expression. Let this be your guide to creating pieces that feel as immersive and refreshing as the far-off places that inspire them. Your escape is right here, waiting in the loop of your next stitch.
1. Capture Radiance with Thread Painting on Black Fabric
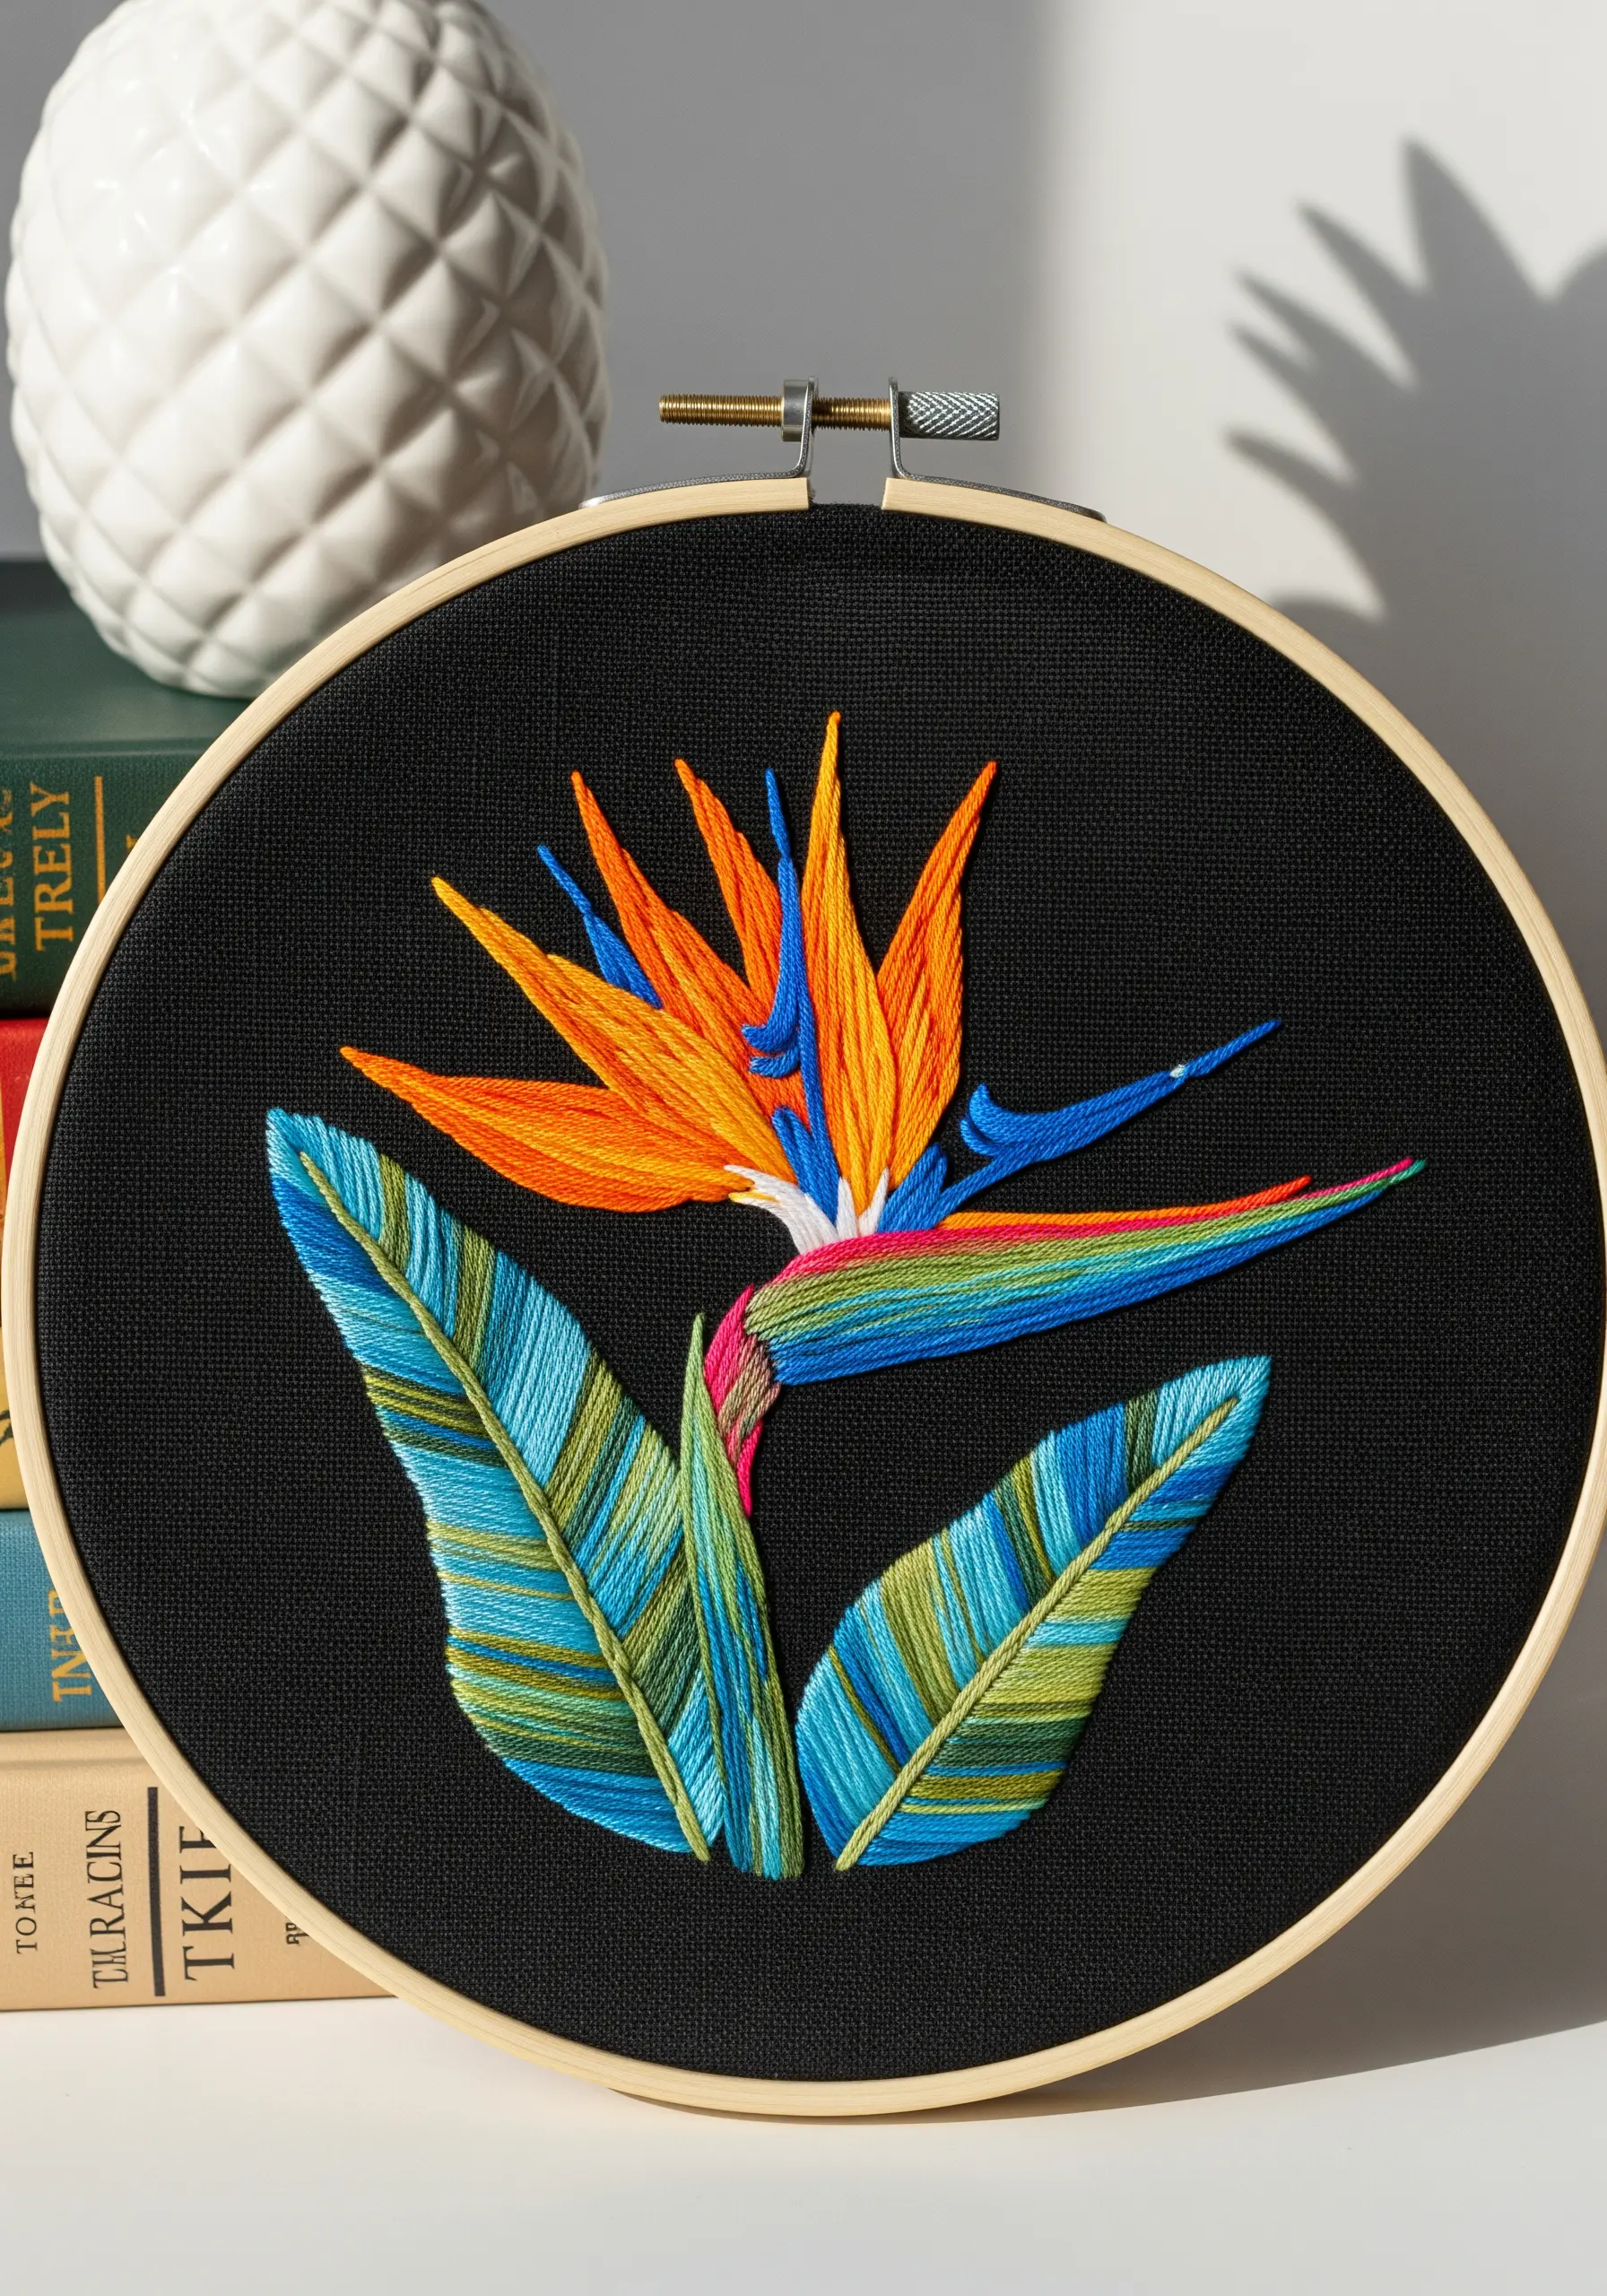
Make your colors command attention by stitching on a dark background, such as black or navy cotton twill.
The high contrast eliminates visual noise, forcing the eye to focus solely on the thread and making every hue appear more intense and luminous.
For the bird of paradise petals, use a long-and-short stitch to blend oranges, yellows, and blues seamlessly, creating a smooth, painterly gradient.
This technique removes harsh lines between colors, which is essential for capturing the soft transitions found in nature.
Stitch the leaves by laying down different shades of green and blue in vertical satin stitches, letting the colors organically mix to create a variegated, feather-like texture.
2. Create Realistic Leaf Veins with Directional Stitching
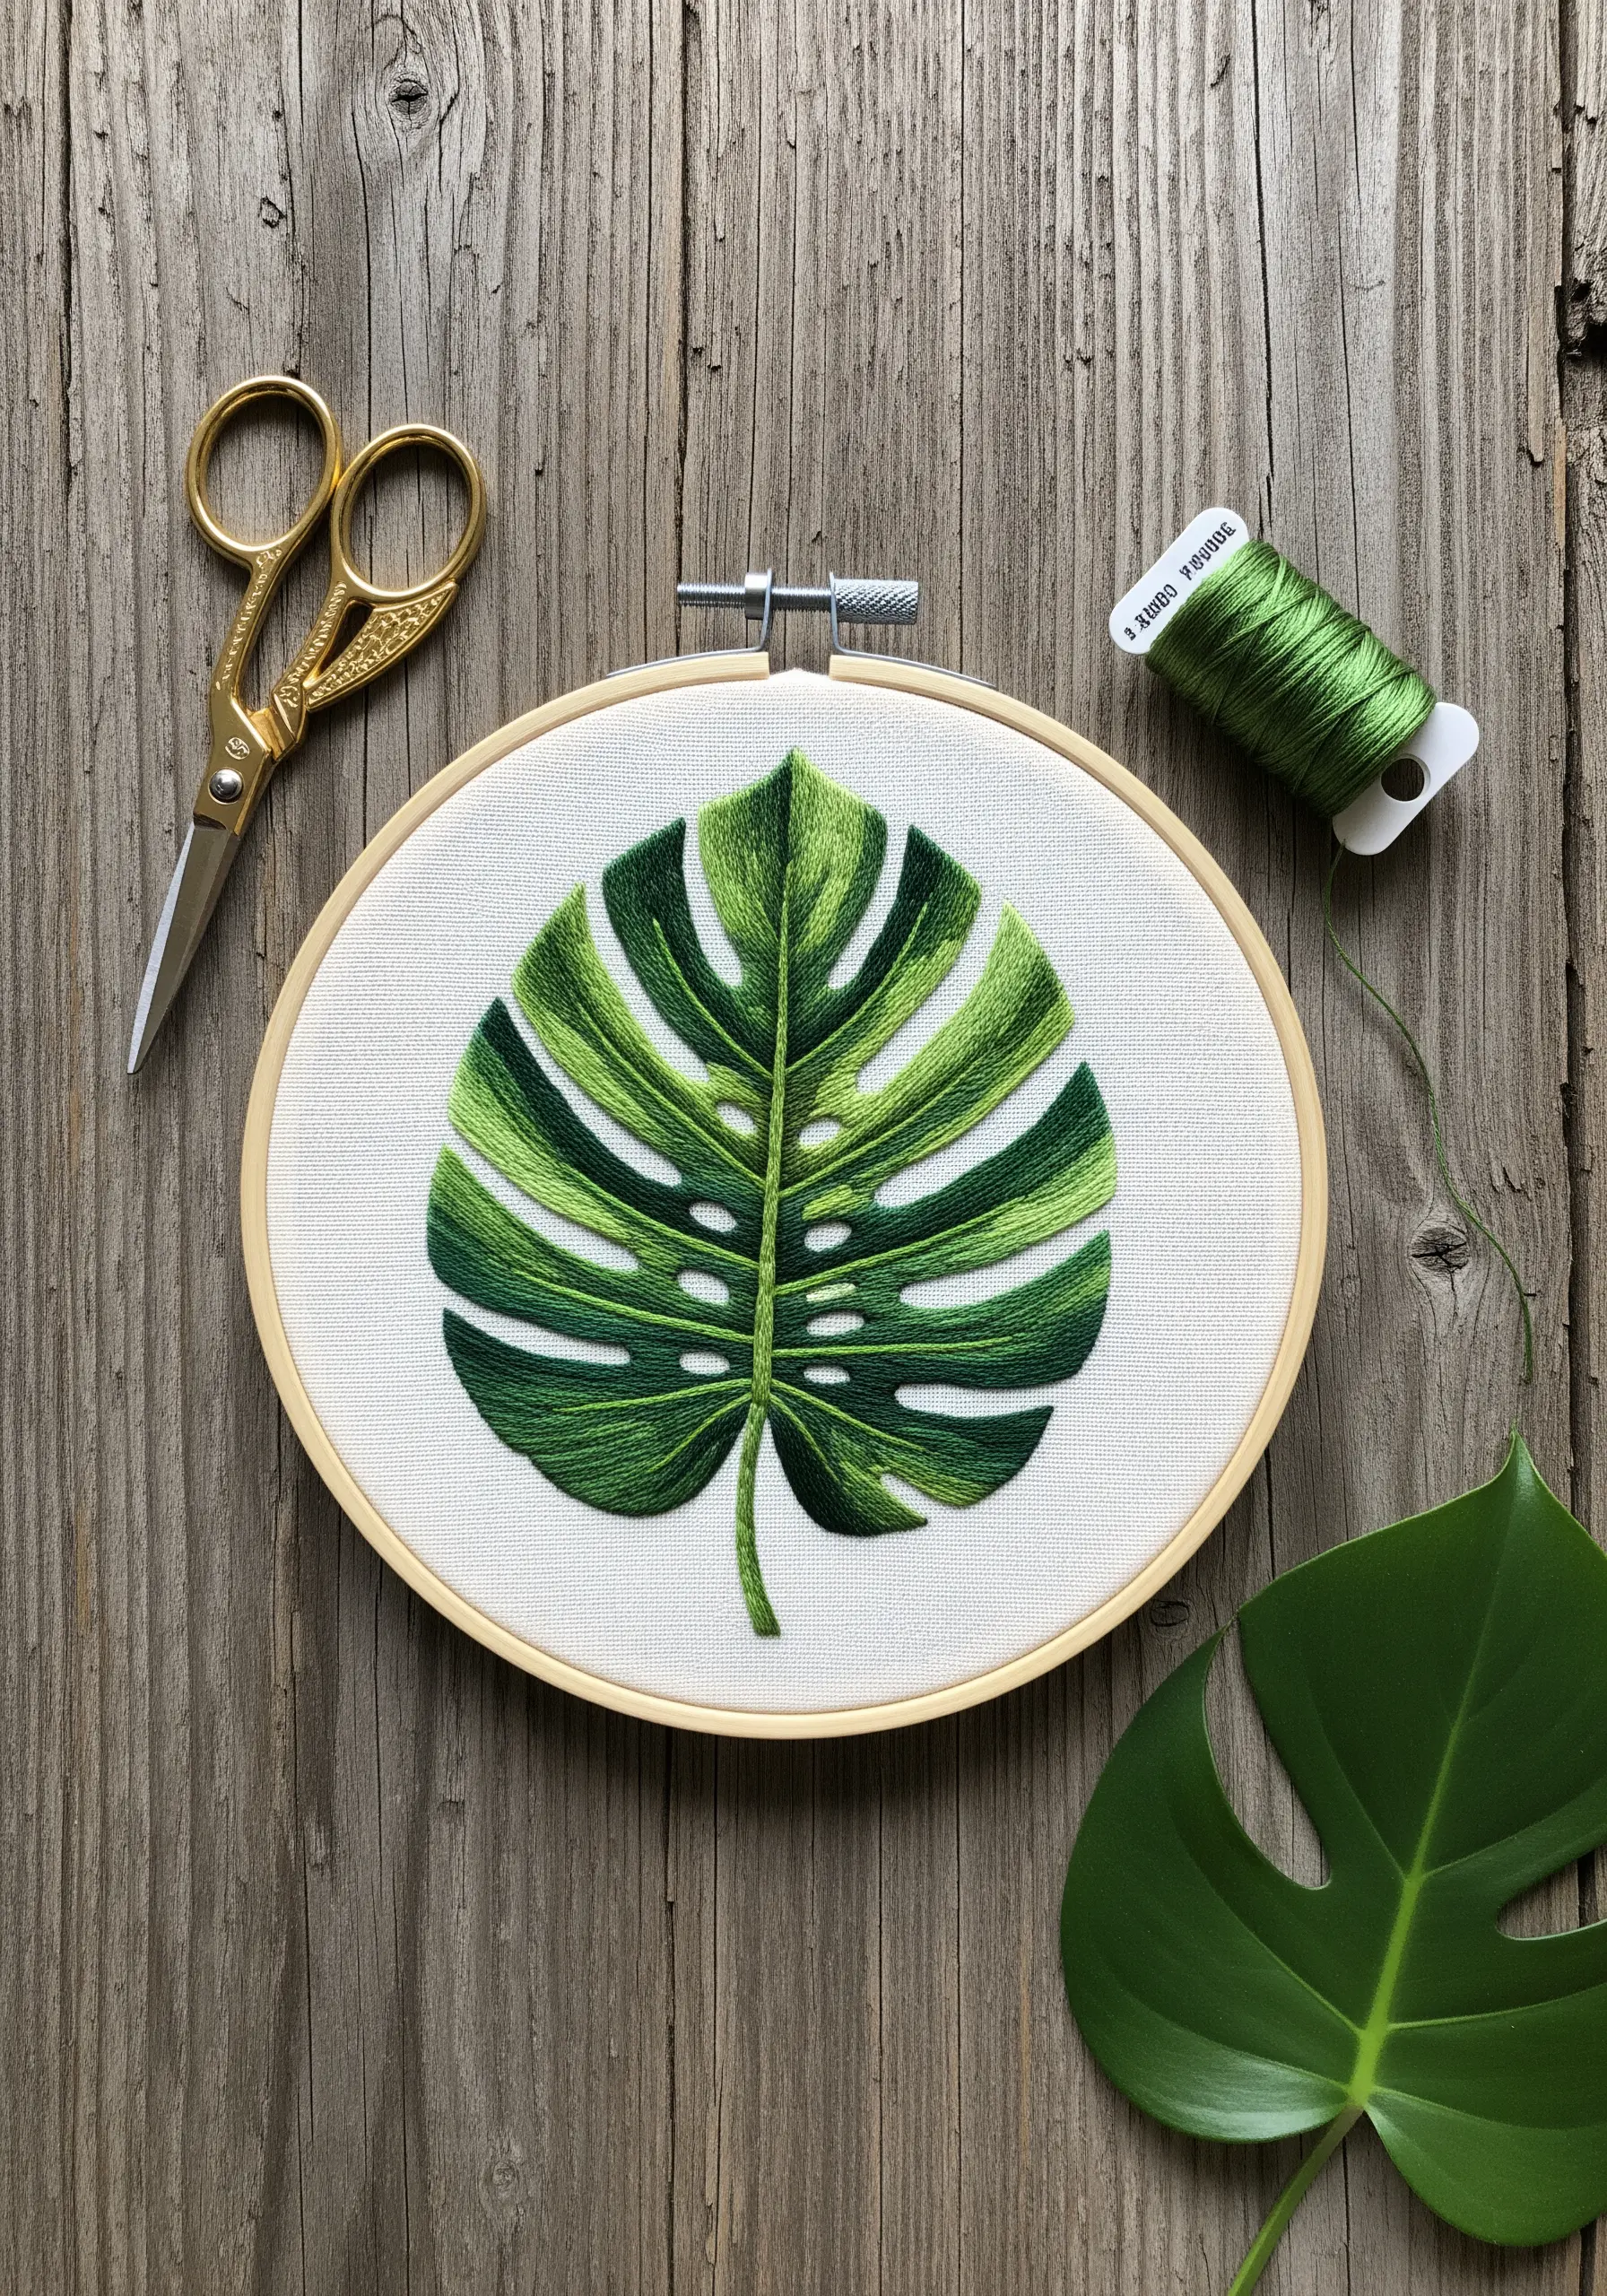
To give a Monstera leaf its signature depth, divide it into sections and vary the direction of your long-and-short stitches for each one.
Stitch from the central vein outwards towards the edge, angling your stitches slightly to follow the leaf’s natural growth pattern.
Introduce at least three shades of green—a dark, a mid-tone, and a light—to simulate light and shadow, which gives the flat surface a three-dimensional feel.
For the sharpest edges and vein lines, outline each section with a single strand of your darkest green using a split stitch before filling it in.
This creates a subtle boundary that keeps your fill stitches neat and adds another layer of realism to your modern botanical stitches.
3. Achieve 3D Petals with Padded Satin Stitch
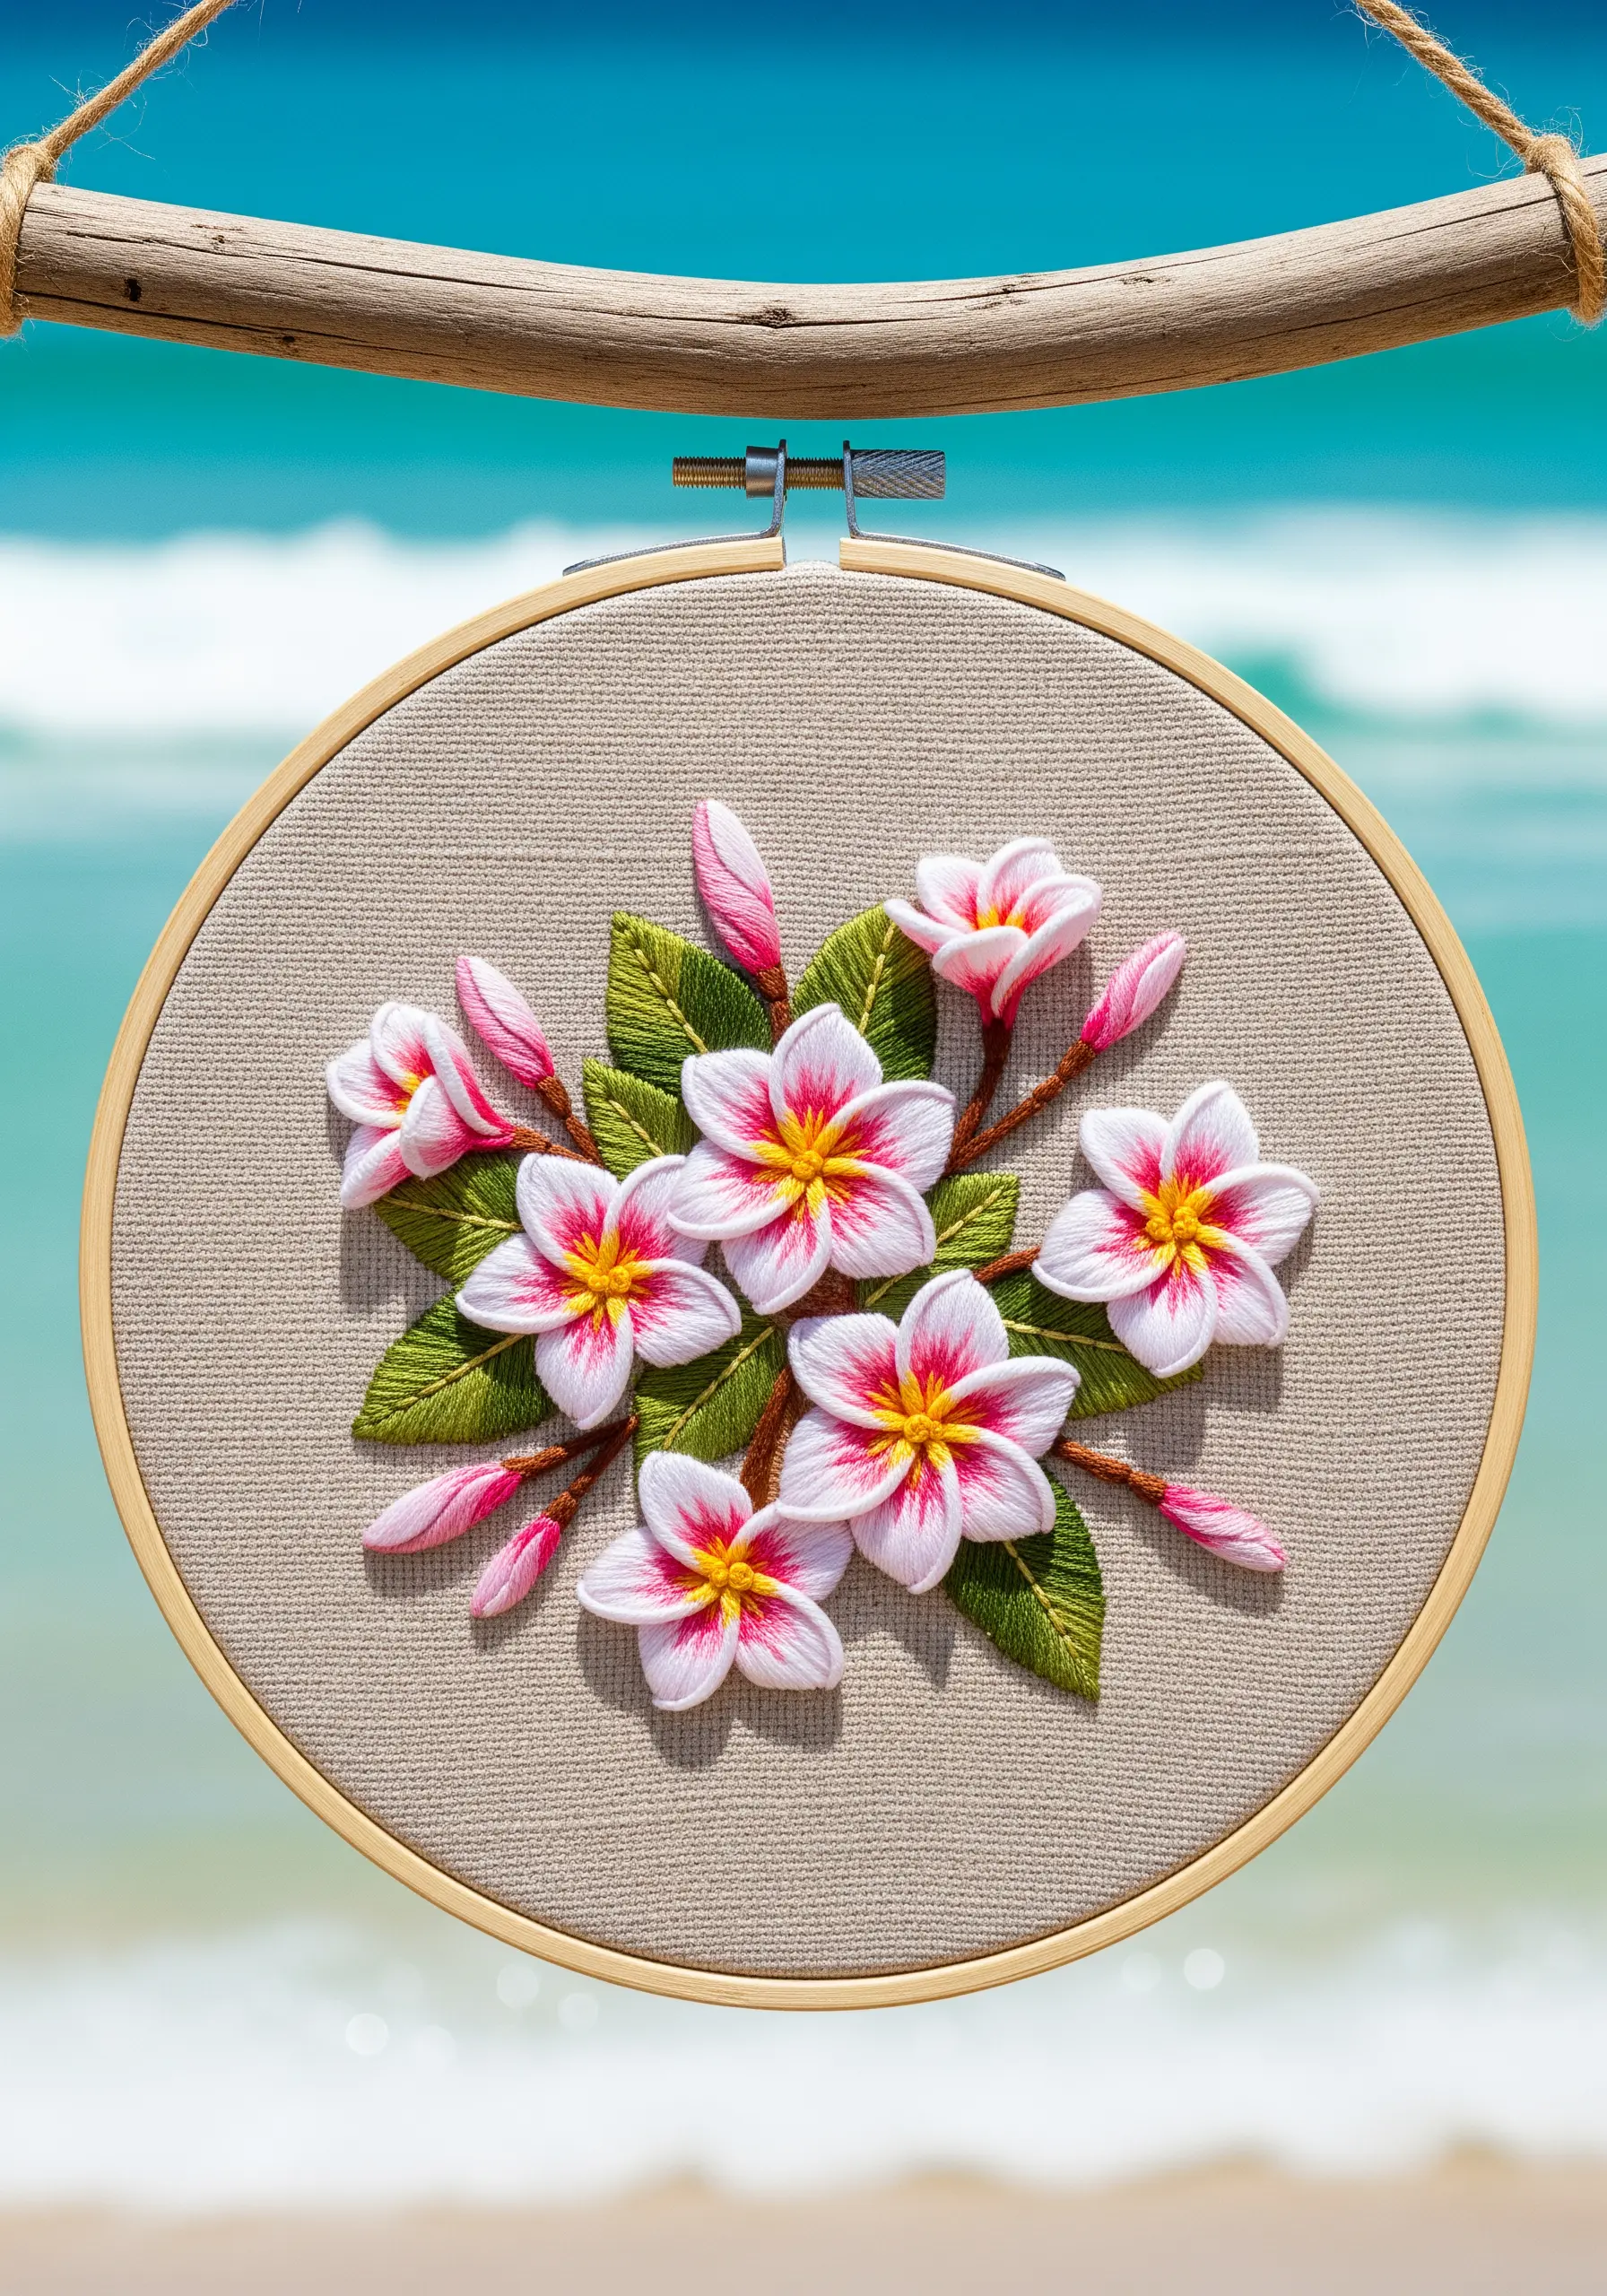
Give your plumeria flowers a soft, sculptural quality by using a padded satin stitch for the petals.
First, fill the petal shape with a base layer of small, straight seed stitches, then cover this layer with smooth, uniform satin stitches.
This underlay lifts the top stitches off the fabric, creating a raised, touchable effect that catches the light beautifully.
For the delicate pink edges, use a single strand of thread to blend the color softly into the white base with a few long-and-short stitches.
These 3D floral embroidery techniques make your work pop, turning a simple hoop into a piece of textile art.
4. Define Illustrations with a Crisp Split Stitch Outline

For a bold, graphic style like this toucan, focus on creating flawless satin stitch fills with clean, defined edges.
To achieve this, always outline each color block section with a split stitch using two strands of thread before you begin filling.
This simple step acts as a barrier, giving your needle a firm line to stitch against and preventing the satin stitches from becoming uneven.
Fill each area with a single strand of floss to get the smoothest possible finish, ensuring your stitches lay flat and parallel.
These boho-inspired wall hoop embroidery ideas rely on color and clean execution to make a statement.
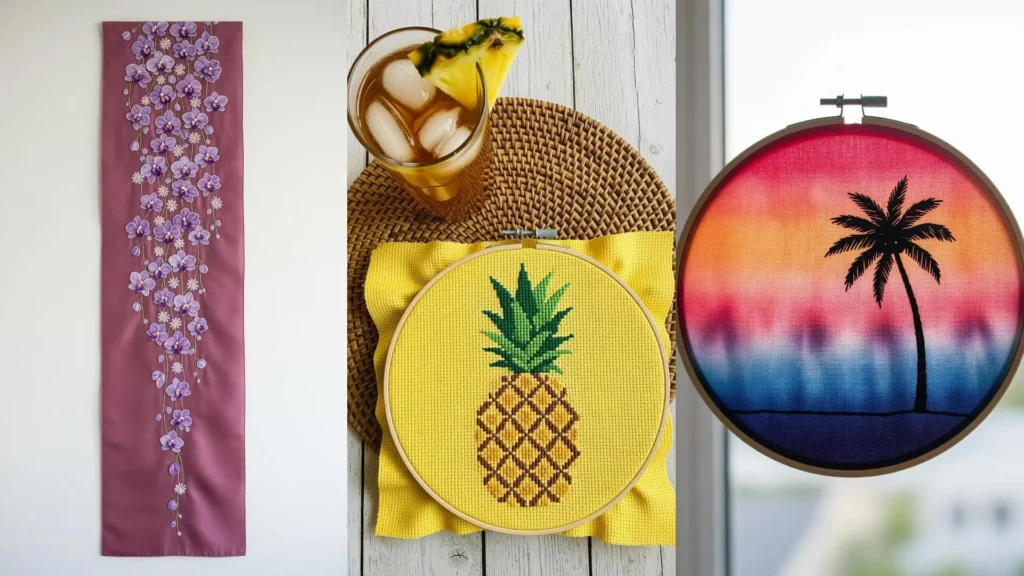
5. Paint Your Fabric for an Instant Sunset Gradient
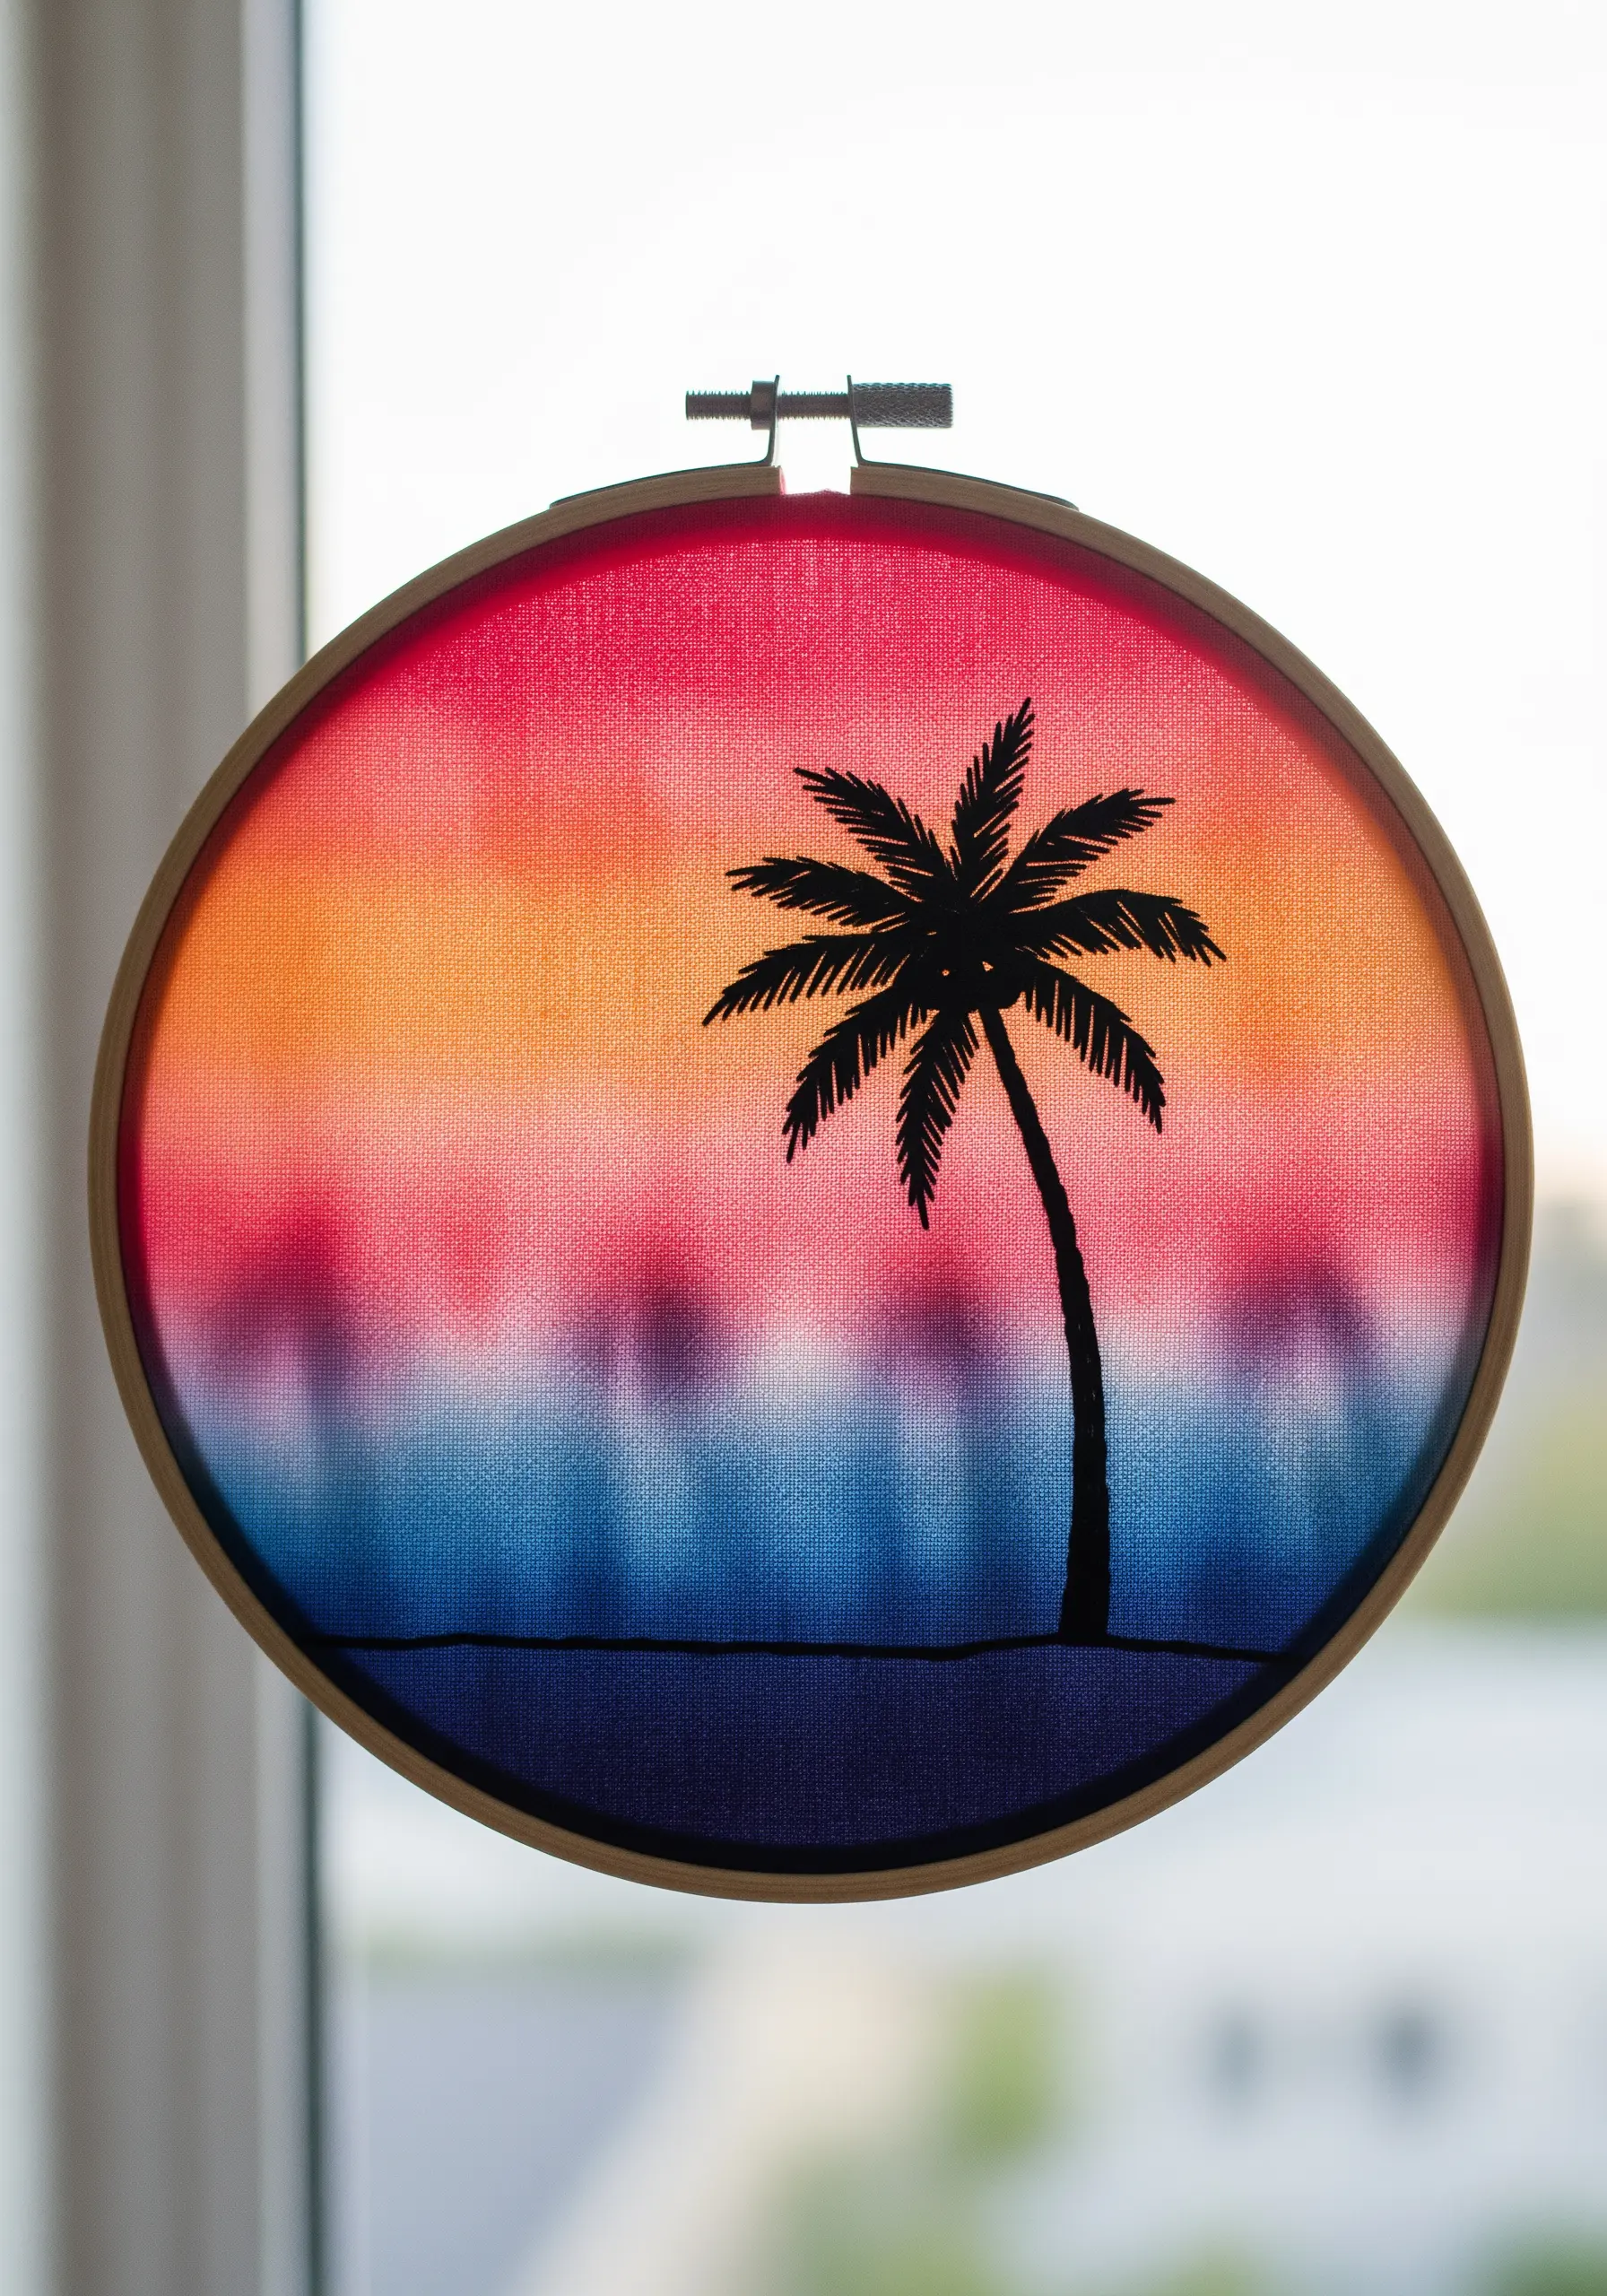
Let the fabric do the heavy lifting by creating a watercolor background before you add a single stitch.
Stretch plain cotton fabric in your hoop and use fabric-safe paints or watercolor paints to brush on a sunset gradient, allowing the colors to bleed together.
Once the fabric is completely dry, you only need to stitch the silhouette—in this case, a palm tree—using a simple backstitch or stem stitch in black thread.
This mixed-media approach is incredibly efficient for creating atmospheric scenes, as the background provides all the color and mood.
6. Embrace Geometric Simplicity with Cross-Stitch
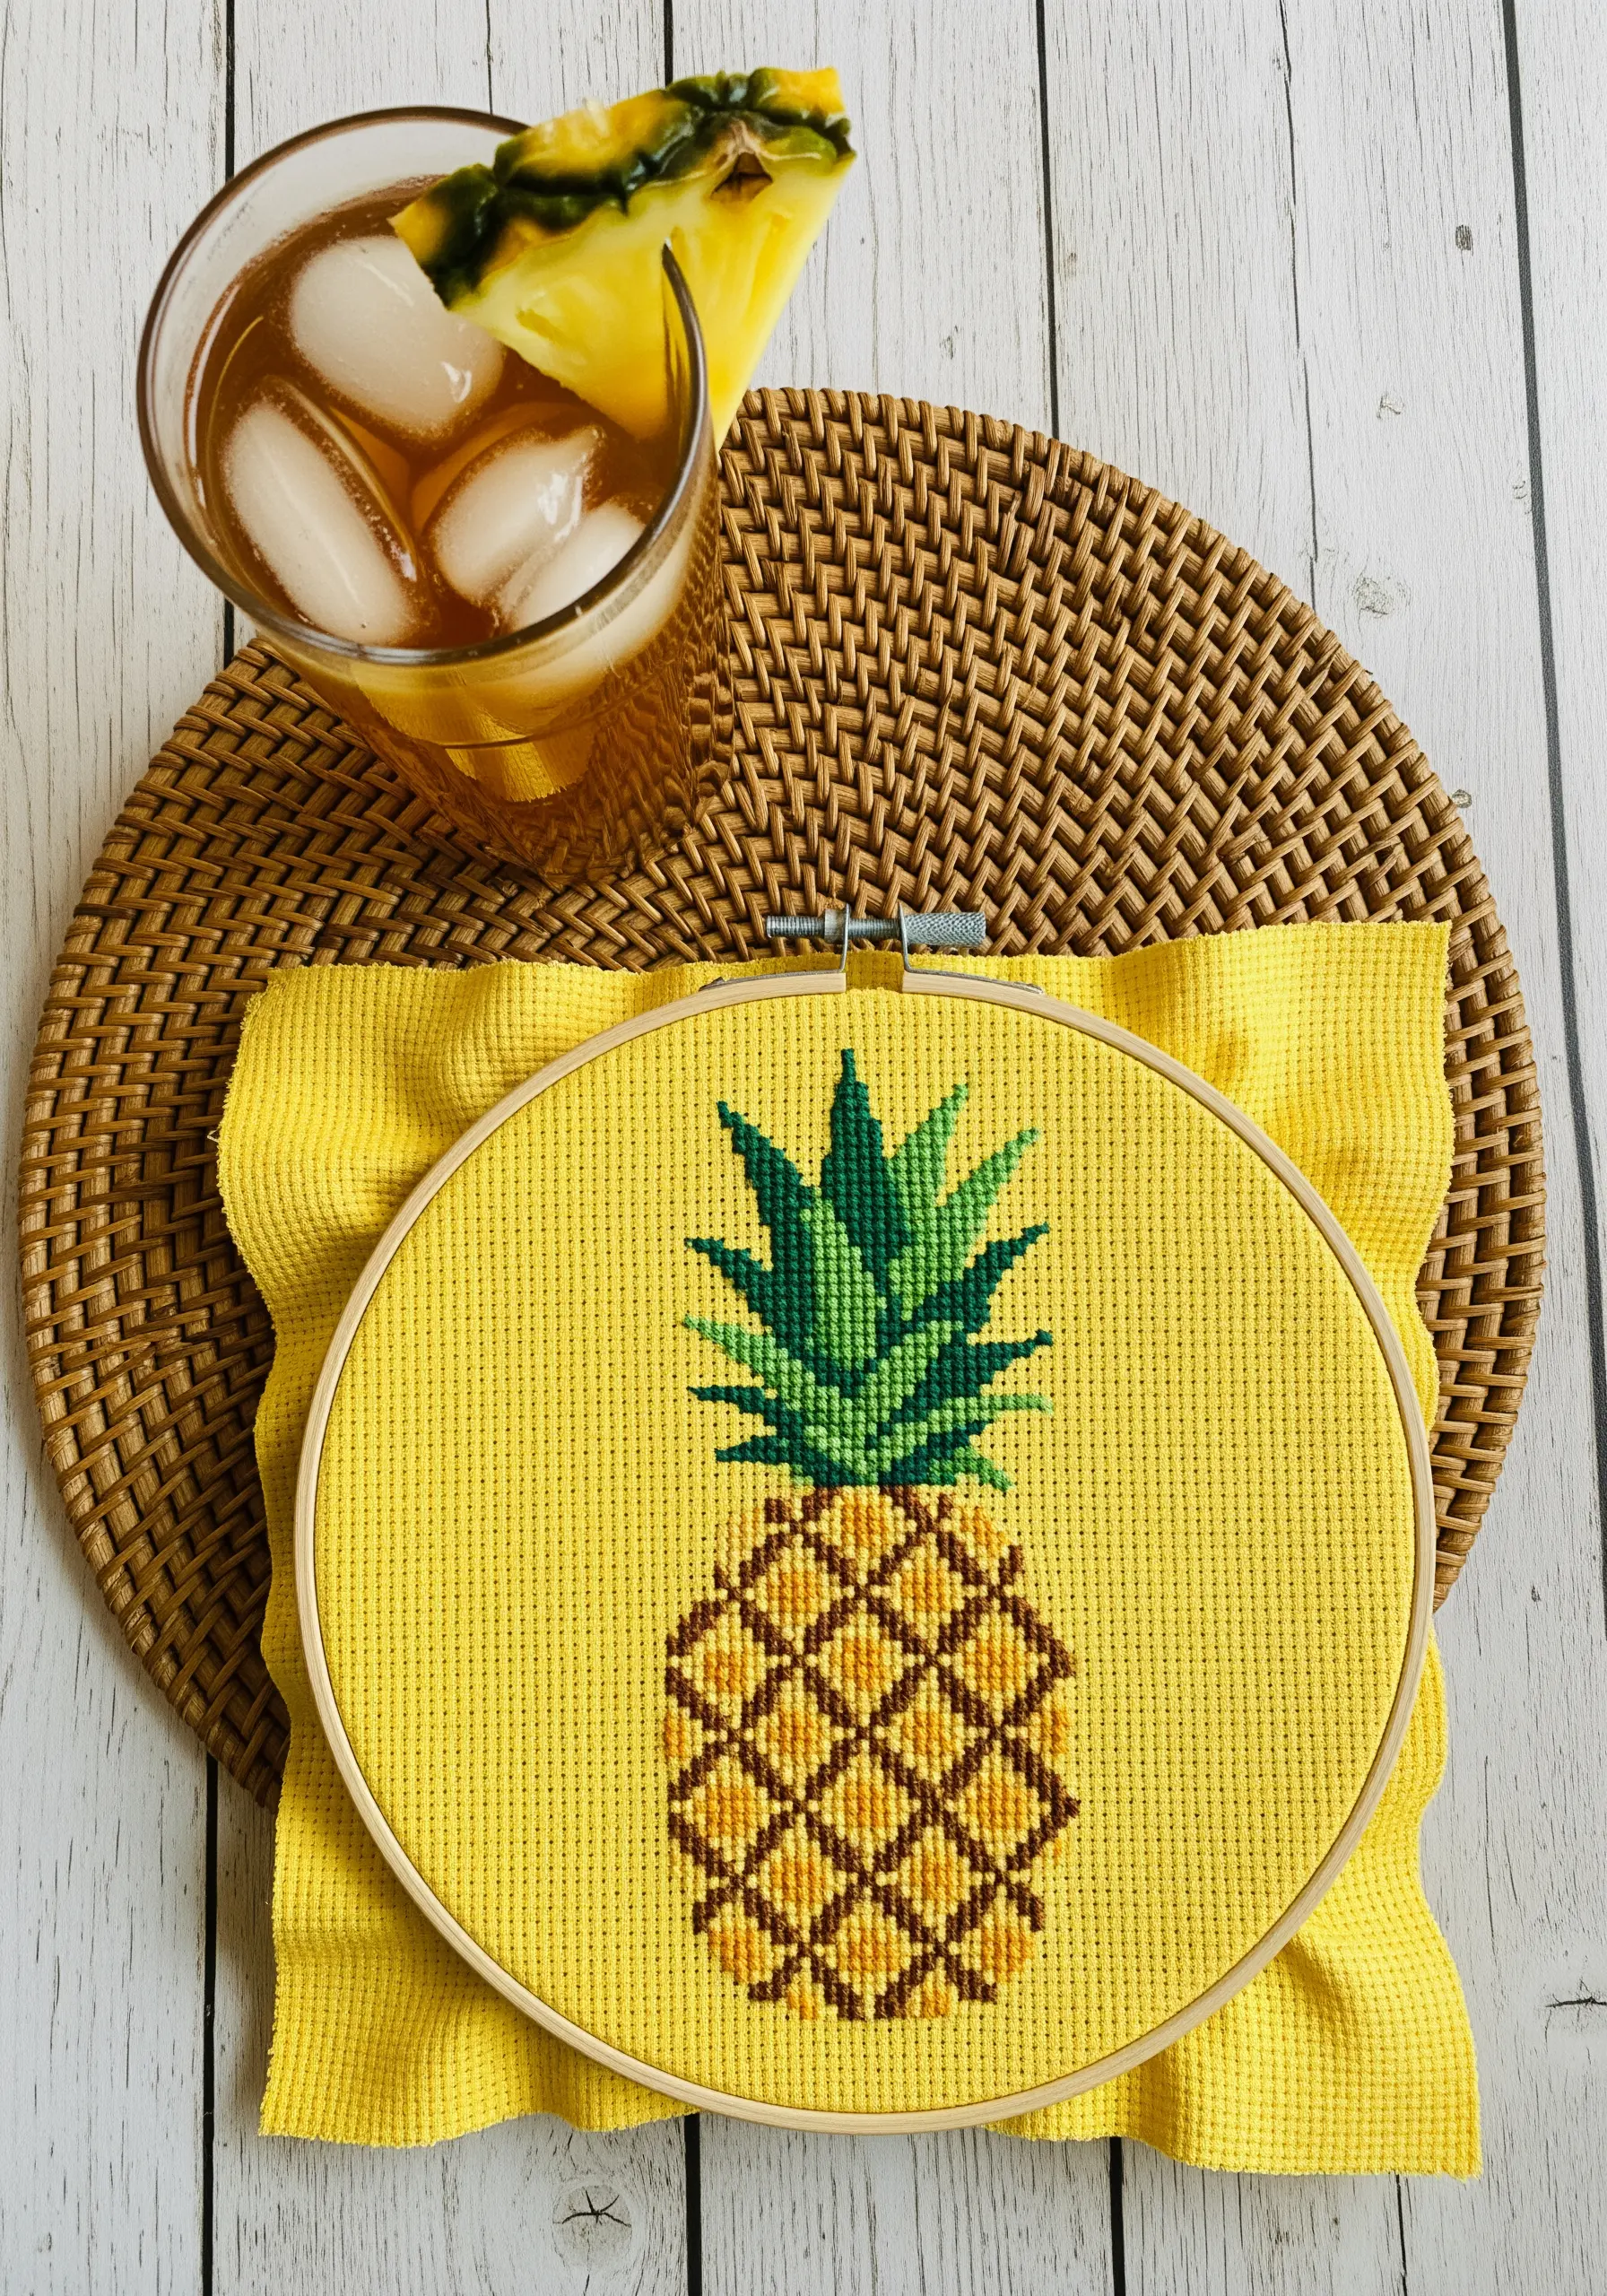
Shift gears from freeform embroidery to the meditative rhythm of counted cross-stitch for a clean, graphic pineapple motif.
Using Aida cloth with its built-in grid ensures every ‘X’ is uniform, creating a pixelated texture that is both modern and nostalgic.
Choose a brightly colored Aida fabric, like this sunshine yellow, to complement your design and serve as part of the overall color palette.
This technique is perfect for beginners, as it relies on simple counting and a single type of stitch to build a satisfying and precise image.
7. Build Complex Floral Centers with Layered Knots
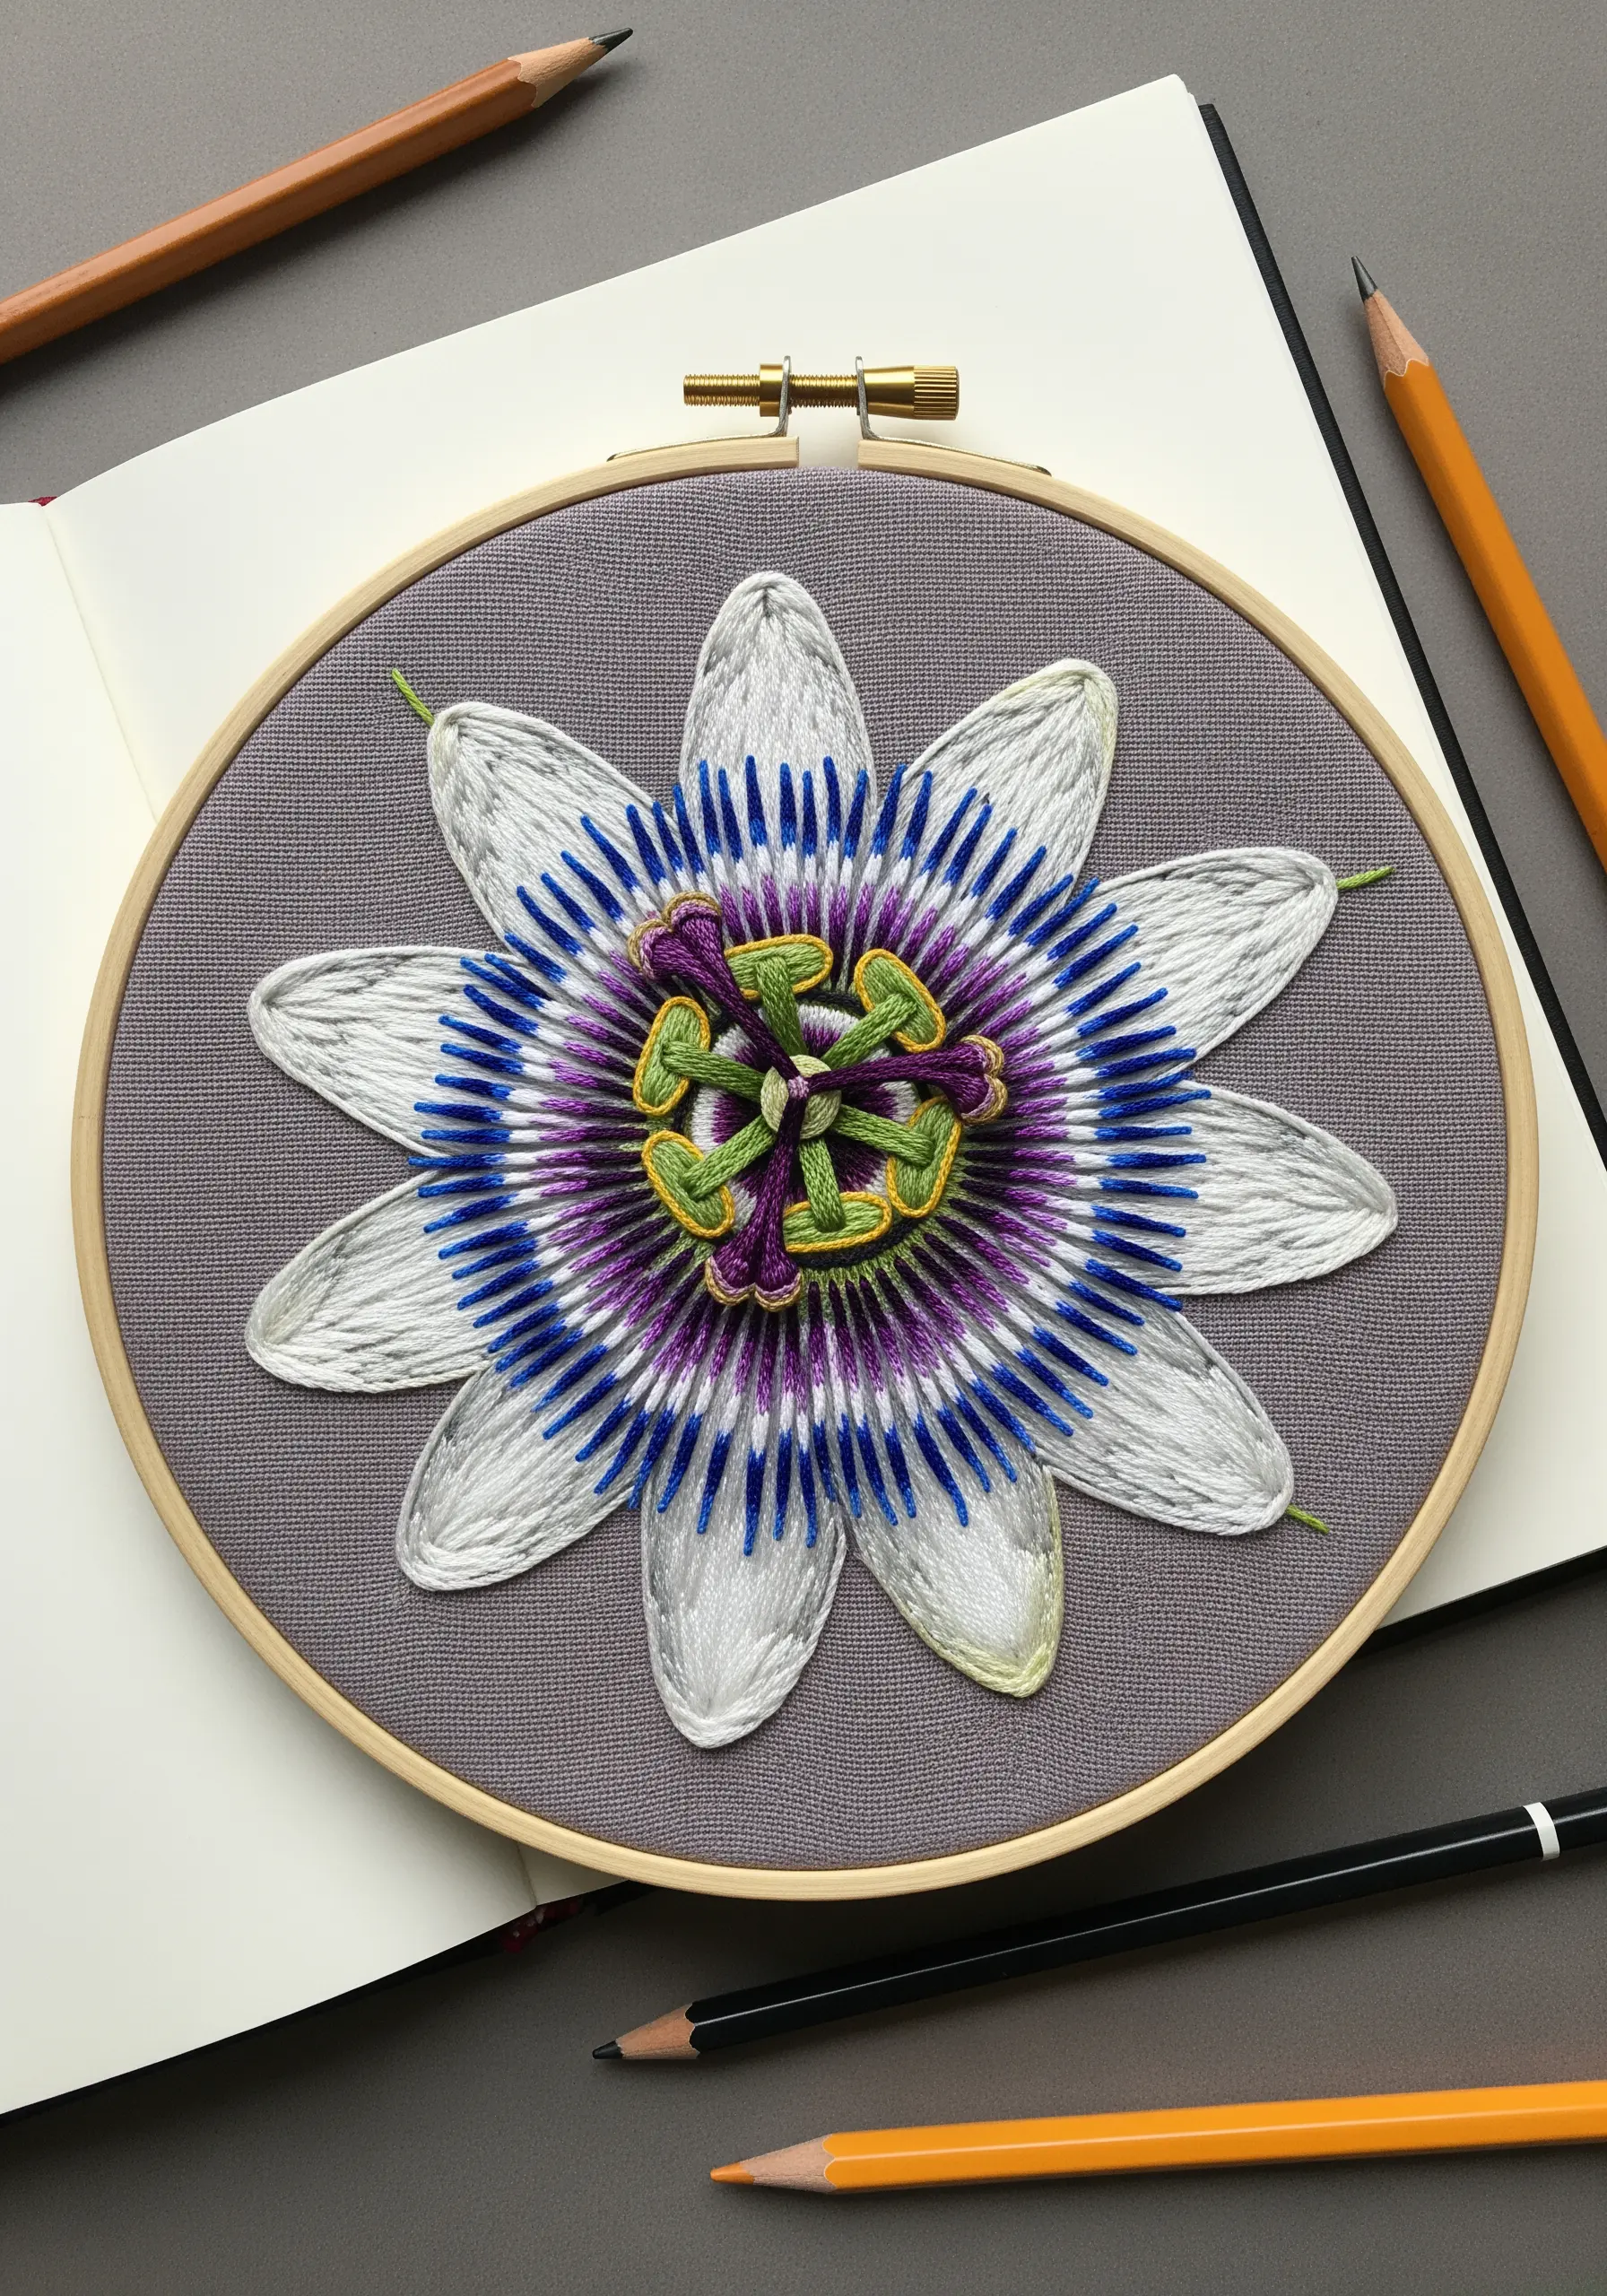
Recreate the intricate structure of a passion flower by layering different textural stitches in its center.
Use bullion knots or raised stem stitch bands for the prominent green stamens, giving them a truly three-dimensional form.
Fill the surrounding corona filaments with a dense field of French knots in purple and white, varying the number of wraps to create different knot sizes for more texture.
For the outer petals, a classic long-and-short stitch provides a smooth contrast to the busy, knotted center, drawing the eye inward.
8. Use Fill Patterns to Define Form and Texture
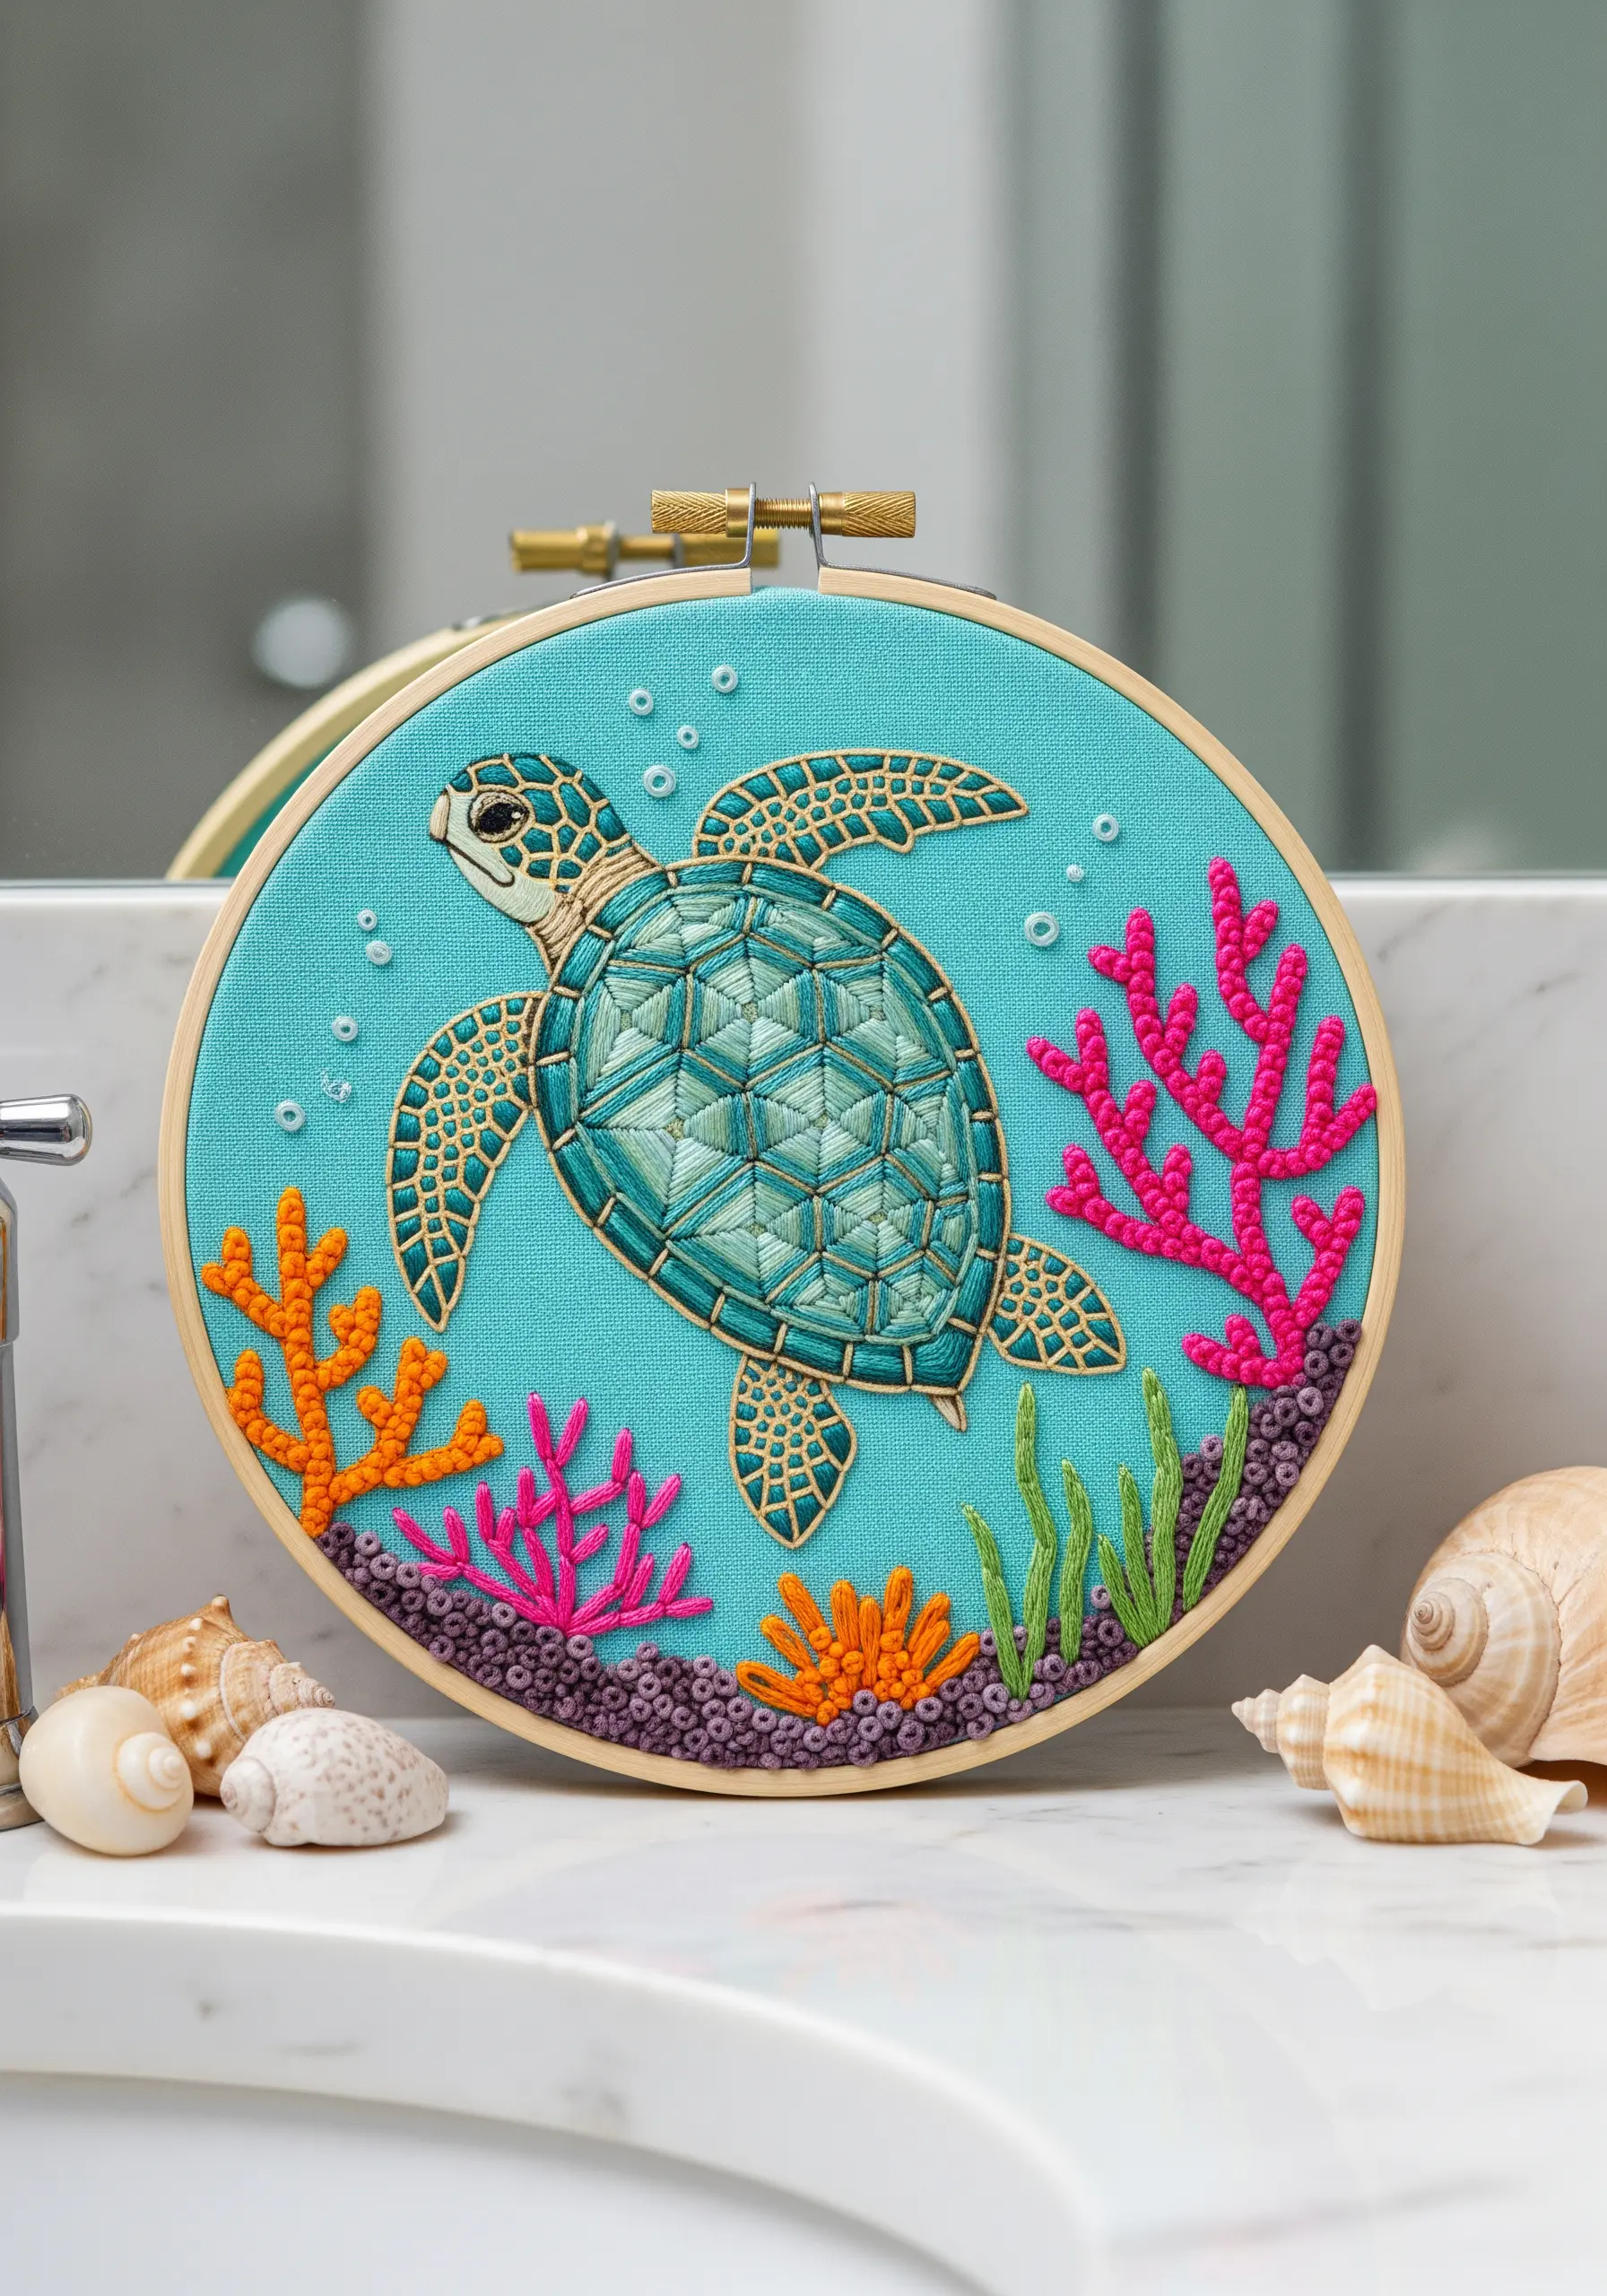
Instead of a simple satin stitch, fill the turtle’s shell with a geometric pattern using a lighter shade of thread.
Stitch a grid of straight stitches or a brick stitch pattern over the base color to mimic the scutes of the shell without adding bulk.
Outline each segment of the shell and body with a whipped backstitch to create a smooth, cord-like line that adds definition and polish.
For the surrounding coral, use a combination of French knots and feather stitch to create organic, varied textures that contrast with the turtle’s smooth form.
9. Mimic Iridescence with Single-Strand Blending
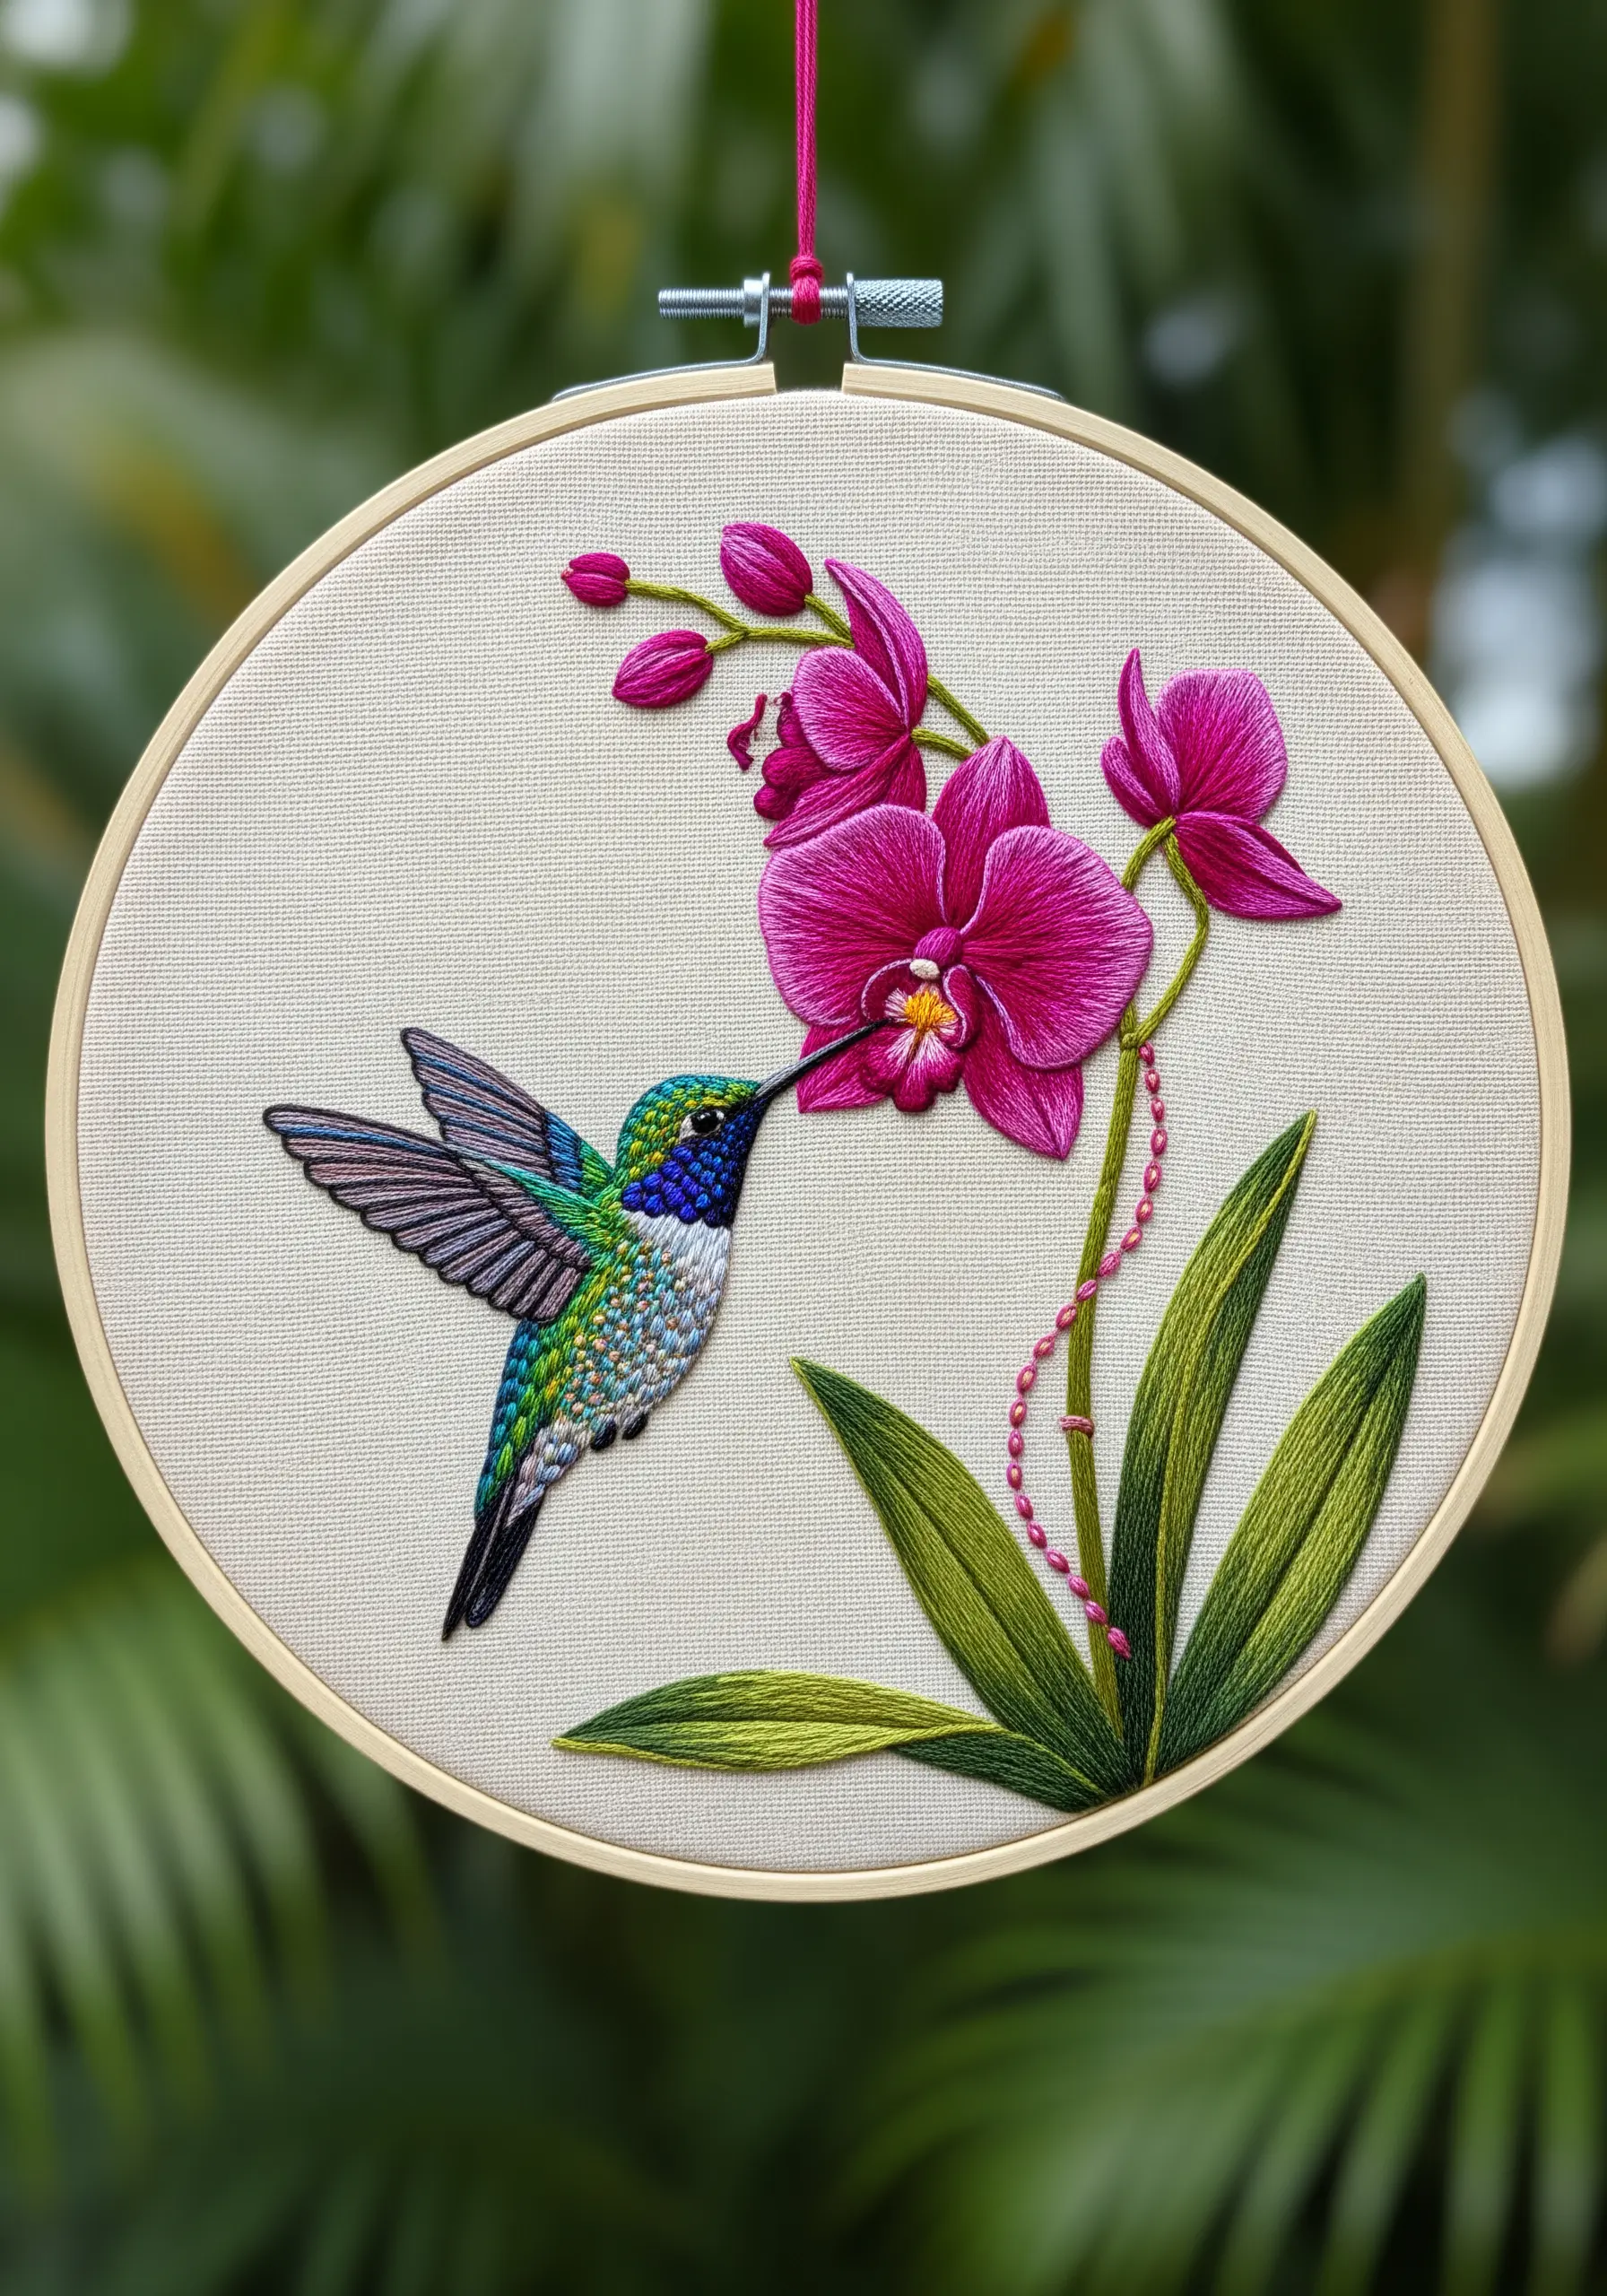
To capture the shimmering quality of a hummingbird’s feathers, work with a single strand of floss and the needle painting technique.
Place tiny, angled long-and-short stitches side-by-side, blending multiple shades of blue, green, and turquoise to create a gradient that shifts with the light.
The key is to make your stitches small and varied in length, just like real feathers, to avoid creating stripes of color.
Contrast the detailed bird with smoother satin stitches for the orchid petals, using floral thread painting techniques to blend the deep magenta and soft pinks.
10. Create a Sampler of Foliage Textures
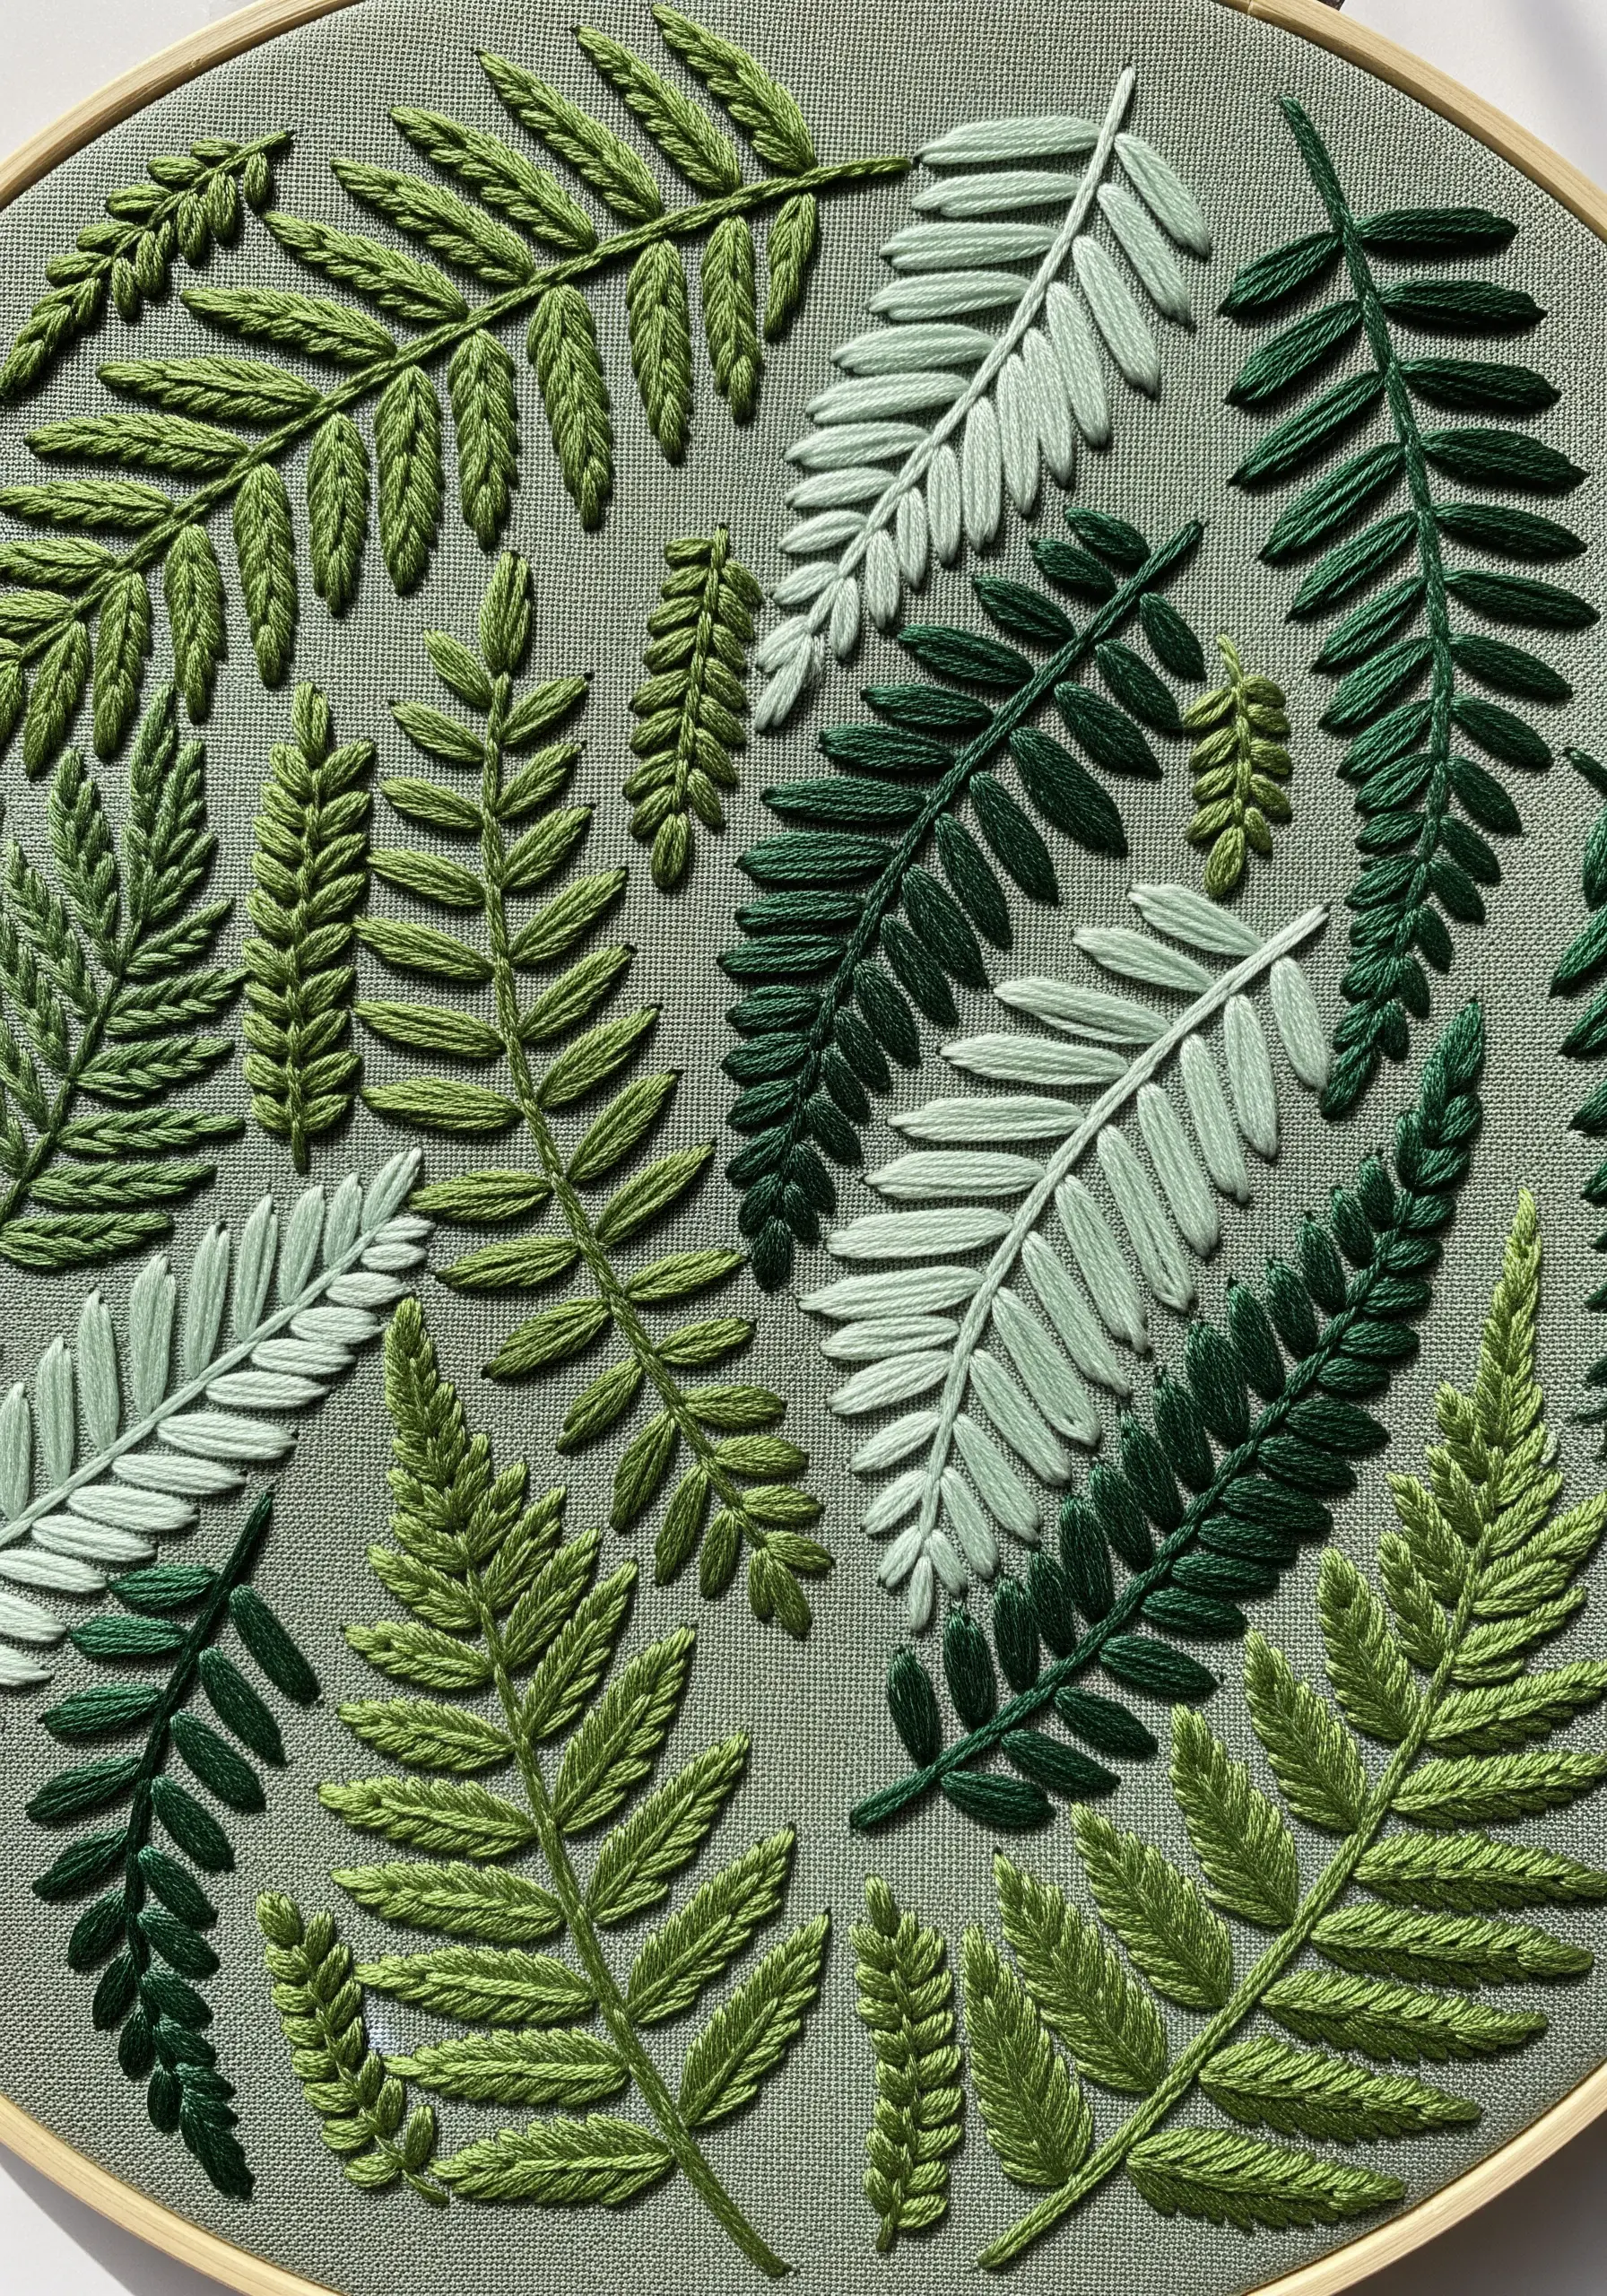
Turn a simple hoop into a botanical study by filling it with different fern varieties, each rendered in a distinct stitch.
Use a fly stitch for the classic open fronds, a fishbone stitch for denser leaves, and detached chain stitches for delicate, budding tips.
By dedicating one stitch type to each fern, you create a compelling visual rhythm and a sampler of your technical skills.
Limit your palette to various shades of green on a neutral background to keep the focus purely on the interplay of texture and form.
This approach shows how you can use ways to layer leaf stitching to build a complex, satisfying composition.
11. Emphasize Form with High-Contrast Outlines
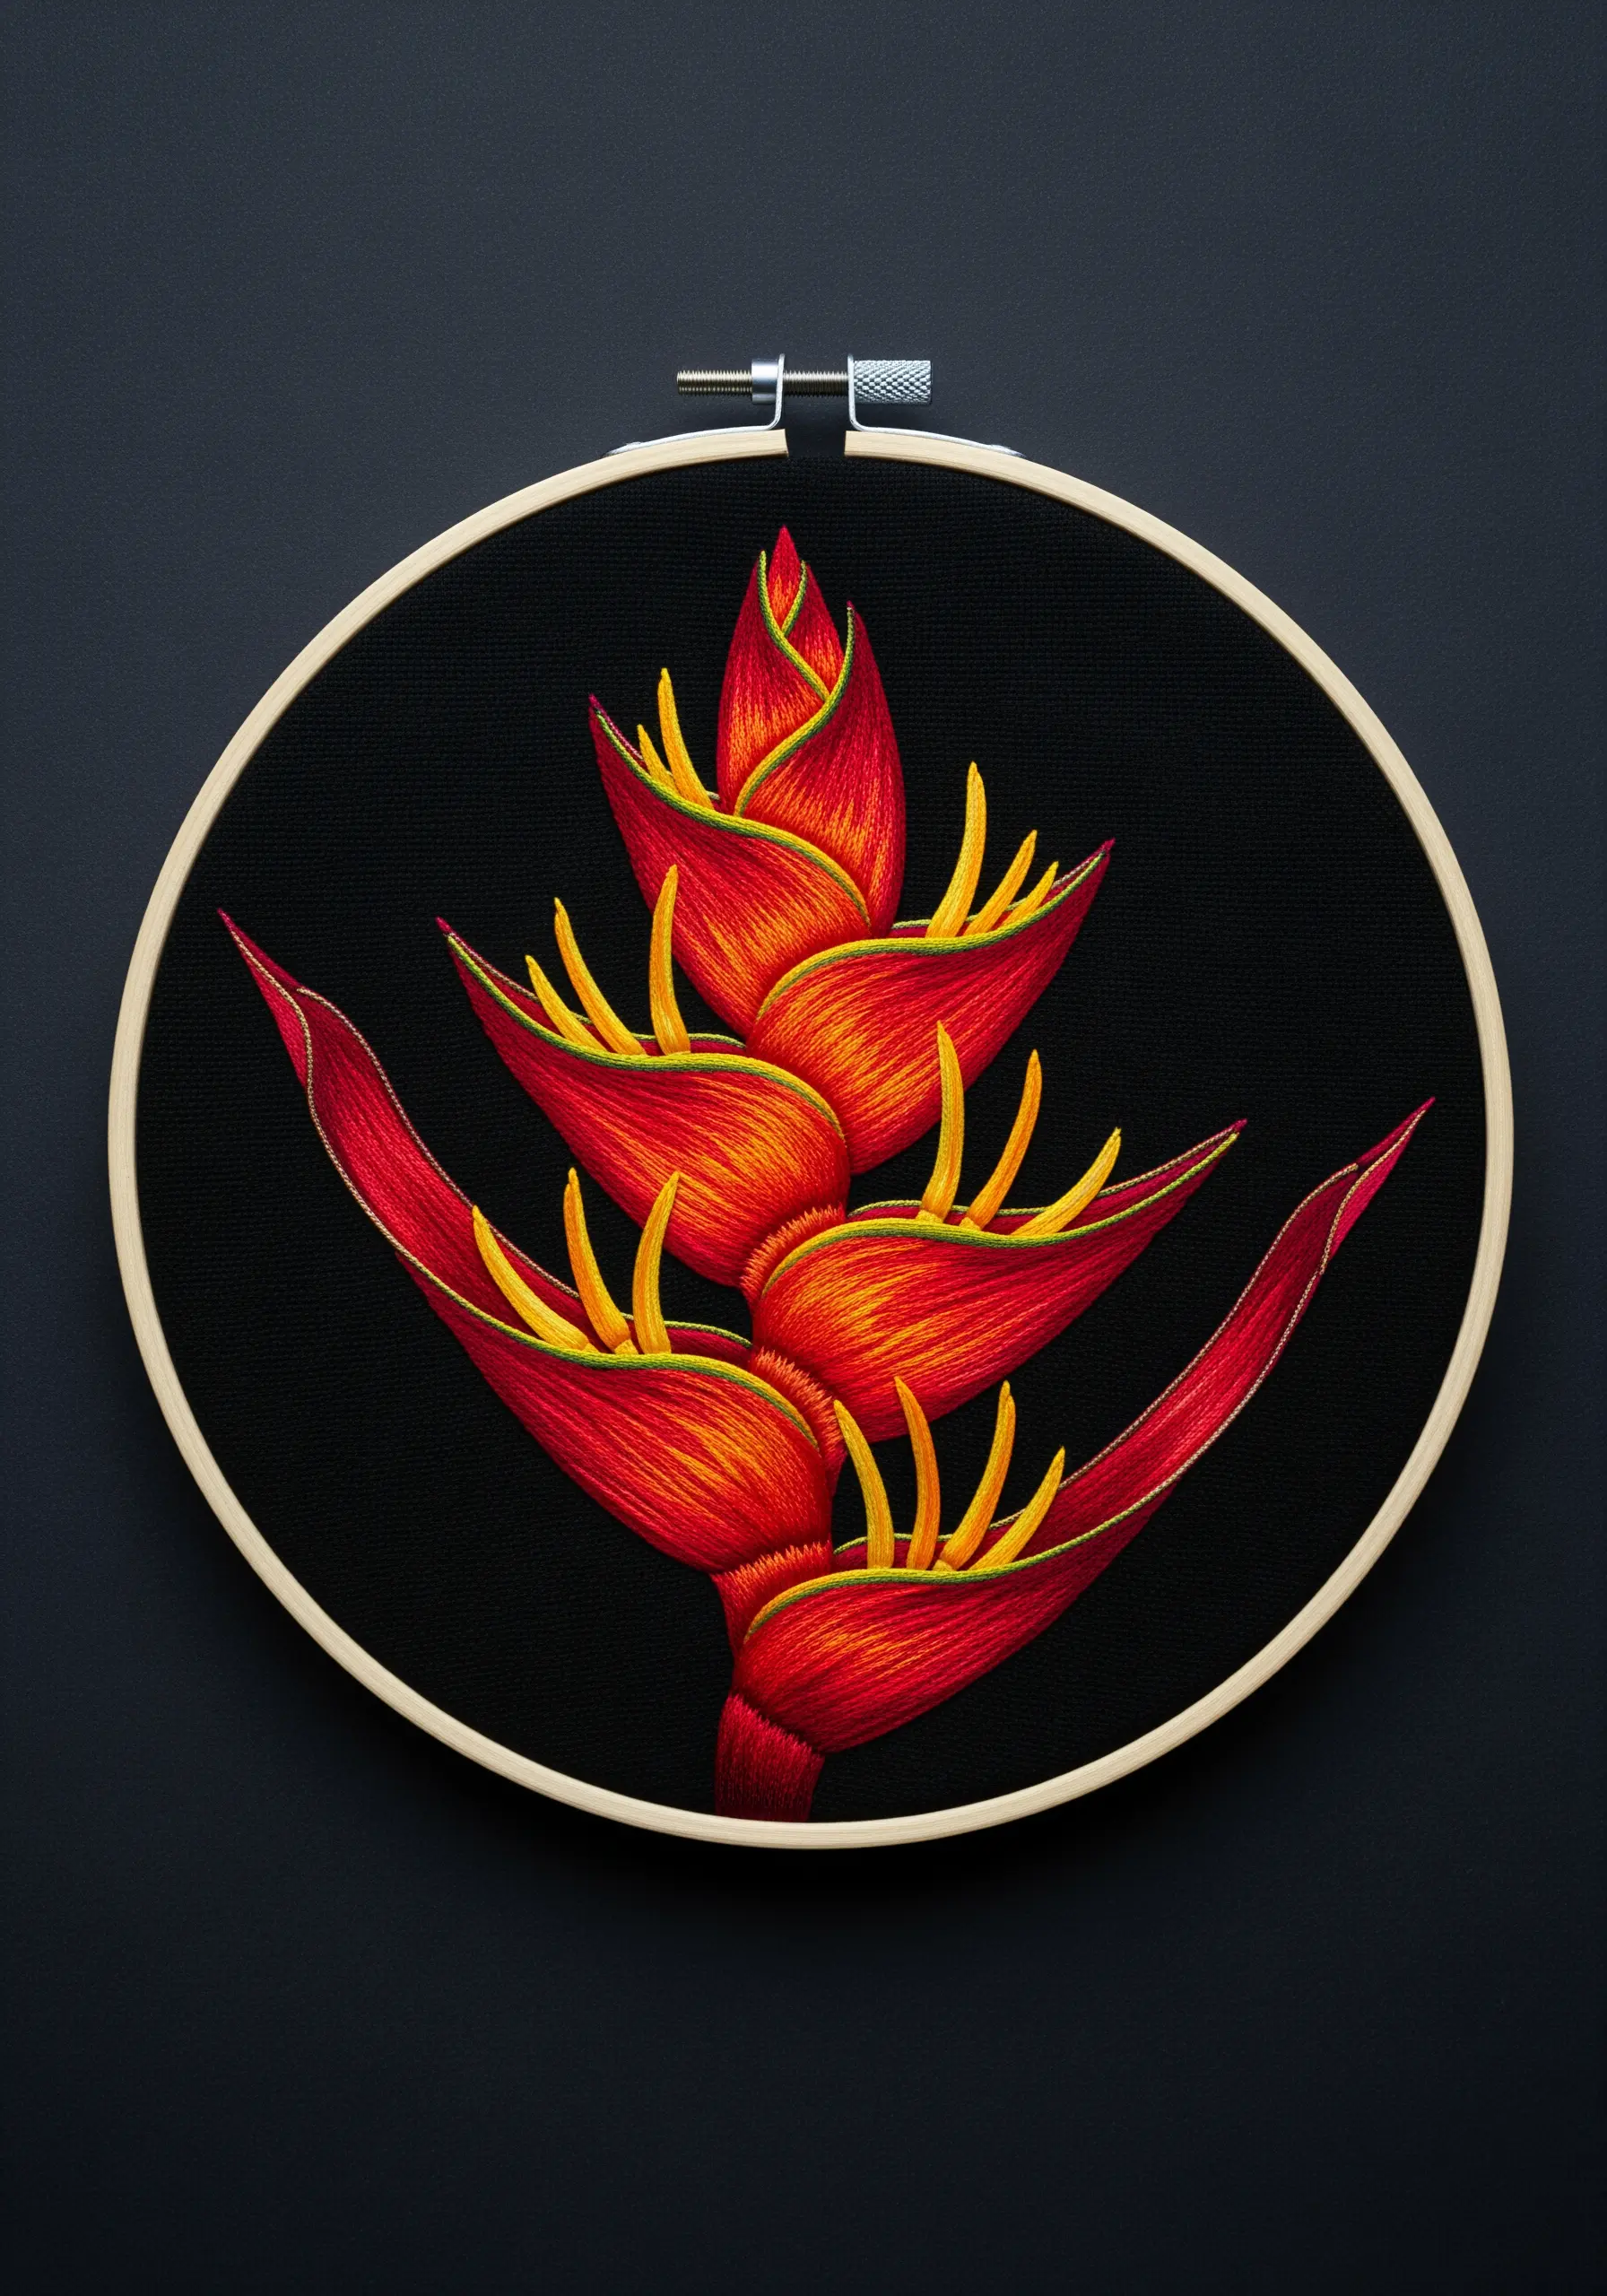
Make the fiery reds and oranges of a heliconia flower pop even more by adding a strategic outline in a contrasting color.
After filling the bracts with a smooth gradient of long-and-short stitch, use a single strand of bright lime green or yellow to trace the top edge with a stem stitch.
This technique creates a sharp, clean line that defines the shape, contains the fill stitches, and adds a surprising jolt of energy to the design.
It works because the unexpected cool tone against the warm reds creates a strong visual vibration, making the entire motif feel more dynamic.
12. Adapt Embroidery for Functional Home Décor
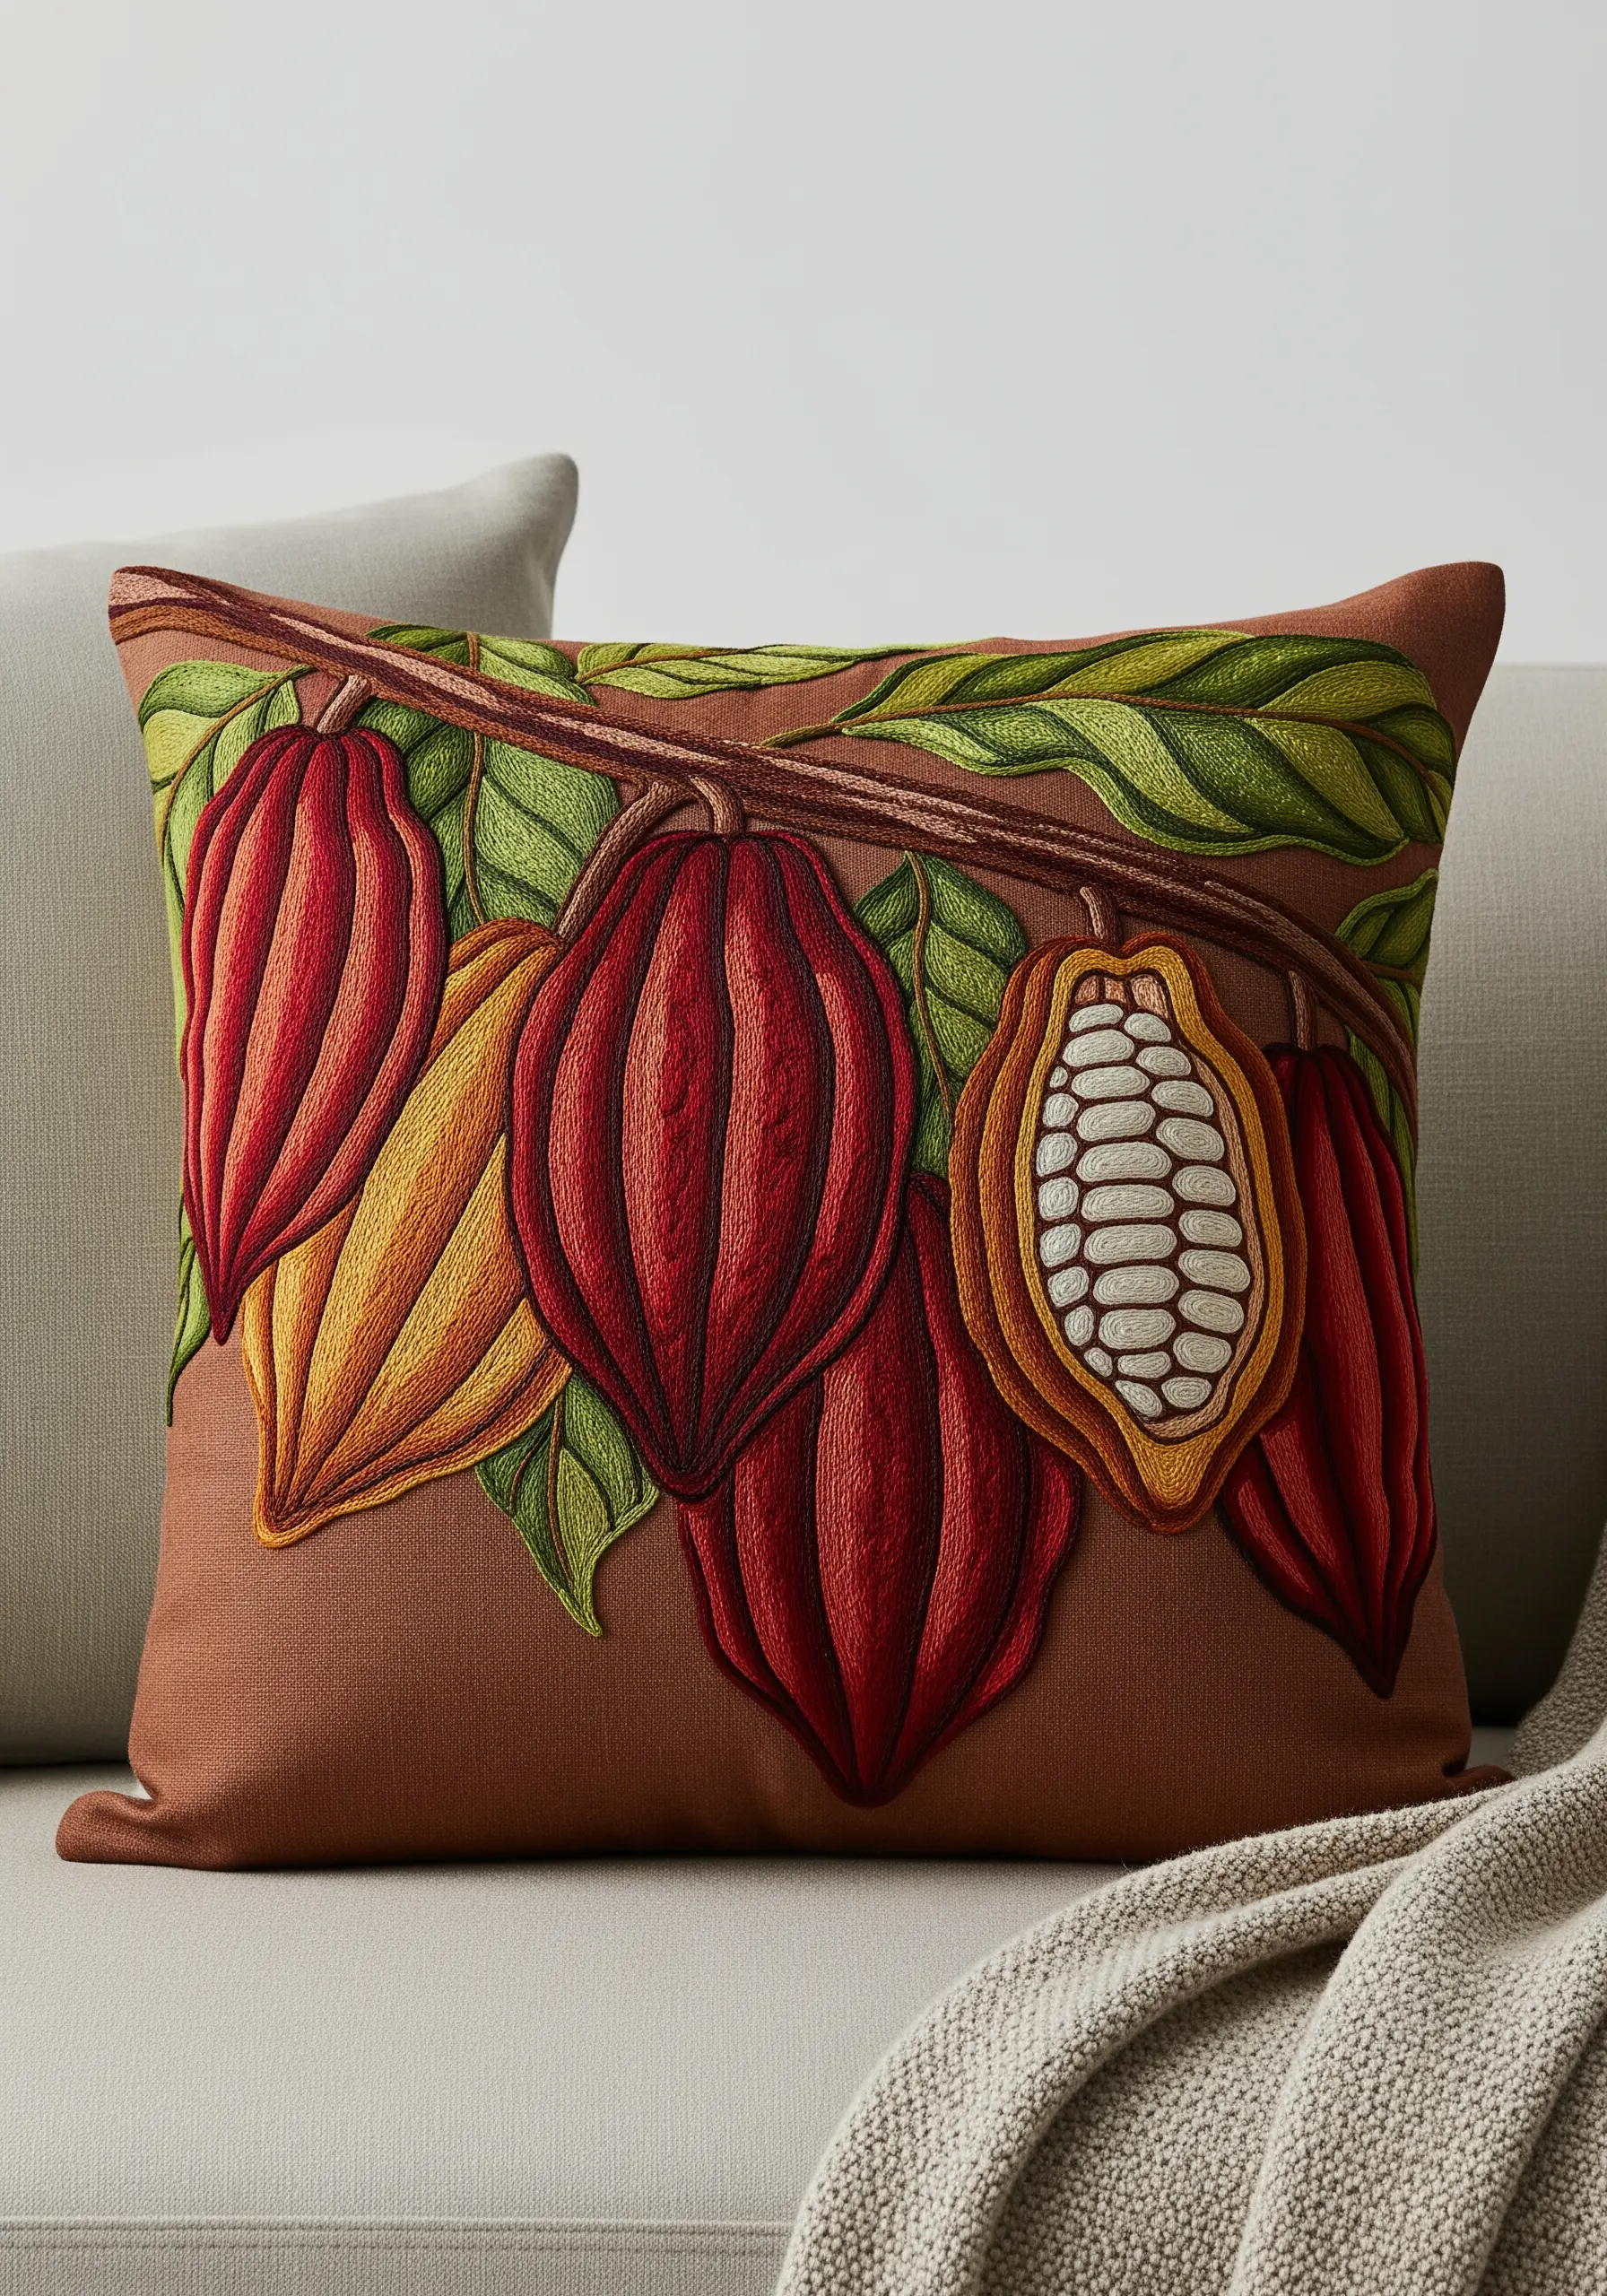
When applying embroidery to a high-use item like a pillow, choose durable stitches that can withstand wear.
Satin stitch, when worked densely, is robust enough for decorative cushions. Ensure your stitches aren’t too long, as they can snag; break up larger areas with split stitches.
For the cacao pods, you could also use felt appliqué for the main shapes and embroider the details on top. This technique is faster for large designs and adds wonderful dimension.
Choose a sturdy base fabric like cotton canvas or linen blend, which provides excellent support for the weight of the thread.
This project is perfect for turning embroidered pillow covers into functional art.
13. Create Ethereal Designs on Sheer Fabric
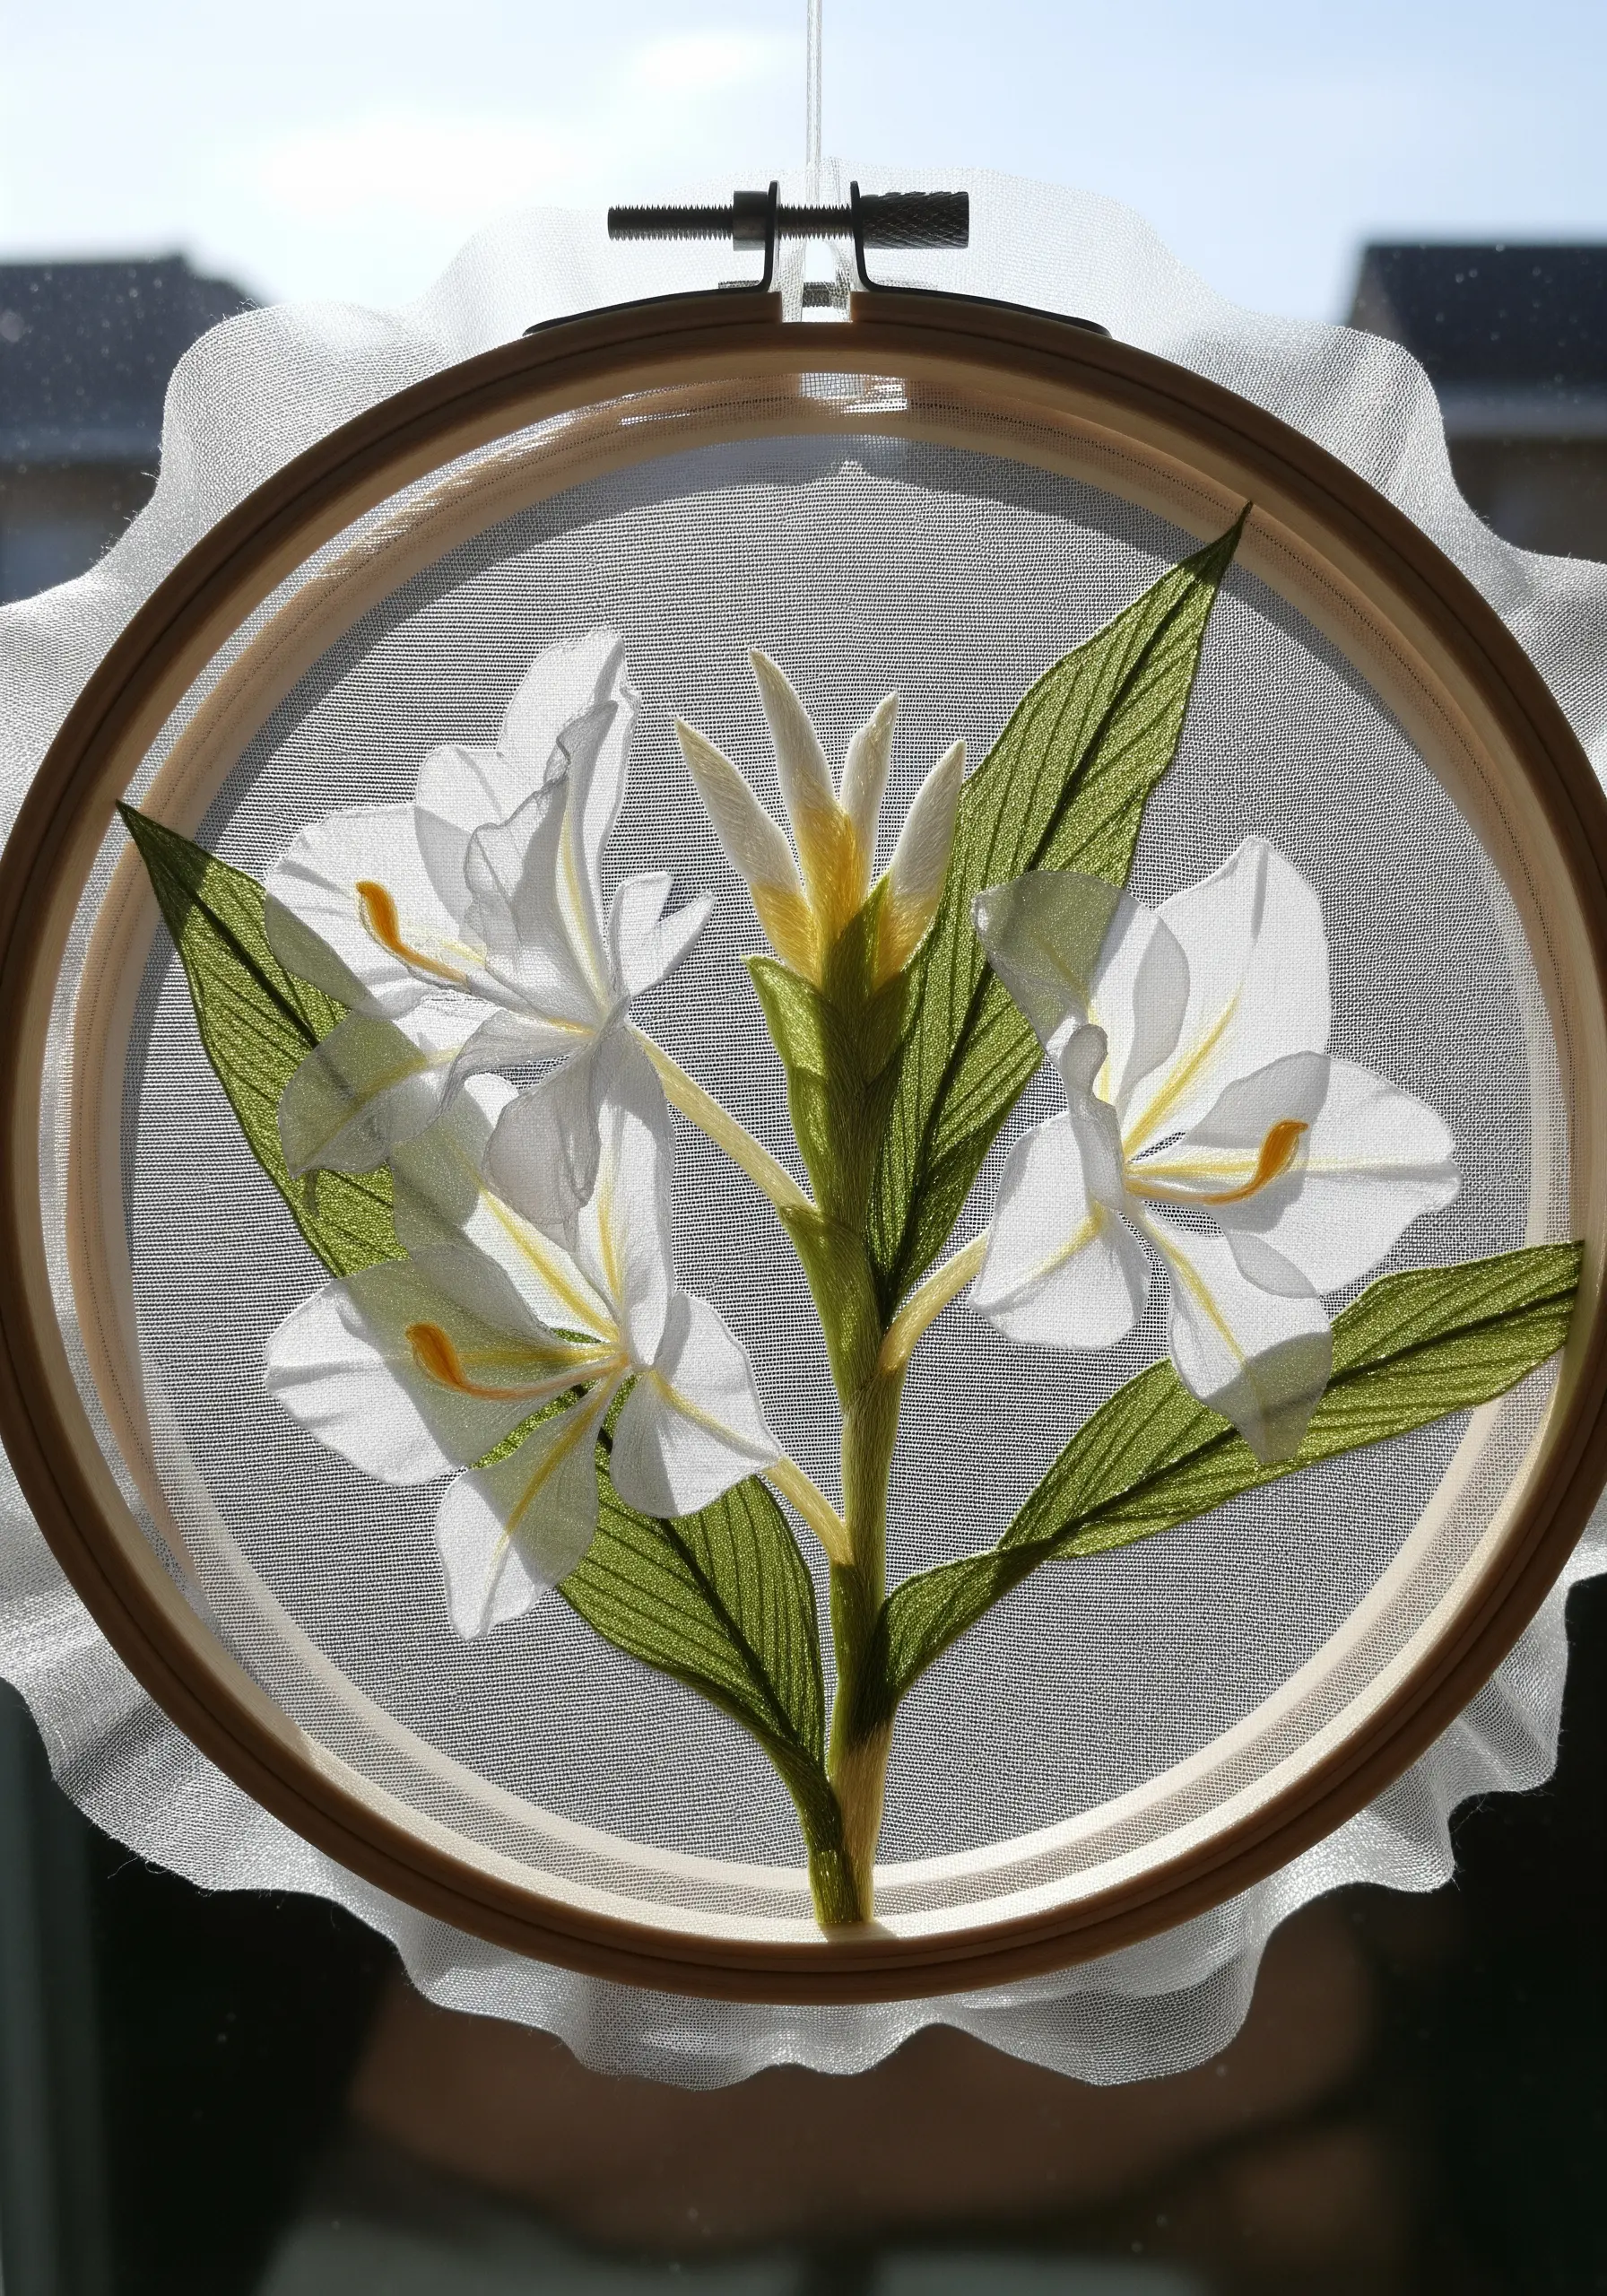
Achieve a magical, floating effect by stitching your design on a sheer fabric like organza or tulle.
To do this successfully, you must use a water-soluble stabilizer. Hoop the stabilizer and fabric together, stitch your design, and then rinse it away, leaving only the stitches on the transparent material.
This method is perfect for delicate botanicals like these white ginger lilies, as it makes them appear to be suspended in mid-air.
Be mindful that your stitches will be visible from the back, so aim for neatness on both sides of the fabric.
14. Use Stitch Details to Convey Fruit Textures
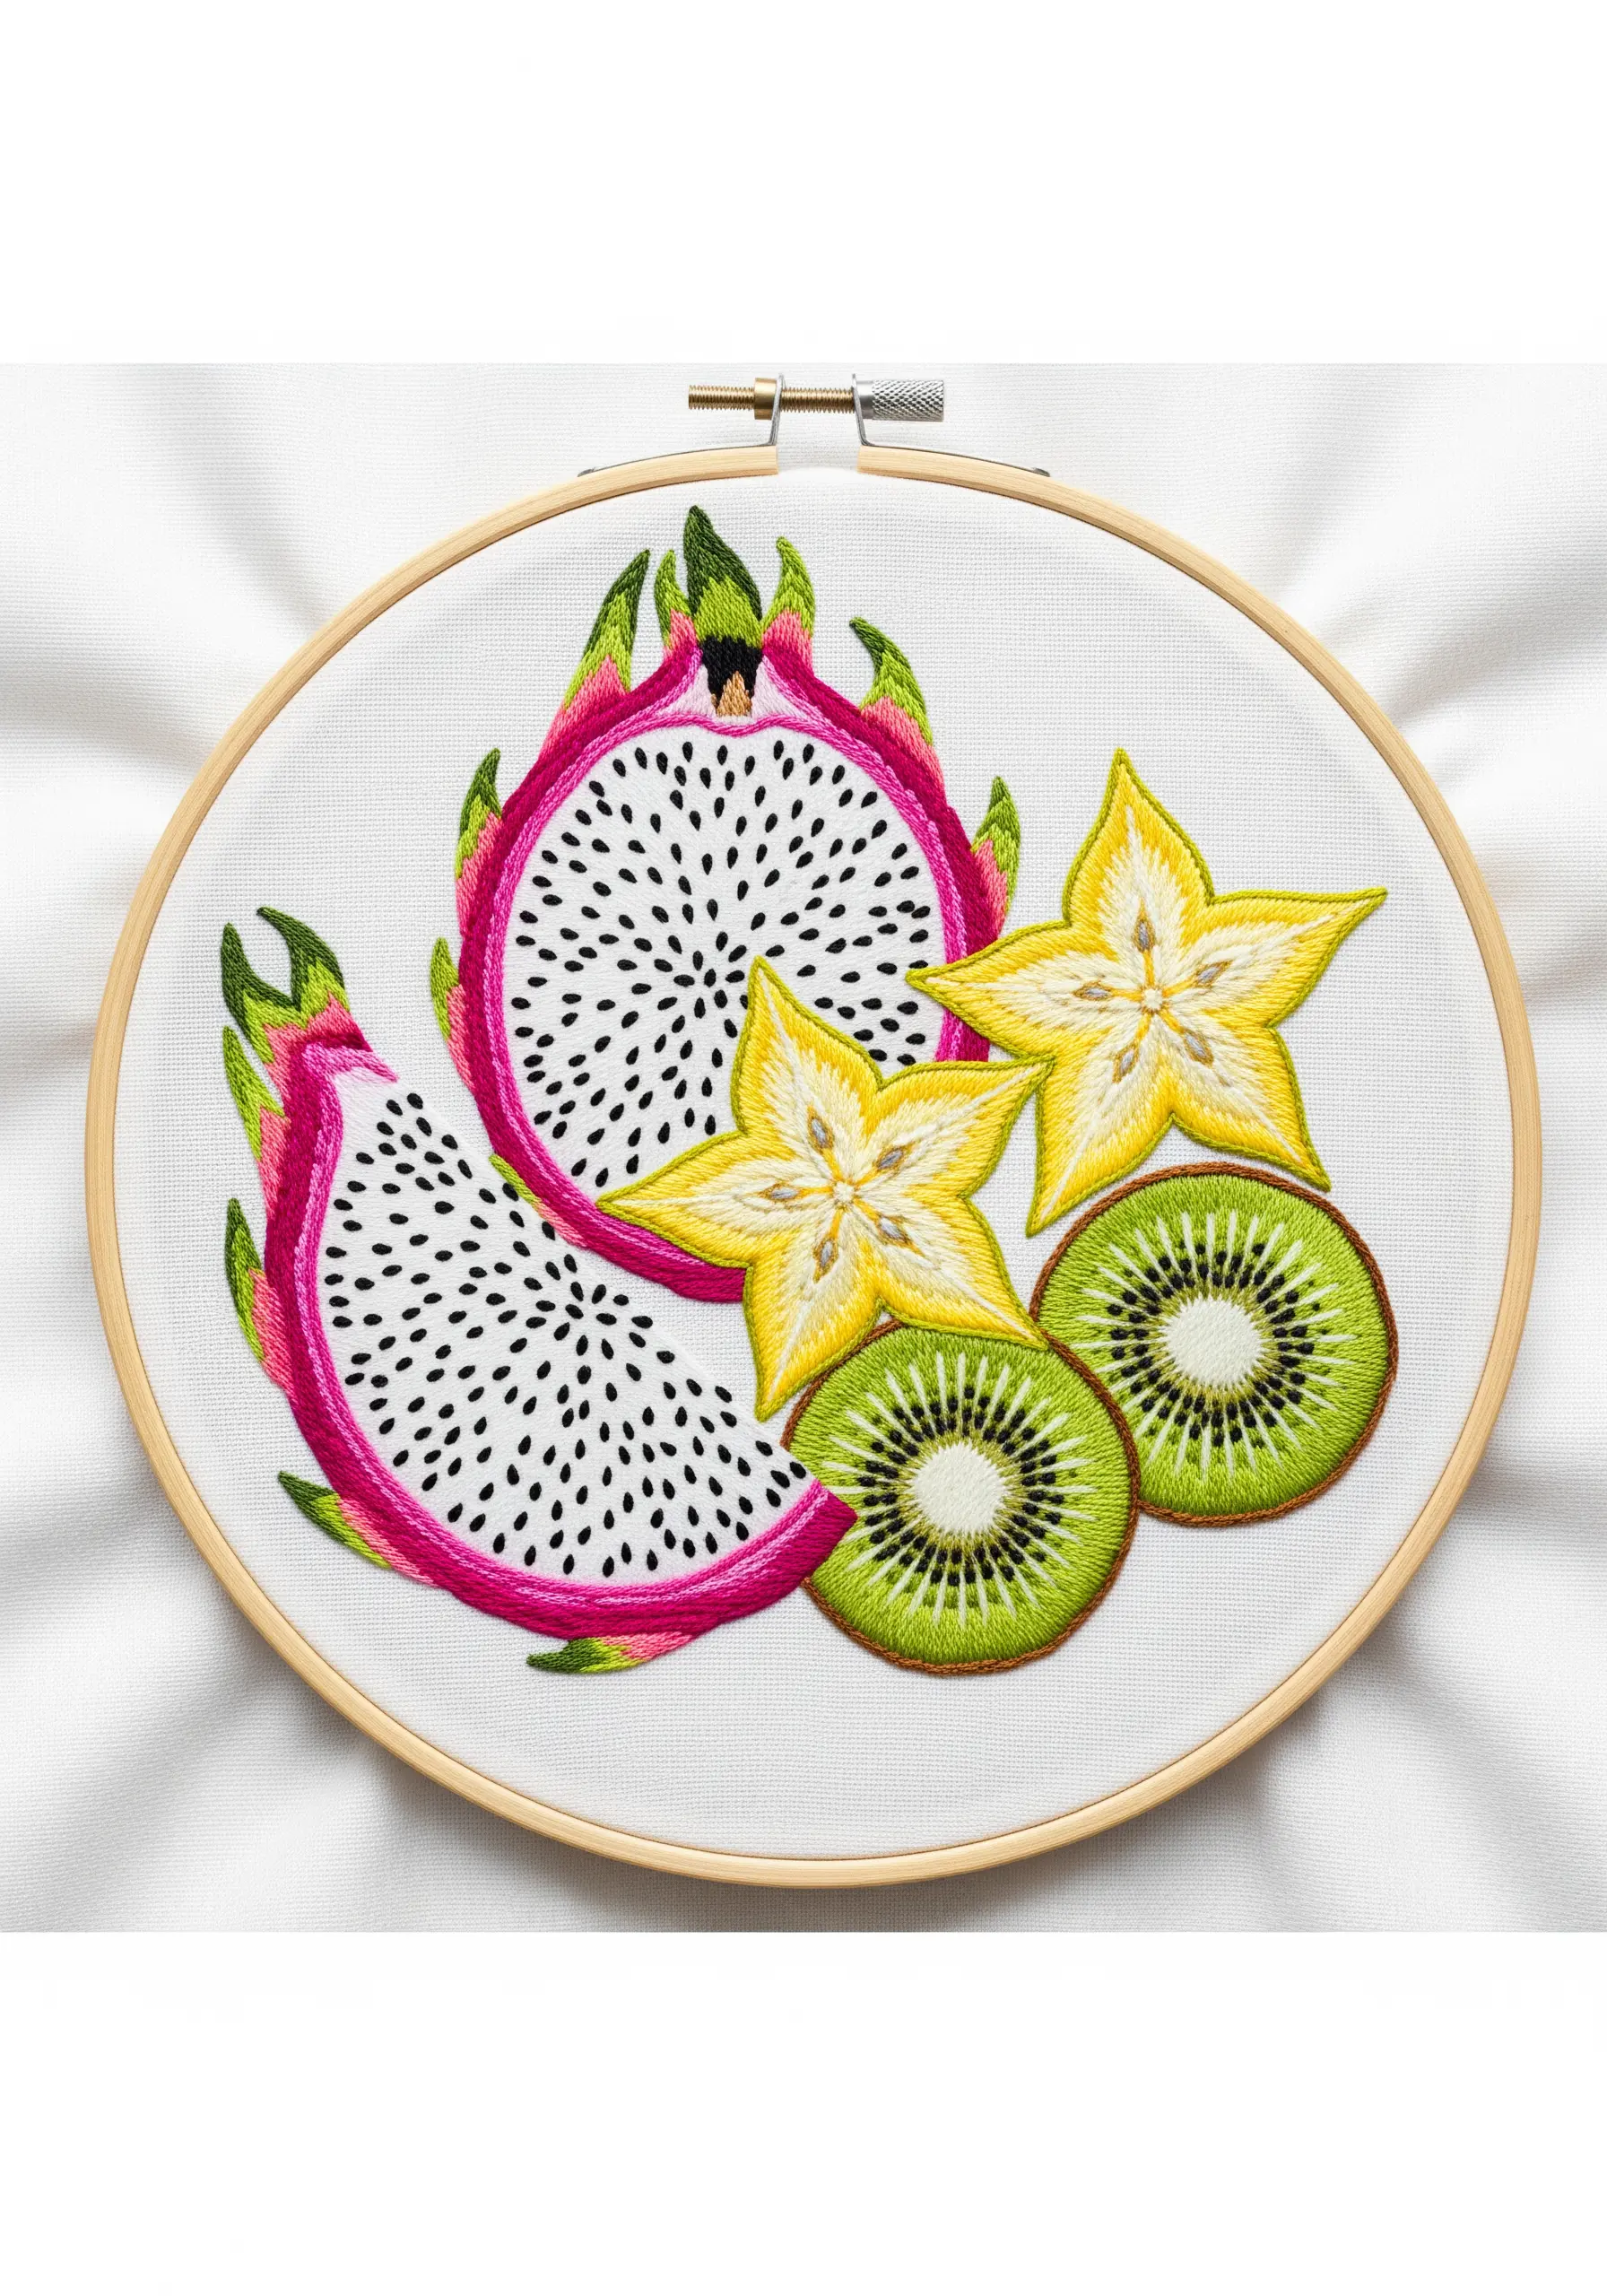
Go beyond color to capture the essence of tropical fruits by choosing stitches that mimic their unique textures.
Use hundreds of tiny, black French knots to represent the seeds of the dragon fruit, creating a tactile and visually accurate surface.
For the kiwi, work concentric circles of satin stitch around a core of white knots to suggest its fuzzy flesh and seed pattern.
A crisp, whipped backstitch outline in a bold color gives each fruit slice a clean, graphic look that unifies the composition.
15. Imply Form with Minimalist Vertical Stitches
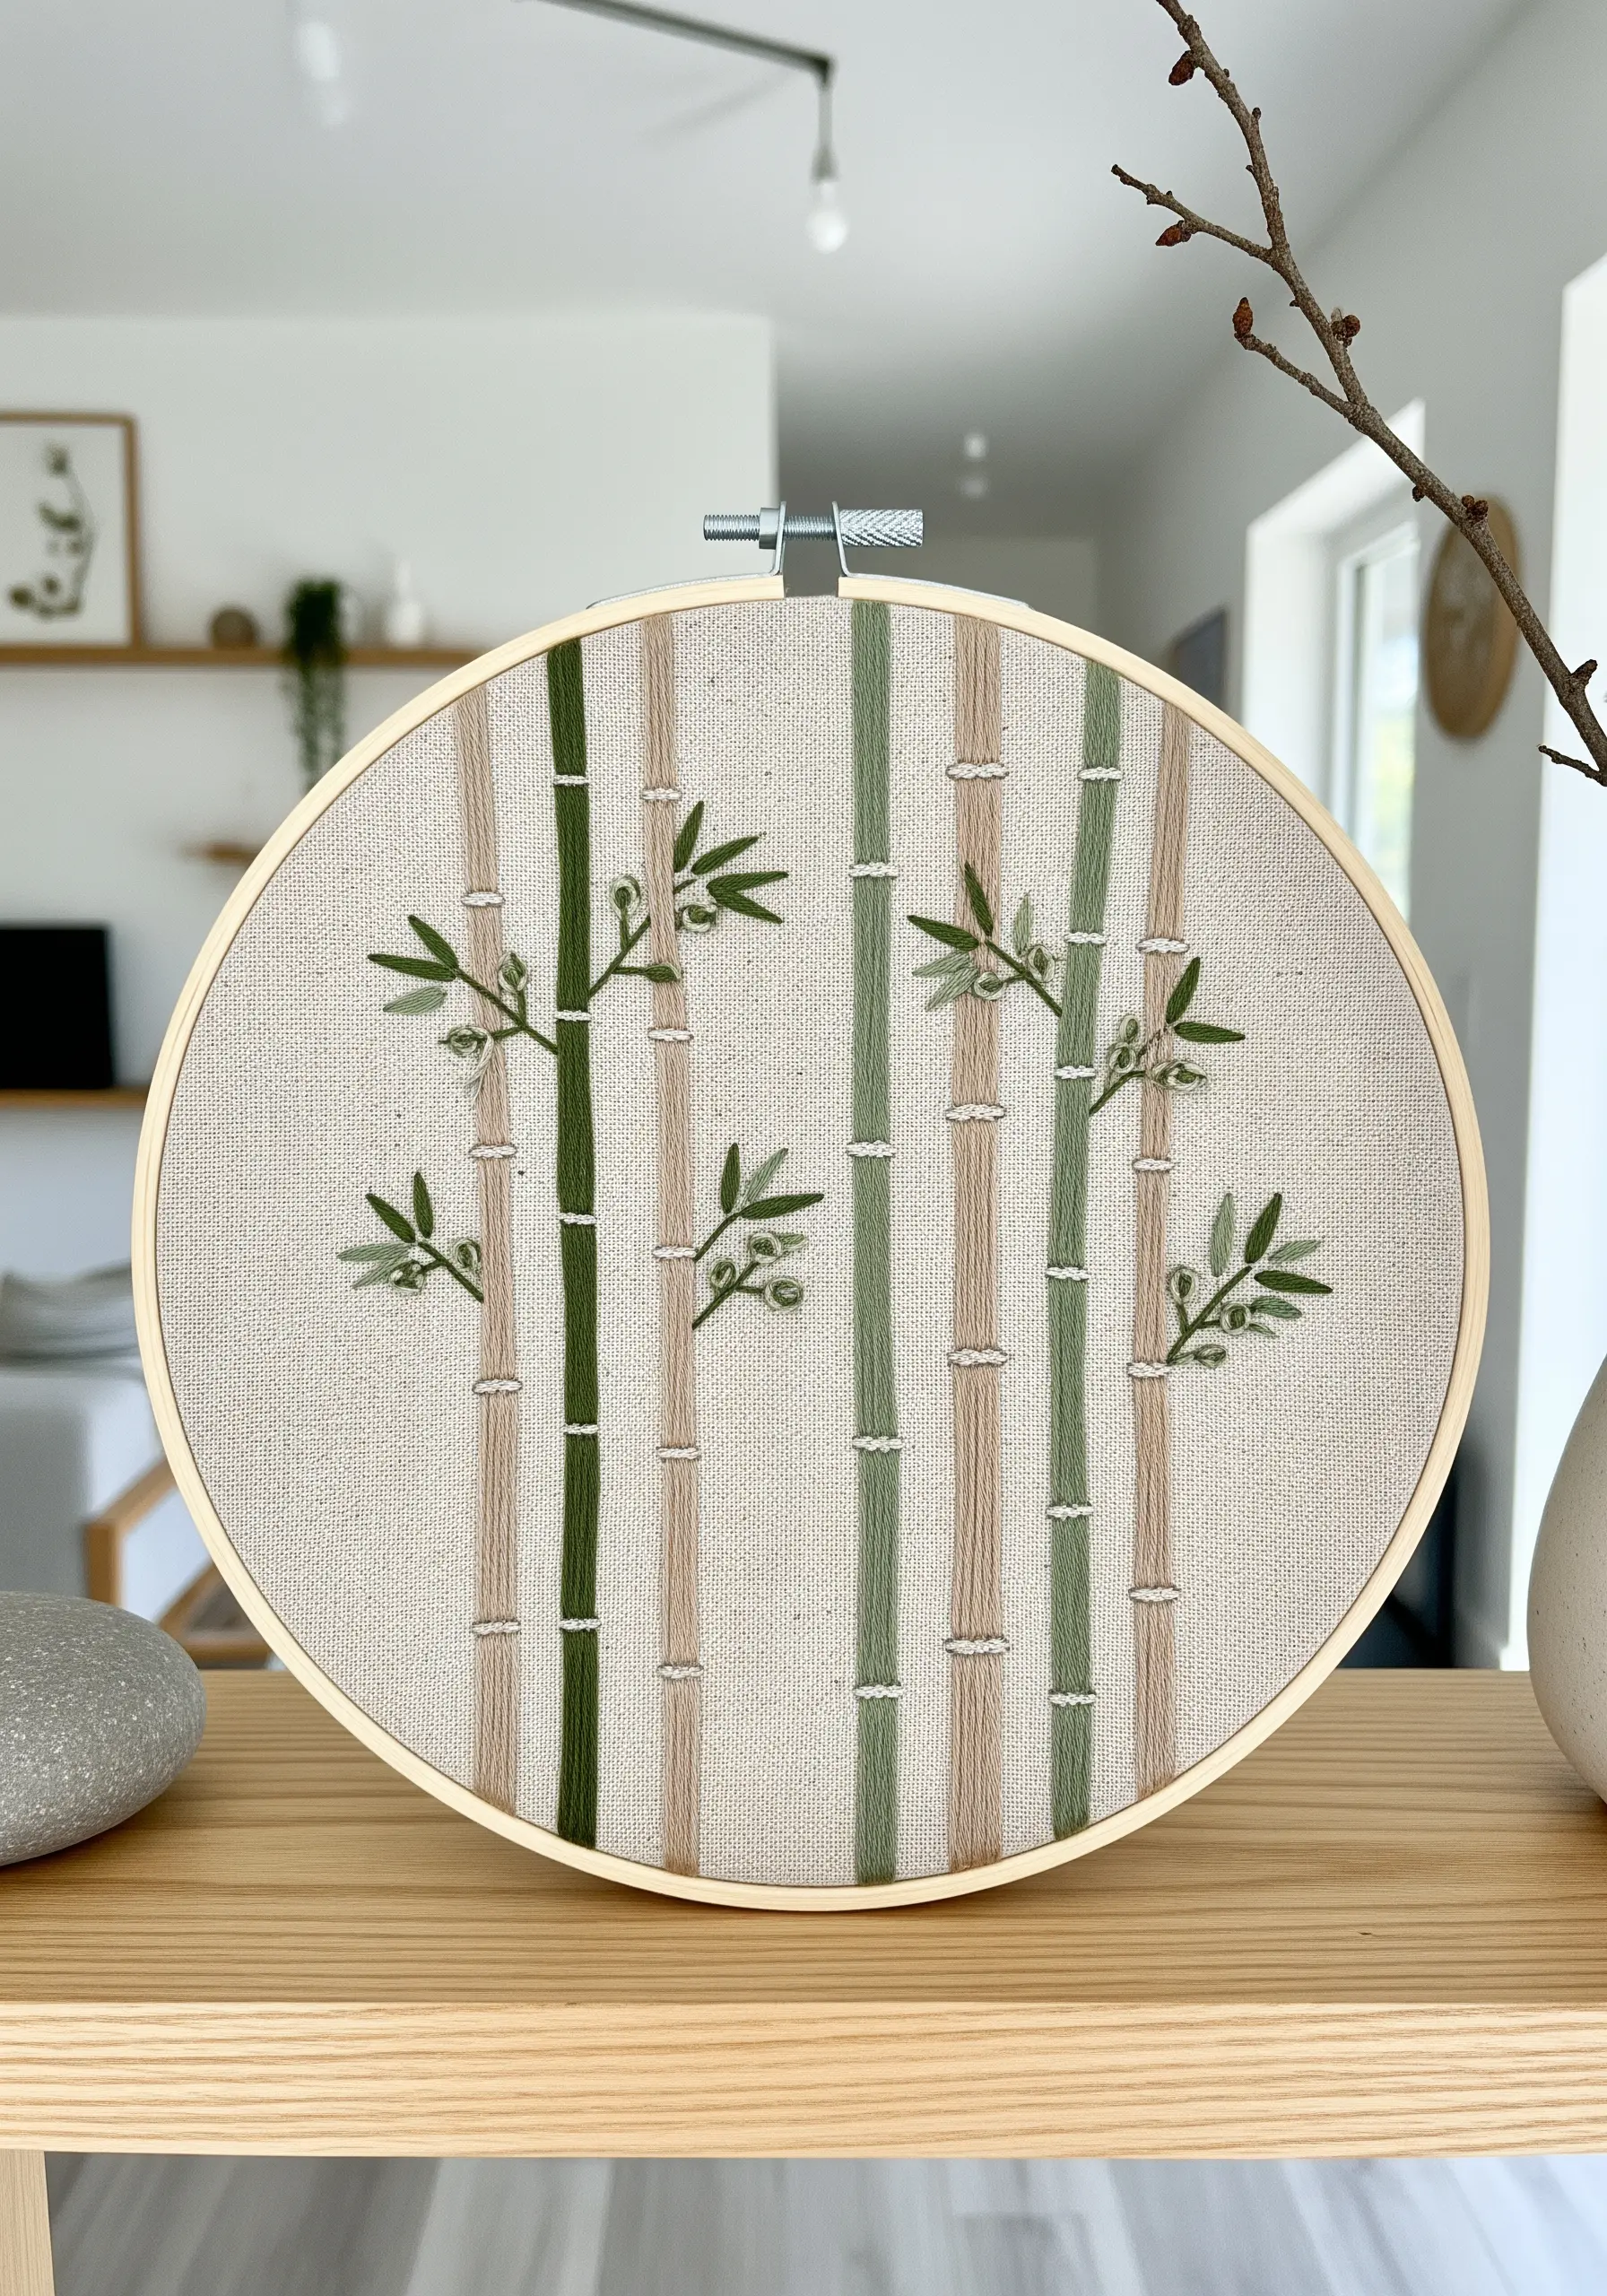
You don’t need complex fills to suggest a subject. For these bamboo stalks, simple vertical satin stitch bars are all it takes.
Create visual interest by varying the colors and widths of the stalks, using the negative space of the fabric to define their edges.
Add just a few tiny leaves using a detached chain stitch or straight stitches to complete the impression of a bamboo grove.
This minimalist embroidery idea proves that thoughtful placement and restraint can be just as powerful as dense, detailed stitching.
16. Sculpt a Landscape with Advanced Textural Stitches
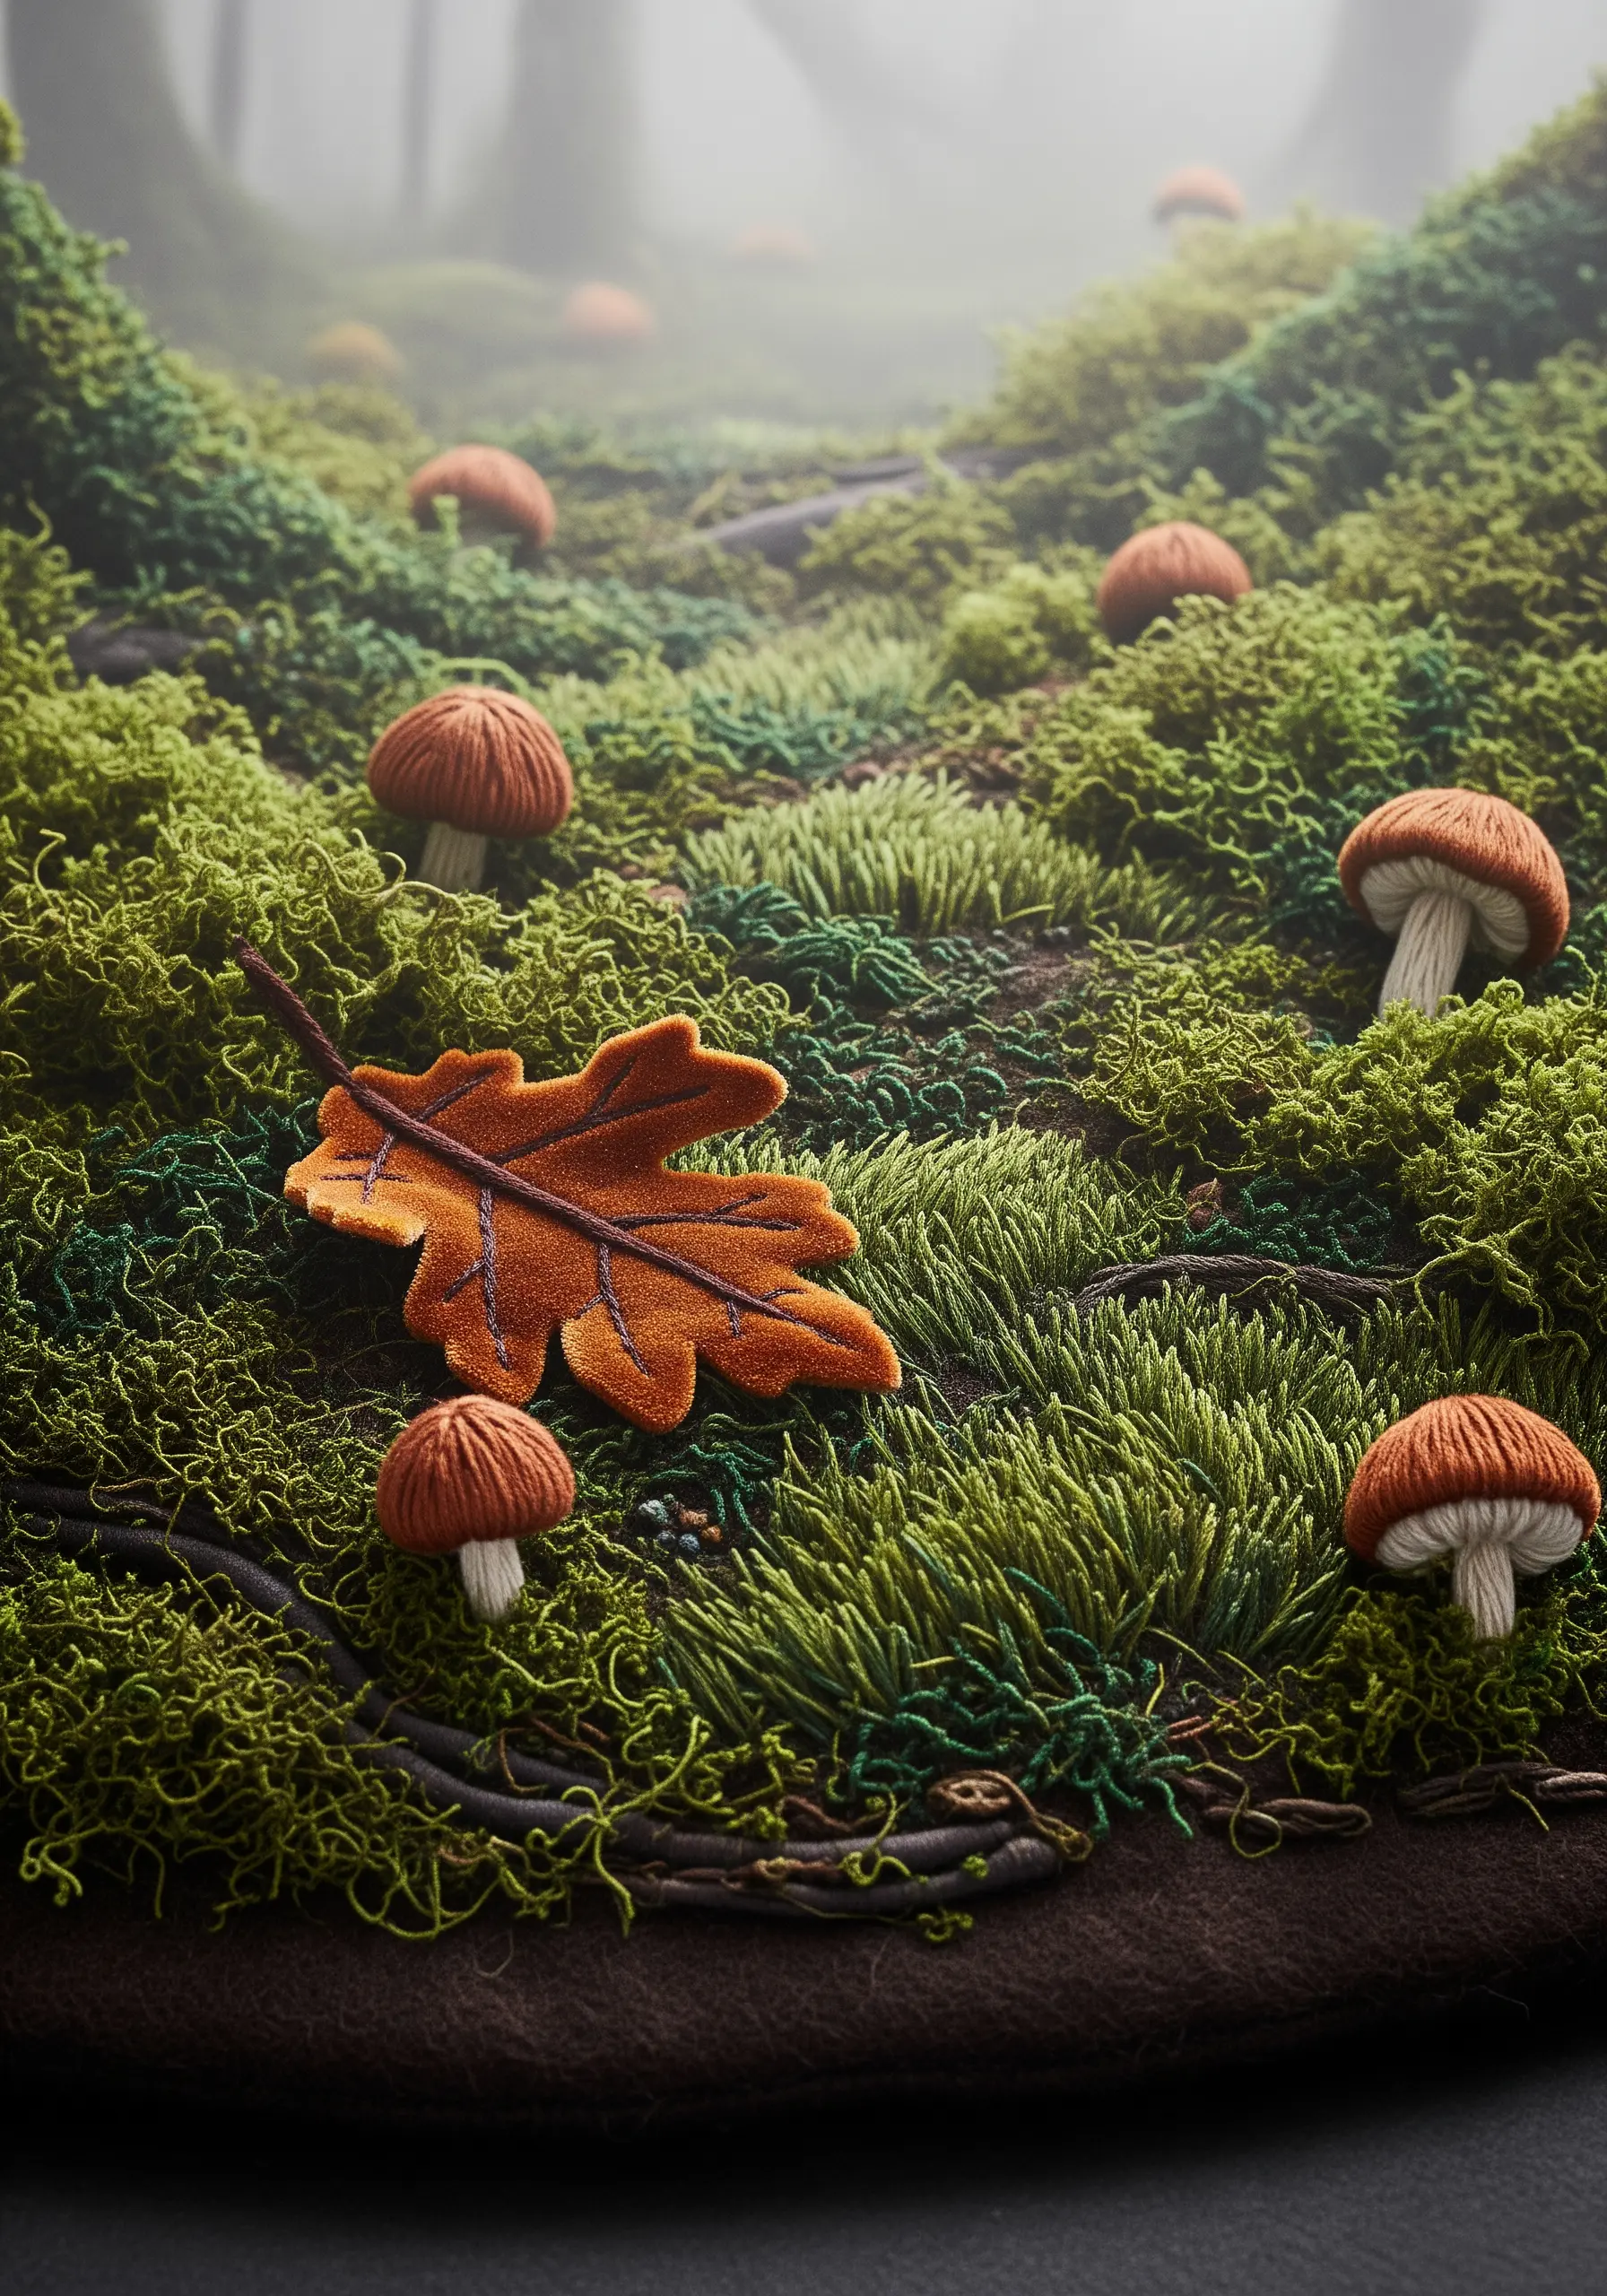
Move beyond the hoop to create a textile sculpture that tells the story of a forest floor.
Use the turkey work stitch (or Ghiordes knot) to create a lush, pile-like texture that you can trim with scissors to resemble moss.
For the mushrooms, use a padded satin stitch for the caps and a ribbed spider web stitch for the gills underneath, adding incredible realism.
This piece is not meant to be flat; it’s a celebration of how thread can be used to build three-dimensional, explorable worlds.
17. Design a Cascading Composition for Long-Form Textiles
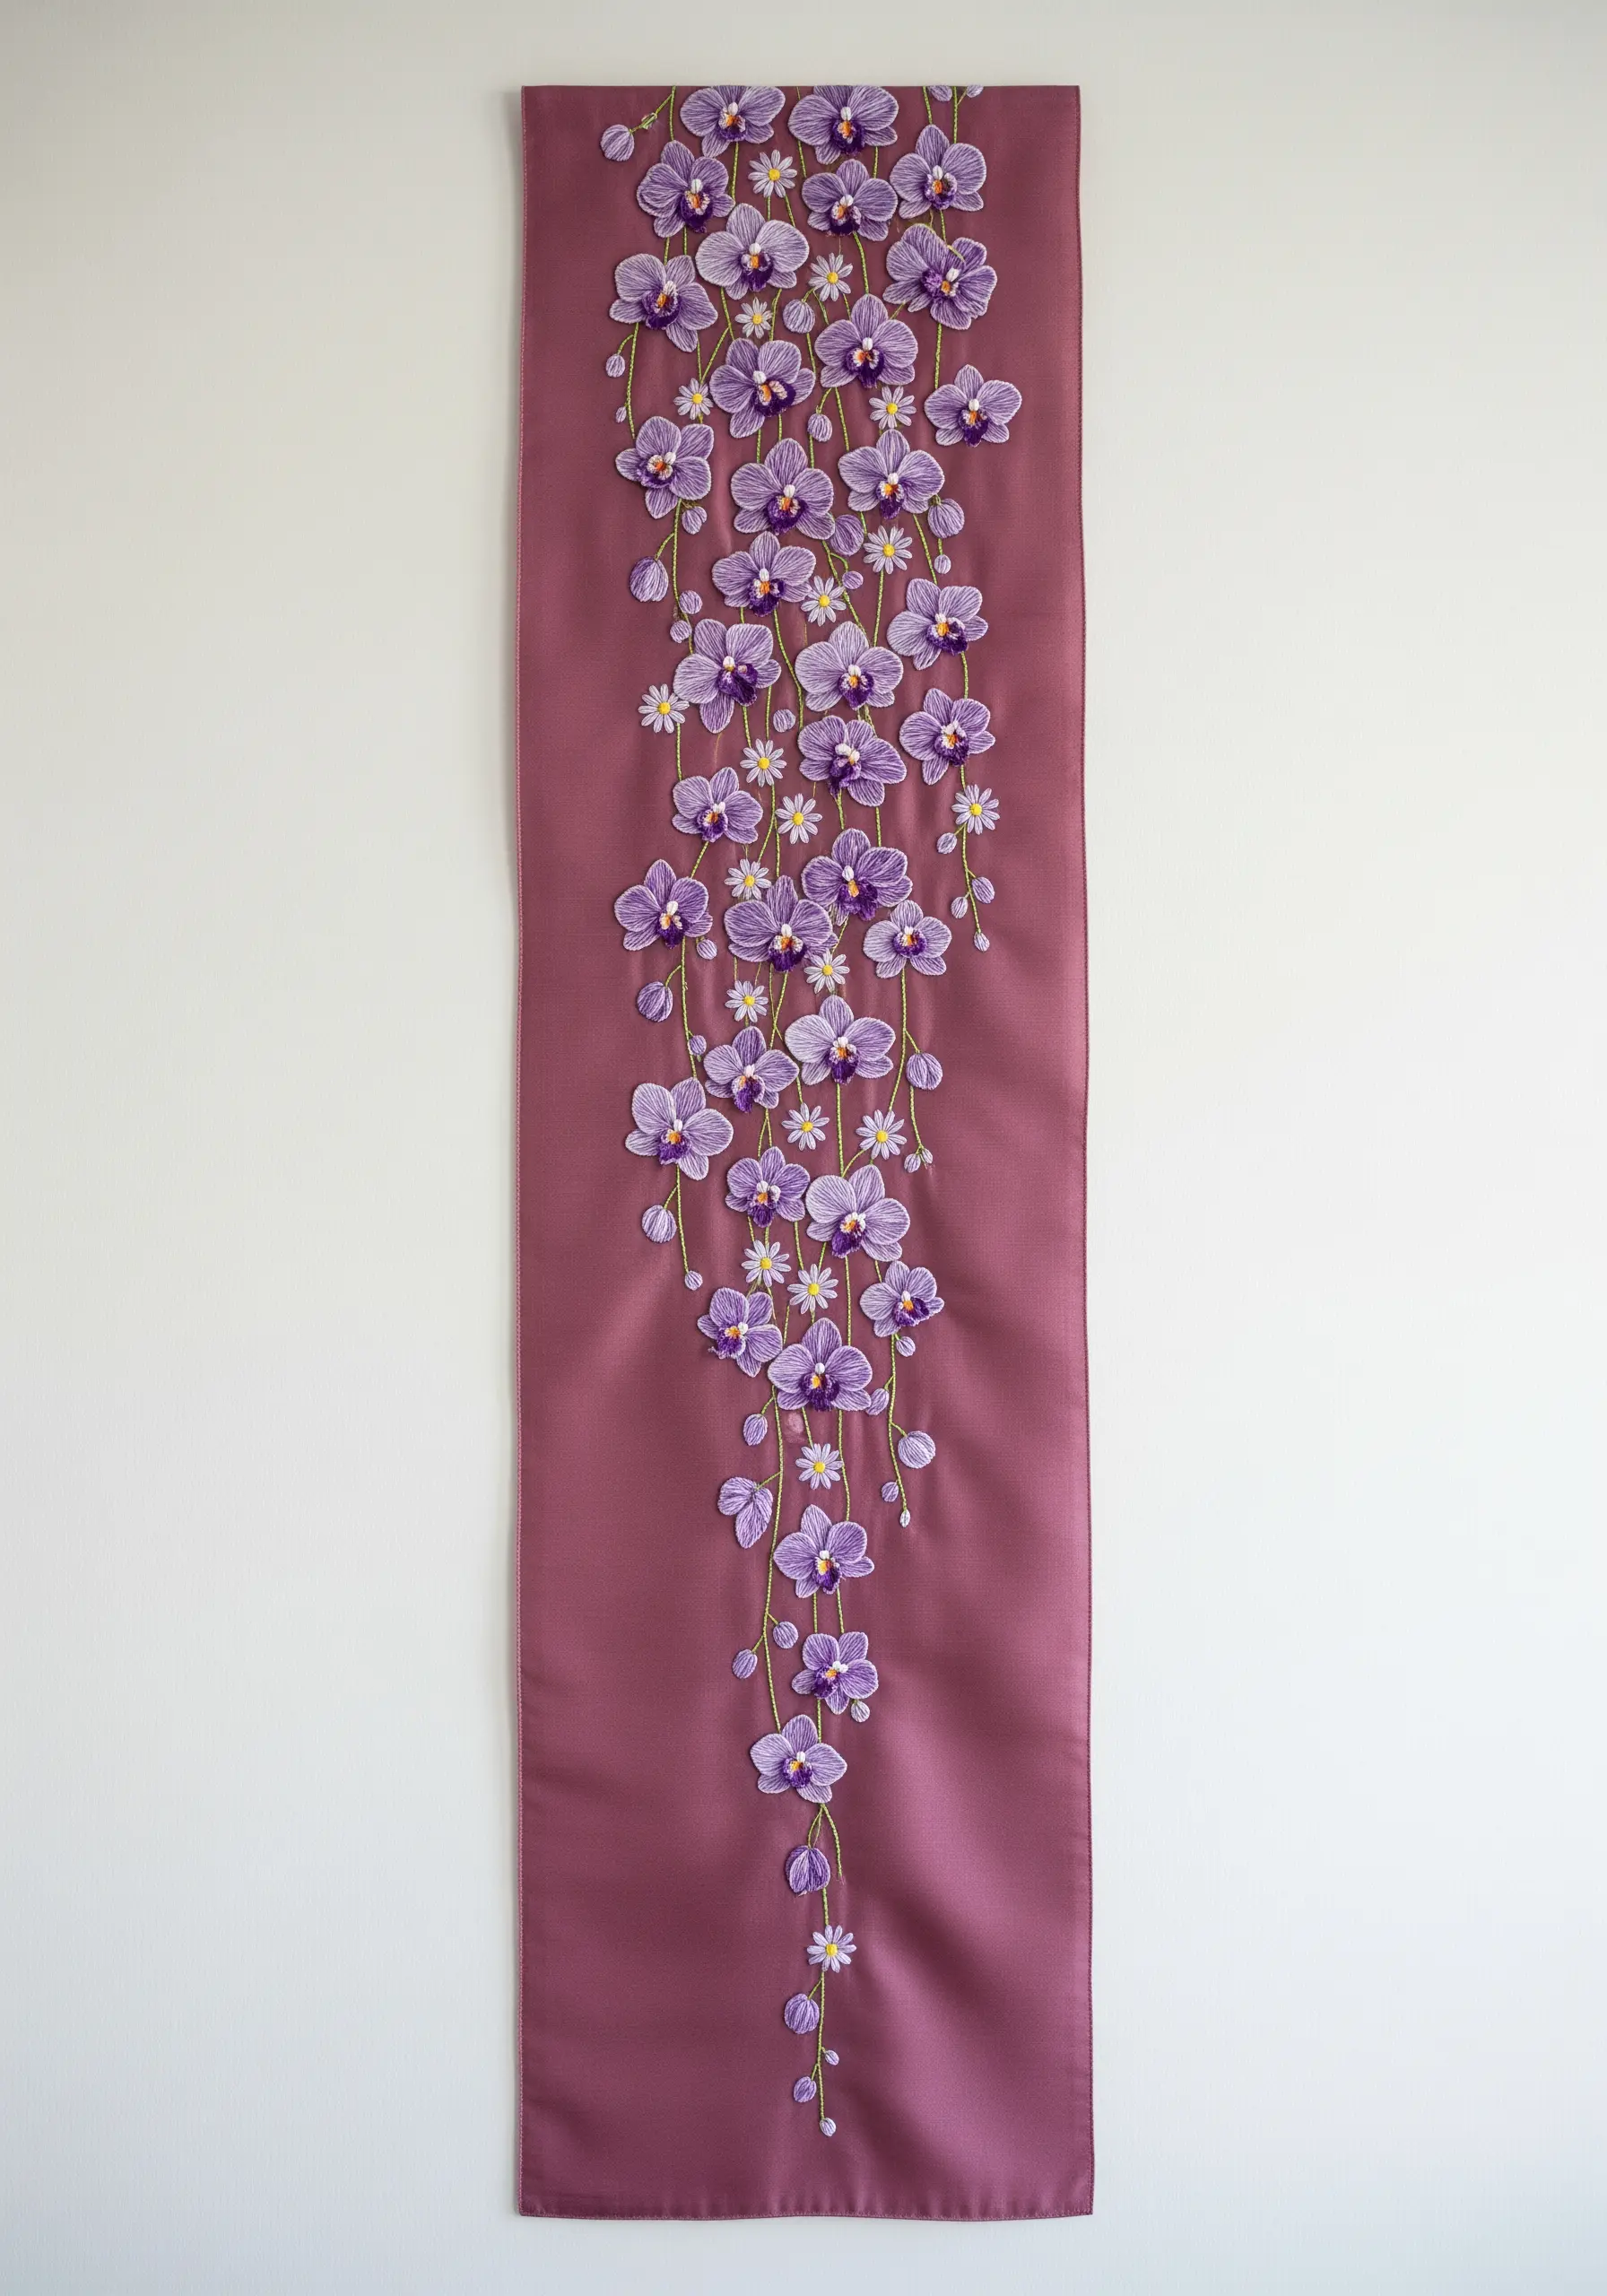
When embroidering a table runner or wall hanging, create a design that flows naturally down the length of the fabric.
A cascading floral vine, like these orchids, guides the eye gracefully from top to bottom.
Vary the size and orientation of the flowers to create a sense of movement and prevent the pattern from feeling too repetitive.
Using a satin or sateen fabric gives the piece a subtle sheen that complements the silkiness of the thread, making it perfect for hand-stitched table runner embroidery designs.
18. Master Density with a Complex Protea

A protea flower is the perfect subject for practicing dense, layered stitching and subtle color work.
For the central dome, use a tightly packed field of colonial knots or French knots, blending several shades of cream and white for a textured gradient.
Stitch the large outer bracts (petals) using a long-and-short stitch, paying close attention to the direction of your stitches to create the flower’s distinct pointed shape.
Incorporate a single strand of metallic gold or bronze thread in the center to add a hint of shimmer that catches the light.
19. Explore the Elegance of Continuous Line Art
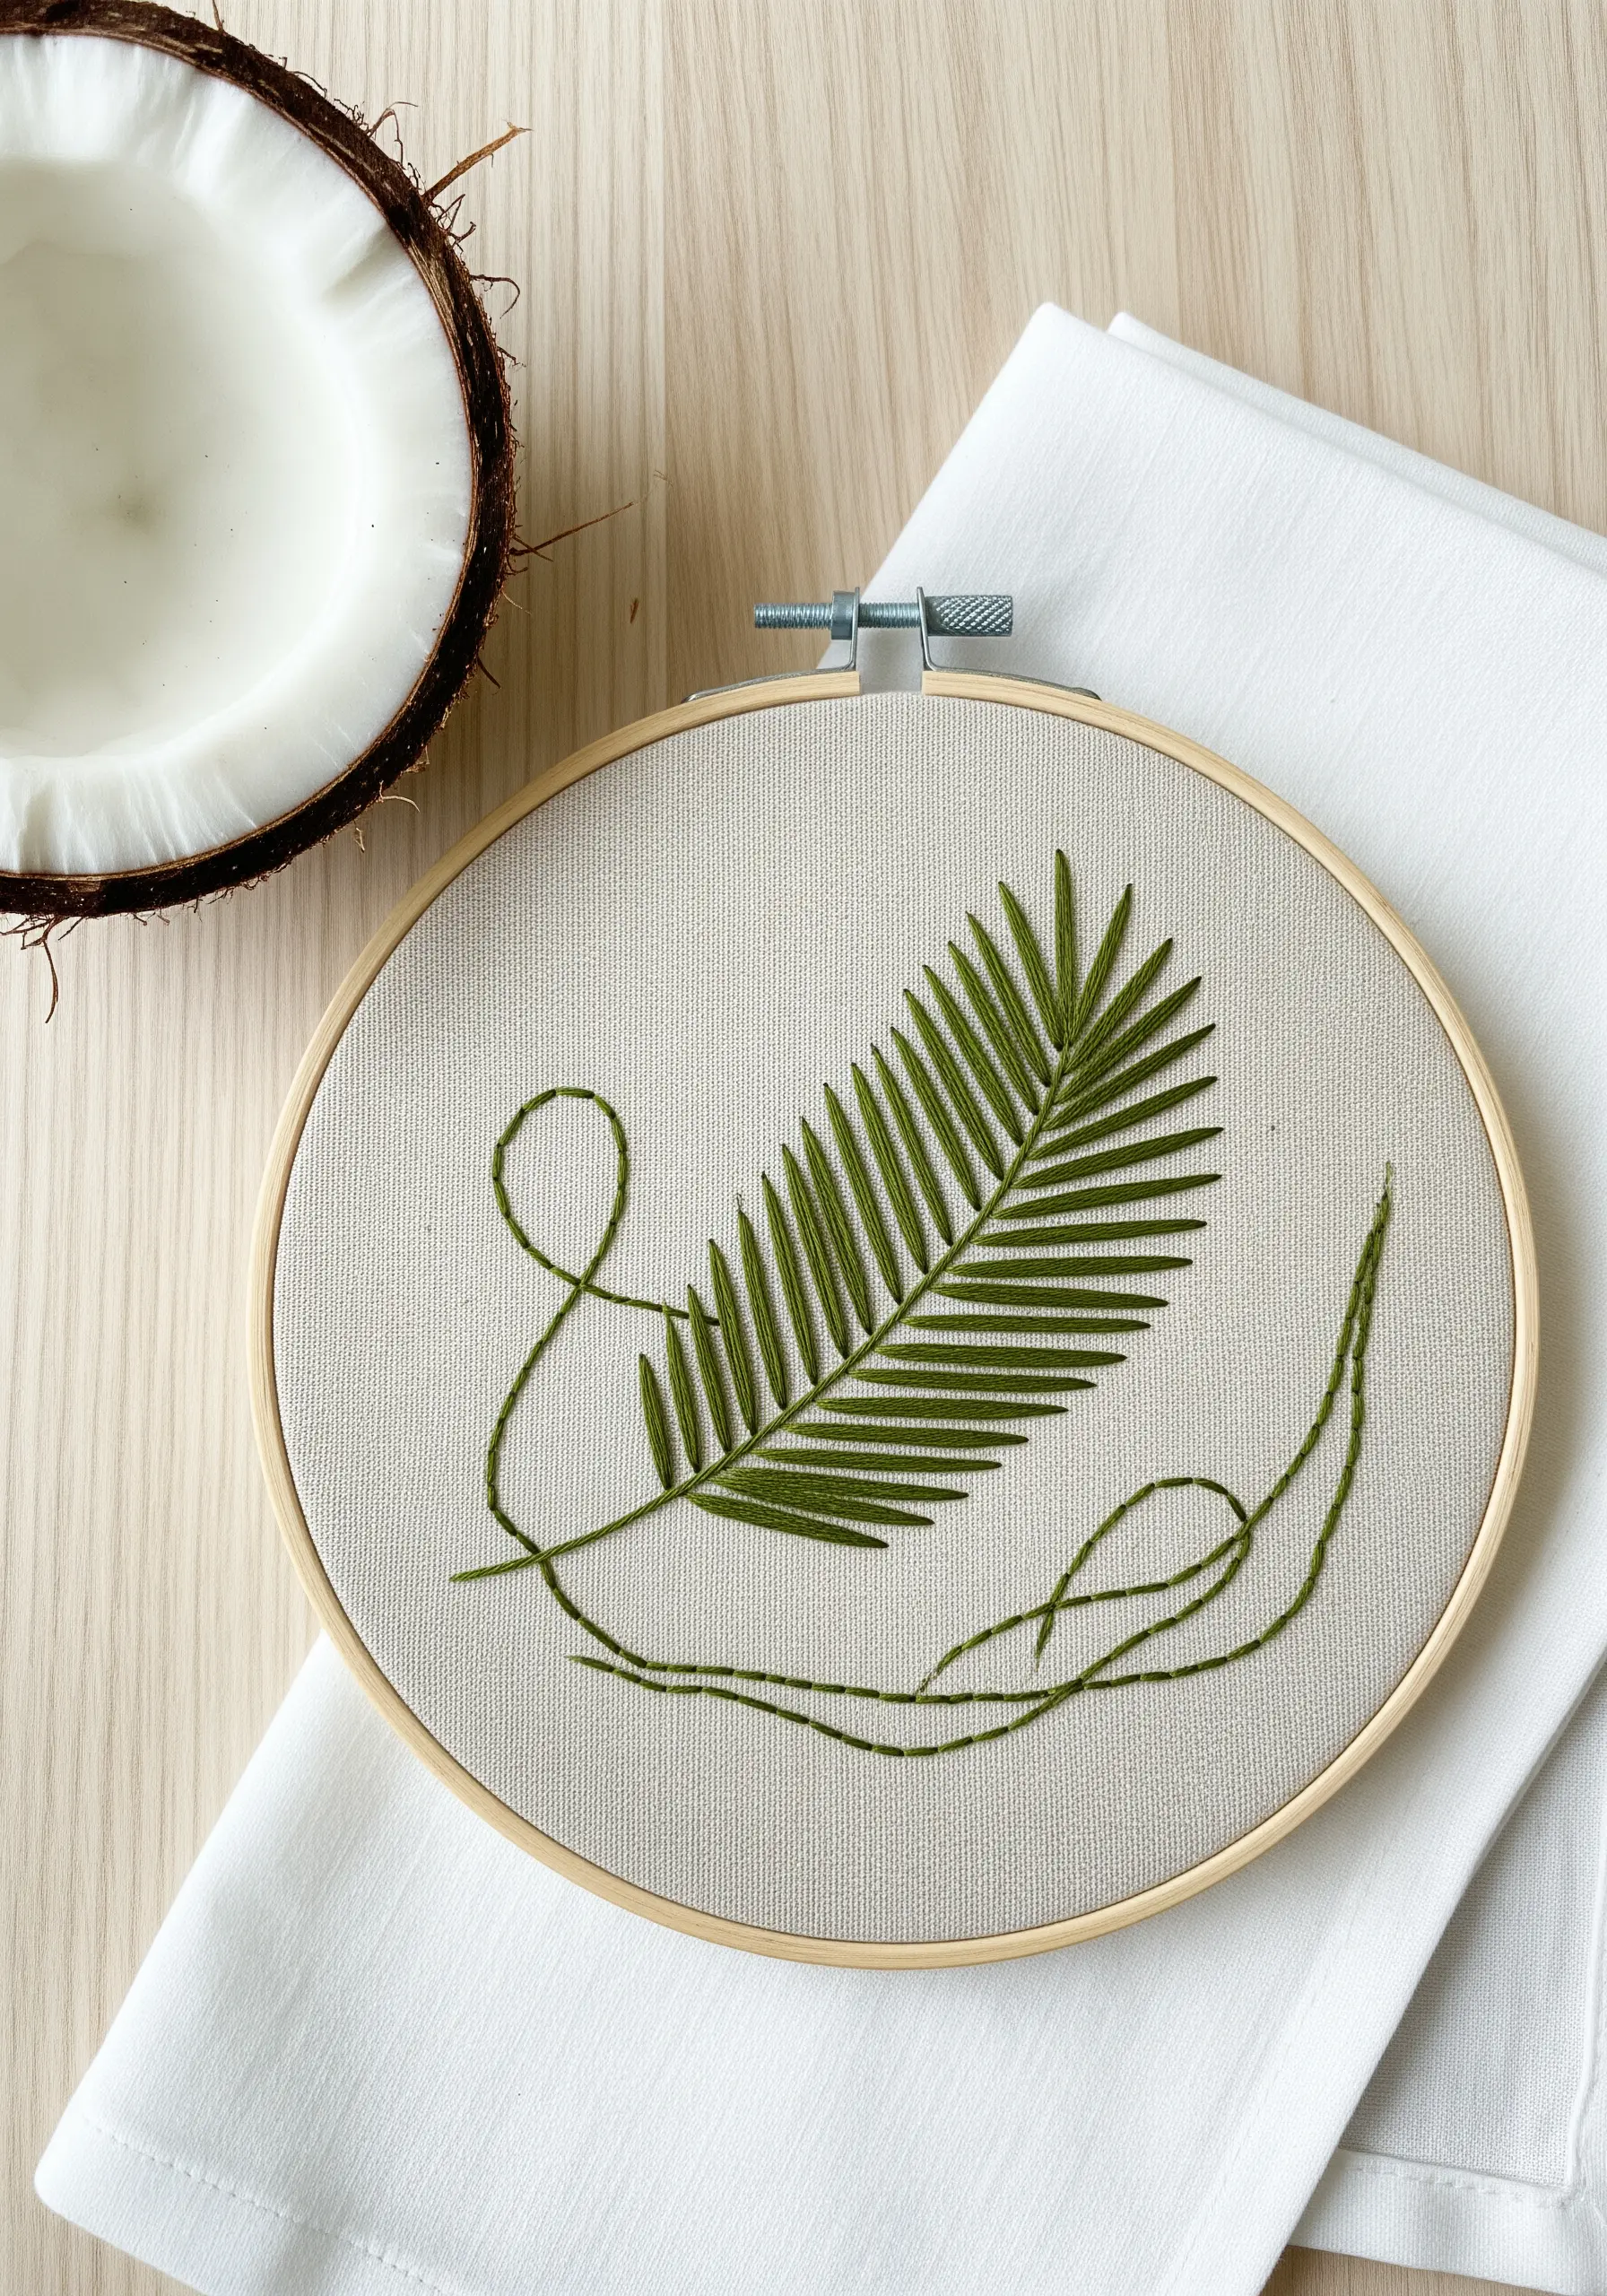
Create a sophisticated and modern piece by reducing a botanical subject to its essential lines.
Use a single, unbroken line of thread to trace the form of a palm frond, focusing on the graceful curves and negative space.
A stem stitch or whipped backstitch is ideal for this, as it creates a smooth, solid line that looks refined and intentional.
This technique celebrates simplicity and is a powerful reminder that sometimes, the stitches you *don’t* make are as important as the ones you do.
20. Weave a Tapestry of Tropical Foliage
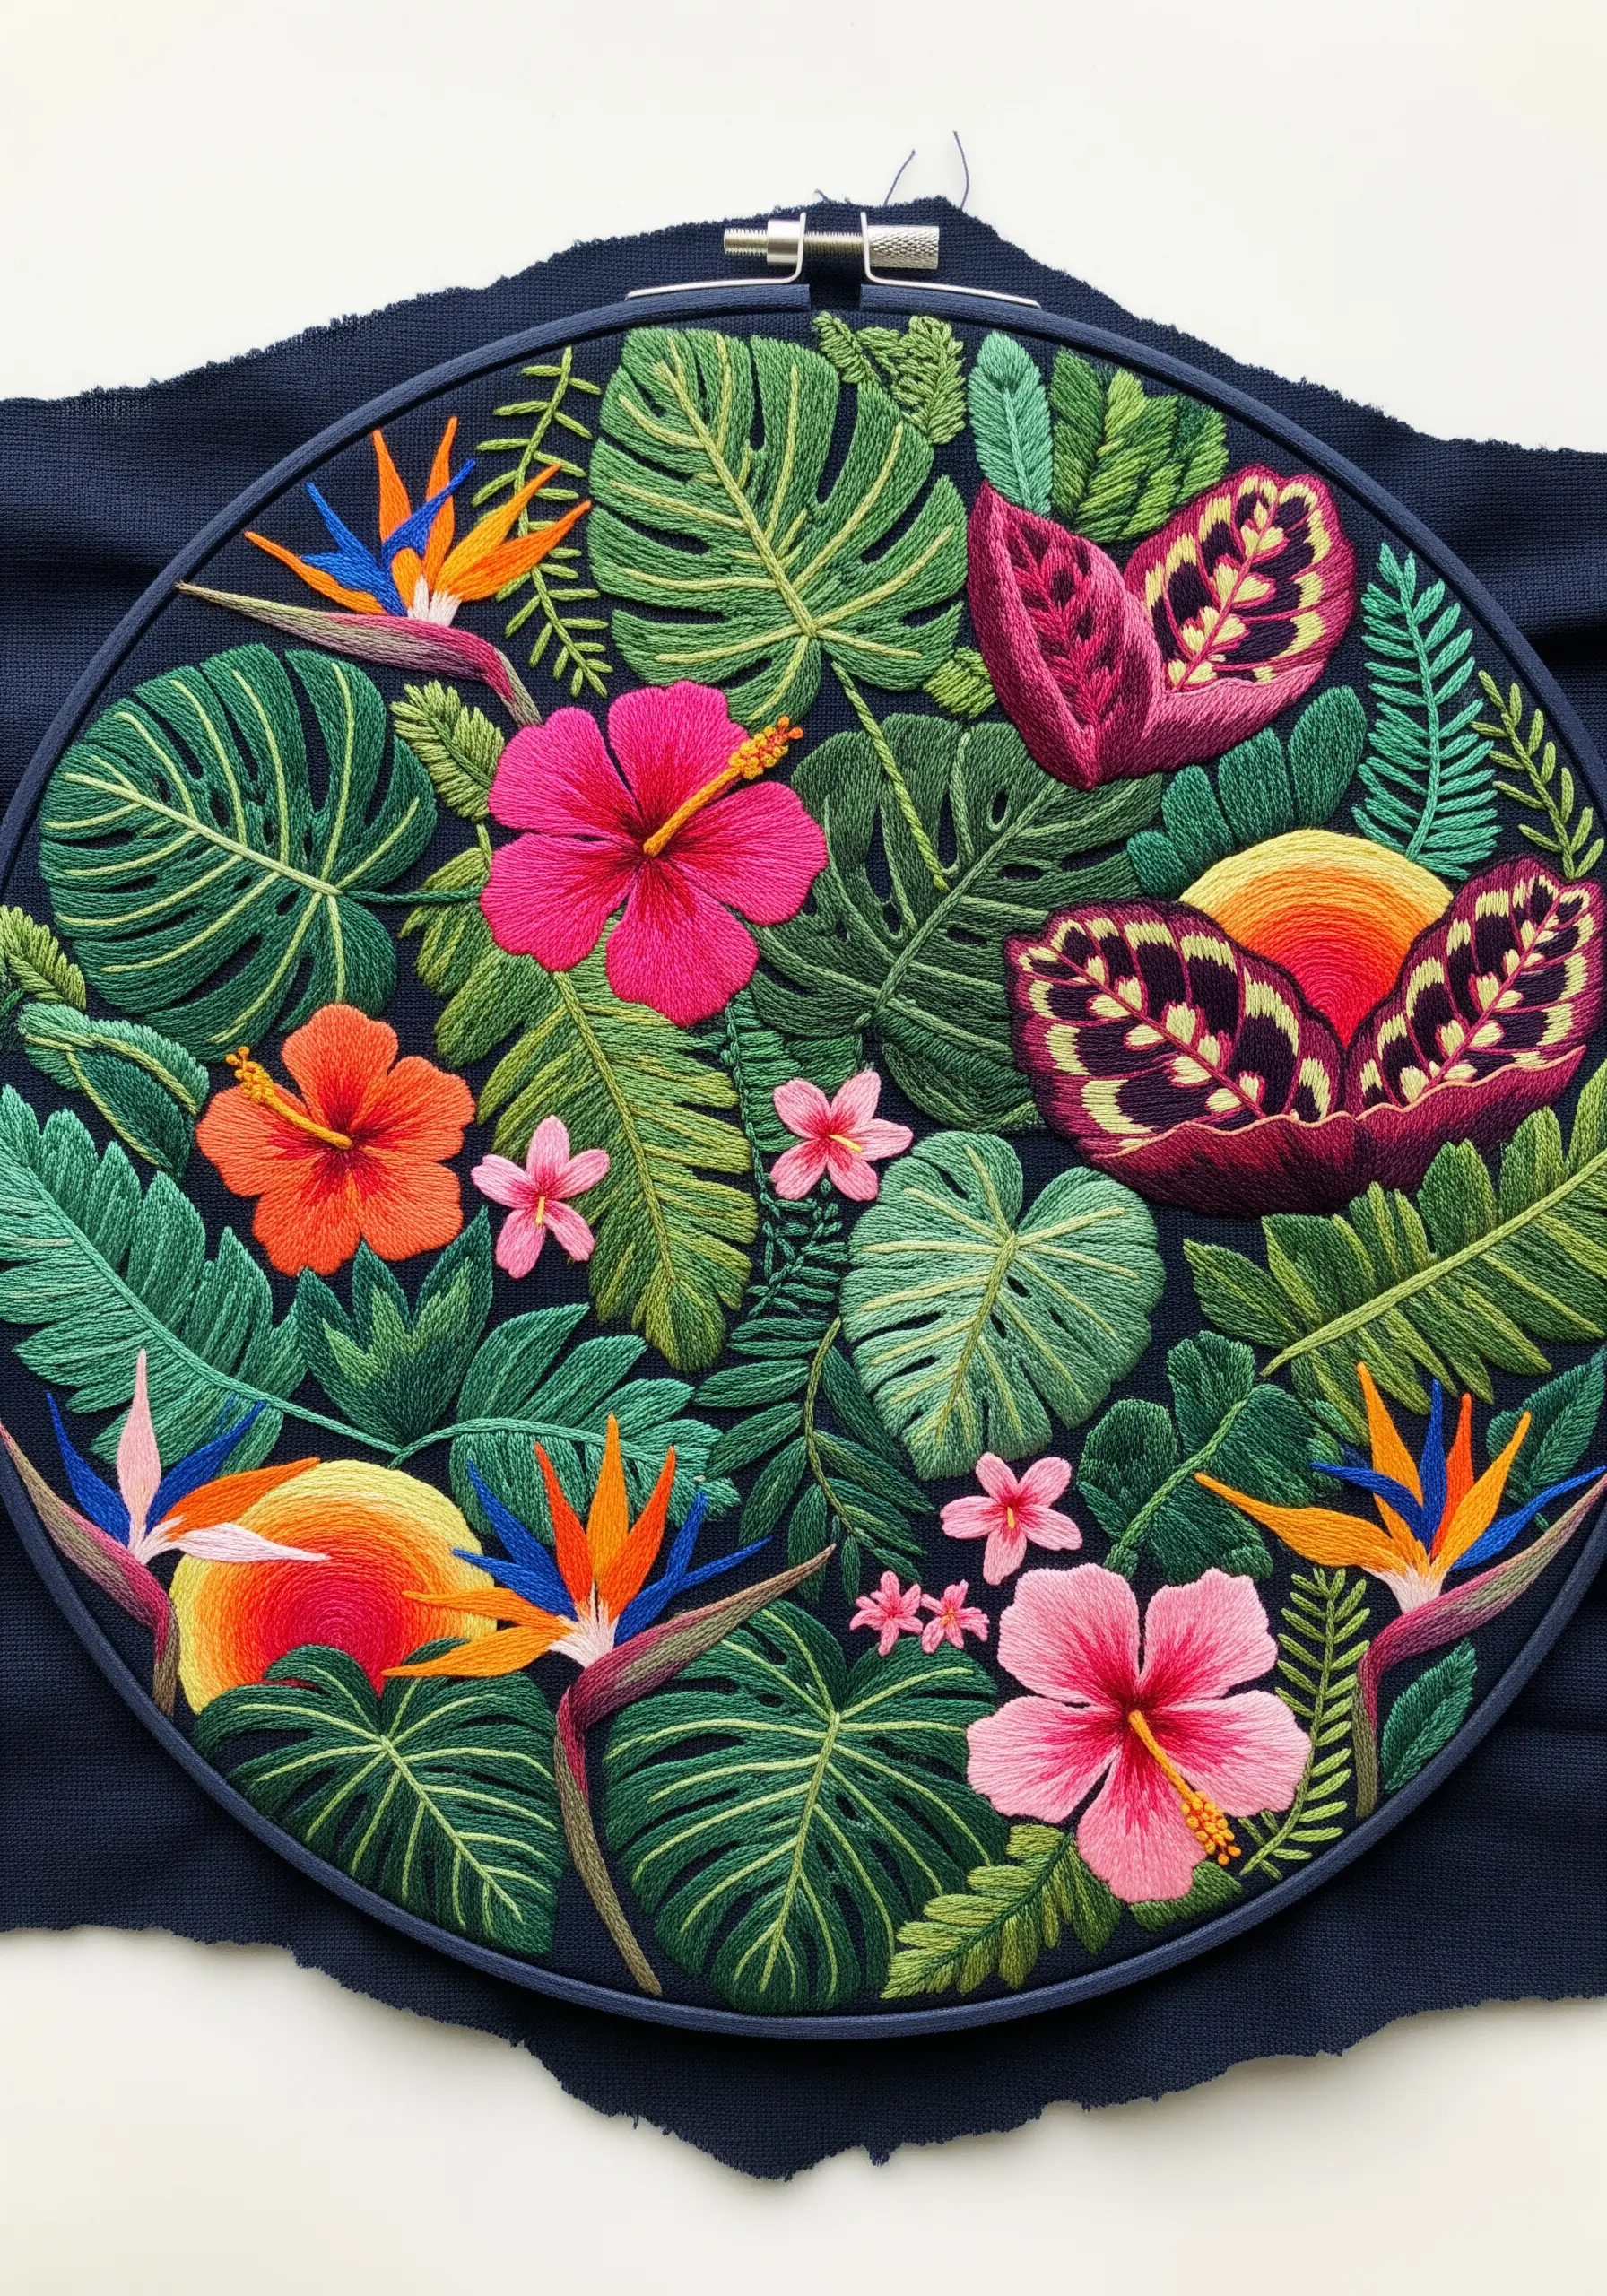
To create a dense, jungle-like composition that feels lush rather than cluttered, focus on layering and varied textures.
Stitch the elements in the background first, like the darker monstera leaves, and then stitch the foreground elements (hibiscus, bird of paradise) on top.
Use different stitches for different leaves—satin stitch for smooth ones, fishbone for veined ones—to ensure each plant remains distinct.
This method of creating tropical leaf embroidery designs builds realistic depth and invites the viewer’s eye to explore the rich tapestry you’ve woven.


