

Beyond the hoop and the sampler, there’s a world where thread and fabric reshape the very feel of a room. It’s about thinking of every surface—from a plain lampshade to a staircase riser—as a potential canvas waiting for a quiet touch of artistry.
This isn’t about complexity or mastering hundreds of stitches. It’s about seeing the potential in a single, well-placed line on a headboard, or understanding how the texture of a chunky yarn can transform a flat wall into a sculptural piece. It’s about the unexpected delight of finding a delicate detail in a functional object.
Here, you’ll find ways to integrate your love for textiles into your home in ways that feel both intentional and deeply personal. Let these ideas guide you to create spaces that don’t just look beautiful, but feel thoughtfully and uniquely crafted by you.
1. Reimagine Stairways with Quilted Textiles
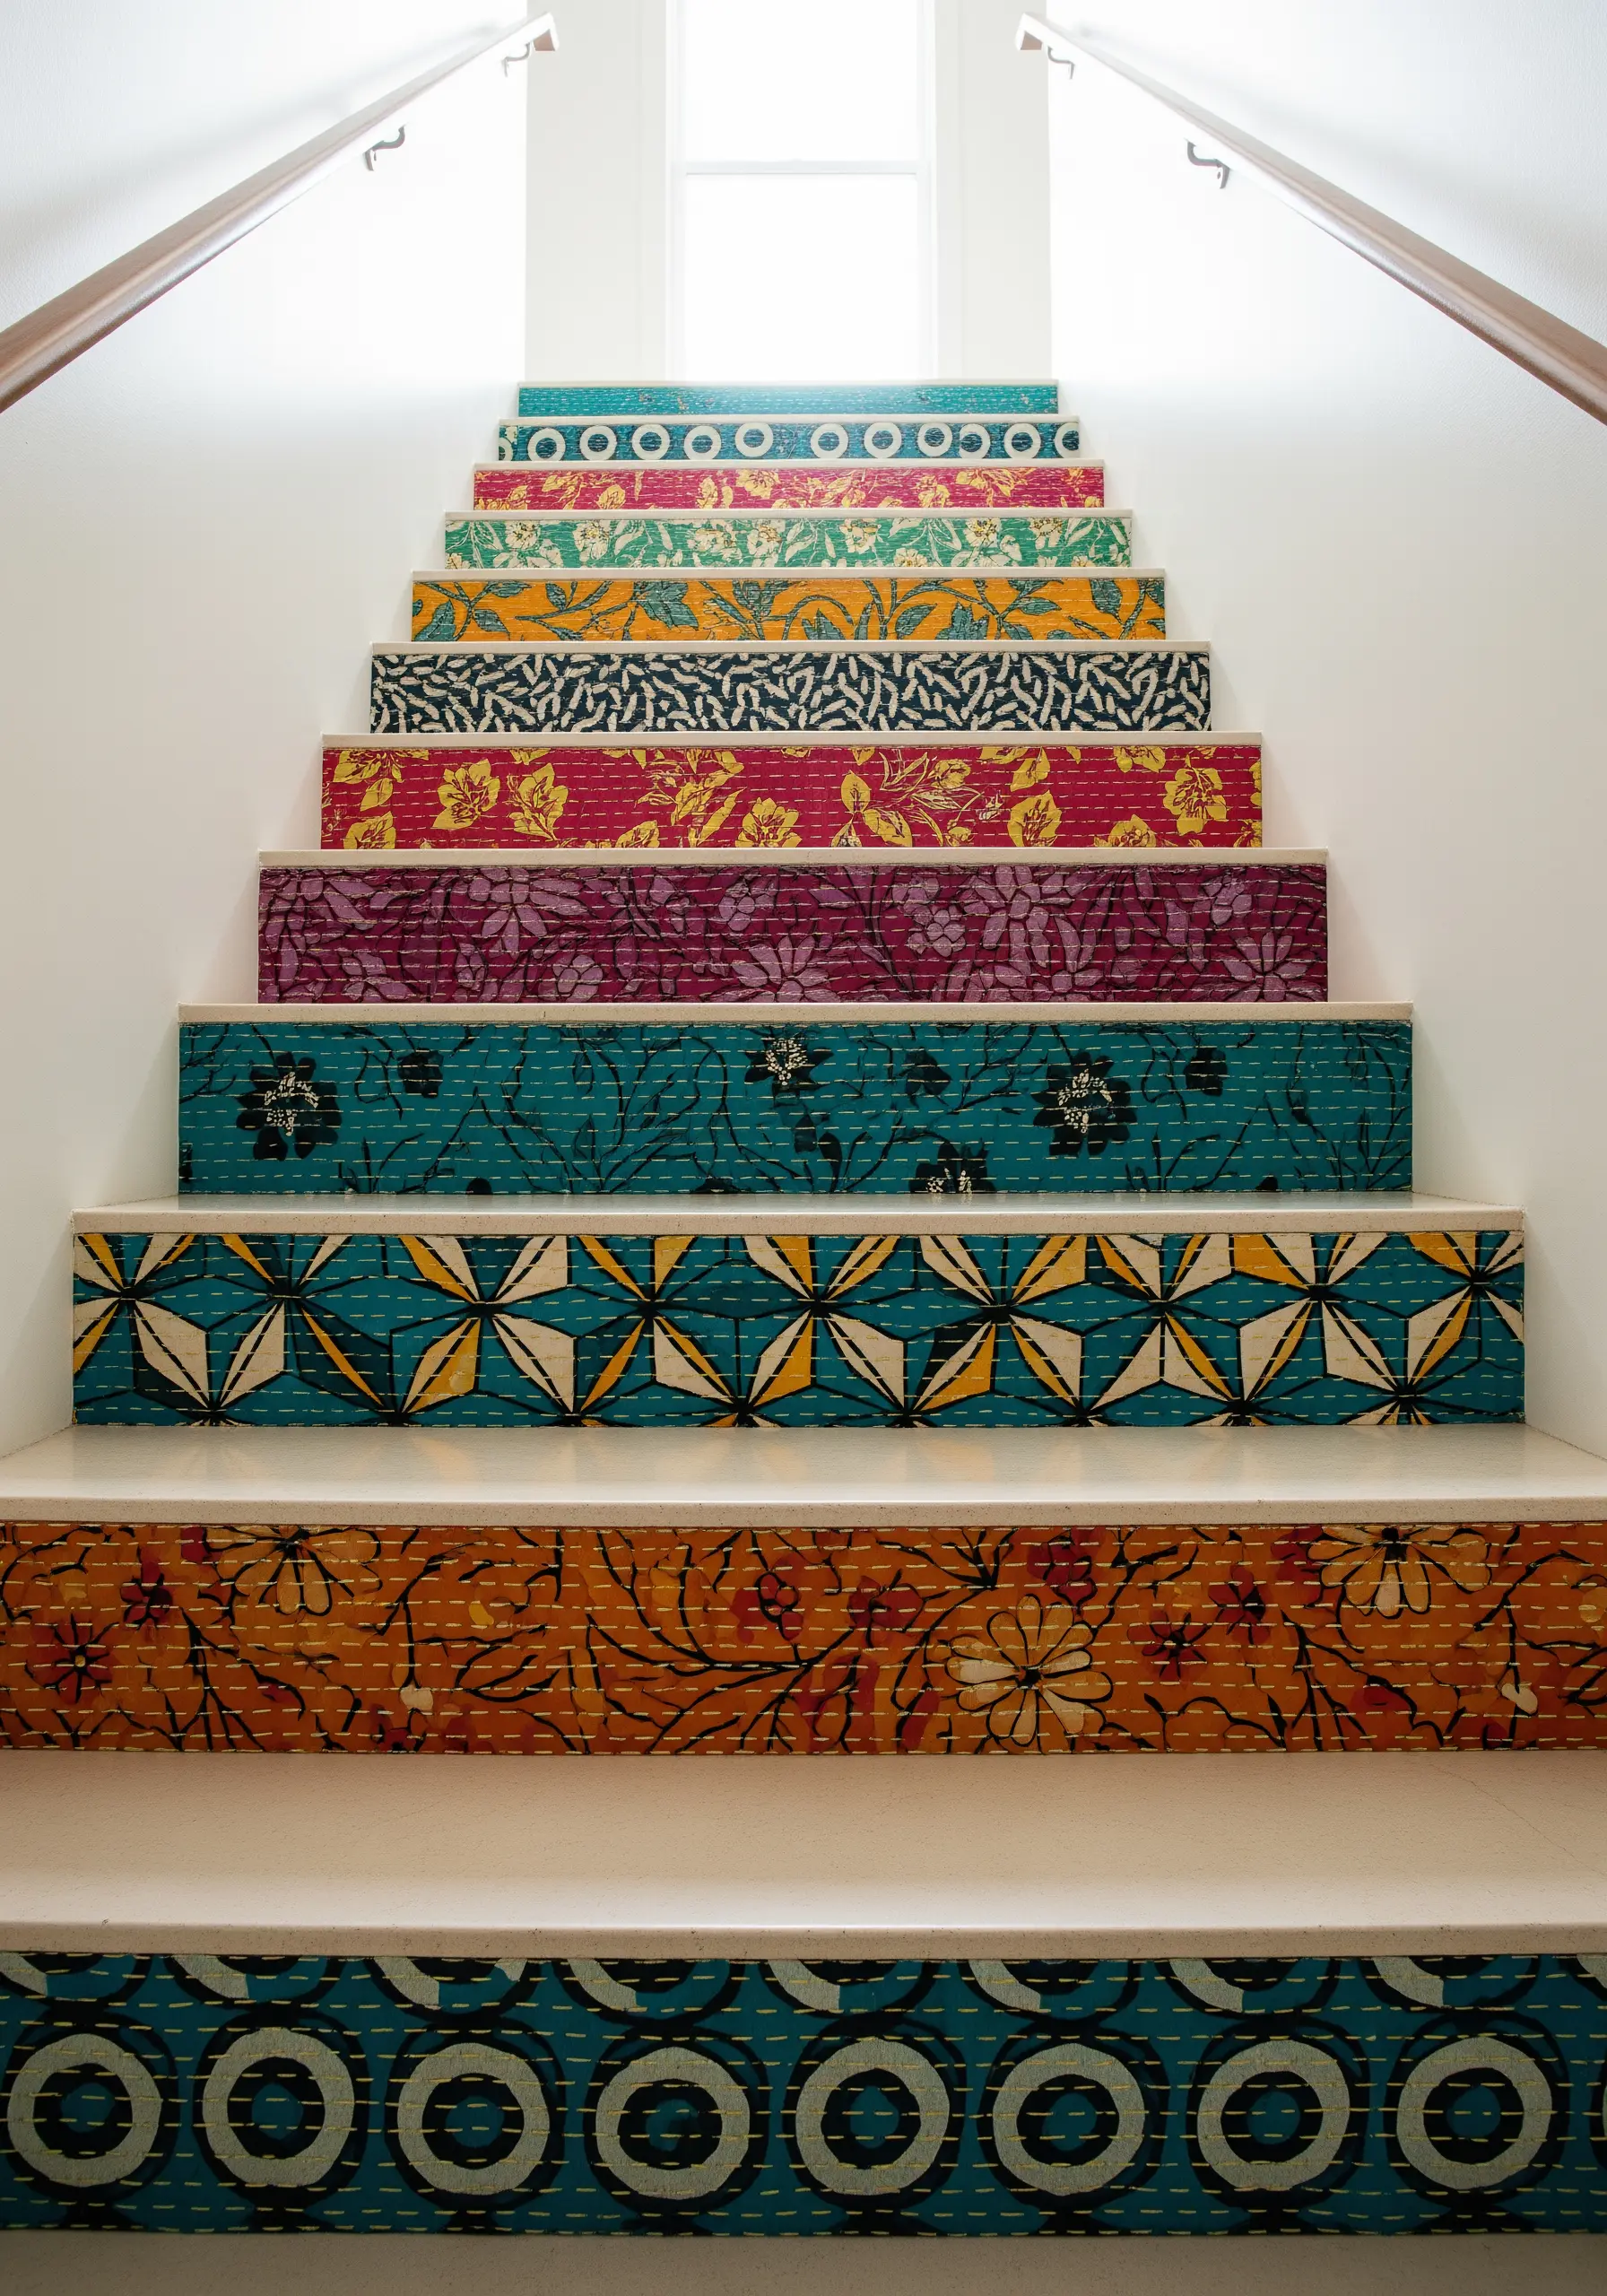
Transform your stair risers into a stunning textile gallery by applying panels of patterned fabric.
Use vintage Kantha quilts or heavily embroidered textiles for their inherent texture and story.
Measure each riser precisely, cut the fabric with a slight overlap, and apply it using a strong spray adhesive for a smooth, bubble-free finish.
The visible running stitches of Kantha fabric add a layer of authentic craftsmanship that paint or wallpaper simply cannot replicate.
For durability in a high-traffic area, seal the fabric with a few coats of clear, matte Mod Podge or a similar water-based sealant.
2. Sculpt a 3D Fiber Art Coral Reef

Move beyond the hoop by creating a high-relief, sculptural wall piece that commands attention.
Start with a sturdy base, like a cork board or a carved foam panel, painted a dark color to create depth.
Build up texture by combining different fiber techniques: use chunky French knots for coral polyps, needle felting for soft, rounded forms, and turkey work for a shaggy, moss-like effect.
For the rigid, branching corals, wrap thick wire with vibrant yarn and bend it into organic shapes before securing it to the base.
This layering of soft and structural elements is what gives the final piece its dynamic, lifelike energy, turning your wall into one of these handmade art objects.
3. Master Large-Scale Couching for Graphic Impact

Create monumental, minimalist art using the simple technique of couching—securing a thick cord onto a surface with smaller, contrasting stitches.
Use sound-dampening acoustic panels as your canvas for a piece that is both beautiful and functional in a home office.
Plan your design with chalk first, then lay down a thick, decorative rope—like a bright yellow climbing rope—along the lines.
Use a durable upholstery thread and a curved needle to tack the rope down at regular intervals, making each anchor stitch a deliberate part of the design.
This method transforms a simple line into a bold, sculptural statement.
4. Illuminate Your Stitches with a Perforated Lampshade

Turn a standard lampshade into a captivating light fixture by combining embroidery with perforation.
Choose a tightly woven, opaque fabric in a dark color, like black linen or cotton drill, to maximize the contrast when the light is on.
After embroidering your design—a city skyline works perfectly—use a fine awl or a thick, sharp needle to carefully punch small holes in the areas you want to illuminate, like windows.
When lit from within, the pinpricks of light create a starry, dramatic effect, transforming your thread work into an interactive piece of art.
5. Create a Sculptural Felt Flower Table Runner

Elevate your tablescape with a three-dimensional centerpiece crafted from felt and embellished with simple stitches.
Cut petal and leaf shapes from high-quality wool-blend felt, which holds its shape better than acrylic craft felt.
Layer the petals and secure them with a few central stitches, adding French knots or seed beads to the flower centers for realistic detail.
Attach the finished flowers and foliage to a simple linen runner with discreet tacking stitches, arranging them in an organic, flowing line to mimic a natural vine.
This creates an impressive, reusable centerpiece that adds both color and sculptural form to your dining table.
6. Weave Room Dividers with Fabric Strips

Construct an airy, functional art piece by weaving with fabric instead of yarn.
Build simple wooden frames and warp them vertically with durable cotton rope or jute twine.
Instead of a traditional weft, use wide strips of fabric—cut from old linens, cotton sheets, or bolts of complementary colored fabrics.
Vary the texture by knotting, twisting, or braiding the strips as you weave them through the warp.
This technique allows you to create semi-transparent partitions that divide a space while allowing light to filter through, adding softness and color without visual weight.
7. Design a Multi-Panel Embroidered Headboard

Transform a simple upholstered headboard into a bespoke piece of furniture with linear embroidery.
Create your design to flow across multiple panels, treating them as a single canvas. A stylized mountain range, like this one, is perfect for connecting separate sections into a cohesive whole.
Use a thick, high-contrast thread, like a cream-colored Perle cotton or sashiko thread on dark blue upholstery, to make the lines pop.
A simple running stitch or backstitch is all you need; the power of the design comes from the scale and the boldness of the lines, creating a dramatic focal point for a serene bedroom look.
8. Add Botanical Details to Cabinet Fronts

Give plain kitchen or storage cabinets a sophisticated, custom touch with delicate botanical embroidery.
Remove the door fronts and wrap them in a durable, textured fabric like a linen-cotton blend. Secure it tightly at the back with a staple gun.
Before reattaching the hardware, embroider a simple motif, such as a single herb sprig, onto the center of each panel.
Use a limited color palette and simple stitches like stem stitch for outlines and satin stitch for leaves to maintain a clean, modern aesthetic.
This unexpected application of embroidery brings a soft, handmade elegance to a typically hard-surfaced space.
9. Construct a Geometric Embroidered Mobile
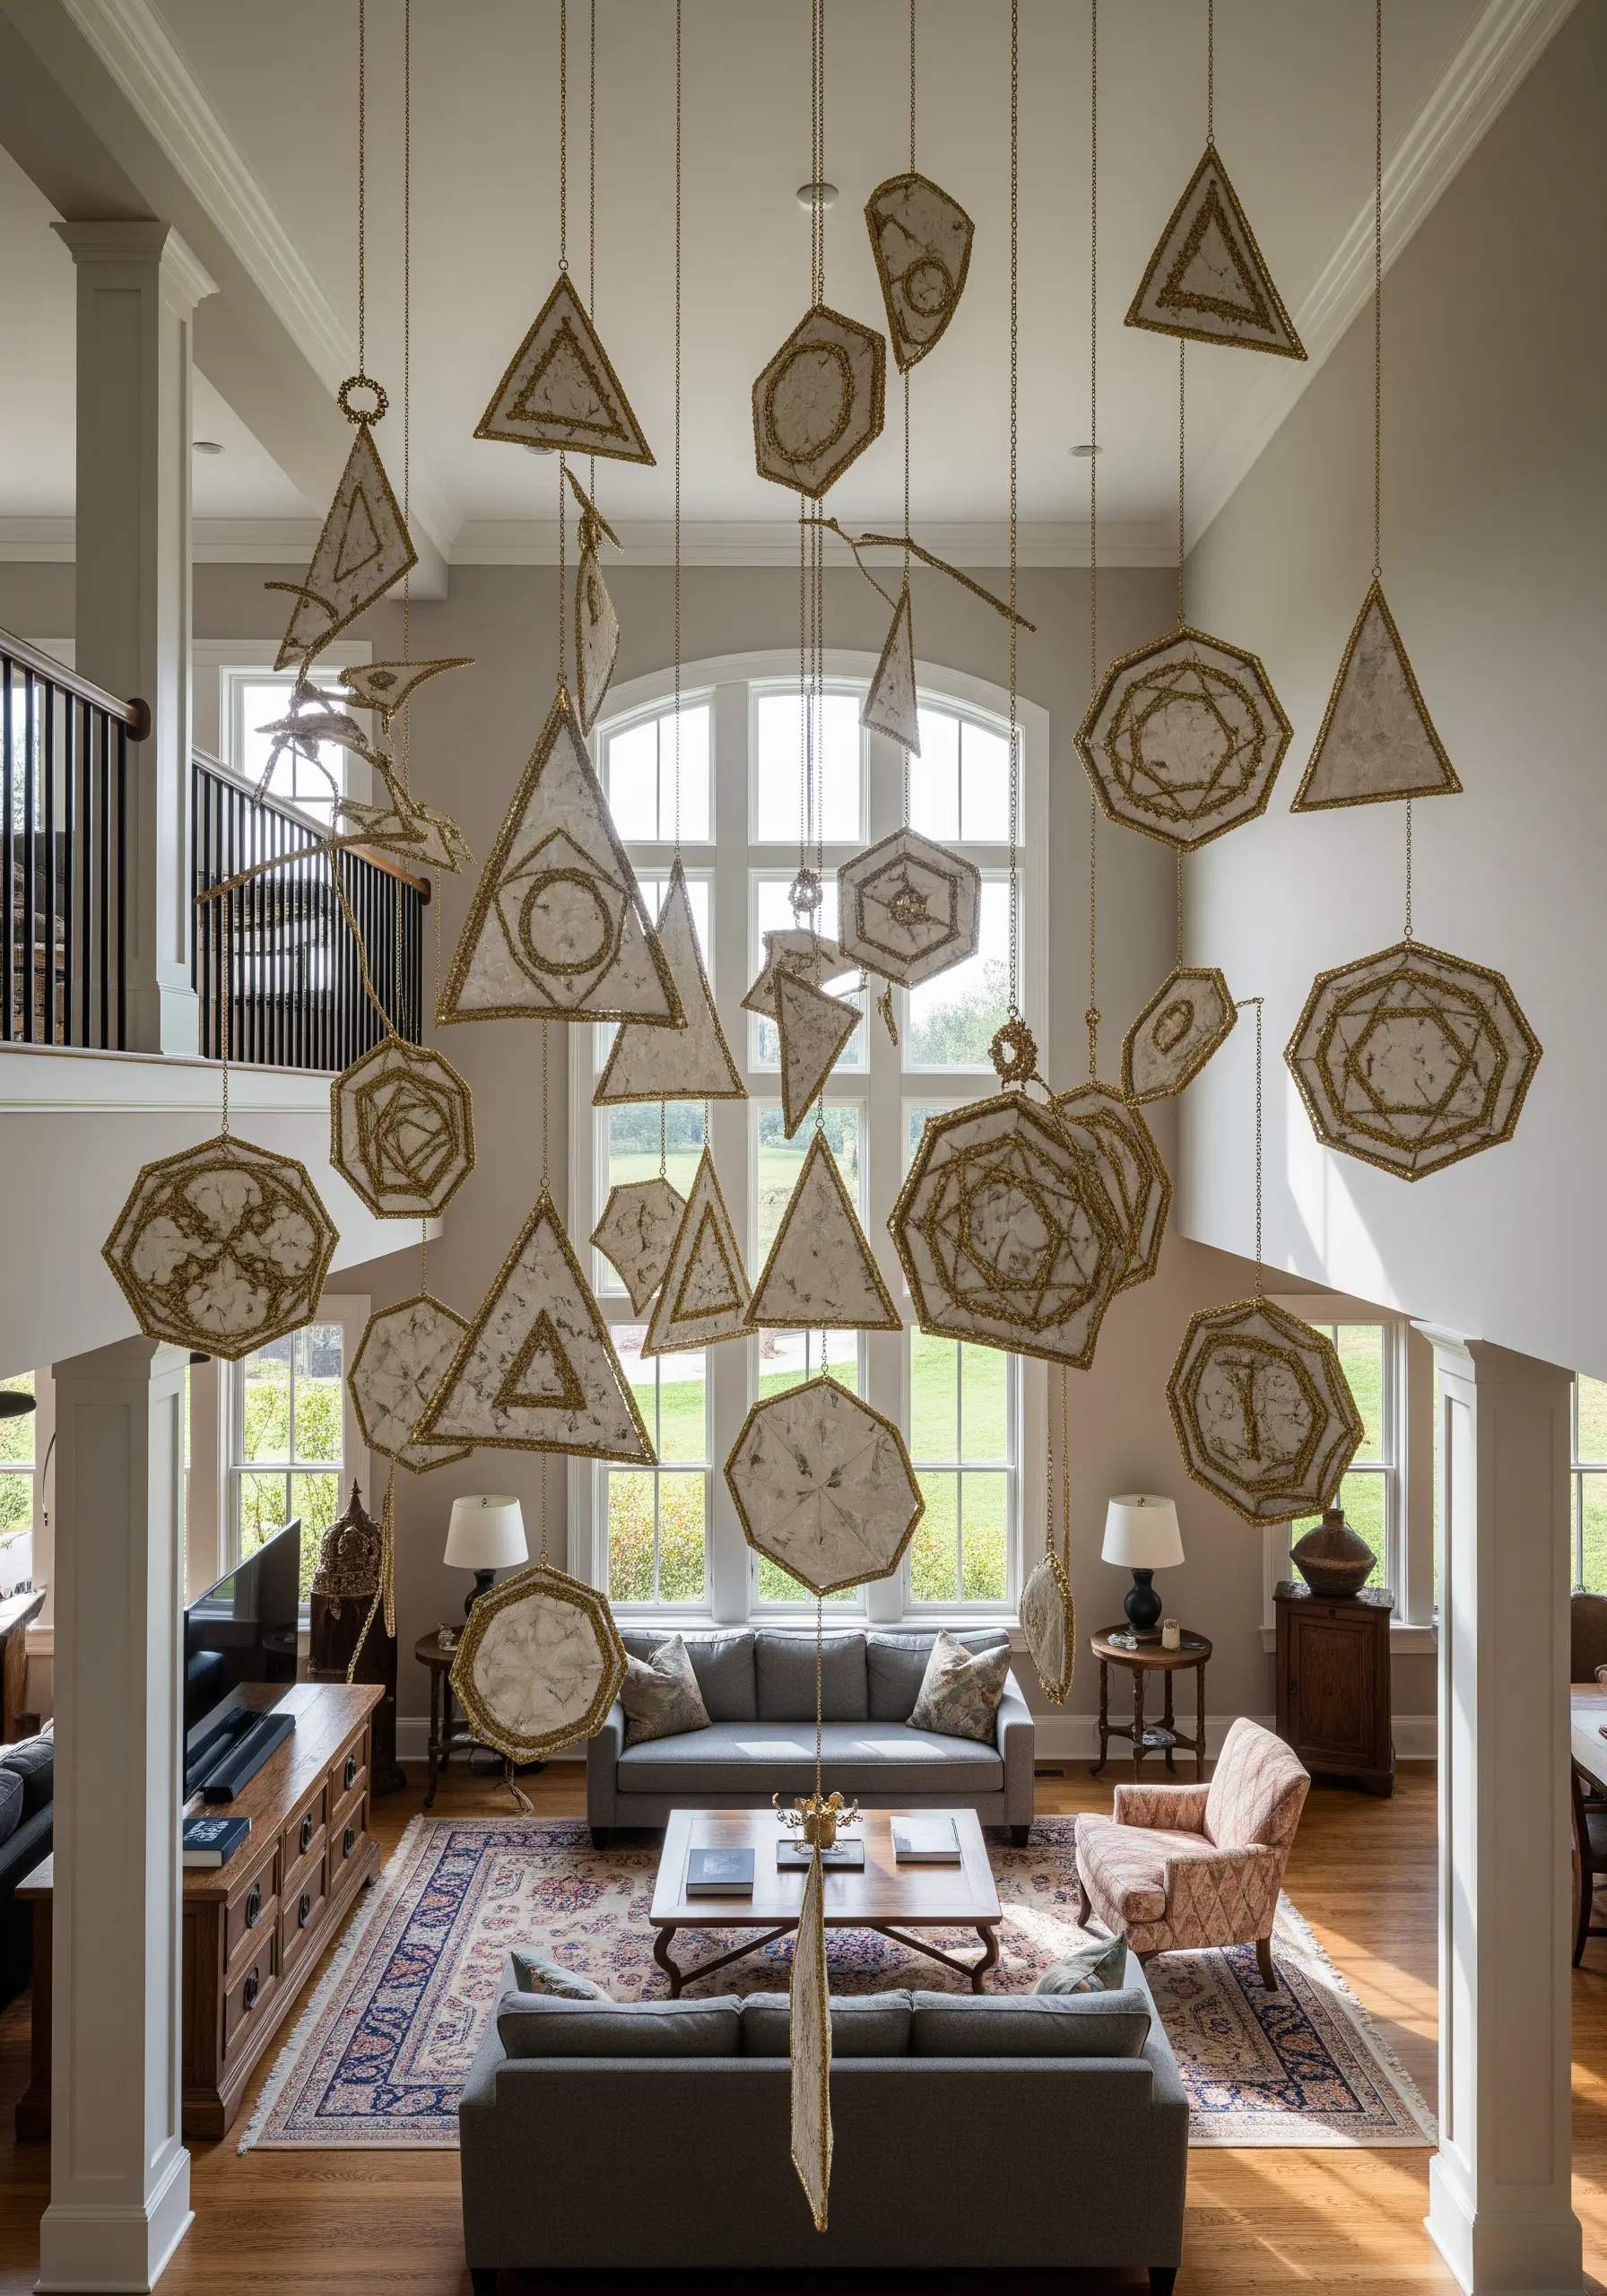
Create a stunning, large-scale mobile that combines delicate stitching with structural forms.
Stretch semi-sheer fabric, like organdy or silk organza, in sturdy metal or wooden frames of various geometric shapes.
Embroider sacred geometry or mandala-inspired patterns onto the taut fabric using metallic or high-sheen threads that will catch the light.
The transparency of the fabric makes the stitches appear to float within the frames.
Hang the finished pieces at varying heights using fine chains or clear filament to create a dynamic, light-filled installation that moves with the air currents in your home.
10. Embellish Chunky Knits with Delicate Florals

Add a touch of softness and detail to chunky, textured knits by incorporating delicate embroidery.
Instead of stitching through the thick yarn of a pouf or blanket, which can be difficult, weave your stitches between the knitted loops.
Use a blunt-ended tapestry needle to avoid splitting the yarn fibers.
Create small floral sprays using detached chain stitches for petals and French knots for centers. The contrast between the bold, rustic knit and the fine, detailed embroidery creates a beautiful visual and textural balance.
11. Craft Ornate, Fabric-Covered Books

Transform ordinary journals or display books into treasured objects by covering them with ornate fabrics.
Choose richly textured materials like brocade, jacquard, or embroidered velvet for a luxurious feel.
Carefully wrap the fabric around the book’s cover, mitering the corners for a clean finish, and secure it on the inside with fabric glue.
You can further embellish the spine with beads or add a metal clasp for an antique look.
This is a perfect way to give new life to damaged books or to create a set of cohesive, decorative objects for a shelf or console table.
12. Create a Storytelling Fabric Map

Design a deeply personal piece of wall art by creating a fabric map that blends appliqué, embroidery, and quilting.
Start with a base fabric like indigo-dyed cotton or linen. Create the continents using appliqué with fabrics that have personal meaning—scraps from clothing, old curtains, or pieces collected during travels.
Secure the appliqué pieces with a decorative running stitch, then add embroidered details: city names, travel routes, or small icons representing memories.
The layers of fabric and visible hand-stitching turn a simple world map into a rich, tactile narrative of your life’s journey.
13. Embroider a Cascade of Autumn Leaves on Sheer Curtains
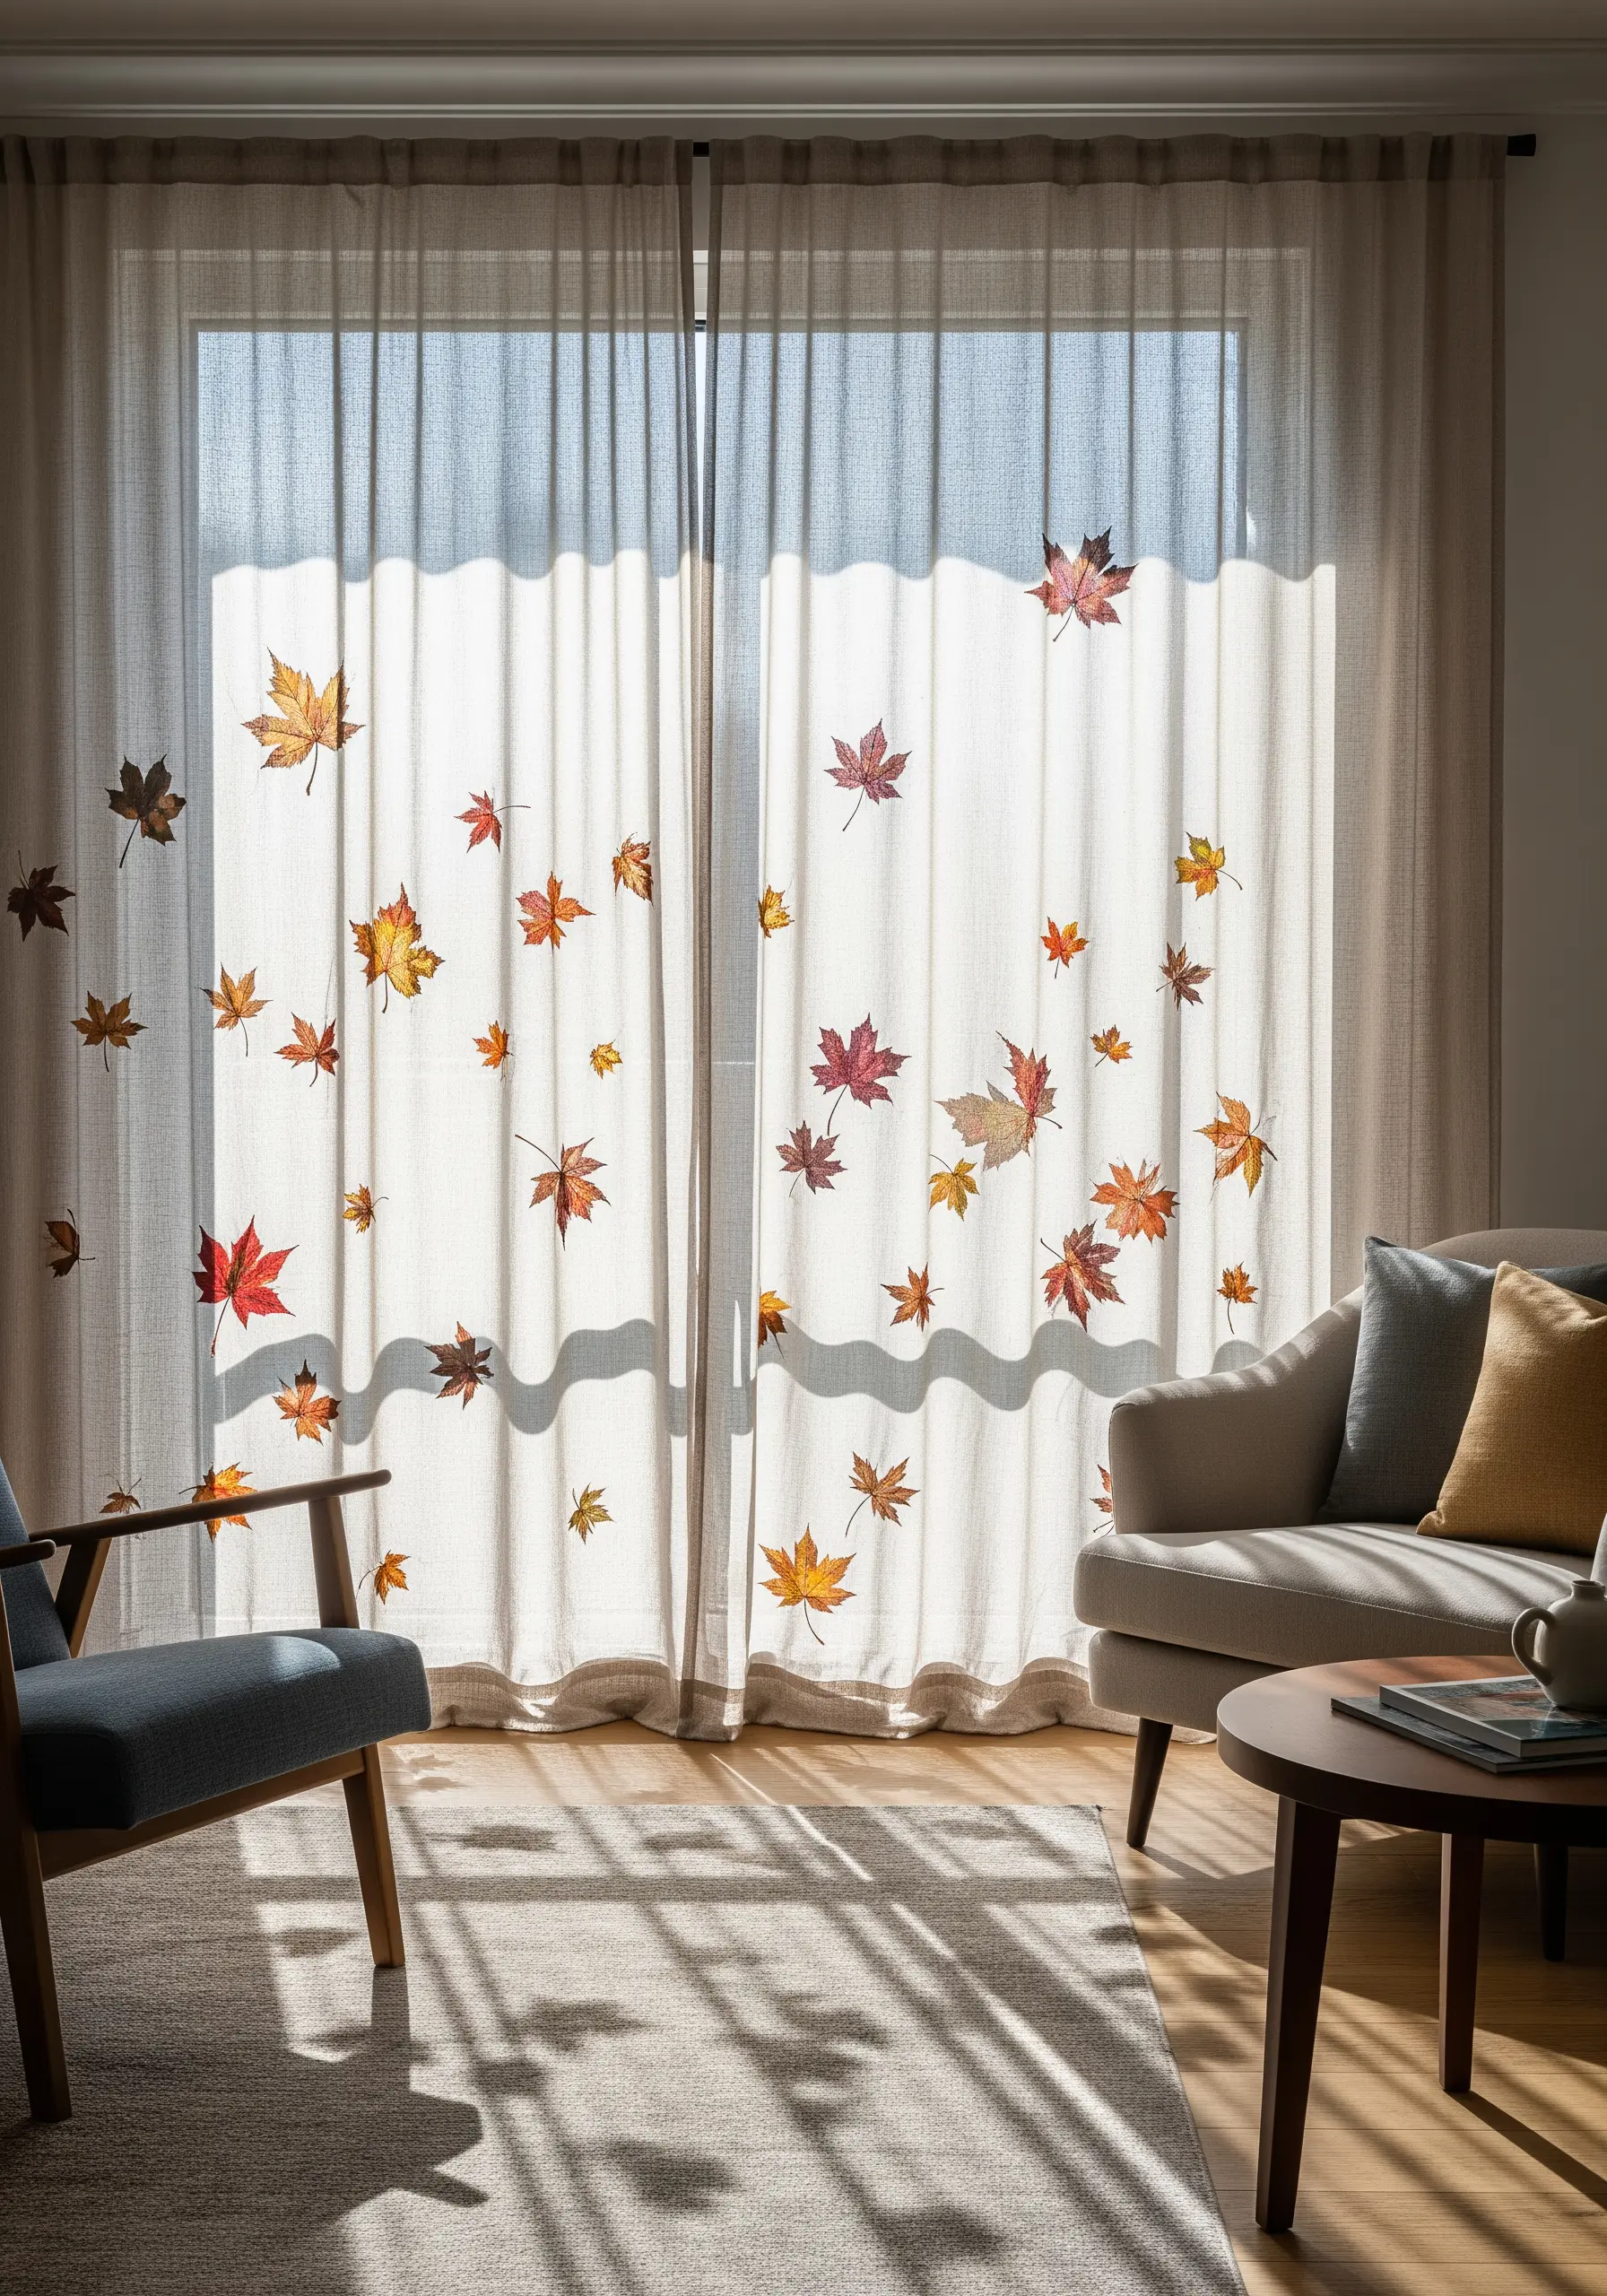
Bring the beauty of the season indoors by embroidering directly onto sheer curtain panels.
Use a water-soluble stabilizer to support the delicate fabric while you stitch, preventing puckering and distortion.
Arrange the motifs—like these autumn leaves—in a scattered, random pattern to mimic them gently falling.
Employ a thread painting technique, blending shades of red, orange, and gold within each leaf to give them a realistic, variegated appearance. When the sunlight filters through, the leaves will appear to glow, creating an ethereal effect.
14. Construct a Modernist Patchwork Fire Screen
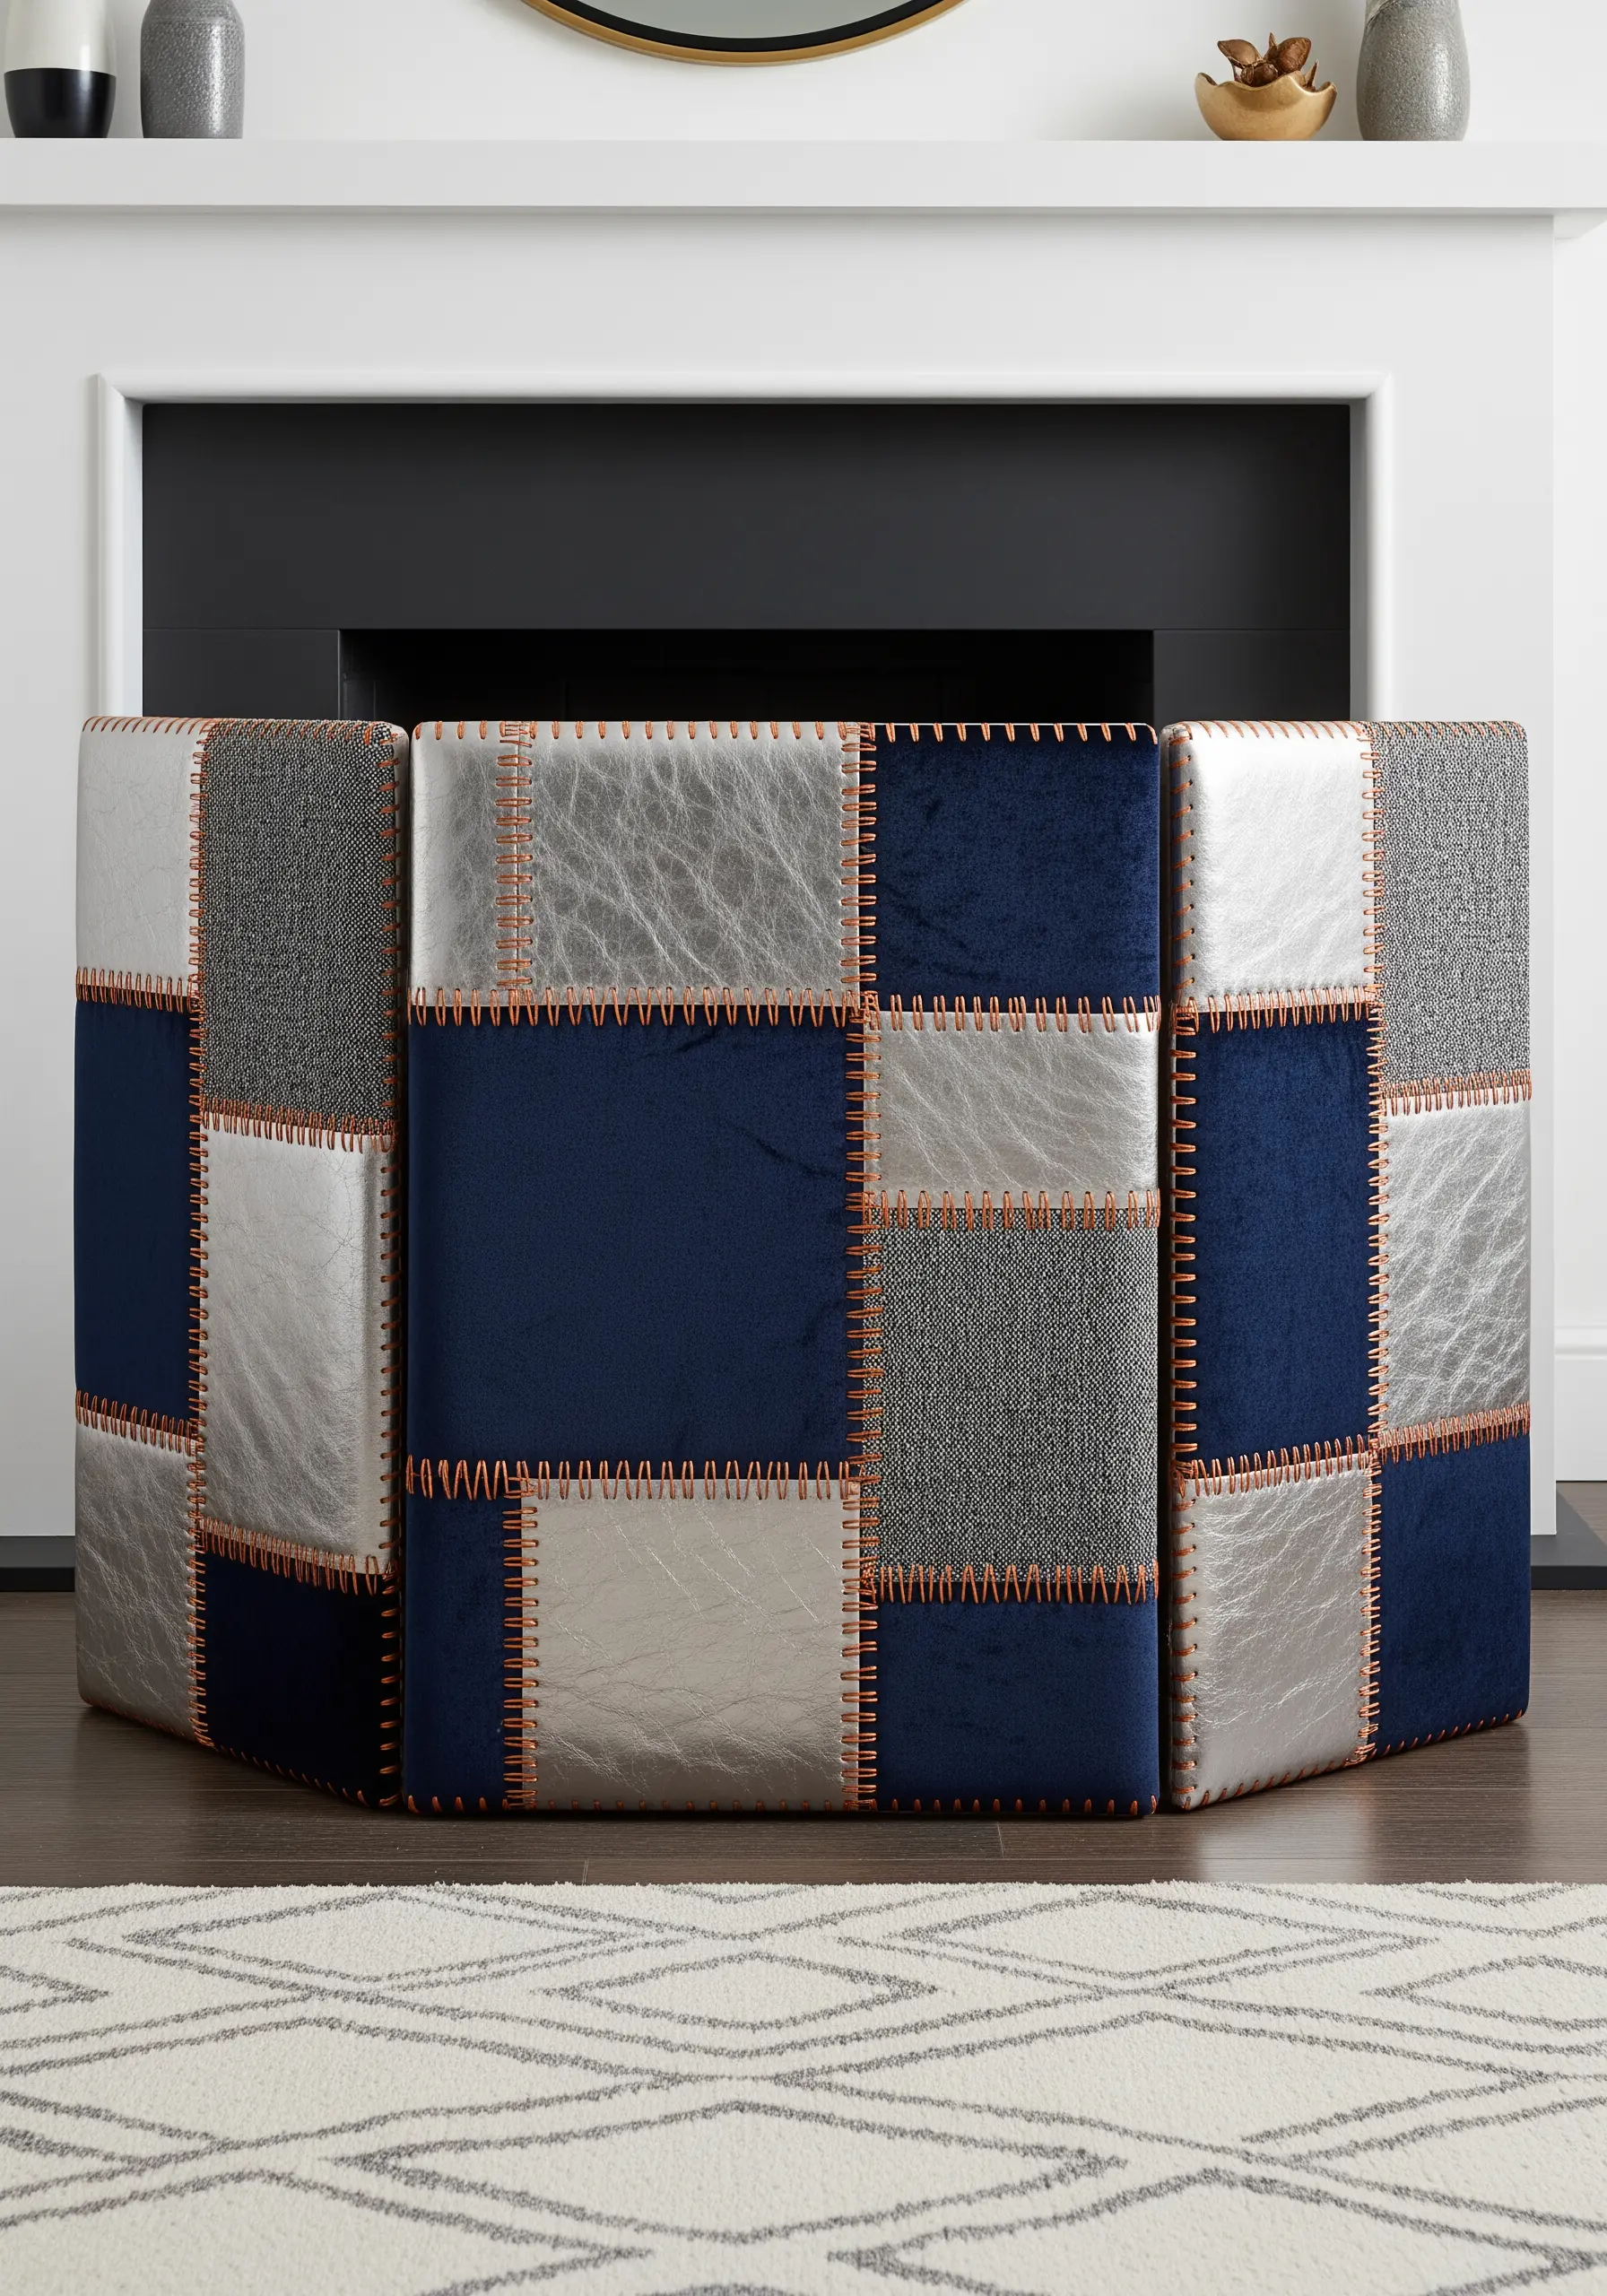
Assemble a unique, functional fireplace screen using upholstery techniques and bold stitching.
Cover hinged wooden panels with a patchwork of textured fabrics, like bouclé, velvet, and metallic faux leather, for a sophisticated tactile contrast.
Instead of hiding your seams, celebrate them. Use a thick, contrasting thread—like this copper-colored cord—and a large, visible whipstitch or blanket stitch to join the patches.
This approach turns the construction itself into a key design element, resulting in a piece that feels both rustic and highly modern.
15. Sculpt a Collection of Stitched Fabric Cacti
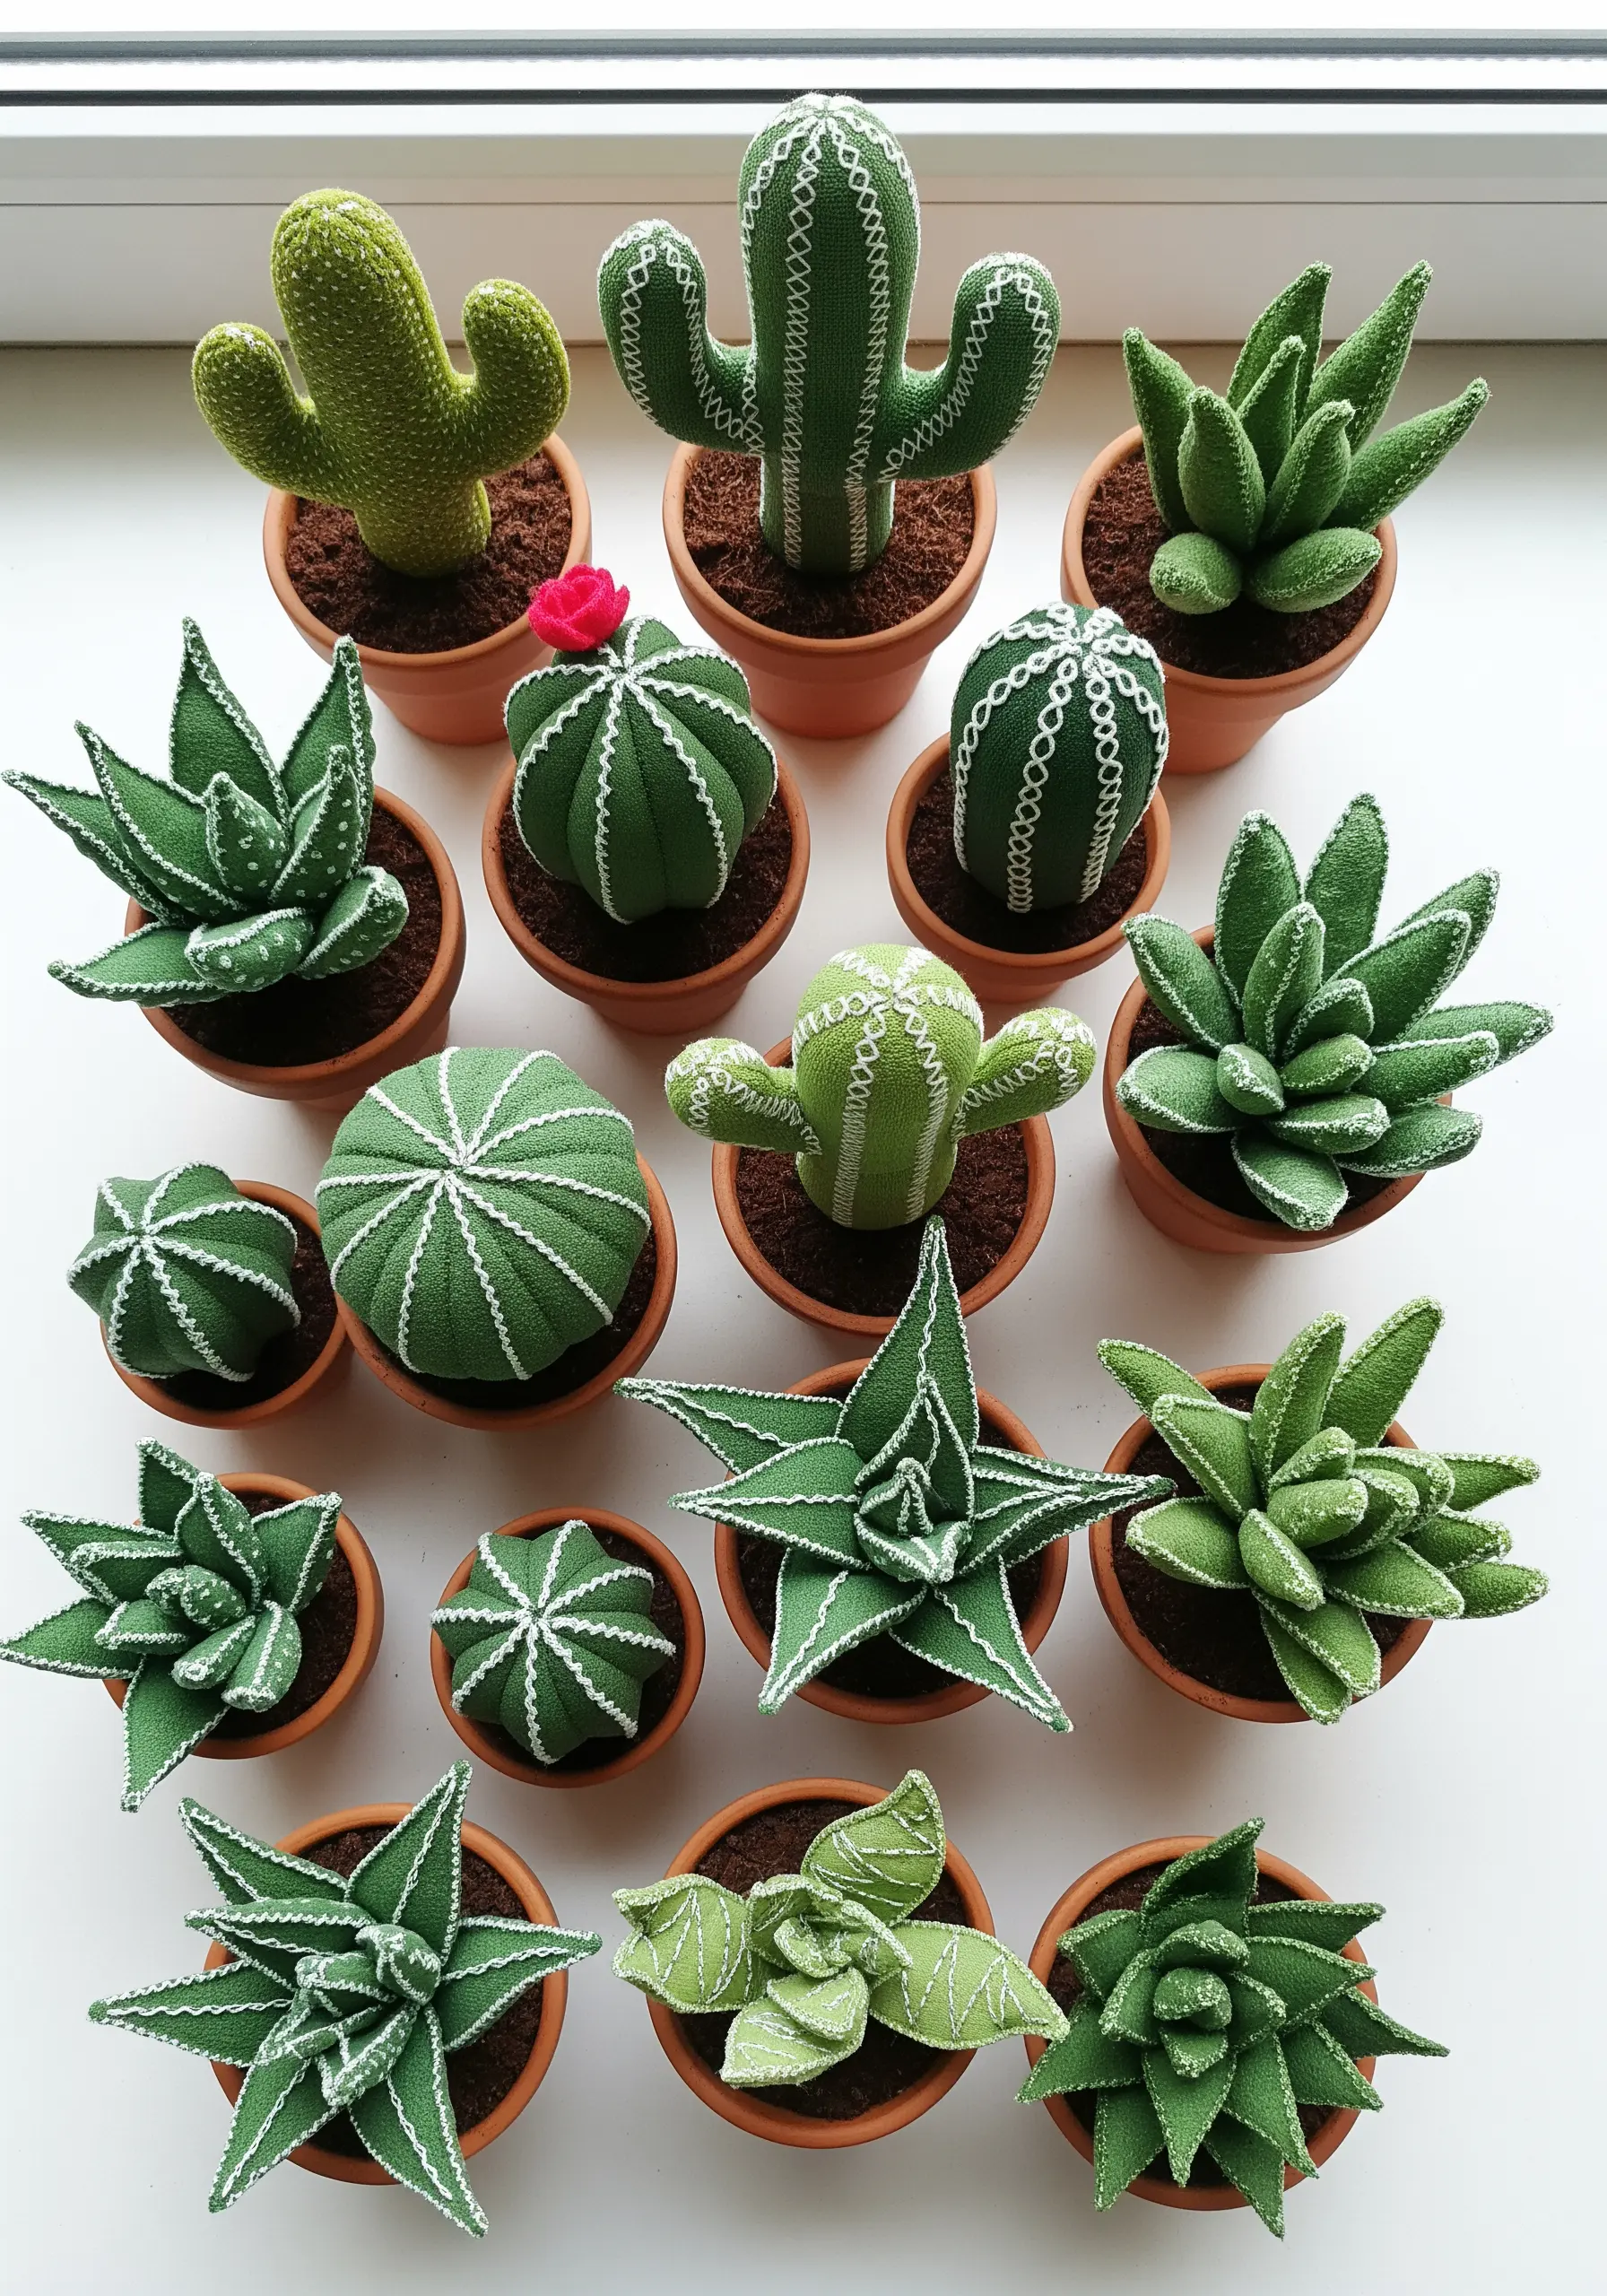
Create a low-maintenance indoor garden with three-dimensional, embroidered fabric succulents.
Use felt or thick cotton canvas in various shades of green. Cut out the cactus shapes, stitch them together, and stuff firmly with fiberfill to create the 3D form.
The magic is in the finishing details. Use a contrasting white or cream thread to add texture and definition with simple running stitches or backstitches, mimicking the natural ribs and spines of the plants.
This project allows you to play with form and line in a sculptural way, going far beyond flat embroidery.
16. Paint with Yarn Using Punch Needle Art
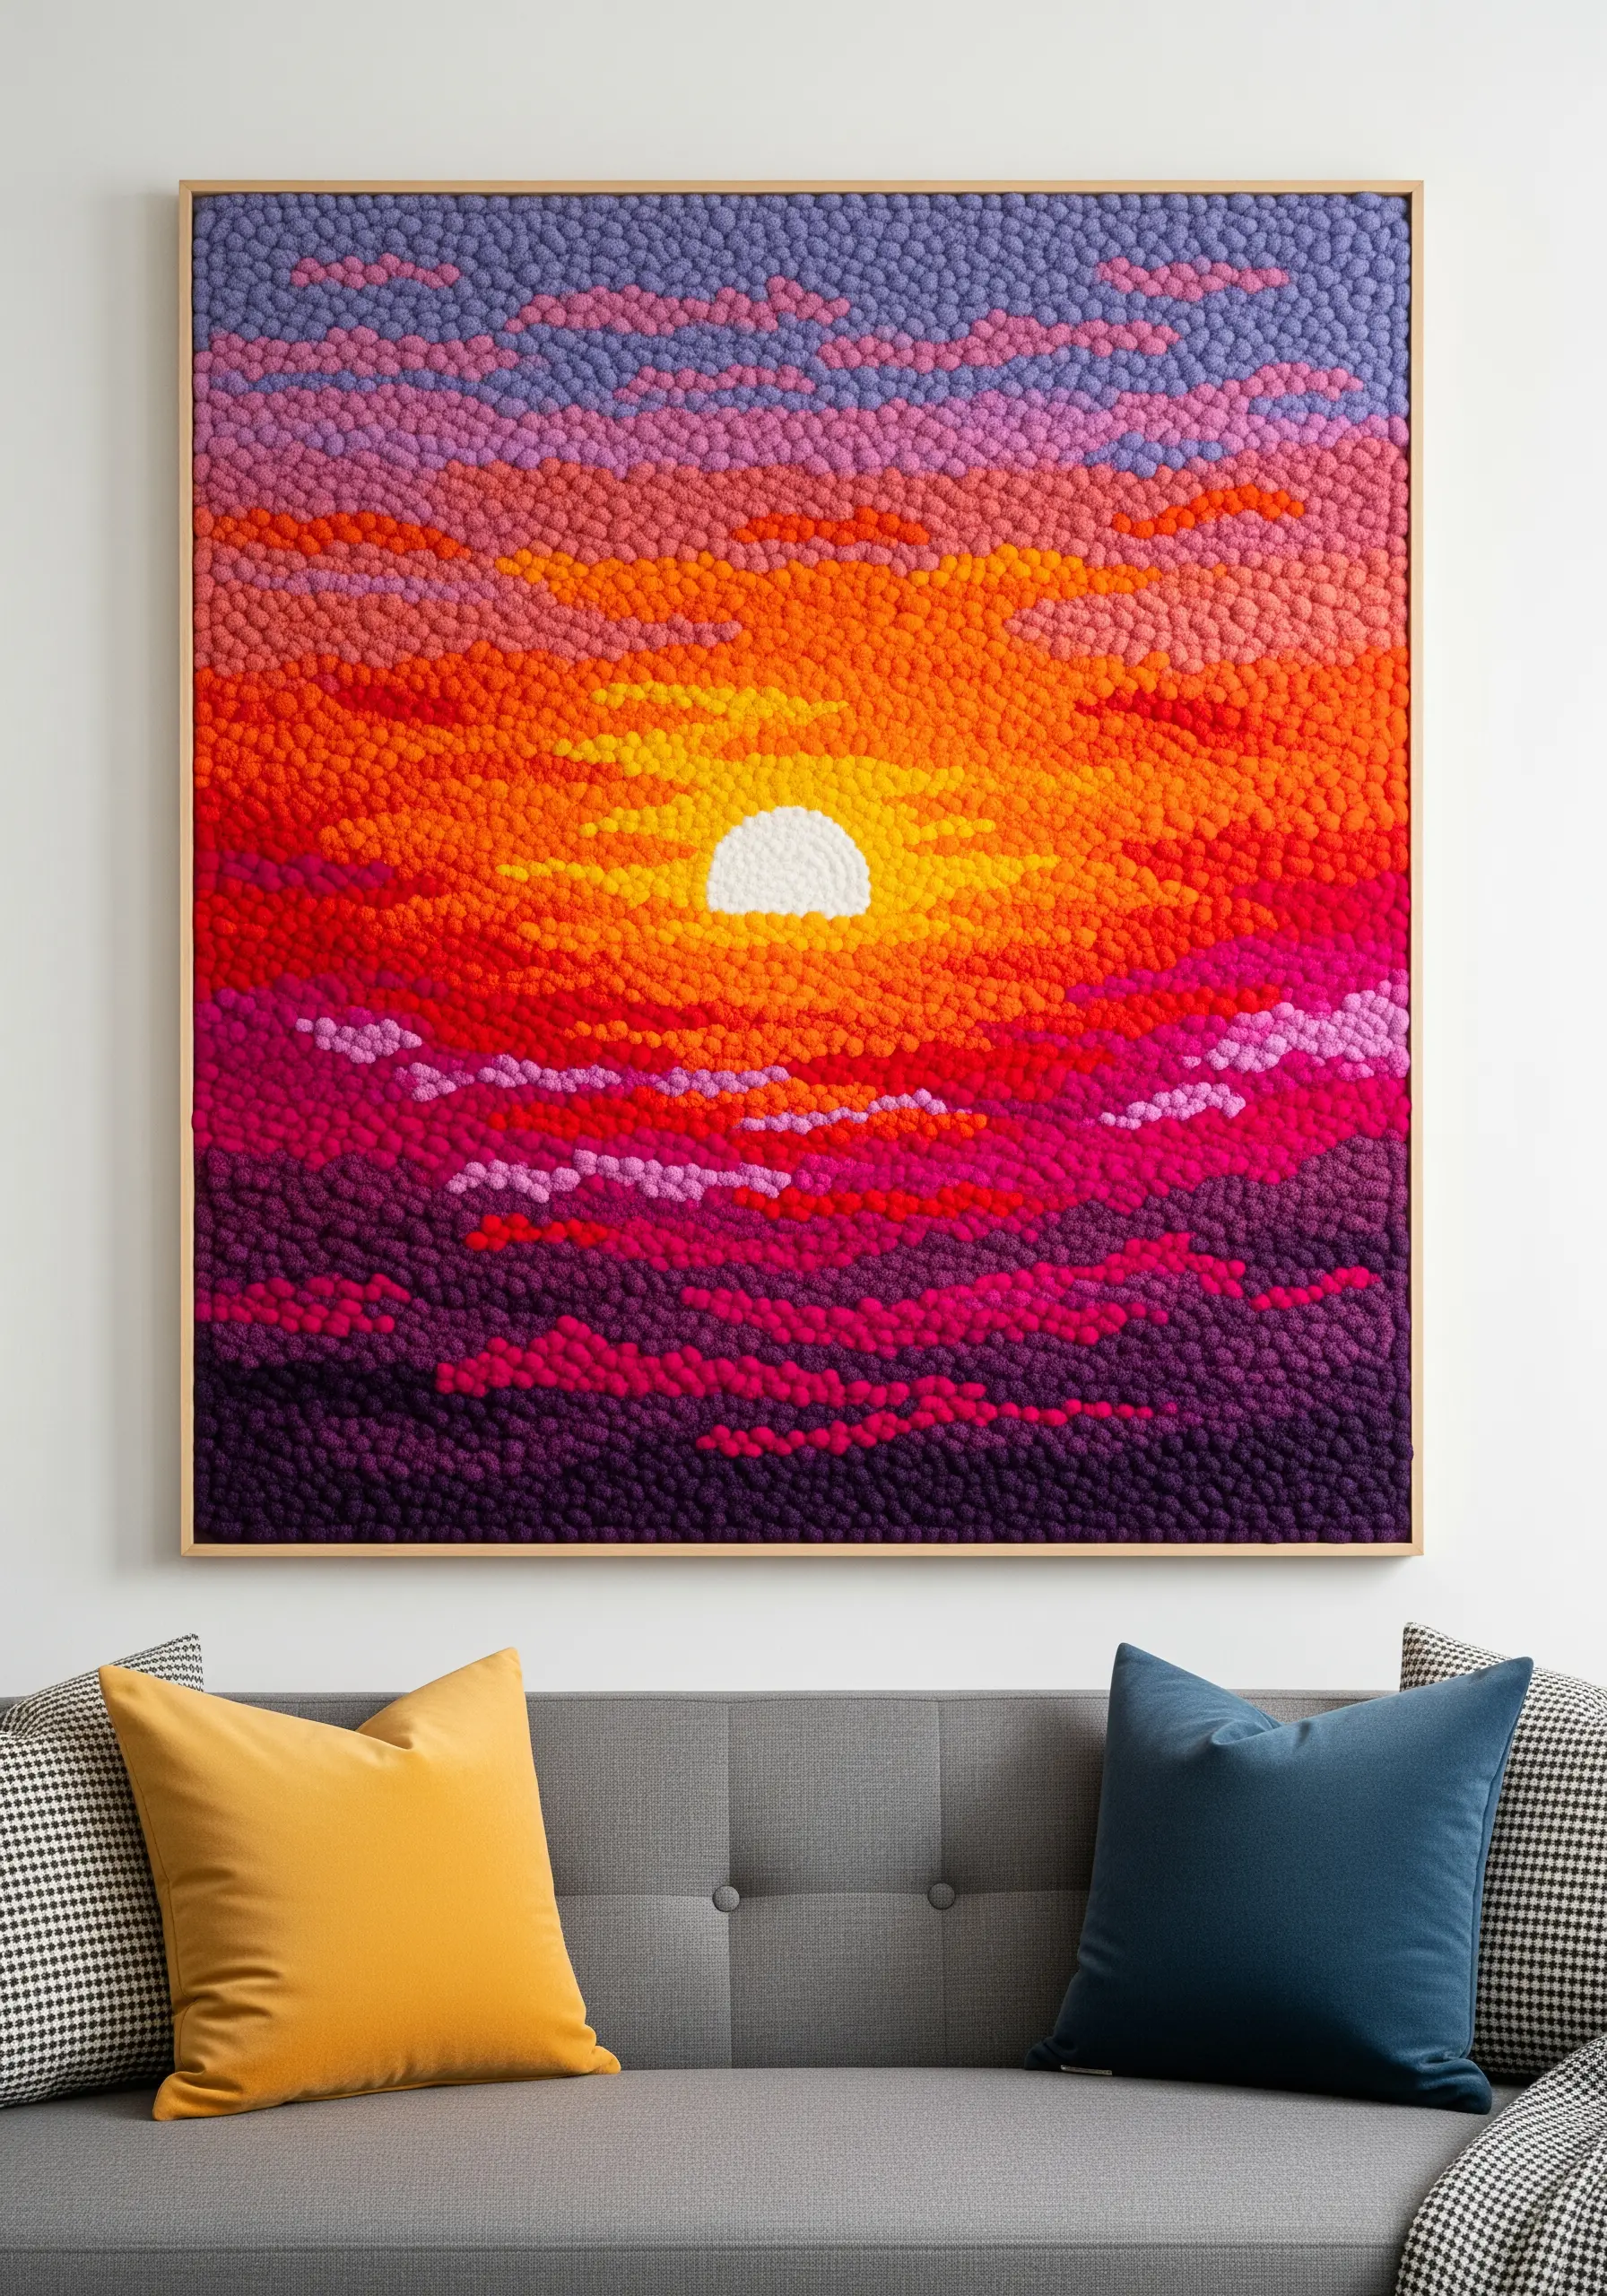
Explore the art of punch needle to create highly textured, painterly wall hangings that are surprisingly fast to complete.
Unlike traditional embroidery, punch needle works by creating loops of yarn on the surface of the fabric. The density and height of these loops create a lush, rug-like texture.
To achieve a gradient sunset effect, work in blocks of color, blending the edges by alternating punches of adjacent hues.
The result is a stunning mixed-fiber project that feels like a plush, impressionistic painting made of yarn.
17. Craft Monogrammed Velvet Bookends
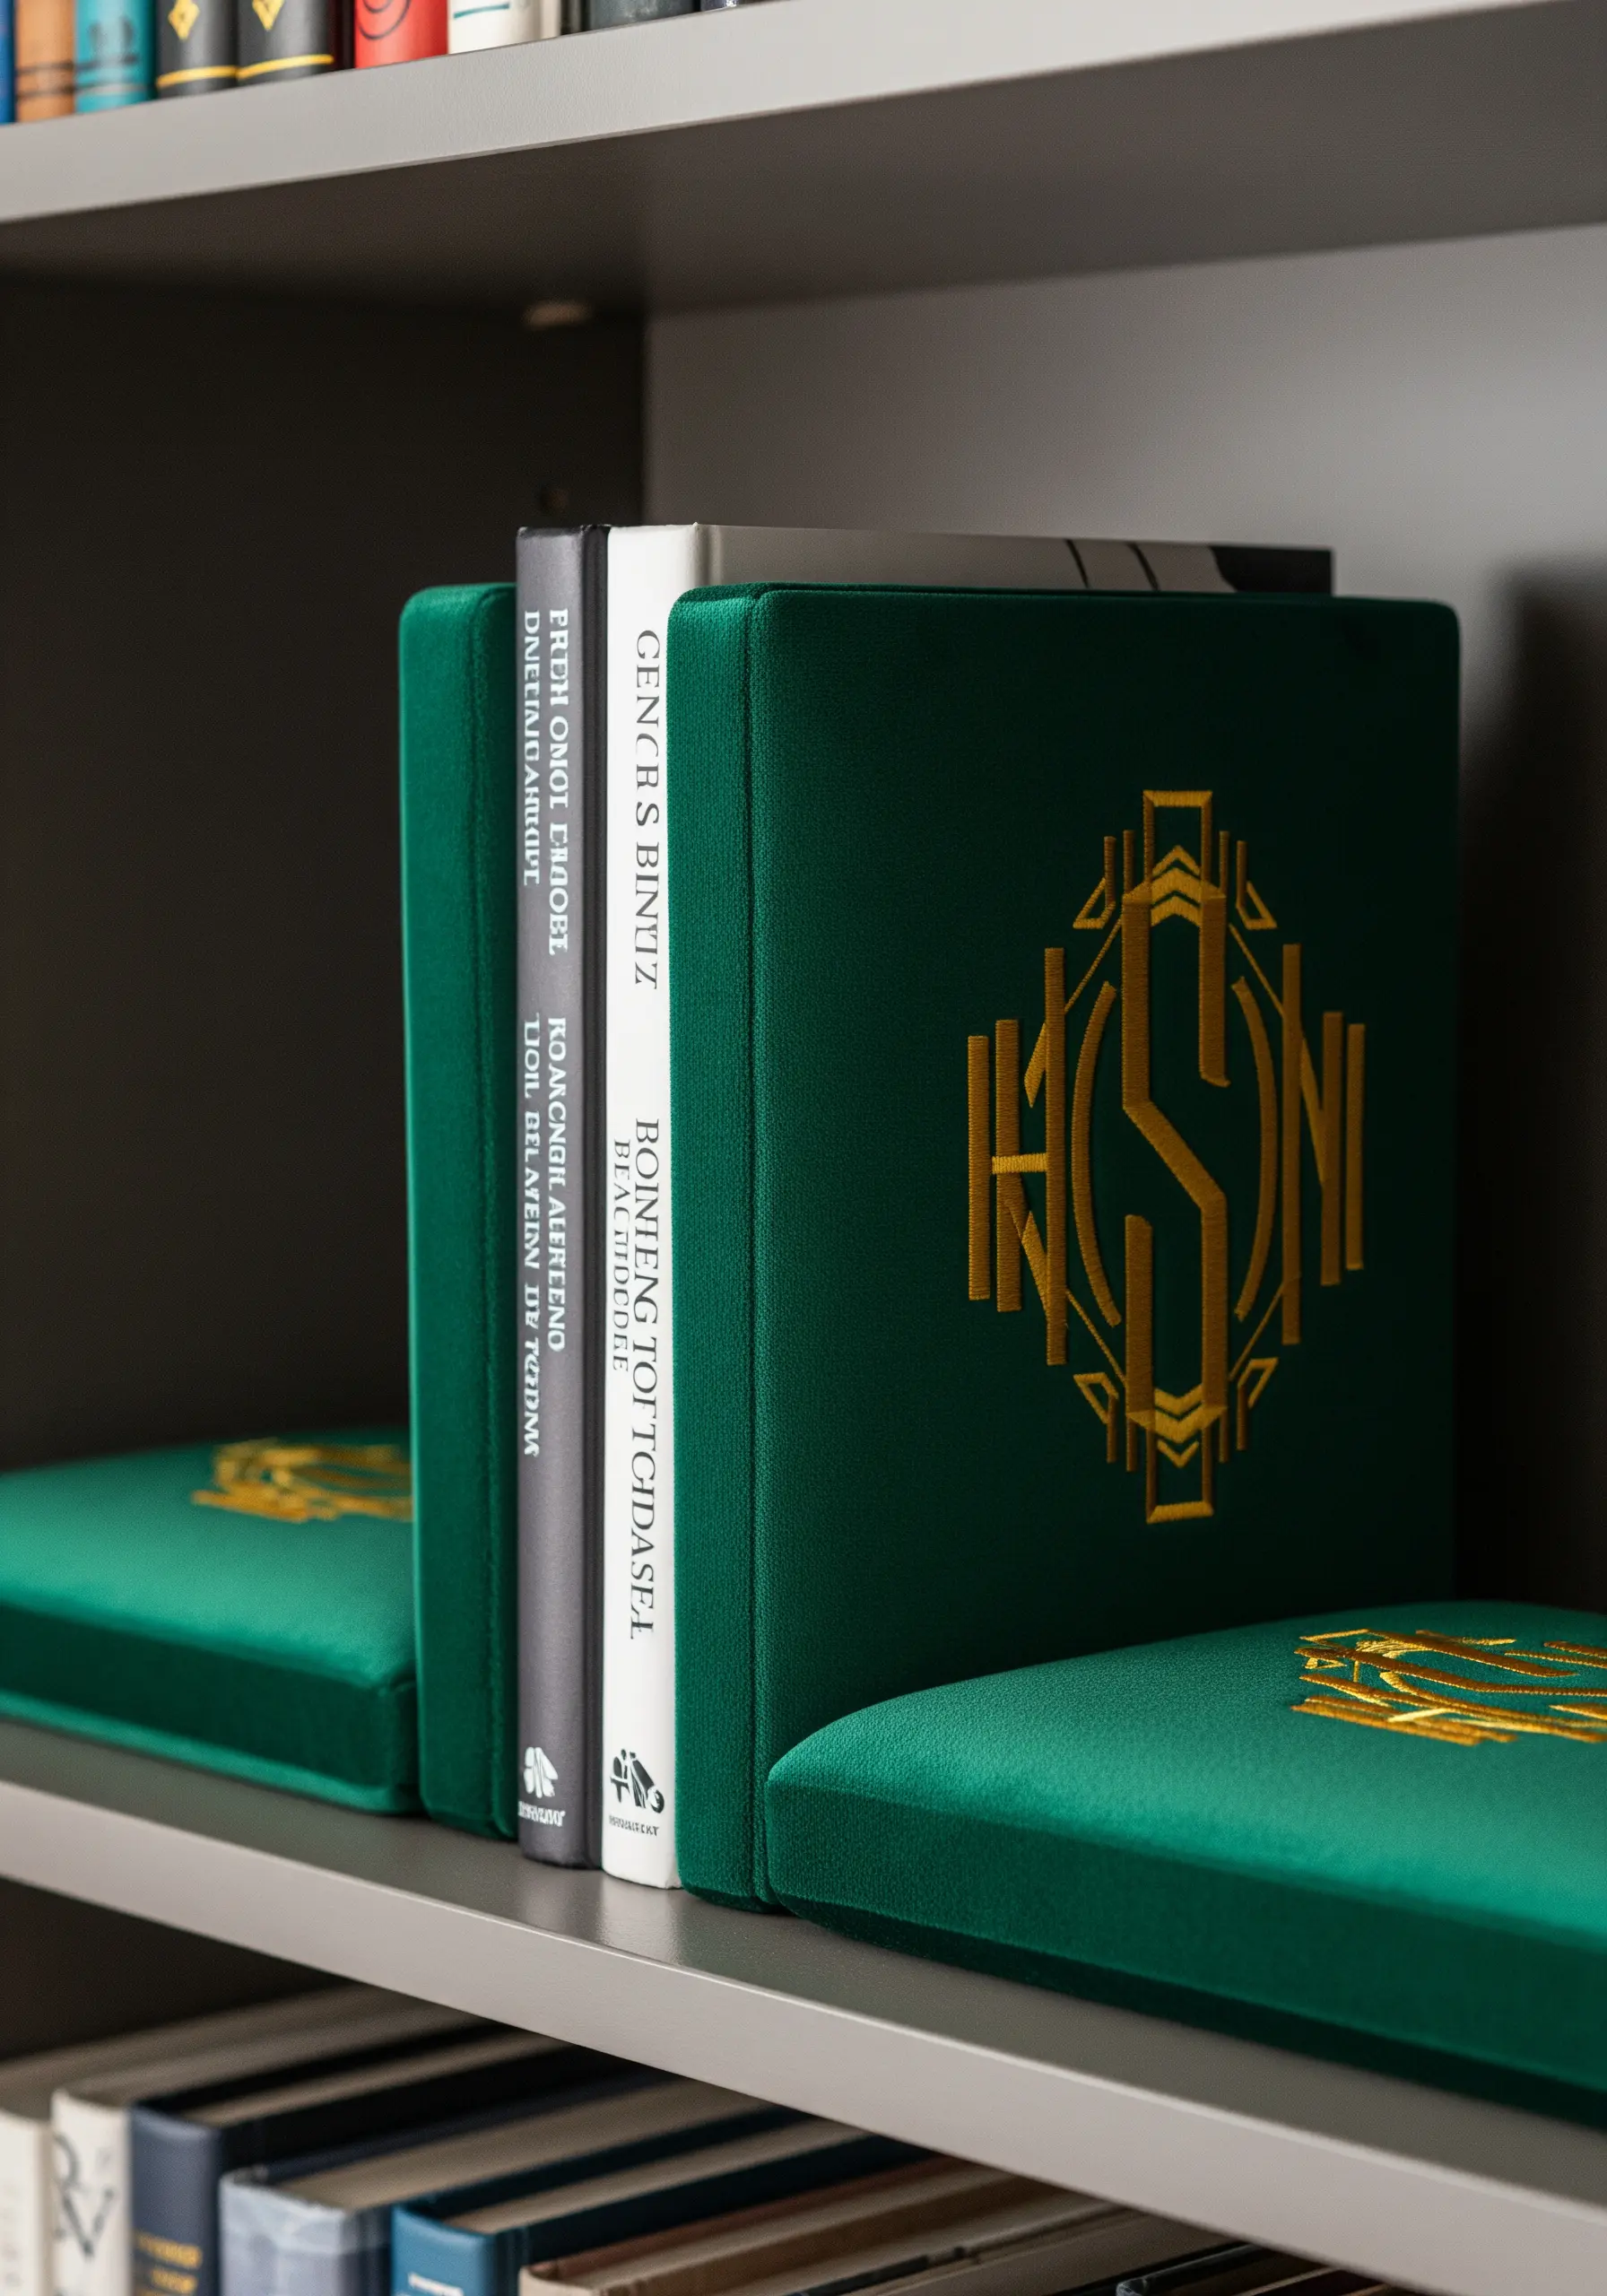
Design functional and luxurious bookends by combining upholstery with machine embroidery.
Construct simple, weighted blocks from wood and cover them in a rich, jewel-toned velvet.
Before assembling, use an embroidery machine—or meticulous hand-stitching—to add a bold, Art Deco-style monogram in a contrasting metallic gold thread.
The sheen of the thread against the deep pile of the velvet creates a sense of classic elegance, turning a practical shelf accessory into a personalized statement piece.
18. Design Minimalist Noren Curtains

Add a touch of Japanese-inspired tranquility to your doorways with custom Noren curtains.
These traditional fabric dividers are perfect for separating spaces with a light, artistic touch. Use a medium-weight, natural fabric like linen or cotton canvas.
Embroider a simple, graphic design—like these two koi fish forming a circle—using a bold, single-color backstitch or stem stitch.
The beauty of this project lies in its restraint; the negative space is just as important as the stitched lines, creating a sense of calm and balance.
19. Create an Embroidered Folding Screen Headboard

Use a folding screen as an innovative and dramatic headboard, turning it into a large-scale embroidery canvas.
Source a silk or fabric-paneled screen, or reupholster a wooden one with a fabric of your choice, like this serene blue-gray linen.
Plan a design that flows across the panels, such as flying cranes or a continuous branch of blossoms, to create a sense of movement and unity.
The vertical format encourages grand, elegant motifs that draw the eye upward, making the room feel more spacious while serving as a stunning piece of personalized bedroom decor.
20. Incorporate Ribbon for 3D Dandelion Clocks
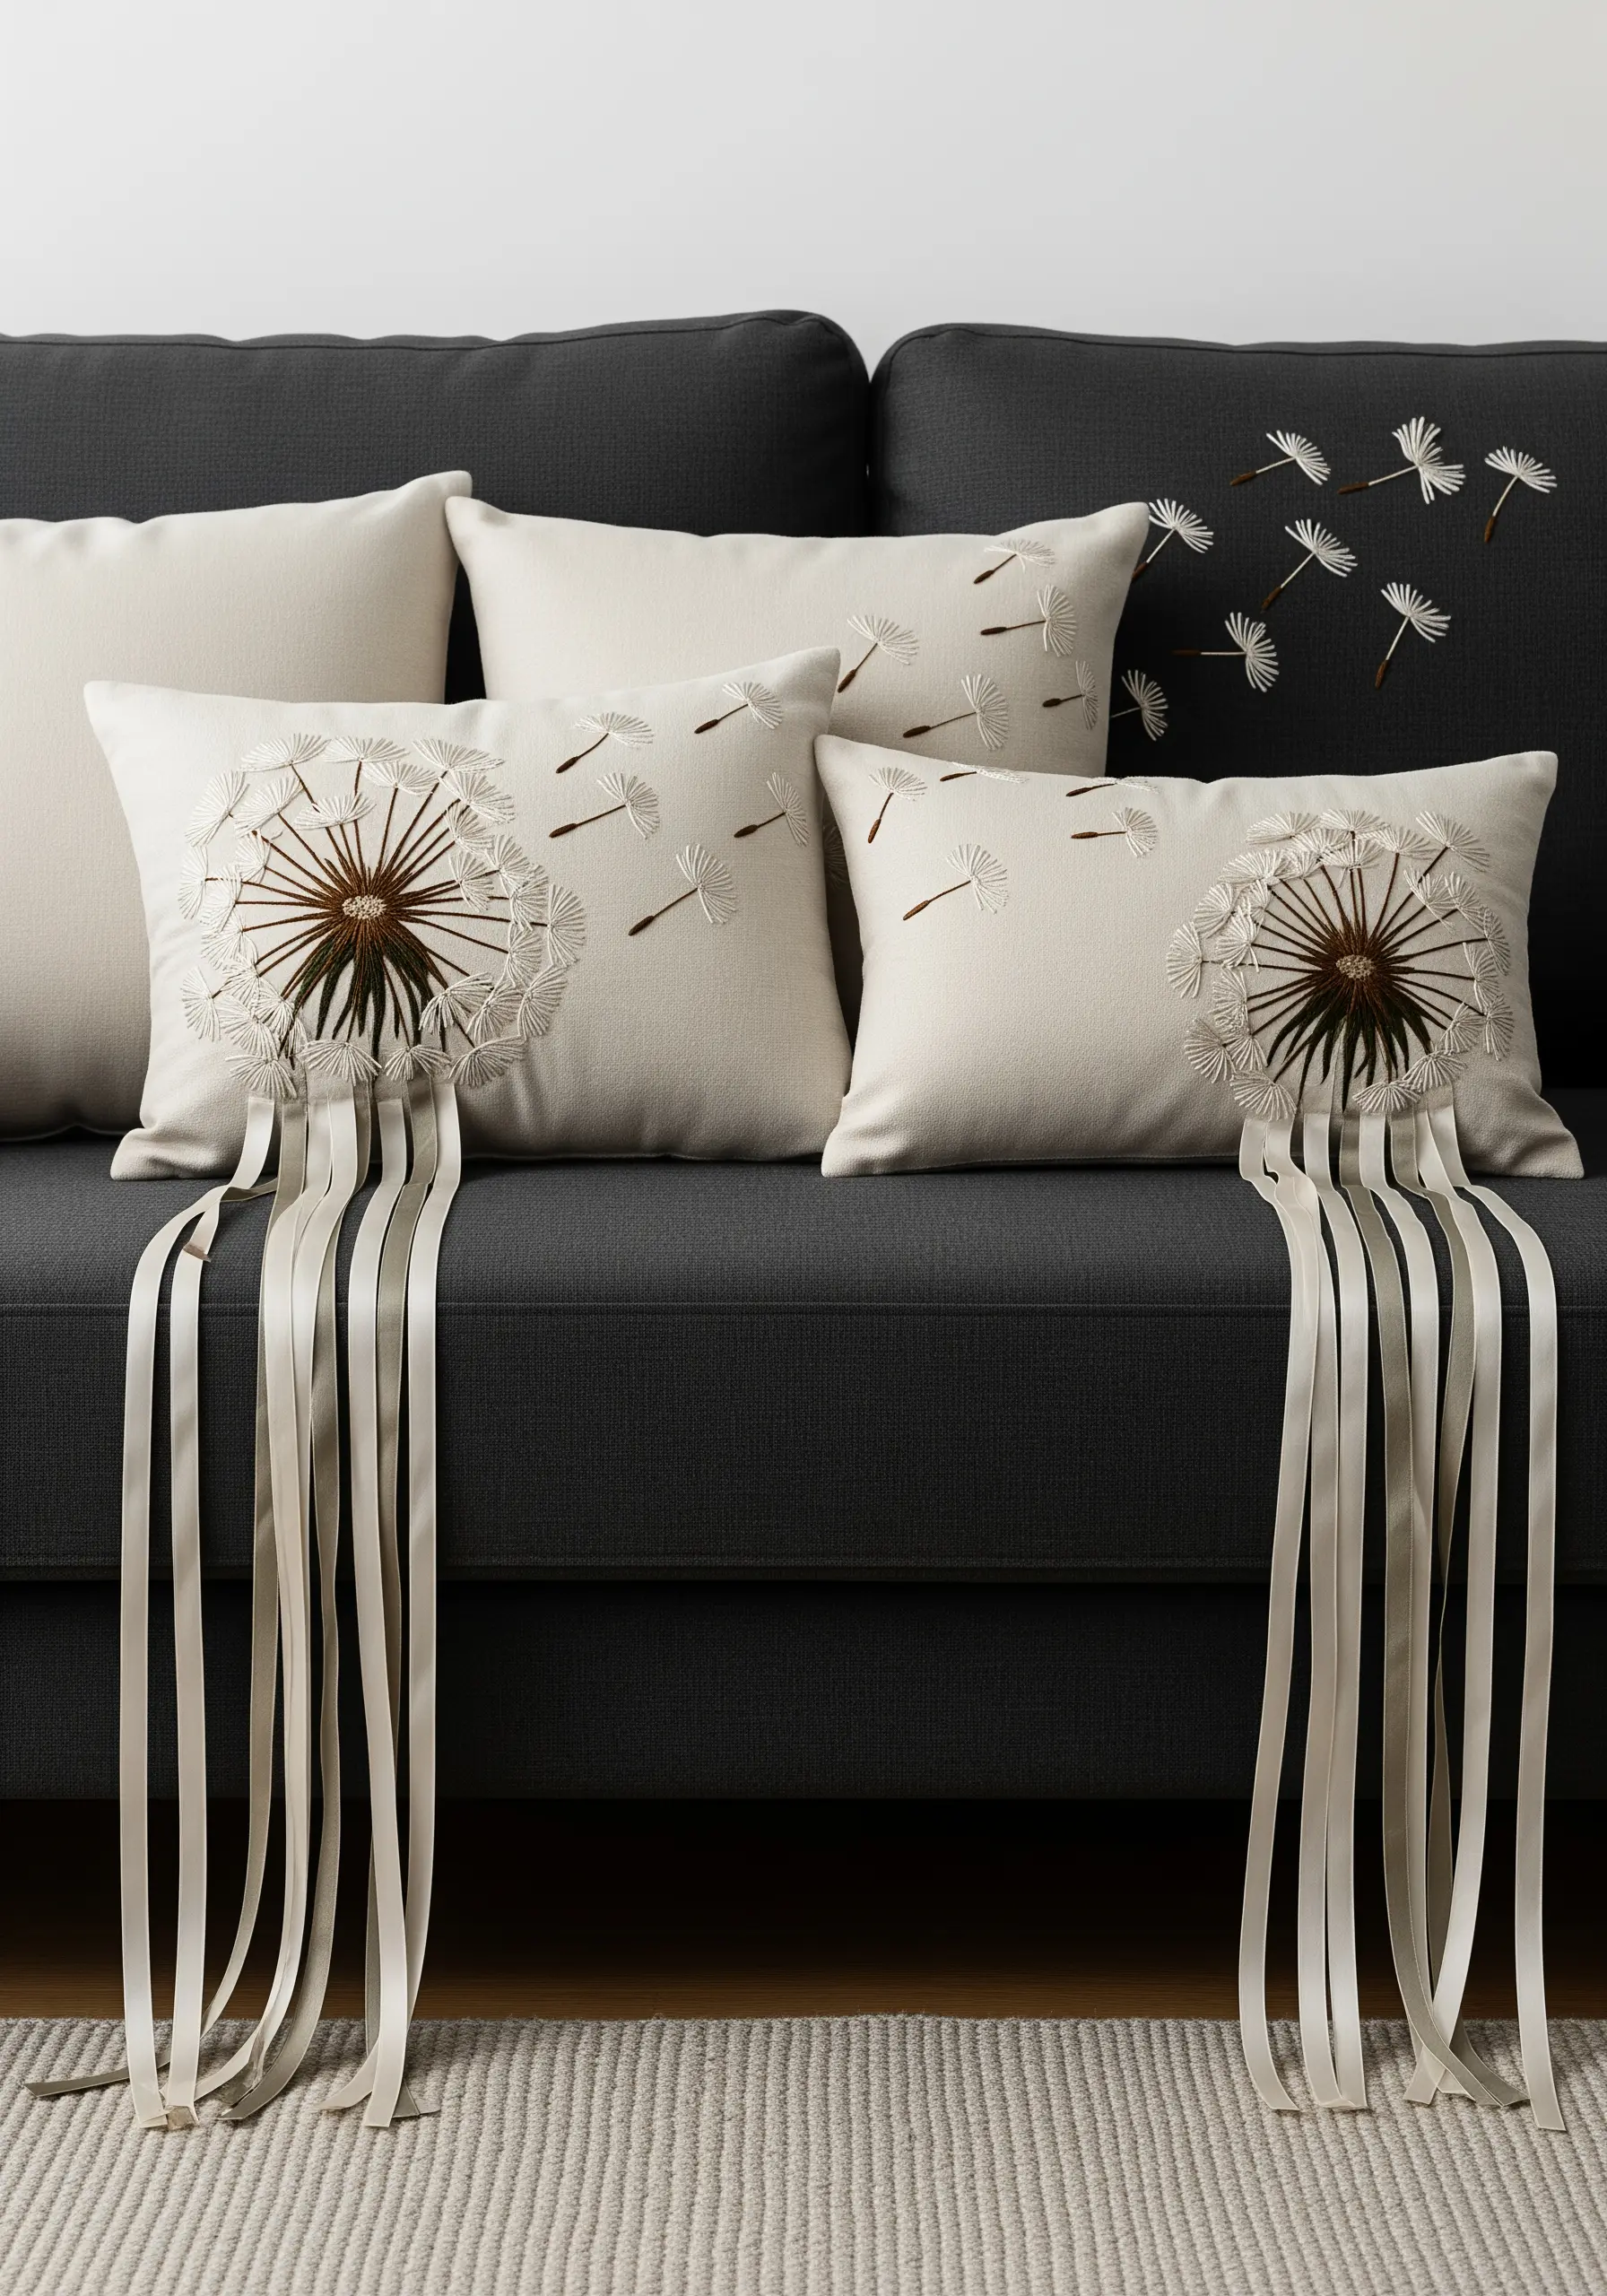
Add an unexpected, playful dimension to your embroidery by incorporating non-thread elements like ribbon.
Stitch the dandelion head using traditional straight stitches for the seeds and French knots for the center.
For the ‘wishes’ blowing away, simply stitch down the center of short lengths of satin ribbon, leaving the ends free to move.
To create the striking 3D effect on the main flower, thread wide ribbons through the fabric base, leaving long, flowing tails. This technique turns a flat image into an interactive, tactile piece.
21. Scale Up a Design for a Statement Shower Curtain
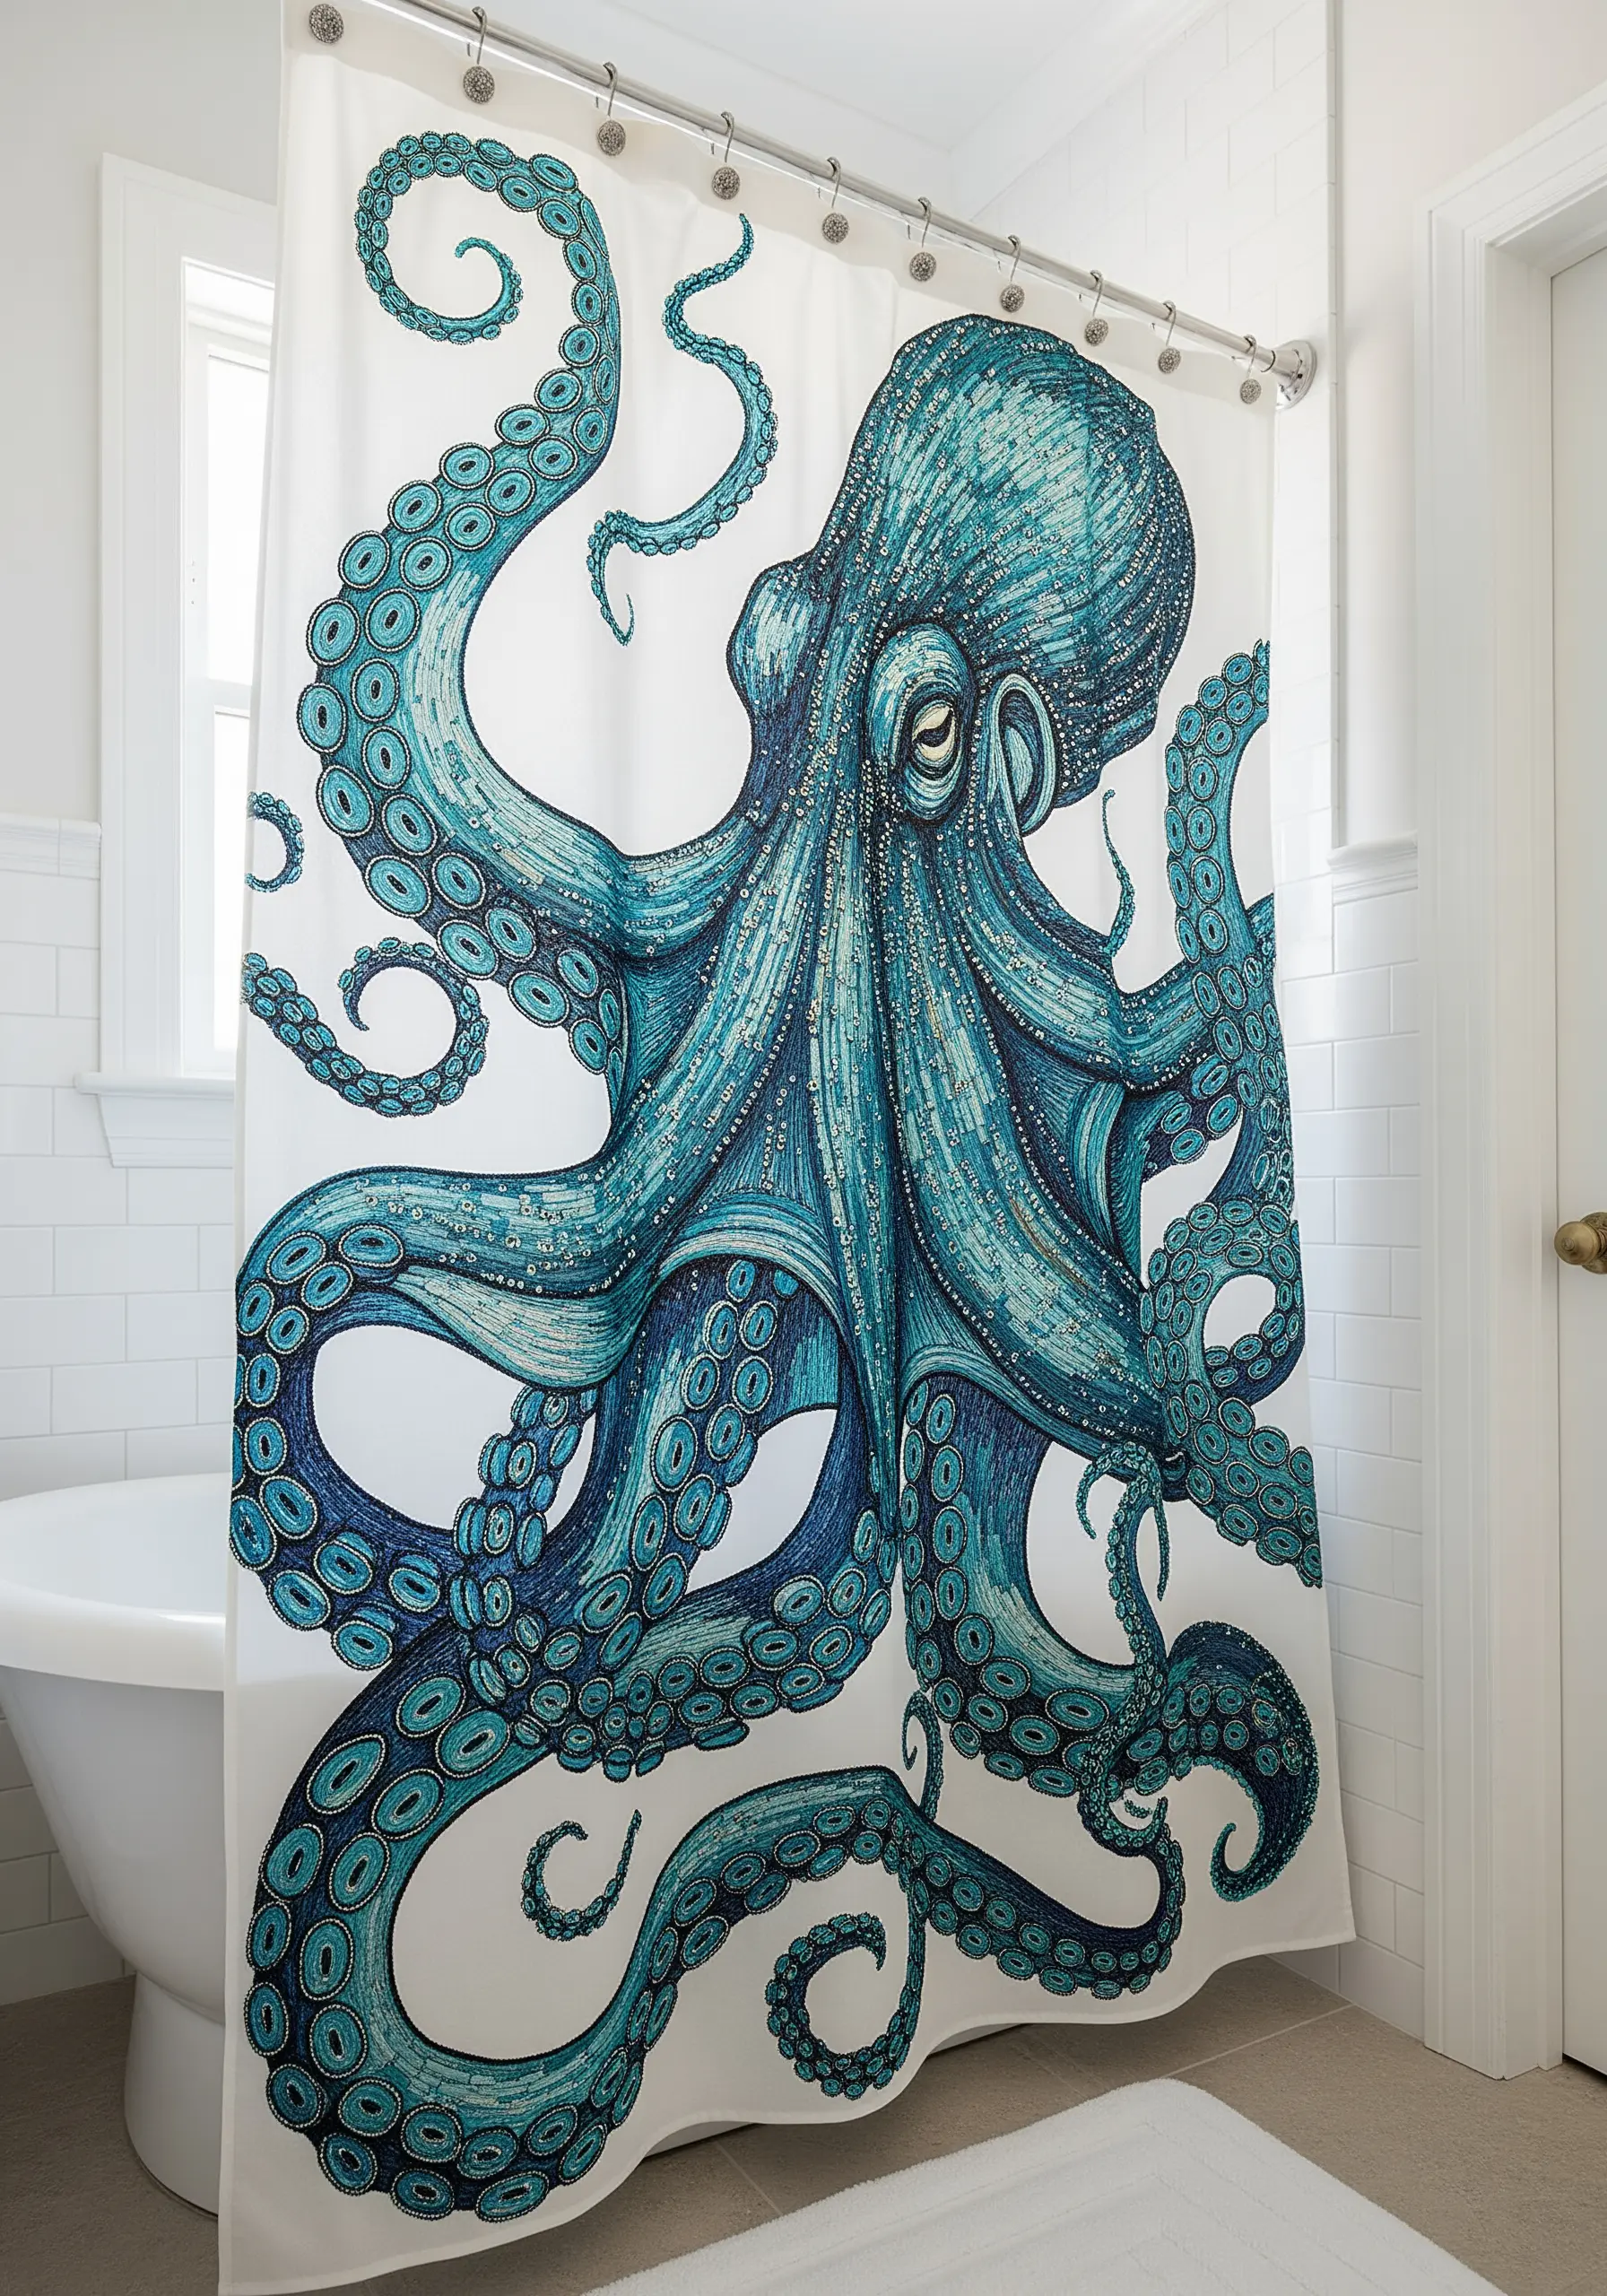
Don’t limit your embroidery patterns to small hoops; think big by adapting a design for a large-scale fabric item like a shower curtain.
To transfer a large design, use an art projector to cast the image onto the fabric and trace it with a water-soluble marker.
You don’t need to actually embroider it—you can achieve a similar look by printing a high-resolution image of a detailed drawing or stitch pattern onto a blank polyester shower curtain.
This approach allows you to enjoy the intricate aesthetic of textile art in a humid environment where real thread might not be practical.
22. Display Textile Art with Museum-Style Mounting

Elevate a piece of clothing or textile from craft to fine art through intentional, minimalist presentation.
Mount the garment on a custom-shaped, acid-free foam board backing to give it structure and presence.
Instead of a traditional frame, encase the piece in a clear acrylic box. This protects it from dust while allowing it to be viewed from multiple angles, highlighting its three-dimensional qualities.
Leaving a single thread dangling, as shown here, adds a poignant, narrative touch that connects the finished work to the process of its creation.
23. Embroider on Upcycled Denim Patchwork
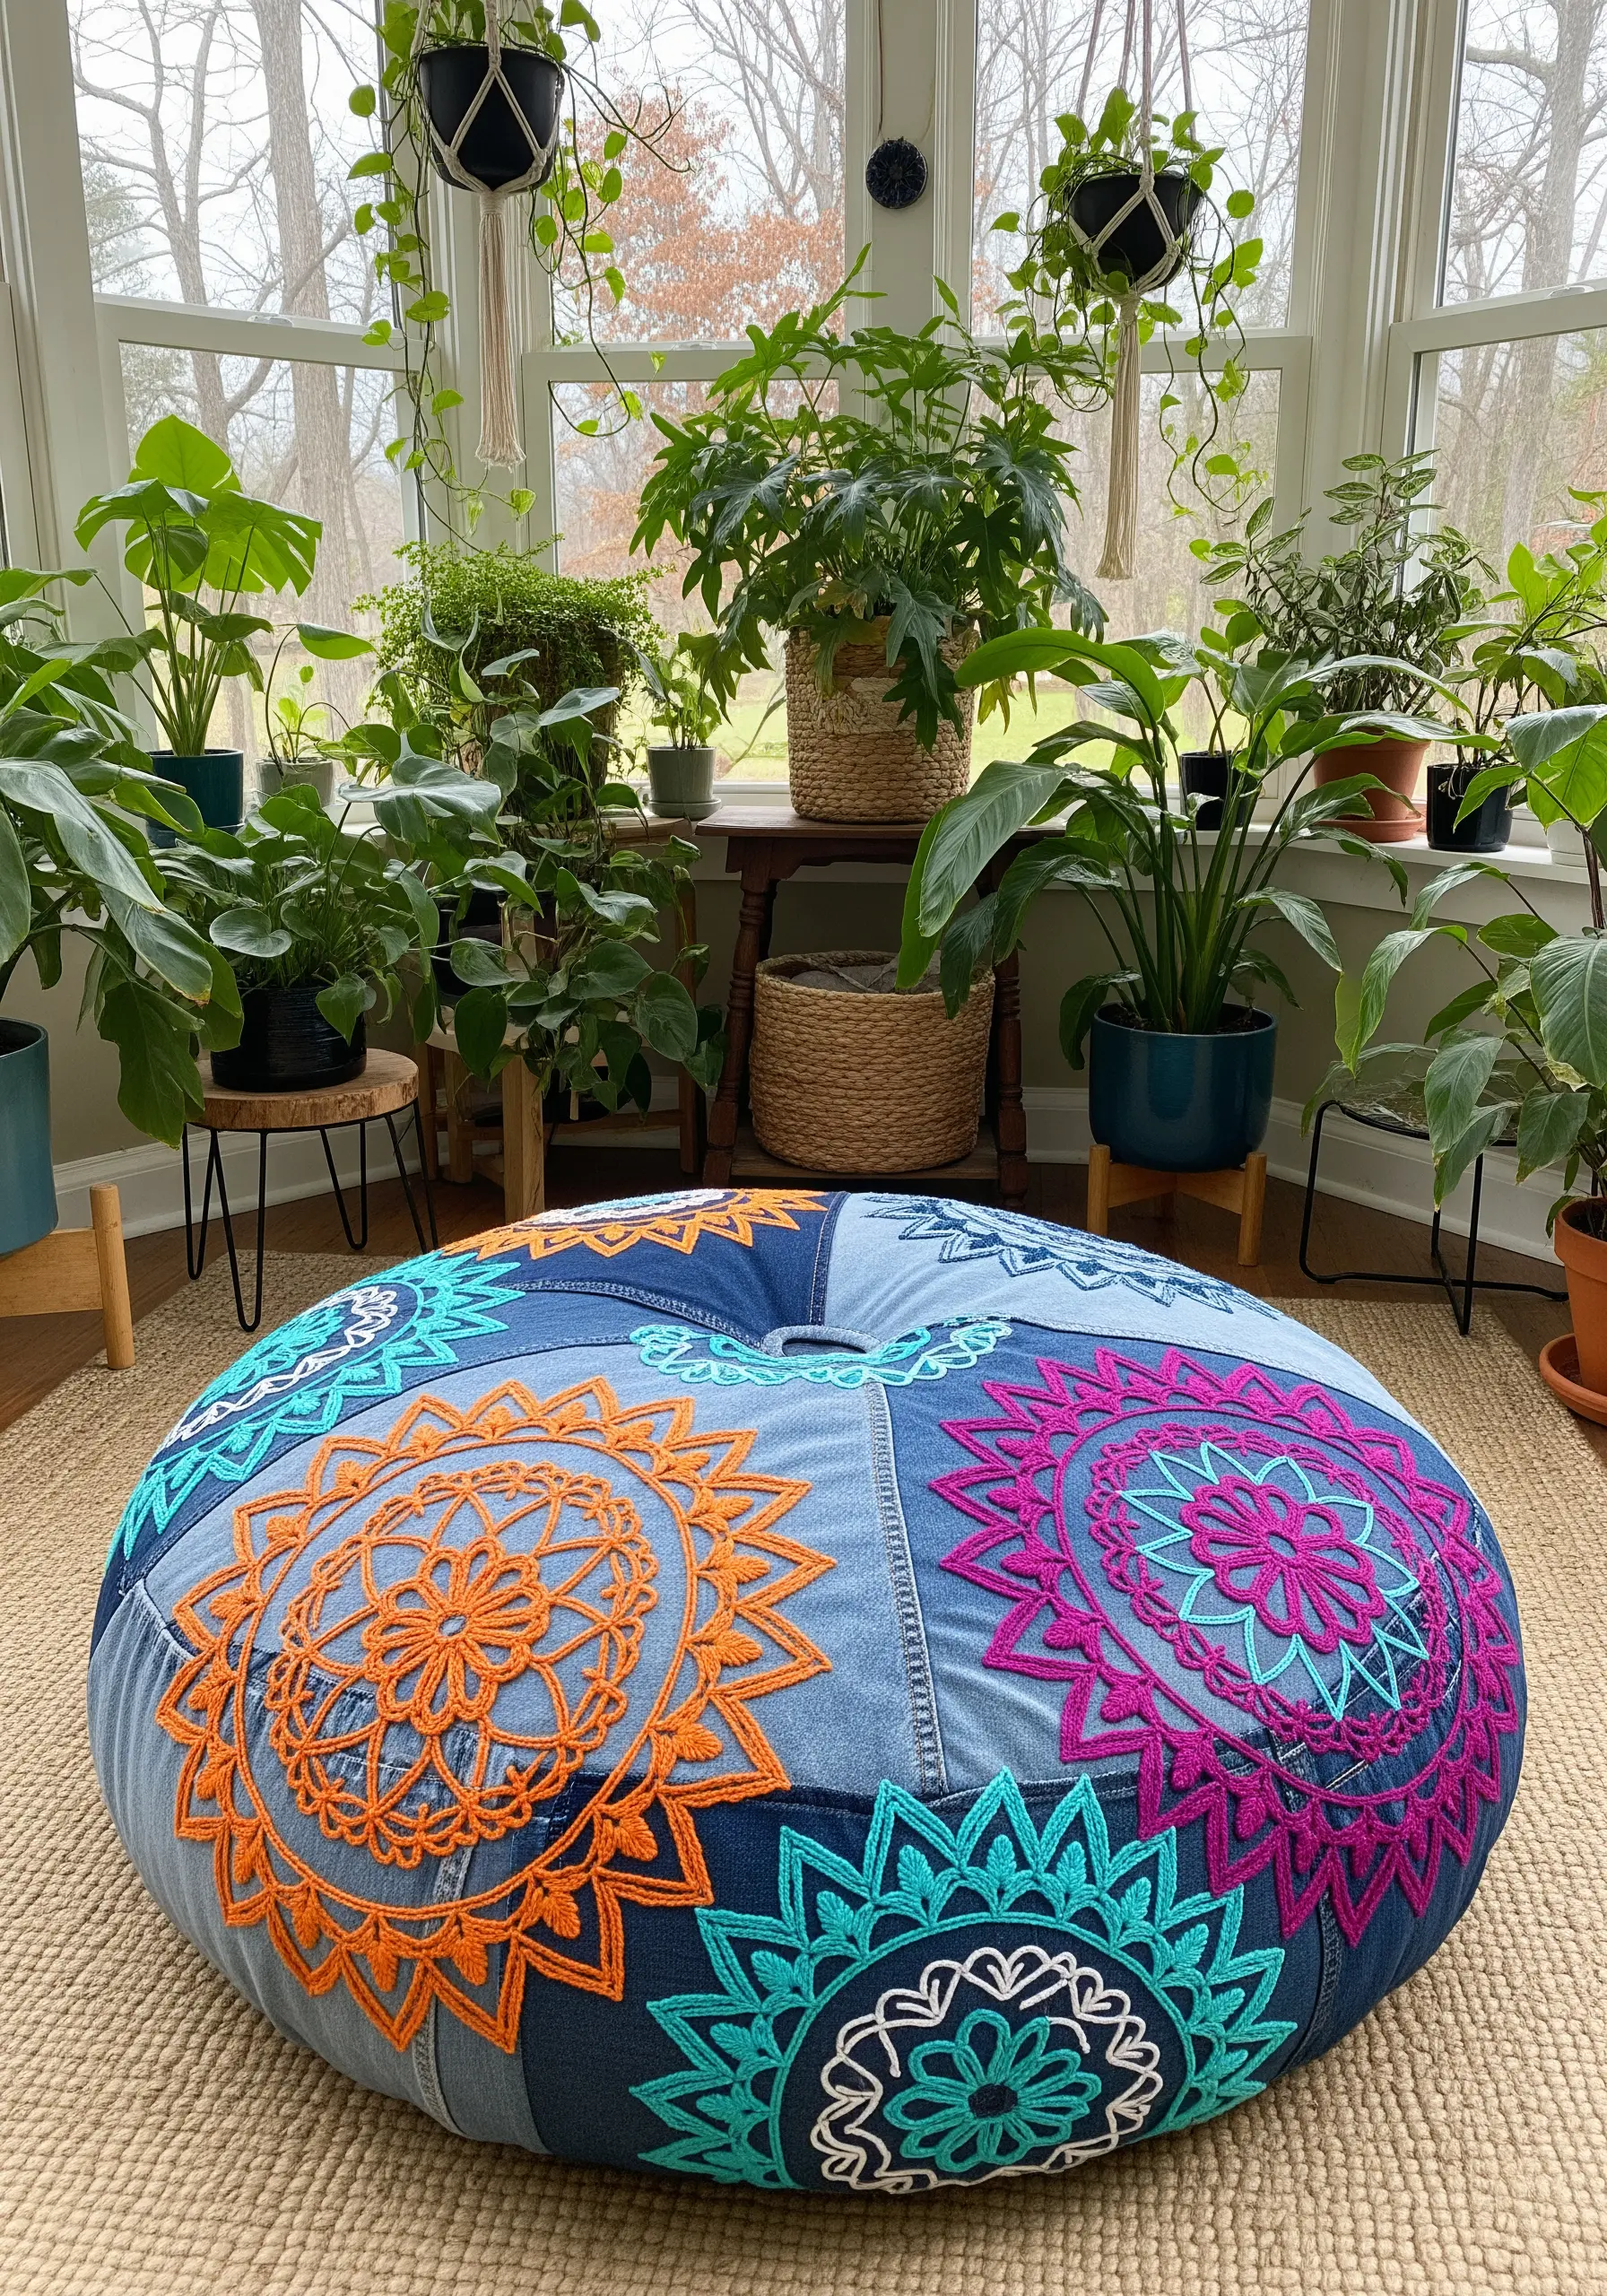
Give old jeans new life by creating a patchwork surface for bold, graphic embroidery.
Construct a pouf or cushion cover from deconstructed denim, mixing different washes and textures for visual interest.
Use the patchwork seams as a guide for your design. Here, large mandala motifs are centered within the patchwork ‘rays’, creating a cohesive and intentional composition.
Choose thick, vibrant threads that will stand out against the sturdy denim. The combination of recycled materials and bright, modern stitching feels both sustainable and stylish.
24. Apply Boro-Inspired Decorative Mending

Turn a repair into a beautiful focal point using techniques inspired by Japanese Boro stitching.
Instead of trying to hide a worn spot on an armchair, celebrate it. Cover the area with a contrasting patch of beautiful fabric—a piece of silk brocade or a vintage textile scrap works perfectly.
Then, stitch over both the patch and the surrounding area with a decorative grid or pattern using a thick, visible thread like sashiko cotton.
This not only reinforces the worn fabric but also adds a thoughtful, artisanal detail that tells a story of care and preservation.
25. Add a Crocheted Border to Woven Placemats

Finish simple woven placemats with a colorful, decorative edge for a polished, bohemian look.
First, work a round of blanket stitch directly into the edge of the placemat using a sharp needle and durable Perle cotton. This creates a stable foundation of loops to work into.
Then, using a crochet hook, work a simple scalloped or shell stitch pattern into the loops you created.
This mixed-craft technique is a perfect way to add a pop of color and a soft, handmade finish to inexpensive, store-bought table linens.


