

Perhaps you have a box of threads and a desire to create something with more soul than a store-bought print. You want to fill your walls not just with decoration, but with texture, warmth, and story. Vintage embroidery isn’t about recreating the past; it’s about borrowing its timeless techniques to say something new.
Here, we move beyond simple patterns. We’ll explore how to use thread weight to create dimension, how a specific stitch can mimic the shimmer of a peacock’s feather, and how a limited color palette can turn a collection of small hoops into a cohesive gallery wall. This is where your needle becomes a paintbrush and your fabric a canvas.
Forget the pressure to be perfect. Instead, focus on intention. Each of these ideas offers a clear path to elevating your work, helping you create pieces that feel polished, personal, and deeply satisfying to have in your home.
1. Render a Botanical Tapestry with Dimensional Crewelwork

Move beyond flat stitches and give your large-scale botanicals a rich, tactile presence using wool crewel threads instead of standard cotton floss.
Use a single-ply wool yarn for ferns and foliage with a stem stitch; the thicker thread fills space faster and creates a soft, raised line that mimics natural texture.
For the mushrooms, work a padded satin stitch by laying down a foundation of straight stitches first, then covering them with satin stitch in the opposite direction—this gives the caps a rounded, 3D effect.
The key to a cohesive wall hanging is balancing dense textures with open space, letting the neutral fabric ground the composition.
2. Curate a Retro Hoop Art Gallery Wall
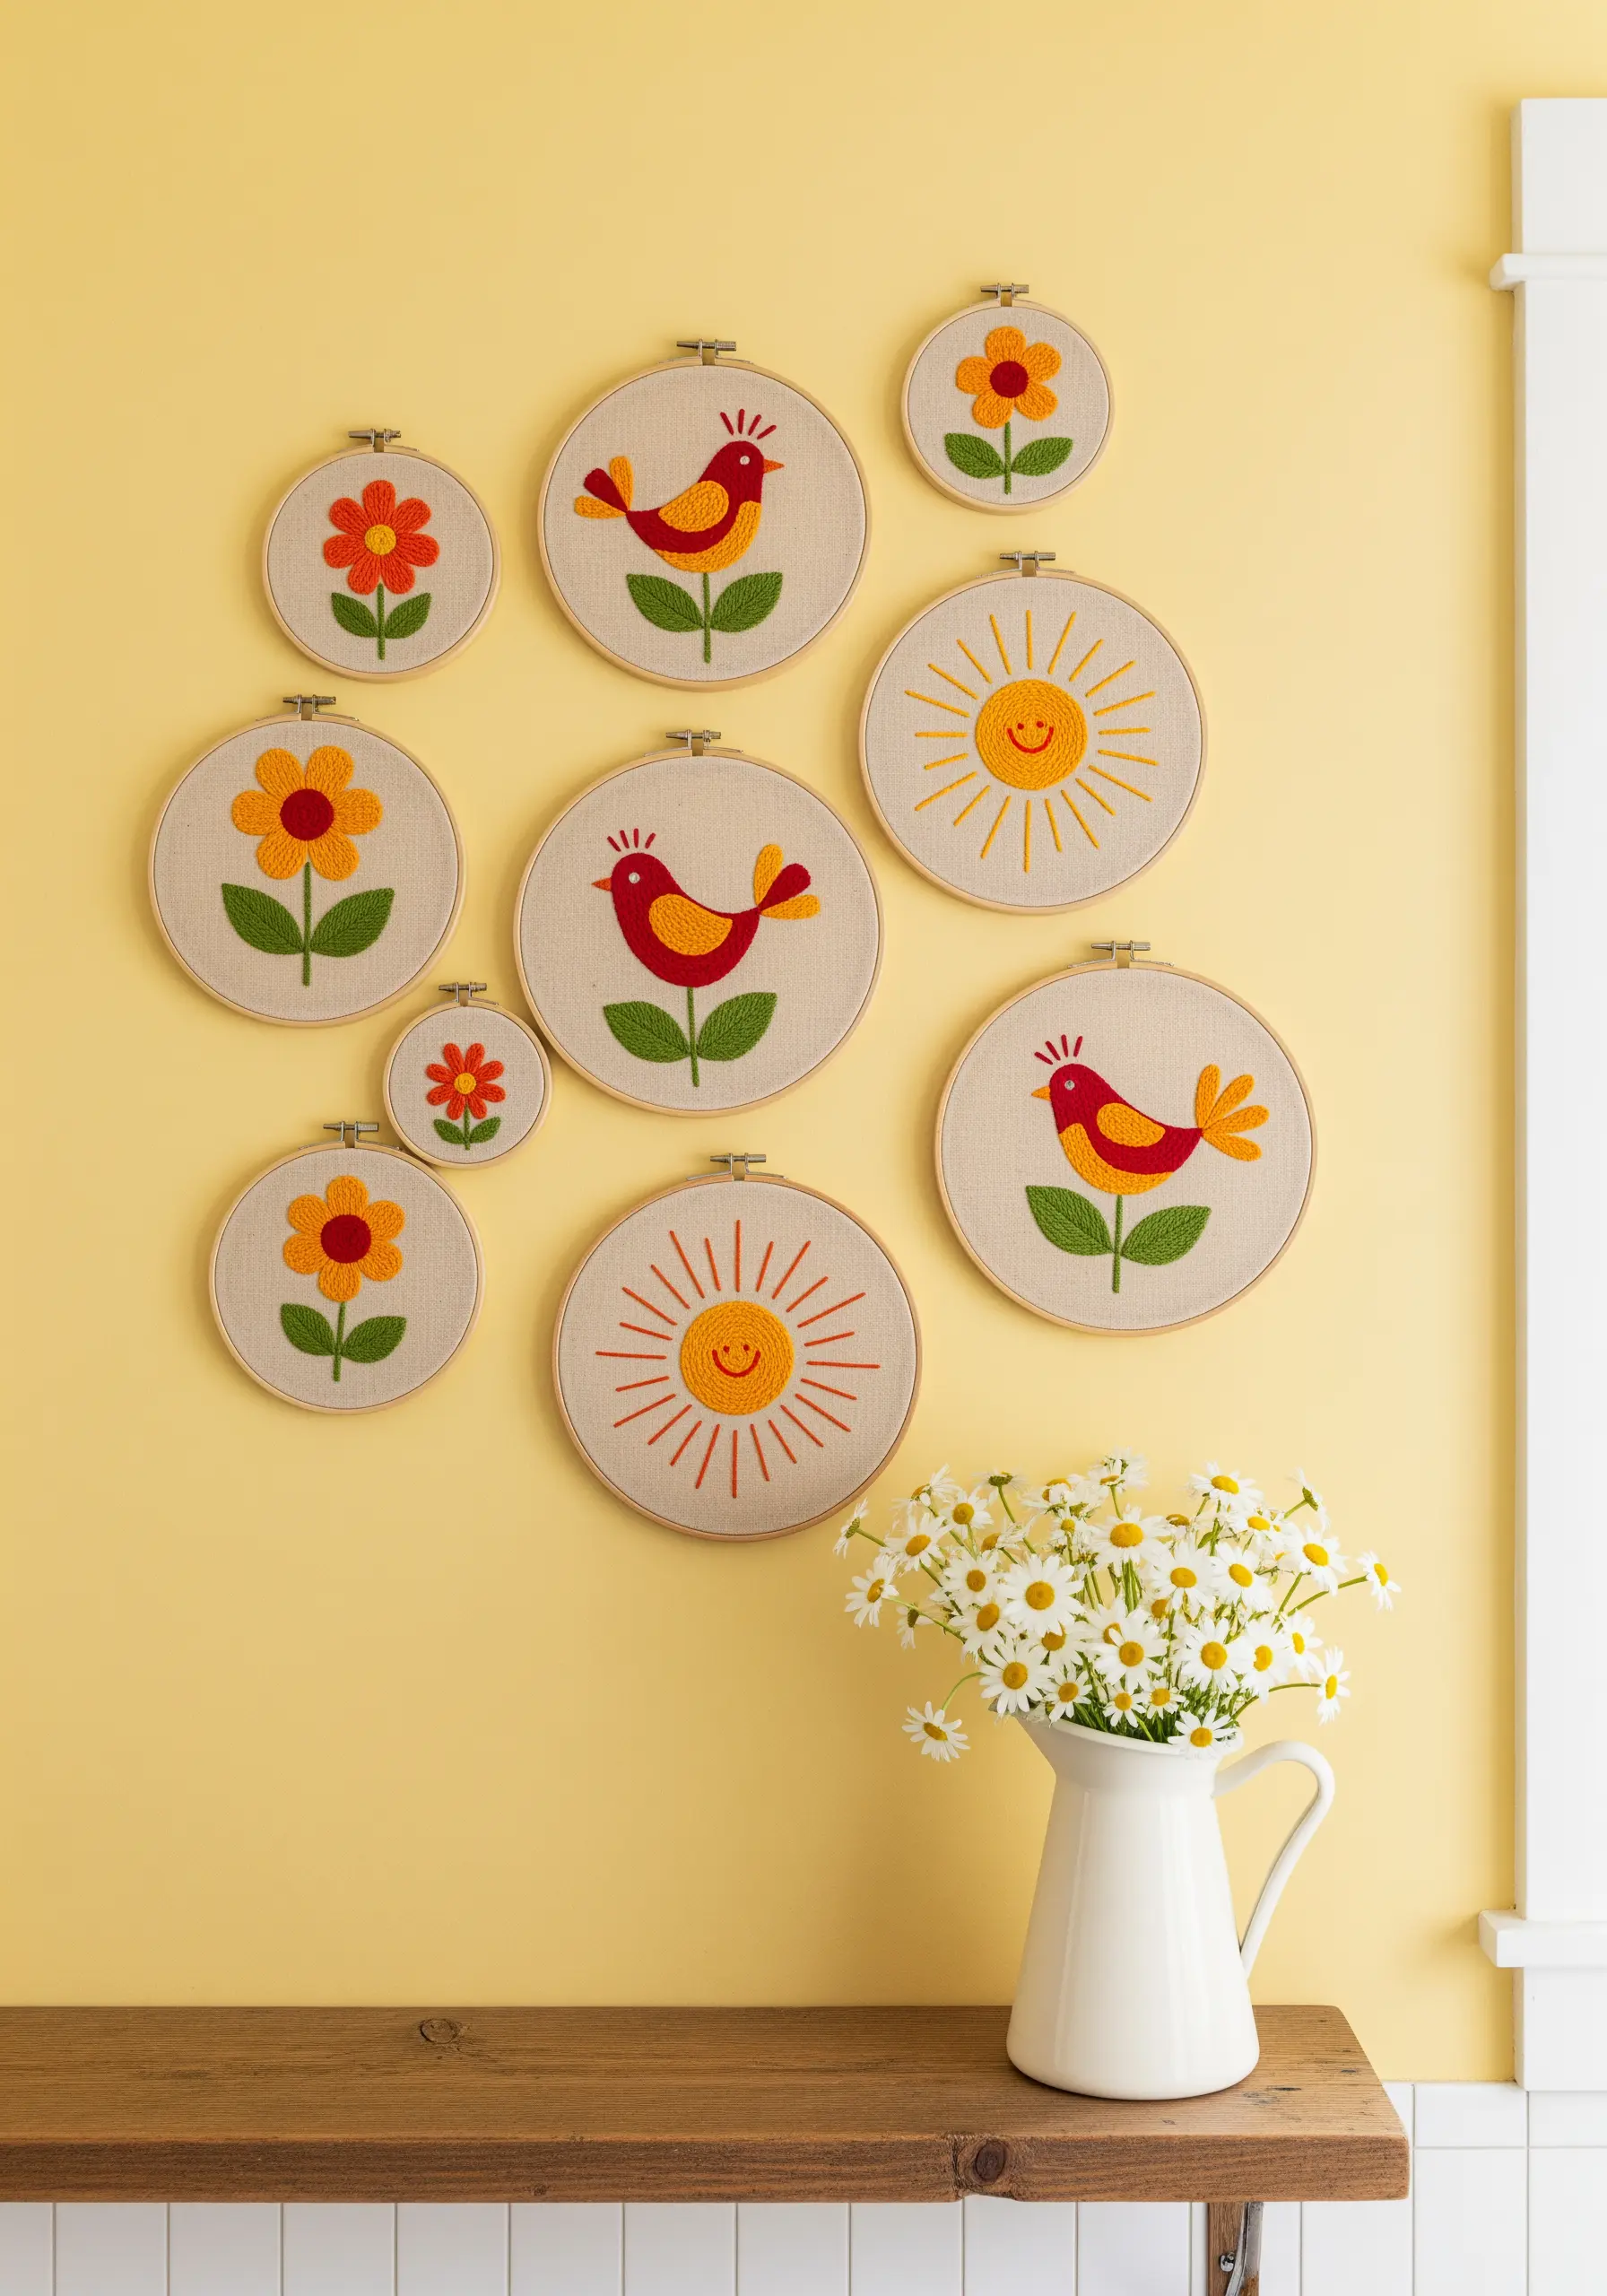
Transform simple motifs into a compelling display by thinking like a curator, not just a stitcher.
Choose a limited, high-contrast color palette—like marigold, poppy red, and olive green—and use it consistently across all your pieces to ensure they feel like a collection.
Vary the hoop sizes and arrange them in an organic cluster, rather than a rigid grid, to create movement and visual interest on the wall.
To achieve that clean, graphic look, outline every shape with a sharp two-strand backstitch before filling it with a dense, smooth satin stitch.
This method of creating hooped wall collage layouts turns simple stitches into intentional, impactful art.
3. Capture Art Deco Elegance with Metallic Threads
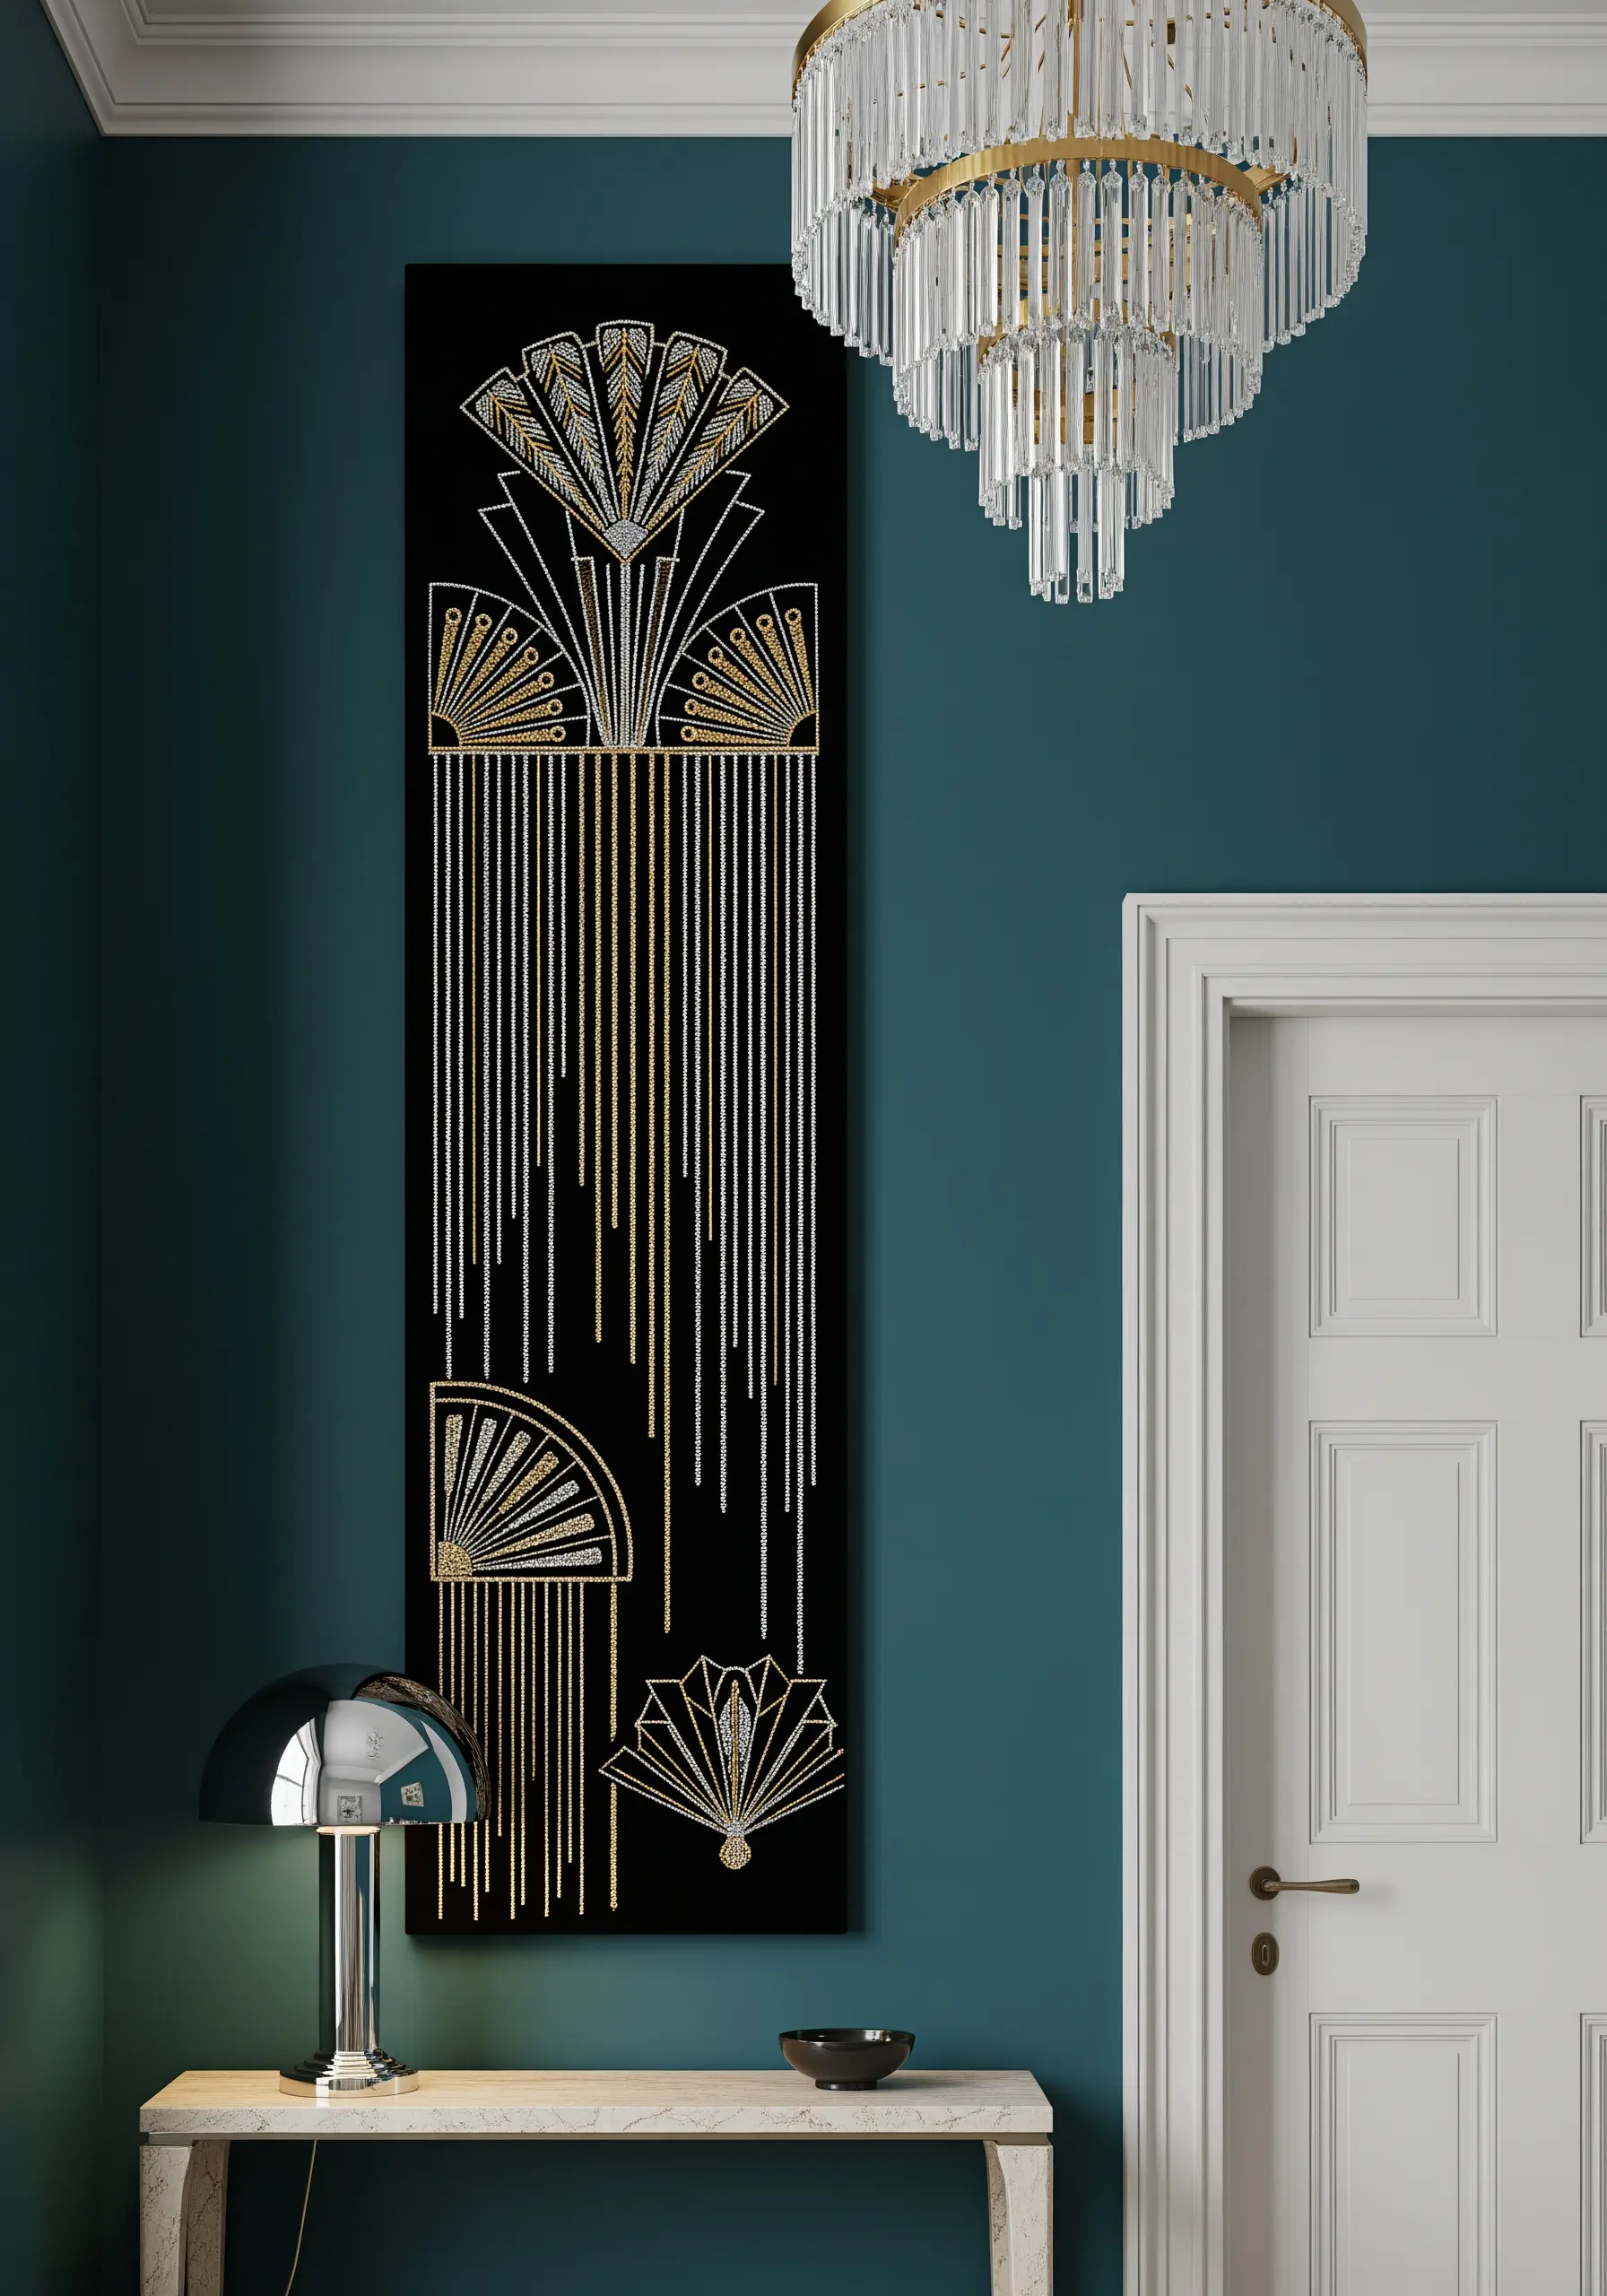
Evoke the glamour of the 1920s by pairing high-contrast black fabric with shimmering metallic threads for a sophisticated wall panel.
To keep your metallic lines crisp, use a chain stitch or couching stitch; metallic floss can fray easily, and these stitches help control its tension and direction.
For the fanned-out geometric shapes, fill them with tiny seed stitches instead of a traditional satin stitch—this creates a textured shimmer that catches the light beautifully without looking bulky.
The success of this style lies in precision, so transfer your design meticulously and work slowly to ensure every line is perfectly placed.
4. Embrace Mid-Century Modern with Abstract Yarn Art

Channel the spirit of mid-century textile art by swapping fine floss for chunky yarn, creating bold, sculptural shapes with dramatic texture.
Use a punch needle or a wide-eyed chenille needle to lay down thick fields of color, focusing on organic, boomerang-like forms and a vibrant, contrasting palette of teal, orange, and brown.
Define the edges of your shapes by couching a darker yarn along the borders—this technique involves laying the thick yarn on the surface and tacking it down with a thinner, matching thread.
Introduce subtle detail by working parallel lines of stem stitch within some shapes, adding a linear texture that contrasts with the solid looped areas.
These bold yarn wall art patterns make an immediate impact above a desk or console table.
5. Personalize a Traditional Cross-Stitch Sampler
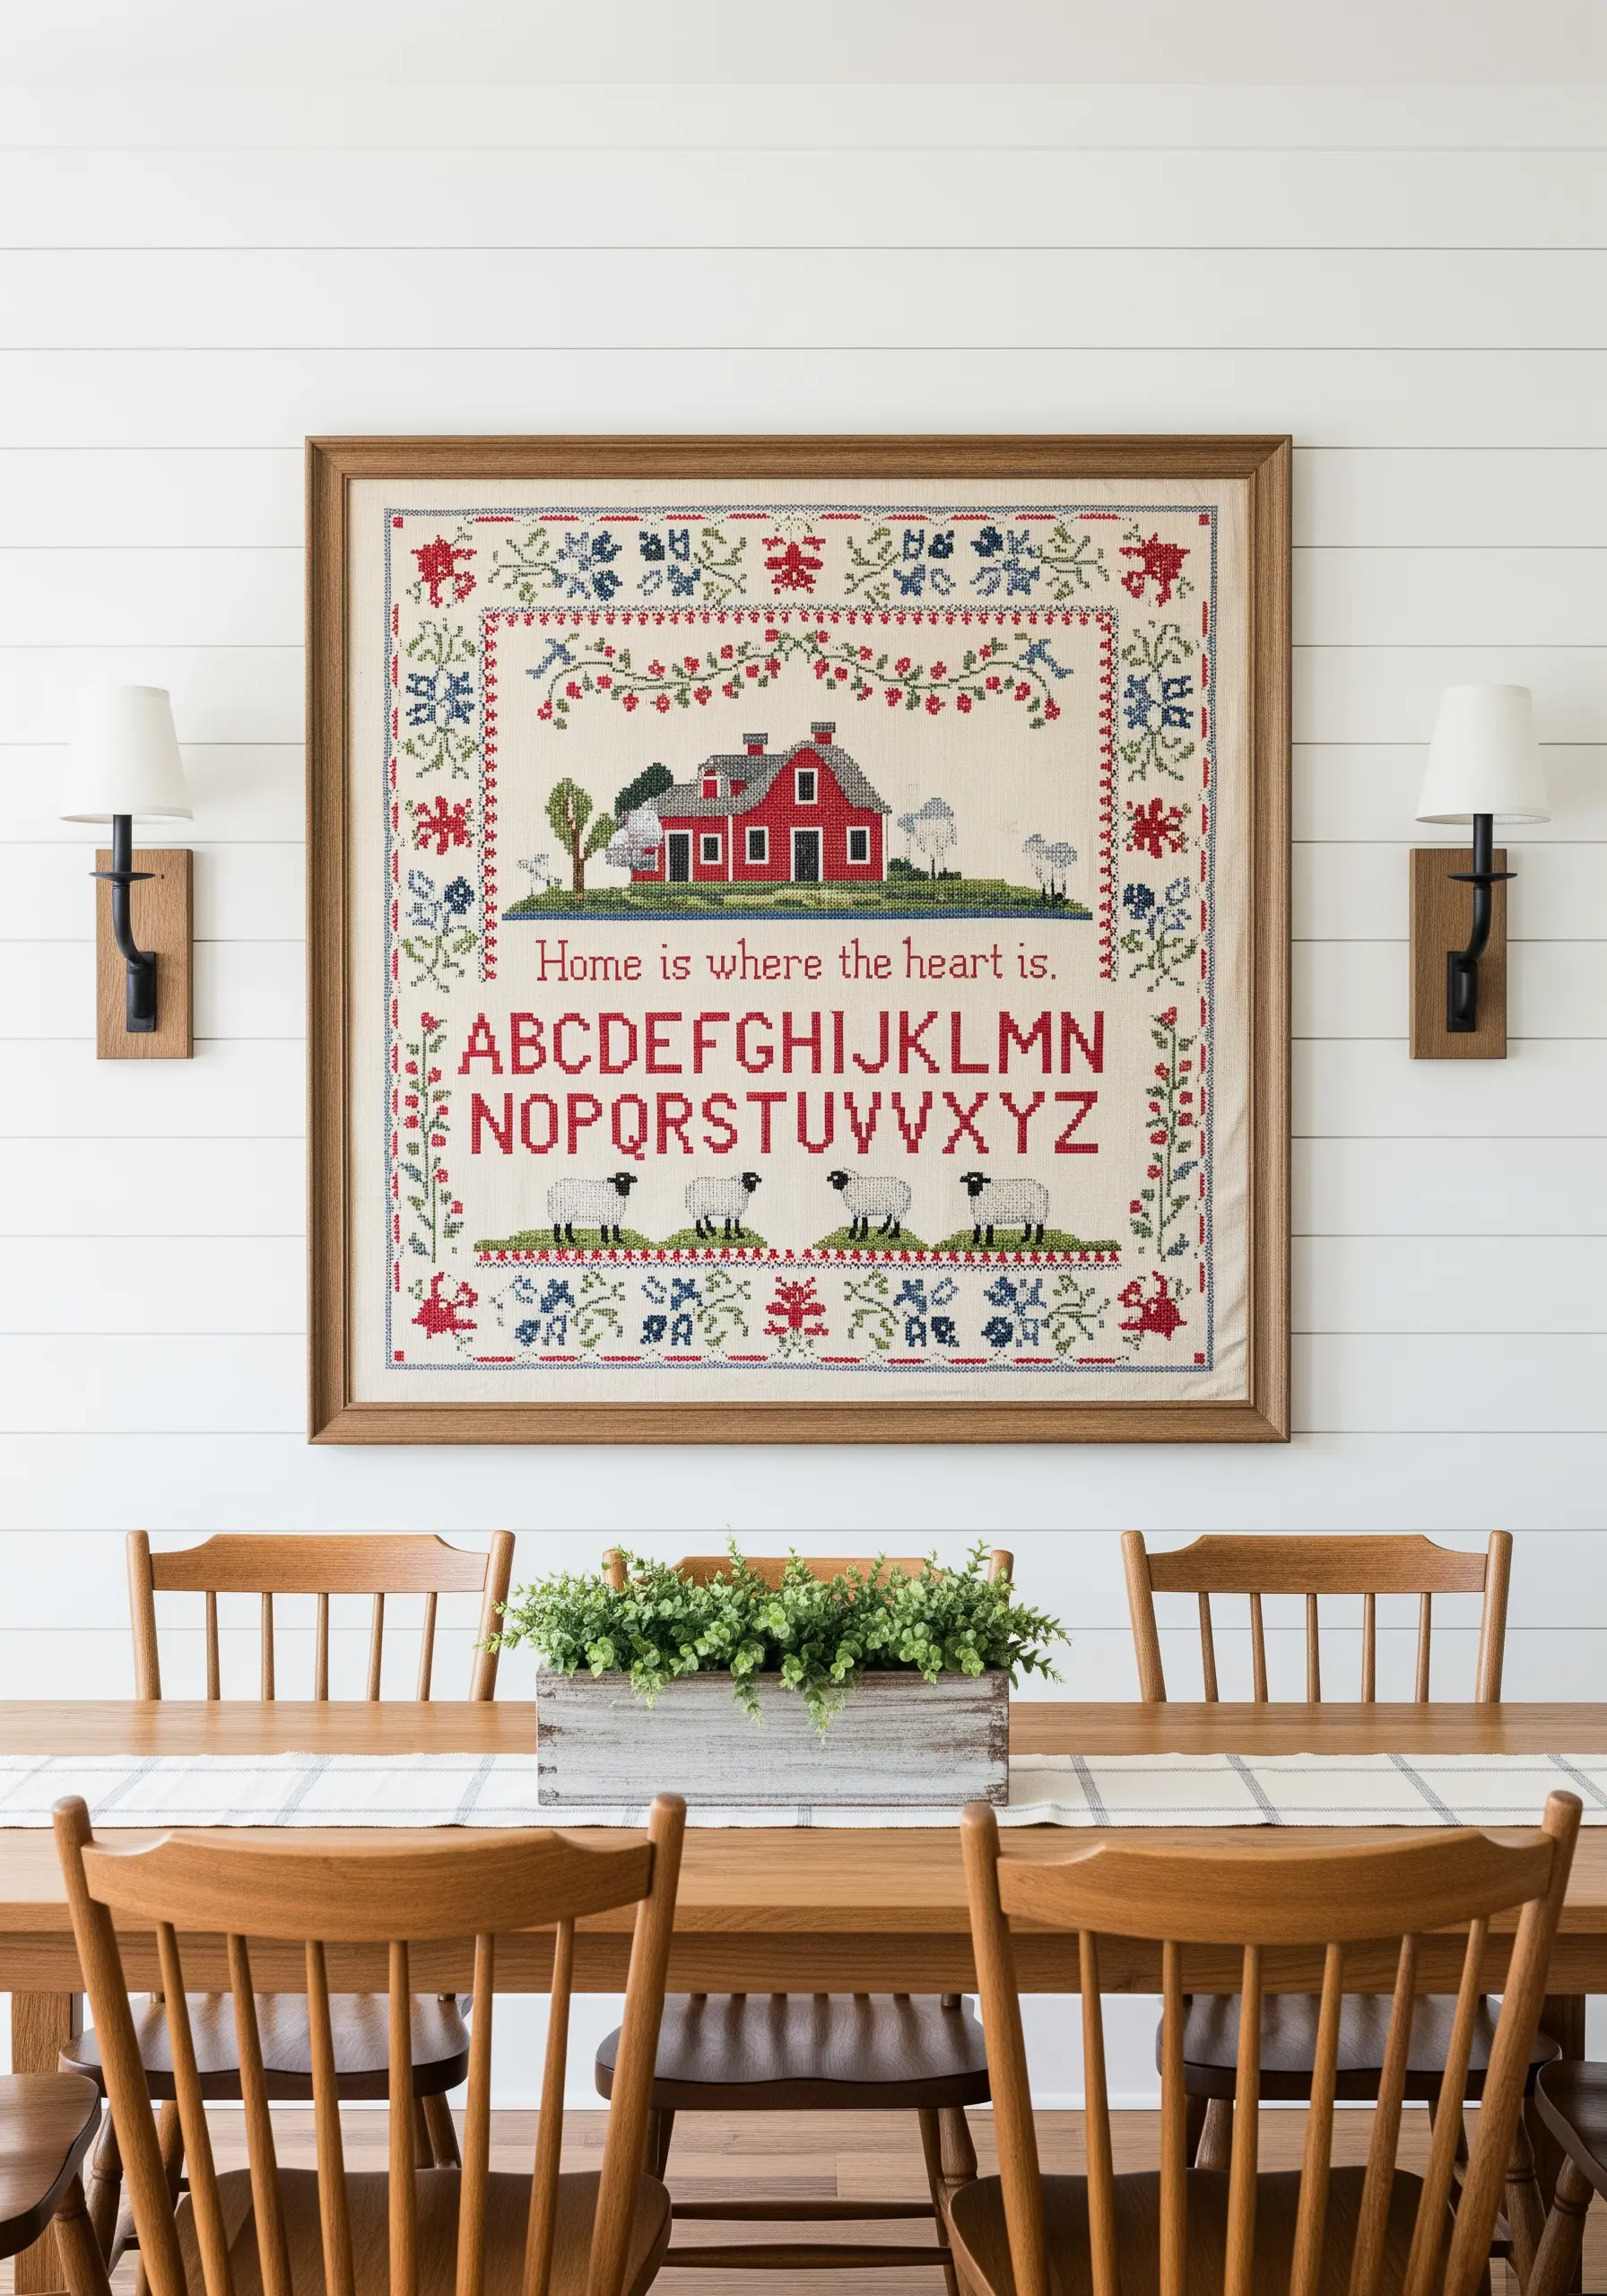
Reimagine the classic alphabet sampler to create a modern heirloom that feels both nostalgic and deeply personal.
Instead of a generic phrase, stitch a family motto, an inside joke, or a meaningful date to make the piece uniquely yours.
Work on an evenweave linen fabric instead of Aida cloth for a more refined, traditional finish; the softer weave gives your stitches a slightly gentler appearance.
Frame the finished piece without glass to allow the texture of the stitches and the fabric to become part of your room’s decor.
6. Sculpt a Landscape with Punch Needle Textures

Create a rolling landscape with tangible depth by using punch needle embroidery to vary the texture of each element.
Use the looped side of your punch needle work for the flower fields and clouds; this creates a fluffy, high-pile texture that brings them to the foreground.
For the distant hills and fields, use the flat stitch side of your work. This creates a smoother, woven look that suggests distance and perspective.
Define the winding river with a single line of tightly packed French knots using a slightly lustrous rayon thread to mimic the subtle shimmer of water.
7. Achieve Painterly Florals with Delicate Stitches
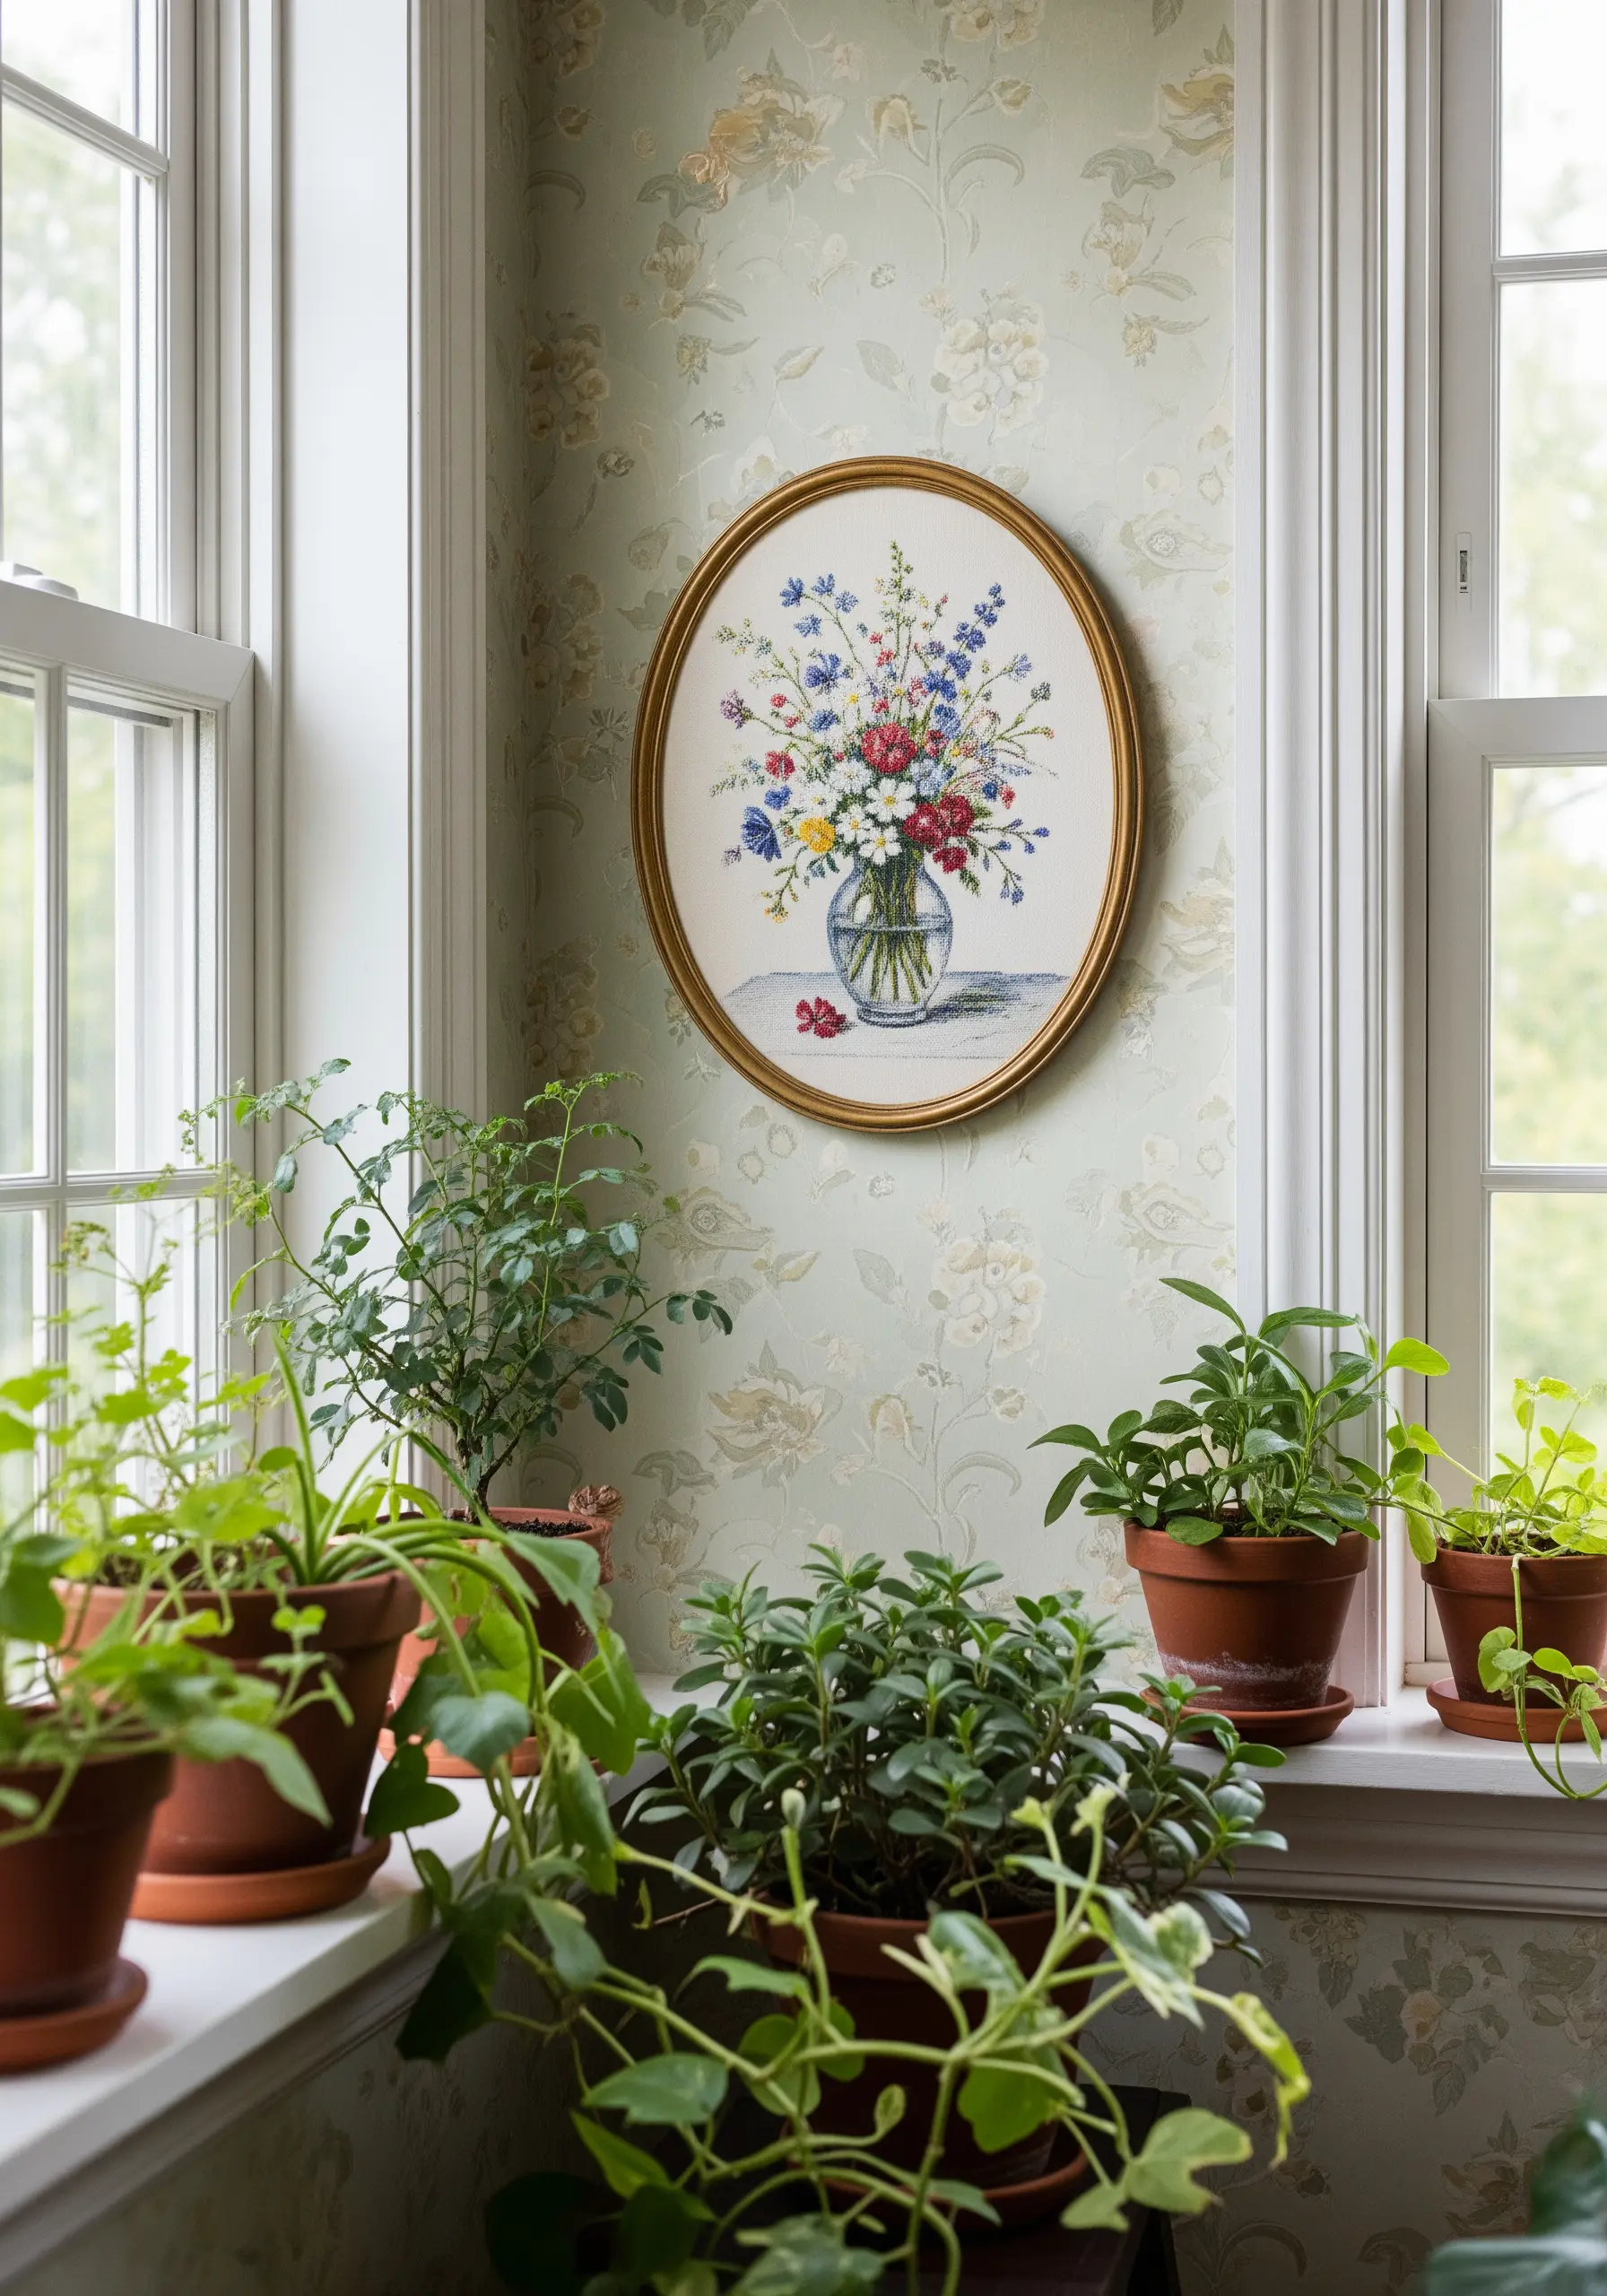
Stitch a wildflower bouquet that feels less like a pattern and more like a delicate watercolor painting.
Use single-strand cotton floss for the entire piece. This allows for subtle color blending and prevents the tiny petals from looking bulky or overwrought.
Combine long-and-short stitch for the larger petals with tiny French knots and lazy daisy stitches for the smaller filler flowers and buds.
This approach to wildflower thread painting techniques relies on layering sheer color rather than solid blocks, giving your work an airy, realistic quality.
An oval frame enhances the vintage, portrait-like feel of the finished piece.
8. Chart the Stars with Luminous Thread
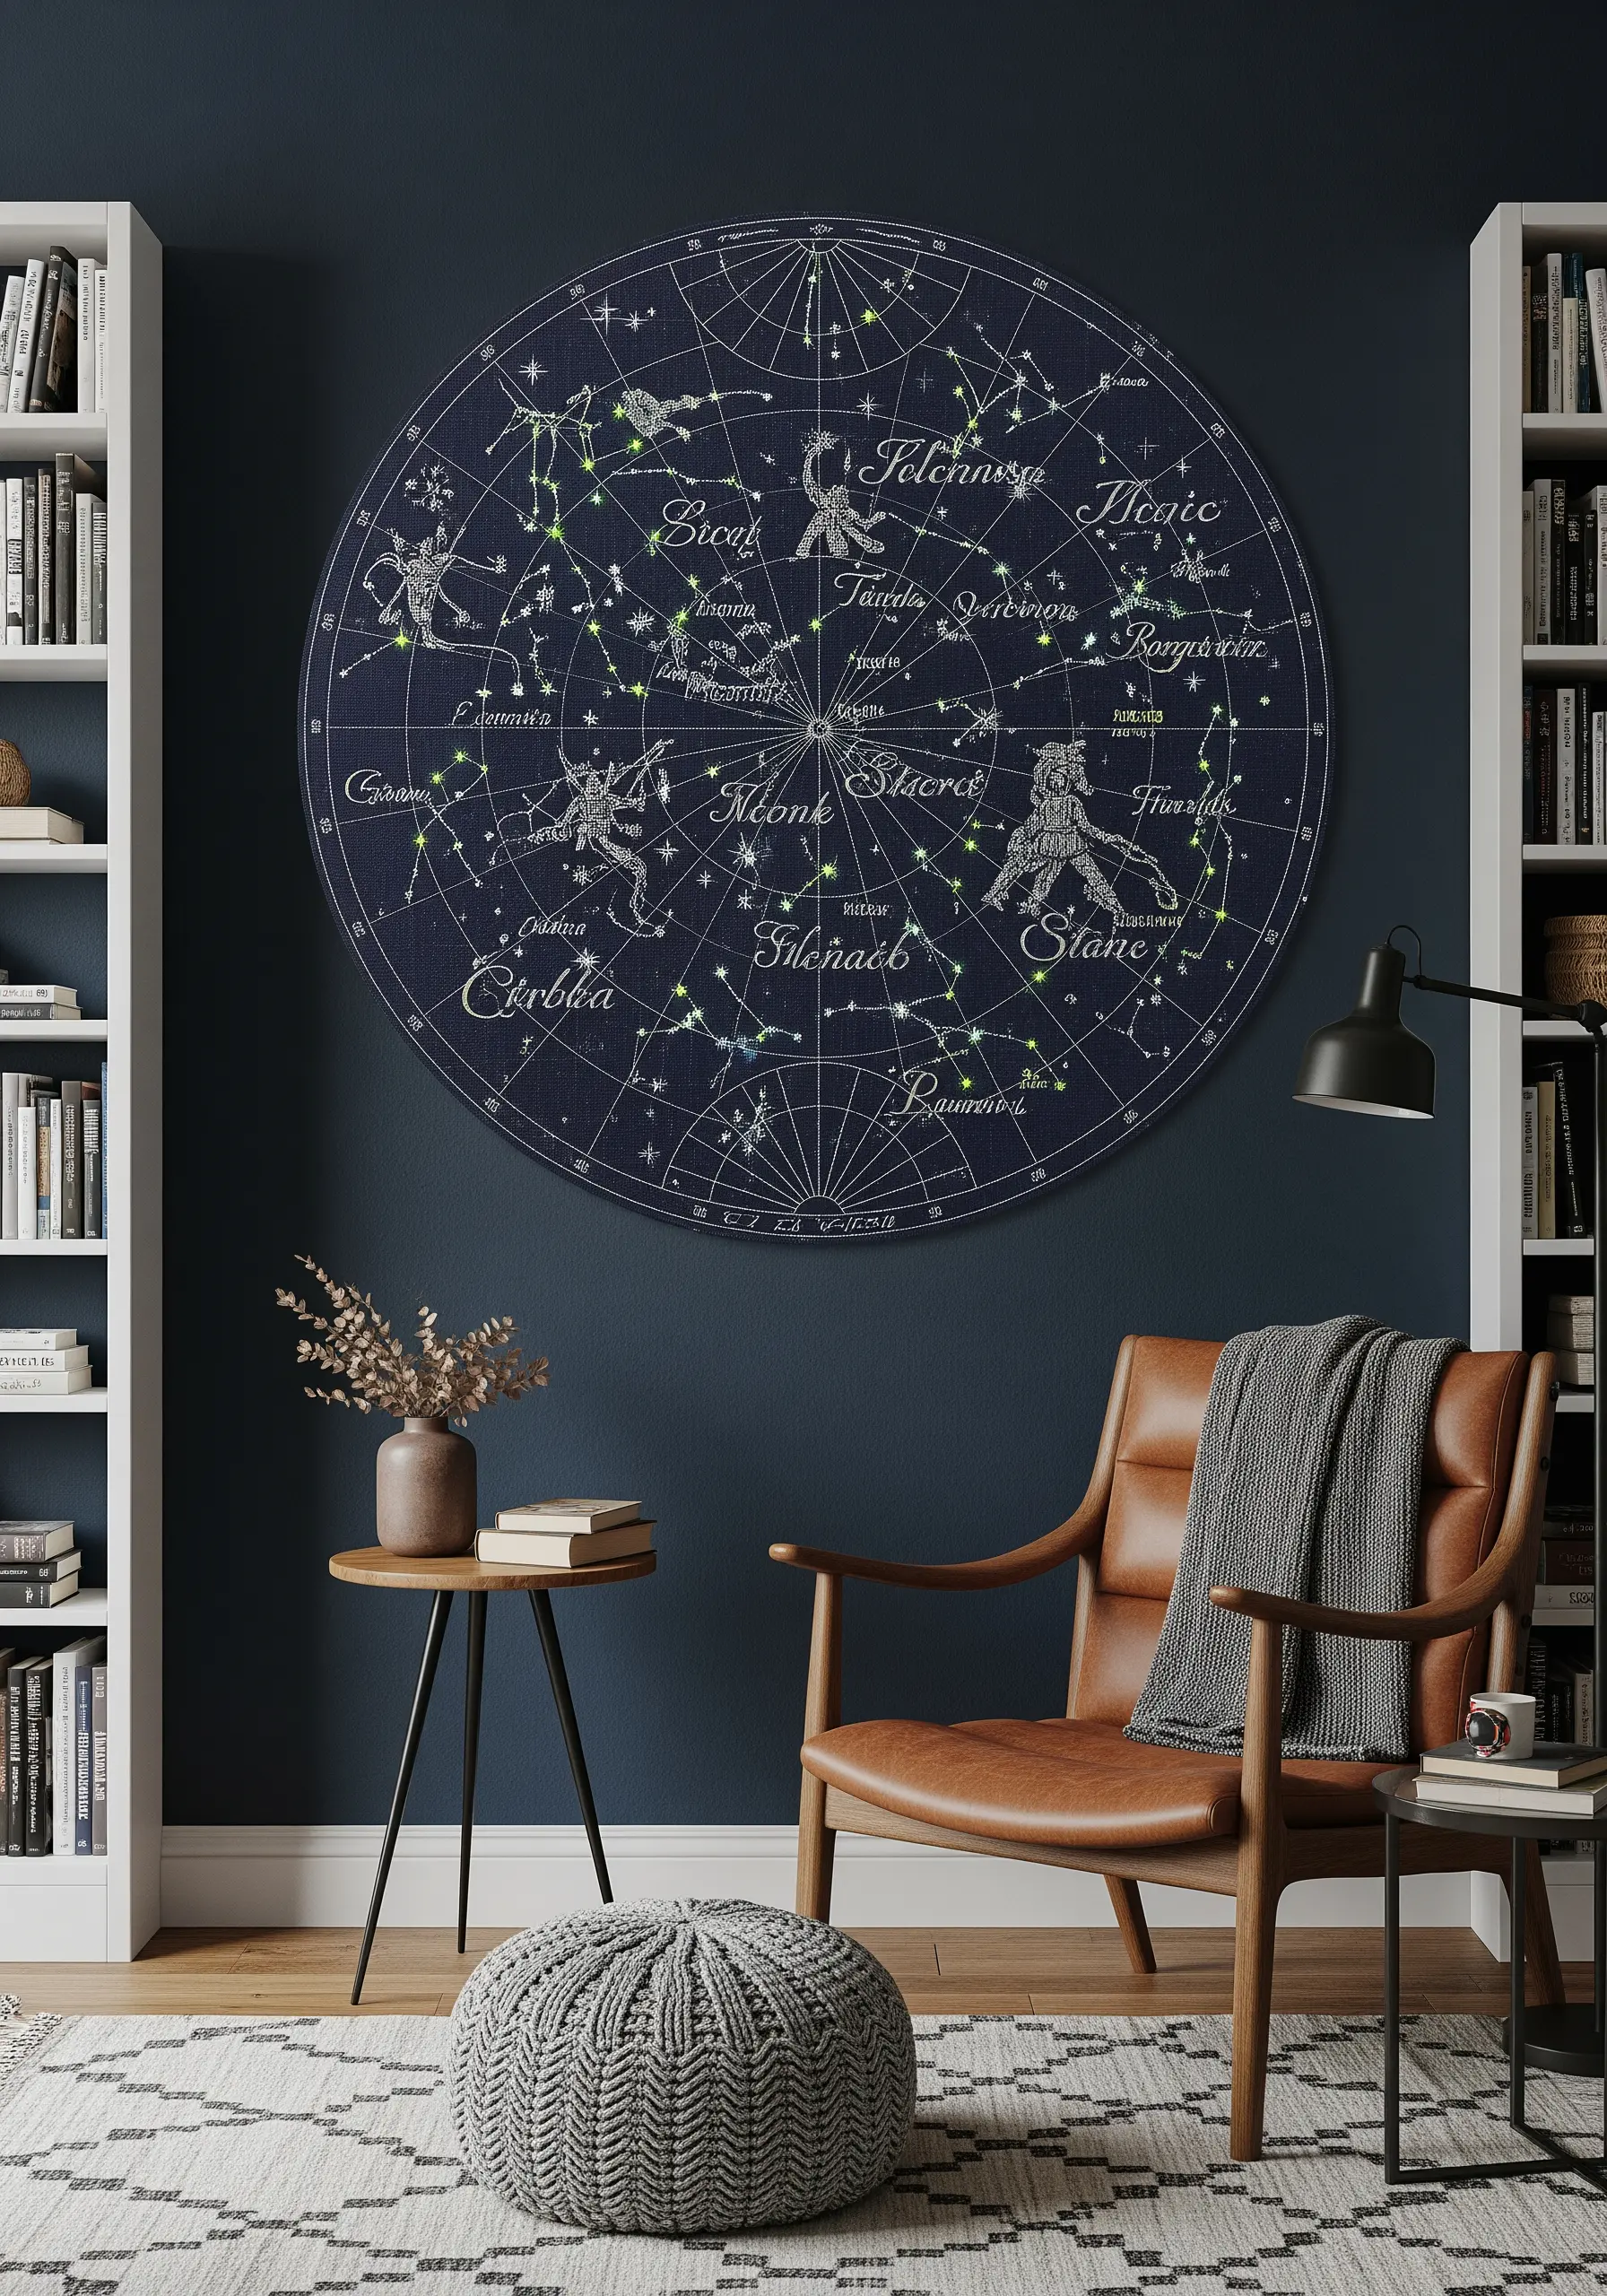
Create a dramatic celestial map by stitching onto dark navy or black linen, turning your wall into a piece of the night sky.
Use a single strand of white or silver thread for the constellation lines and lettering, opting for a tiny split stitch to maintain clarity and precision.
For the stars themselves, use a high-quality glow-in-the-dark thread and form them with single French knots or four-sided Smyrna crosses for a subtle twinkle.
This large-scale circular format makes a powerful focal point in a reading nook or study, inviting closer inspection.
9. Master the Art of Opulence with a Peacock Panel
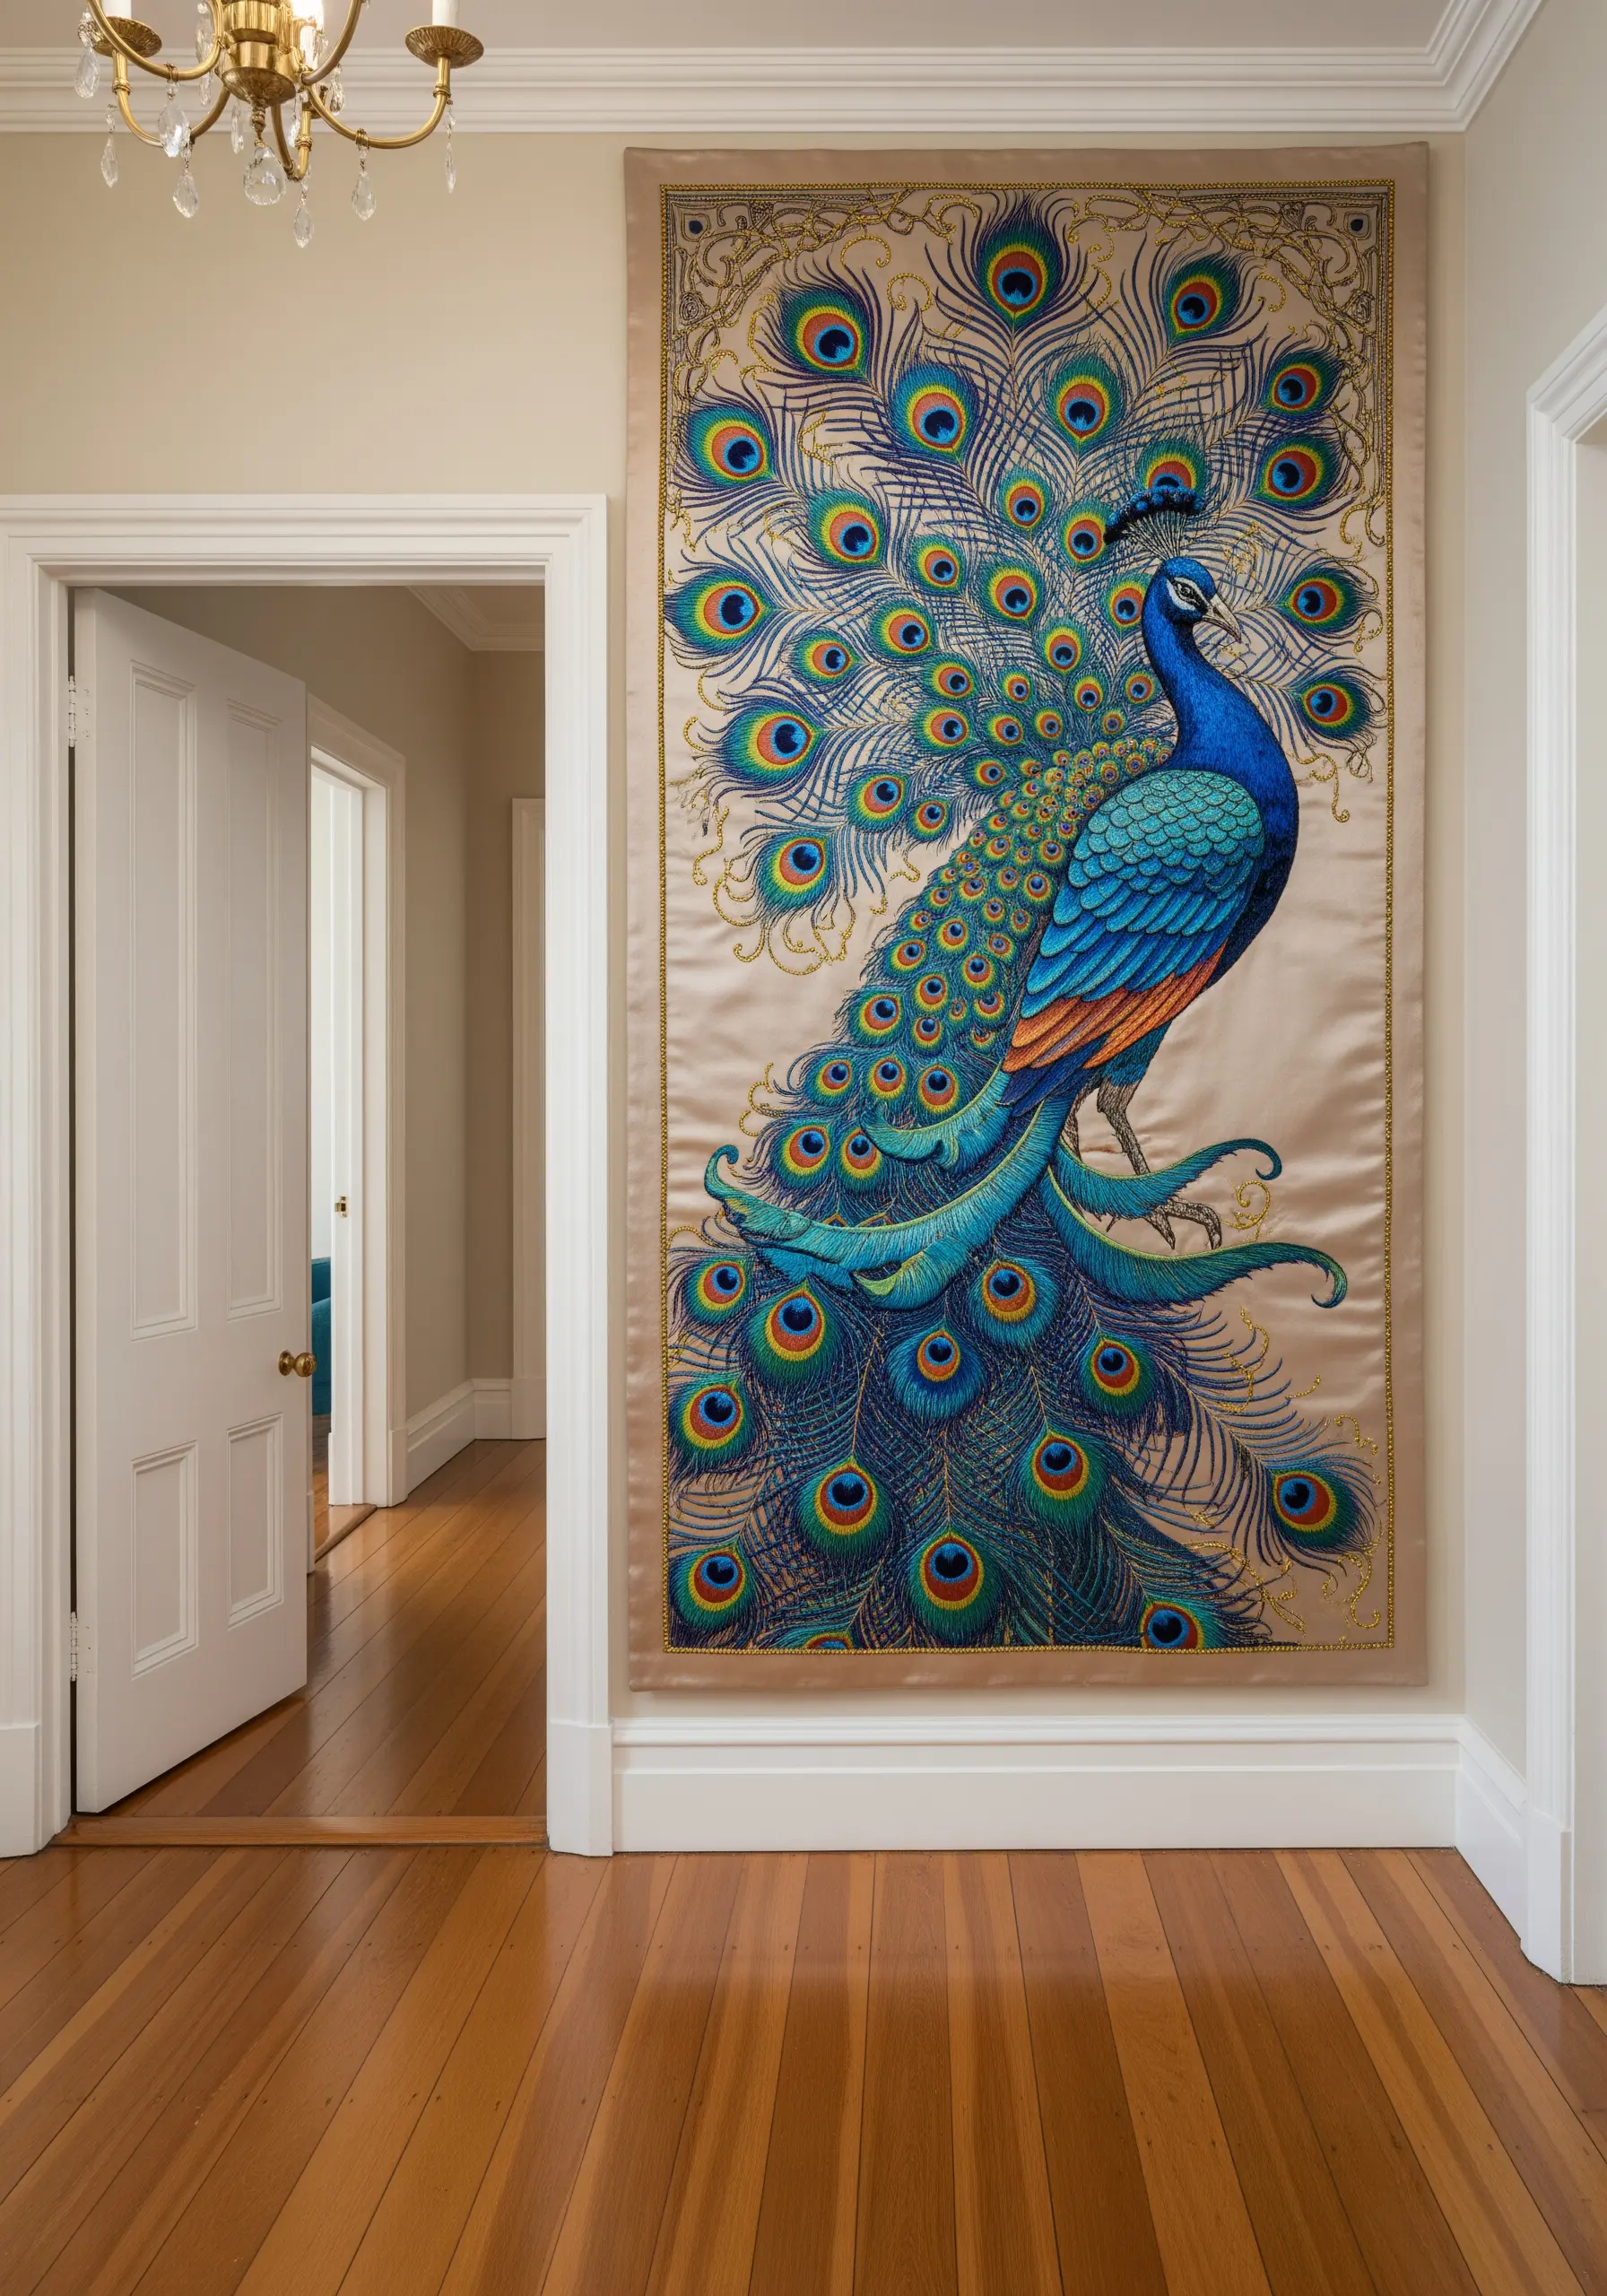
Tackle a complex and luxurious subject like a peacock by breaking it down into manageable sections of color and texture.
For the iridescent body, use satin stitches placed at different angles. This technique, called directional satin stitch, causes the thread to catch the light differently, mimicking the natural shimmer of feathers.
Use long-and-short stitch for the tail feathers to blend the jewel tones of blue, green, and gold seamlessly.
Outline each ‘eye’ of the feather with a fine metallic gold thread using a simple backstitch to add a final layer of regal definition and sparkle.
10. Capture Nostalgic Charm with Folk Art Motifs

Channel the simple beauty of folk art by focusing on stylized motifs, a primary color palette, and clean, confident stitchwork.
Choose a single, repeated element, like a bird or flower, and render it in bold blocks of color using a dense satin stitch.
The charm of this style comes from its handmade imperfections, so don’t worry about perfect symmetry. Instead, focus on creating smooth, even stitches within each shape.
Display your pieces in a simple vertical stack of natural wood hoops to maintain the clean, unpretentious aesthetic.
11. Stitch a Vintage-Inspired Kitchen Herbarium

Bring a touch of cottage charm to your pantry or kitchen with cross-stitched botanical labels reminiscent of old seed packets.
Work on a rustic, nubby fabric like burlap or a low-count linen to enhance the vintage, utilitarian feel.
Keep the typography simple and legible by using a basic backstitch for the lettering, ensuring it stands out against the detailed illustration.
Mount the finished pieces on fabric-wrapped cardstock and add a simple hook for an easy, unframed display that feels authentic and unfussy.
12. Create a Regal Monogram with Raised Stitches

Elevate a simple monogram into a statement piece of decor by incorporating techniques from classical whitework and goldwork.
Use a padded satin stitch to give the central letter a raised, three-dimensional quality. Create this by first building a small mound of foundation stitches, then covering it with smooth satin stitches.
For the surrounding scrollwork, use a whipped backstitch with a contrasting or metallic thread to create a delicate, cord-like outline that adds a touch of luxury.
Stretching the final piece in a heavy, ornate frame transforms it from a simple craft into a formal piece of art suitable for a study or library.
13. Evoke Serenity with a Chinoiserie Wall Hanging
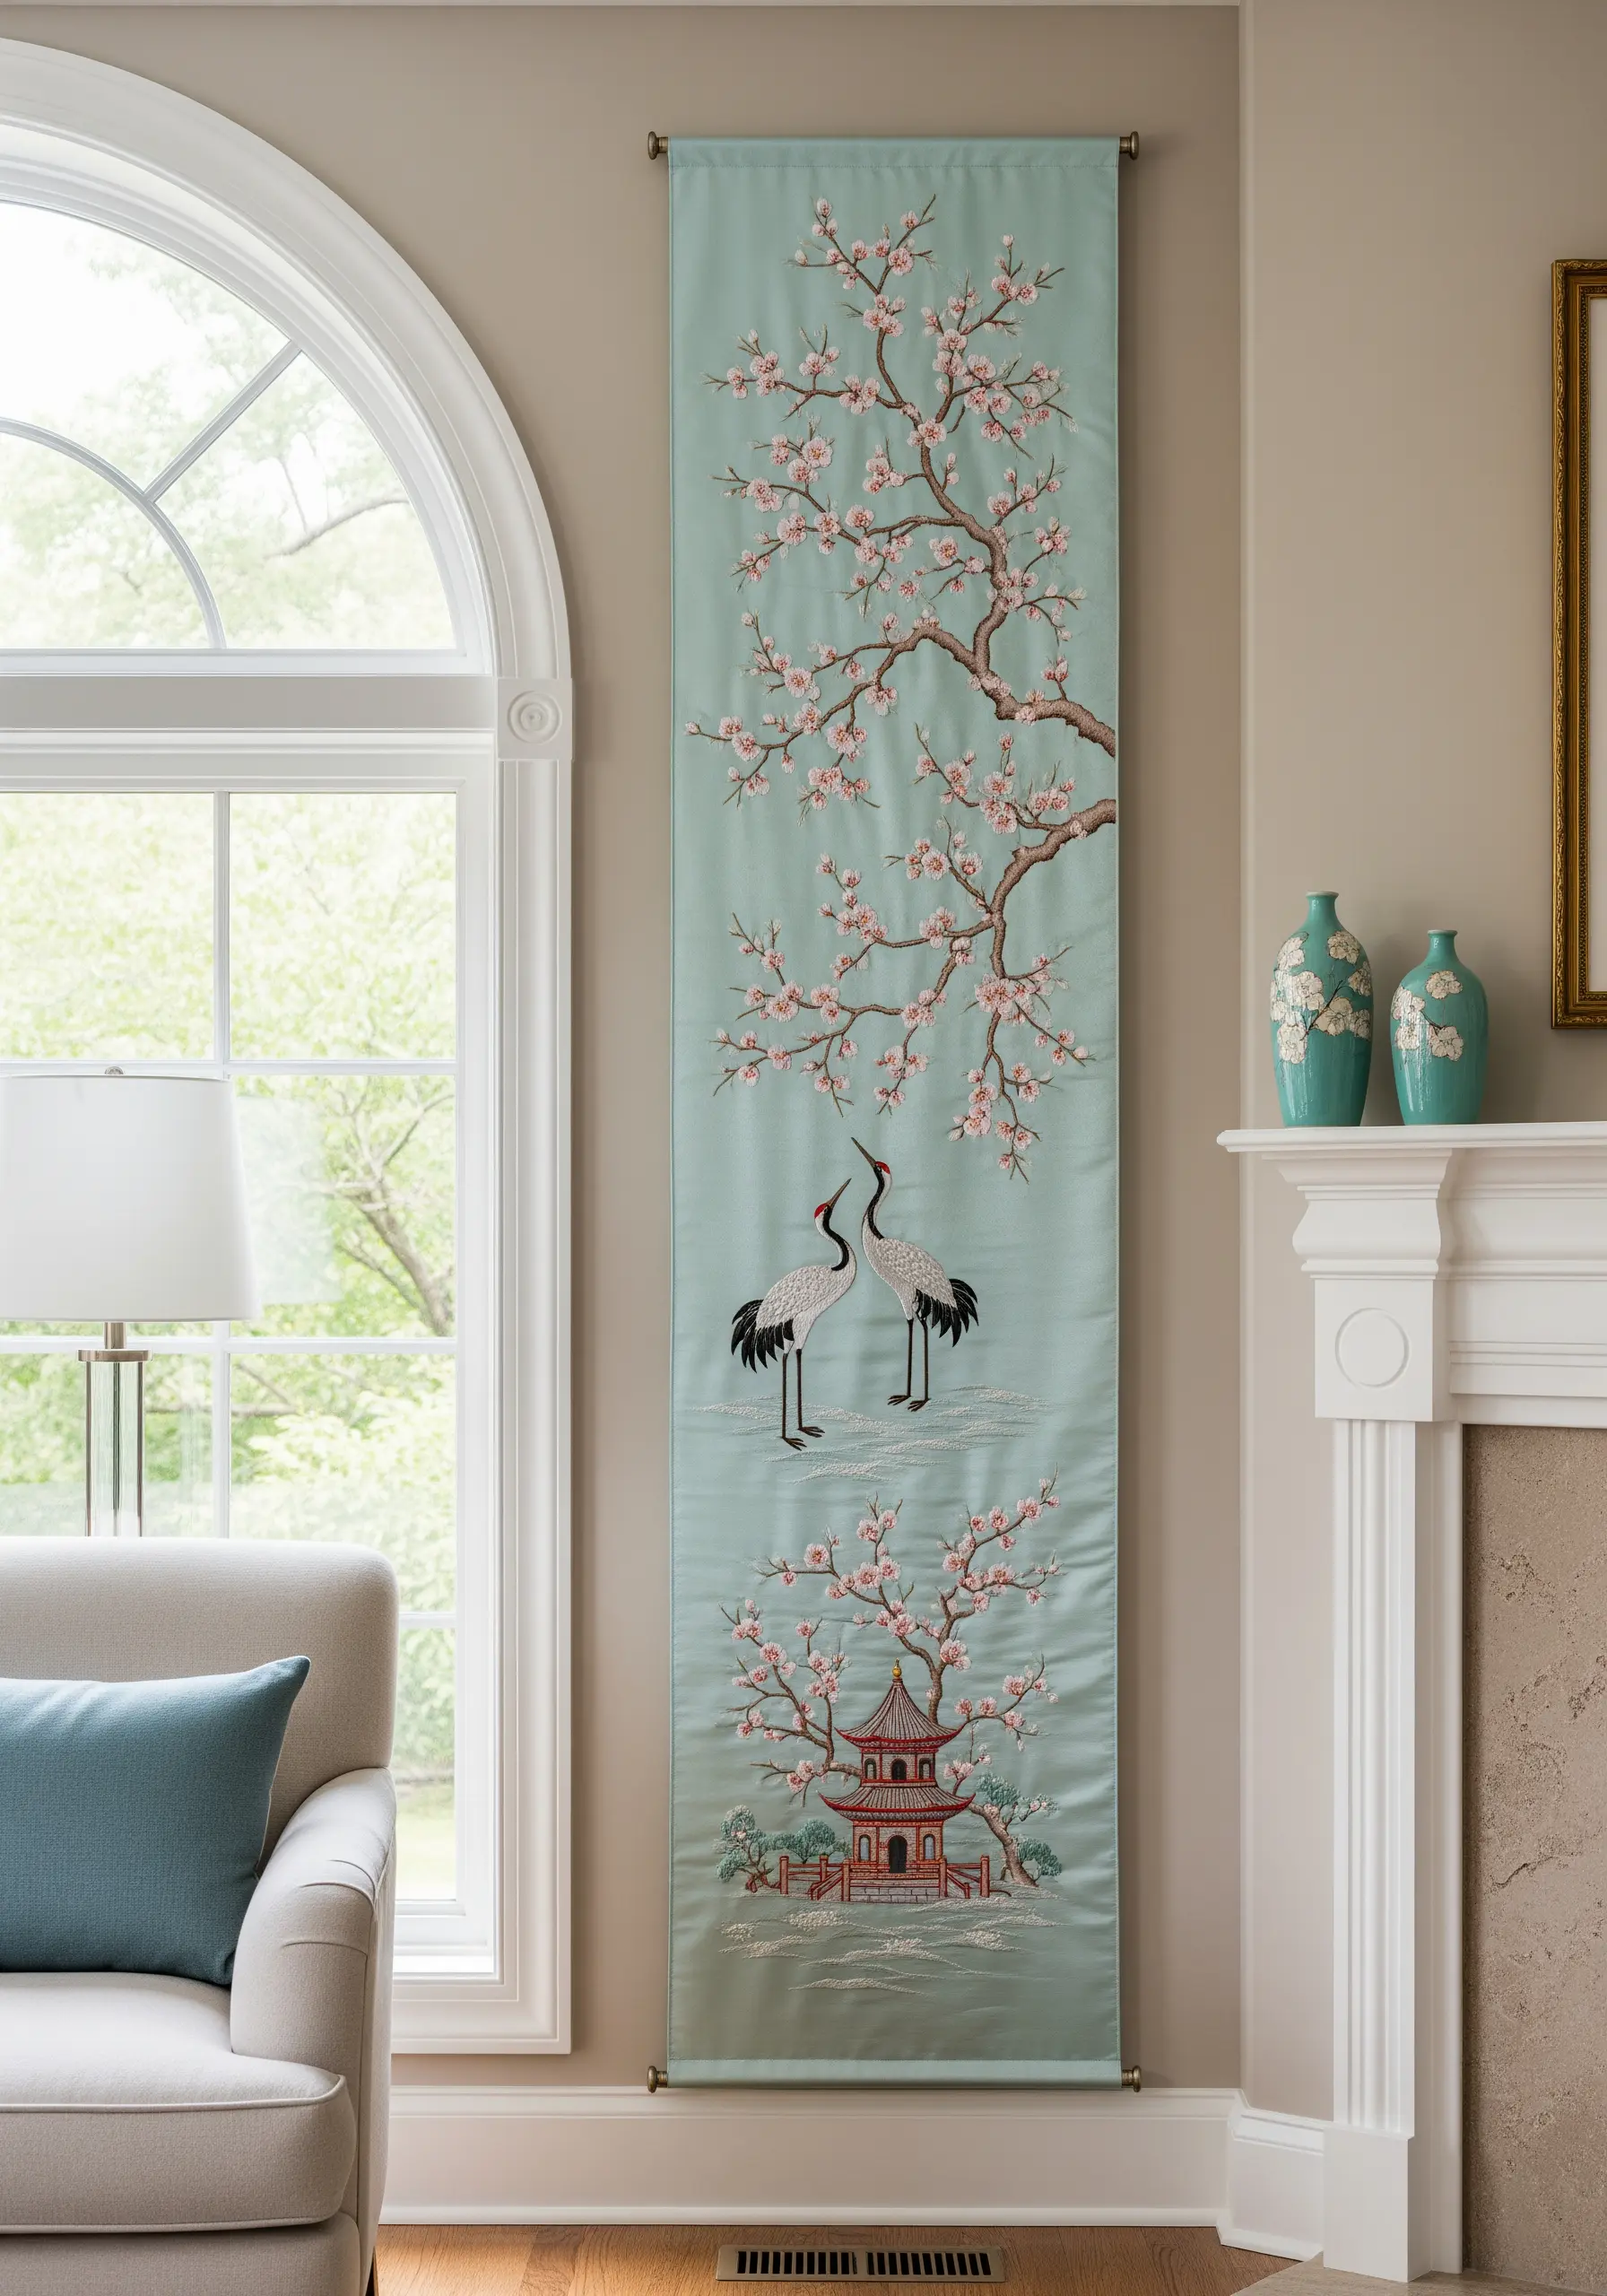
Capture the delicate grace of Asian art with a vertical panel that emphasizes elegance, balance, and fine detail.
To create the ethereal cherry blossom embroidery projects, use detached chain stitches (lazy daisies) and French knots with just one or two strands of silk floss on a satin or silk-blend fabric.
Use a twisted chain stitch or stem stitch for the branches to give them a gnarled, realistic texture that contrasts with the delicate blossoms.
The vertical format is perfect for narrow walls or flanking a doorway, drawing the eye upward and creating a sense of height and tranquility.
14. Weave in Glamour with Bead Embroidery
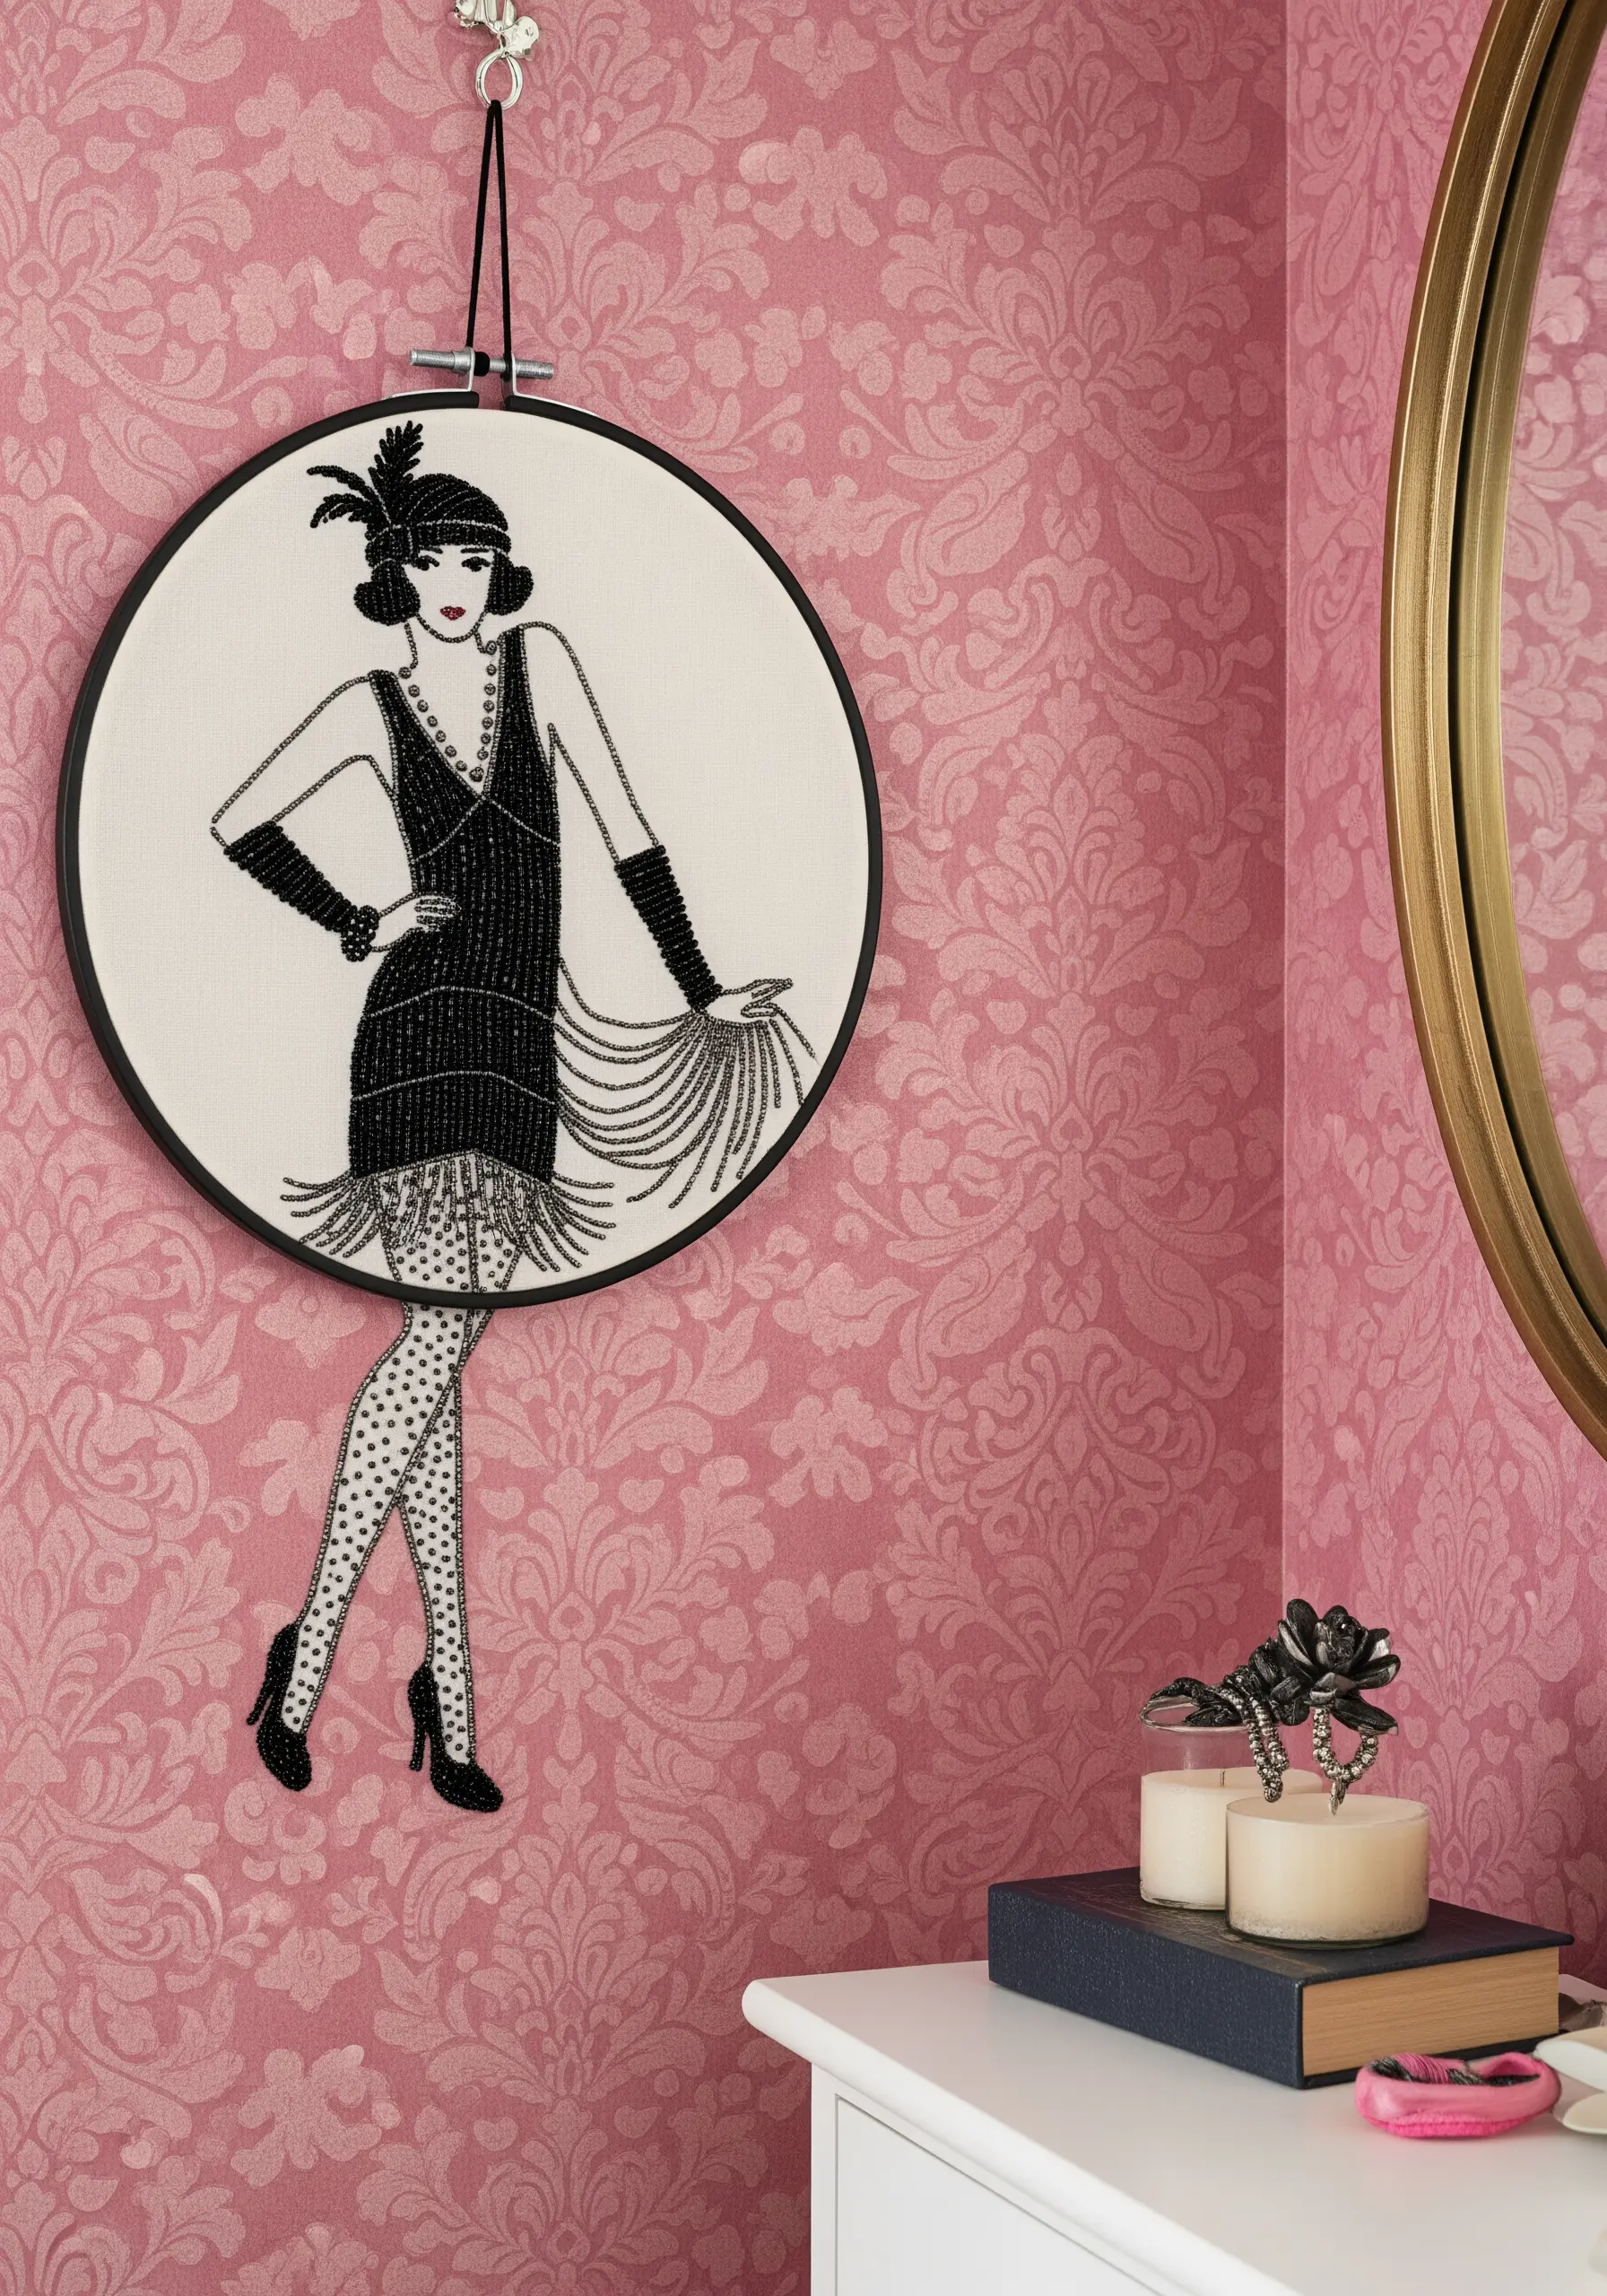
Add authentic Roaring Twenties sparkle to your embroidery by integrating beads to mimic the era’s fashion.
First, stitch the outline of your figure with a clean, two-strand backstitch to establish a solid foundation.
Fill in the dress and accessories with lines of tiny black seed beads, securing them one by one with a matching thread. For the draped fringe, create loops of beads and tack only the ends down, allowing them to move freely.
This is one of the best mixed-media techniques for embroidery lovers who crave unique art because it adds texture, light, and a touch of vintage opulence.
15. Chart an ‘Old World’ Map with Fine Line Work

Recreate the artistry of antique cartography by focusing on precise line work and a muted, aged color palette.
To achieve the fine details of coastlines and typography, use a single strand of dark brown or black floss and a sharp, size 10 crewel needle.
A tiny split stitch will give you more control and a smoother line than a backstitch for the intricate curves and lettering.
Before you begin stitching, give your off-white linen fabric a tea or coffee bath to create a convincing, unevenly aged parchment effect.
16. Paint a Thatched Cottage Scene with Thread

Build a picturesque landscape by thinking in layers of texture, just as a painter would build layers of color.
Use dense French knots in various shades of green, pink, and red to create the flowerbeds and foliage; this gives them a lush, impressionistic quality.
For the thatched roof, use long, straight stitches in straw-like colors, layered unevenly to mimic the texture of bundled reeds.
The key to these cozy cottage-core fabric collage embroidery designs is using a wide variety of stitches—from satin stitch for the walls to stem stitch for the pathway—to differentiate every surface.
17. Display Delicate Botanicals in a Specimen Series
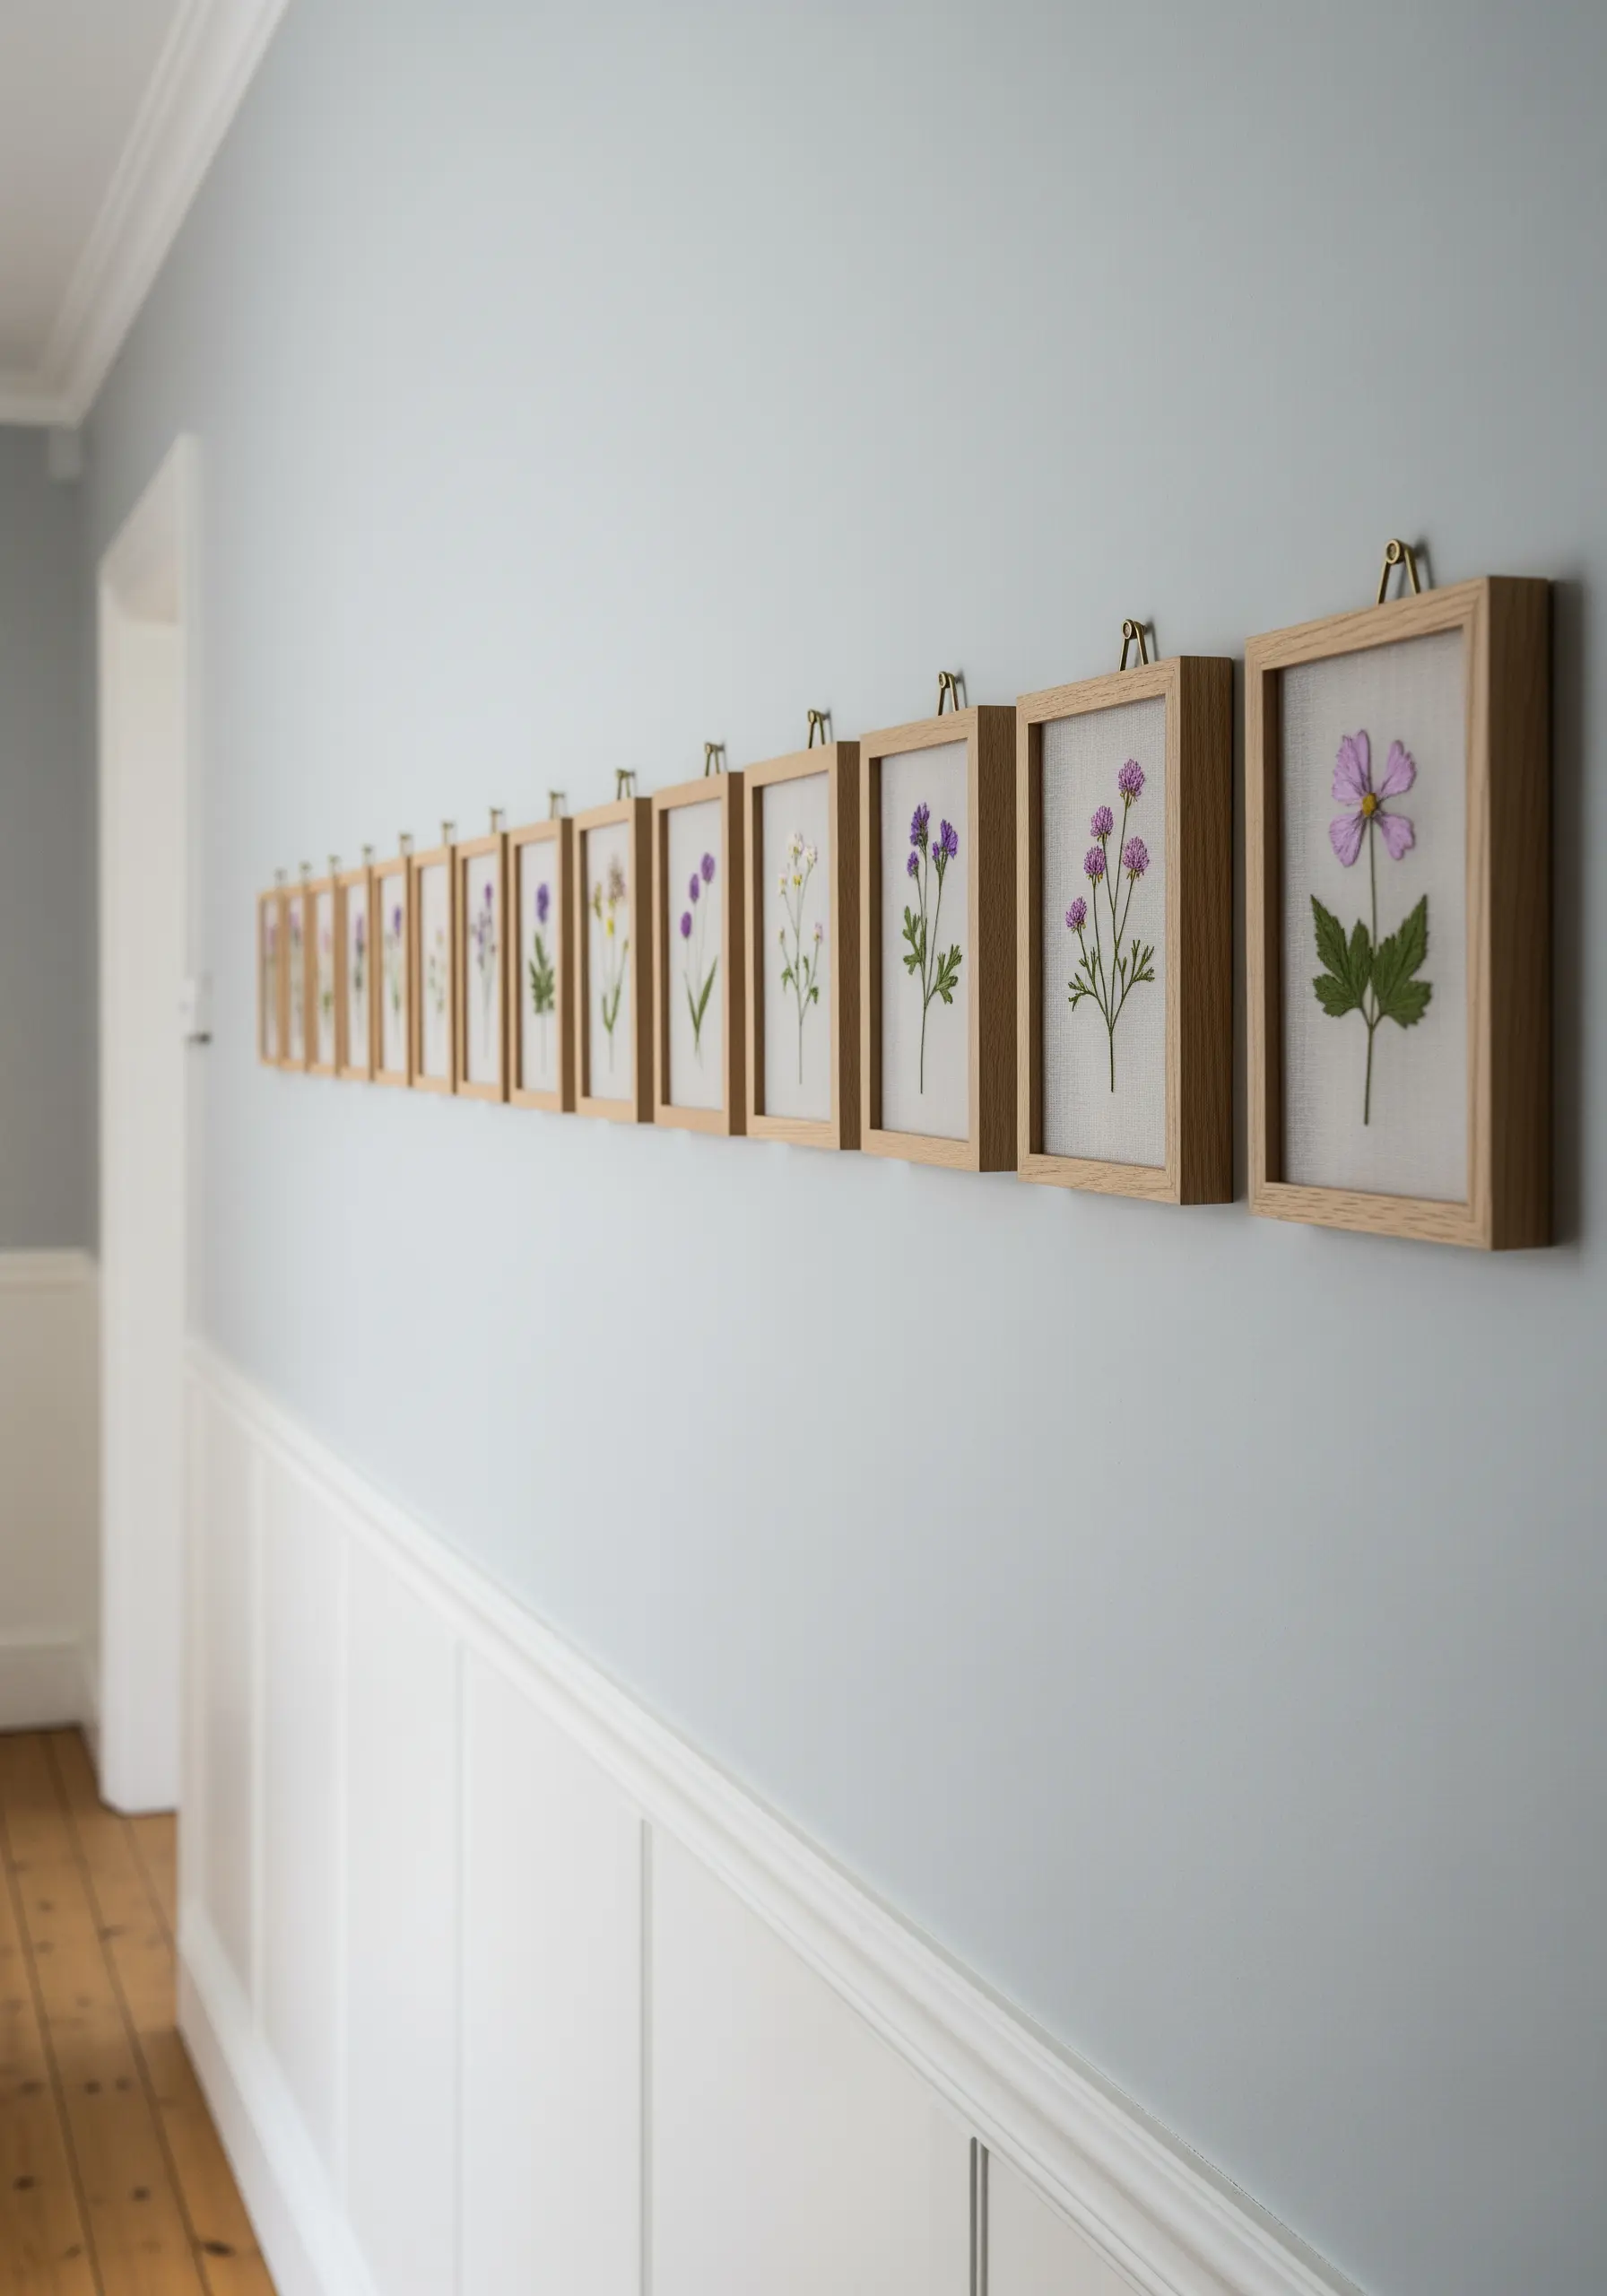
Create a refined, scientific-style display by stitching individual botanical stems and framing them as a linear collection.
Focus on accuracy and delicacy, using a single strand of thread and the finest possible stitches, like a split stitch or tiny stem stitch, to render the leaves and petals.
Mount each finished embroidery on a piece of neutral linen, ensuring the stem is perfectly centered, and use simple, matching wood frames.
This series approach creates a powerful, cohesive statement in a hallway or along a staircase, celebrating the quiet beauty of individual plants.
18. Animate Your Kitchen with Retro Pop Art
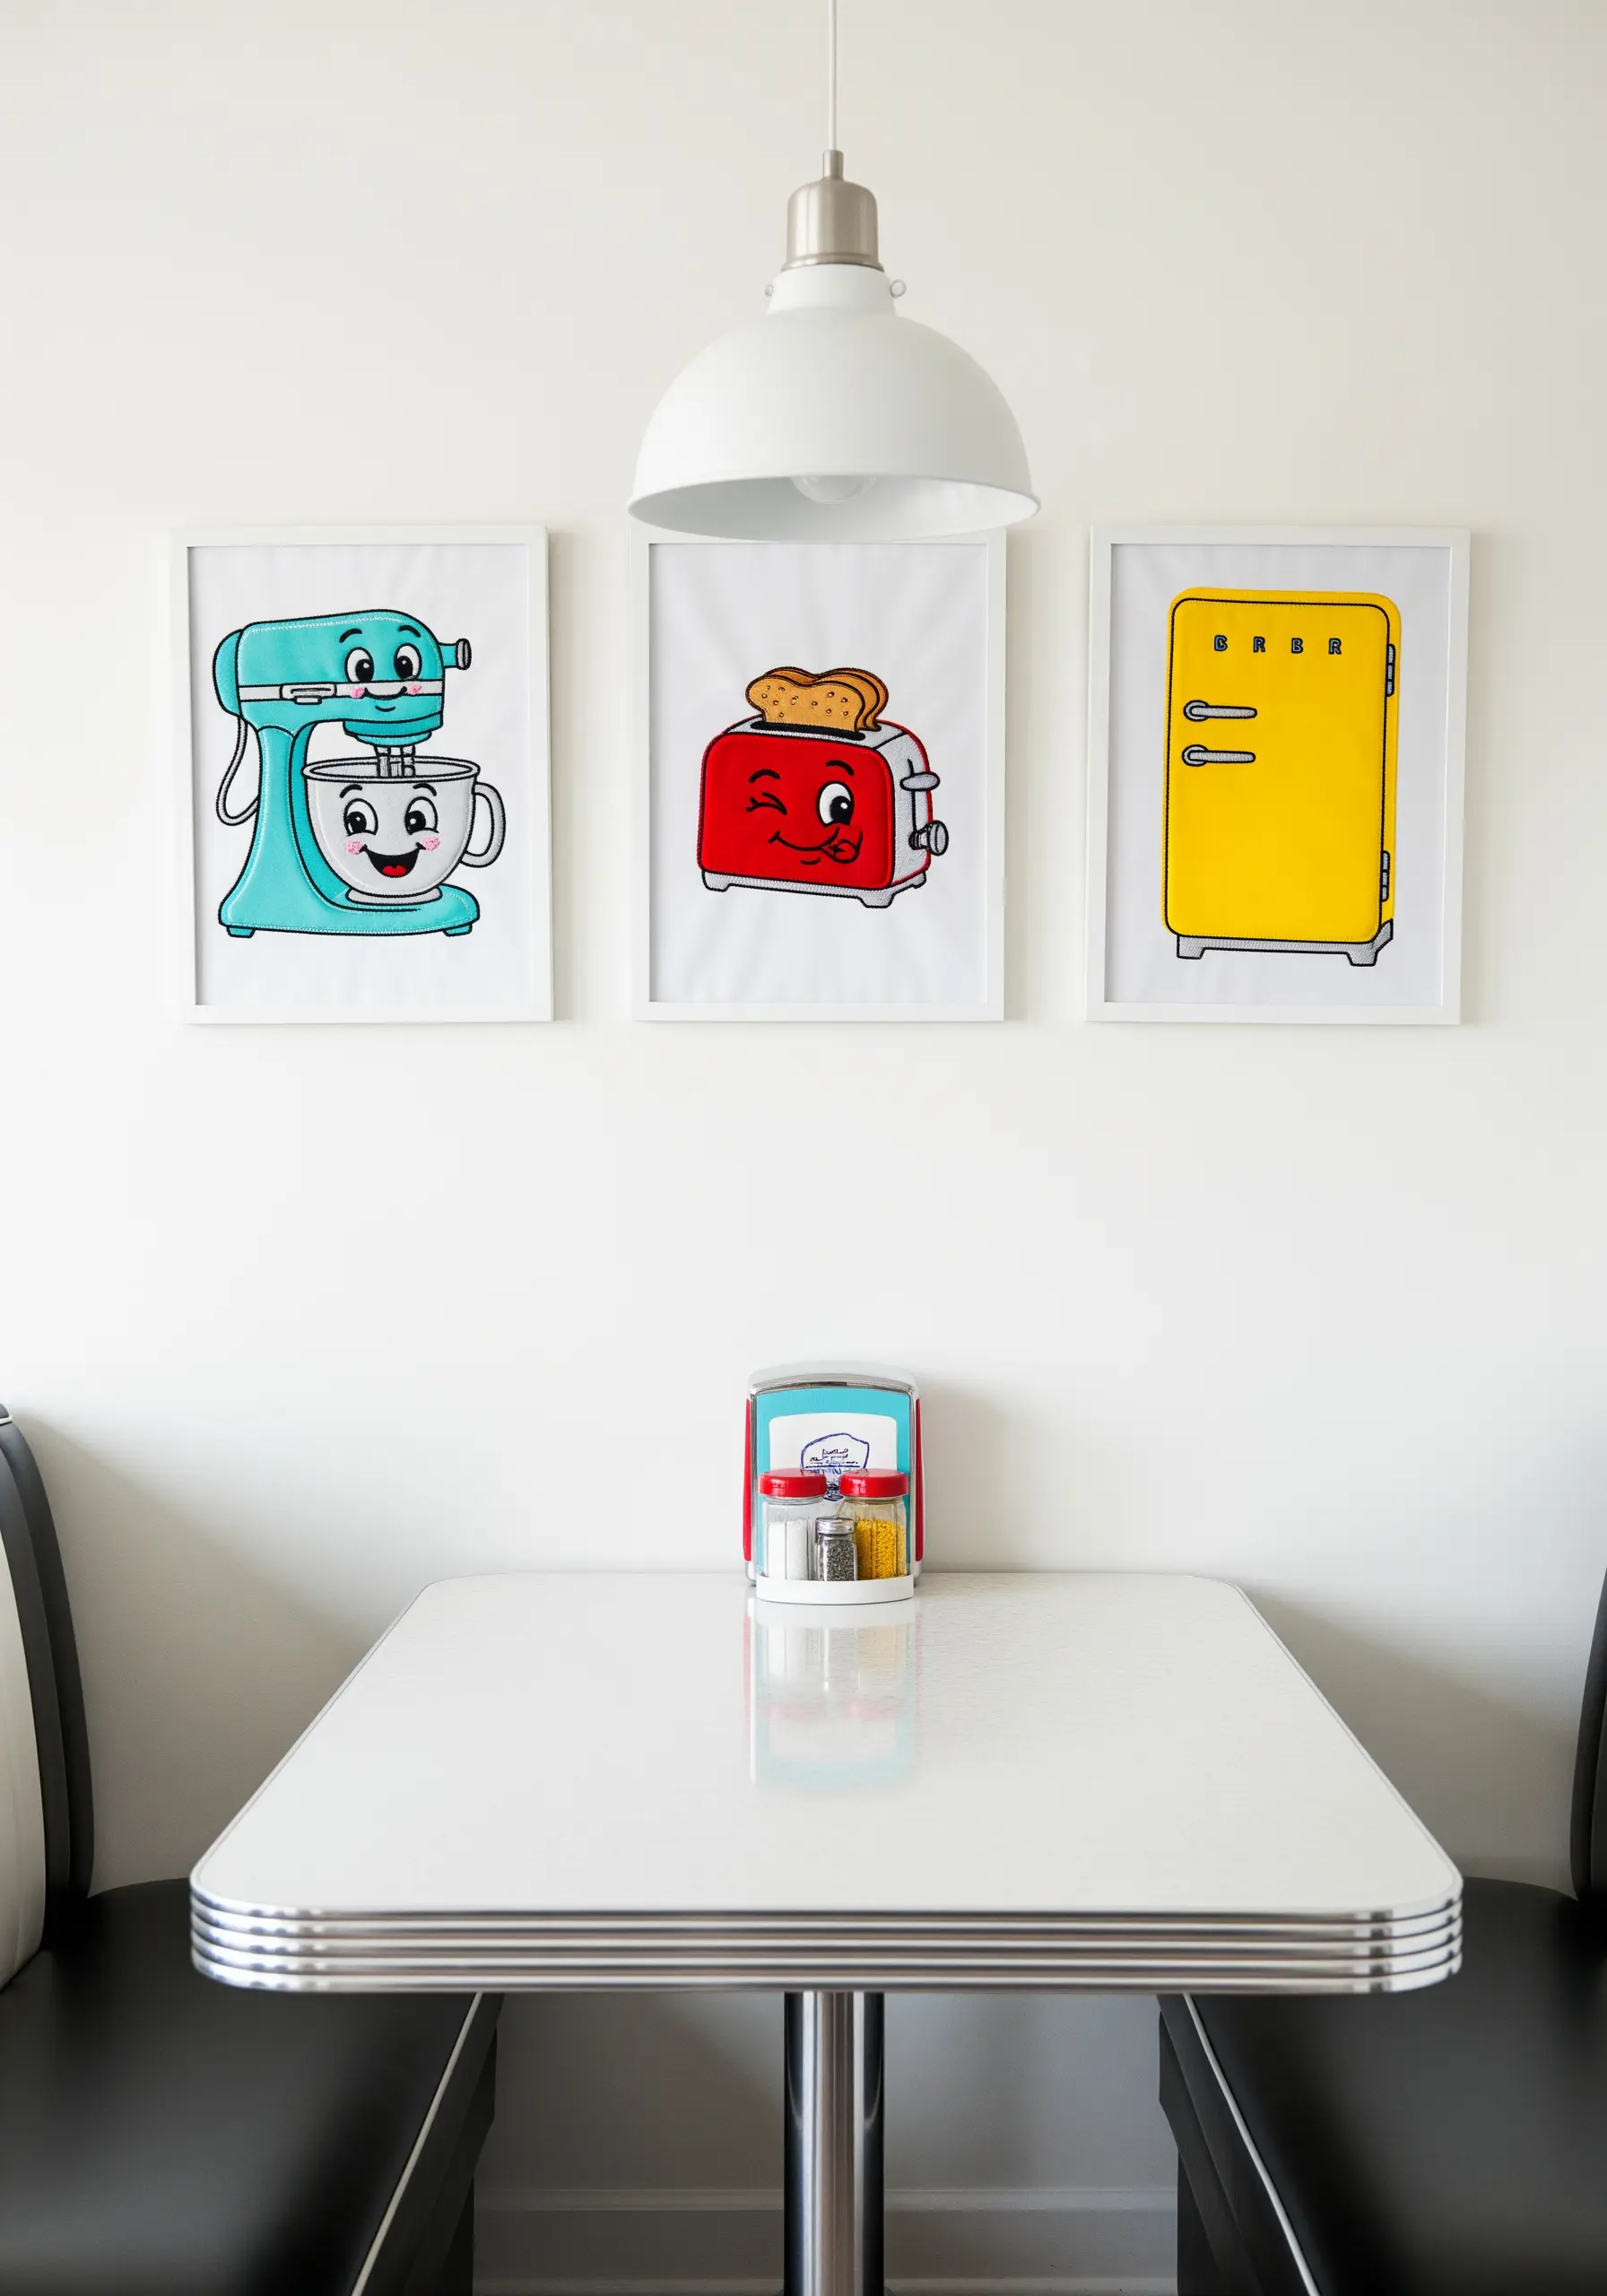
Inject a dose of 1950s diner fun into your decor with simple, embroidered cartoon characters.
The key to this style is the bold, black outline. Use a three-strand backstitch or stem stitch to create a confident, comic-book line that defines every shape.
Fill the shapes with a perfectly smooth satin stitch in bright, saturated colors like turquoise, cherry red, and sunny yellow.
White highlights, added with a few simple straight stitches, are essential for giving the characters that cheerful, animated personality.
19. Capture a Storybook Moment with Atmospheric Stitching

Evoke the feeling of a classic fairy tale by using thread painting to create a scene rich with light, shadow, and emotion.
For the foliage and tree bark, use a variety of directional long-and-short stitches with several shades of green and brown to suggest dappled sunlight filtering through leaves.
Pay close attention to the light source; in this piece, the area around the door is darkest, so use your deepest shades there to create a sense of mystery and depth.
Keep the character’s features simple to maintain the illustrative quality, letting the texture of the surrounding environment tell most of the story.
20. Achieve an Intricate Wallpaper Effect

Recreate the dense, repeating patterns of Arts and Crafts-era design by focusing on stitch consistency and a harmonious color palette.
This is not a project for a wide variety of stitches. Instead, master two or three—like the satin stitch, stem stitch, and French knot—and use them with precision across the entire design.
To avoid monotony, use several shades within each color family. For example, use three different greens for the leaves to create subtle depth and movement.
Working a large-scale, all-over pattern like this requires patience, but the result is a breathtaking piece of textile art that transforms a wall.
21. Stitch a Lasting Family Tree
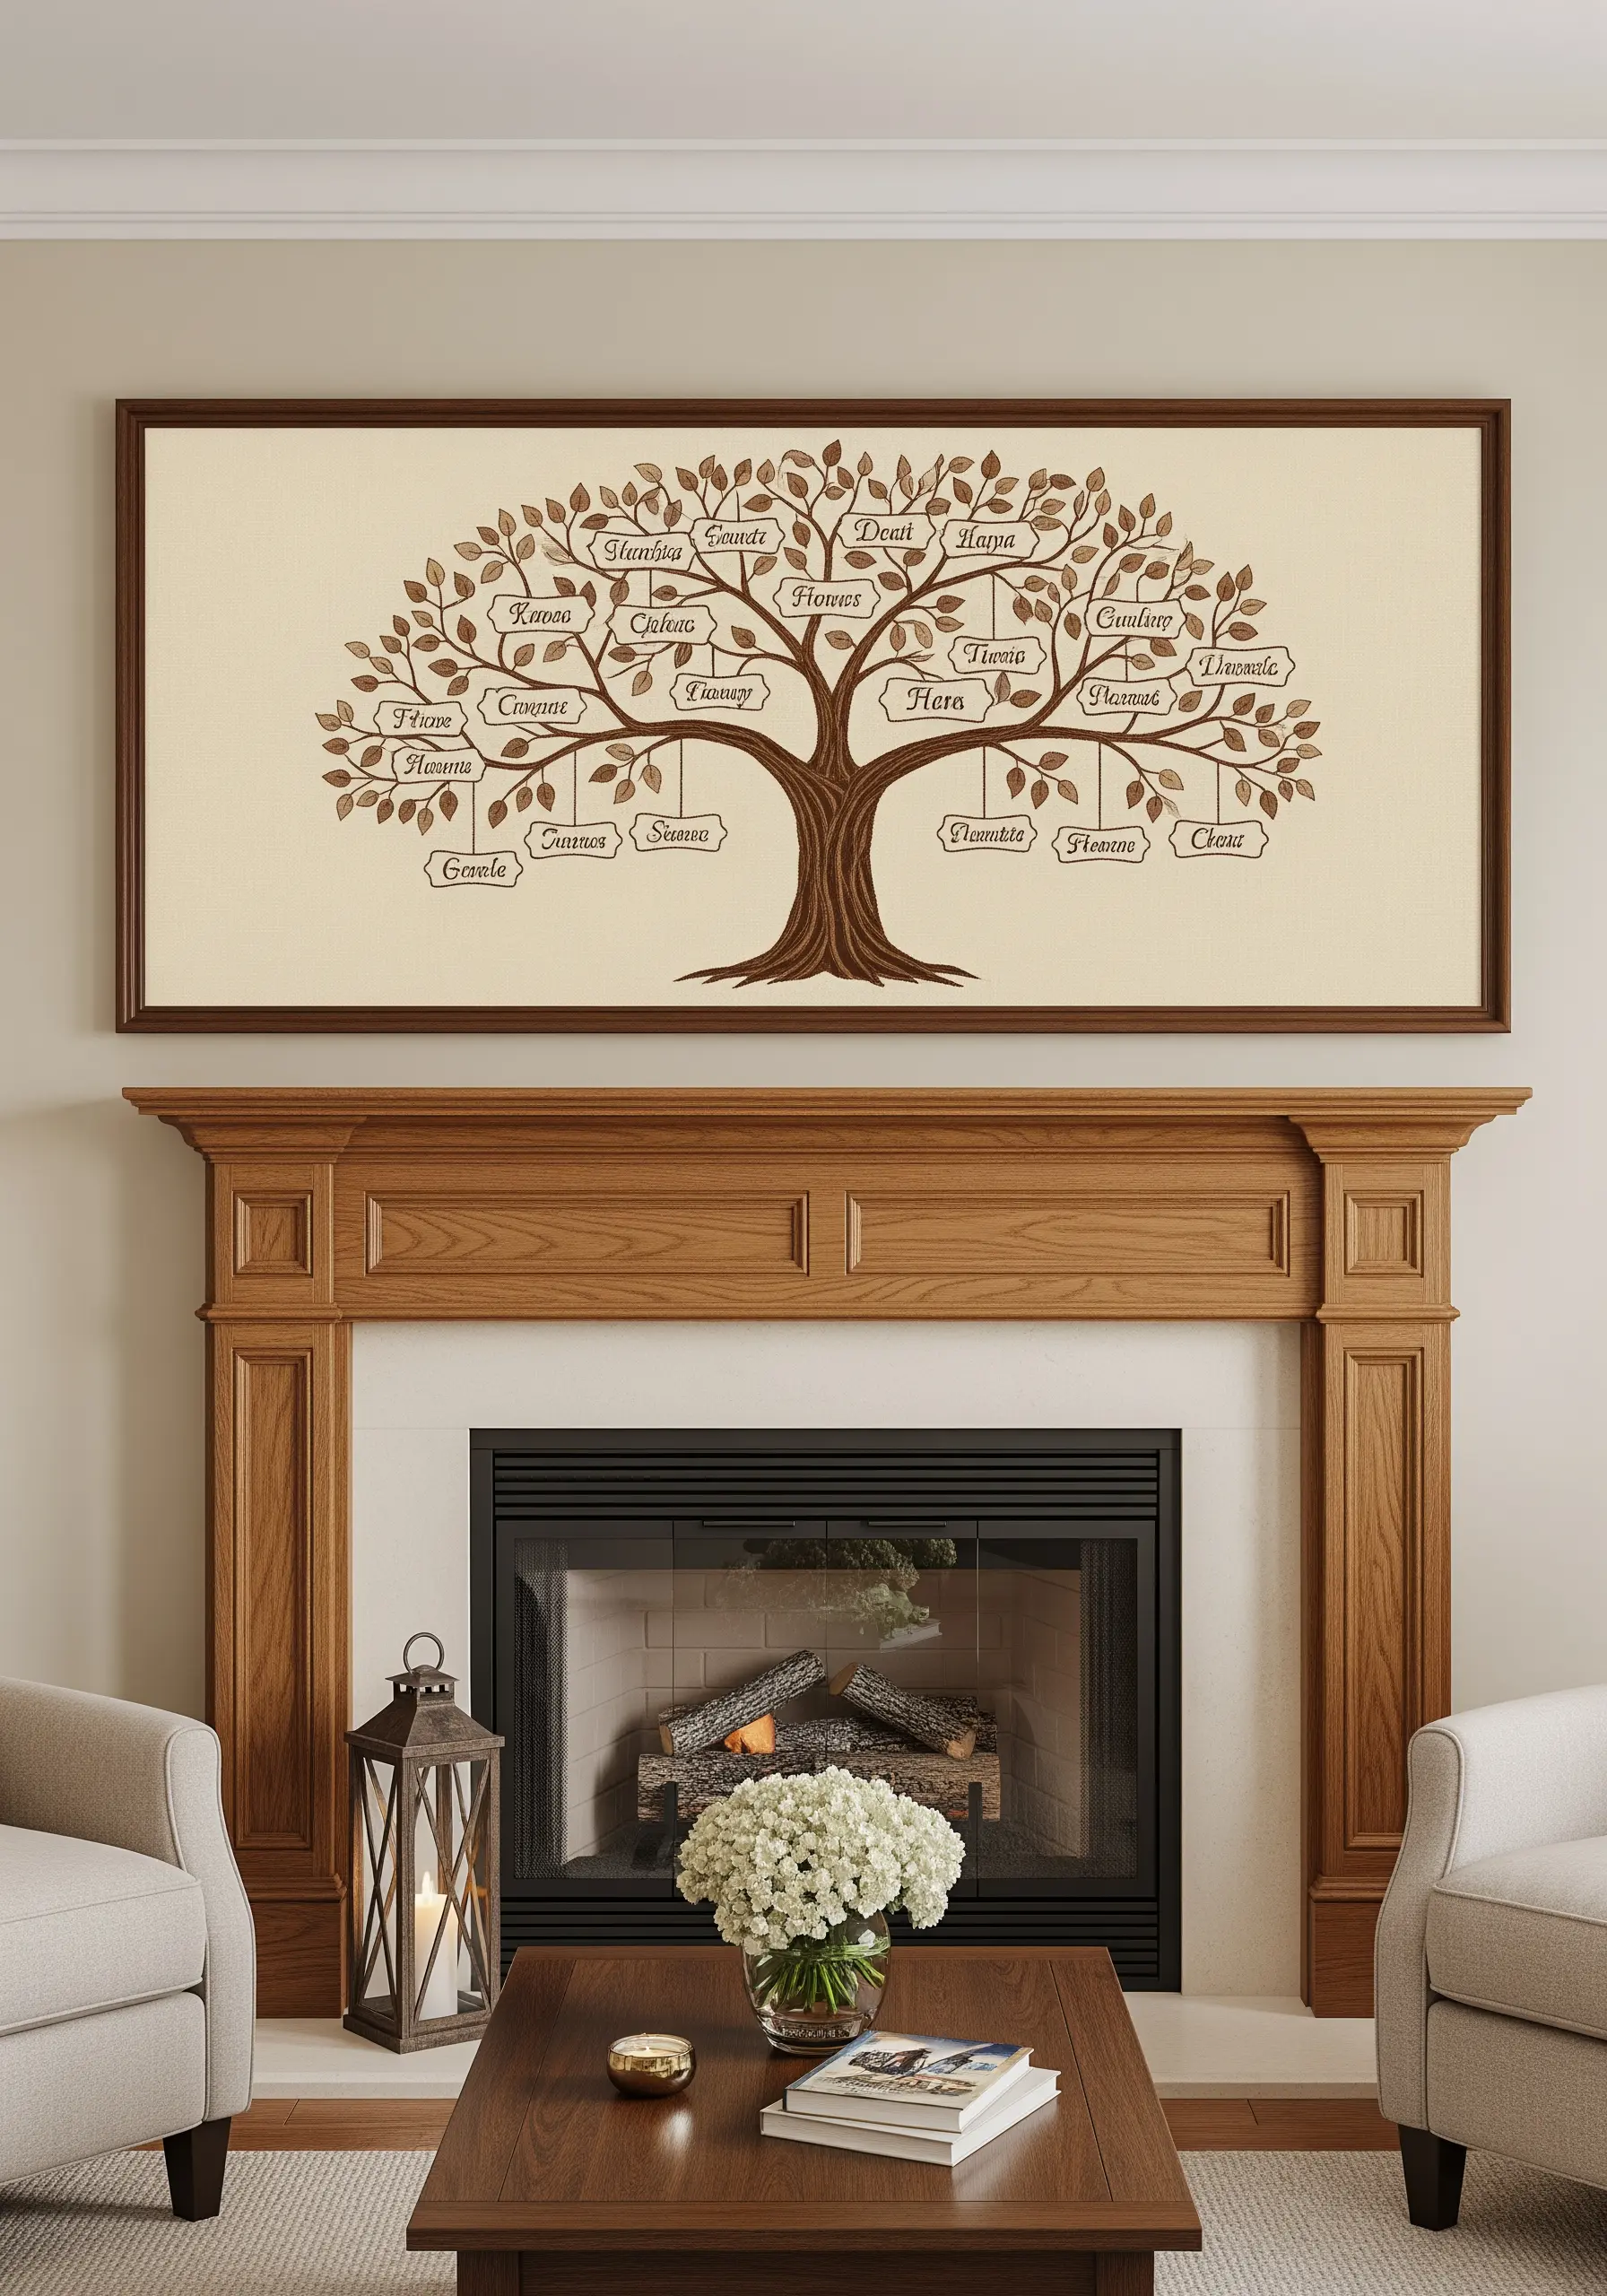
Create a meaningful heirloom by designing and embroidering your family tree, combining simple stitches for a timeless result.
For the names, use a tiny, two-strand backstitch or a single-strand split stitch to ensure every letter is crisp and legible.
Give the tree trunk and branches texture by working them in a stem stitch, using a few different shades of brown to add dimension.
This project is one of the most rewarding personalized DIY embroidery ideas for couples and families, as it becomes a piece of history that can be cherished for generations.
22. Frame Vintage Lace as Textile Art
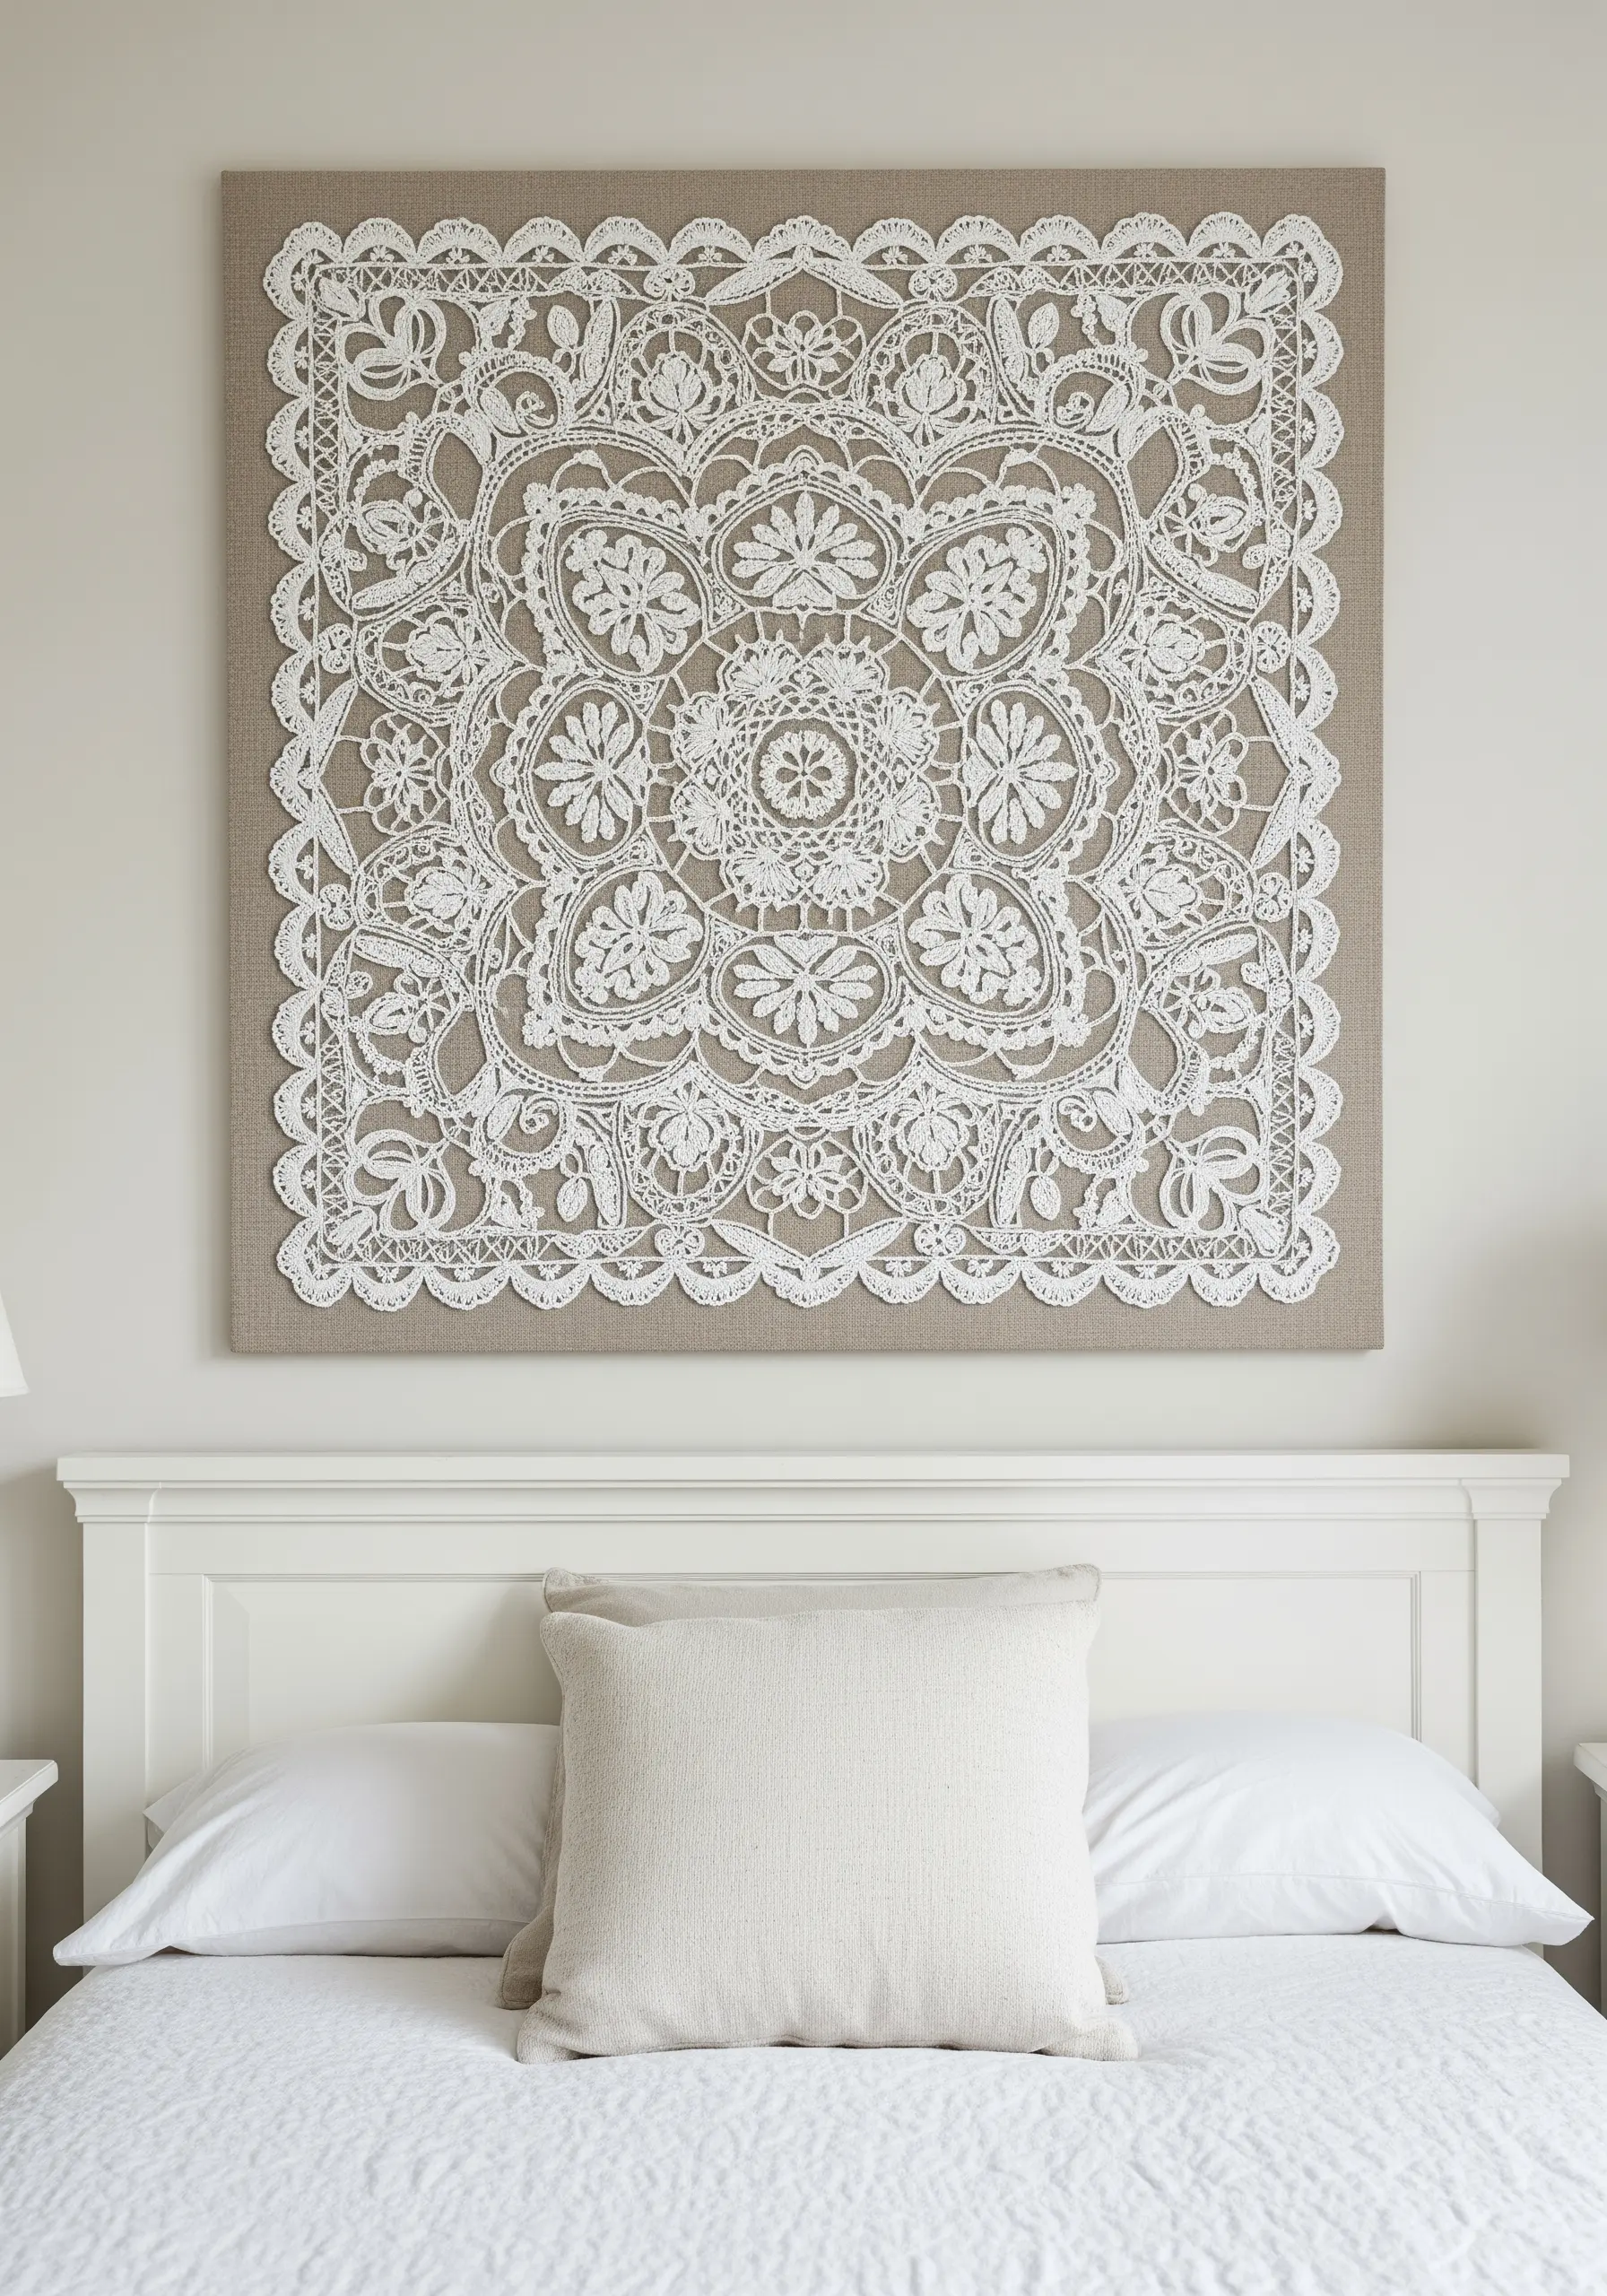
Honor the intricate craft of lacemaking by giving a treasured doily or piece of lace the presentation it deserves.
Choose a background fabric, like a neutral linen or dark silk, that provides enough contrast to make the delicate lacework pop.
Carefully press both the lace and the background fabric before mounting the linen tautly over a canvas frame or in a large hoop.
Secure the lace to the background using tiny, nearly invisible appliqué stitches with a fine thread that matches the lace, preserving its form without distracting from its beauty.


