

The pillows in your home are more than just cushions; they are invitations to rest, to gather, and to feel at ease. Embroidering them yourself transforms them from simple decor into personal, tactile art that tells a story and offers comfort.
But how do you move beyond basic stitches to create something that feels truly special? The answer lies in the thoughtful details: the way you blend threads to create a gradient, the choice to use a knotted stitch for texture, or the decision to couch a thick yarn for a bold, graphic line.
Here, you’ll discover how small adjustments in technique can make a significant impact on your finished work. These ideas are designed to inspire confidence, helping you create pillows that not only look beautiful but feel intentional, cozy, and entirely your own.
1. Add Playful Texture with Seed Stitch
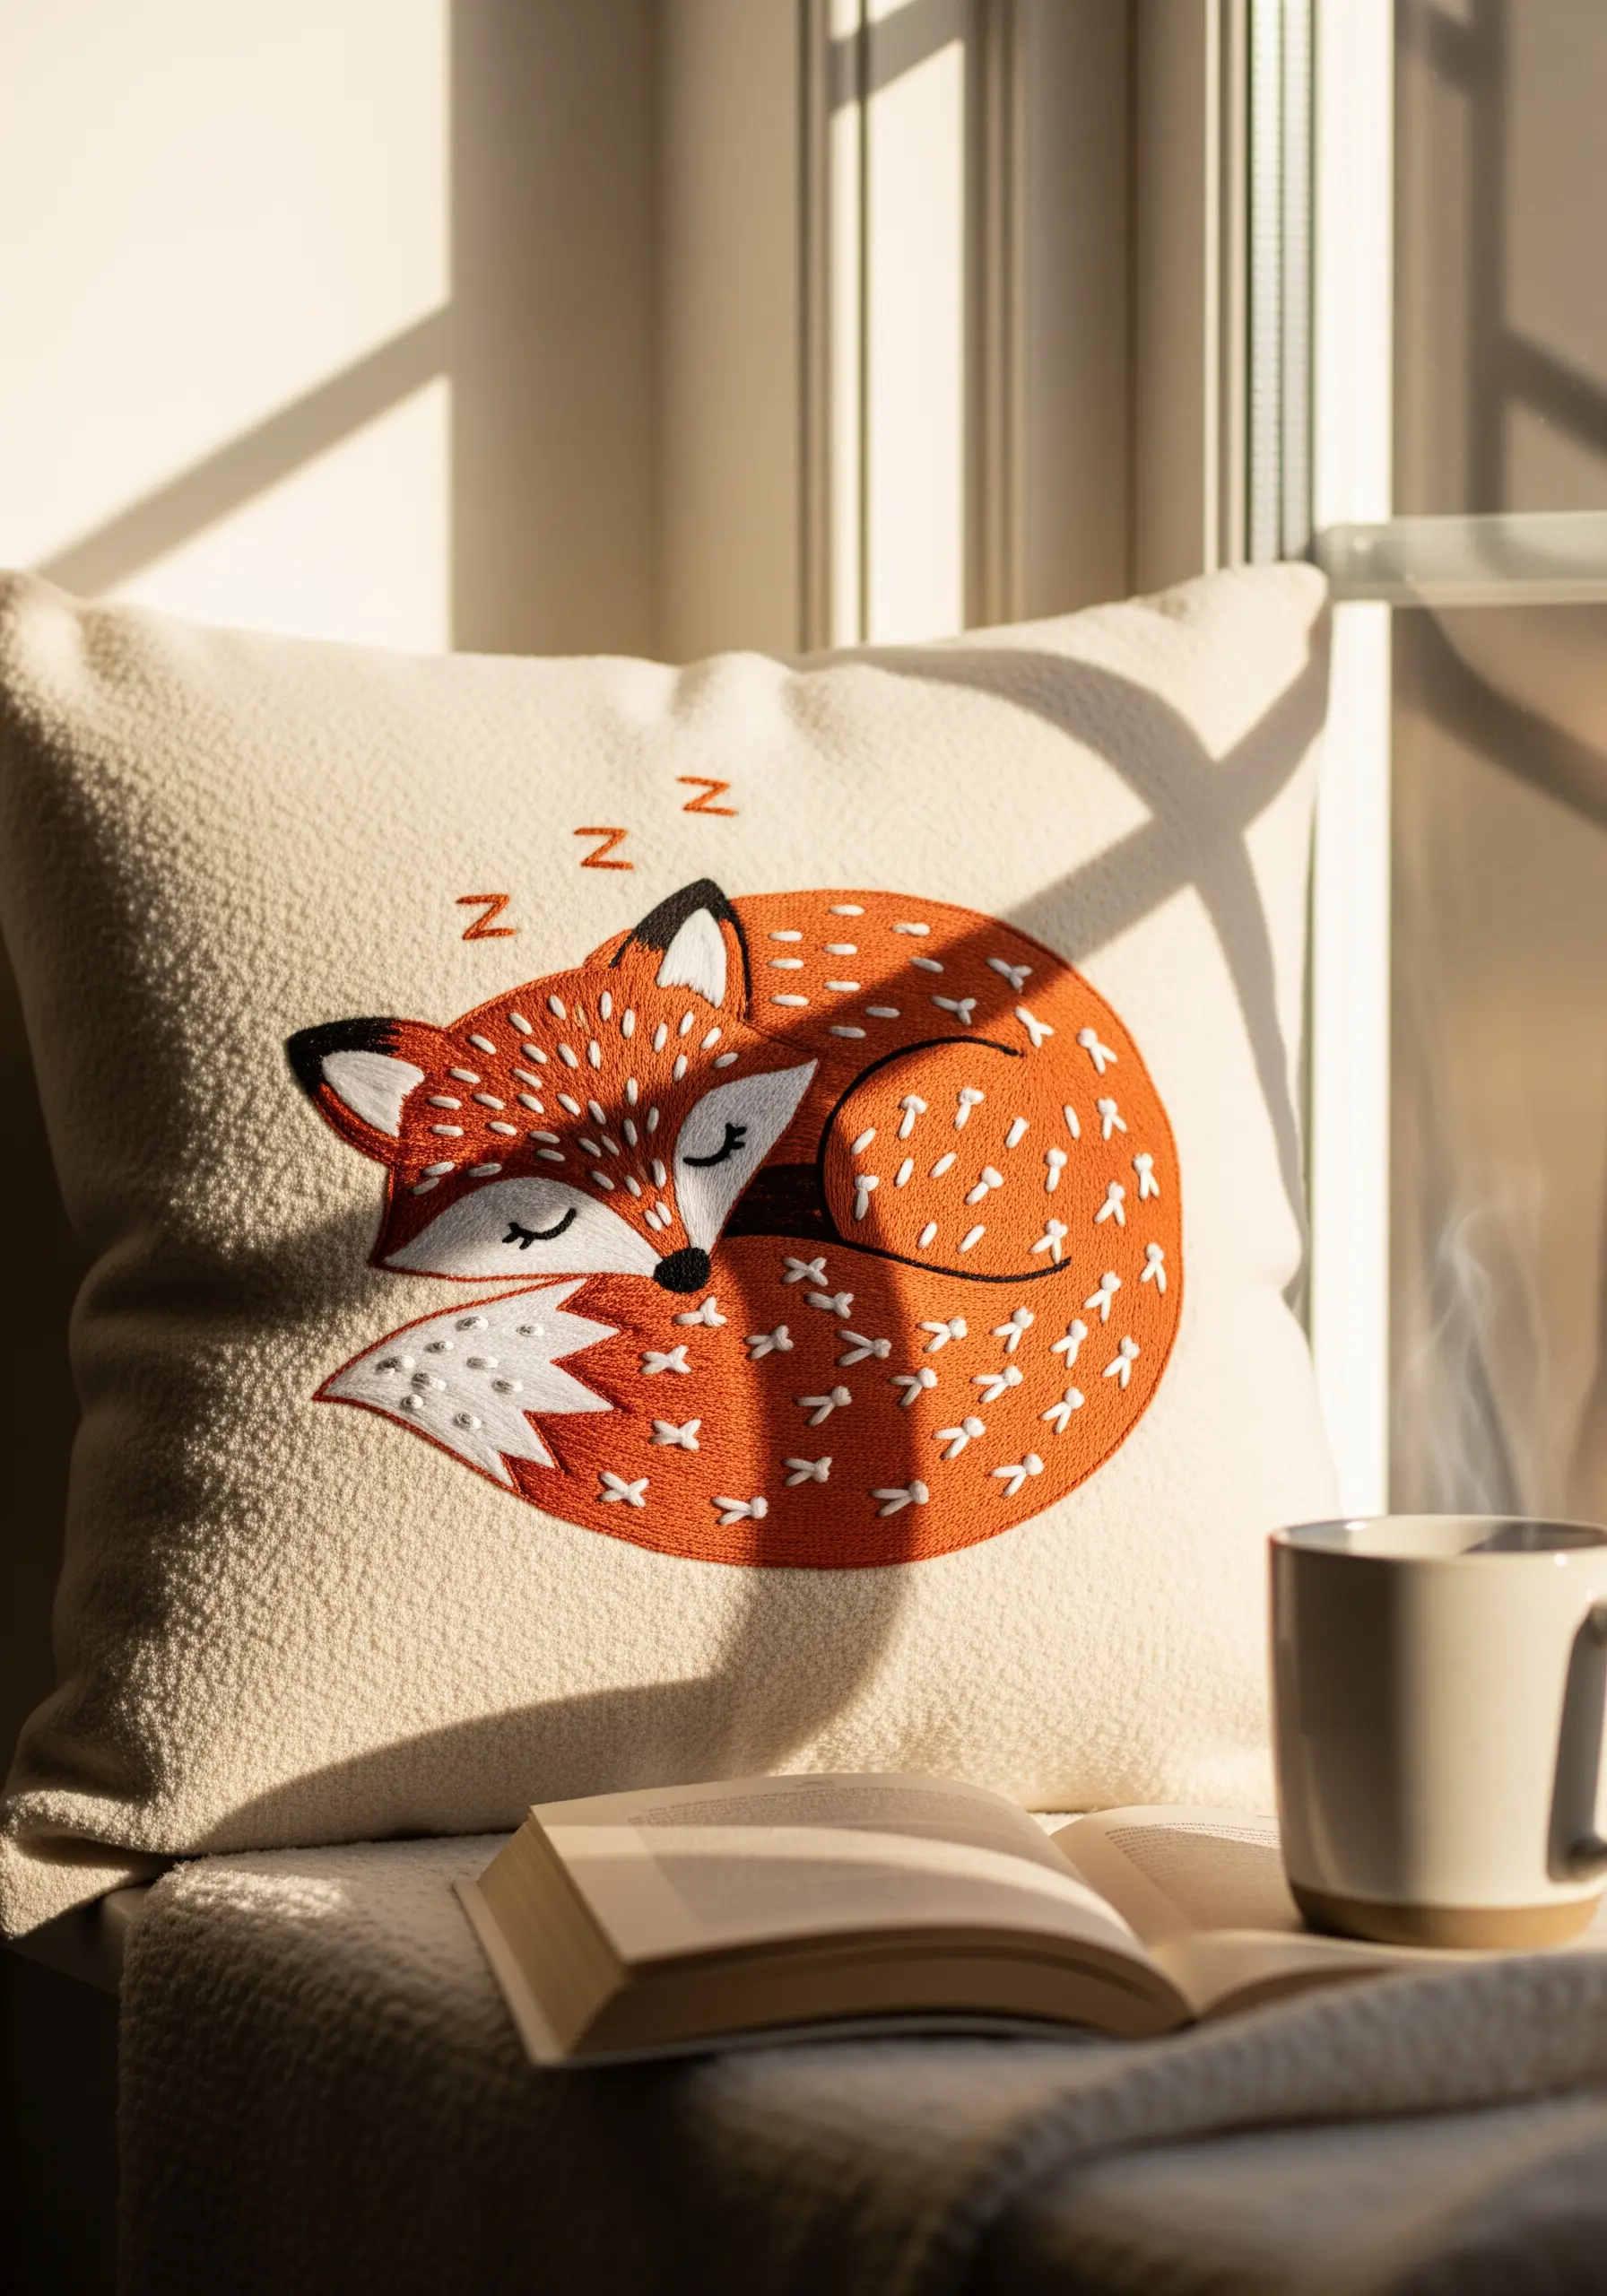
Instead of filling your motif with a flat satin stitch, scatter short, straight stitches randomly across the area.
This technique, known as seed stitch, creates a soft, fur-like texture that adds dimension and warmth without complex shading.
Vary the length and angle of each stitch slightly to enhance the organic feel, making it perfect for woodland animals or other natural motifs.
For a clean edge, outline the shape first with a split stitch, which contains the seed stitches and gives the design a polished frame.
2. Create Depth with Painterly Thread Blending
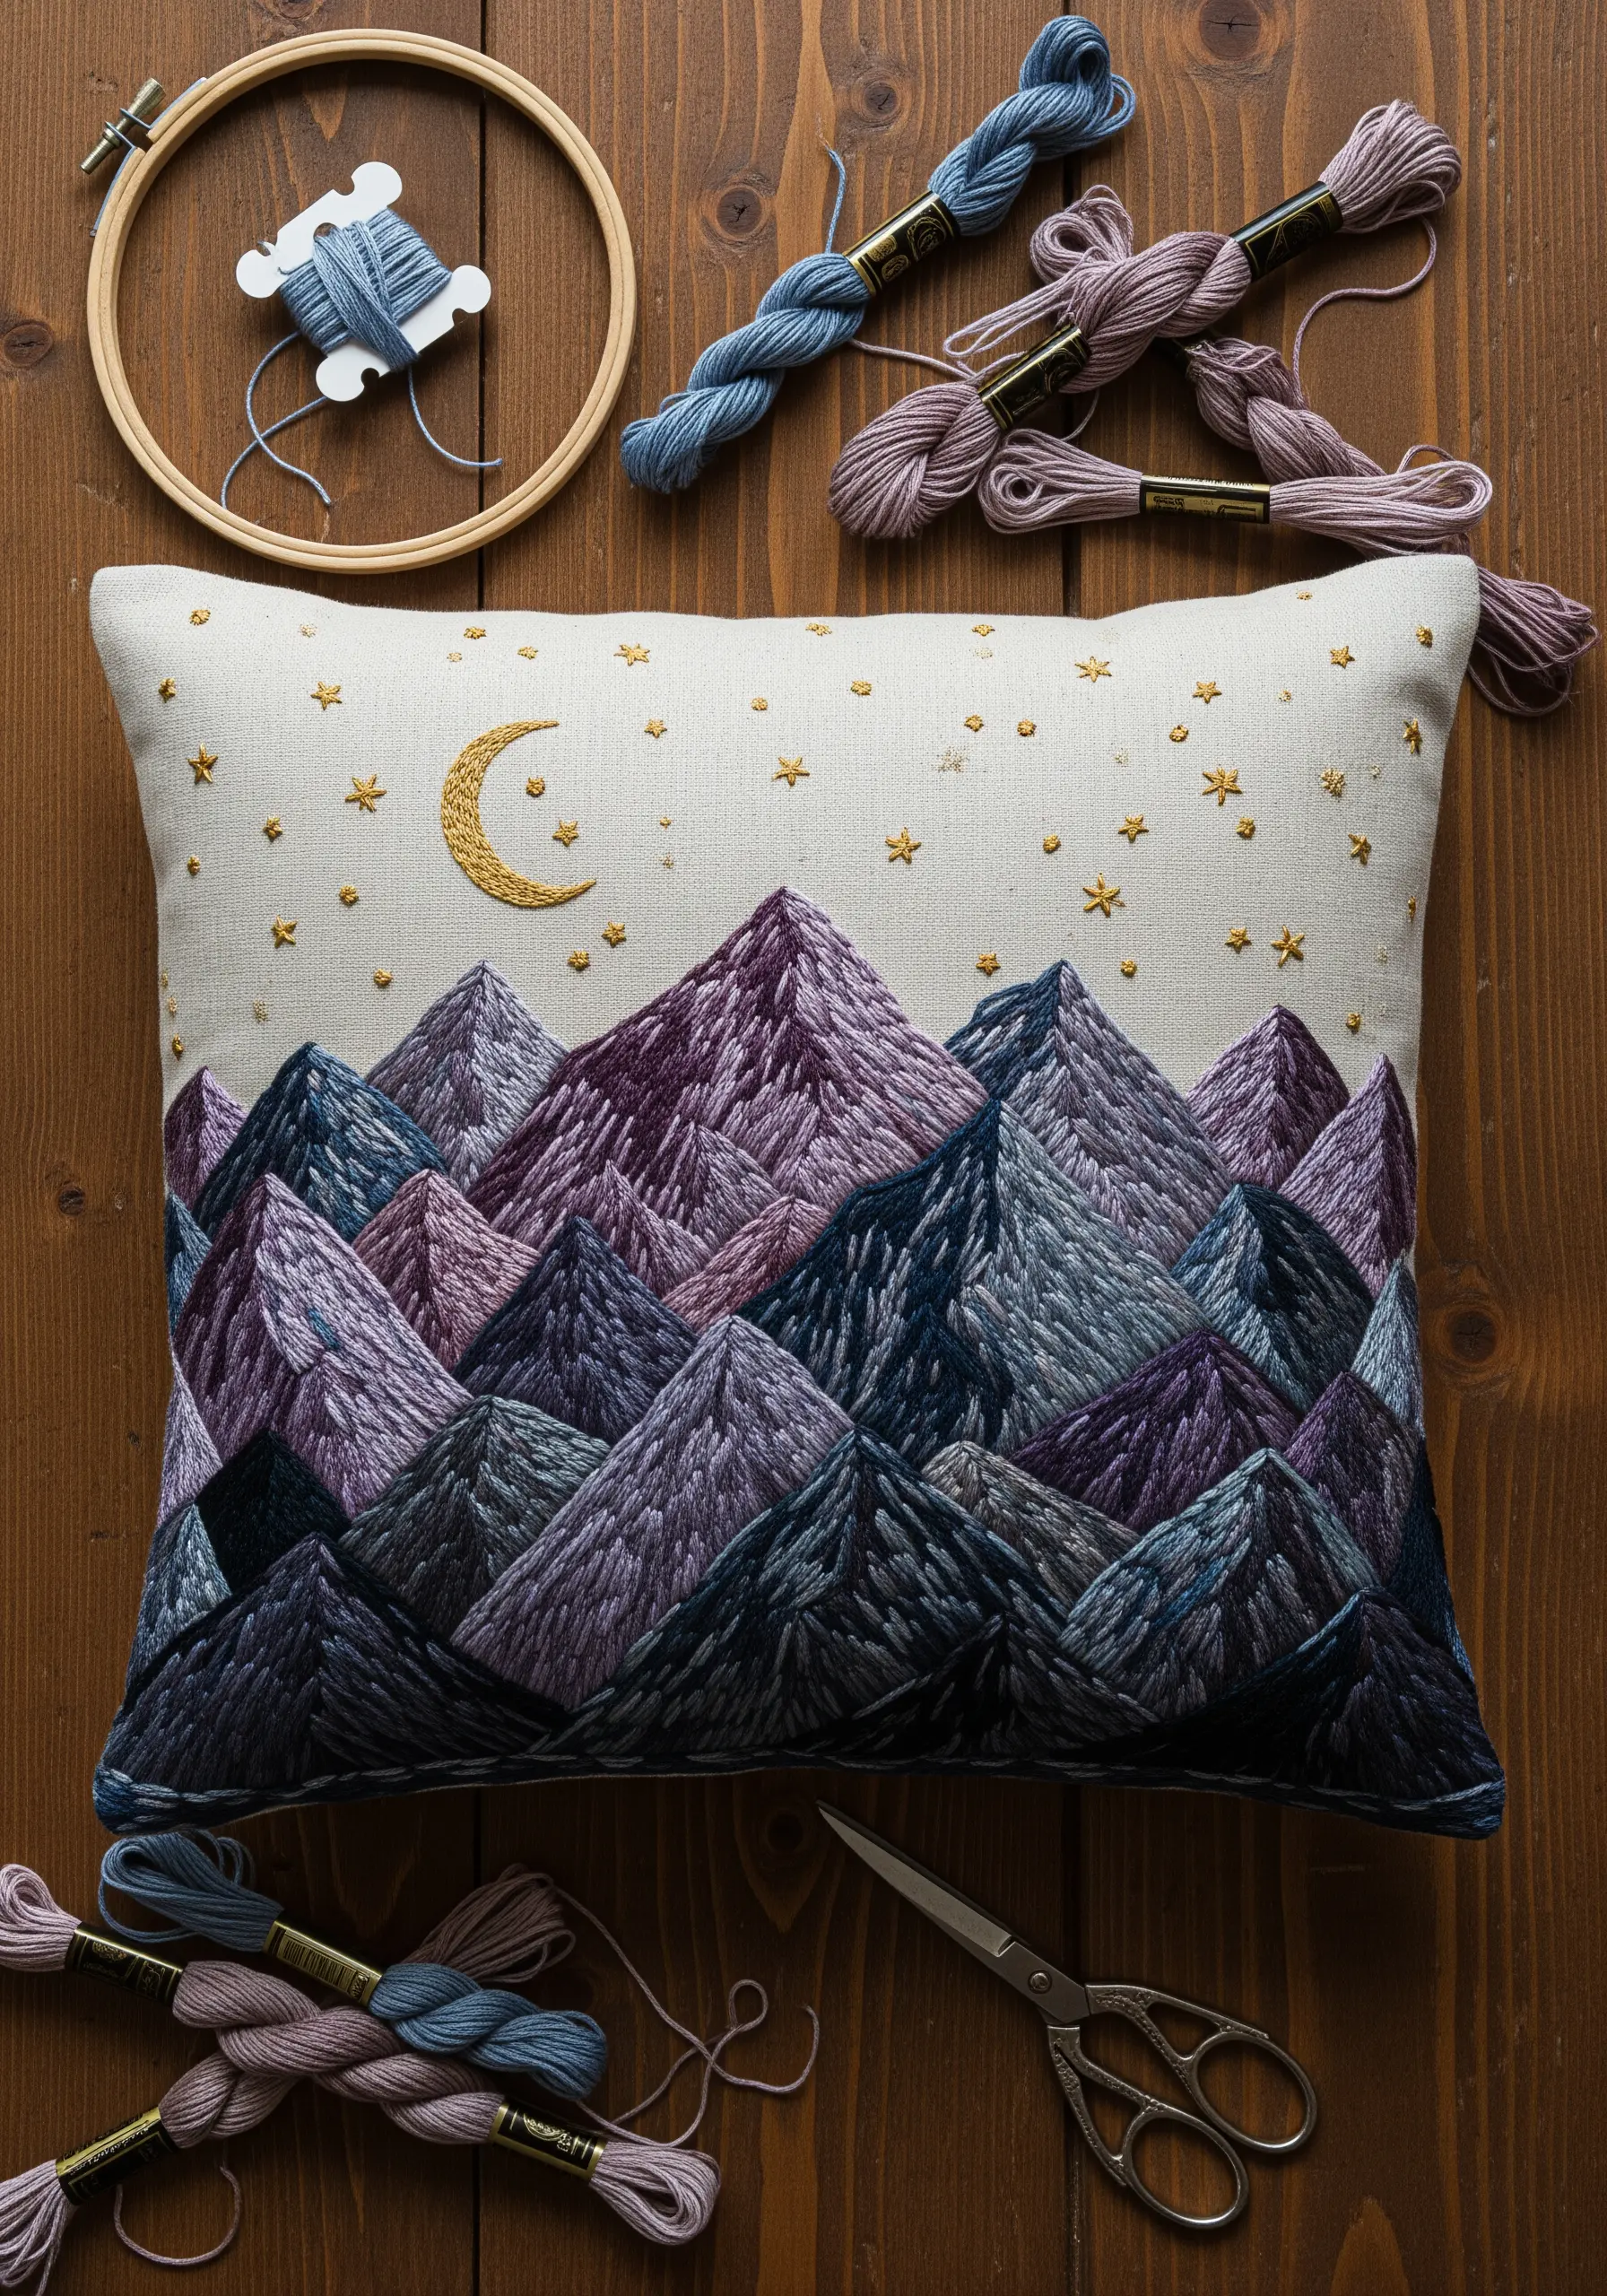
To give your landscapes a sense of distance and perspective, use long-and-short stitch to blend colors within each mountain peak.
Start with your darkest shade at the bottom of a peak, then gradually introduce lighter threads as you work your way up, overlapping stitches to create a seamless gradient.
Use fewer strands of floss (two or three) for distant mountains and more strands (four to six) for those in the foreground.
This subtle shift in thread weight enhances the illusion of depth, making your scene feel more immersive and dynamic.
These mountain landscape thread painting techniques create stunning, realistic results.
3. Master Metallics on High-Pile Fabrics
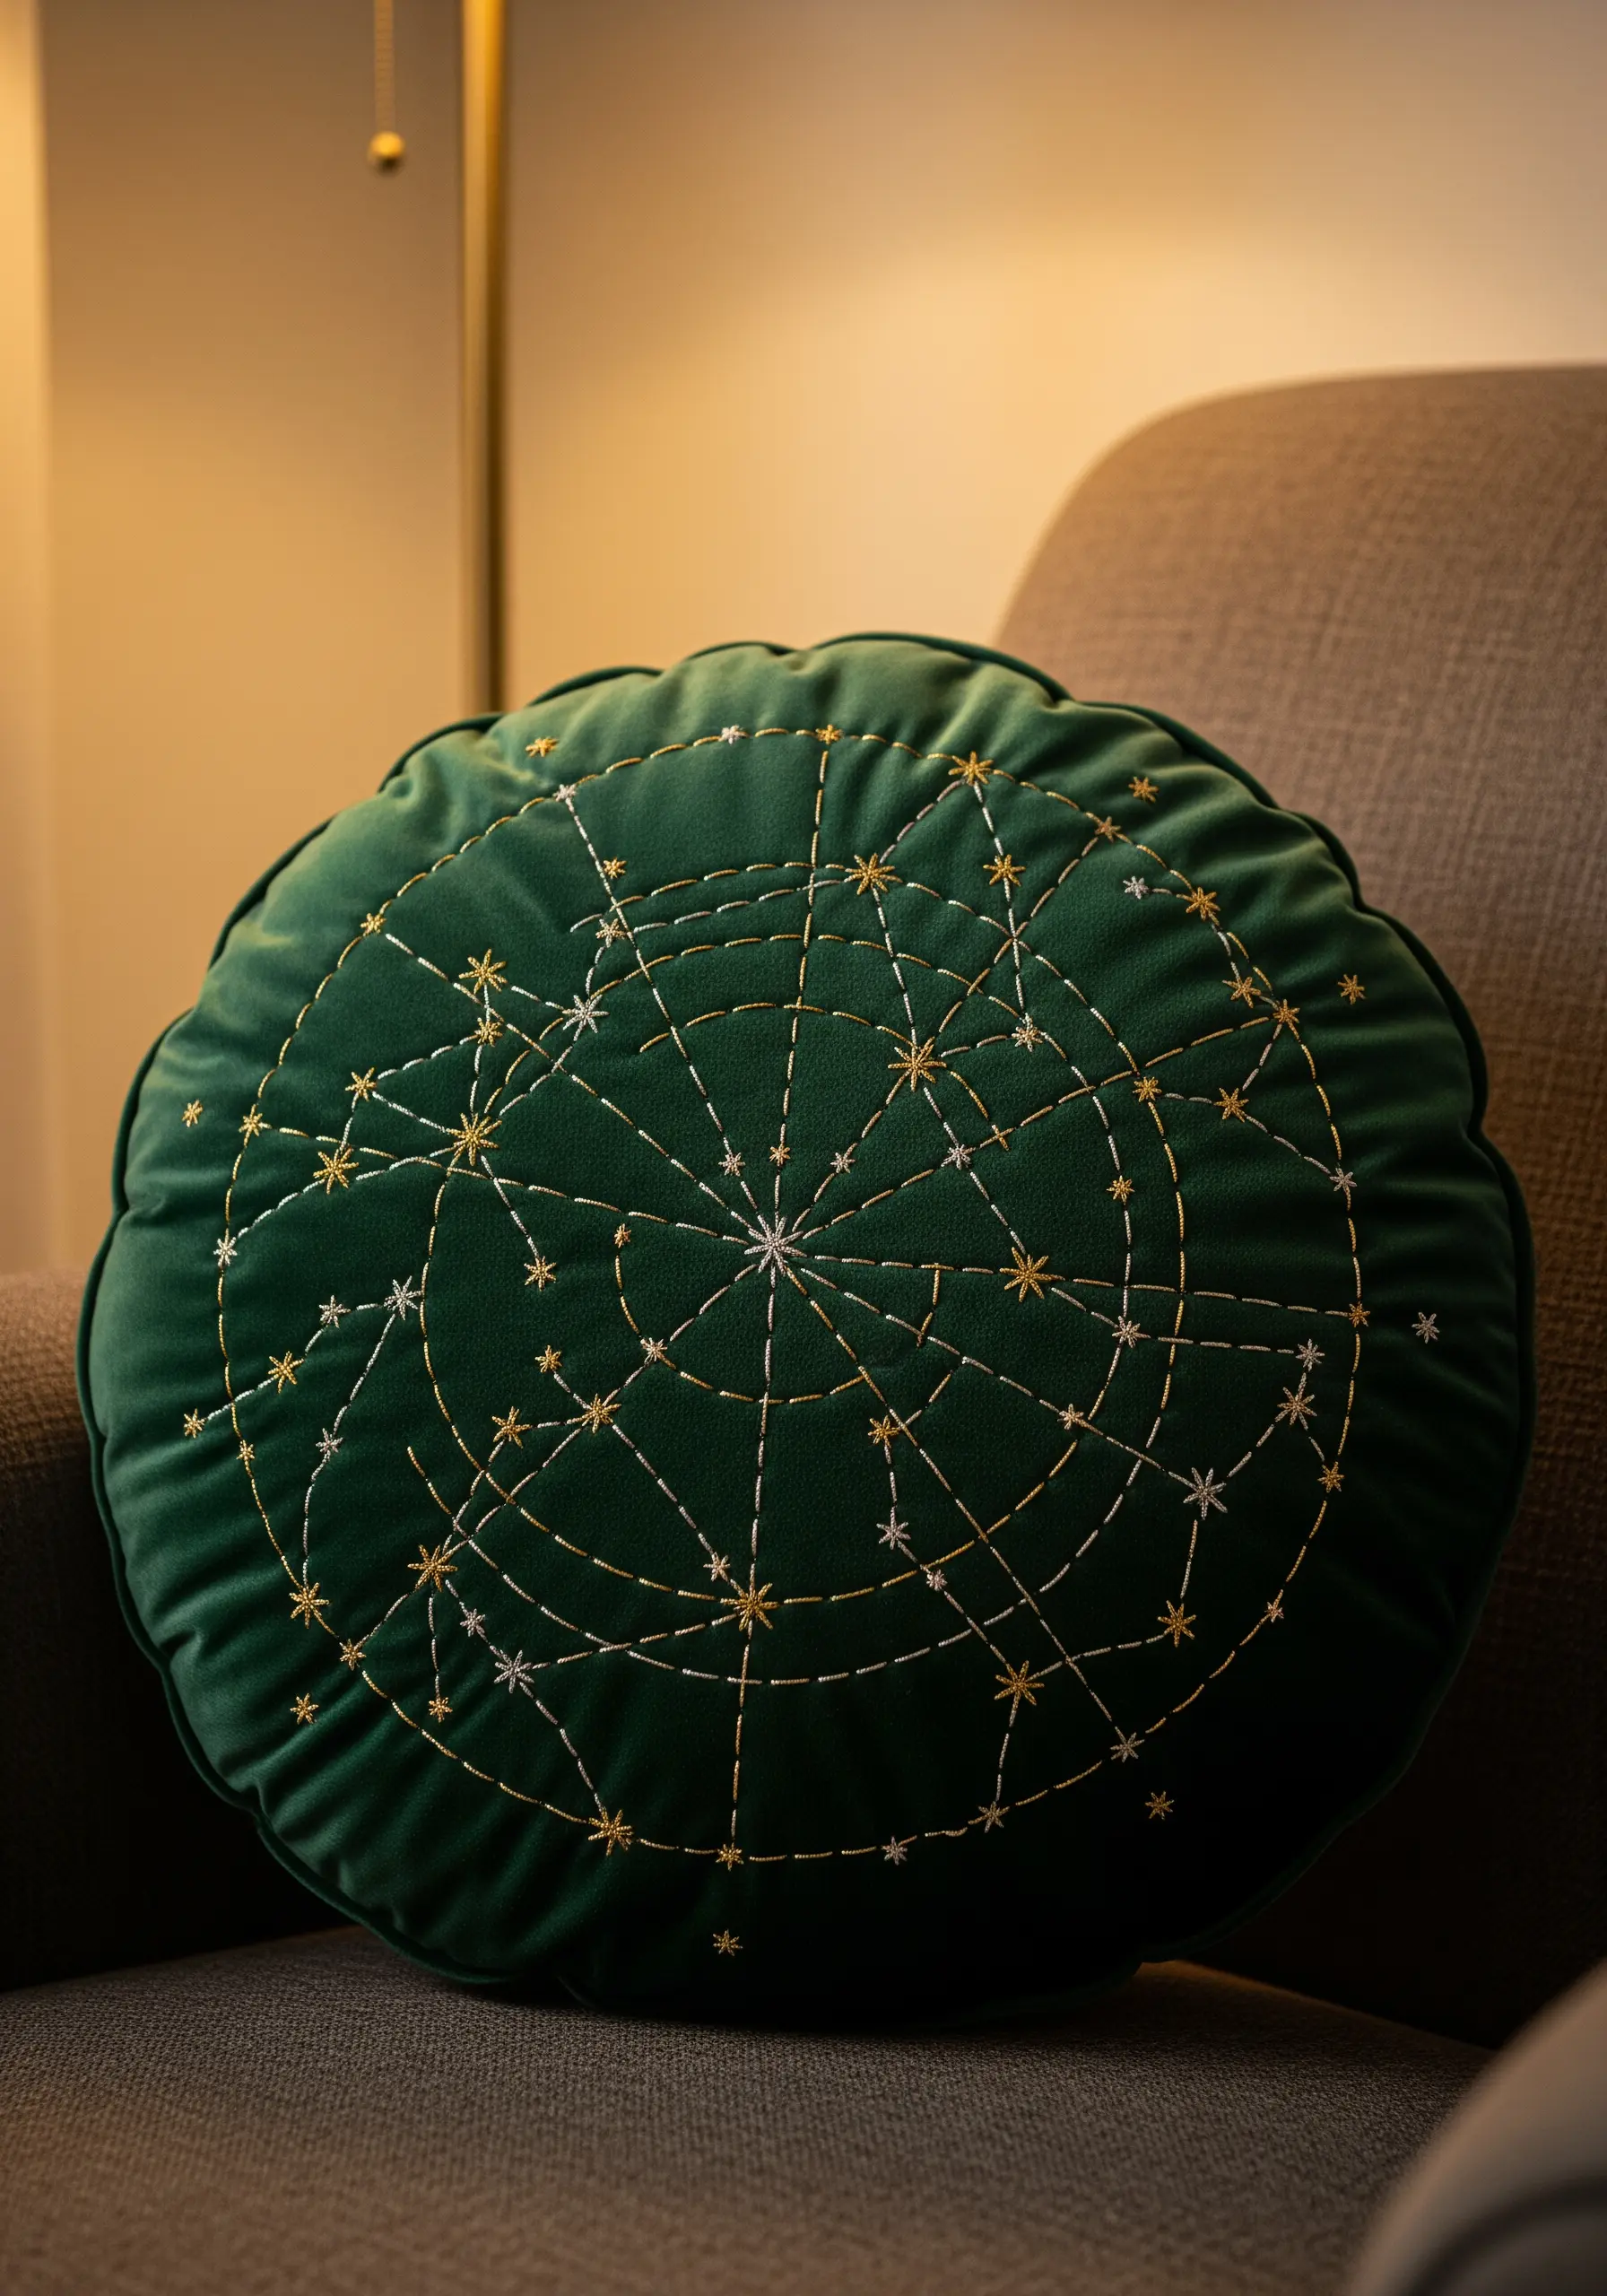
When stitching on plush fabrics like velvet, prevent your stitches from sinking by applying a lightweight, iron-on stabilizer to the back of the fabric before you begin.
For metallic threads, swap your standard needle for a topstitch or metallic needle; its larger, polished eye reduces friction, which prevents the delicate thread from shredding or tangling.
Use shorter lengths of metallic thread than you normally would—about 12 inches is ideal—to further minimize wear as you stitch.
These simple adjustments ensure your celestial patterns remain crisp and bright against the luxe background.
4. Build Three-Dimensional Texture with Knots

Transform flat winter scenes into tactile landscapes by building up texture with knots.
Create fluffy, dimensional snow on rooftops and pine branches by clustering French knots or bullion knots tightly together.
Use a thicker thread, like pearl cotton or all six strands of embroidery floss, to make each knot more substantial and reduce the number of stitches needed.
Contrast this high texture with simple backstitch for the background trees to make the snowy elements pop even more.
Explore more natural texture embroidery patterns that bring forest vibes indoors.
5. Design a Meadow with Varied Stitch Heights
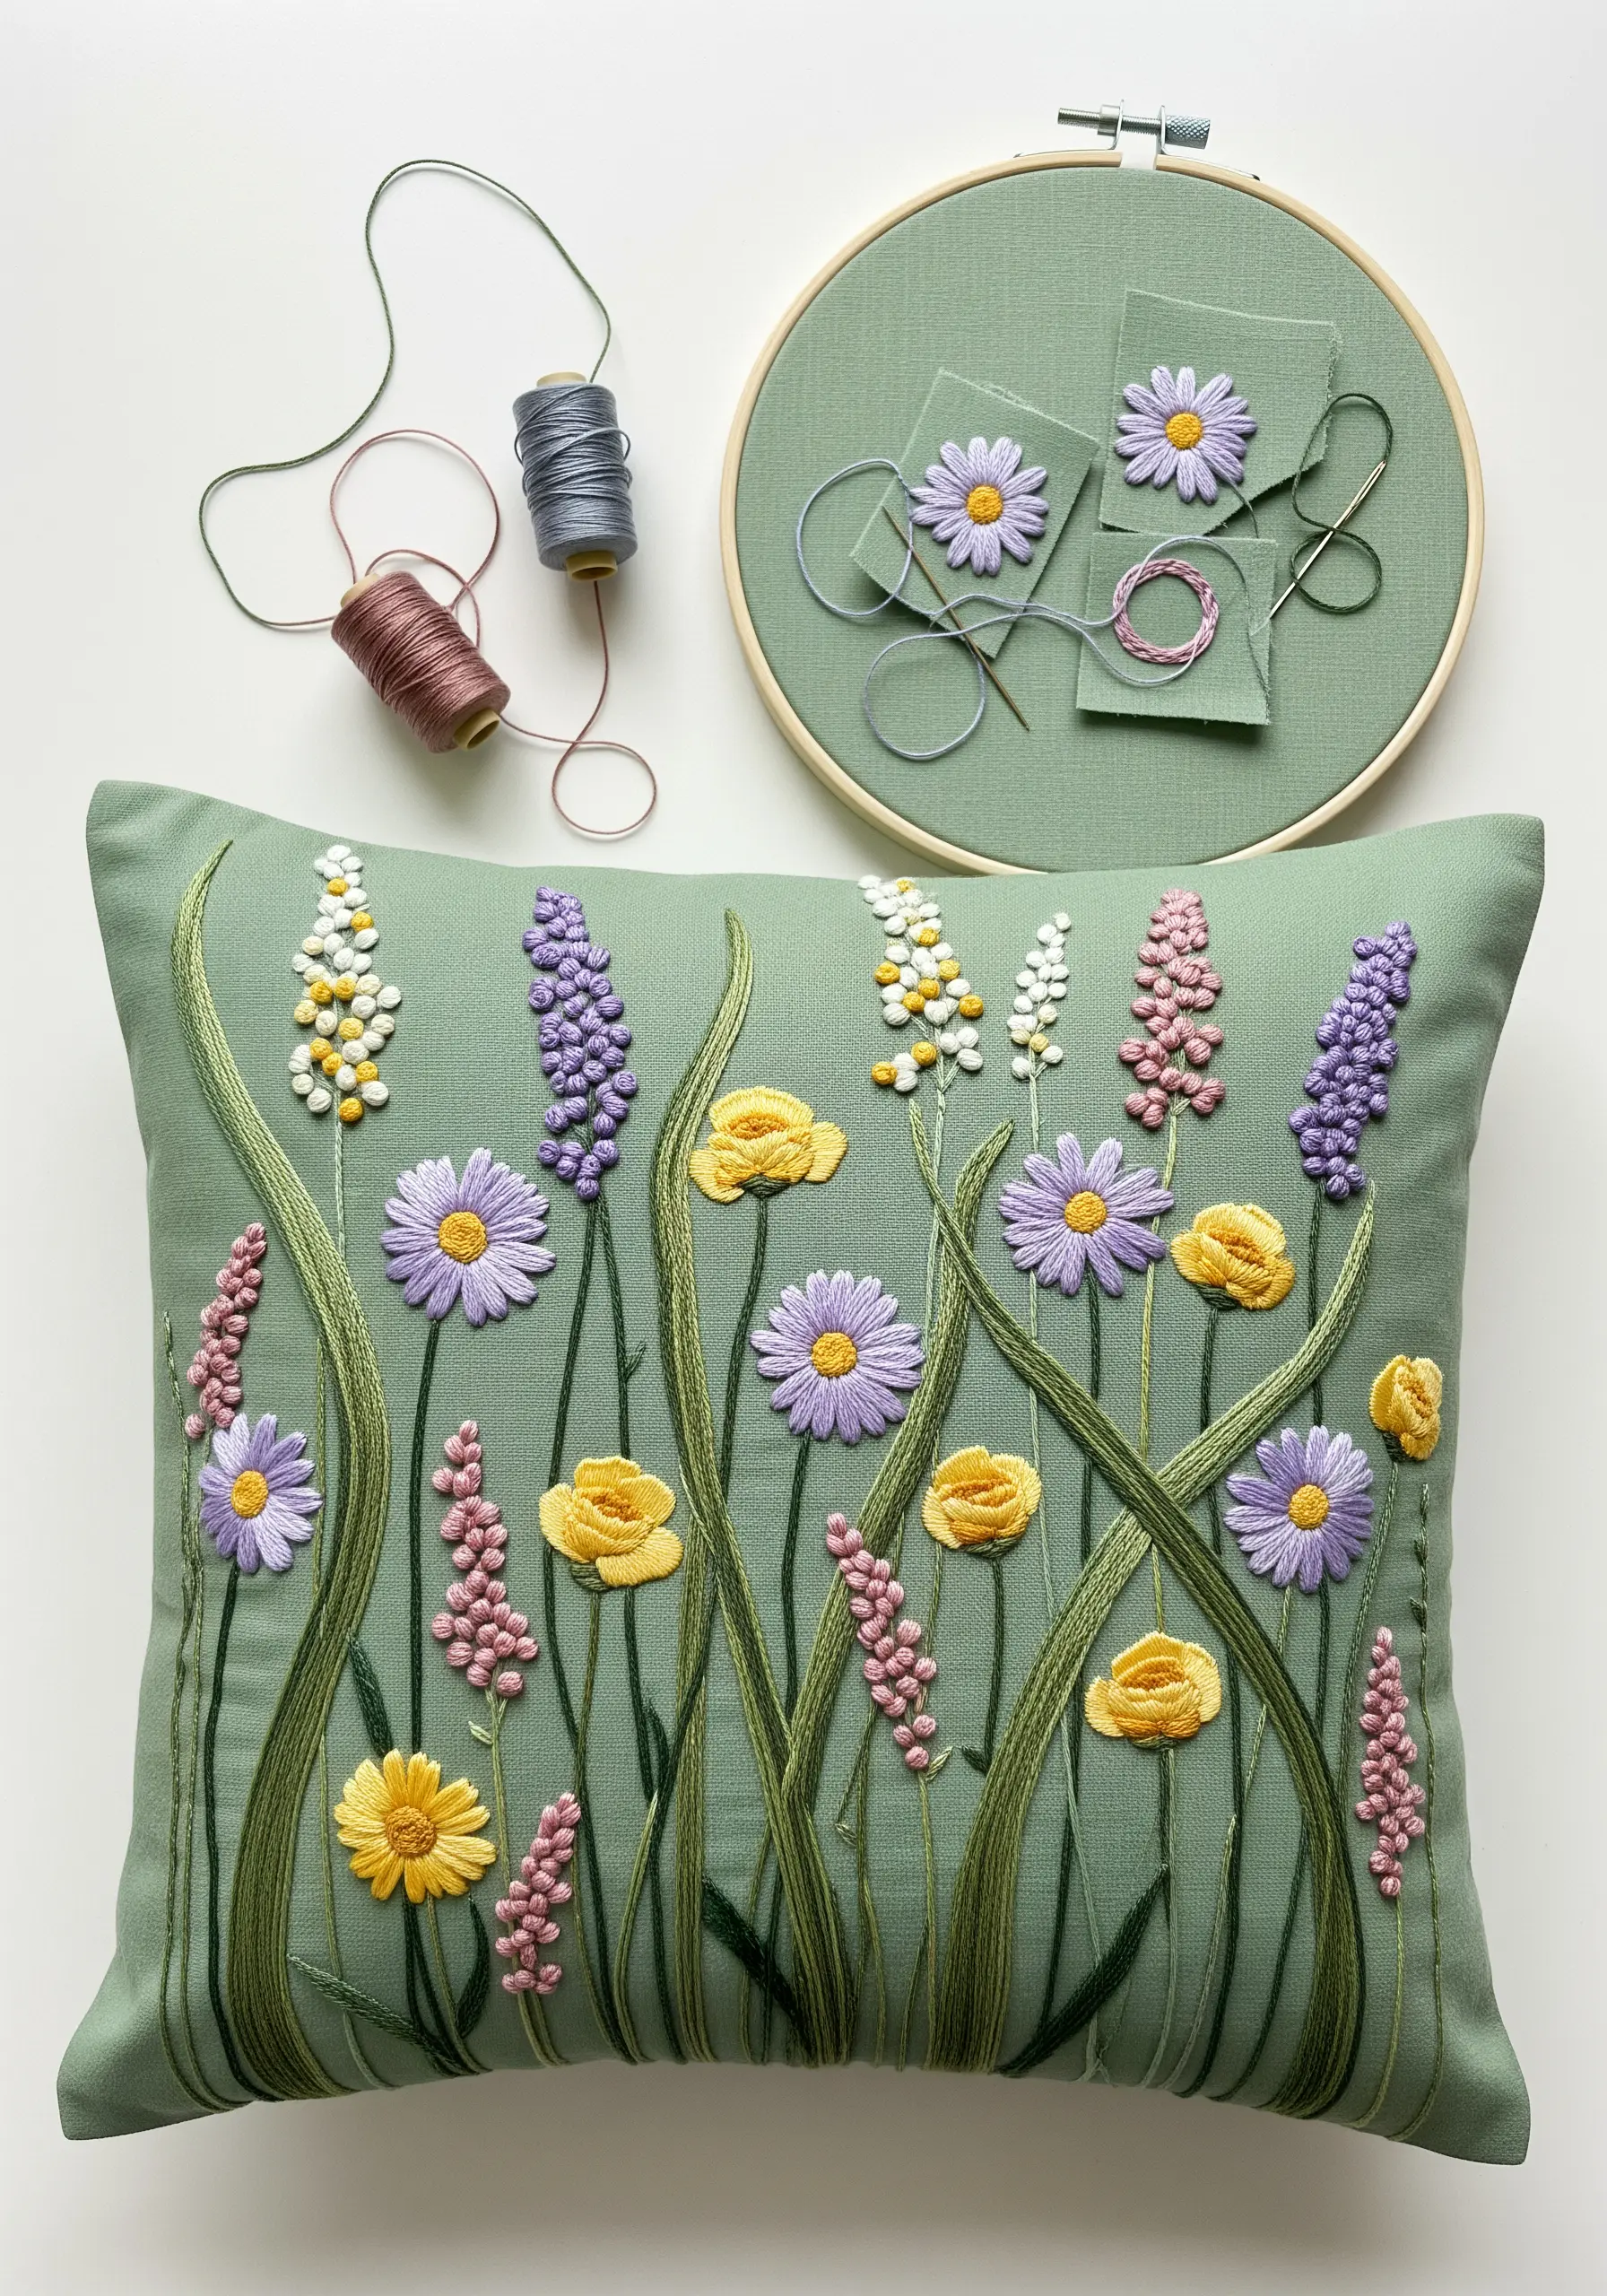
To create a dynamic wildflower meadow, combine simple stitches of varying heights and textures.
Use tall, elegant stem stitches for grasses, plump French knots for flower buds, and lazy daisy stitches for petals.
For the lavender stalks, try using bullion knots or a series of stacked French knots to create a dense, cone-like shape that stands out from the fabric.
This layering of different dimensional stitches is what makes the composition feel lush and alive, turning your pillow into a small garden.
6. Mimic Cable Knits with Raised Stitches

You can achieve the cozy texture of a cable-knit sweater using only a needle and thread.
Create this effect by first laying down parallel lines of padding stitches (simple straight stitches) where you want your cables to be.
Then, work a dense satin stitch over the padding. This technique, called padded satin stitch, lifts the embroidery from the surface, creating a rounded, three-dimensional look.
For an even simpler approach, use a raised chain stitch band with a thick yarn to build up texture quickly.
These Scandinavian texture embroidery ideas will add instant hygge to your space.
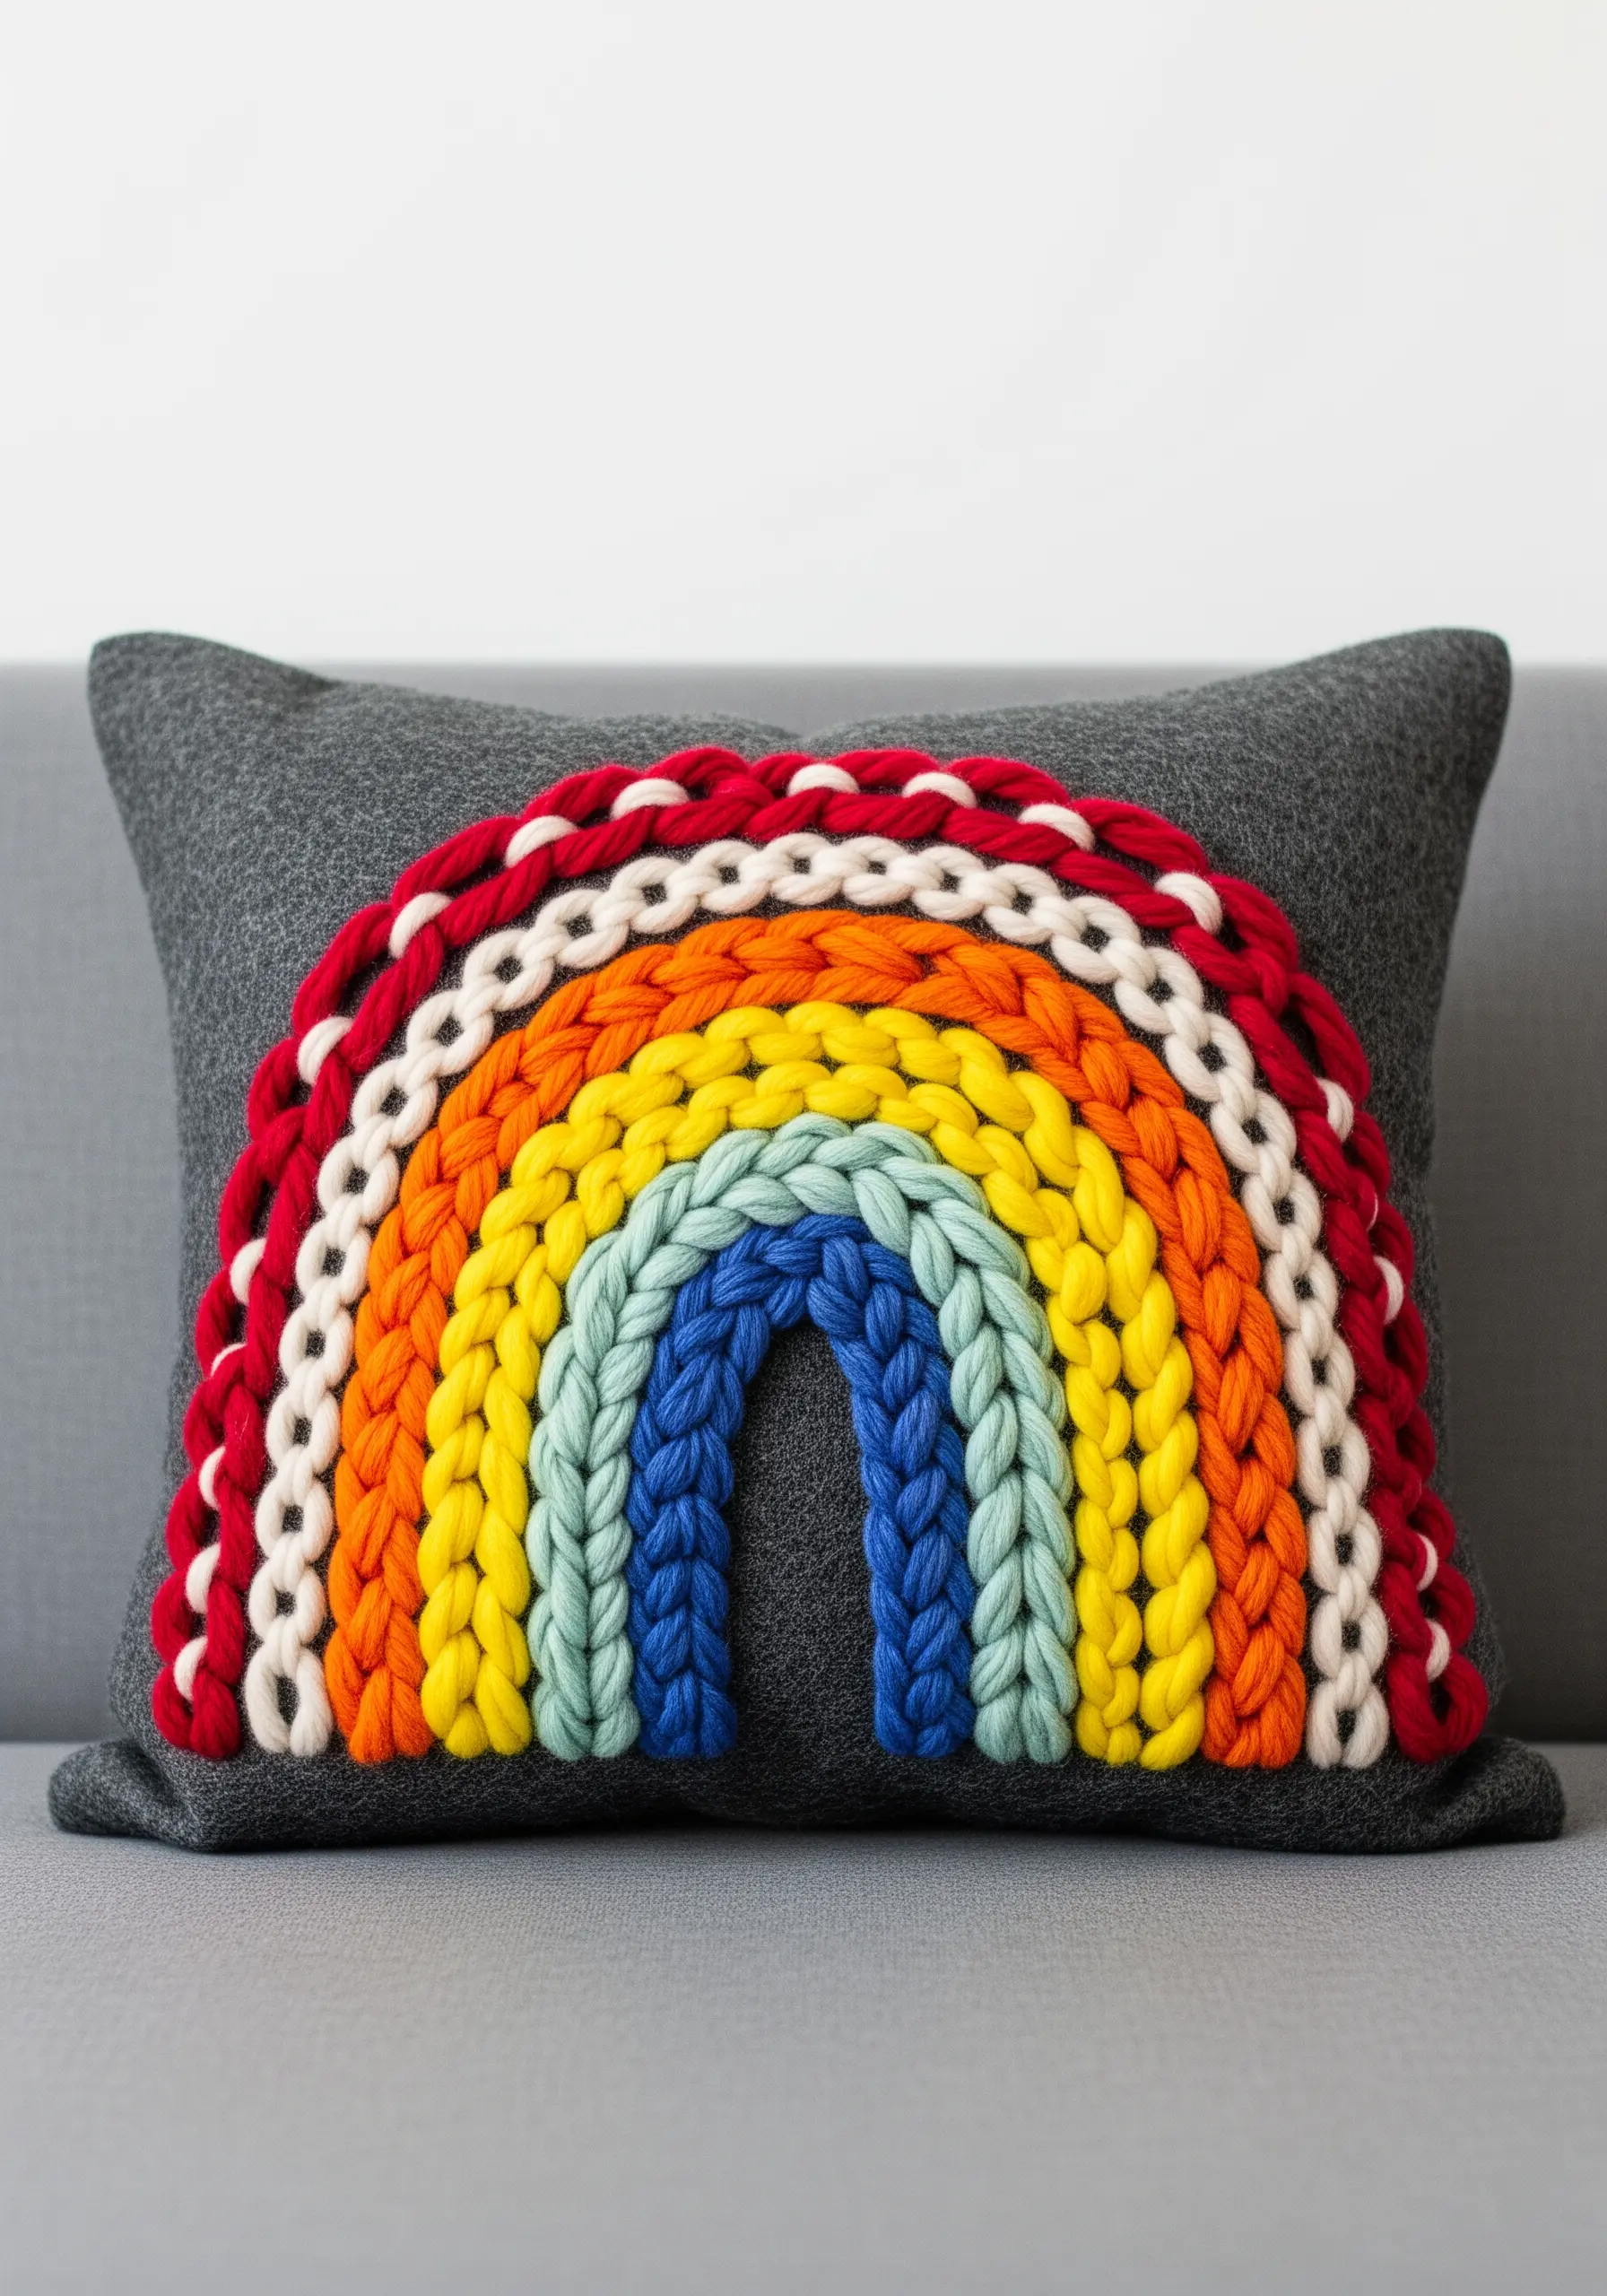
7. Ensure Clean Edges on Satin Stitch Arcs

For designs with bold, graphic color blocking like this rainbow, the key to a professional finish is a perfectly clean edge.
Before you begin your satin stitch, outline each color block with a split stitch using two strands of matching floss.
This creates a slightly raised border that acts as a guide and a barrier. As you fill the shape, bring your needle up just outside the split-stitch line and down just inside it on the other side.
Your satin stitches will stack neatly against this edge, resulting in crisp, defined arcs of color.
8. Add Dimension with Directional Shading
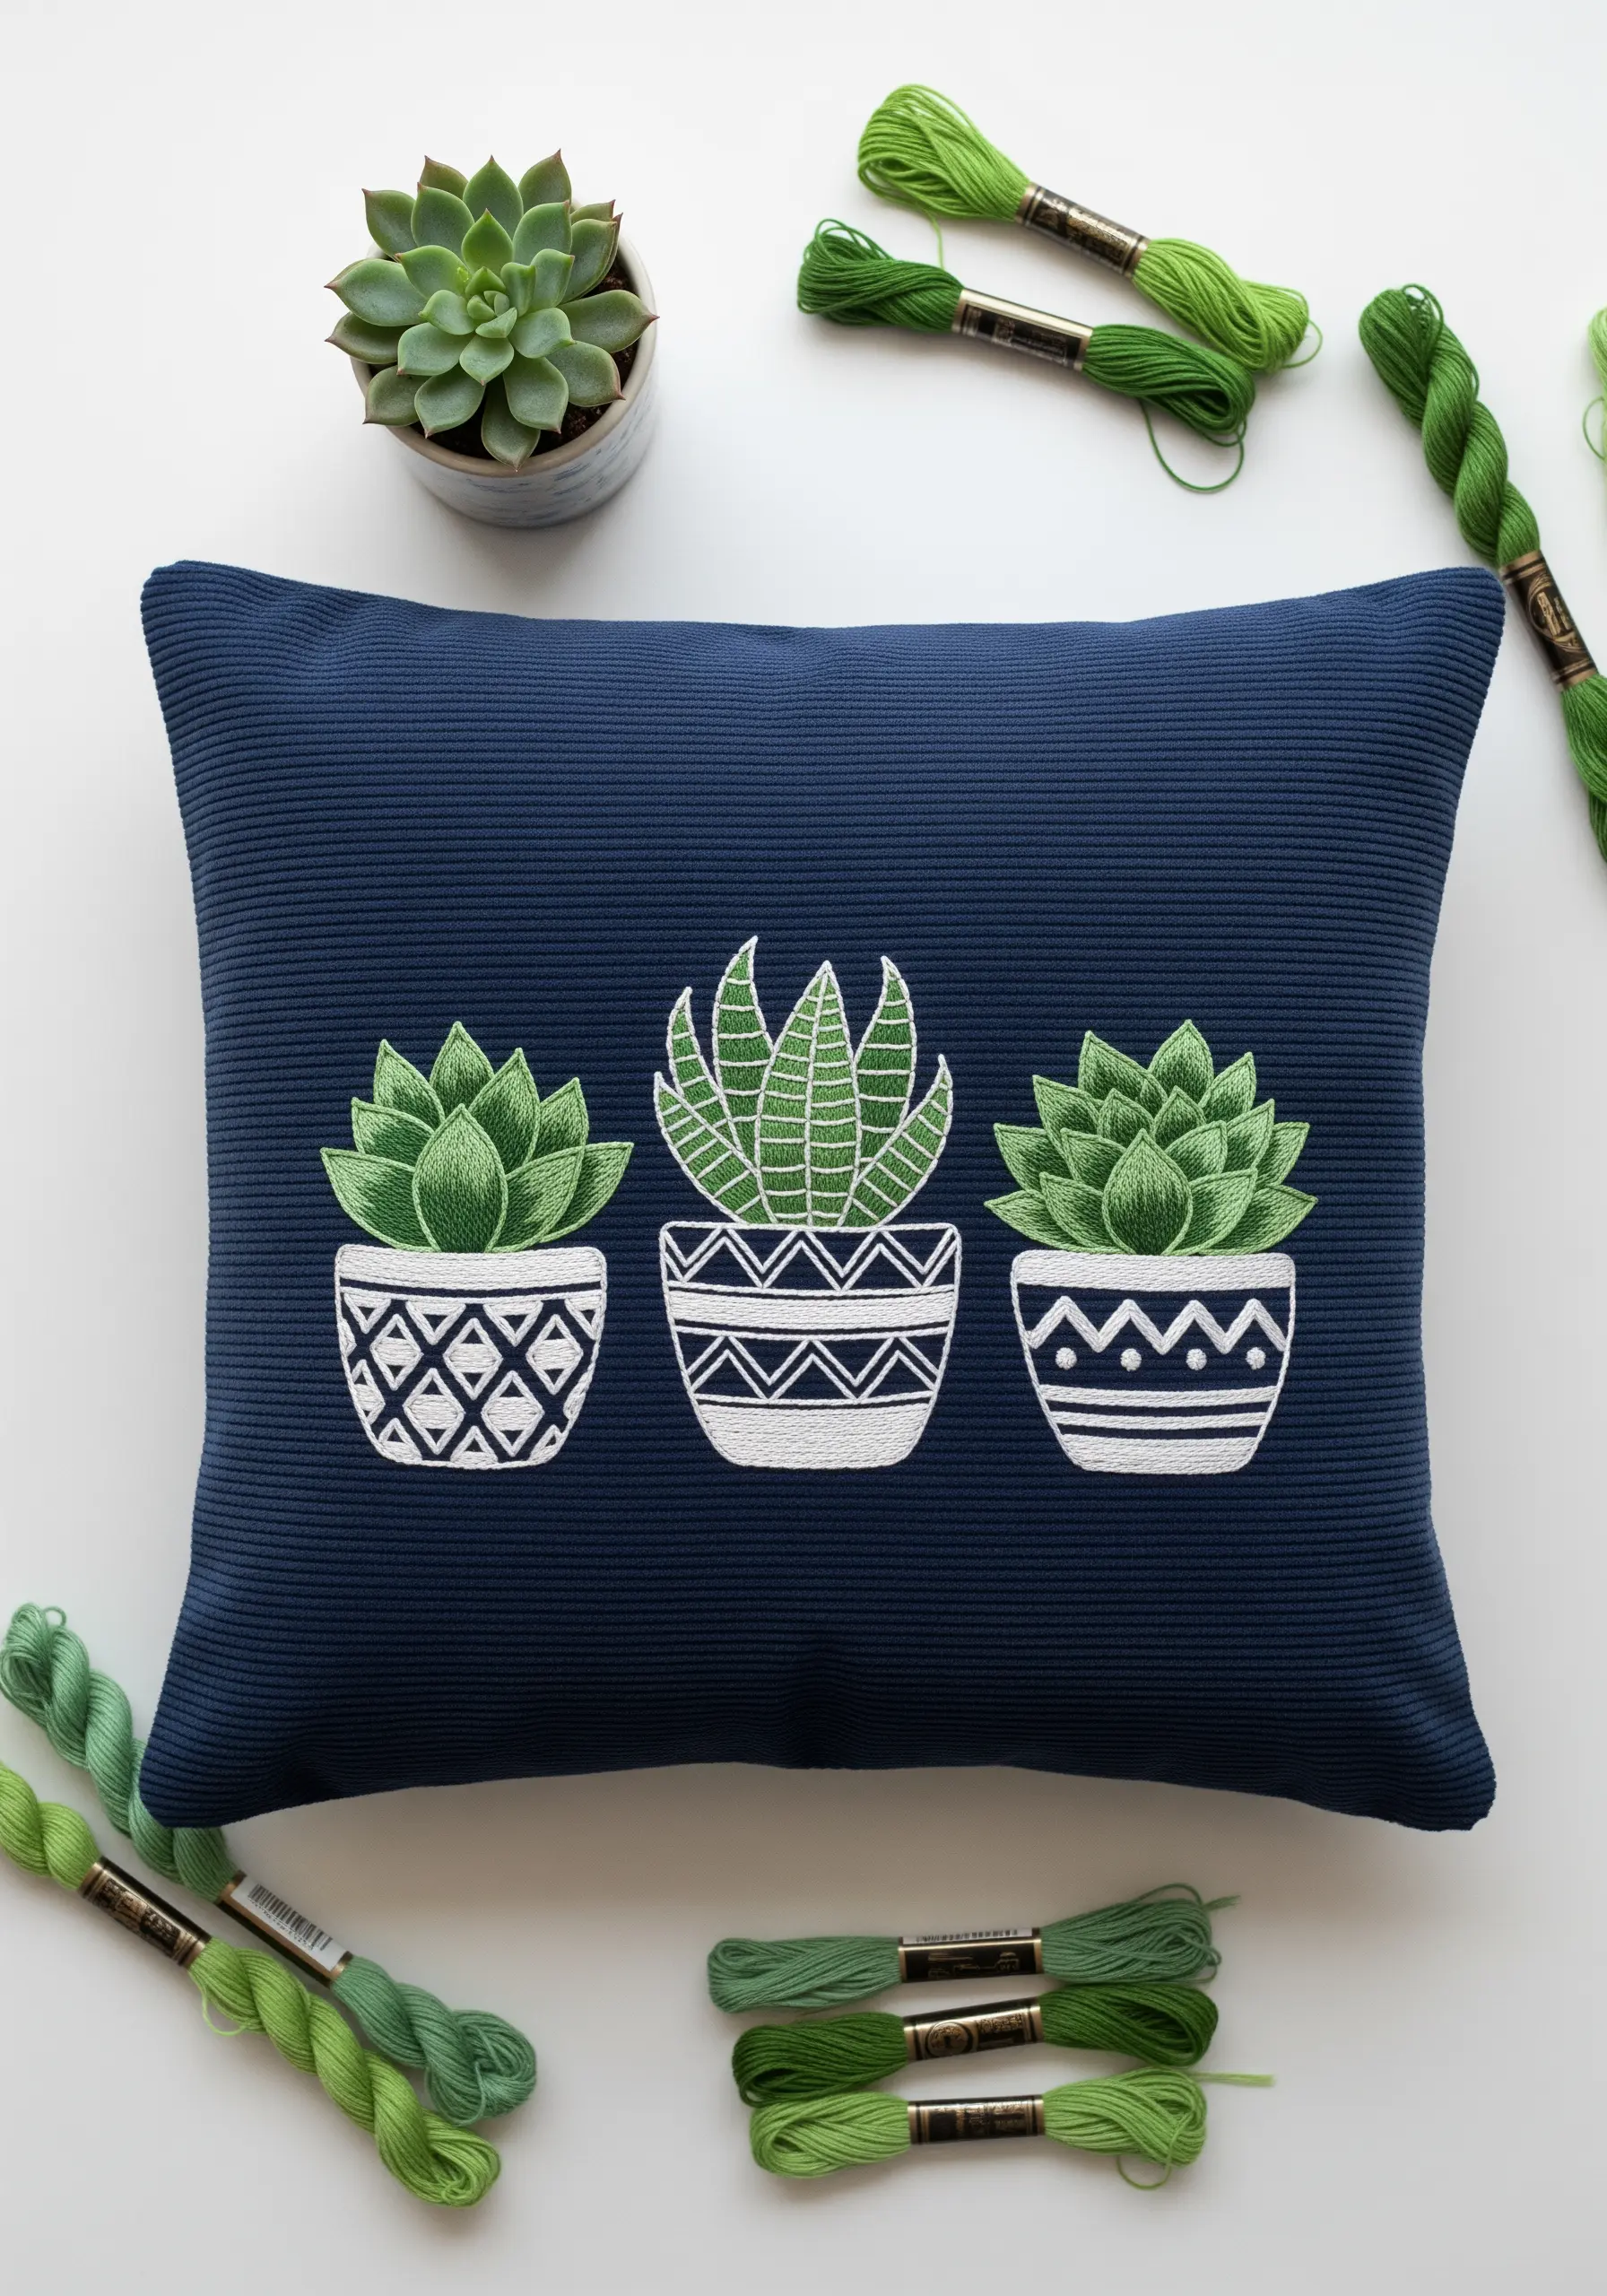
Give simple botanical motifs realistic dimension by paying attention to the direction of your stitches.
For these succulents, fill each leaf with long-and-short stitches that radiate outward from the center, just as they would grow in nature.
Use a slightly lighter shade of green for the top half of each leaf and a darker shade for the bottom to create a subtle highlight and shadow effect.
This directional stitching transforms a flat shape into a believable, dimensional object. Consider these houseplant embroidery motifs for more inspiration.
9. Achieve Flawless Cursive with Whipped Stitch

To create smooth, elegant lettering that flows like ink, use a whipped backstitch.
First, stitch your text using a standard backstitch, keeping your stitch length consistent, especially around curves.
Once the foundation is complete, take a new length of thread and, using a blunt tapestry needle, weave it through each backstitch from the top without piercing the fabric.
This wrapping motion covers the individual stitches, creating a seamless, raised line that gives your script a refined, calligraphic quality.
10. Use Negative Space in Folk Art Designs

In symmetrical folk art patterns, the unstitched fabric is just as important as the embroidered areas.
To make your design pop, focus on creating flawless fill stitches. Use a dense satin stitch and ensure every thread lays flat and parallel to the others.
When filling curved shapes like the bird’s body, slightly angle your stitches toward the center of the curve. This helps maintain a smooth, clean edge and prevents the shape from looking distorted.
The contrast between the pristine stitching and the clean fabric background is what gives this style its graphic power.
11. Create Dimension with Padded Satin Stitch

To make a motif like this honeycomb stand off the fabric, use a padded satin stitch.
Outline each hexagon with a backstitch, then fill the inside of that outline with small, straight padding stitches.
Finally, cover the entire shape with satin stitches perpendicular to the padding stitches. This underlayer lifts the top stitches, creating a beveled, three-dimensional effect.
For the bee, use turkey work for a fuzzy body and add sheer organza for delicate, transparent wings.
12. Couch Chunky Fibers for Bold Texture
When you want to incorporate thick yarns or roving wool that won’t fit through a needle, couching is the perfect technique.
Lay your chunky fiber on the fabric along your design line. Then, using a standard embroidery floss in a matching or contrasting color, make small tacking stitches over the yarn to secure it in place.
Space these tacking stitches evenly for a neat finish or randomly for a more rustic look.
This method allows you to add dramatic texture and color to your pillows that traditional embroidery can’t achieve. Explore more with these mixed-fiber embroidery patterns.
13. Combine Appliqué with Delicate Stitches
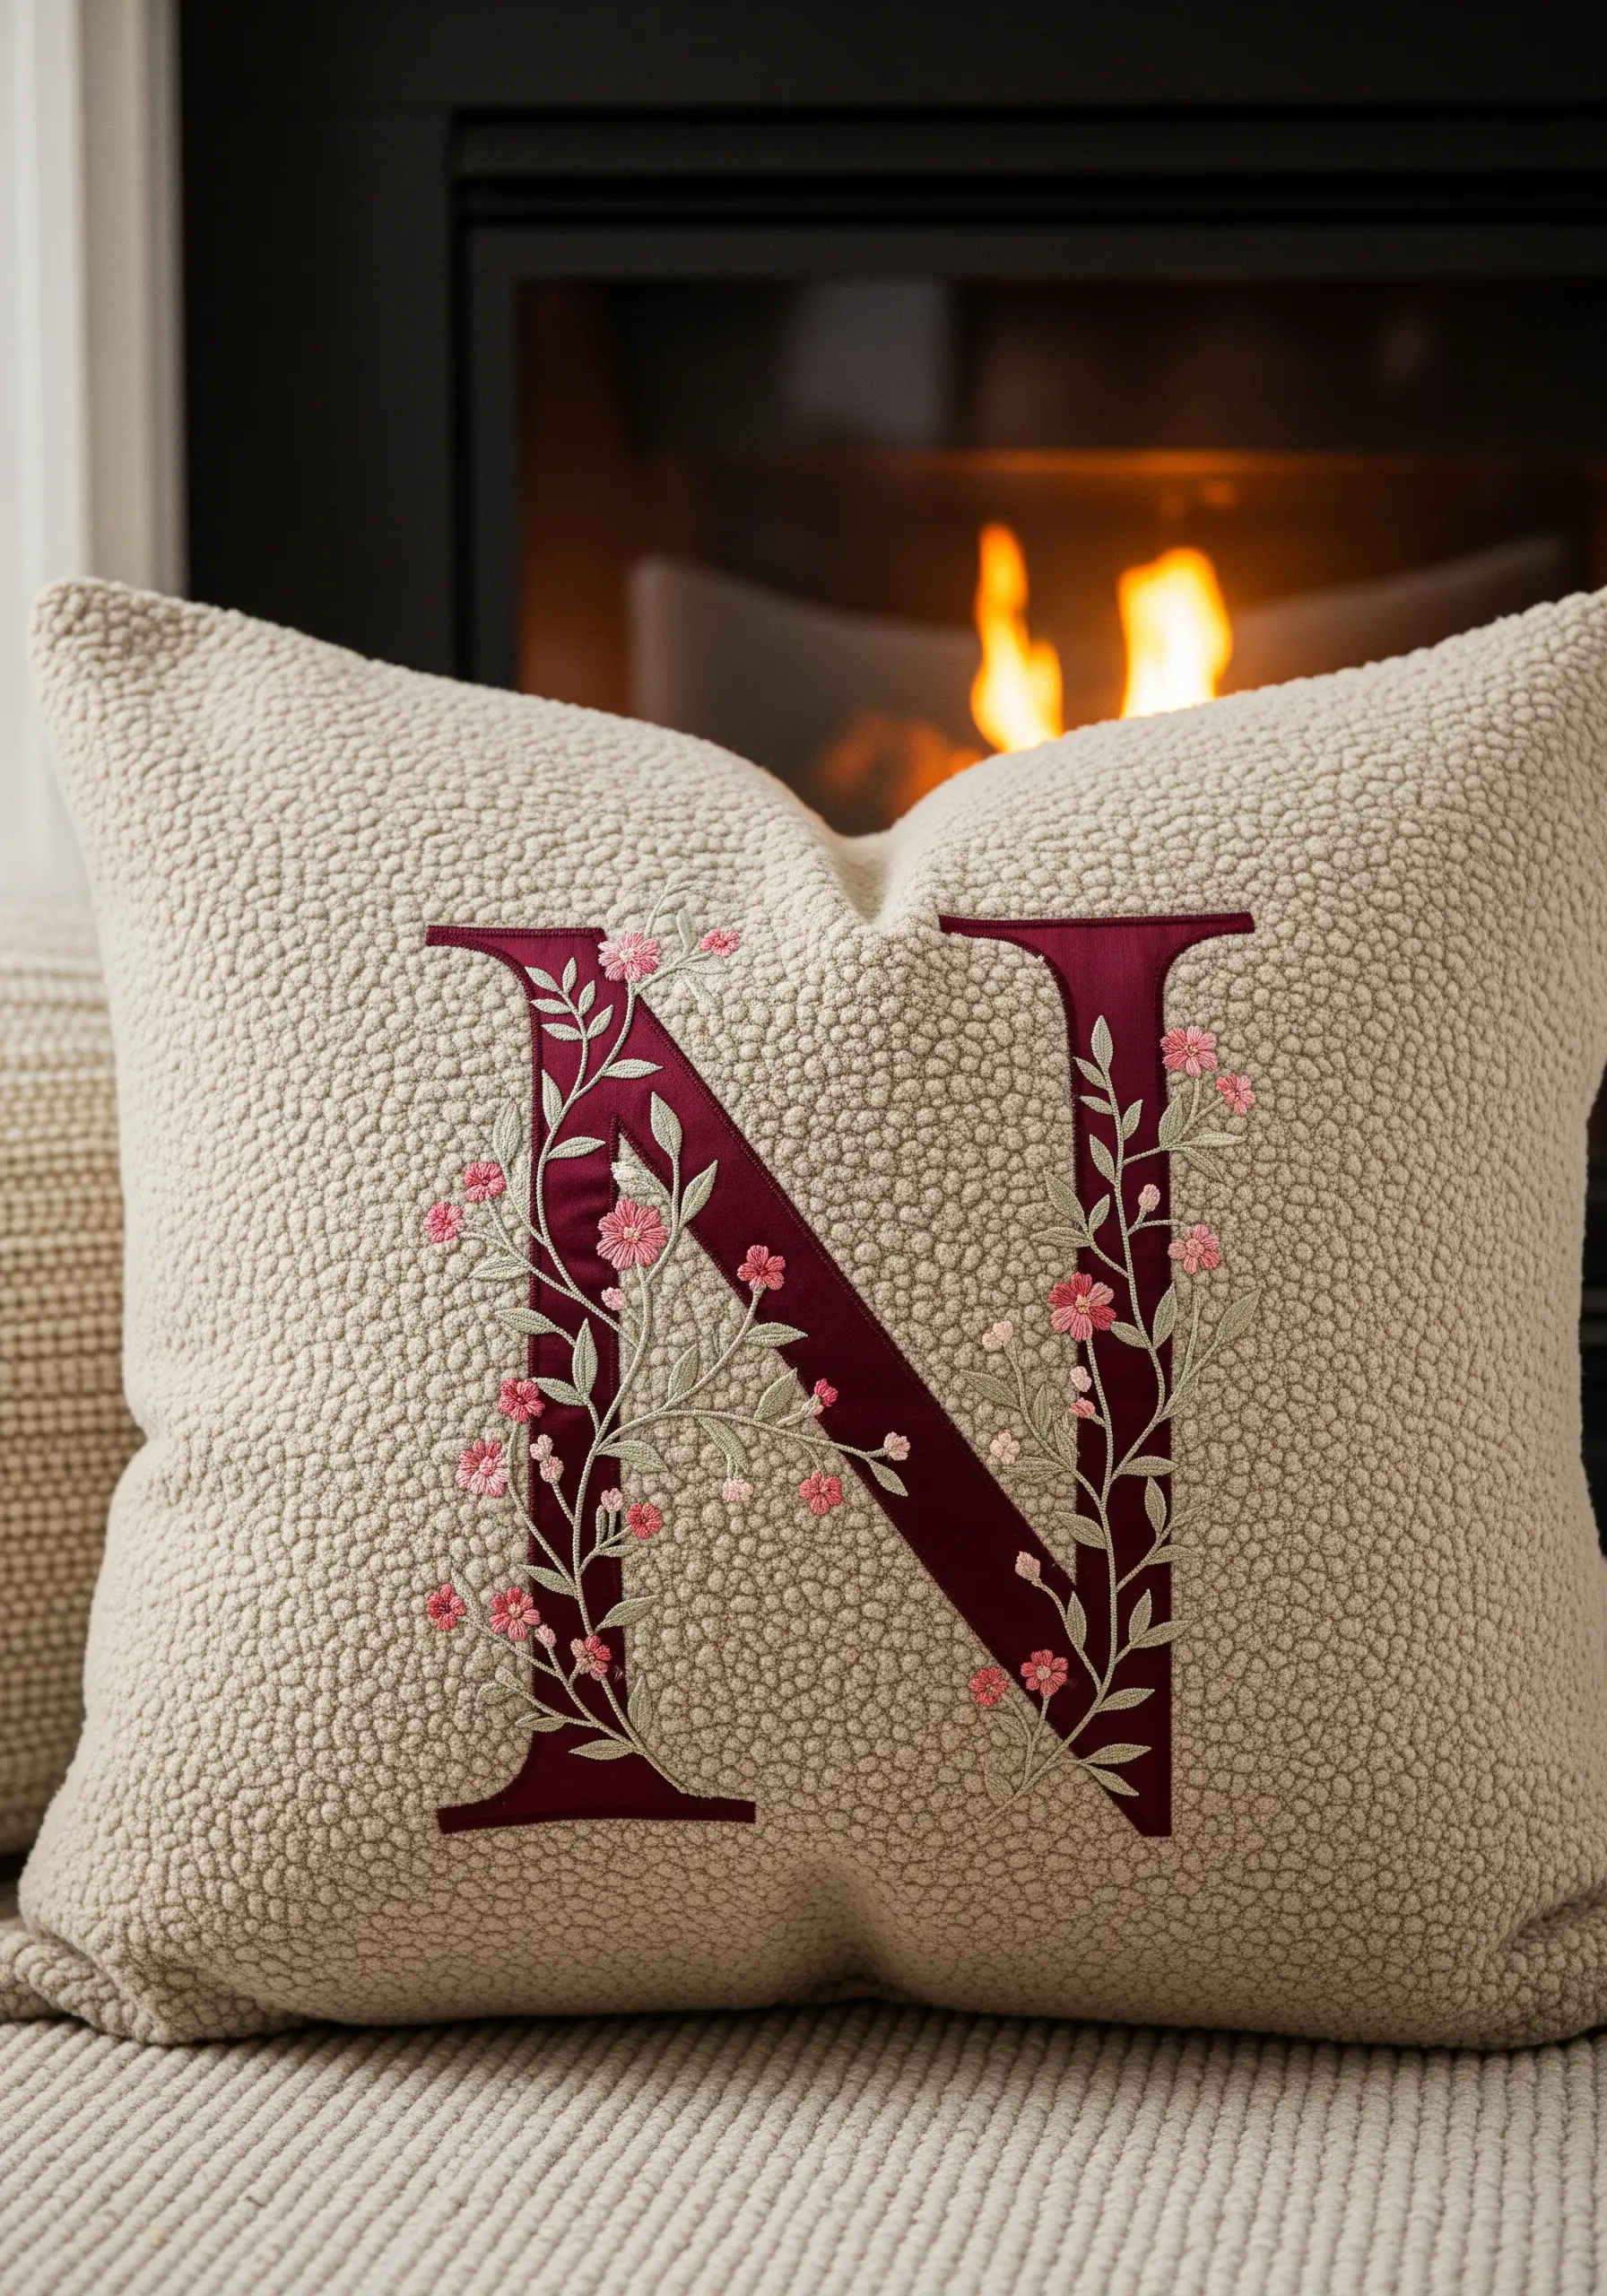
For a design that blends boldness with delicacy, combine fabric appliqué with fine embroidery.
First, cut your monogram letter from a non-fraying fabric like felt or use an iron-on adhesive for cottons. Secure it to the pillow with a neat blanket stitch or a tight satin stitch around the edges for a clean finish.
Then, use a single strand of floss to stitch delicate floral vines over the top. This contrast between the solid fabric letter and the fine, detailed thread work creates a visually stunning and balanced composition.
You can create a beautiful personalized name monogram using this technique.
14. Capture Movement with Linear Stitches
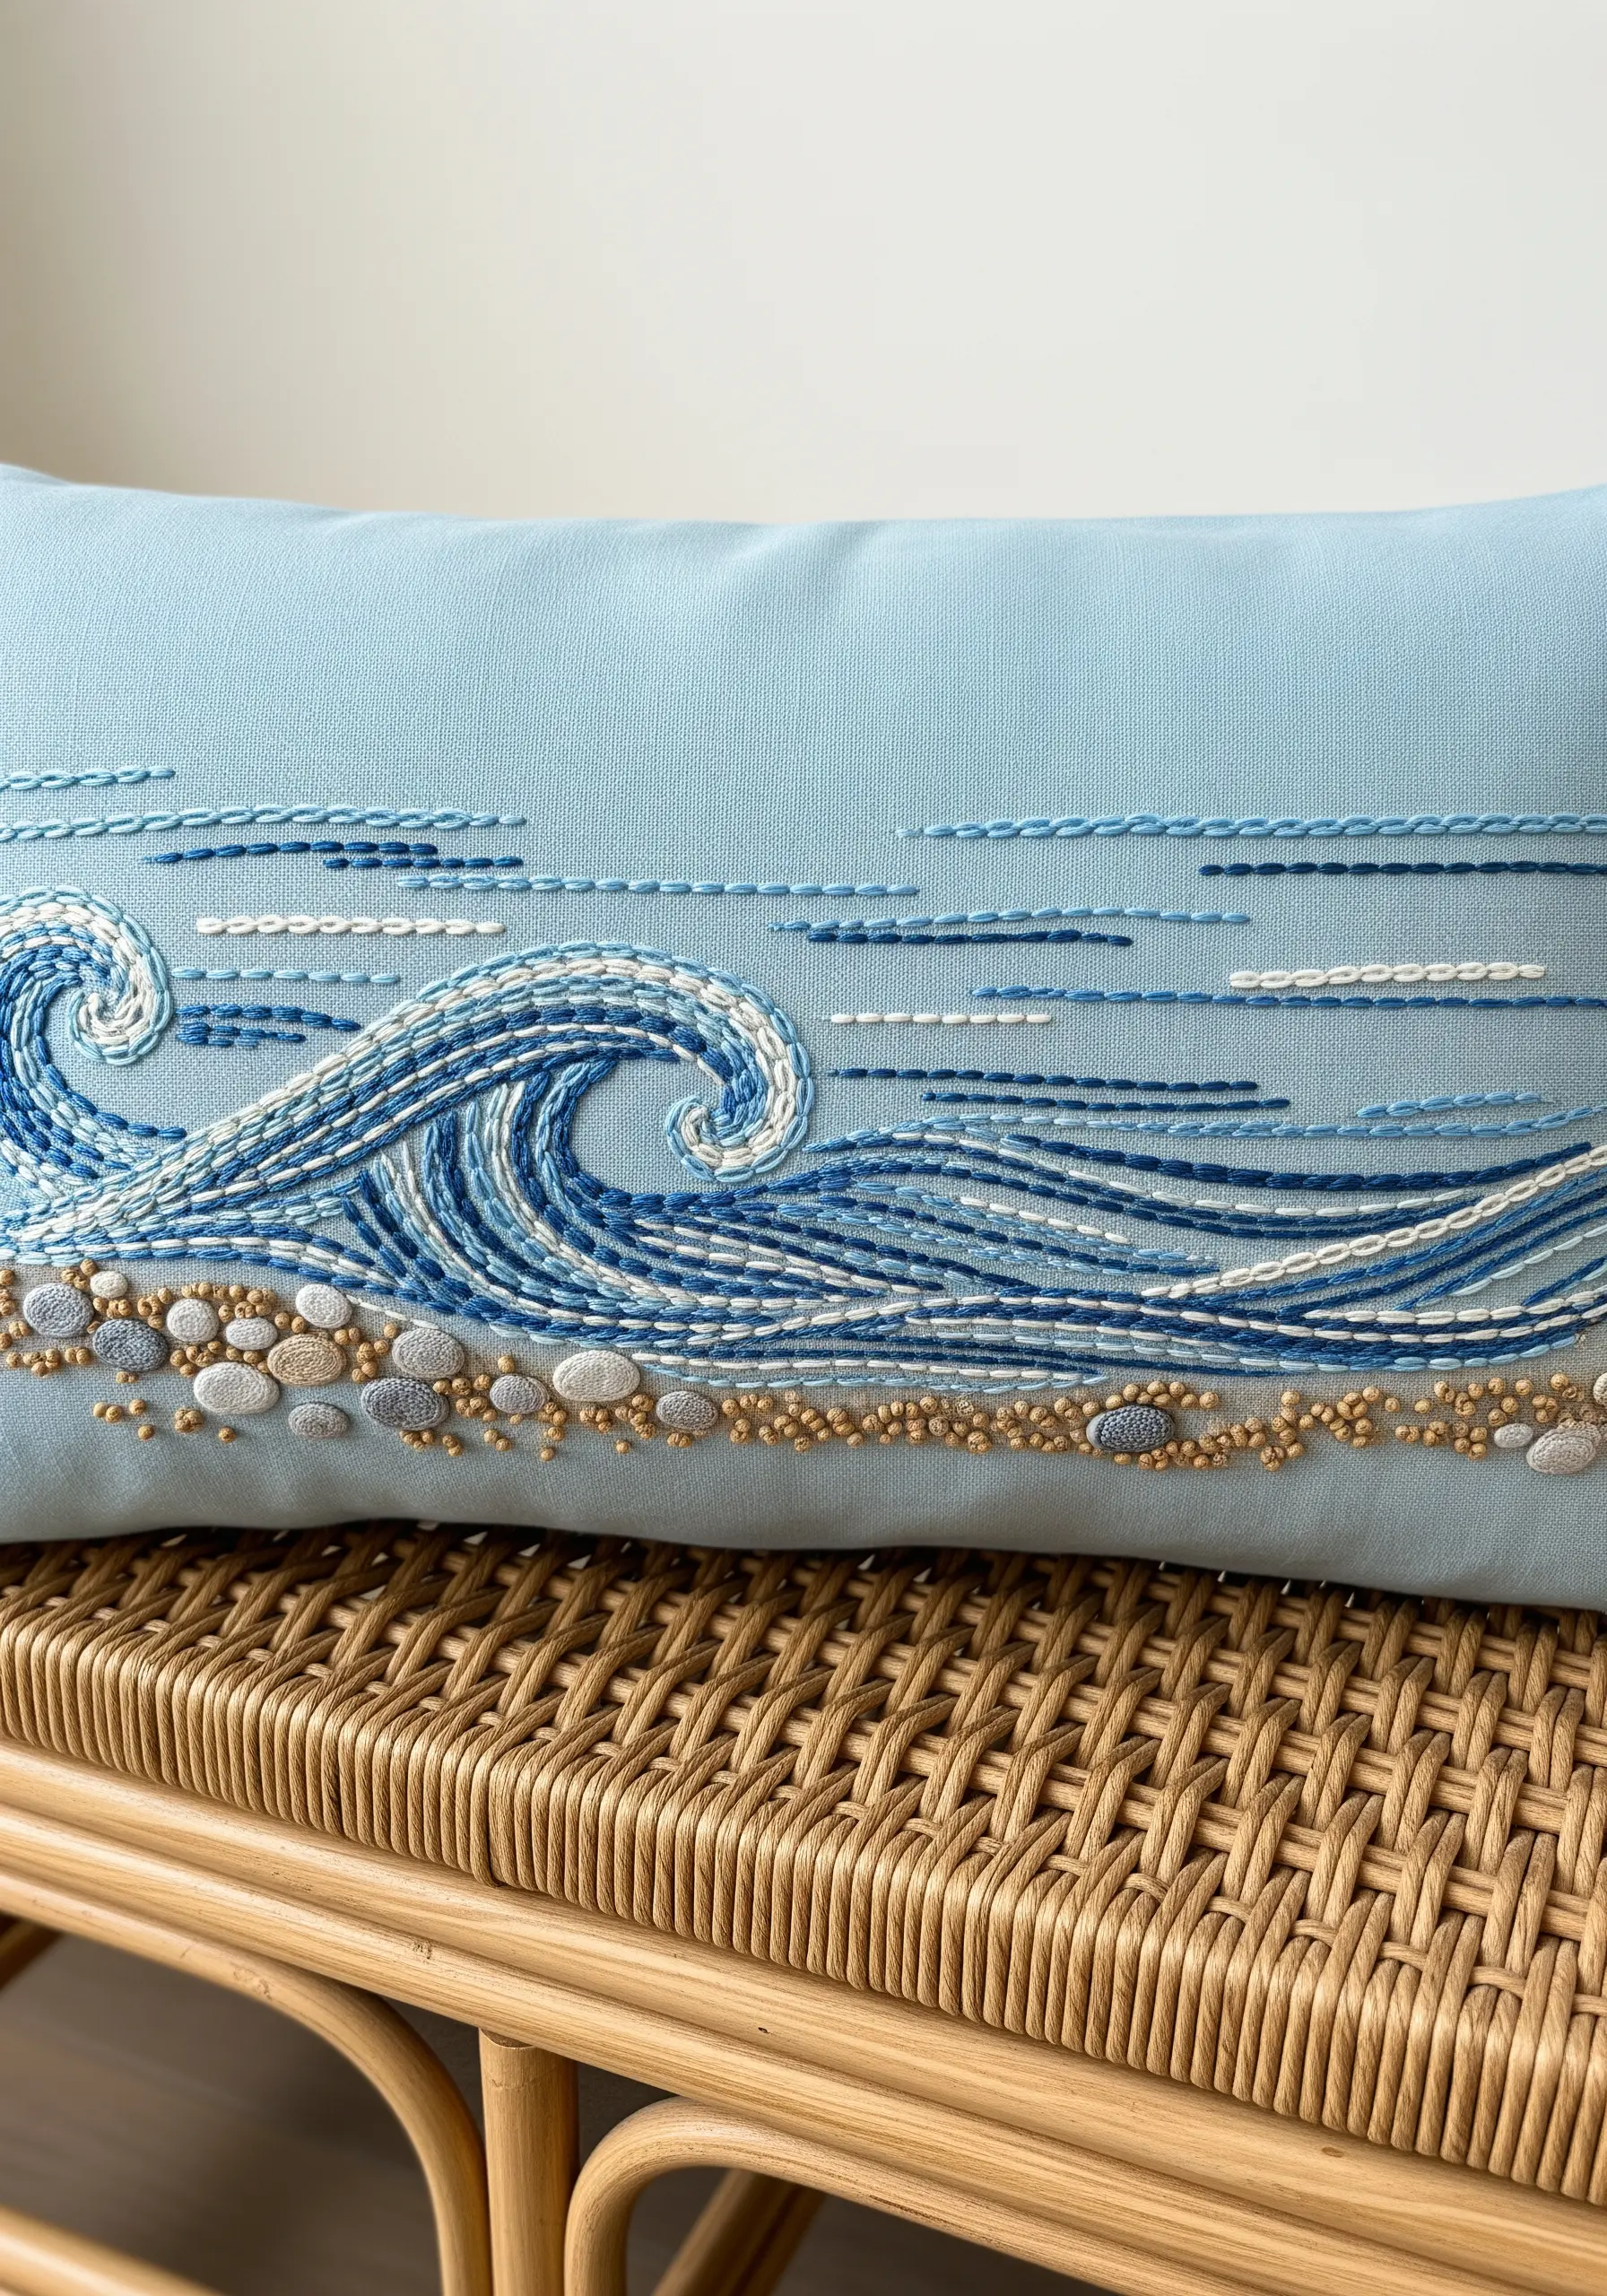
Evoke the energy of ocean waves by using a variety of simple linear stitches.
Use rows of backstitch, running stitch, and split stitch in varying blues and whites to create the impression of flowing water.
Alternate the number of strands you use—from a single fine thread to a thicker twist of four—to add texture and depth.
For the seafoam, use clusters of white French knots. For the shore, use French knots in sandy tones, which grounds the energetic lines of the water and completes the coastal scene.
15. Create Natural Veins with Fishbone Stitch
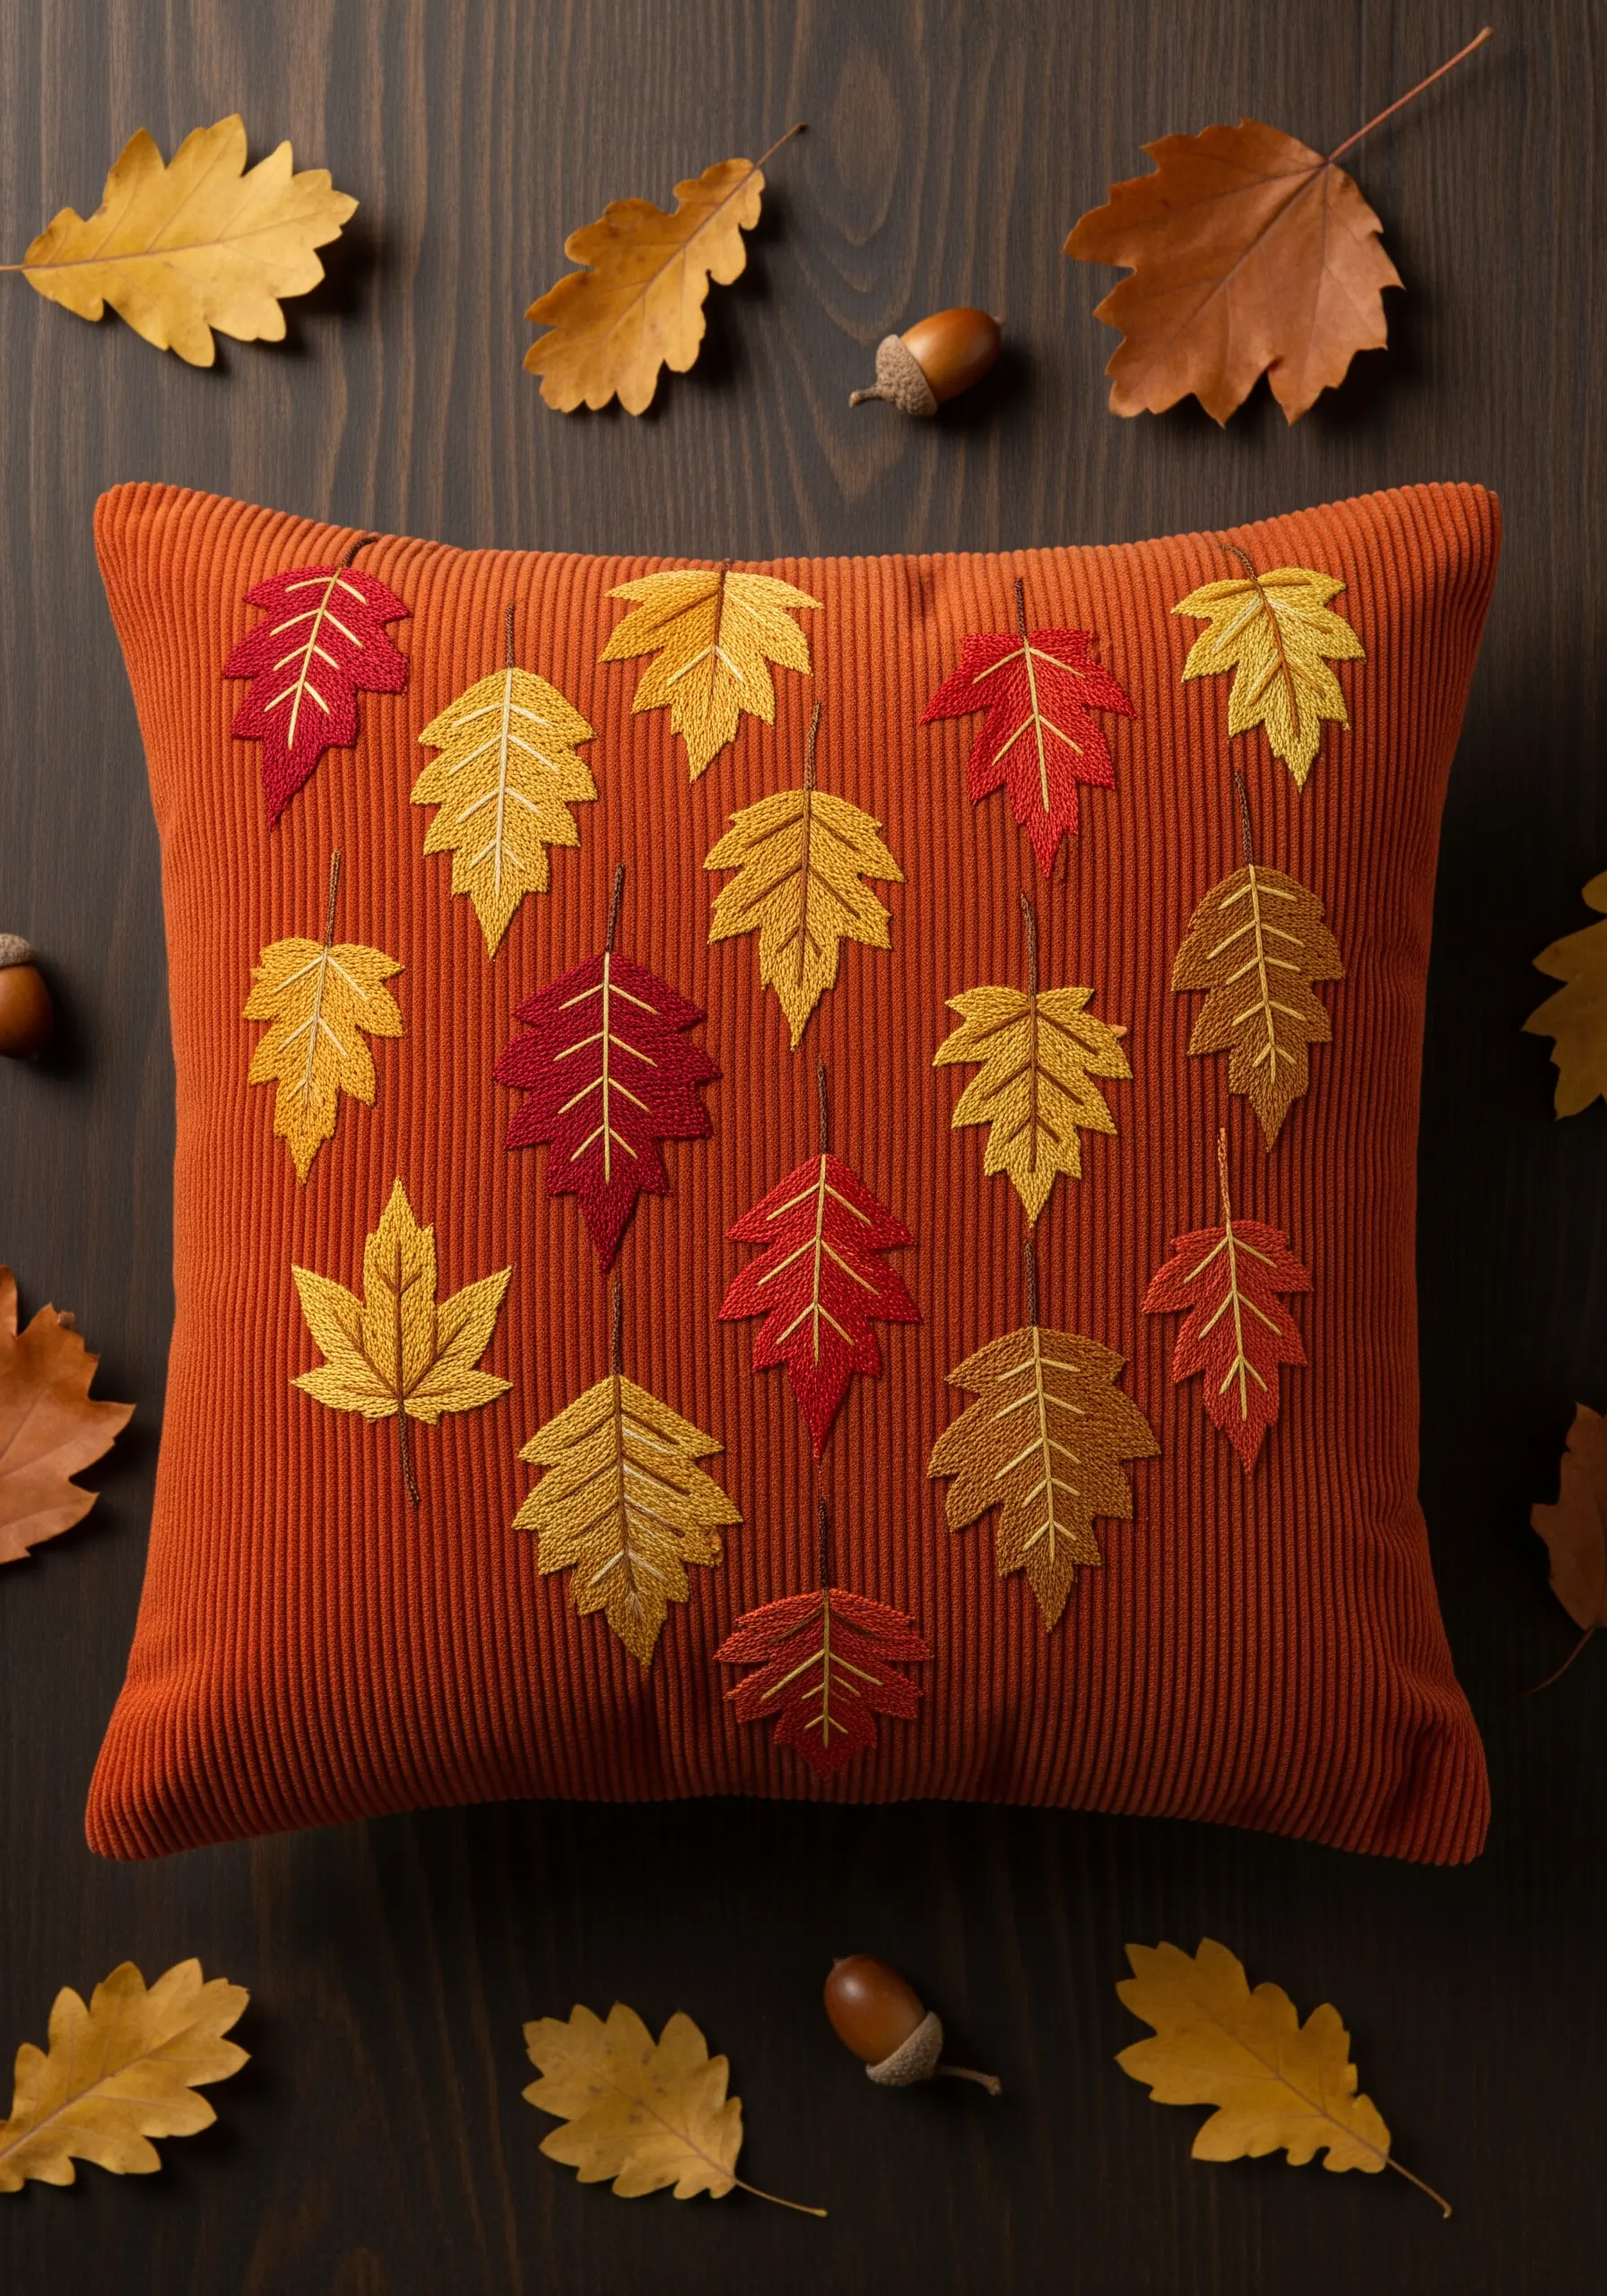
The fishbone stitch is perfect for embroidering leaves, as it creates the central vein and fills the shape simultaneously.
Start with a single straight stitch from the tip to the center of the leaf. Then, bring your needle up on one side of the outline and make a diagonal stitch that crosses over the central vein.
Repeat on the other side, alternating back and forth until the entire leaf is filled. This creates a beautifully textured leaf with a natural-looking spine.
Learn more about leaf vein stitch methods for even more realistic botanicals.
16. Use French Knots for Whimsical Detail

Add a touch of whimsy and texture to motifs like these mushrooms by using French knots for small details.
Instead of stitching flat white circles on the mushroom caps, create raised, tactile dots with single-wrap French knots. Place them irregularly for a more natural look.
For the gills underneath, use closely packed straight stitches in an off-white or beige radiating from the stem. This creates a sense of shadow and makes the bright red caps stand out even more against the rich velvet.
Get inspired by more forest floor botanical stitch ideas.
17. Make Bold Outlines with Couching
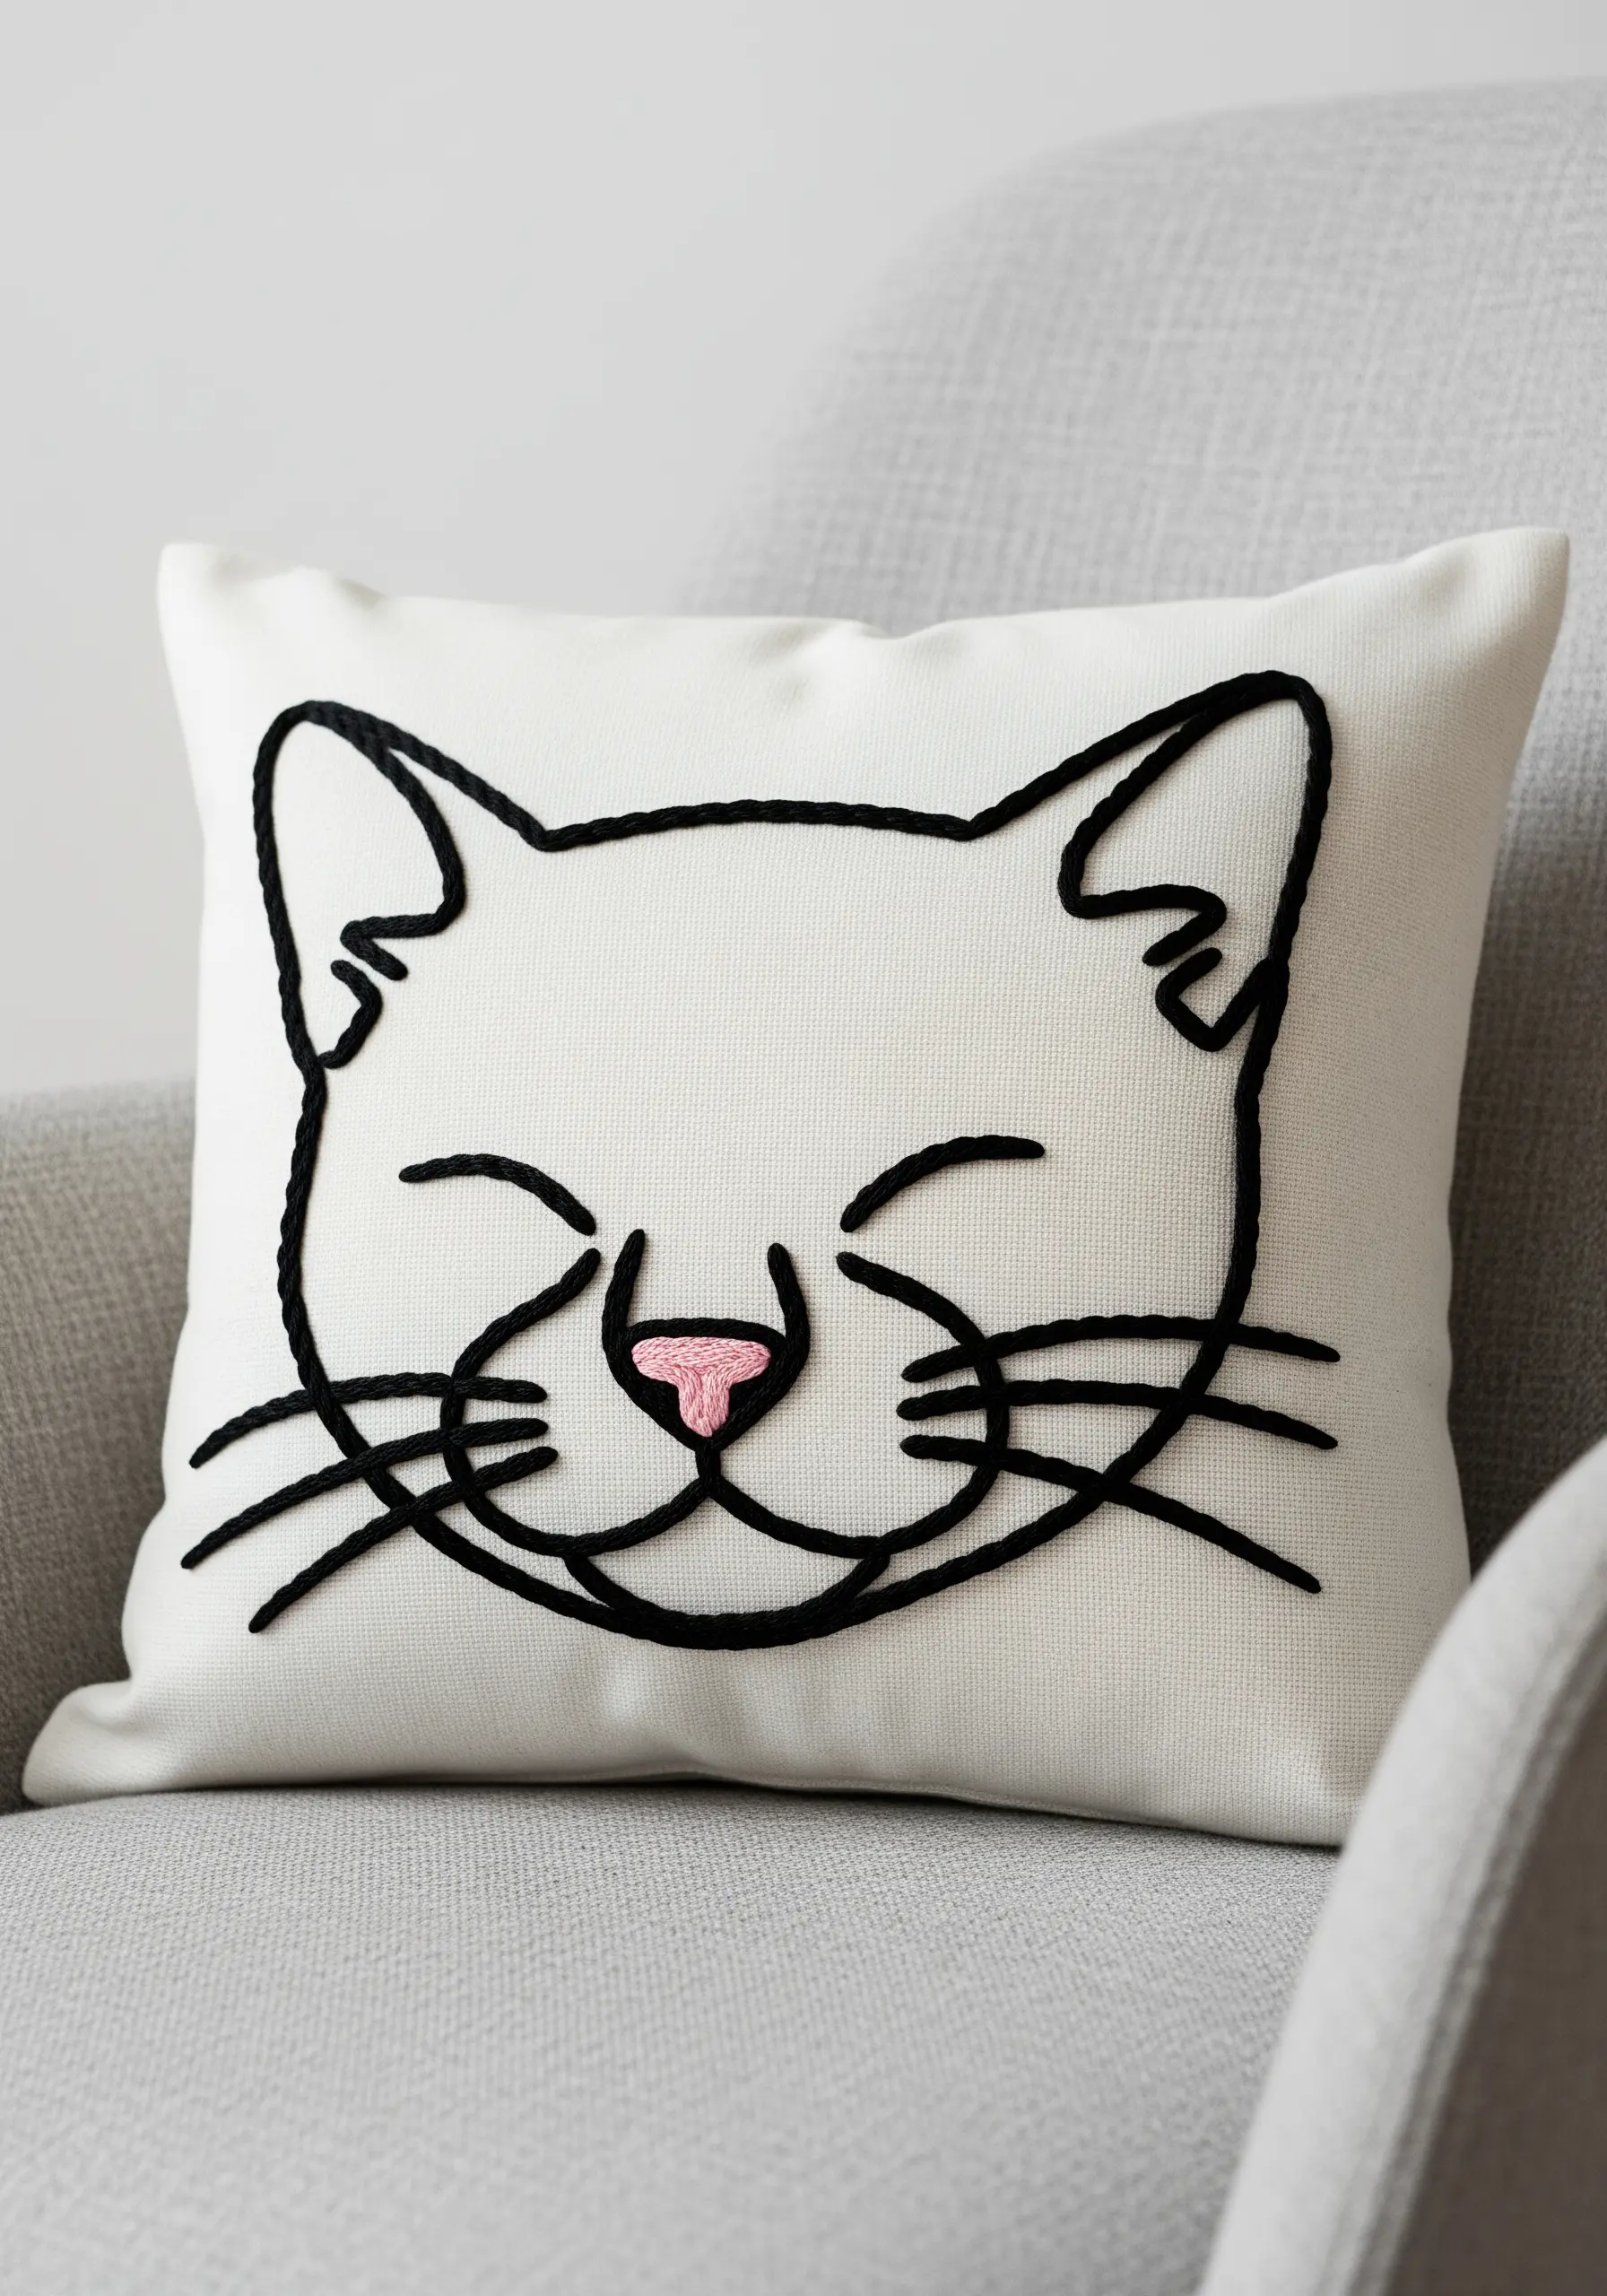
For minimalist line art, give your design more presence by creating a bold, sculptural outline.
Instead of a standard backstitch, couch a thick black yarn or several strands of embroidery floss along your design lines.
Simply lay the thick thread onto the fabric and use a single strand of matching floss to tack it down with small, evenly spaced stitches.
This technique produces a clean, graphic line with a raised texture that makes even the simplest drawing feel substantial and modern.
18. Incorporate Beads for Luminous Texture
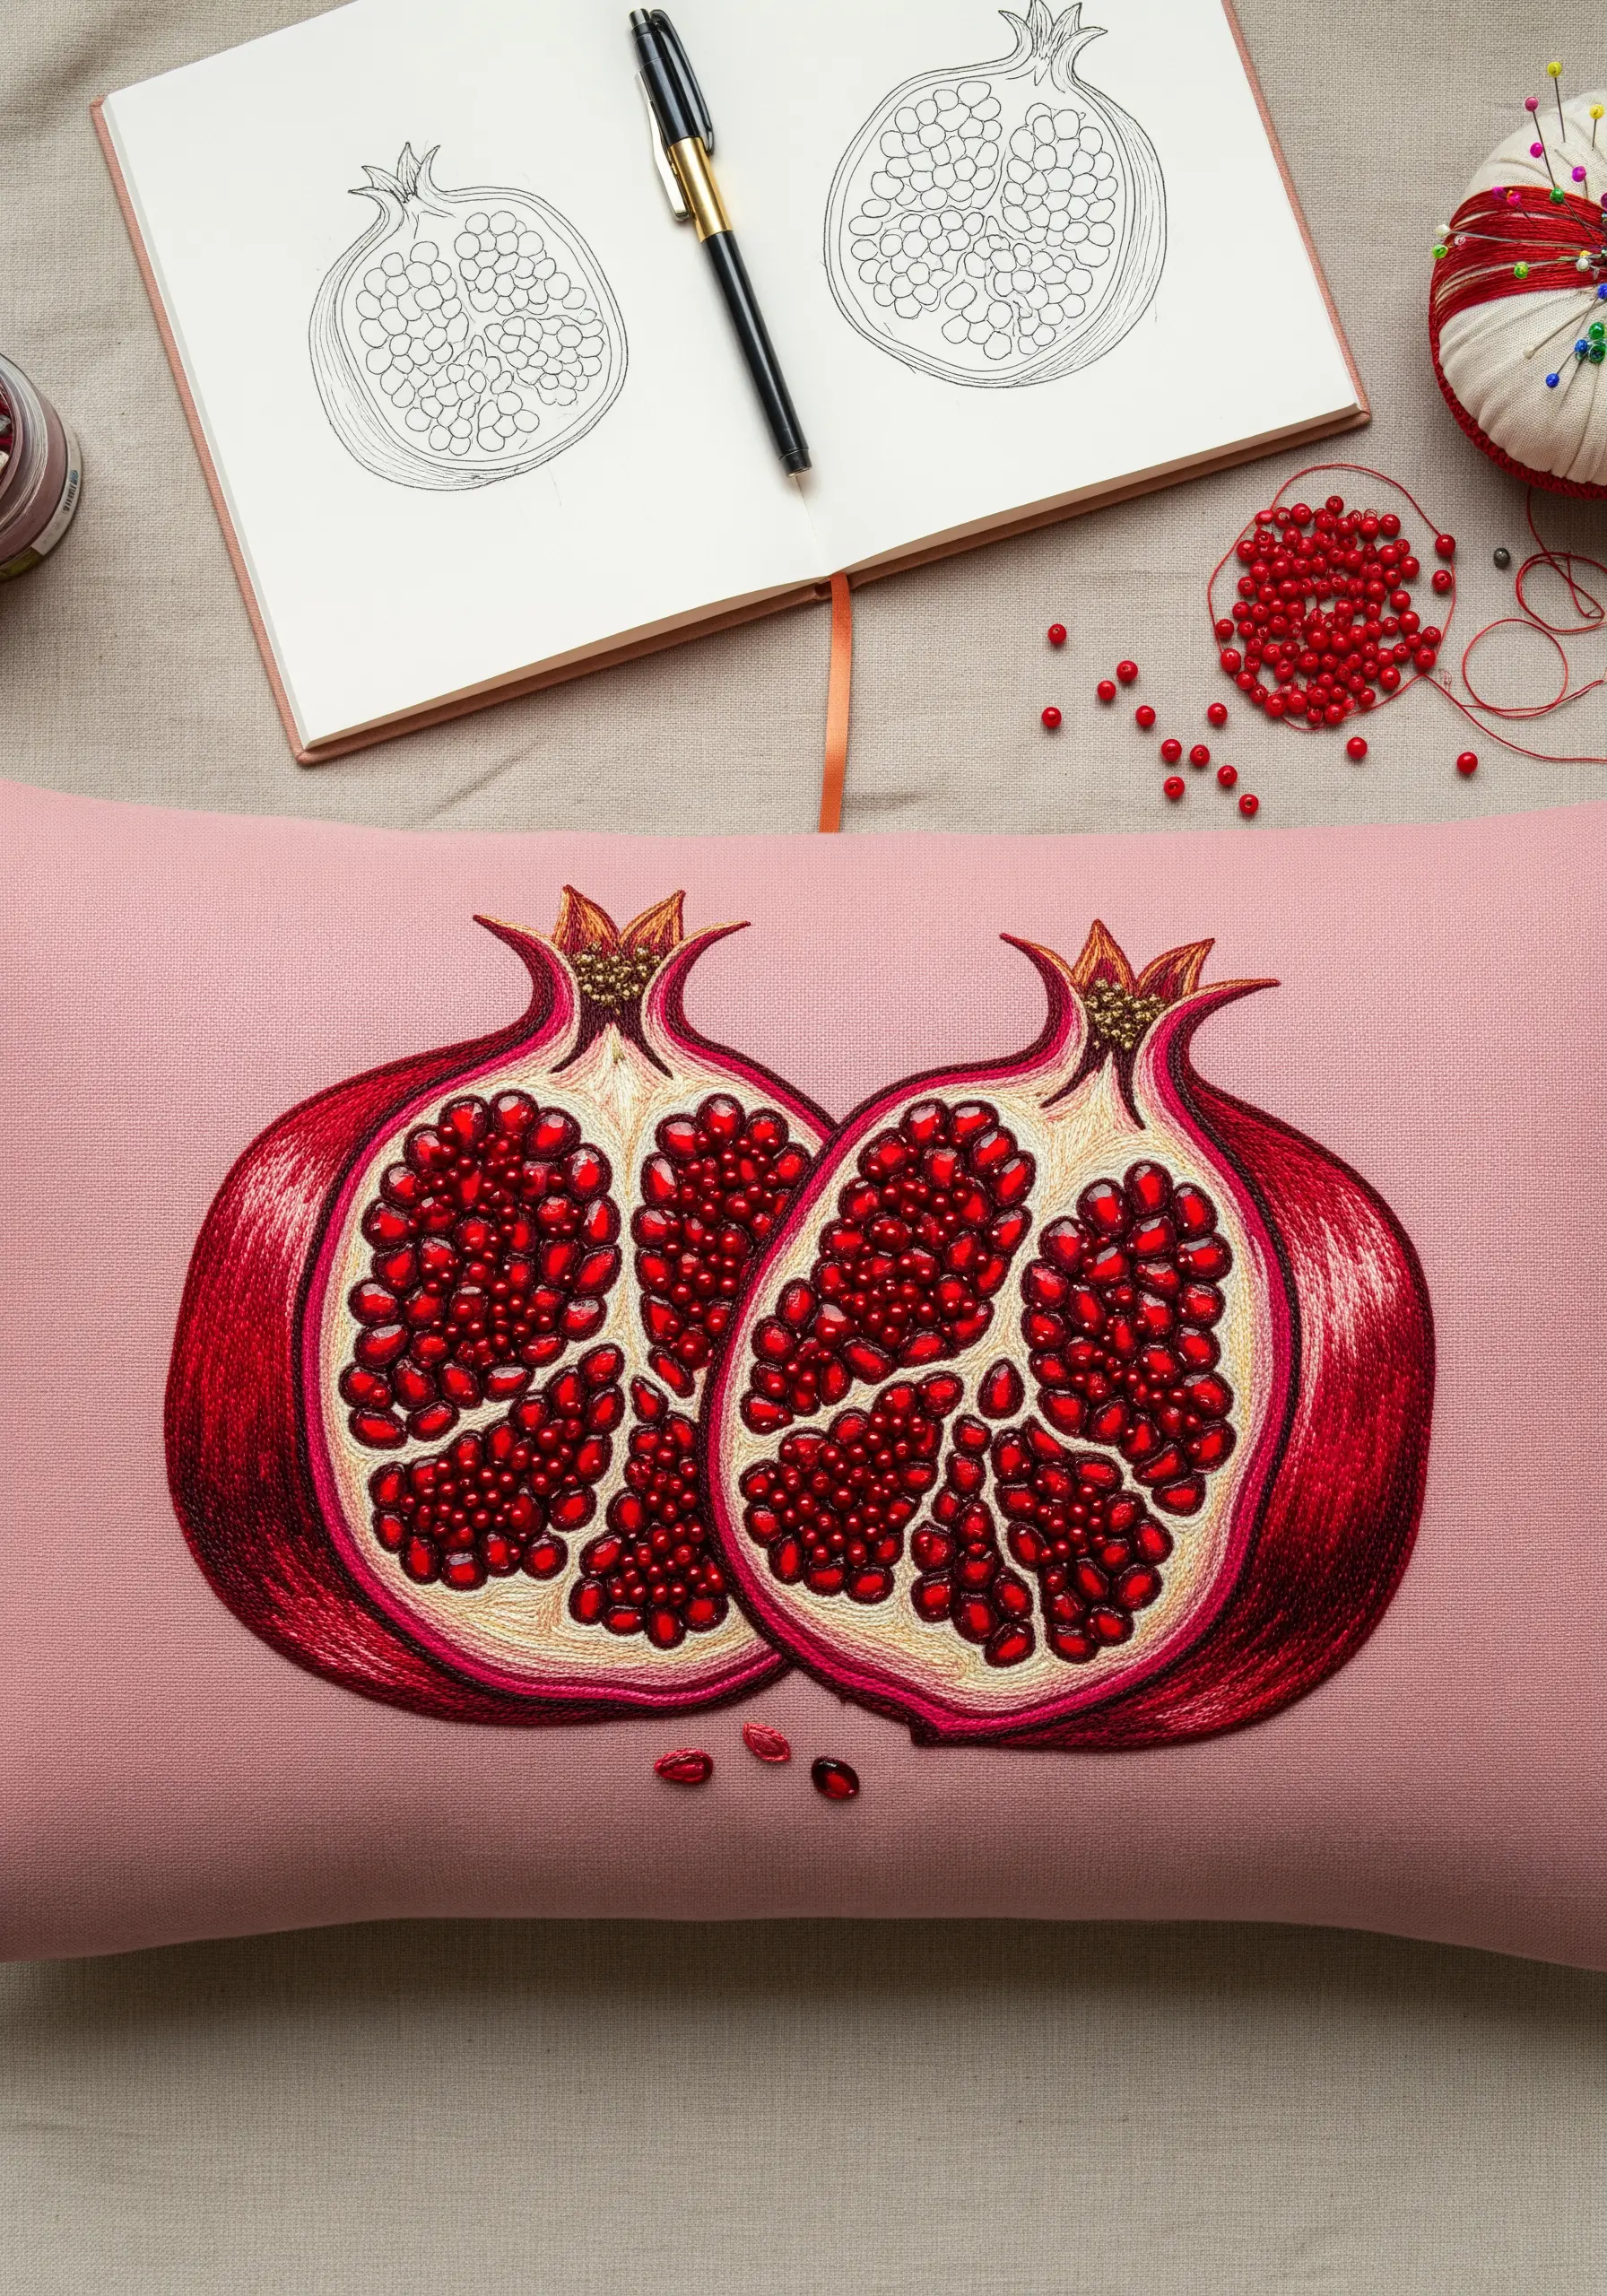
To capture the jewel-like quality of pomegranate seeds, incorporate small glass seed beads into your embroidery.
Instead of filling each seed shape with thread, use a single strand of matching red floss to secure one bead at a time with a tiny stitch.
This creates a stunning textural contrast with the matte finish of the surrounding floss, and the beads will catch the light beautifully.
Use a beading needle, which is finer than a standard embroidery needle, to pass through the tiny holes with ease.
19. Ensure Precision in Geometric Patterns
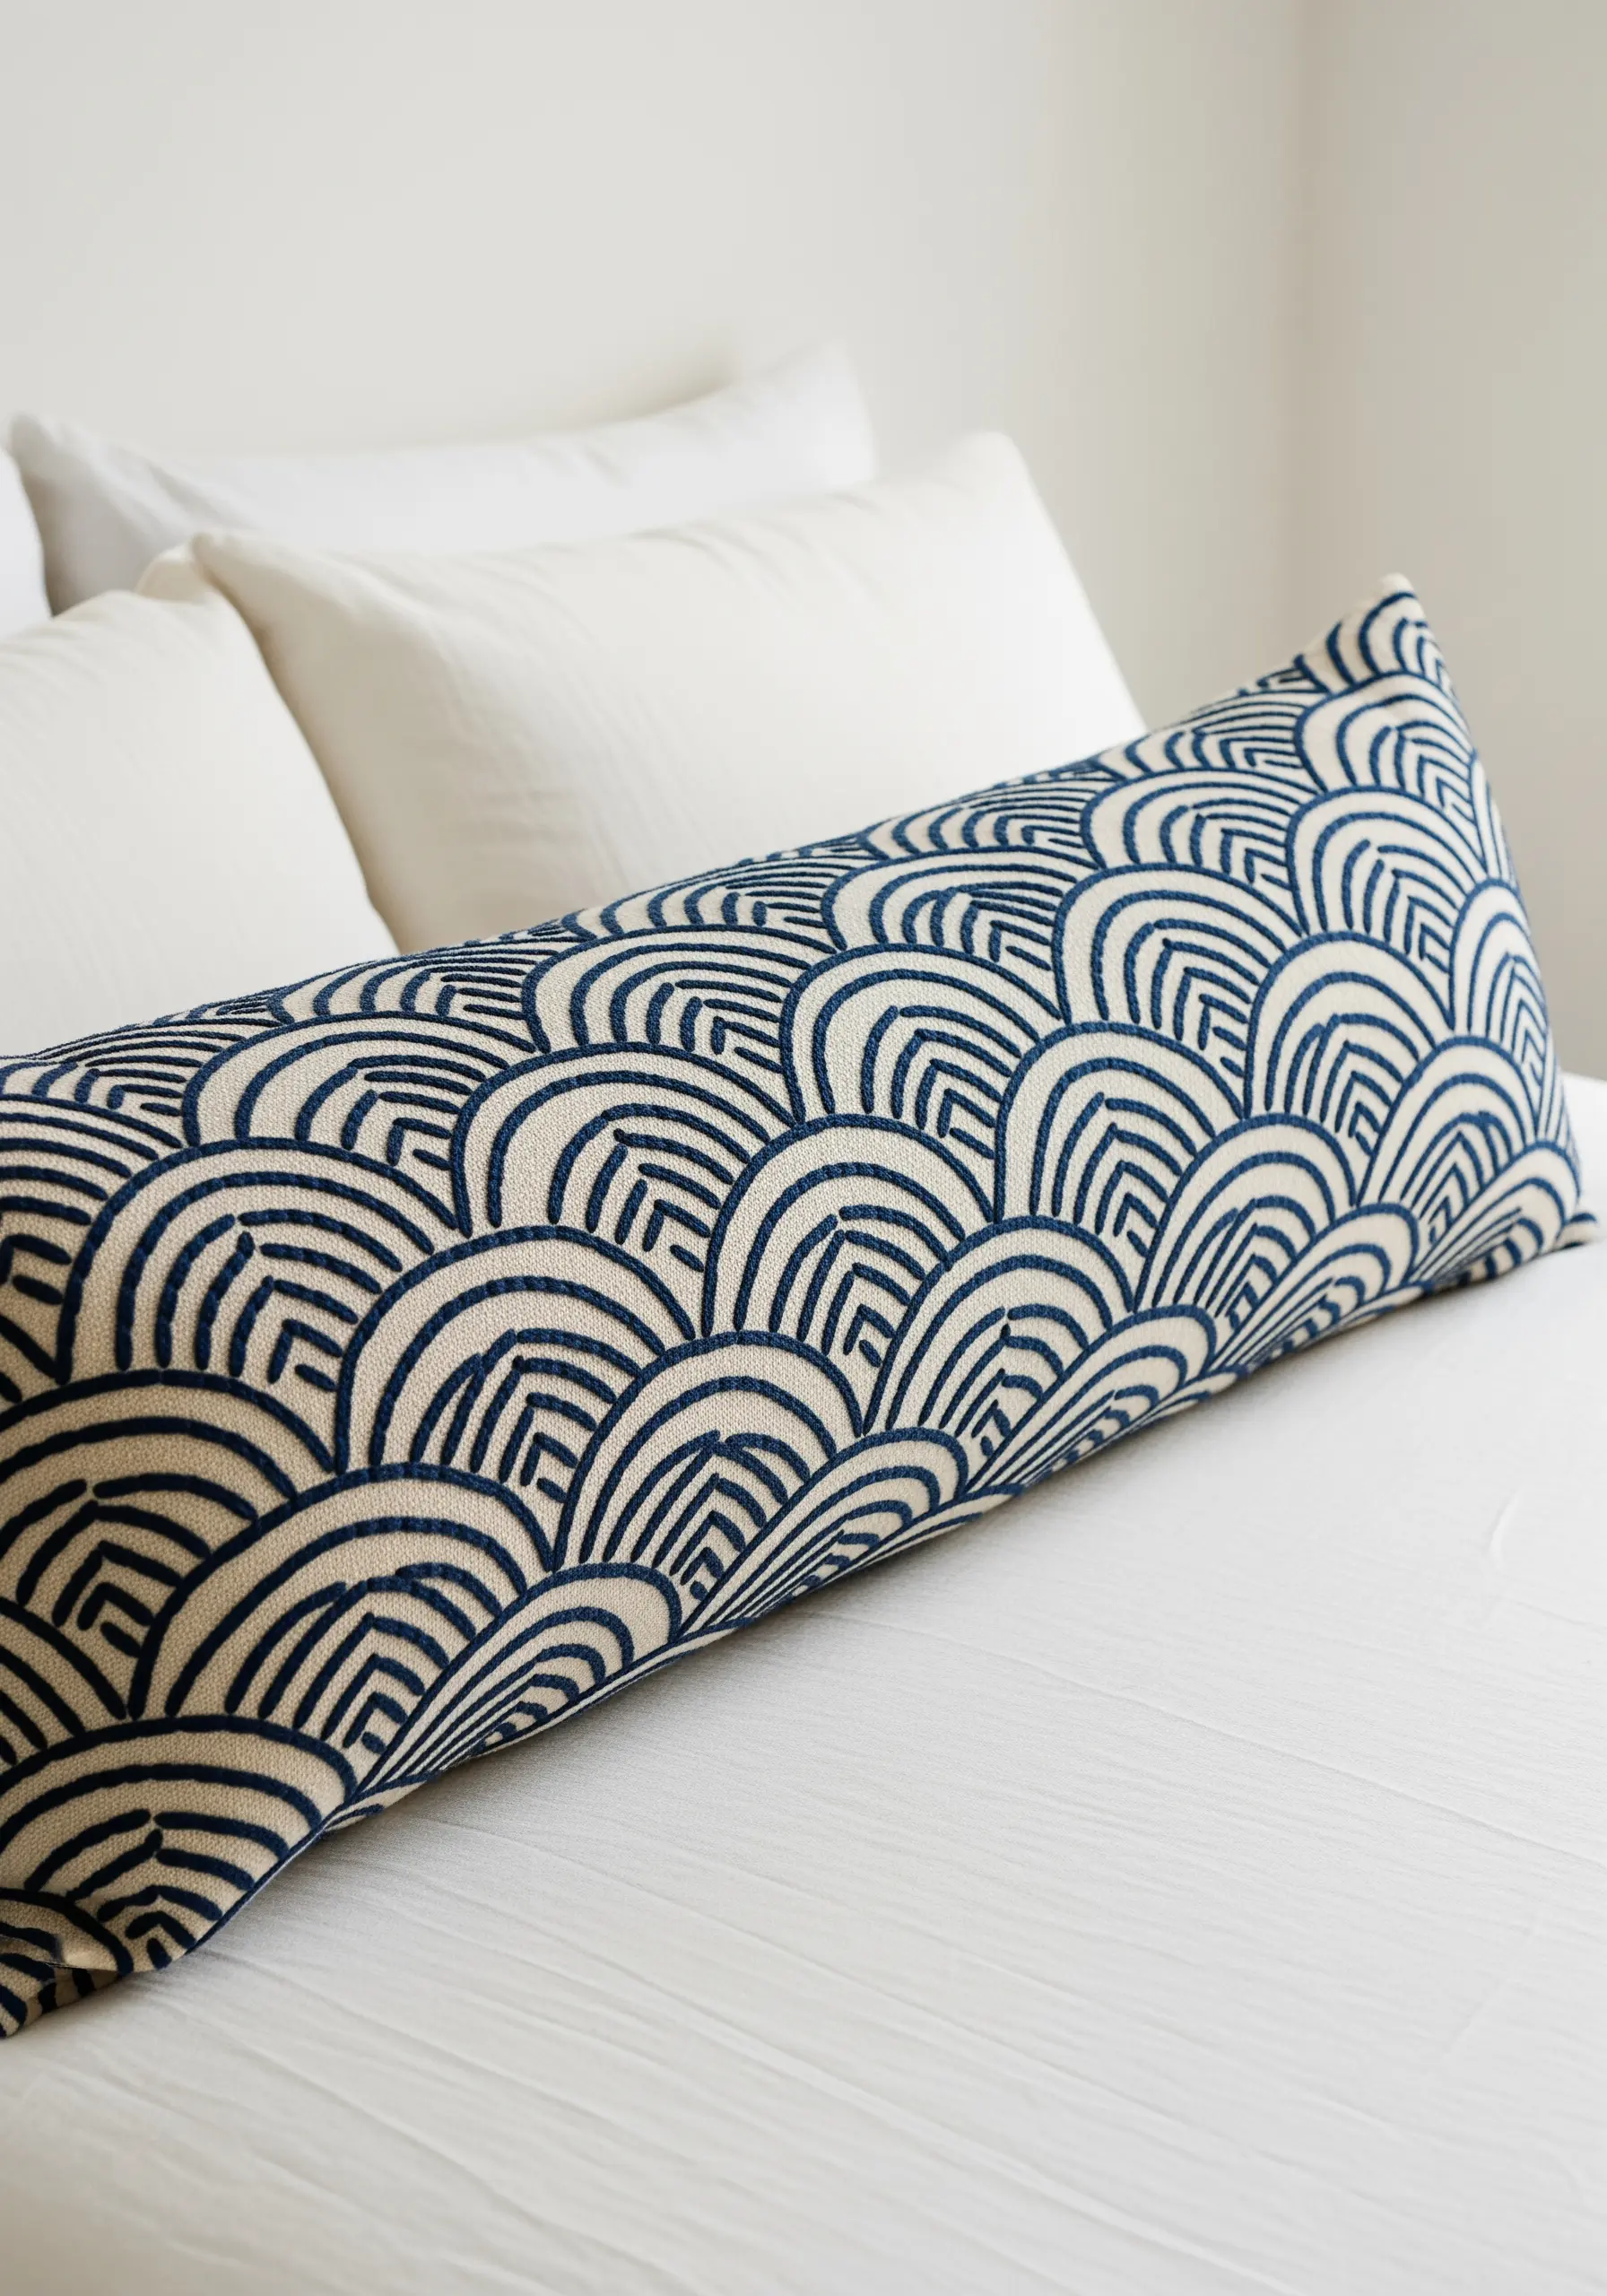
When embroidering a repeating geometric pattern, precision is everything. A flawless result depends on a perfect template.
Use a water-soluble or heat-erasable fabric marker to transfer your pattern onto the fabric before you start. A clear ruler and a quilting stencil can help you maintain perfect spacing.
Use a simple backstitch with a consistent number of strands (two or three is ideal) and focus on making every single stitch the same length.
It’s this uniformity, not the complexity of the stitch, that will make your final piece look incredibly polished and professional.
20. Create a Woven Effect with Basket Stitch

Instead of a standard satin stitch, fill larger areas with a basket weave stitch for a more interesting, tactile surface.
This stitch is created by laying down a grid of horizontal and vertical straight stitches. You then weave your thread over and under these foundation stitches to build up a woven texture.
It gives the fill a textile quality that is far more engaging than a flat surface and adds to the cozy, handmade feel of the design.
This technique is perfect for motifs like mugs, baskets, or clothing to add subtle, realistic texture.
21. Layer Appliqué for Soft, Dimensional Leaves
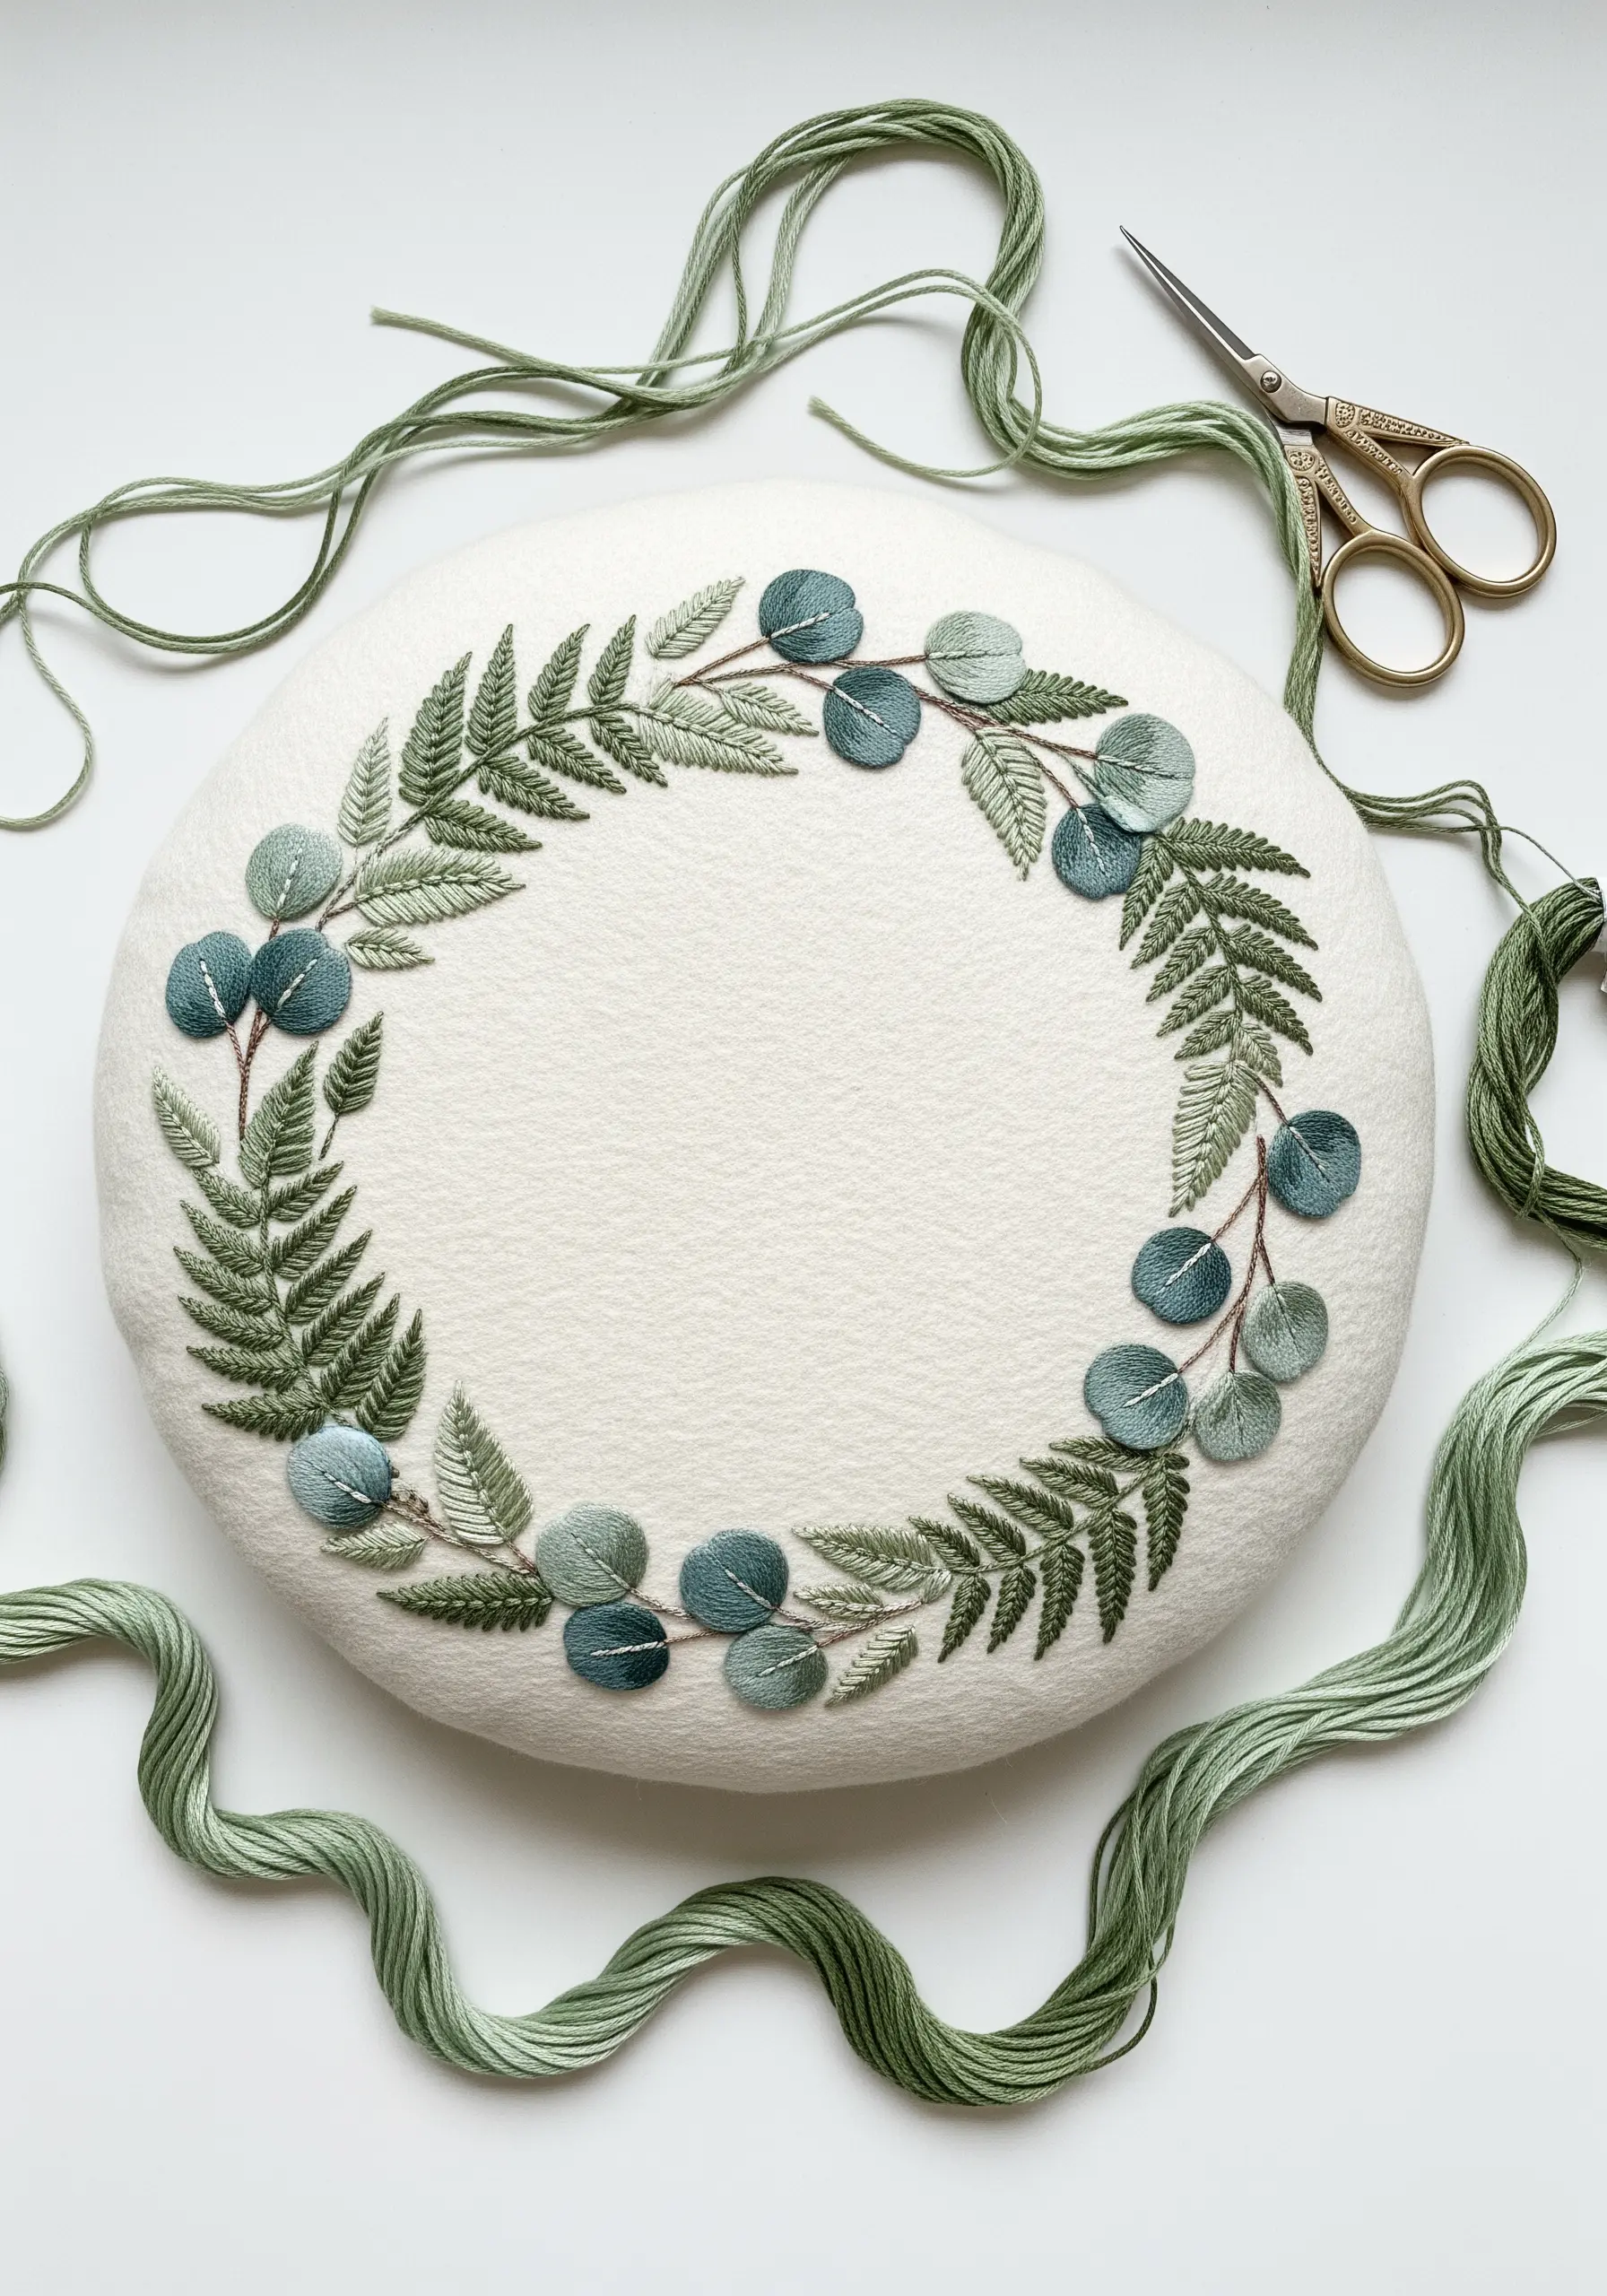
For a soft, modern botanical design, use felt appliqué instead of fill stitches for the eucalyptus leaves.
Cut the leaf shapes from thin felt in muted green and blue tones. Arrange them in a wreath pattern and secure each one with a single line of backstitch down the center, which acts as the leaf’s vein.
This technique is much faster than satin stitching and creates a beautiful, layered effect with soft dimension.
Intersperse the felt leaves with finely stitched ferns using a fern stitch to add delicate contrast.
22. Use Spirals and Grids for Urban Texture
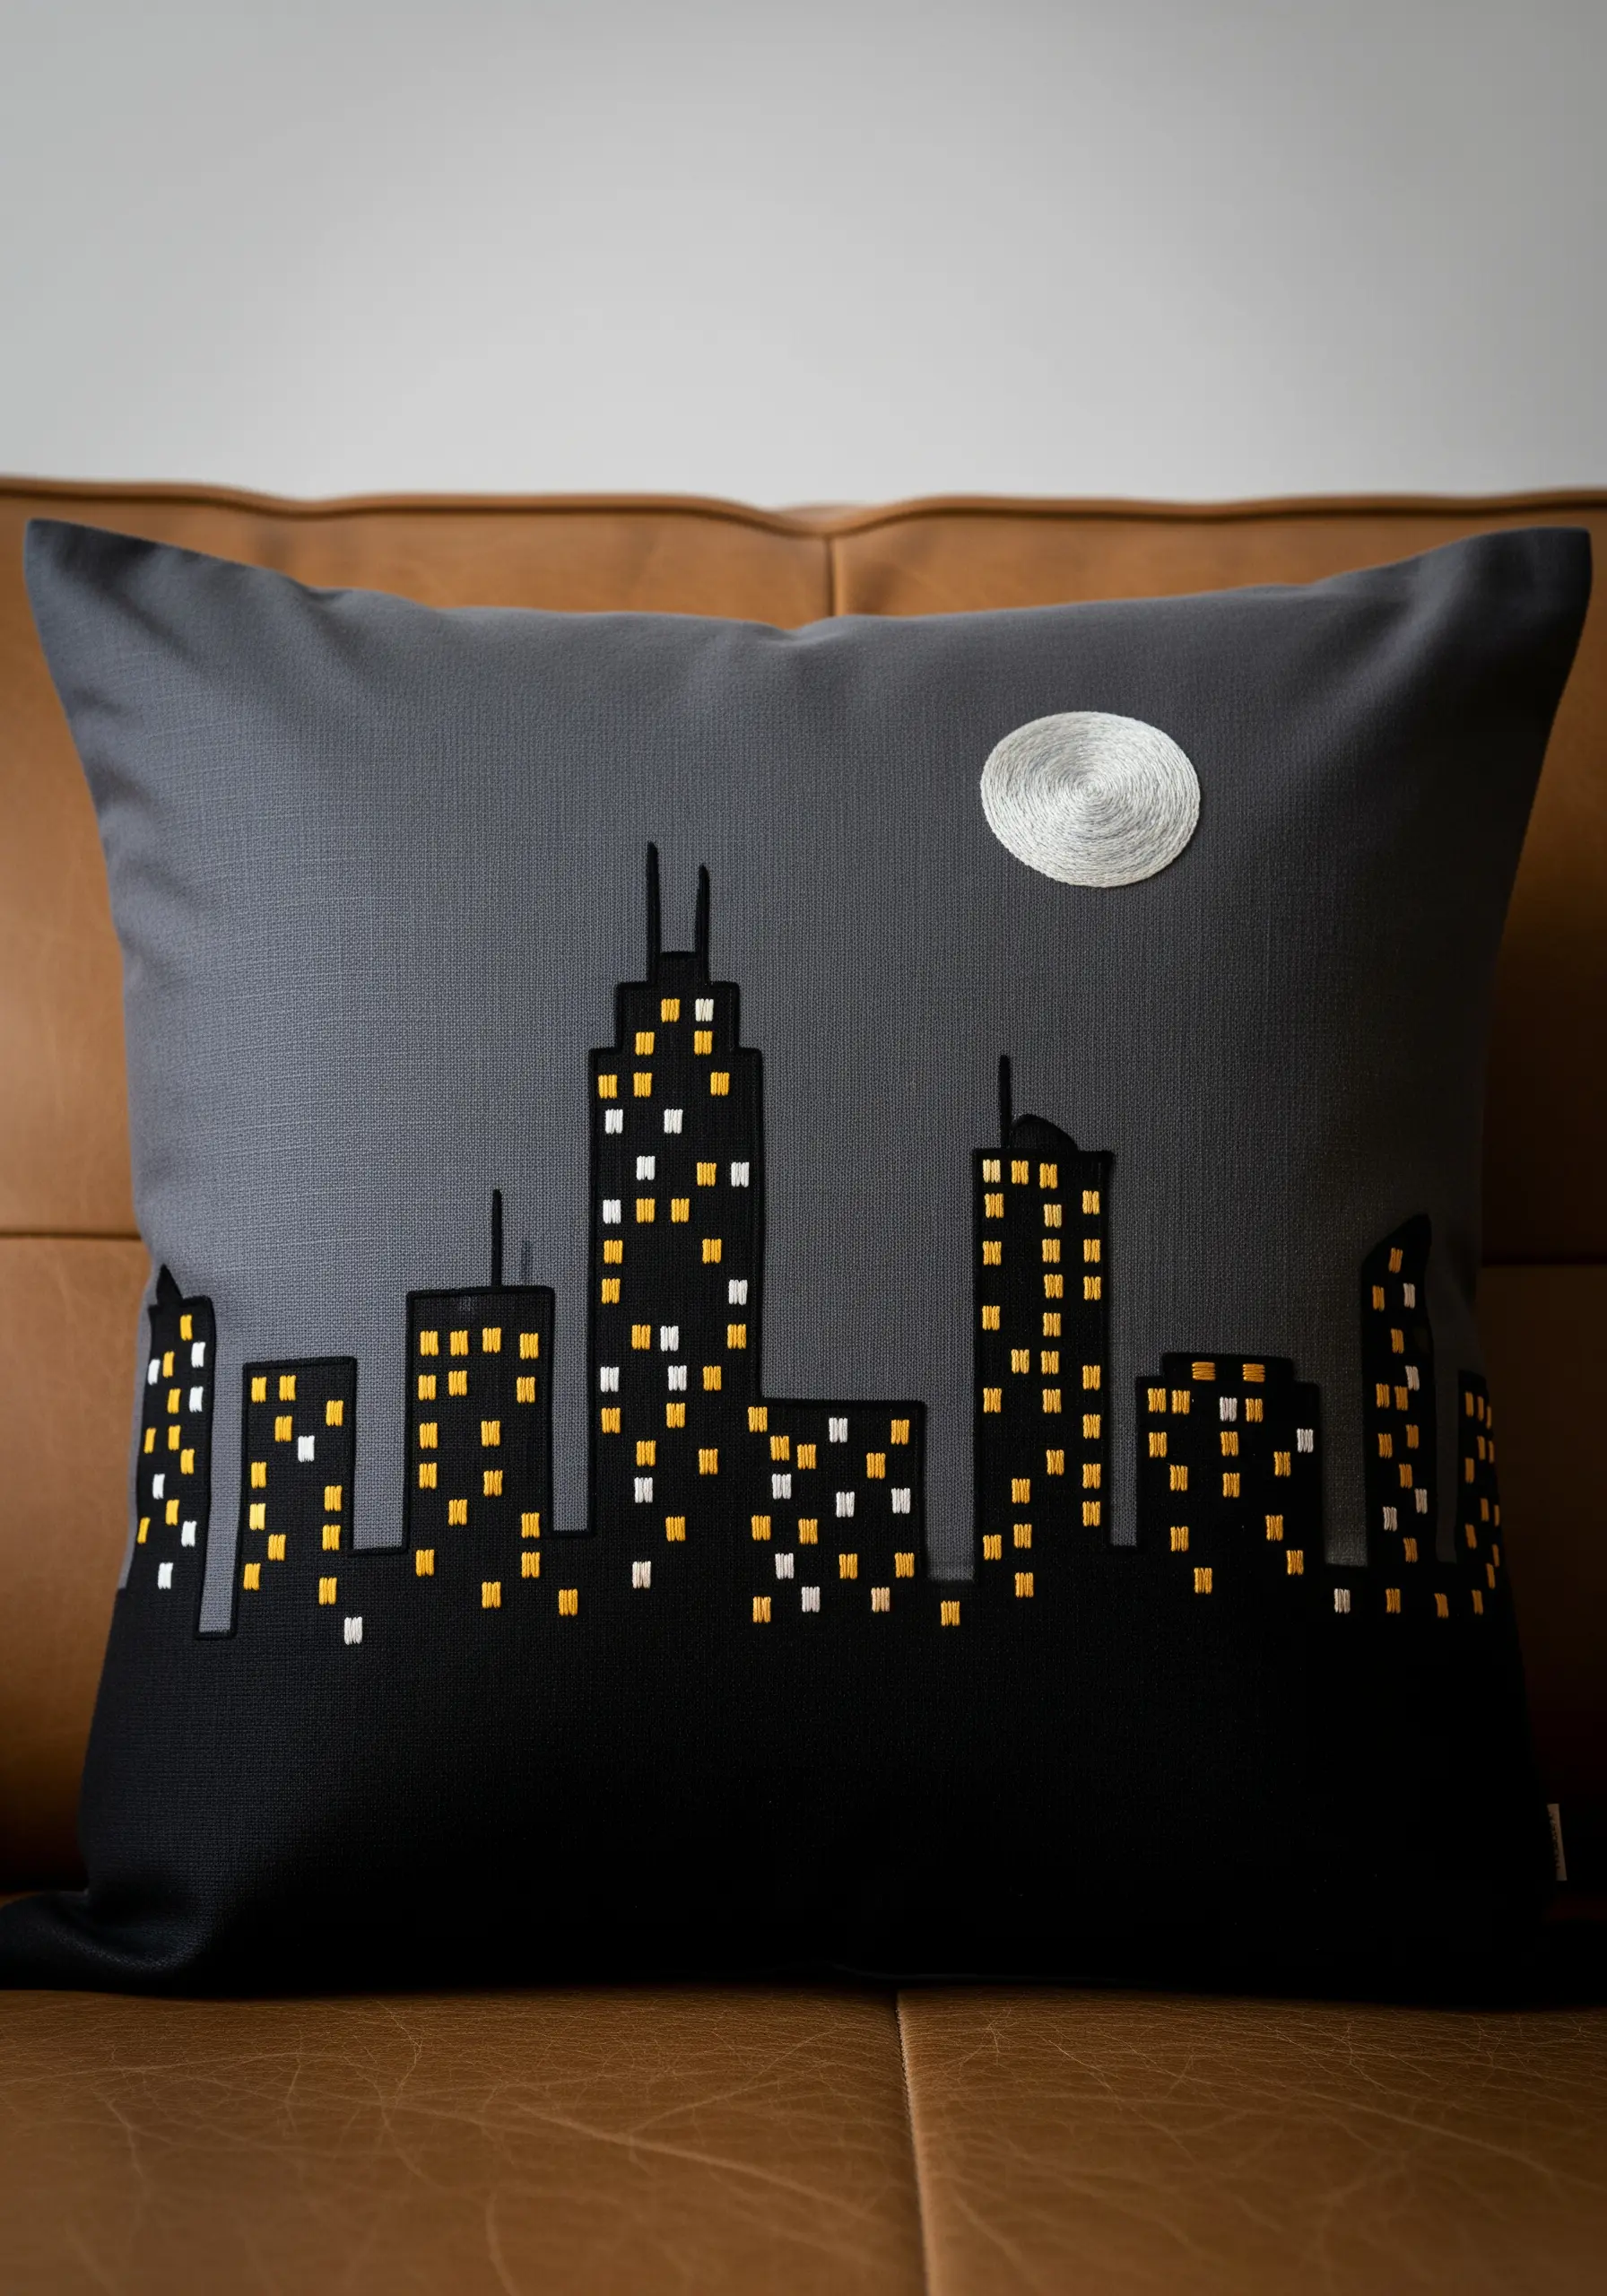
Capture the essence of a cityscape with simple, effective stitches that suggest light and form.
For the glowing moon, instead of a satin stitch, work a spiral of split stitch from the center outwards. This creates a subtle texture that suggests lunar craters and catches the light differently.
Embroider the lit windows as small squares of satin stitch, alternating between yellow and white thread to create variety and visual interest.
This minimalist approach allows simple stitches to convey a complex scene with modern elegance.
23. Achieve Uniformity in Repeating Motifs
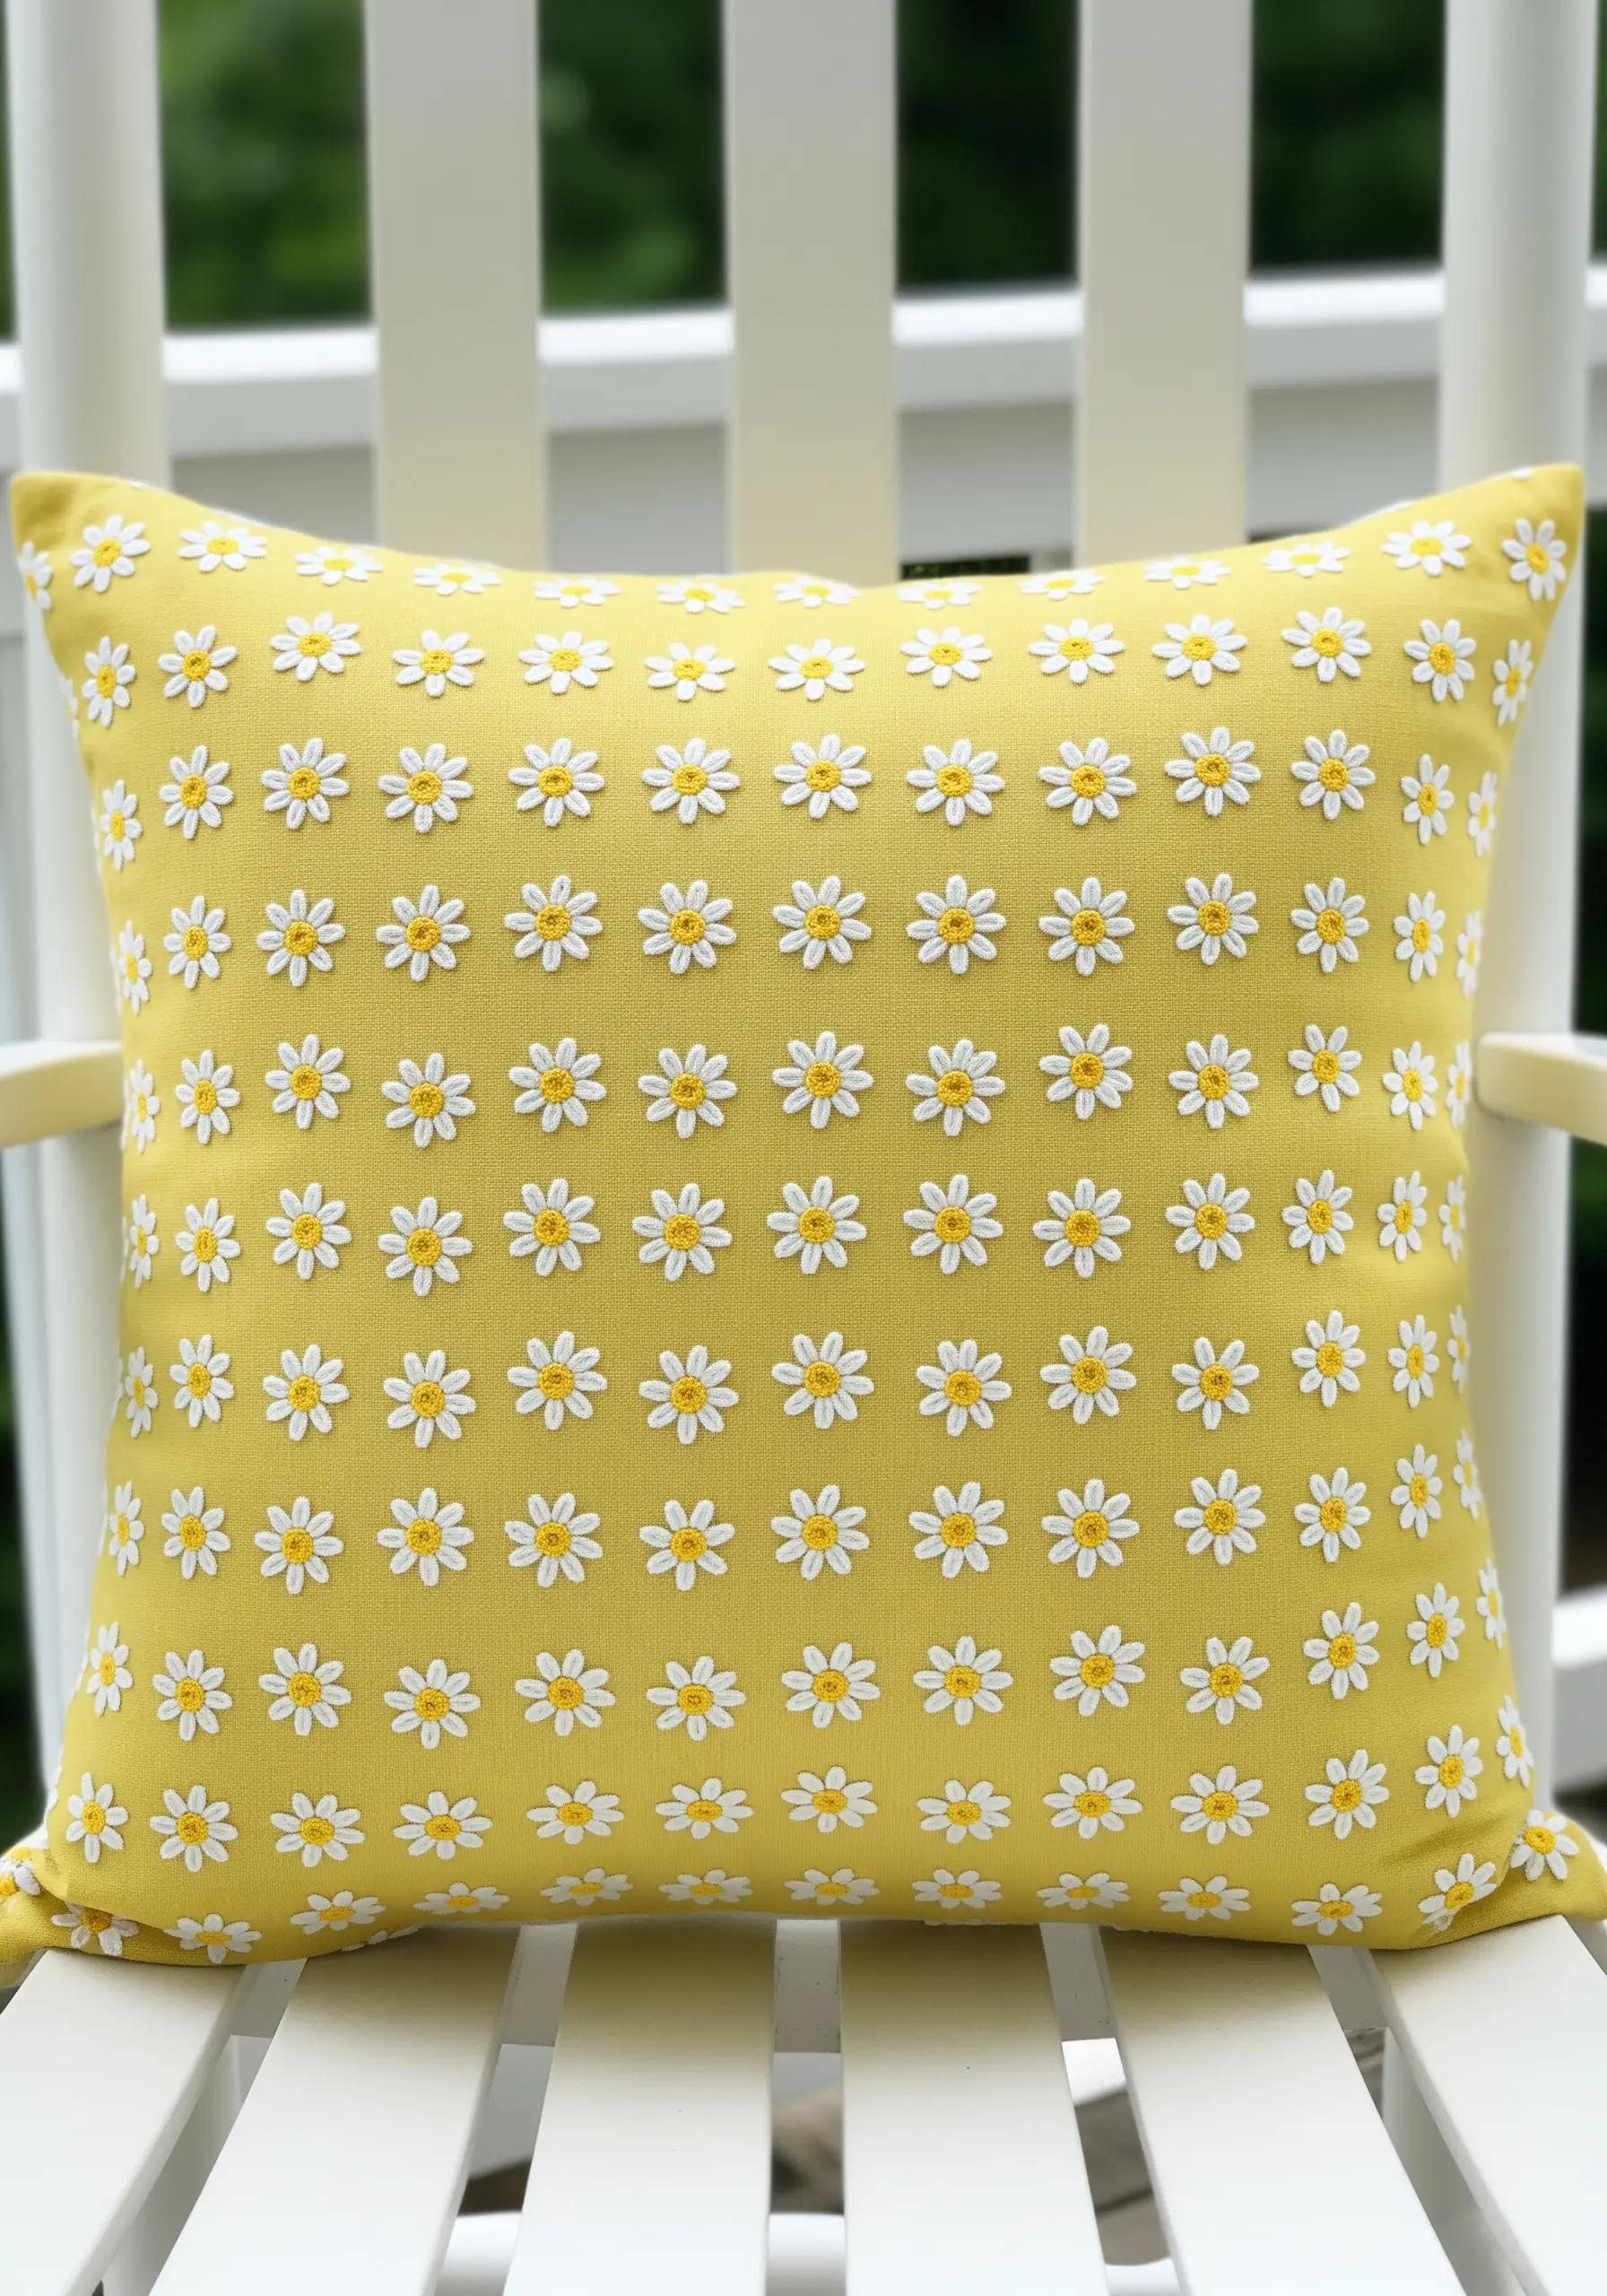
For a perfectly spaced pattern of small motifs like these daisies, creating a guide is essential.
Use a ruler and a disappearing ink pen to mark a grid on your fabric. This ensures every flower is perfectly aligned.
Stitch all the centers first with French knots. Then, work the petals on each flower using a lazy daisy stitch. Making each loop the same size is key to a uniform look.
By working in batches—all centers, then all petals—you’ll get into a rhythm that improves your consistency and speed.
These daisy and buttercup projects are perfect for practicing consistency.
24. Weave and Weft Directly on Fabric

Create extraordinary texture by weaving directly onto your pillow fabric.
For the plush cloud, create a foundation of long, vertical straight stitches, then use a blunt tapestry needle to weave thick, soft roving wool over and under these stitches until the shape is filled.
Contrast this soft texture with fields of dense French knots and hills filled with smooth satin stitch. This variety of textures is what makes the landscape so captivating and tactile.
Ensure your base fabric is a sturdy linen or canvas that can support the weight of these heavy embellishments without puckering.
25. Refine Line Art with Shorter Stitches
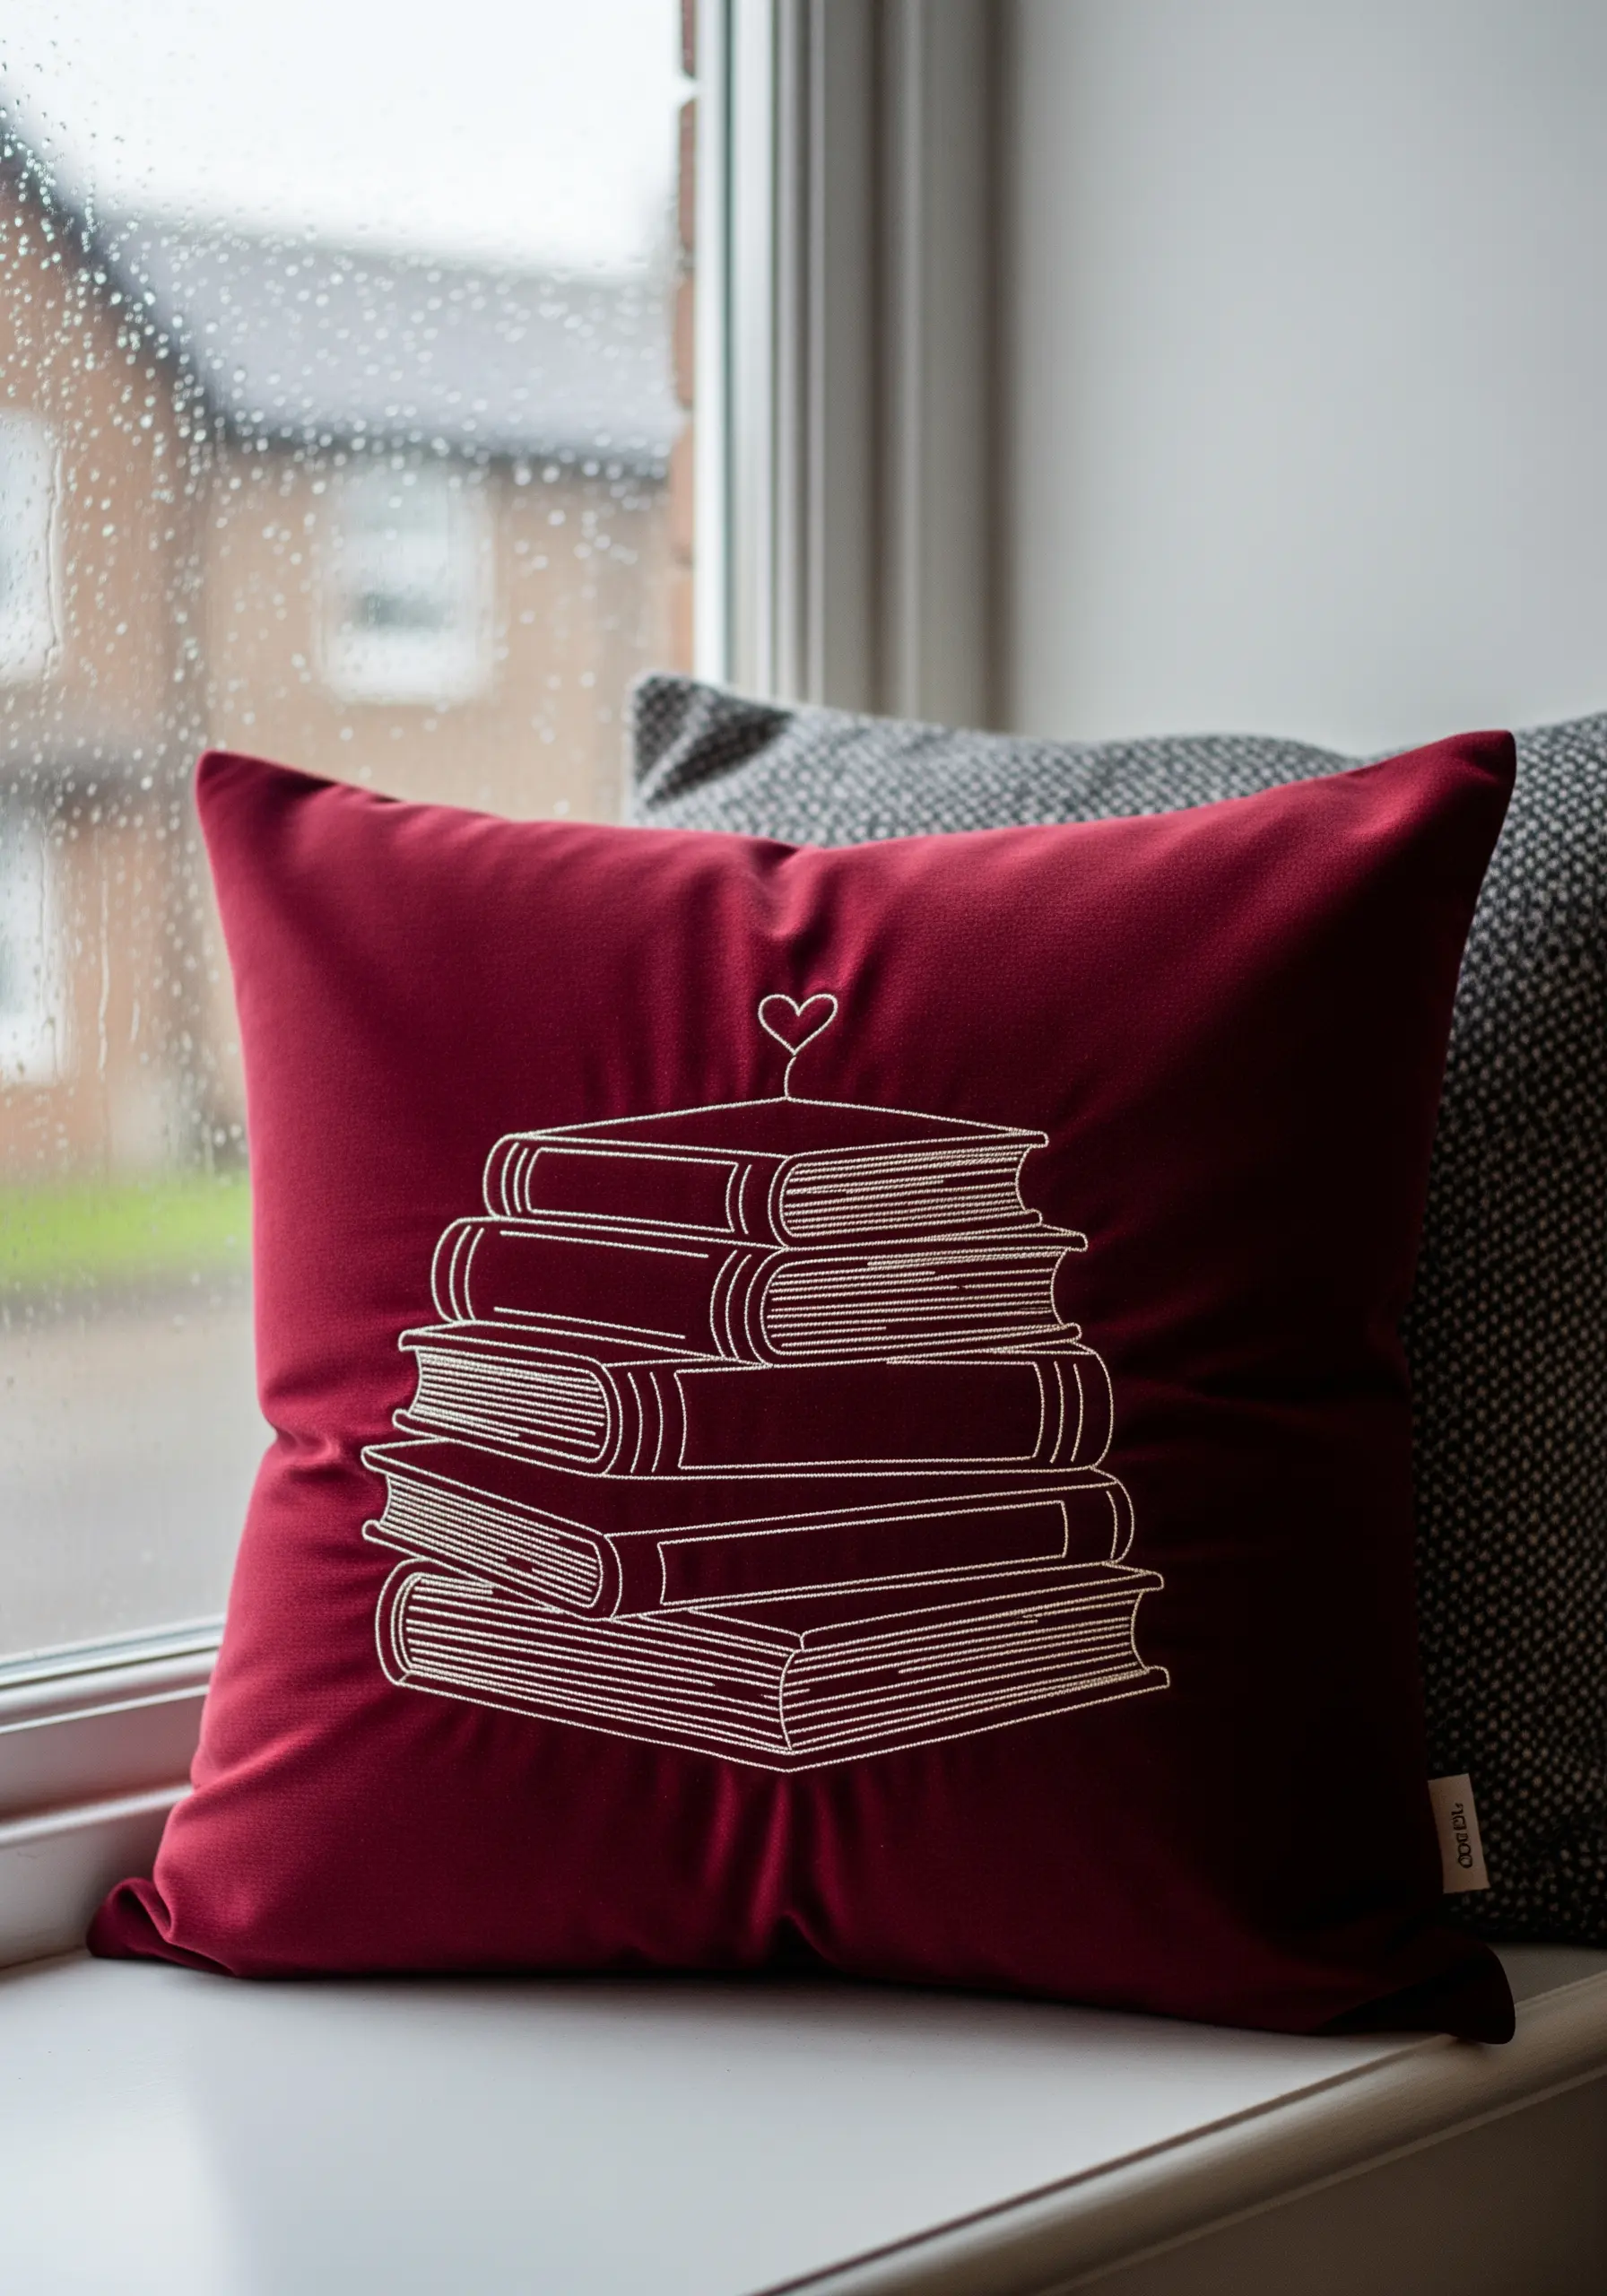
When embroidering fine line art, the secret to smooth curves is a short stitch length.
Using a single strand of floss and a simple backstitch, shorten your stitches significantly as you navigate the curves of the book spines and pages.
Longer stitches will create a jagged, almost pixelated effect, while shorter stitches will form a fluid, continuous line that looks clean and intentional.
This small adjustment requires a little more time but makes a huge difference in the final quality of your work, elevating a simple design into something truly elegant.


