
Yarn is more than just a material for knitting or crochet—it’s a medium for painting with texture, sculpting with color, and building worlds thread by thread. When you step beyond traditional embroidery, you discover that yarn can be woven, knotted, tufted, and wrapped to create art with incredible depth and personality.
In this collection, I want you to see how different fiber techniques can transform your walls. From the rhythmic knotting of macrame to the plush, painterly loops of punch needle, each method offers a unique way to express your creative voice. It’s not about mastering every craft, but about borrowing principles—a knot here, a weave there—to enrich your own work.
Consider this your invitation to think bigger. Let go of the idea that yarn art must be flat or confined to a hoop. Let’s explore how you can create pieces that are sculptural, textural, and uniquely yours, turning a simple skein of yarn into a stunning focal point for your home.
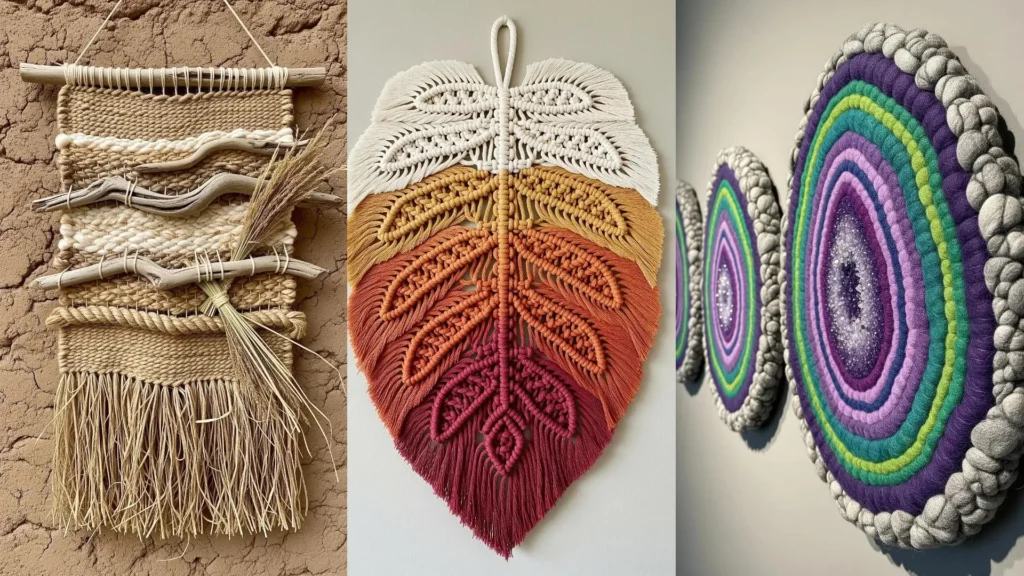
1. Frame Your Weaving with Macrame Borders

Combine the structure of macrame with the softness of weaving to create a single, cohesive piece.
Use square knots and half-hitch knots to build a geometric frame directly on your dowel, leaving a central open space for your warp threads.
This technique adds immediate dimension and a polished, intentional border that contains the freer, more colorful woven section.
By blending these two crafts, you create a dynamic piece where rigid lines beautifully contrast with soft, textural fills, resulting in sophisticated hand-embroidered wall hangings.
2. Design a Cohesive Triptych with Color Blocking
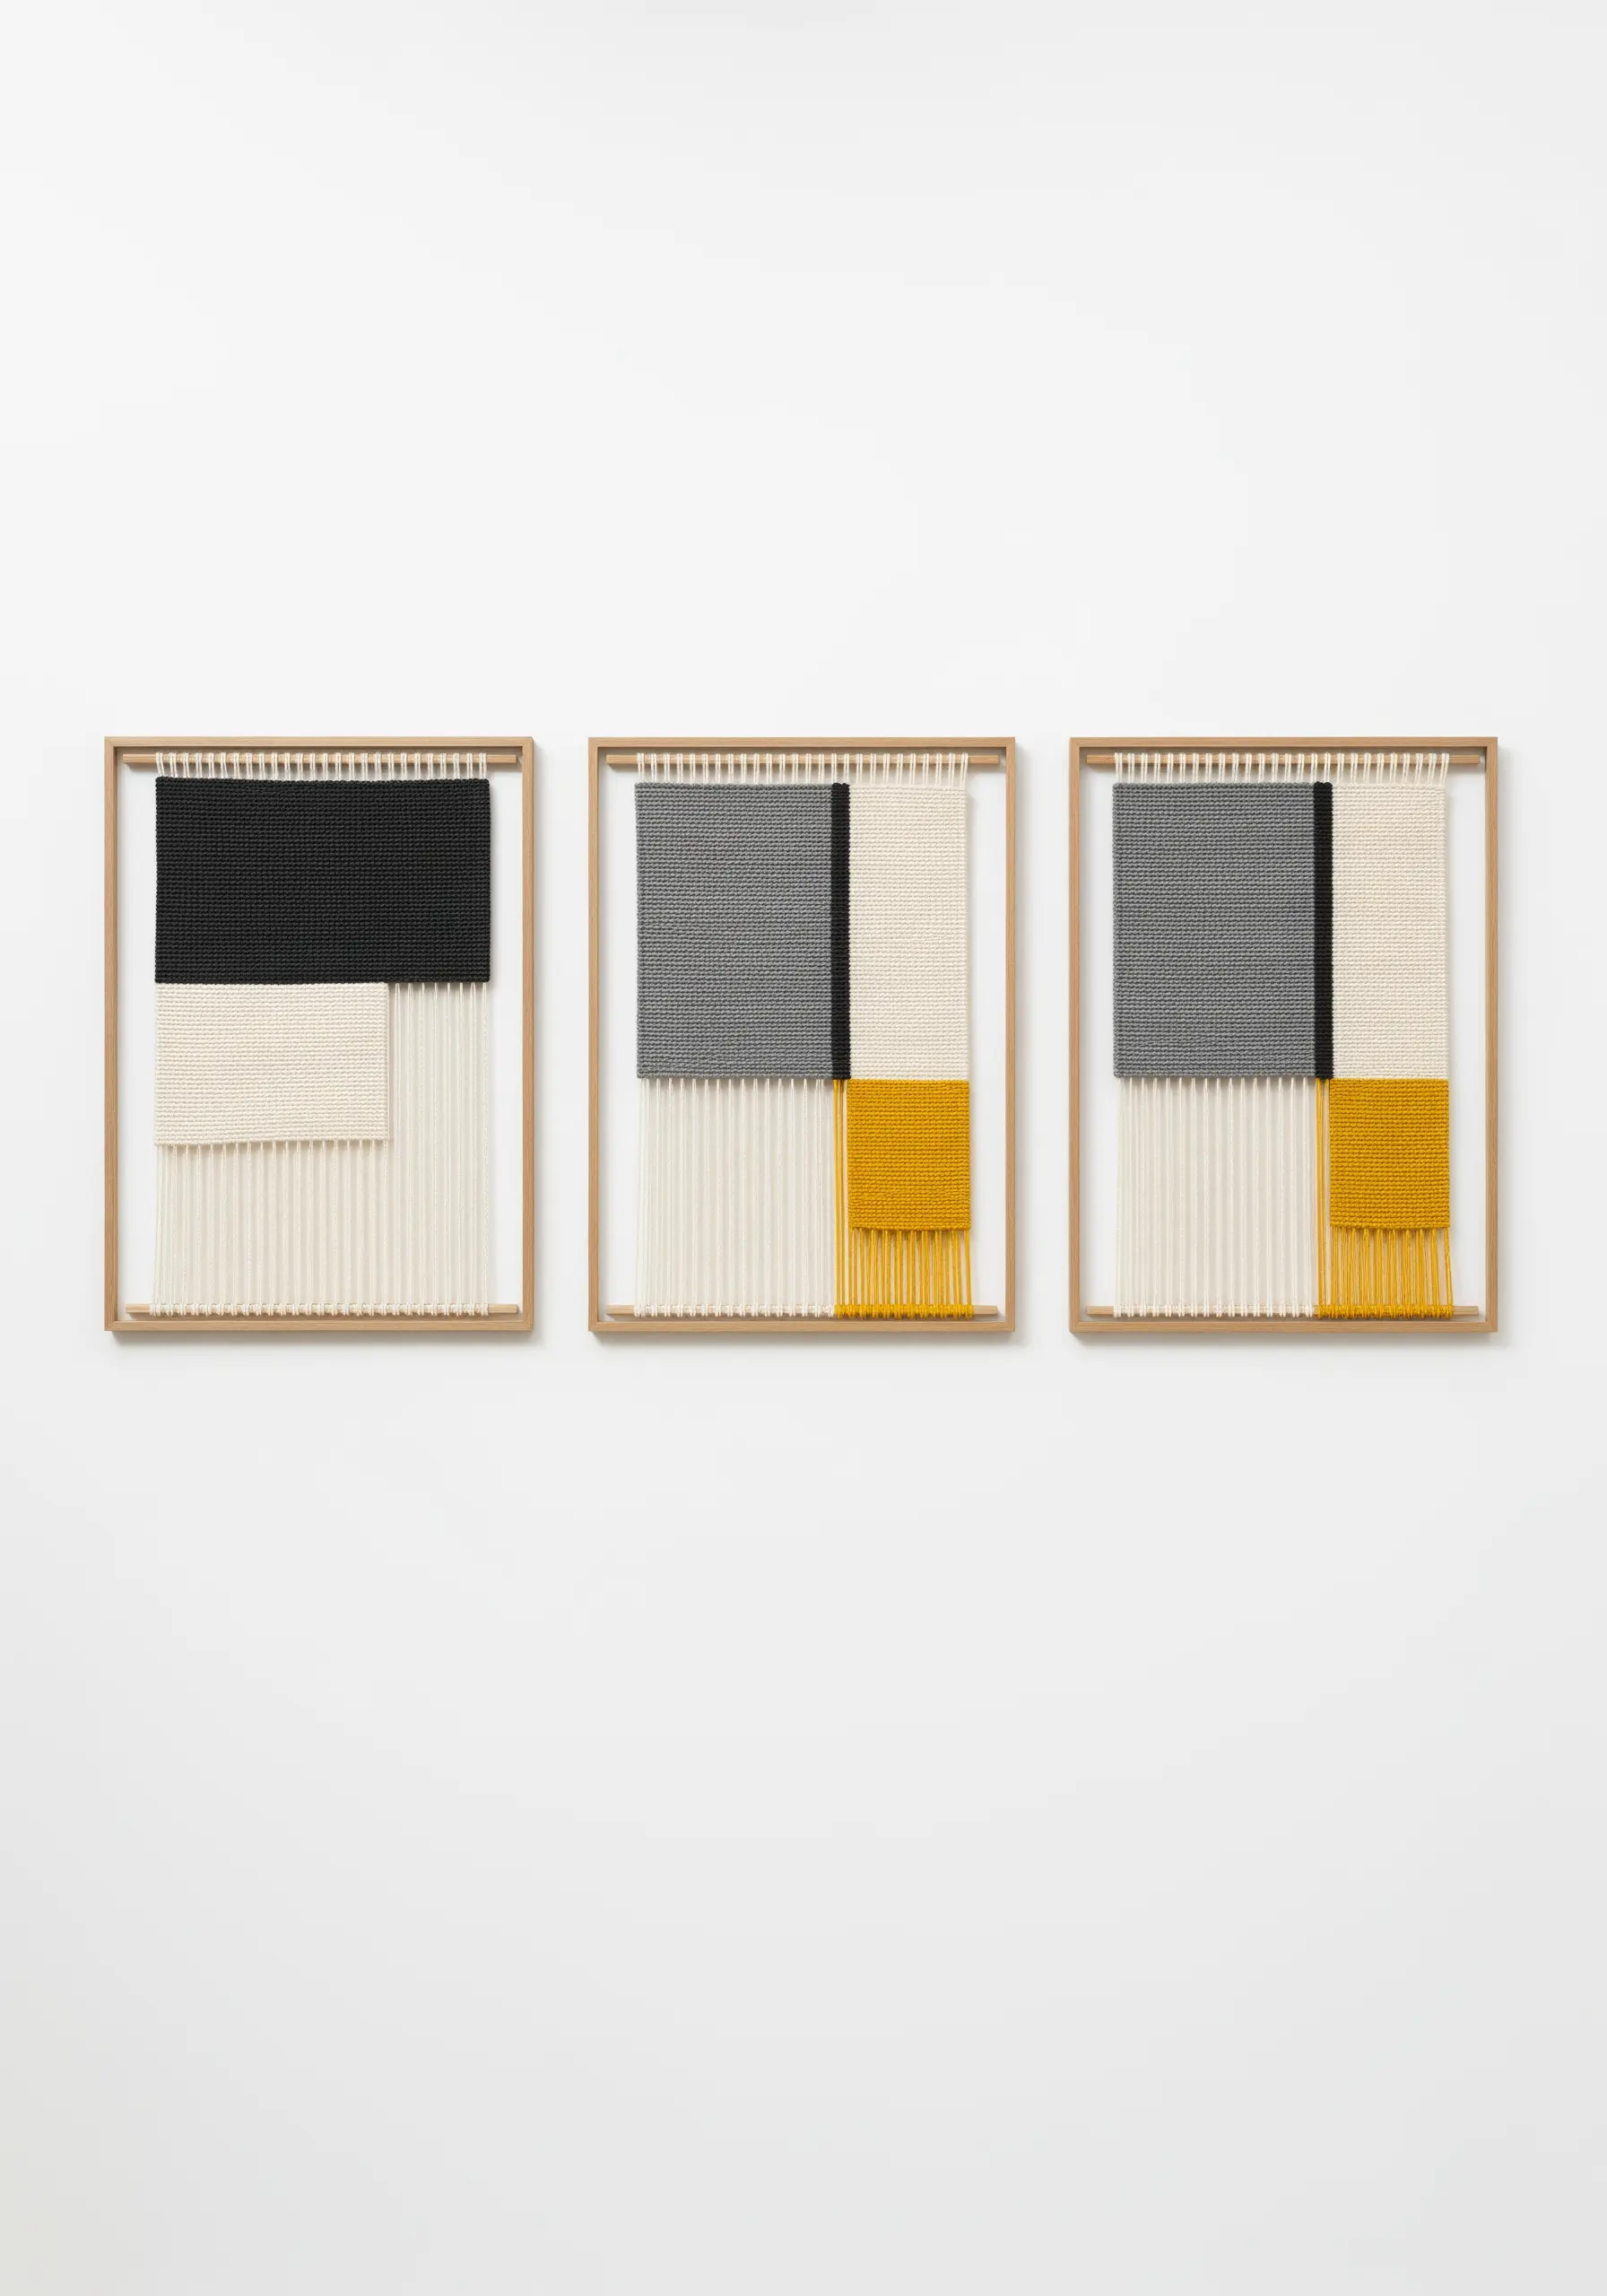
Elevate simple woven panels by creating a triptych—a series of three pieces designed to be displayed together.
Use a consistent, minimal color palette across all three frames, but vary the arrangement of the color blocks in each one.
This creates rhythm and visual interest without overwhelming the eye.
Leave long, uncut warp threads at the bottom to create negative space, which helps unify the series and gives the entire installation a light, airy feel.
This approach turns simple weaving into a sophisticated geometric framed embroidery pattern.
3. Achieve Crisp Edges with Punch Needle
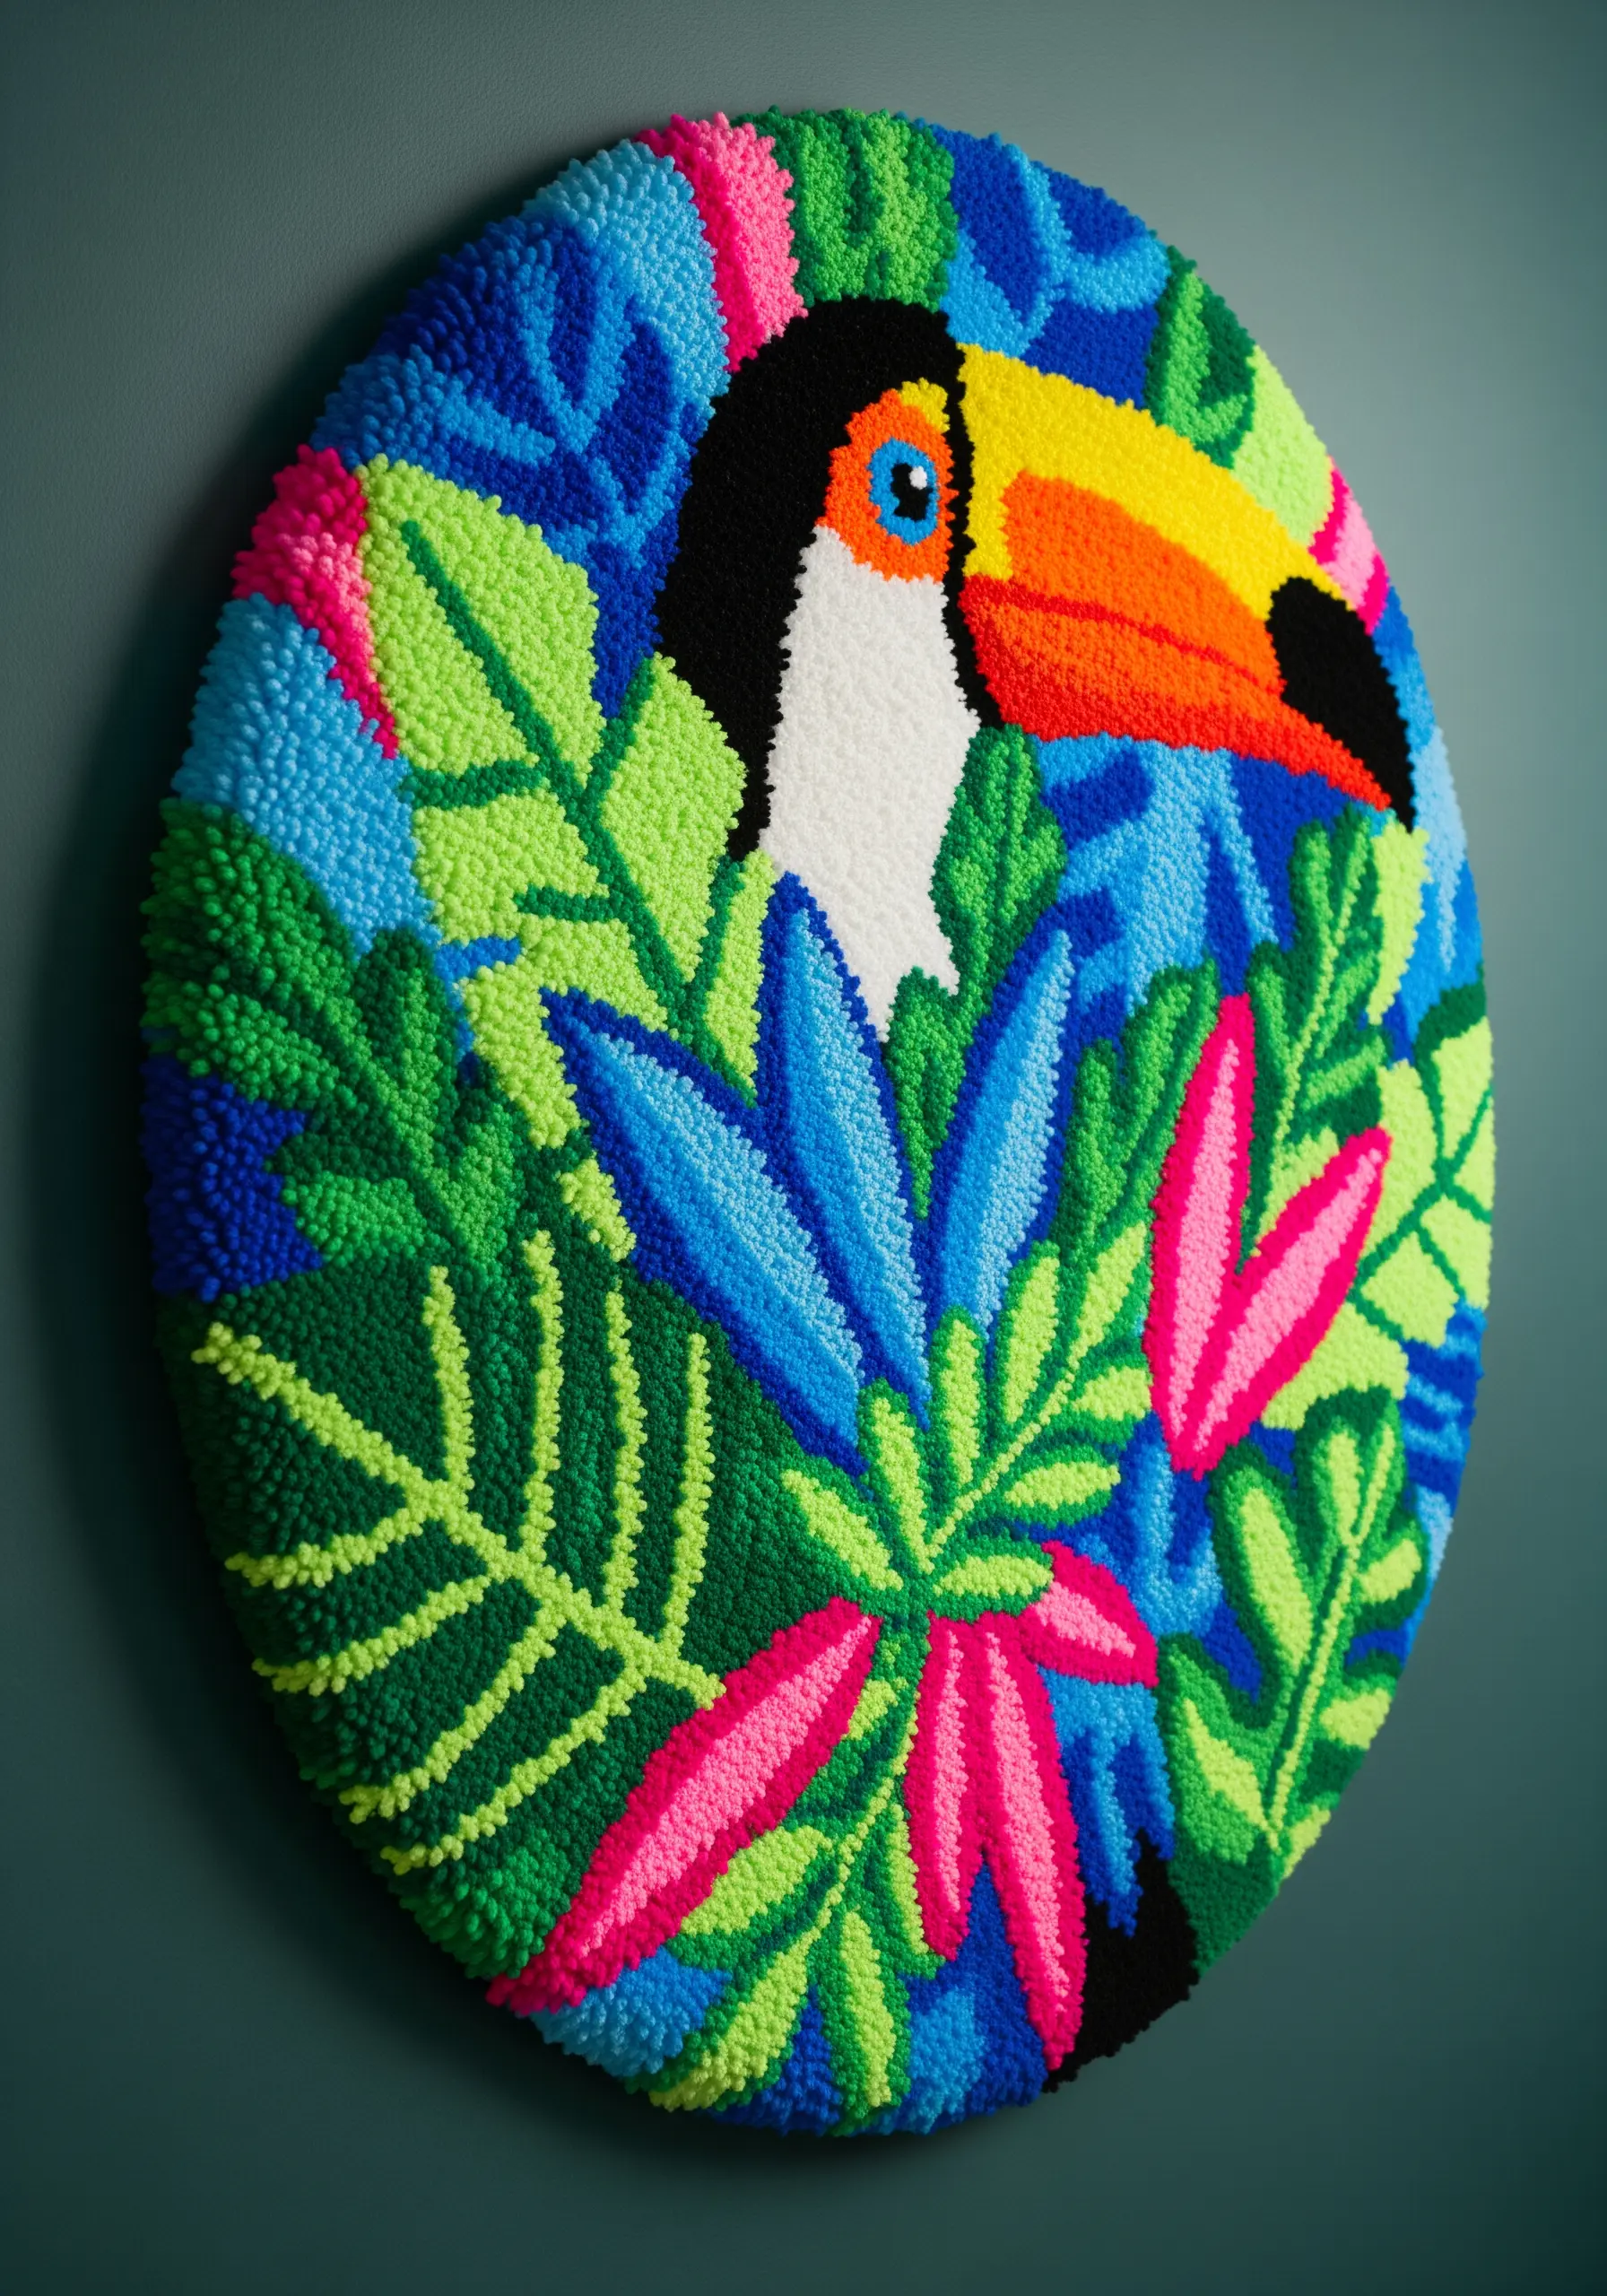
To create sharp, defined shapes like this toucan, work your outlines first with the punch needle.
This creates a clear boundary that contains your fill colors and prevents them from looking blurred or messy.
For a dense, rug-like texture, ensure your loops are tightly packed together, adjusting your stitch length for maximum plushness.
The combination of vibrant yarn and dense loops turns a simple illustration into a dynamic piece of color-pop embroidery art.
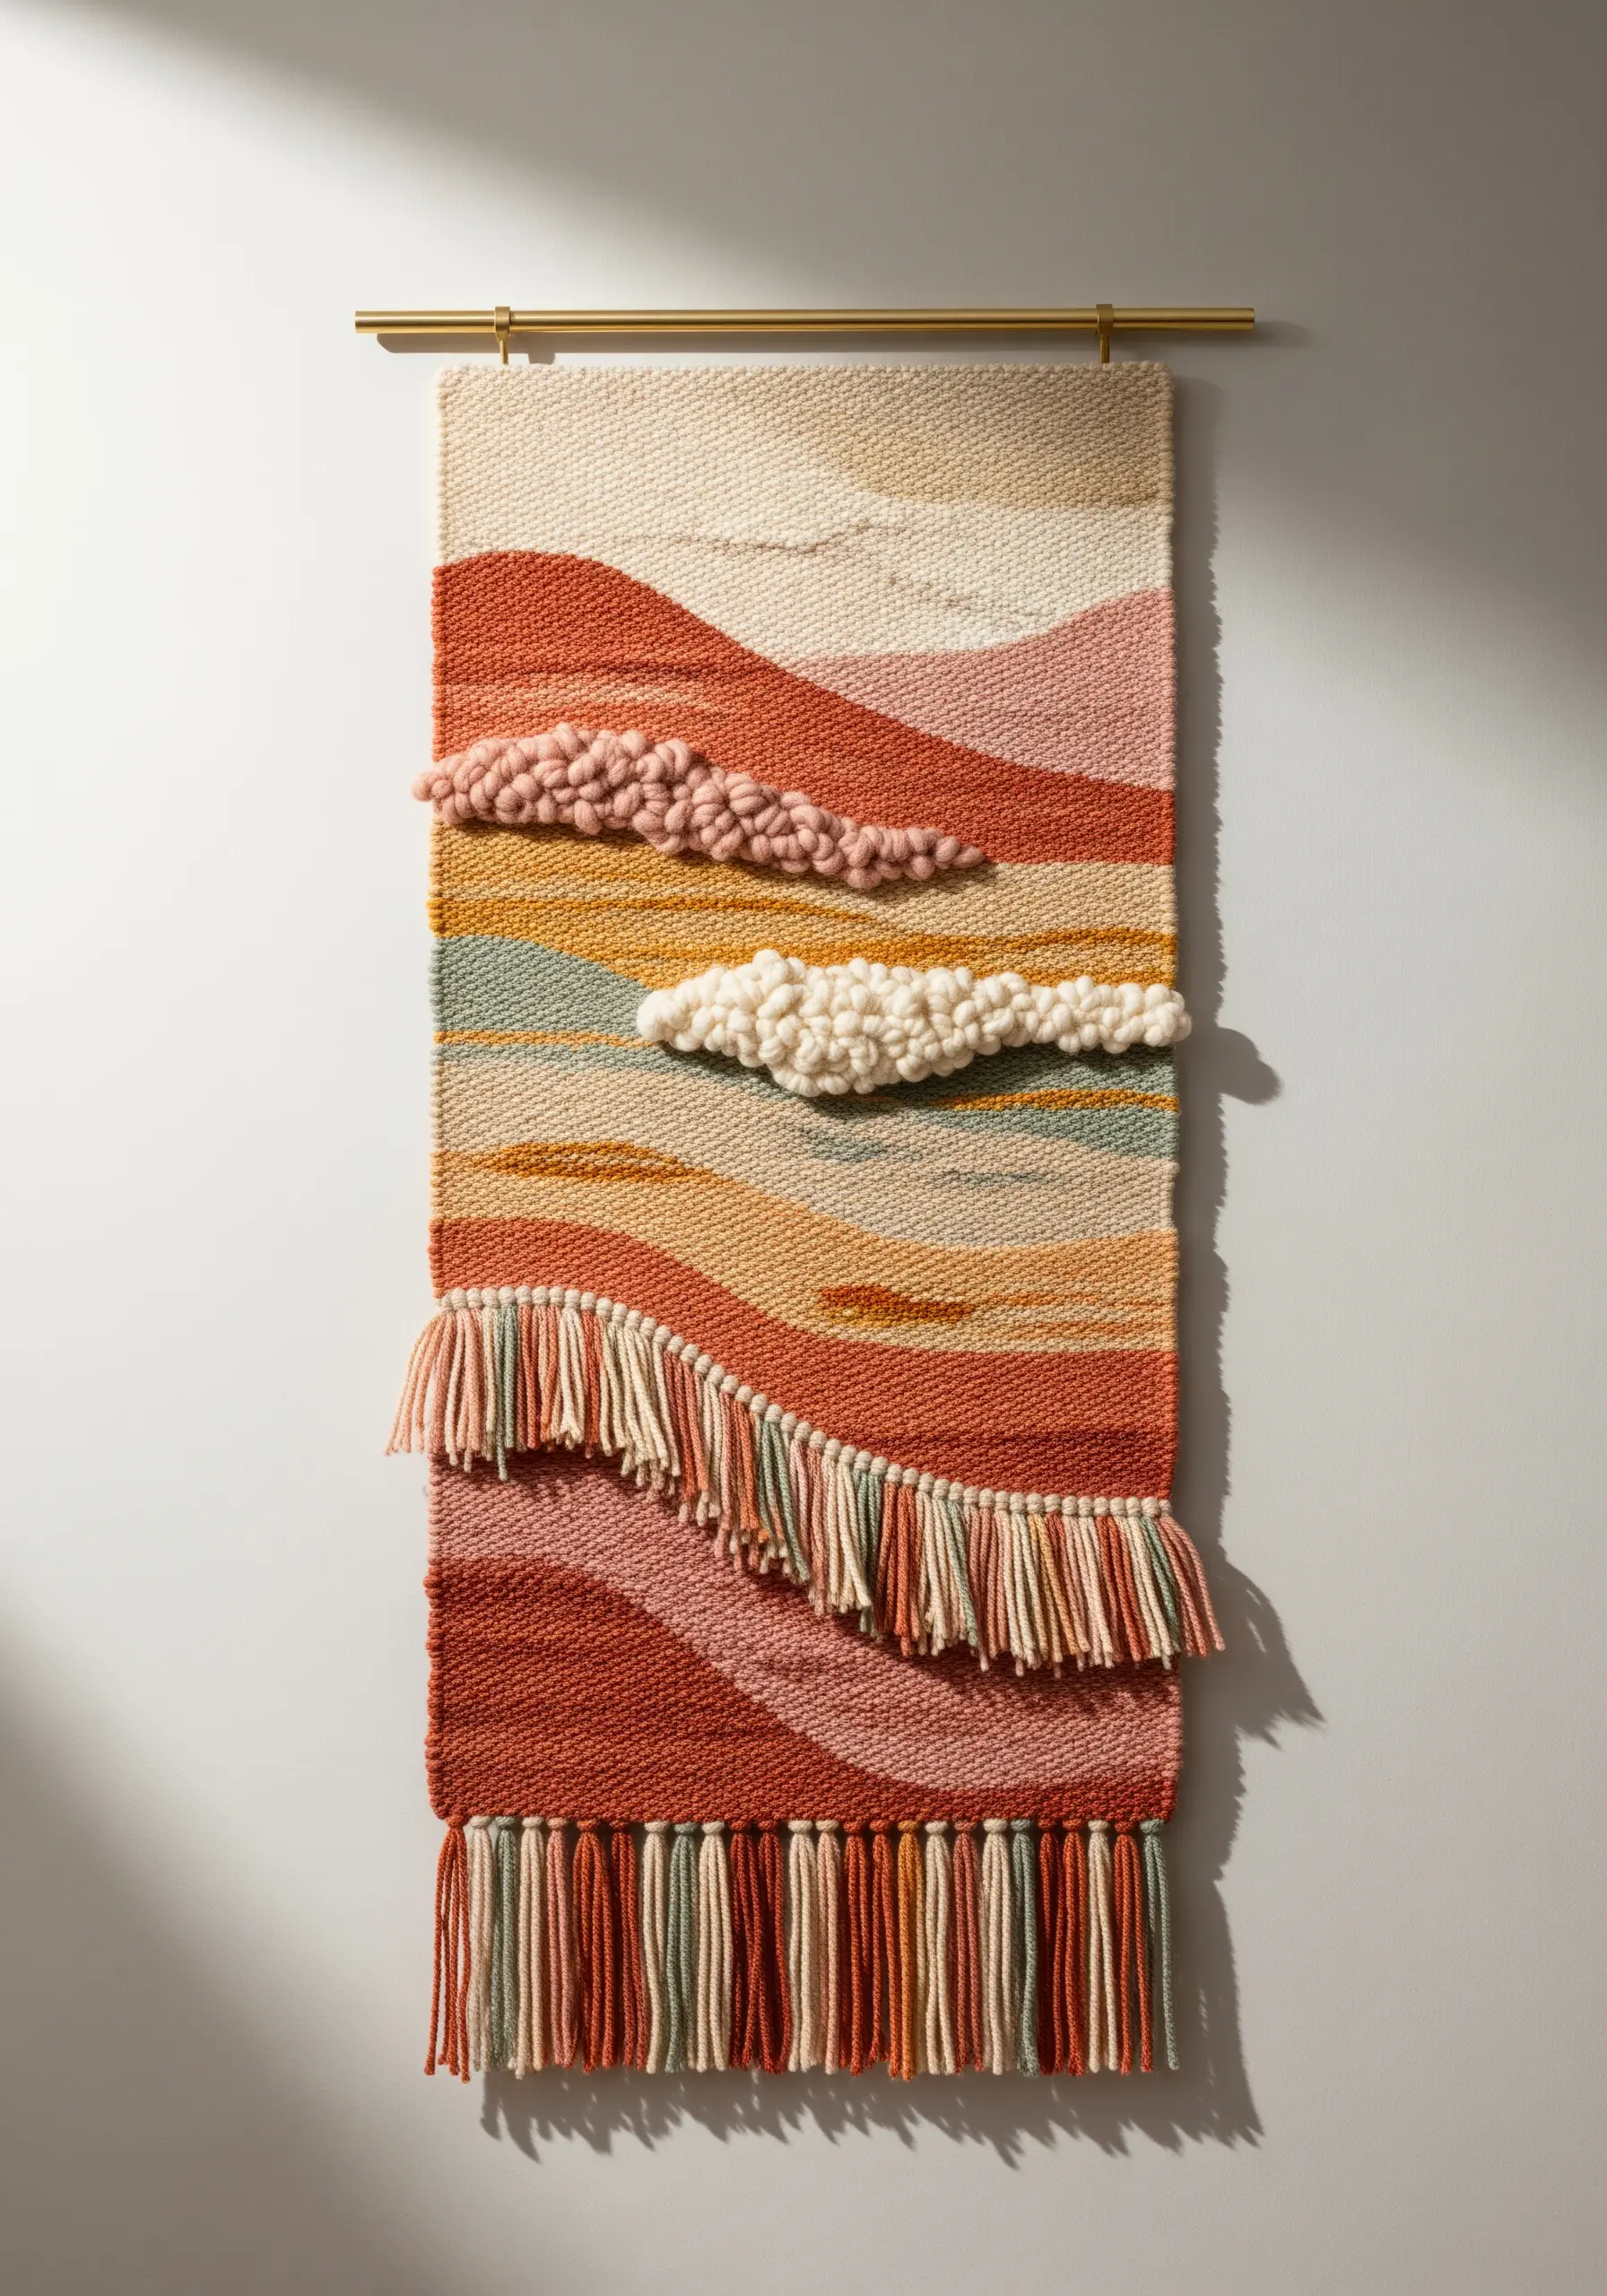
4. Paint with Yarn Using Dense Loop Textures
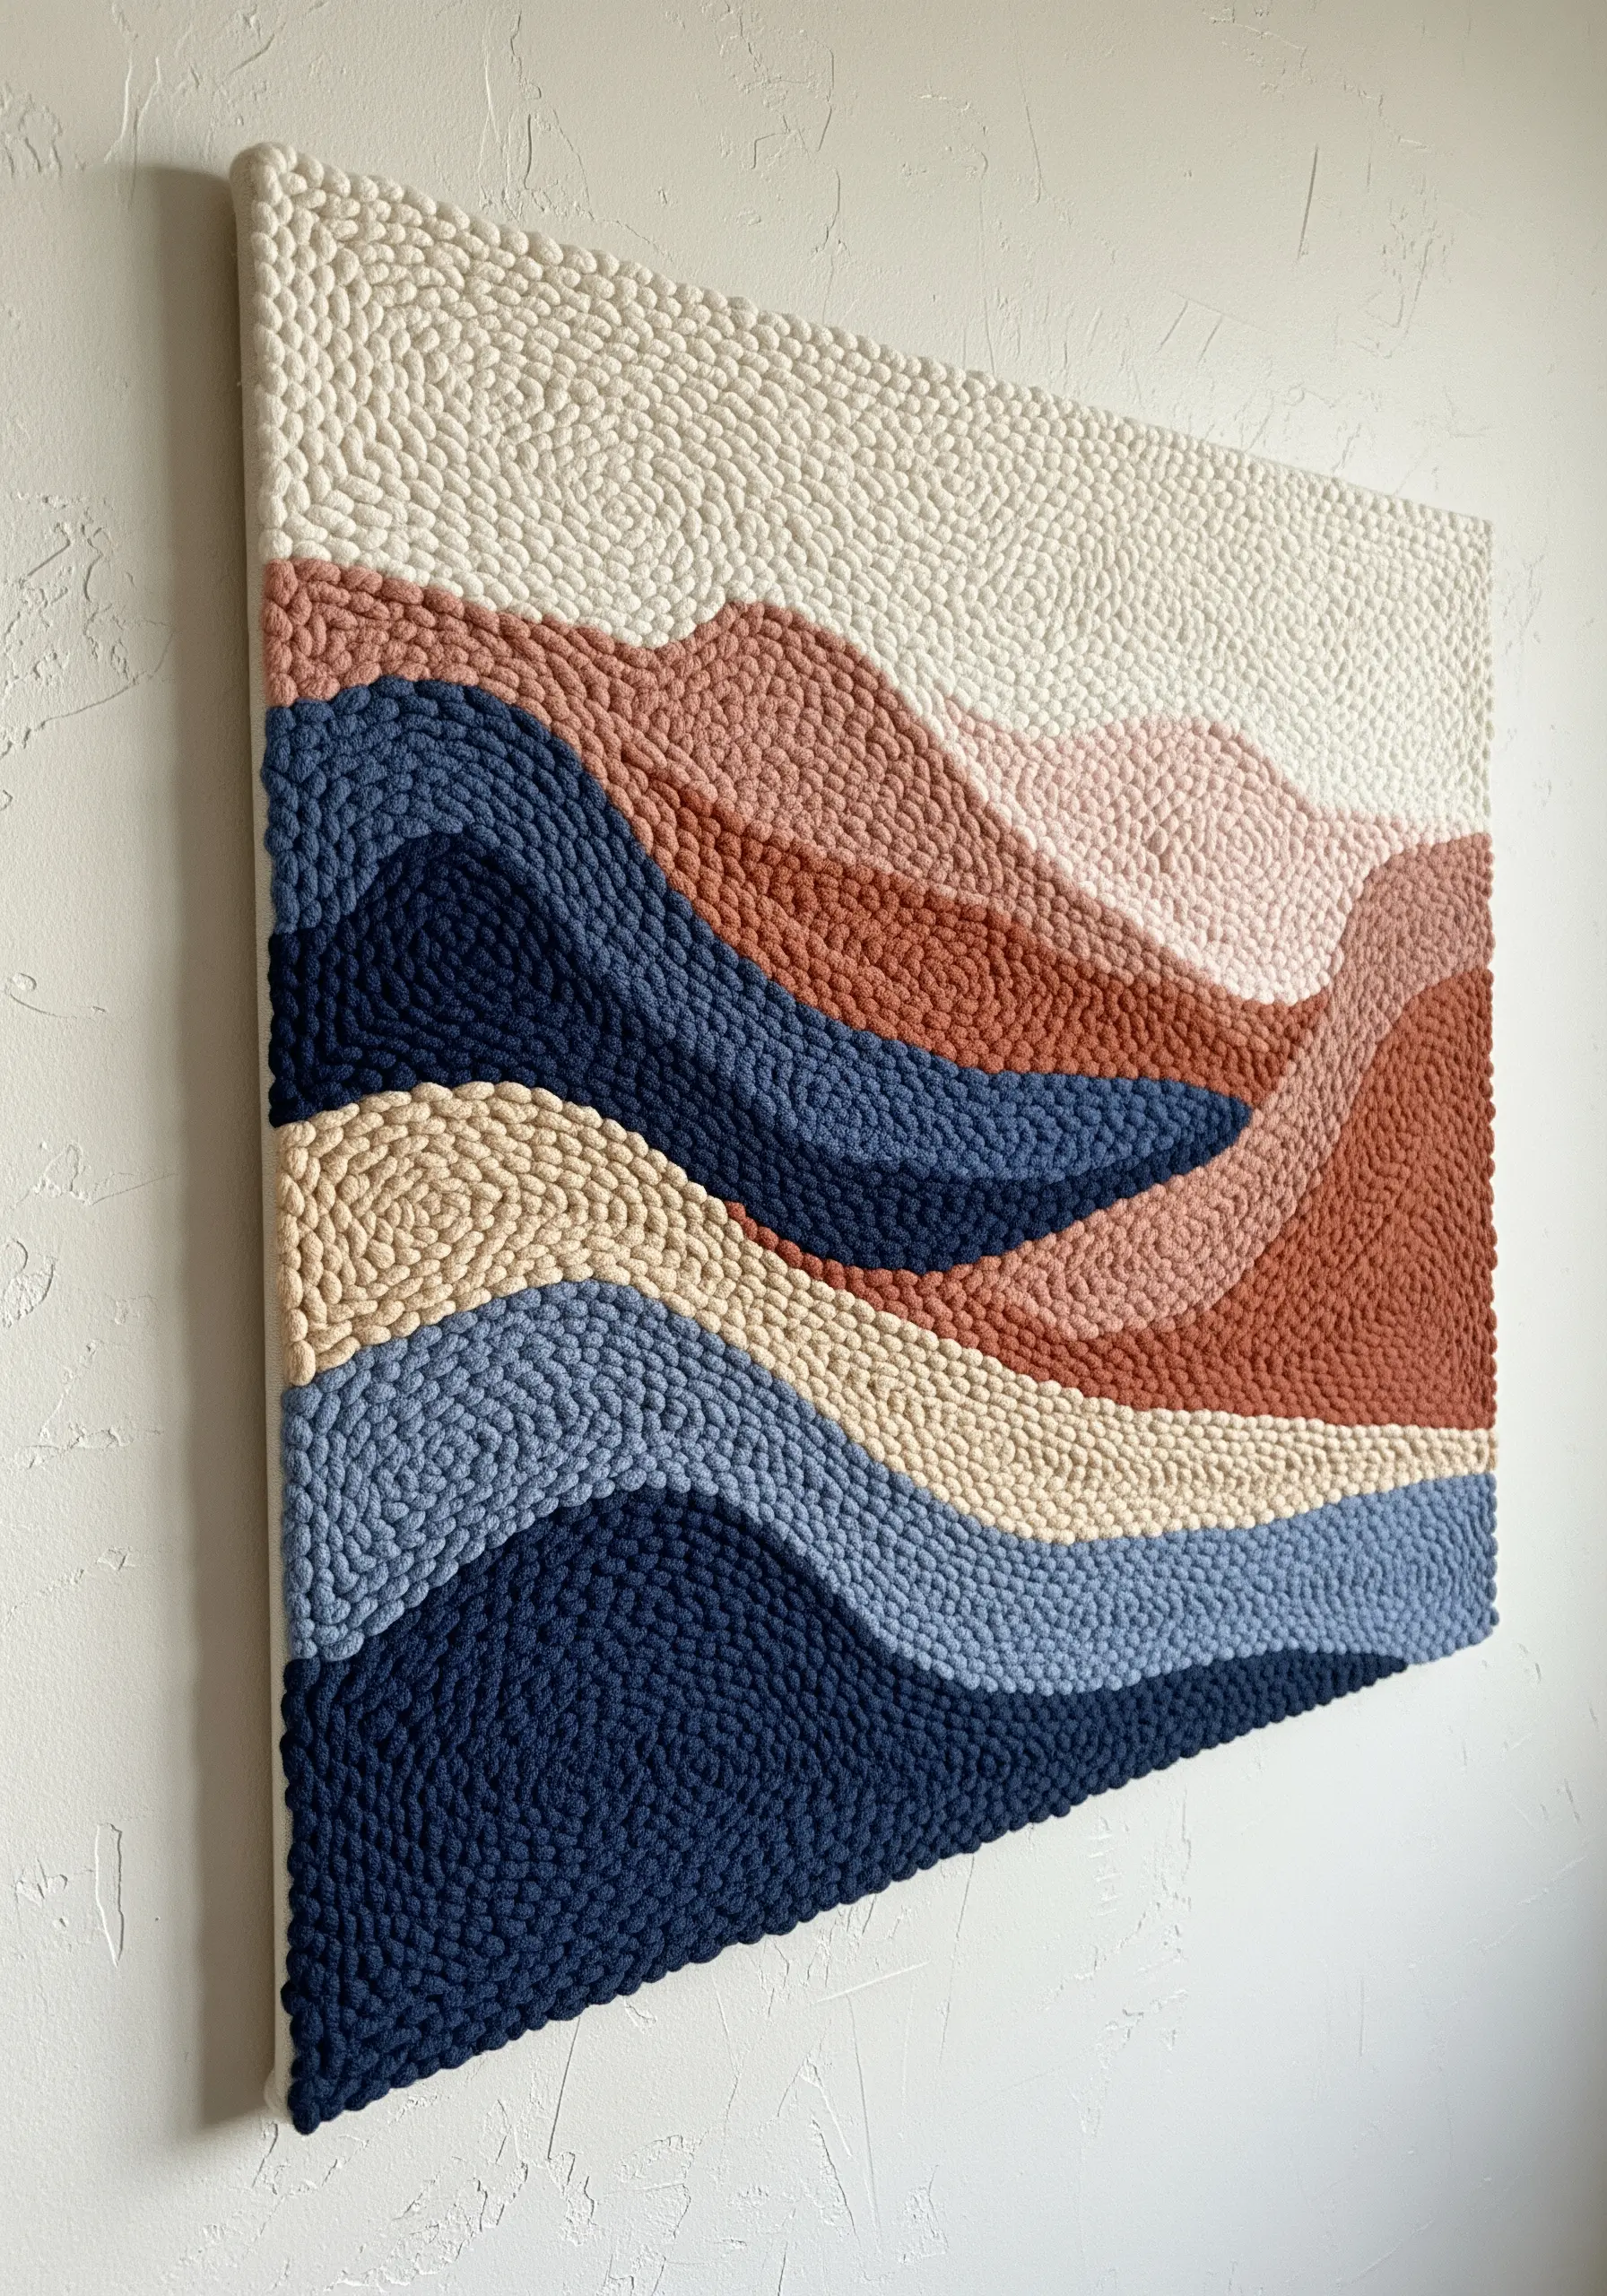
Think of your punch needle as a paintbrush and your yarn as paint to create rolling, abstract landscapes.
Work in flowing, contoured lines rather than straight rows, following the shape of your hills and valleys.
By packing the loops tightly, you create a solid, sculptural surface where color transitions feel seamless and painterly.
This technique transforms simple color fields into mountain landscape thread paintings with incredible depth and texture.
5. Introduce Luxury with Metallic Cord
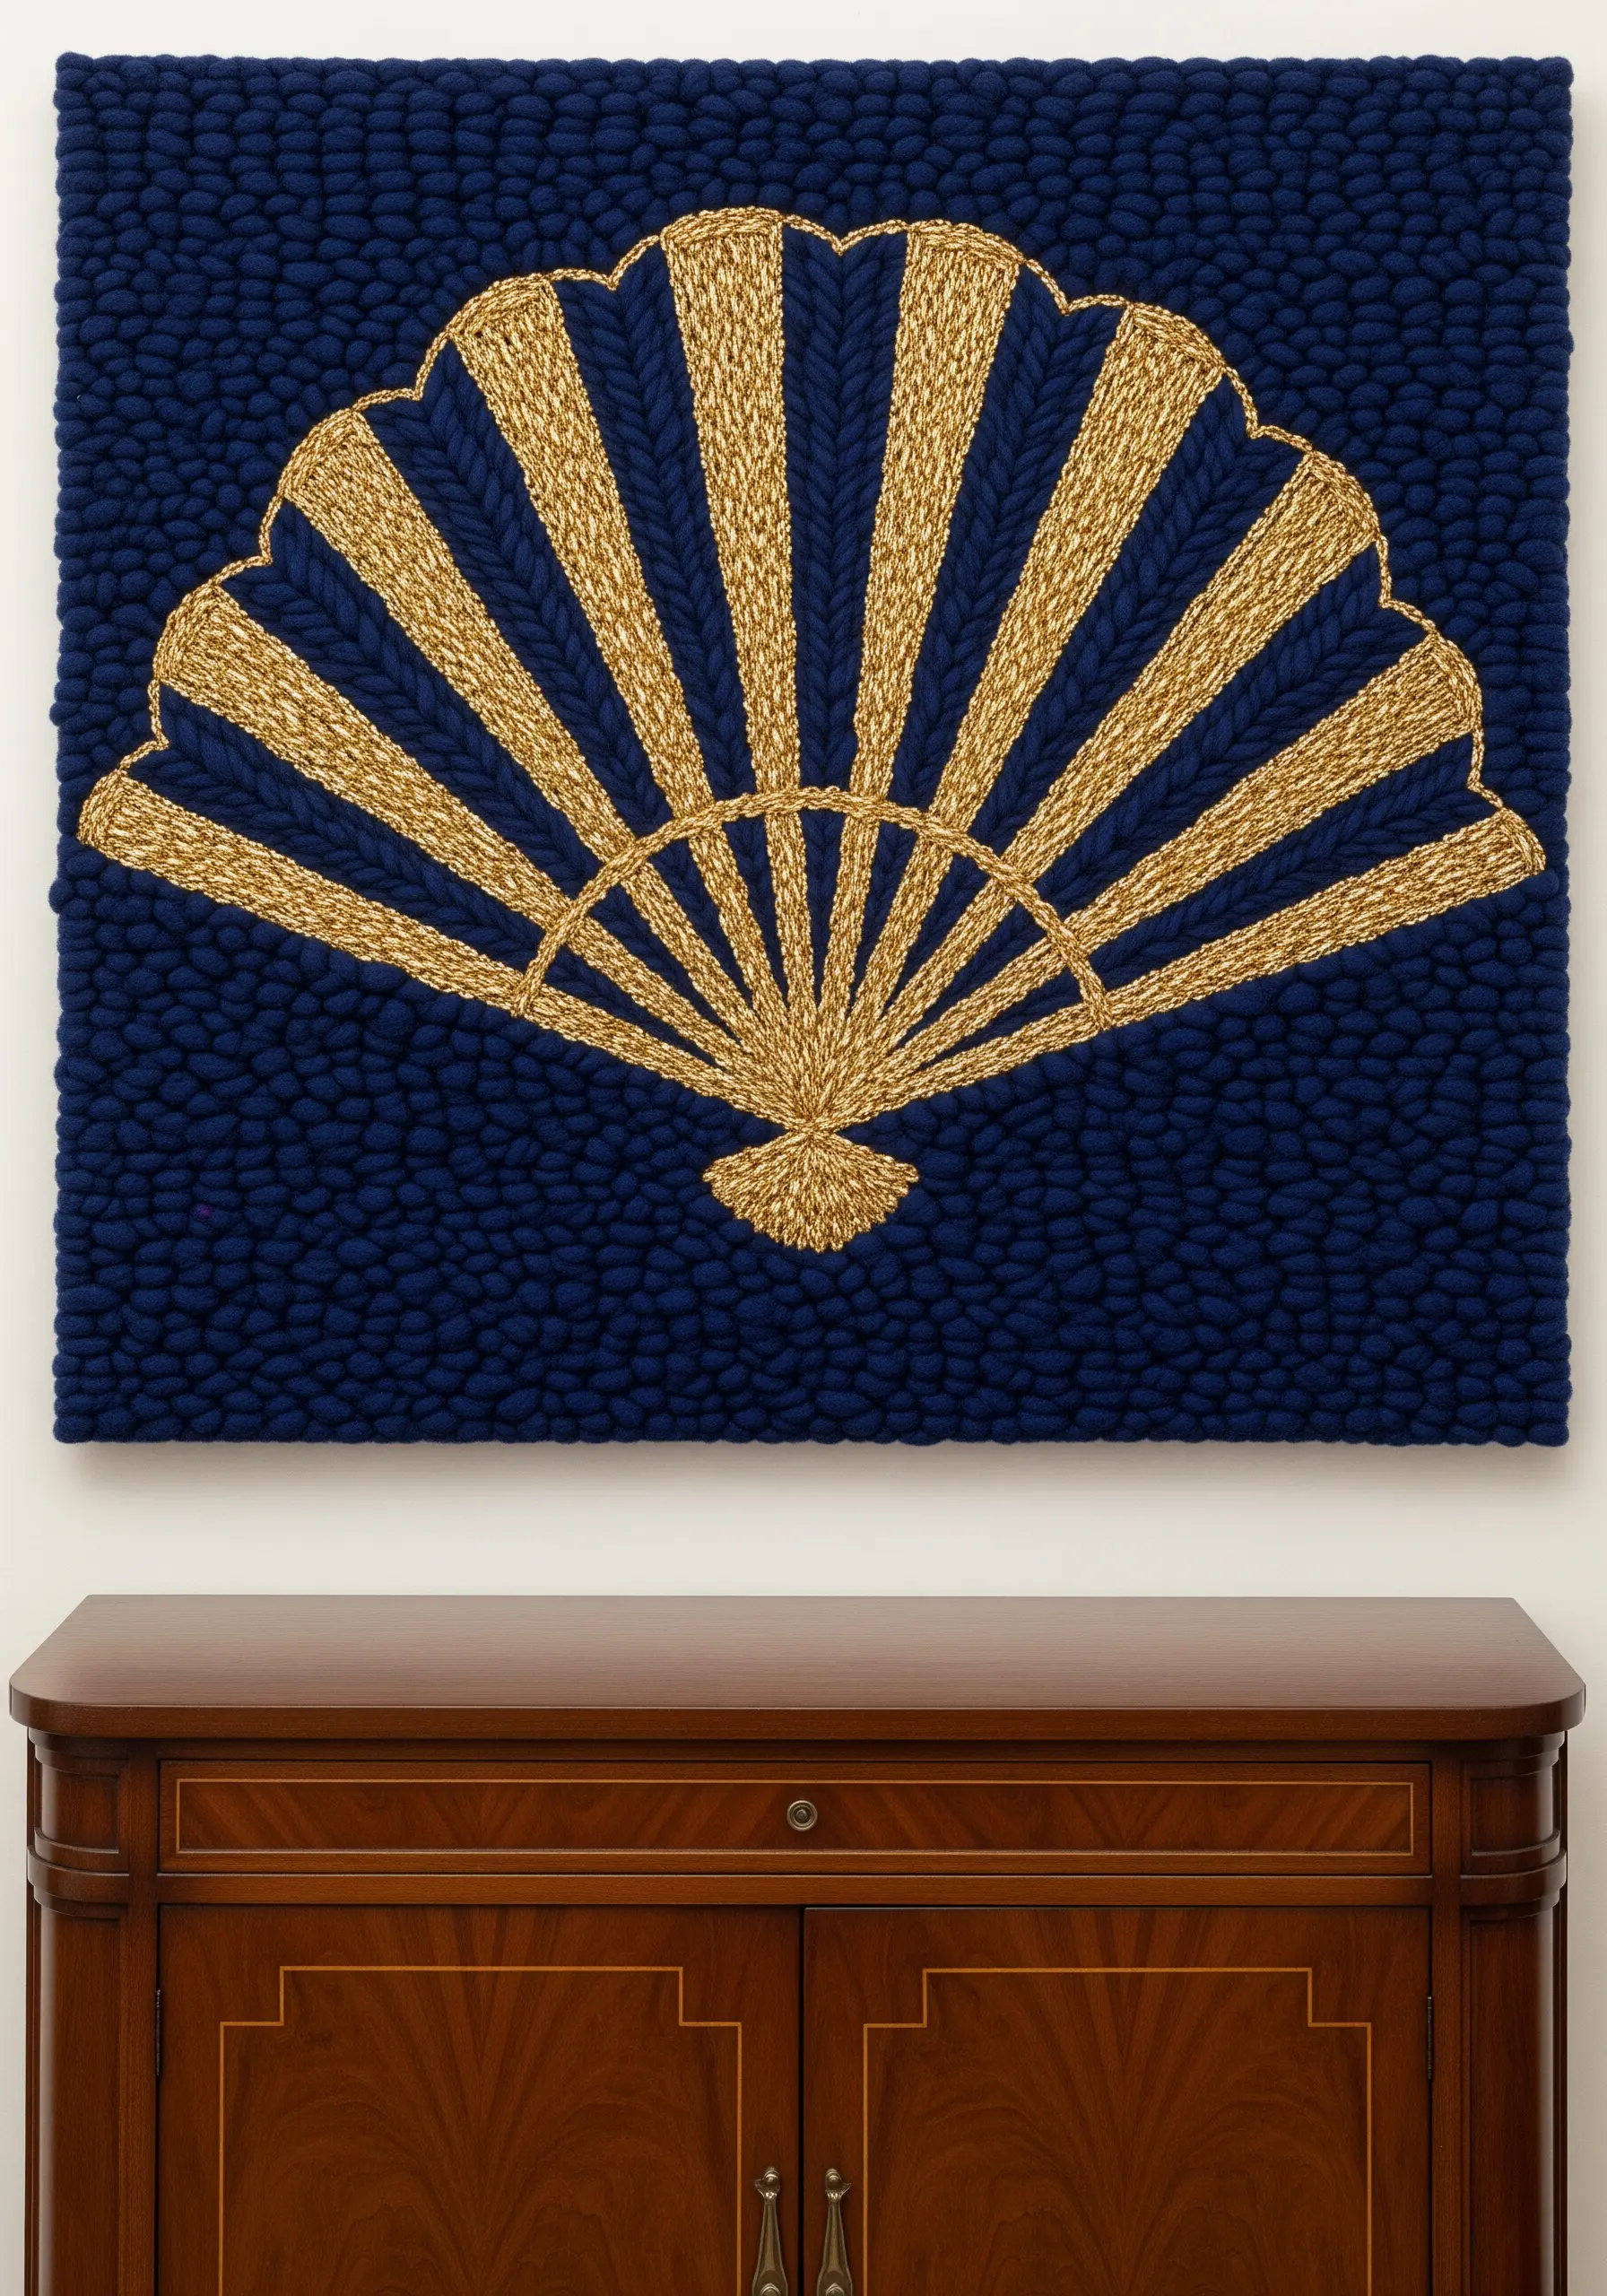
Create a stunning visual contrast by pairing a matte, textured background with a high-shine metallic element.
Use a plush, dark yarn like merino wool or chunky chenille for the background to absorb light and add depth.
For the central motif, use a tightly braided metallic cord or lurex yarn, applying it with couching stitches or knitting it separately and attaching it to the surface.
This juxtaposition of matte and shine makes the metallic details pop, creating metallic thread wall art designs that feel incredibly luxurious.
6. Transform Macrame with Dip-Dye Gradients
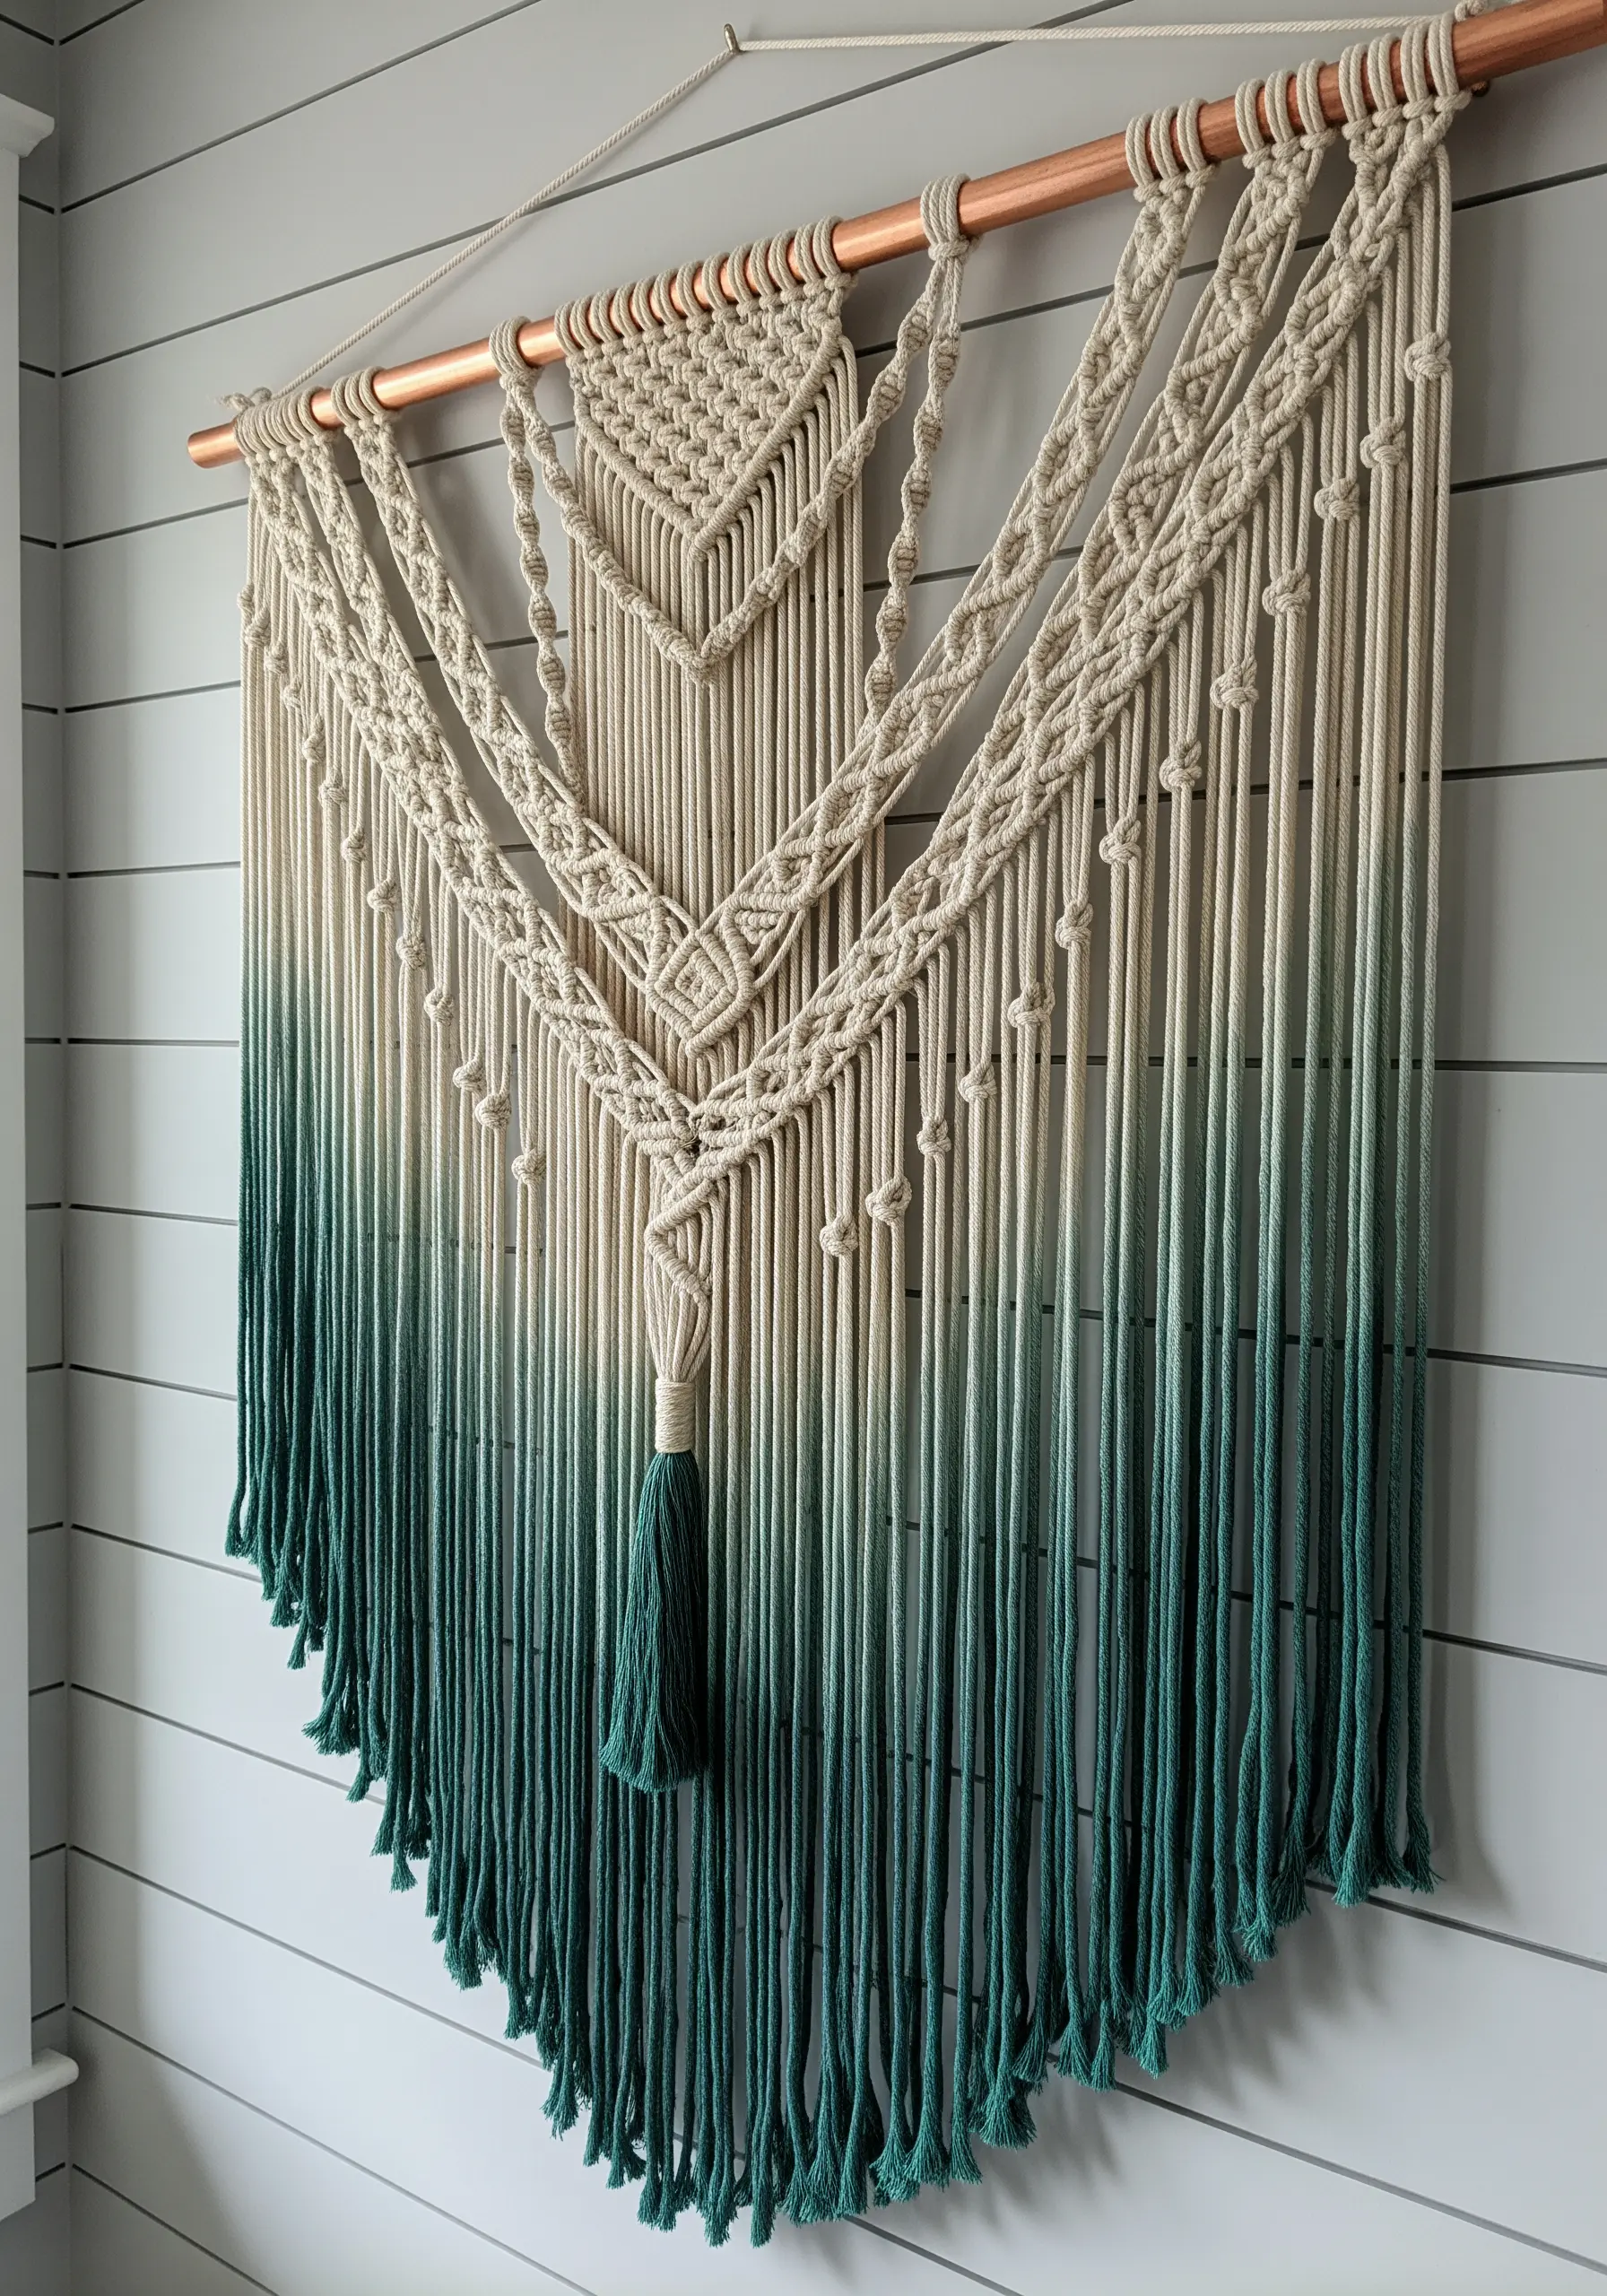
Add a layer of artistry to your macrame by dip-dyeing the finished piece to create a beautiful ombré effect.
Use a fabric dye appropriate for your fiber (cotton, wool) and gradually submerge the piece, leaving it in longer at the tips for a deeper color saturation.
This technique allows you to introduce color in a soft, organic way that complements the texture of the knots without competing with them.
It’s a perfect way to turn a simple macrame pattern into a custom piece of cozy embroidered wall art.
7. Craft a Statement Garland with Mixed-Fiber Tassels
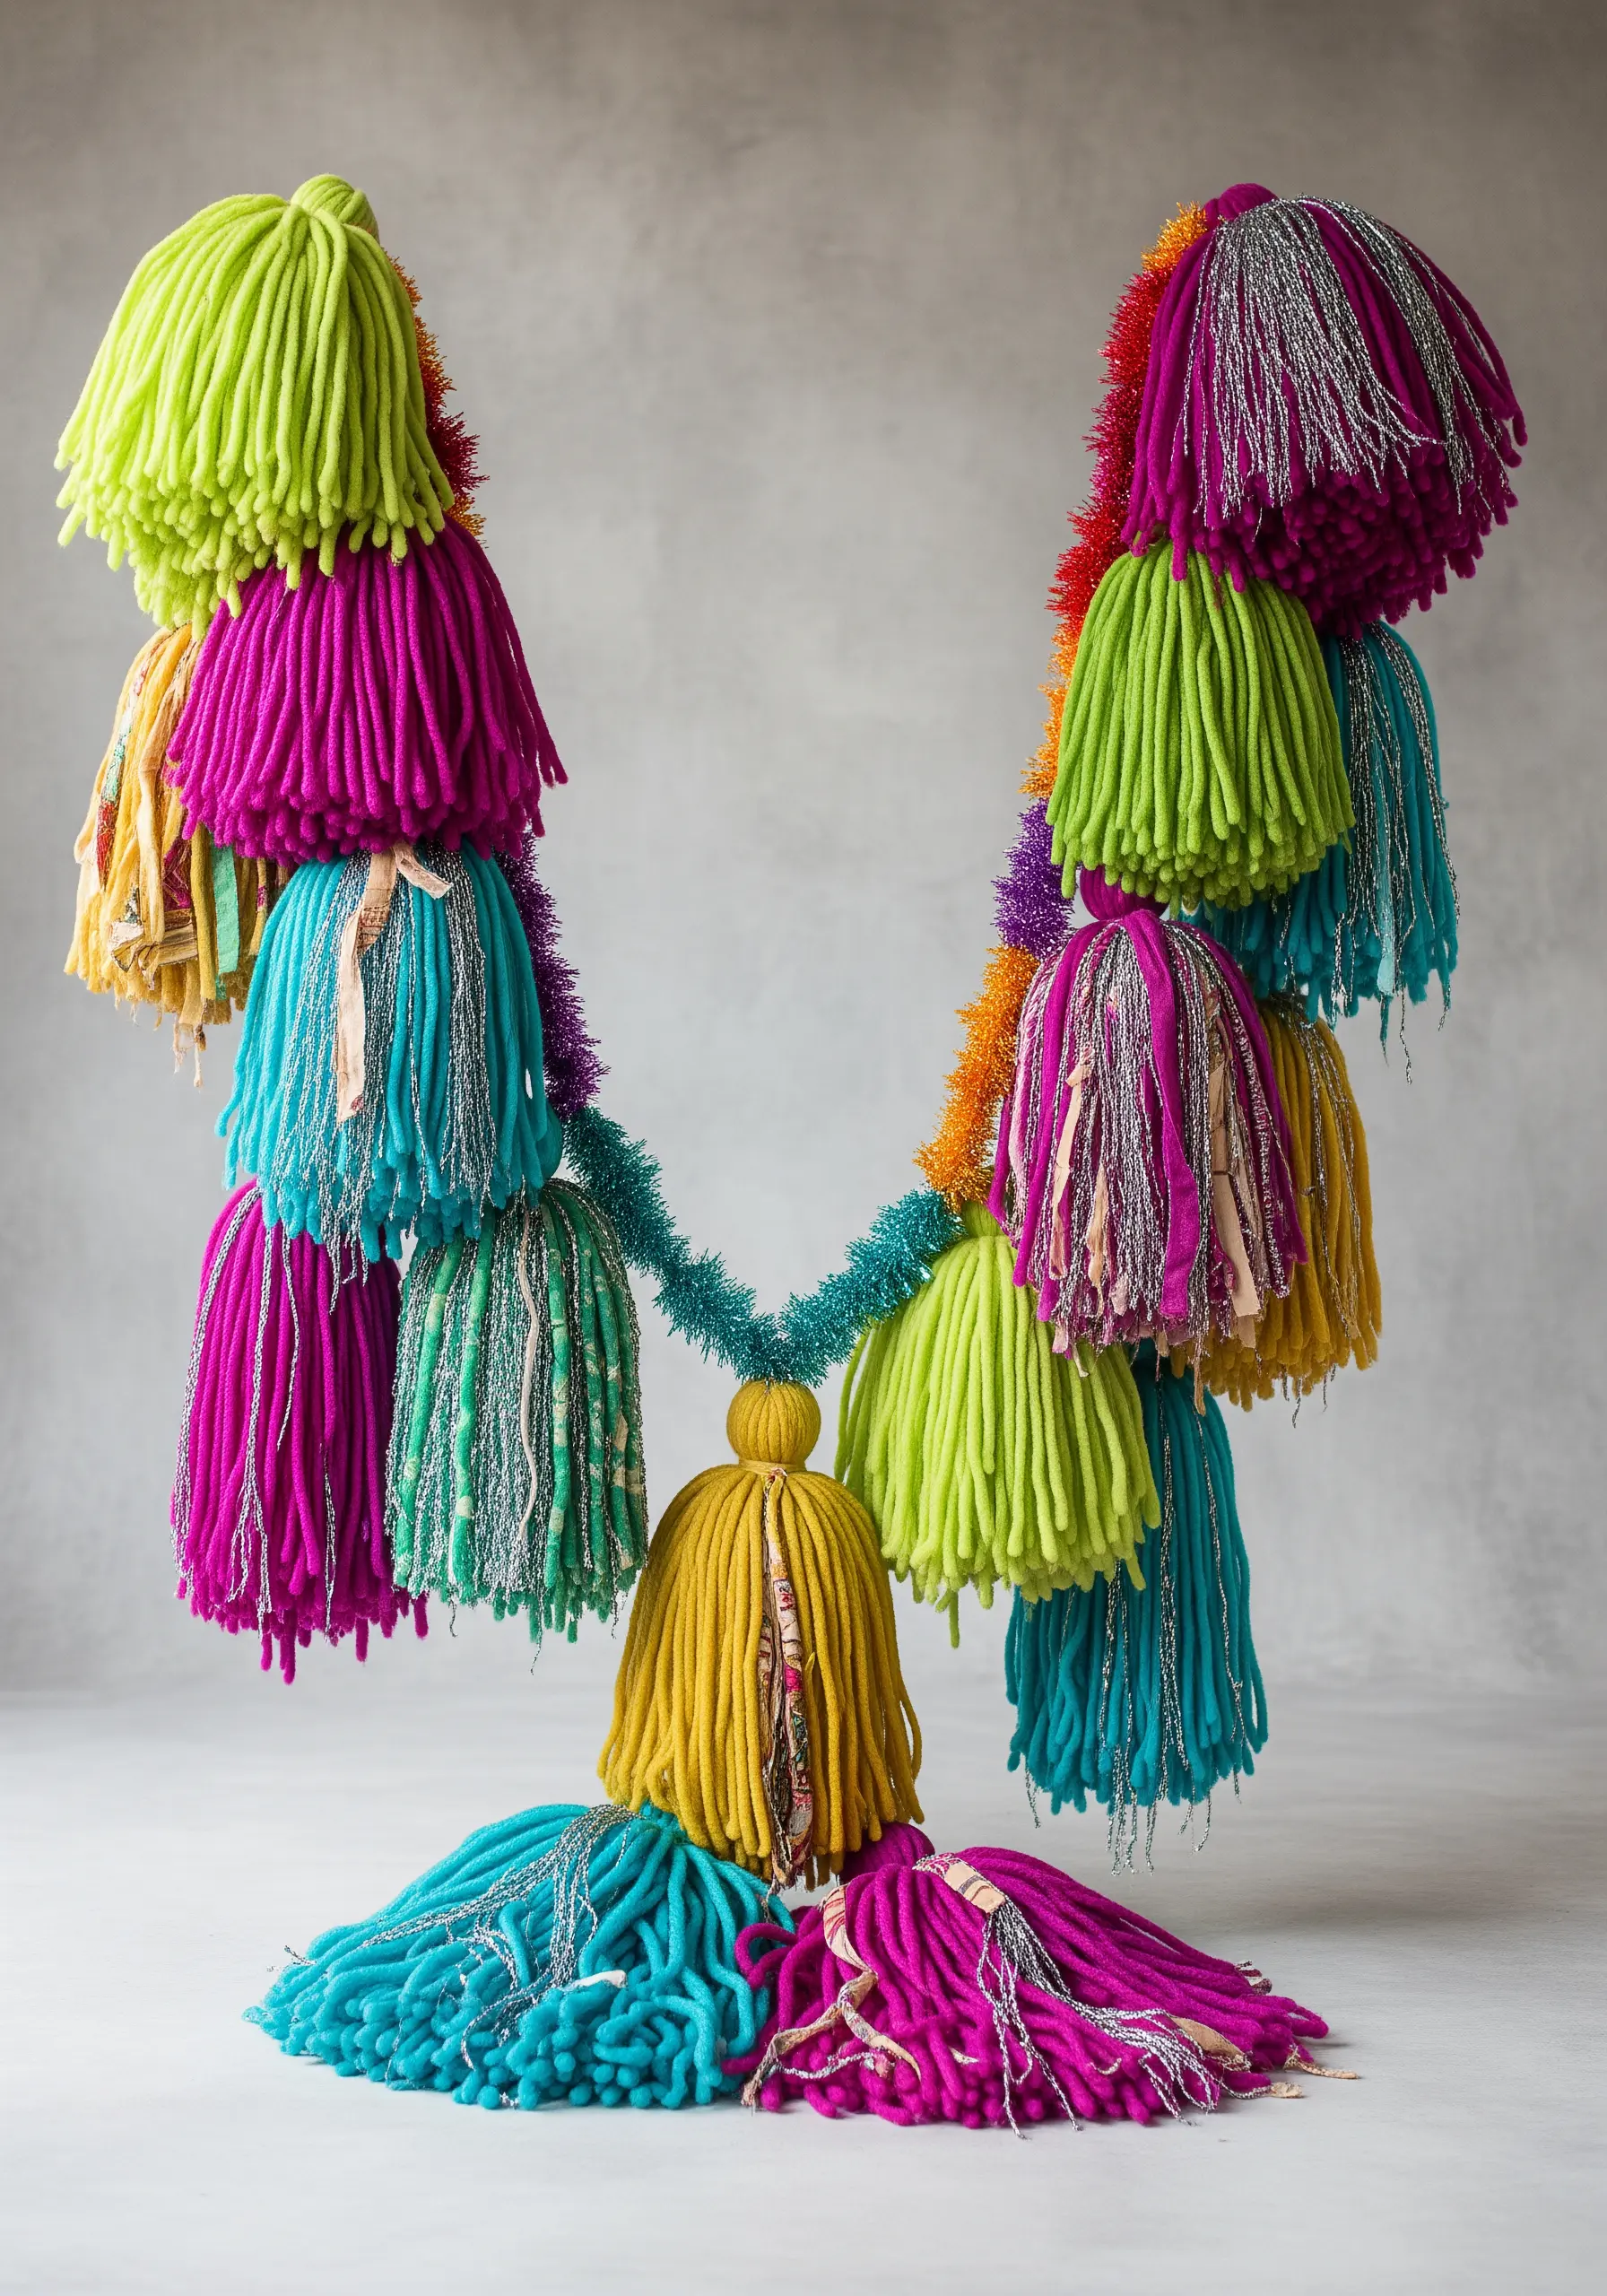
Go beyond simple tassels by mixing different yarn weights, textures, and colors within each bundle.
Combine chunky wool, fine cotton, and even metallic tinsel or sari silk ribbon to create tassels with incredible depth and personality.
To achieve this voluminous look, make your tassels much fuller than you think you need and tie them onto a thick, durable cord.
This maximalist approach results in playful mixed-fiber art projects that are bursting with energy and joy.
8. Weave a Landscape in a Hoop with Roving

Use an embroidery hoop as a loom to create charming, self-contained woven scenes.
Alternate between chunky wool roving for soft, voluminous clouds and tighter plain weave for the land and sky.
The extreme difference in fiber thickness is what creates the compelling visual and tactile contrast.
This is one of those fun hoop art projects that allows you to play with scale and texture in a small, manageable format.
You can even add small appliqué elements, like the felt trees, for a final touch of detail.
9. Curate a Woven Gallery Wall
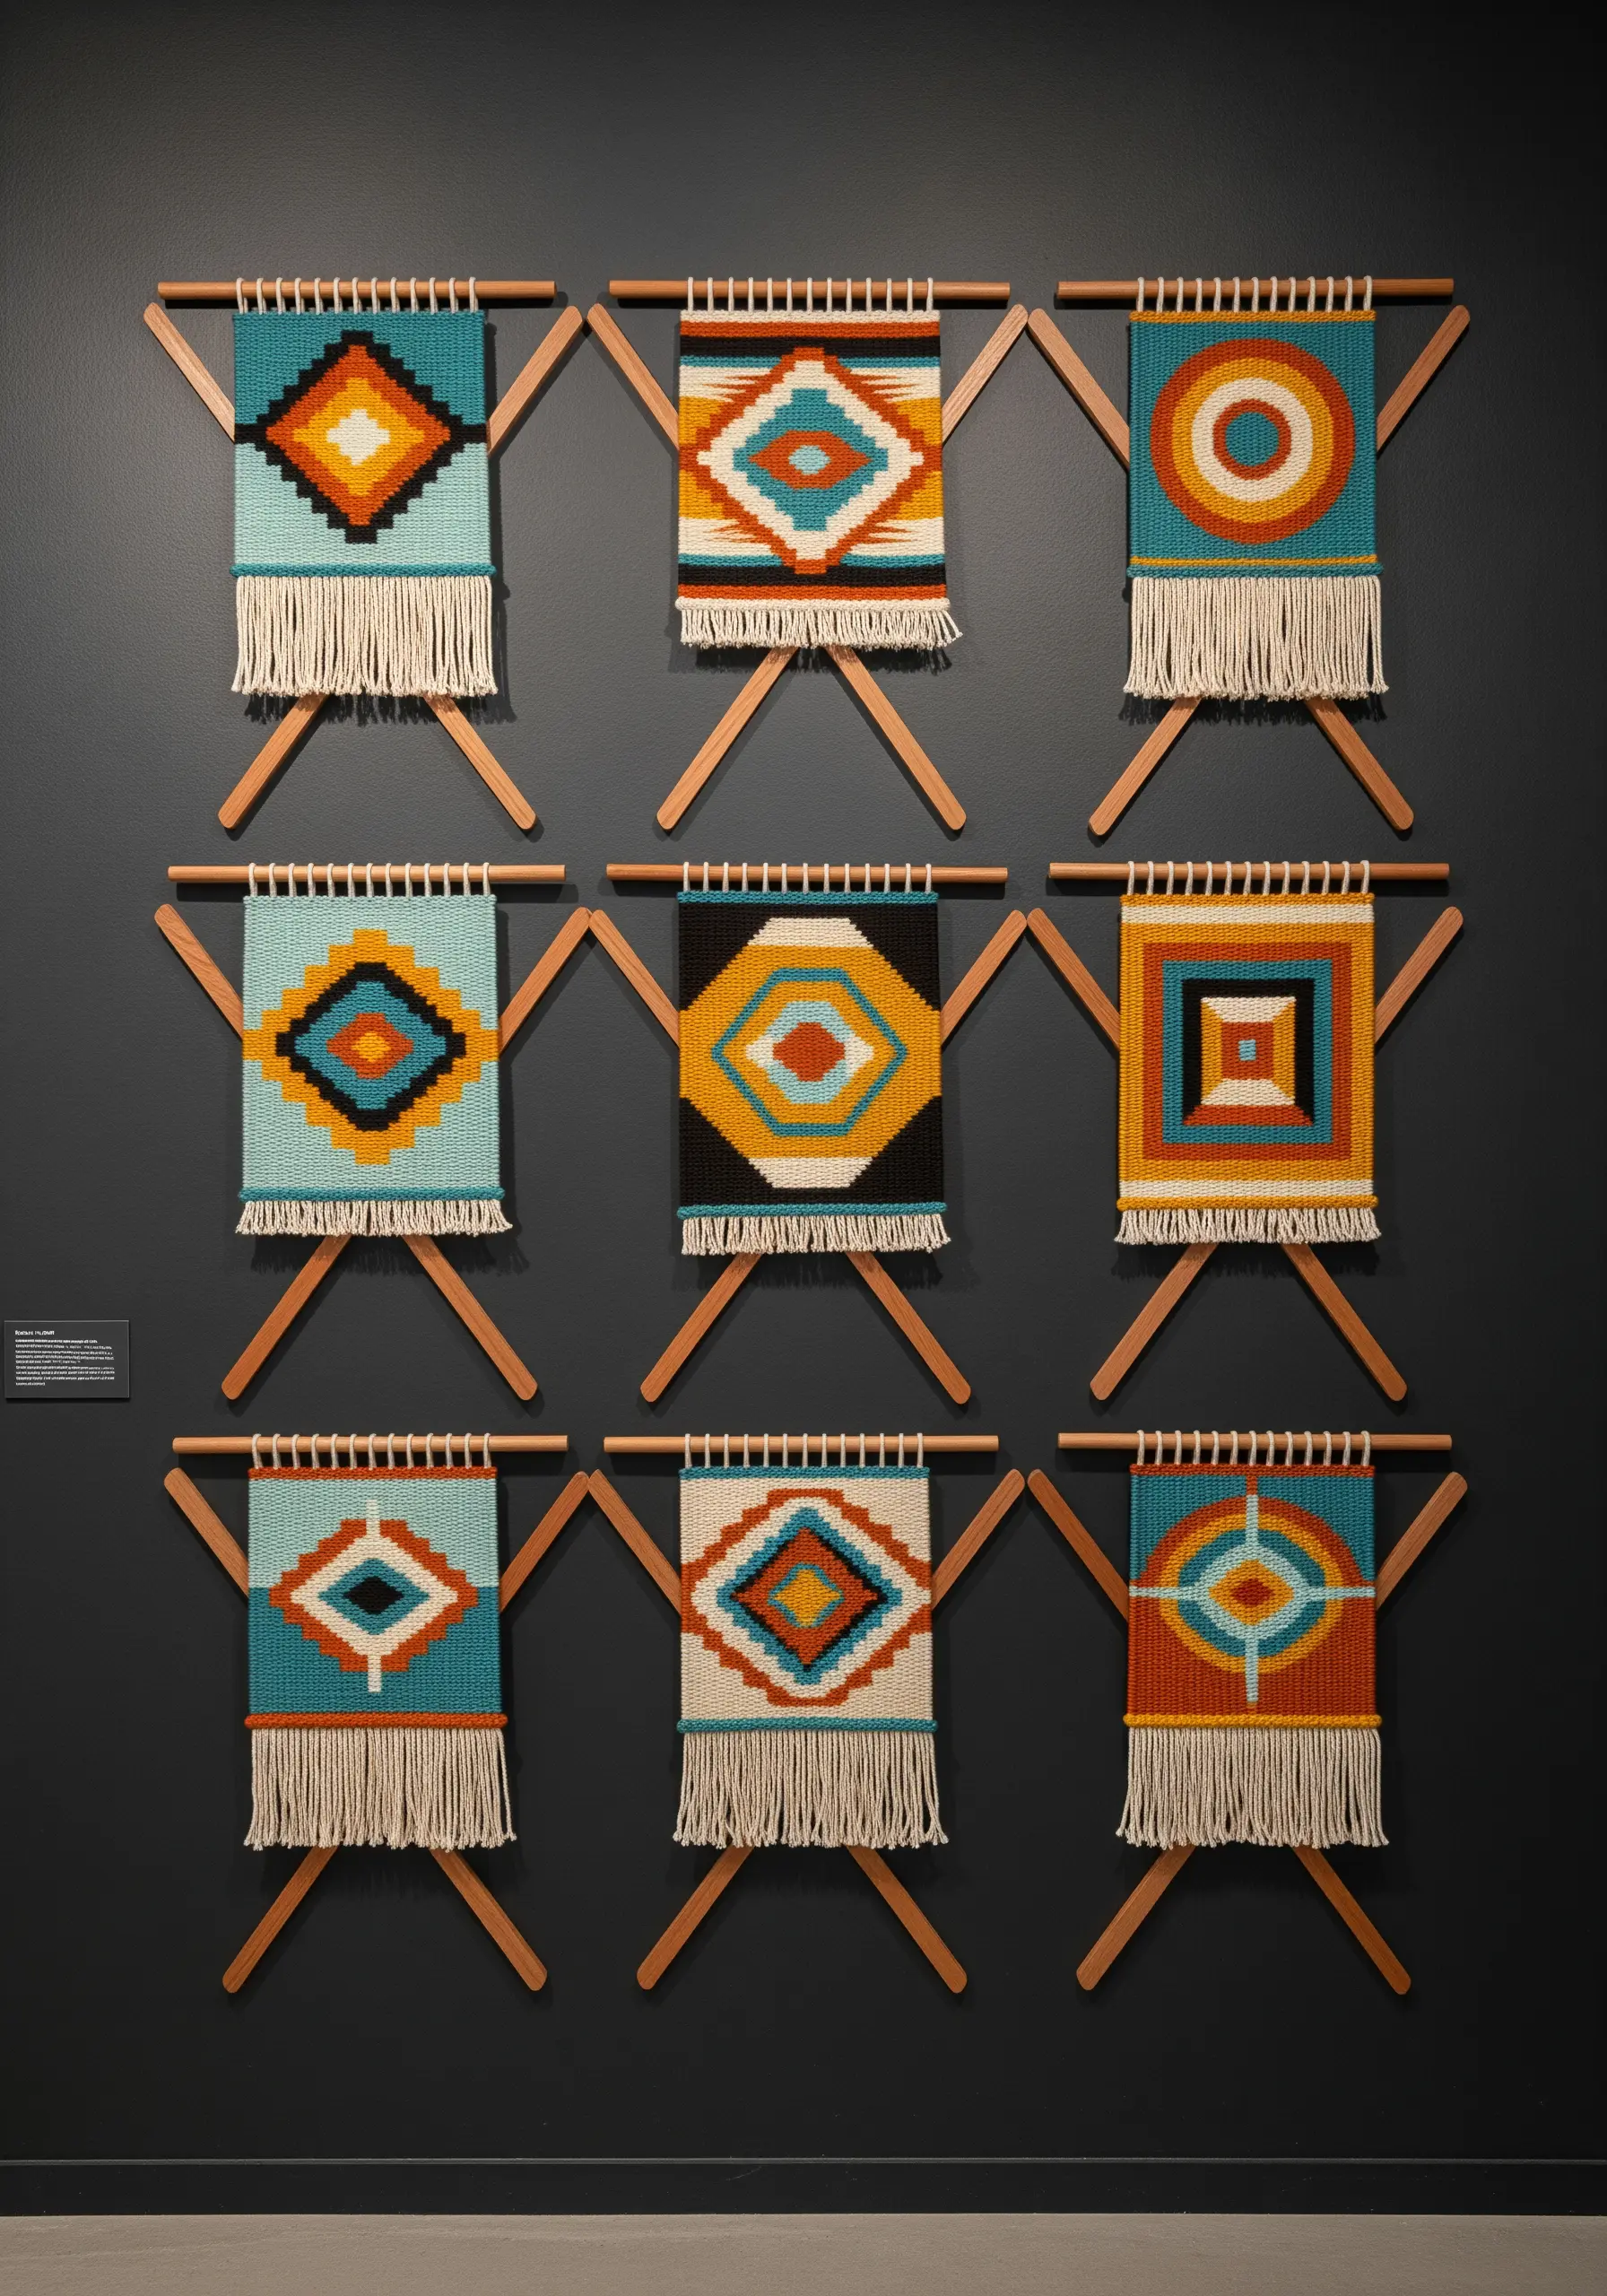
Create a high-impact installation by grouping multiple small weavings together.
To ensure the collection feels curated, not chaotic, use a consistent color palette and a uniform mounting method.
The repetition of bold, geometric patterns and a shared color story of turquoise, orange, and cream ties these individual pieces into a single, powerful statement.
This is a brilliant way to fill a large wall space and showcase your skills, turning small studies into a significant work of fiber art.
10. Explore Texture in a Monochromatic Palette
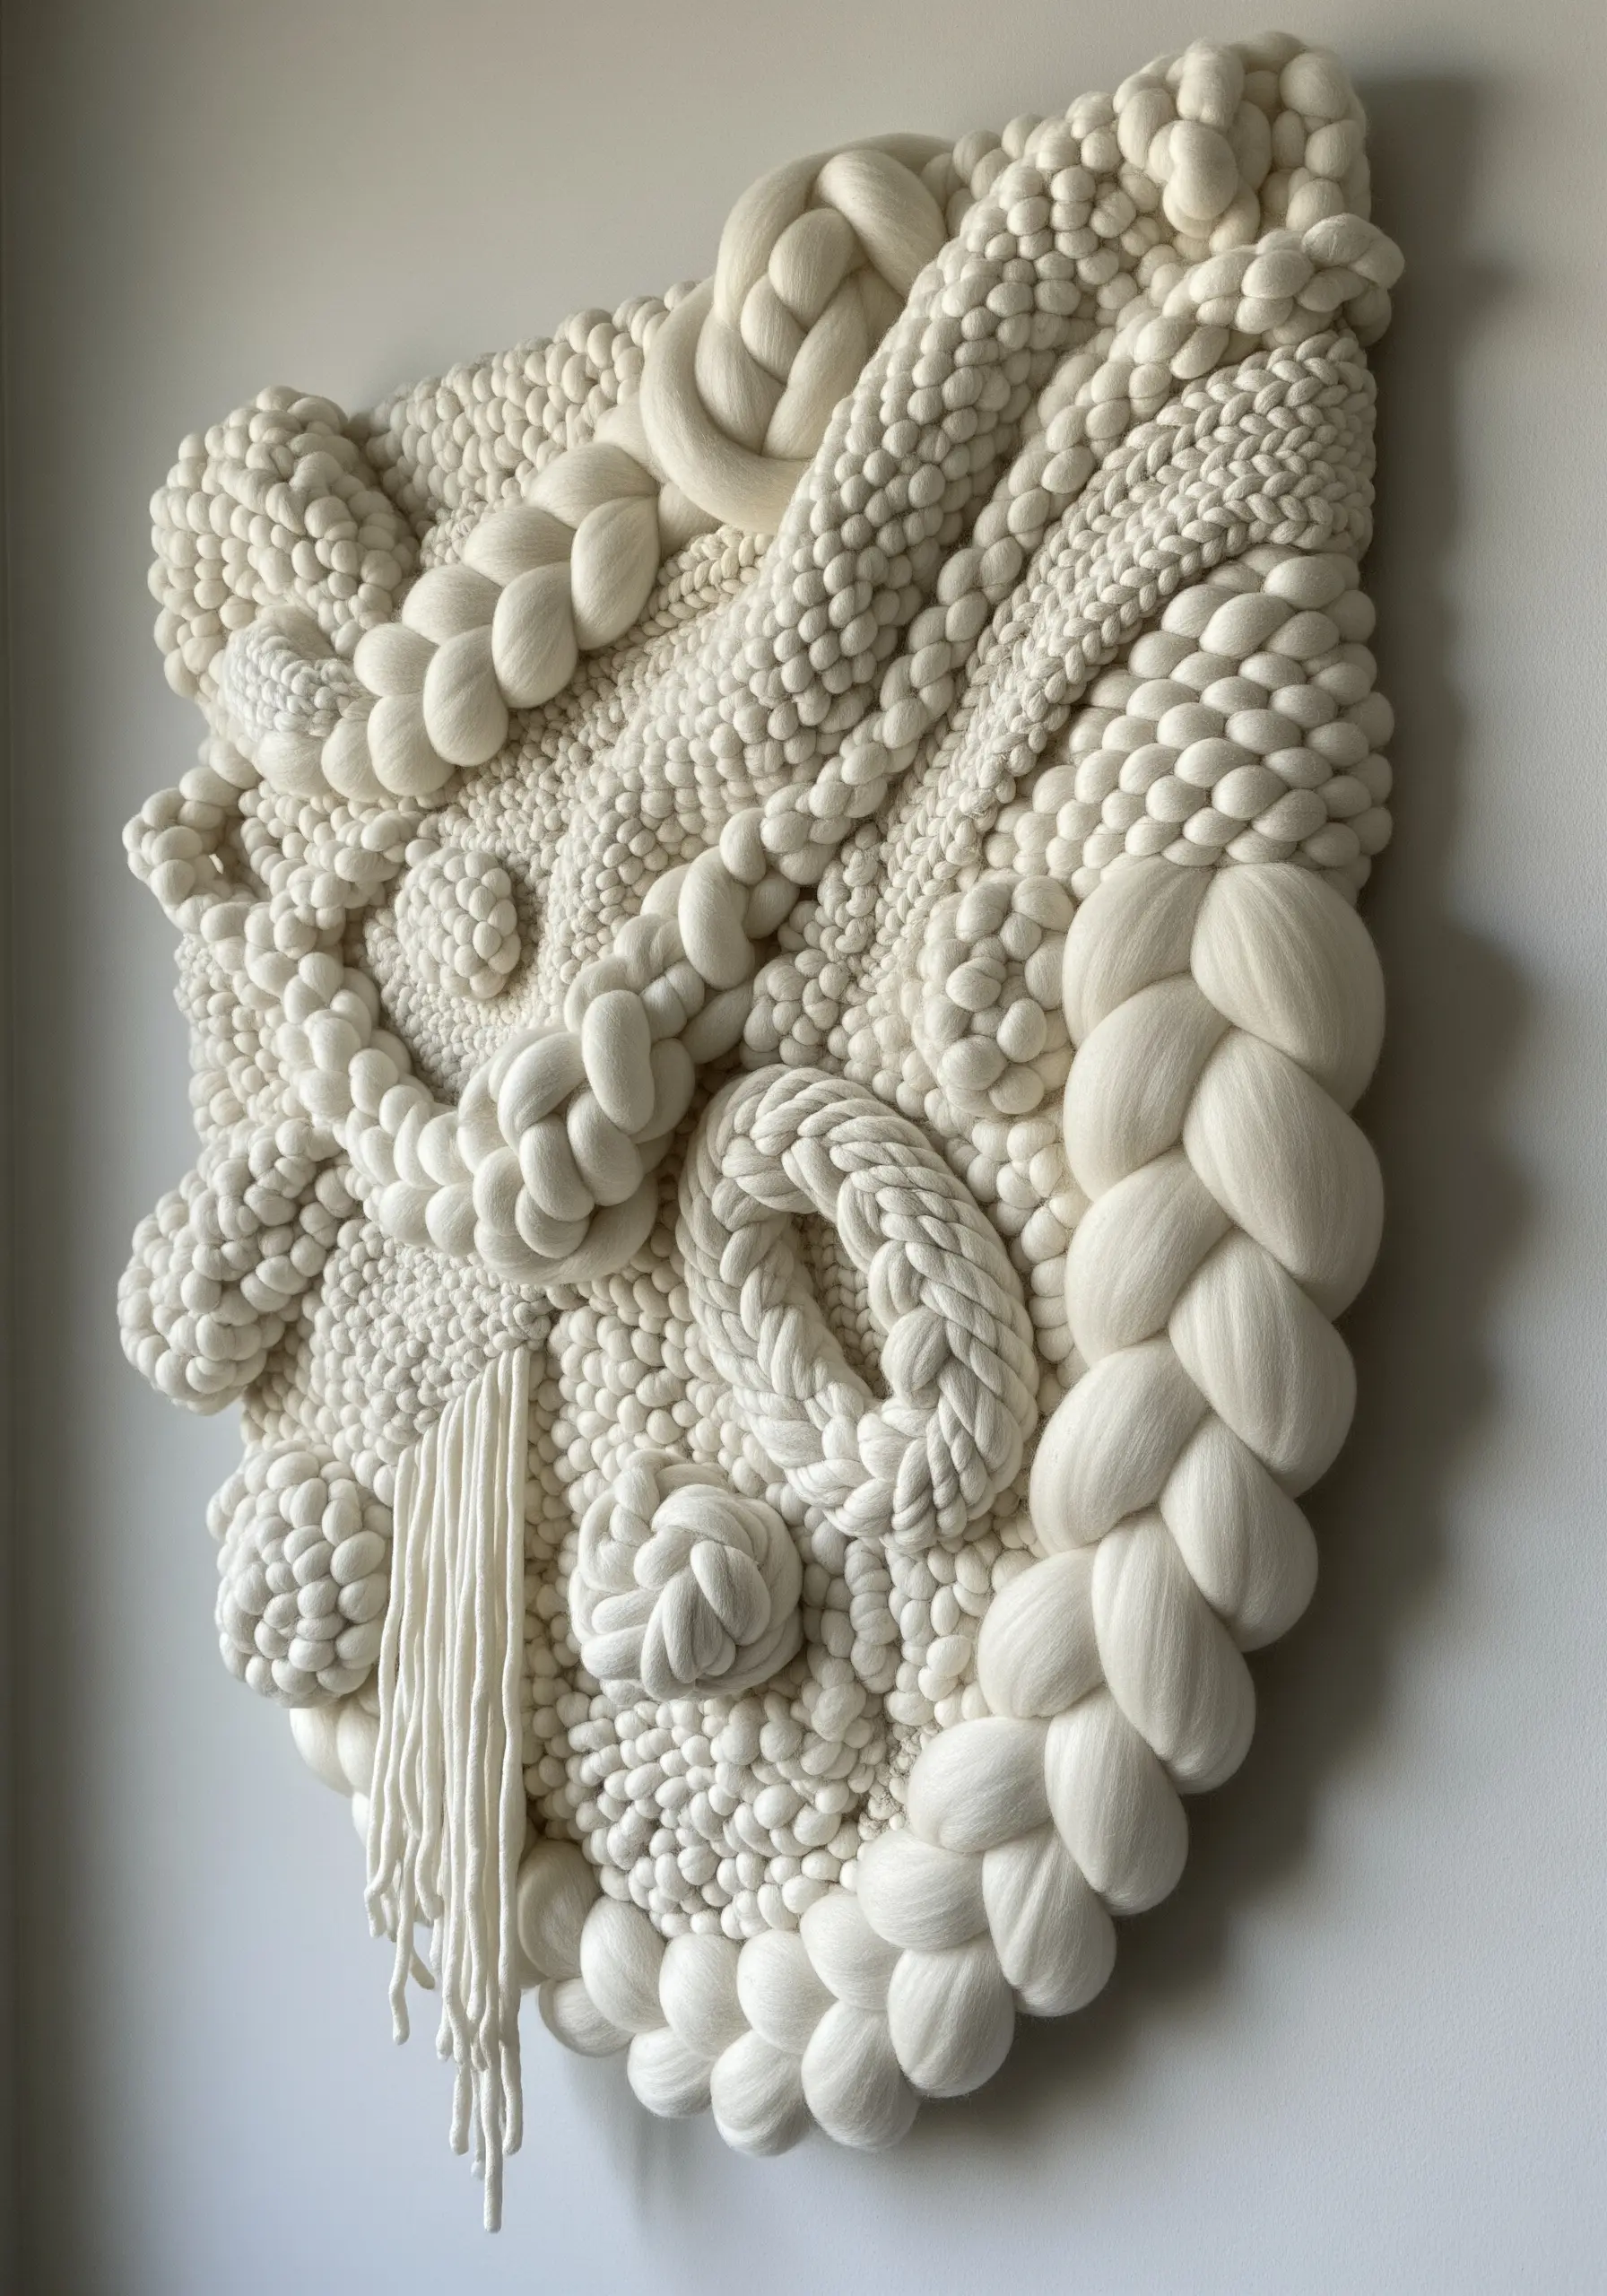
Challenge yourself to create a visually captivating piece using only a single color.
The key is to explore a wide range of textures: chunky braids, tight knots, plush loops, and smooth weaves.
Without color to distract the eye, the focus shifts entirely to the interplay of light and shadow across the different surfaces.
This practice sharpens your technical skills and results in tone-on-tone embroidery techniques that feel both complex and serene.
11. Use Wrapped Hoops as a Sculptural Medium
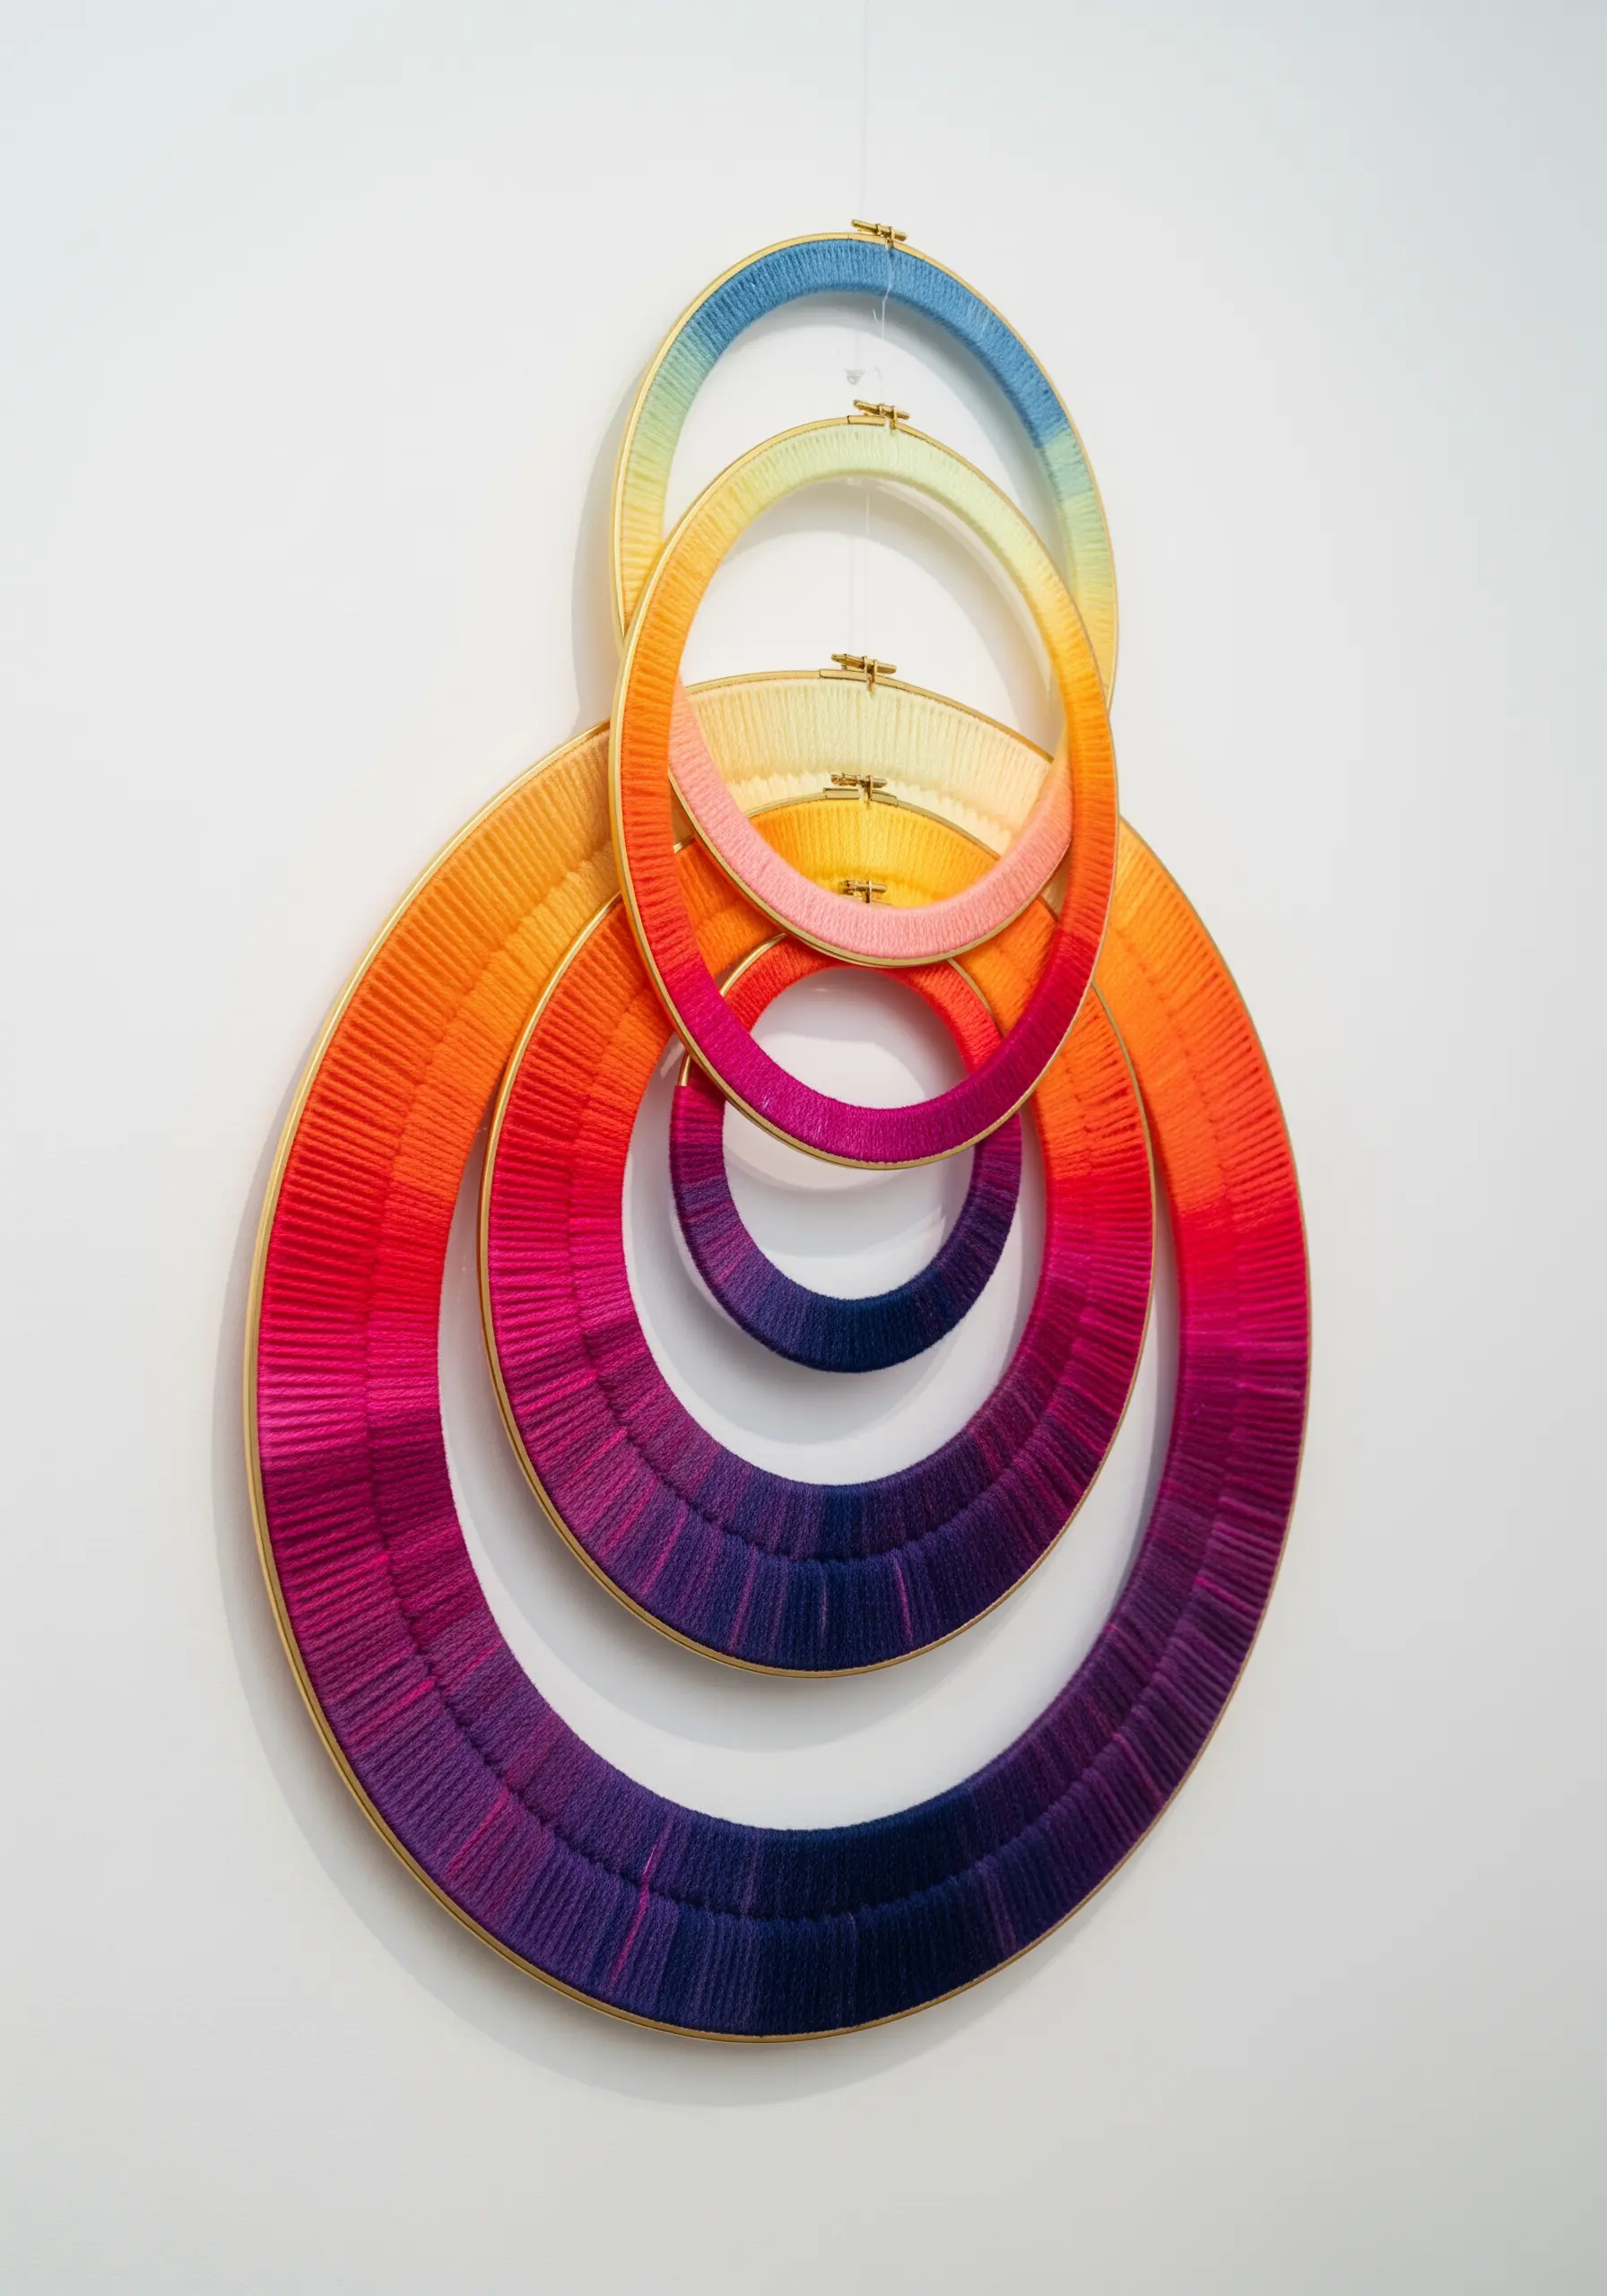
Transform simple embroidery hoops into a modern, sculptural art piece by wrapping them tightly with yarn.
Use variegated or ombré yarn to create beautiful color transitions effortlessly.
The magic happens when you layer the hoops, allowing the colors and circular forms to interact and create new shapes and color combinations.
Secure the overlapping hoops with a few stitches of clear thread to create a stable, multi-dimensional piece of abstract thread embroidery.
12. Integrate Natural Elements into Your Weaving
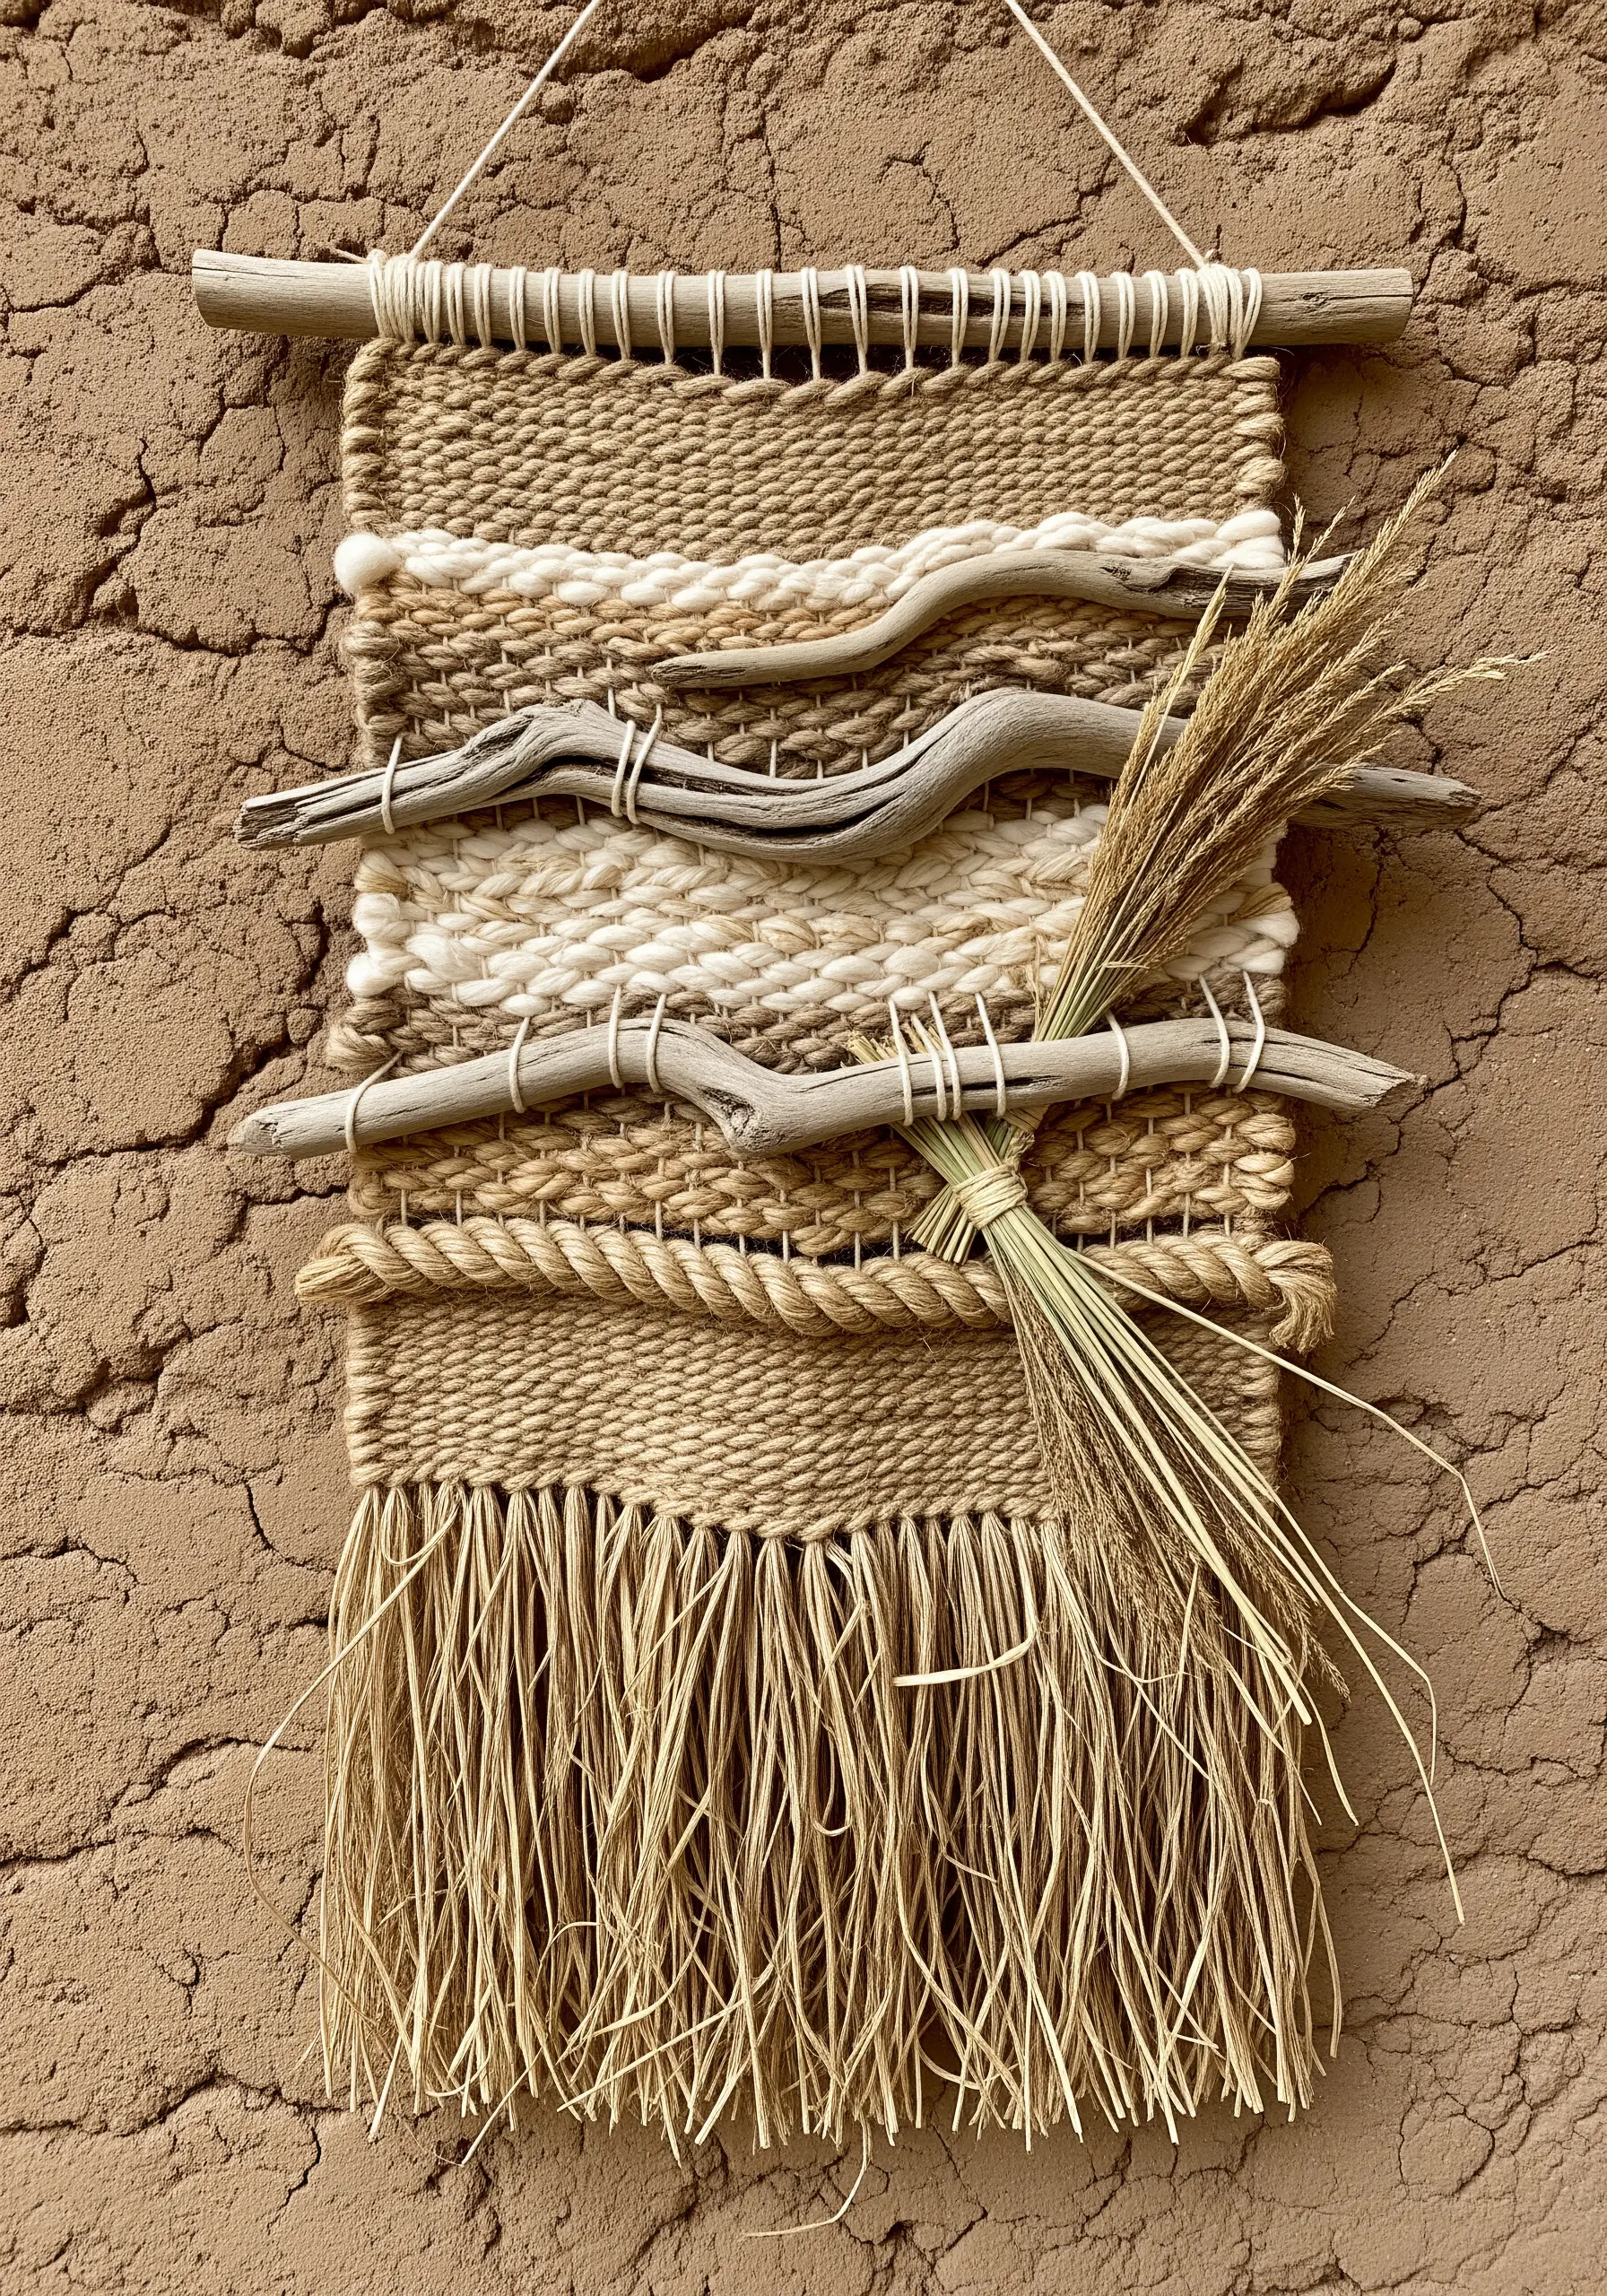
Bring the outside in by weaving found natural objects directly into your tapestry.
Incorporate elements like driftwood, dried grasses, or seed pods by securing them between rows of plain weave or tying them onto the warp threads.
Choose a neutral, earthy color palette for your yarns to complement the organic textures rather than compete with them.
This approach creates beautifully earthy texture embroidery patterns that connect your art to a specific time and place.
13. Create an Abstract Composition with Chunky Yarn Appliqué
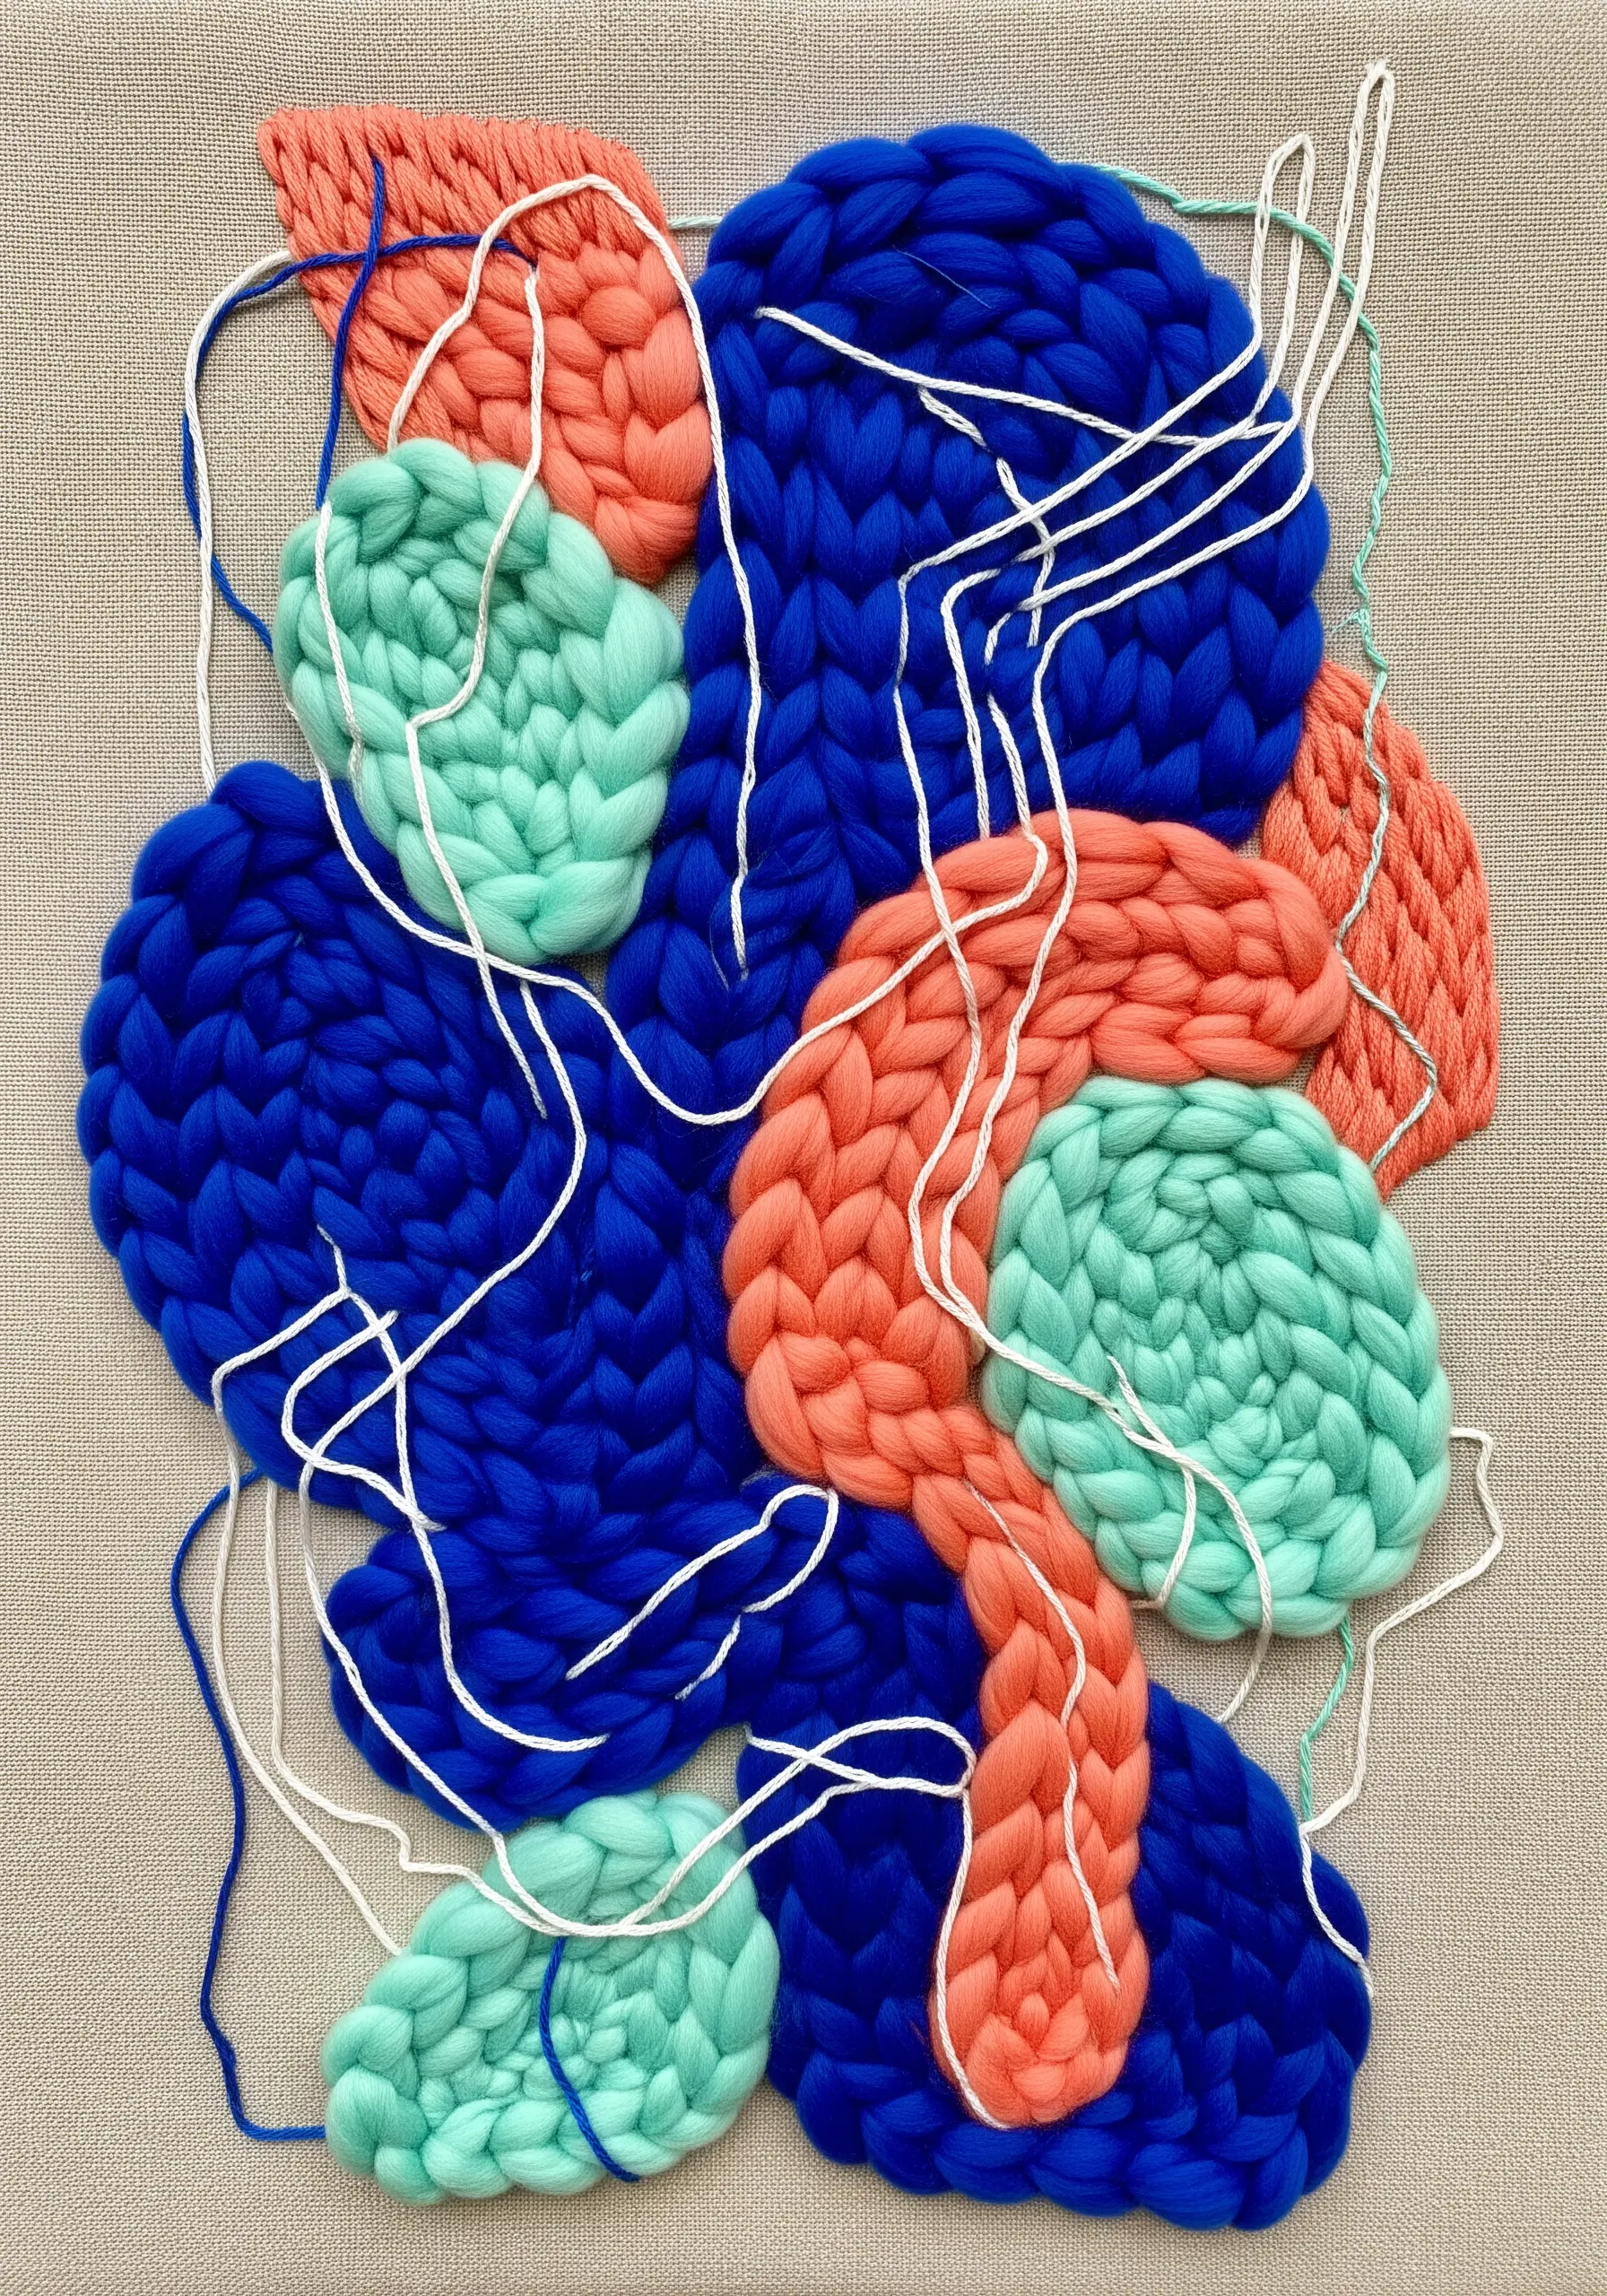
Use super-chunky yarn not for weaving, but as a bold, graphic element on a fabric background.
Knit or crochet abstract shapes and then appliqué them onto a stretched canvas using a strong, coordinating thread.
The extreme thickness of the yarn creates a high-relief, sculptural effect that is both playful and modern.
Finish the piece by adding loose, gestural lines with a finer thread to connect the larger forms and add a sense of movement to these abstract thread-sculpt designs.
14. Design Pixel Art with a Grid of Pom-Poms
Translate the aesthetic of digital pixel art into a soft, tactile medium by using pom-poms.
Create a grid on a sturdy backing material inside a shadow box frame, then attach handmade pom-poms in your desired color pattern.
For a clean, uniform look, use a pom-pom maker to ensure they are all the same size and density.
This technique is a fun way to create soft, textured gradients and modern minimalist small hoop designs or larger framed pieces.
15. Construct Geometric Art with a Rigid Frame Loom
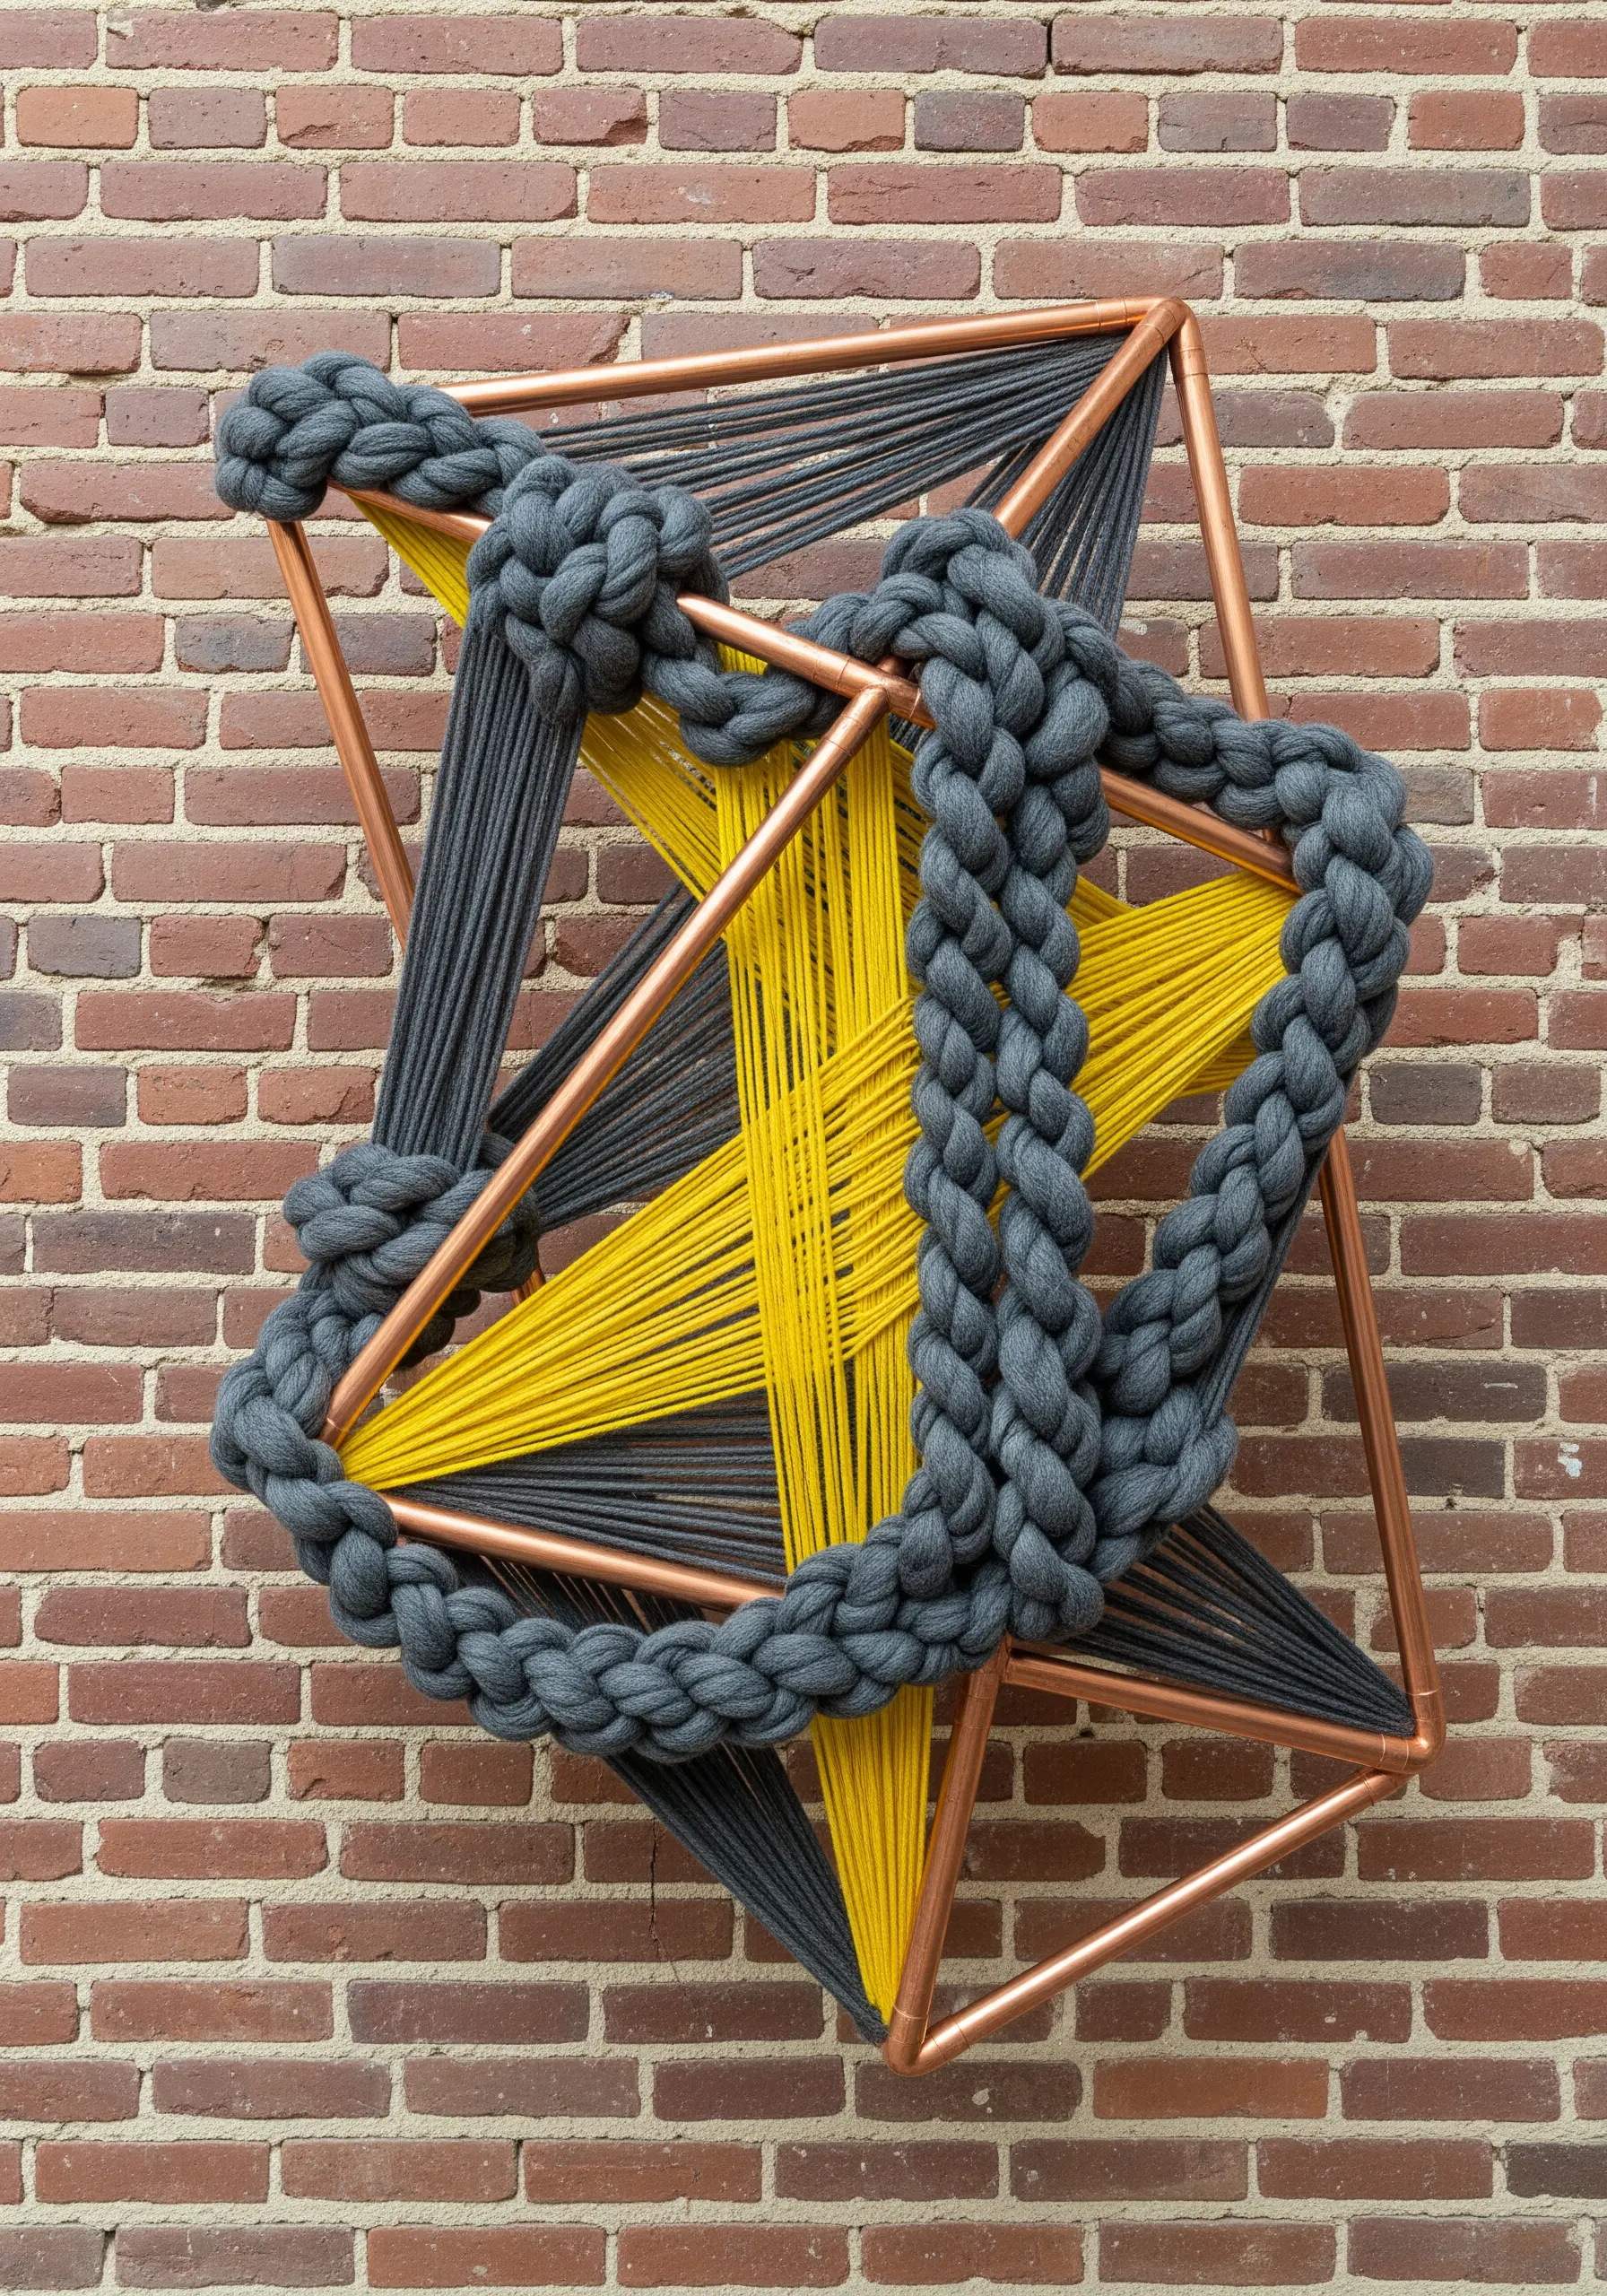
Move beyond traditional looms by building a three-dimensional frame from copper pipes or wooden dowels.
Wrap yarn tightly across the structure, using the intersections as anchor points to create geometric planes of color and line.
Contrast the sleek, industrial frame with a soft, textural element, like the chunky grey braid that traces its edges.
This method transforms yarn into a powerful tool for creating geometric abstract thread patterns with architectural presence.
16. Add Sculptural Dimension with Raised Textures
Make your woven landscapes more dynamic by incorporating raised, sculptural elements.
Use techniques like Rya knots or pile weaving to create fluffy, cloud-like sections that literally pop off the surface of the flat tapestry.
This contrast between the flat background and the high-relief texture adds incredible depth and makes the piece far more engaging.
It’s a simple way to master contemporary texture techniques that give your work a professional finish.
17. Create Lunar Texture with Directional Stitching
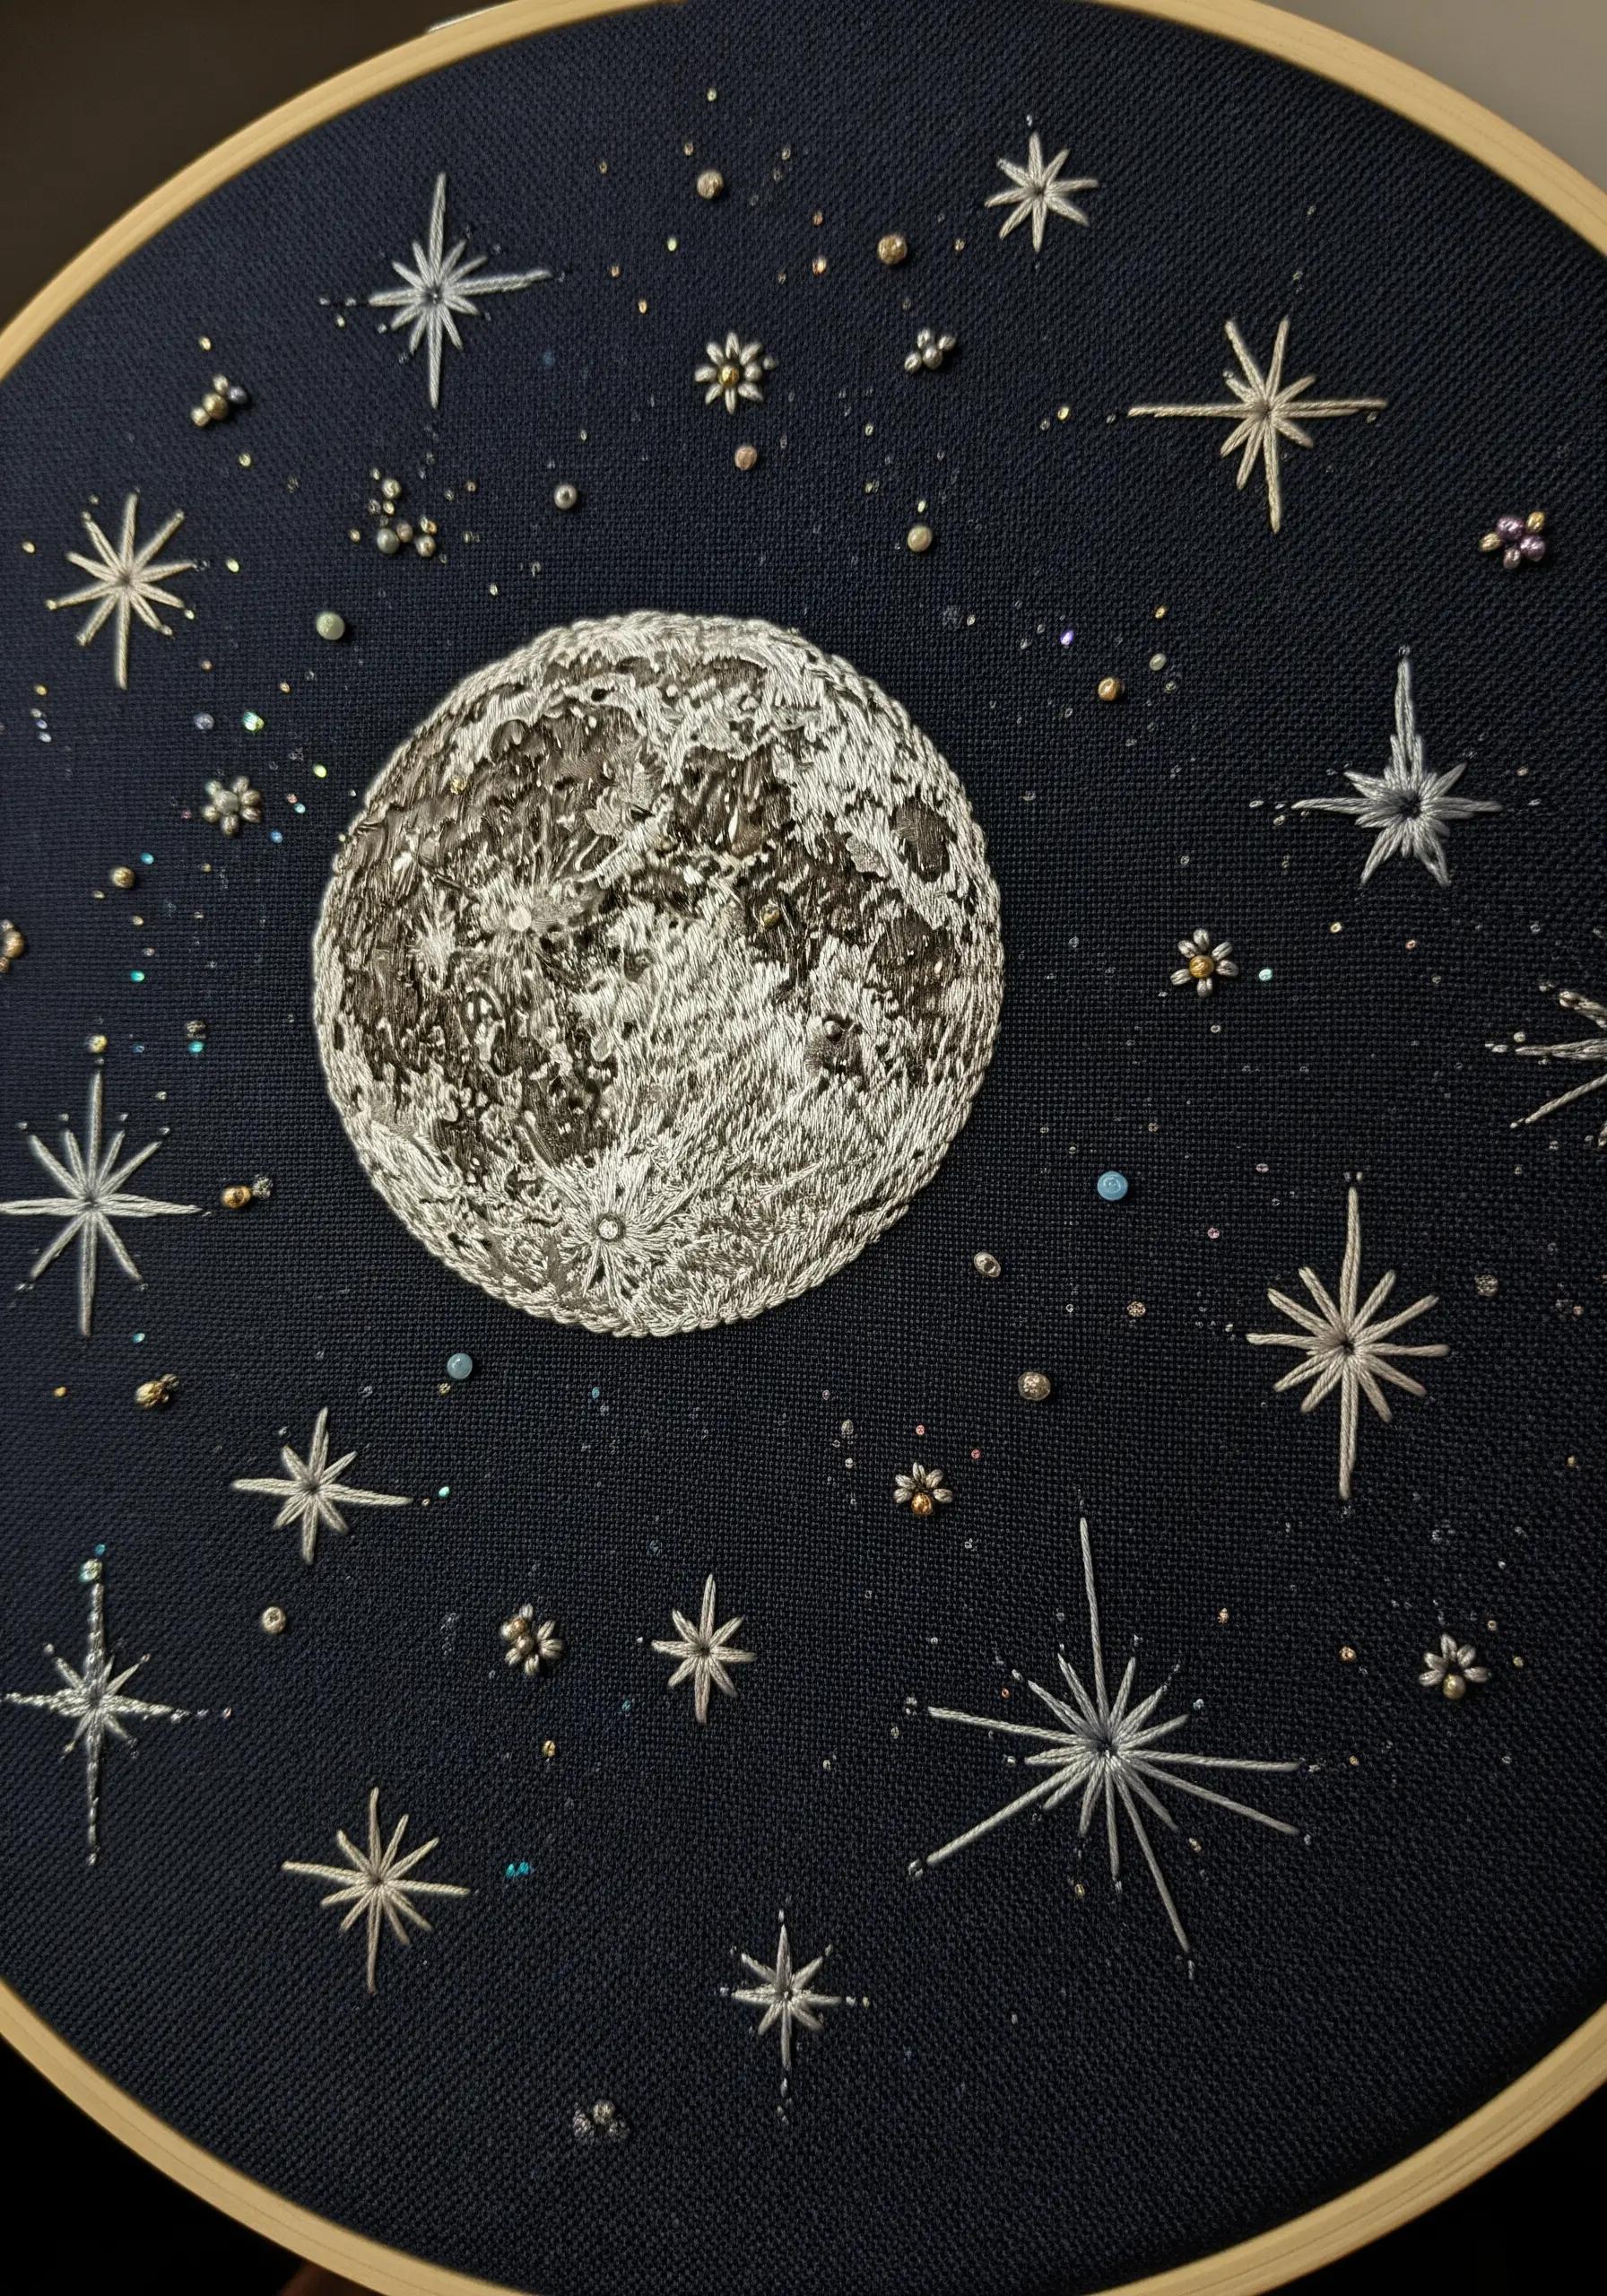
To embroider a realistic moon, use a single color of thread but vary your stitch direction.
Fill the shape with a dense satin stitch, but instead of uniform straight lines, stitch in small, swirling patterns to mimic the craters and shadows of the lunar surface.
Use a silvery grey or off-white thread on a dark navy or black fabric to create a dramatic contrast.
Add tiny seed beads and scattered star stitches to complete your celestial scene and create dreamy, nature-inspired embroidery designs.
18. Mimic Nature’s Patterns with Fiber Geodes
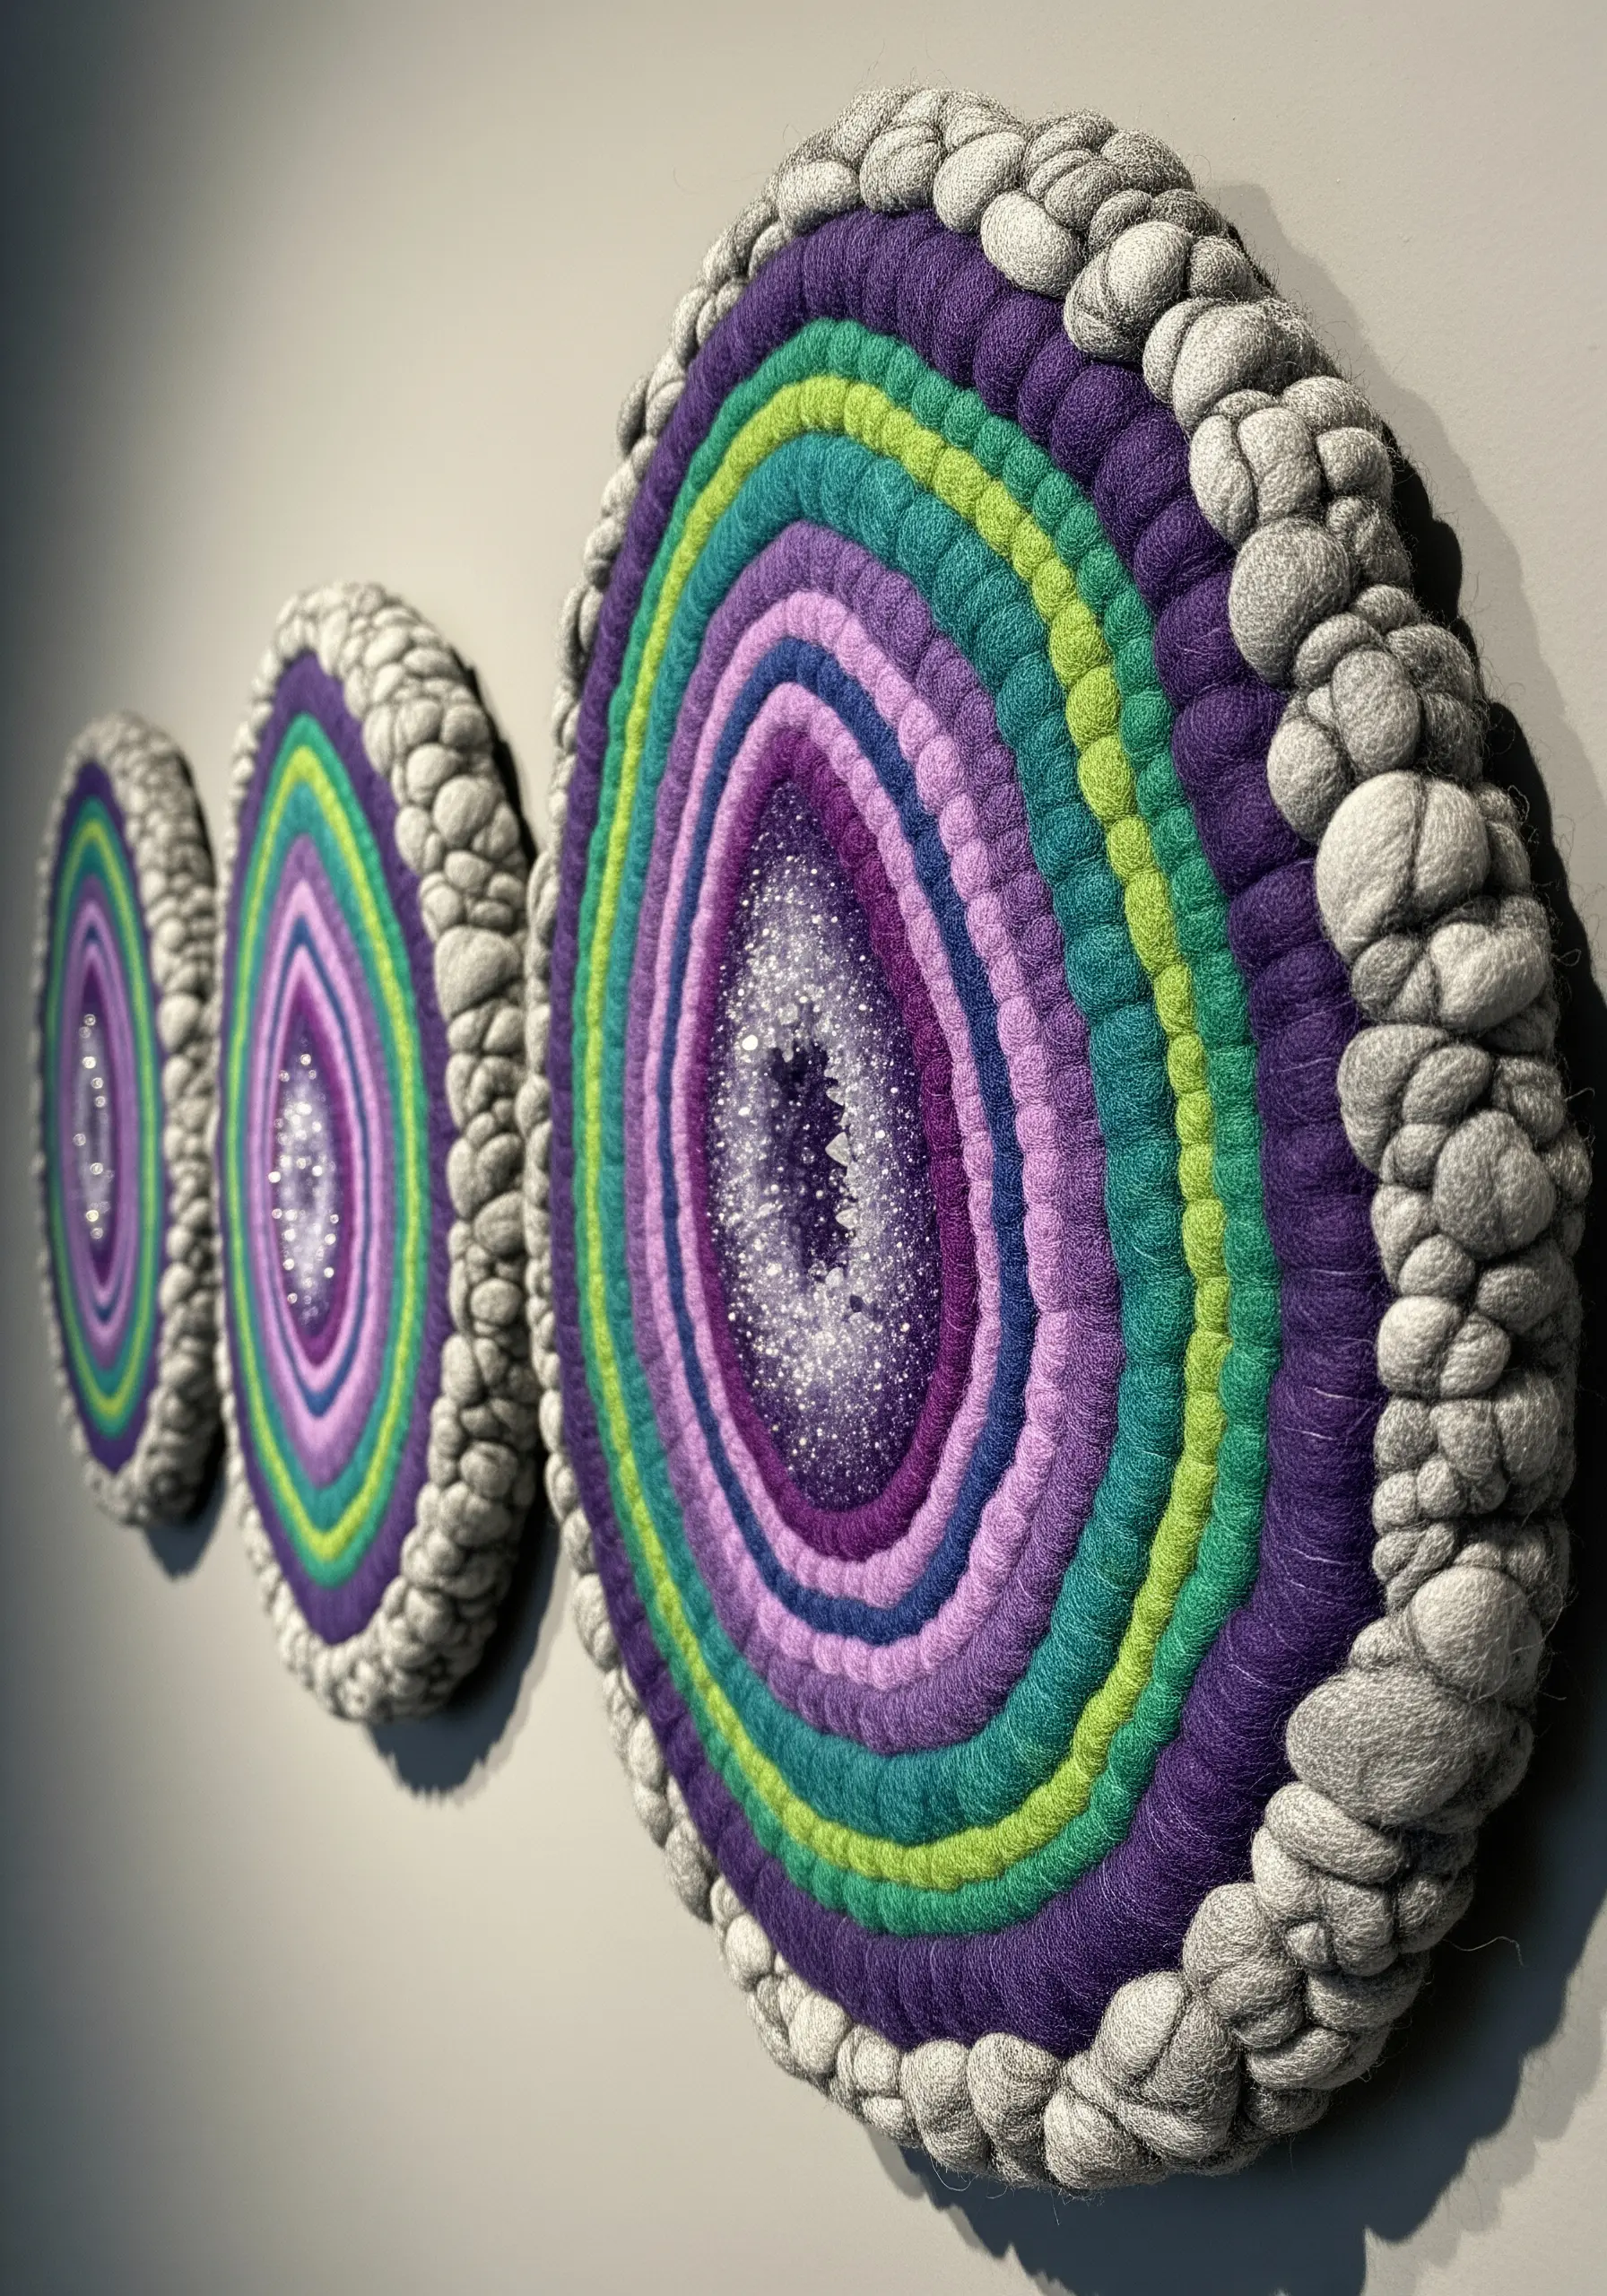
Recreate the mesmerizing layers of a geode using yarn, felt, and a touch of sparkle.
Build concentric rings of color with wrapped felt strips or chunky yarn, varying the colors and textures to mimic natural crystal formations.
For the center, use crushed glass glitter or tiny seed beads to replicate the crystalline core.
Frame the piece with a bumpy, rock-like texture made from knotted yarn to complete the illusion. This is a brilliant example of combining embroidery and mixed media for a stunning effect.
19. Embrace Bold Simplicity with Graphic Punch Needle
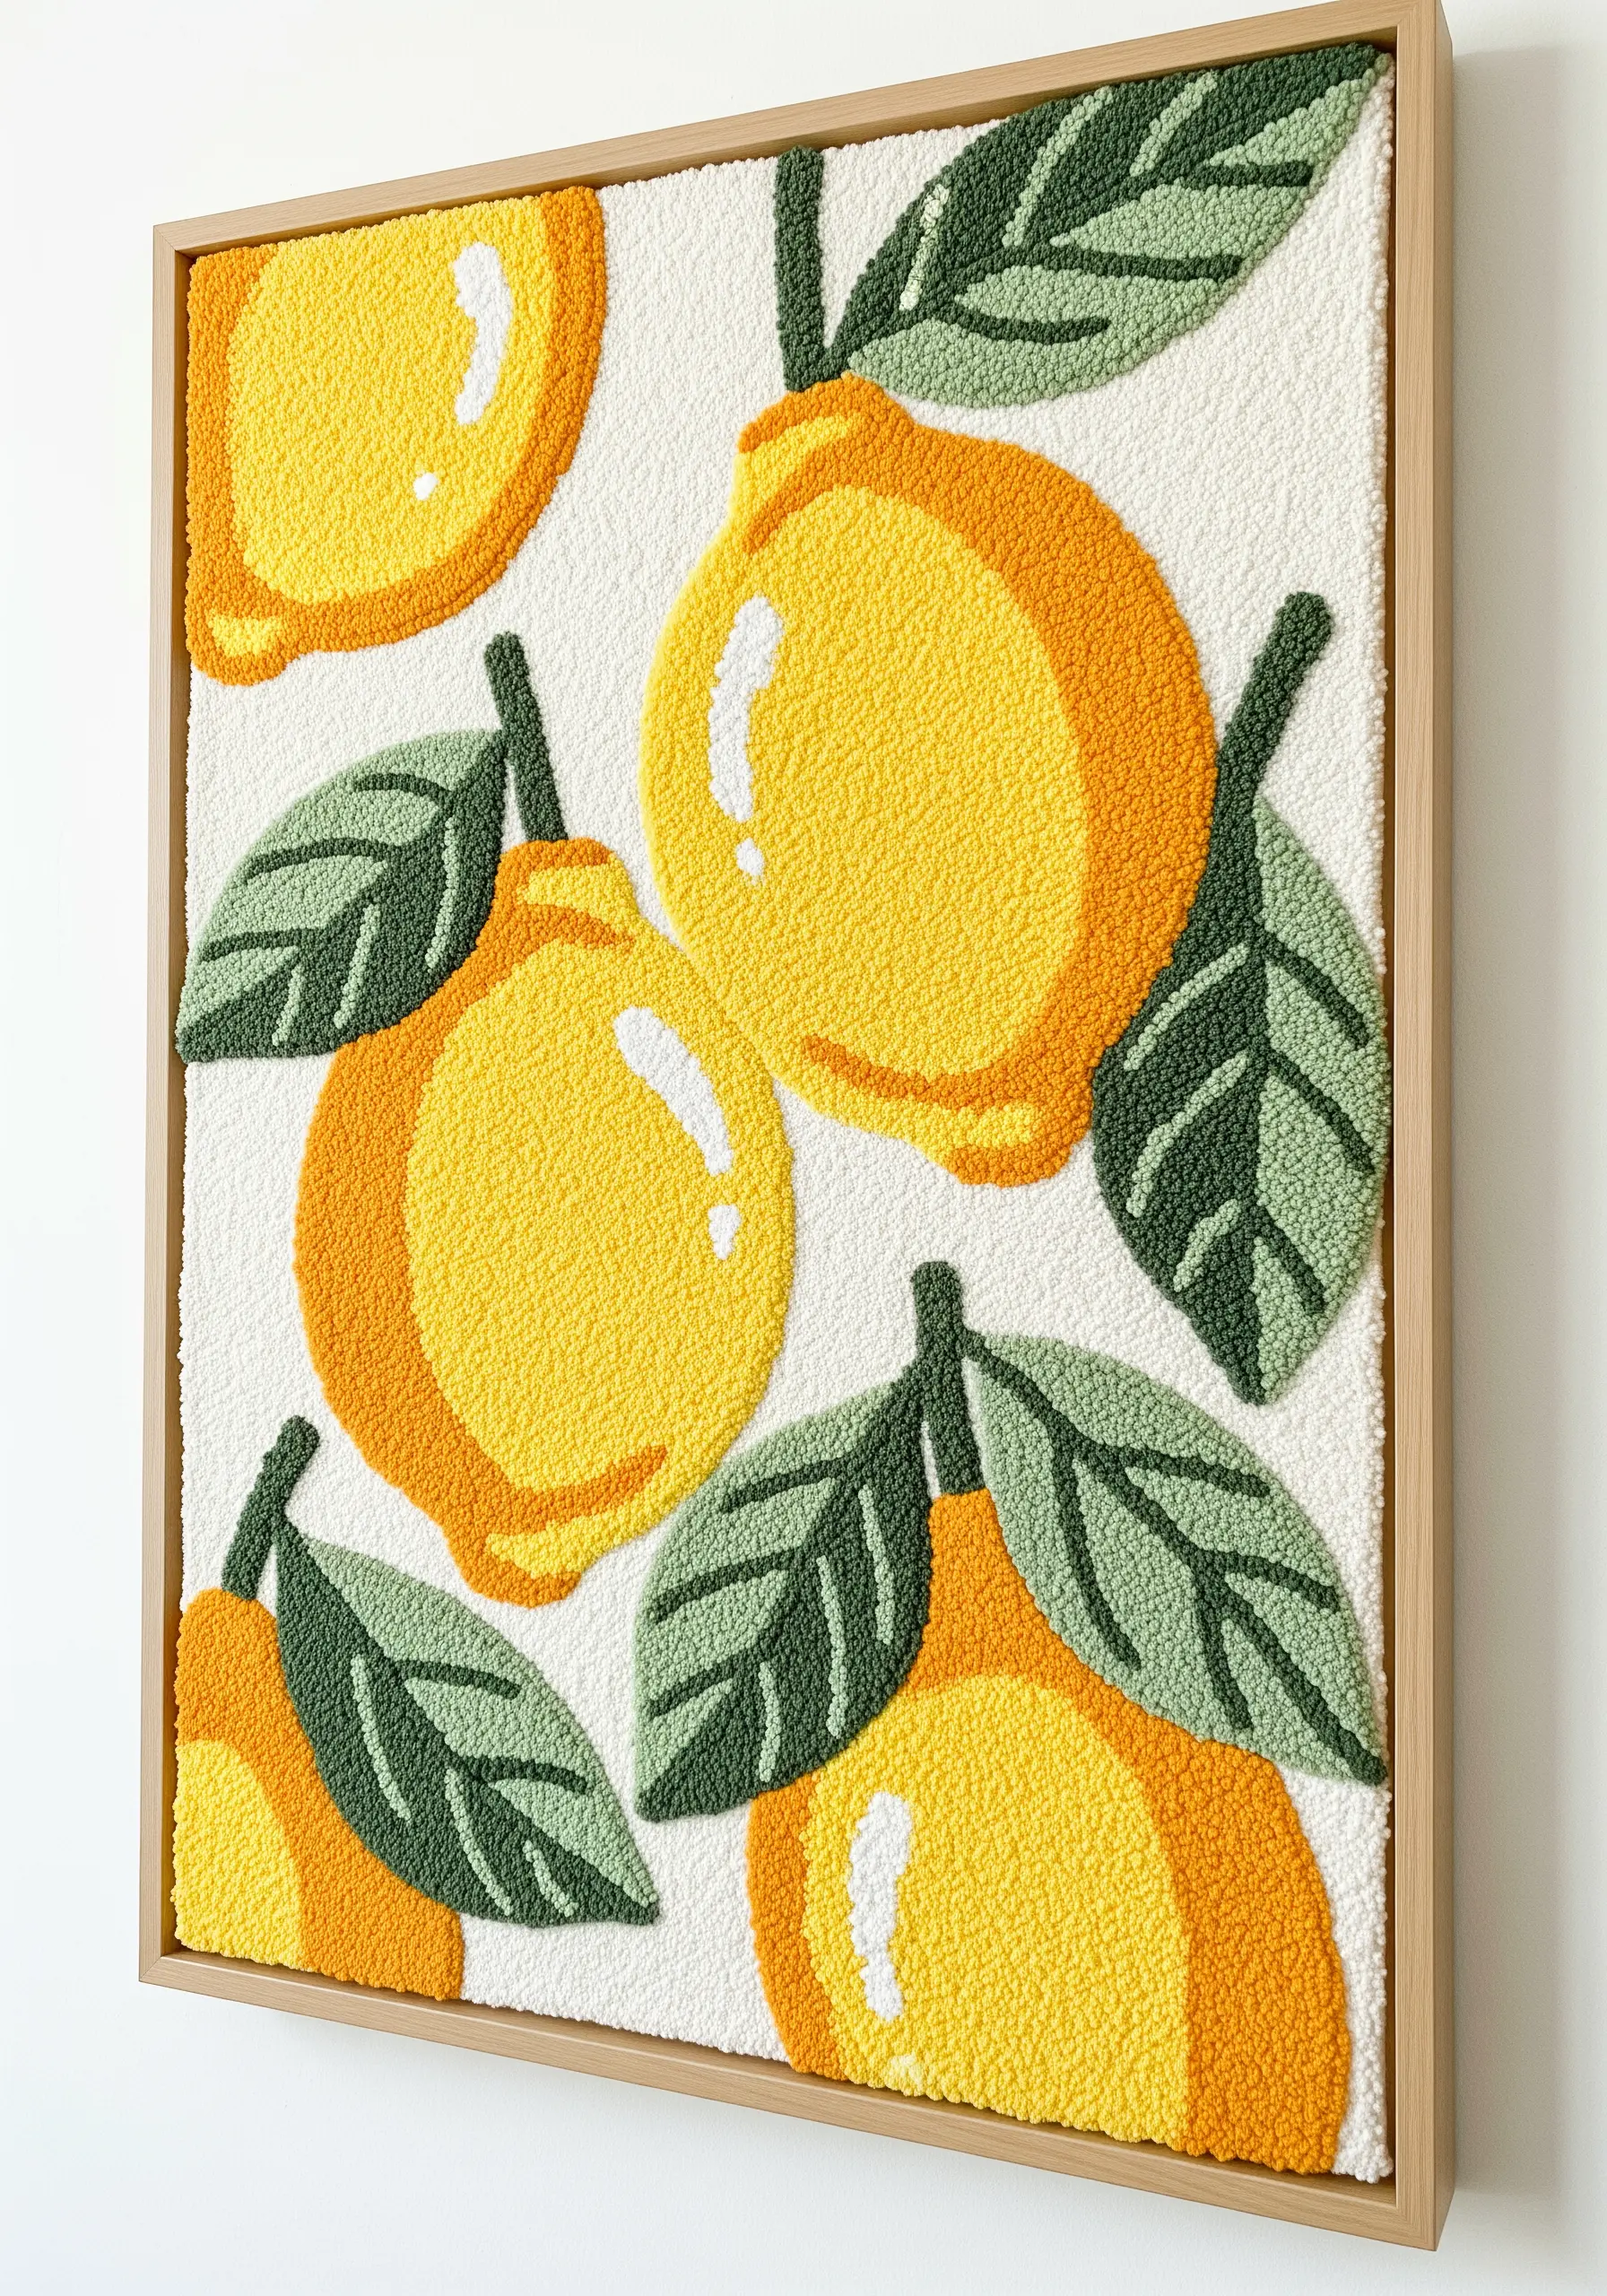
You don’t need complex shading to create a striking piece. Focus on bold shapes and a clean, limited color palette.
The uniform, looped texture of punch needle gives these simple lemon motifs a wonderful sense of volume and solidity.
Use a contrasting color to outline each shape, which adds definition and a graphic, almost illustrative quality.
This approach is perfect for creating minimal fruit and botanical embroidery patterns that feel fresh and modern.
20. Weave with Meaning Using Upcycled Materials
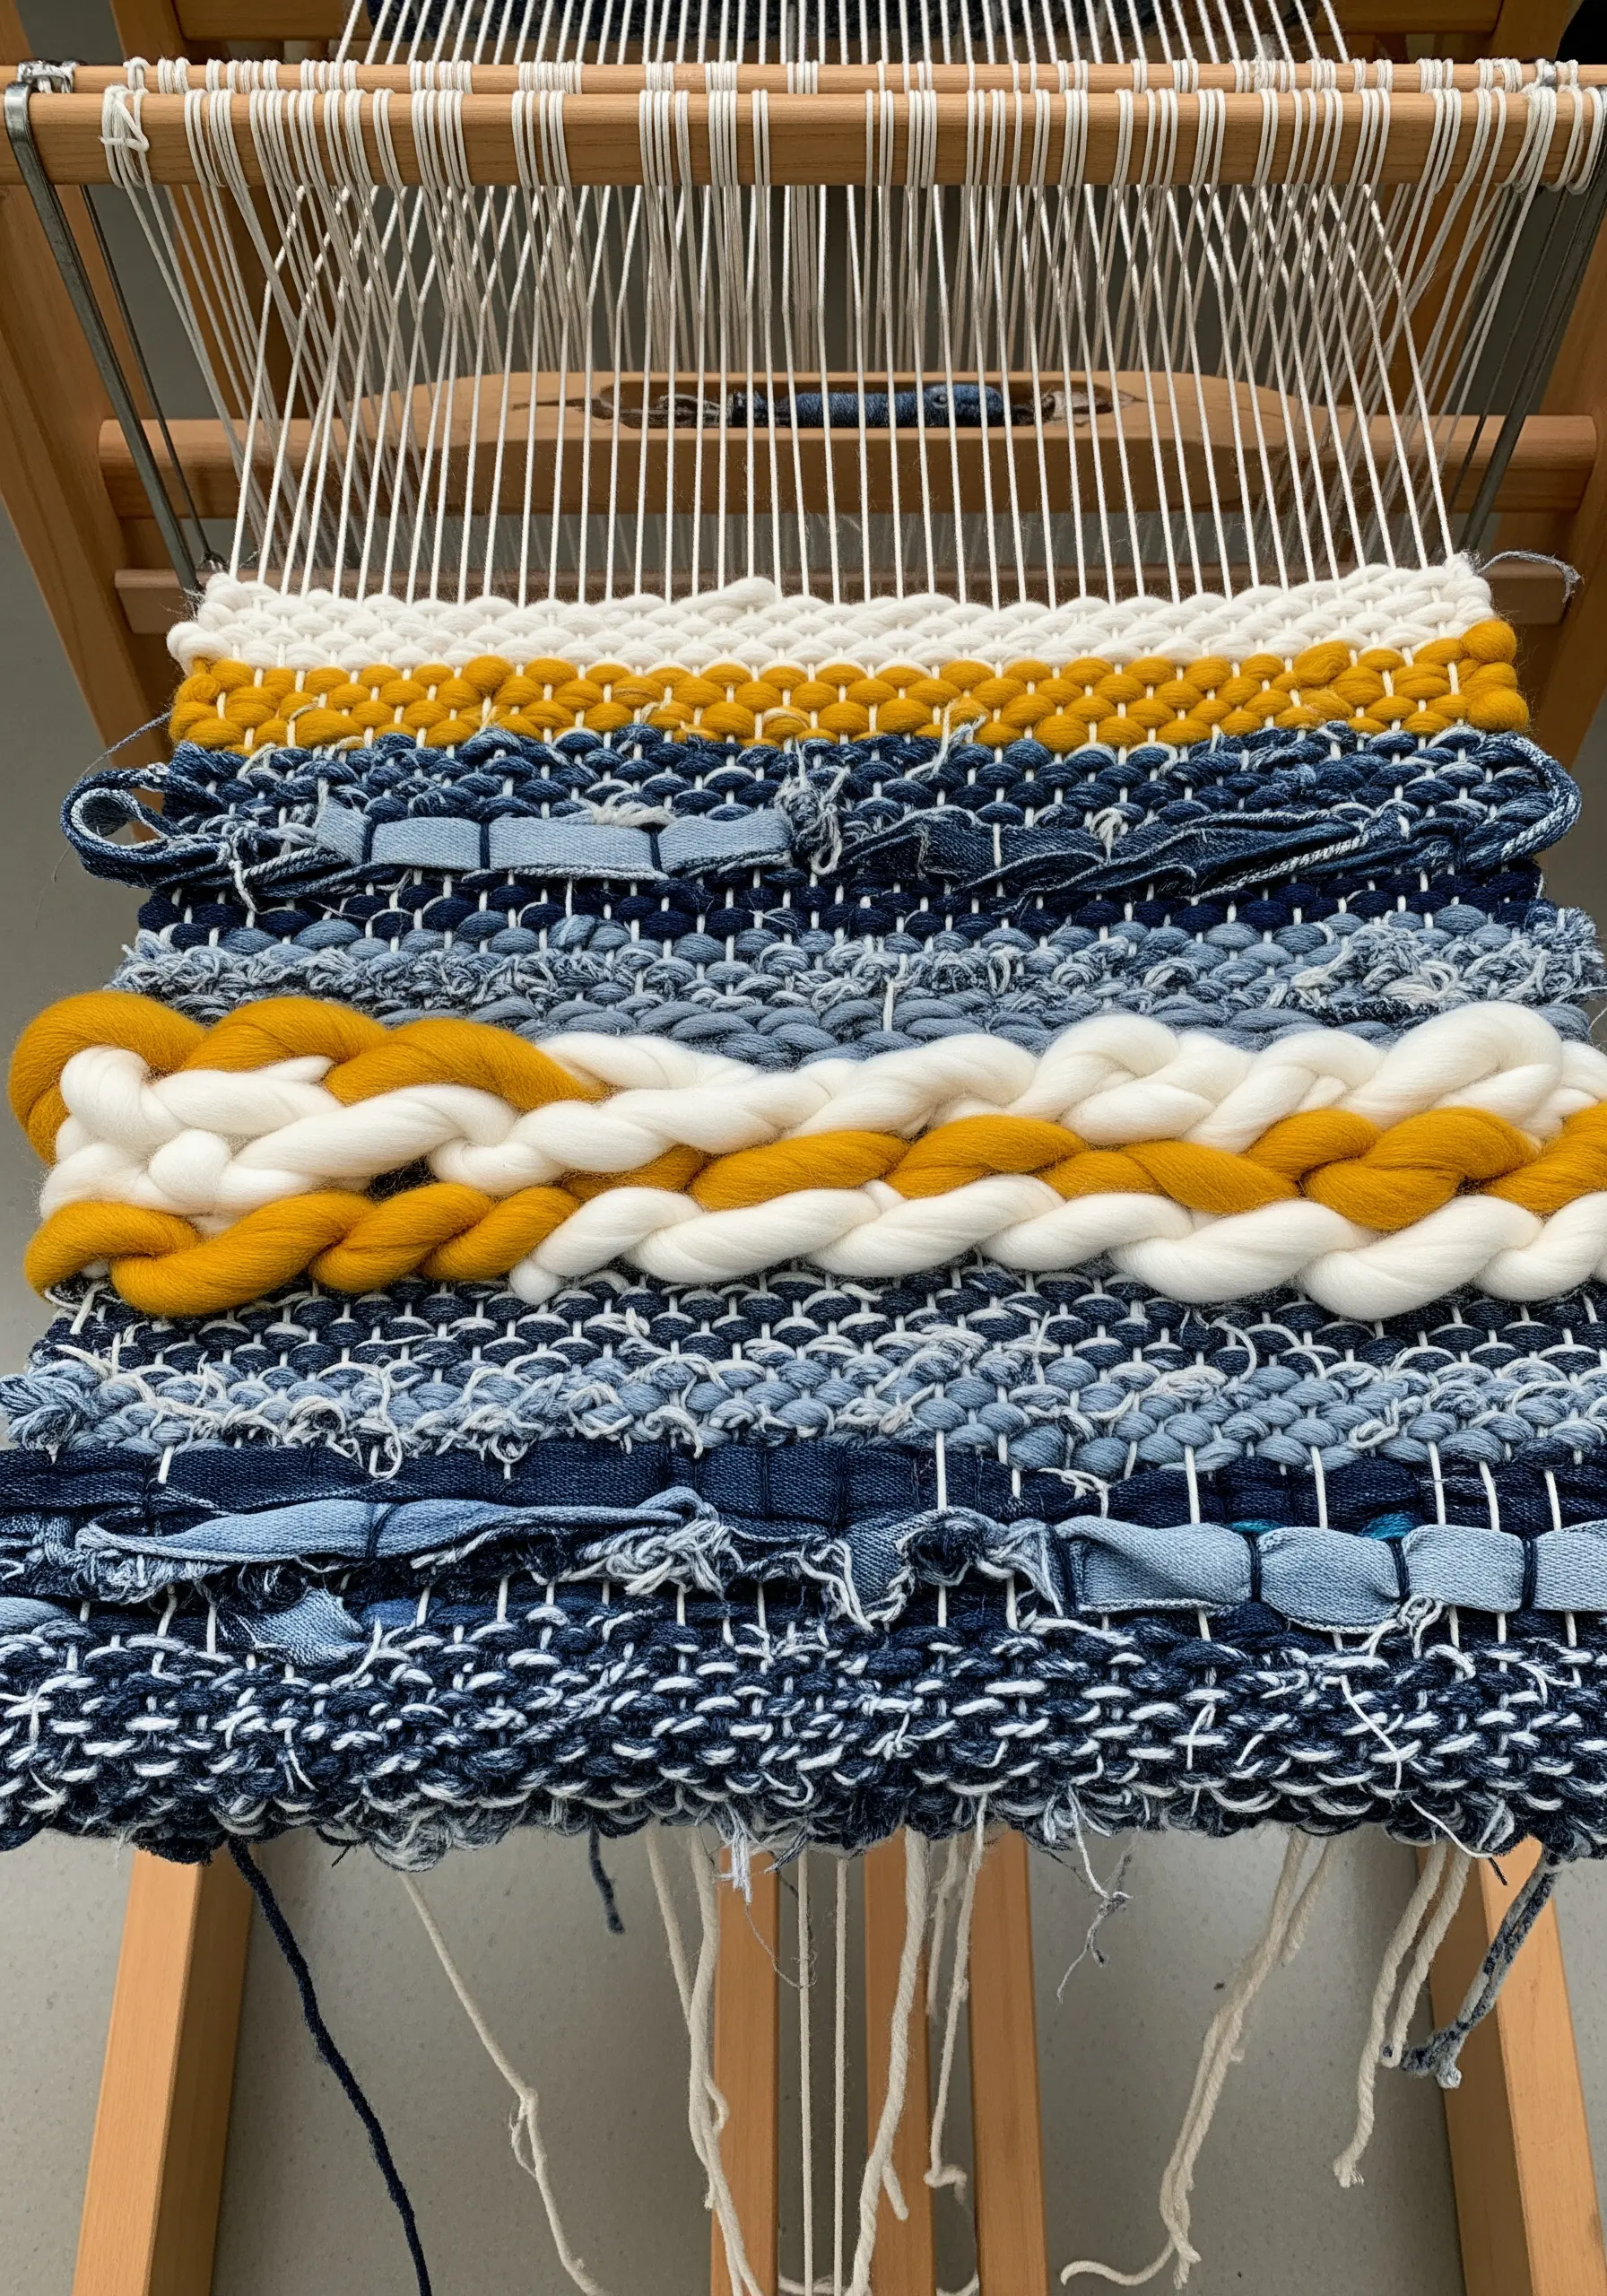
Create a truly personal piece of art by weaving with materials that hold memories, like old denim jeans.
Cut the denim into thin strips, leaving the seams and edges for added texture.
Combine the denim strips with traditional yarn in a contrasting color to highlight the unique texture and color variations of the recycled fabric.
This sustainable practice results in textile wall art ideas that are not only beautiful but also rich with personal history.
21. Sculpt Organic Shapes with Macrame Knots
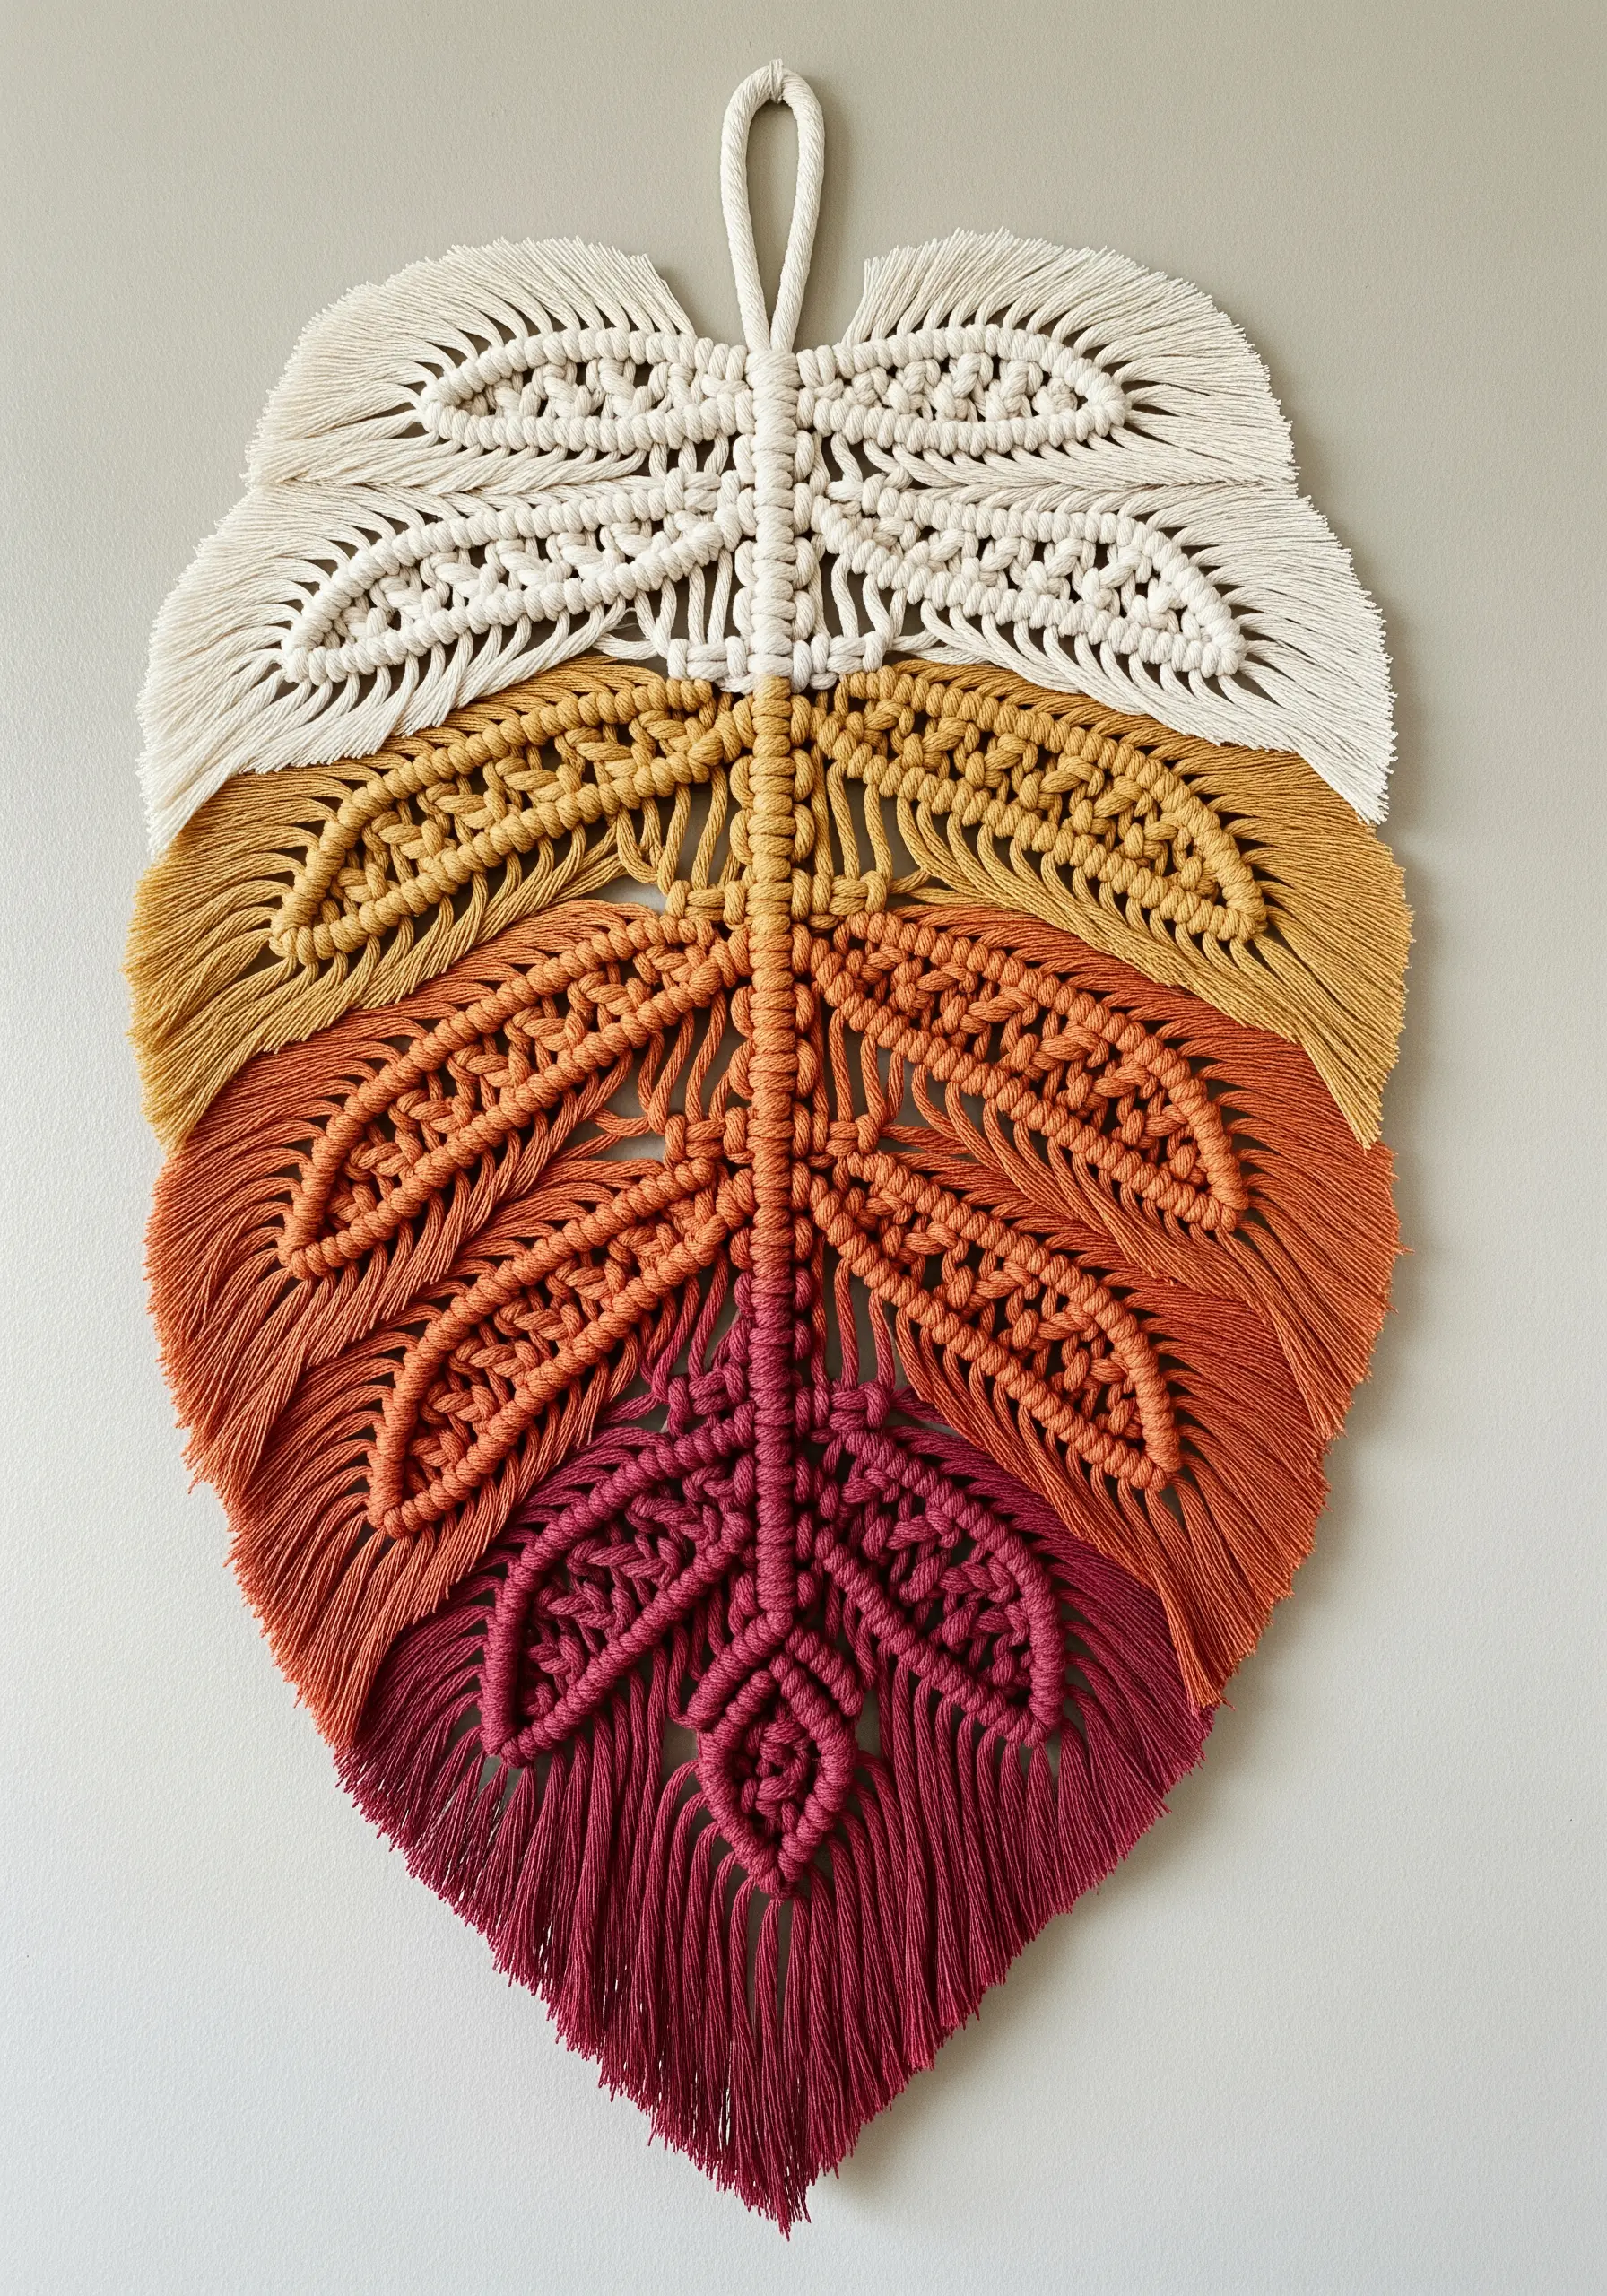
Use fundamental macrame knots to build organic shapes, like this stylized leaf.
A central spine of lark’s head knots provides the structure, while repeating rows of double half-hitch knots create the angled shape of the leaf’s edges.
To achieve the soft, fringed border, simply un-twist and comb out the ends of the cotton cord.
Dyeing the cords beforehand in an ombré sequence adds a beautiful, natural gradient that enhances the leaf form, making it a perfect piece of organic decor.
22. Weave Functional Art with Integrated Pockets
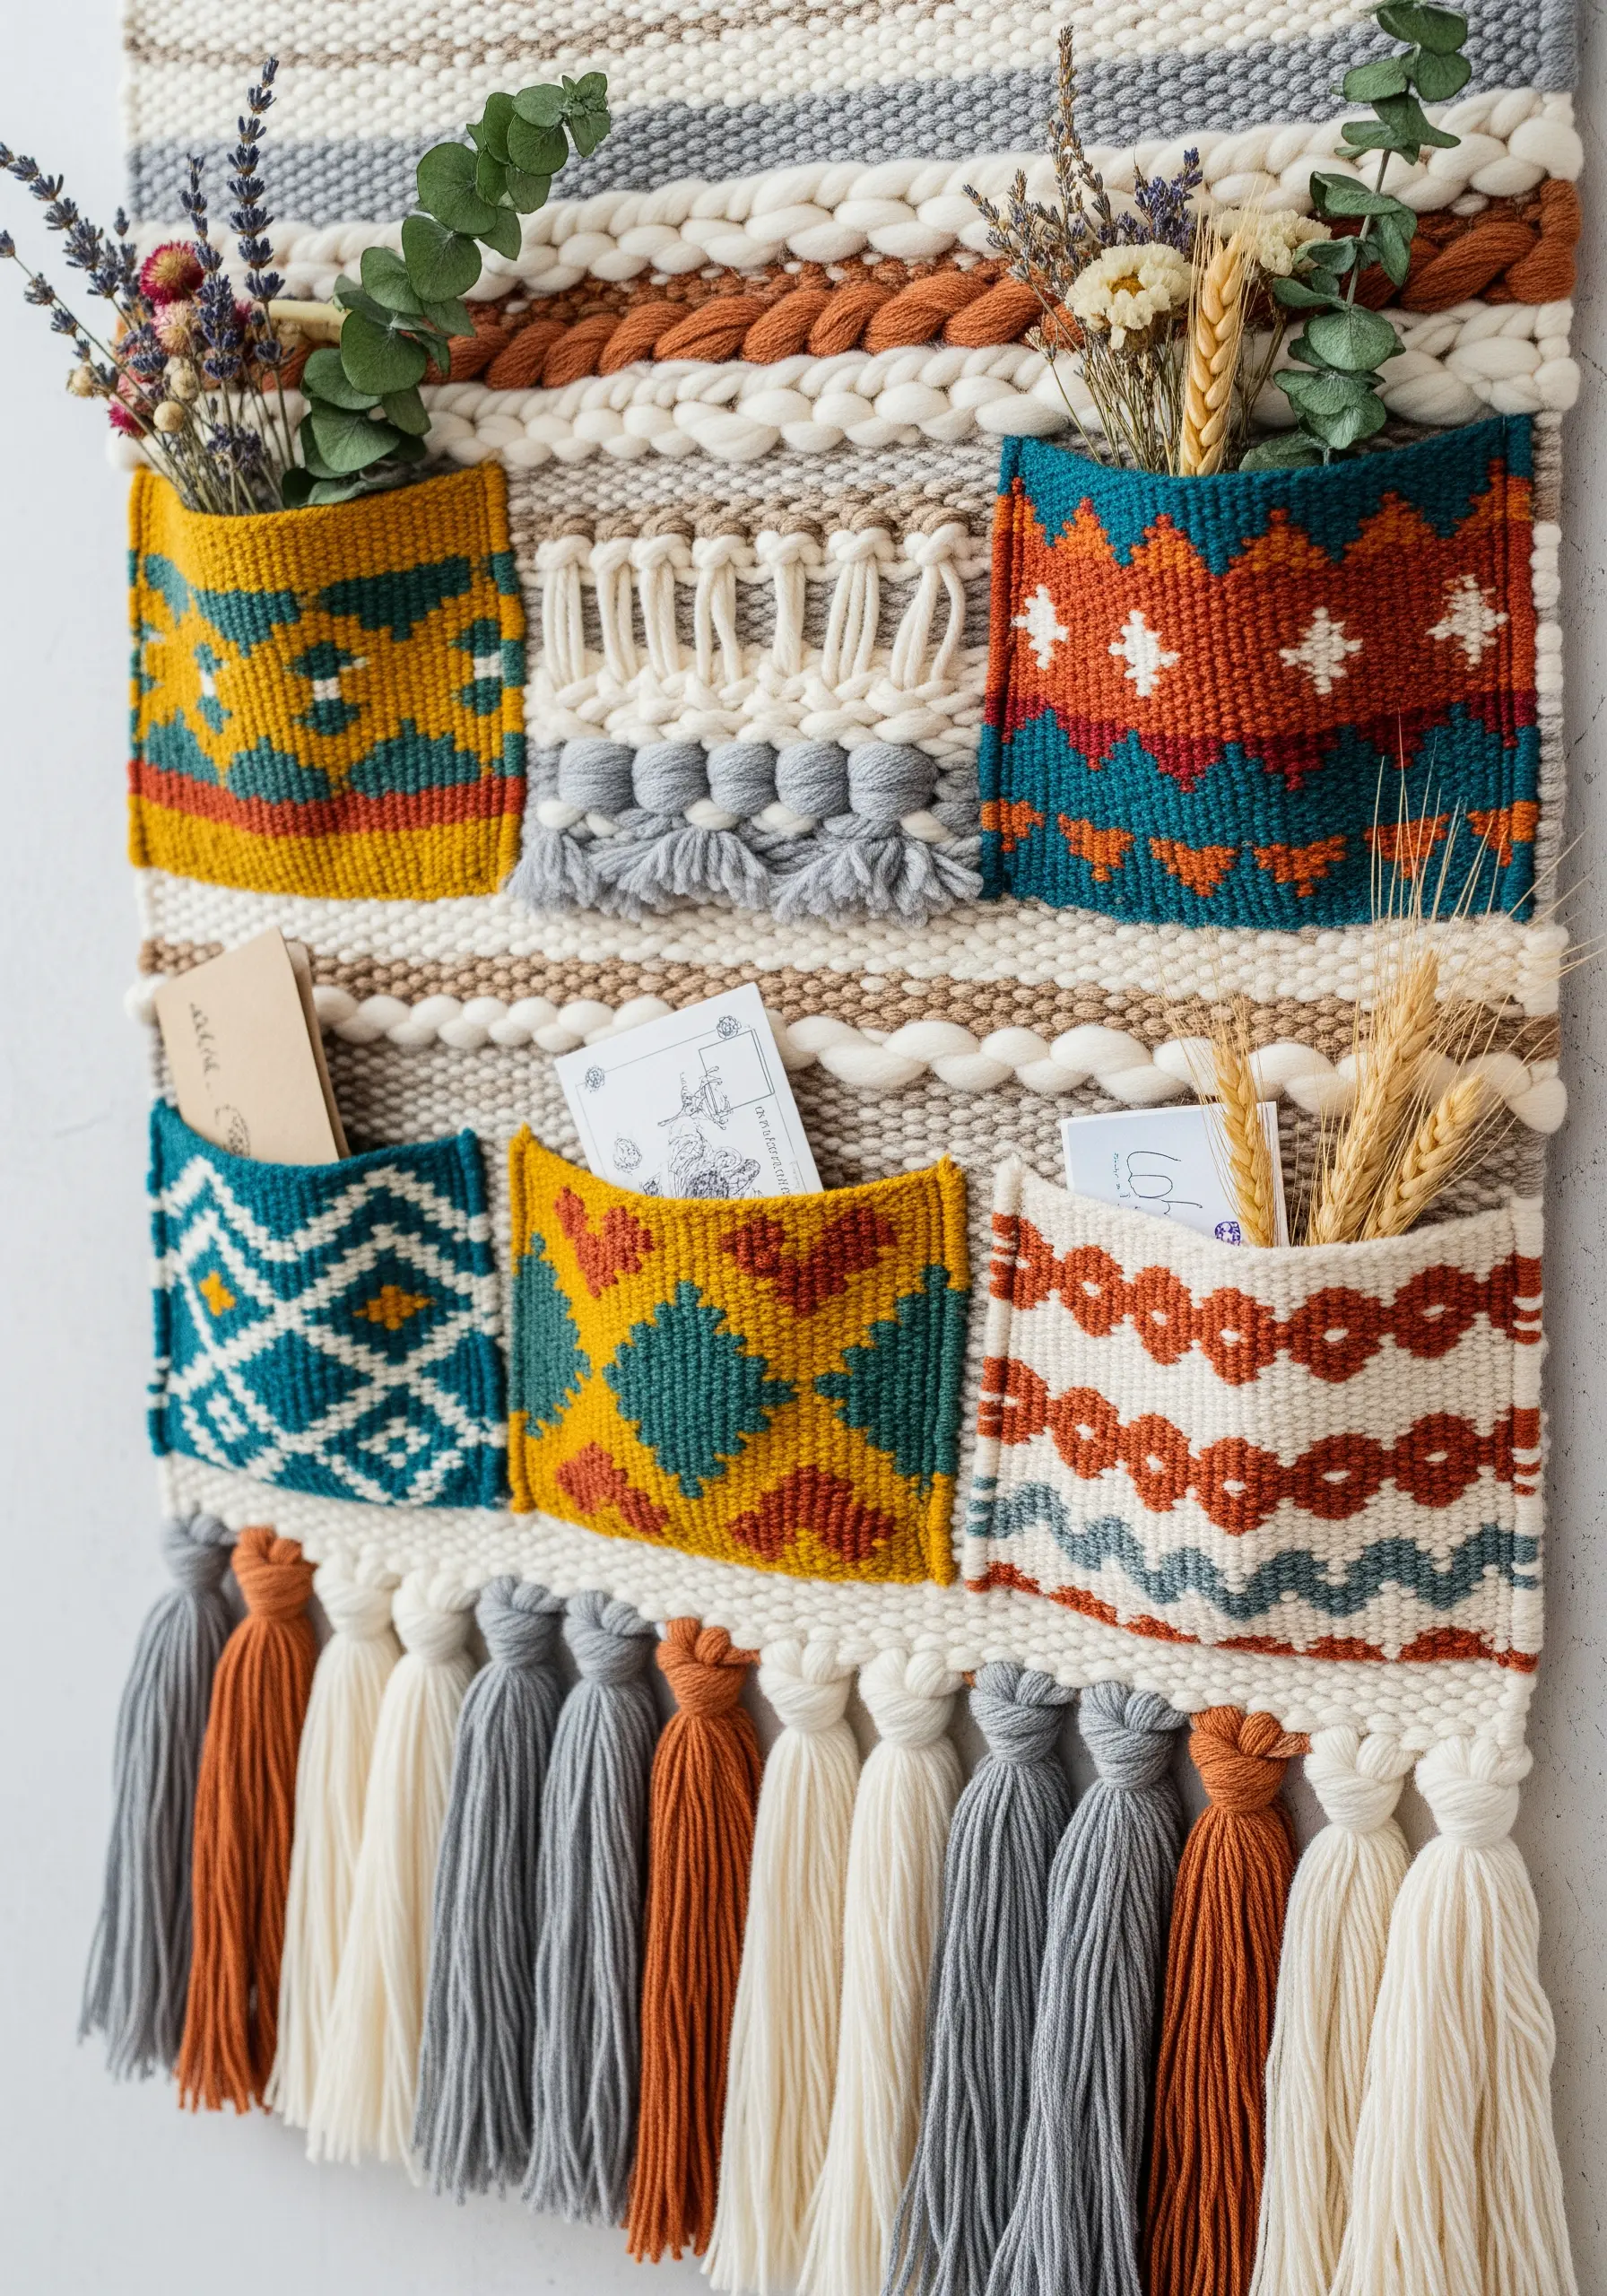
Combine beauty and utility by designing a wall hanging that also serves as an organizer.
To create the pockets, weave small, individual sections and then fold them up, stitching the sides to the main tapestry backing.
Use distinct colors and patterns for the pockets to make them stand out as both a design element and a functional feature.
This thoughtful approach turns a decorative weaving into a useful piece of art, perfect for storing mail, notes, or dried flowers. It’s an excellent way to create handmade art objects with purpose.


