
You have the threads, the fabric, and the desire to create something beautiful. But sometimes, the finished piece doesn’t quite capture the vision in your mind. It feels… homemade. I want you to know that the gap between ‘craft’ and ‘art’ is smaller than you think.
It’s not about buying more supplies or mastering a hundred different stitches. It’s about refining your approach—understanding how to use texture to create depth, how a limited color palette can be more powerful than a rainbow, and how combining different fiber techniques can tell a richer story.
In each idea that follows, I’ll show you a specific technique or a shift in perspective. These are the details that elevate your work, giving it that intentional, polished quality you’re searching for. Let’s begin.
1. Master the Tension of a Wrapped Rainbow Arch
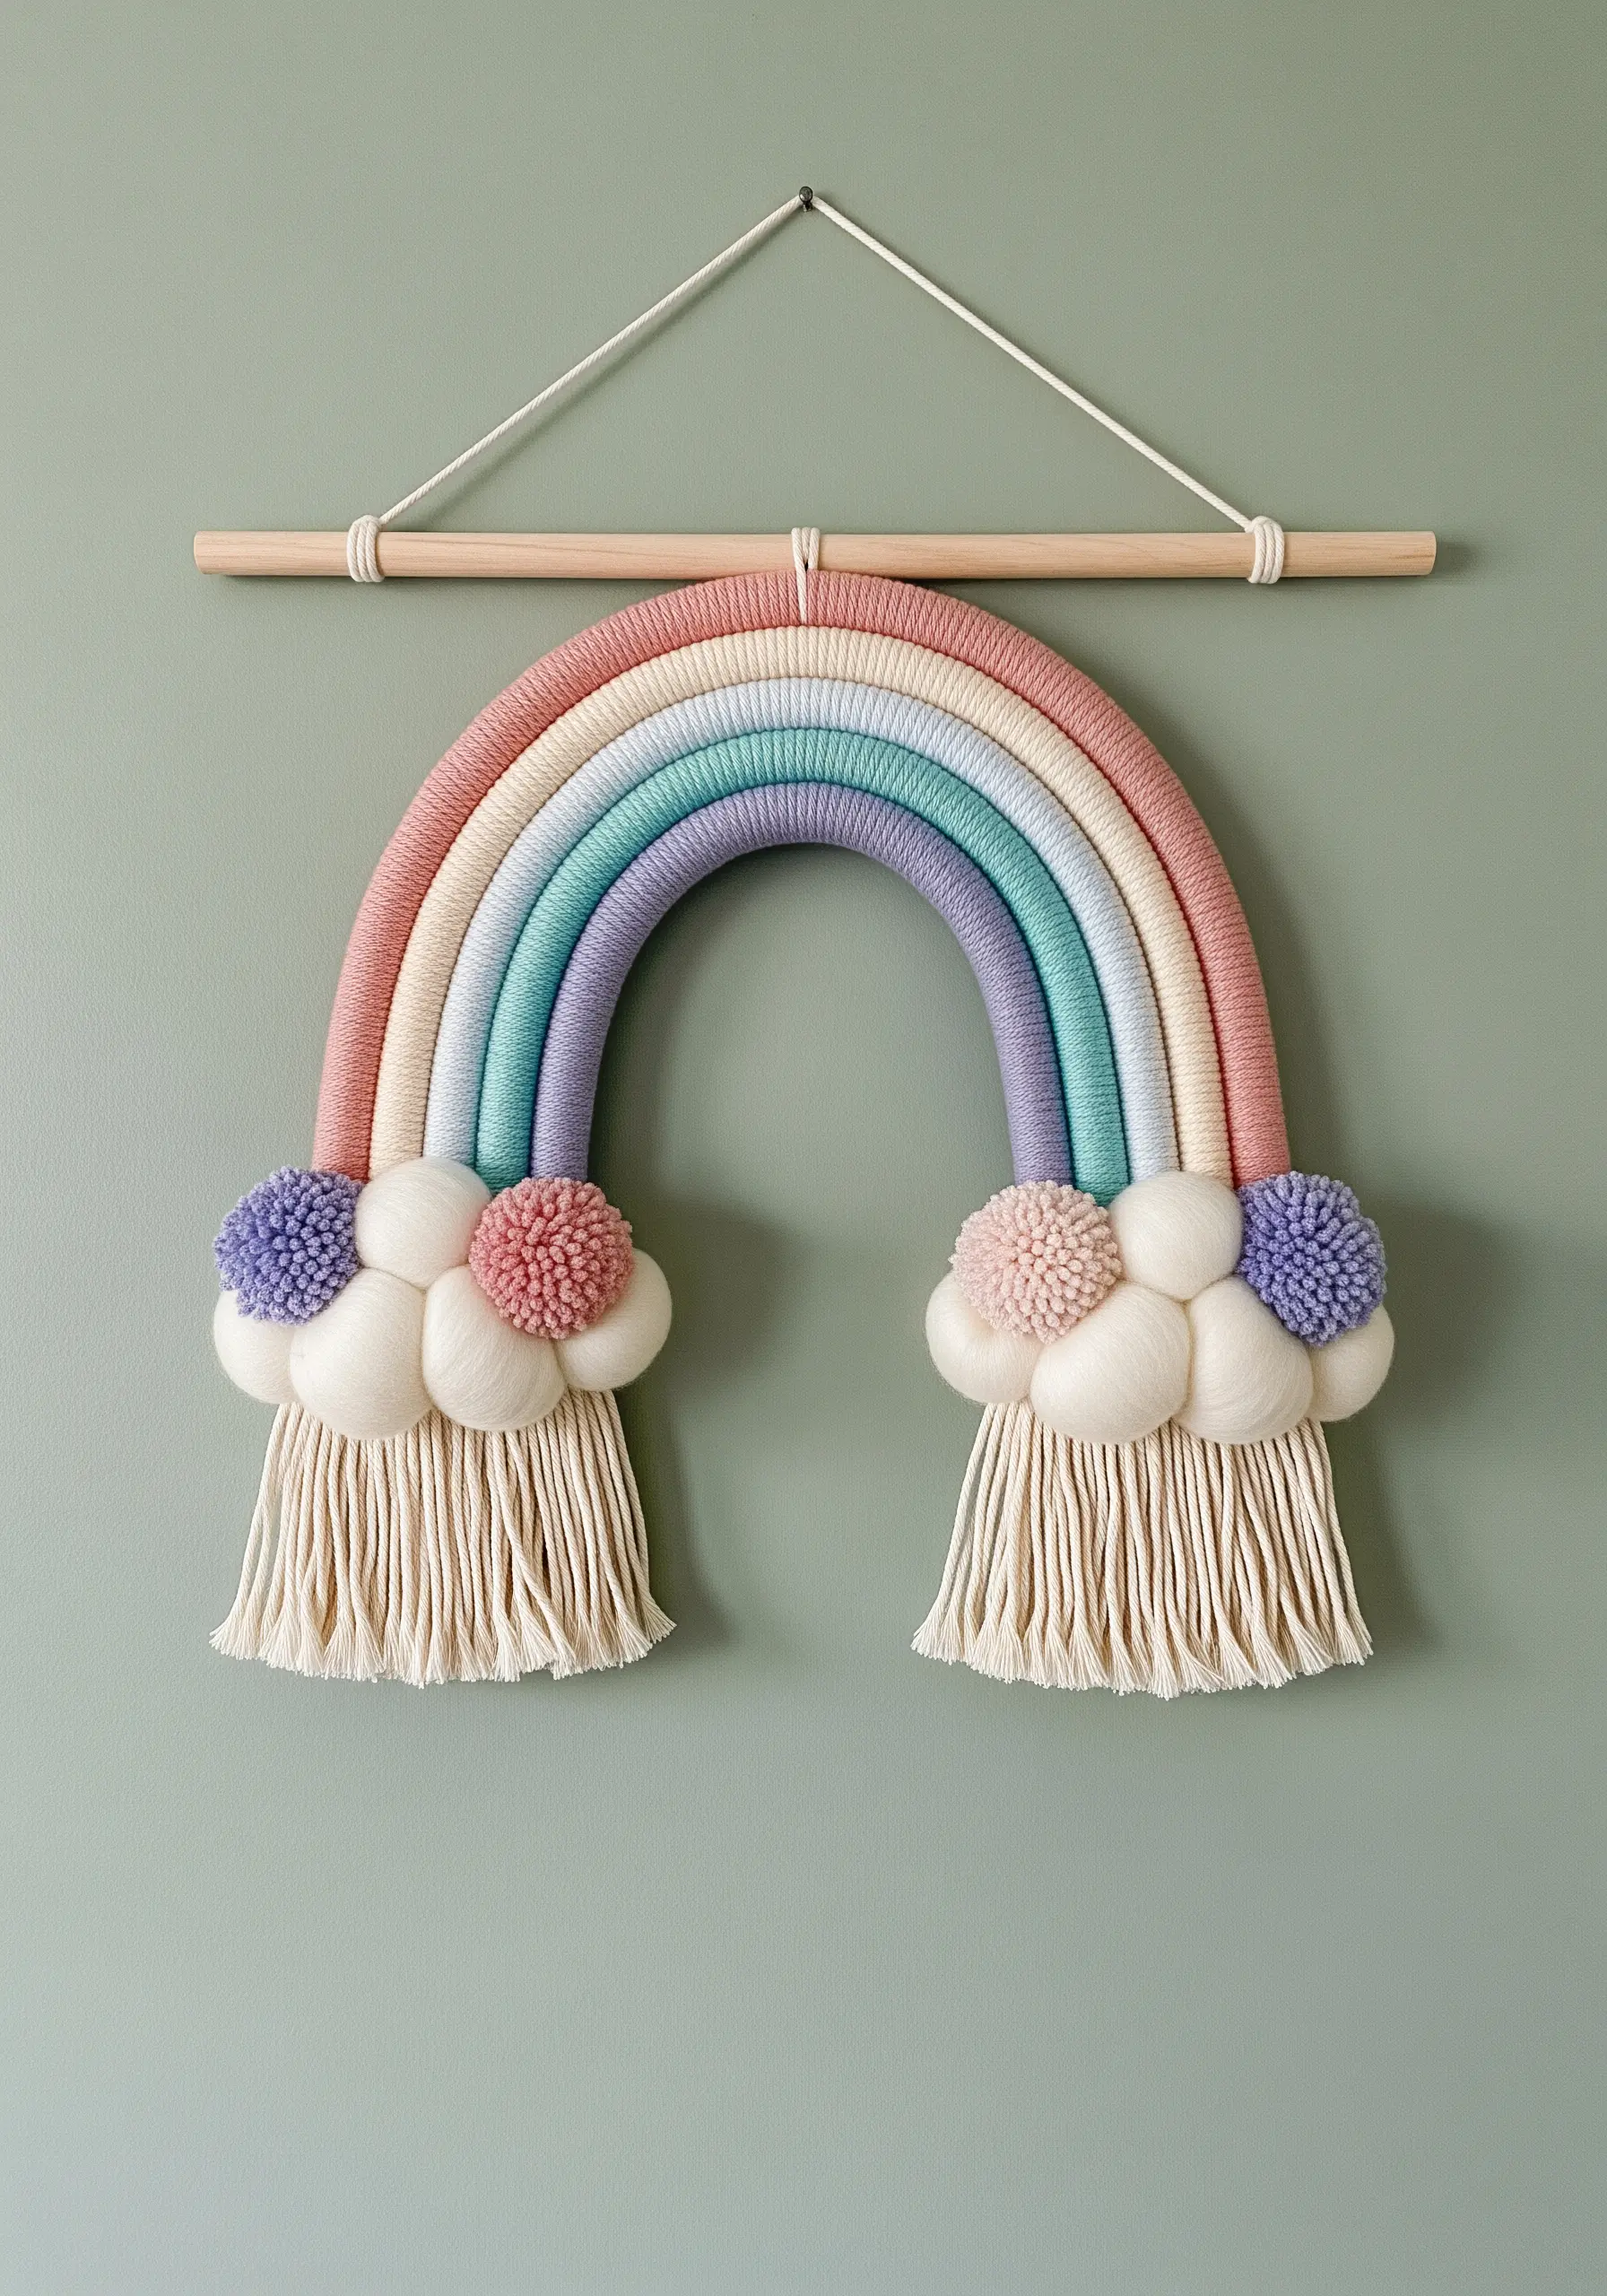
To achieve that perfectly smooth, dense color on a wrapped rainbow, the secret is consistent tension.
Instead of wrapping loosely, pull the yarn taut with each loop, ensuring it nestles tightly against the previous one without overlapping.
This technique eliminates gaps and creates solid, satisfying blocks of color.
For the clouds, use wool roving and needle felting to create soft, sculptural forms that contrast beautifully with the sleek arches.
This juxtaposition of textures—smooth yarn against fluffy wool—is what gives the piece its professional, polished feel.
2. Weave a Moonscape with Dimensional Texture
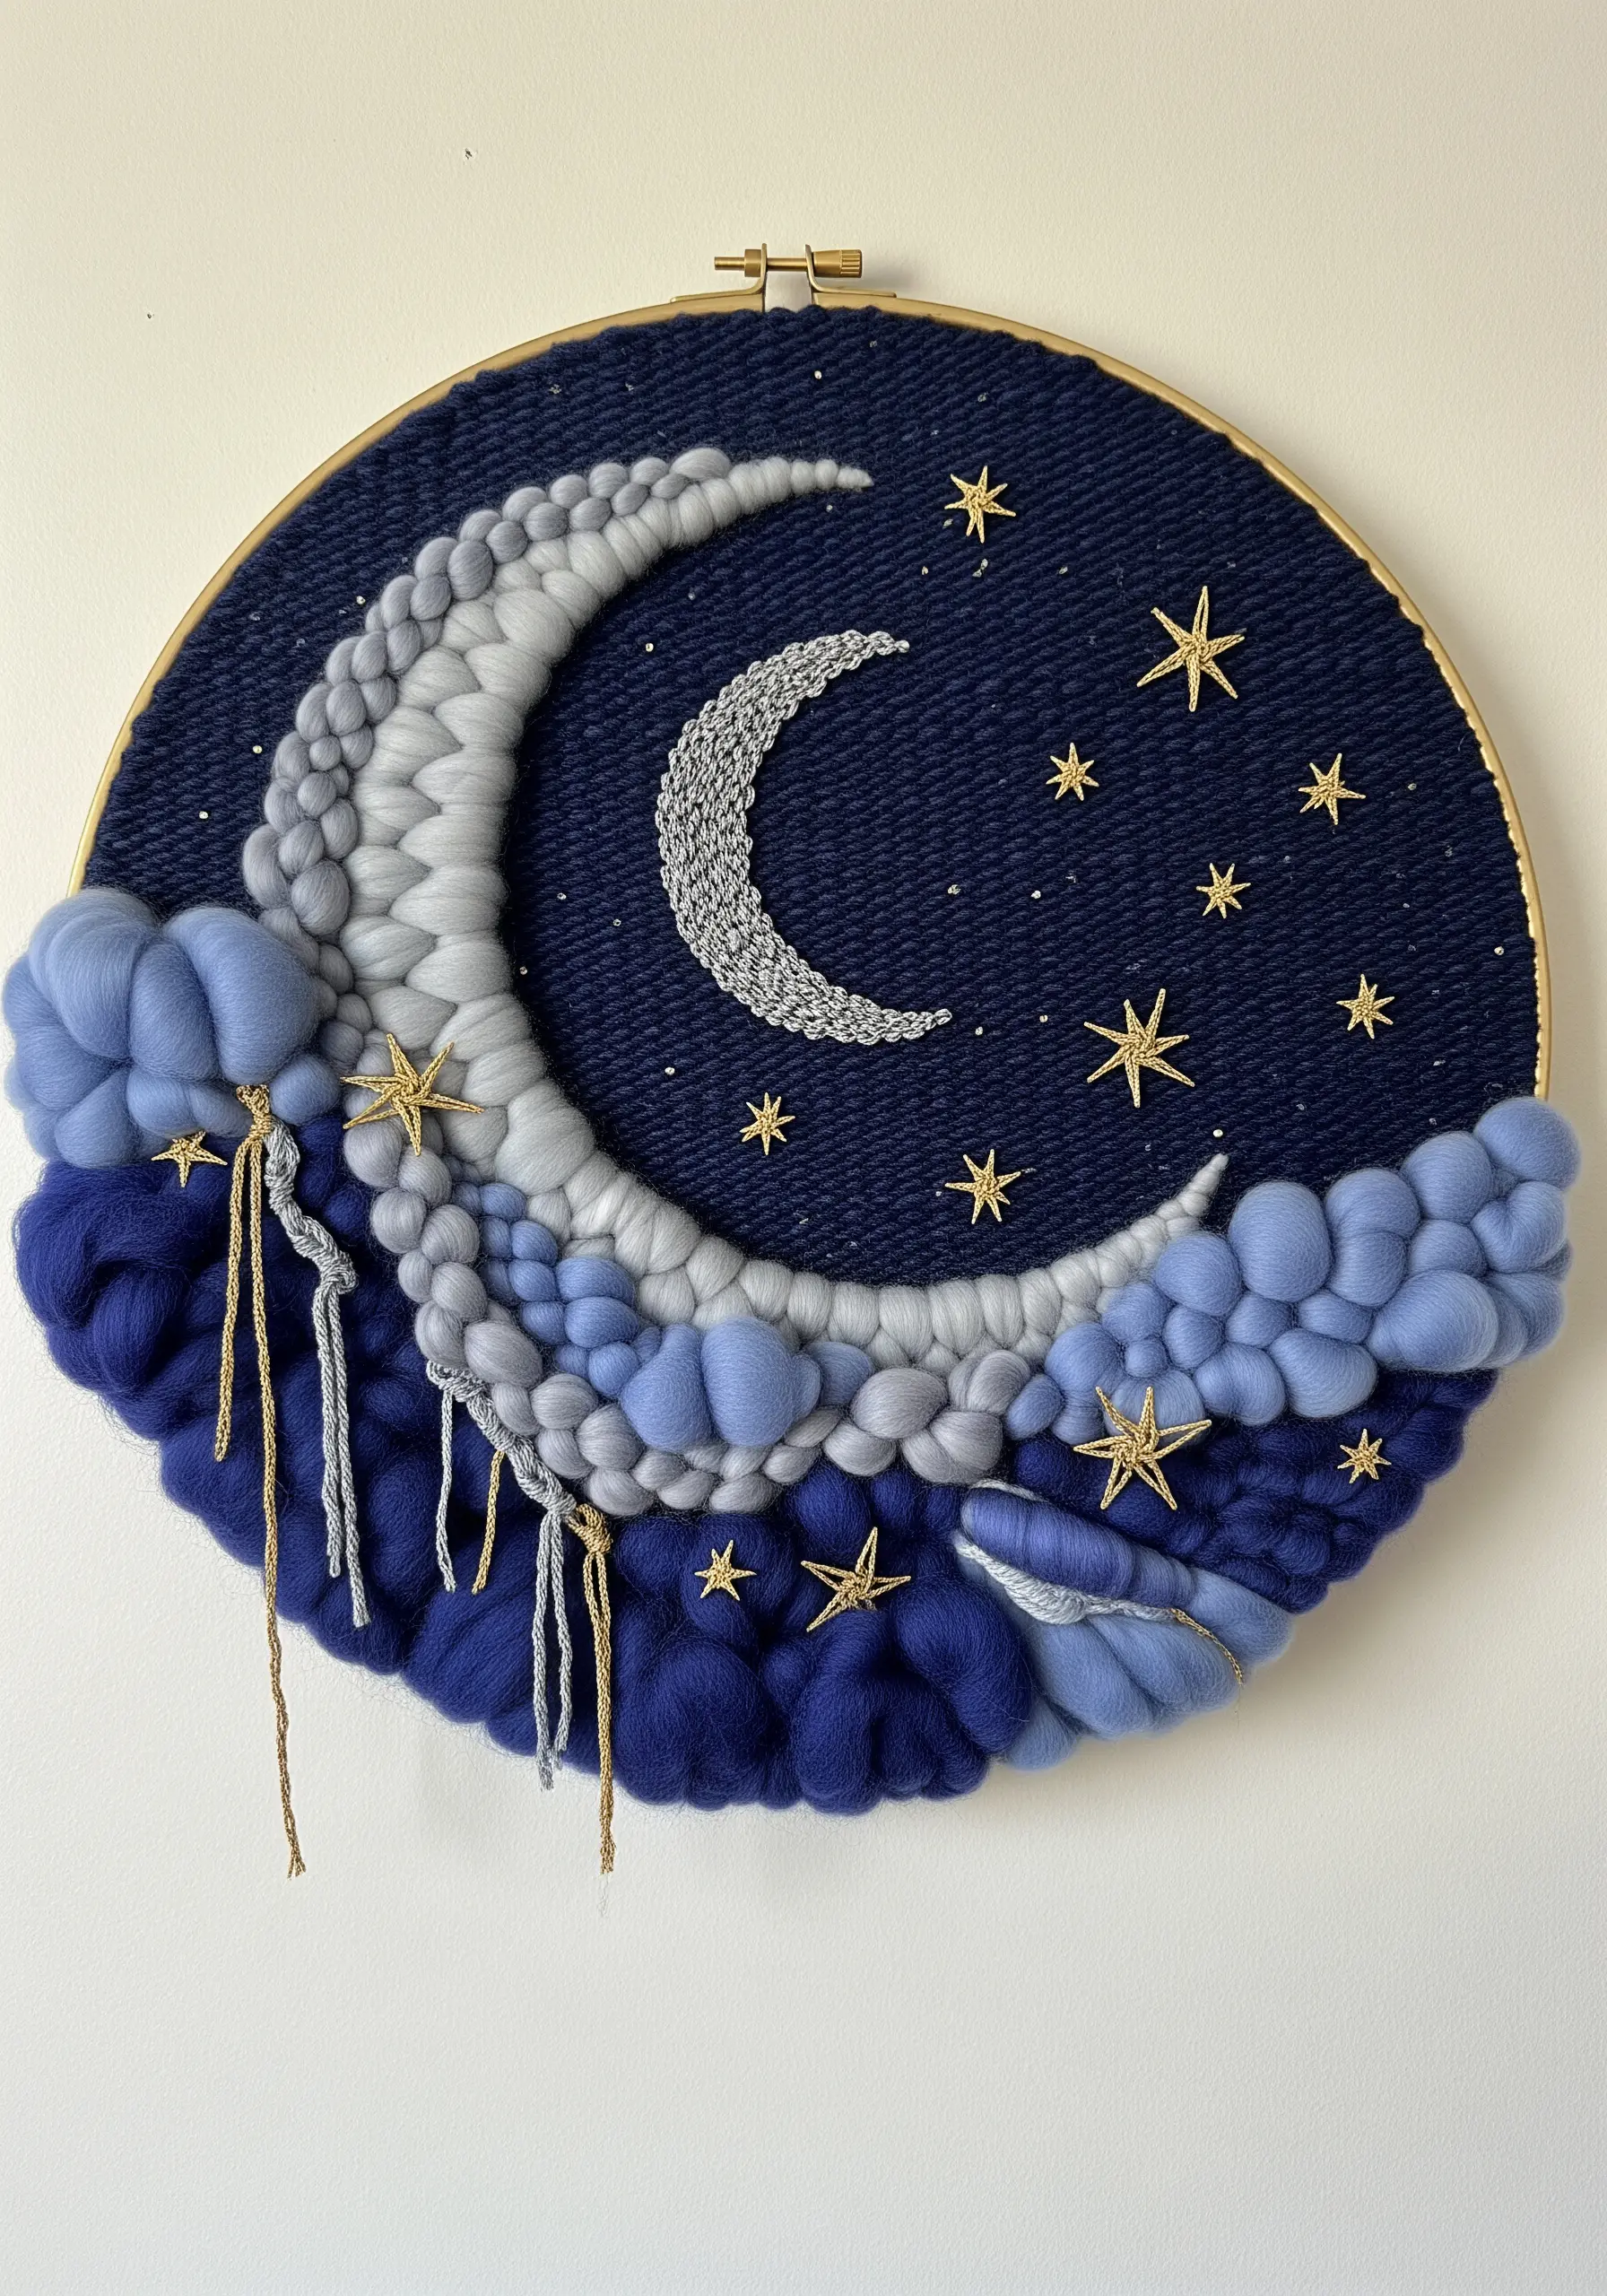
Go beyond flat stitching by weaving with yarns of varying weights directly onto your fabric base.
Use chunky wool roving for the prominent curves of the moon and clouds to create dramatic, raised surfaces that catch the light.
Intersperse these thick textures with finer, traditional yarns and metallic threads to add depth and shimmer.
The contrast between the matte, soft roving and the sparkle of the stars elevates the piece from a simple embroidery to a tactile, celestial micro-embroidery masterpiece.
3. Sculpt with Yarn Using Punch Needle Technique
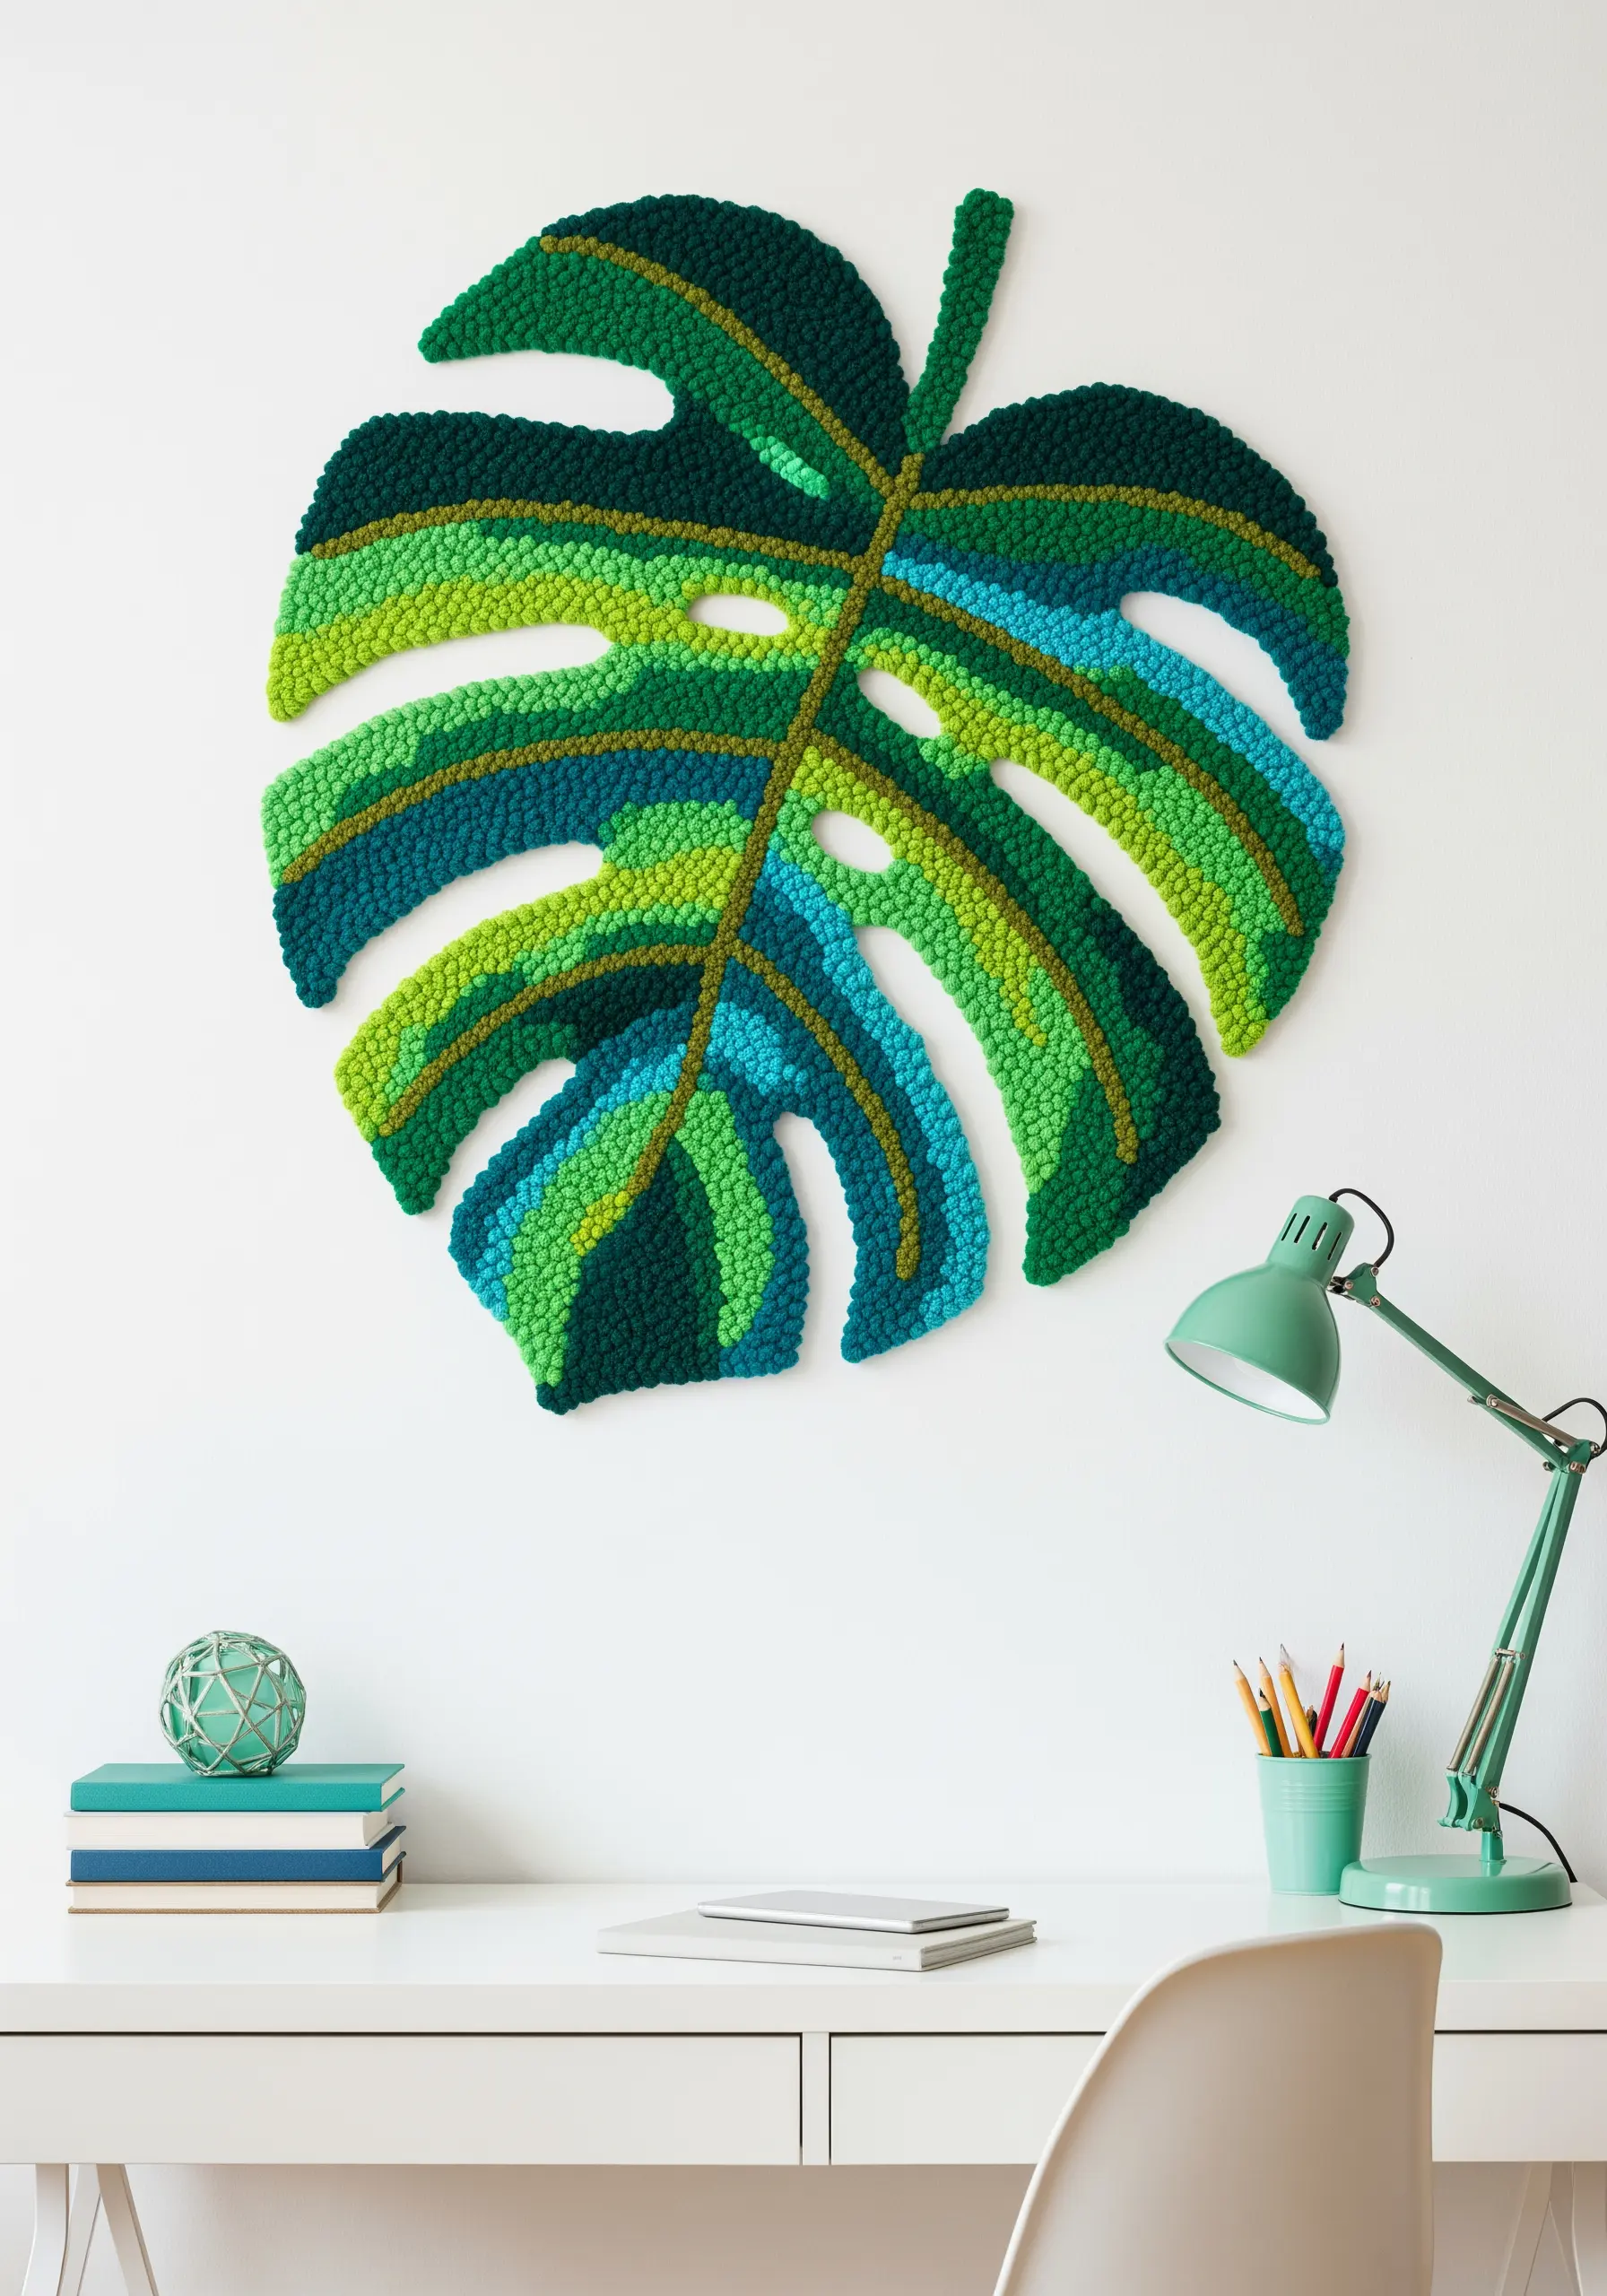
For a lush, carpet-like texture that fills large areas quickly, punch needle is your ideal tool.
To create the clean color-blocking seen in this leaf, map out your design on the back of your monk’s cloth first.
Work from the outside in, outlining each color section before filling it.
This defines the edges and prevents colors from bleeding into one another, resulting in a crisp, graphic design.
Varying the loop height slightly can add subtle dimension to your tropical leaf embroidery designs, making them feel more organic and alive.
4. Create Geometric Depth with String Art
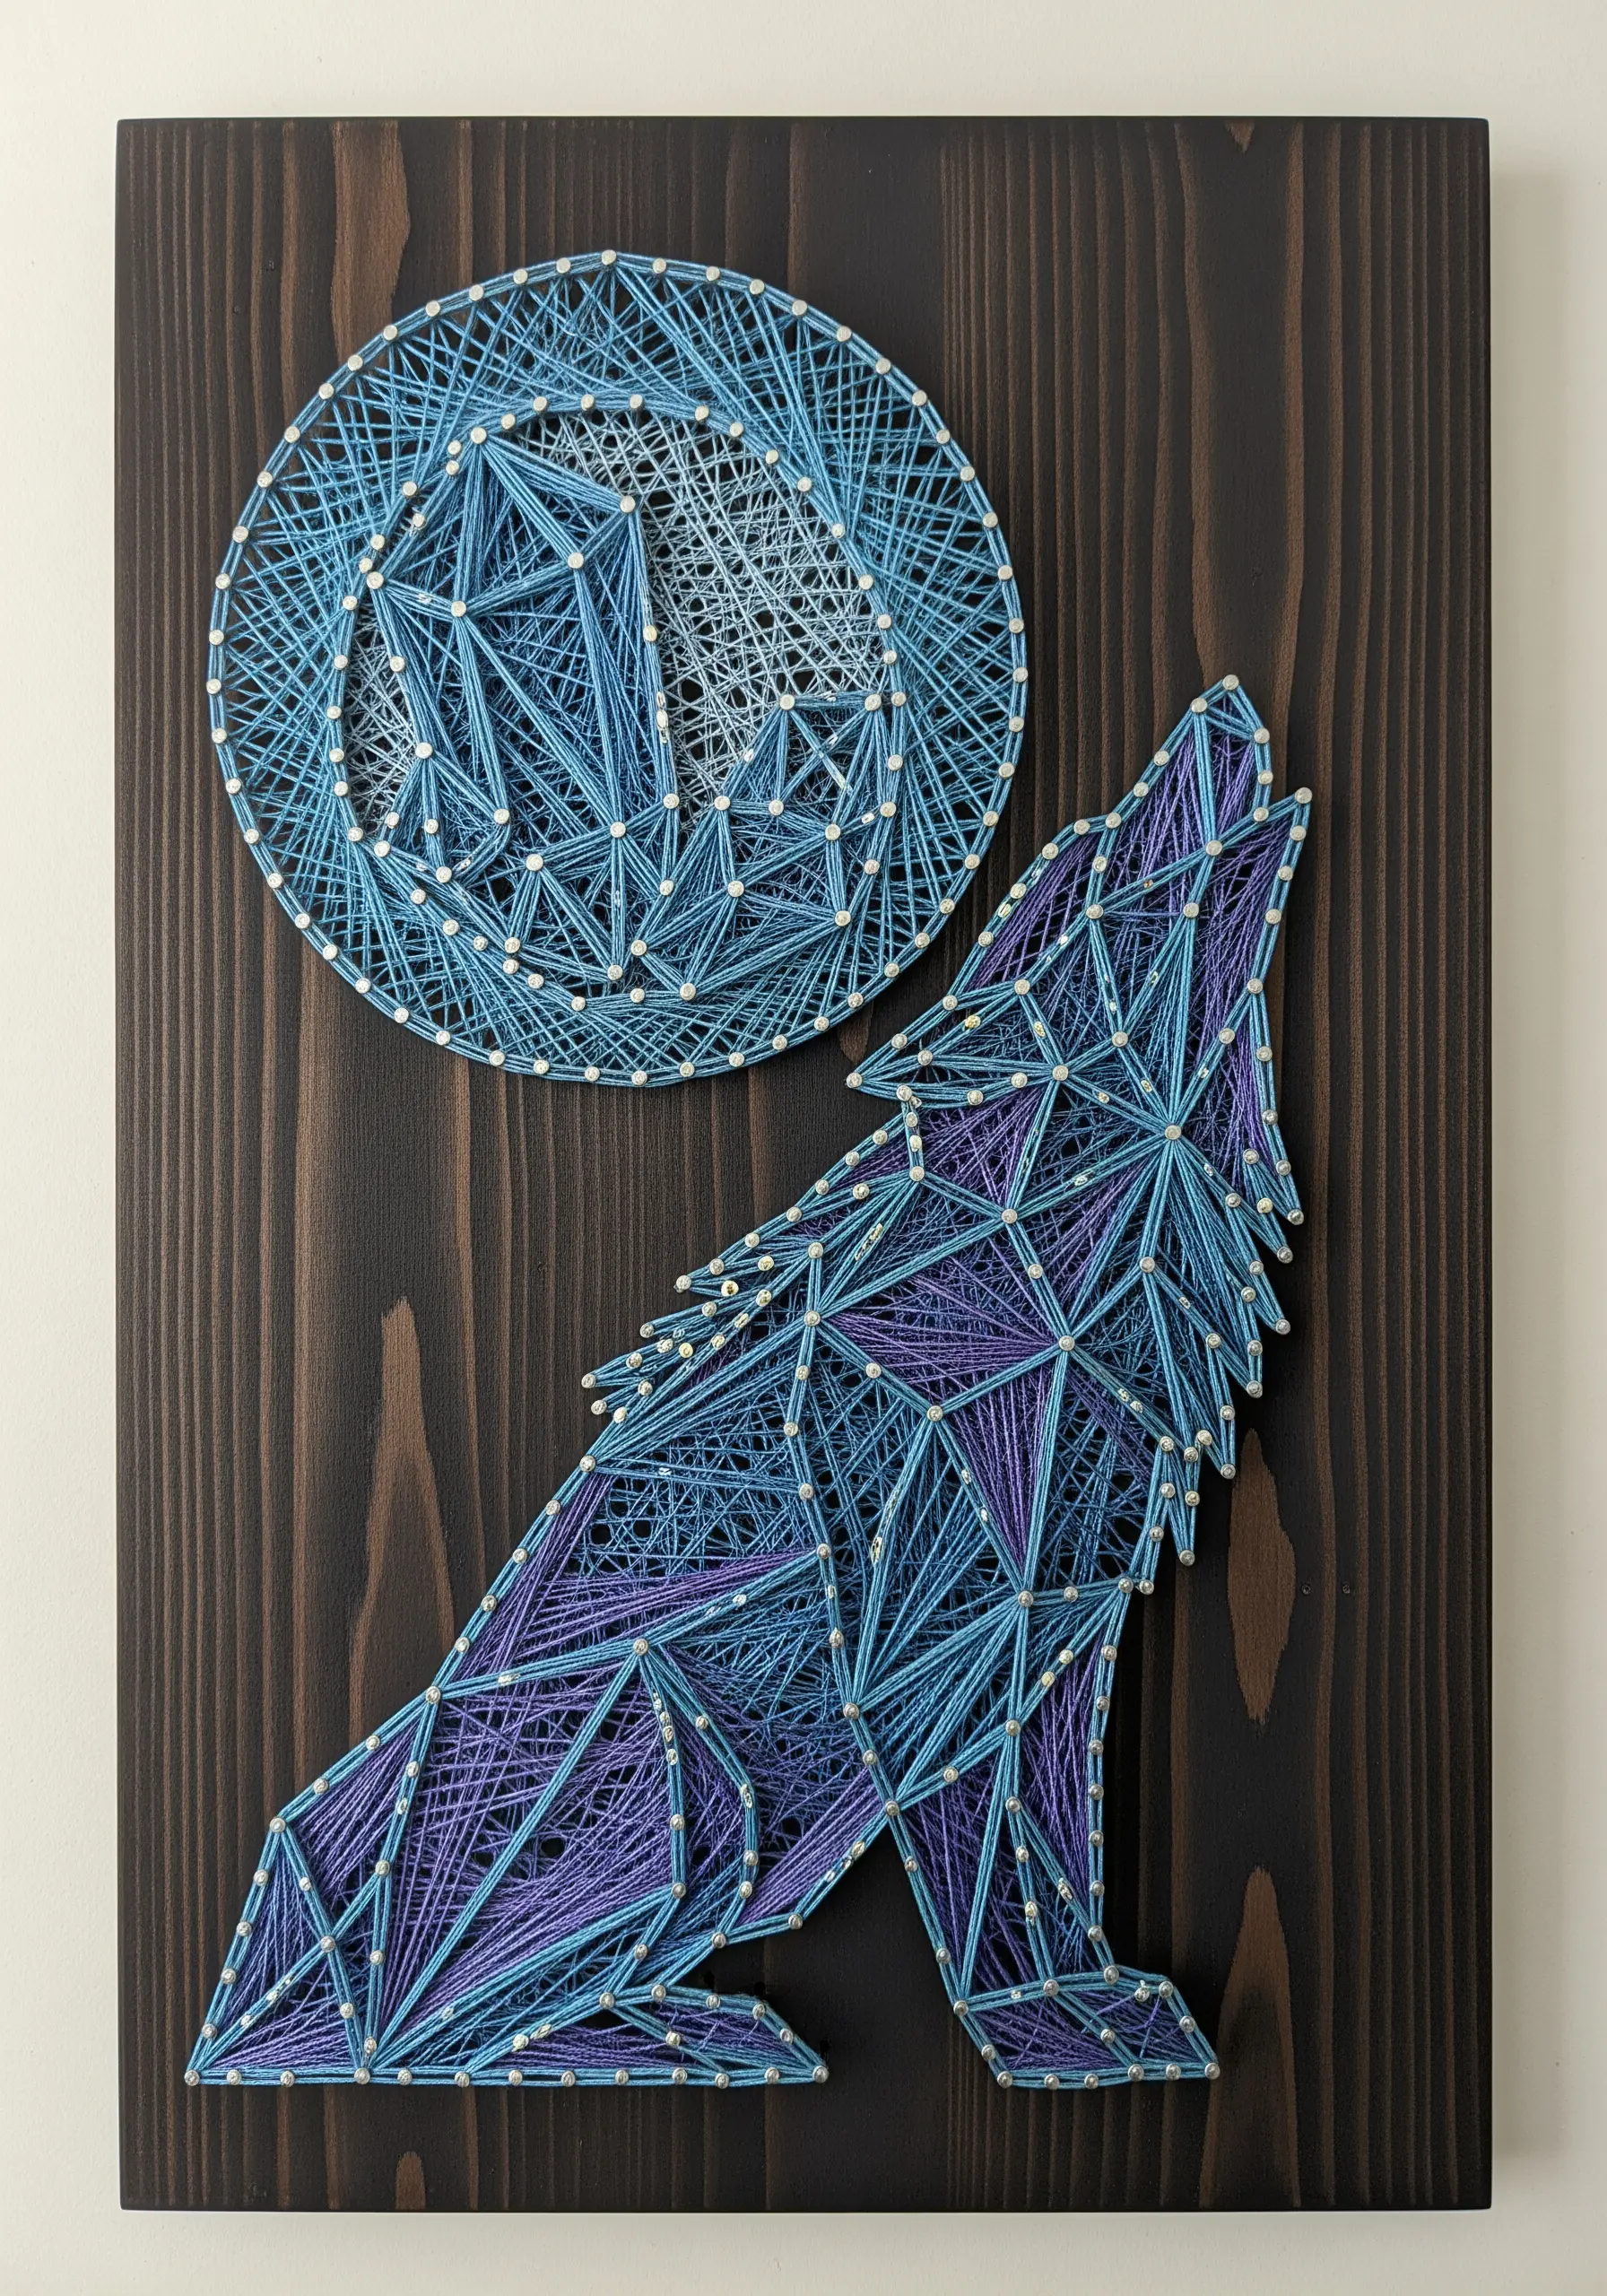
String art transforms a simple outline into a complex, faceted design through the art of layering.
Instead of randomly wrapping the string, work in planned layers, crisscrossing the thread between nails to build up density and color gradients.
Use a darker thread for the base layers and a lighter one on top to create highlights and the illusion of shadow.
This methodical layering is what gives realistic wolf embroidery motifs a crystalline, three-dimensional quality against a solid background.
5. Curate a Gradient Tassel Garland
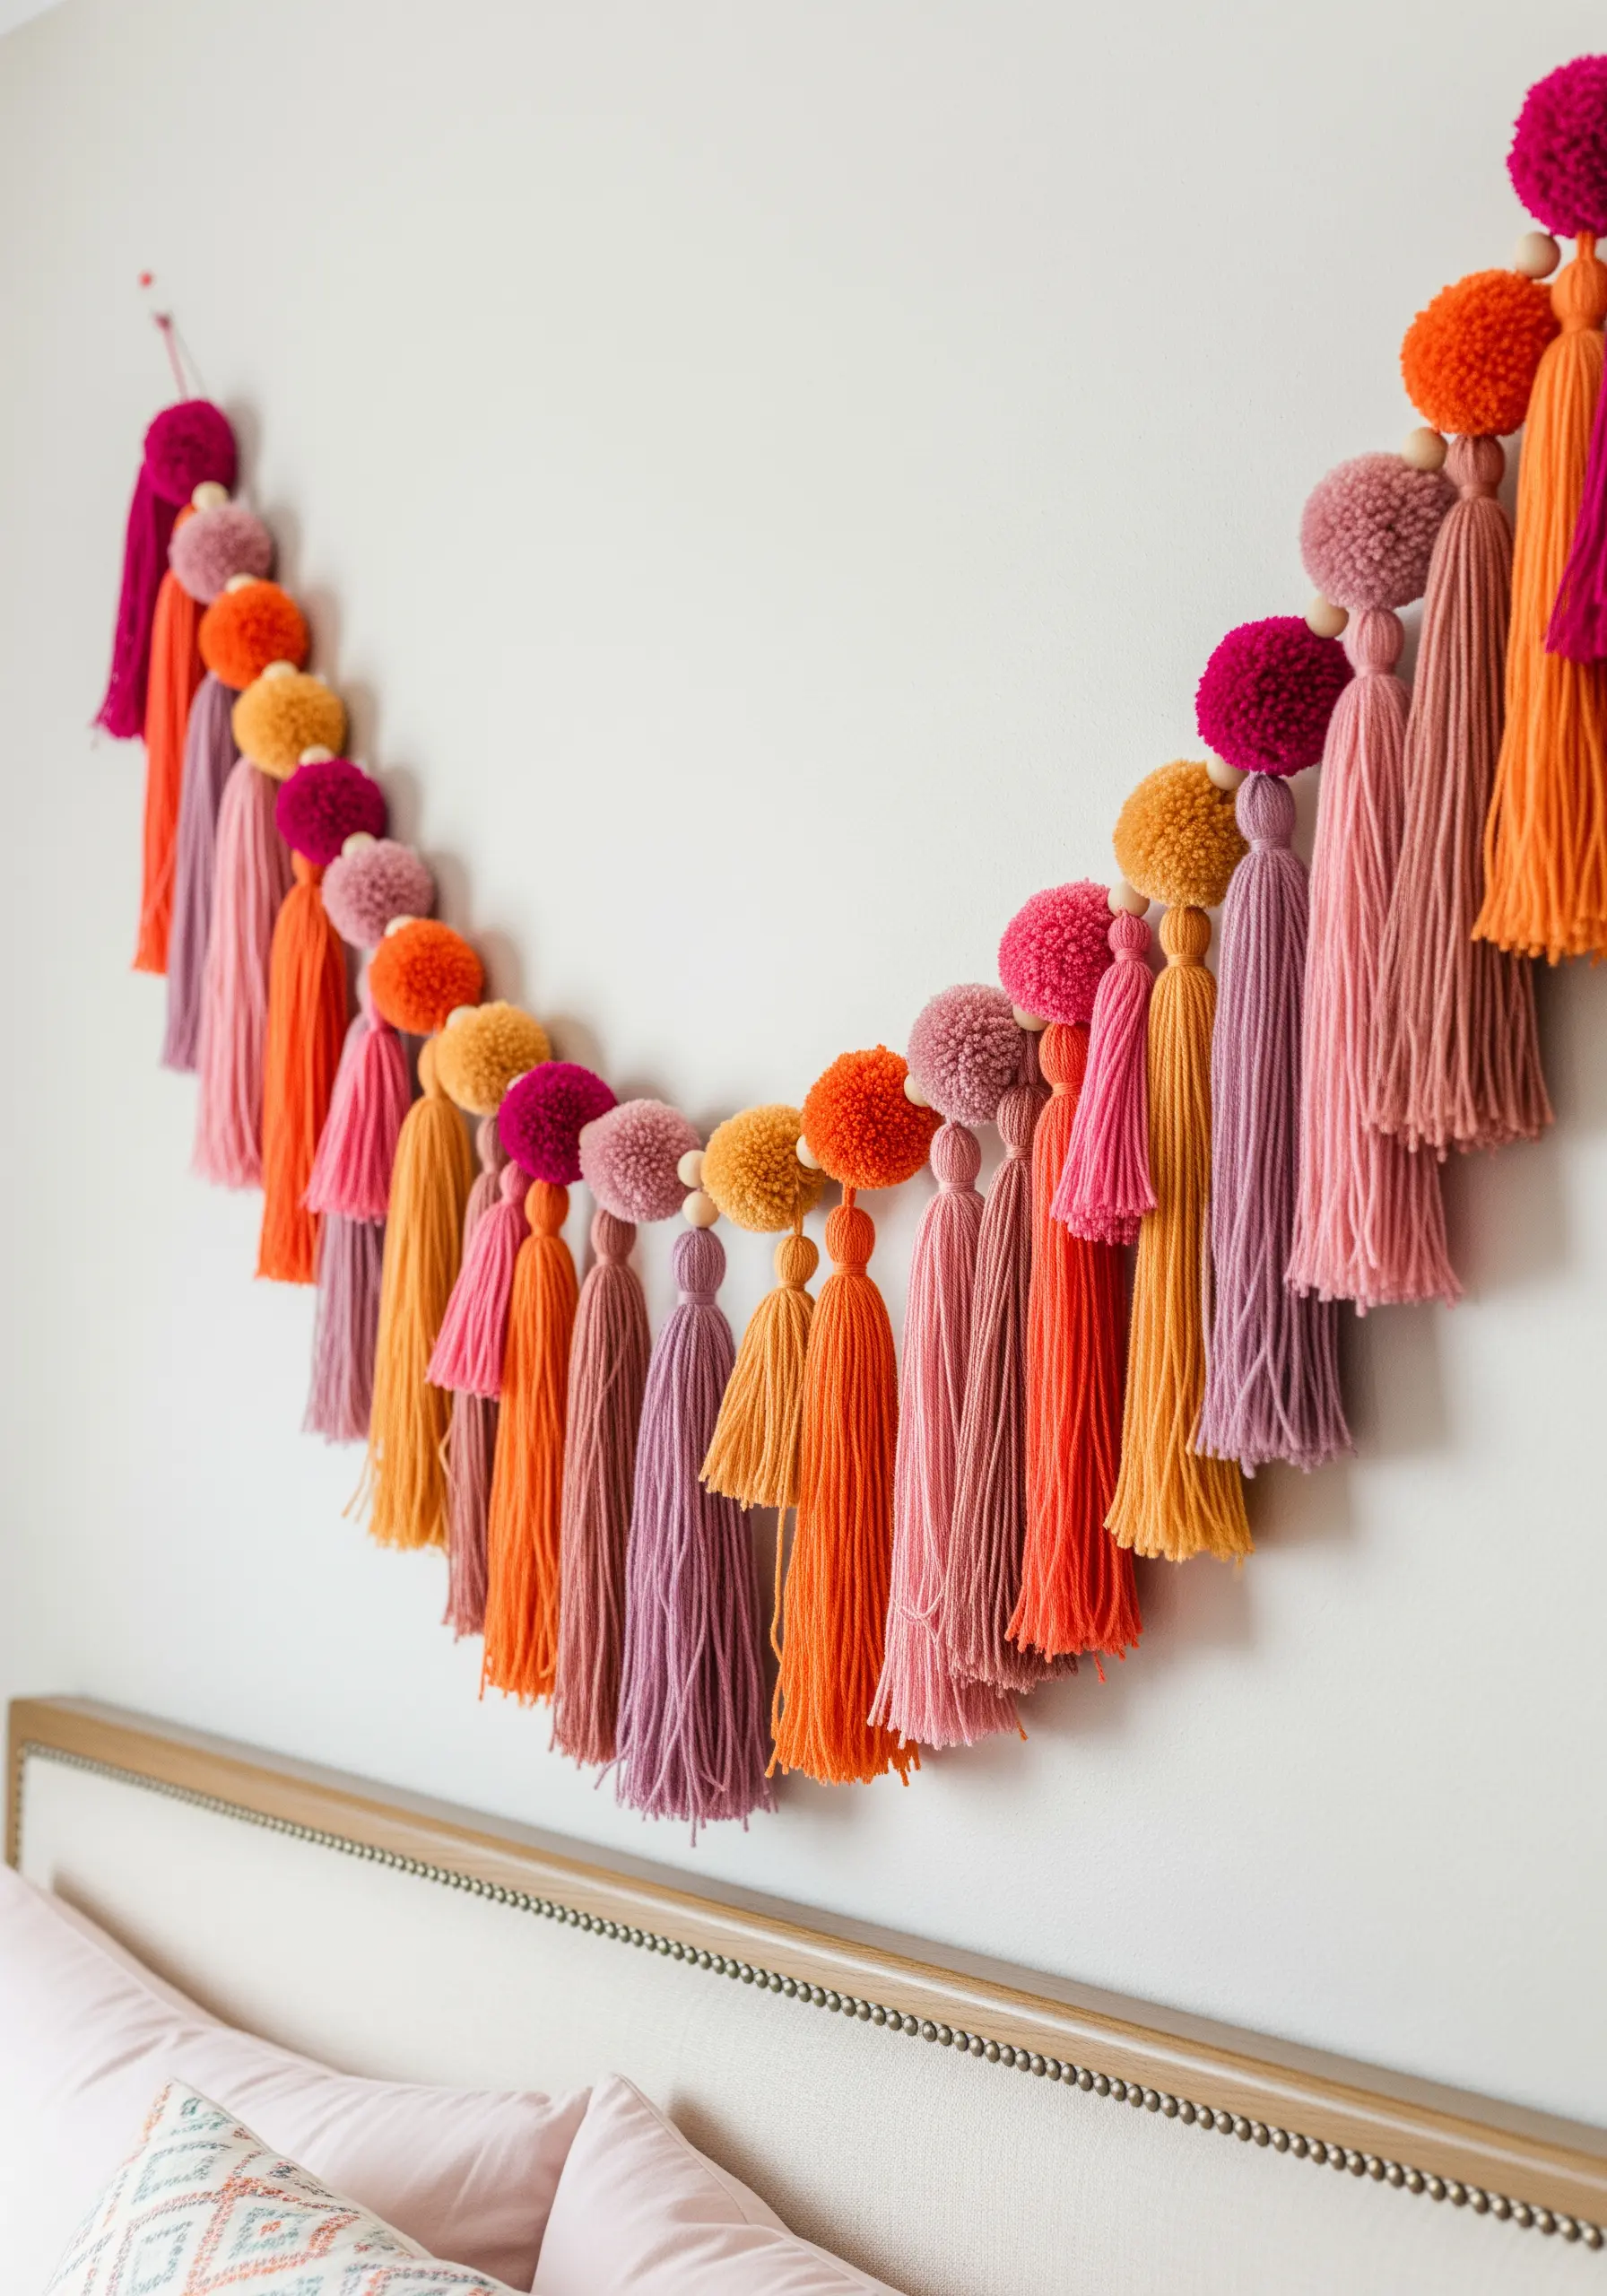
Elevate a simple tassel garland by focusing on a sophisticated color story and consistent craftsmanship.
Choose an analogous color scheme—colors that sit next to each other on the color wheel, like pinks, oranges, and purples—for a harmonious gradient effect.
To make your tassels look full and luxurious, wrap the yarn around a piece of cardboard at least 50 times before tying it off.
Trim the ends with sharp scissors to ensure a perfectly clean, uniform edge, turning a simple craft into one of those DIY fabric crafts that double as unique handmade gifts.
6. Blend Macrame Knots with Freeform Weaving
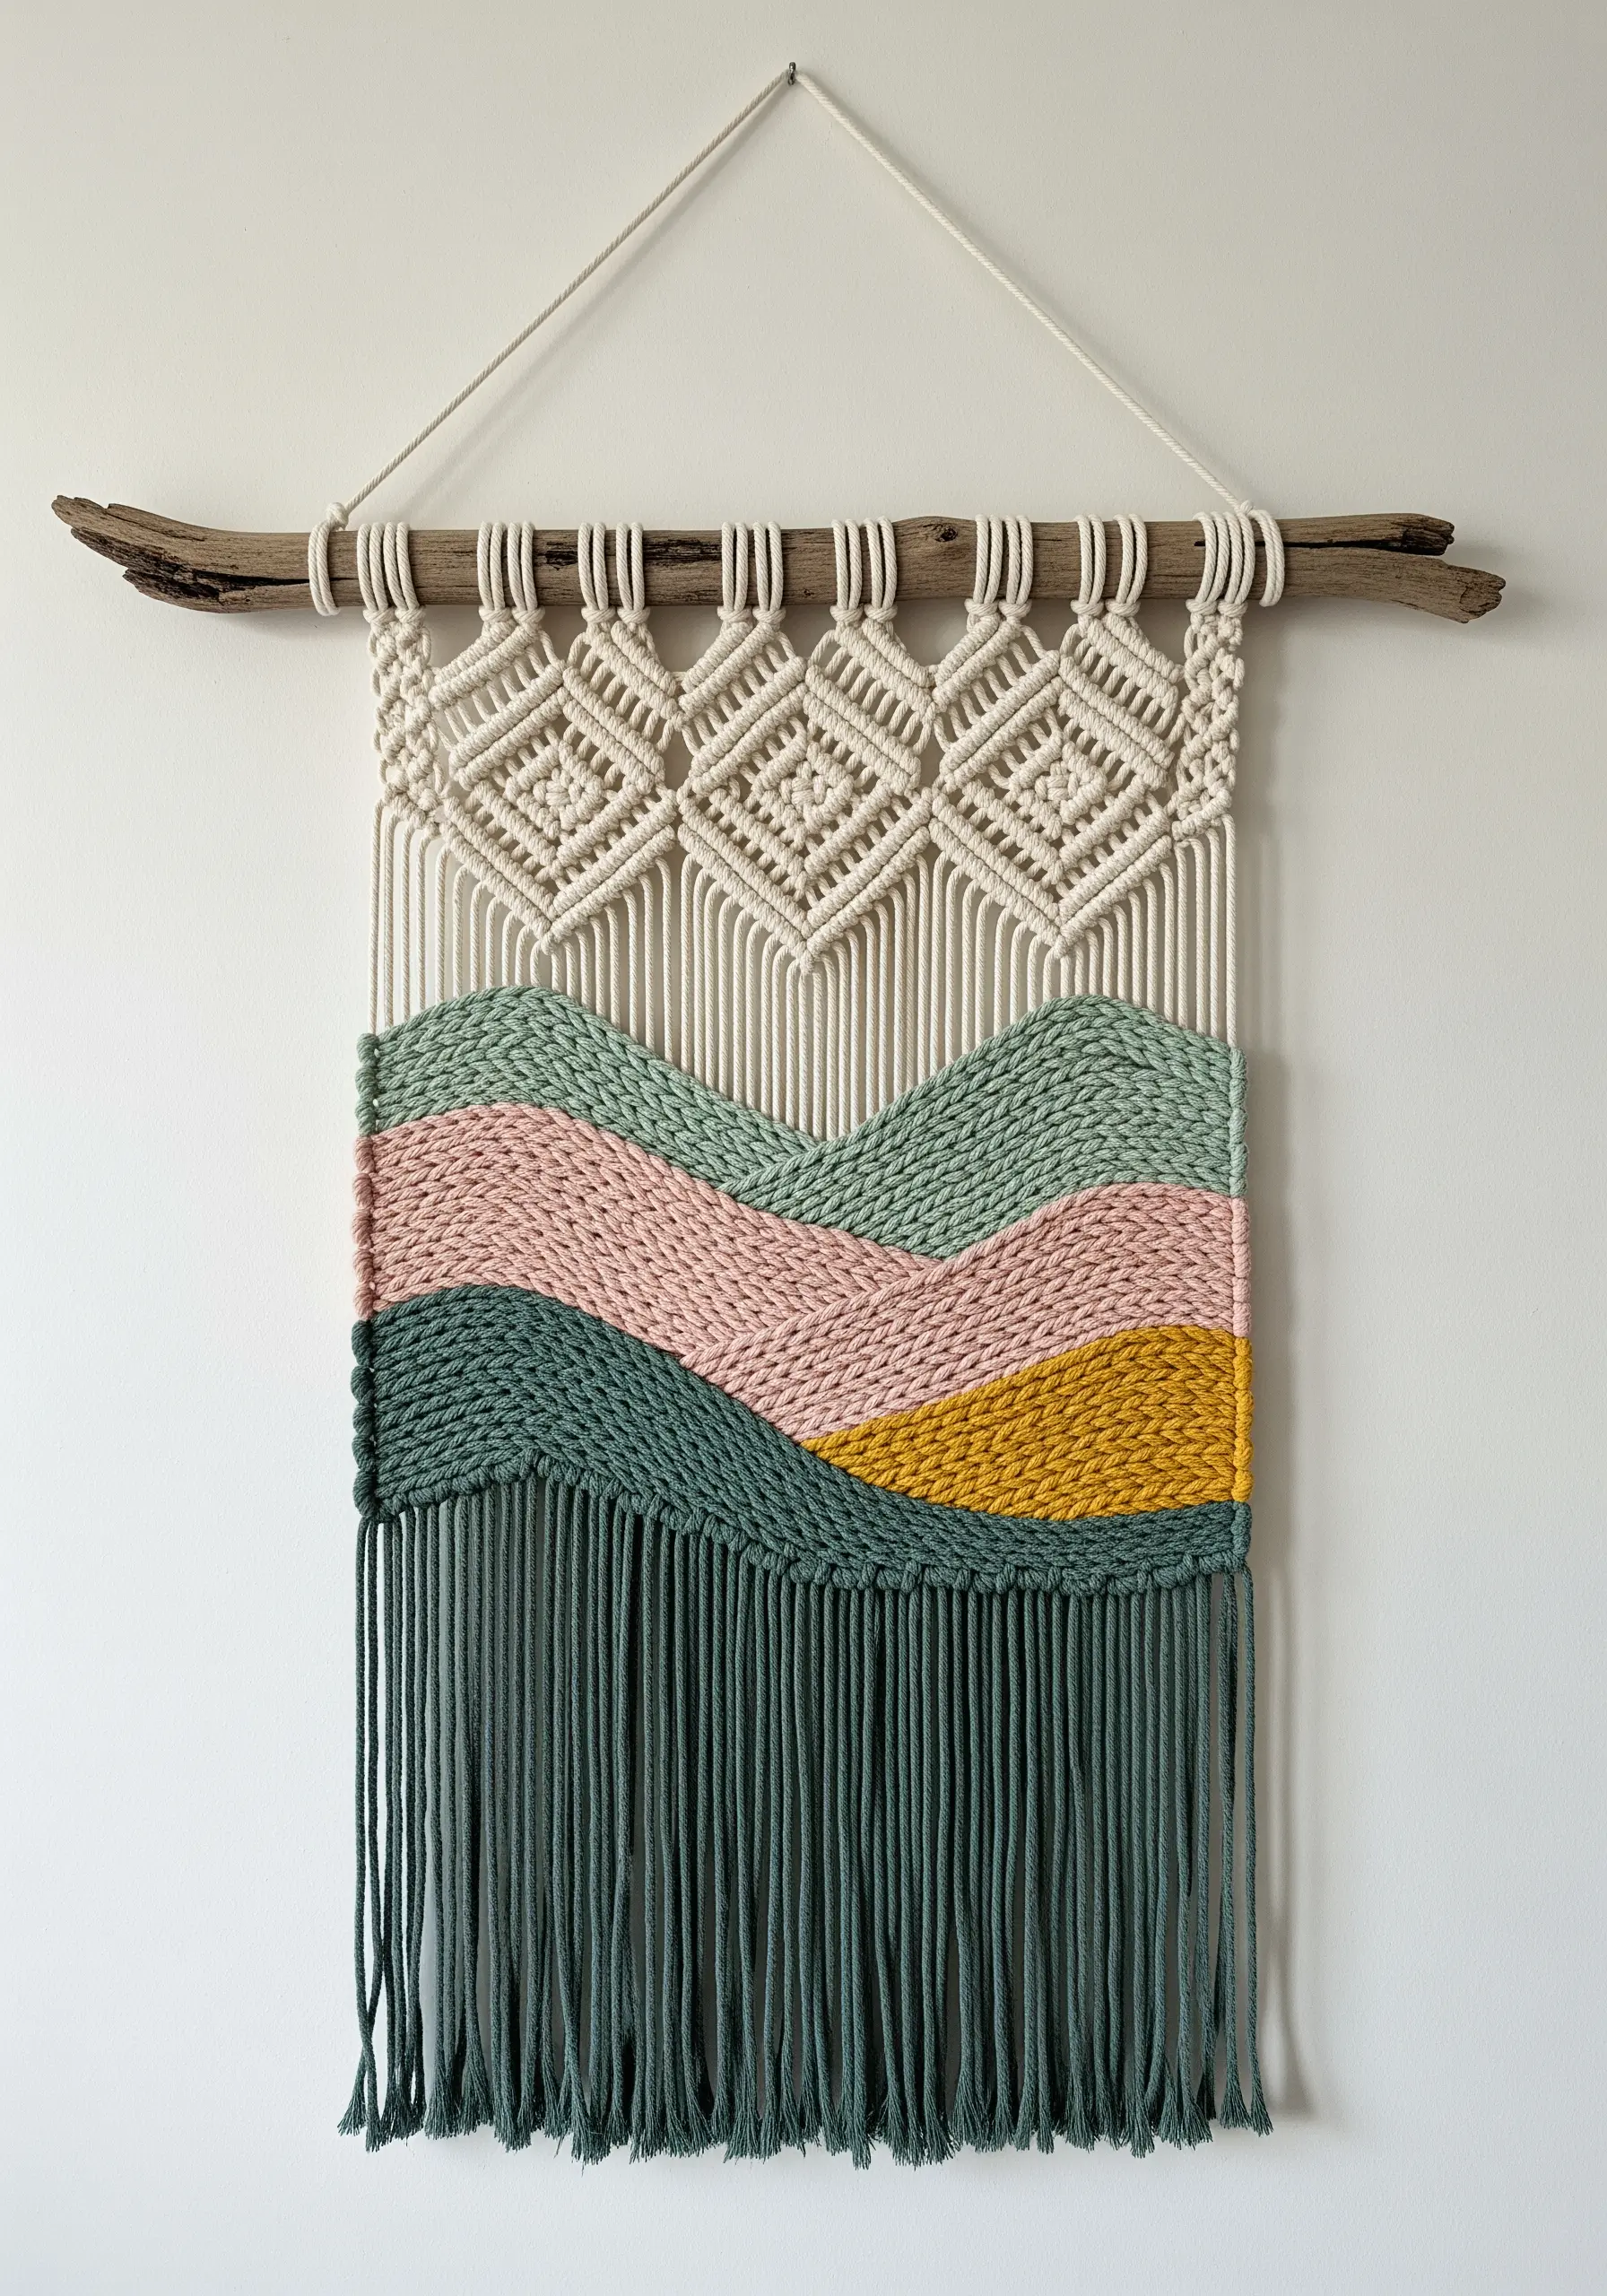
Combine the structure of macrame with the fluidity of weaving to create a dynamic landscape tapestry.
Start with a row of disciplined macrame knots, like square or diamond knots, to establish a strong, geometric header.
Then, transition to weaving, using a tabby weave (over-under) with different colored yarns to build the soft, rolling hills.
Allow the boundaries between colors to be organic and curved rather than perfectly straight, which mimics the natural lines of a landscape in these boho-inspired textile wall art patterns.
7. Add Luminous Details with Beadwork
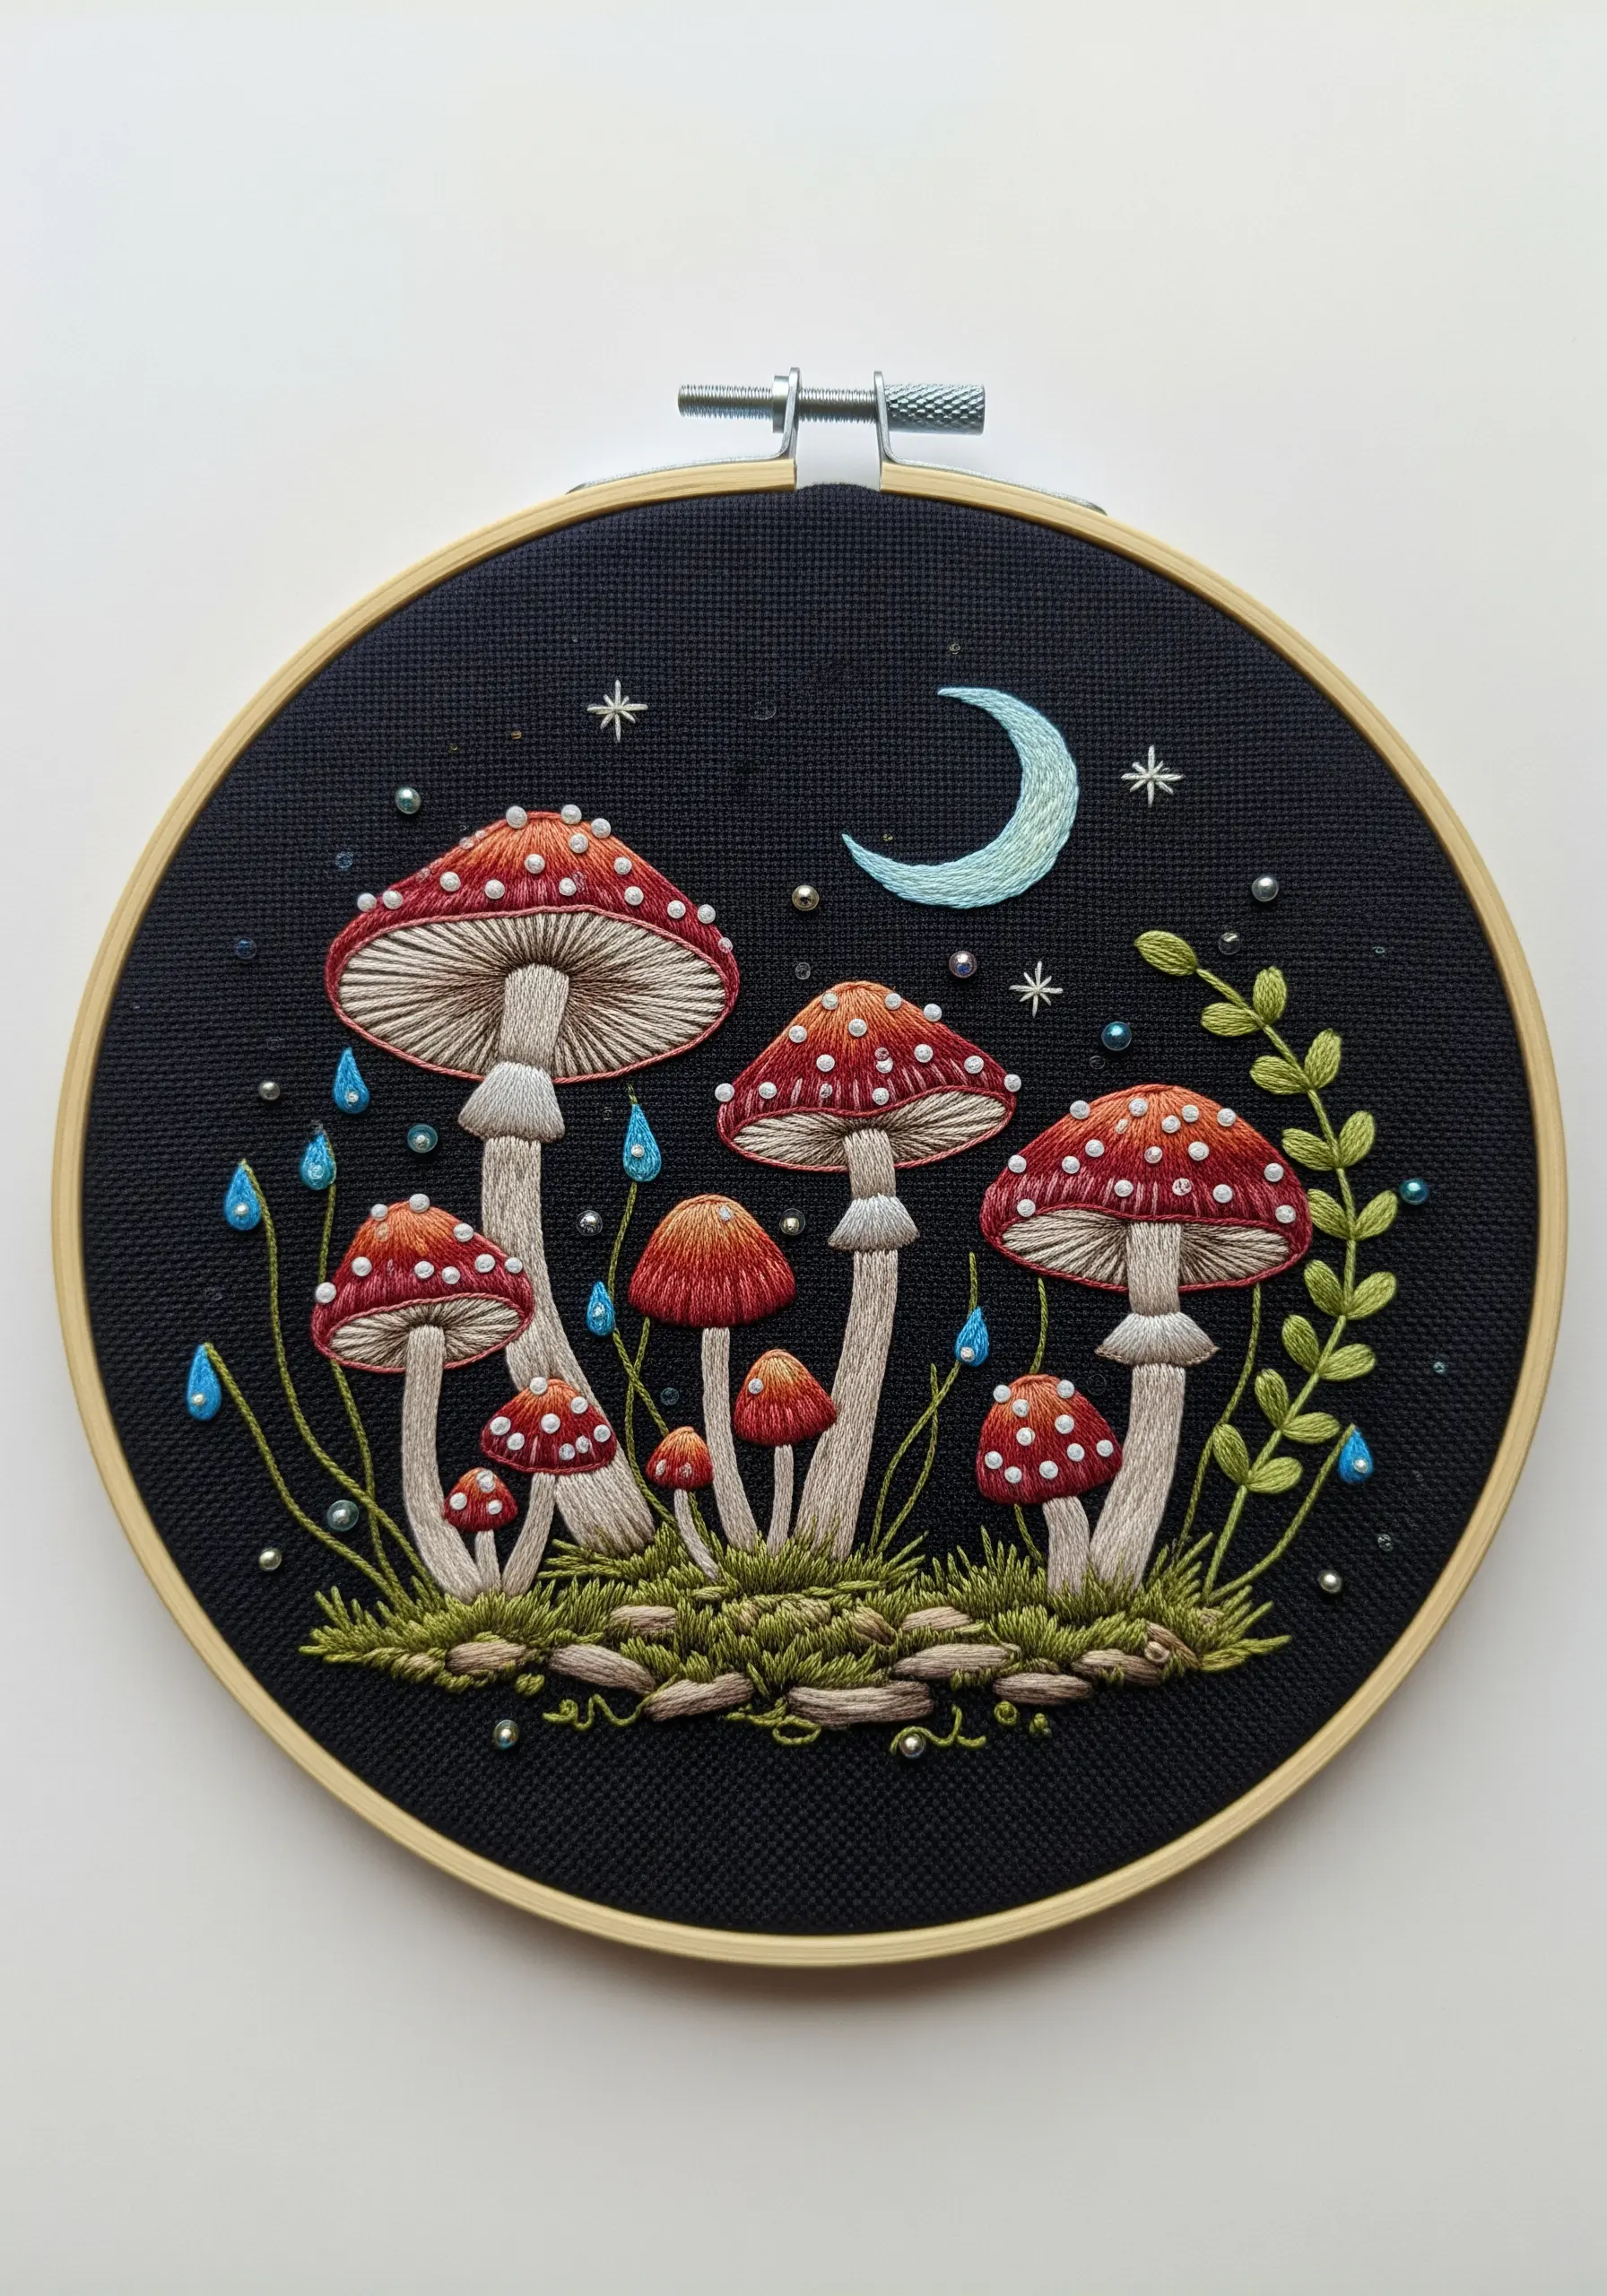
To make your embroidery truly magical, introduce non-thread elements like beads and pearls.
On a dark fabric background, carefully placed seed beads can represent dewdrops, stars, or magical spores, catching the light in a way thread cannot.
Stitch each bead individually with a thread that matches the fabric to make them appear as if they are floating.
This small addition introduces a sophisticated texture and a touch of luminescence to otherwise traditional whimsical floral embroidery ideas.
8. Amplify Impact with a Monochromatic Palette
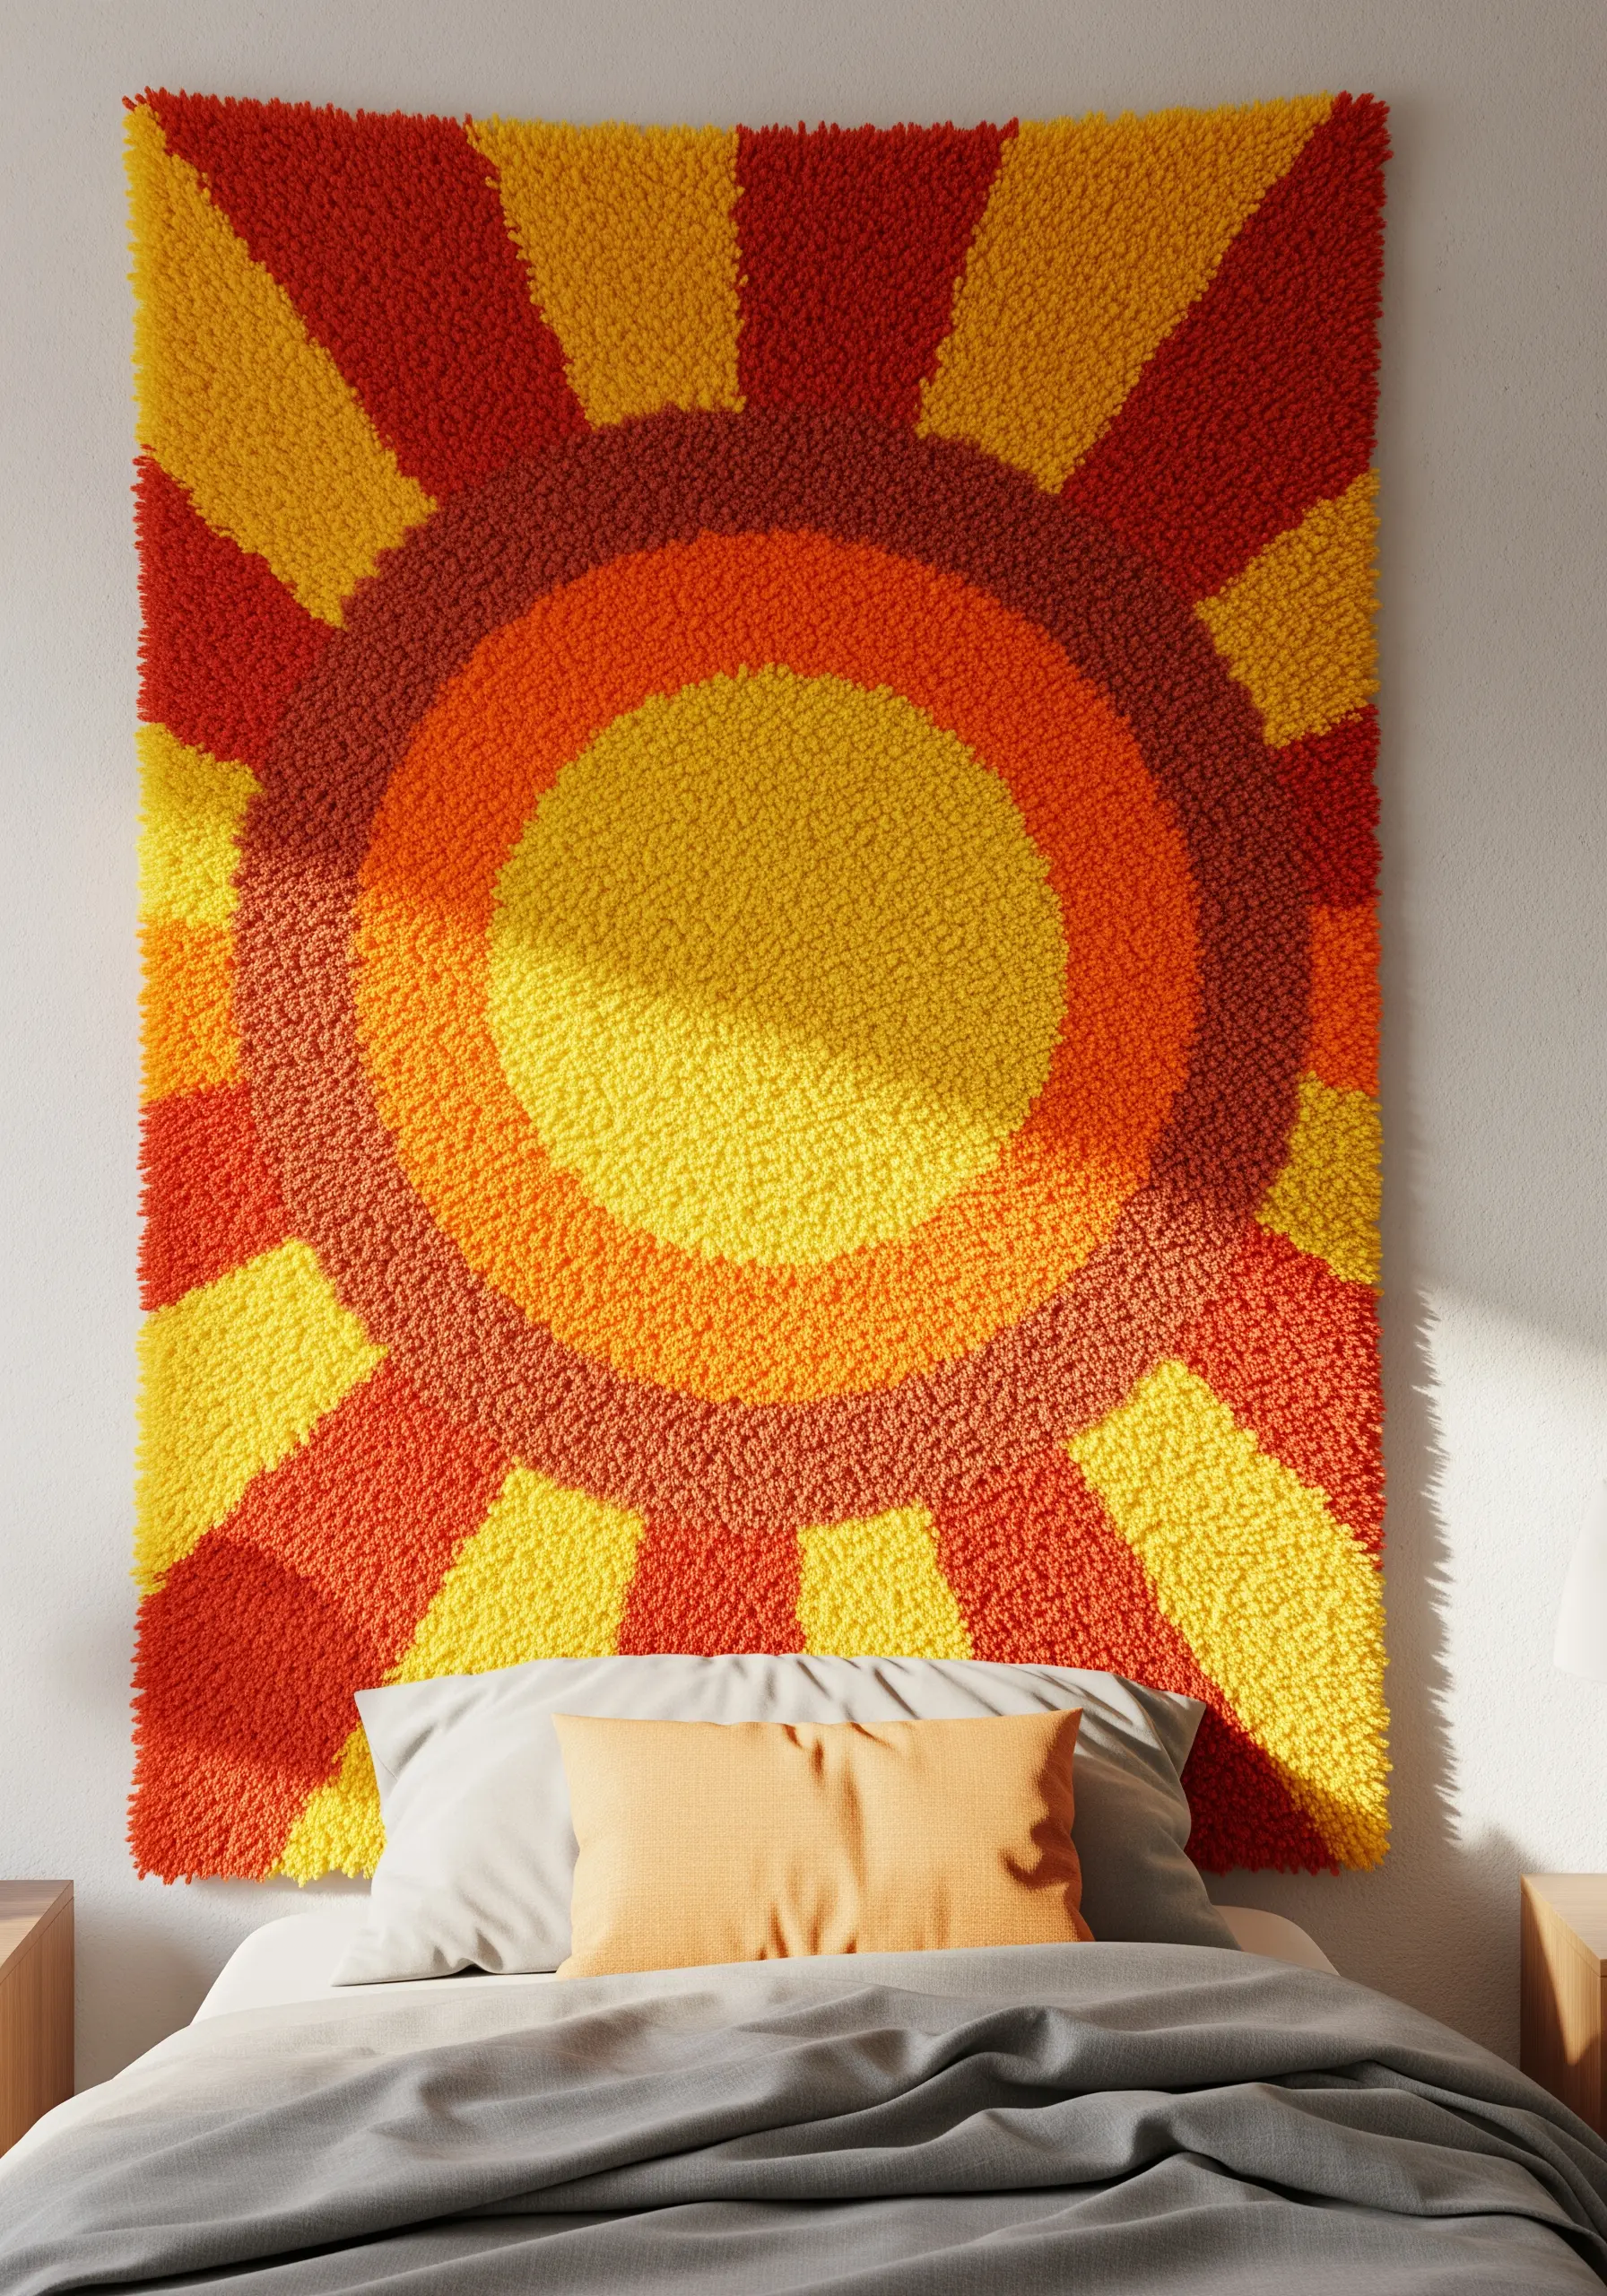
Create a bold, retro-inspired statement piece by limiting your color palette to different shades and tints of a single color.
Using a latch hook or punch needle, fill in large, graphic shapes with analogous colors like yellow, orange, and red.
The power of this design comes from the dense, uniform texture combined with the simplicity of the color scheme.
The result is one of those confident, statement-size embroidered textile hangings that feels both energetic and cohesive.
9. Layer Textures for a Tactile Dreamcatcher
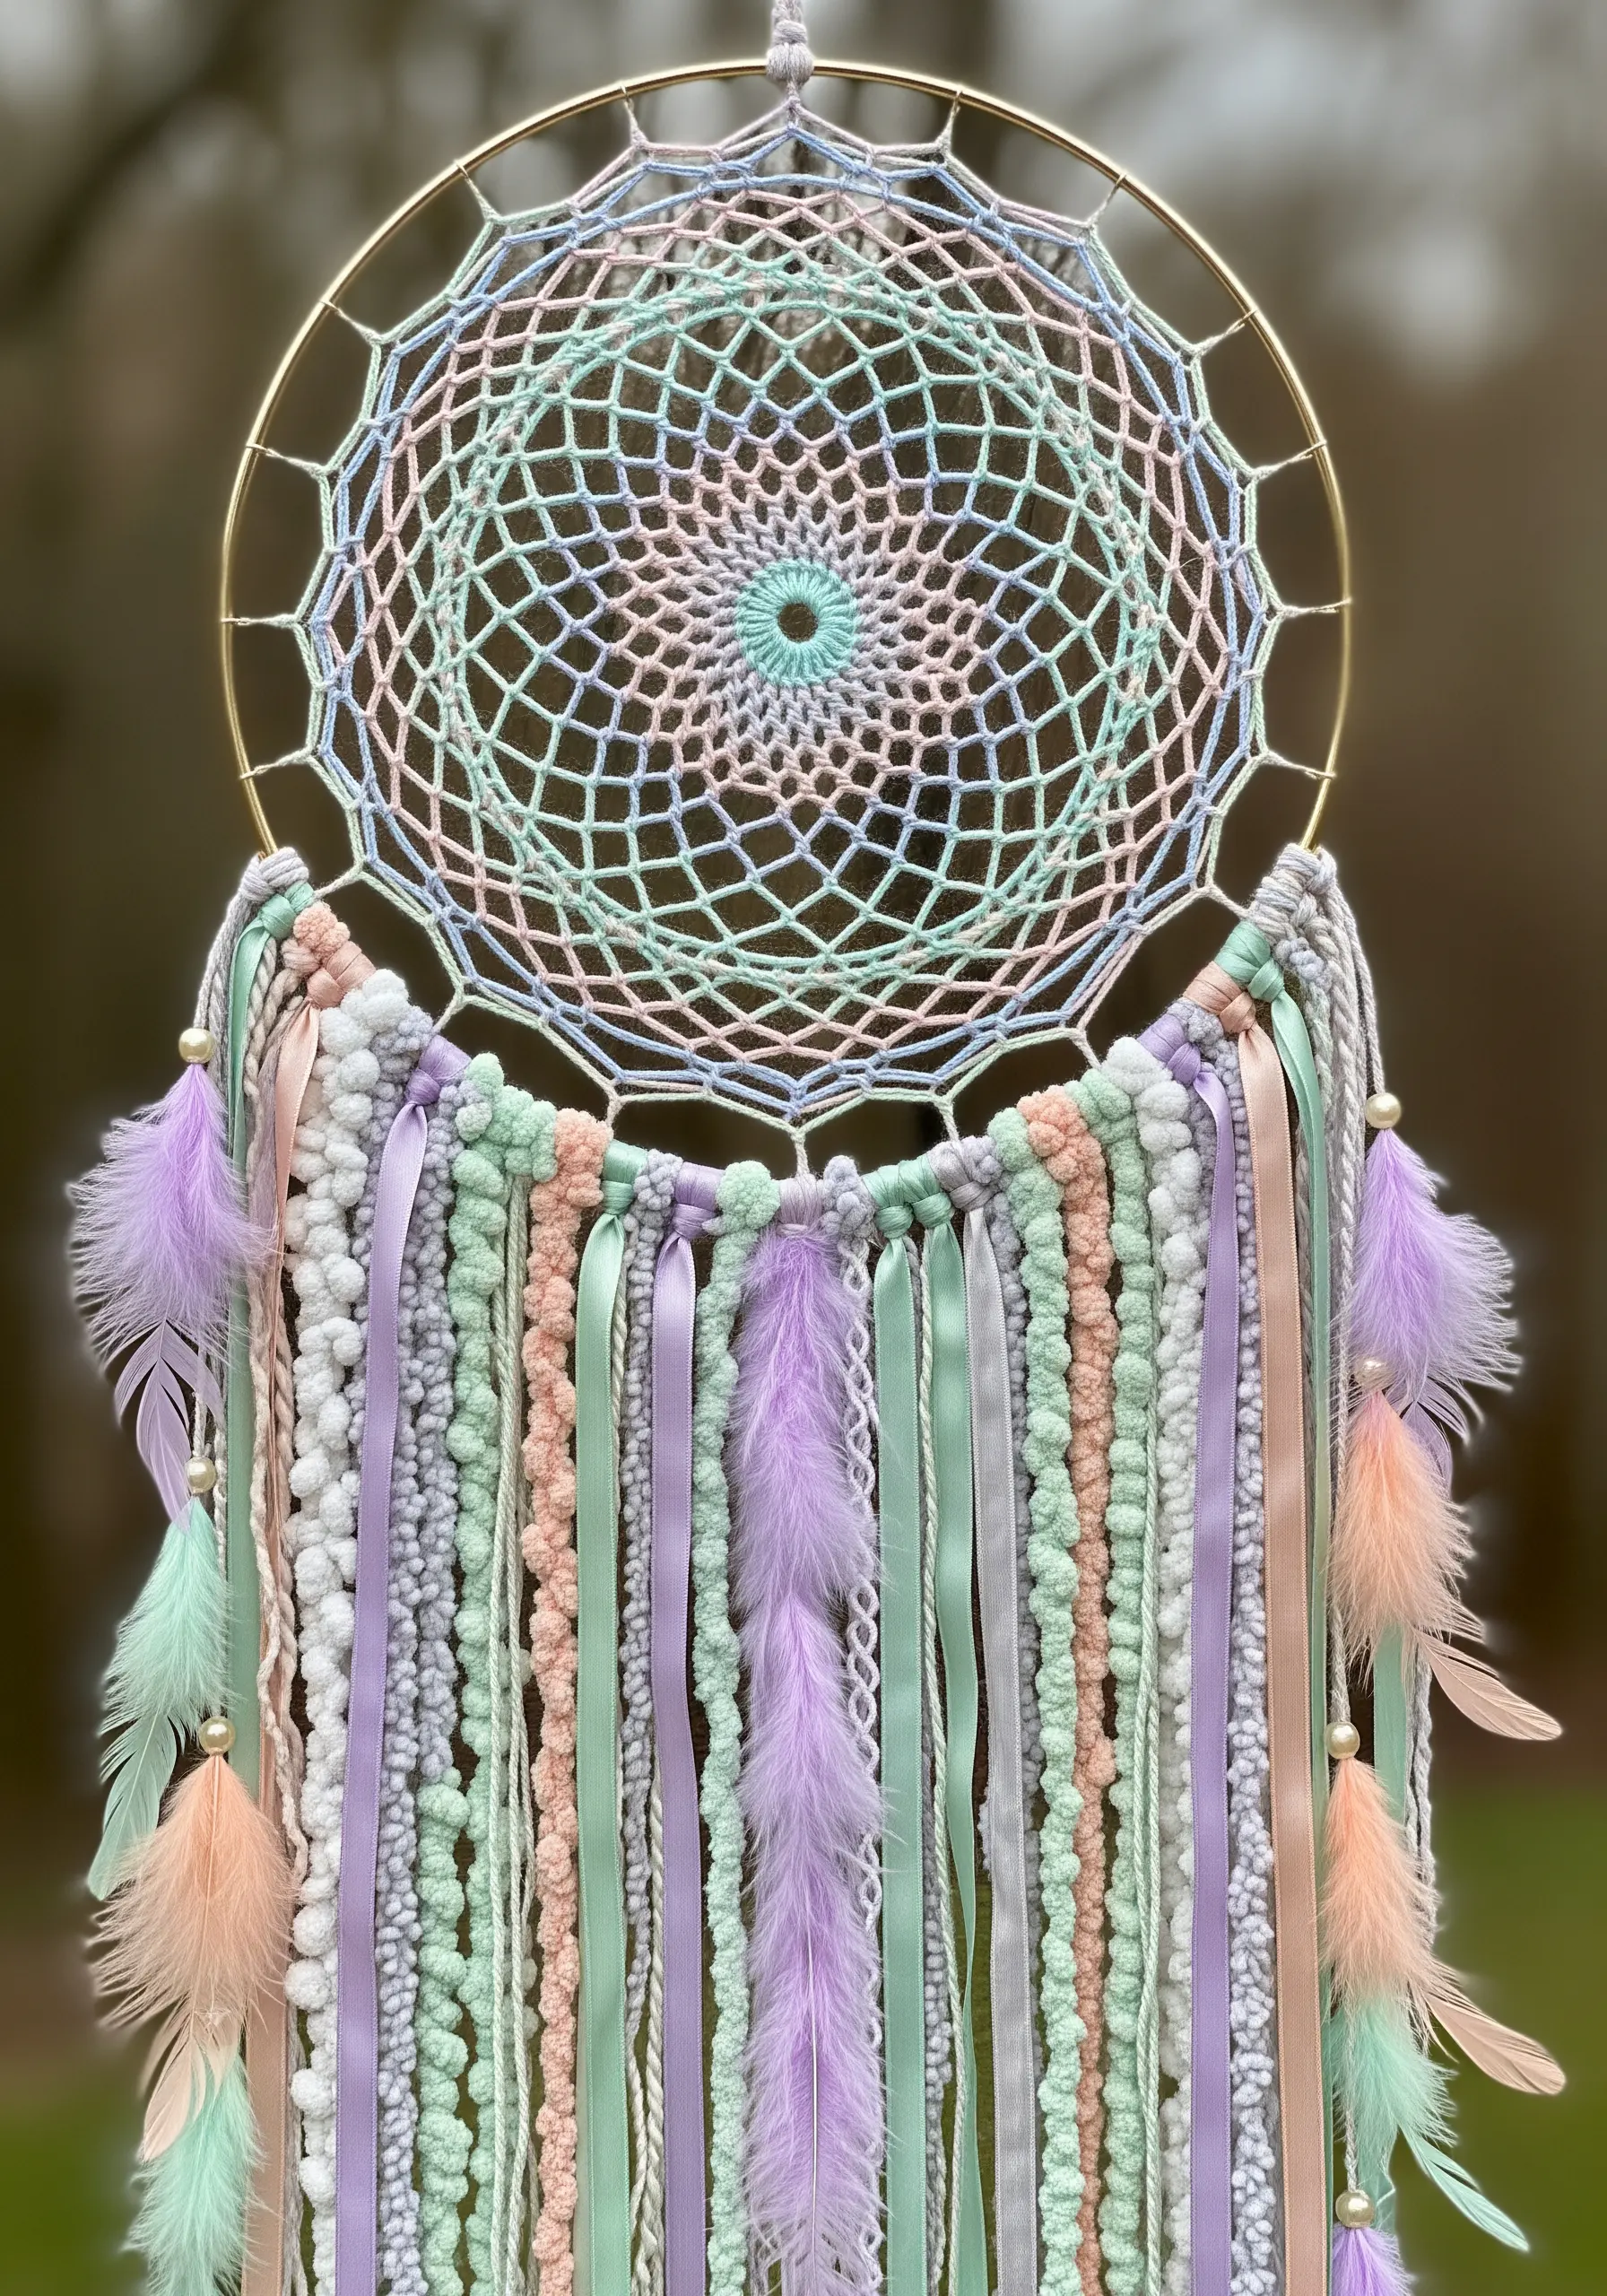
Move beyond the traditional dreamcatcher by turning it into a canvas for textural exploration.
Instead of just string, incorporate a variety of materials: satin ribbons, chunky chenille yarn, braided cords, and even faux feathers.
Vary the thickness and finish of each strand—pairing shiny ribbon next to matte yarn, or a smooth cord next to a fluffy one.
This intentional layering of different materials is what transforms the piece into one of your most dreamy nature-inspired embroidery designs.
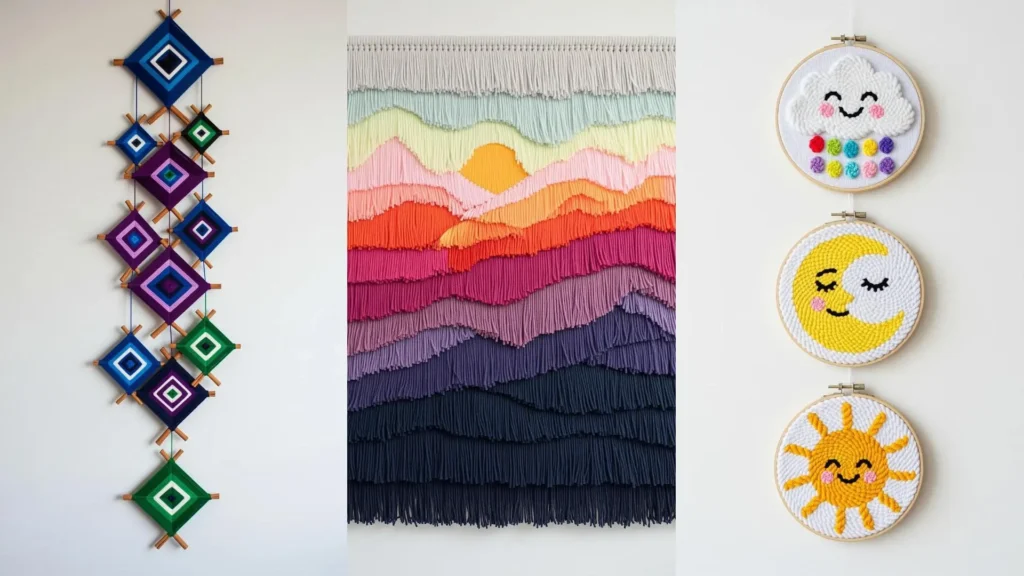
10. Design a Cohesive Trio of Hoop Art
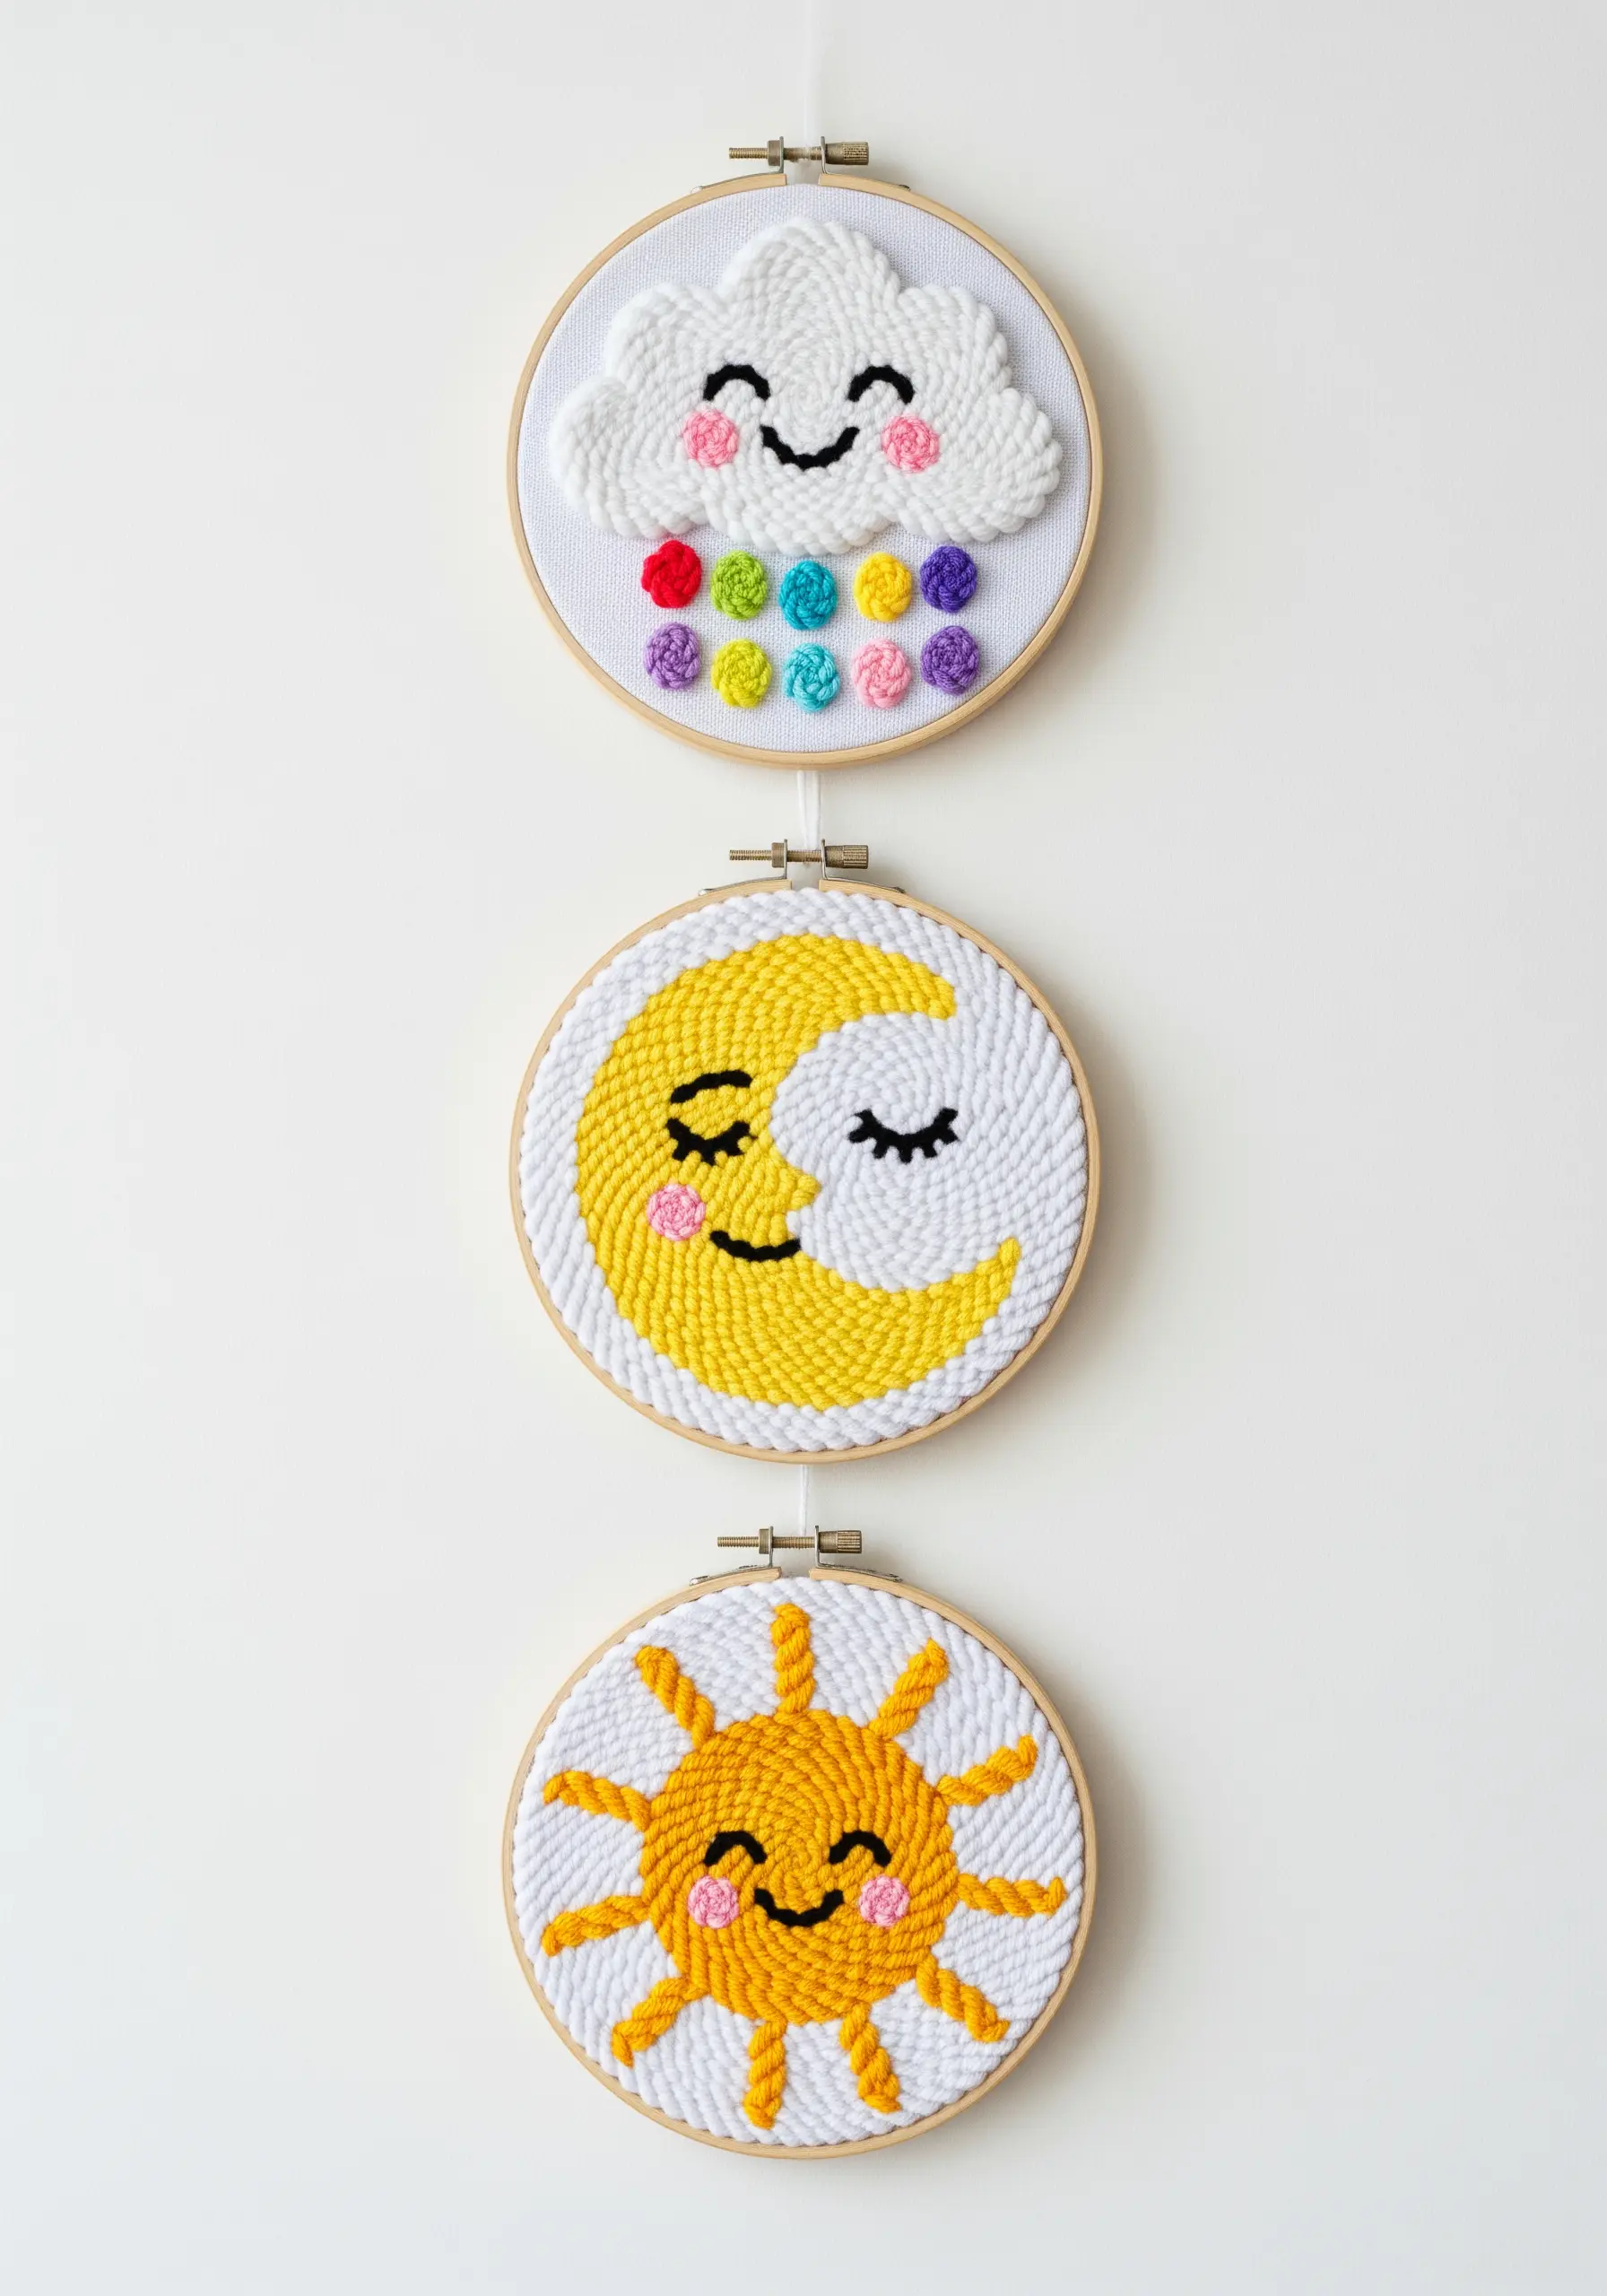
To create a gallery wall effect with smaller hoops, design them as a unified set.
Choose a consistent theme, like celestial bodies, and use the same punch needle technique and a shared color palette across all three pieces.
While each motif is different, the repetition of texture, style, and key colors ties them together visually.
This approach ensures your collection of playful hoop art ideas looks intentional and thoughtfully curated, rather than random.
11. Sculpt Abstract Waves with Chunky Roving
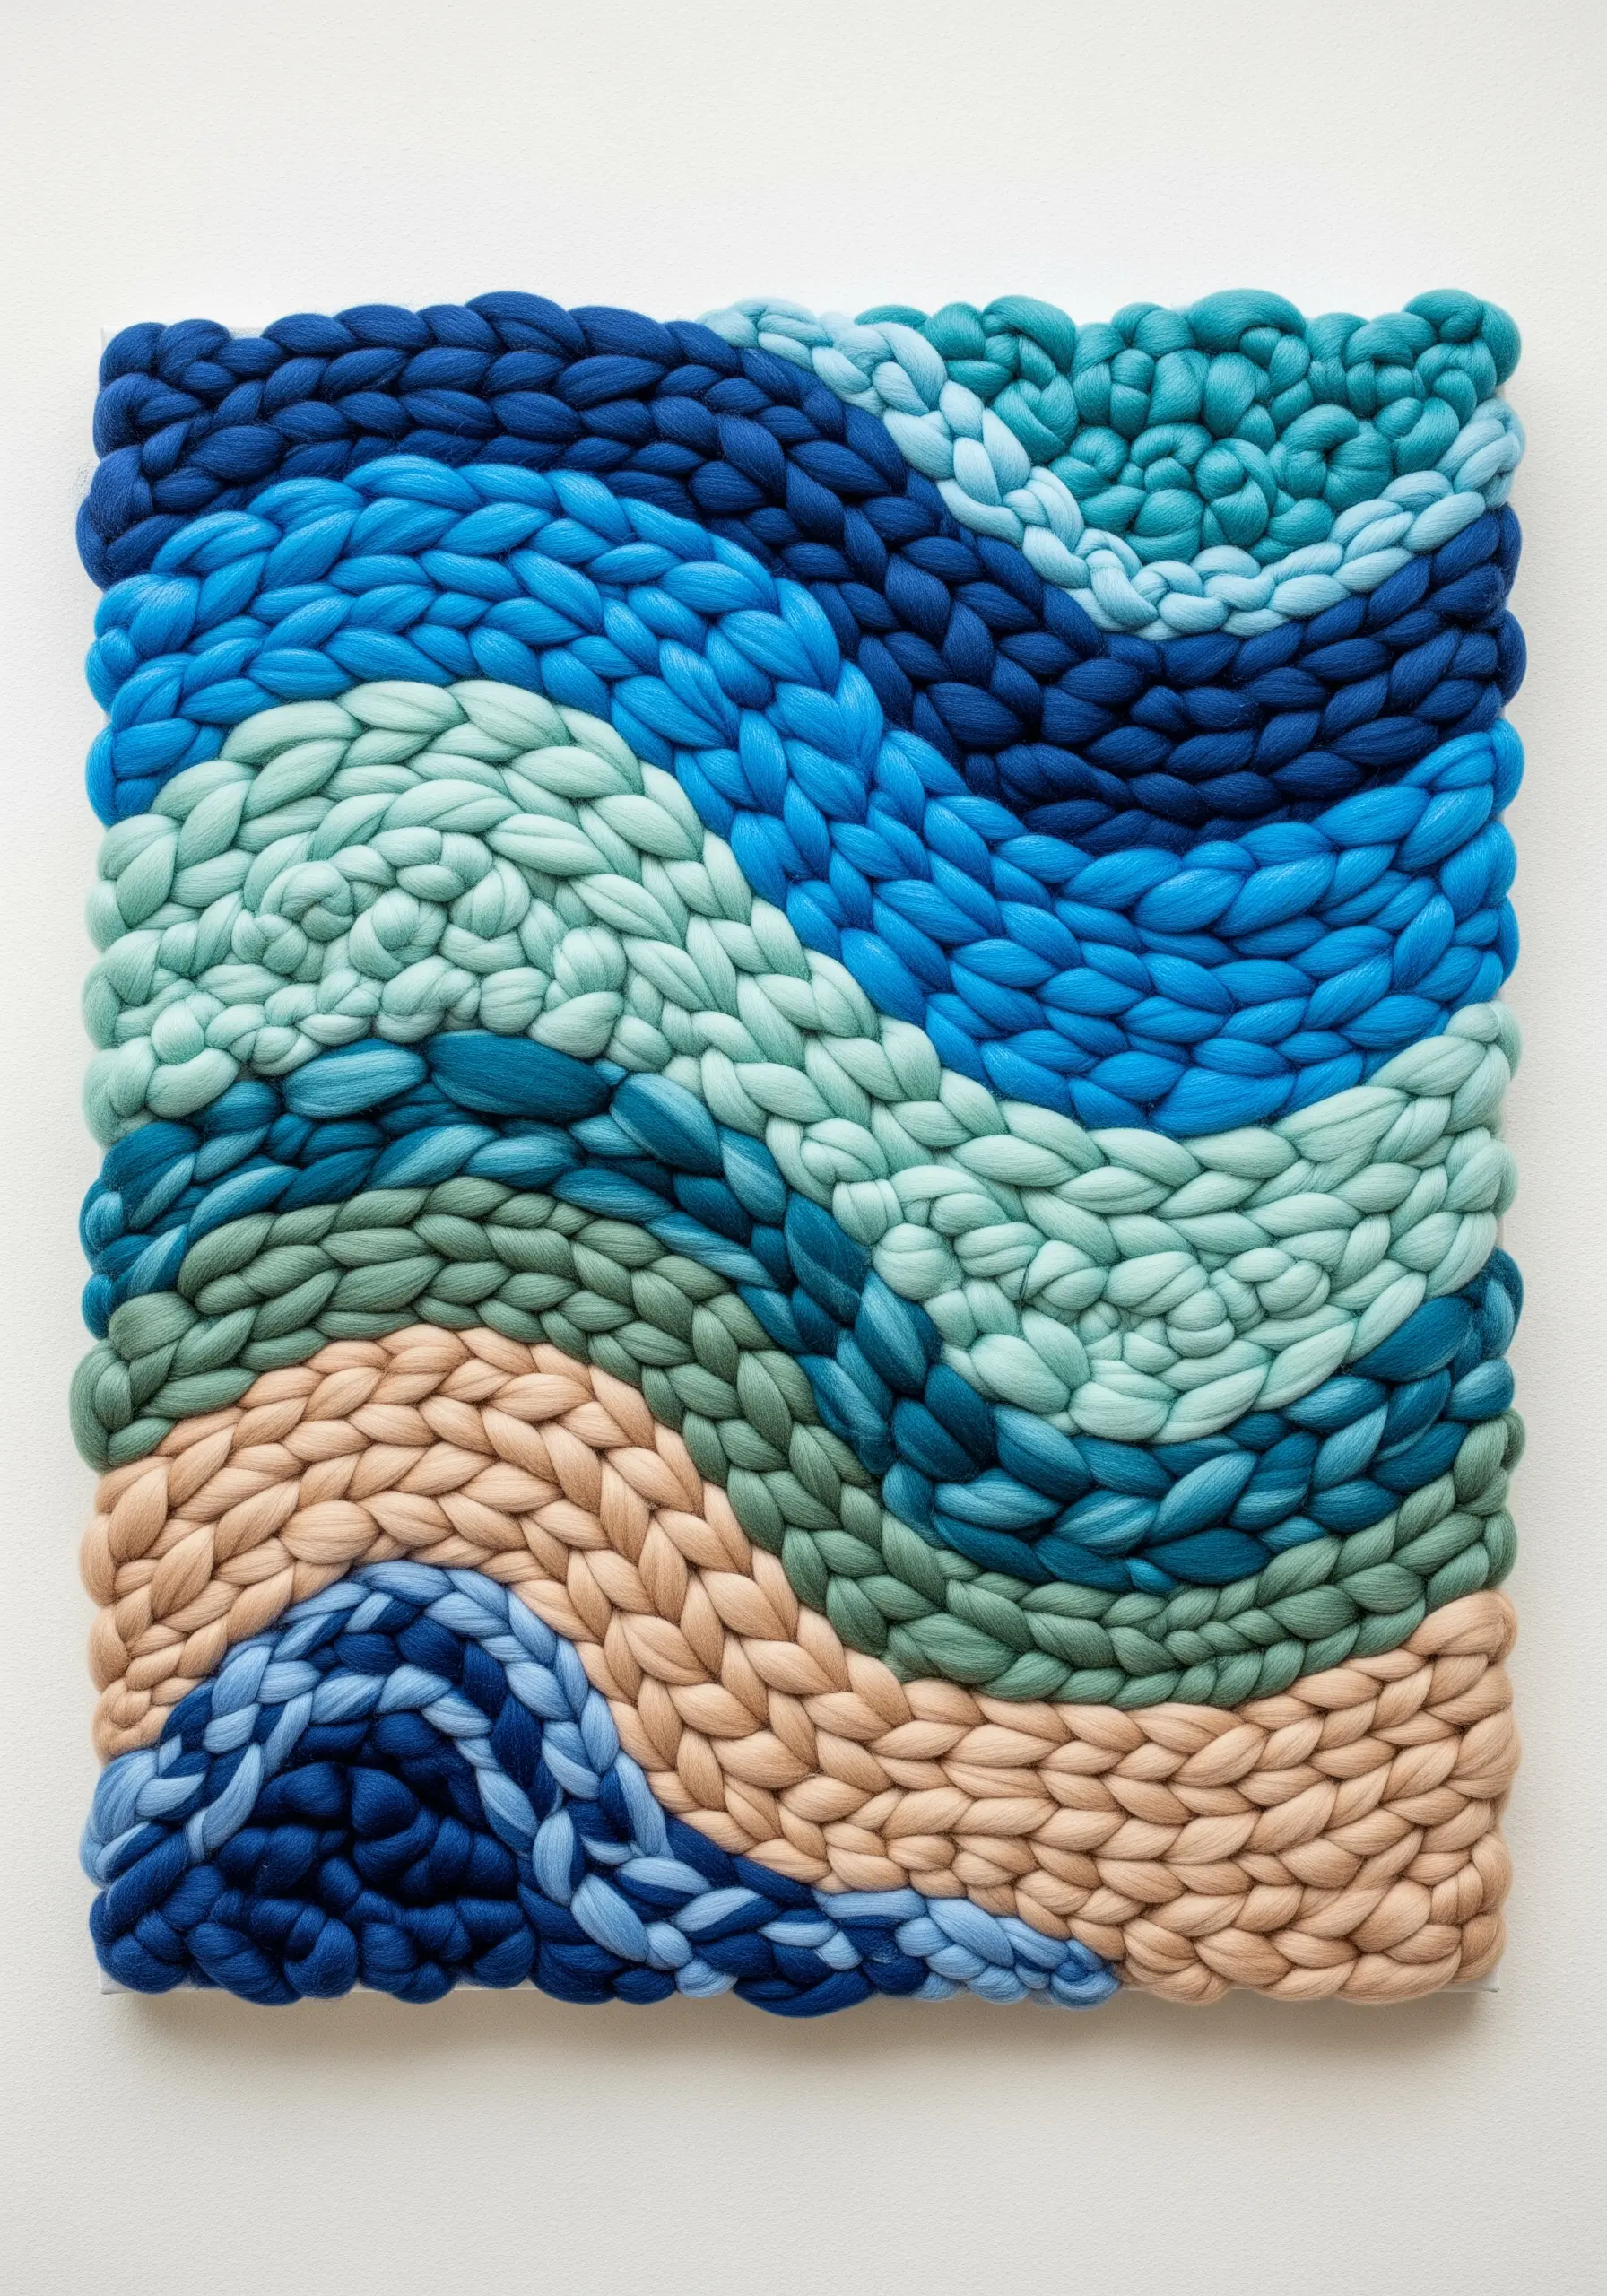
Create a sense of movement and flow by weaving with super-chunky wool roving.
Instead of a straight, horizontal weave, guide the roving in organic, undulating lines to mimic the motion of water.
Pack the rows tightly together to build a dense, sculptural surface where the texture itself becomes the focal point.
The key is to use an ombré or analogous color palette to enhance the sense of depth and motion in these abstract thread embroidery ideas inspired by nature.
12. Combine Weaving and Stitching for Narrative Detail
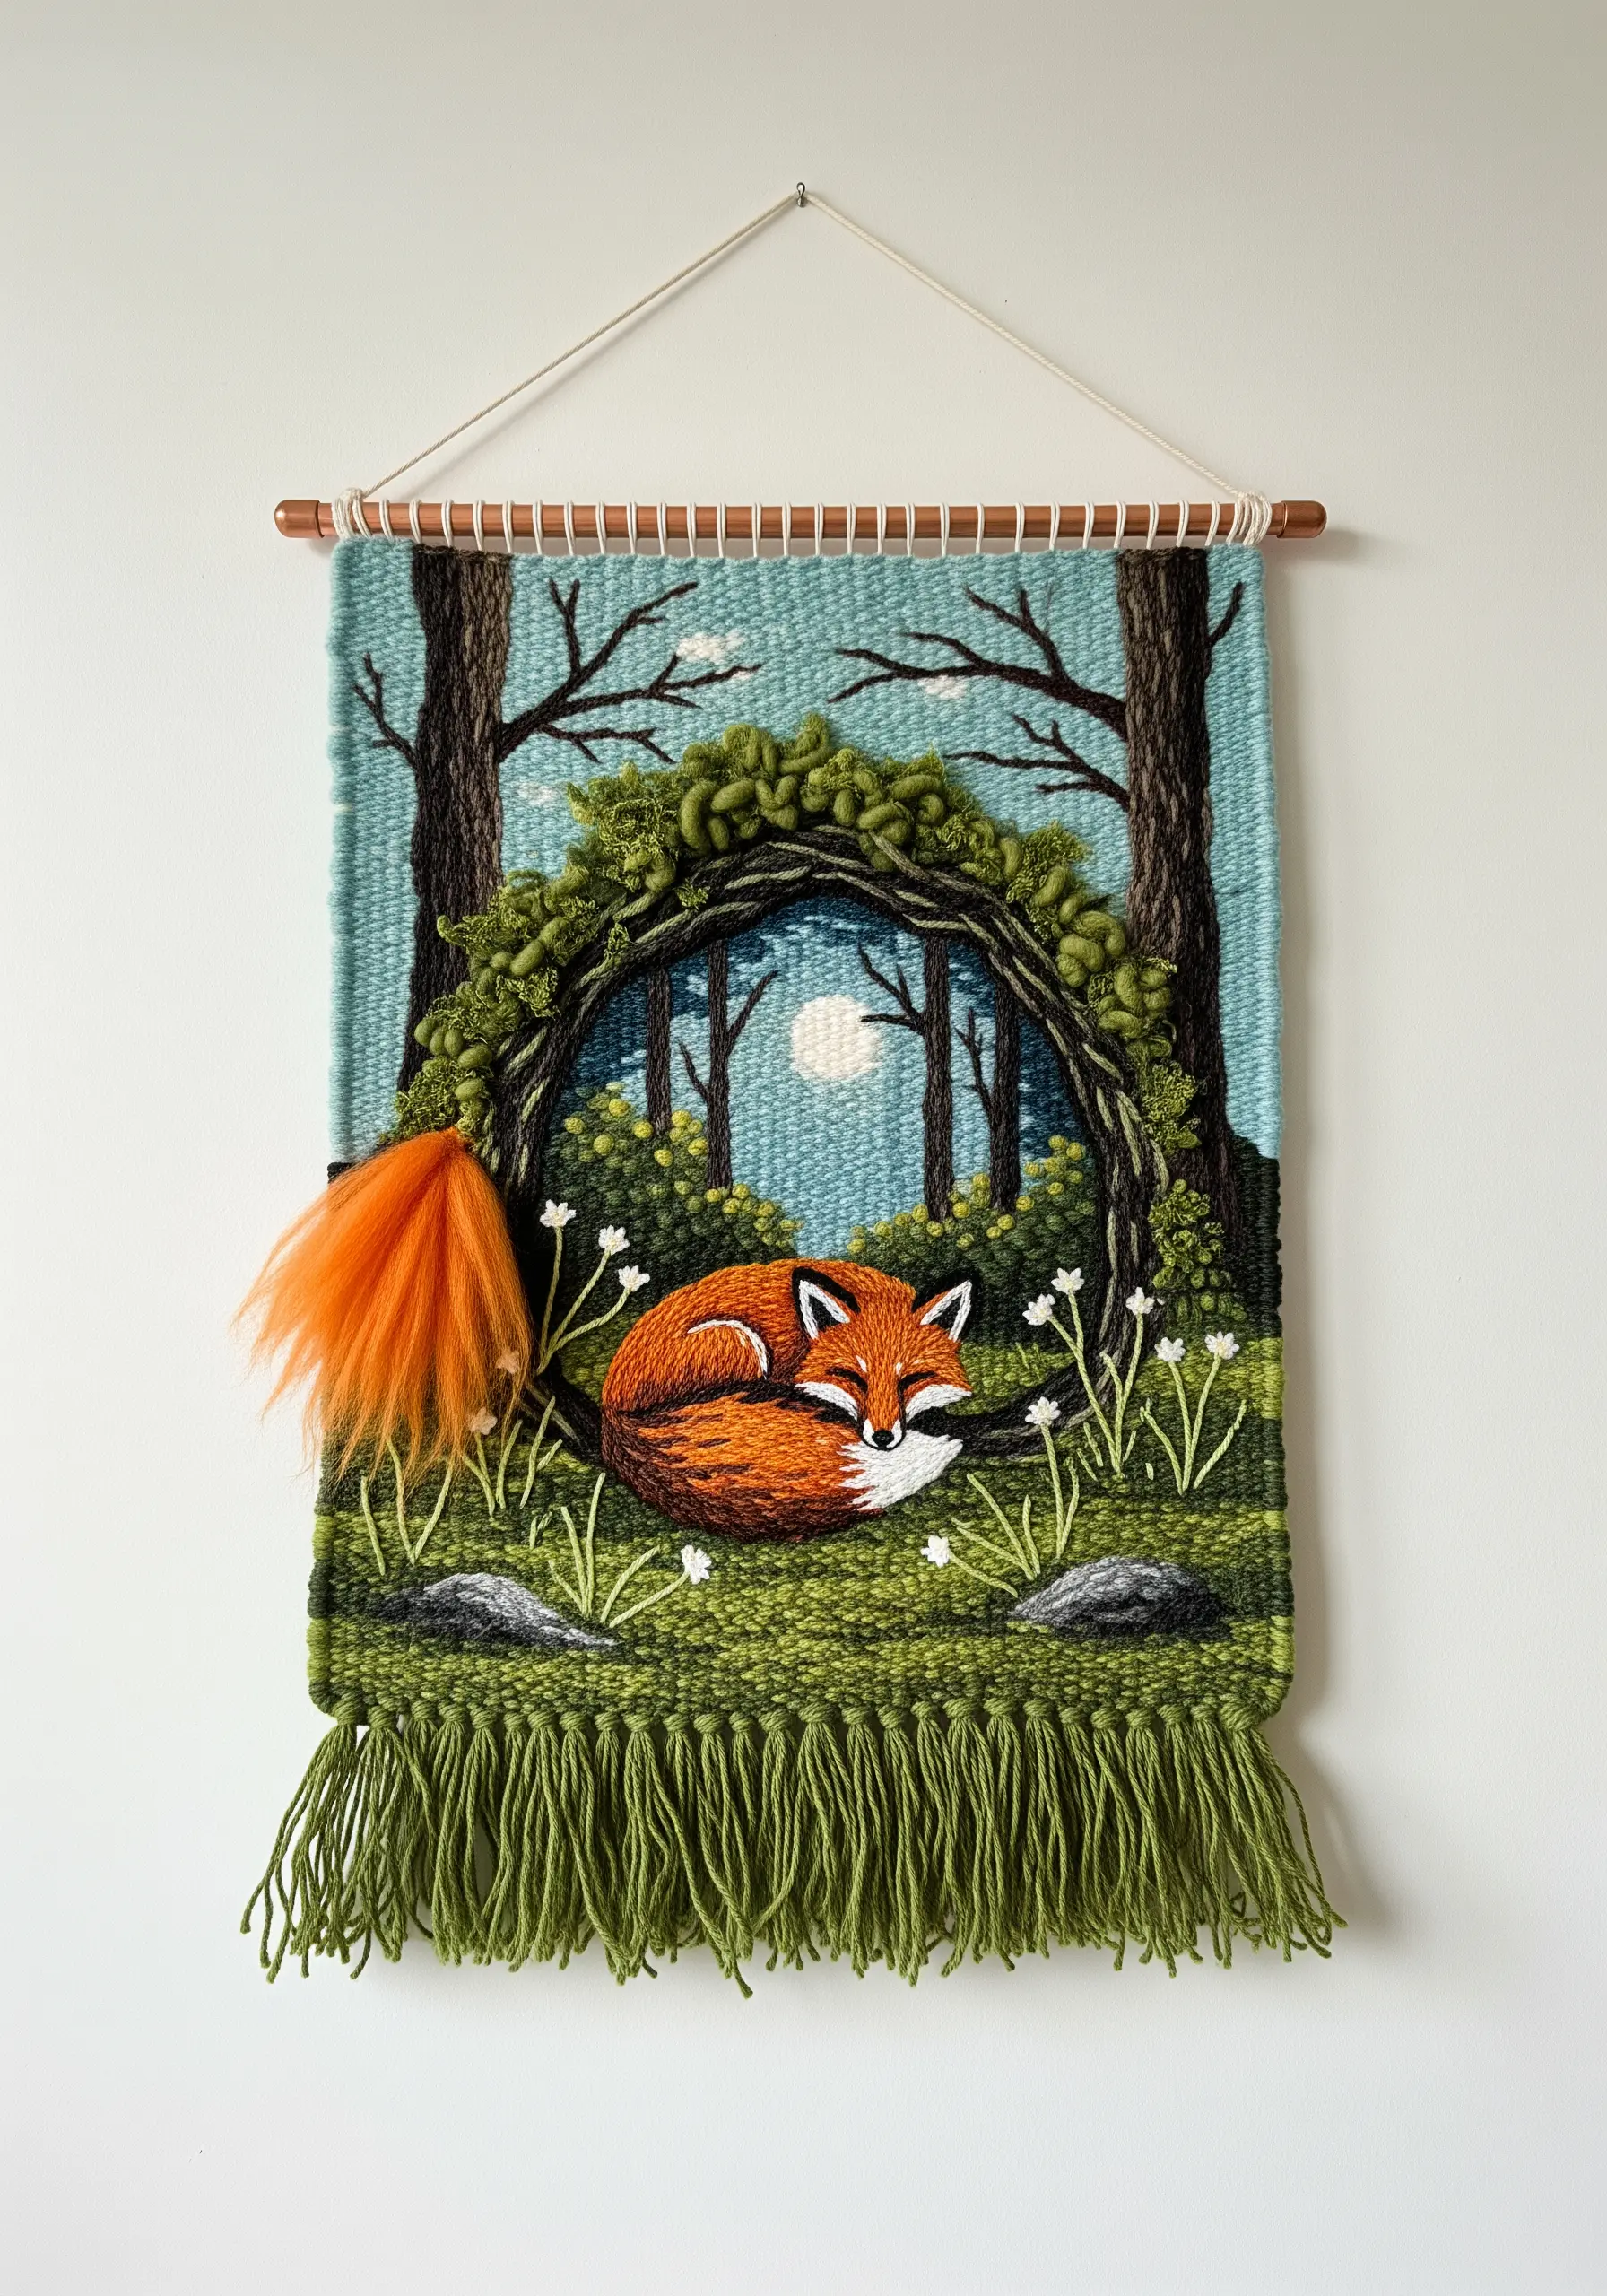
Create a rich, illustrative tapestry by using different fiber techniques for different elements of your scene.
Use flat weaving for the background and sky to establish the setting without overwhelming the composition.
For your focal point—like the sleeping fox—switch to detailed embroidery or needle felting to create sharp lines and finer textures.
This combination of broad background shapes and finely rendered details draws the eye and tells a more compelling visual story in your adorable forest animal embroidery ideas.
13. Achieve Precision with Geometric Yarn Wrapping
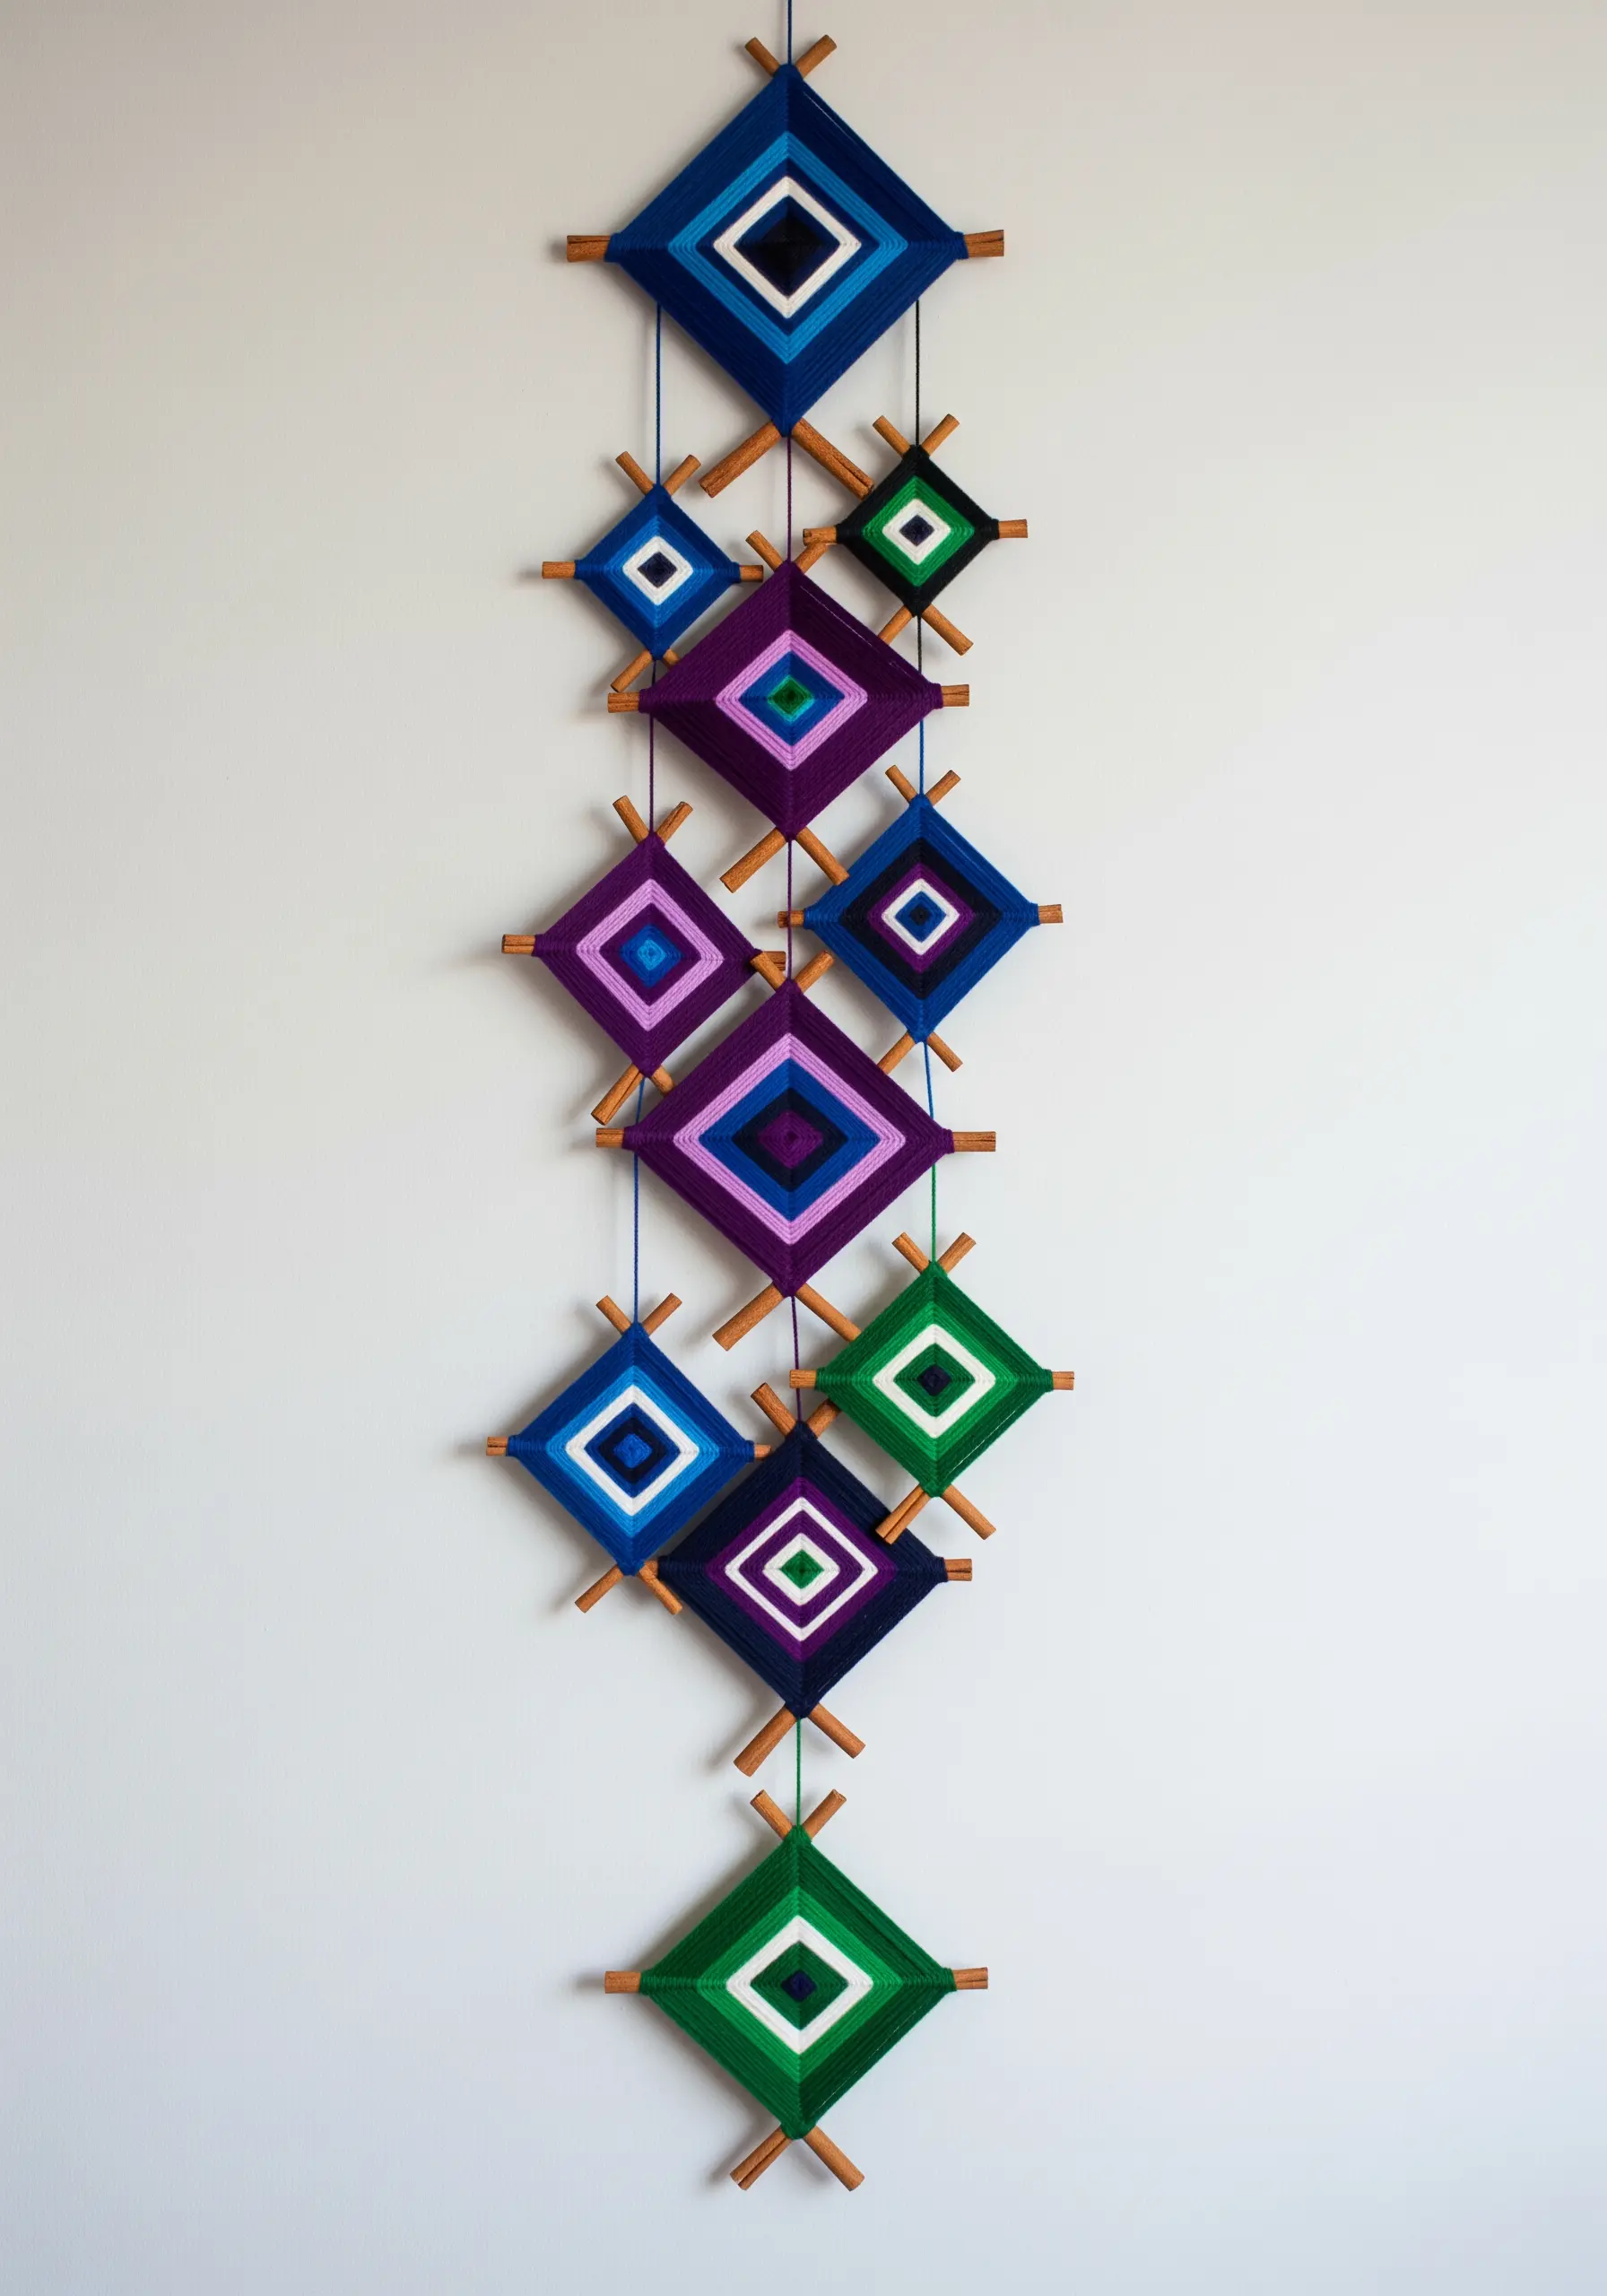
The beauty of an Ojo de Dios (God’s Eye) lies in its perfect, geometric symmetry.
To achieve this, focus on maintaining even tension as you wrap the yarn around the dowels in a consistent over-and-under pattern.
When changing colors, tie the new yarn to the old one on the back side to keep the front clean.
This technique turns simple yarn and sticks into sharp, mesmerizing diamonds, perfect for modern geometric thread art ideas that require precision.
14. Define a Shaped Piece with a Contrasting Border
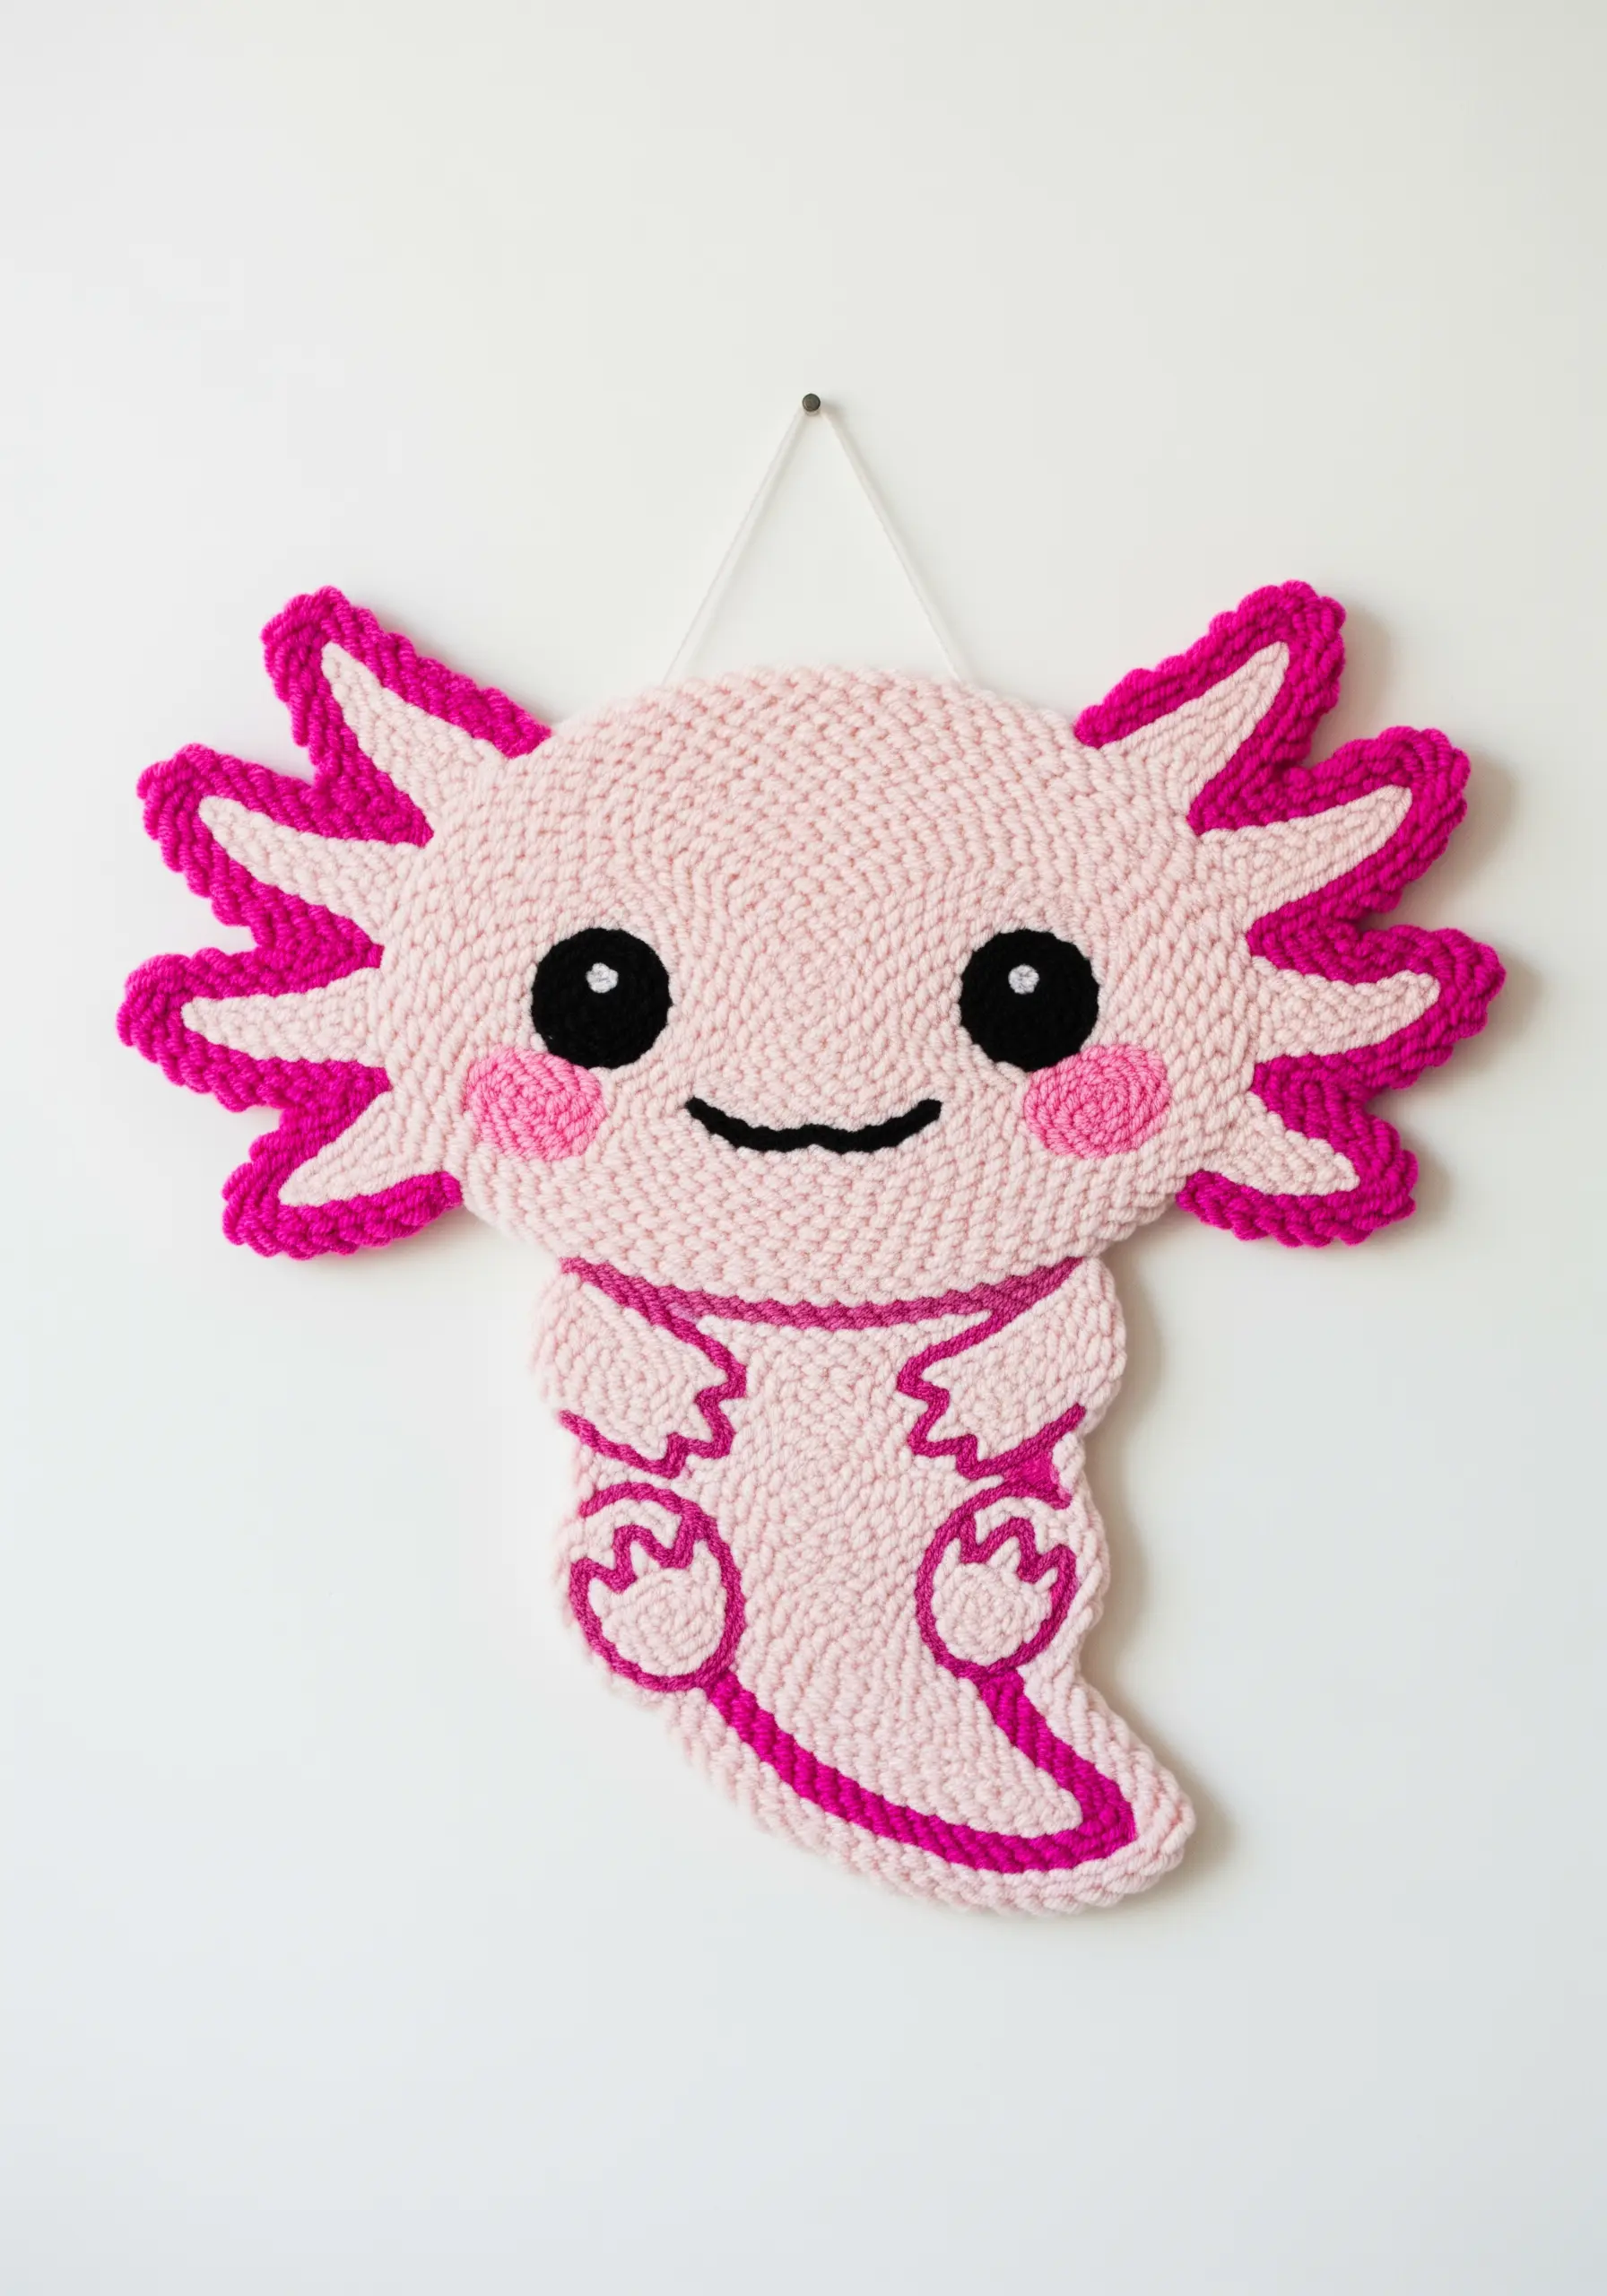
When your fiber art isn’t confined to a hoop, the edge becomes a critical design element.
After creating your shape with crochet or punch needle, define its silhouette with a contrasting outline stitch, like a chain stitch or whip stitch, in a bold color.
This technique not only provides a clean, finished edge but also makes the entire shape pop, turning it into a graphic statement.
It transforms the piece into one of those handmade objects that make your home a mini art gallery.
15. Paint a Landscape with Layers of Fringe
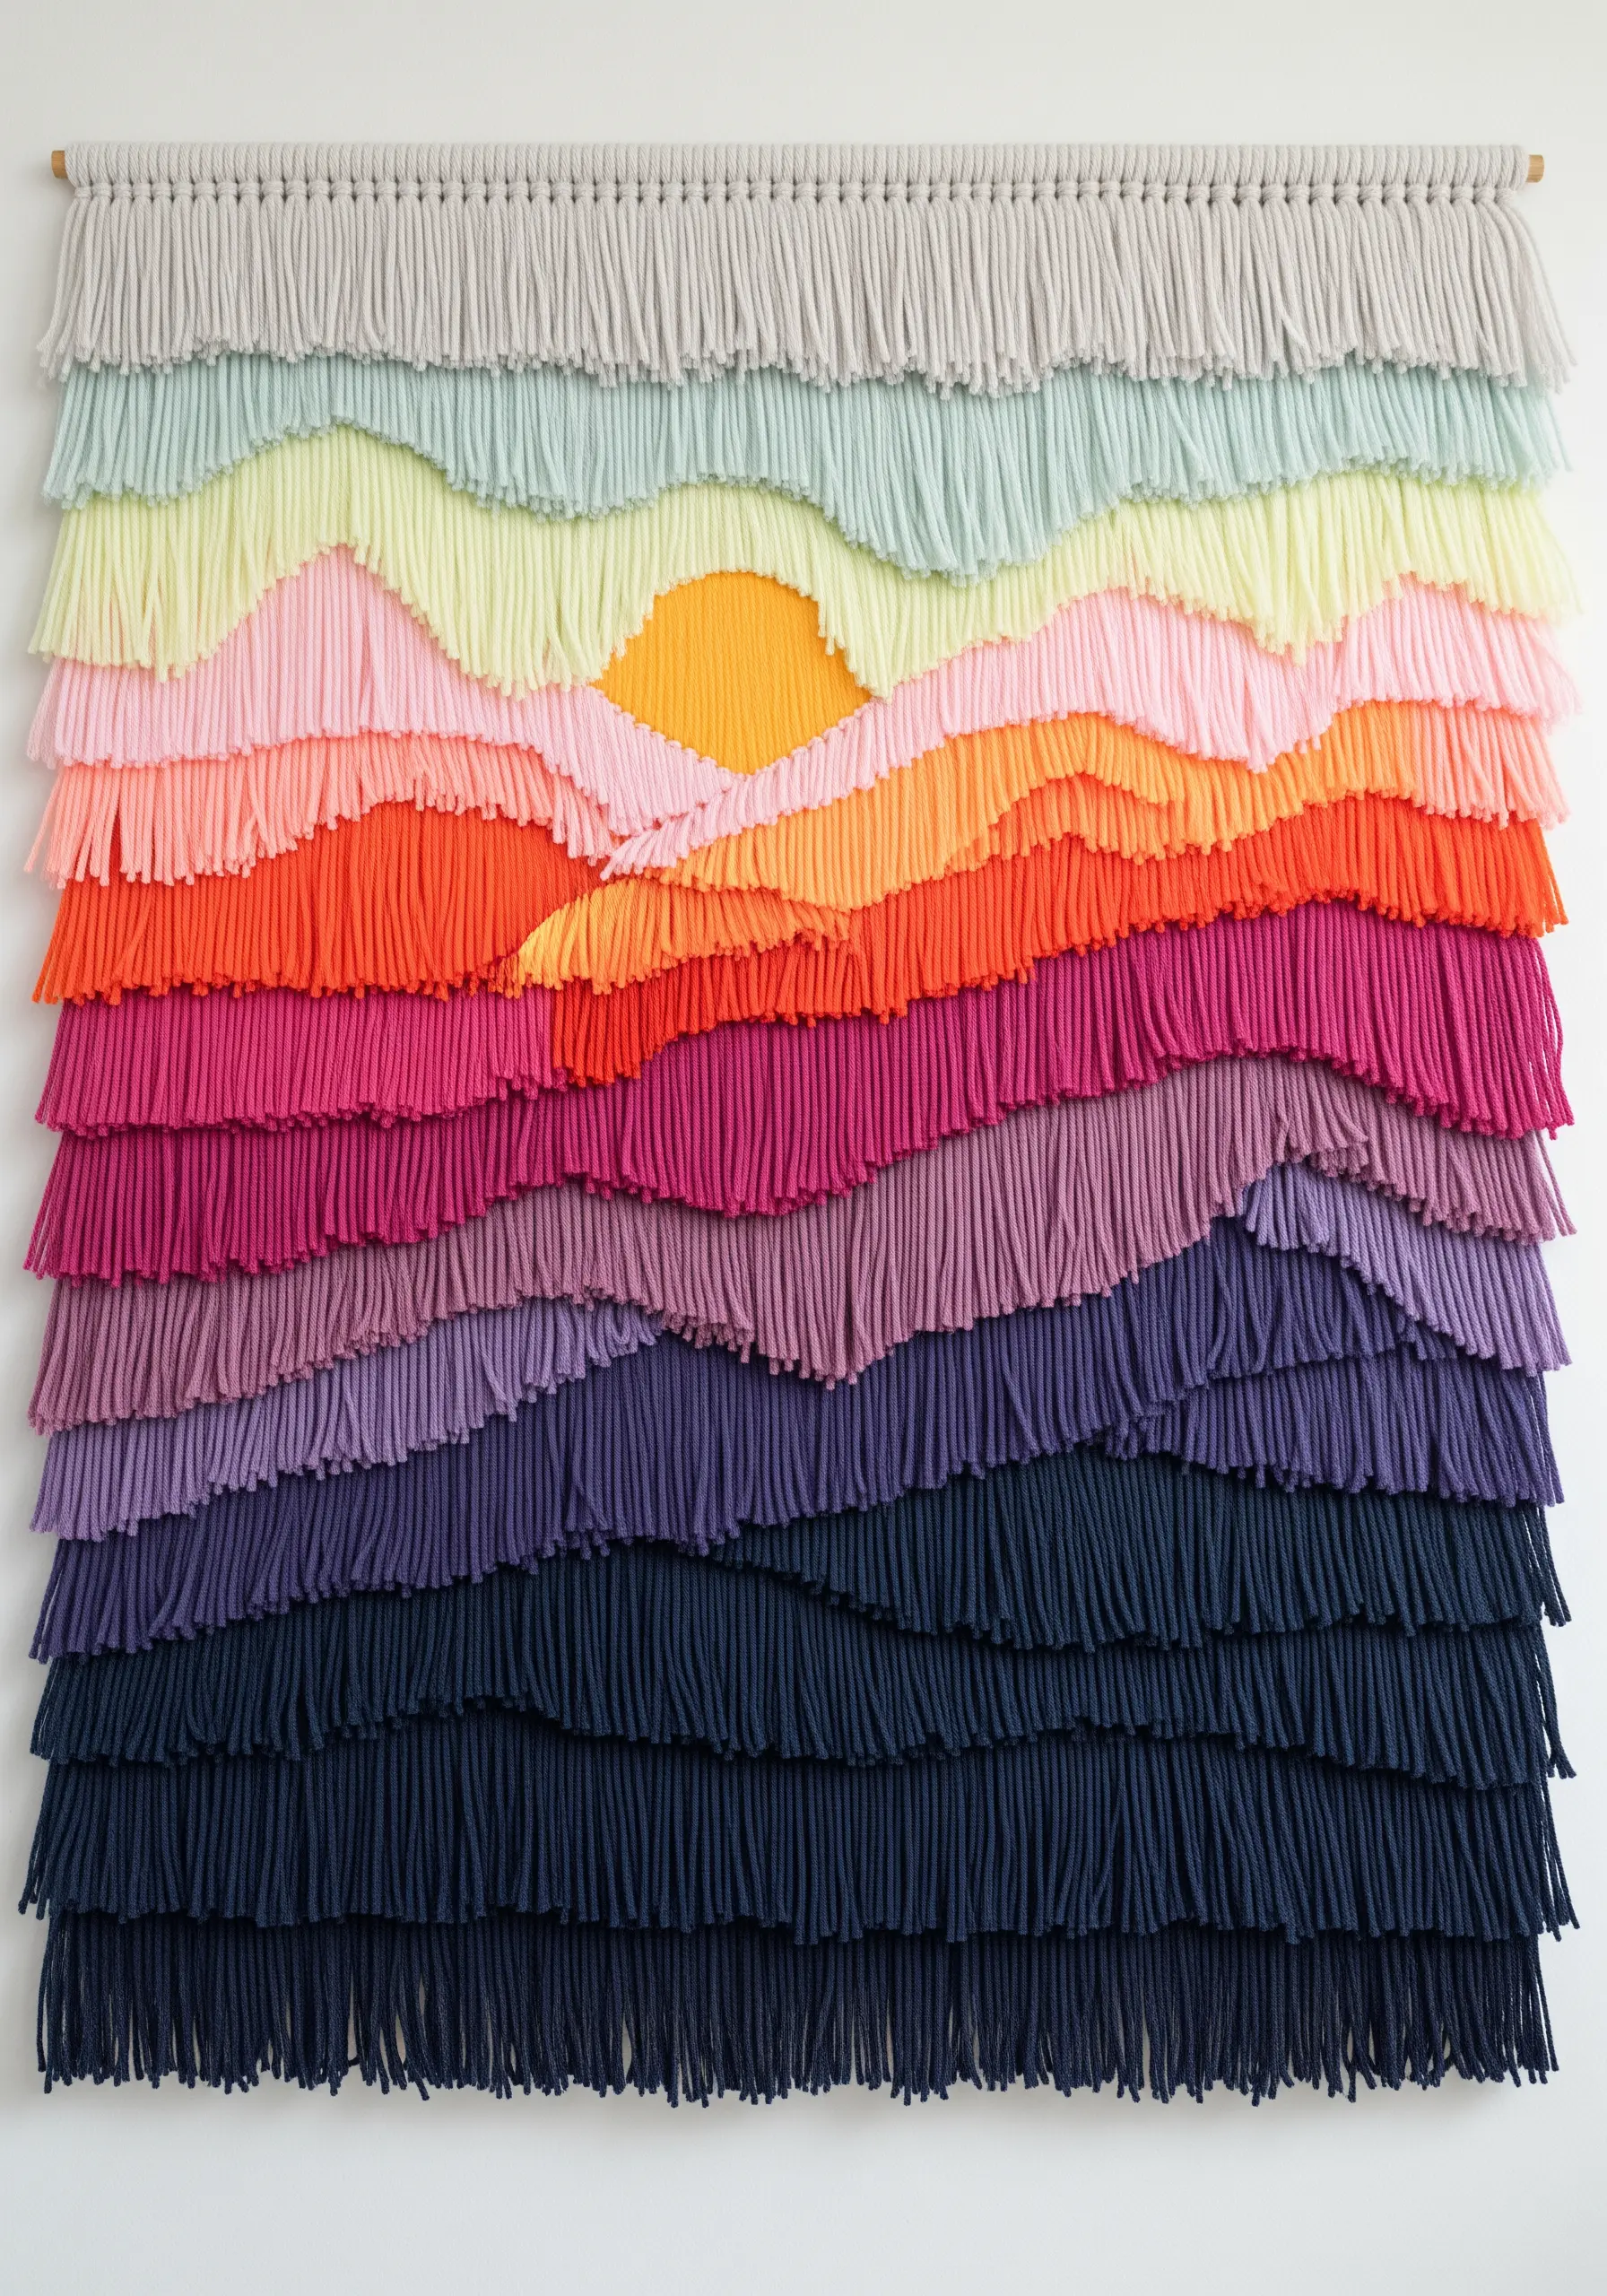
Create a stunning, impressionistic landscape using nothing but layered fringe.
Start by attaching long rows of yarn to a backing fabric or dowel, then carefully trim them to form the undulating lines of mountains and hills.
Use a rich, gradient color palette to suggest depth, with darker shades at the bottom and lighter ones toward the top.
The softness of the cut yarn mimics the atmospheric haze of distant mountains, echoing advanced mountain landscape thread painting techniques with a modern twist.
16. Create Bold, Dimensional Lettering
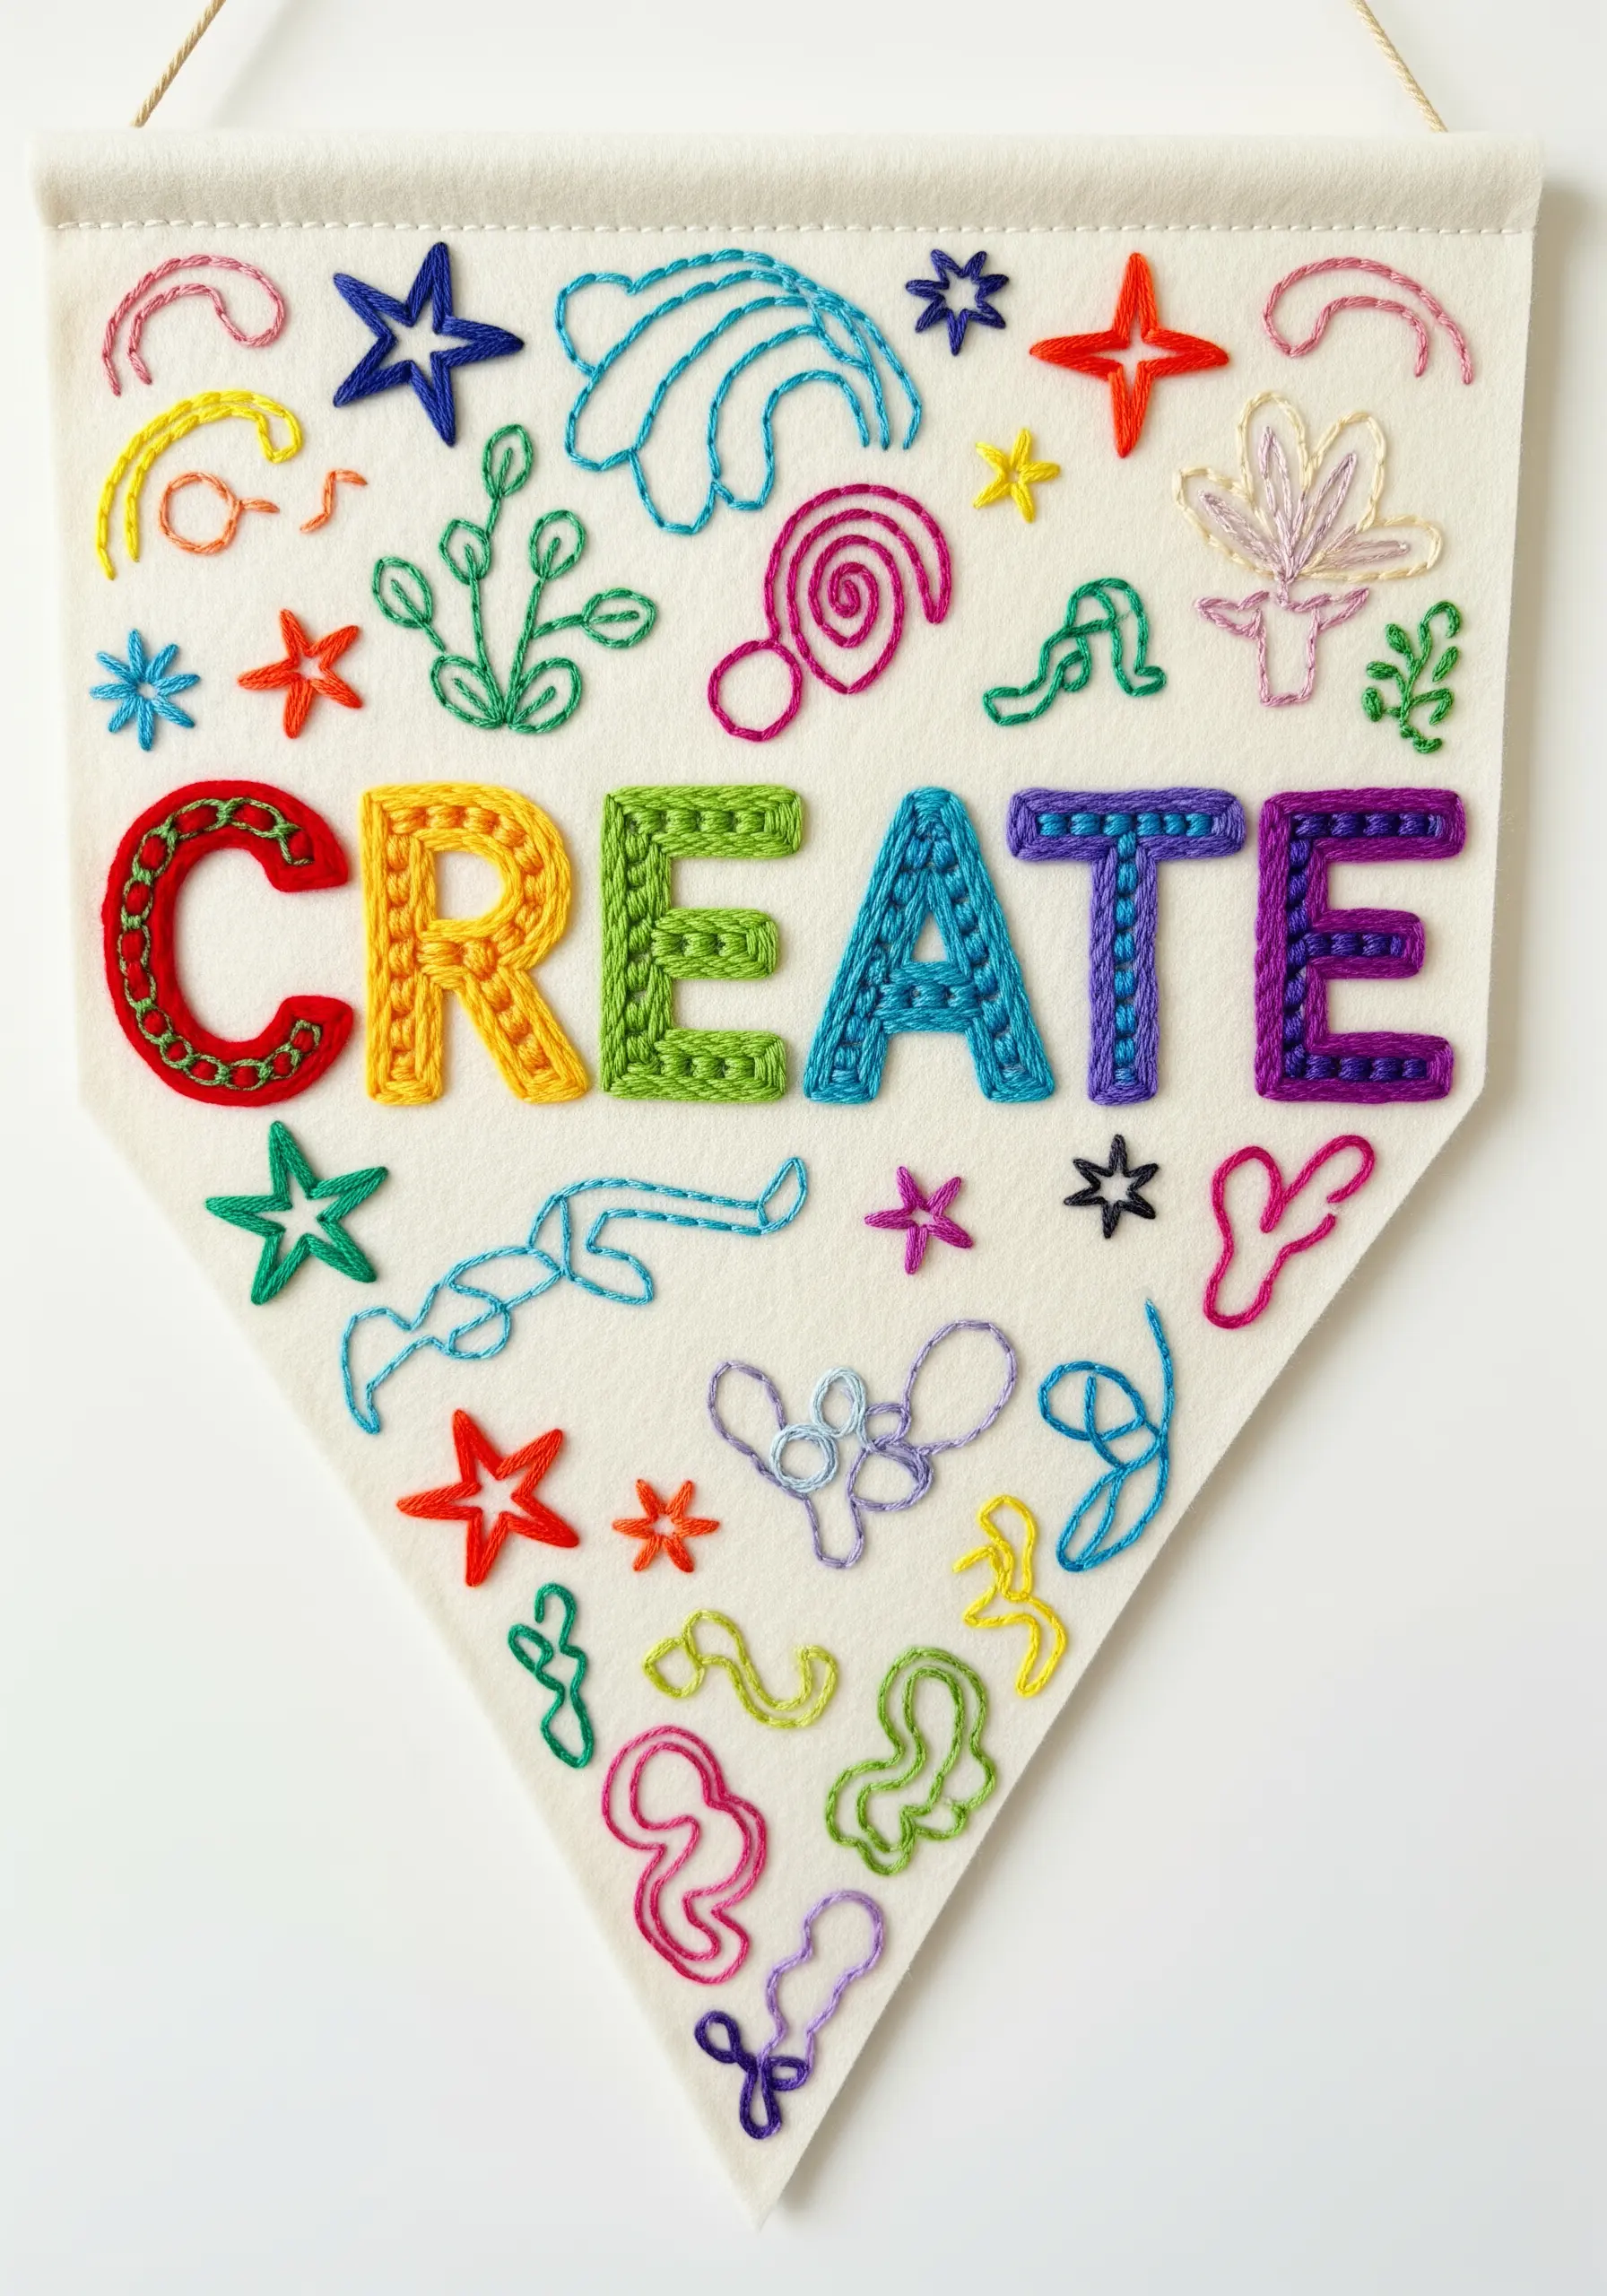
Make your words stand out on a felt banner by using stitches that create height and texture.
Instead of a simple backstitch, fill your letters with a raised satin stitch over a padded base of split stitches, or use a thick chain stitch.
This adds dimension and shadow, making the letters feel substantial and bold.
Pairing this technique with a vibrant, multi-color palette turns simple inspirational quote embroidery hoops and banners into eye-catching graphic art.
17. Construct a Celestial Mobile with Macrame and Wire
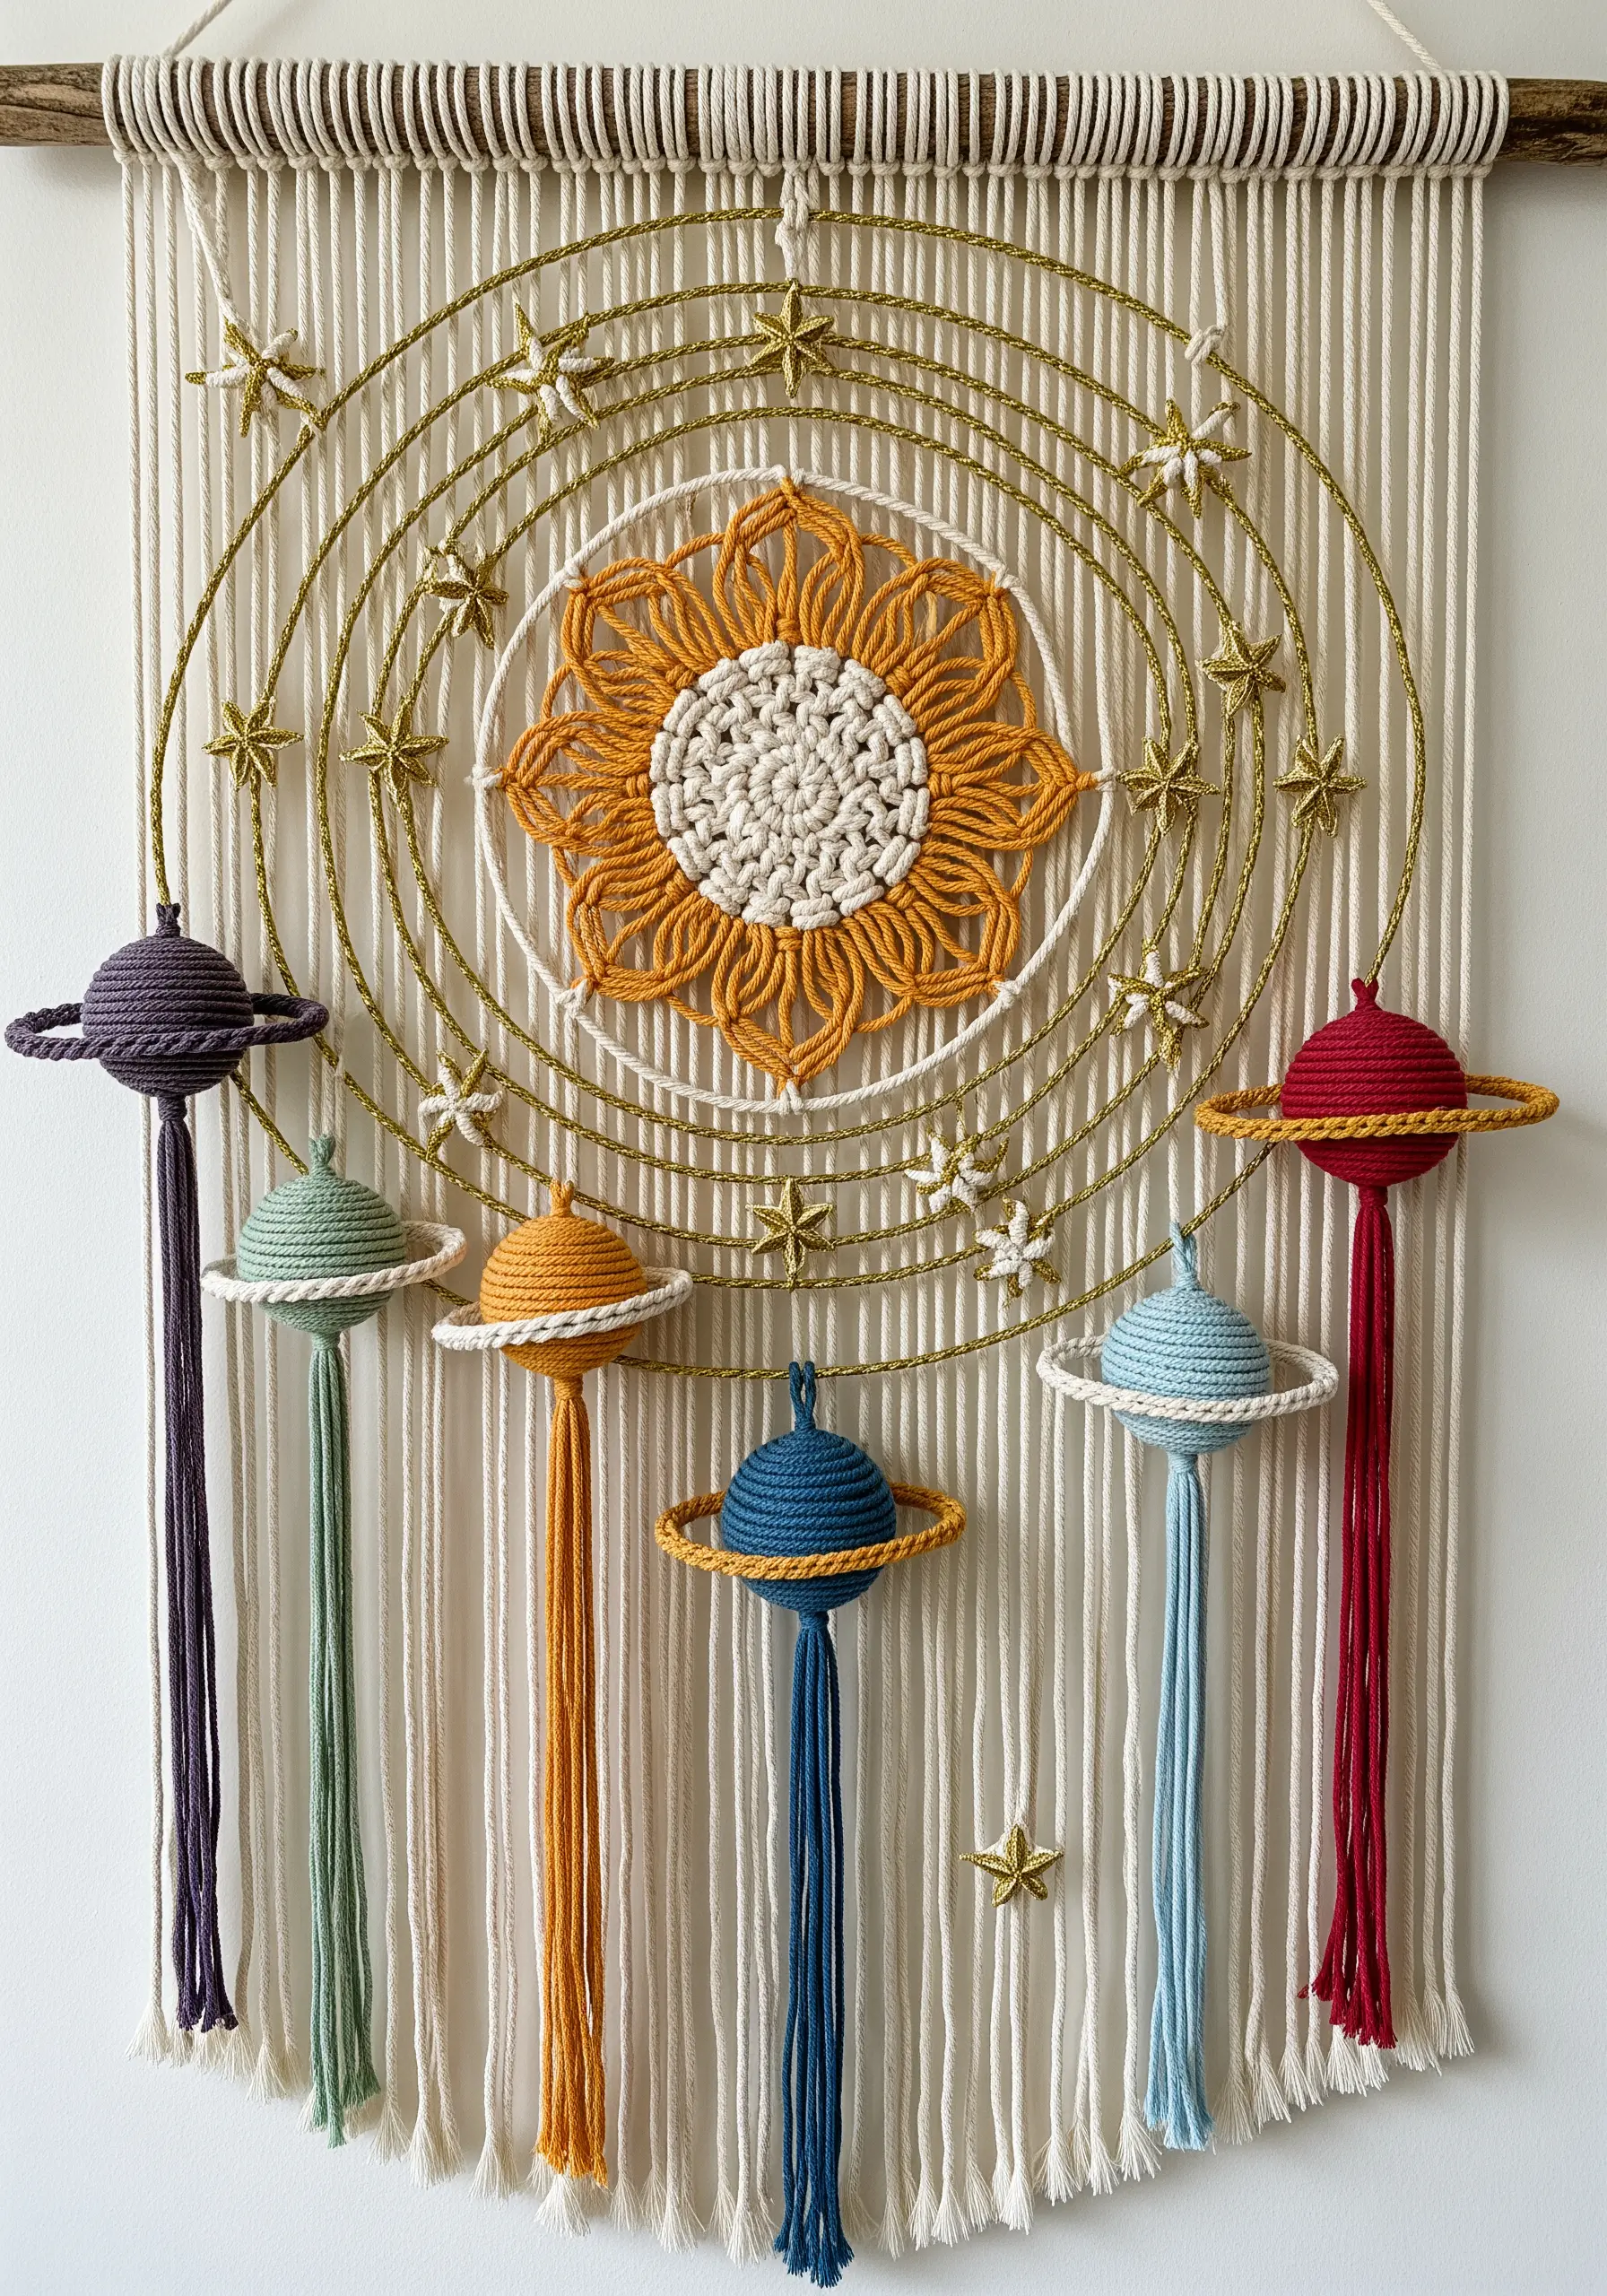
Create a three-dimensional solar system by combining macrame knots with wrapped wire forms.
Fashion rings and armatures from sturdy craft wire to create the planet shapes and the orbital paths.
Then, use macrame knots like the gathering knot or half hitch to cover the forms with yarn, adding tassels for planetary tails.
This method allows you to build complex, lightweight structures, creating fiber art installations that turn ordinary spaces into magical experiences.
18. Capture Ethereal Beauty with Mixed Media

To replicate the translucent, delicate nature of jellyfish, you must think beyond thread.
Embroider the bells using iridescent threads or variegated floss to create a shimmering, multi-tonal effect.
For the tentacles, integrate materials like sheer organza ribbon, metallic cording, and fine, unwaxed linen thread.
This blend of textures and finishes is essential for capturing the otherworldly quality of marine life in ocean-inspired hoop embroidery ideas.
19. Wrap a Monogram with Precision
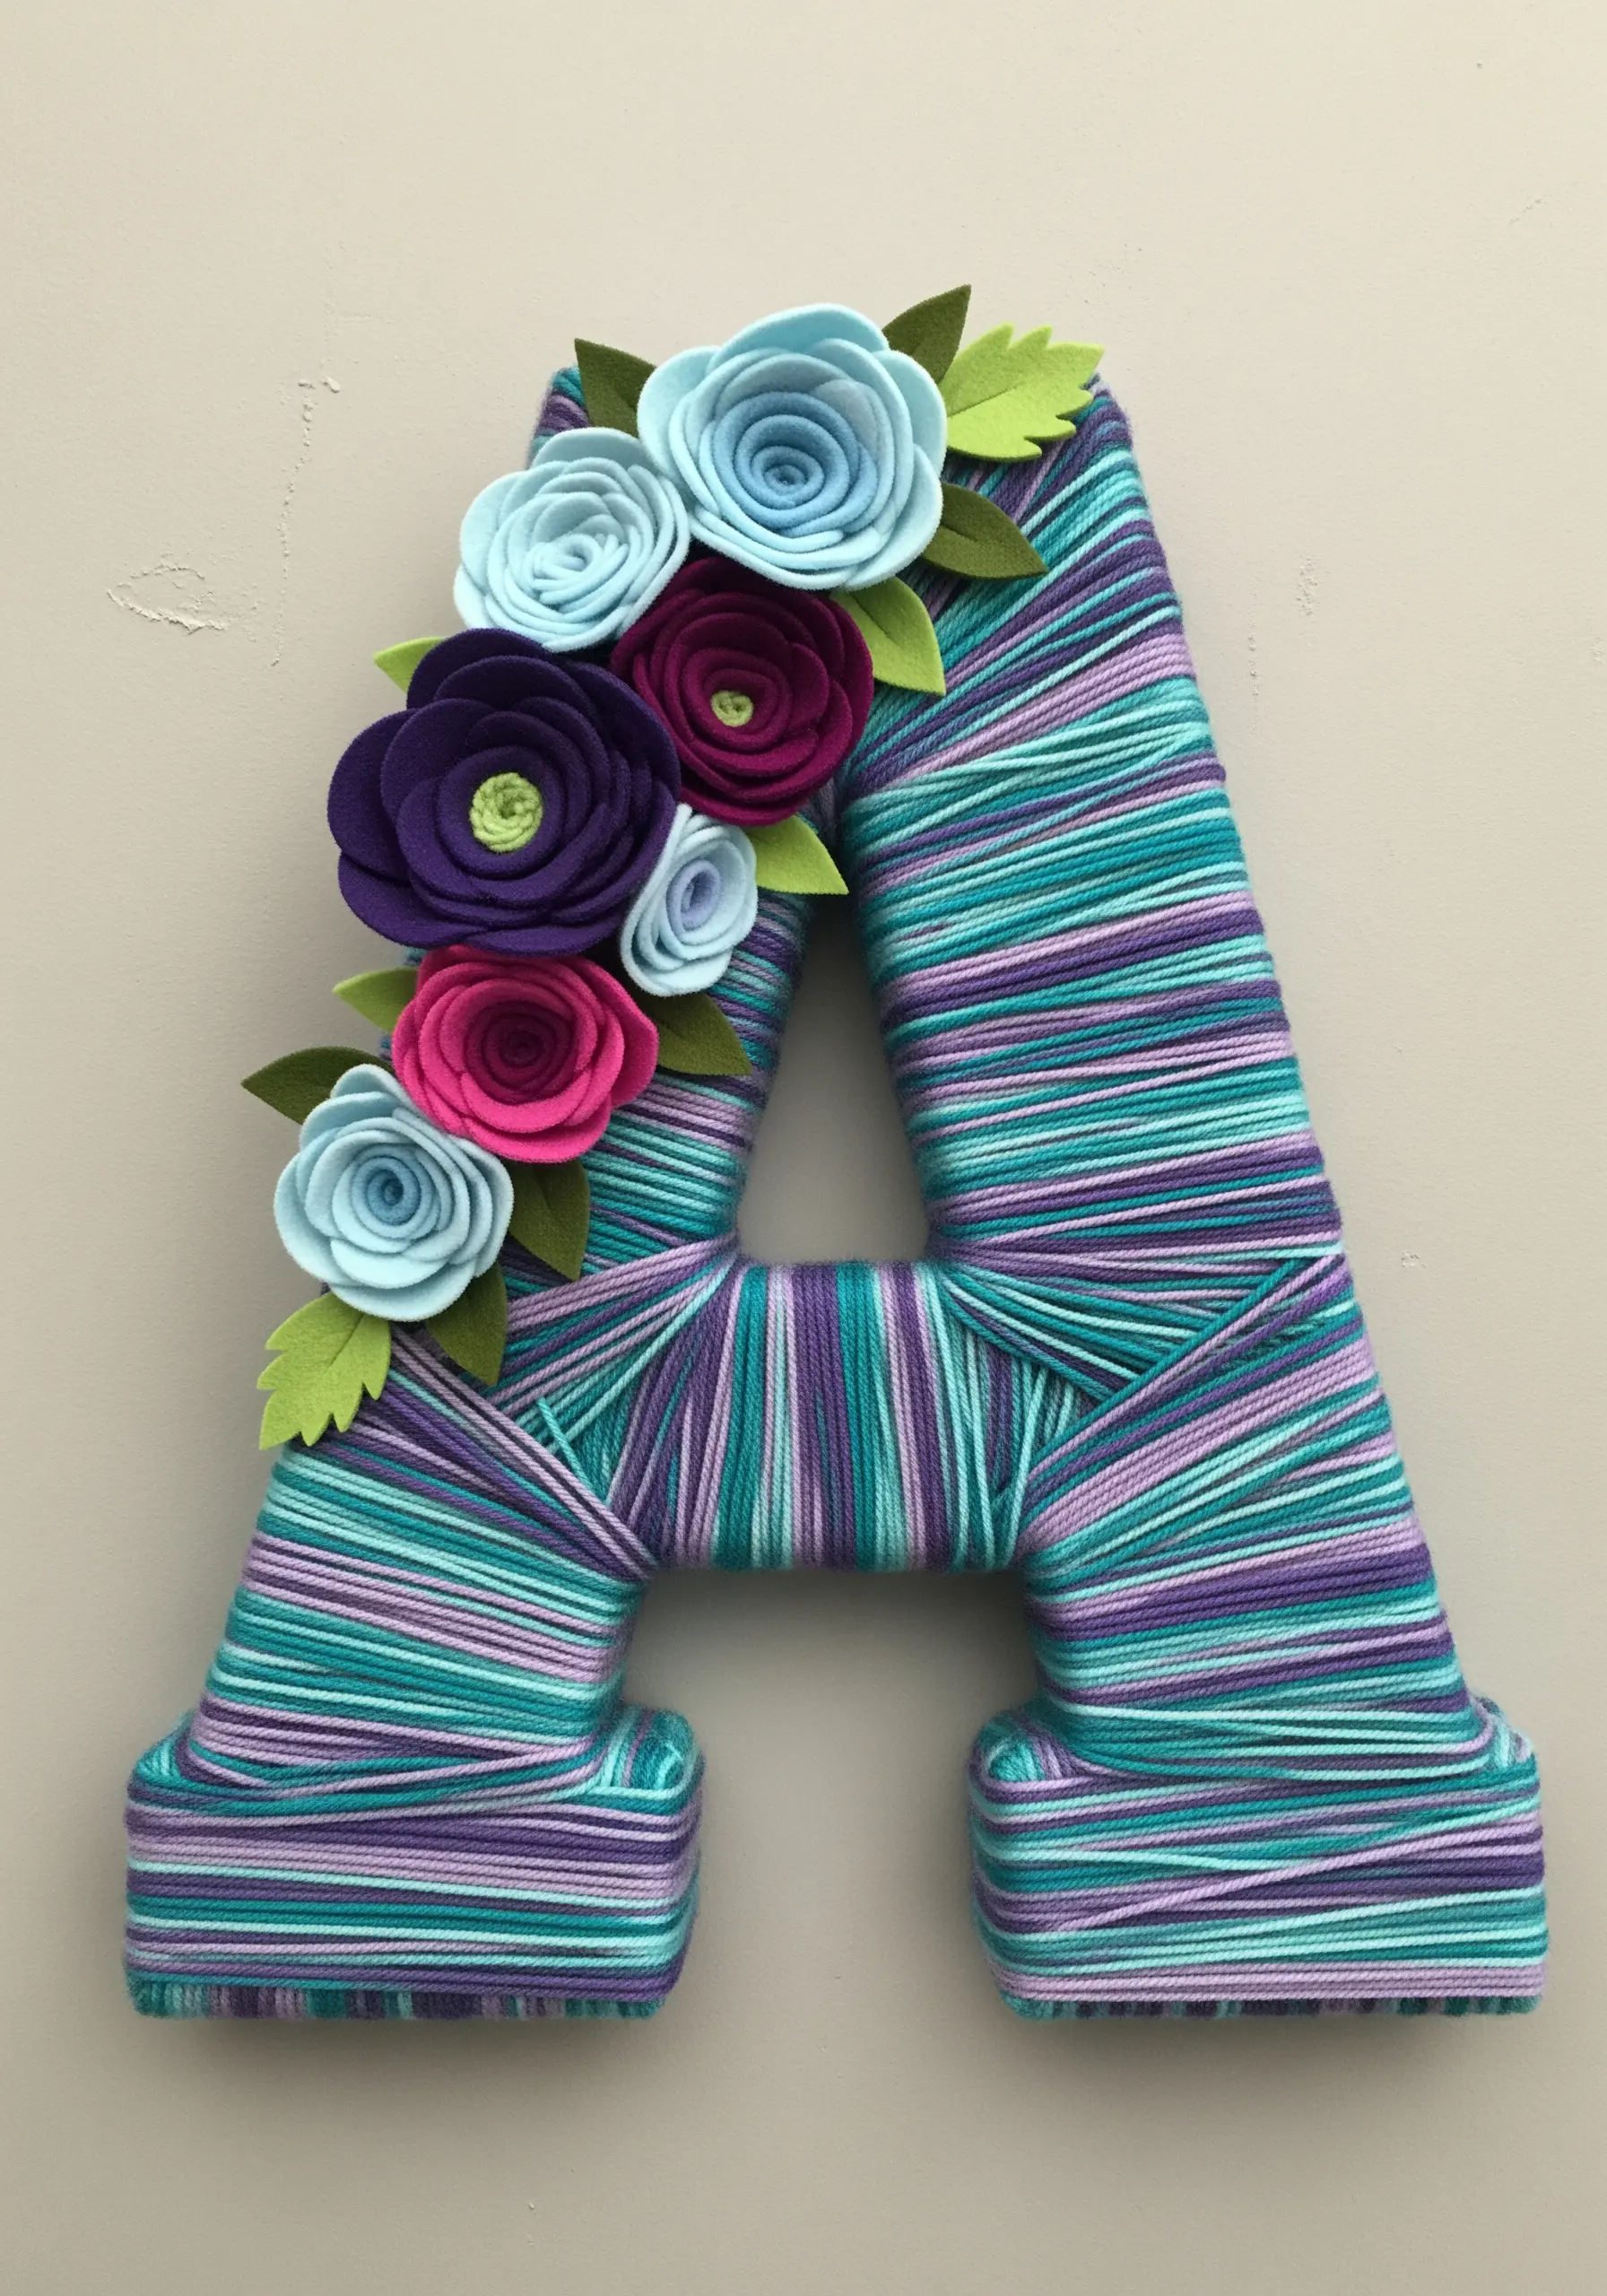
Transform a simple wooden or cardboard letter into a personalized piece of art with yarn wrapping.
For a clean, striped look, wrap two or three different colored yarns at the same time, allowing them to create a variegated pattern.
At corners and curves, carefully guide each strand to lie flat and follow the letter’s shape without bunching.
Finish by embellishing with contrasting felt flowers, turning a simple initial into a piece that rivals complex botanical monogram embroidery ideas.


