

You see beautiful yarn art online and in boutiques, and you feel that familiar spark—the desire to create something just as tactile, personal, and polished. But turning a bundle of yarn into a cohesive piece of wall art can feel intimidating. Where do you even begin?
Think of yarn not just as a strand, but as a sculptural line you can bend, knot, weave, and tuft. This is where your artistry comes alive. It’s not about mastering dozens of complex techniques overnight, but about understanding how a single knot, a change in texture, or a thoughtful color choice can transform your entire piece.
These ideas are your starting point for making art that feels both intentional and joyfully handmade. Let’s explore how to give your yarn creations the structure, depth, and personality they deserve, turning them into gorgeous gifts or the perfect statement piece for your own walls.
1. Symmetrical Knots for Architectural Grace

Build your macrame piece with a focus on symmetry and rhythm to create a sophisticated, architectural feel.
Start with a central anchor point and mirror your knot patterns on both sides, such as repeating diamond shapes using square knots.
Alternate densely knotted sections with areas of loose, hanging cords. This contrast creates negative space, which allows the intricate details to stand out and prevents the design from feeling too heavy.
Maintain consistent tension in your knots for a polished, professional finish that highlights the geometric precision of your work.
2. Weaving Landscapes with Textural Depth
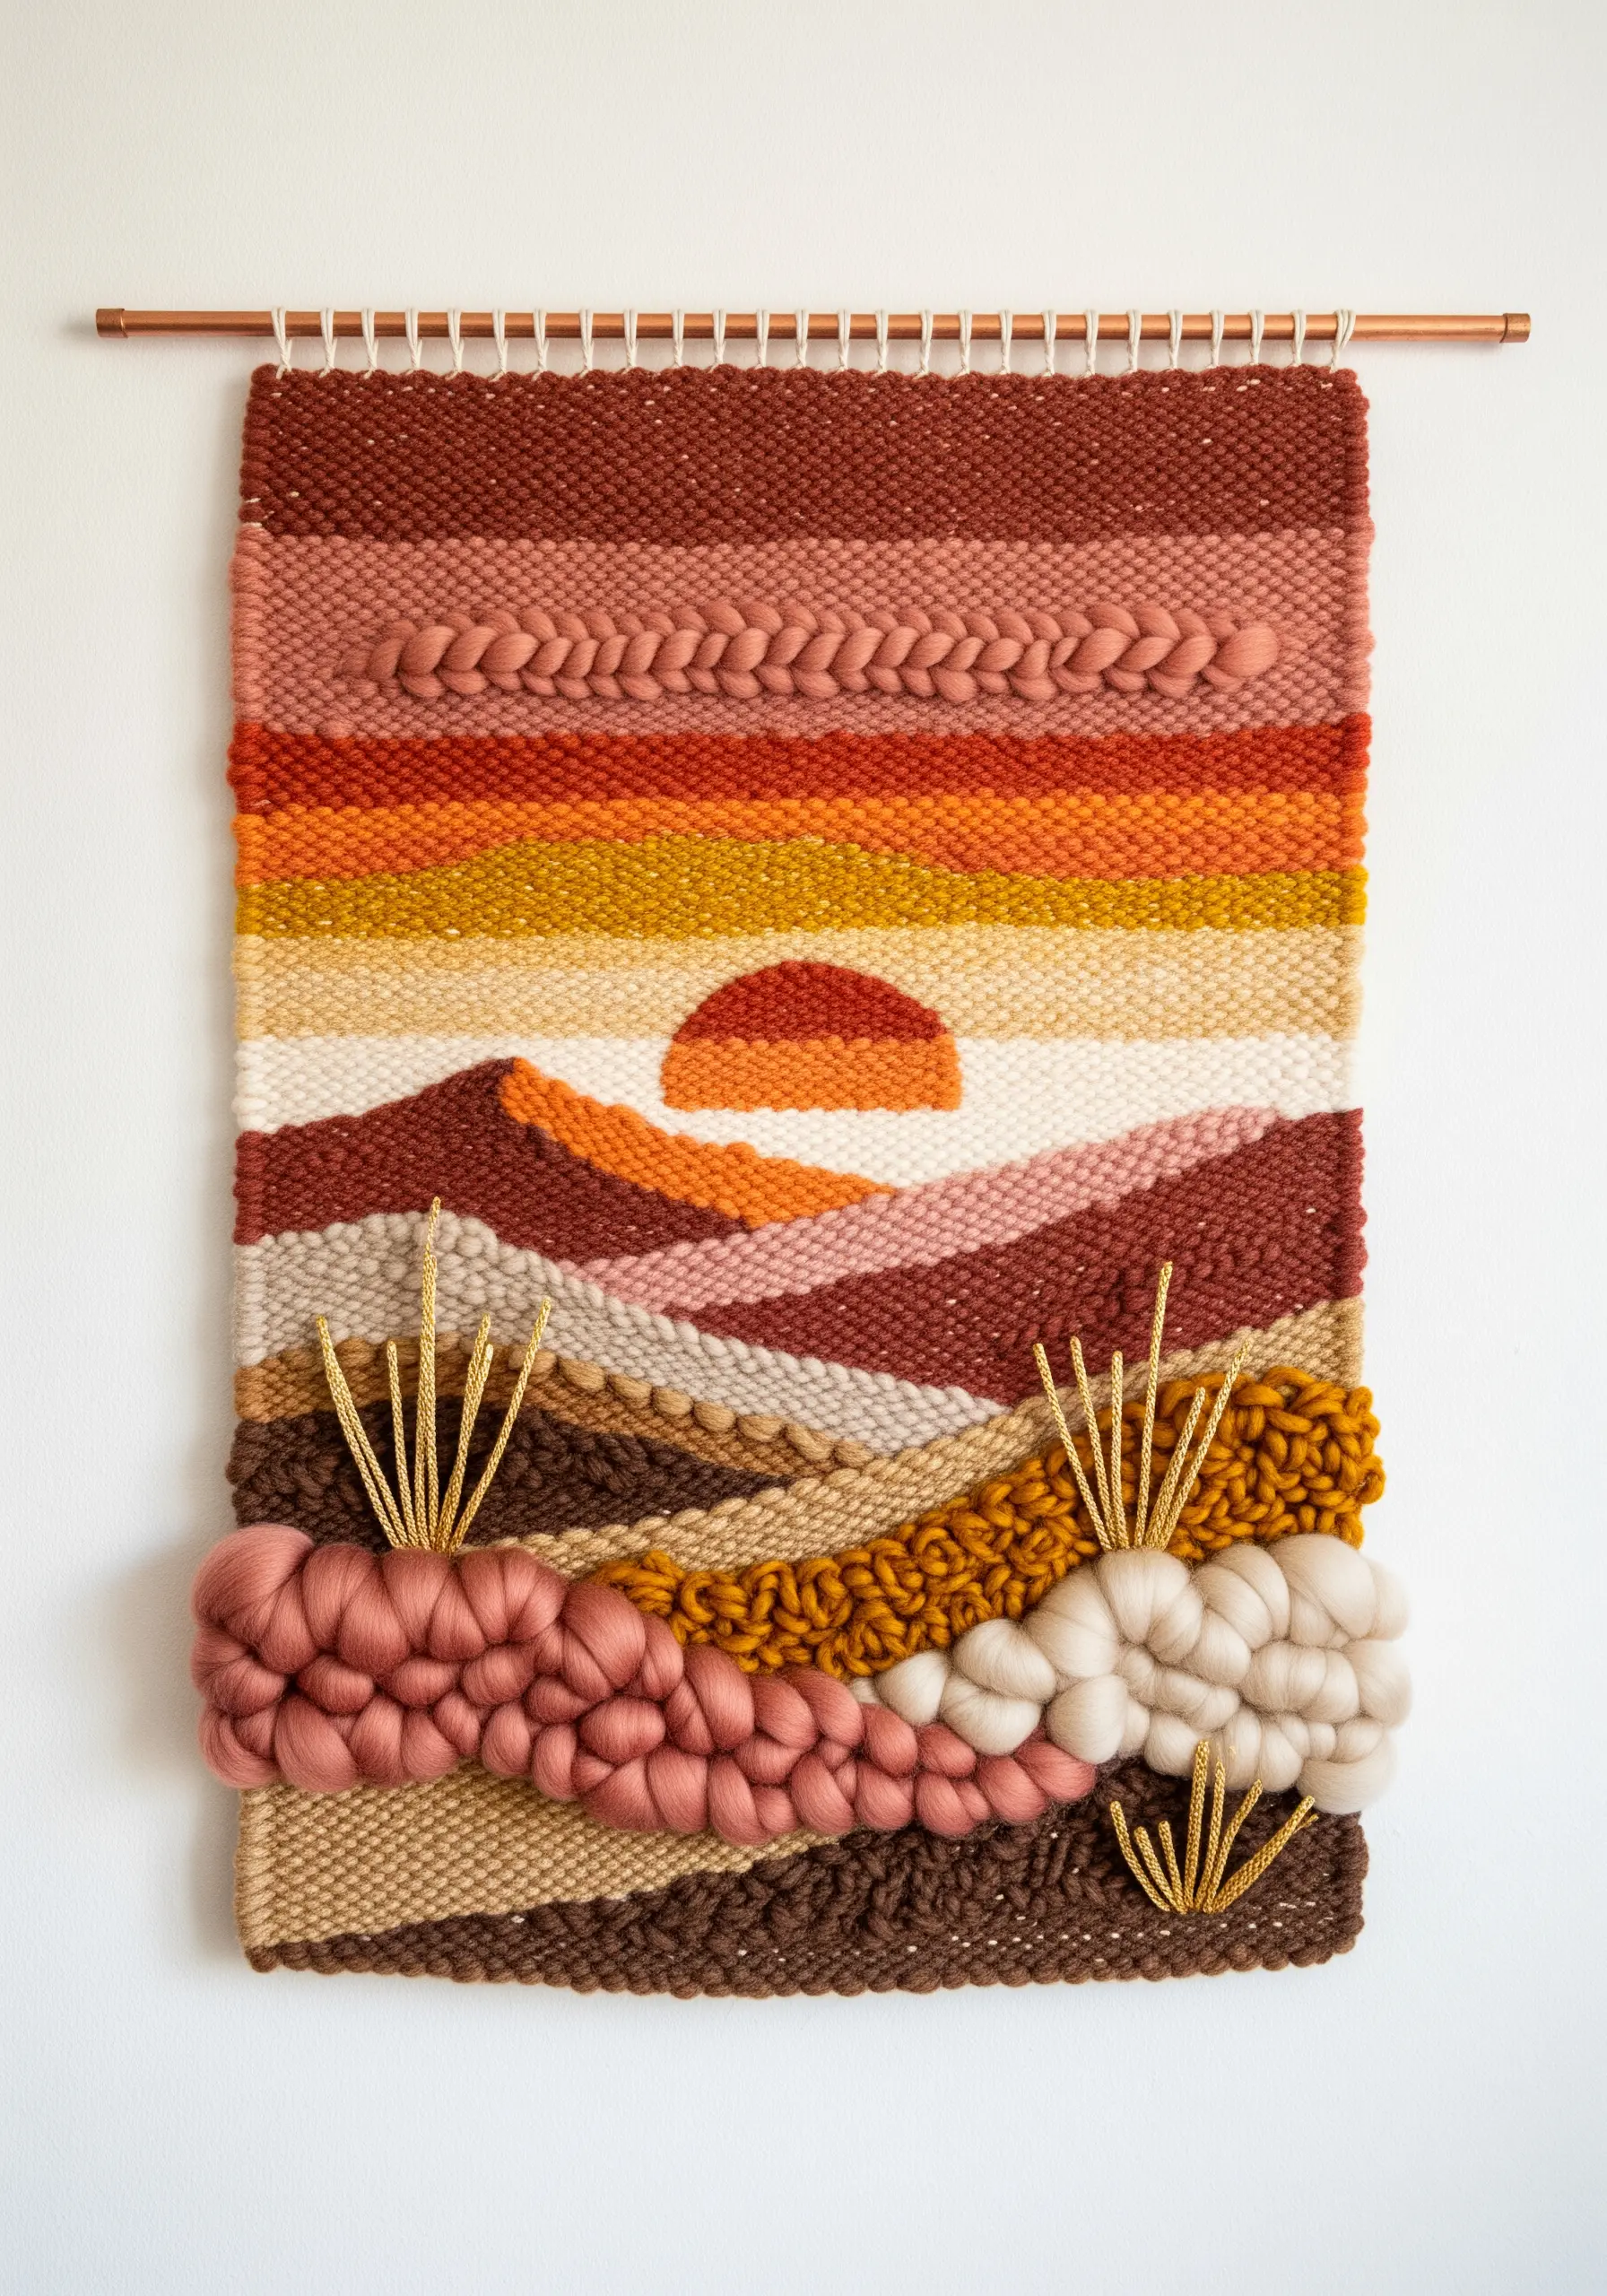
Create painterly landscapes by thinking in layers of texture and color, just as you would with paint.
Use thick, chunky roving yarn for foreground elements like clouds or hills to make them physically pop from the weaving, creating an immediate sense of depth.
For the sky or distant mountains, use a simple tabby weave with thinner yarns, blending colors to create soft gradients.
Introduce unexpected elements like metallic thread or soumak braids to define horizons or add a touch of light, guiding the viewer’s eye through your scene.
3. Sculpting Florals with Punch Needle Loops

Move beyond flat color and give your punch needle florals a sculptural, three-dimensional quality by varying your loop height.
Use a punch needle with adjustable settings. Create shorter, tighter loops for the centers of your flowers and longer, plusher loops for the outer petals to mimic how a real flower opens.
Instead of outlining in black, define your shapes with a contrasting color or a slightly darker shade of the main petal color. This technique keeps the design soft and modern.
This tactile approach makes for beautiful, handmade art pieces that feel personal and heartfelt, making them perfect gifts.
4. Minimalist Geometry with Metal and Yarn

Use metal hoops as a framework to explore tension, color, and negative space for a modern, airy wall hanging.
Instead of filling the entire space, wrap yarn tightly around sections of the hoops to create clean, graphic blocks of color.
Arrange multiple hoops of different sizes, overlapping them to build a dynamic composition. The empty space within and around the hoops is just as important as the wrapped sections.
Stick to a refined color palette, like soft neutrals and a single metallic accent, to maintain a sophisticated and minimalist aesthetic.
5. Graphic Impact with Dense Latch Hooking

Achieve bold, graphic patterns with a plush, satisfying texture using the latch hook technique.
This method is ideal for retro-inspired, color-blocked designs because the dense loops create clean lines and saturated fields of color without any gaps.
Before you start, draw your design onto a latch hook canvas, creating a clear map for your work. This preparation ensures sharp edges between your geometric shapes.
Choose a high-contrast color palette to emphasize the graphic nature of the design, making it a powerful statement piece for any room.
6. Painting with Wool: Needle-Felted Landscapes

Use wool roving like paint to create soft, atmospheric landscapes with incredible depth and realism.
Work on a woven or felt background and apply thin layers of different colored wool fibers, blending them directly on the surface with your felting needle to create soft, cloud-like gradients.
For sharp details like snowy peaks or dark crevices, use a smaller amount of tightly felted wool or add fine embroidery stitches on top.
This is one of the best organic thread art techniques that mimic watercolor without using any paint, resulting in a piece with both visual softness and tactile depth.
7. Elevating a Simple Rainbow with Mixed Textures
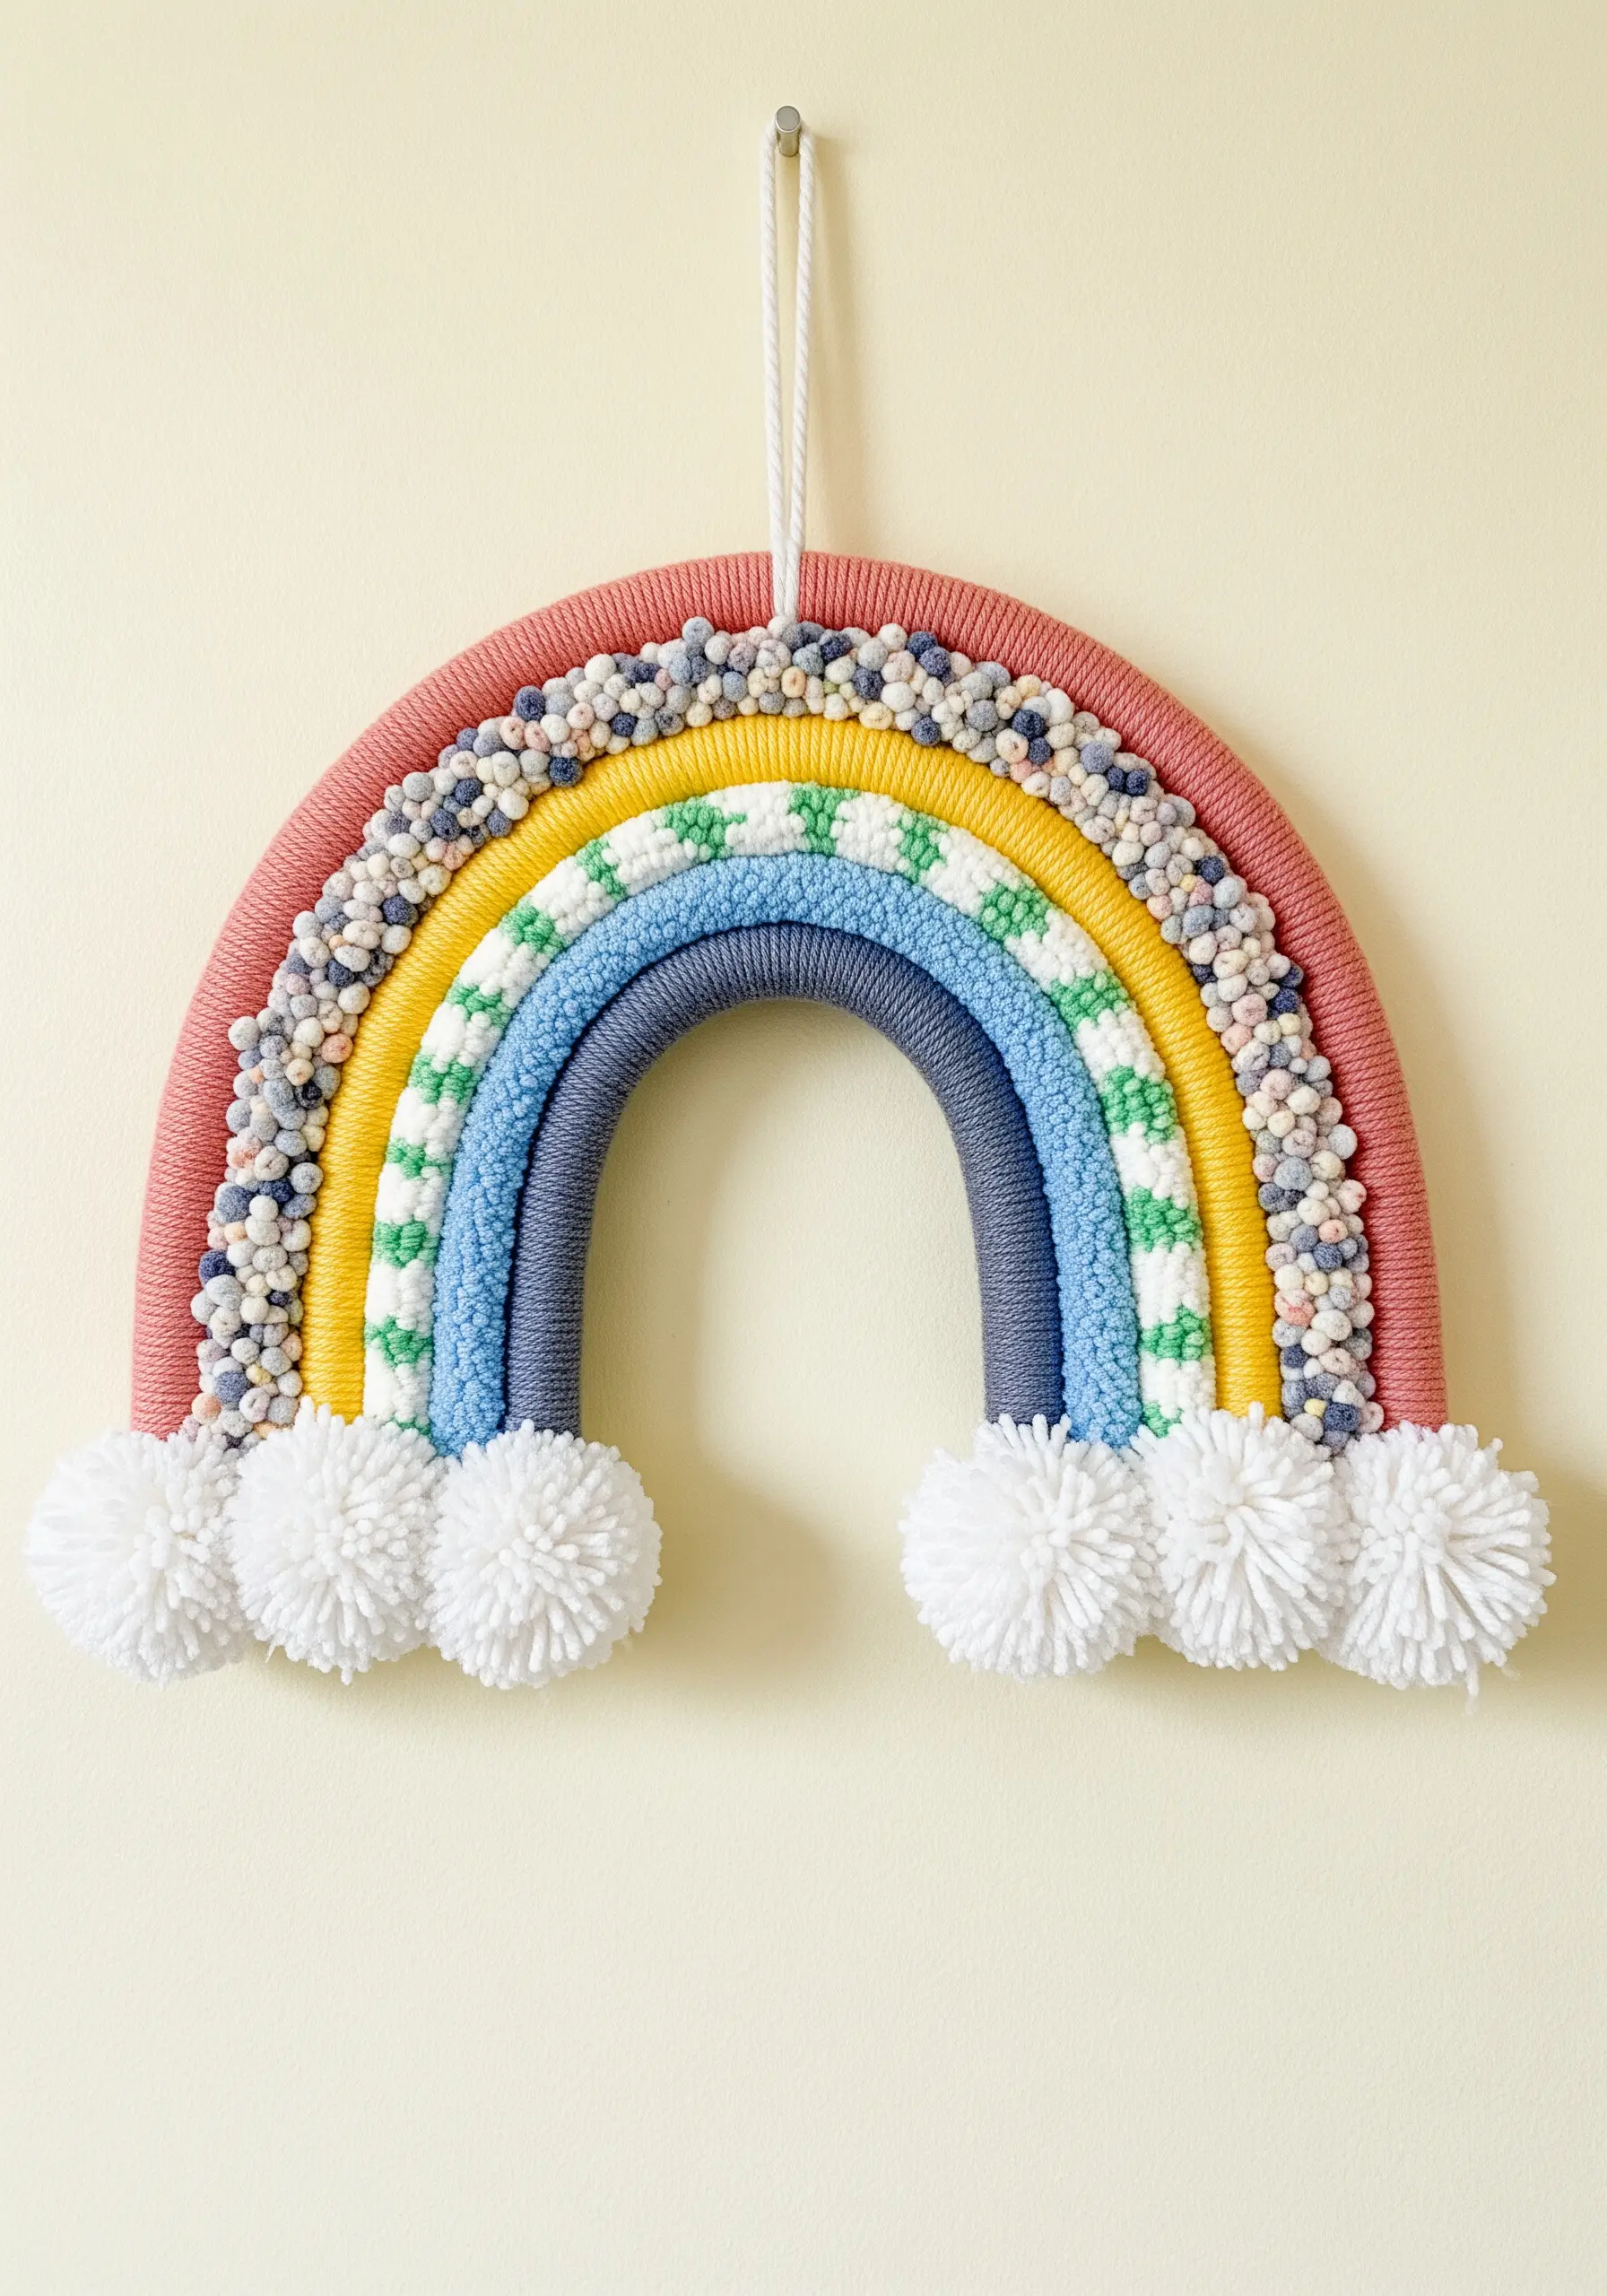
Transform the classic wrapped rainbow into a unique sensory piece by incorporating a variety of textures in each arc.
Start with a base of rope wrapped in standard yarn, but leave some sections open for embellishment.
Fill these open areas with different materials: stitch on seed beads, couch a fuzzy chenille yarn, or add a line of tight French knots.
This multi-textured approach adds visual interest and sophistication, turning a simple craft into a piece of decorative art perfect for a soft, dreamy baby room.
8. Creating Gradient Art with Dip-Dyed Tassels

Achieve a stunning, professional-looking ombre effect by dip-dyeing your own tassels.
Create a series of uniform tassels from natural fiber yarn, like cotton or wool, which will absorb the dye evenly.
Working in batches, submerge the tassels into fabric dye at varying depths and for different lengths of time to create a smooth transition from light to dark.
Arrange the finished tassels in cascading rows from lightest to darkest for a dramatic, waterfall-like effect that highlights the subtle color shifts.
9. The Art of Abstract Weaving with Found Fibers
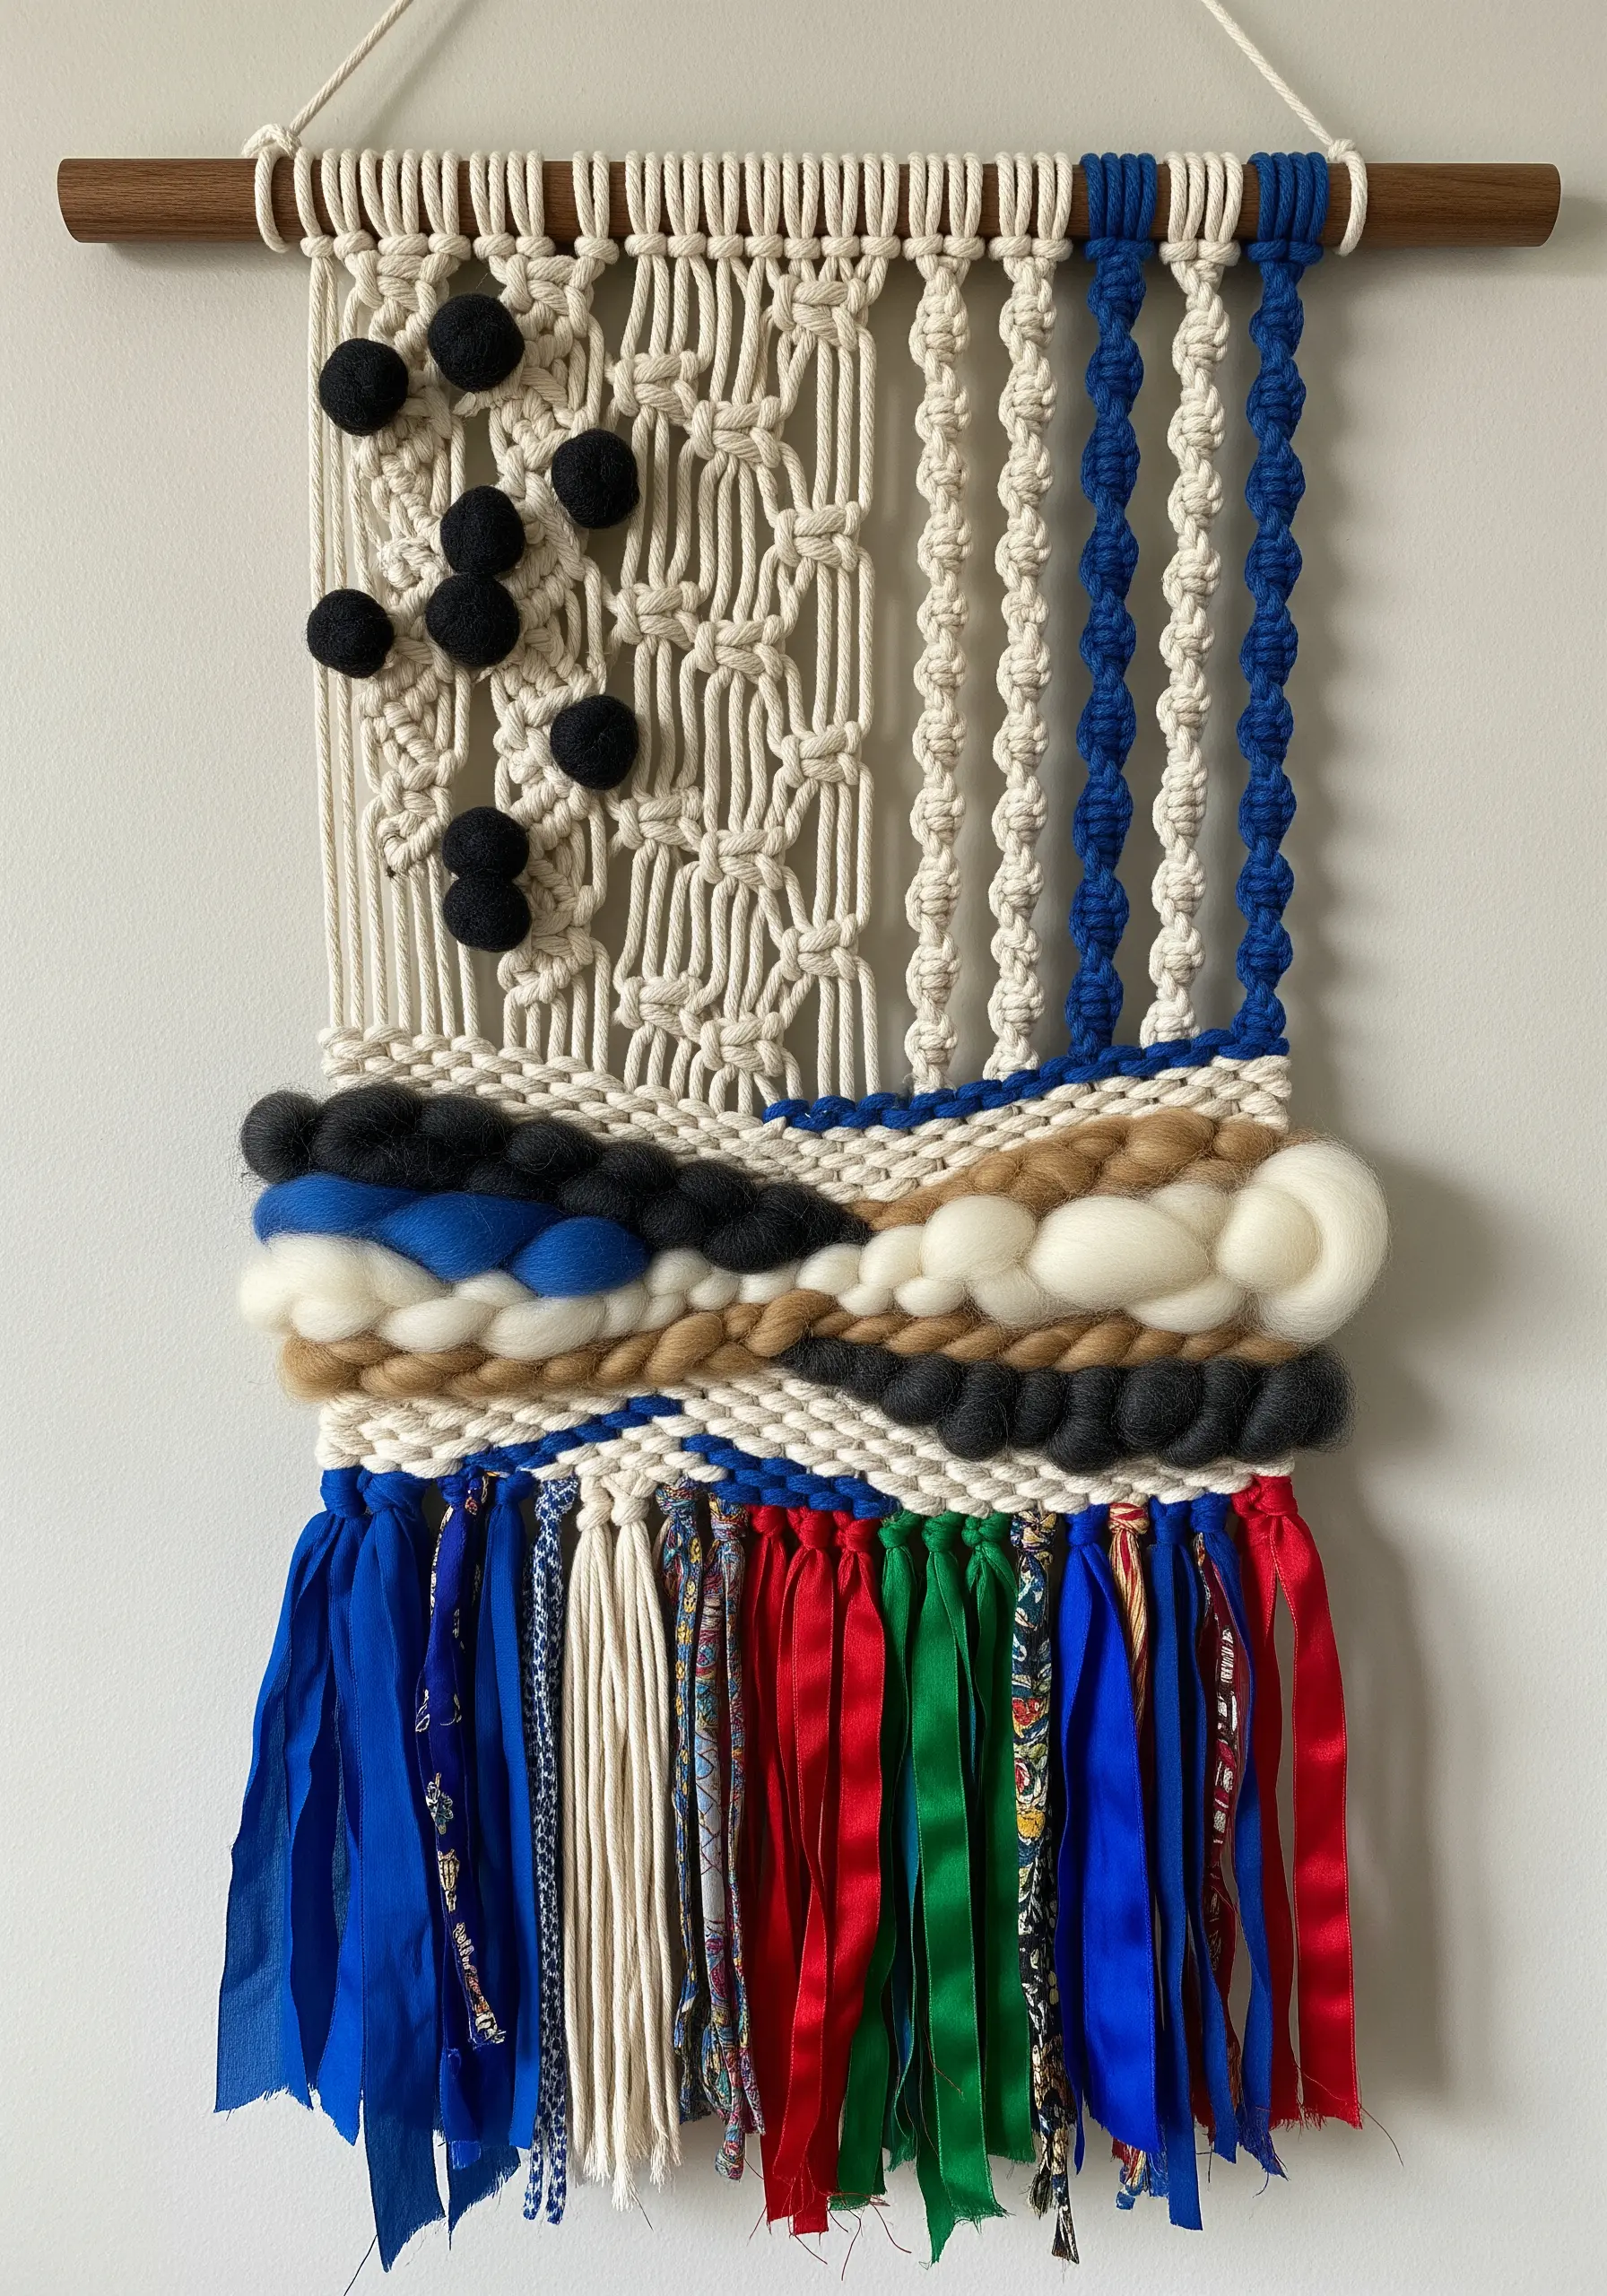
Break free from traditional weaving by incorporating unconventional materials to create a rich, abstract tapestry.
Gather not just yarn but also strips of silk ribbon, scraps of fabric, unspun wool roving, and even felted shapes.
Introduce these elements sporadically. A thick, bubbly section of roving followed by a sleek, flat ribbon creates a dynamic push-and-pull of textures.
This technique turns your weaving into one of those colorful mixed-fiber ideas to brighten up your living space and tell a unique visual story.
10. Meditative Weaving: The Ojo de Dios Mandala

Create a calming, geometric mandala by wrapping yarn around a structural frame of crossed sticks or dowels.
This technique, known as Ojo de Dios (God’s Eye), is a meditative process of systematic wrapping. The pattern emerges from the repetition.
The artistry lies in your color choices. Use variegated yarn for a fluid, watercolor effect, or switch between solid colors every few rows to create sharp, concentric shapes.
Embellish the final piece by adding small crocheted flowers or preserved moss to the outer rings for an organic, botanical touch, making it a perfect example of modern mandala stitch patterns.
11. Stitching the Stars: Minimalist Constellation Art

Capture the night sky with a beautifully understated piece that relies on precision and elegant simplicity.
Use a dark, high-quality fabric like navy linen or black cotton as your canvas to make the ‘stars’ pop.
Map out your chosen constellation with small dots first. Use single straight stitches to connect the stars and tiny French knots or metallic beads for the stars themselves.
For a subtle glow, use a variegated thread with hints of silver or a specialty glow-in-the-dark floss. This makes for a truly magical and personalized embroidered gift.
12. Punch Needle Portraits with Graphic Shading

Tackle a portrait not with subtle blending, but with bold, graphic blocks of color inspired by pop art and illustration.
Simplify a reference photo into distinct areas of light, mid-tone, and shadow. Assign a specific yarn color to each value.
The uniform, plush texture of punch needle loops is perfect for creating flat, saturated areas of color that define the facial features with confidence.
Use a vibrant, unexpected color for accents like makeup or highlights to add a modern, artistic flair to the final piece.
13. Dimensional Lettering with Padded Satin Stitch

Make your embroidered words literally stand off the fabric by using a padded satin stitch technique for a 3D effect.
First, outline your letters with a split stitch. Then, fill the inside of the letters with rows of straight stitches or seed stitches. This underlying padding is the secret to the loft.
Finally, cover the padded area with smooth, even satin stitches, ensuring they extend just beyond your outline for a clean, rounded edge.
Using a variegated thread adds a gentle color gradient, enhancing the visual depth and making your personalized embroidery wall pieces even more special.
14. Sculptural Forms with Freeform Crochet
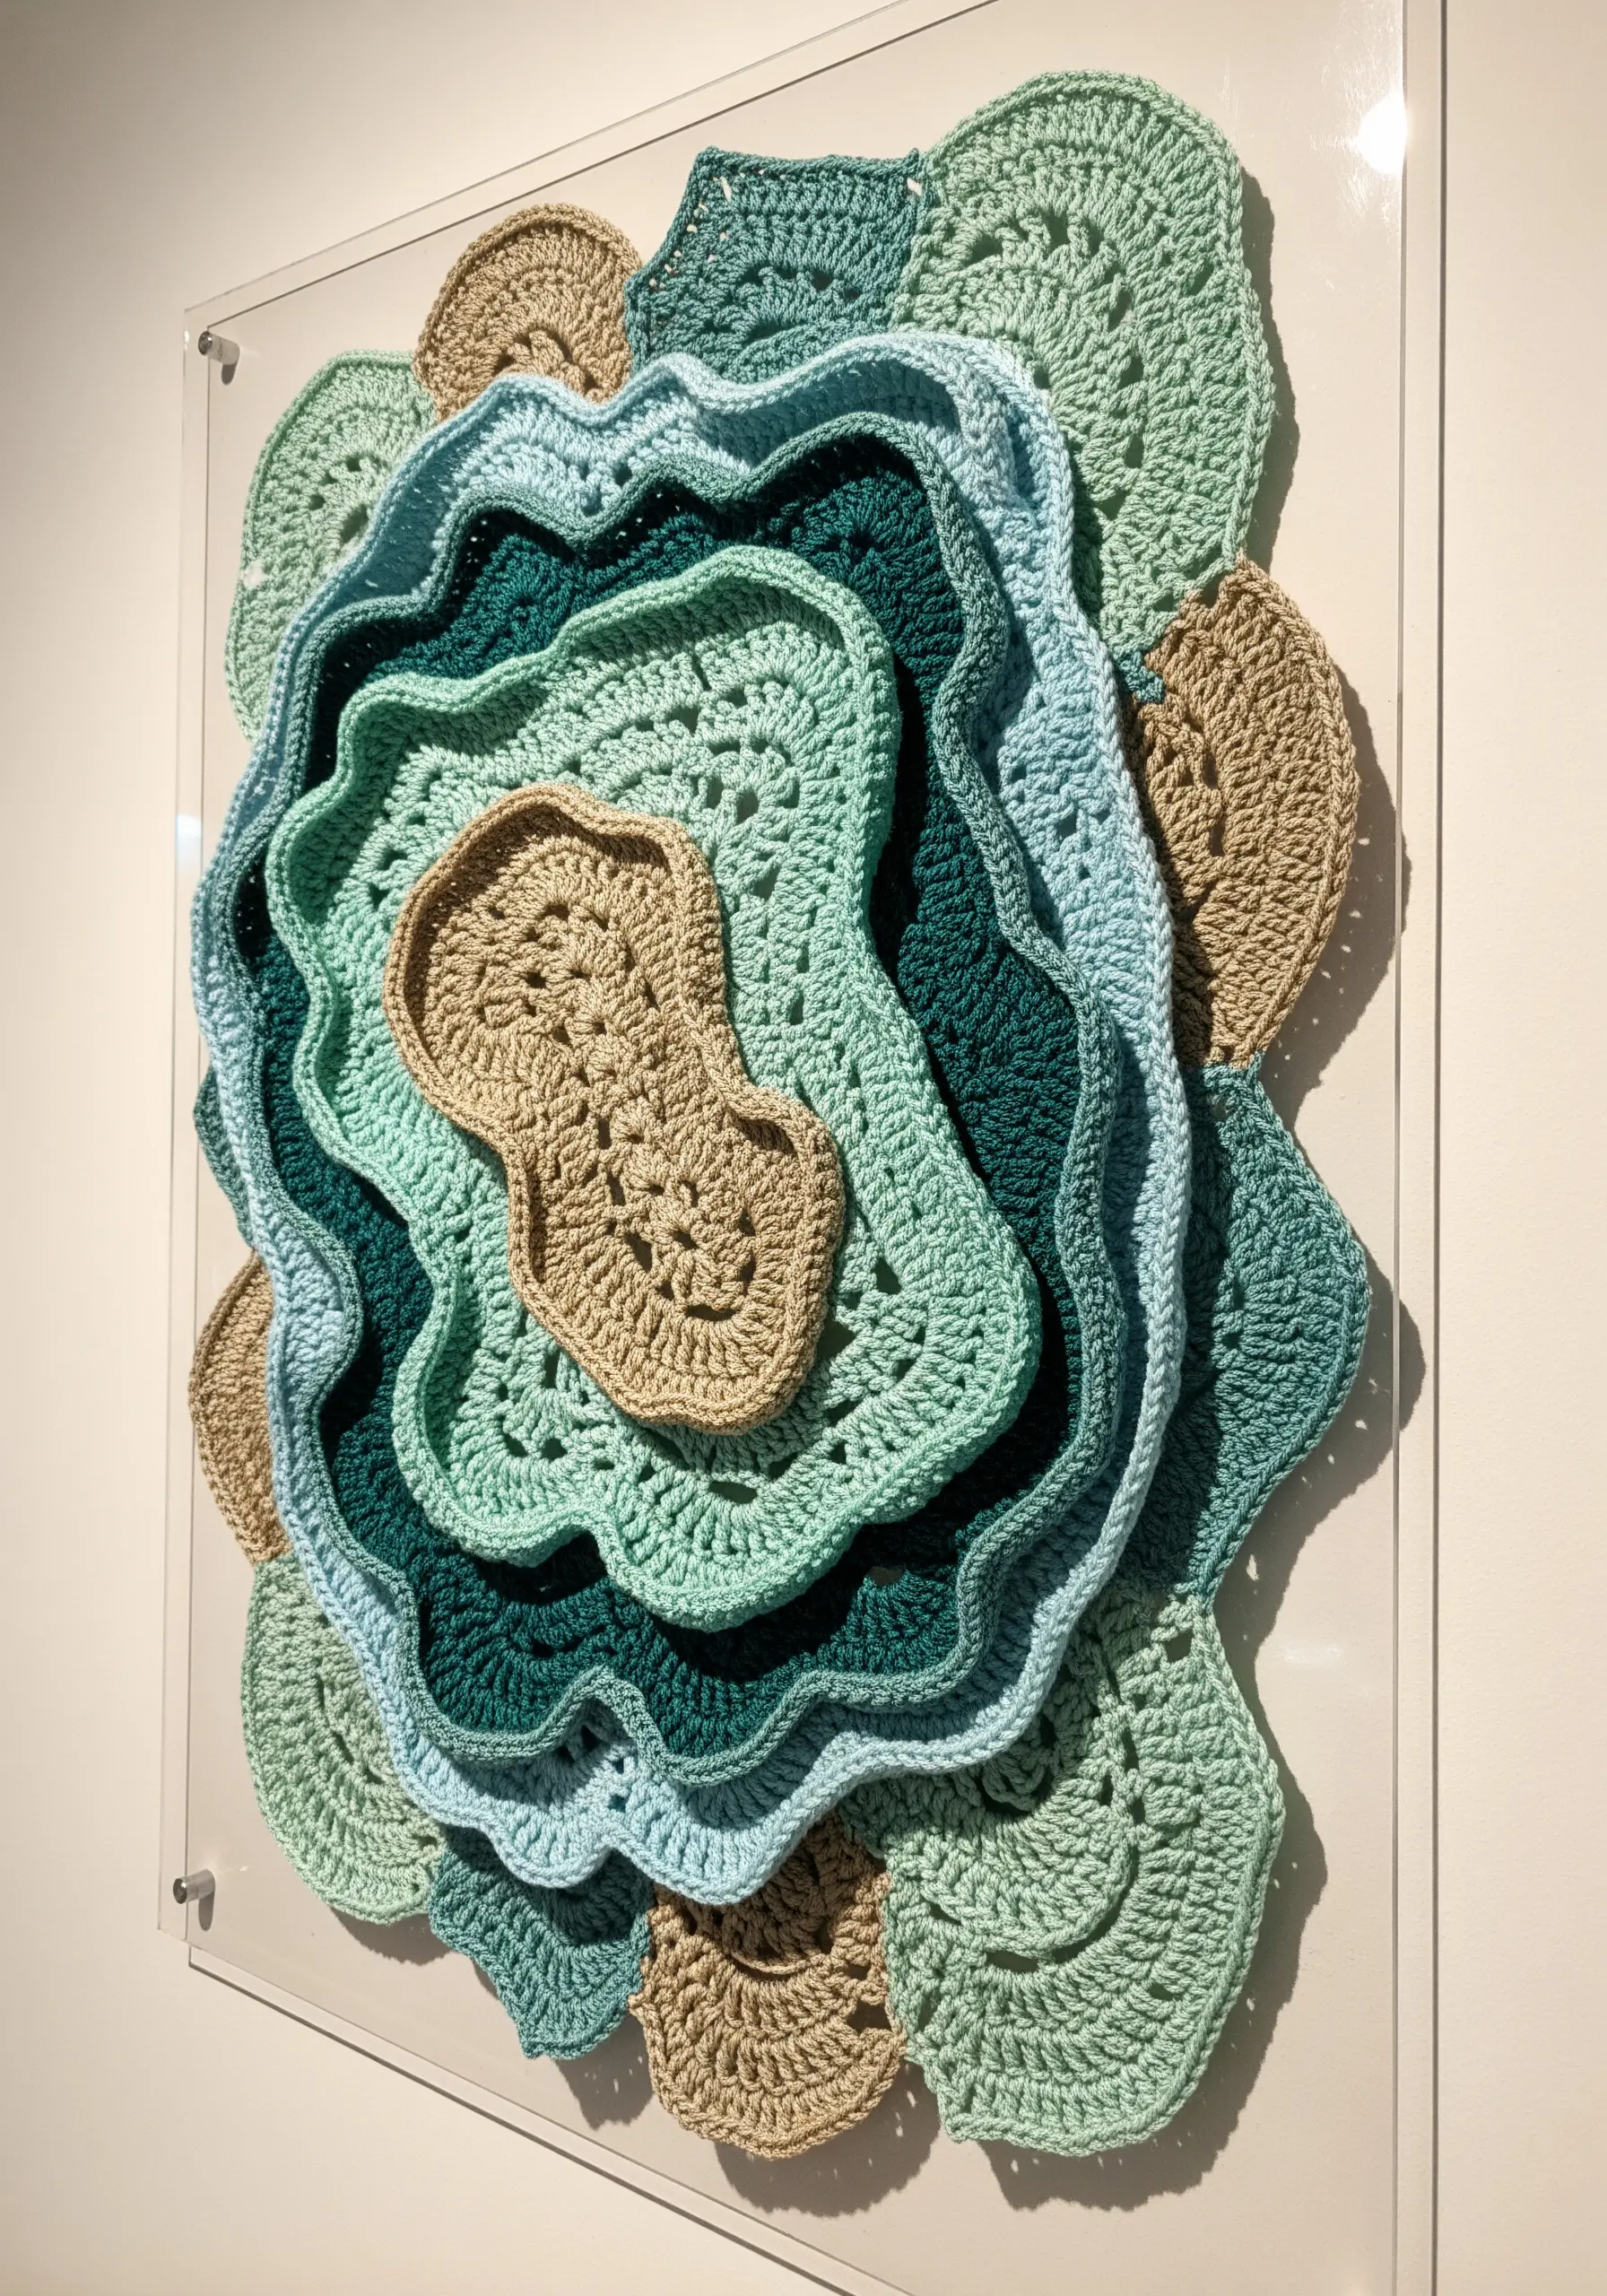
Create organic, coral-like sculptures by embracing the principles of freeform and hyperbolic crochet.
Instead of following a strict pattern, work in the round and increase stitches at a rapid, irregular rate. This forces the fabric to curl, ripple, and form natural-looking ruffles.
Experiment with different yarn weights and hook sizes within the same piece to vary the texture and density of the ruffles.
Layer multiple freeform pieces in a shadow box to create a stunning, three-dimensional wall sculpture that mimics the forms of a reef or a blooming flower.
15. Art Deco Elegance with Precision Satin Stitch

Capture the glamour of the Art Deco era by focusing on flawless satin stitching and a sophisticated color palette.
The key to this style is creating perfectly smooth, flat stitches with sharp, clean edges. Use a laying tool or your needle to ensure the threads lie flat and parallel.
Work with a limited color palette of black, cream, and a metallic accent like gold or silver. The contrast is what gives the geometric pattern its dramatic impact.
These luxury metallic thread wall decor ideas rely on precision, turning simple stitches into a refined piece of art.
16. Statement Texture with Arm-Knitted Merino Wool

Create a wall hanging with dramatic, sculptural presence using giant, unspun merino wool roving.
Instead of needles, use your arms or hands to create massive knit stitches. The scale itself becomes the main design element.
Incorporate different types of knots, like a Celtic knot or a simple overhand knot, between sections of knitting. These knots act as sculptural focal points, breaking up the braids and adding complexity.
This is one of the quickest stunning yarn wall art projects you can finish in a weekend, offering maximum impact with minimal time.
17. Creating ‘Stained Glass’ with Thread and a Frame
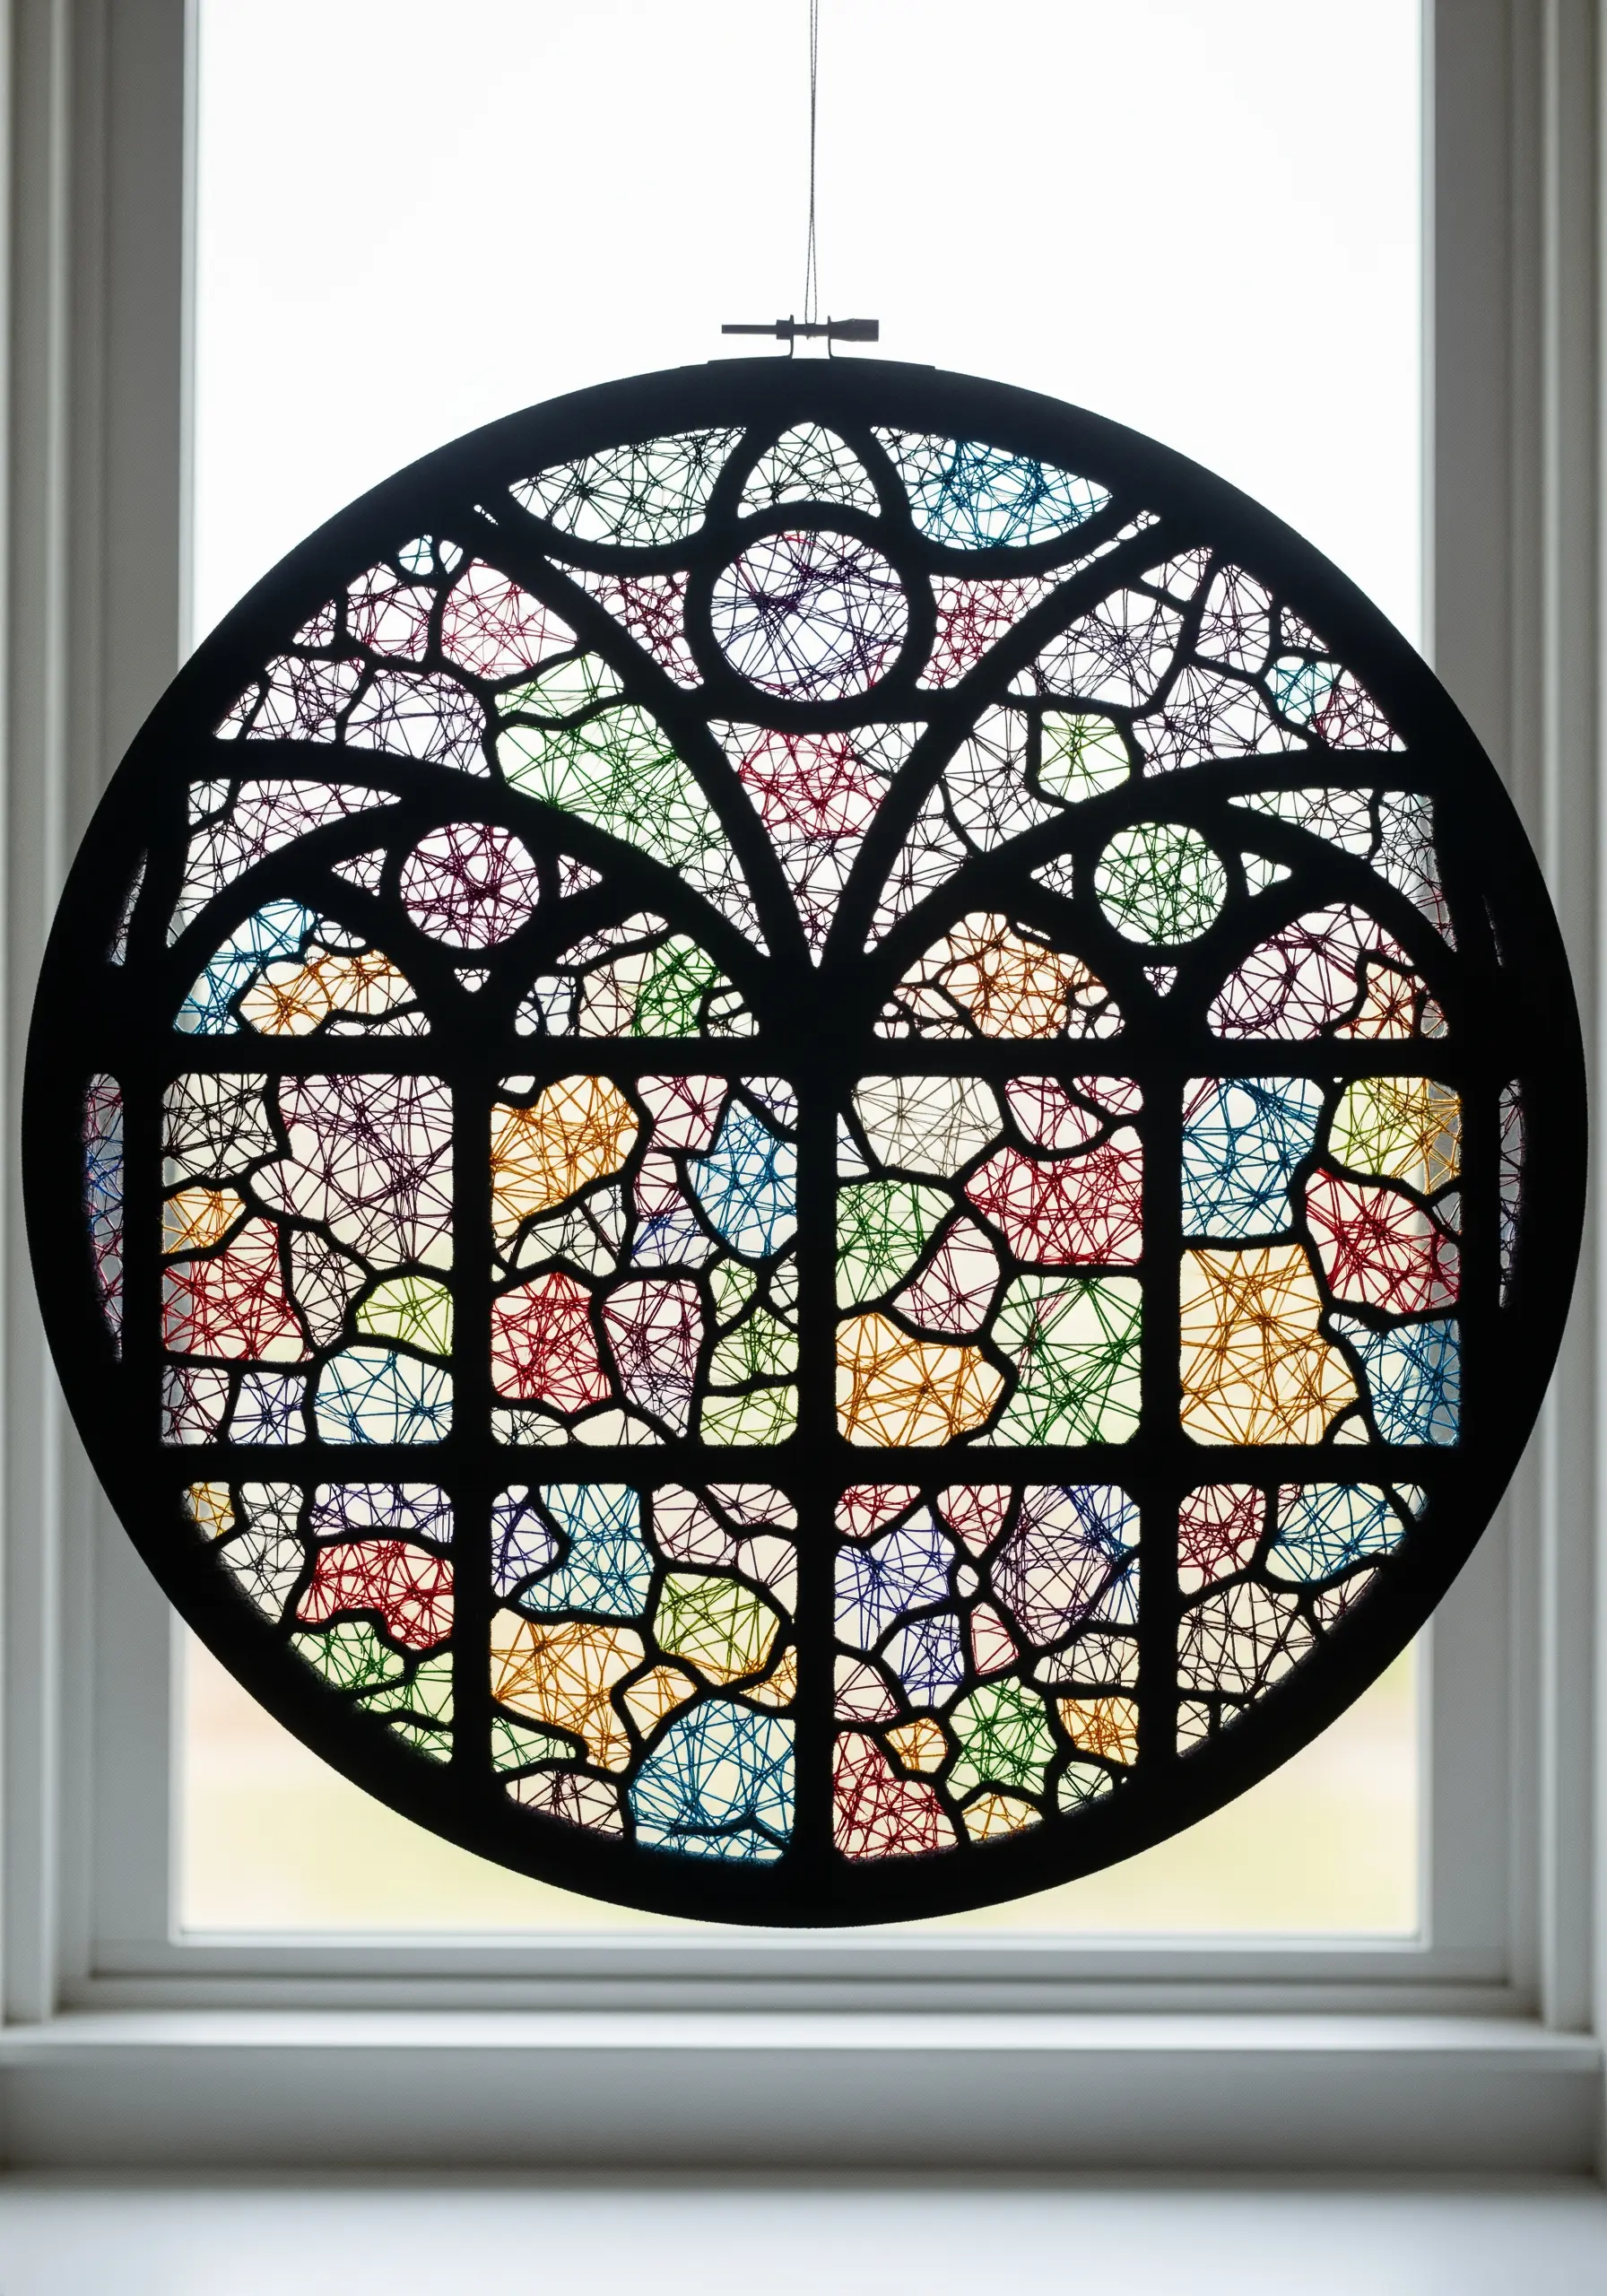
Mimic the luminous quality of stained glass by using thread and a rigid frame to play with light and color.
Start with a laser-cut wood frame or a sturdy metal hoop with an interesting geometric interior.
Wrap different colored threads across the open sections, crisscrossing them to build up layers of color. The density of the wrapping will determine how much light passes through.
When hung in a window, the light illuminates the threads, creating a vibrant, translucent effect that changes throughout the day.
18. Weaving with Nature: Integrating Branches and Grasses

Add an organic, rustic element to your weaving by incorporating natural materials directly into the tapestry.
Gather interesting natural finds like slender twigs, dried grasses, or seed pods. Ensure they are completely dry before you begin to prevent any future decay.
As you weave, simply lay these elements between your warp threads and pack the weft yarn tightly around them to hold them in place.
This technique works best with a neutral, earth-tone DIY embroidery design, as the natural colors of the yarn complement the organic additions without overwhelming them.
19. The Simple Joy of a Felt Ball Garland

Create a cheerful and versatile piece of decor where the primary artistic choice is color arrangement.
While incredibly simple to assemble—just thread felt balls onto a string—the impact comes from your color story.
Arrange the balls in a rainbow sequence for a playful look, create a subtle ombre gradient for a more sophisticated feel, or use a tight palette of three or four complementary colors for a modern, curated aesthetic.
This project is a perfect way to add a pop of color and softness, and it makes a wonderful, quick gift for kids and teens.


