

Have you ever finished a piece and felt that something was missing, that it needed just one more layer to feel truly complete? Often, the answer isn’t a more complicated stitch—it’s a different texture.
Mixing fibers is where your embroidery gains a voice. It’s not about overwhelming your design, but about making thoughtful, deliberate choices. It’s learning how the plushness of yarn contrasts with the sharpness of metallic thread, or how a soft halo of wool can make simple stitches feel atmospheric and alive.
These ideas are designed to be accessible, to give you tangible ways to introduce new materials without needing new equipment. Think of this as your invitation to experiment, to create pieces that aren’t just seen, but are deeply felt—by you, and by anyone lucky enough to see your work.
1. Paint with Wool Roving and Chunky Yarn
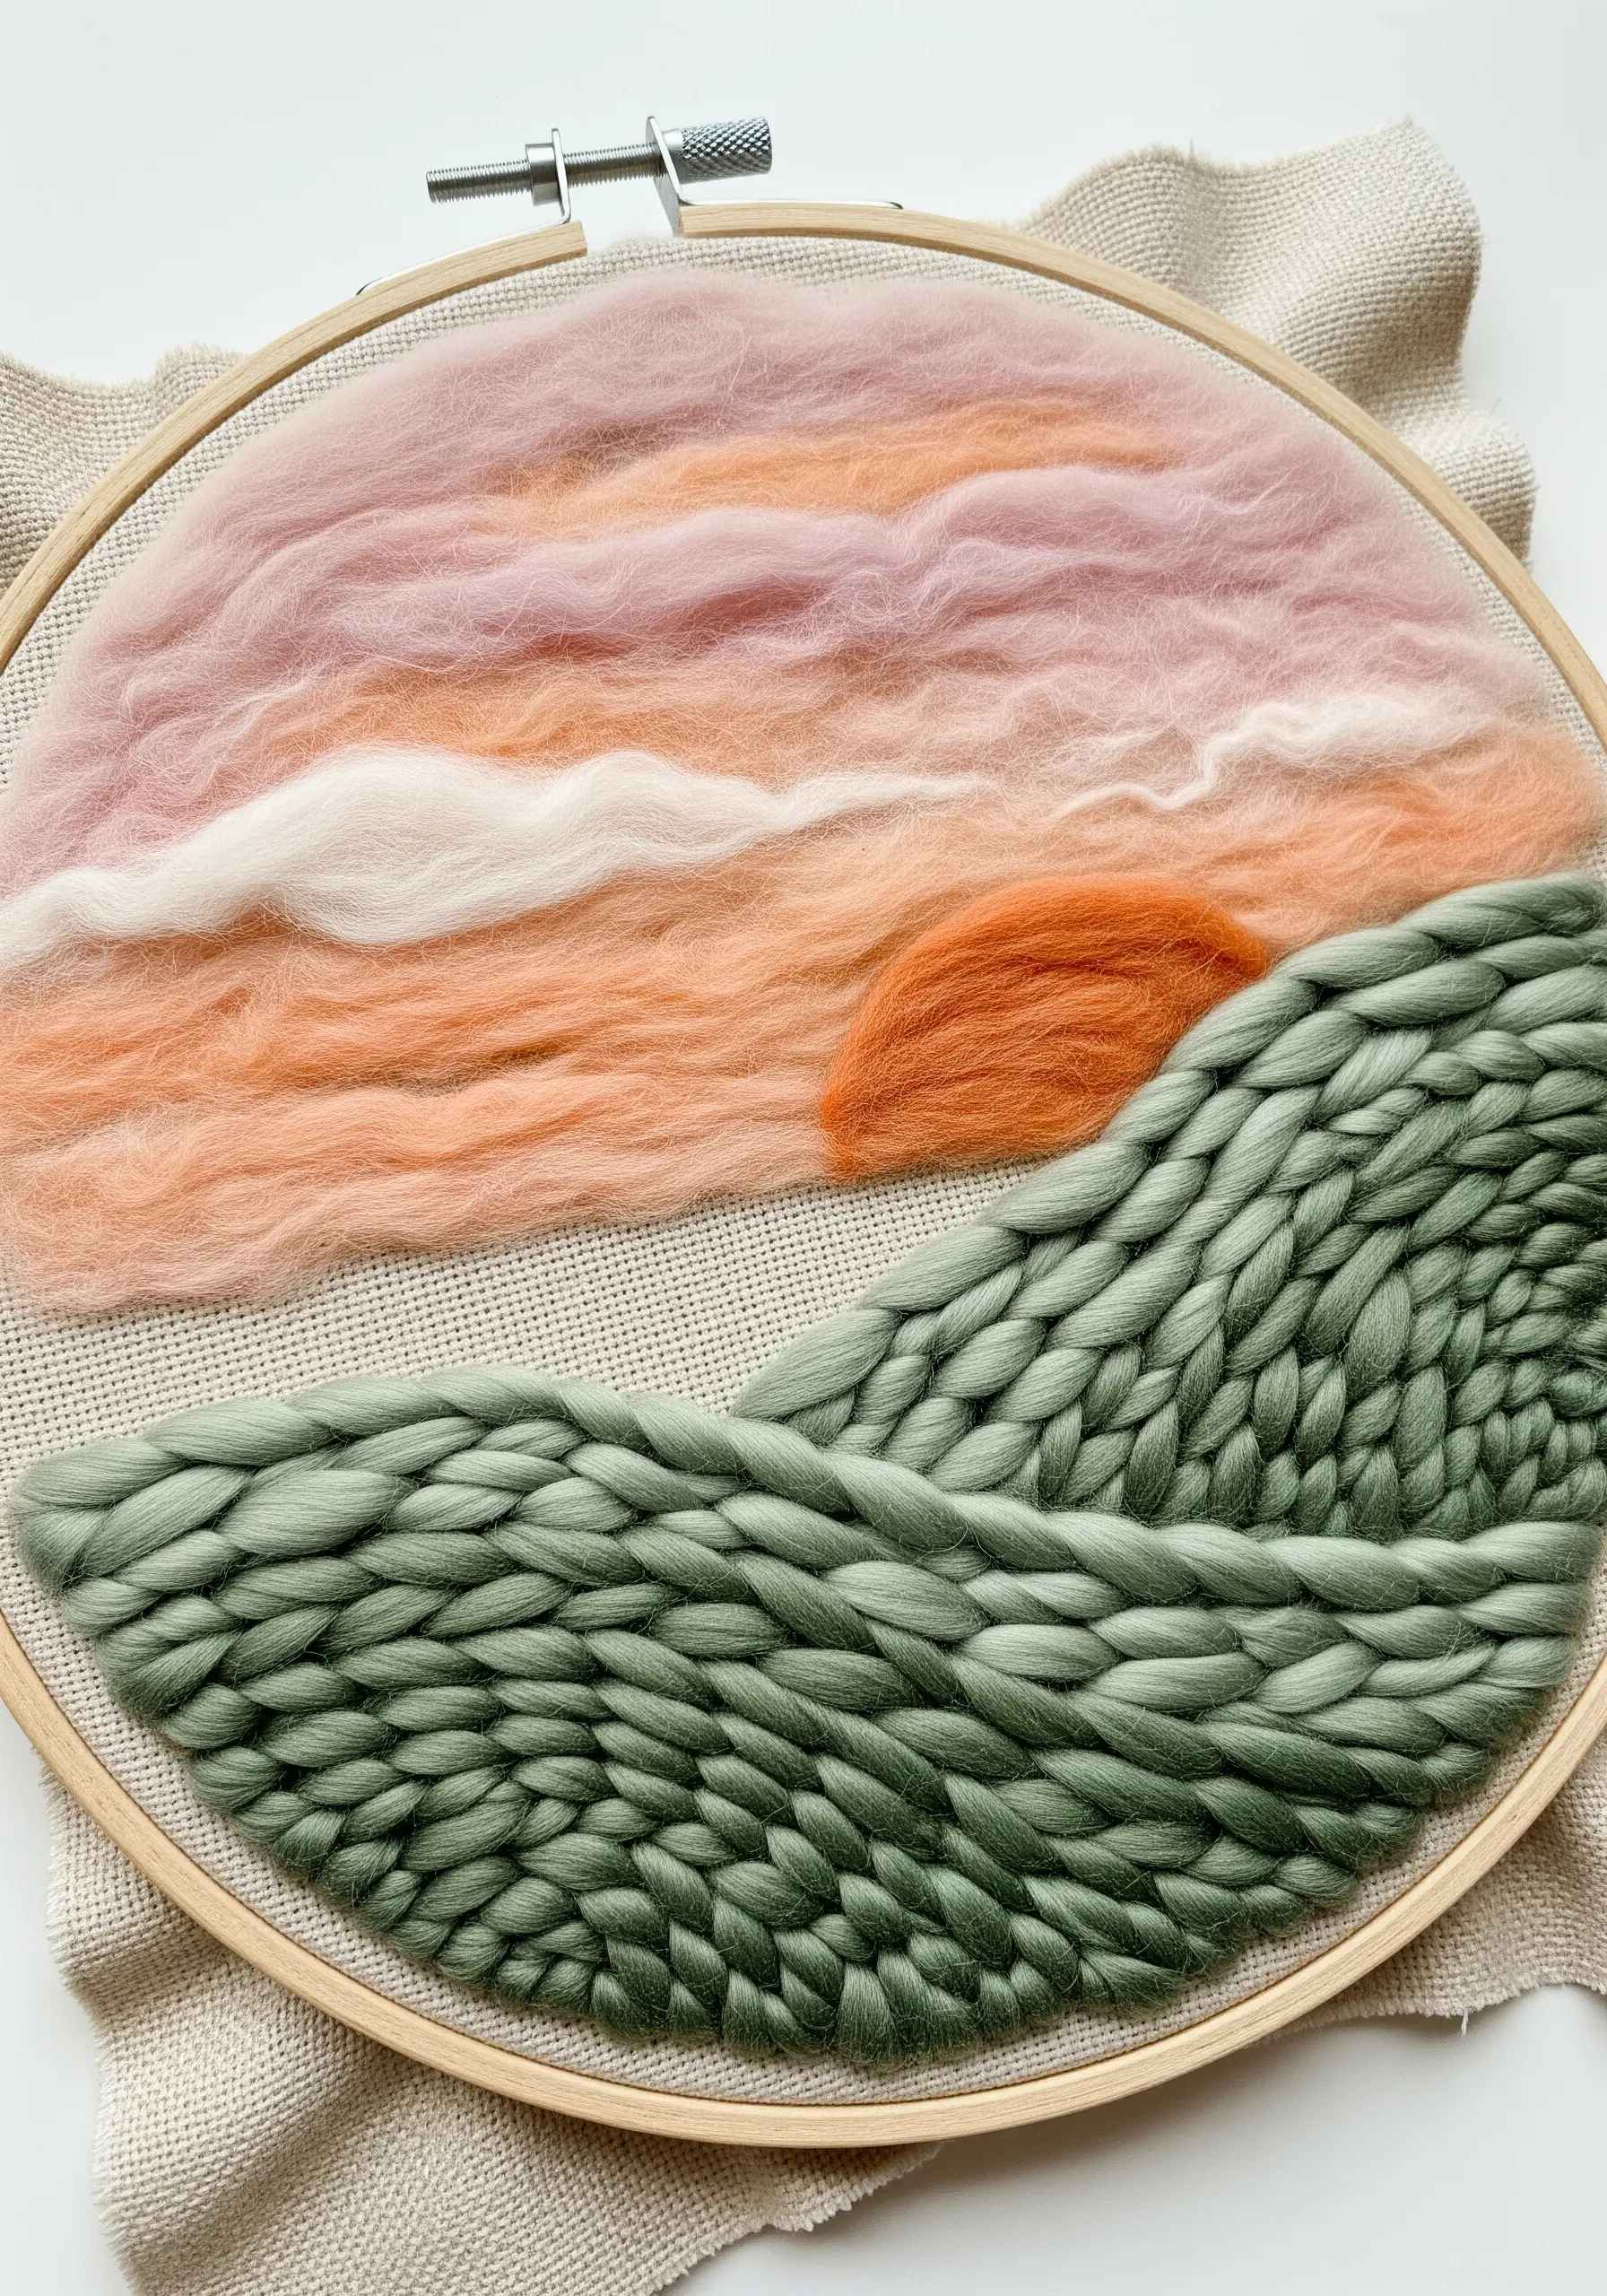
Create soft, painterly landscapes by using wool roving instead of thread for elements like clouds or skies.
Simply pull apart thin layers of roving, arrange them on your fabric, and tack them down with a felting needle or tiny, hidden stitches.
Contrast the softness of the wool with a bold, textural foreground made from couched or woven chunky yarn.
This juxtaposition of diffuse color and sculptural lines creates incredible depth and makes for compelling nature-texture embroidery projects that engage more than just the eye.
2. Elevate Rainbows with Braided Yarn and Pom-Poms
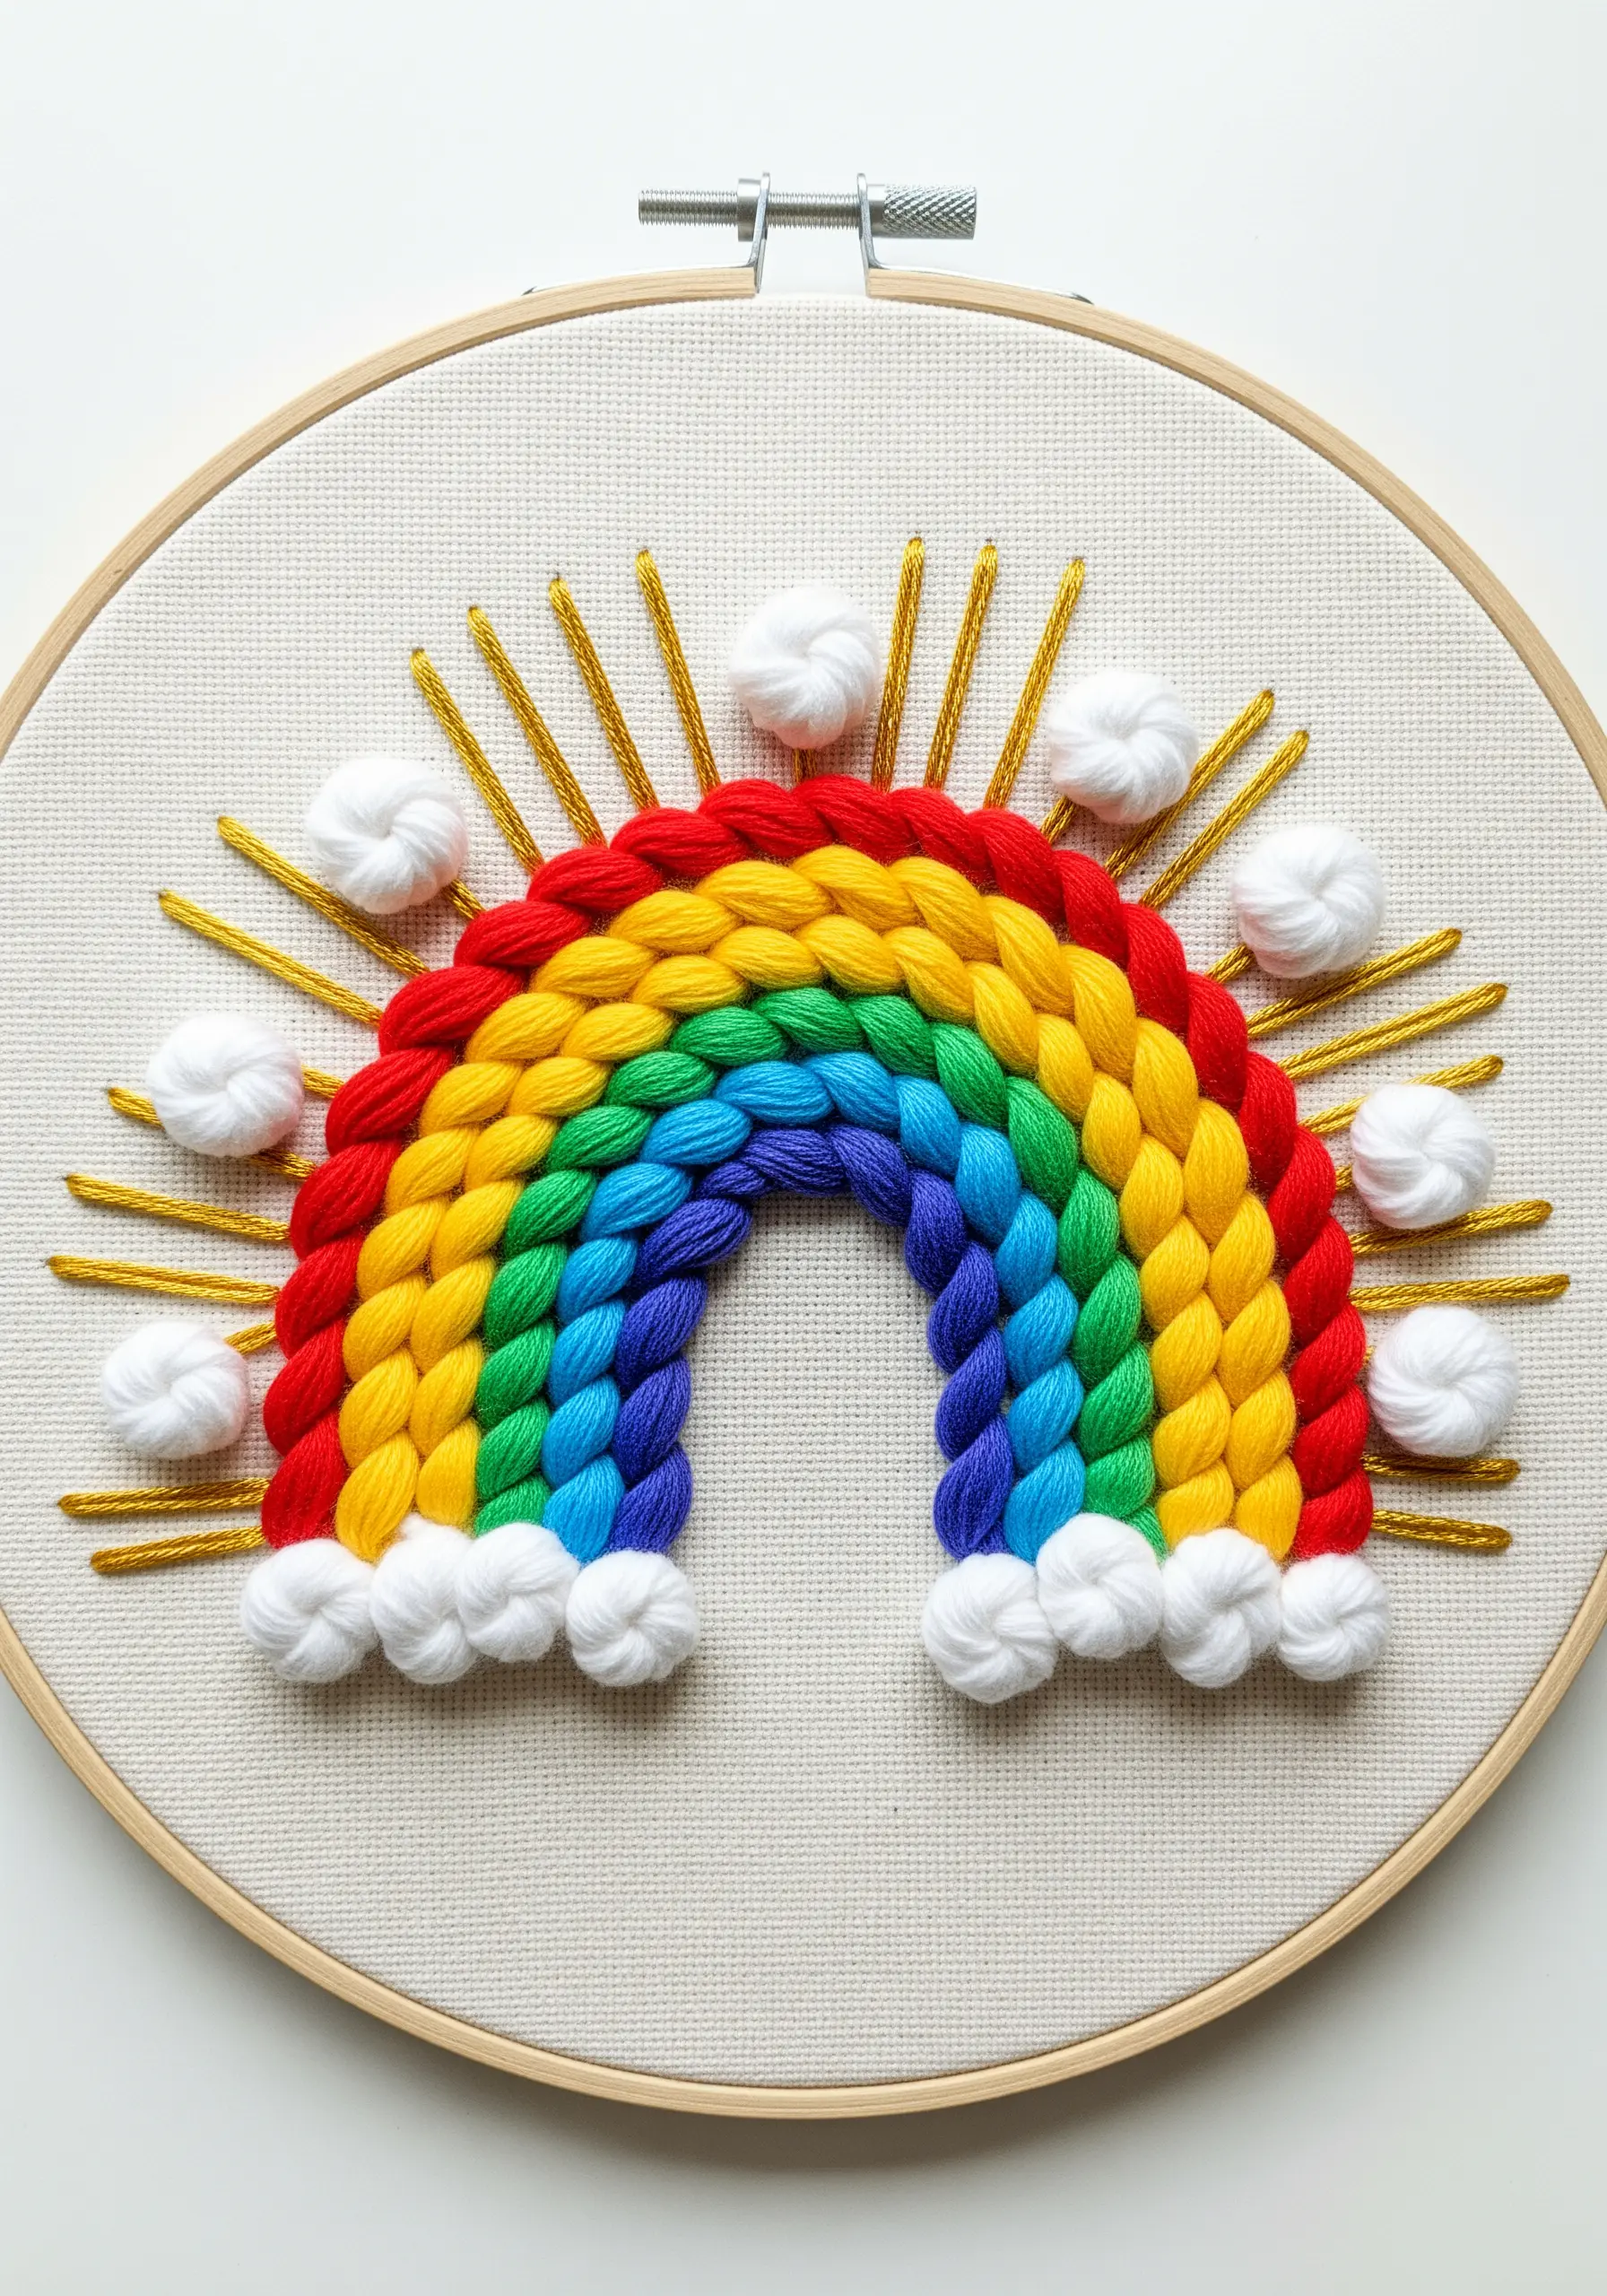
Give a simple rainbow motif a delightful, three-dimensional upgrade by using braided yarn for the arcs.
Braid three strands of chunky yarn together and couch the braid onto your fabric, which creates a much bolder, more sculptural line than satin stitch.
For the clouds, craft tiny, dense pom-poms from soft white yarn for a plush, cartoon-like effect.
Finish with sharp, radiant sun rays using a bright metallic thread to contrast the soft textures, creating a playful piece perfect for embroidered nursery decor.
3. Master Dimensional Florals with Silk Ribbon

Move beyond flat petals by incorporating silk ribbon into your floral designs for instant volume and realism.
Create lush roses by twisting a wide ribbon and coiling it, tacking it down as you go to form the flower.
Use a simple ribbon stitch—where the needle pierces the ribbon itself—to create delicate, dimensional leaves or smaller petals.
Pair these bold ribbon elements with classic embroidery stitches like French knots and lazy daisies to create a balanced, texturally rich bouquet.
4. Create Radiance with a Woven Wheel and Strategic Lines

The power of this minimalist sunburst comes from the contrast between its dense center and its light, airy rays.
Start with a woven wheel stitch (also known as a spider web stitch) to create a solid, textured focal point.
For the rays, use simple straight stitches, but vary their length and color to create a sense of rhythm and movement.
Using a dark fabric background makes the warm colors feel more vibrant and turns this simple design into one of those celestial micro-embroidery ideas with maximum impact.
5. Frame Constellations with an Ethereal Wool Halo
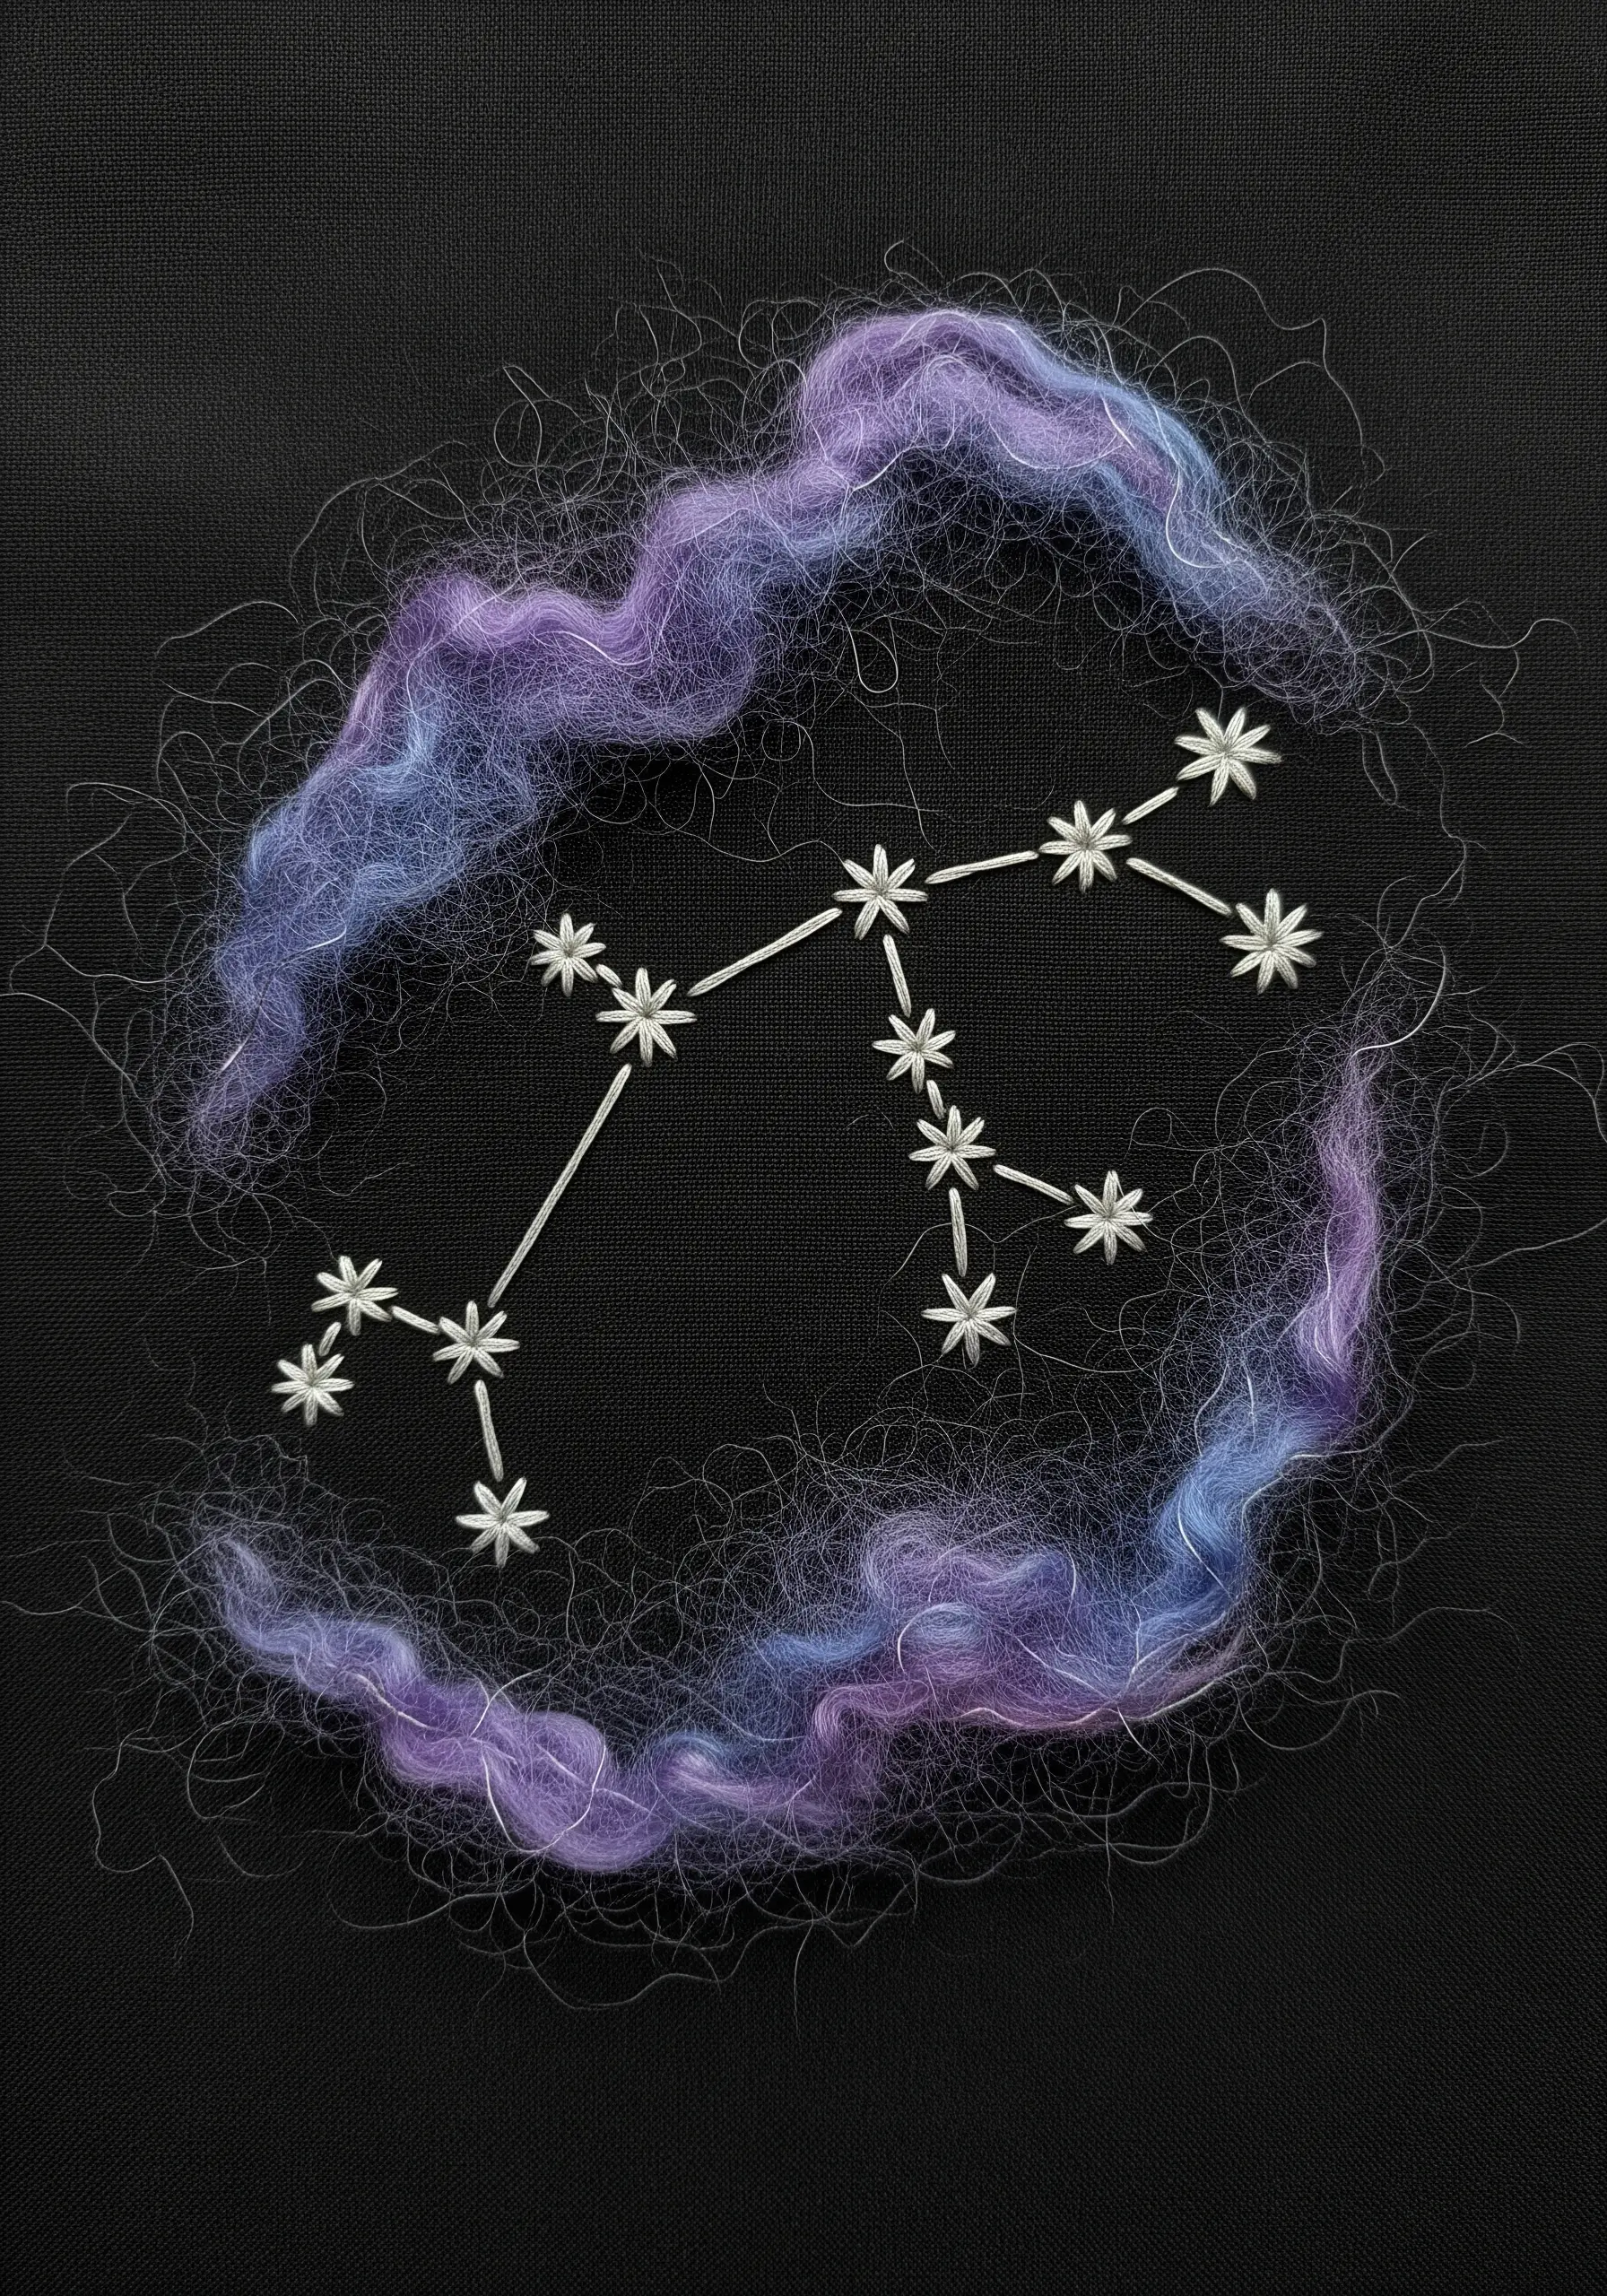
Elevate a simple stitched constellation by giving it a soft, atmospheric nebula effect using wool roving.
First, stitch your constellation with a crisp backstitch for the lines and star stitches for the stars.
Then, gently pull apart wisps of colored wool roving, arranging them in a loose circle around your stitching.
Secure each wisp with a single, nearly invisible tacking stitch in its center to create beautiful tiny night sky designs that feel both sharp and soft.
6. Build a Tactile Library with a Mixed Fiber Sampler
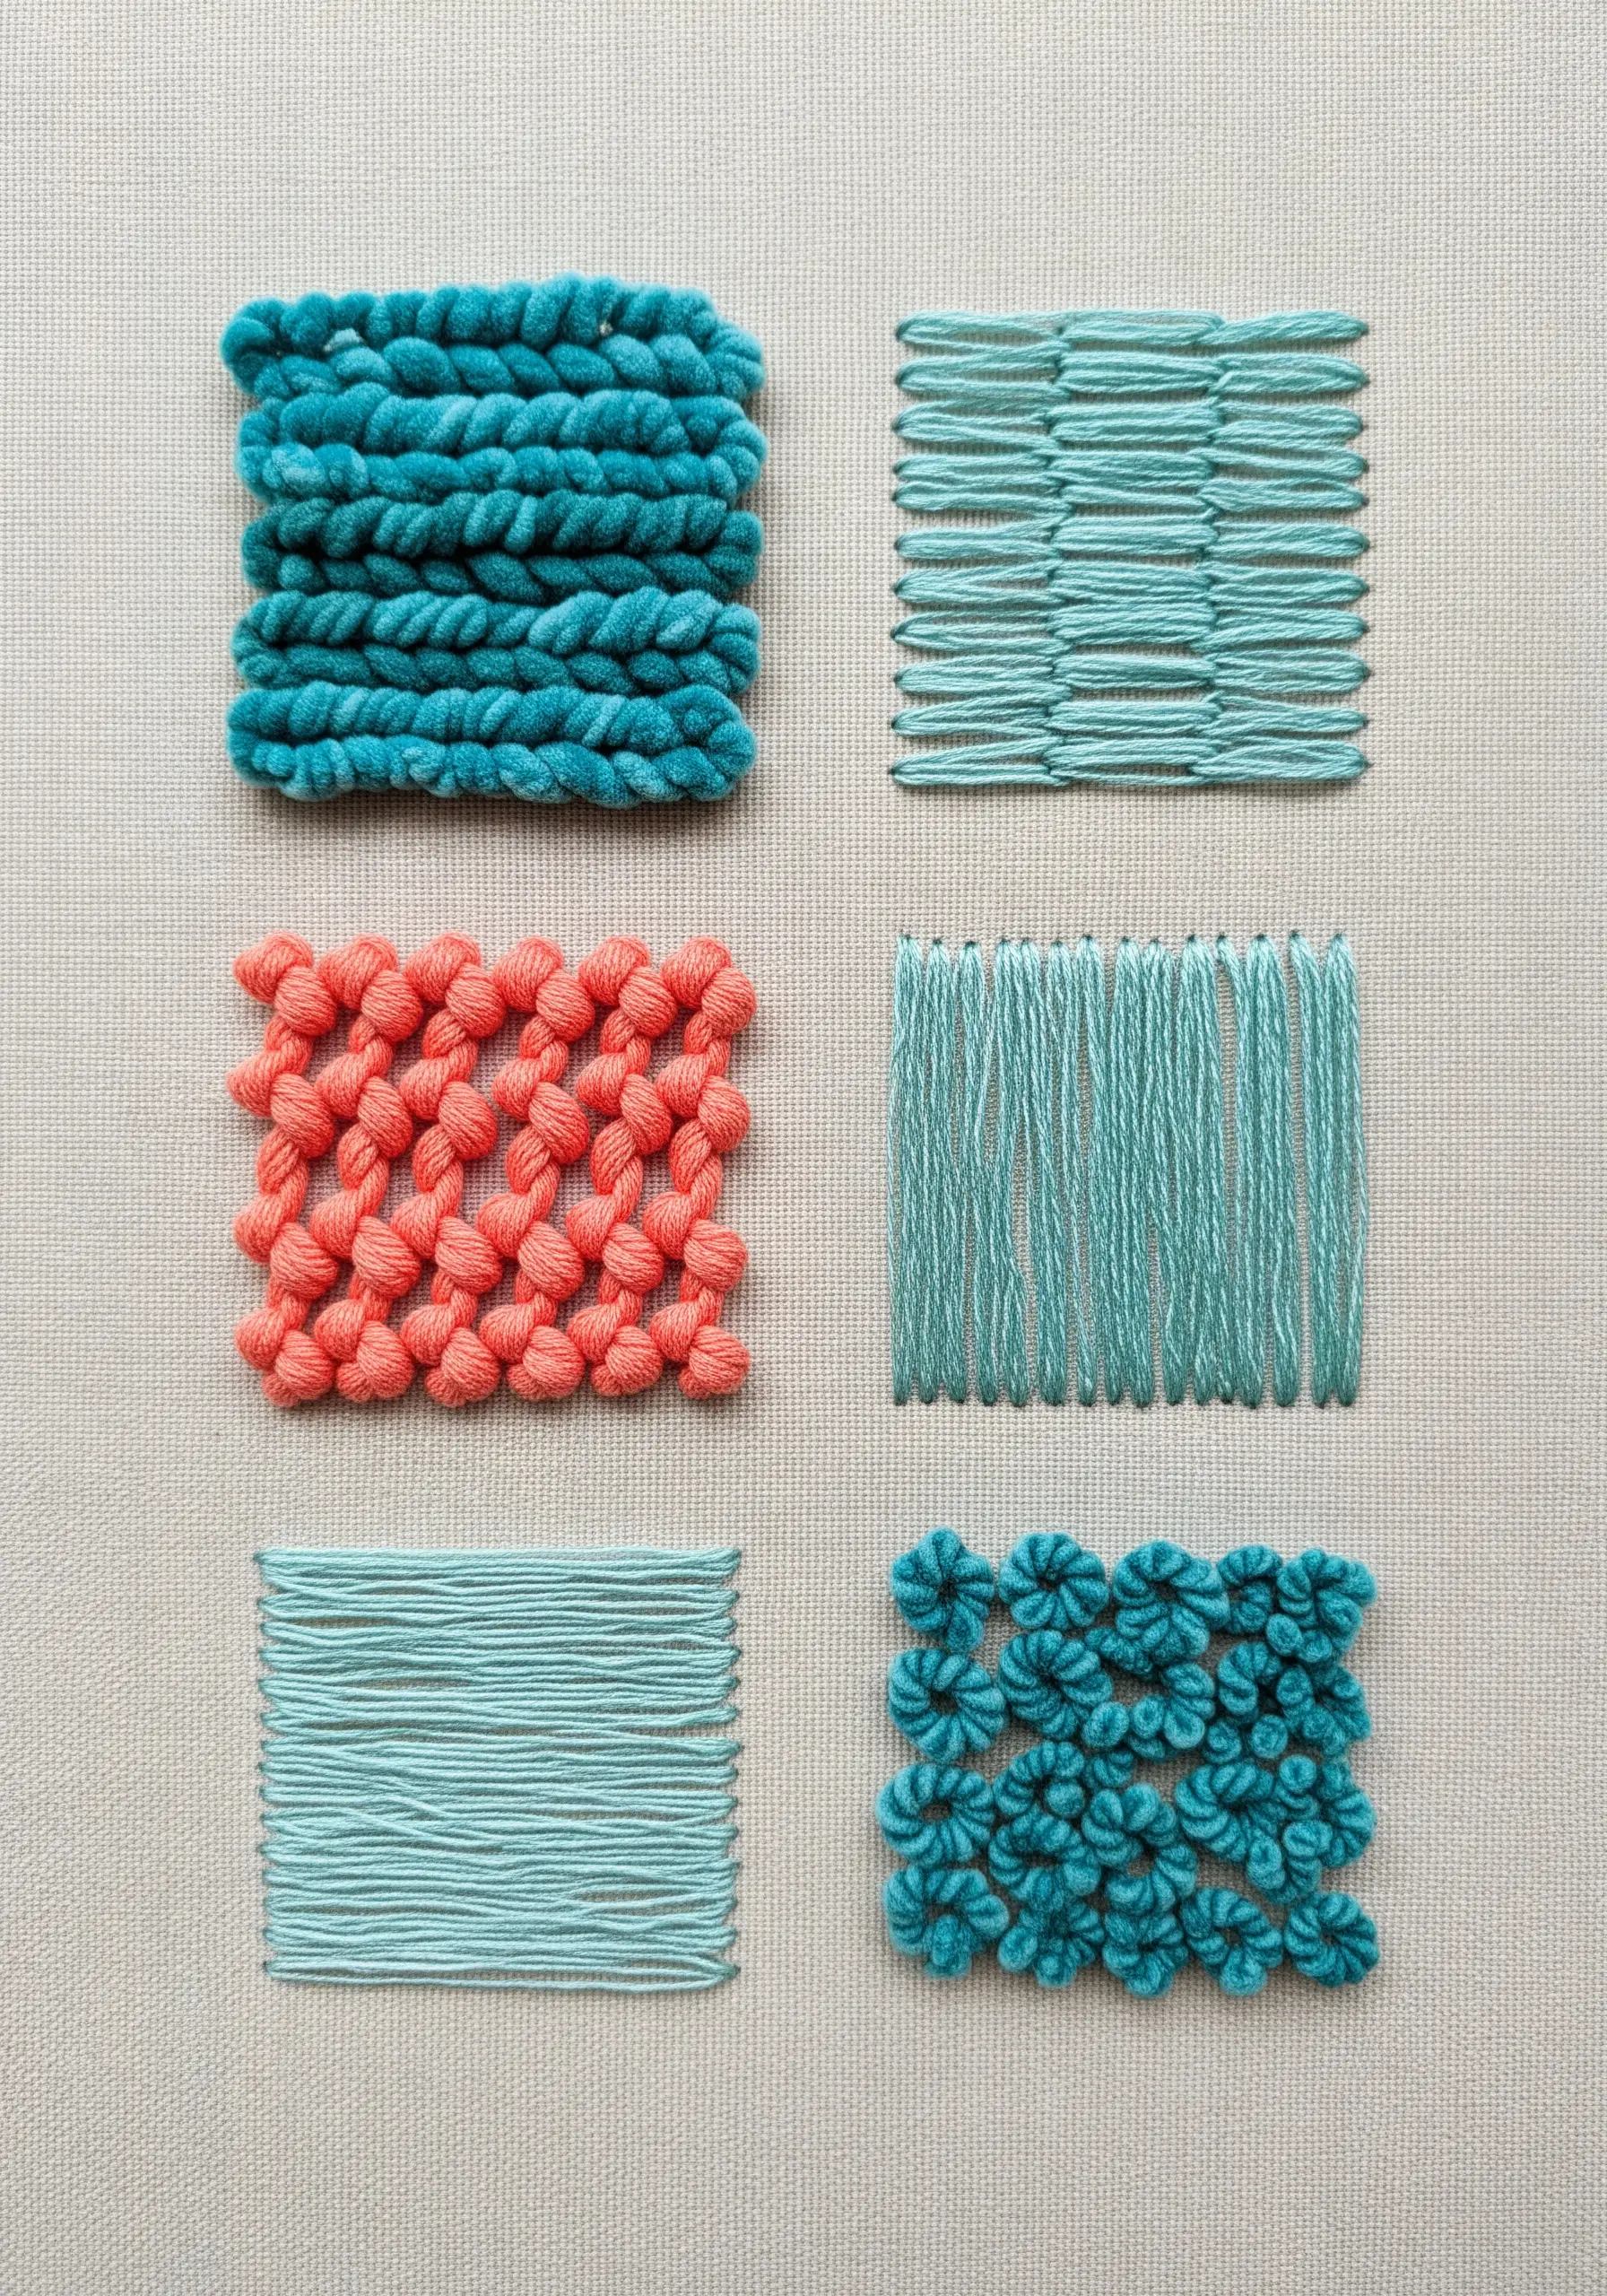
Before starting a large project, create a small sampler to explore how different fibers and stitches interact.
Divide your fabric into squares and assign a different technique to each one.
Combine a flat stitch like satin stitch in one block with a highly textured one like couched chenille yarn in another.
This practice builds your confidence and serves as a physical reference for future projects, allowing you to master gorgeous mixed-fiber textures.
7. Craft Plush Animals with Turkey Work and Felt

The Turkey work stitch is your secret to creating a plush, rug-like texture that’s perfect for fluffy animal fur.
You create a series of loops with your thread and then snip them open to create a soft, dense pile.
For a clean edge and better control, first cut your animal shape from felt, then stitch the Turkey work directly onto the felt piece.
Finally, appliqué the finished, fluffy shape onto your background fabric for charming animal-themed pillow stitching ideas.
8. Layer Dimension with Felt Appliqué and Couching
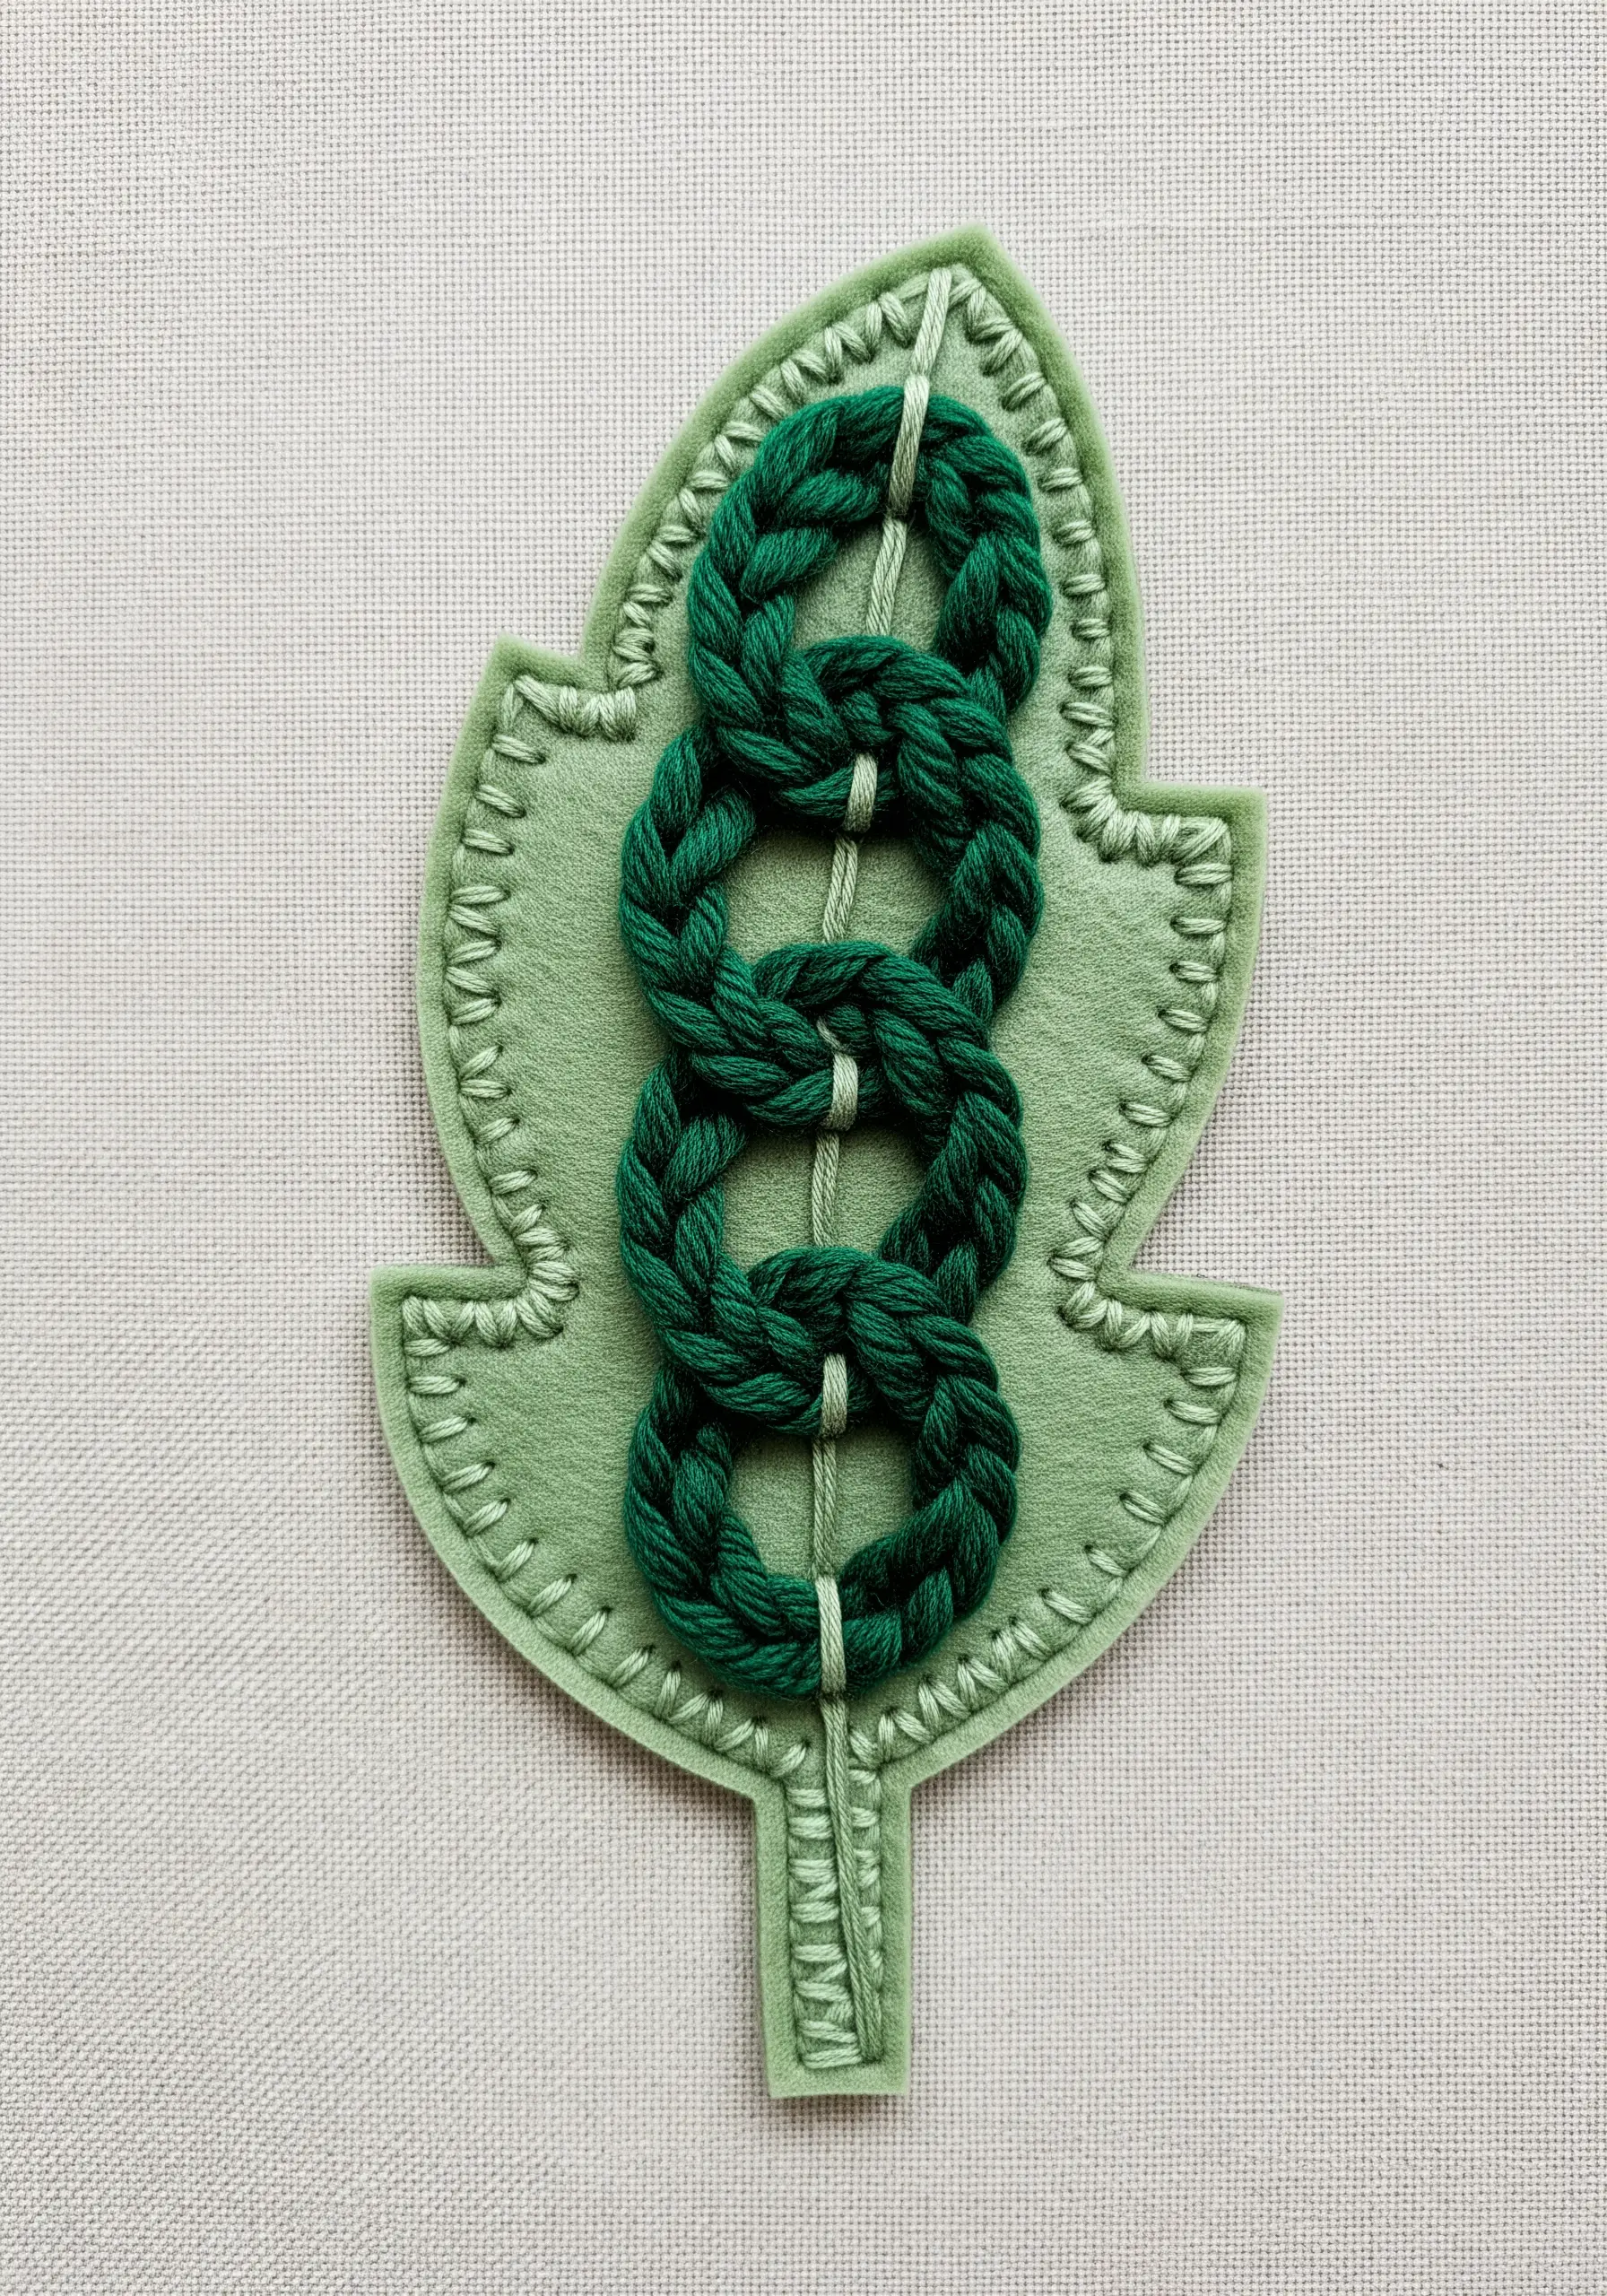
This technique builds bold, graphic botanicals through simple, effective layering.
Start by cutting a leaf shape from felt and securing it to your background fabric with a neat blanket stitch around the edge.
For the central vein, braid a few strands of thicker yarn together and couch it down the middle of the leaf.
The contrast between the flat felt and the raised, sculptural braid makes the design visually dynamic and is perfect for modern leaf & plant embroidery ideas.
9. Explore Botanical Forms with Three Distinct Techniques

Instead of stitching a whole garden, create a sophisticated study by rendering three leaves with completely different fibers.
First, create a dense, realistic fern using fishbone stitch with standard embroidery floss.
Next, outline a graphic monstera leaf with chunky yarn using a simple backstitch.
Finally, form a delicate, skeletal leaf by wrapping fine wire with metallic thread, shaping it, and tacking it to the fabric.
This trio showcases how fiber choice transforms a simple shape, resulting in elegant botanical stitch ideas.
10. Capture Ocean Movement with a Multi-Fiber Palette
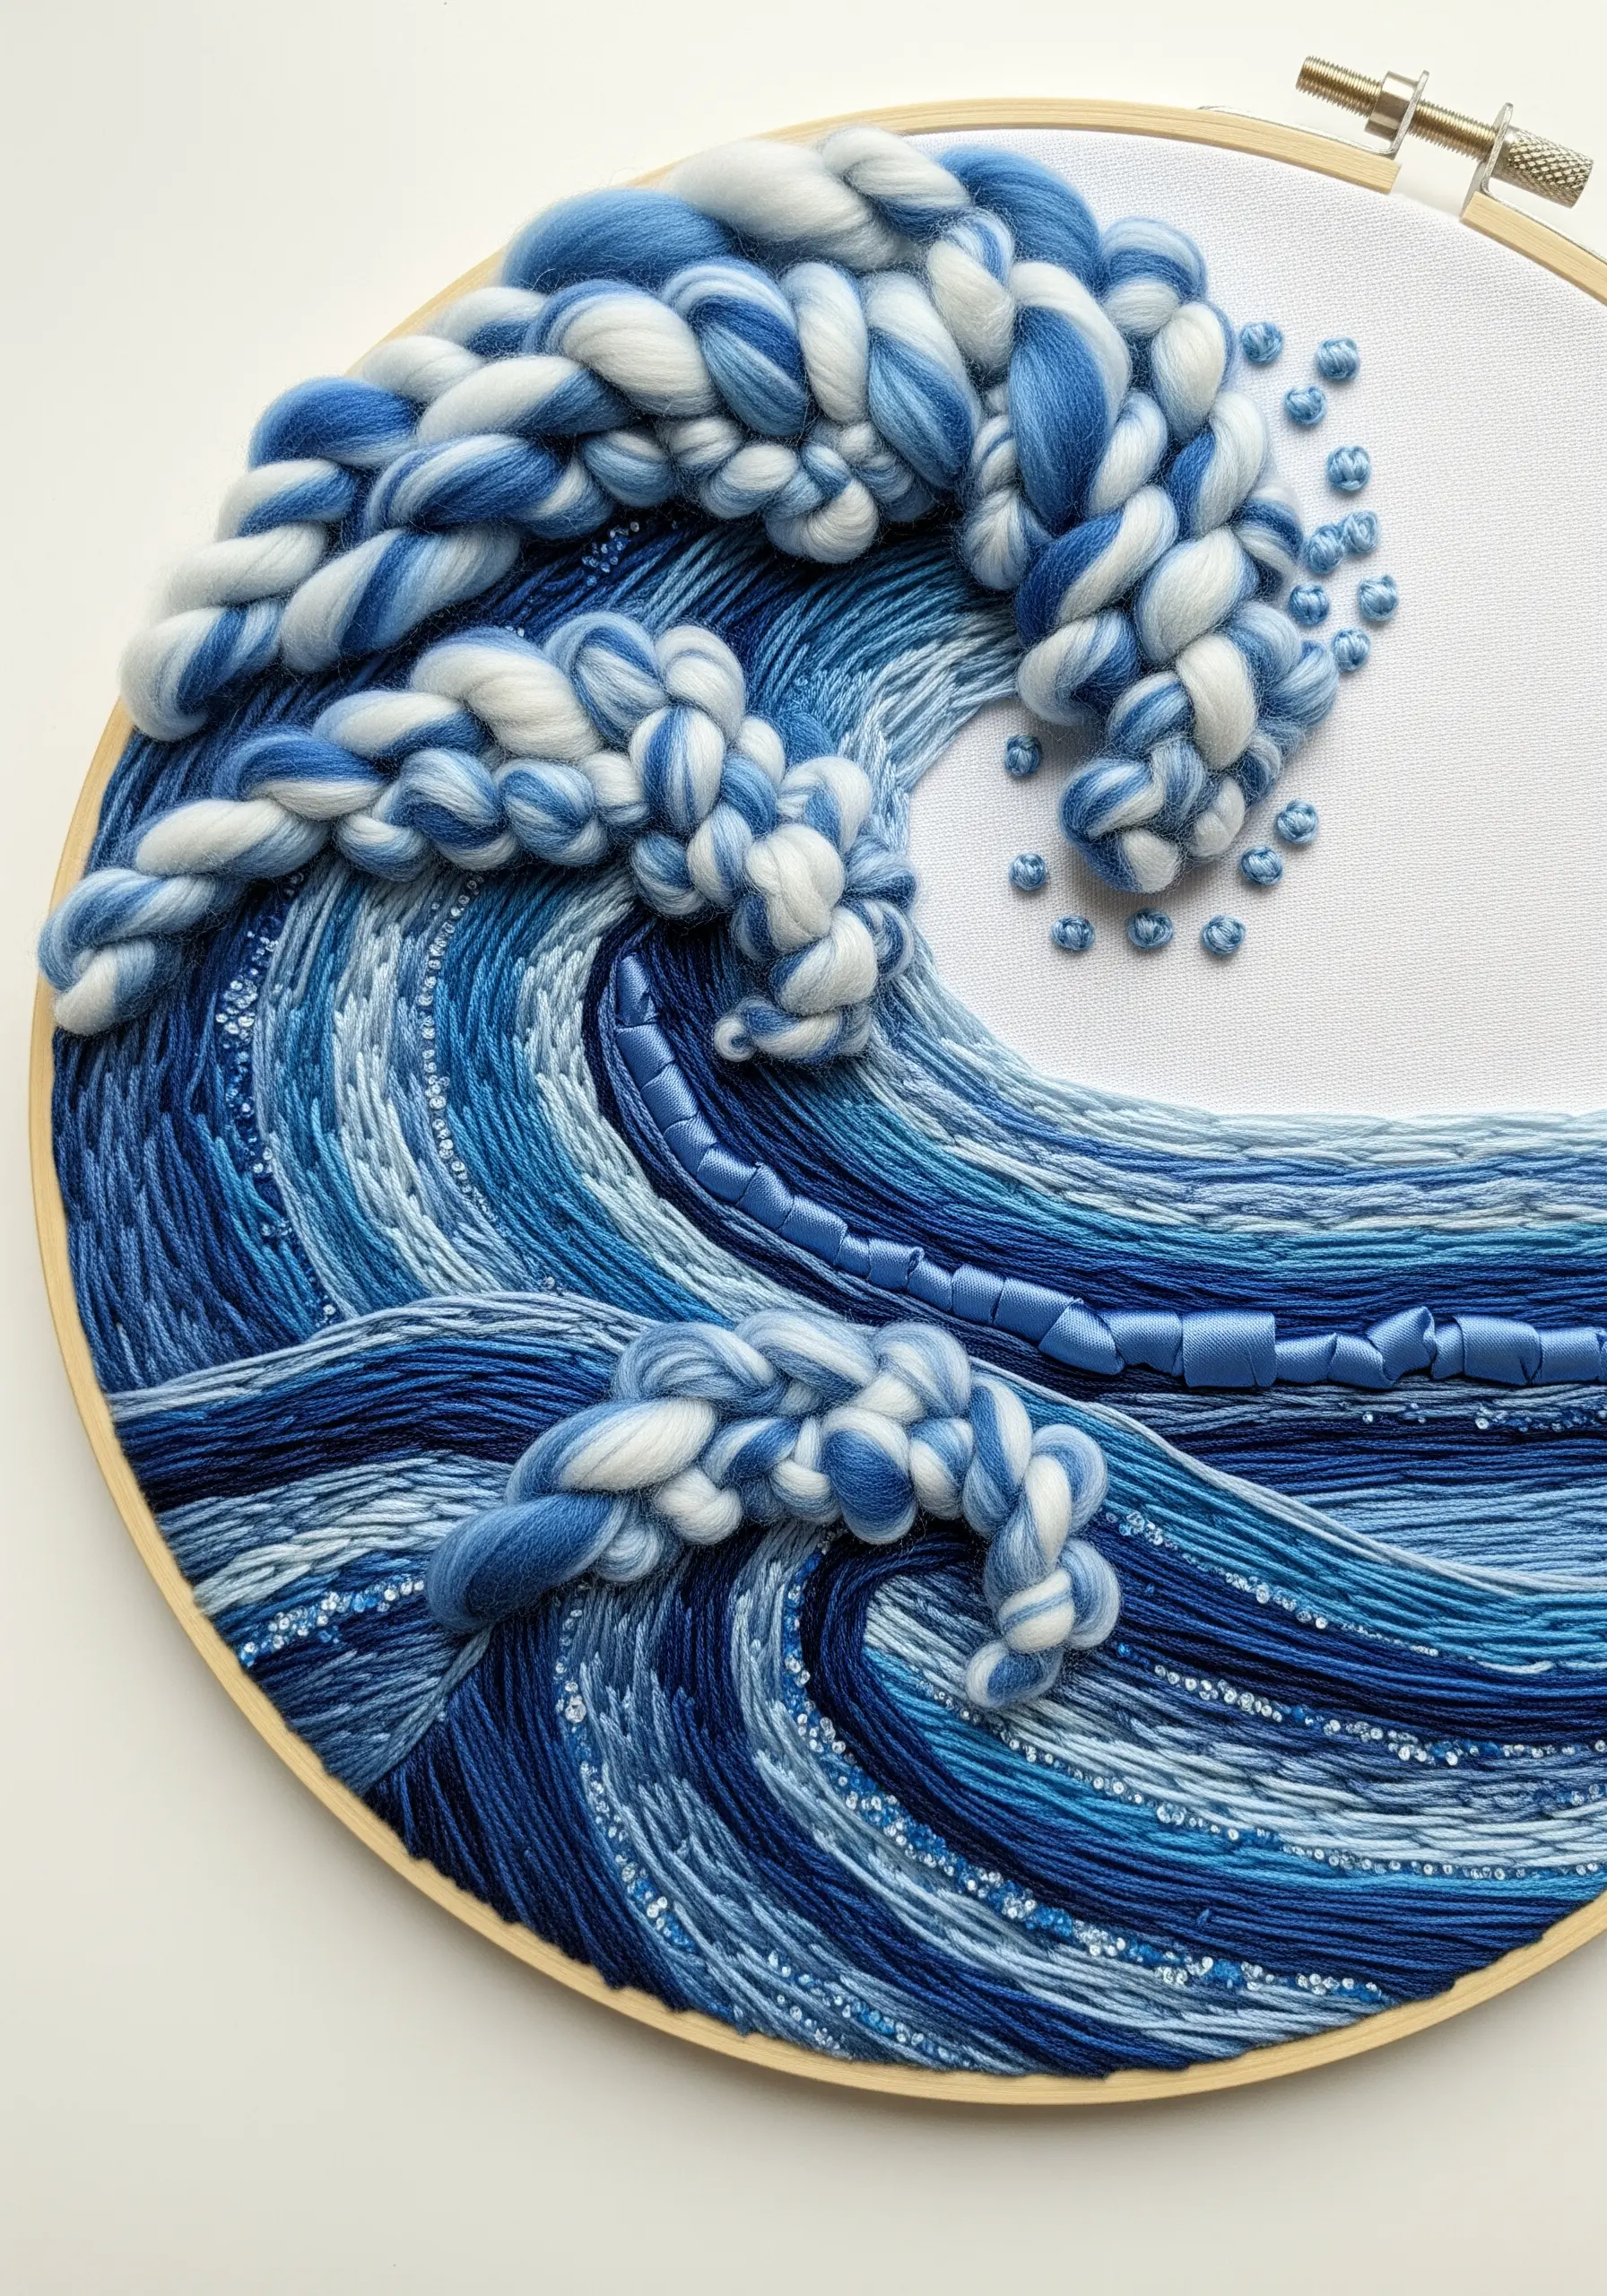
A dynamic ocean wave requires a mix of textures to convey energy and light.
Use chunky, variegated wool roving for the crashing foam, couching it down in thick, swirling shapes to create volume.
Weave thin silk ribbon through satin-stitched water sections to mimic the glossy sheen of the surface.
Finally, scatter tiny seed beads or add a few white French knots to represent sea spray, a perfect way to capture motion and flow in your embroidery.
11. Integrate Woven Textures Directly onto Your Fabric

Add a patch of woven texture to your embroidery without needing a separate loom.
First, create a ‘warp’ by stitching a series of parallel straight stitches directly onto your fabric.
Then, using a tapestry needle, weave a thicker ‘weft’ thread (like wool or roving) over and under the warp threads.
This technique is perfect for creating geometric blocks of color and texture that beautifully contrast with finer line stitches.
12. Achieve Realistic Lavender with Knots and Ribbon
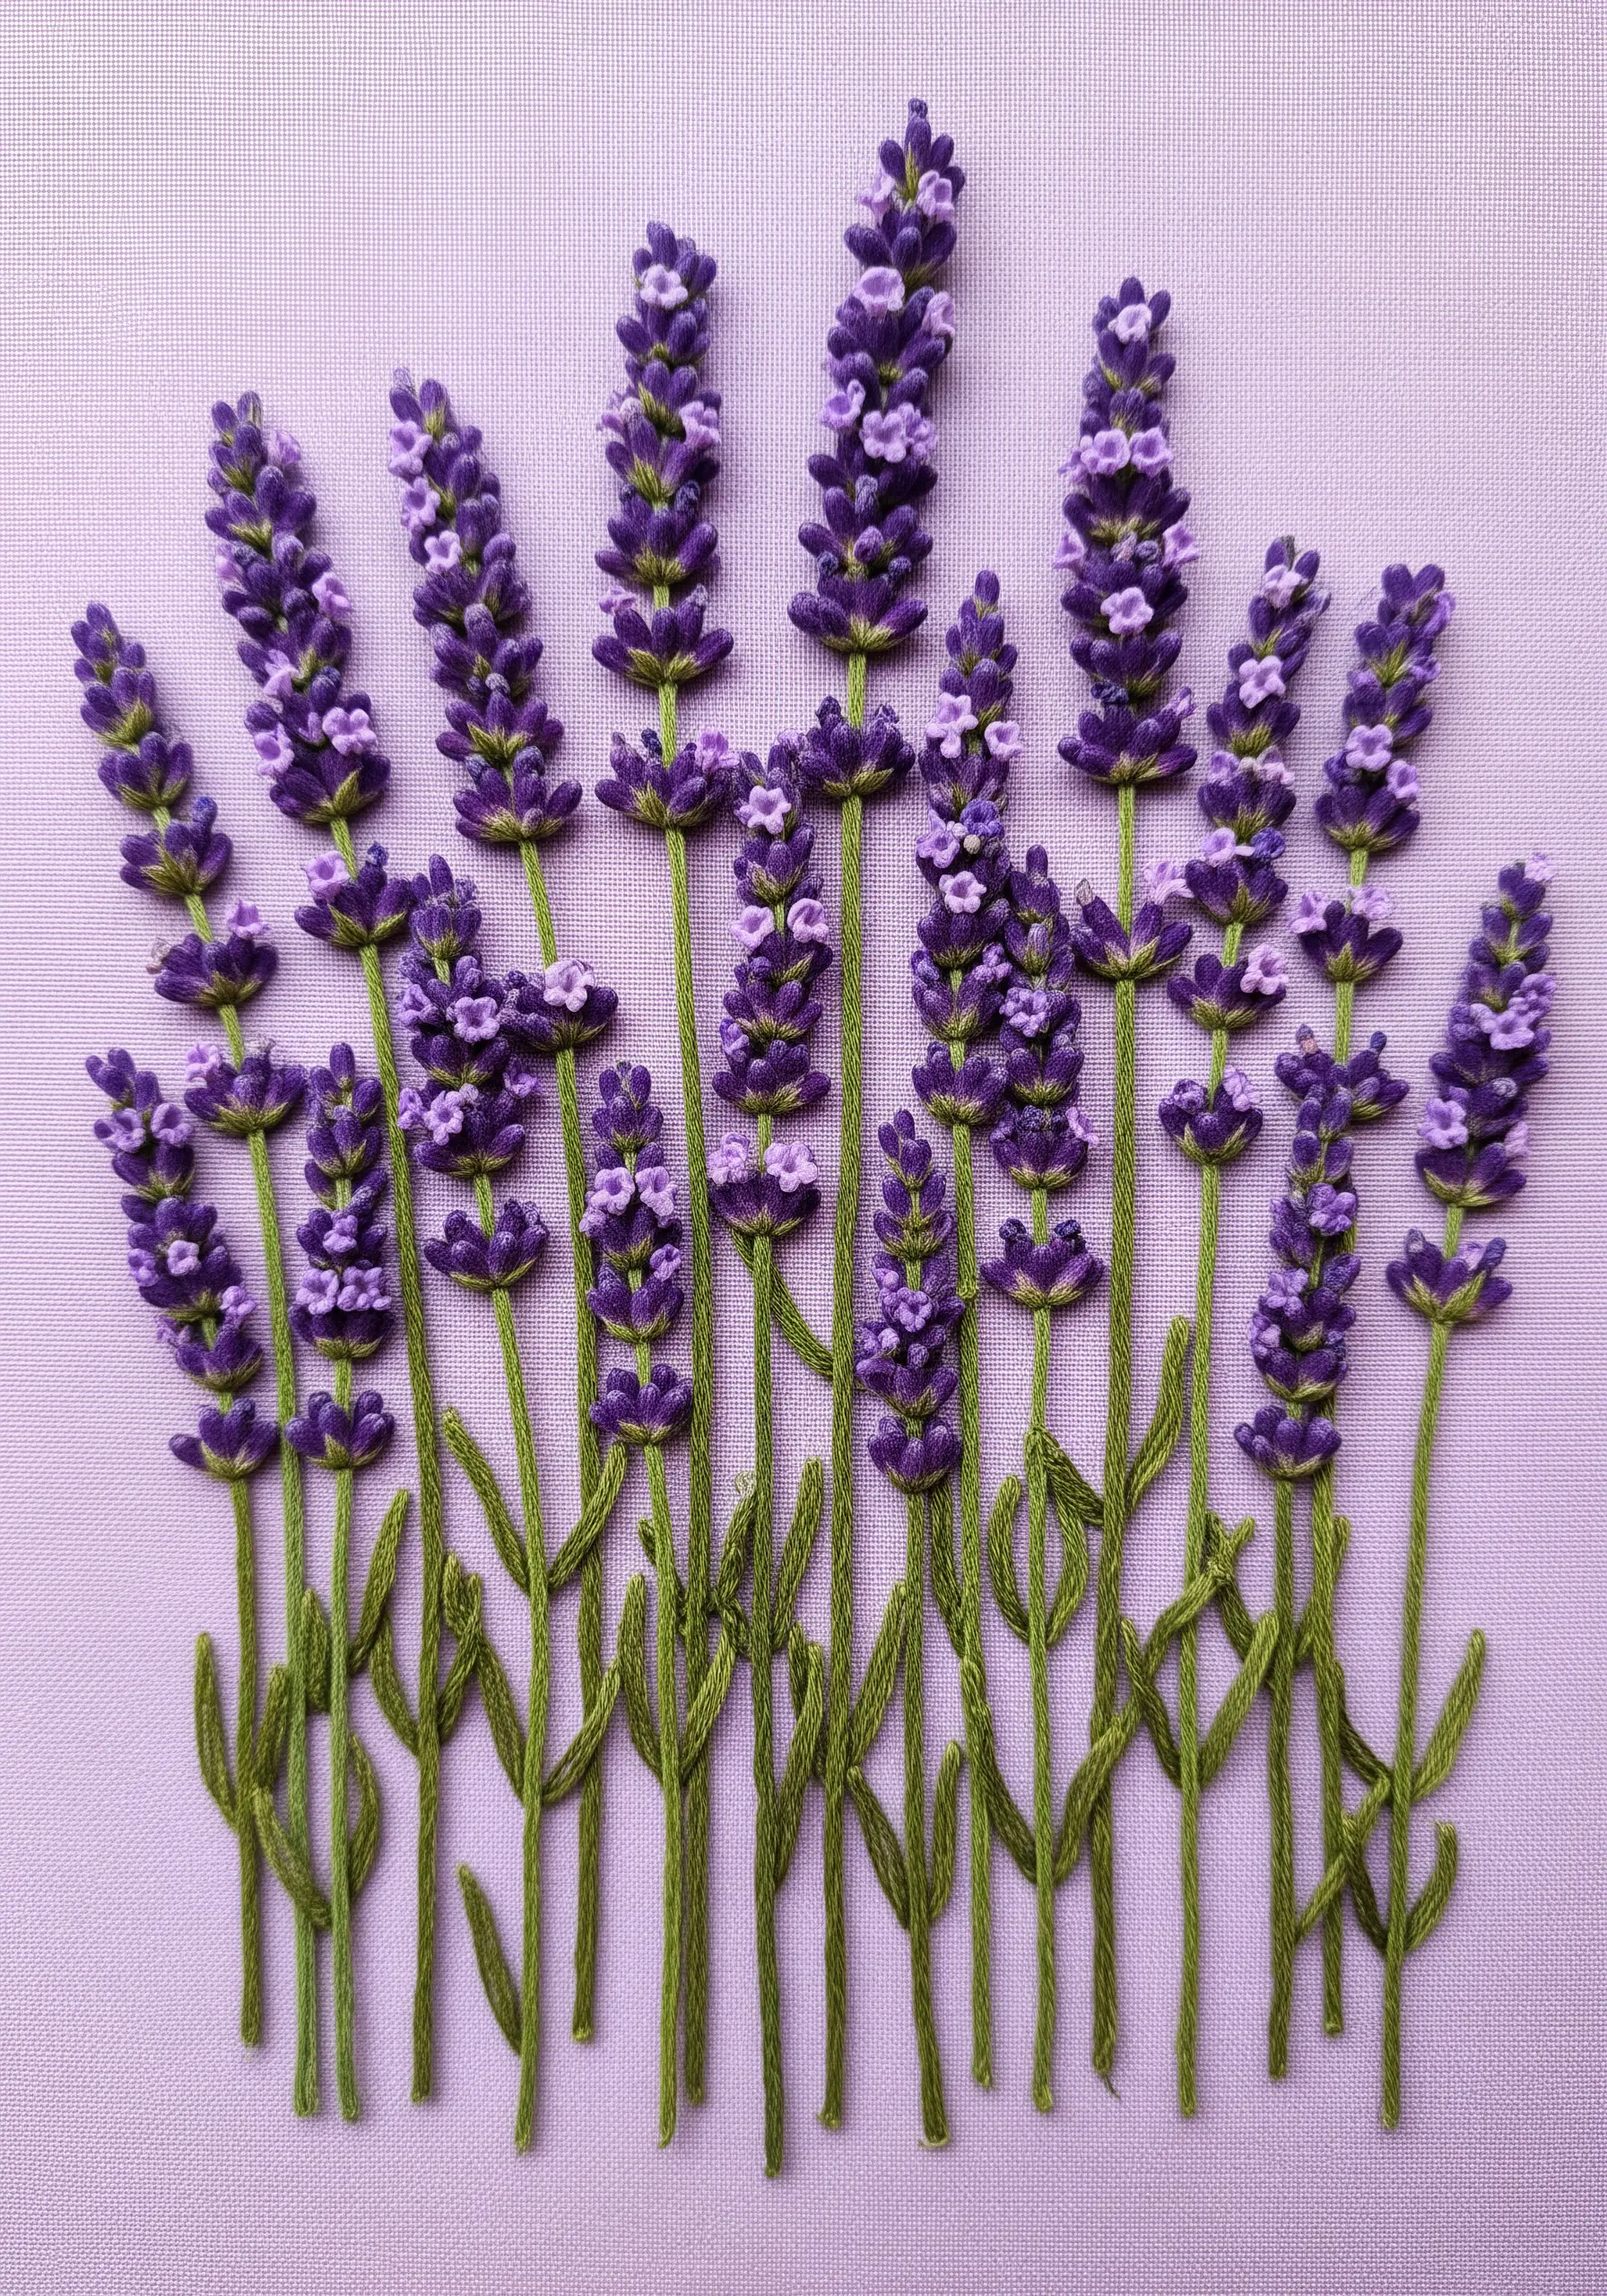
The key to believable lavender is creating the texture of its tiny, clustered florets.
Use a narrow ribbon stitch with purple silk ribbon to form the individual buds, which gives them a more petal-like shape than a simple knot.
Cluster these stitches tightly near the top of the stem, adding a few scattered French knots in a lighter shade for depth.
This combination of techniques results in beautifully rendered, delicate lavender stitch ideas that feel almost real.
13. Construct Playful Florals with Beads, Ribbon, and Wire

Embrace a truly mixed-media approach for whimsical, structural flowers.
Form the petals by folding loops of wide satin ribbon and stitching them down at the base.
For added definition and sparkle, outline the ribbon petals with a line of seed beads.
Create a sturdy, posable stem by wrapping a pipe cleaner with green floss, then stitching it securely onto your fabric. This is one of those fun mixed-media crafts with embroidery that invites play.
14. Illustrate Mountainscapes with Directional Stitches
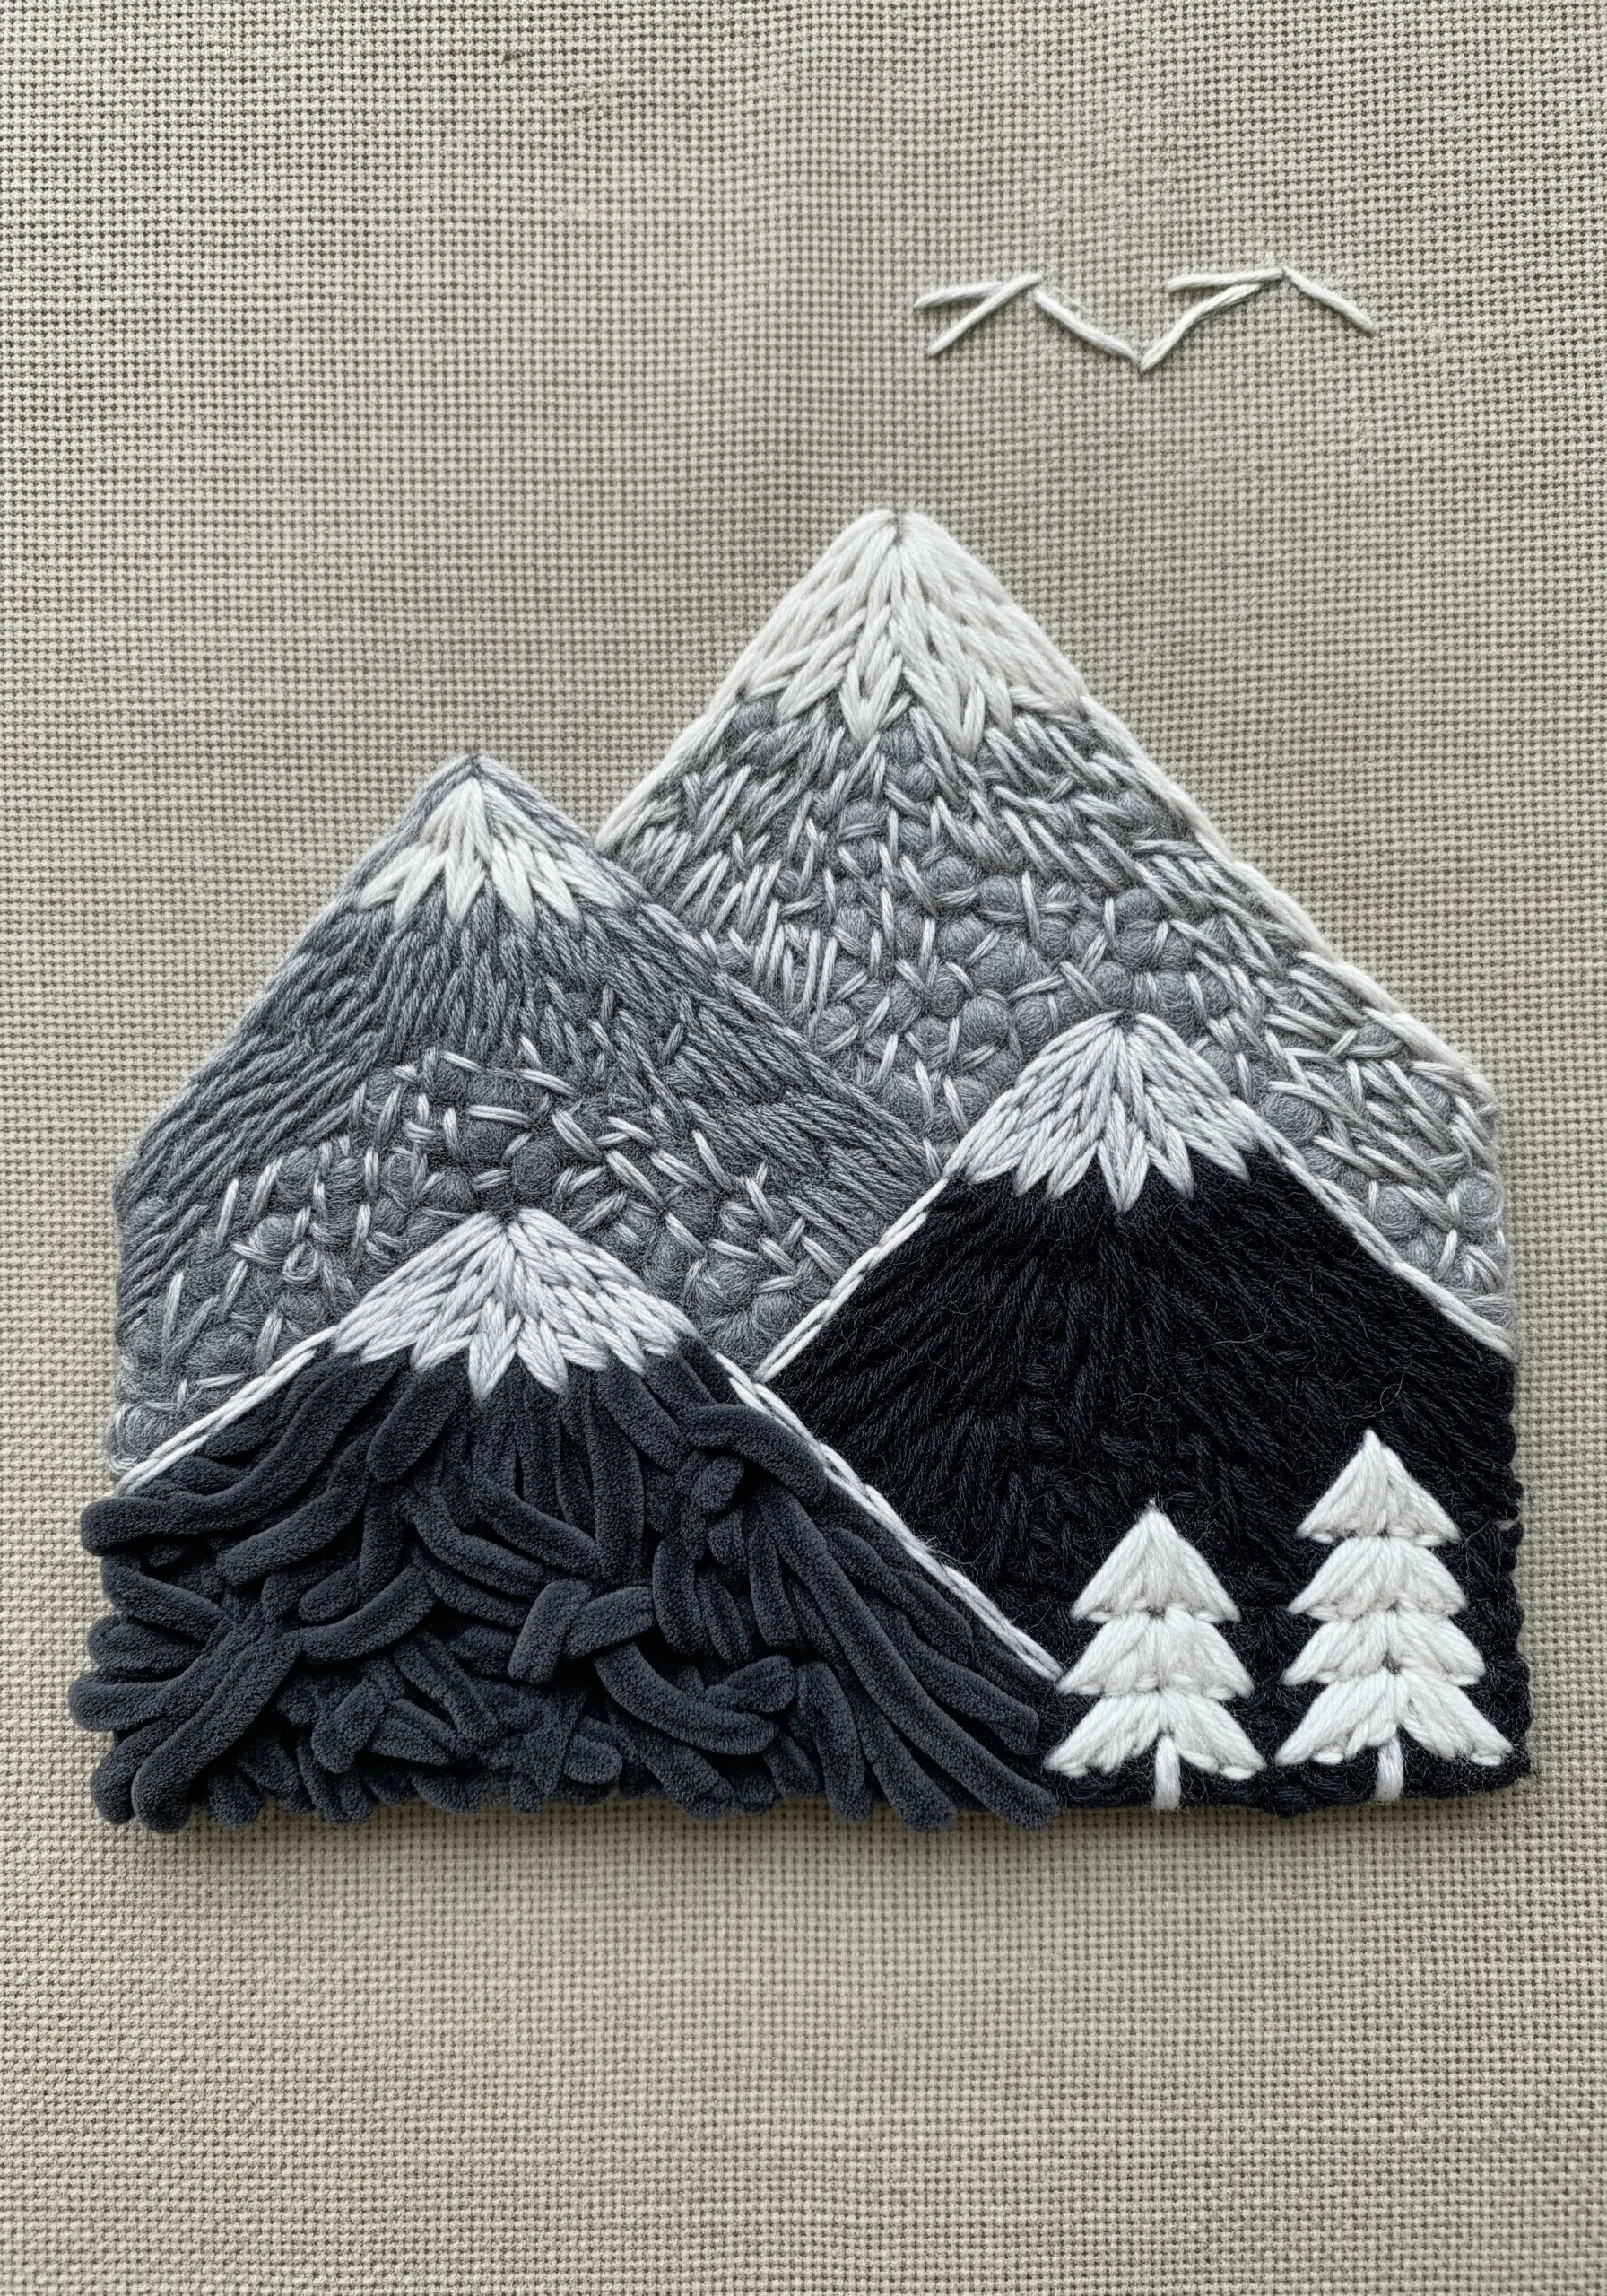
Give each mountain in your landscape a unique character by assigning it a different textural stitch.
Fill one peak with long-and-short stitches to create the smooth, graded look of rock.
Use a dense field of French knots on another to suggest a forested slope, and scattered seed stitches on a third for a gravelly texture.
This approach transforms a simple outline into one of those embroidery ideas inspired by national parks that feels vast and detailed.
15. Define Shapes with a Contrasting Braided Border

Elevate a simple satin-stitched motif by framing it with a bold, textural border.
First, fill the sections of your design with satin stitch, keeping your stitches smooth and even.
Then, create a thin braid or twist from a thicker yarn—using a contrasting or complementary color—and couch it neatly around the outer edge of your shape.
This technique provides a clean, professional finish and adds a satisfying tactile element.
16. Sculpt Abstract Forms with Knotted Roving

Turn fiber into a sculptural element by moving beyond traditional stitches and focusing on form.
Use a soft, pliable yarn or wool roving that holds its shape when manipulated.
Create texture by tying the fiber into chunky knots, forming plush loops, or coiling it tightly before couching it down.
Arranging these varied textures together produces stunning abstract thread embroidery ideas that are wonderfully tactile and visually bold.
17. Transform a Hoop into a Loom for Woven Wall Art

Your embroidery hoop can double as a miniature loom for creating richly textured wall hangings.
Warp your threads vertically across the hoop, creating a grid to weave into.
Then, use a tapestry needle to weave various fibers through the warp—try chunky yarn, fabric strips, silk ribbon, and wool roving.
Leaving a long fringe at the bottom completes the look, making it one of the easiest DIY yarn wall art pieces you can make.
18. Add Bohemian Flair with Tassels and Simple Stitches
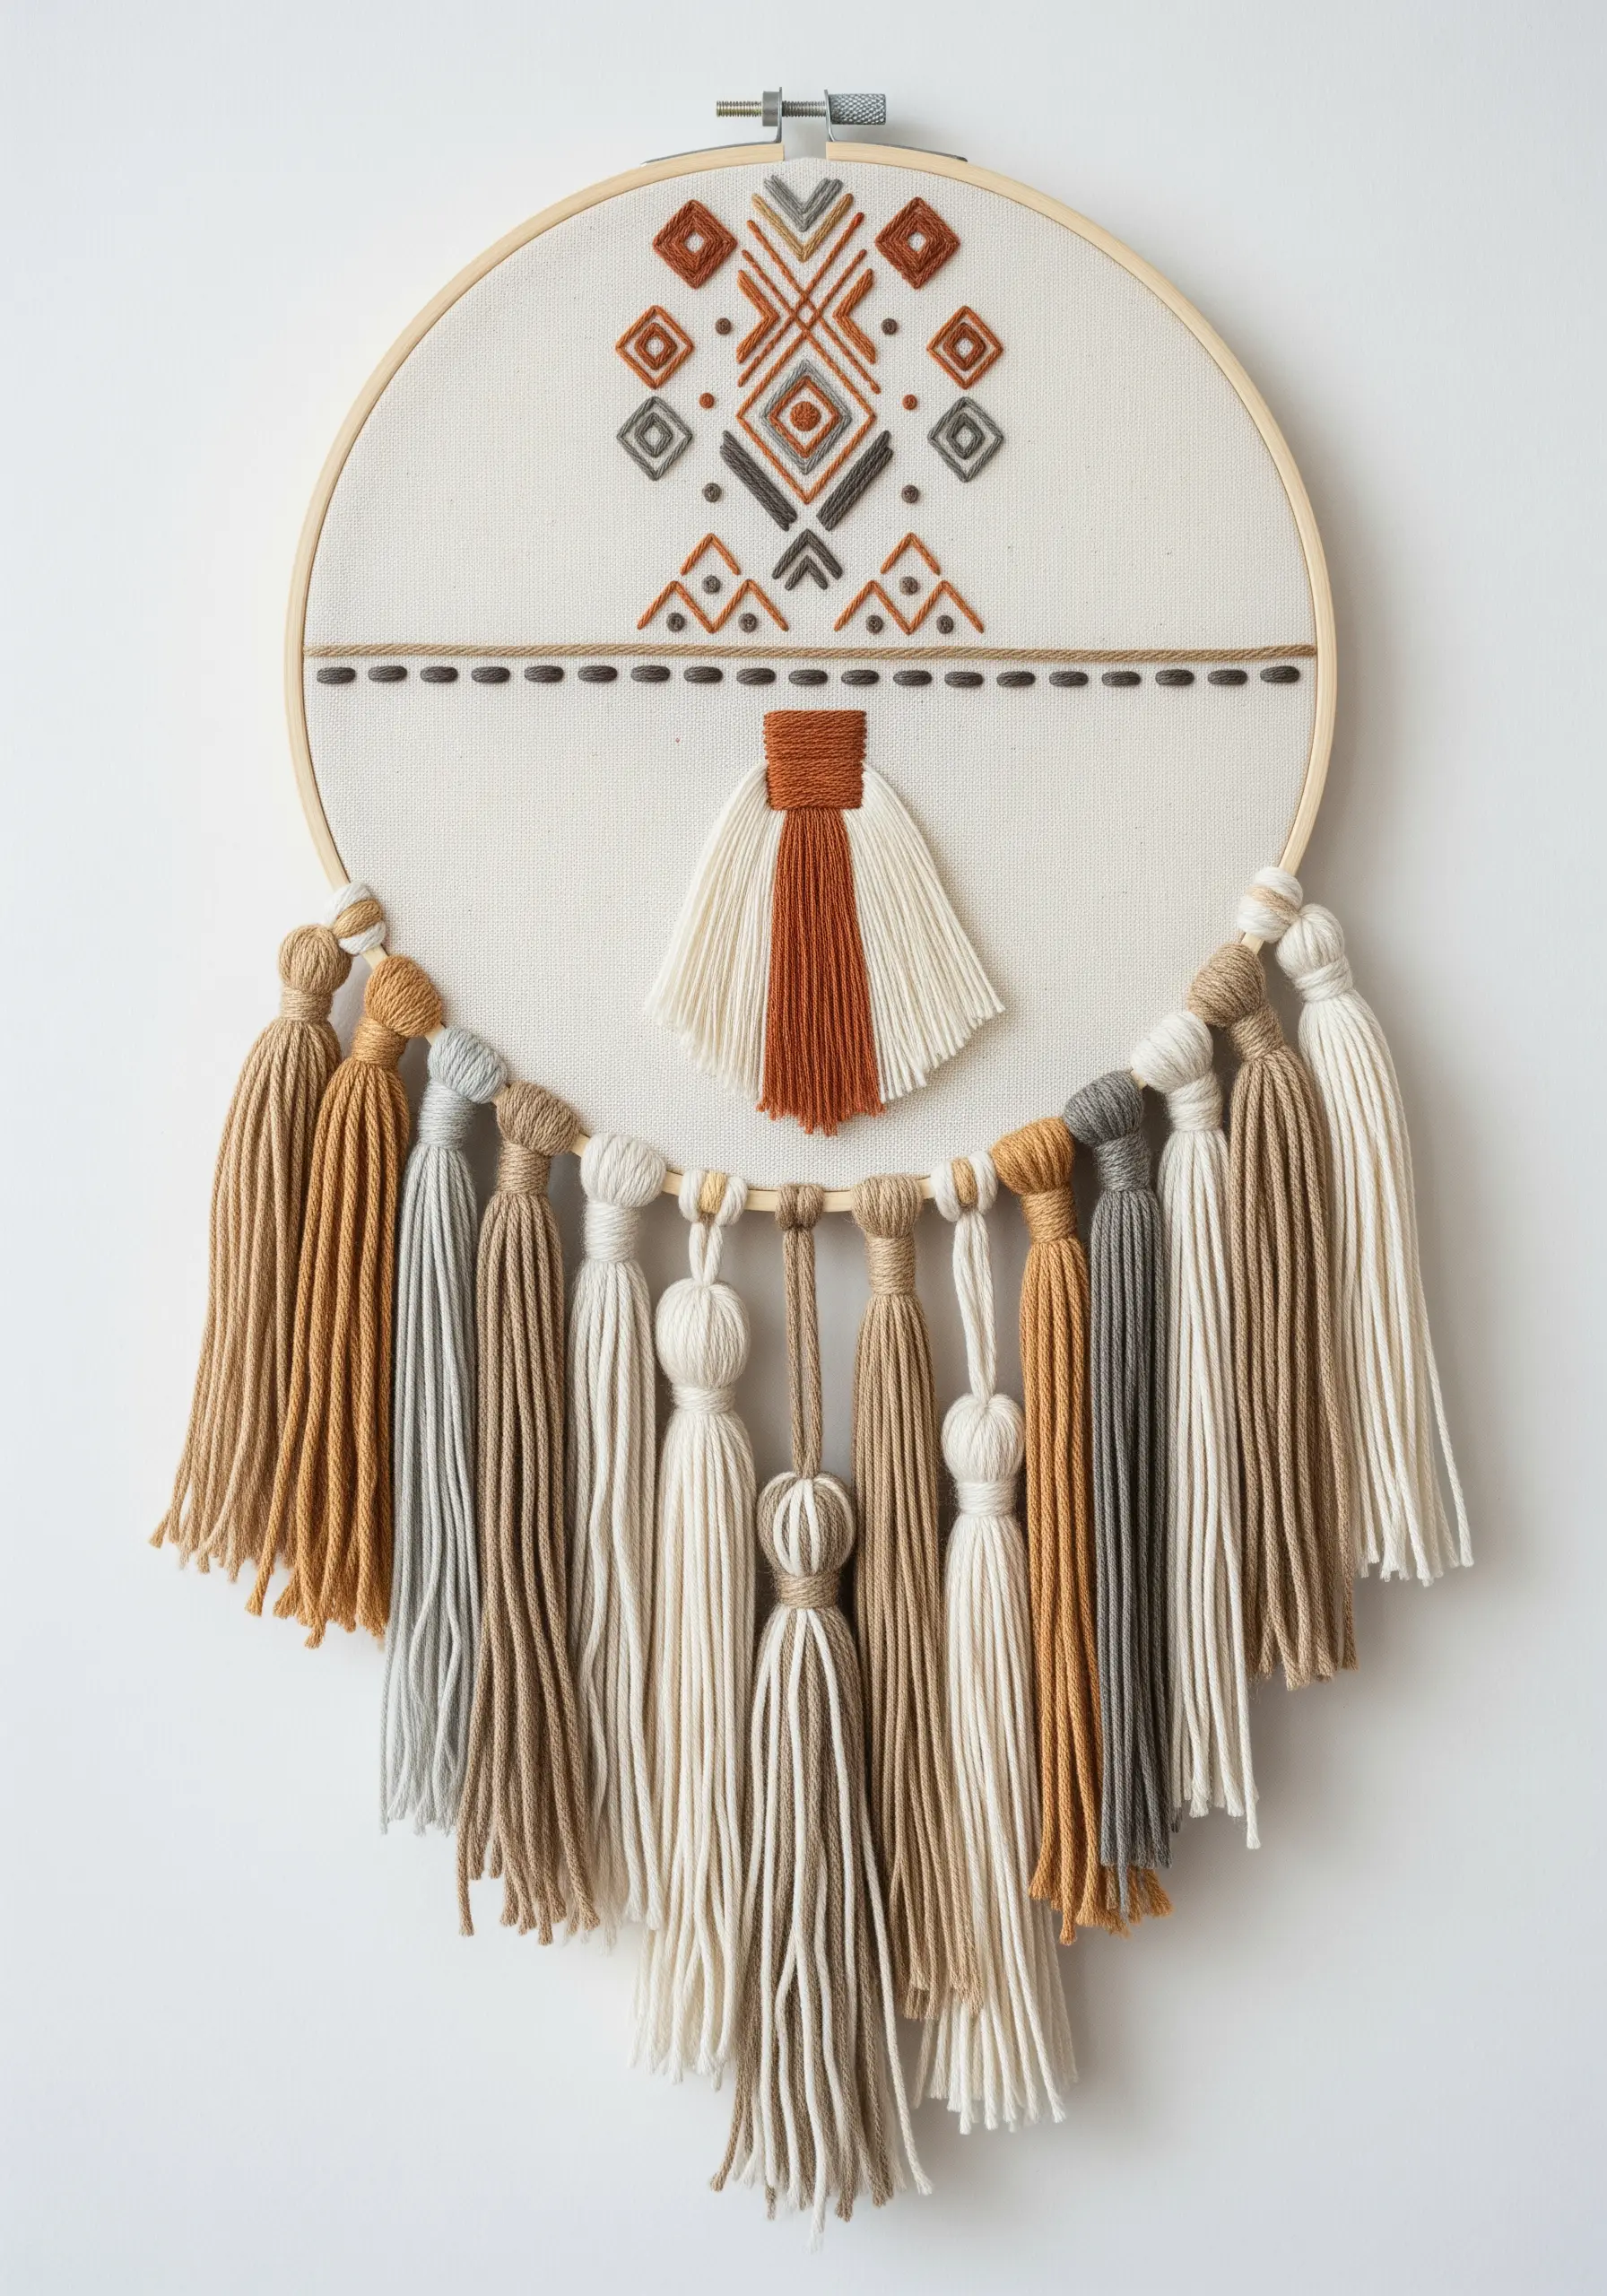
Achieve a relaxed, bohemian aesthetic by pairing clean, geometric stitching with soft, flowing elements.
Embroider a simple motif in the center of your hoop using basic stitches like backstitch or running stitch.
The main feature is the tassels: create a lush fringe using yarn from the same color palette and attach them to the bottom of the hoop.
This addition of weight and movement is the key to creating authentic-looking boho embroidery patterns.
19. Construct a Tree with Wrapped Wire and Ribbon

Create a truly three-dimensional piece by building a sculptural tree that stands off the fabric.
Form the trunk and branches by twisting craft wire into your desired shape, then wrap it tightly with brown yarn or floss.
Secure this wire armature to your background fabric.
For the leaves, simply tie small pieces of colorful satin ribbon directly onto the wire branches, creating an airy, fluttering canopy. These are wonderful DIY art pieces that celebrate form.
20. Compose Abstract Art with Fabric and Fiber Blocking

Think like a collage artist, using texture and sheen instead of just color to create your composition.
Couch down thick cords of velvet or chenille yarn in straight lines to create a block of plush, matte texture.
Next to it, apply a piece of pleated or folded satin fabric for a touch of structured shine.
The success of these abstract fabric collage embroidery ideas lies in the bold contrast between the different material properties.
21. Embellish Felt Appliqué with Graphic Stitches

Felt appliqué gives you a perfect, solid-colored base, allowing simple stitches to become the main decorative element.
Cut your shapes from craft felt and secure them to your fabric.
Then, use a contrasting thread color to add personality with simple, graphic stitches—like running stitches for texture, or ‘V’ shapes and crosses for pattern.
A few tiny French knots can serve as flowers or berries, adding that final pop of color and detail.
22. Incorporate Natural Fibers like Raffia for Organic Texture

To create convincing natural motifs, look for fibers that mimic real-world textures.
For the delicate gills of a mushroom, natural raffia is a perfect choice. Its papery, slightly irregular texture adds a rustic feel that thread can’t replicate.
Stitch down small bundles of raffia so they fan out from the stem.
Pair this with the soft texture of a felt cap and a plush, braided yarn stem for one of those realistic mushroom forest floor embroidery projects.
23. Contrast Woven Textures and Soft Roving for Celestial Art

Create a powerful celestial design by giving the sun and moon completely opposite textural identities.
For the sun, couch down rows of chunky yarn to mimic a knitted or woven texture, giving it a solid, structured feel.
For the moon, use soft, ethereal wool roving, gently shaping it and securing it with a felting needle or invisible stitches.
This contrast between the firm sun and the soft moon creates a beautiful balance, resulting in minimalist statements that pop against a dark background.


