
If you’ve ever pressed a flower between the pages of a book, you already understand the desire to hold onto a fleeting moment of beauty. But what comes next? How do you transform that fragile, paper-thin memory into a lasting piece of art?
This is where embroidery offers its quiet magic. Your needle and thread are not just tools for decoration; they are instruments for preservation. Instead of trying to perfectly replicate a petal with satin stitch, you will learn to collaborate with the real thing. You’ll use thread to anchor, frame, and elevate the natural beauty that’s already there.
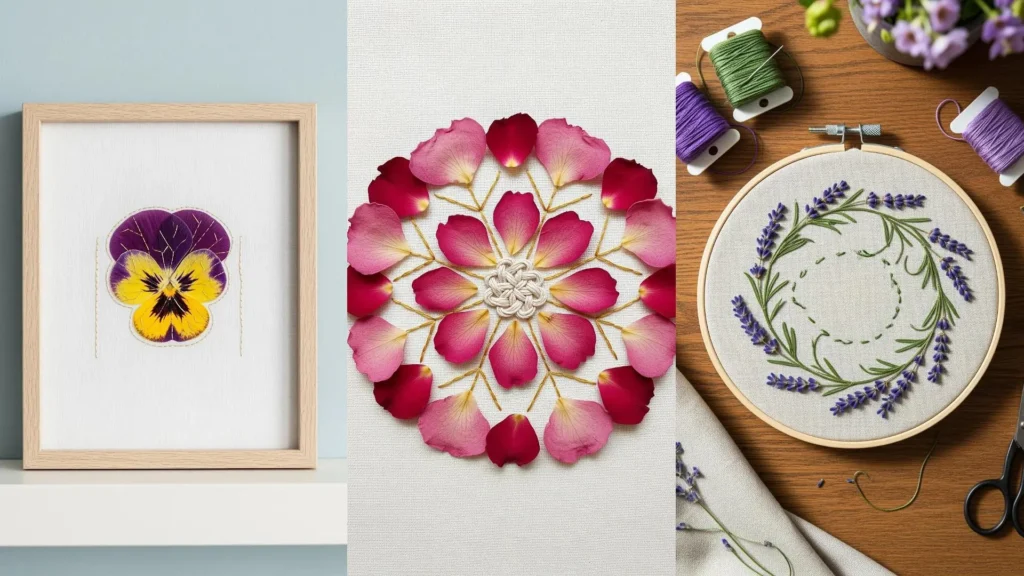
Here, you’ll discover how a simple stitch can secure a delicate stem, how a transparent fabric can make a fern seem to float in mid-air, and how a touch of metallic thread can turn a pansy into a modern heirloom. Let’s begin.
1. Frame a Lavender Wreath with Dimensional Stitches
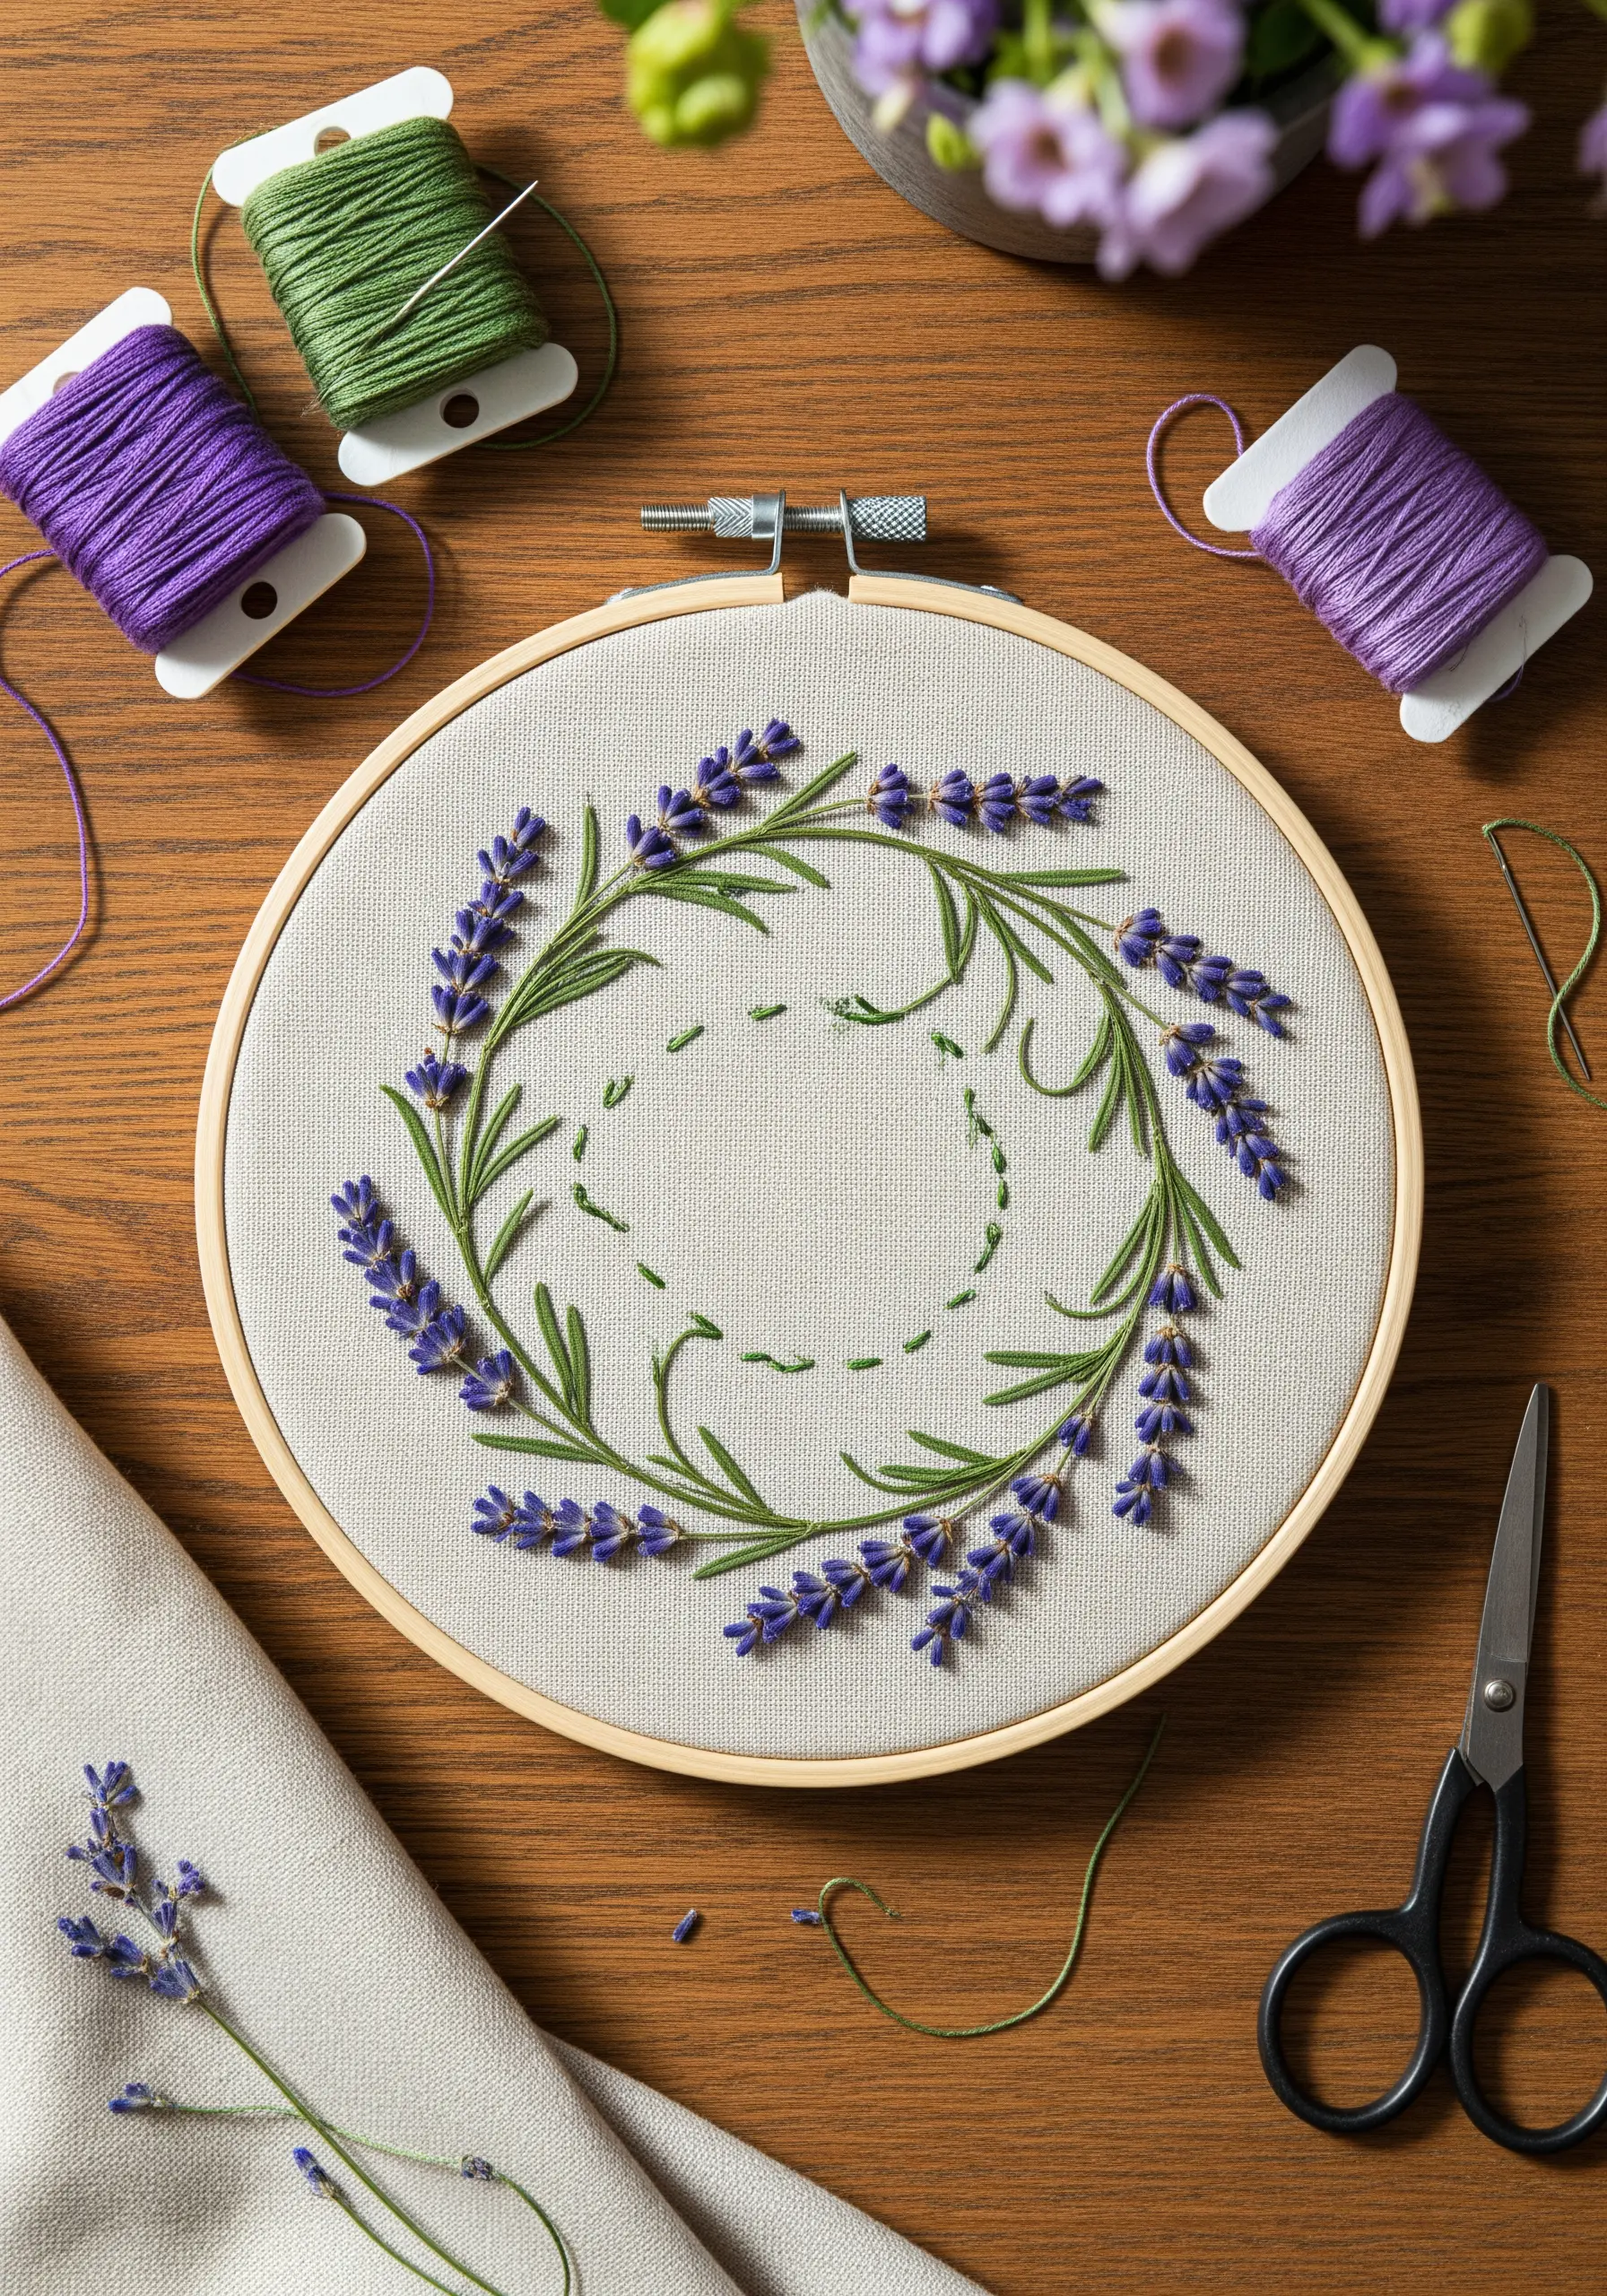
Instead of merely outlining your pressed lavender, give it life by stitching a full wreath to frame the space where the real flowers will go.
Use a fishbone stitch for the leaves to create a central vein and gentle texture that mimics nature.
For the lavender blossoms, use a combination of French knots and short straight stitches; this variation adds depth and prevents the purple from looking flat.
The open center is perfect for adding a minimal monogram or a significant date, turning a simple hoop into a cherished keepsake.
2. Outline Pressed Petals with a Touch of Gold
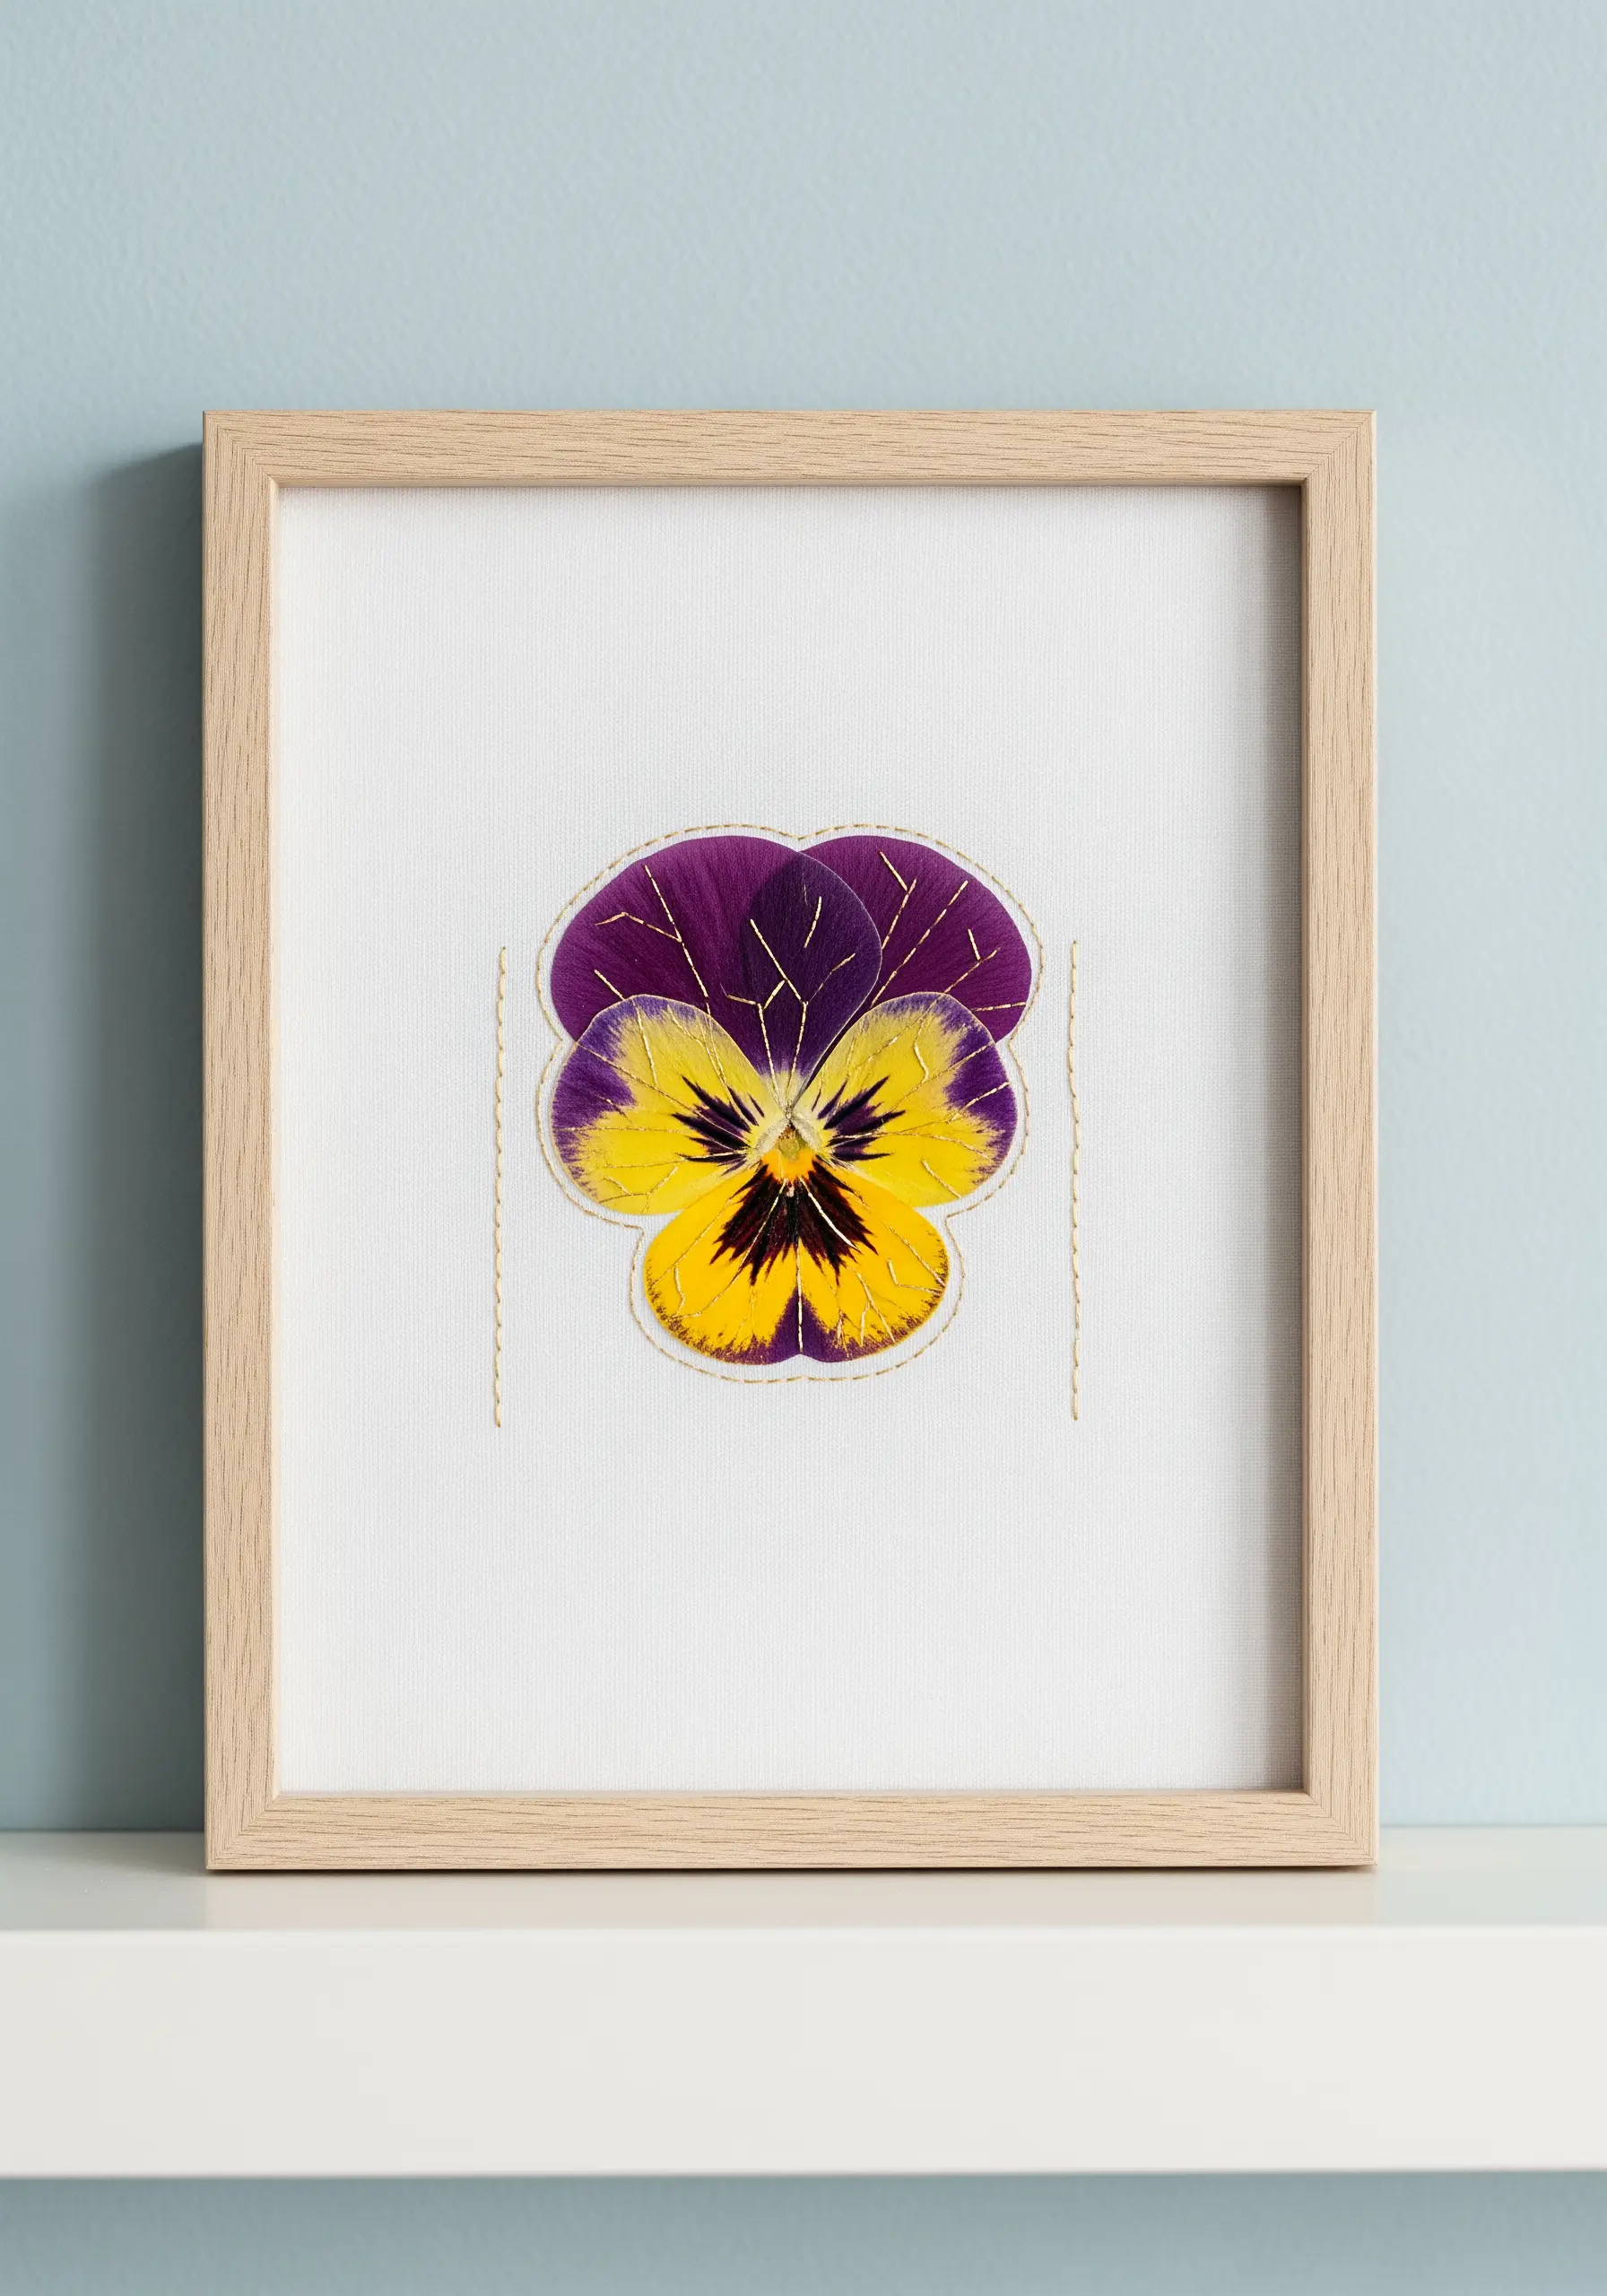
Preserve a delicate pressed pansy by framing its natural shape with thread, turning it into a piece of fine art.
Before you begin, lightly coat the flower with a matte spray sealant to protect its color and prevent crumbling during stitching.
Use a couching stitch with a single strand of fine metallic thread to tack the flower down.
This technique secures the fragile petals without piercing them directly, while the metallic sheen adds a modern, almost illustrative quality that elevates the entire piece.
3. Create a Flowing Daisy Chain on Table Linens
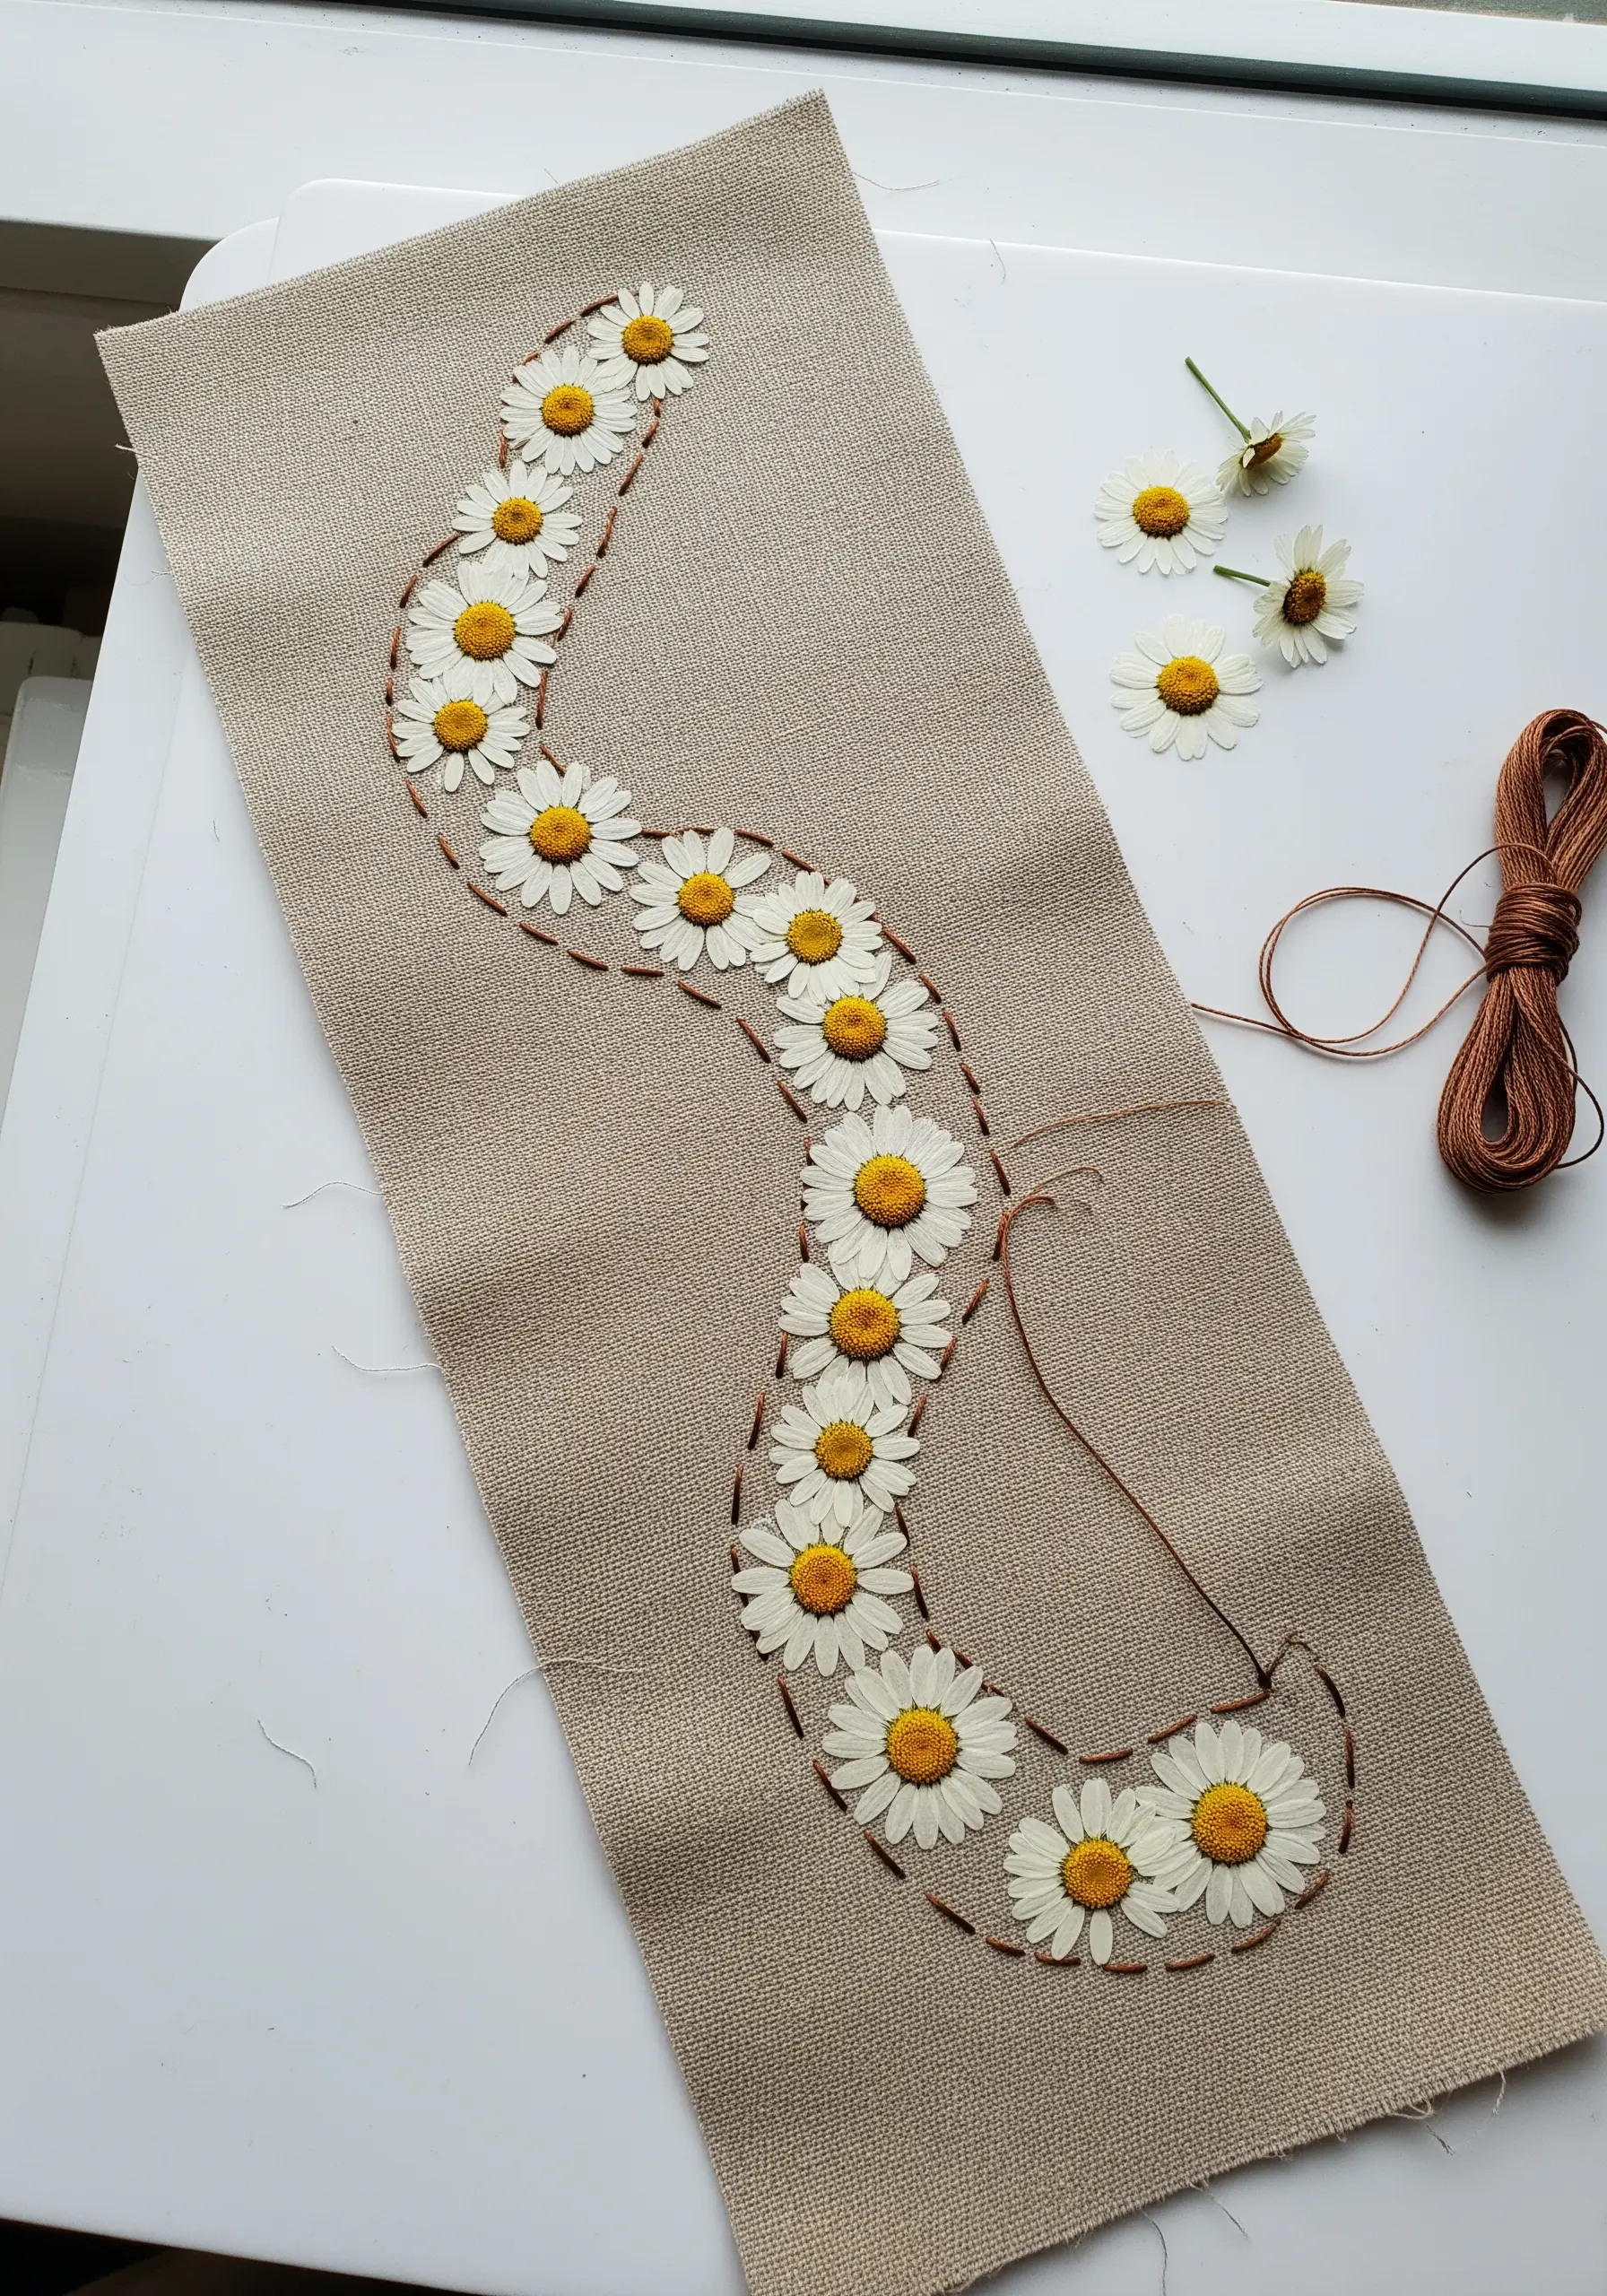
For a project like a table runner or wall hanging, guide the eye with a gentle, meandering line of pressed flowers.
First, arrange your pressed daisies in a soft ‘S’ curve, which feels more organic and less rigid than a straight line.
Secure the flowers using a simple, rustic running stitch in a contrasting earth tone, like brown or dark green.
This minimalist approach allows the natural beauty of the daisies to remain the focal point, while the visible stitches add a touch of handmade organic charm.
4. Suspend Botanicals on Sheer Tulle
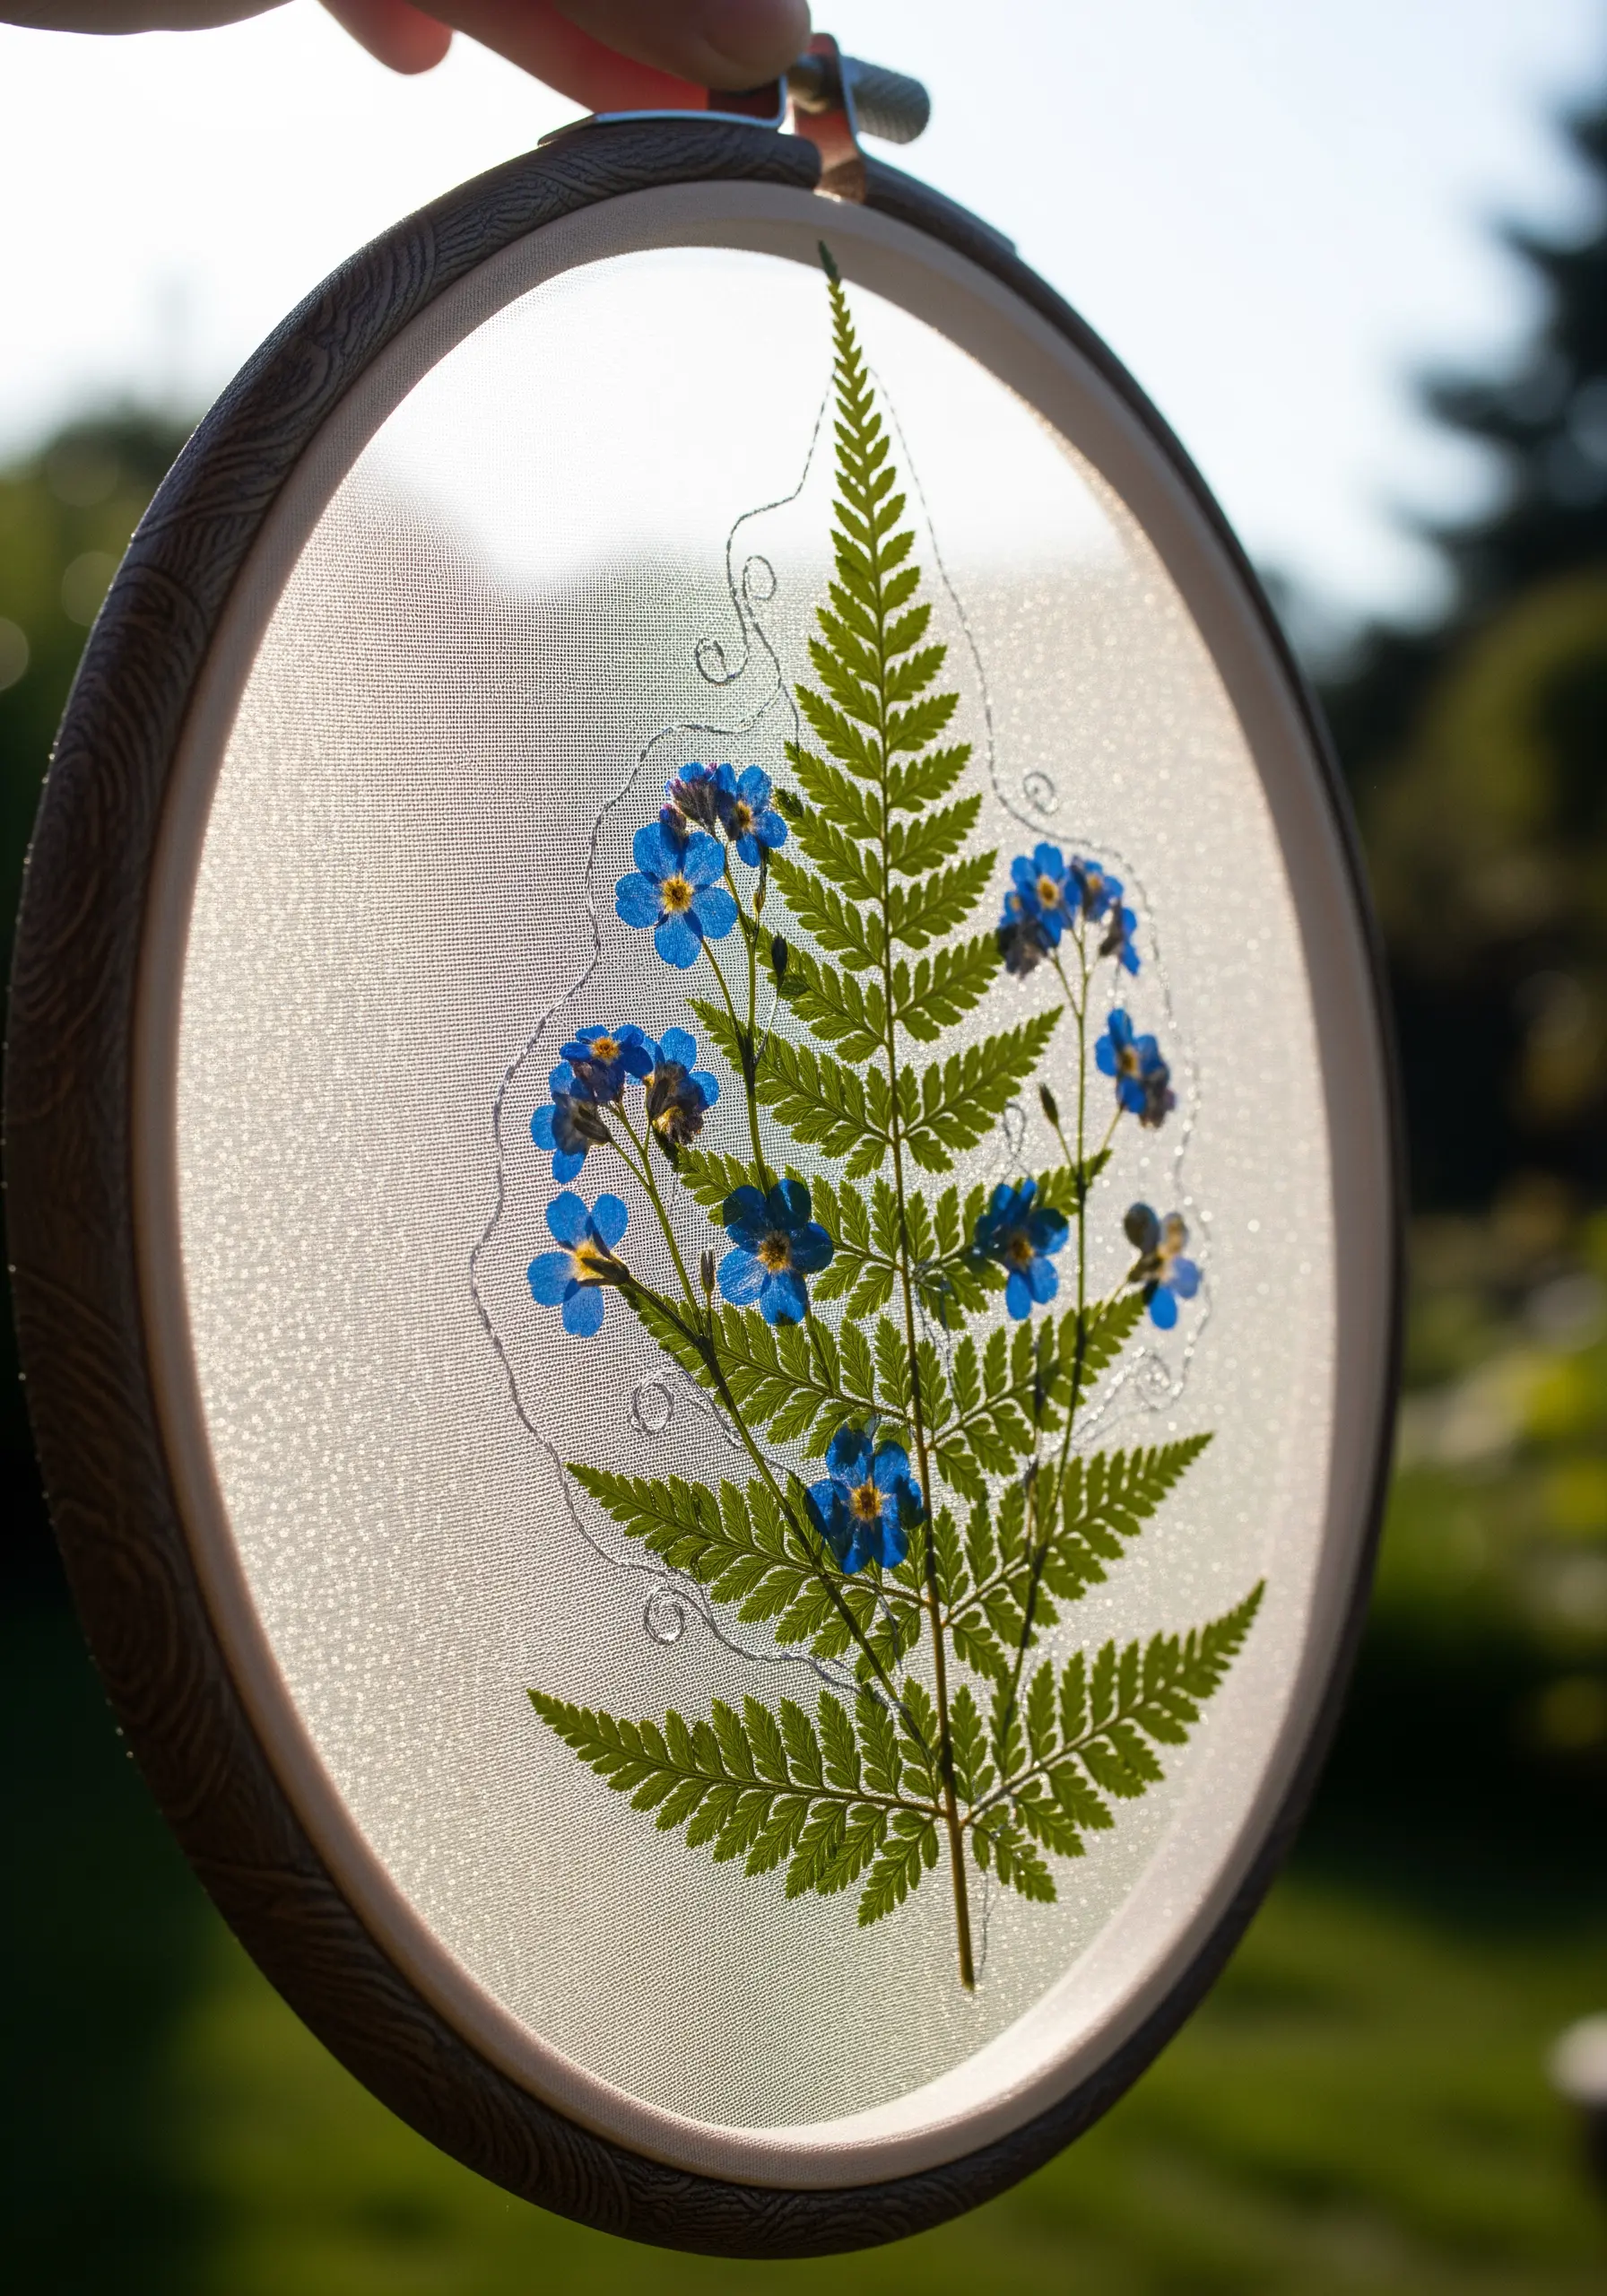
Create a stunning ‘floating’ effect by embroidering on a transparent fabric like tulle or organza.
To keep the delicate fabric taut, hoop it with a layer of water-soluble stabilizer, which you can rinse away after stitching.
Arrange your pressed fern and forget-me-nots, then use tiny, almost invisible stitches with a single strand of thread to anchor them in place.
Add subtle embroidered swirls or dots to integrate the botanicals with the background, completing the ethereal illusion.
5. Design a Wildflower Scatter on a Tote Bag
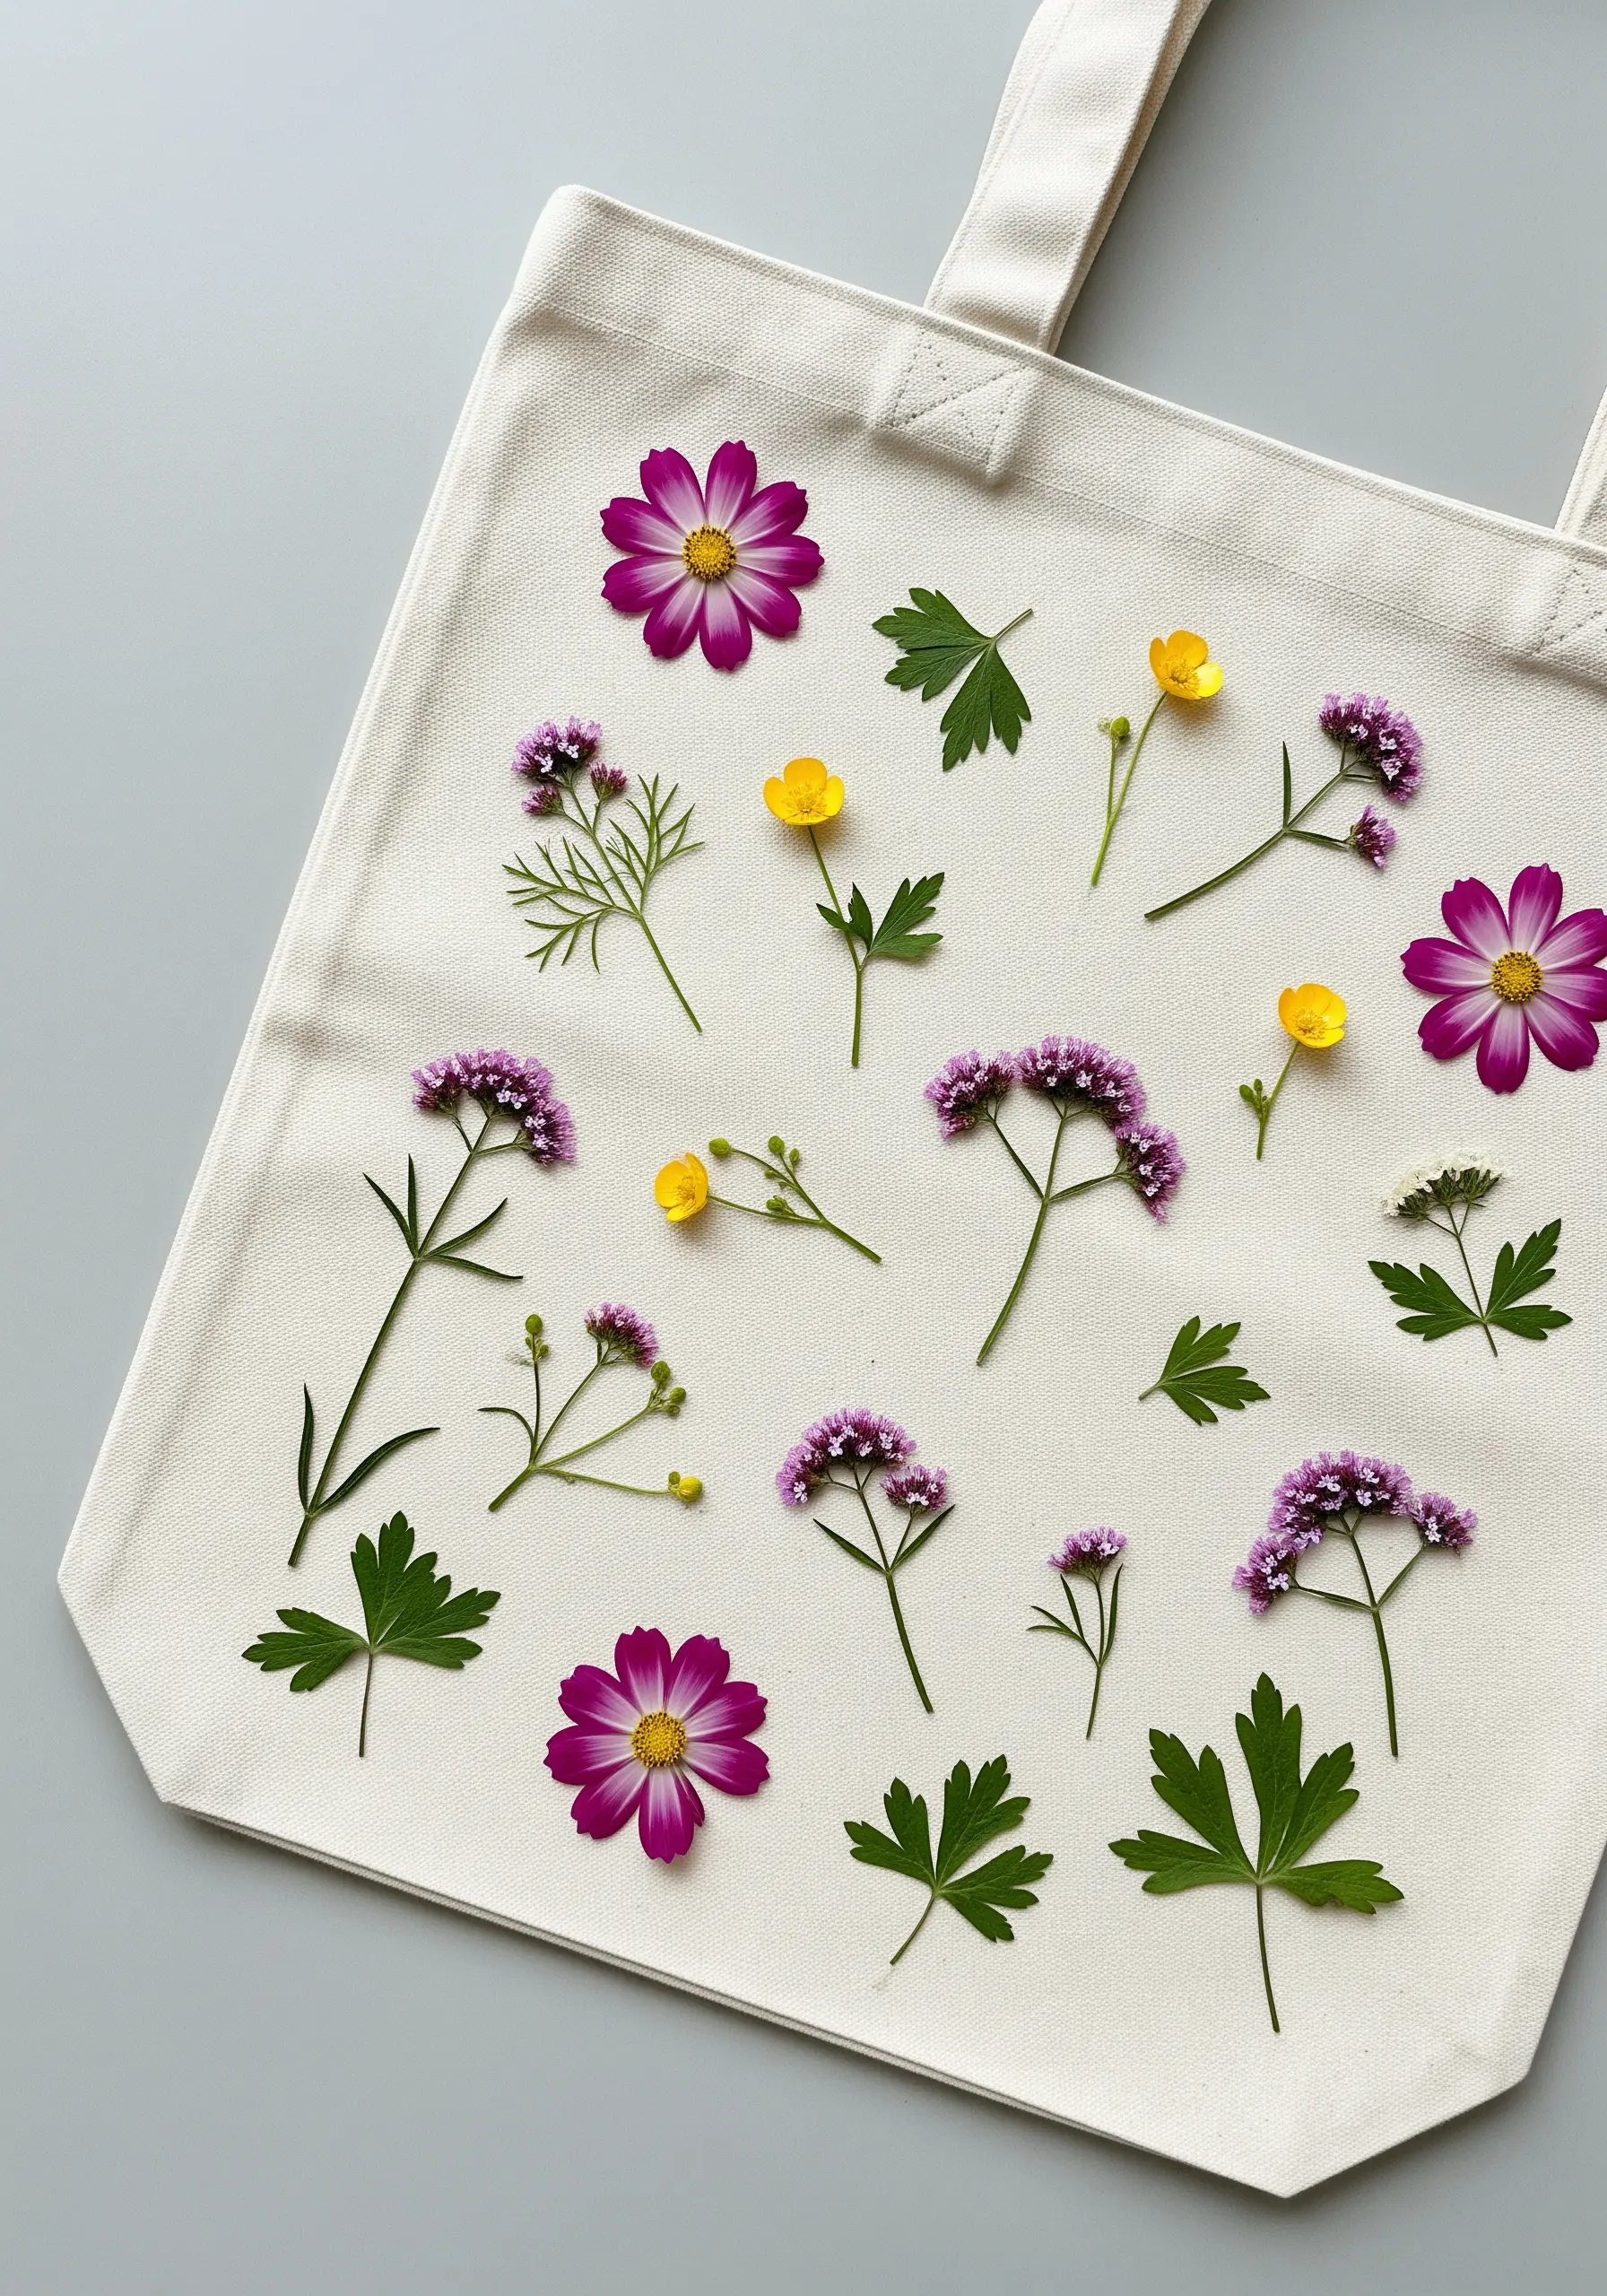
Transform a plain canvas tote by arranging pressed flowers in a balanced, asymmetrical composition.
Lay out your flowers and leaves, paying attention to color, shape, and direction to create a sense of natural movement.
Secure each element with a few tiny stitches in a matching color, hiding them under petals or along stems.
For durability on a high-use item, apply a layer of lightweight, iron-on fusible interfacing to the inside of the bag to protect the flowers and stitches from wear and tear.
6. Isolate a Specimen for Minimalist Impact

Highlight the singular beauty of a flower like the cosmos by giving it ample negative space.
Position your pressed flower arrangement slightly off-center; this creates a more dynamic and artistically considered composition than placing it directly in the middle.
Use couching stitches with a thread that matches the stem color to secure it invisibly to the fabric.
Pairing the delicate floral with a bold, modern black hoop creates a striking contrast that feels contemporary and clean.
7. Amplify Color with a Contrasting Background
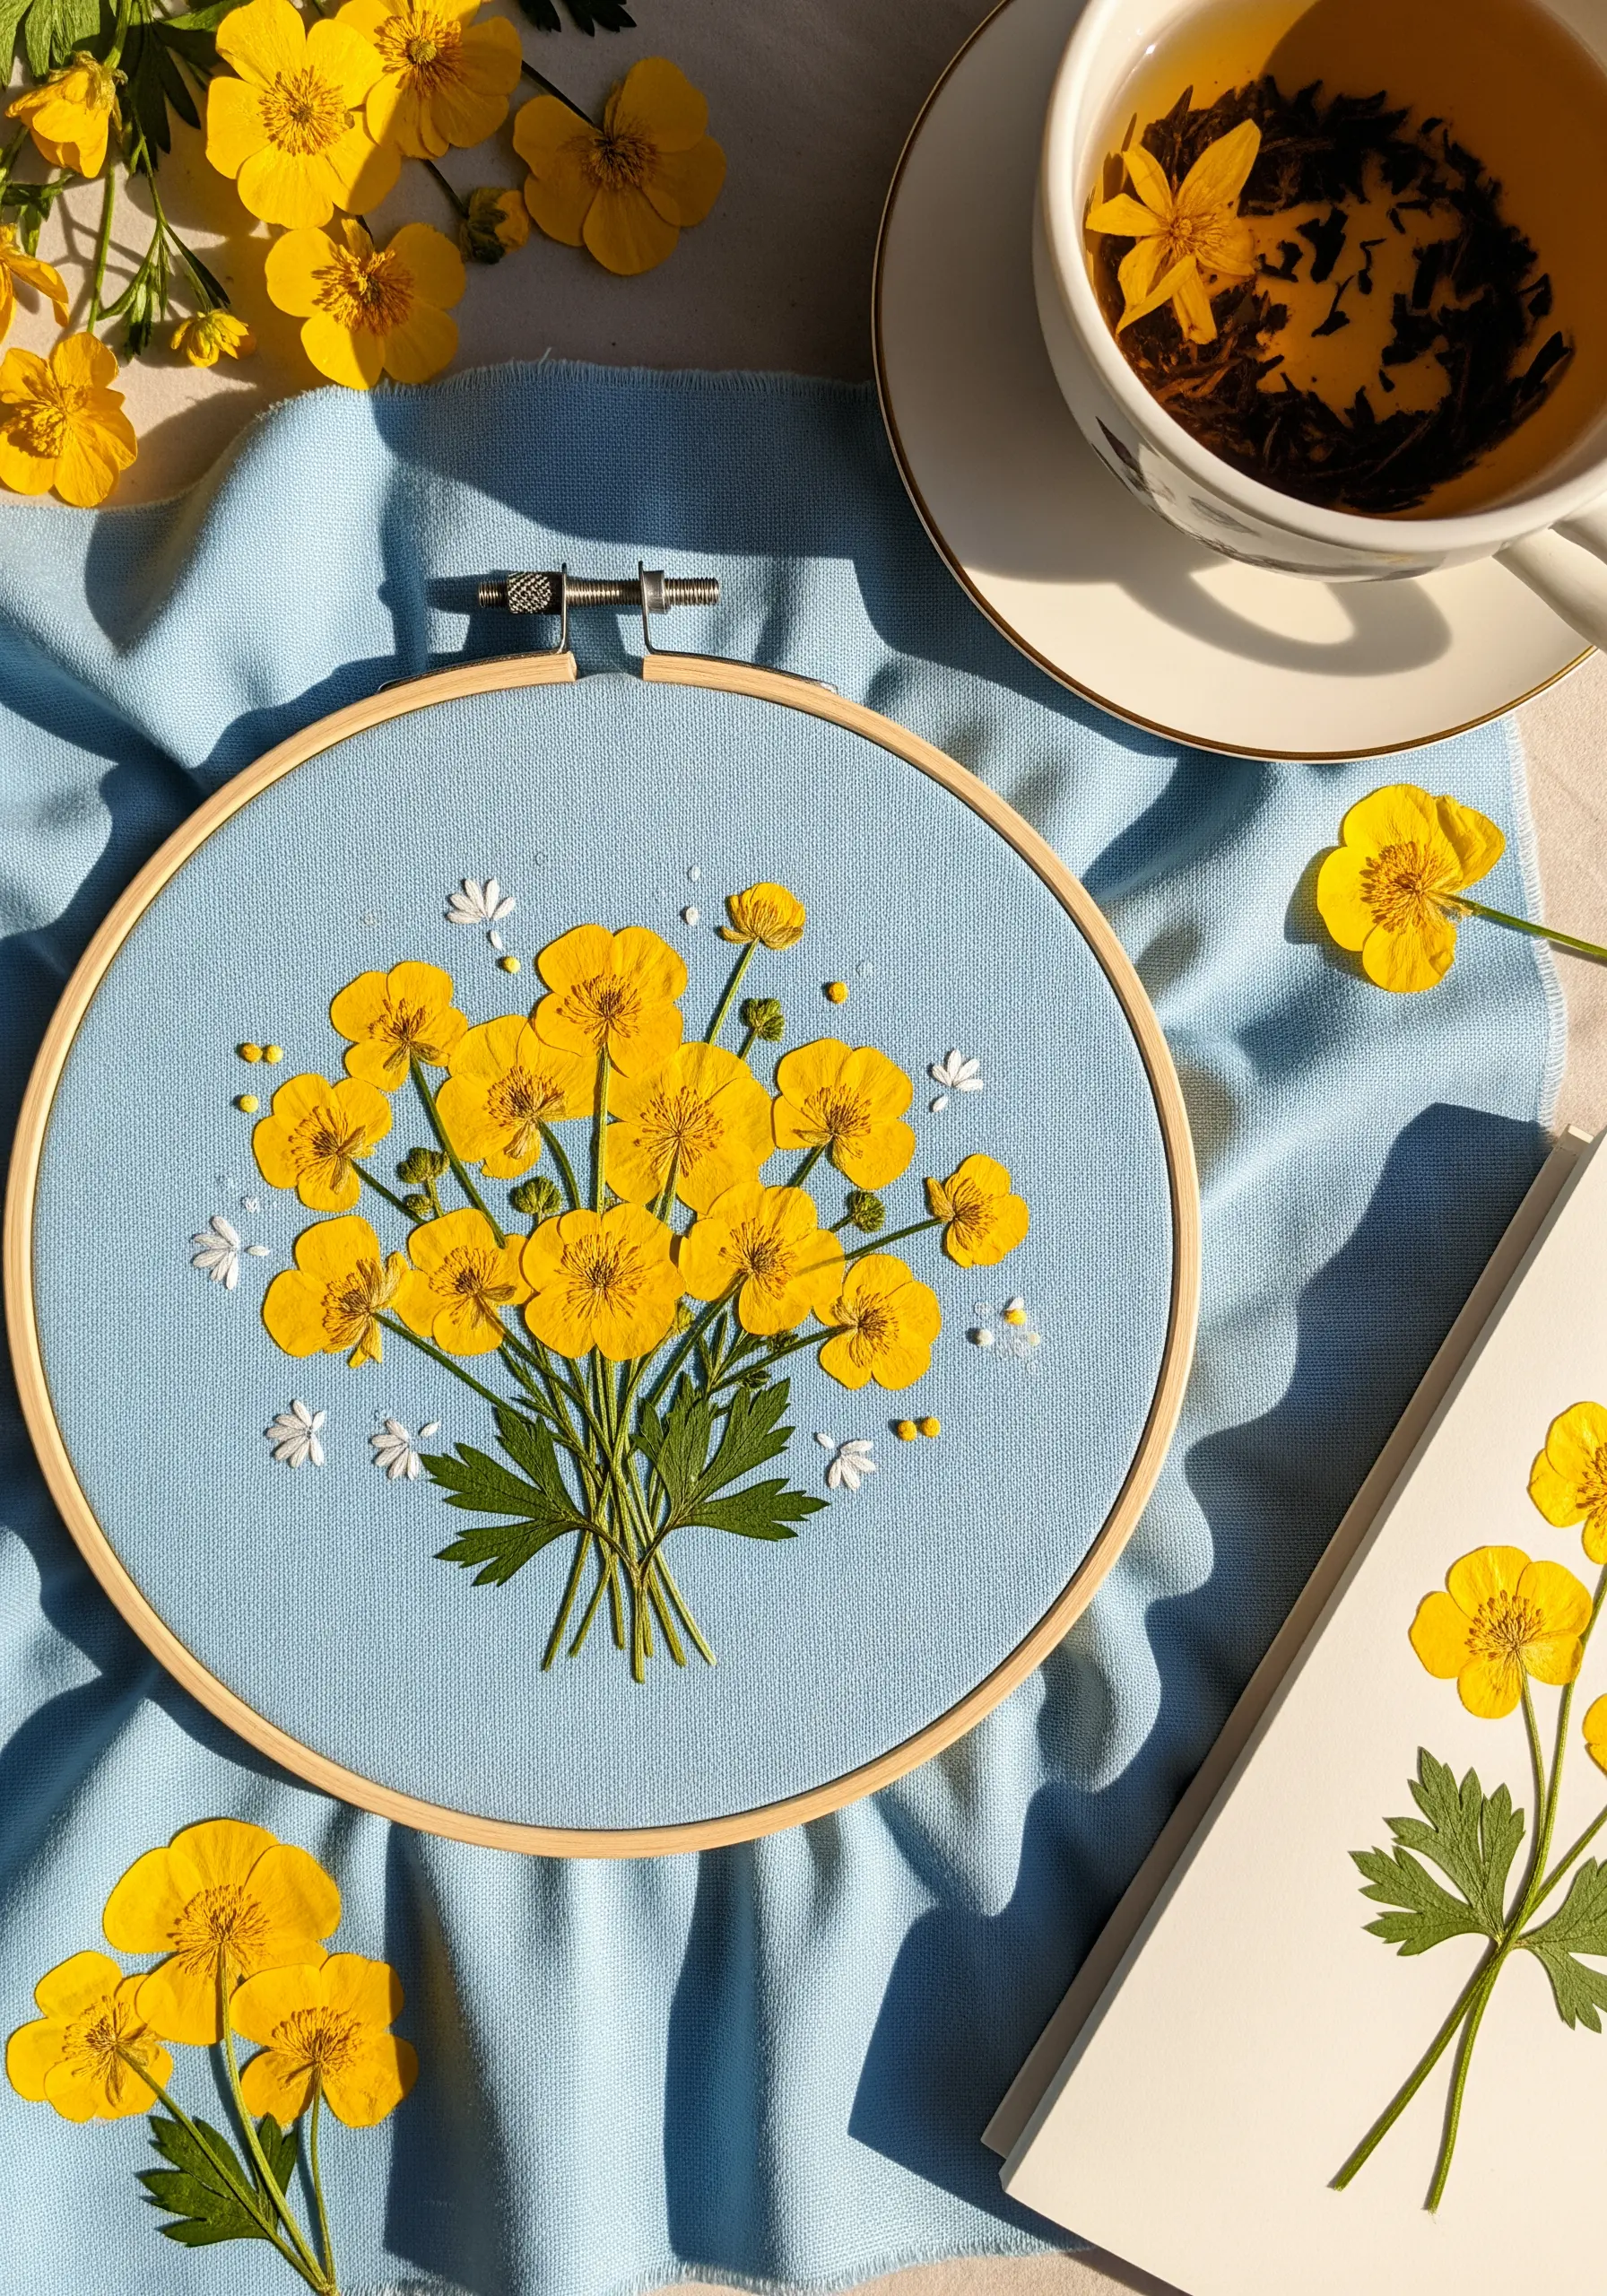
Make your pressed flowers vibrant by choosing a background fabric in a complementary color.
The soft sky-blue fabric makes these yellow buttercups appear brighter and more saturated than they would on a neutral background.
After securing the main bouquet, add tiny white French knots scattered around the arrangement.
These small details break up the solid color, add a touch of whimsy, and make the entire composition feel more complete and intentional.
8. Build a Rose Petal Mandala
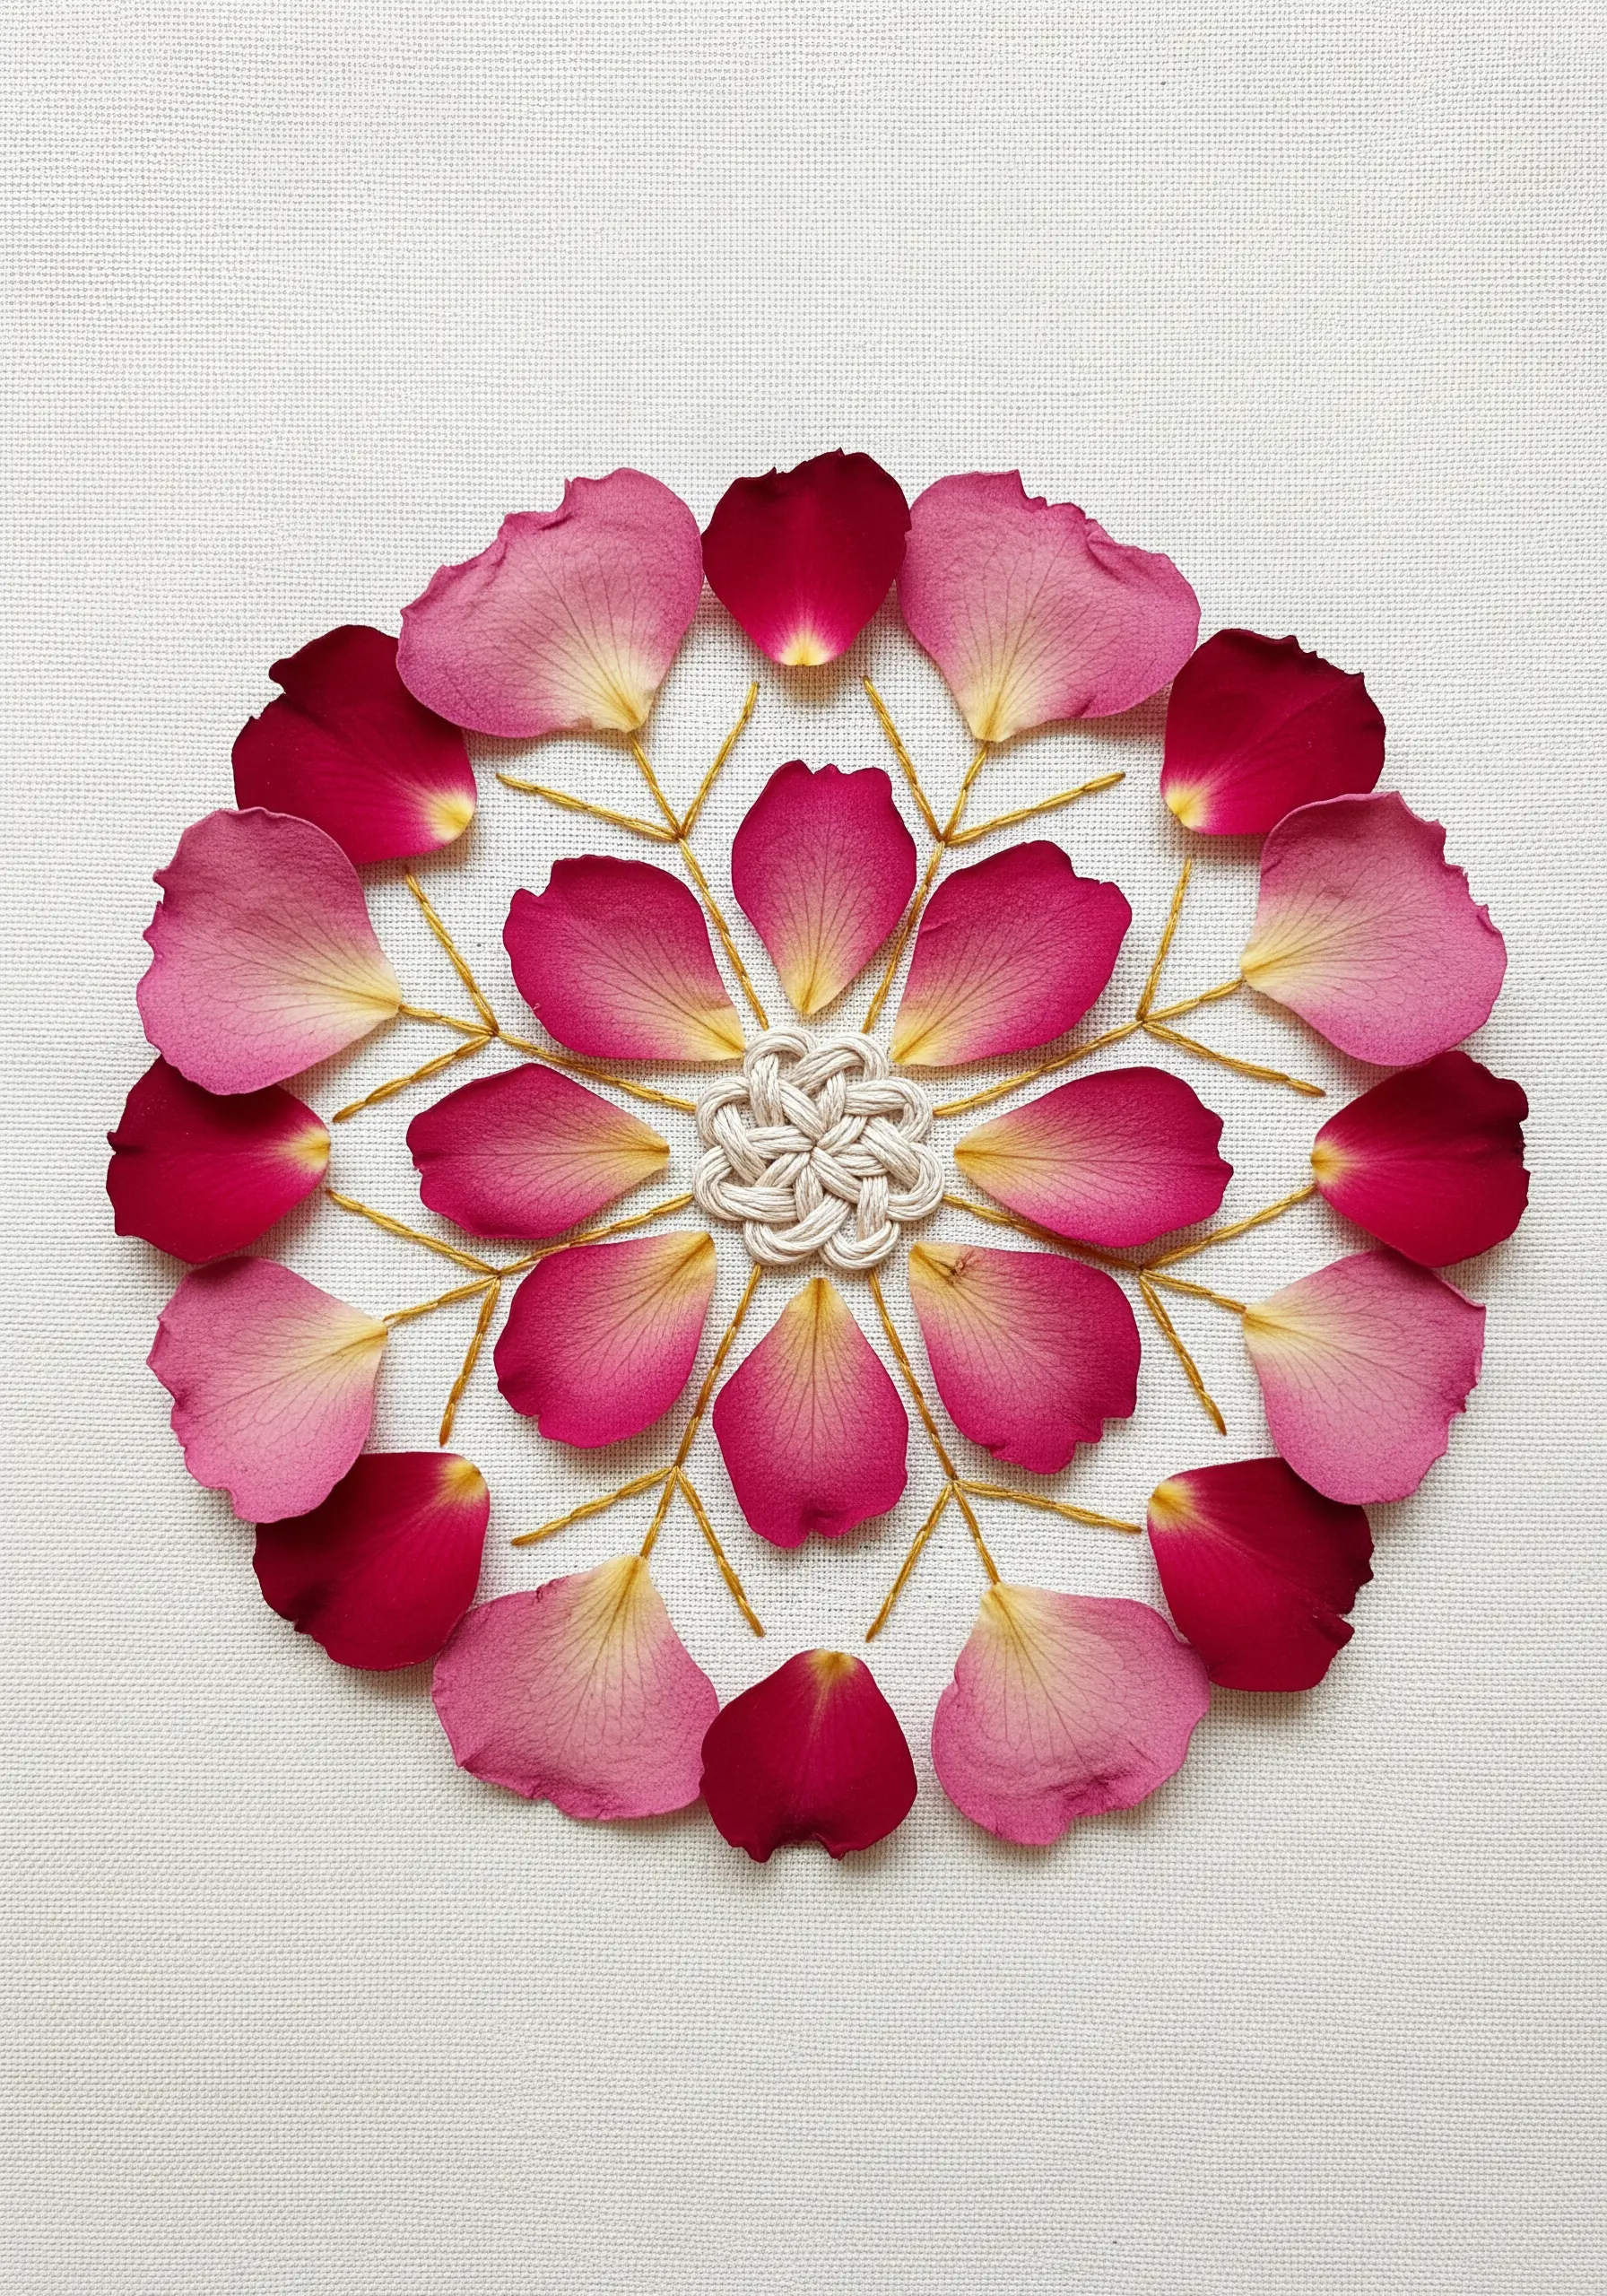
Combine the soft texture of real petals with the satisfying geometry of a mandala.
Begin by stitching a central motif, like a woven wheel or a complex knot, to act as the anchor for your design.
From this center, stitch radiating lines in a simple backstitch to serve as guides for your petals.
Finally, arrange the rose petals along these lines, securing each one at its base with a few tiny, hidden stitches, creating a layered, dimensional effect.
9. Create a Hydrangea Cushion with Textural Depth
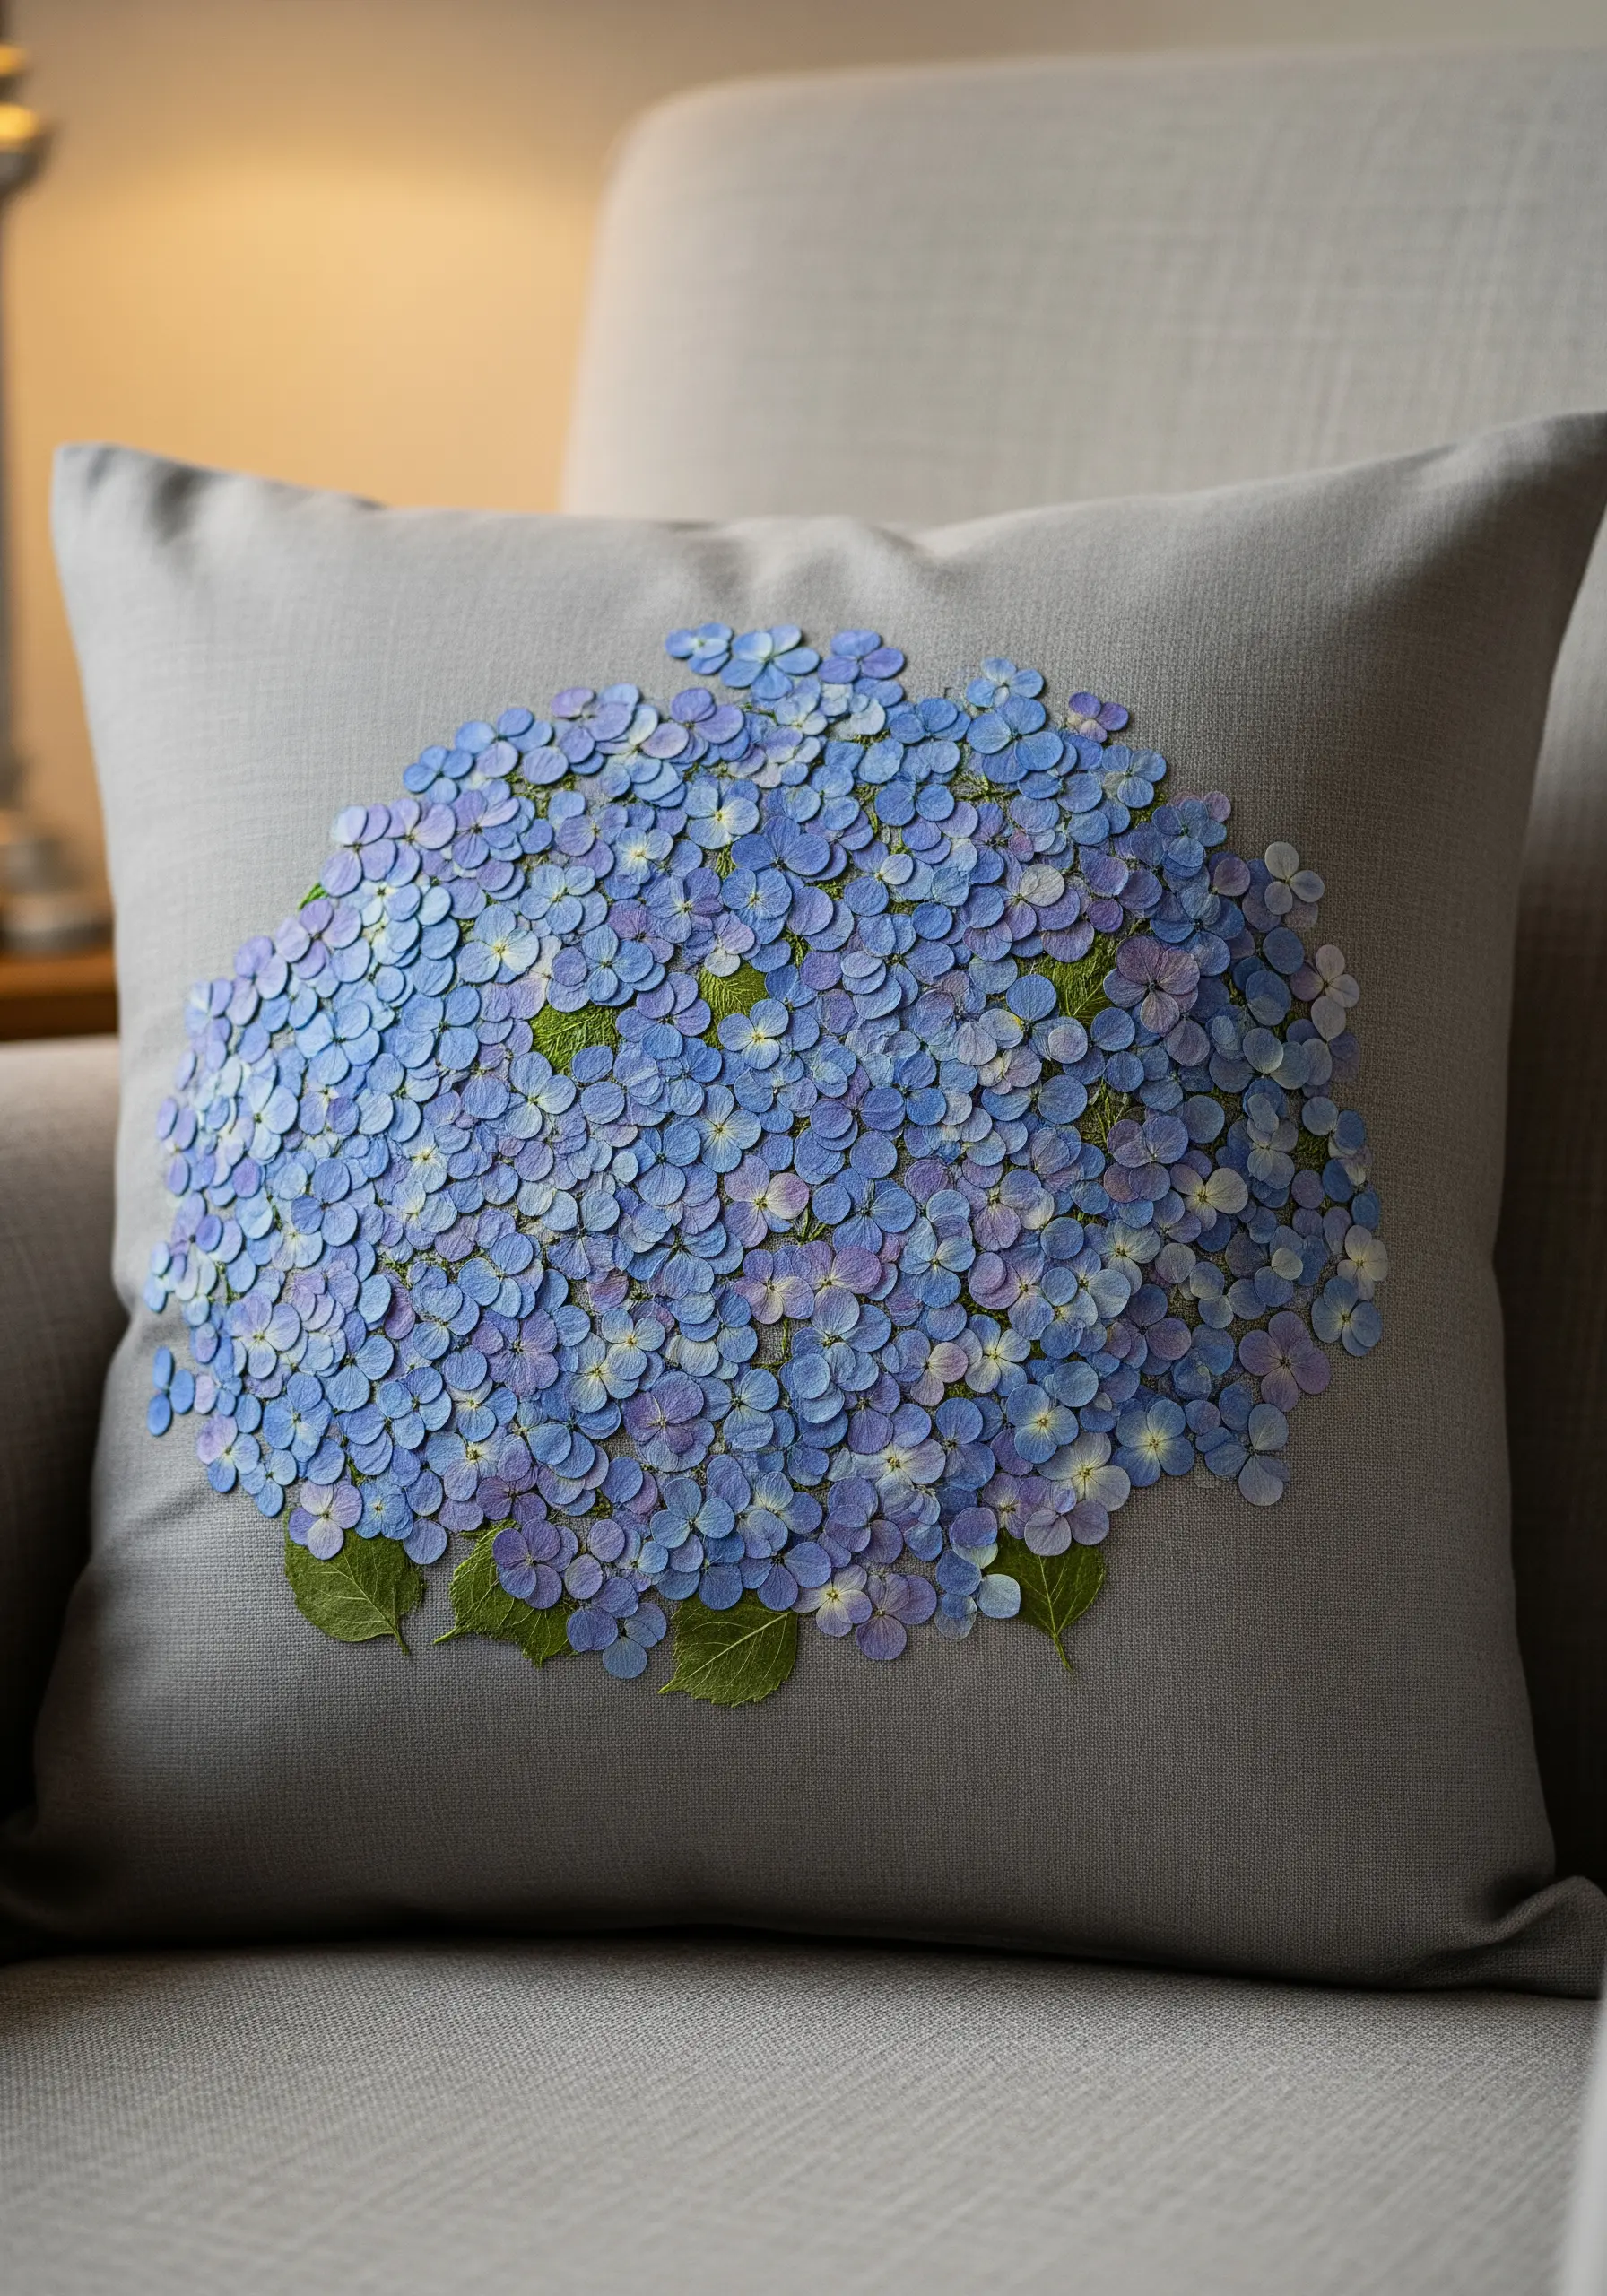
Emulate the lush, clustered look of a hydrangea by layering dozens of individual pressed florets.
This technique is best for a decorative cushion rather than one for daily use, to protect the delicate flowers.
Secure each tiny floret by stitching a French knot or a small seed bead through its center with a matching thread.
This not only anchors the flower securely but also mimics the natural center of the bloom, adding a layer of realism and intricate detail to your embroidered pillow cover.
10. Secure a Statement Leaf with Lacing Stitches
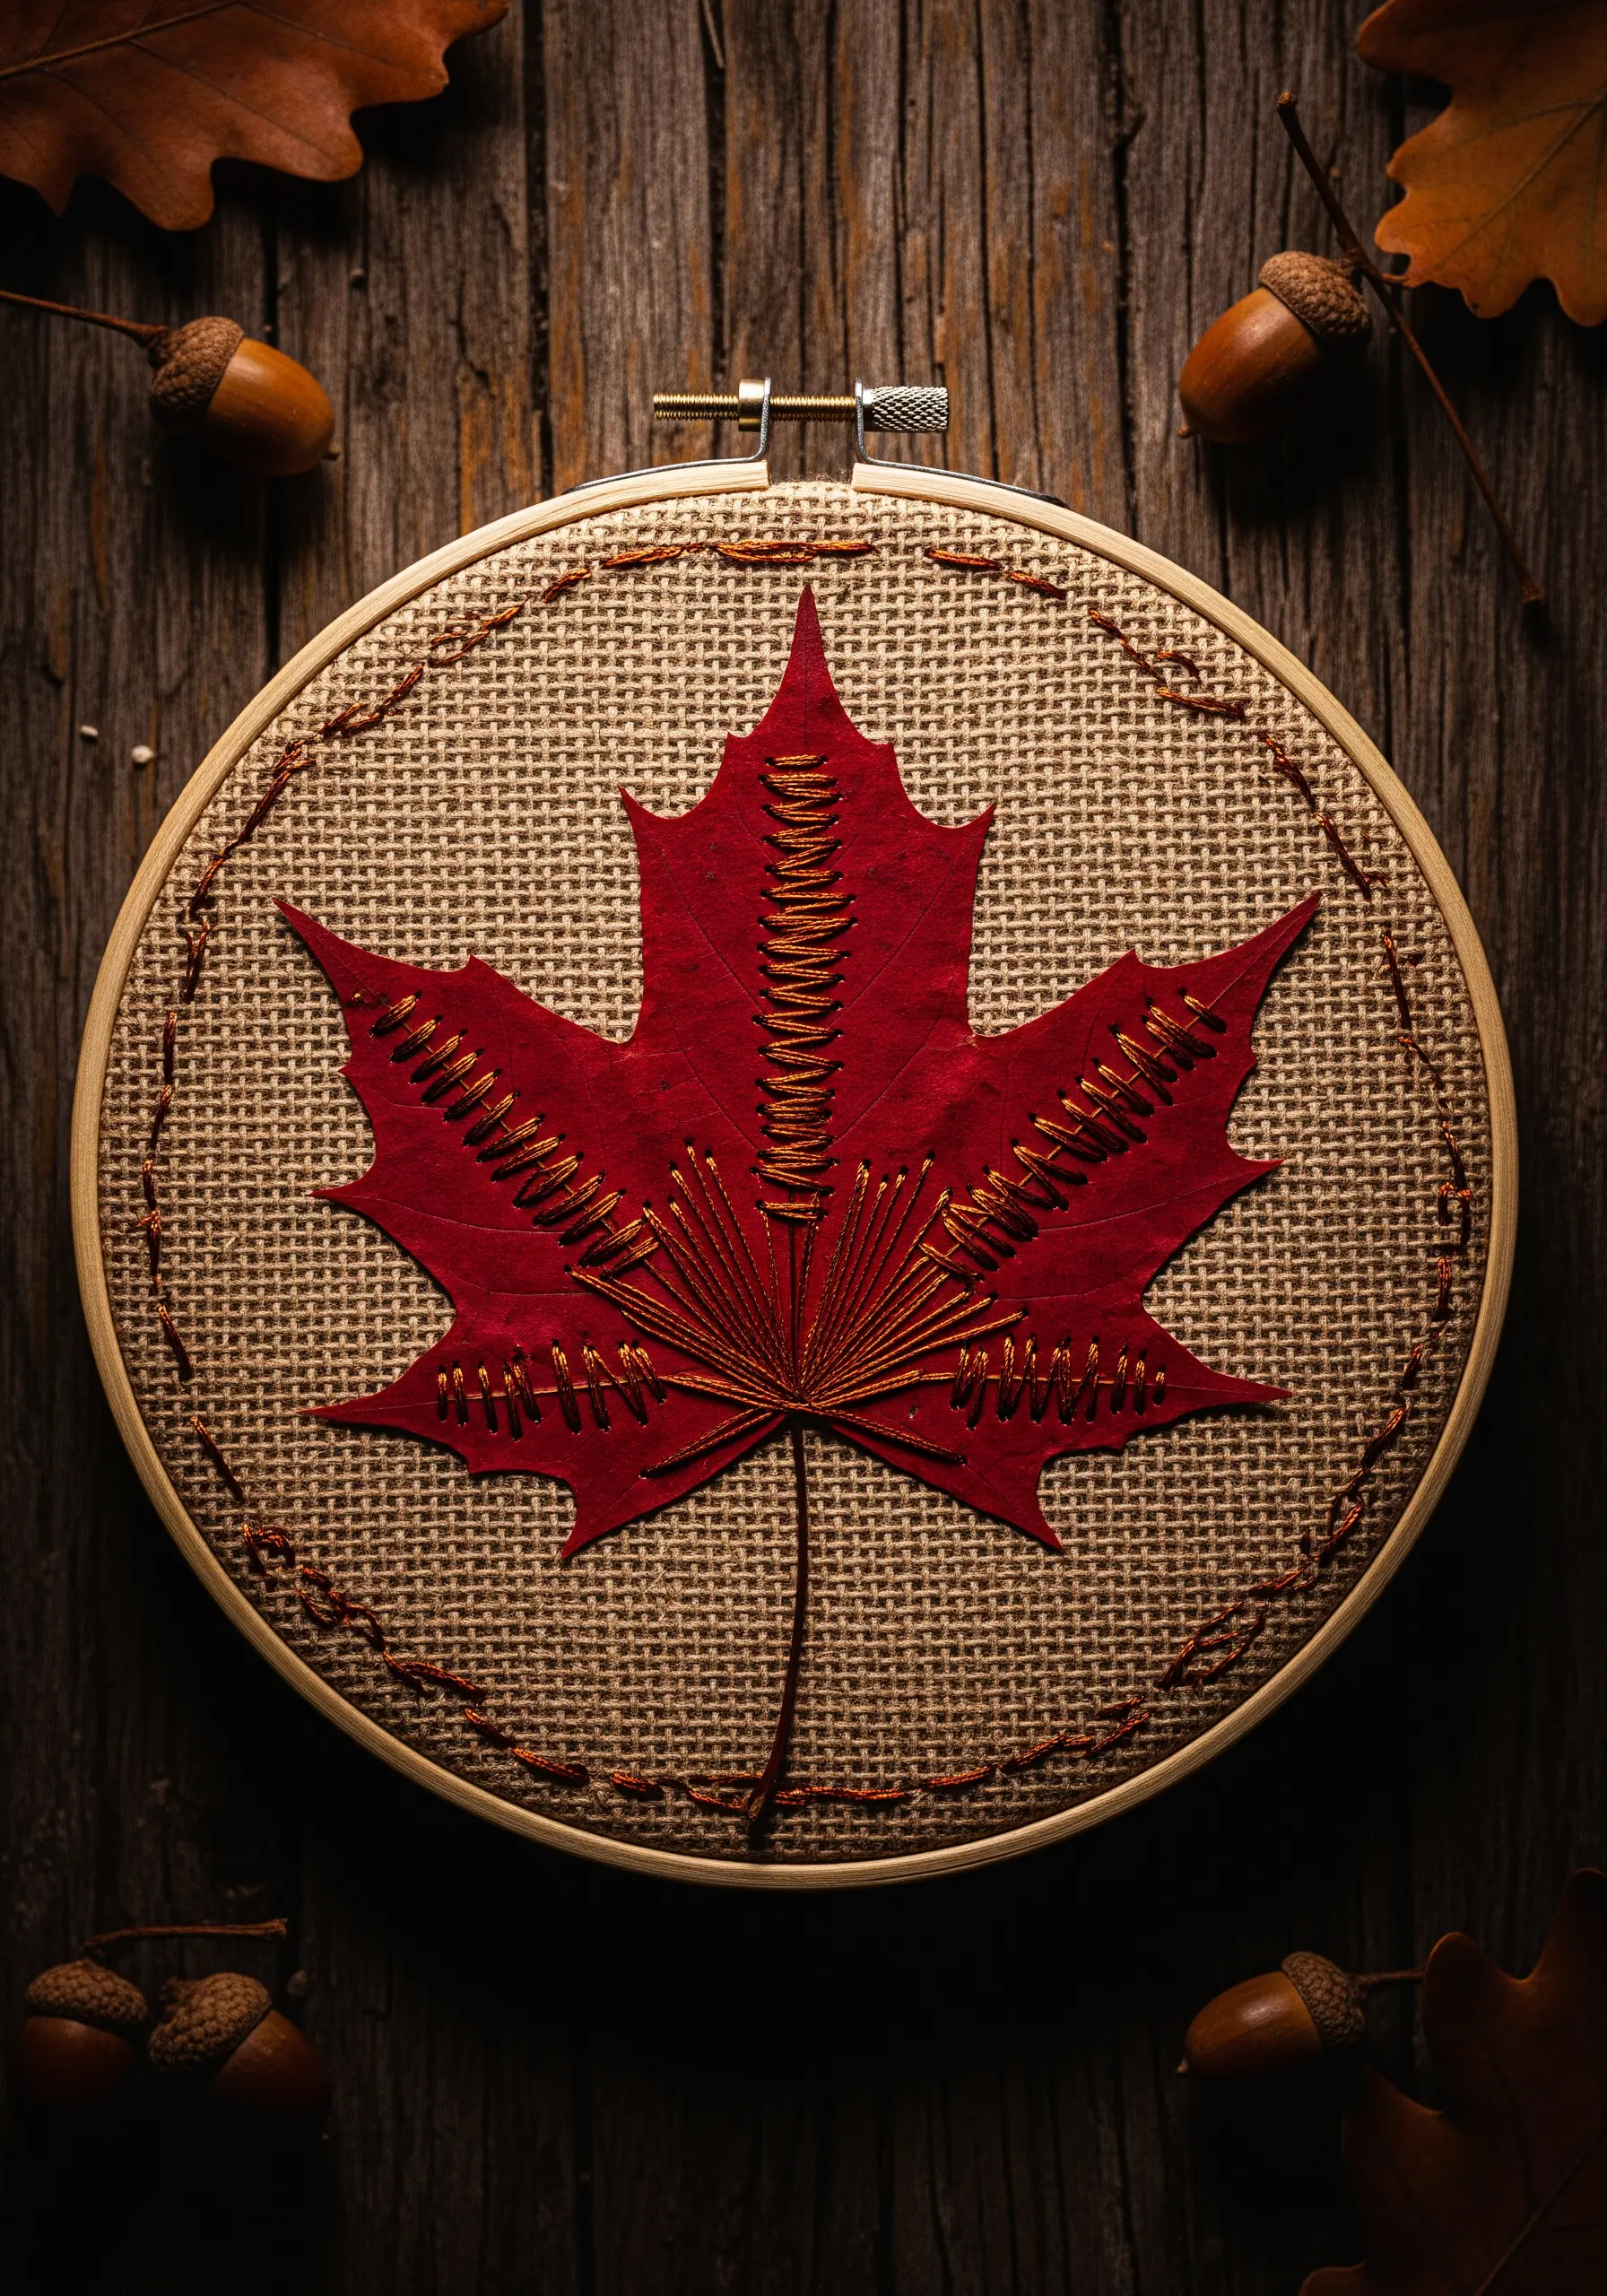
Turn a simple pressed leaf into a rustic work of art by using decorative stitches as both an embellishment and a functional anchor.
Choose a coarse-weave fabric like burlap or linen, which complements the natural, earthy feel of the leaf.
Use a thicker thread, like a pearl cotton or multiple strands of floss, to create bold lacing or blanket stitches over the leaf’s surface.
This method not only holds the leaf firmly in place but also adds a graphic, textural contrast that draws the eye.
11. Stitch an Ethereal Queen Anne’s Lace on Tulle
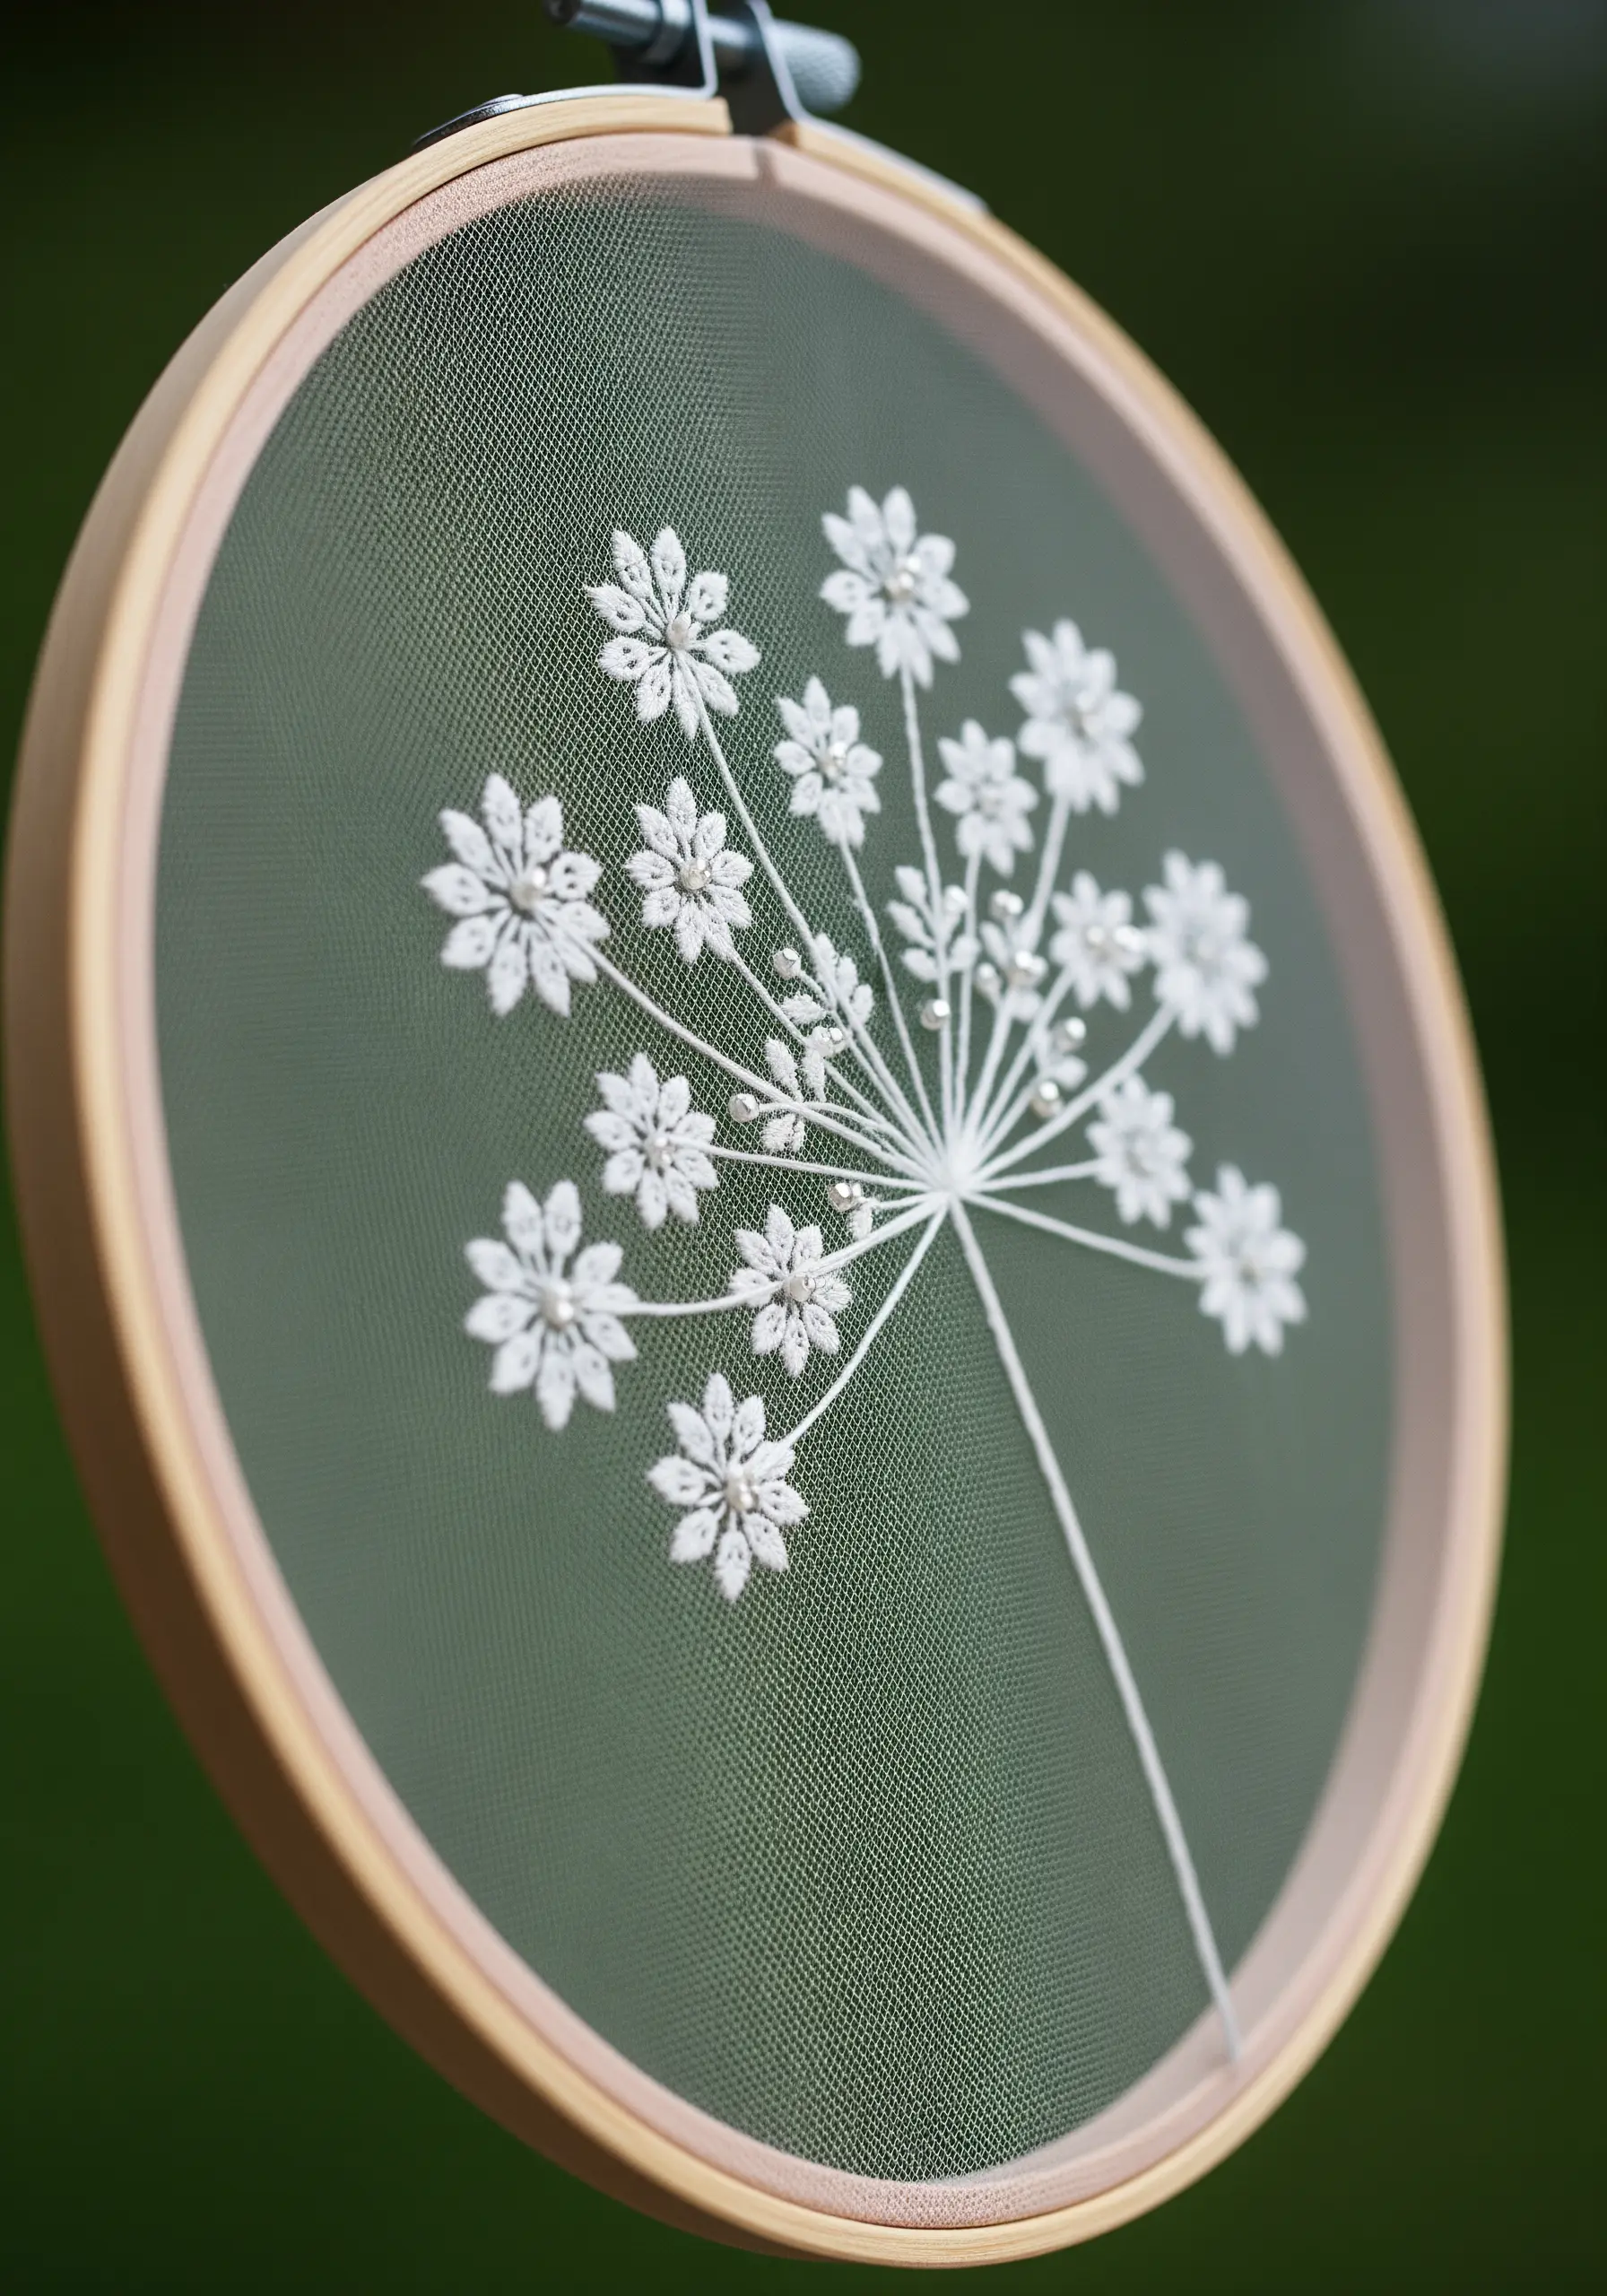
Instead of using a real flower, you can recreate the delicate structure of Queen Anne’s lace entirely with thread for a more permanent, airy design.
Work on sheer organza or tulle for a transparent, floating effect.
Use a single strand of white thread to create the radiating stems with simple straight stitches.
Form each tiny floret with a detached chain stitch (a lazy daisy), and add a single French knot at its center for a polished, dimensional finish.
12. Craft a Floral Monogram with Violets
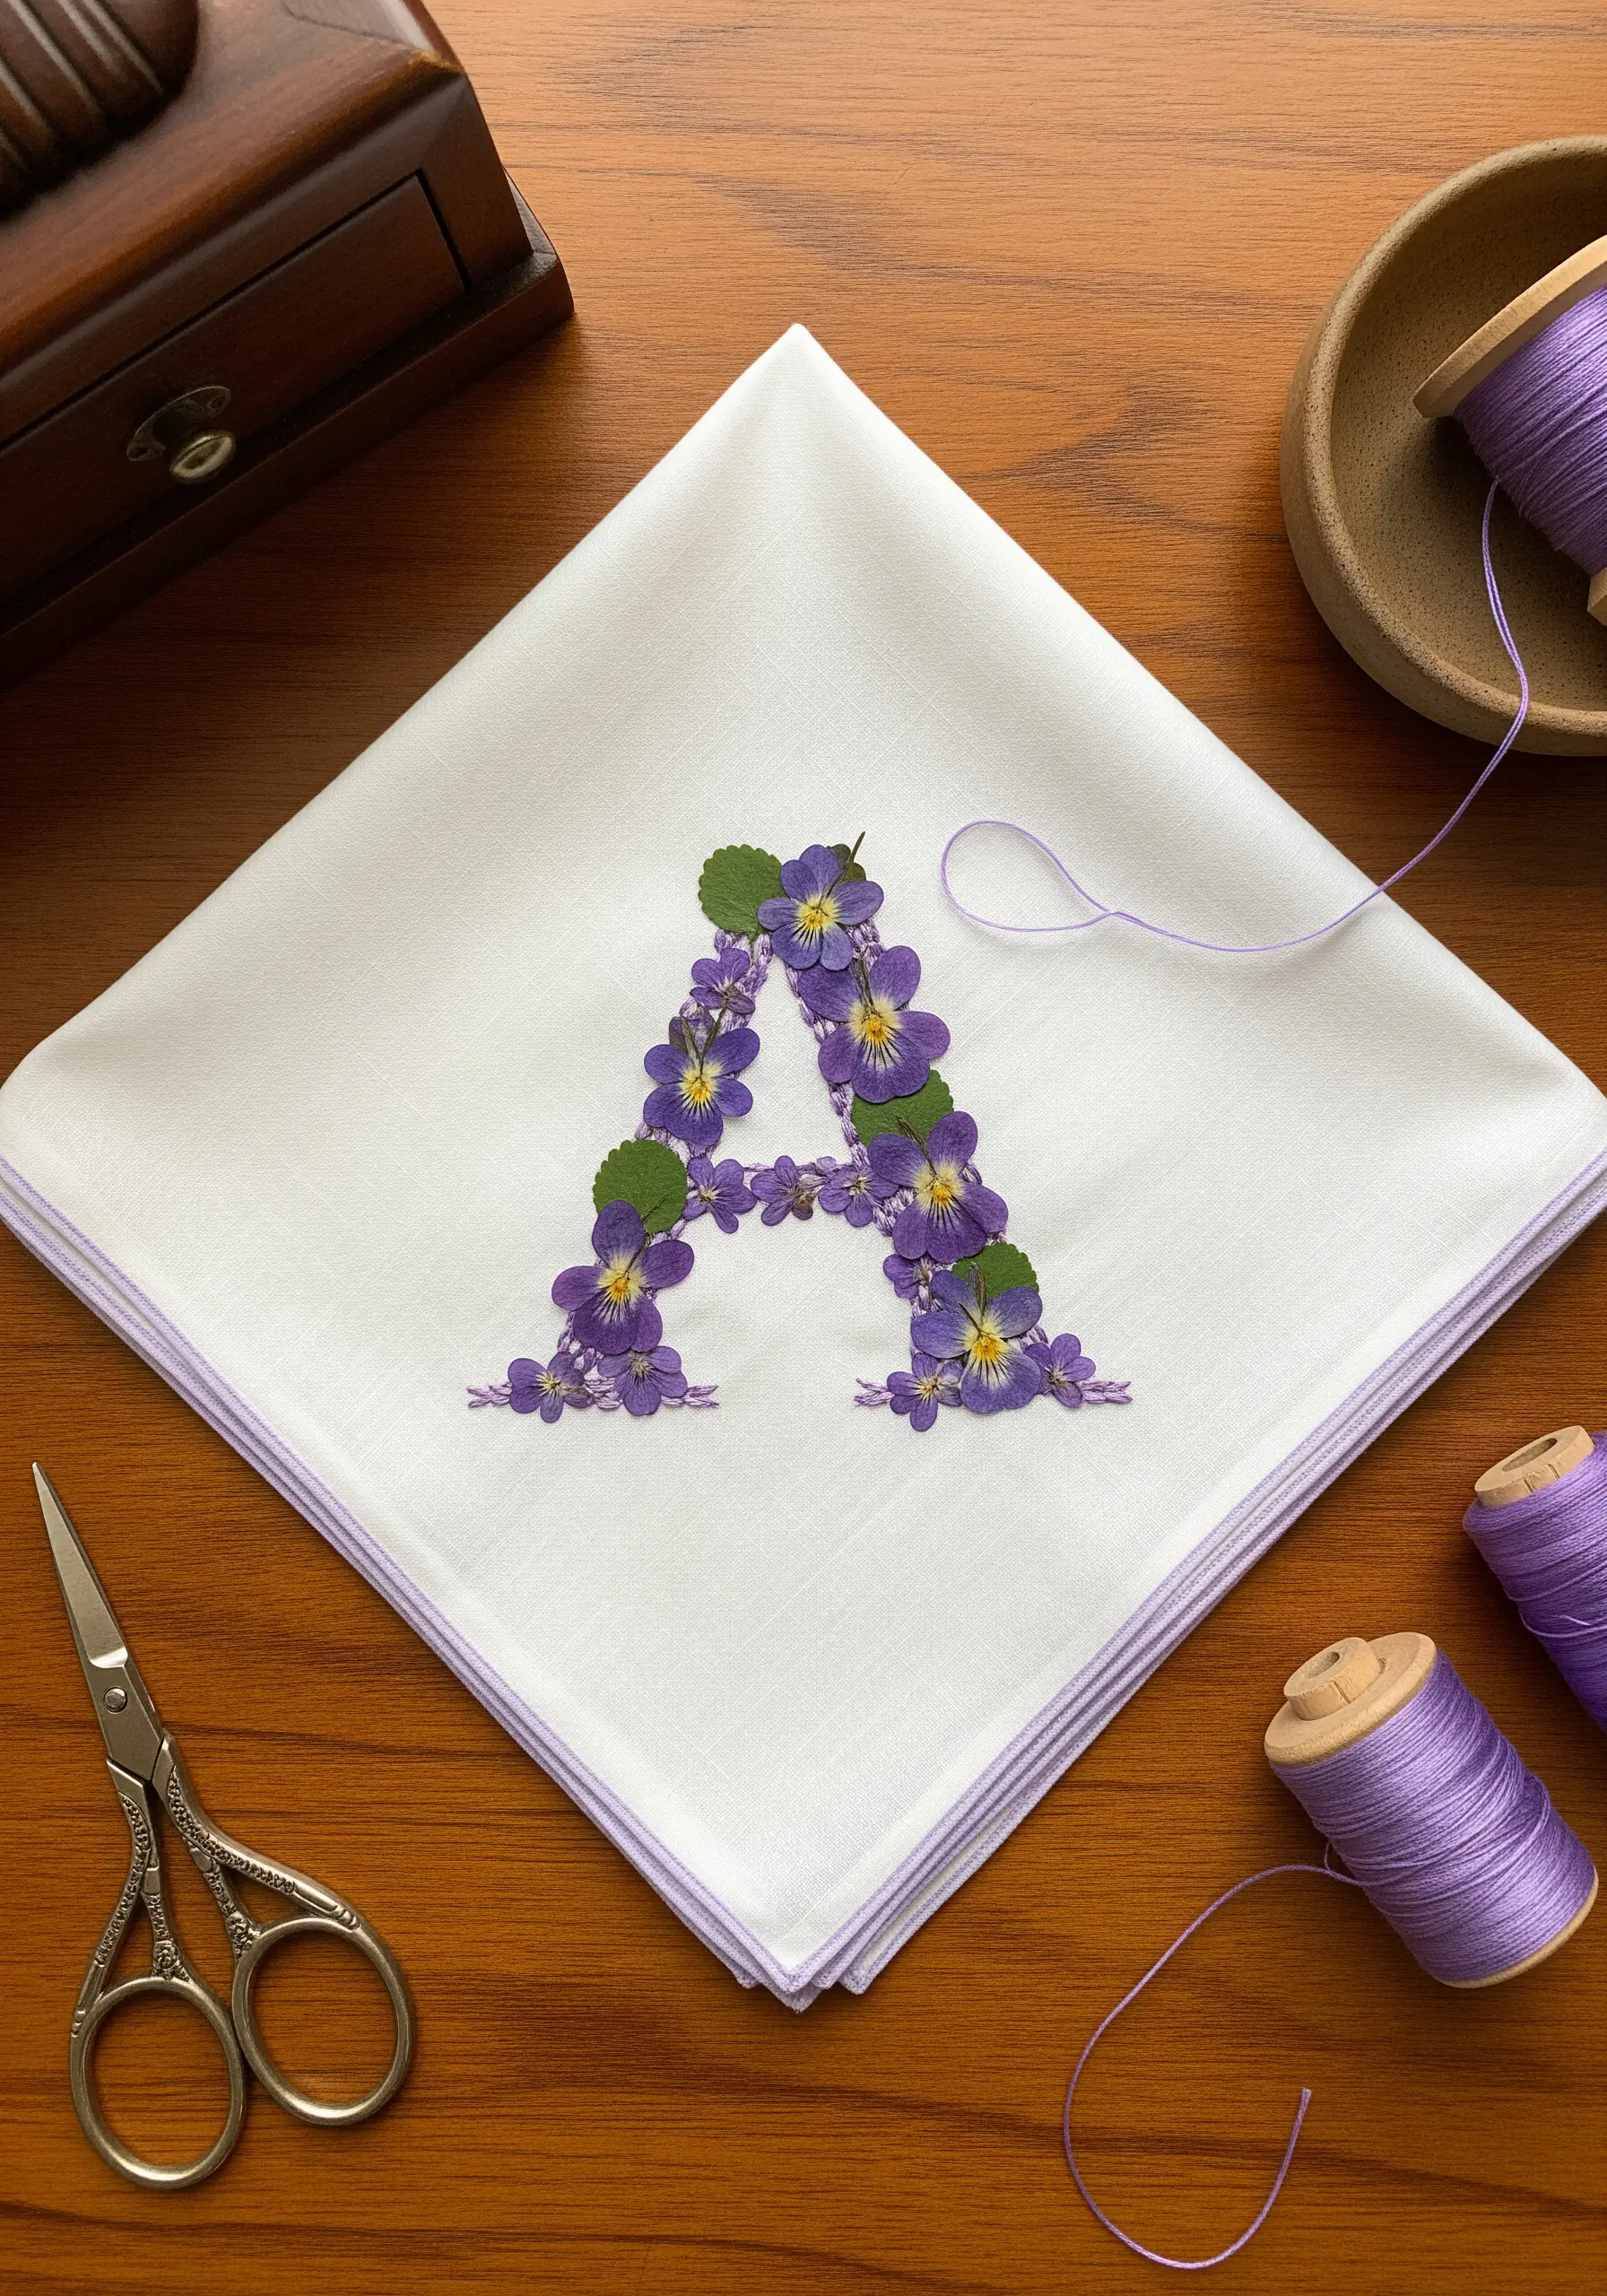
Personalize a handkerchief or piece of linen by forming a letter from small, colorful pressed flowers.
Lightly trace your chosen initial onto the fabric with a water-soluble marker to create a clear guide.
Carefully arrange the pressed violets within the lines of the letter, overlapping them slightly to create a full, lush shape.
Secure them with discreet stitches in a matching purple thread, tucking the knots and ends behind the petals to keep the finish clean and professional.
13. Map a Floral Constellation
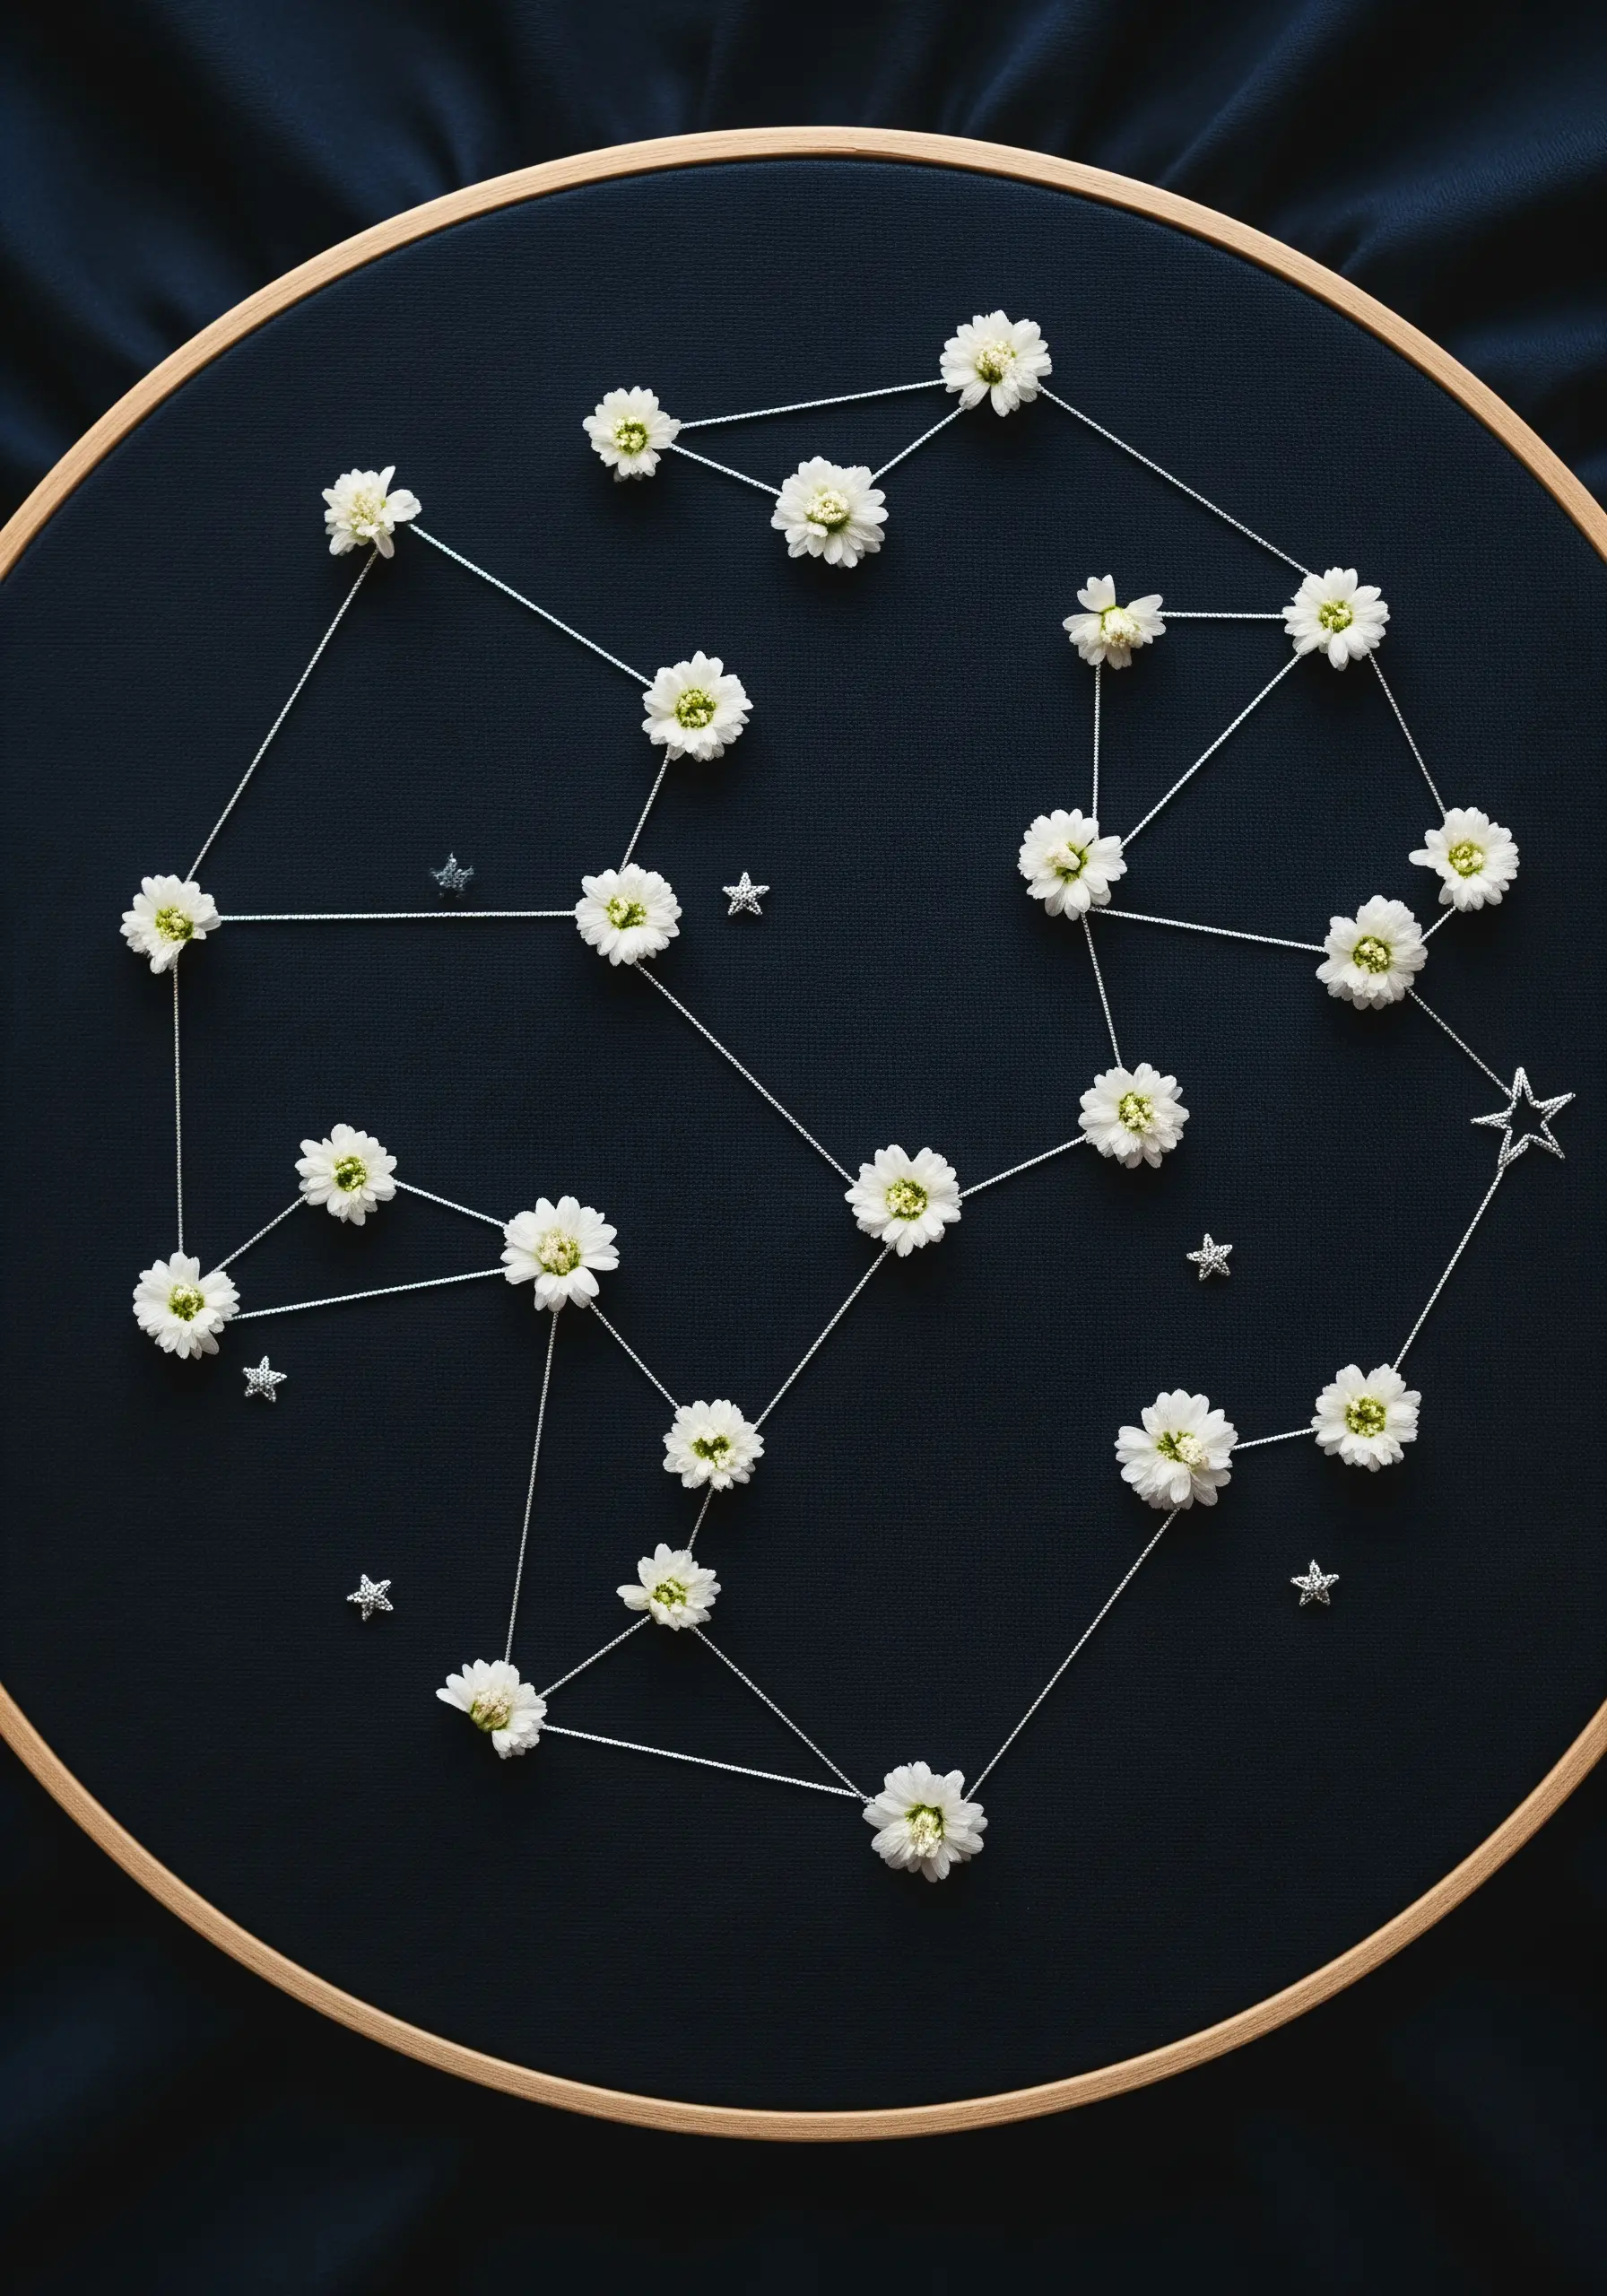
Combine your love for the stars and flowers with this celestial design on dark fabric.
Choose a dark blue or black cotton fabric to represent the night sky, which will make the white flowers and thread stand out dramatically.
Use a single strand of silver metallic or bright white thread to connect the ‘stars’ with a simple backstitch, following a printed star map of your favorite constellation.
At each major point, secure a tiny pressed white flower with a single stitch through its center, adding small star-shaped sequins for extra sparkle.
14. Embellish a Bookmark with a Delicate Vine
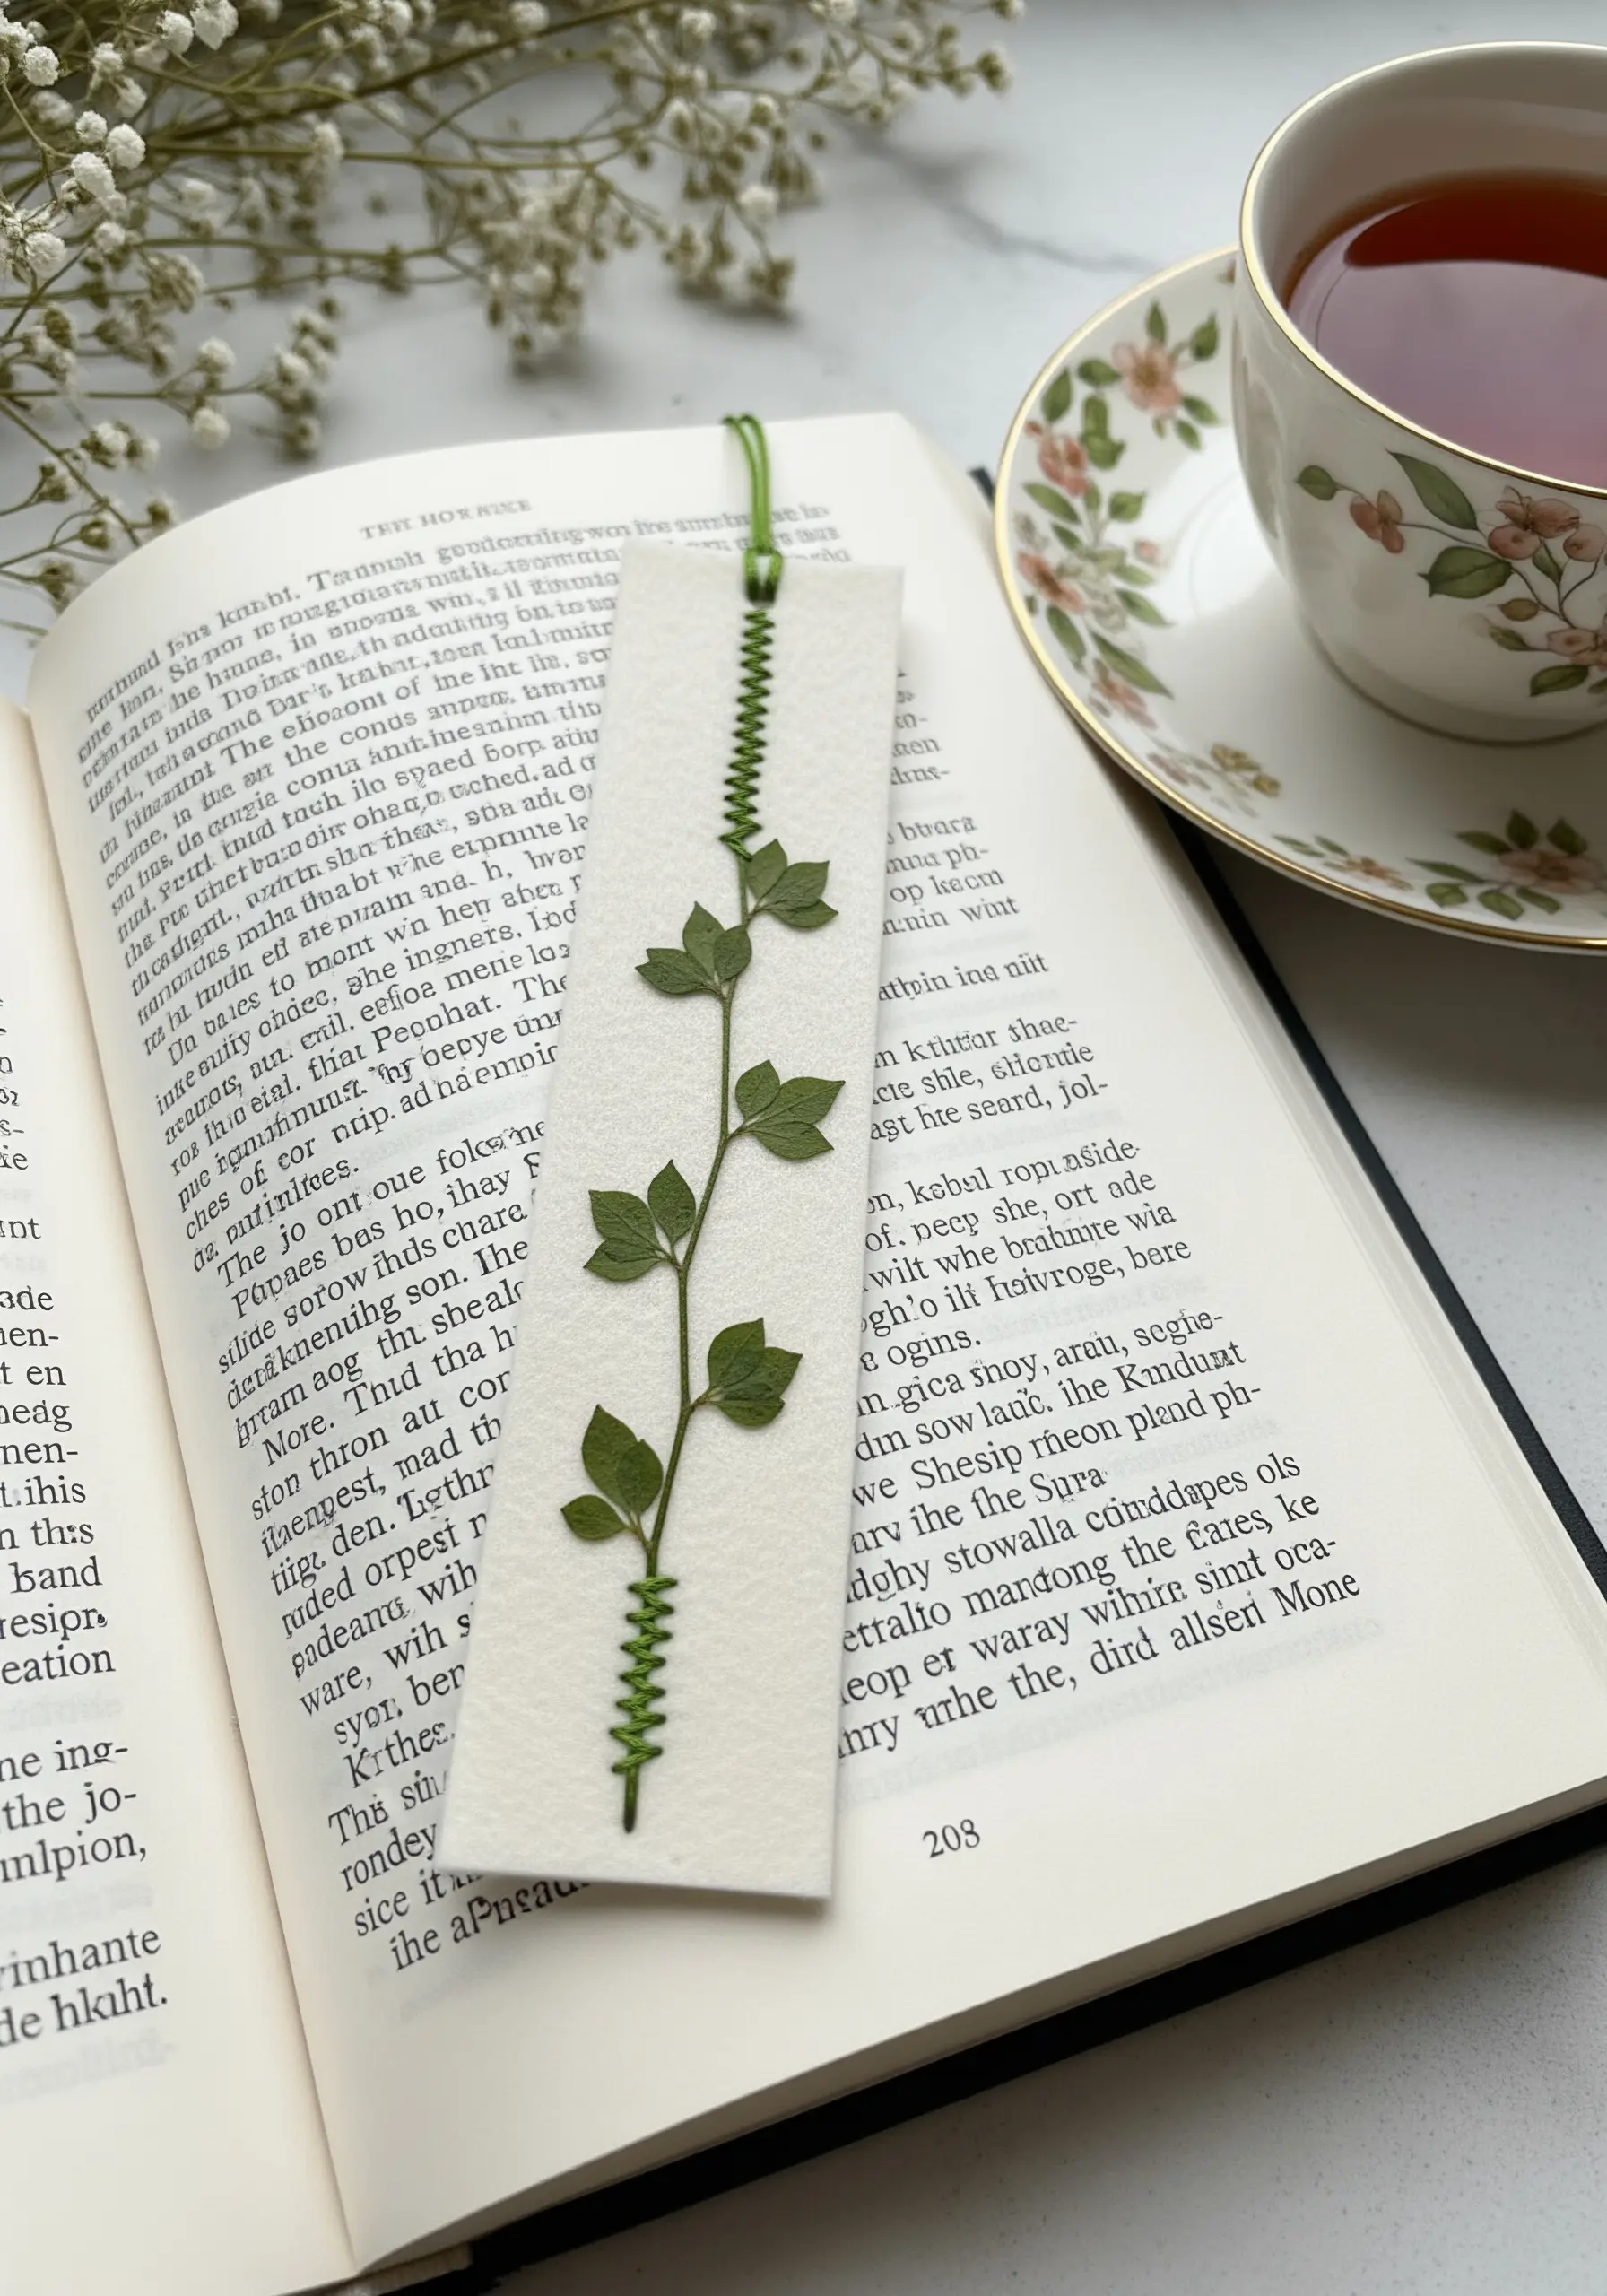
Combine paper craft and embroidery by stitching directly onto heavy cardstock or felt for a unique bookmark.
Before stitching, gently pre-pierce the holes along your design path with your needle; this prevents the paper from buckling or tearing as you pull the thread through.
Anchor the pressed vine using small, evenly spaced couching stitches that lay across the stem.
Finish the top with a decorative stitch, like this ladder stitch, for a polished detail that also secures the ribbon.
15. Create an Embroidered Herbarium
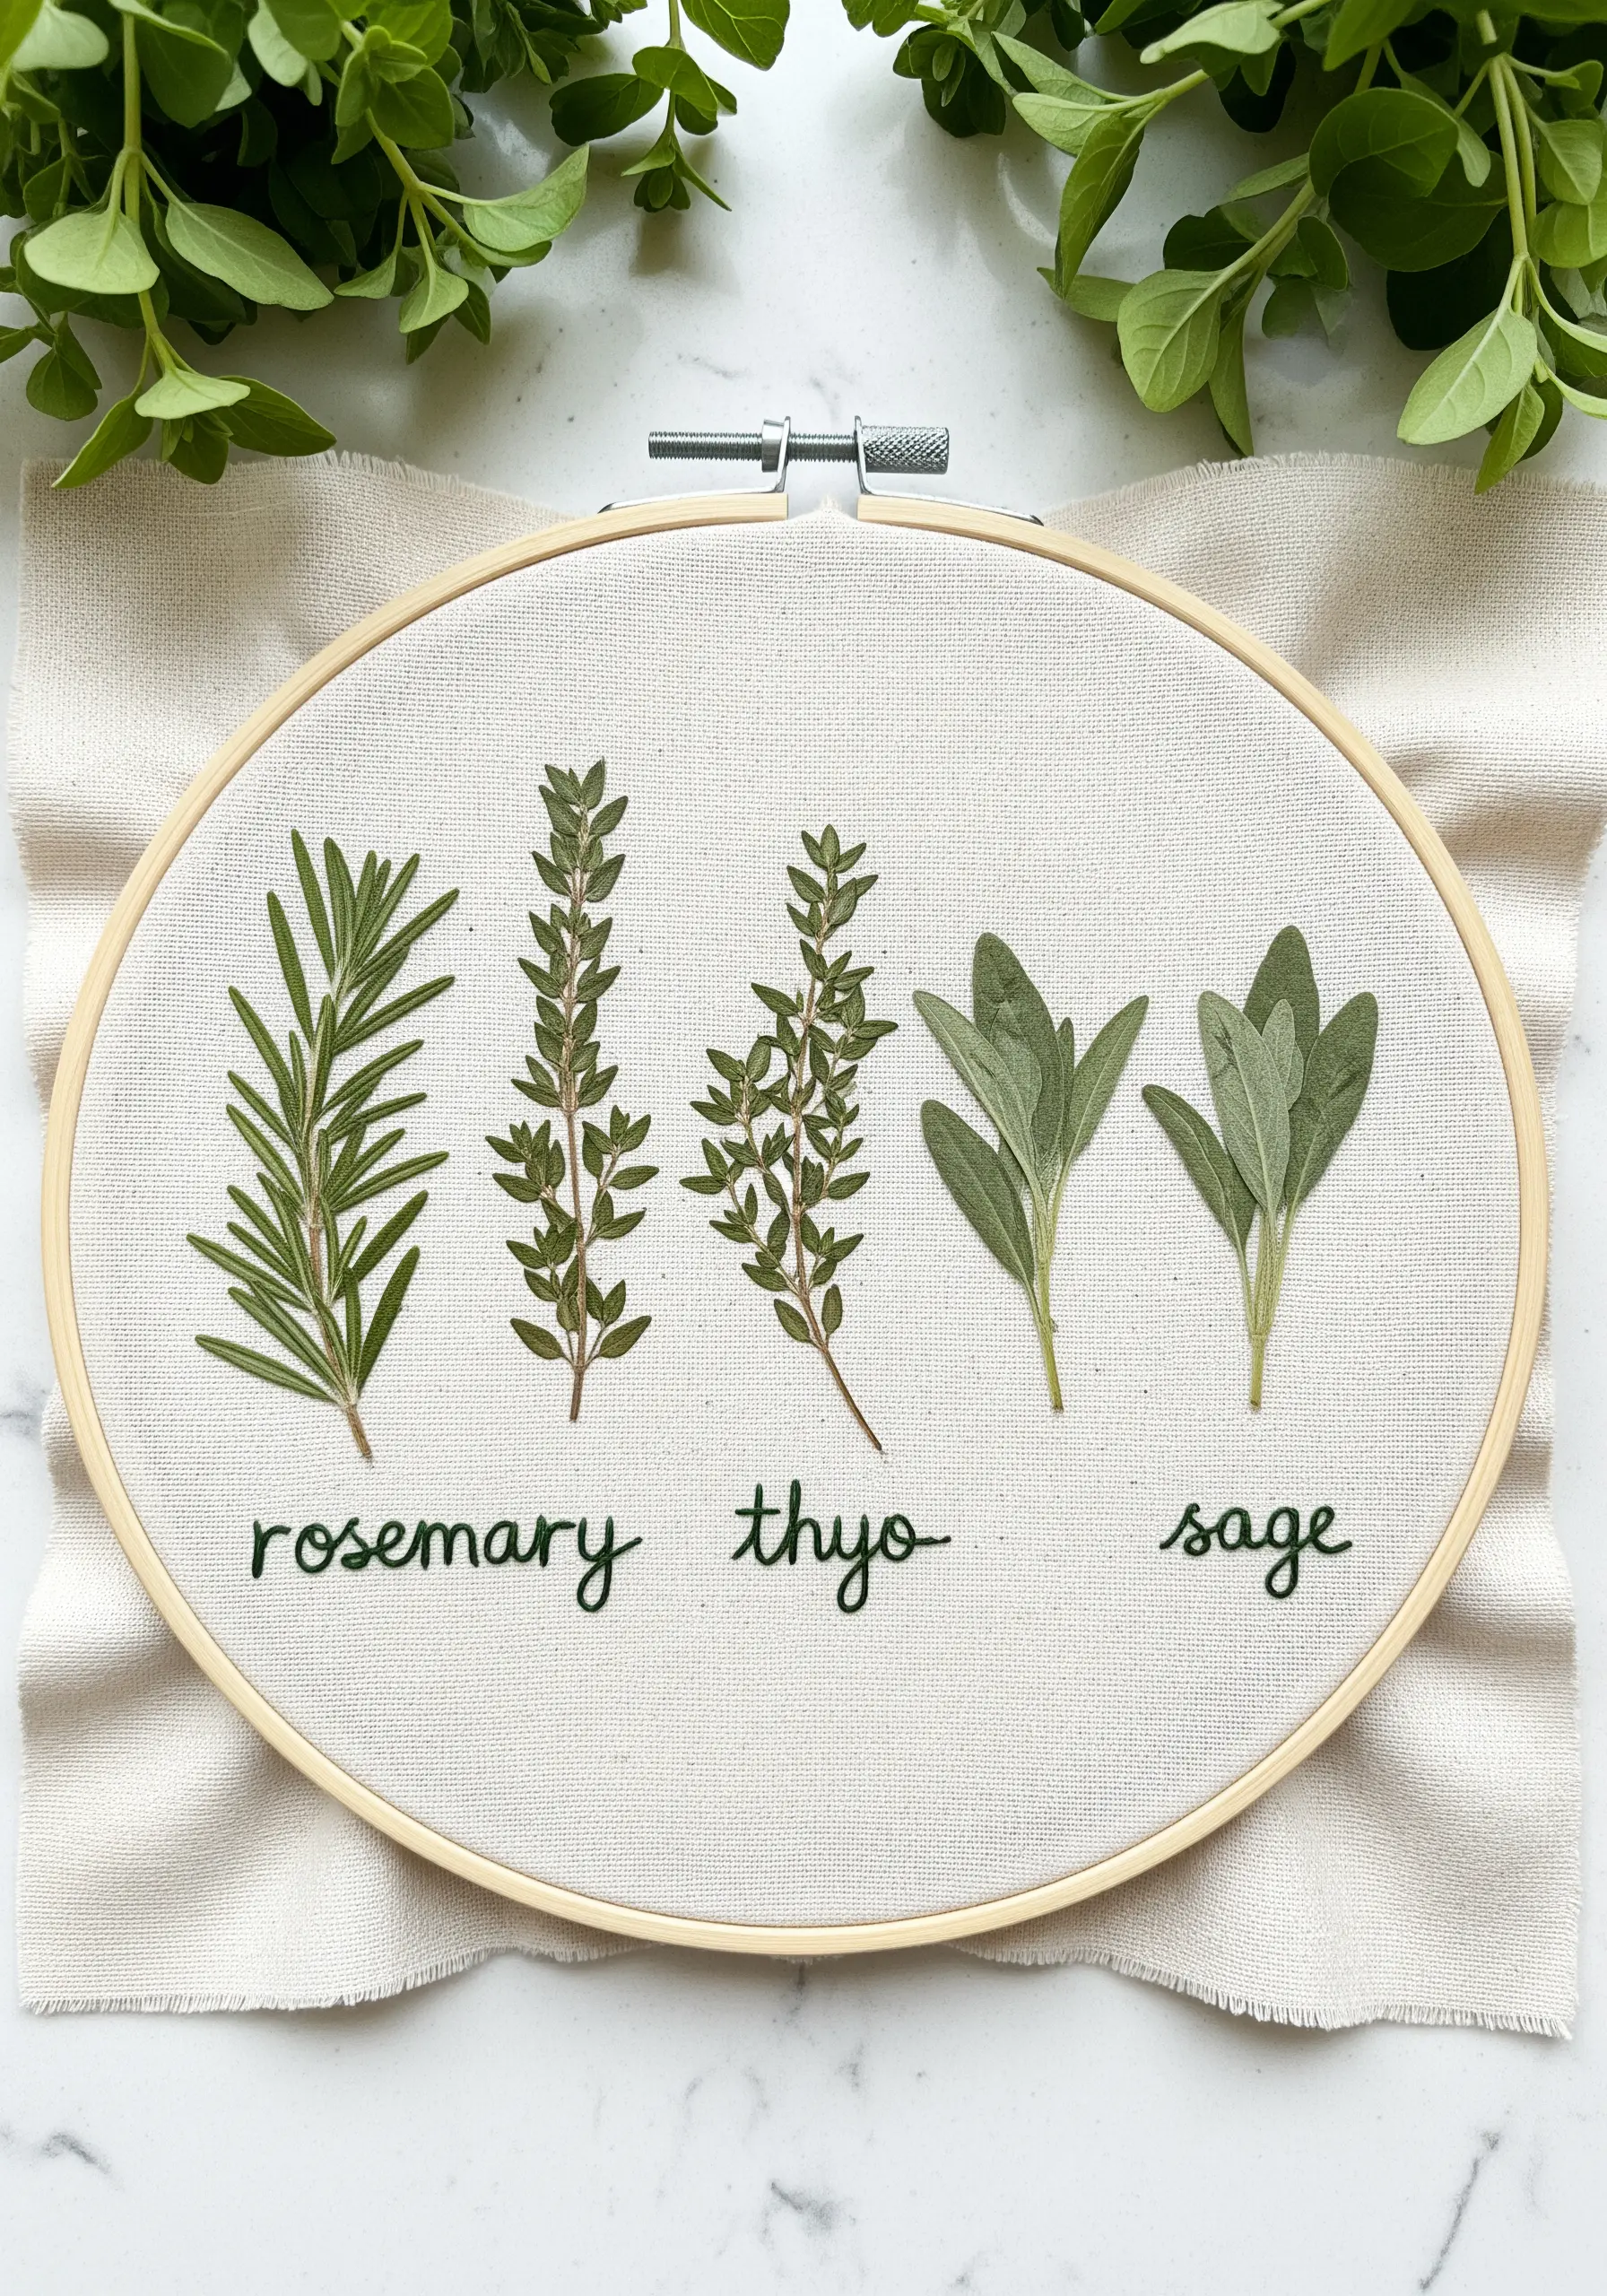
Showcase your favorite culinary herbs by combining pressed botanicals with simple, elegant lettering.
For woody herbs like rosemary and thyme, use a couching stitch to tack down the main stem, as it’s too thick to pierce directly.
For the lettering, choose a simple, clean script and execute it with a two-strand backstitch for clarity and readability.
This creates a beautiful, modern piece of kitchen wall decor that feels both educational and artistic.
16. Elevate Your Work with a Statement Frame
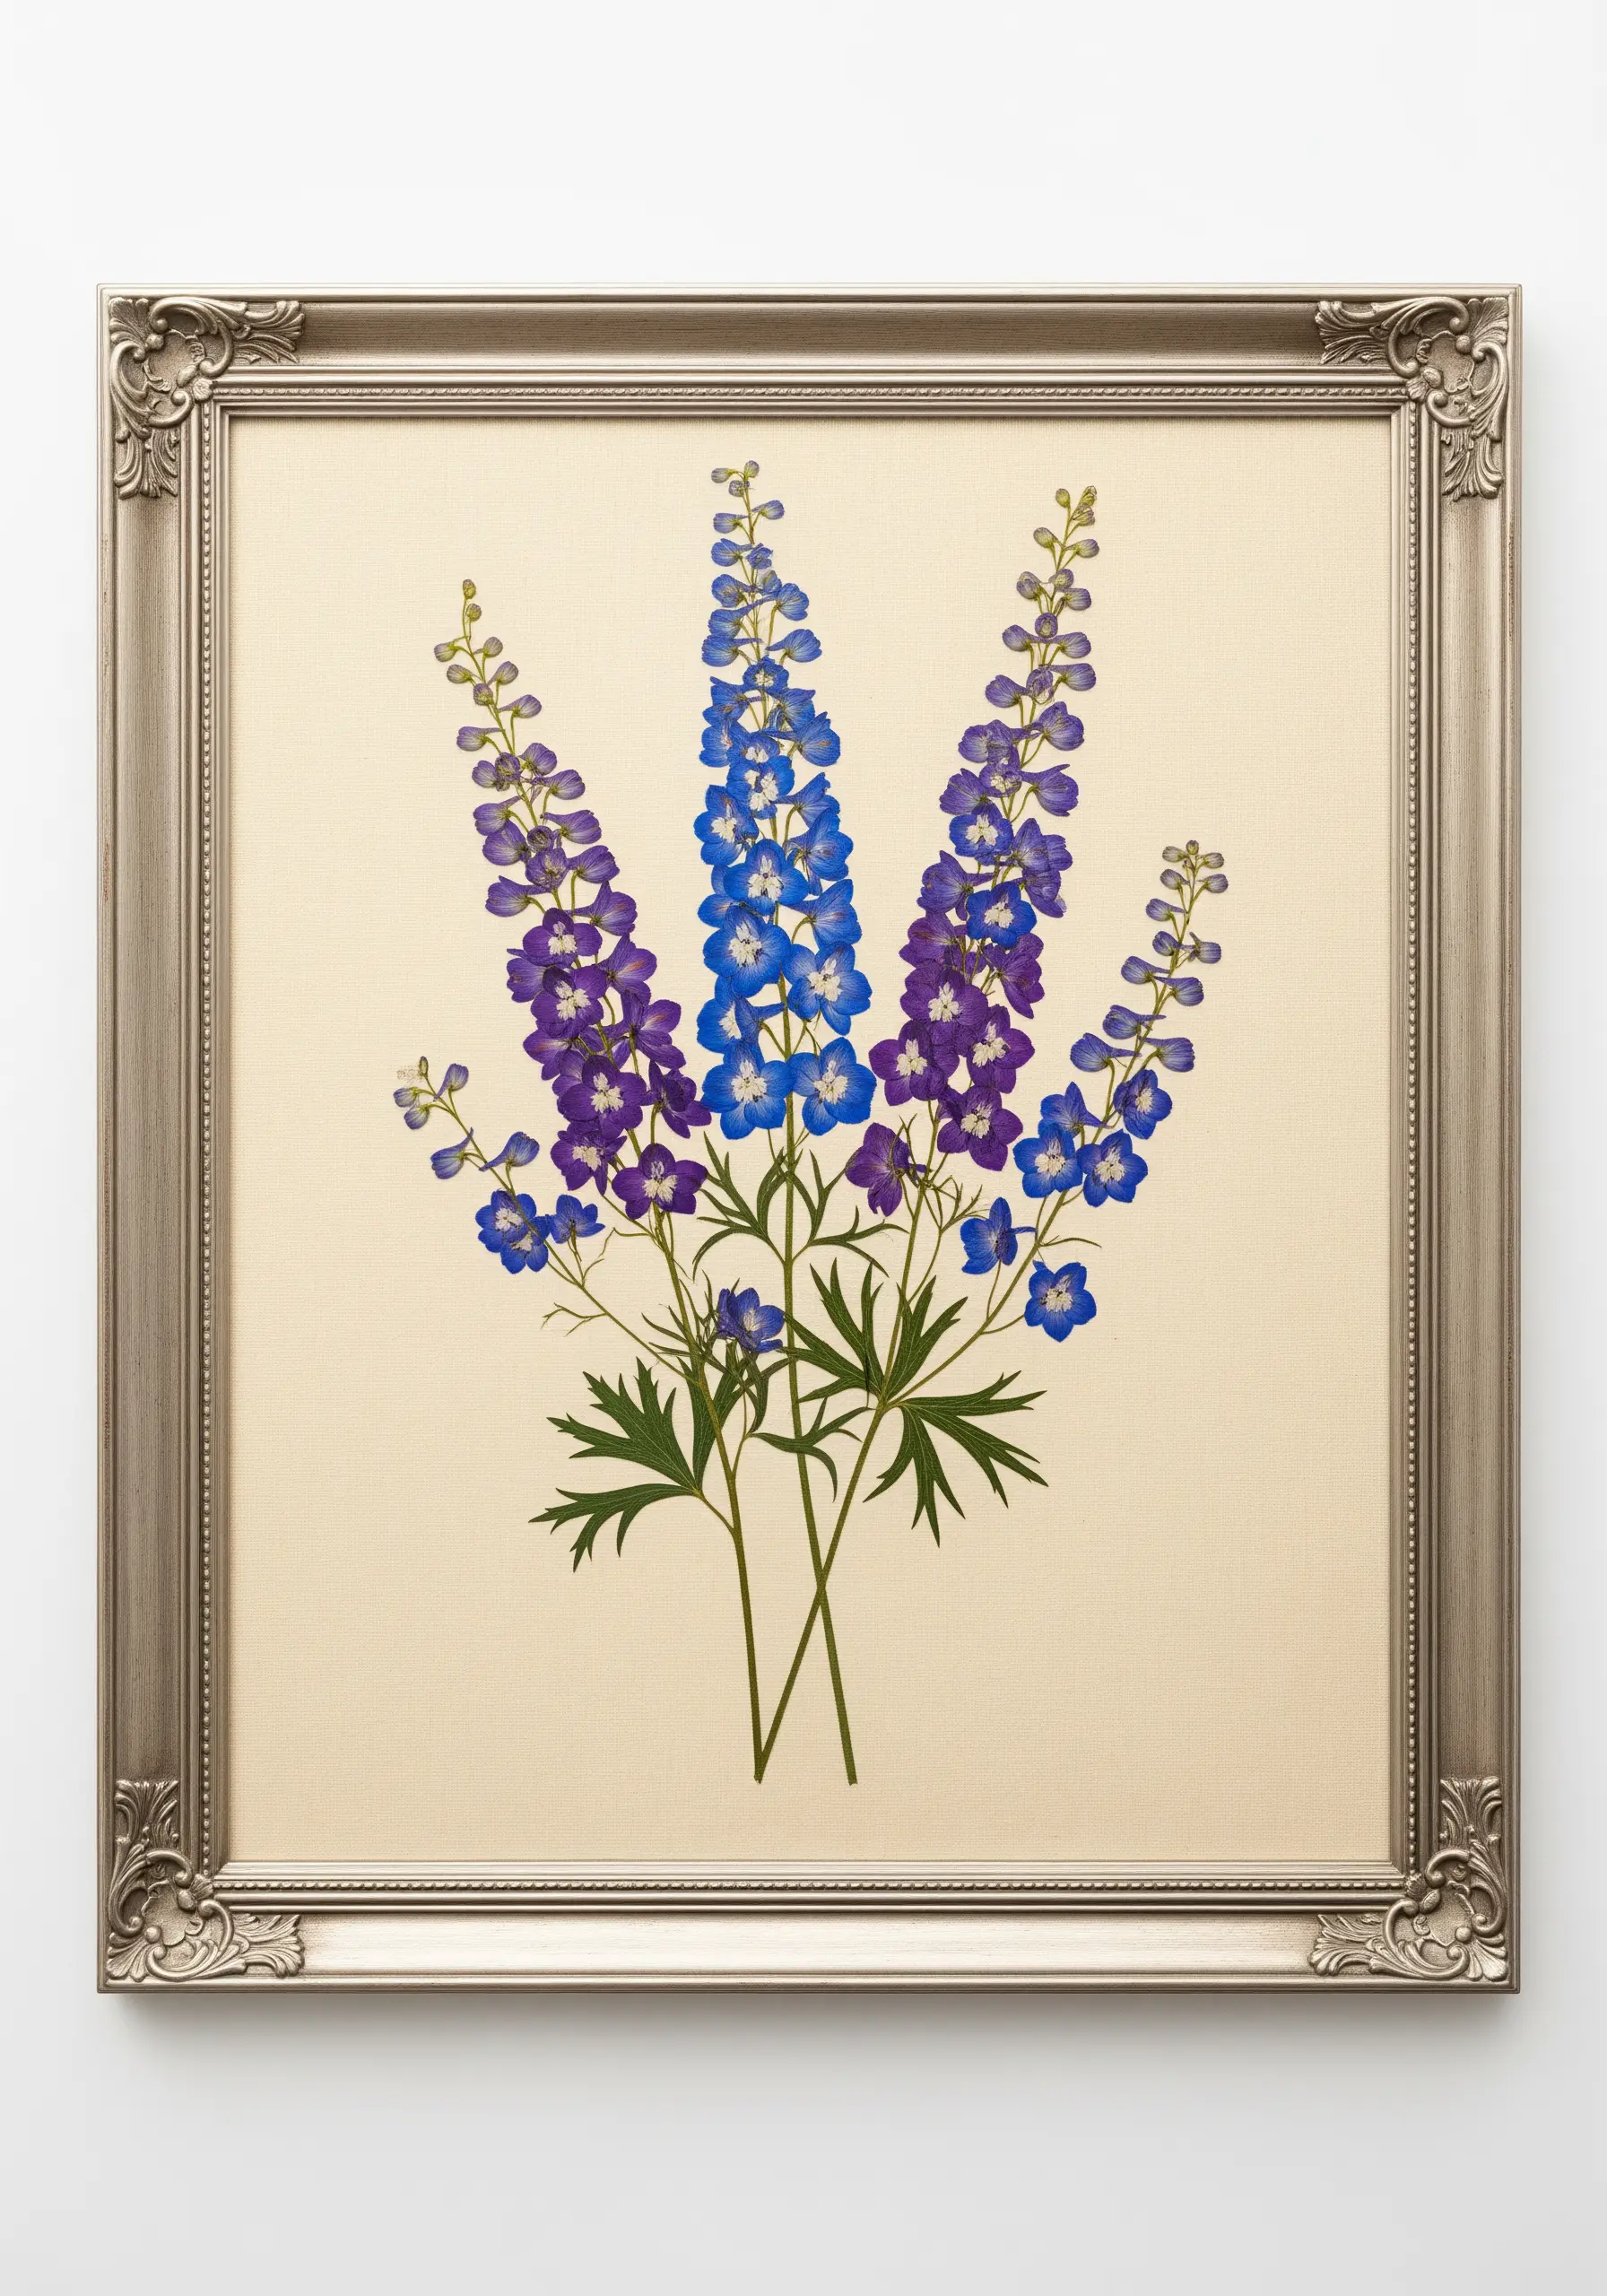
The final presentation of your work is just as important as the stitching itself.
In this piece, the embroidery is minimal—just a few tiny stitches to hold the delphinium stems in place.
The artistry comes from the careful arrangement of the flowers to create a sense of movement and depth.
Choosing an ornate, vintage-style frame provides a striking contrast to the organic, natural beauty of the flowers, transforming your project from a simple craft into a sophisticated piece of decor.
17. Add Whimsy with Mixed Media Elements
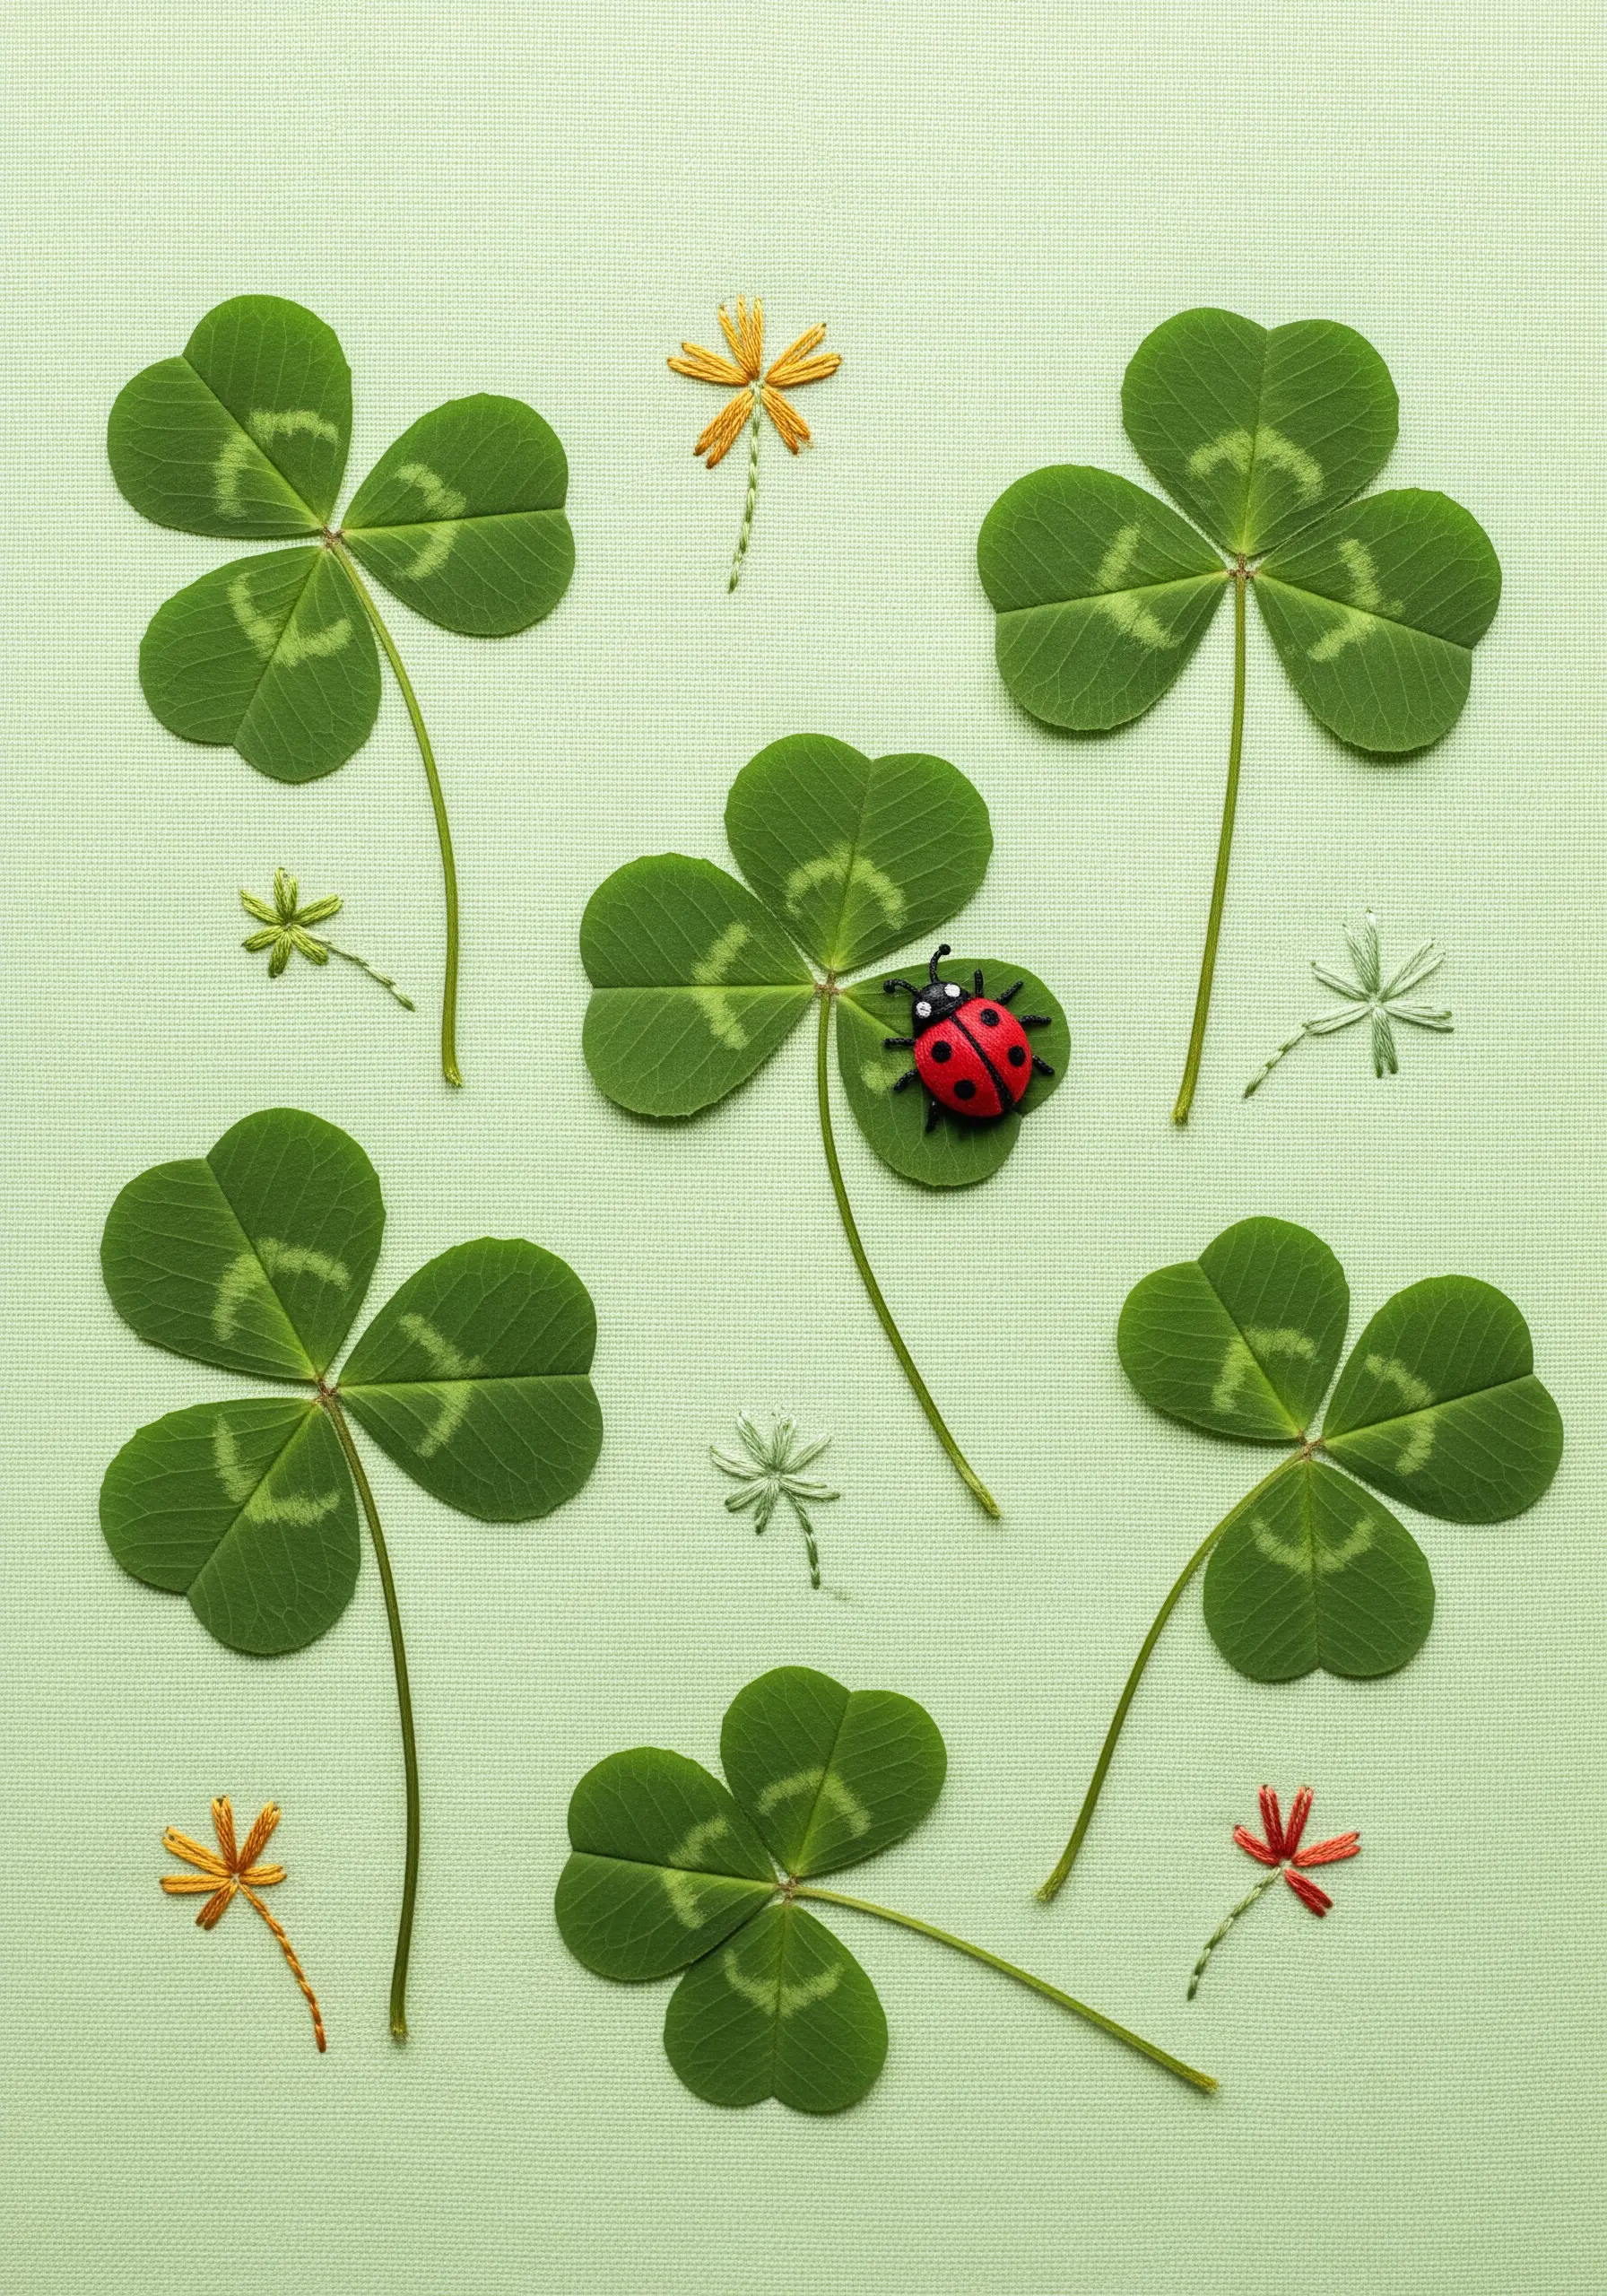
Introduce a playful touch to your botanical composition by incorporating small, non-thread embellishments.
After arranging and securing your pressed clovers, create tiny, abstract flowers using a few brightly colored straight stitches or lazy daisies.
Then, add a focal point by stitching on a small bead or charm, like this ladybug button.
This mixed media approach adds an unexpected pop of dimension and personality, making the piece more engaging and unique.
18. Create a Glowing Silhouette with Backlighting
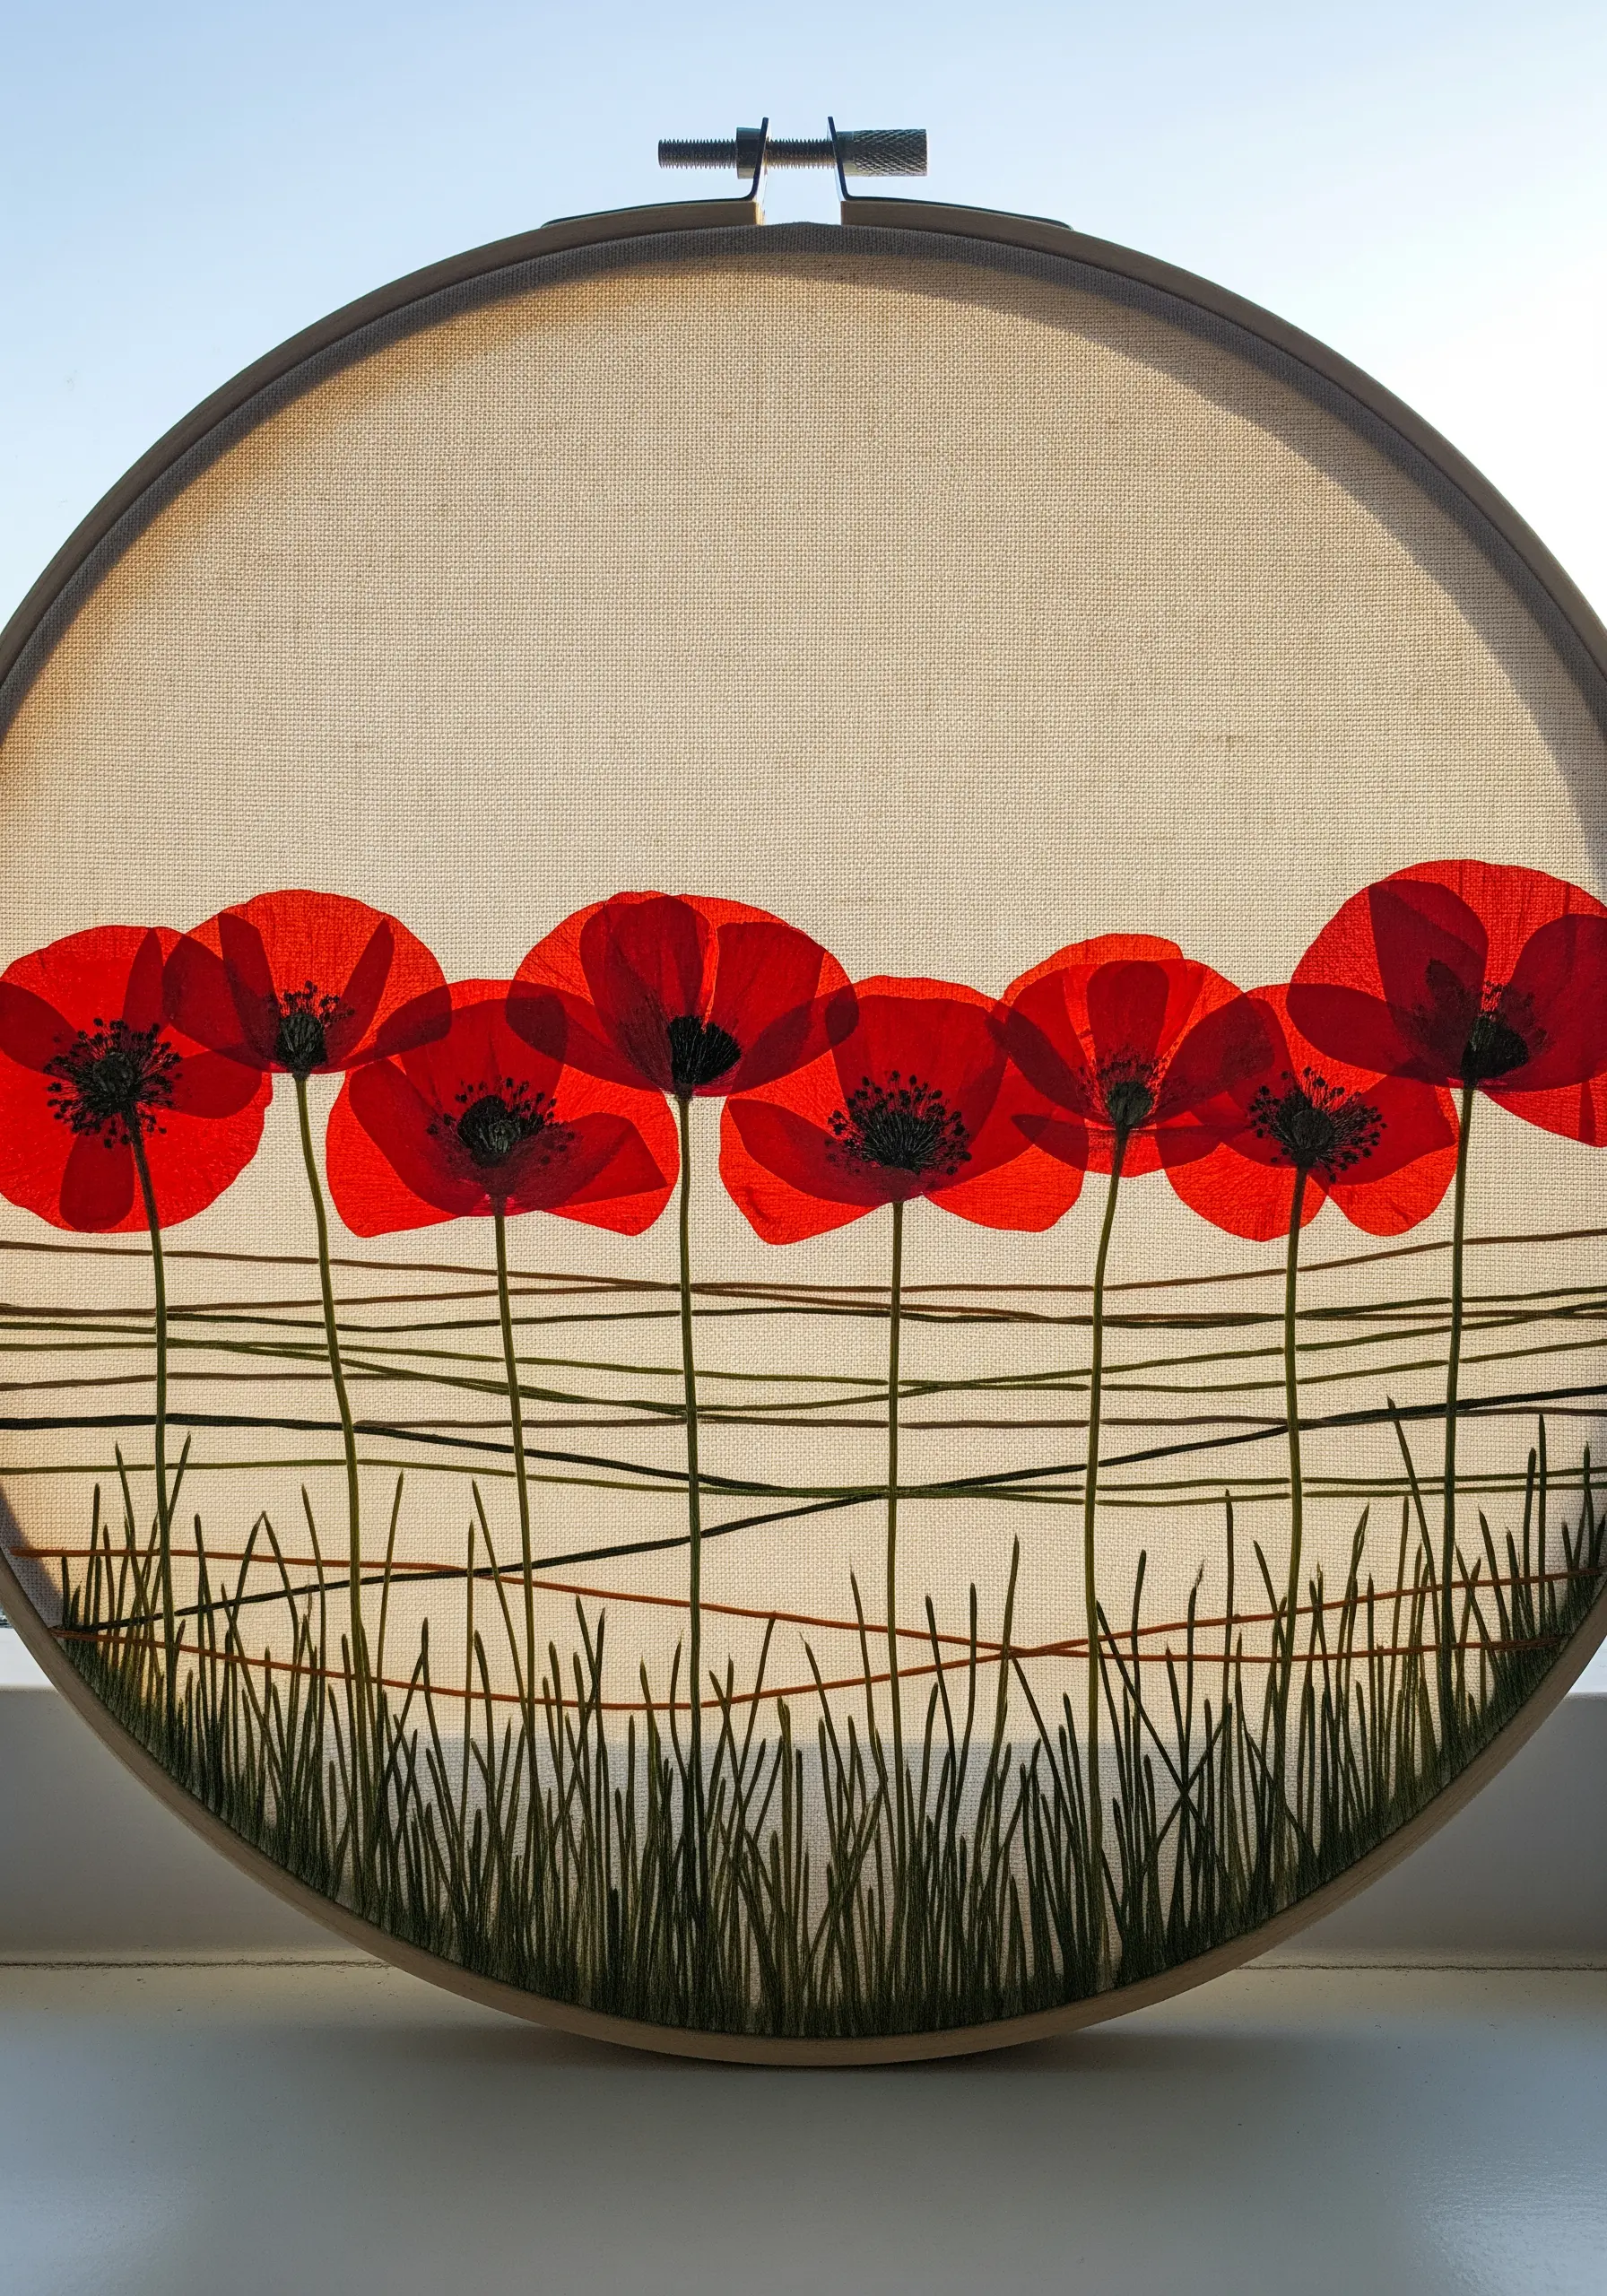
Harness the power of light by working with translucent flowers on a sheer or semi-sheer fabric.
Pressed poppy petals are thin enough to allow light to pass through, creating a brilliant, stained-glass effect when placed near a window.
Use dark thread to stitch the stems and a dense layer of grass with long, varied straight stitches.
This creates a strong silhouette that grounds the composition and makes the glowing red of the petals even more dramatic and impactful.
19. Define Shapes with a Minimalist Running Stitch
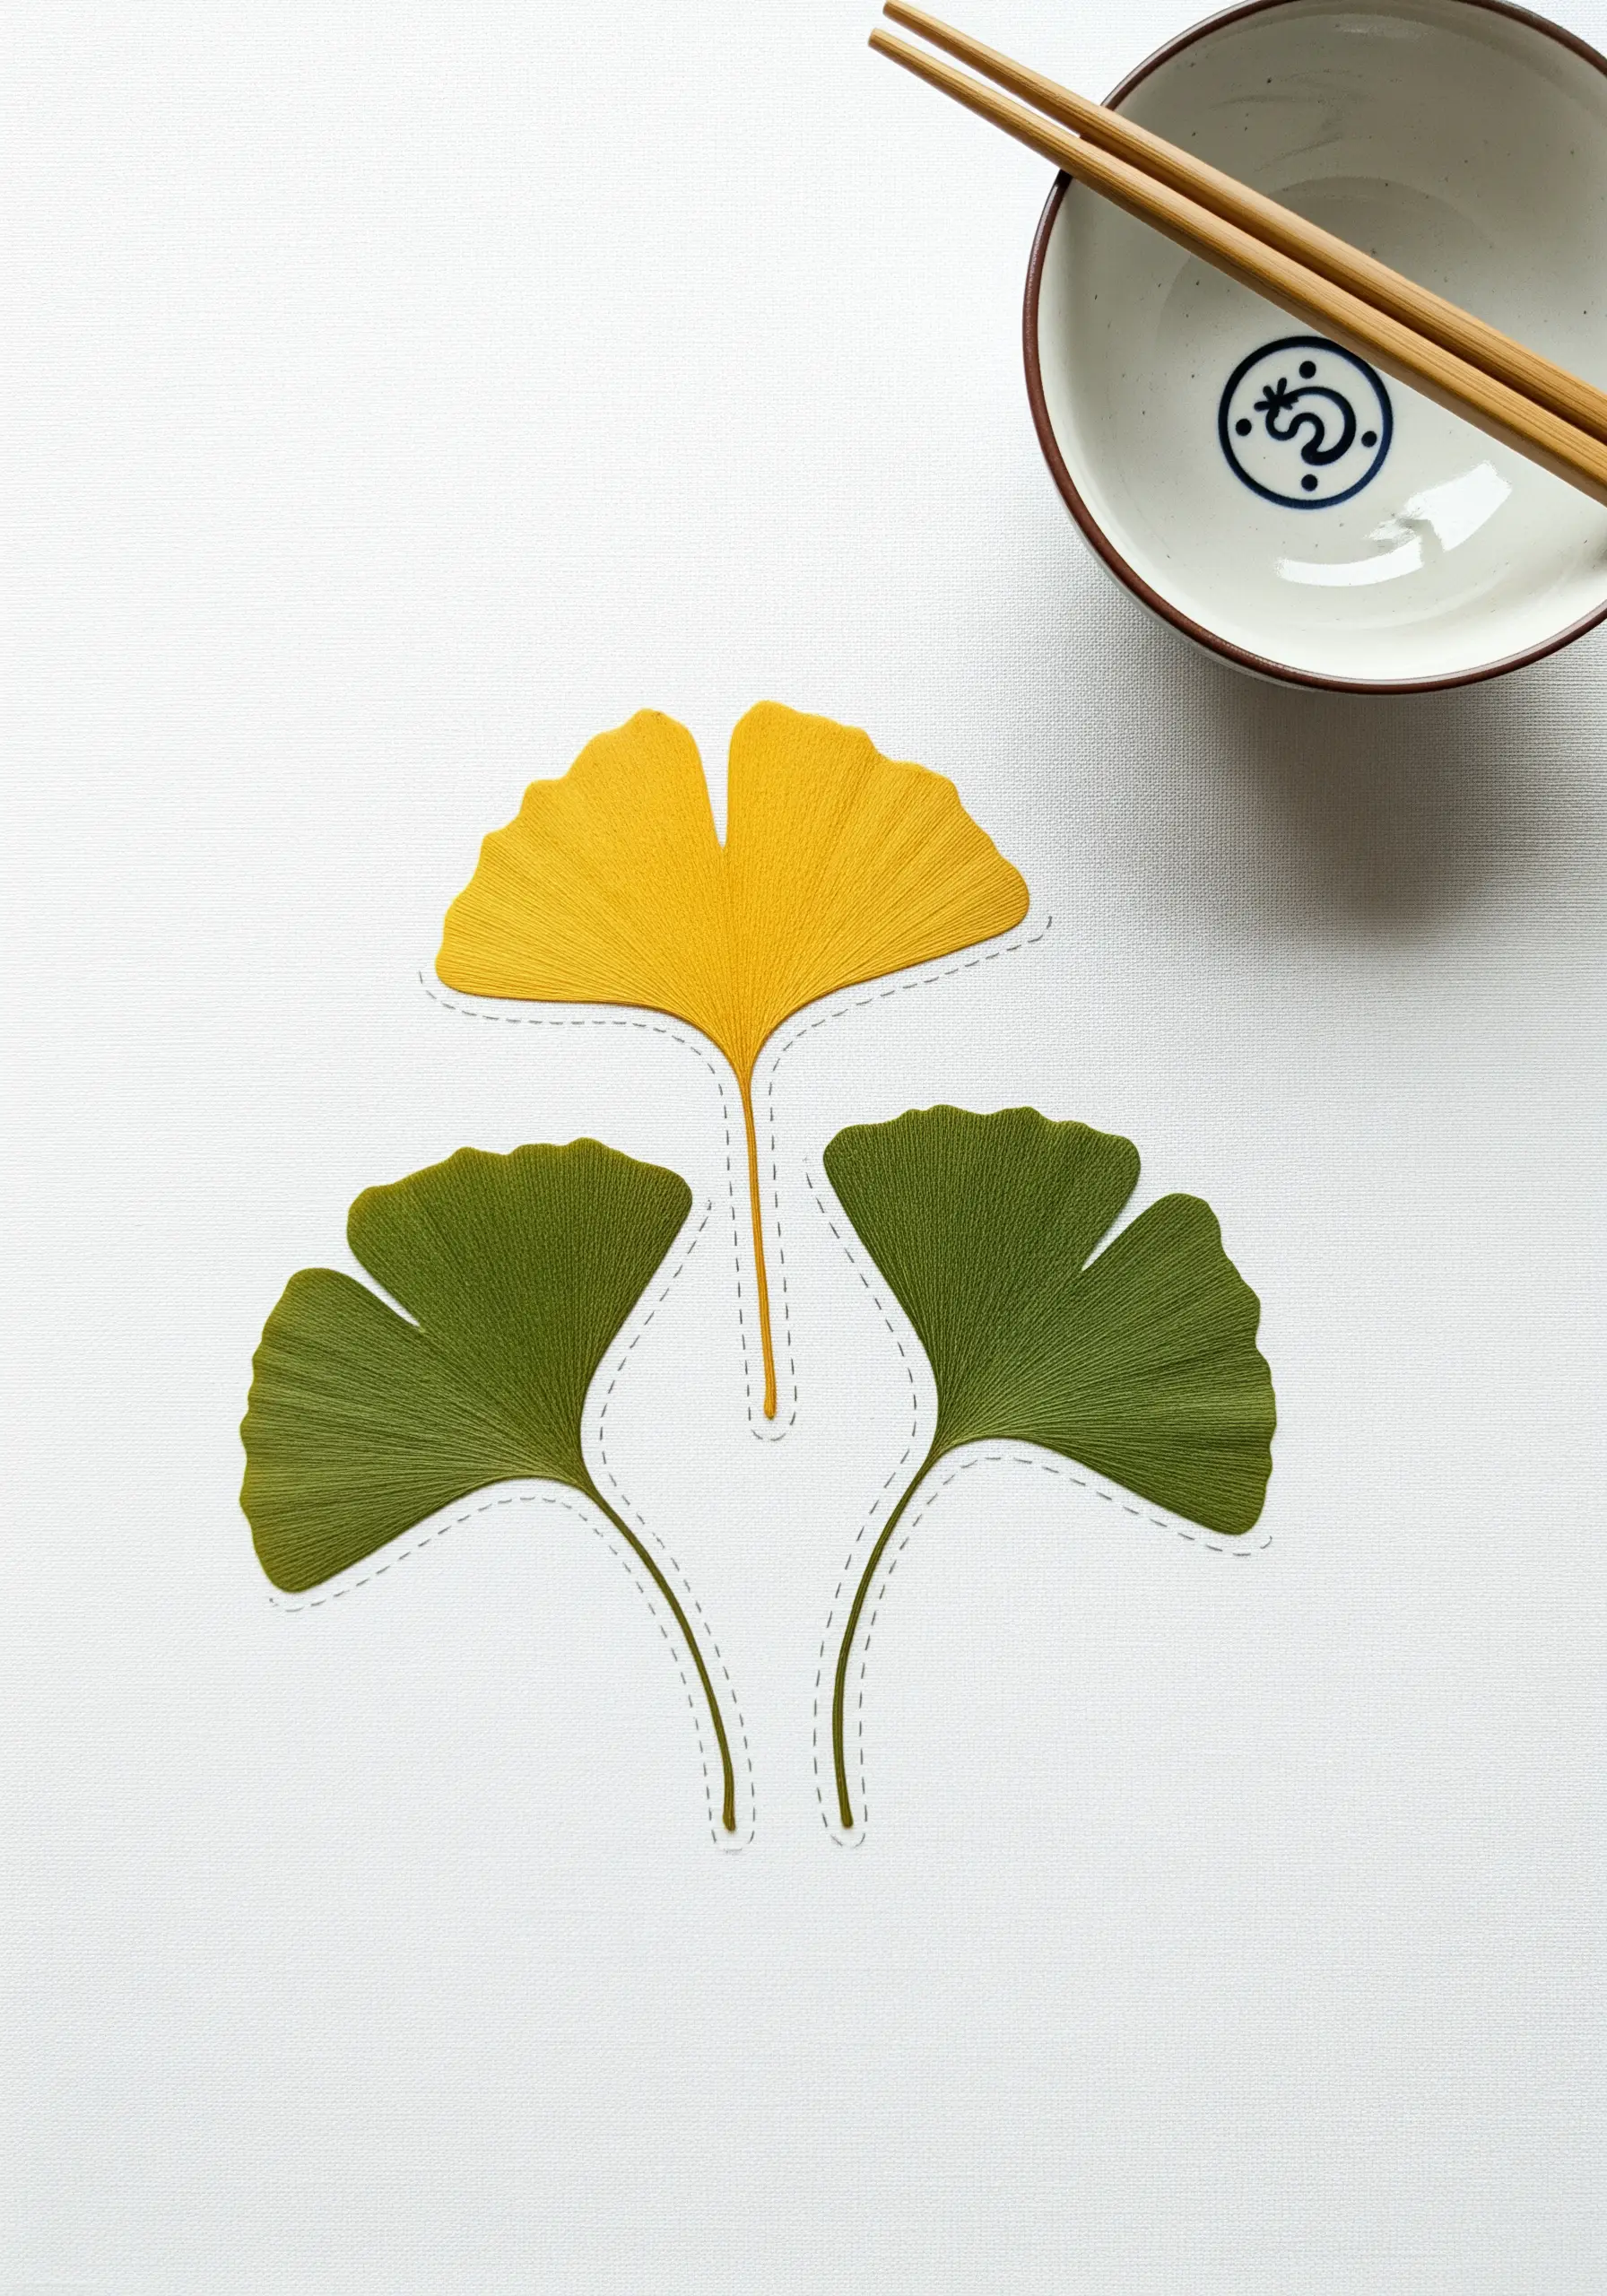
Instead of a solid, heavy outline, use a delicate running stitch to suggest the shape of your pressed leaves.
This technique adds a subtle, handmade texture without overpowering the natural beauty of the botanicals.
Use a single strand of thread in a neutral color to create a light, airy feel that complements the ginkgo leaves’ graceful form.
This approach feels modern and clean, perfect for minimalist thread art and Japanese-inspired aesthetics.
20. Illustrate a Scene with Thread and Flowers
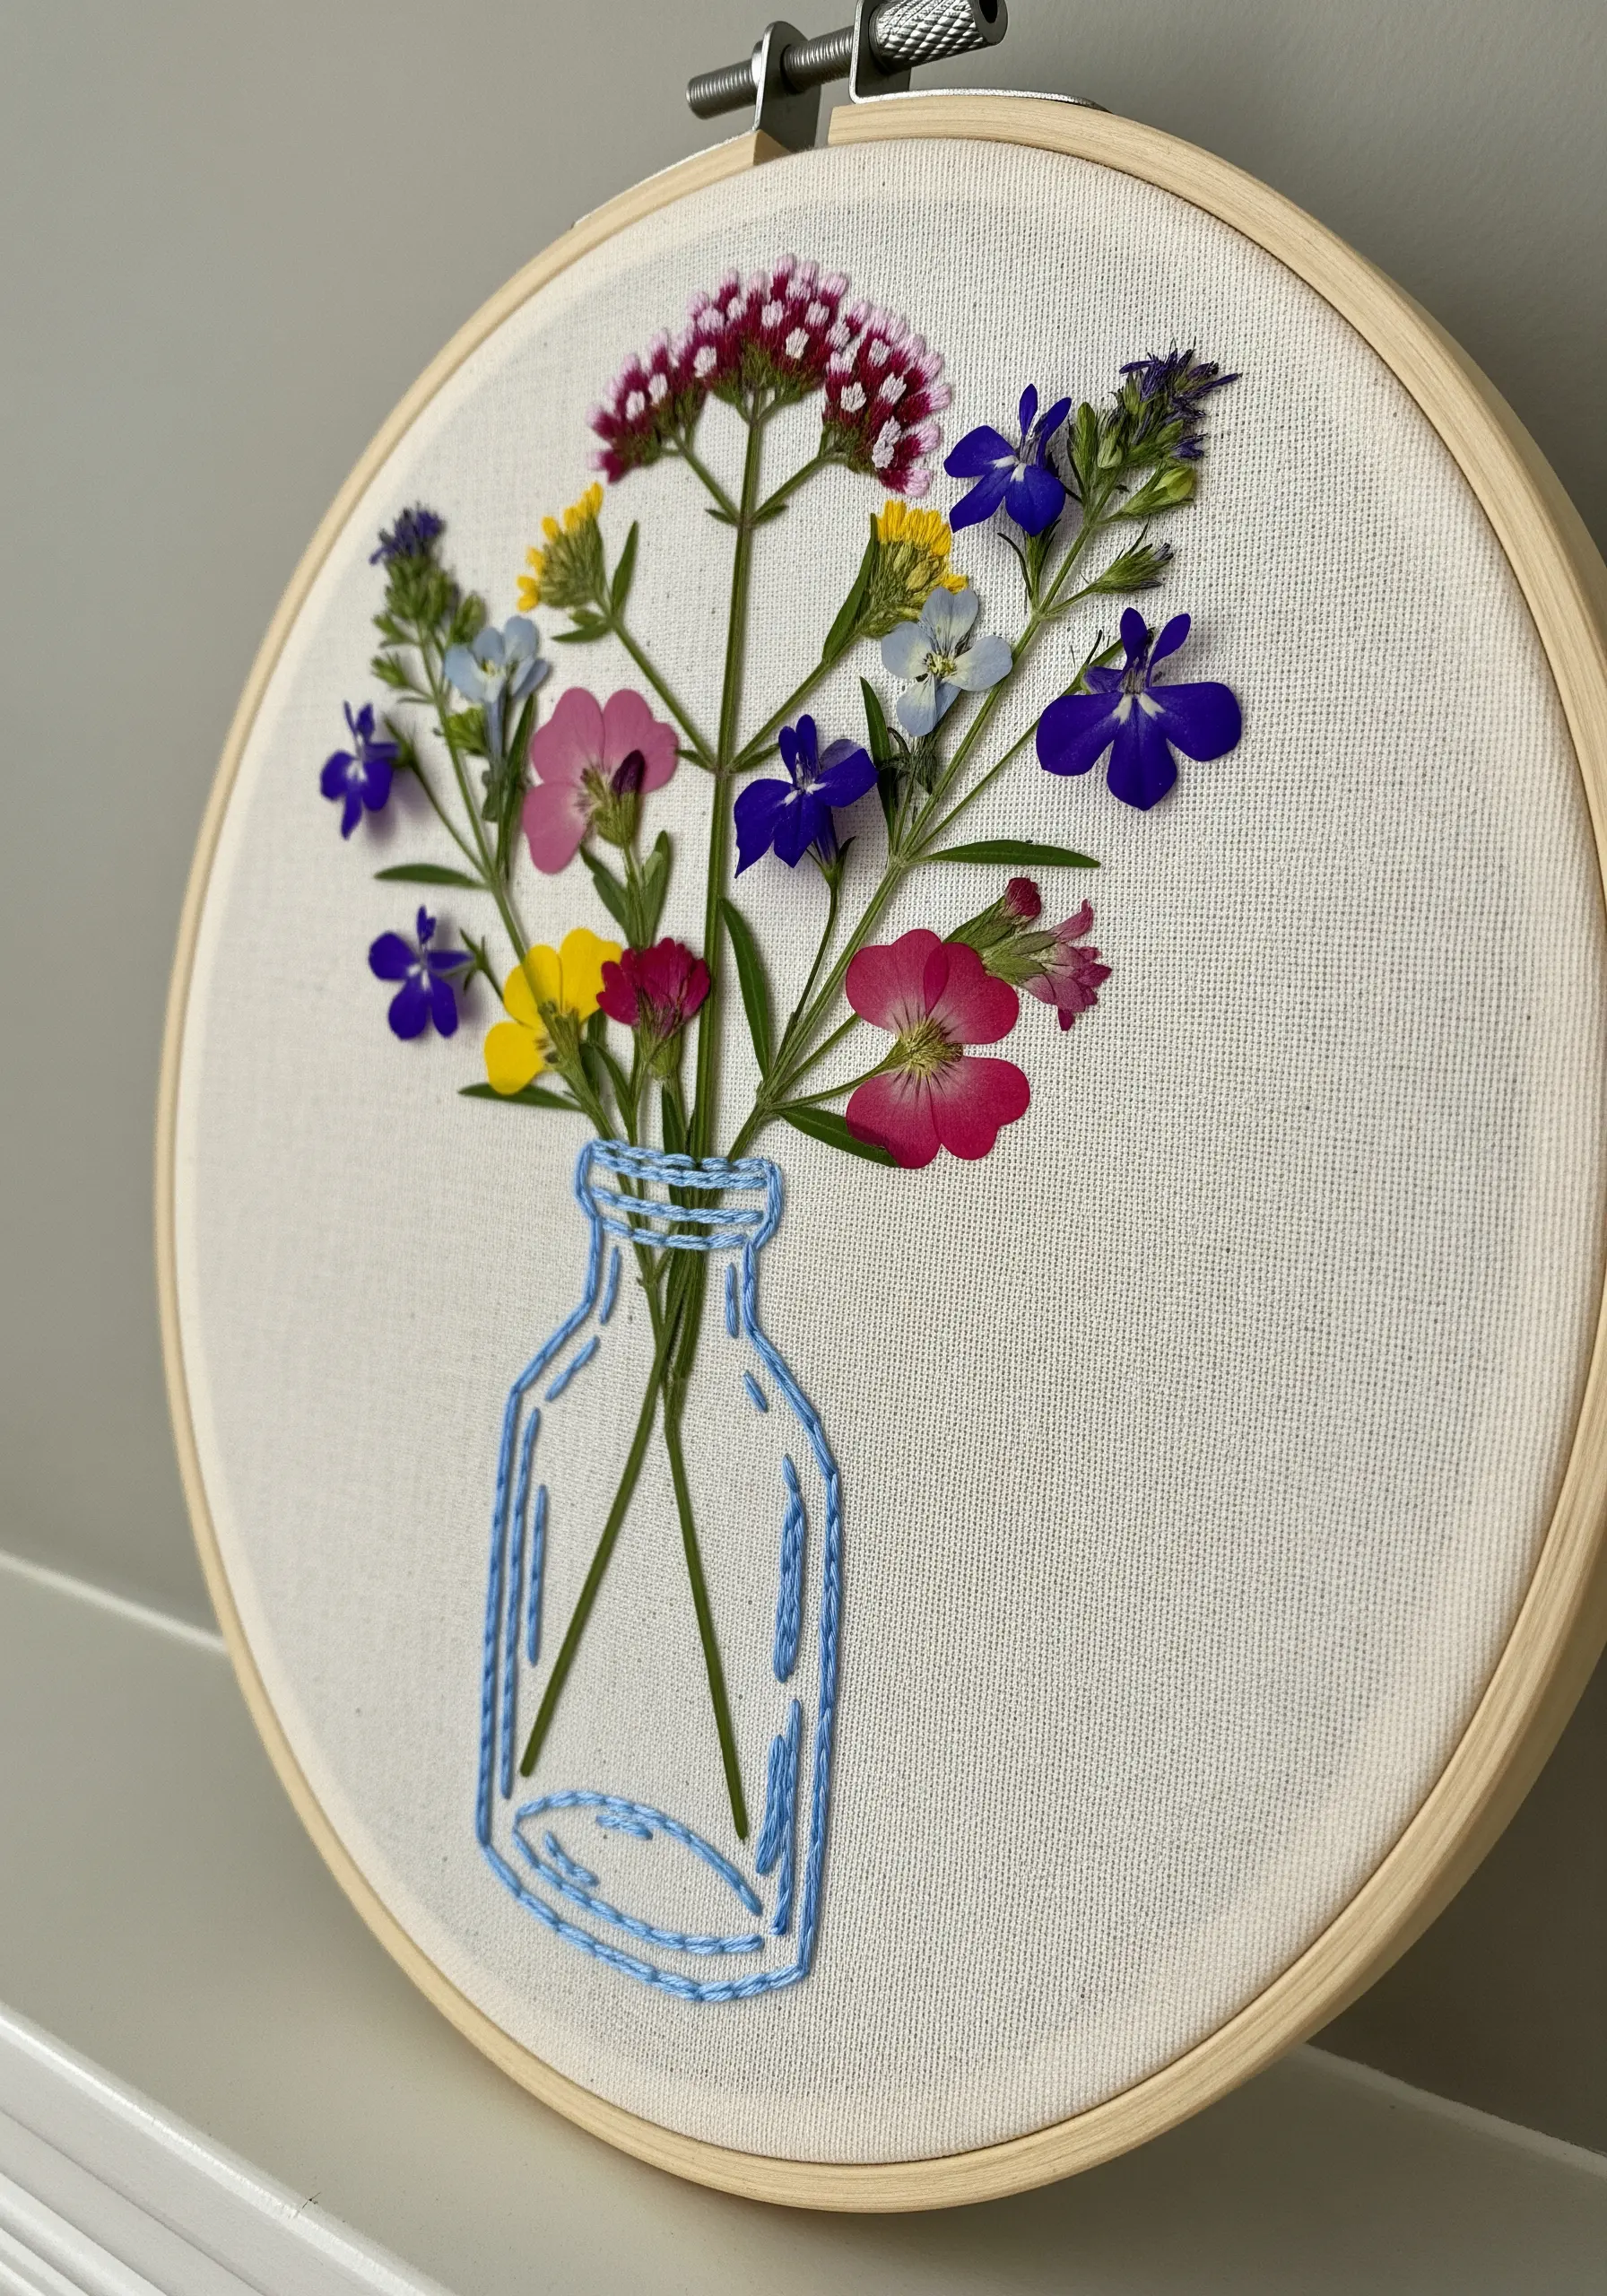
Combine line art embroidery and real pressed flowers to create a charming mixed-media scene.
First, use a simple backstitch or stem stitch to embroider the outline of a vessel, like this glass jar.
Next, arrange your pressed wildflowers so their stems appear to be inside the embroidered jar, creating a delightful illusion.
Secure the flowers with a few tiny, hidden stitches, letting the 2D illustration and 3D botanicals work together to tell a story.


