
Have you ever stitched a leaf that looked a little… flat? You chose the right colors and followed the pattern, but the final piece lacks the life and dimension you envisioned. It’s a common frustration, but the solution is simpler and more creative than you think.
The secret to botanical embroidery that feels alive is layering. I don’t just mean stitching one leaf over another, but layering techniques, textures, and even materials. It’s about understanding how a padded satin stitch can make a leaf feel plump, how blending threads can create a painterly effect, or how a simple felt base can turn a flat design into a sculptural object.
These are not complex, gate-kept secrets. They are intuitive adjustments you can start making today. Each one is a small shift in perspective that will transform how you approach your work, giving you the tools to create botanical art that is not just beautiful, but full of depth, texture, and intention.
1. Combine Ribbon and Thread for a High-Contrast Finish
For a bold, sculptural leaf, use wide satin ribbon to fill the main sections, creating a surface that reflects light beautifully.
Contrast this high sheen by stitching finer details, like the upper leaf segments, with matte six-strand cotton floss using a fishbone stitch.
This juxtaposition of lustrous ribbon and flat thread adds immediate dimension and tactile interest without needing complex padding or under-stitching.
A thin, couched line for the stem provides a delicate anchor, balancing the volume of the ribbon.
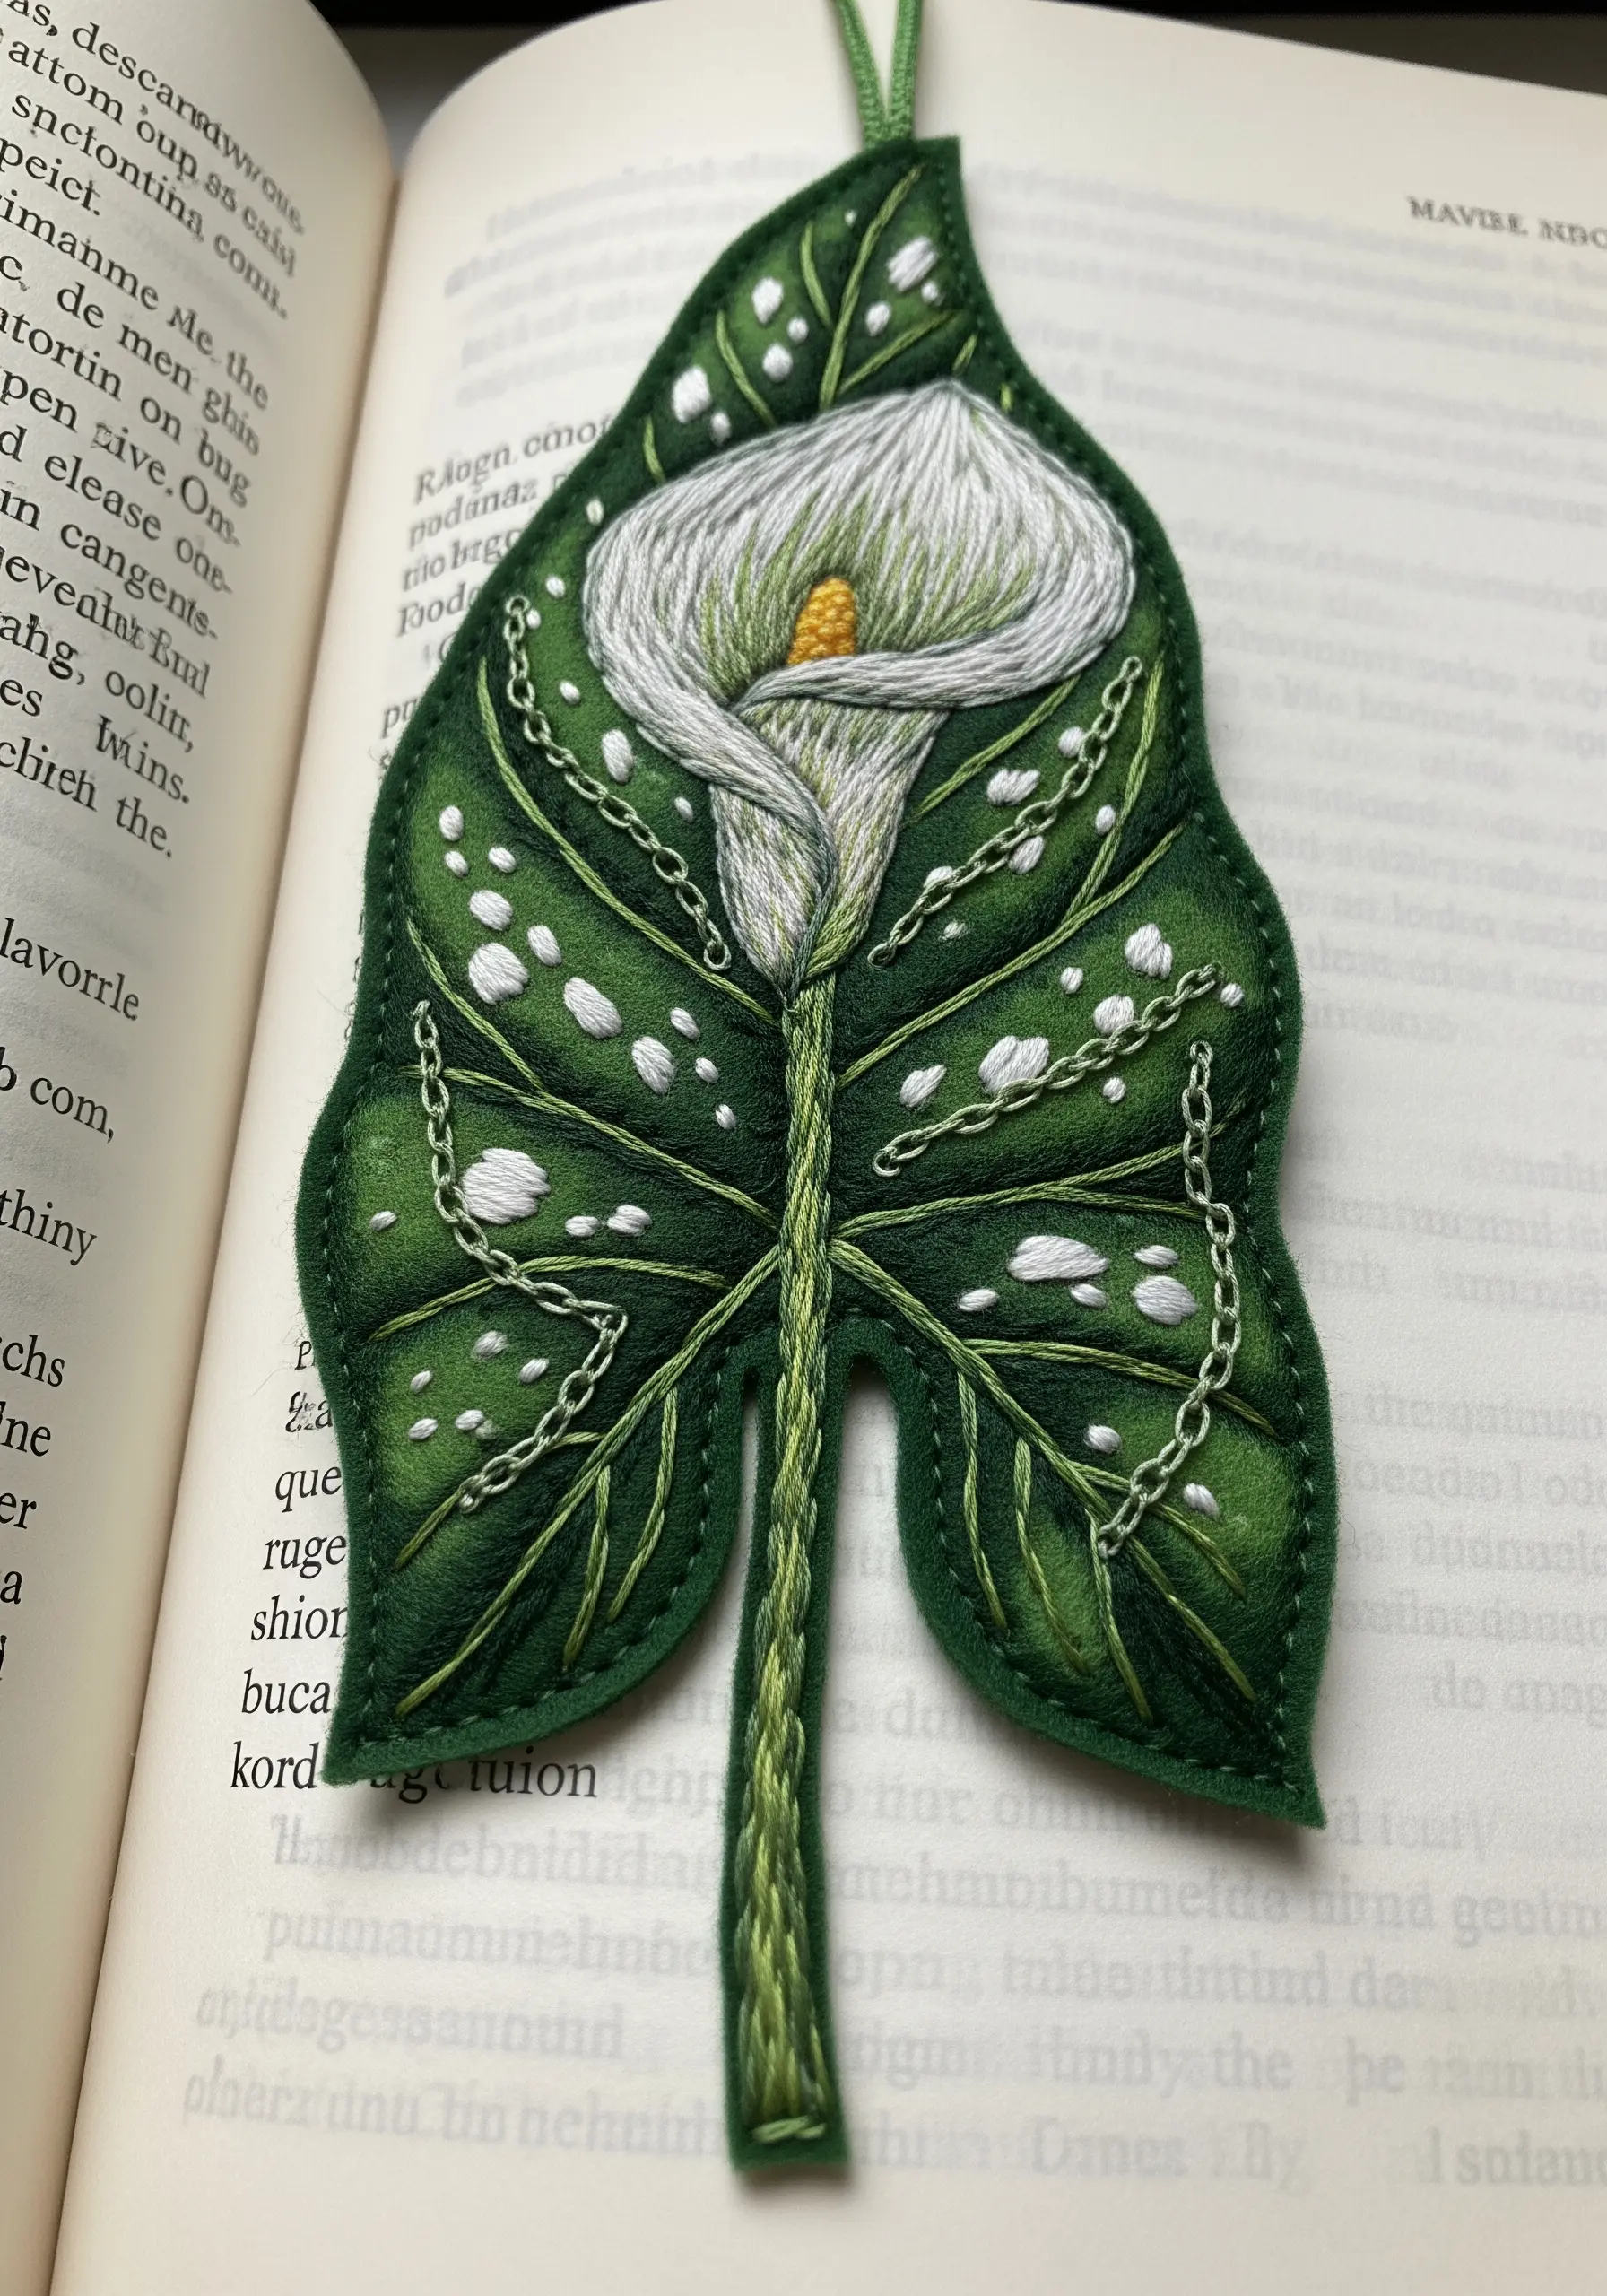
2. Use Appliqué Foundations for Raised, Sharp-Edged Leaves
To make your leaves physically lift from the fabric, start with a felt appliqué base.
Cut your leaf shapes from felt, tack them onto your base fabric, and then completely cover them with dense satin or long-and-short stitches.
This instantly creates a raised, embossed effect that gives your work a professional, three-dimensional quality.
Finish by outlining each leaf with a sharp split stitch to define the edges and make the colors pop, especially against a dark background.
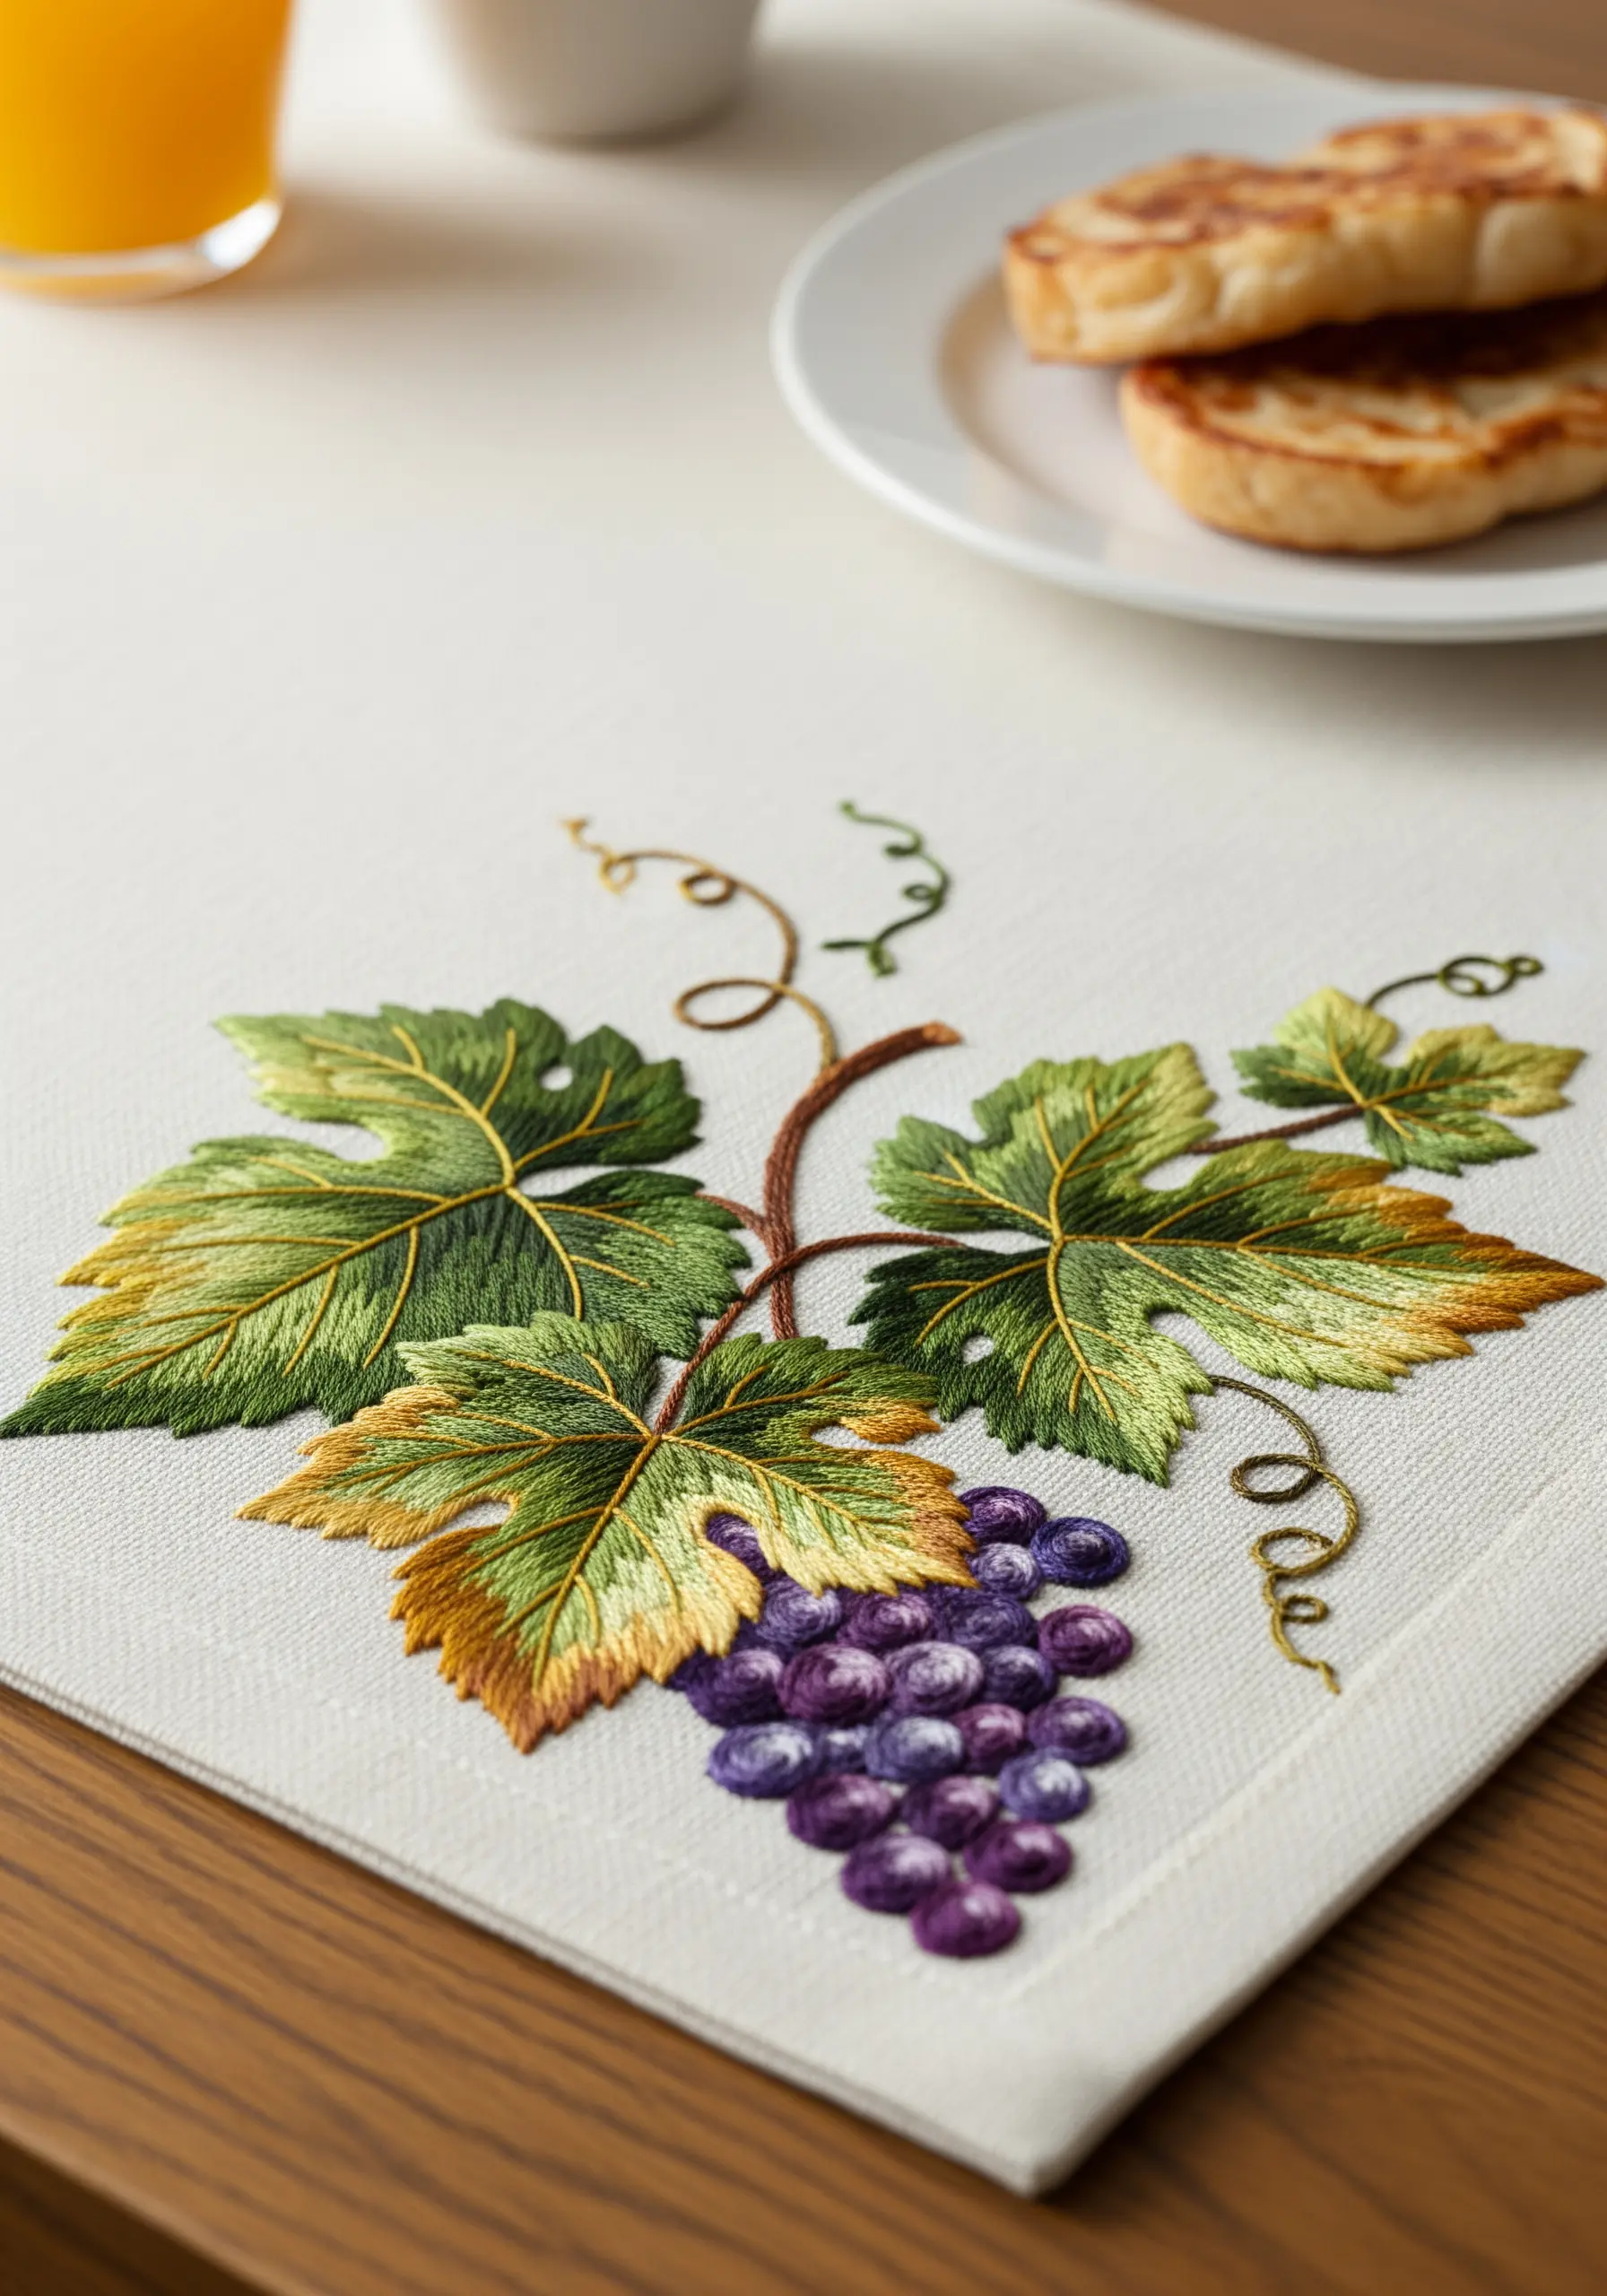
3. Split Color Down the Middle for a Realistic Sheen
Create the illusion of a central vein and natural light by dividing your leaf into two vertical halves.
Fill one side with a lighter shade of green and the other with a darker shade, using angled satin stitches that meet cleanly in the middle.
This simple color-blocking technique is incredibly effective for suggesting form and shadow without any complex blending.
Outline the entire shape in the darker shade to give it a crisp border that stands out on textured fabric like denim.
4. Overlap Padded Satin Stitches for a Cascading Effect
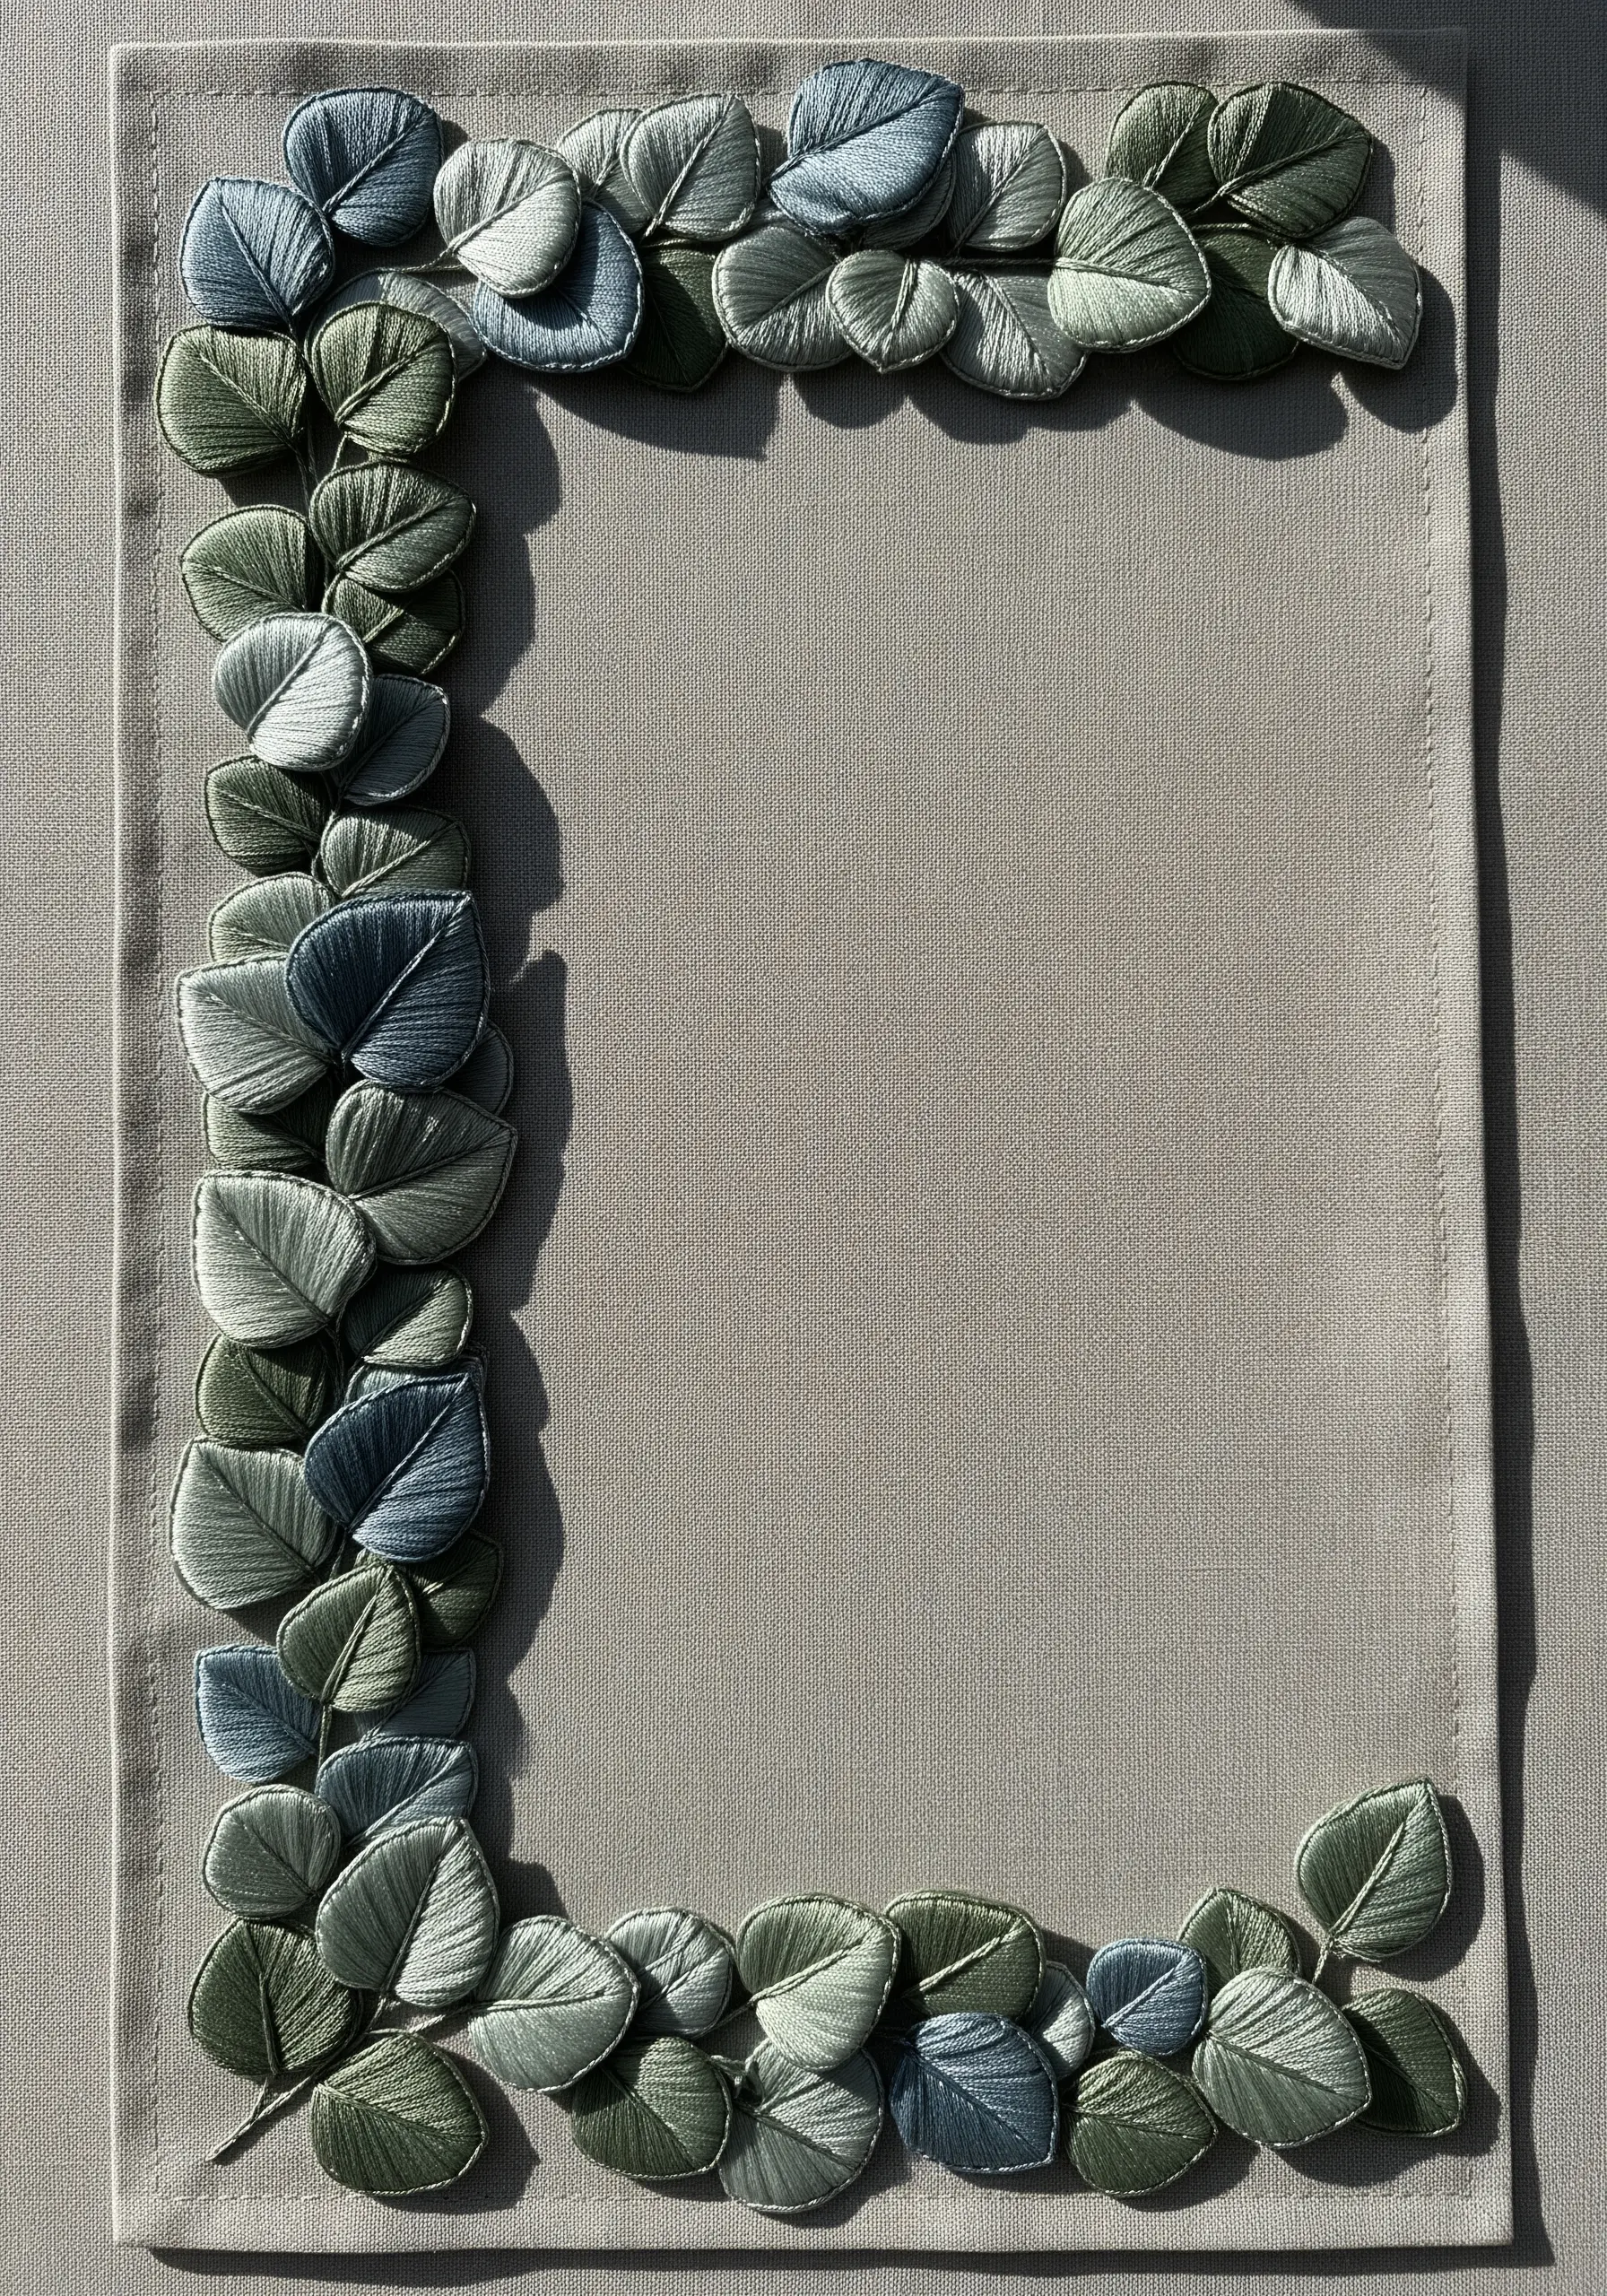
To build a lush, overlapping border, give each leaf individual volume with padded satin stitch.
First, create a small underlayer of straight stitches within your leaf shape, then cover it with satin stitches laid in the opposite direction.
This gives each leaf a subtle, puffy appearance.
By varying the shades of dusty green and blue and strategically overlapping each finished leaf, you can create a composition that feels abundant and natural.
5. Direct Your Stitches to Emphasize Natural Form
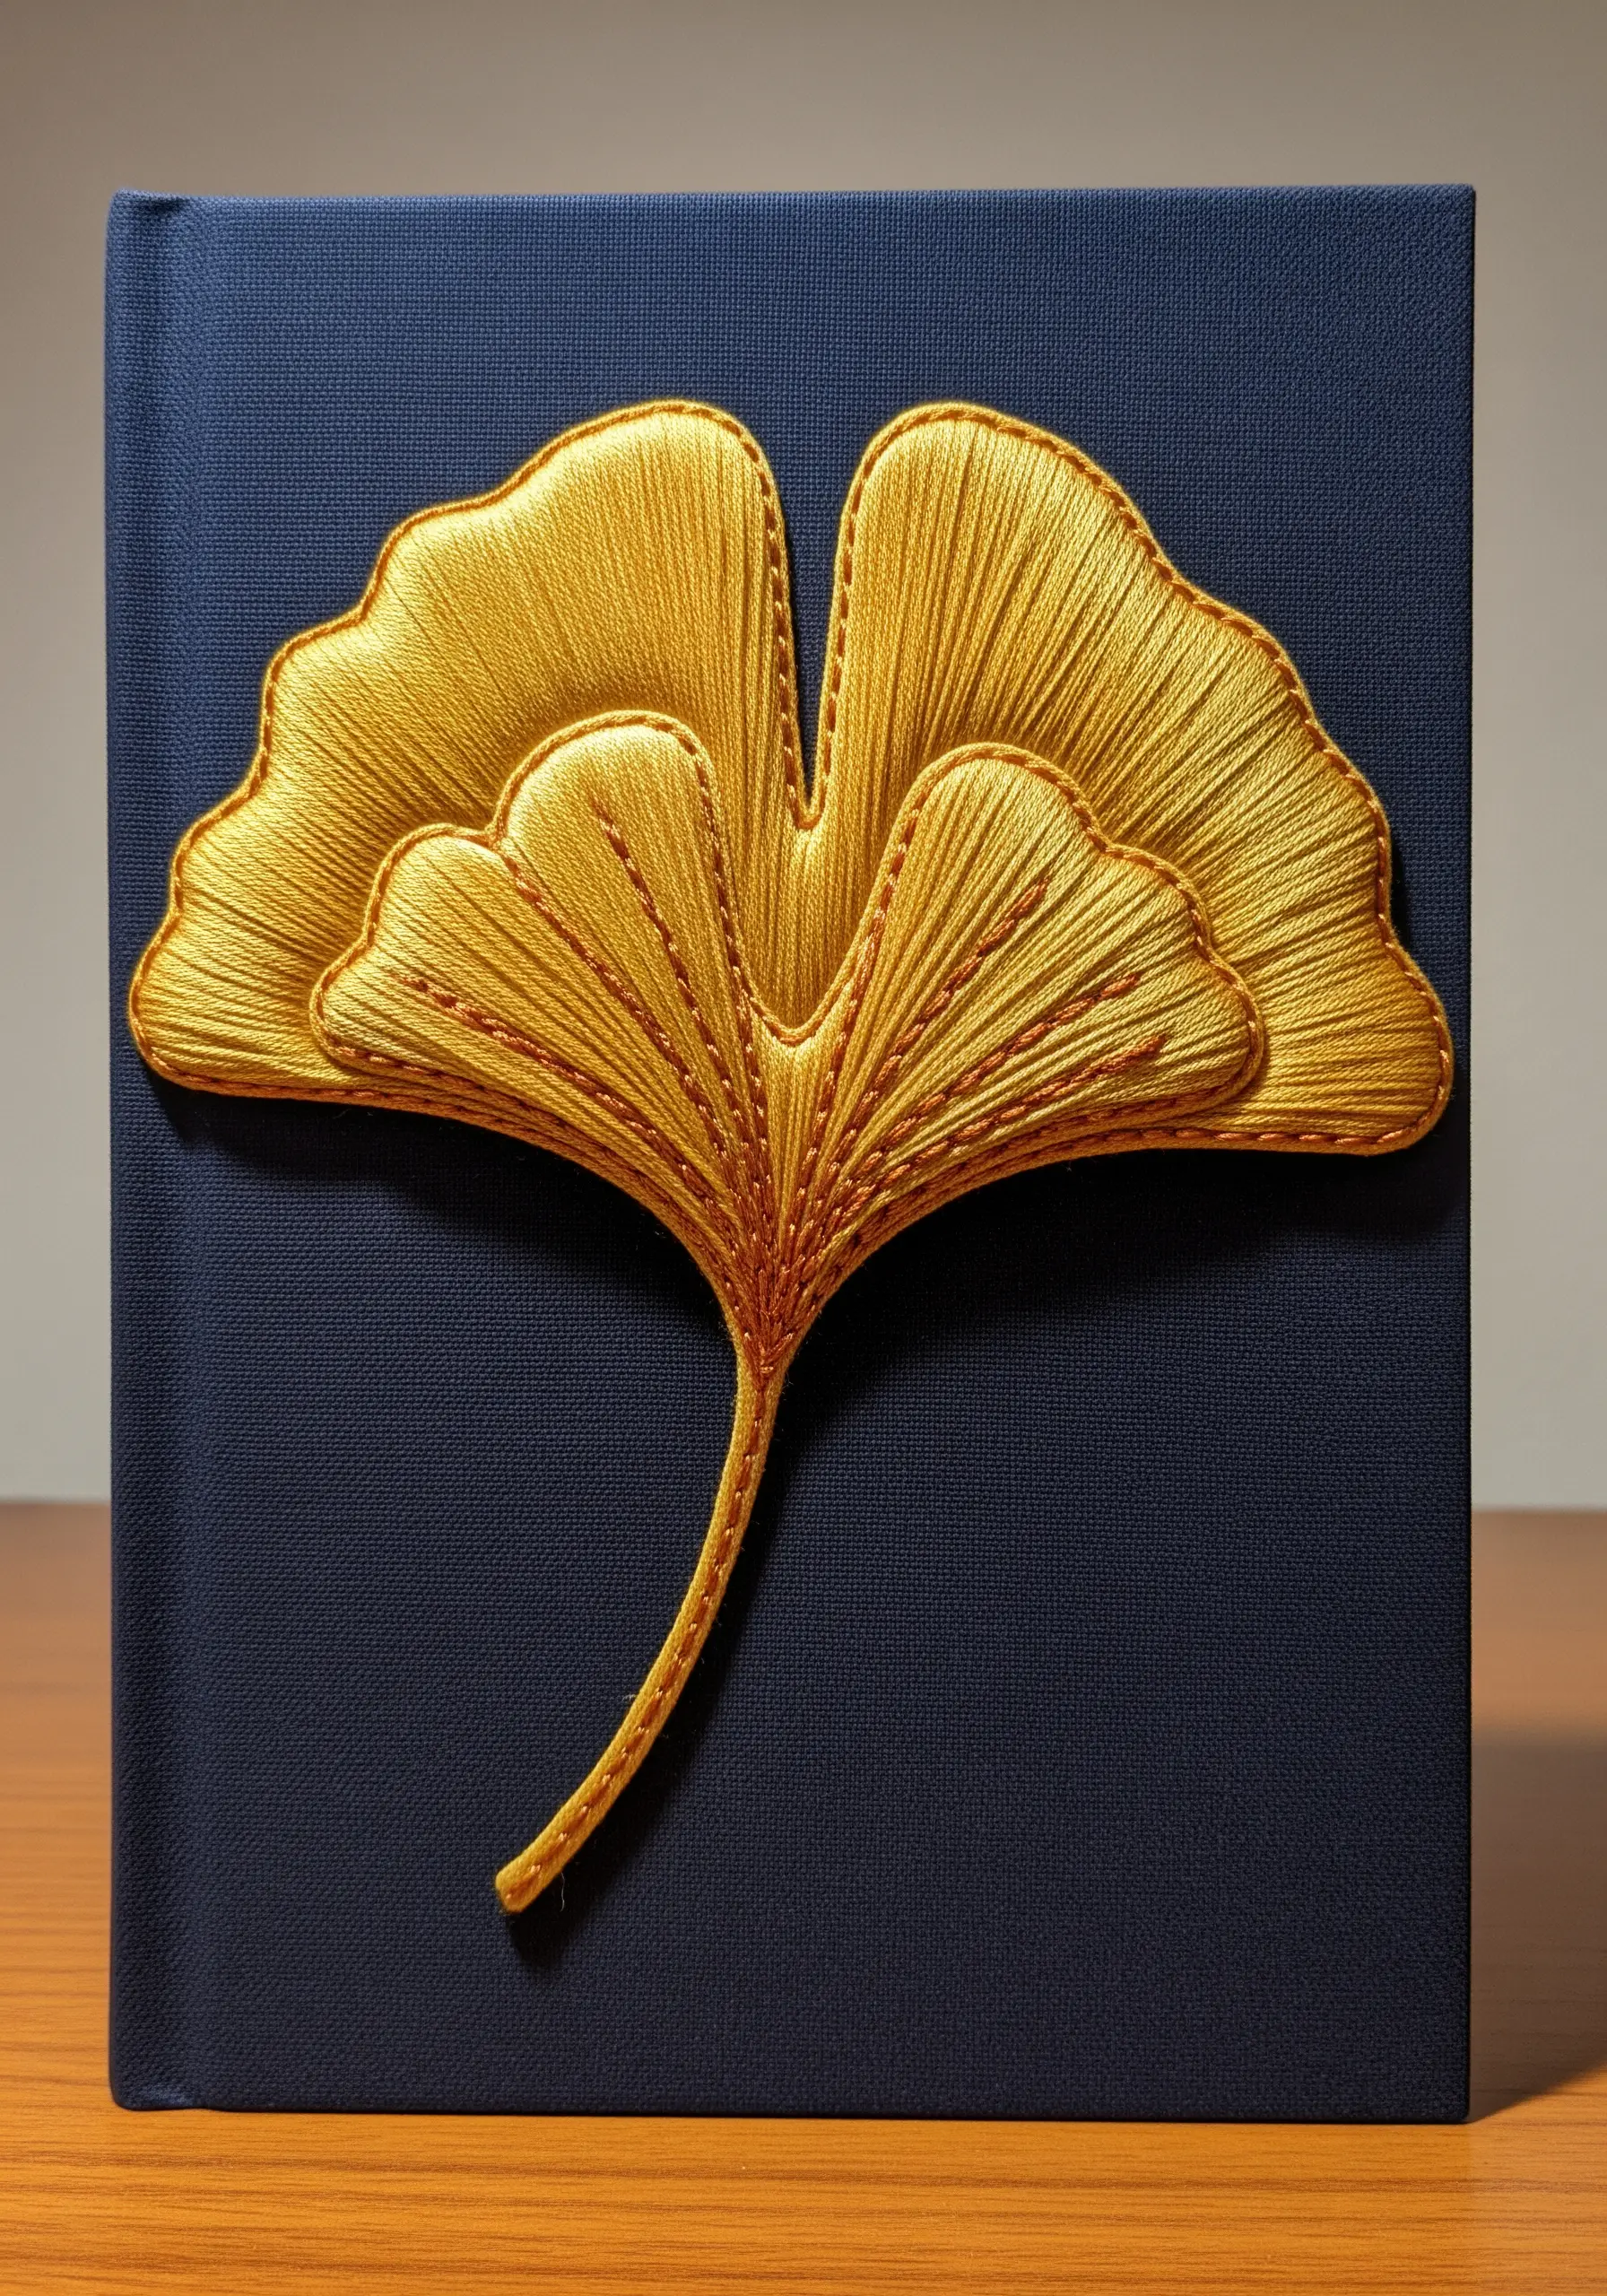
The elegance of a ginkgo leaf lies in its radiating veins, so let your stitches follow that same path.
Use a long, fanned satin stitch that originates from the base of the leaf and extends toward the scalloped outer edge.
To create the layered lobes, simply stitch the back section first, then stitch the front section directly on top.
A simple backstitch outline in a slightly darker thread defines the separation, turning a basic stitch into a powerful directional tool.
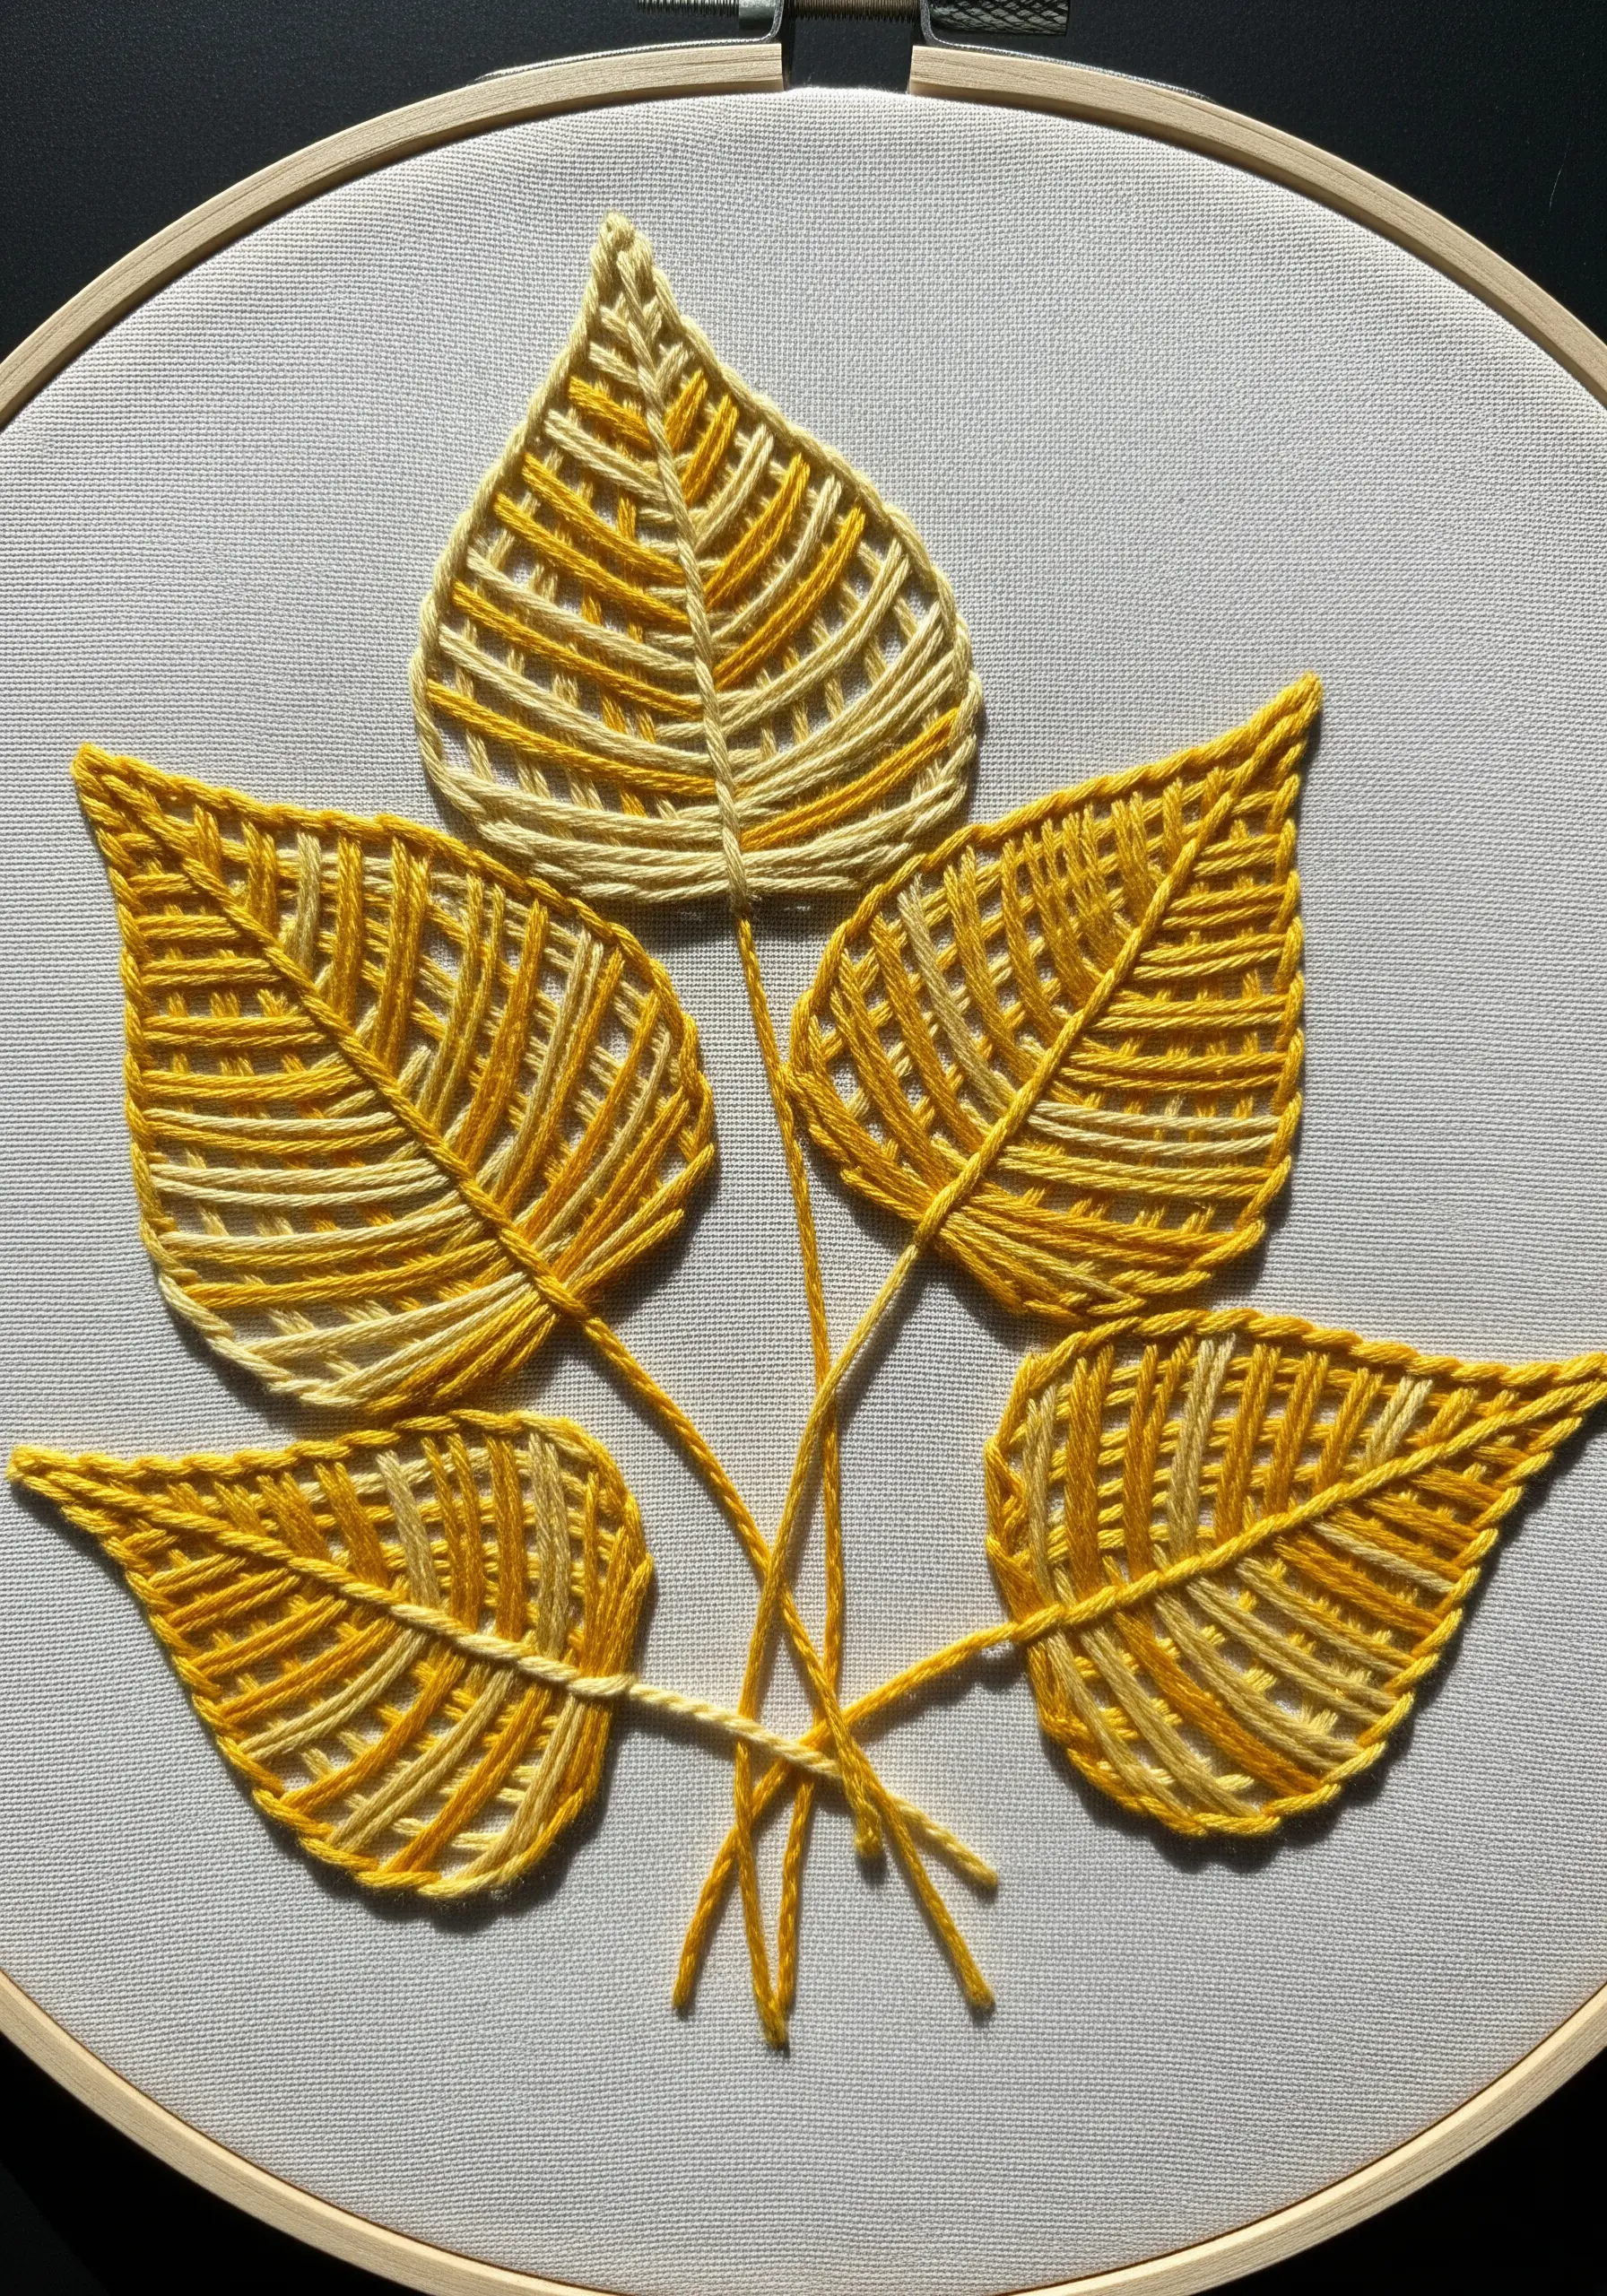
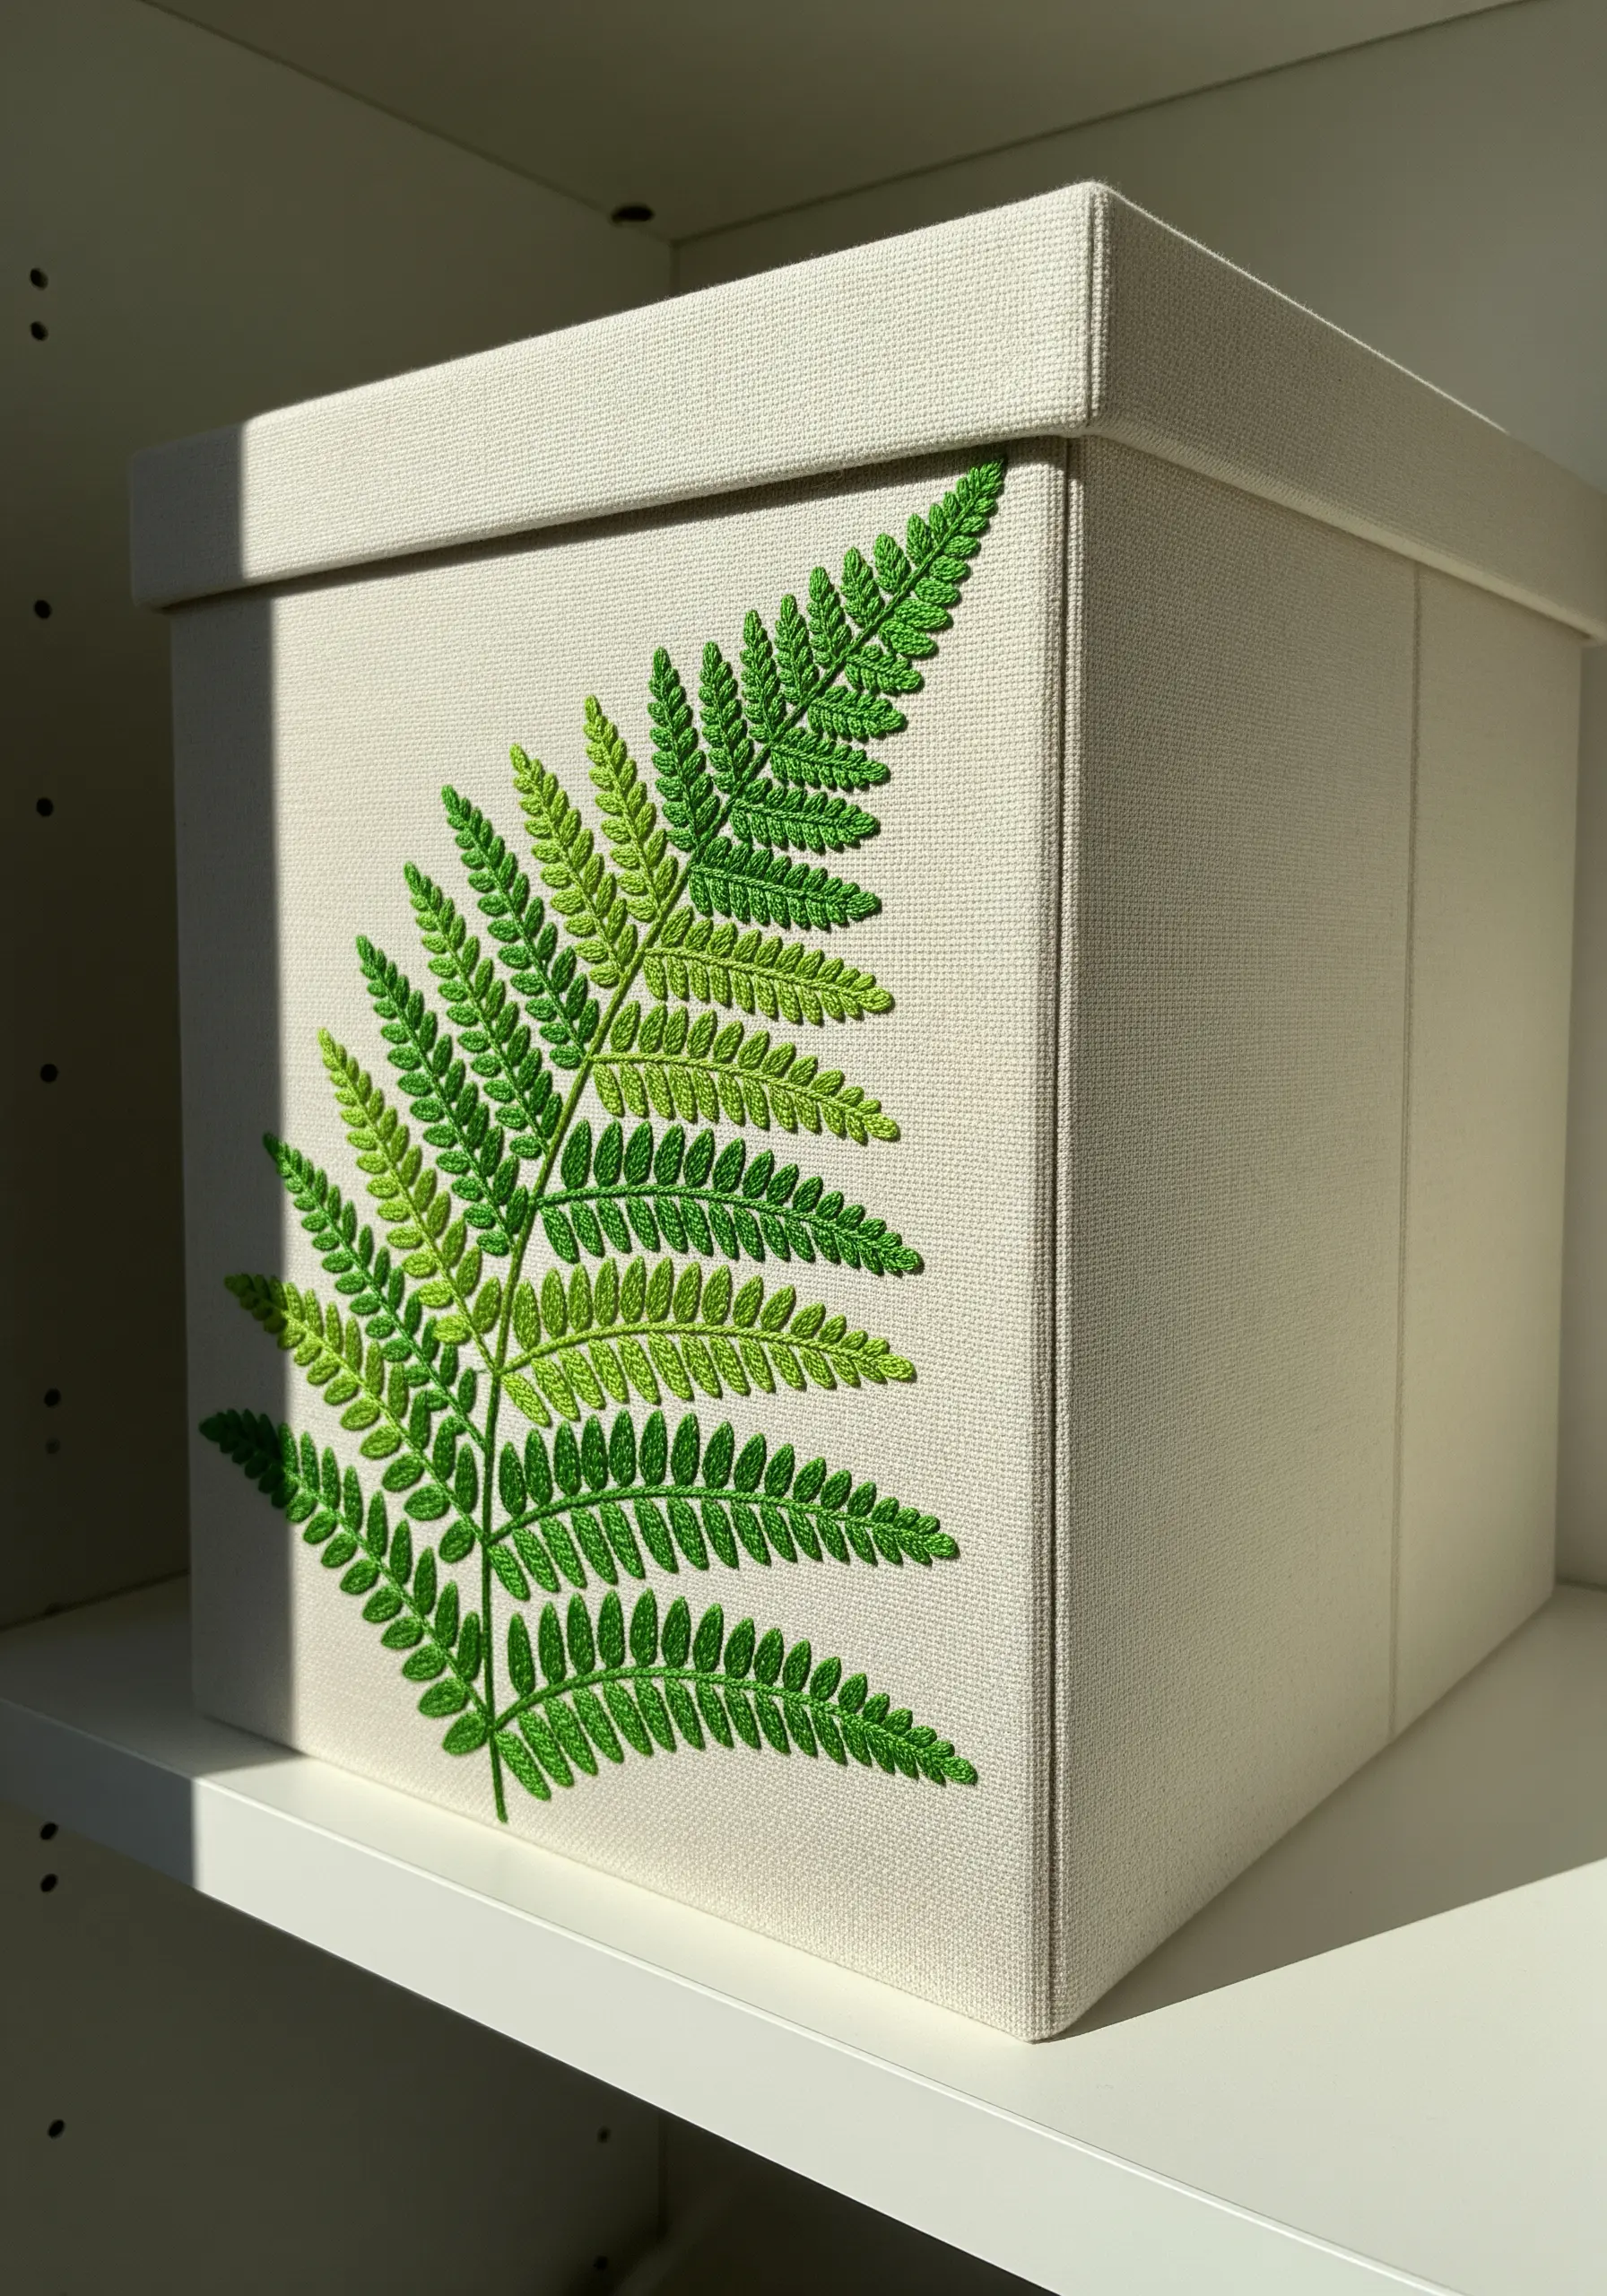
6. Vary Stitch Density for an Ombré of Texture
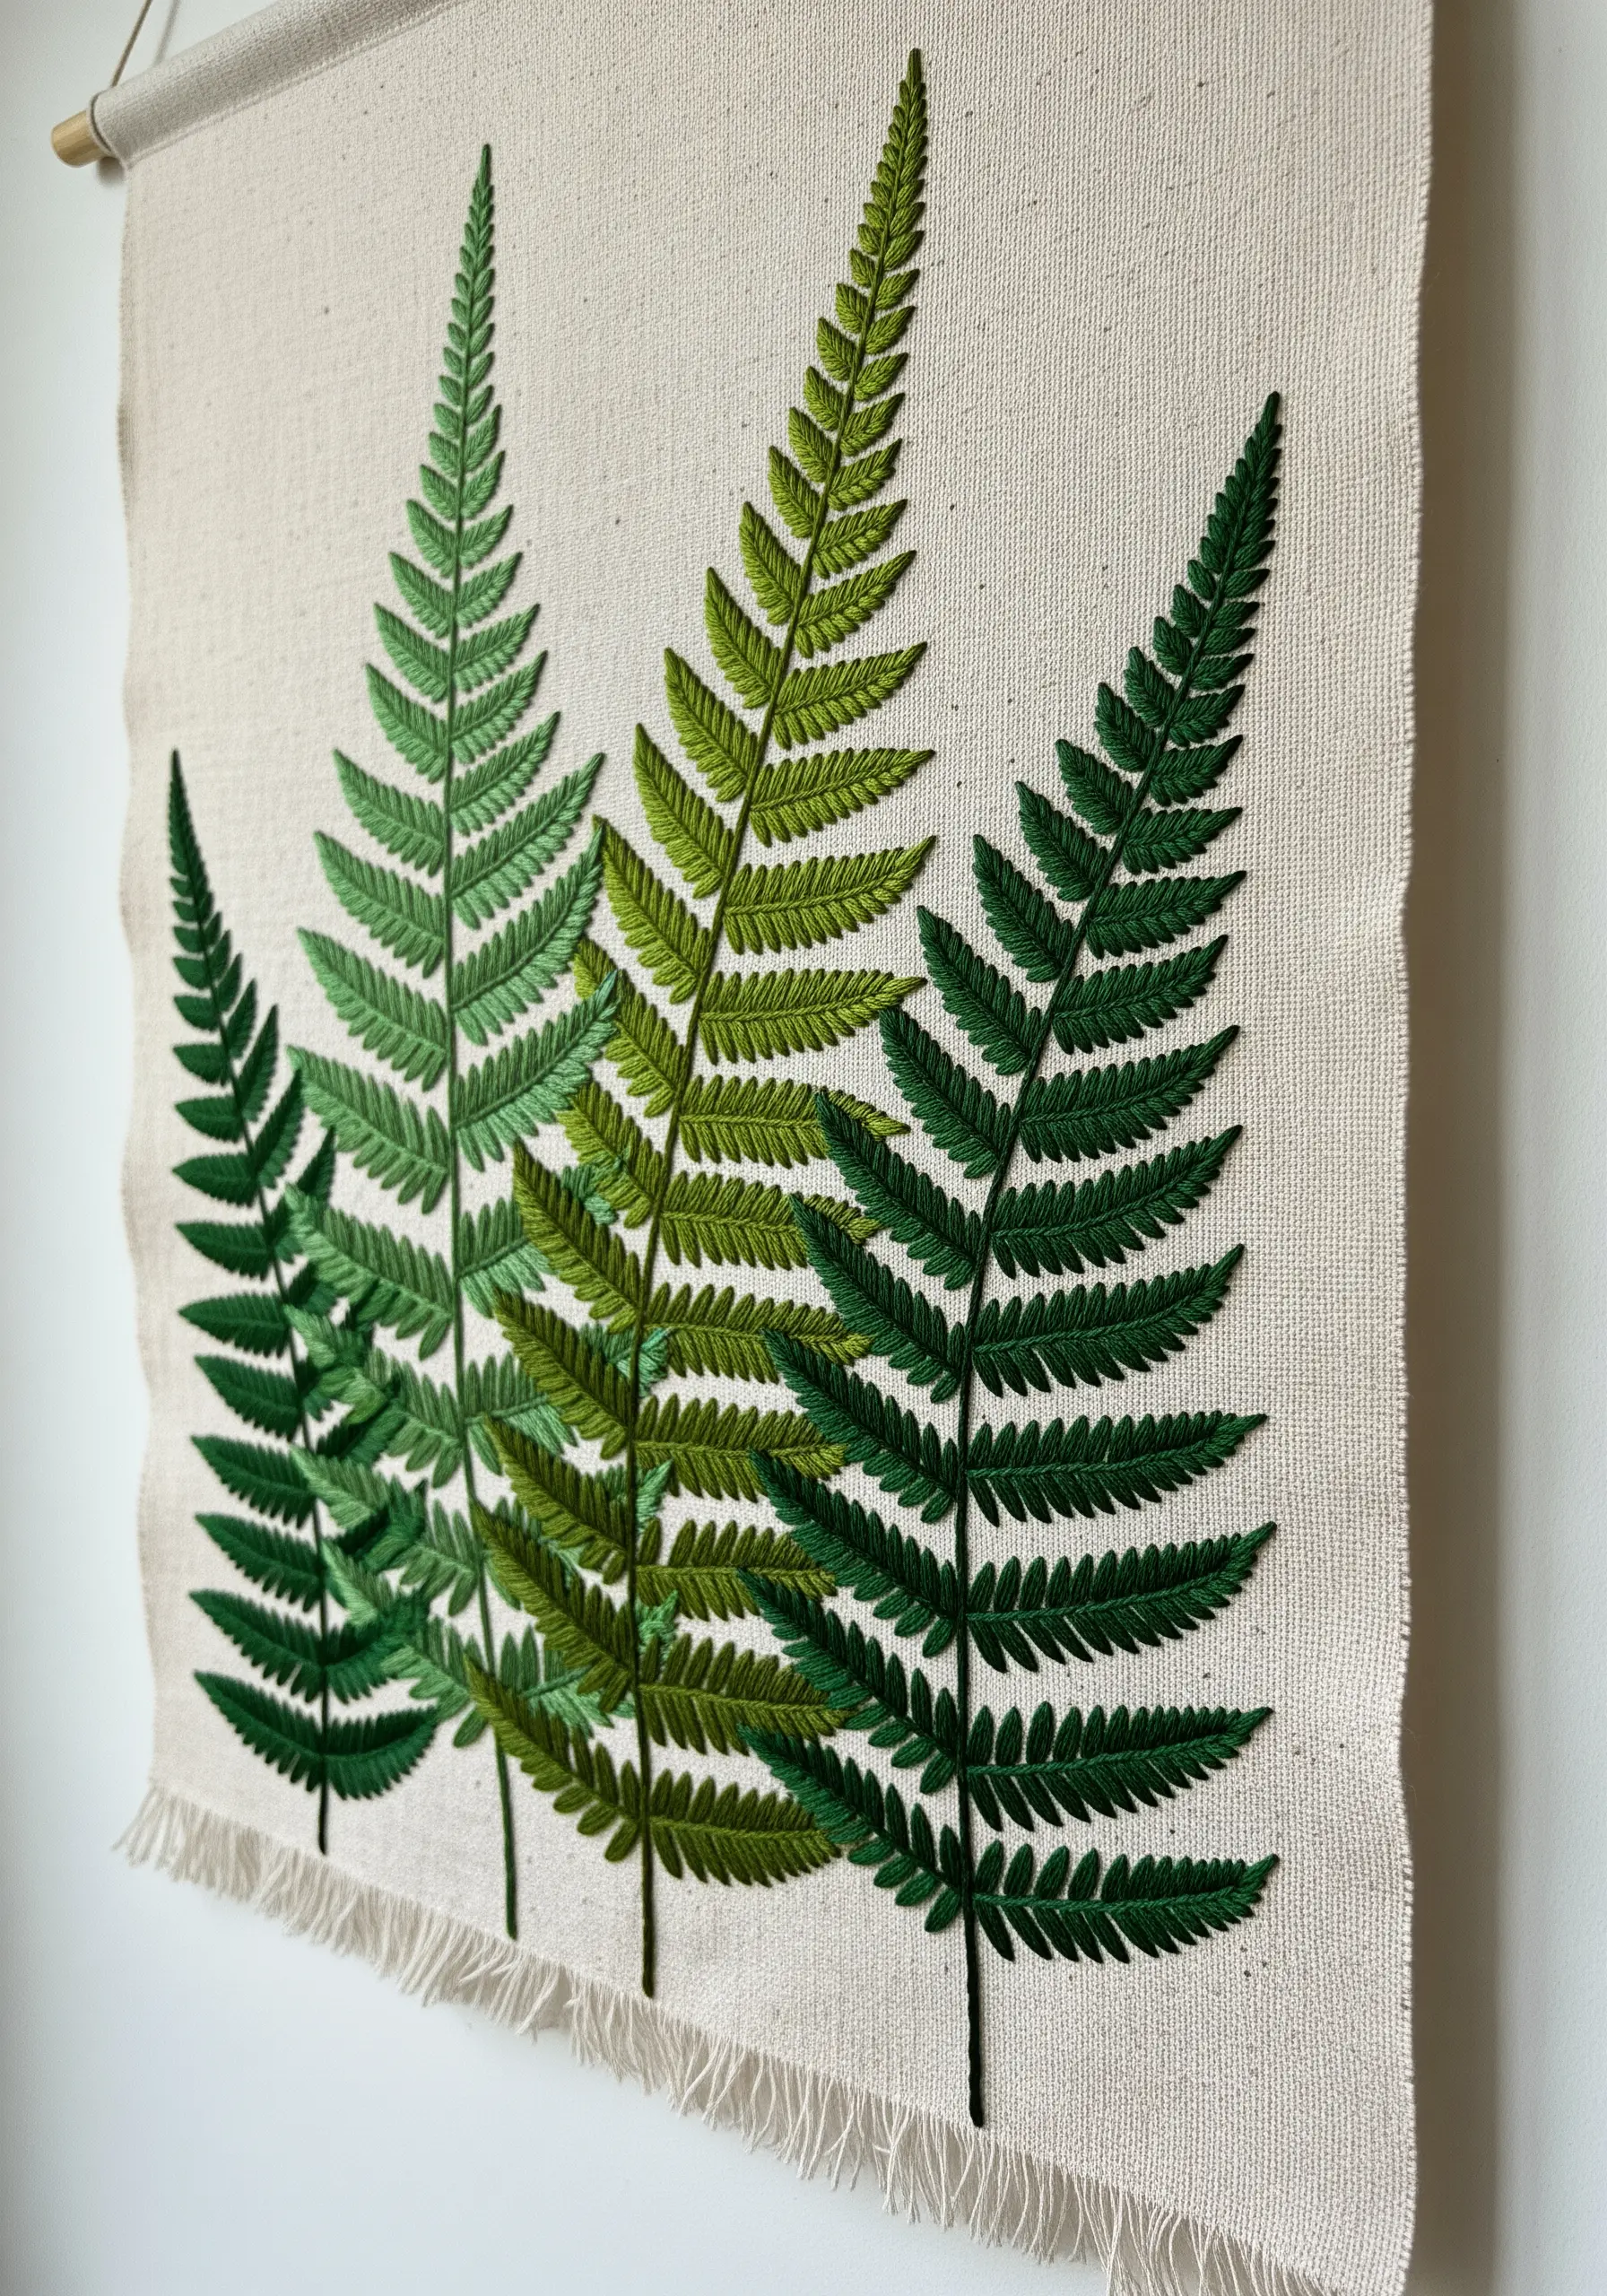
Create an illusion of depth in a group of ferns by adjusting both color and texture.
For the ferns you want to appear farther away, use a lighter green and a sparser fishbone stitch.
As you move to the foreground, switch to darker greens and a much denser, tightly packed satin stitch for the individual fronds.
This gradient in both color and stitch density makes the front ferns appear closer and more substantial, adding dimension to the entire composition.
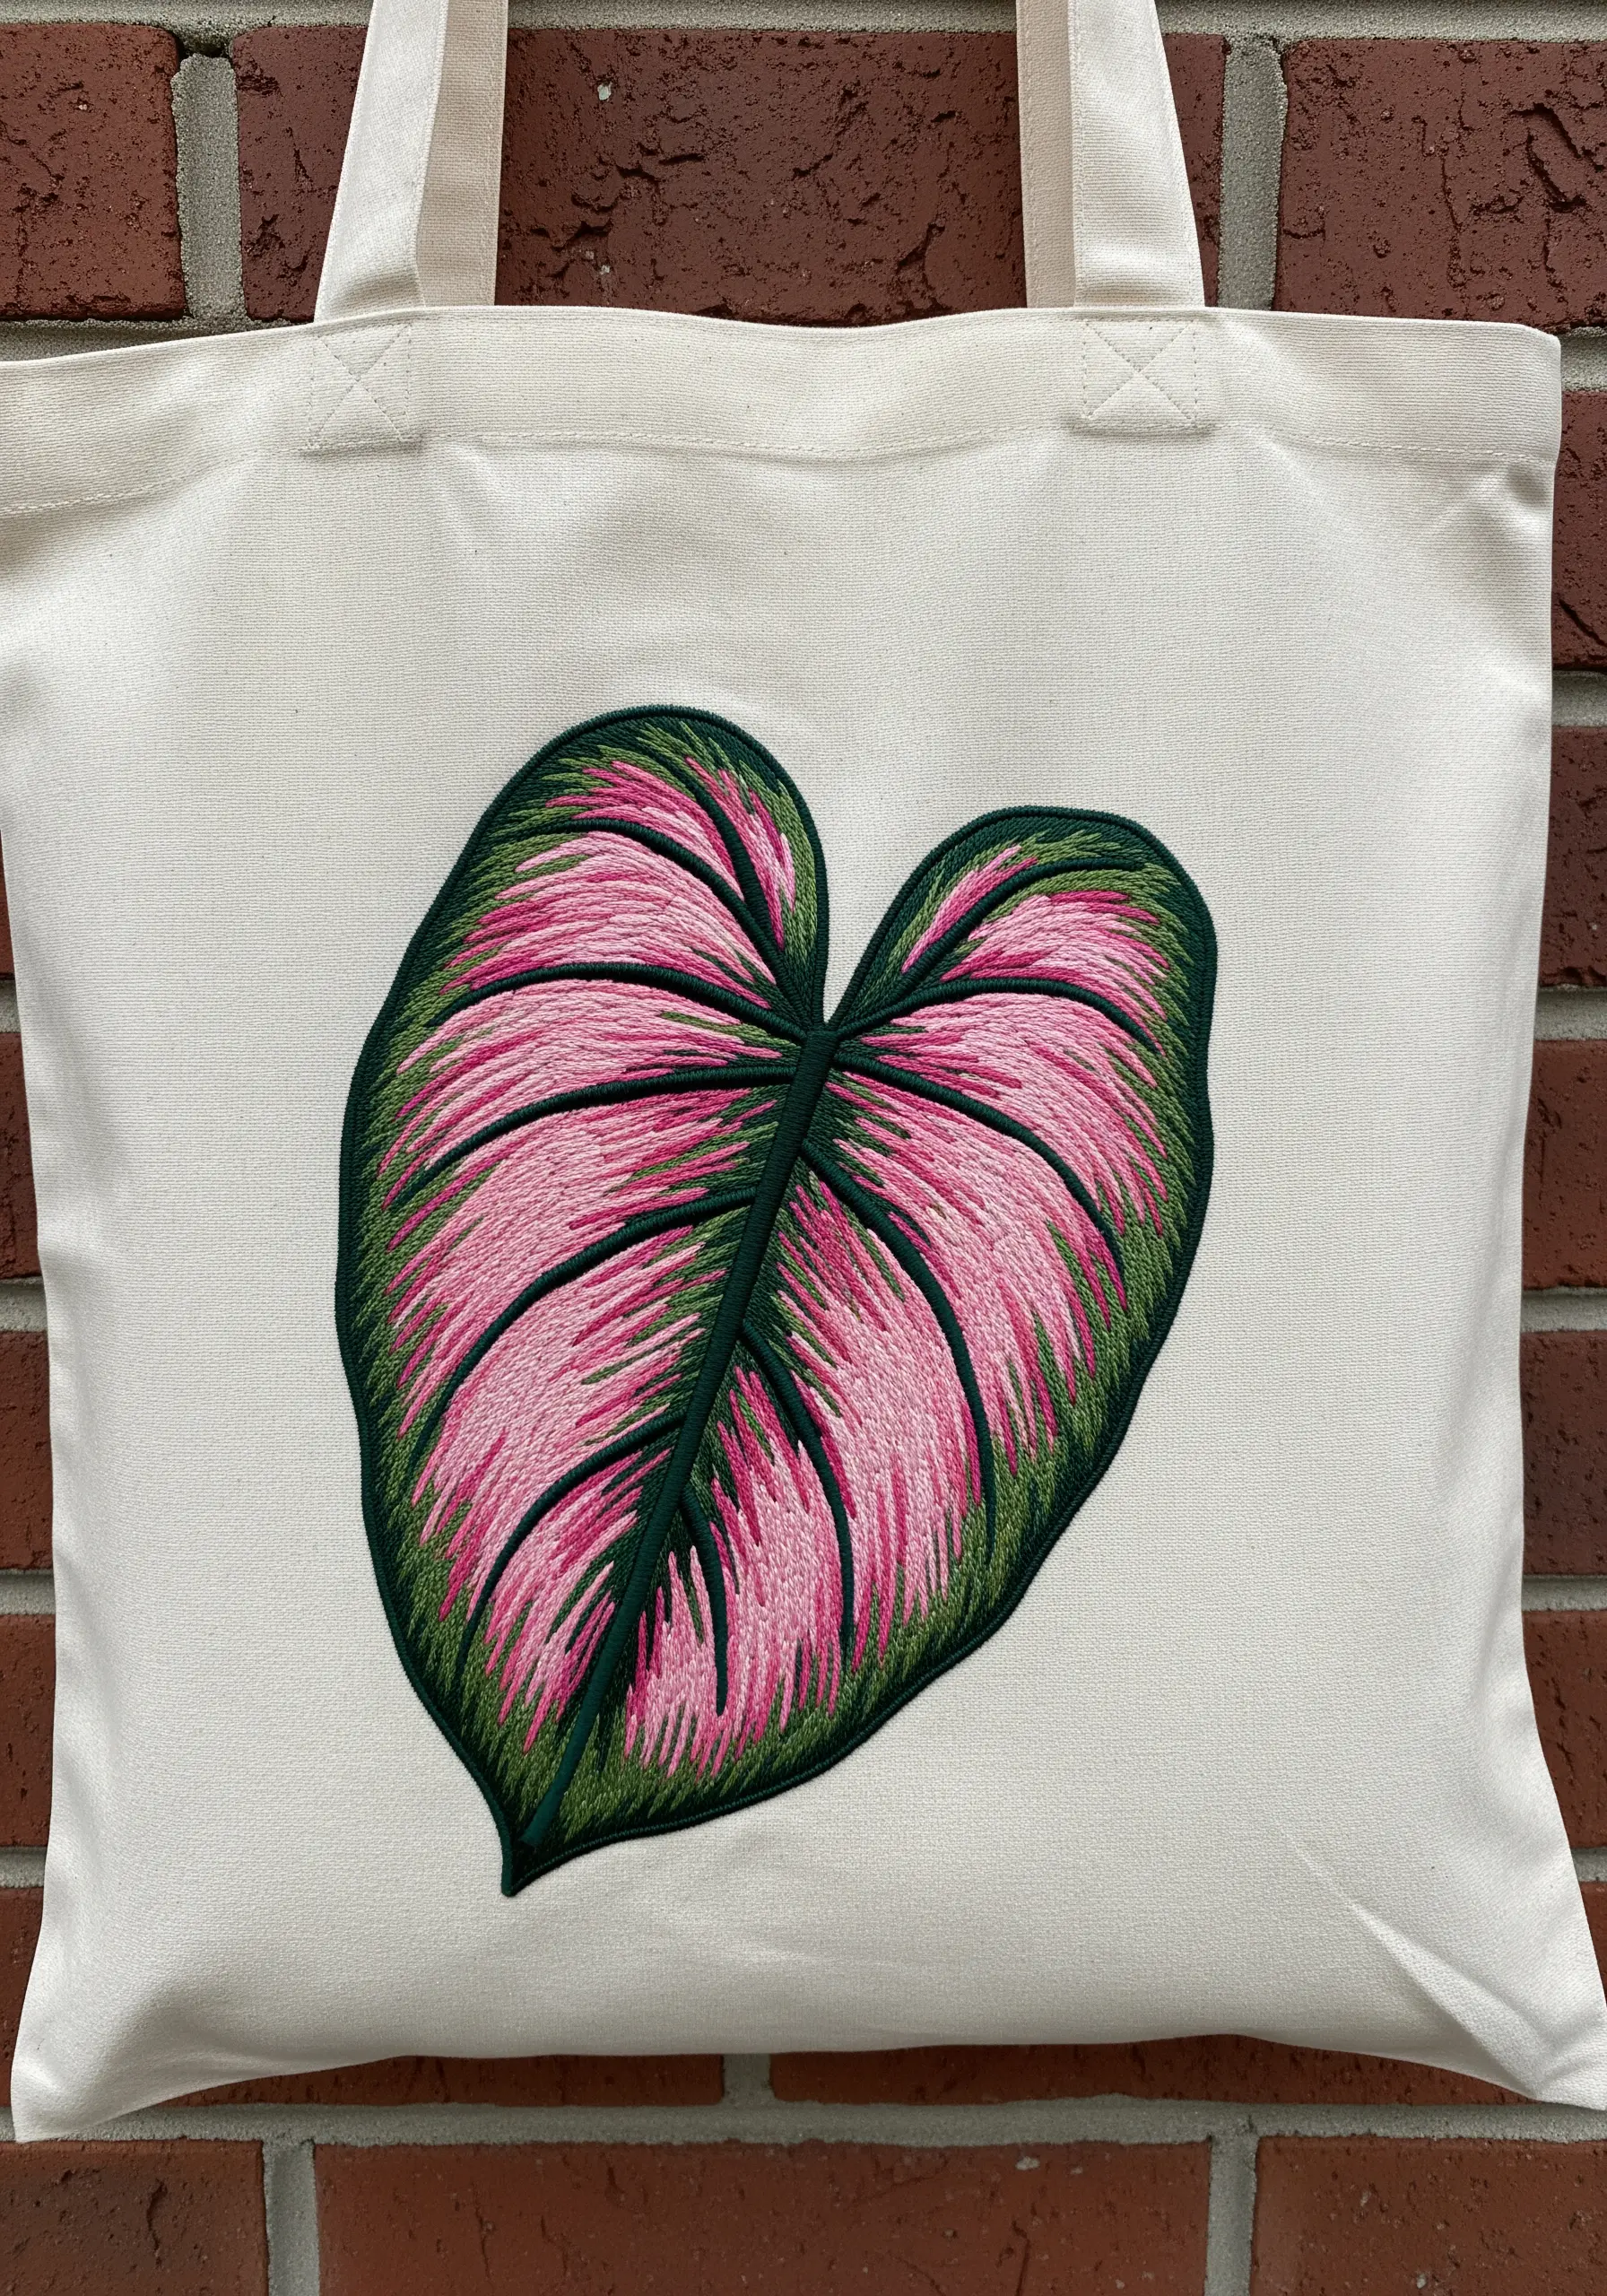
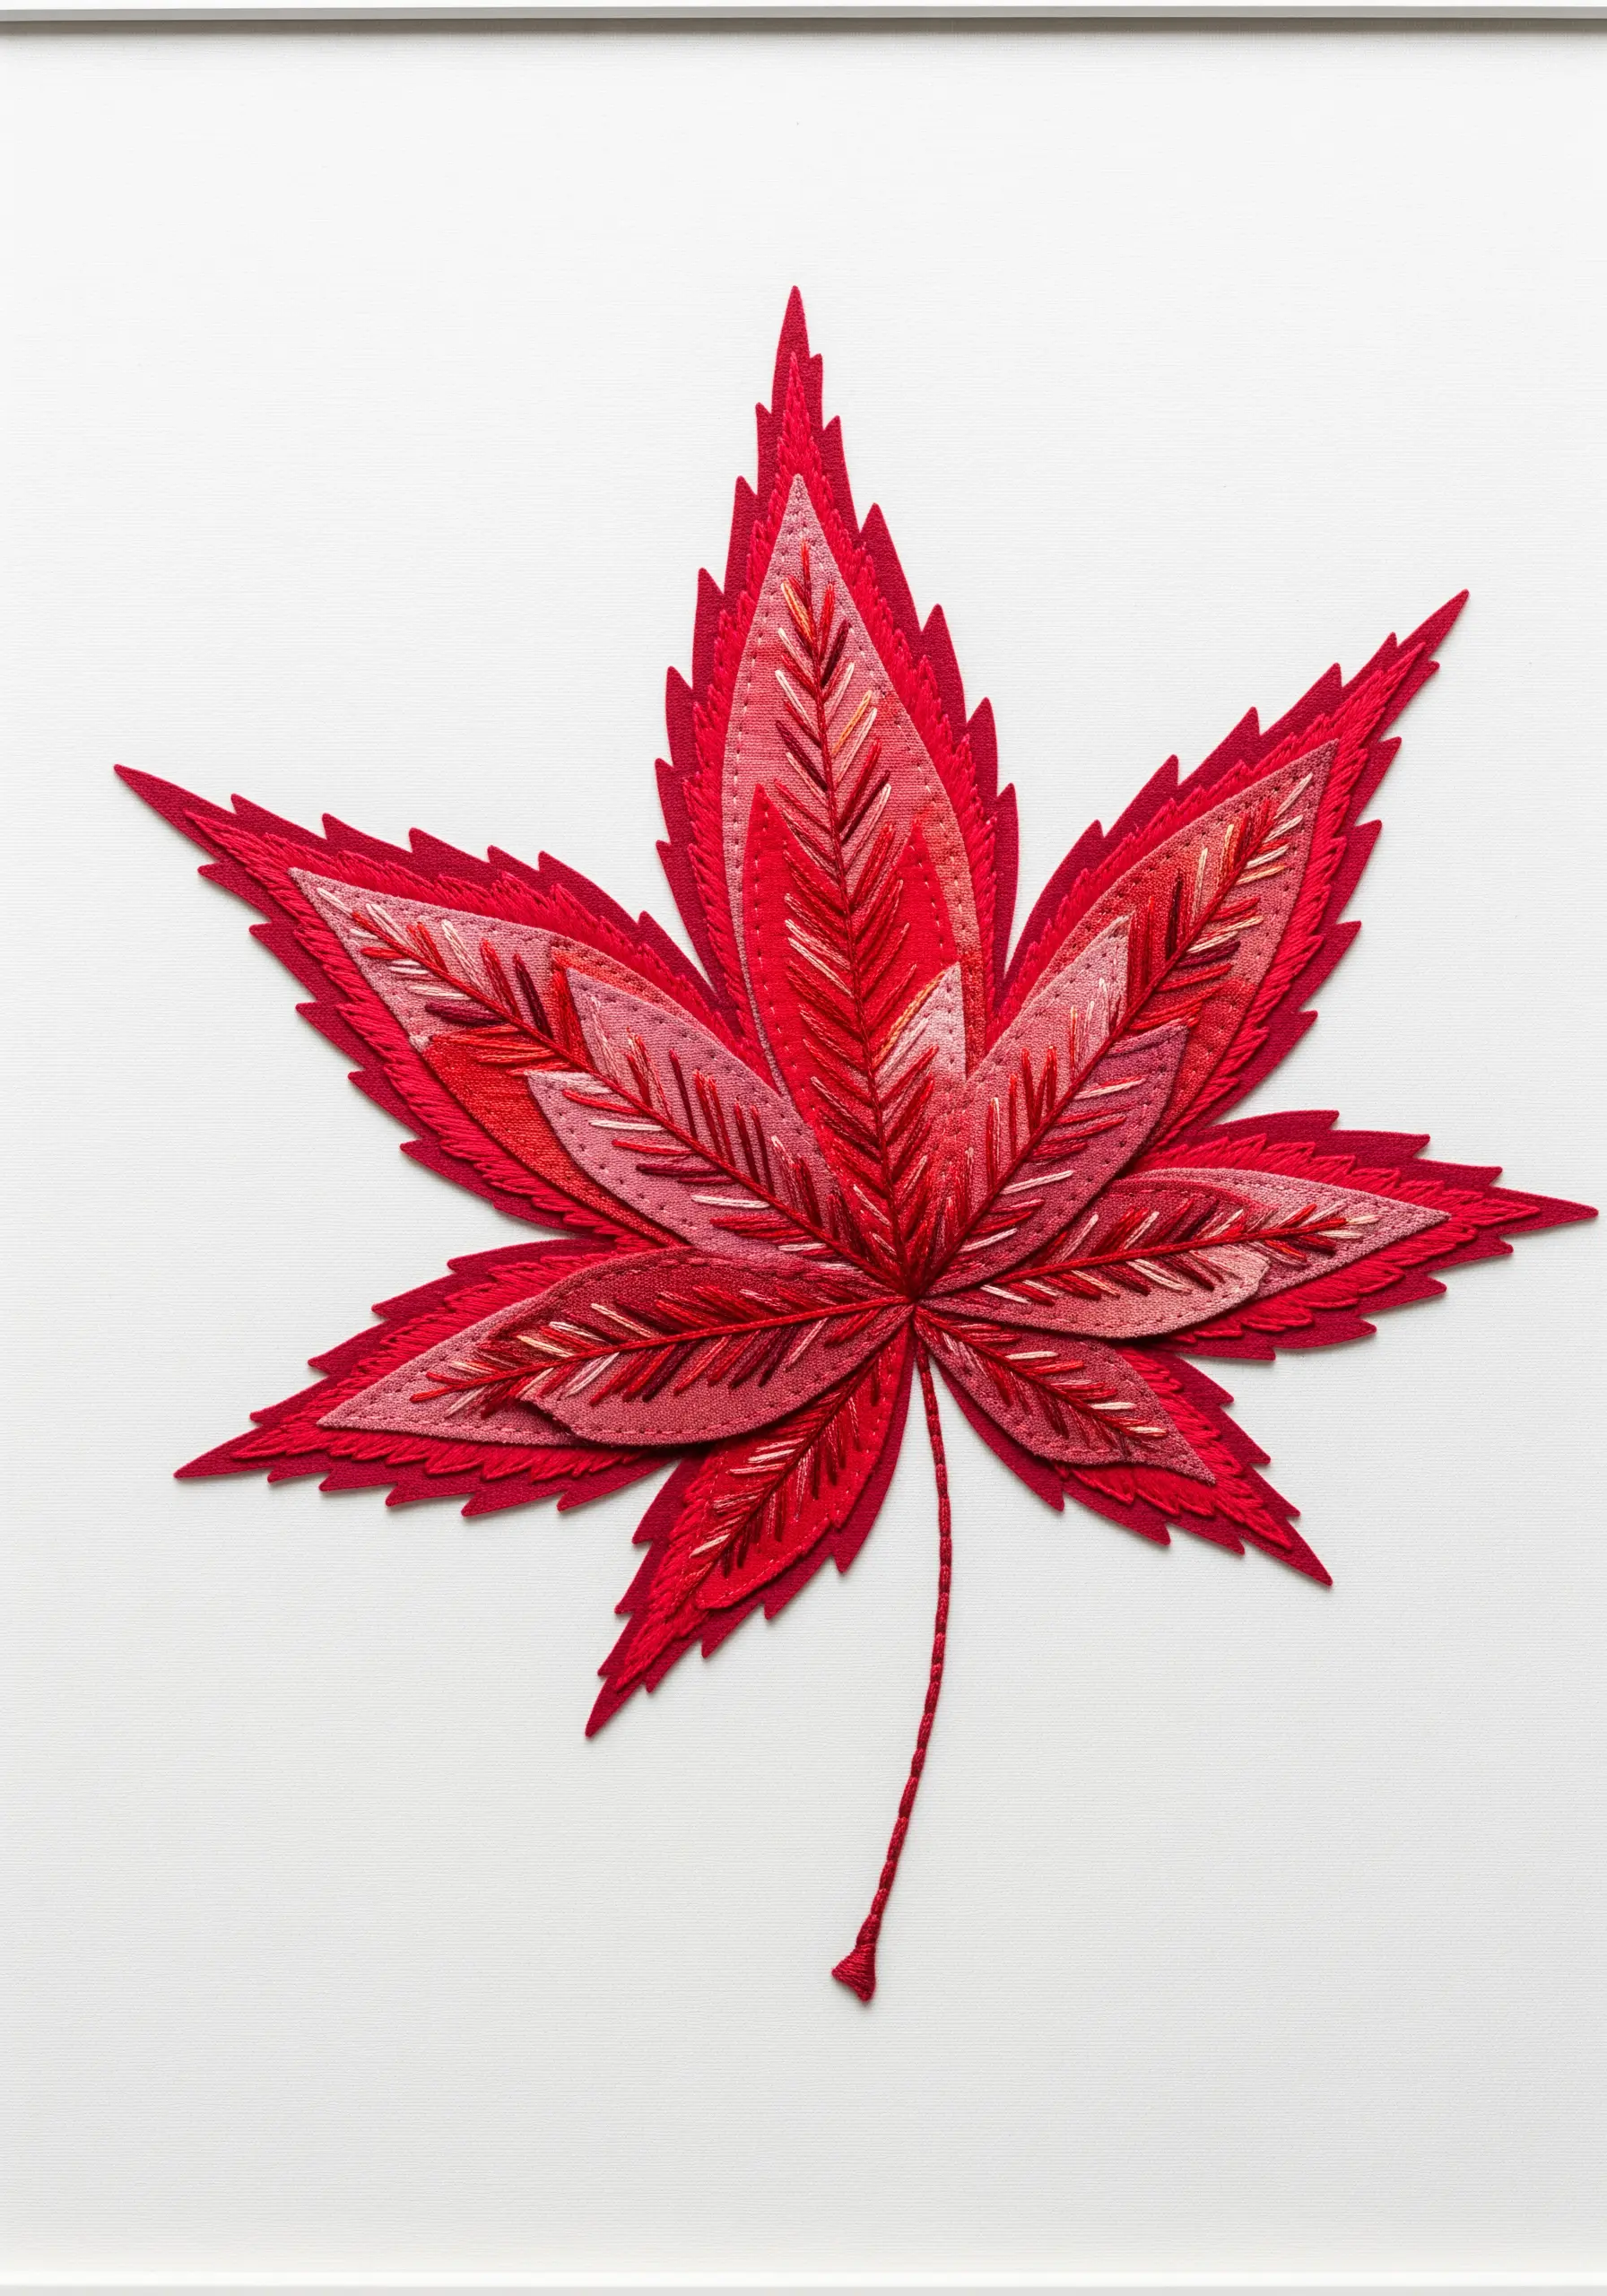
7. Block Colors Boldly for Graphic, Patterned Foliage
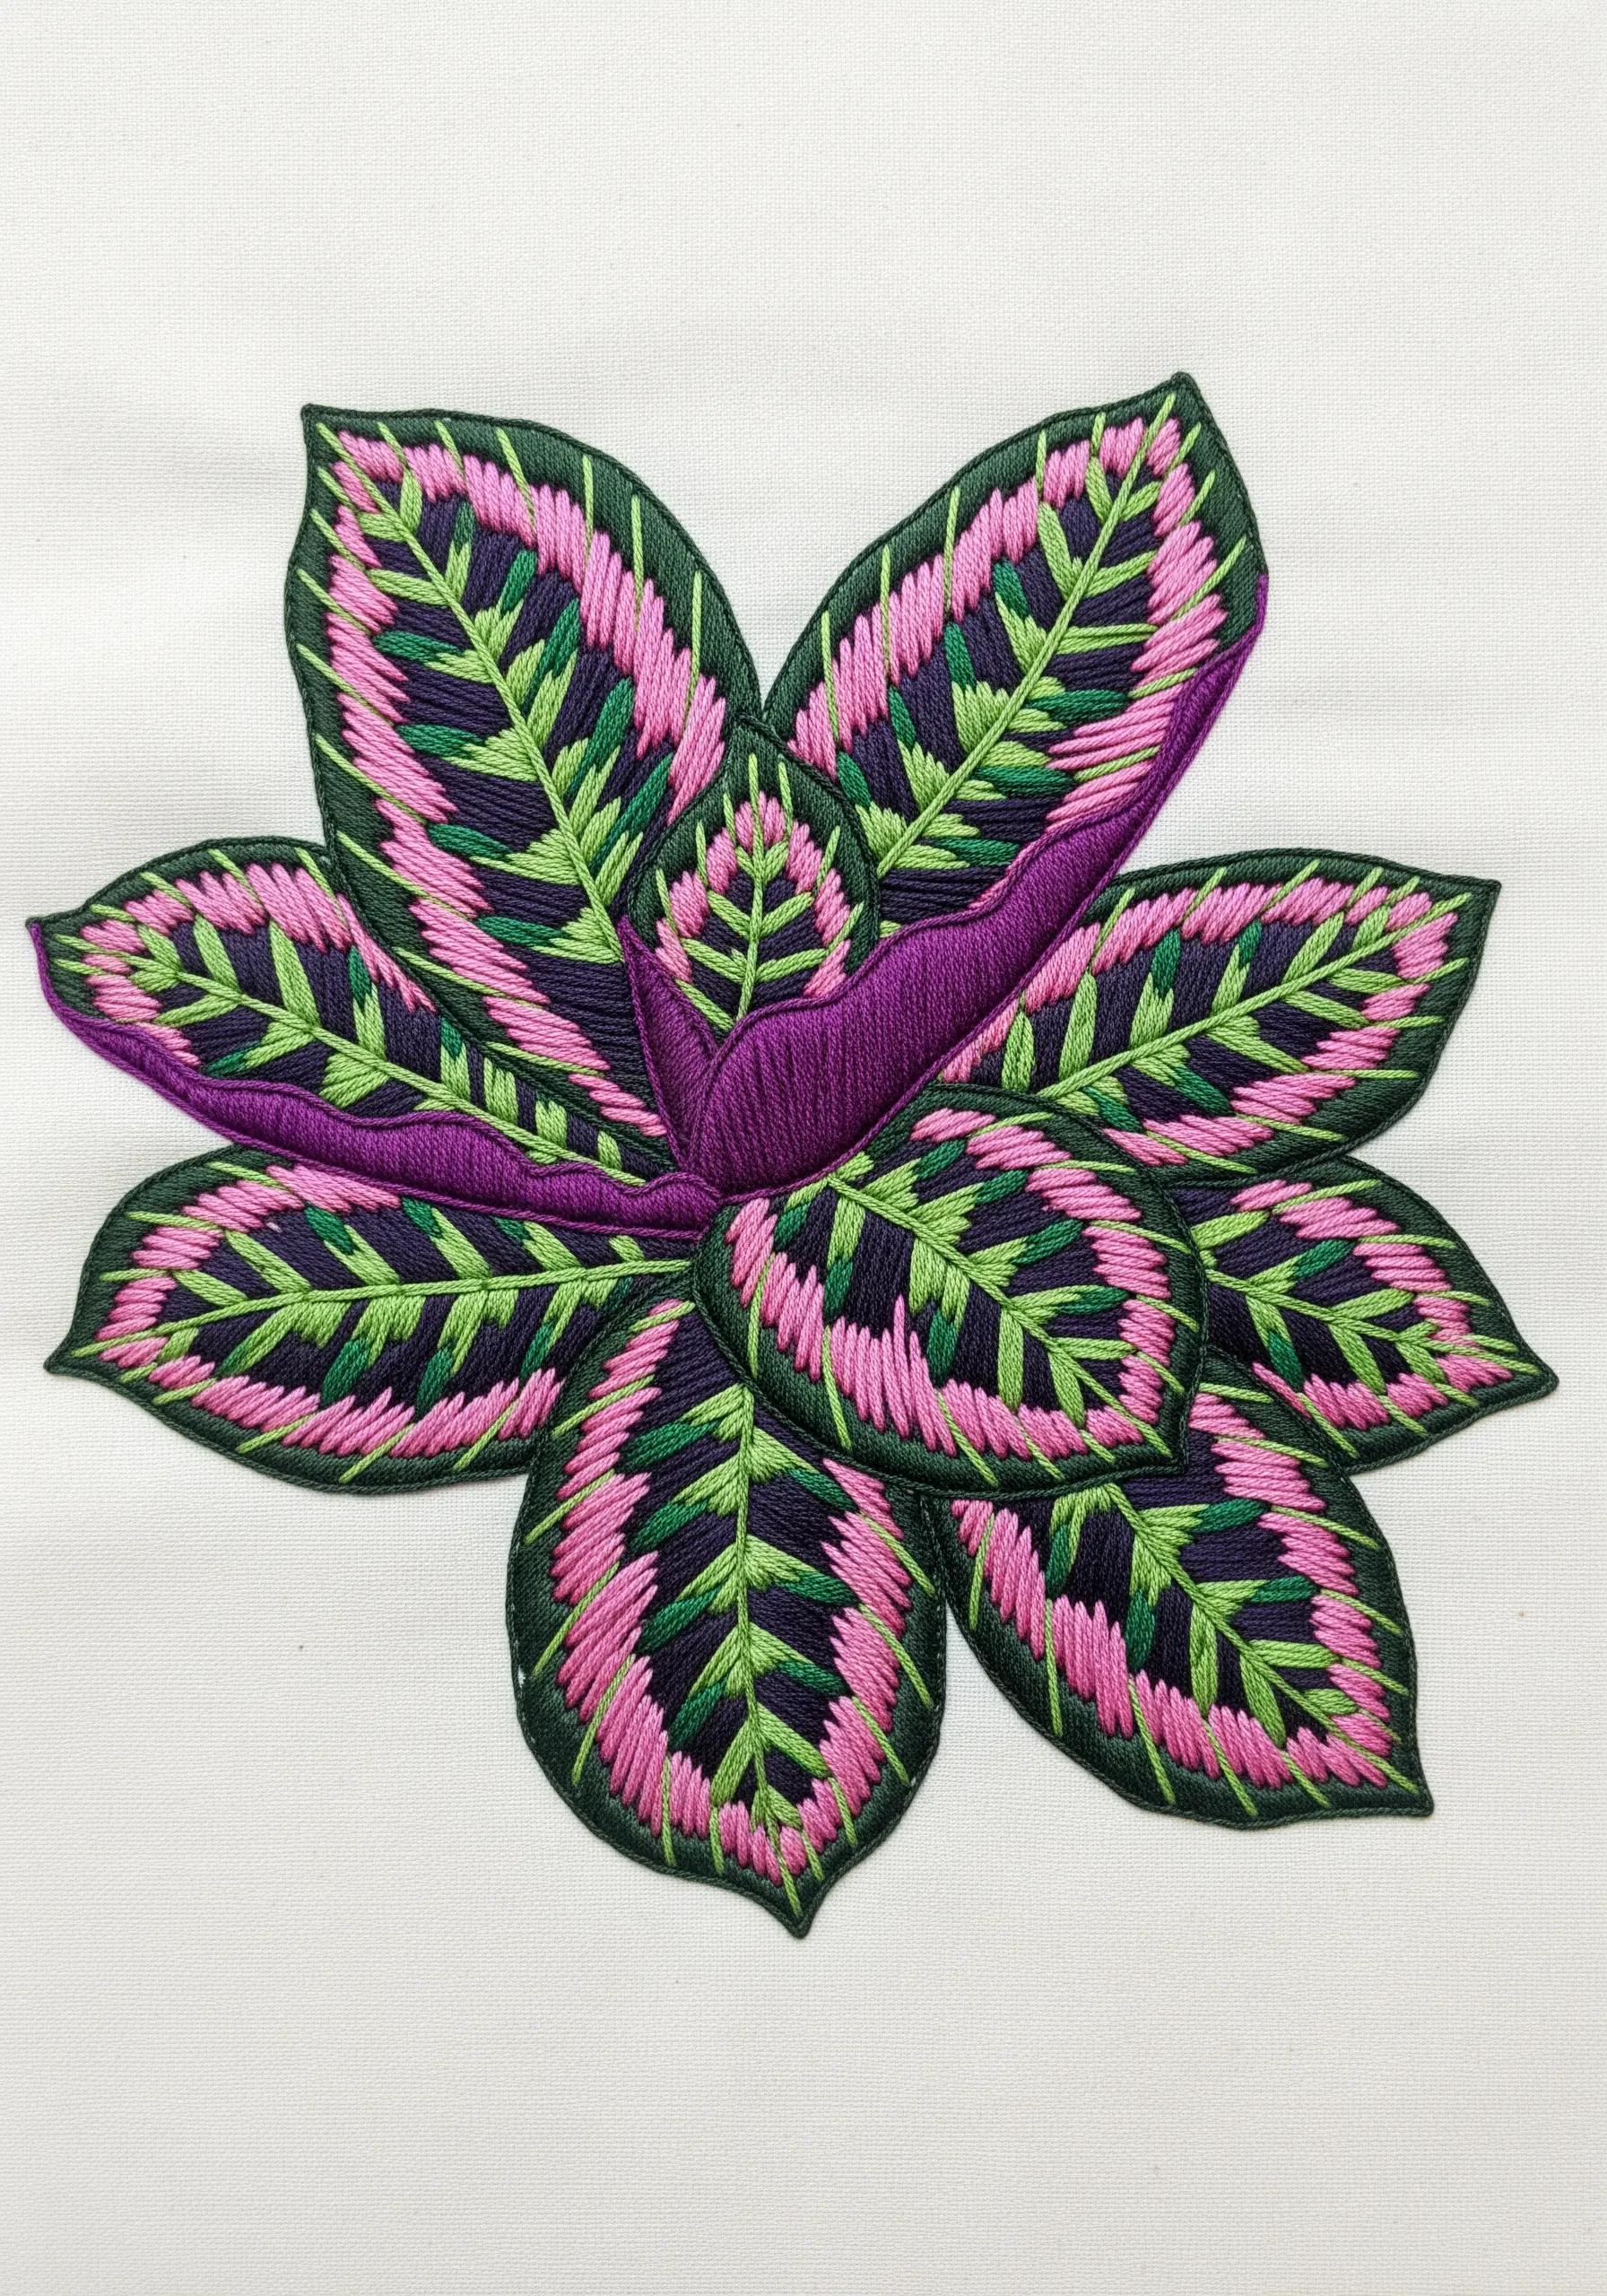
When tackling leaves with intricate, built-in patterns, treat each color section like a separate, interlocking shape.
Fill the pink areas with long-and-short stitch, the dark green with satin stitch, and the light green veins with fishbone stitch to create a mosaic of varied textures.
A clean, dark split-stitch outline around each leaf unifies the busy pattern and gives it a sharp, graphic finish, perfect for capturing the striking beauty of patterned houseplants.
8. Blend Threads in the Needle for a Painterly Effect
To recreate the soft, mottled variegation of leaves like the Pink Princess Philodendron, blend your colors before they even hit the fabric.
Use your needle with a custom mix of floss—for example, one strand of dark green, one of light green, and two of pink—all at once.
This technique creates soft, unpredictable color transitions with a realistic, watercolor-like effect that is impossible to achieve with solid colors alone.
9. Layer Satin Stitch for a Two-Tone Sheen
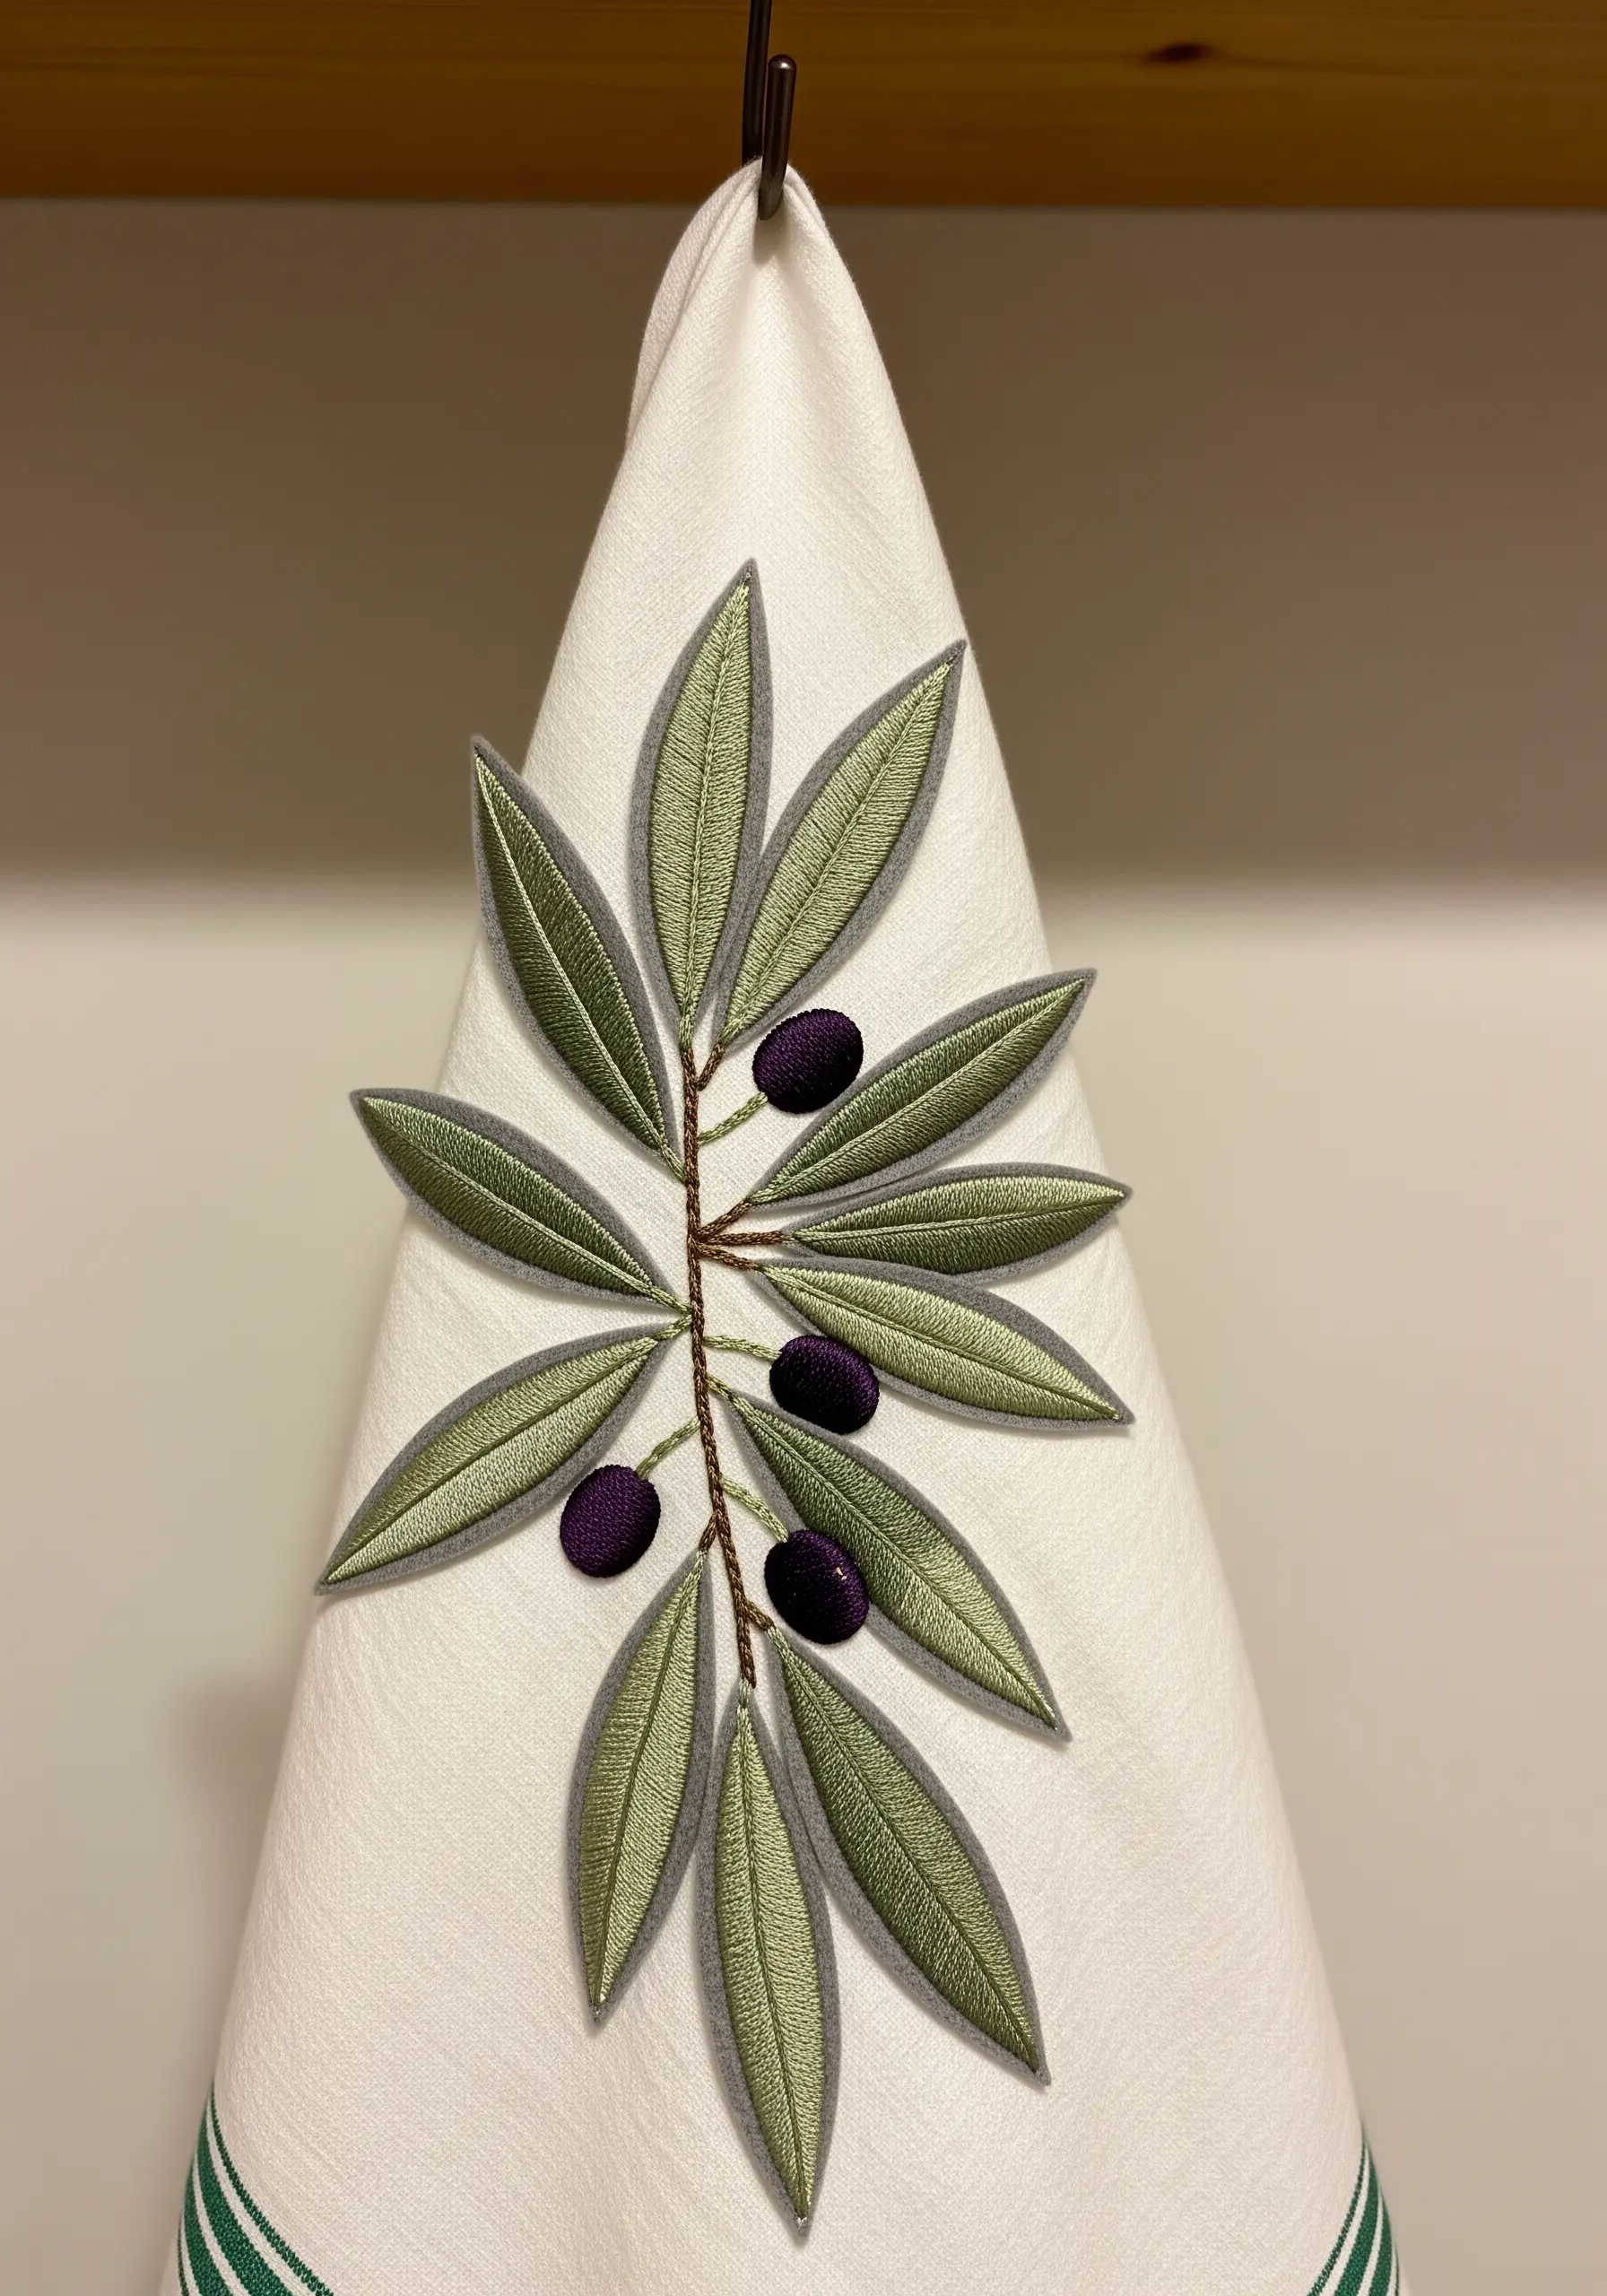
You can achieve the silvery-green look of an olive leaf by layering two distinct shades of satin stitch.
First, fill the entire leaf shape with a base of dark olive green thread.
Then, stitch a smaller, central section directly on top using a lighter, silvery-green floss.
This layered approach creates a subtle, elegant highlight that mimics how light reflects off a real leaf’s curved surface, making it perfect for delicate botanicals on home linens.
10. Use Woven Stitches for a Light, Skeletal Texture
For a delicate, semi-transparent leaf, combine outlining with weaving.
Start by creating a solid frame for the leaf and its central veins using a whipped backstitch for strength and smoothness.
Next, use a single strand of floss to weave horizontal bars between the veins, leaving intentional gaps to let the background fabric show through.
This technique gives your leaves a light, airy quality and a unique organic texture.
11. Combine Different Stitches for Varied Foliage Textures
To create a realistic bouquet, you need a variety of leaf textures.
Use open fly stitches for the wispy, spread-out leaves at the base of your arrangement.
For the denser clusters of foliage, use small, detached chain stitches packed closely together.
This simple contrast in stitch choice makes the entire composition feel more natural and less uniform, adding depth and realism to your work.
12. Create Opulence with Metallic Thread on Velvet
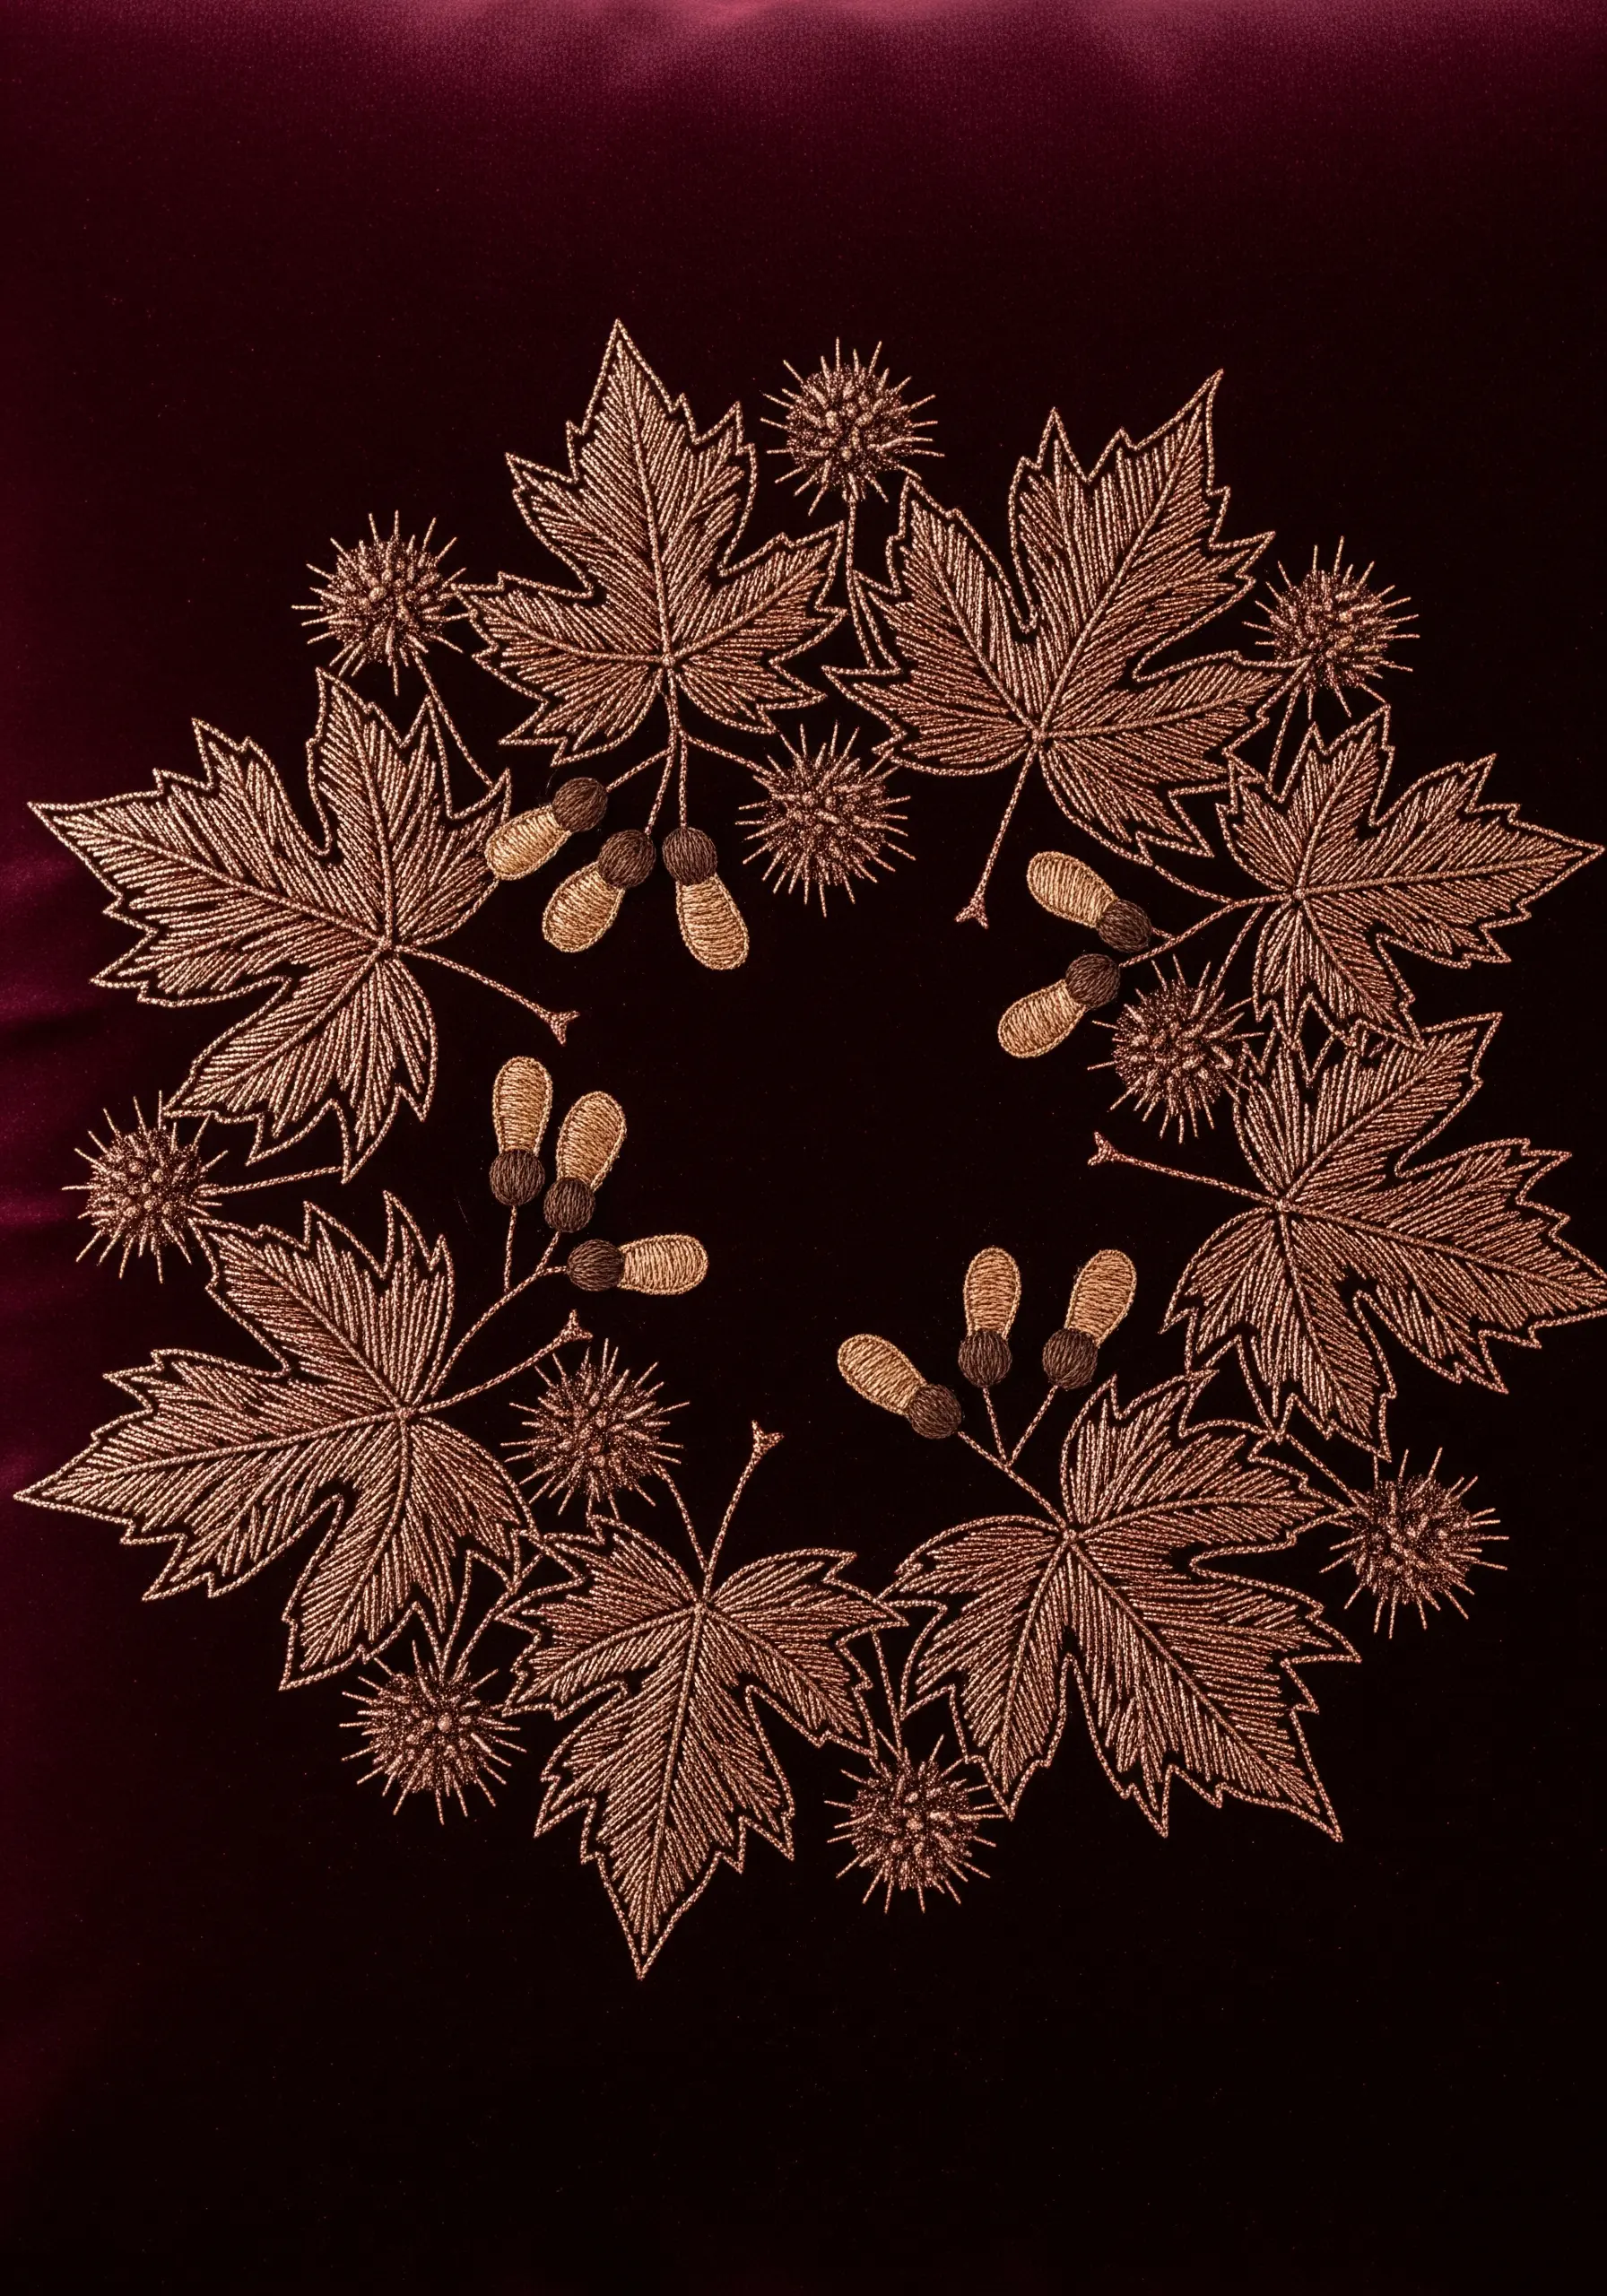
Elevate a classic botanical design by stitching it entirely in a single shade of metallic thread.
When stitched on a dark, plush fabric like velvet, the metallic floss catches the light, creating a luxurious shimmer that contrasts beautifully with the fabric’s matte finish.
Use a detailed fishbone stitch to create intricate veining, turning a simple wreath into a truly opulent statement piece.
13. Stitch and Cut for a 3D Appliqué Effect
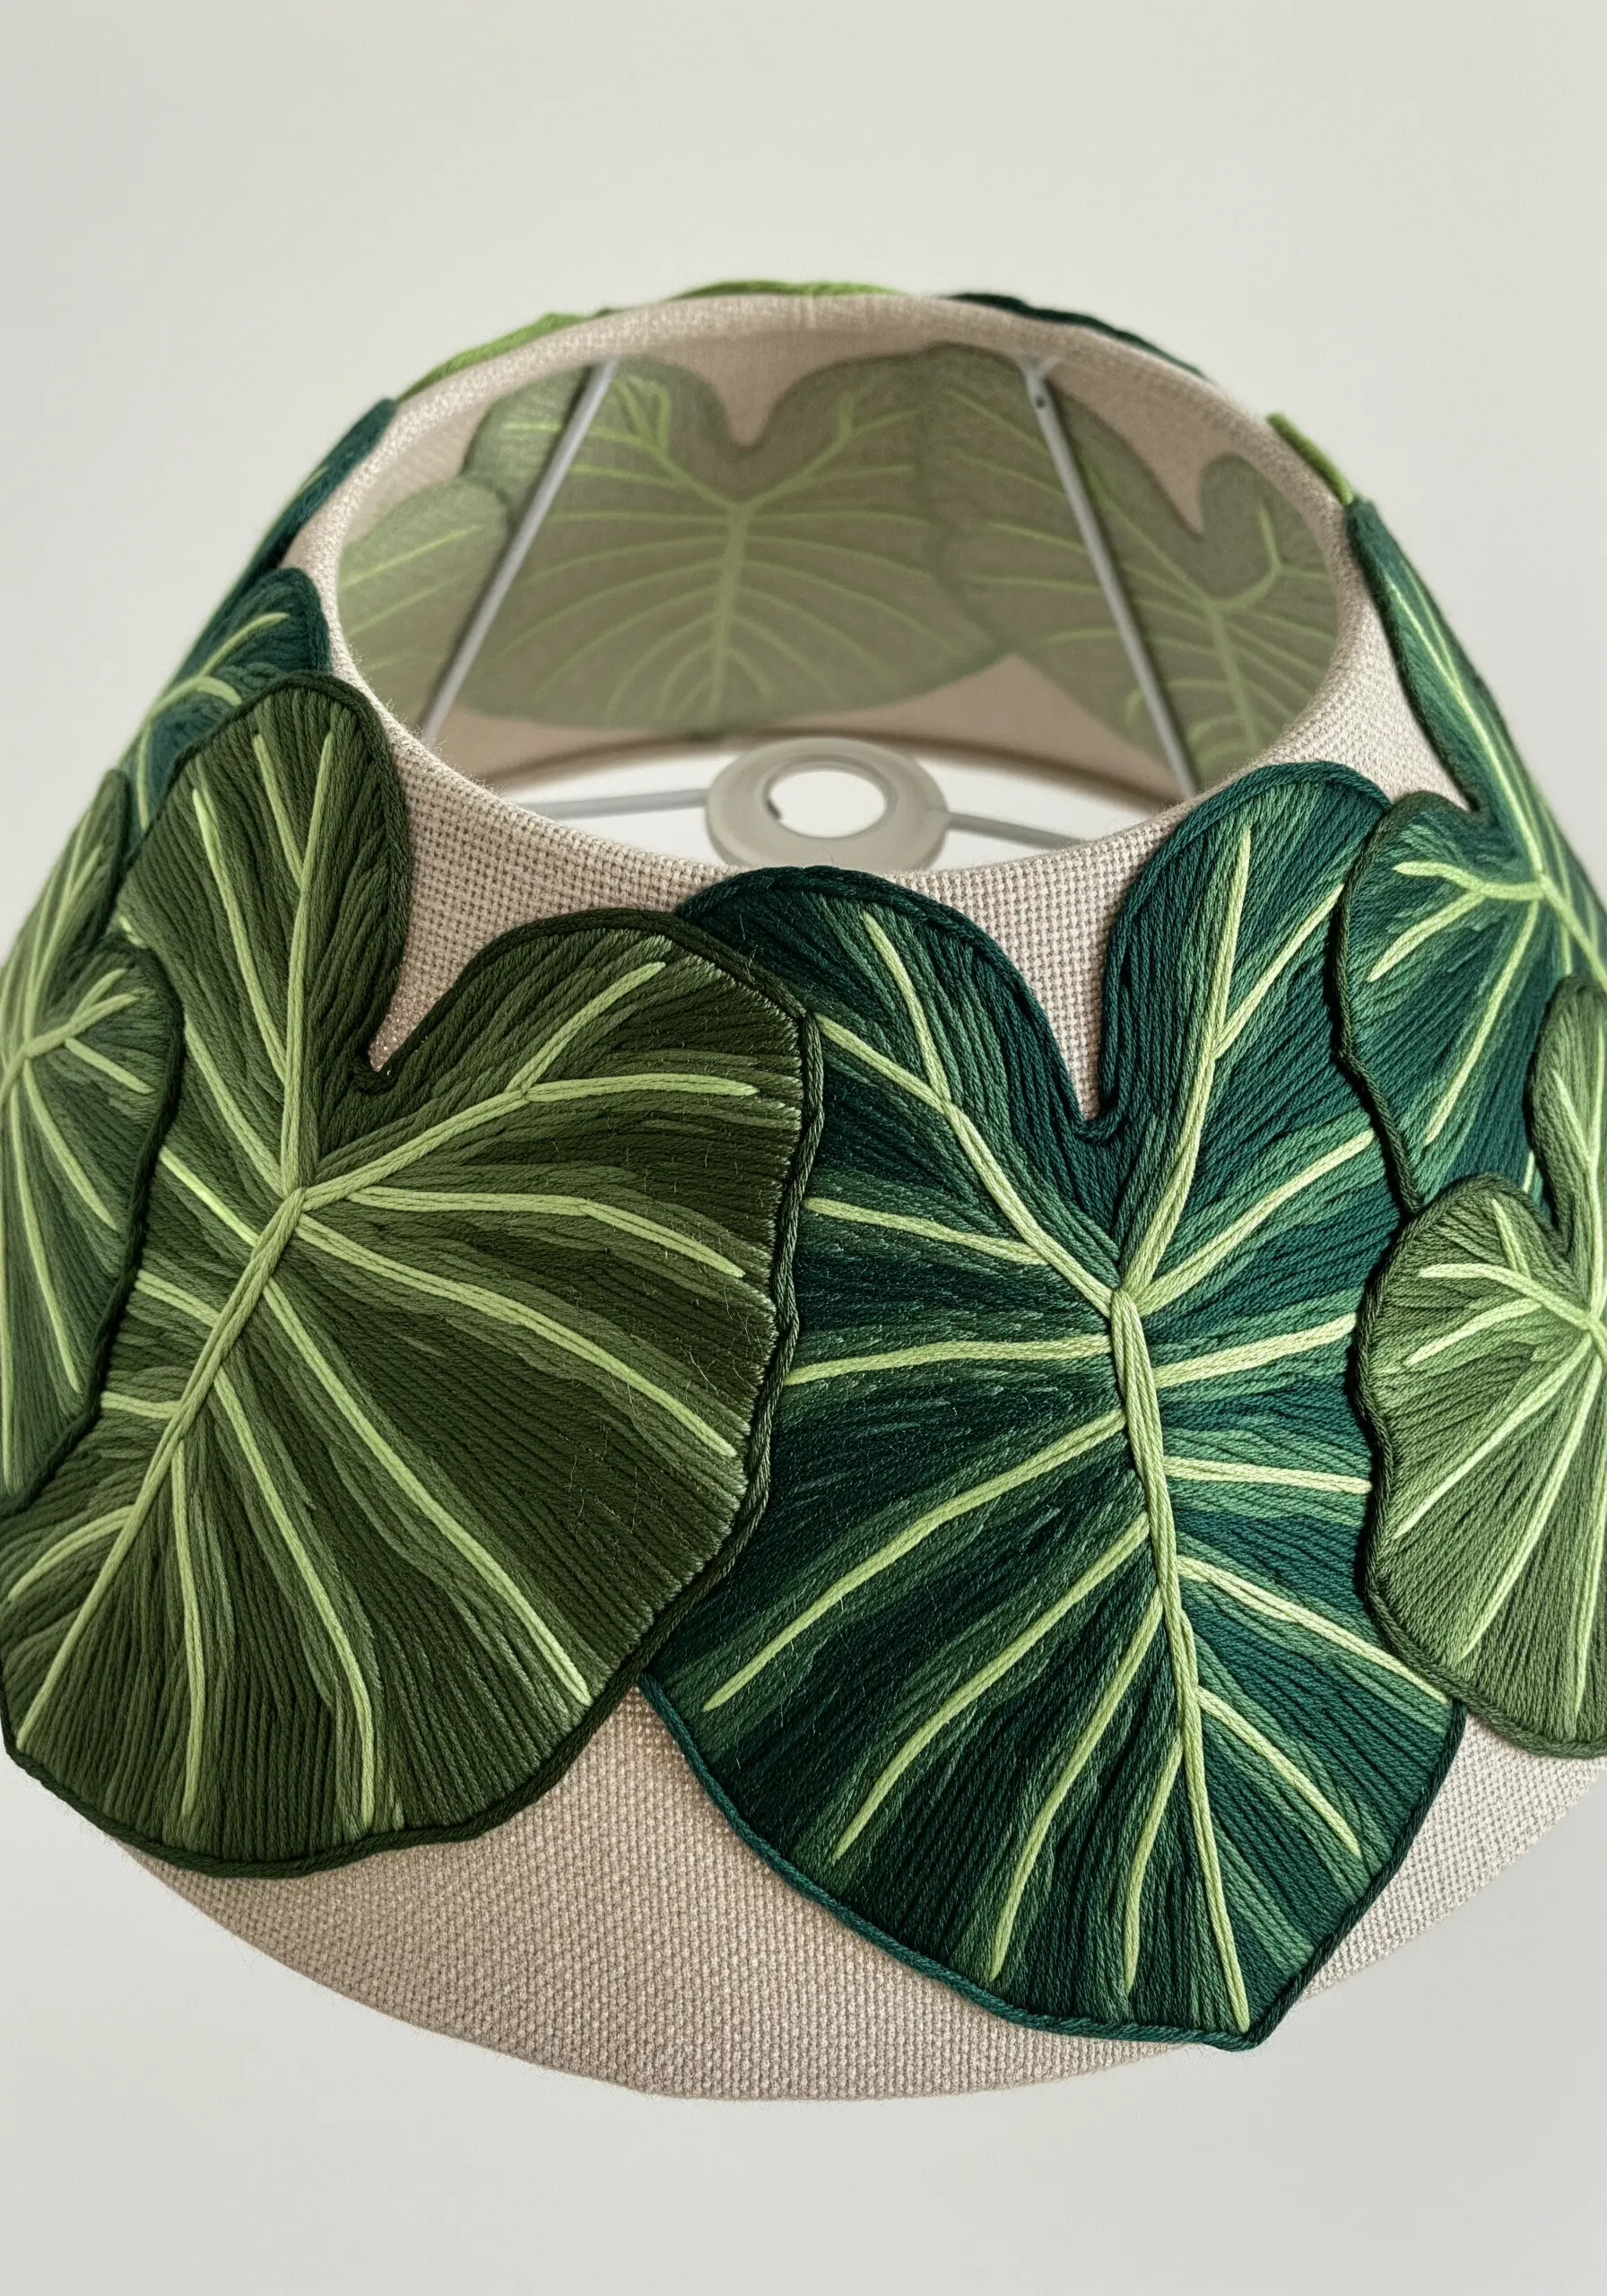
To create leaves that appear to be growing right off a surface, embroider them on a separate piece of fabric first.
After stitching, apply a fusible backing, carefully cut out each leaf, and then appliqué them onto your final object, like a lampshade or pillow.
For an even greater sense of dimension, allow the edges and tips of some leaves to remain unattached, enhancing the three-dimensional, overlapping effect.
14. Layer Fabric Pieces for a Collage-Style Design
This technique combines fabric appliqué with embroidery for a richly textured, layered look.
Cut segments of your leaf from different shades of fabric and arrange them on your base layer.
Tack them down, then use embroidery to add veins, outlines, and other fine details.
A tight buttonhole stitch around the raw edges of each fabric piece will secure it cleanly and add yet another layer of texture.
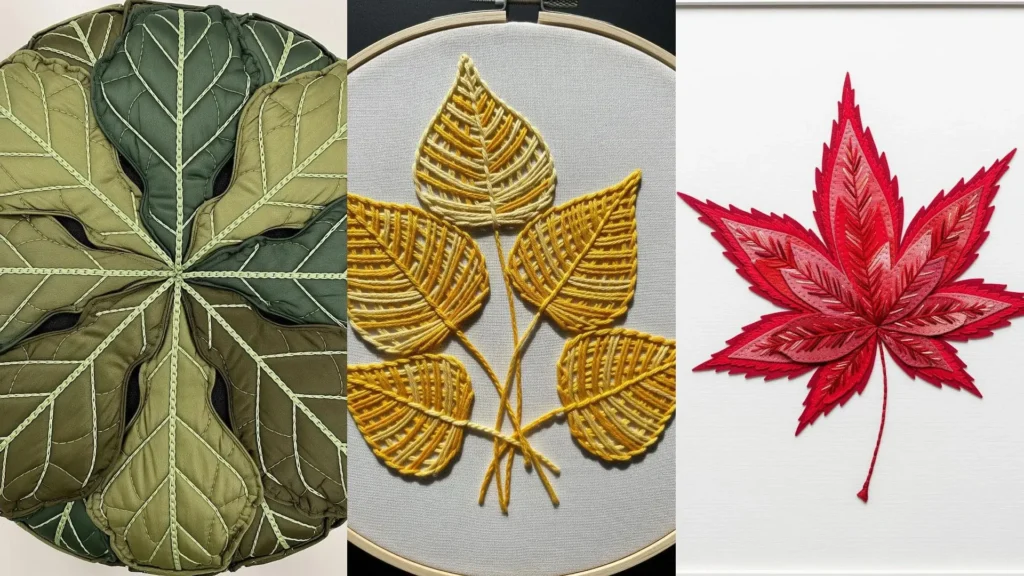
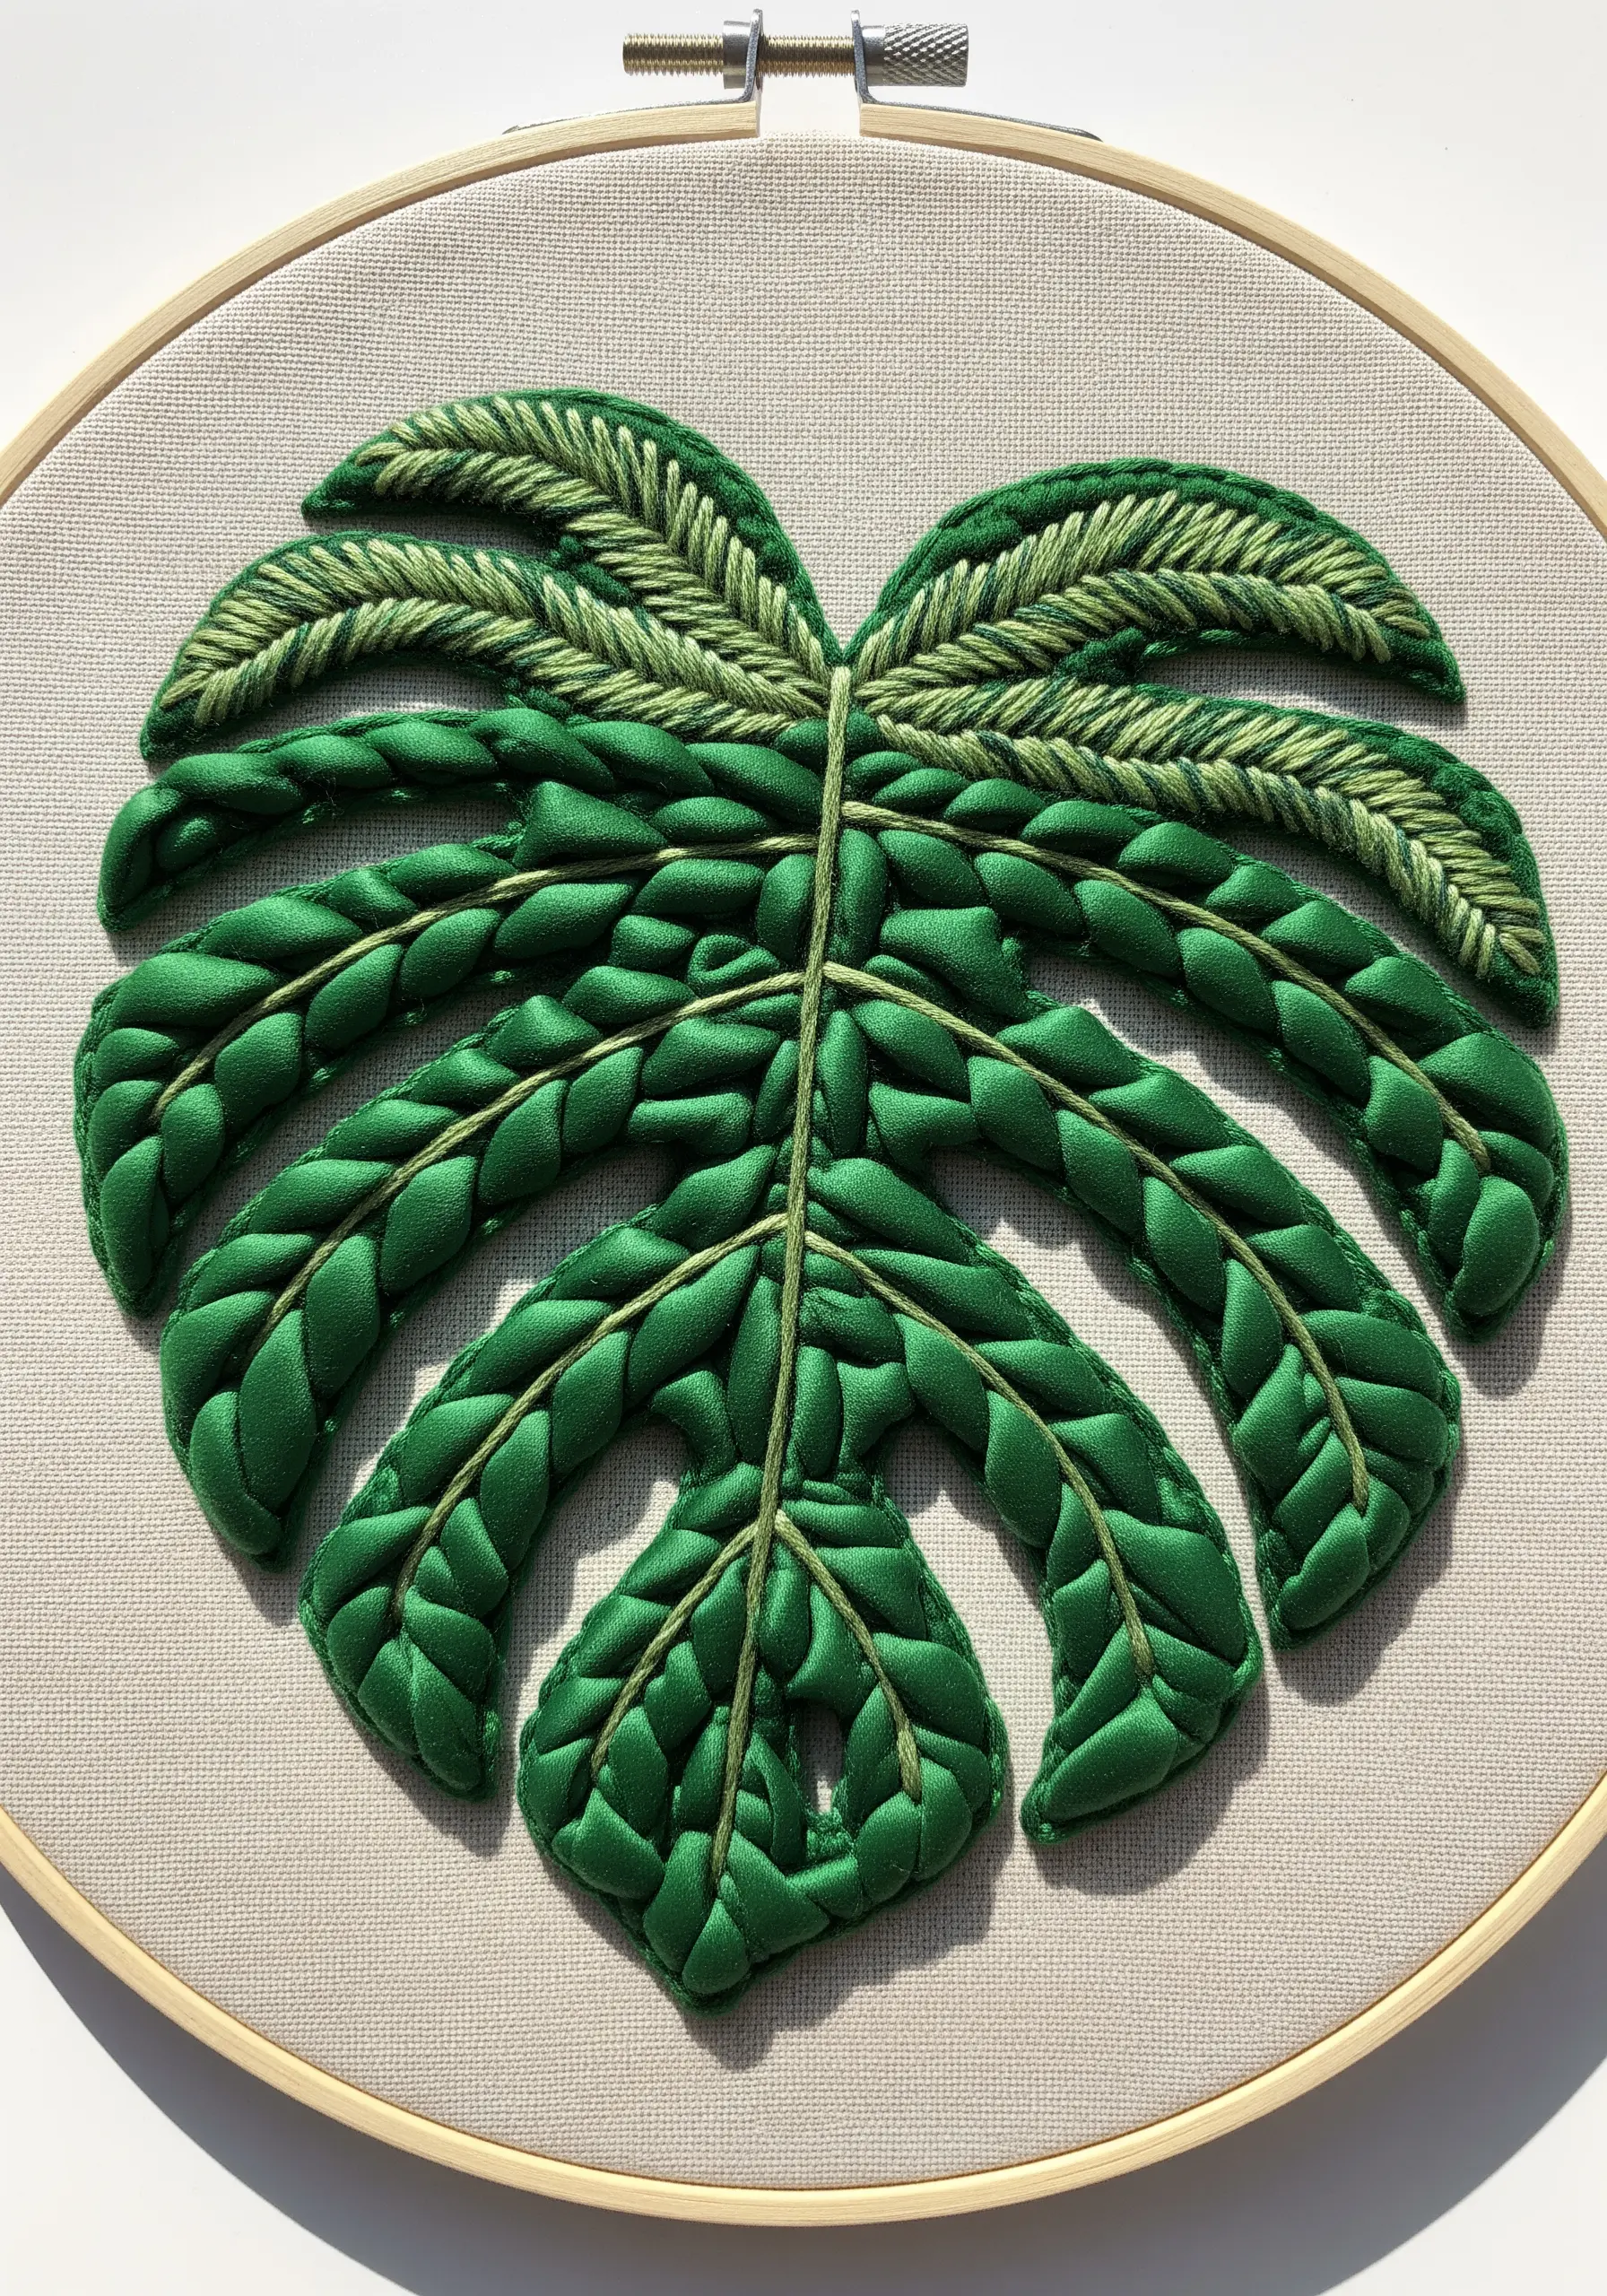
15. Combine Quilting and Stitching for Padded Dimension
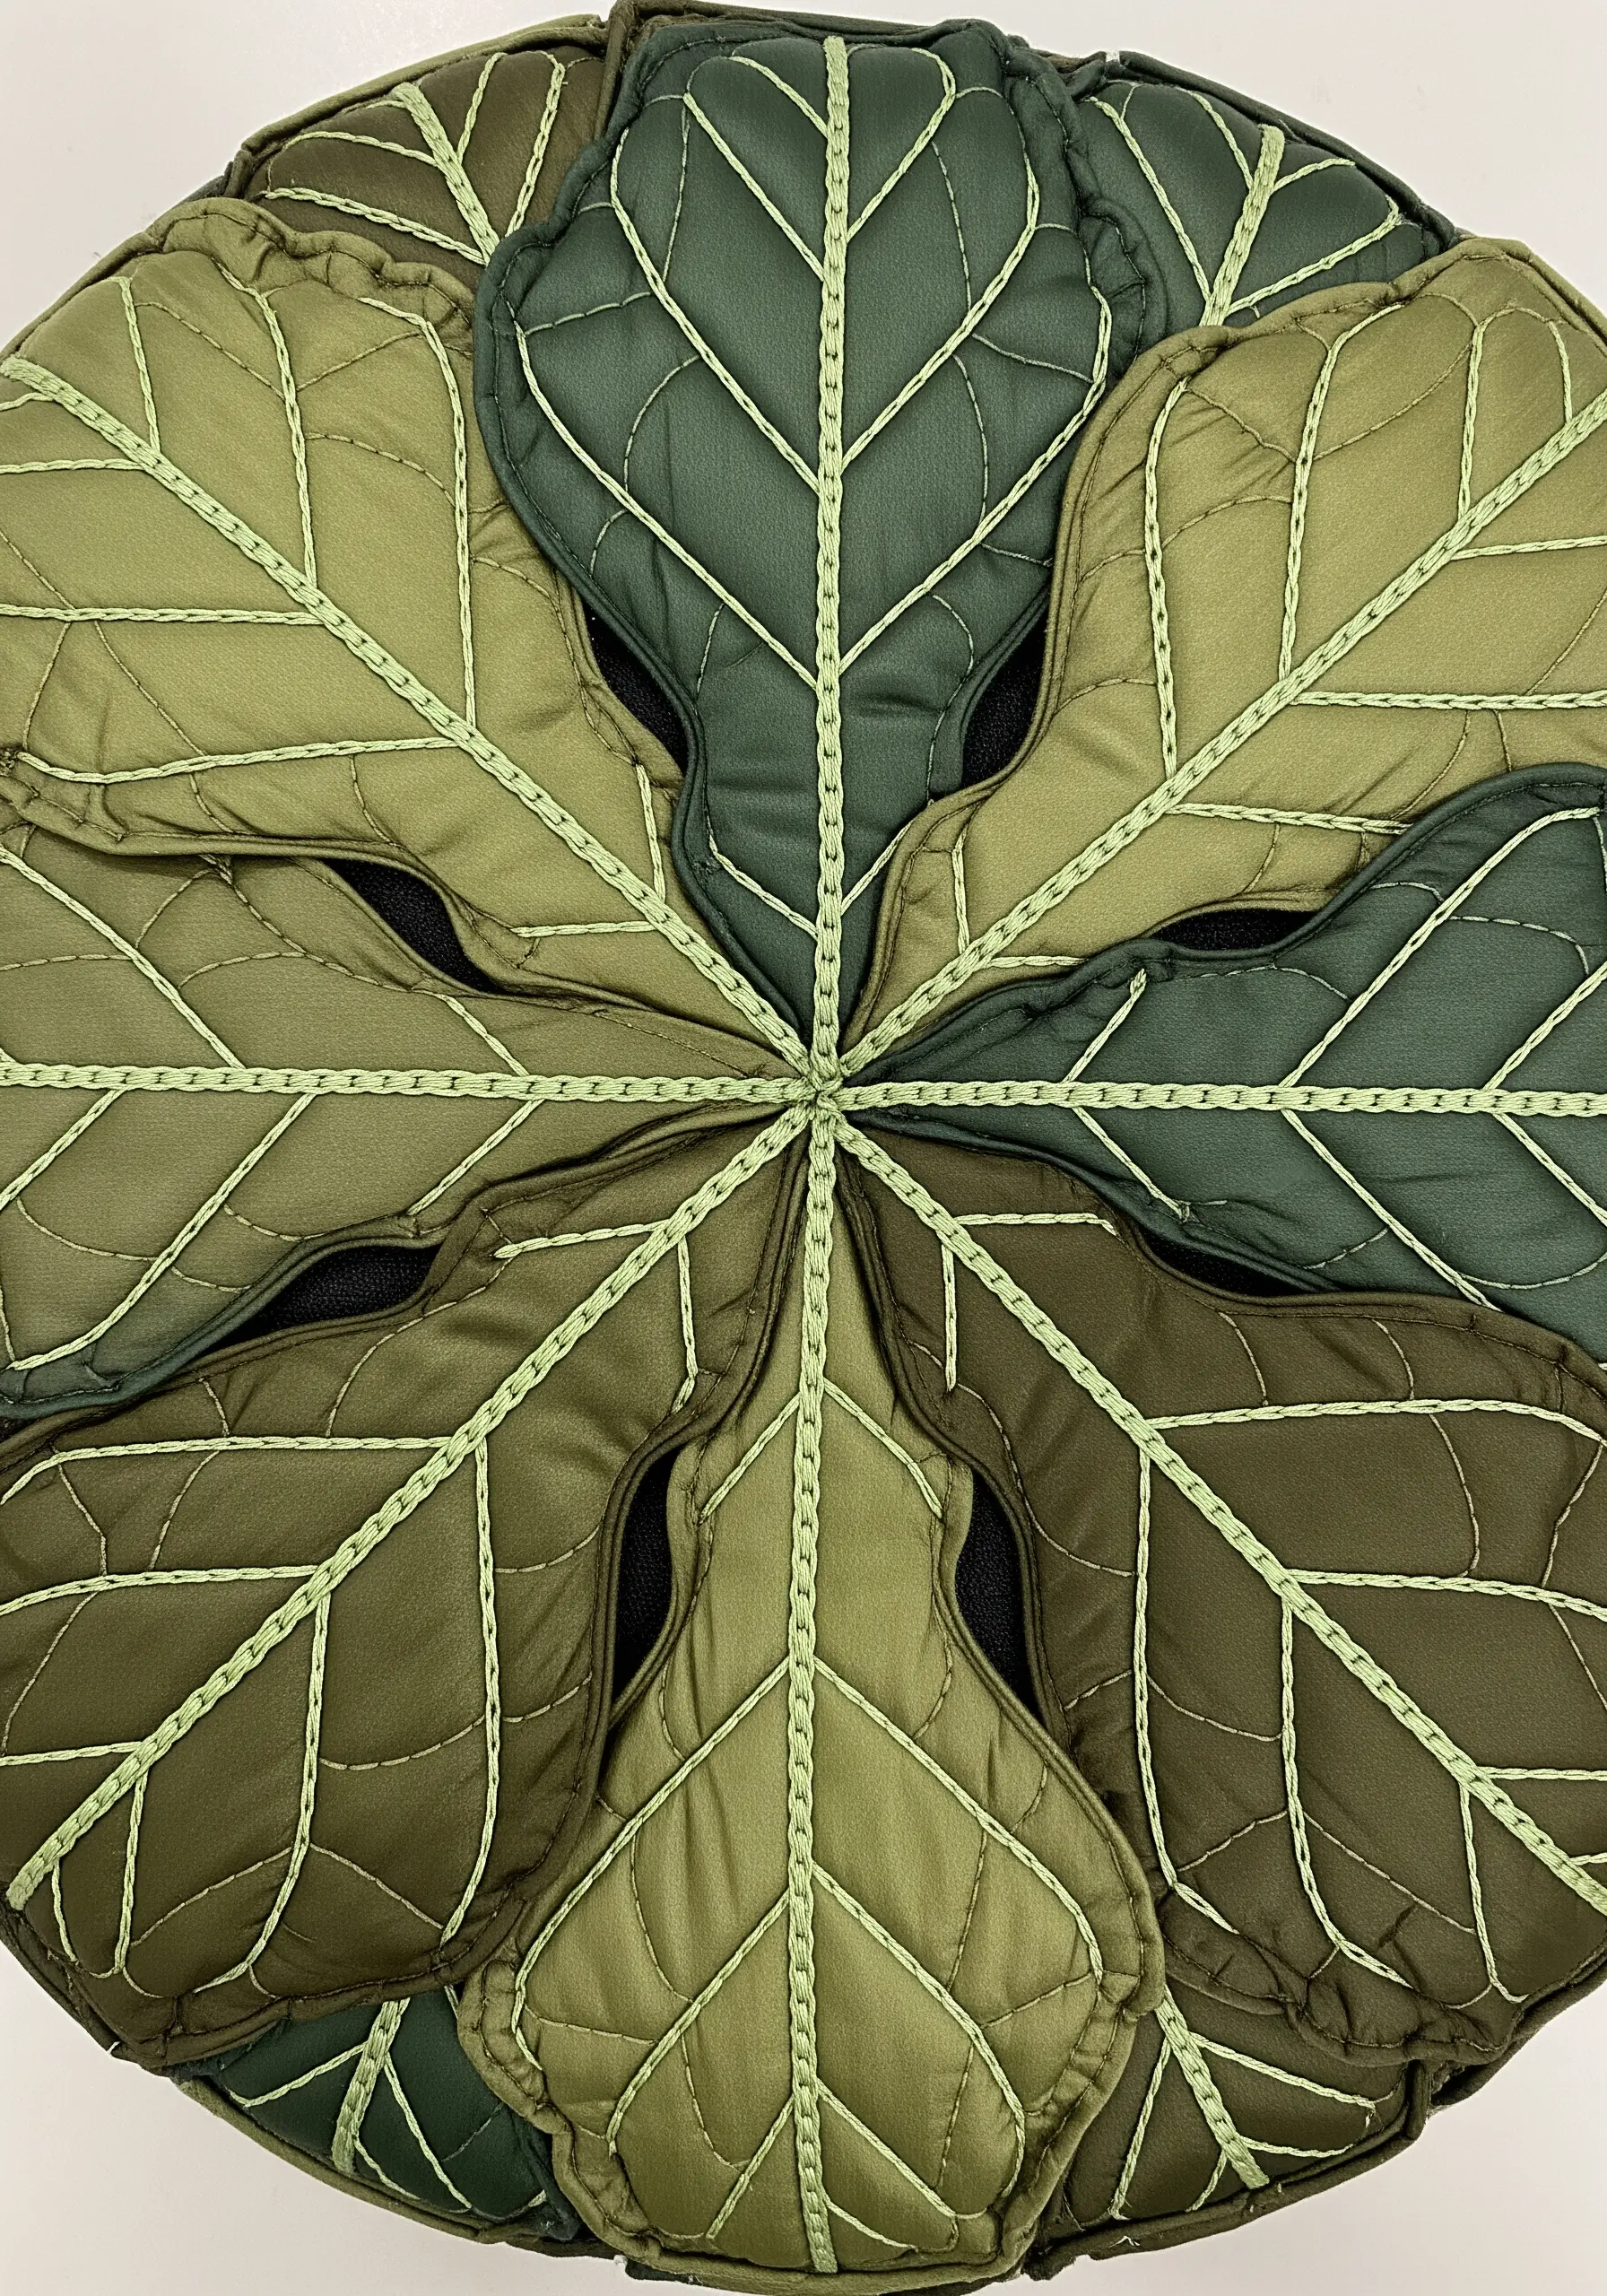
For a plush, sculptural leaf, try a trapunto-inspired technique.
Layer two pieces of fabric with batting in between, then stitch your leaf outline and vein design through all three layers.
This quilting process creates puffy, segmented sections that provide a unique tactile and visual depth.
This method is perfect for functional items like trivets, coasters, or decorative pillows.
16. Incorporate Decorative Stitches for an Artful Touch
Transform a simple leaf shape by incorporating unexpected decorative stitches.
After filling the leaf with a smooth satin stitch, add delicate, trailing chain stitches or couched threads to suggest magical patterns or textures.
A few scattered seed stitches can mimic water droplets or light flecks, turning a straightforward botanical into a more imaginative, artful piece.
17. Use Color Gradients to Mimic Light and Shadow
To create a highly realistic fern, blend three to four shades of green using long-and-short stitch.
Start with the lightest shade at the center of the frond where light would naturally hit, and gradually transition to your darkest shade at the base and outer edges.
This careful color planning creates a convincing illusion of light and shadow, making the fern appear to lift right off the fabric.
18. Embrace Unconventional Colors for a Modern Pop
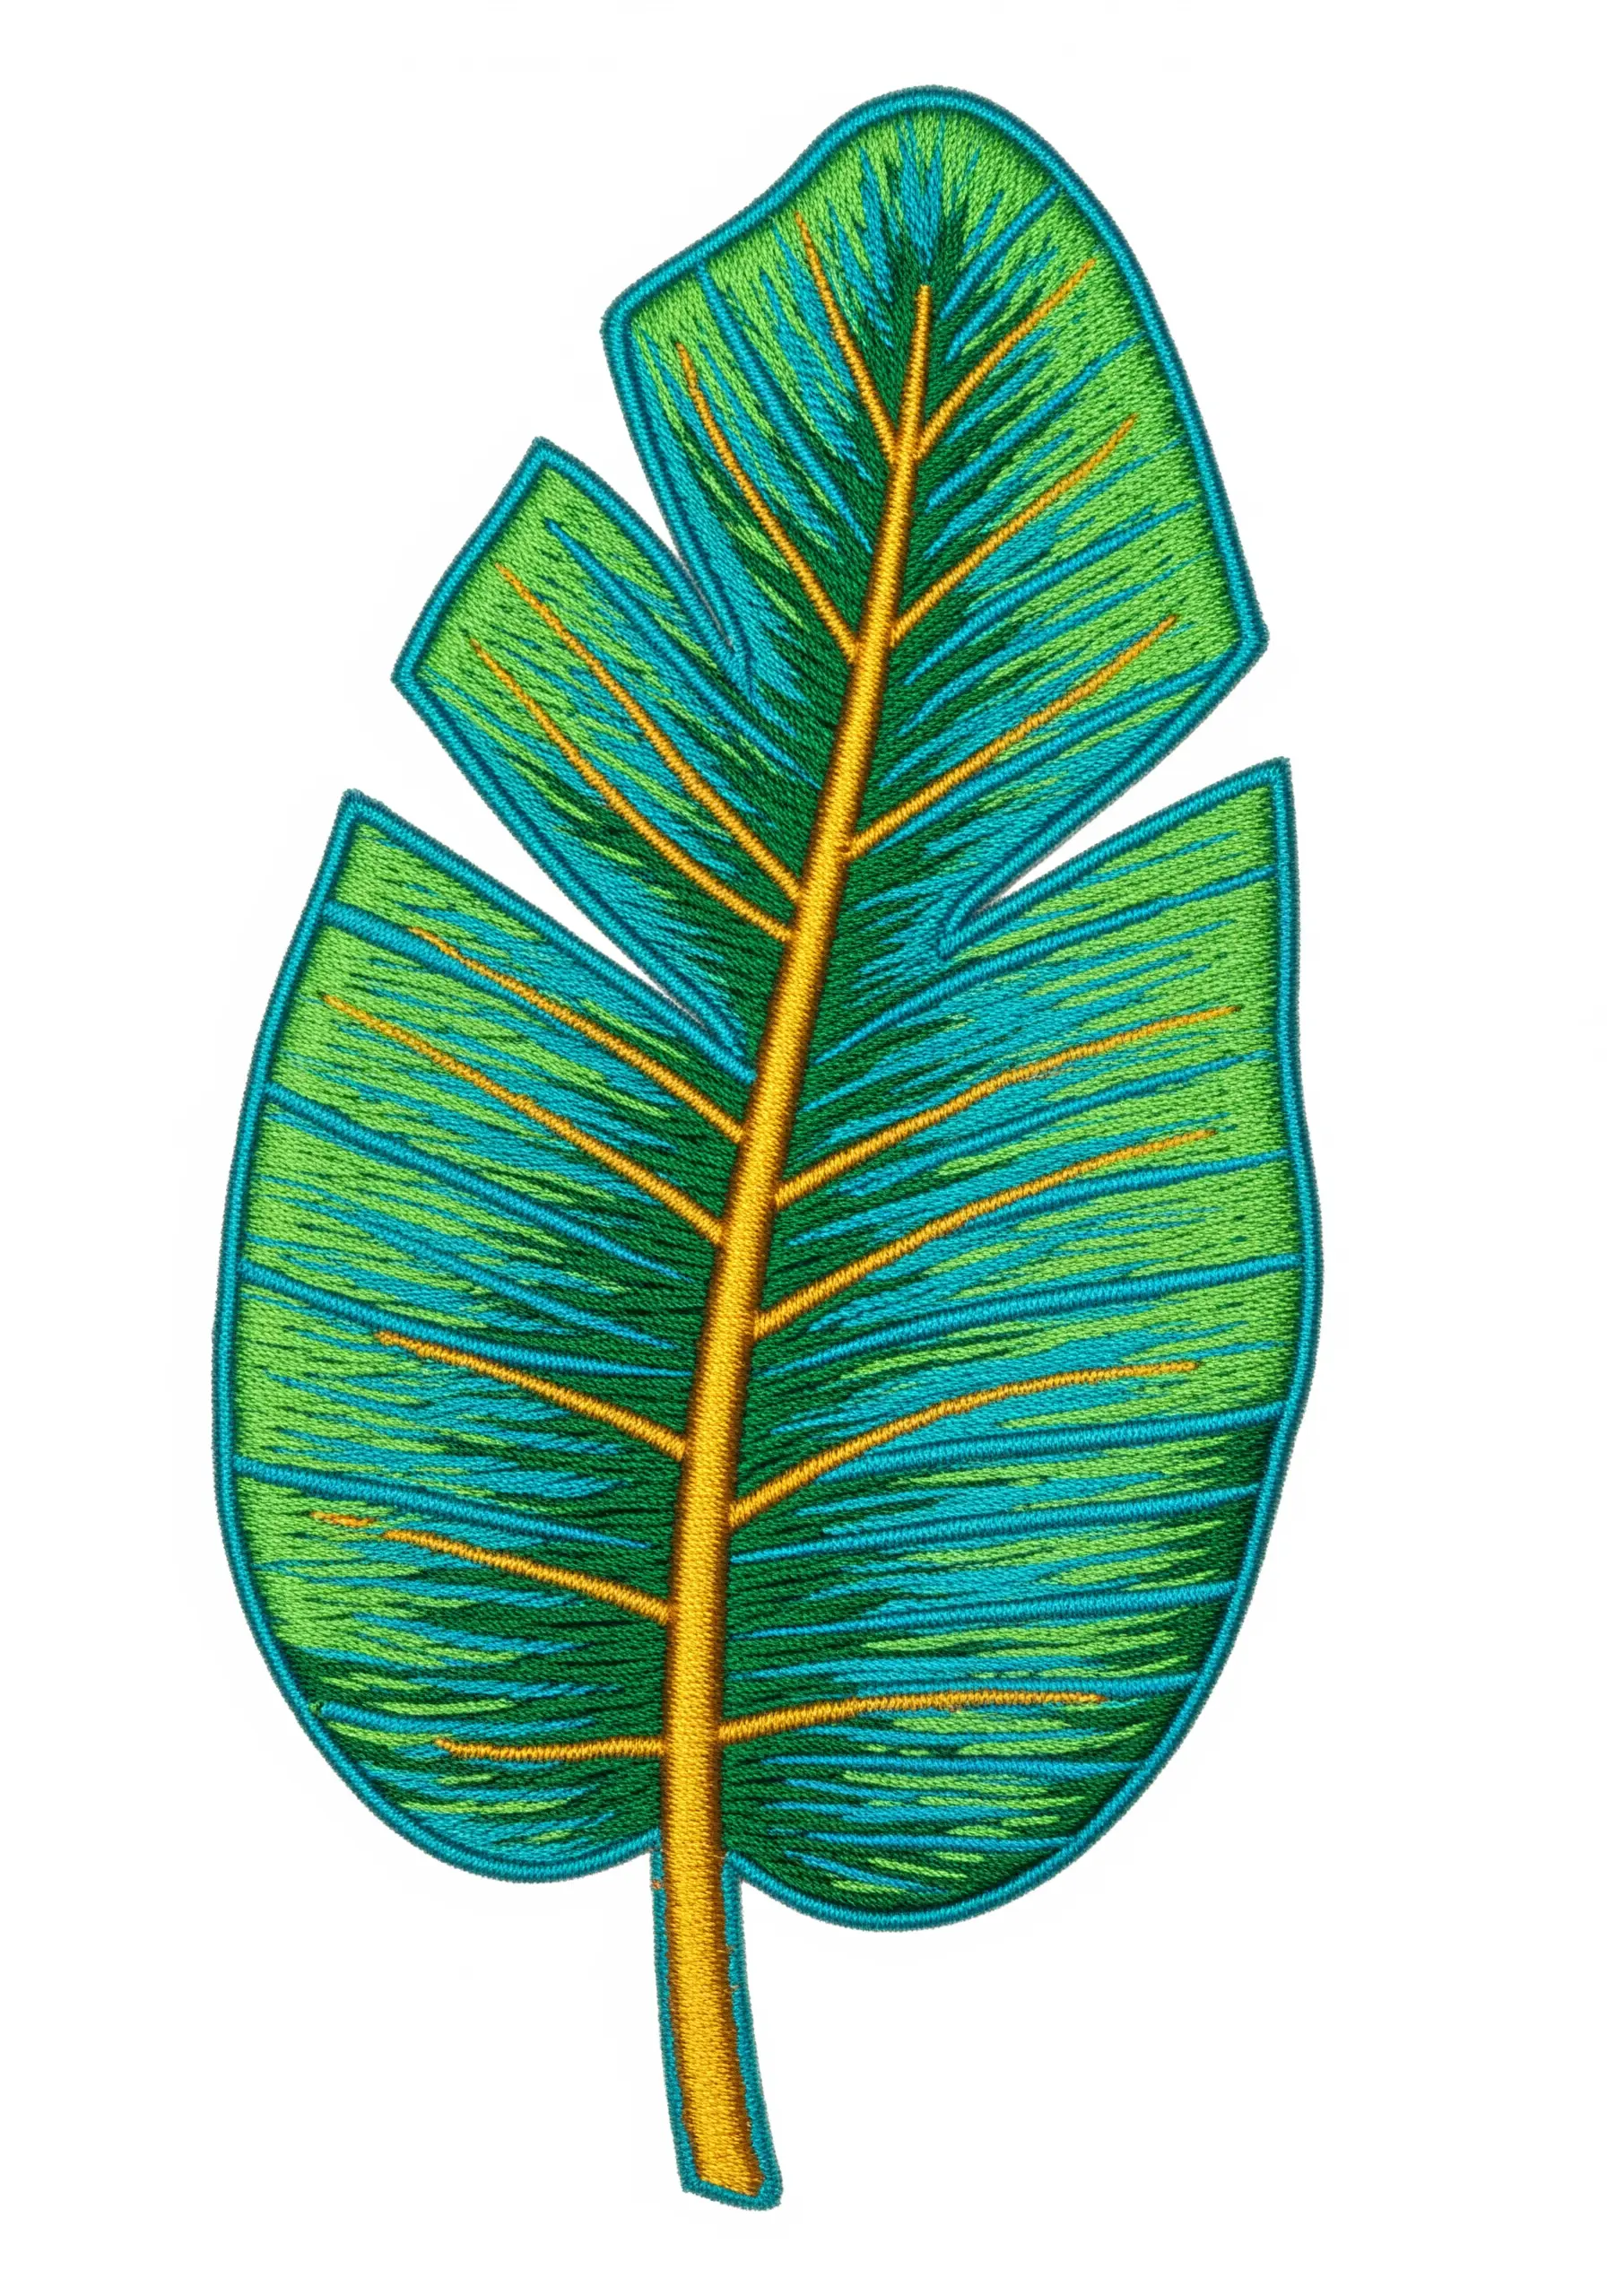
Don’t feel constrained by a natural color palette.
Create a bold, graphic leaf by combining unexpected colors like turquoise, bright green, and orange.
Use long satin stitches for the fill and a high-contrast color for the veins and stem.
A thick, raised satin stitch border cleanly defines the shape and makes it perfect for a standalone patch, turning a classic botanical into modern pop art.
19. Use Real Leaves as Your Direct Template
For unparalleled realism, trace directly from nature.
Arrange fresh or pressed leaves on your fabric into a composition you love, then carefully trace their outlines with a water-soluble or heat-erasable pen.
Pay attention to the unique overlaps, curves, and natural imperfections.
This method ensures your embroidered work has an organic, true-to-life flow that is difficult to achieve from a pre-drawn pattern.
20. Create Detached 3D Elements for Functional Art
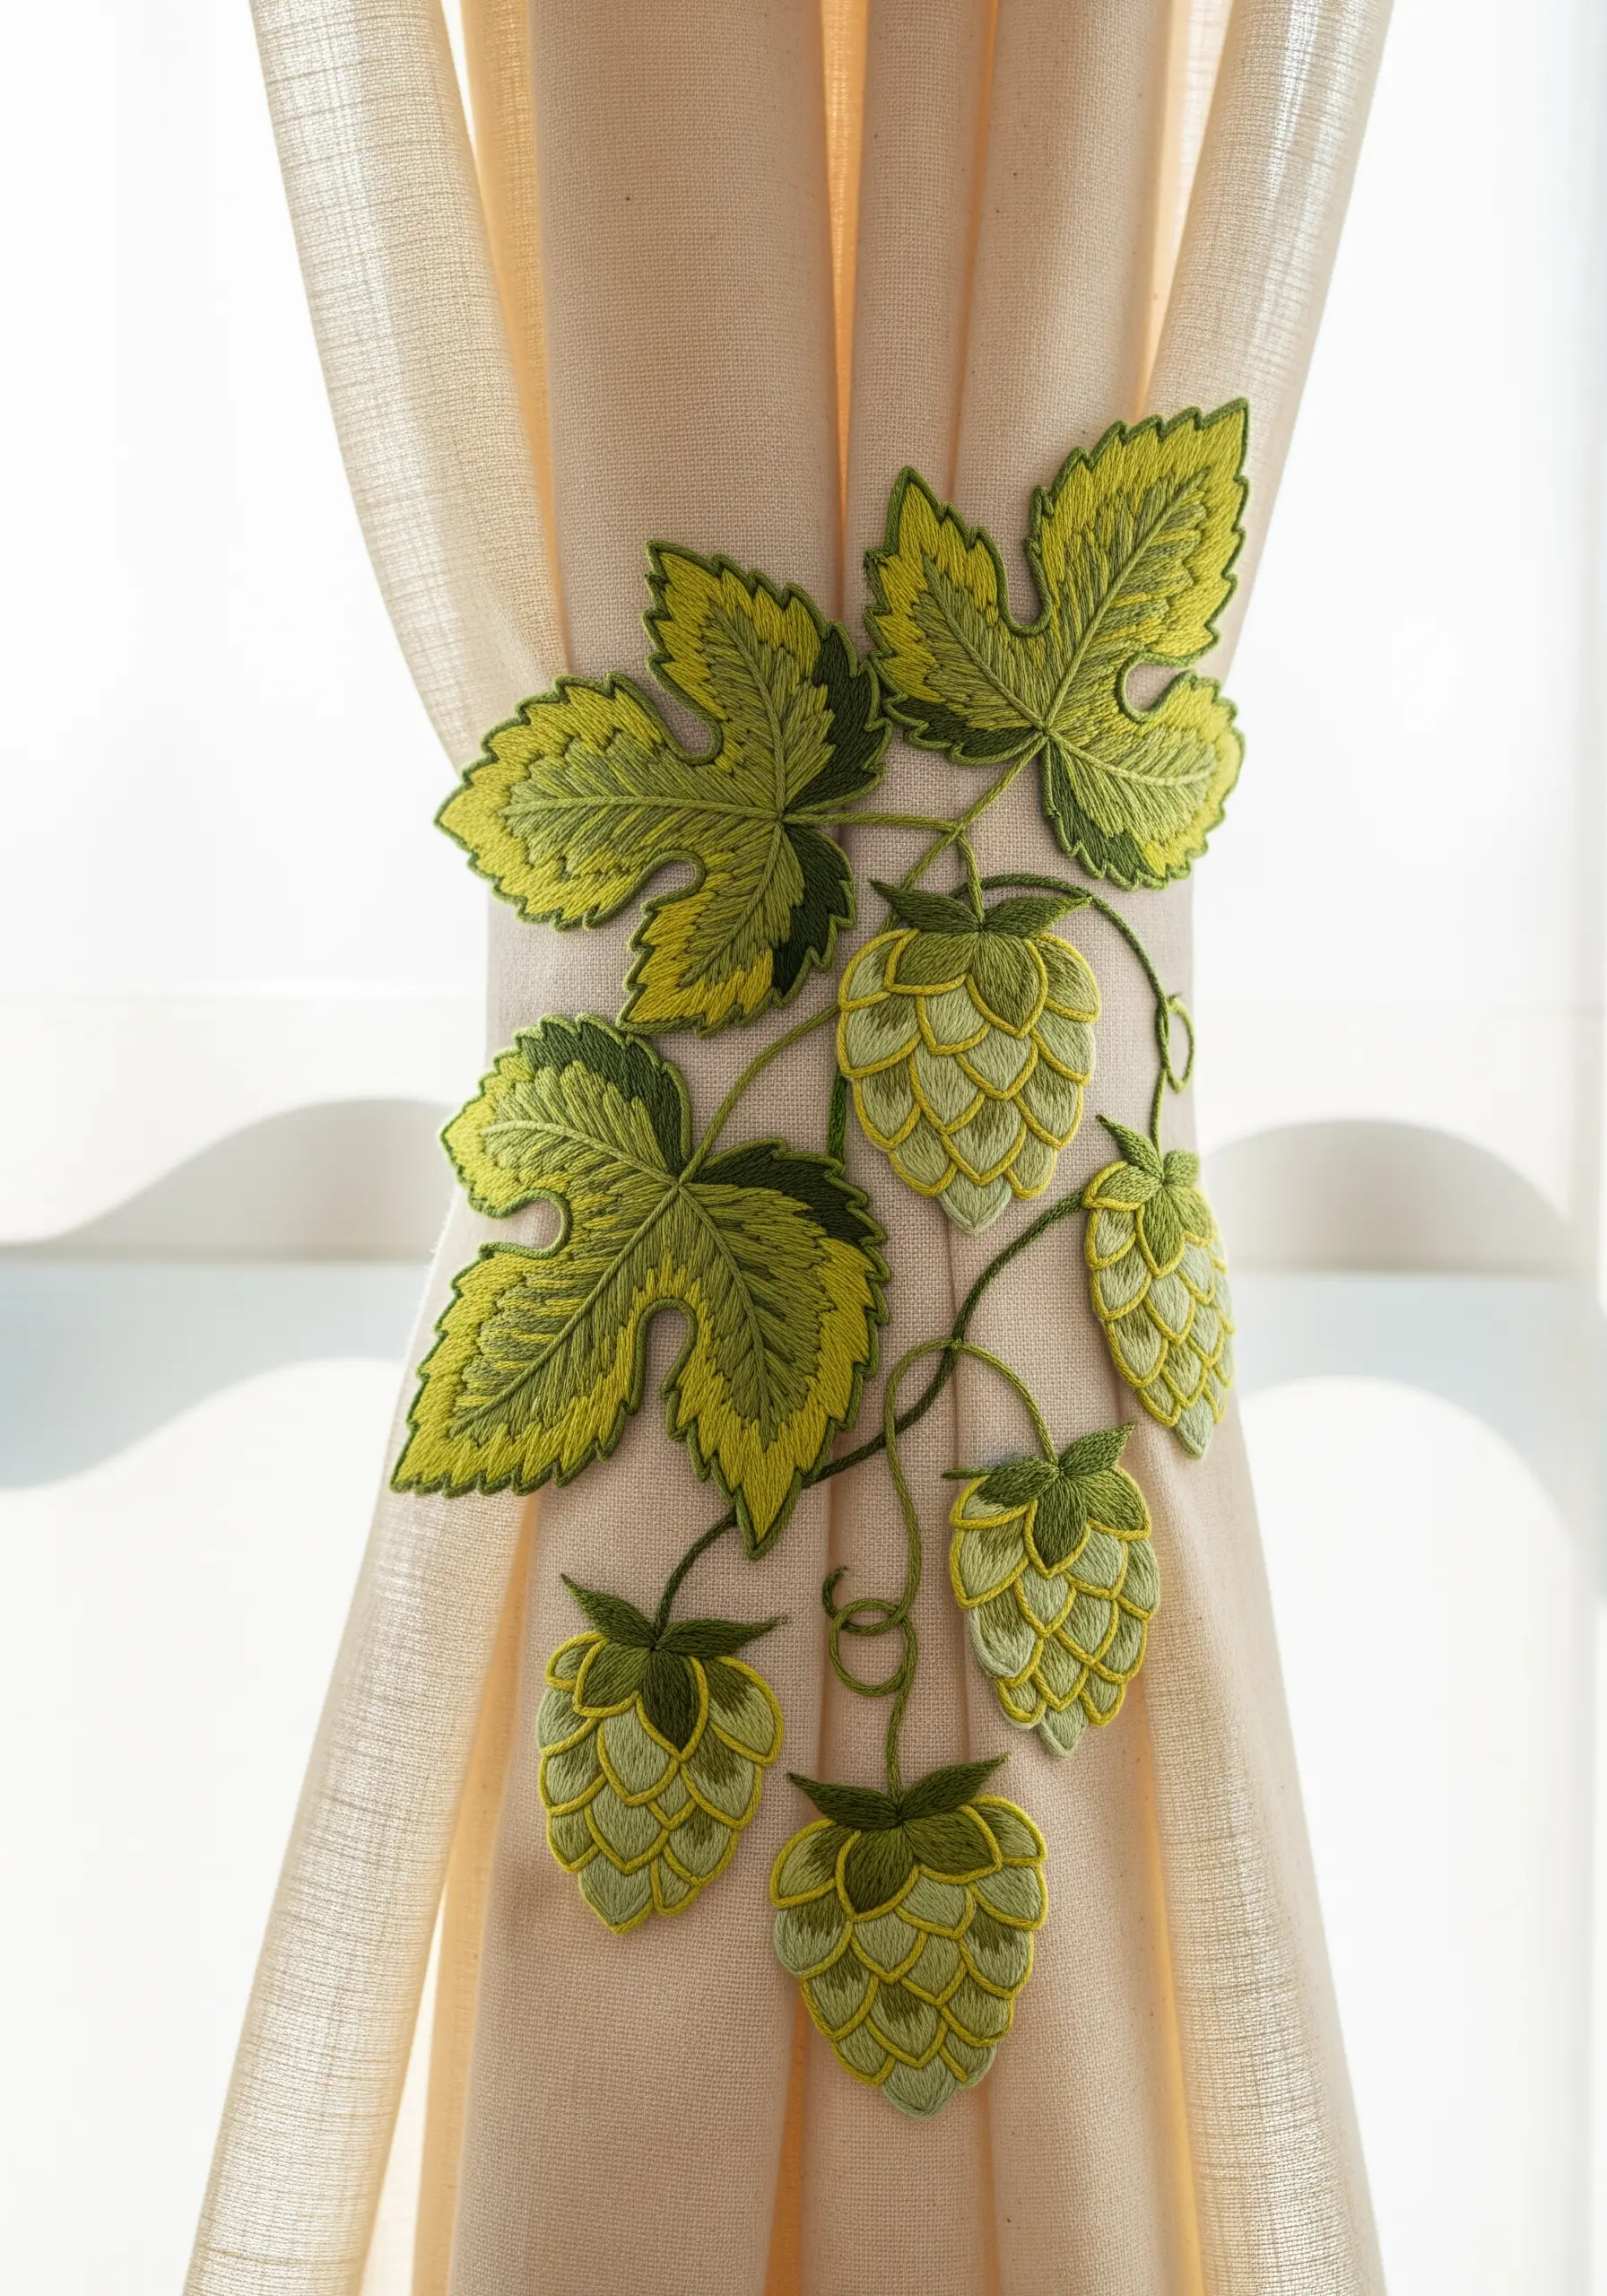
Make your embroidery interactive by creating detached elements using stumpwork techniques.
Stitch your leaves onto a base fabric backed with a sturdy stabilizer, then carefully cut them out, leaving a tiny fabric border.
You can then assemble these pieces into a dimensional object, like this curtain tie-back, where the leaves appear freestanding.
This method truly bridges the gap between embroidery and sculpture.
21. Mix Stitches to Replicate Different Natural Textures
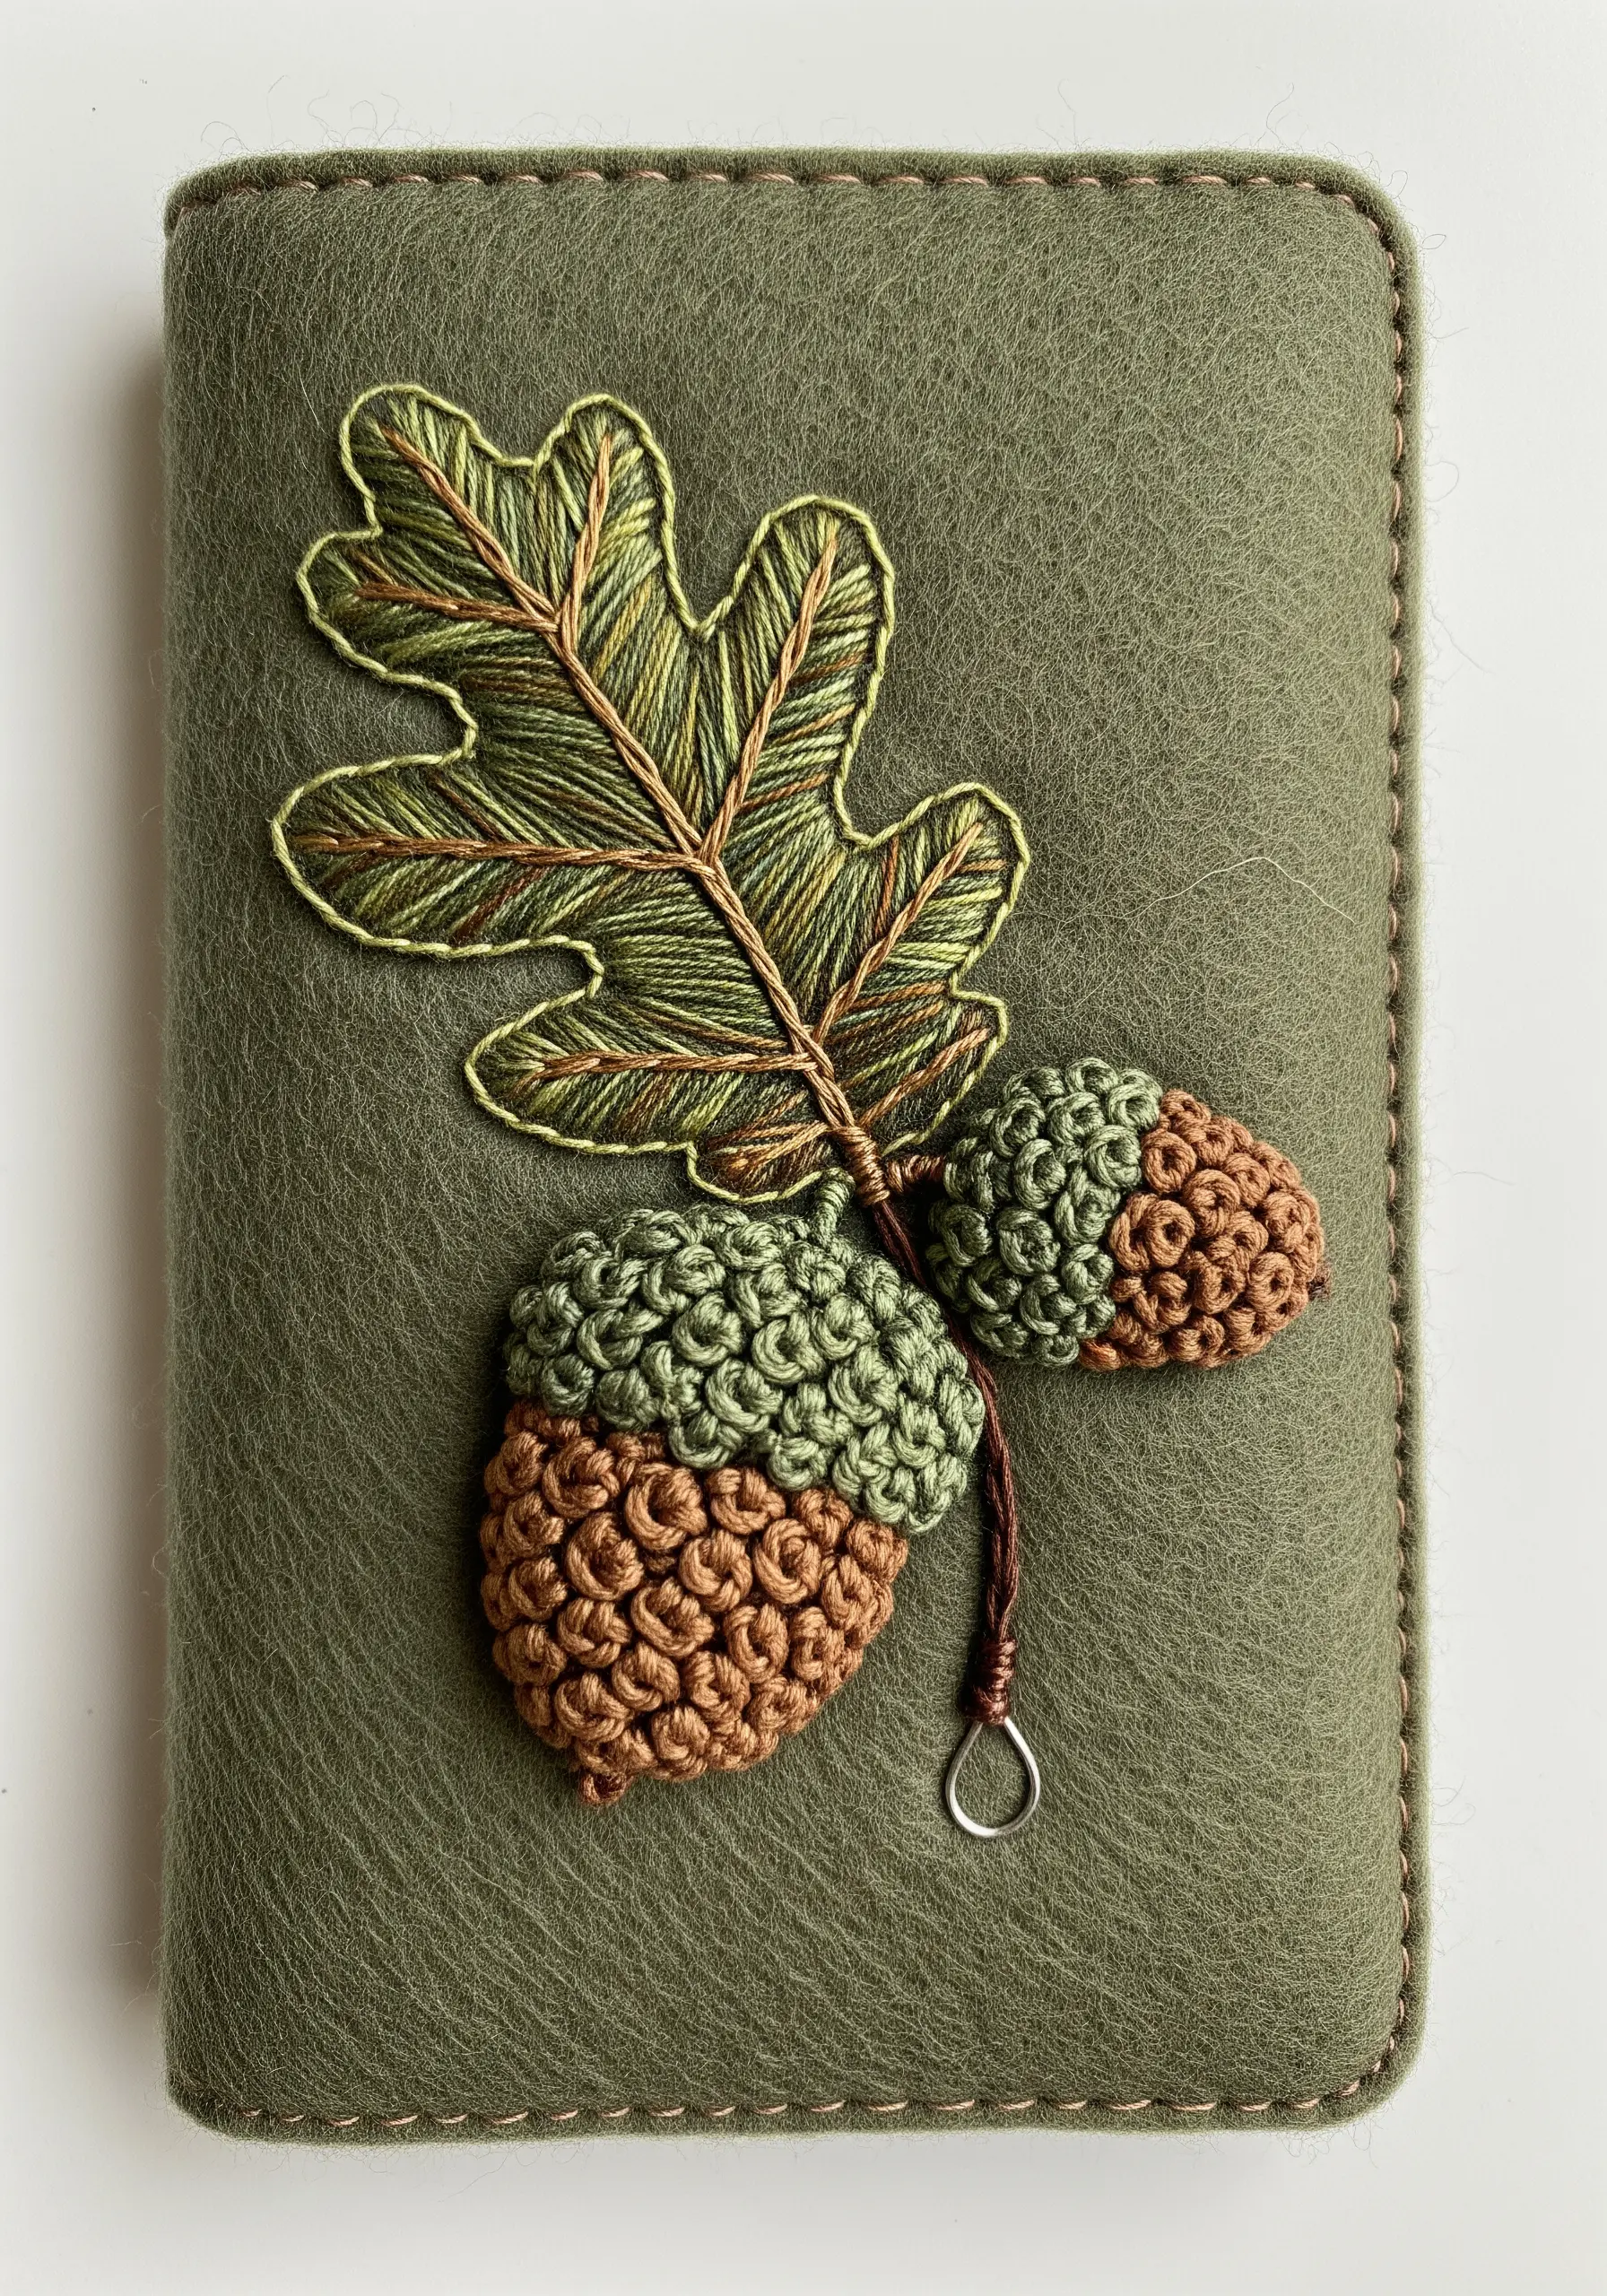
A real oak leaf and its acorns have very different surfaces, so use distinct stitches to capture that contrast.
Use a directional fishbone stitch for the leaf to create its veined, papery texture.
For the acorn caps, switch to tightly packed French or colonial knots to mimic their bumpy, rough surface.
This tactile variety makes the entire motif more engaging, realistic, and interesting to the touch.
22. Simplify Complex Patterns for Small-Scale Impact
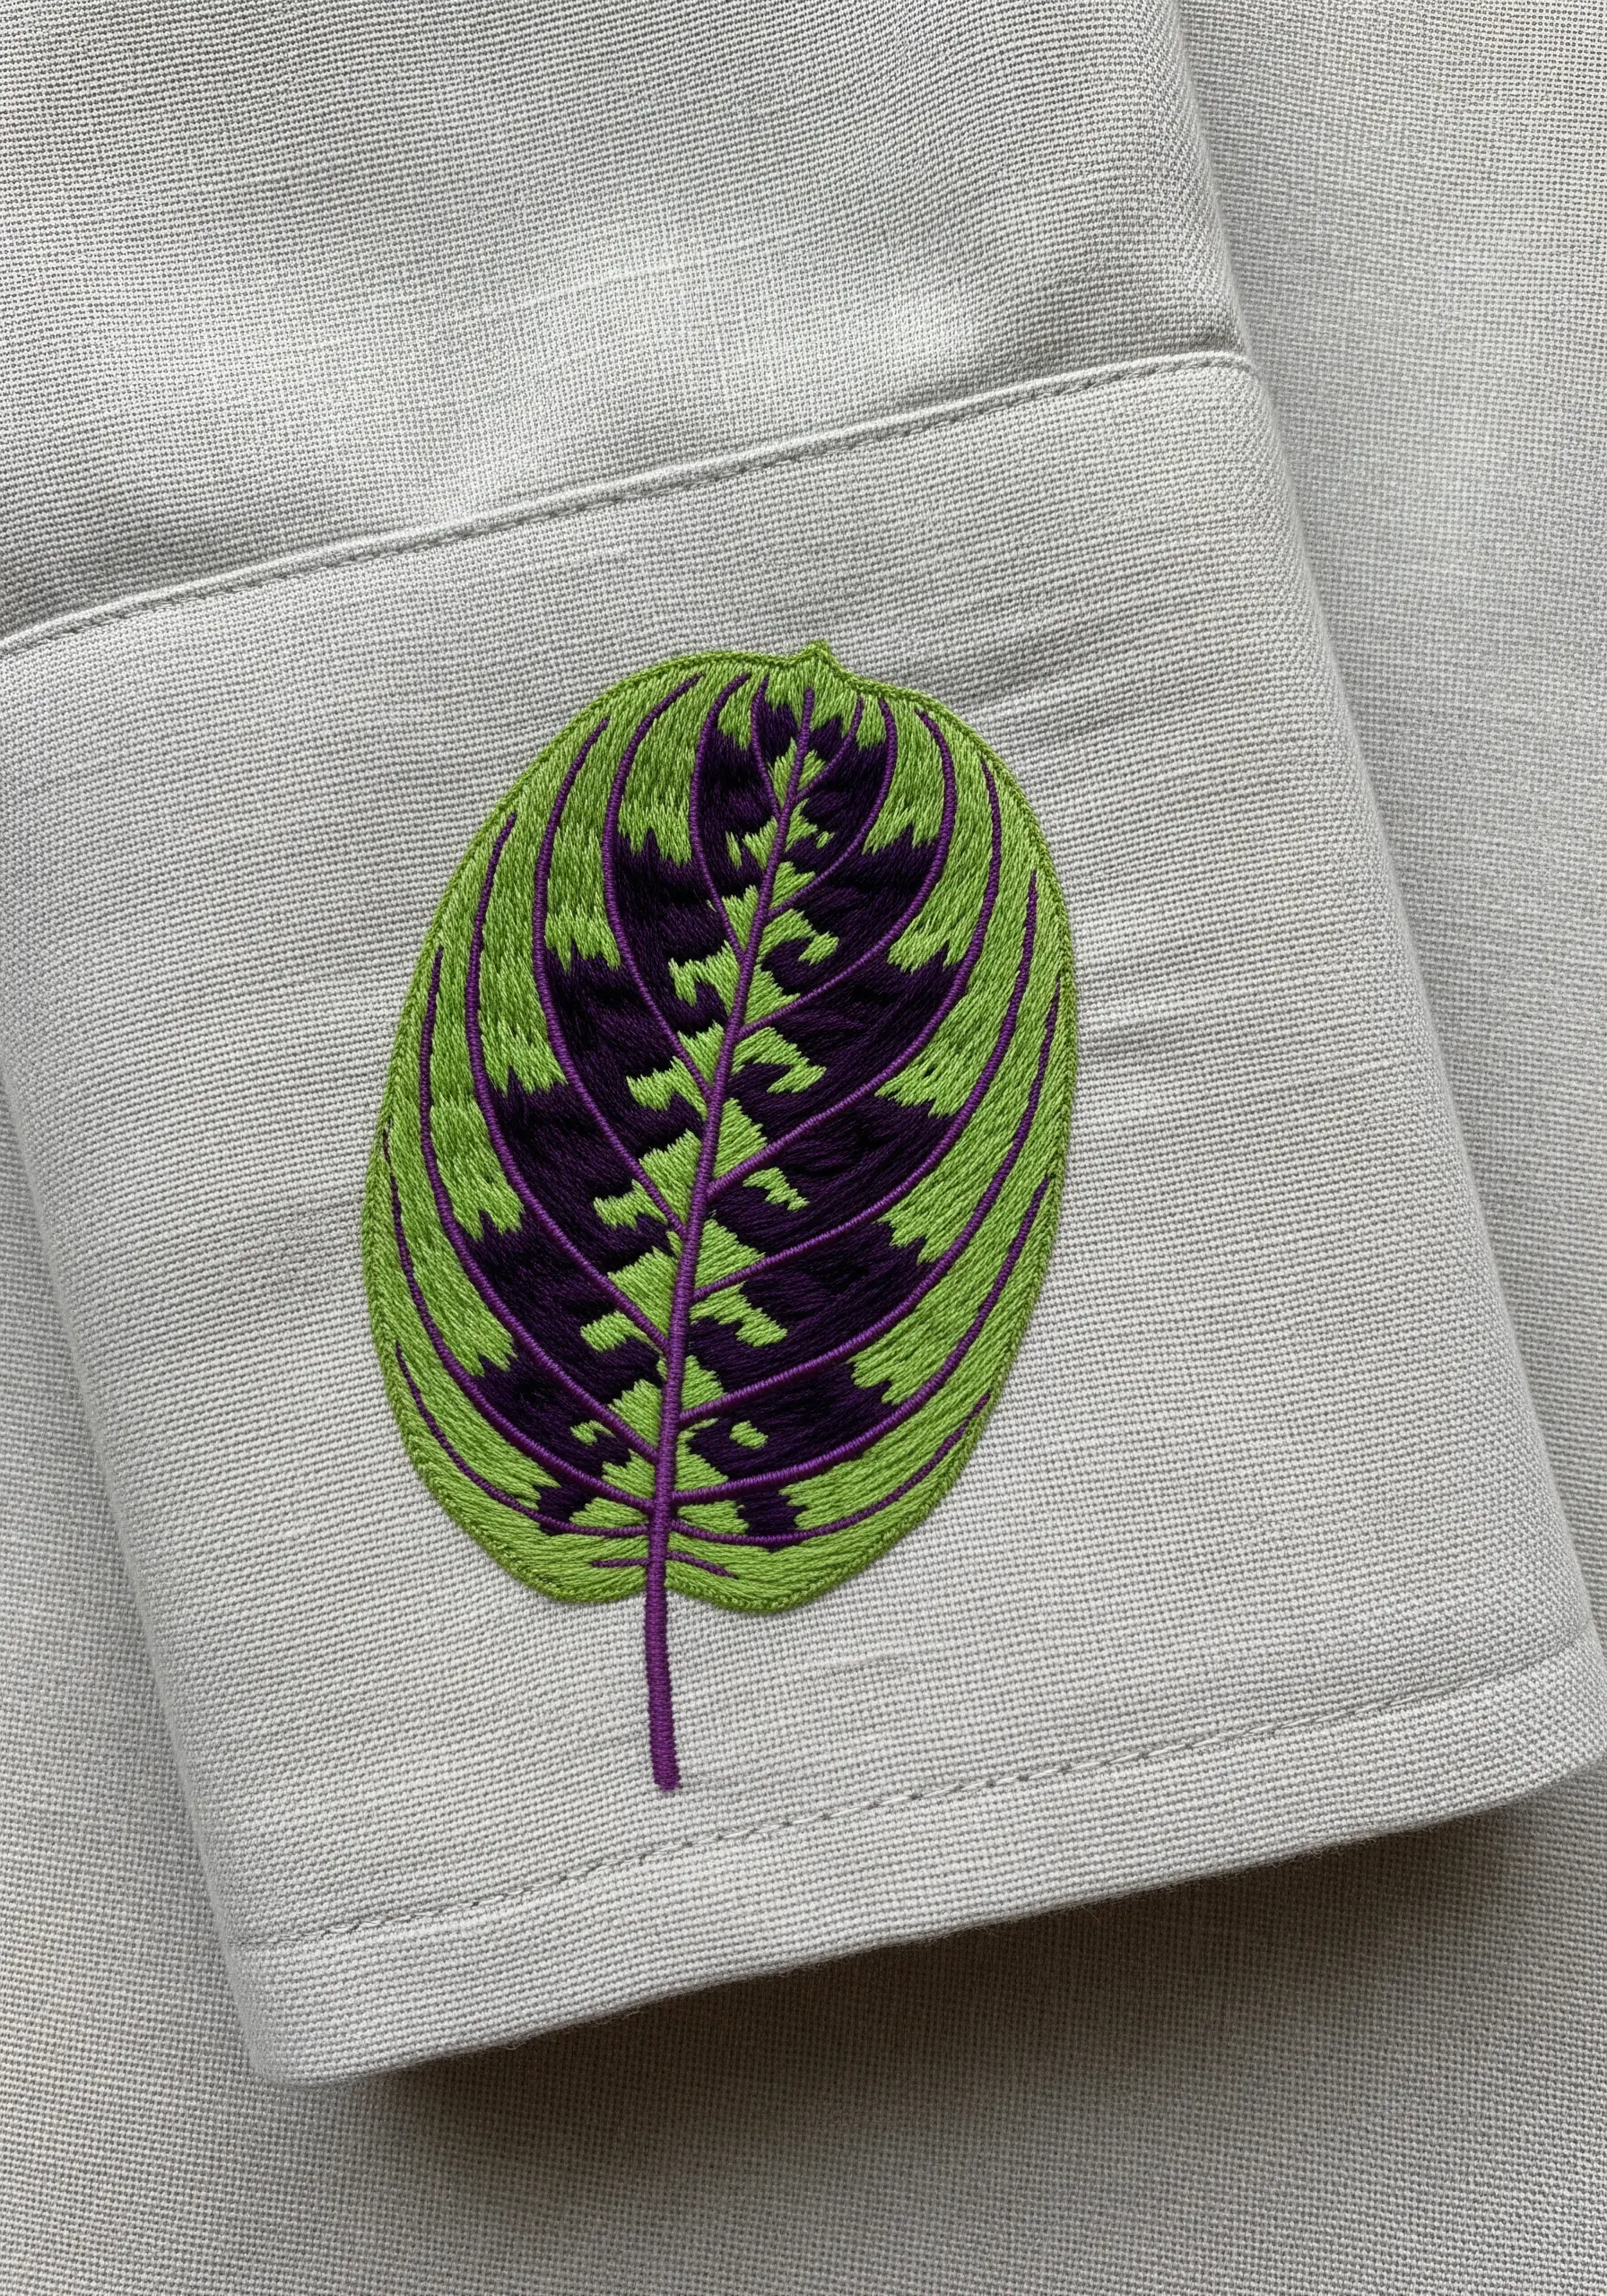
When embroidering a detailed leaf on a small area like a cuff, simplify the pattern to its most essential elements.
Instead of trying to replicate every tiny detail, focus on the bold blocks of color that define the leaf’s character.
Use clean satin stitches for the fills and a simple backstitch for the central vein.
This approach ensures your design is readable and impactful, not cluttered, even at a miniature scale.
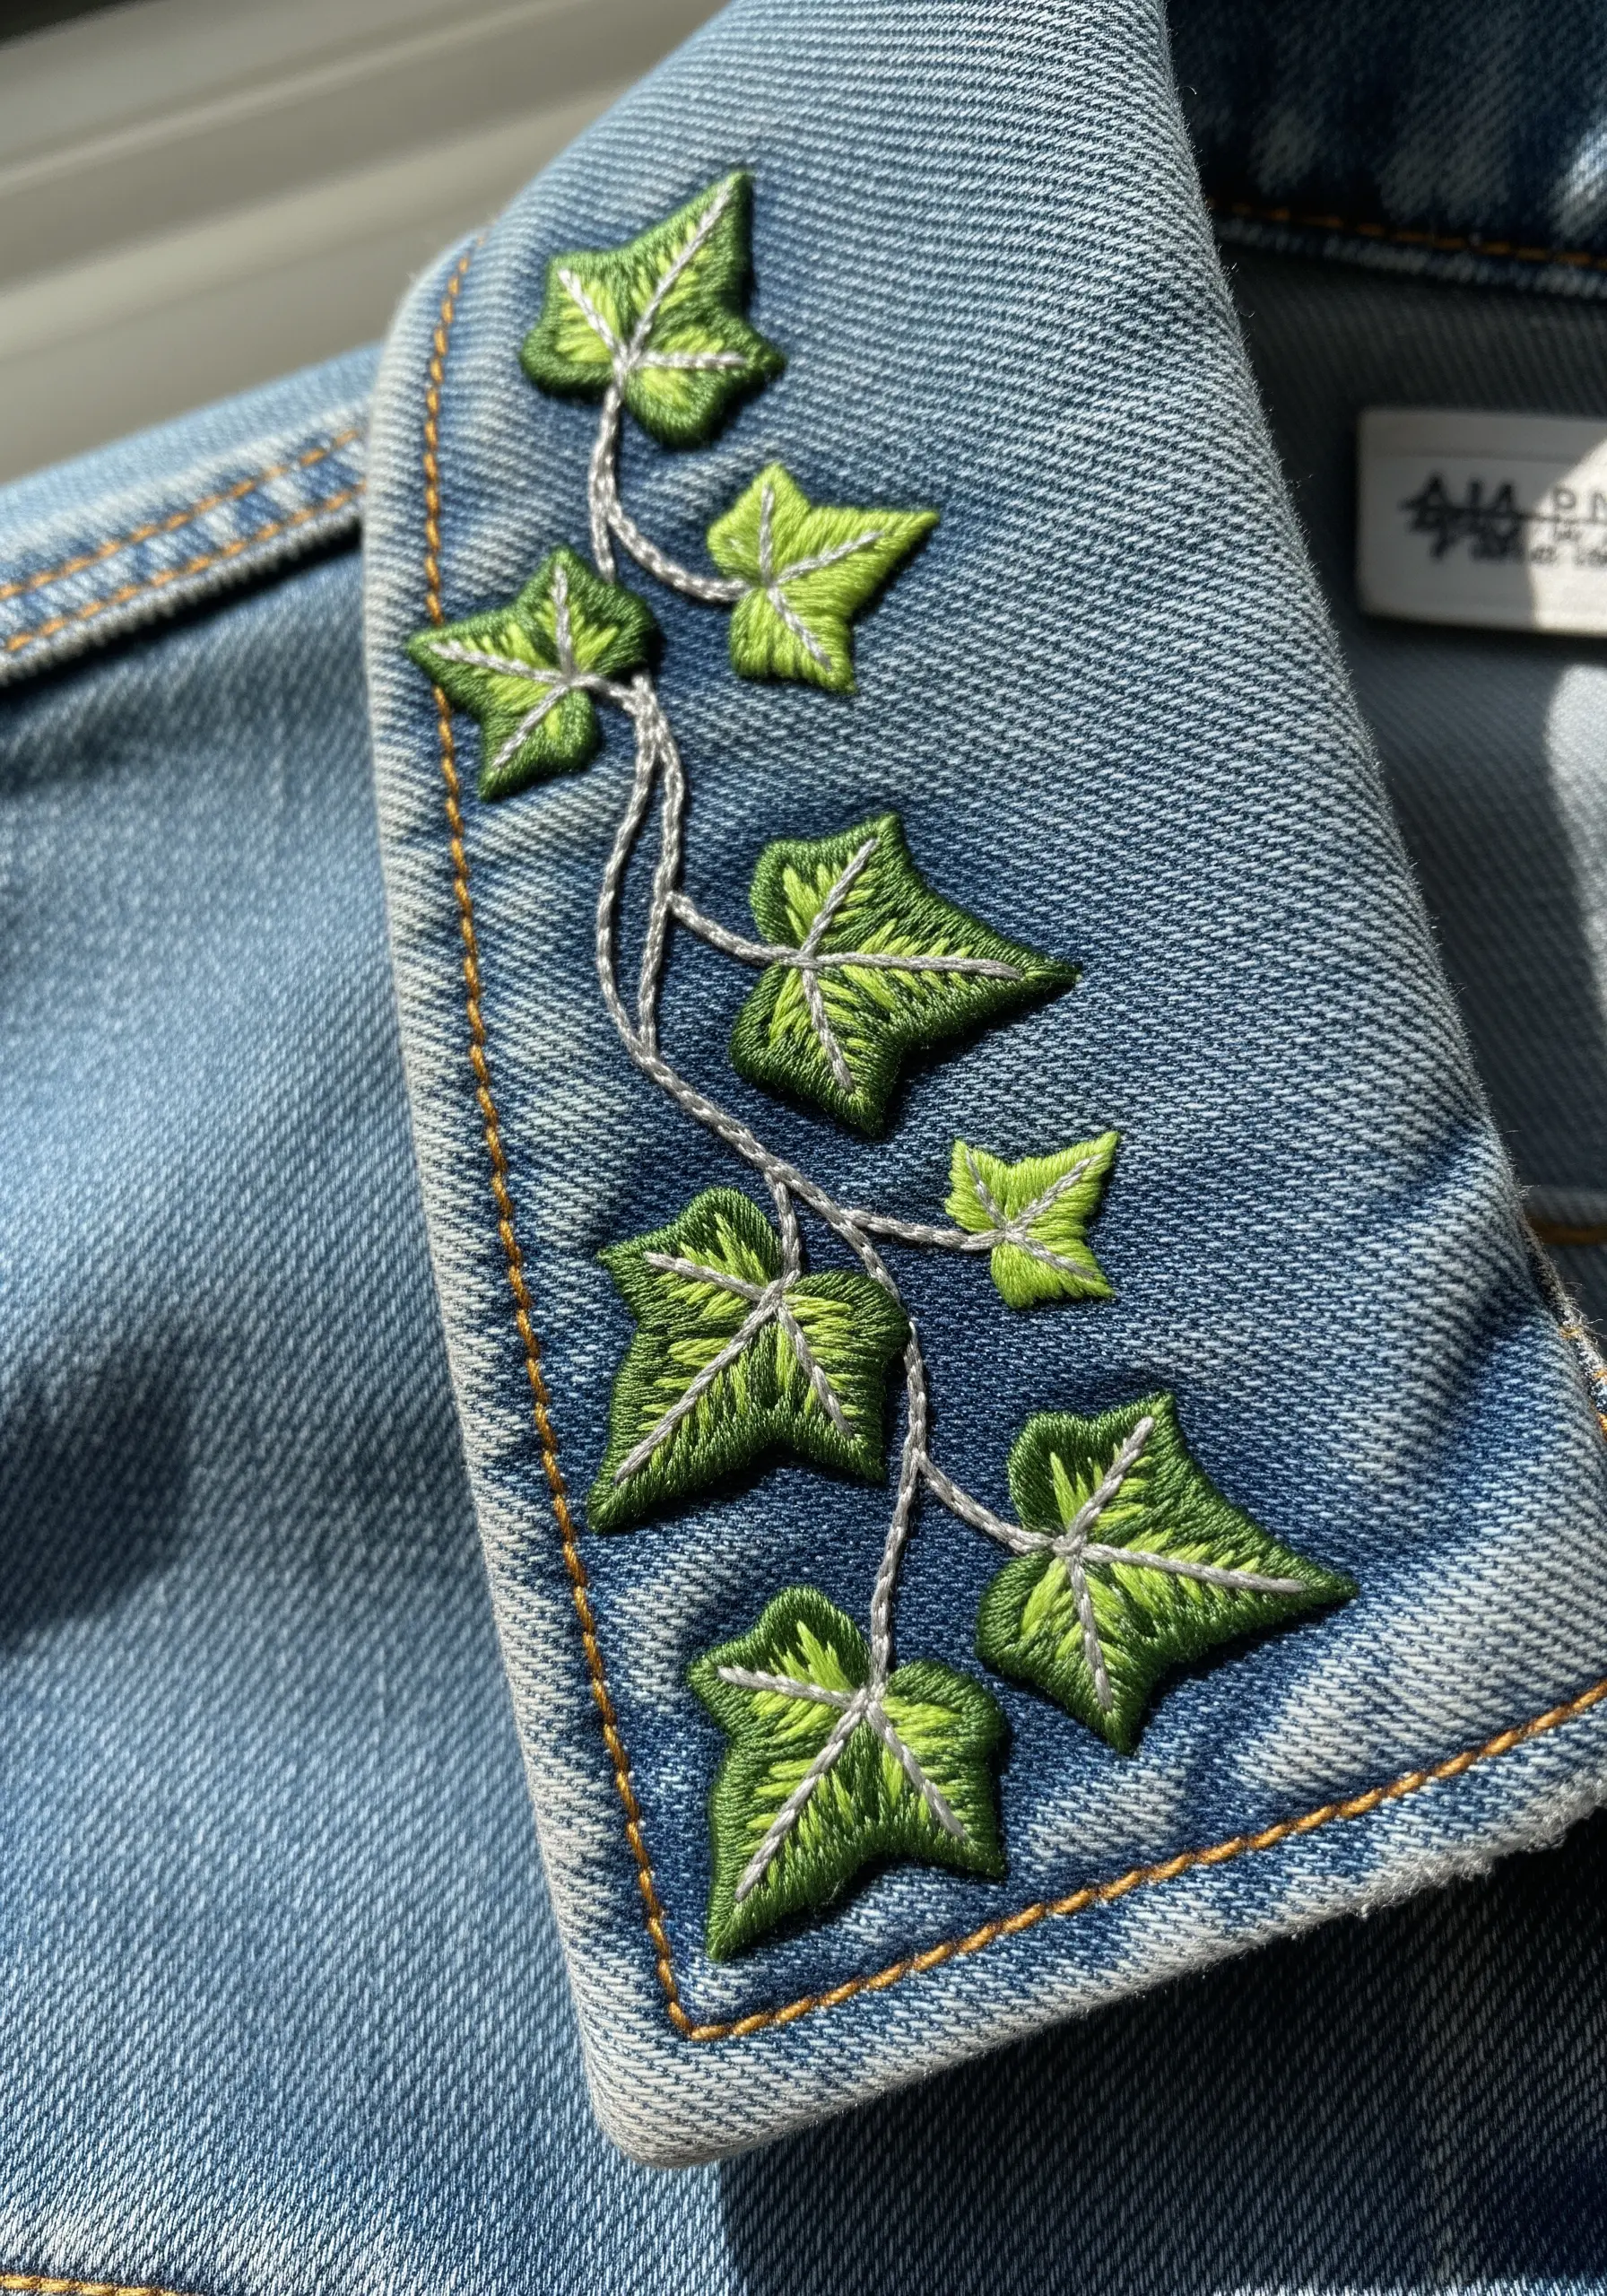
23. Adapt a Botanical Design to an Unconventional Surface
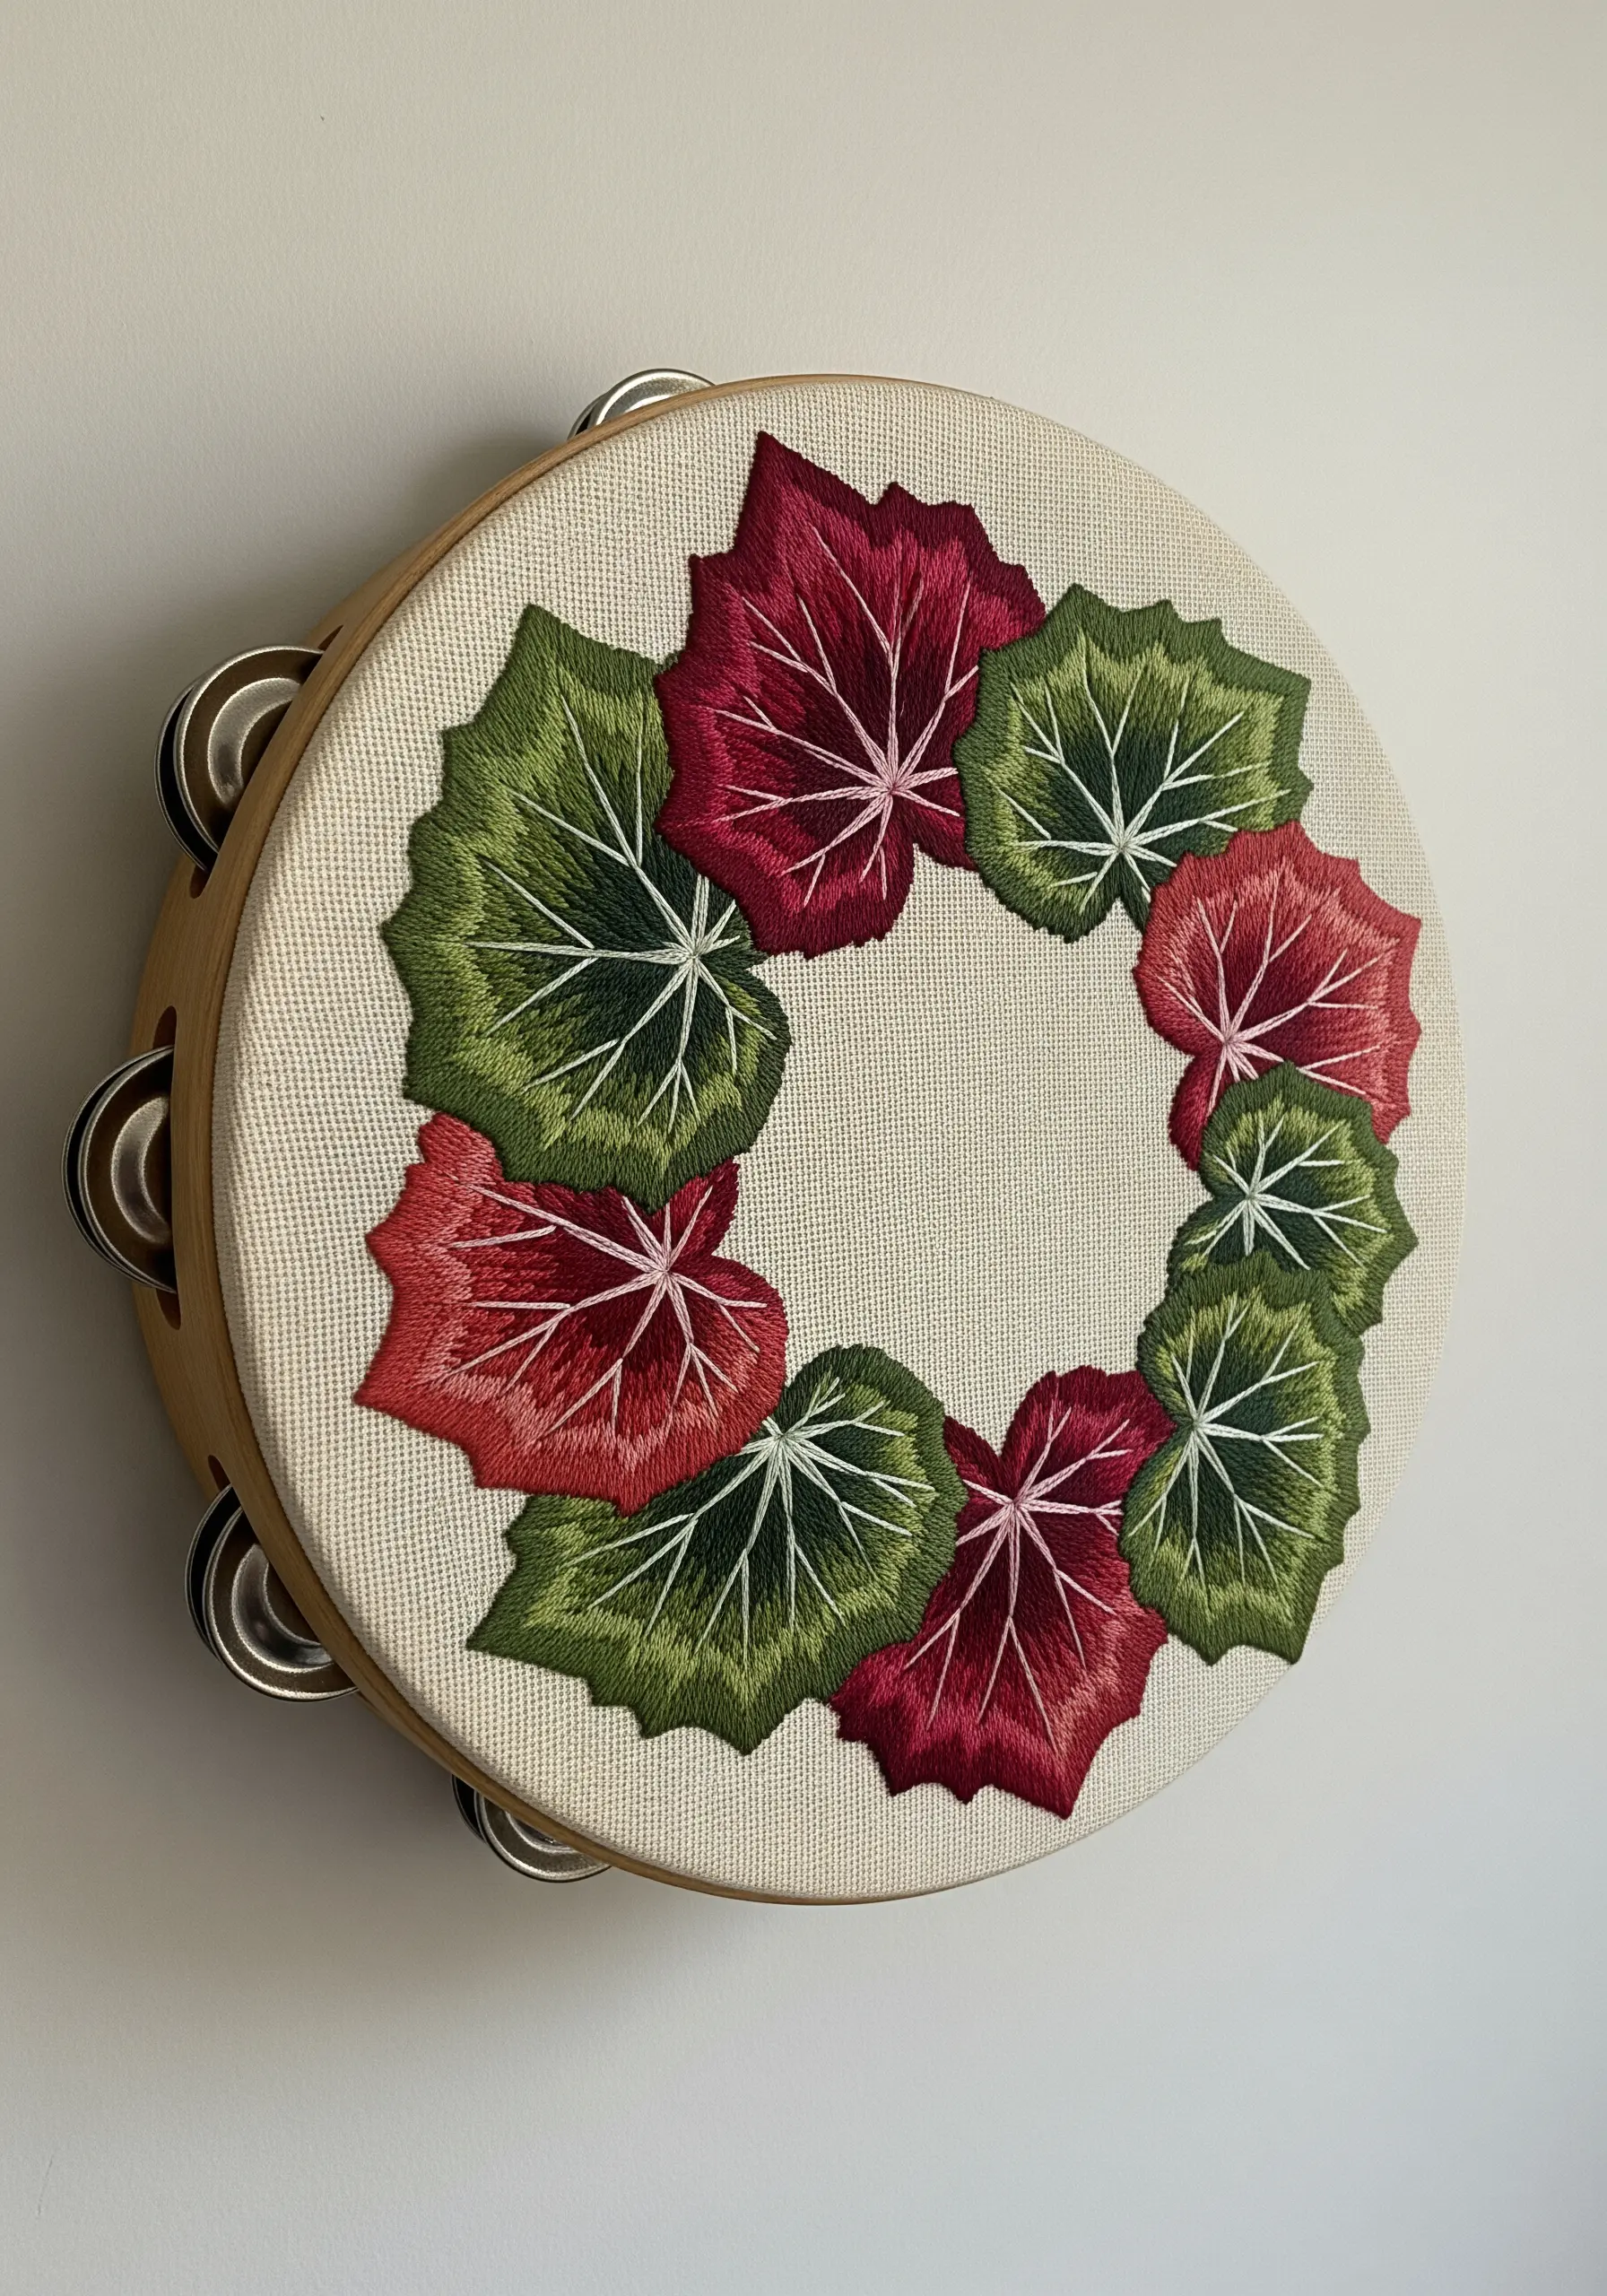
Don’t limit your embroidery to traditional hoops and clothing.
You can transform nearly any object by stretching your embroidered fabric over it, turning it into a unique piece of wall art.
Here, a simple wreath of satin-stitched leaves gives a tambourine a new, decorative purpose.
The key is to choose a repeating design that complements the object’s shape without overwhelming it.
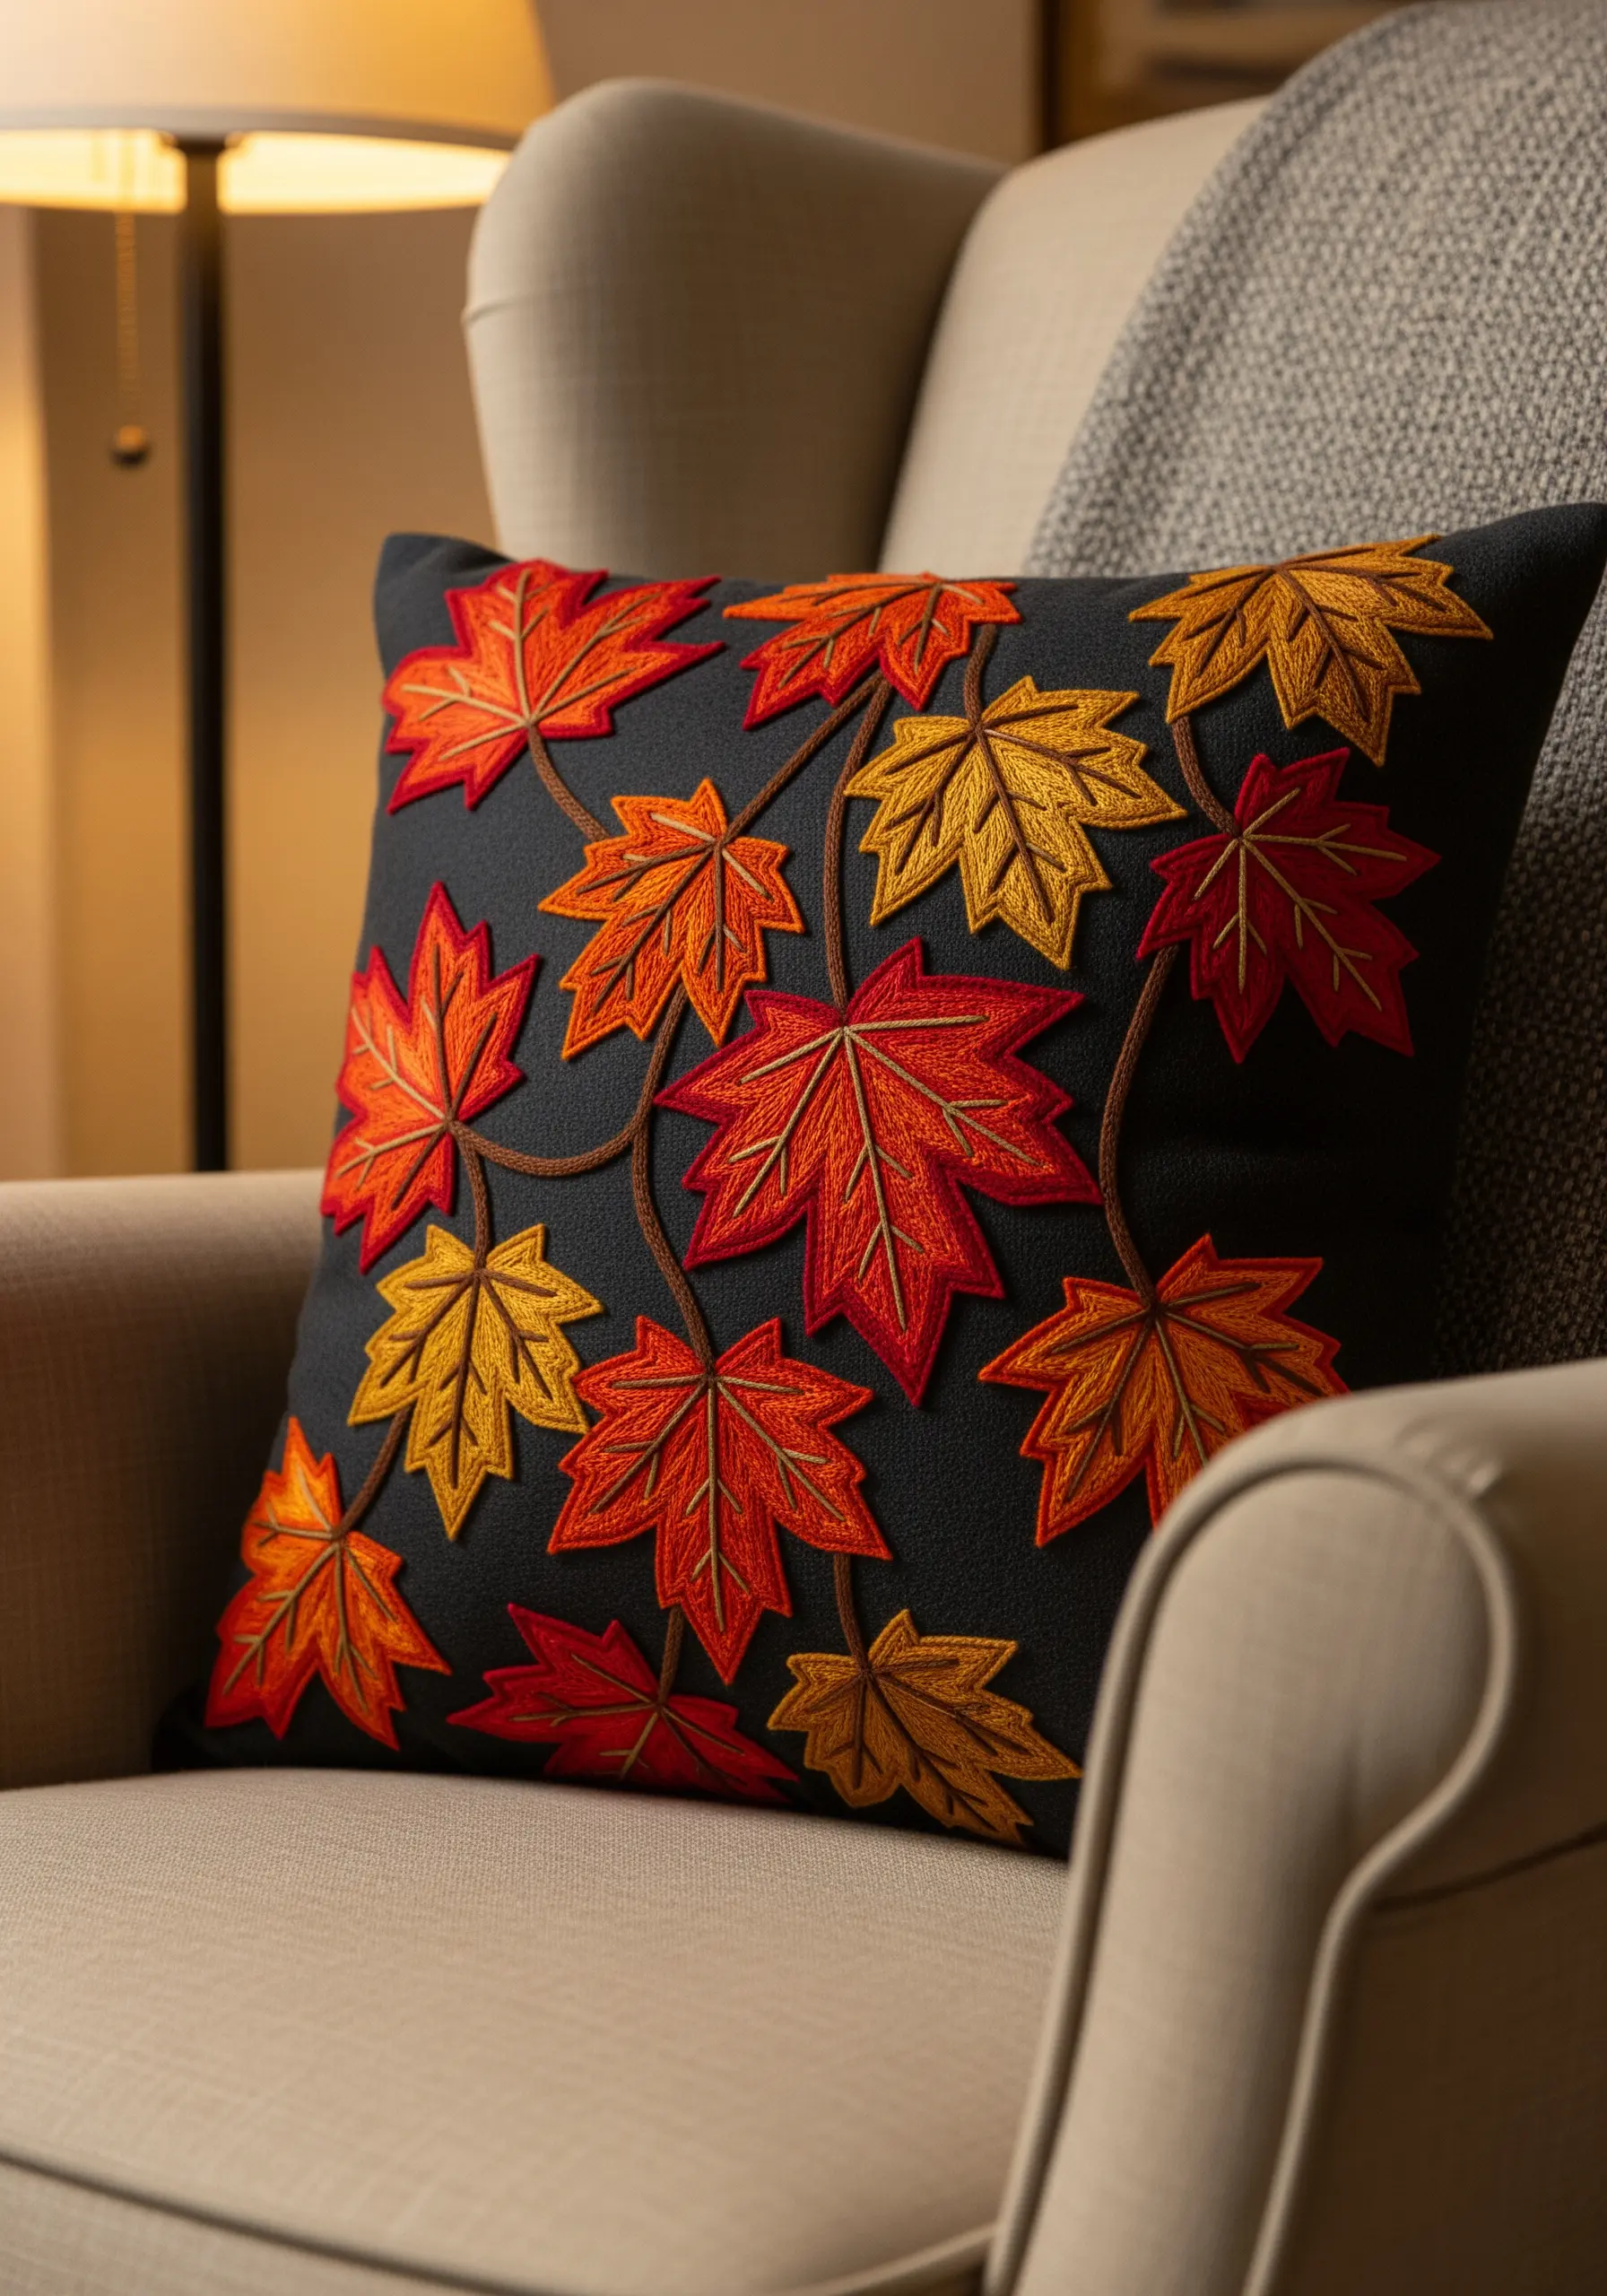
24. Use Thread Painting for Realistic Color Transitions
To capture the subtle color shifts in autumn leaves, the thread painting technique, or long-and-short stitch, is your best tool.
Begin with one color at the leaf’s edge, making stitches of varying lengths.
Then, bring your next color up through the first layer of stitches, blending the two colors together seamlessly.
This allows you to create the gradual, natural transitions from green to gold seen in real foliage.
25. Create High Drama with a Monochromatic Palette
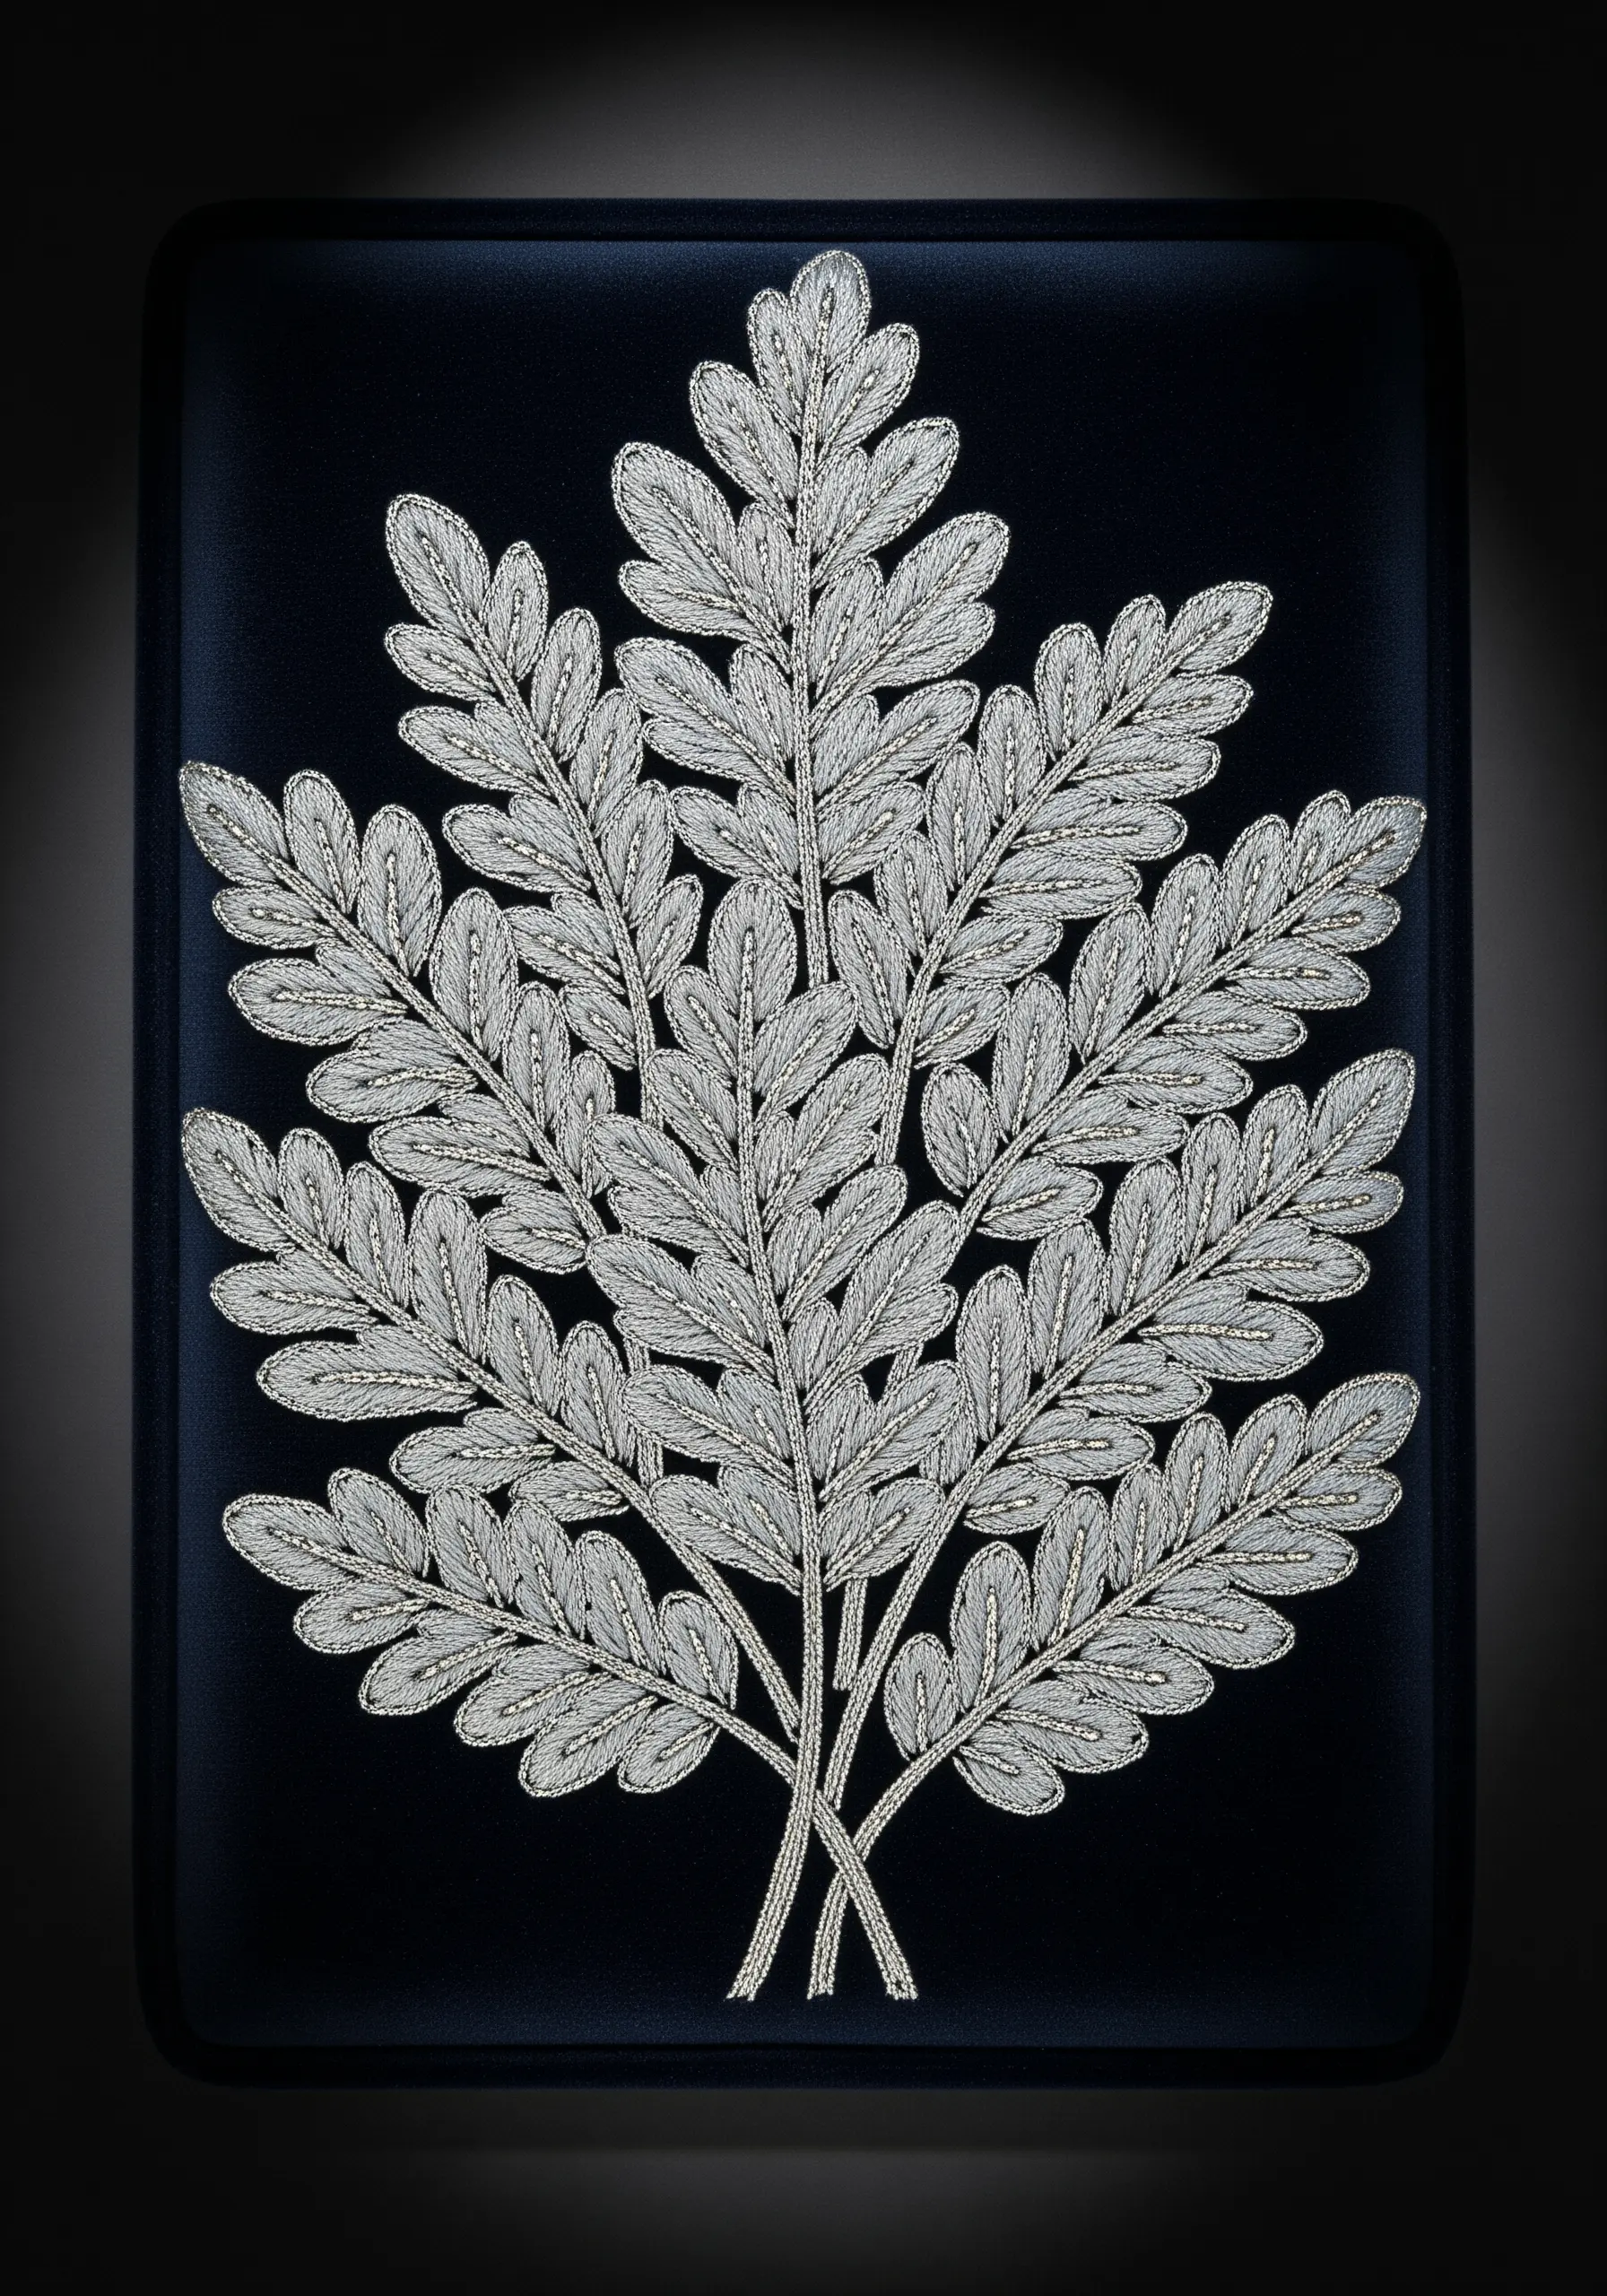
A powerful statement can be made with just a single, high-contrast color choice.
Use a shimmering silver thread on a dark, luxurious fabric like black velvet to create a dramatic effect.
This extreme contrast highlights the texture and detail of every stitch.
A meticulous fishbone or split stitch will catch the light, proving you don’t need a full spectrum to create a visually arresting, elegant piece with a monochromatic palette.
26. Build an Ecosystem with Layered, Mixed-Media Textures
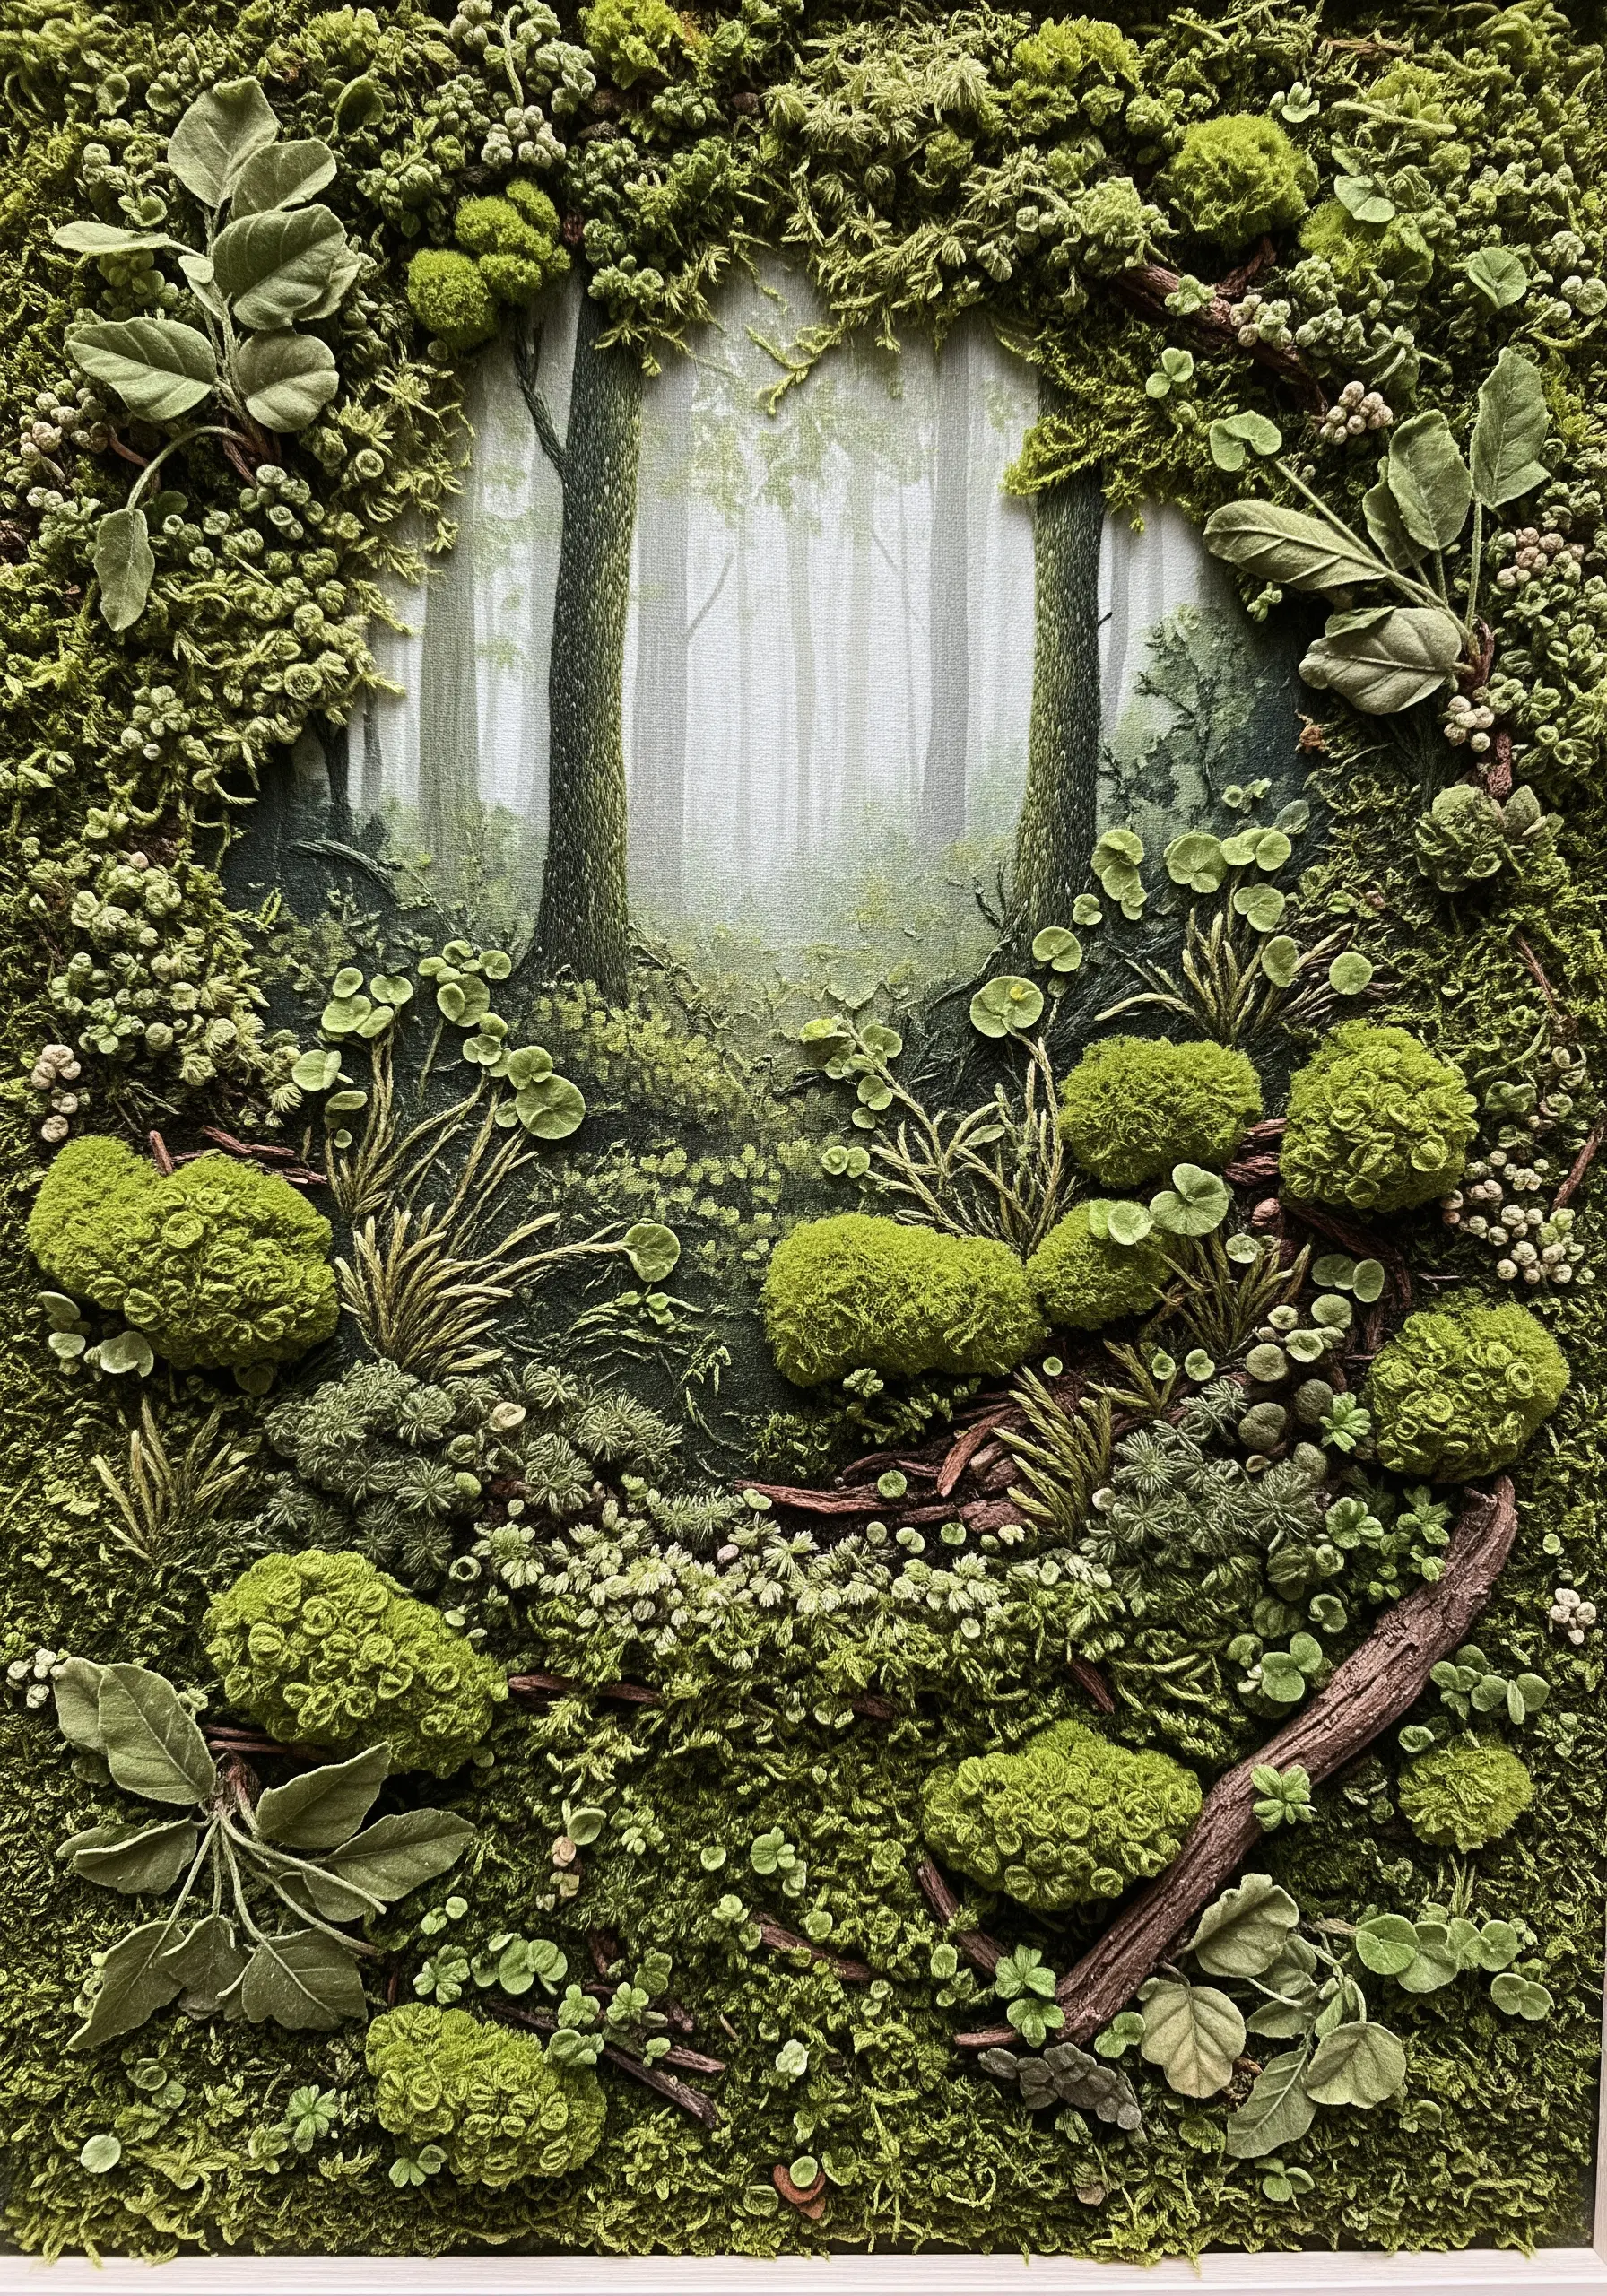
Go beyond a single leaf and create an entire botanical scene with rich, varied textures.
Use a painted or printed fabric for the background to establish depth, then build foreground layers with different stitches: French knots for moss, turkey work for grassy tufts, and padded satin stitch for leaves.
This mixed-media approach turns your hoop into a miniature diorama, inviting the viewer into a tiny, textured world.


