
The smallest hoop can hold the most intricate world. Think of your miniature embroidery not as a scaled-down project, but as a concentrated piece of art, where every single stitch matters.
This is your opportunity to transform a simple motif into a piece of wearable storytelling. We will move beyond basic stitches and explore how texture, dimension, and subtle details can give your tiny hoops a presence that feels both personal and professional.
You have the skill; now, let’s refine the technique. In each of these ideas, you’ll find a specific adjustment—a new stitch, a different thread, a thoughtful composition—that will elevate your work from craft to art. Let’s begin.
1. Render Lavender with Tactile Detail

Give your lavender sprigs a plush, three-dimensional quality by using French knots for the delicate blossoms.
Vary the number of wraps around your needle (one for tiny buds, two for fuller blooms) to create natural-looking texture.
For the stems, use a fine stem stitch or a whipped backstitch with just two strands of floss to maintain a delicate profile against the textured flowers.
This contrast between the smooth stems and bumpy knots is what gives the piece its realistic and engaging feel.
2. Paint Mountain Landscapes with Thread
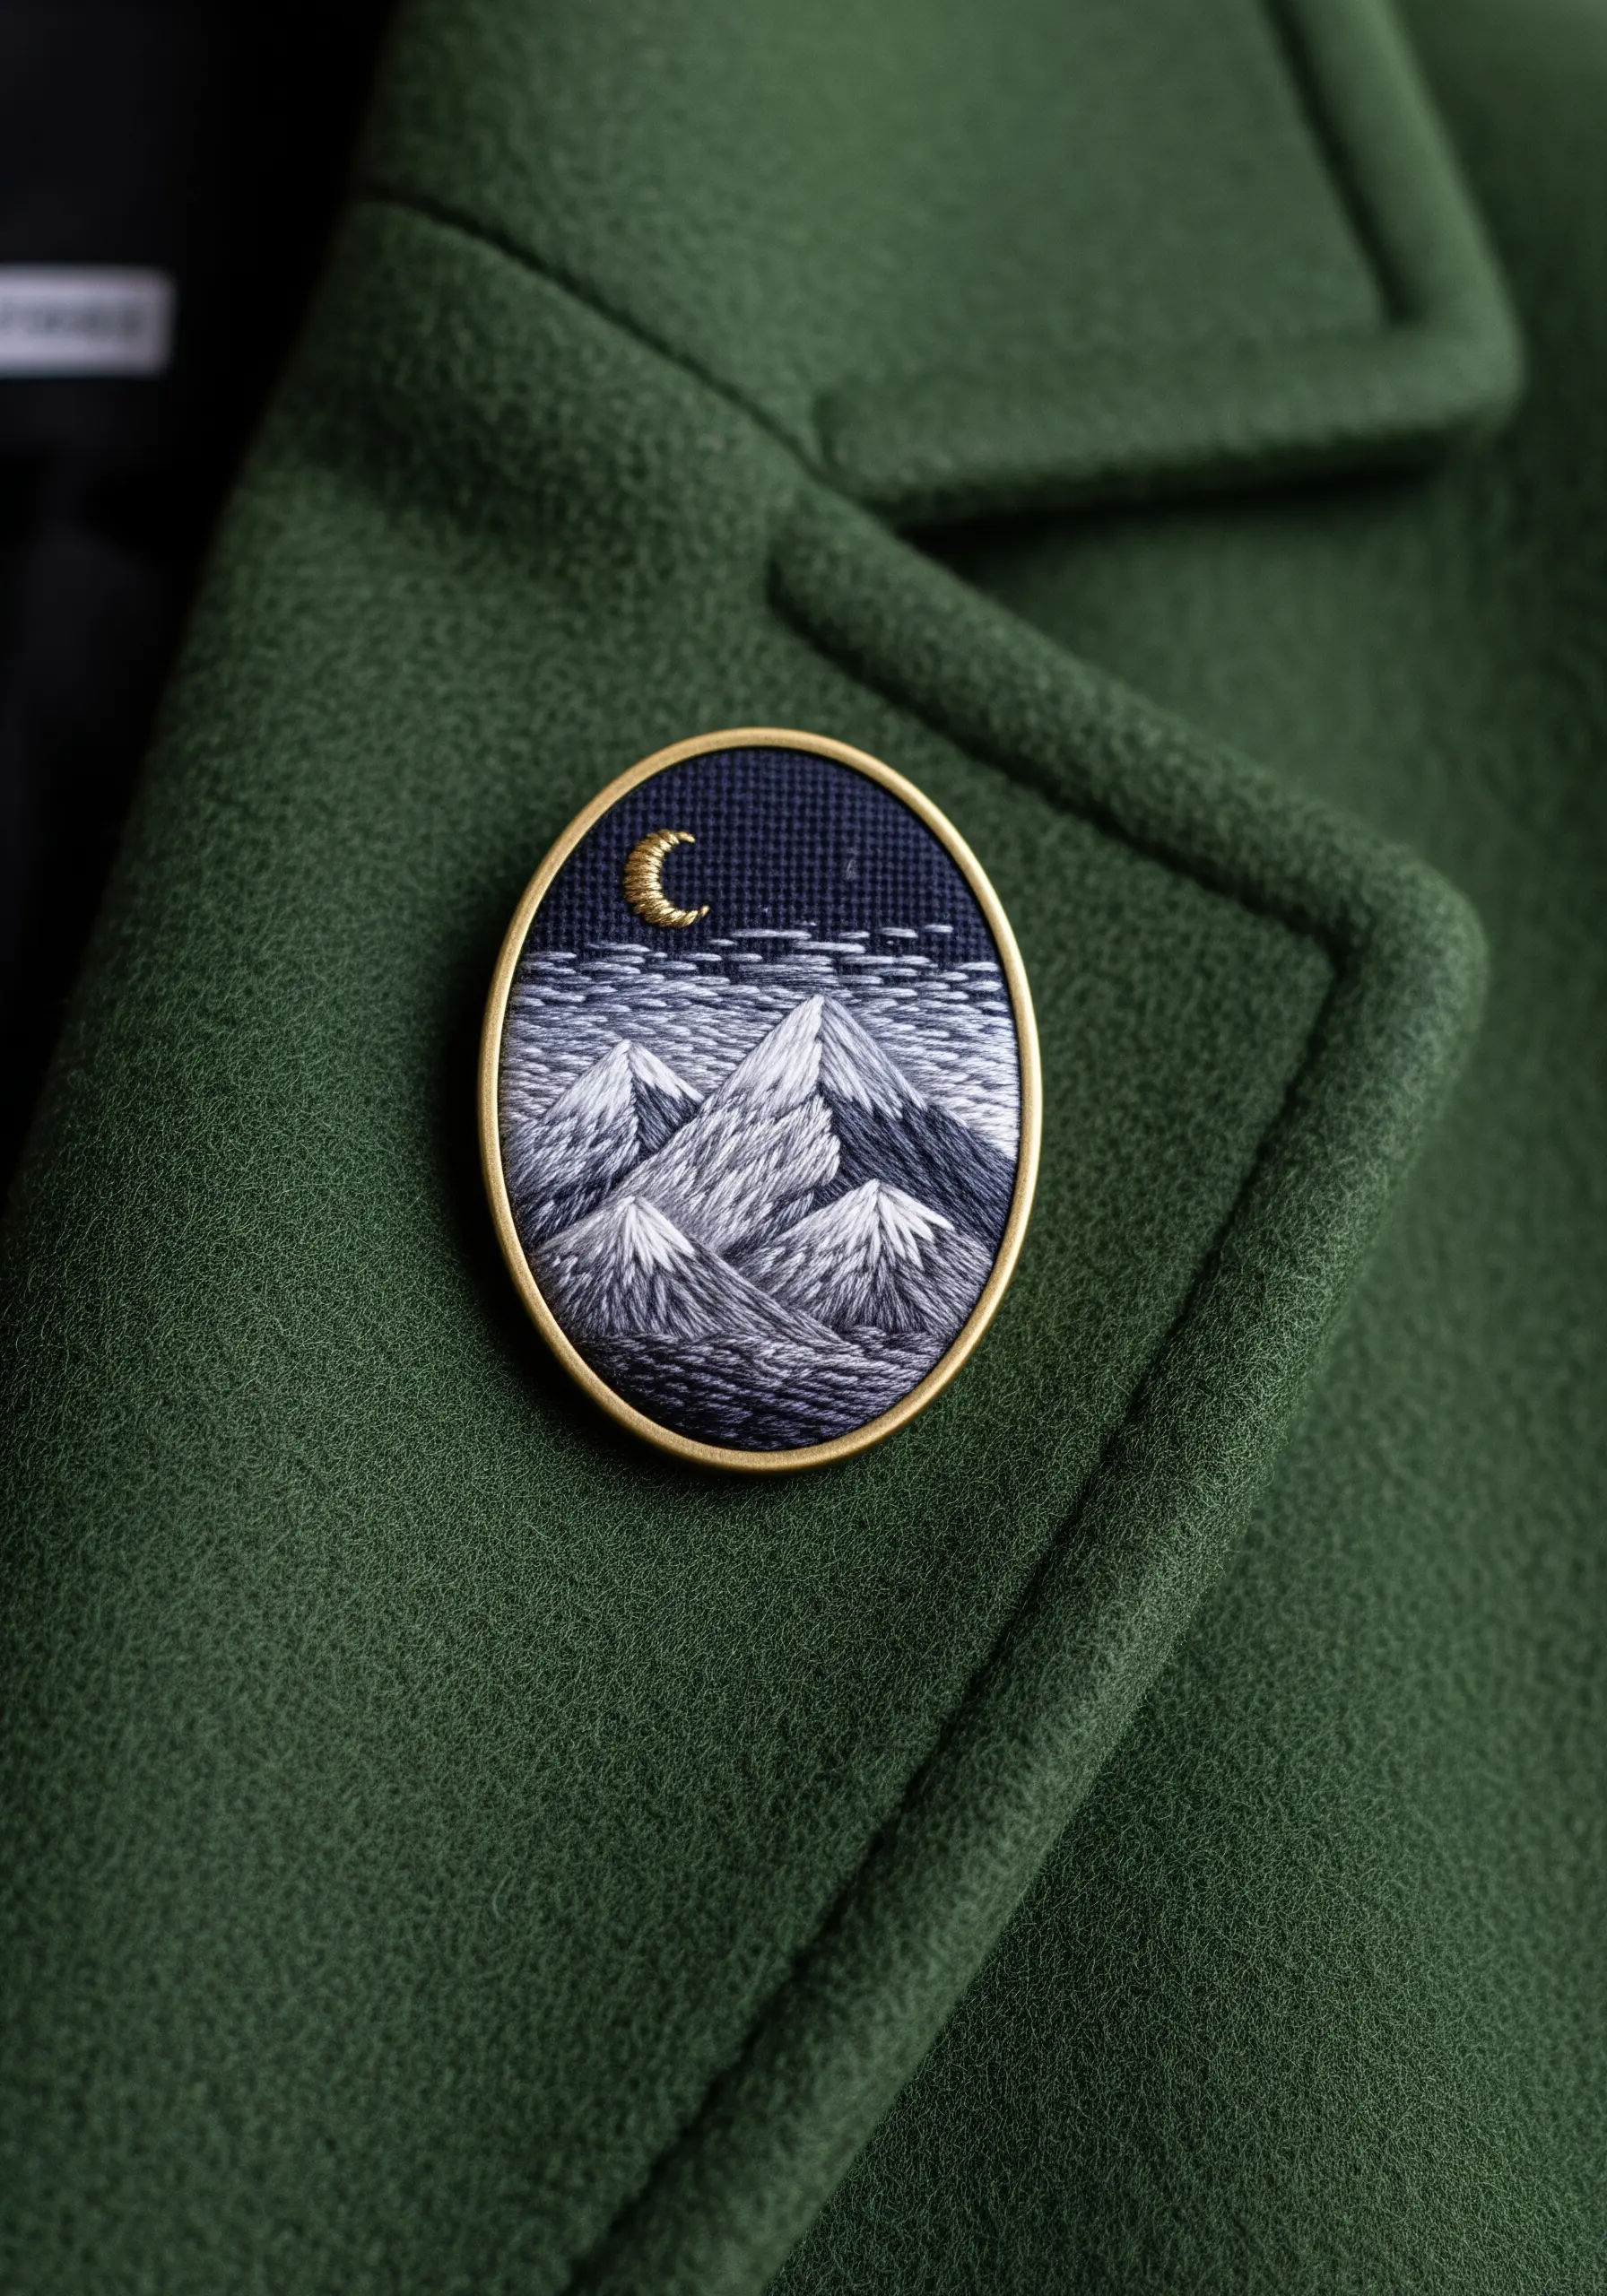
Create depth in miniature landscapes by treating your needle like a paintbrush.
Use long and short stitches to blend shades of white, grey, and dark blue for the mountain shadows, ensuring your stitches follow the natural angles of the peaks.
For the sky, switch to uniform, horizontal satin stitches; this textural shift separates the sky from the mountains, making the peaks feel sharper and more defined.
A single, shimmering metallic thread for the crescent moon provides a perfect focal point against the matte cotton floss.
3. Achieve a Fuzzy Texture for Bees
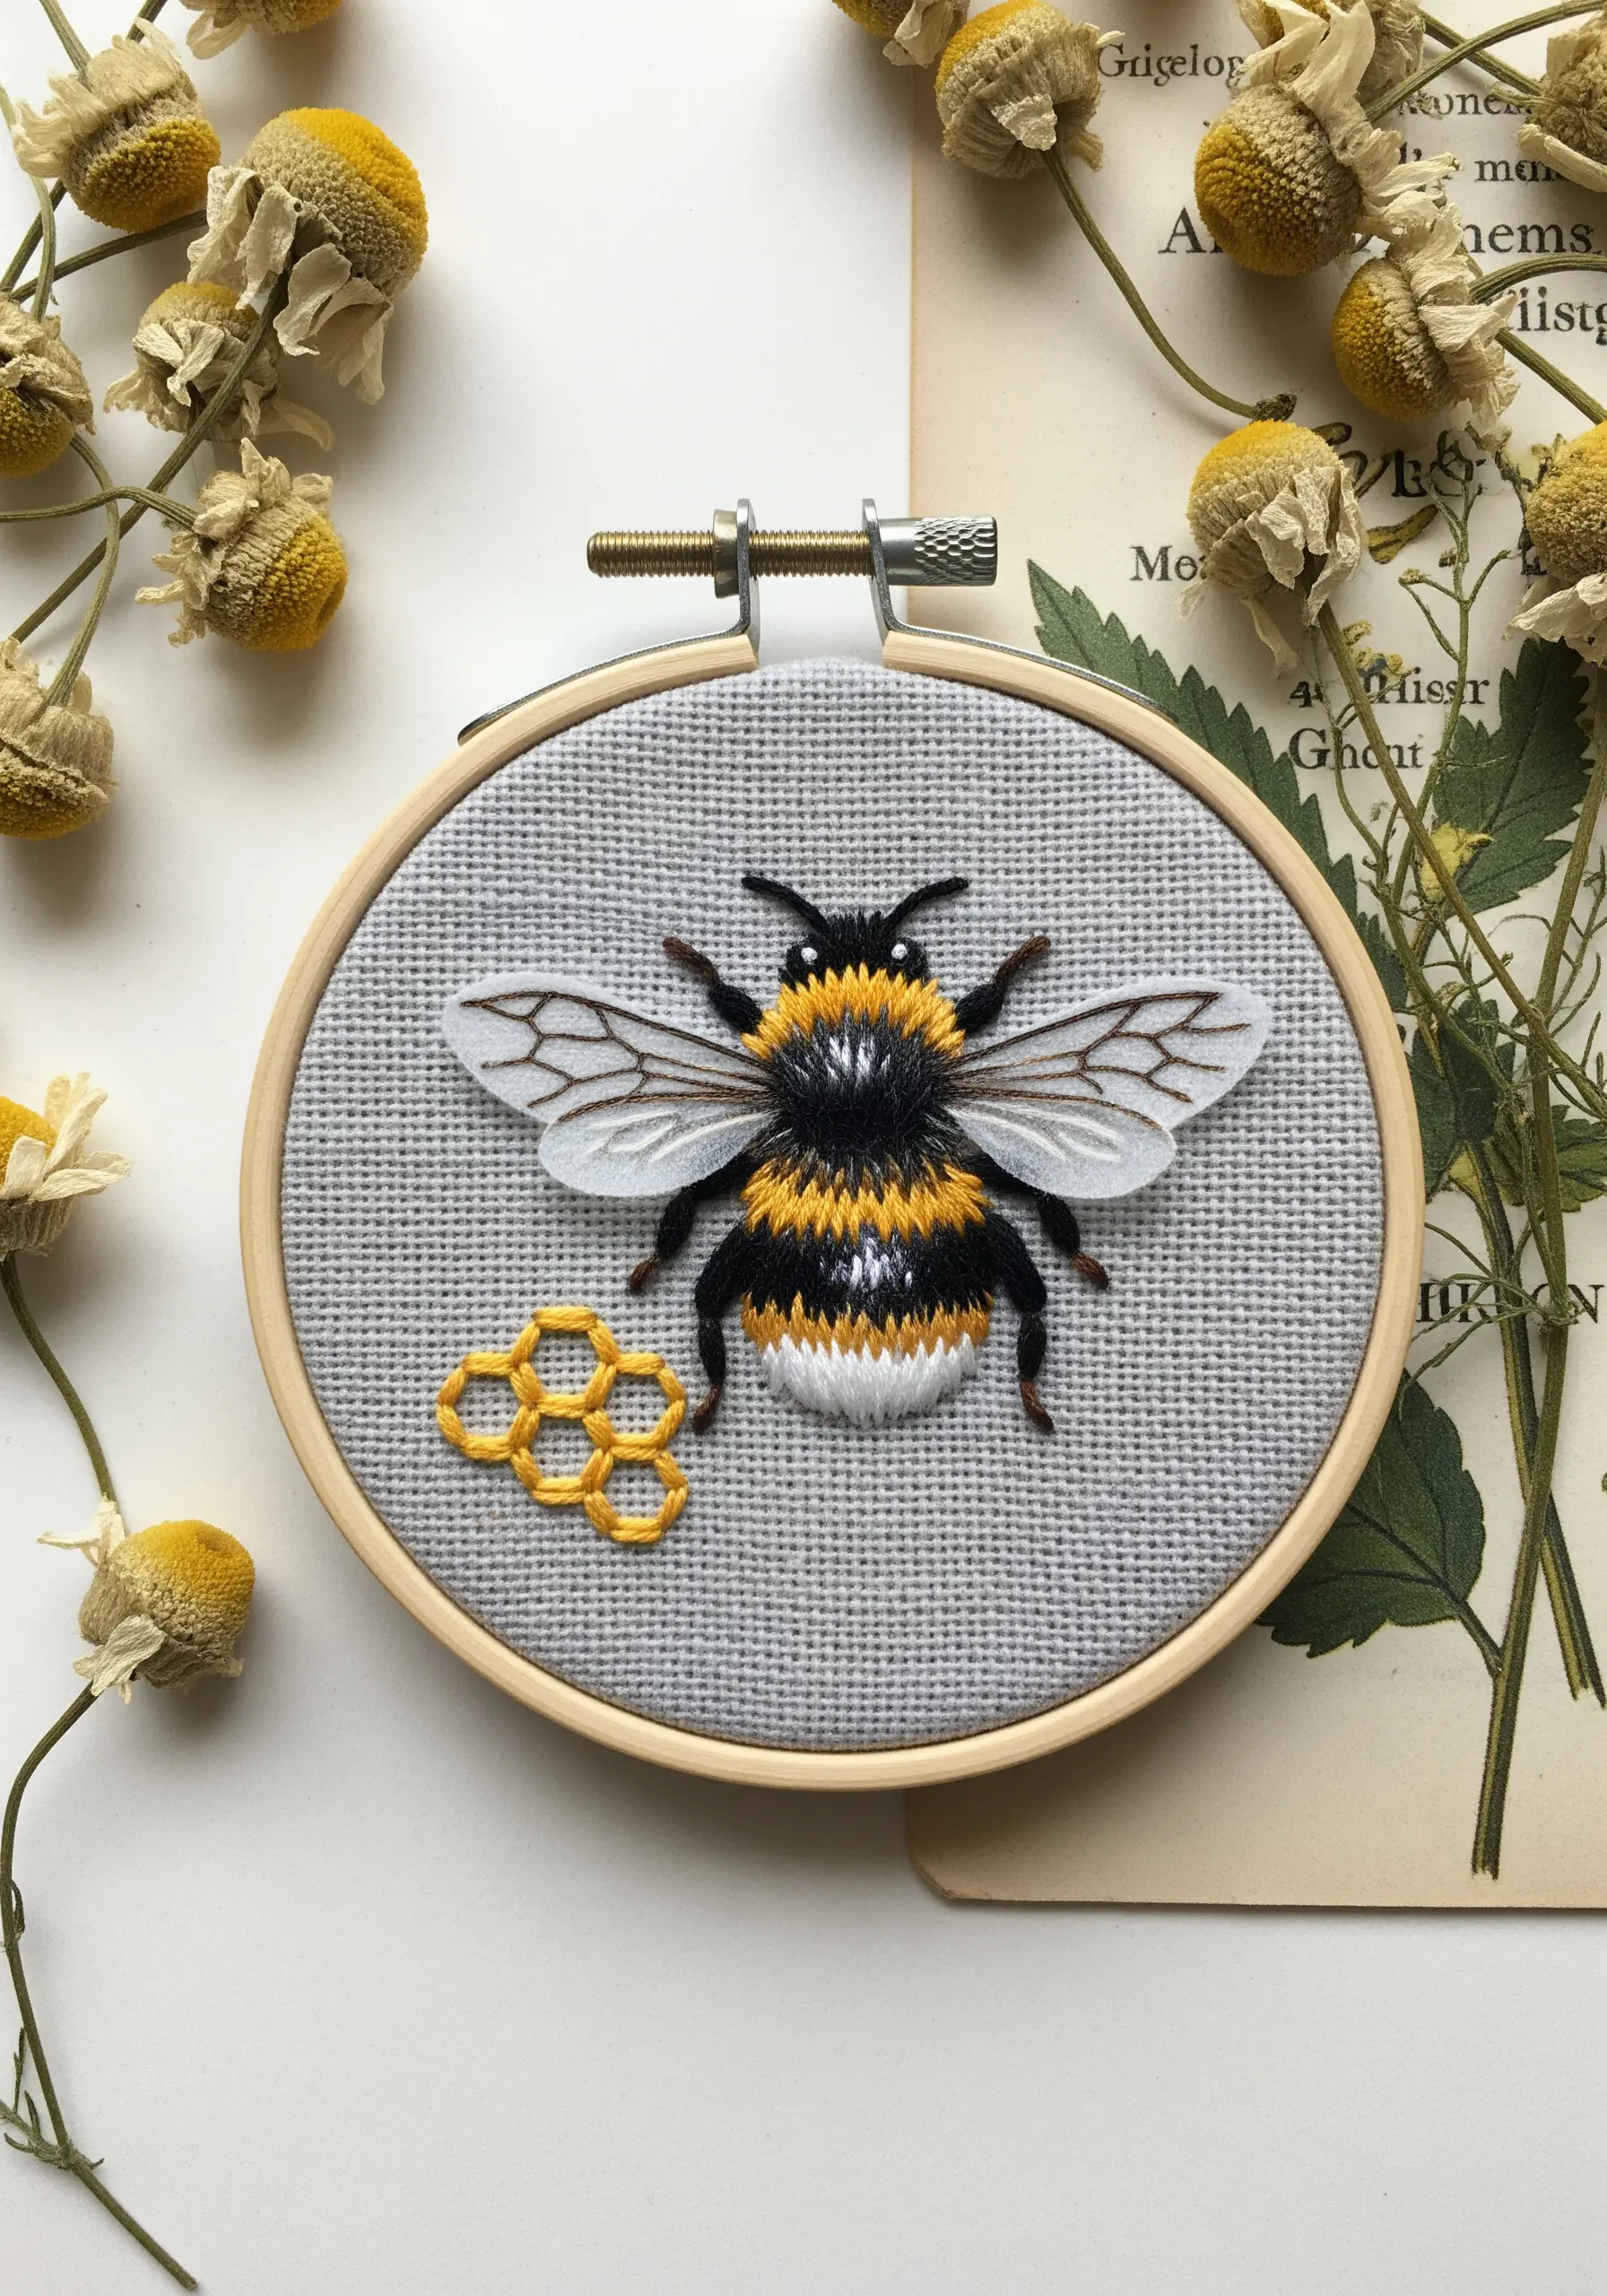
To give your bee a soft, fuzzy body, lay down long satin stitches in yellow and black, then add a sparse layer of turkey work on top.
Trim the loops closely to create a dense, velvety pile that mimics the bee’s natural fuzz.
For the wings, stitch the outline on a sheer organza overlay, then cut away the excess fabric. This technique creates delicate, translucent wings that appear to float above the background.
4. Master the Padded Satin Stitch for Mushrooms

Make your mushroom caps pop by using a padded satin stitch.
First, fill the cap area with a base of small, underlying stitches (like seed stitches), then cover it with smooth, vertical satin stitches.
This simple preparation raises the surface, creating a rounded, 3D effect that catches the light beautifully.
Add tiny, precise French knots for the white spots after the red satin stitch is complete to ensure they sit neatly on top.
5. Explore Texture in Celestial Designs
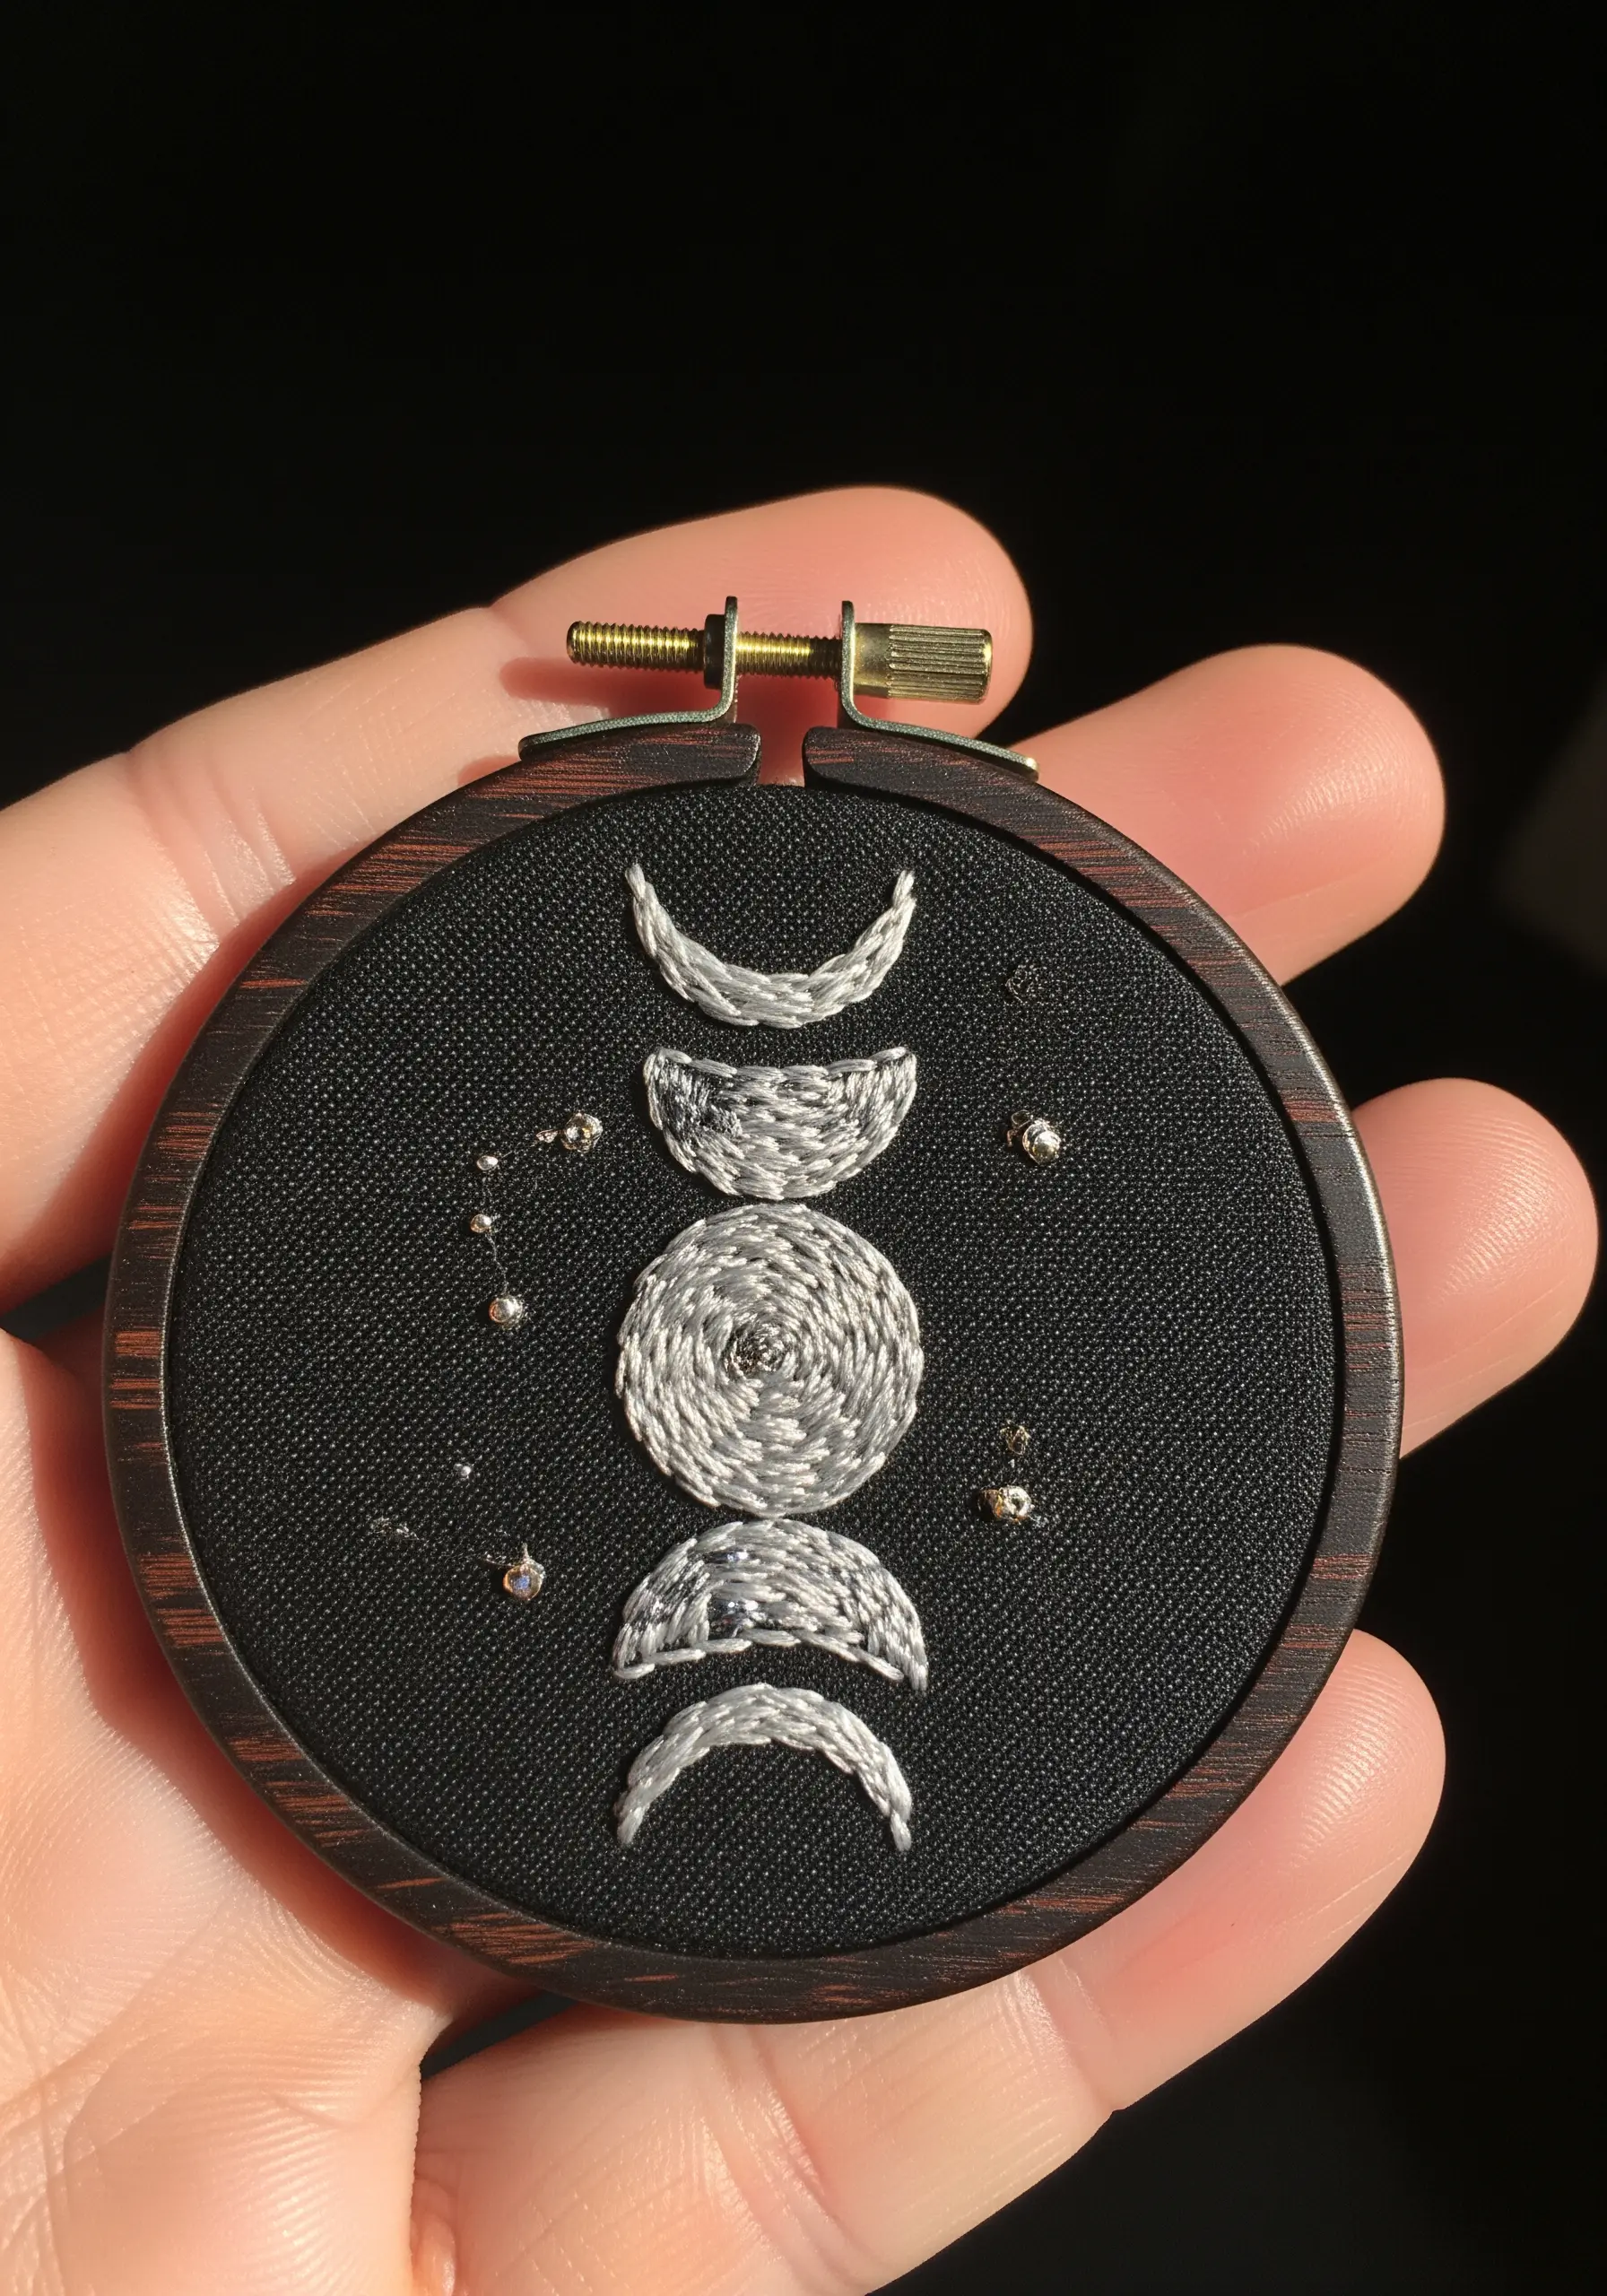
Instead of a simple satin stitch, define your moon phases using a whipped backstitch or couching a thicker, metallic thread.
This creates a raised, rope-like outline that adds sophisticated texture and dimension.
Fill the shapes with a spiraling satin stitch for the full moon and directional satin stitches for the crescents to enhance the visual interest.
A few strategically placed metallic beads serve as stars, catching the light more dynamically than French knots.
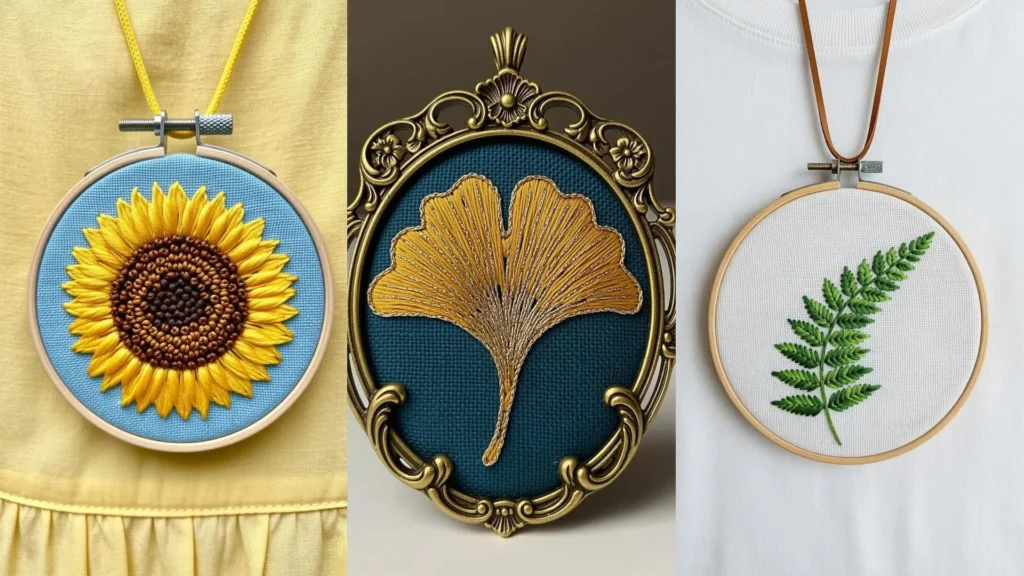
6. Capture Botanical Accuracy with Fishbone Stitch
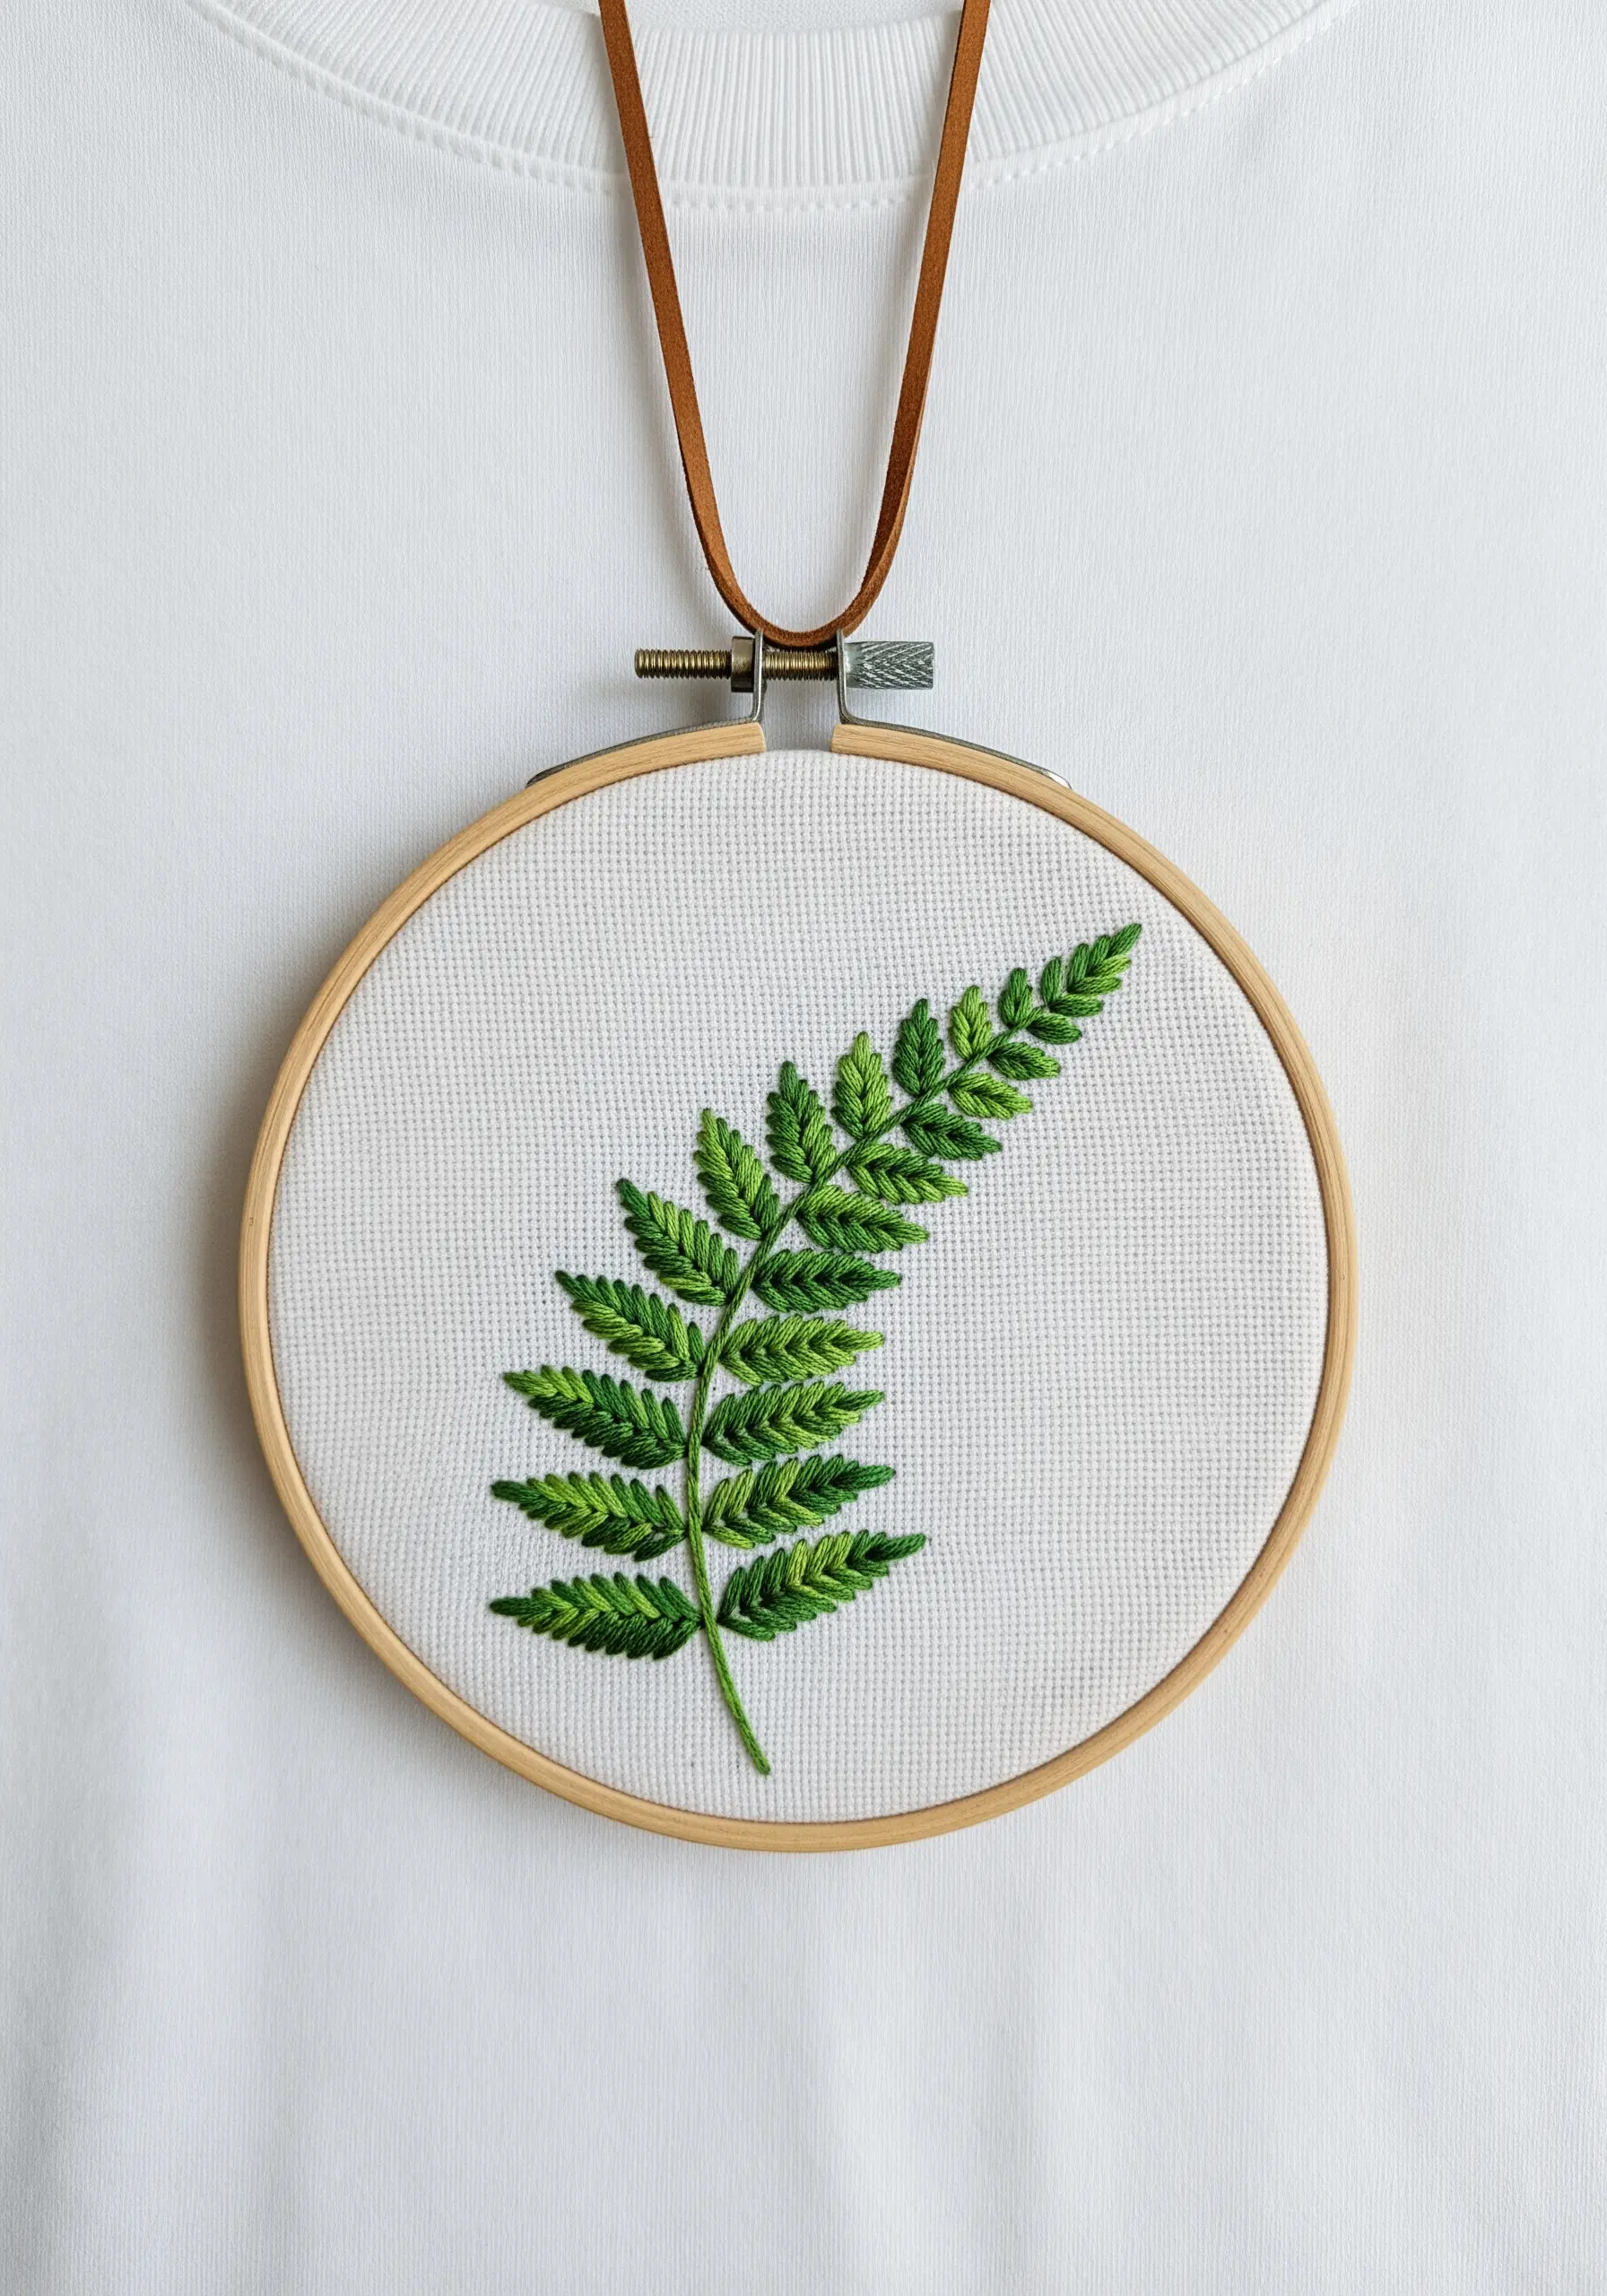
The fishbone stitch is your best tool for creating realistic leaves like this fern.
Each stitch crosses over in the center, forming a defined central vein that mimics nature perfectly.
To achieve a subtle, lifelike gradient, use two strands of floss in slightly different shades of green on your needle at the same time. This simple trick blends the colors organically as you stitch.
7. Layer Petals with Directional Stitching
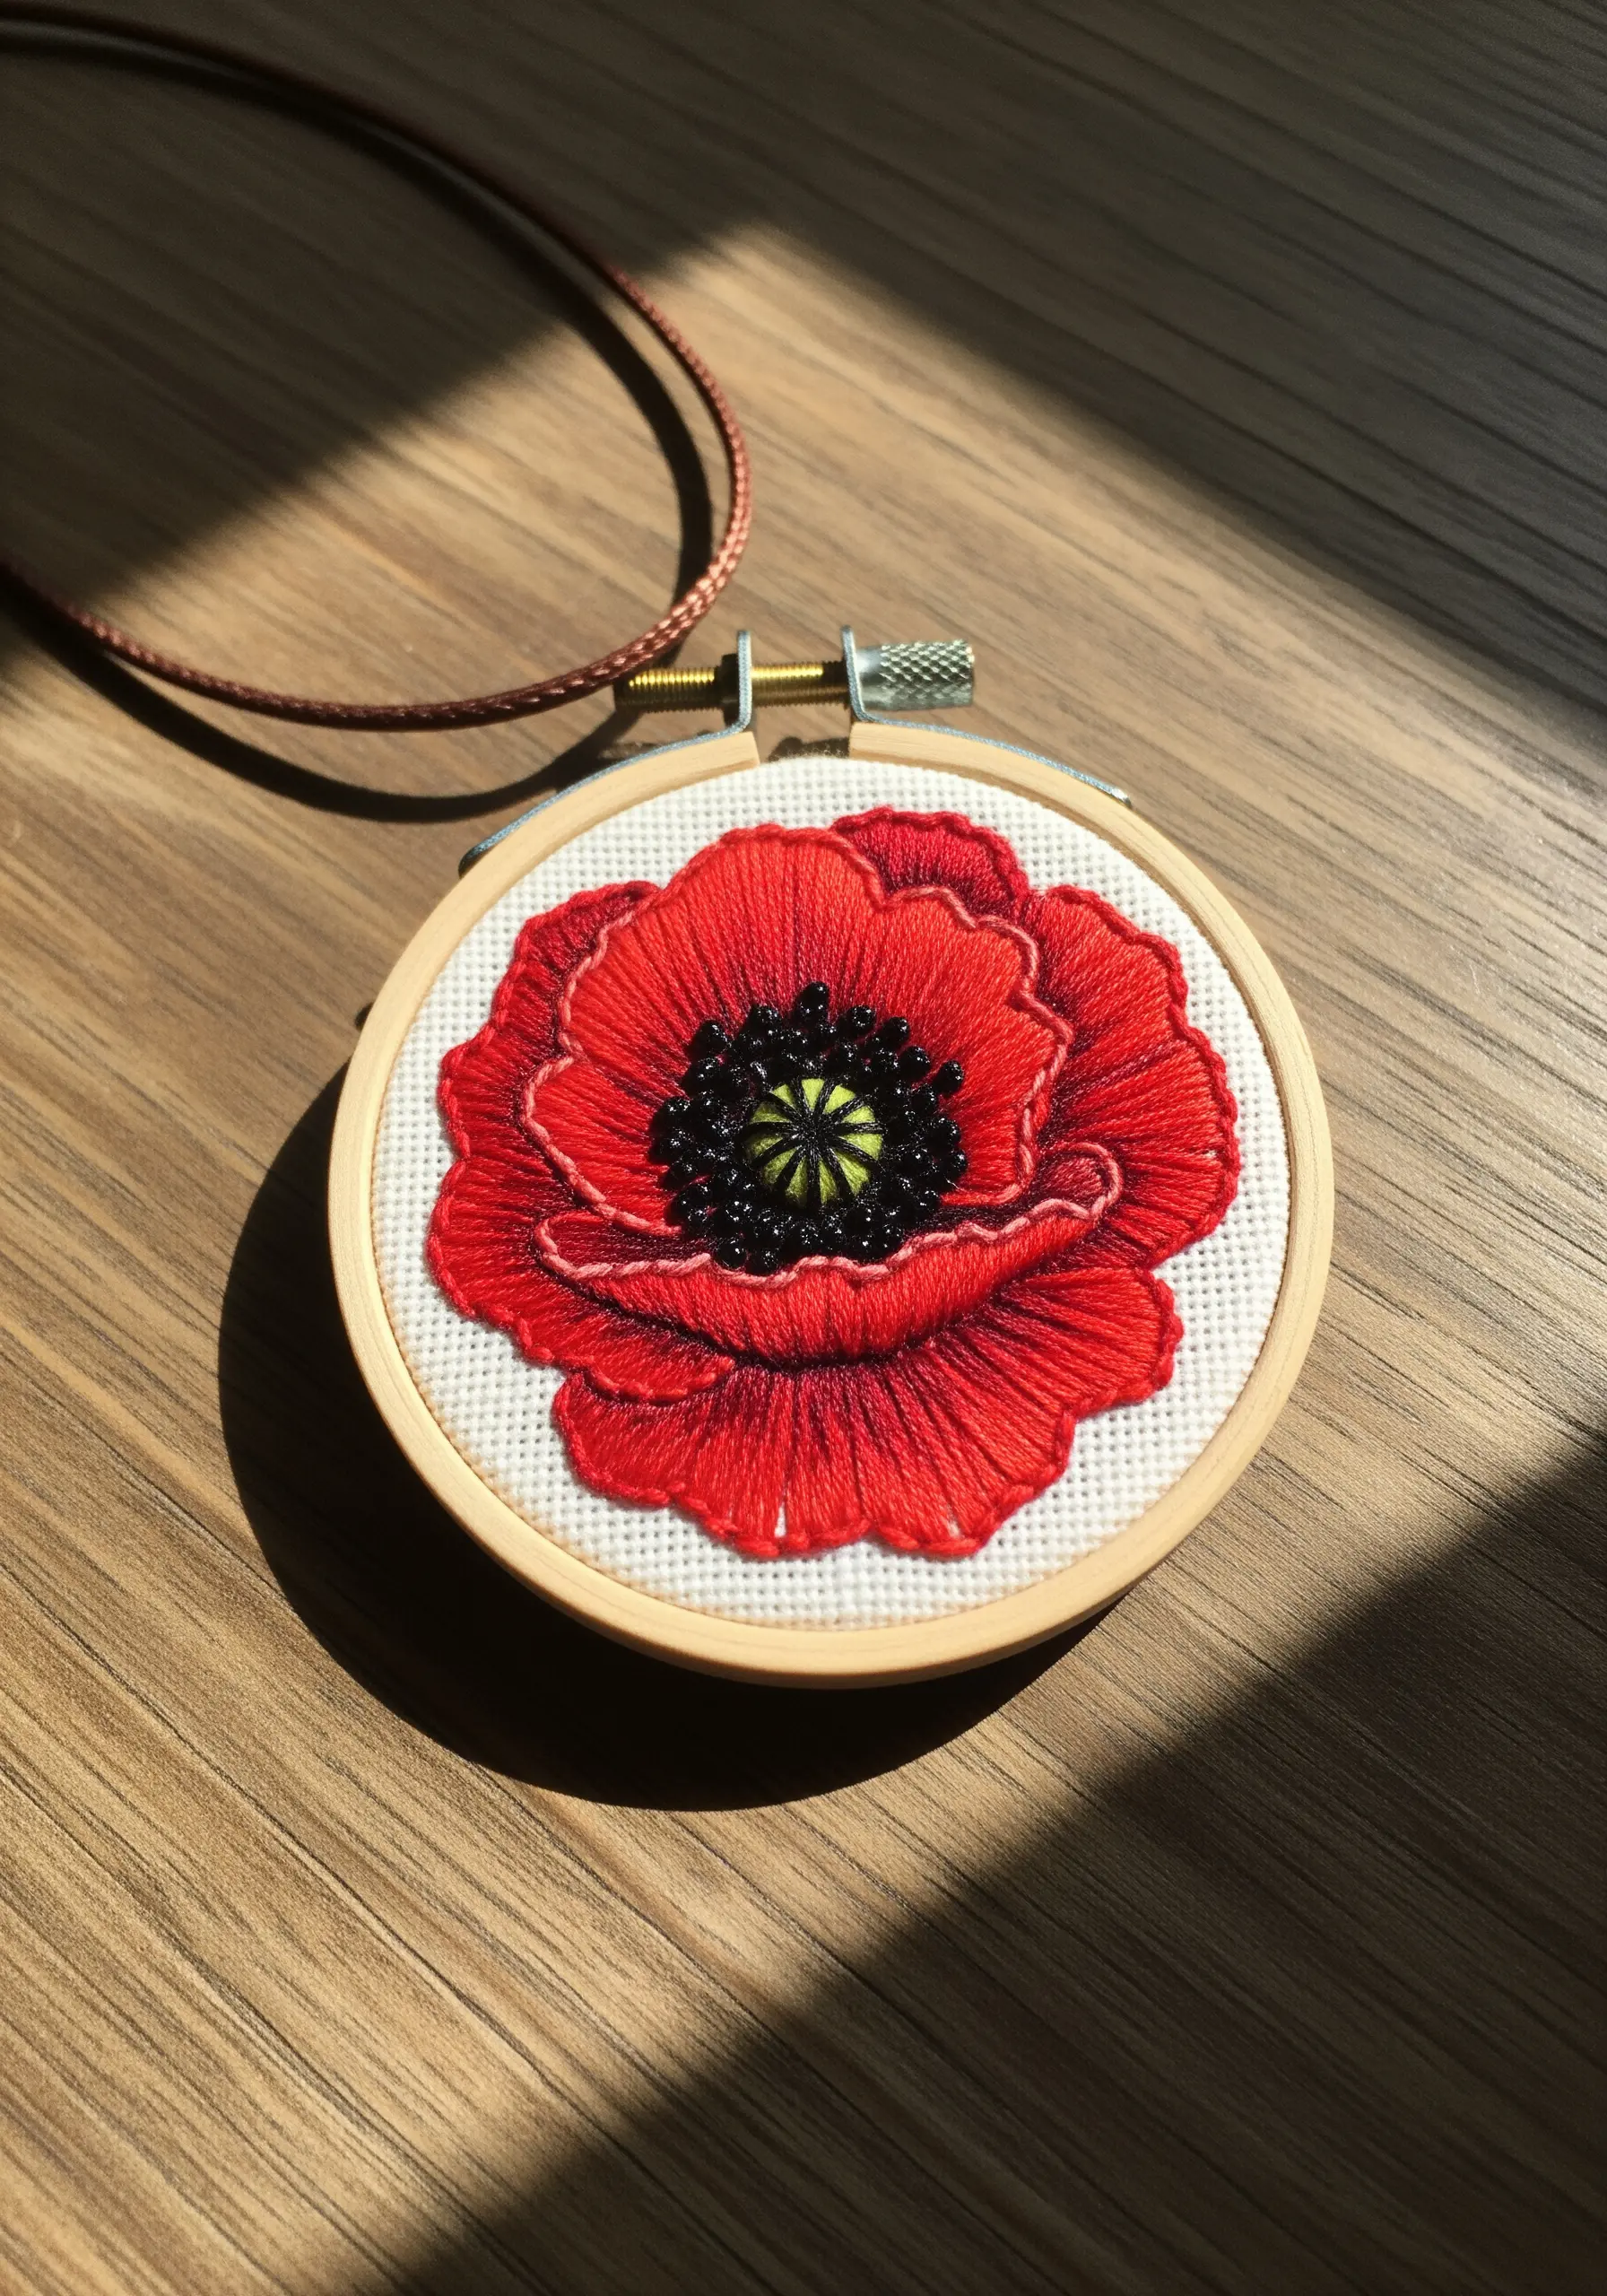
Build the delicate, overlapping petals of a poppy using long and short stitch.
Work in layers, starting from the outer edge and moving inward, slightly changing the angle of your stitches for each petal to create separation and movement.
For the flower’s center, create a dense cluster of black French knots, then outline it with a ring of bright green split stitch. This contrast in color and texture draws the eye inward, giving the flower a dramatic focal point.
8. Convey Motion with Thread and Knots
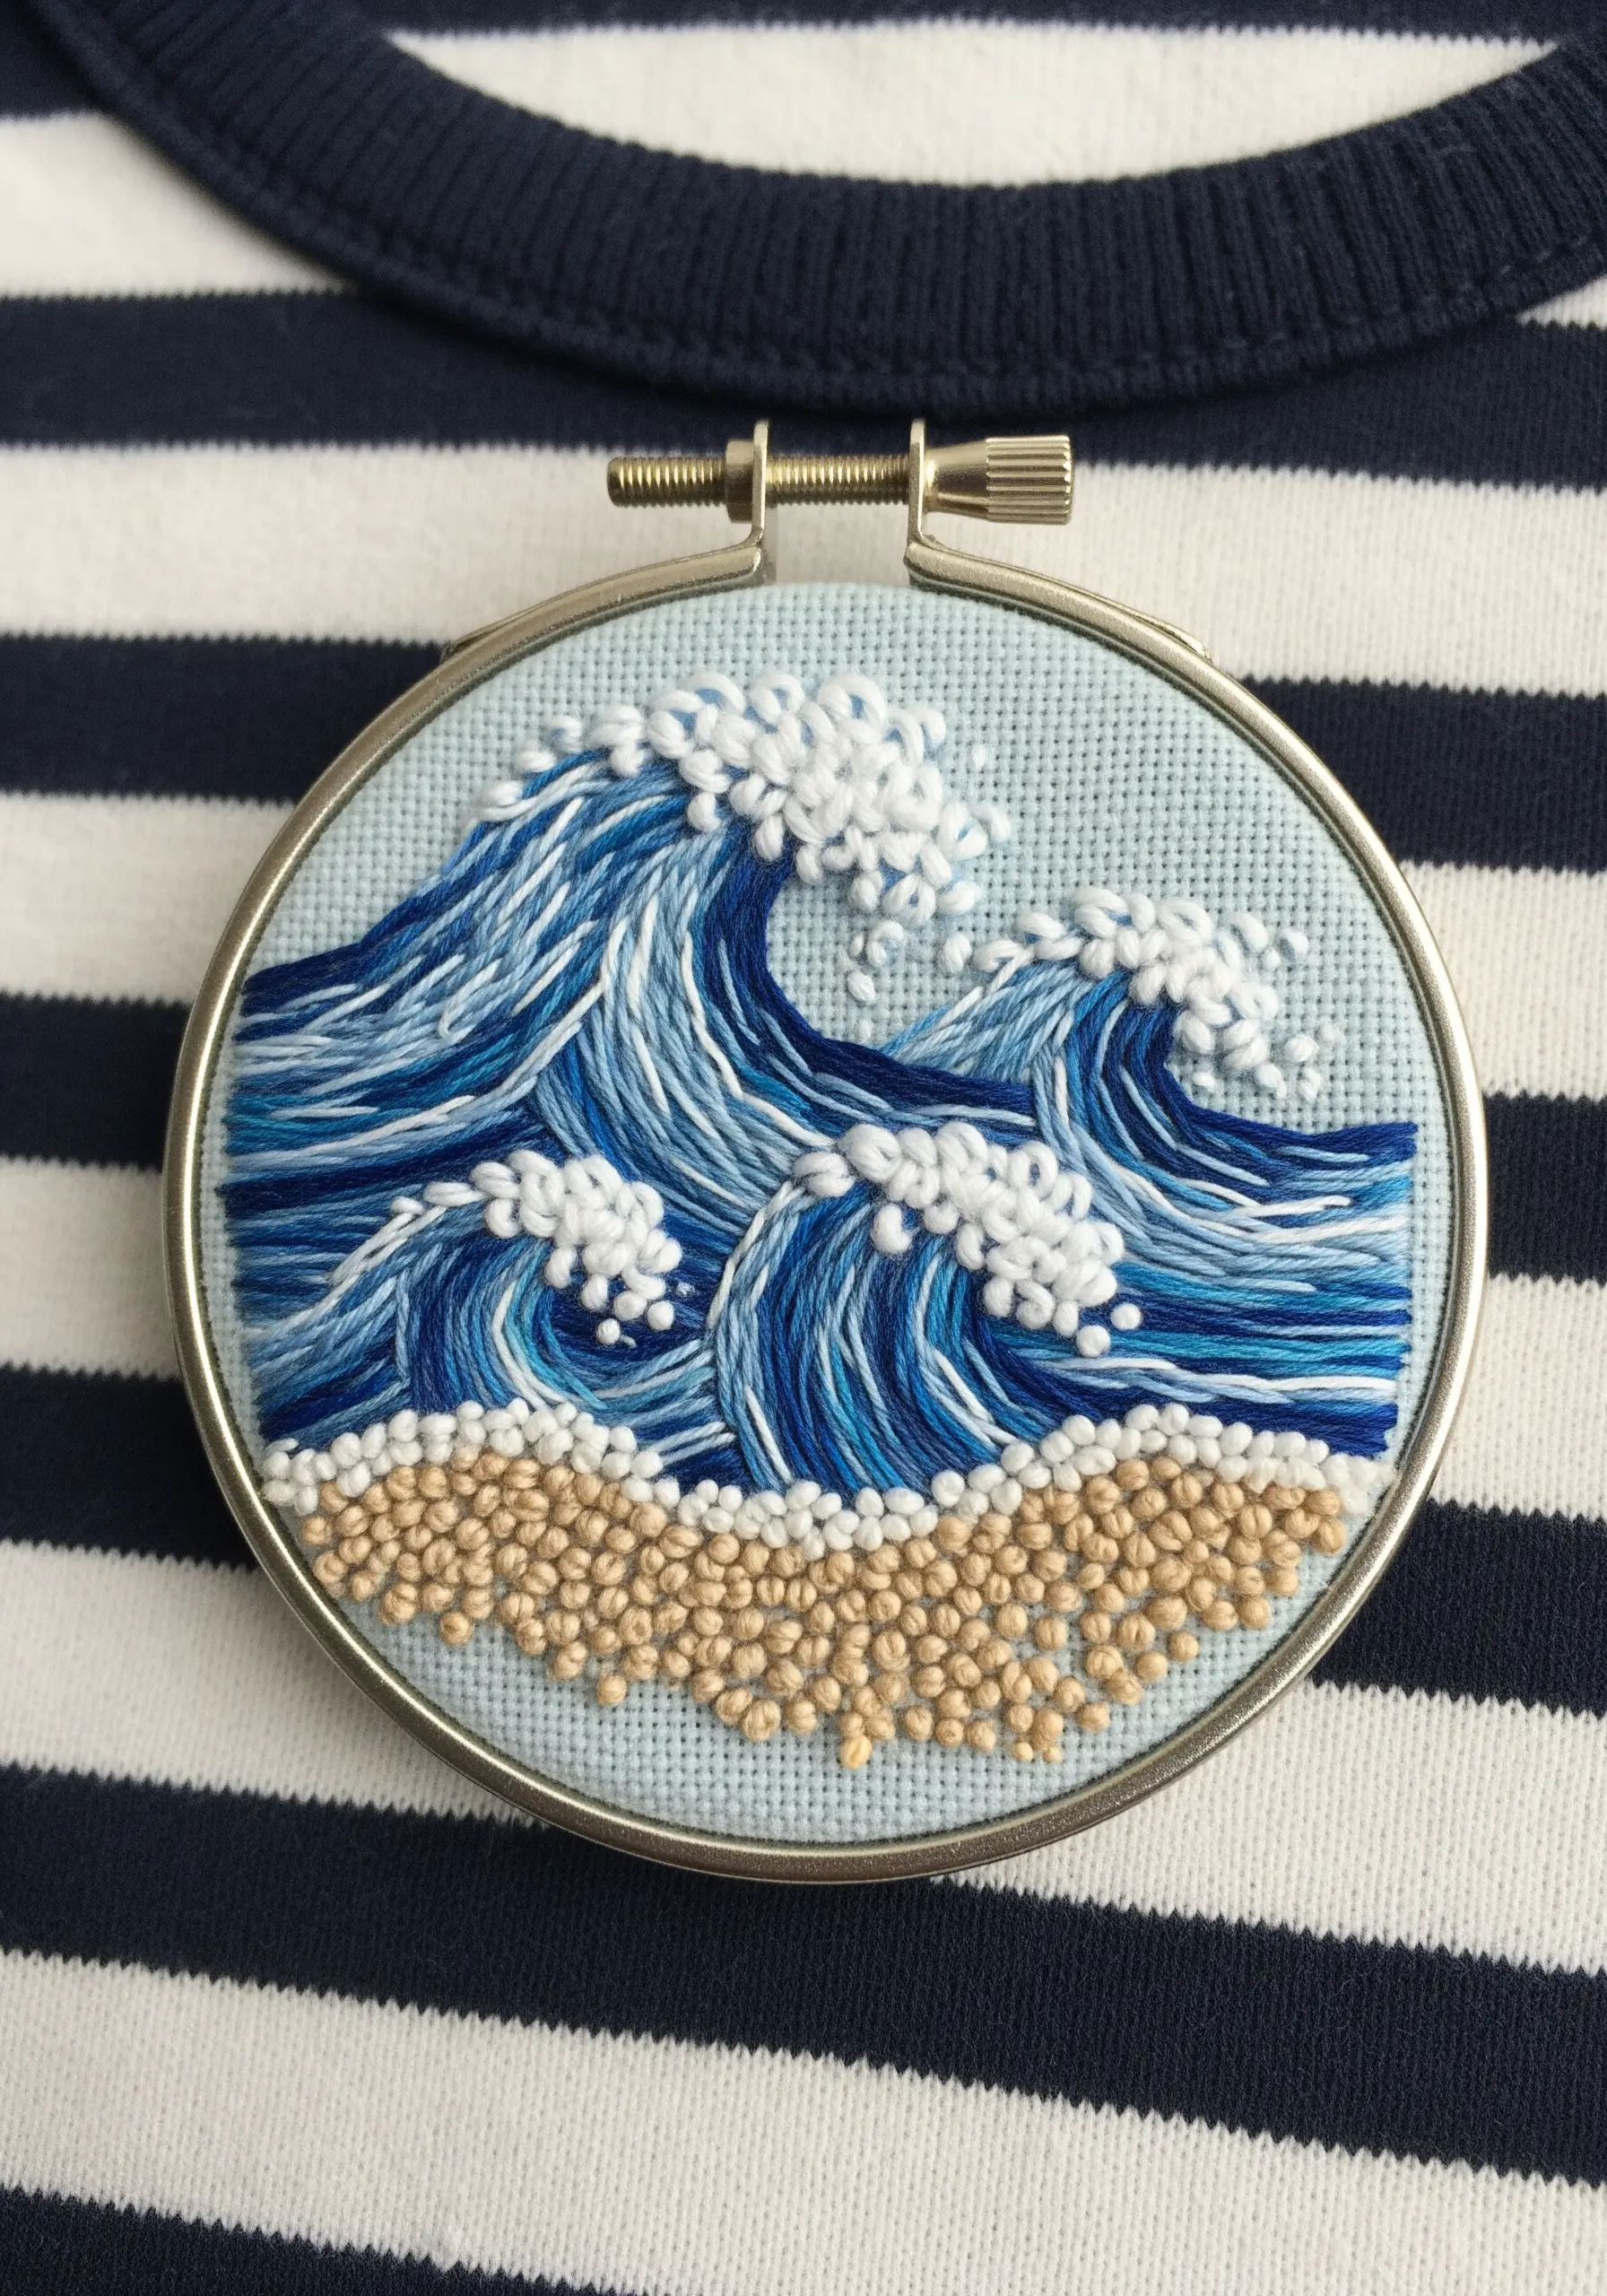
To capture the energy of ocean waves, use a mix of straight stitches and stem stitches in various shades of blue and white.
Vary the length and direction of your stitches to follow the water’s flow, creating a sense of powerful movement.
For the sea foam, use densely packed French knots in bright white. The raised, bumpy texture of the knots provides a stunning contrast to the smoother stitches of the water, mimicking the froth of a crashing wave.
9. Stitch Dainty Florals with Lazy Daisy

The lazy daisy stitch is perfect for creating the small, uniform petals of forget-me-nots, even on a miniature scale.
Arrange five stitches in a circle for each blossom, ensuring your tension is consistent for evenly sized petals.
A single, bright yellow French knot in the center of each flower provides a pop of contrasting color and anchors the design.
Using a vintage-style pendant frame complements the delicate, classic nature of the flower.
10. Blend Autumnal Colors Seamlessly
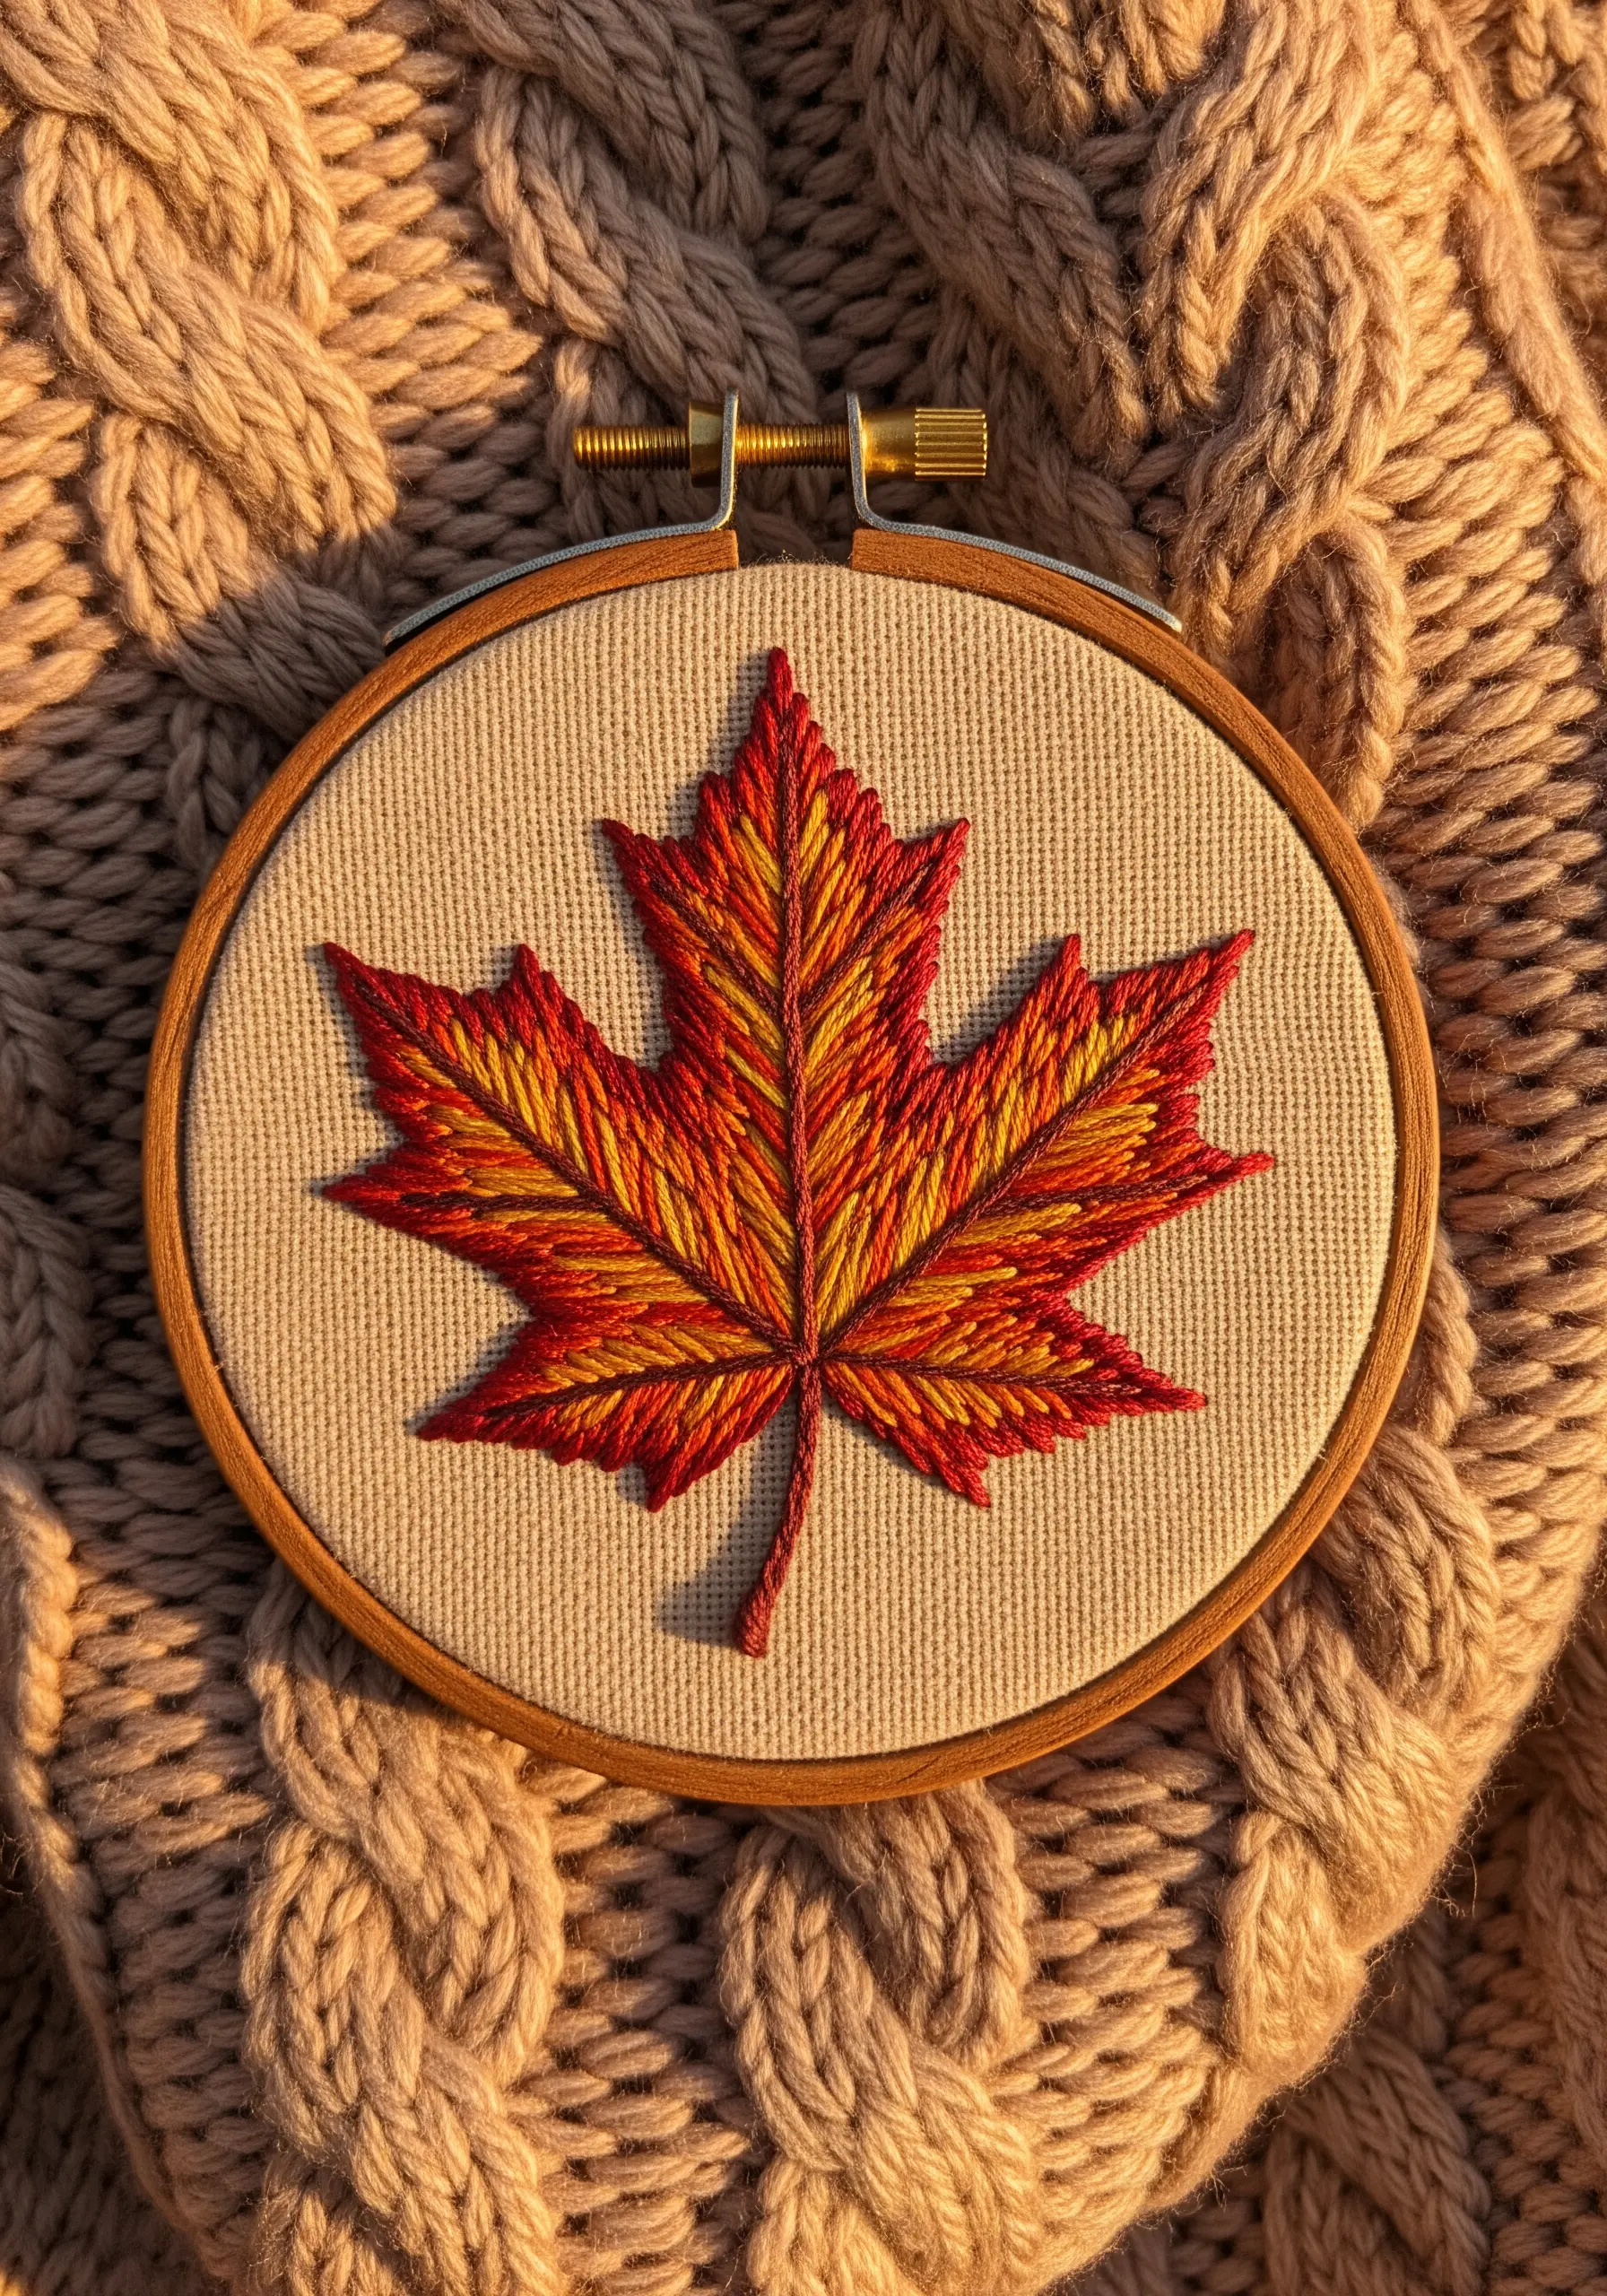
Recreate the stunning gradient of a maple leaf by blending multiple thread colors within your long and short stitches.
Instead of stitching solid blocks of color, bring needles with red, orange, and yellow thread up through the same area, letting them mix randomly to create a natural, variegated effect.
A split stitch outline in a dark red defines the leaf’s sharp points and contains the blended colors for a polished finish.
11. Create a Sense of Weightlessness
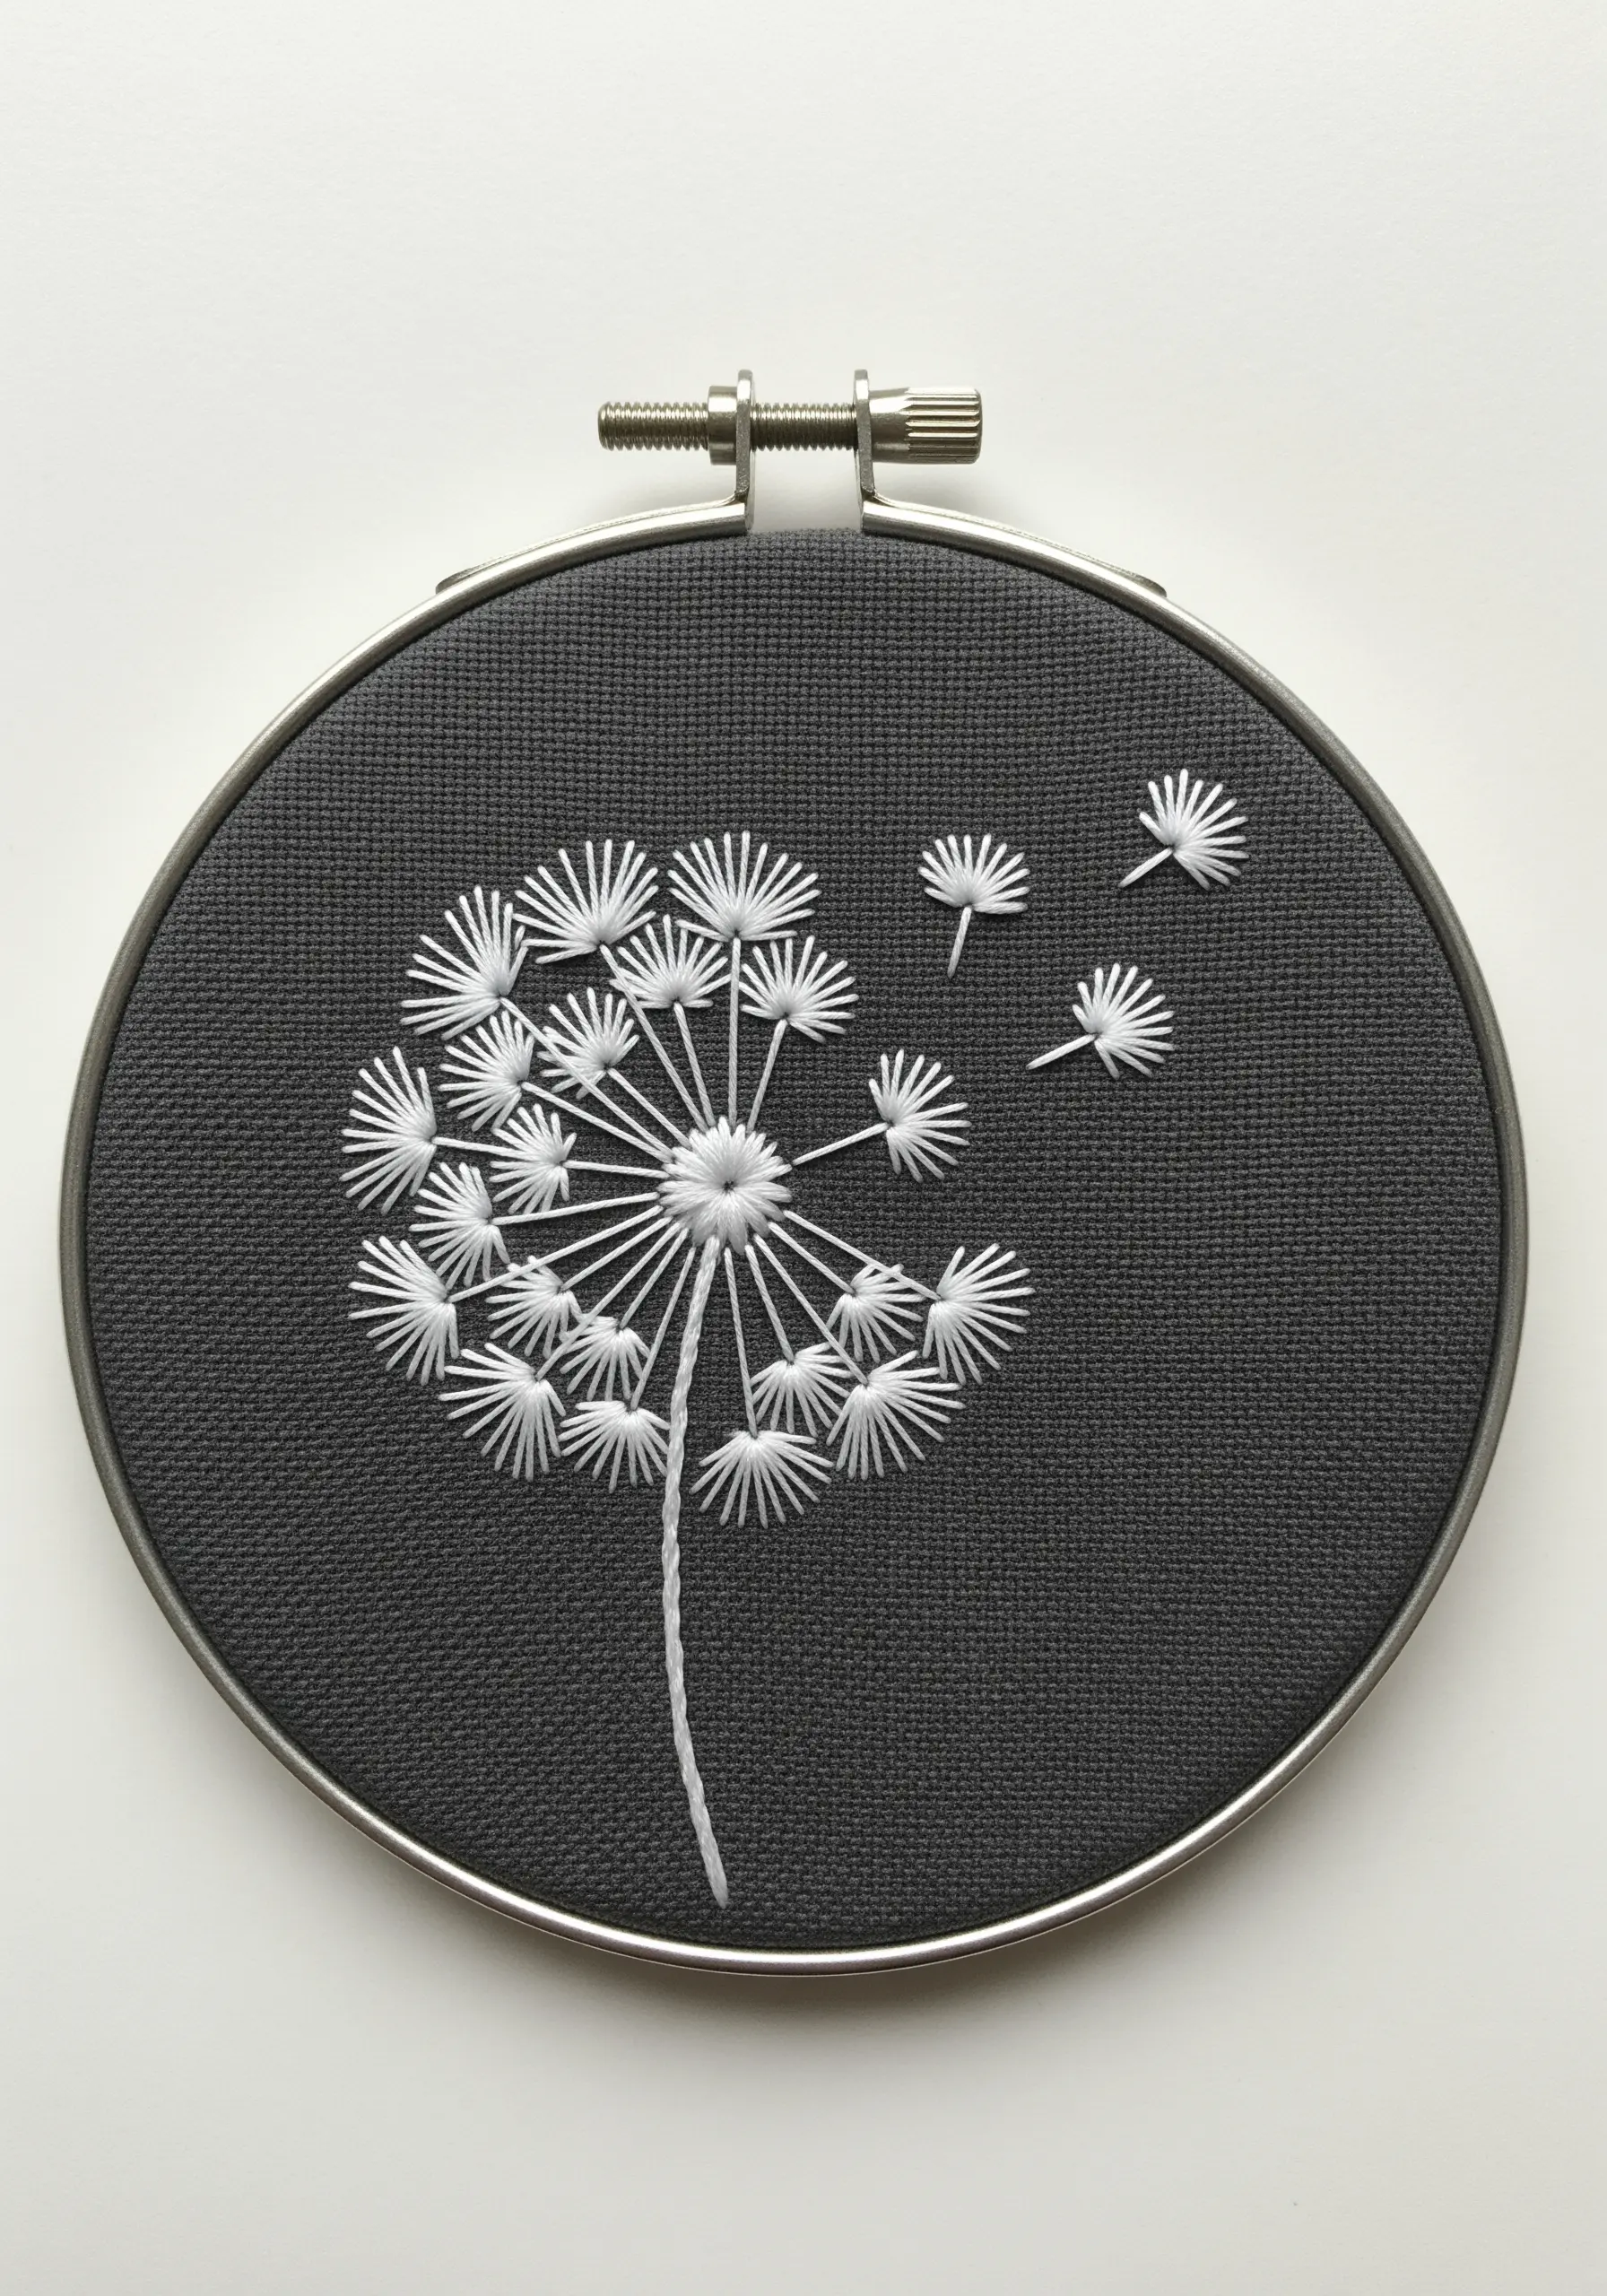
For a delicate dandelion, use single-strand white thread for all the elements. This is essential for achieving a light, airy feel.
Use detached chain stitches for the unopened seed heads and simple straight stitches for the open ones.
To create the illusion of seeds floating away, make the stitches progressively smaller and more spaced out as they move away from the dandelion head. This simple compositional trick gives the piece a feeling of gentle movement.
12. Build a Sculptural Succulent Garden
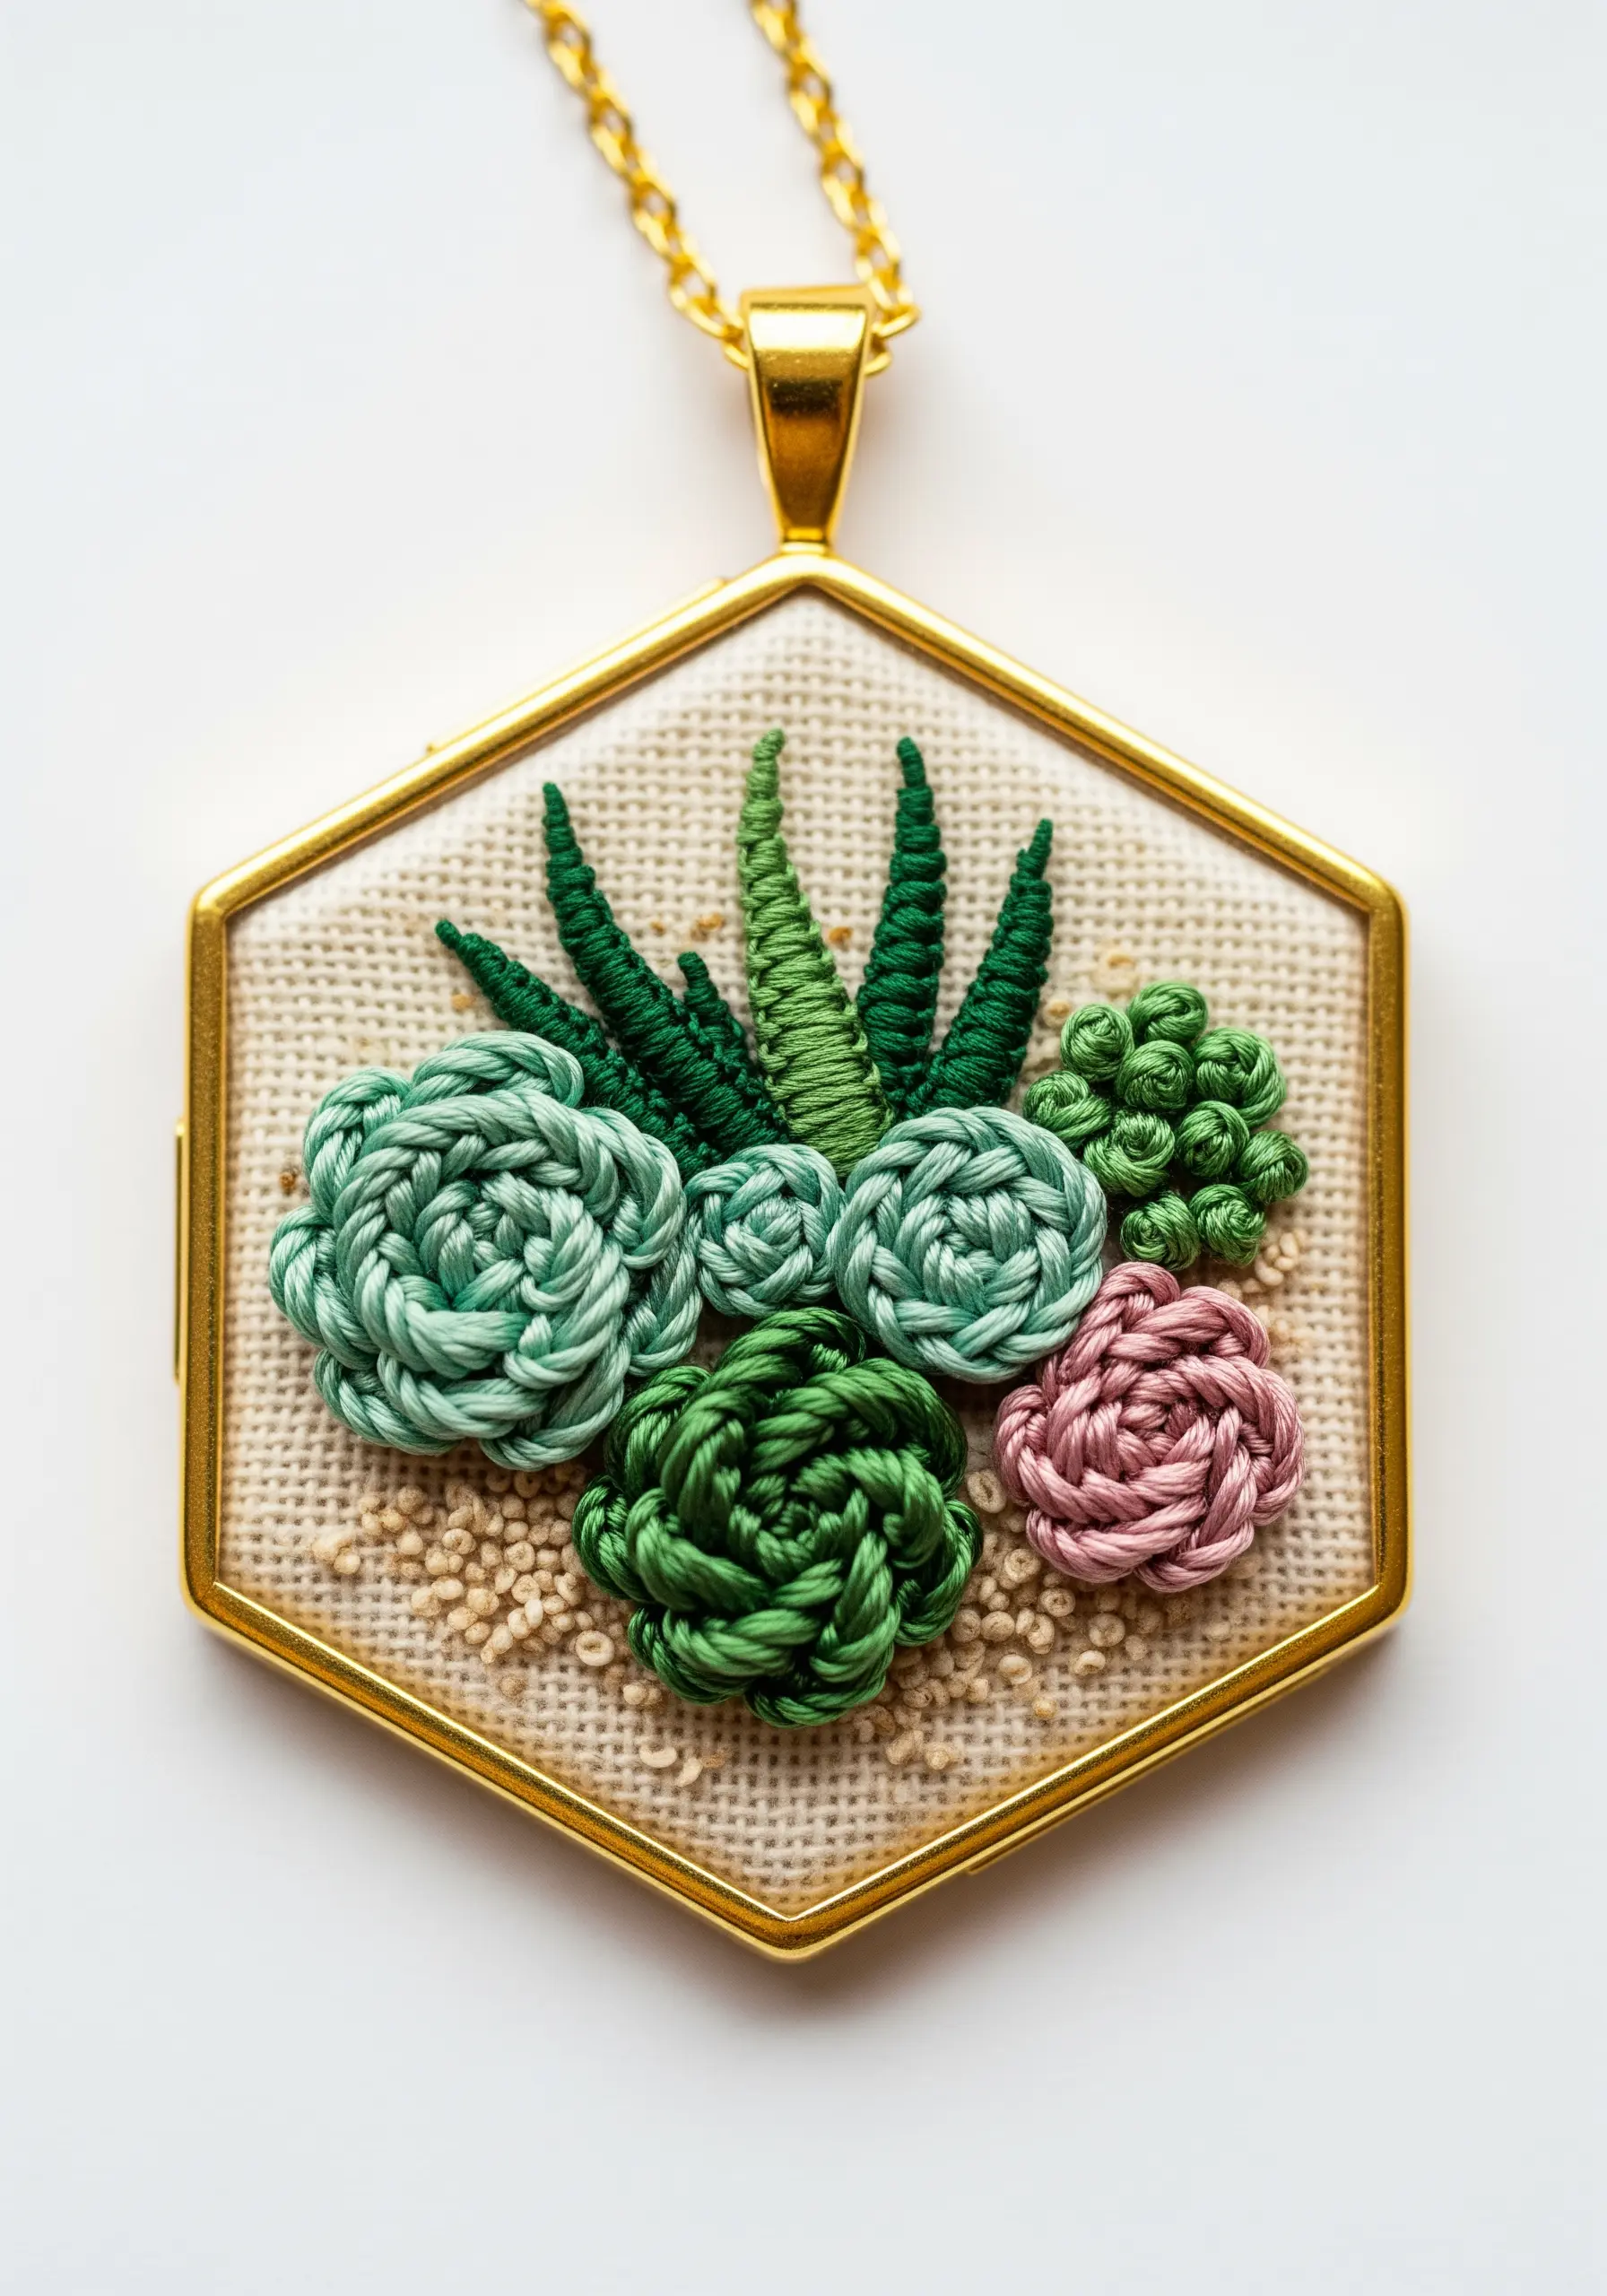
Create a stunning, raised, sculptural embroidery piece by choosing stitches with inherent dimension.
Use woven wheel stitches for rose-like succulents, bullion knots for finger-like plants, and dense French knots for ground cover.
Varying the tightness of your woven wheels and the length of your bullion knots will create a variety of plant shapes from just two core stitches.
This is a perfect project for using up leftover green threads.
13. Embroider the Night Sky with a Secret Glow
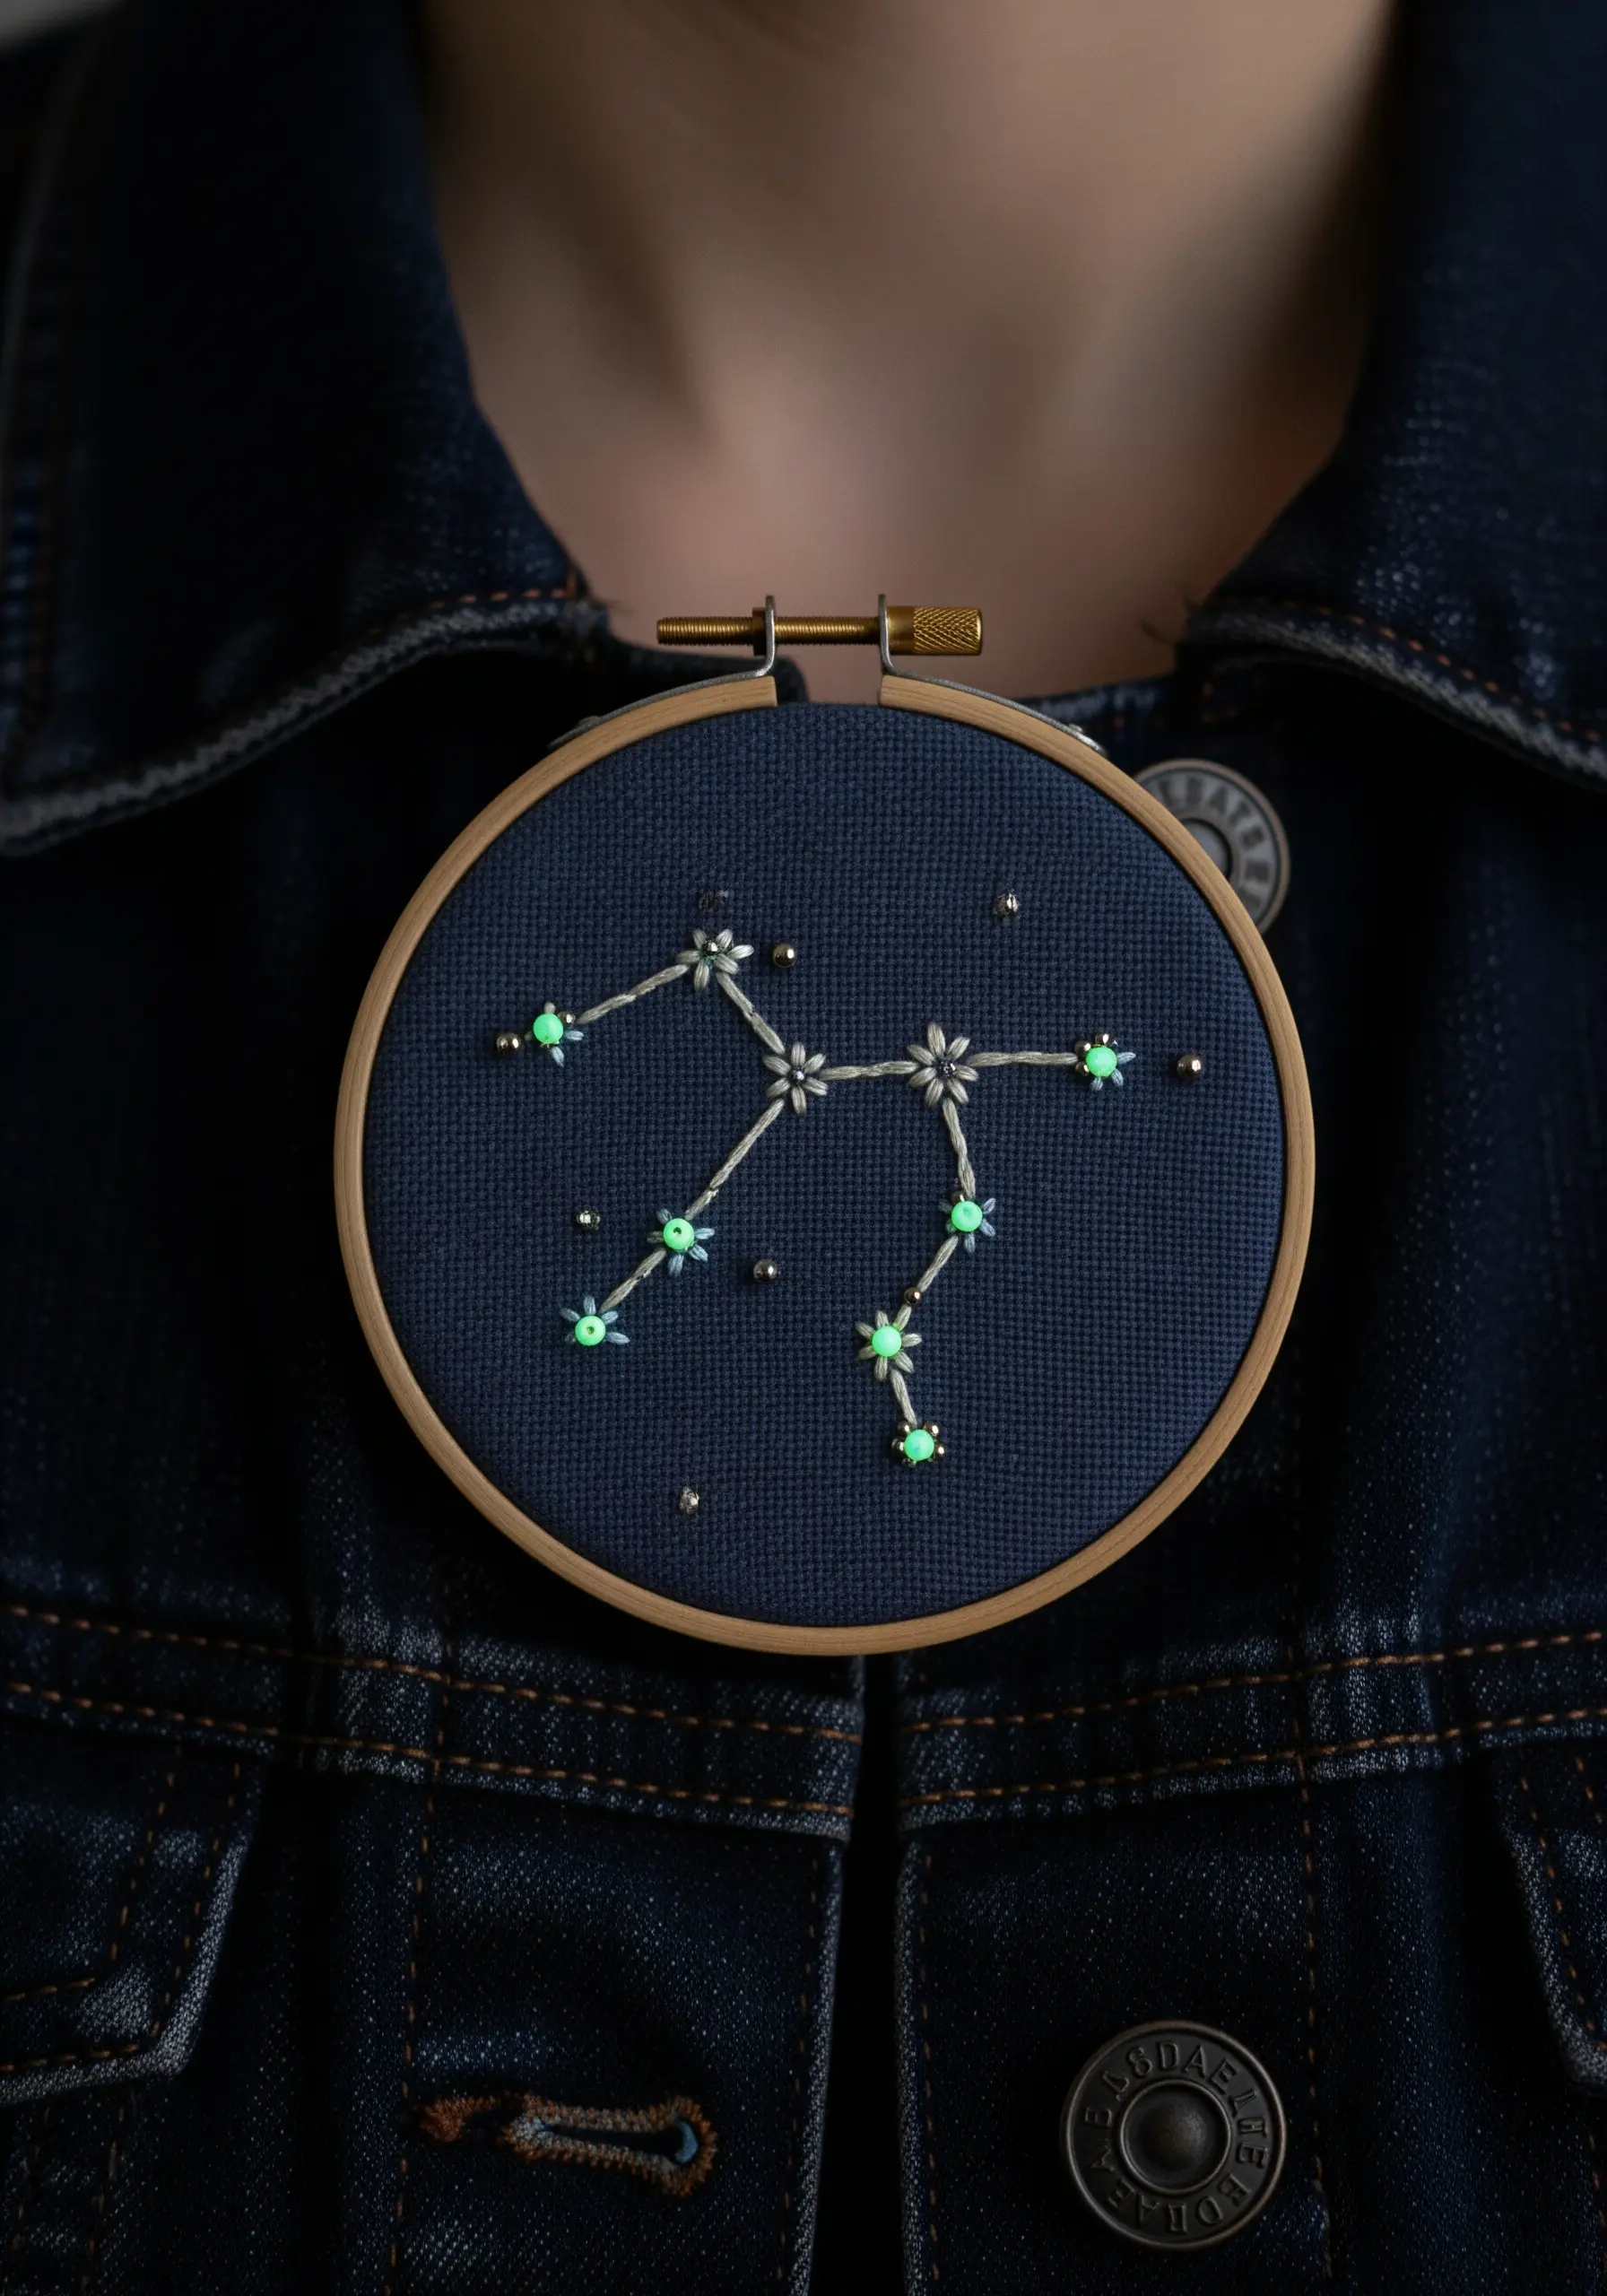
Elevate a simple constellation design by using glow-in-the-dark thread for the stars.
During the day, it’s a chic astronomical design; at night, it reveals a secret luminescence.
Use small lazy daisy stitches for the stars to give them a subtle twinkling shape, and connect them with a fine, single strand of silver metallic thread.
A few scattered silver beads add an extra layer of sparkle against the dark blue fabric.
14. Achieve Softness in Cherry Blossoms
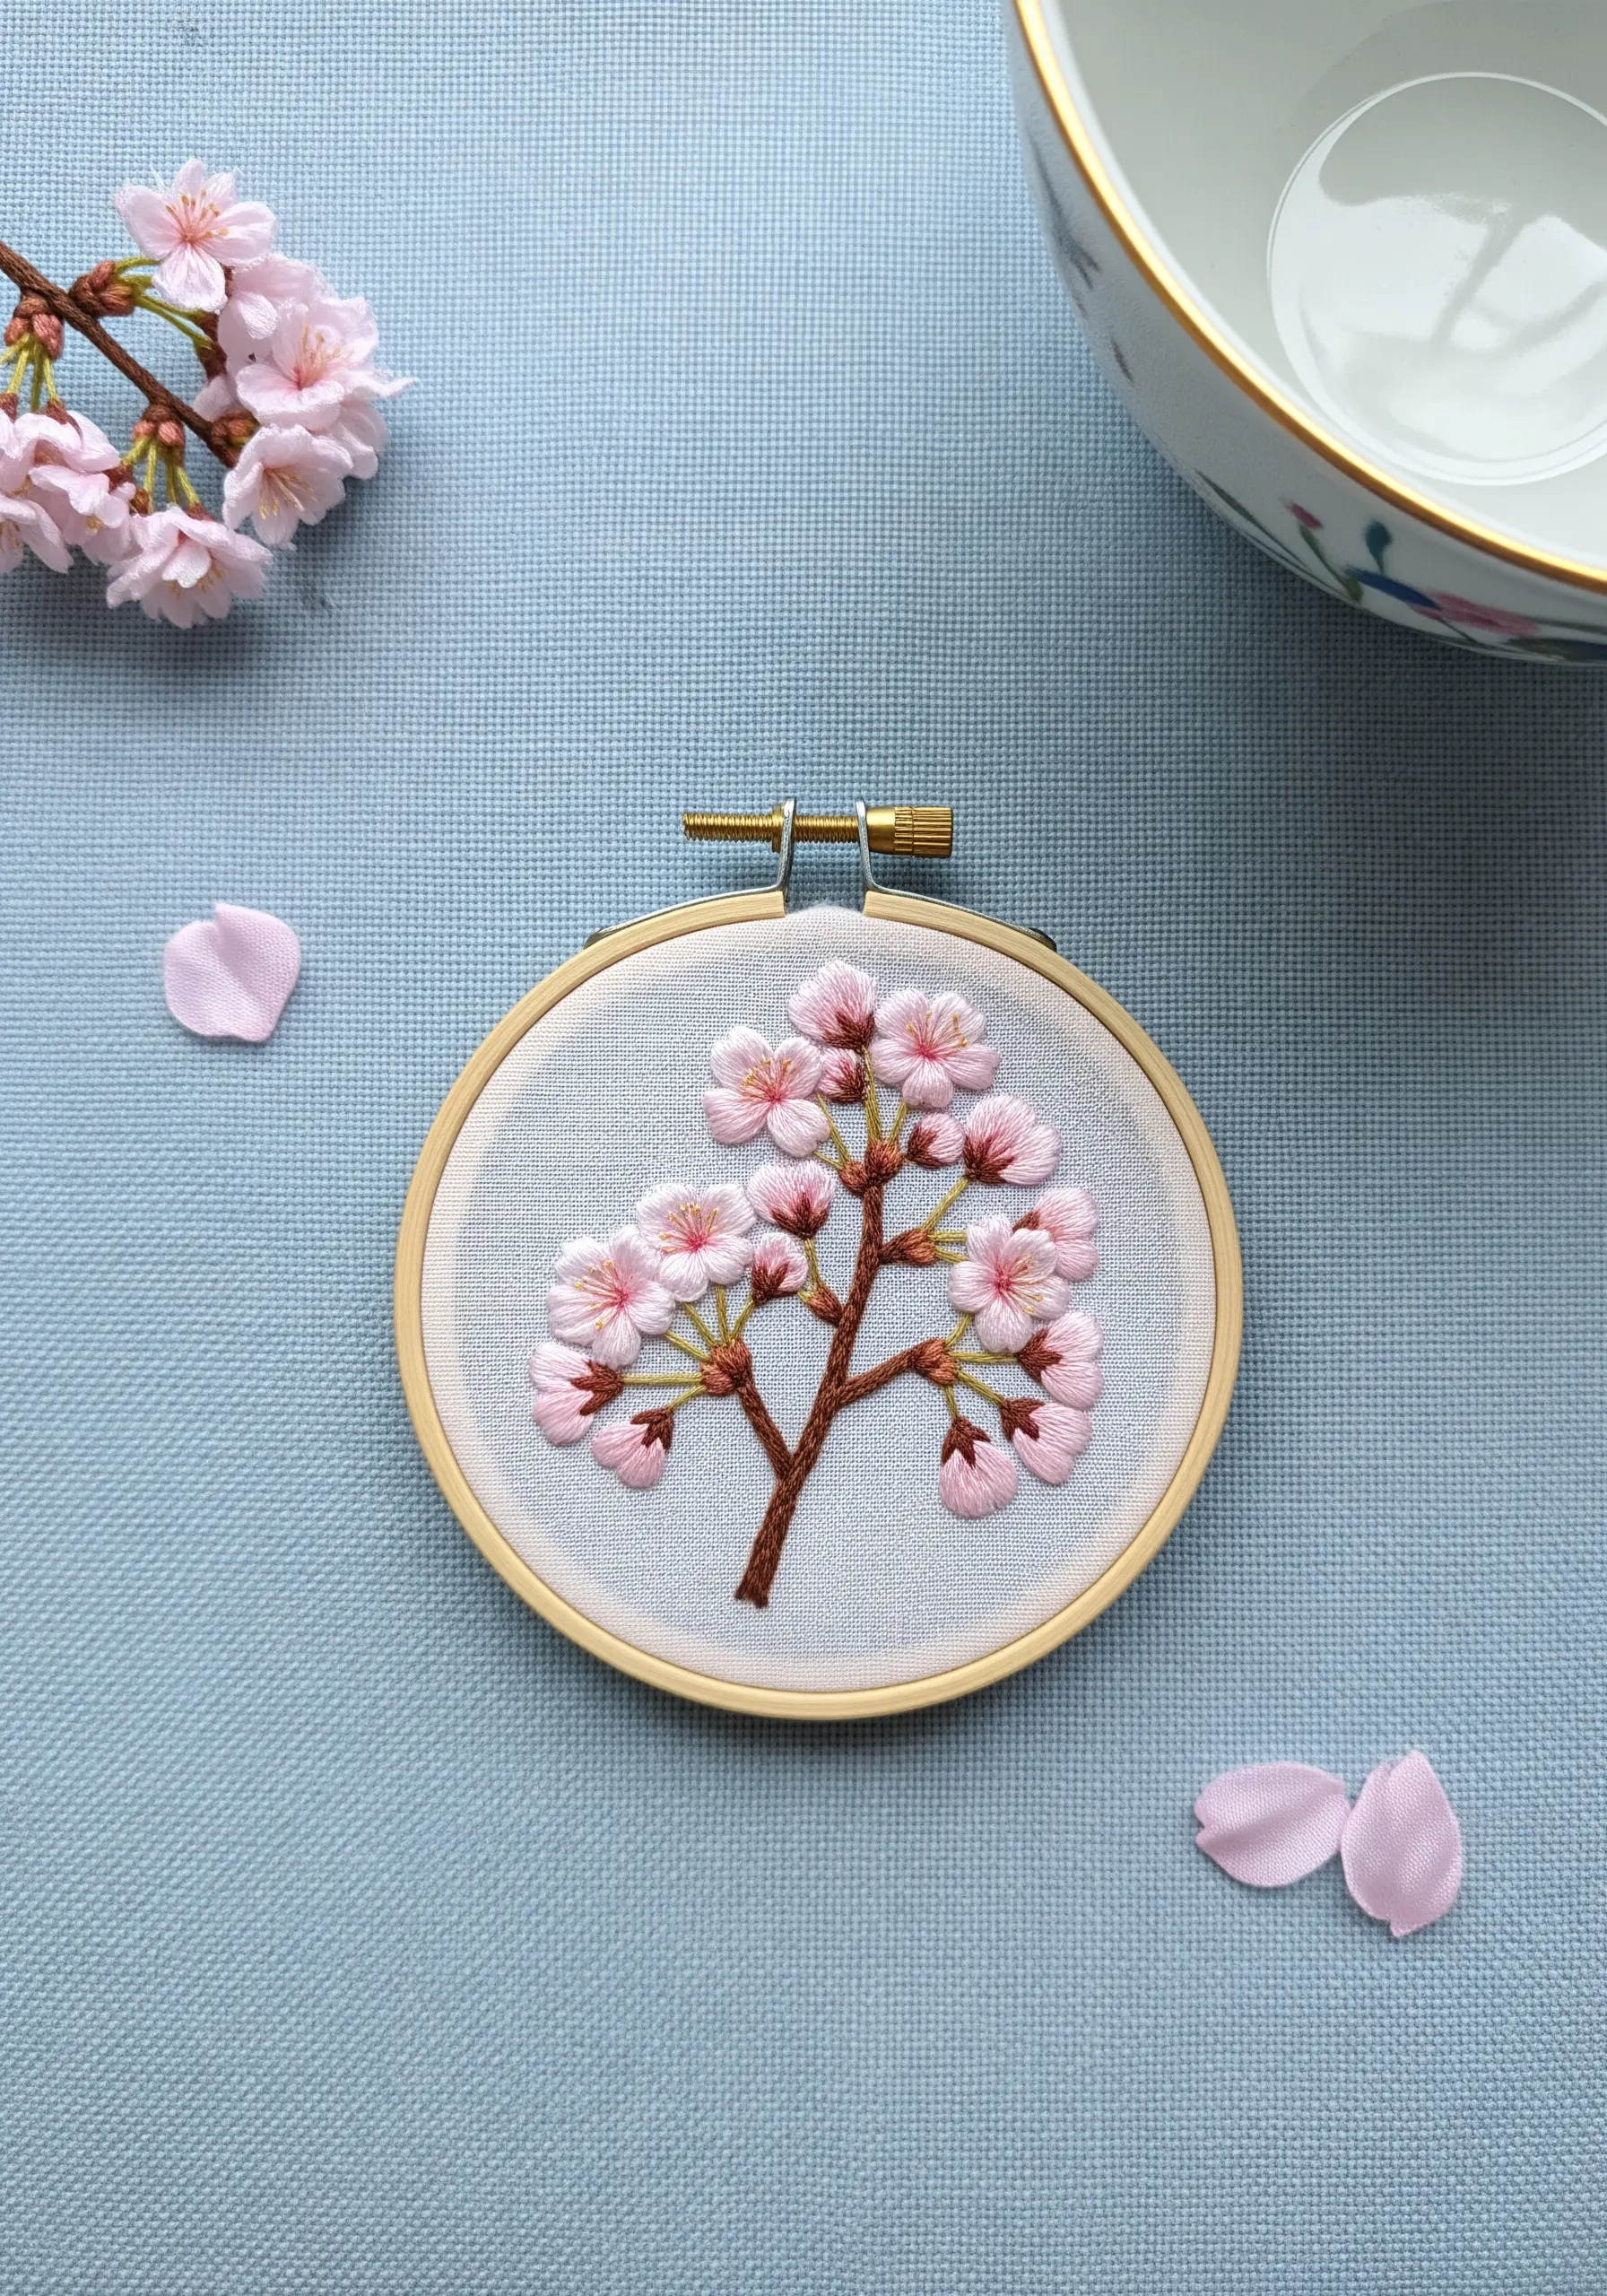
To capture the delicate nature of cherry blossoms, work with only one or two strands of floss.
Use a pale pink satin stitch for the main petal and add a single white stitch at the base to create a subtle, realistic color transition.
Tiny red French knots at the center of each flower provide a focal point without overwhelming the soft color palette.
The key to this design is restraint and the use of fine threads for a truly delicate finish.
15. Define Intricate Patterns with Outlines
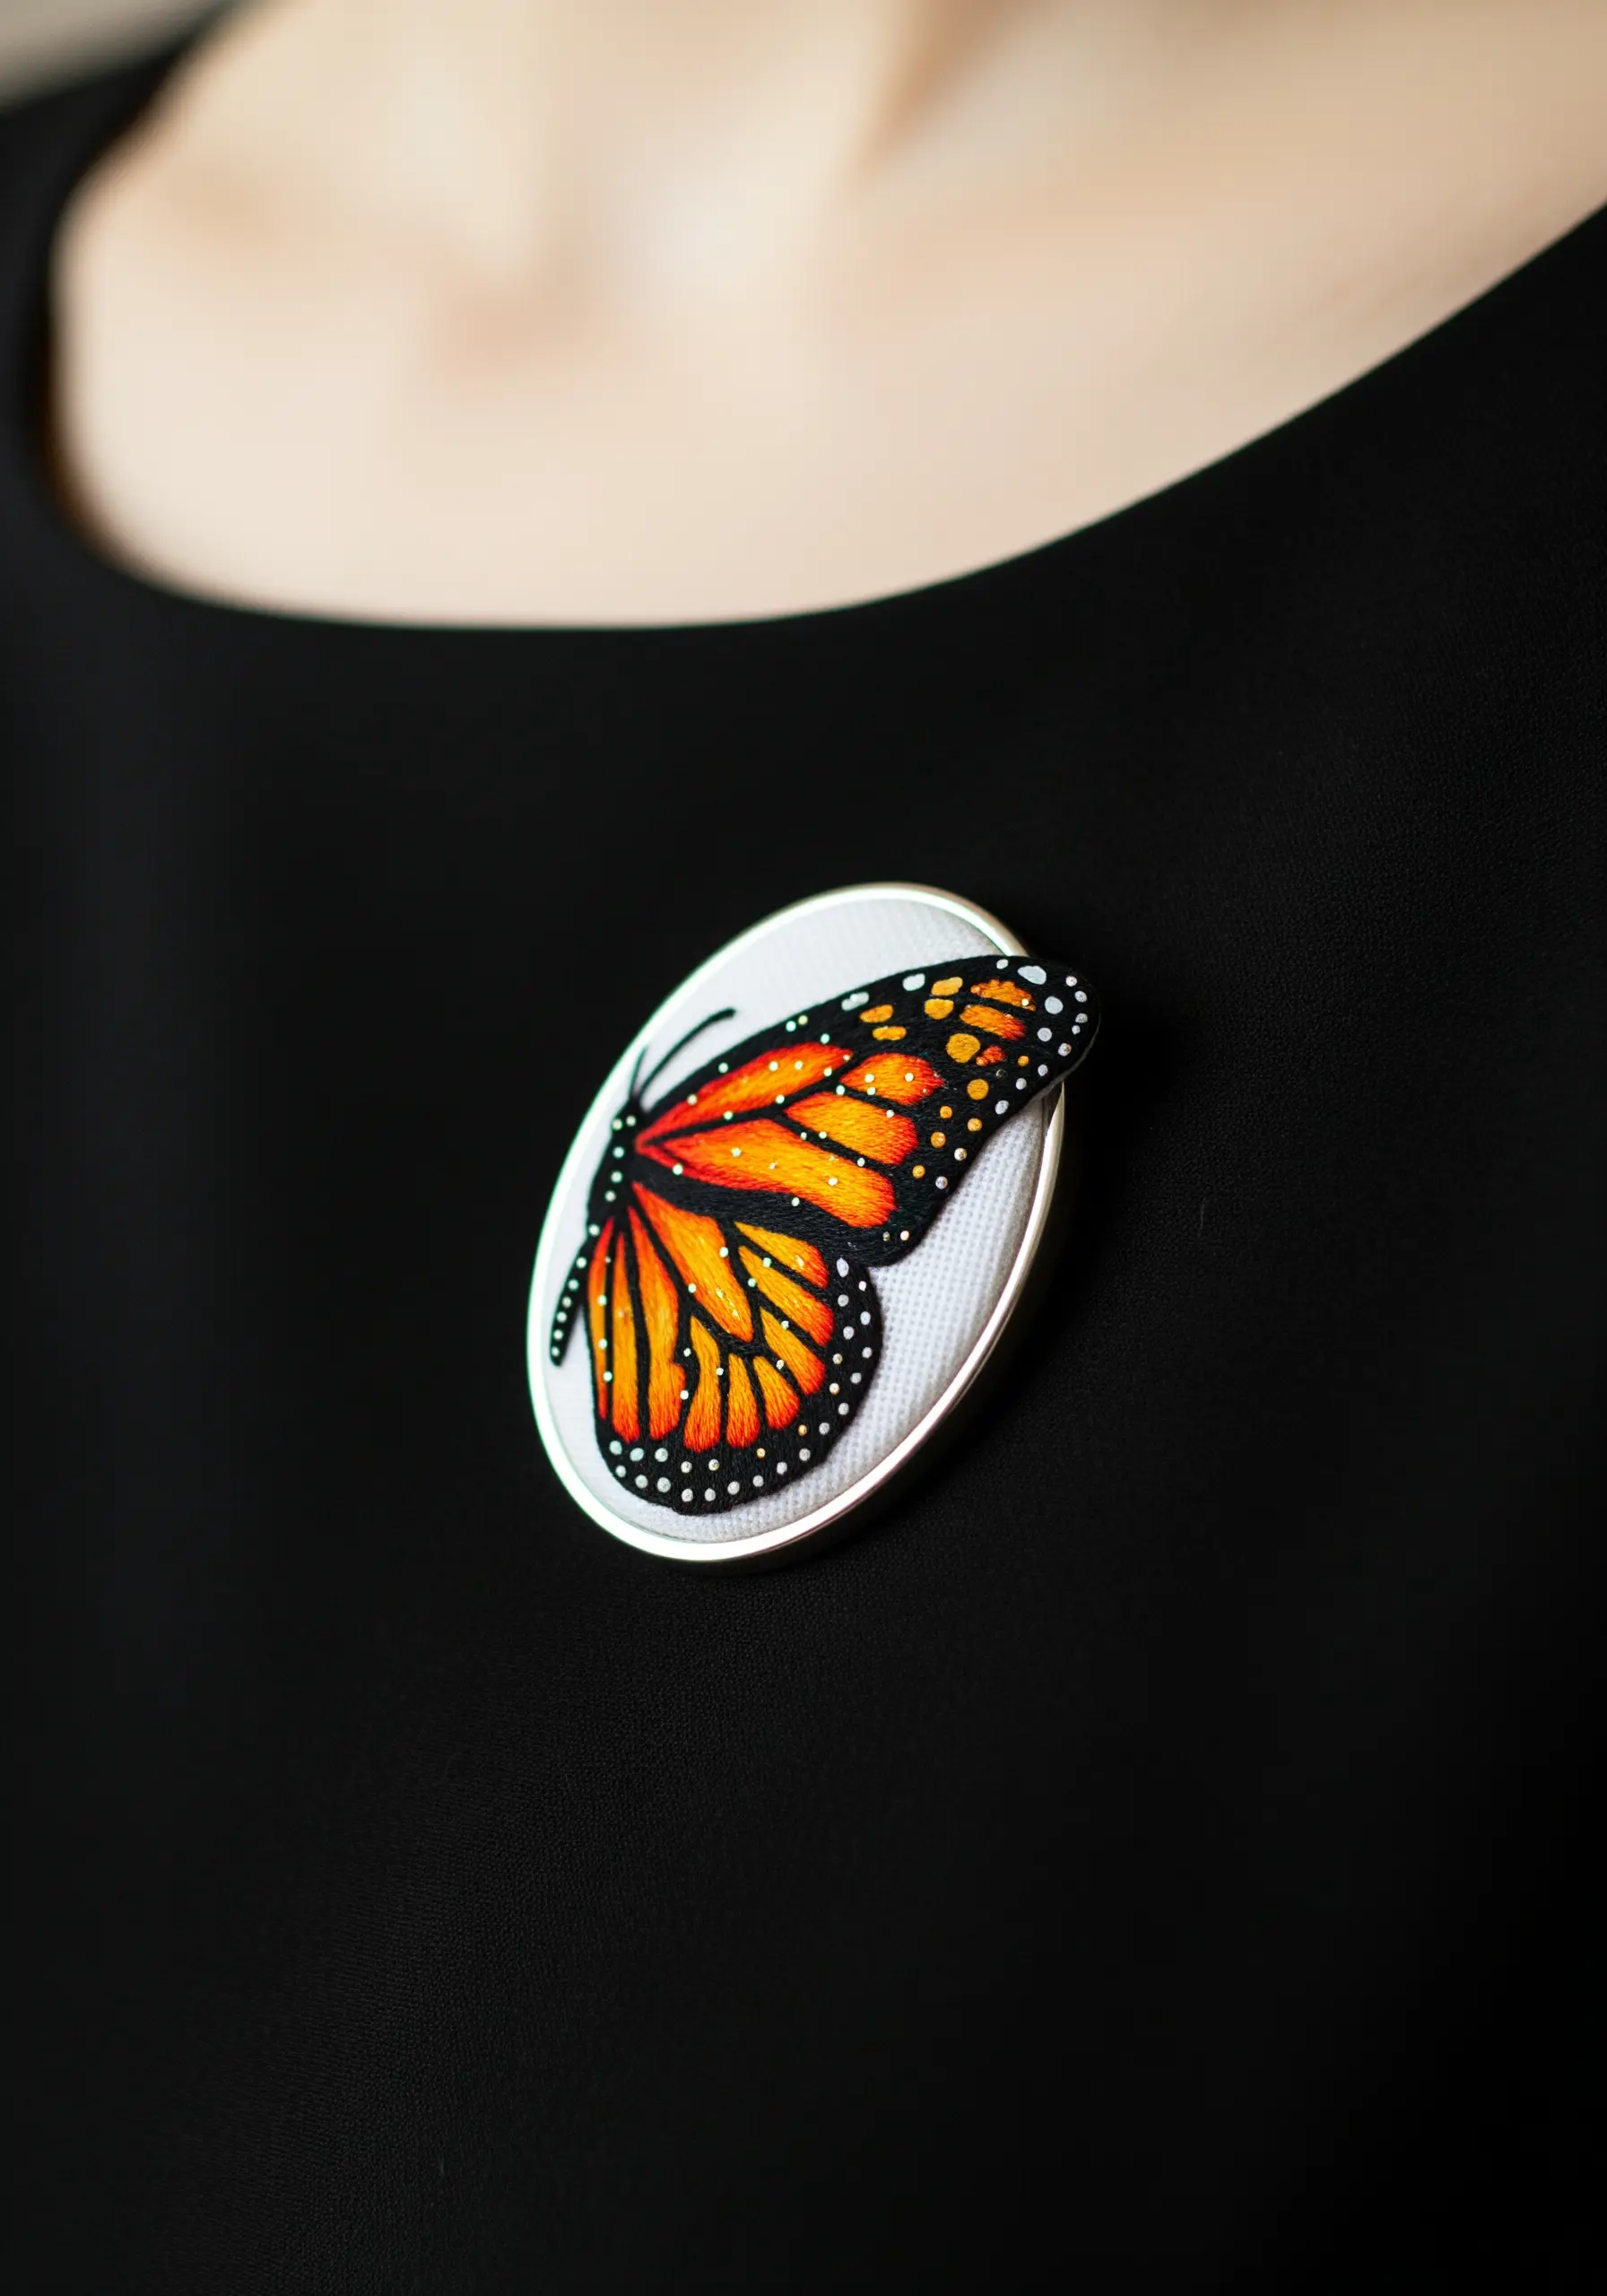
When creating a detailed motif like a monarch butterfly, stitch the black outlines last, not first.
First, fill the wing sections with a foundation of long and short stitches in orange and yellow, blending them softly.
Then, use a single strand of black thread to add the sharp, defining veins and borders with a precise backstitch. This technique makes the colors appear richer and the lines cleaner, as the black thread sits neatly on top of the fill.
16. Layer Stitches for Realistic Snow
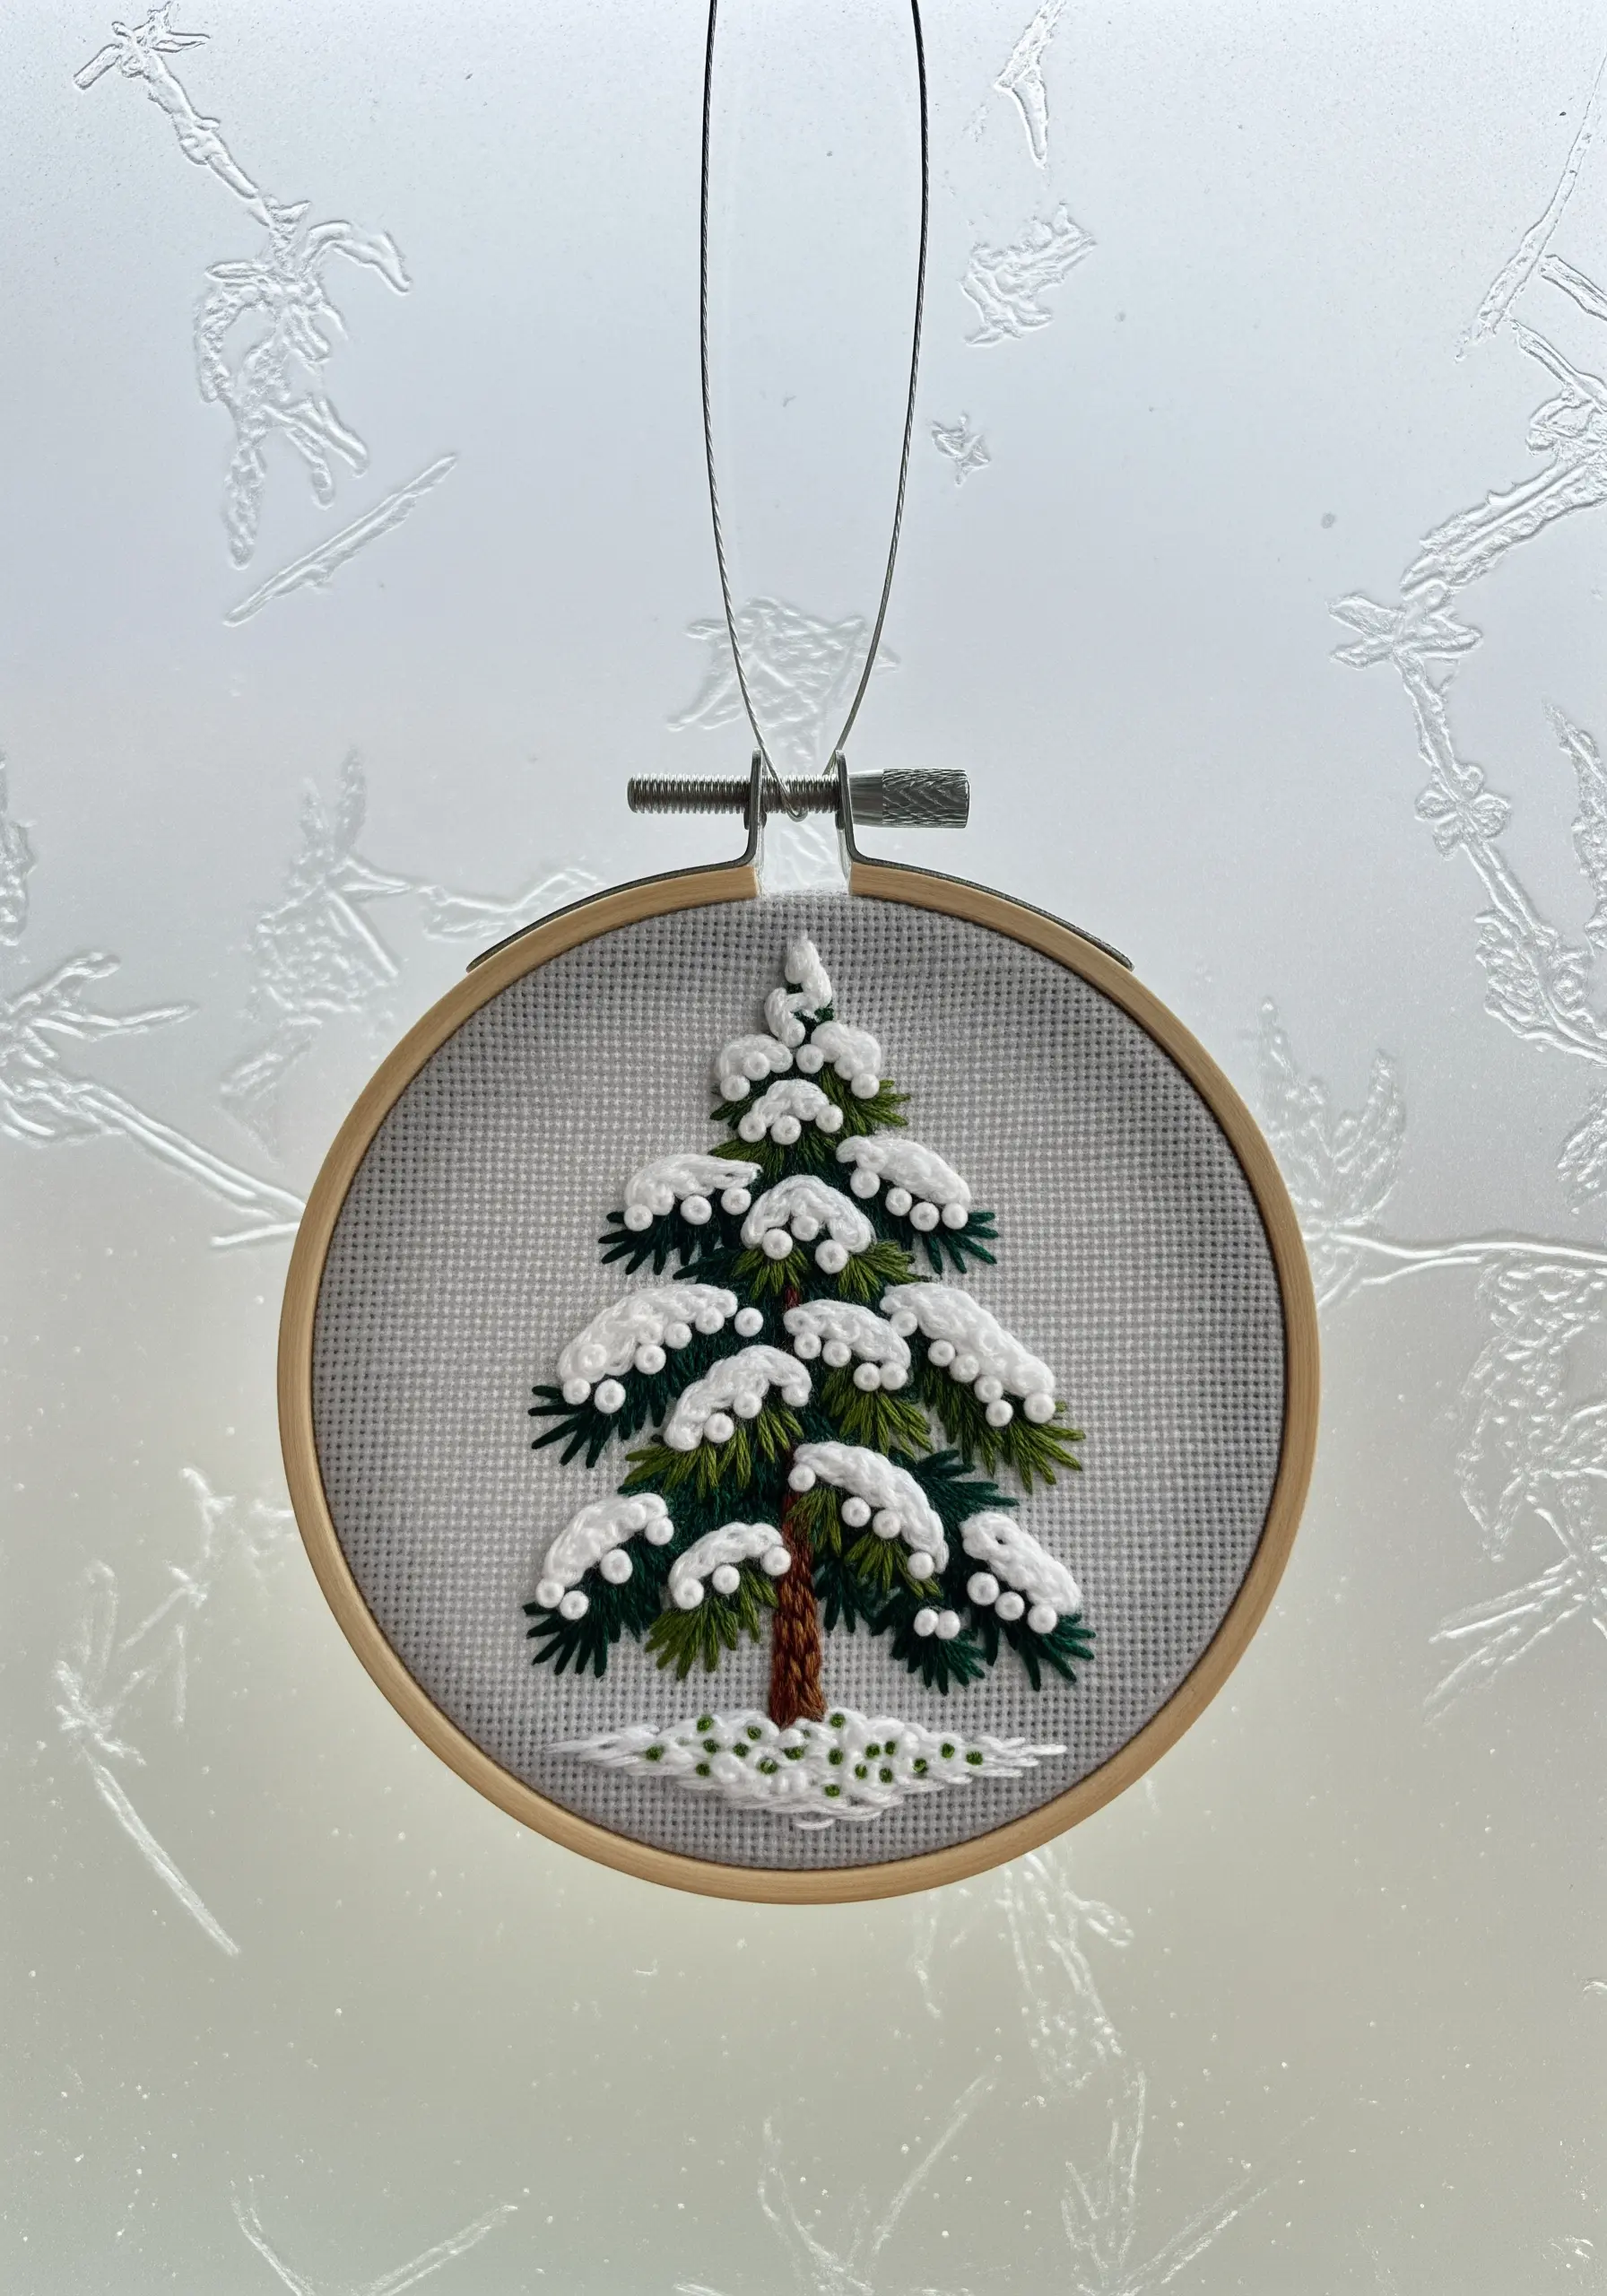
Create the look of freshly fallen snow on a pine tree by layering textures.
First, embroider the green branches using a fishbone or fly stitch. Then, add clumps of white French knots and straight stitches on top of the branches.
Vary the density of the white stitches—make them heavier on the upper surfaces of the branches where snow would naturally collect. This thoughtful placement is what makes the effect so convincing.
17. Create Geometric Tension with a Centerpiece
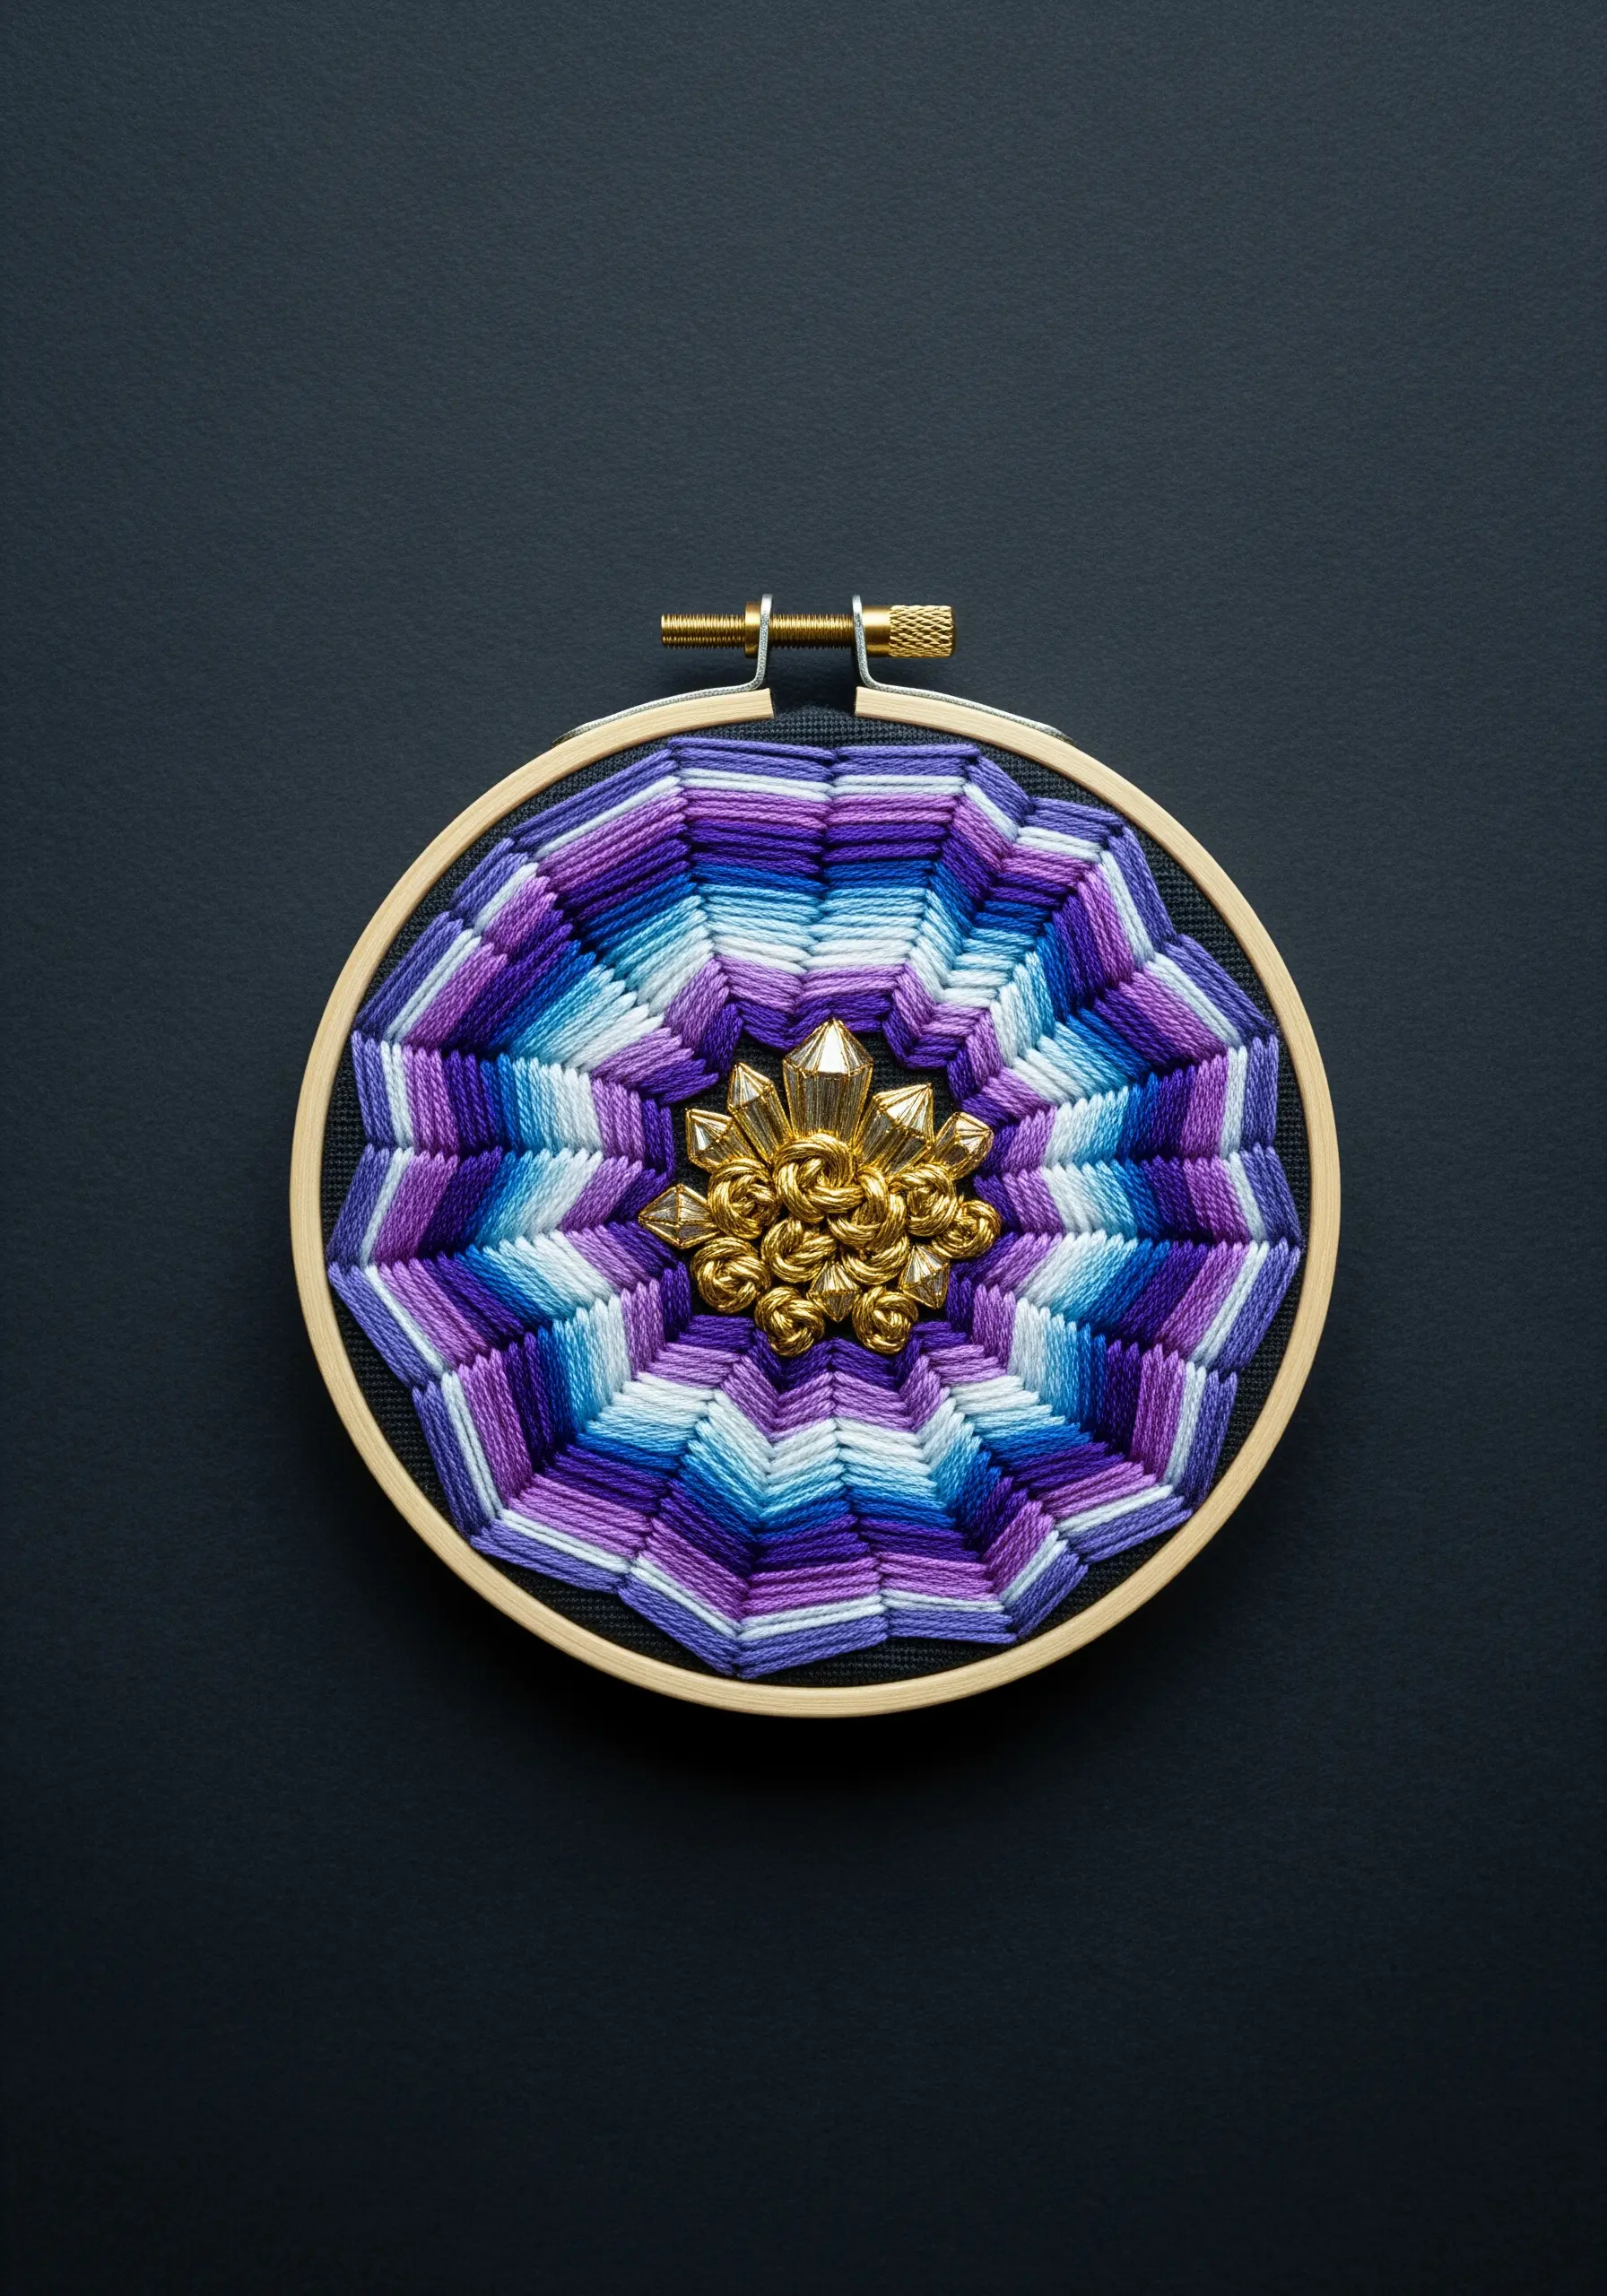
For a precise geometric design, tension is everything. Ensure your fabric is drum-tight in the hoop.
Use long, straight satin stitches, working opposite sides of the design to balance the tension and prevent distortion.
Anchor your composition with a bold, three-dimensional centerpiece, like a metallic bead or a cluster of gold bullion knots. This not only adds a luxurious focal point but also helps disguise the central point where all your stitches converge.
18. Build a Dense, Textured Sunflower Center
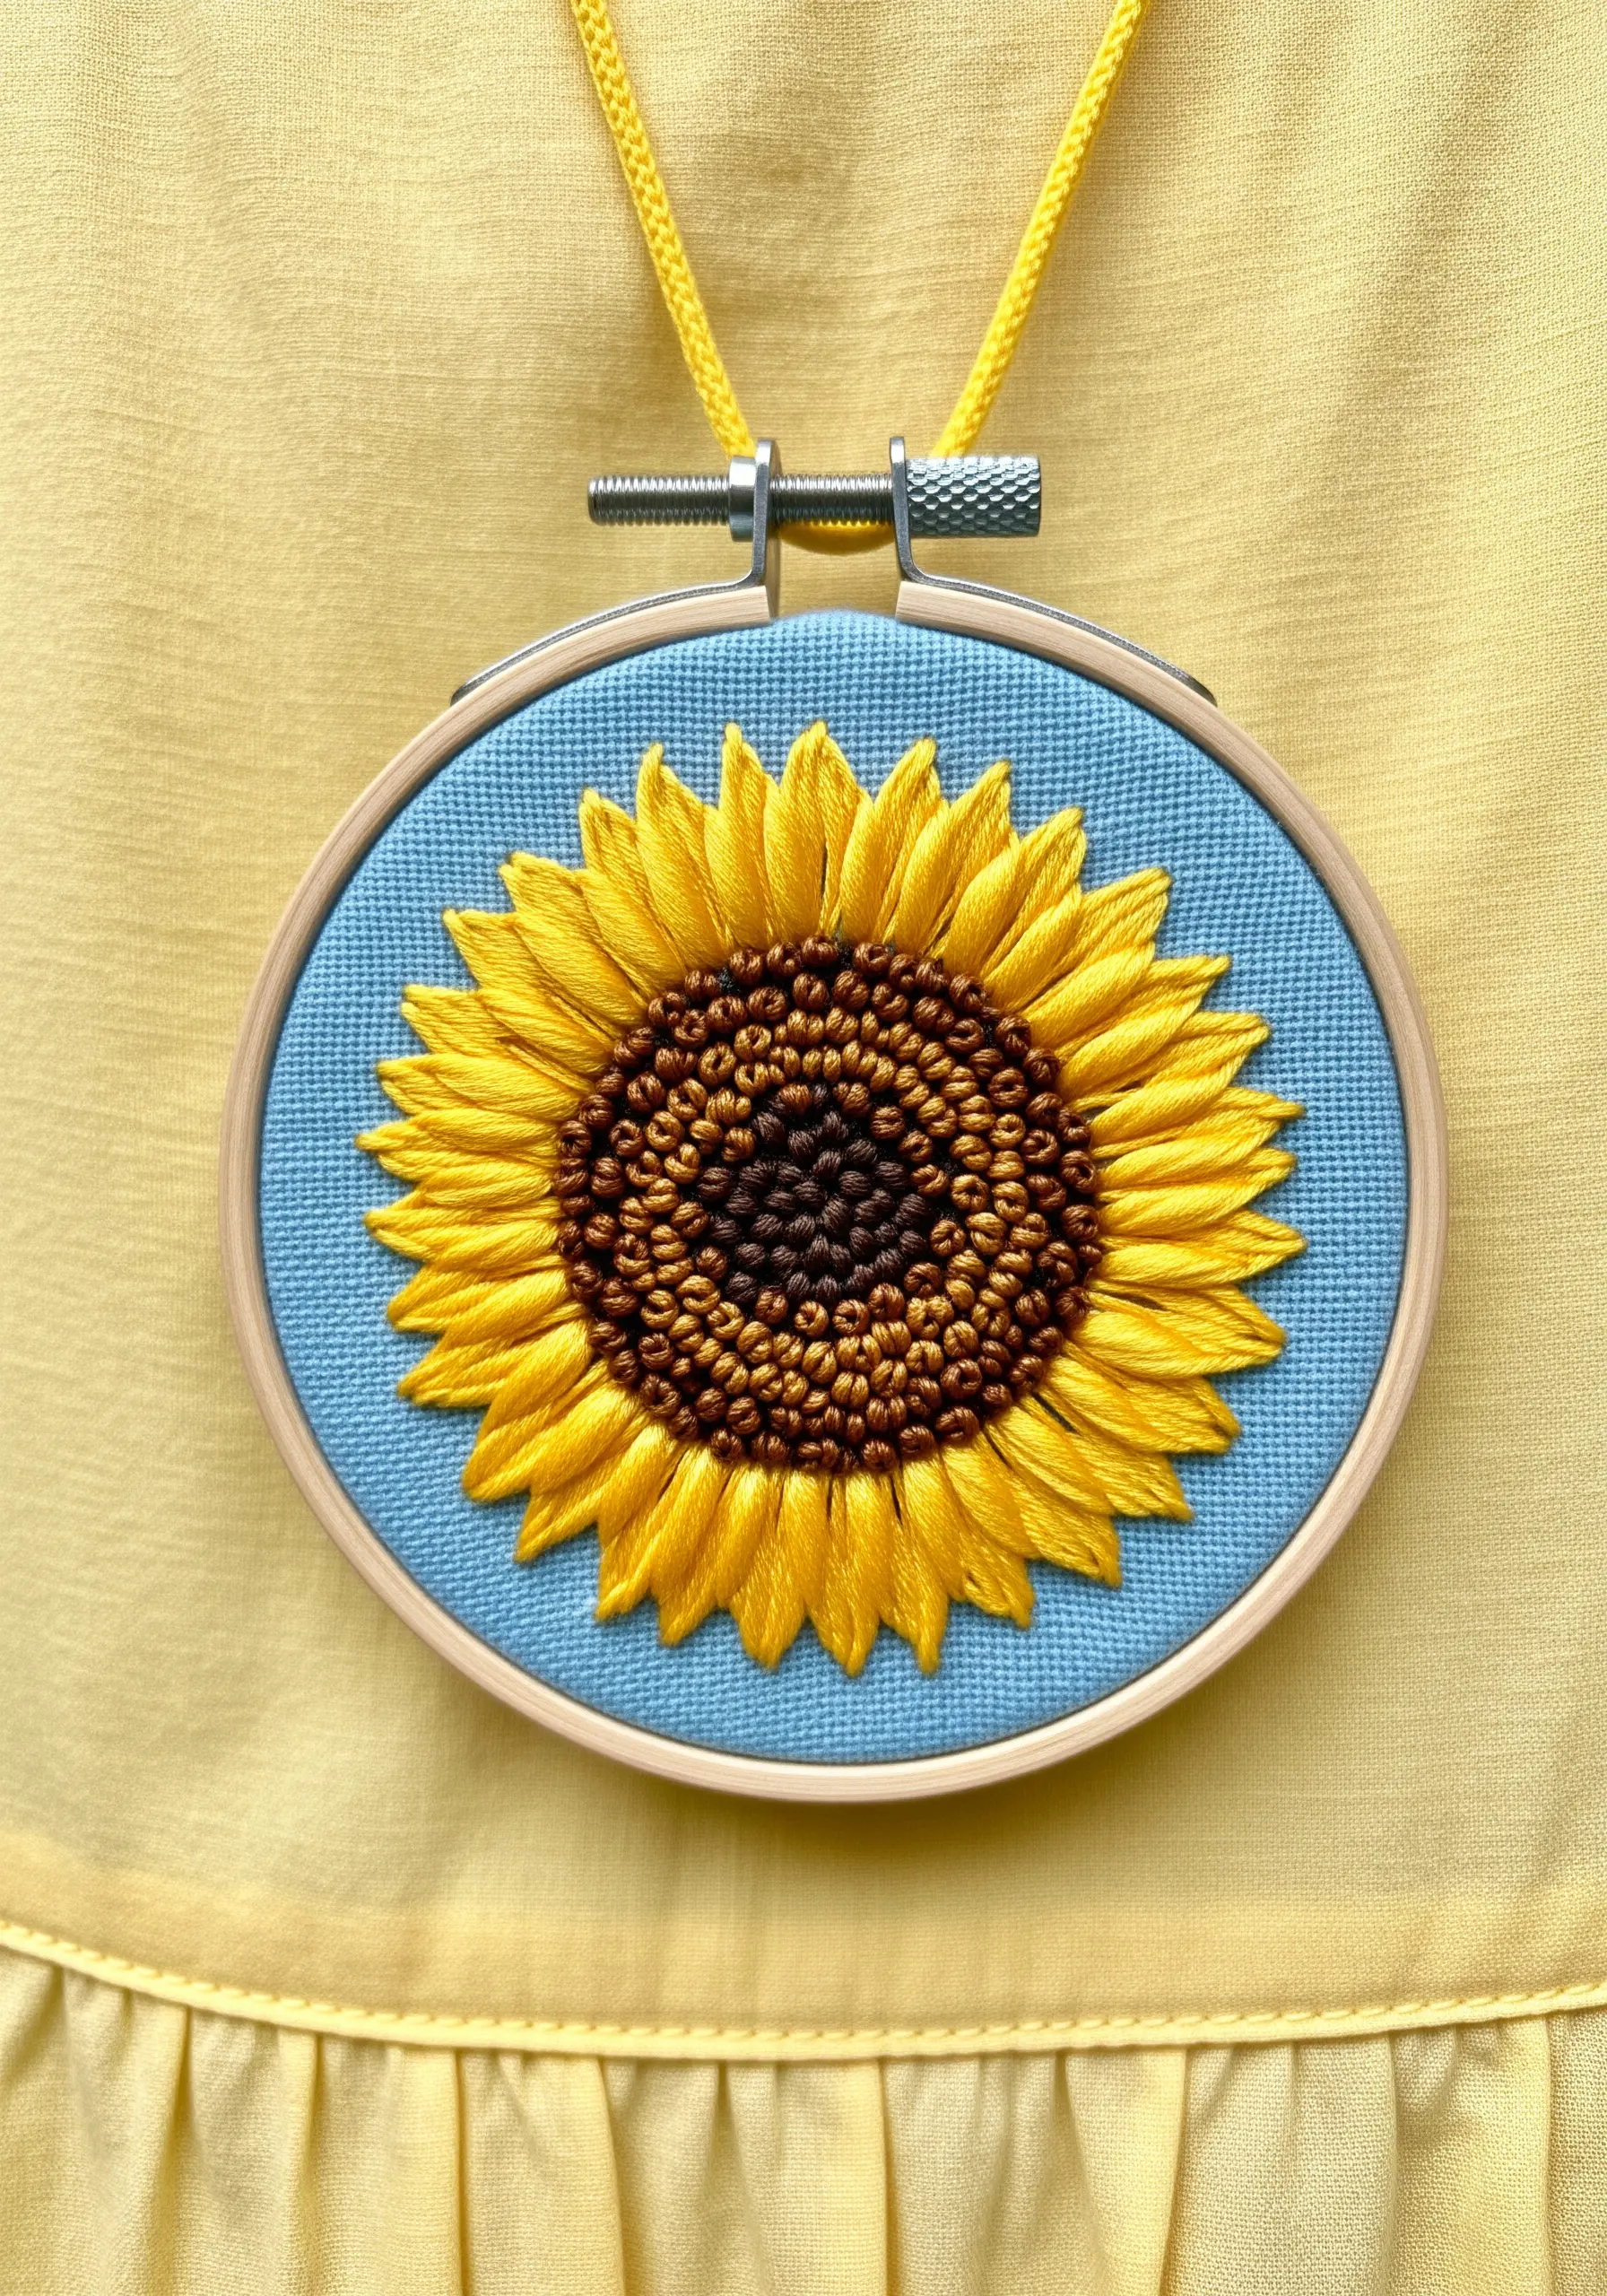
The key to a realistic sunflower is the texture of its seed head.
Fill the center with a dense concentration of French knots, using at least three different shades of brown and black to create depth and variation.
For the petals, use a vibrant yellow satin stitch, angling each stitch slightly towards the center to create a subtle fan effect. The contrast between the smooth, shiny petals and the matte, bumpy center makes the entire flower pop.
19. Mimic Iridescence with Thread Choice
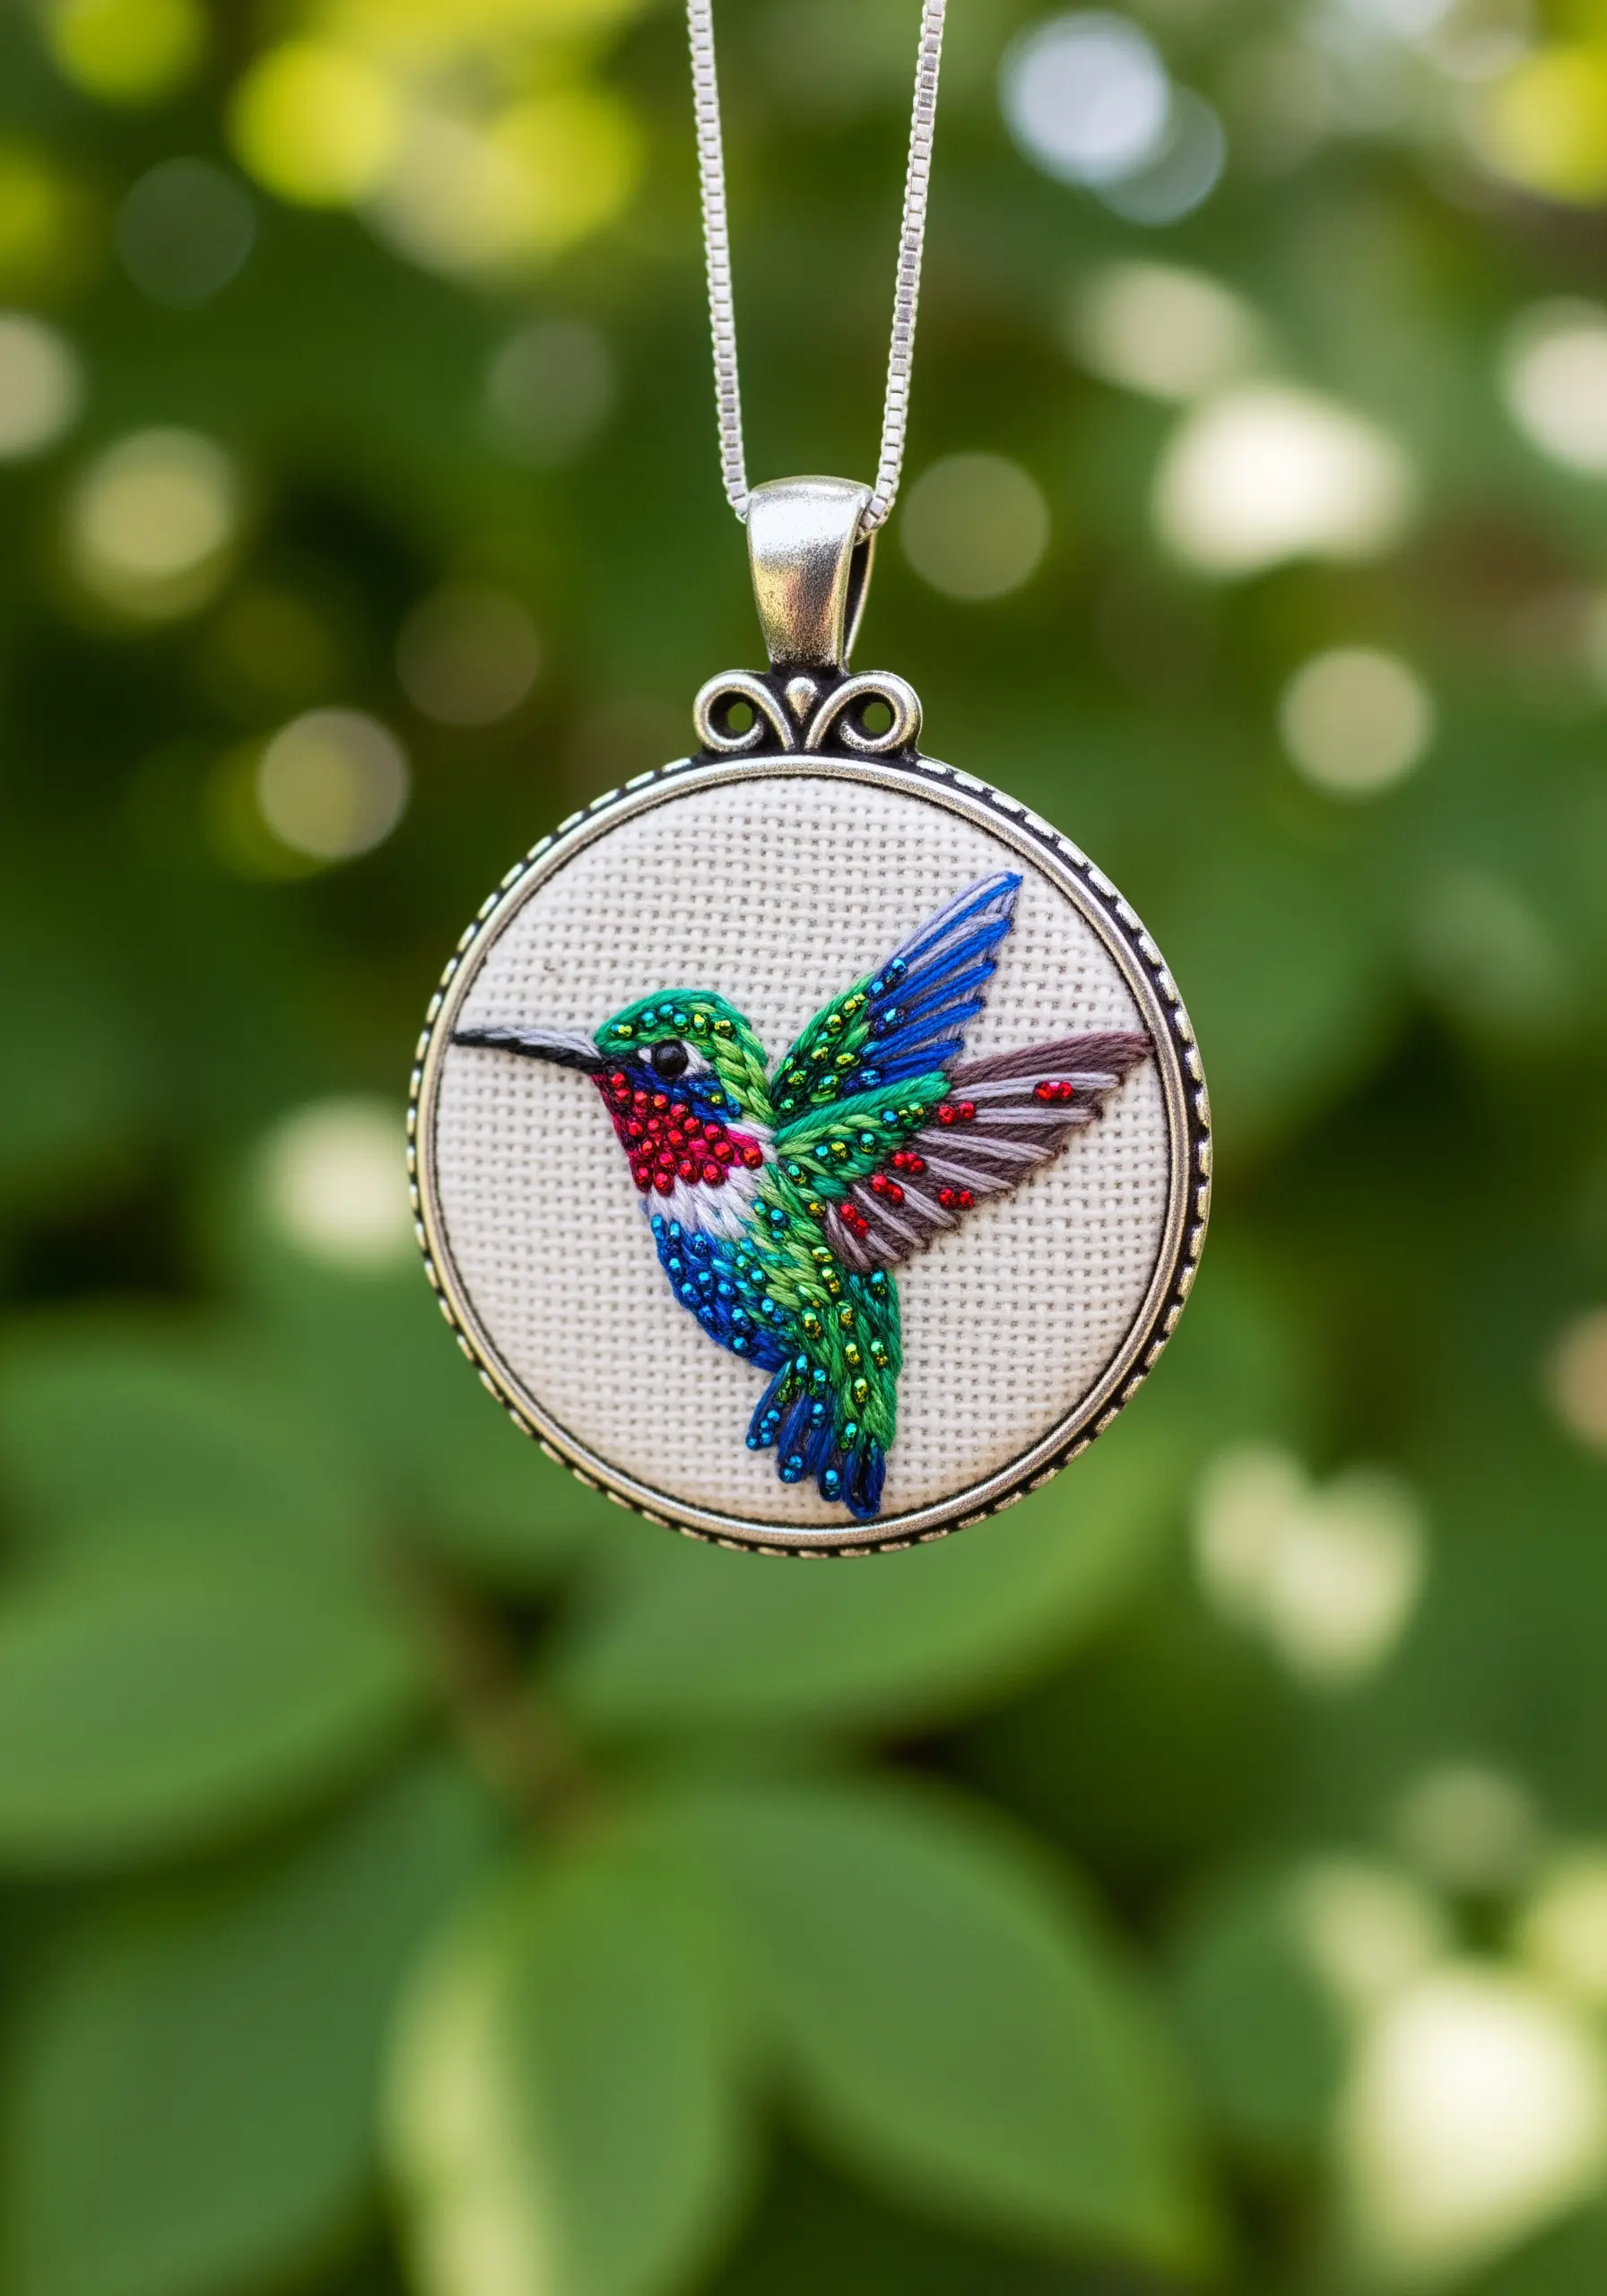
To capture the shimmering quality of a hummingbird’s feathers, choose your thread wisely.
Use single strands of silk or rayon floss, which have a much higher natural sheen than standard cotton. Place small satin stitches of different colors directly next to each other without blending.
This technique, known as color blocking, allows the light to catch each shiny thread individually, creating an iridescent effect that mimics the bird’s feathers.
20. Give Berries a Plump, 3D Form

For perfectly round, plump blueberries, use a padded satin stitch.
Start by creating a small, raised foundation with several layers of seed stitches or a tiny circle of felt. Then, cover this padding with smooth, vertical satin stitches in a rich blue.
Add a tiny, star-like detail at the top of each berry with a few small straight stitches in a darker shade. This simple finishing touch instantly makes them identifiable and realistic.
21. Stitch a Sunset Gradient Sky
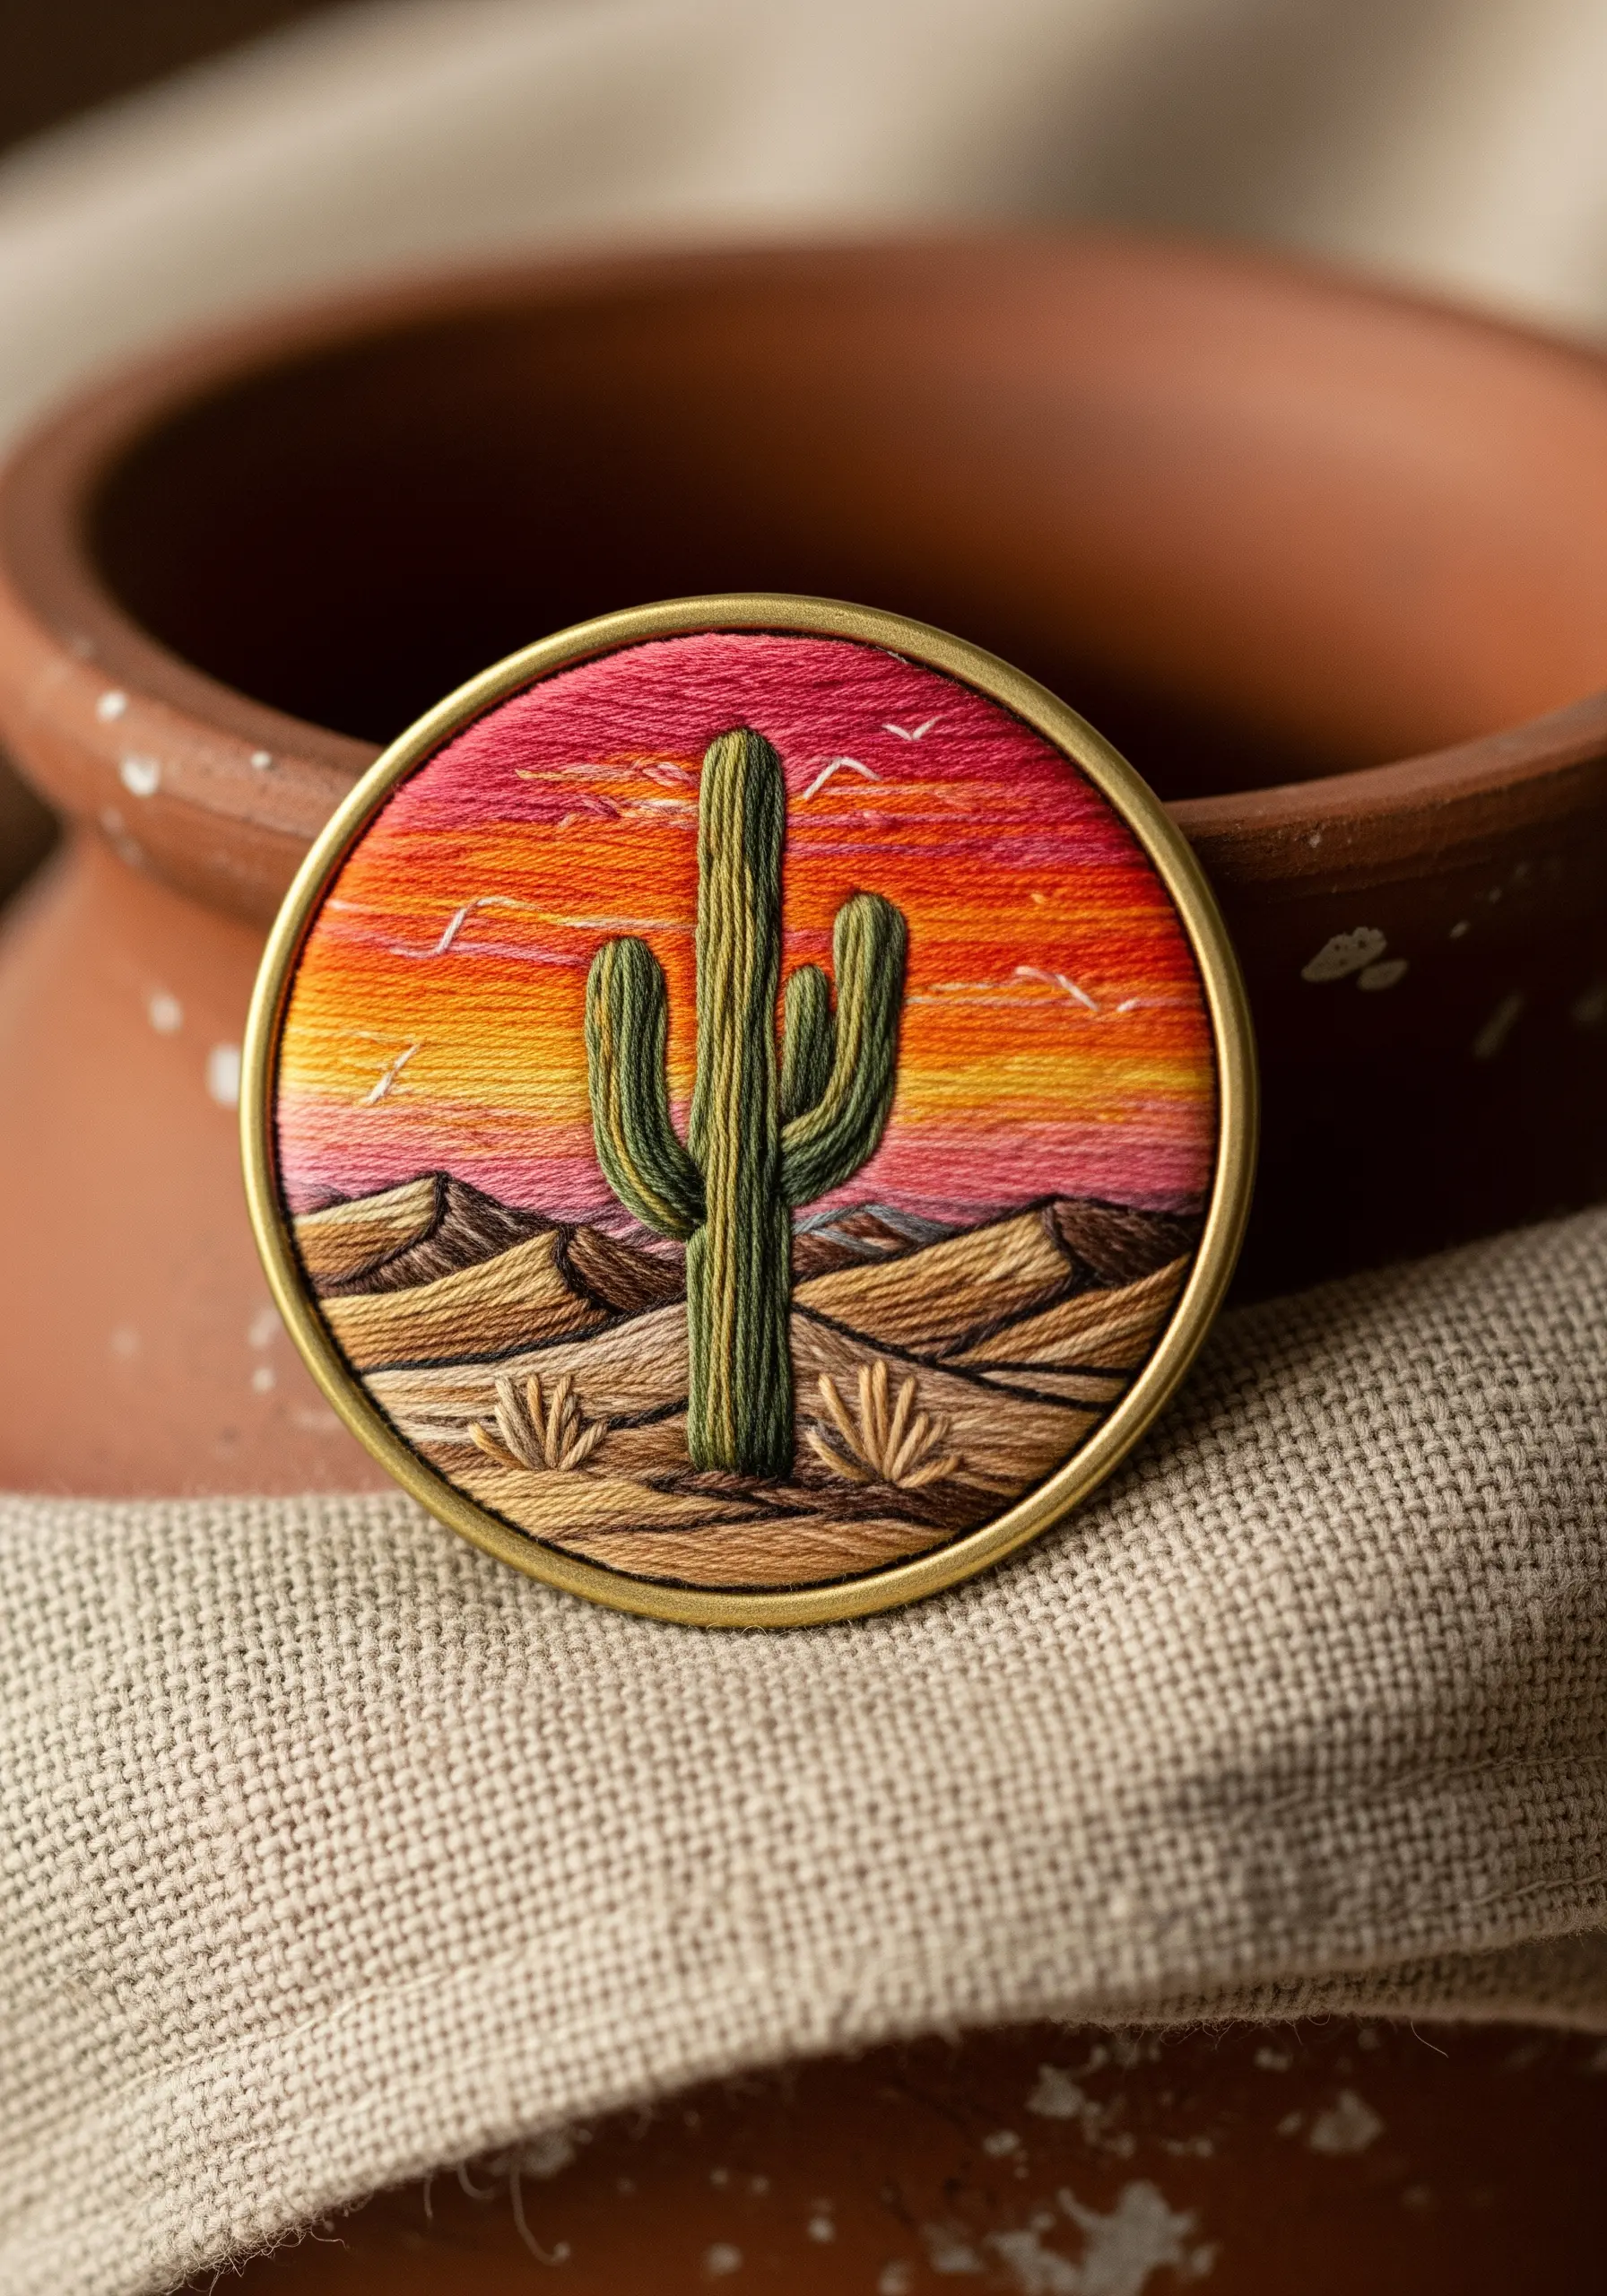
Create a stunning desert sunset by laying down horizontal bands of color with long and short stitches.
Start with yellow at the horizon and blend upwards into orange, pink, and red. To ensure a smooth transition, allow the stitches from each color band to overlap slightly into the next.
Keep all your stitches horizontal to create a calm, expansive feeling, contrasting with the vertical lines of the saguaro cactus in the foreground.
22. Add Elegance with Metallic Highlights
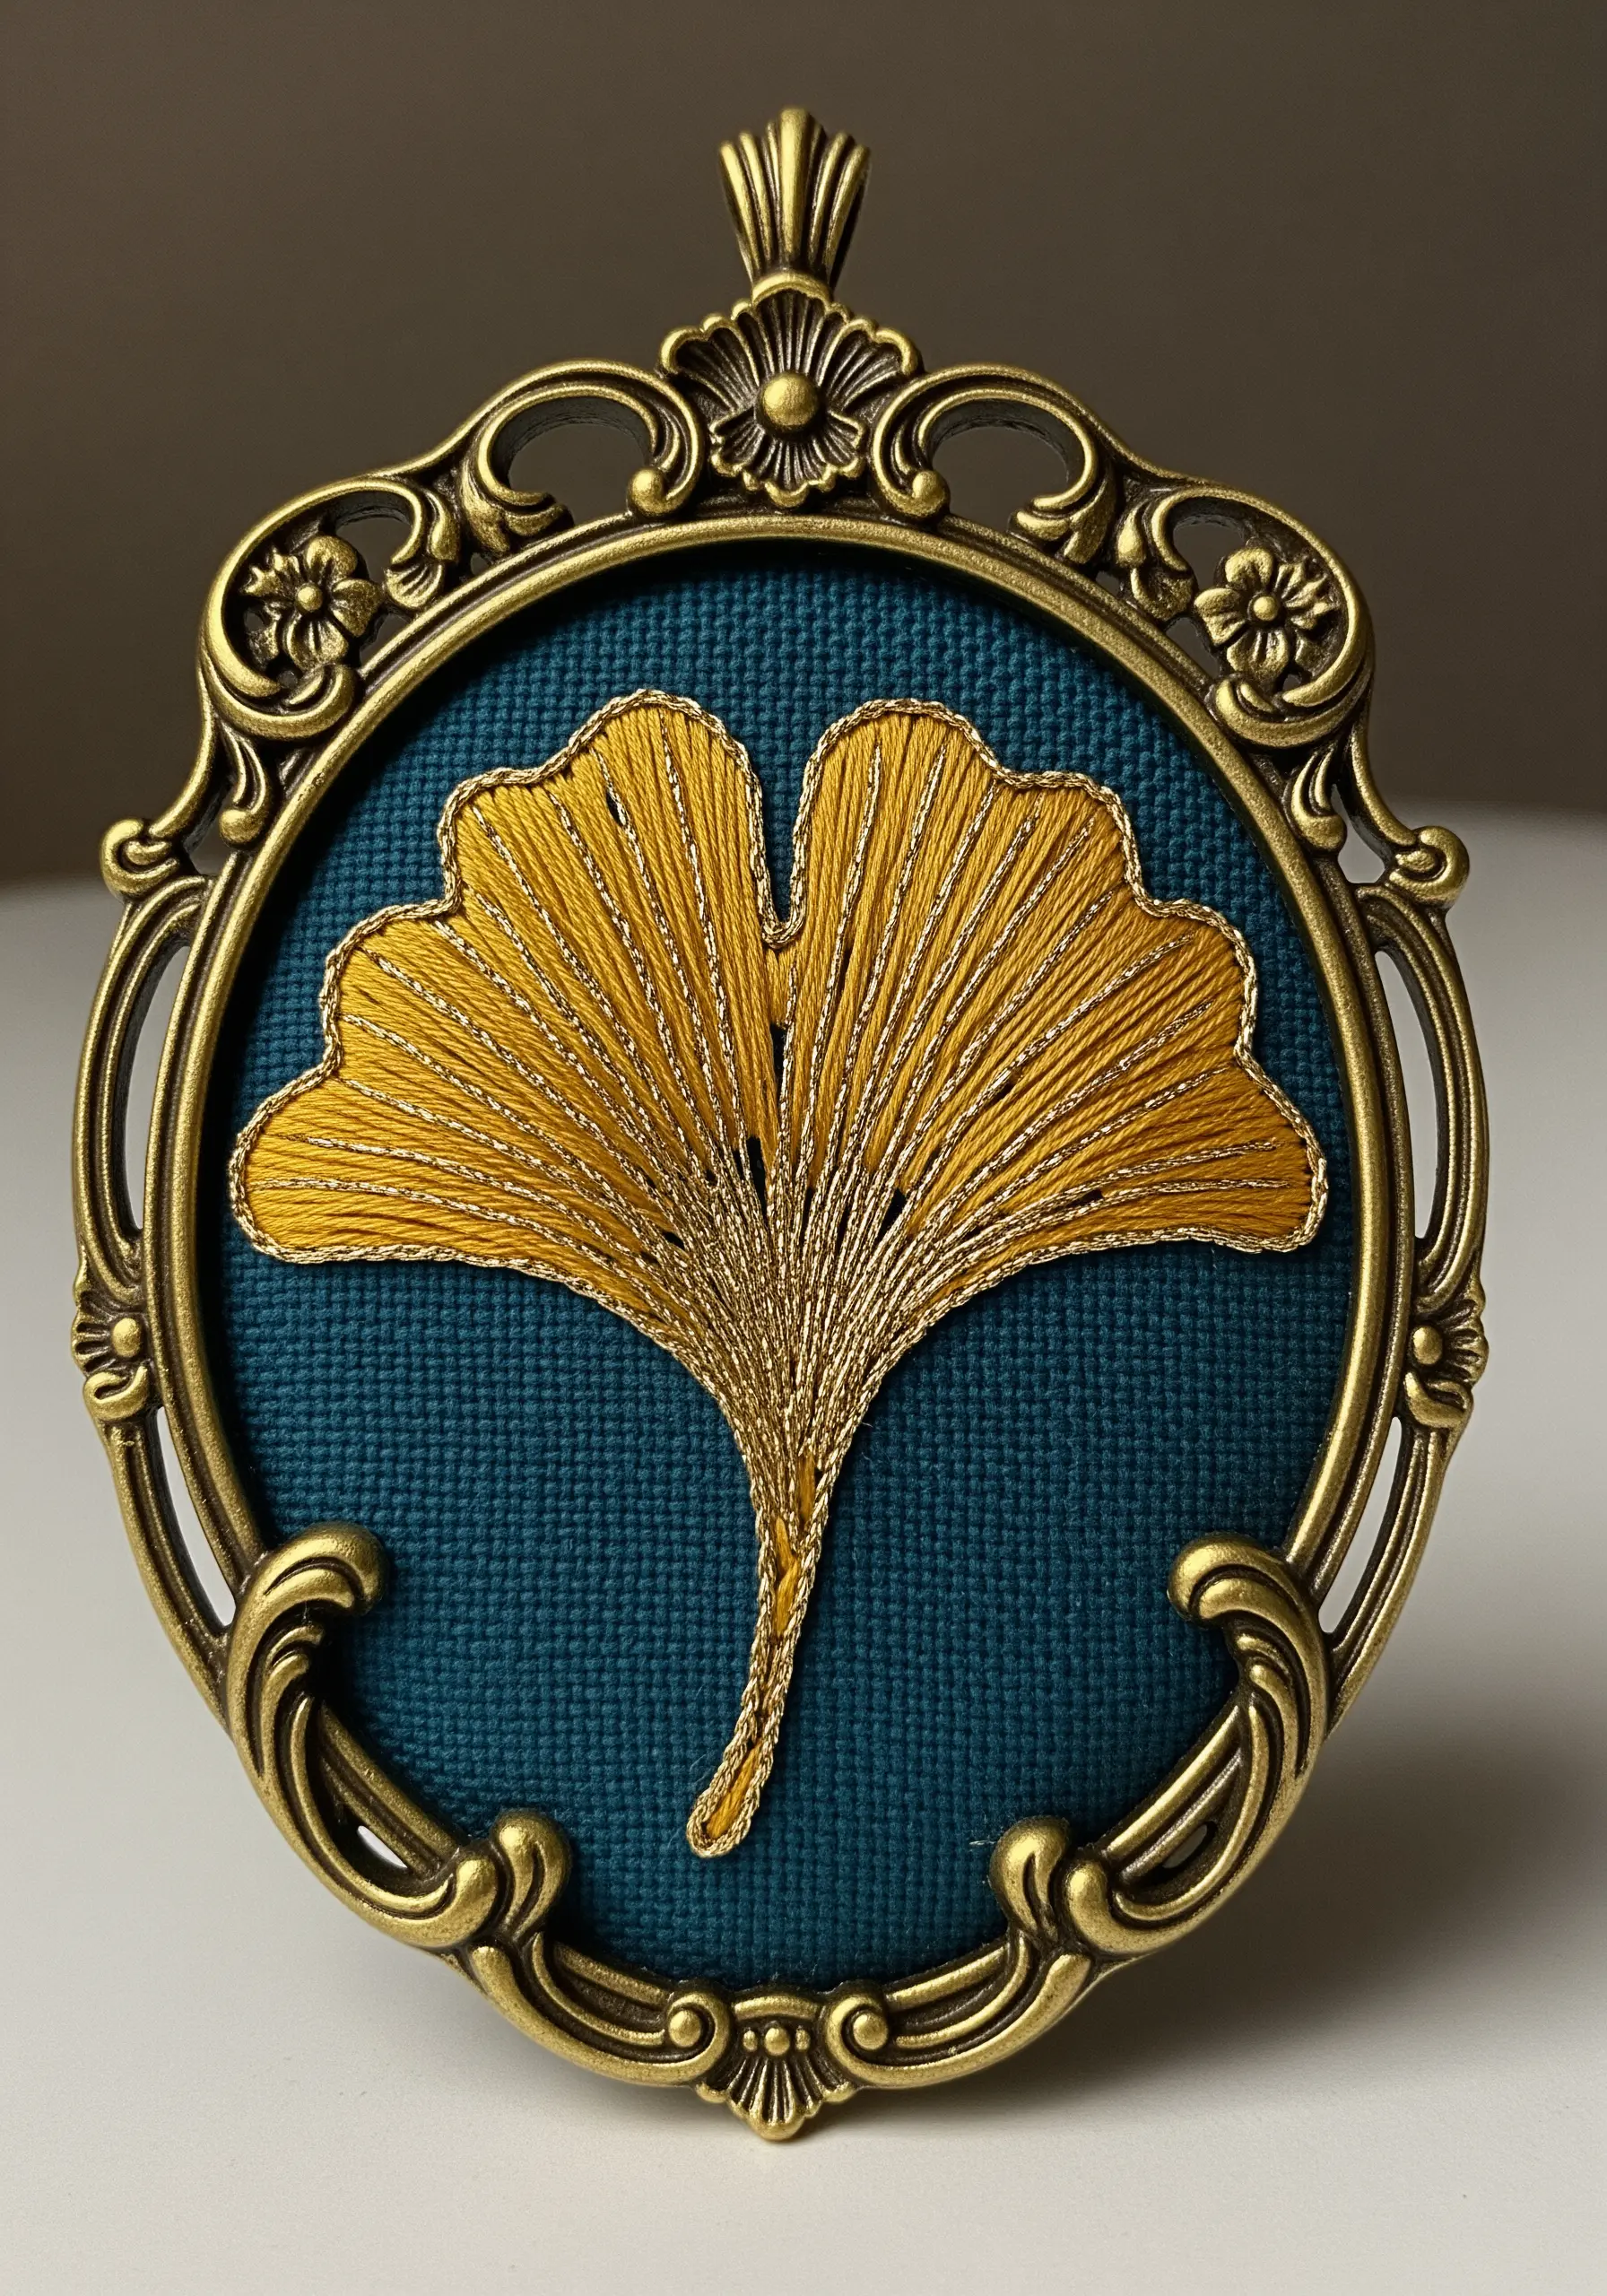
Elevate a simple satin stitch design by incorporating a single strand of metallic thread alongside your cotton floss.
For this ginkgo leaf, stitch the entire shape with yellow cotton, then go back and add radiating lines from the base using a fine gold metallic thread.
This subtle addition catches the light and adds a touch of luxury and definition without overwhelming the delicate shape of the leaf.
23. Combine Metallic and Floral Elements
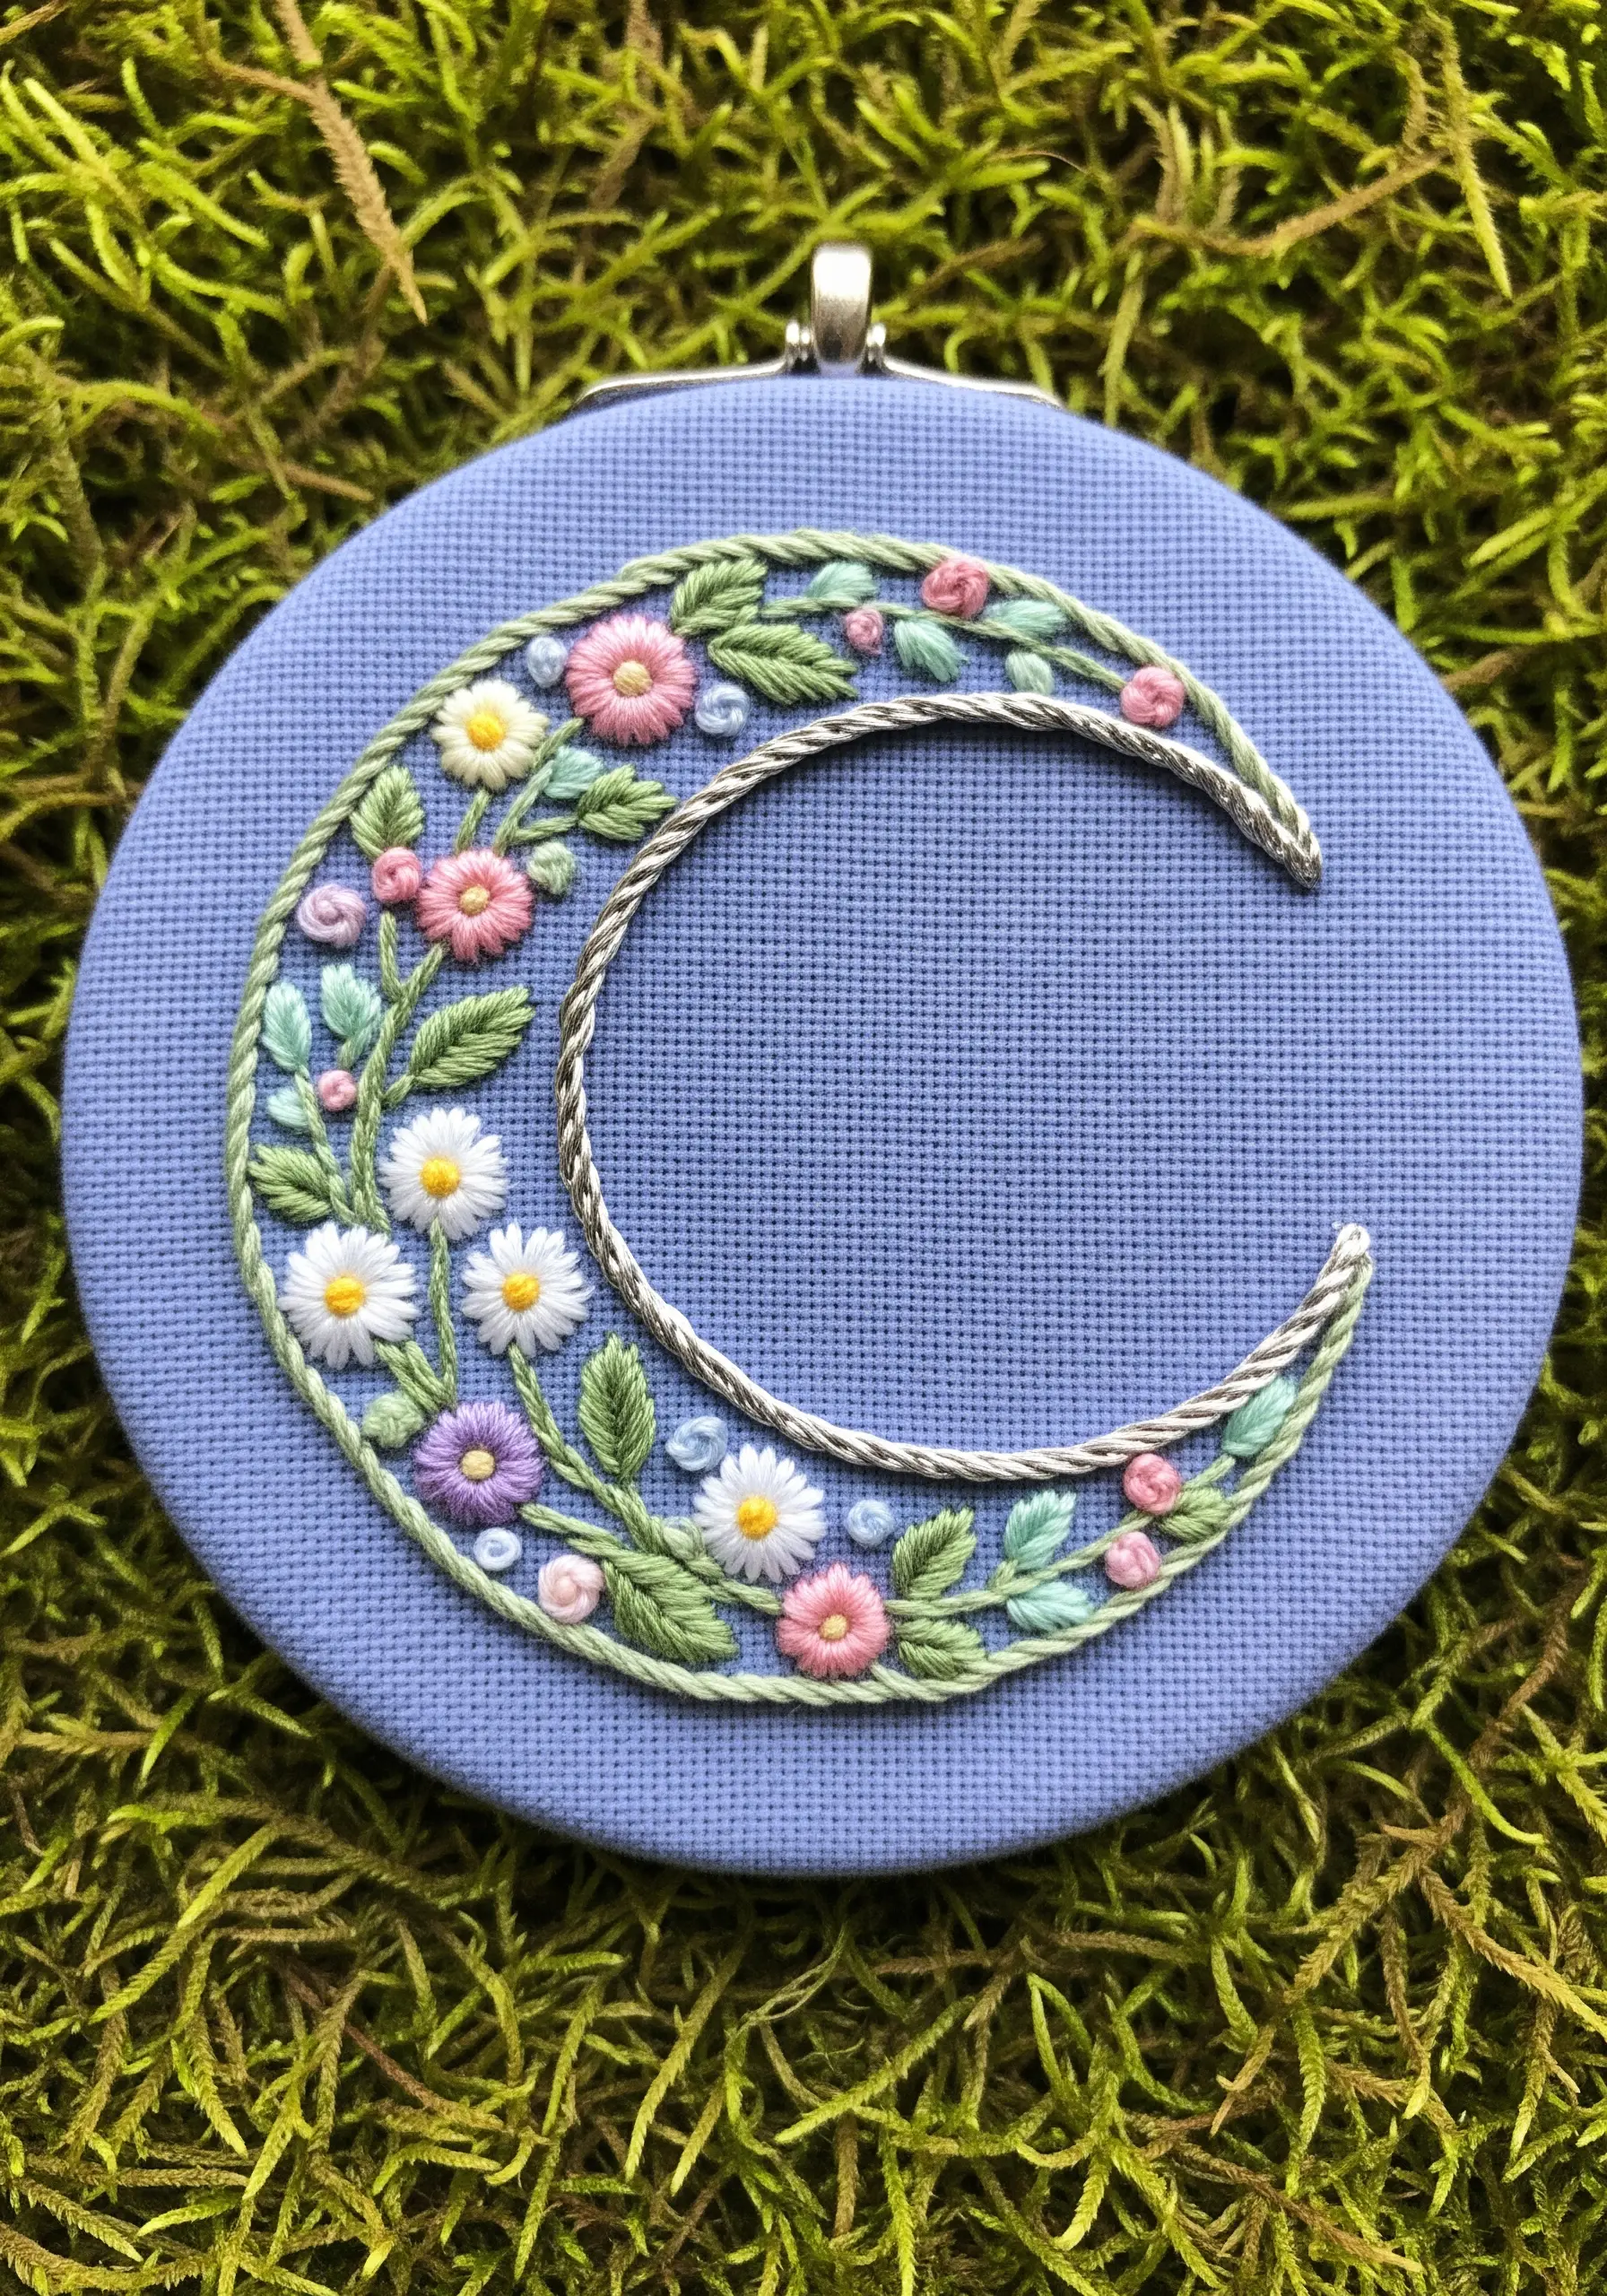
Create a beautiful contrast by pairing a hard, metallic element with soft, organic florals.
Define the crescent moon shape using a silver cord couched onto the fabric or a heavy whipped backstitch with metallic thread.
Then, fill the inside of the crescent with a dense meadow of tiny floral embroidery ideas: lazy daisy stitches, French knots, and small fishbone leaves. This juxtaposition of textures makes the design visually compelling and balanced.
24. Sculpt a Ladybug with Padded Stitching
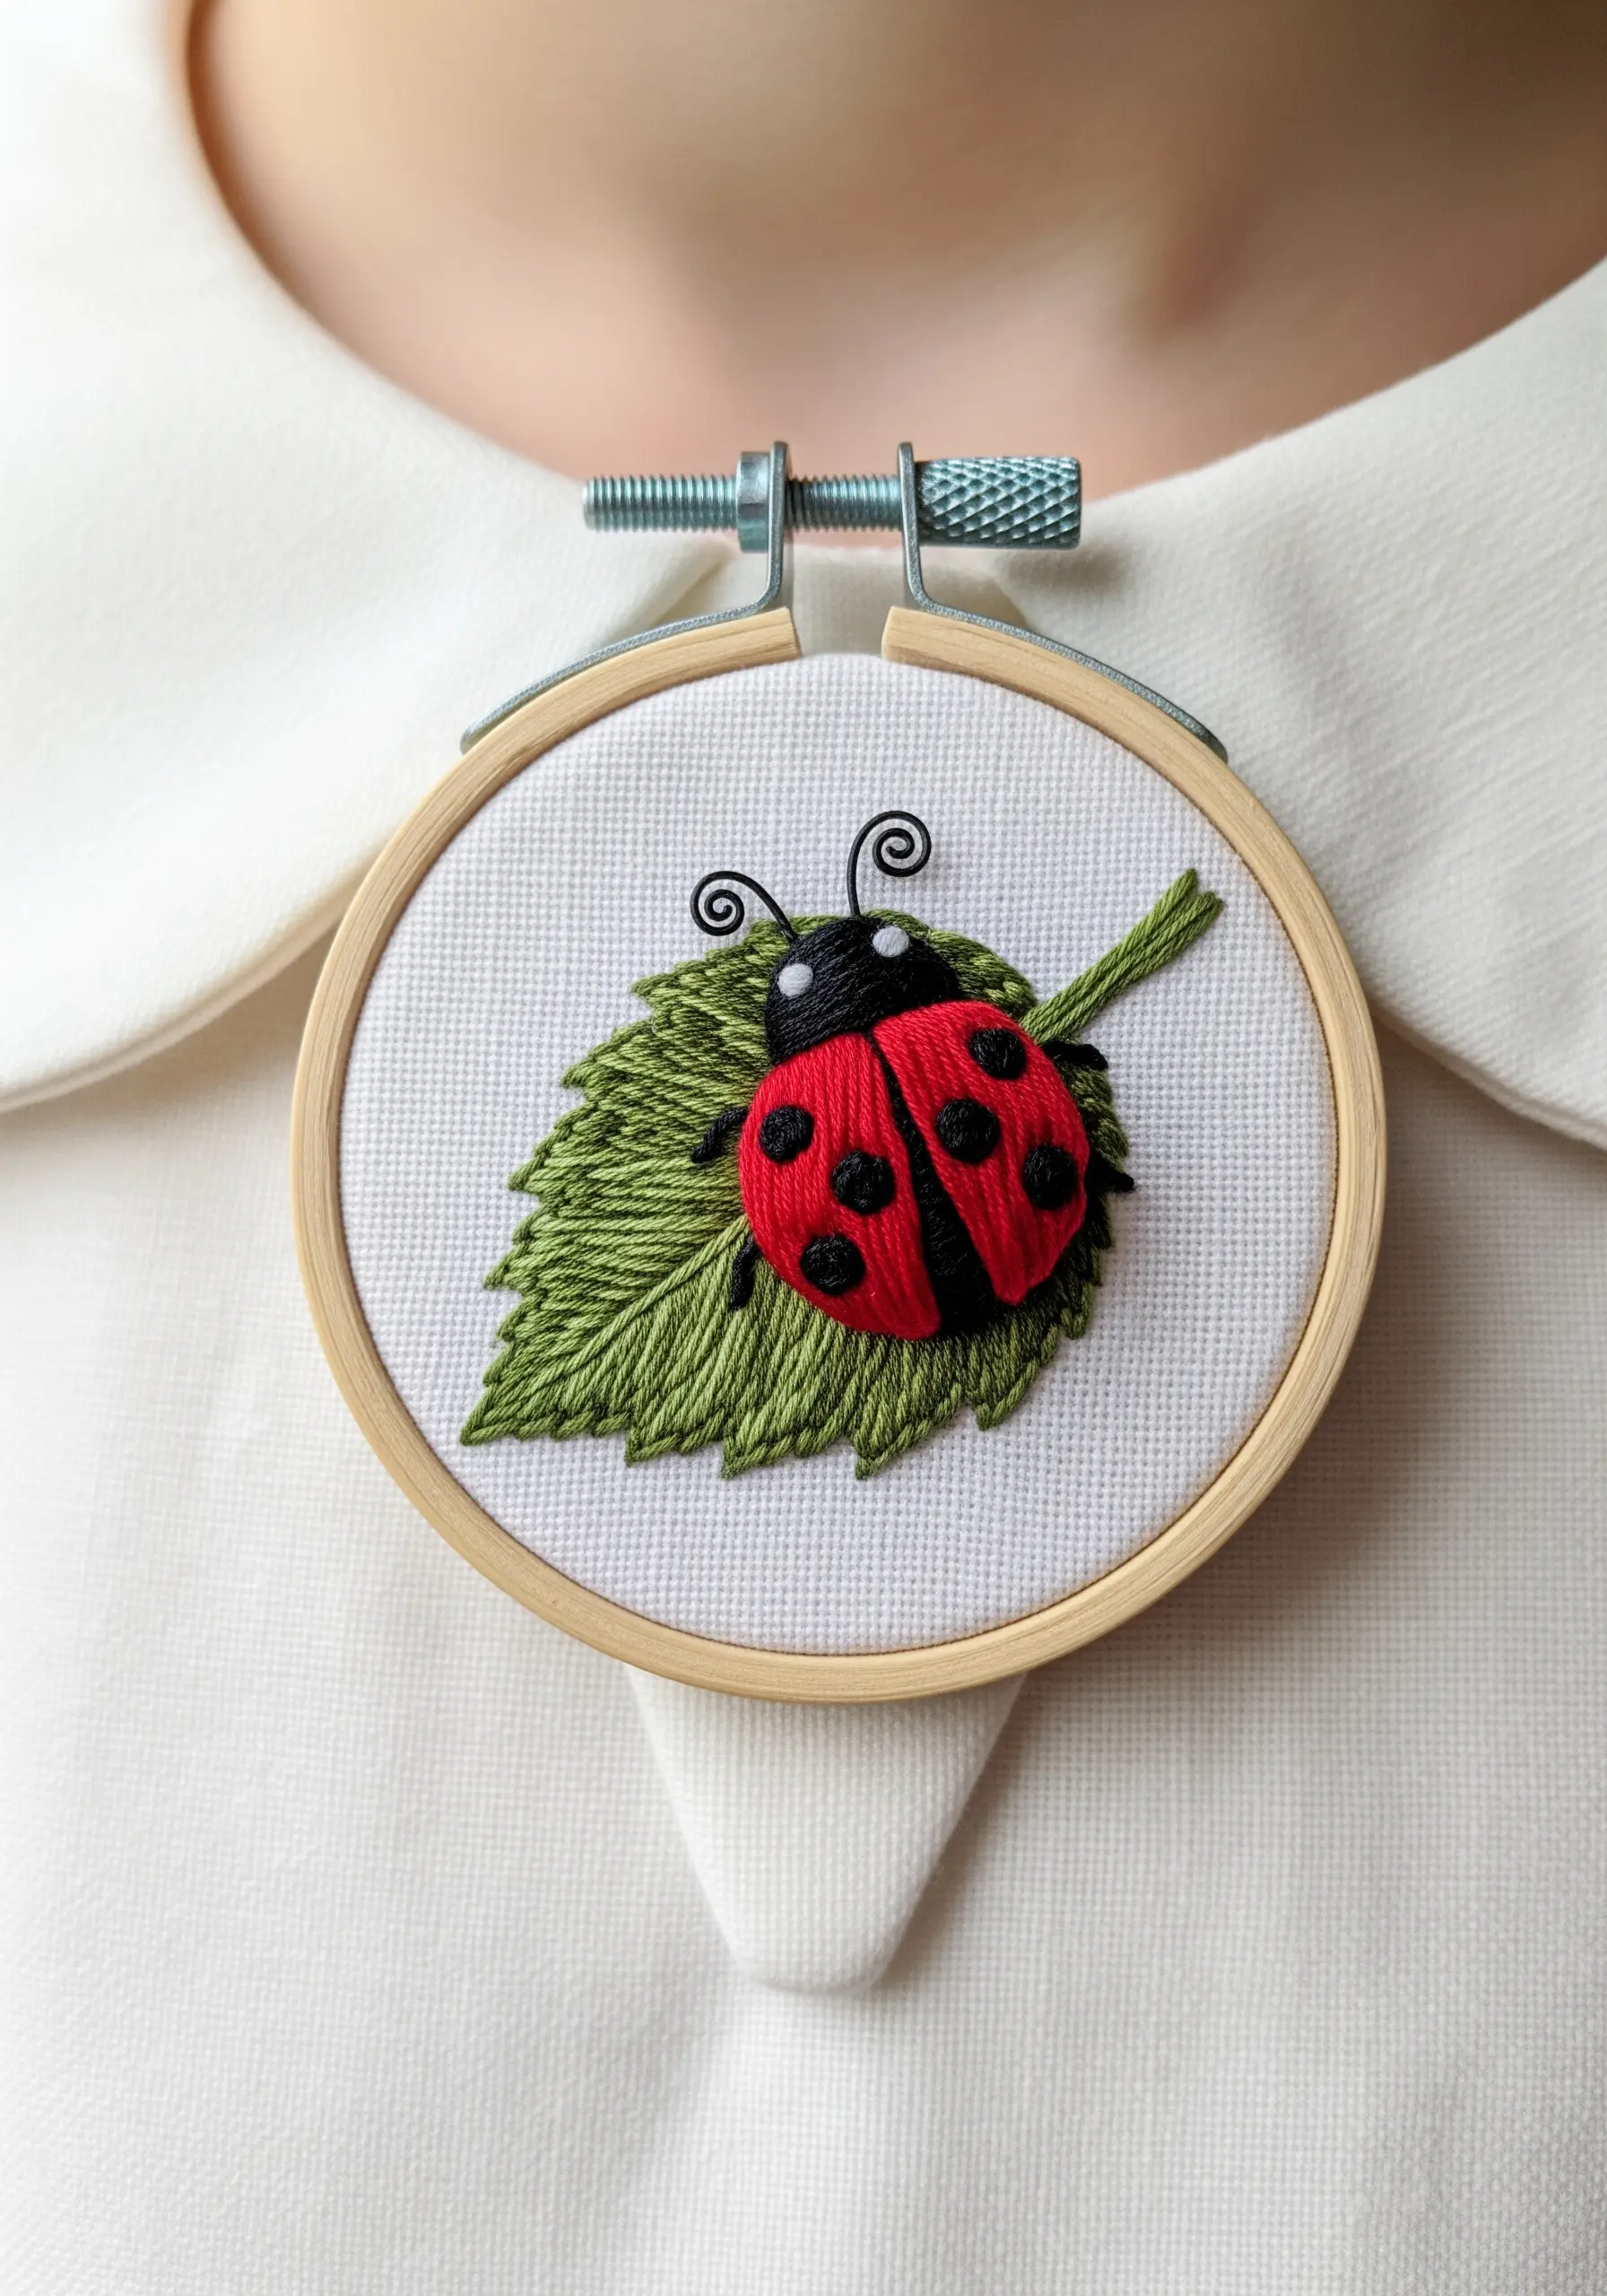
A padded satin stitch is the perfect technique to give a ladybug its characteristic domed shape.
Create a small oval foundation with several layers of floss, then cover it with bright red satin stitches. Stitch a black line down the center before adding the French knot spots.
For the antennae, use a single strand of black thread and make two straight stitches, securing the ends with tiny French knots for a delicate, rounded finish.
25. Tell a Story with Directional Stitches

Guide the viewer’s eye and create form by being intentional with your stitch direction.
For the snail’s shell, use a stem stitch or whipped backstitch in a spiral pattern to mimic its natural growth rings.
Contrast this with the vertical satin stitches on the mushroom stems and the radiating stitches on their caps. Each texture tells a different part of the story and adds to the richness of the miniature woodland scene.
26. Create Harmony with a Limited Palette
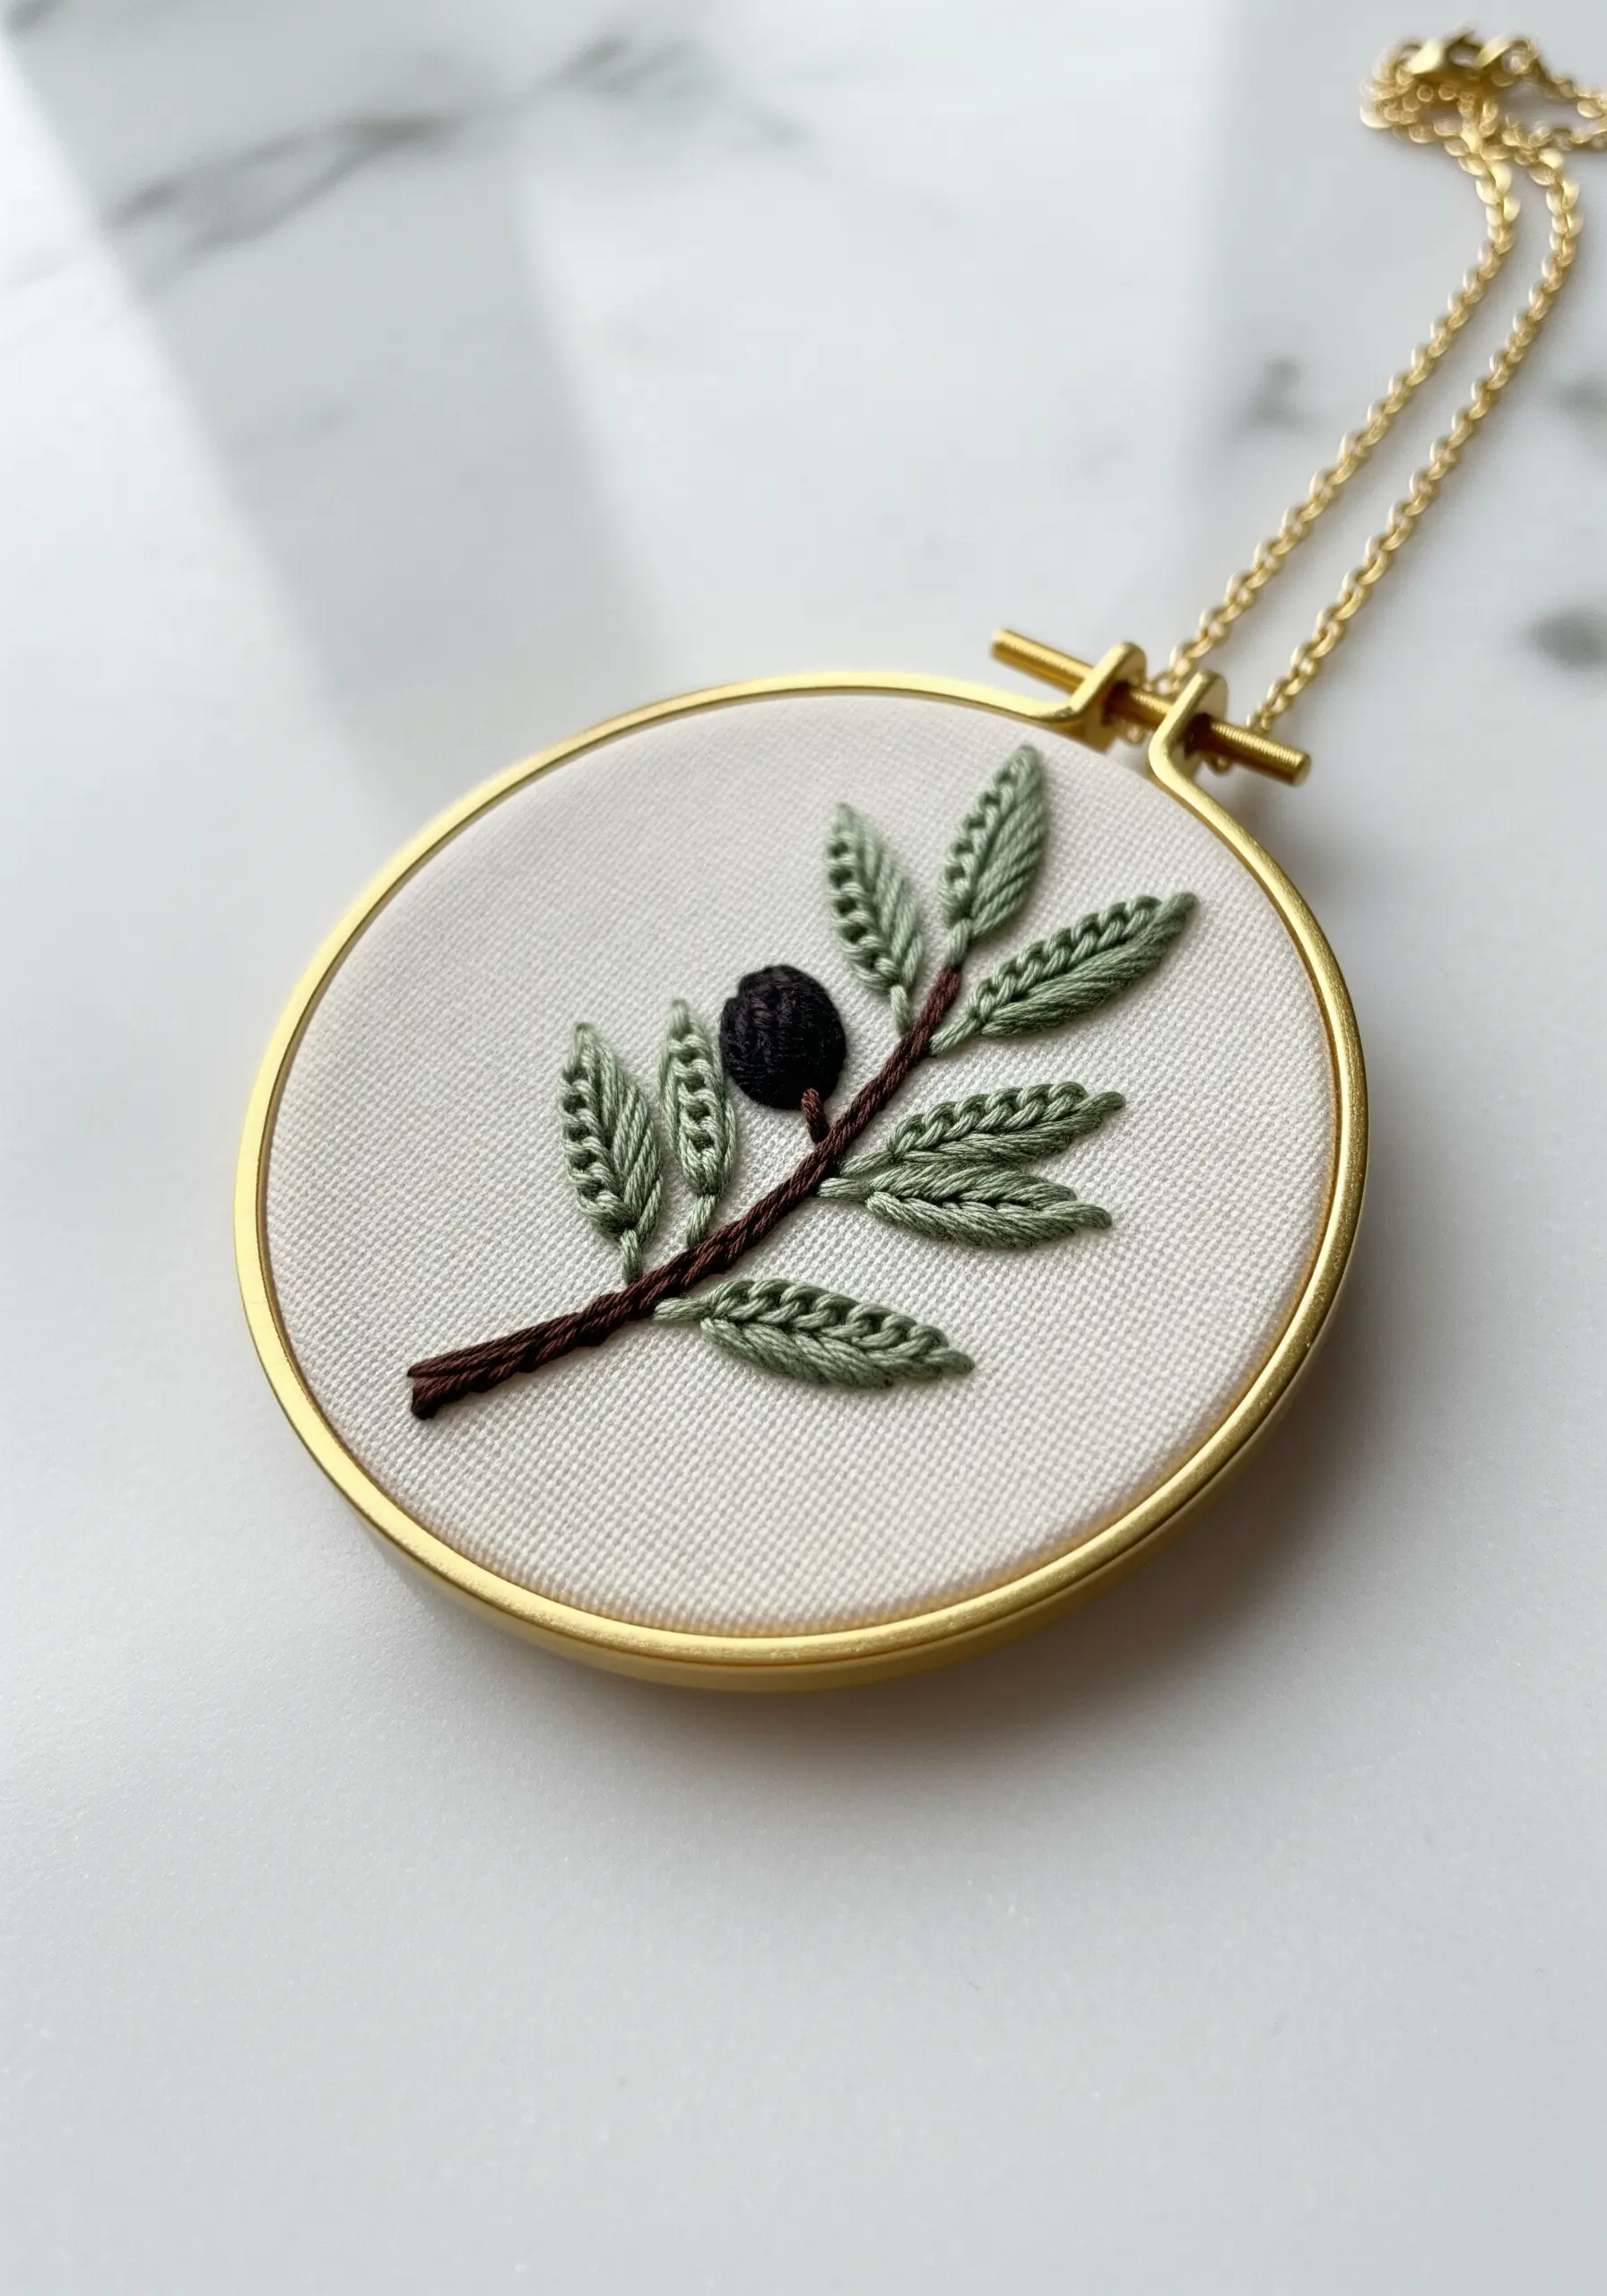
You don’t need a lot of colors to create a sophisticated design. This olive branch uses only four shades: two greens, a brown, and a black.
The key is to vary the stitches. Use fishbone stitch for the wide leaves, a simple straight stitch for the narrow ones, stem stitch for the branch, and a padded satin stitch for the olive.
This variety in texture creates interest and depth, proving that stitch choice can be more impactful than color.
27. Innovate with Light and Thread
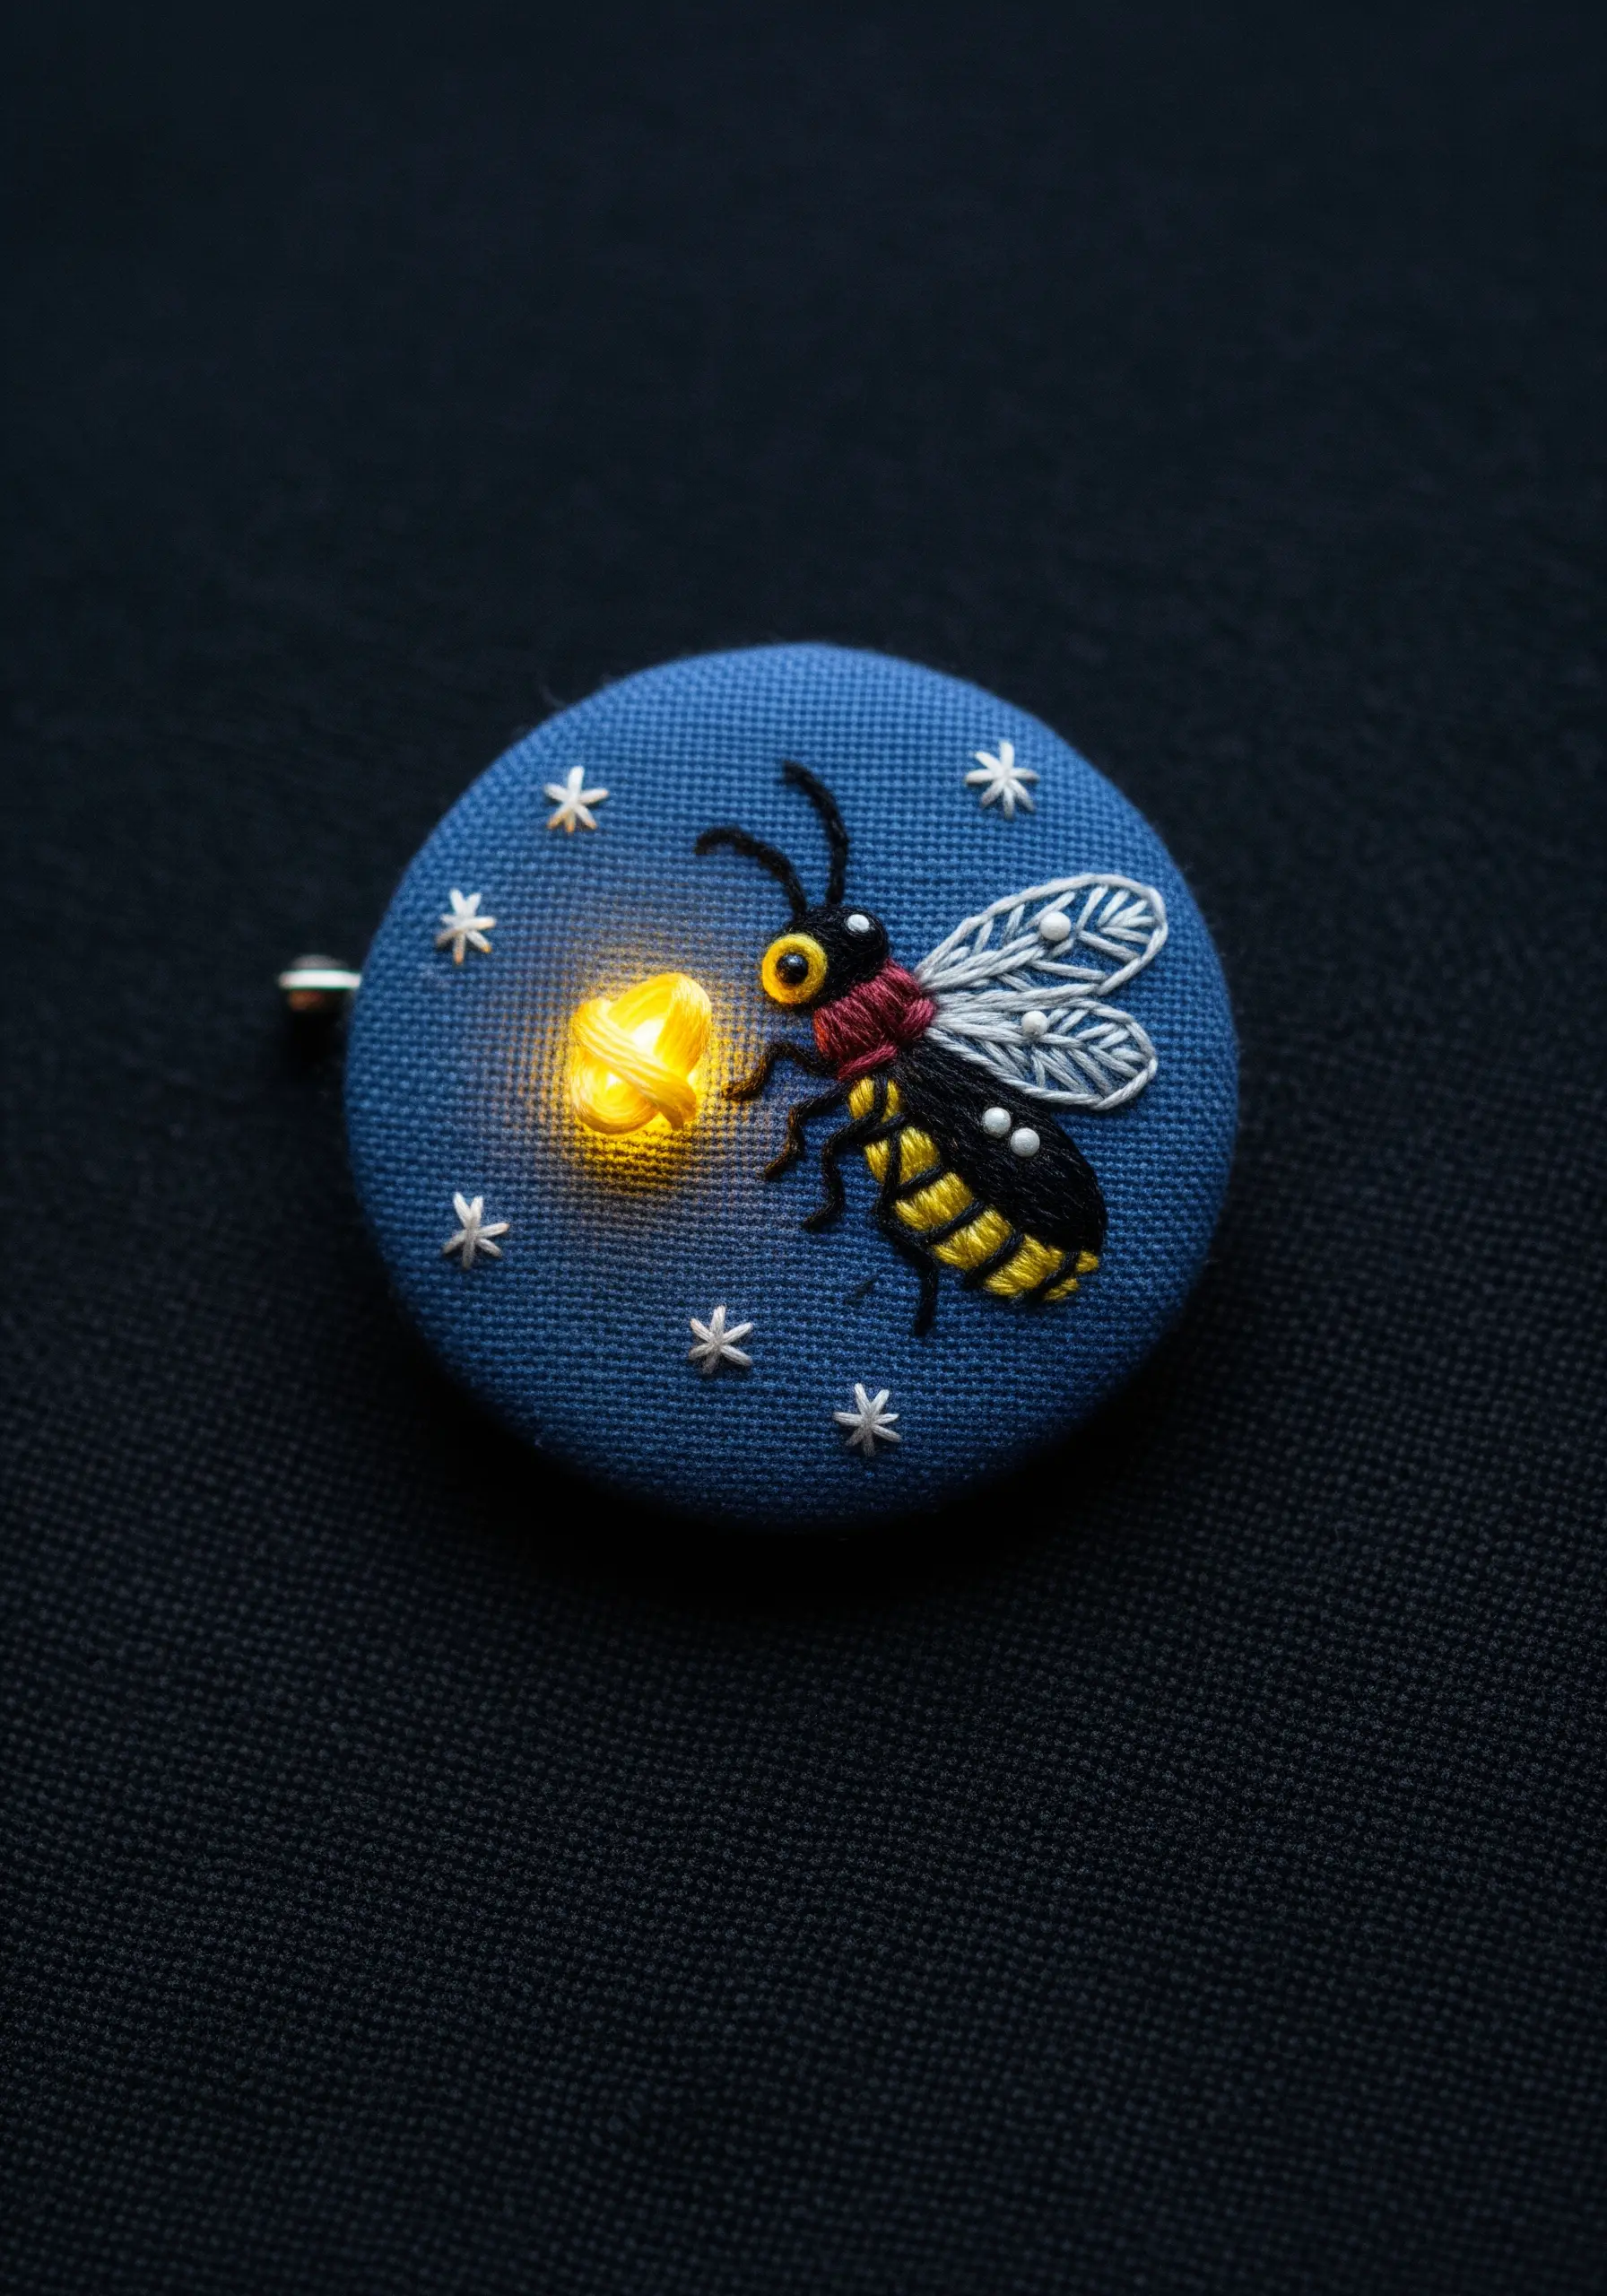
For a truly magical effect, incorporate a micro LED light into your design. This is an advanced technique that creates unforgettable wearable art.
Position the tiny light behind the fabric and secure it. Then, stitch a yellow woven wheel or a dense cluster of French knots directly over it, allowing the light to diffuse through the thread.
Embroider the firefly’s body around this glowing element to complete the illusion.
28. Compose a Balanced Wildflower Bouquet
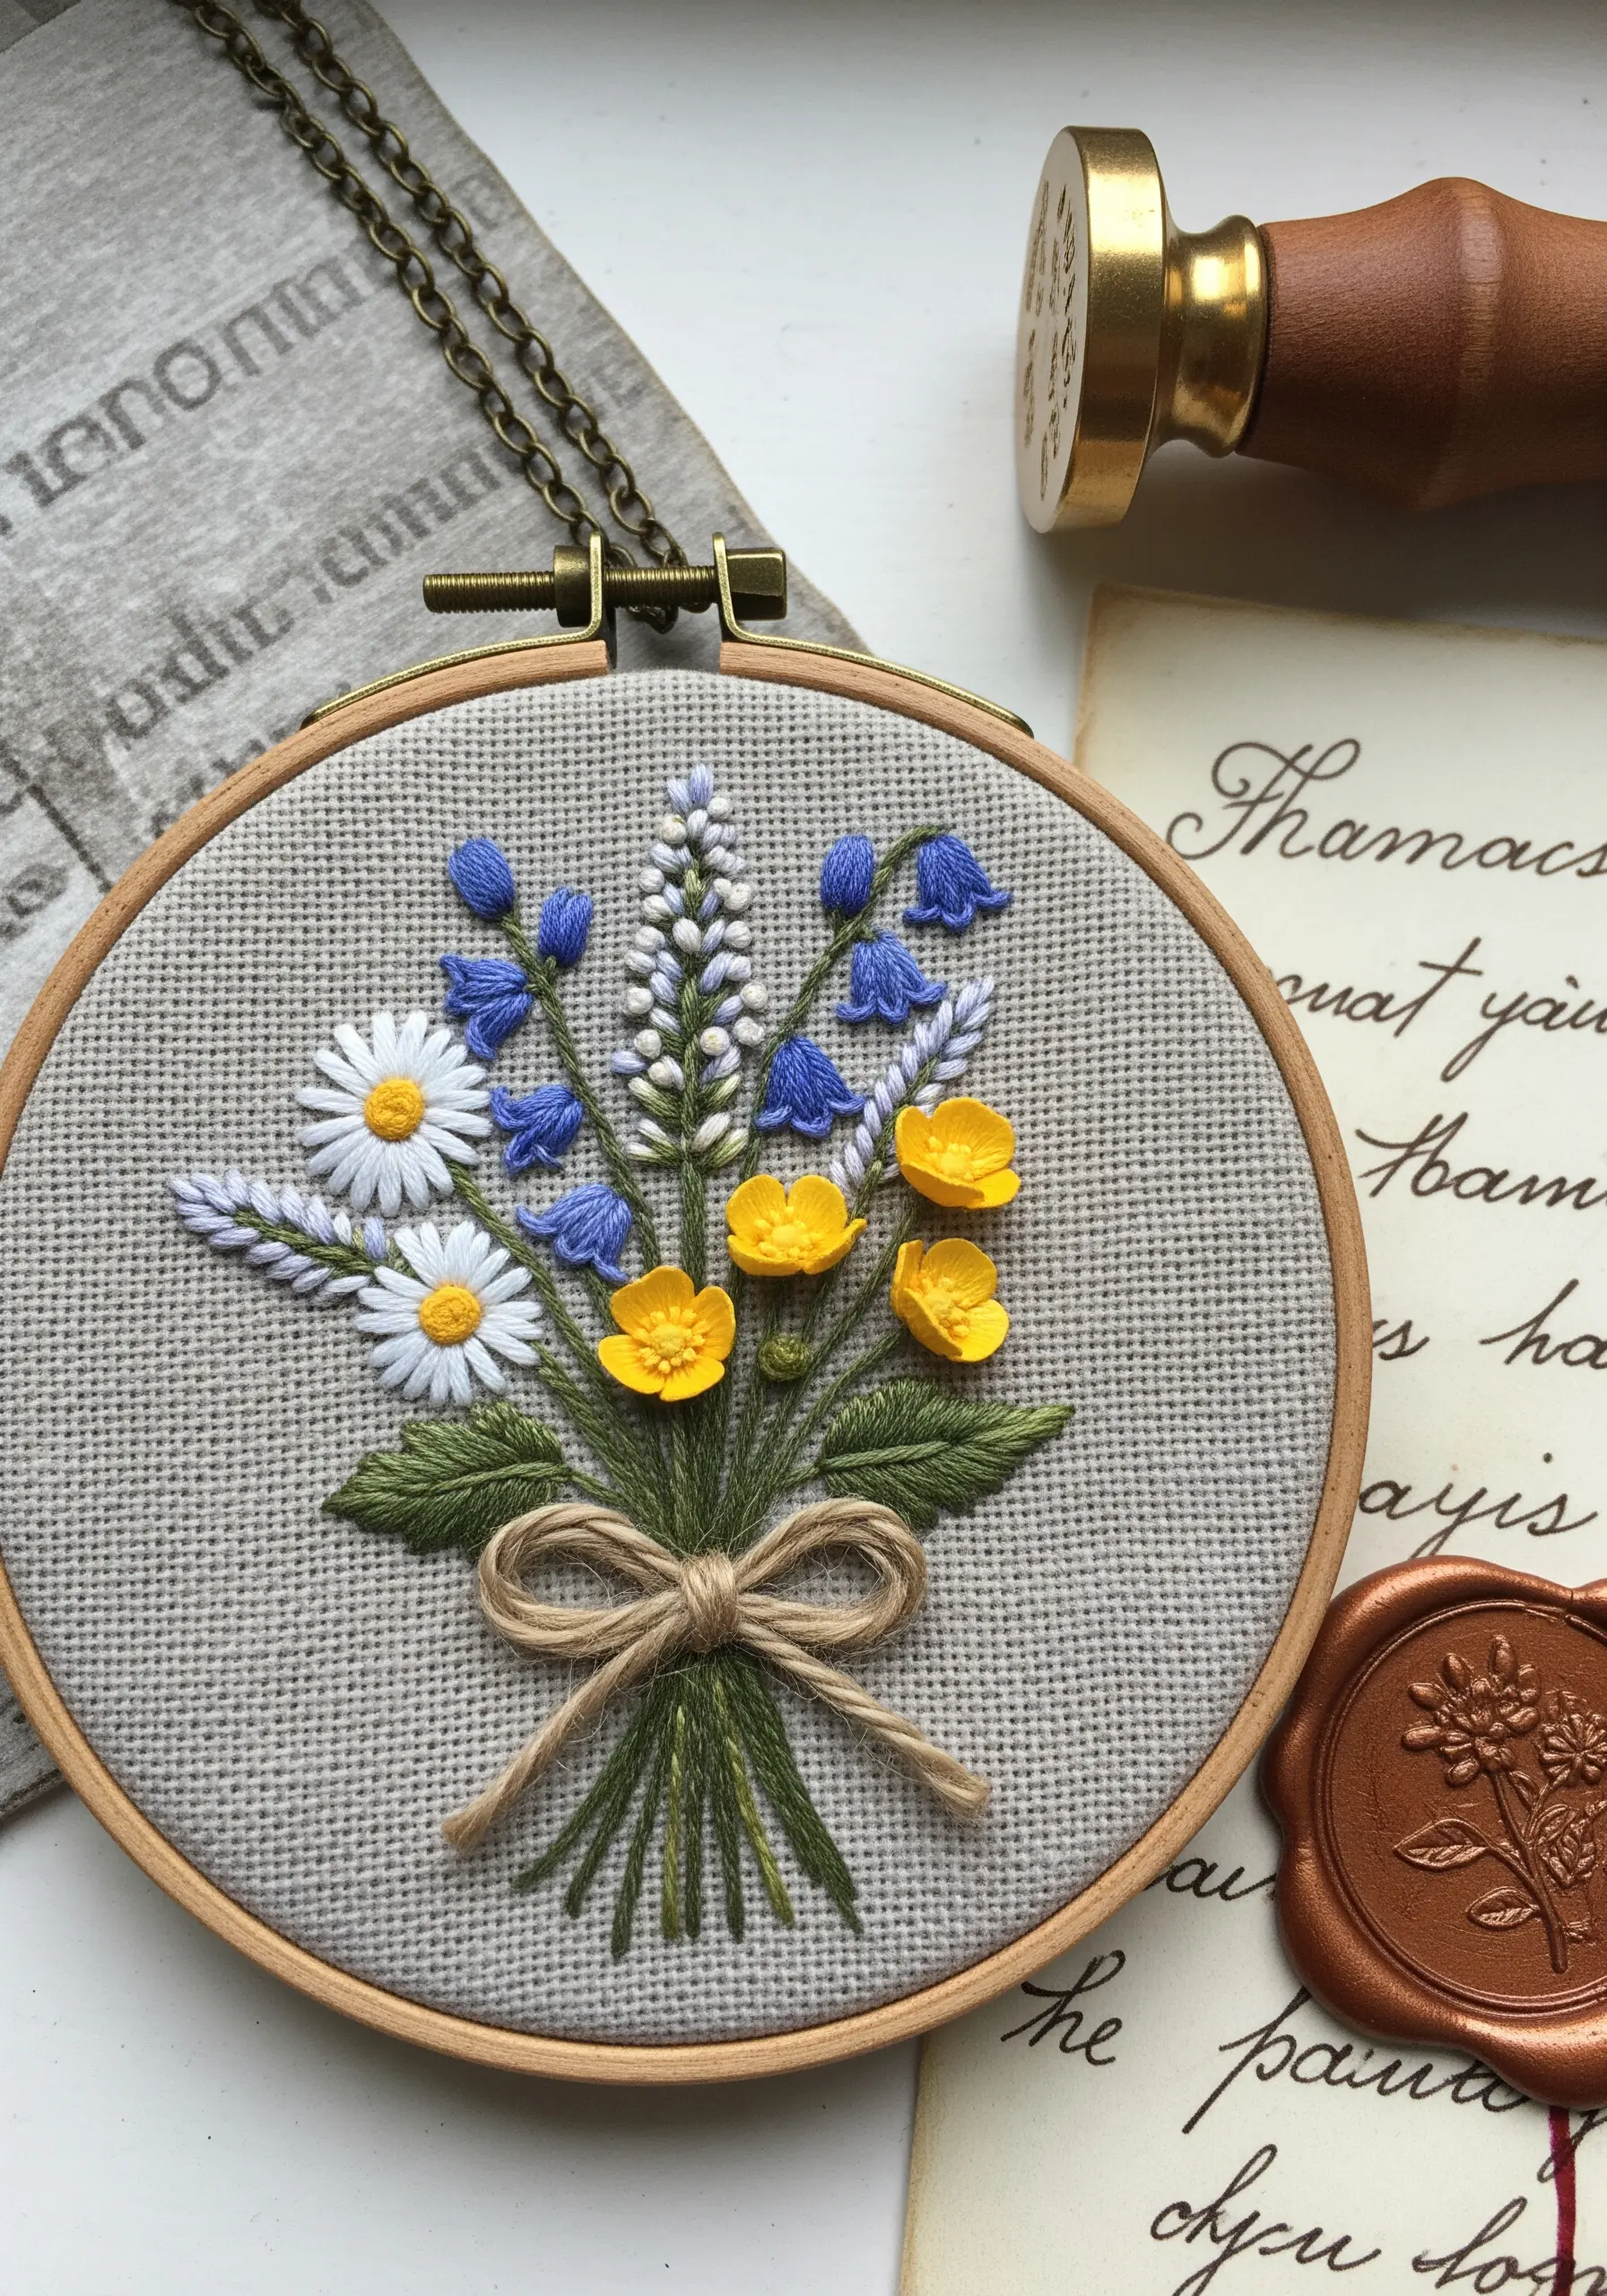
When stitching a bouquet, think like a florist. Create visual interest by varying the height, shape, and texture of your flowers.
Use tall bullion knots for lavender, flat lazy daisy stitches for daisies, and round woven wheels for buttercups.
Tuck in some simple fishbone stitch leaves to fill out the arrangement. A simple bow tied with a neutral twine or floss grounds the composition and adds a rustic touch.
29. Capture Frost with Iridescent Thread
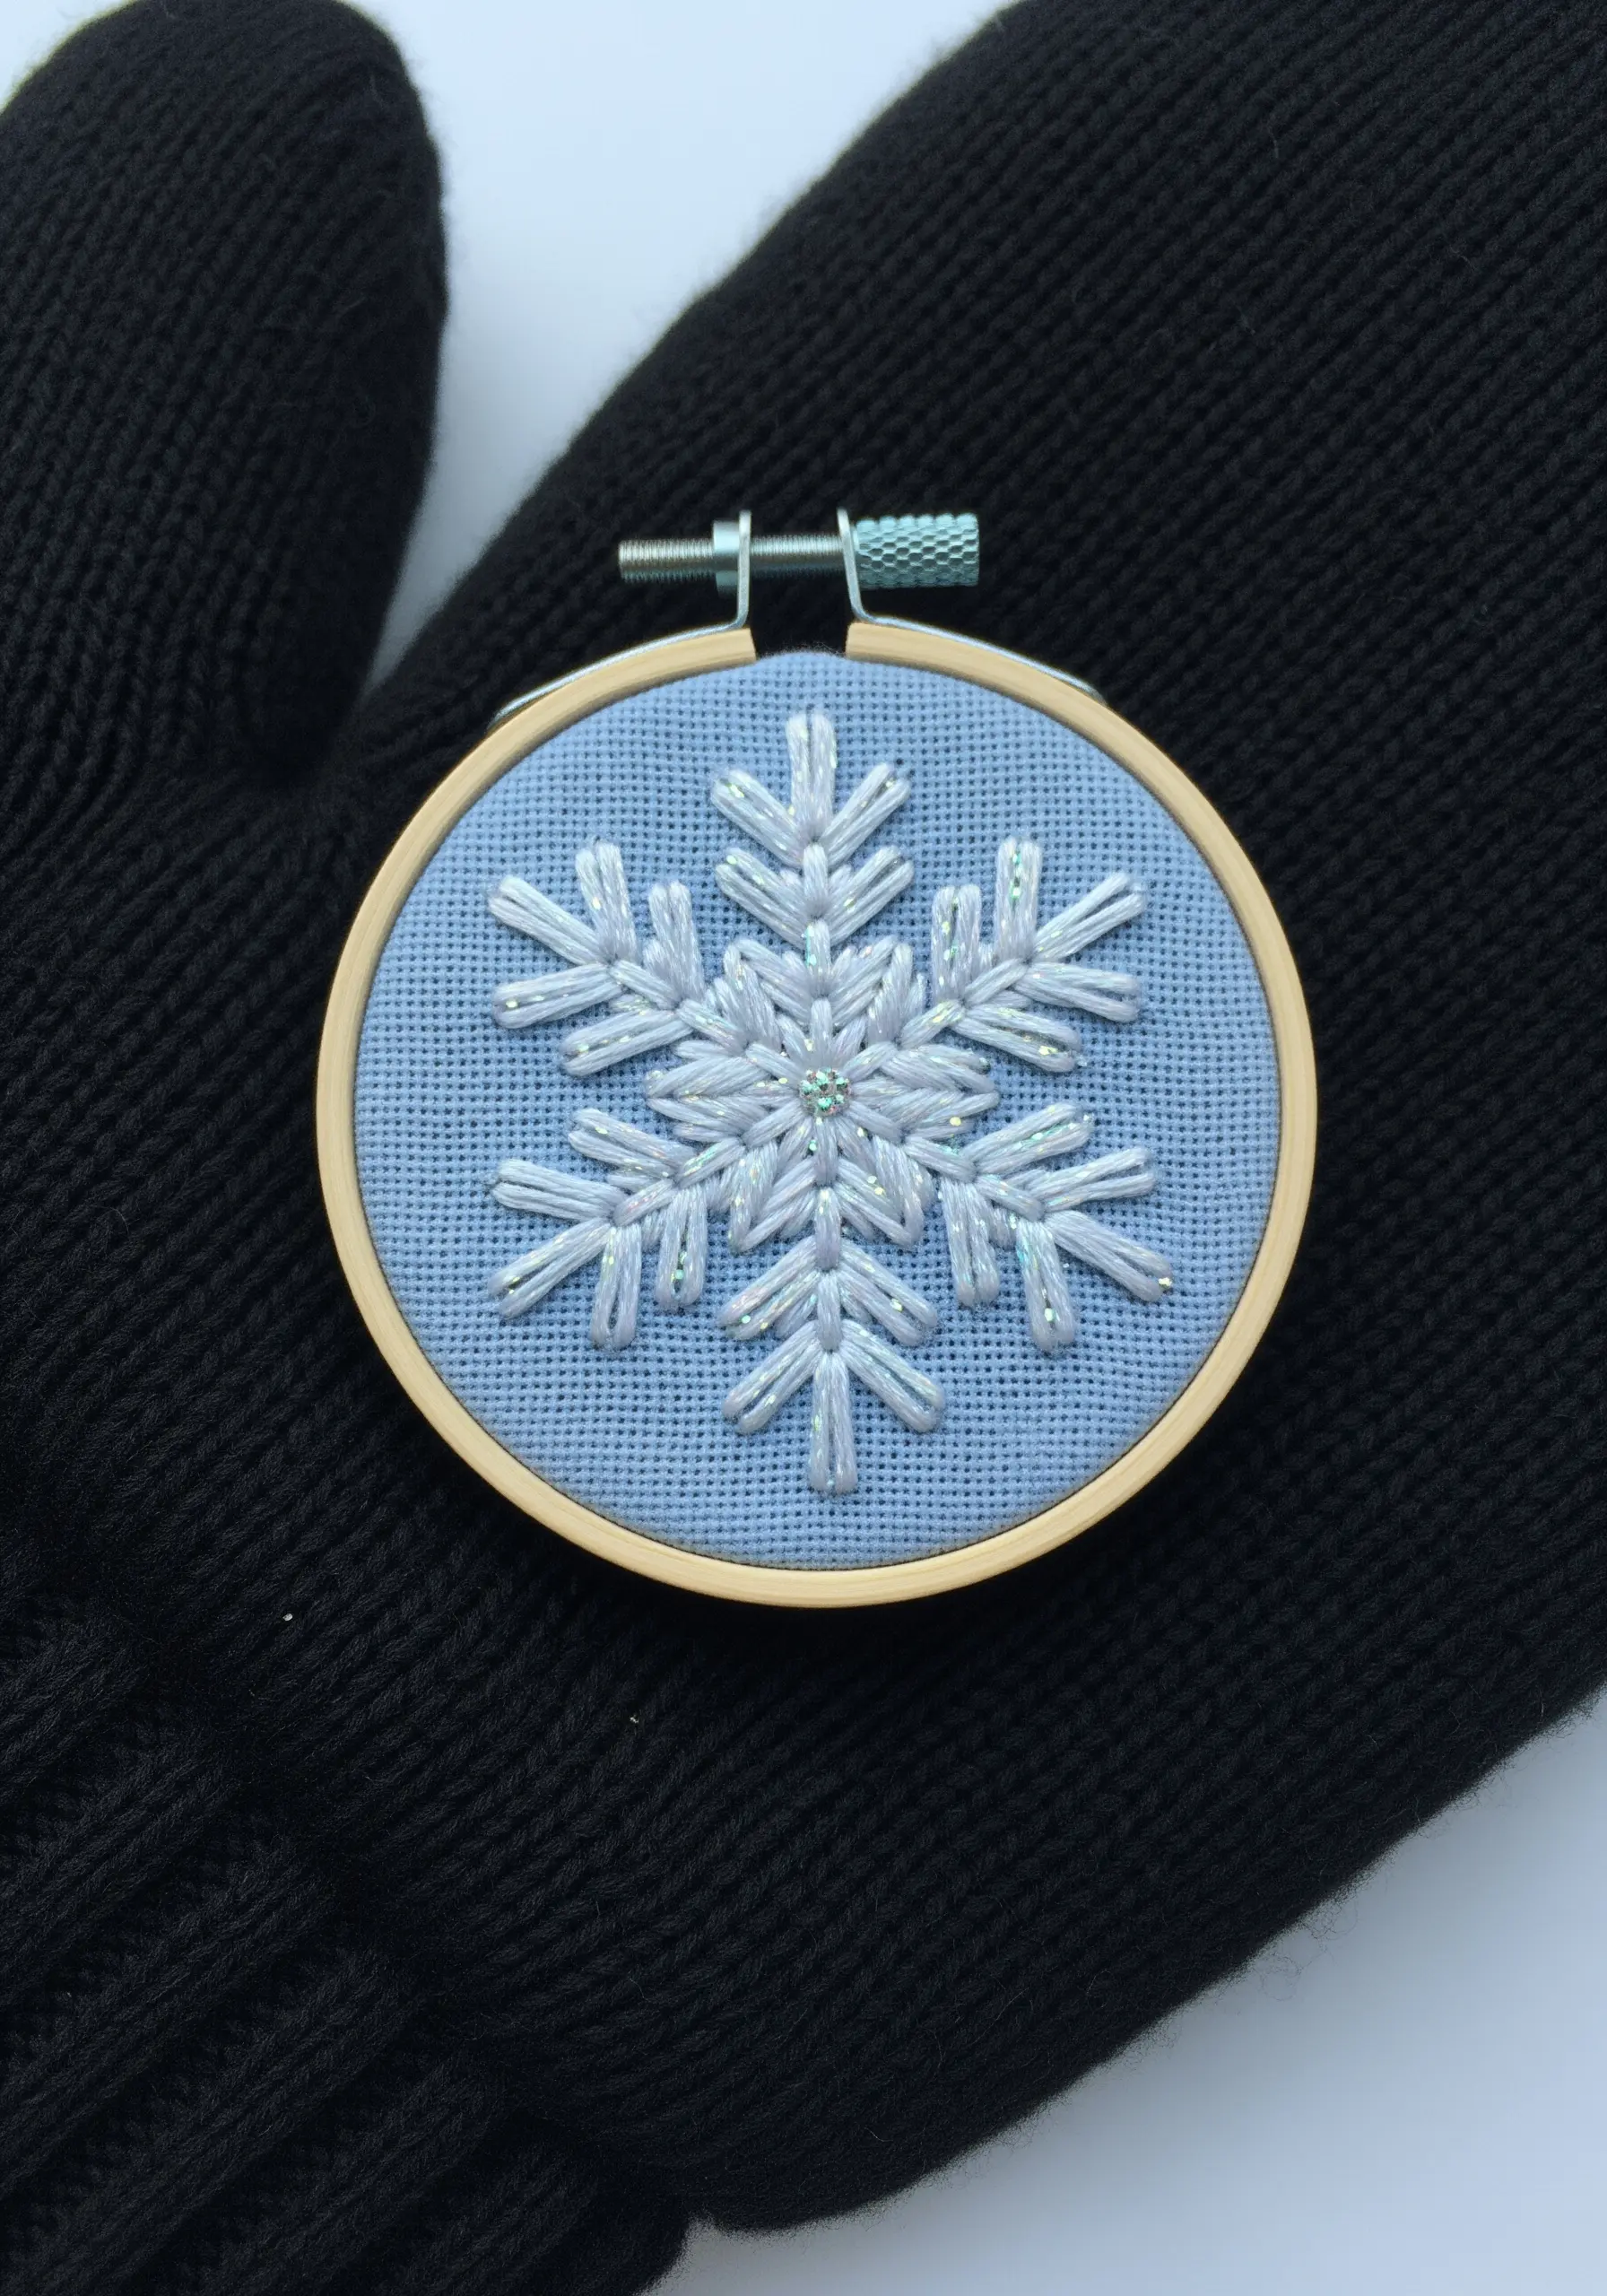
To make your snowflake sparkle like real ice, blend a single strand of iridescent or metallic thread with your white cotton floss.
As you create the classic snowflake shape with straight stitches, the specialty thread will catch the light from different angles, creating a subtle, glittering effect.
Place a tiny, iridescent bead at the very center to anchor the design and add an extra point of reflection.
30. Create Water Ripples with Outline Stitches
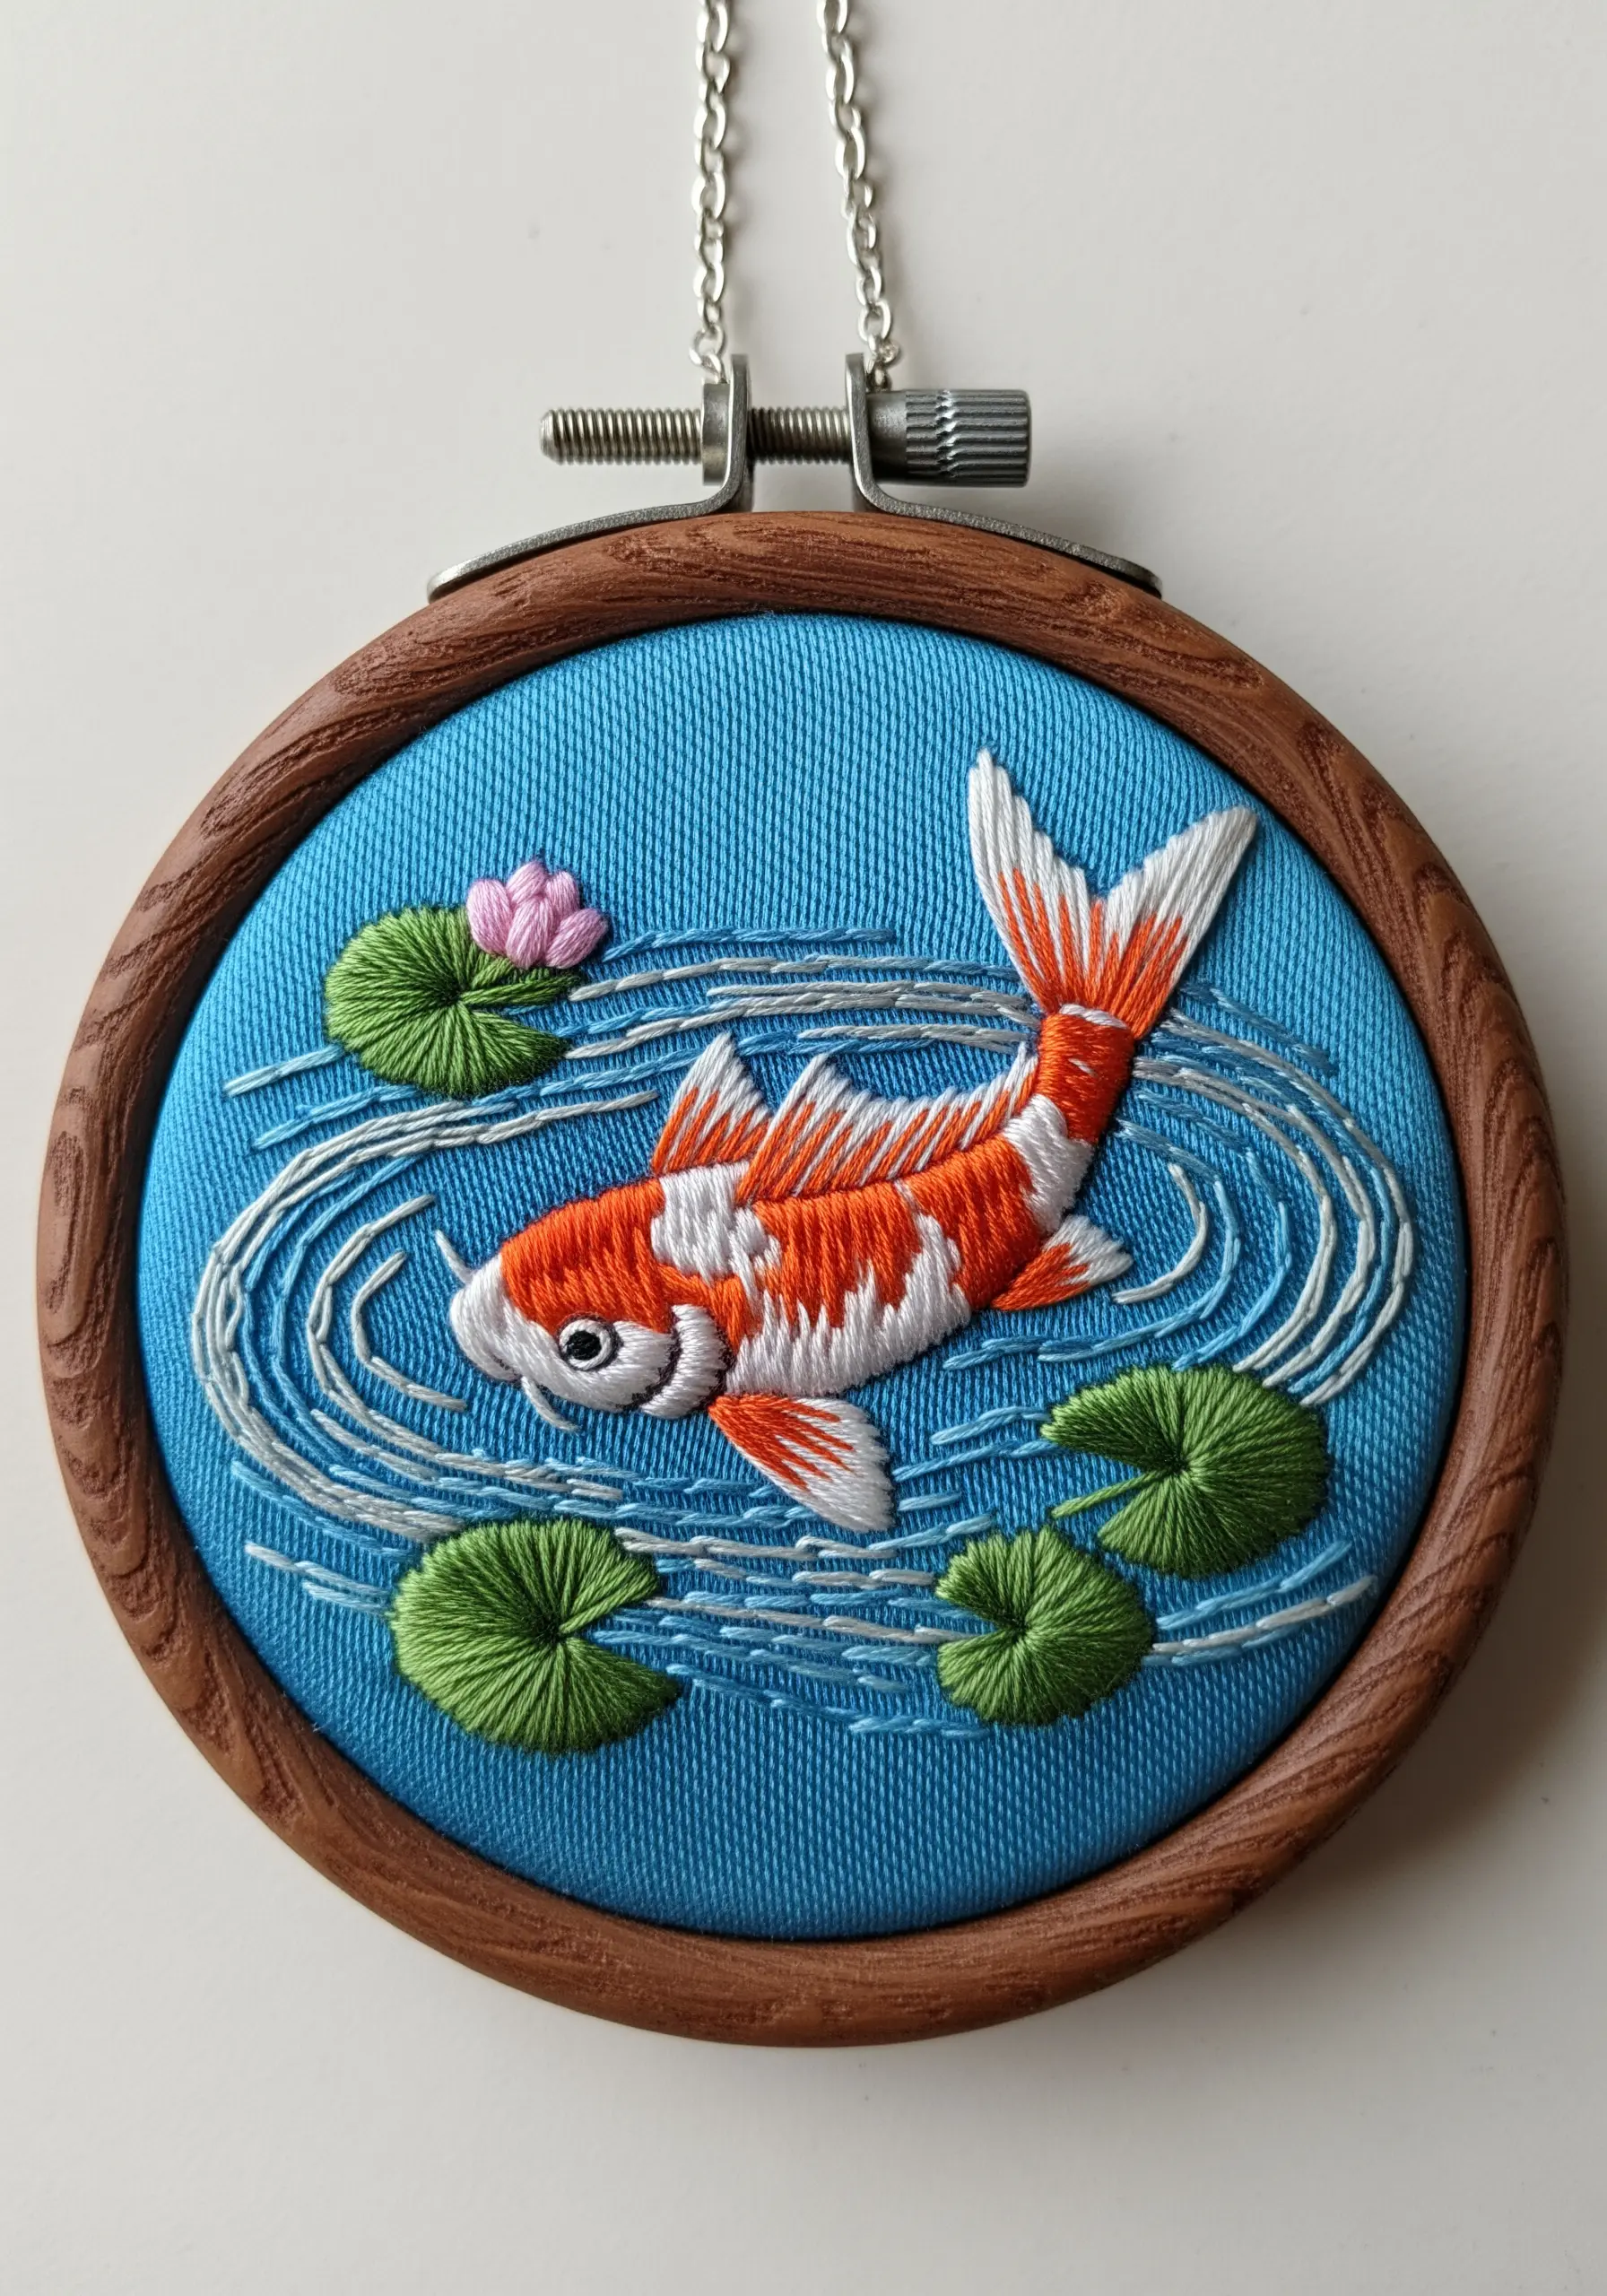
Suggest the movement of water around a koi fish without overwhelming the subject.
Use a simple backstitch or split stitch in a slightly lighter shade of blue than your background fabric.
Stitch concentric, imperfect oval shapes radiating outwards from where the fish is breaking the surface. This subtle effect creates the illusion of ripples and depth while keeping the focus on the brightly colored koi.
31. Use Bullion Knots for Plump Grapes
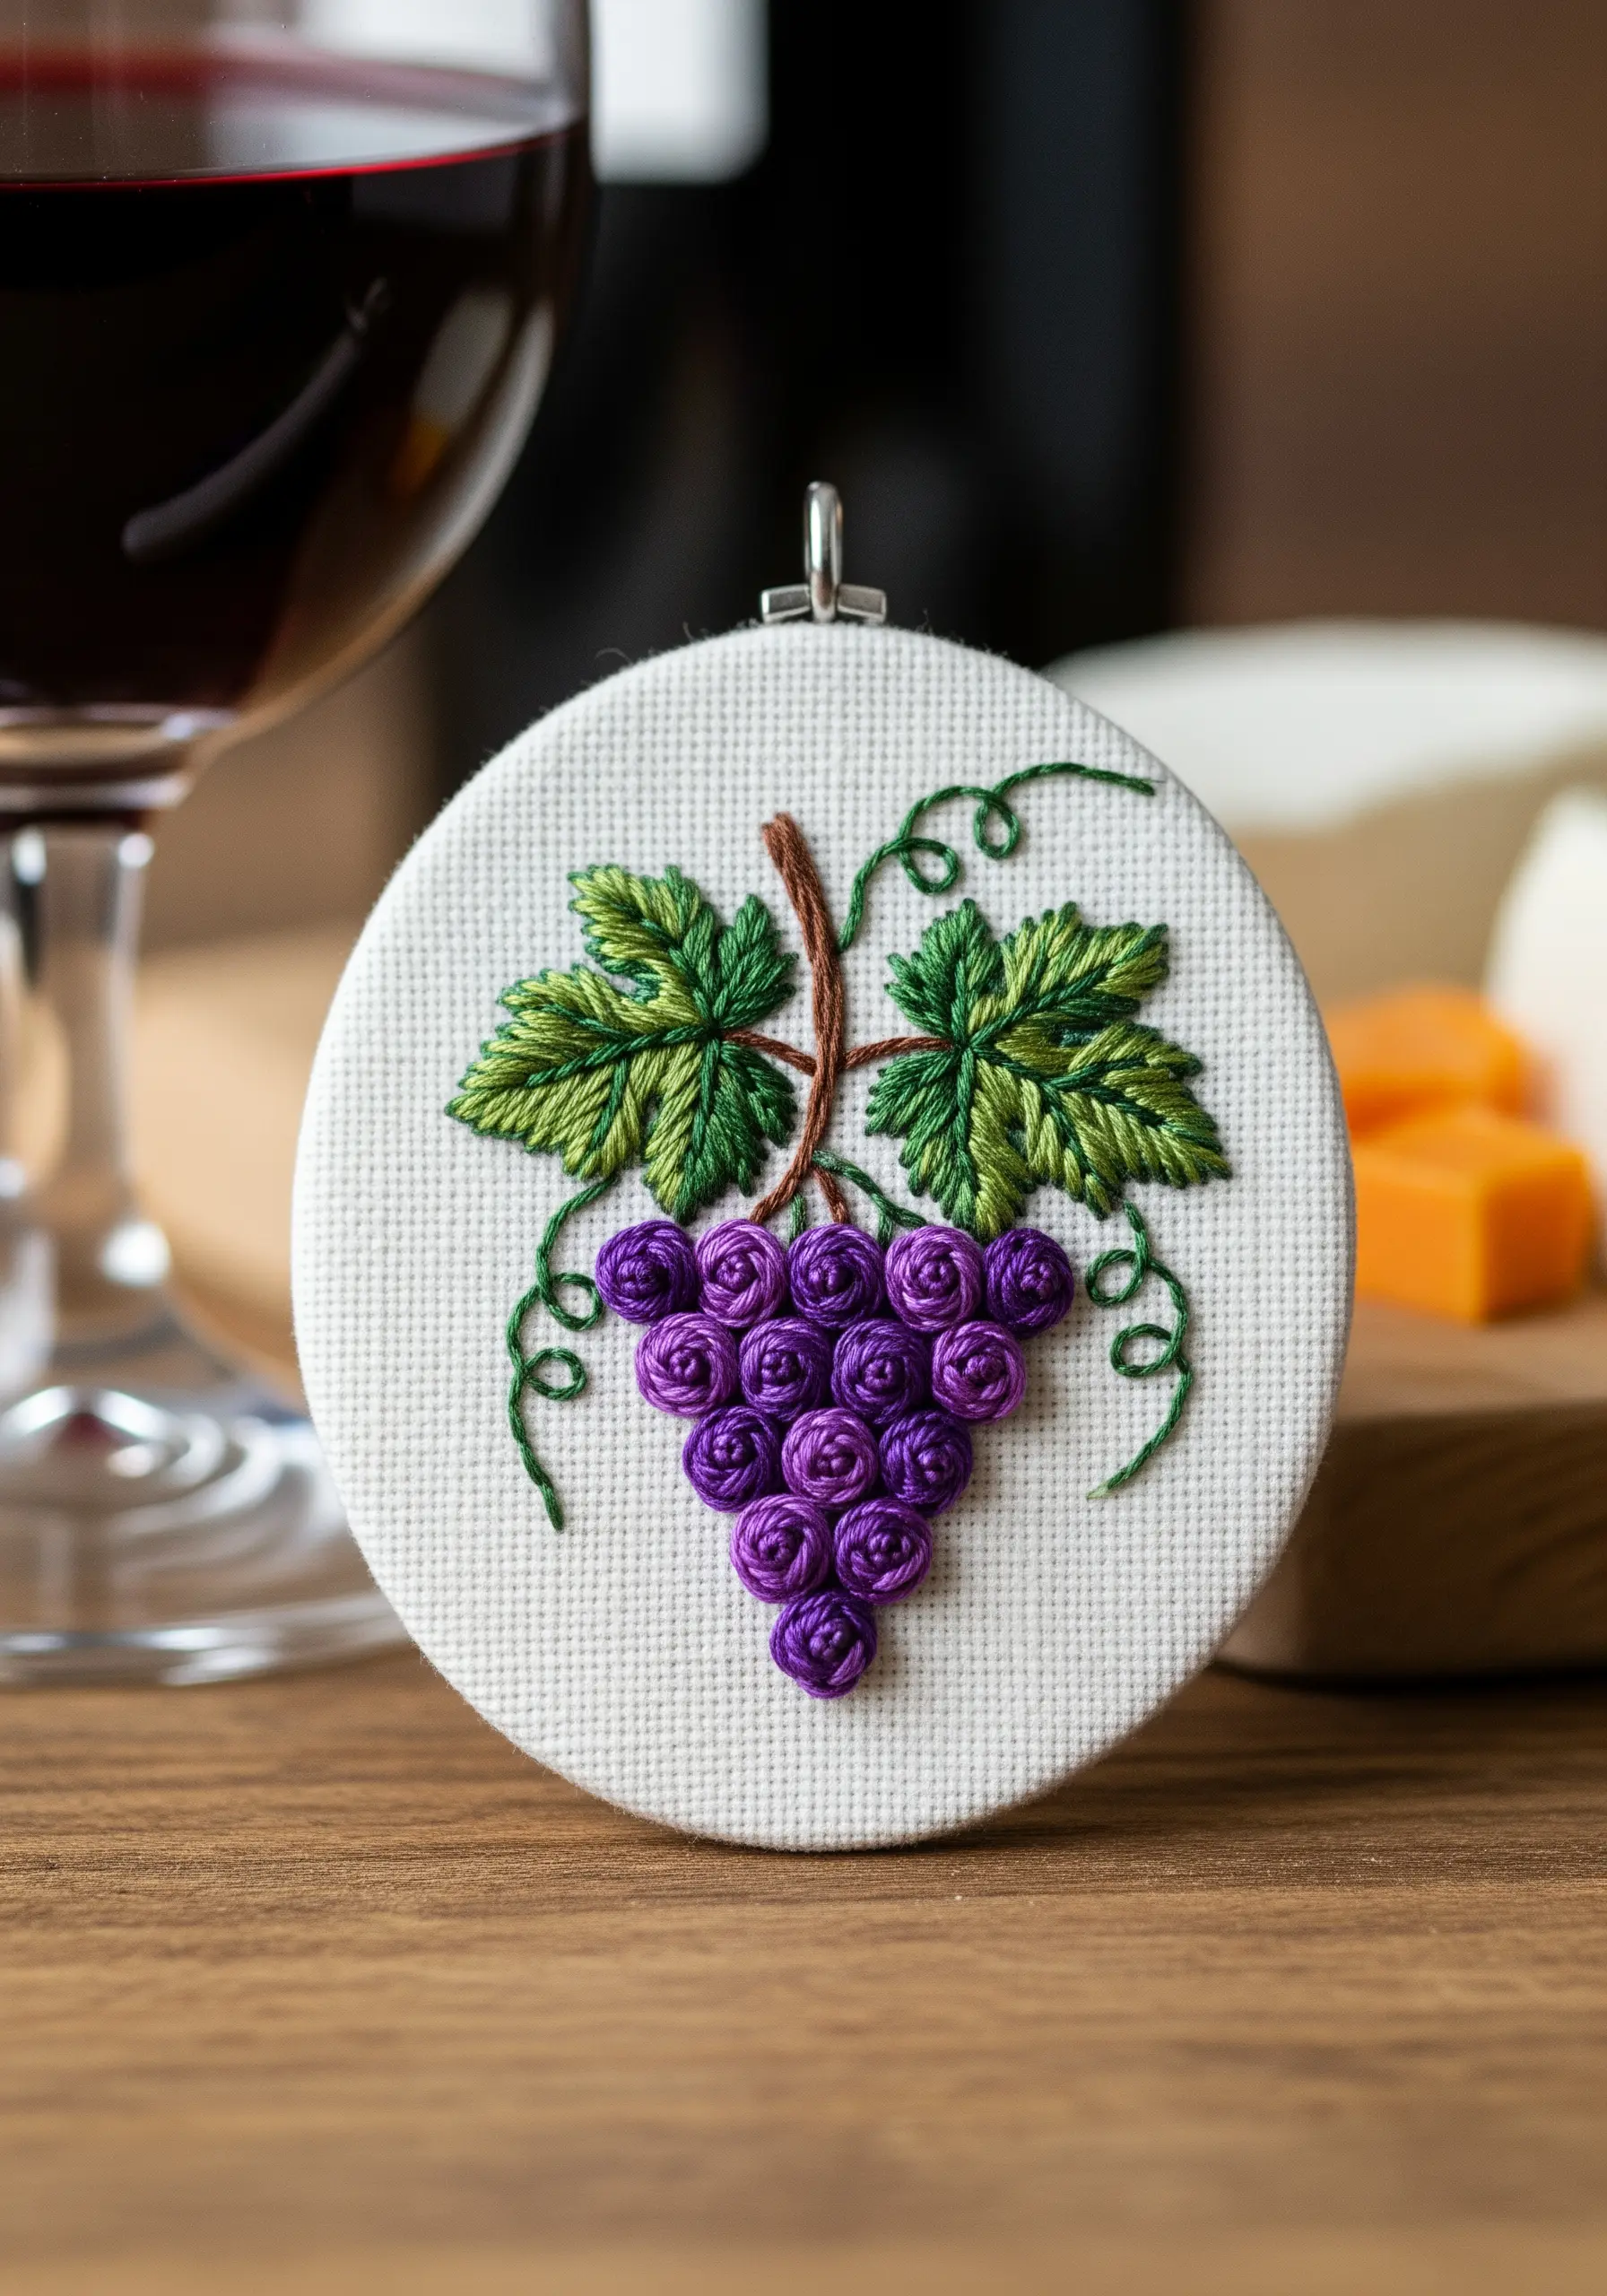
For a cluster of grapes, the bullion knot is the perfect stitch to create a plump, cylindrical shape.
Vary the length and number of wraps for each knot to create grapes of slightly different sizes, which will make your cluster look more natural.
Stitch them closely together, overlapping them slightly, to build a convincing bunch. This stitch provides much more dimension and realism than a simple French knot or satin stitch would.
32. Go Beyond the Hoop with Appliqué
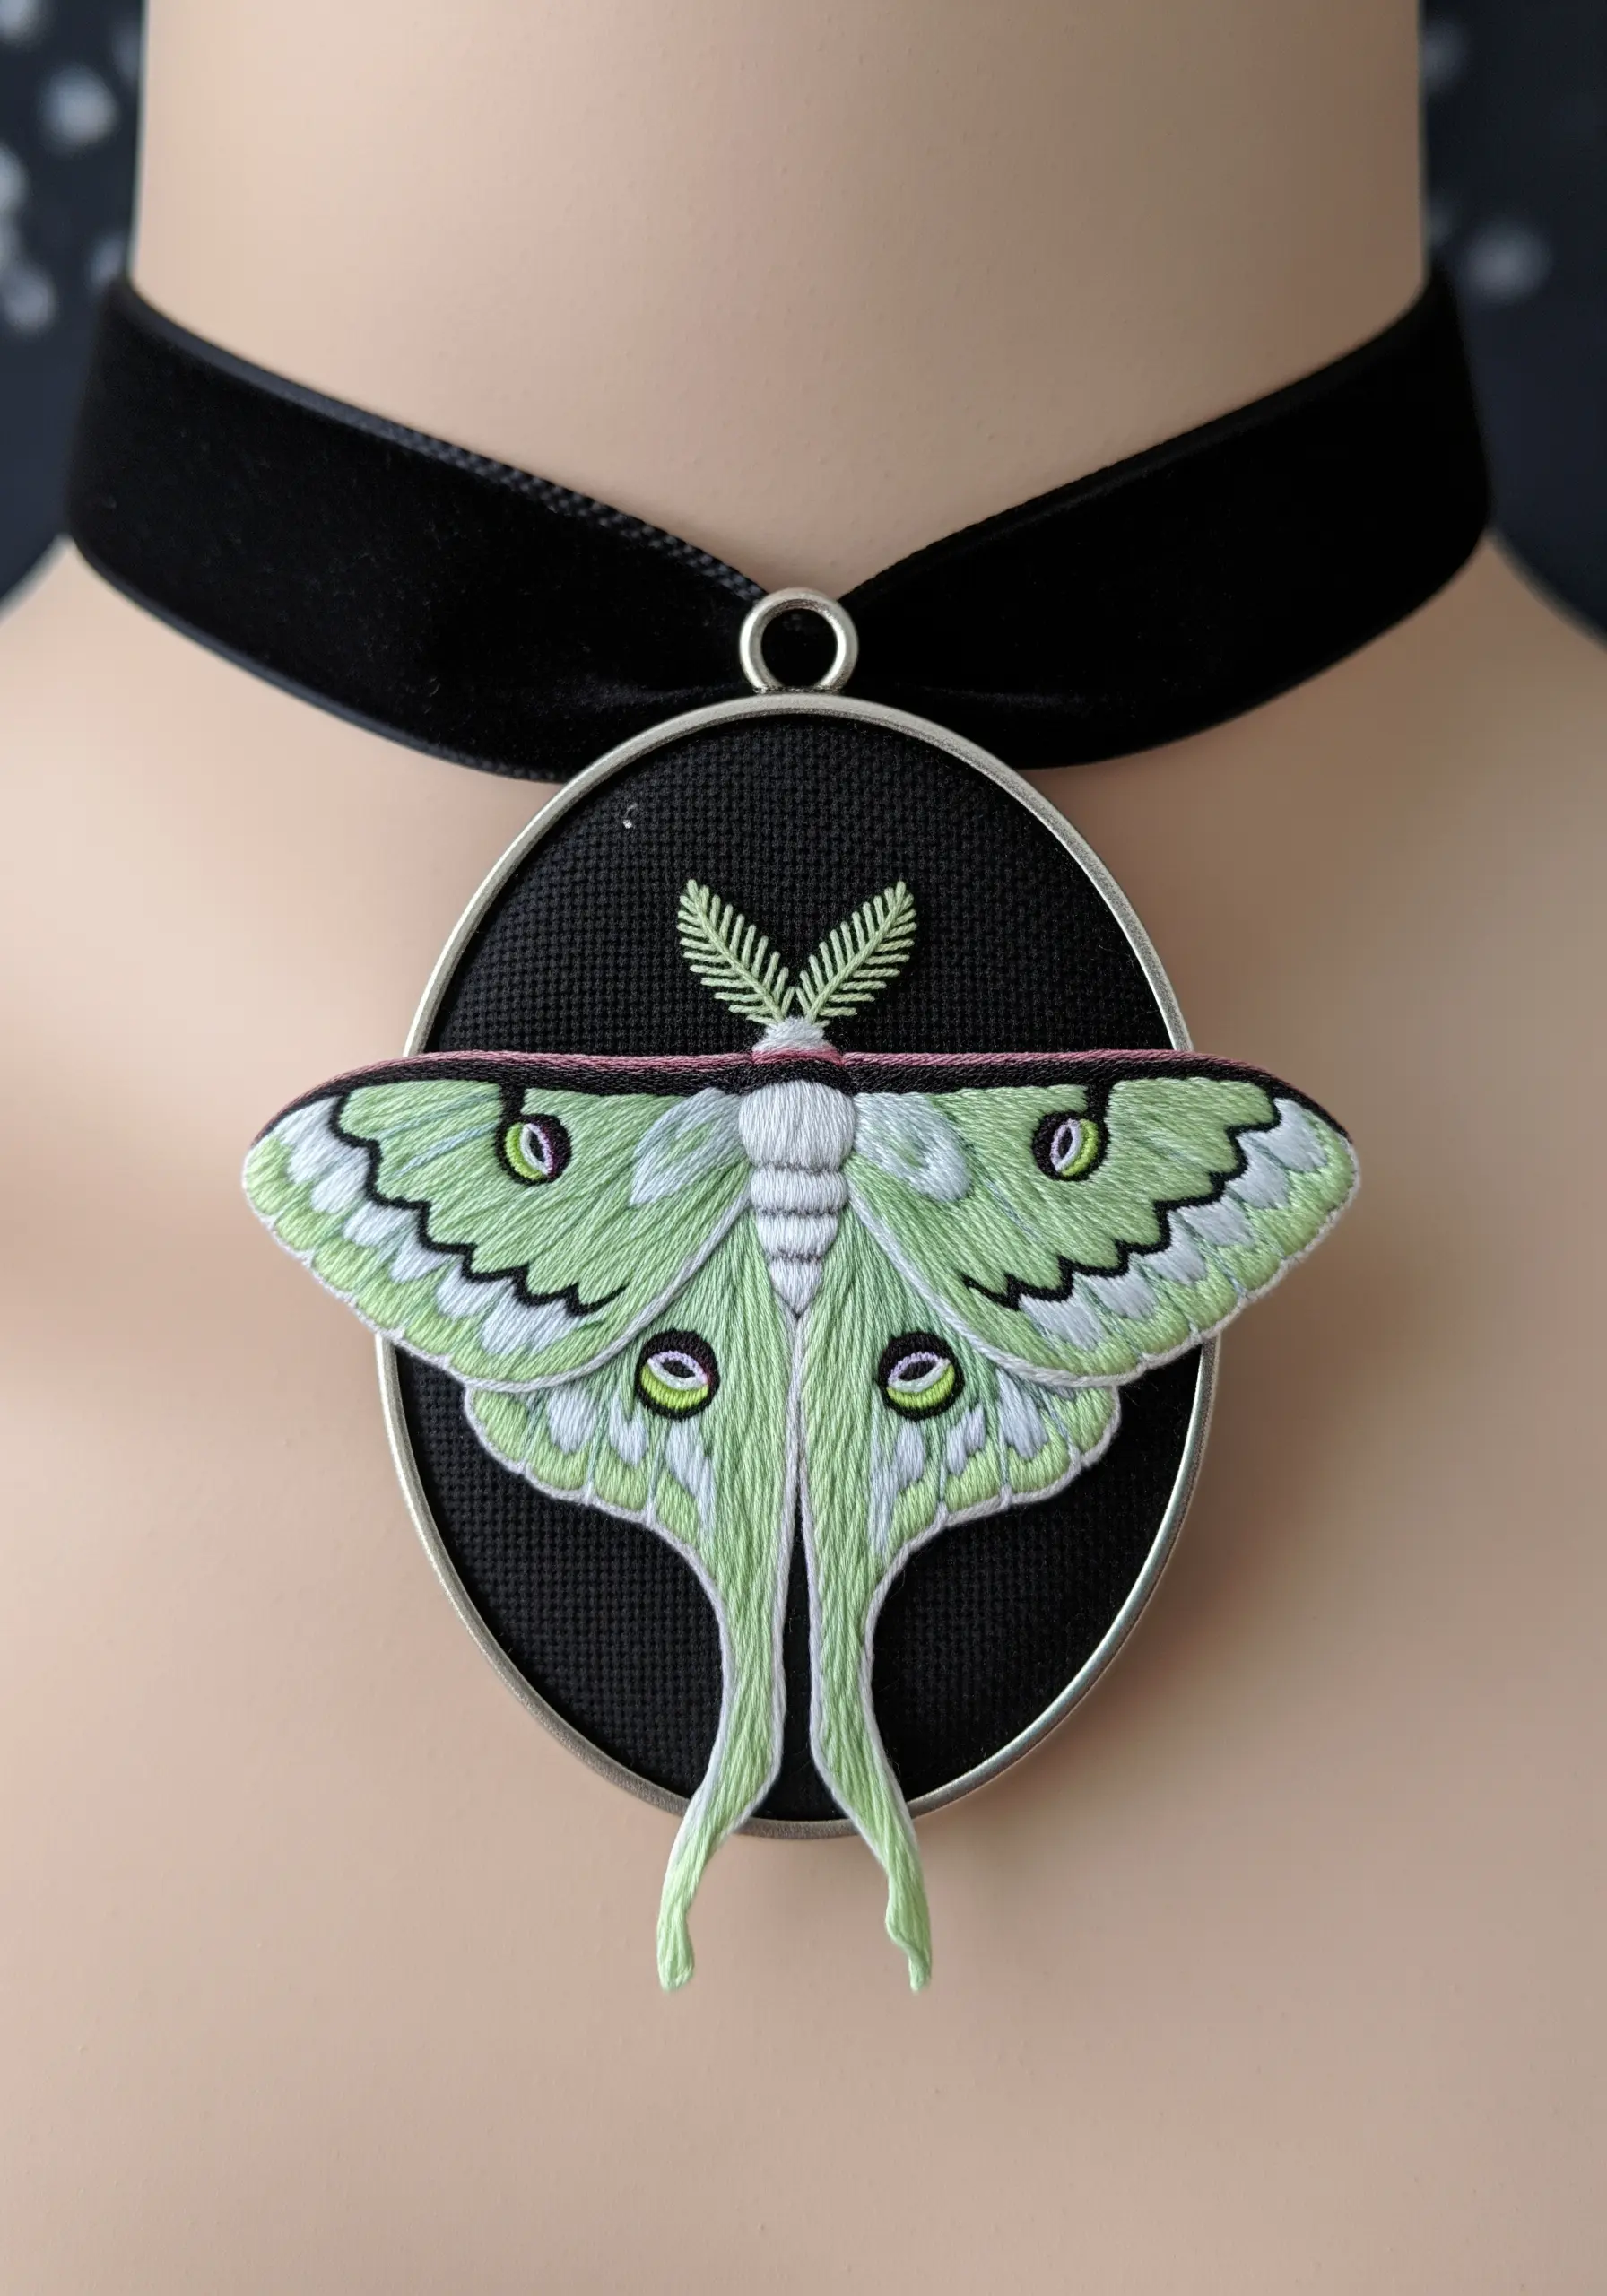
Create a dramatic, statement piece by taking your embroidery outside the frame.
Stitch your Luna moth on a separate piece of sturdy fabric, leaving a small margin around the design. Carefully cut it out and treat the edges with a fray-stopping liquid.
Finally, attach the body of the moth to your background fabric within the pendant, allowing the wings to extend freely. This creates a stunning 3D effect that feels dynamic and alive.
33. Define Form with Linear Details
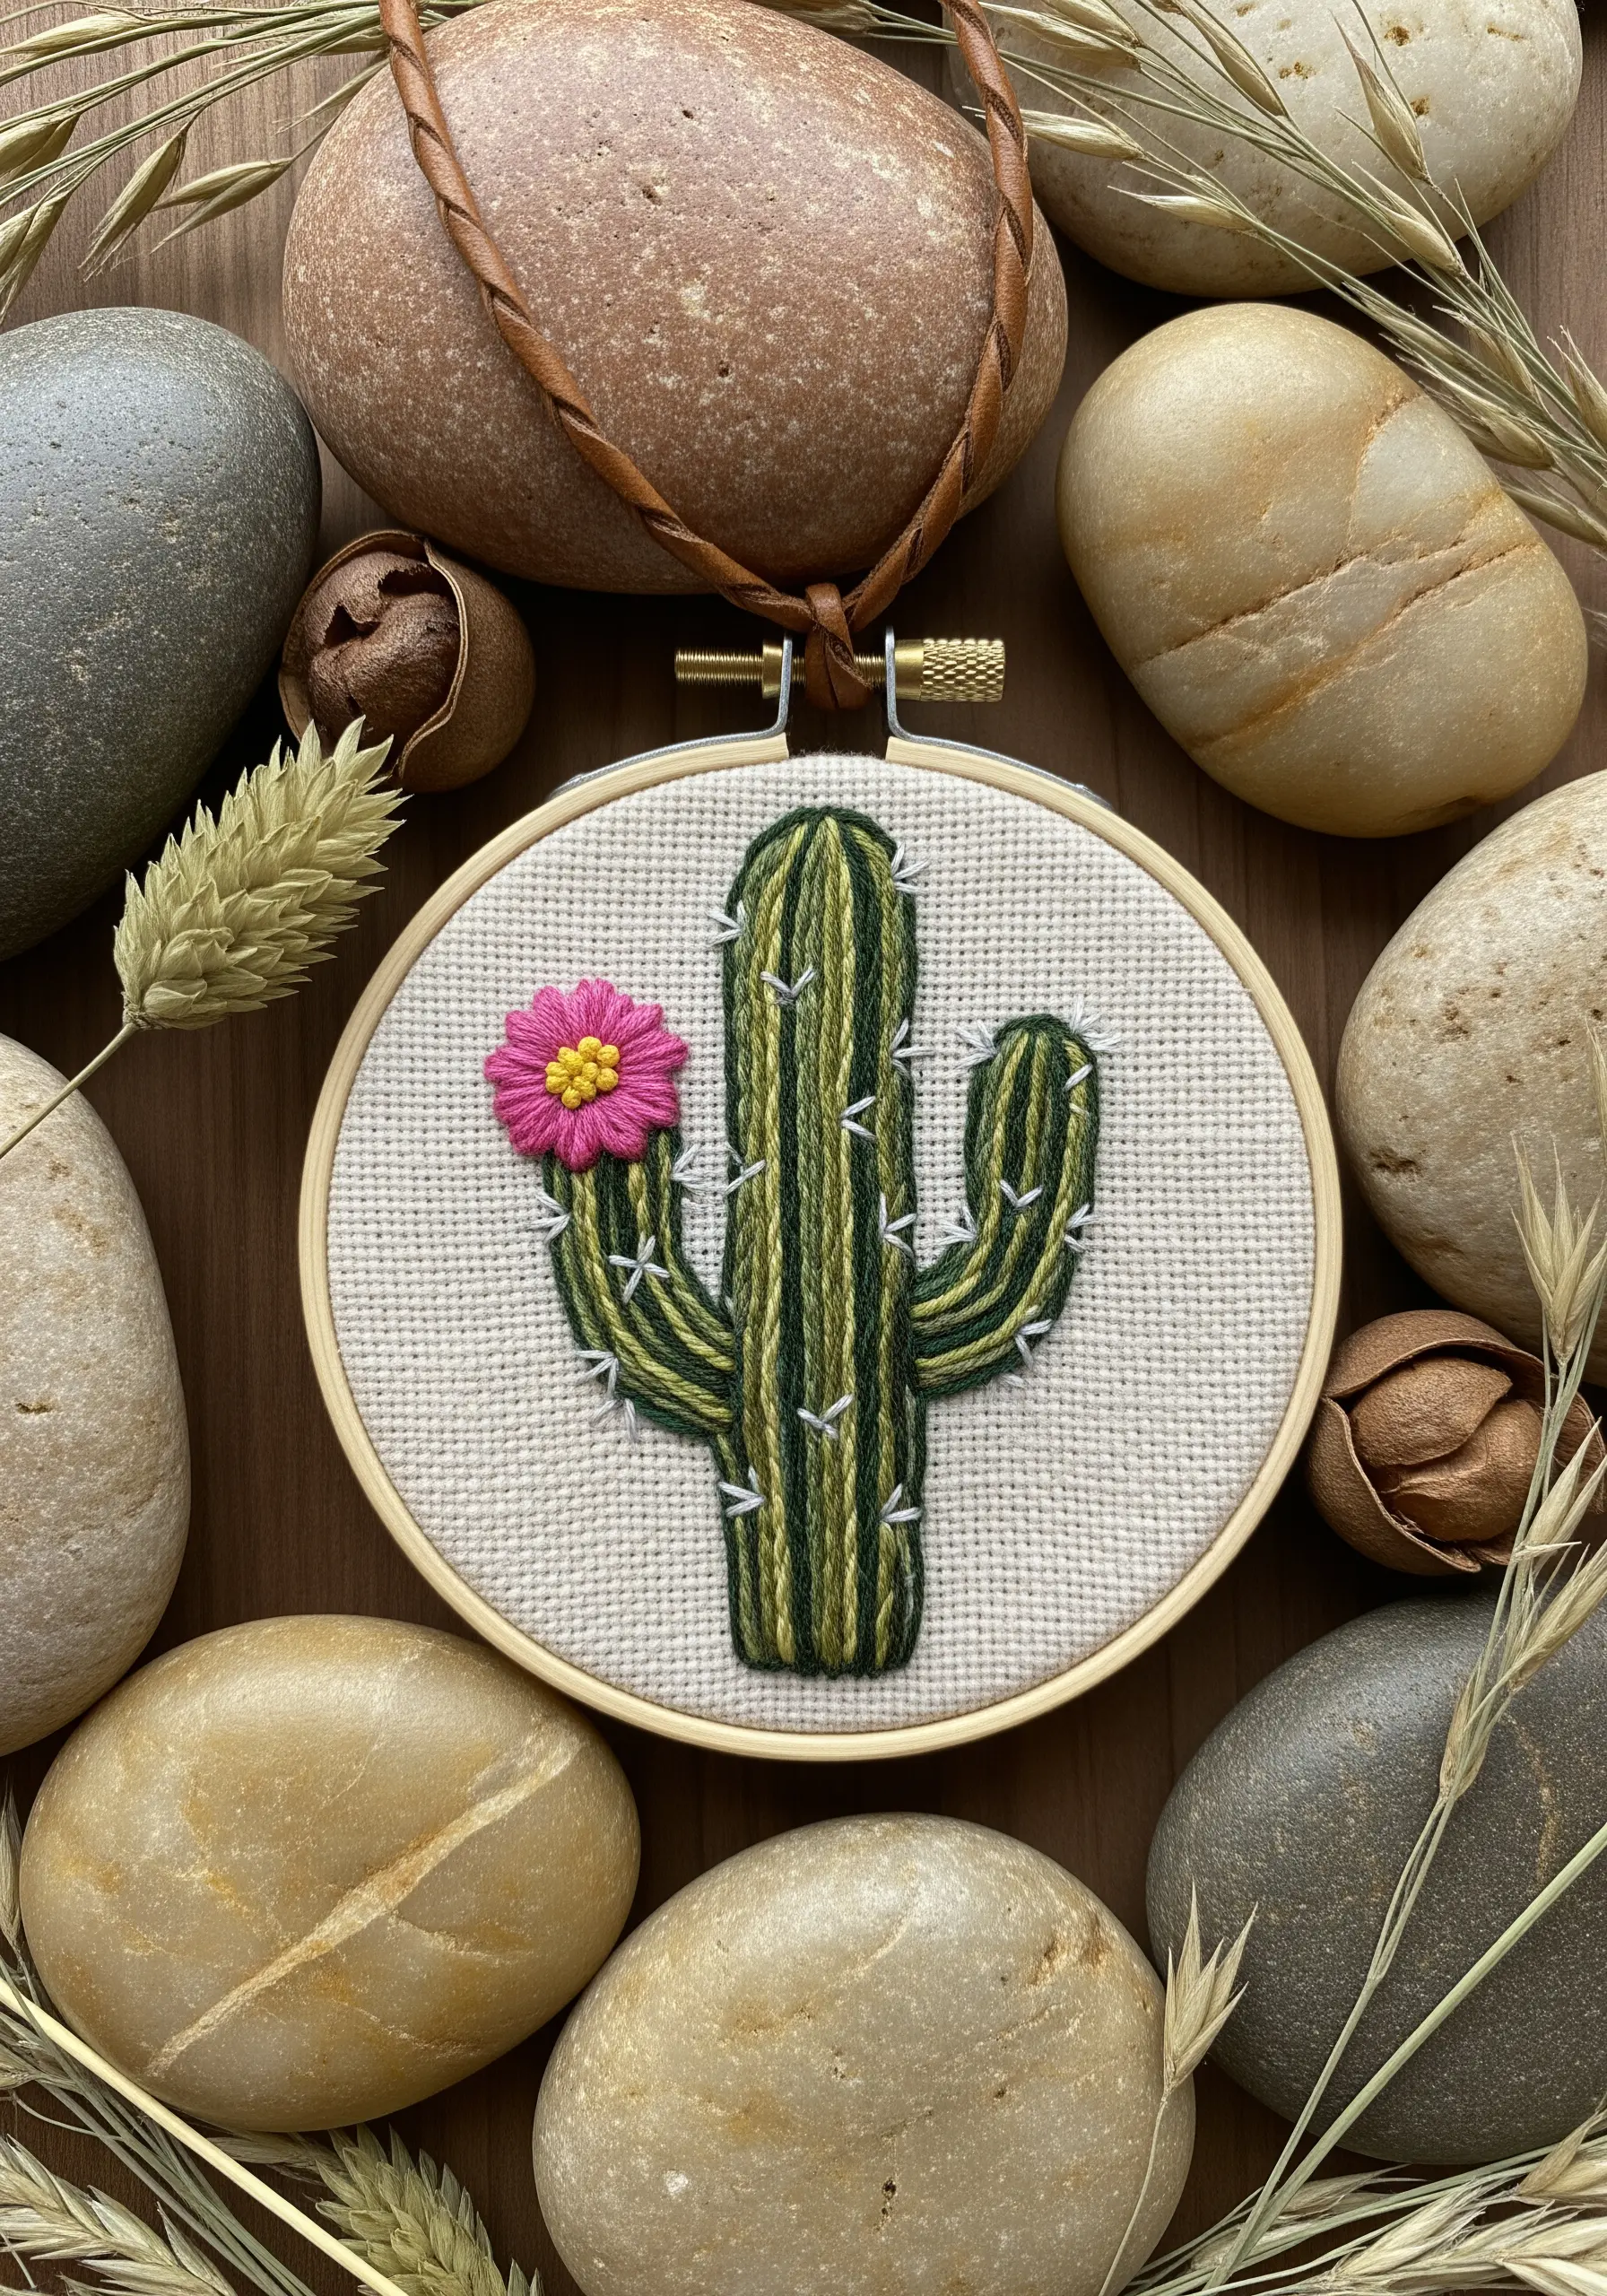
Even a simple shape like a cactus can be given dimension and realism with linear details.
First, fill the body of the saguaro with vertical long and short stitches in a medium green.
Then, come back with a lighter green or white thread and add long, vertical straight stitches to represent the cactus’s ribs. Finish with tiny, V-shaped stitches for the spines. These linear elements break up the solid color and define the cactus’s form.
34. Use Brick Stitch for a Smooth, Textured Fill
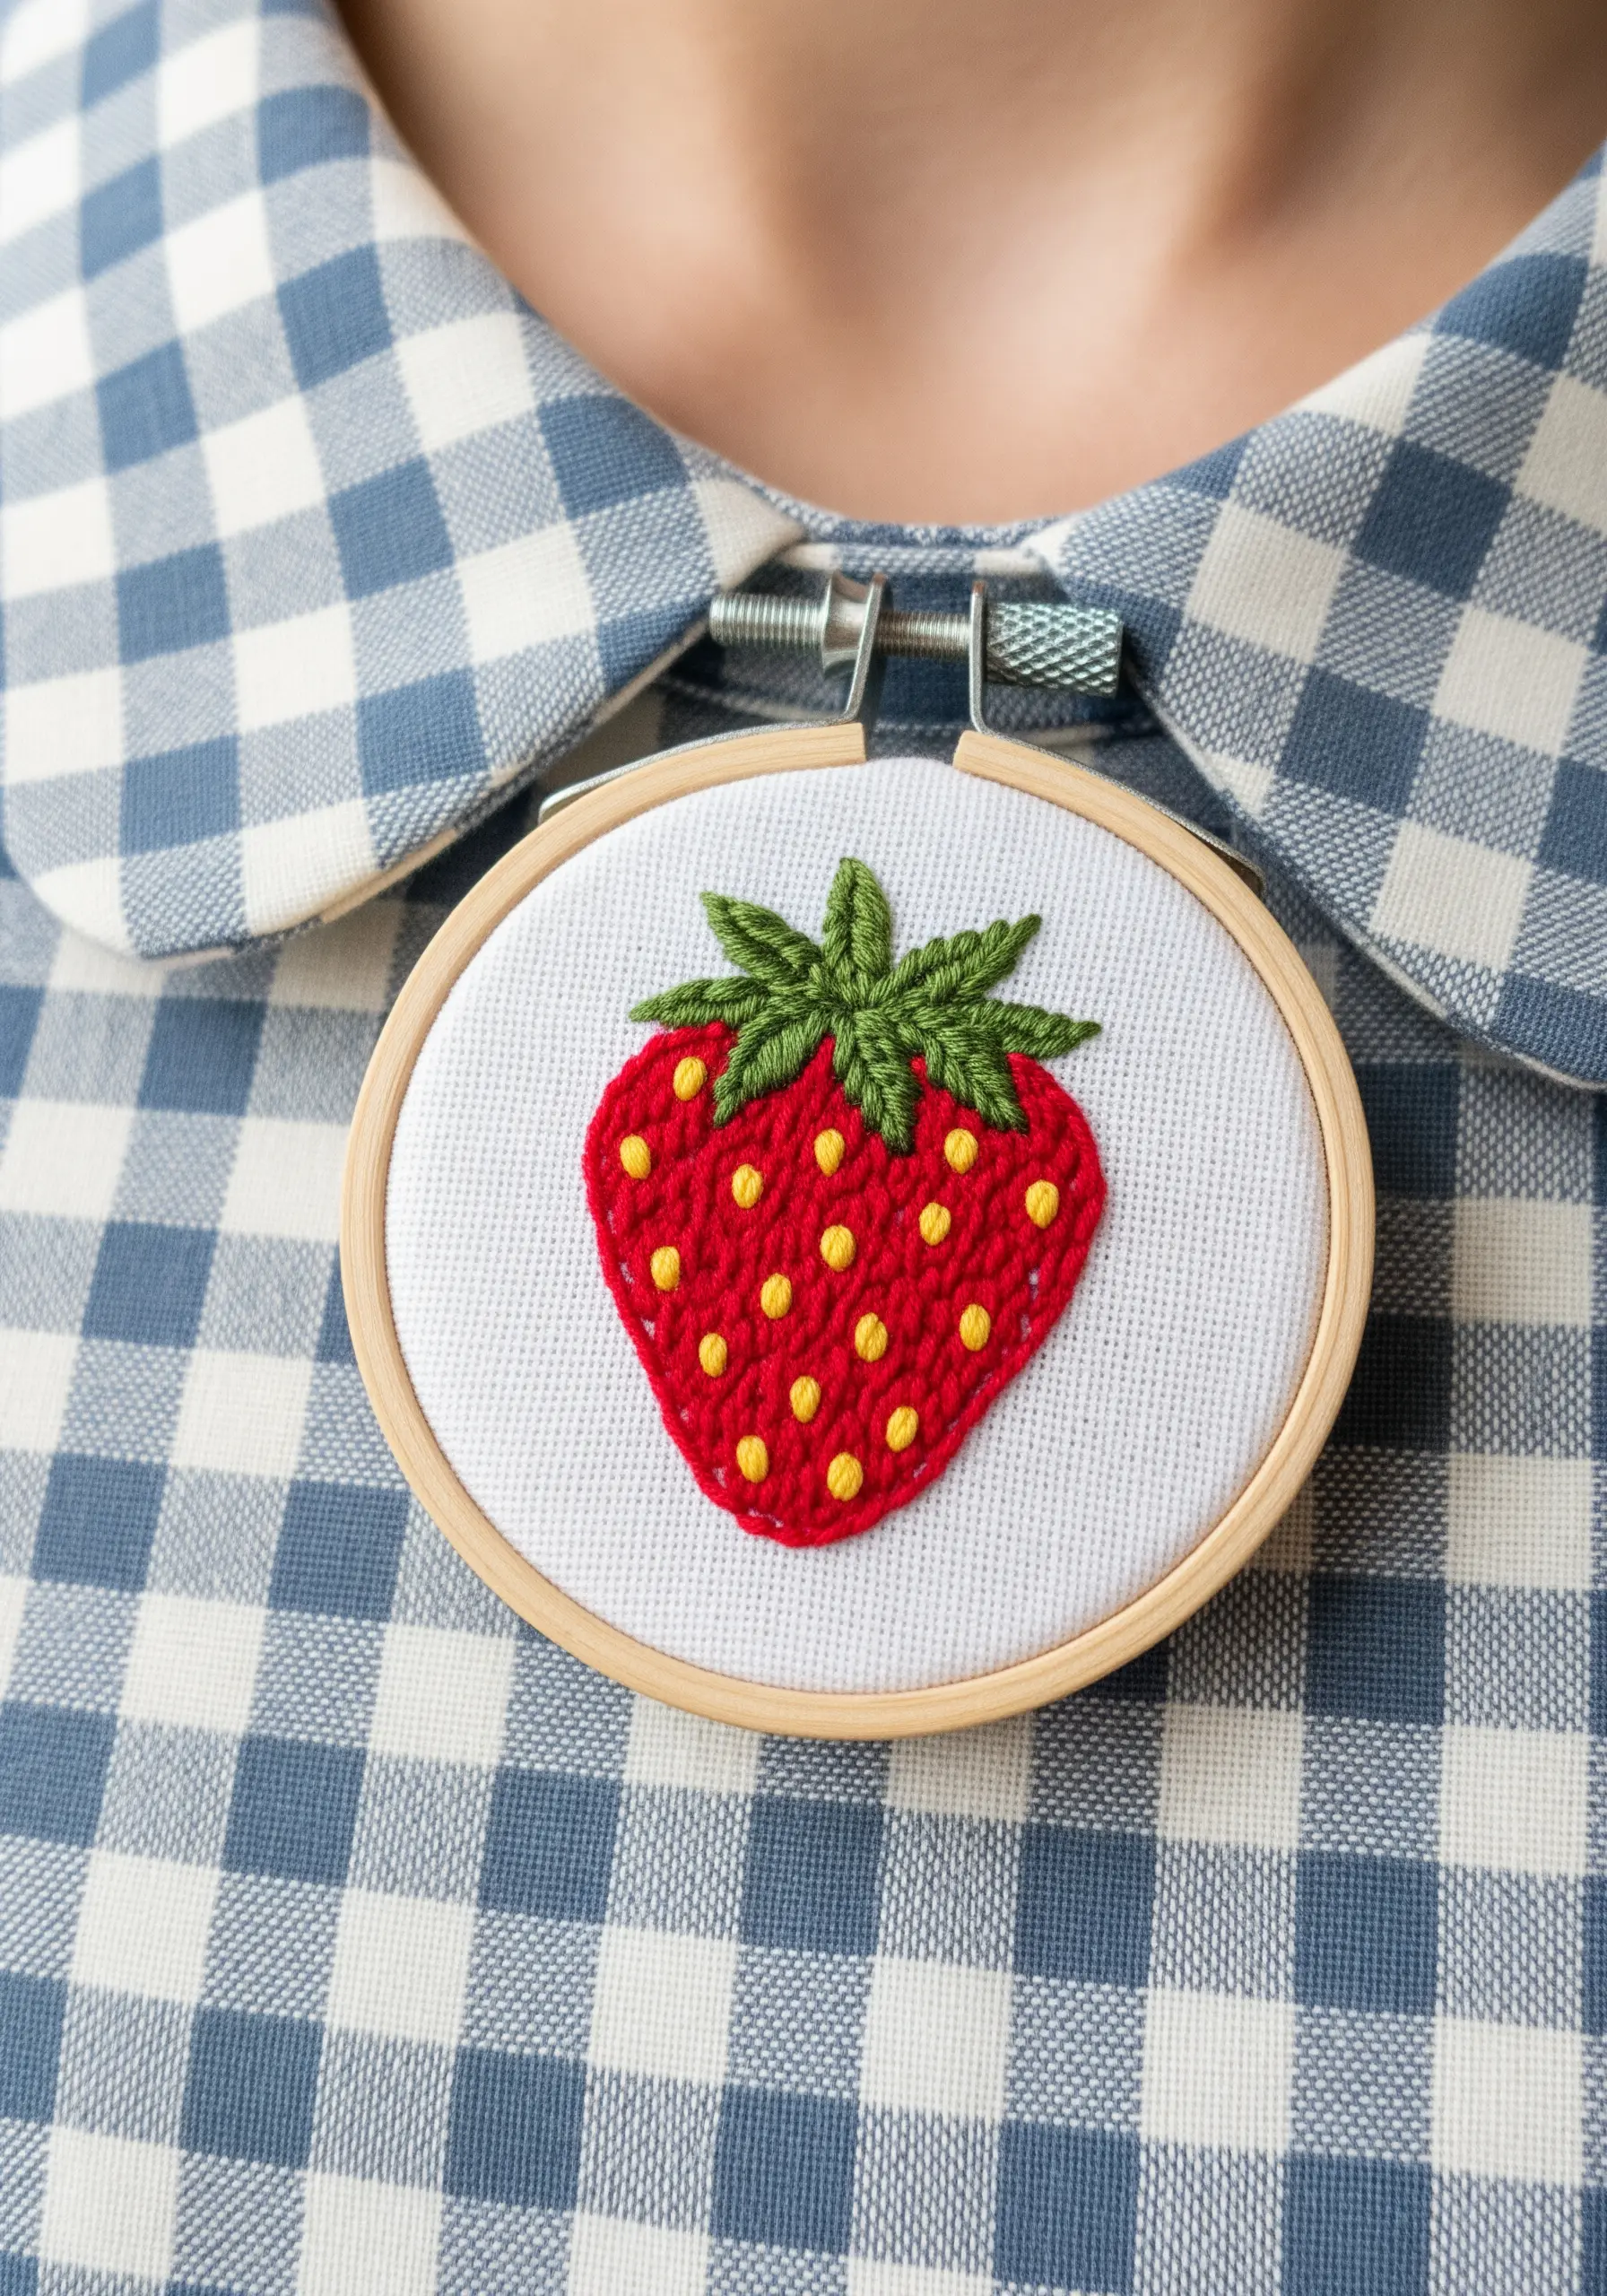
For a fill that is smoother than a seed stitch but more textured than a satin stitch, use the brick stitch.
Work rows of small, straight stitches, offsetting the stitches in each subsequent row like bricks in a wall. This creates a beautifully woven texture that’s perfect for fruits like strawberries.
Add the yellow seeds using tiny, single-strand straight stitches *after* the red fill is complete so they sit on top and don’t get lost.
35. Tame Metallic Threads for Brilliant Results
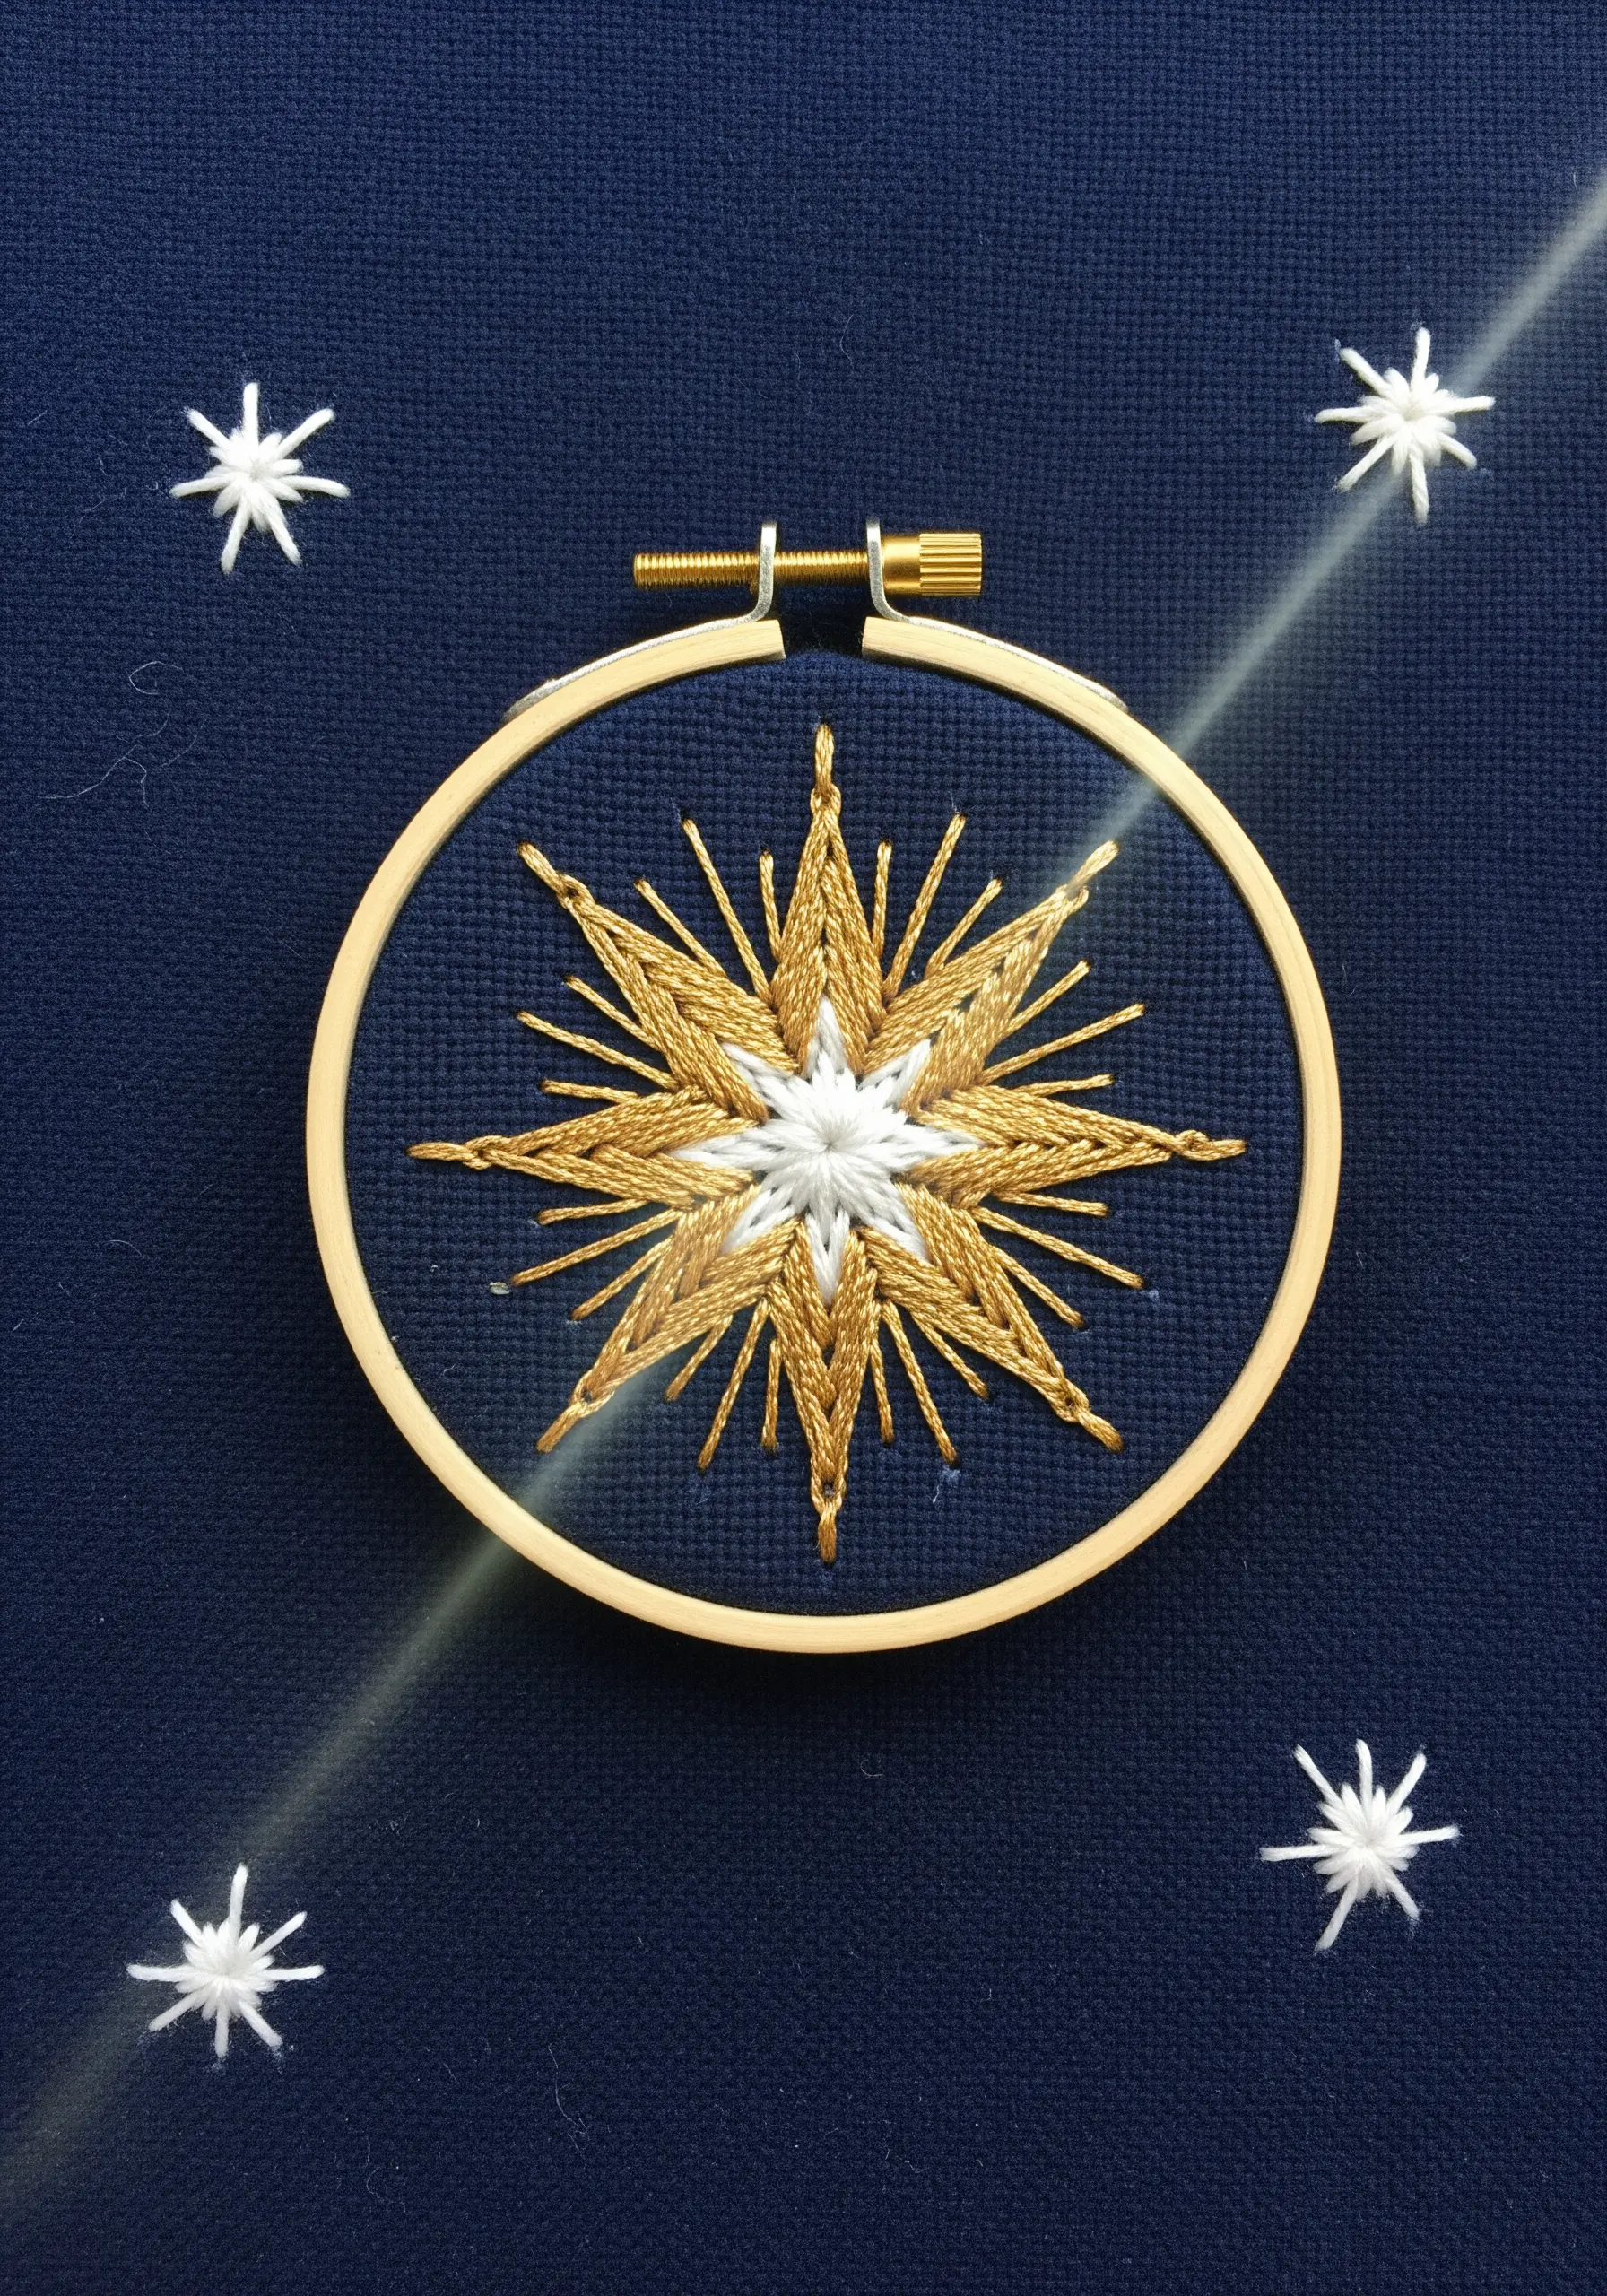
Metallic thread can be tricky, but the sparkle is worth it. To prevent fraying and tangling, use a shorter length of thread than you normally would (no more than 12 inches).
You can also run it through a thread conditioner or beeswax before stitching. For this starburst effect, use a combination of satin stitch for the solid center and radiating straight stitches for the light rays. This mix of textures enhances the brilliant effect.
36. Build a Coral Reef with a Stitch Sampler
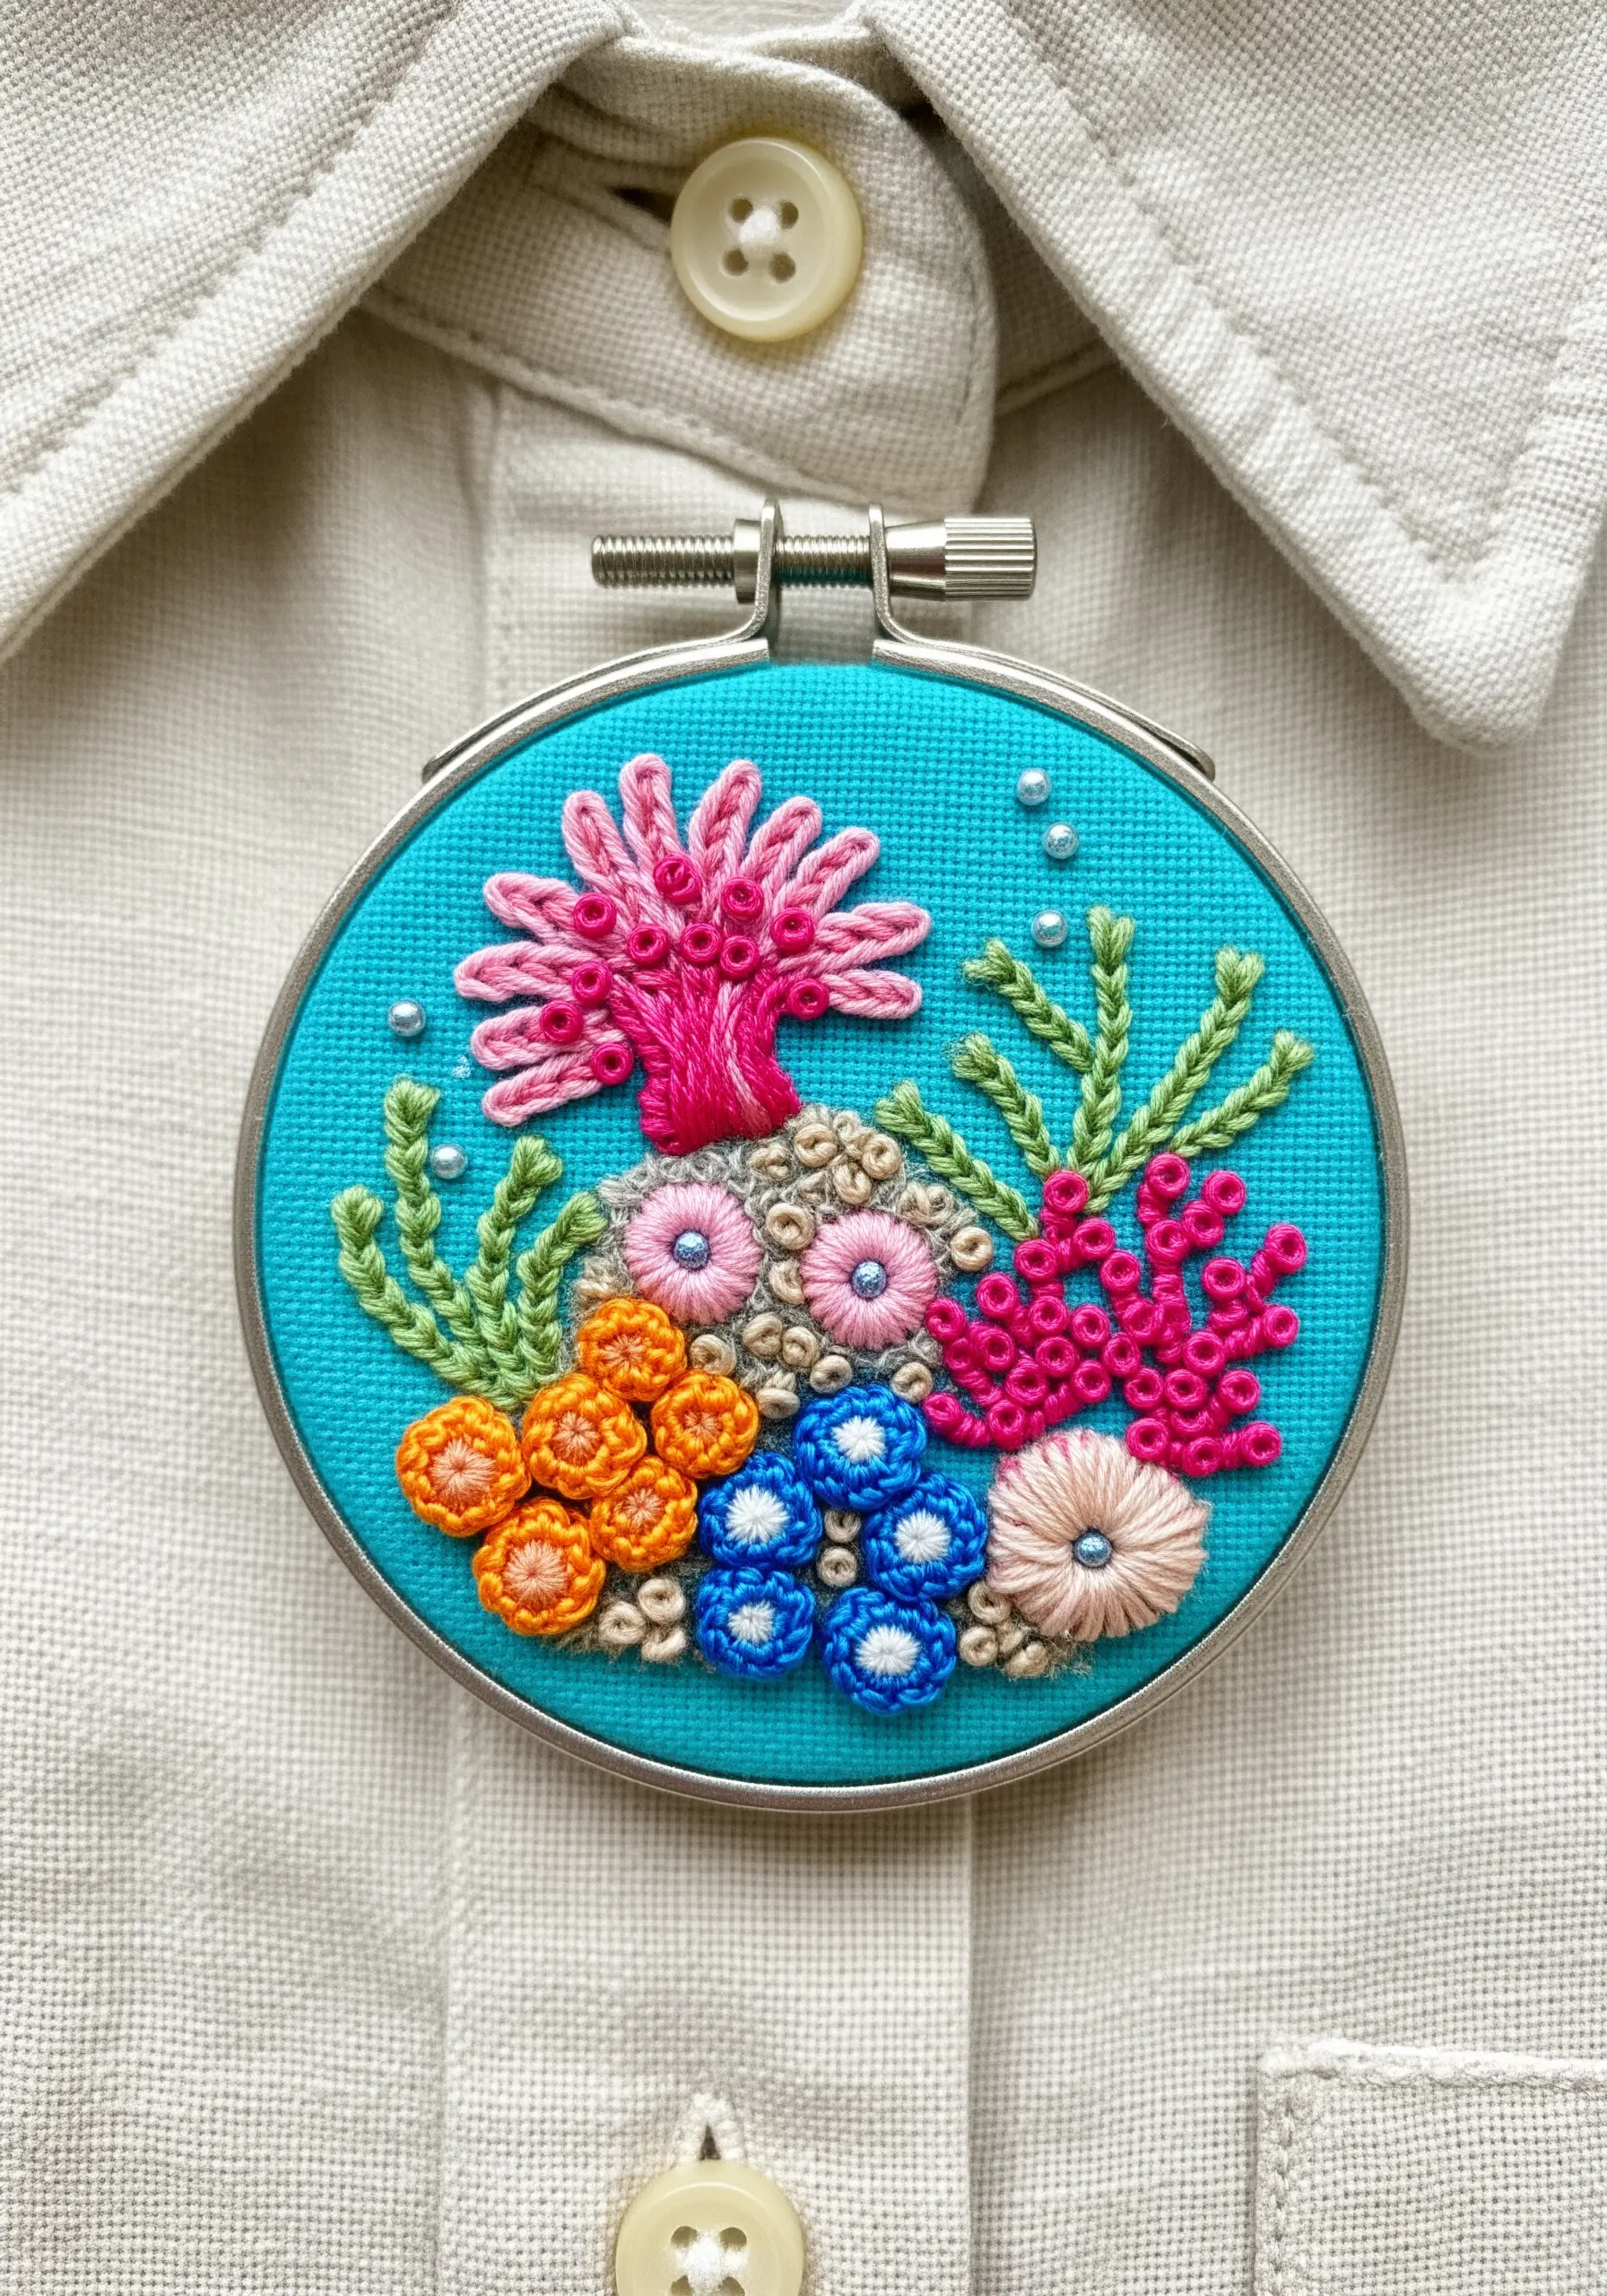
A coral reef is the perfect subject for practicing your textural stitches.
Don’t be afraid to mix and match: use bullion knots for tube coral, woven wheel stitches for sea anemones, and dense French knots for porous sponges.
Use bright, contrasting colors and cluster the stitches closely together to build up a rich, vibrant underwater landscape. A few tiny seed beads can represent air bubbles, adding a final touch of detail.


