
Sometimes the most meaningful embroidery isn’t a large, complex wall hanging, but a small, thoughtful piece you can hold in your hand. A hand-stitched card, a personalized bookmark, or a tiny ornament carries an intimacy and warmth that grander projects often miss.
This is where you can truly refine your technique. Working on a small scale challenges you to make every single stitch count. It’s an exercise in precision, color choice, and textural balance. It teaches you to communicate an idea or an emotion with beautiful efficiency.
Here, you’ll discover how to transform simple materials—paper, felt, scraps of linen—into polished, heartfelt gifts. Forget perfectionism; embrace the joy of creating something small, beautiful, and entirely your own in just an afternoon.
1. Add Dimension with Varied Floral Stitches

When embroidering a bouquet on paper, move beyond simple satin stitch to create a richer, more tactile design.
Use tightly packed French knots for the magenta and yellow flowers to give them a dense, pollen-like texture that contrasts beautifully with flatter stitches.
For the daisies and cornflowers, use a classic satin stitch for the petals but make the centers a single, prominent French knot—this draws the eye and adds a subtle 3D pop.
Vary the thickness of your stems with one, two, or three strands of thread to mimic the natural diversity of a real bouquet.
This combination of textures elevates a simple card into a piece of small floral embroidery art.
2. Stitch a Celestial Bookmark on Faux Leather

Stitching on a non-traditional surface like faux leather requires a few adjustments for a clean, professional finish.
Use a sharp, fine needle to pierce the material without creating large, visible holes. Plan your stitch placement carefully, as each puncture is permanent.
Incorporate tiny seed beads or pearls at the star points to add a subtle glimmer that mimics starlight.
For the connecting constellation lines, couch a single strand of metallic thread with a finer, matching thread; this gives you a perfectly straight, shimmering line without pulling the metallic fiber apart.
Finish with a clean running stitch along the border for a polished, handmade look.
3. Create Graphic Coasters with Yarn Wrapping

For a bold, modern mini-gift, use thick felt coasters as your base and embroidery yarn as your medium.
The key here is tension—wrap the yarn tautly enough to stay in place but not so tight that it warps the felt shape.
Secure the ends of the yarn on the back with a few discreet stitches or a strong fabric glue for a seamless look.
Experiment with asymmetrical compositions and intersecting lines to create geometric embroidered wall decor on a smaller scale.
This technique is less about traditional stitching and more about using thread as a graphic design element, making it fast and impactful.
4. Master Simple Sprigs on Linen Sachets

Embroidering on a loosely woven fabric like linen requires attention to stitch direction and tension to avoid a messy finish.
Use a single, elegant sprig of lavender for a minimalist design that complements the fabric’s natural texture.
For the purple buds, use a satin stitch, ensuring each stitch lies flat and parallel to the one before it. A stabilizer on the back can prevent puckering.
Use a simple stem stitch for the stems, which gives a clean, rope-like line that stands out on the textured linen.
This project is perfect for practicing neatness and precision on lavender-inspired embroidery designs.
5. Combine Calligraphy with 3D Stitched Elements

Elevate a simple thank-you card by integrating a dimensional embroidered motif with elegant lettering.
First, stitch your typography using a whipped backstitch to create a smooth, ink-like line that flows beautifully.
For the bee, create the wings separately on a piece of sheer organza fabric stabilized in a hoop. Use a delicate split stitch for the outlines and fill with a few seed stitches.
Cut the wings out, leaving a tiny margin, and tack them onto the card over the embroidered body. This stumpwork technique makes the bee appear ready to fly off the page.
This thoughtful detail turns a thank-you note into a treasured keepsake, especially when paired with minimal typography quotes.
6. Build Architectural Texture in a Mini Hoop
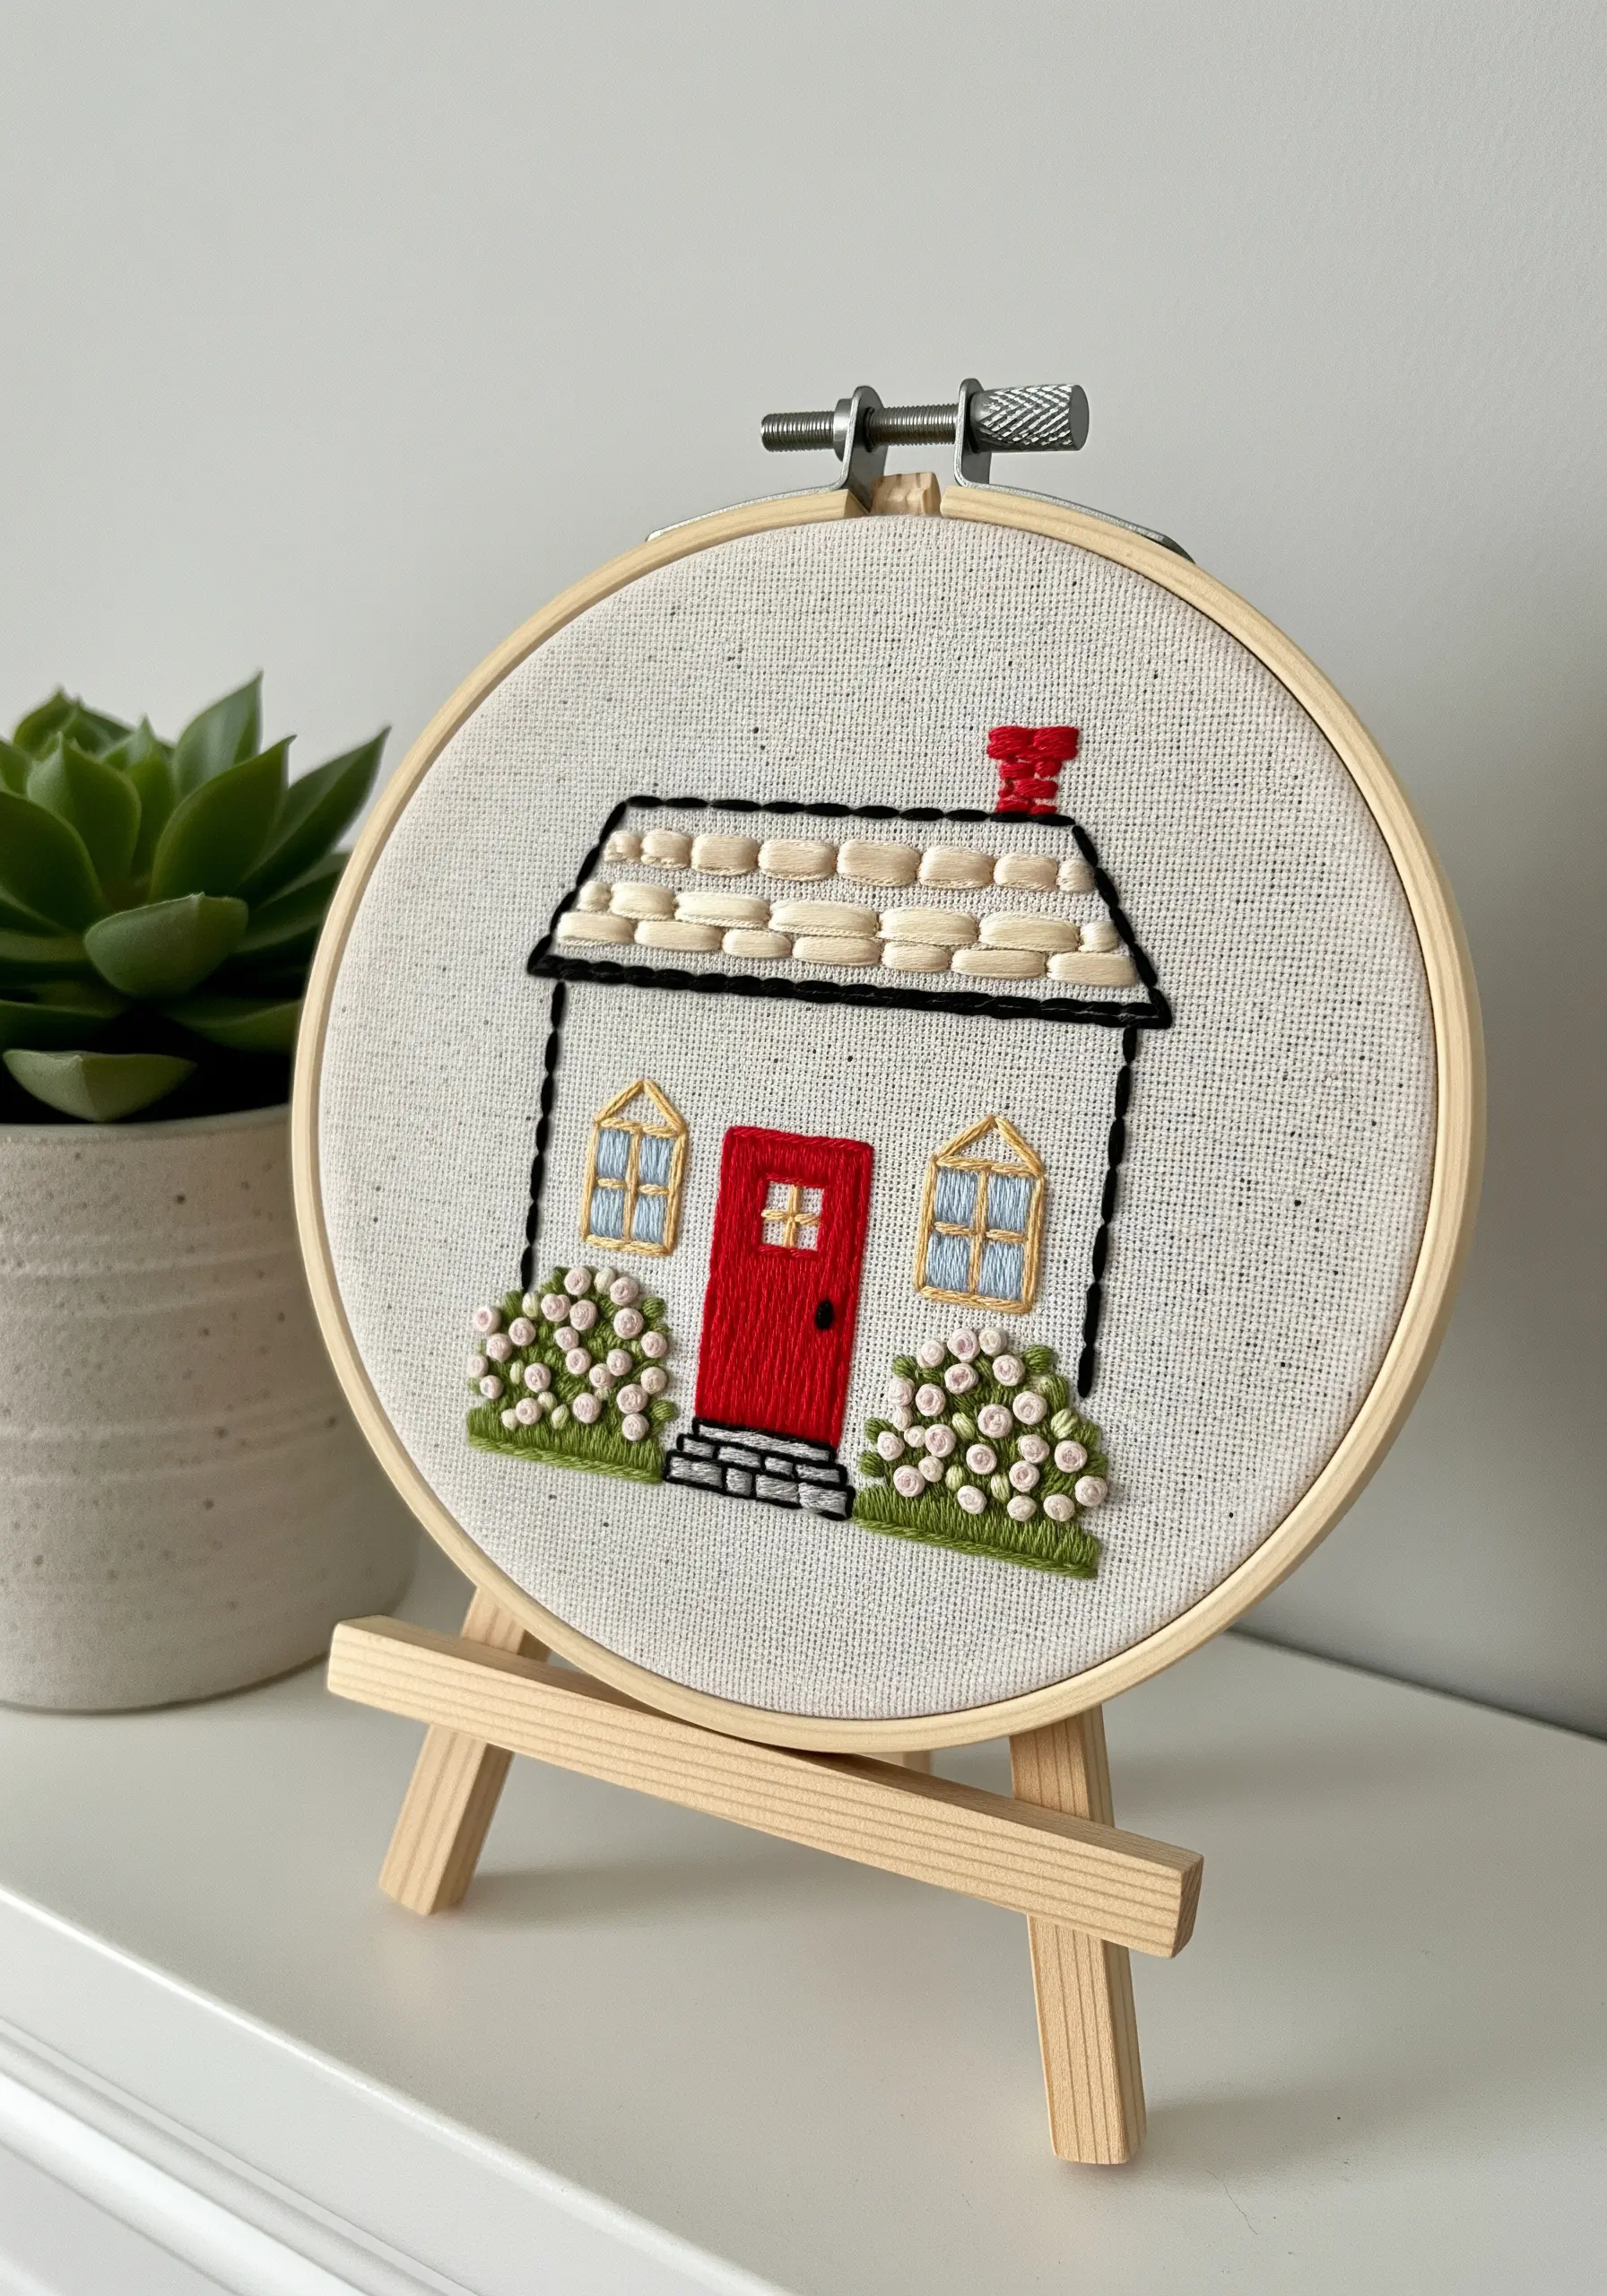
Transform a simple house portrait from a flat outline into a character-filled piece by assigning a different texture to each architectural element.
Use a padded satin stitch for the roof tiles by laying down a foundation of straight stitches first, then covering them with perpendicular satin stitches. This creates a raised, dimensional effect.
Fill the bushes with a dense cluster of French knots in slightly varied shades of green to mimic leafy volume.
Keep the house outline crisp with a bold backstitch in a contrasting color like black to ensure the structure remains defined amidst the textures.
This approach makes even the simplest of easy embroidery wall hoops feel dynamic and detailed.
7. Achieve Realistic Gradients on Paper Tags

Thread painting on cardstock creates a stunning, high-contrast effect, but it requires a gentle hand.
Use a very fine, sharp needle (like a milliner’s needle) to minimize paper tearing. Pre-punching your holes along the outline with the needle can also help.
To create the Monstera leaf’s gradient, use the long-and-short stitch, blending two or three shades of green. Work in sections, following the natural direction of the leaf’s segments.
Instead of pulling threads tight, allow them to lay smoothly on the surface. The stiffness of the paper provides all the tension you need, giving you a clean, painterly finish.
Mastering this allows you to create incredibly realistic botanicals, especially using leaf vein stitch methods.
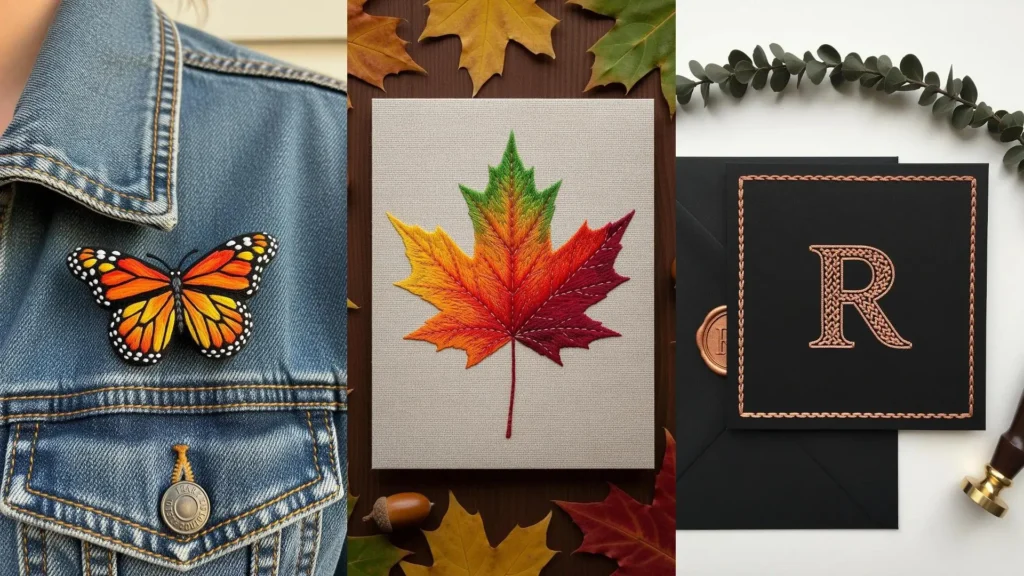
8. Craft a Dimensional Butterfly Brooch

Create a wearable piece of art using stumpwork techniques to give your butterfly three-dimensional, lifelike wings.
First, create a wire framework for the wings and couch it onto a spare piece of fabric. Then, fill the shape with long-and-short stitch, blending oranges, yellows, and reds for a Monarch’s signature gradient.
The white dots are precise French knots, and the black edges are a sharp satin stitch worked over the wire.
Once complete, carefully cut the butterfly from the fabric, fold the wire edges back, and attach a pin backing. This technique transforms flat stitching into a sculptural object.
It’s an advanced way to bring bird and butterfly embroidery patterns to life.
9. Sculpt Fluffy Clouds with French Knots

Give your embroidered scenes a sense of depth and atmosphere by playing with high-texture and low-texture elements.
For the clouds, use a thick, soft cotton thread like perle cotton to make voluminous French knots. Cluster them tightly together, varying the number of wraps around your needle to create an uneven, fluffy surface.
In contrast, fill the hot air balloon with a smooth, flat satin stitch. This juxtaposition makes the clouds feel closer and softer, adding a dreamy, tactile quality to the card.
This is a core principle of modern texture layering—letting one stitch amplify another.
10. Finish a Mini Hoop for a Polished Keychain
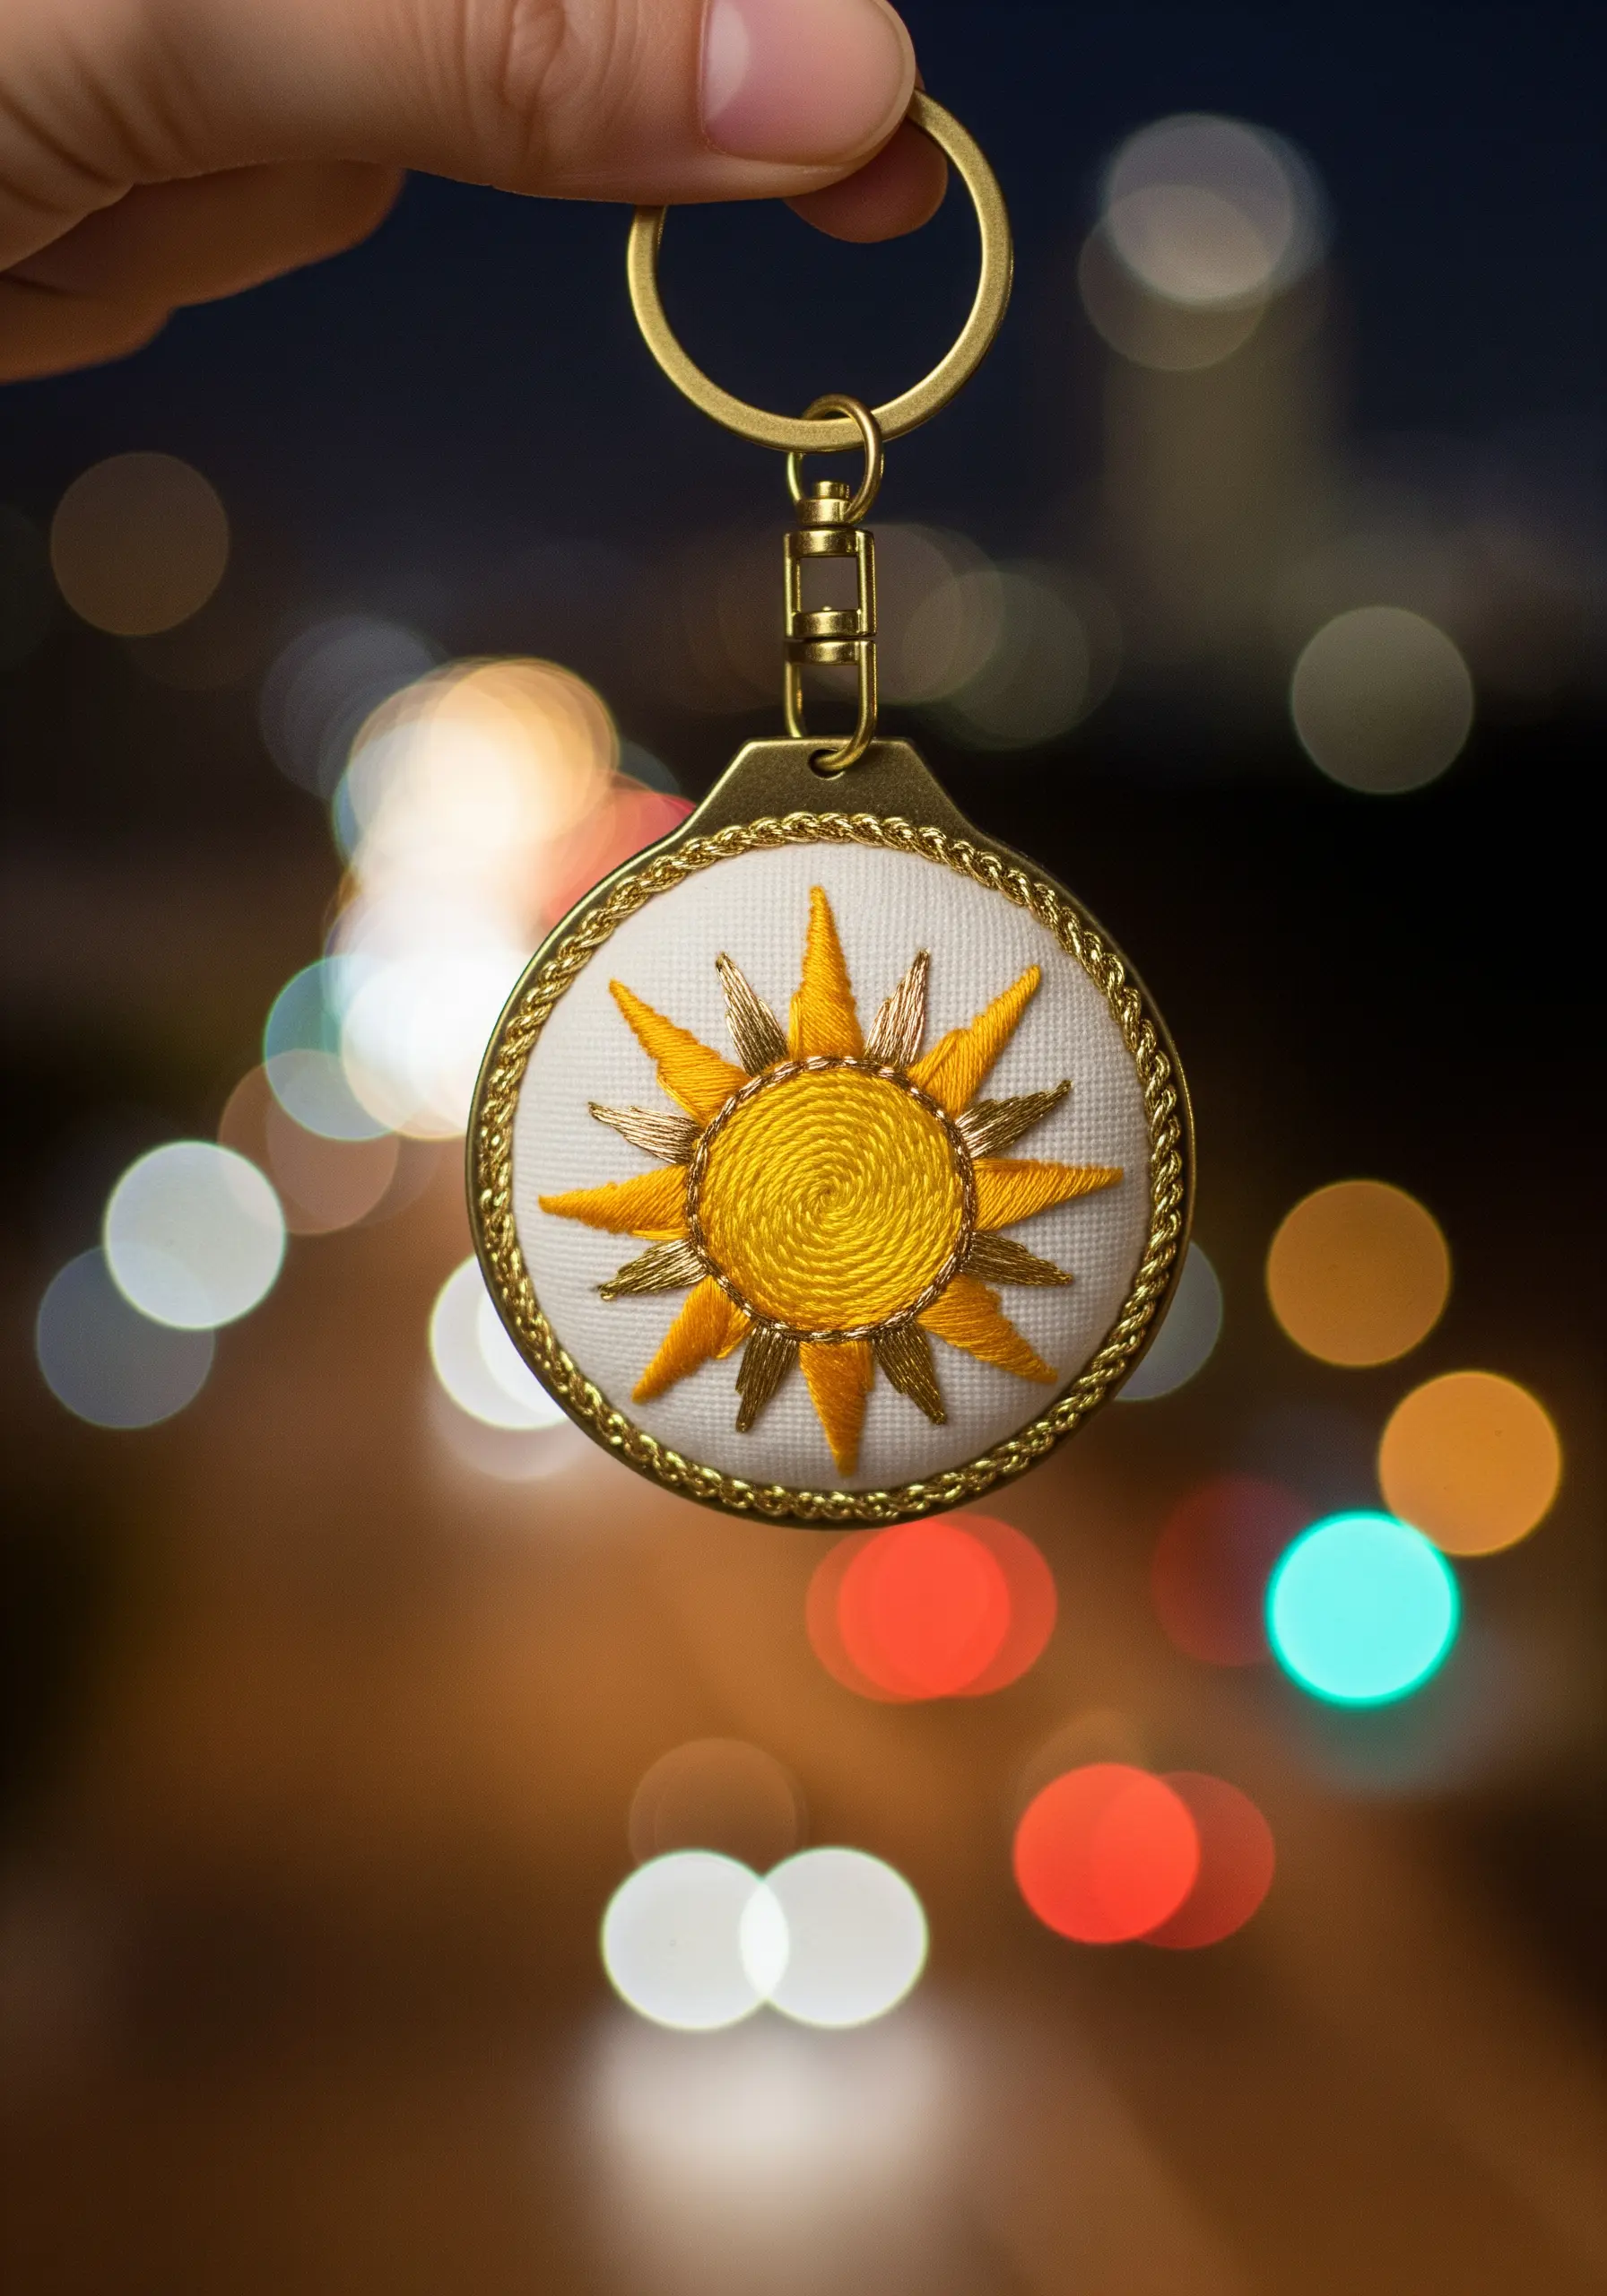
Turning a small embroidered piece into a durable keychain requires a clean and secure finishing technique.
After stitching your design—like this sun with a spiral-stitched center and radiant straight stitches—trim the excess fabric to about half an inch around the hoop’s edge.
Run a gathering stitch around the fabric edge, pull it tight to cinch the fabric neatly at the back, and knot it securely.
Cut a piece of felt or cardstock to the size of the inner hoop and glue it over the back to hide the messy threads and create a professional finish.
Finally, attach keychain hardware to the hoop’s screw, and you have beautiful, functional handmade embroidered jewelry and accessories.
11. Appliqué and Stitch on Felt for Holiday Ornaments

Felt is the ideal base for ornaments because it doesn’t fray, making it perfect for appliqué and decorative edging.
Cut two identical gingerbread man shapes. On the front piece, add details like button eyes with French knots and a smile with a simple backstitch.
Use a crisp chain stitch for the white icing outlines; its braided texture looks just like piped frosting.
Place the back piece behind the front, and use a blanket stitch around the entire edge to sew them together, adding stuffing as you go for a plush, 3D effect.
It’s a charming way to create tactile festive season embroidery wall hangings or tree ornaments.
12. Embroider Delicate Florals on a Journal Cover

When stitching on a pre-made item like a journal, your primary challenge is working on a surface you can’t always hoop easily.
If the cover is flexible, use a small hoop. If it’s rigid, you’ll need to stitch by hand, carefully passing the needle through without bending the cover.
Choose a delicate design like forget-me-nots, which relies on small, simple stitches: tiny satin stitches for petals, a French knot for the center, and a fine stem stitch for the vines.
Using just a few strands of thread (two for petals, one for stems) ensures the design remains graceful and doesn’t overwhelm the object, turning it into a beautiful DIY embroidered mixed media journal.
13. Paint a Landscape with Thread
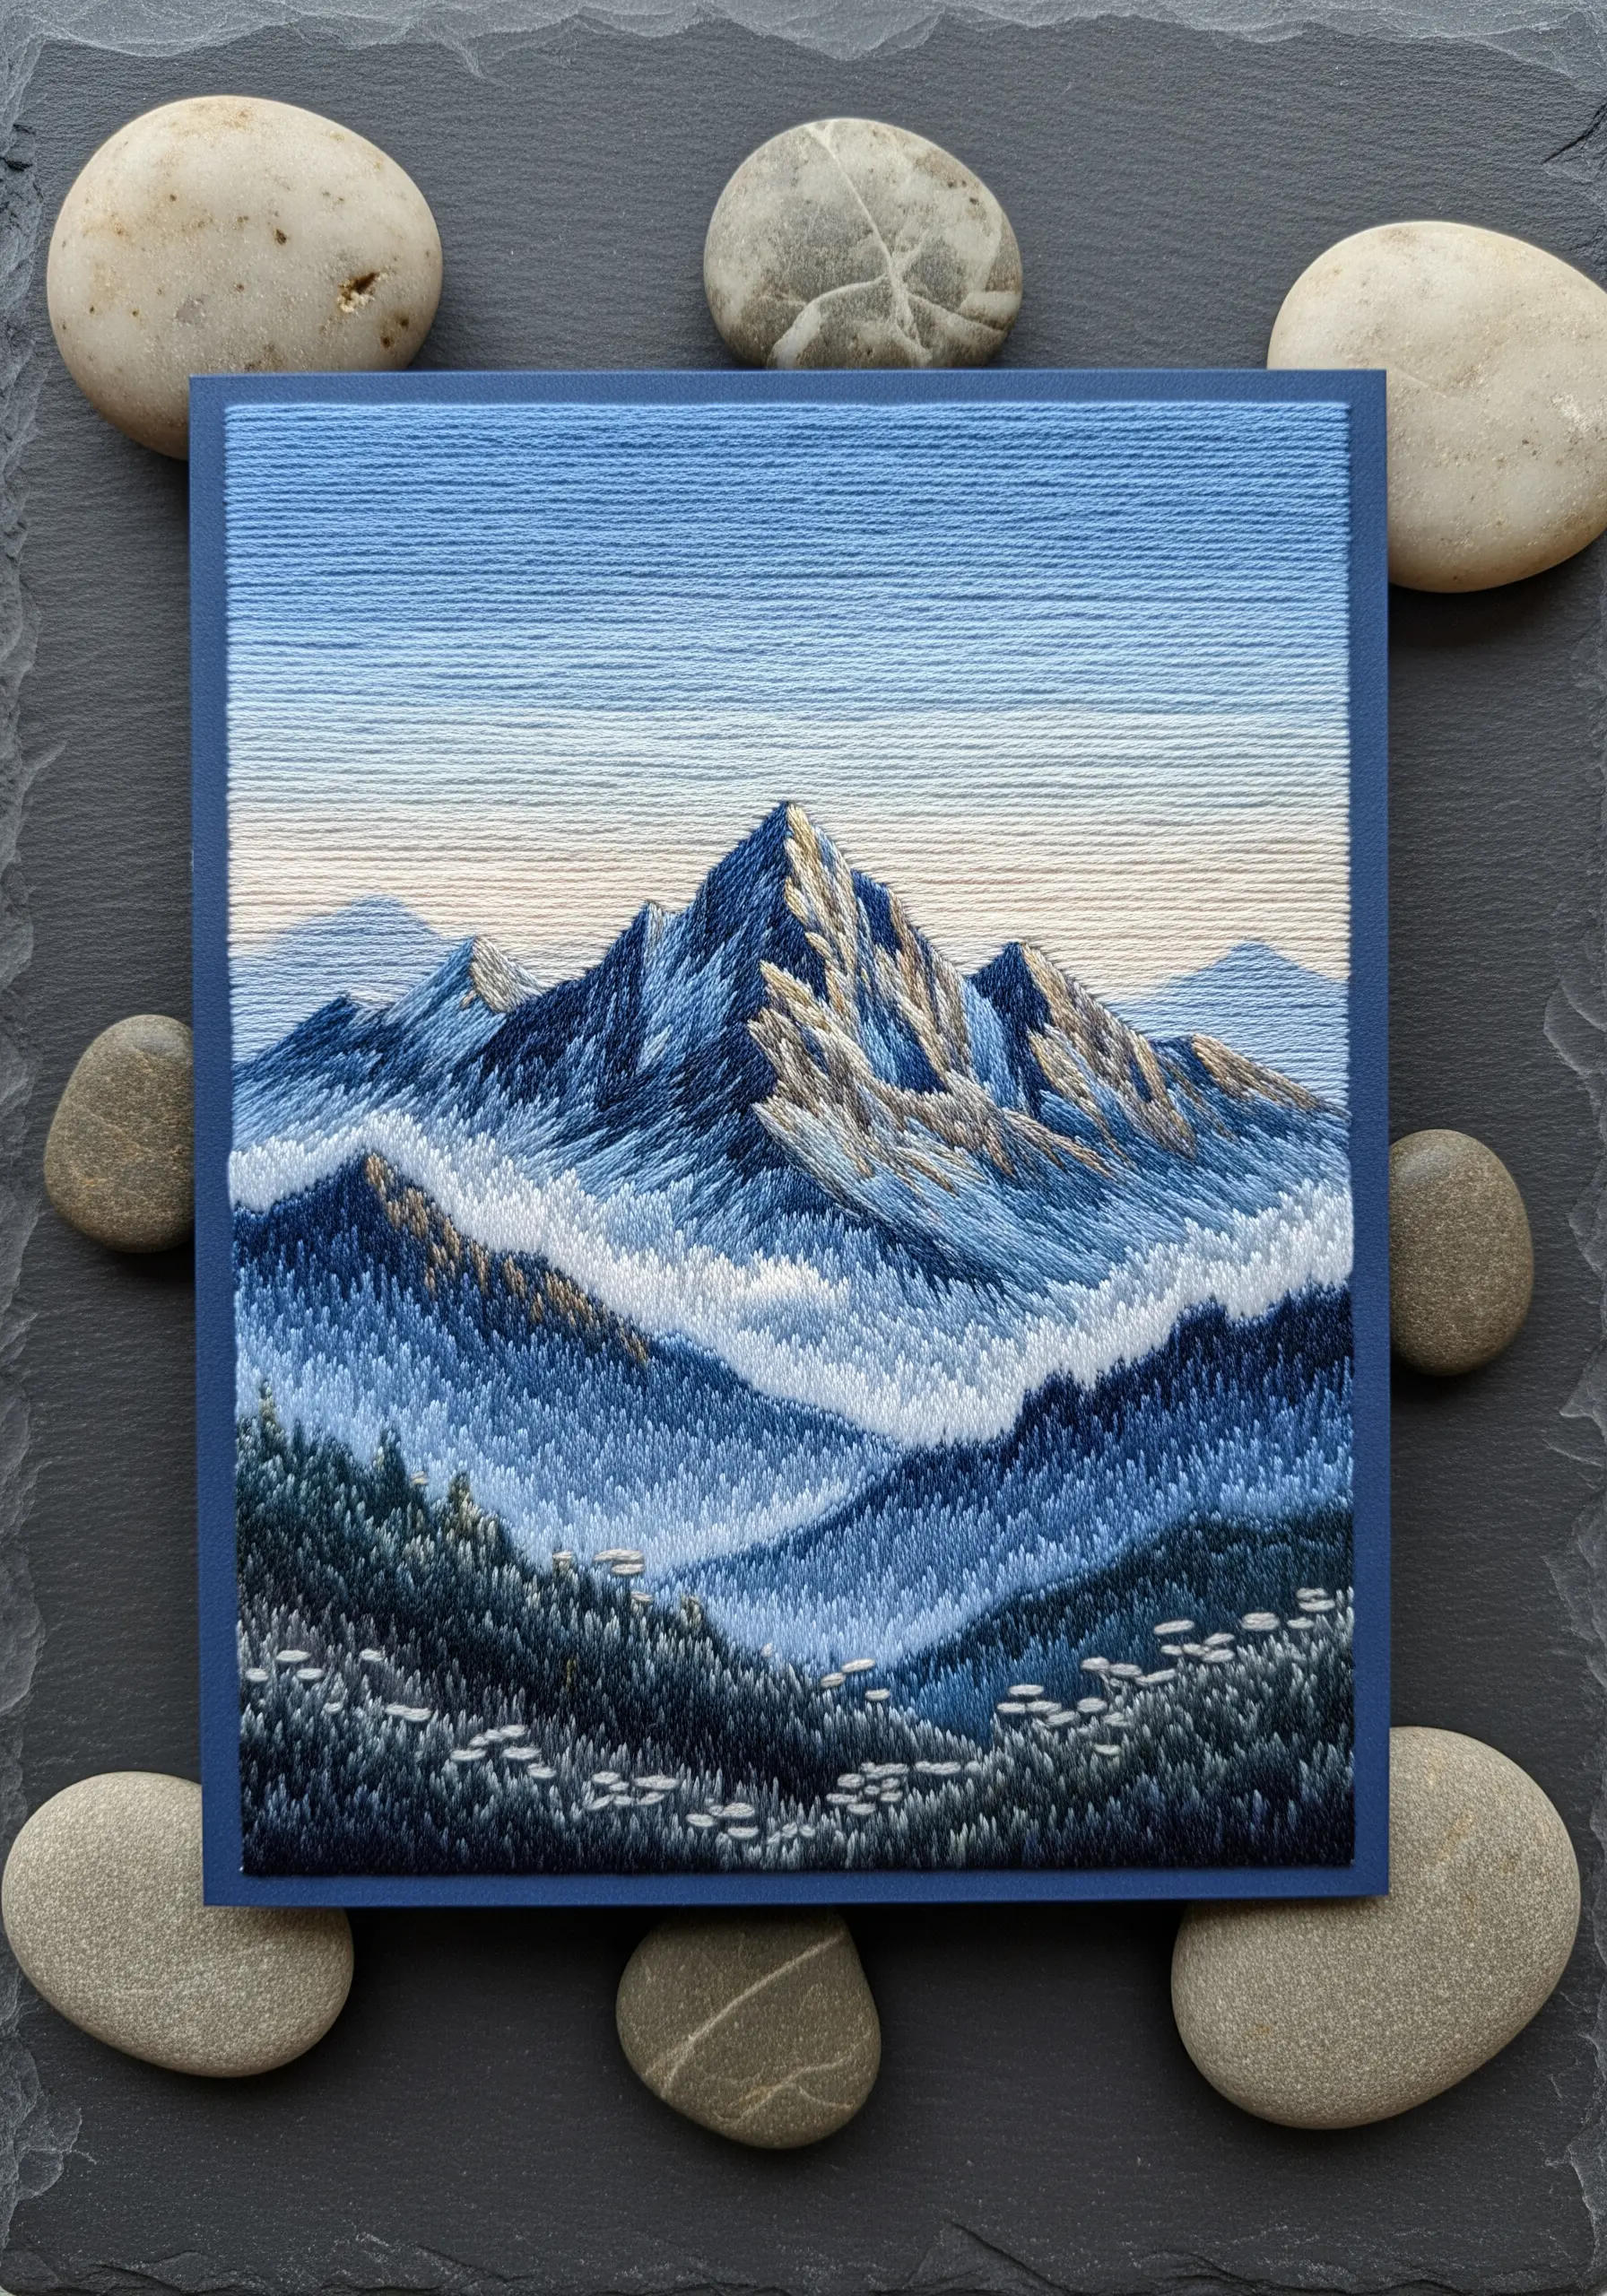
To create an atmospheric mountain scene, think like a painter and use thread to build layers of color and distance.
Start with the sky, using long, horizontal satin stitches in pale blues and whites. Then, stitch the farthest mountains in the lightest, grayest blues to create a sense of atmospheric perspective.
As you move to the foreground, use darker, more saturated colors and add more textural details, like French knots or seed stitches for trees.
Varying your stitch direction is crucial: follow the contours of the mountainsides to give them shape and form. This transforms a flat surface into a deep, realistic vista.
This project is a masterclass in mountain landscape thread painting techniques.
14. Define Shapes with Directional Satin Stitch
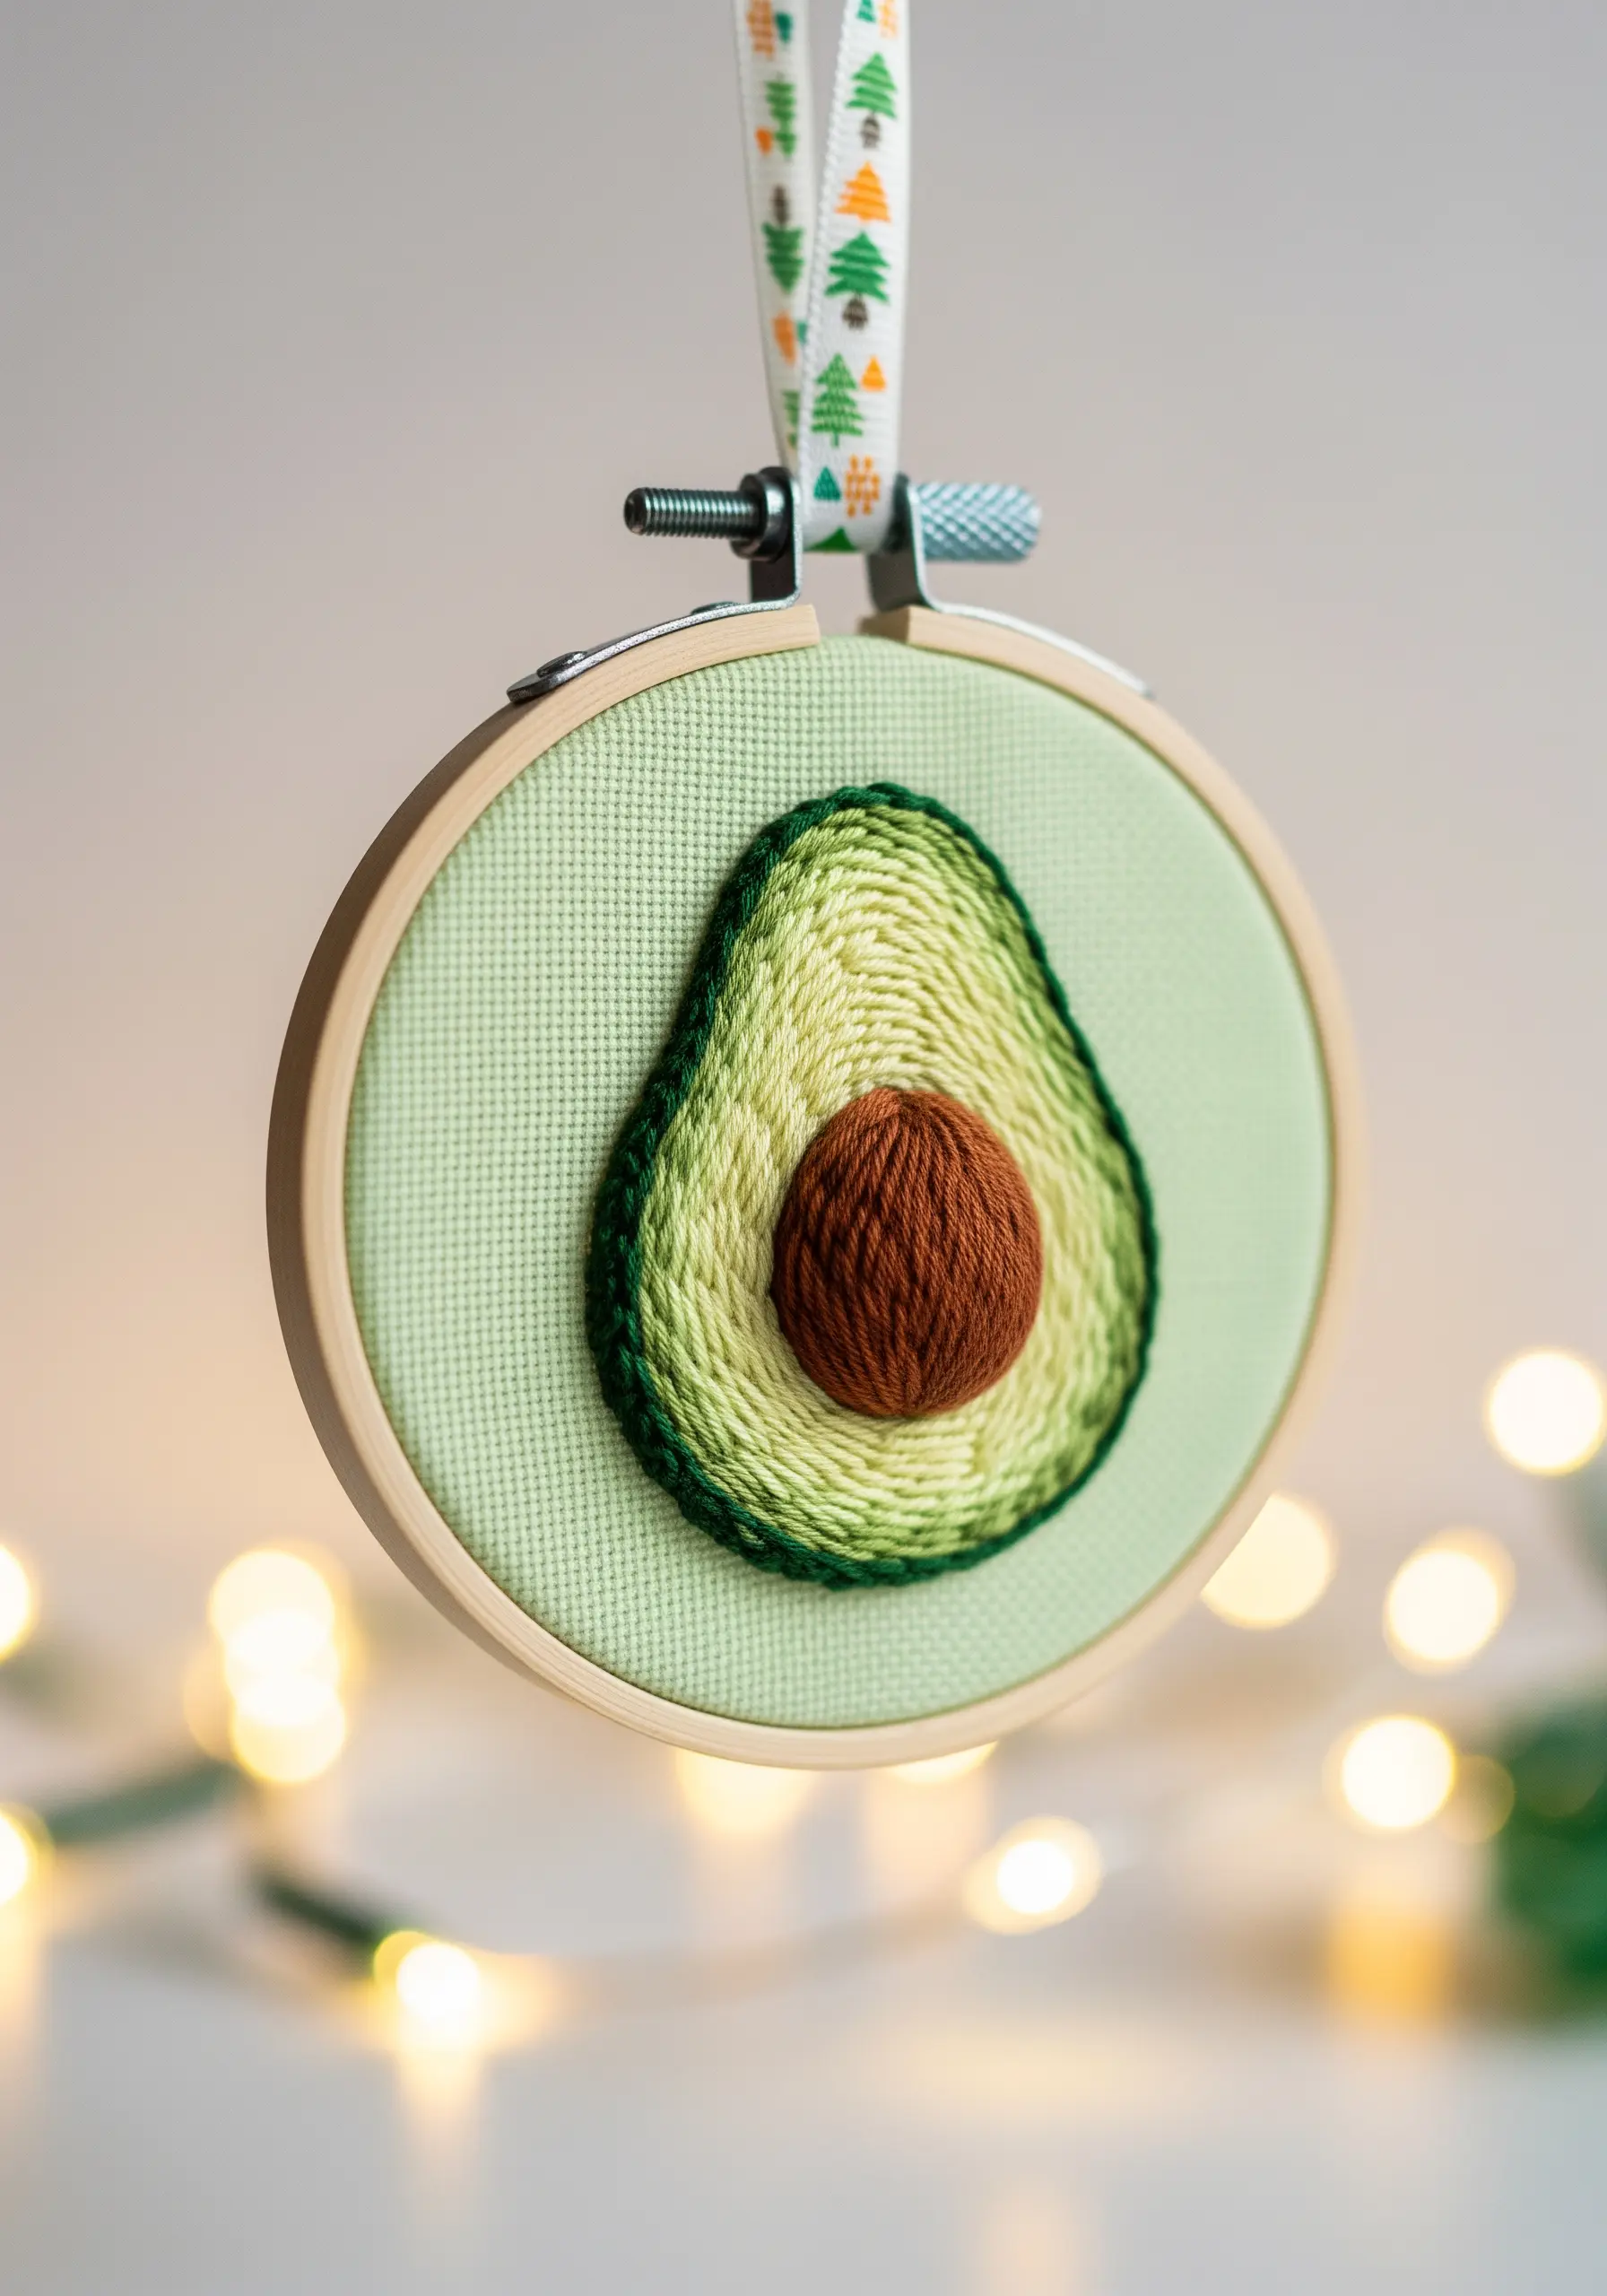
Even a simple motif like an avocado gains incredible dimension when you control the direction of your satin stitches.
For the pit, work your stitches in a circular or spiral pattern, starting from the center and working your way out. This reinforces its round, convex shape.
For the green flesh, angle your stitches to radiate outward from the pit. This contrast in direction instantly separates the two elements and creates a sense of contour.
Outline each section with a darker shade using a split stitch to create a clean, defined edge that makes the colors pop.
This thoughtful approach turns mini fruit & herb embroidery frames into polished works of art.
15. Fuse Watercolor and Stitches for Dynamic Waves

Create a powerful sense of movement by combining the soft bleed of watercolor with the sharp texture of embroidery.
First, paint a loose wash of blues onto your paper or fabric and let it dry completely. The unpredictable edges of the paint will add an organic, fluid quality.
Next, use directional straight stitches in various shades of blue and white to define the wave’s form, following the curve and crash of the water.
Finally, add clusters of white and off-white French knots of varying sizes to represent sea foam and spray. The raised texture of the knots makes the water feel like it’s leaping off the surface.
This is one of the most effective mixed-media techniques for embroidery lovers who want to add energy to their work.
16. Craft a Functional and Adorable Needle Minder
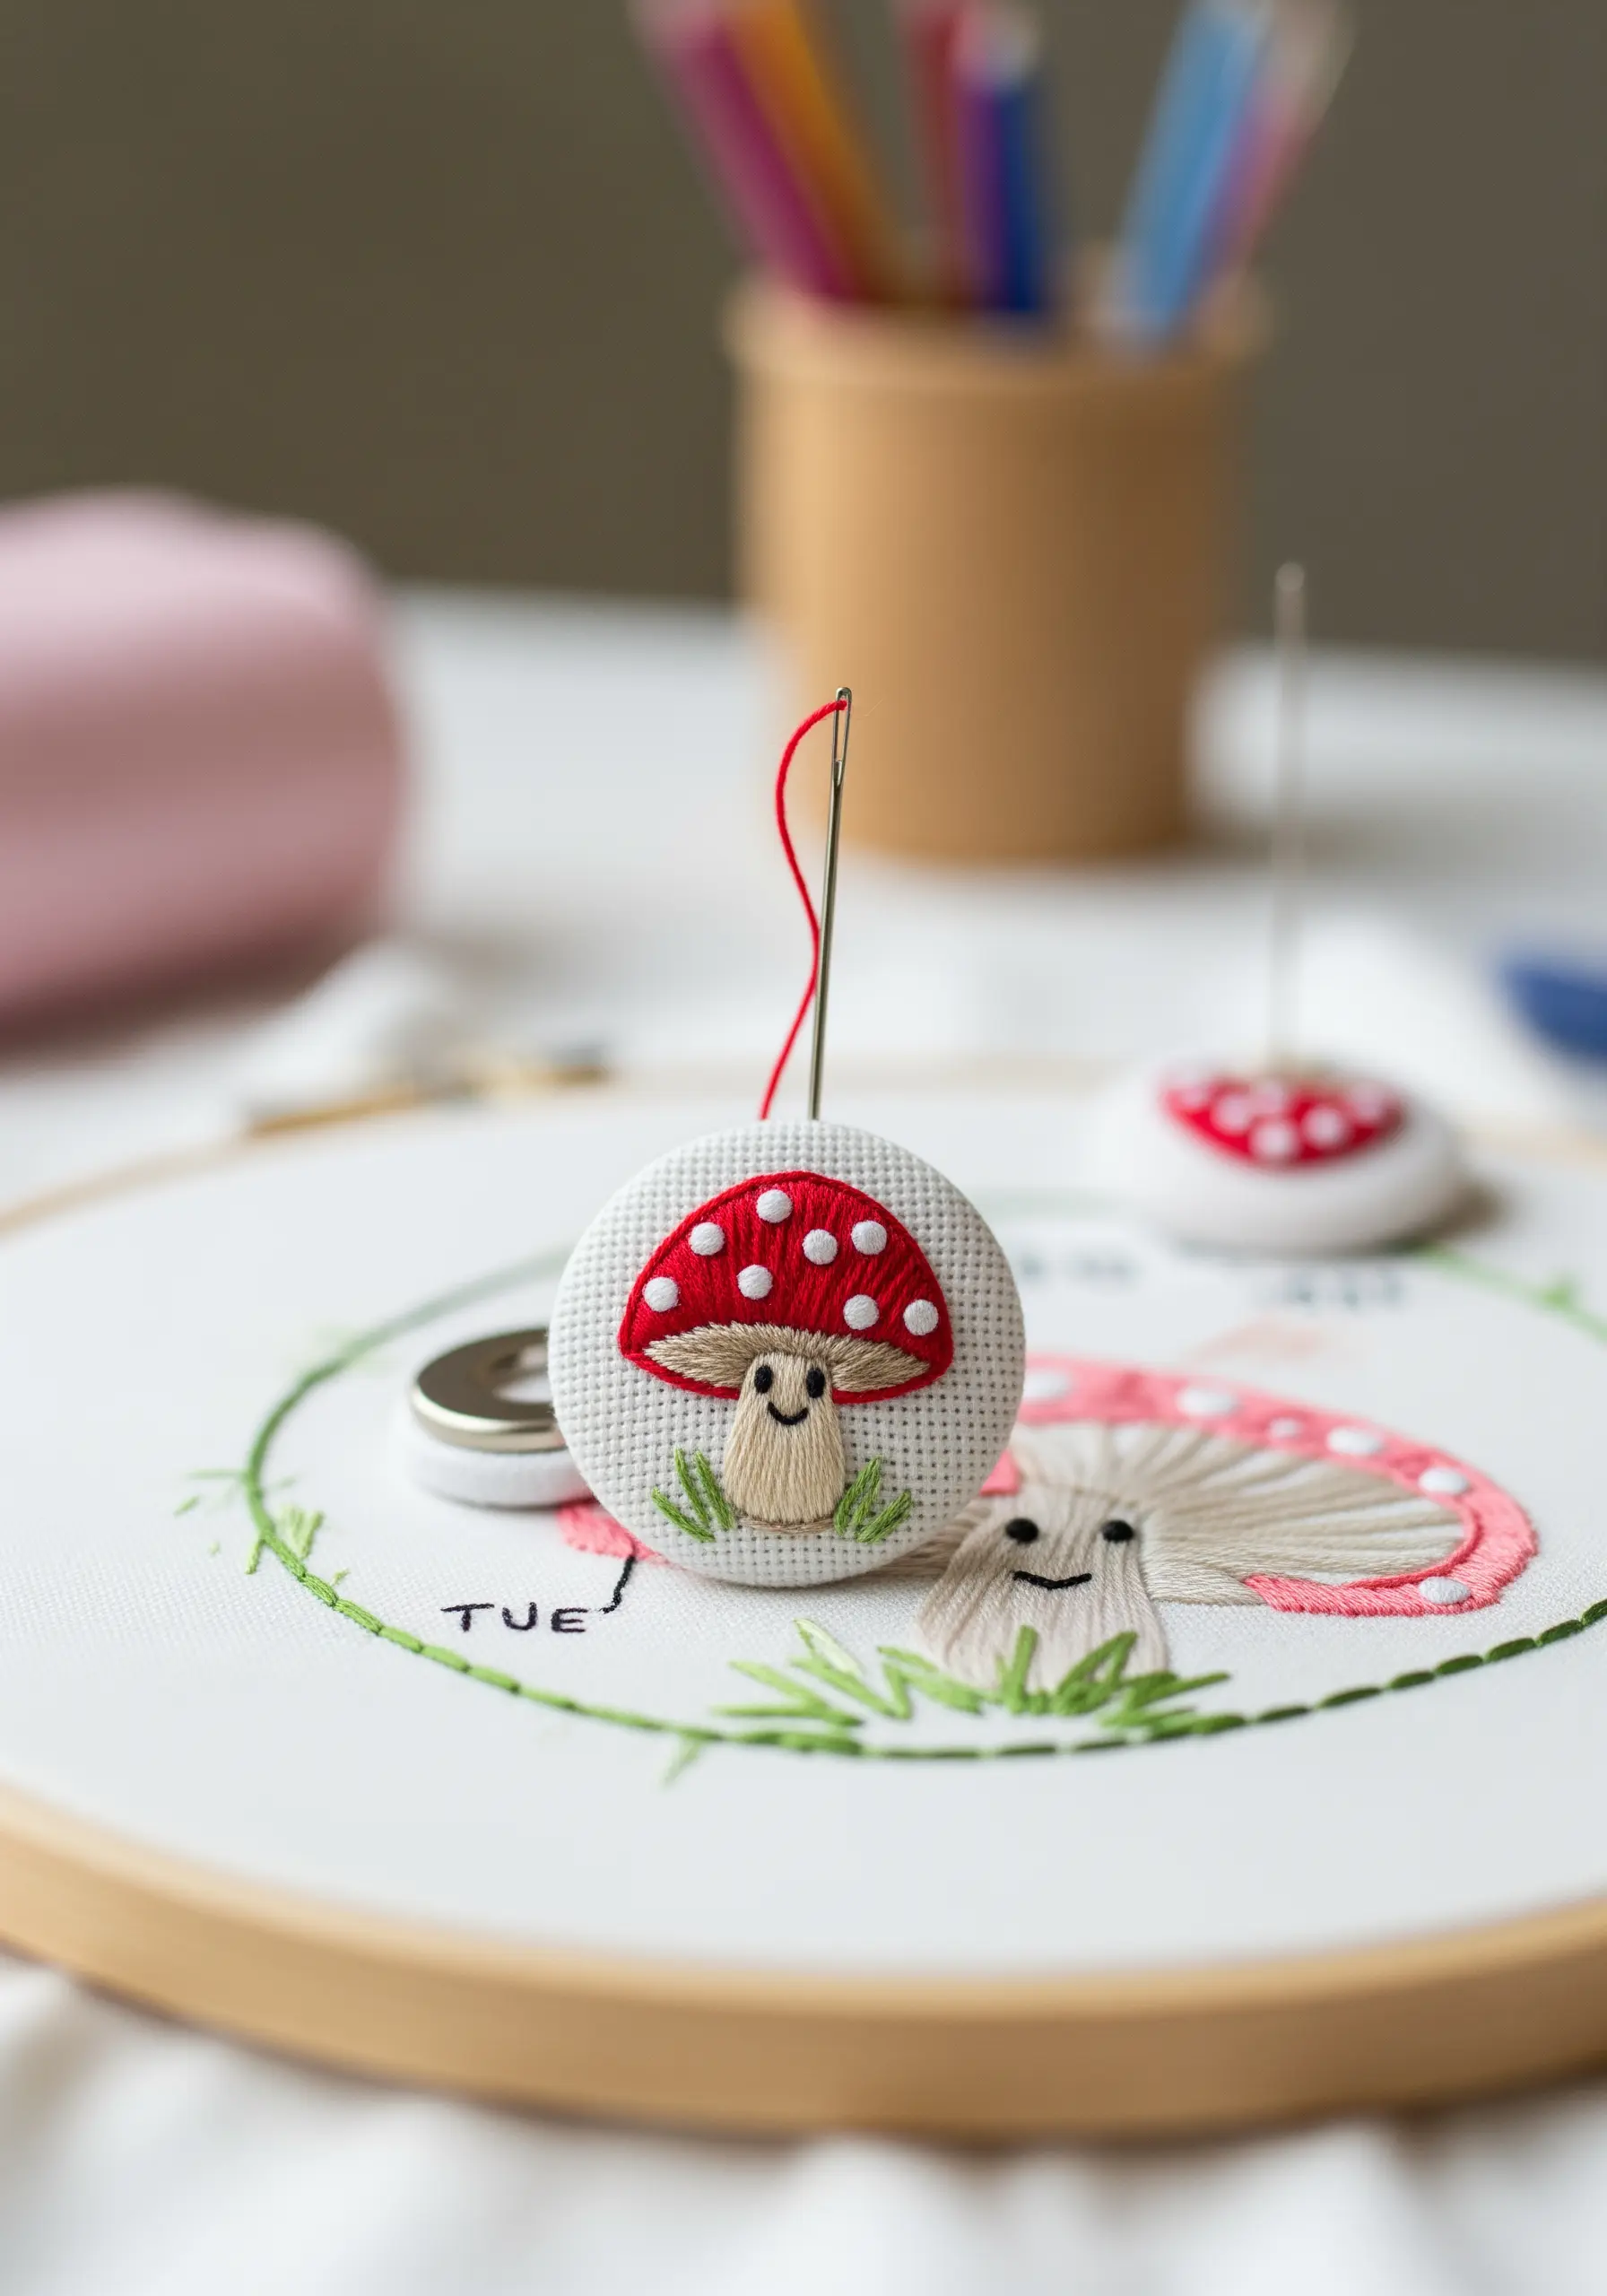
A needle minder is a perfect mini-project that’s both a charming gift and a practical tool for any stitcher.
Start with a cover button kit. Embroider your chosen design—like this cute mushroom—onto a small piece of fabric, ensuring it fits within the button’s diameter.
Use a smooth satin stitch for the mushroom cap and simple straight stitches for the stem details. Add two tiny French knots for the eyes to give it personality.
Assemble the cover button, then use a strong adhesive like E6000 to glue one neodymium magnet to the back of the button and a second one loose. The fabric-covered magnet sits on your work, while the second magnet holds it in place from behind.
This idea works beautifully with small forest floor botanical stitch ideas.
17. Achieve Textured Elegance with Woven Fill Stitches

For a sophisticated monogram, skip the standard satin stitch and use a woven or textural fill stitch instead.
The basketweave stitch, used here, creates a beautiful interlocking pattern that adds depth and catches the light differently than a flat fill.
To execute it, lay down a grid of horizontal and vertical straight stitches, then weave your thread over and under the grid lines without piercing the fabric.
Using a metallic or silk thread on high-contrast black paper enhances the luxurious feel. Outline the letter and border with a simple couching stitch for a clean, defined frame.
This is a perfect way to make personalized name & monogram wall embroidery gifts that feel truly special.
18. Design Graphic Motifs with Negative Space

This lemon slice tea tag demonstrates how leaving parts of your fabric unstitched can be just as impactful as filling them in.
Outline the segments of the lemon in yellow, then fill them with clean satin stitches. The key is to leave a thin, unstitched line of the white fabric between each segment.
This negative space defines the shapes clearly and gives the design a crisp, graphic quality that feels modern and fresh.
Add a few white French knots for seeds and a bold double outline to complete the look. This technique is brilliant for creating clean, minimal fruit & botanical embroidery patterns.
19. Explore Abstract Forms with Thread
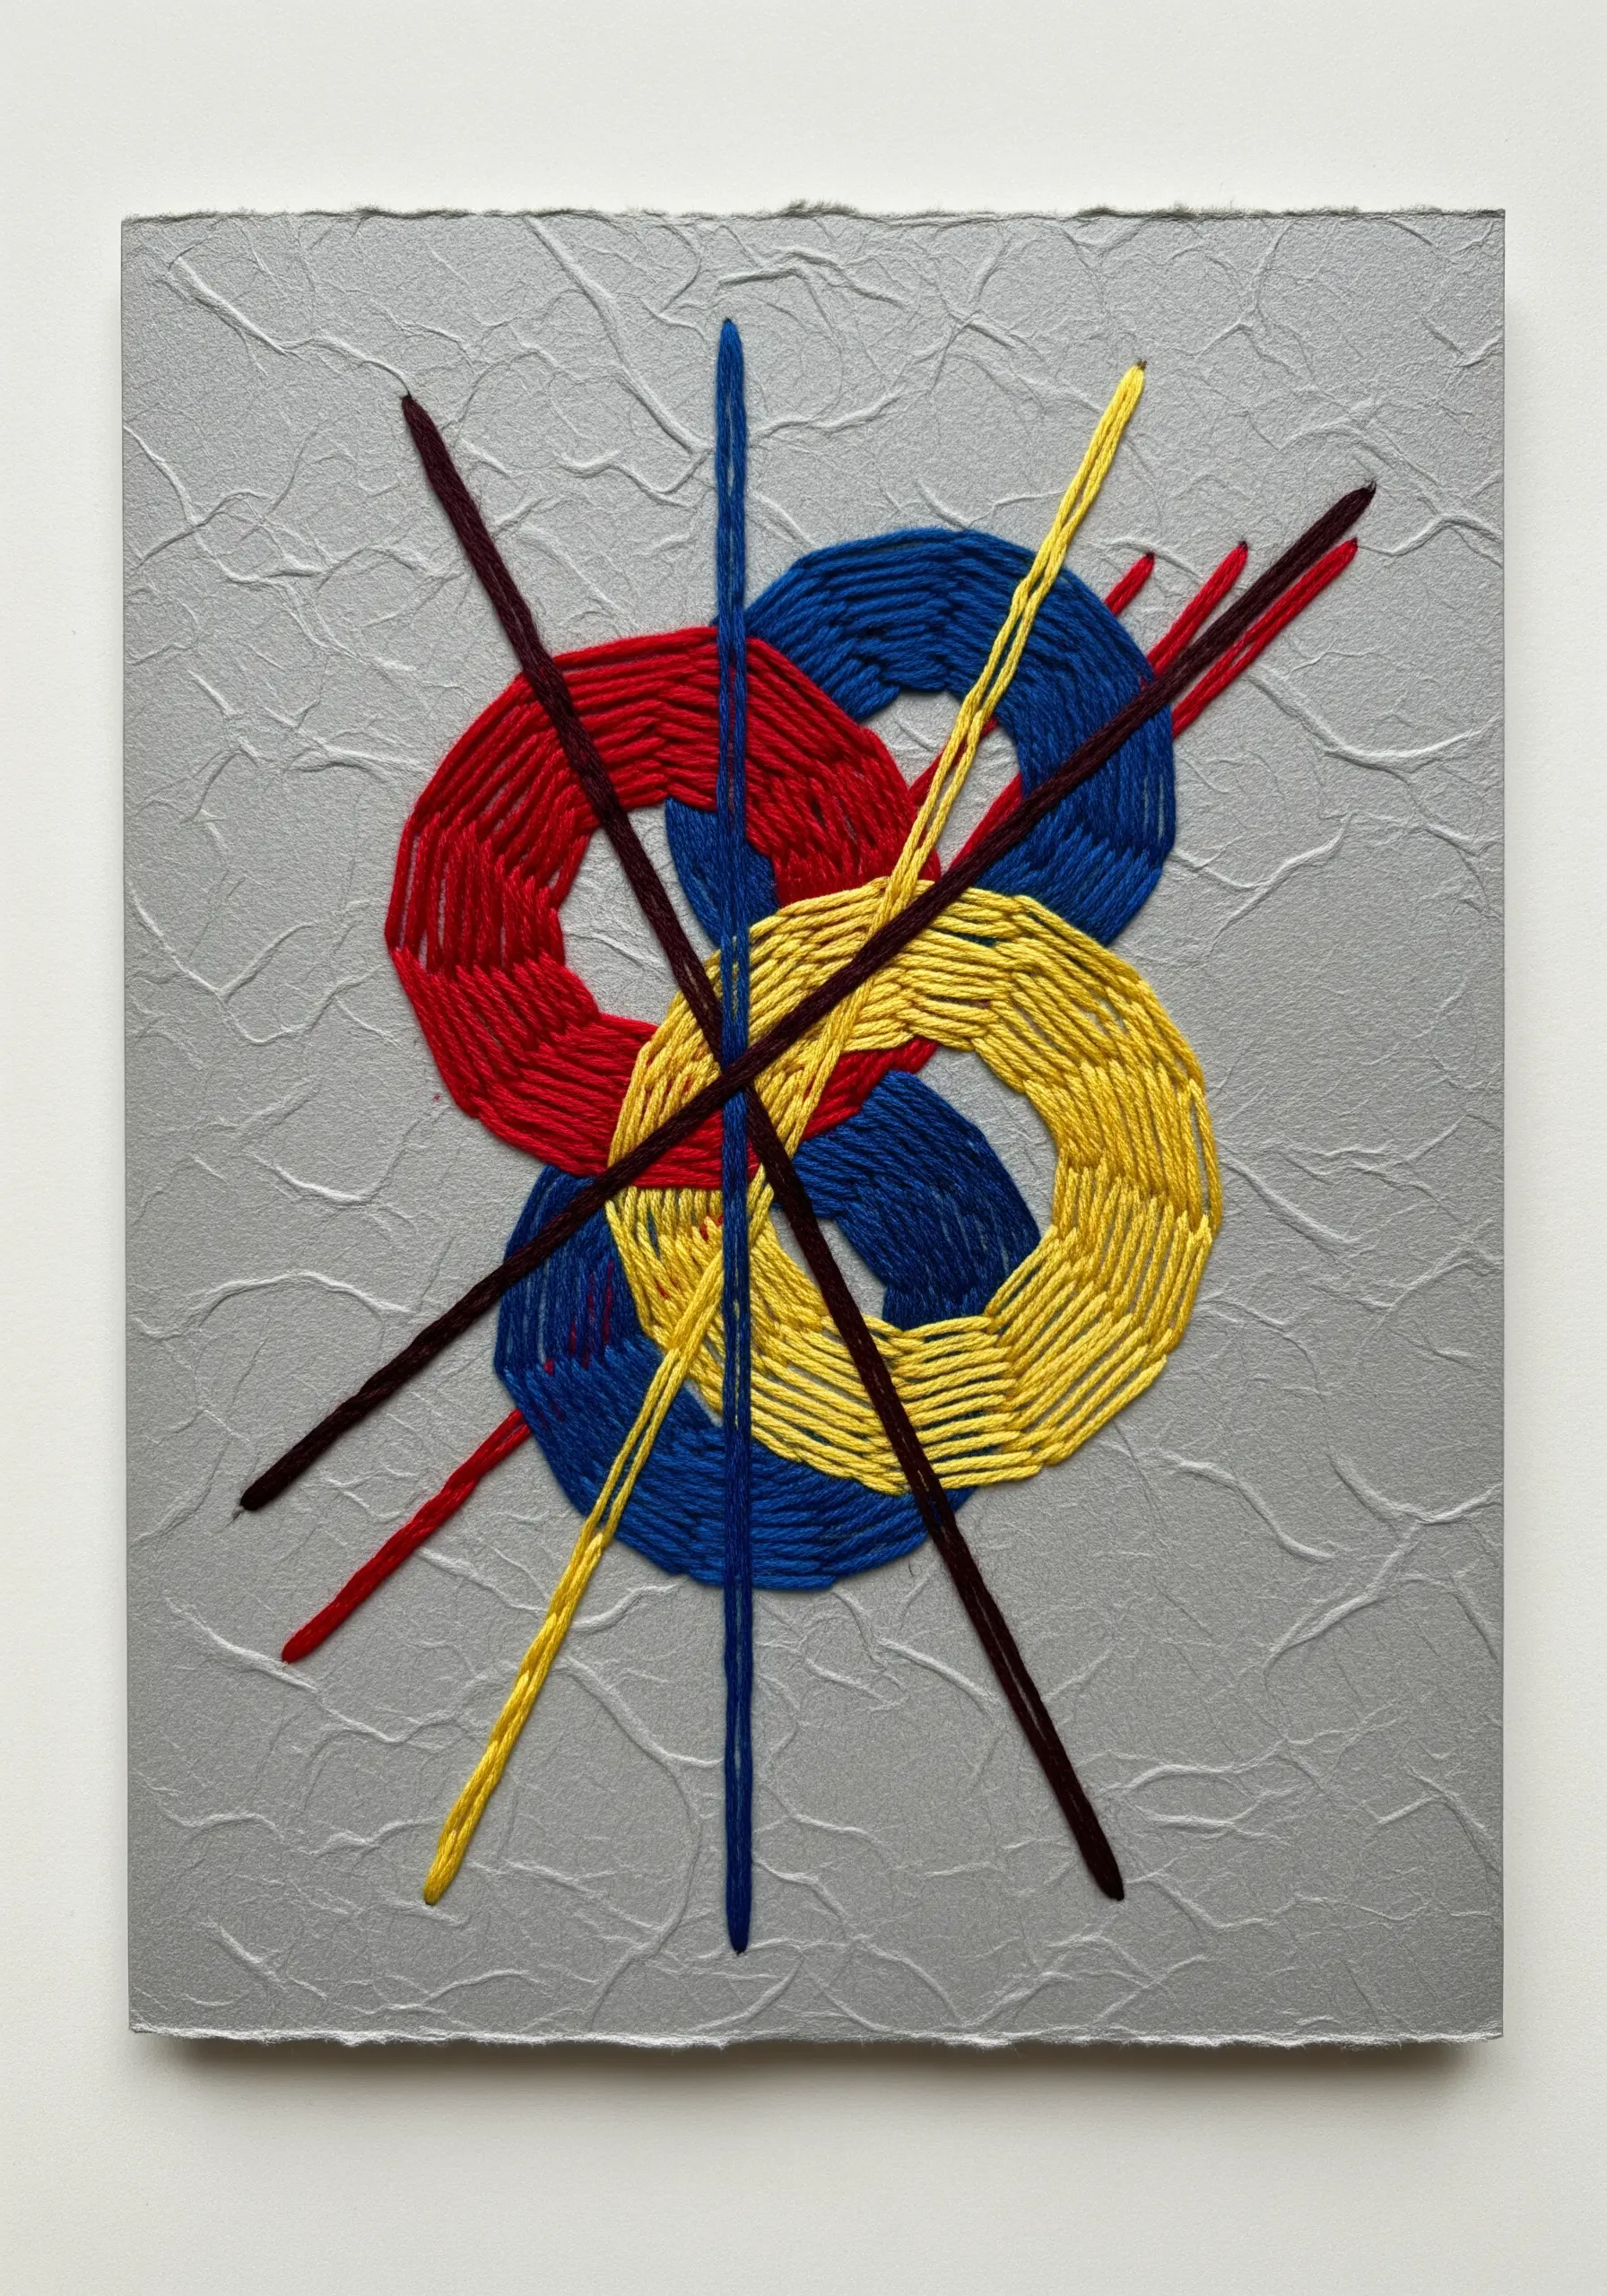
Move beyond representative art and use thread to explore color, shape, and composition in an abstract way.
On a textured paper base, create bold, overlapping shapes using a dense satin stitch. Let the forms interlock and weave over and under one another to create a sense of depth.
Limit your palette to a few primary colors against a neutral background to make the shapes pop.
Add dynamic energy with intersecting straight lines in contrasting colors. This turns the piece from a simple collection of shapes into a cohesive, energetic composition.
This approach transforms your hoop into a canvas for abstract embroidery patterns that feel like modern art.
20. Master Clean Typography on Felt Pennants
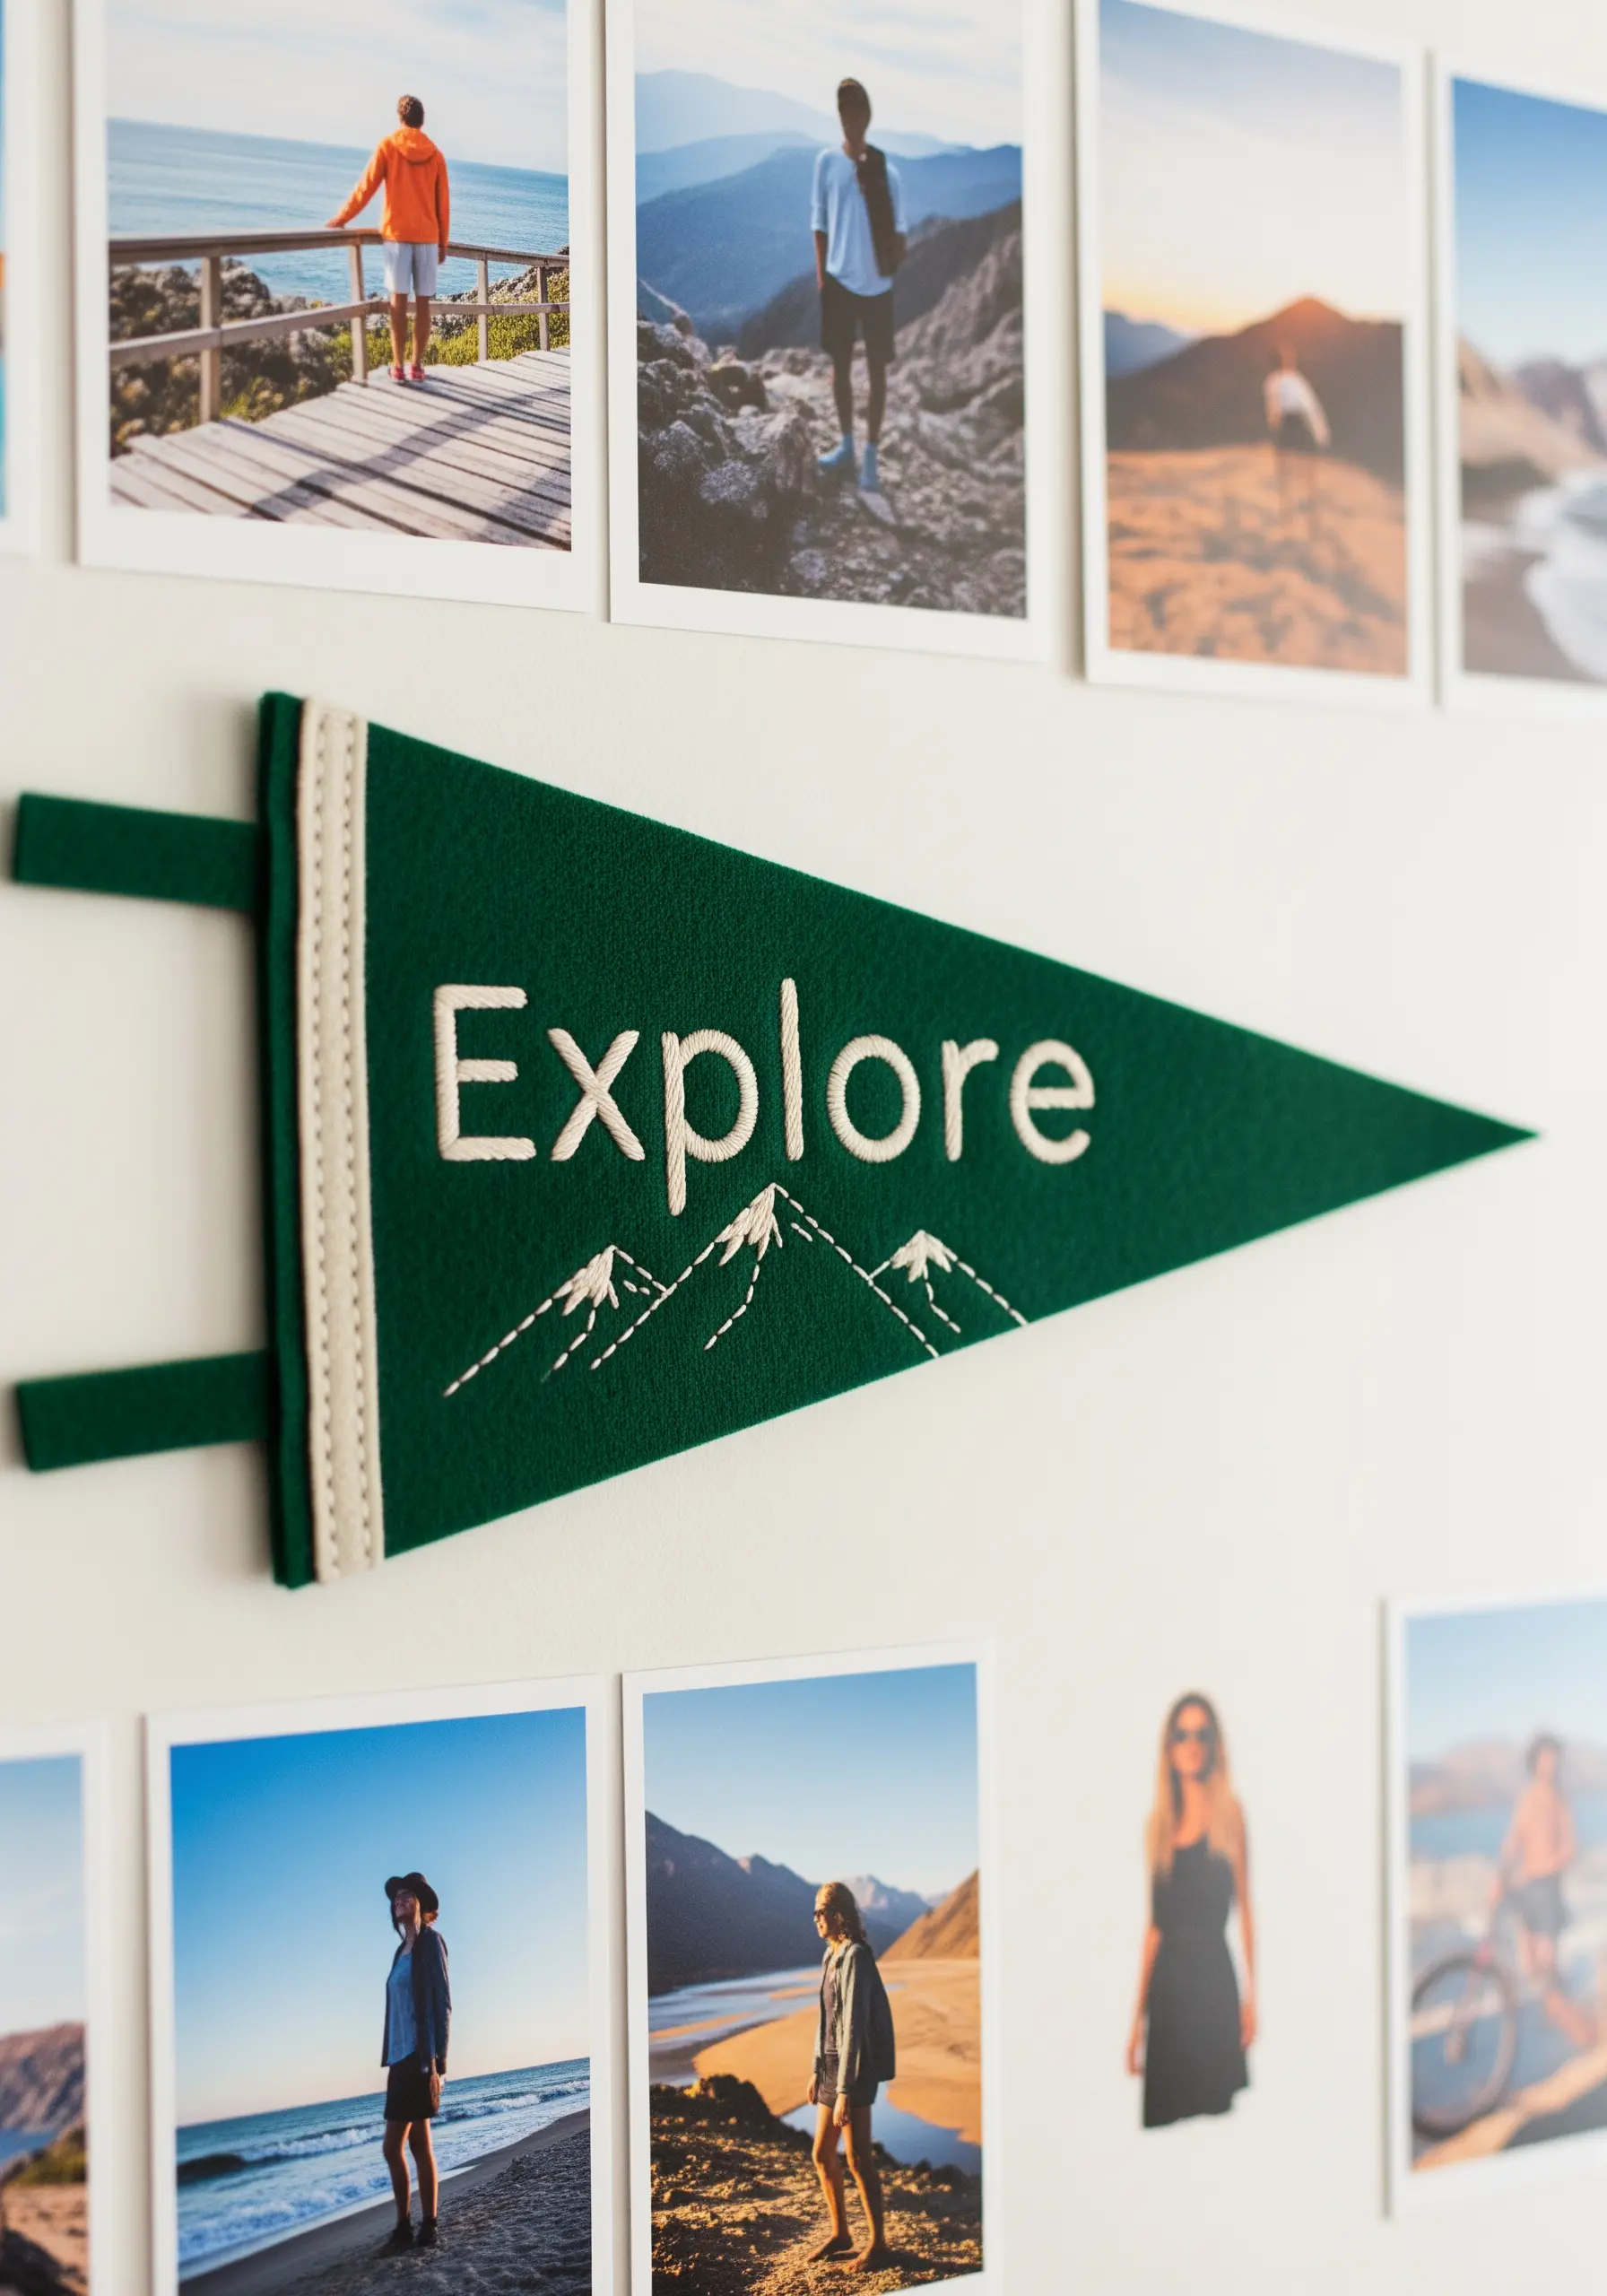
Stitching letters on soft, thick felt requires a technique that ensures crisp, legible lines without sinking into the fabric.
Use a split stitch for your typography. It creates a solid, sharp line that mimics the look of a chain stitch but is smoother and more controlled for curves and corners.
Choose a thread color that has high contrast with your felt to make the message stand out. A simple, sans-serif font is easiest to execute cleanly.
Pair the lettering with simple line-art motifs, like these mountains, to create a balanced and thematic piece of decor perfect for a gallery wall.
This technique is excellent for anyone inspired by travel-inspired jacket embroidery ideas and other personal statements.
21. Blend Colors for a Painterly Autumn Leaf

Capture the transient beauty of autumn by using thread painting to blend multiple colors within a single leaf.
Divide the leaf into sections for each color transition. Use a long-and-short stitch, angling your stitches to follow the natural direction of the leaf’s veins.
Where two colors meet, interlock the stitches from each section, pulling individual strands from one color into the other. This creates a soft, seamless gradient rather than a hard line.
Finish by adding the central vein with a contrasting backstitch, which anchors the design and adds a final touch of realism.
Pay close attention to leaf vein details to elevate your botanical work from good to breathtaking.
22. Create Soft Textures with Appliquéd Sherpa
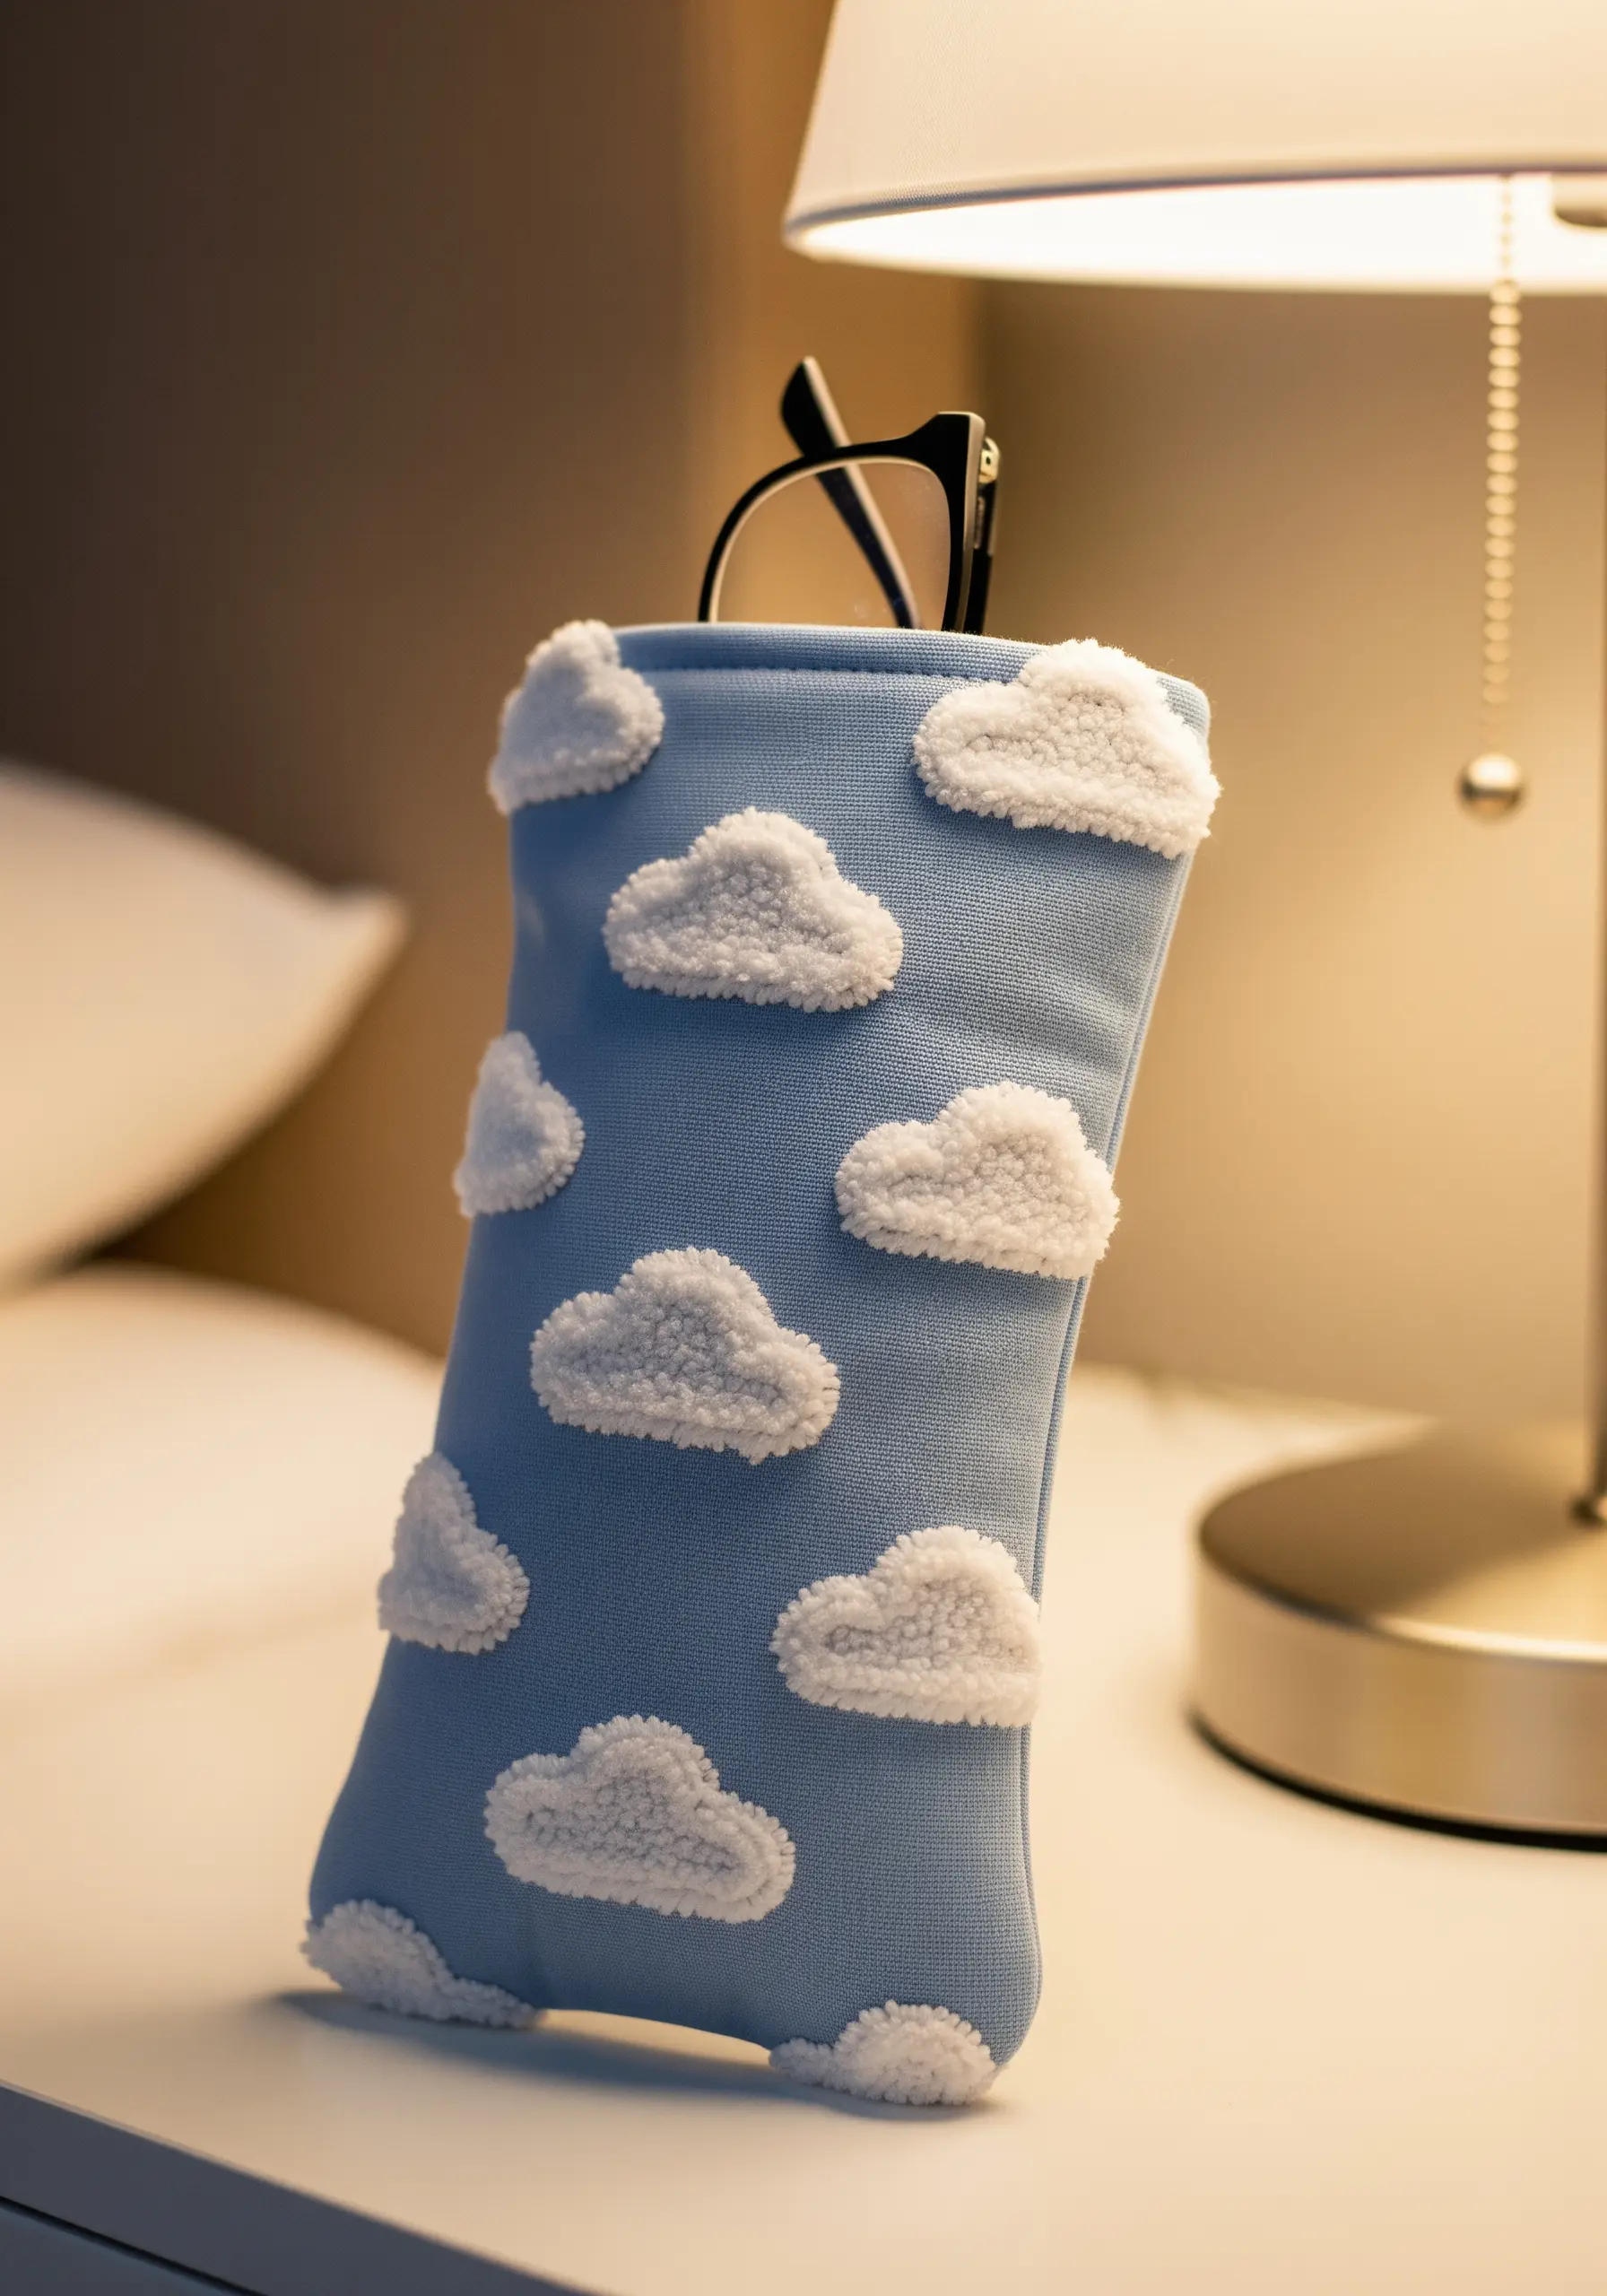
Introduce an irresistibly soft and tactile dimension to your projects by using fluffy fabric like sherpa or fleece for appliqué.
Cut your cloud shapes from the sherpa fabric. Because this material is thick and non-woven, it won’t fray, so you don’t need to turn the edges under.
Attach each cloud to your base fabric (like this light blue cotton for a glasses case) using a simple, nearly invisible appliqué stitch or a small running stitch around the edge.
The result is a design with high-contrast texture that is both visually and physically appealing, perfect for creating cozy, cloud-soft embroidery hoops and accessories.
23. Layer Felt for a Sweet Celebration Card

Craft a charming birthday card by layering pieces of felt to build a colorful and textural cake slice.
Cut out each element—cake layers, frosting, icing—from different colors of felt. The stiffness of felt makes it easy to get clean, precise shapes.
Use a simple running stitch in a contrasting color to add details like the filling layers. This adds both decoration and structure, holding the layers together.
Embellish the frosting with tiny French knots for sprinkles and use a shimmering metallic thread for the candle flame to add a touch of magic.
This appliqué method is one of the most satisfying and cute and colorful embroidery projects you can finish in a day.


