
You don’t need weeks to create a piece of art that transforms a room. With the right yarn and a clear technique, you can craft a stunning wall hanging this weekend that feels both personal and professionally finished.
This is your invitation to explore texture, shape, and color in ways that are deeply satisfying and surprisingly fast. Forget complex patterns and think instead about the simple, powerful impact of a well-placed knot, a perfectly wrapped rainbow, or a cascade of soft tassels.
Each of these projects is designed to give you a beautiful result without a huge time commitment. Let’s make something you’ll be proud to hang on your wall.
1. Master the Art of Layered Macrame
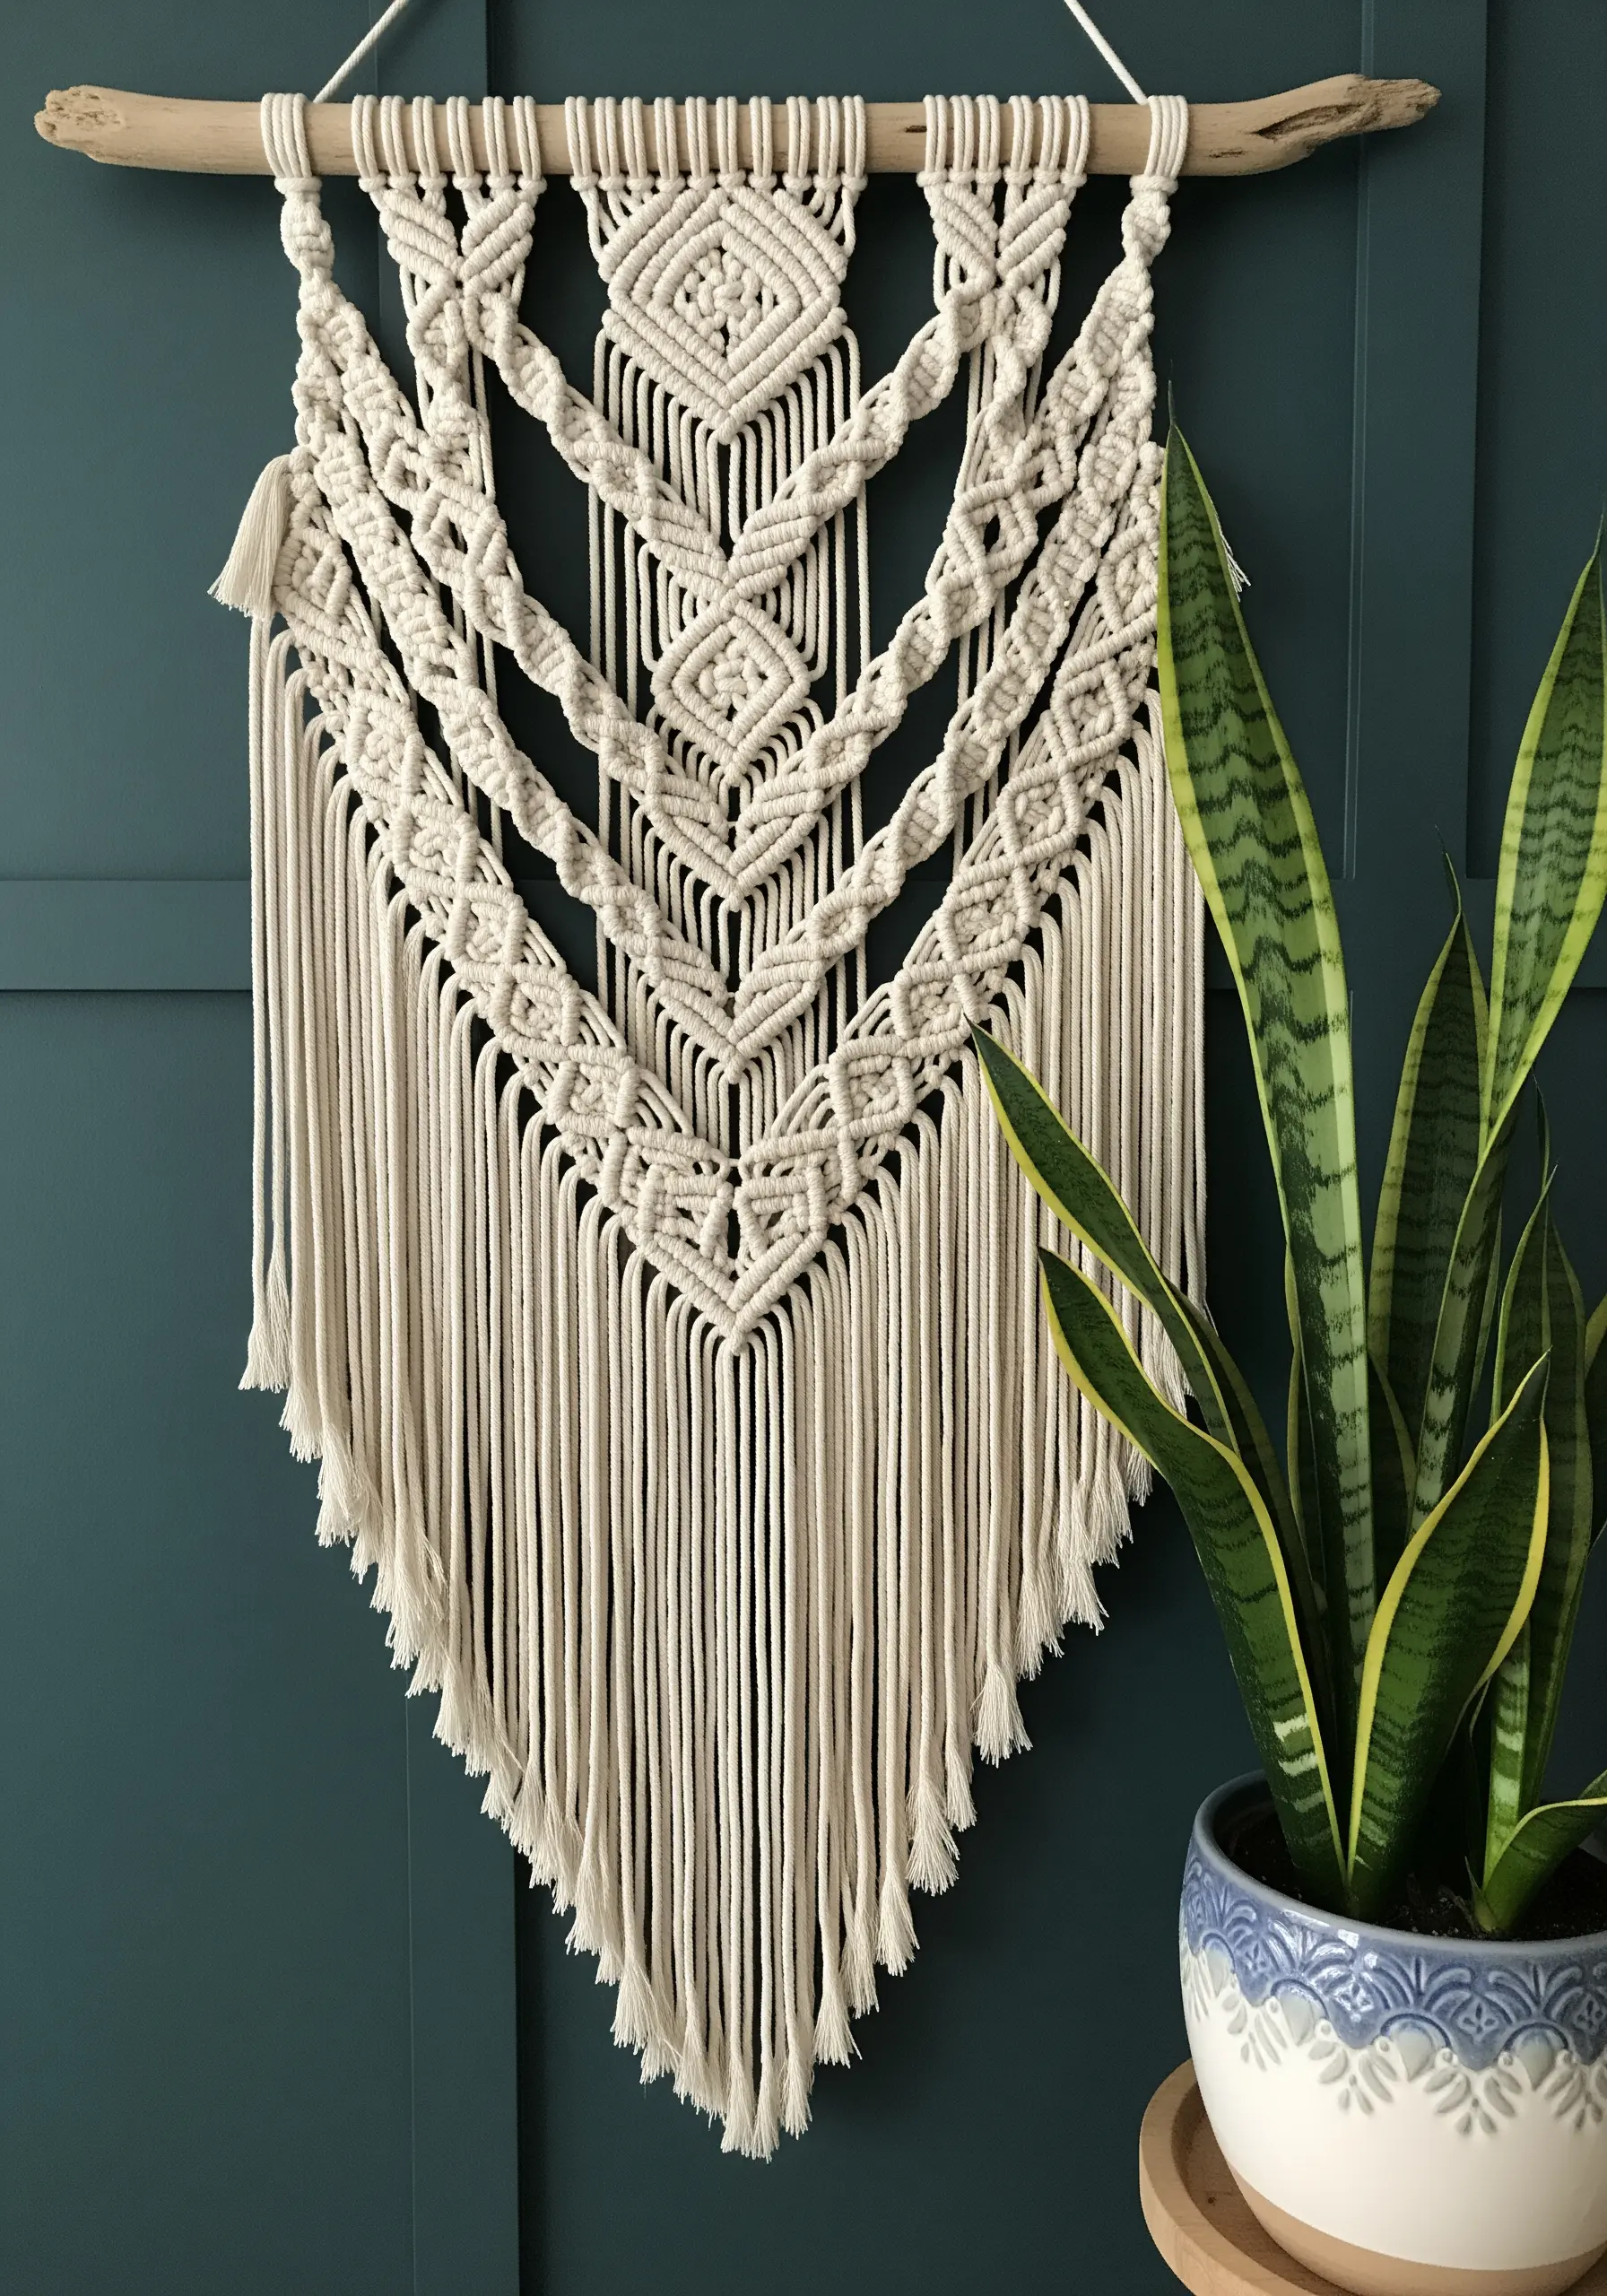
Create visual depth by layering different knot patterns, moving from a foundation of simple square knots to more complex diagonal clove hitches.
This technique creates the strong, graphic V-shapes that guide the eye through the piece.
Use varying cord thicknesses to introduce subtle texture, and focus on maintaining consistent tension to keep your lines clean and prevent buckling.
A well-made piece of macrame is as much about structure as it is about decoration.
2. Weave an Abstract Sunset with Roving Wool
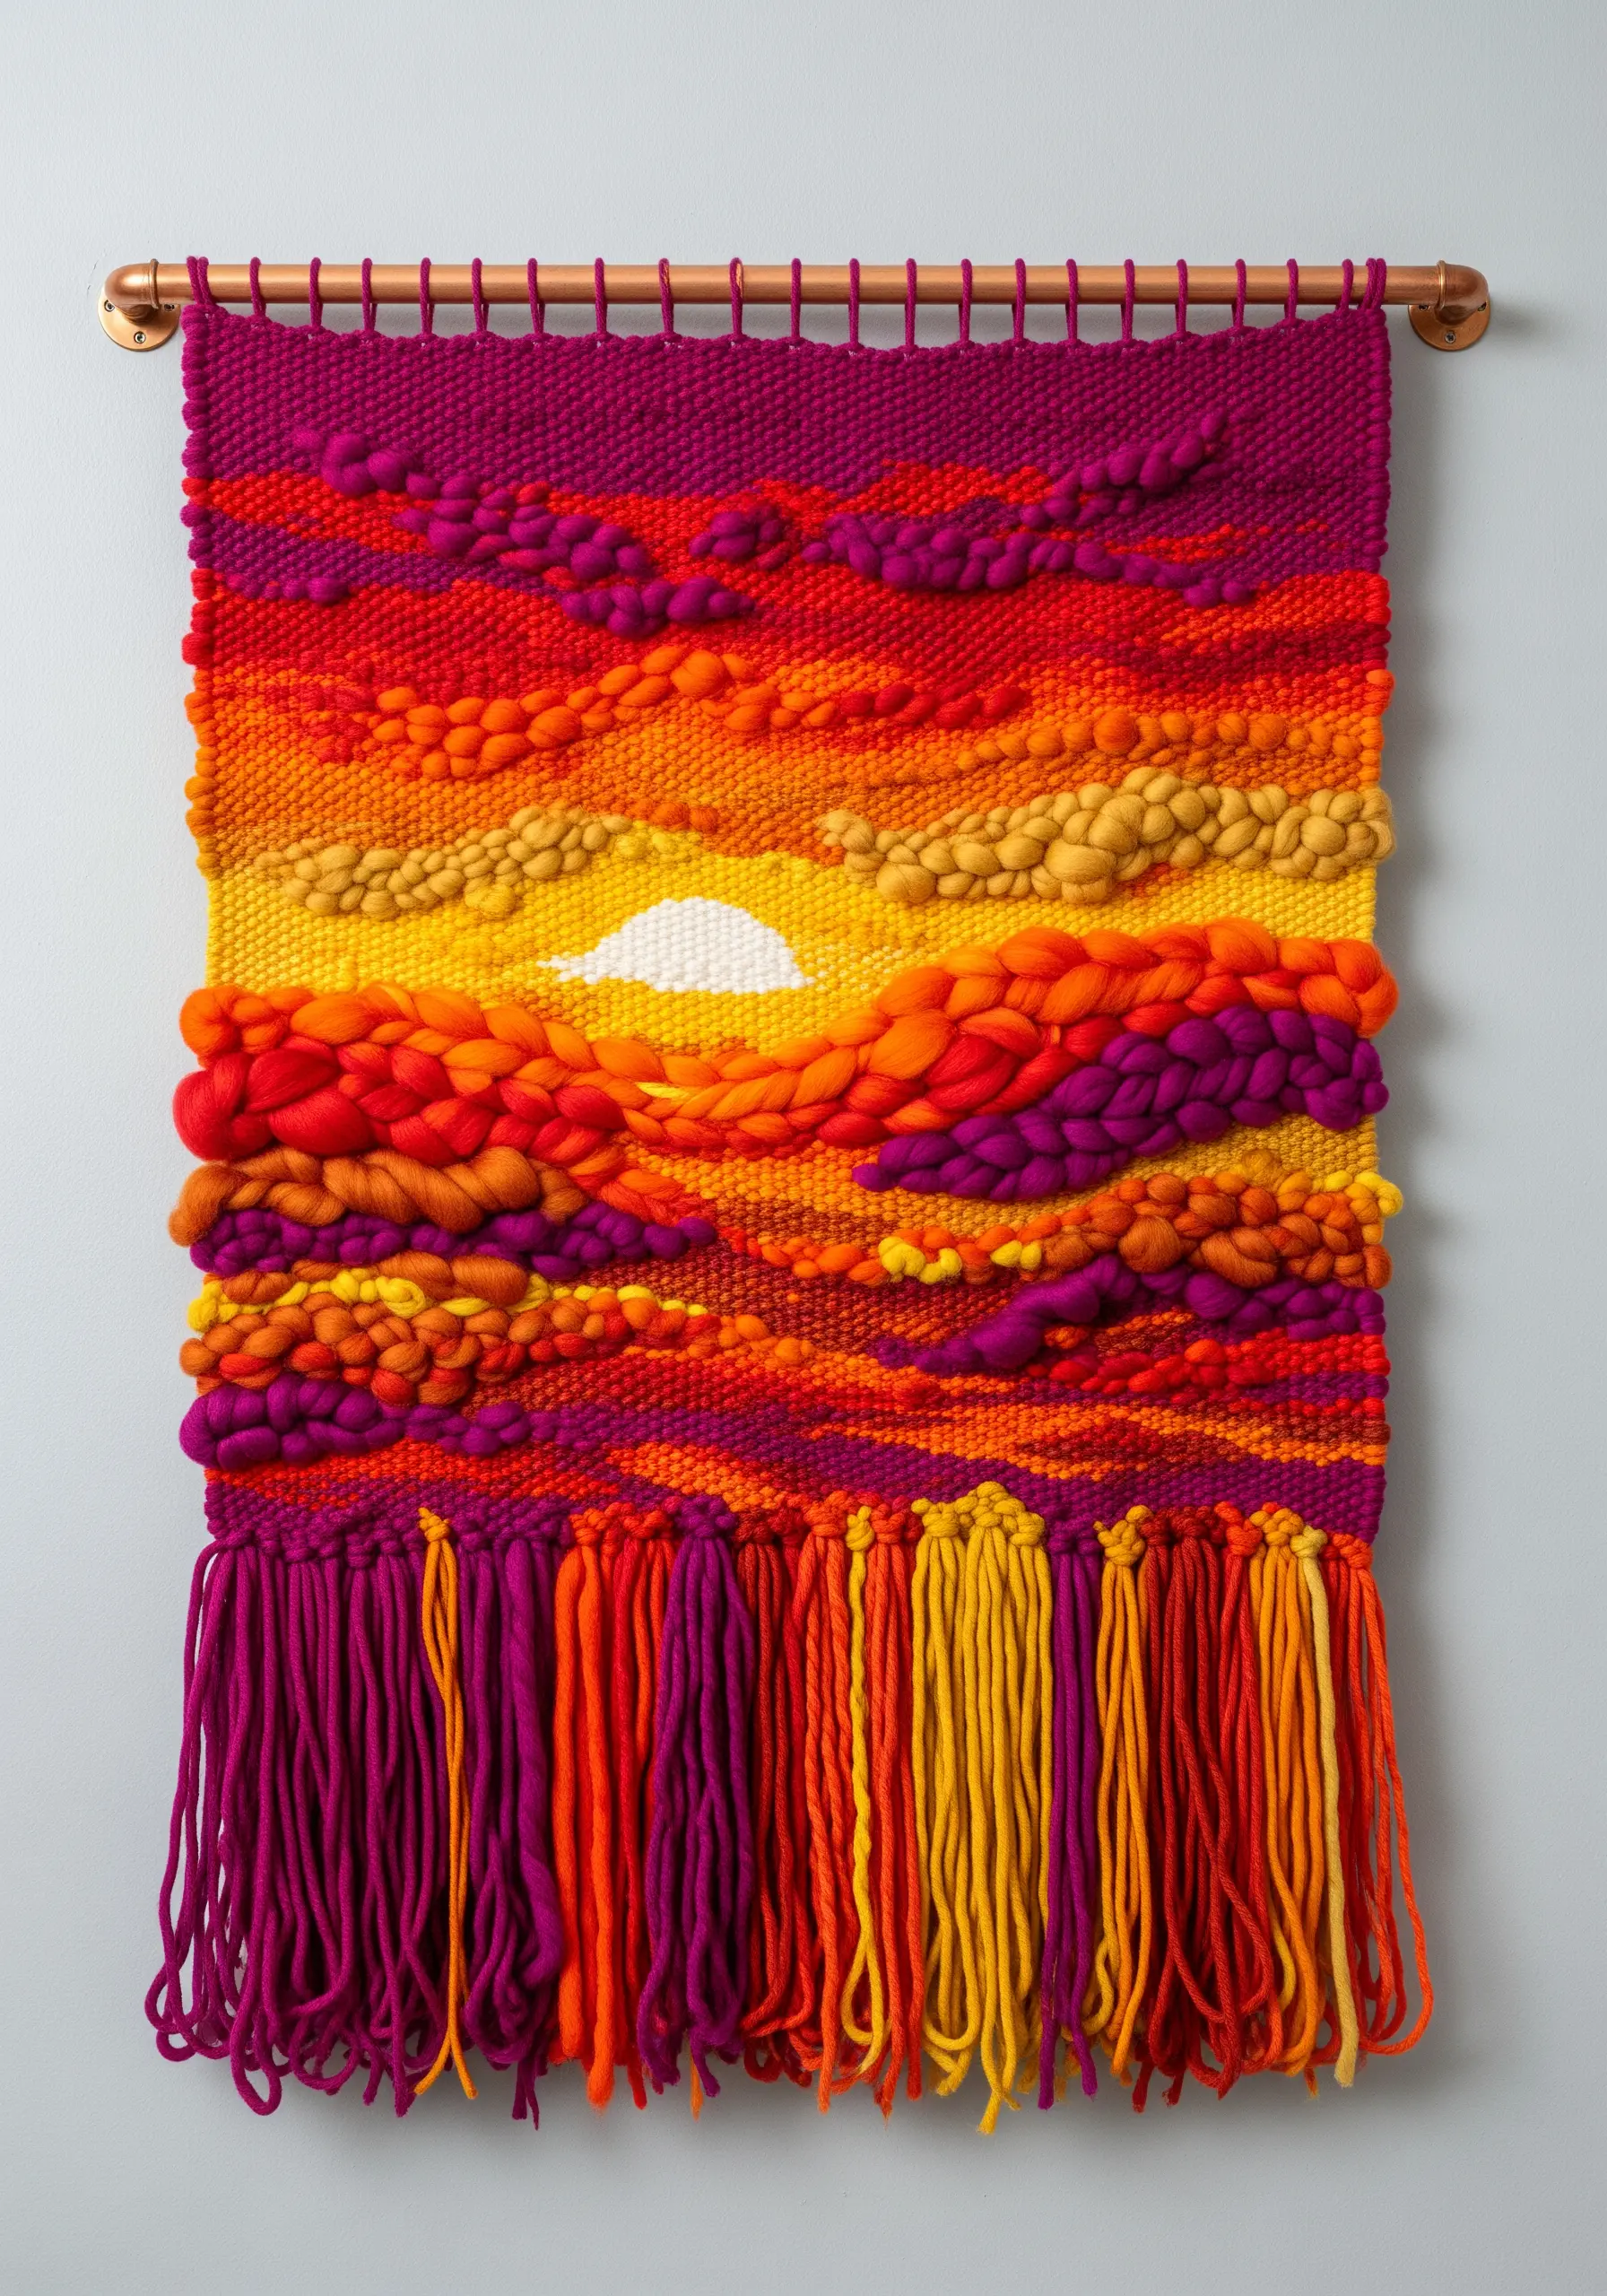
Use thick, unspun wool roving to build bold, cloud-like forms directly on your loom.
Instead of a traditional flat weave, try a soumak stitch—wrapping the weft yarn around the warp—to build raised, dimensional areas that catch the light.
Blend colors by weaving with two or three different shades of roving at once, creating a soft, painterly transition perfect for abstract nature-inspired motifs.
3. Create a Sculptural Garden with Punch Needle
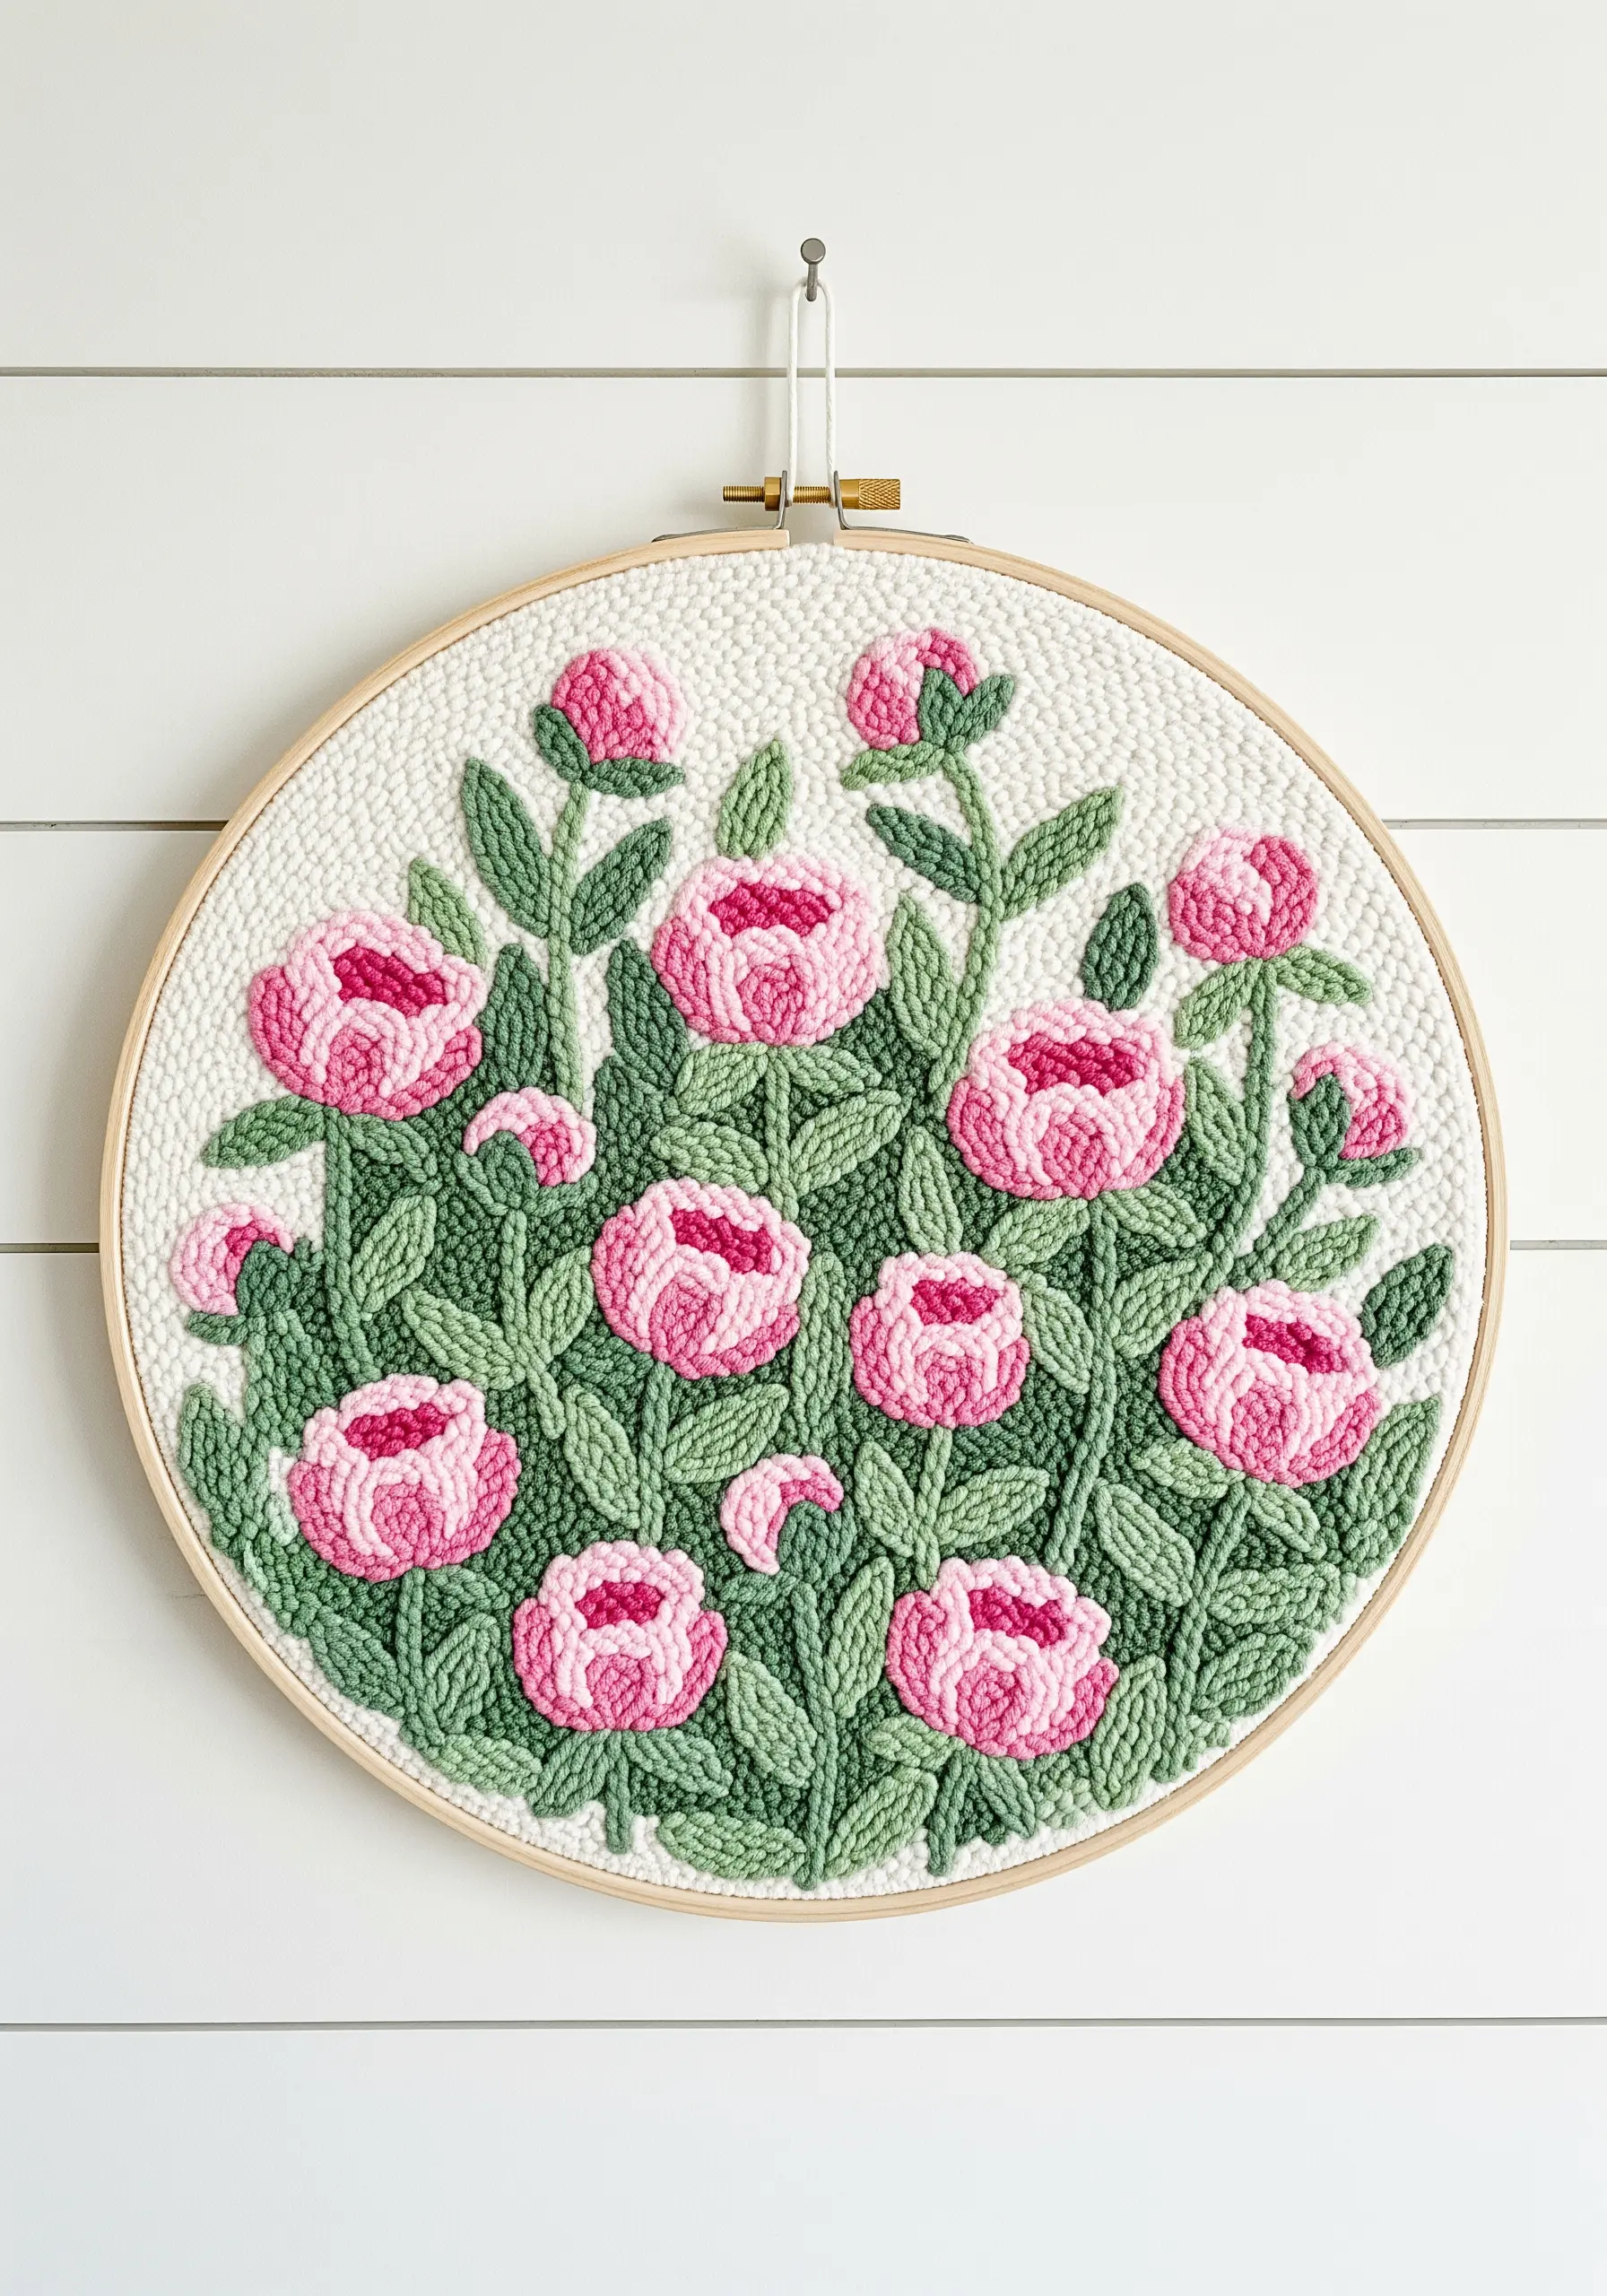
Achieve a stunning three-dimensional effect by varying your loop heights with an adjustable punch needle.
Use shorter, tighter loops for the background and leaves, which makes them recede visually.
Create longer, plusher loops for the flower petals, allowing them to pop forward and create a sense of depth and softness.
Define each petal with a darker outline to add an illustrative quality that makes the entire design look more professional.
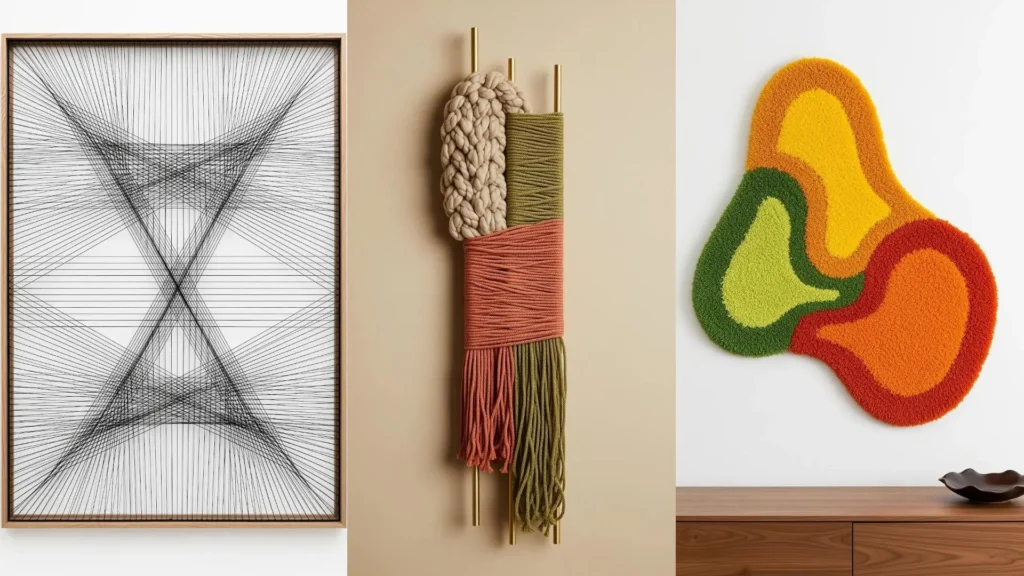
4. Design a Modernist Shape with Tufting

For a clean, graphic look, focus on crisp color-blocking with a tufting gun.
Draw your organic shapes directly onto the stretched monk’s cloth, ensuring your curves are smooth and intentional.
To get those defined edges between colors, tuft the outline of each shape first, then fill in the center.
Shearing the final piece evenly is the crucial last step; it transforms the shaggy loops into a dense, velvety surface that highlights the minimalist form.
5. Build a Dynamic Gradient with Yarn Tassels
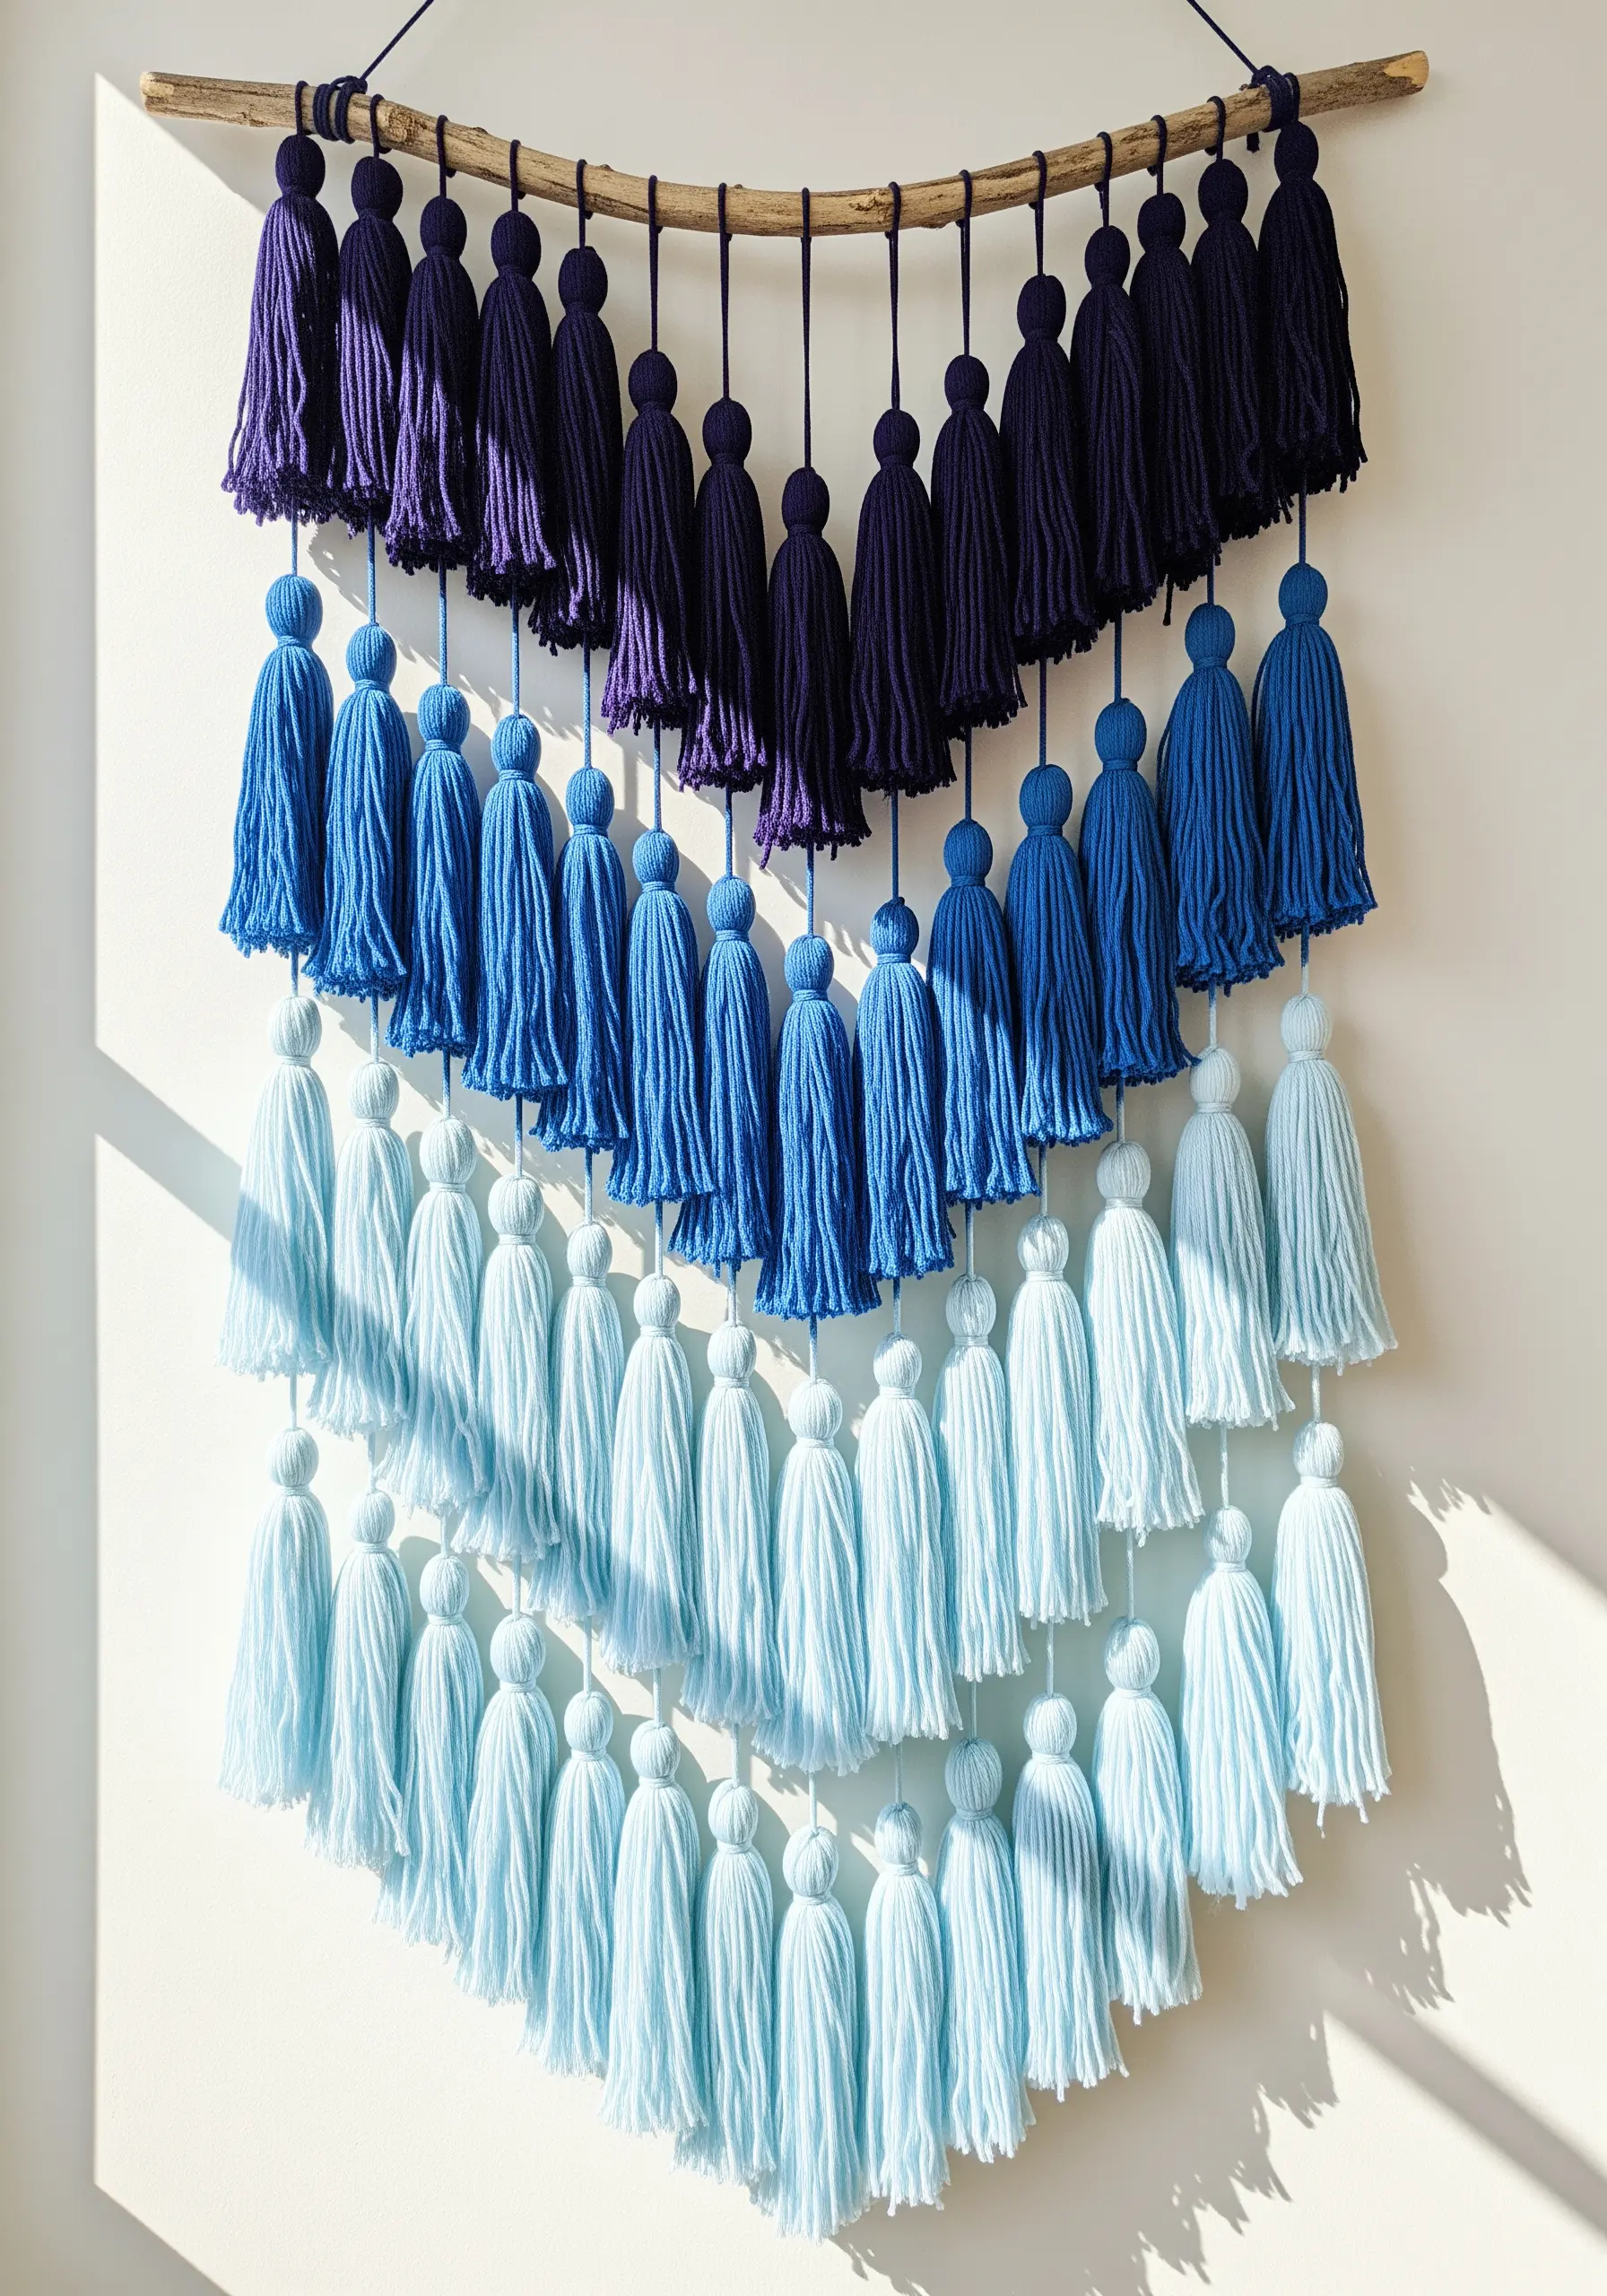
The success of a tassel wall hanging depends on a well-planned color gradient.
Select at least three shades of a single color family—light, medium, and dark—to ensure a smooth transition.
Make all your tassels first, ensuring they are uniform in size and thickness for a cohesive look.
When hanging them from the dowel, arrange them in distinct color blocks to create a powerful visual cascade that feels both organized and artistic.
6. Construct a Minimalist Fiber Sculpture
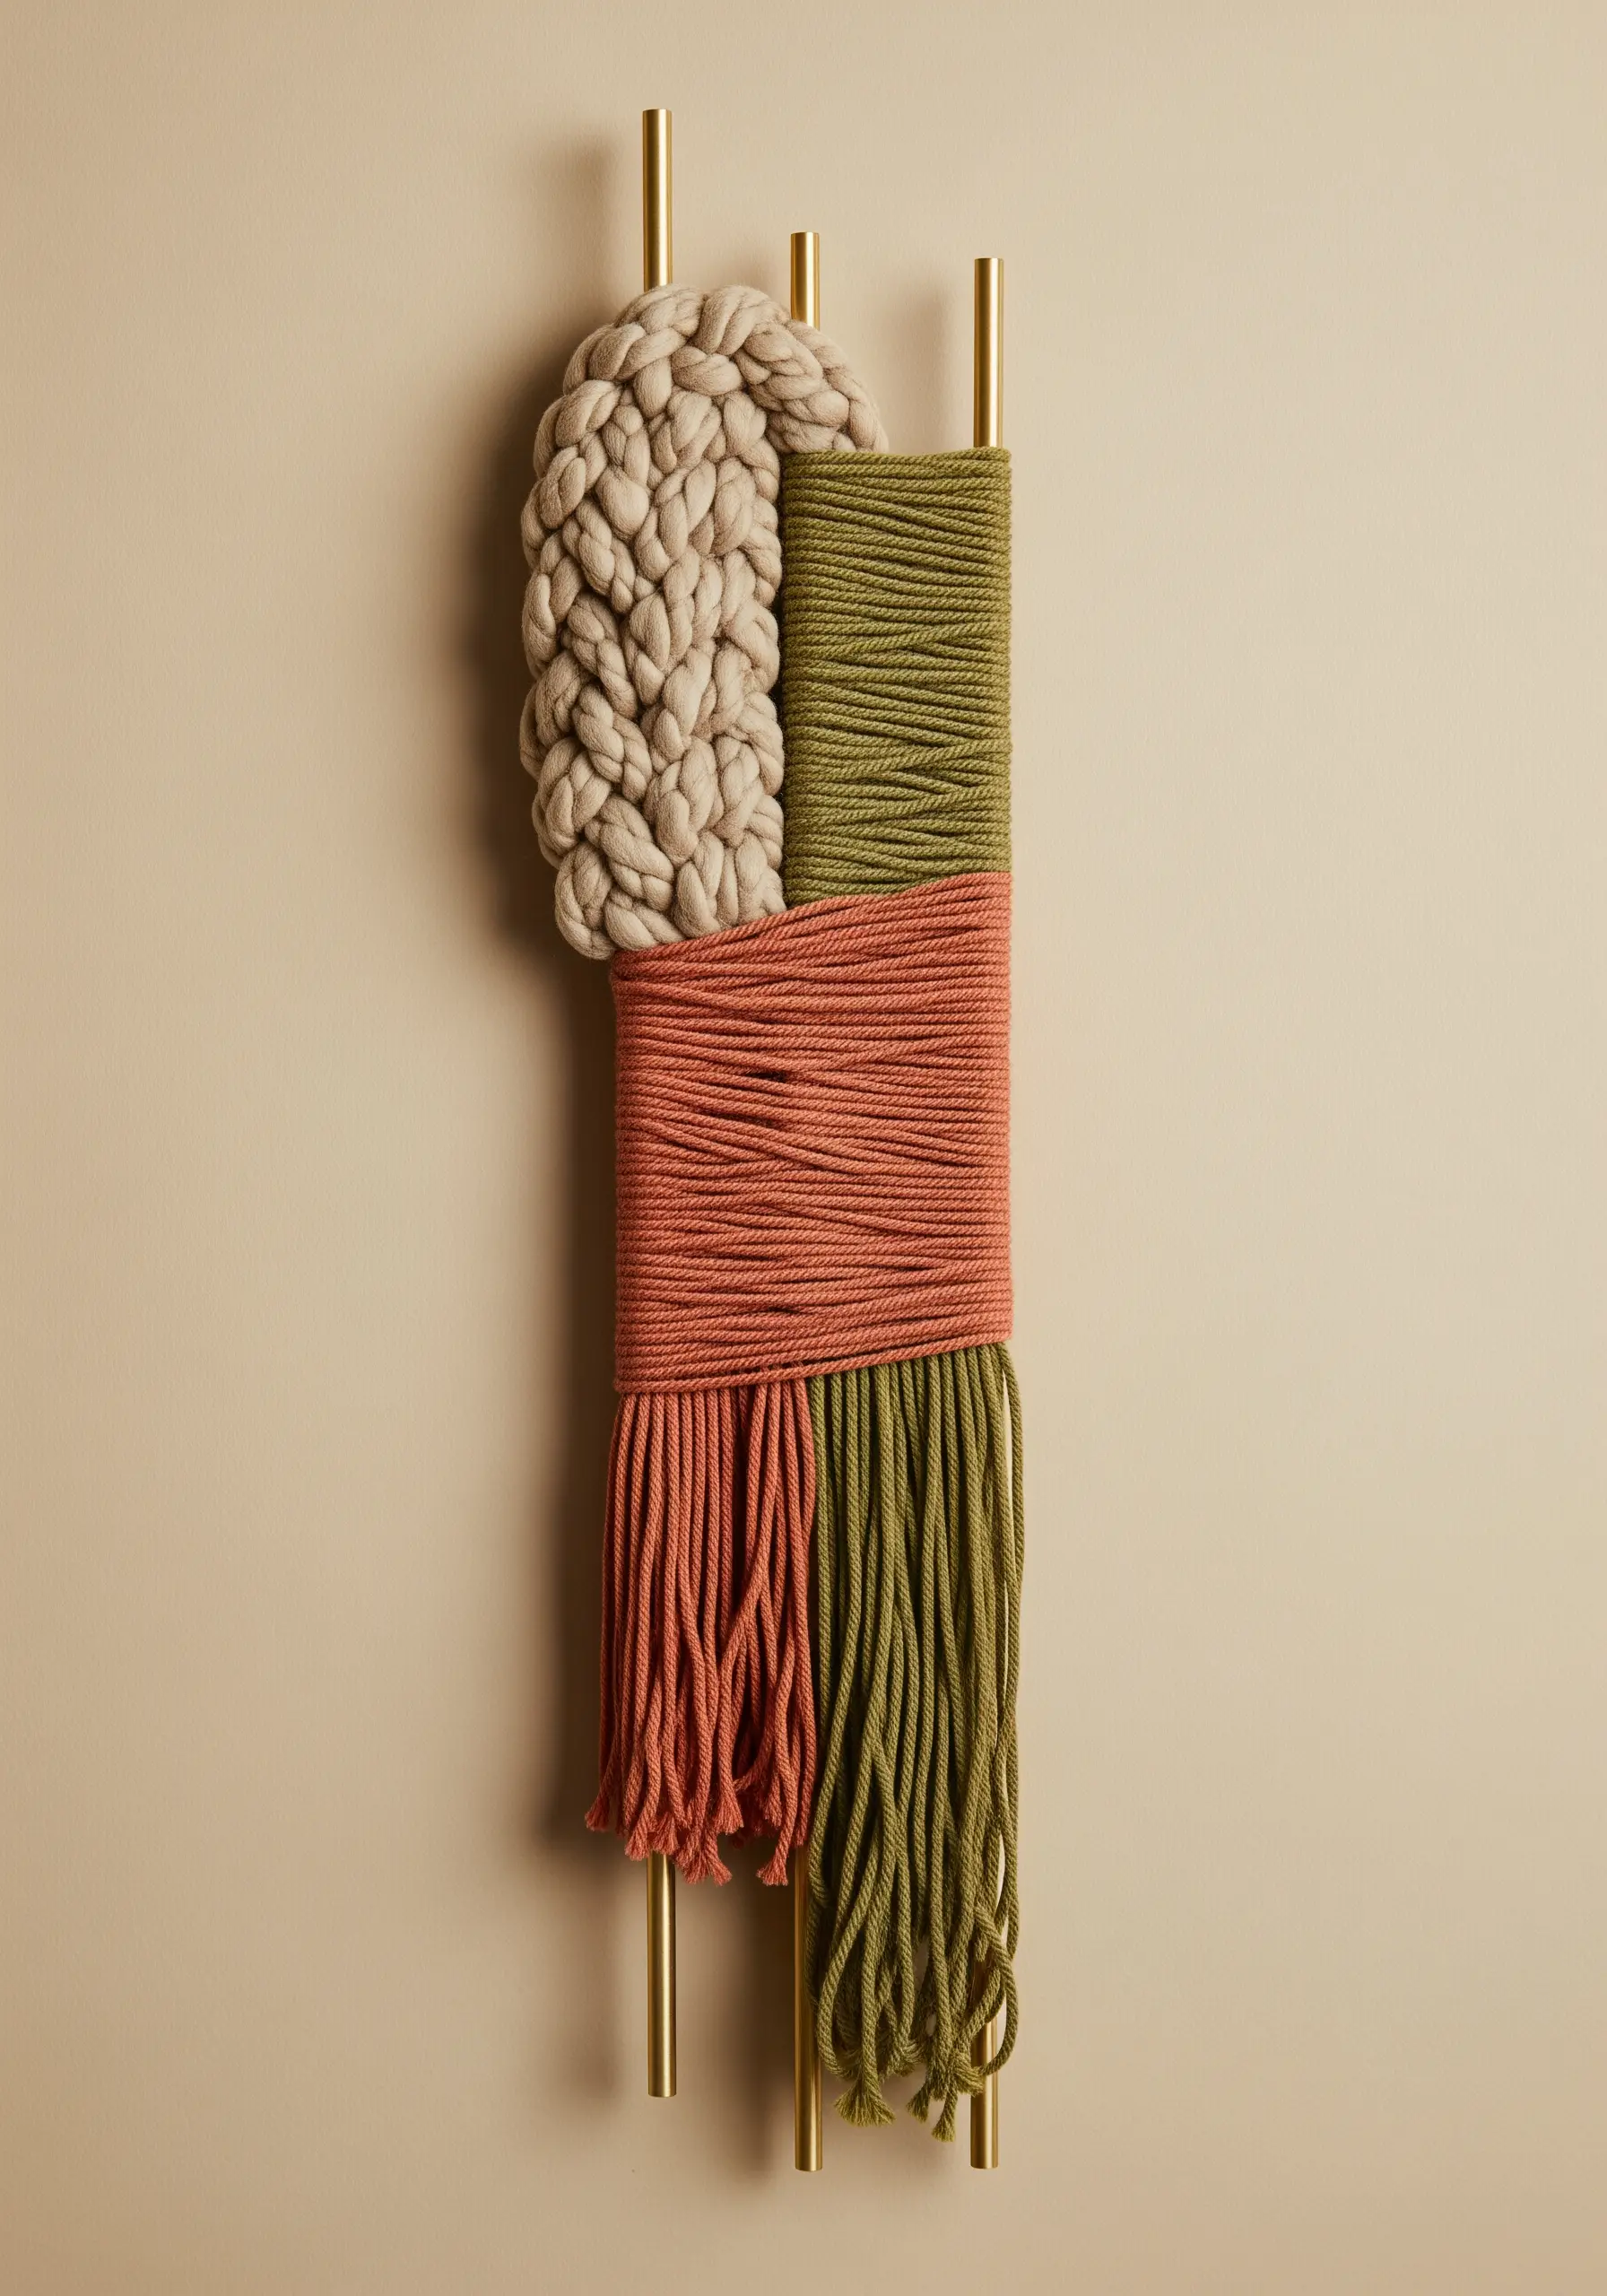
Elevate simple yarn wrapping by focusing on the power of contrasting textures.
Pair a chunky, loosely braided yarn with a smoothly wrapped, thinner yarn for immediate visual interest.
The tension is everything: wrap the thinner yarn tightly and evenly around the brass rods for a sleek, modern finish, while letting the braided section remain soft and sculptural.
This juxtaposition of tight control and organic volume is what gives the piece its sophisticated, minimalist appeal.
7. Craft a Dreamy Pom-Pom Cloud
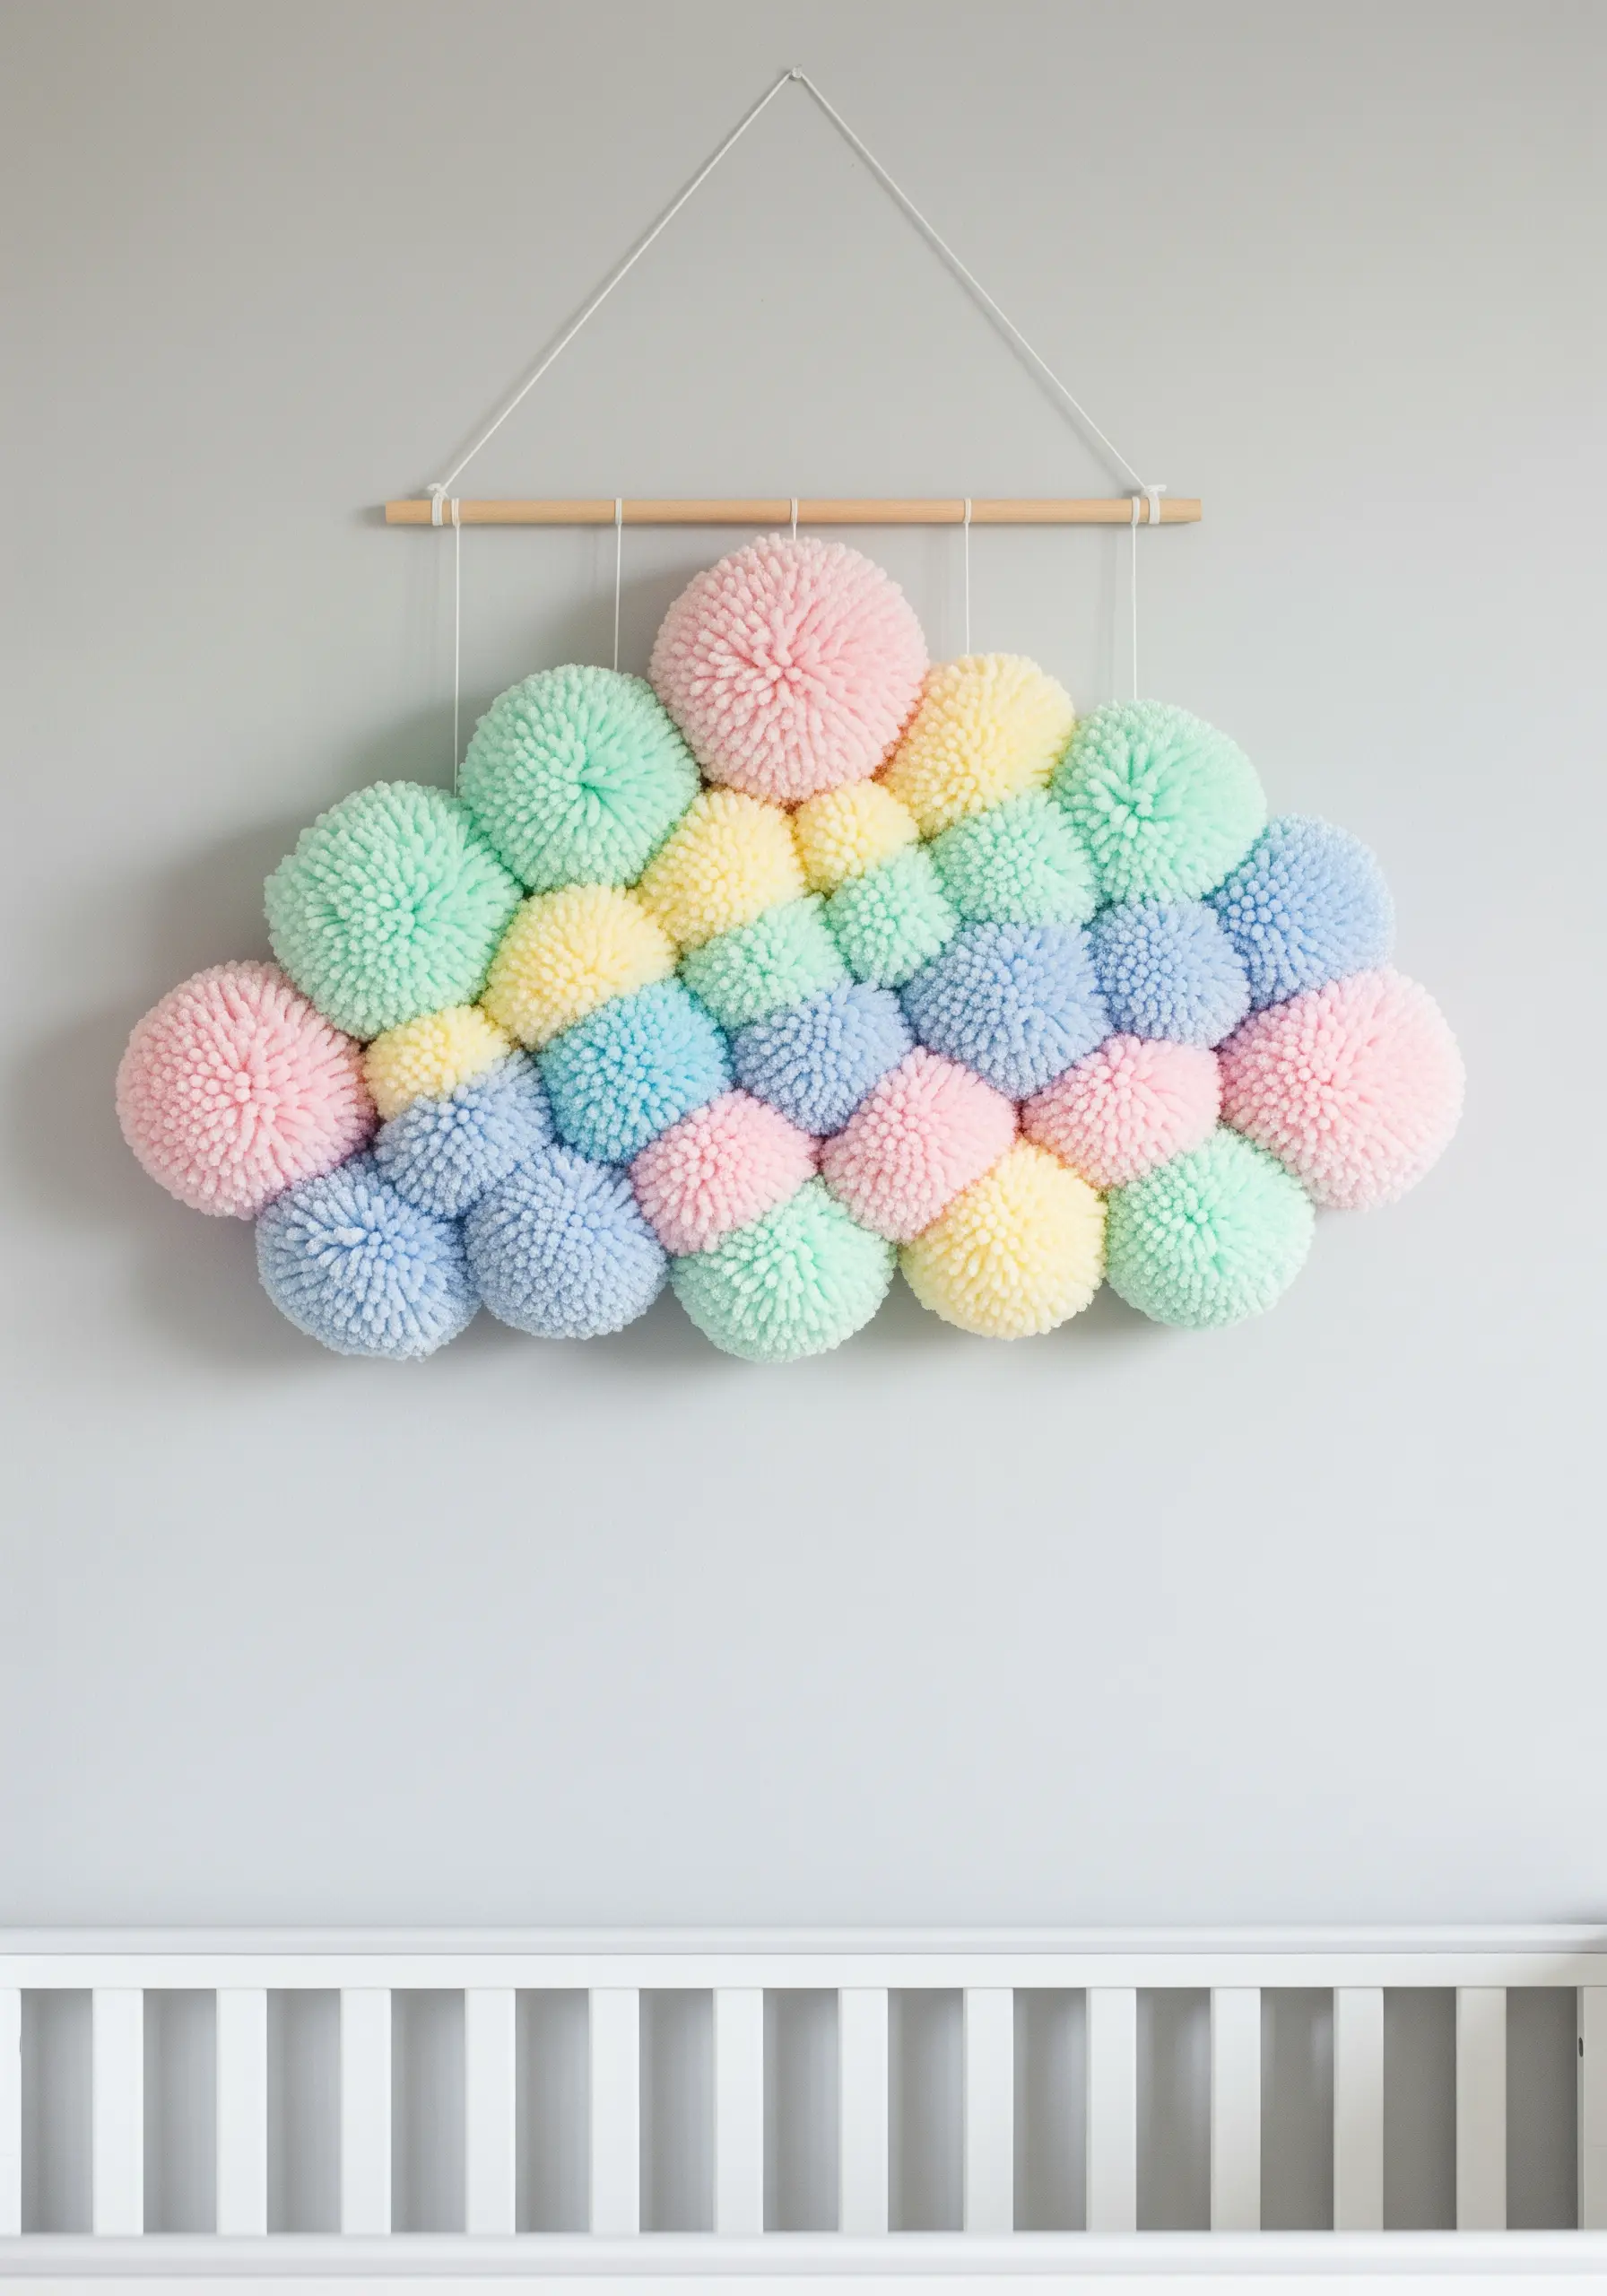
To create a soft, ethereal form, use a variety of pom-pom sizes made with pom-pom makers for consistency.
Choose a soft, pastel color palette and arrange the pom-poms organically, clustering smaller ones around larger ones to fill gaps and create a natural shape.
Secure them to a hidden felt or wire base cut into a cloud silhouette; this gives the piece structure without compromising its fluffy appearance.
This is a perfect project for a nursery or calm space.
8. Design a Geometric String Art Mandala
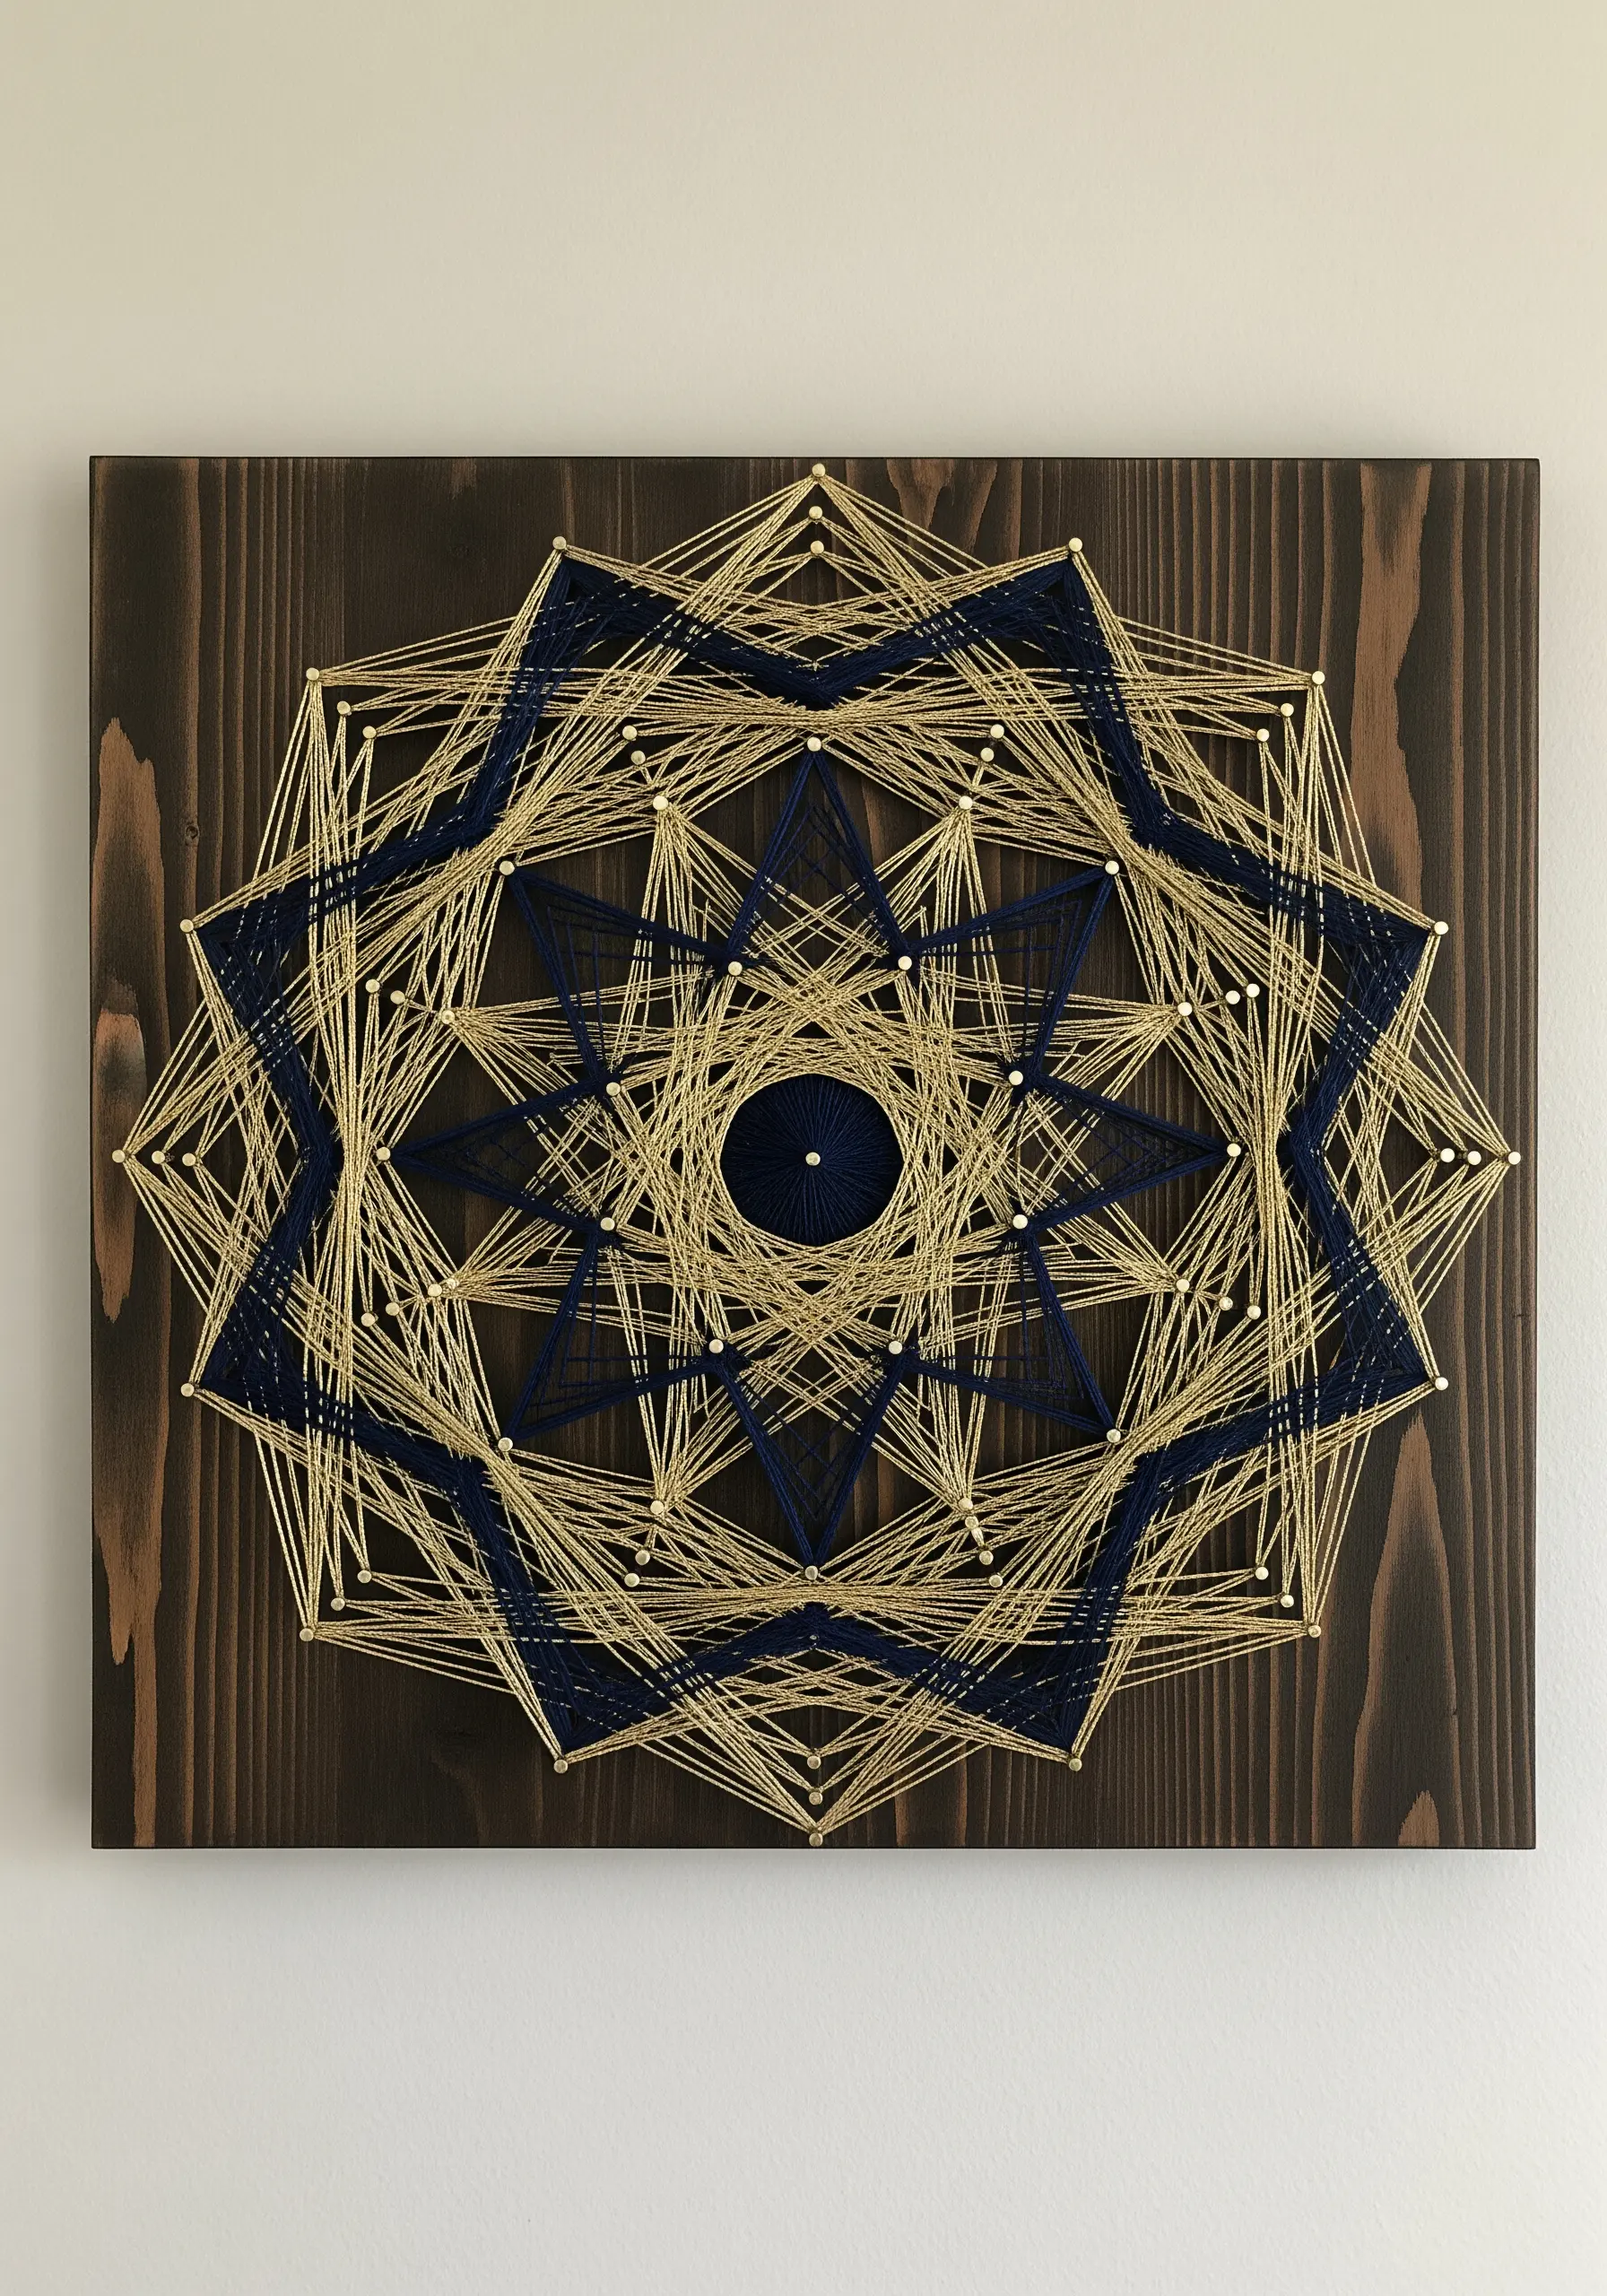
The precision of string art comes from the perfect placement of your nails.
Use a printed geometric template to mark the points on your wood board before hammering, ensuring flawless symmetry.
Create depth by layering your colors: start with the background color (blue), then weave the foreground accent (gold) on top.
Pulling the string taut with each wrap is essential for creating the sharp, clean lines that define the pattern.
9. Add Dimensional Texture to Celestial Hoop Art
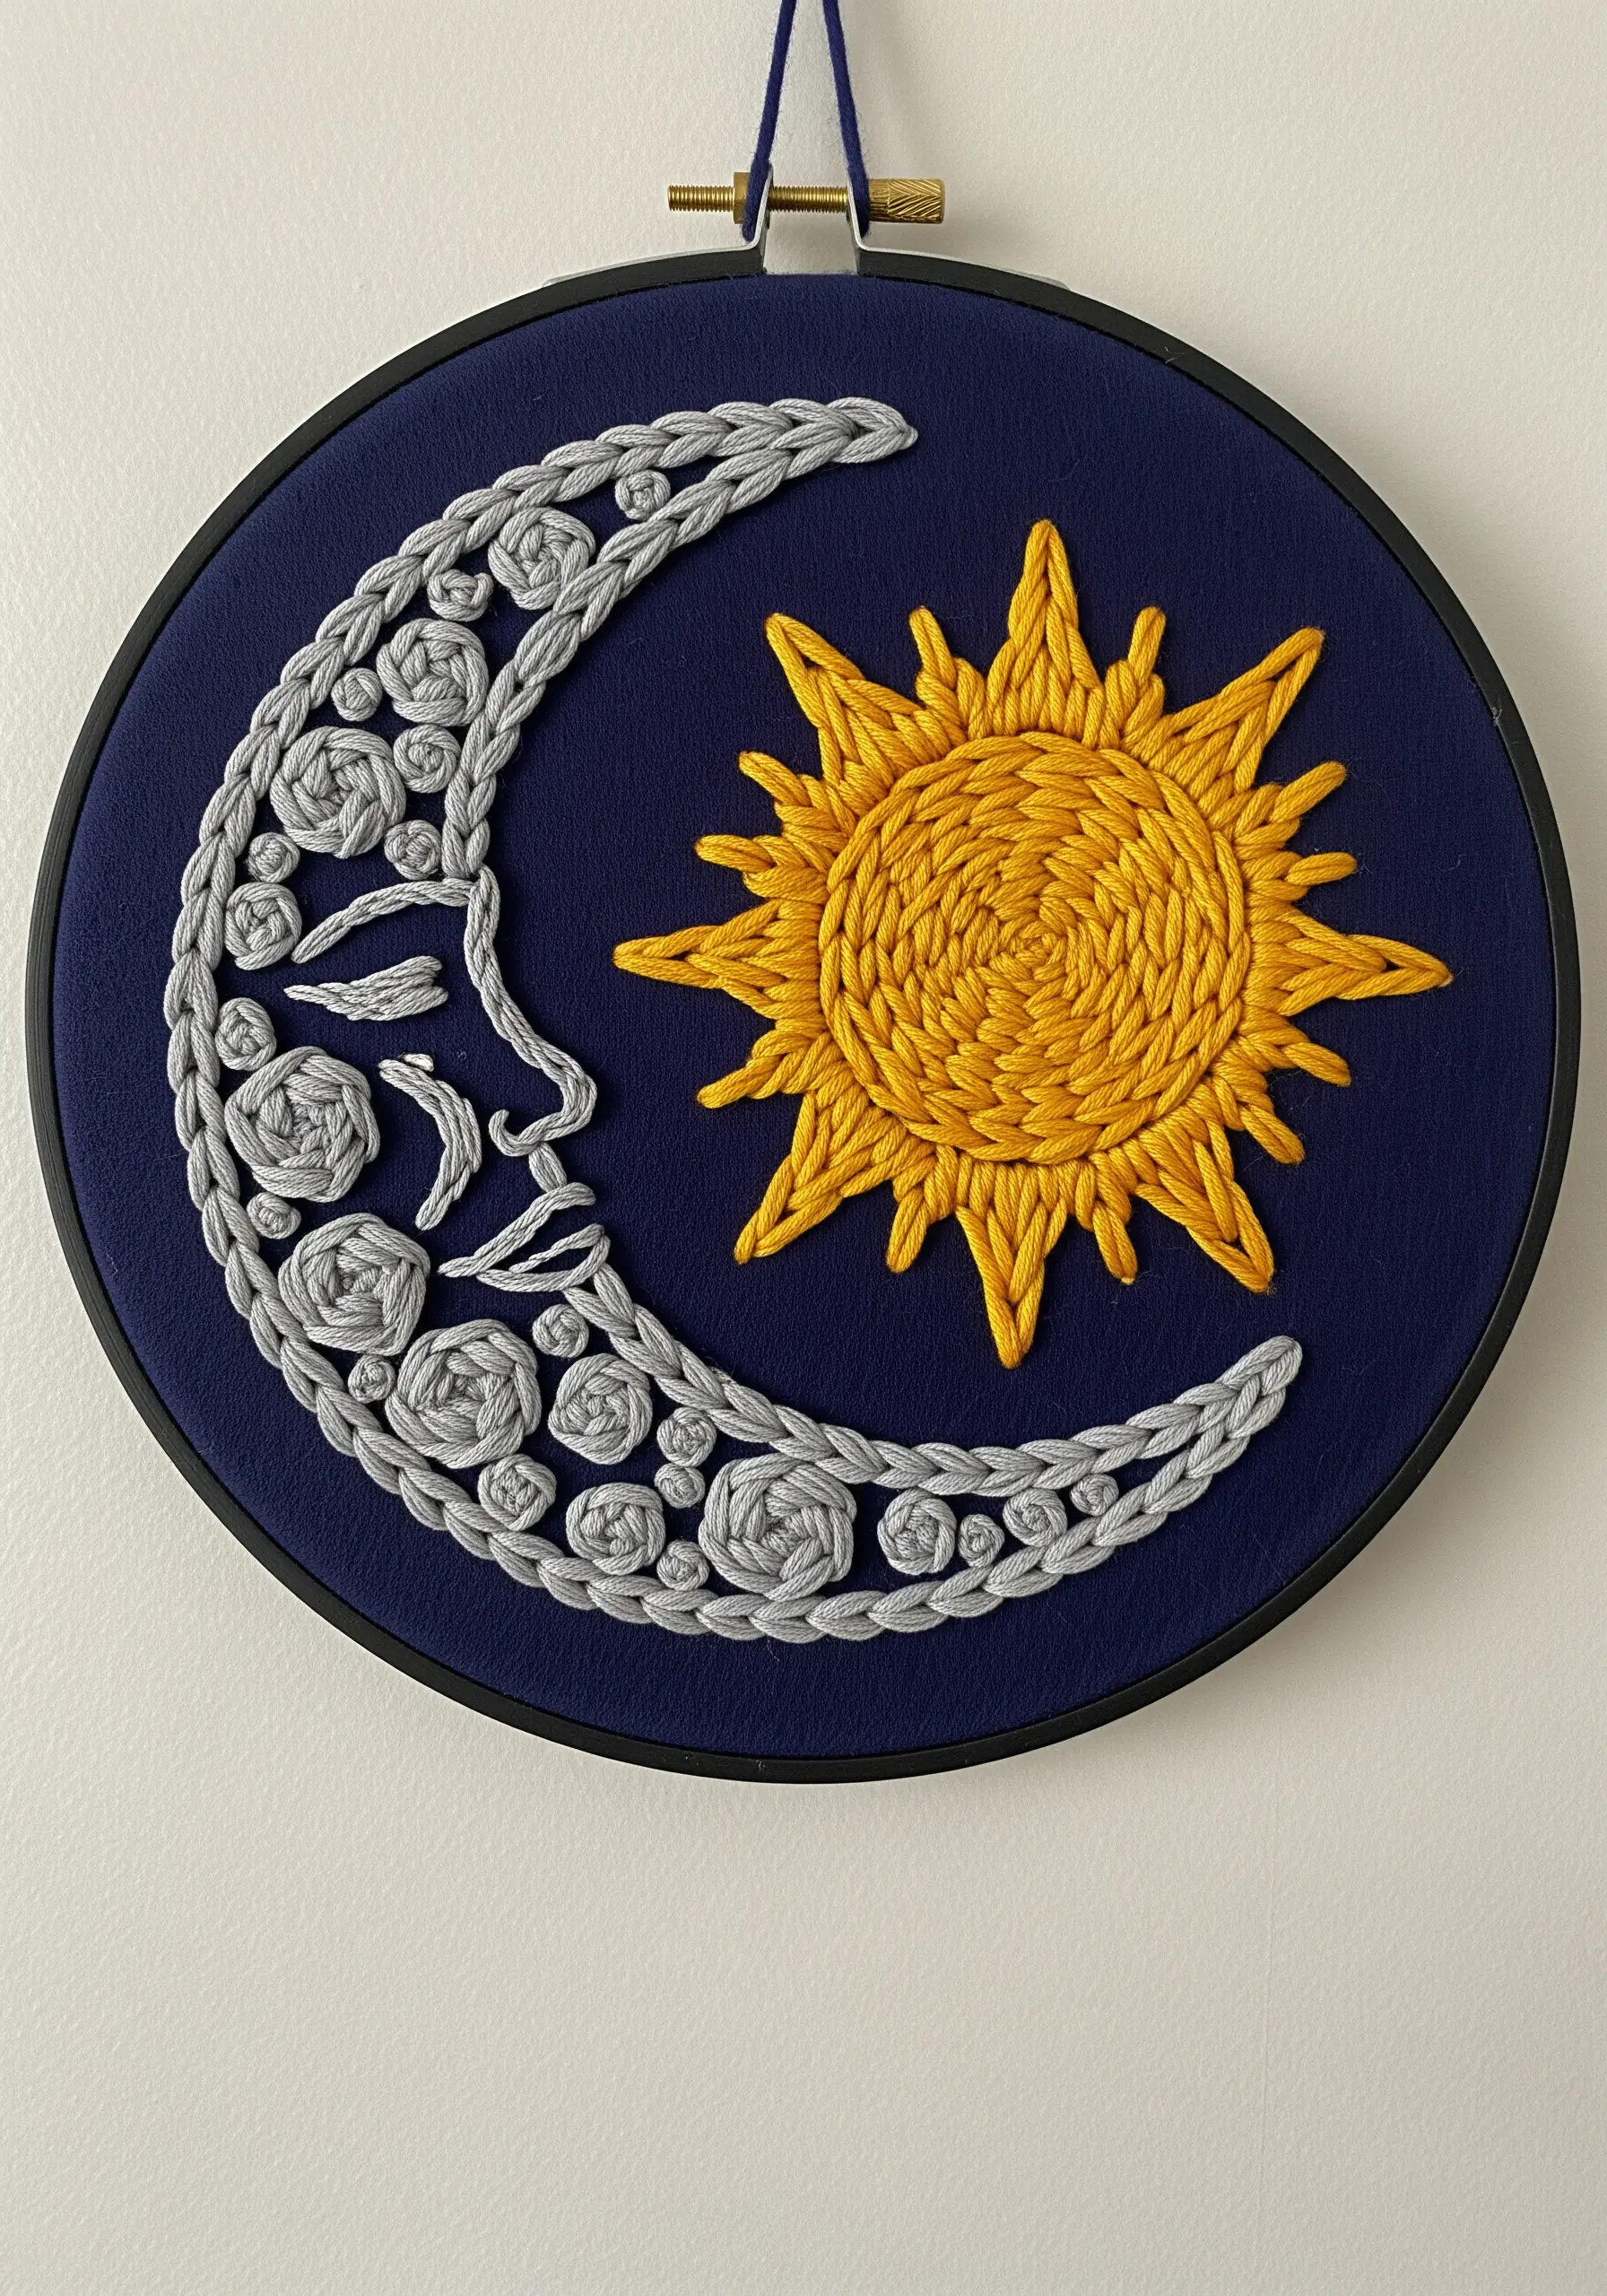
Elevate a simple silhouette by incorporating thick, braided textures that stand off the fabric.
Create the moon’s surface by couching a chunky, pre-braided cord onto the fabric with a thinner, matching thread.
For the sun, use a dense satin stitch worked in a spiral to create a smooth, radiant sheen.
The contrast between the sun’s smoothness and the moon’s rugged, raised texture makes the entire piece visually compelling.
10. Integrate Soft Weaving into Your Macrame
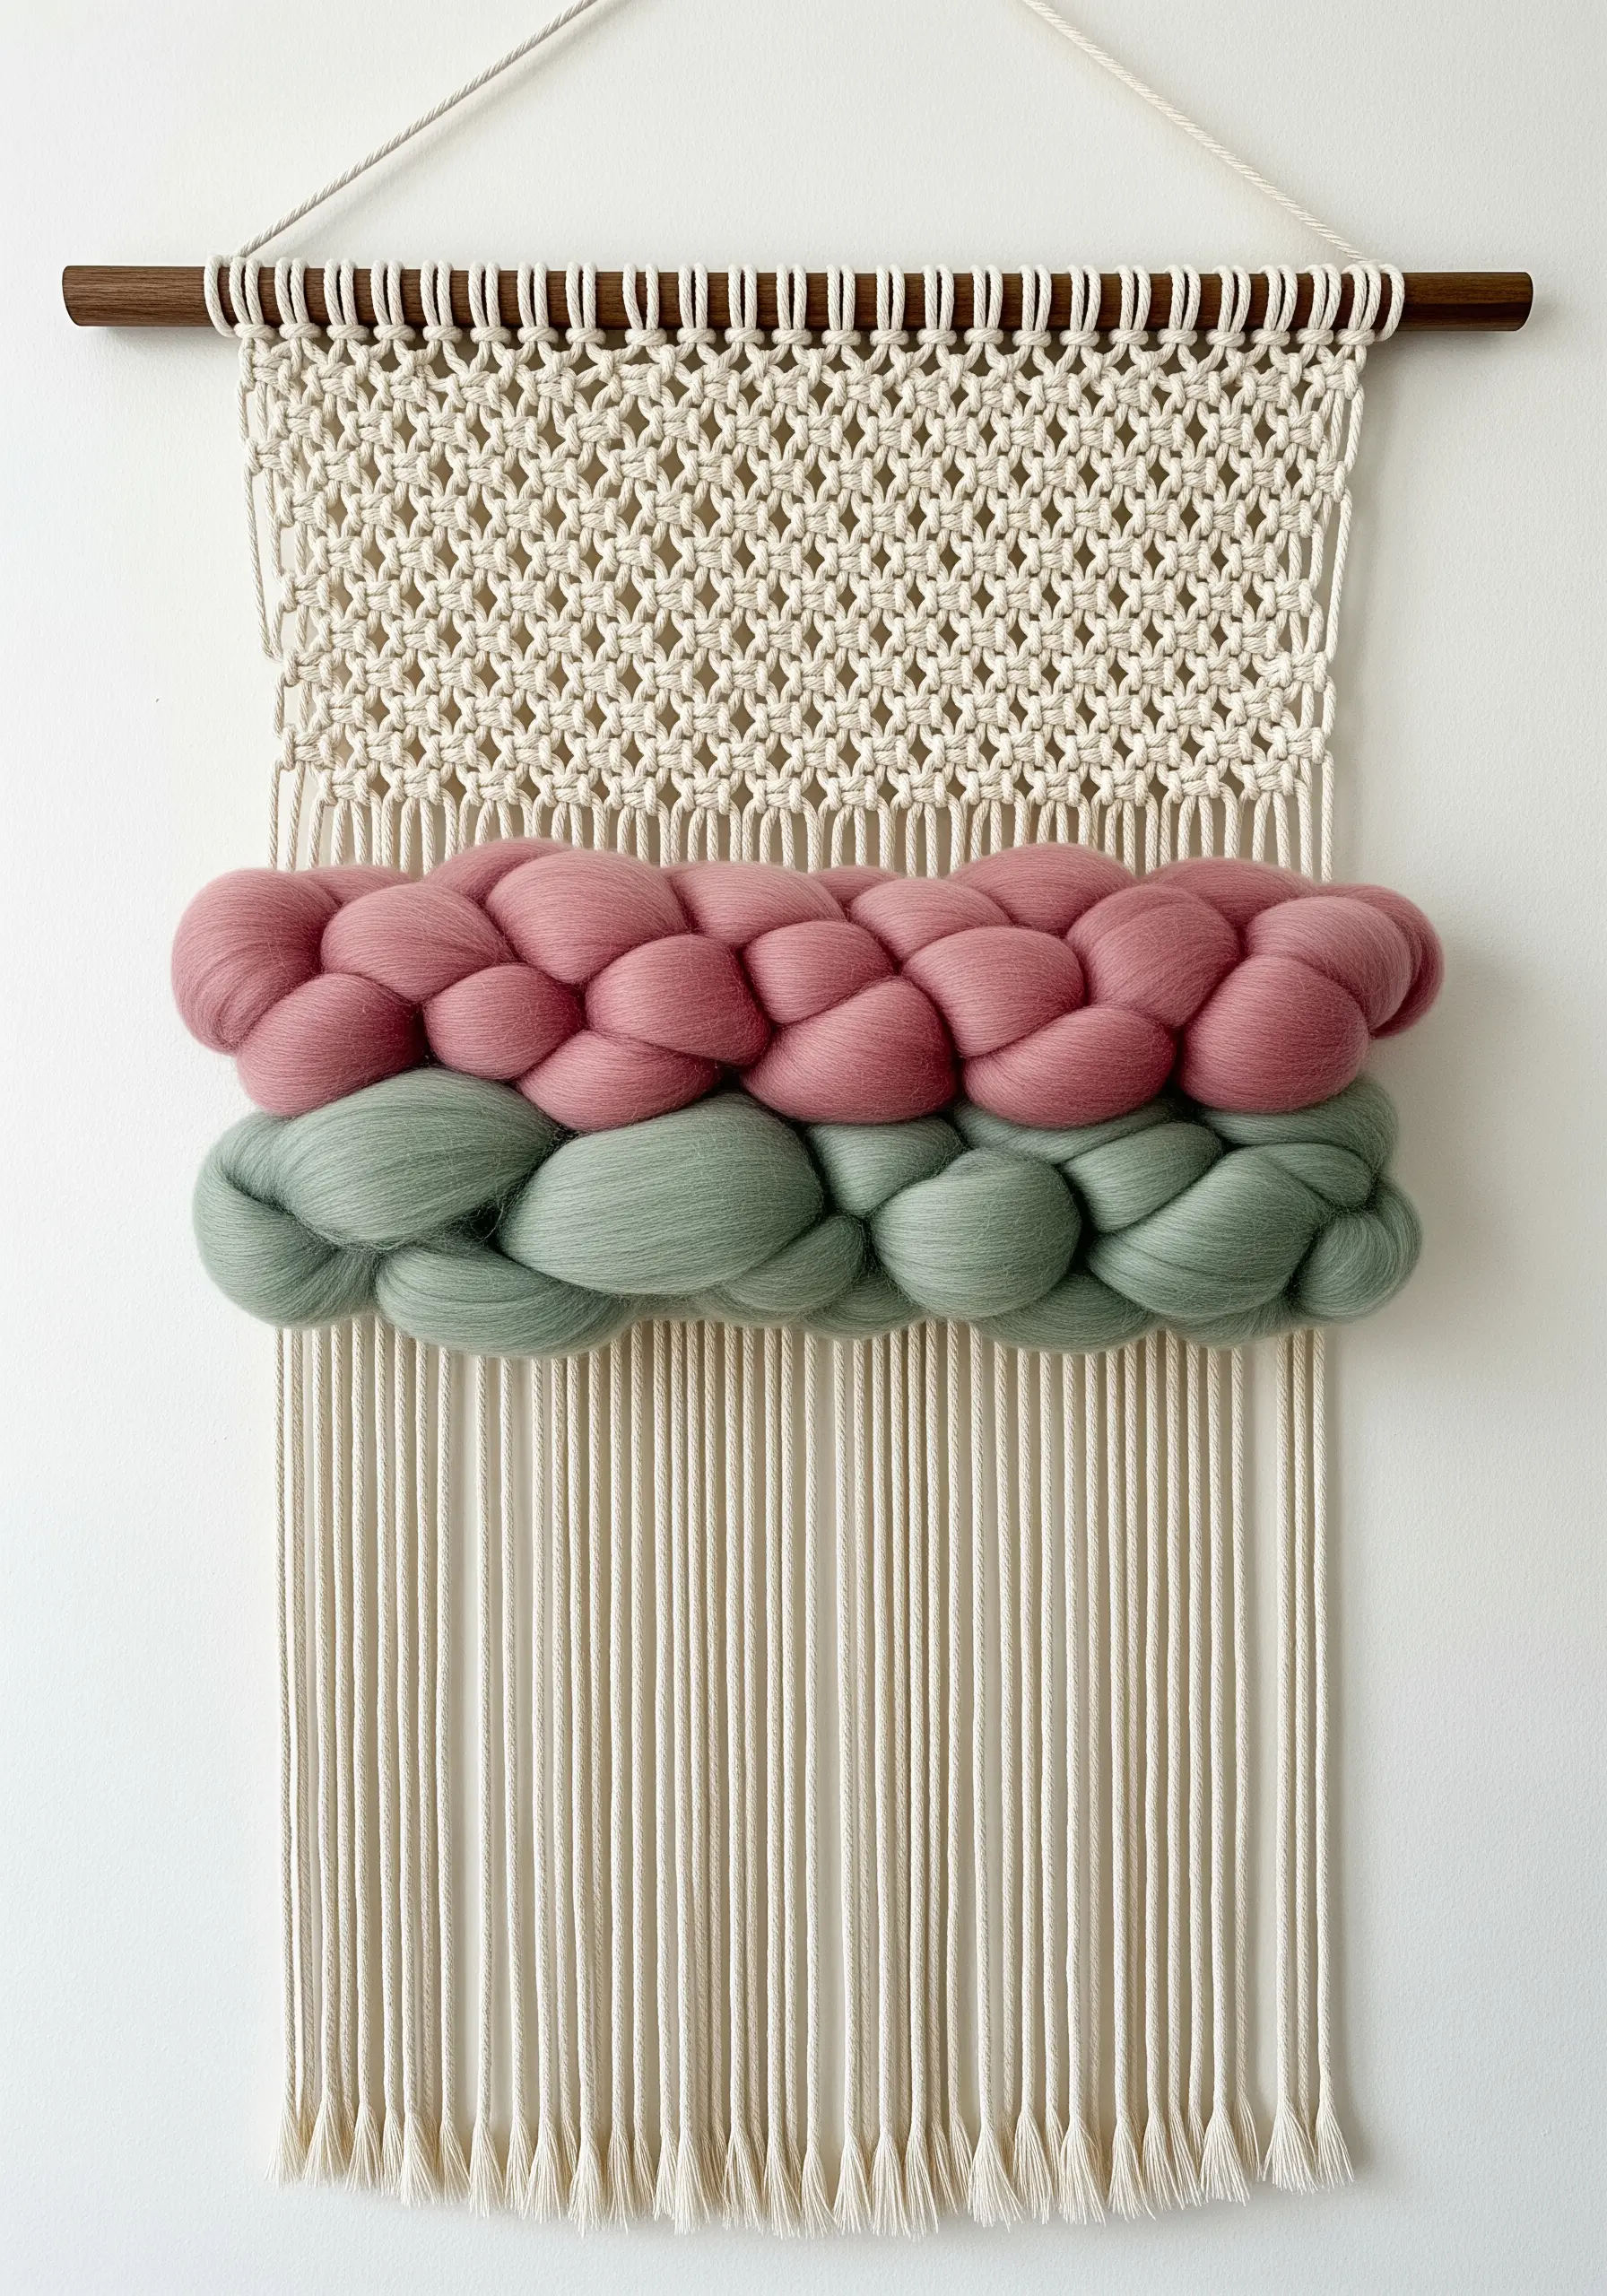
Break up the precise geometry of macrame knots by introducing soft, woven sections of wool roving.
After completing a section of square knots, leave a gap in your vertical cords and weave the roving through using a simple tabby weave (over-one, under-one).
This technique adds a block of plush color and texture, creating a focal point and softening the overall design.
It’s a beautiful way to create stunning mixed-fiber art.
11. Explore Freeform Weaving on a Circular Loom
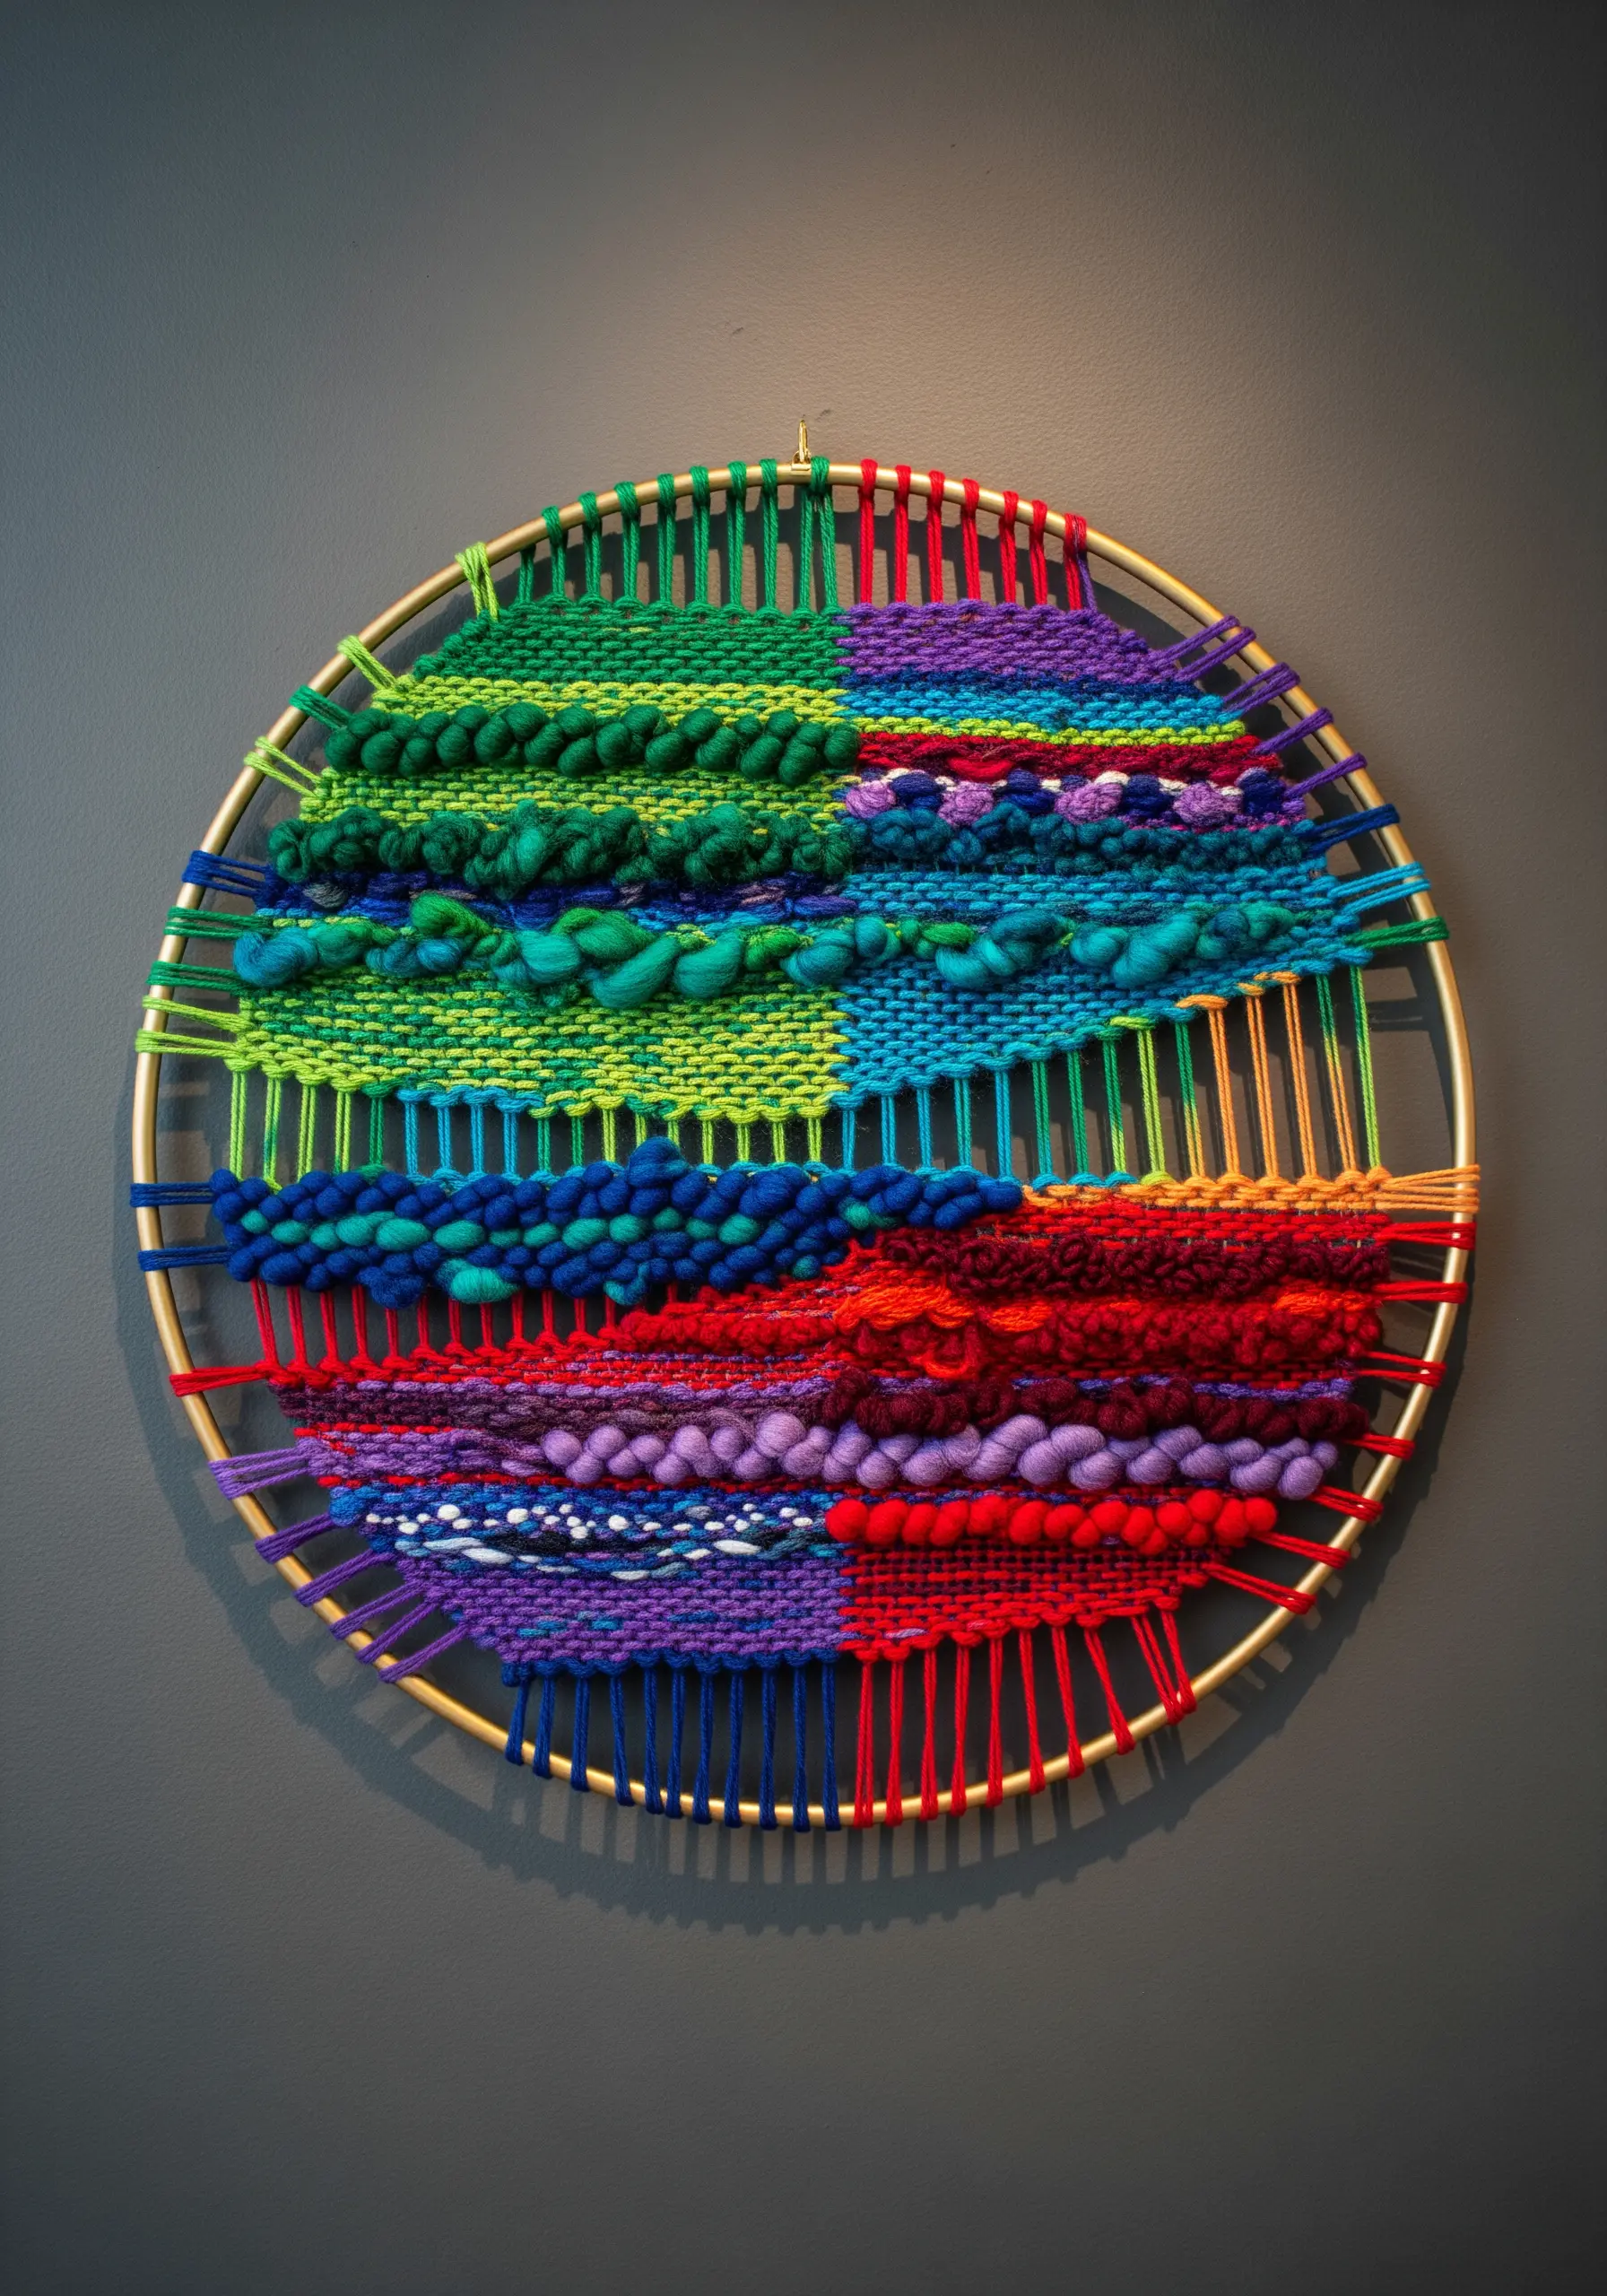
A circular loom is an invitation to play with texture and color in a non-linear, intuitive way.
Warp a metal hoop and work in quadrants, filling each section with a different color and stitch technique.
Experiment with pile knots (like rya knots) for shaggy sections and soumak stitch for raised braids.
Don’t be afraid to let colors bleed into neighboring sections; this organic approach gives the piece its vibrant, improvisational energy.
12. Weave a Vibrant Ojo de Dios (God’s Eye)
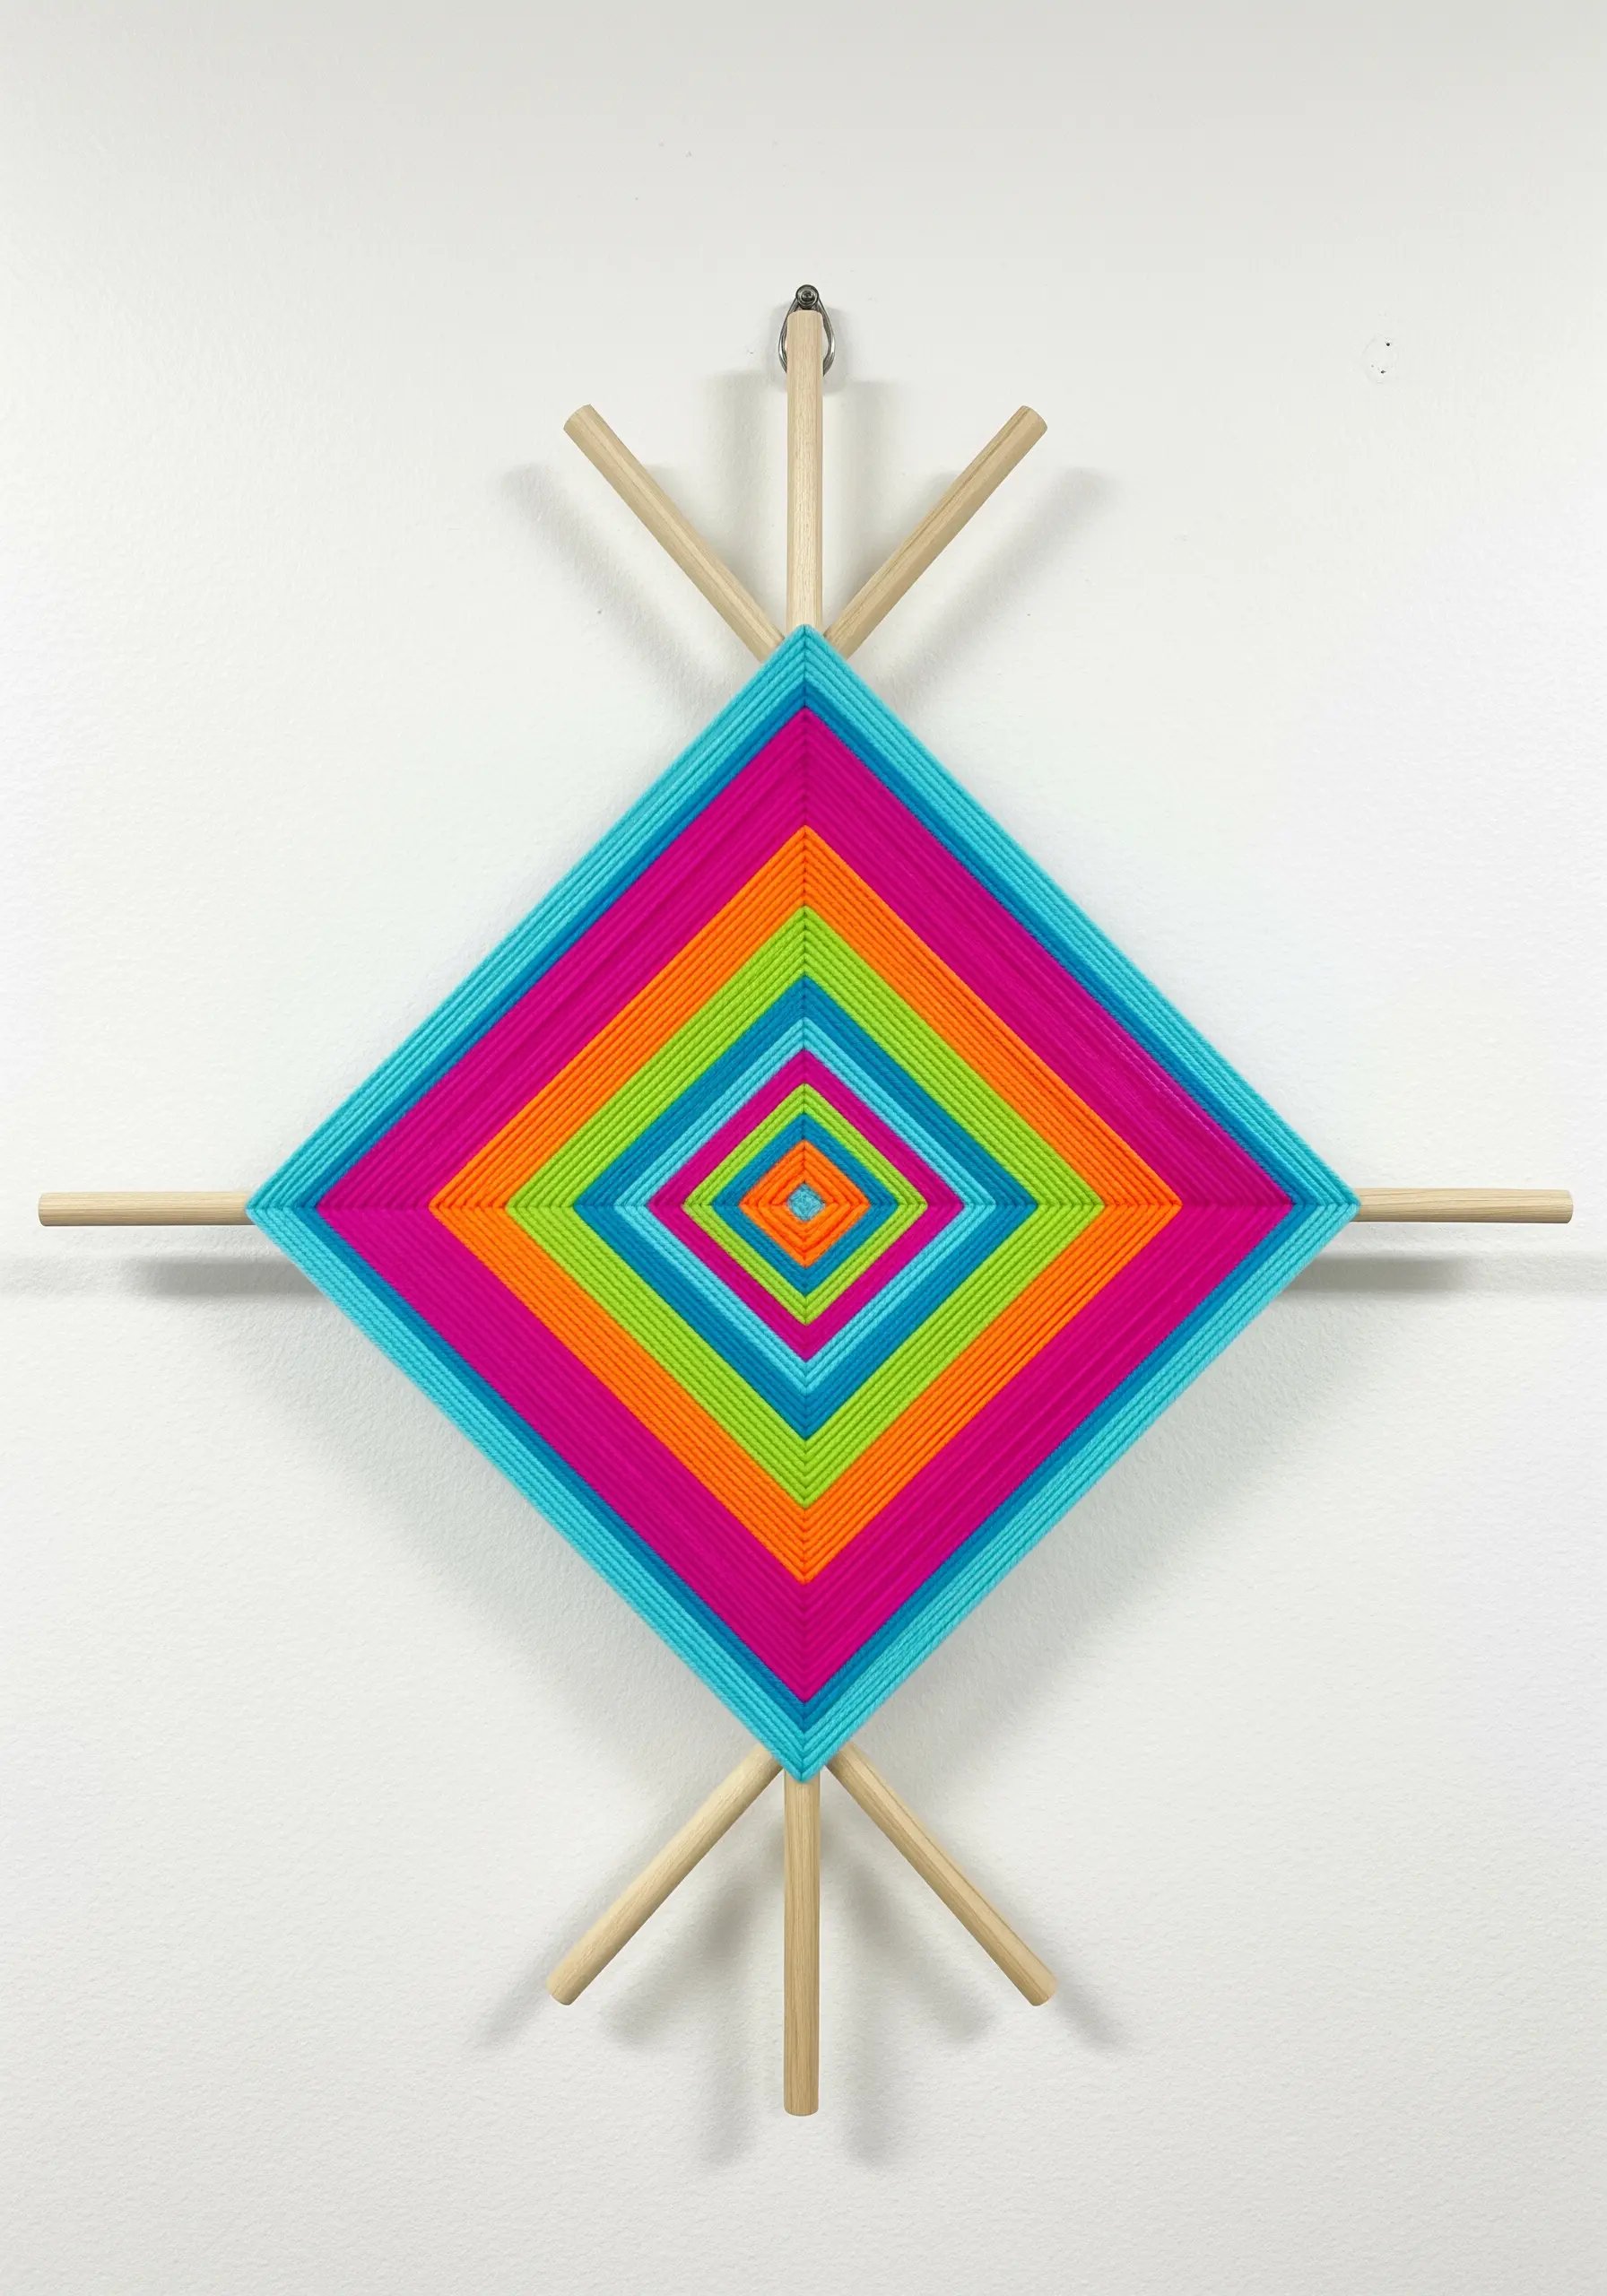
This traditional craft is a beautiful exercise in tension and color wrapping.
Start by crossing two dowels to form a stable frame, securing them tightly at the center.
The key is to wrap the yarn around each dowel in a consistent pattern, maintaining even tension to form the iconic diamond shape.
For the sharpest color transitions, securely tie off one color on the back before beginning the next.
13. Construct an Elegant Tiered Fringe Chandelier

To create this sophisticated cascading effect, you will need metal rings in graduating sizes.
The entire structure is built with the simple lark’s head knot, attaching each piece of yarn to the rings.
The secret to a high-end look is a final, precise trim. Use a rotary cutter and mat for a perfectly straight edge on each tier.
Choosing a high-quality, single-twist cotton cord that brushes out into a soft fringe also elevates the finish.
14. Create a Living Wall with Preserved Moss
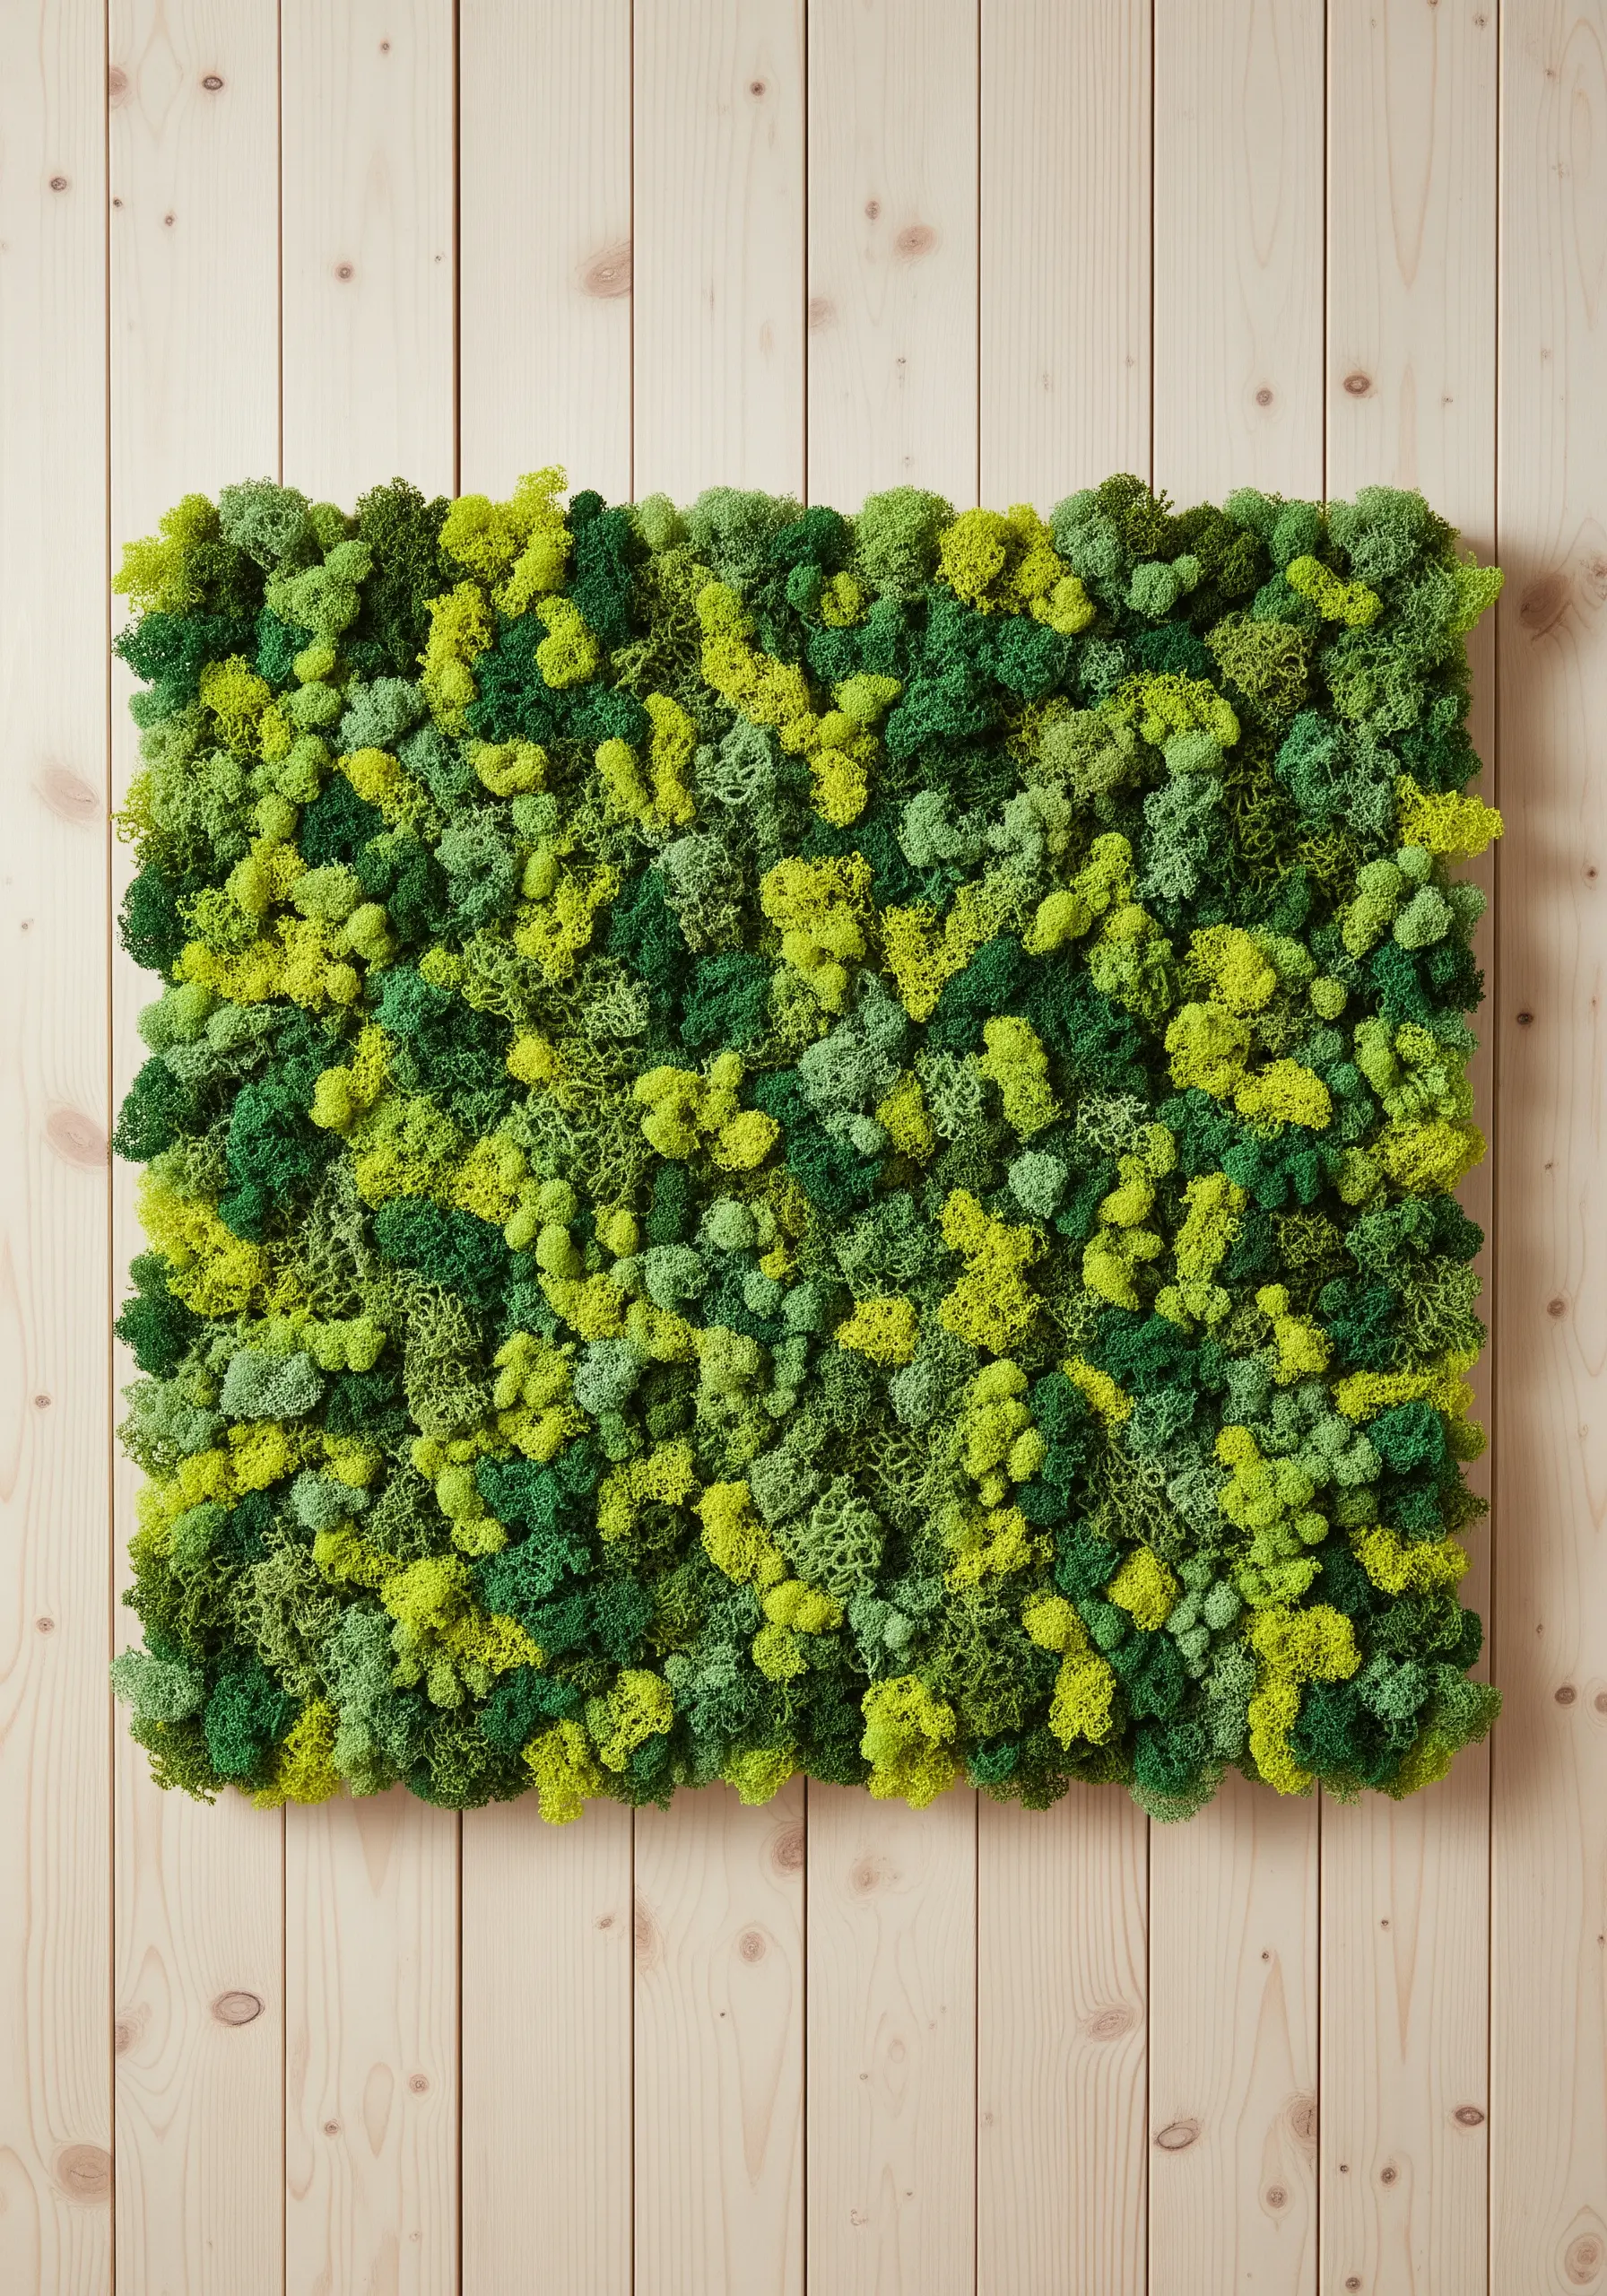
This is textile art without any thread or yarn, focusing purely on organic texture.
To achieve a natural, multi-tonal look, use at least three different shades of preserved reindeer moss.
Work on a sturdy backing like corkboard and apply a strong craft glue in sections, pressing clumps of moss firmly into the adhesive.
Overlap the colors and vary the density to mimic the organic growth patterns found in nature. This is a stunning way to make nature-inspired wall decor.
15. Craft a Perfectly Wrapped Yarn Rainbow
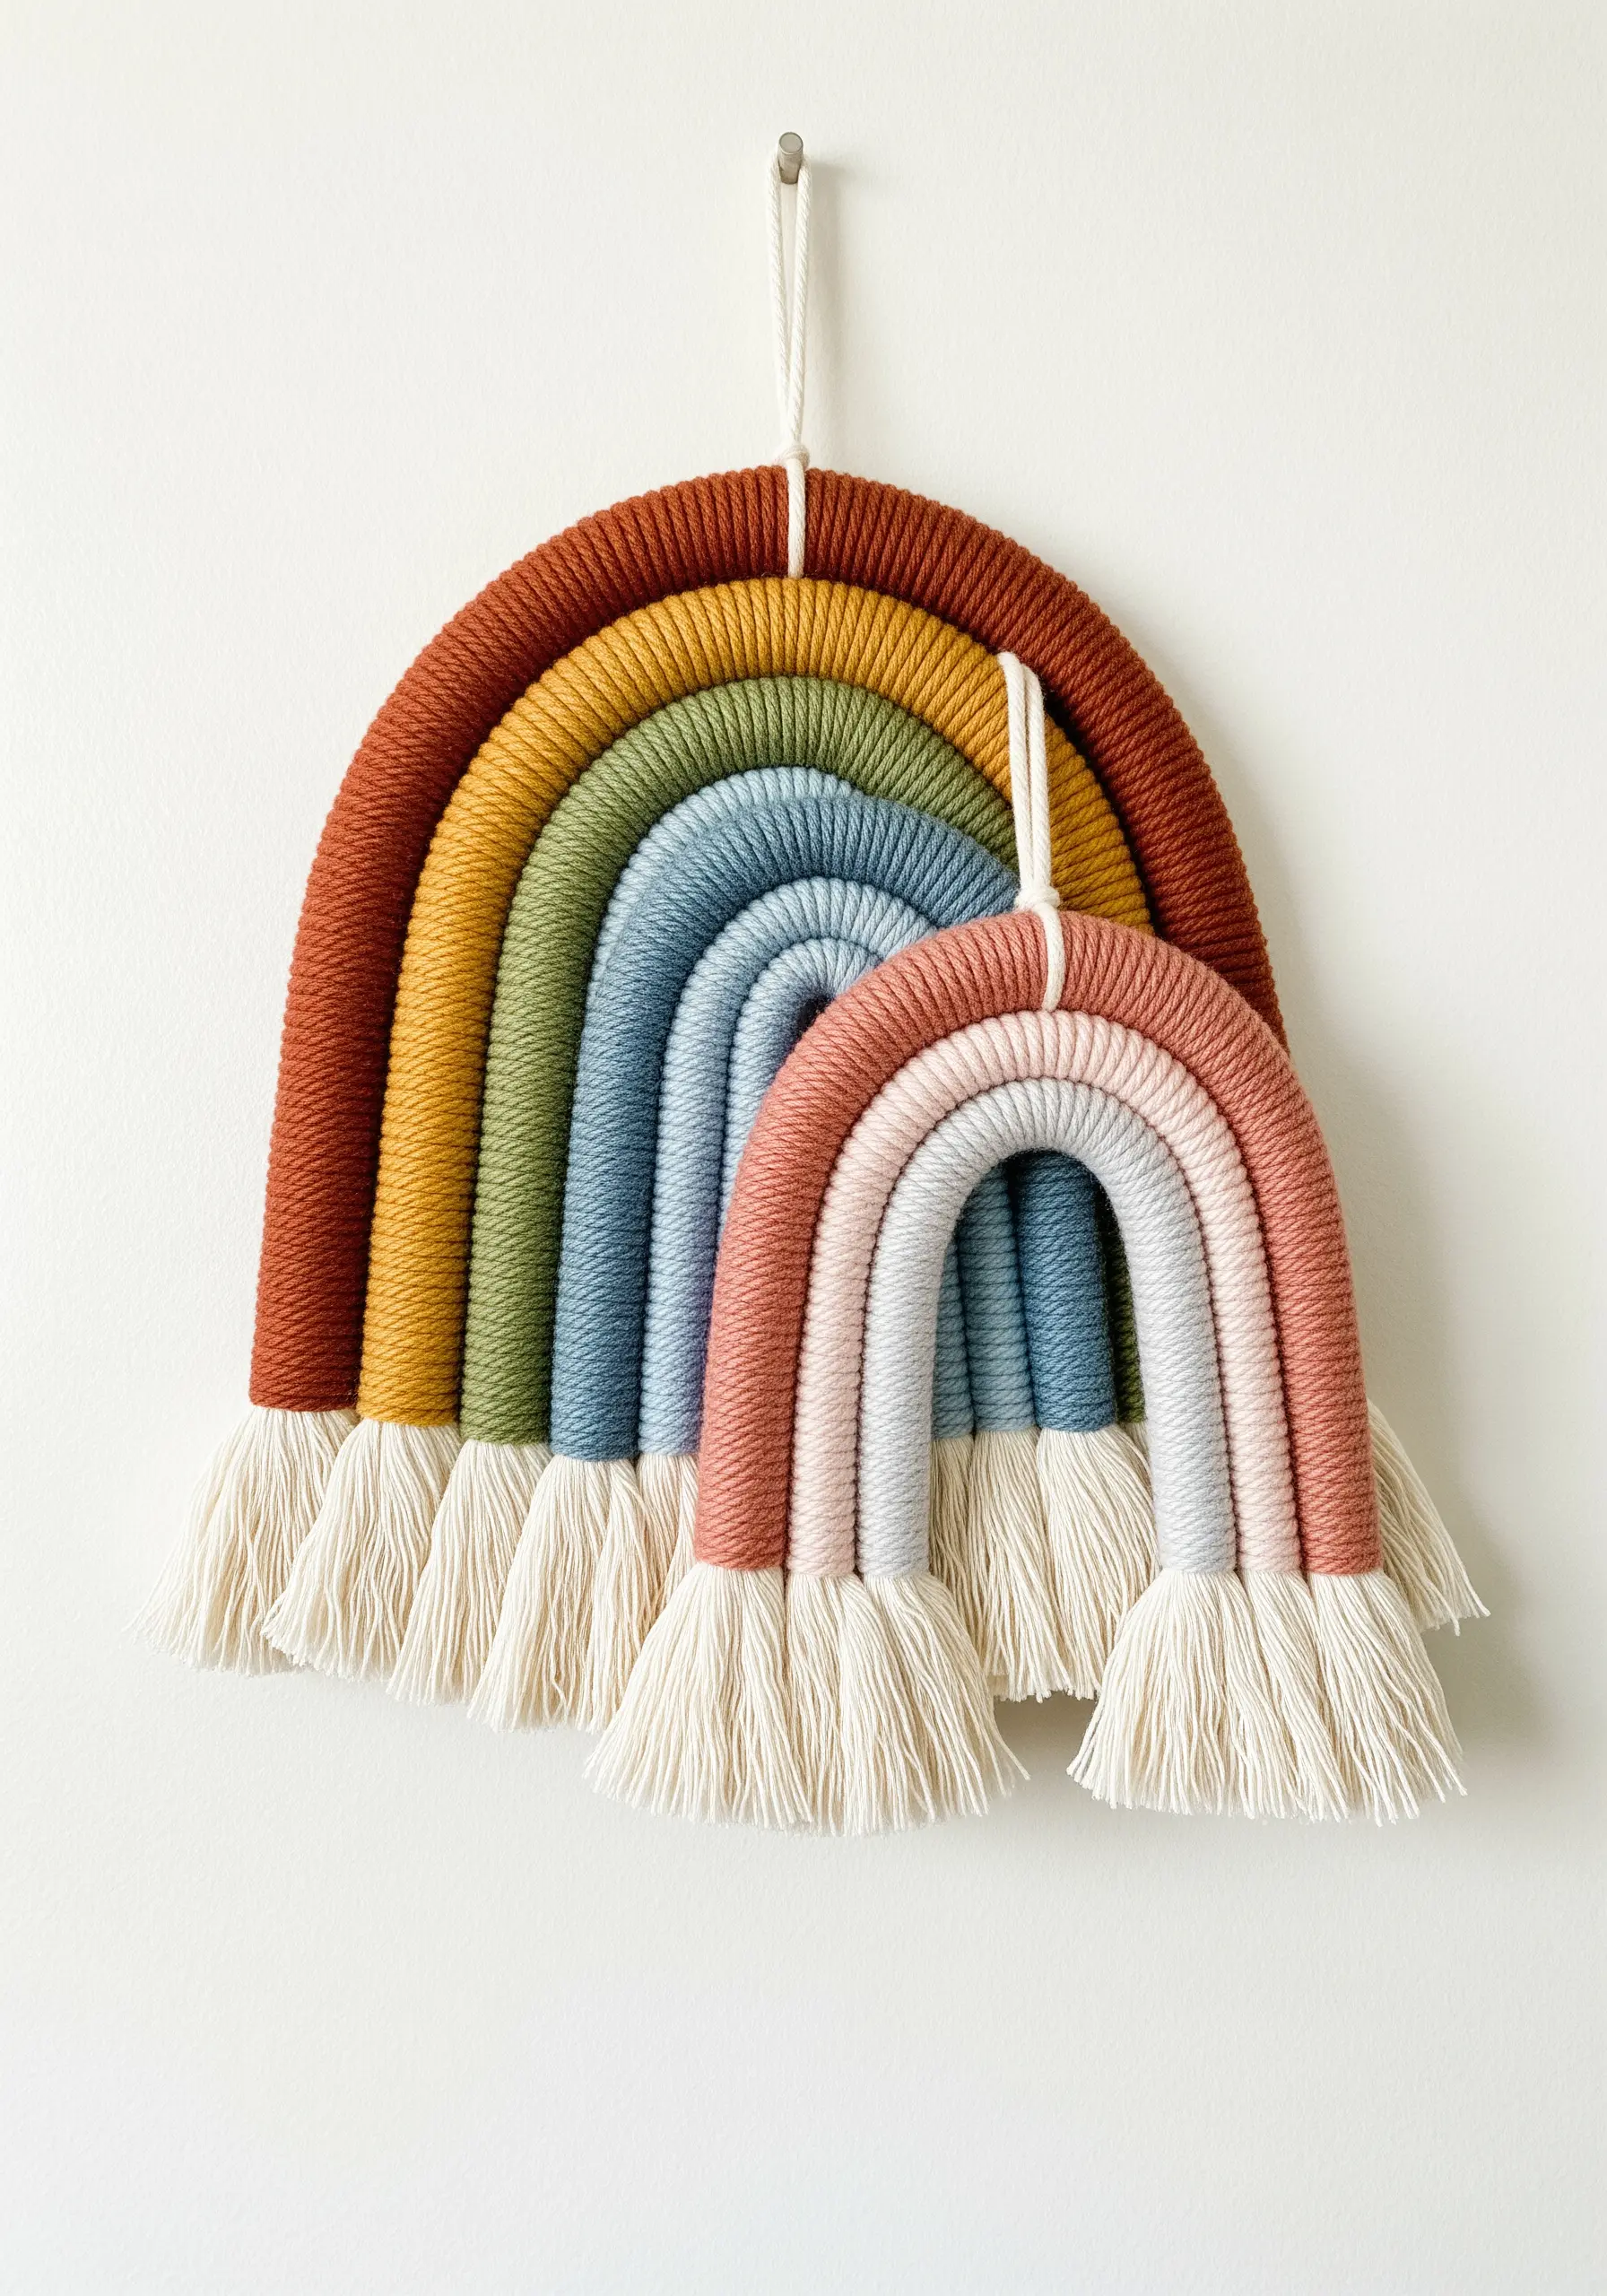
The key to a smooth, uniform rainbow arch is a solid foundation.
Use a thick, stiff rope as the core for each colored arch to give it structure and weight.
Wrap your colored yarn tightly around the rope, ensuring each new wrap sits snugly against the last with no gaps showing through.
To assemble, stitch the wrapped arches together securely on the back, then unravel and comb the rope ends to create a full, even fringe.
16. Knit a Cozy Cable Wall Tapestry
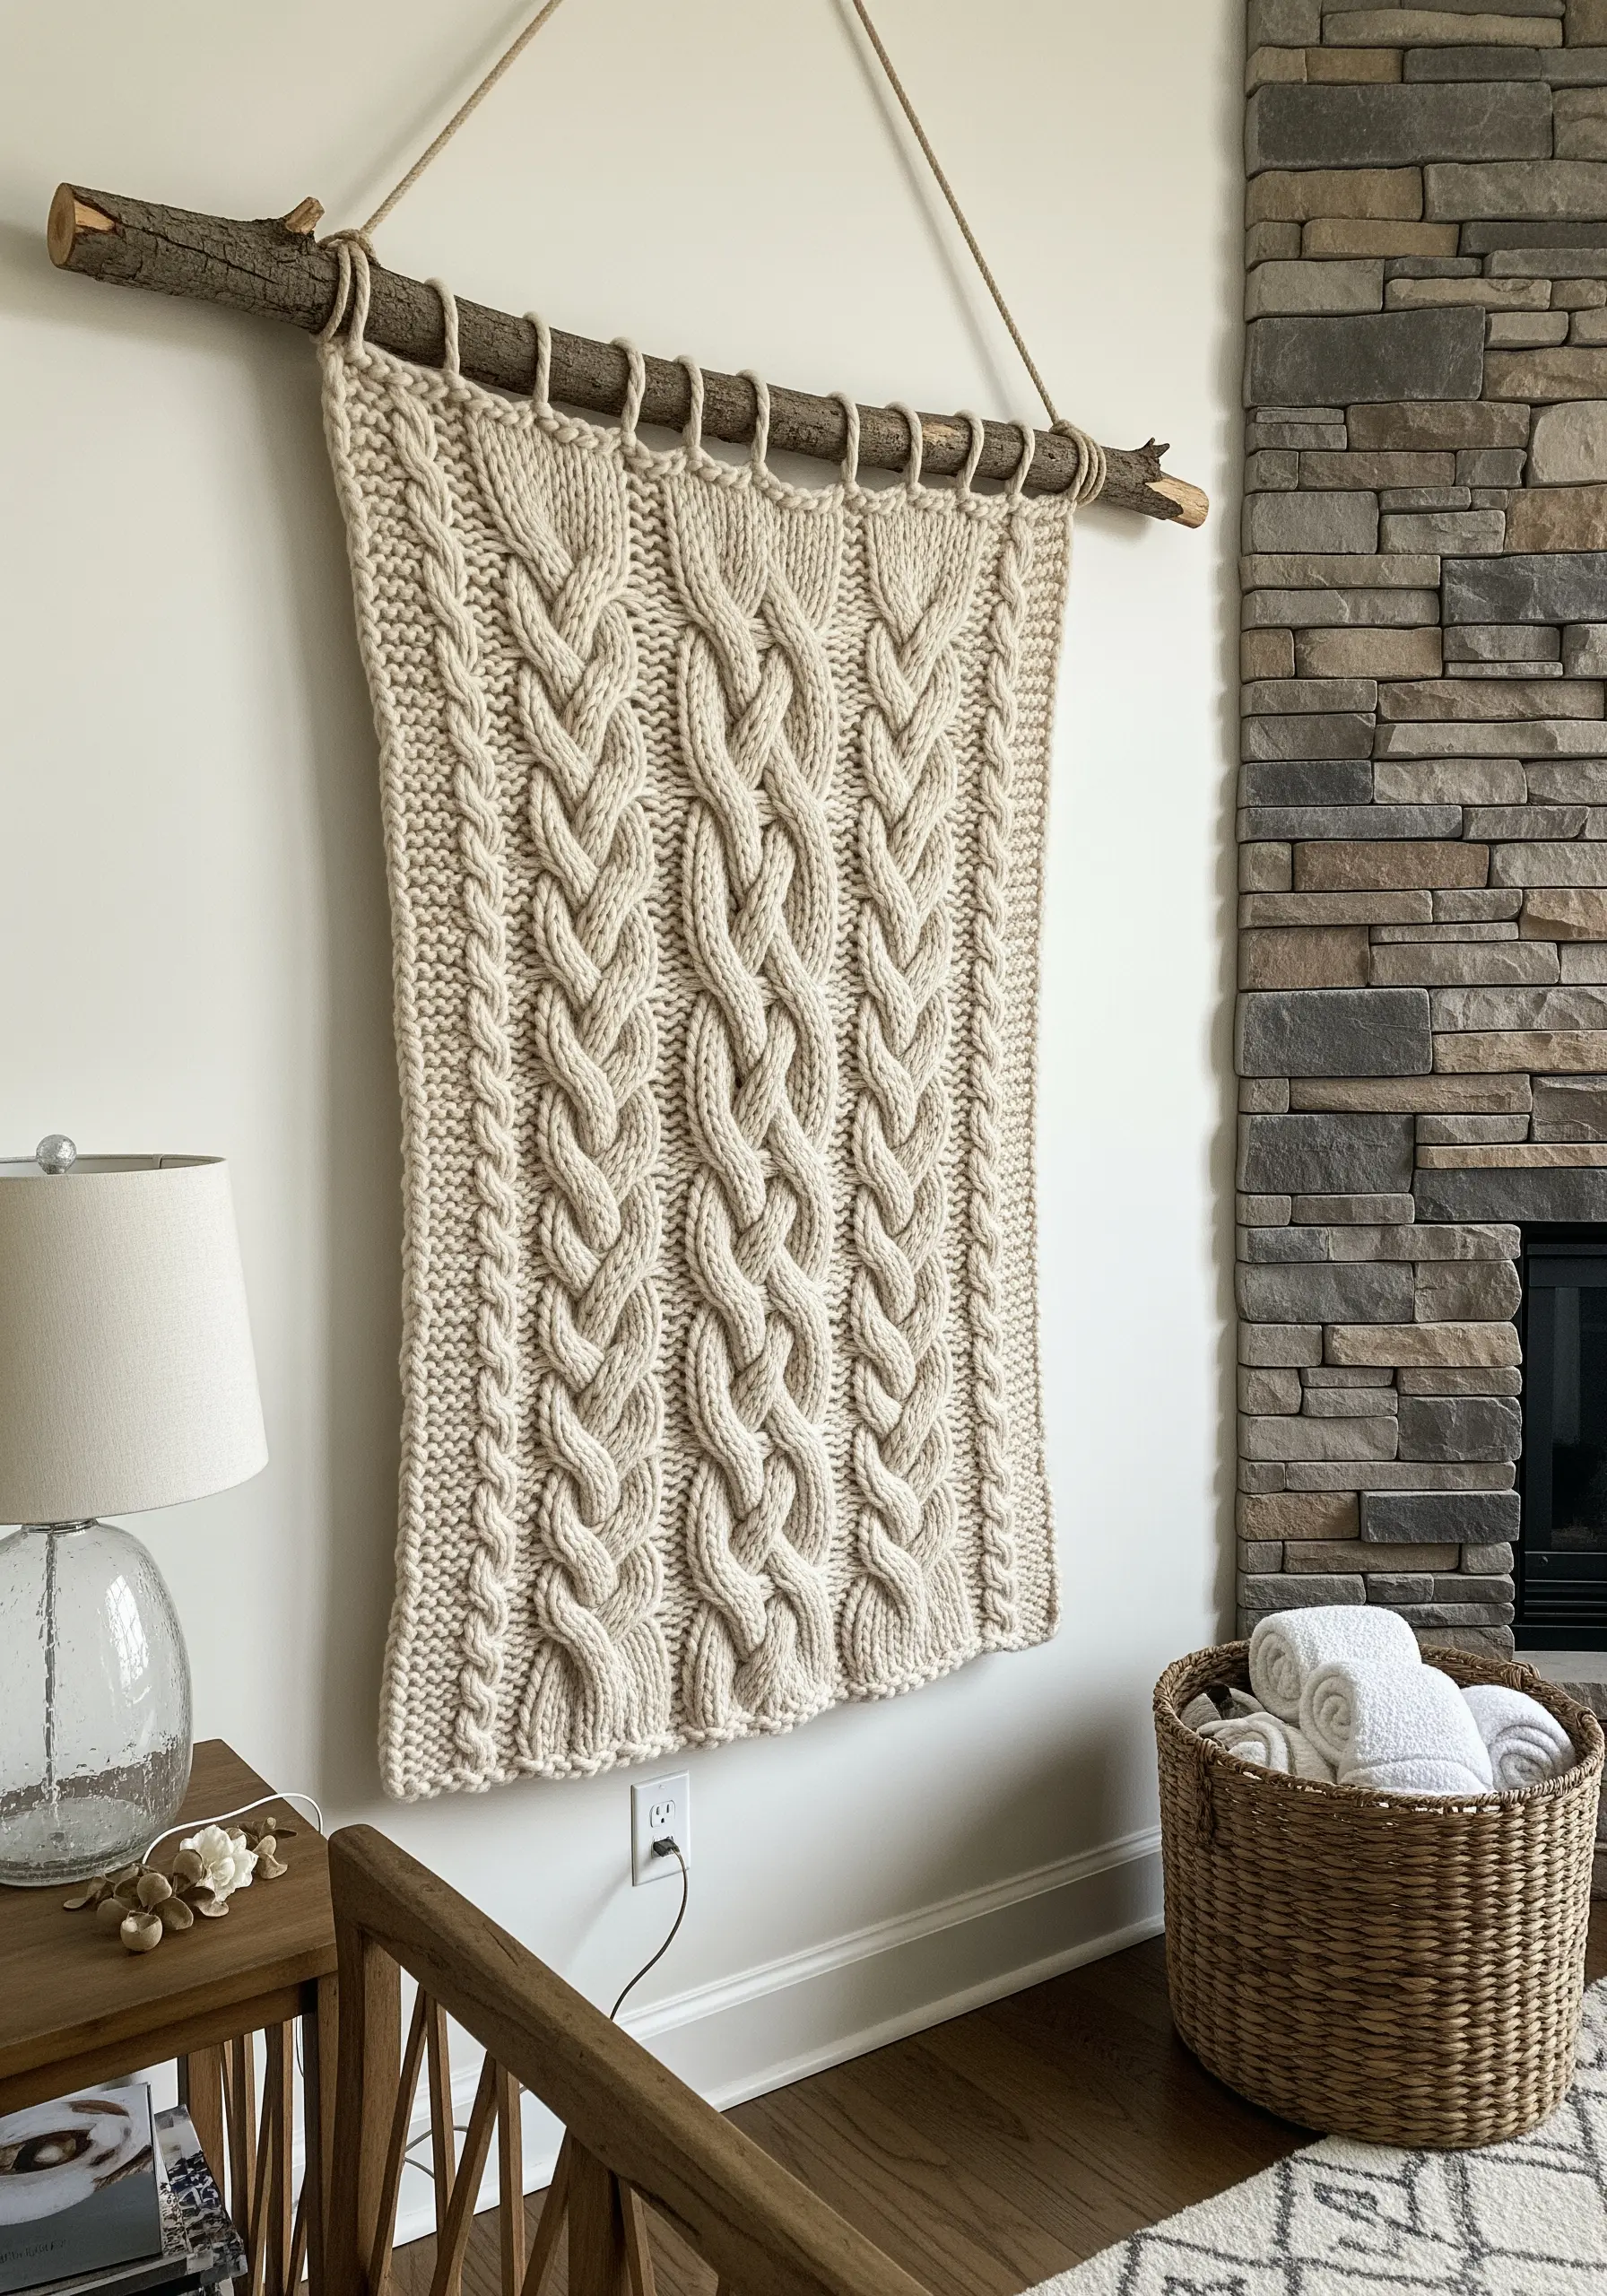
Create this stunning piece of textile art with oversized knitting needles and super chunky merino wool yarn; the large scale means it works up incredibly fast.
The cable stitch, which looks complex, is simply a matter of knitting stitches out of order using a special cable needle.
This technique creates the beautiful braided texture that gives the piece its classic, comforting appeal.
Hang it from a natural branch to complete the rustic aesthetic.
17. Combine Weaving and Coiling for Abstract Art
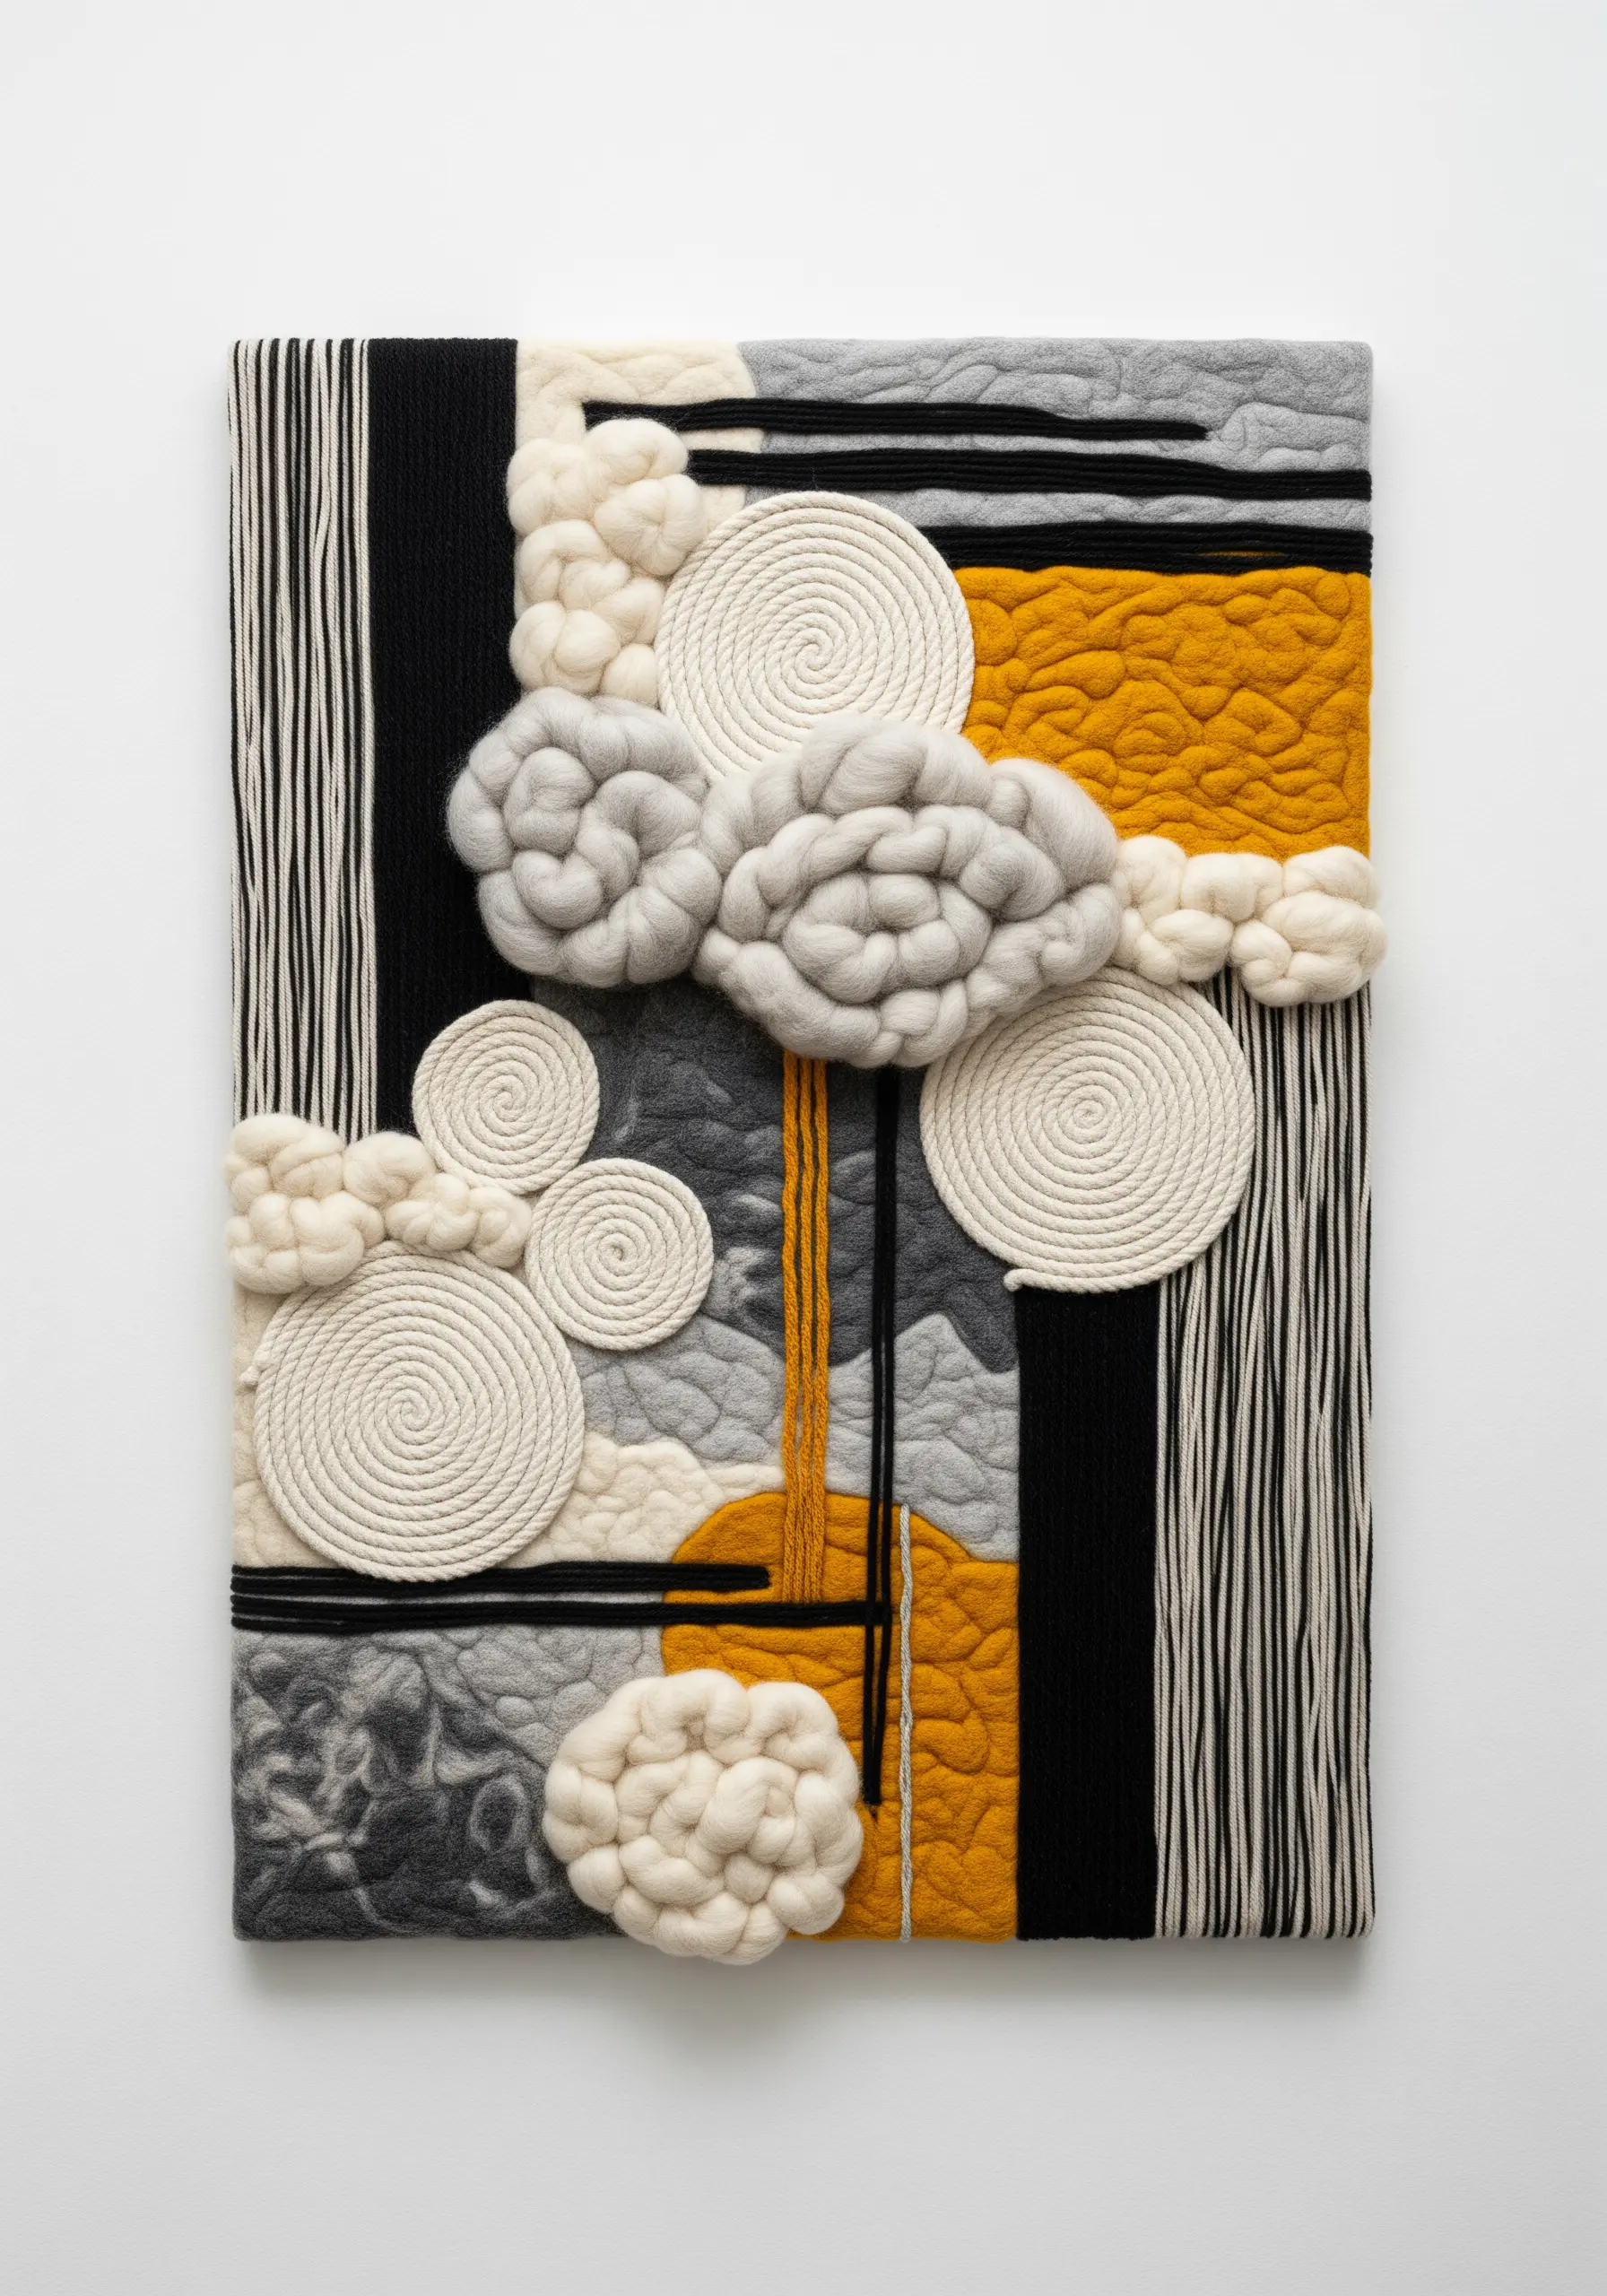
This piece achieves its dynamic impact by mixing multiple fiber techniques on a single canvas.
Create flat, woven sections as your base, then add dimensional circles by coiling yarn-wrapped rope.
Build the bubbly, cloud-like textures with needle-felting or by attaching clusters of unspun wool roving.
Arranging these different textures side-by-side creates a compelling abstract landscape that invites touch.
18. Explore Tension and Line with Framed Thread Art
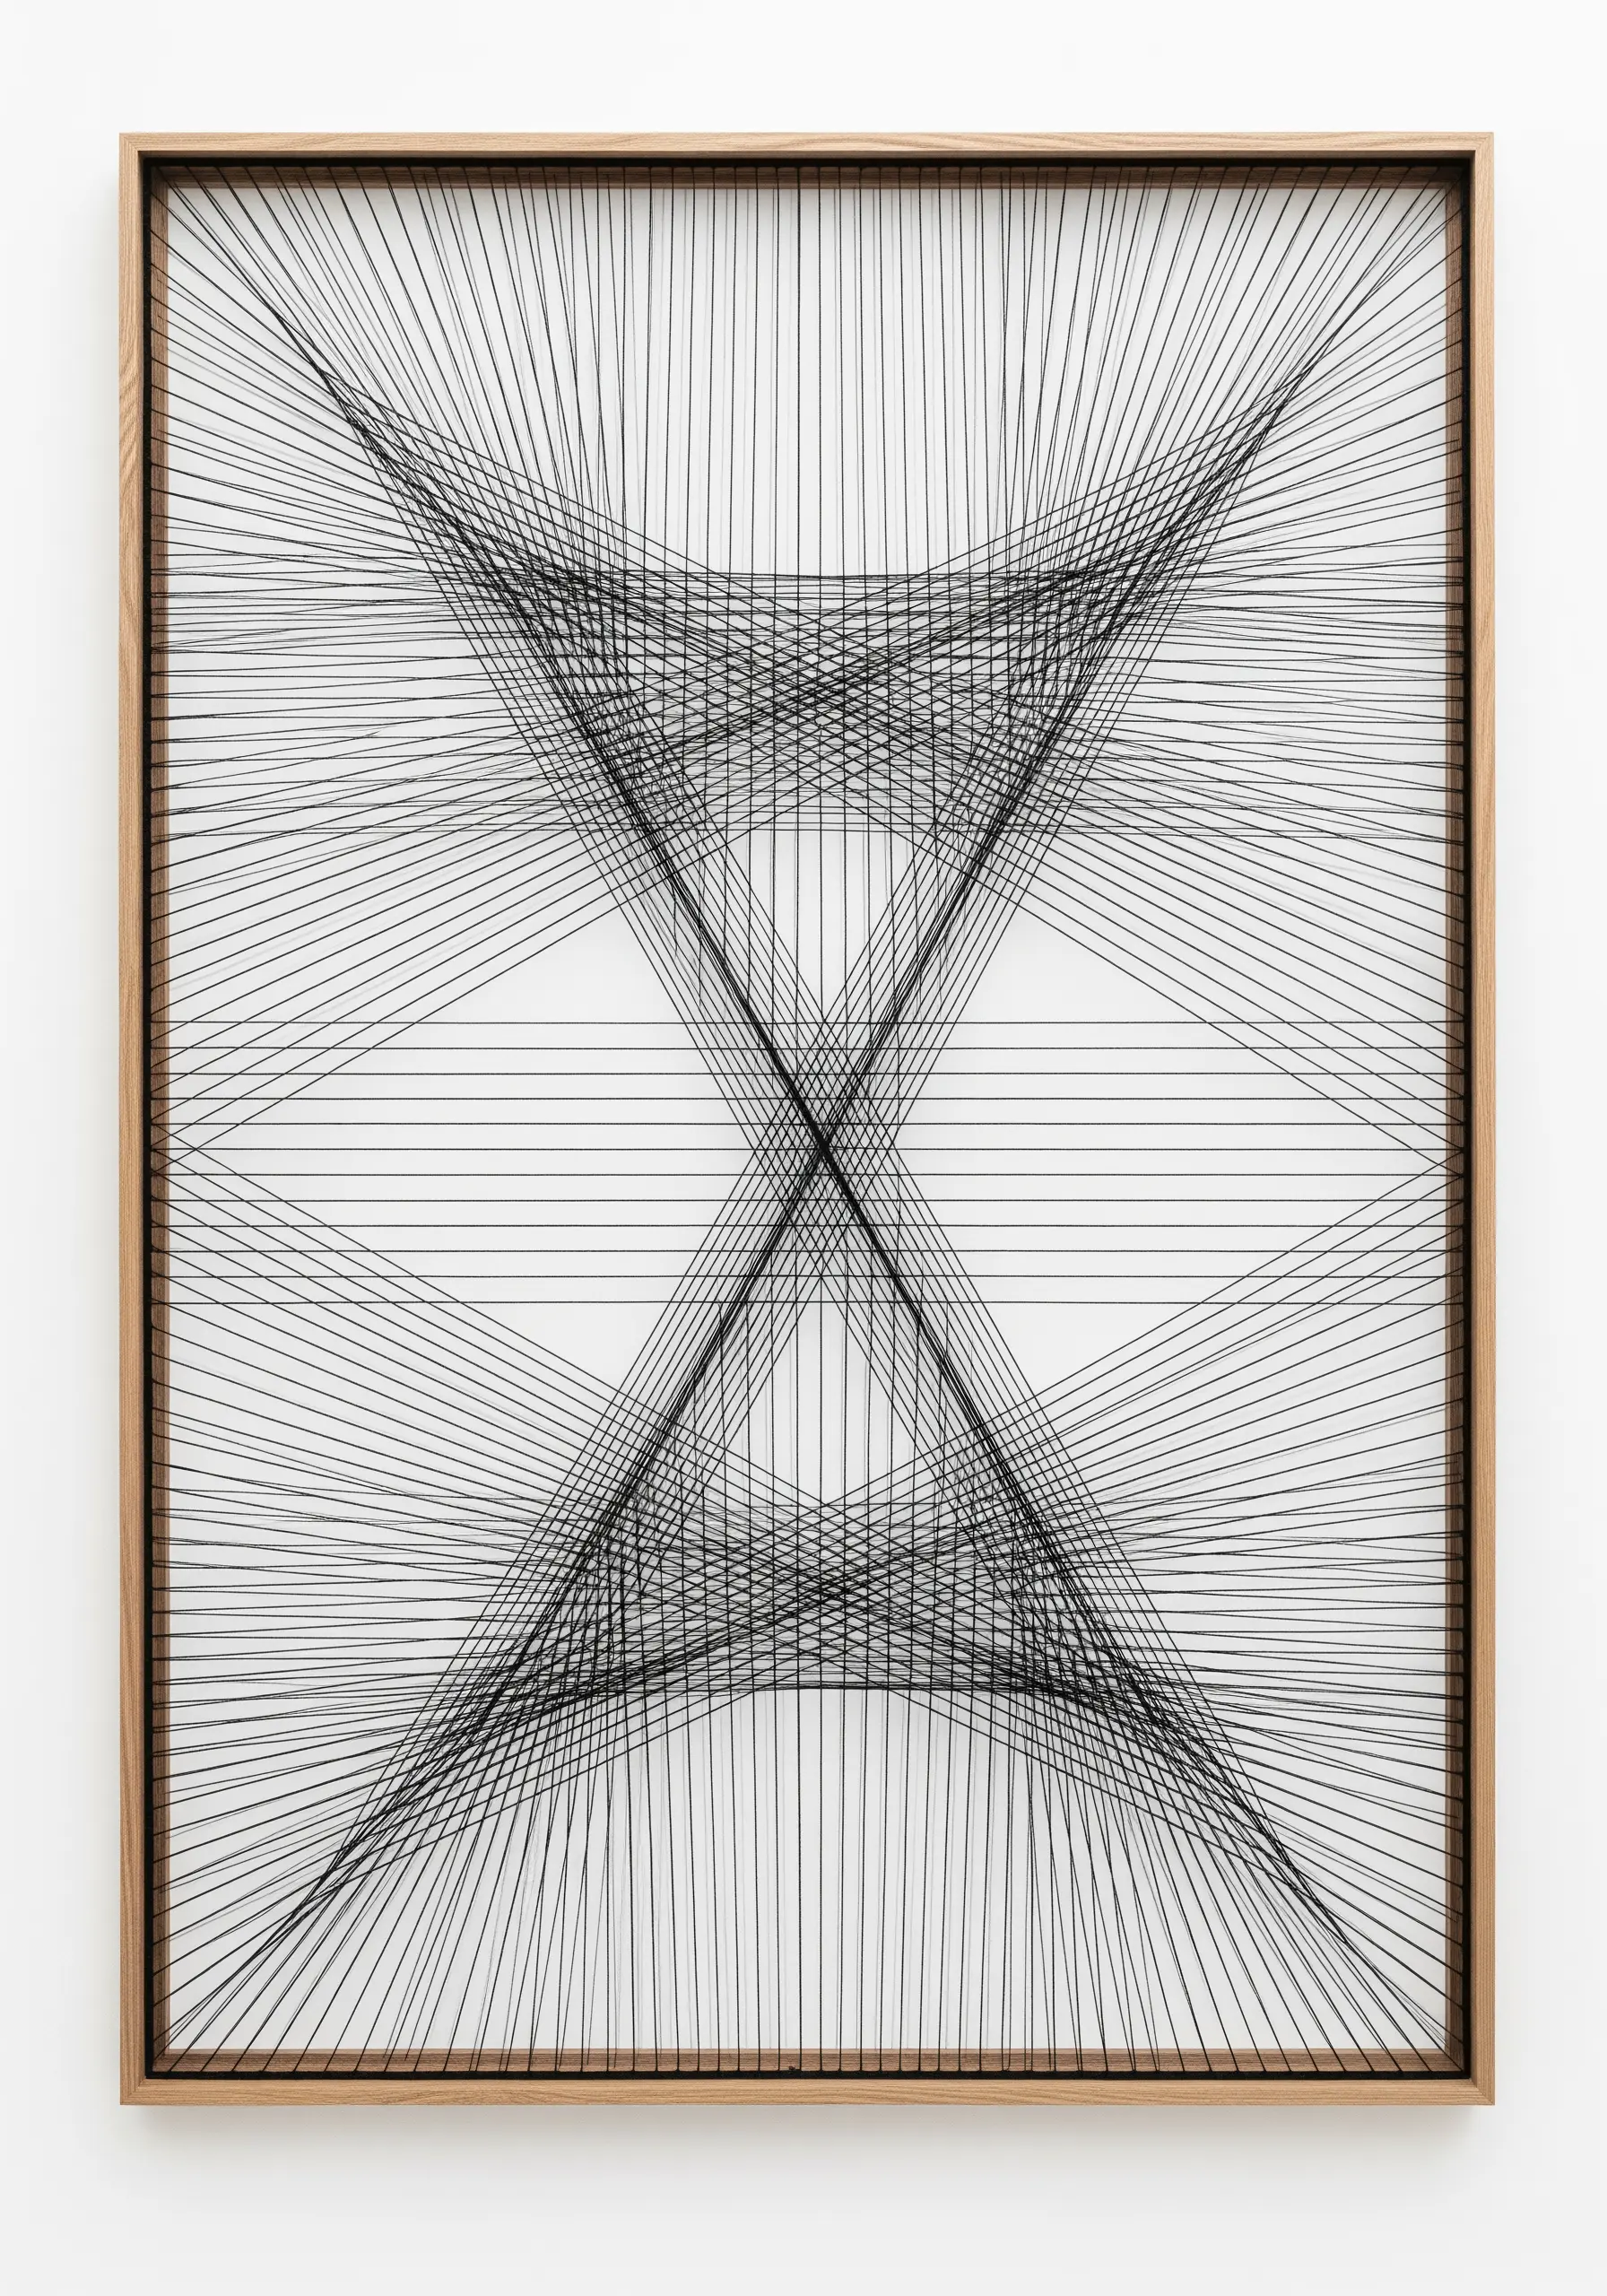
This minimalist art form is a beautiful study in precision and geometry.
Instead of a solid board, use an open frame, hammering small, evenly spaced nails along the inside edges.
The illusion of curves is created by stretching straight threads between these points in a methodical pattern.
Using a fine, strong thread is key, as it allows the negative space to play a role in the final design. This is a beautiful form of abstract thread art.
19. Create a Simple and Elegant Draped Yarn Hanging
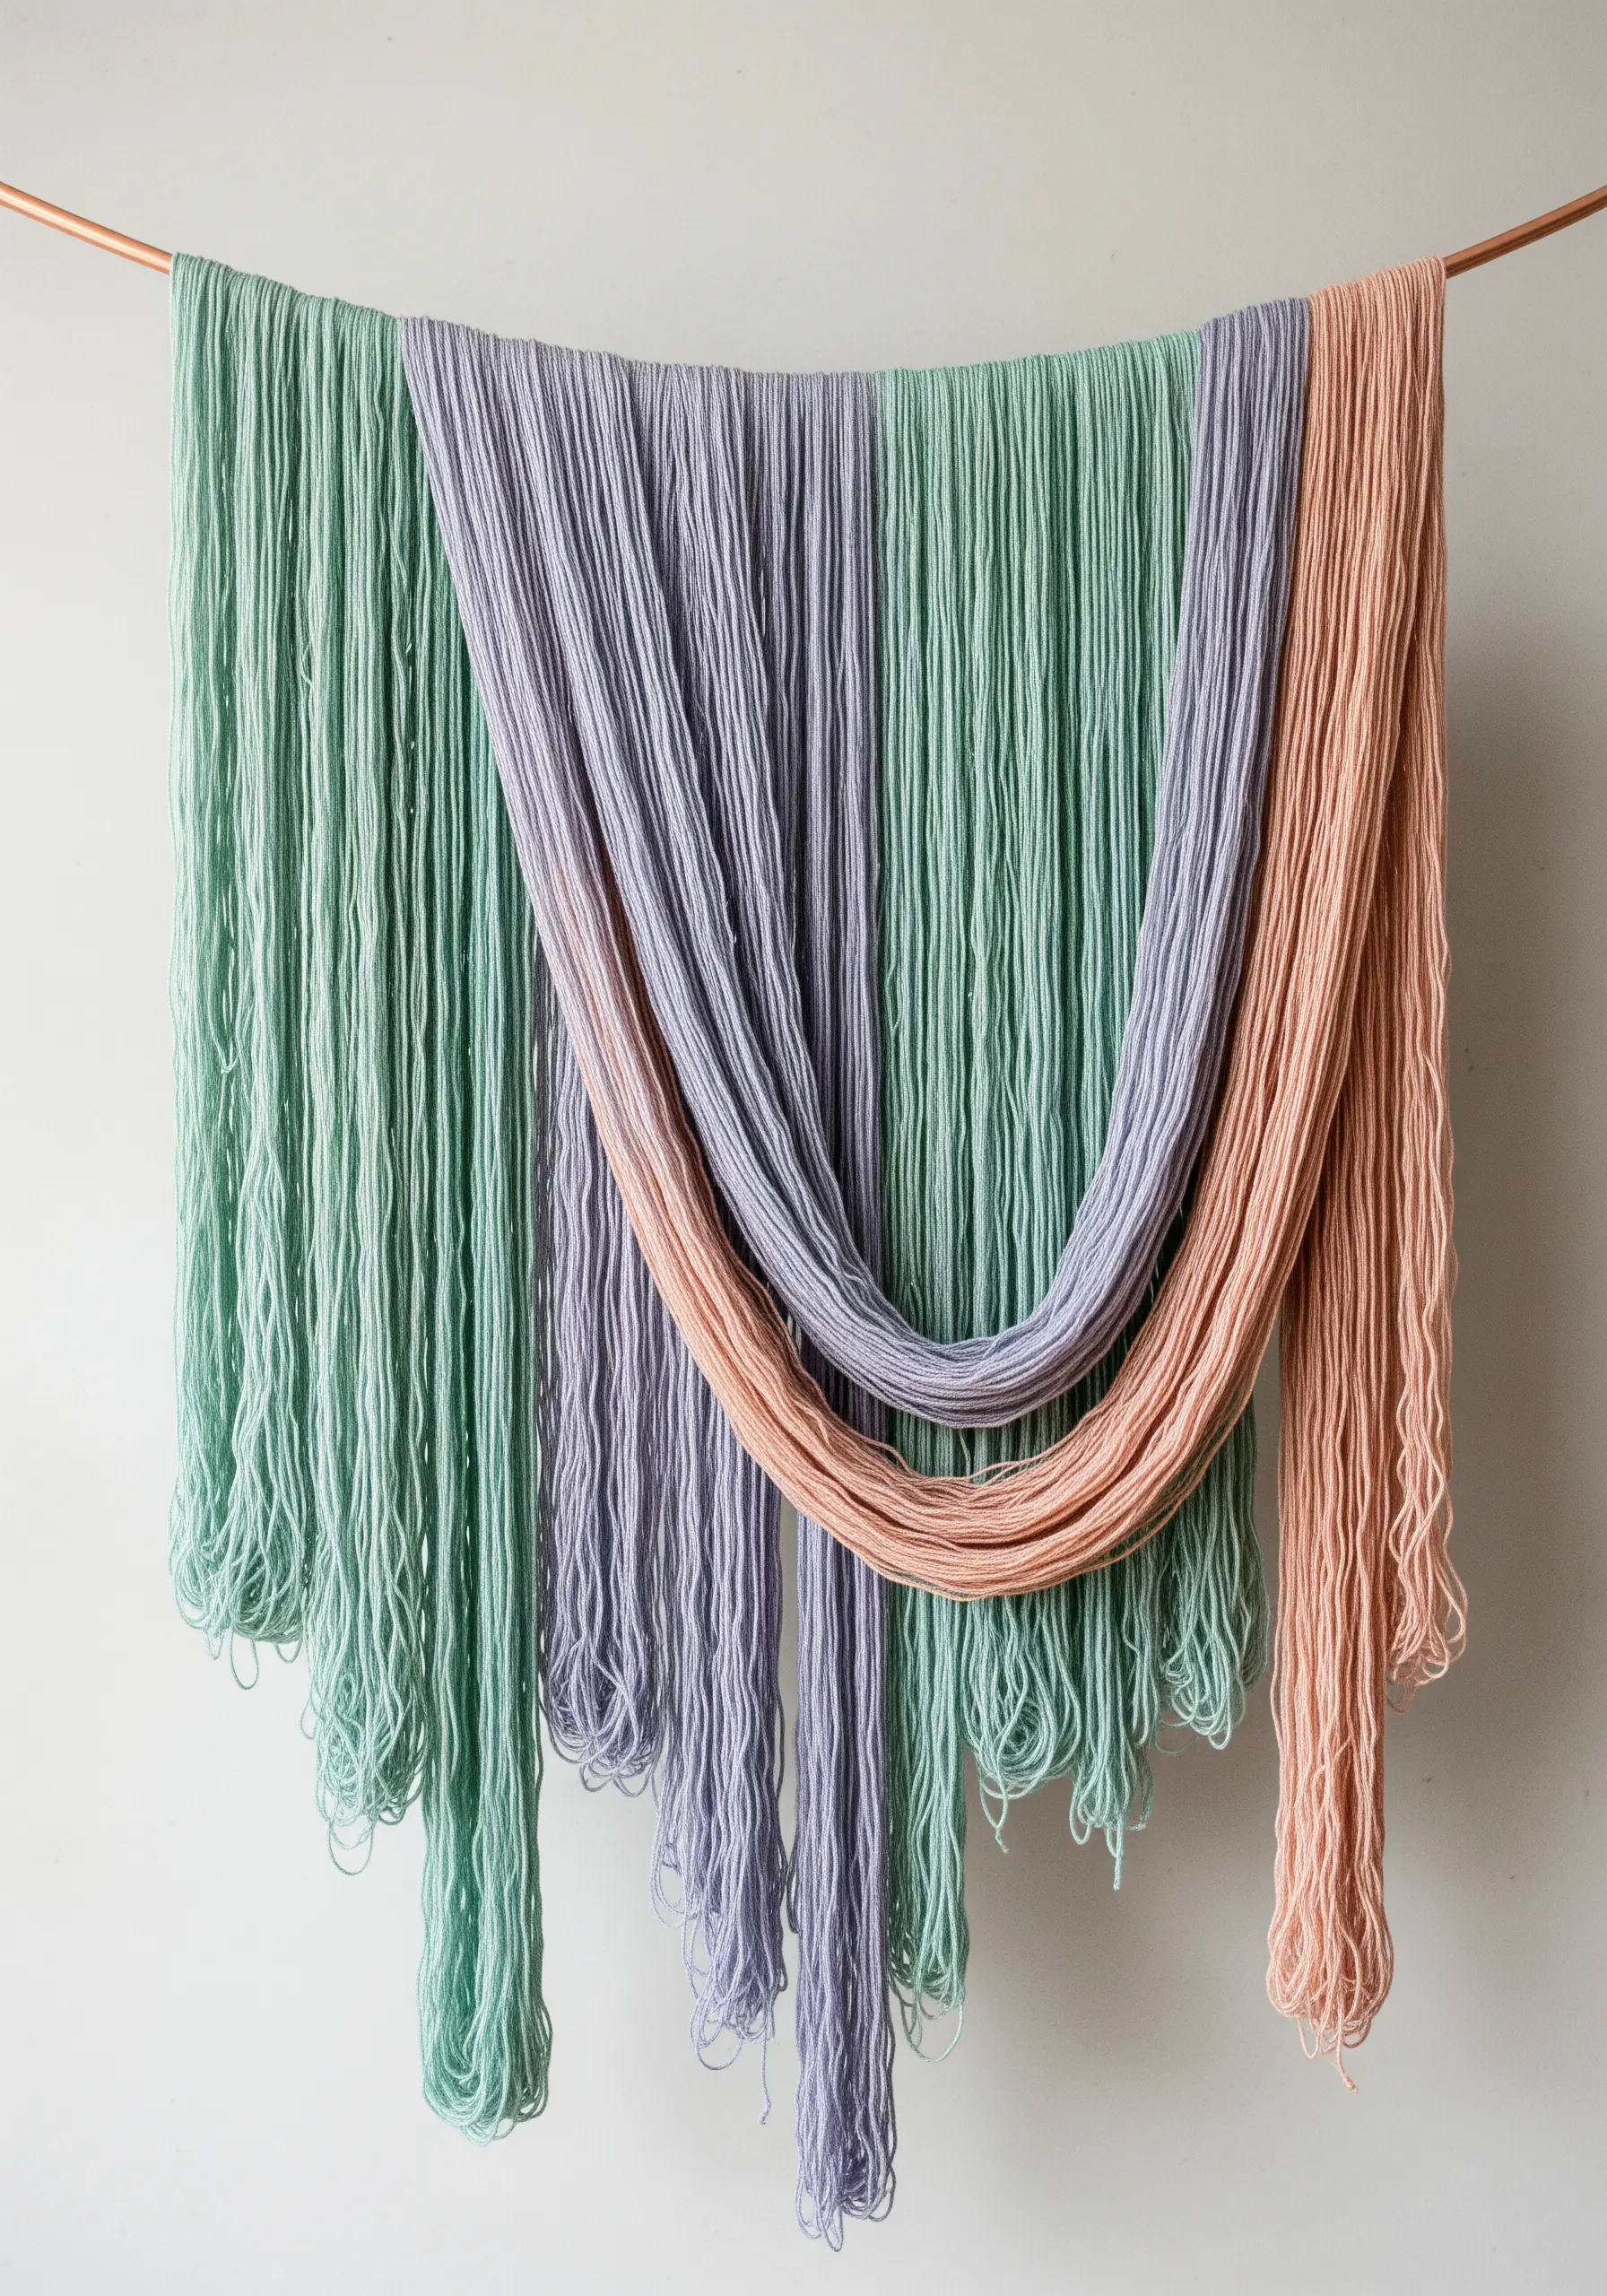
The beauty of this piece lies in its effortless simplicity and the quality of the yarn itself.
Choose a fiber with a beautiful, heavy drape, like a merino wool or a silk blend, in a harmonious color palette.
Cut dozens of strands to a uniform length and attach them to a copper rod using a simple lark’s head knot.
Create the gentle swags by gathering sections and loosely tying them, allowing the material to hang naturally.


