

Have you ever held a dried flower and wished you could capture its delicate, papery texture in thread? You sense there’s a way to make your embroidery feel more alive, more intentional—but the path from a simple stitch to a piece with true depth feels unclear.
Let’s set aside the pressure of mastering dozens of complex stitches. Instead, think of your fabric scraps, felt, and even ribbons as your new palette. Fabric collage is a wonderfully forgiving and expressive technique that allows you to build color, form, and texture in a way that feels more like painting than stitching.
These ideas are an invitation to observe the natural world more closely—the way petals overlap, how light filters through a leaf, the rustic texture of a seed pod. By combining fabric elements with thoughtful stitches, you can translate that quiet beauty into art that is uniquely yours, full of tactile grace and modern elegance.
1. Layered Fabric and Thread Sunflower
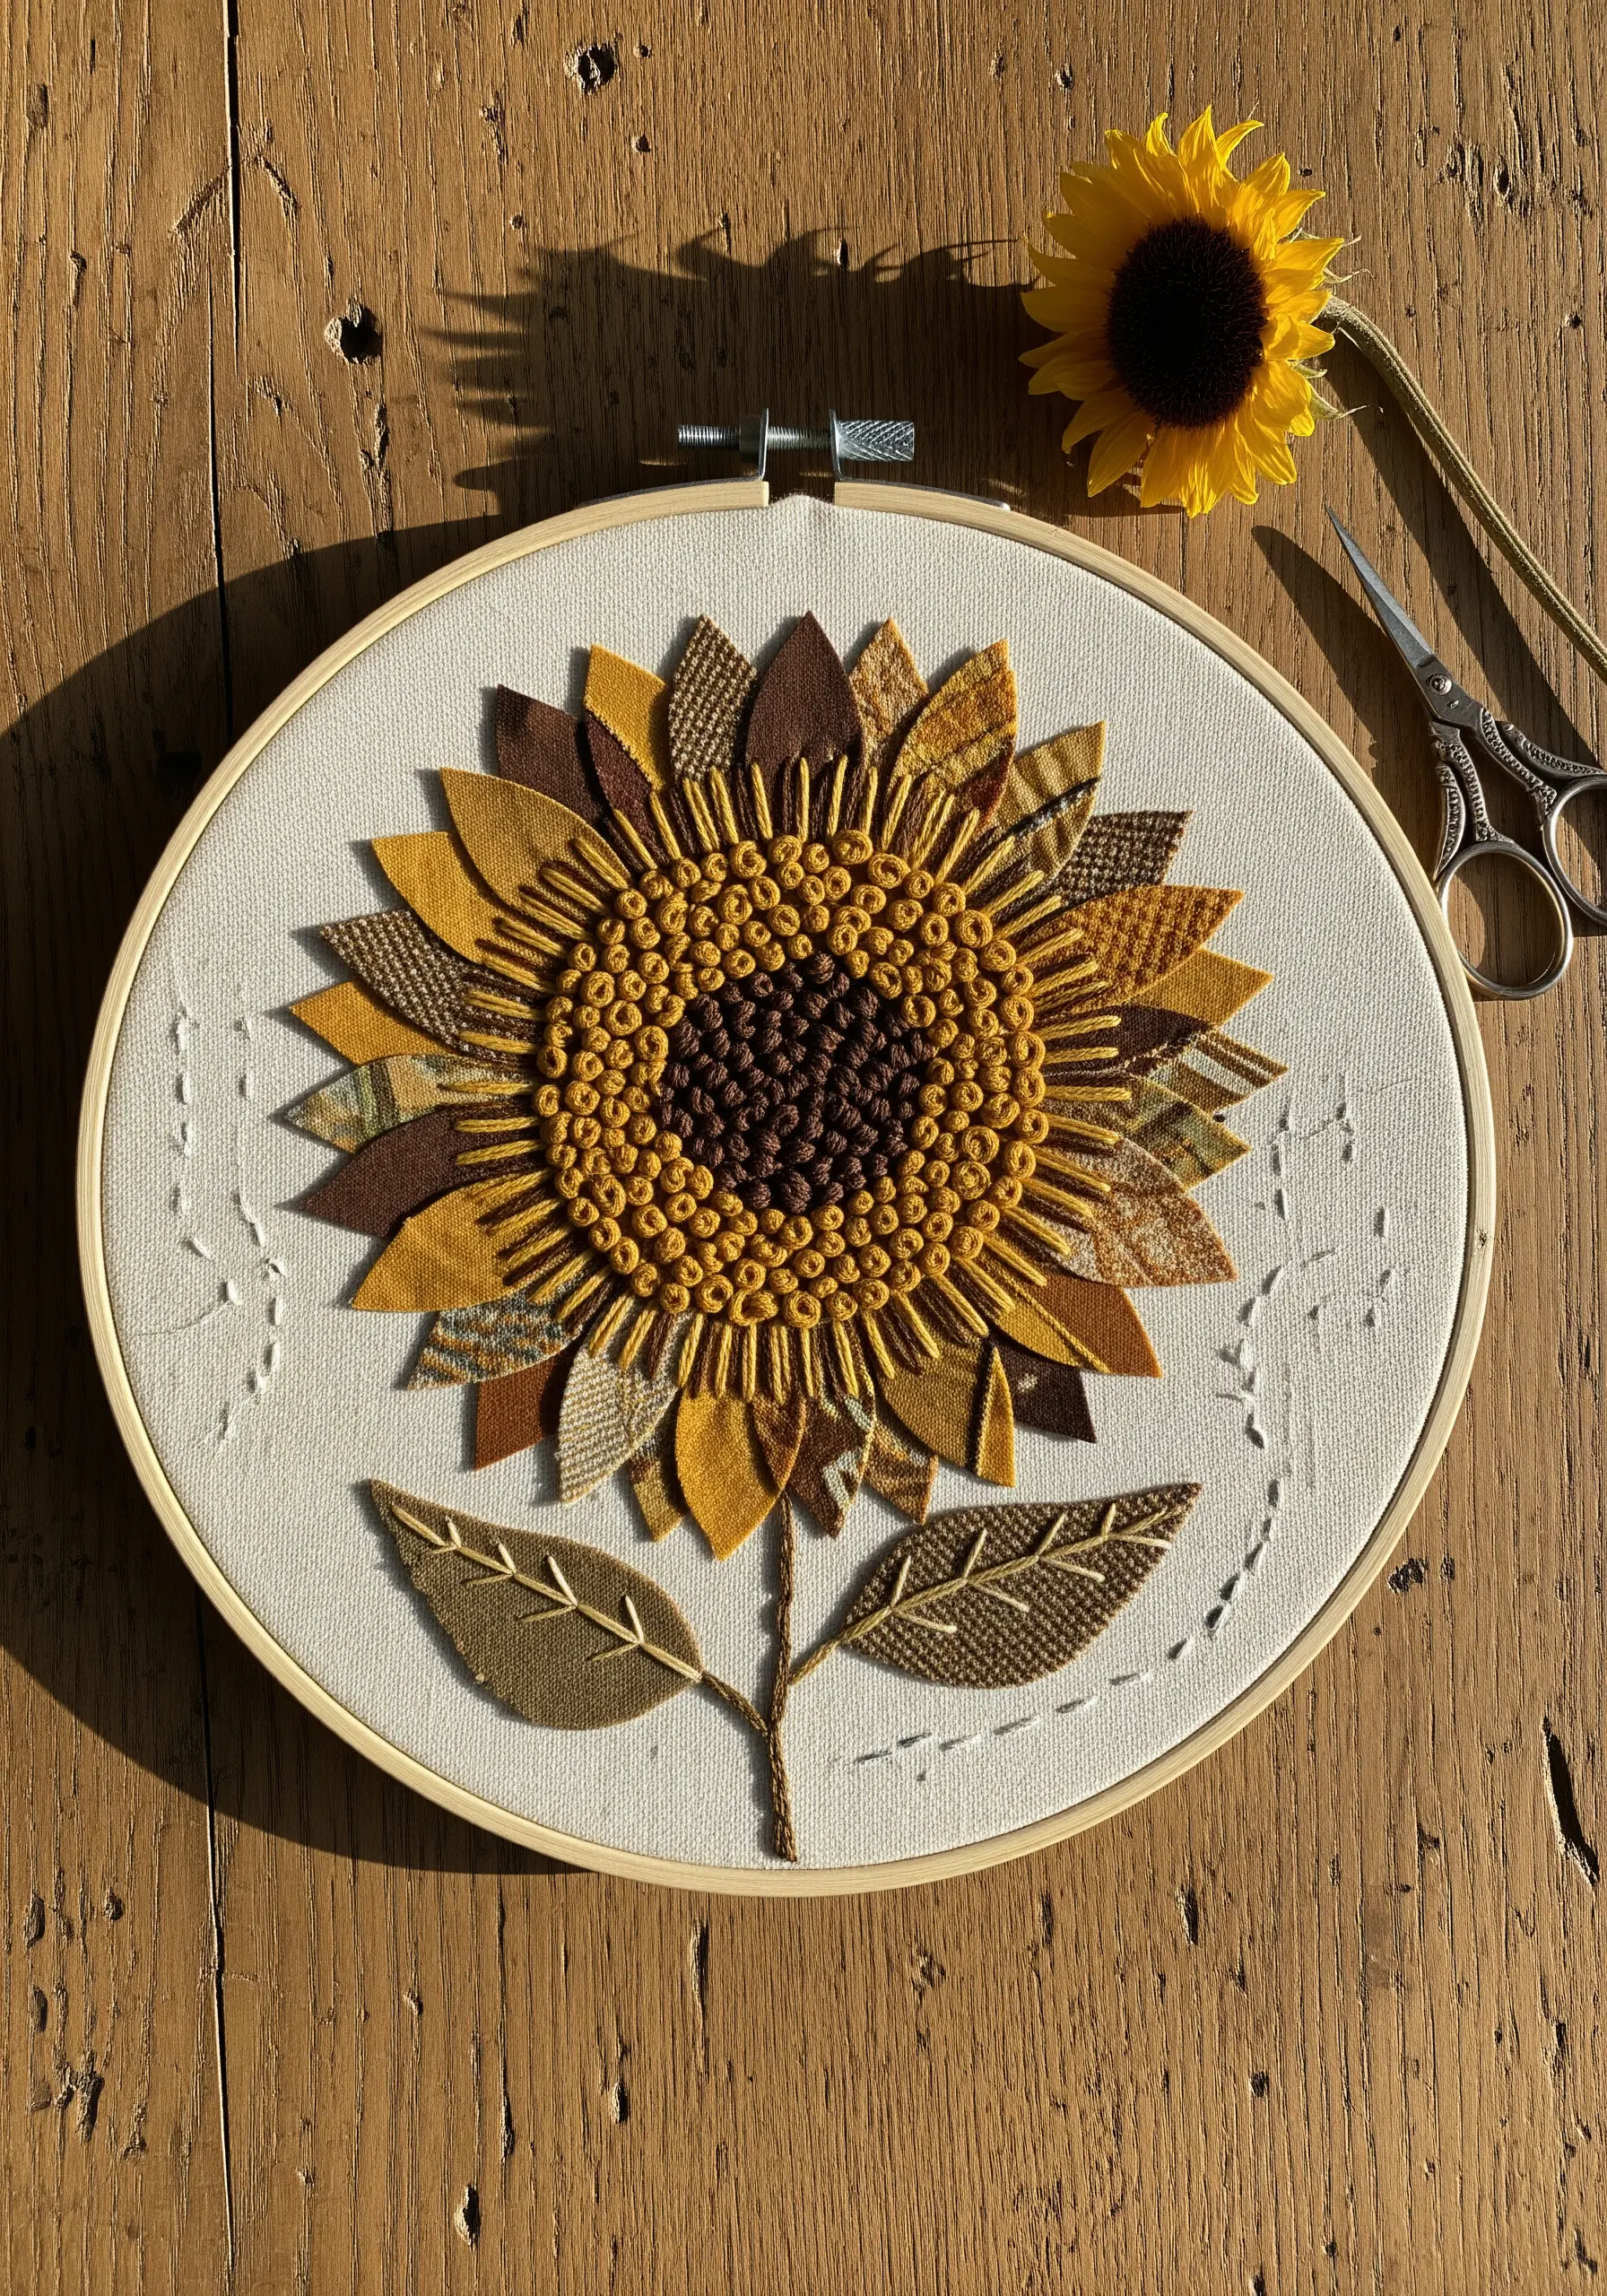
Create depth in your petals by using fabric collage instead of dense satin stitch.
Select a variety of textured fabrics like wool, tweed, and patterned cotton in sunflower hues—mustards, golds, and browns.
Cut each petal individually, allowing the edges to fray slightly for a rustic feel, and secure them with a single running stitch down the center.
For the flower’s head, combine a dense cluster of dark brown French knots with an outer ring of golden yellow satin stitches to mimic the pattern of seeds and pollen.
This technique builds texture quickly and gives your hand-stitched flower wreath a rich, tactile quality that thread alone cannot achieve.
2. Woven Ribbon Lavender Field
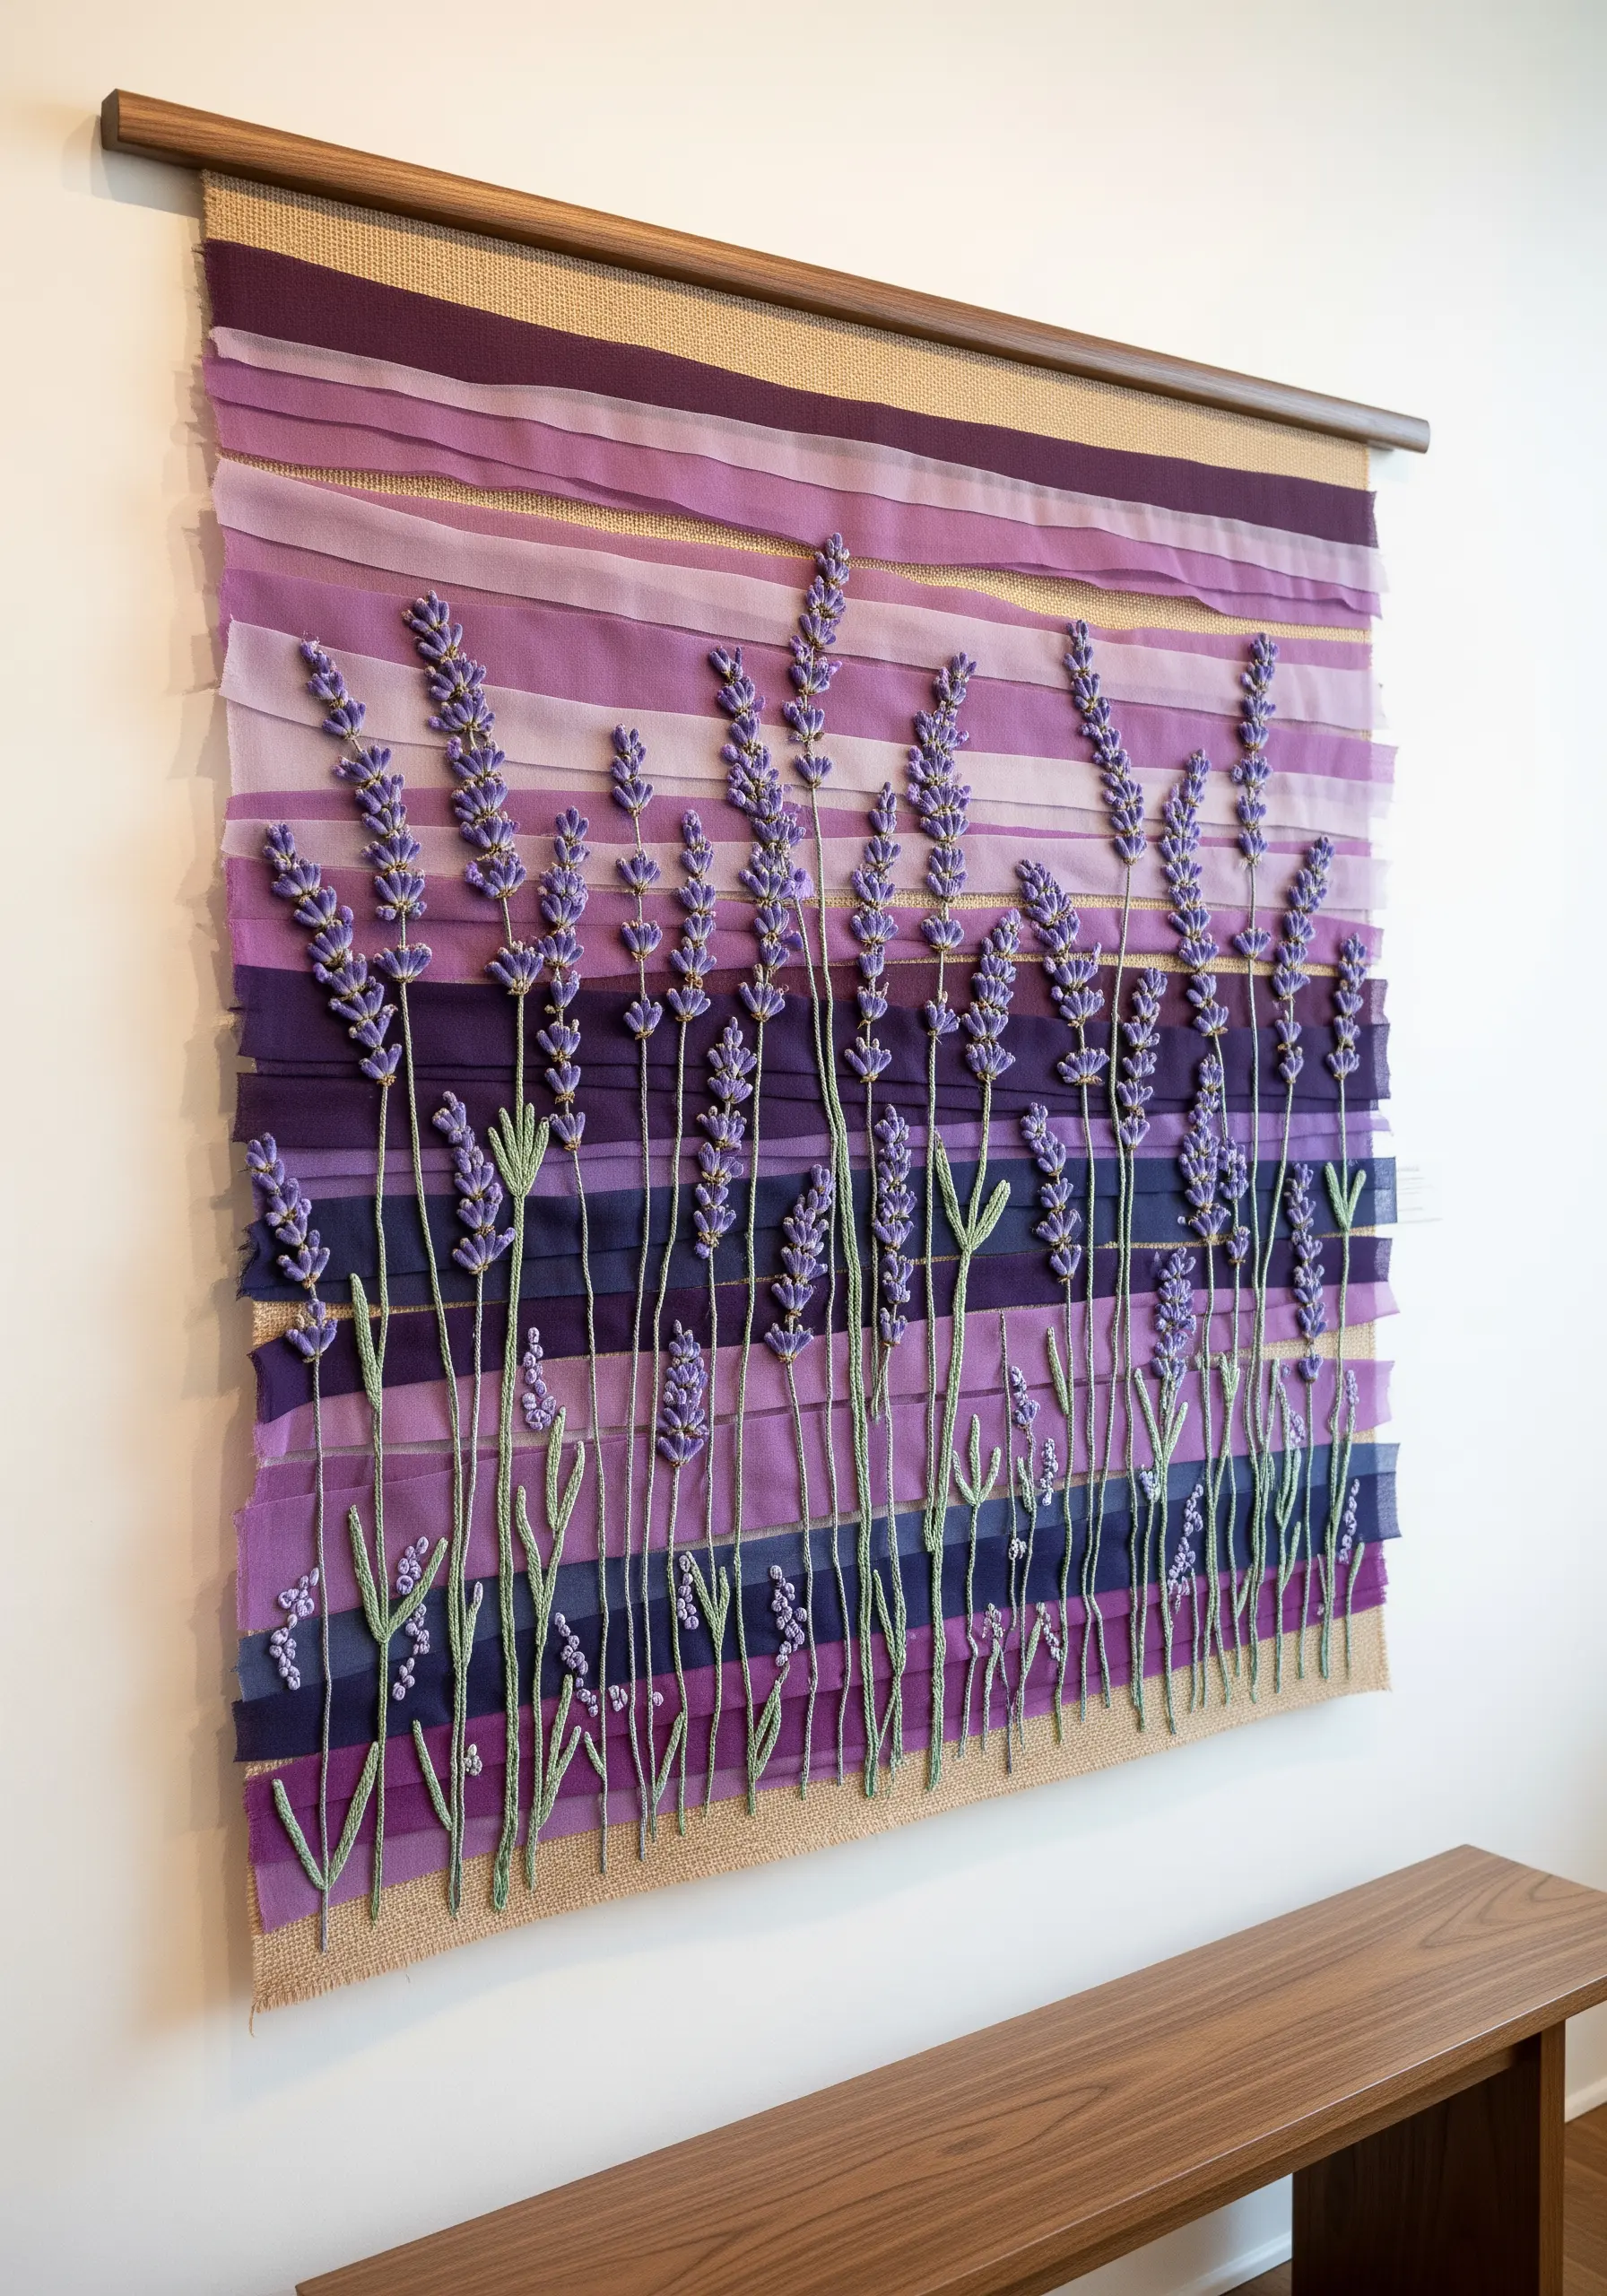
Build a dynamic, color-washed background by weaving strips of fabric and ribbon directly onto your frame or canvas.
Use a mix of sheer organza, matte linen, and satin ribbons in shades of purple, lilac, and mauve to create a gradient that mimics a distant field at dusk.
Embroider the lavender stalks directly over the woven base using a simple stem stitch for the stems and bullion knots or French knots for the delicate flowers.
This large-scale approach transforms a simple botanical into one of your most impressive fiber art installations, perfect for a statement wall piece.
3. Sheer Organza Fern Overlay

Preserve the delicate structure of real pressed ferns by layering them under a sheer fabric like organza.
Arrange your dried botanicals on a neutral linen background, then carefully stretch a piece of fine organza over the top in the same hoop, creating a soft, ethereal filter.
Use a single strand of thread in a matching green to stitch a delicate outline just around the edge of each fern frond, securing it to the base fabric.
This method protects the fragile leaves while adding a layer of artistry, turning simple pressed flower art into a durable, elegant textile piece.
4. Hydrangea Petal Appliqué
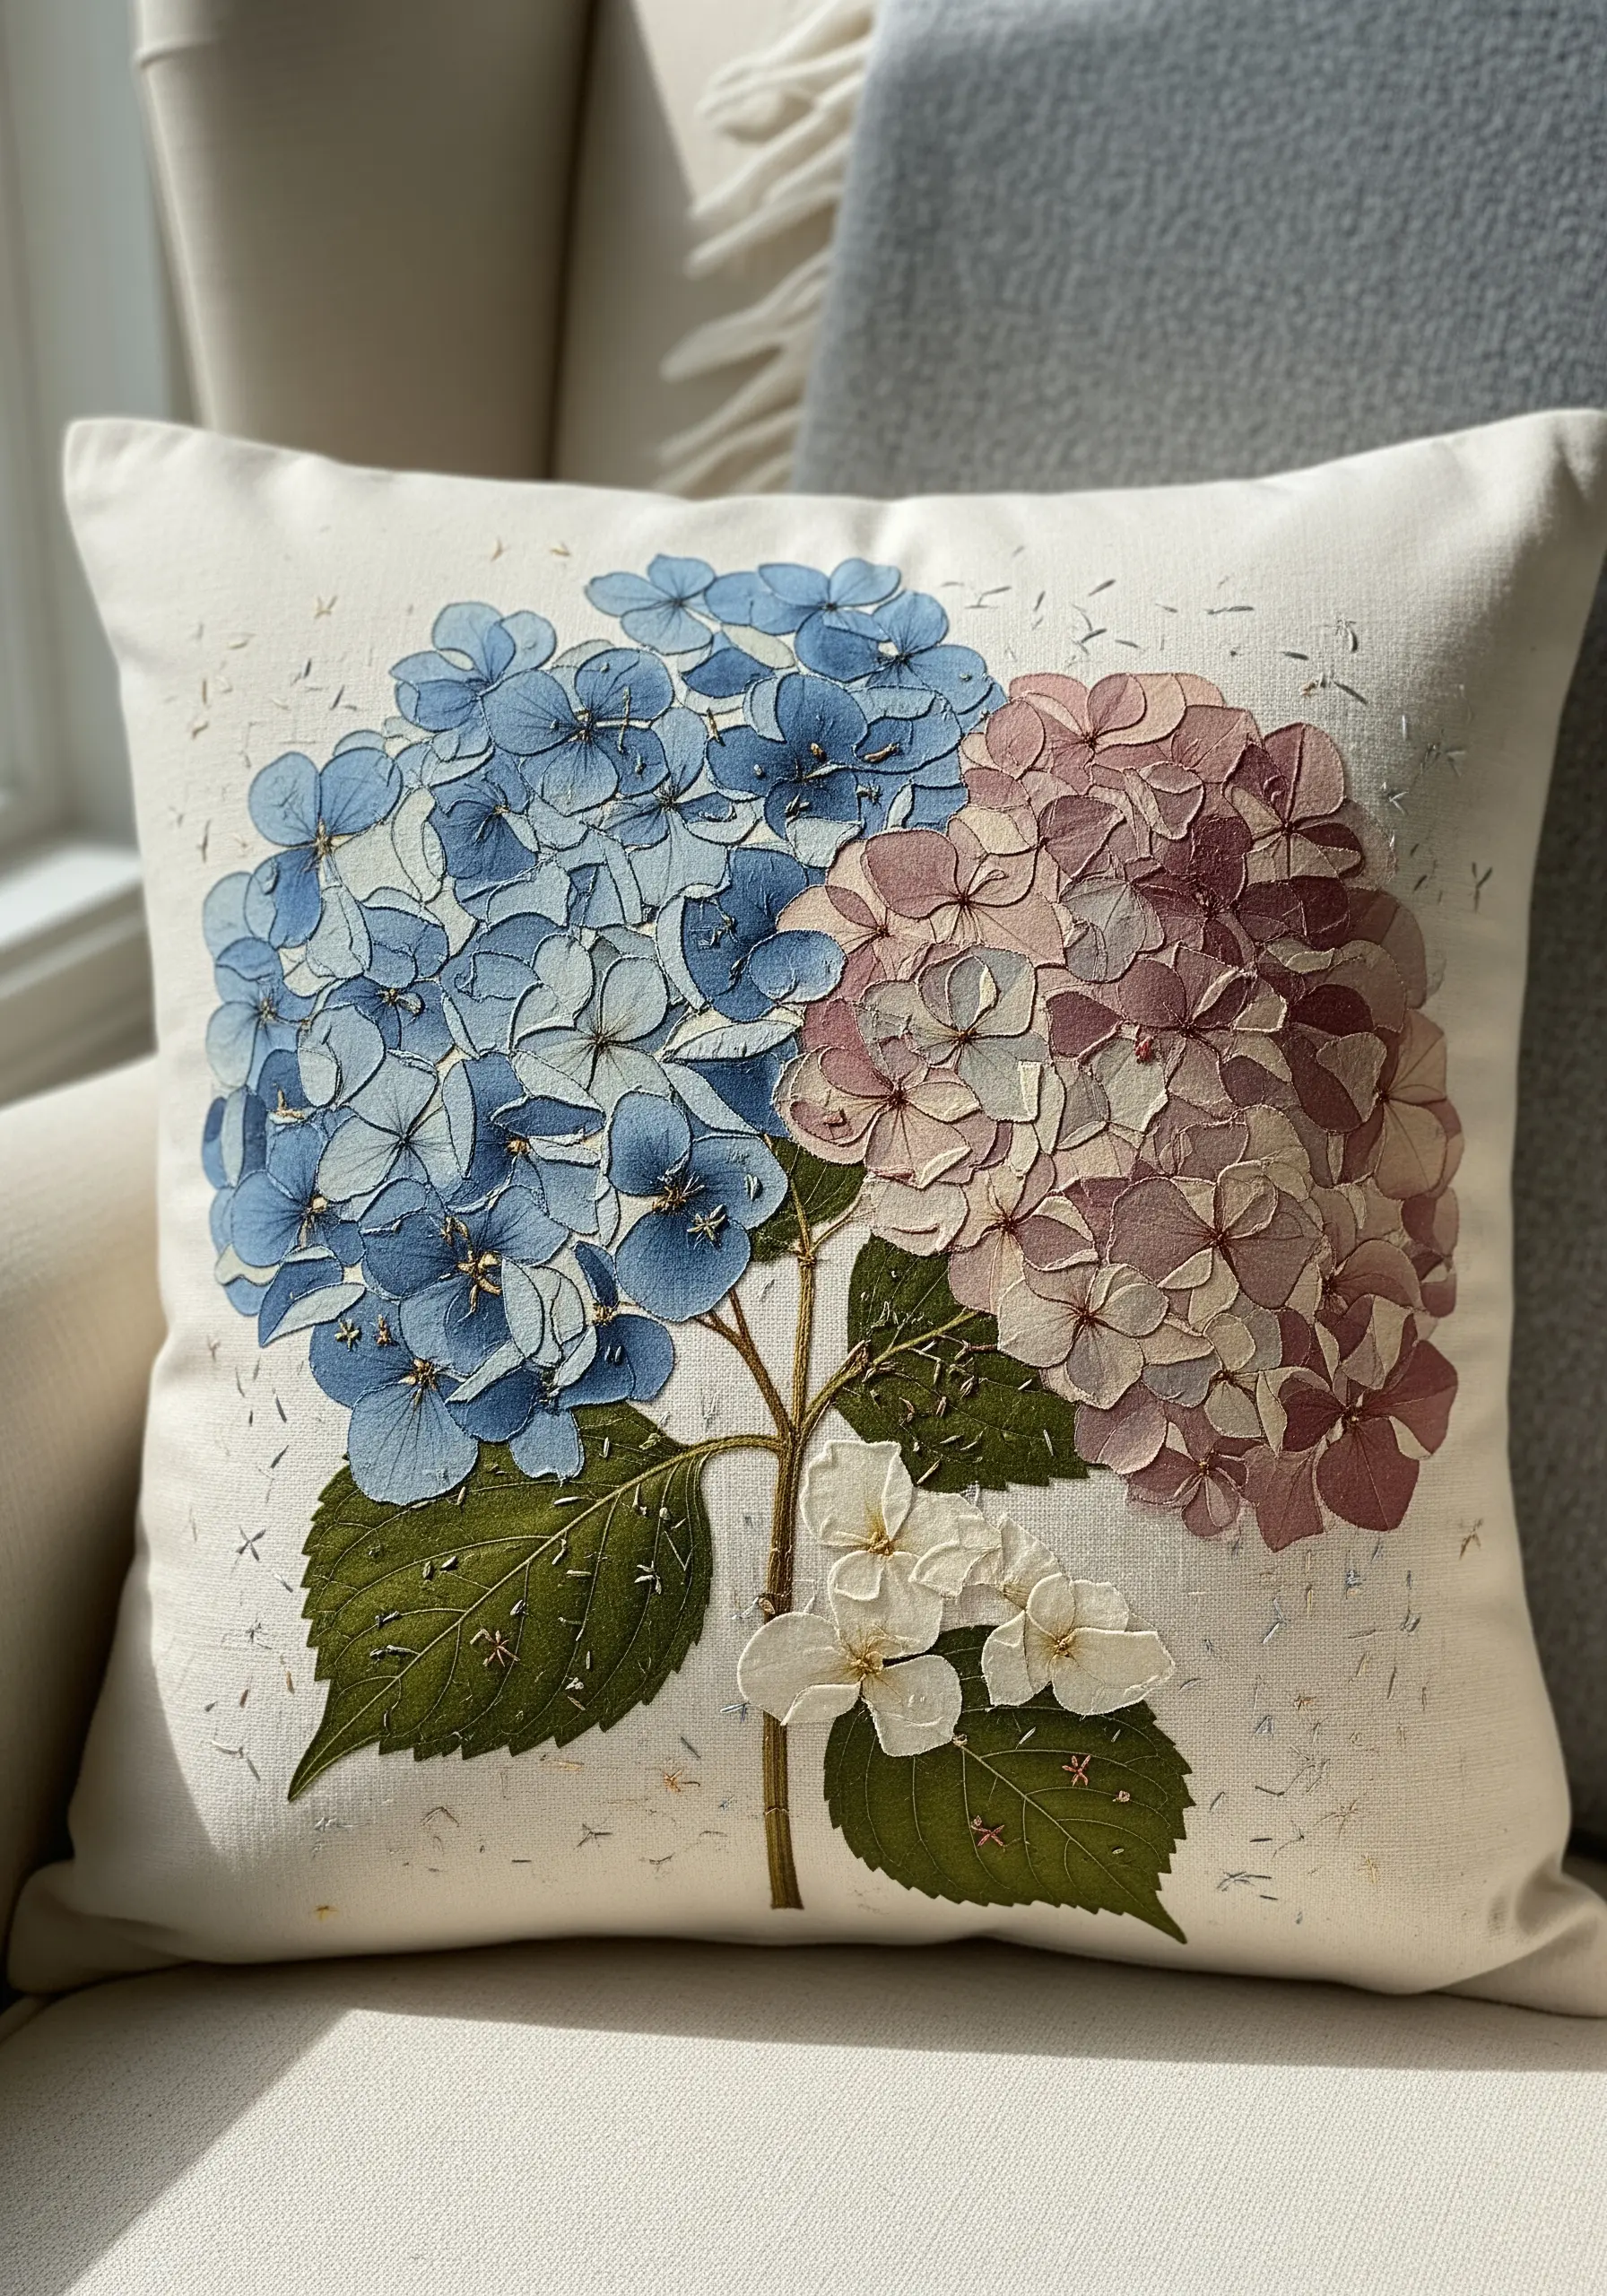
Recreate the voluminous clusters of hydrangea blooms by appliquéing tiny, individually cut fabric petals.
Choose lightweight cotton or silk in gradient shades of blue, pink, and cream, and cut them into small, four-petaled flower shapes.
Secure each tiny fabric blossom to your base with a single French knot or a cross stitch in the center, allowing the fabric edges to lift and curl.
Layer the fabric blossoms closely together, overlapping them to build realistic dimension and color variation, creating beautiful embroidered pillow covers with a soft, touchable finish.
For the leaves, use a solid green fabric and add veins with a simple backstitch to ground the piece.
5. Abstract Rosebud Journal Cover
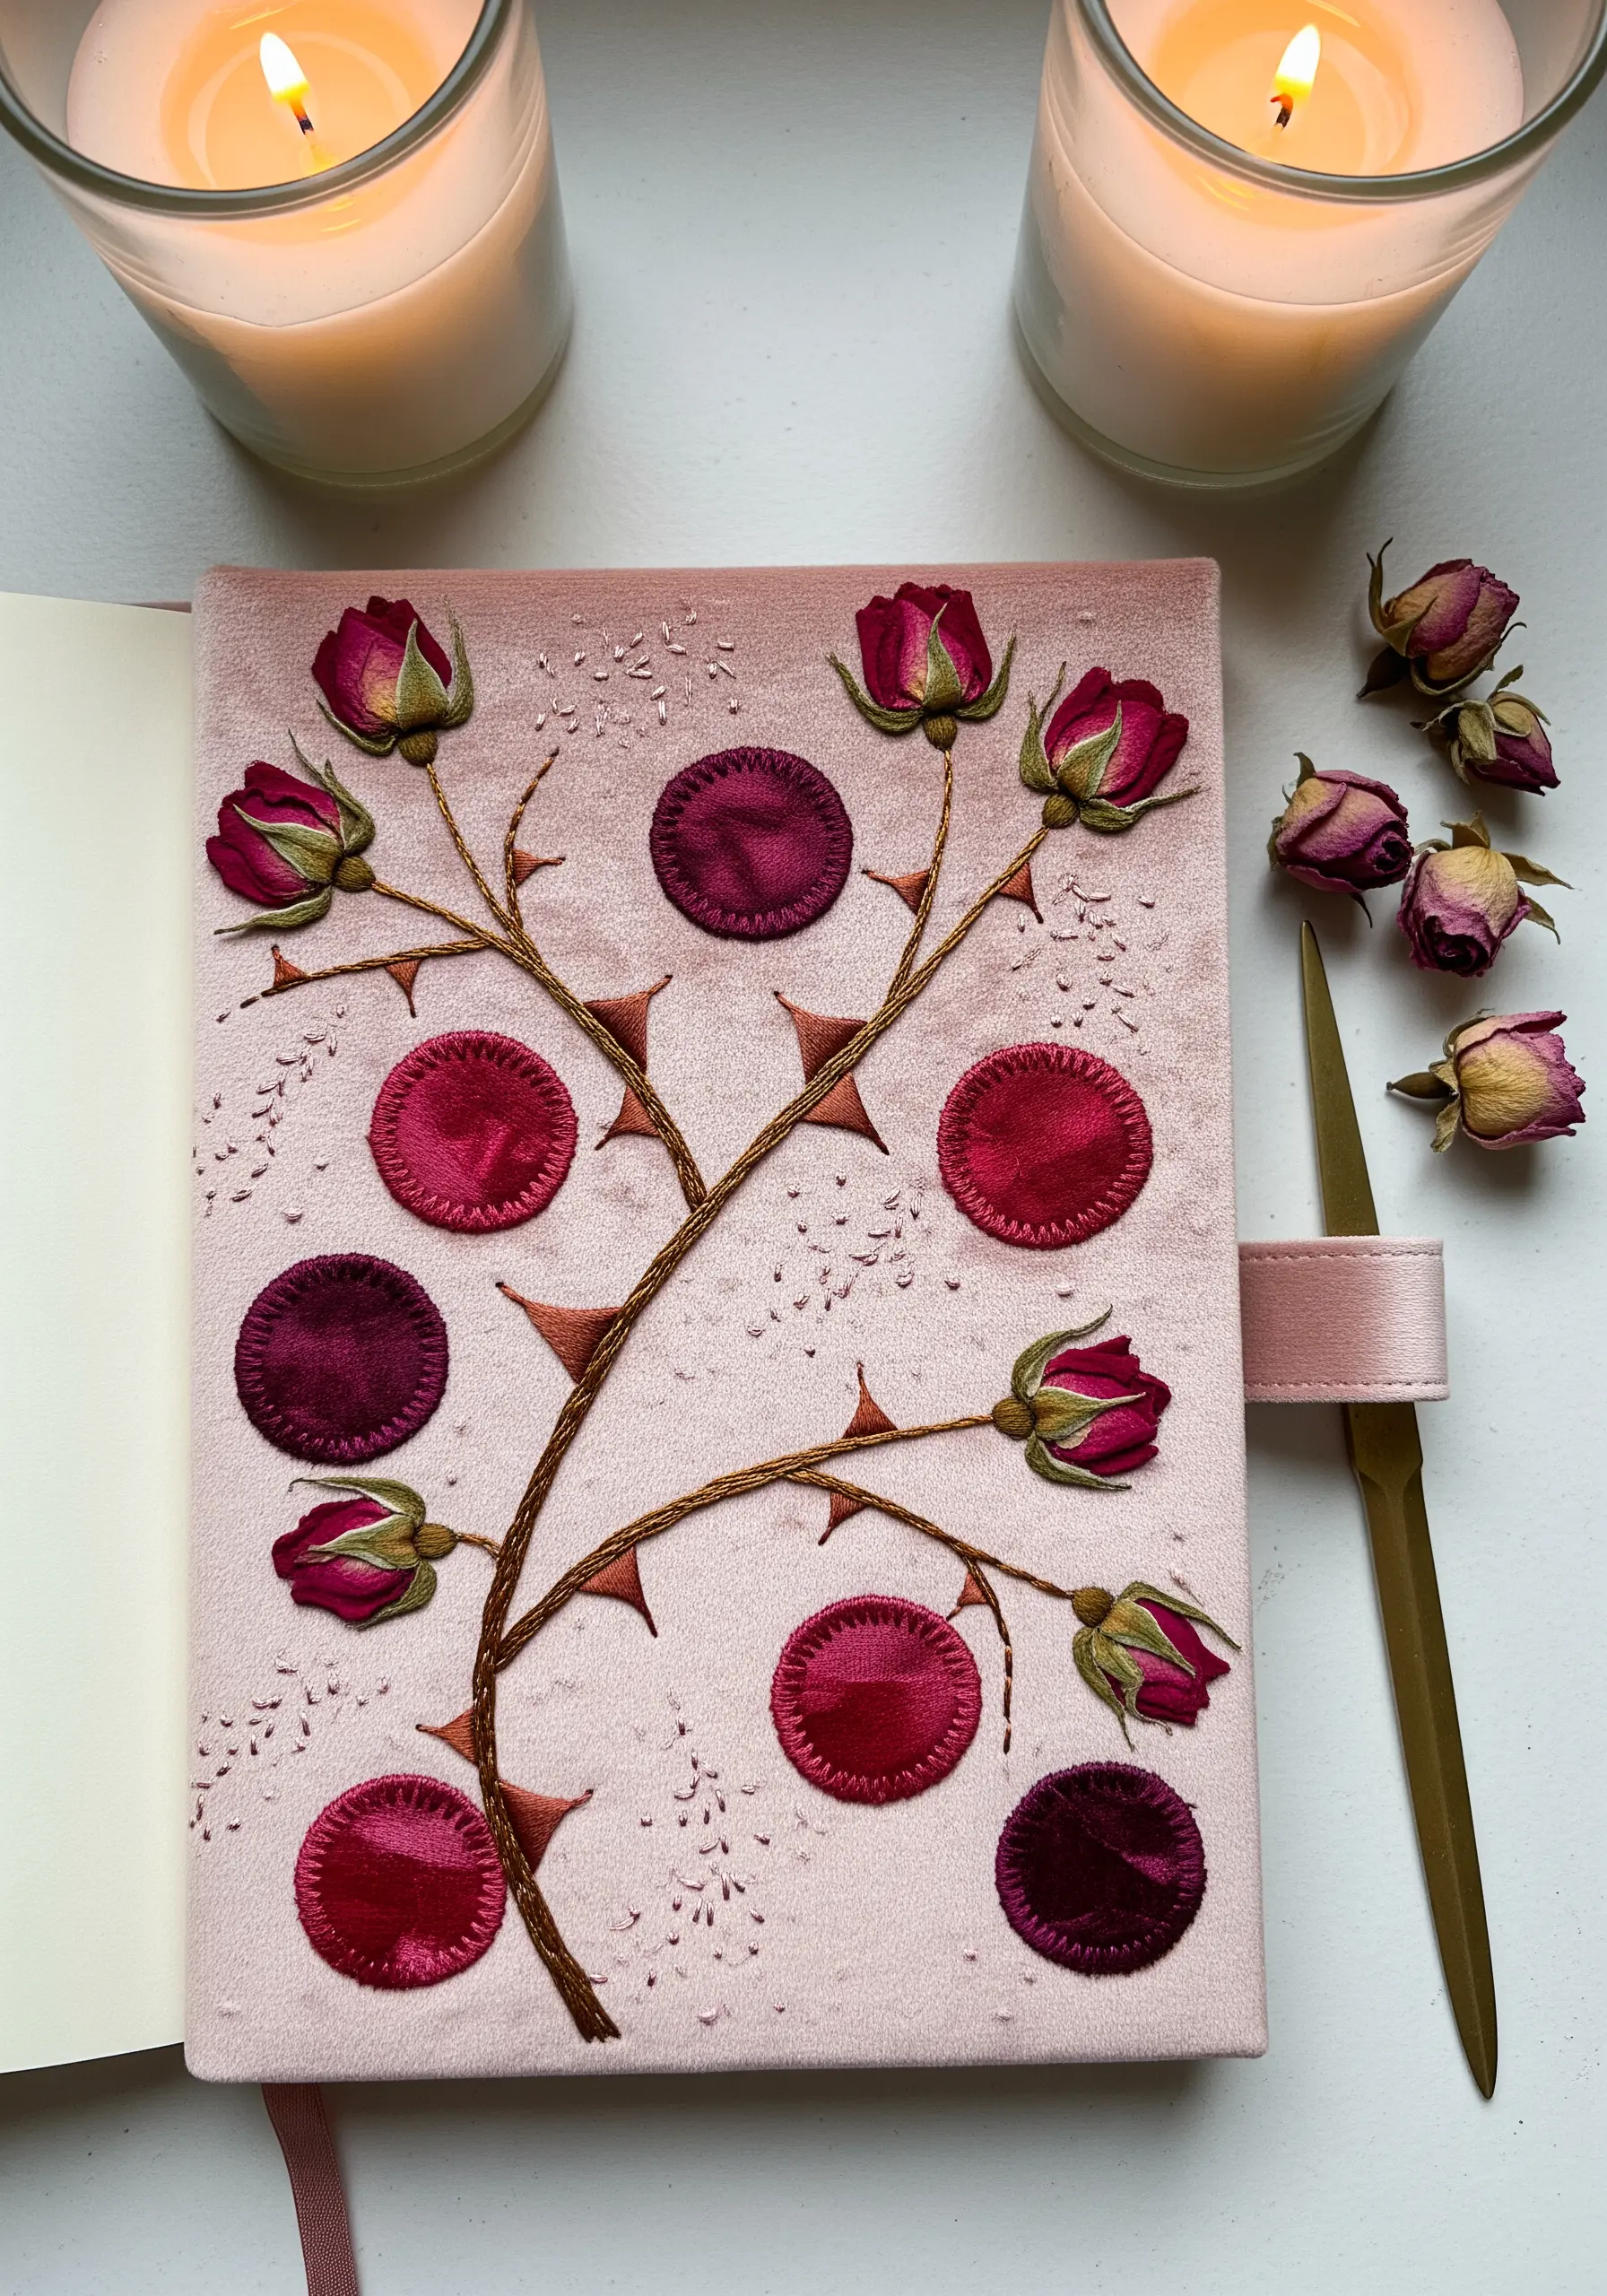
Elevate a simple journal by combining dimensional embroidery with graphic appliqué on a luxe fabric like velvet.
Form the rosebuds by folding and securing small pieces of silk or satin ribbon, then attach them with a few anchoring stitches.
Use a couched stitch with a thicker, textural thread for the thorny branches; this allows you to create elegant curves that sit on top of the velvet’s pile.
Introduce abstract elements, like the satin appliqué circles, to create rhythm and a modern composition, turning everyday items into DIY embroidered mixed-media journals.
Remember to use a sharp needle and a stabilizer to prevent the velvet from stretching as you work.
6. Minimalist Botanical Triptych
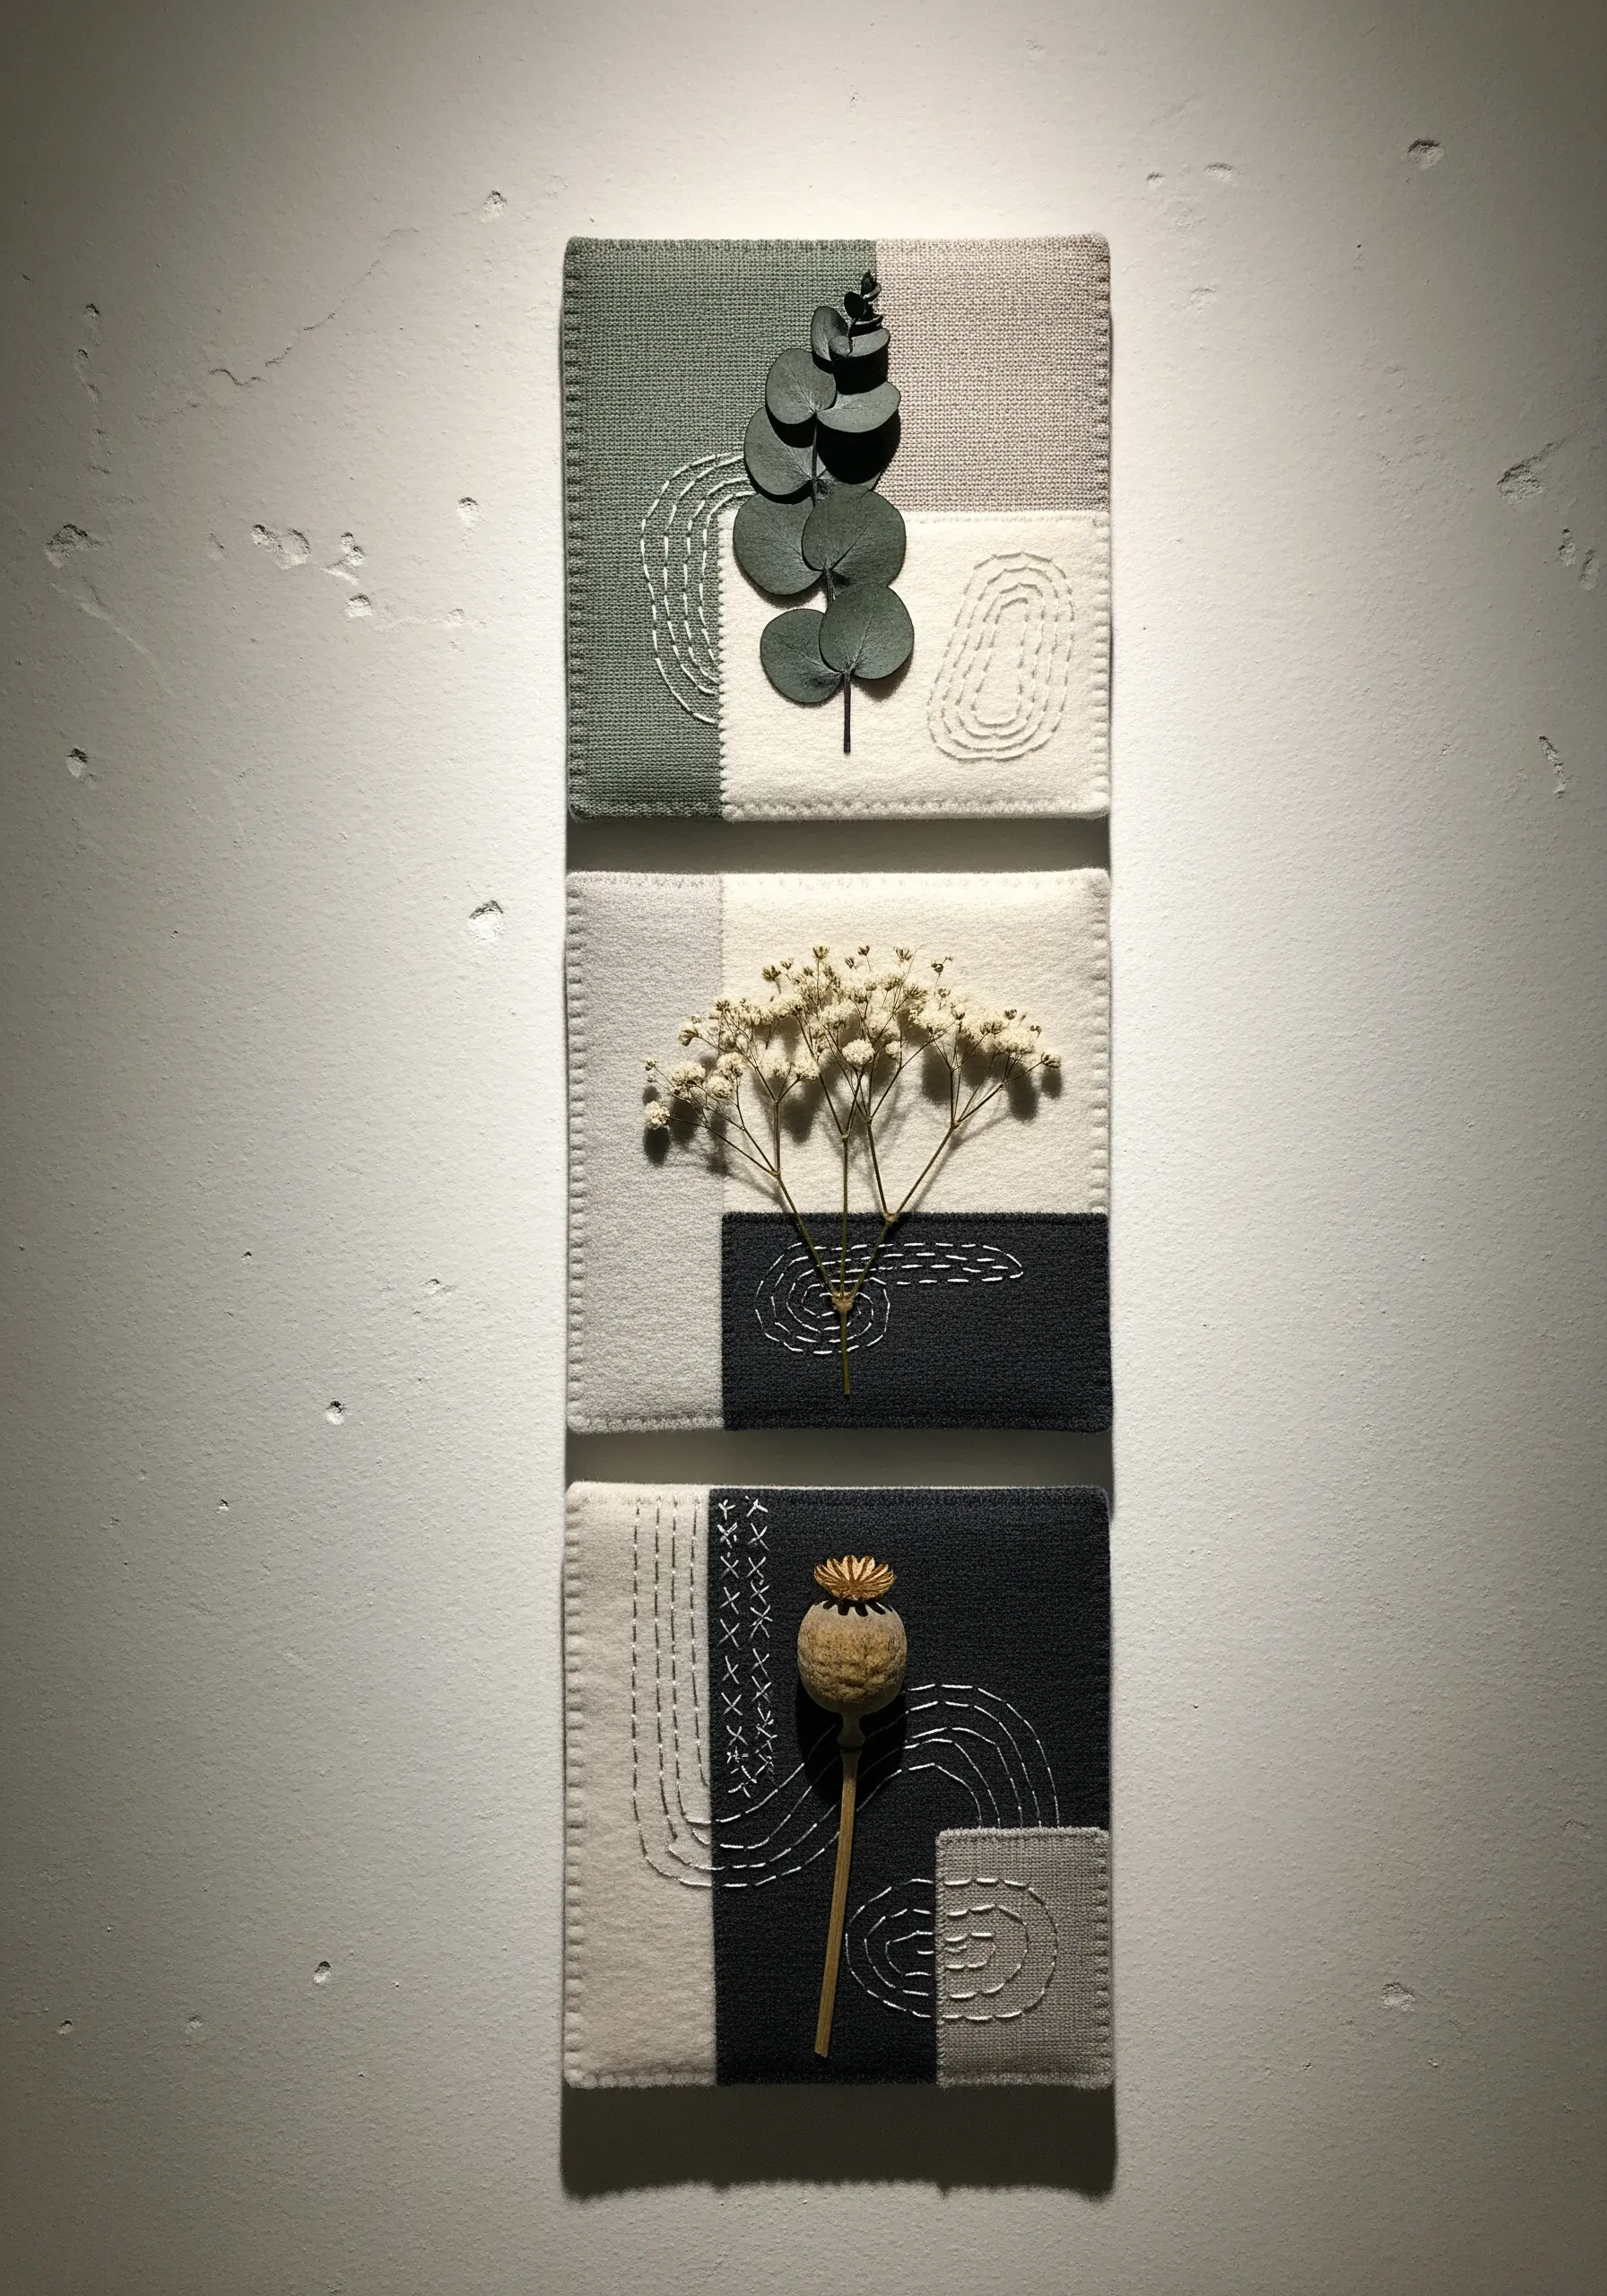
Create a sophisticated wall display by mounting real dried botanicals onto color-blocked felt panels.
Choose a restrained color palette—like charcoal, grey, and cream—to let the natural textures of the eucalyptus, baby’s breath, and poppy seed head shine.
Instead of dense stitching, add subtle accents with minimal hand embroidery, such as seed stitches or simple line work, to complement the botanicals’ forms.
Secure the dried elements with a few carefully placed, almost invisible stitches, turning them into focal points within your minimalist embroidery patterns.
This approach emphasizes composition and the beauty of negative space.
7. Beaded Queen Anne’s Lace

Capture the intricate spray of Queen Anne’s Lace using a combination of fine stitches and delicate beadwork.
On a dark, high-contrast fabric like navy blue cotton, use a fine white thread to create the delicate branching stems with split stitches.
For the tiny florets, cluster a mix of white and off-white seed beads and tiny French knots at the end of each stem.
Incorporate small, sheer ribbon details at the center to mimic the light, airy quality of the flower head.
This precision work creates a stunningly realistic and elegant botanical study that sparkles under the light.
8. Sculptural Ginkgo Branch Wall Art
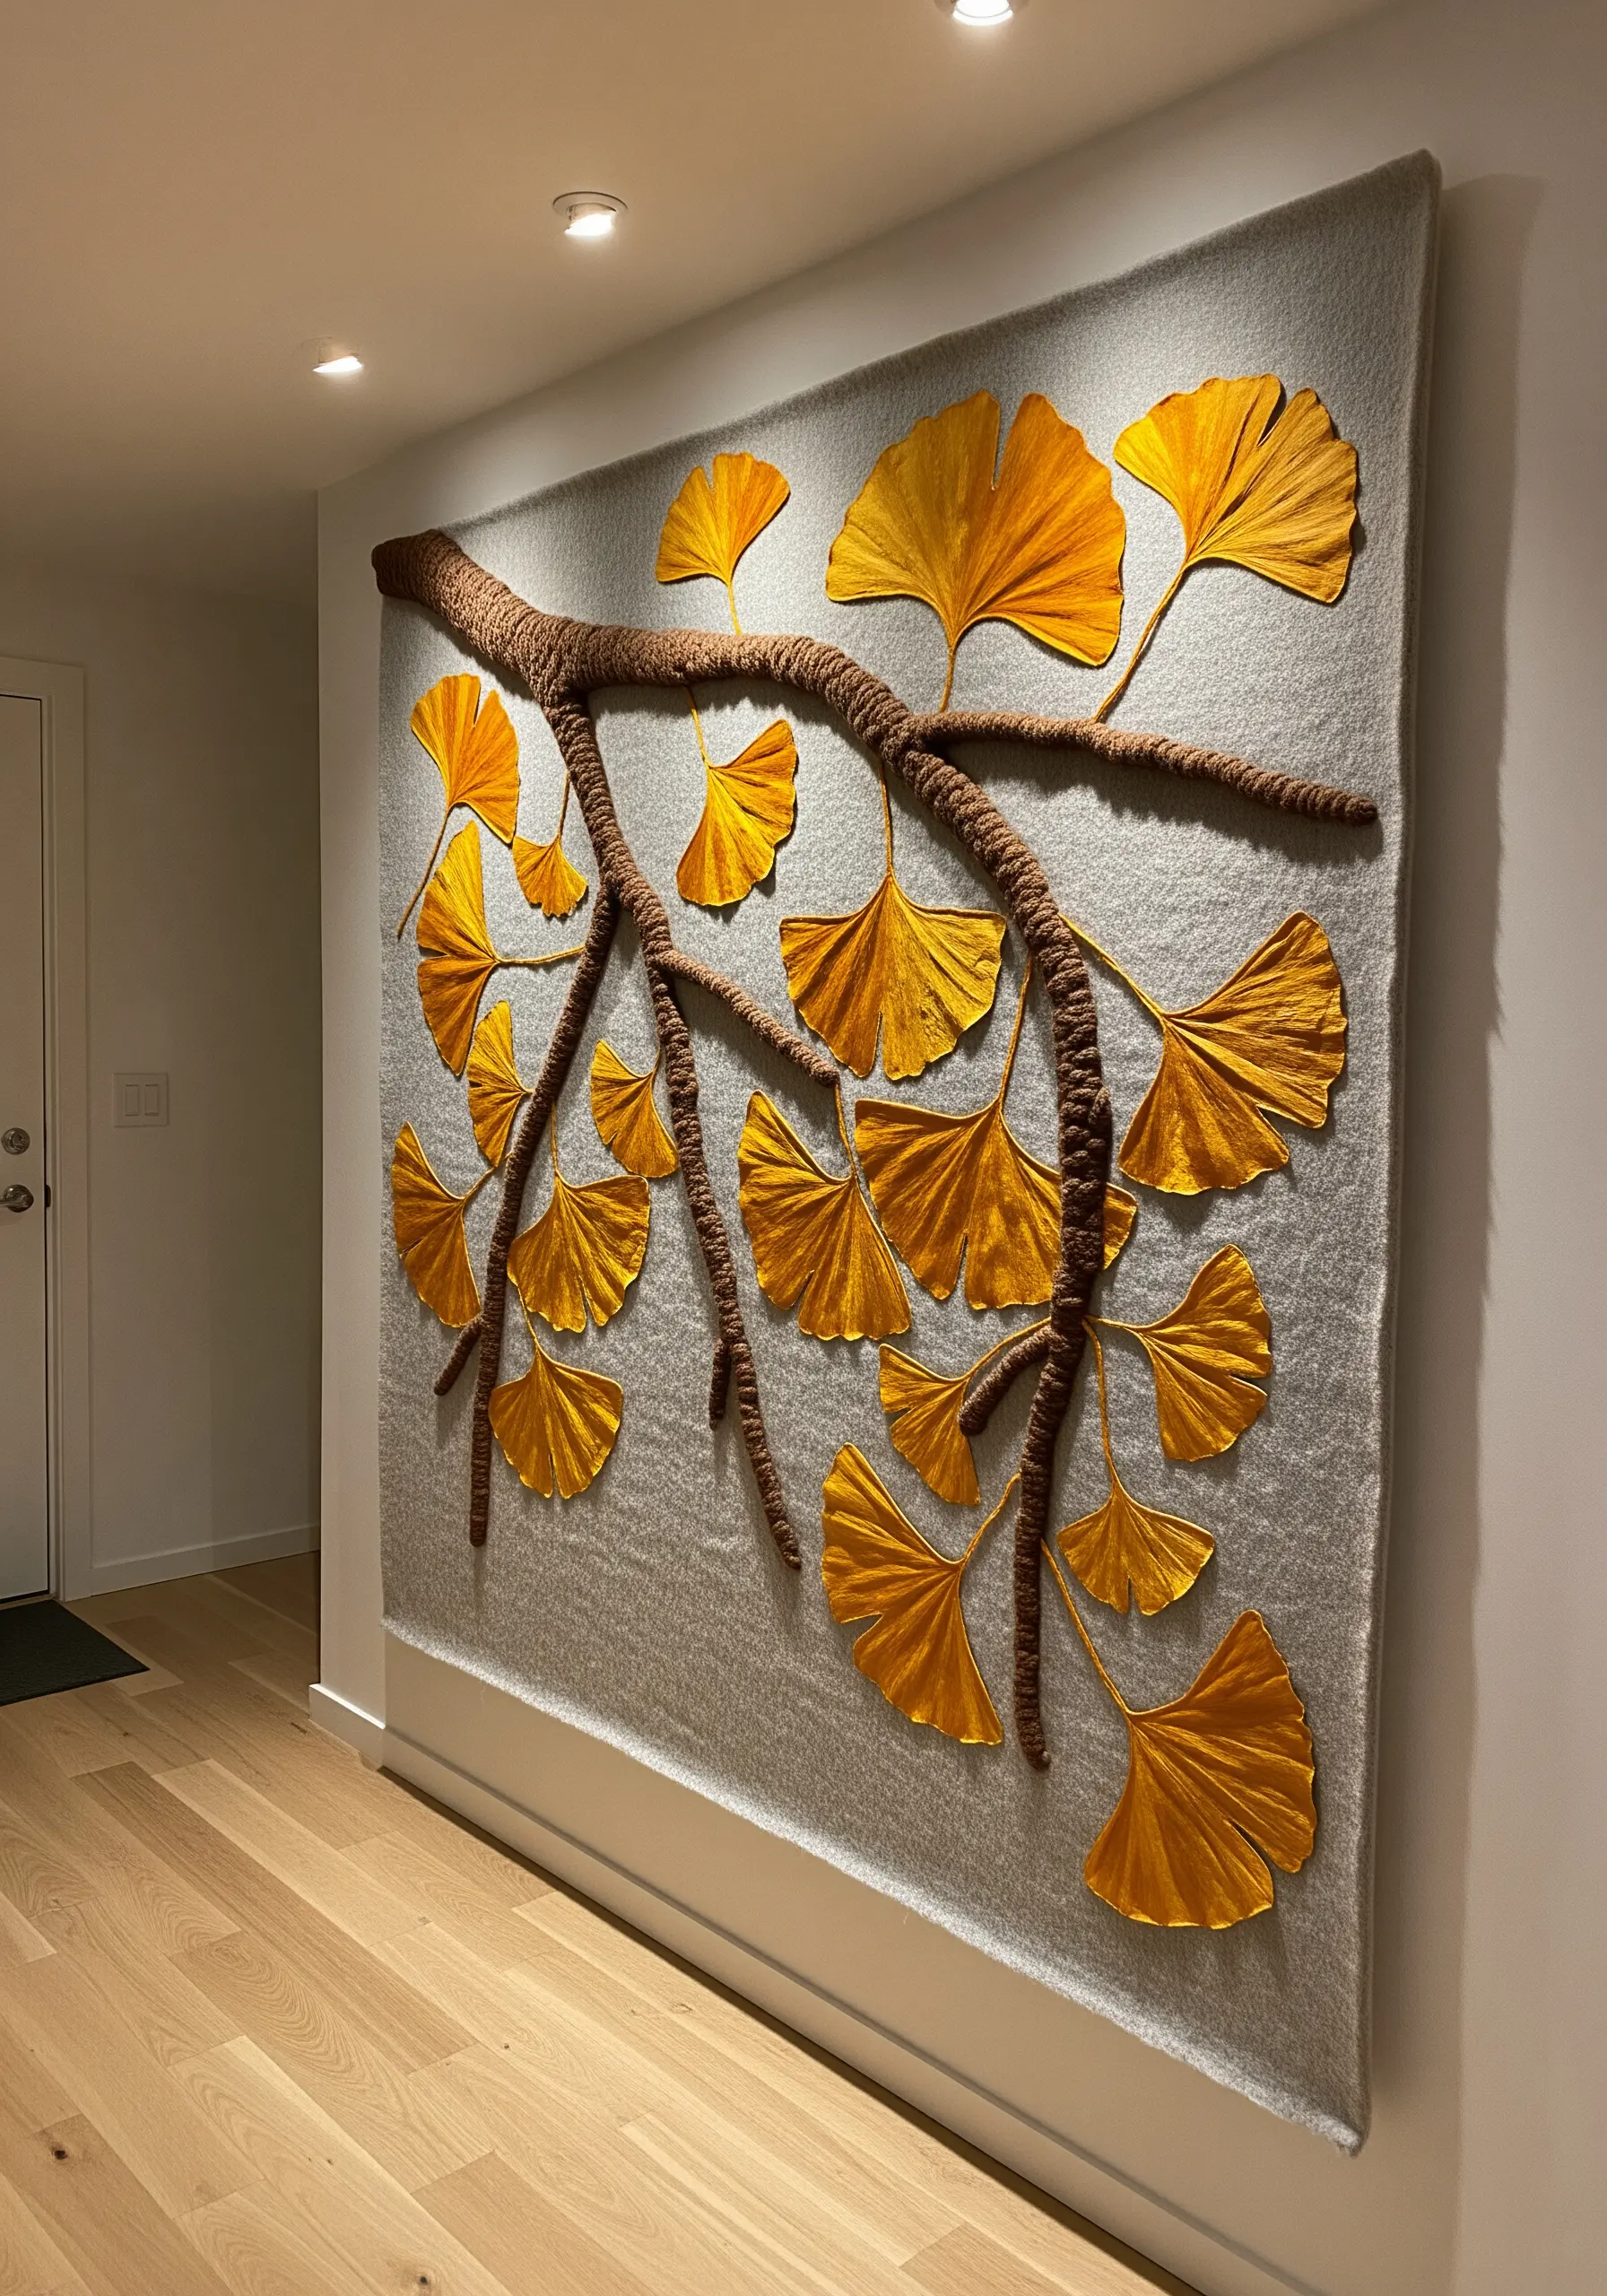
Go beyond the hoop with large-scale sculptural embroidery that commands a room.
Create the ginkgo leaves by cutting shapes from golden yellow satin or silk, then use thread painting to add delicate veins before appliquéing them to a felt or wool background.
For the branches, wrap thick cord or rope with brown yarn to build a three-dimensional, textural form that stands out from the flat surface.
Arrange the leaves in a natural, cascading pattern to give the piece movement and life, creating statement-size embroidered textile hangings that feel both graphic and organic.
9. Spiced Orange Thread Painting

Combine real dried elements with masterful thread painting for a piece that engages multiple senses.
Use real dried orange slices and star anise as compositional anchors, securing them with a few discreet stitches or fabric glue.
Fill the remaining space with thread painting that mimics the textures around it; for example, use a brick stitch or long-and-short stitch in gradient orange and brown tones to echo the color of cinnamon.
This technique challenges you to translate one texture into another, blending the real and the rendered for a uniquely cozy and aromatic-themed piece.
10. Patchwork Wildflower Garden Tote
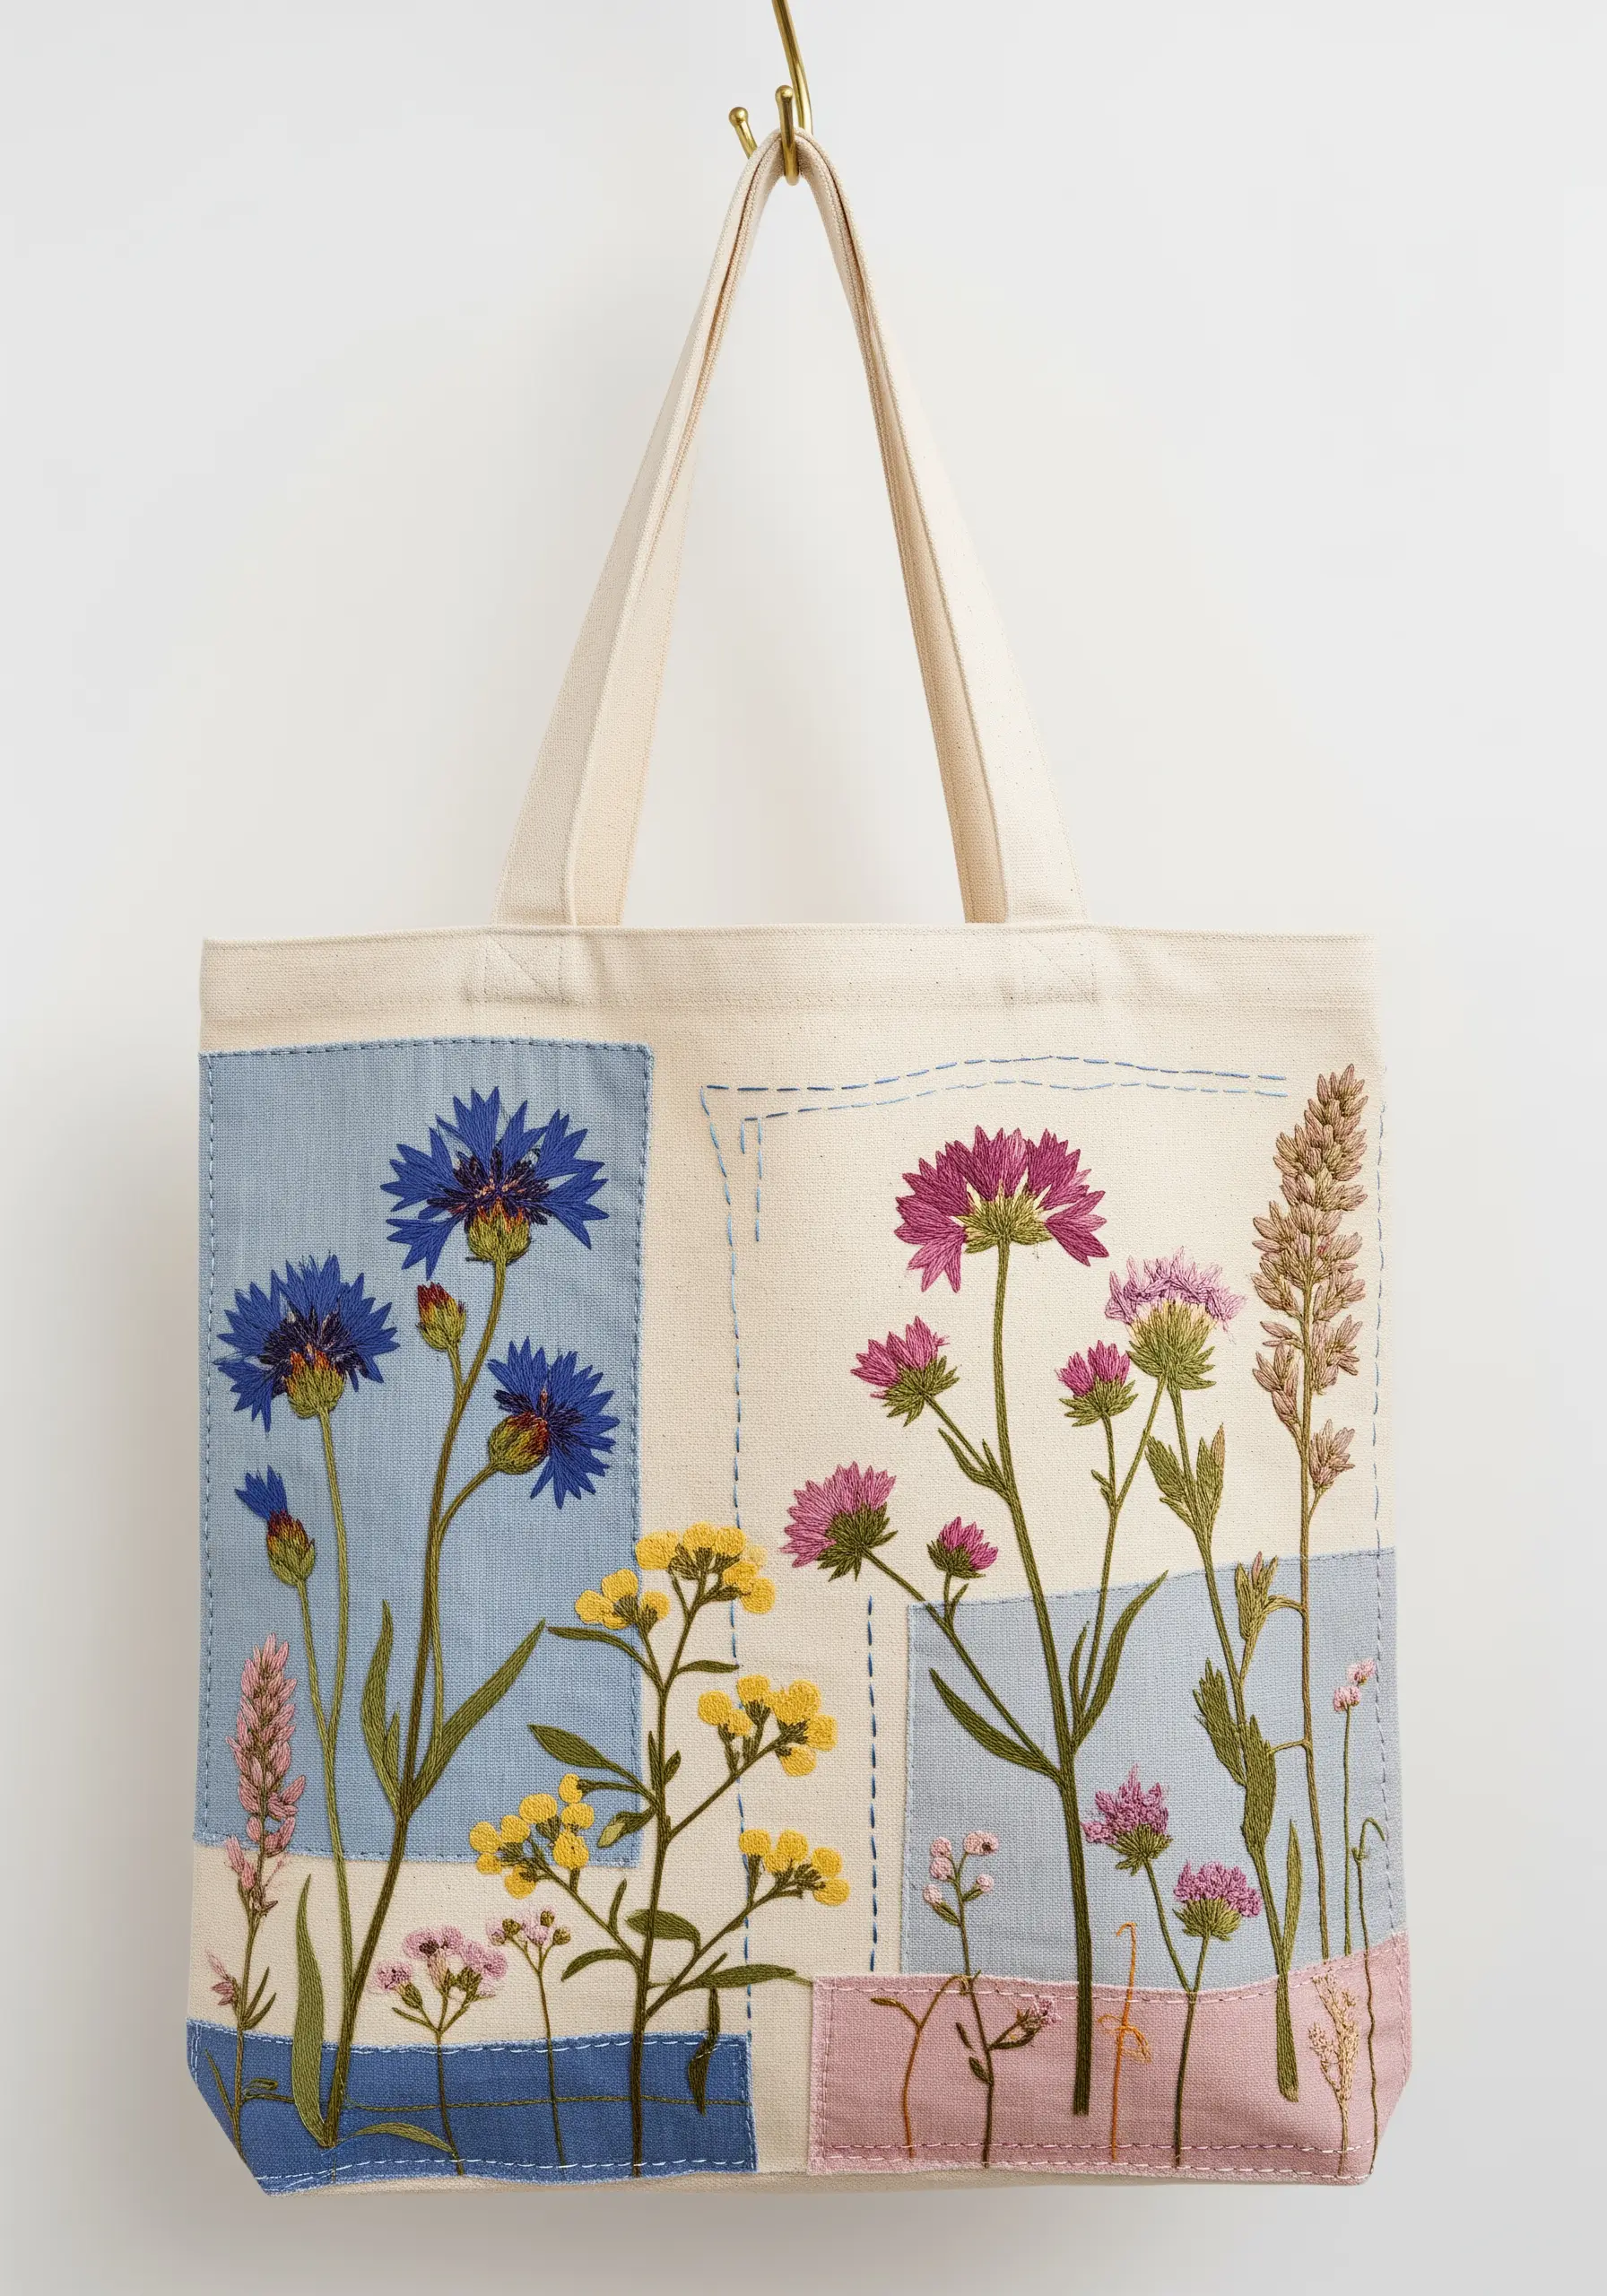
Use fabric patchwork as a dynamic canvas for your botanical embroidery, creating distinct color fields for your flowers to grow from.
Stitch together squares of muted blue, pink, and natural linen to form your base, securing them with a decorative running stitch.
Embroider different wildflowers in each patch, letting them overlap the seams to unify the design.
This method adds narrative and structure to your composition, turning simple personalized tote bag embroidery designs into a charming, meadow-inspired accessory.
11. Iridescent Skeleton Tree

Explore the interplay of light and shadow by stitching on sheer organza with metallic and iridescent materials.
Use a single layer of organza in a hoop and a tear-away stabilizer behind it while you stitch.
Outline a delicate, branching tree form with a dark, fine thread, then fill the surrounding leaf-like shapes with pieces of iridescent cellophane or film, tacked down with metallic silver thread.
Add tiny beads for extra sparkle. When hung near a light source, the piece will cast beautiful, colored shadows, creating a magical, ever-changing artwork.
12. Autumn Leaf Appliqué Quilt
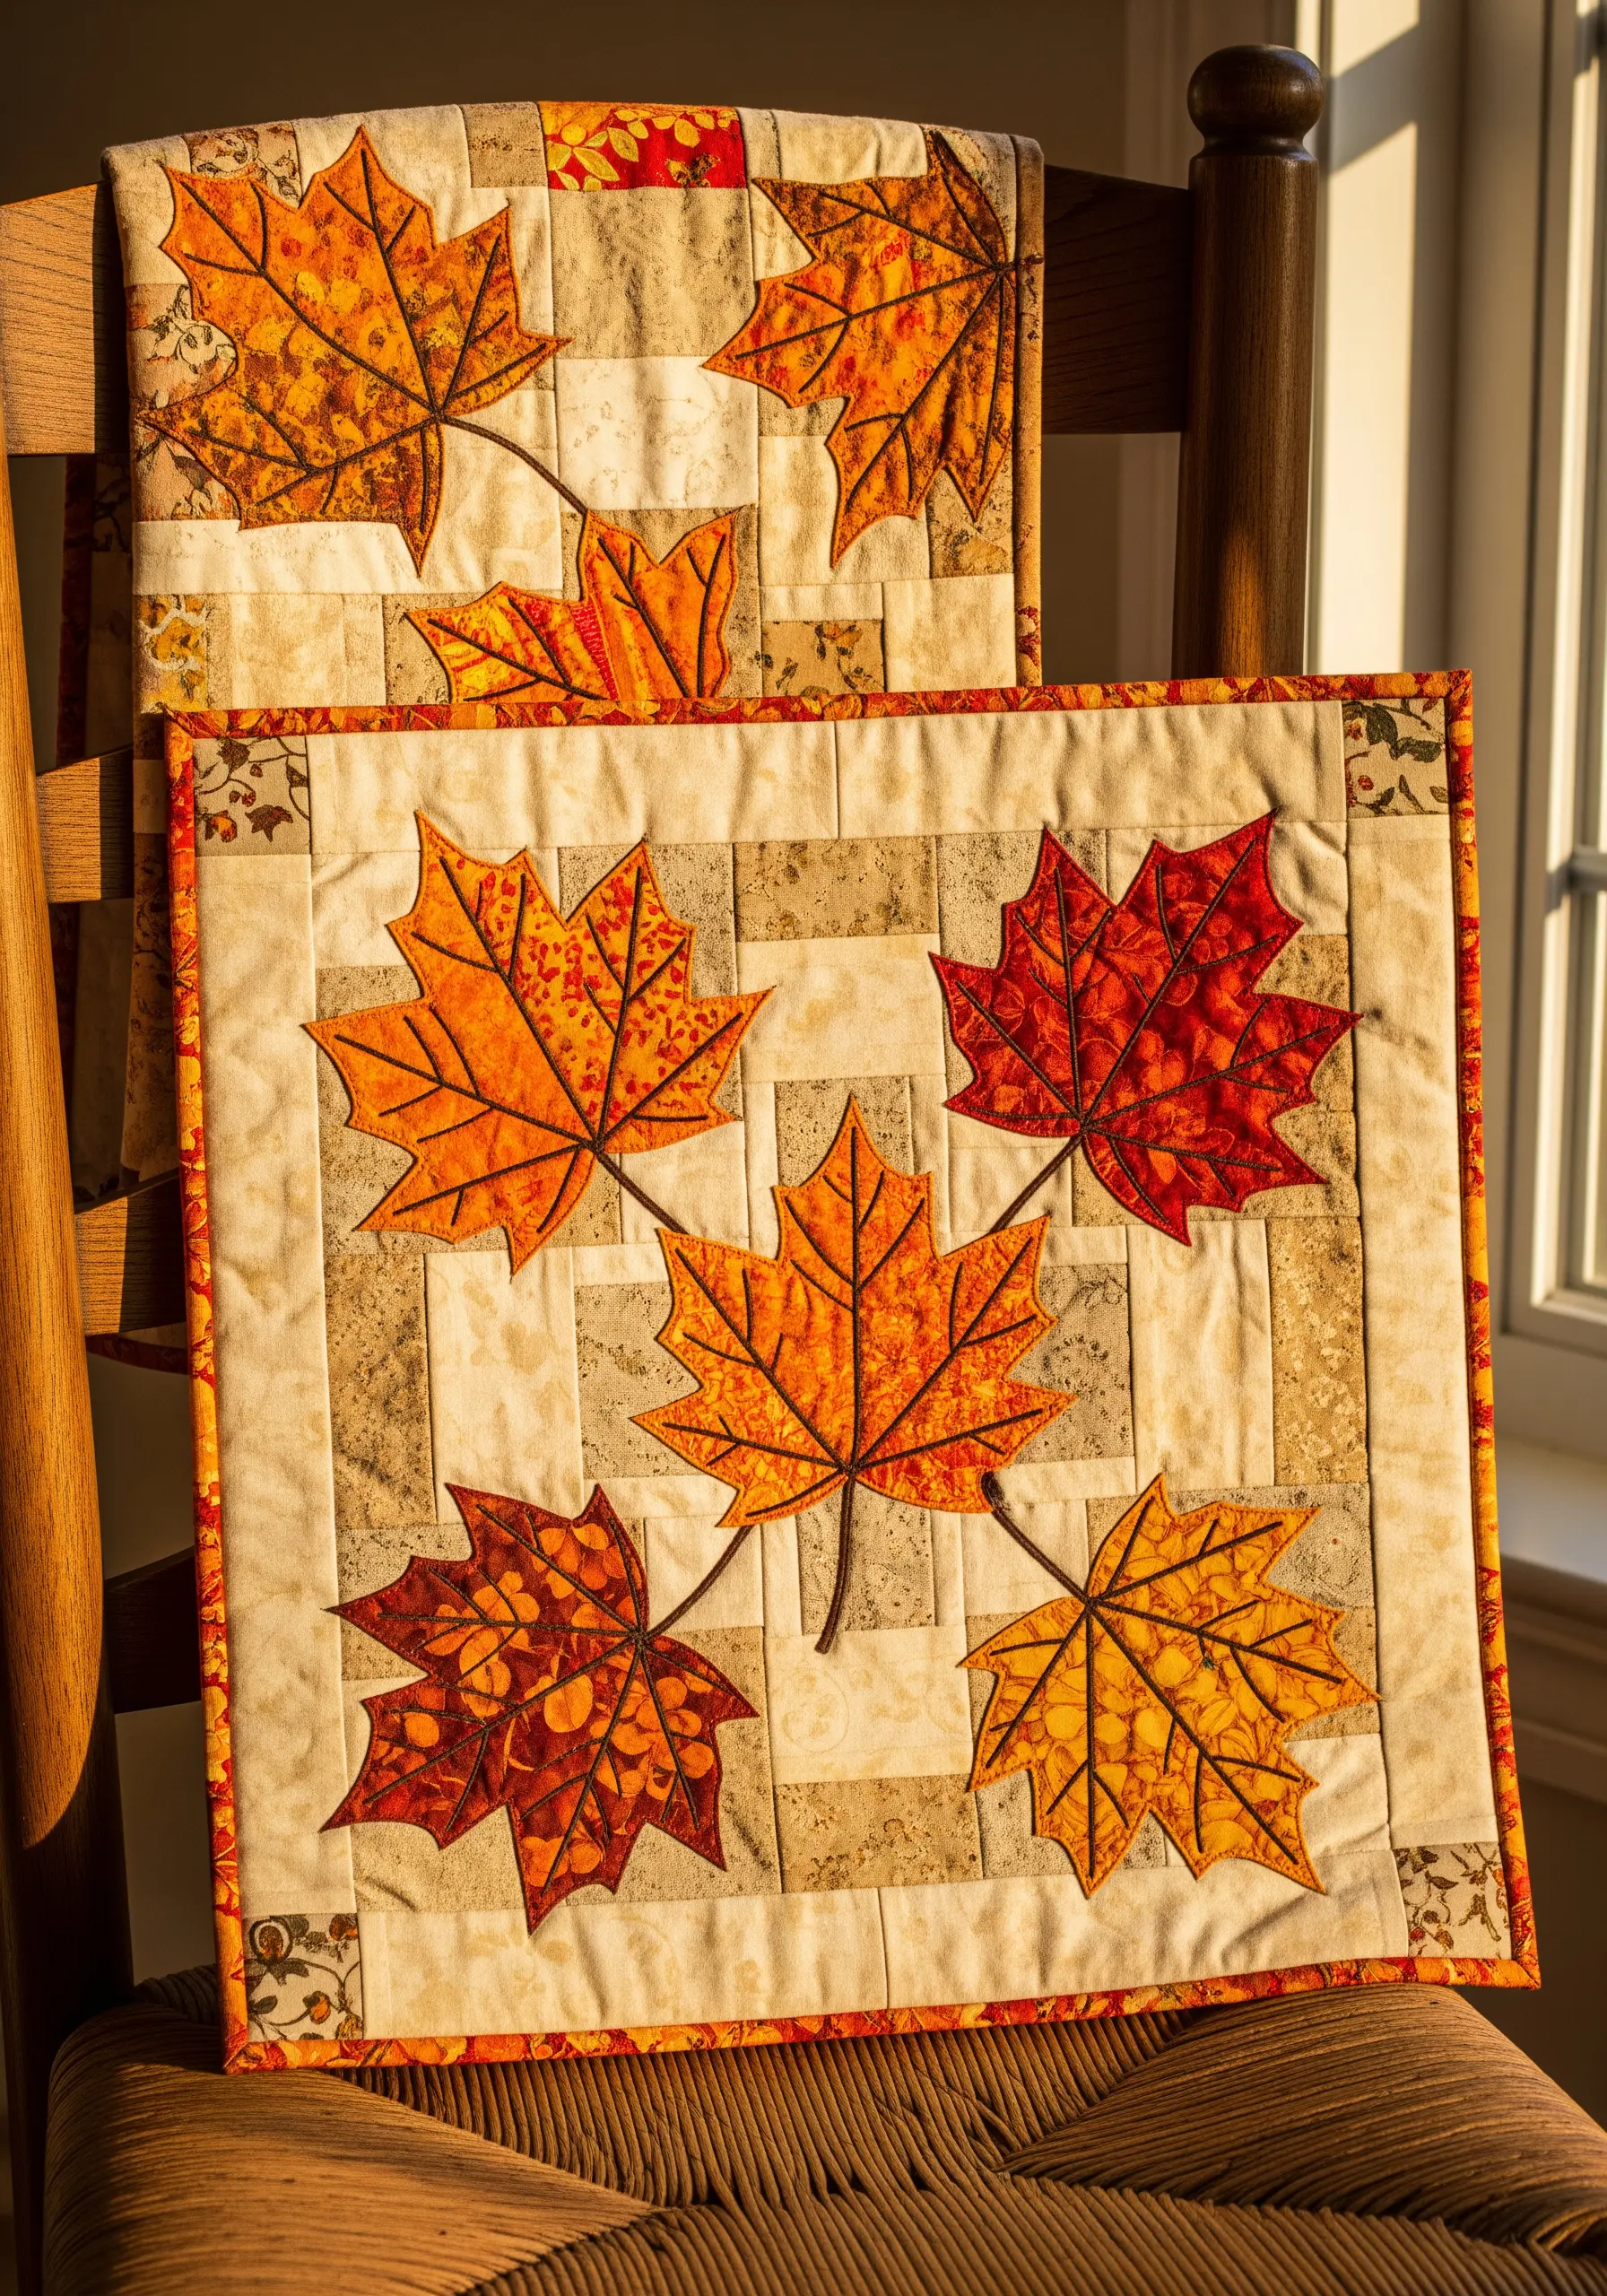
Give your quilting projects a polished, professional finish with clean appliqué and defining embroidery.
Select cotton fabrics with autumnal prints—mottled oranges, deep reds, and golds—for the maple leaves.
Use a heat-fusible adhesive to temporarily place your leaves, then secure the edges permanently with a neat buttonhole stitch in a matching thread color.
Add the central veins with a simple, contrasting backstitch to make the leaf shapes pop against the pieced background.
This combination of techniques results in a crisp, graphic design that is both beautiful and durable.
13. Dimensional Chamomile Blooms
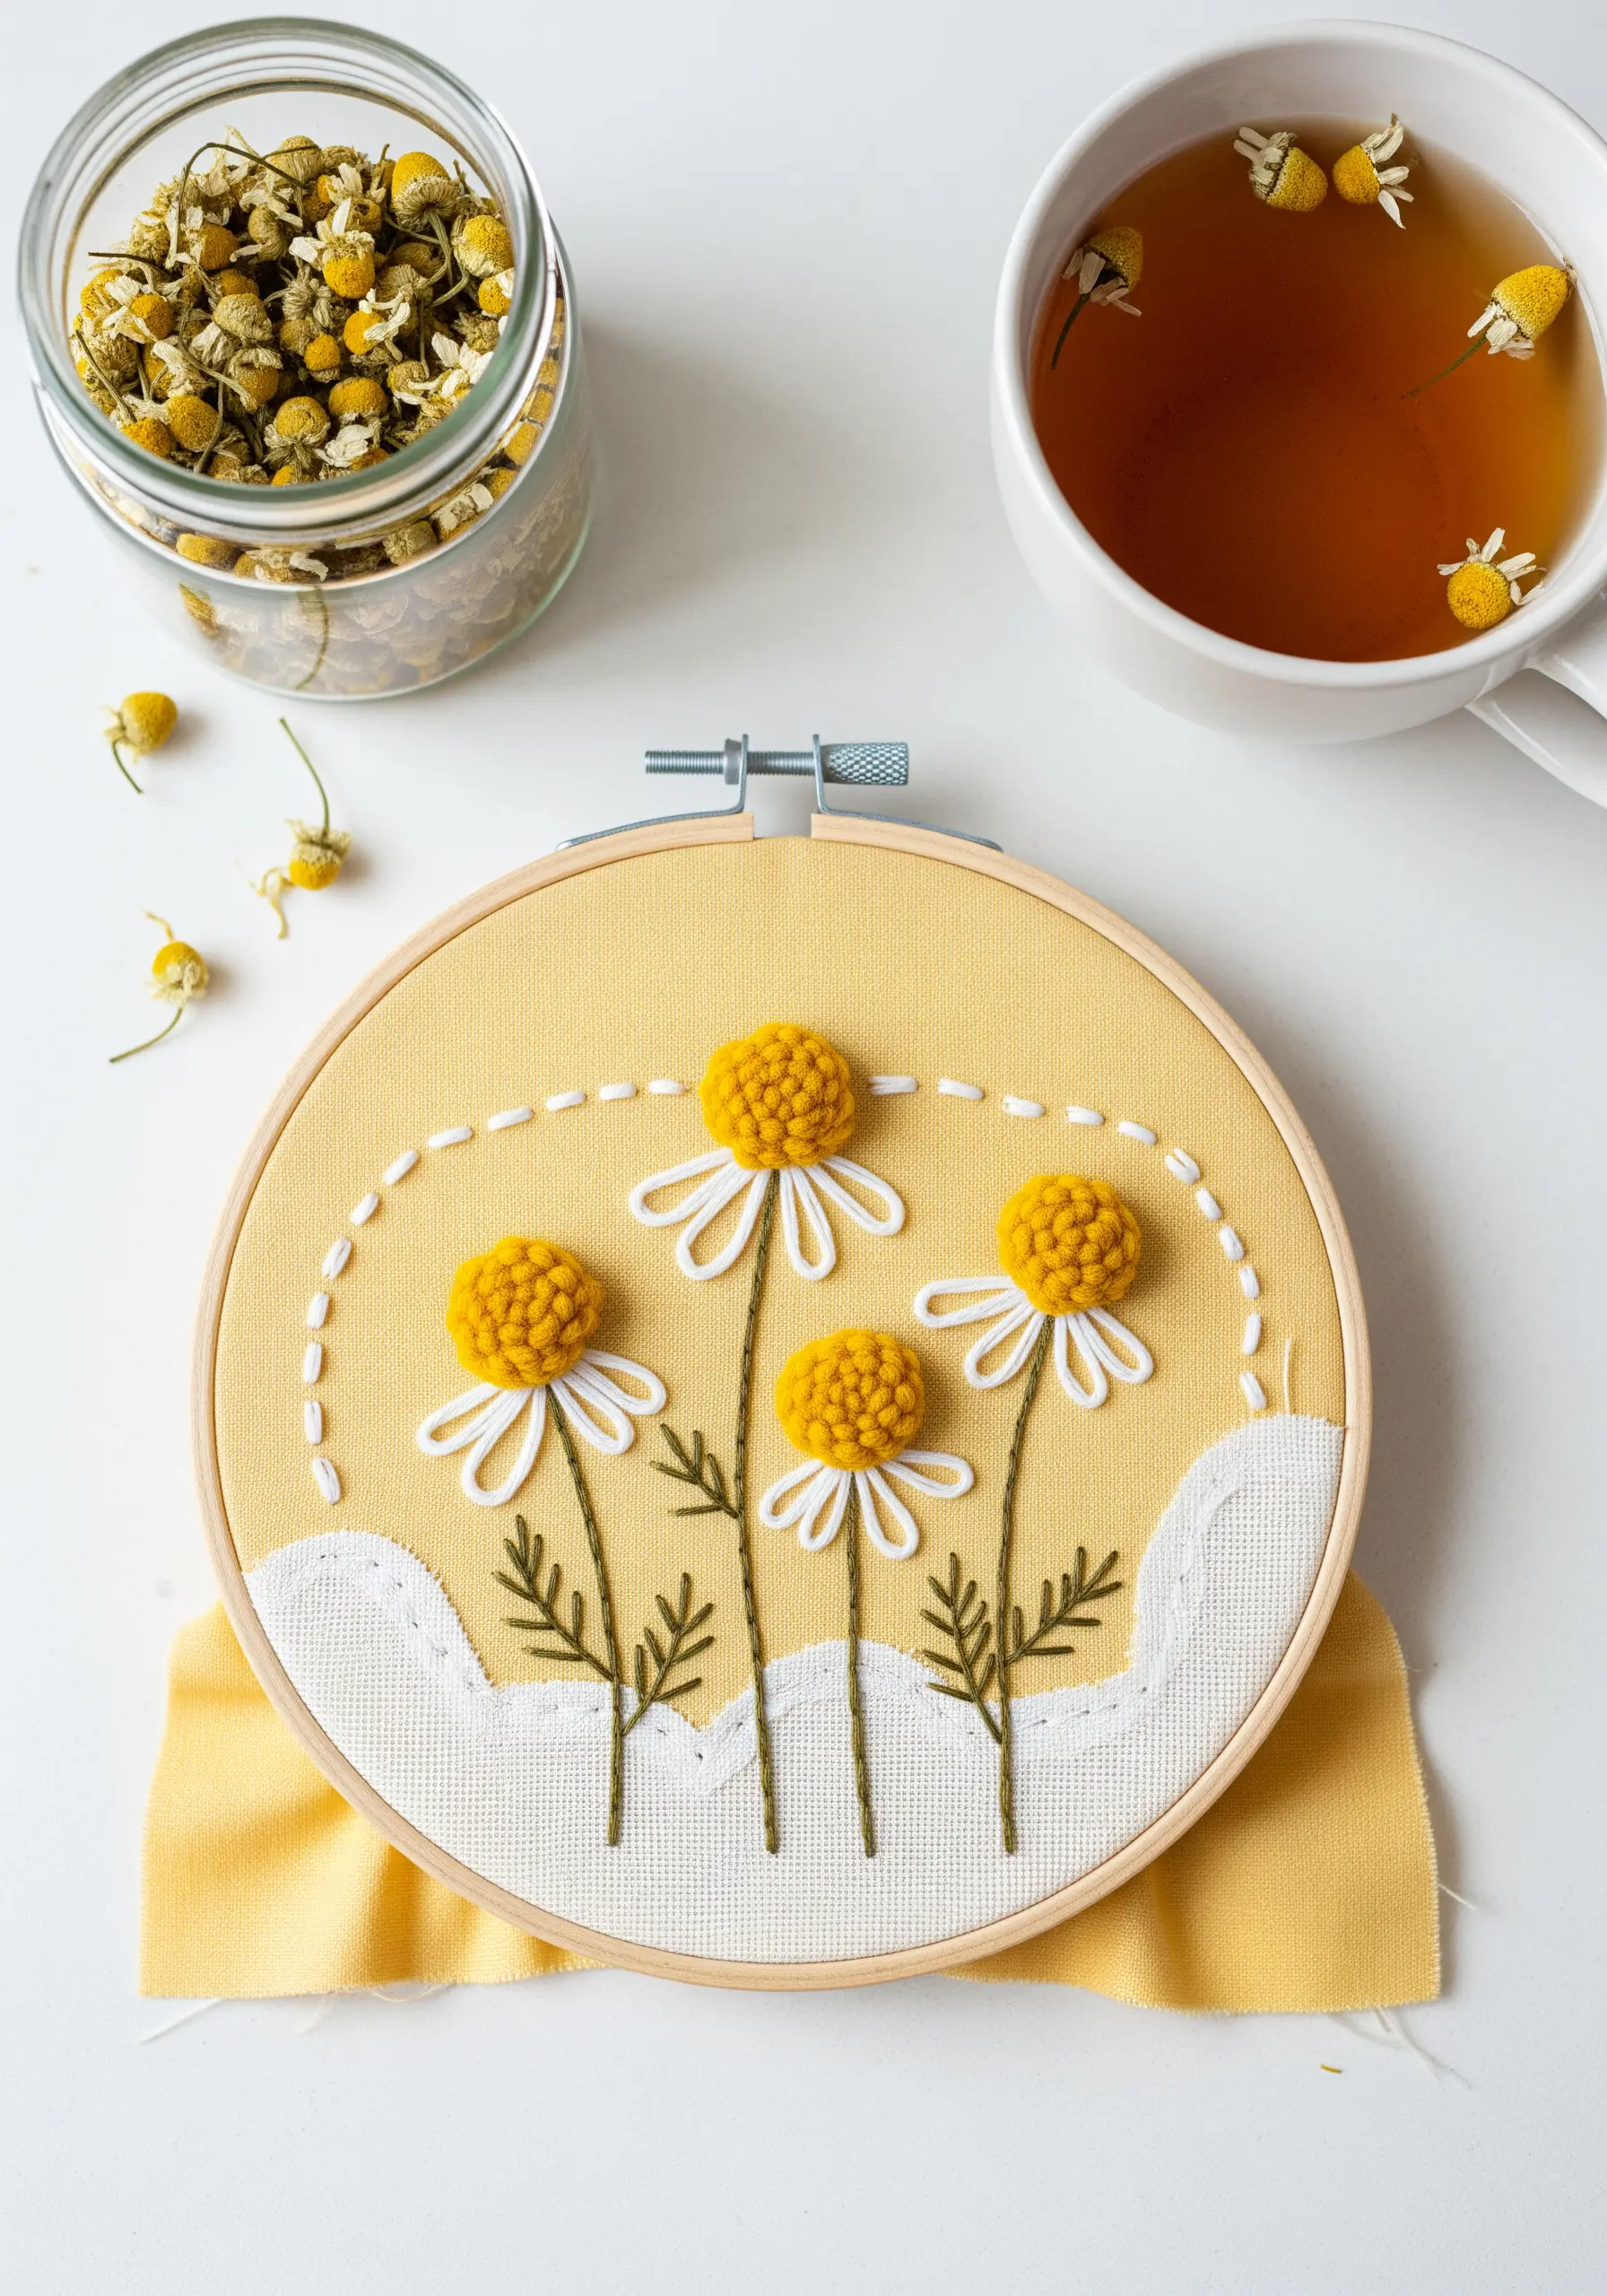
Create playful, highly tactile flowers by combining dimensional stitches with clean, graphic outlines.
For the chamomile centers, use a woven wheel stitch or a dense cluster of French knots with a thick, soft cotton yarn to achieve a puffy, 3D effect.
Contrast this texture by stitching the white petals with simple, open detached chain stitches, which gives them shape without adding bulk.
Place this on a layered fabric background—like the scalloped white piece here—to add even more depth and compositional interest to your hoop art.
14. Layered Felt Thistle
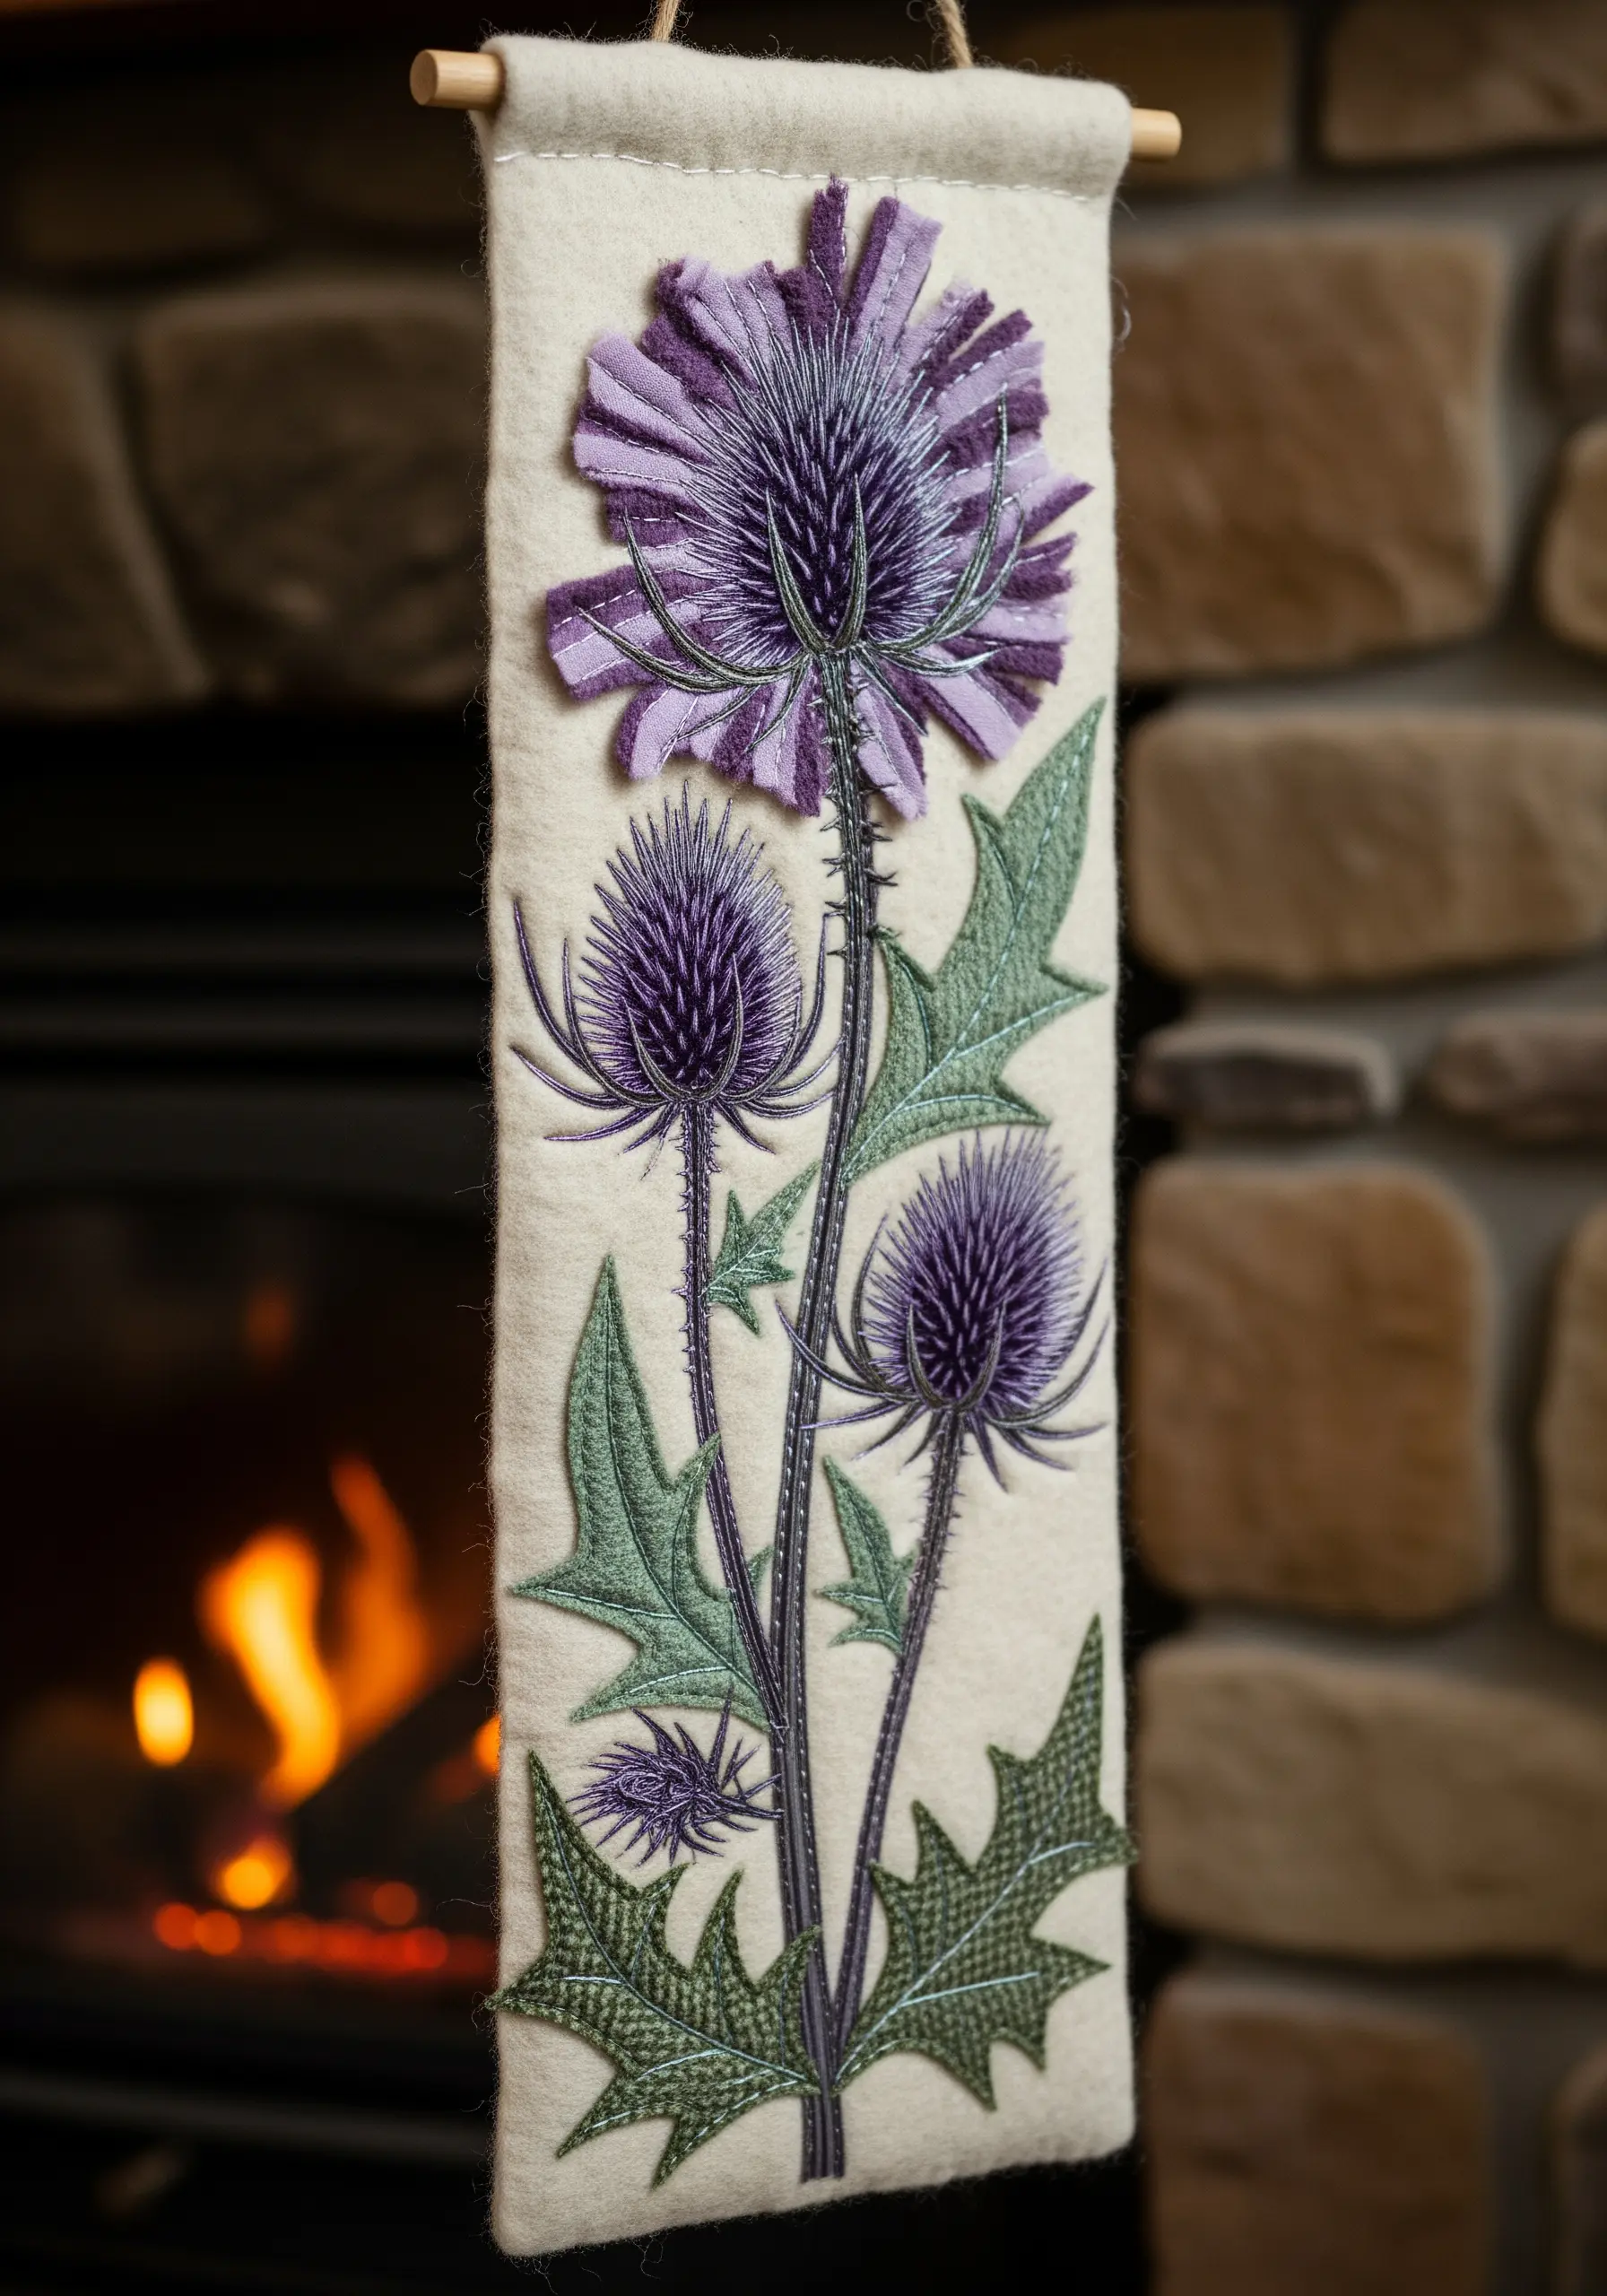
Achieve incredible depth and texture by building your botanical design with layers of cut felt.
Cut the spiky leaves and thistle heads from different colors of wool felt, then layer them to create natural dimension before stitching them to your base fabric.
Use thread painting directly onto the felt appliqué to add fine details, like the veins on the leaves and the feathery texture of the blooms.
This method is faster than stitching a solid shape from scratch and results in a bold, sculptural piece with a soft, rustic finish perfect for a wall hanging.
15. Pressed Pansy Composition
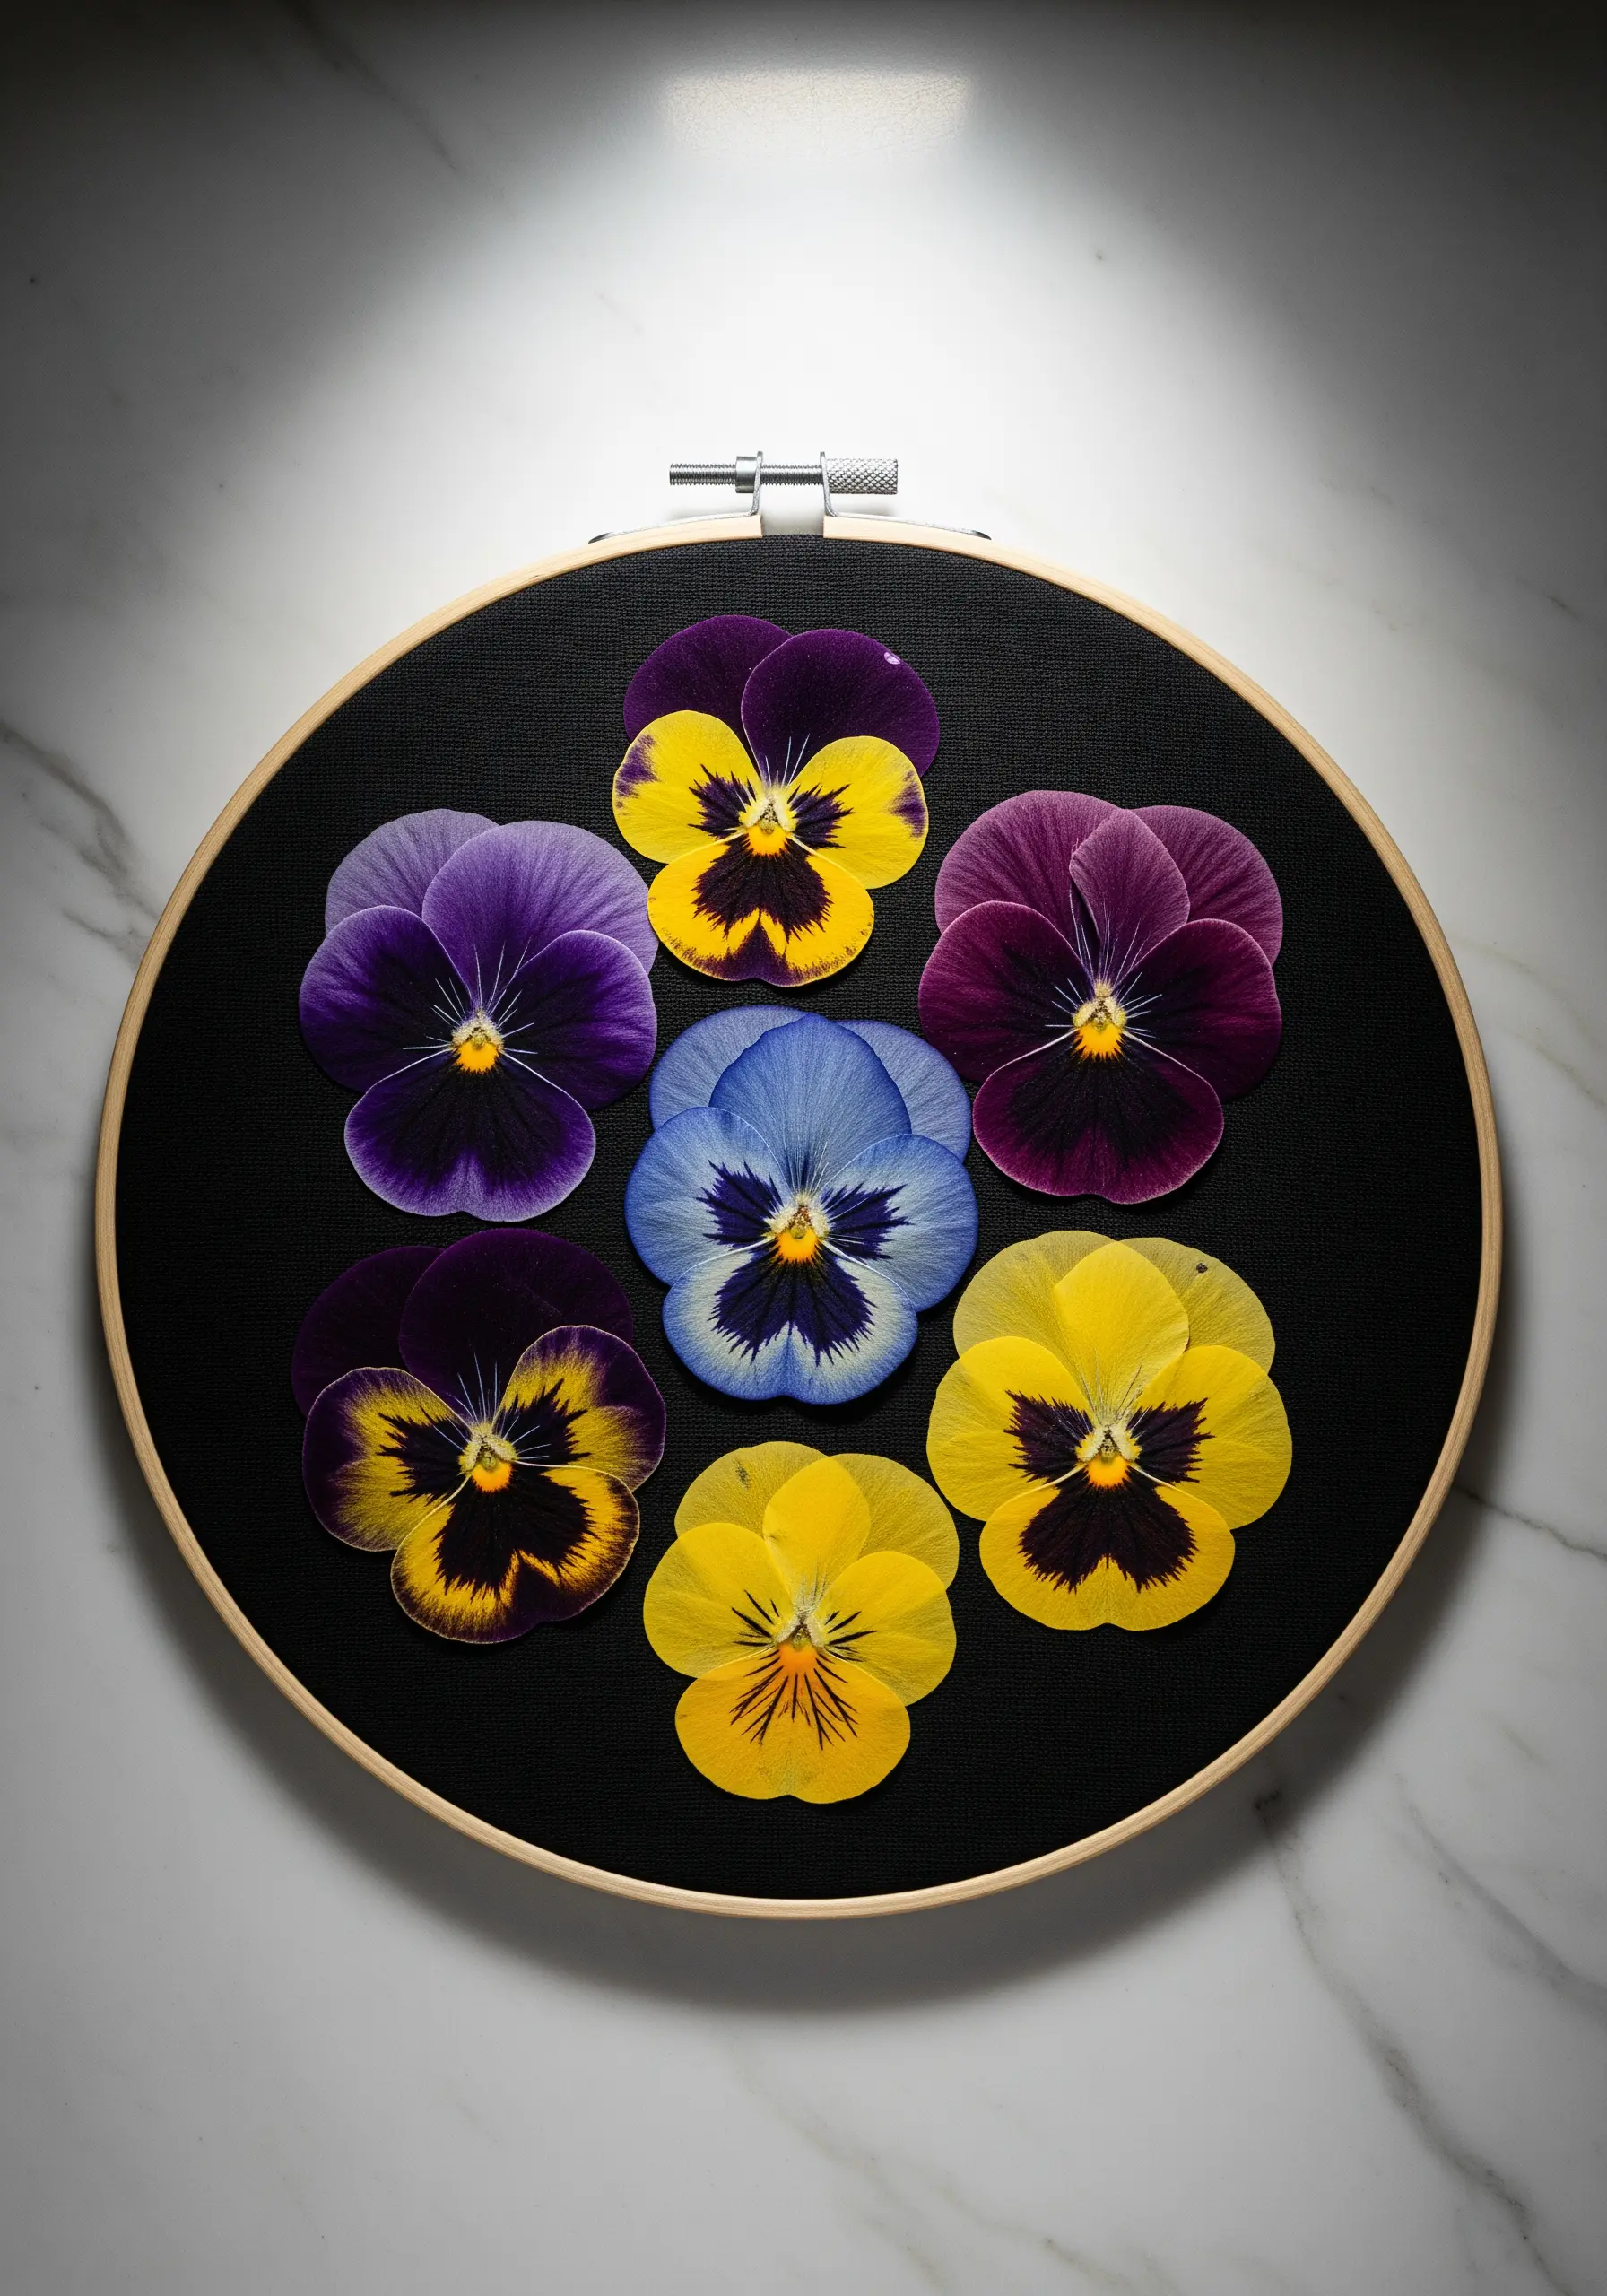
Use the vibrant, velvety colors of real pressed pansies as a direct guide for your thread palette.
While this piece uses real flowers, you can recreate this exact look with thread painting.
Carefully study the color transitions in each petal—the deep purples, bright yellows, and soft blues—and replicate them using long-and-short stitches.
Use just one or two strands of floss to capture the delicate, paper-thin quality of the petals. A black fabric background will make your stitched colors appear exceptionally luminous and rich.
16. Textural Yarn Pampas Grass
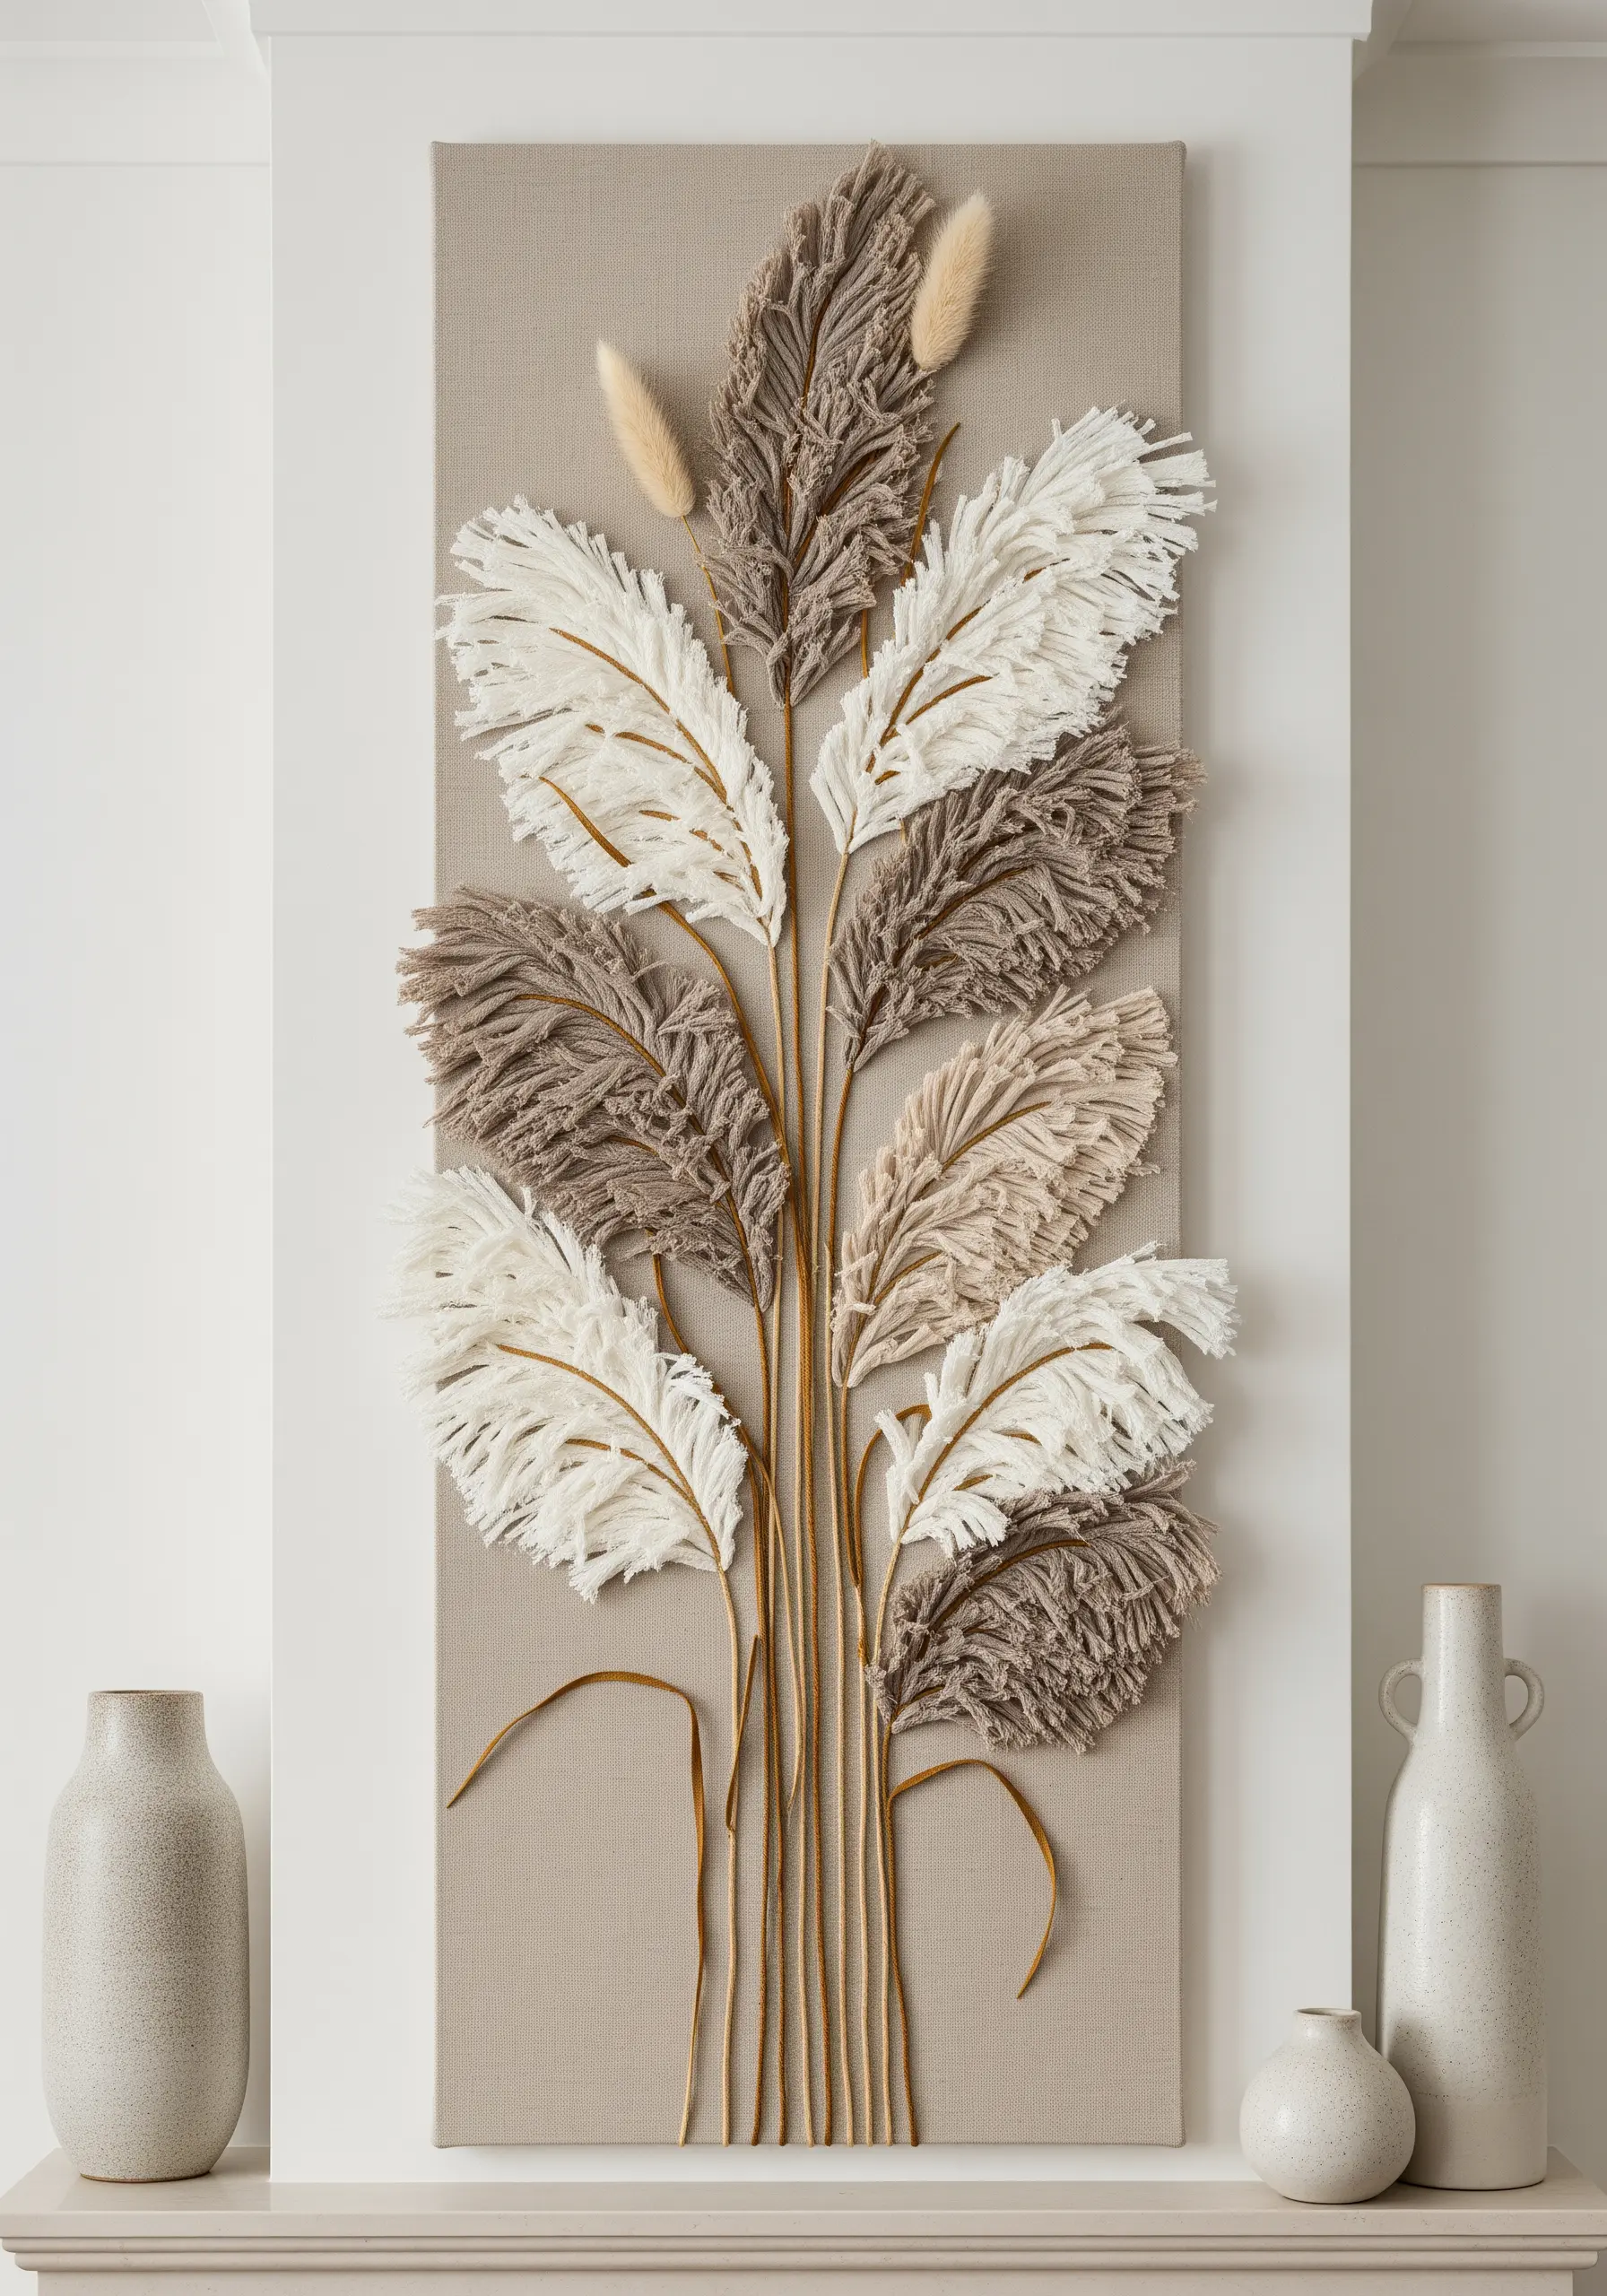
Mimic the soft, feathery texture of pampas grass using simple yarn techniques for a stunning piece of fiber art.
Create the fluffy plumes by making a series of long, loose loops with a soft, neutral-colored yarn, anchoring them along a central stem stitch line.
Carefully snip the loops and unravel the yarn strands with a fine-toothed comb to create a soft, airy texture.
Contrast the fluffy plumes with sleek, yarn-wrapped stems. This technique is perfect for creating neutral tone thread palettes with high textural impact.
17. Realistic Mushroom Study
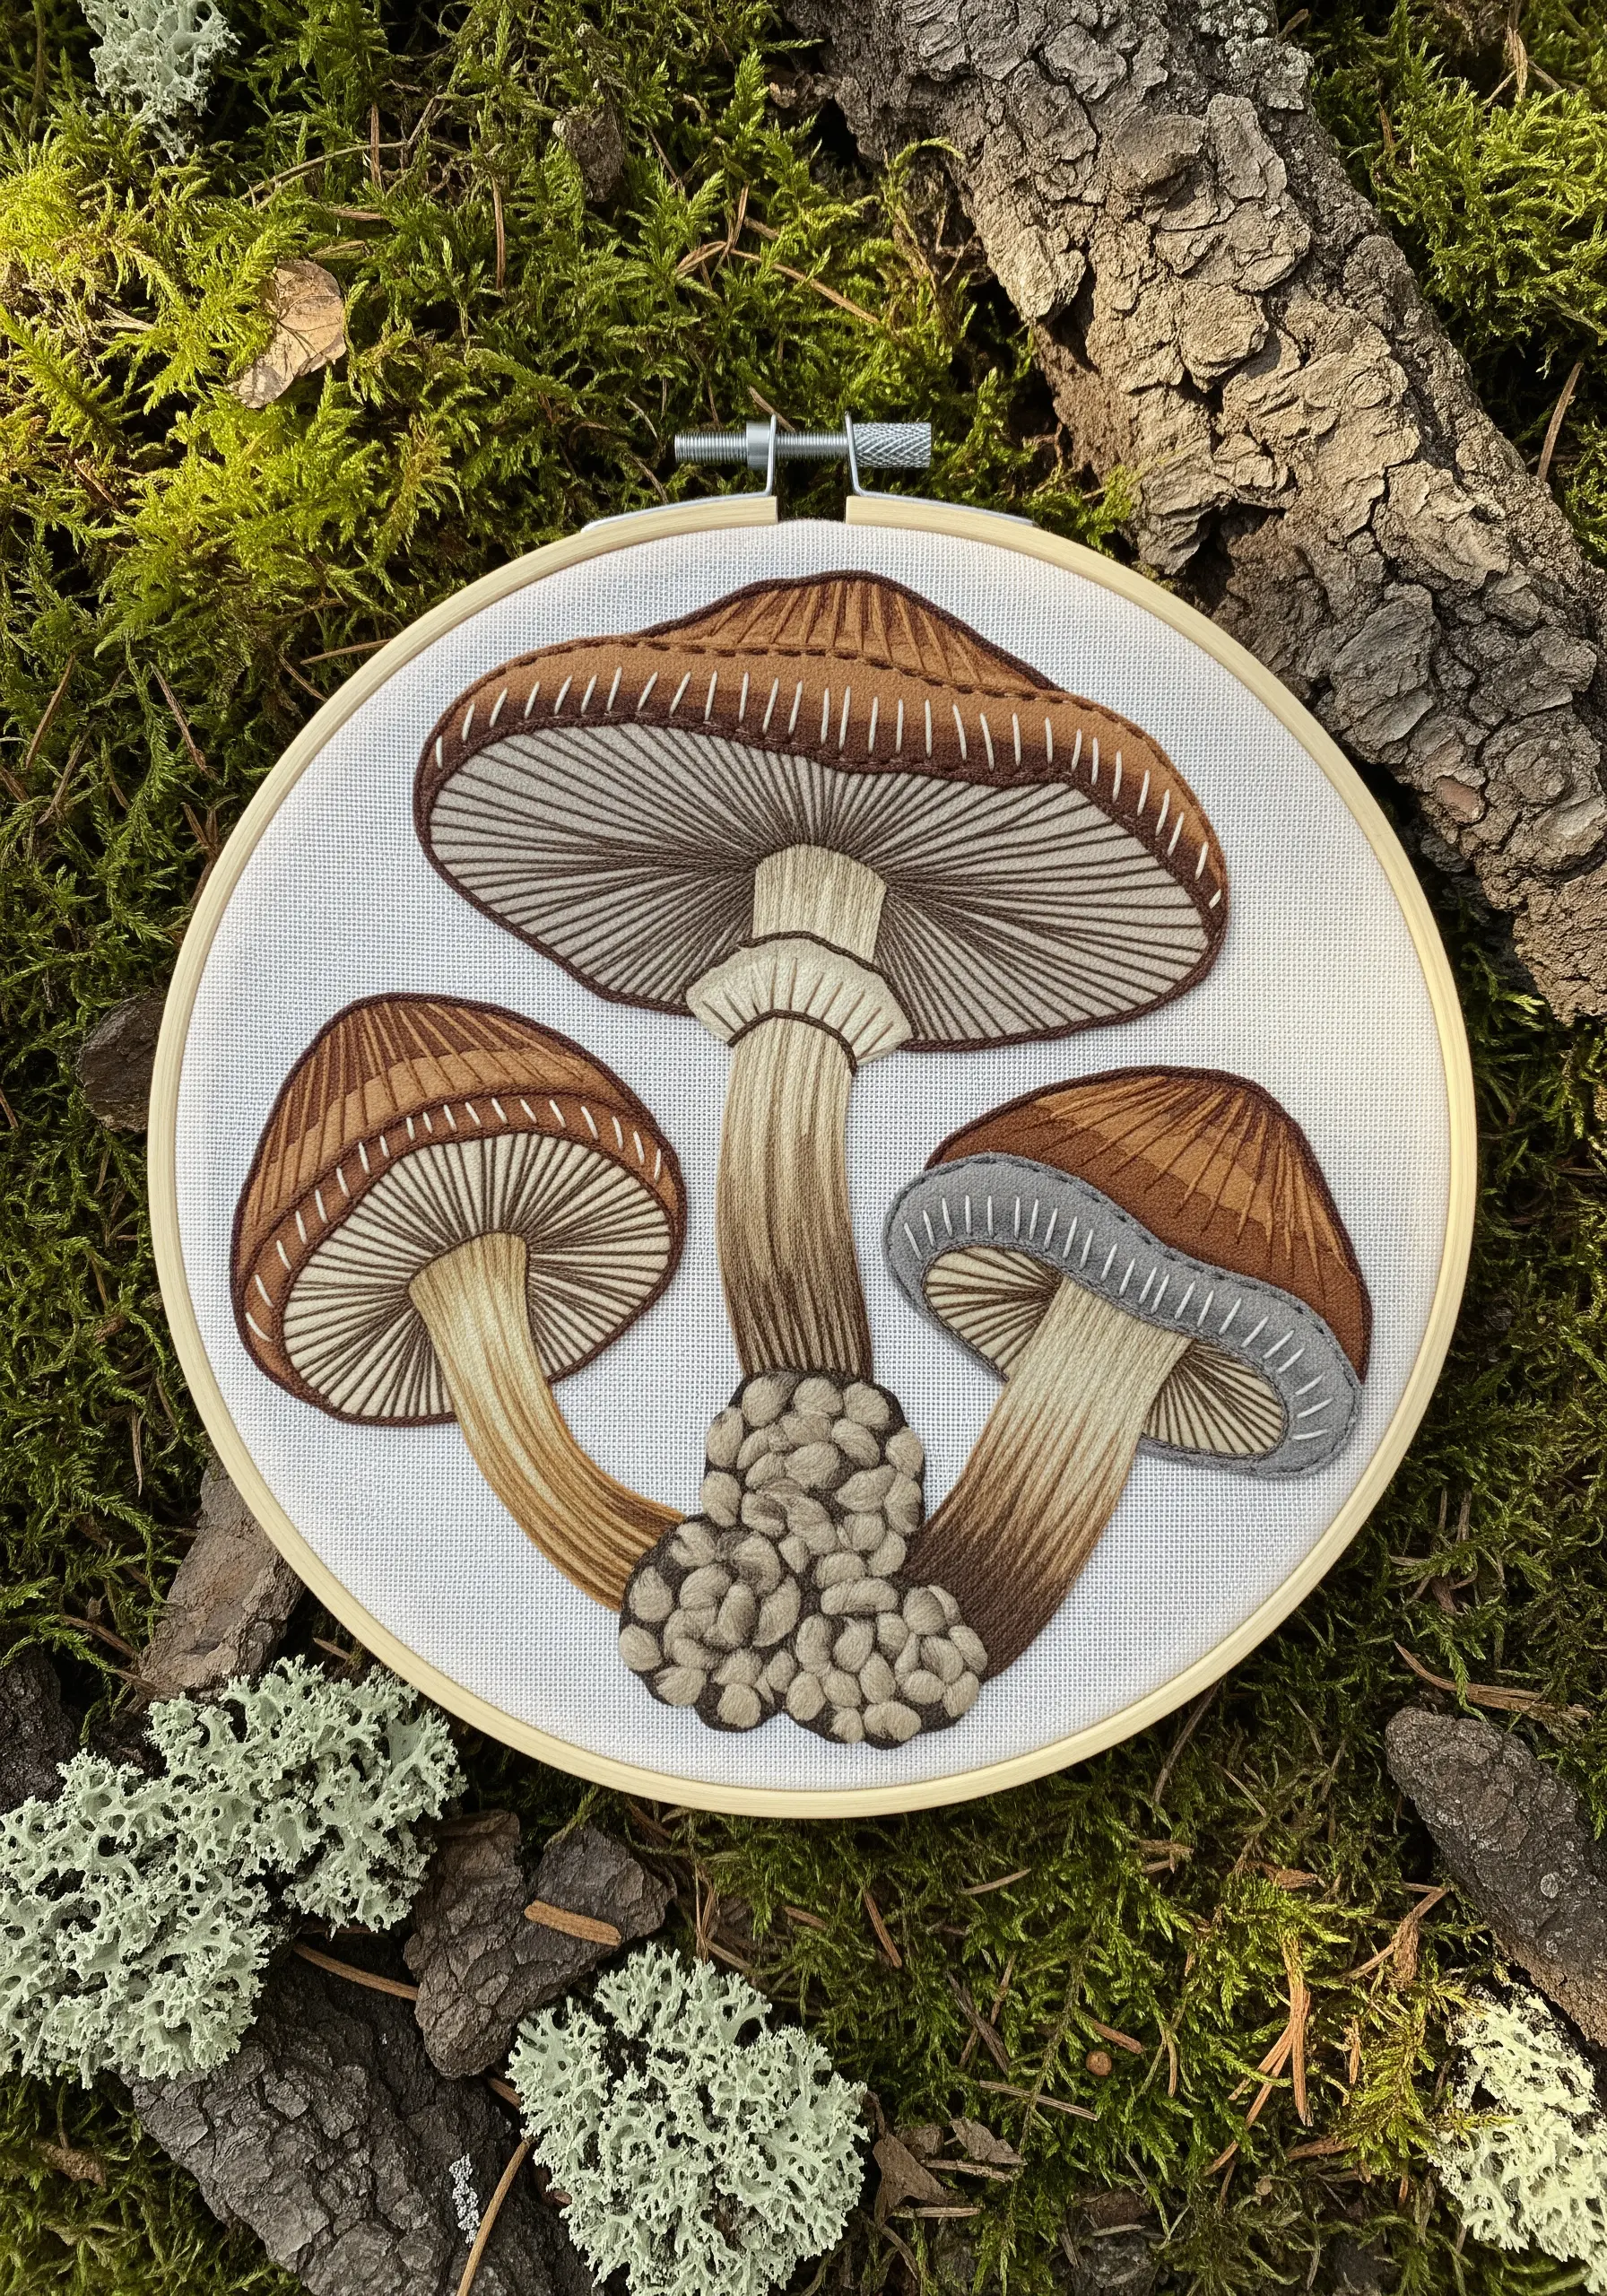
Capture the complex anatomy of mushrooms by combining fabric appliqué with directional thread painting.
Use different fabrics for the caps and stems to establish your base colors and textures. A subtly striped fabric is perfect for the gills.
Stitch over the fabric pieces with long-and-short stitches that follow the natural curves and lines of the mushroom, creating shadow and form.
Pay close attention to the direction of your stitches—straight stitches for the gills, curved stitches for the cap—to achieve a convincing, realistic effect and learn creative ways to stitch natural textures like a pro.
18. Herbarium-Inspired Coasters
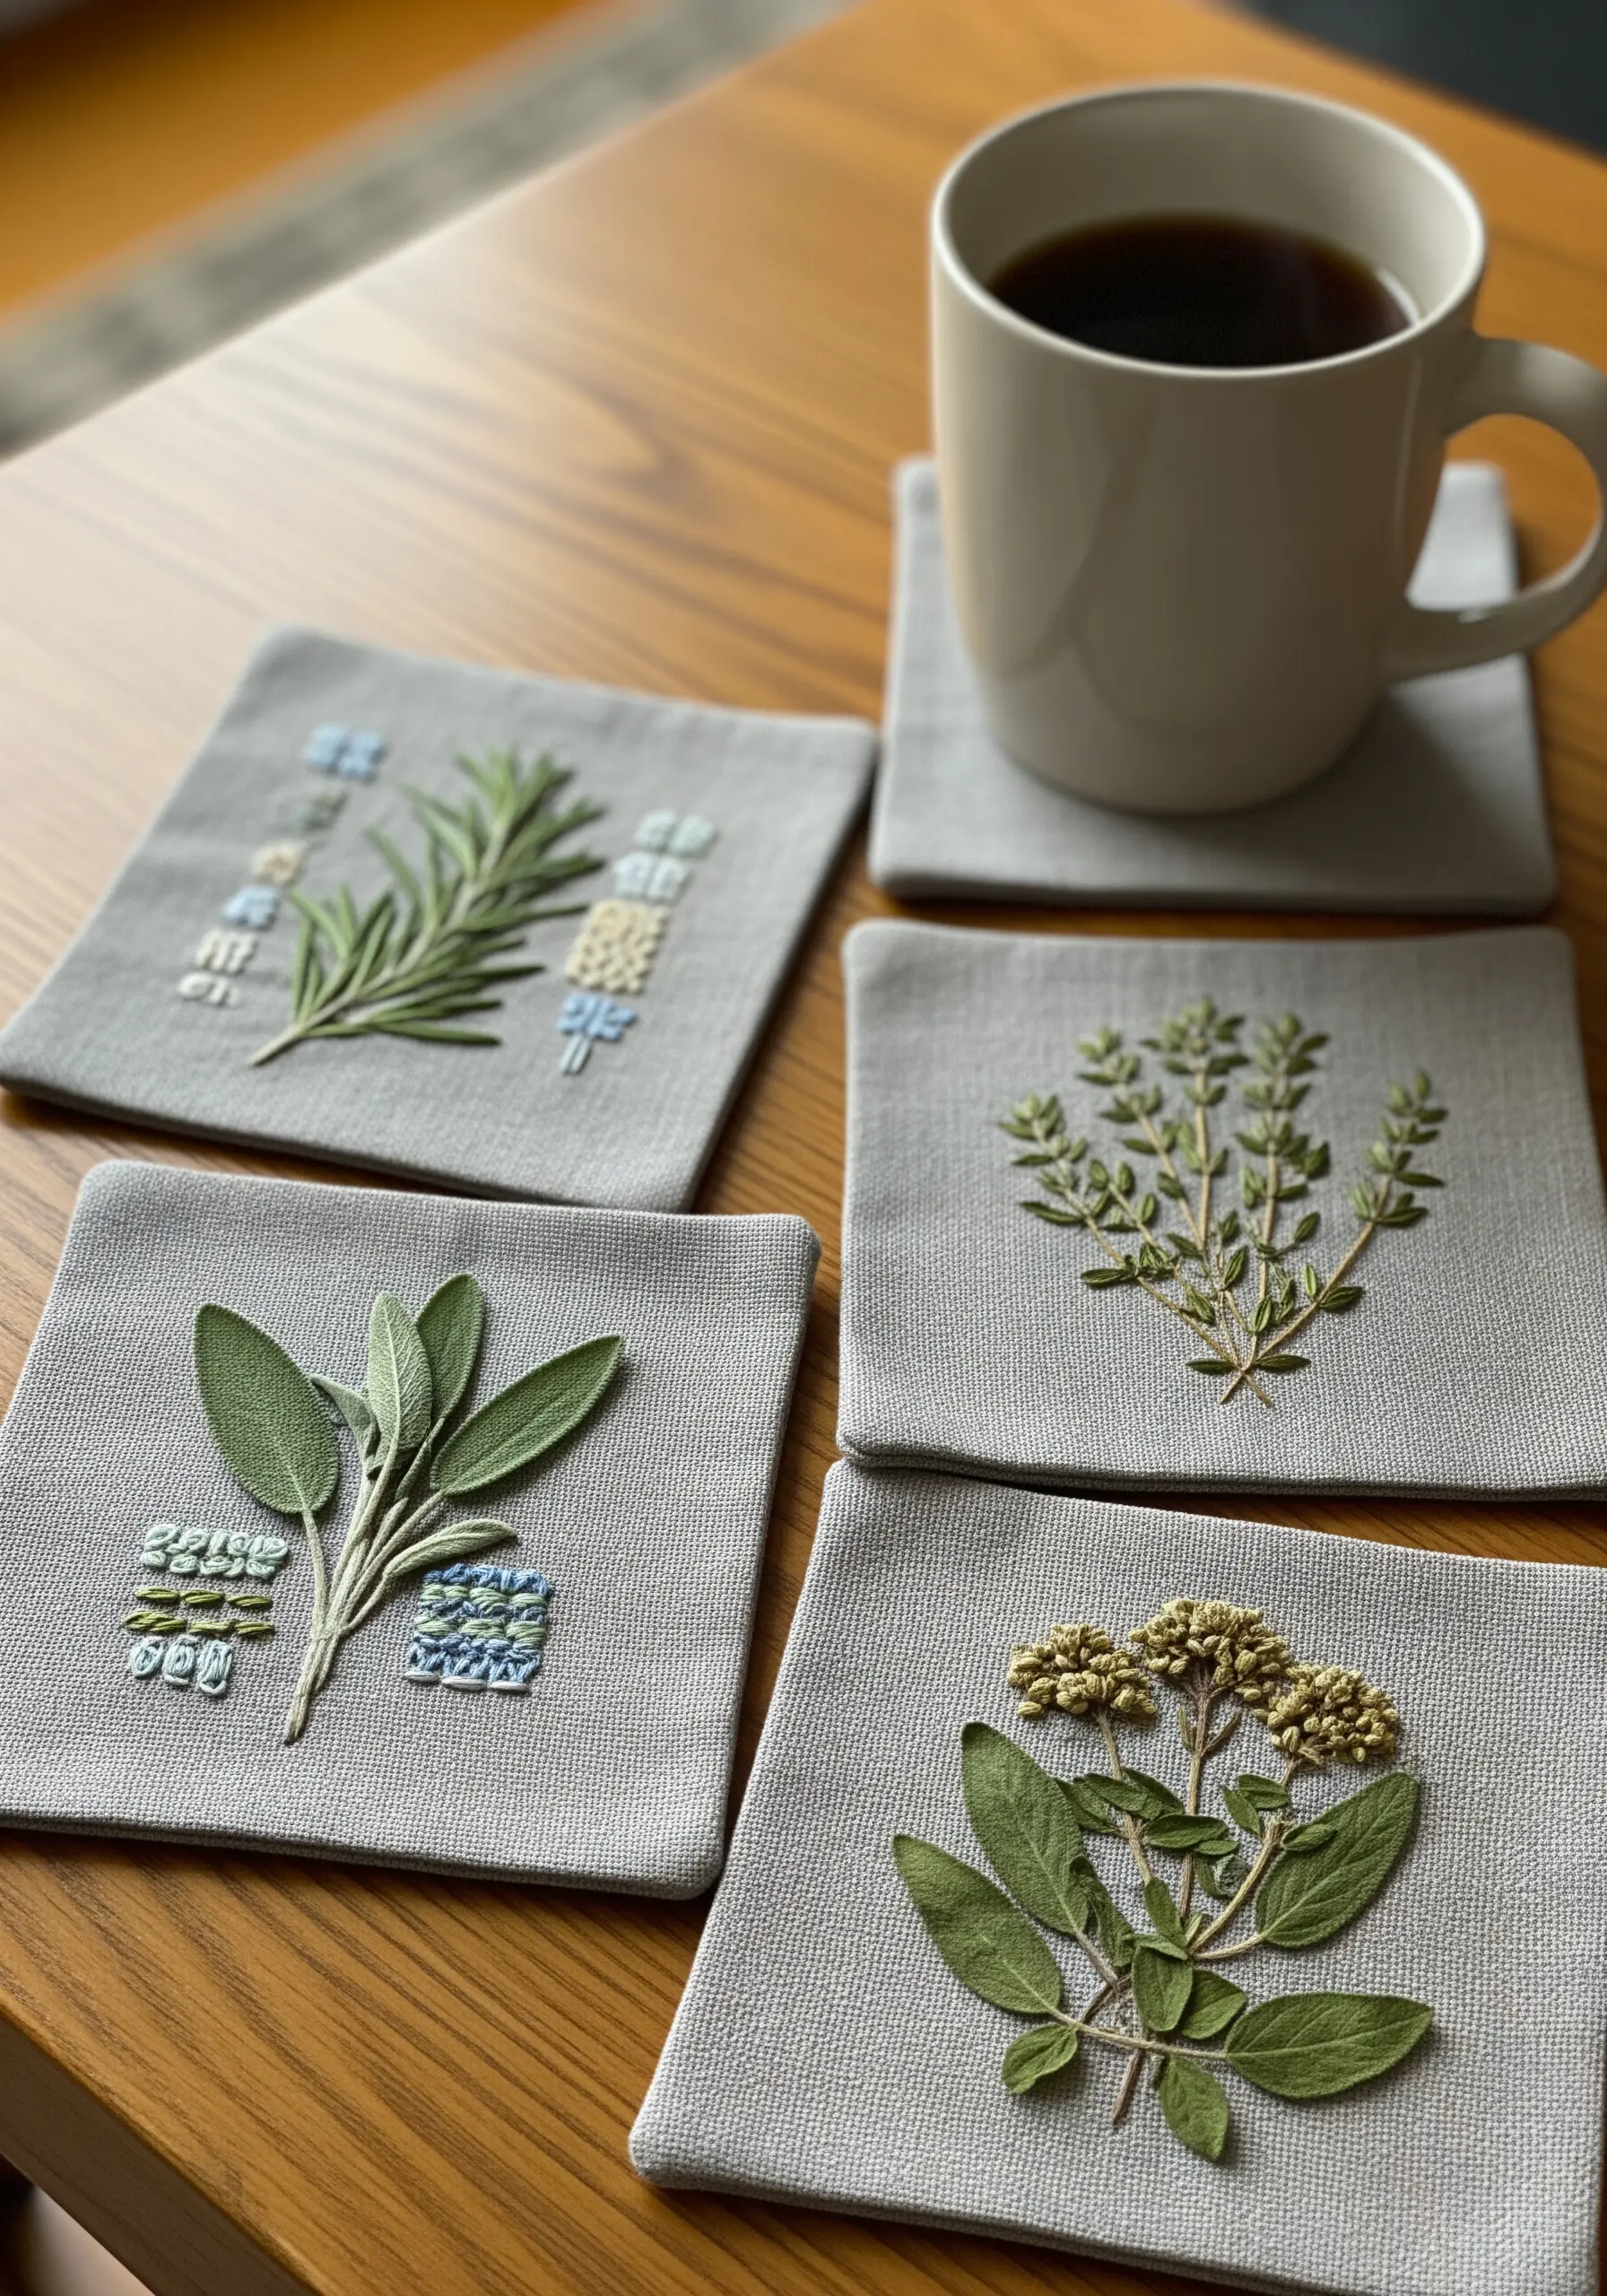
Create elegant and functional art by incorporating real dried herbs into your embroidery projects.
To make these durable, place your pressed herbs (like sage or rosemary) onto your base fabric and cover them with a layer of fine, sheer organza.
Quilt around the herbs with tiny running stitches to secure them in place, effectively trapping them within the fabric layers.
Add a small, abstract embroidered element, like a color-blocked patch of satin stitch, to balance the organic forms and elevate the design, making perfect small embroidery ideas that make perfect handmade gifts.
19. Vibrant Layered Felt Zinnias
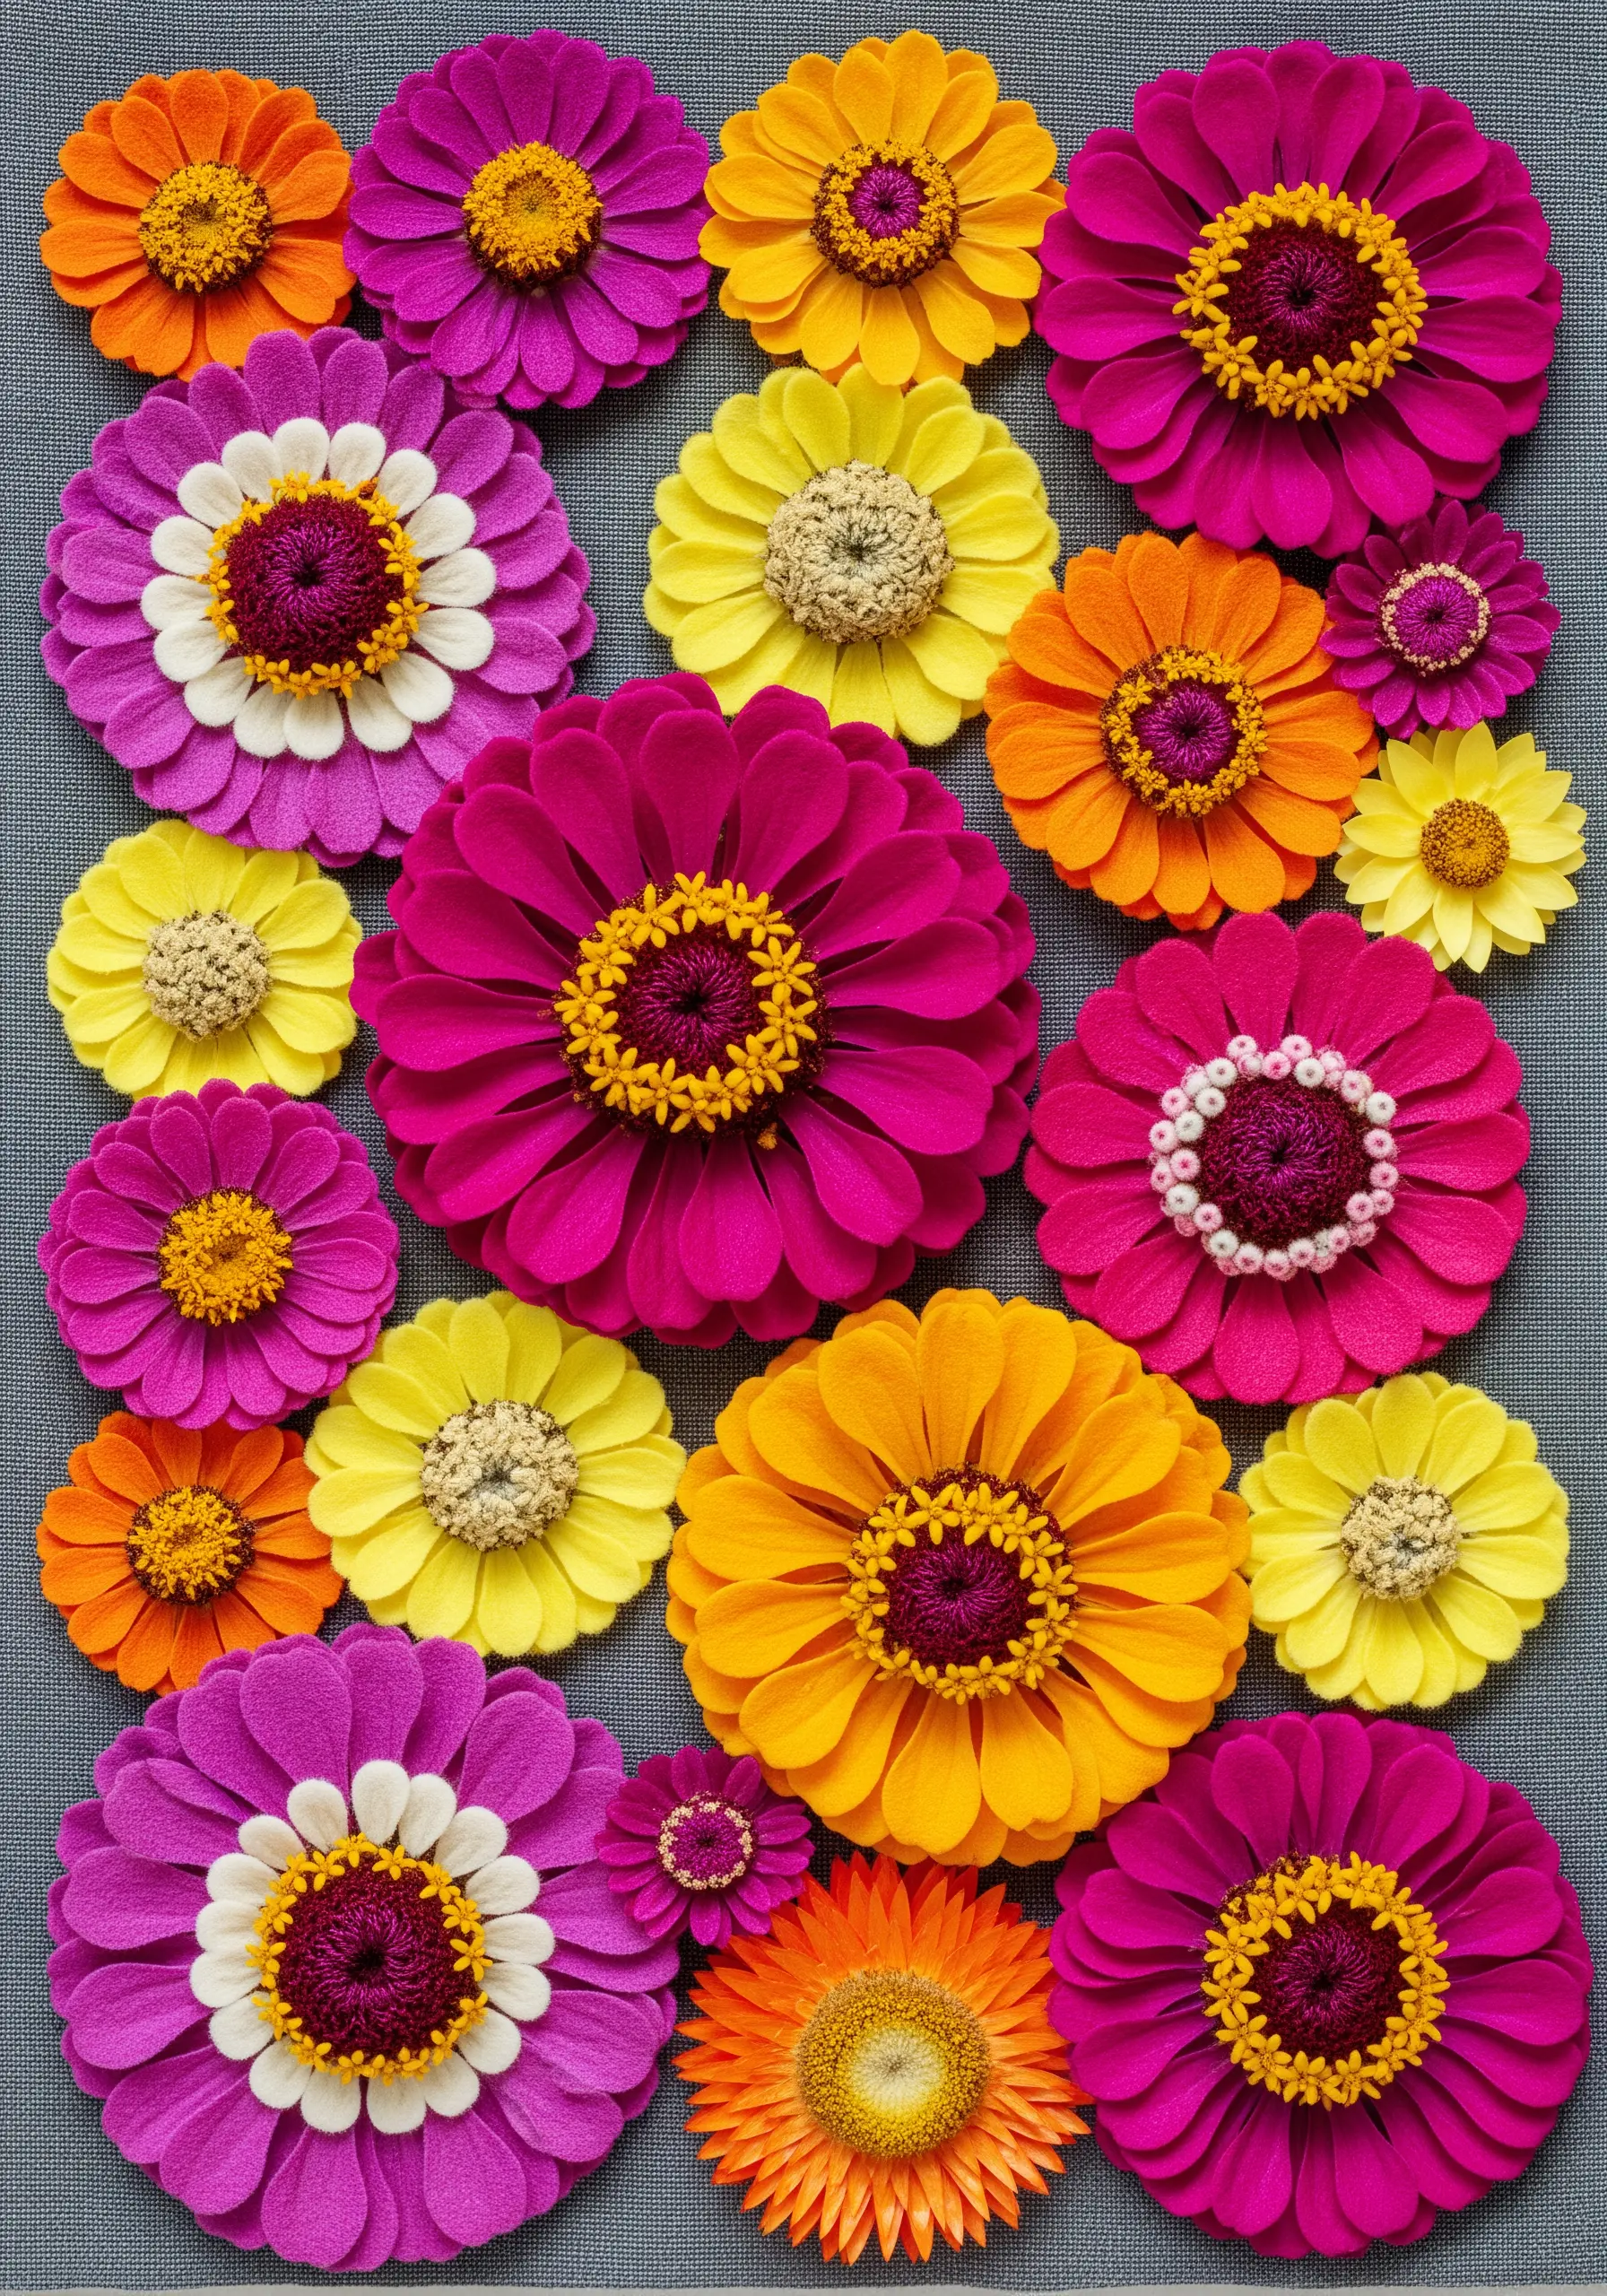
Construct a field of vibrant zinnias using stacked layers of felt for a quick, high-impact result.
Cut circles of felt in various sizes and bright colors. Snip radial cuts from the edge toward the center of each circle to create petals.
Layer two or three different-sized felt pieces for each flower, rotating them slightly so the petals are offset.
Secure the layers with a cluster of contrasting French knots or beads in the center, which doubles as the flower’s textured core.
This is a fantastic way to create a dense, colorful composition without hours of stitching.
20. Translucent Wisteria Suncatcher

Design a botanical piece that transforms with the light by using sheer, layered fabrics.
Cut cascading petal shapes from different shades of purple and blue organza and tulle. Don’t worry about perfect edges; slight irregularities add to the organic feel.
Layer the translucent shapes to build up the iconic wisteria clusters, stitching them together at the top.
Hang the finished piece in a window. The sunlight will filter through the layers, blending the colors and creating a beautiful, stained-glass effect that changes throughout the day.
21. Mixed-Media Cotton Plant
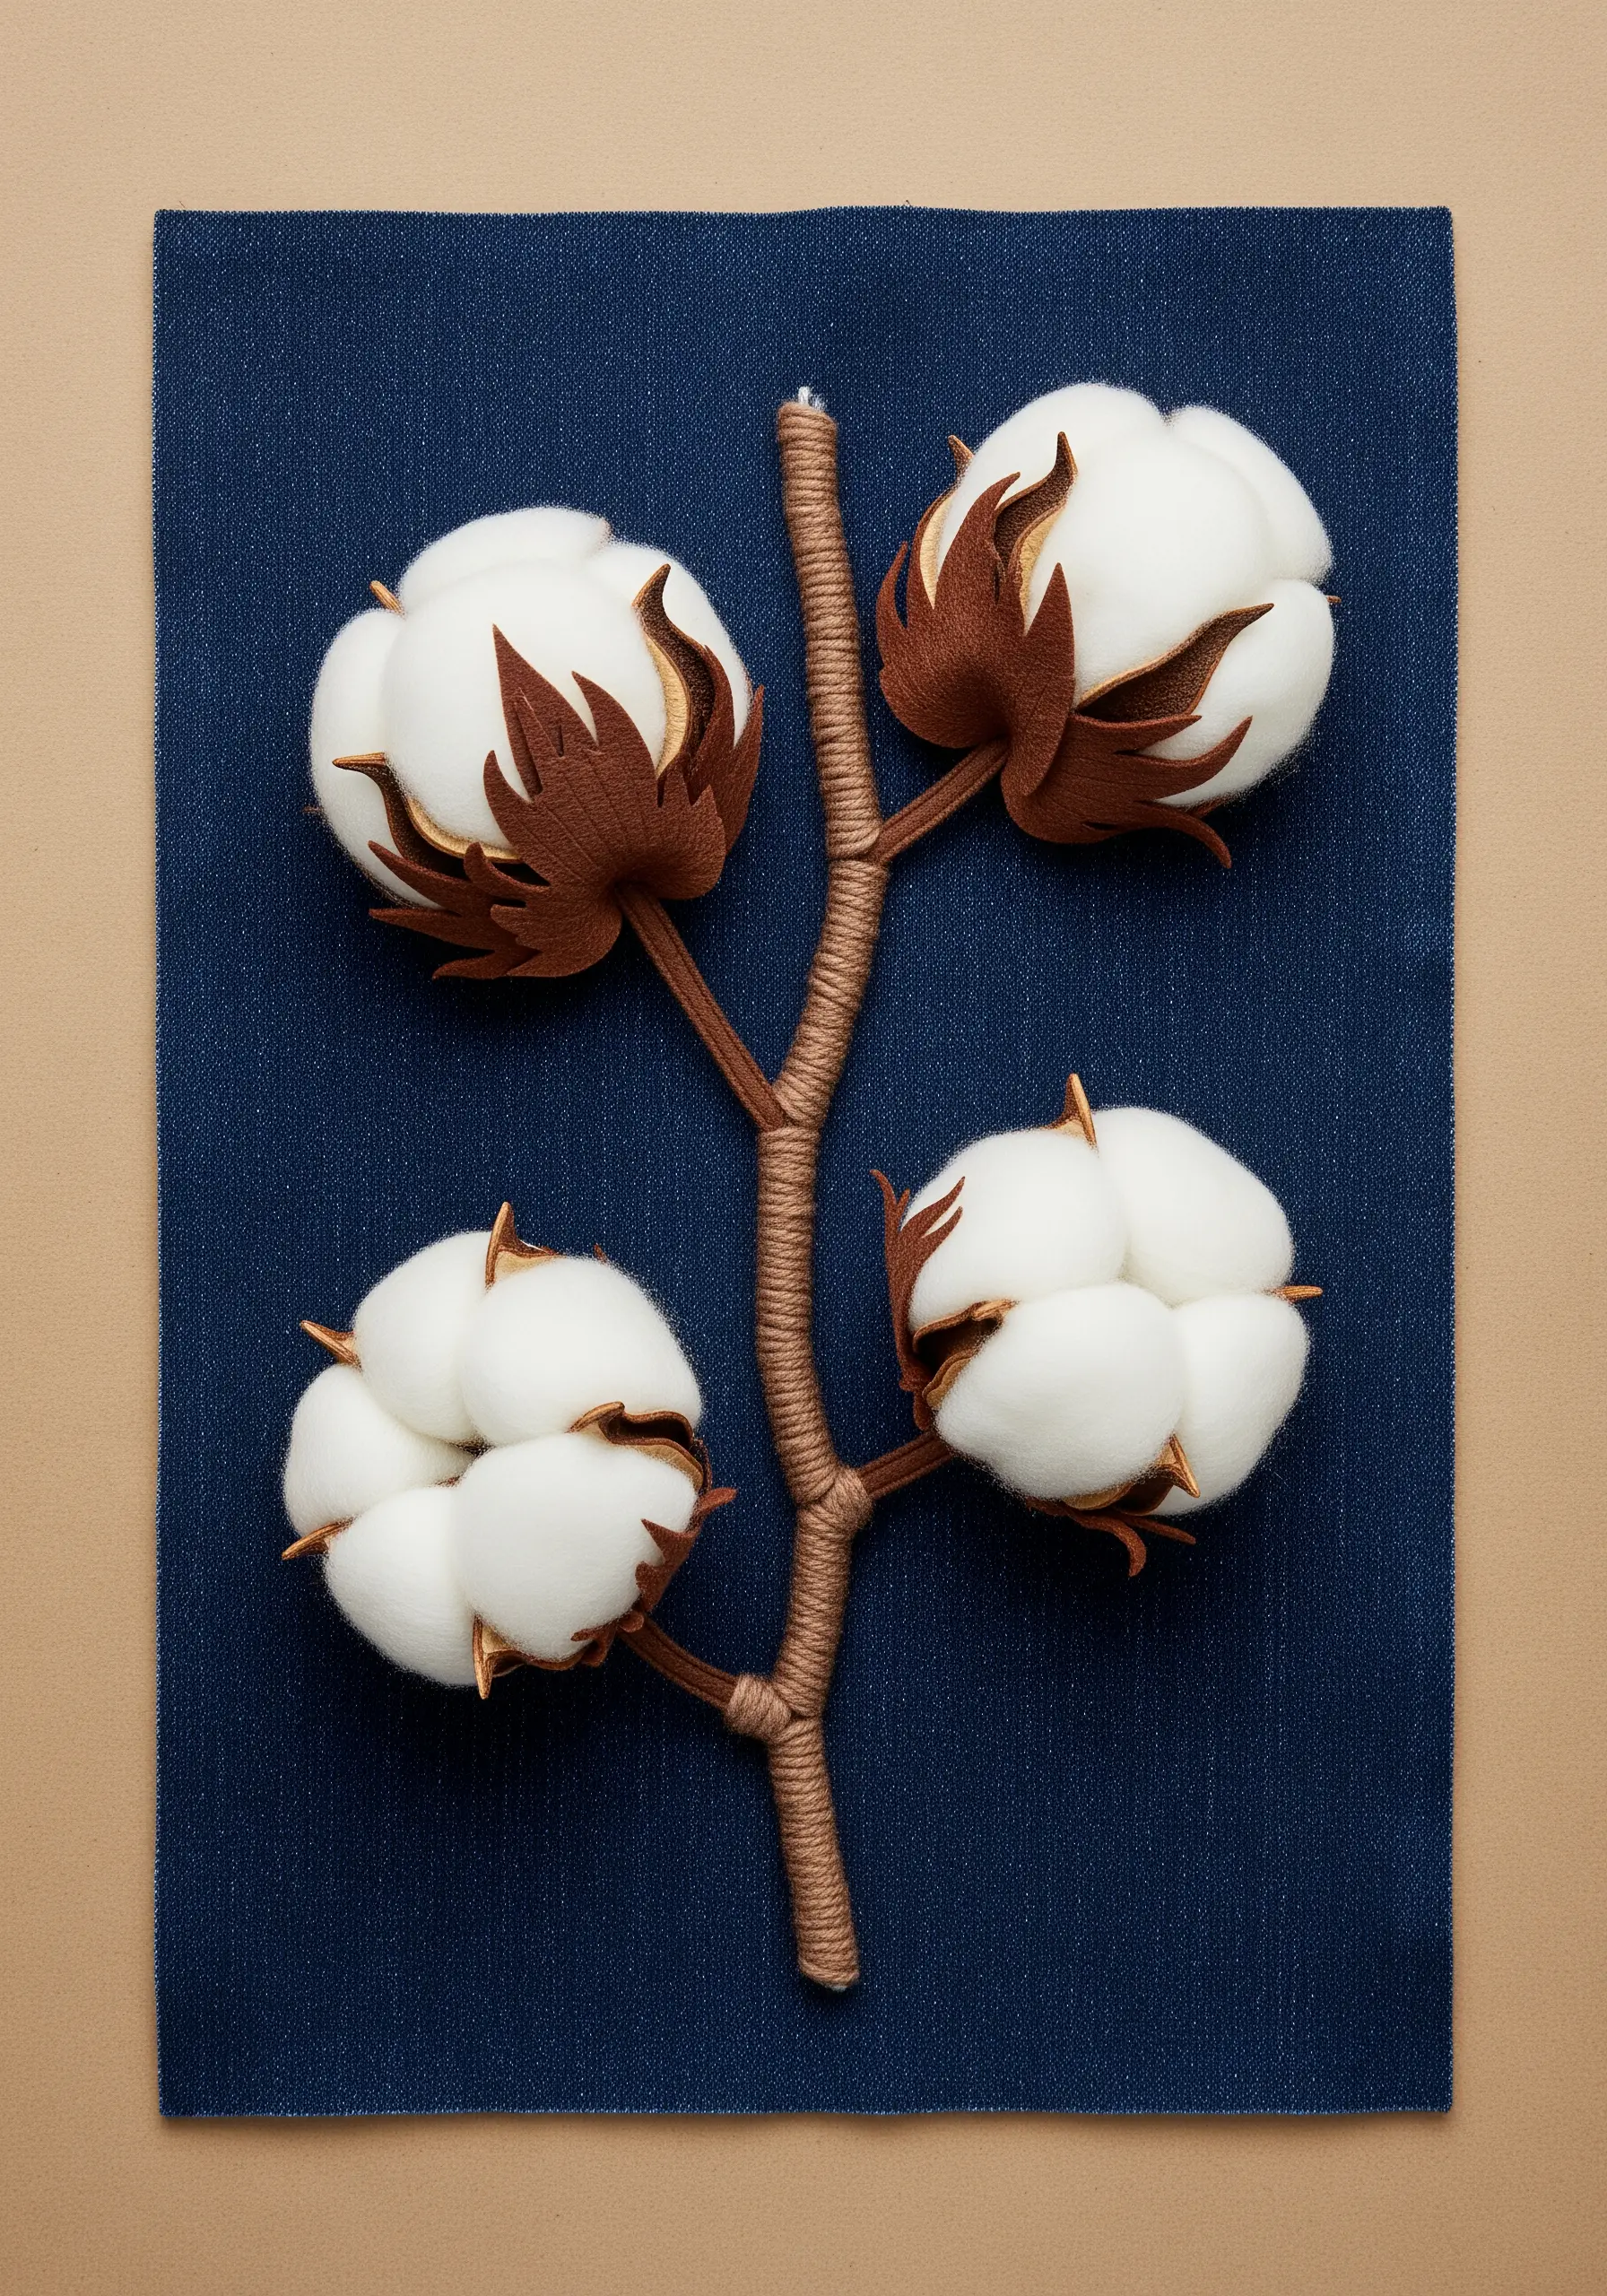
Create a truly three-dimensional botanical sculpture by integrating natural materials directly into your work.
For the fluffy cotton bolls, use real cotton balls, wool roving, or felted wool, tacking them onto the fabric with a few secure stitches.
Craft the brown bracts (the outer casings) from felt or sturdy cotton canvas, cutting them into pointed star shapes and stitching them behind the cotton.
Wrap the stem with thick brown thread or twine to give it a woody, rigid texture. This mixed-media approach results in a piece that is engagingly tactile and realistic.
22. Appliqué Cattail Lampshade
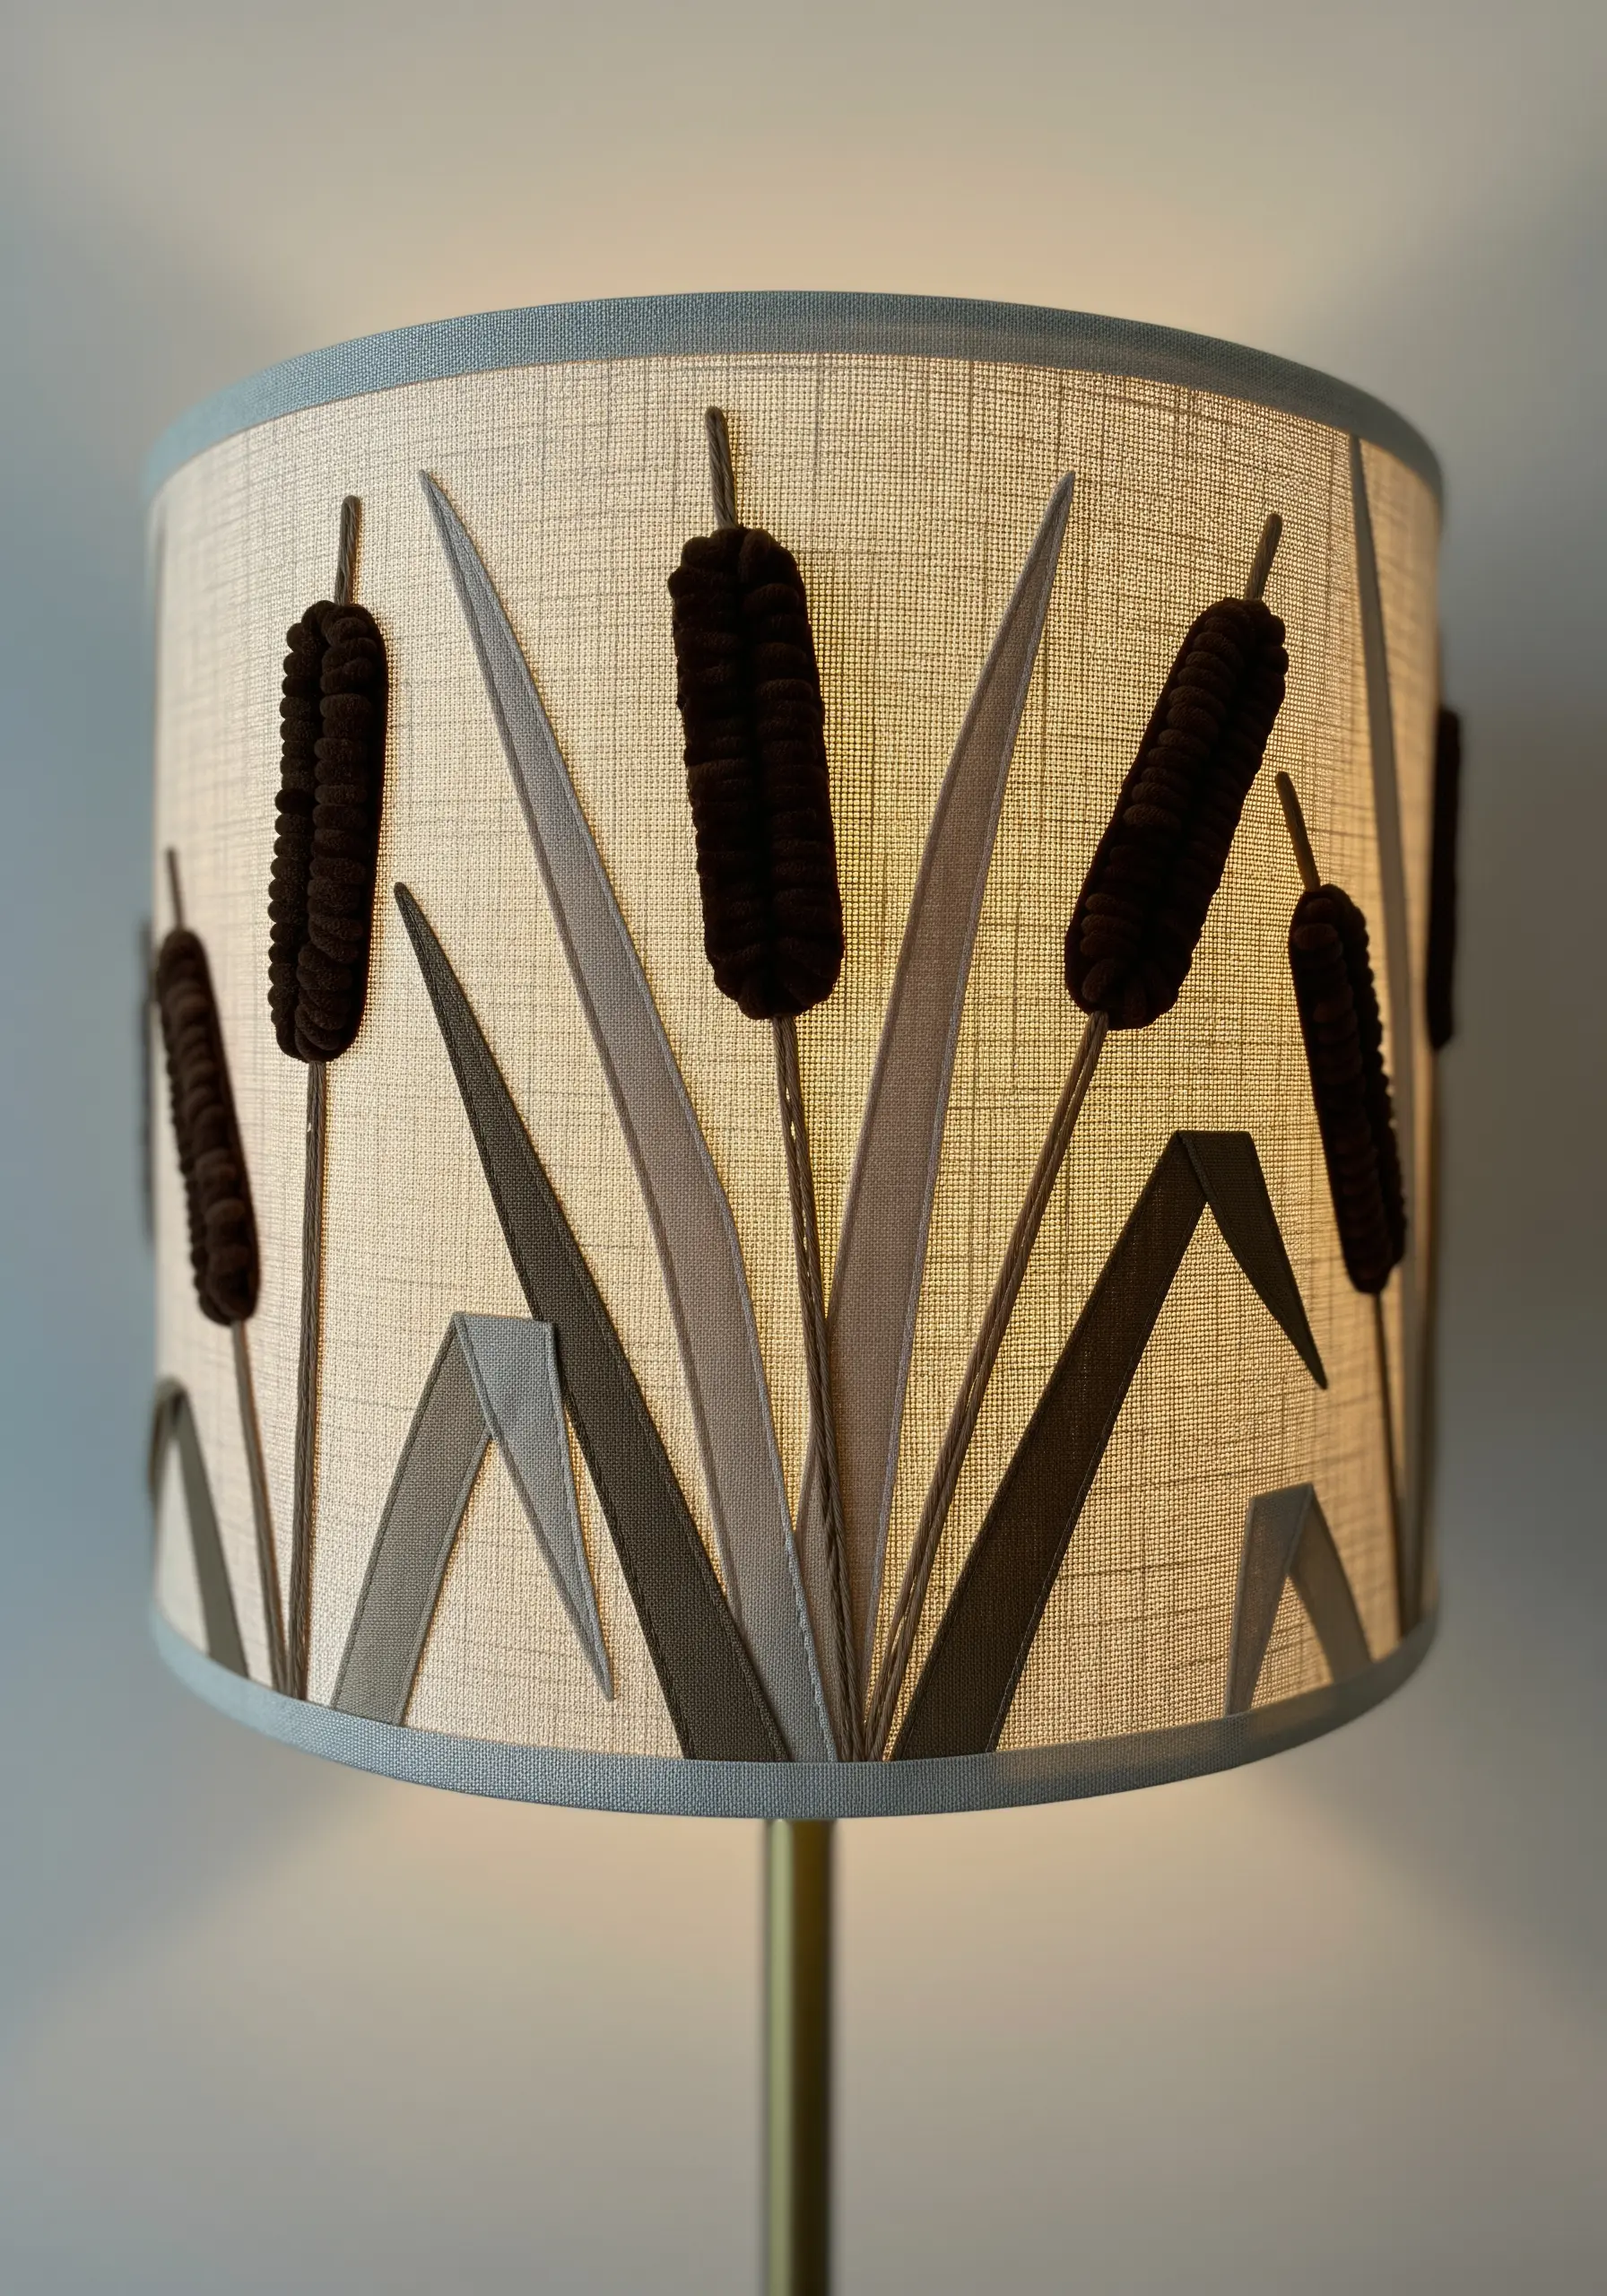
Turn a plain lampshade into a piece of functional art with simple fabric appliqué.
Choose fabrics in earthy, neutral tones for the cattail leaves and a dark, textural fabric like corduroy or velvet for the flower heads.
Cut your shapes and use a permanent, heat-fusible webbing to iron them securely onto the lampshade fabric. This avoids puckering and is safer than stitching into a pre-made shade.
When the lamp is turned on, the fabric shapes will be beautifully silhouetted, creating a warm, ambient glow and adding a subtle, handcrafted touch to your room.


