

Have you ever looked at a wildflower meadow and wished you could capture not just its image, but its feeling? That’s the beautiful potential waiting in your embroidery hoop. It’s time to move beyond simply filling in a pattern and start thinking like a painter, using thread and fabric to create atmosphere, texture, and light.
This isn’t about learning dozens of complicated new stitches. It’s about seeing the stitches you already know in a new way. It’s understanding that the choice between one strand of floss and three can change everything, that a dark fabric can make your colors sing, and that the space you leave empty is just as powerful as the space you fill.
In these projects, you’ll find the small adjustments that make a big difference. You’ll see how to blend colors to mimic a sunset, layer stitches to create a lush forest floor, and use texture to bring a simple leaf to life. Let this be your guide to creating hoop art that feels less like a craft project and more like a miniature world you’ve stitched into existence.
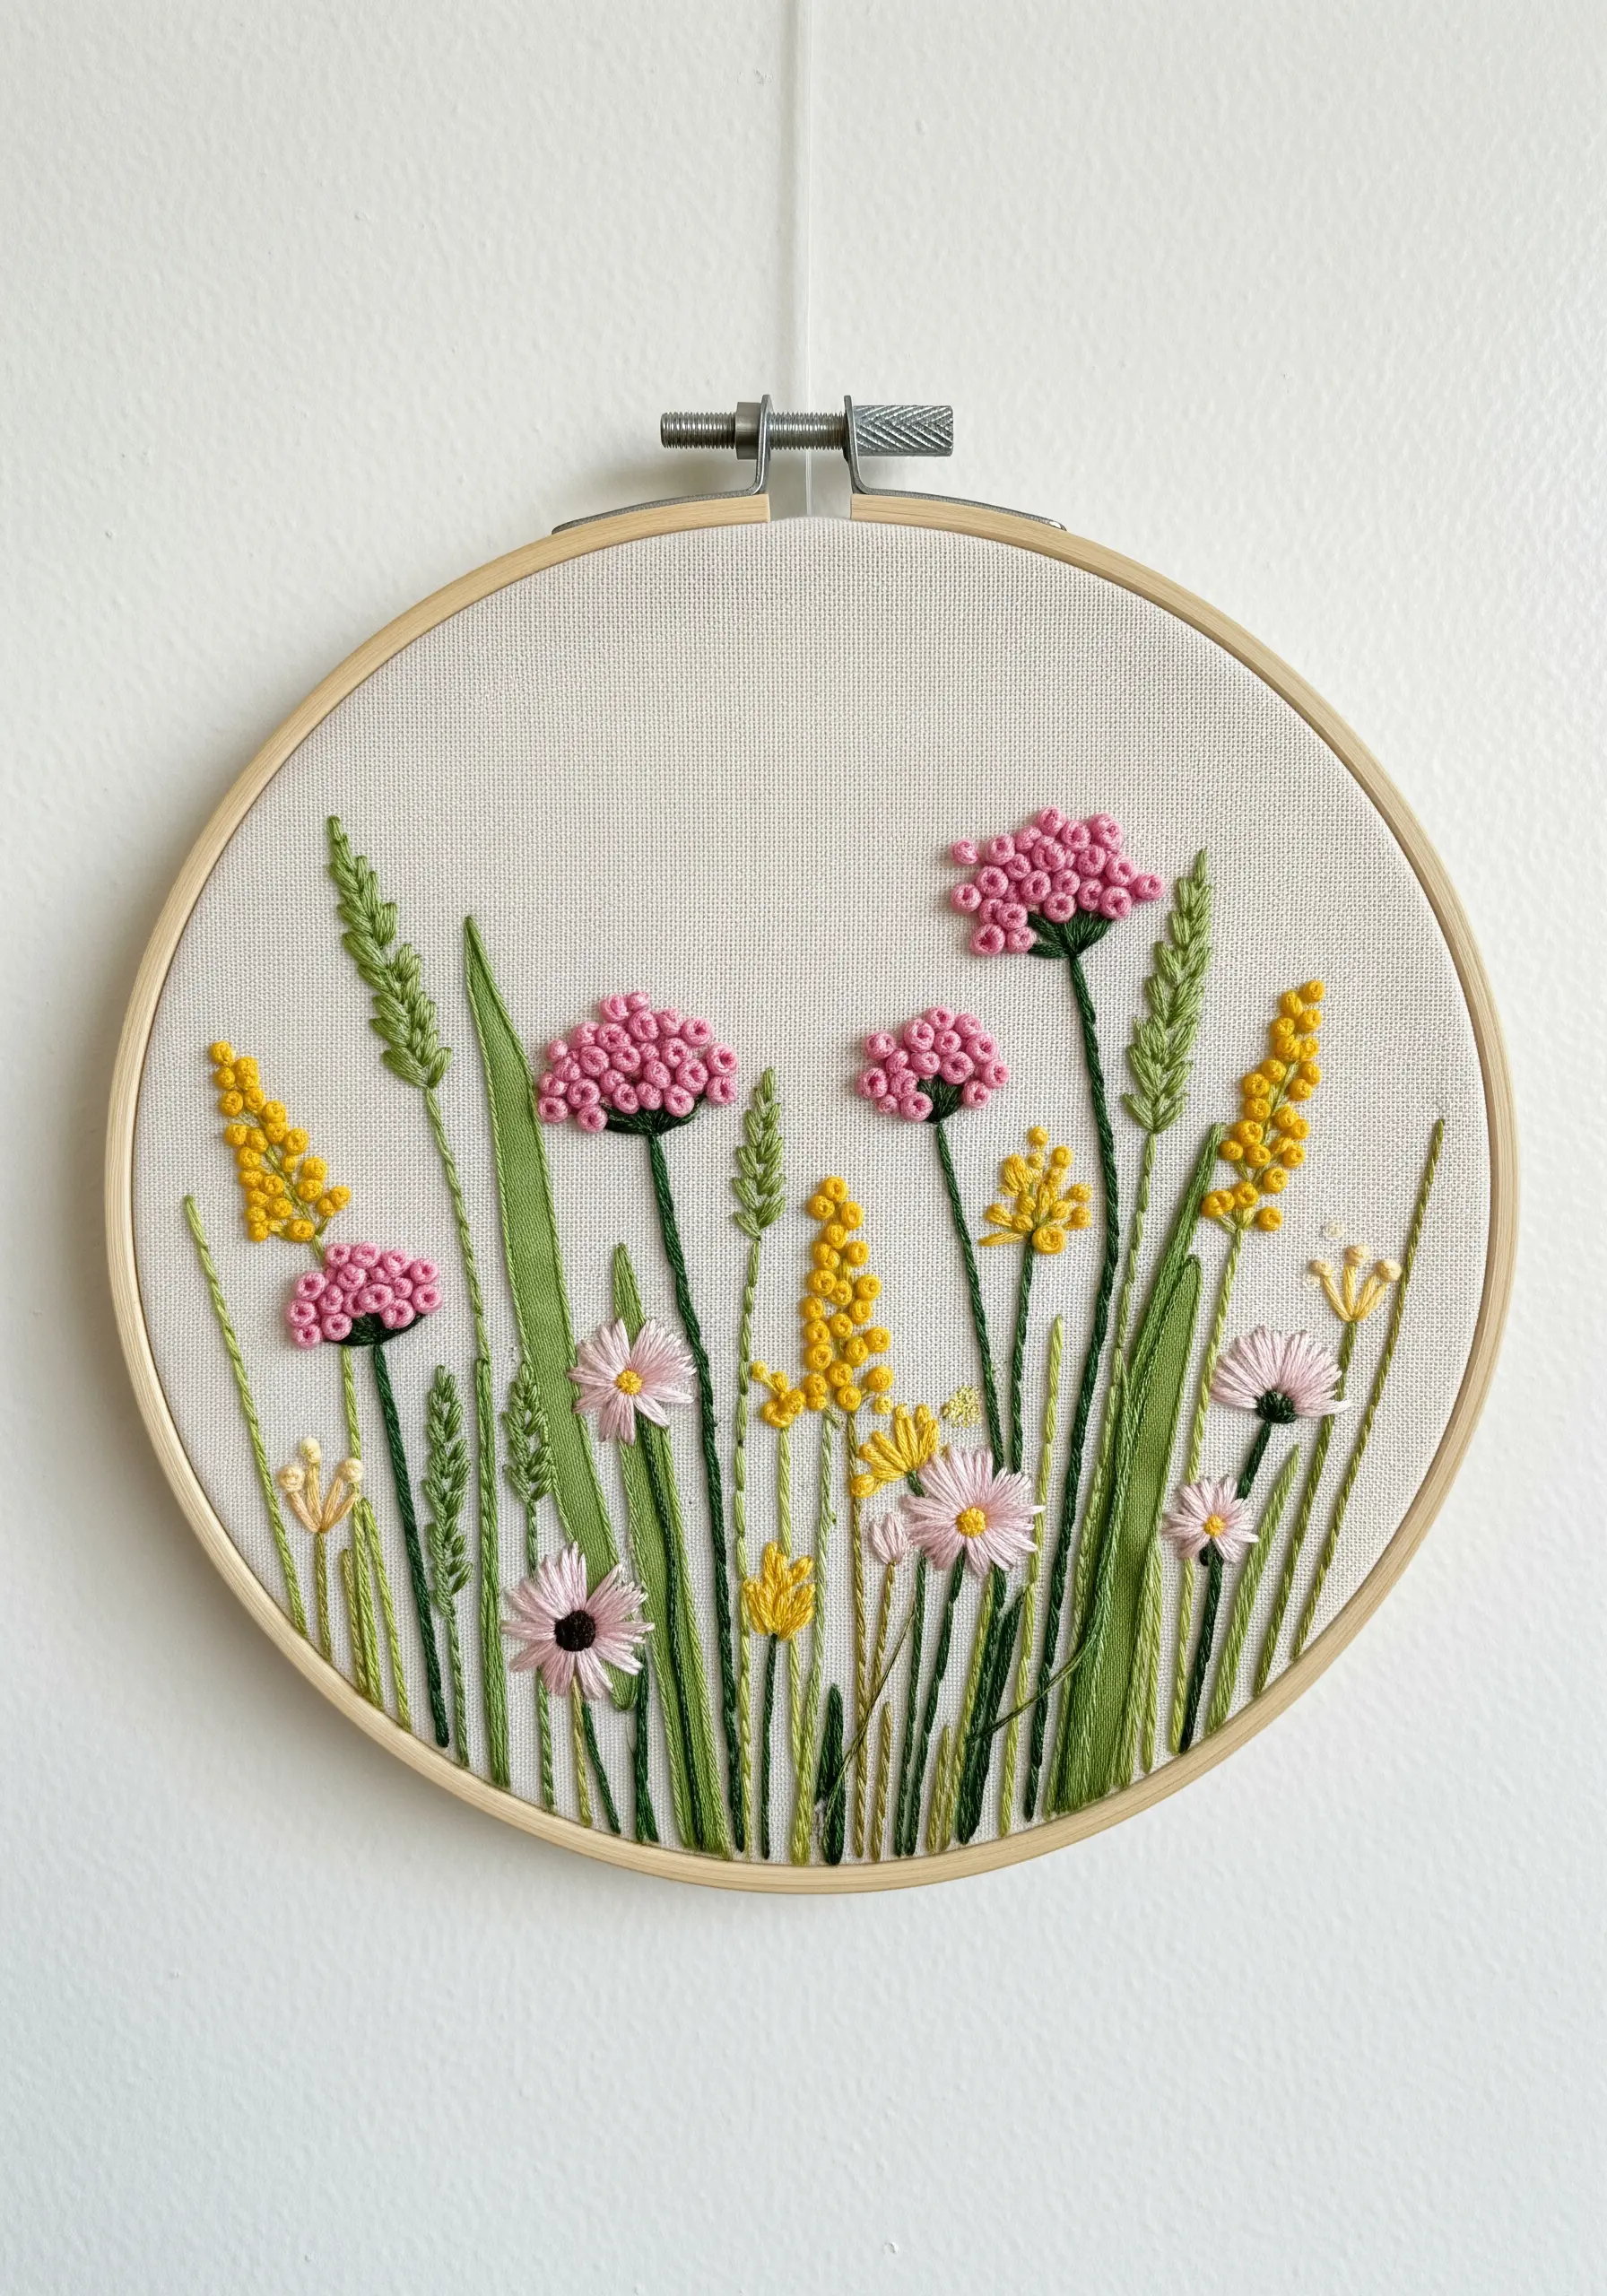
1. Layer Stitches for a Lush Meadow
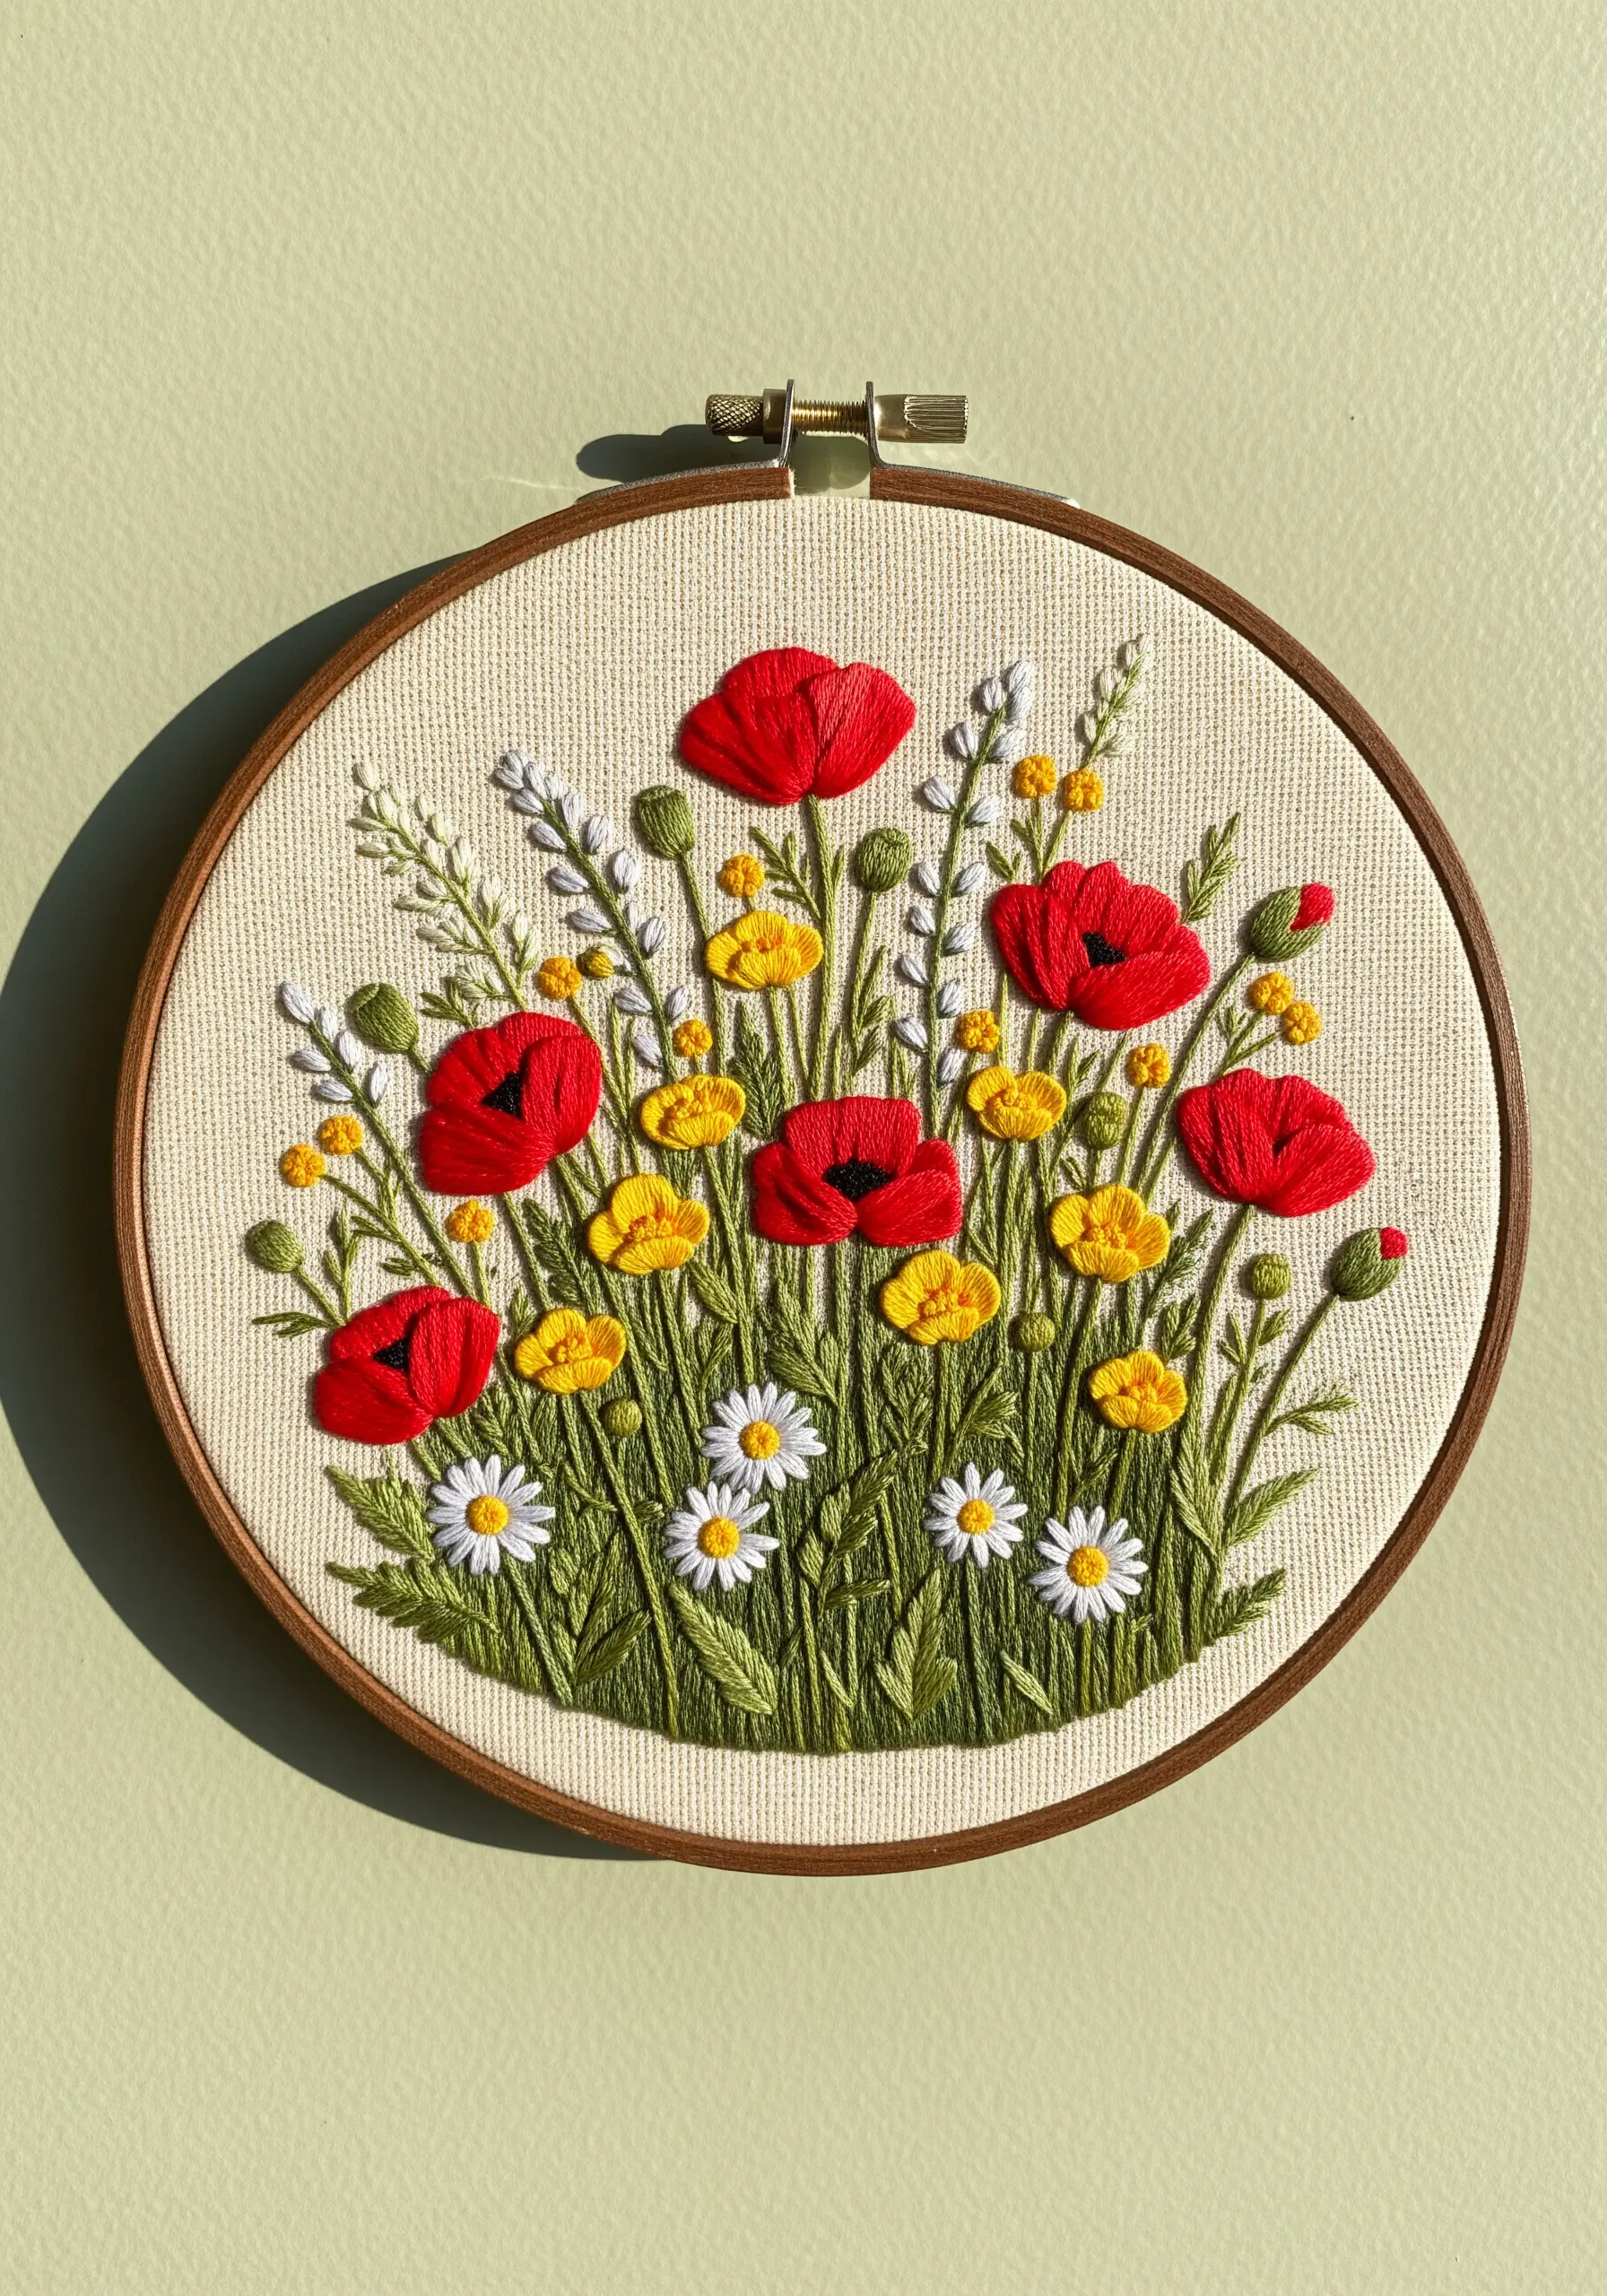
To create a dense, vibrant meadow, think in layers just as you would when painting.
Start with the background foliage, using straight stitches in various lengths and shades of green to establish a base.
Work your way forward, adding taller stems with stem stitch, then stitch your larger flowers like poppies using a padded satin stitch to make them stand out.
Finish with the smallest details—daisies and filler flowers—using French knots and lazy daisy stitches. This layering technique builds realistic depth and texture.
2. Use a Dark Fabric to Intensify Your Colors

Stitching on black or dark navy fabric instantly makes your thread colors appear more saturated and luminous.
For lavender stalks, use a combination of satin stitch and French knots with three to four shades of purple to create highlights and shadows, giving them a rounded, dimensional look.
Contrast the soft texture of the lavender-inspired embroidery with the delicate, airy quality of Queen Anne’s lace, created with tiny, tightly clustered white French knots.
The dark canvas eliminates the need for a background, allowing your floral composition to command full attention.
3. Paint a Sunset with Long and Short Stitches

Capture the warmth of a golden hour meadow by using thread painting techniques for the sky.
Use single strands of floss in shades of yellow, orange, and gold, blending them with the long and short stitch to create a smooth, painterly gradient.
Keep your stitches directional, following the curve of the sun to enhance the effect.
For the foreground flowers, choose colors that harmonize with the sky, like warm oranges and deep magenta, to create a cohesive and immersive scene.
4. Contrast Textures for Delicate Realism
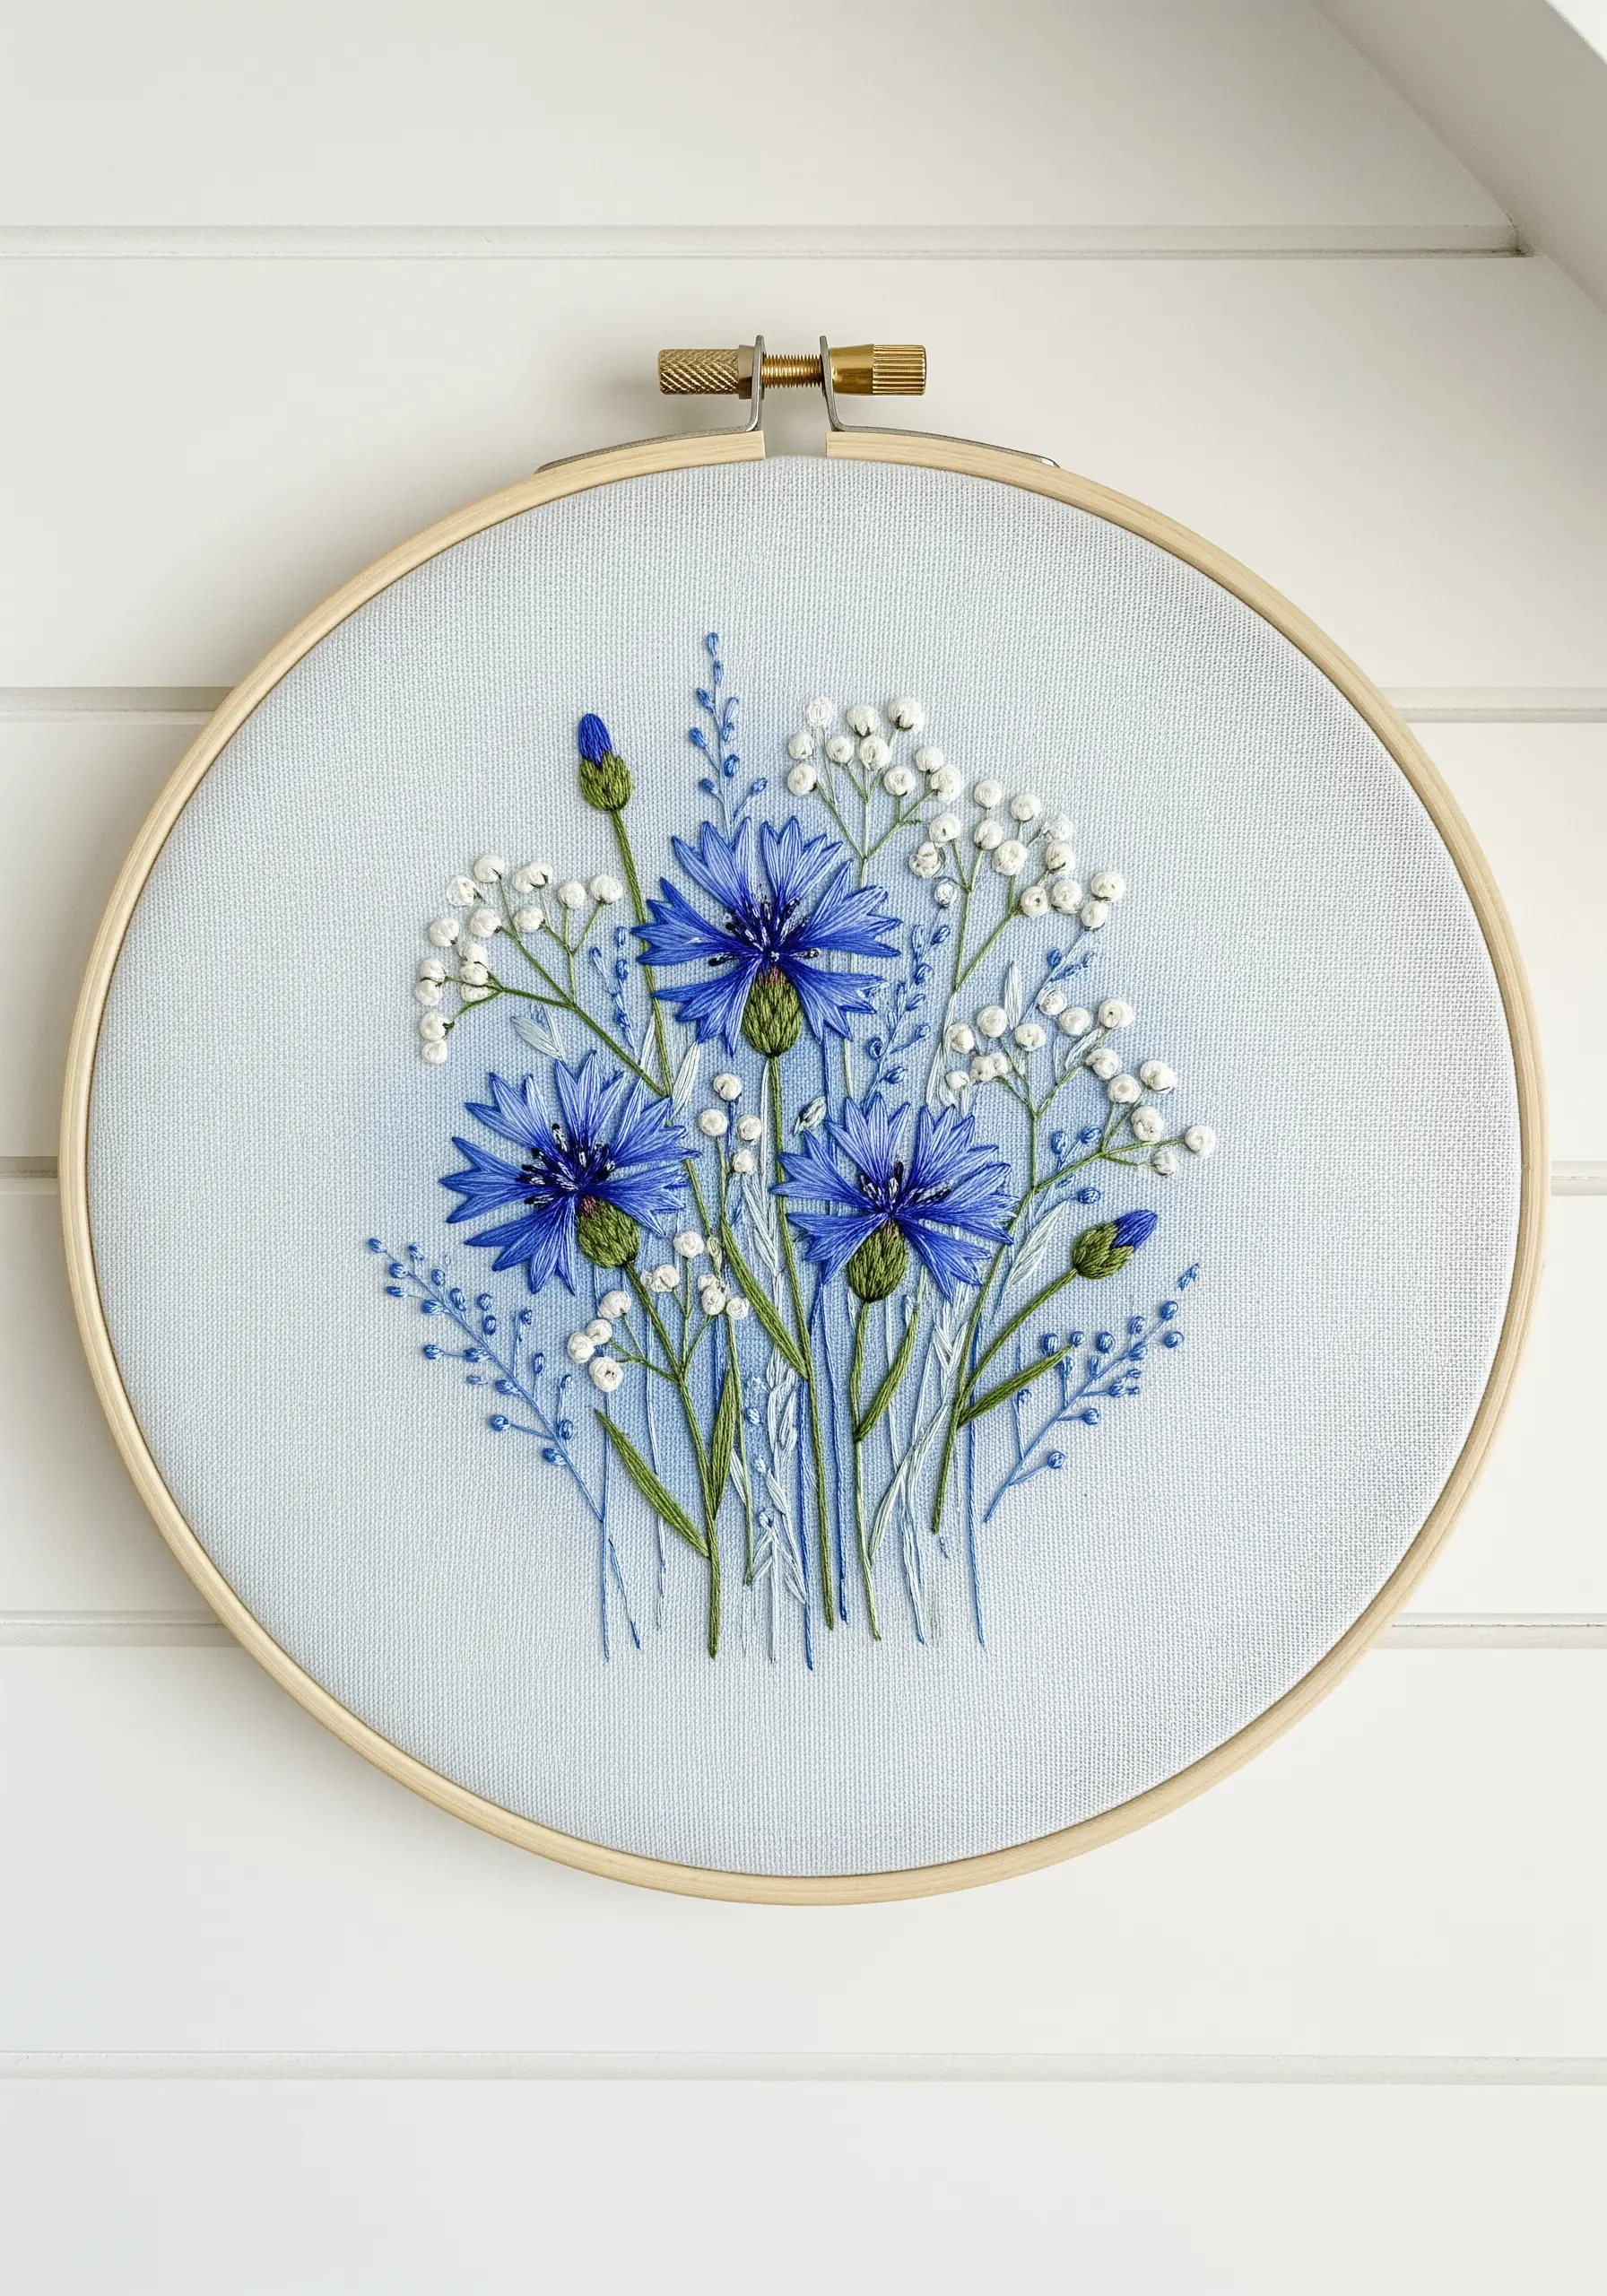
To prevent a floral arrangement from looking flat, create a dynamic interplay of textures.
For the bold cornflowers, use layered satin stitches, allowing the thread to build a subtle, plush dimension.
Juxtapose this with the airy, scattered placement of tiny French knots for the baby’s breath, using just one or two strands of white floss.
This contrast between the substantial petals and the delicate dots gives the bouquet a refined, lifelike quality on the soft blue fabric.
5. Isolate Colors for Graphic Impact

Create a clean, modern wildflower composition by focusing on a simple and strong color palette—in this case, purple, yellow, and green.
Use a woven wheel stitch for the purple asters to give them a dense, pom-pom-like texture that contrasts beautifully with the smooth satin stitch of the yellow petals.
The distinct separation of color and texture makes each flower type immediately recognizable and adds a graphic, almost illustrative quality to your hoop art.
6. Use Fabric Color to Set a Soft Mood

The fabric you choose is as important as your thread. A medium-grey or muted-tone linen provides a sophisticated, gentle backdrop that complements pastel threads.
For forget-me-nots, use lazy daisy stitches with a French knot center—it’s a quick and effective way to create tiny, uniform blossoms.
By stitching a dense, low-growing meadow along the bottom curve of the hoop, you create a peaceful scene that feels grounded and calm, perfect for tranquil bedroom decor.
7. Create Vertical Drama with an Oval Hoop

Switching to an oval hoop naturally encourages taller, more dramatic compositions.
For towering flowers like lupines, use the fishbone stitch. This stitch creates a central line, with angled stitches branching off, perfectly mimicking the way lupine petals grow.
In contrast, stitch dandelion seed heads using radiating straight stitches with tiny detached chain stitches at the ends to represent floating seeds.
This combination of height and delicate, floating elements makes your composition feel dynamic and alive.
8. Add Dimension to Leaves with Directional Stitching
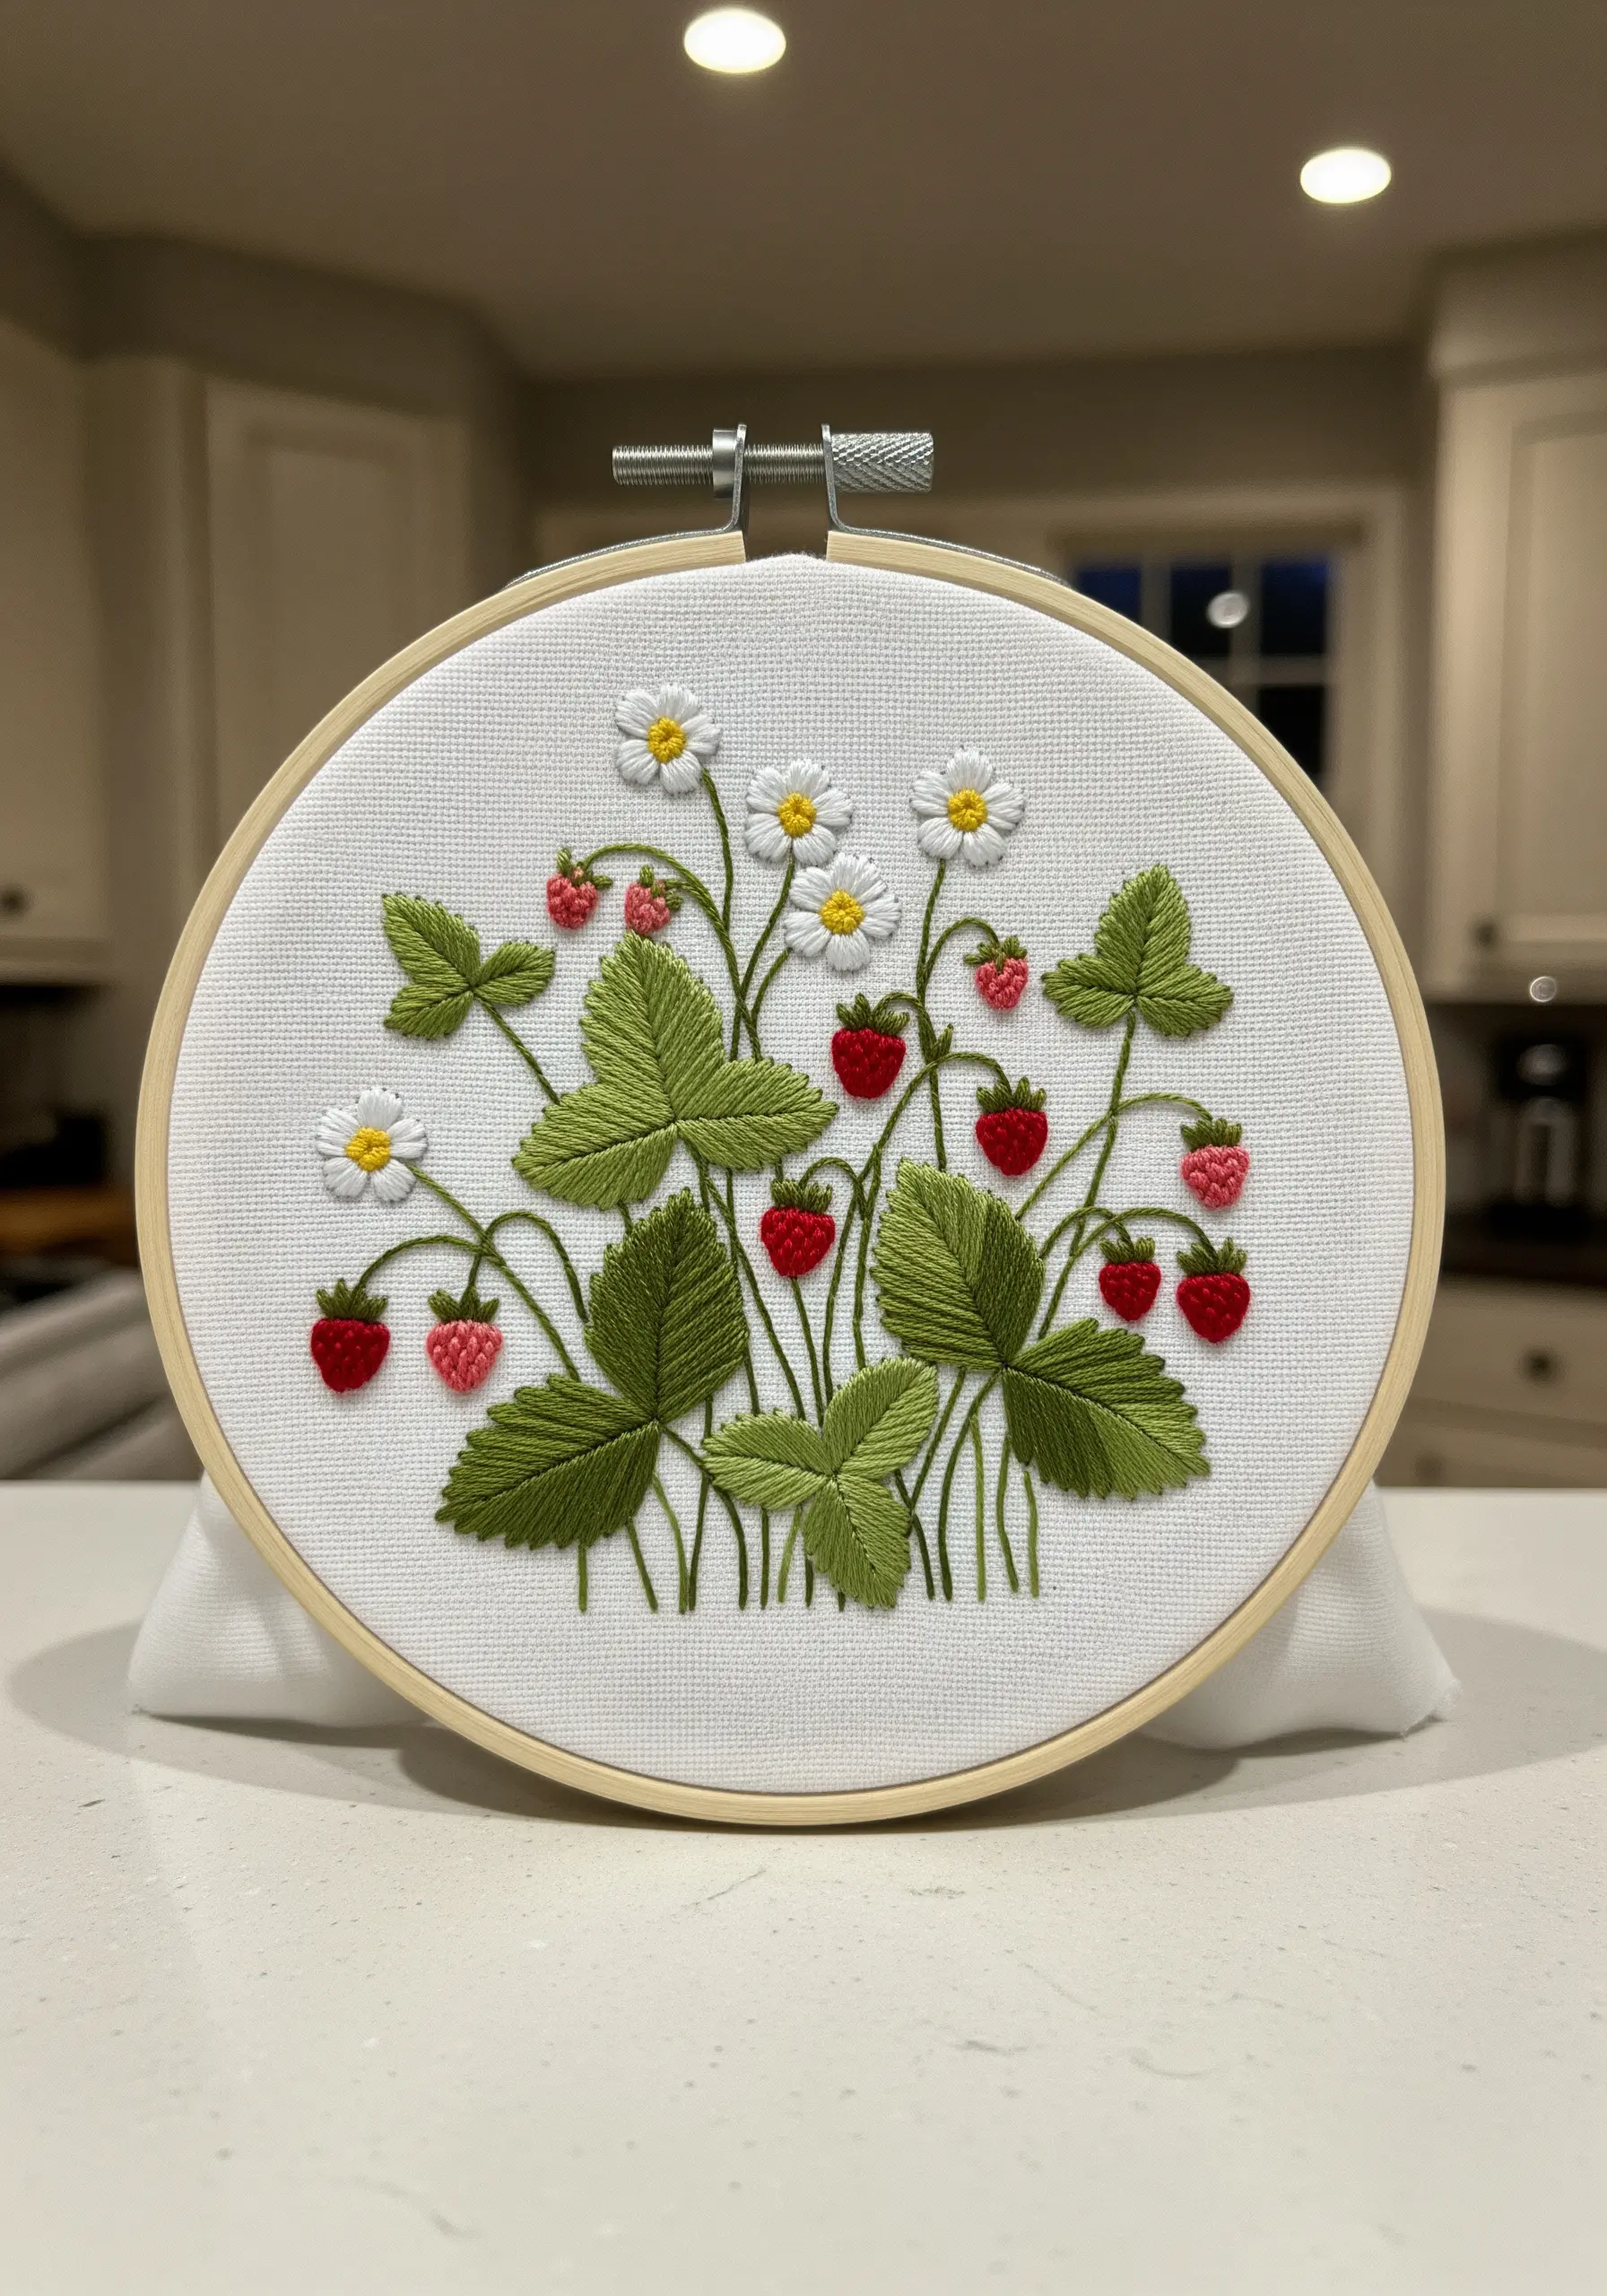
Give your foliage a realistic, three-dimensional feel by paying attention to stitch direction.
Instead of a simple satin stitch, use a fishbone or leaf stitch for the strawberry leaves. This technique creates a central vein and forces you to angle your stitches outward, just like a real leaf.
Use two or three shades of green to add subtle highlights and shadows, further enhancing the illusion of shape and form.
For the berries, a few scattered seed stitches over the satin stitch will give them that characteristic texture.
9. Mimic Nature’s Textures with Varied Stitches
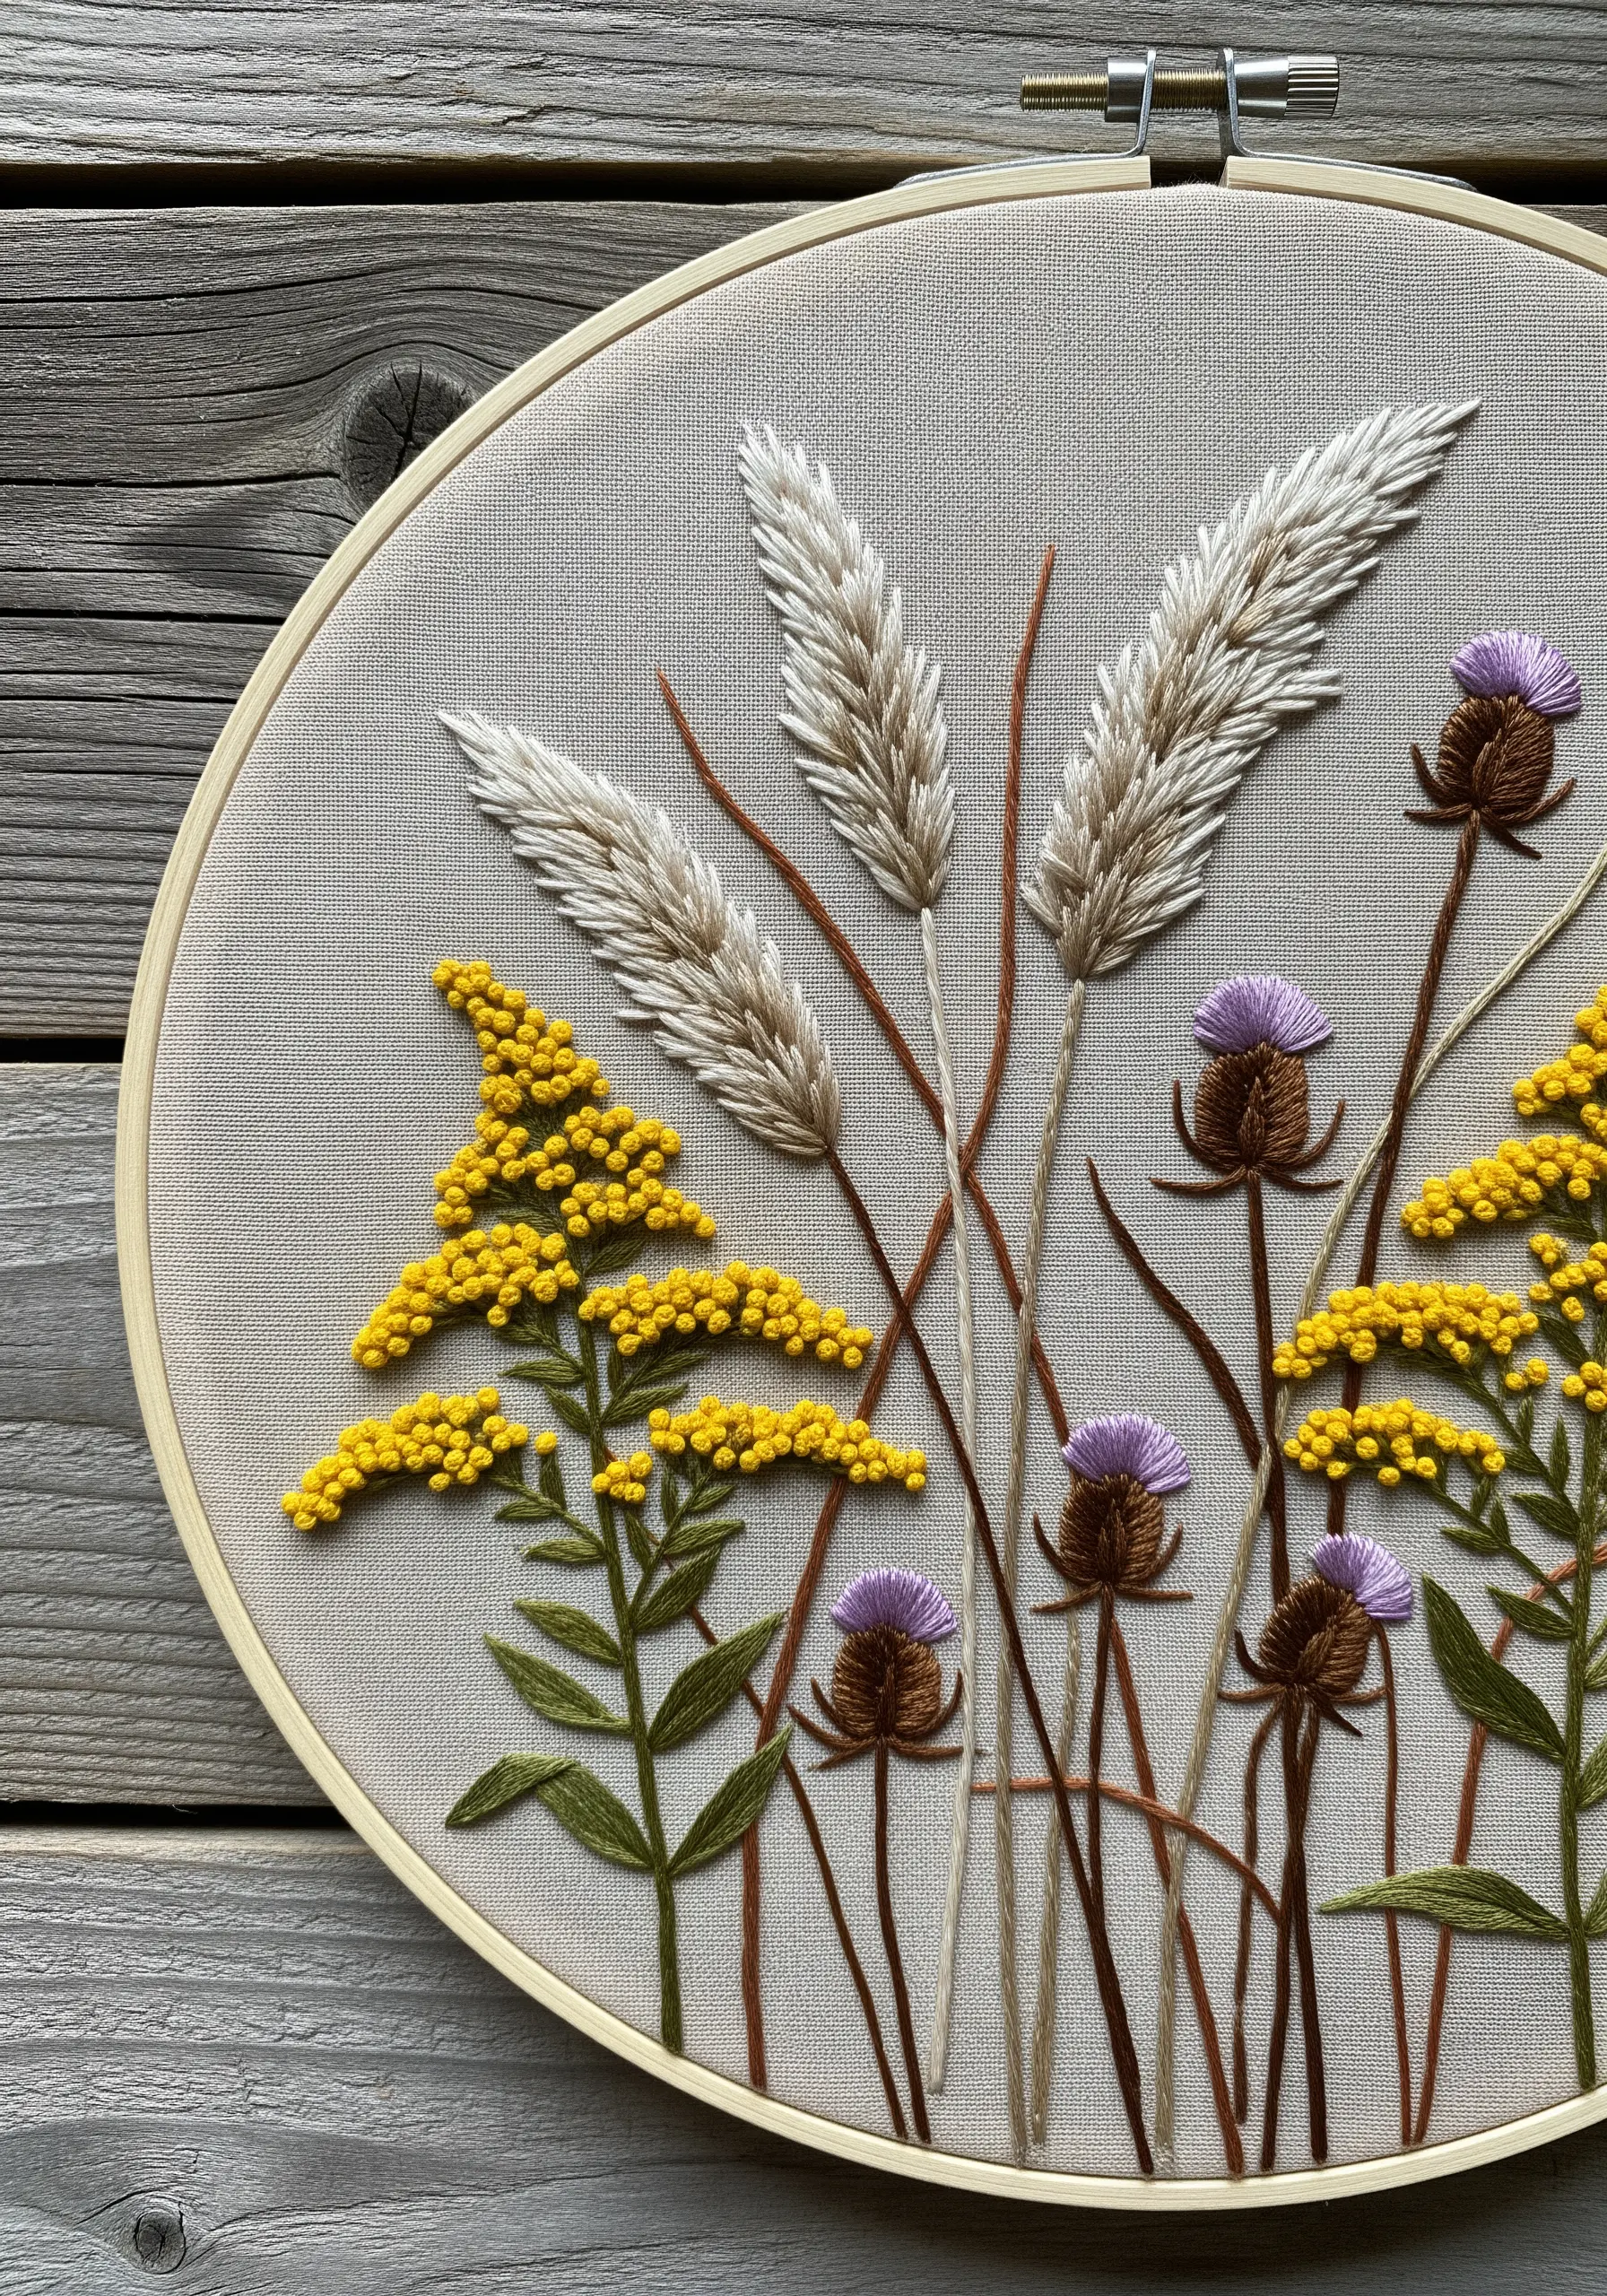
To capture the essence of a wild prairie, focus on recreating the distinct textures of each plant.
Use a series of detached chain stitches or turkey work for the fluffy thistle tops, giving them a genuinely prickly appearance.
For the feathery grasses, a fishbone stitch using off-white and beige threads creates a soft, wheat-like effect.
Contrast these highly textured elements with clusters of simple French knots for the goldenrod, creating a composition that is rich in natural texture.
10. Build a Balanced and Delicate Wreath

A floral wreath offers a timeless and elegant composition. To keep it from looking cluttered, build it with intention.
Start by lightly sketching a circle on your fabric. Place your main flowers—the pink and blue bell shapes—at regular intervals around the circle using satin stitch or detached chain stitch.
Next, connect these anchor points with graceful, curving stems in stem stitch.
Finally, fill in the gaps with smaller leaves and clusters of French knots. This methodical approach ensures your wreath is balanced, airy, and beautiful.
11. Explore Texture in a Monochromatic Palette

Create a sophisticated and modern piece by limiting yourself to a single color family.
When working monochromatically, texture is everything. Vary your stitches to differentiate each flower and leaf type: use satin stitch for smooth petals, French knots for fluffy clusters, and lazy daisy stitch for smaller blooms.
Incorporate several shades of the same color—from pale mint to deep forest green—to create depth and prevent the design from appearing flat.
This exercise in restraint results in a uniquely chic and organic design.
12. Suggest a Sky with Subtle Stitches
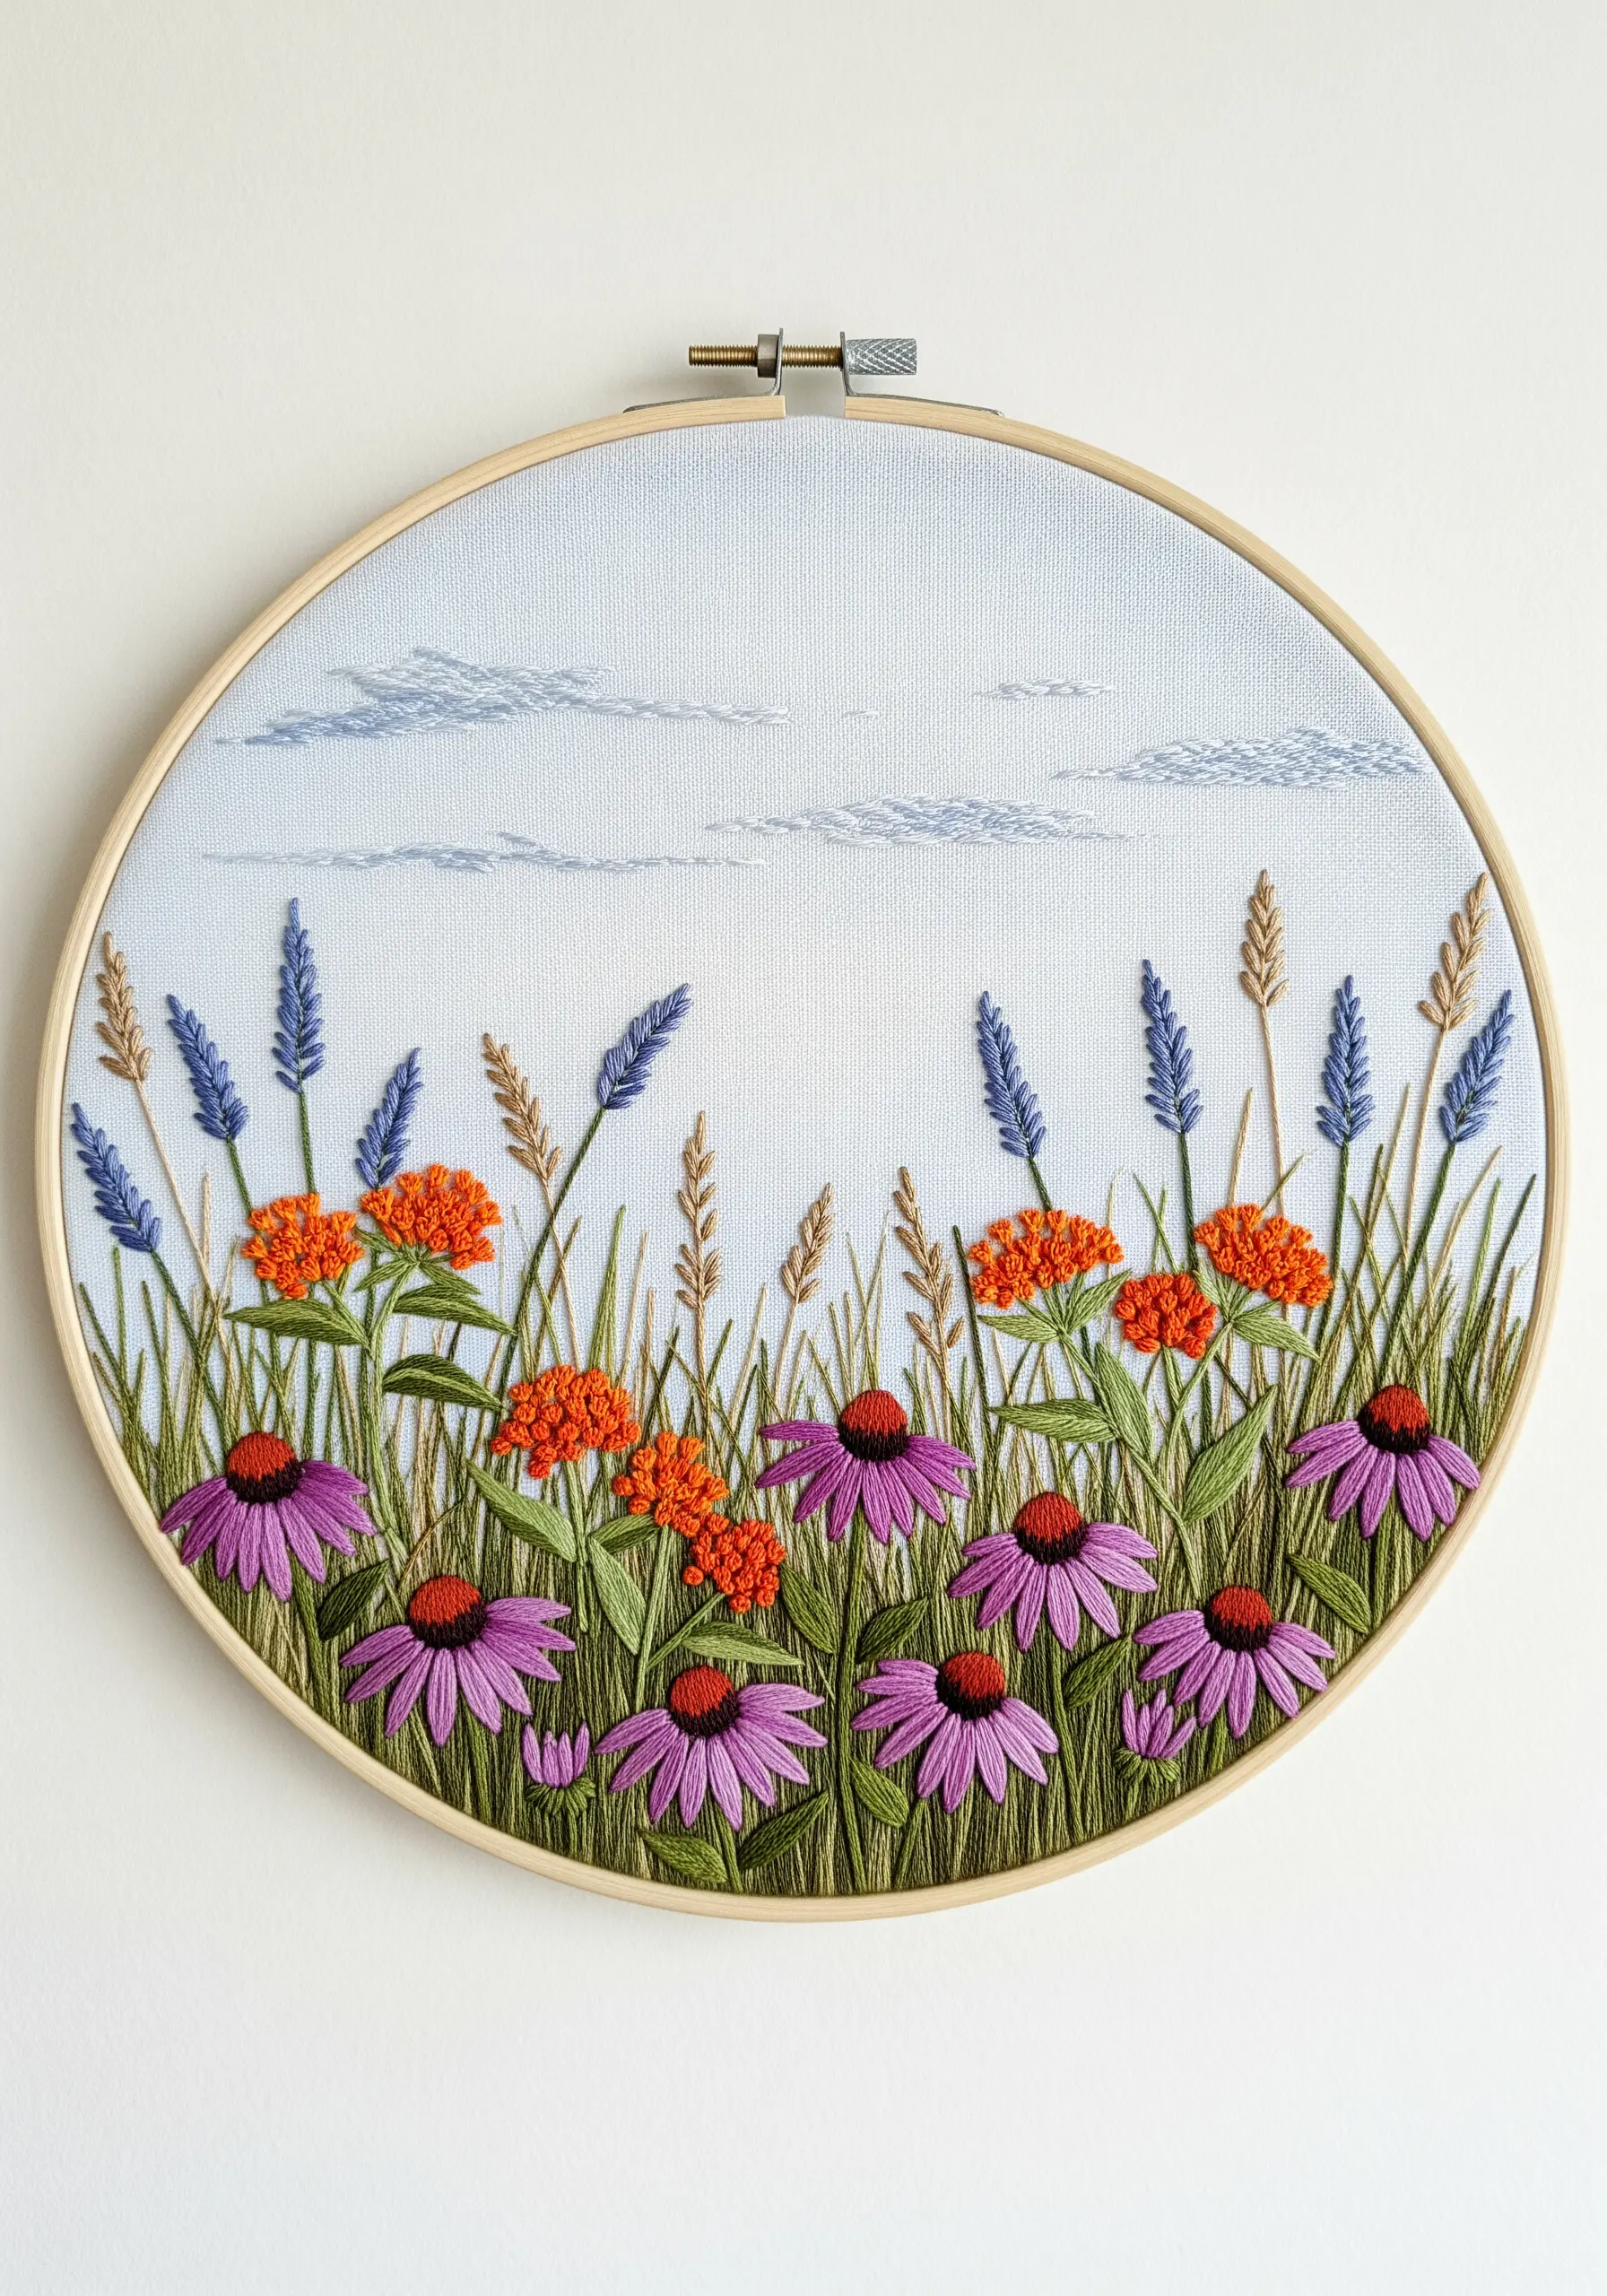
To create a full landscape without overpowering your flowers, stitch the sky with a light touch.
Use a simple backstitch or running stitch with a single strand of light blue or white thread to outline cloud shapes.
Alternatively, fill the sky area with sparse seed stitches. This technique adds texture and context to your scene while ensuring the vibrant prairie flowers in the foreground remain the undeniable focal point.
13. Embellish with Beads for a Touch of Magic
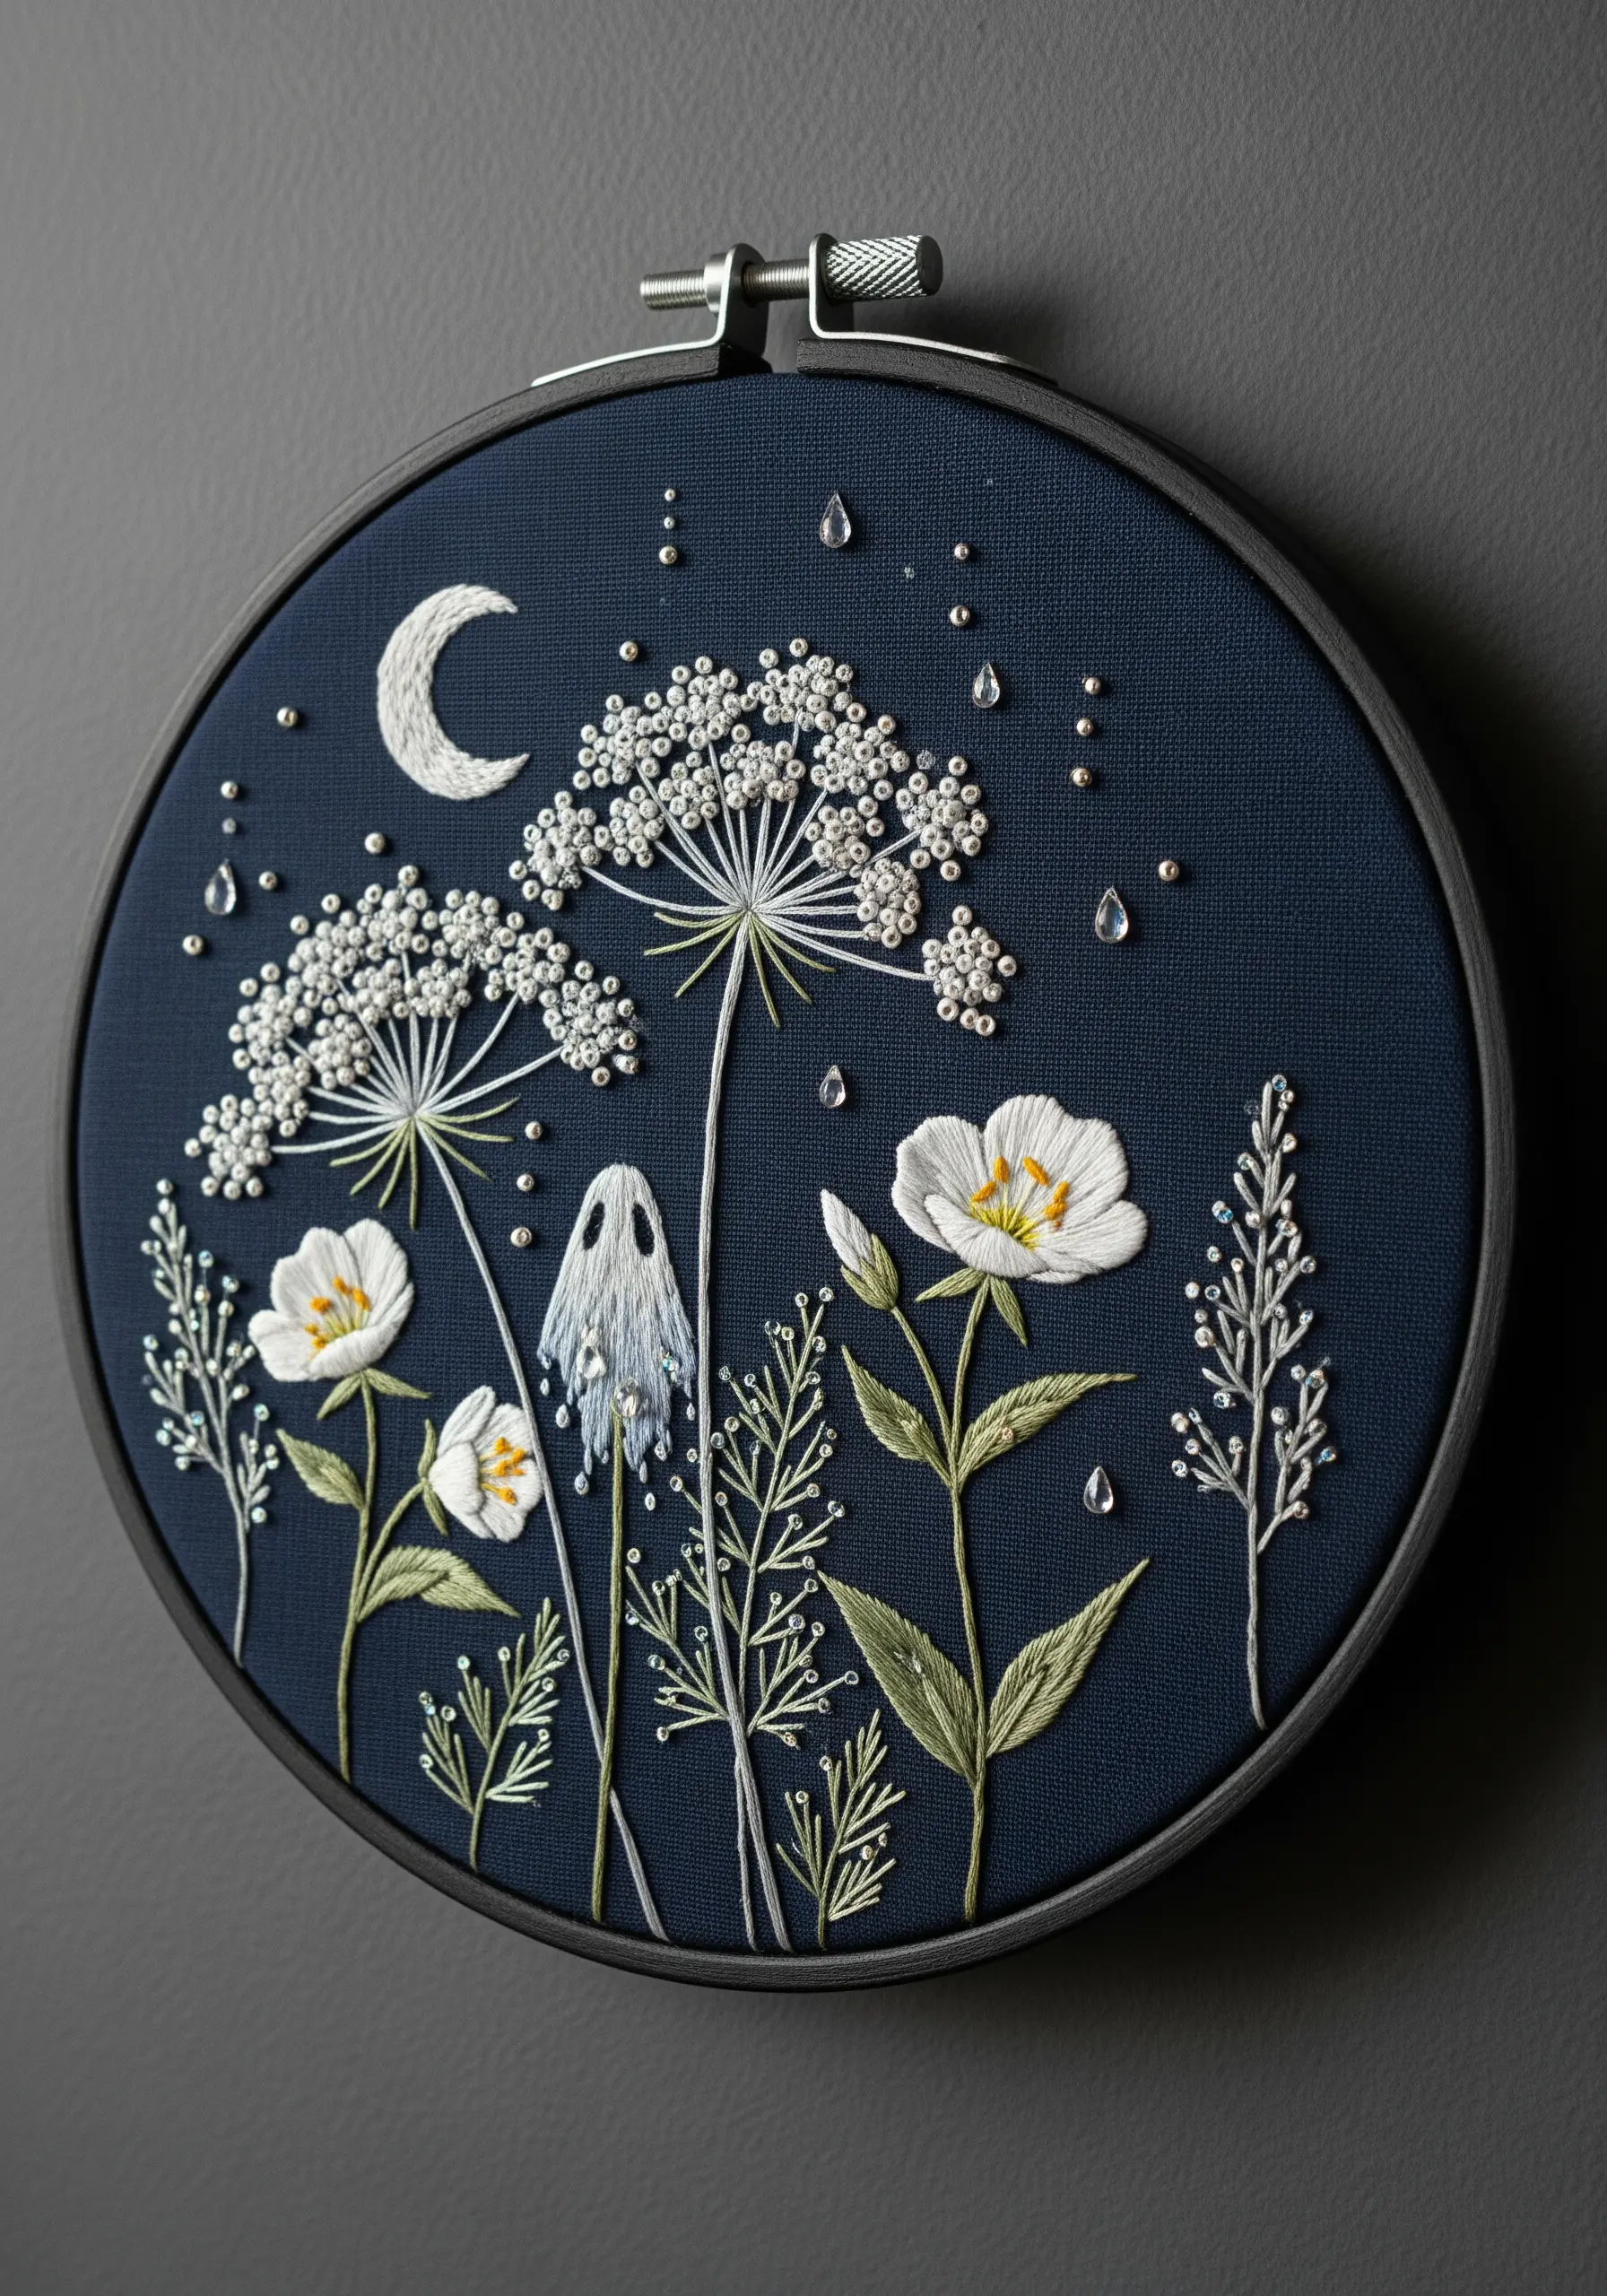
Elevate a nighttime scene by incorporating tiny seed beads or crystals alongside your stitches.
Use them sparingly to represent stars, dewdrops, or magical accents. Secure each bead with a small stitch, using a thread that matches either the bead or the fabric to make the stitch invisible.
This touch of sparkle catches the light differently than thread, adding a layer of dimension and enchantment to your work. It’s a perfect technique for night-blooming floral stitch themes.
14. Maximize Visual Energy with Complementary Colors

Pairing colors from opposite sides of the color wheel, like the vibrant yellow of sunflowers and the deep blue of delphiniums, creates a powerful visual contrast.
This high-energy combination makes both colors appear brighter and more dynamic. Use a dense field of French knots for the sunflower centers to add a satisfying, bumpy texture.
The contrast in both color and form makes for an incredibly eye-catching piece that feels joyful and full of life.
15. Shade Petals for Photorealistic Depth
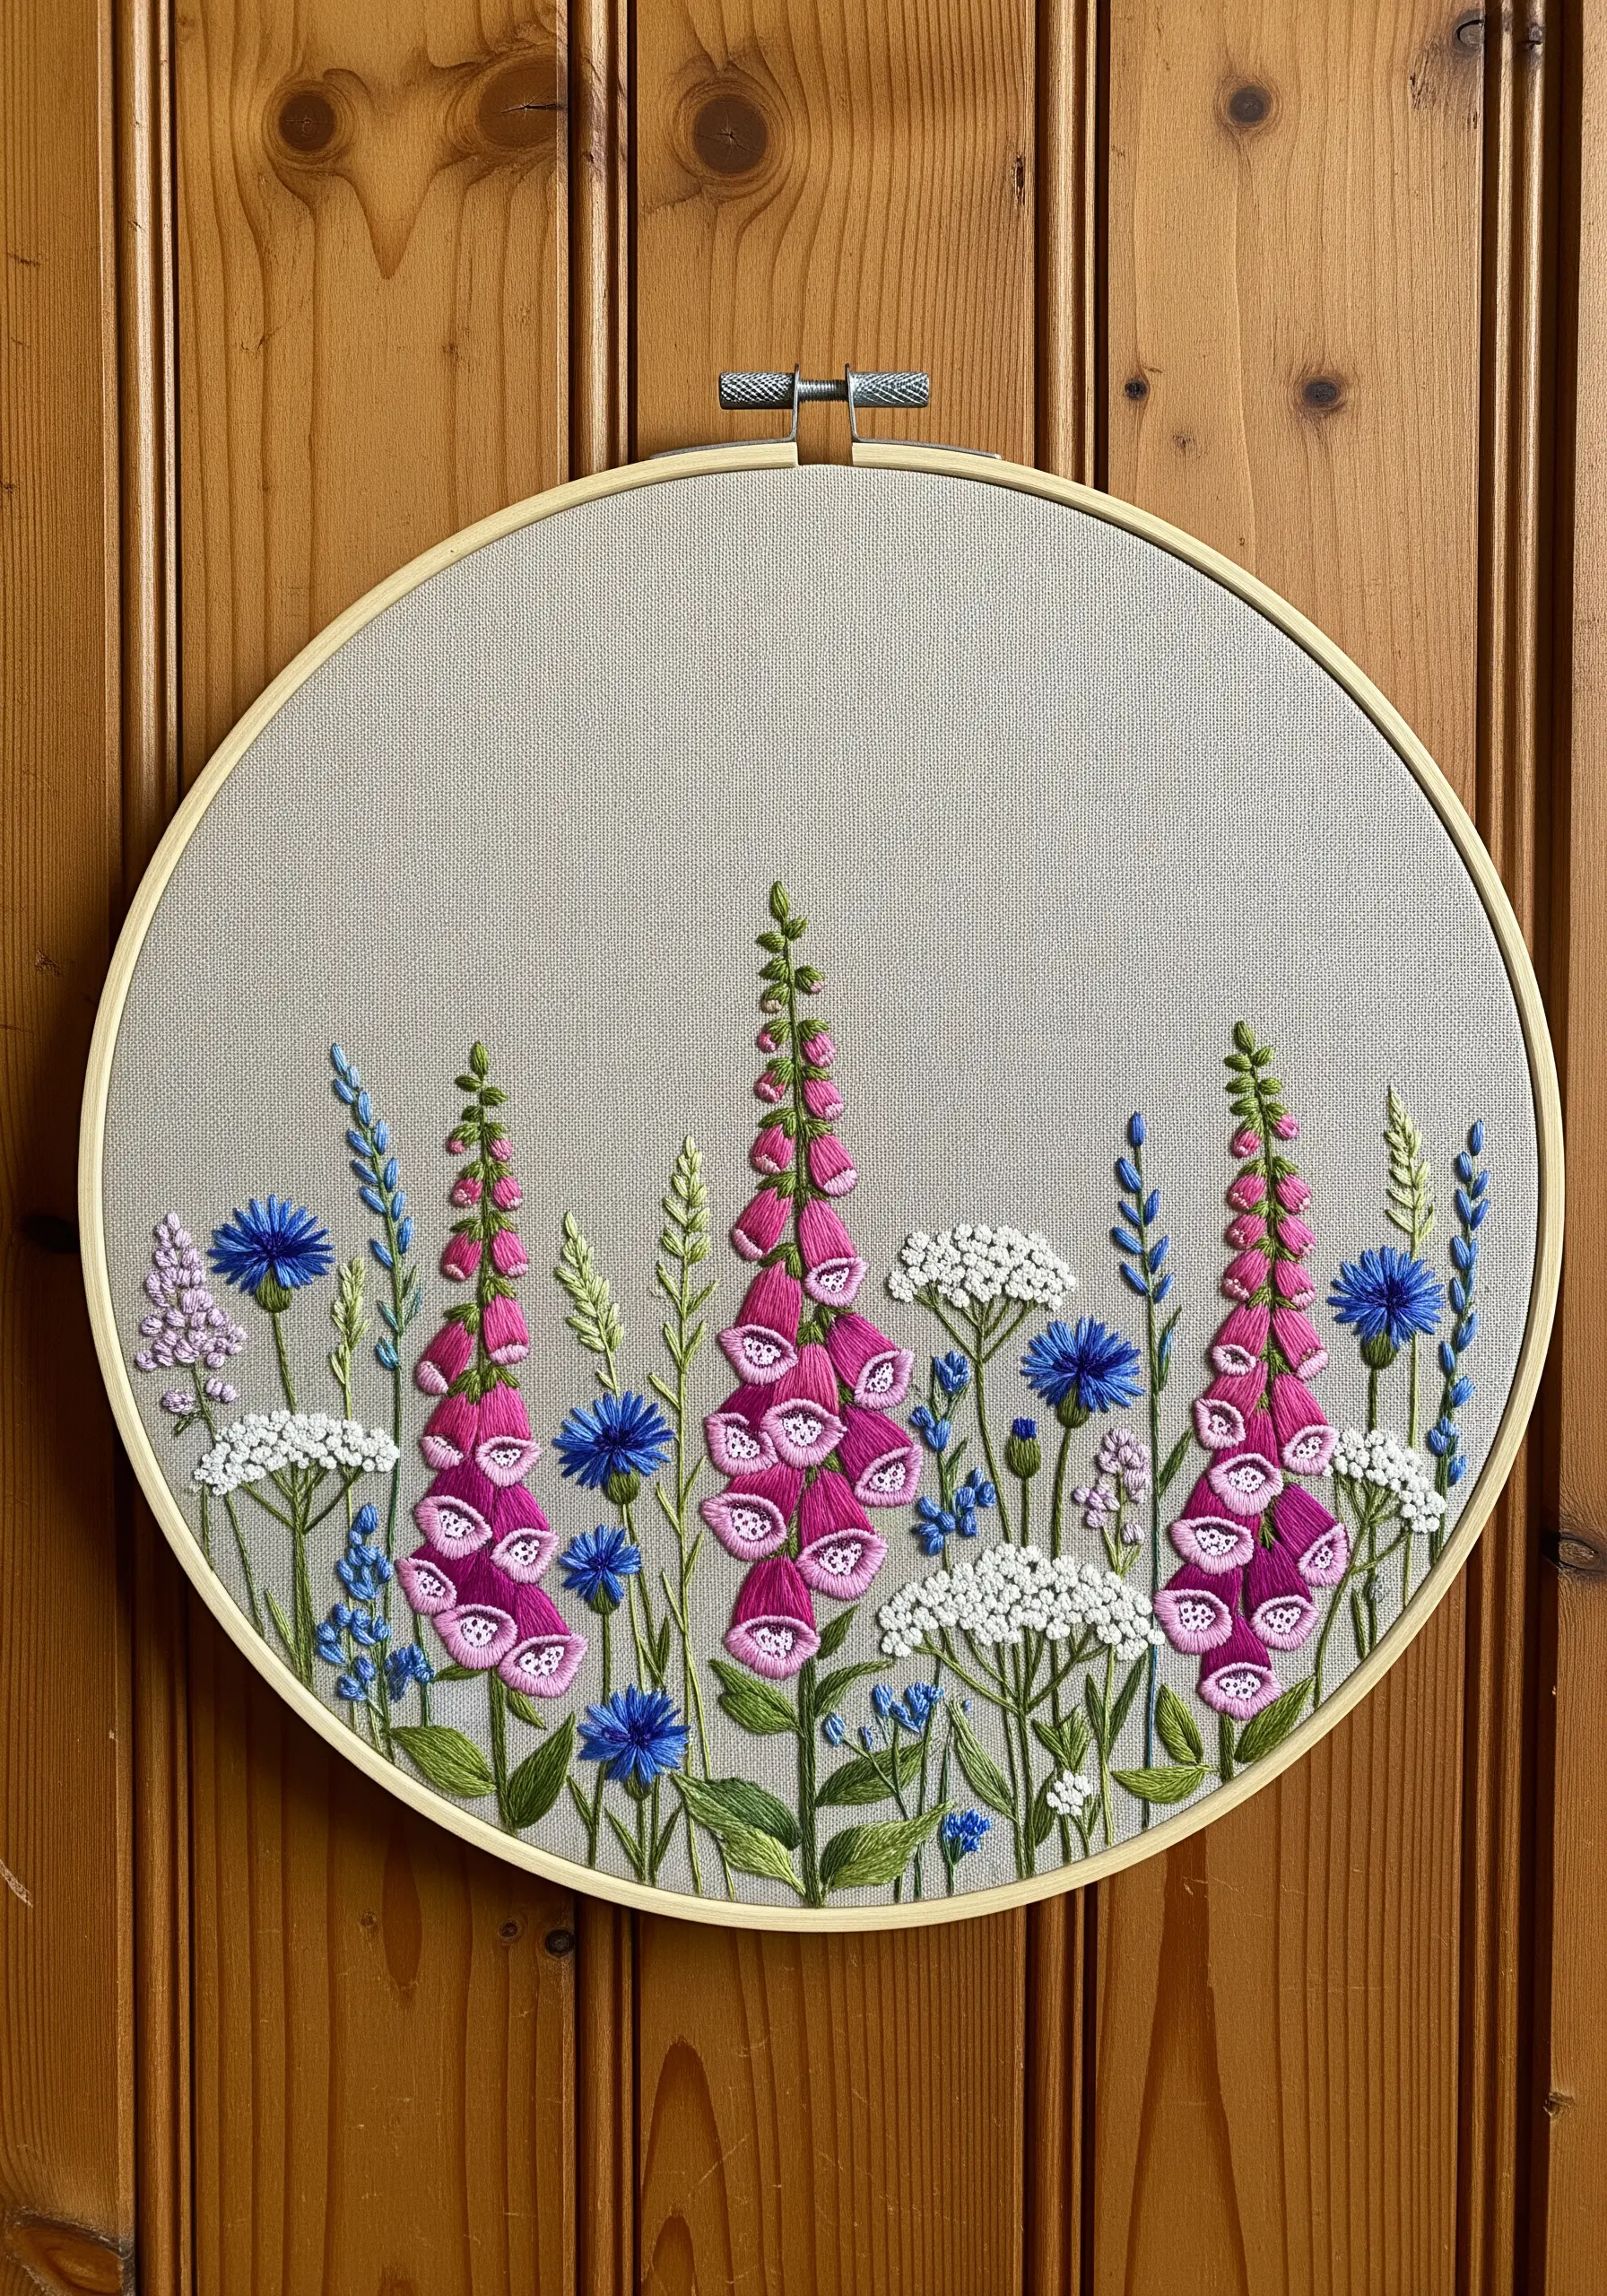
To give flowers like foxgloves their characteristic bell shape, you need to master subtle shading.
Use a long and short stitch with at least three tones of the same color—a dark, a medium, and a light shade.
Place the darkest shade on the outer edges and inside the ‘bell,’ blending into the medium tone, and finish with the lightest shade at the most prominent, light-catching point.
This creates a convincing illusion of roundness and depth, elevating your floral work from flat to lifelike.
16. Embrace Negative Space for Minimalist Elegance

Sometimes, the stitches you *don’t* make are the most important. A minimalist composition allows each element to breathe and be appreciated.
For this delicate Queen Anne’s lace, use a fine thread and precise, tiny stitches. The surrounding empty space on the sage green fabric is not just a background; it’s an active part of the design.
This approach creates a sense of calm and focuses the viewer’s attention on the intricate beauty of your stitch work, turning a simple subject into a piece of minimal embroidery art.
17. Build a Foundation with Foreground Elements
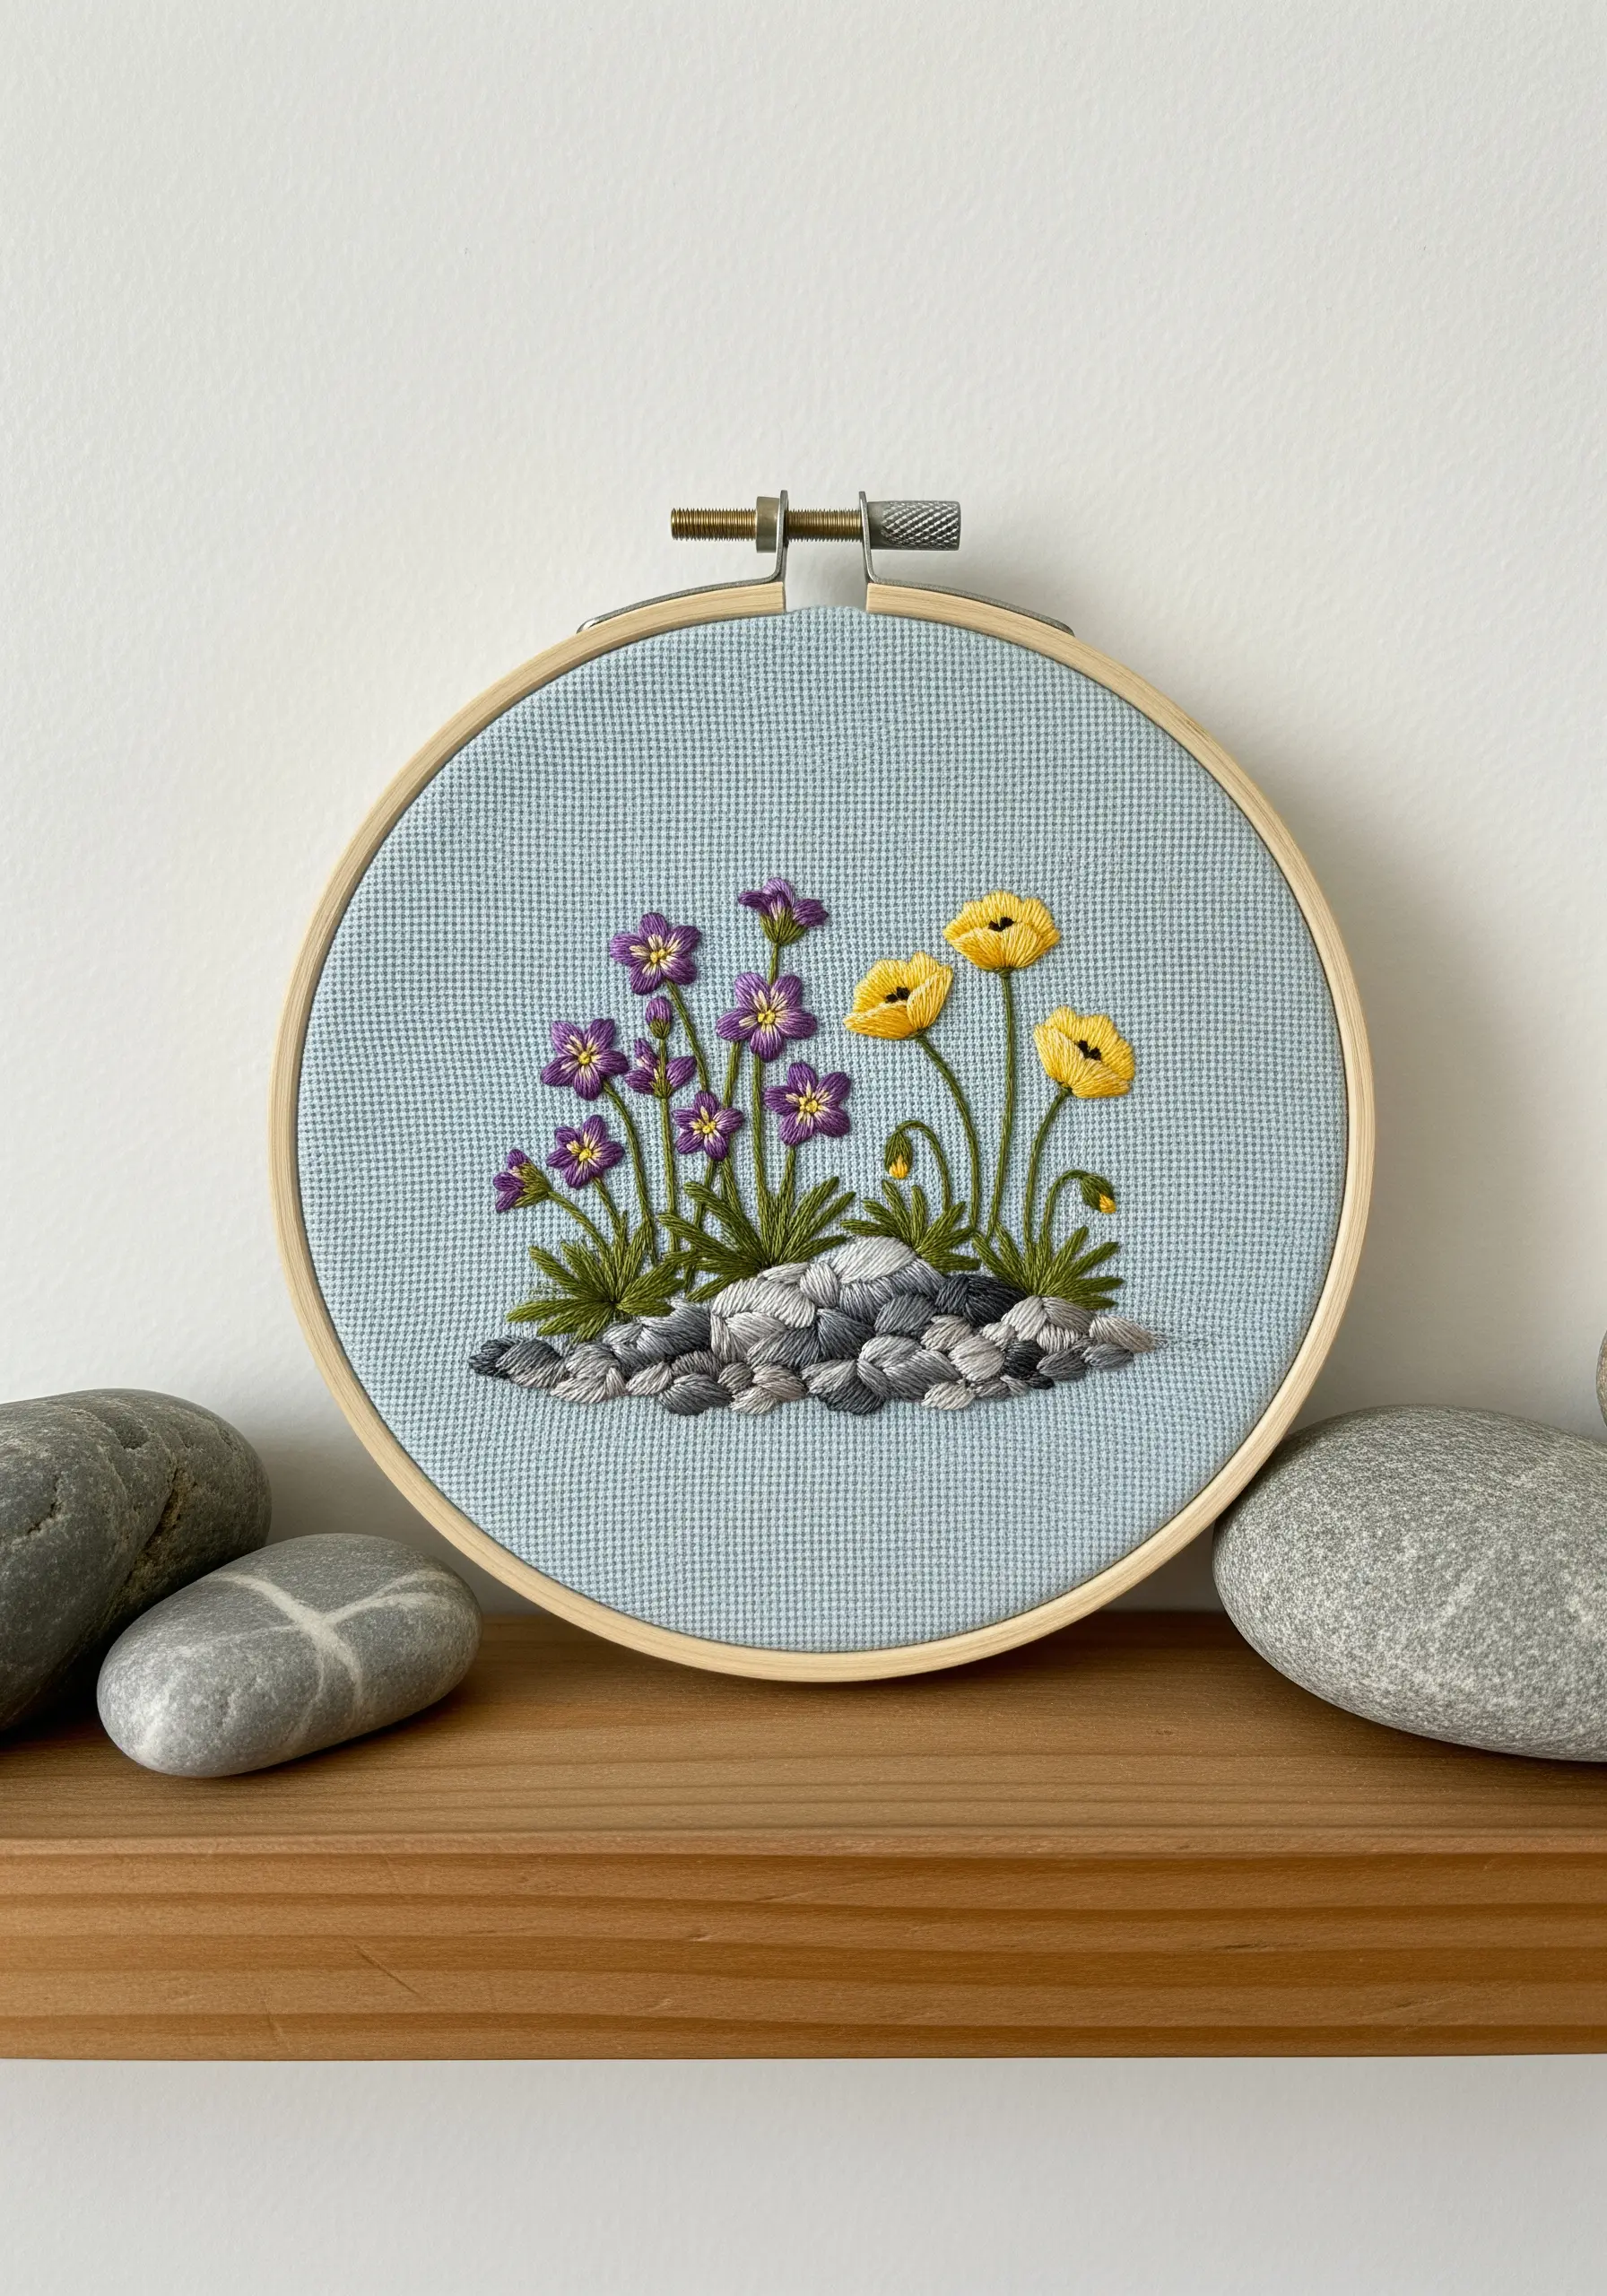
Create a realistic sense of place by stitching foreground elements, like these stones, before adding your flowers.
Use satin stitch in multiple directions with several shades of grey, silver, and charcoal to mimic the facets and shadows of rocks.
Once this foundation is complete, stitch your flower stems so they appear to grow naturally from between the cracks.
This simple sequencing trick adds a surprising amount of realism and narrative to your scene.
18. Convey Movement with Directional Stitches

Capture the feeling of a breezy day by unifying the direction of your stitches.
Instead of stitching stems vertically, angle them all slightly in the same direction. Do the same for your leaves and even the petals of your flowers.
This consistent diagonal movement across the fabric creates a powerful illusion of wind sweeping through the meadow, bringing your static embroidery to life.
This is a simple yet incredibly effective technique for adding dynamism to landscape pieces.
19. Design a Cohesive Triptych for Wall Decor

Elevate your hoops from individual projects to a curated art installation by creating a series.
Choose a consistent element to tie the pieces together—such as the same neutral linen fabric, hoop size, and a complementary color palette.
Vary the floral arrangements in each hoop to keep it interesting. Displaying them together on a fabric wall runner transforms them into a single, impactful piece of handmade wall decor.
20. Achieve a Botanical Illustration Effect
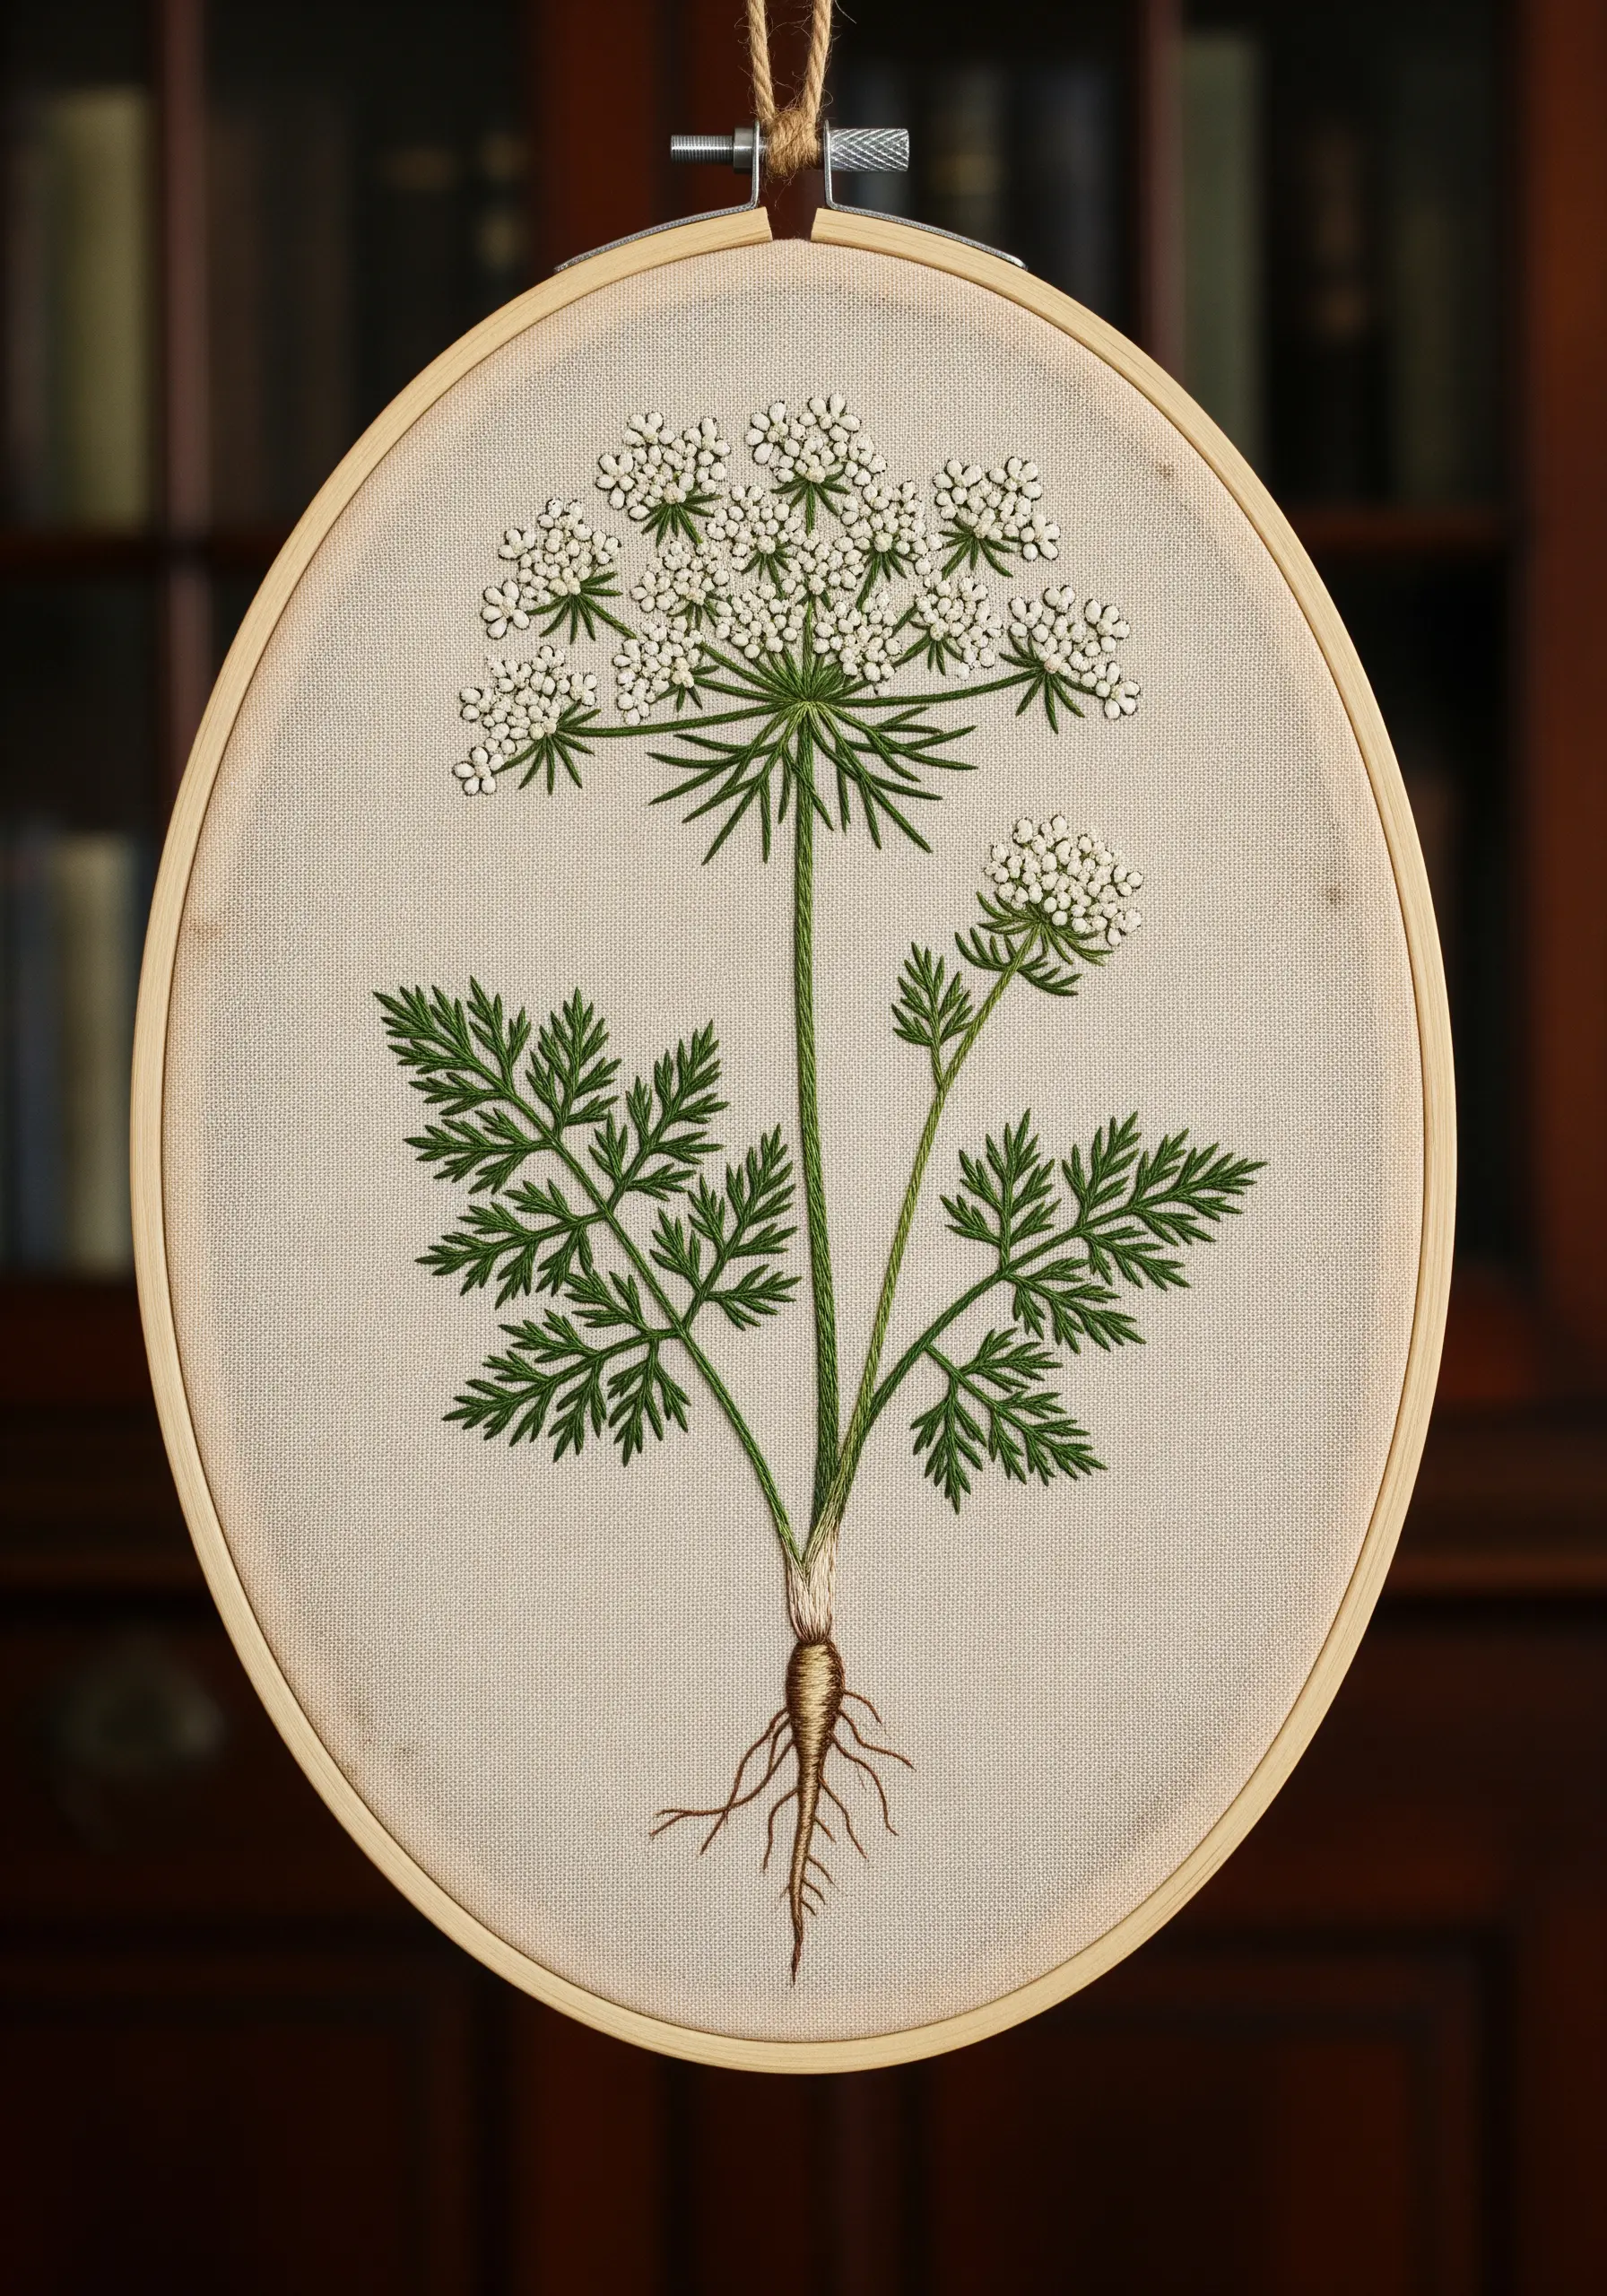
Emulate the precision of a scientific drawing by focusing on clean lines and accurate detail.
Use a single strand of floss for your outlines to keep them crisp and fine. A split stitch or whipped backstitch will give you a smoother line than a standard backstitch.
Pay close attention to the structure of the plant, from the delicate leaflets to the fine root hairs.
Stitching on a high-count linen or cotton in a neutral color enhances the academic, illustrative aesthetic.
21. Choose a Background That Tells a Story

A vibrant fabric color can do more than just showcase your threads—it can set the entire mood of your piece.
A cheerful, marigold-yellow background instantly evokes feelings of sun, warmth, and happiness, perfectly complementing a scene of busy bees and bright summer flowers.
This thoughtful choice turns your embroidery hoop into a complete, self-contained world, where the background is as much a part of the story as the stitches themselves.
22. Use Couching for Unique Textural Foliage

For foliage that needs a distinct, fuzzy, or corded texture, try the couching technique.
Lay down a thicker thread, such as wool or multiple strands of floss, onto the surface of your fabric in the desired shape.
Then, use a second, finer thread to tack it down with small, perpendicular stitches. This method is perfect for creating the texture of plants like dusty miller or lamb’s ear, adding a wonderful, tactile dimension that stands out from standard stitches.
23. Create Abstract Fire with Thread Painting
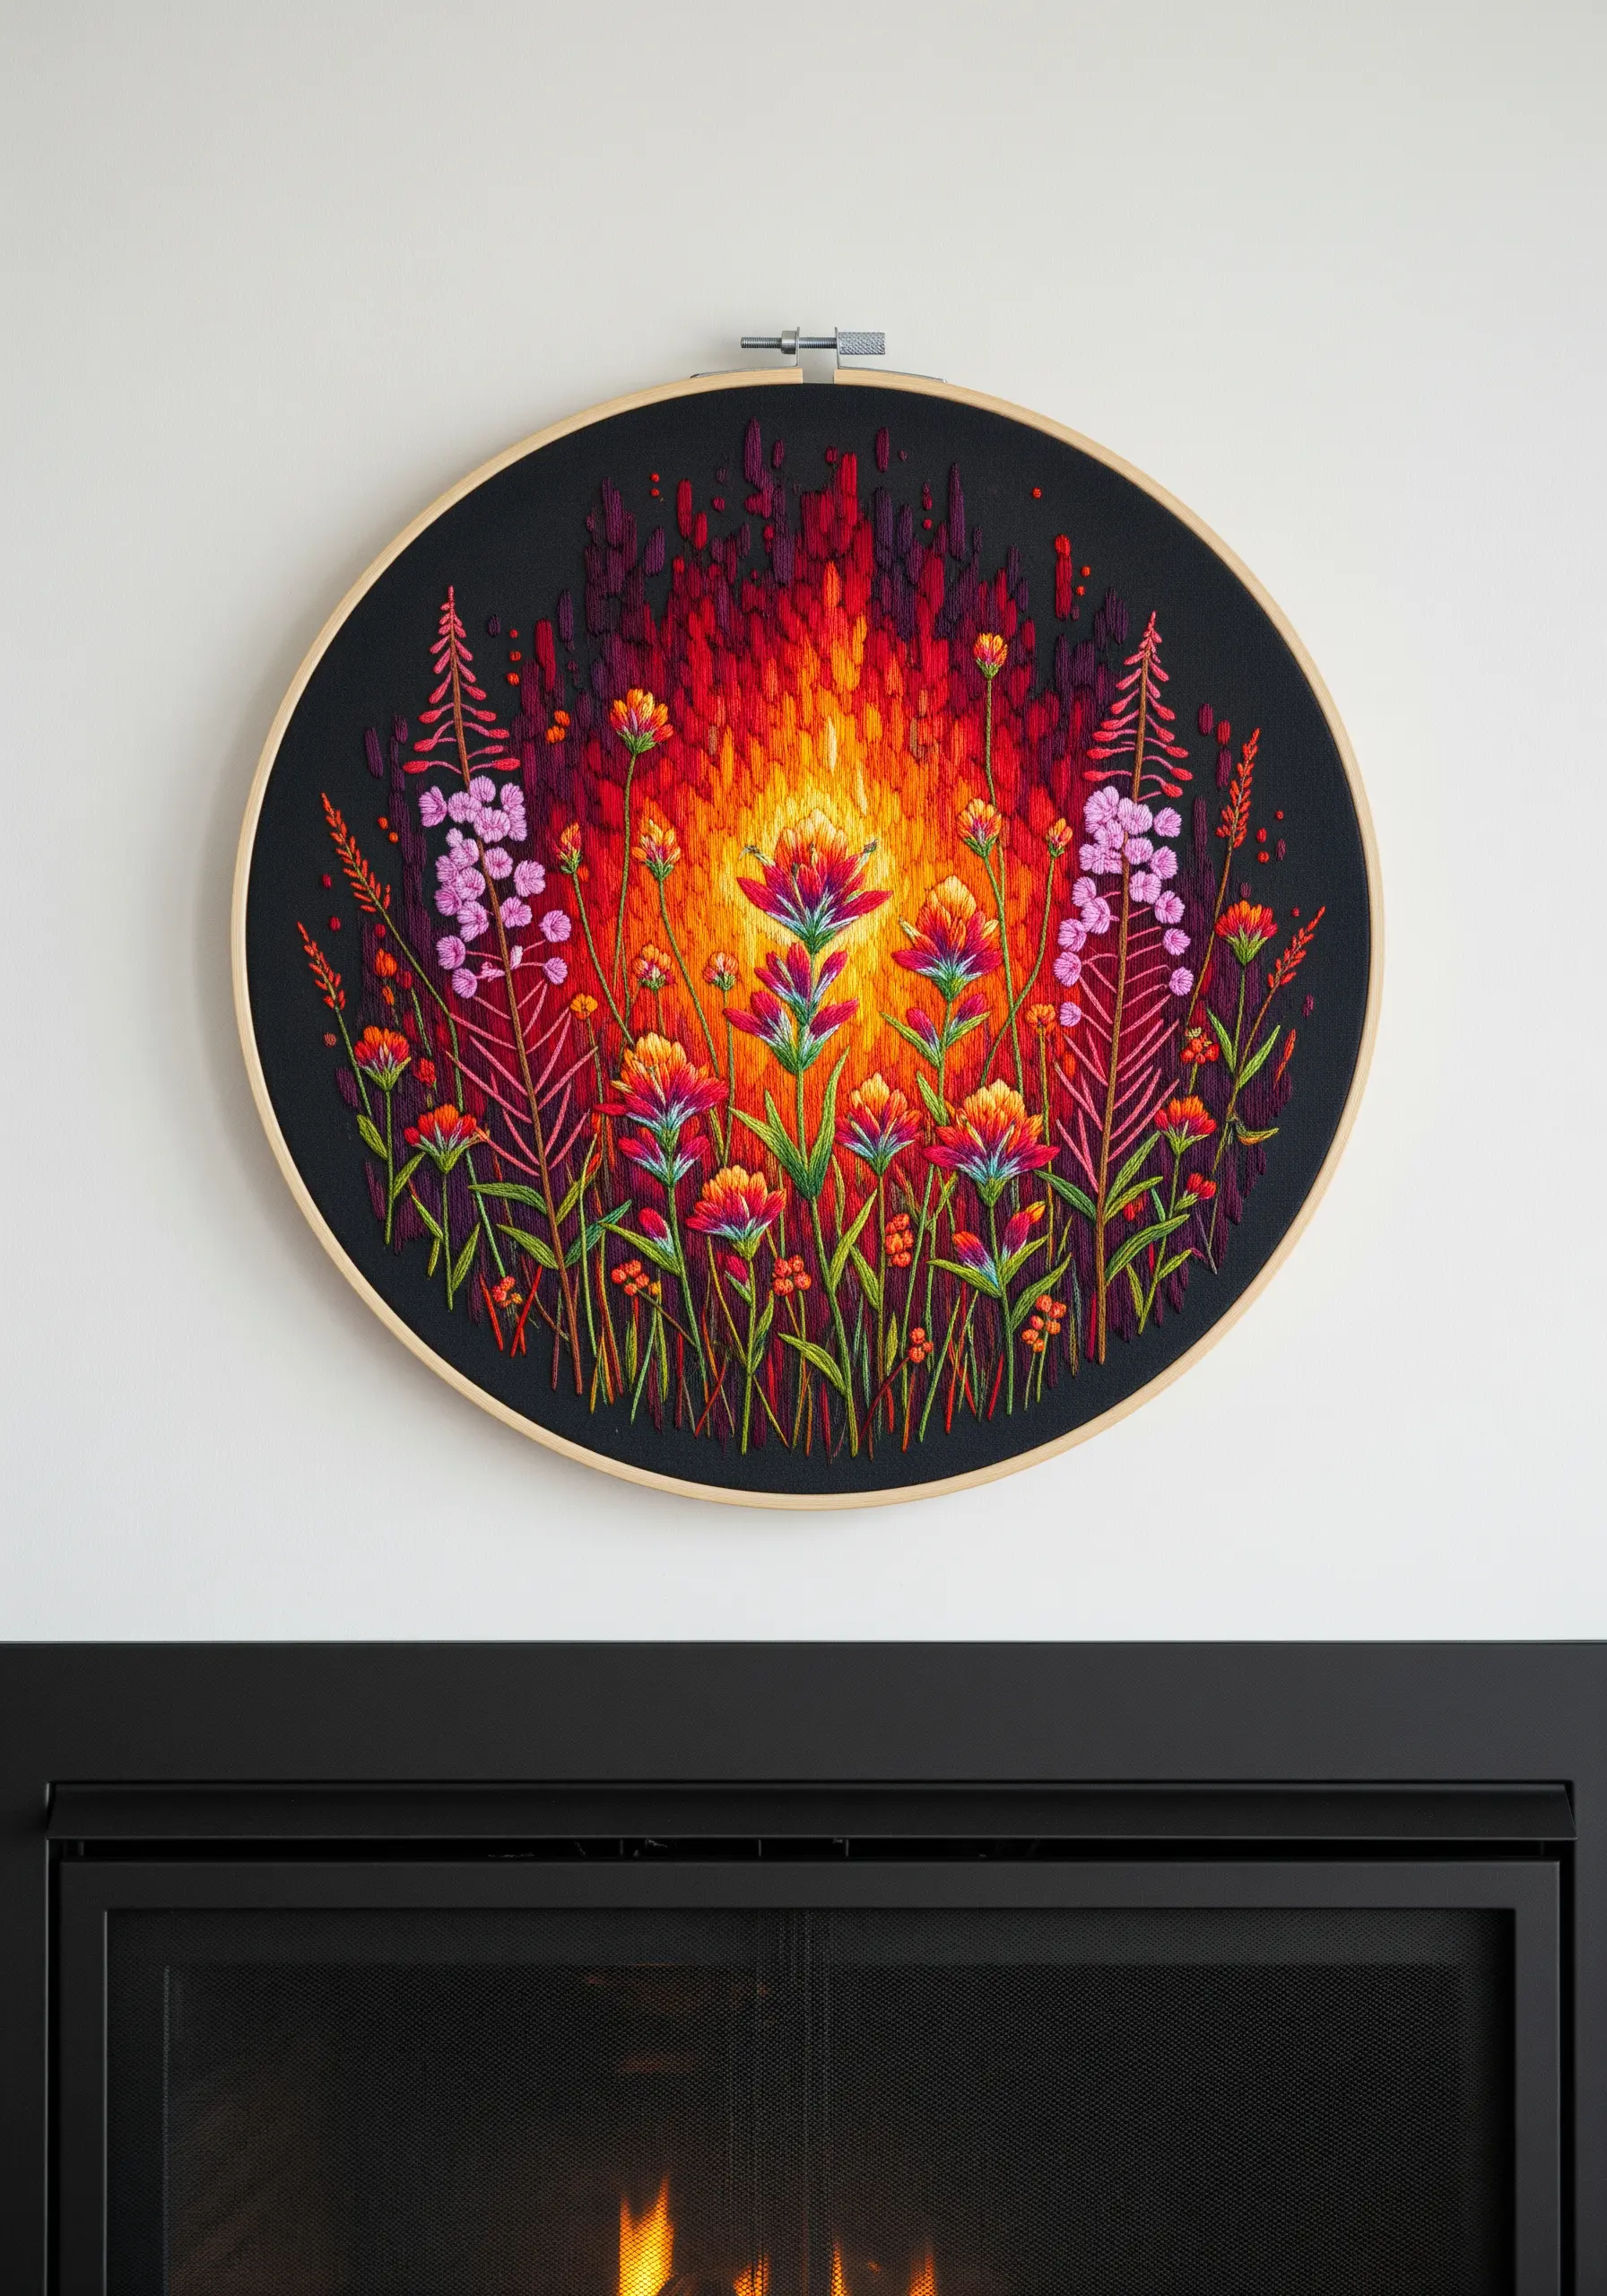
Push your creativity by translating an abstract concept like fire into a floral composition.
Use vertical long and short stitches in a palette of reds, oranges, and yellows to build an intense, glowing background that mimics rising flames.
Let your wildflower silhouettes emerge from this fiery base, using the same vibrant color scheme.
This technique transforms a simple meadow into a powerful, abstract nature-inspired motif that feels both energetic and emotional.
24. Stitch on Sheer Fabric for an Ethereal Look
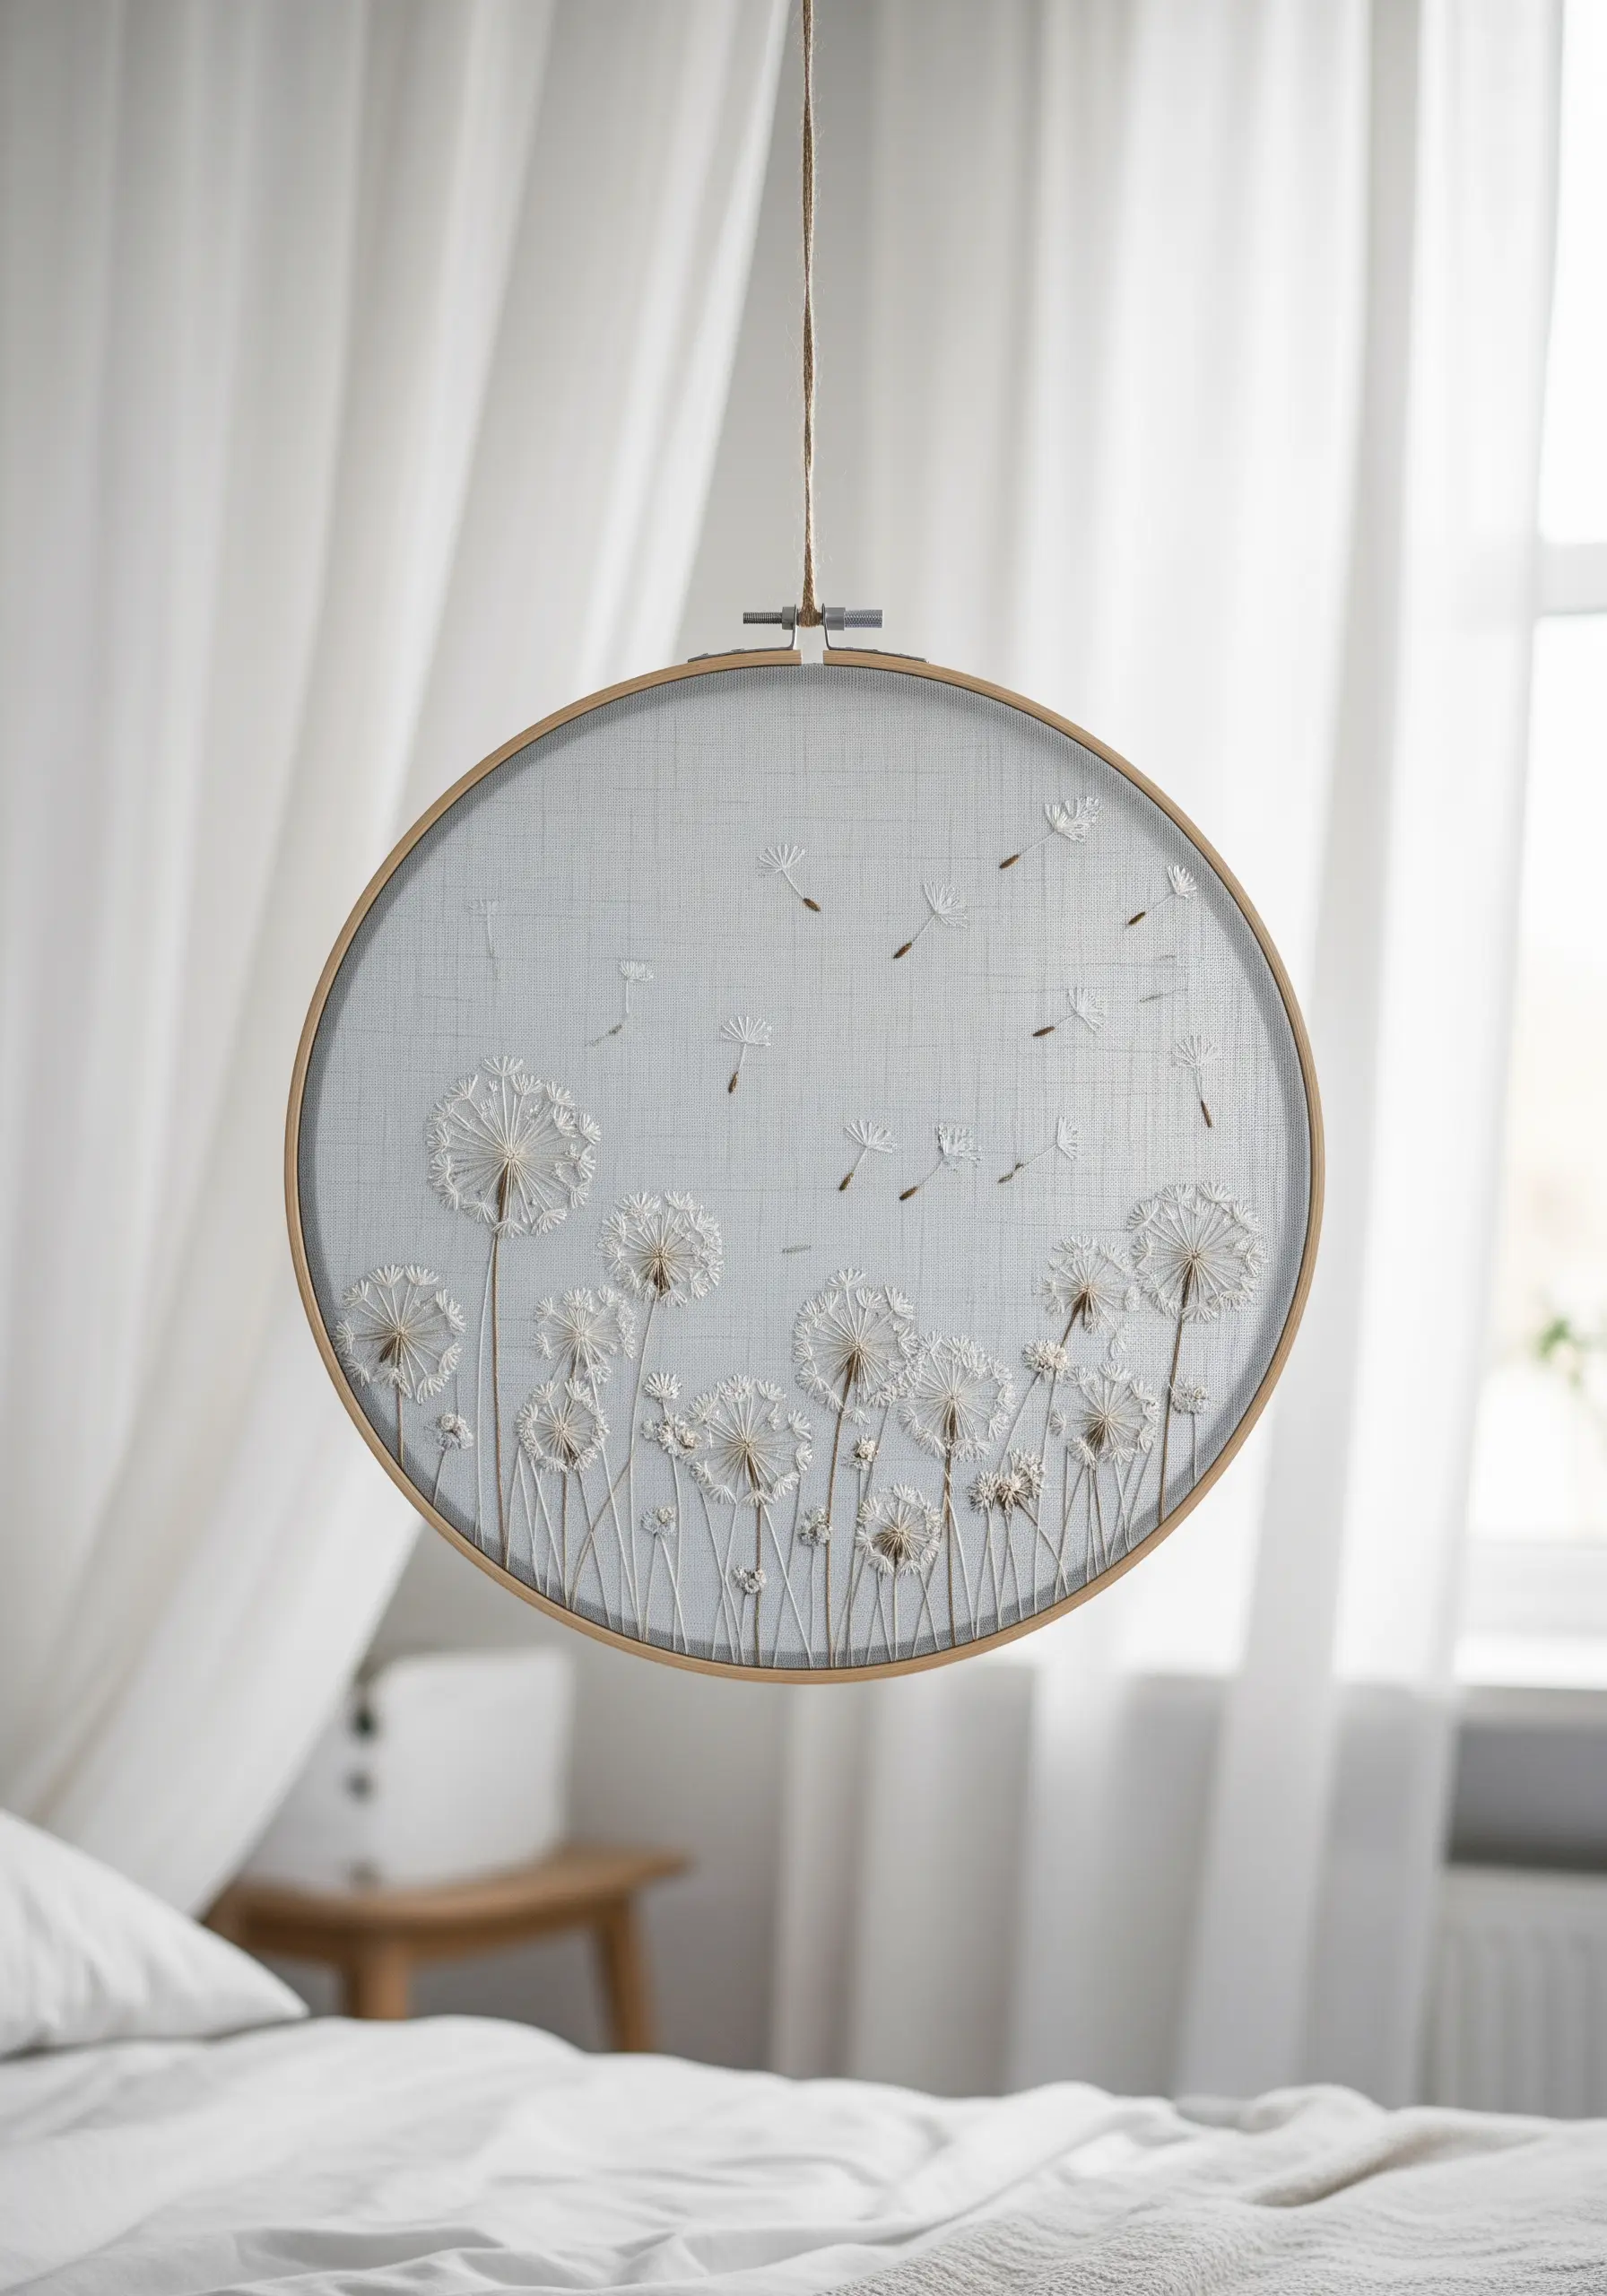
Working on a translucent fabric like organza creates a stunning, floating effect, as if your stitches are suspended in air.
To make this manageable, hoop your sheer fabric with a layer of water-soluble stabilizer. This provides the support you need while stitching.
Once you are finished, simply rinse the piece in water, and the stabilizer will dissolve, leaving only your delicate, ethereal embroidery behind.
This is perfect for capturing the weightless quality of dandelion seeds drifting on the breeze.
25. Build a Rich Forest Floor with French Knots

To create the convincing texture of soil, moss, and fallen leaves, rely on the versatility of the French knot.
Use multiple strands of thread (3-4) in earthy browns, deep greens, and ochres, and pack the knots tightly together to build up a dense, loamy ground layer.
Vary the tightness and number of wraps for each knot to create an uneven, organic surface. This organic texture provides the perfect anchor for your delicate woodland flowers to spring from.
26. Let Your Fabric Choice Enhance the Theme

The rustic, open weave of burlap or a coarse linen is the perfect canvas for celebrating the beauty of common weeds.
The slightly rough, earthy texture of the fabric complements the untamed nature of dandelions and thistles, making the entire piece feel more authentic and grounded.
This intentional pairing of subject and material shows a deeper level of artistry and adds a charming, rustic character to your finished work.
27. Create an Impressionistic Field with Knots
You don’t need perfect, crisp lines to suggest a meadow. Instead, take an impressionistic approach using clusters of French knots and lazy daisy stitches.
Work with a soft, pastel color palette and focus on creating shapes of color rather than individual, detailed flowers.
Vary the size and density of your knot clusters to suggest different types of flowers in the distance.
This technique is fast, forgiving, and results in a beautifully soft, dreamy landscape.
28. Design within a Crescent Moon Shape

A crescent shape provides a beautiful and dynamic framework for a floral composition.
Begin by lightly tracing a crescent onto your fabric. Anchor the design by placing your largest, most detailed flowers along the thickest part of the curve.
Then, taper the design by adding smaller leaves, buds, and delicate filler stitches like seed stitch or tiny French knots towards the points of the crescent.
This creates a natural, graceful flow that is both balanced and visually captivating.
29. Stitch Water with Horizontal Satin Stitches
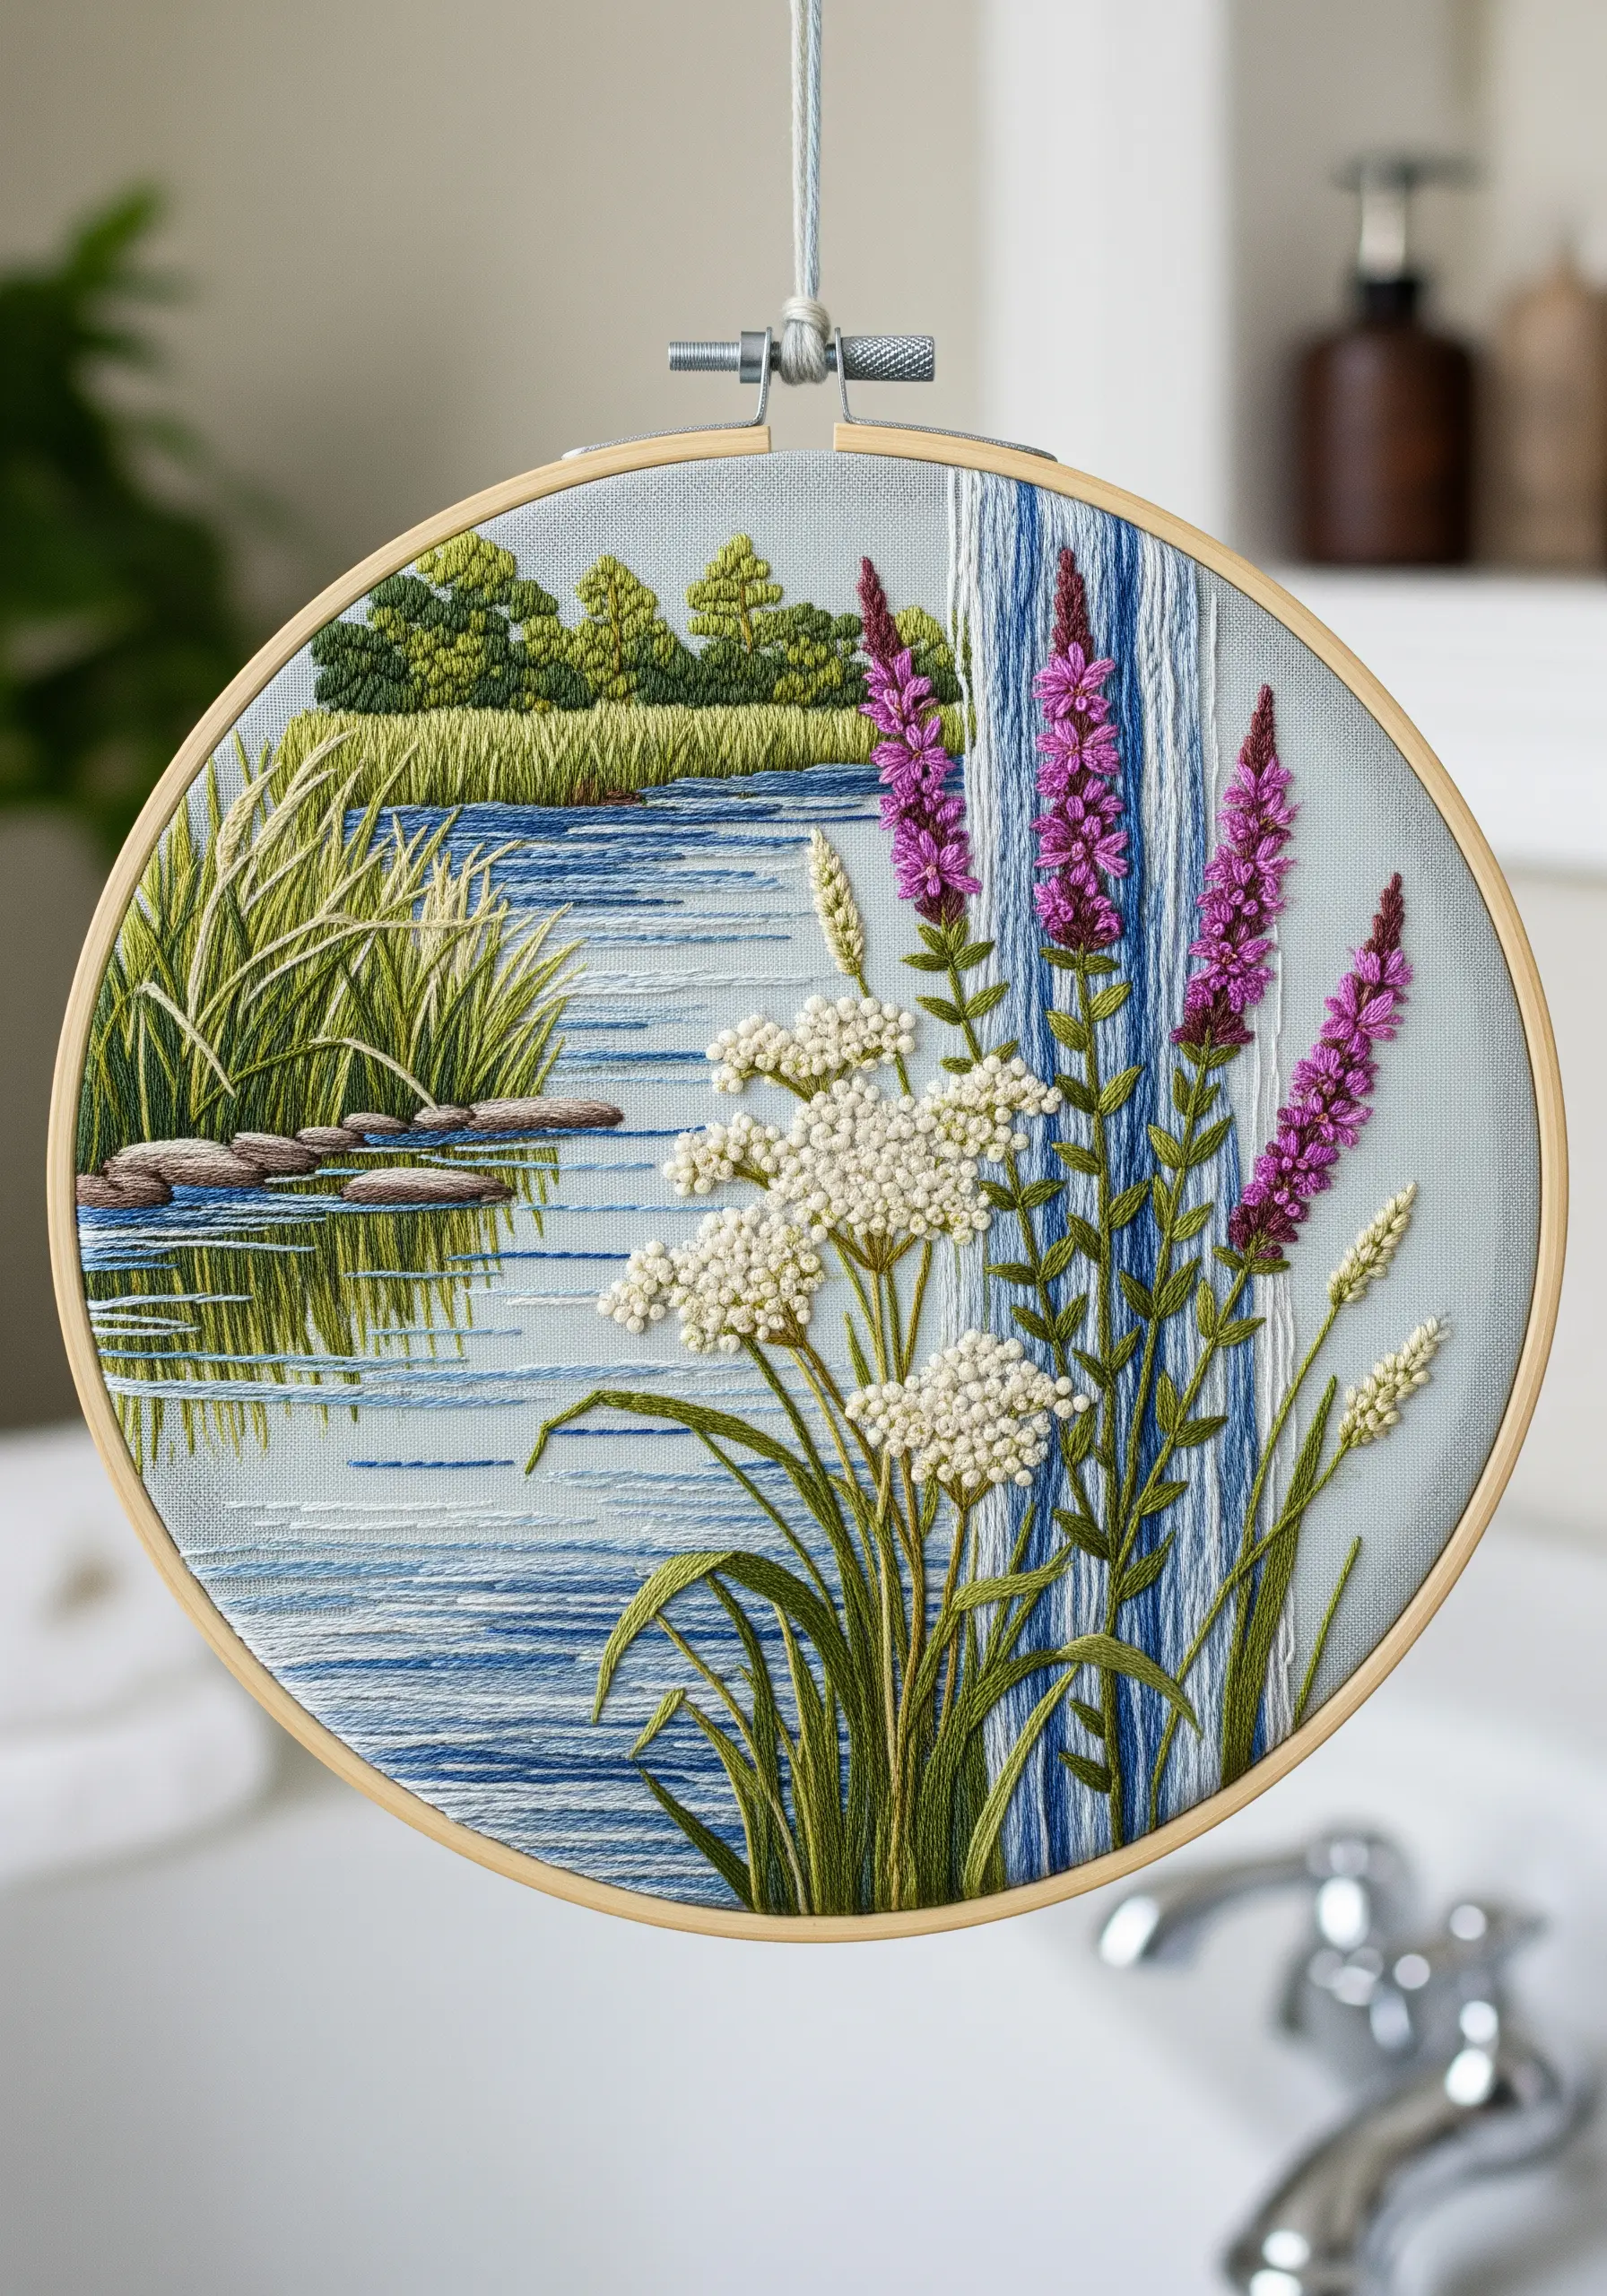
To create the illusion of calm, reflective water, use long, horizontal satin stitches.
Choose three to five shades of blue and white, and lay your stitches in subtle, wavy bands across the water area. This variation in color mimics the way light hits the surface of a lake or river.
A few single, horizontal stitches in a darker green or brown can suggest subtle reflections from the surrounding foliage, adding another layer of realism to your mini-landscape embroidery.
30. Add 3D Dimension with Stumpwork Petals
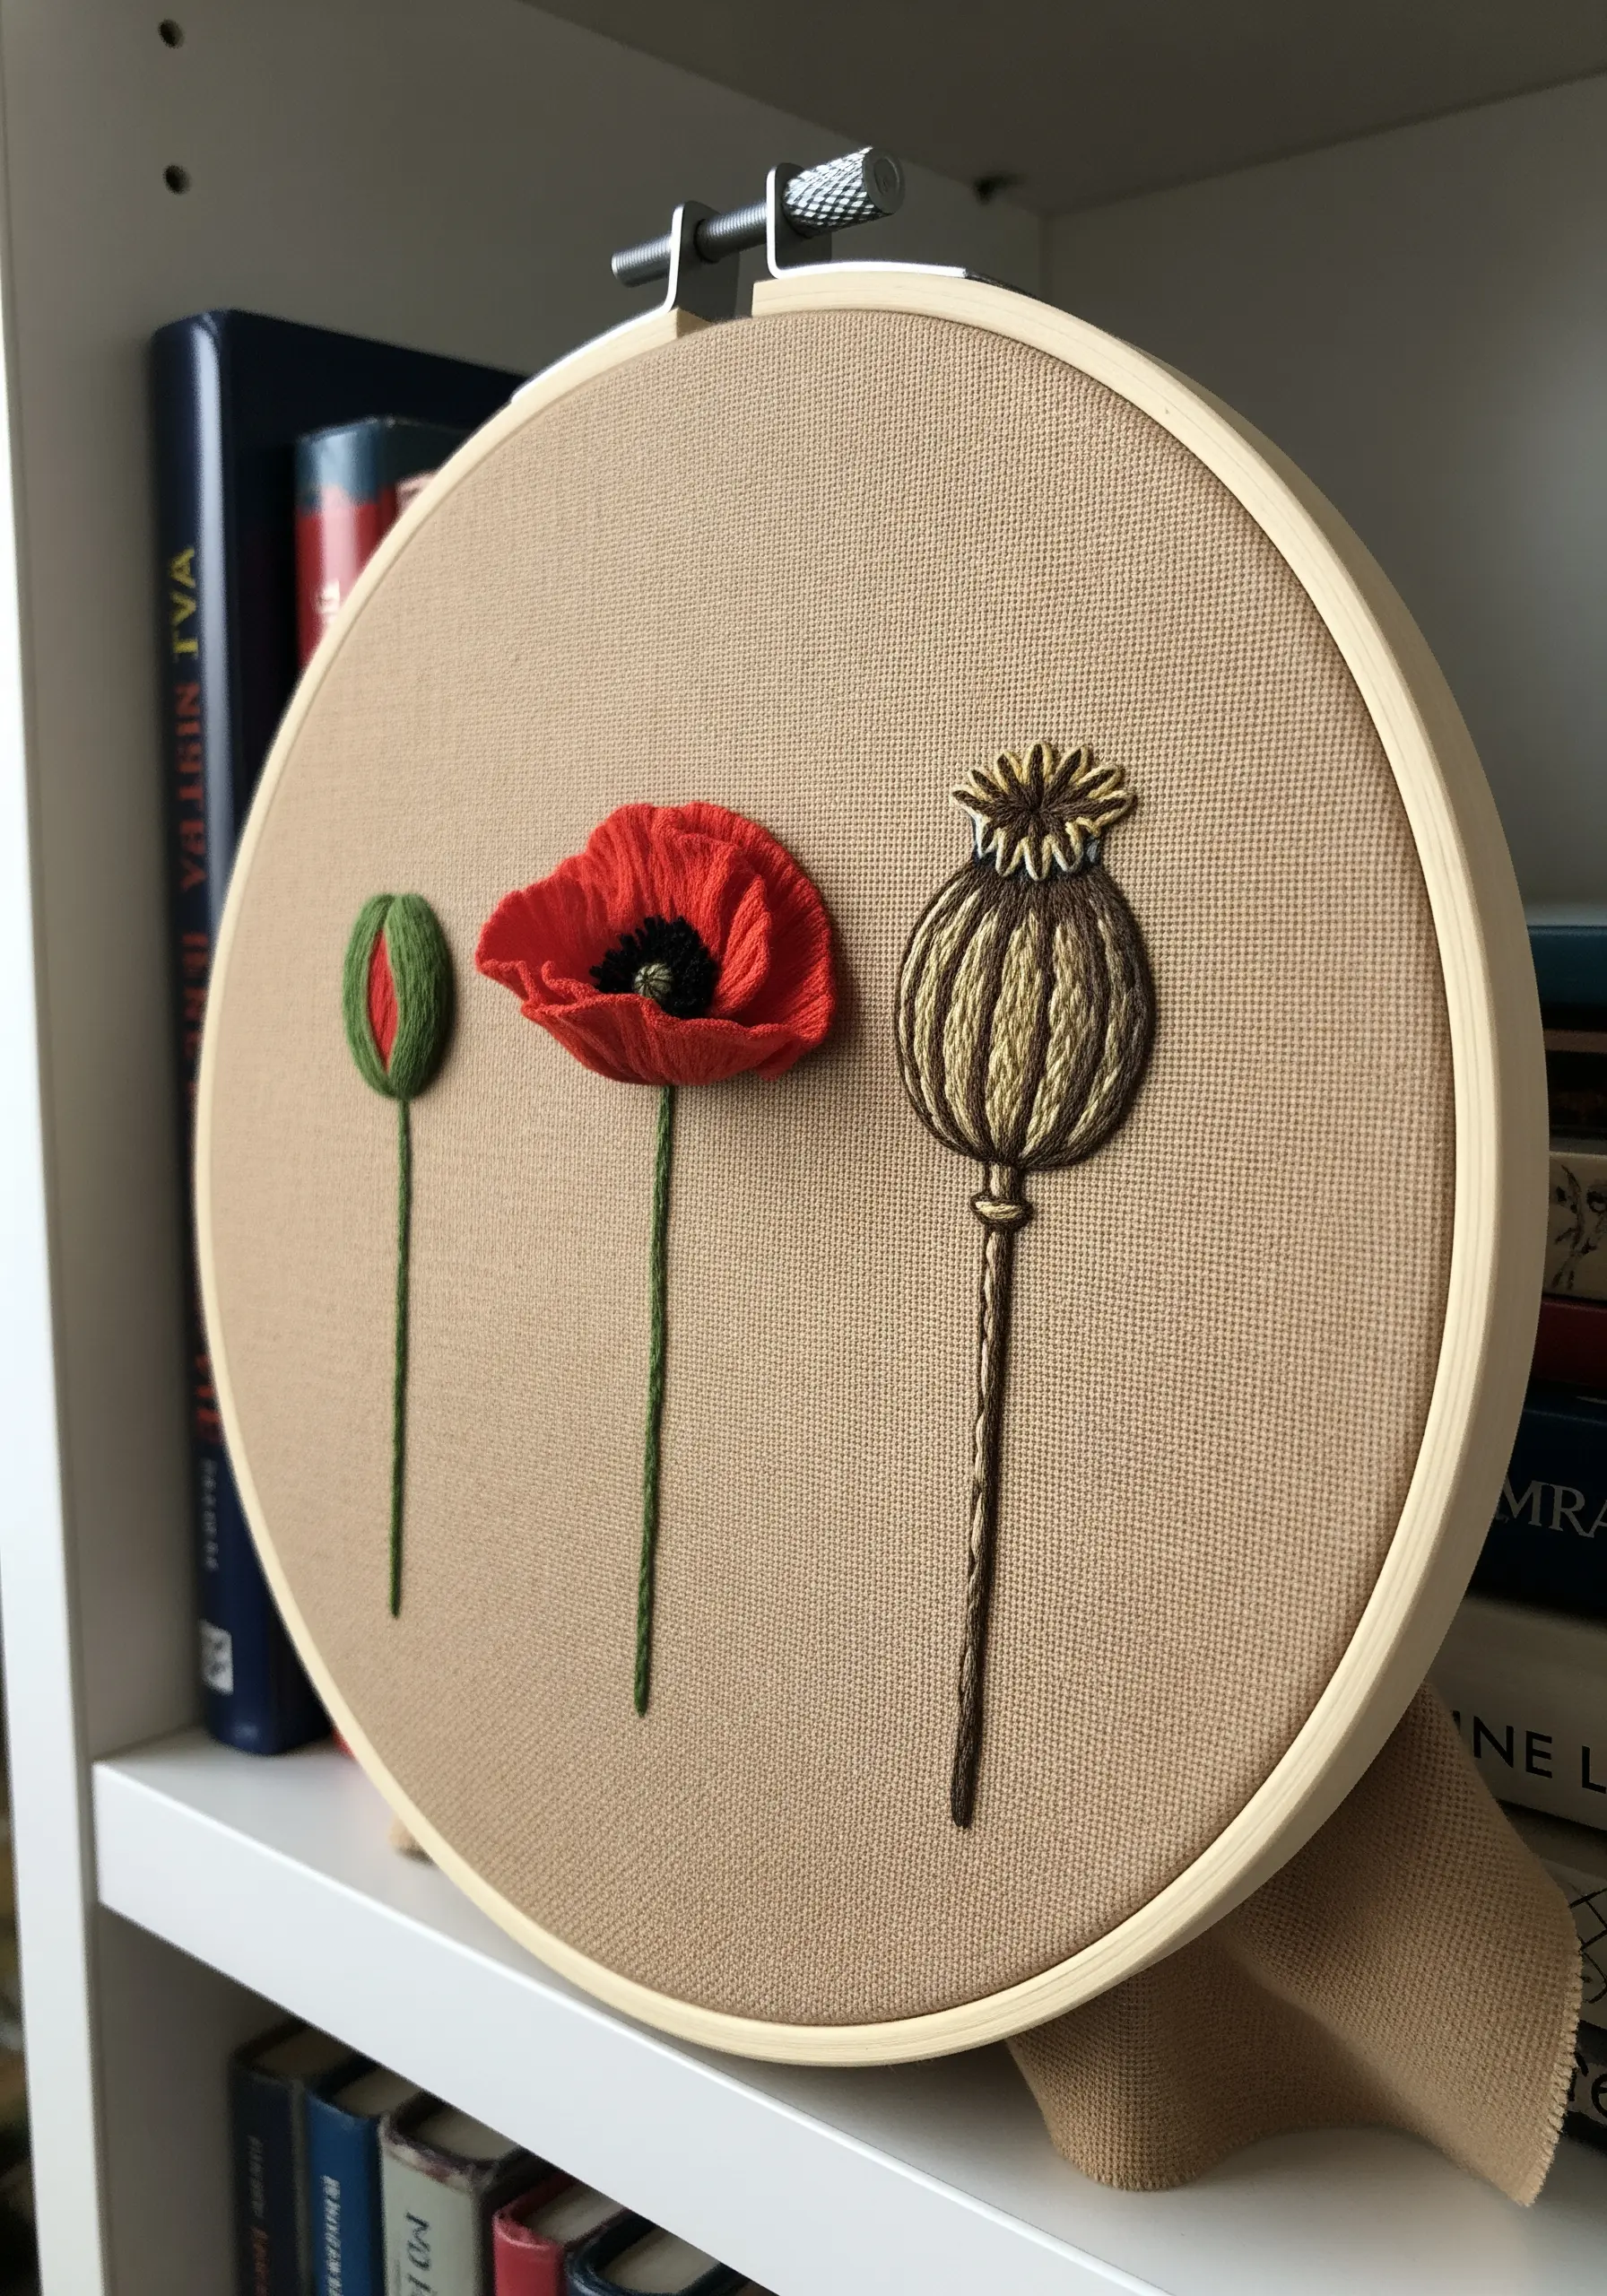
For a flower that truly pops, try a simple stumpwork technique. Stitch the poppy petal separately on a spare piece of fabric with a wire stitched around its edge.
Cut it out carefully, and then appliqué it onto your main design, stitching it down only at the base.
This allows you to gently bend and shape the petal, making it lift off the background for a stunning three-dimensional effect that draws the eye immediately.
The minimal composition makes this single 3D element even more impactful.
31. Combine Line Art with Thread Coloring

Achieve a delicate, storybook feel by treating your embroidery floss like watercolor paint.
Start by transferring a simple line drawing of your flowers onto the fabric. Outline the shapes with a single strand of dark thread using a neat backstitch.
Then, fill in the areas with a light layer of long and short stitches, allowing some of the fabric to show through.
This technique combines the charm of a sketch with the soft texture of thread, creating a unique and artistic finish.
32. Scale Up Your Meadow into a Tapestry
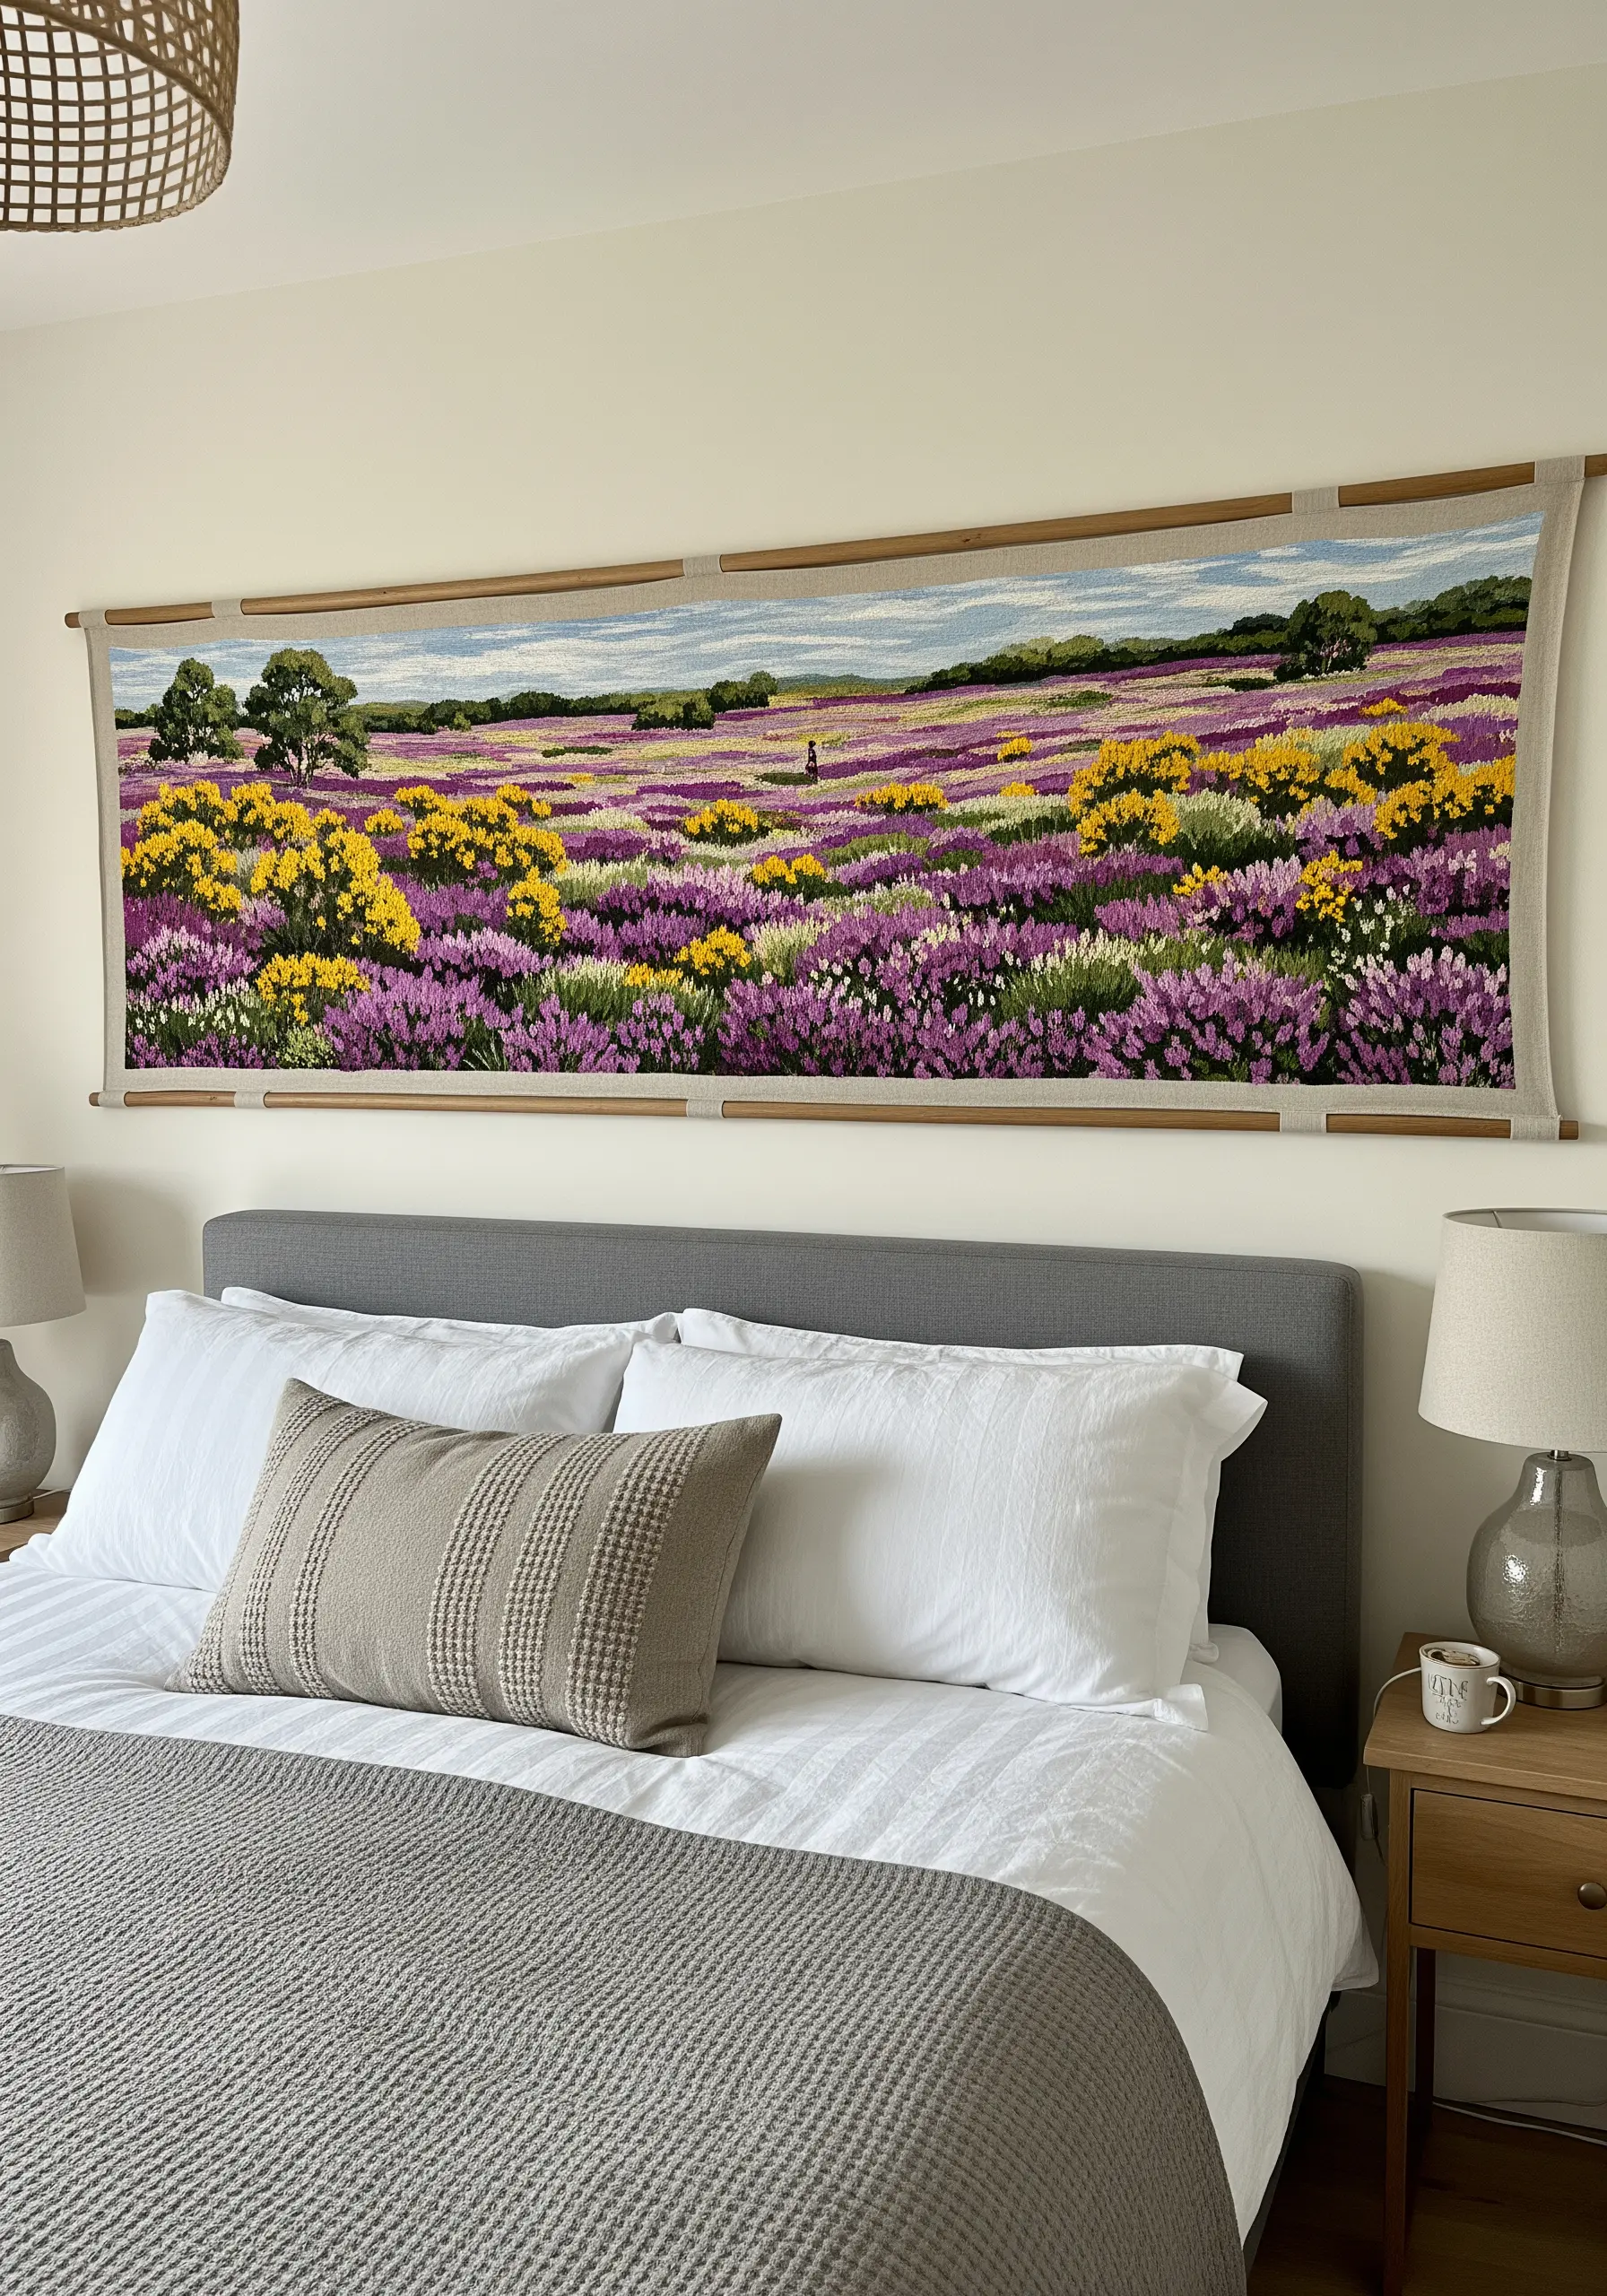
Take your love for wildflower meadows to the next level by creating a large-scale embroidered tapestry to hang above a bed or sofa.
To tackle a project of this size, work with thicker threads like tapestry wool or multiple strands of embroidery floss to cover the area more efficiently.
Break the design down into smaller, manageable sections. The result is a breathtaking piece of fiber art that serves as a stunning focal point for any room.
33. Create Perspective with a Winding Path
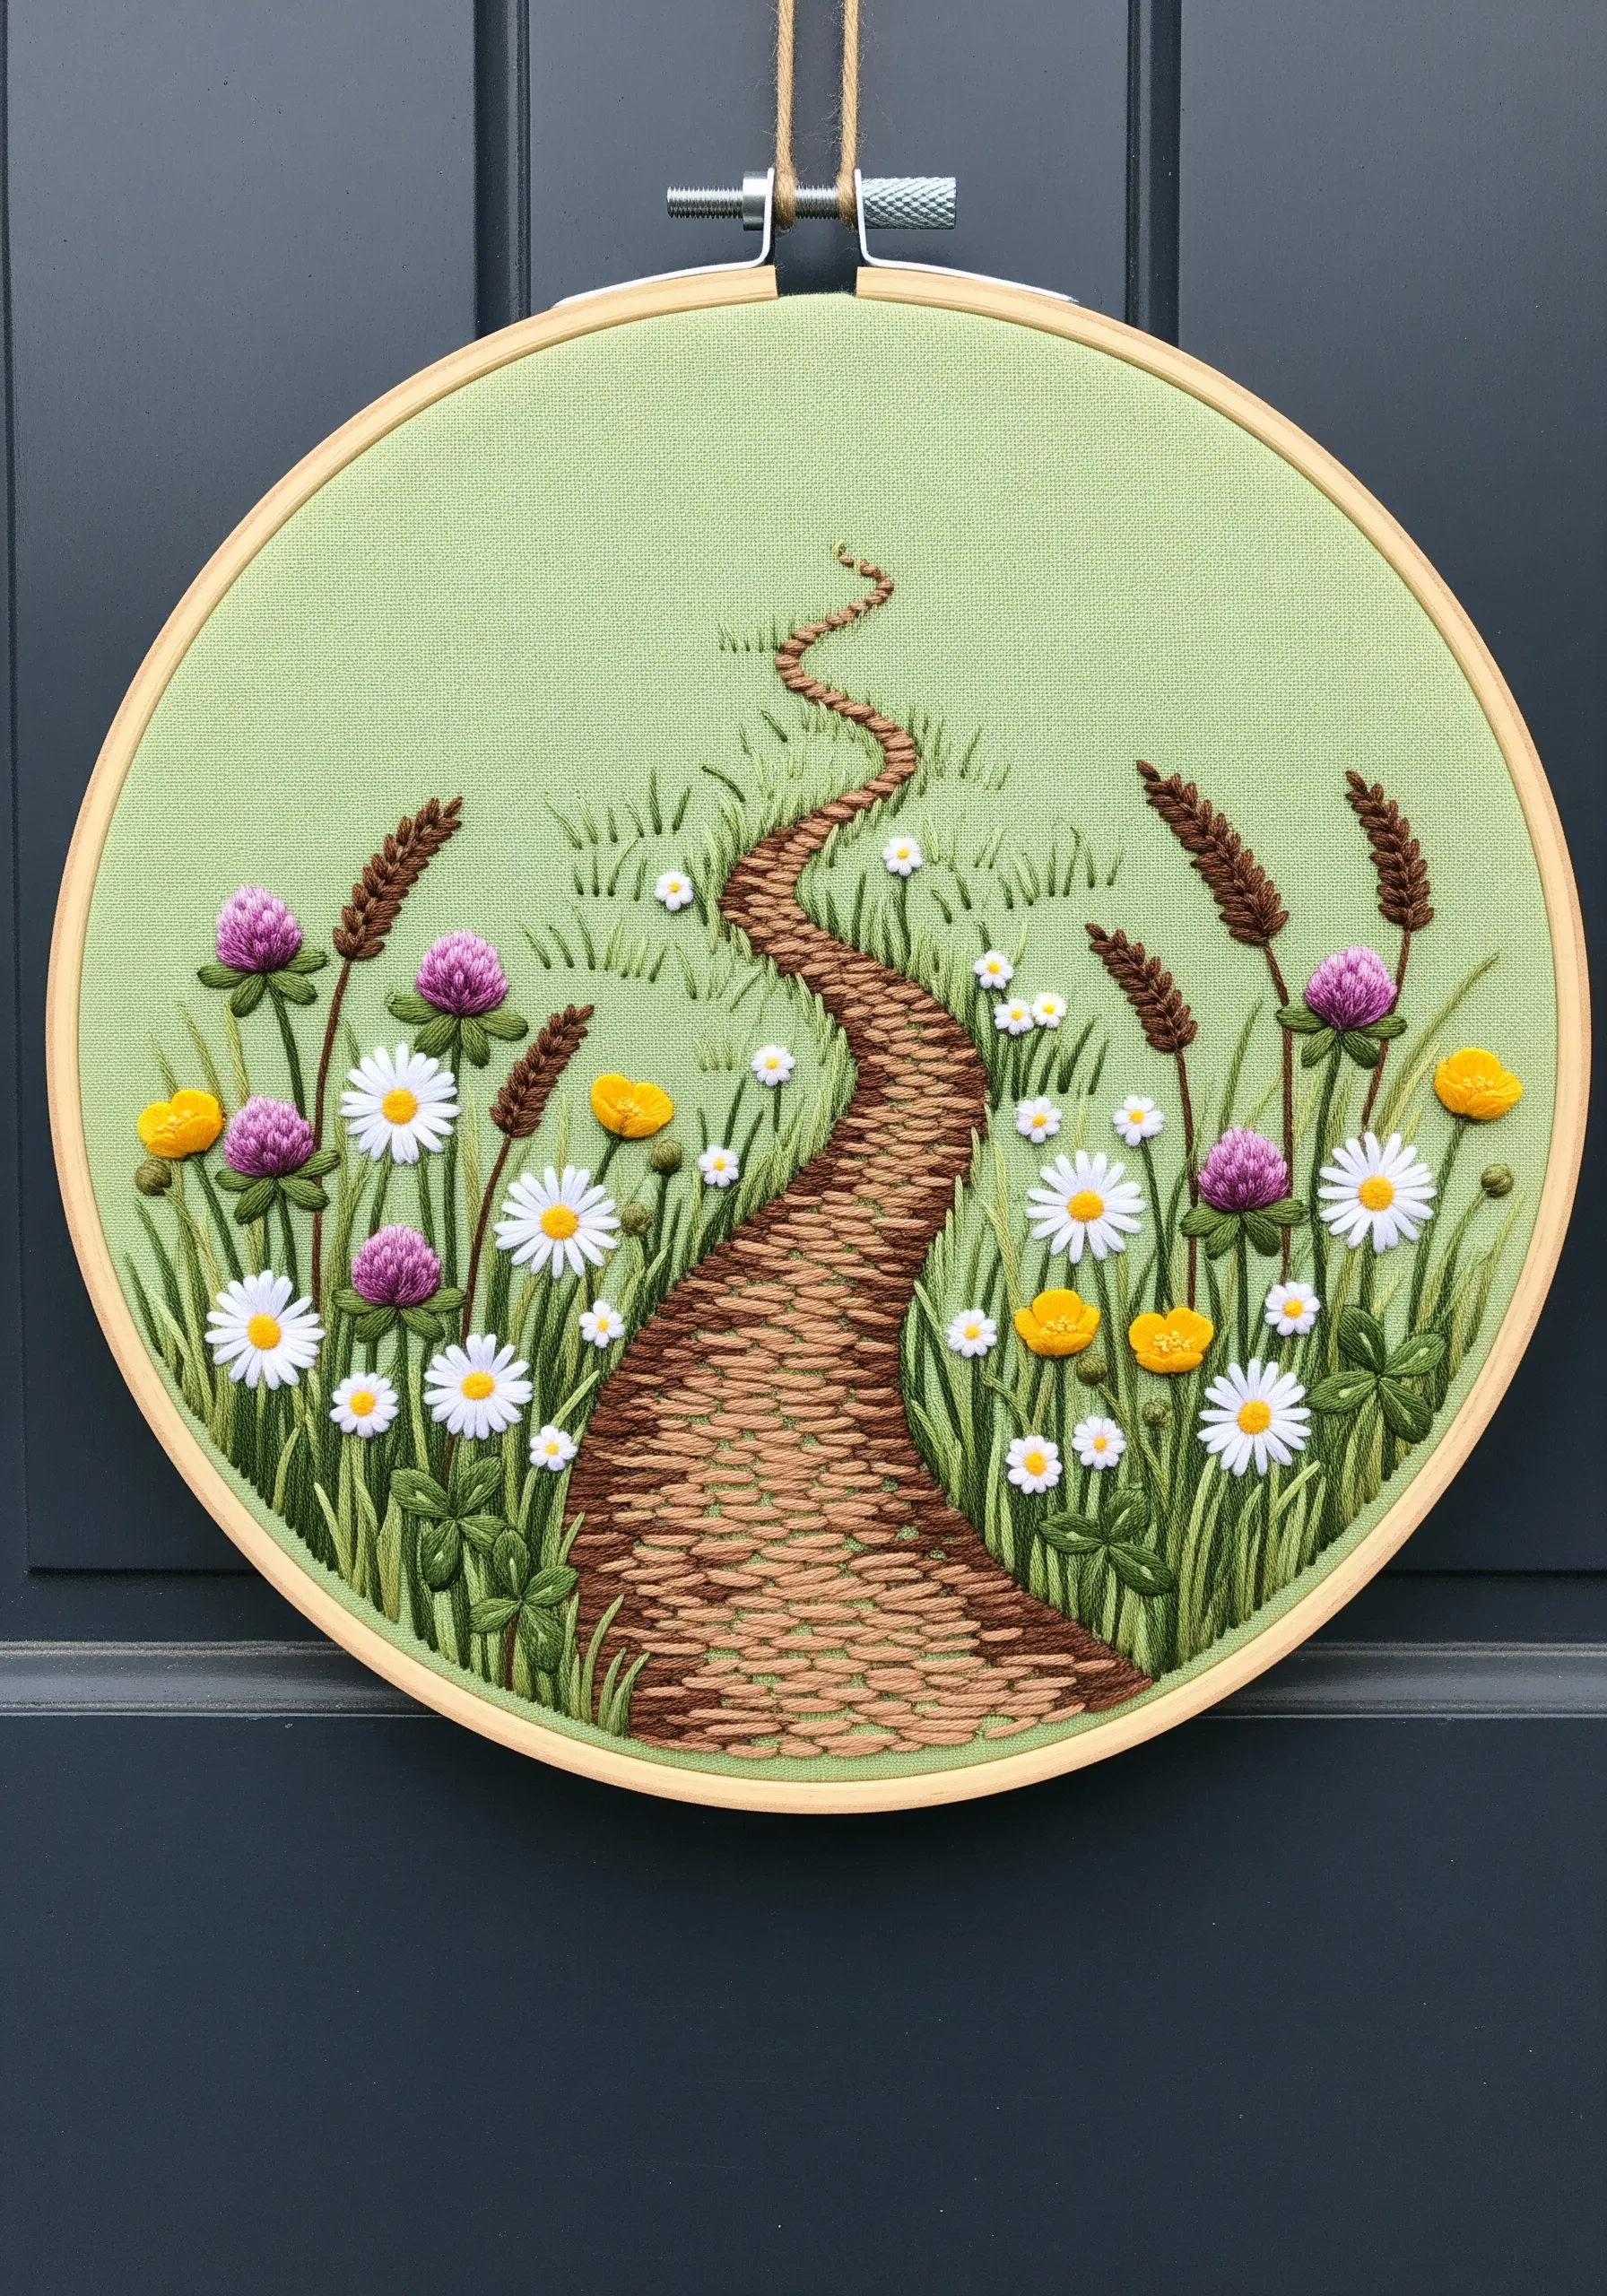
Guide the viewer’s eye into your landscape by incorporating a path that recedes into the distance.
Make the cobblestones or pathway elements larger and more detailed in the foreground, using textured stitches like French knots or bullion knots.
As the path winds back, make the stitches smaller, flatter (like satin stitch), and less defined.
This simple trick of perspective creates an inviting sense of depth and makes your small hoop feel like a window into a larger world.
34. Set a Mood with Stitched Weather
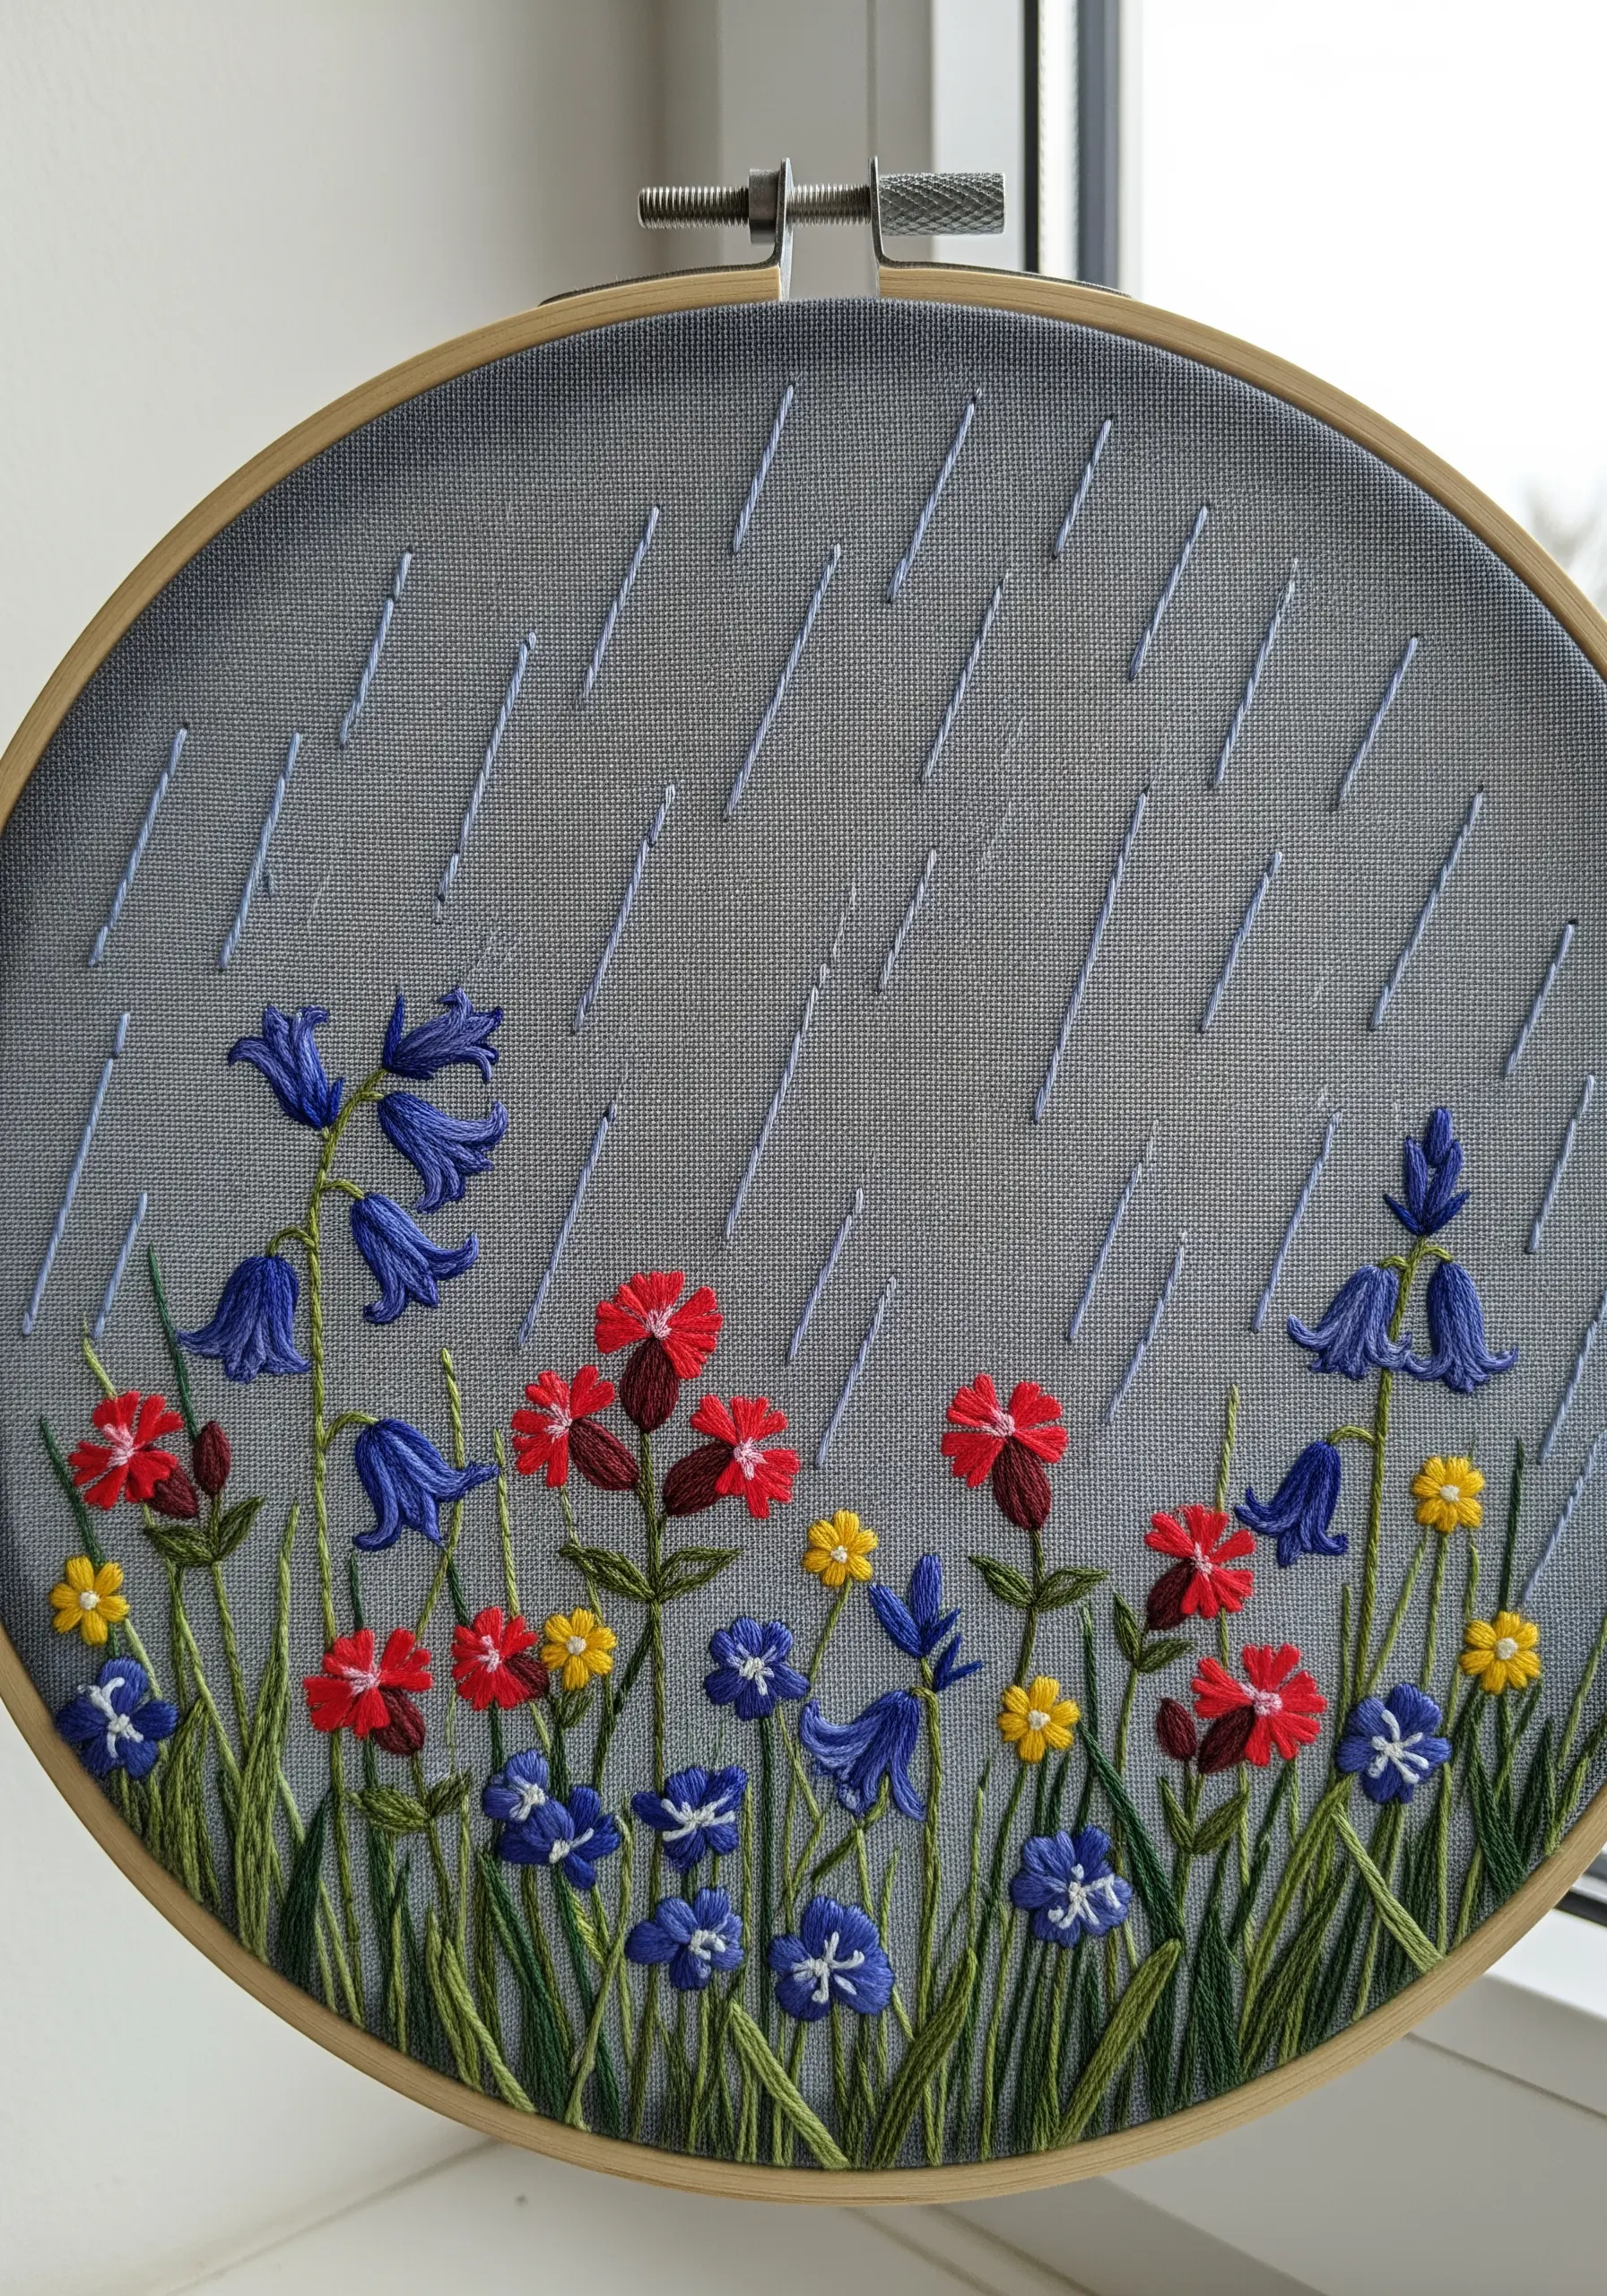
Introduce a narrative element to your floral scenes by stitching the weather.
Create the effect of a gentle rain shower by using evenly spaced, diagonal straight stitches across the upper portion of your hoop.
Use a single strand of a silvery-grey or light blue thread to keep the effect subtle.
This simple addition transforms a static botanical image into a specific moment in time, evoking the quiet, peaceful feeling of flowers in the rain.


