

You have the threads, the hoop, and the desire to create something beautiful for your home. But perhaps you feel stuck, repeating the same few stitches, wondering how to make your work look less like a beginner’s project and more like intentional art.
The secret isn’t in buying more supplies or tackling impossibly complex patterns. It’s in mastering a select few modern stitches and, more importantly, understanding how to use them to create texture, depth, and clean, confident lines.
This guide is your invitation to move beyond simply filling in shapes. Here, you will learn not just the ‘how’ but the ‘why’ behind each stitch—transforming your technique so that every piece you create feels polished, personal, and perfectly at home in your space.
1. Master Textured Fills with French Knots

Move beyond flat satin stitch and use French knots to create a dense, tactile surface that begs to be touched.
By varying the number of times you wrap the thread around the needle (once for small, tight knots; twice for larger, plusher ones), you can introduce a subtle gradient and visual depth.
Combine this textured fill with a clean stem stitch outline to create a sophisticated contrast between line and form.
This is a foundational technique for creating beautiful organic texture embroidery designs that feel alive.
2. Create Graphic Depth with Layered Satin Stitch

For clean, modern color-blocking, nothing beats the satin stitch—if you prepare correctly.
To achieve those perfectly crisp edges, first outline each shape with a split stitch, then fill with satin stitches that just cover the outline.
Pay close attention to the direction of your stitches; this angle guides the light and can create the illusion of layers and movement.
This precise approach is perfect for abstract embroidery patterns that look graphic and intentional.
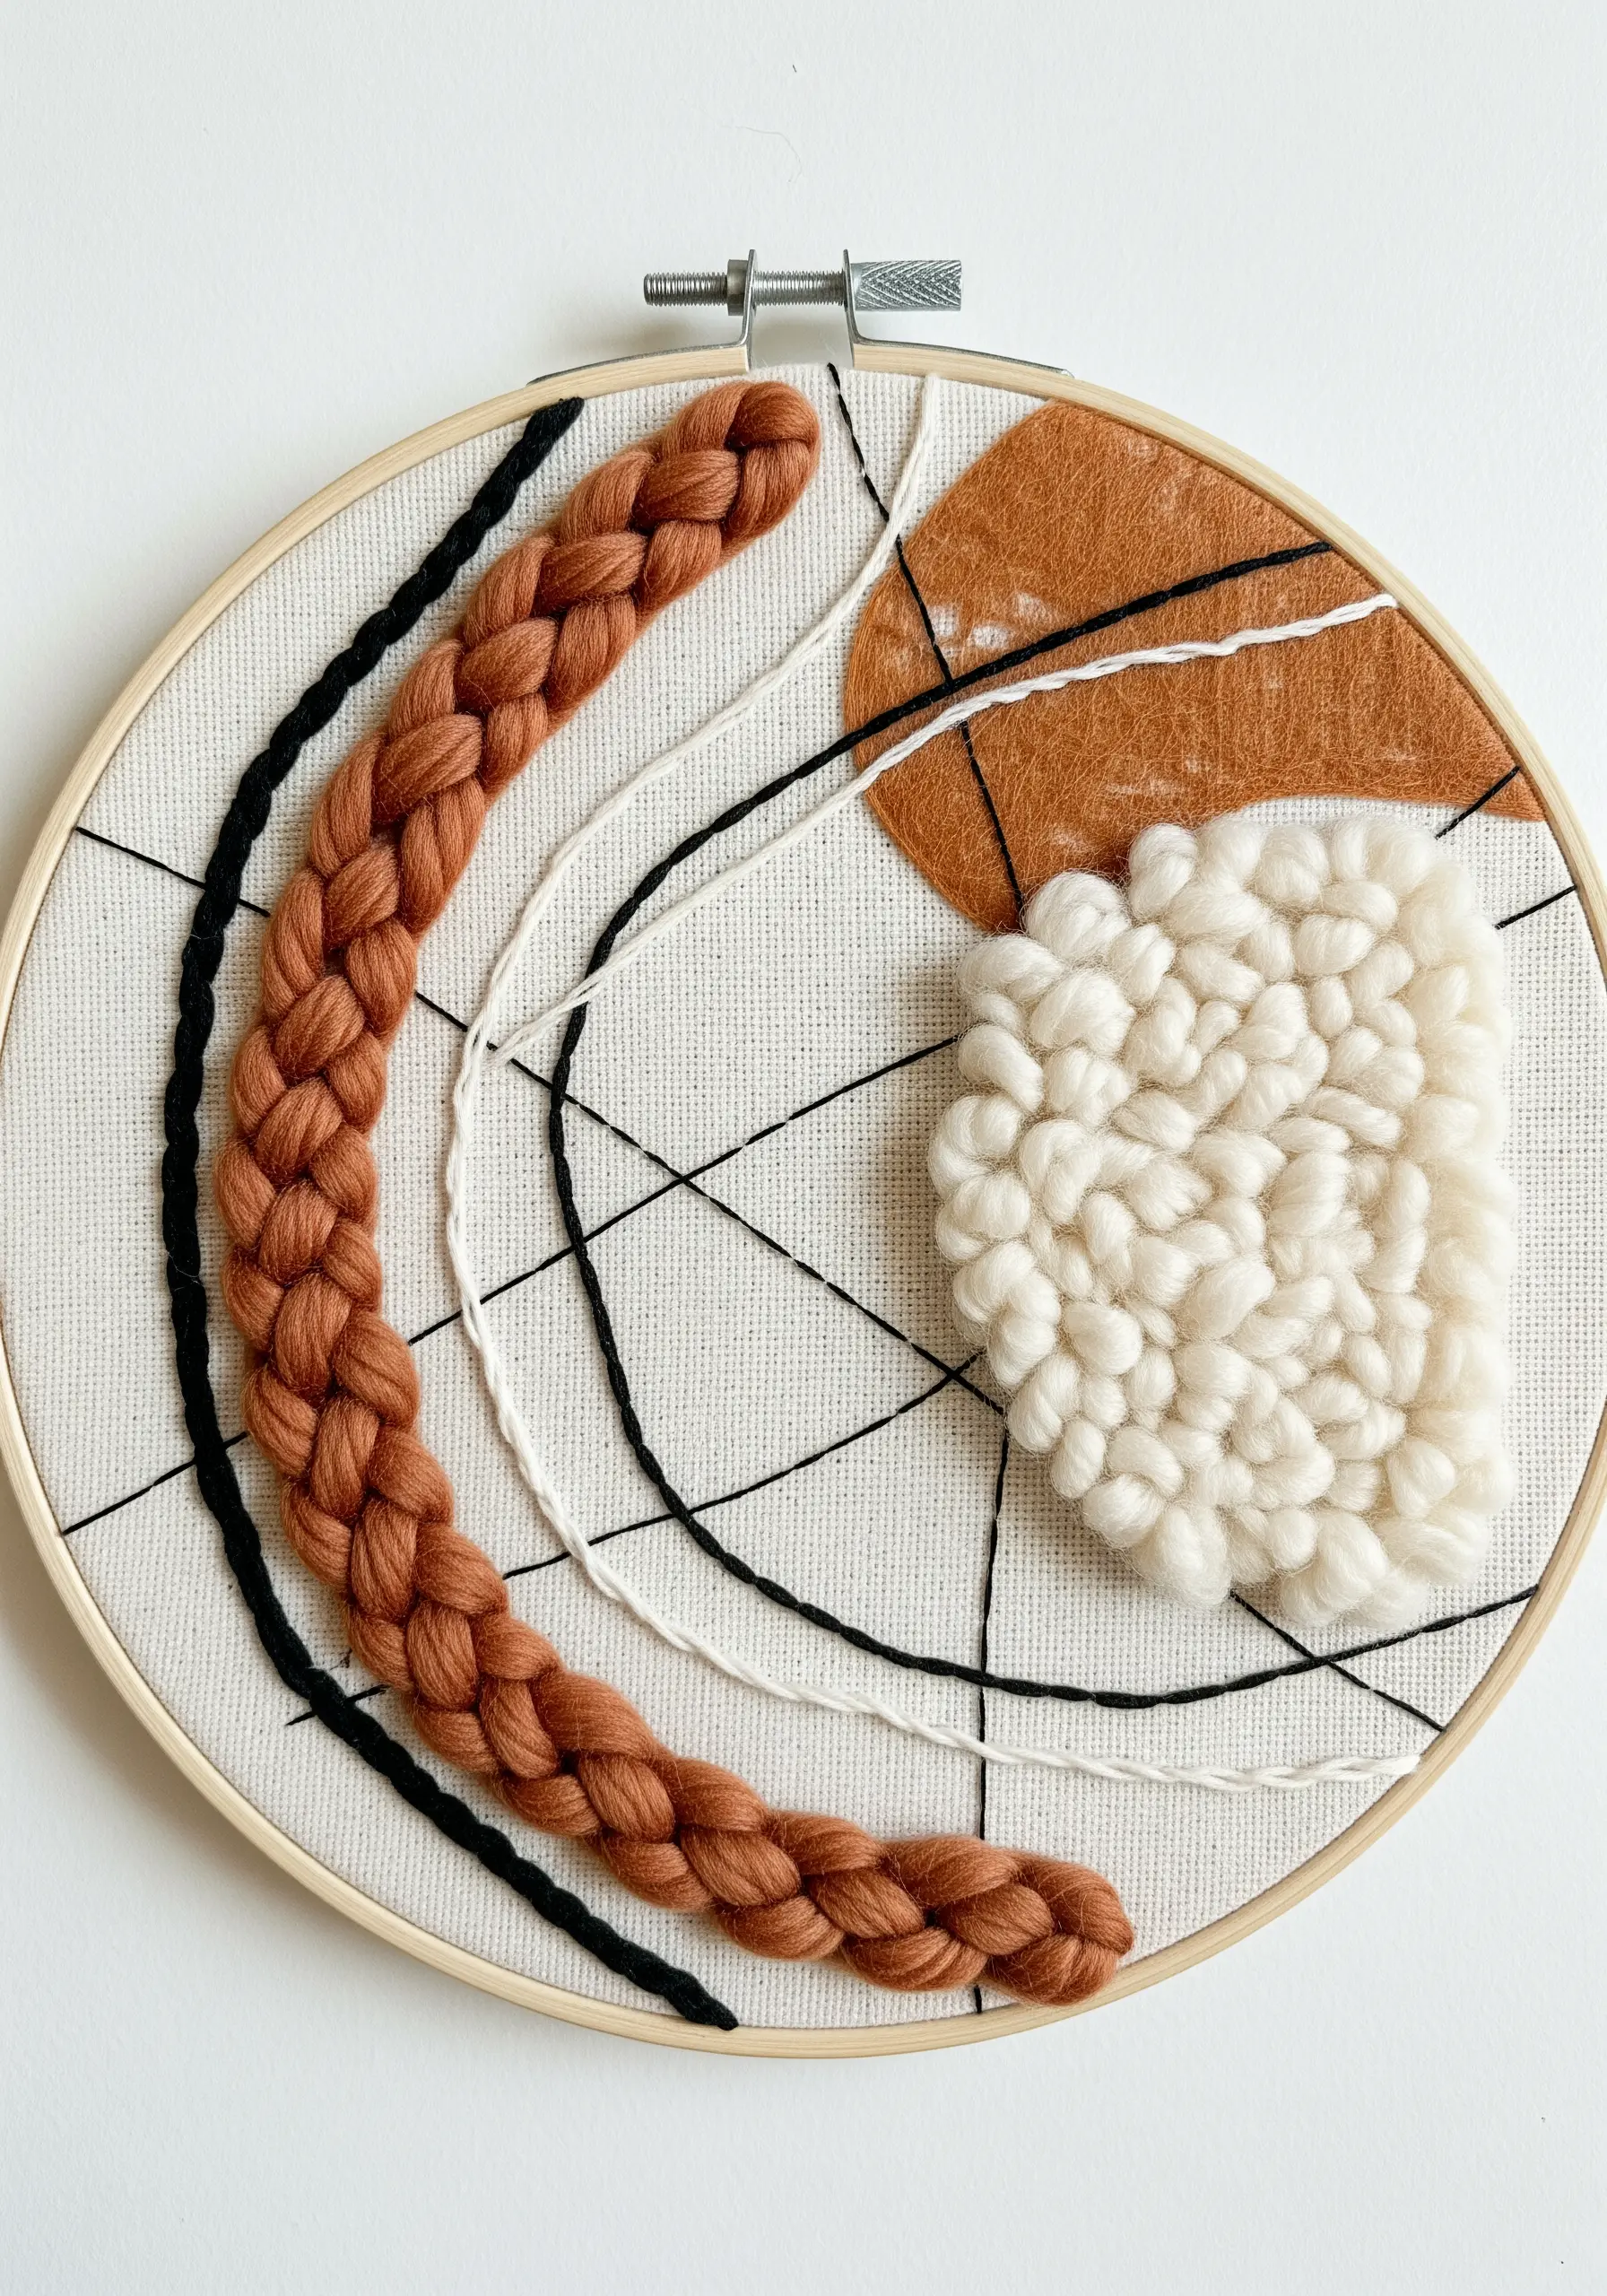
3. Build Sculptural Texture with Woven Wheel Roses
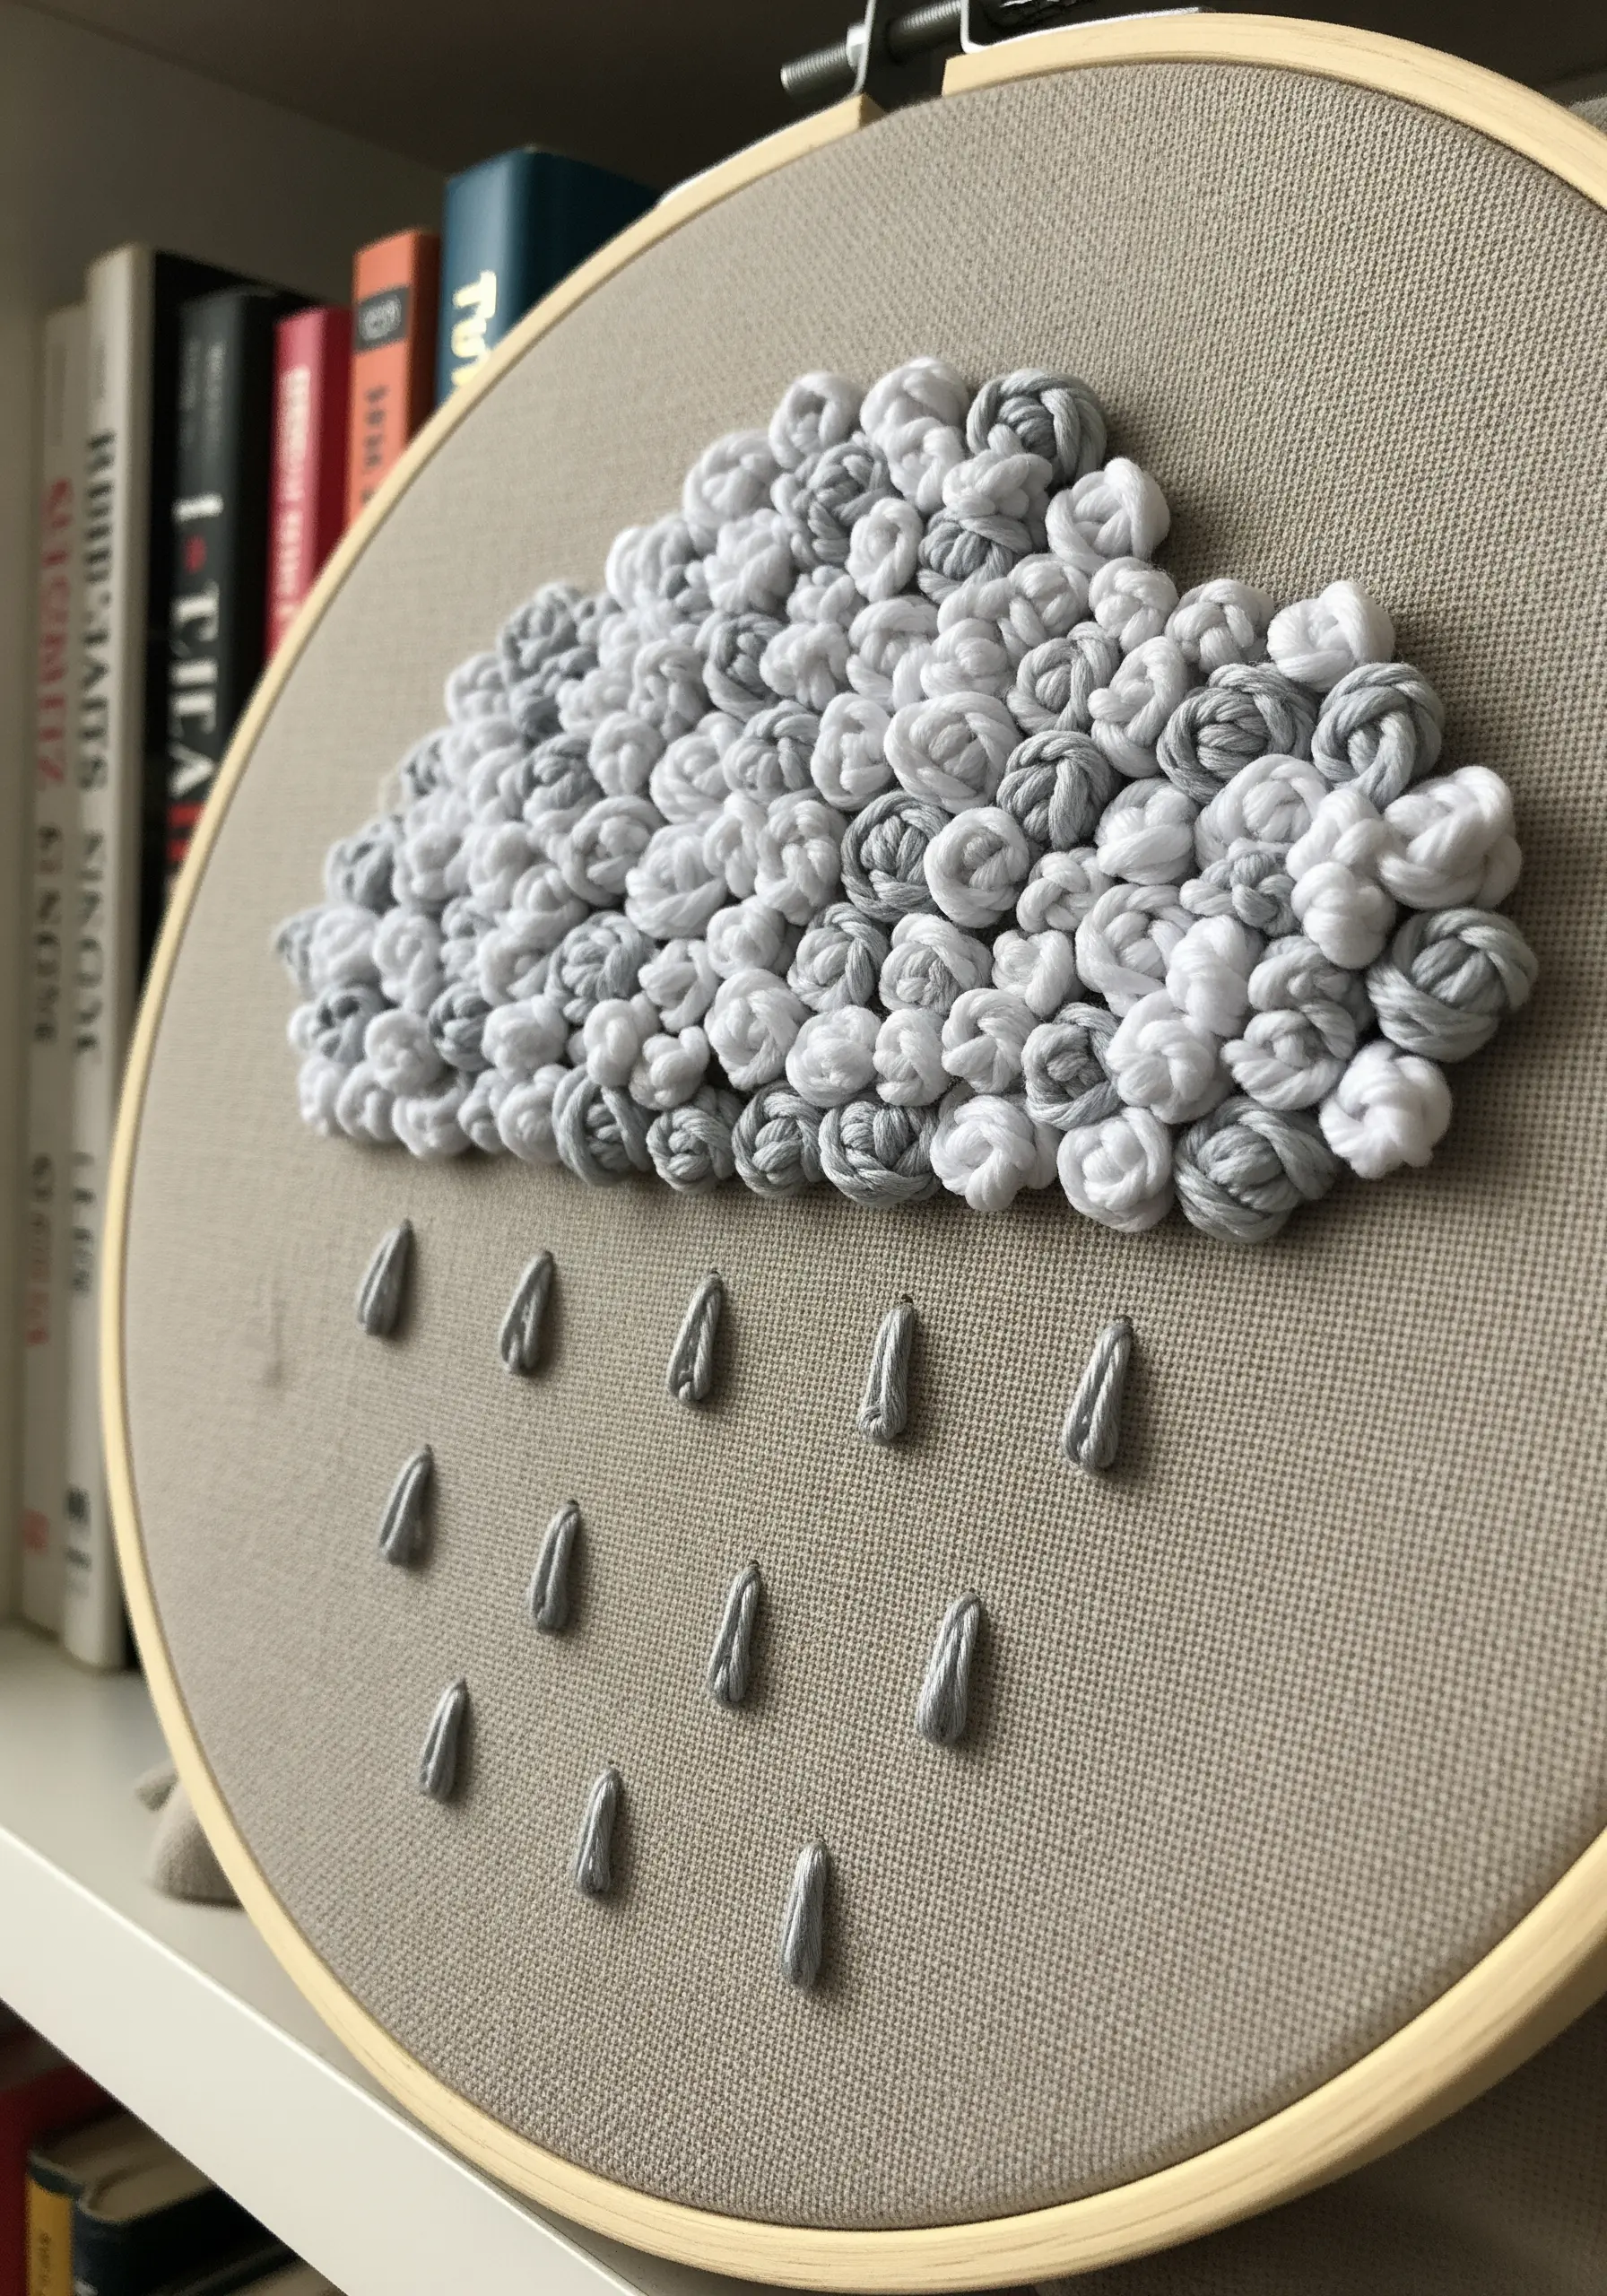
The woven wheel stitch is not just for florals; it’s your go-to for creating any dense, raised, circular element.
Instead of thinking of them as roses, see them as textural building blocks to form clouds, fluffy animals, or abstract polka dots.
Vary the tension of your weave—tighter for a flatter, more defined wheel, and looser for a puffier, softer finish.
This approach is central to making soft texture embroidery projects that have a truly three-dimensional quality.
4. Define Geometric Lines with Whipped Backstitch
When a simple backstitch outline feels too thin or broken, elevate it with whipping.
First, complete a standard backstitch line, then use a blunt tapestry needle to slide a second thread under each stitch without piercing the fabric.
The result is a smooth, solid, and cord-like line that gives geometric patterns a clean, substantial finish.
It’s a simple adjustment that adds immense polish to minimalist thread art ideas.
5. Achieve Delicate Motion with Straight and Fly Stitches
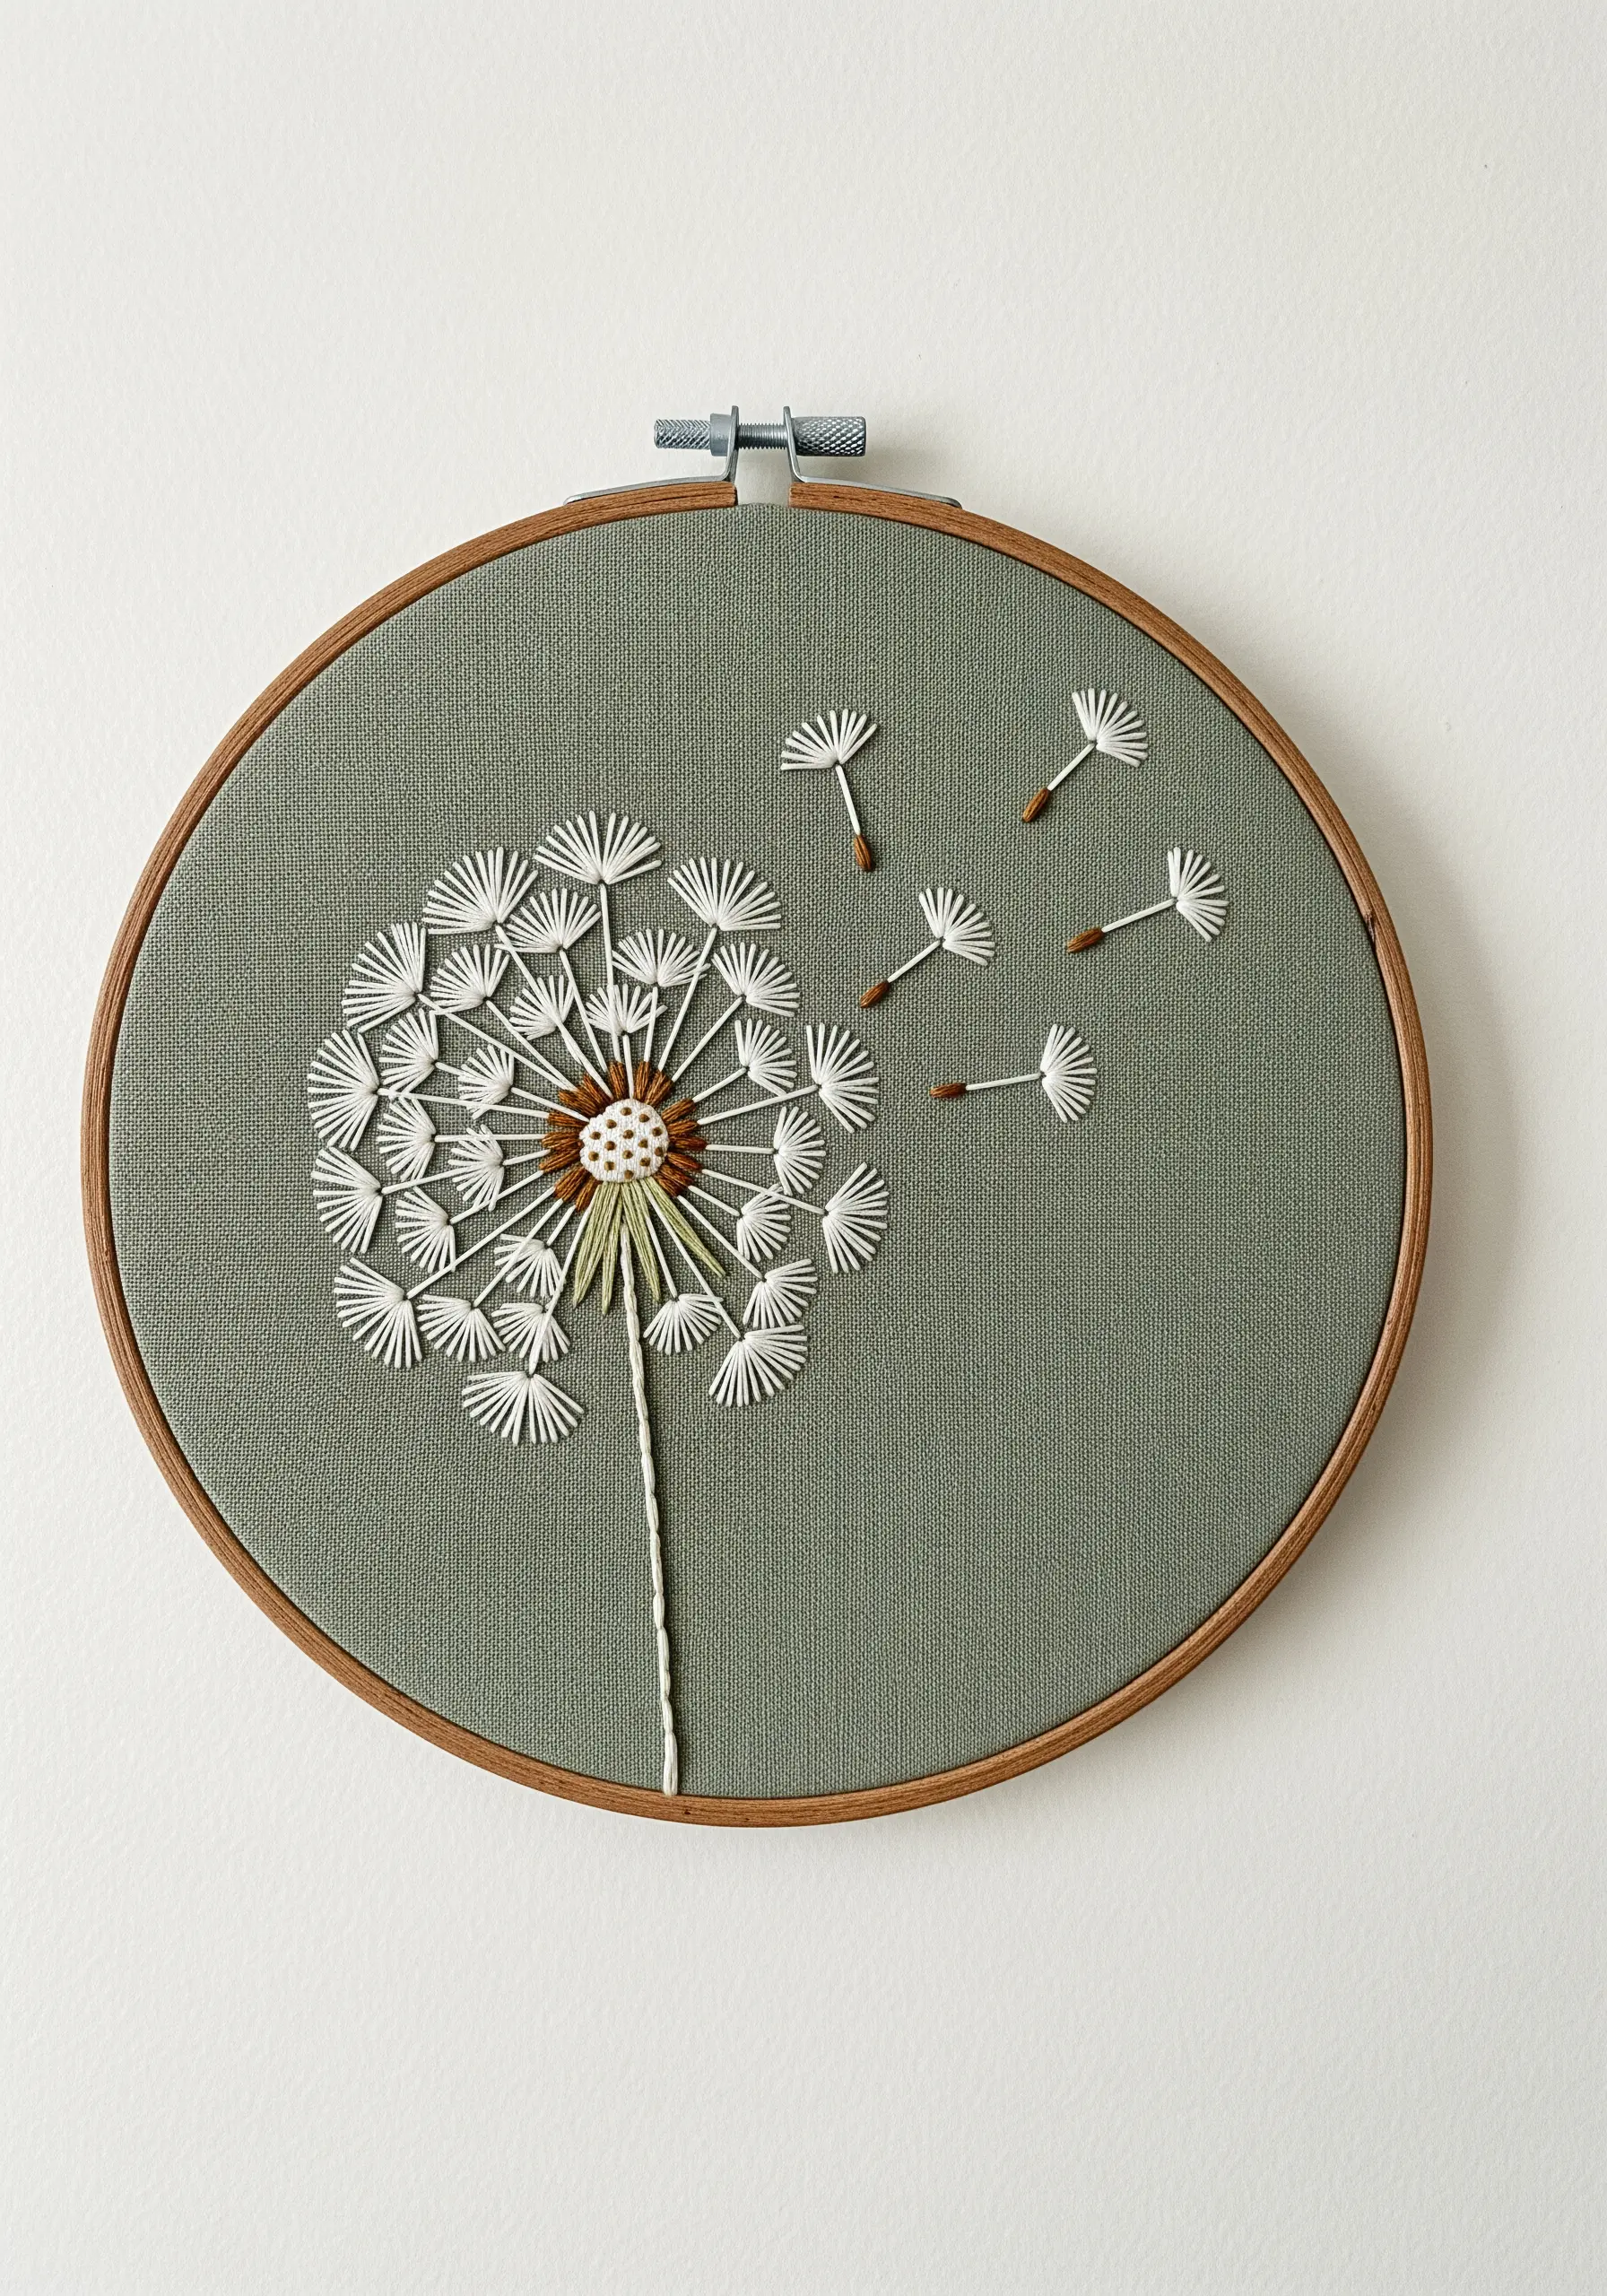
This design proves that complexity can arise from the simplest of stitches.
The dandelion head is a careful composition of straight stitches, while the floating seeds are a combination of a single straight stitch (the stem) and a tiny fly stitch (the parachute).
The artistry lies in the placement, length, and angle of each stitch to create a sense of lightness and movement.
It’s a perfect example of how to execute subtle floral embroidery motifs that feel elegant and modern.
6. Construct Elegant Monograms with a Floral Stitch Sampler
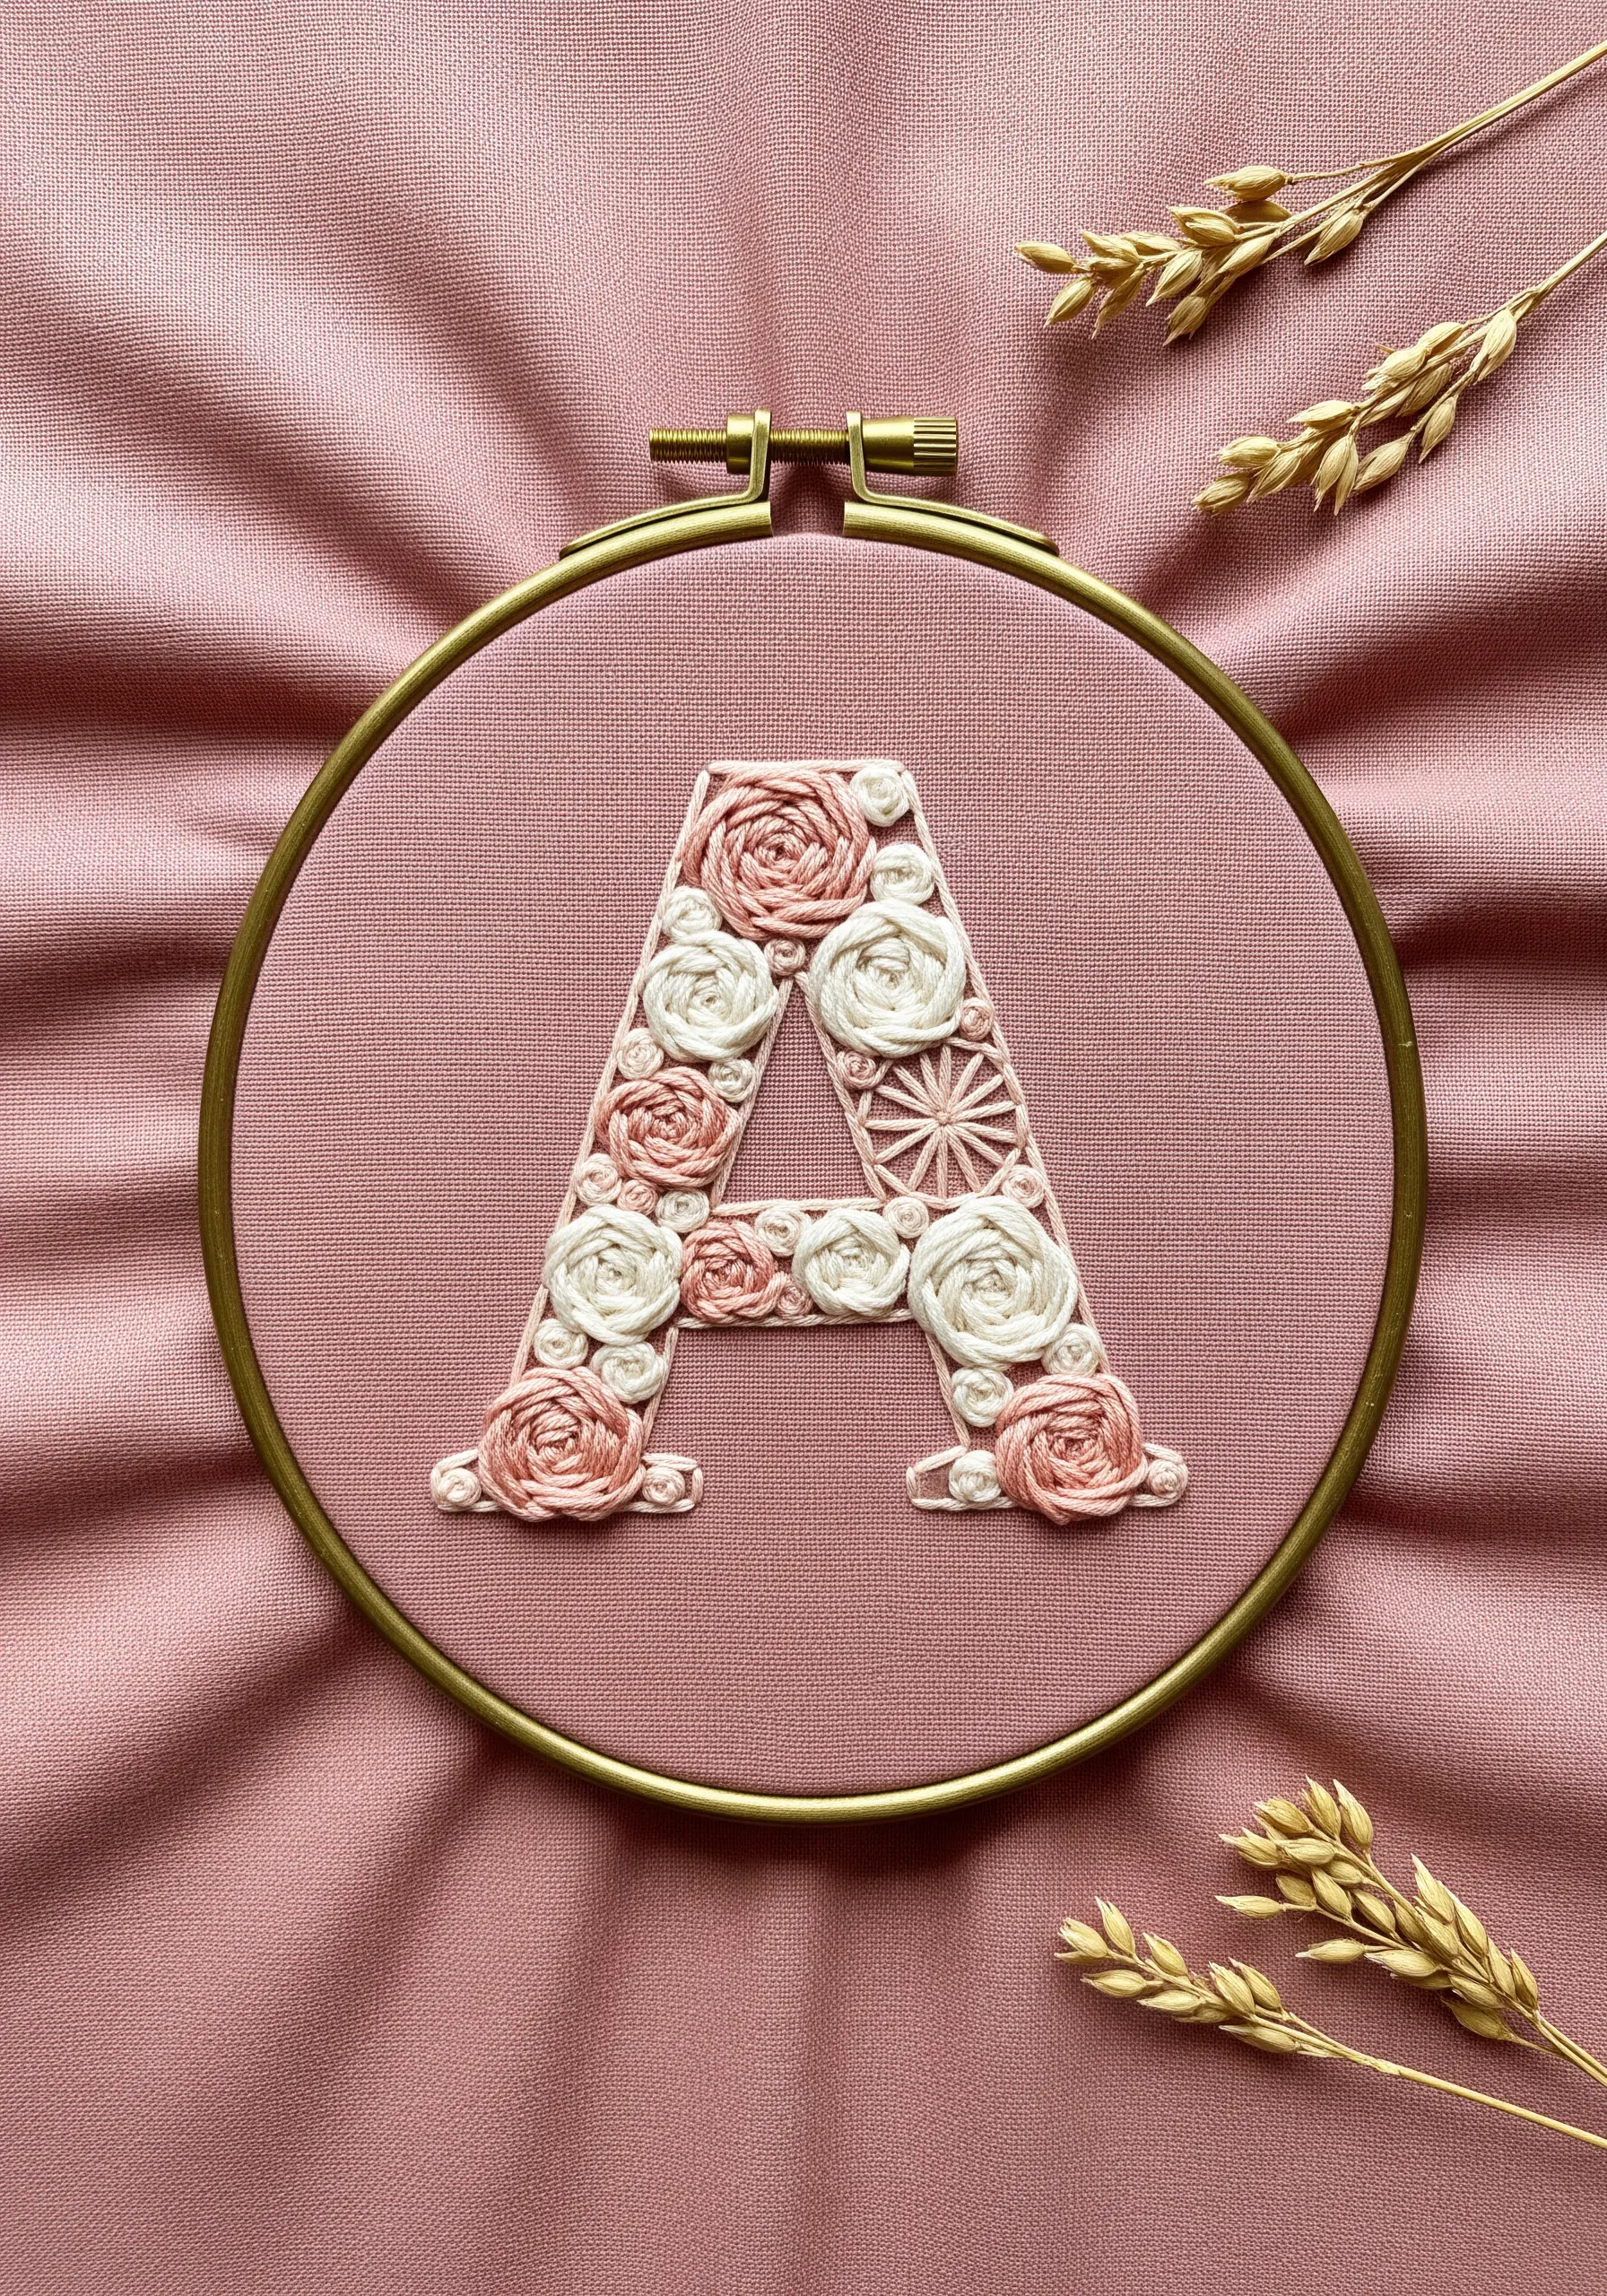
Use the outline of a letter as a miniature canvas to practice and combine your favorite textural stitches.
Here, woven wheel roses, French knots, and simple straight-stitch leaves come together to form a rich tapestry.
To ensure the design feels cohesive and not chaotic, restrict your palette to three or four harmonious colors.
This technique turns a simple initial into cherished, personalized name monogram wall embroidery gifts.
7. Create a Cohesive Gallery with Abstract Stitch Studies
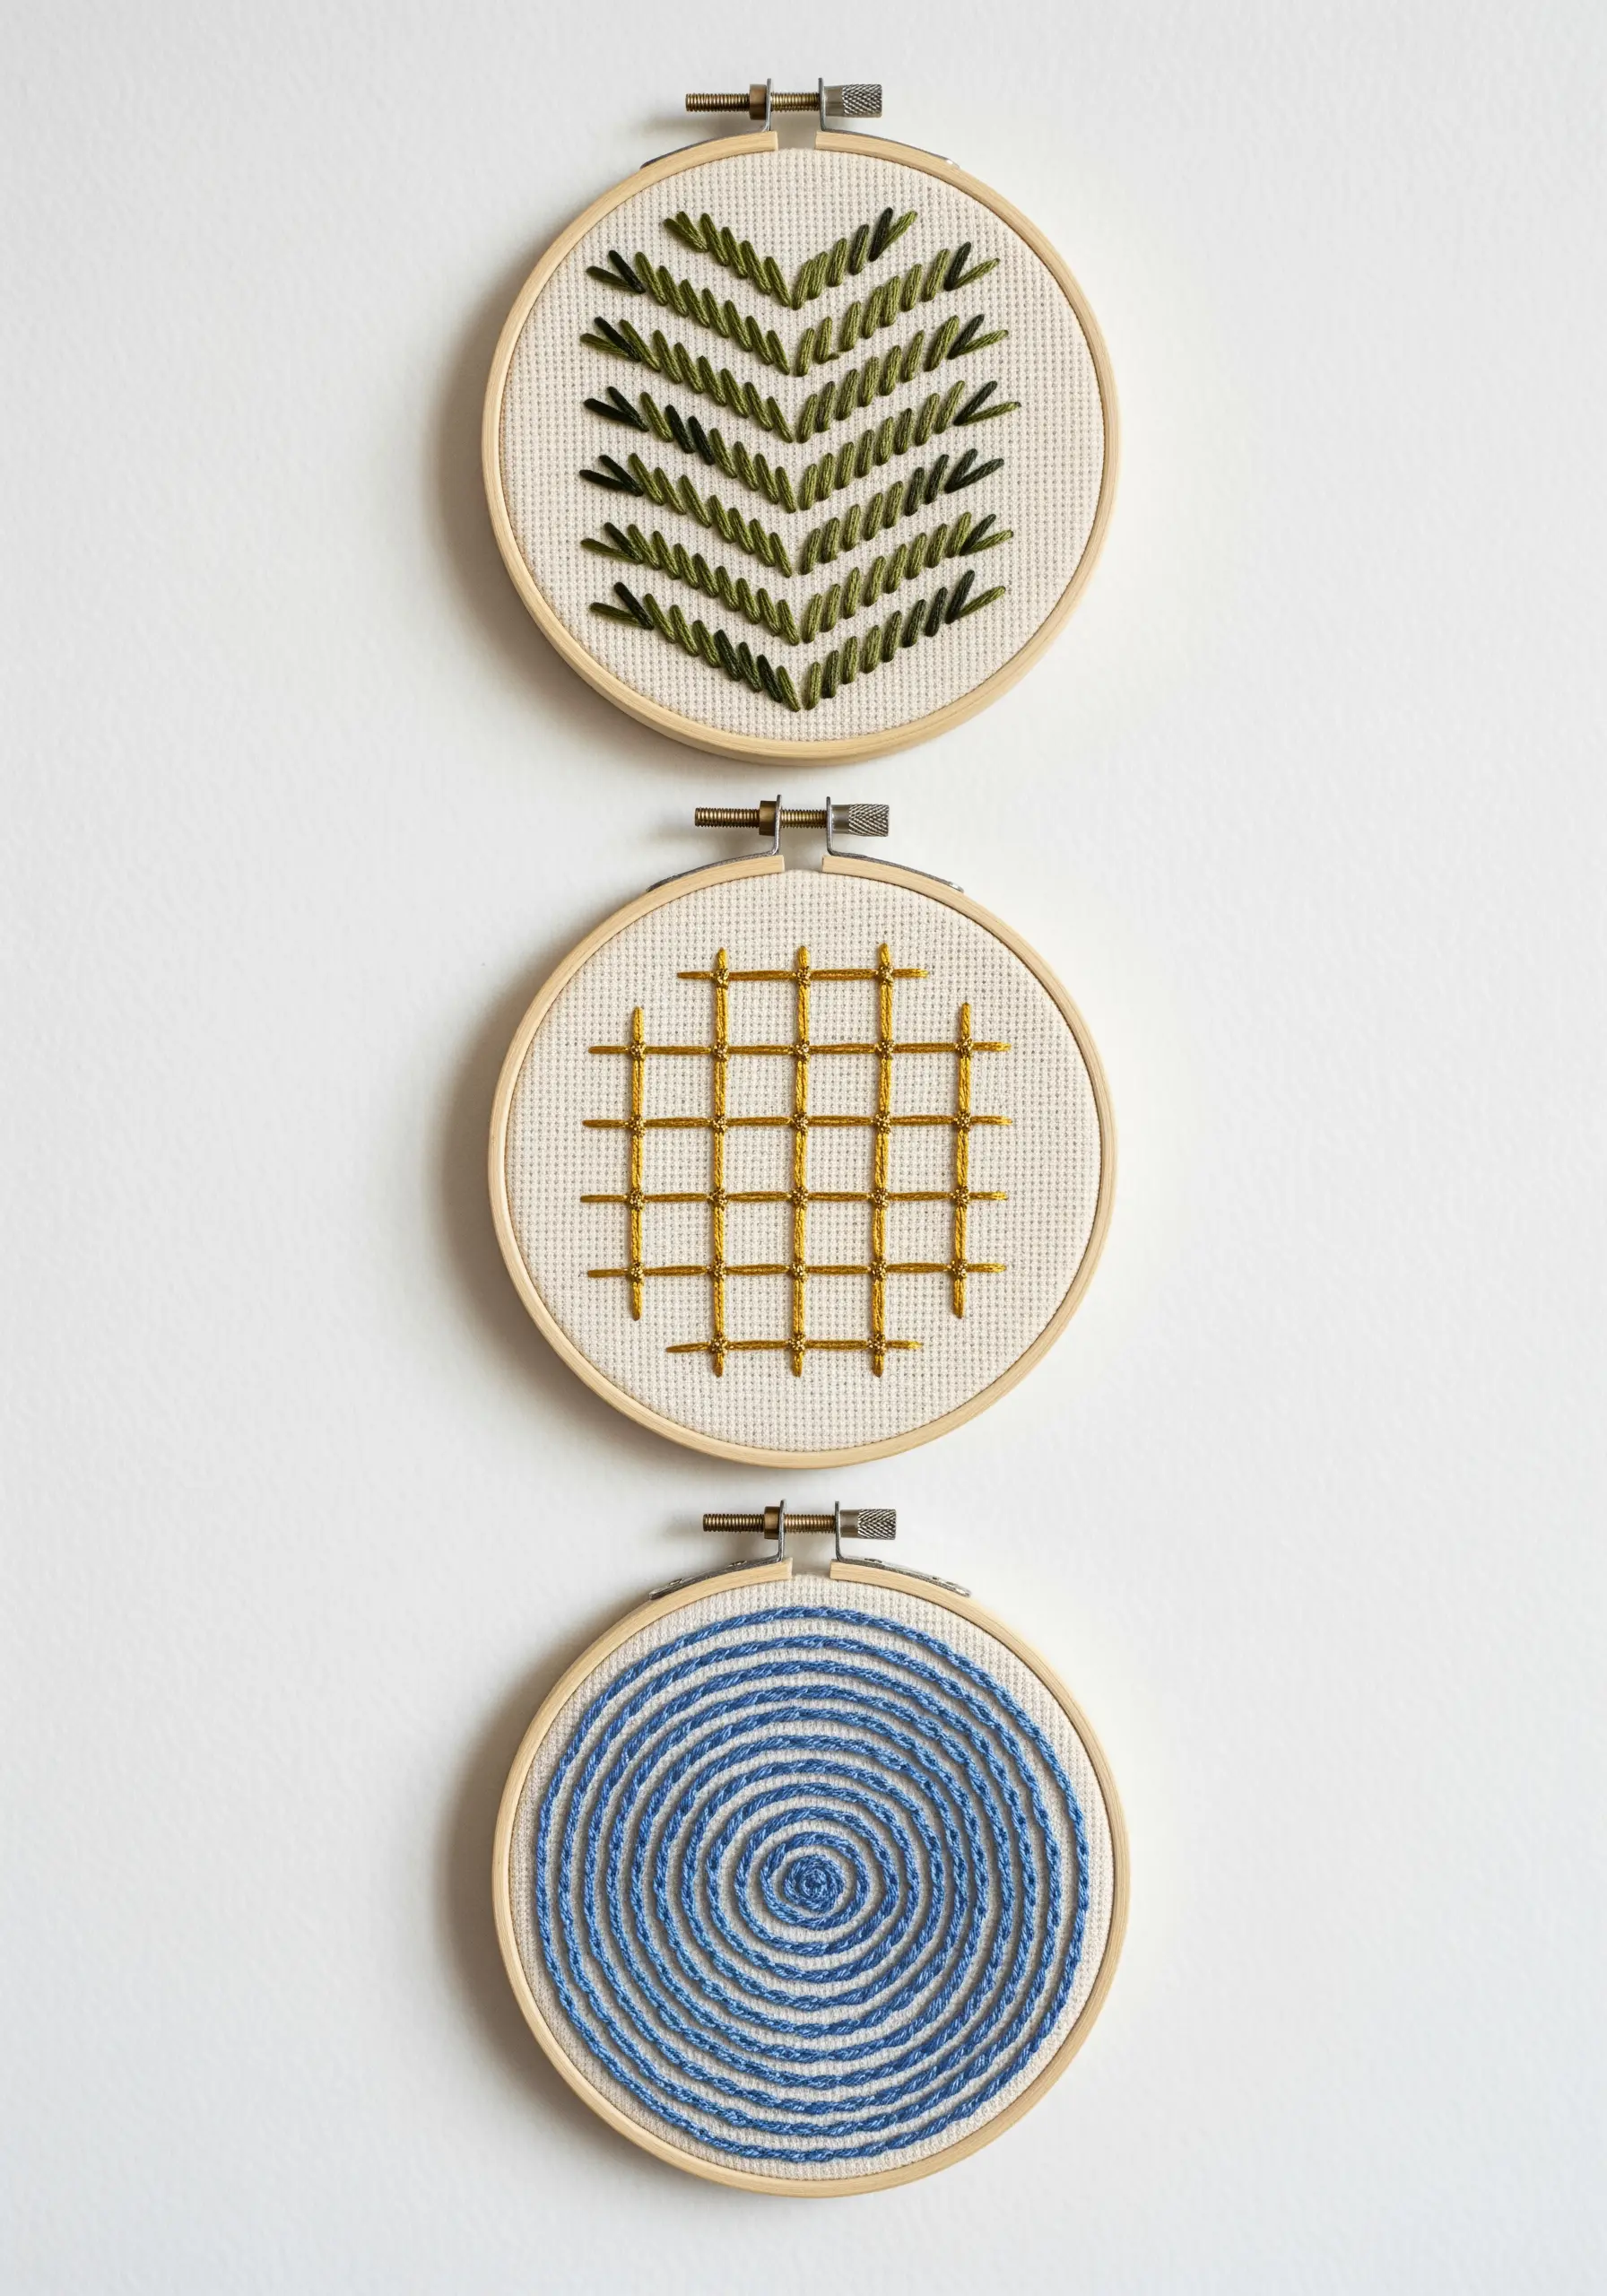
Turn simple practice swatches into a sophisticated triptych by focusing on composition and consistency.
Choose three different stitches—like the fishbone stitch, an intersecting grid of straight stitches, and a backstitched spiral—and work them in small, identical hoops.
By using a unified color palette and displaying them together, you create high-impact hooped wall collage layouts from the most basic techniques.
8. Paint Landscapes with Contoured Couching Stitches
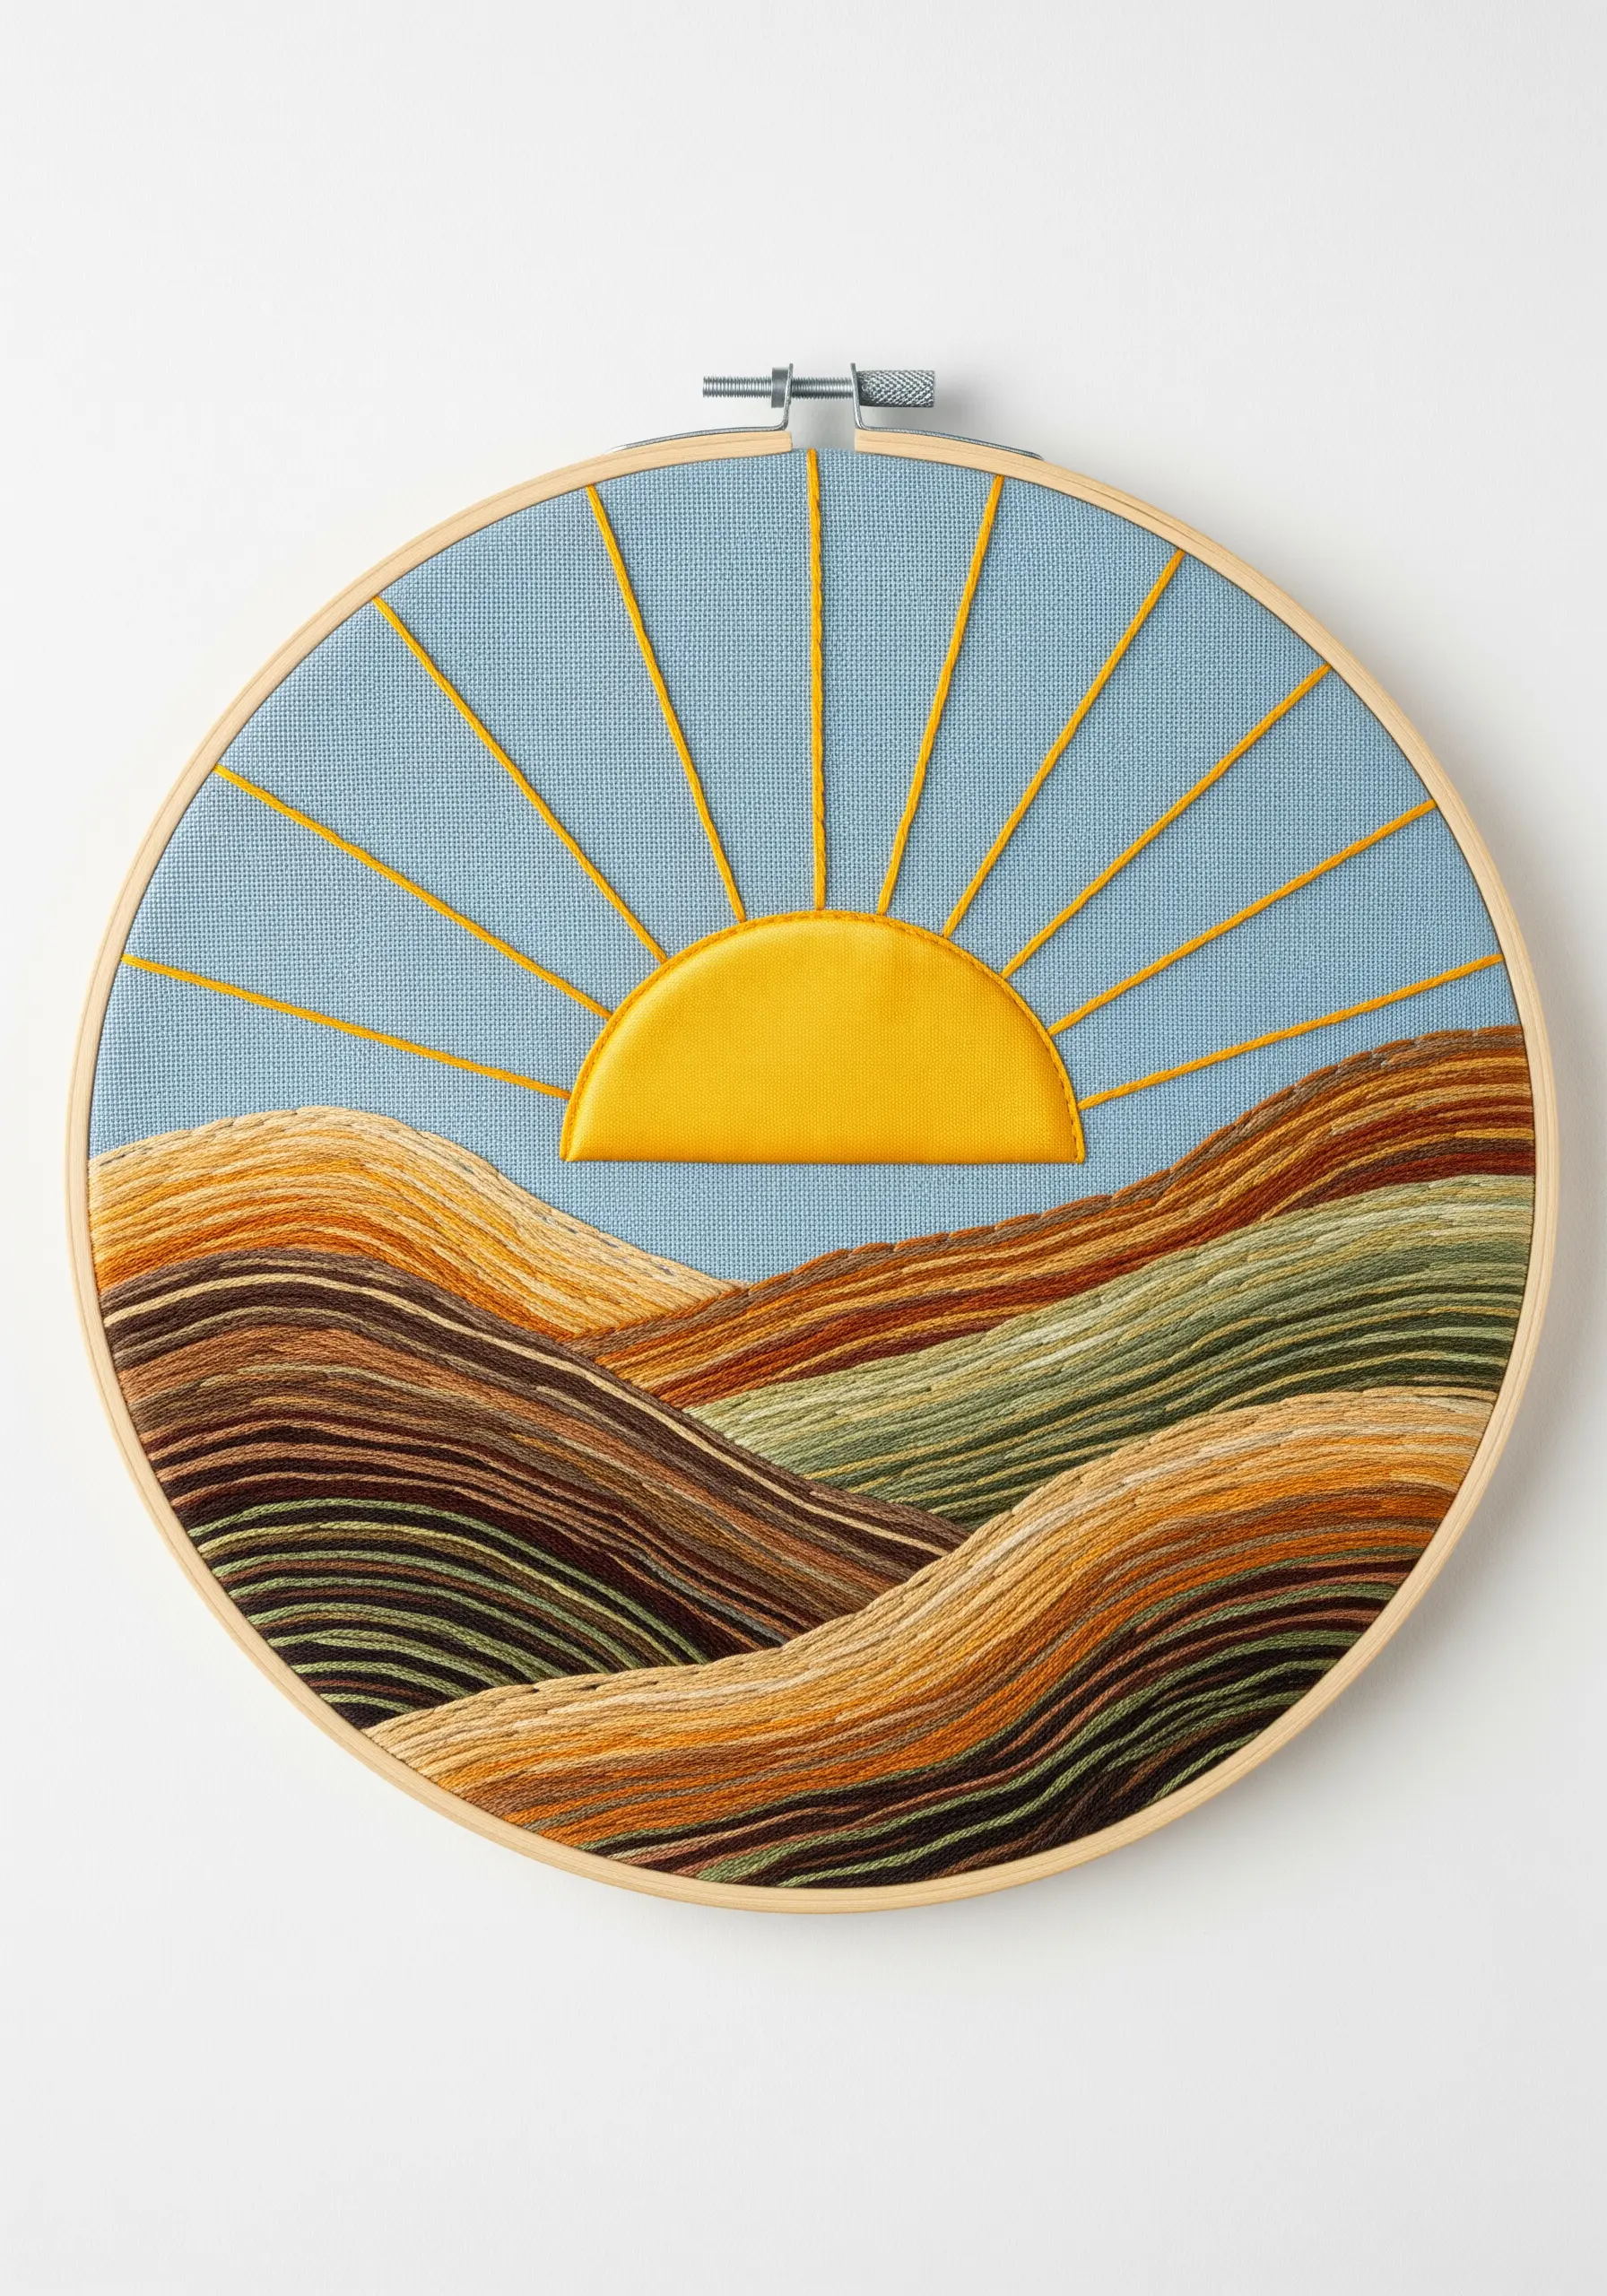
Couching is your secret weapon for creating fluid, painterly lines with thick yarn or multiple strands of floss.
Simply lay your thick thread along the desired path and use a second, thinner thread to tack it down with small, perpendicular stitches.
This allows you to follow the organic contours of a landscape, building up layers of color and texture to mimic rolling hills.
It is an ideal method for stitching abstract nature-inspired embroidery motifs with a flowing, artistic quality.
9. Build Realistic Lavender with Fishbone Stitch

The fishbone stitch is uniquely suited for creating the herringbone-like texture of lavender florets.
By angling each stitch from the outer edge toward a central line, you create a slightly raised, braided effect that perfectly mimics the real plant.
Add a single French knot at the tip of each floret for a finishing touch of realism.
This is one of the most satisfying and effective lavender-inspired embroidery designs you can create.
10. Draft Striking Mandalas with Straight Stitch Grids
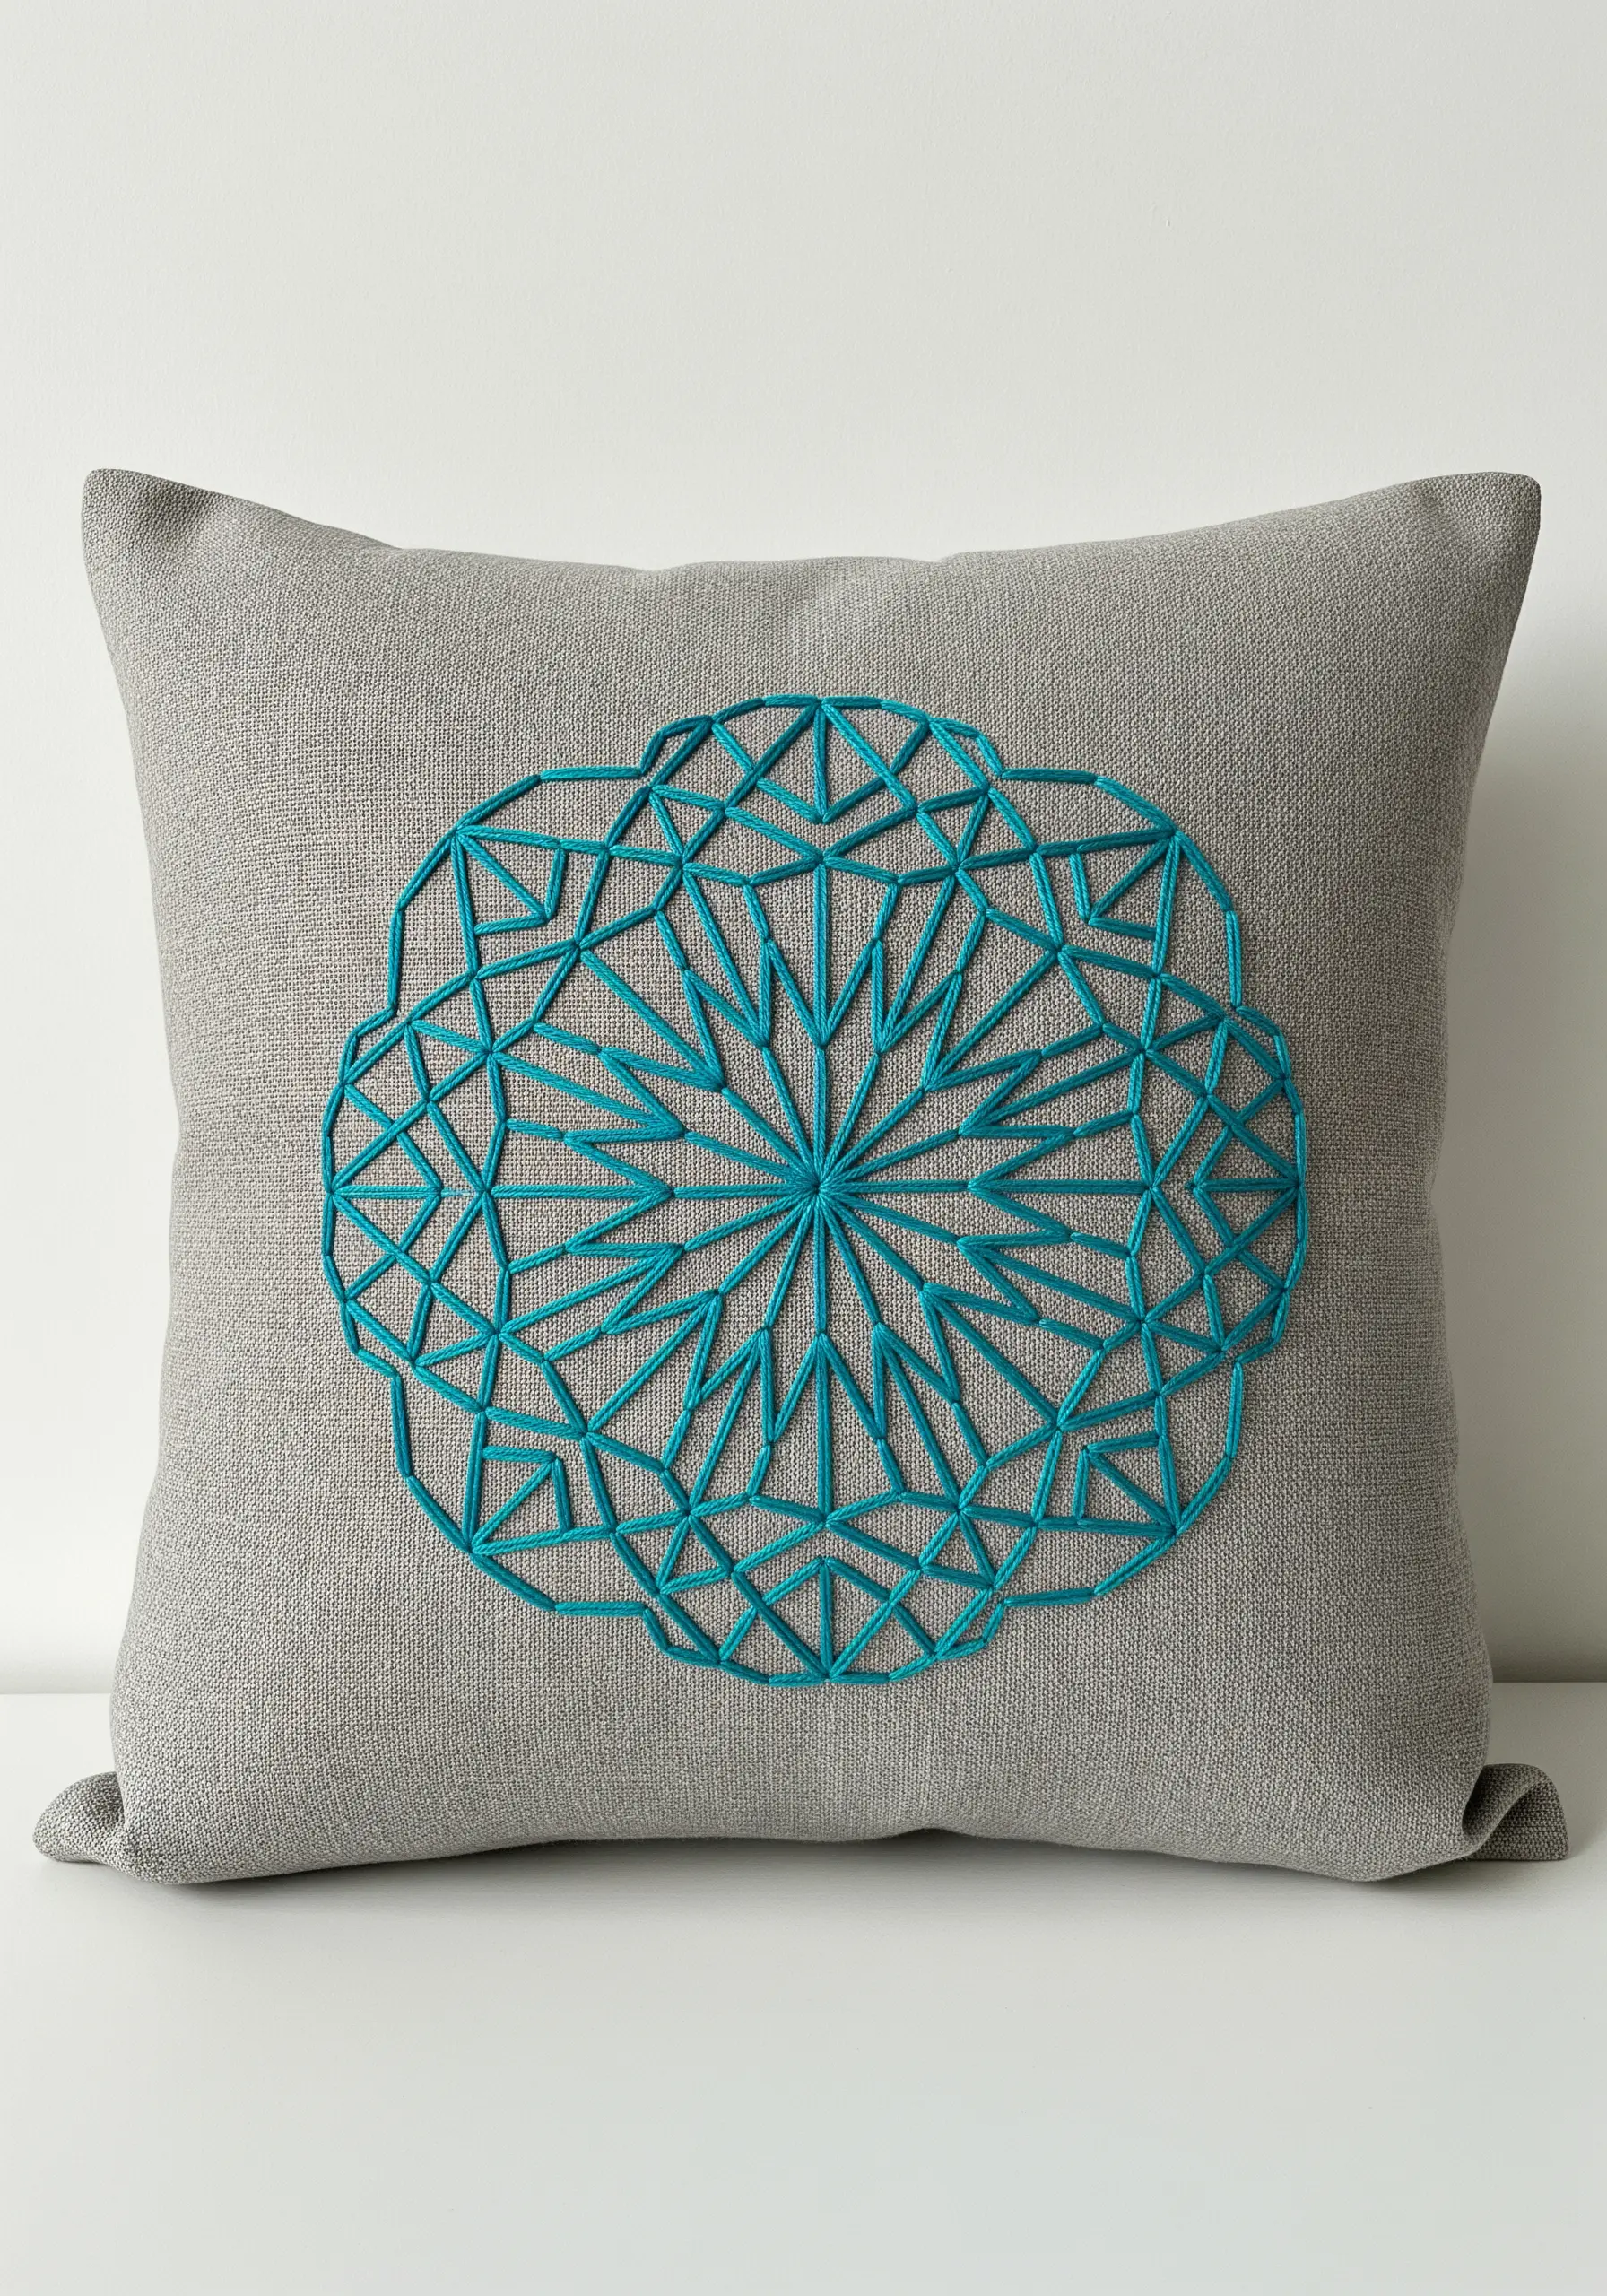
An intricate mandala doesn’t require complex stitches; it requires precision.
This entire design is built from simple straight stitches, but its power comes from a perfectly drawn guide on the fabric.
Use a water-soluble marker and a ruler to create your geometric anchor points, then simply connect the dots with your thread.
This technique is perfect for creating bold, modern line art cushion embroidery designs.
11. Add Shimmer and Texture with Seed Stitch Shading
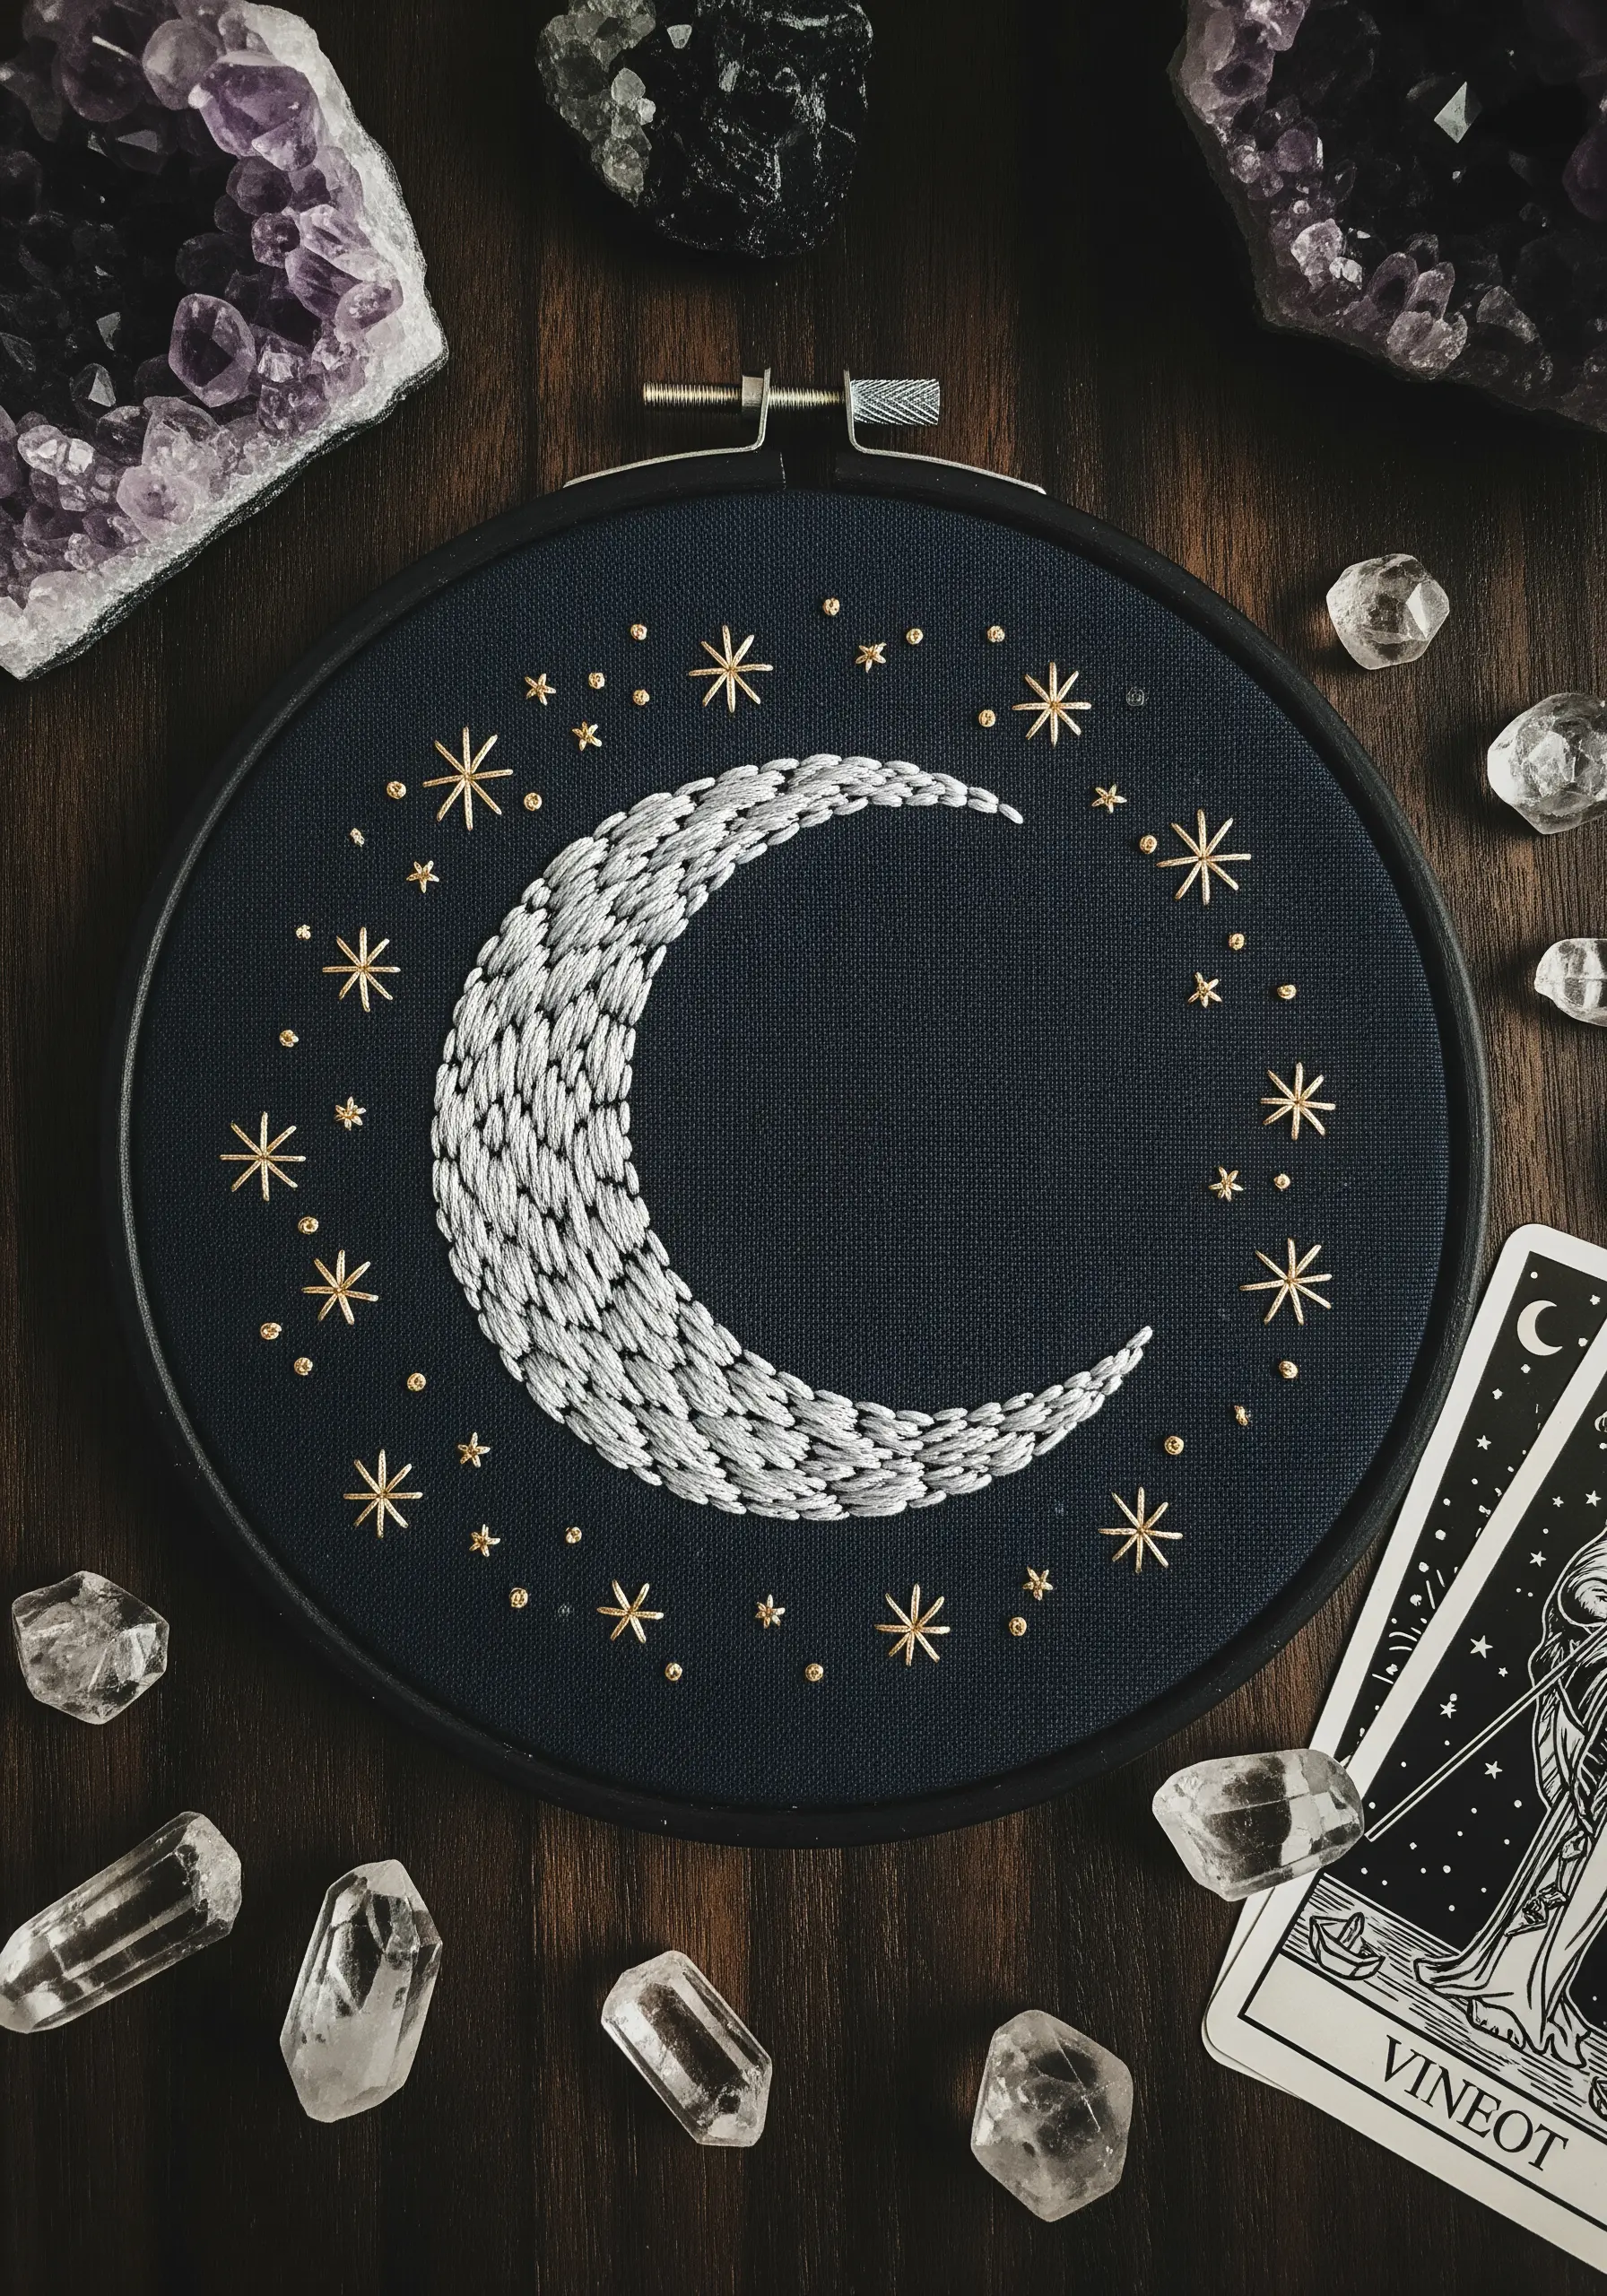
The seed stitch—composed of tiny, scattered straight stitches—is a remarkably versatile fill.
When packed densely, it creates a rich, matte texture; when spaced farther apart, it adds a delicate, shimmering effect.
Use this stitch to create a subtle gradient on a moon, starting with dense white stitches and transitioning to sparse gray to evoke a cratered, luminous surface.
This technique excels in dark academia cushion embroidery patterns and other atmospheric pieces.
12. Define Shapes with Contrasting Outline and Fill Stitches

To make a motif pop, especially on patterned fabric, create a strong contrast between its outline and its interior.
Use a bold, ropey stitch like the chain stitch for the outline, which contains the shape and gives it weight.
Then, fill the interior with a textural stitch like brick stitch, laying the threads in a uniform direction to add dimension and subtle pattern.
This combination is perfect for cheerful mini fruit & herb embroidery frames.
13. Explore Dimension with Mixed-Media Fiber Art
Elevate your embroidery by incorporating materials beyond standard floss.
Here, thick yarn is worked in a raised chain stitch or braided and couched down, while wool roving is needle-felted or woven directly onto the fabric for a soft, fuzzy texture.
These elements, combined with simple thread work and felt appliqué, result in stunning mixed-fiber embroidery patterns with unmatched depth.
14. Achieve Flawless Curves with Whipped Stem Stitch
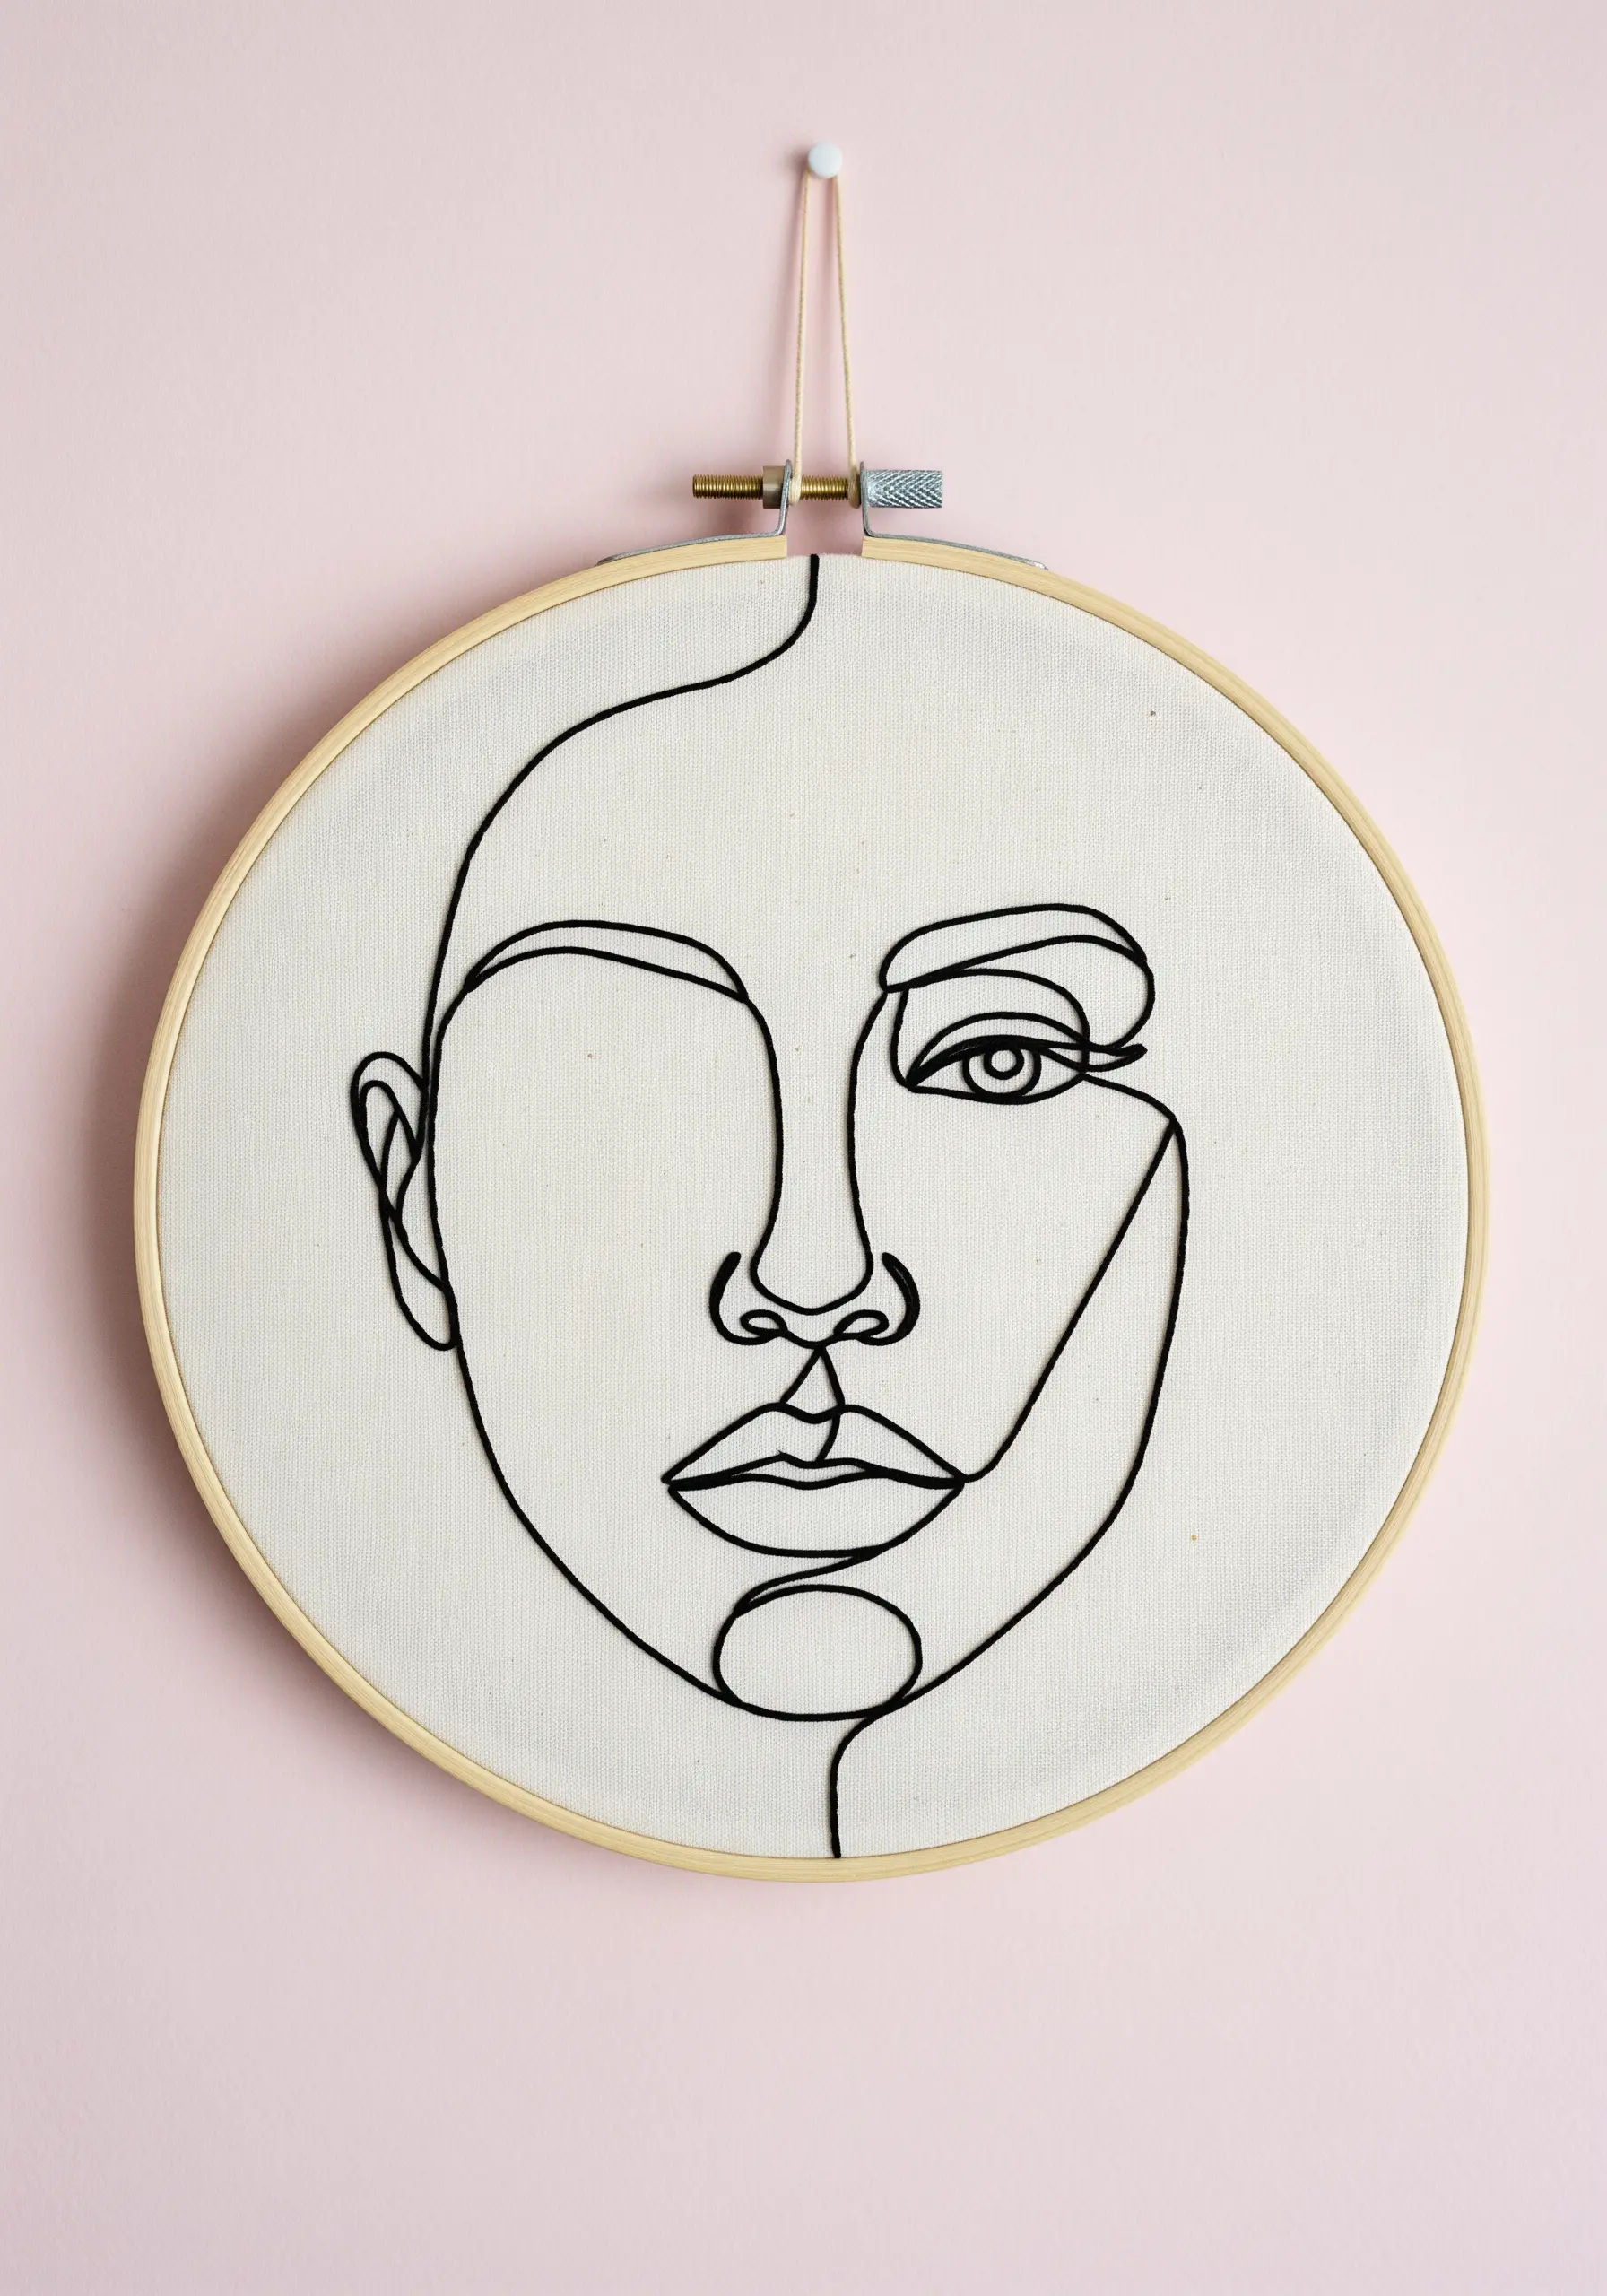
For minimalist line art, the quality of your line is everything.
The stem stitch is naturally suited for curves, but whipping it creates an even smoother, more refined finish.
After completing your stem stitch line, use the same thread to wrap each stitch, concealing the intersections and creating a perfectly fluid, unbroken curve.
This is the professional’s secret to impeccable modern line art.
15. Design a Textural Rainbow Sampler
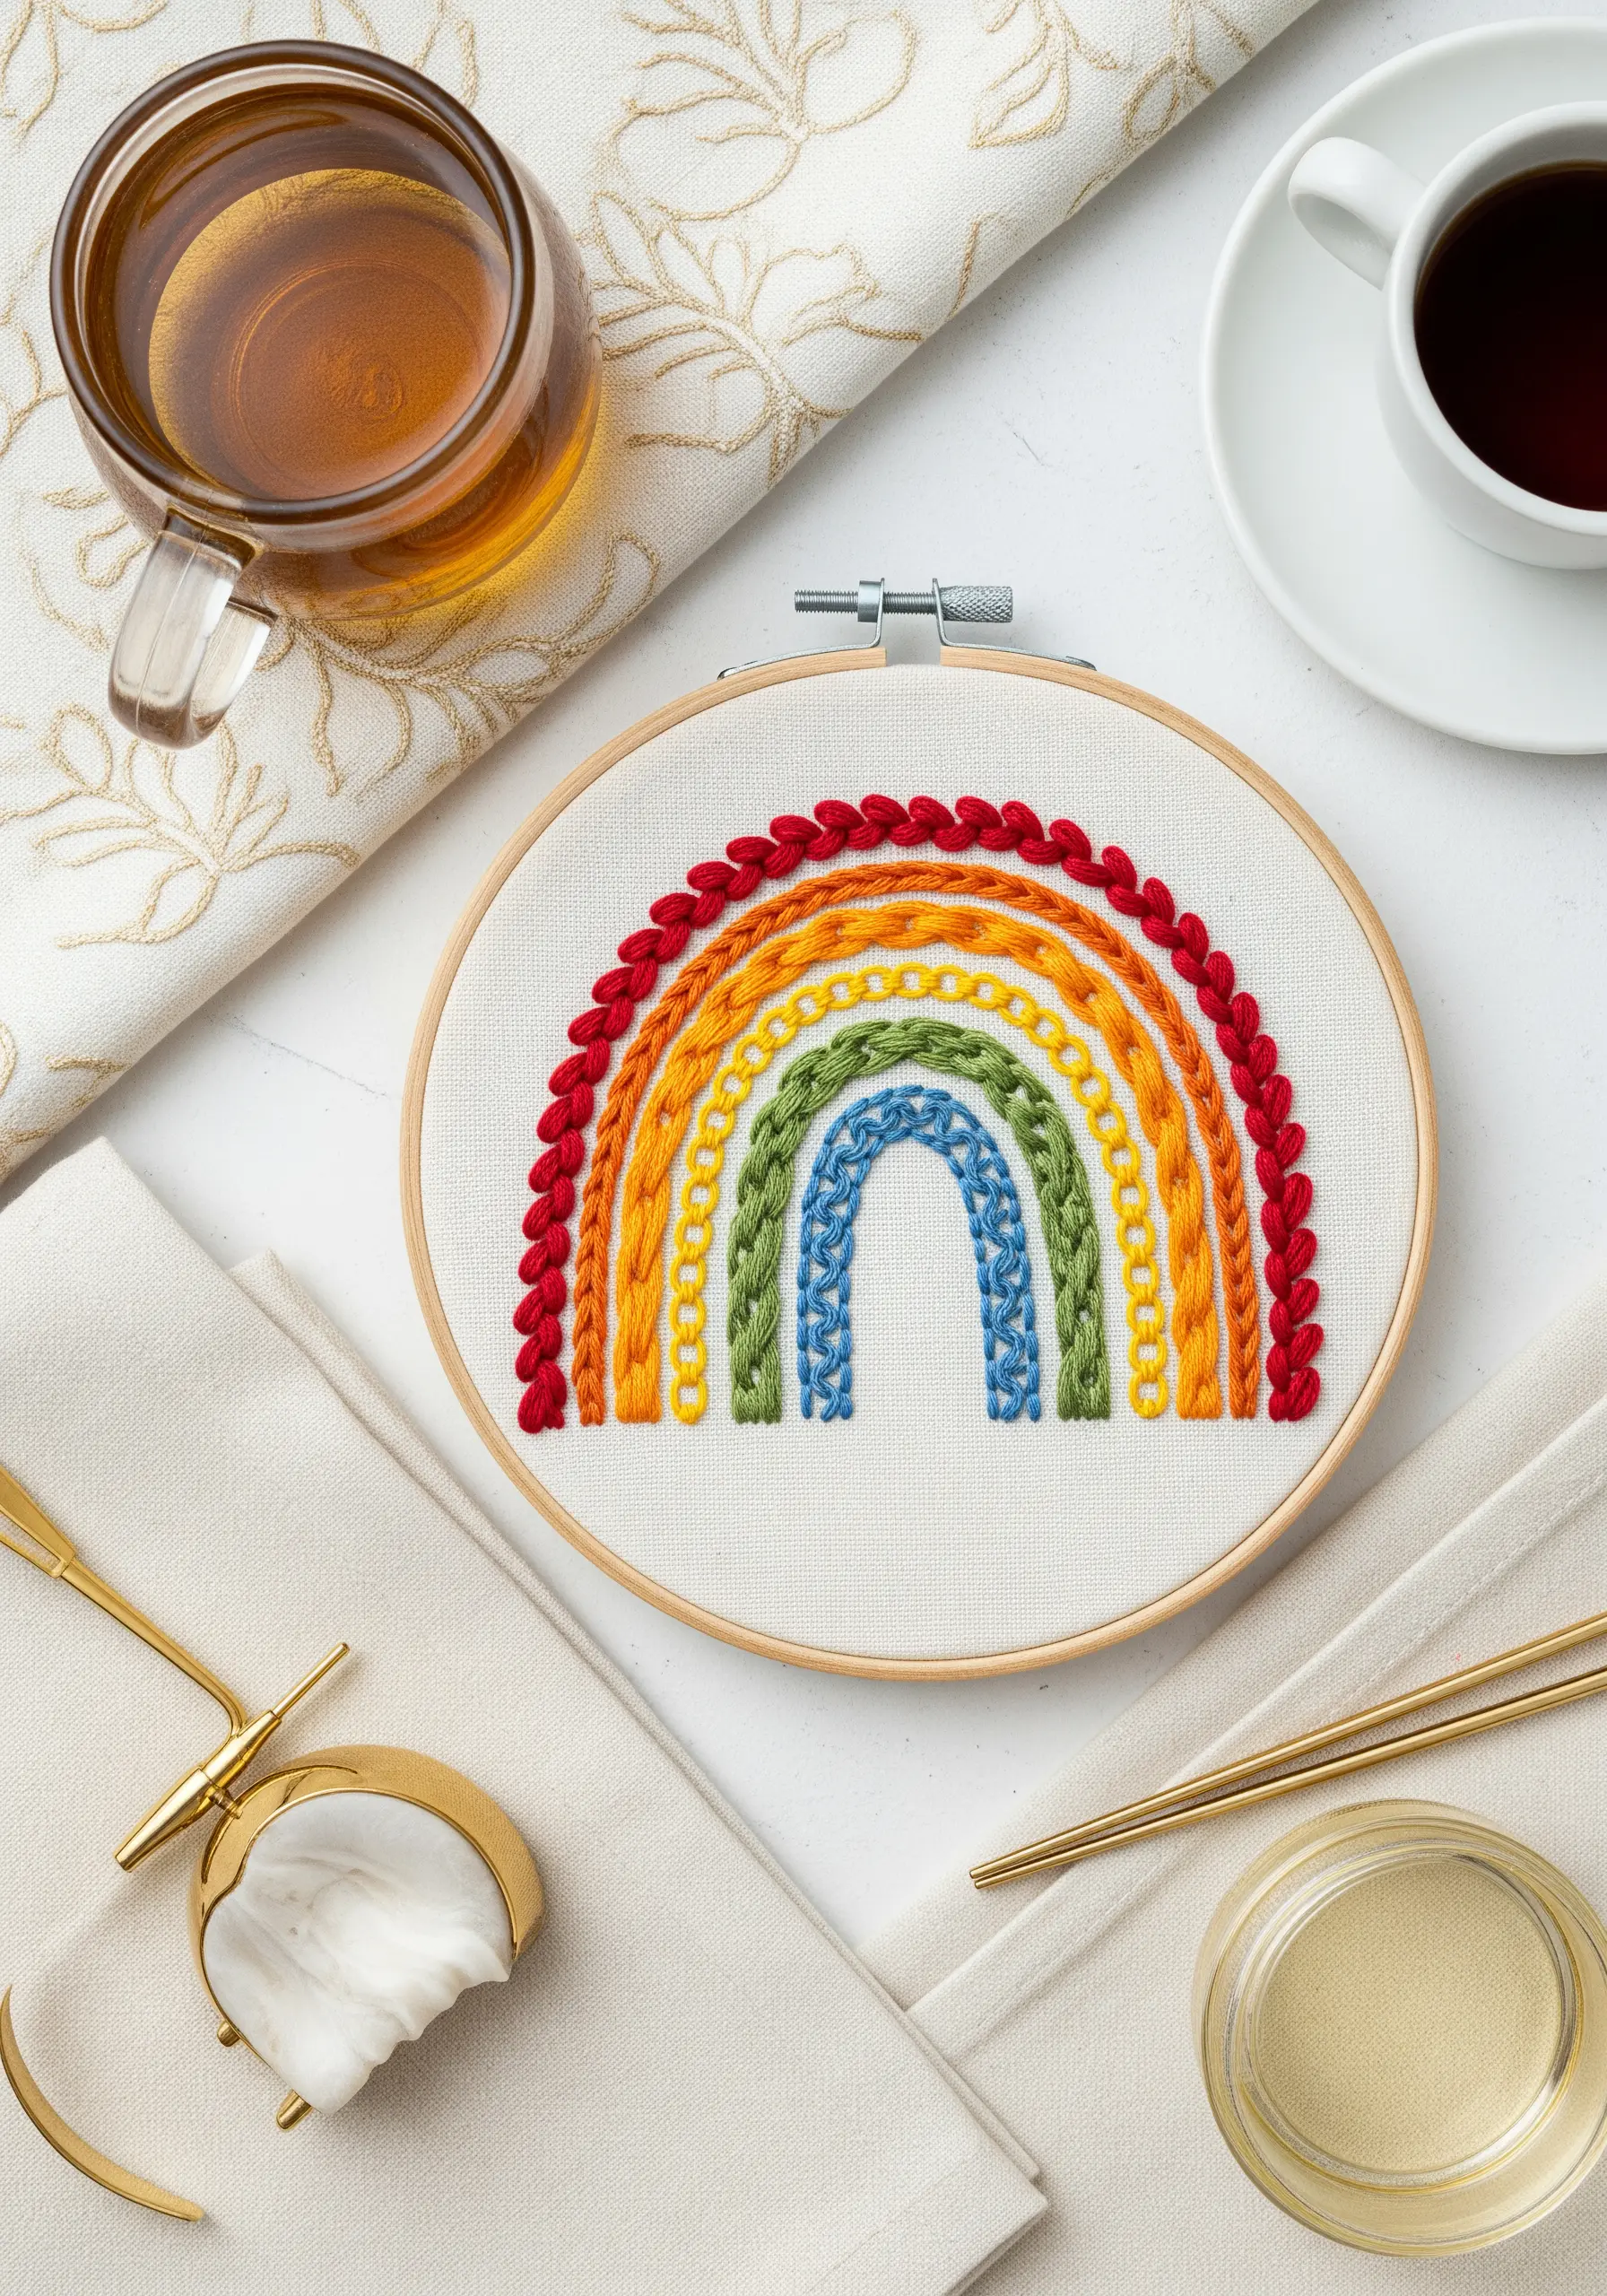
Transform a simple rainbow into an engaging sampler by assigning a different textural stitch to each arc.
This is a brilliant way to practice and showcase your skills. Try a bold chain stitch, a nubby French knot, a smooth whipped backstitch, and a raised stem stitch band.
The variety of textures turns a common motif into one of the most engaging and colorful embroidery hoops you can display.
16. Master the Lazy Daisy Stitch for Repeat Patterns

The lazy daisy stitch, or detached chain stitch, is the fastest way to create perfect, teardrop-shaped petals.
Arrange five or six stitches in a circle around a central point, fill the center with two or three French knots, and you have a flawless daisy.
By repeating this simple motif, you can create a beautiful, dense field of flowers, ideal for creating charming small floral embroidery patterns on any surface.
17. Create Realistic Foliage with Directional Satin Stitch

To embroider realistic botanicals, you must think like a painter and use your stitches as brushstrokes.
The satin stitches that form this fern leaf are angled outward from the central stem, perfectly mimicking the way real foliage grows.
Using slightly different shades of green for different sections enhances this realism, creating highlights and shadows.
This thoughtful application of stitch direction is key to creating gentle botanical embroidery stitches.
18. Refine Simple Outlines with the Backstitch
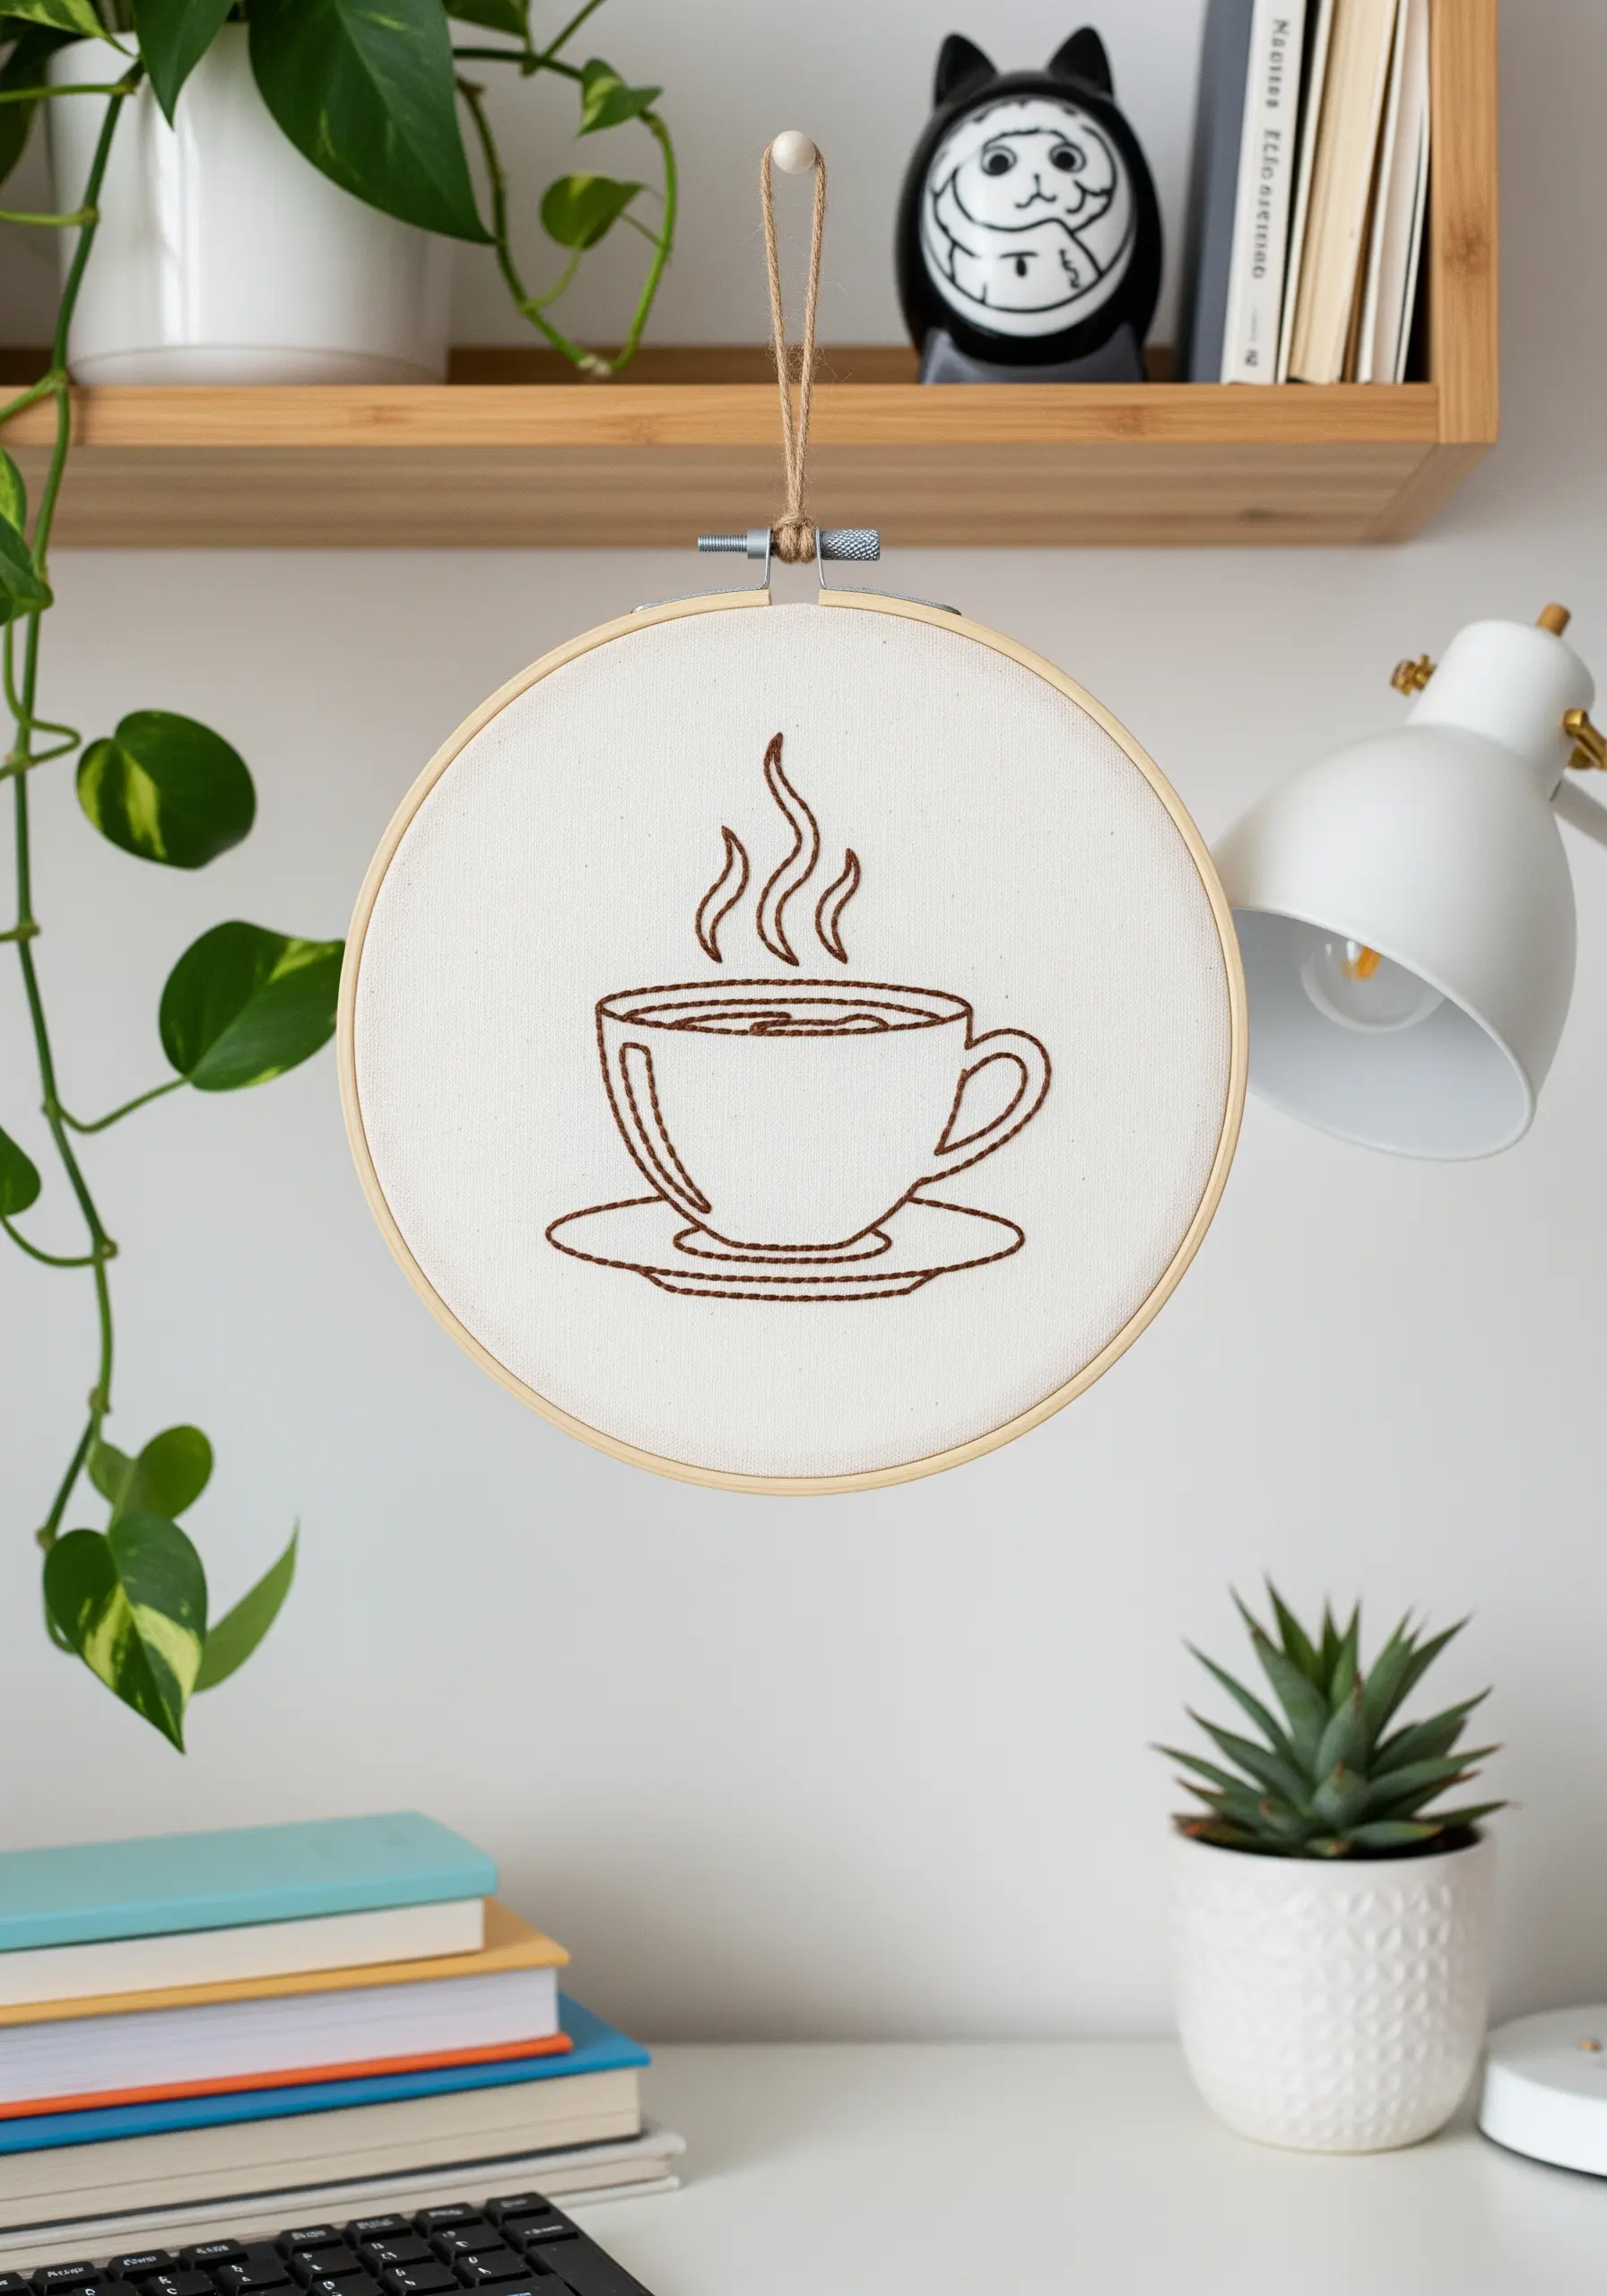
The humble backstitch is the cornerstone of clean, graphic embroidery.
The secret to a professional-looking line is consistency in your stitch length. Use shorter stitches for tight curves and longer ones for straight lines.
To create sharp, defined corners, always end one stitch directly at the point before beginning the next line.
It’s a foundational skill for all quick embroidery DIYs that look polished and modern.
19. Achieve Variegation with Long-and-Short Stitch
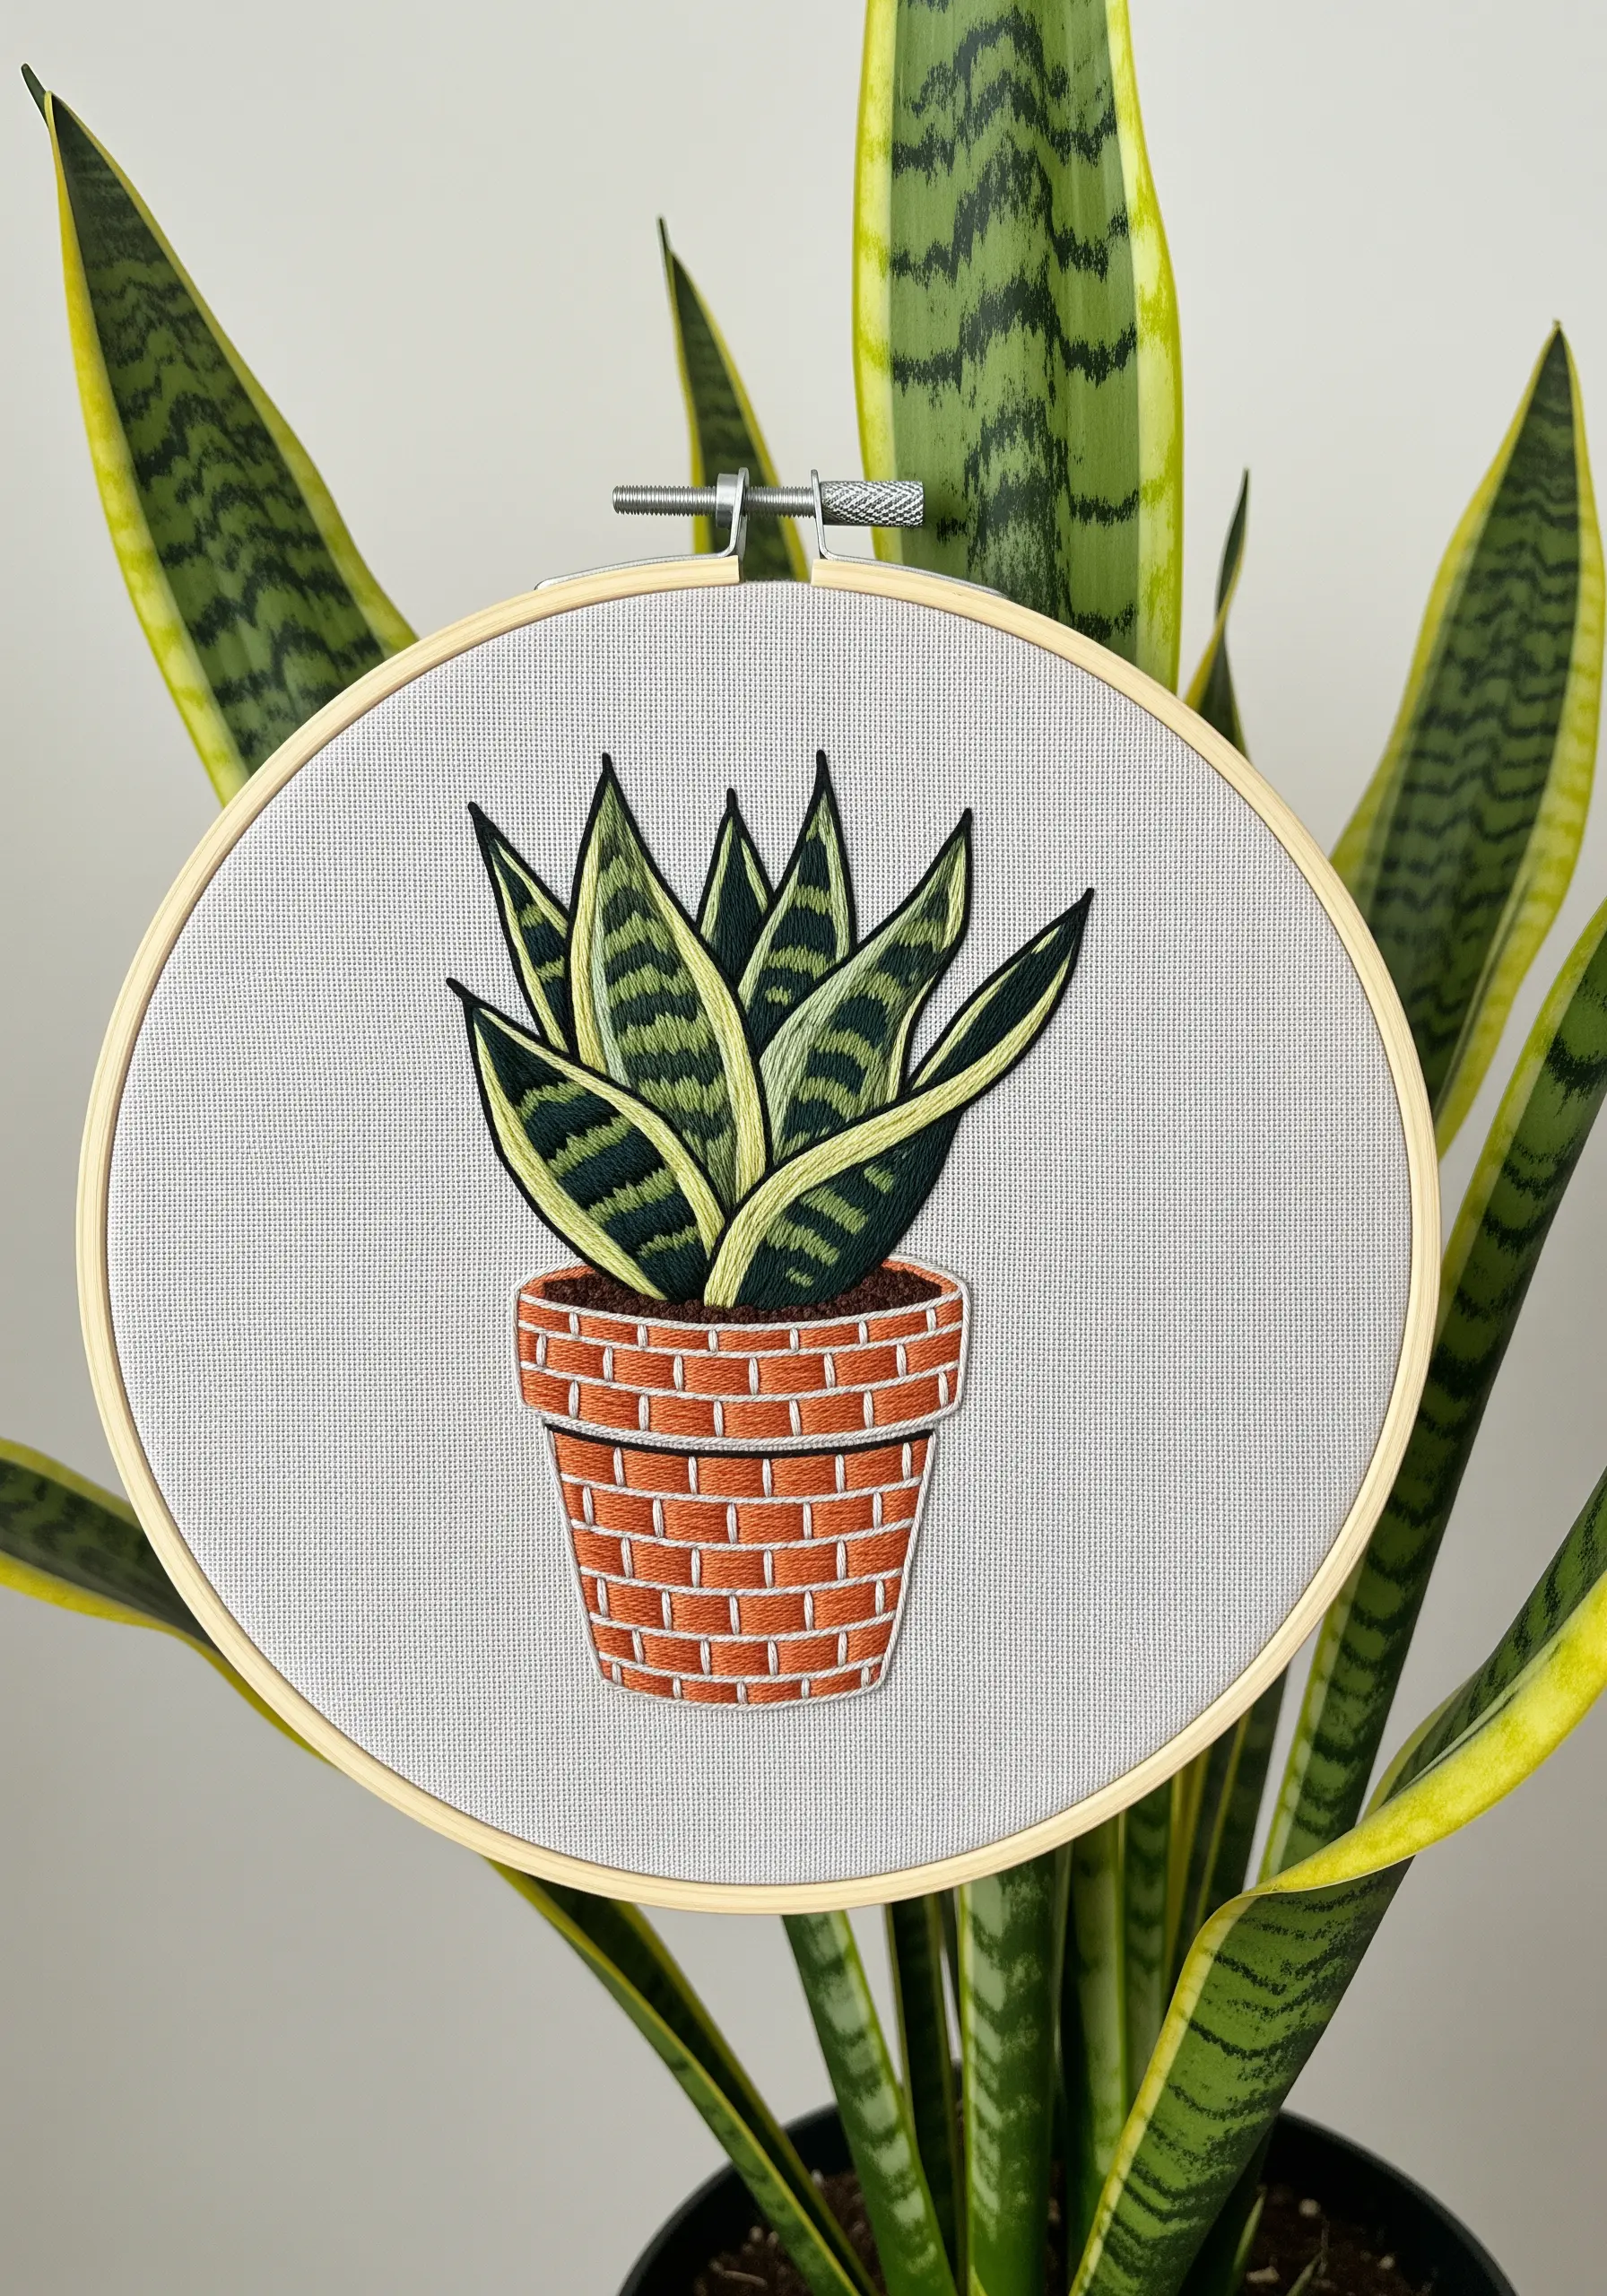
For smooth color blending that mimics painting, you need the long-and-short stitch.
To create the variegated leaves of this snake plant, you’ll work rows of interlocking satin stitches of varying lengths.
This technique allows you to blend shades of green and yellow seamlessly, eliminating the harsh lines you’d get with simple color-blocking and adding a layer of sophisticated realism.
It’s an essential skill for anyone who loves stitching detailed houseplant embroidery motifs.


