
There is a unique joy in creating something for a child—a tangible piece of your care stitched into the fabric of their daily life. But often, the desire to make something special gets lost in the pressure to create complex, time-consuming projects.
Let’s reframe that. The true magic lies not in intricacy, but in intention. A single, thoughtfully placed icon can transform a simple garment into a treasured story, a secret symbol, or a beloved keepsake. It’s a whisper of personality, a tiny work of art they can carry with them.
These small-scale ideas are more than just cute motifs; they are your opportunity to practice and perfect fundamental stitches. Each one is a quick, achievable project that builds your skills while creating something filled with warmth and meaning.
1. The Satin Stitch Patch for Texture and Durability
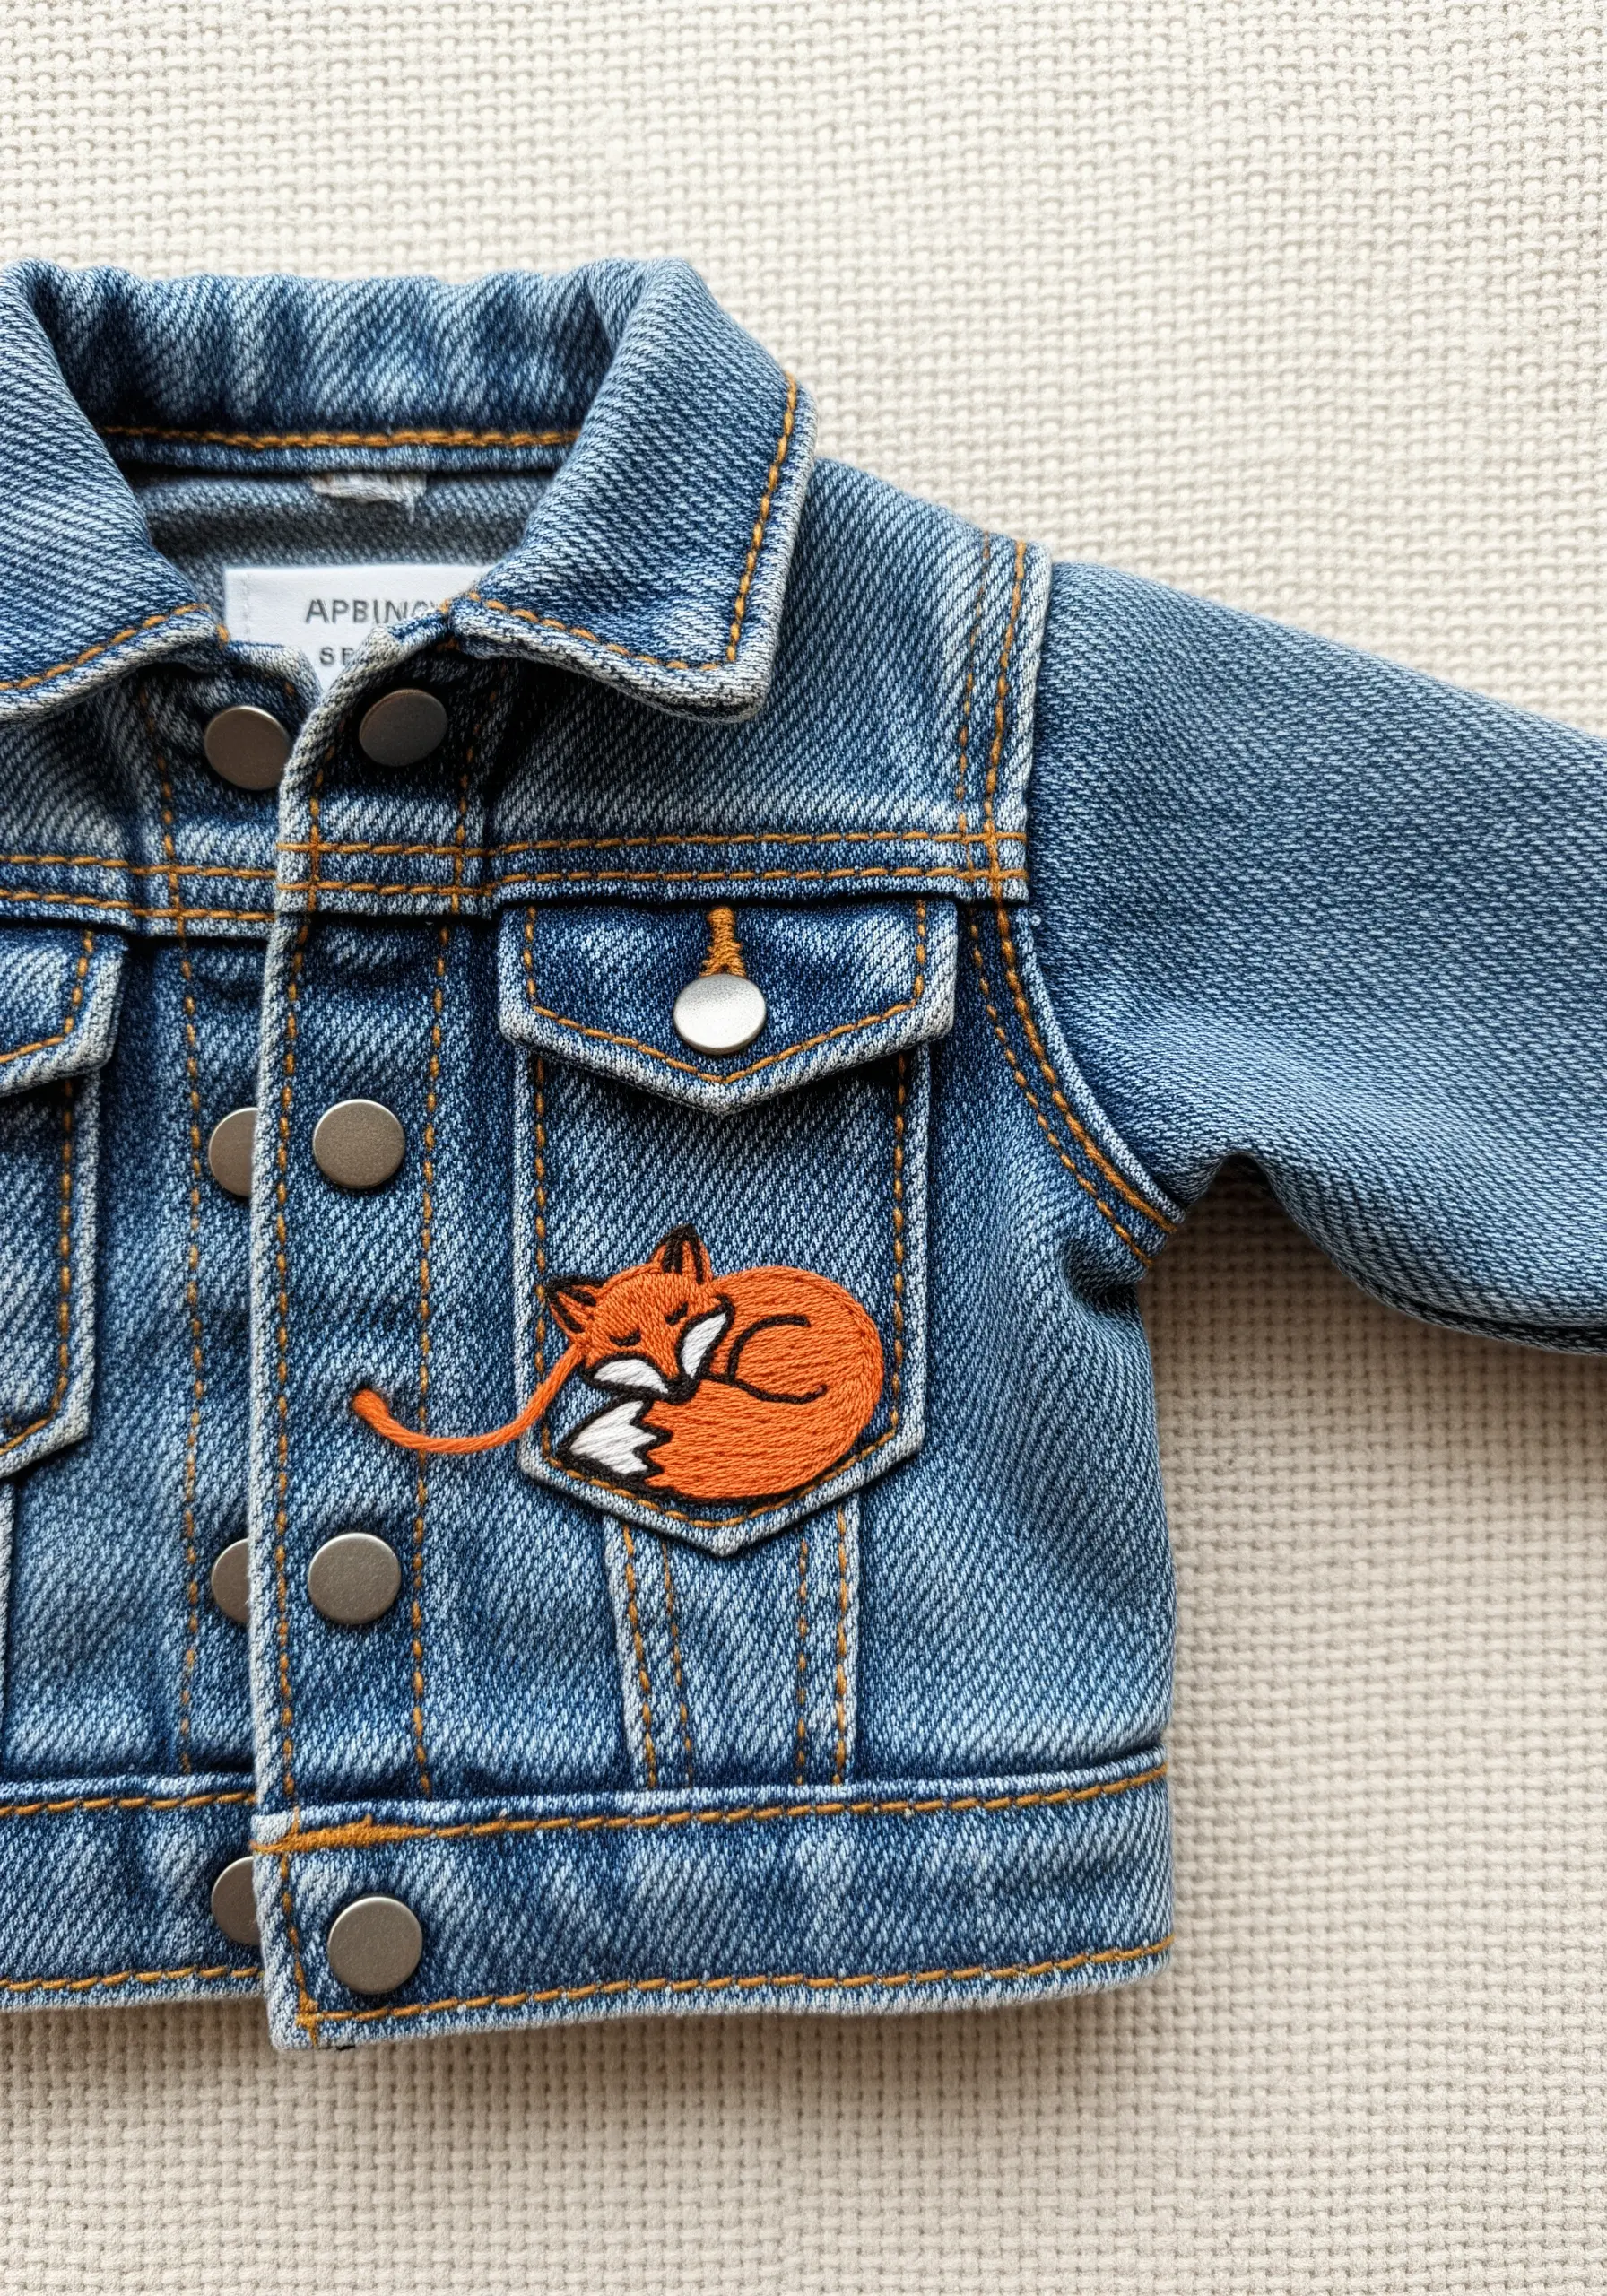
Create a dense, patch-like feel by filling your motif entirely with satin stitch.
For sturdy fabrics like denim, use a tear-away stabilizer on the inside of the garment to prevent puckering and support your stitches.
Use three or four strands of embroidery floss to ensure full, lush coverage that stands up to wear and tear.
Vary the direction of your satin stitches to follow the contours of the animal, suggesting the natural flow of fur and adding subtle dimension.
2. Mastering Dotted Lines with the Running Stitch

For a whimsical flight path or dotted trail, the simple running stitch is your best tool.
The key to a polished look is consistency—aim to keep the length of your stitches and the gaps between them perfectly even.
For the solid outline of the plane, switch to a split stitch or a tiny backstitch using two strands of floss; this creates a crisp line that contrasts beautifully with the airy dotted path.
On delicate collar fabrics, use a single strand of floss and a fine, sharp needle to avoid creating visible holes.
3. Clean Outlines on Stretchy Knitwear
Stitching on knit fabrics requires preparation to prevent the design from stretching or puckering.
Always apply a stick-and-stitch or iron-on stabilizer to the area before you begin; it provides a stable foundation for your work and washes away later.
Choose a stitch with some natural give, like a stem stitch or split stitch, which will move with the fabric better than a rigid backstitch.
Use a ballpoint needle, as its rounded tip separates the knit fibers rather than piercing and potentially snagging them.
4. Tone-on-Tone Stitching for Subtle Elegance
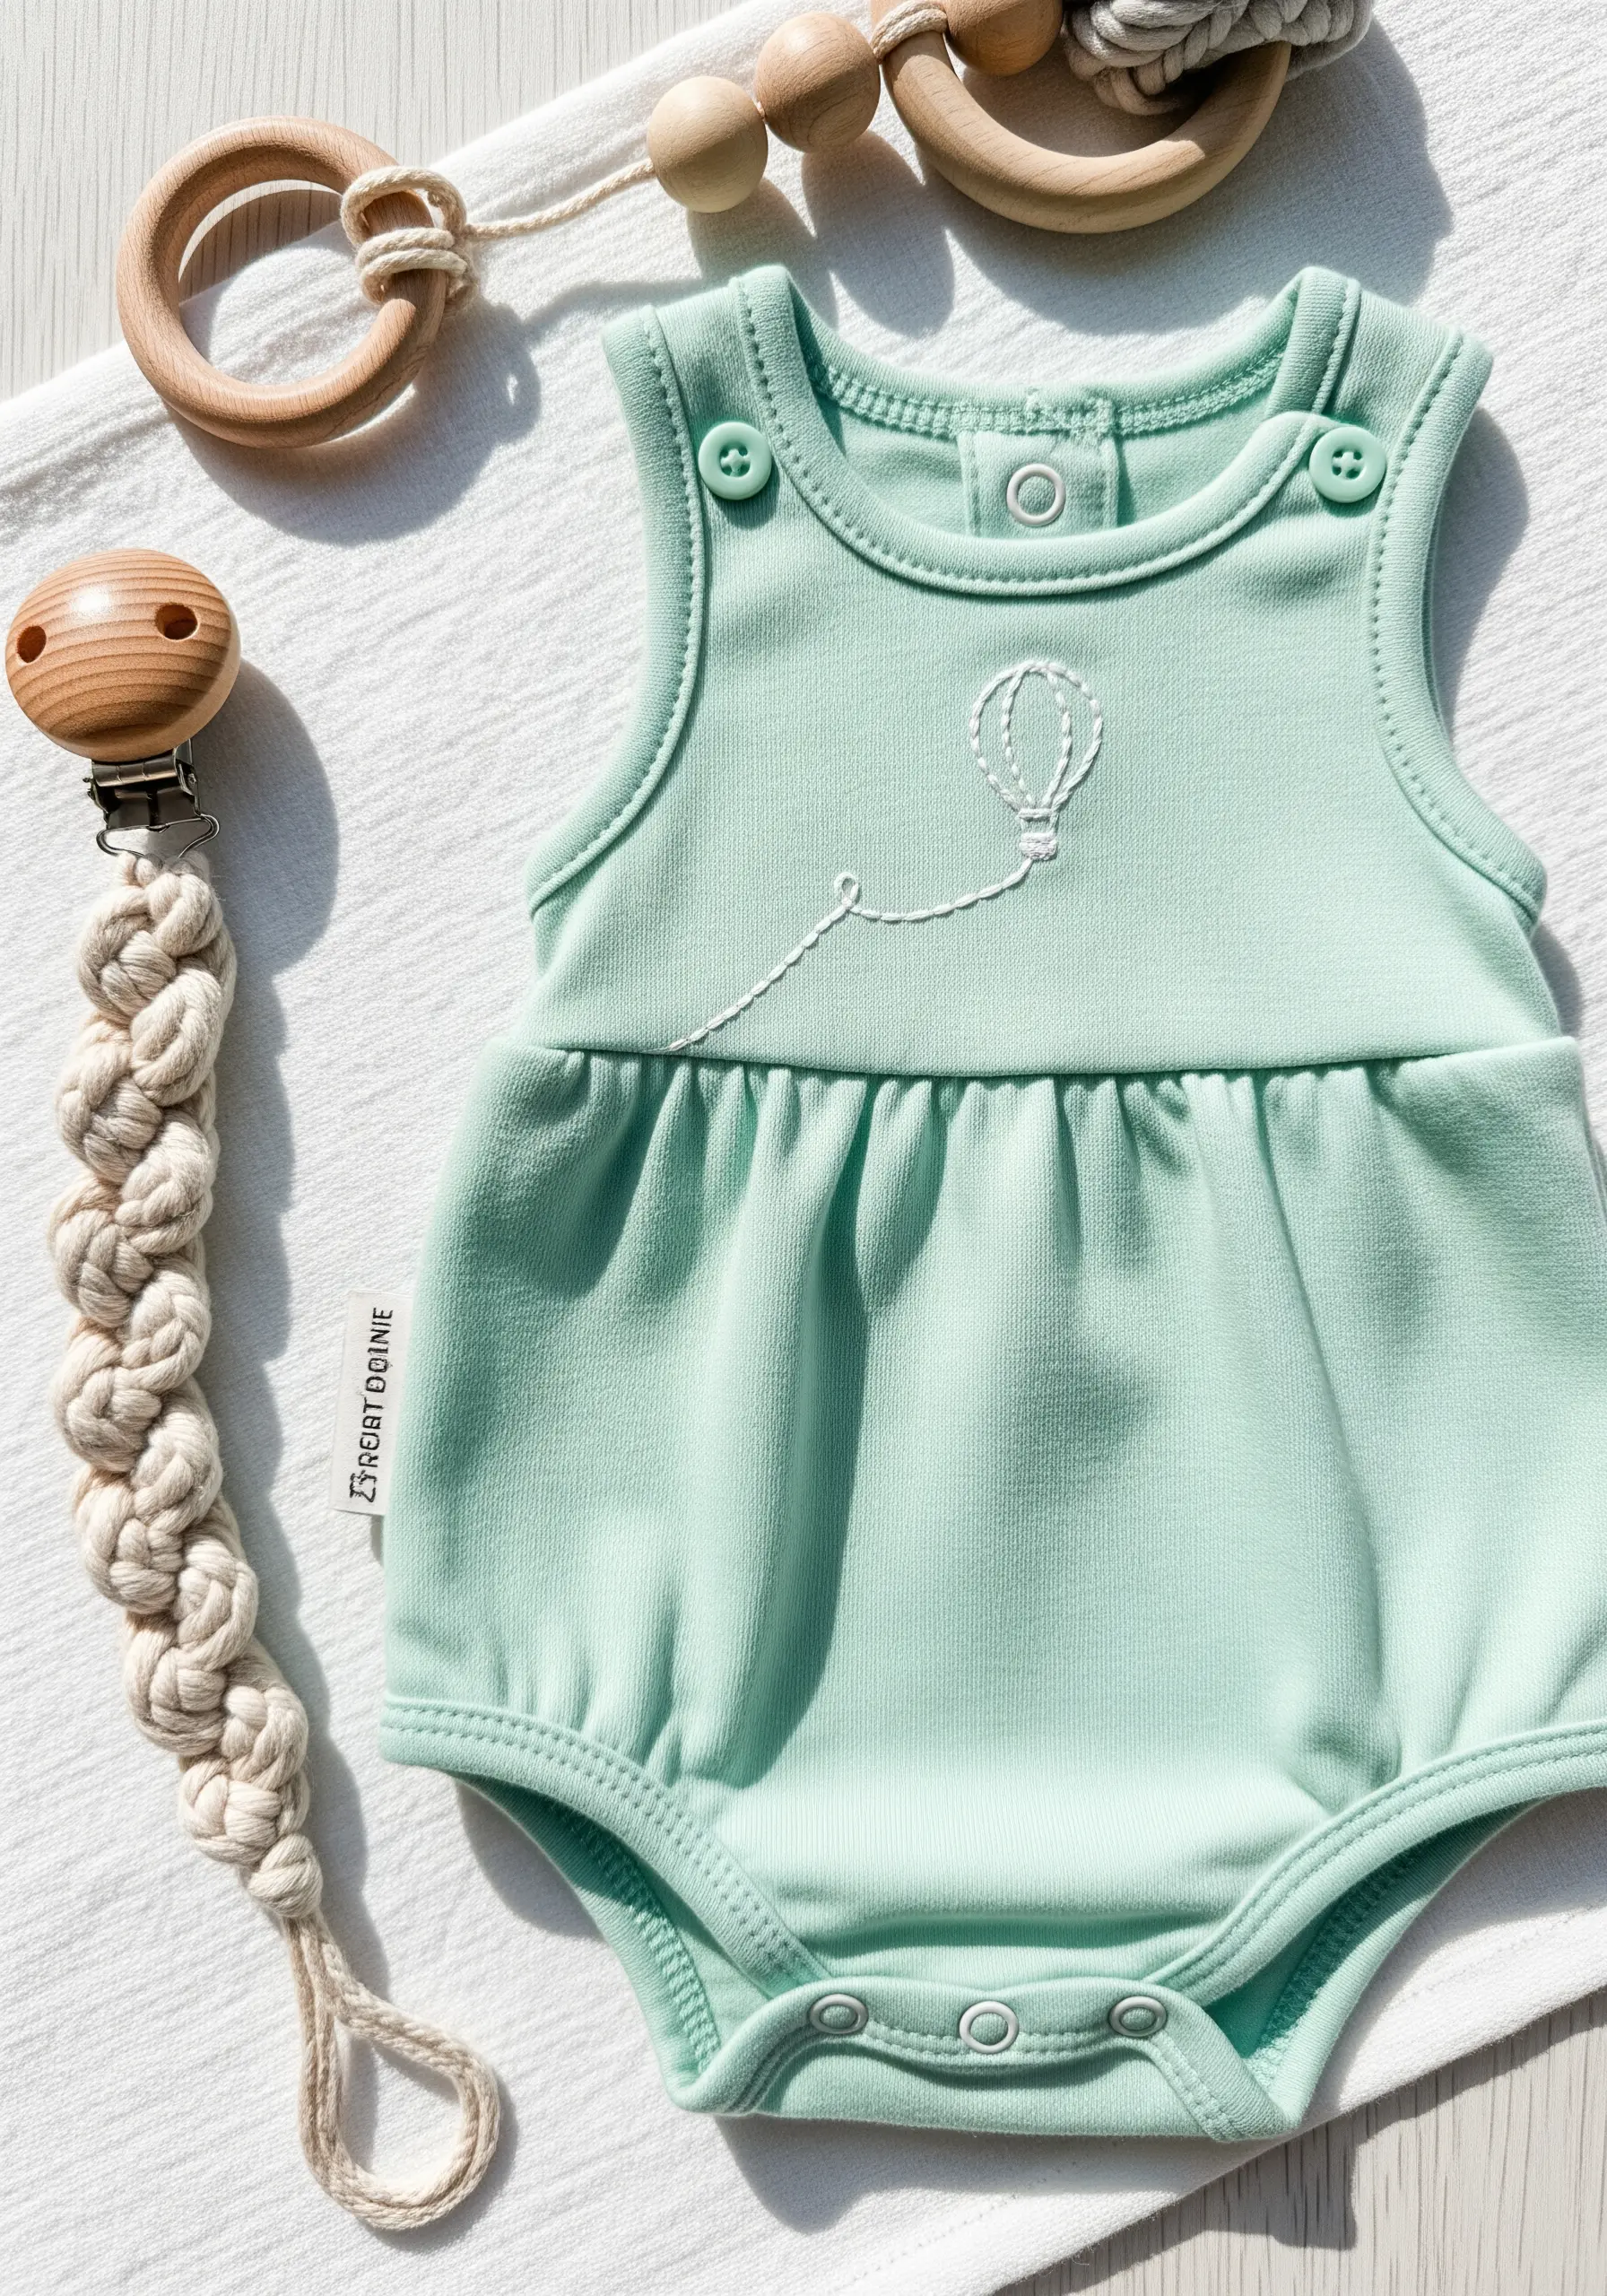
Achieve a high-end, embossed effect by selecting a thread color just a shade or two lighter than your fabric.
This monochromatic approach emphasizes texture over color, resulting in a design that feels both sophisticated and gentle, perfect for minimal baby clothes designs.
Use a delicate whipped backstitch for the balloon’s string to create a perfectly smooth, uninterrupted line on the soft jersey fabric.
This technique is ideal for creating understated heirlooms that feel timeless and deeply personal.
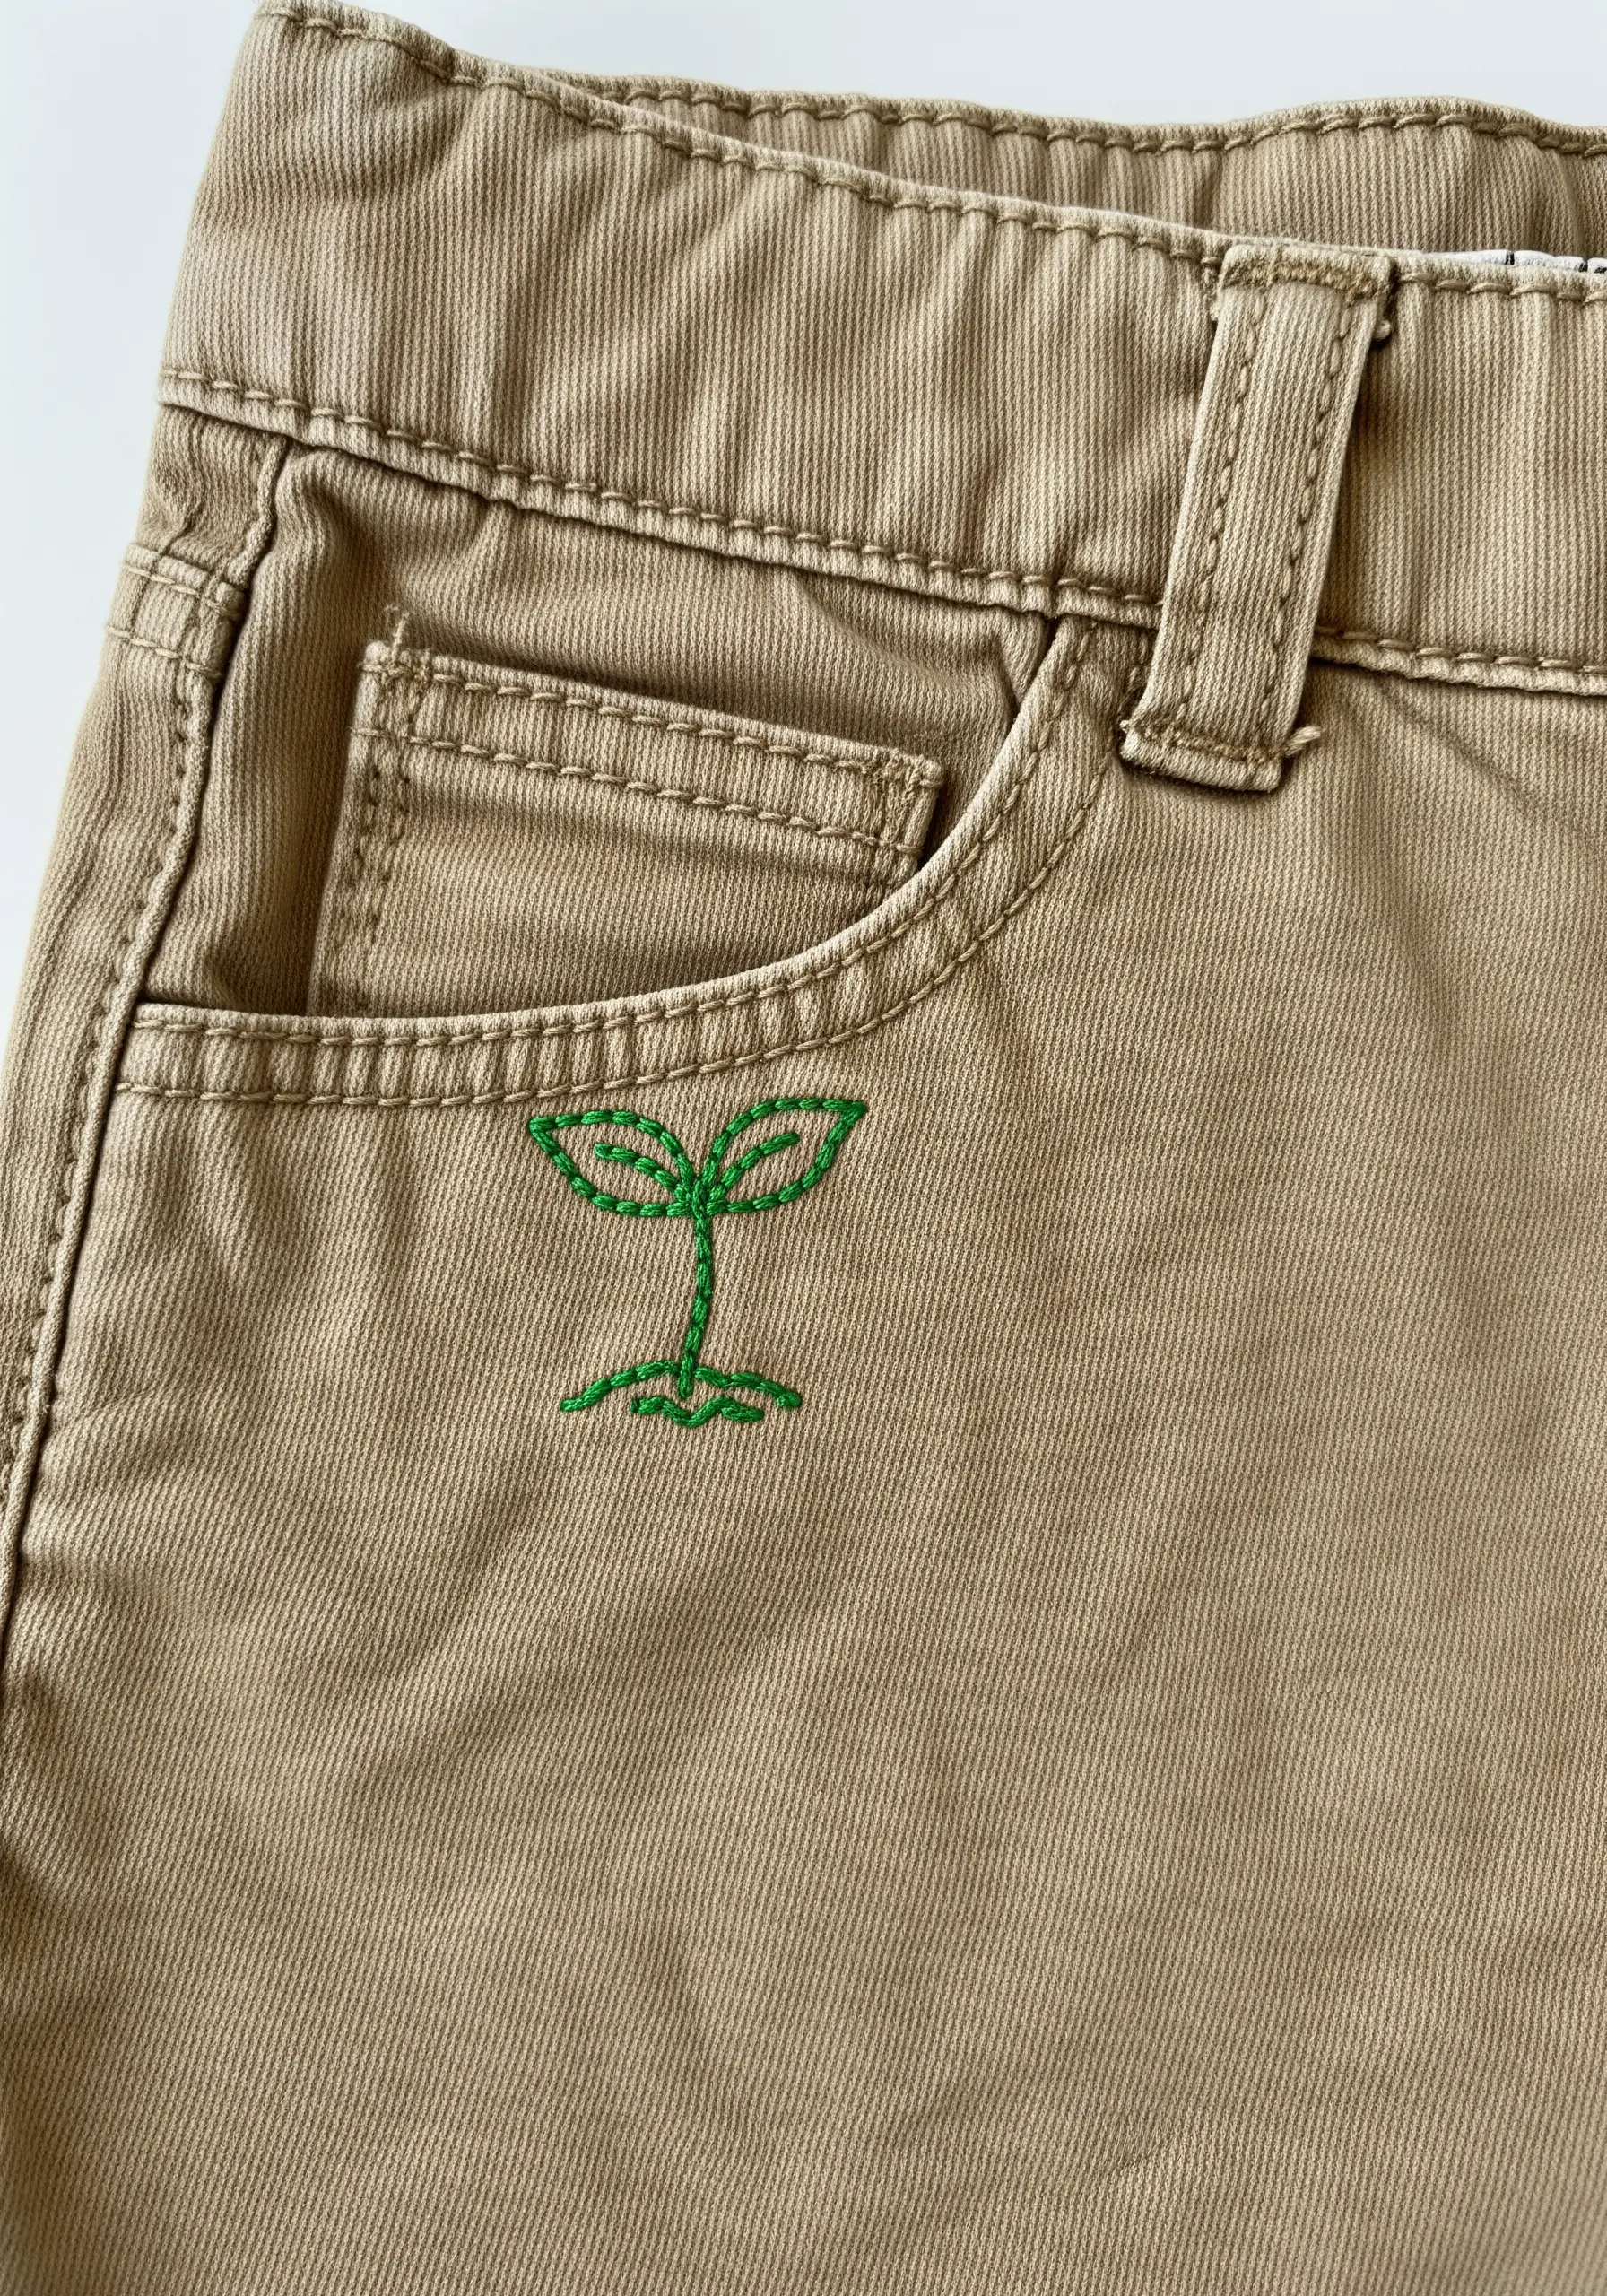
5. The Delicate Power of the Straight Stitch

Capture a sense of weightlessness and movement using only the humble straight stitch.
The magic is in the variation: alter the length and angle of each stitch radiating from the center to create a dynamic, airy form.
For maximum delicacy, especially against a heavy fabric like denim, use only a single strand of white floss.
Ground the design with a tiny, tapered satin stitch for the stem, providing a subtle anchor for the floating seeds.
6. Bold Graphics on Patterned Fabric
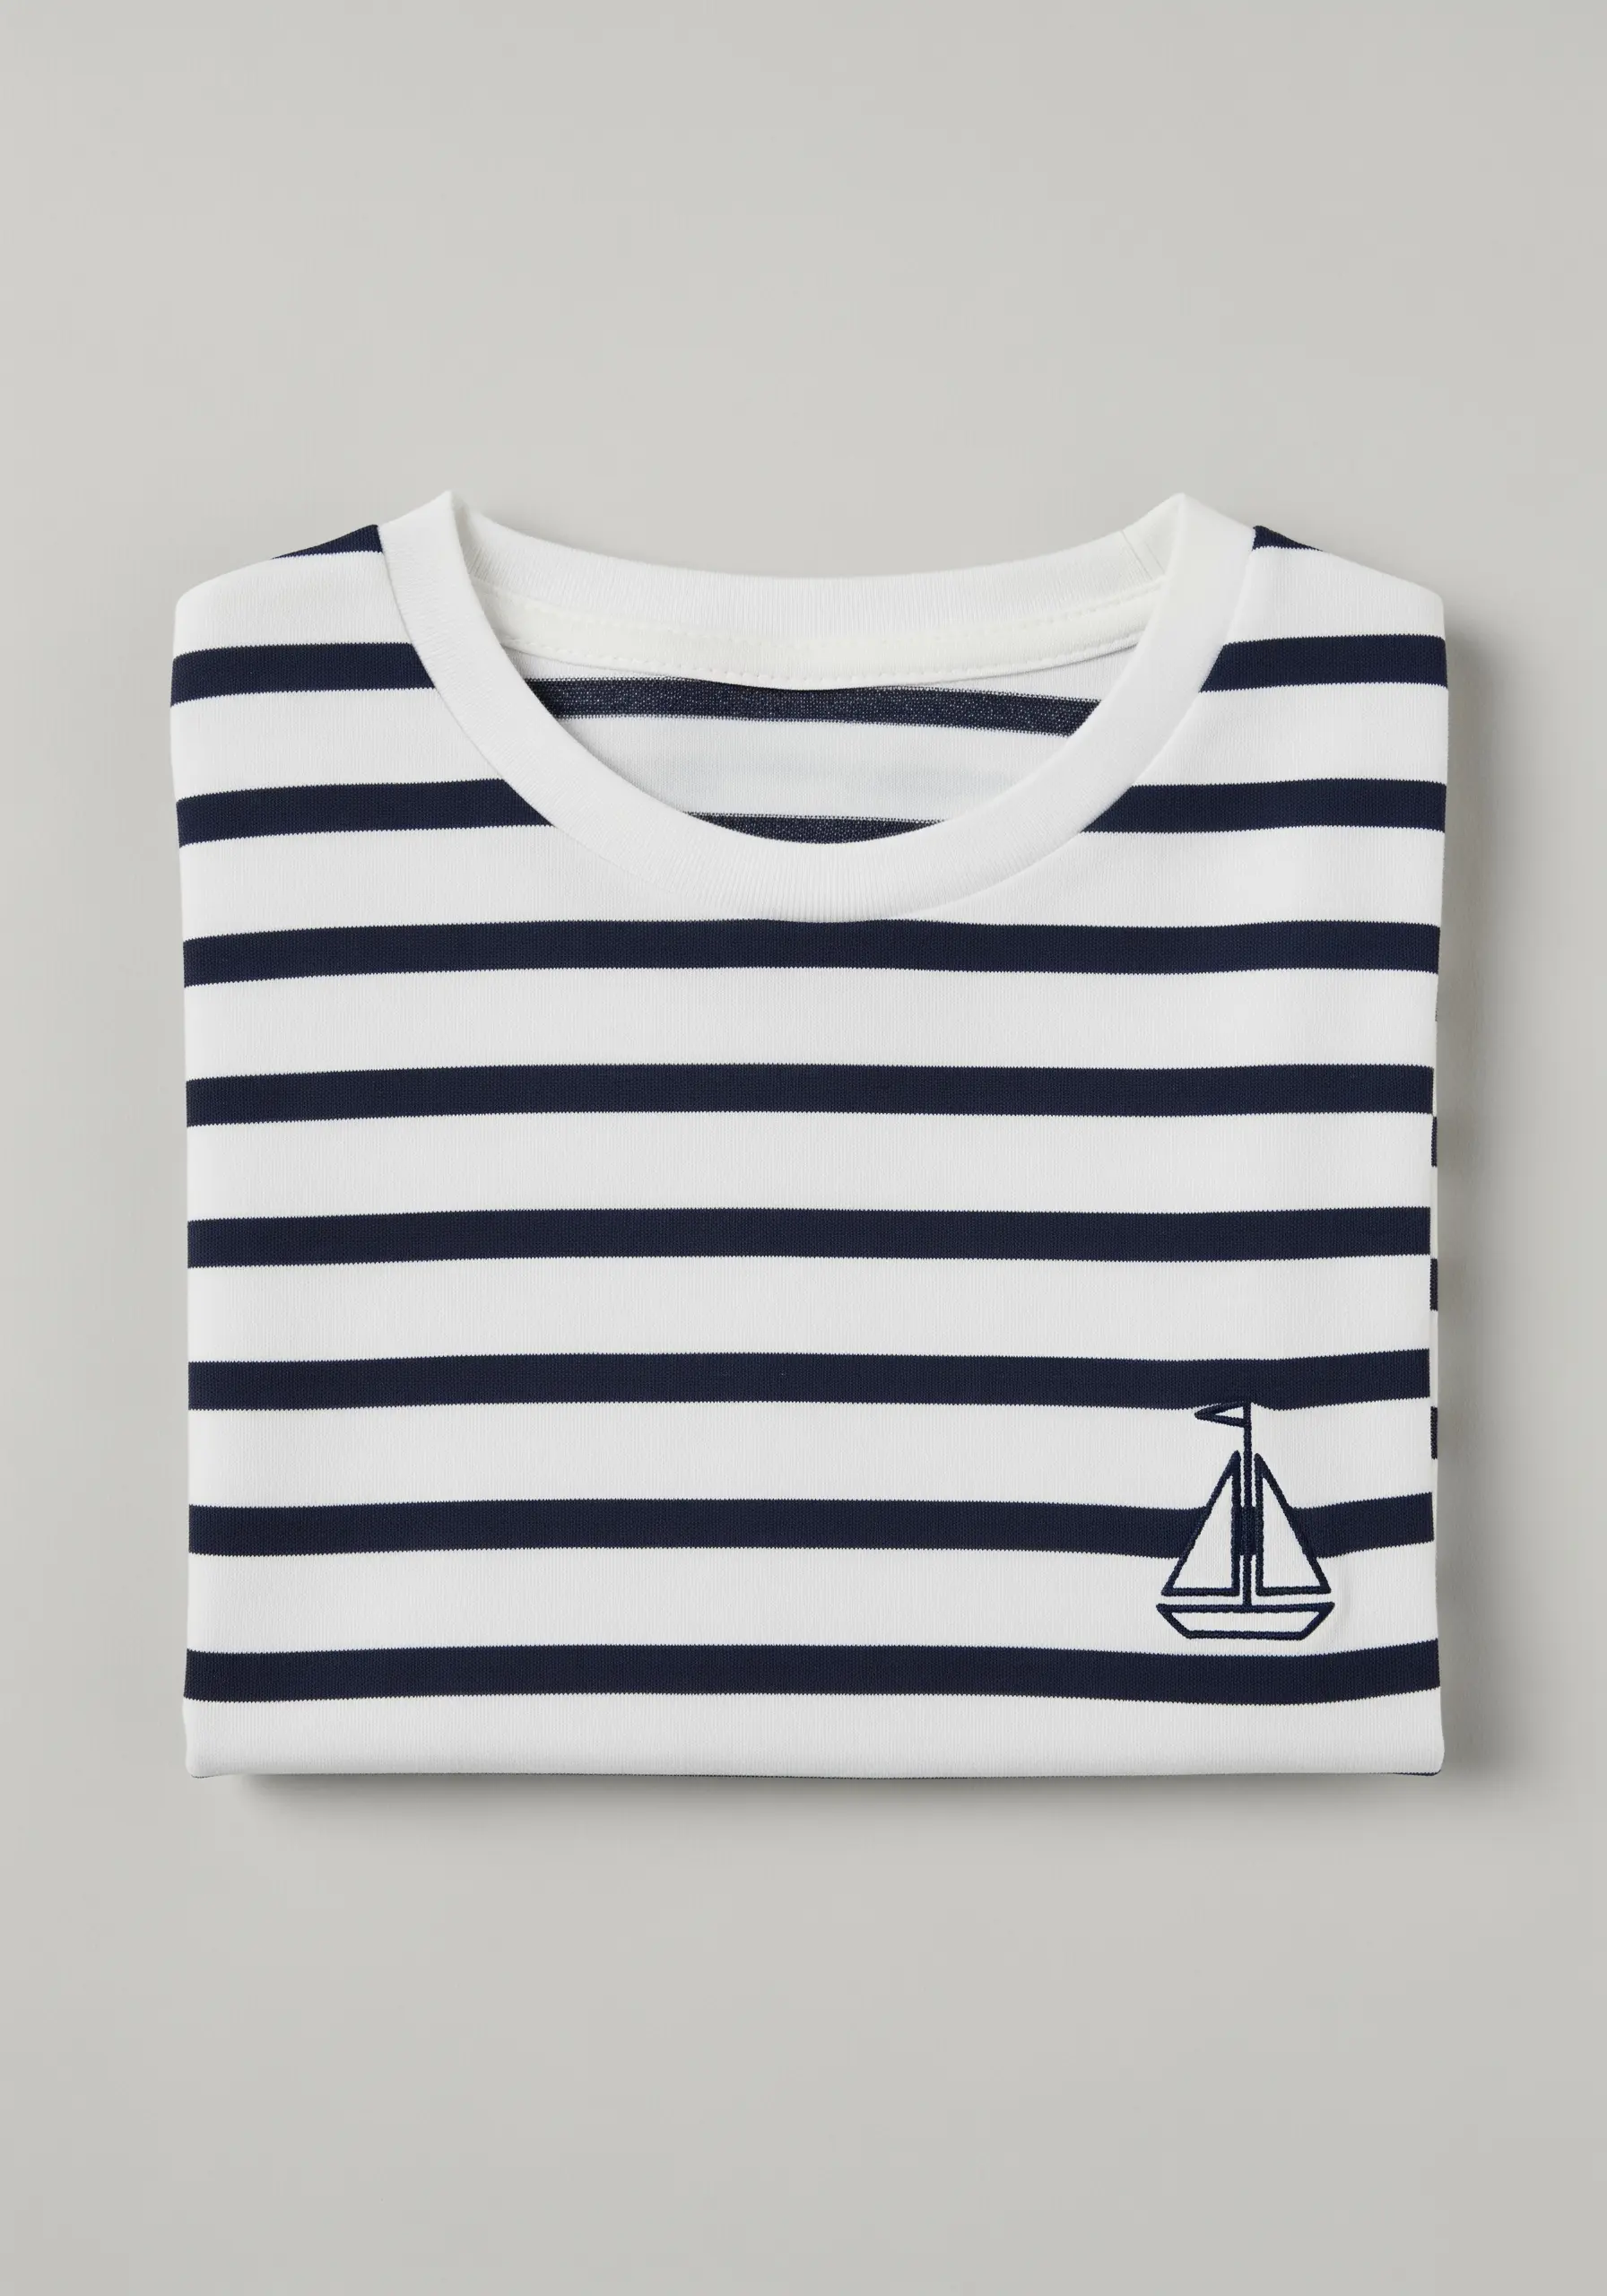
When embroidering on a patterned background like stripes, your design needs a strong presence to avoid getting lost.
Opt for a bold outline using a thick stitch like the chain stitch or a stem stitch worked with all six strands of floss.
The most crucial choice is color contrast; select a thread that stands out against every color in the fabric’s pattern for maximum visual impact.
Keep the design simple and graphic—complex details can become visually cluttered on a busy background.
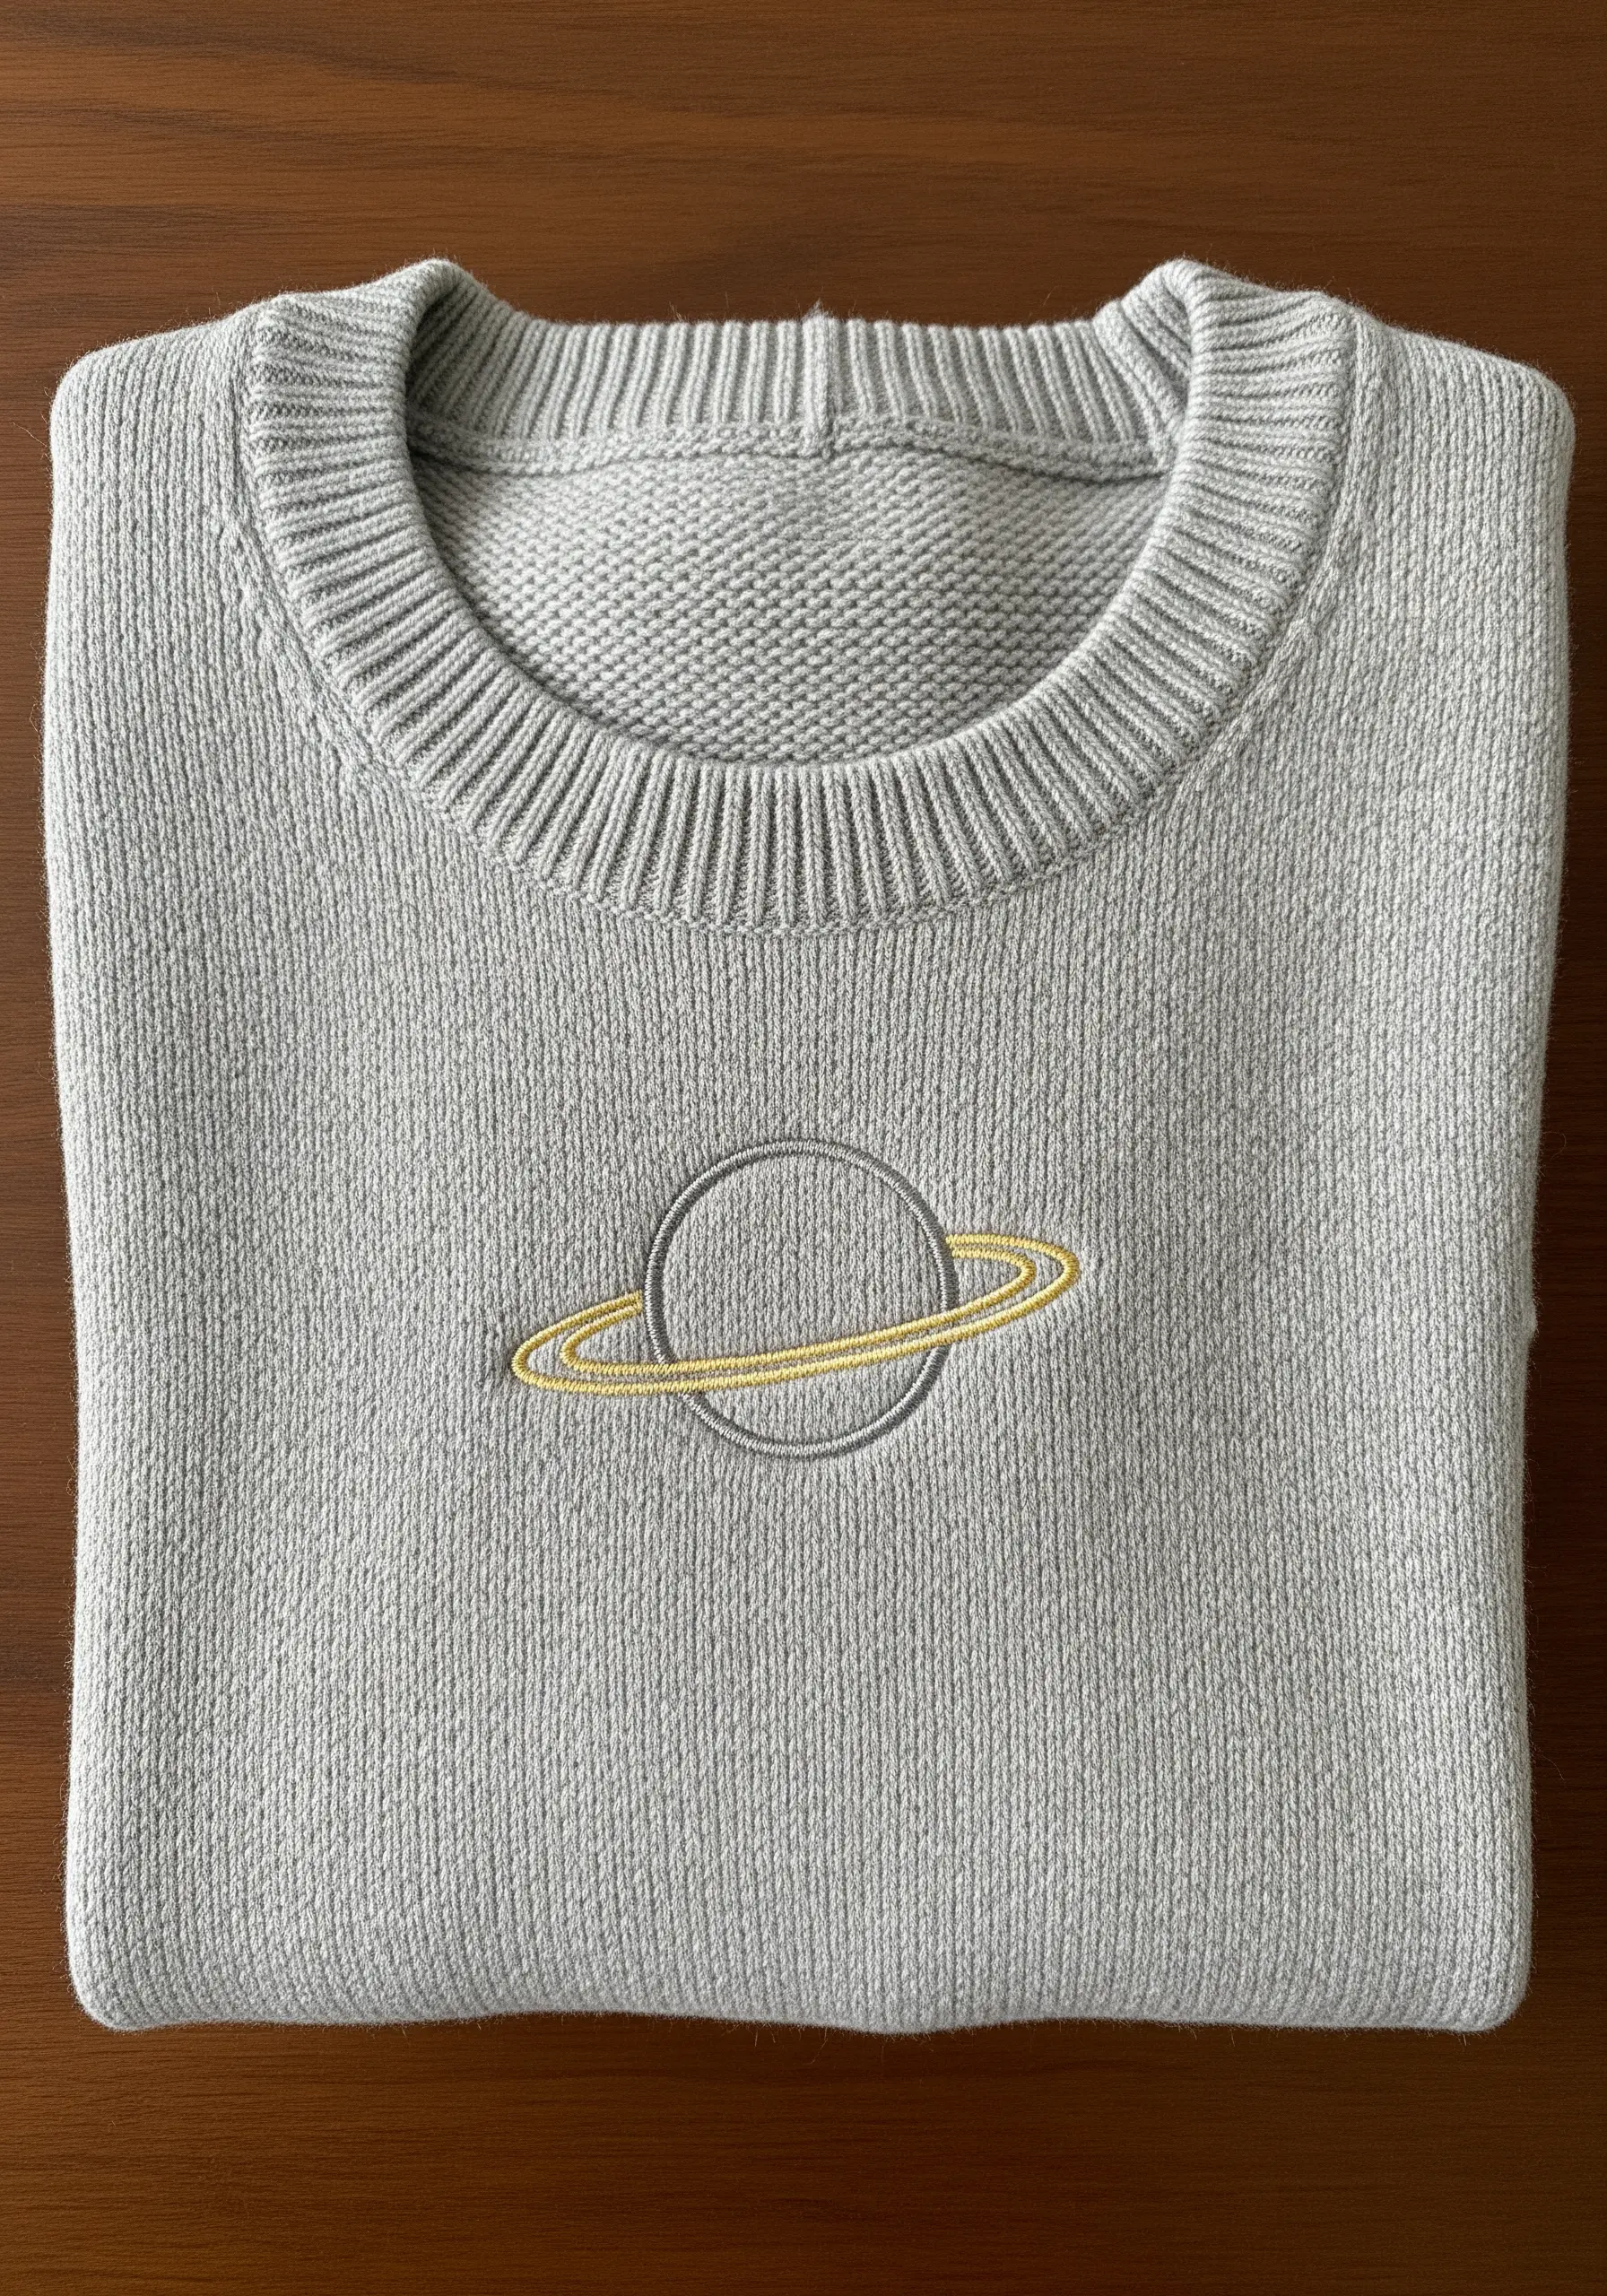
7. Creating Celestial Sparkle with Star Stitches
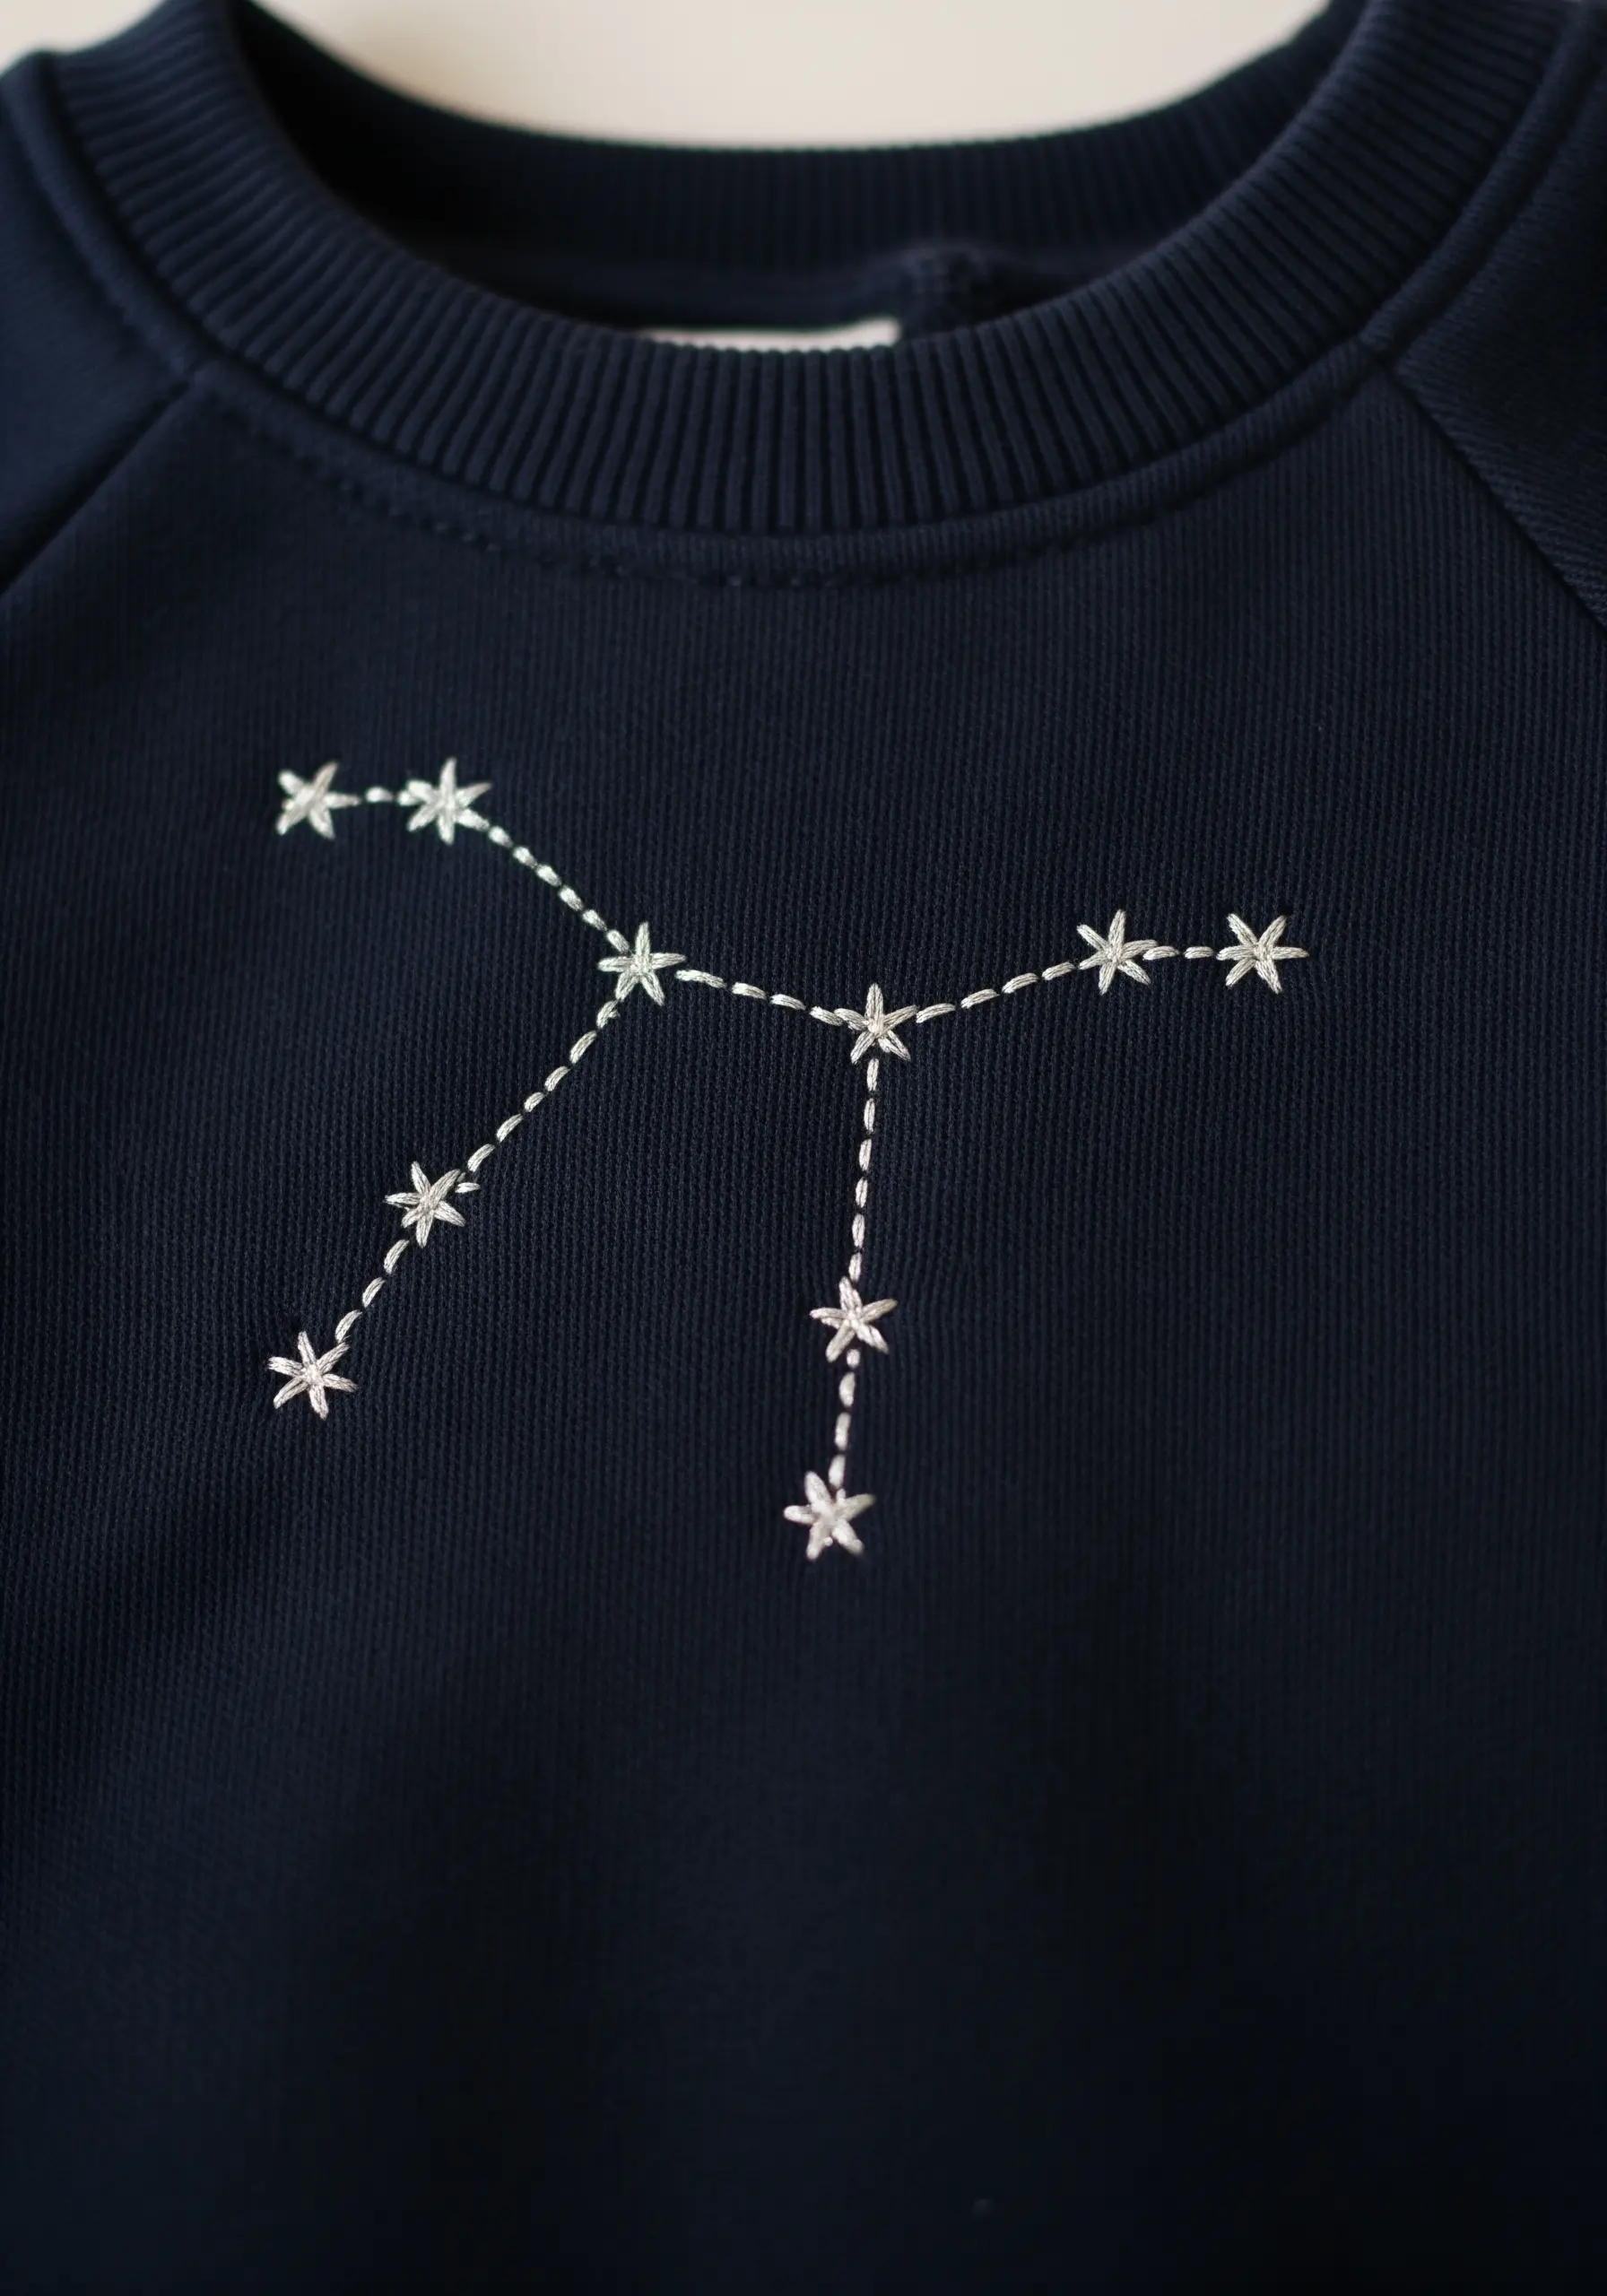
Combine two simple stitches to map out a personal constellation: straight stitches for the connecting lines and star stitches for the focal points.
To form a perfect star stitch, create an odd number of intersecting straight stitches (five is ideal) that all meet at a central point.
Elevate the design by using a single strand of metallic or high-sheen silver thread, which will catch the light and mimic the twinkle of real starlight against the dark fabric.
These are easy to make embroidery designs that are surprisingly stunning and personal.
8. Appliqué Outlines for Heavy Fabrics

Instead of struggling to stitch through thick wool or felt, create a dimensional appliqué patch.
First, embroider your design onto a separate piece of stable, non-fraying fabric like felt.
Carefully cut out the shape, leaving a tiny border, and then affix it to the garment’s lapel with a neat, almost invisible whip stitch or a decorative blanket stitch around the edge.
This method not only saves your hands but also adds a lovely raised texture to the final piece.
9. Crisp Geometric Lines on Textured Corduroy

The deep ridges of corduroy can easily pull your stitches out of alignment, making straight lines look wobbly.
The solution is to use a water-soluble stabilizer on top of the fabric. It provides a smooth, even surface to stitch on, ensuring your geometric lines remain perfectly crisp and sharp.
Once you’re finished, the stabilizer dissolves in water, leaving behind only your flawless stitching.
A simple backstitch using two or three strands of floss provides the ideal strength and definition for this type of graphic work.
10. Combining Fills and Lines for Playful Dimension
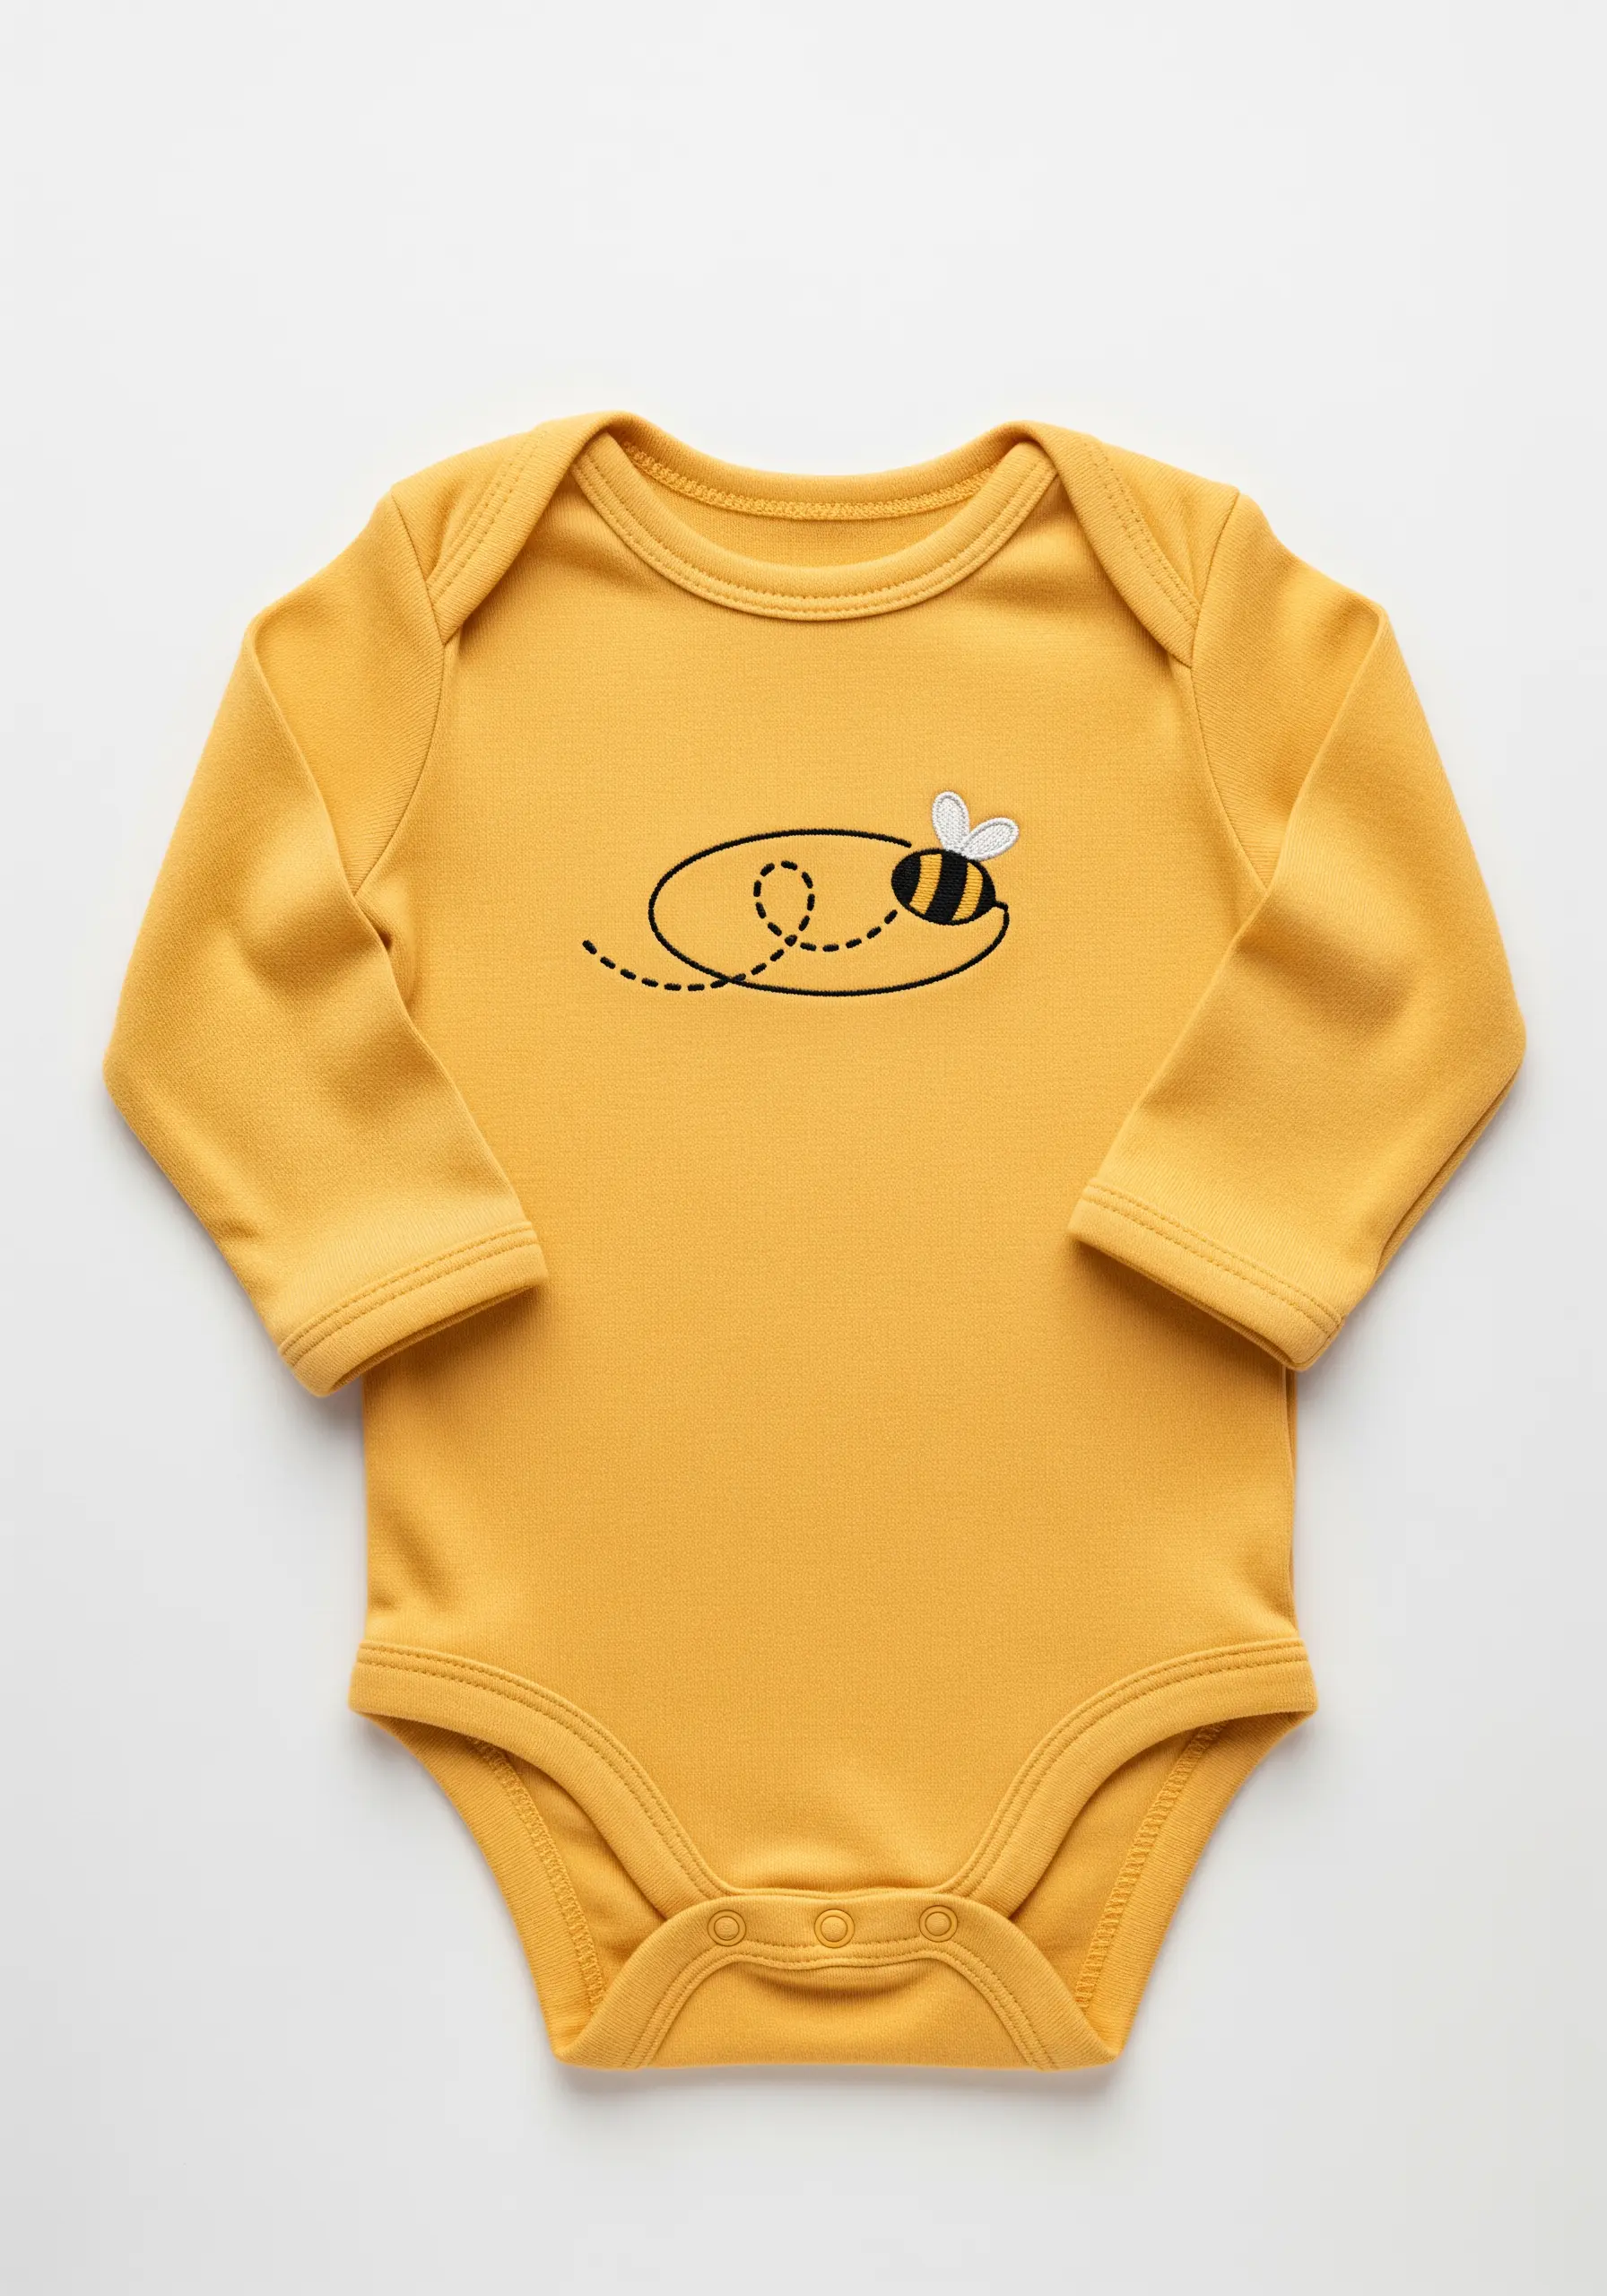
Bring a simple character to life by combining the solid coverage of satin stitch with the delicate movement of backstitch.
Use satin stitch to fill the bee’s body, creating a solid, tactile shape that draws the eye.
Then, use a single strand of black thread in a simple backstitch for the flight path and a single strand of white for the translucent wings, adding a sense of motion and lightness. This is one of many dreamy baby clothing embroidery ideas.
11. The Whipped Backstitch for Smooth, Bold Lines
For a clean, rope-like line that has more presence than a standard backstitch, turn to the whipped backstitch.
First, stitch your design using a basic backstitch. Then, take a second length of the same thread and, without piercing the fabric again, weave it or ‘whip’ it around each backstitch on the surface.
This technique fills in the gaps between stitches, resulting in a perfectly smooth, raised line that gives simple icons a polished, modern finish.
12. High-Contrast Outlines for Maximum Impact
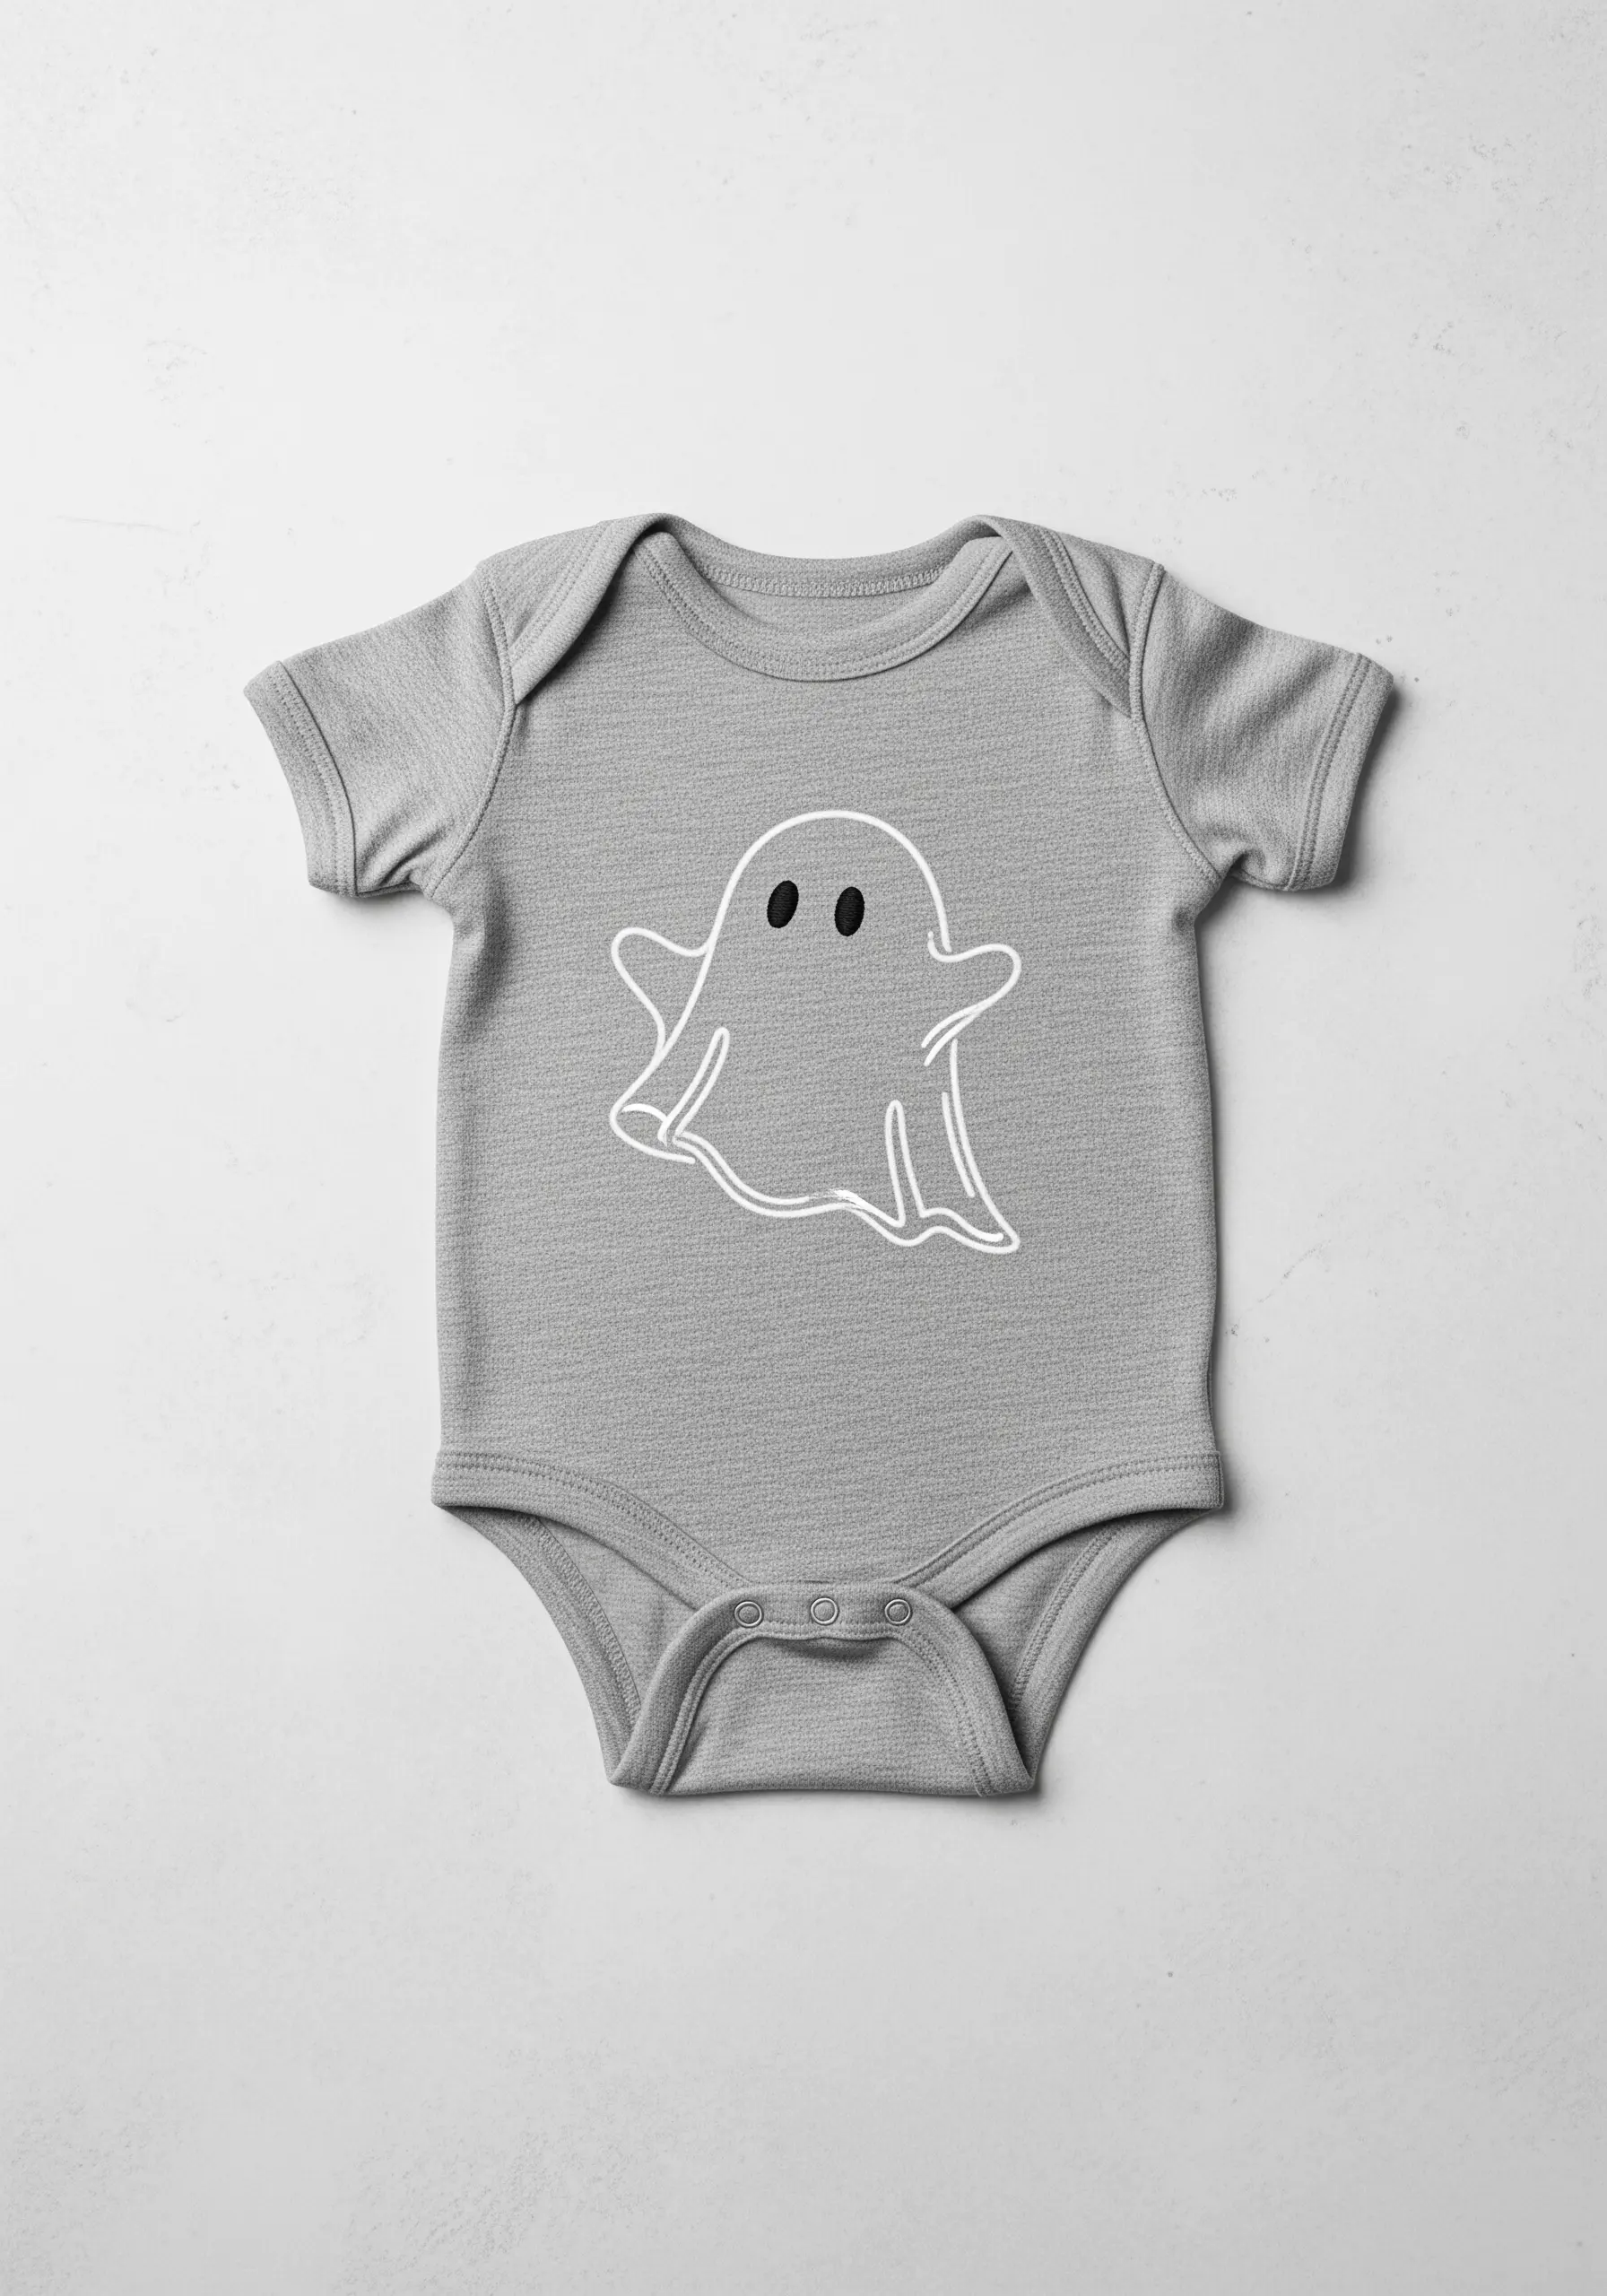
Make a simple icon pop by choosing a thread color that starkly contrasts with the base fabric, like this bright white on heather gray.
A split stitch is an excellent choice for curves, as it creates a smoother, more fluid line than a standard backstitch.
Add personality with the smallest details—two tiny French knots in a dark, contrasting color instantly create expressive eyes, turning a simple shape into a character. These details turn simple clothes into meaningful keepsakes.
13. The Power of Placement: Hemline Details

Elevate a basic garment by placing your embroidery in an unexpected spot, like right along the hemline.
This subtle placement feels intentional and custom-made, drawing the eye to a small, delightful detail.
For fine-line illustrations like this, use only a single strand of embroidery floss and a tiny backstitch. This keeps the design flexible and prevents it from making the soft t-shirt fabric stiff.
Consider other surprising spots: just above a cuff, on the corner of a pocket, or peeking out from a placket.
14. Bold Outlines for Chunky Knits
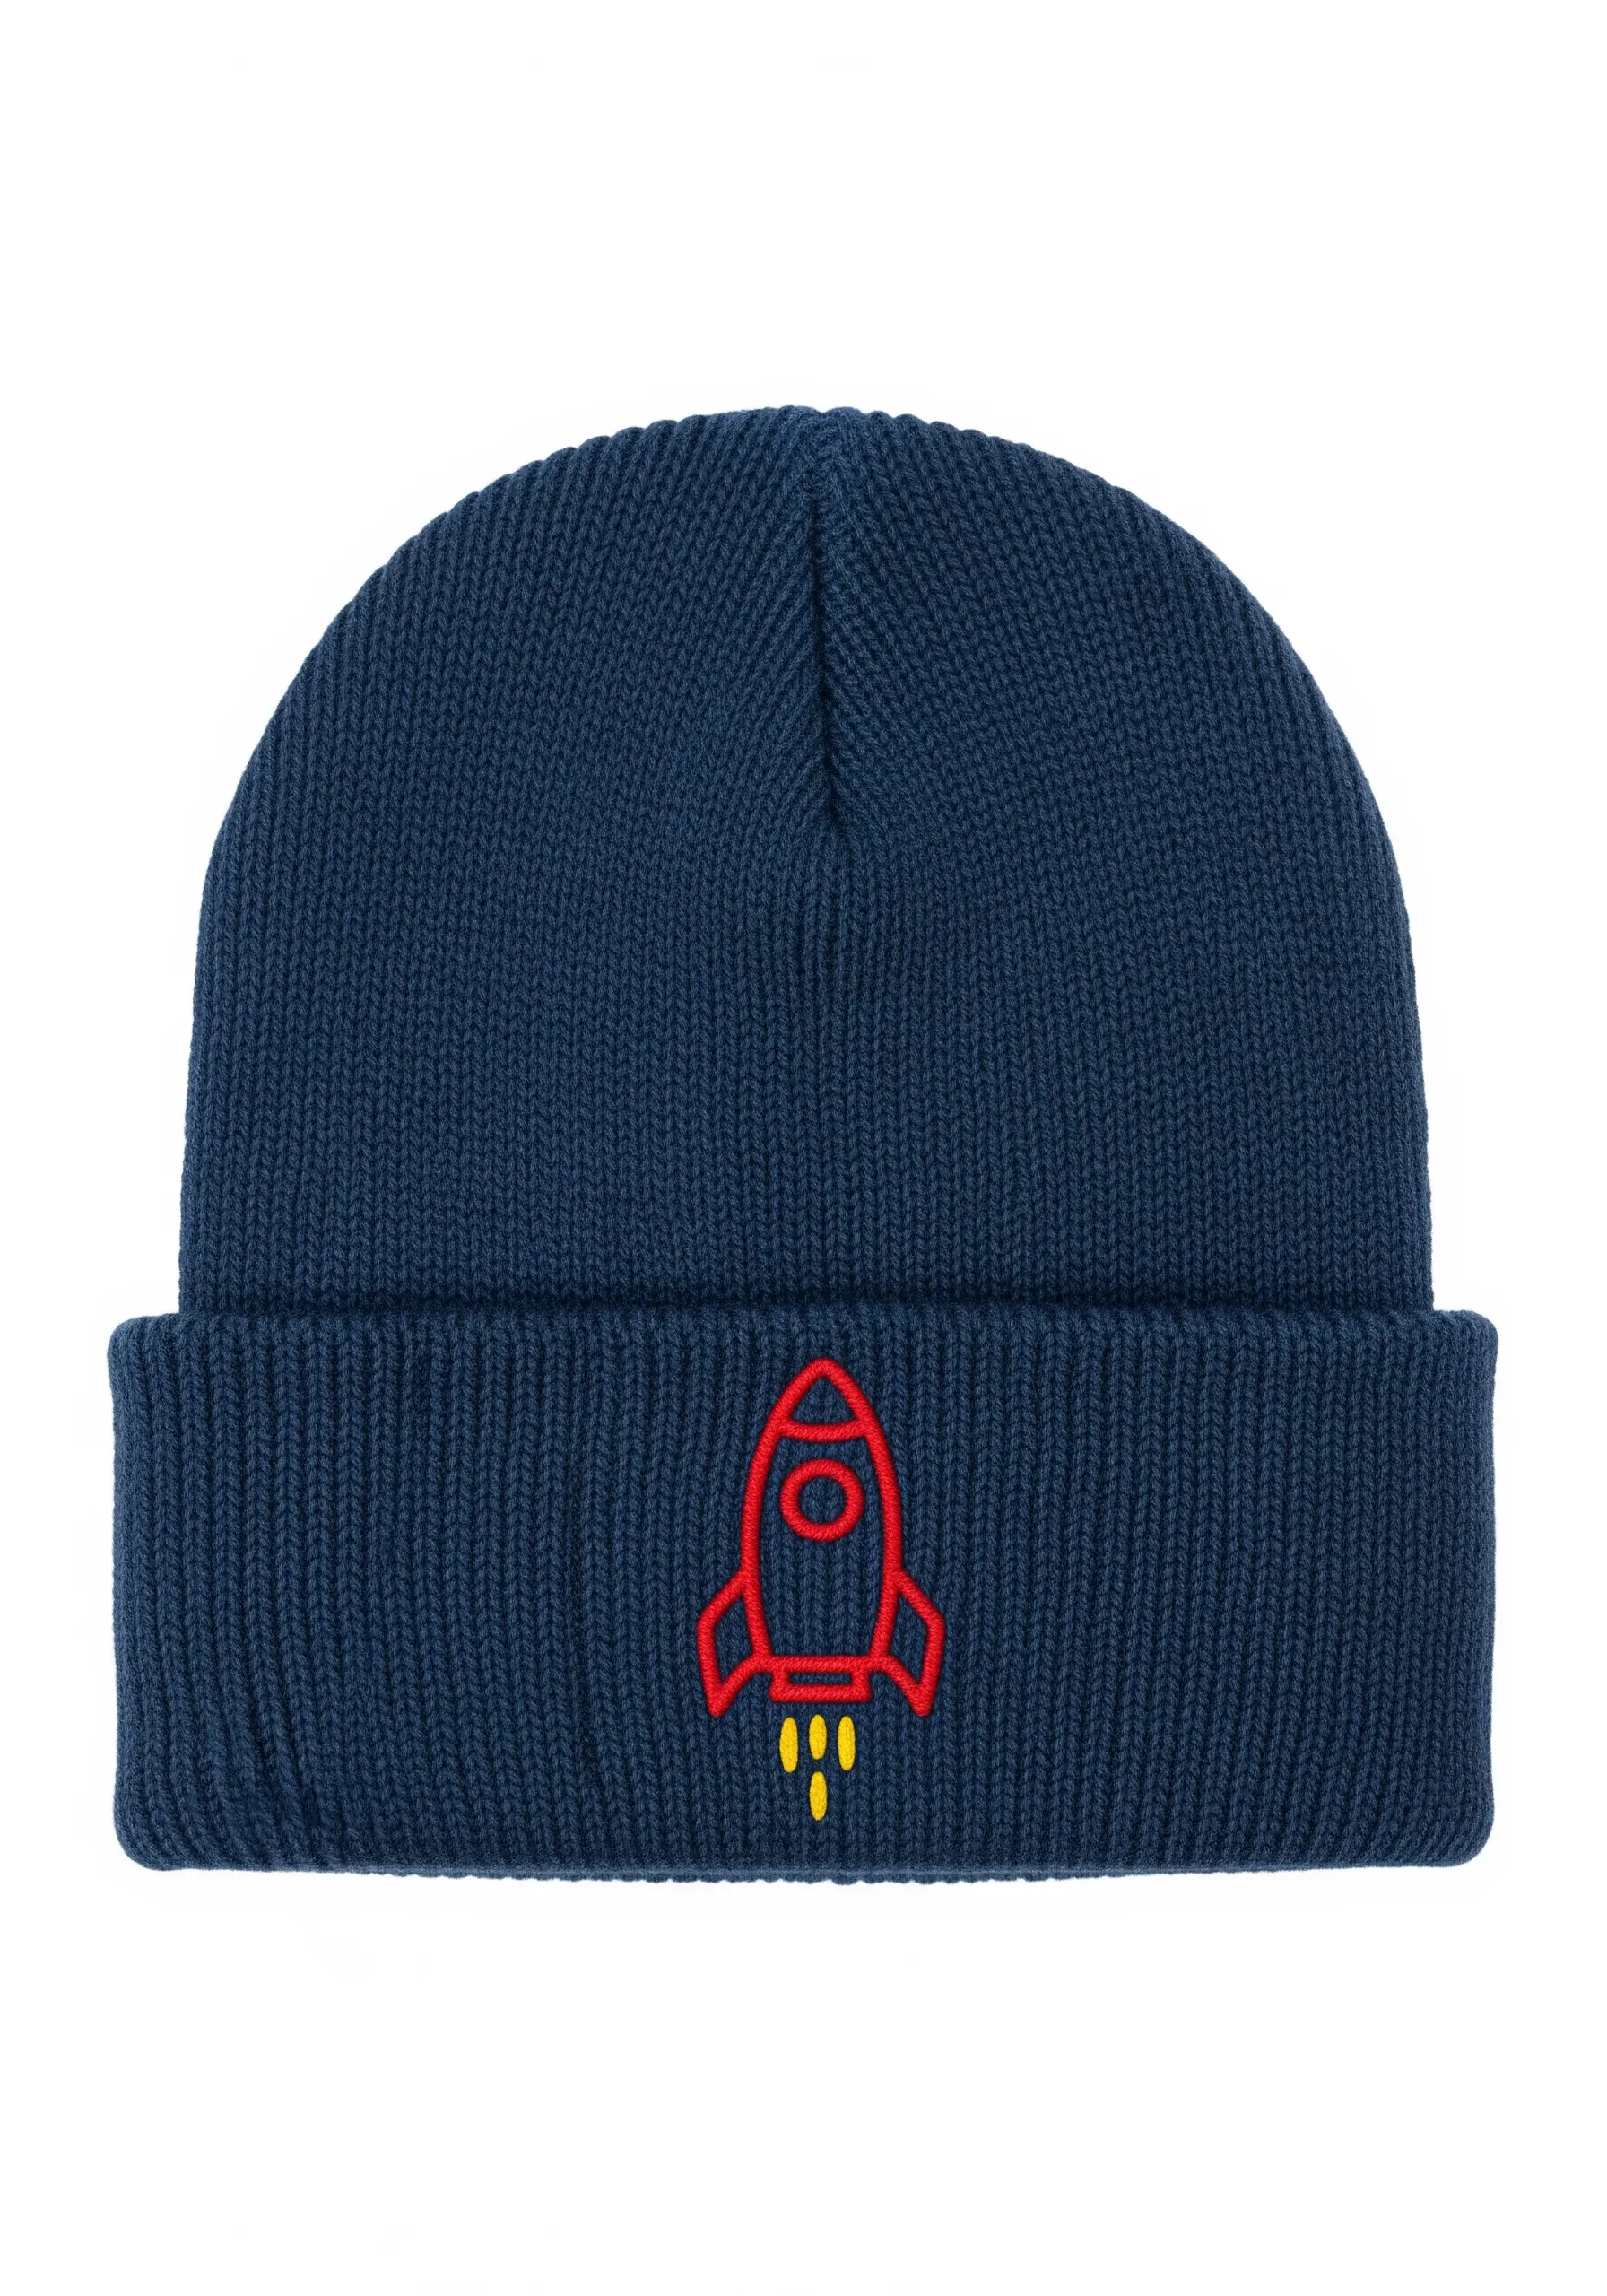
When stitching on heavily textured fabric like a ribbed beanie, your stitches can sink and disappear into the valleys of the knit.
Combat this by using a bold stitch that sits on top of the fabric, such as a chain stitch or a heavy stem stitch worked with all six strands of floss.
A bright, high-contrast color choice is also essential for visibility. This vibrant red on deep navy ensures the rocket’s graphic shape is the star of the show.
15. Using Metallic Thread for a Touch of Magic

Metallic thread adds an instant touch of luxury and whimsy, but it requires a gentle hand.
To prevent the thread from snagging and fraying, work with shorter lengths than you normally would—no more than 12 inches at a time.
Using a thread conditioner (like Thread Magic or even beeswax) can also dramatically reduce friction and make stitching smoother.
The subtle shimmer is perfect for adding a secret, magical detail to a placket or cuff, creating one of those tiny stitched details that add a luxe touch.
16. Clean Line Art on Canvas
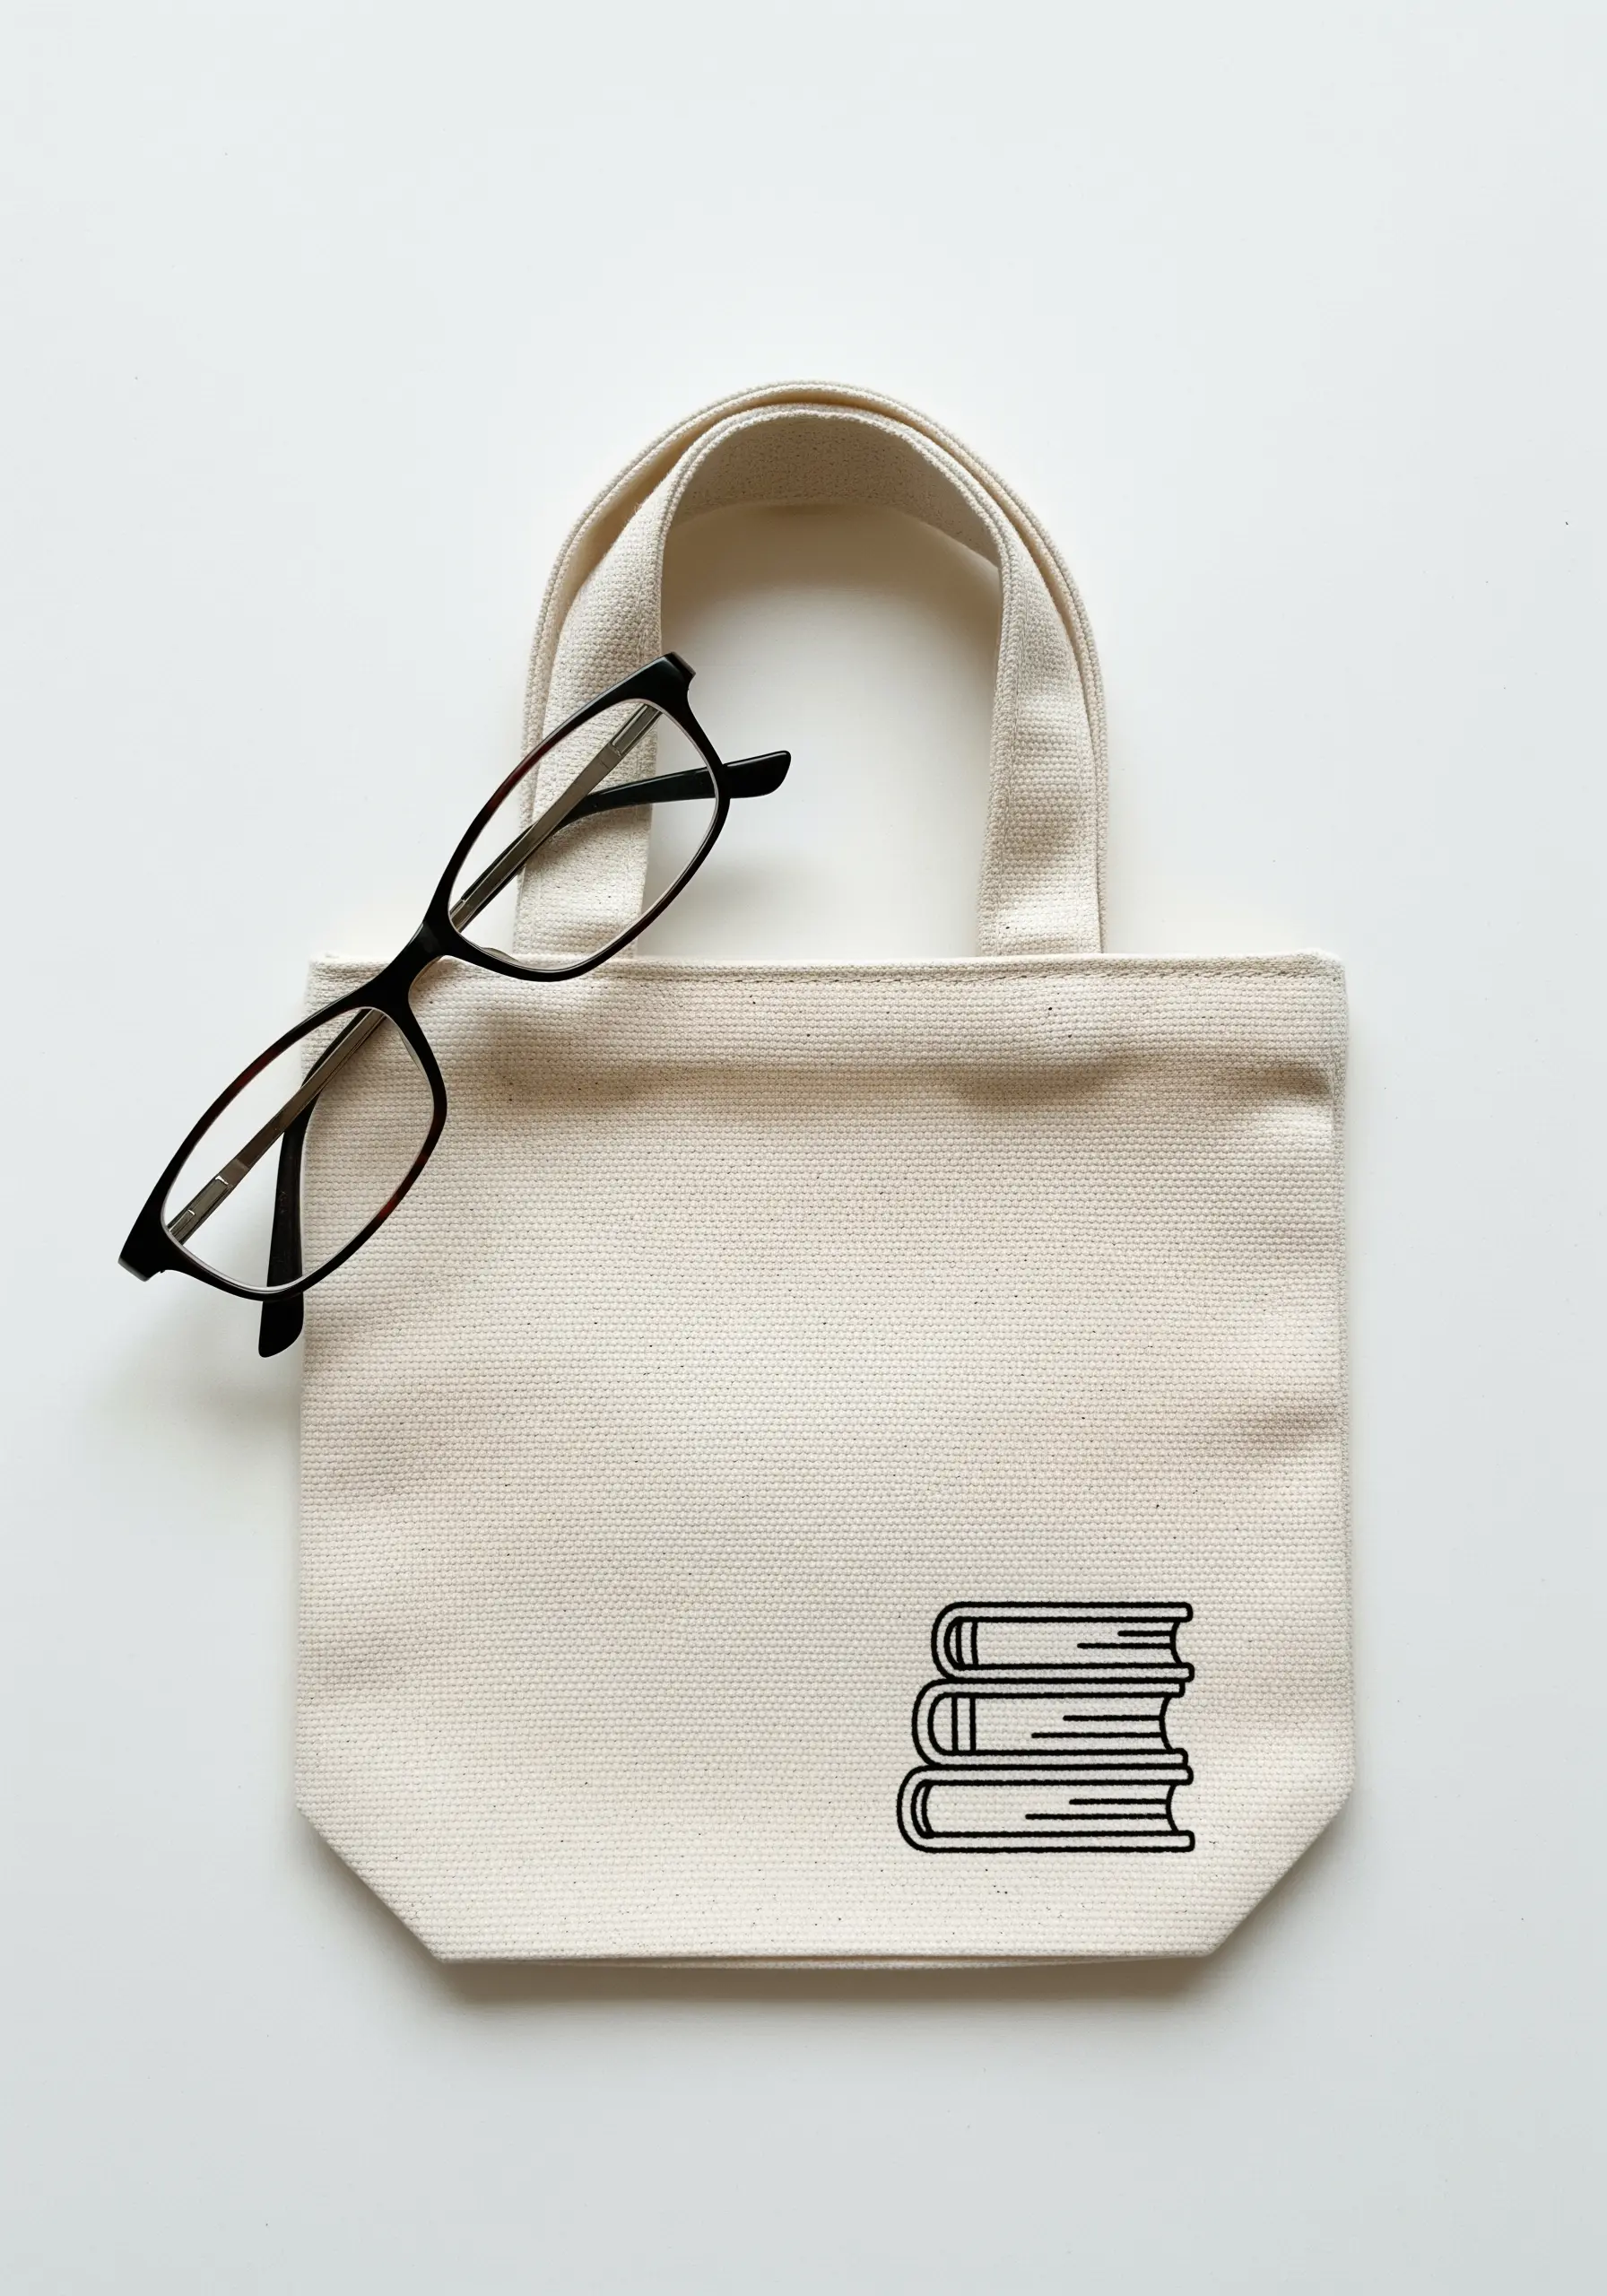
Canvas and other stable, non-stretch cottons are the perfect base for crisp, graphic embroidery.
For perfectly straight and parallel lines, don’t rely on guesswork. Use a water-soluble fabric marker to draw your guidelines directly onto the fabric before you start stitching.
A simple backstitch worked with three strands of embroidery floss provides a line that is substantial enough to feel bold but clean enough to look refined. This is one of many great tote bag embroidery projects you can try.
17. Shading with Thread Weight on Gauzy Fabric

You can create beautiful, subtle shading without changing colors by simply changing the number of threads you’re using.
For this feather, use a thicker bundle (3-4 strands) for the central shaft to give it structure and weight.
Then, for the delicate barbs, split your floss down to a single strand. This dramatic shift in thread weight creates a realistic sense of depth and lightness.
On open-weave fabrics like muslin or gauze, always use a stabilizer to prevent your stitches from pulling the delicate material.


