

You have the threads, the needles, and a love for the quiet rhythm of stitching. But sometimes, you feel a creative plateau. How do you push your work beyond the familiar comfort of the hoop and fabric? The answer might be found in an unexpected material: paper.
Think of paper not as a replacement for fabric, but as its creative partner. It offers a stable, crisp foundation where every single stitch stands out with intention and clarity. Paper allows you to play with layering, sharp edges, and graphic compositions in a way that fabric cannot, giving your thread work a new, modern context.
These ideas are not about mastering complex new skills. They are about shifting your perspective. By combining the tactile softness of thread with the graphic nature of paper, you open up a world of texture, depth, and storytelling. Let this be your invitation to experiment, to cut, to tear, to layer, and to stitch your way to your most expressive work yet.
1. Botanical Pressings with Threaded Veins
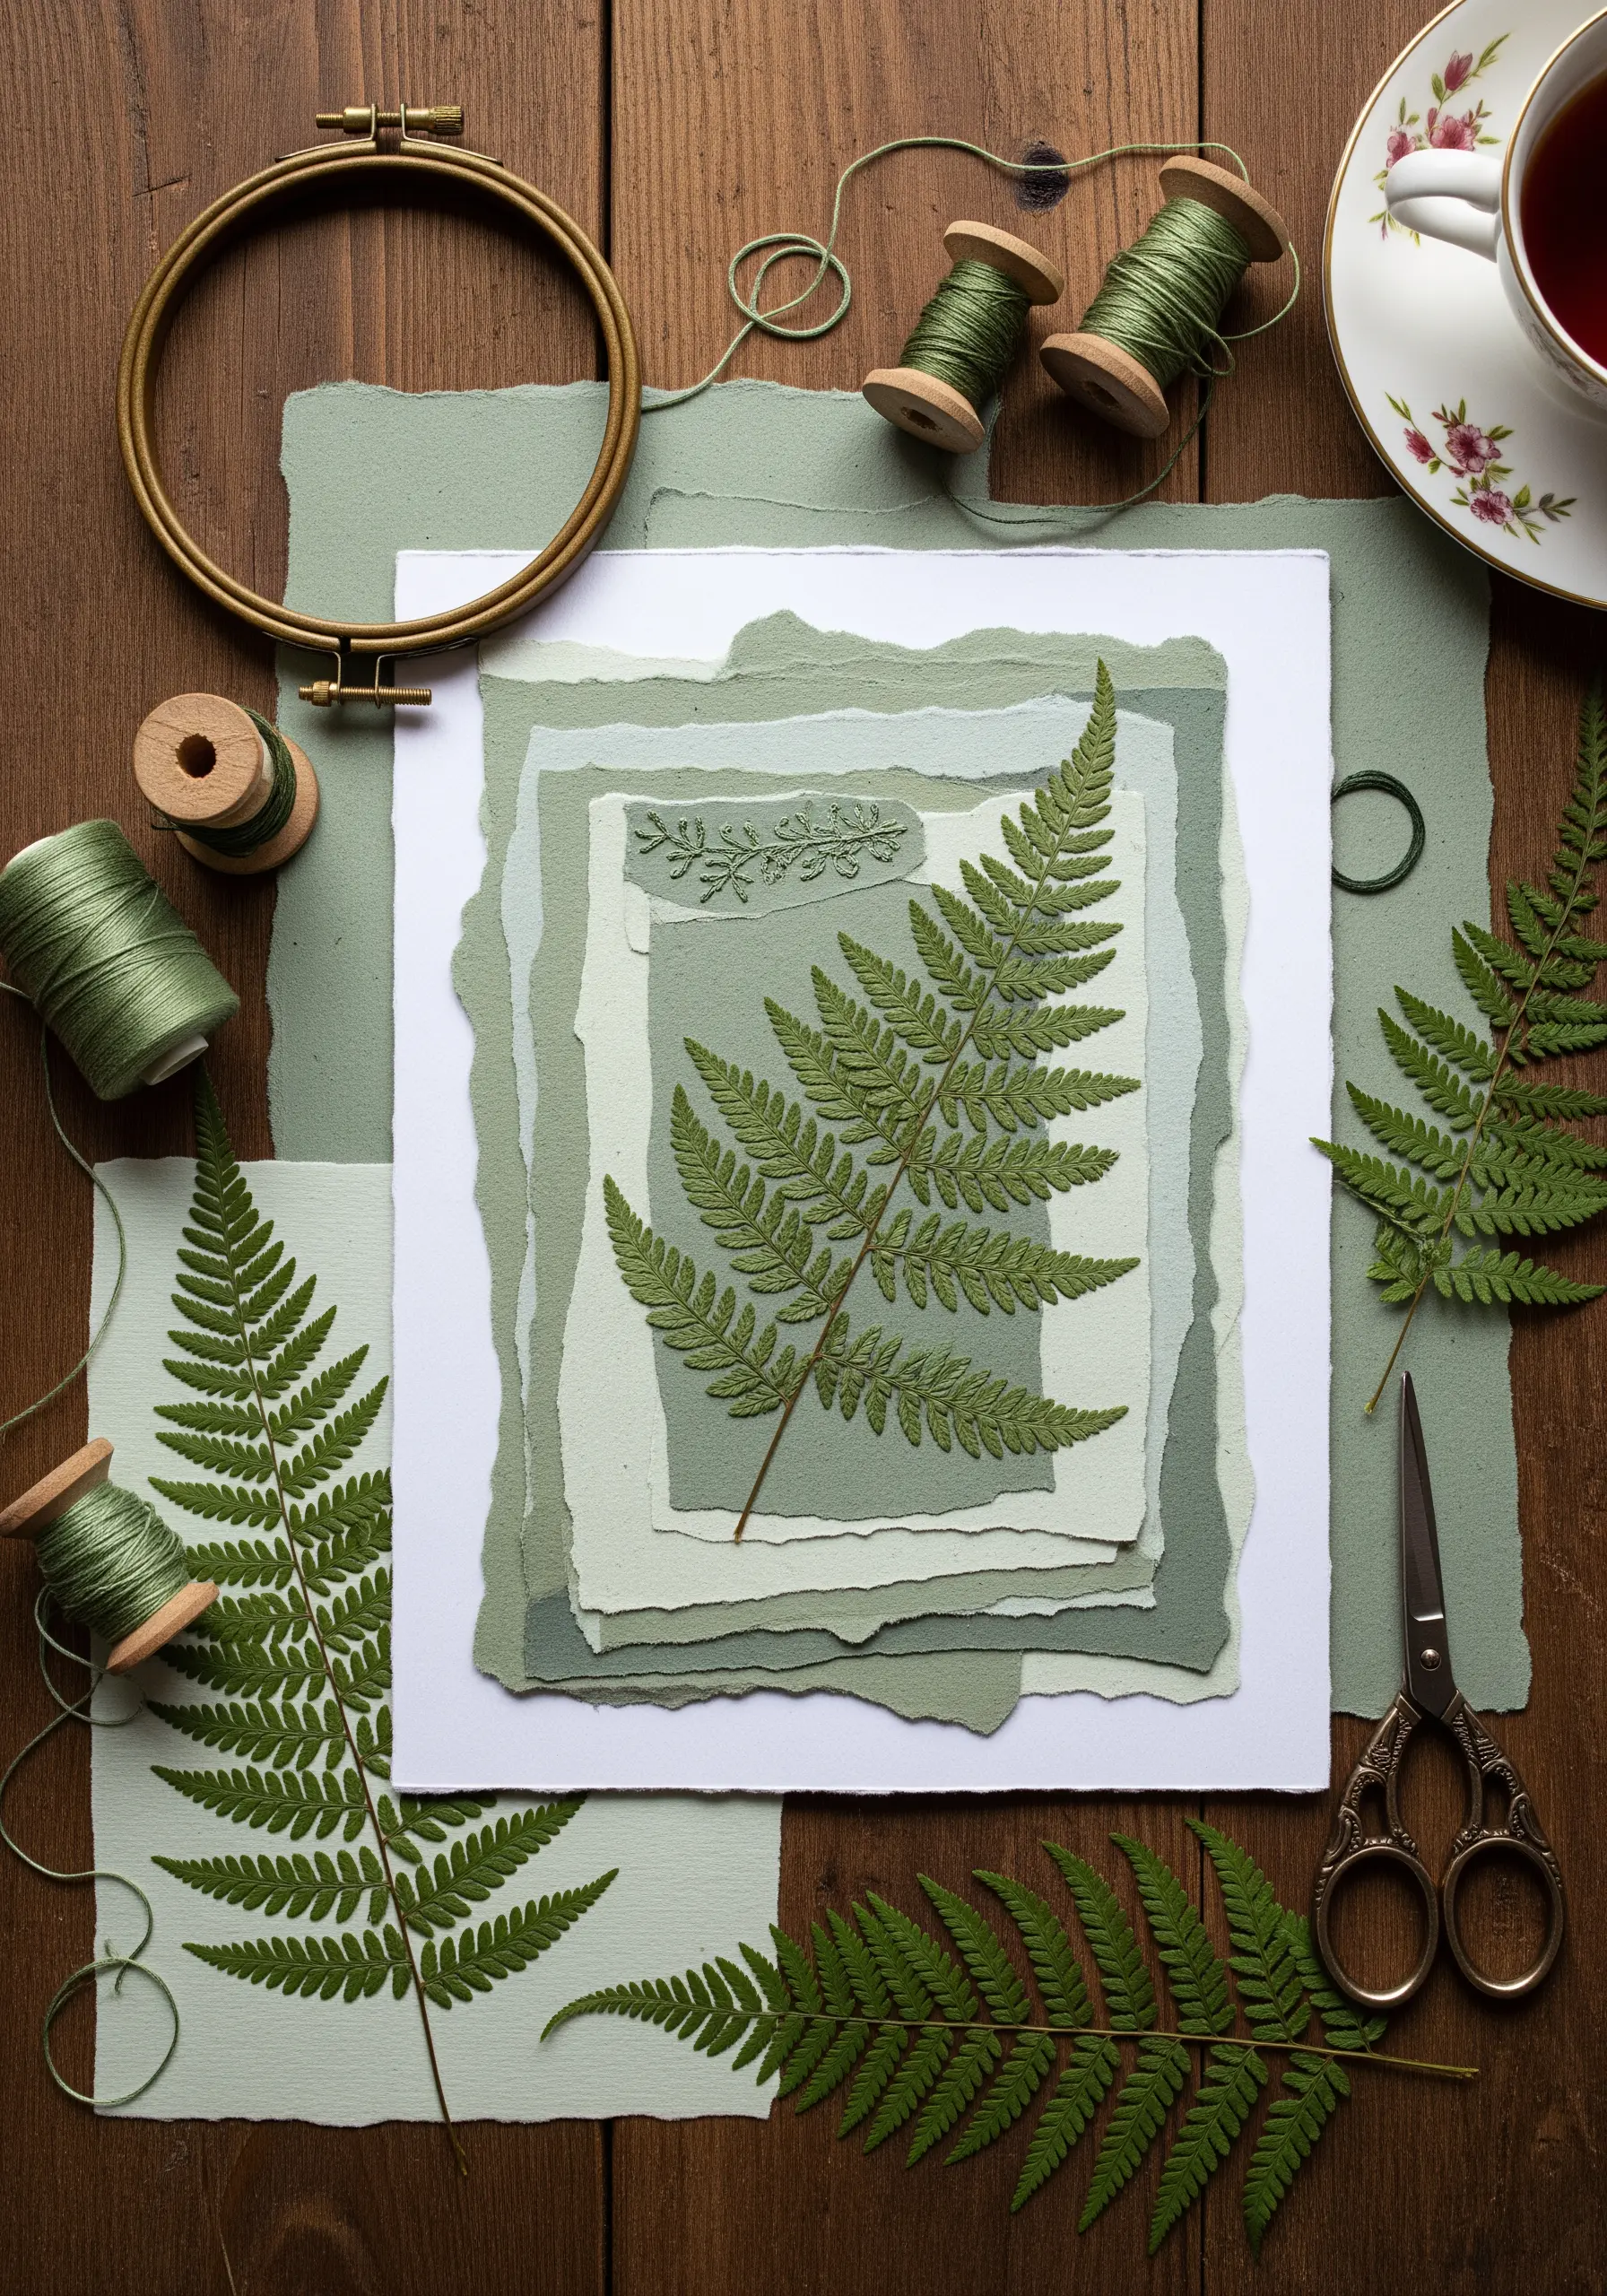
Begin by layering handmade paper in harmonious shades of green, using torn edges to create soft, organic strata.
Once you’ve placed a pressed fern or leaf, use a single strand of embroidery floss in a matching color to add subtle definition.
Trace the central stem with a simple backstitch or stem stitch; this reinforces the botanical’s structure without overpowering its natural delicacy.
The goal isn’t to outline the entire leaf, but to add a whisper of texture that catches the light and merges the pressed element with the paper background.
This technique turns a simple nature collage into a piece of refined botanical textile art.
2. Celestial Maps on Cardstock
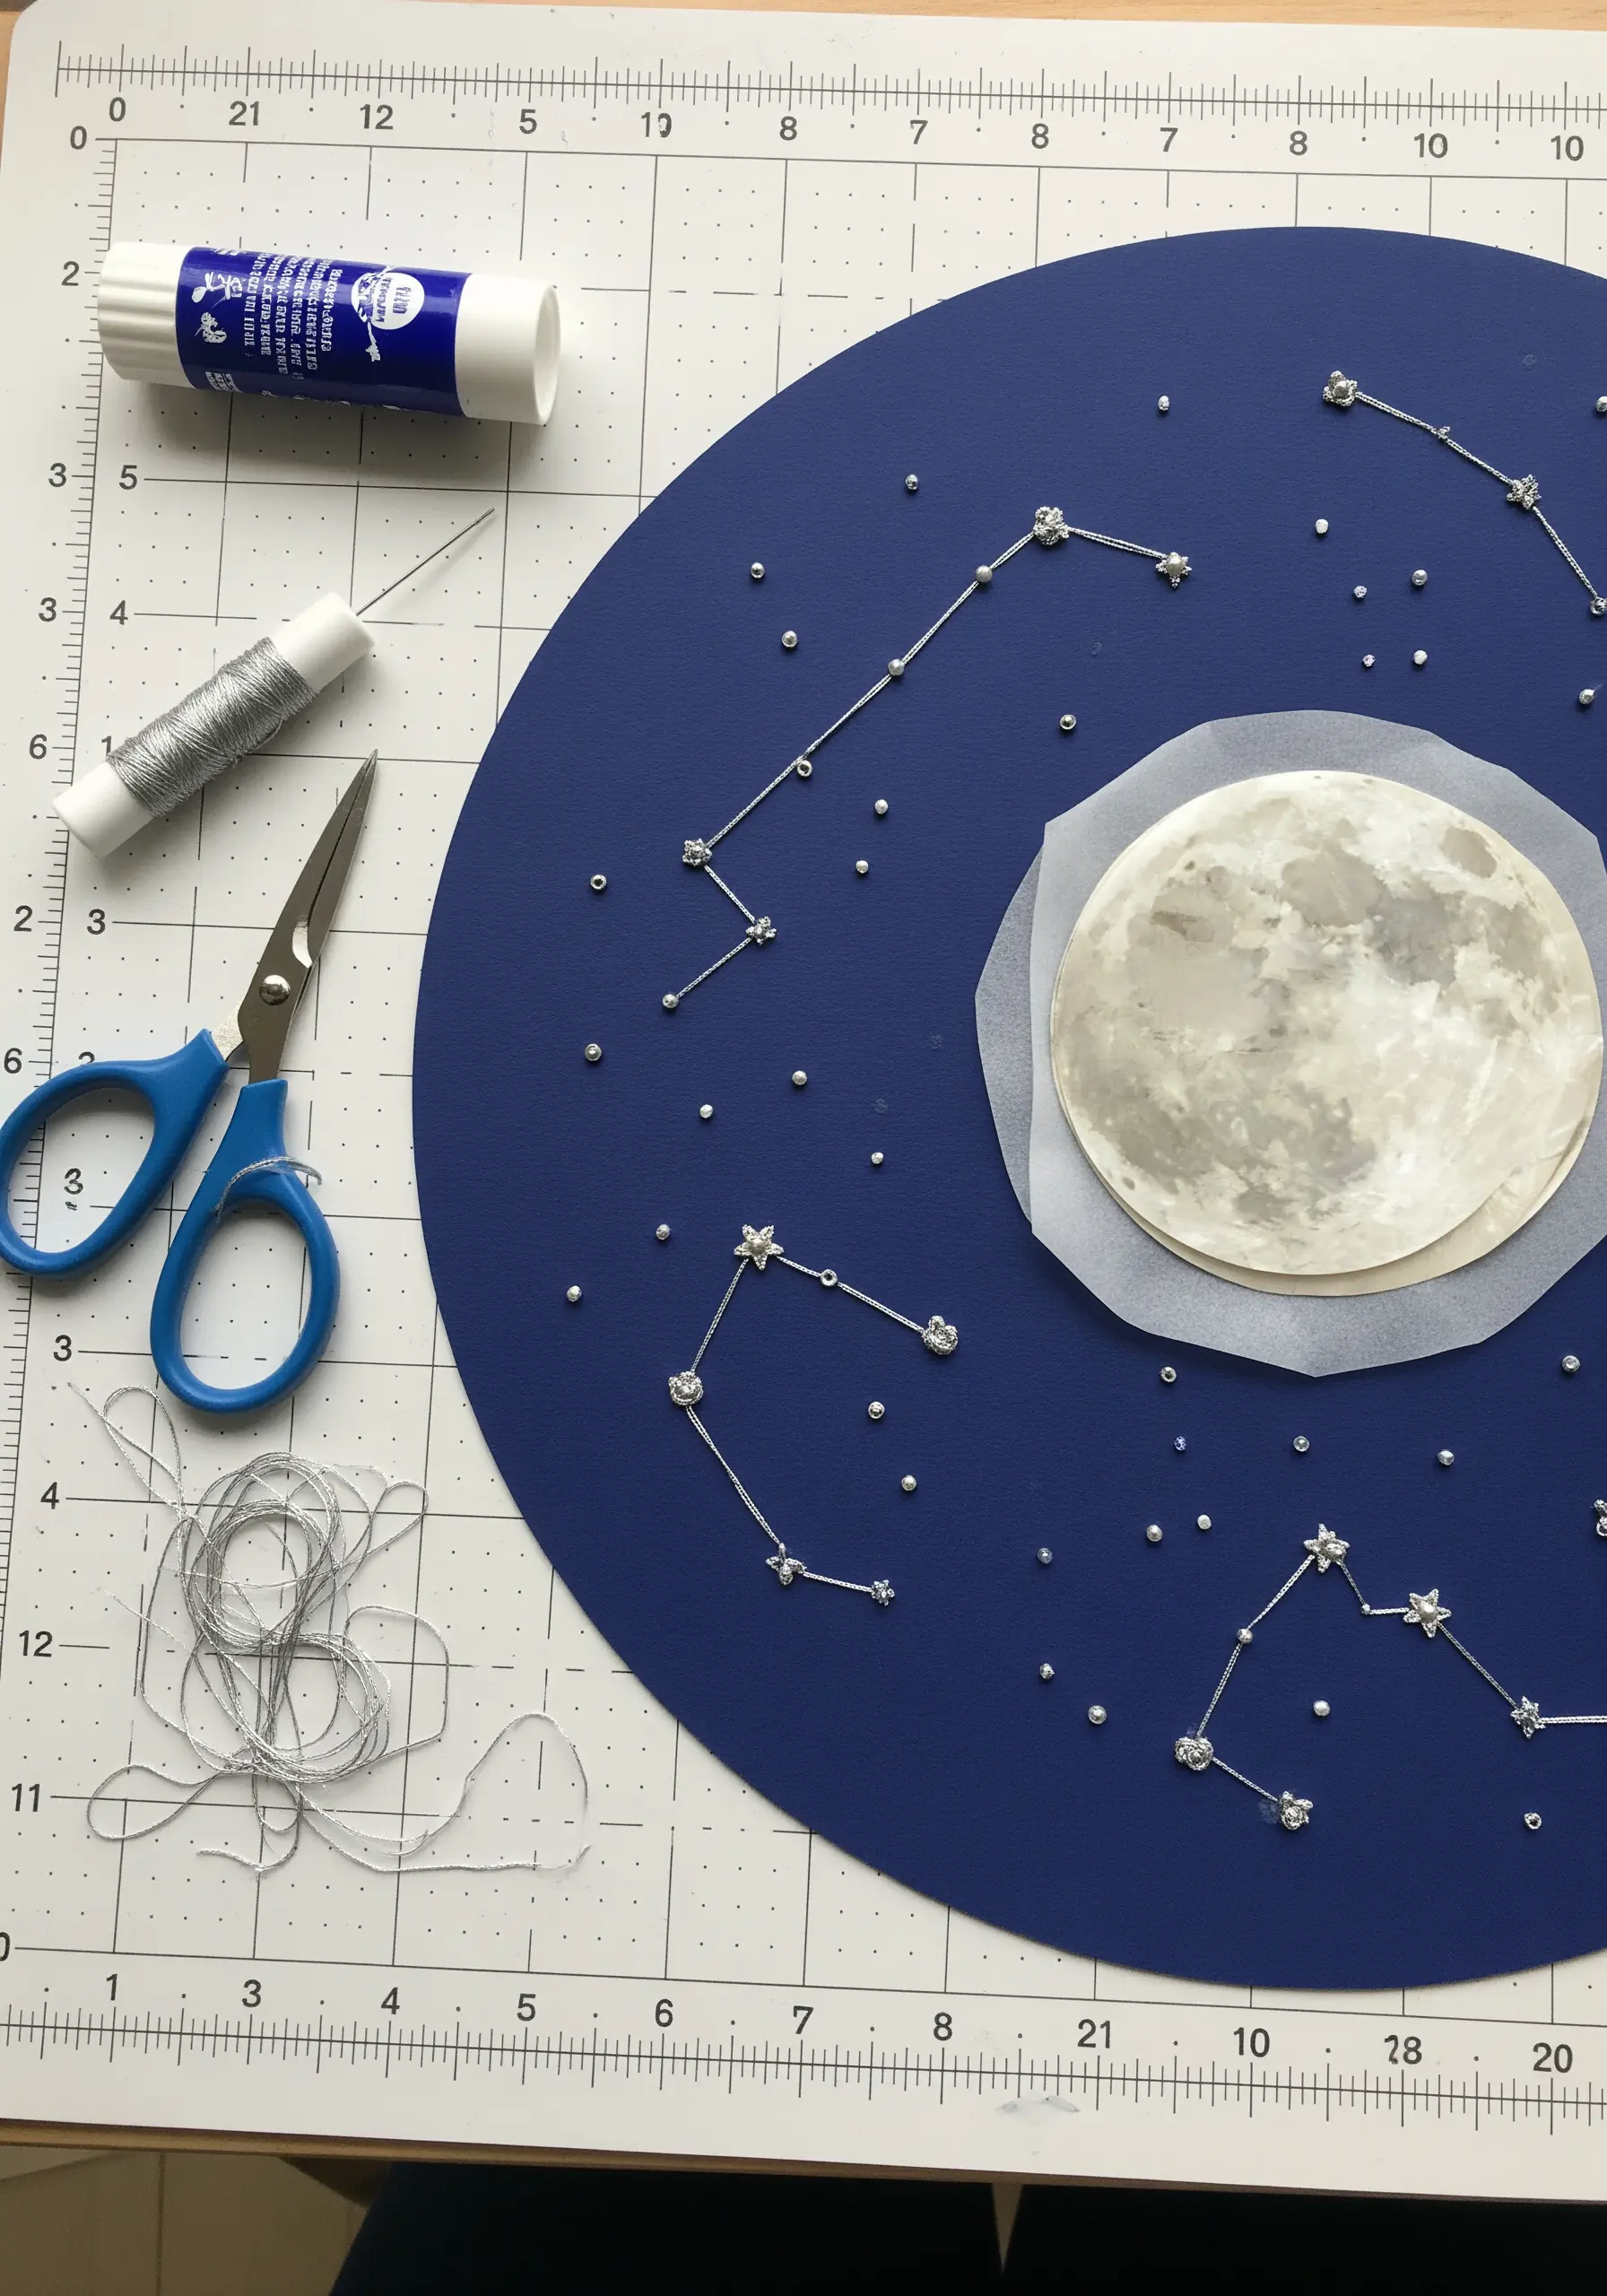
Transform a simple sheet of dark cardstock into a celestial chart by combining a paper moon with stitched constellations.
Before you stitch, lightly sketch your constellations and use a pin to pre-pierce the holes for your stars and connecting lines. This prevents the paper from buckling and ensures every stitch is clean.
Use a fine metallic silver thread for a realistic shimmer, employing straight stitches to connect the ‘stars’.
For the stars themselves, create tiny French knots or attach small silver beads for a three-dimensional effect that mimics the night sky’s sparkle.
3. Sculptural Landscapes with Fiber Elements
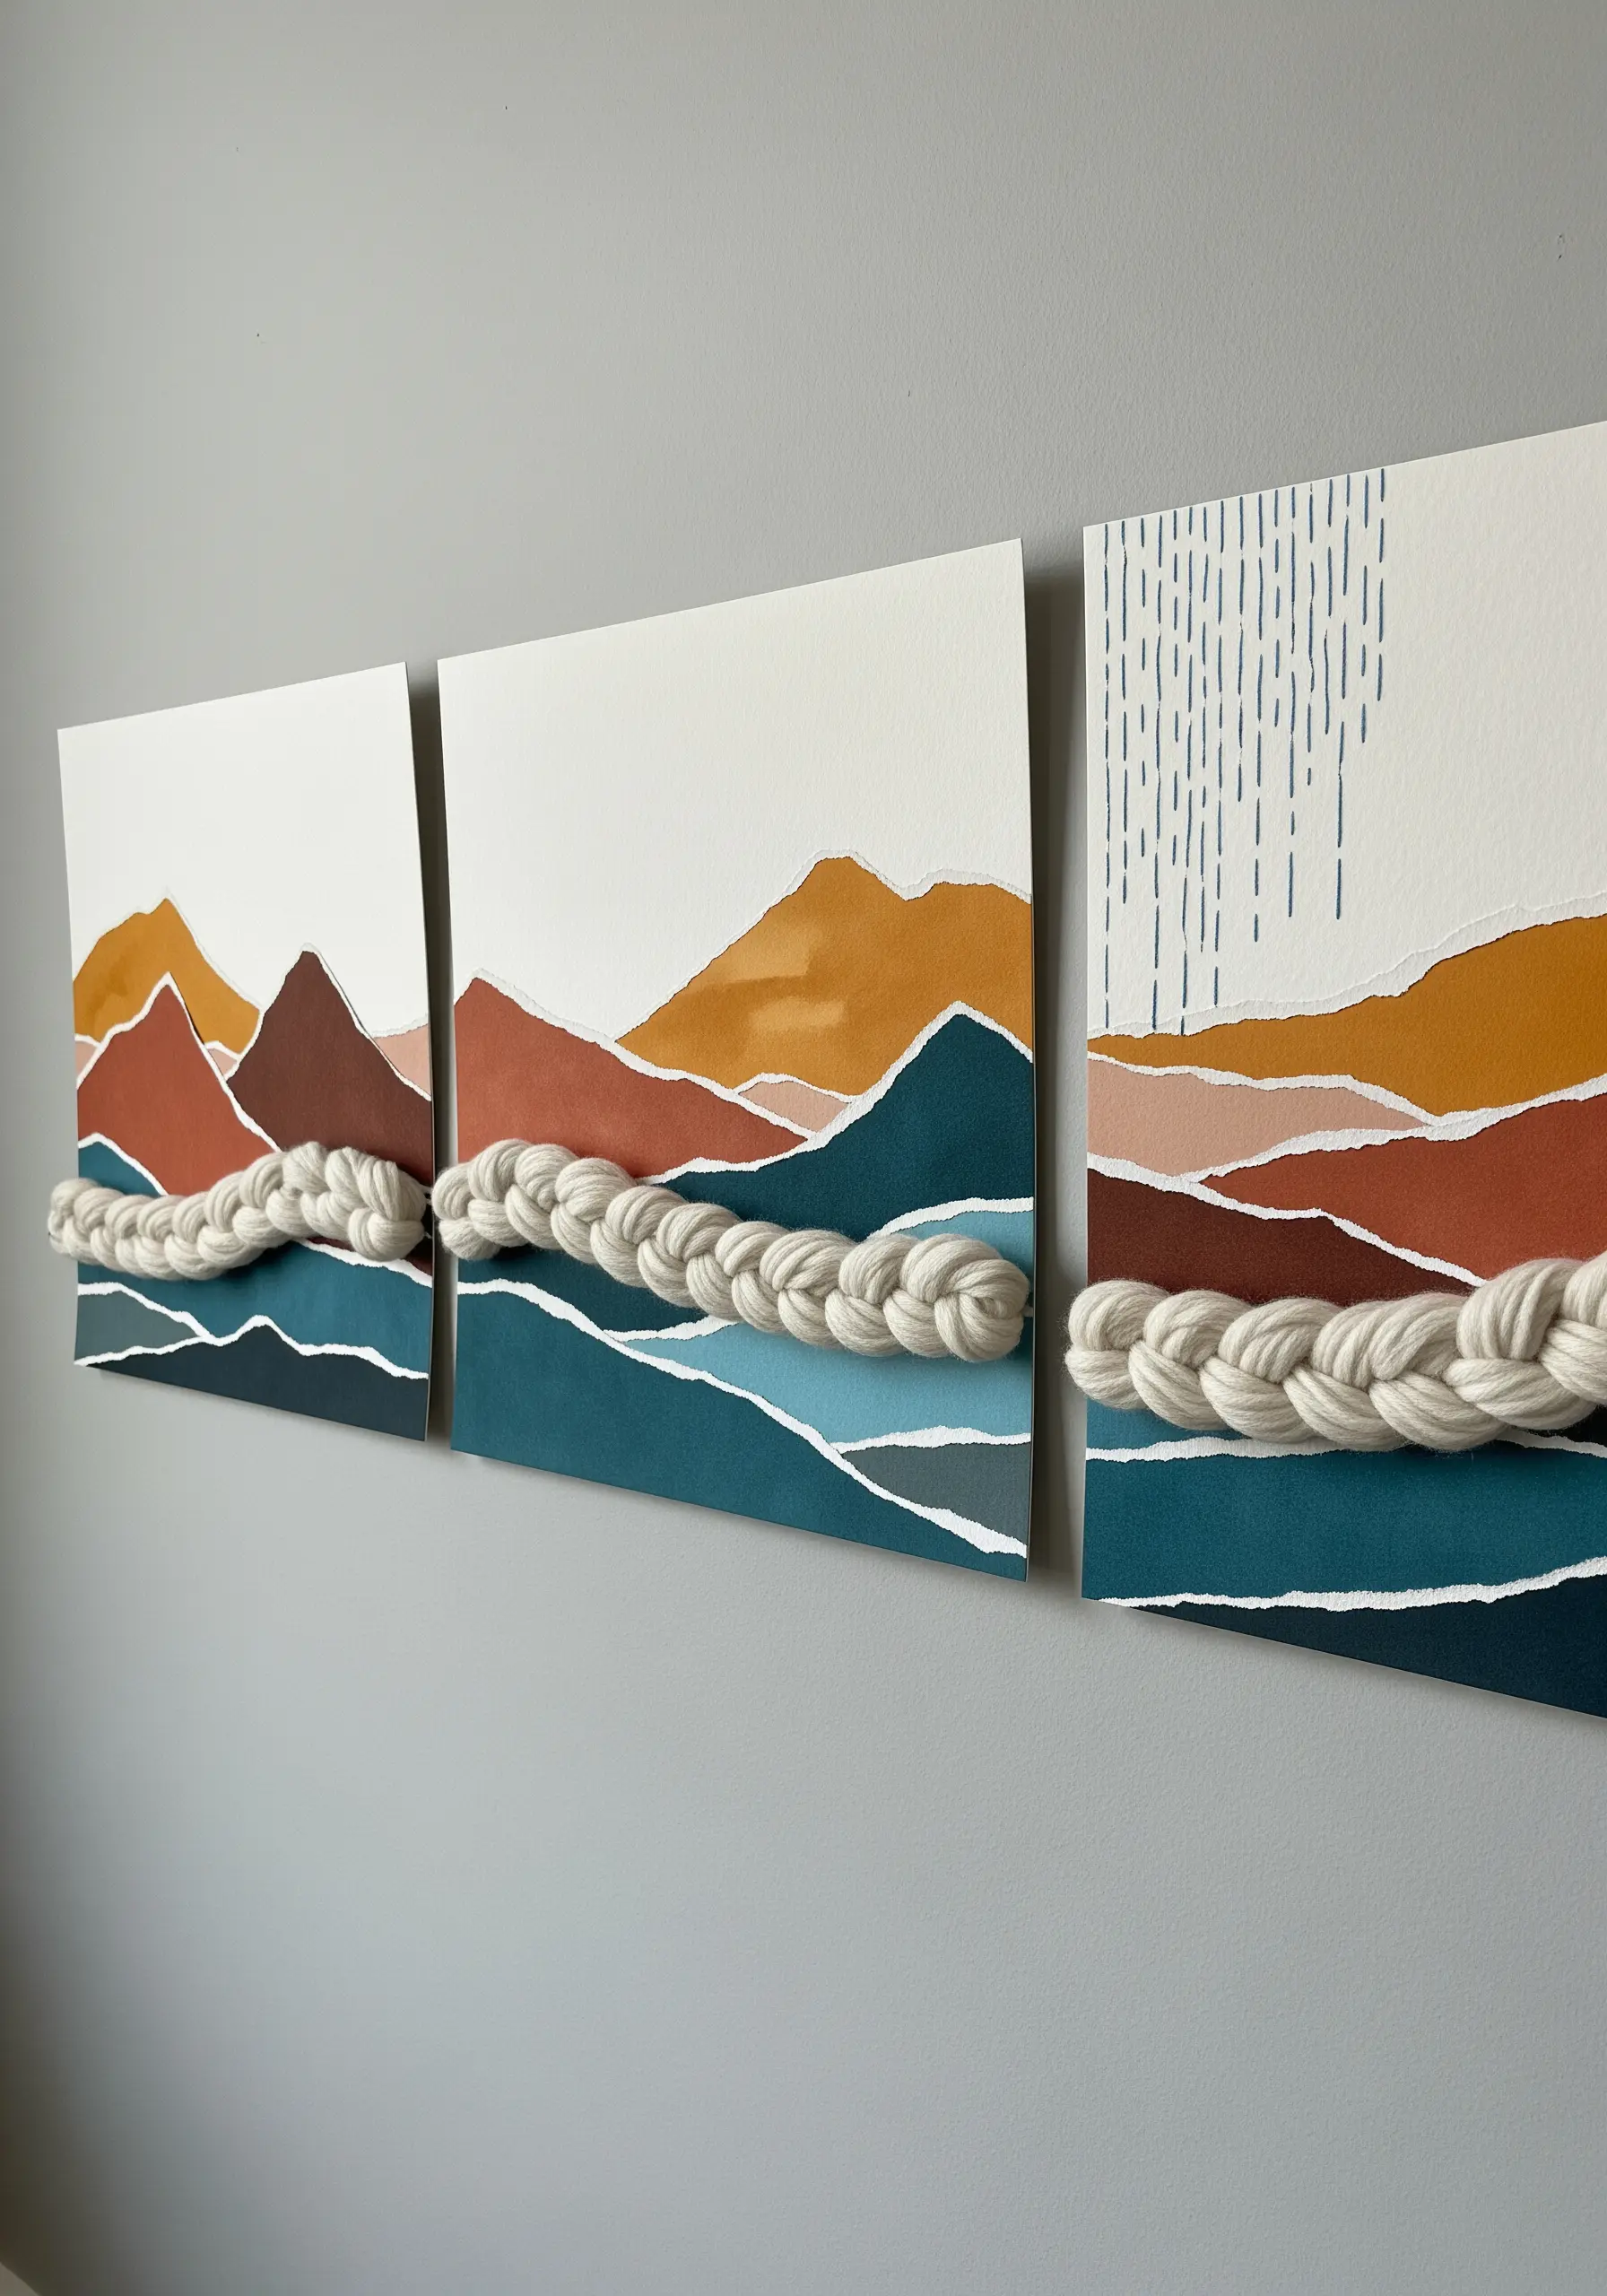
Add dramatic, touchable texture to a flat paper landscape by incorporating thick, braided cord.
First, create your mountain scene with layered, torn paper to establish depth and color gradients.
Then, lay a piece of chunky, braided cotton rope across the composition to represent clouds or rolling hills. Secure it by stitching through the paper from the back, using a heavy-duty needle and thread that matches the rope.
This juxtaposition of flat paper and sculptural fiber creates a powerful visual contrast that immediately elevates the piece from a simple collage to mixed-media textile wall hangings.
4. Dimensional Portraits with Yarn and Thread
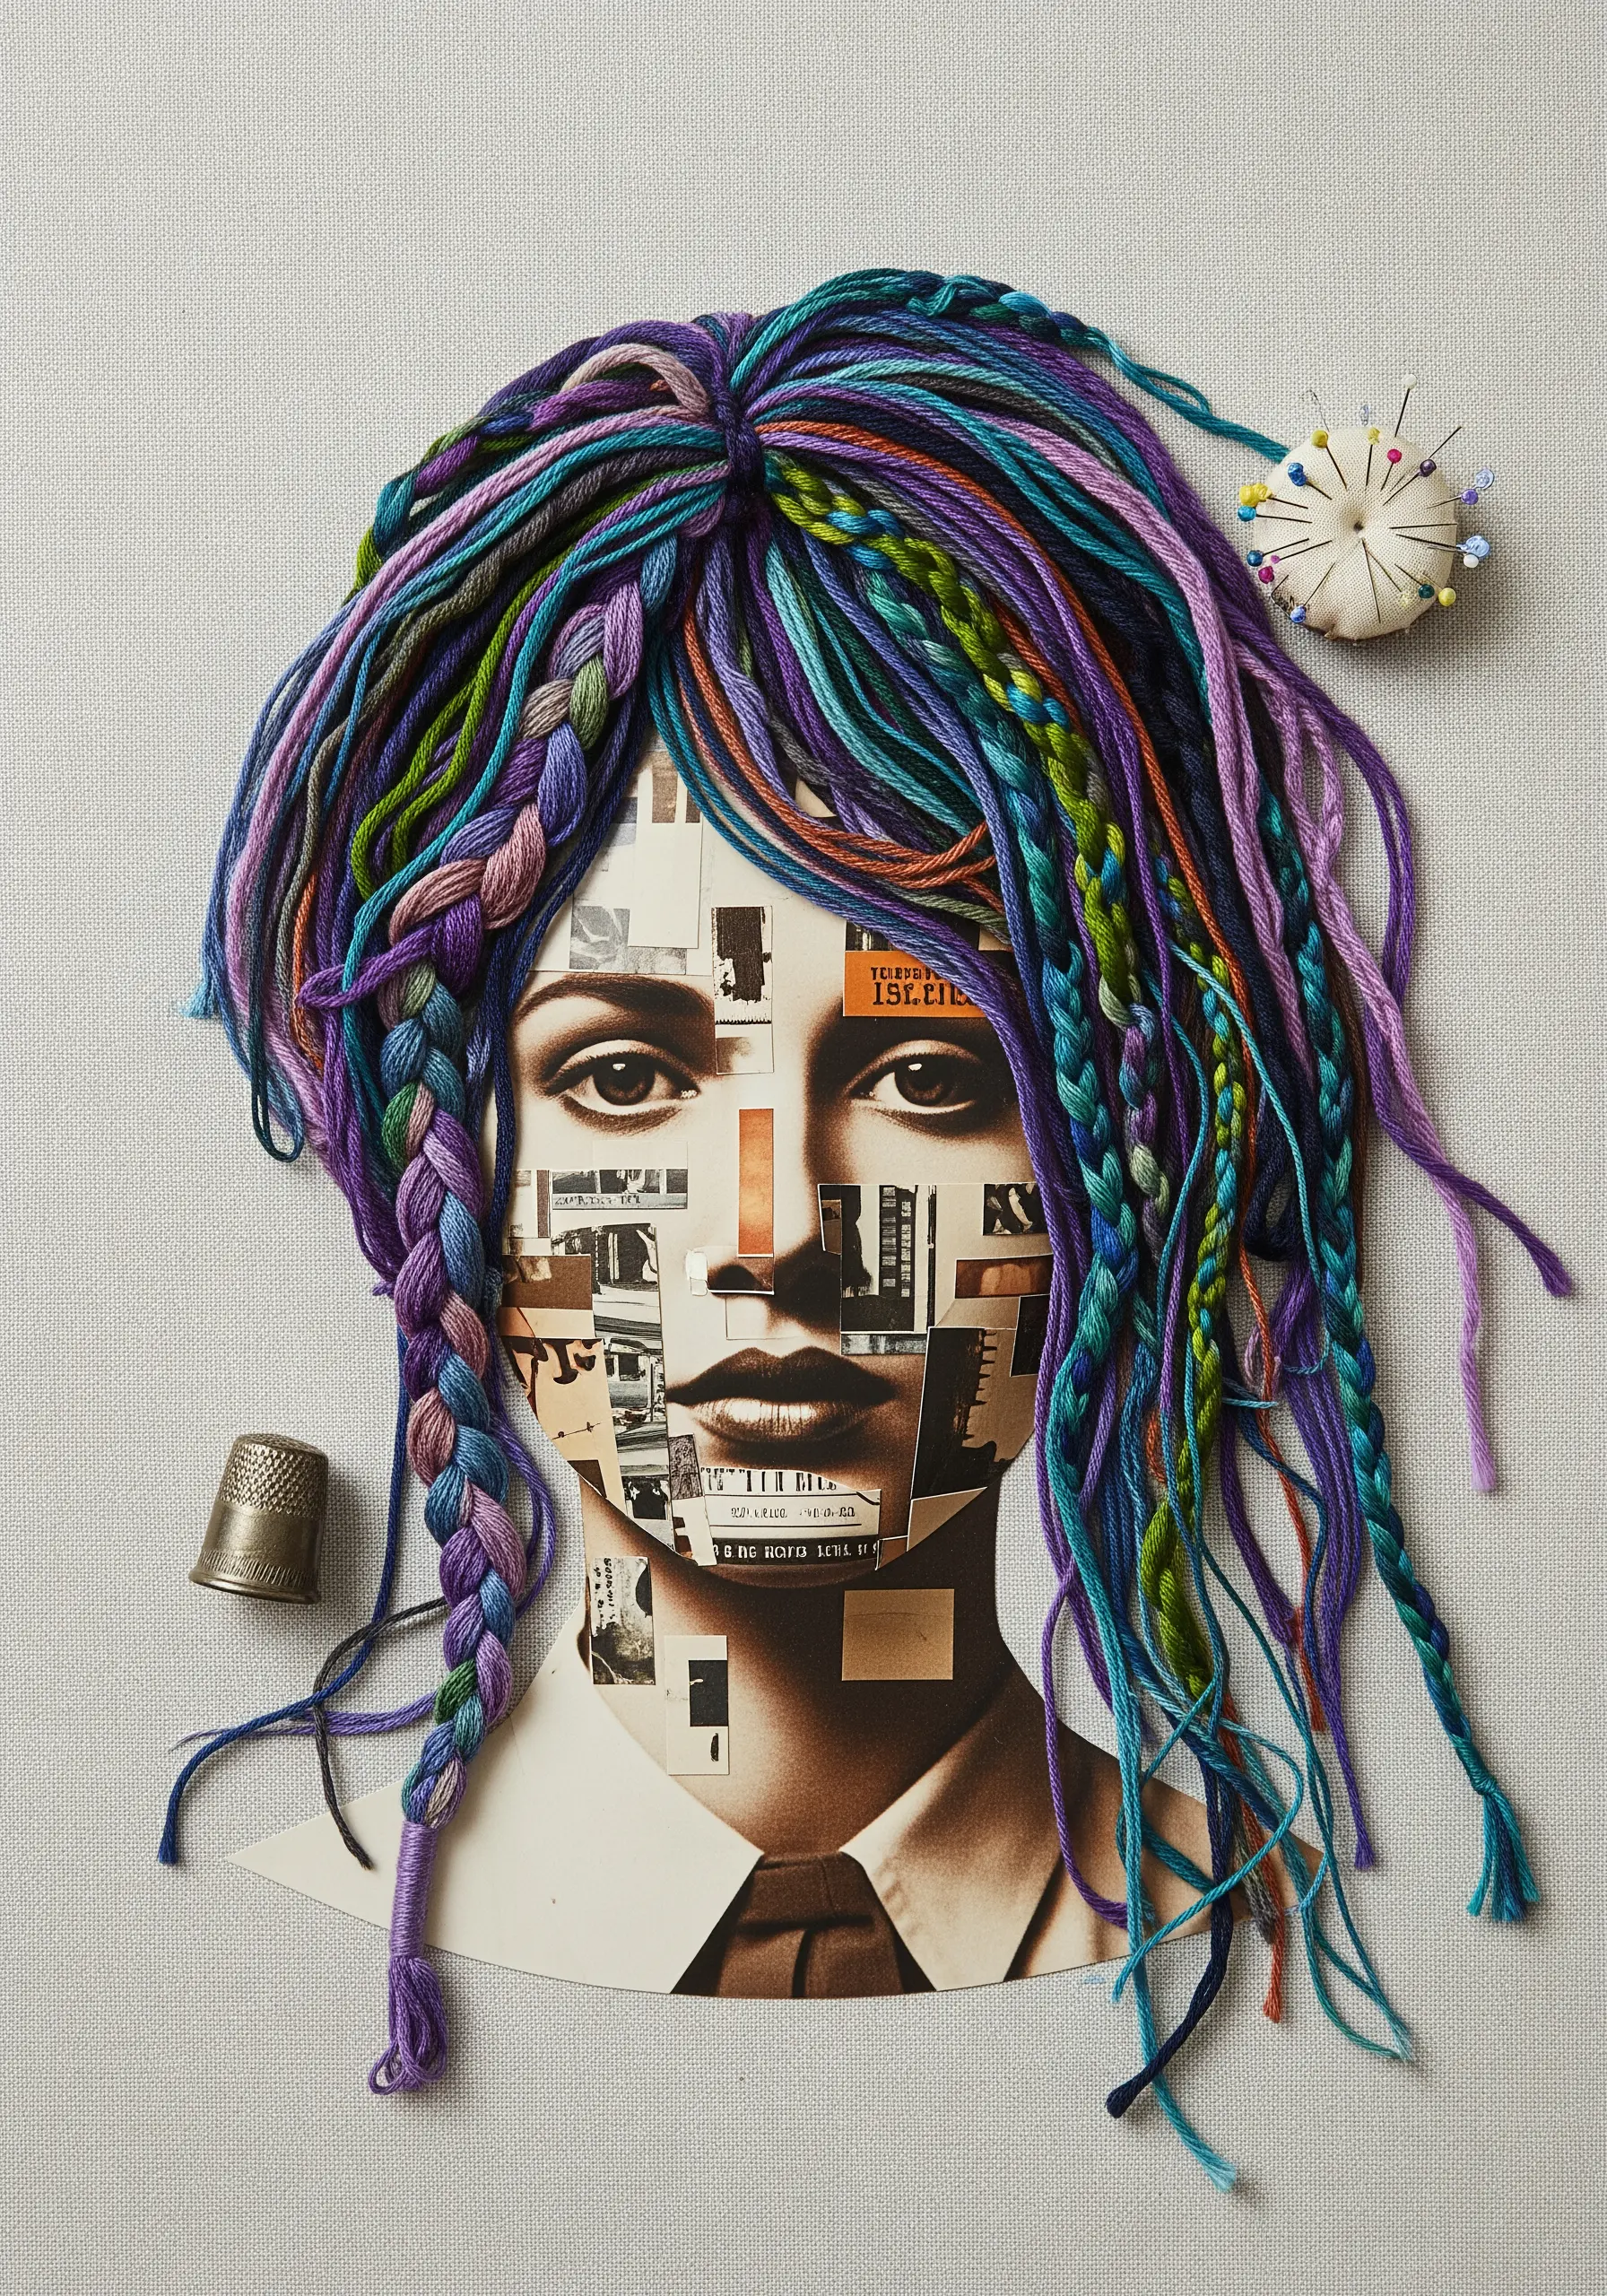
Bring a paper collage portrait to life by creating three-dimensional hair from yarn and embroidery floss.
Arrange various weights and textures of yarn—some braided, some twisted, some loose—over the paper base to form the hair’s shape and flow.
Instead of stitching through the yarn, use a technique called couching: lay the yarn on the surface and use a single strand of matching thread to tack it down with small, discreet stitches.
This method allows the yarn to retain its volume and movement, creating stunningly realistic texture and depth that transforms the collage into one of your modern thread portraits.
5. Architectural Lines as Graphic Stitchwork
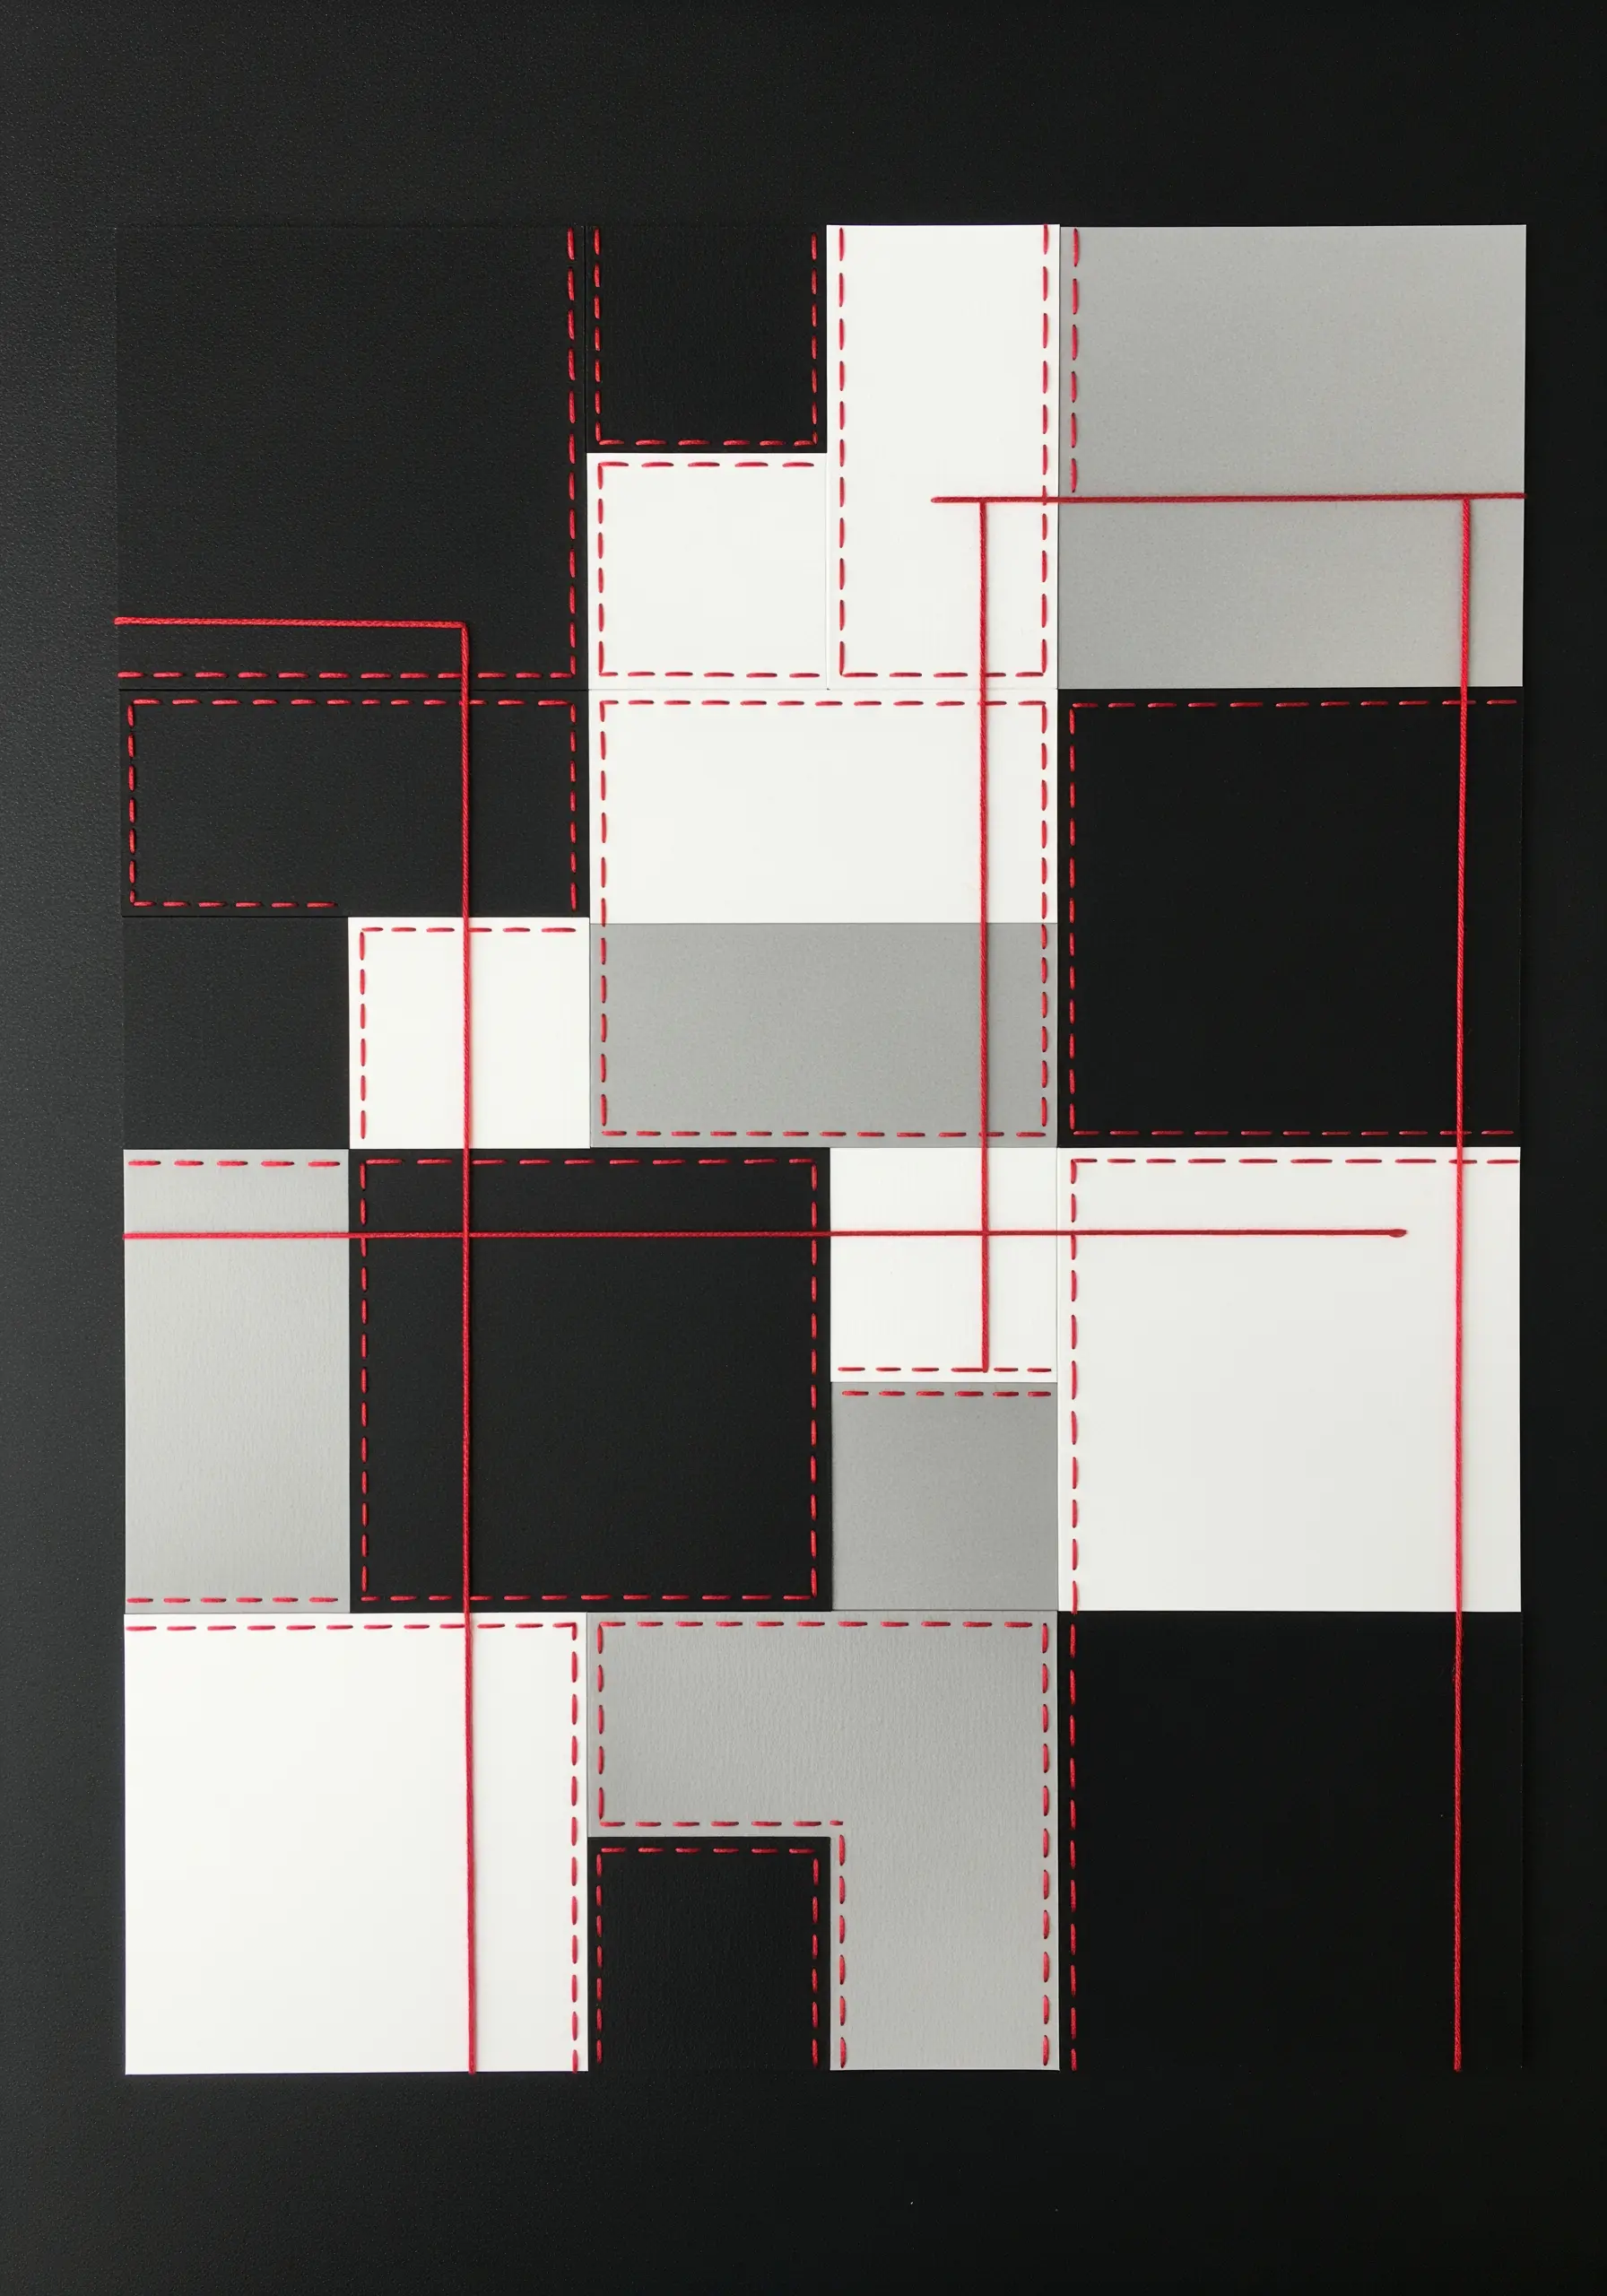
Use thread to create a secondary layer of design that connects and defines geometric paper shapes.
After arranging your monochrome paper blocks, use a vibrant, contrasting thread—like this powerful red—to introduce a new visual language.
A simple running stitch can outline shapes, while long, straight stitches can cut across the composition, unifying separate elements.
Pay close attention to thread tension; it should be taut enough to lie flat without warping the paper. This technique turns your collage into a piece of geometric abstract thread patterns.
6. Textural Sea Foam with Clustered Knots
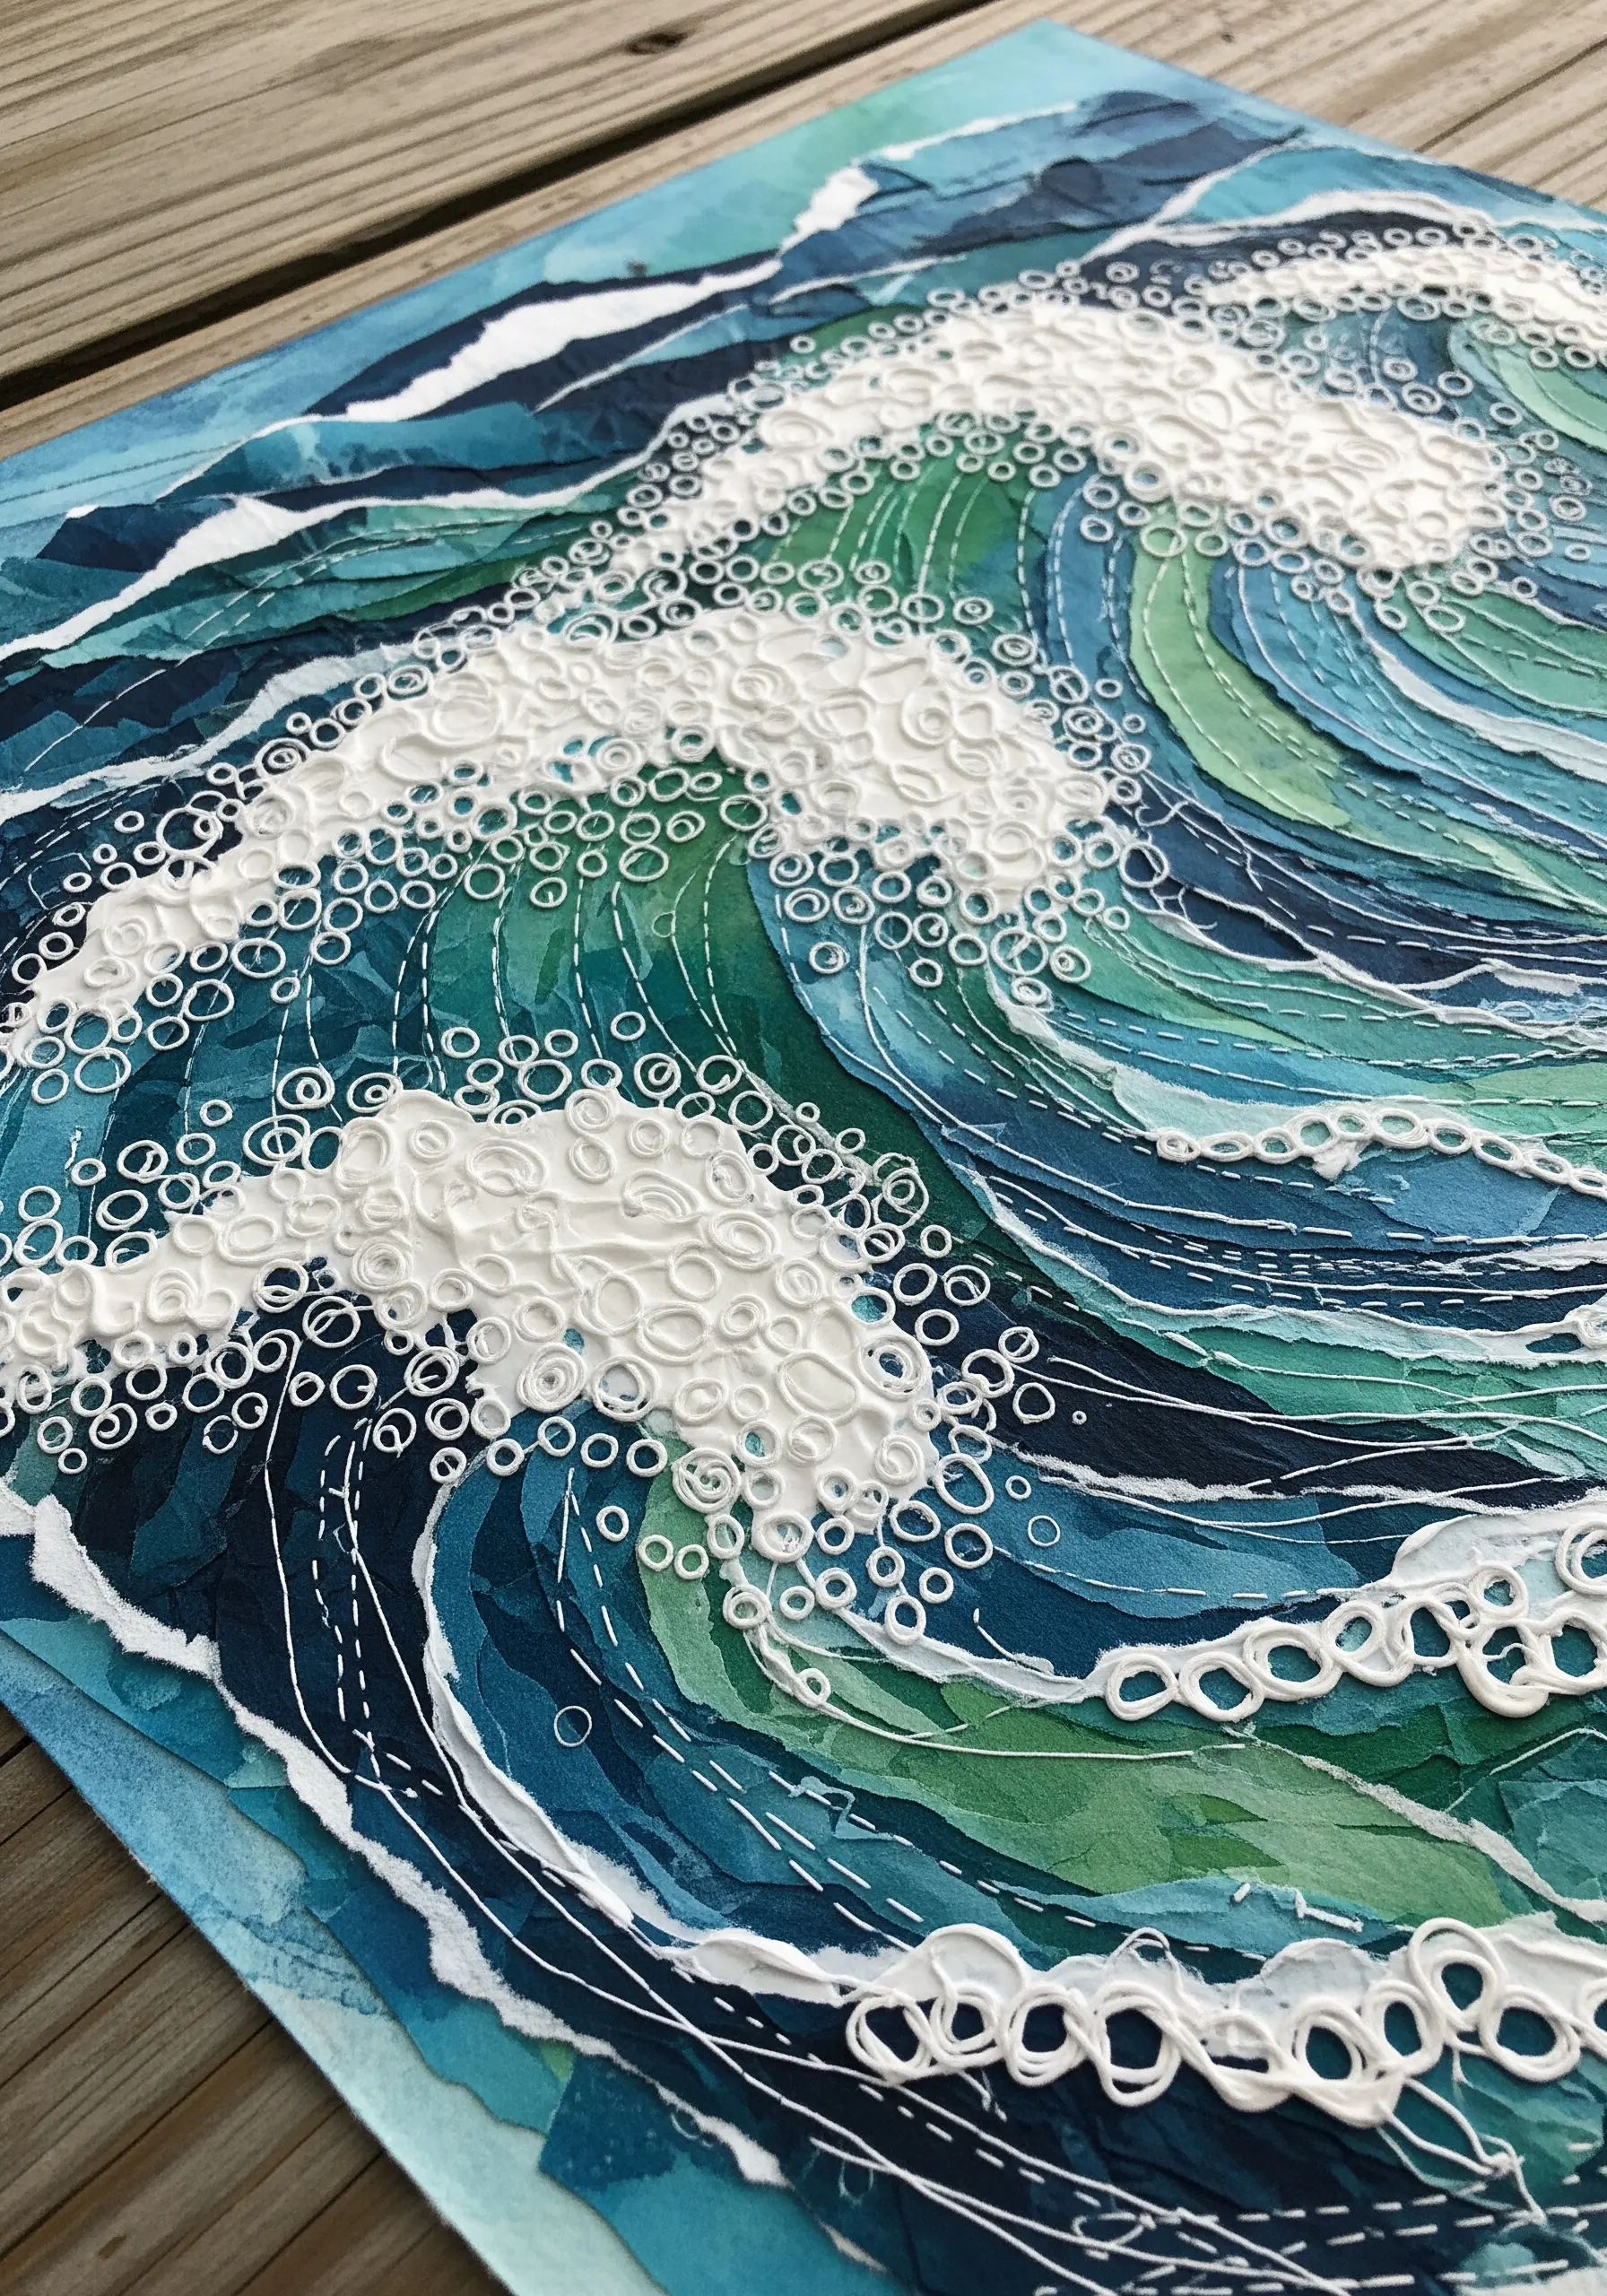
Recreate the chaotic energy of sea foam by using dense clusters of textural stitches on a torn-paper wave.
After layering shades of blue and green paper to form the body of the wave, switch to a thick, white perle cotton or tapestry wool.
Fill the crest of the wave with hundreds of French knots, varying their size and density. For even more dimension, incorporate a few bullion knots or woven wheel stitches.
This approach moves beyond simple outlines, using thread to build a sculptural, tactile surface that perfectly captures the effervescence of the ocean.
7. Woven Paper Panels with Blanket Stitch Edging
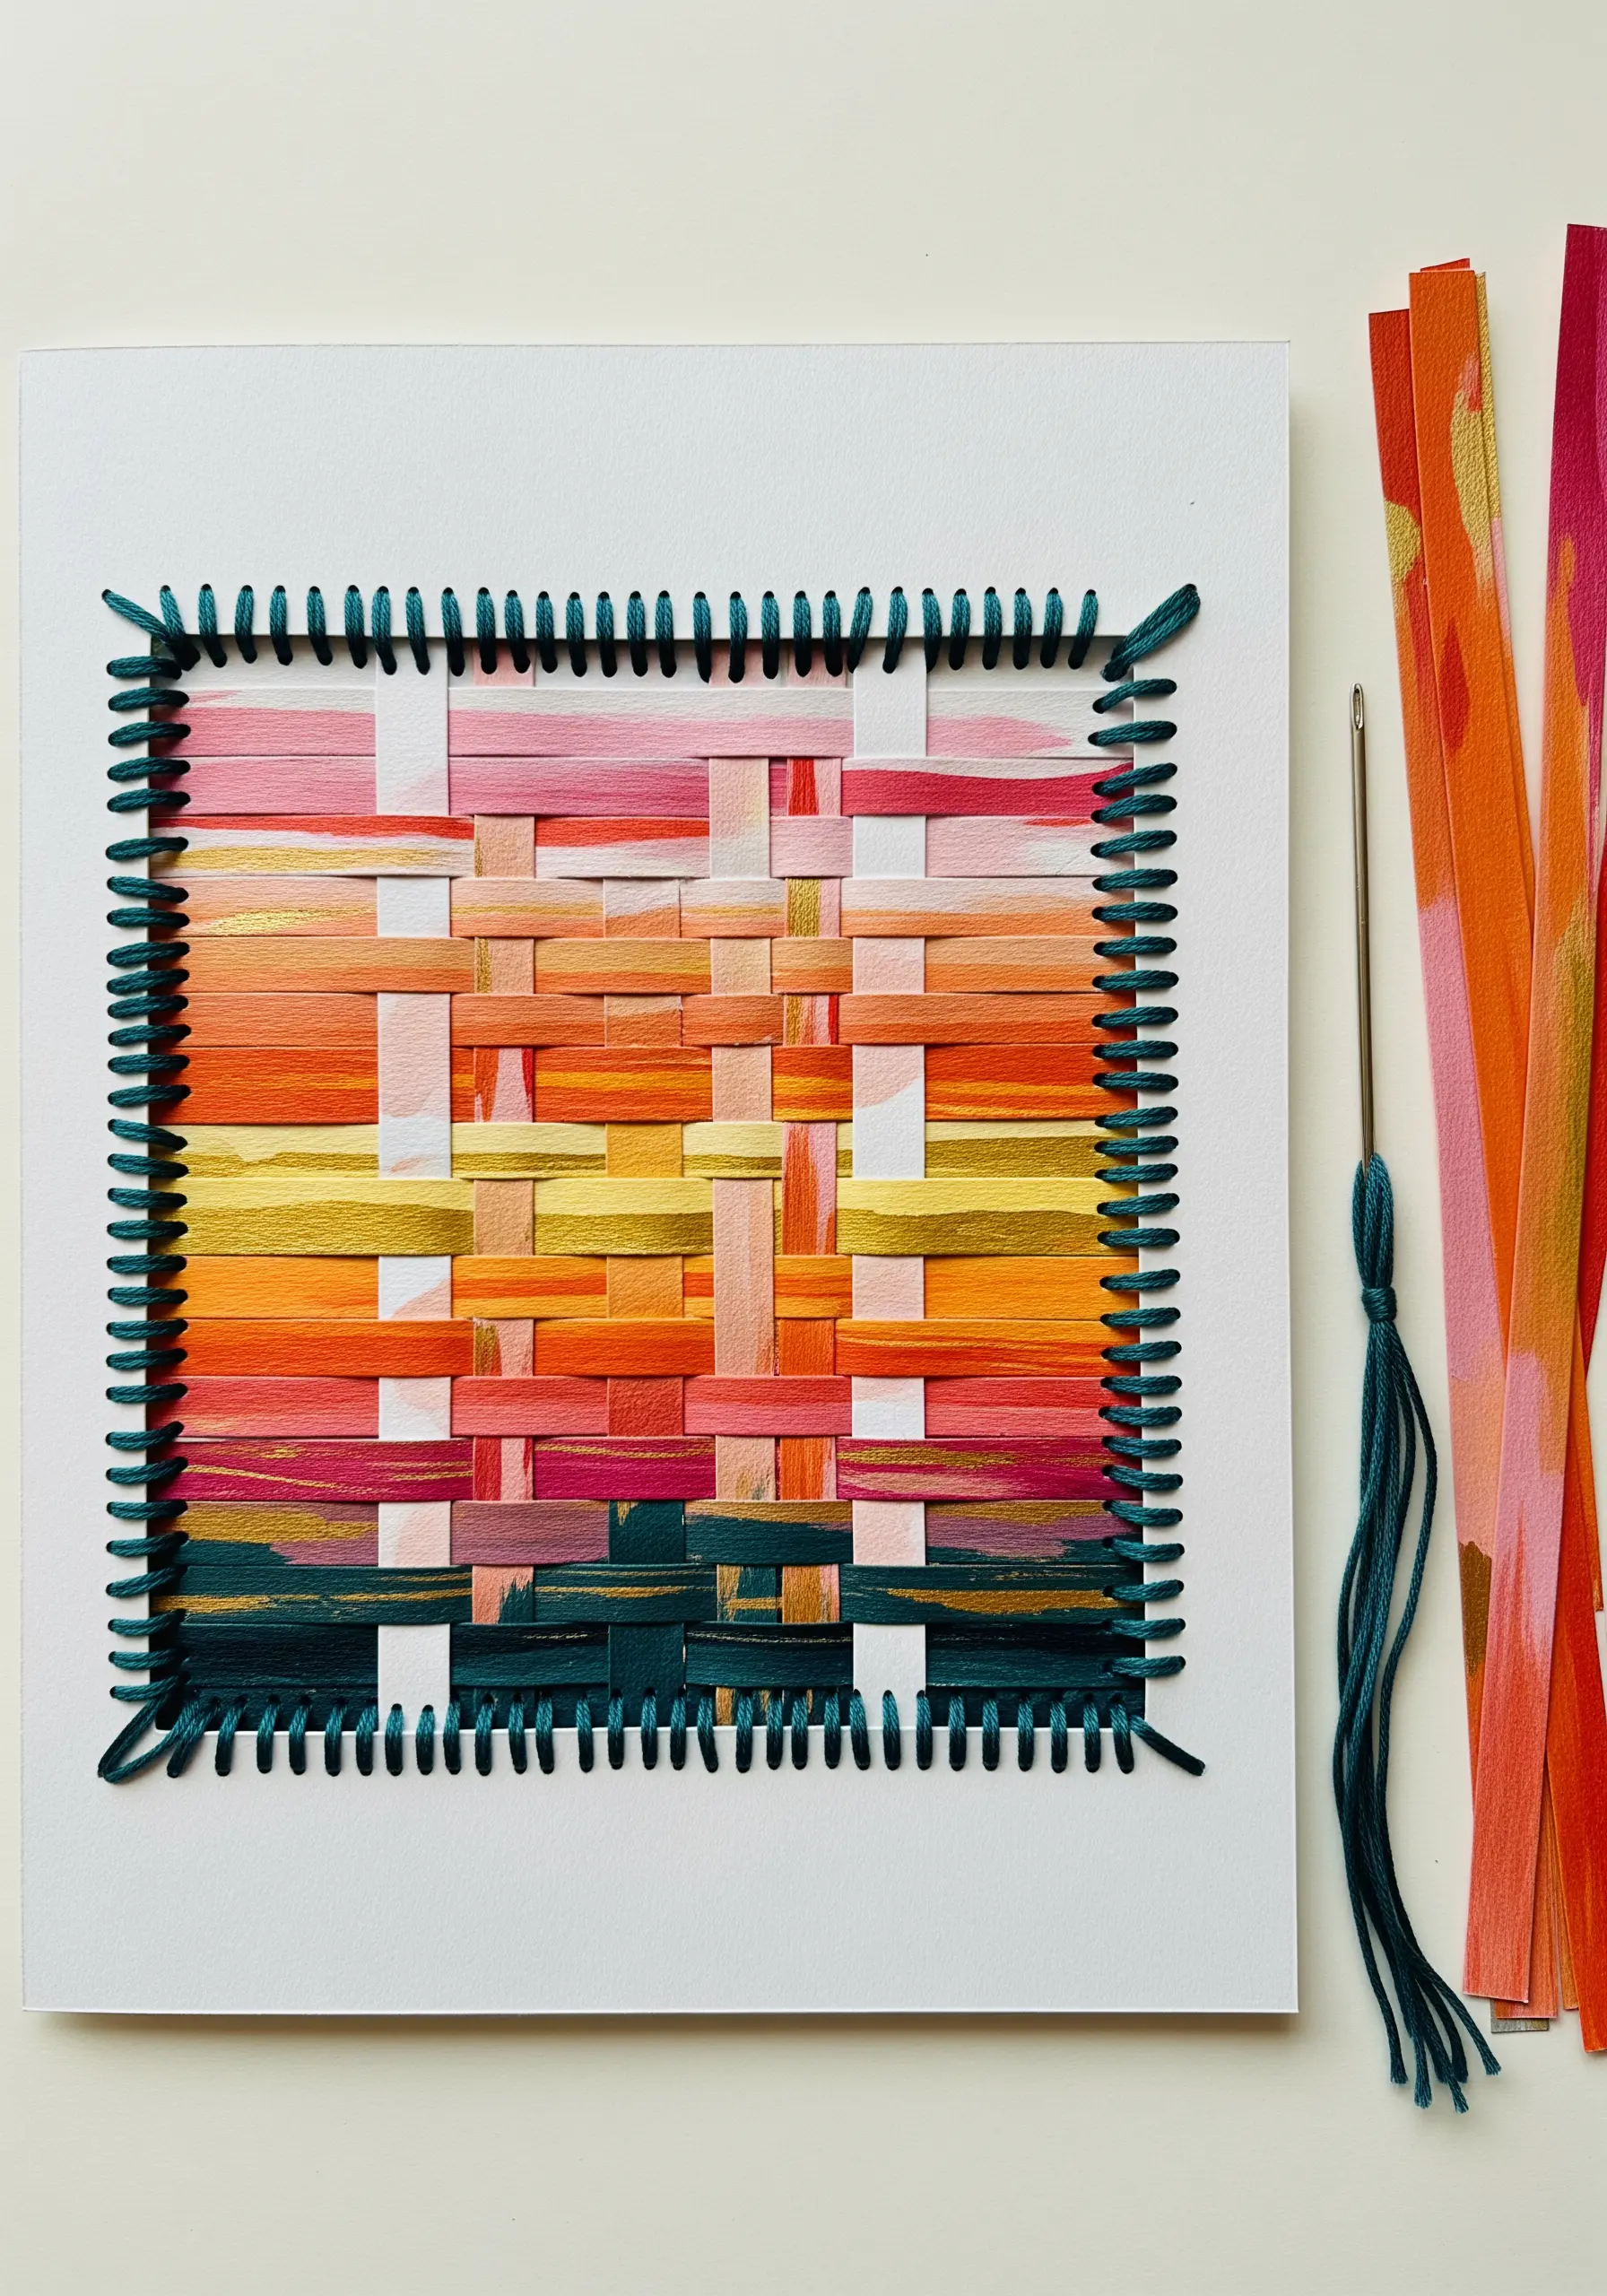
Combine the arts of paper weaving and embroidery to create a piece rich in color and texture.
Weave strips of painted paper to create your central gradient panel, then secure it to a sturdy cardstock background.
To frame the weaving and integrate it fully, use a contrasting color of embroidery floss to work a blanket stitch around the entire perimeter.
This stitch not only secures the woven piece but also creates a clean, decorative border that gives the work a polished, intentional finish. It’s a perfect example of fabric crafts that combine thread, texture, and color beautifully.
8. Rustic Journaling with Bold Cross-Stitch
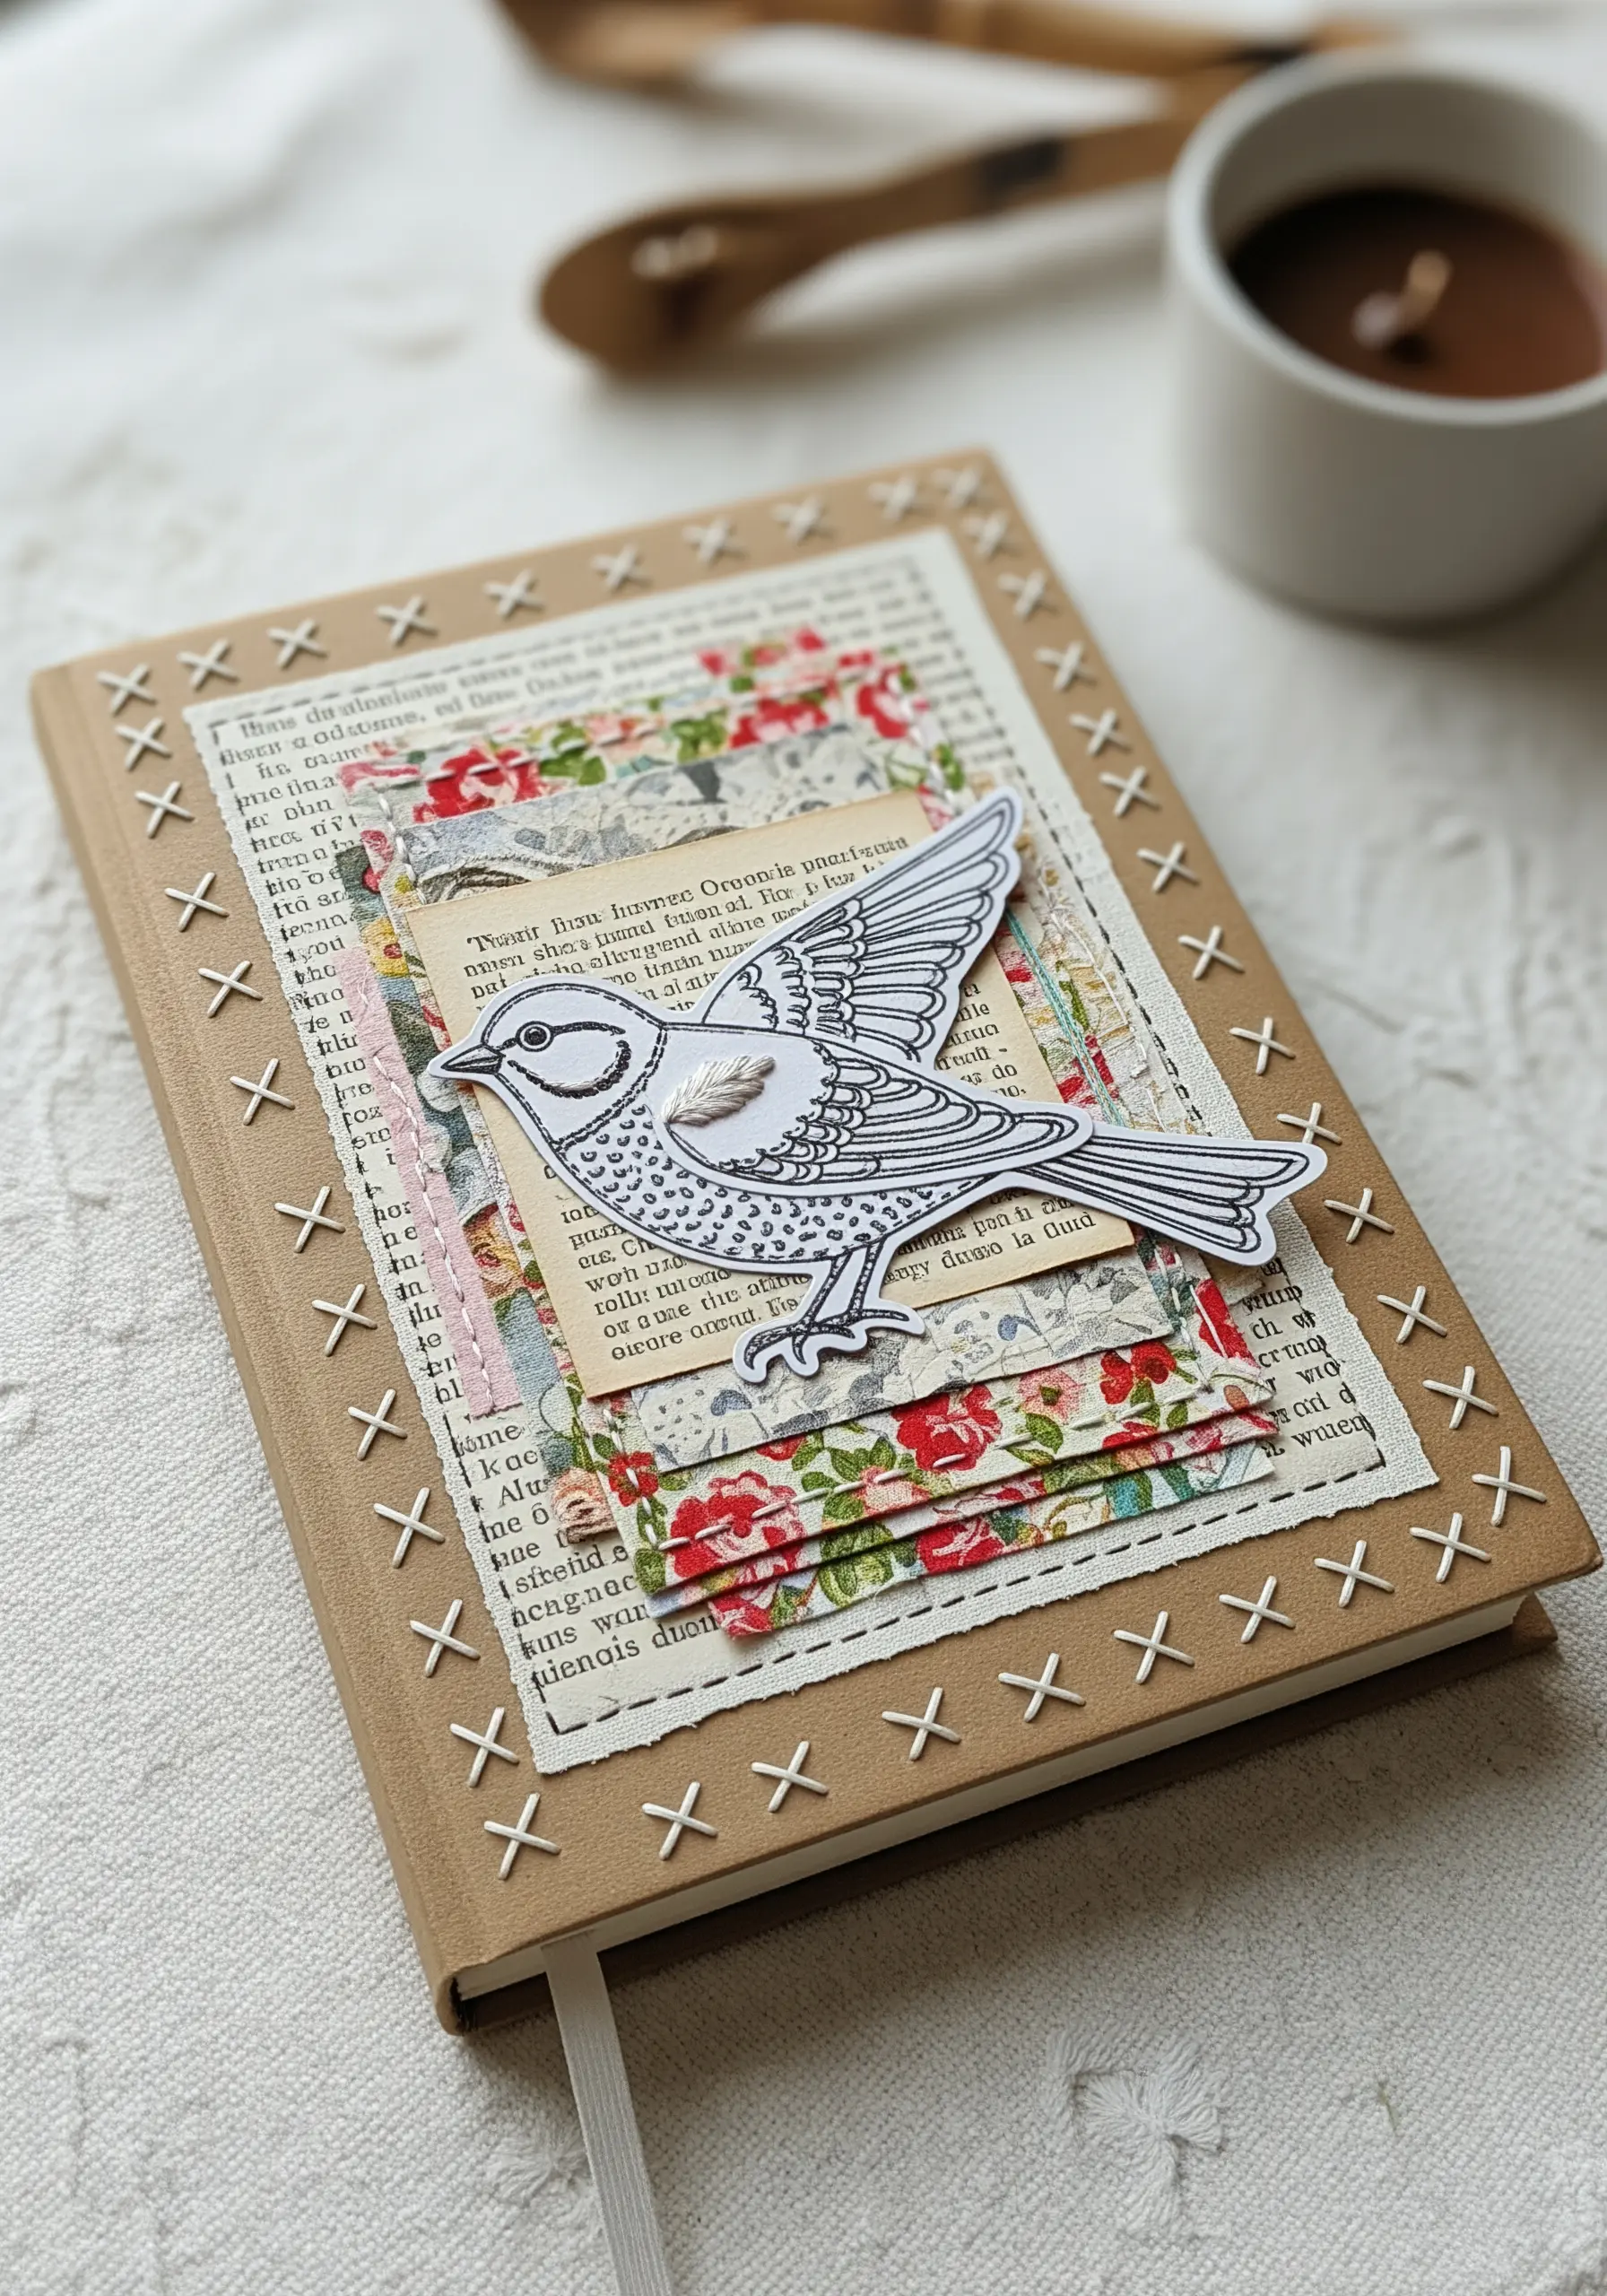
Elevate a simple journal cover by framing a paper collage with a bold, rustic stitch.
Instead of a delicate running stitch, choose a large-scale cross-stitch to create a strong, graphic border.
Use all six strands of embroidery floss or even a fine yarn to give the stitches a chunky, tactile quality that stands out against the layered paper.
This technique is wonderfully forgiving for beginners and adds a touch of handmade charm that feels both cozy and intentional, perfect for mixed-media crafts with embroidery to transform old journals.
9. Gilded Leaf Veins on Watercolor Paper
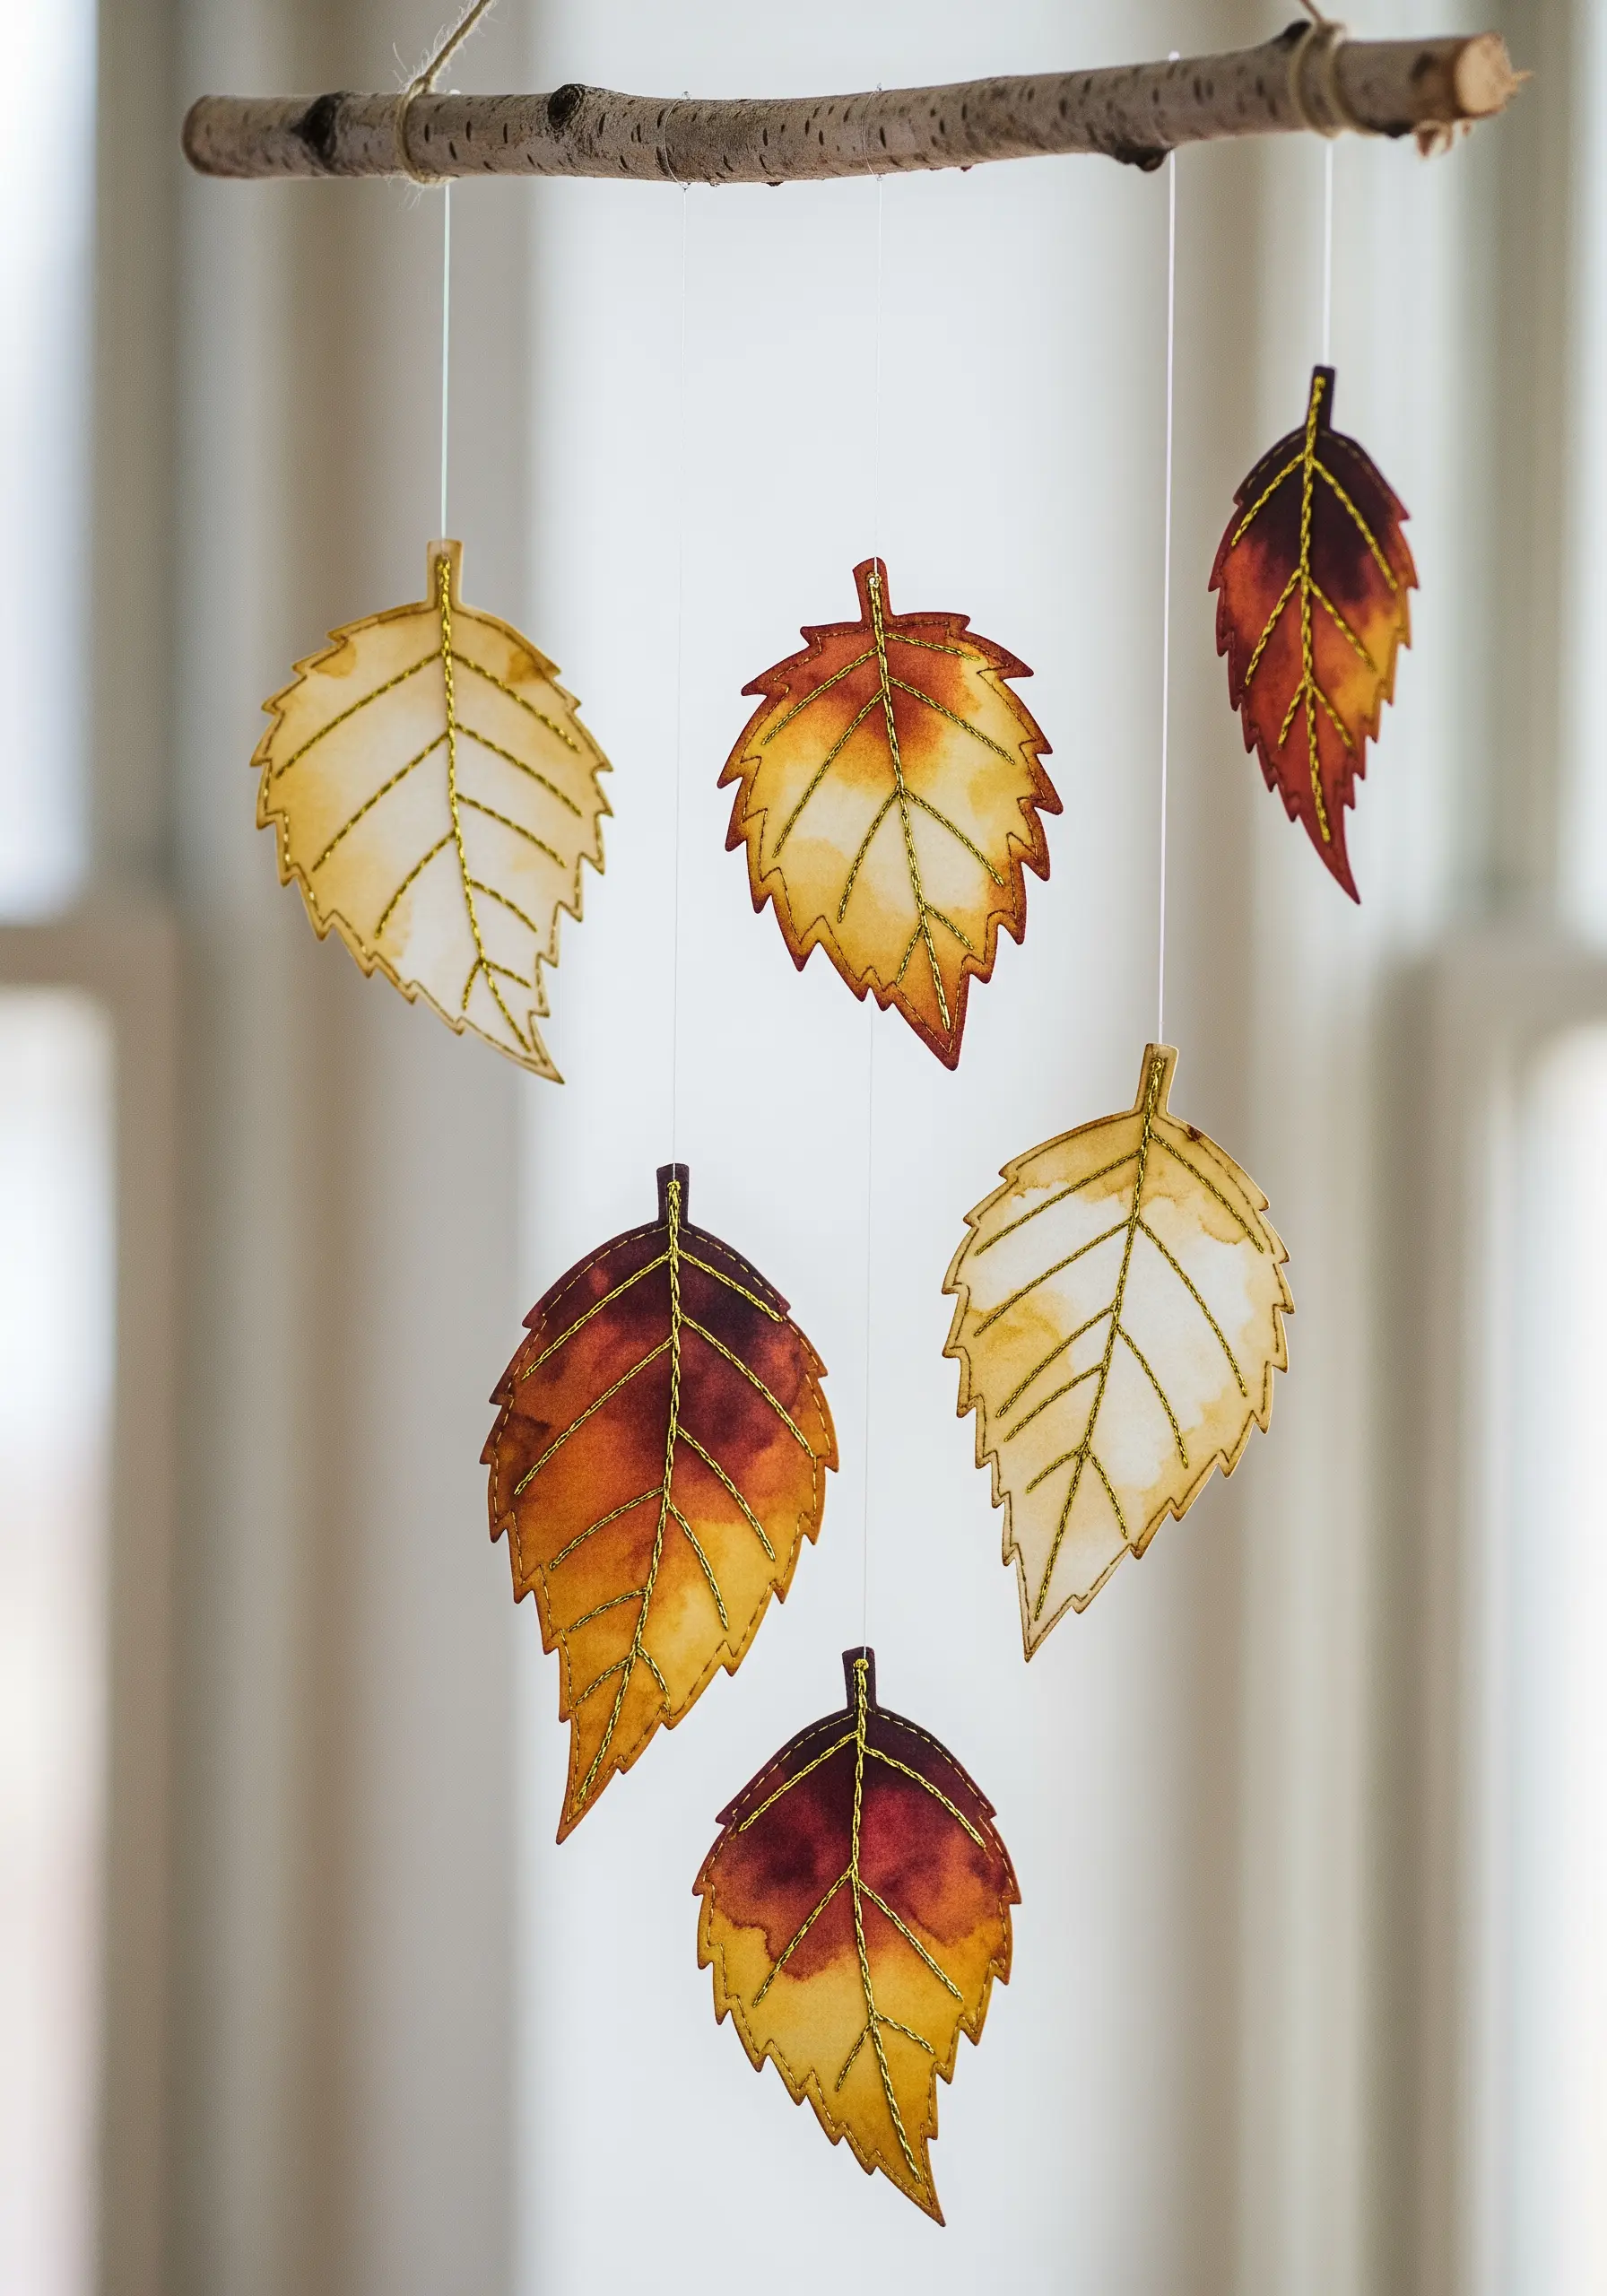
Add a touch of elegance to paper leaves by stitching the veins with metallic thread.
First, cut your leaf shapes from watercolor paper that you’ve painted with autumnal tones. This gives each leaf a unique, organic color gradient.
Then, using a fine gold metallic thread, stitch the central vein and its offshoots with a simple backstitch.
The metallic thread not only adds delicate detail but also catches the light beautifully, bringing a subtle sparkle and sense of life to your hanging mobile.
10. Radiating Light with Straight Stitches
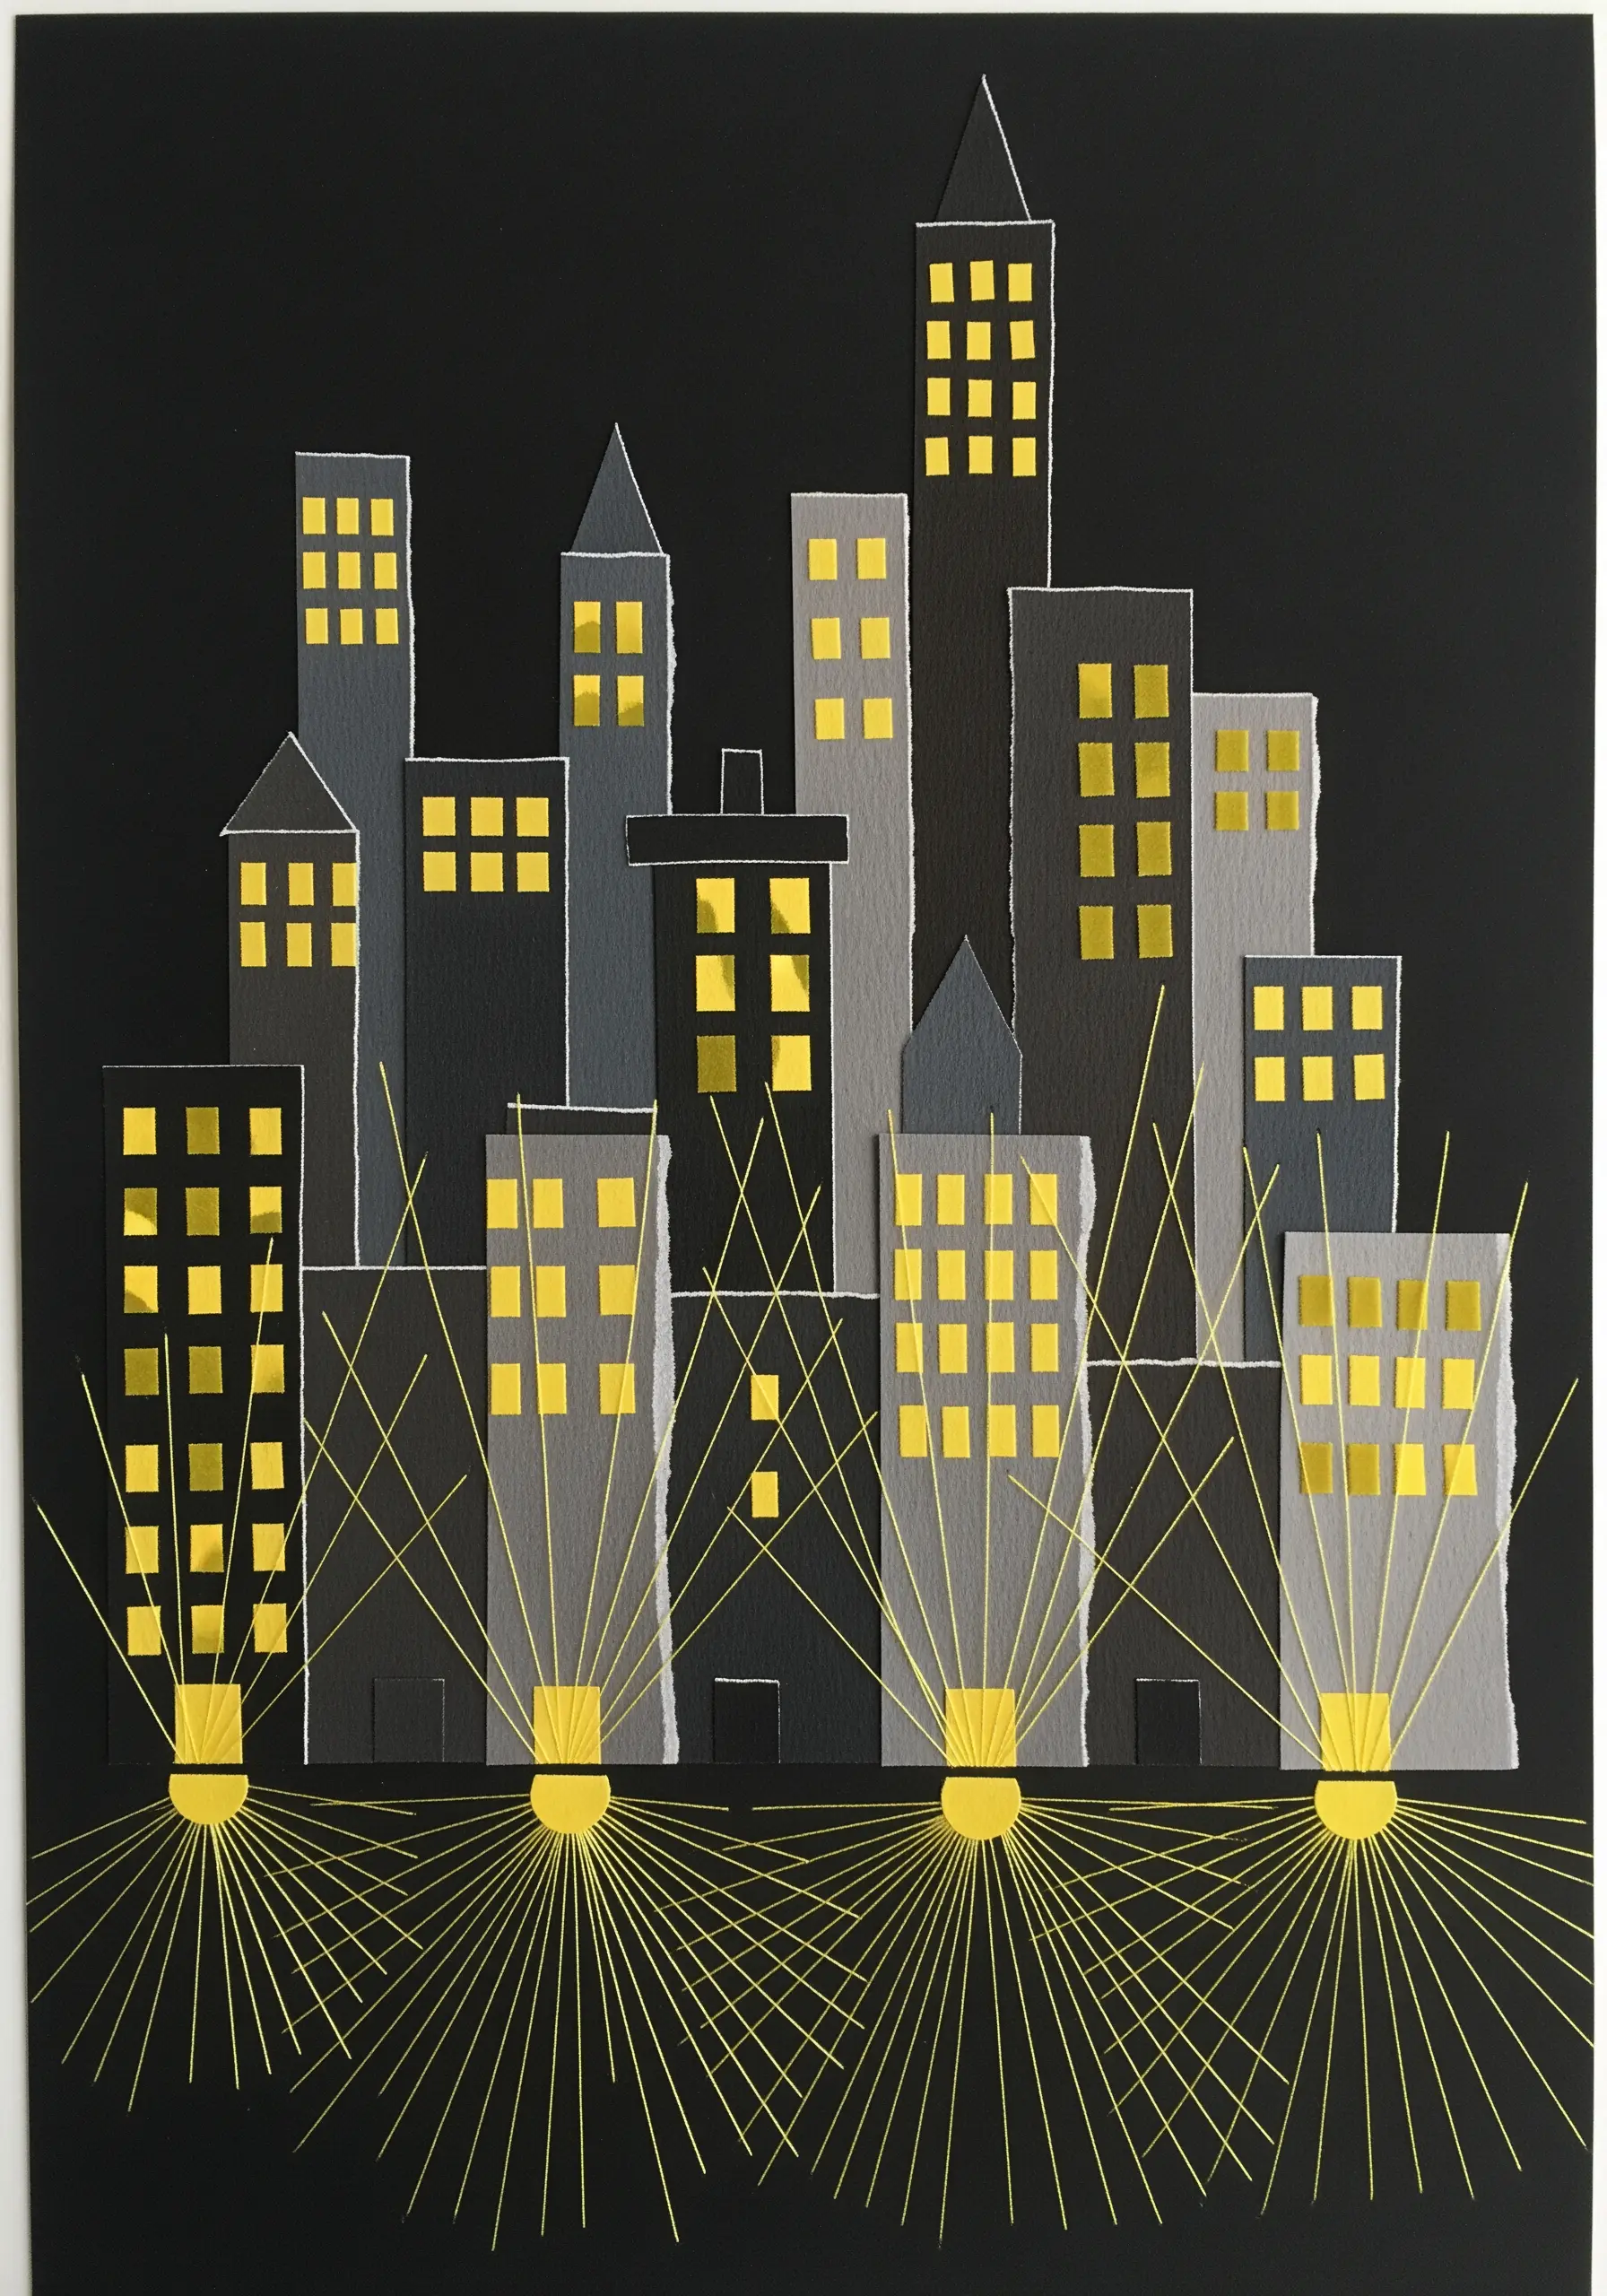
Create the illusion of glowing city lights using nothing more than paper and carefully placed straight stitches.
Construct your cityscape collage from dark and grey paper, leaving cutouts for windows backed with bright yellow paper.
To create the light beams, use a pale yellow or gold thread. Stitch long, straight lines radiating from a single point below each light source.
Varying the length and angle of these stitches creates a dynamic sense of perspective and movement, effectively ‘painting’ with thread to bring the nocturnal scene to life.
11. Threaded Details on Printed Ephemera
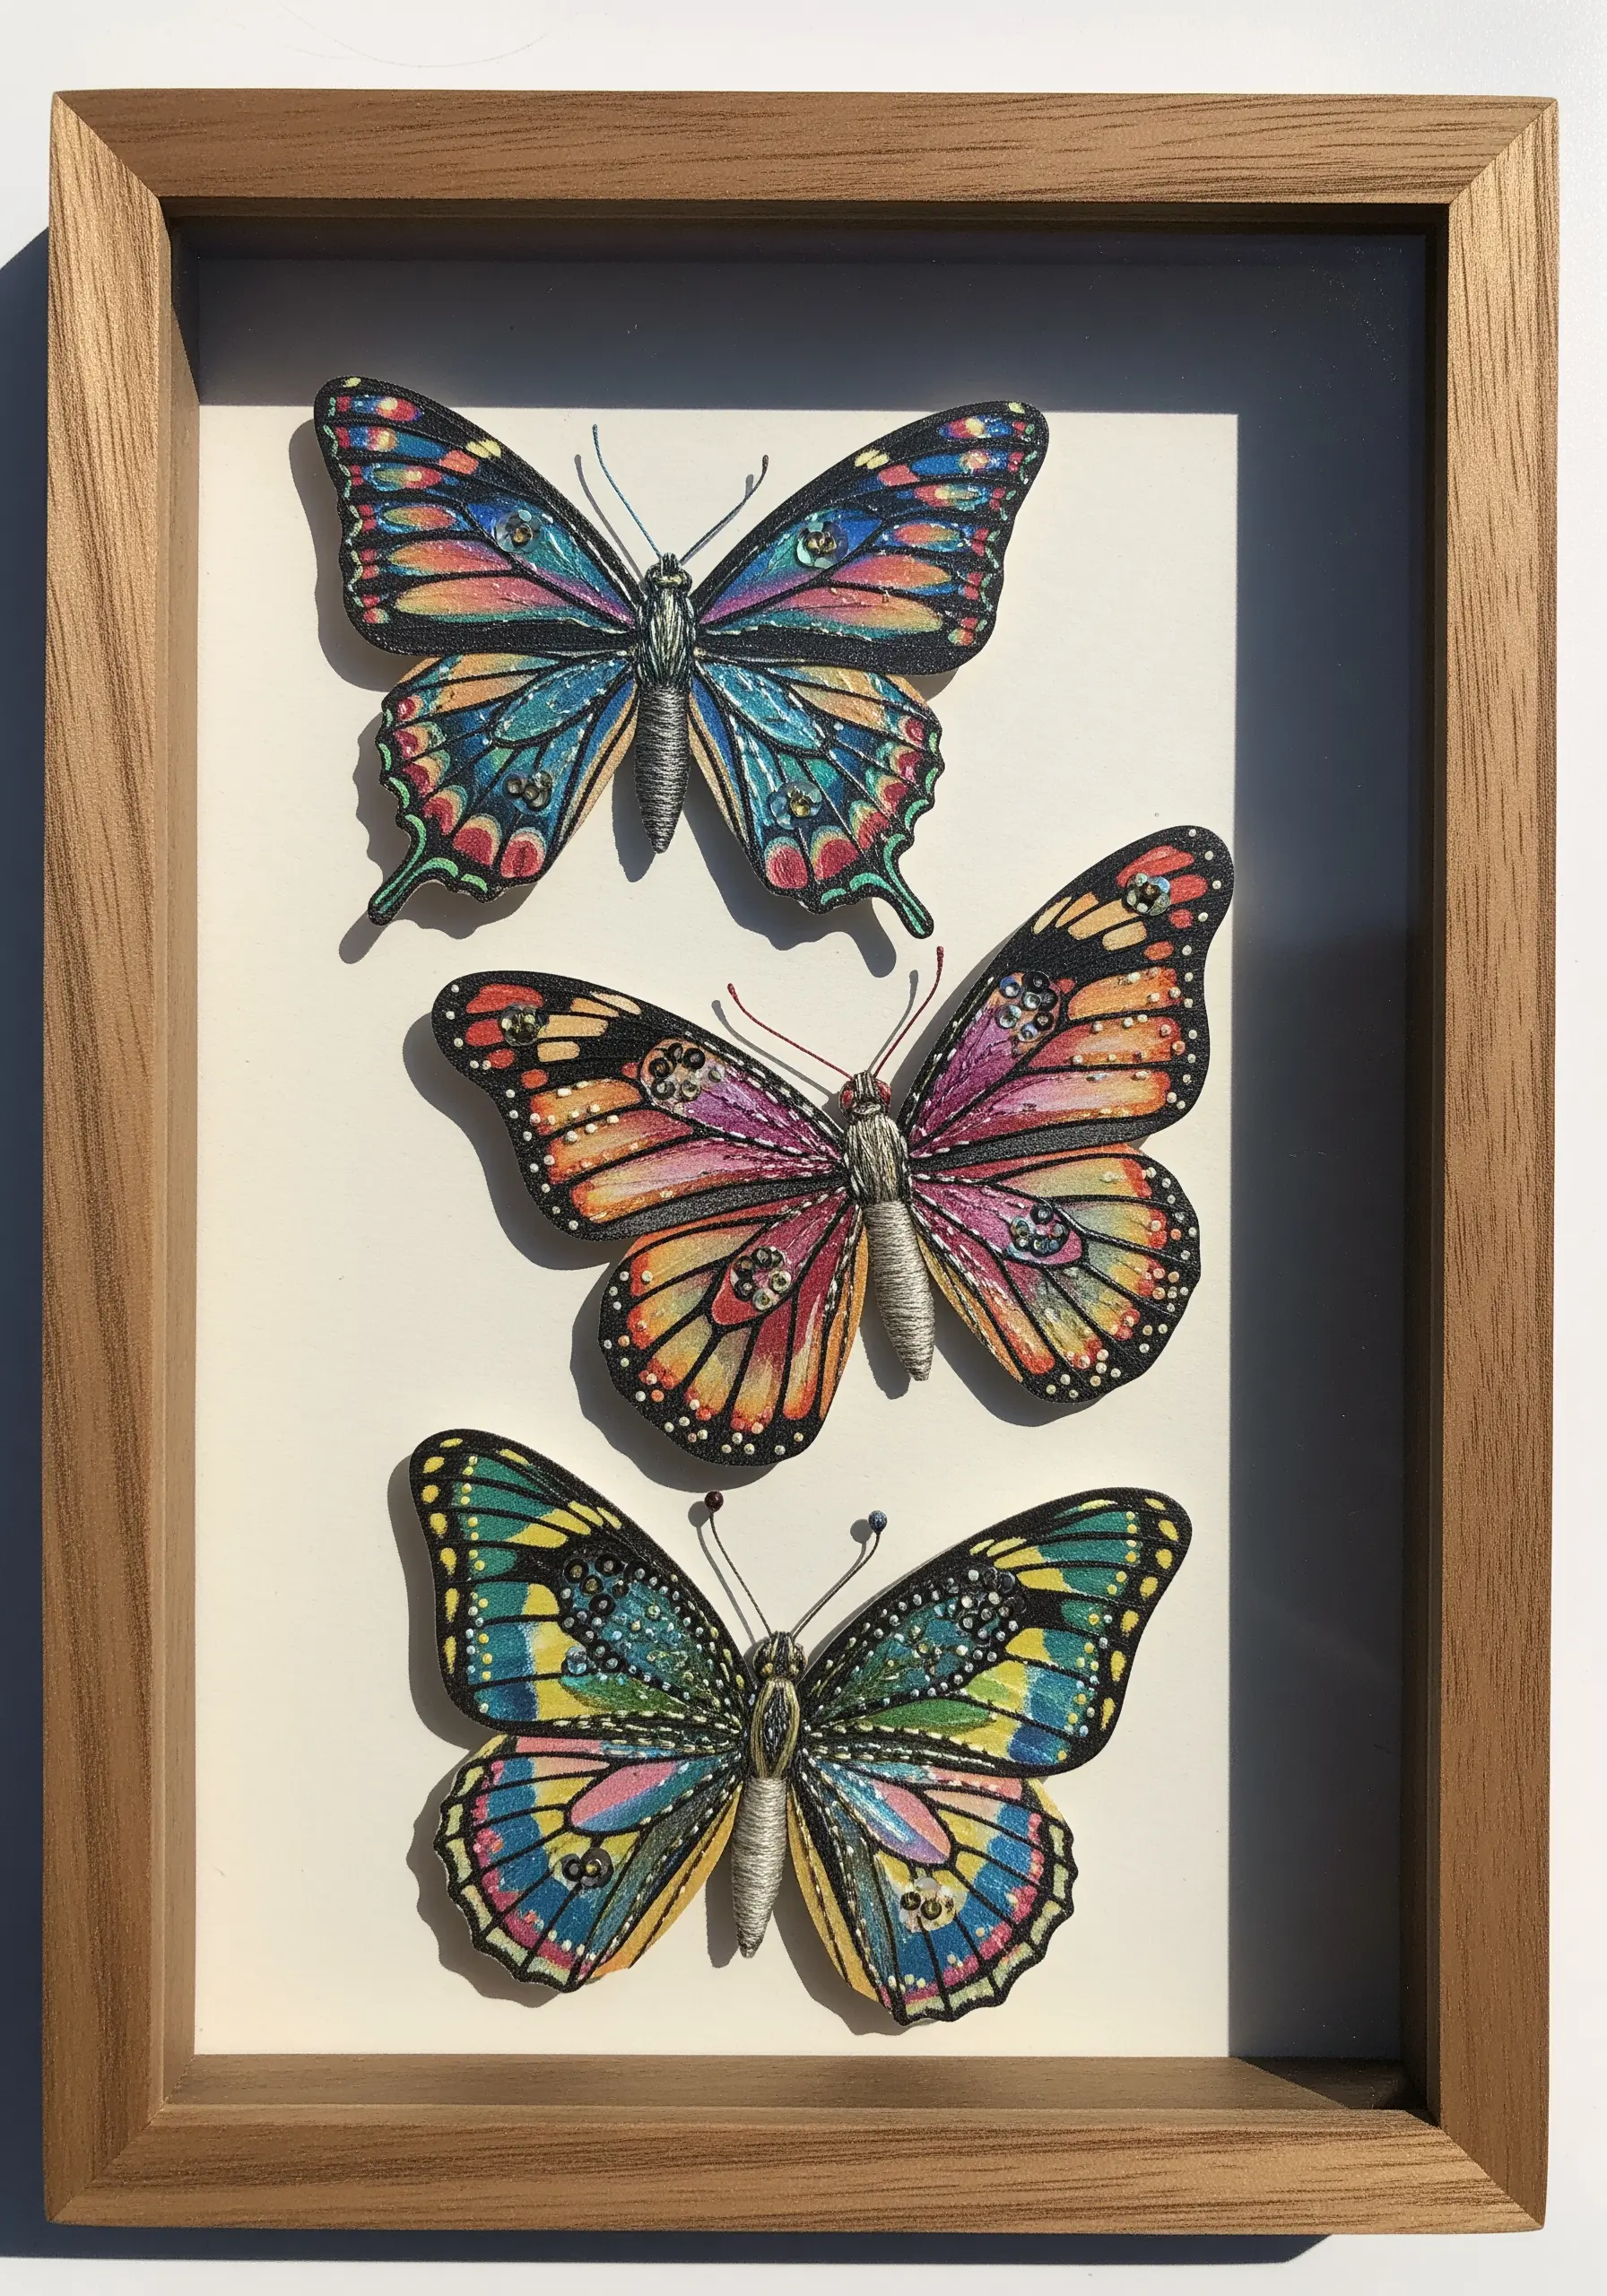
Give printed paper cutouts a hand-finished, artistic touch by adding small, stitched details.
For these butterflies, use a single strand of black thread to stitch delicate antennae using a straight stitch with a French knot at the tip.
You can also use a tiny backstitch along the edges of the wings to add subtle texture and definition, making the paper elements feel less like cutouts and more like integral parts of the artwork.
This technique is perfect for adding depth to any printed illustration, turning it into a handmade embroidery gifts that double as mini art pieces.
12. Building a Coral Reef with Dimensional Stitches
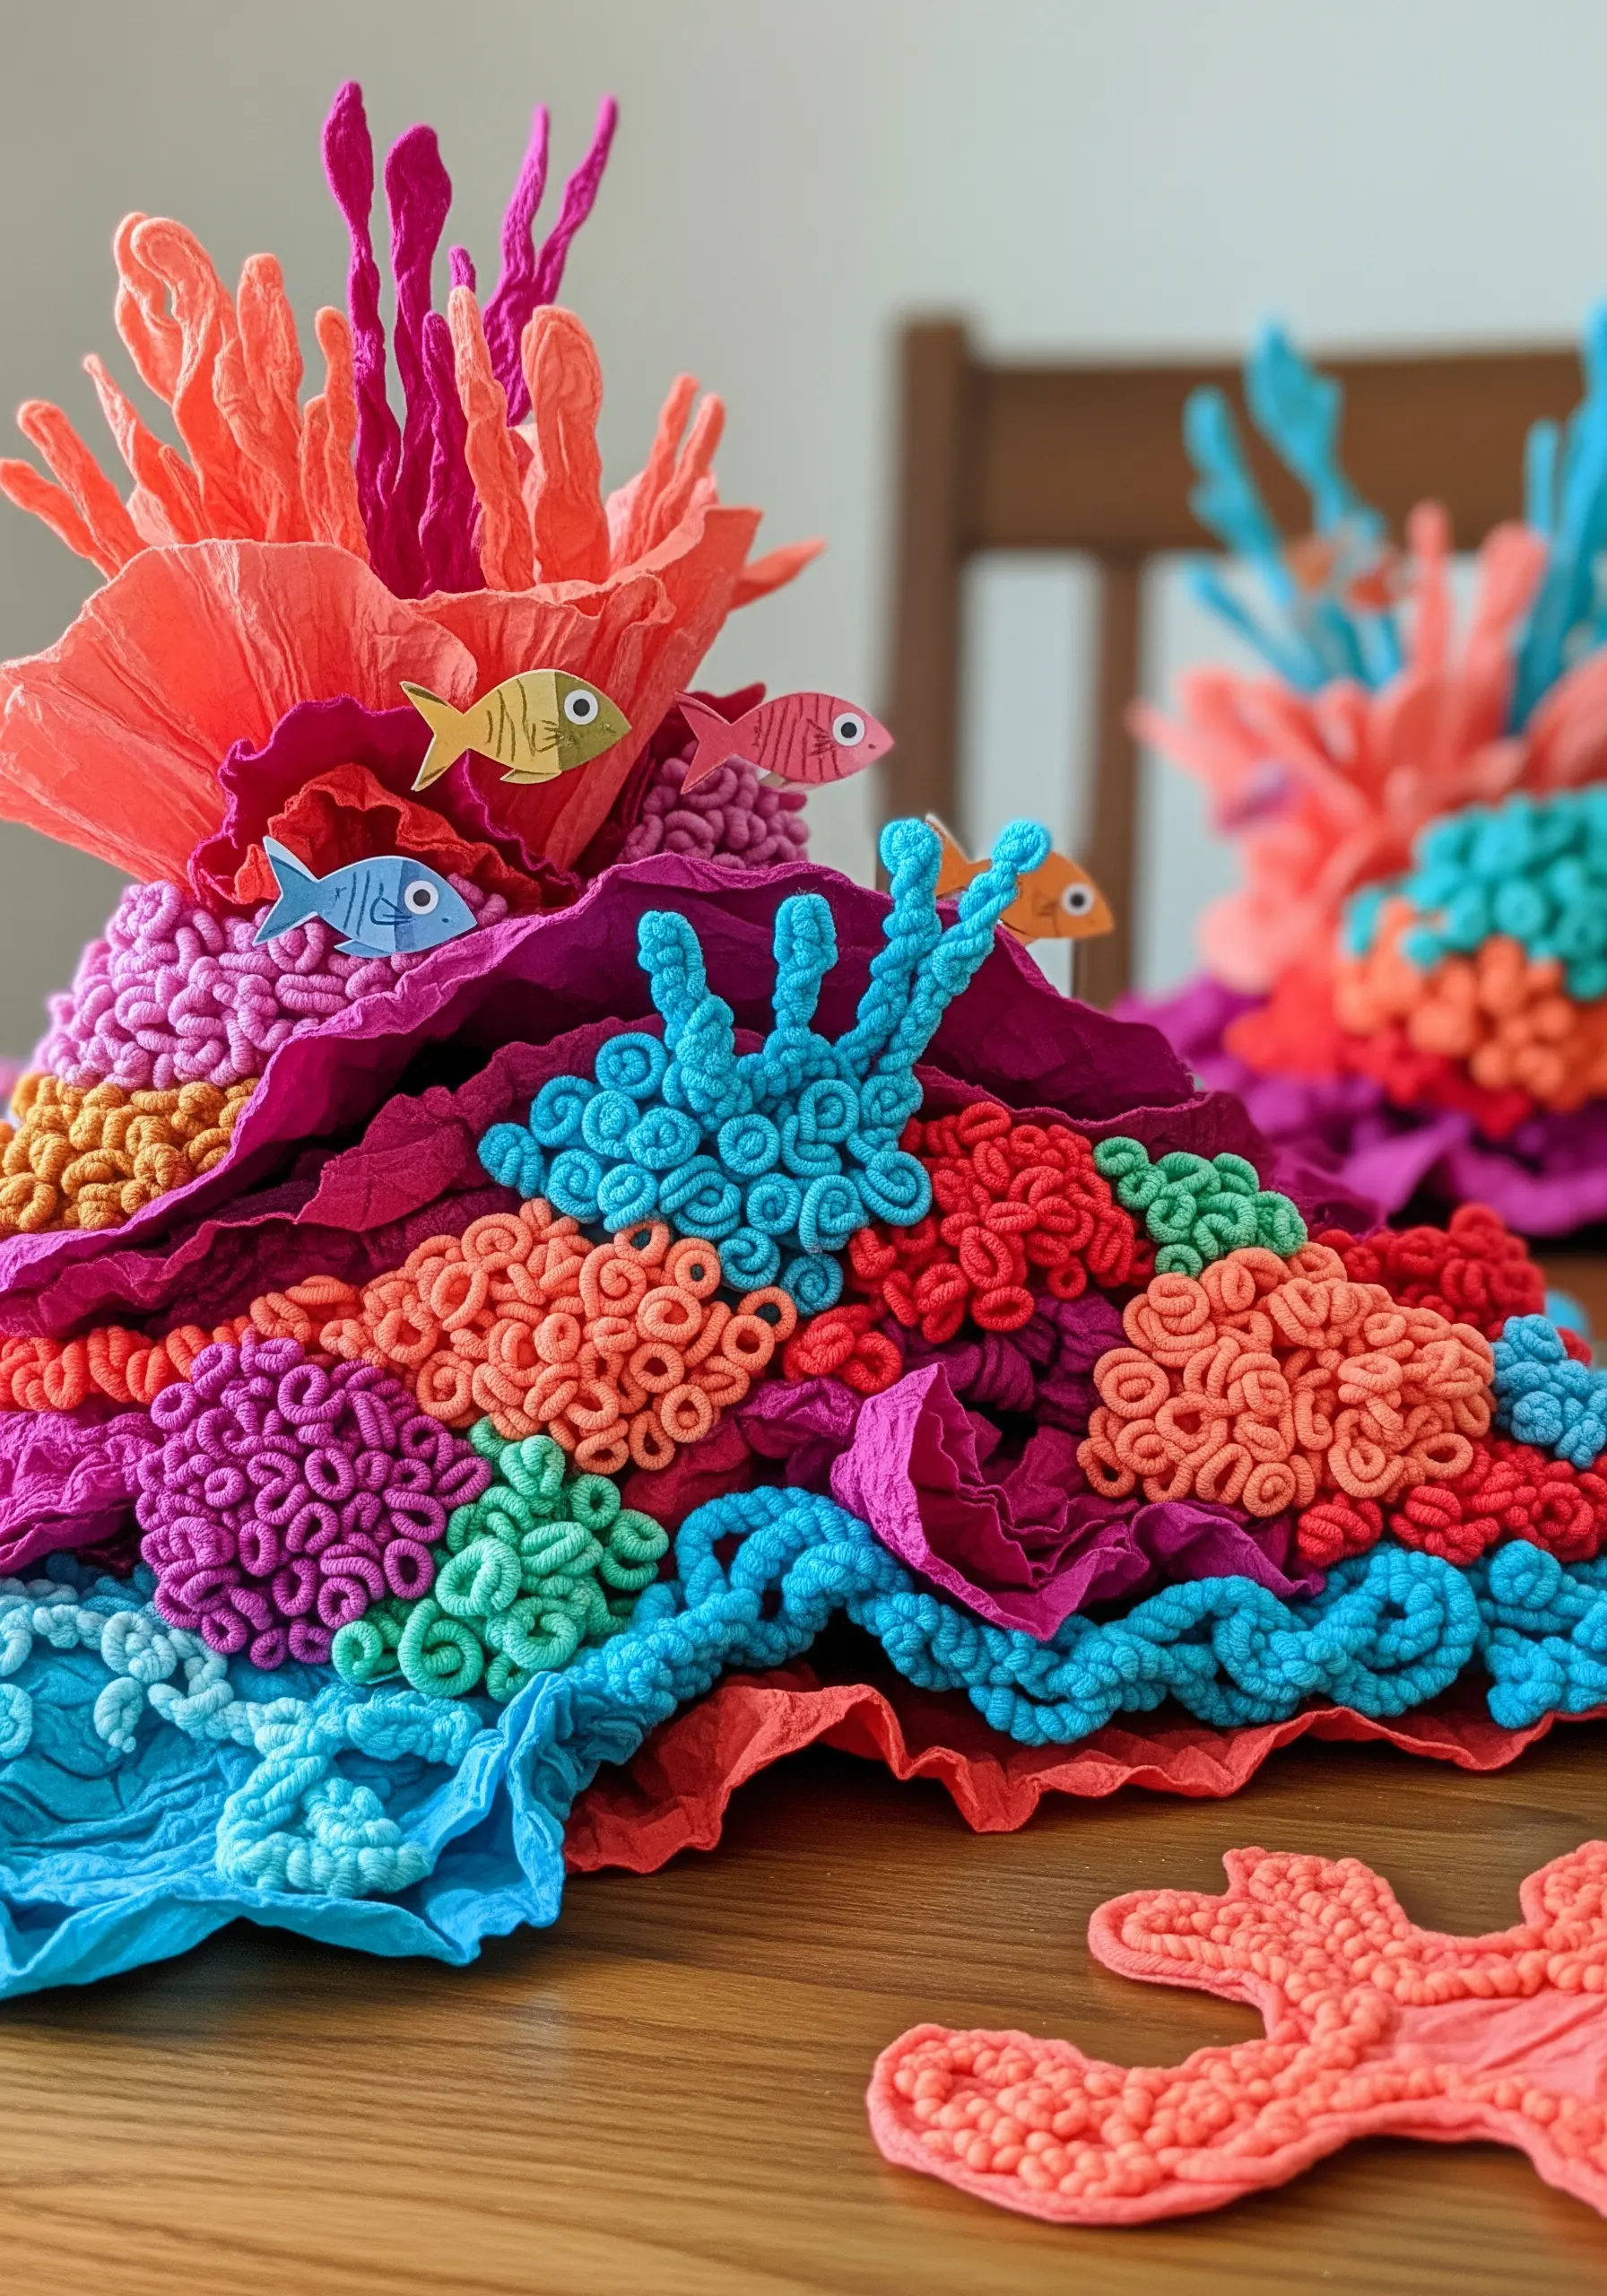
Move beyond flat collage by using a vocabulary of highly textural stitches to build a vibrant, 3D coral reef.
Layer crumpled and folded crepe paper to create the large, foundational shapes of your reef.
Then, use thick thread or yarn to create the intricate coral textures. Bullion knots are perfect for tube-like structures, while dense clusters of French knots mimic brain coral.
By varying the stitch type, thread thickness, and color, you can create an entire ecosystem that invites touch and exploration, showcasing statement textured embroidery techniques.
13. Typographic Stitching for Emphasis
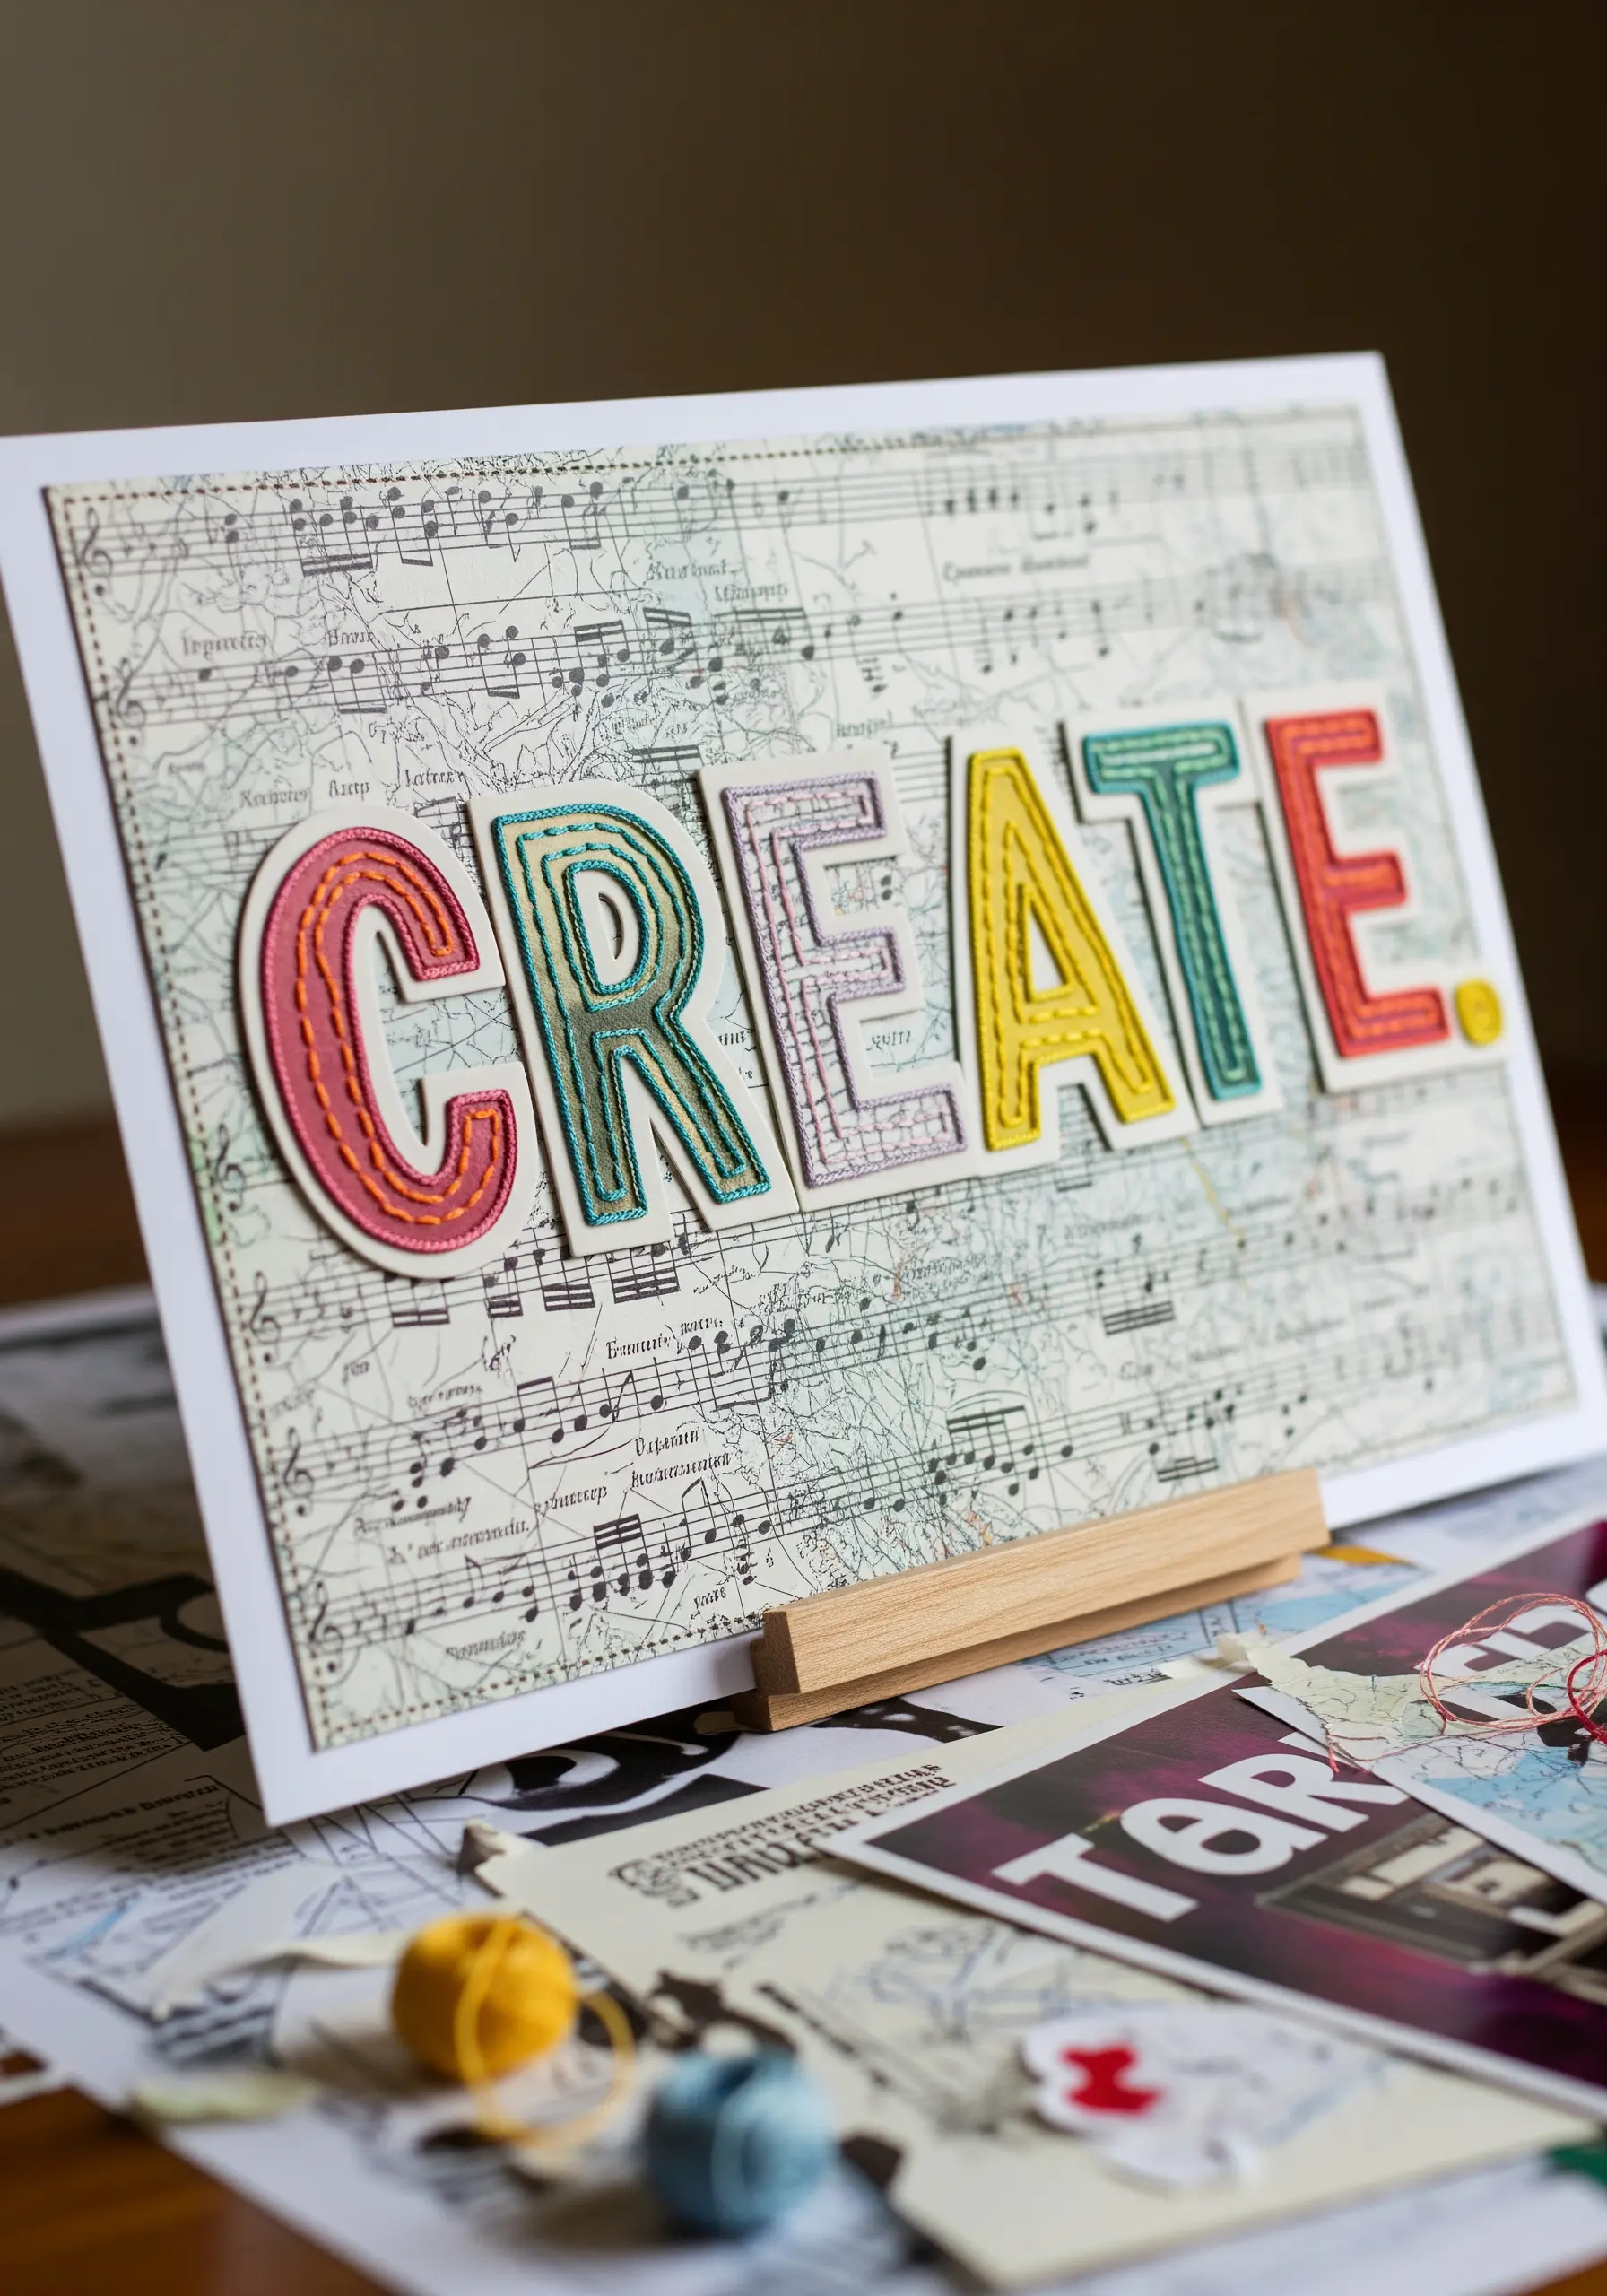
Make your message stand out by using thread to outline and embellish paper typography.
Cut your letters from colored cardstock and arrange them over a textured paper background like sheet music or a map.
Use a simple backstitch or stem stitch around the edge of each letter to give it a crisp, defined border. For extra detail, add a second, concentric line of stitching inside the first.
This technique adds color, texture, and a handmade feel, turning a simple word into a focal point of your artwork, perfect for thread-based typography ideas.
14. A Paper Quilt with Yarn Stitches
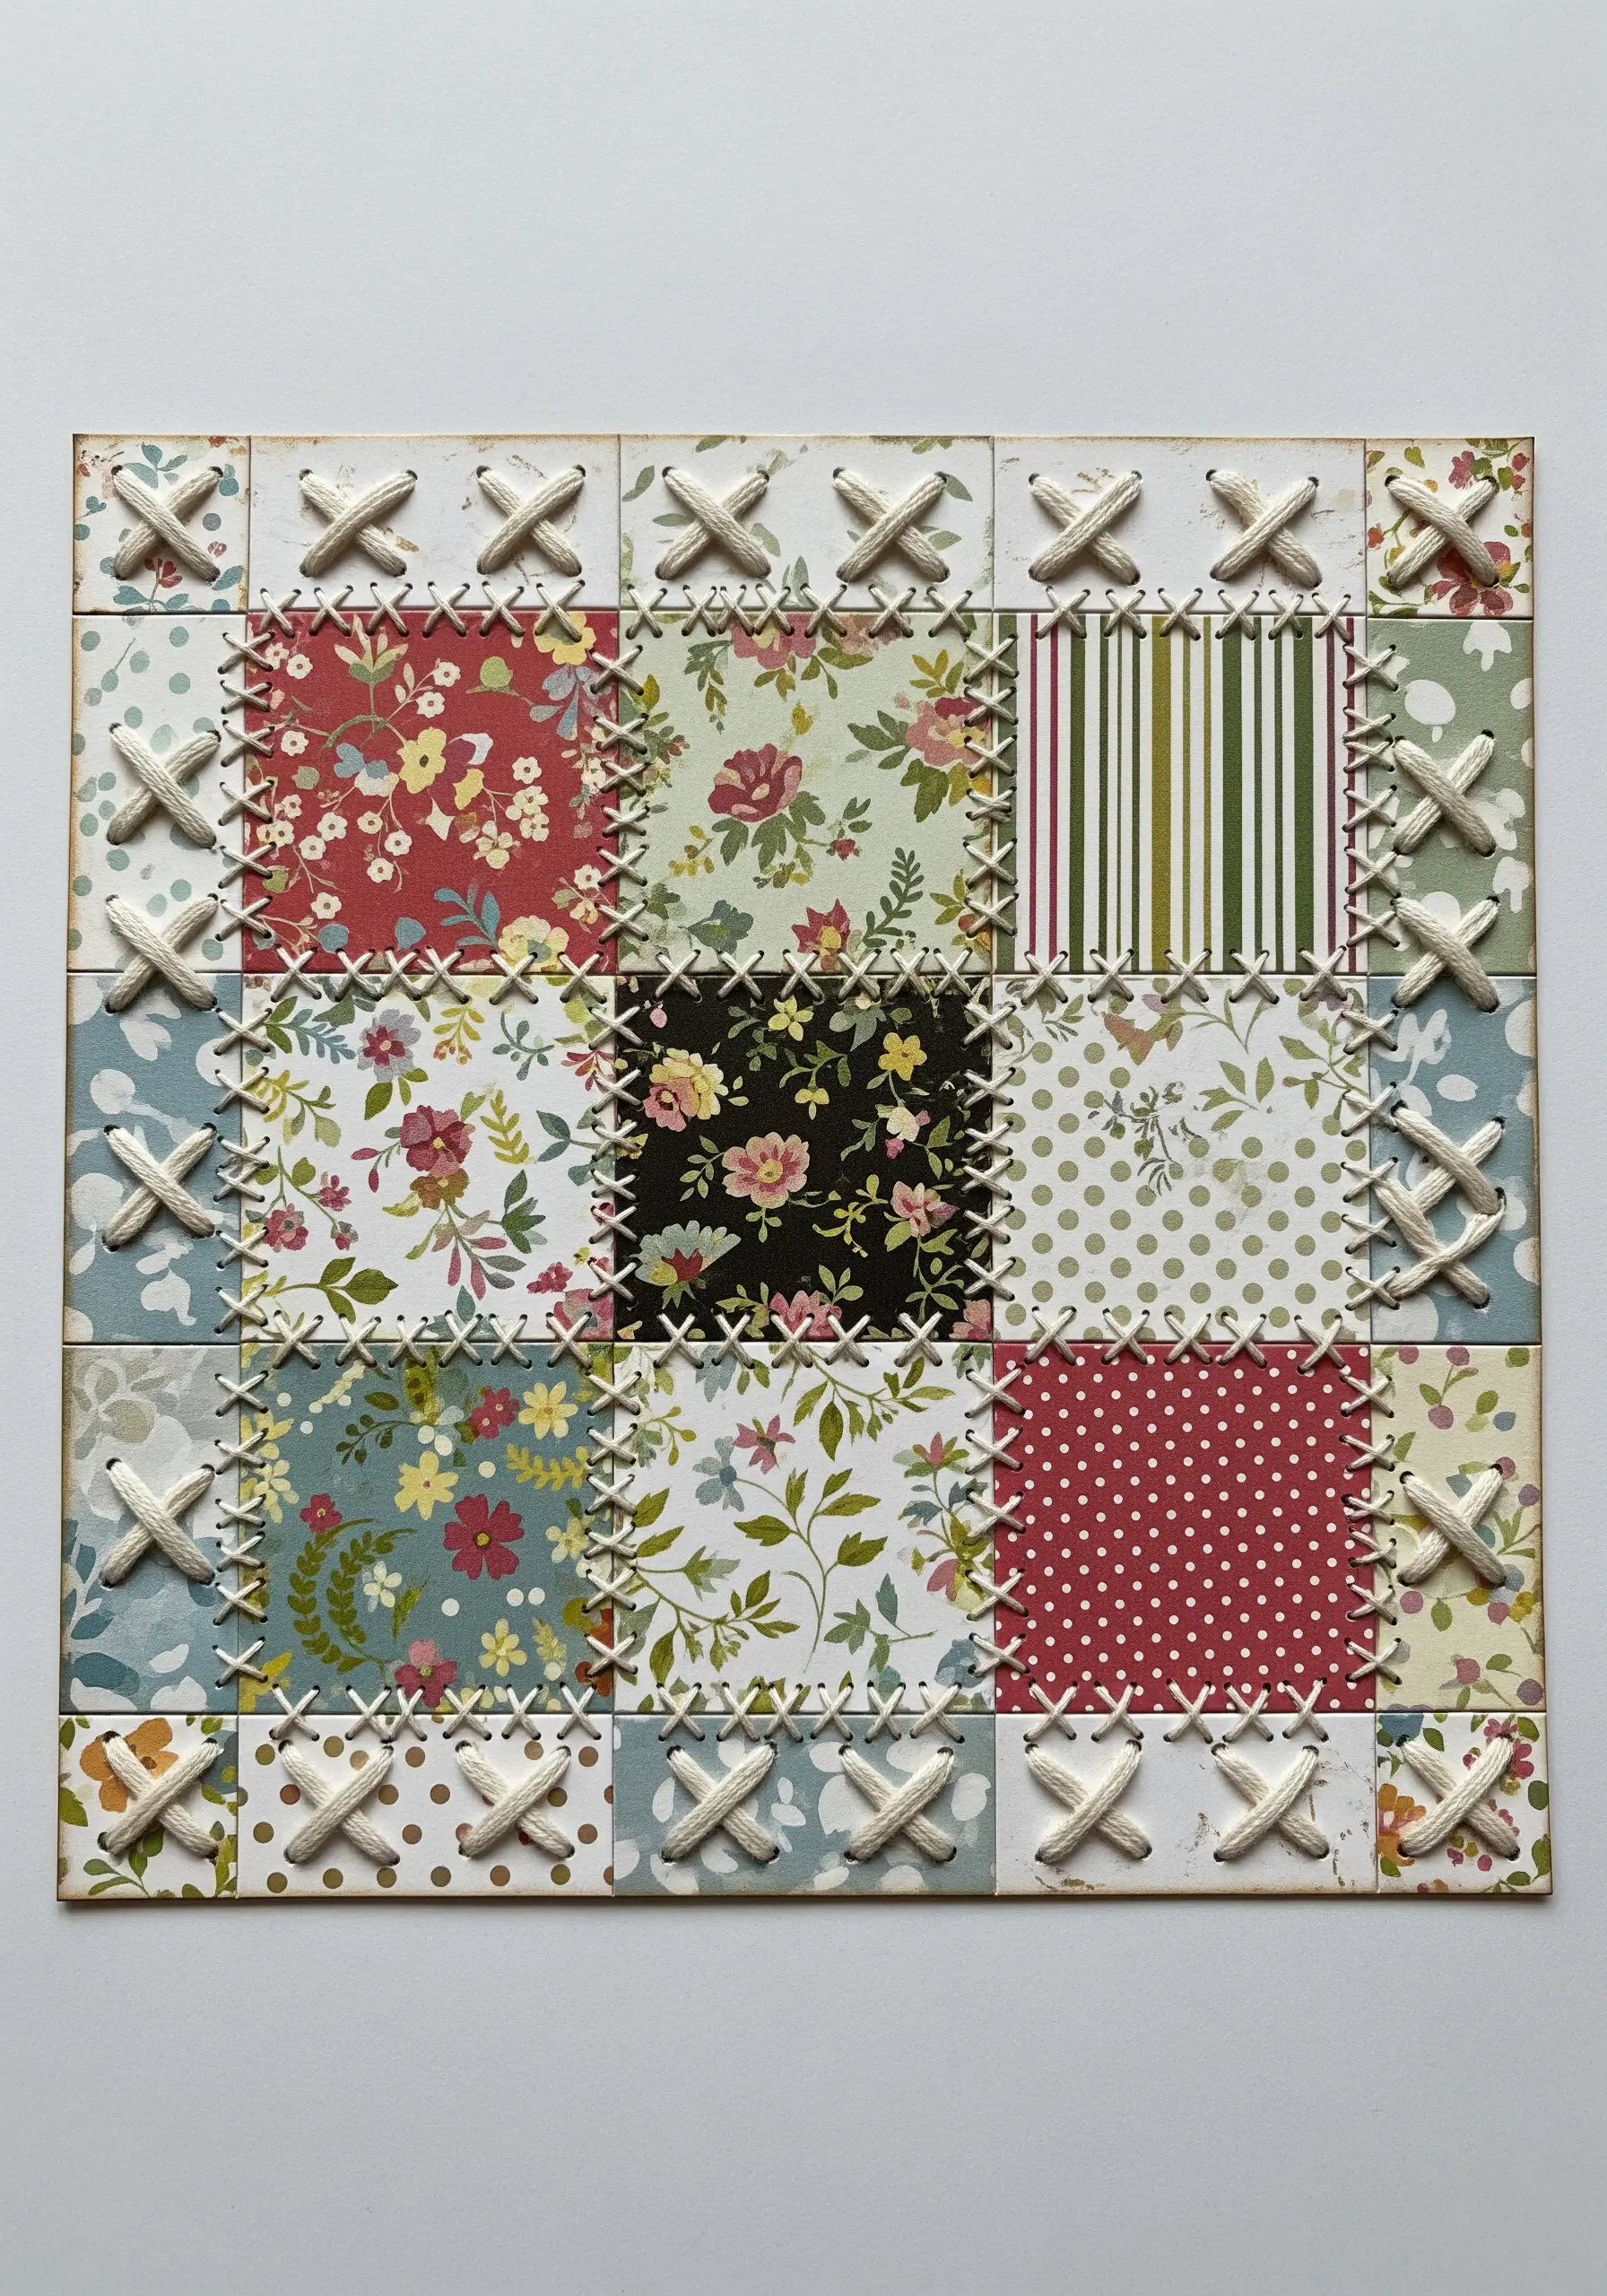
Emulate the charm of a traditional quilt by joining paper squares with chunky, decorative stitches.
Arrange your patterned paper squares in a grid, then use a thick needle or awl to pre-punch holes where the corners meet.
Instead of fine embroidery floss, opt for a soft, thick yarn or cotton cord to create your cross-stitches.
The oversized stitches not only hold the ‘quilt’ together but also provide a soft, textural contrast to the crisp paper, creating a beautiful piece of cozy cottage-core fabric collage embroidery.
15. Metallic Mandalas on a Dark Ground
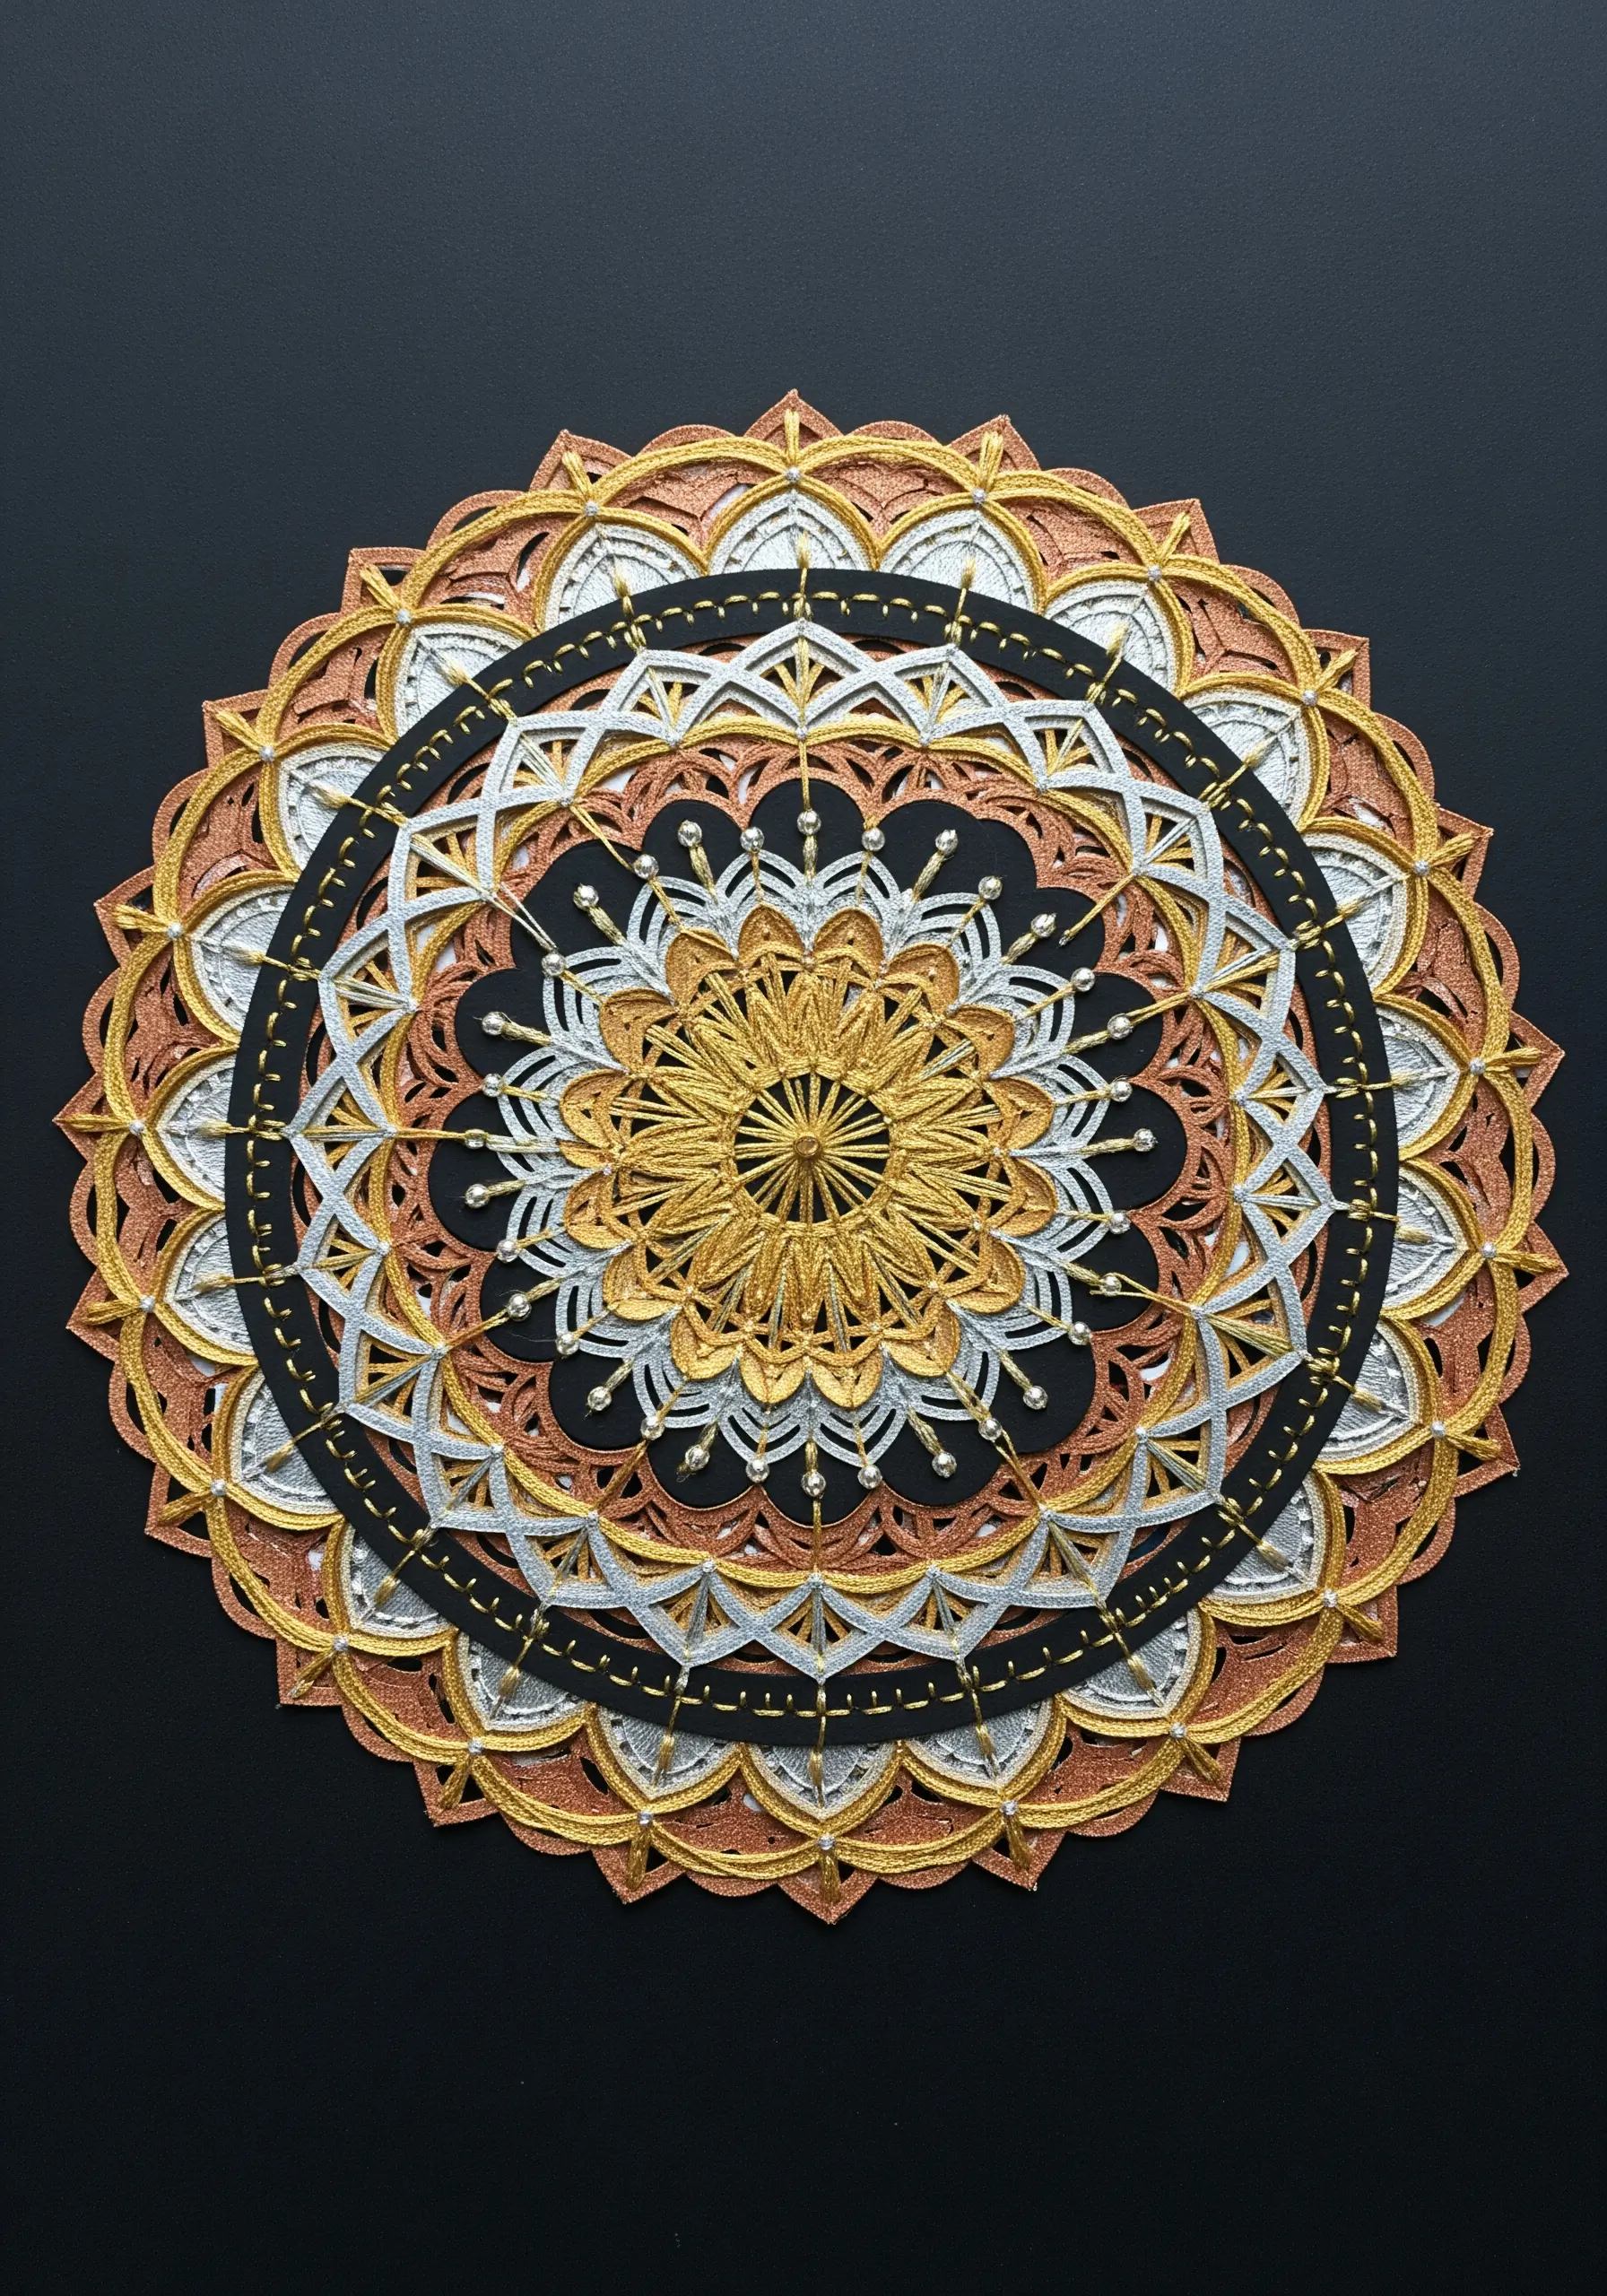
Create a stunning, intricate mandala by combining layered paper with the luxe sheen of metallic threads.
Cut your mandala layers from metallic and glitter cardstock, then mount them on a stark black background to make the colors pop.
Use metallic embroidery threads in gold, silver, and copper to add fine, radial details and outlines with precise straight stitches and backstitches.
The interplay between the solid shimmer of the paper and the delicate glimmer of the thread creates a sense of depth and opulence, perfect for modern thread mandala ideas.
16. Weaving Natural Fibers Through Paper

Explore textural contrast by weaving rustic, natural fibers directly through a structured paper base.
Create a ‘loom’ by cutting parallel slits in a sturdy piece of cardstock.
Weave strips of painted or patterned paper in one direction, then introduce a contrasting material—like this twisted jute rope—in the other direction.
The interplay between the smooth, flat paper and the rough, rounded rope creates a compelling tactile and visual rhythm. This is a simple way to create earthy embroidery ideas inspired by nature’s palette without complex stitching.
17. Hoop Art as a Mixed-Media Loom
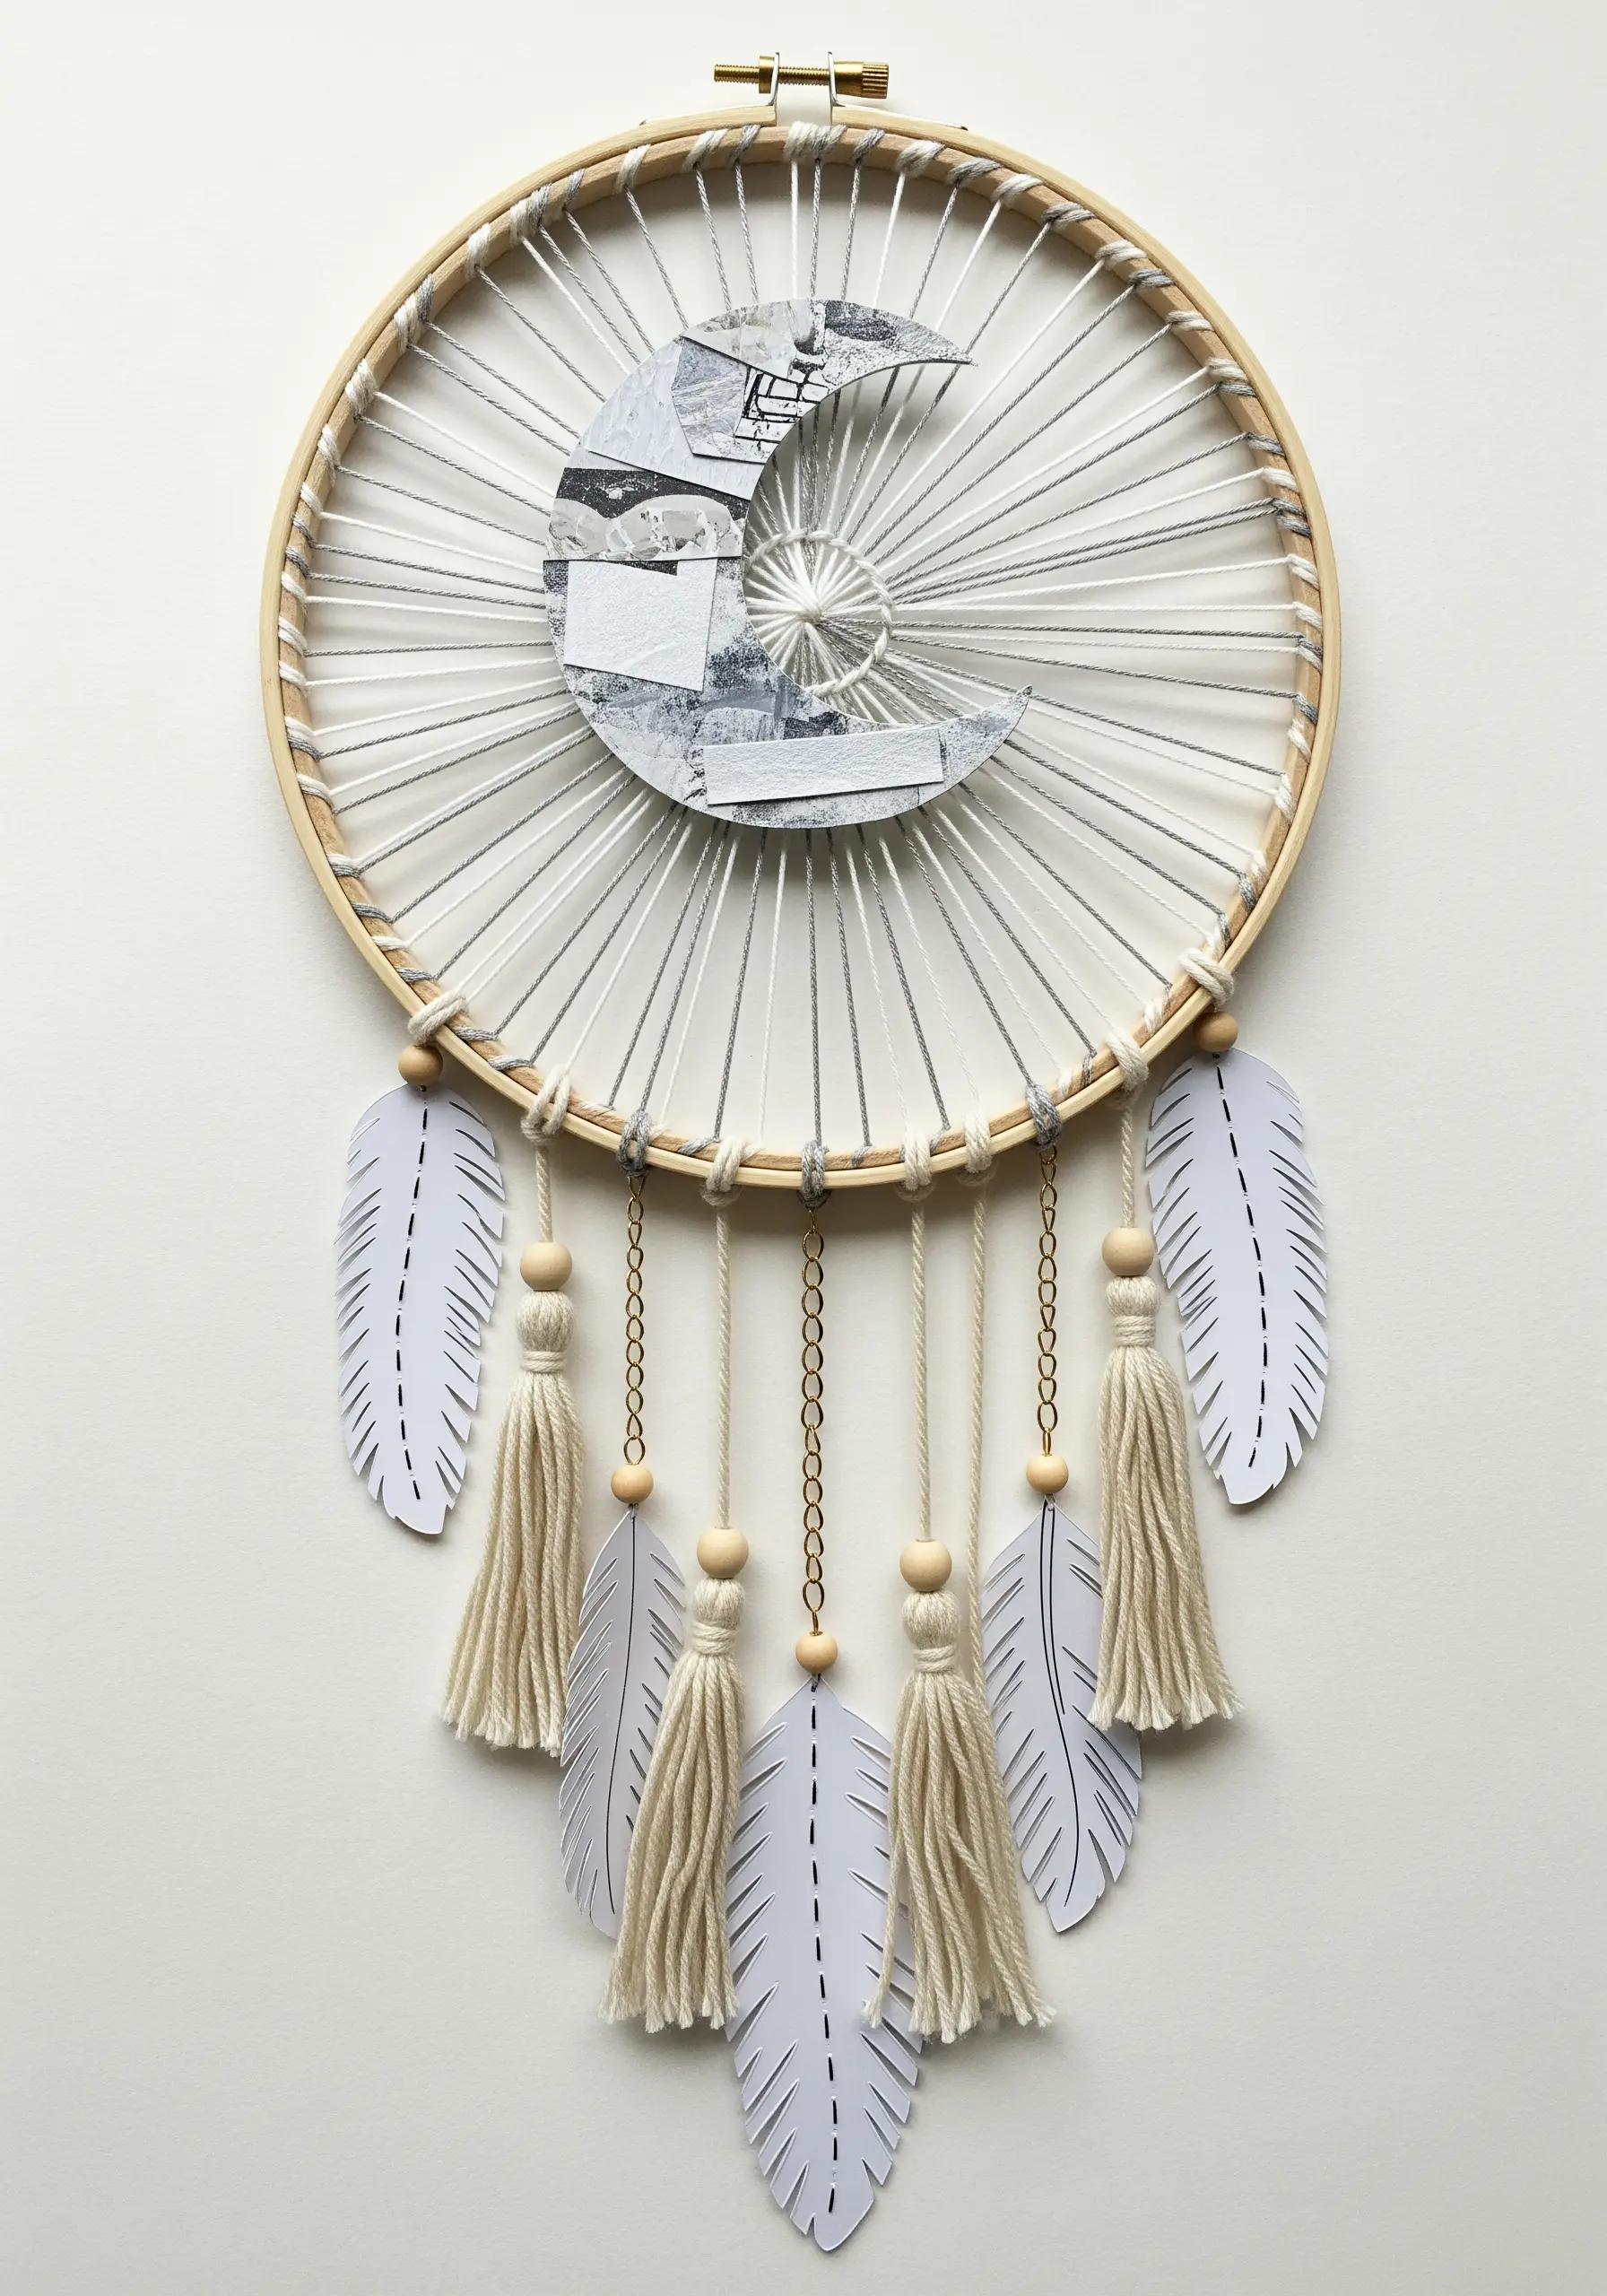
Use a traditional embroidery hoop as a frame for a woven, mixed-media dreamcatcher.
Instead of stretching fabric, wrap the inner hoop with thread to create a radial ‘web’ that serves as your base.
Incorporate a paper collage element, like this crescent moon, by gently weaving it into the threads or securing it with a few discreet stitches.
Complete the piece by adding stitched paper feathers and tassels, turning the hoop into a dynamic scaffold for your paper and thread collage.
18. Stitched Snowfall on Layered Paper Peaks
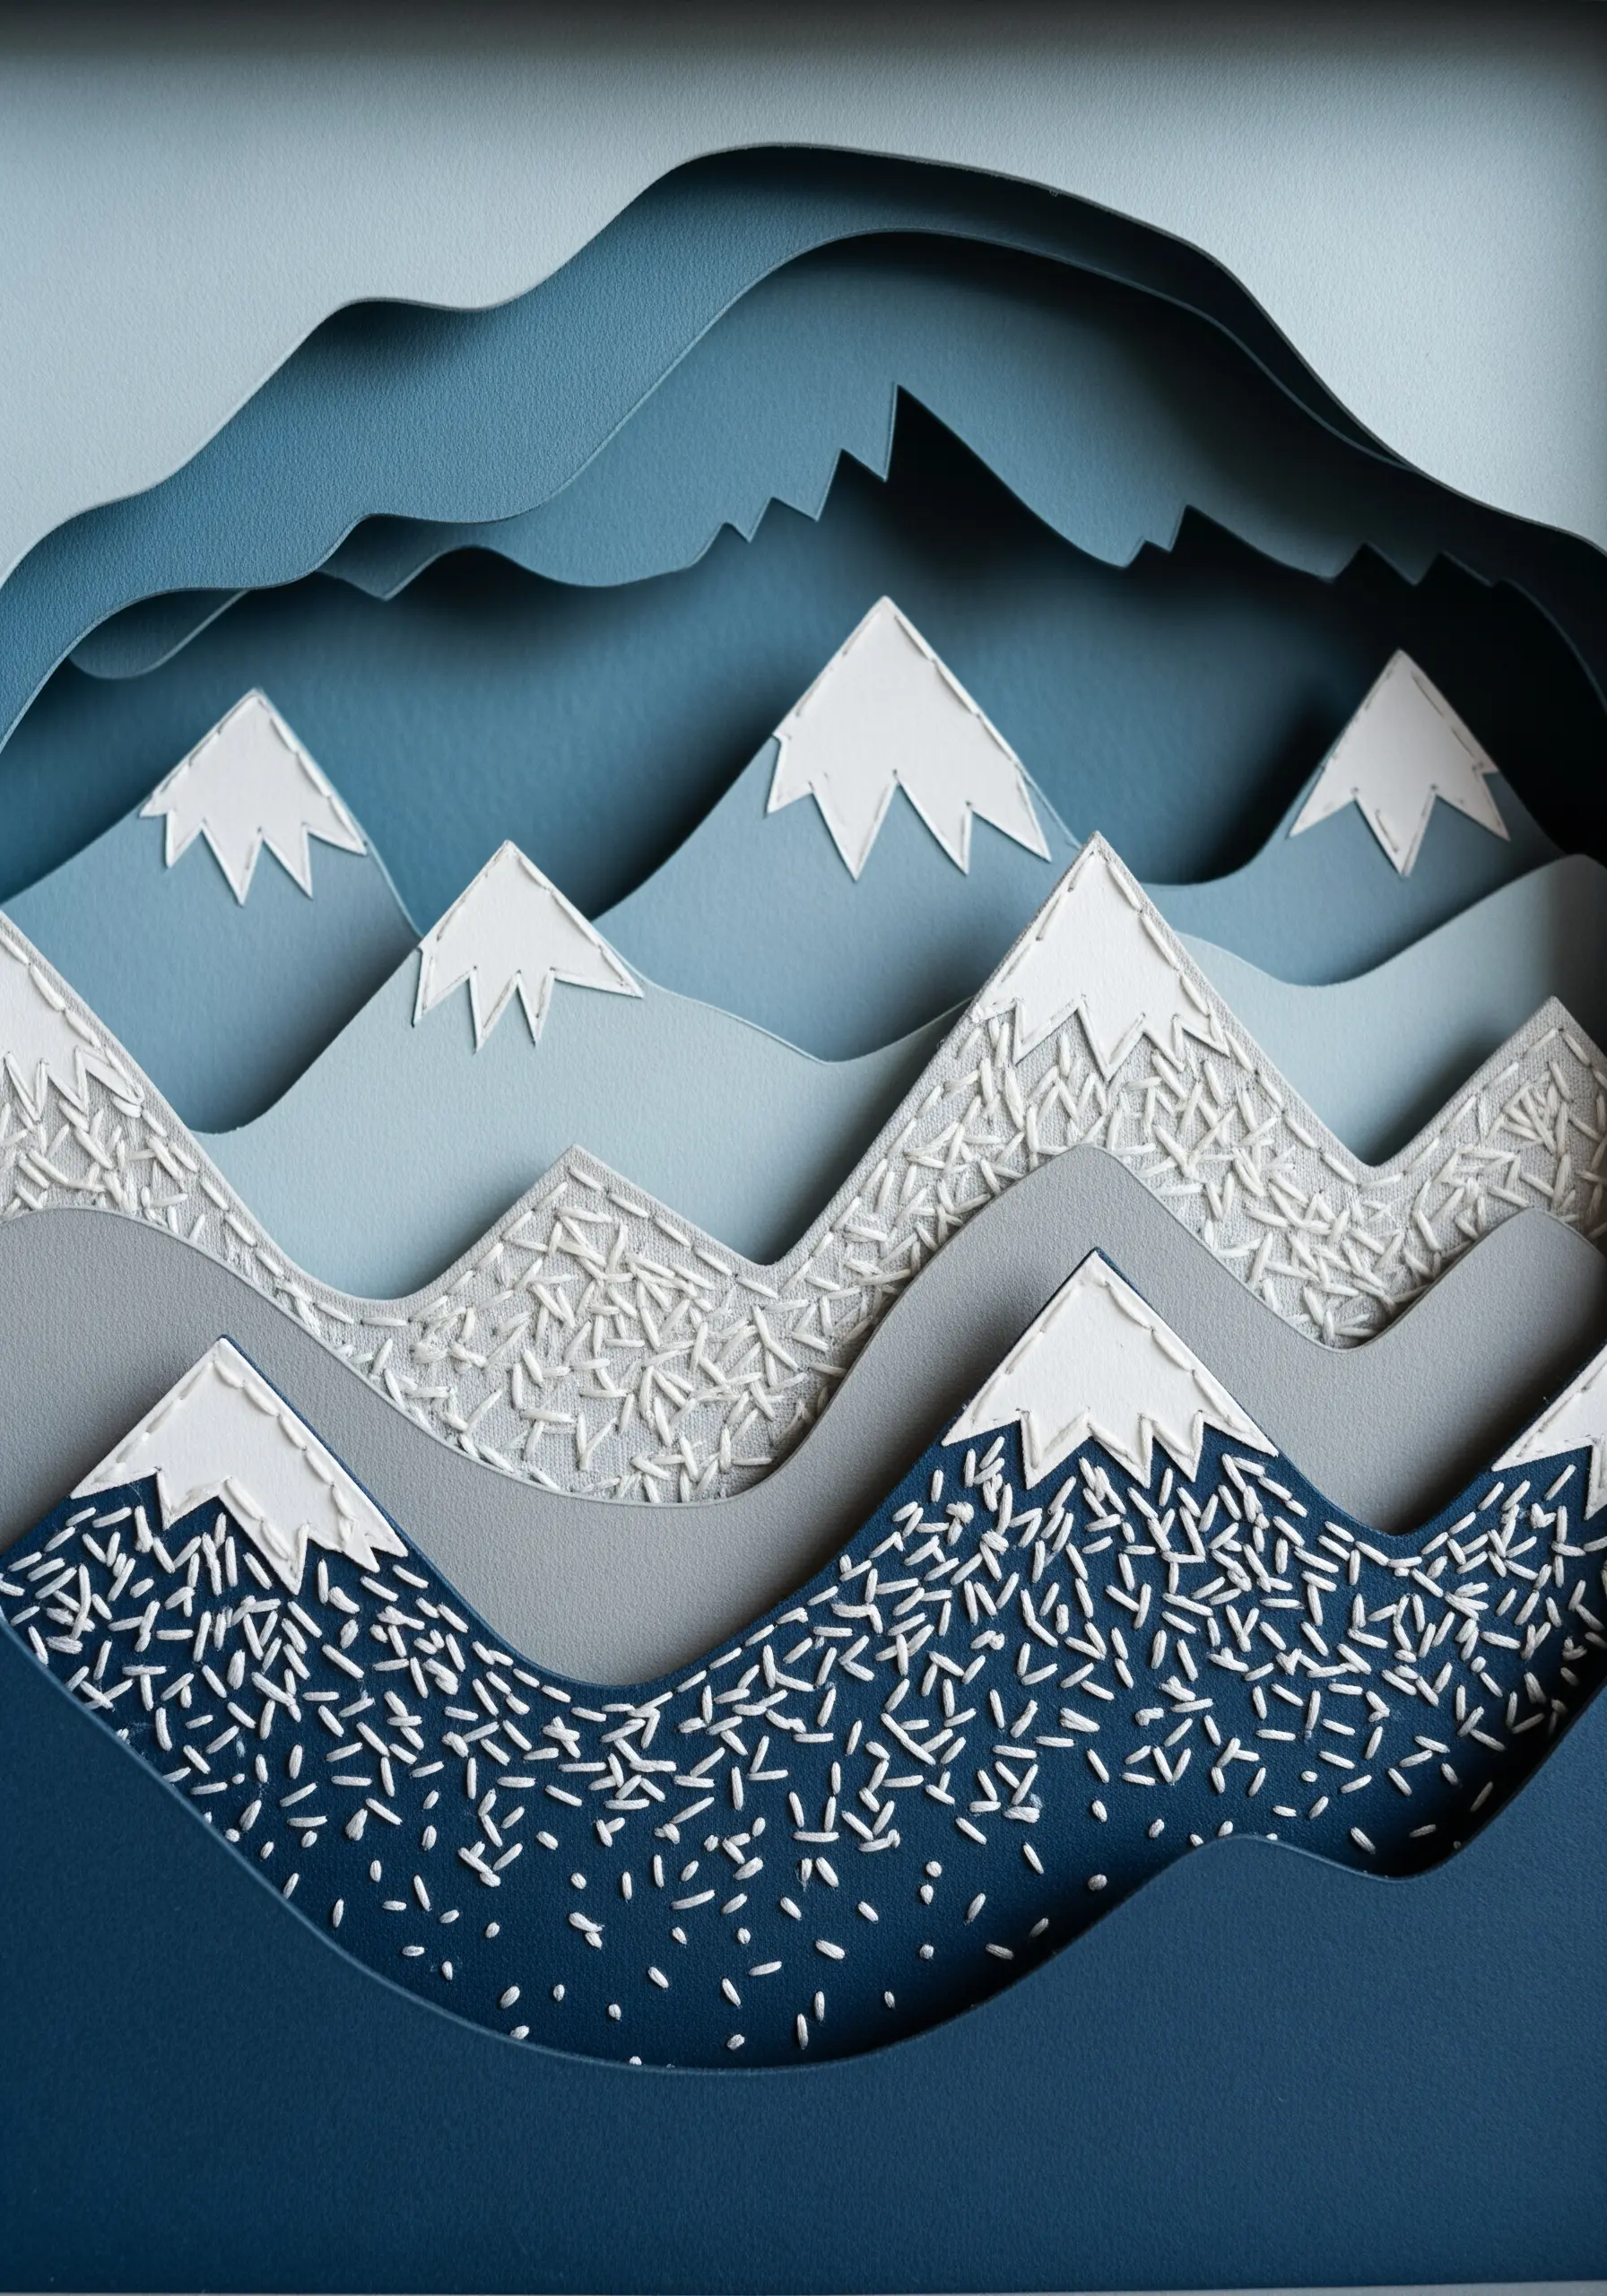
Suggest texture and atmosphere in a paper landscape with minimal, scattered stitches.
Create depth by layering multiple shades of blue and grey cardstock to form your mountain range. The crisp paper edges provide clean, graphic lines.
To create the effect of snow or rocky scree, use a contrasting white thread to add small, randomly placed seed stitches across the paper surfaces.
The stitches add a delicate, tactile texture that breaks up the solid blocks of color, making the entire scene feel more dynamic and alive.
19. Sculpting a Nest with Paper and Thread
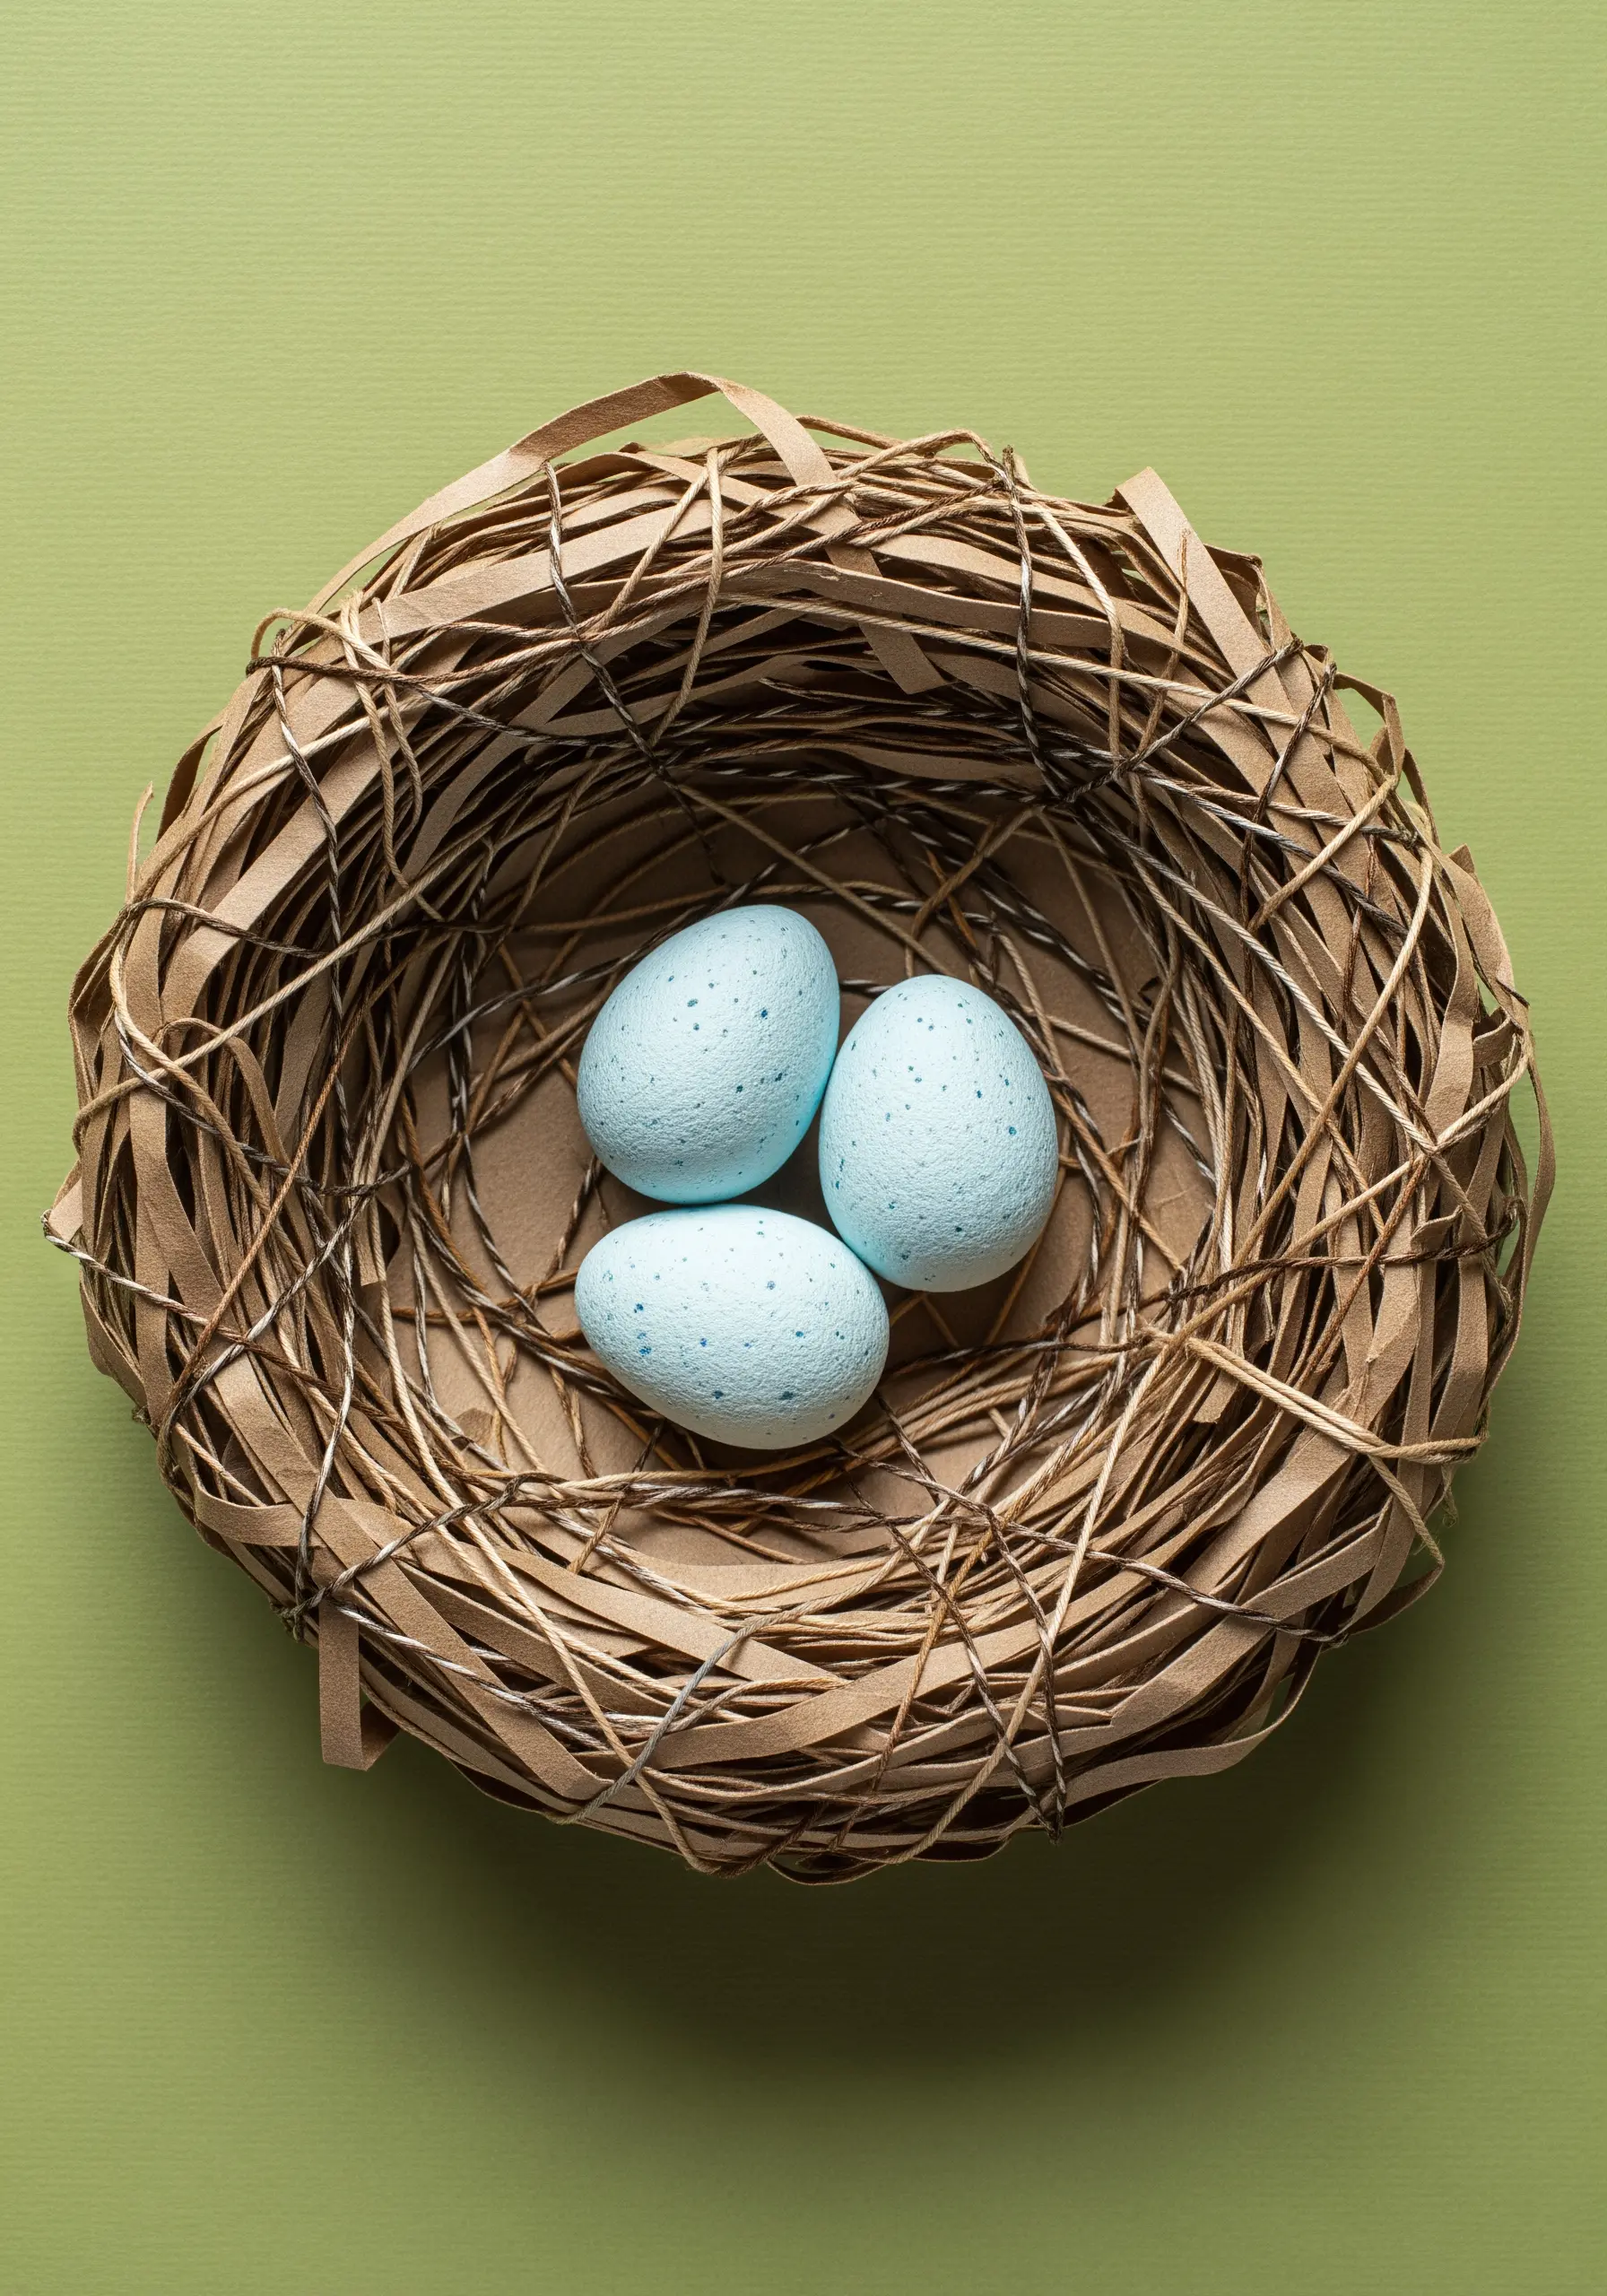
Build a three-dimensional object by using thread to shape and secure strips of paper.
To create this nest, cut thin strips of brown kraft paper and arrange them in a circular, woven pattern.
Use a matching brown thread to couch the paper strips in place, adding stitches wherever needed to hold the form. This allows you to build up the nest’s structure layer by layer.
The thread becomes almost invisible, acting as the structural glue that transforms flimsy paper into a sturdy, sculptural piece.
20. Faux Stained Glass with Threaded ‘Lead’
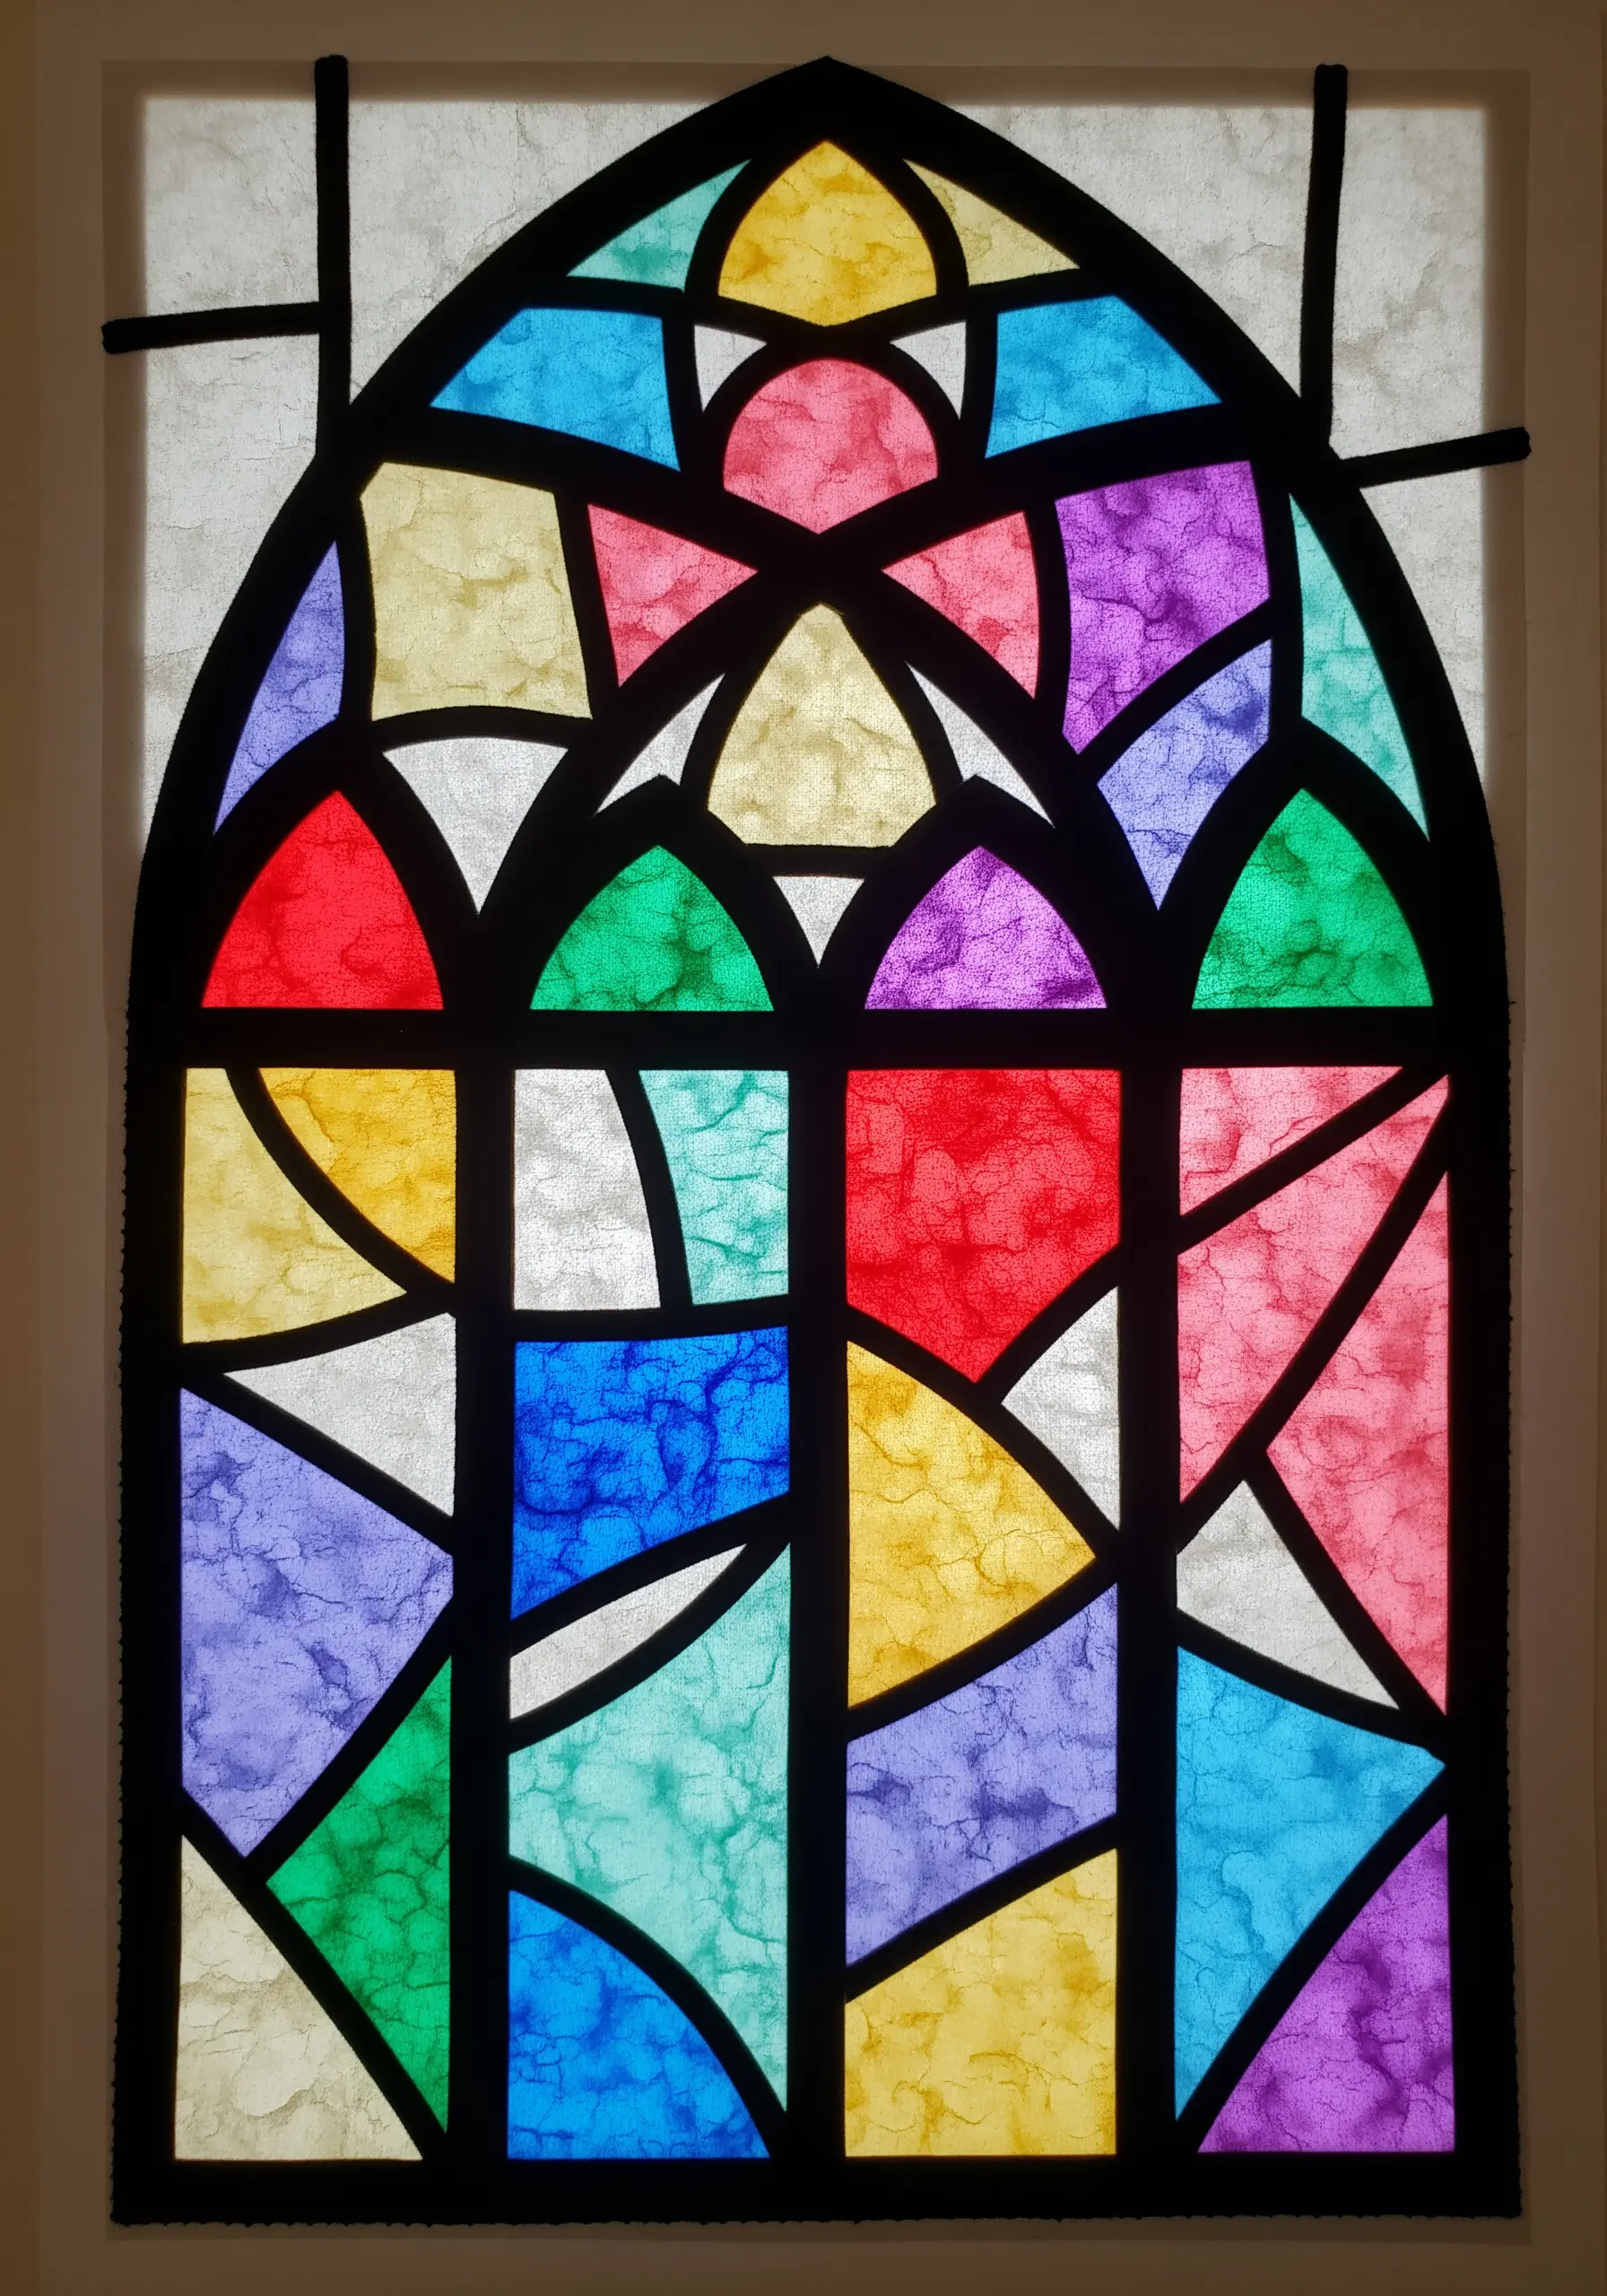
Recreate the look of stained glass by outlining translucent paper with bold, black thread.
Collage pieces of colored tissue paper or vellum onto a clear or white background to mimic glass panes.
Then, couch a thick black thread (such as #5 perle cotton or tapestry wool) along the seams where the colors meet.
The heavy black thread perfectly imitates the lead came of traditional stained glass, providing strong, graphic lines that make the colors appear even more luminous.
21. Highlighting Blueprints with Stitched Outlines
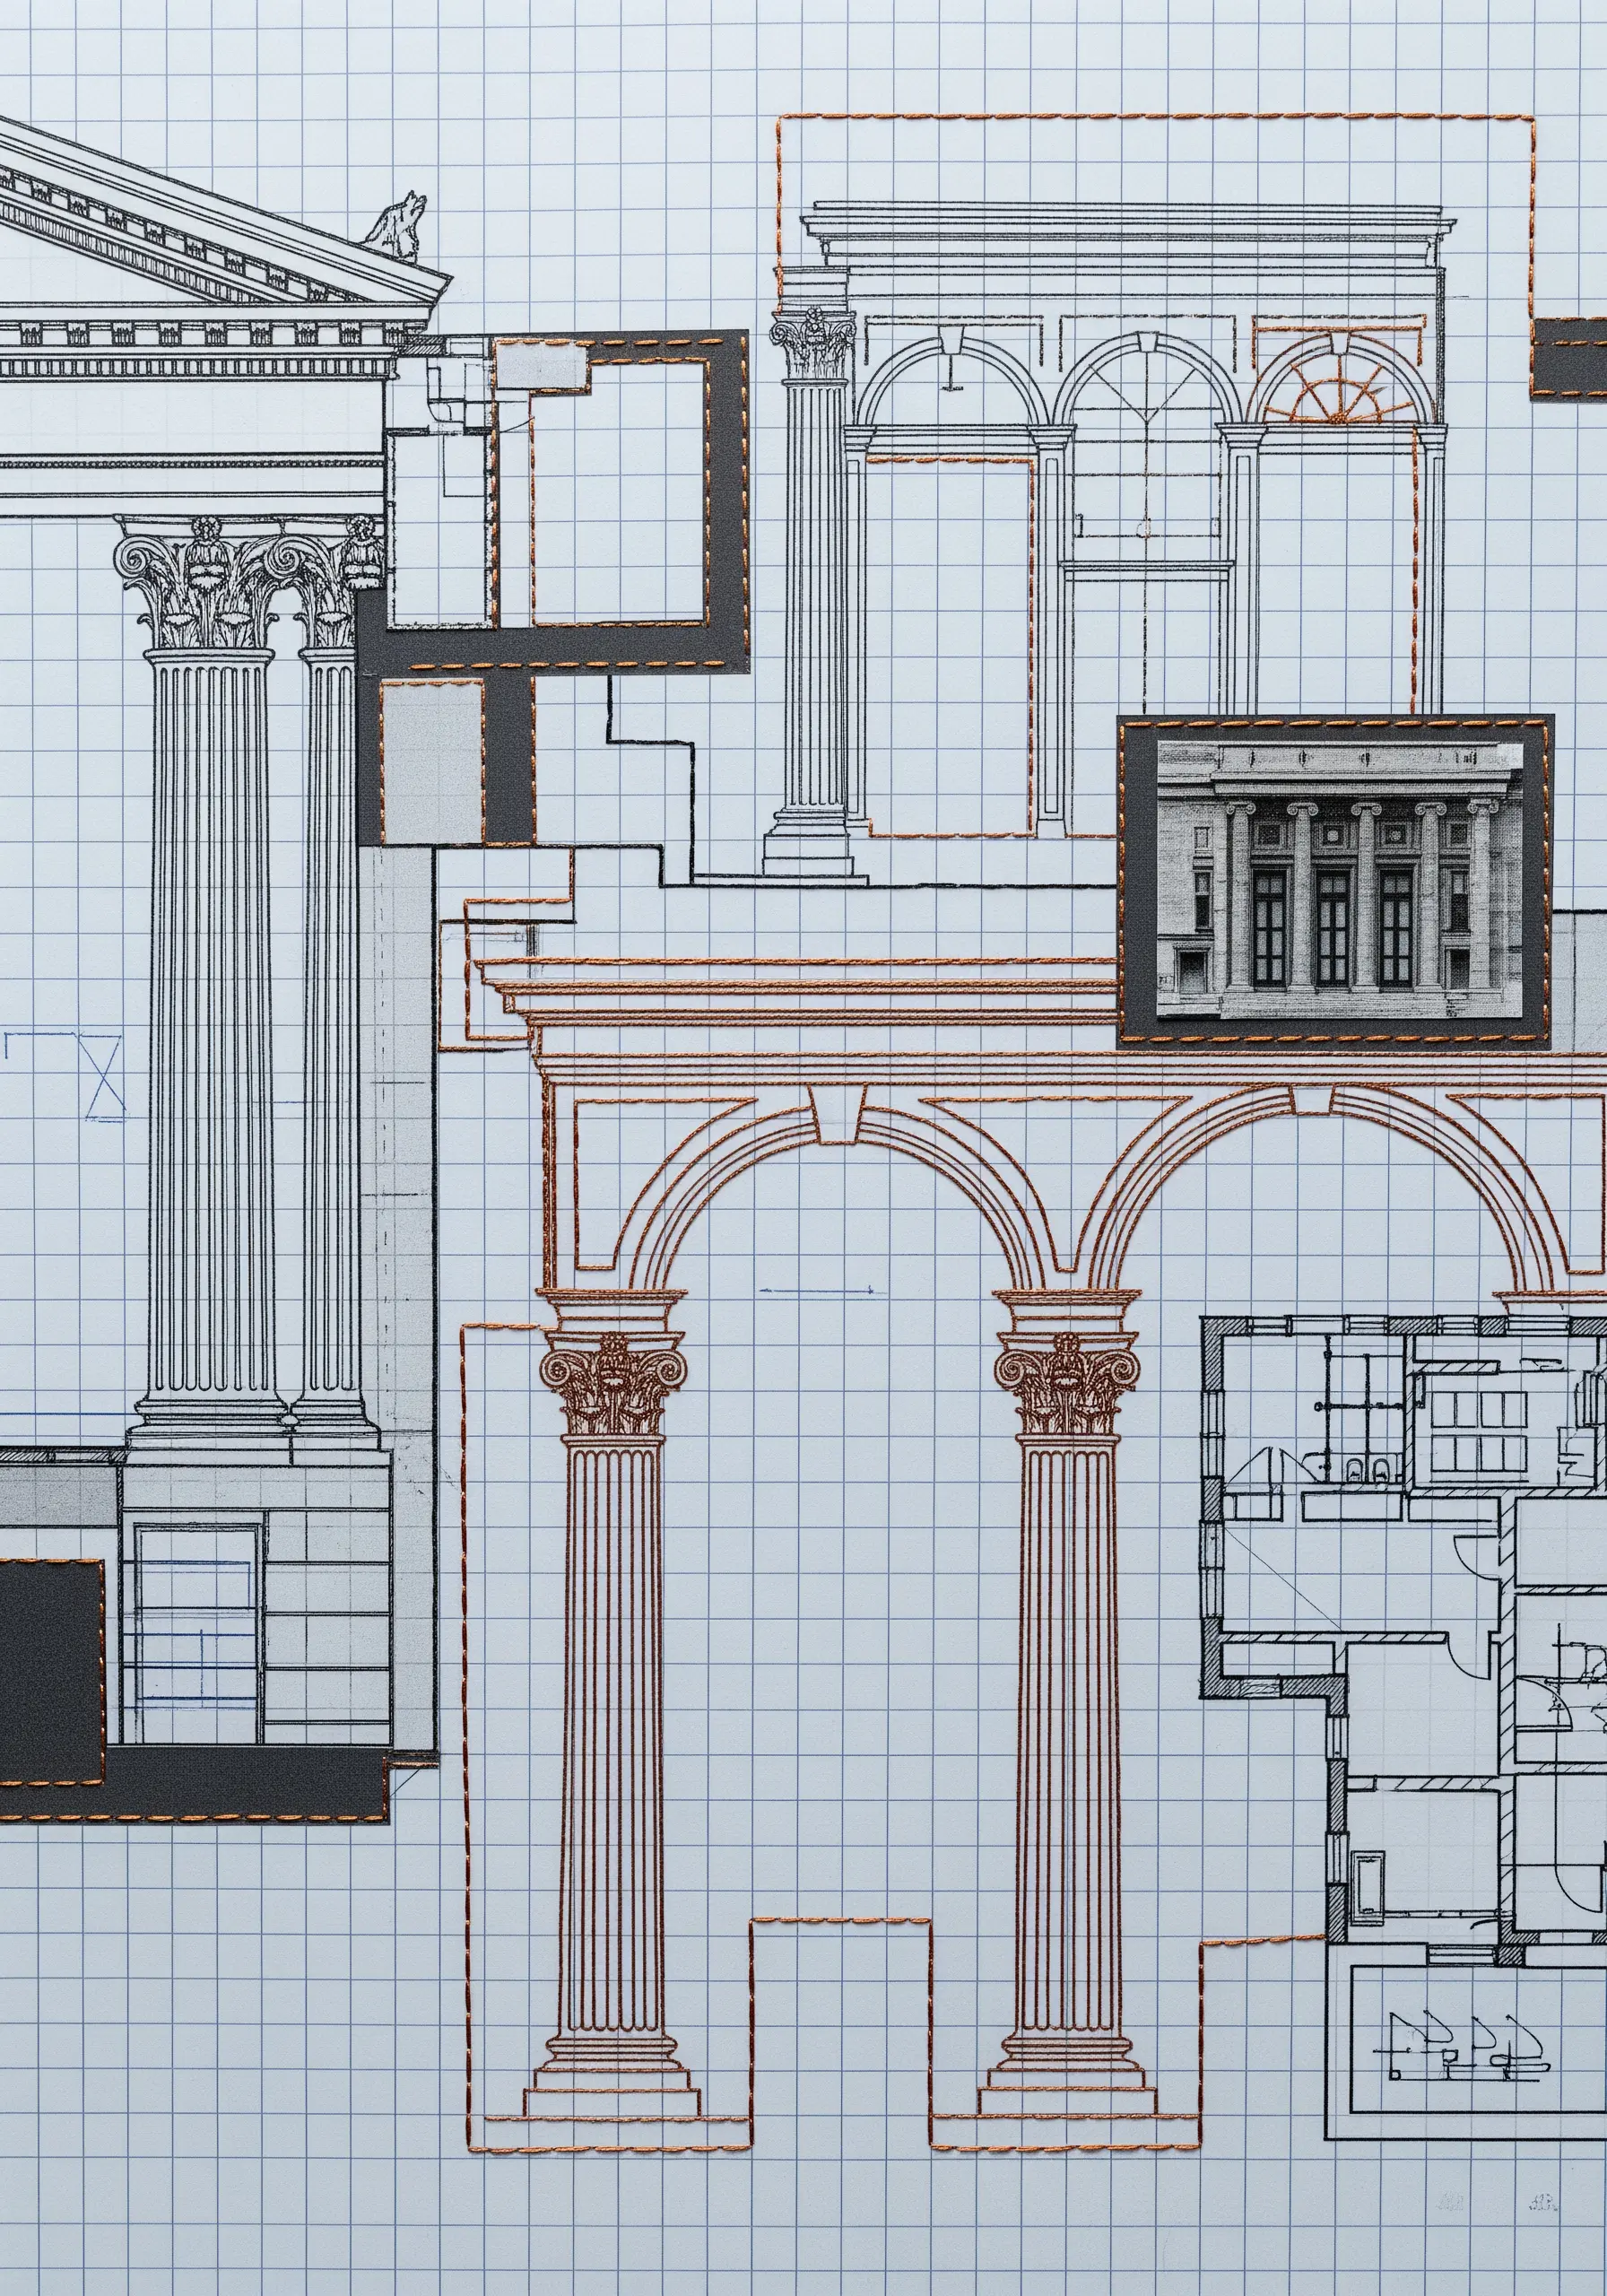
Add an artistic layer to technical drawings by using embroidery to trace and emphasize key architectural features.
Select a section of an architectural plan and use a simple backstitch to outline specific elements like columns, arches, or doorways.
Choose a thread color that complements the blueprint paper but provides enough contrast to be clearly visible, like this warm terracotta.
This technique transforms a functional document into a piece of art, drawing the viewer’s eye and creating a dialogue between the precise printed line and the tactile stitched one. It’s one of many unique collage art ideas.
22. Textured Details on Minimalist Cards
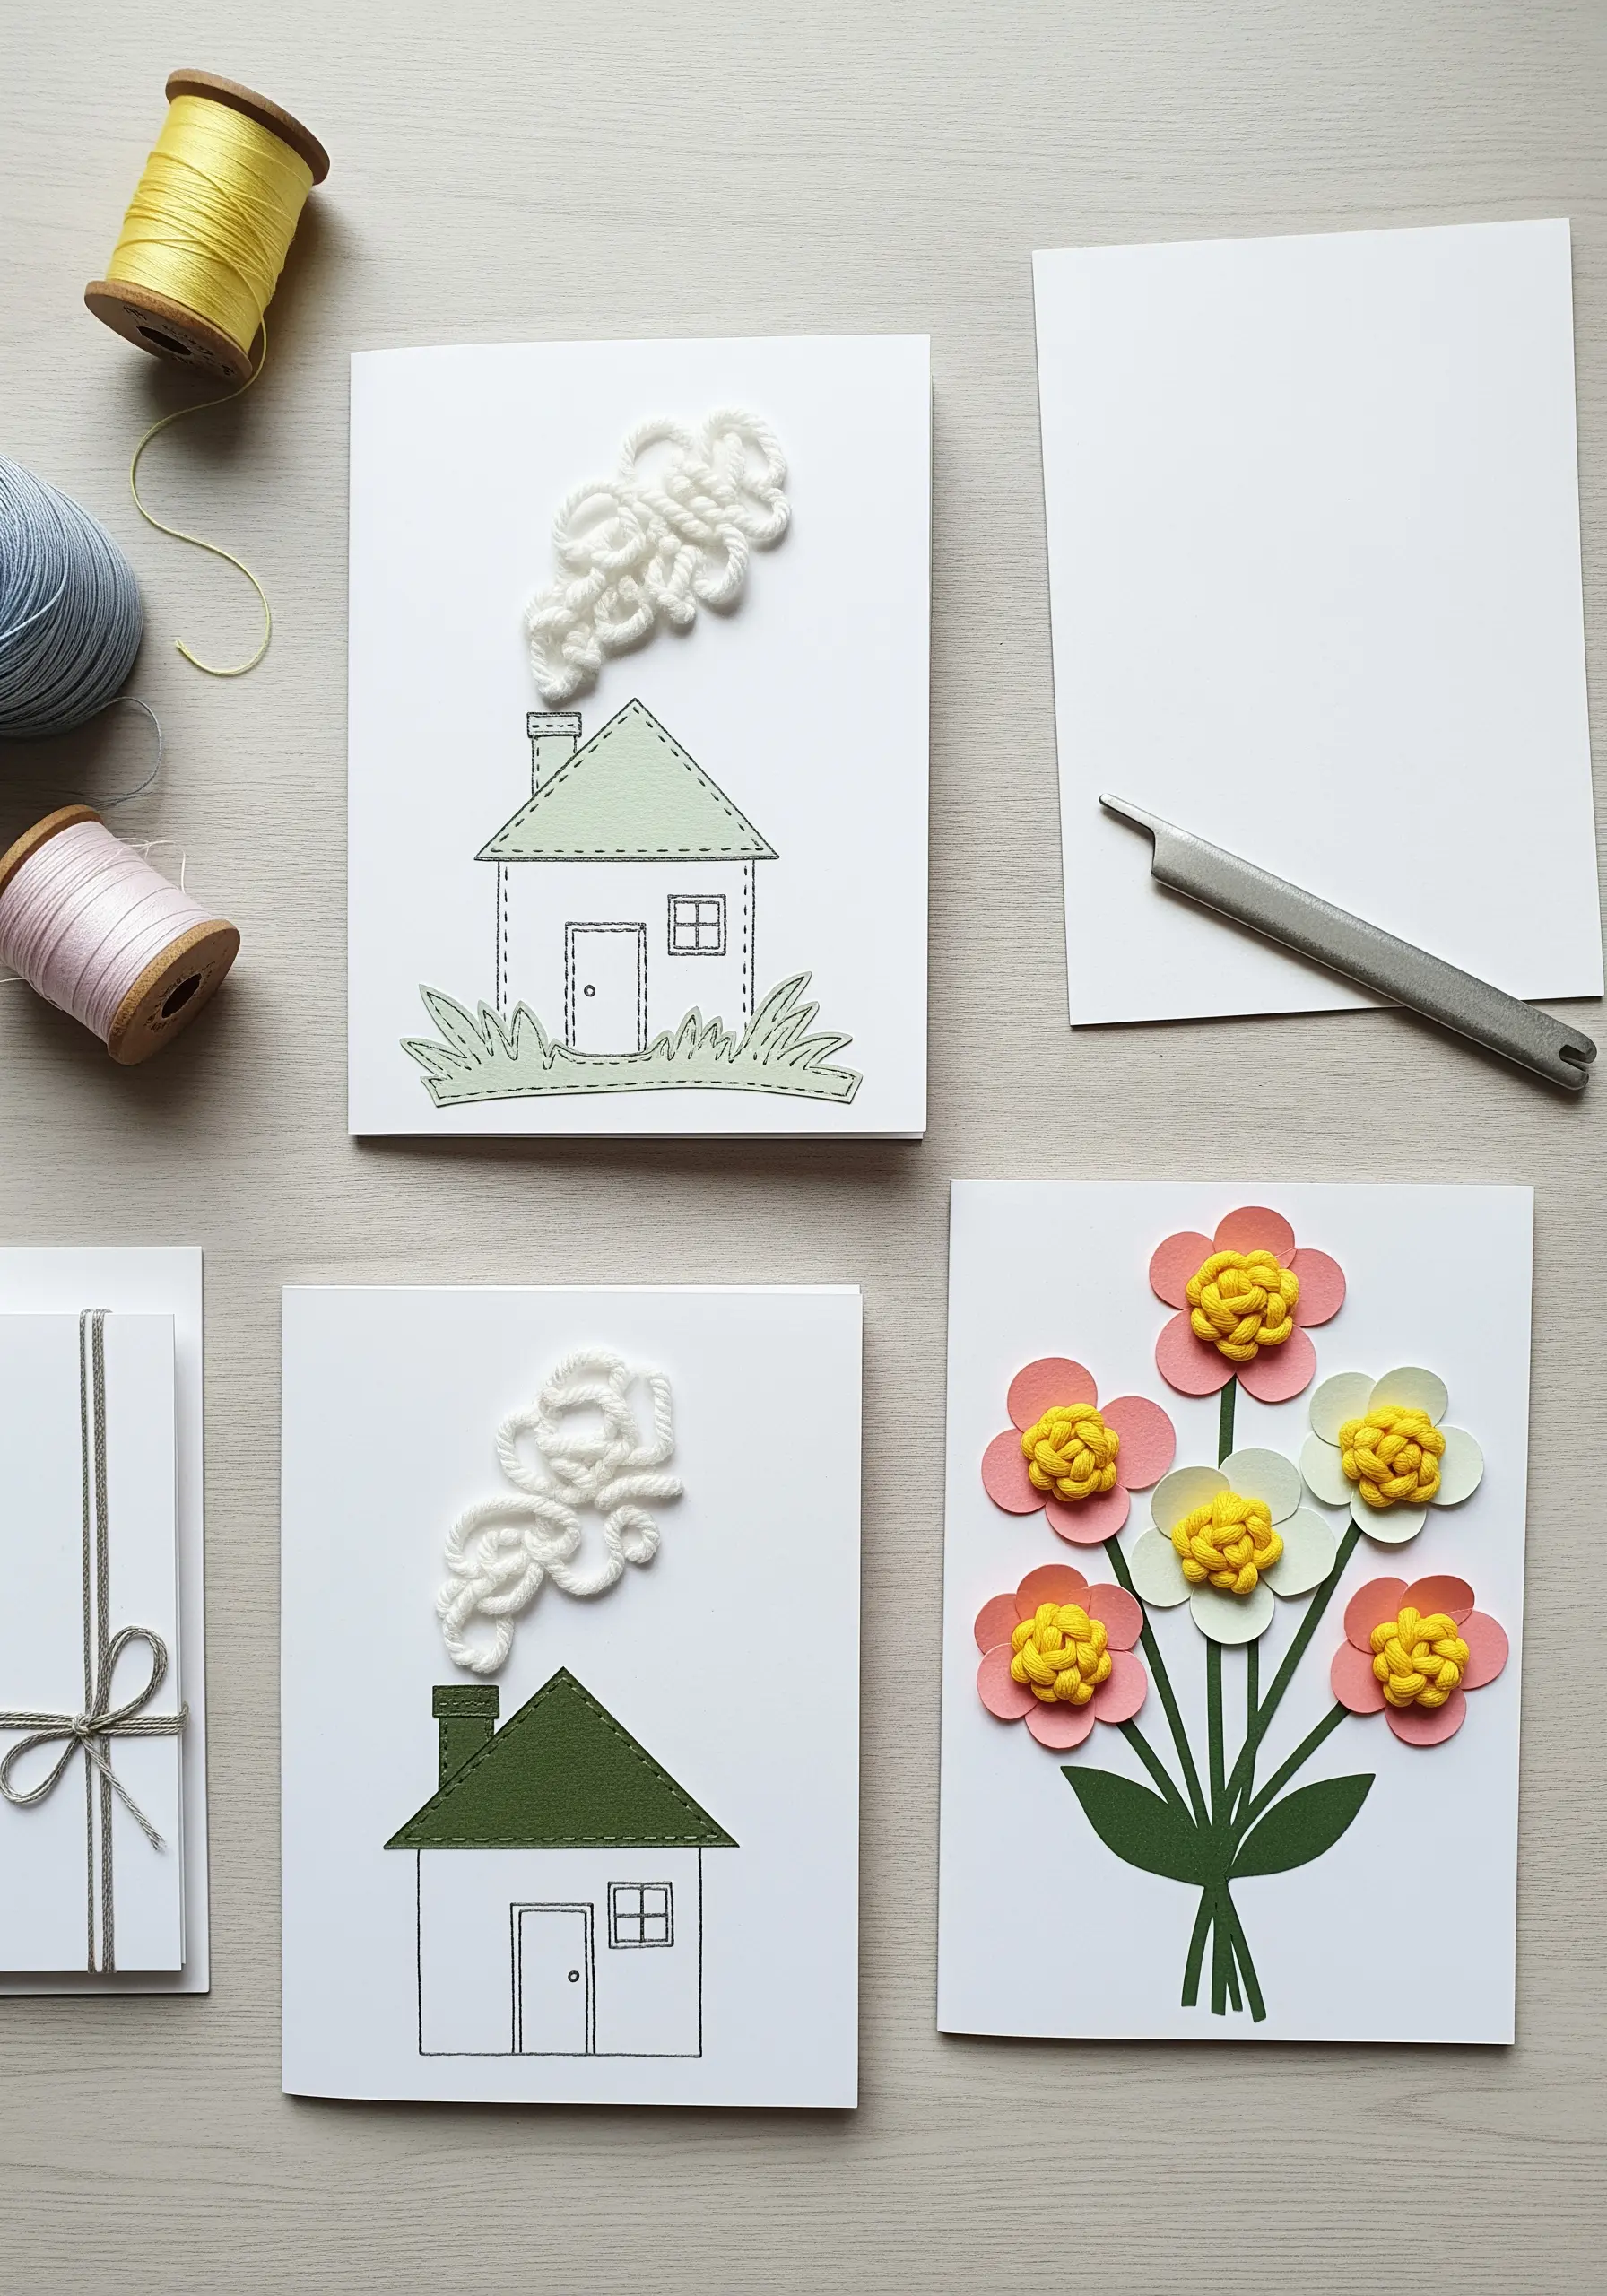
Elevate simple greeting cards by combining paper cutouts with small but impactful textural stitches.
For the whimsical smoke, use a fluffy yarn and a chain stitch to create a puffy, cloud-like effect that rises from the paper chimney.
For the flower centers, a cluster of bullion knots or French knots in a contrasting color creates a plush, three-dimensional look.
These tiny embroidery projects add a delightful tactile element that makes a simple card feel special and thoughtfully crafted.
23. Negative Space as a Celestial Canvas
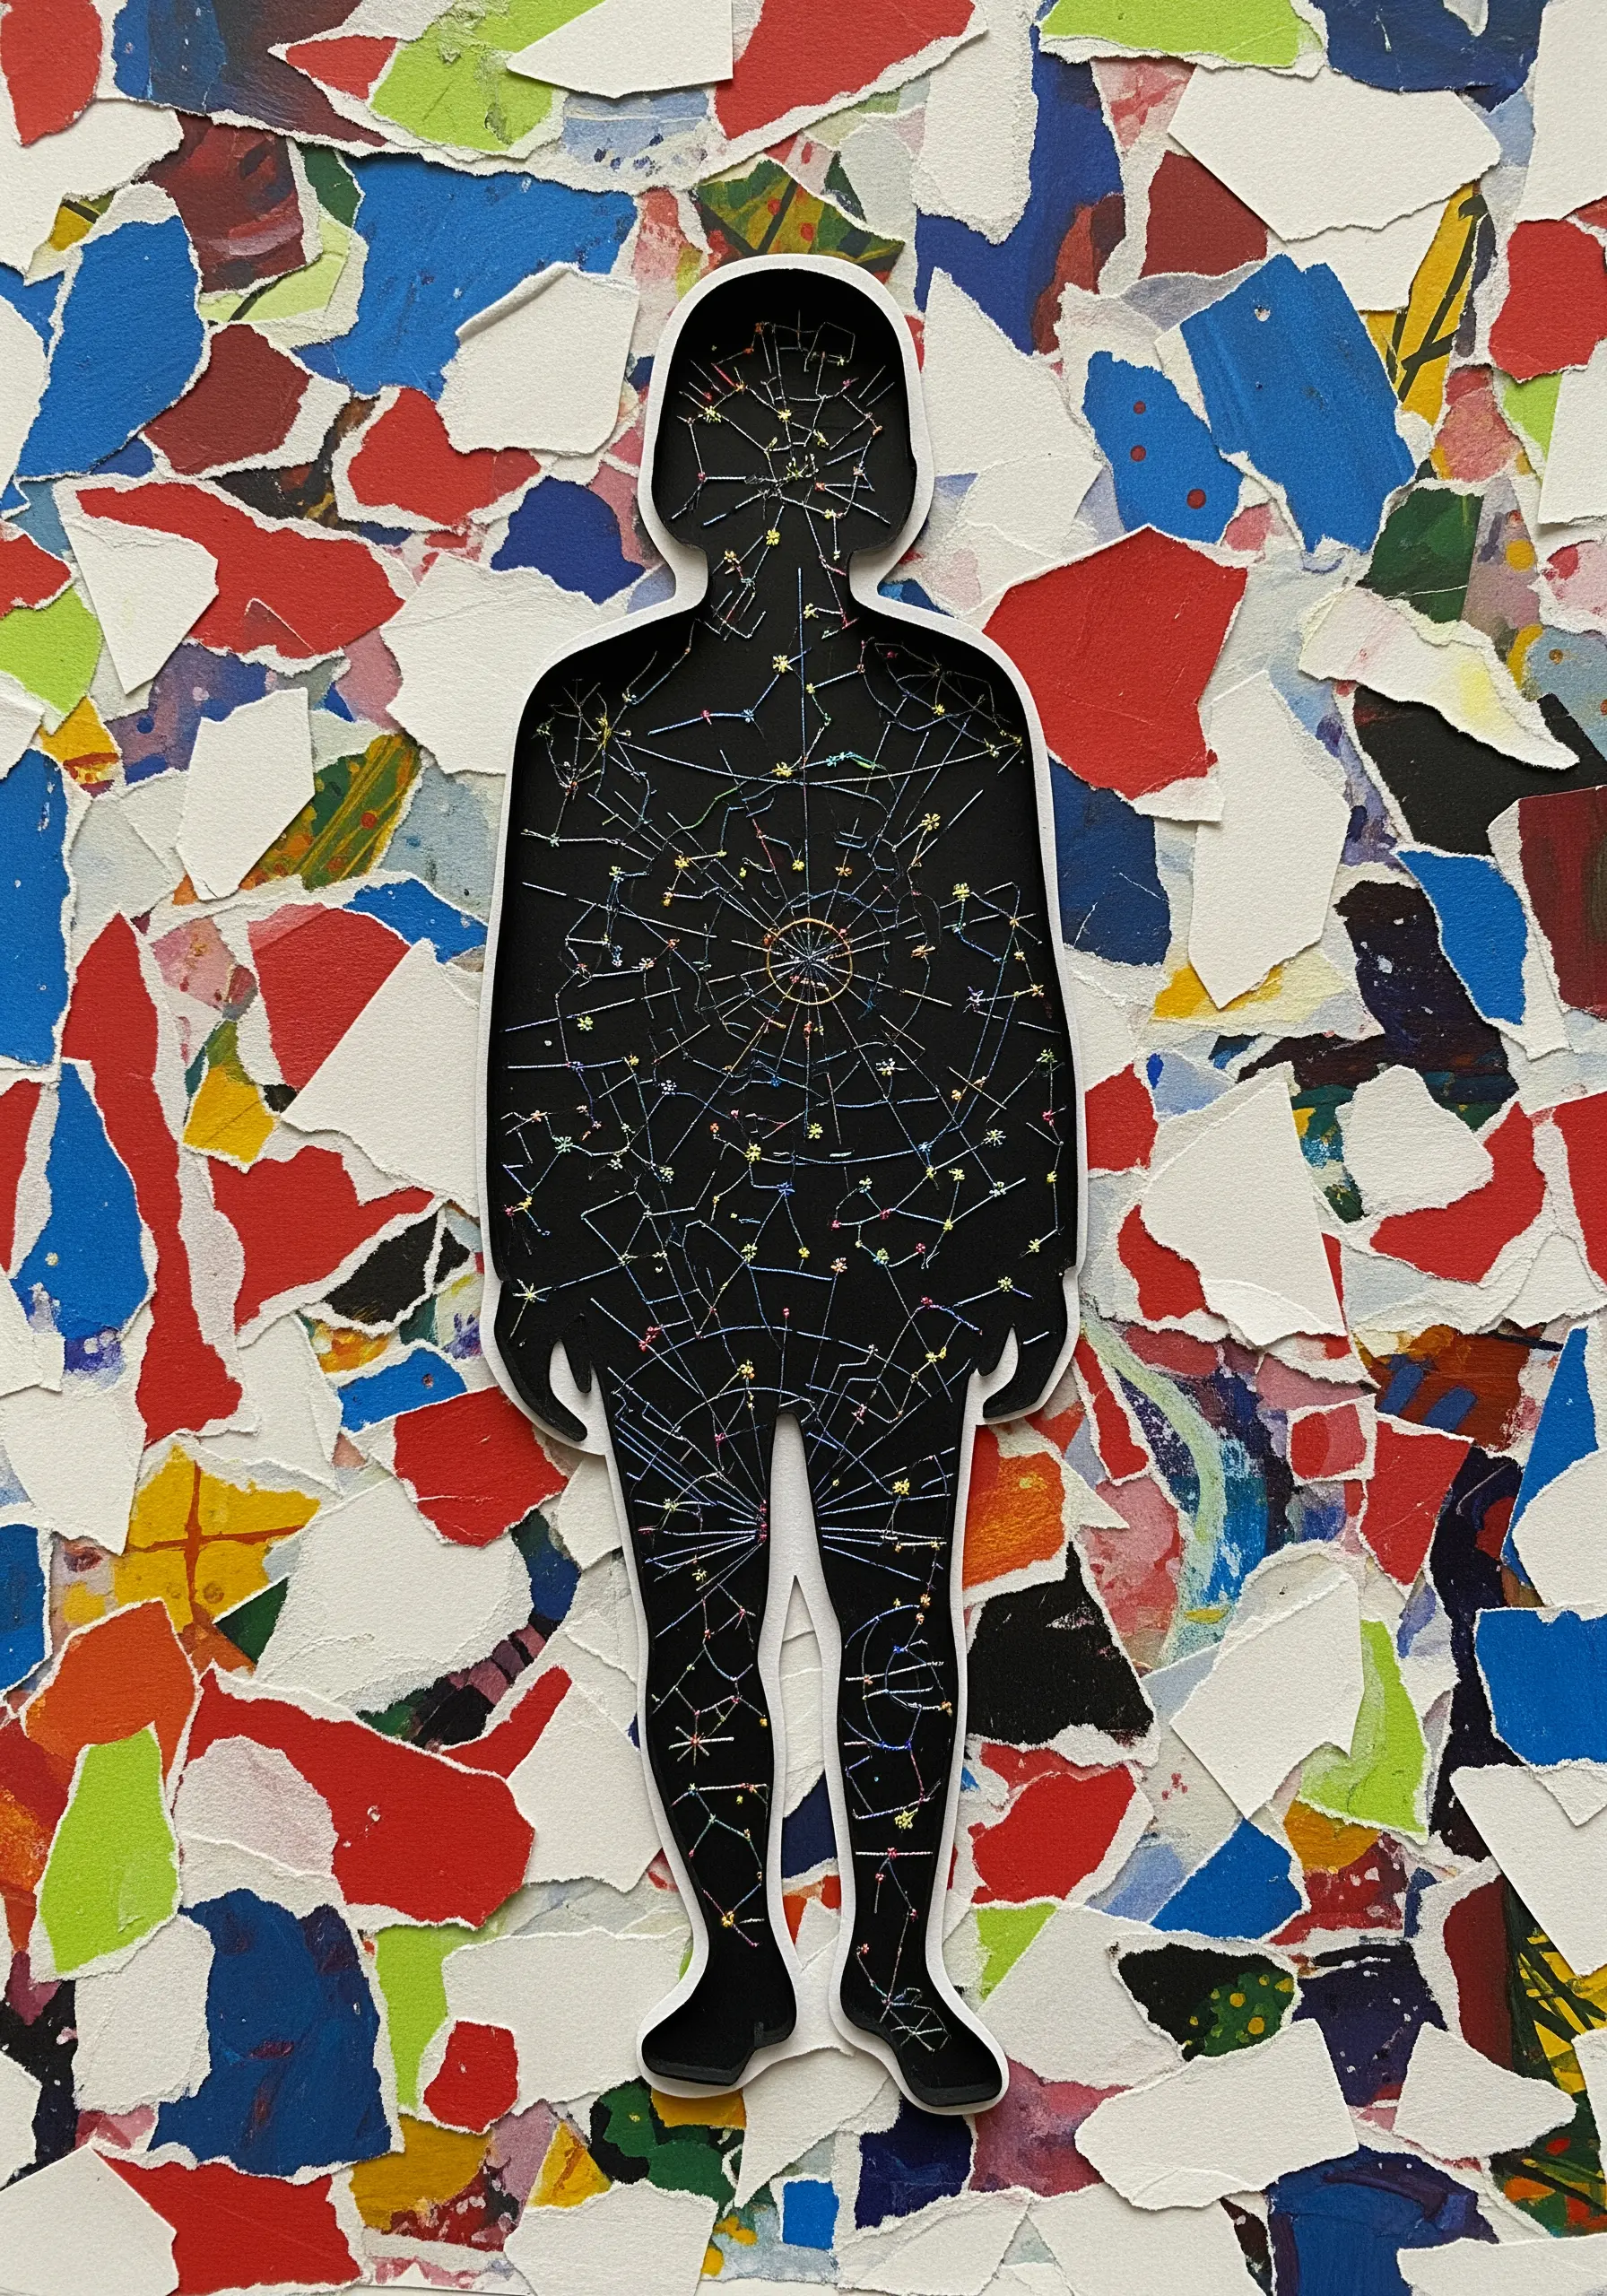
Use a silhouette as a window into an intricate, stitched world.
Create a composition with a bold paper cutout at its center, surrounded by a vibrant collage of torn paper.
Instead of filling the silhouette, leave it as a dark, solid space and use it as a canvas for a delicate star map, stitched with fine, bright thread.
Use tiny straight stitches for the connecting lines and French knots for the stars, creating a stunning contrast between the chaotic color of the background and the ordered cosmos within.
24. Anchoring Collage with a Stitched Frame
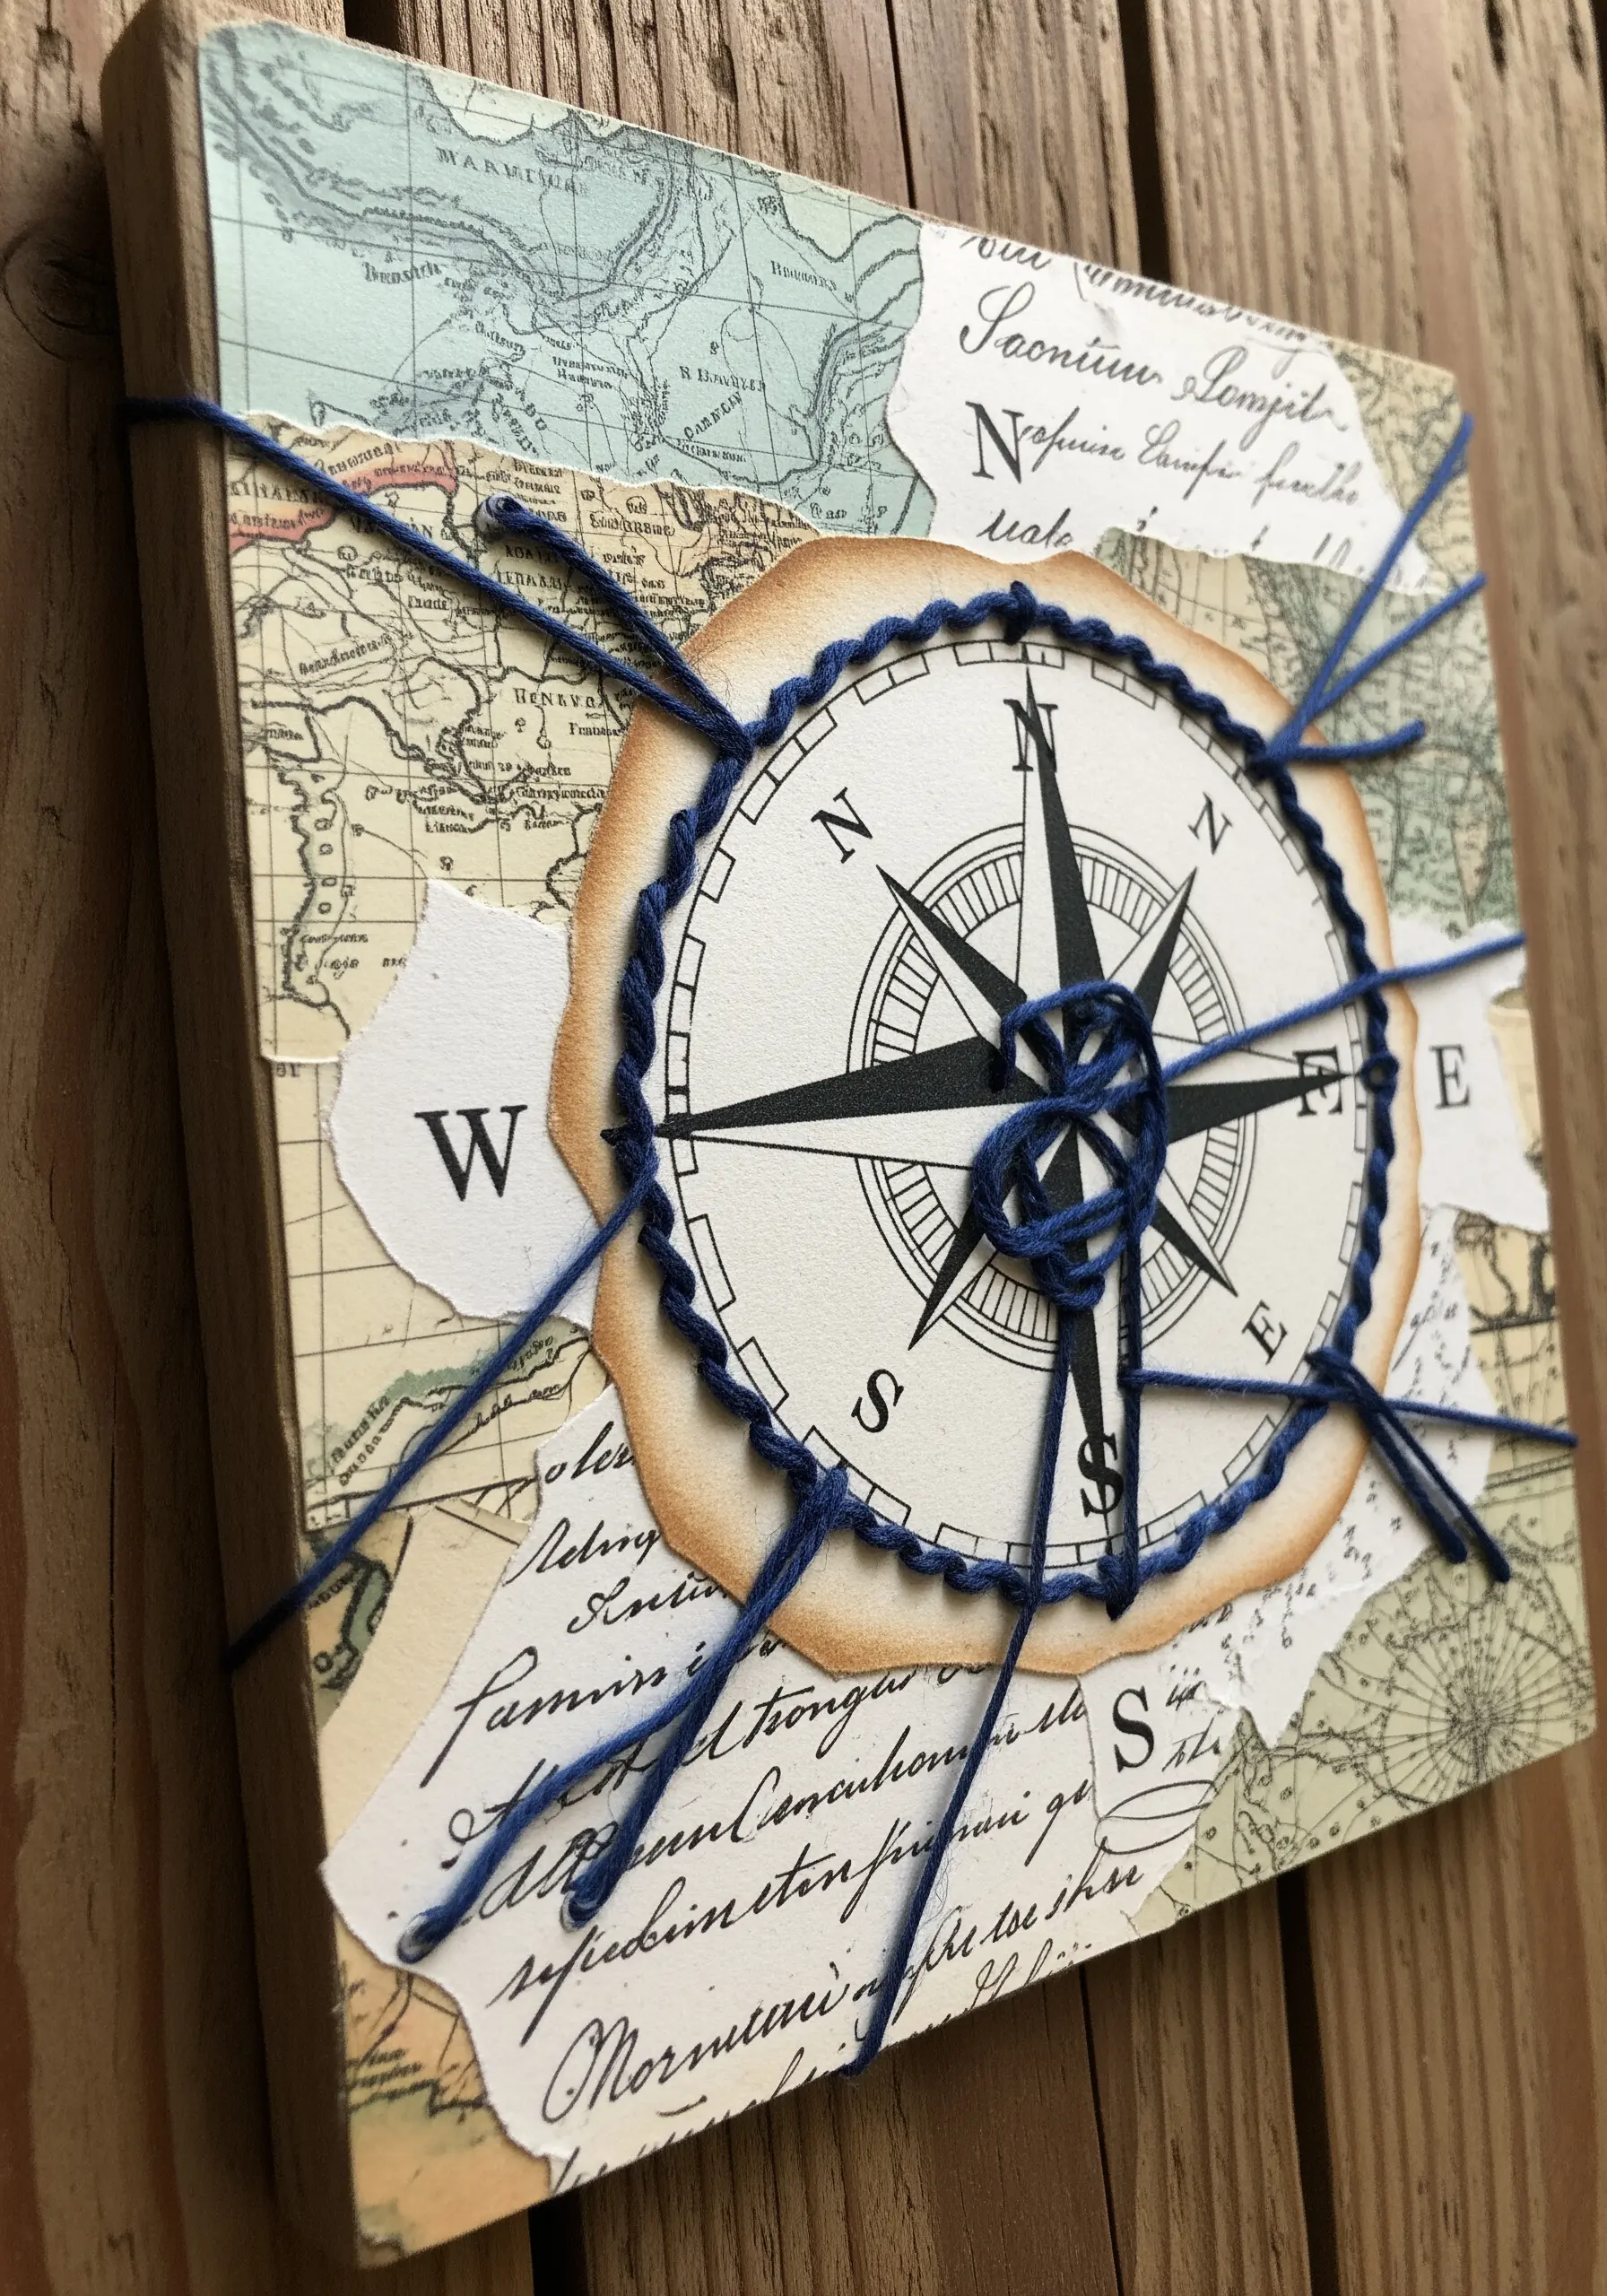
Ground your central collage element and add dynamic energy with a combination of border stitches and radiating lines.
Frame a circular paper element, like this compass, with a heavy border stitch such as a whipped backstitch or a buttonhole stitch to give it weight and definition.
Then, use long straight stitches that radiate outwards, physically connecting the centerpiece to the edges of the artwork.
This technique creates a sense of focus and explosive energy, turning a static collage into a dynamic composition. It’s one of many DIY collage art pieces.
25. Grounding Illustrations with Organic Textures
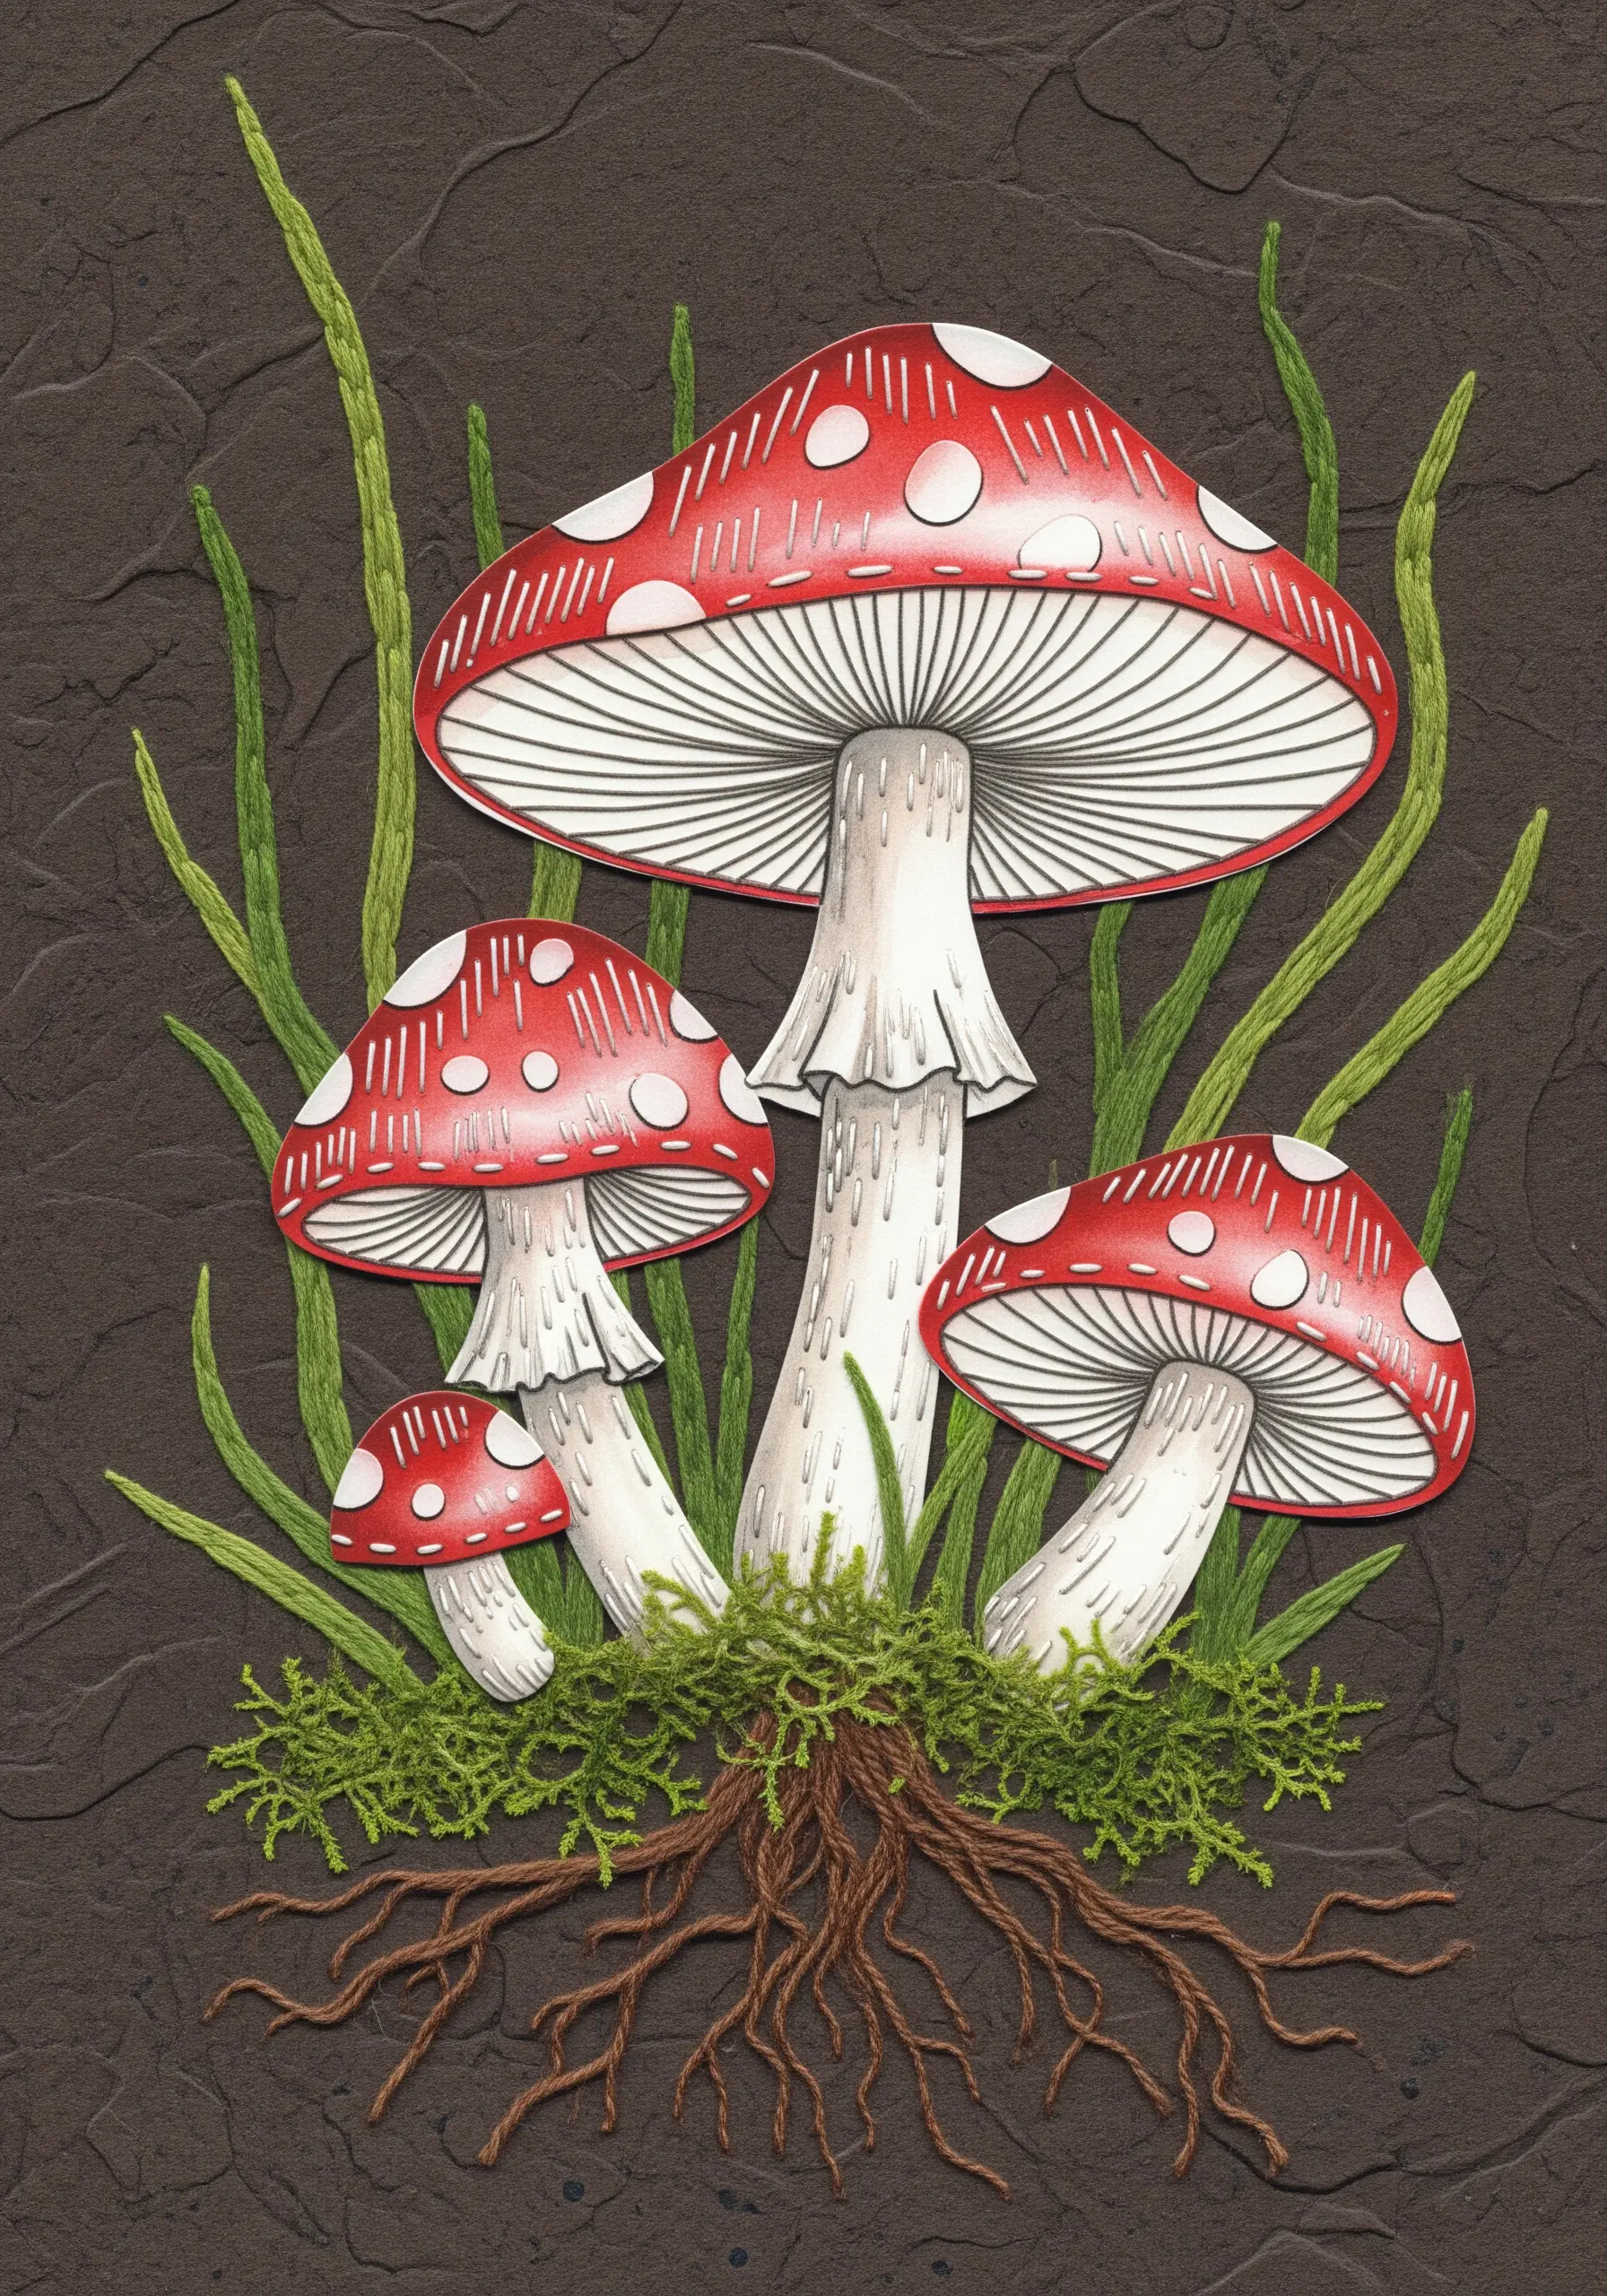
Add realism and depth to a paper collage by stitching the most organic, textural elements.
After arranging your paper-cutout mushrooms, focus on the ground they emerge from. Use a variegated green thread and a mass of French knots and short straight stitches to create a bed of moss.
For the roots, use a brown thread and tangled, overlapping straight stitches to build a convincing root system.
This technique grounds the flat paper elements in a tactile, believable environment, demonstrating ways to embroider natural textures that truly impress.
26. Abstract Compositions with Threaded Tension
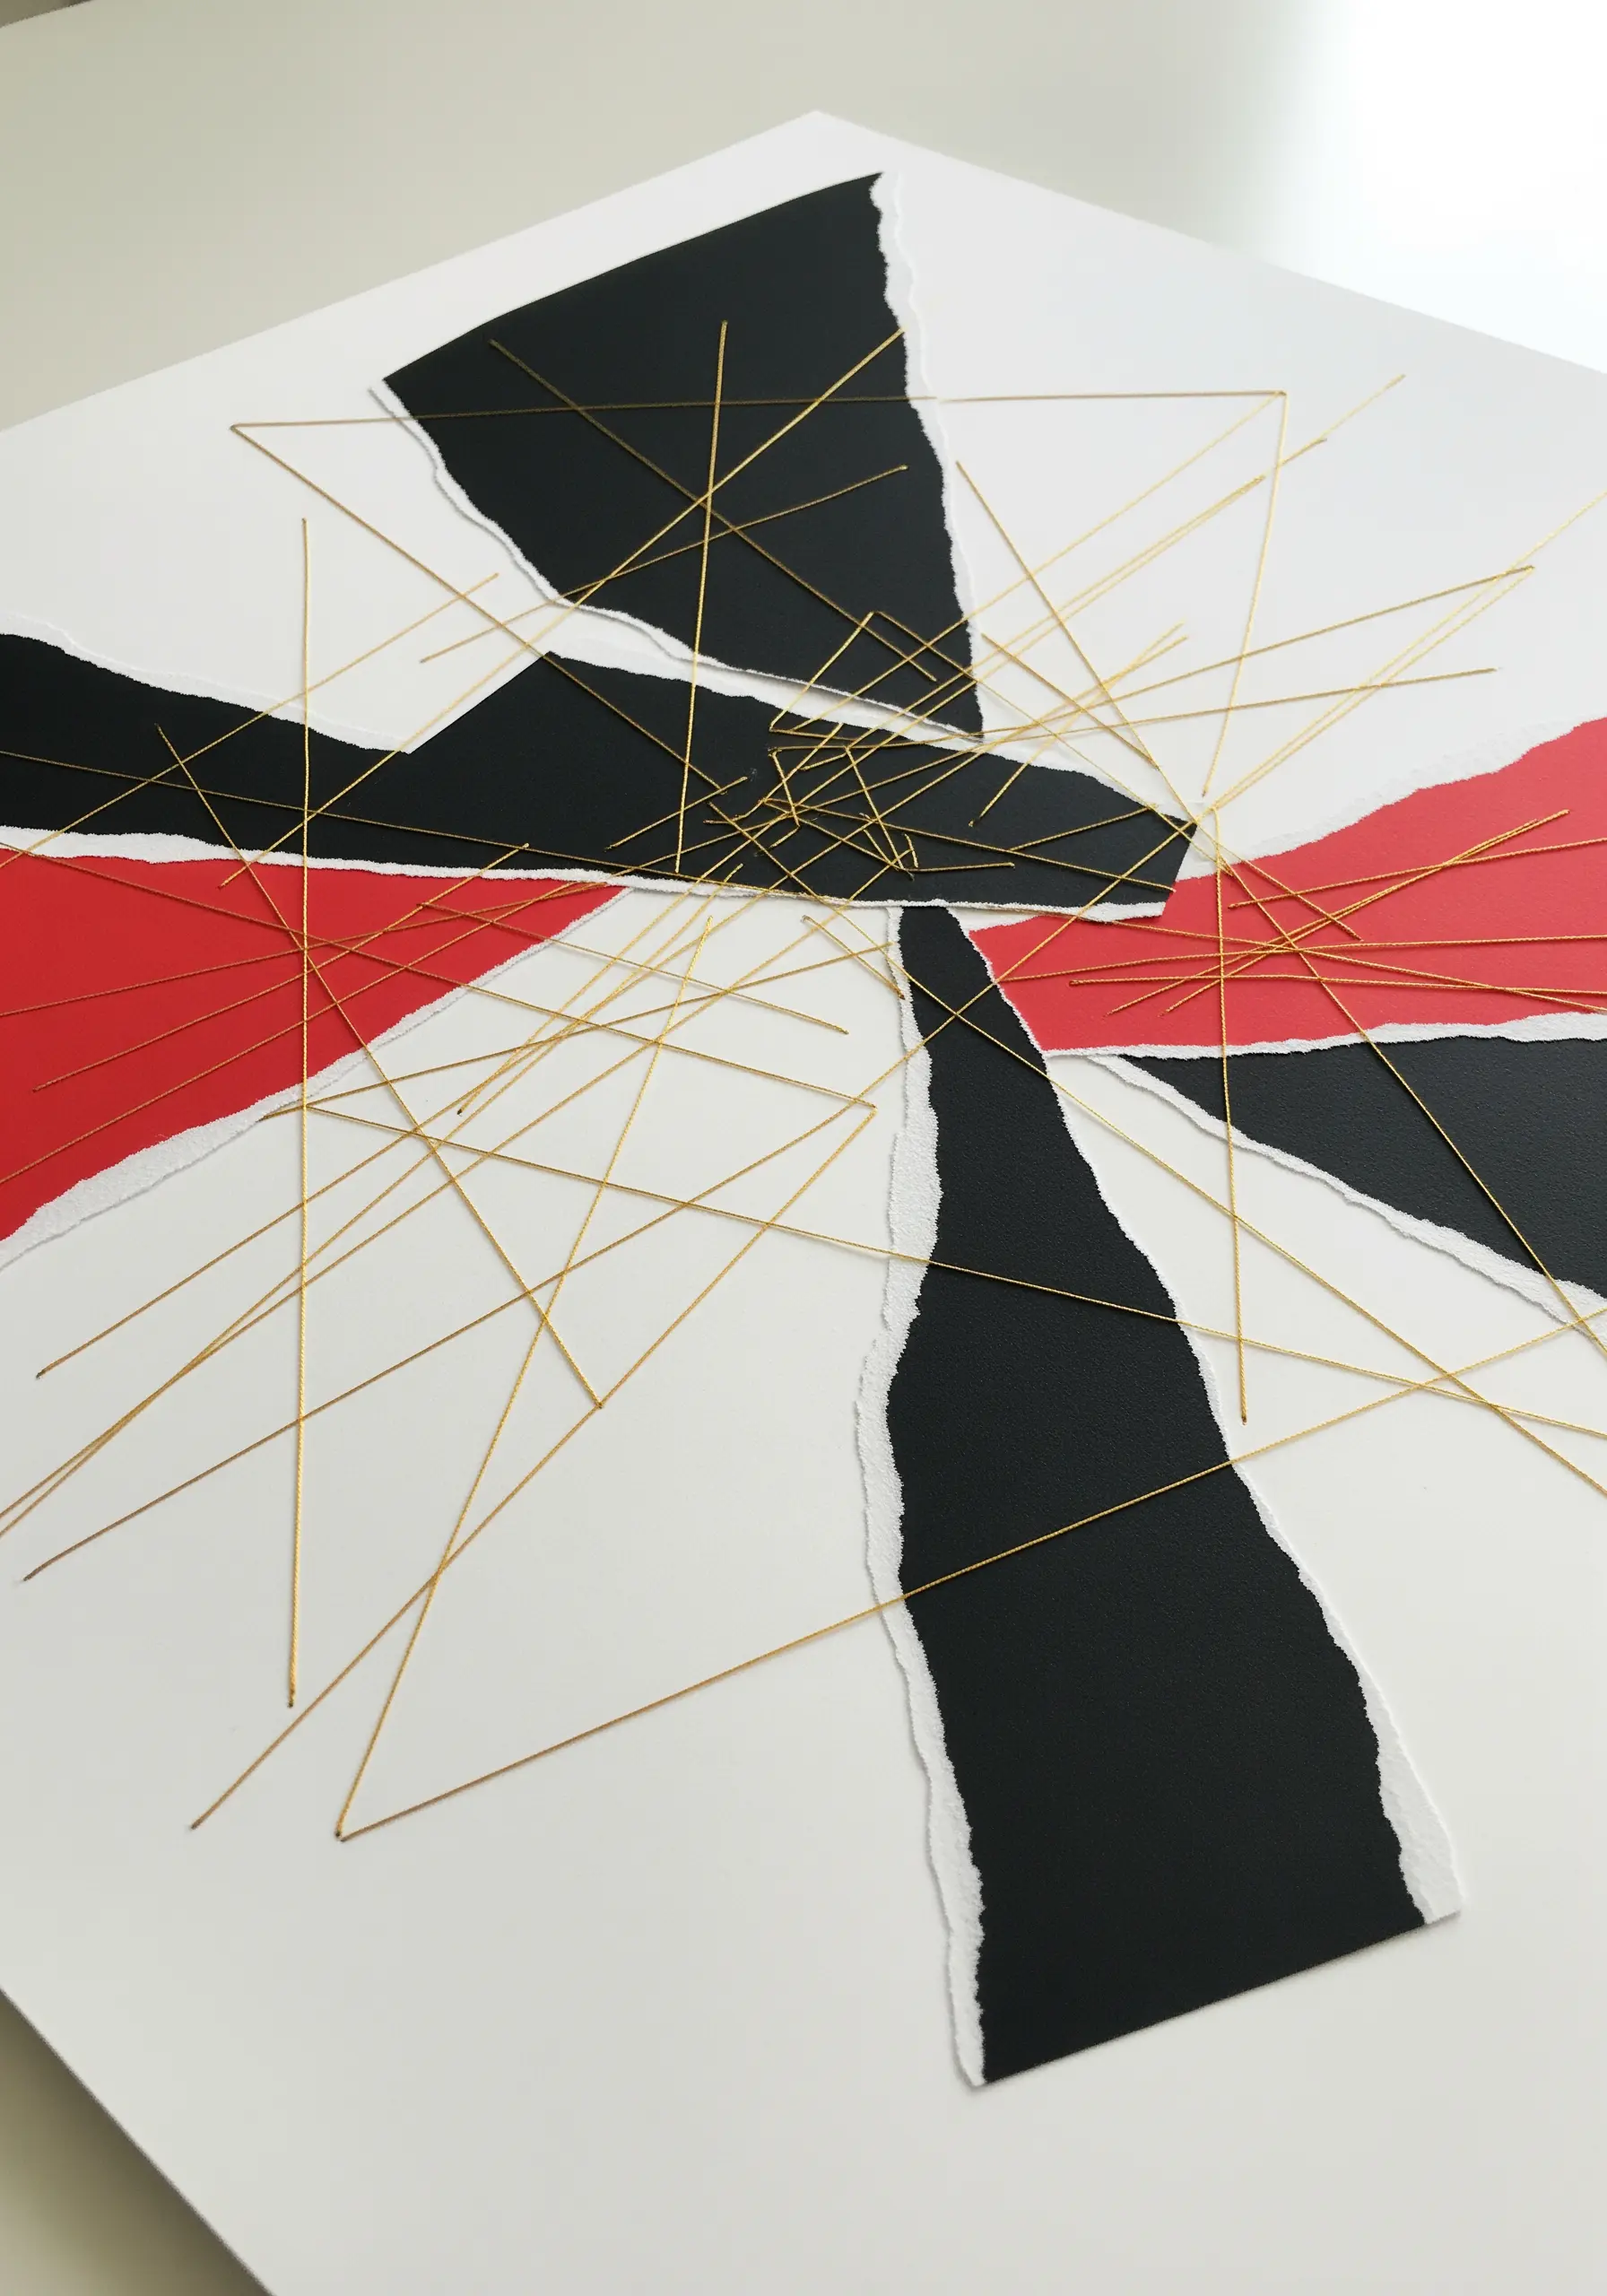
Create a sharp, graphic composition by using tautly pulled thread to dissect and unify torn paper shapes.
Arrange your abstract paper collage, then use pins to mark anchor points for your thread around and across the design.
Use a fine but strong metallic thread, stretching it between the anchor points to create a web of intersecting straight lines.
The tension of the thread adds a rigid, geometric structure that contrasts powerfully with the soft, torn edges of the paper, resulting in a dynamic and modern piece of art.


