

Let’s rethink the bathroom corner. It’s often overlooked, a small, functional space waiting for a touch of warmth and personality. Your embroidery can be that touch—not as clutter, but as a quiet, intentional piece of art.
Forget complex, time-consuming projects. Instead, I want you to focus on small, achievable pieces where technique is the star. A single, perfectly executed stitch can have more impact than a dozen busy ones. We’ll explore how to use thread to create texture, how color choices can define a mood, and how a simple frame can elevate your work from a craft into decor.
Here, you’ll find ideas designed to give you immediate results and lasting confidence. Each one is a small lesson in artistry, a way to transform a forgotten corner into a space that feels thoughtful, calm, and completely yours.
1. Master the Thread-Painted Botanical
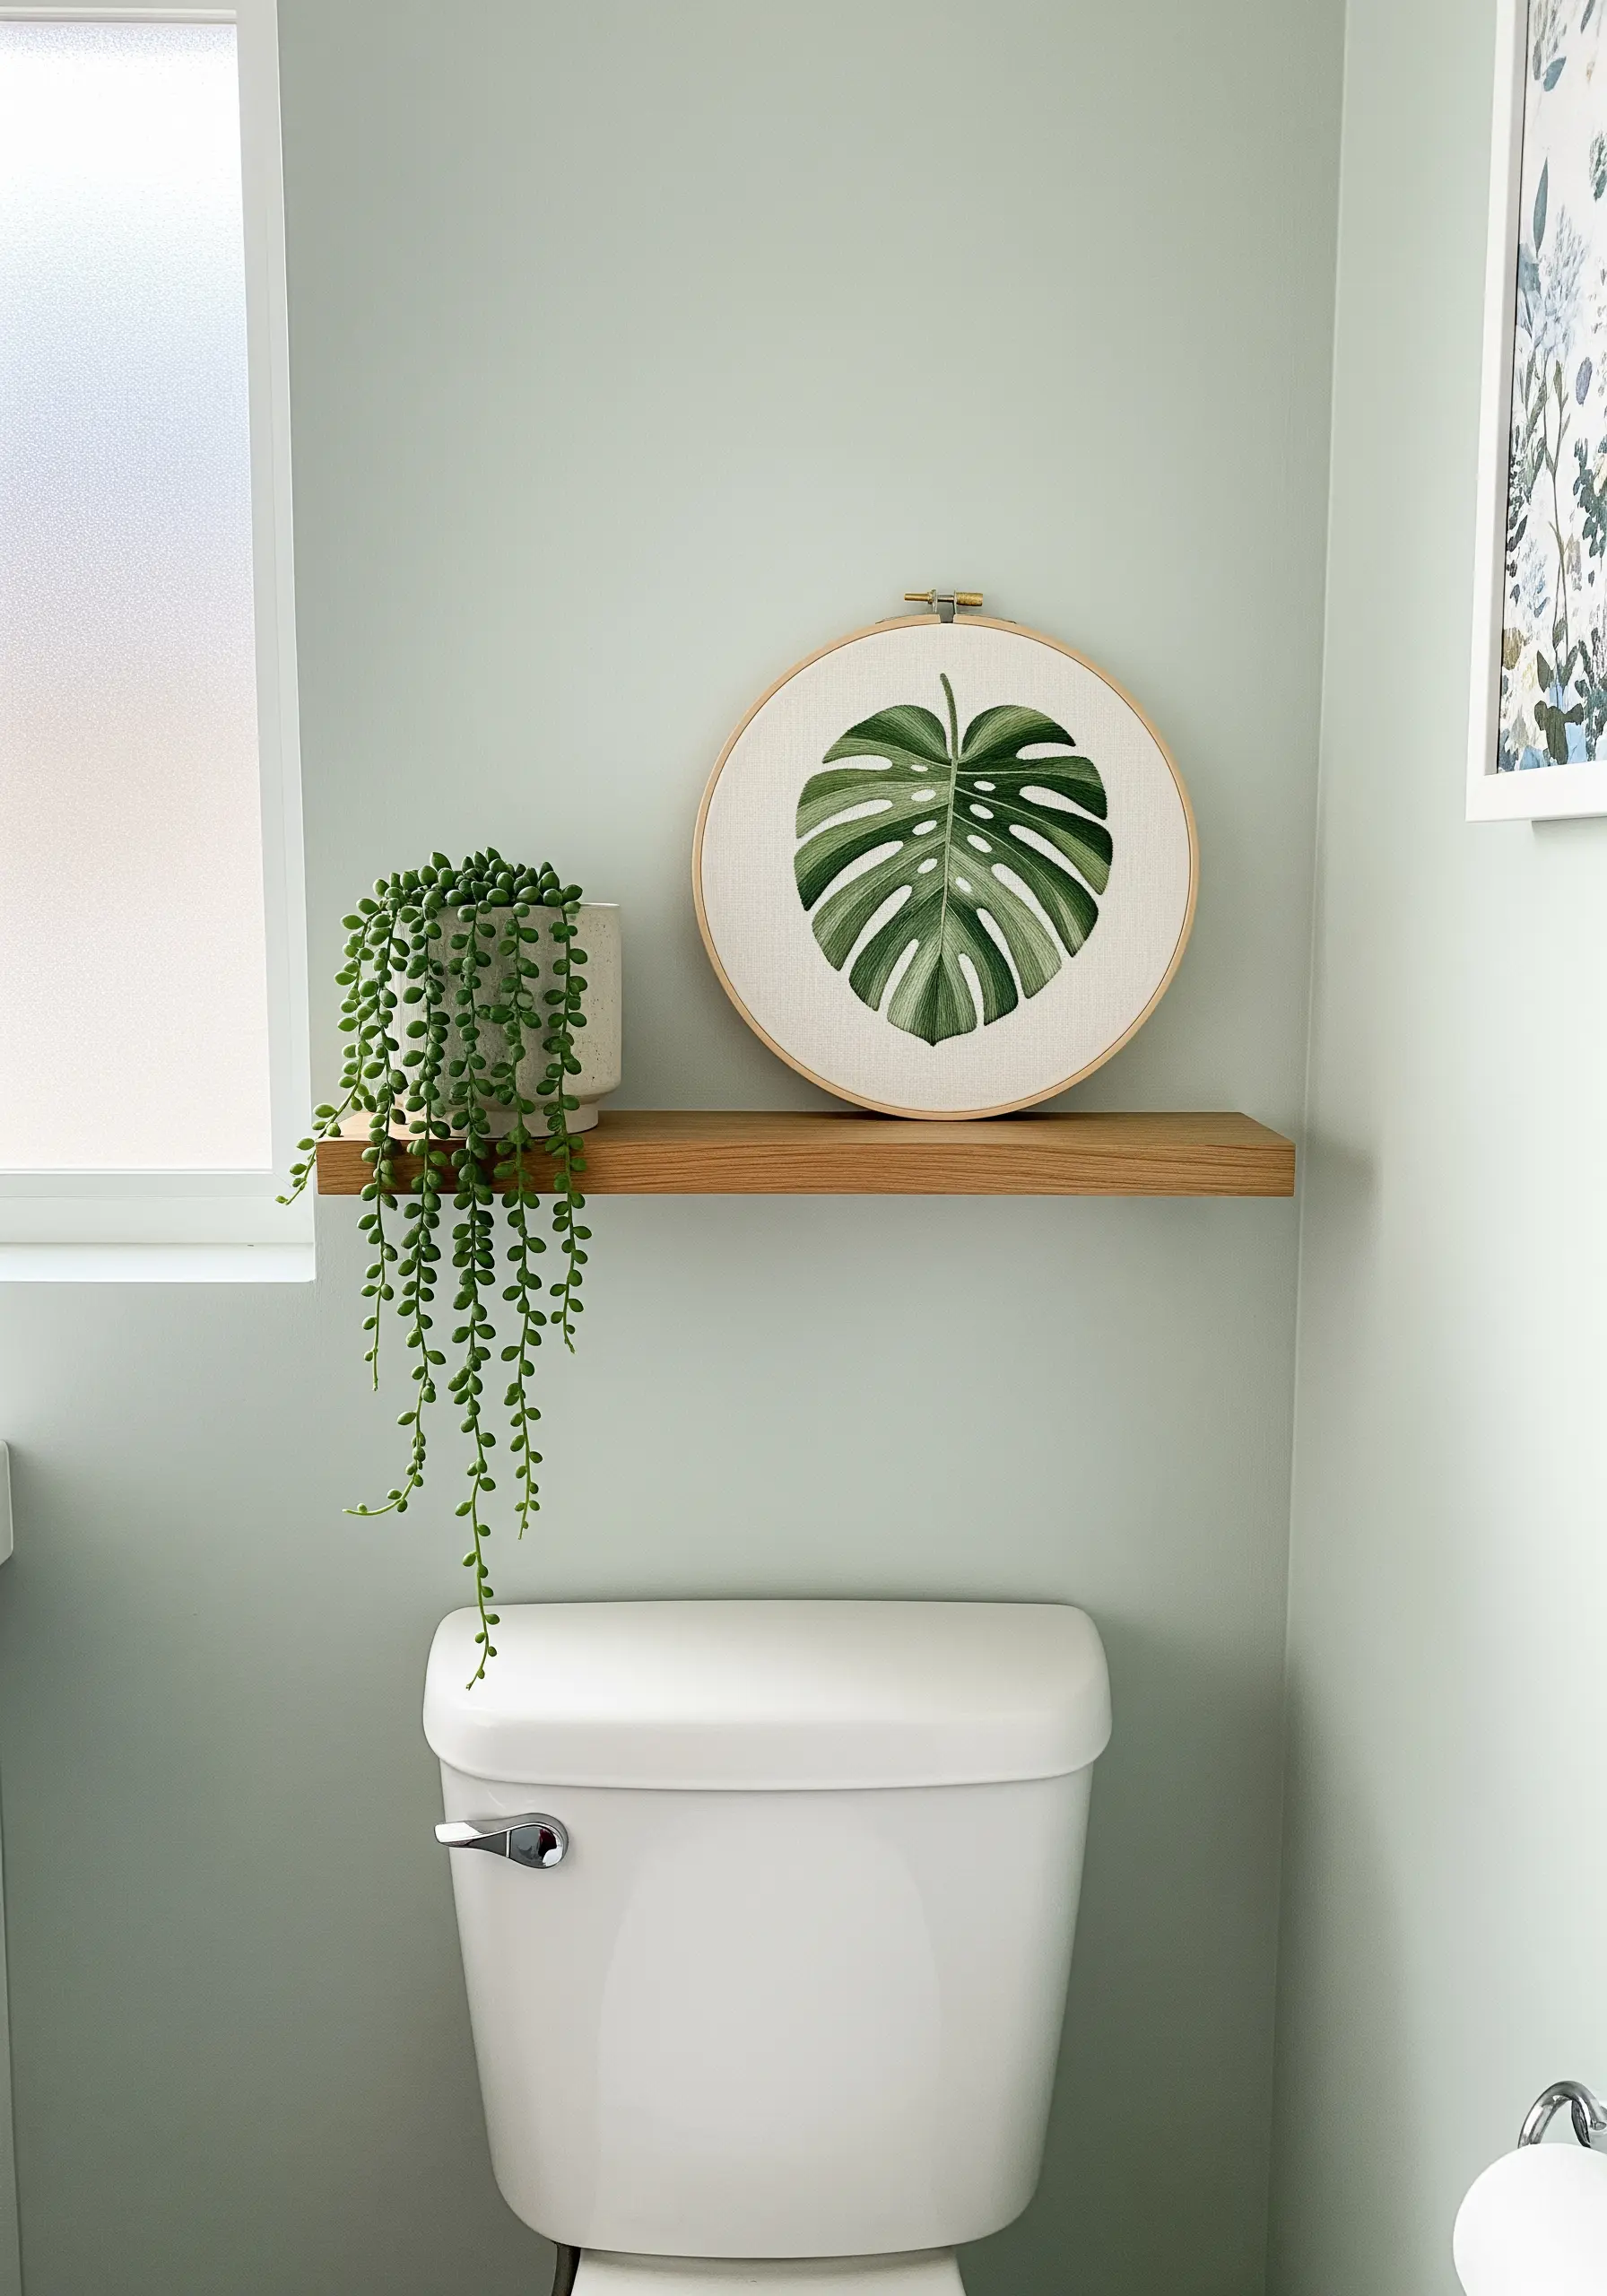
To achieve this painterly effect on a monstera leaf, use the long-and-short stitch instead of a flat satin stitch.
Work in sections, blending at least three shades of green to create realistic light and shadow.
Use a single strand of floss for the finest gradients; this eliminates harsh lines between colors and gives the leaf a soft, organic finish that mimics a watercolor painting.
The key is varying your stitch length and angle to follow the natural contours of the leaf, which adds depth and movement.
2. Create a Cohesive Triptych
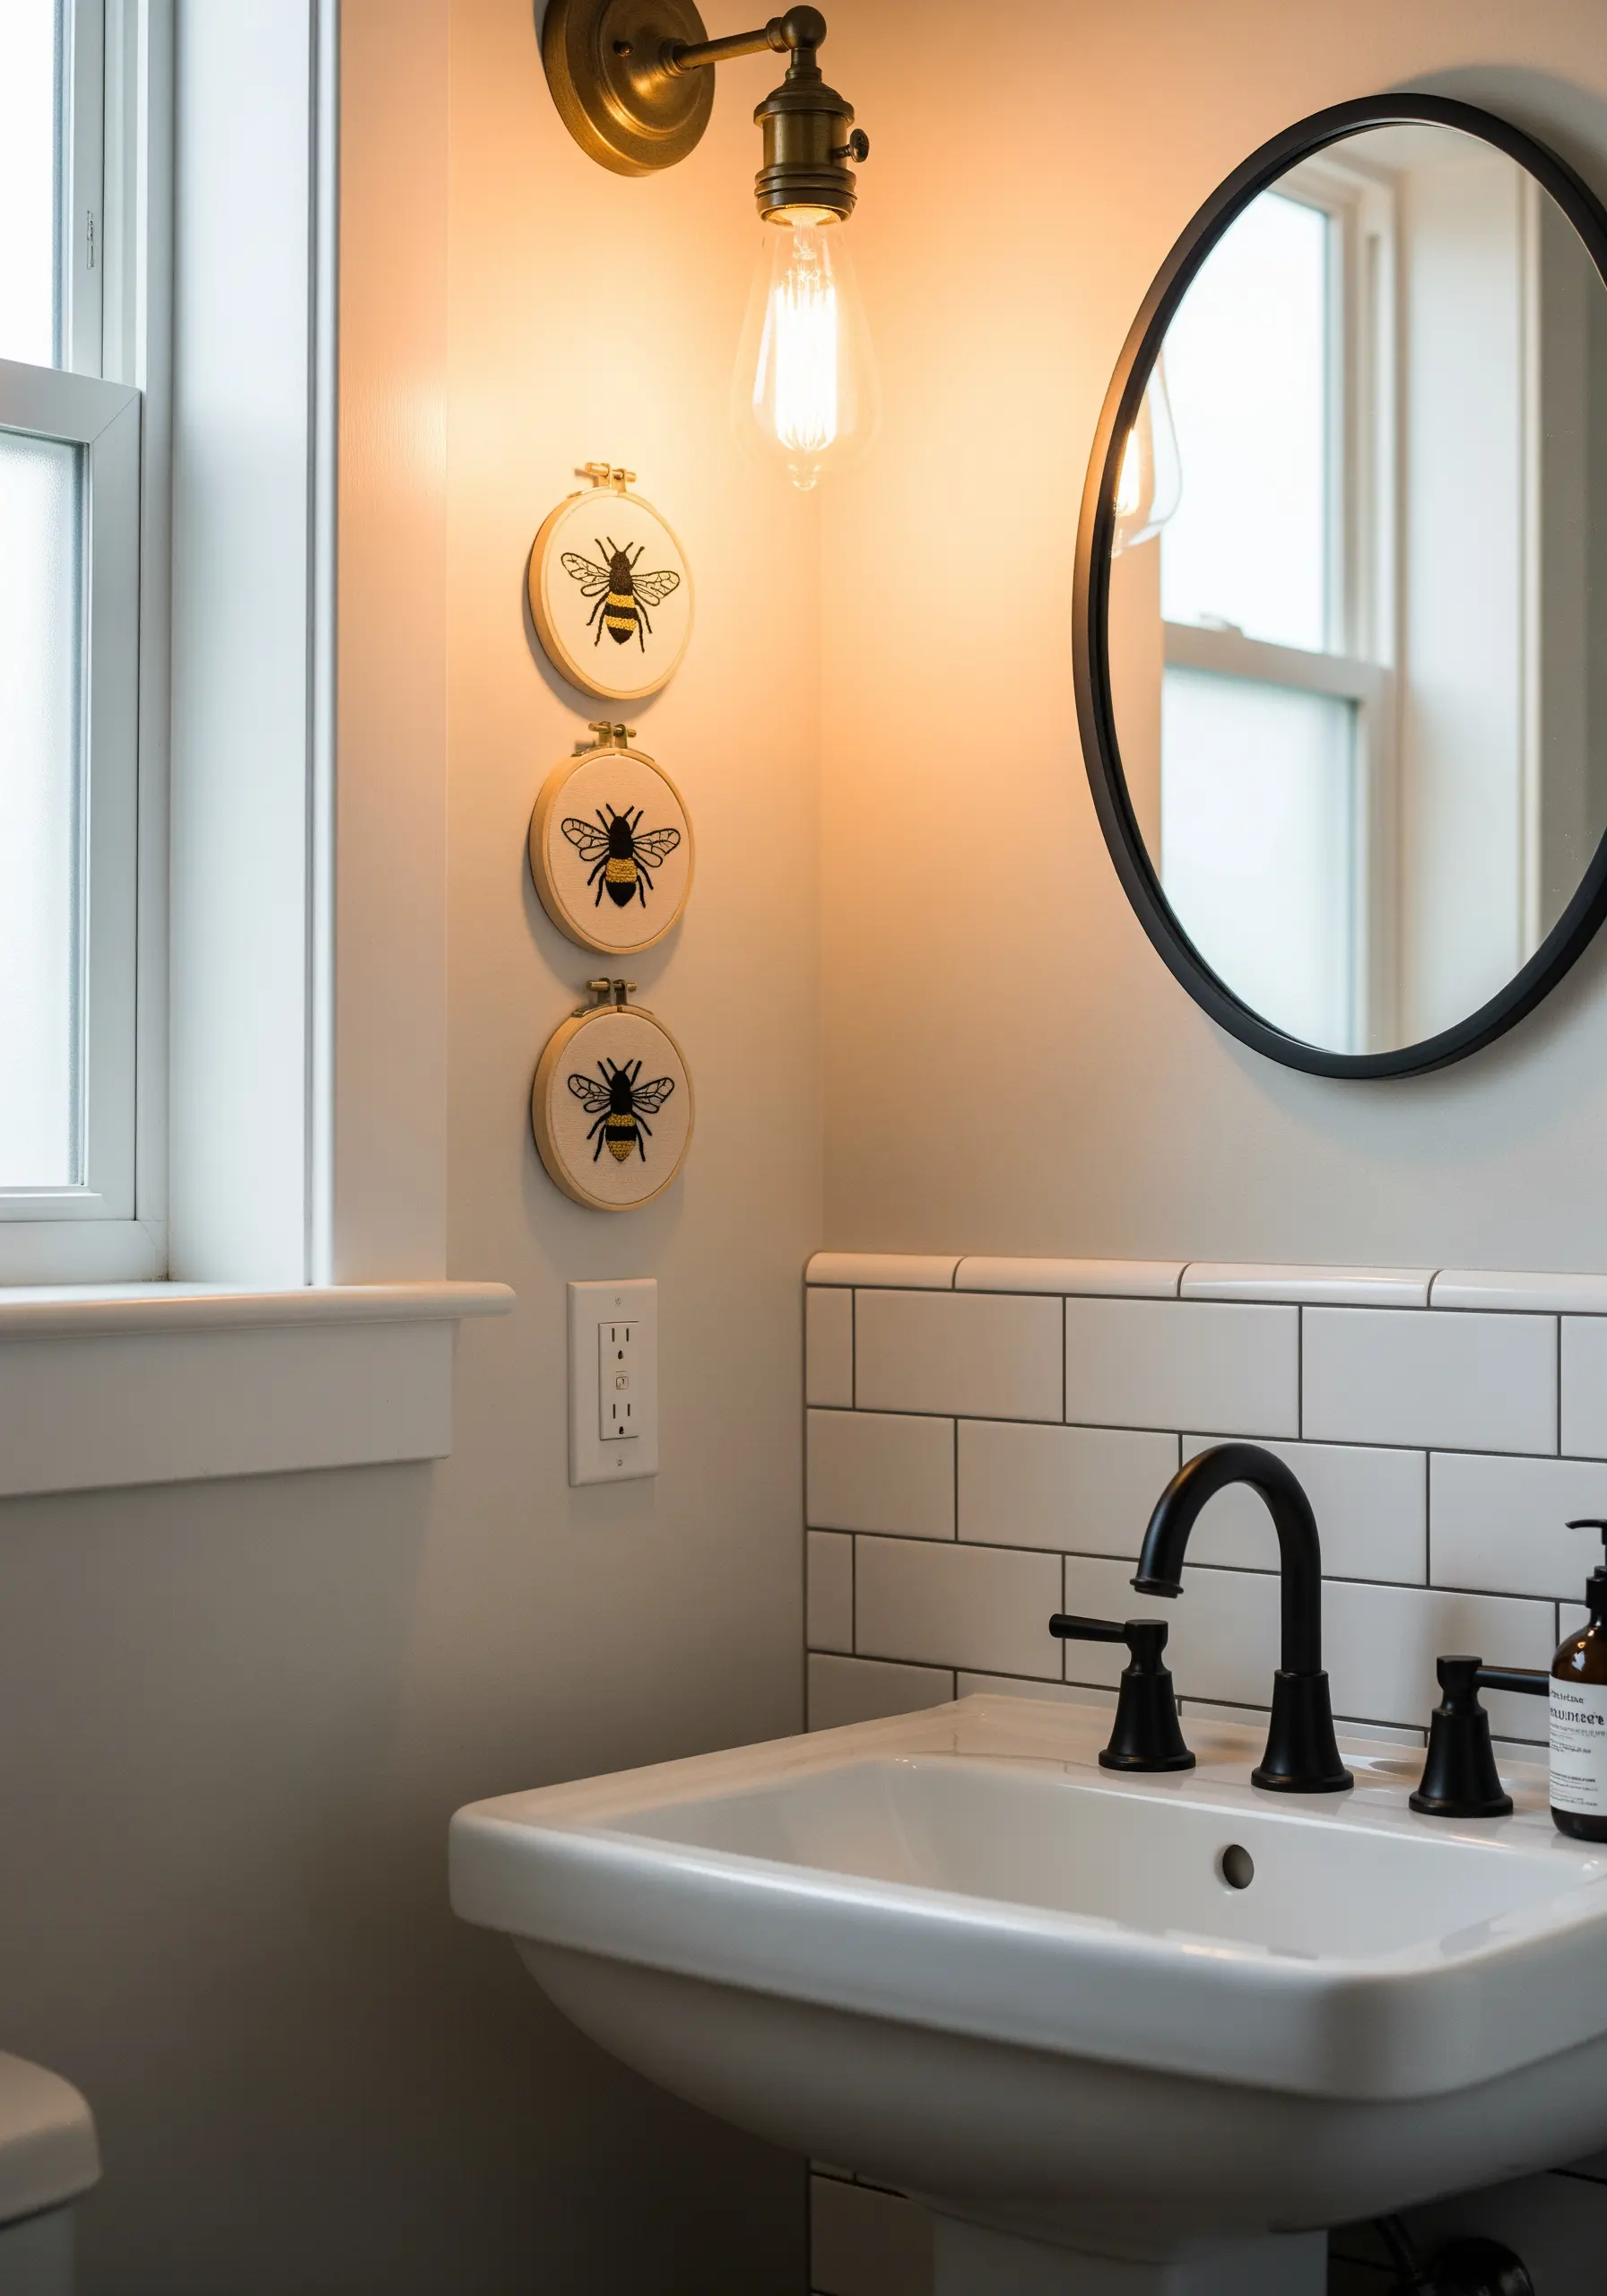
Elevate a simple motif by stitching it in a series of three small hoops arranged vertically.
This technique turns a singular design into a cohesive wall installation, perfect for narrow bathroom spaces.
Use the same fabric and hoop size for each piece to maintain visual consistency.
You can slightly vary the design in each hoop—like changing the bee’s angle—to add subtle interest while keeping the collection unified.
3. Build Dynamic Texture with Dense Stitching
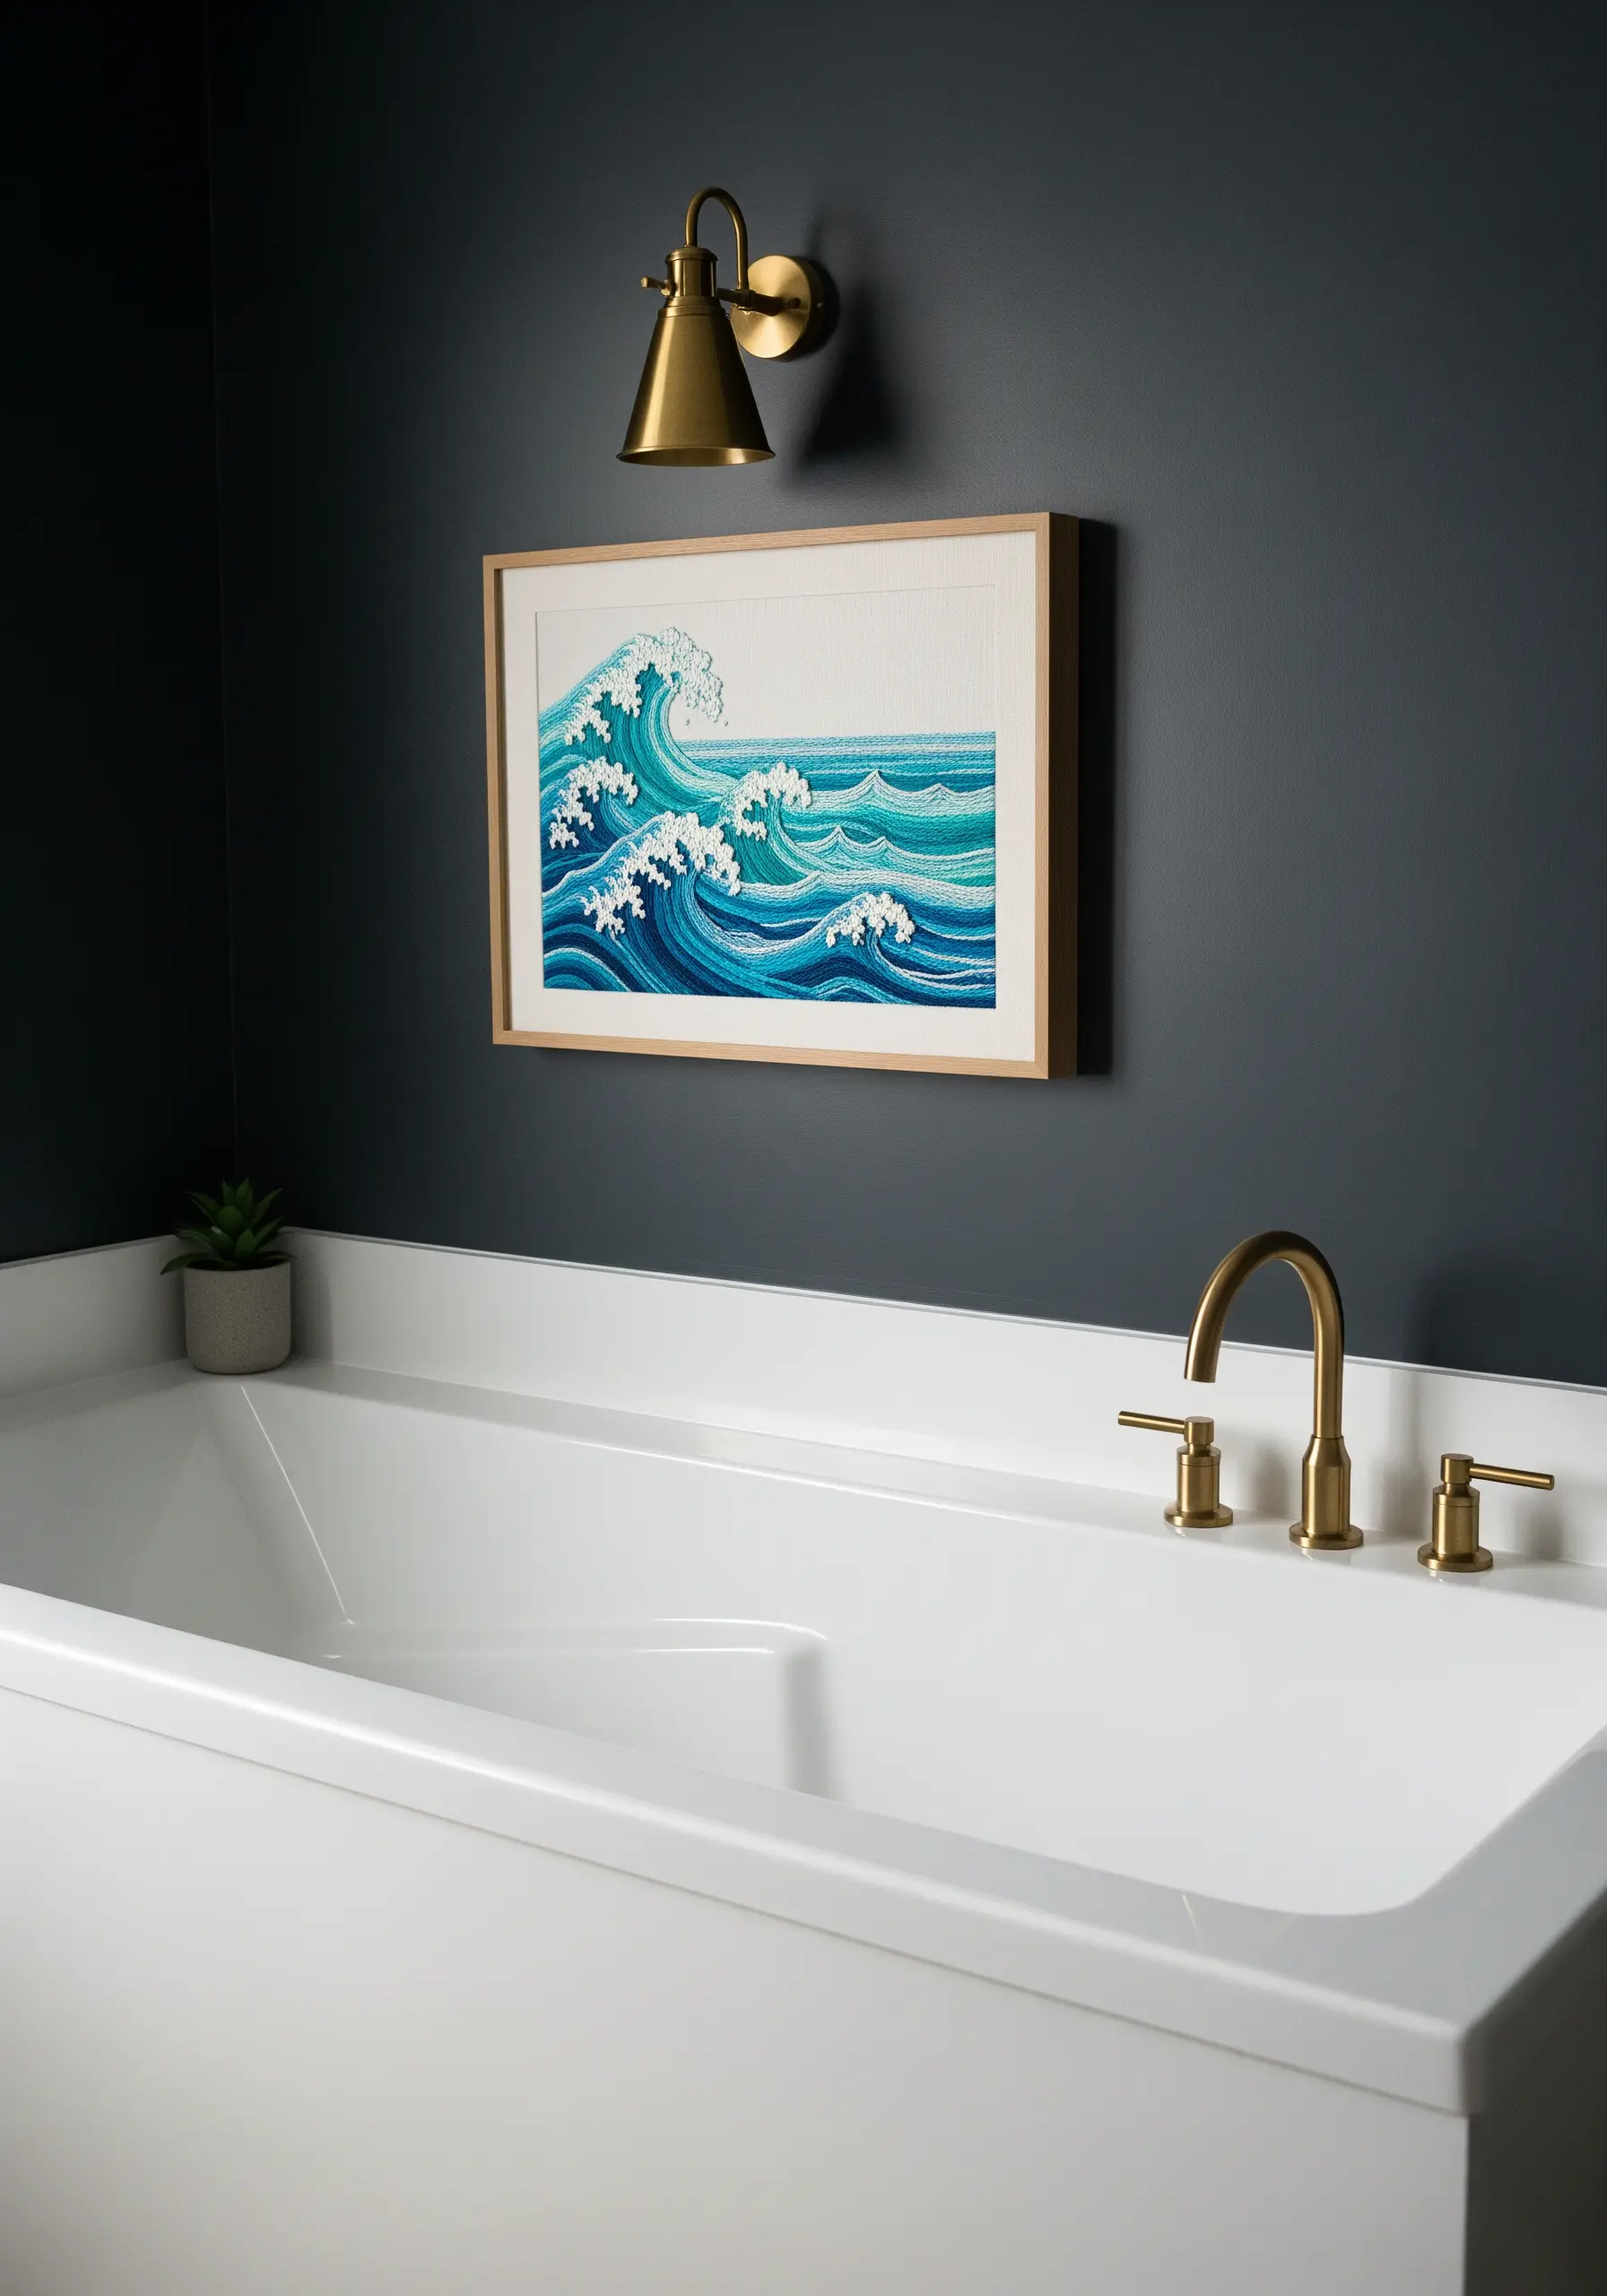
Capture the energy of crashing waves by filling the entire surface with dense, directional stitches.
Use varying shades of blue and turquoise floss, layering straight stitches to mimic the movement of water.
For the seafoam, use French knots in white and off-white, clustering them tightly to create a raised, bubbly texture that contrasts with the smoother water.
This approach moves beyond simple outlines, turning your thread into a sculptural medium that conveys both color and motion.
4. Embrace Bold Color with Geometric Satin Stitch
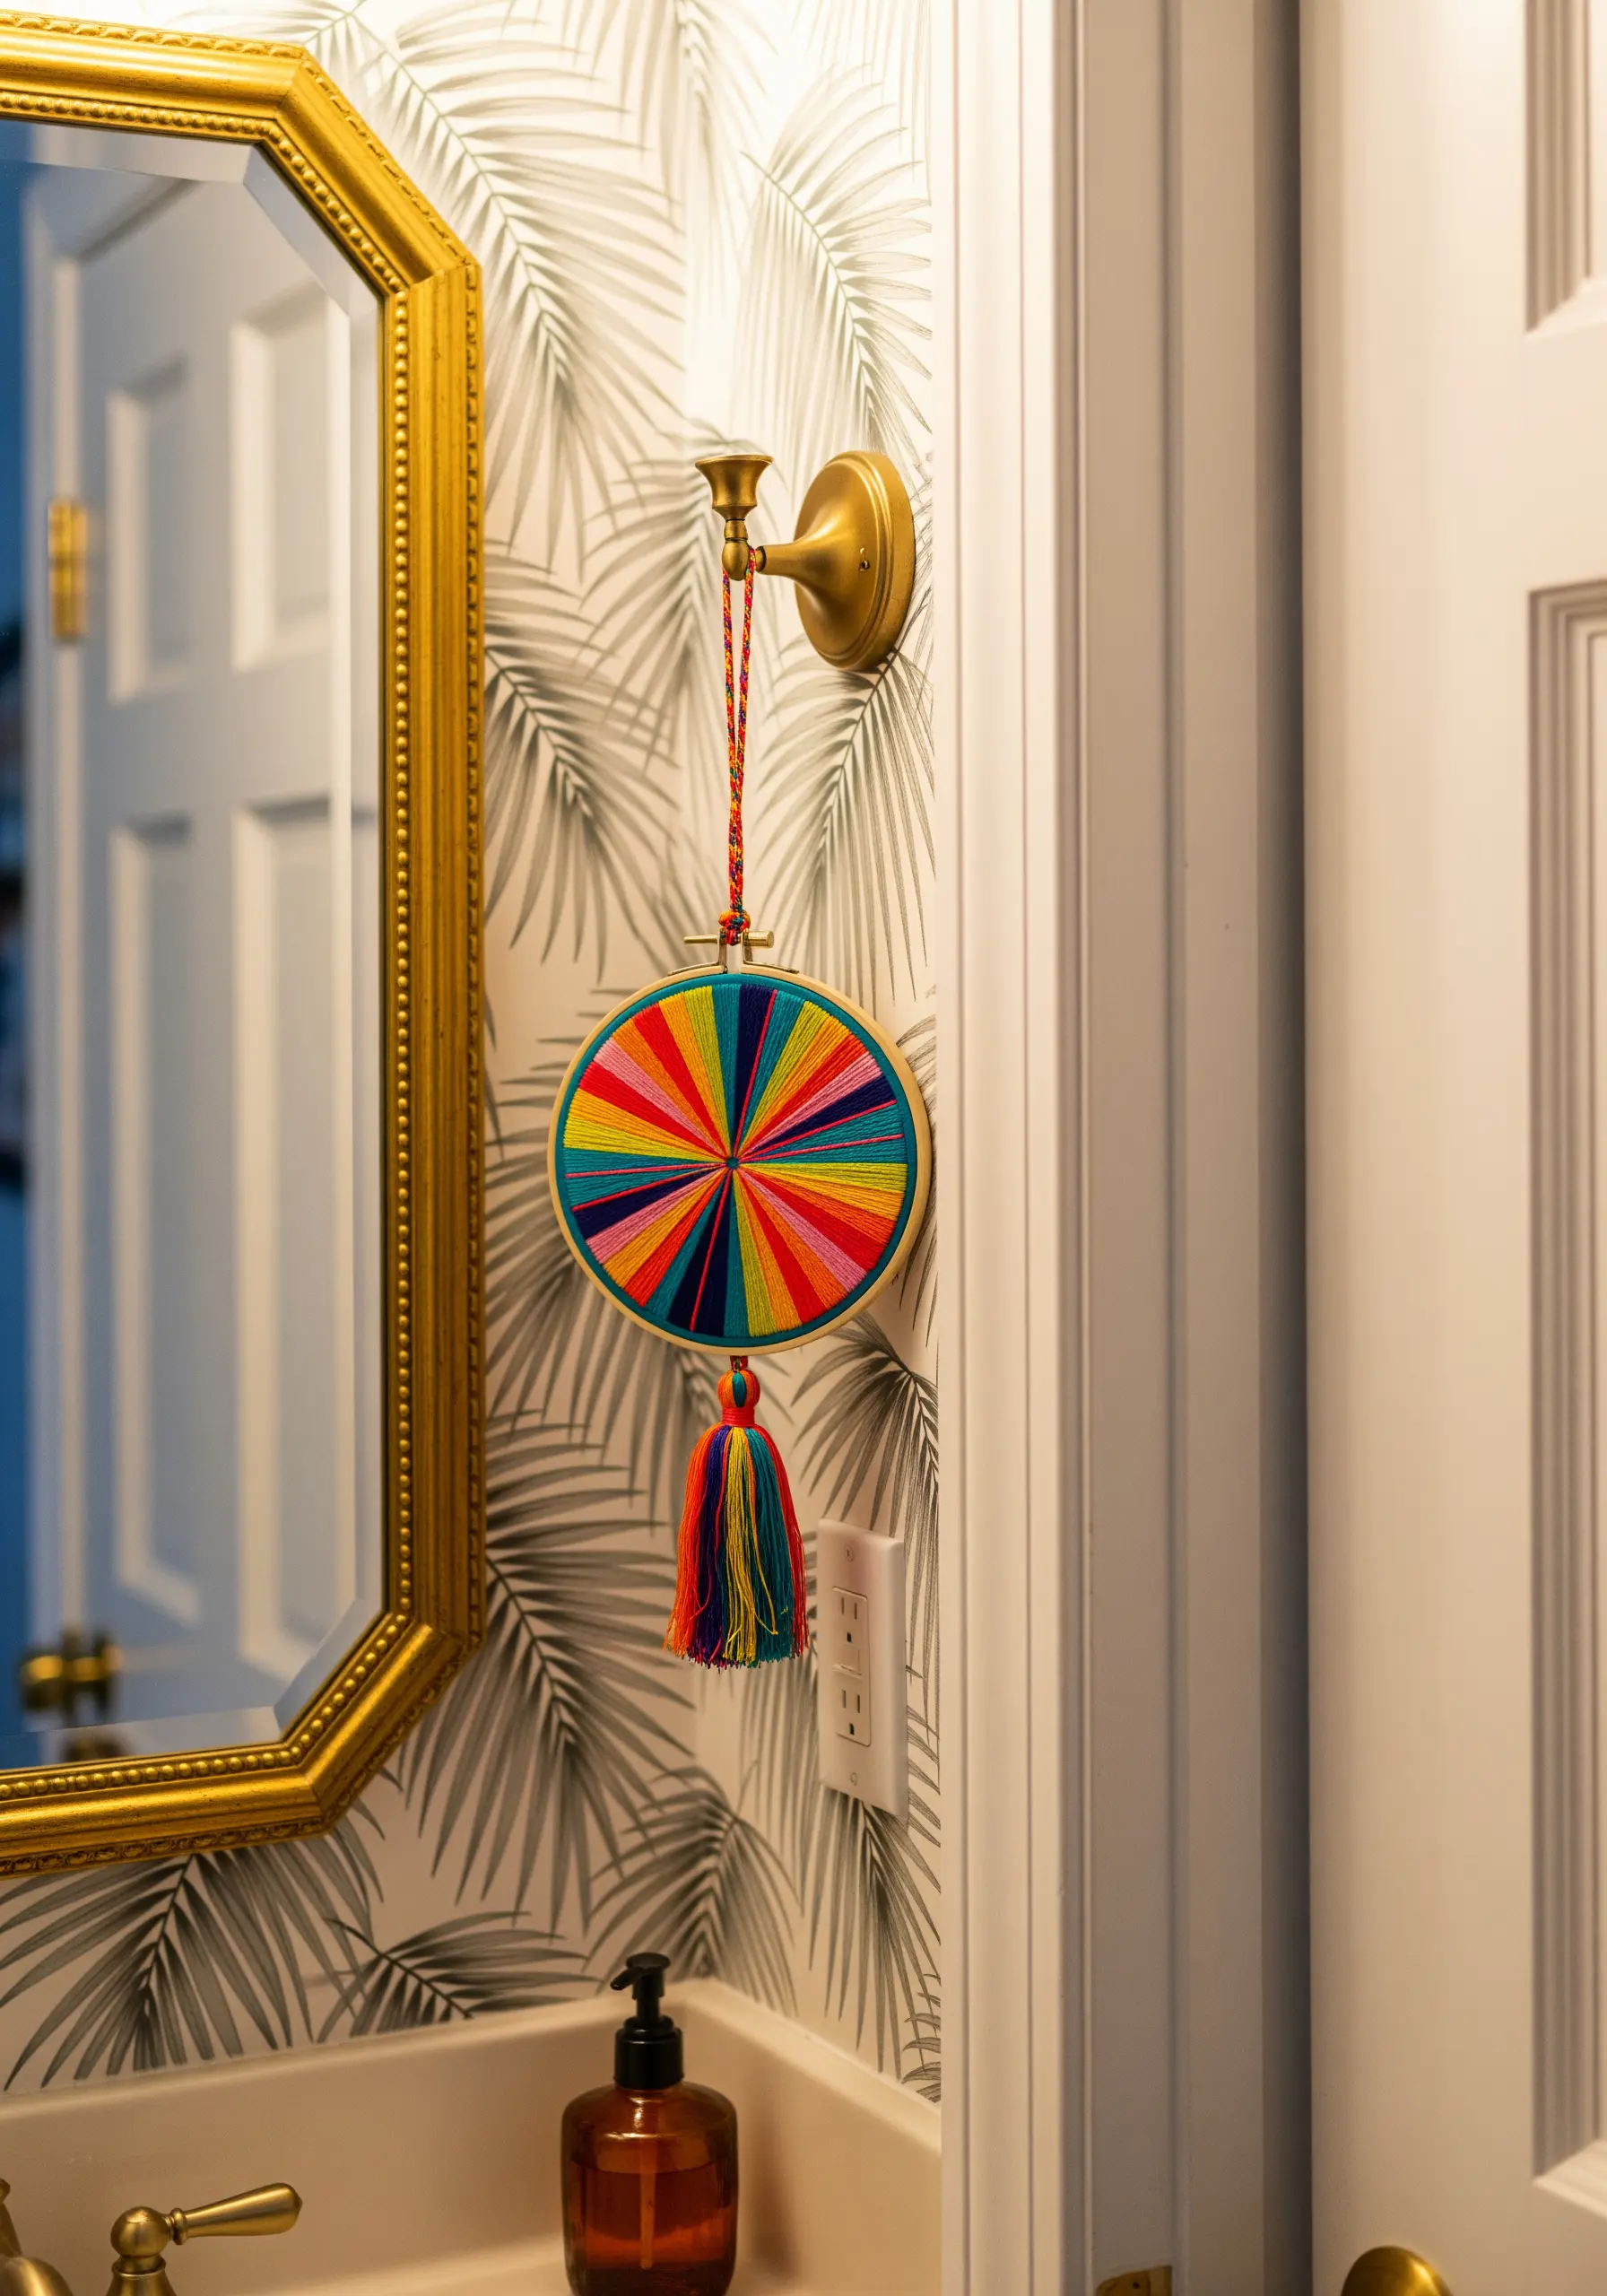
Create a vibrant color wheel by dividing your hoop into clean, geometric sections.
Use a thick, six-strand floss and a tight satin stitch to achieve complete, opaque coverage for each color block.
The success of this design lies in precision: ensure your stitches are perfectly parallel and meet at a sharp central point.
Finish with a handmade tassel using leftover threads from the project to create a perfectly coordinated, playful accent.
5. Frame Geometric Motifs in Unconventional Hoops
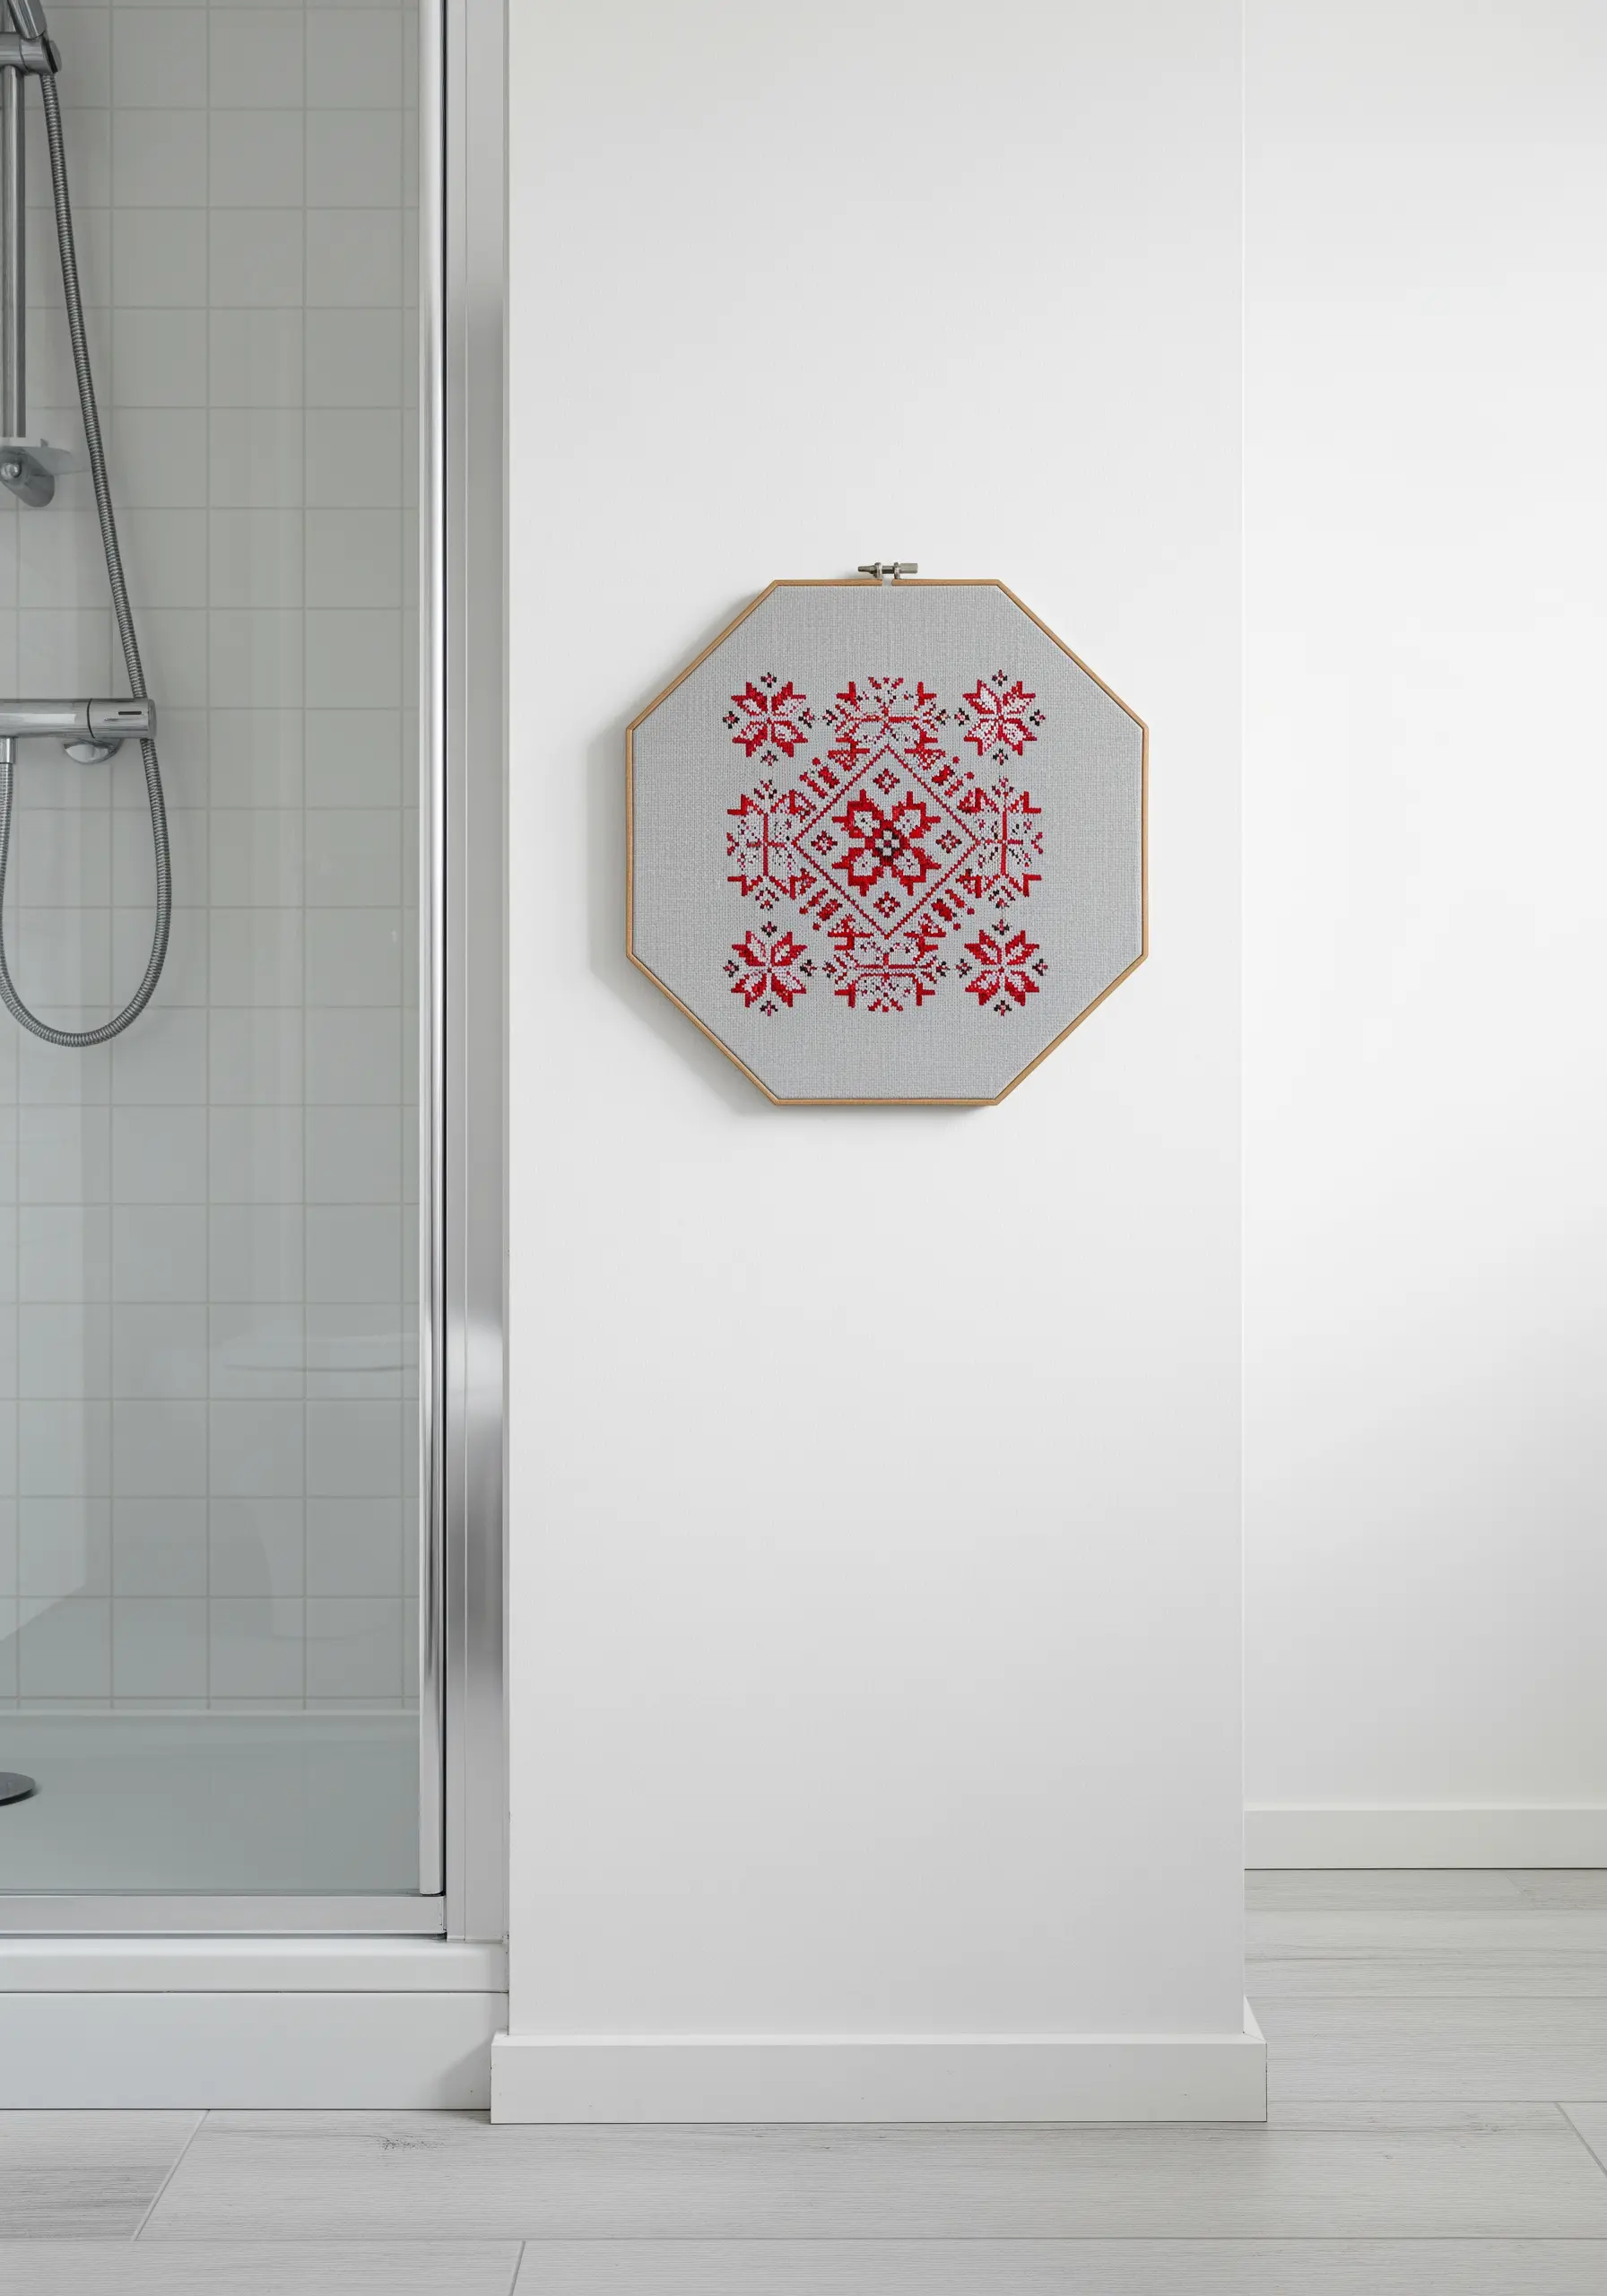
Give traditional, symmetrical patterns a modern edge by mounting them in an octagonal or square hoop.
When stitching geometric designs, maintaining even thread tension is crucial to prevent the fabric from puckering and distorting the lines.
Choose a high-contrast color scheme, like red on grey Aida cloth, to make the crisp lines and intricate details of the pattern stand out.
The unique hoop shape itself becomes part of the artwork, complementing the angularity of the stitchwork.
6. Stitch Art Deco Glamour with Metallic Thread
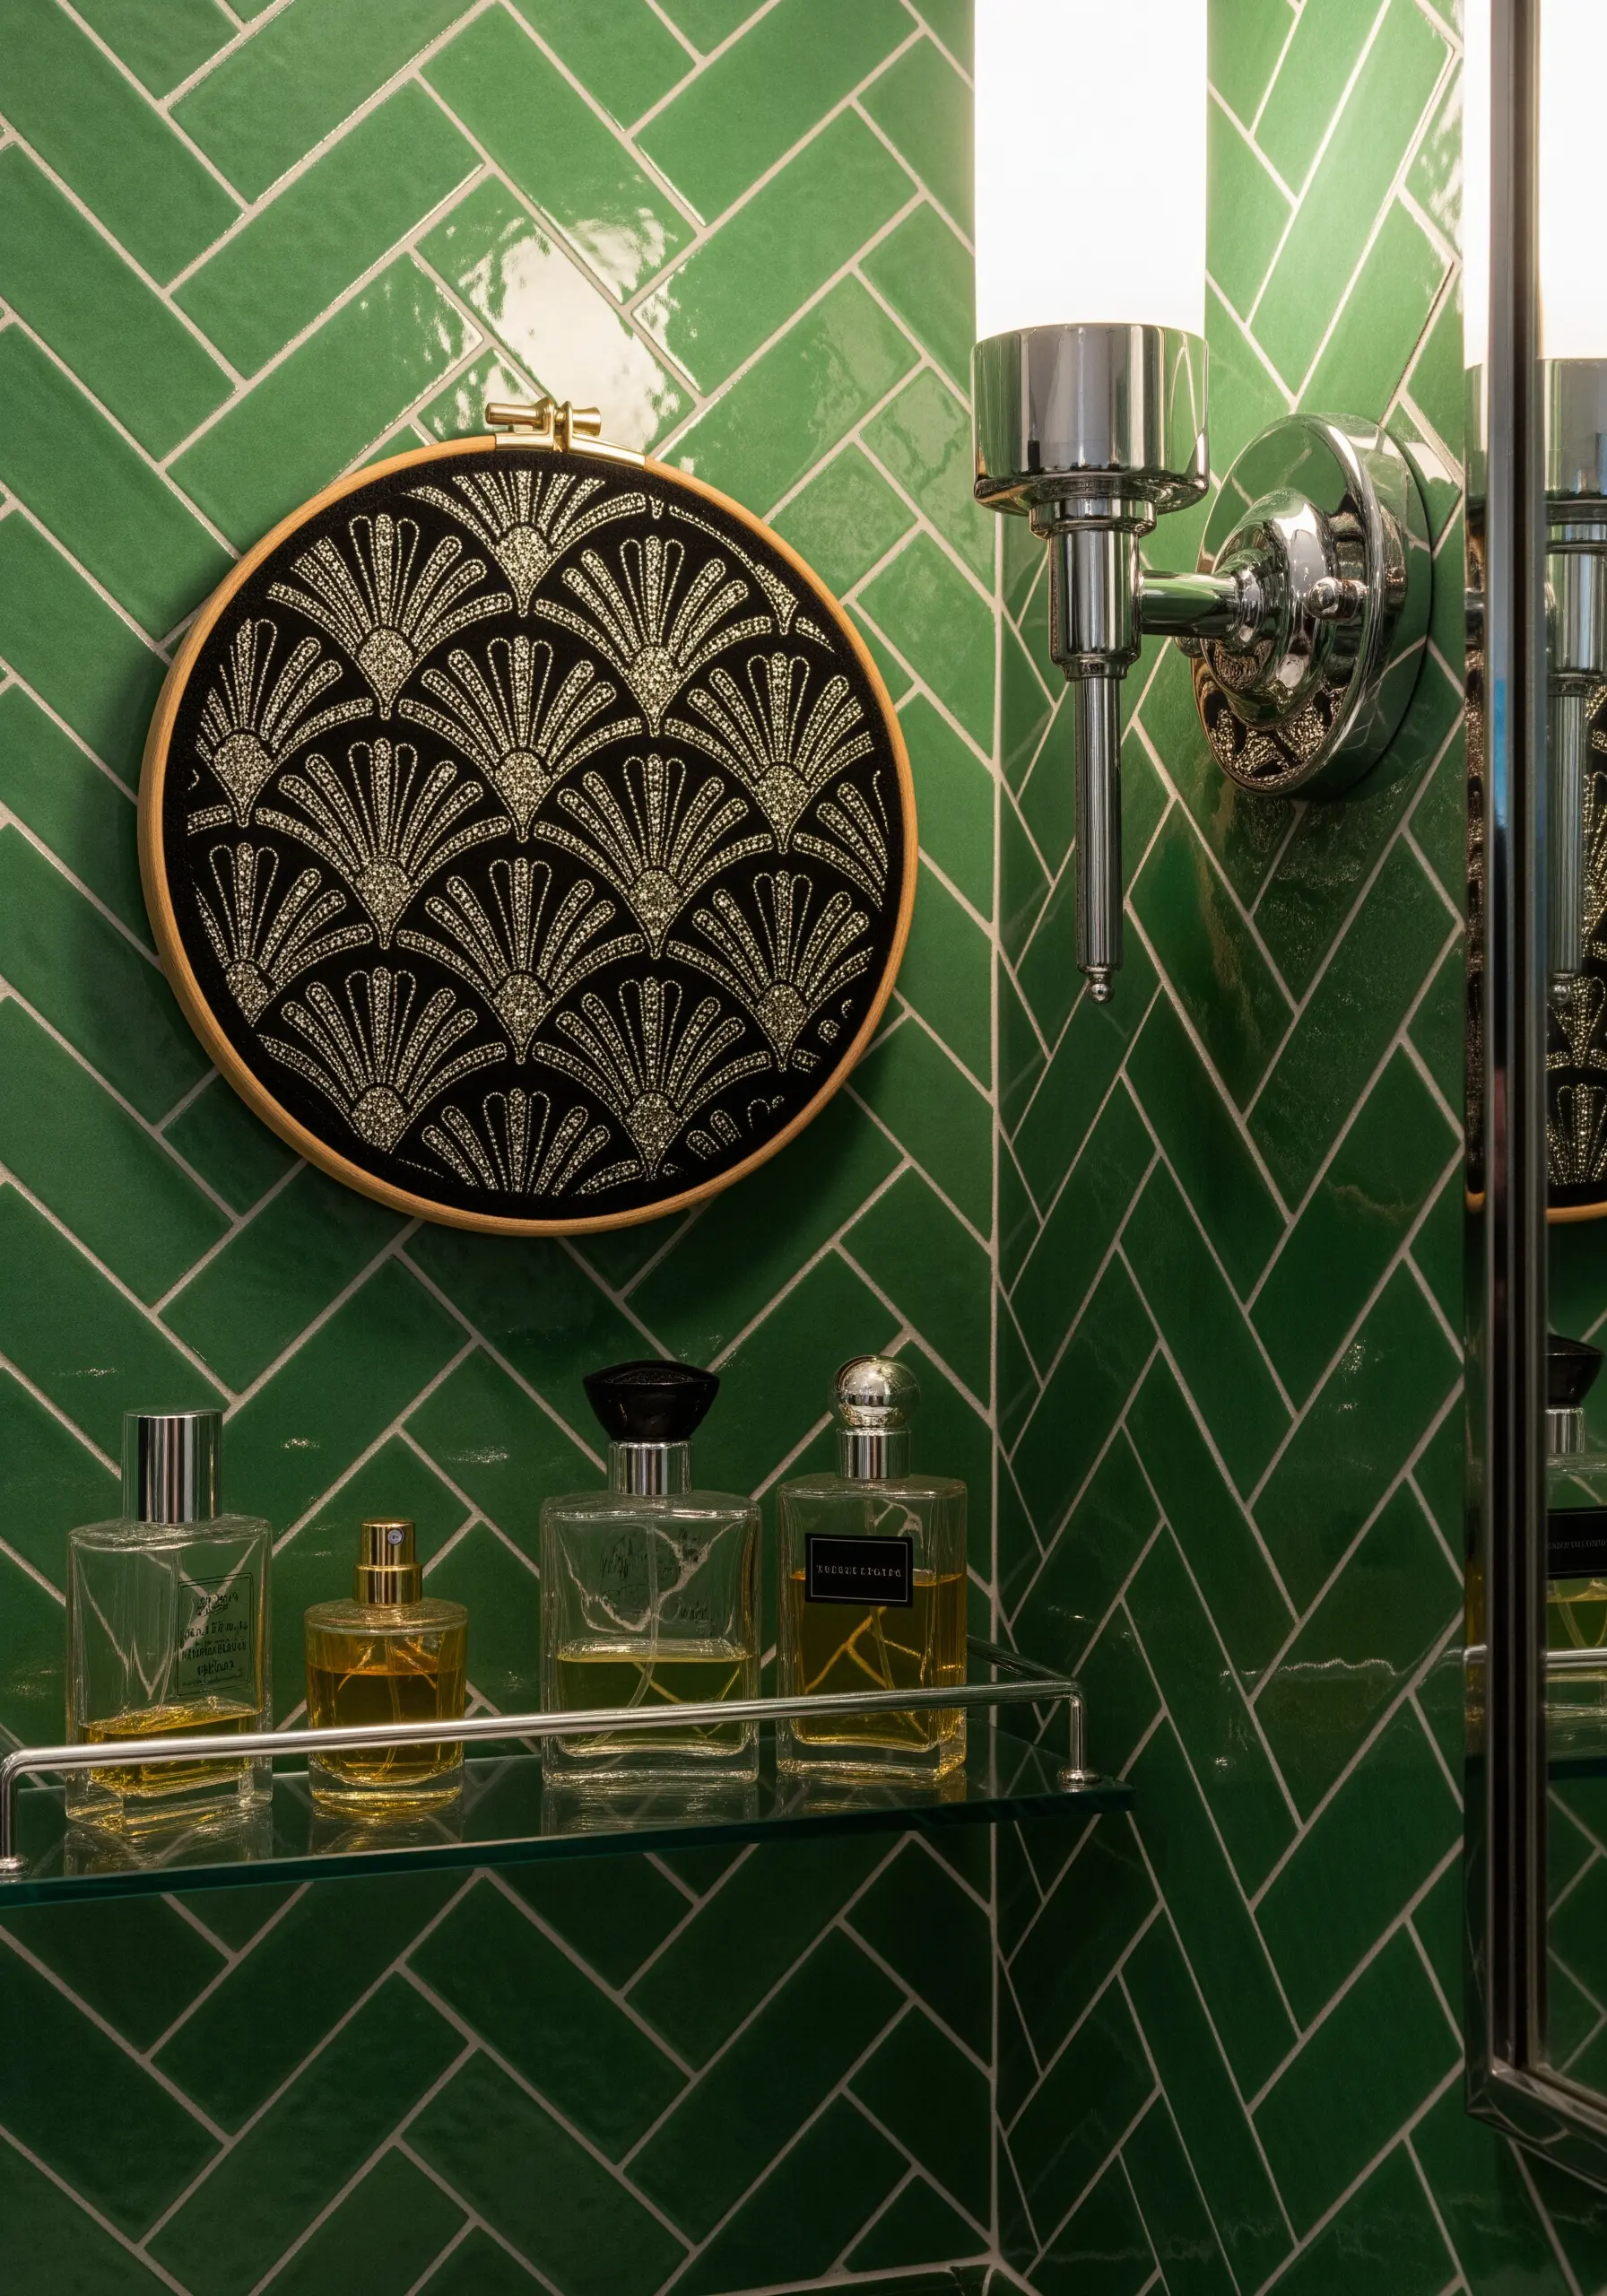
Recreate the opulence of the Art Deco era by pairing metallic thread with black fabric.
To prevent fraying, work with shorter lengths of metallic floss and use a thread conditioner like beeswax.
Lay your stitches—primarily backstitch and satin stitch—carefully to catch the light and create a shimmering, luxurious effect.
This high-contrast combination creates a dramatic piece that feels sophisticated and timeless, perfect for an elegant bathroom setting.
7. Layer Stitches for Botanical Dimension
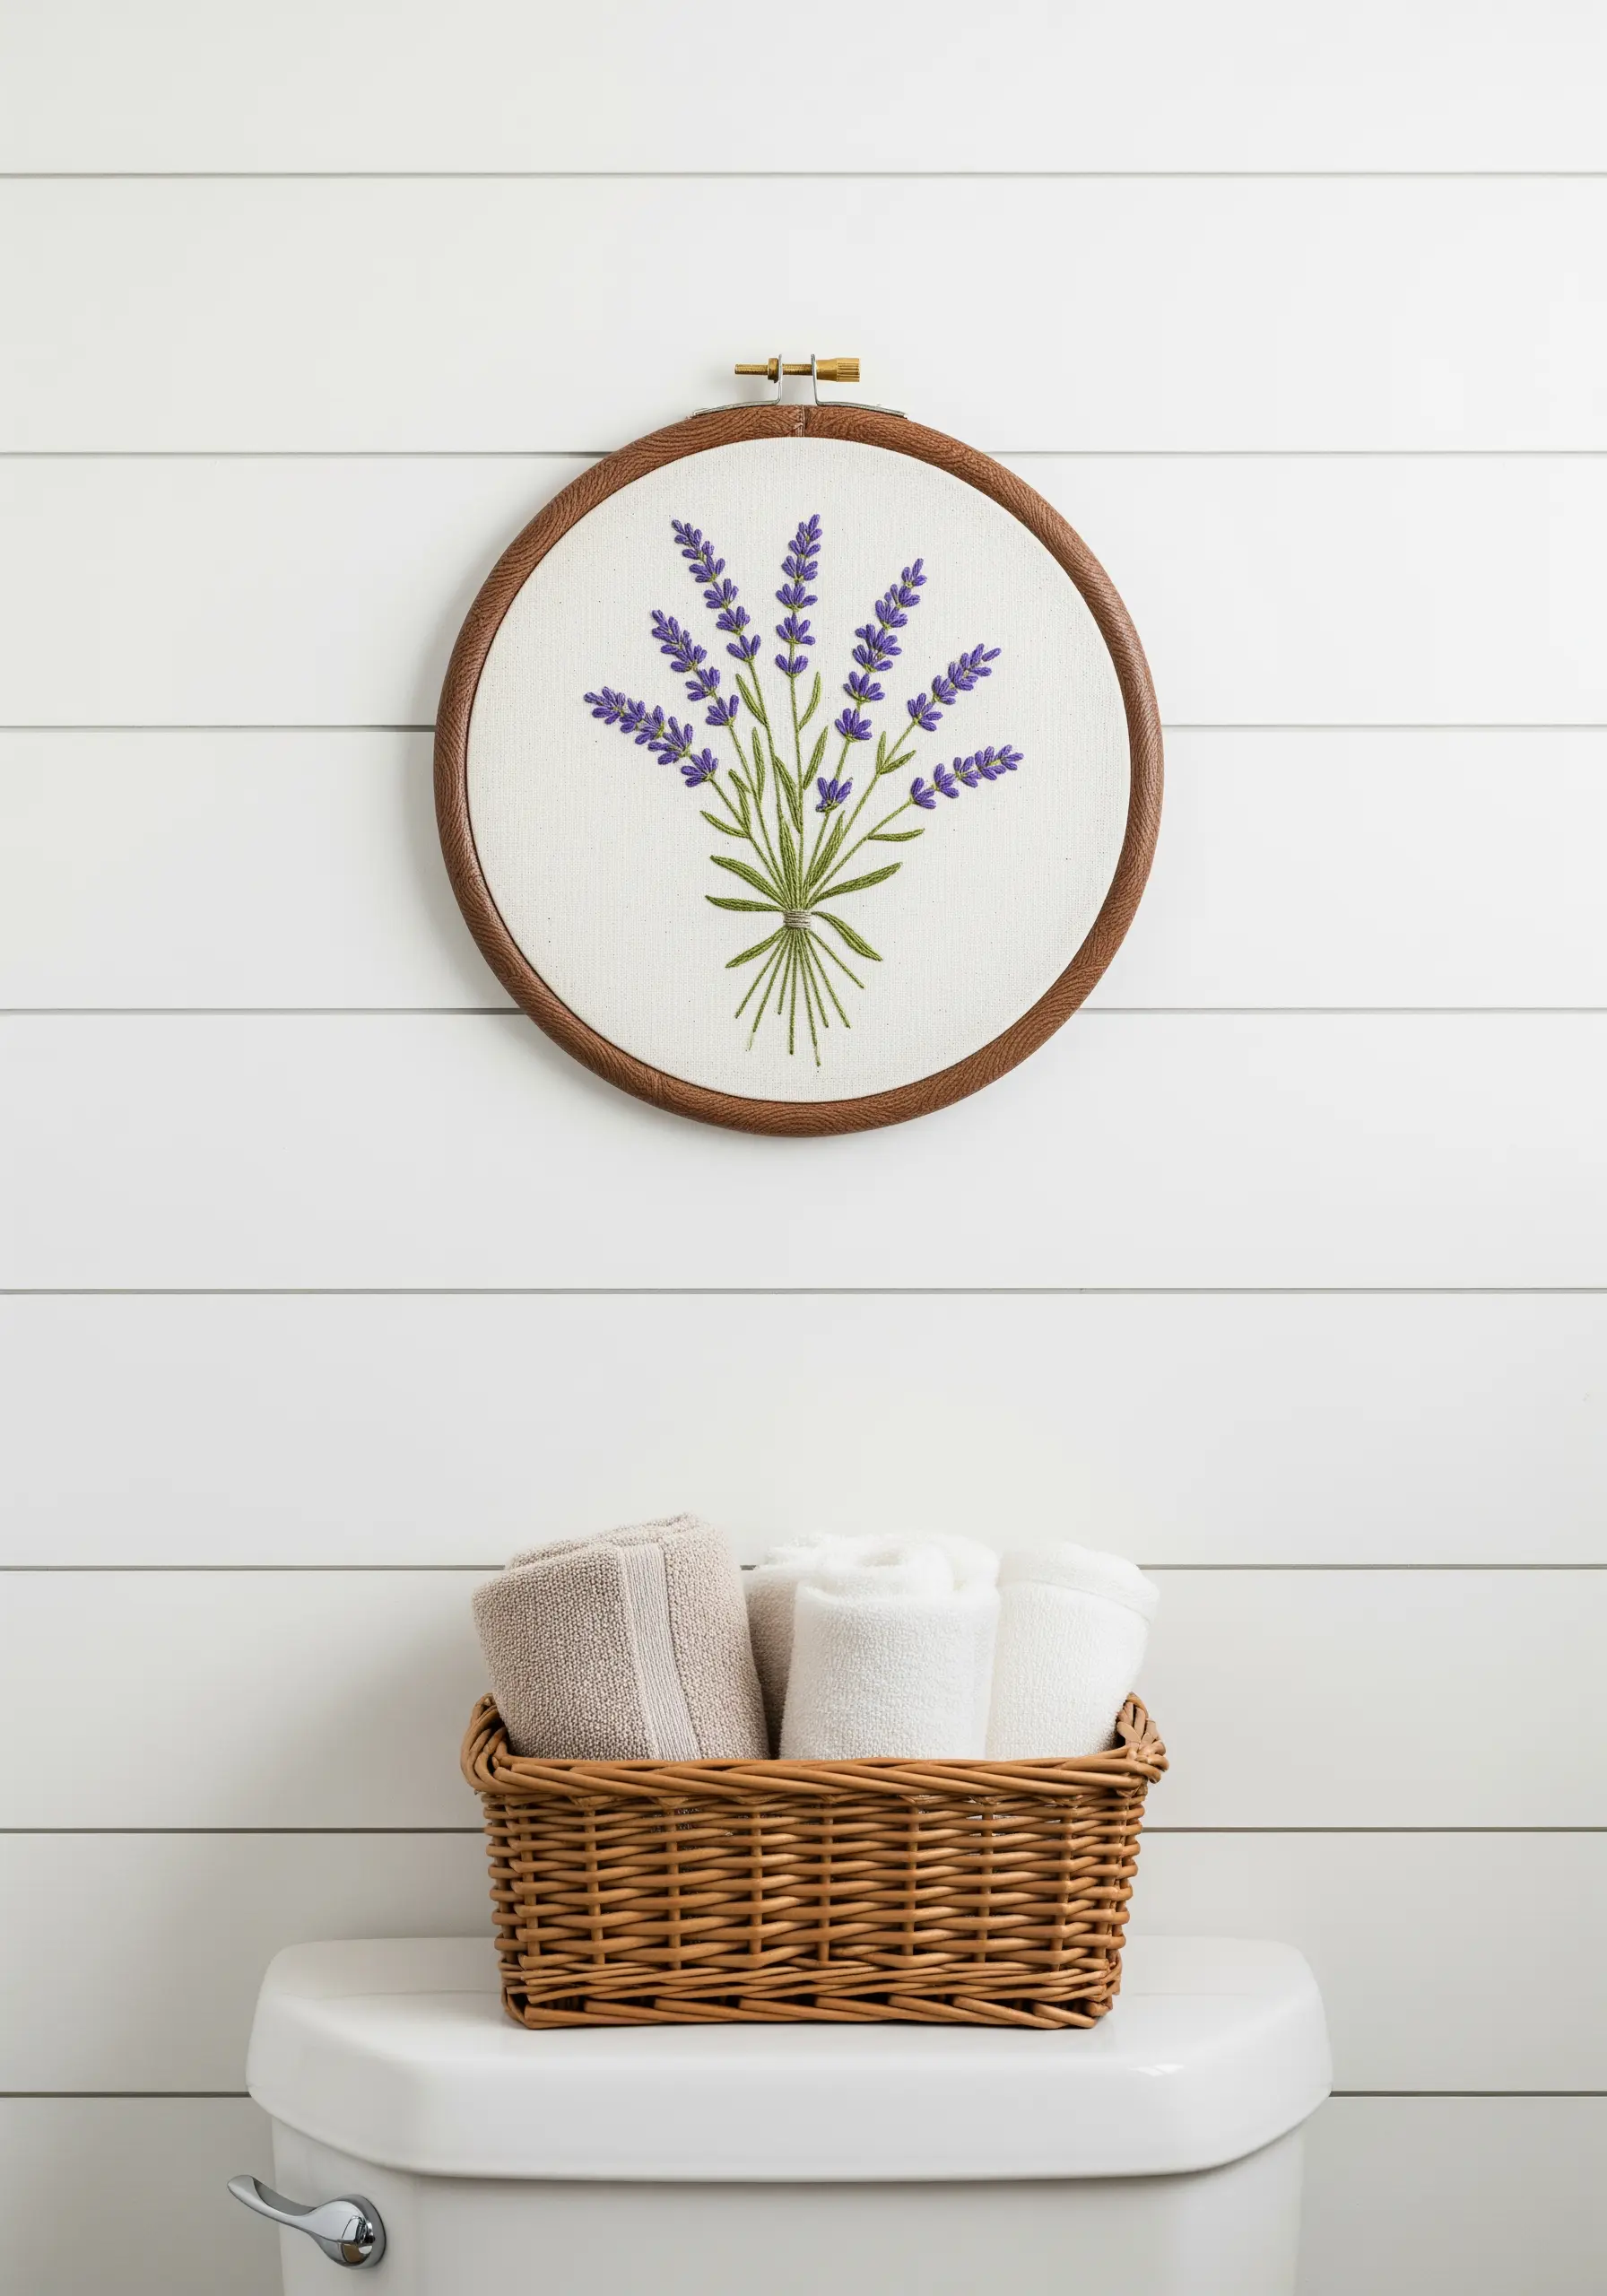
Bring a lavender bouquet to life by using a variety of stitches to build texture.
Use a simple straight stitch or fishbone stitch for the green stems, keeping them taut and clean.
For the lavender blossoms, cluster French knots or lazy daisy stitches in shades of purple and violet.
Varying the size and tightness of the knots will give the bouquet a more natural, organic appearance, as if each blossom is unique.
8. Achieve Clean Typography with Backstitch
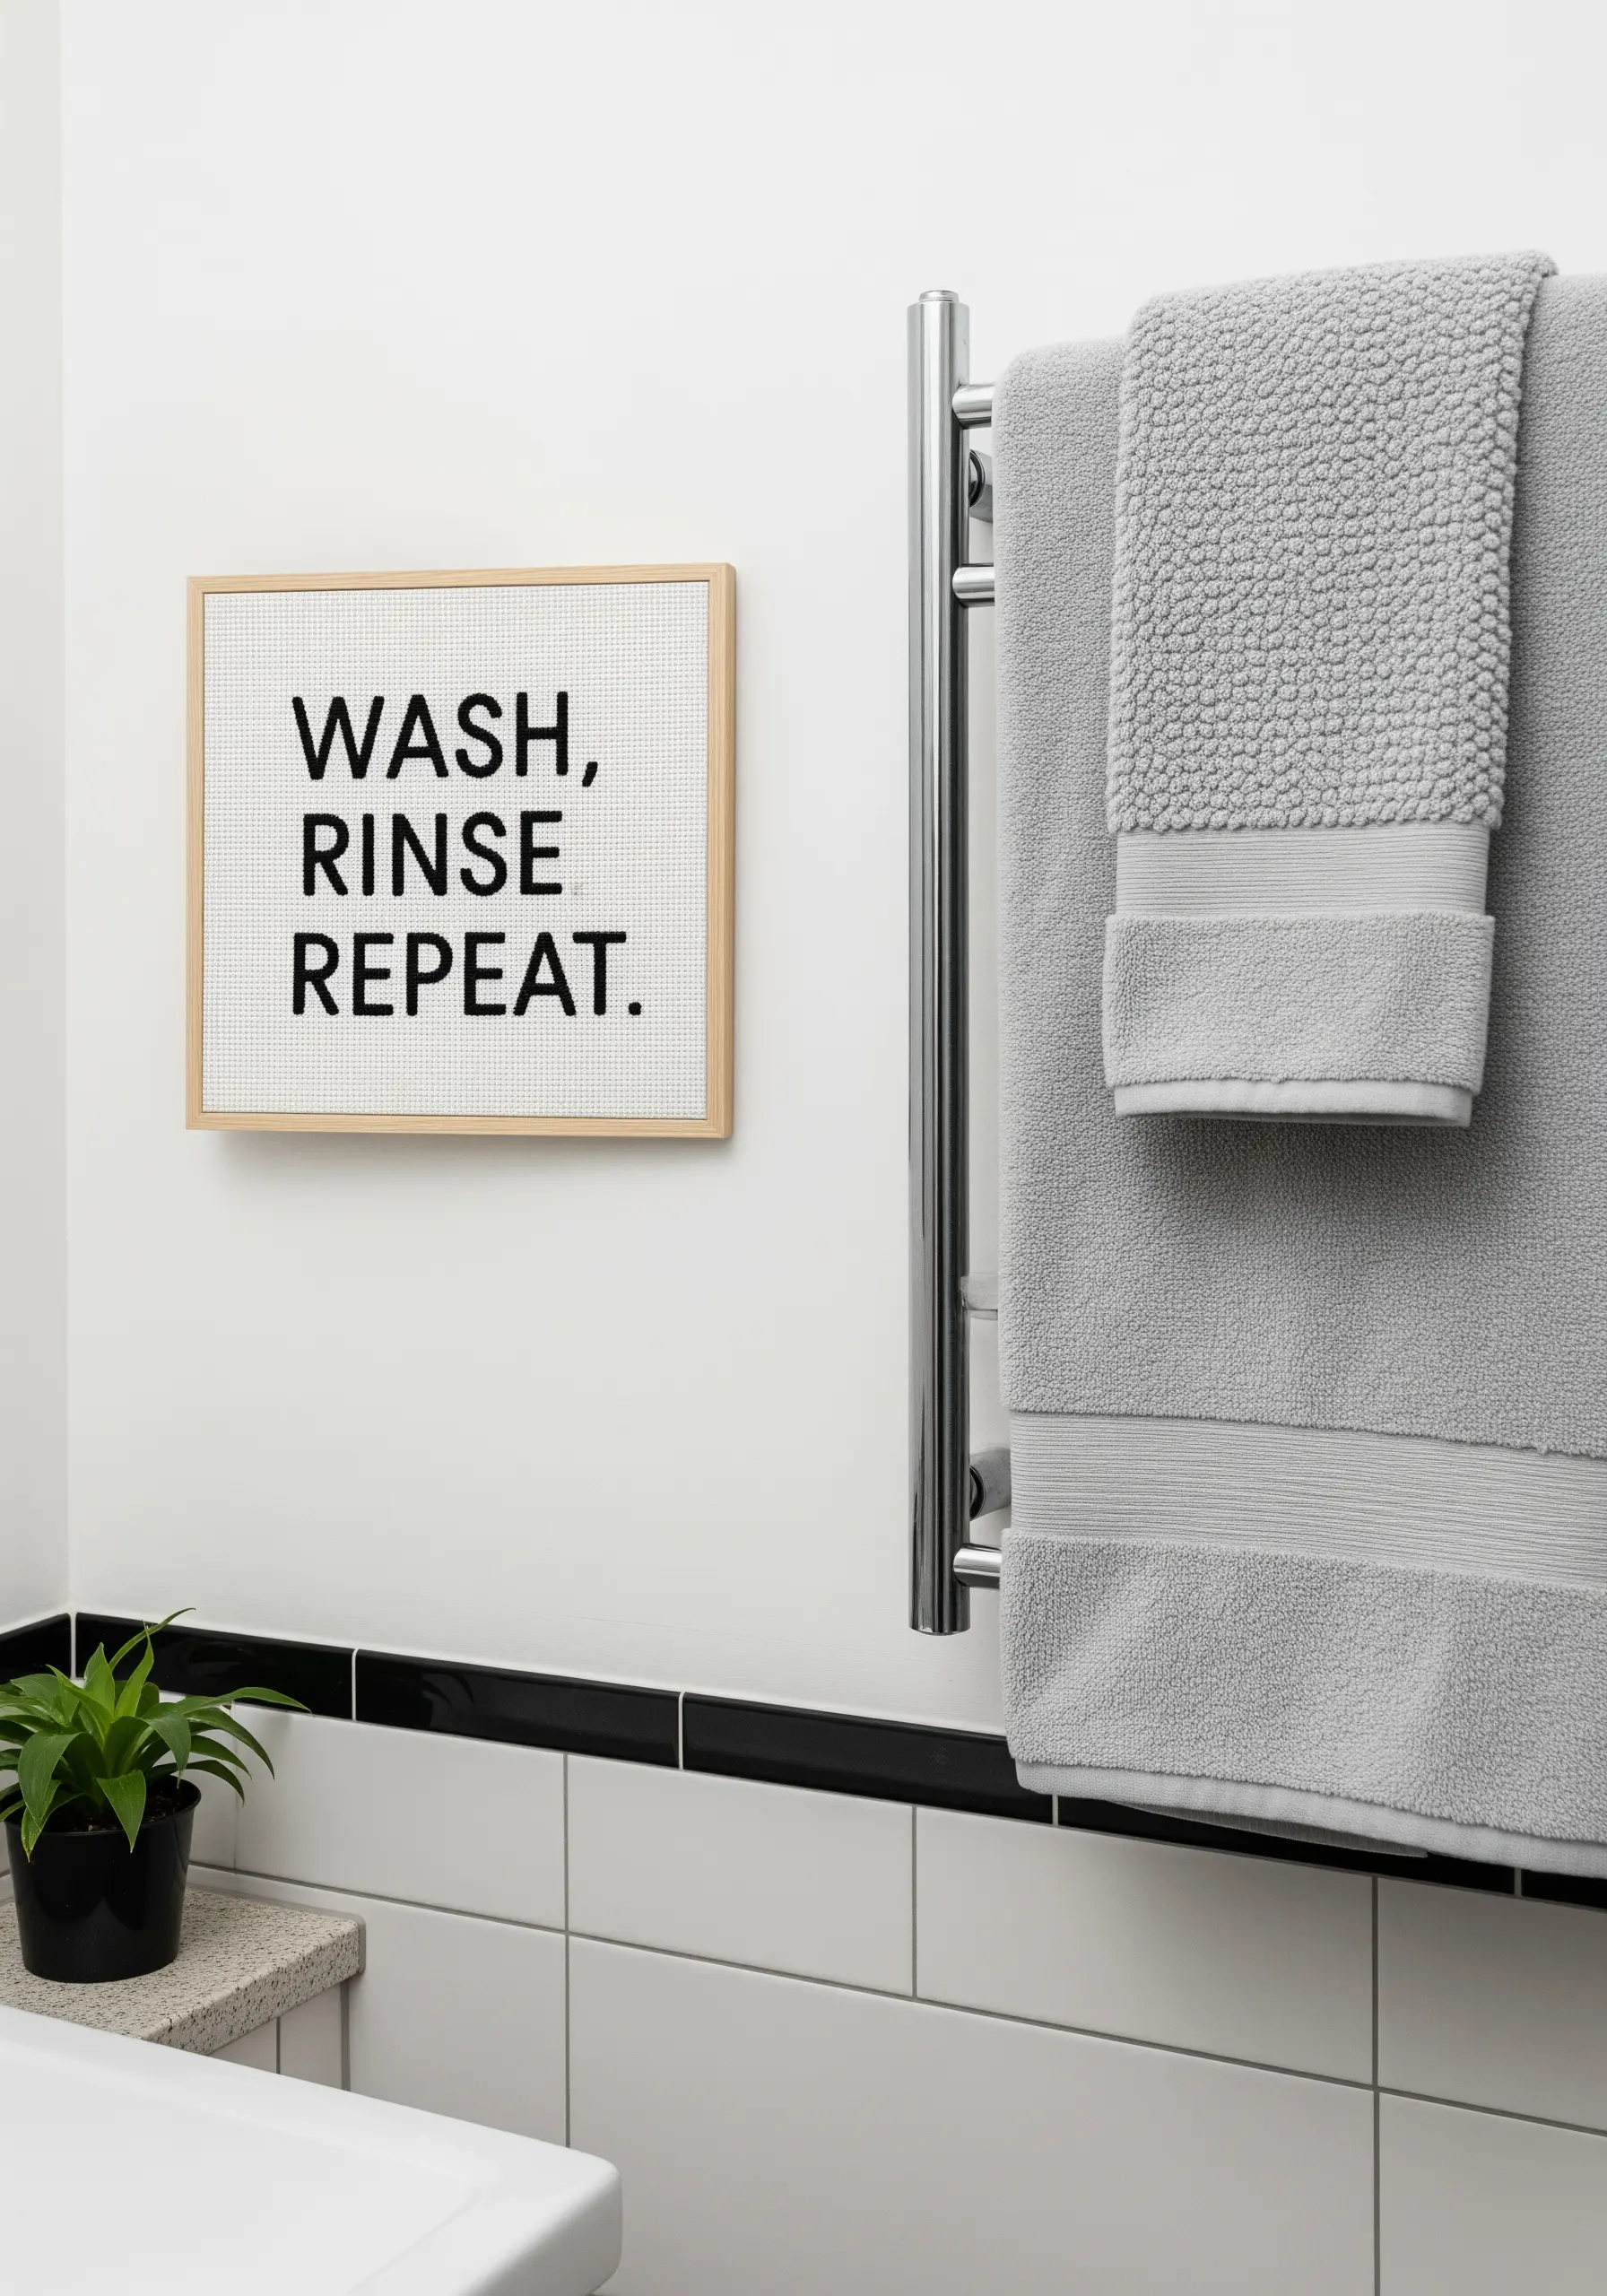
When embroidering text, clarity is key. Use a simple, disciplined backstitch for crisp, legible letters.
Choose a sans-serif font and use two or three strands of floss for lines that are bold but not bulky.
Mount your finished piece on a stretched canvas or in a simple wooden frame for a clean, modern display that moves beyond the traditional hoop.
This technique gives your words a graphic, printed quality while retaining the charm of handmade work.
9. Use Negative Space to Guide the Eye
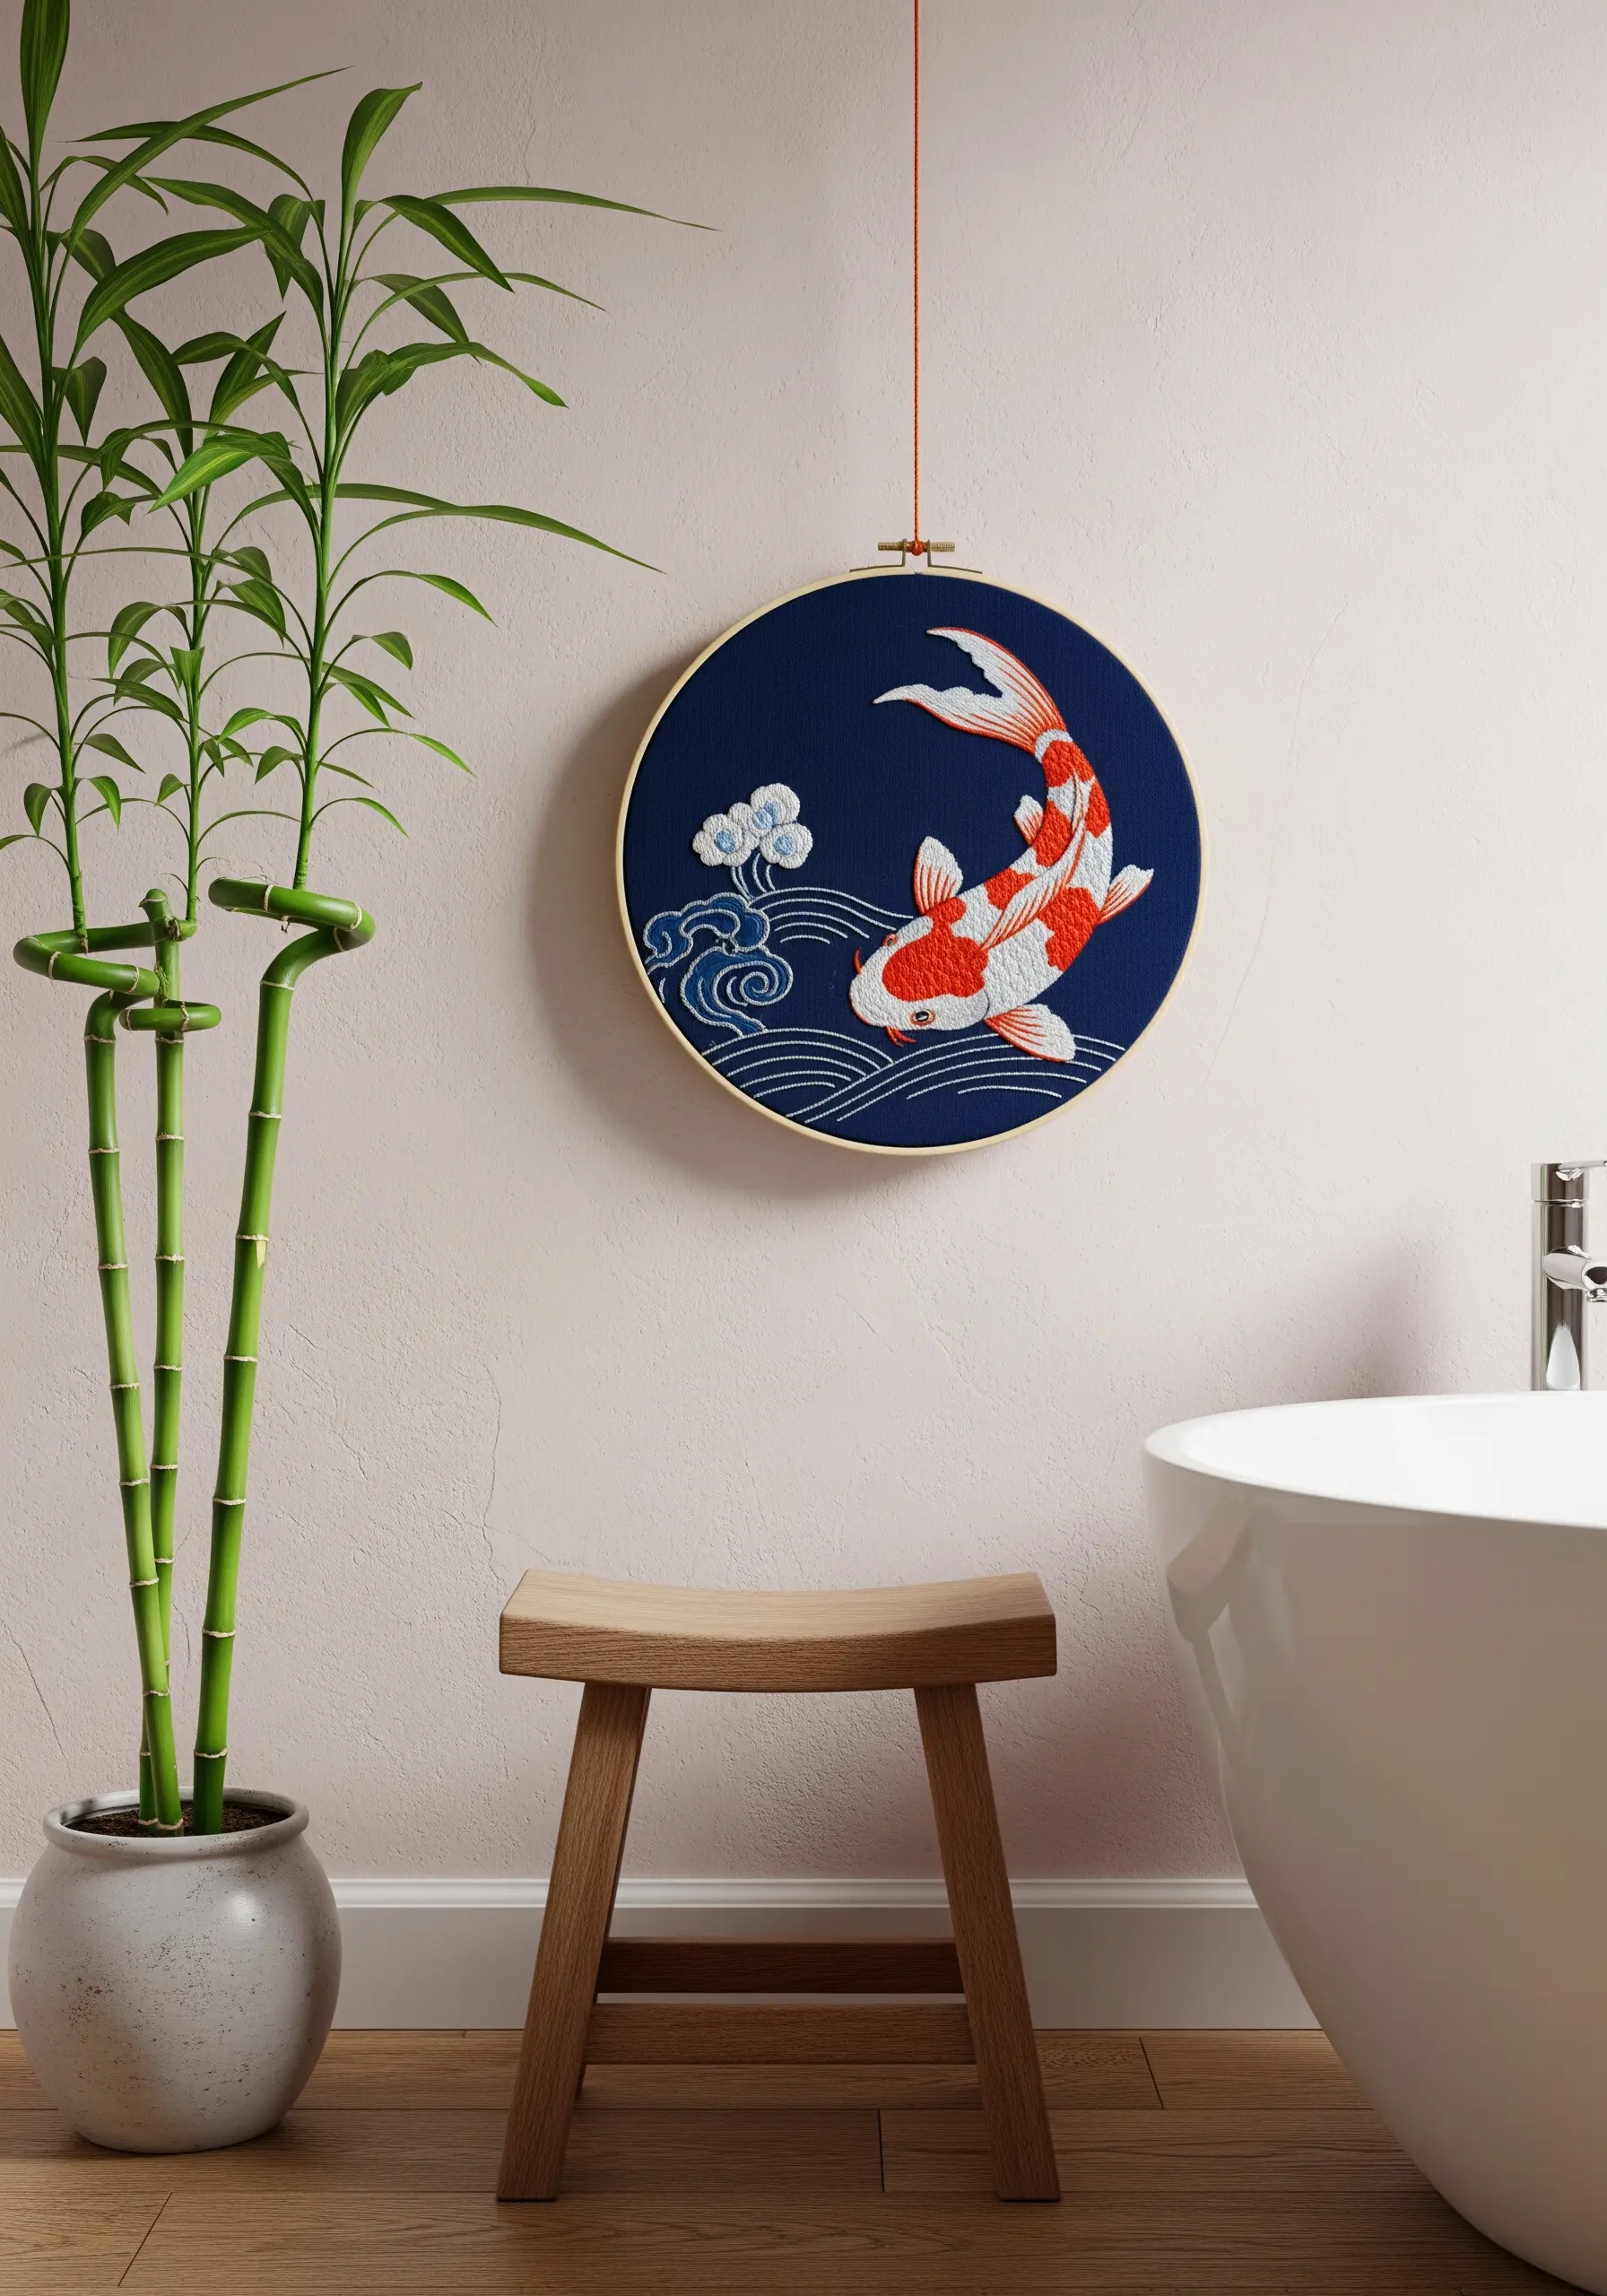
Create a sense of serenity and focus by letting the fabric do some of the work.
Instead of filling the entire hoop, stitch a central motif like this koi fish and allow the deep blue fabric to become the water.
Use directional satin stitch on the fish to create sheen and the illusion of scales, while simple backstitched lines suggest water currents.
This thoughtful use of negative space makes the composition feel balanced and uncluttered.
10. Create Lunar Textures on a Dark Canvas
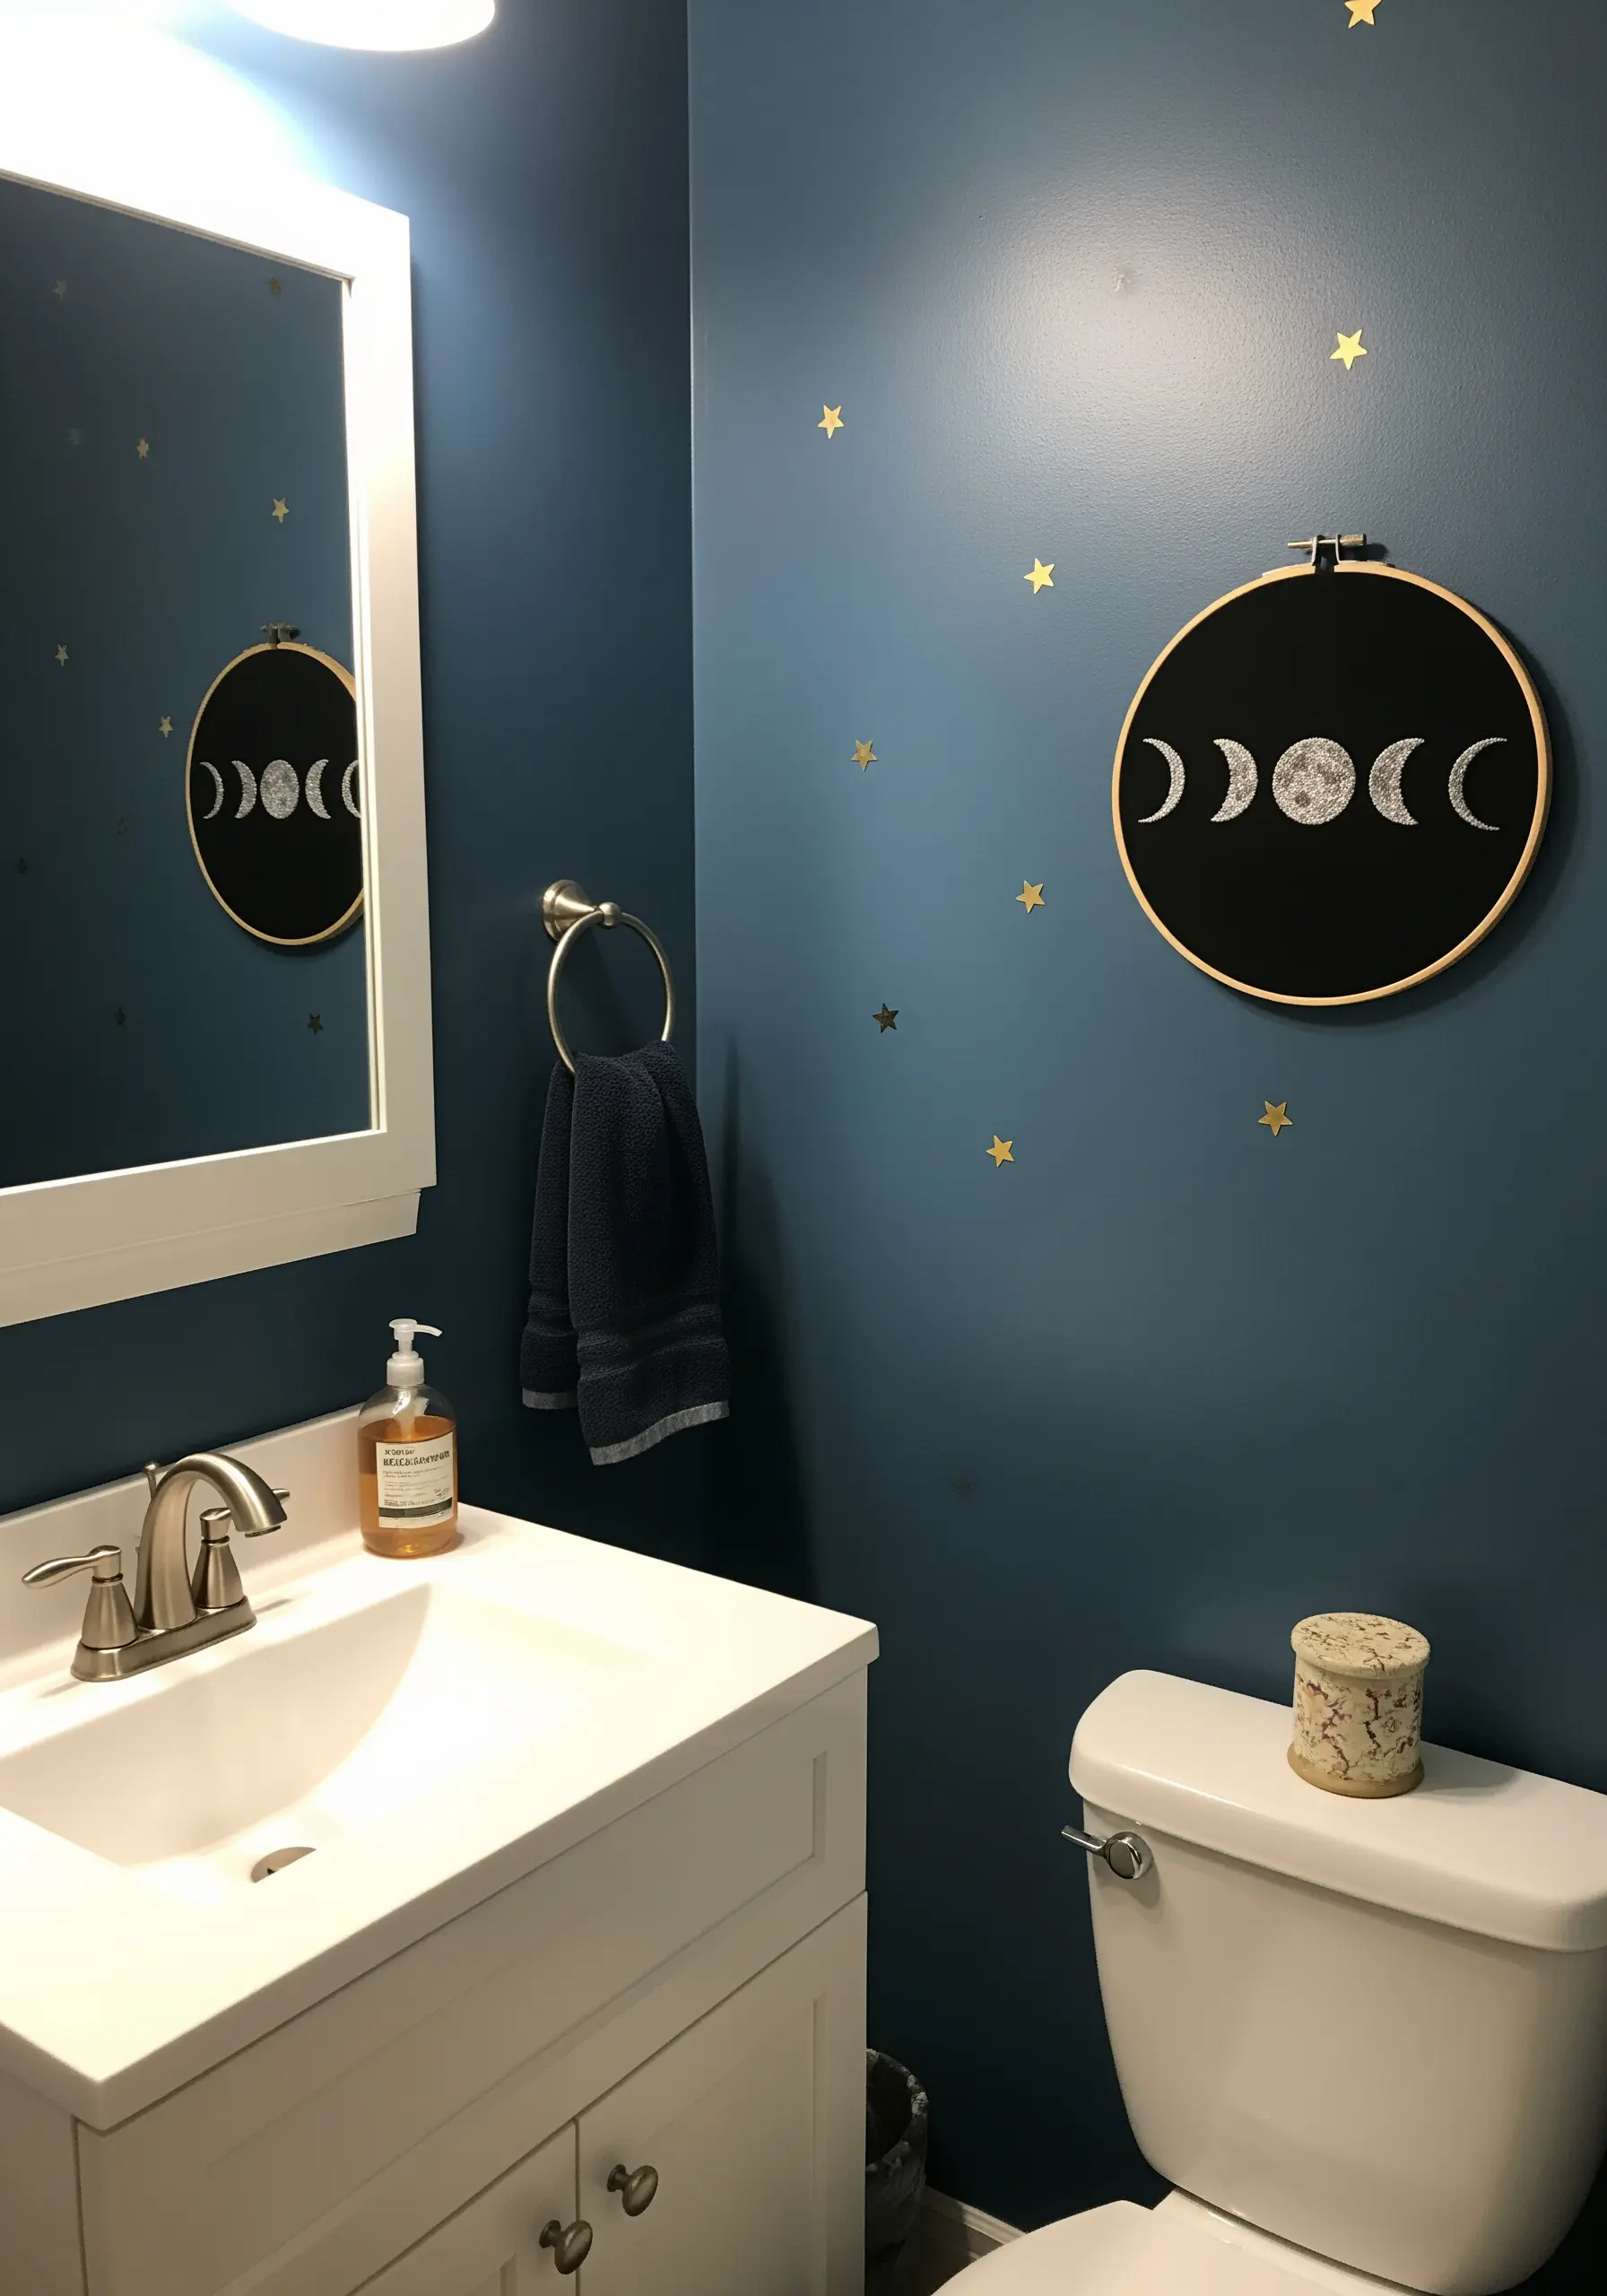
Make moon phases glow by stitching them on black or deep navy fabric for maximum contrast.
Instead of a simple satin stitch, fill the full moon with a dense pattern of French knots and seed stitches using white, silver, and light grey threads.
This creates a wonderfully tactile, cratered texture that mimics the real lunar surface.
For the crescent moons, use a smooth, tight satin stitch to create a sharp, clean edge against the dark background.
11. Blend Colors for a Feathered Effect
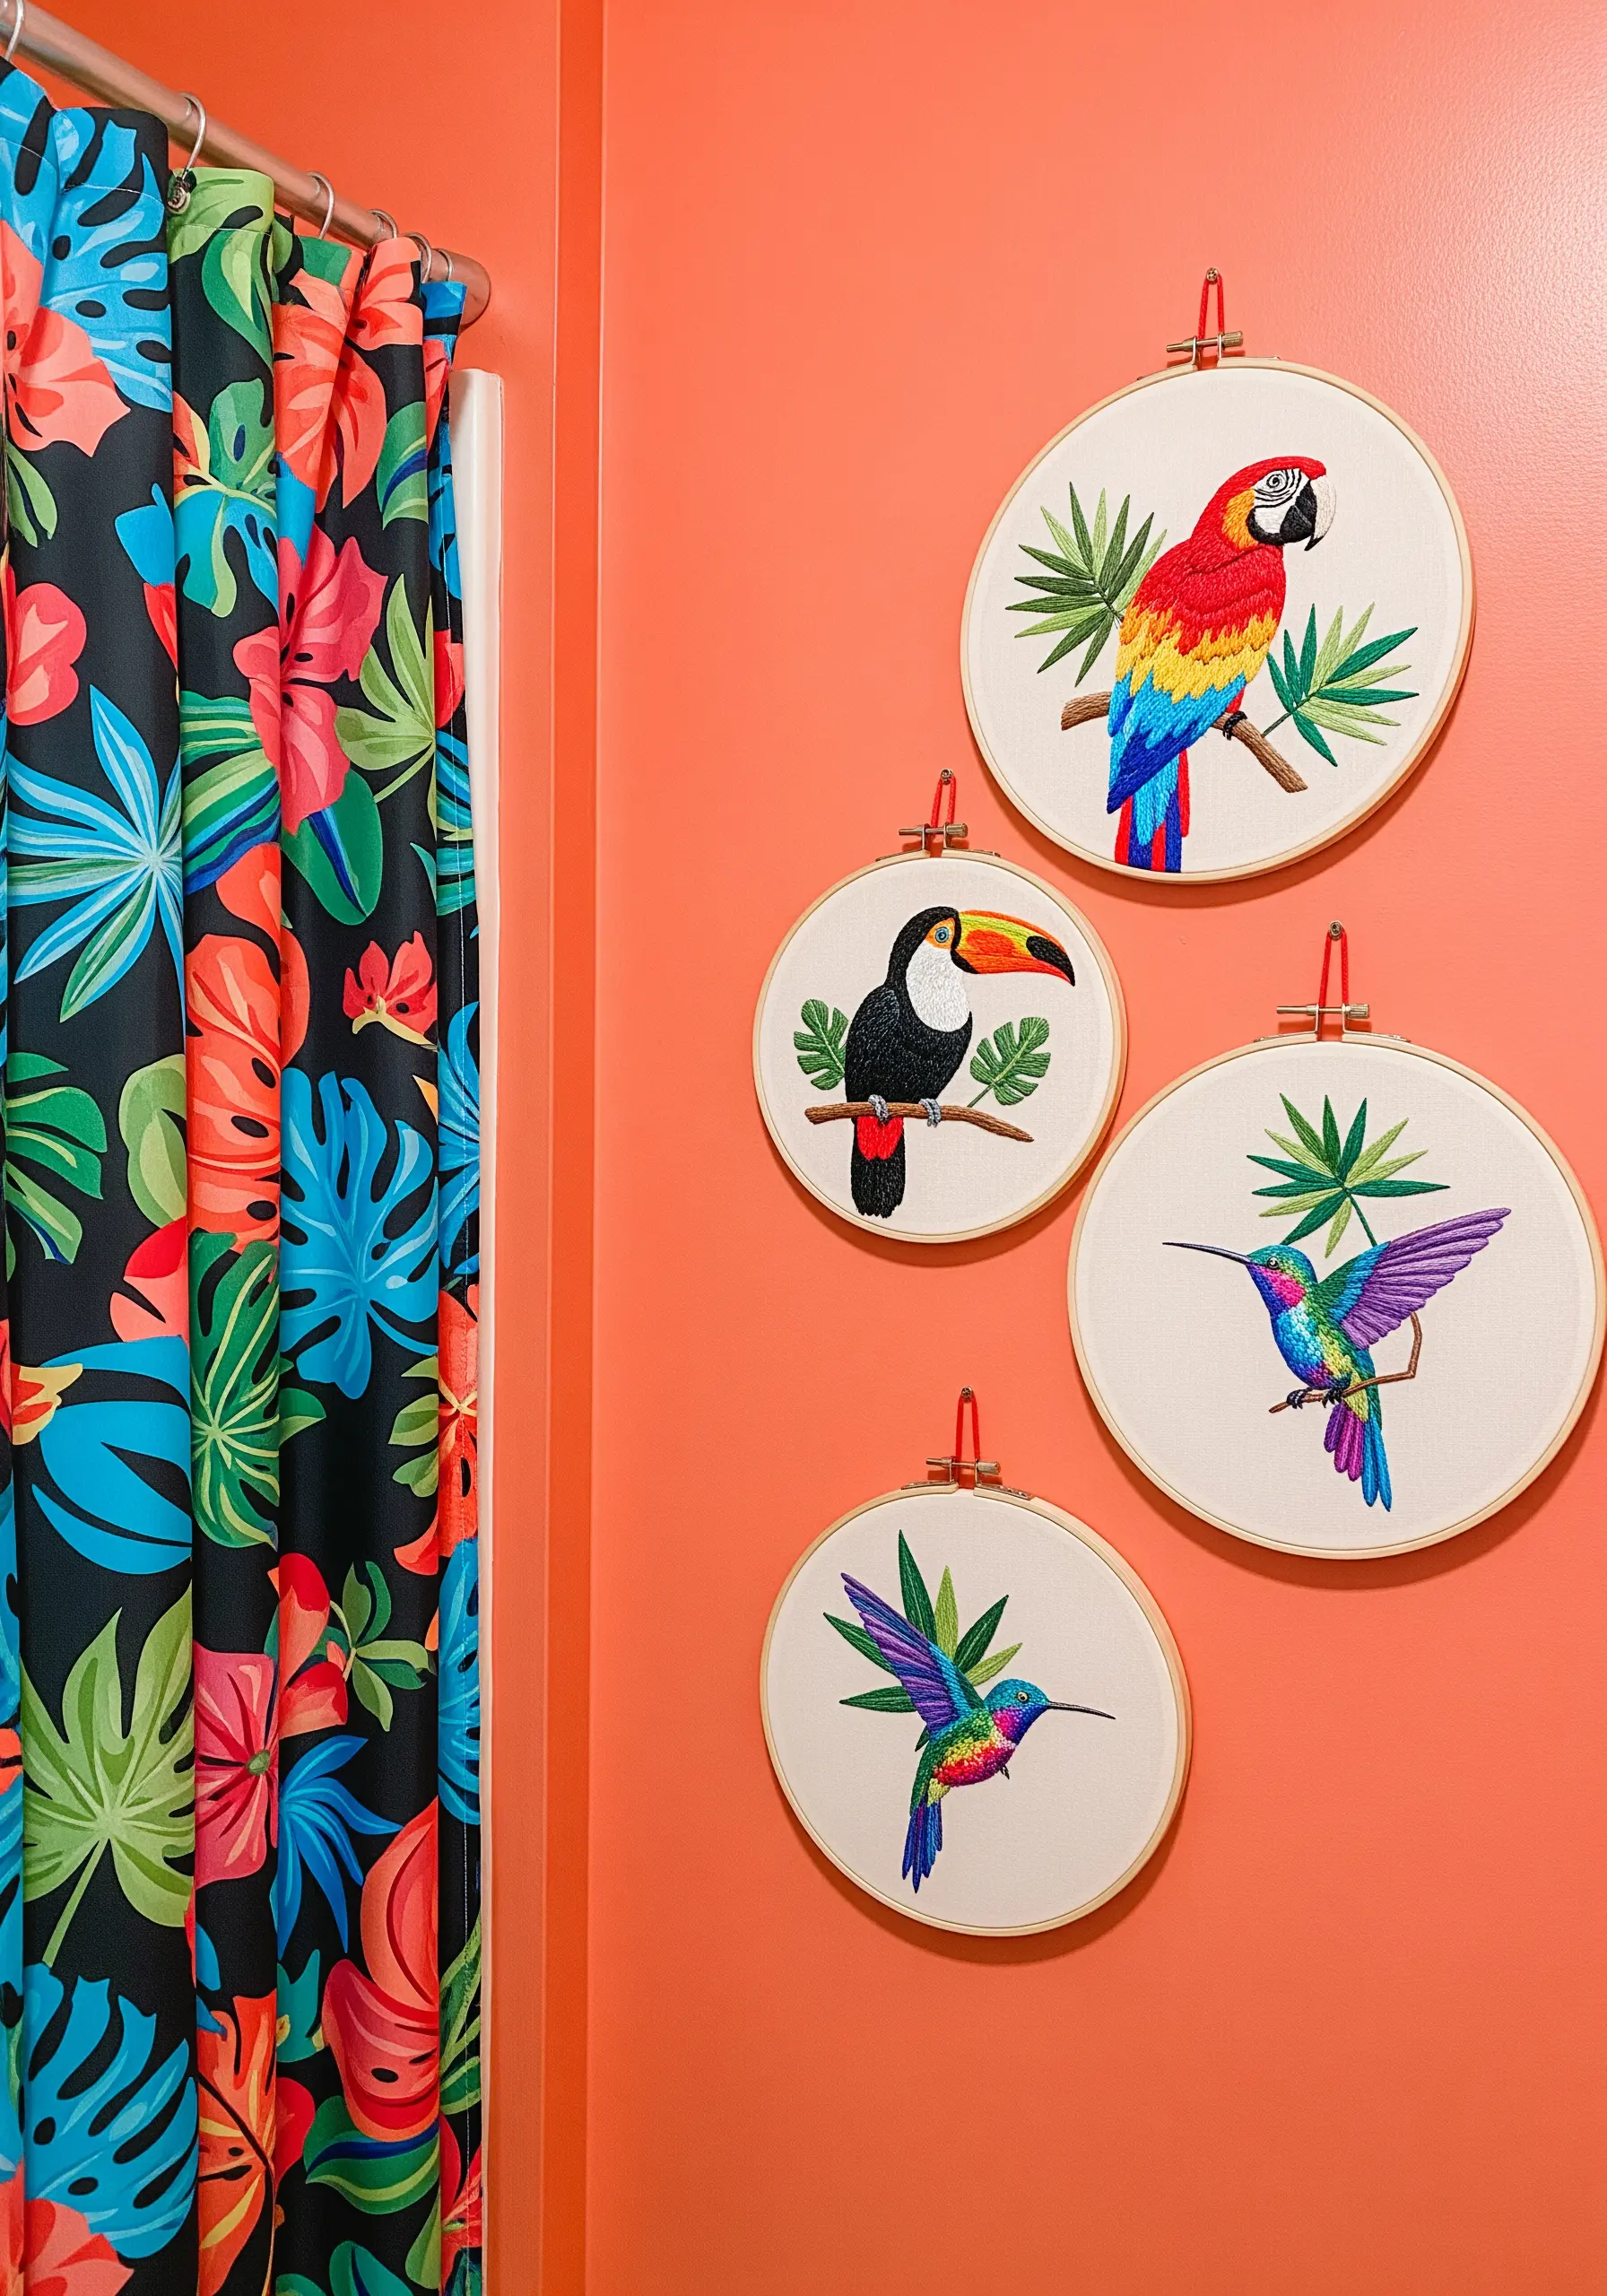
To embroider realistic birds, rely on thread blending to create soft transitions between colors.
Use the long-and-short stitch with a single strand of floss, introducing new colors gradually to mimic the subtle variegation in feathers.
Don’t be afraid to use bold, vibrant floss; the blending technique will soften the transitions and make the colors look natural rather than jarring.
Displaying multiple bird hoops together as a gallery wall creates a cheerful, tropical focal point.
12. Explore Texture with Whitework Embroidery
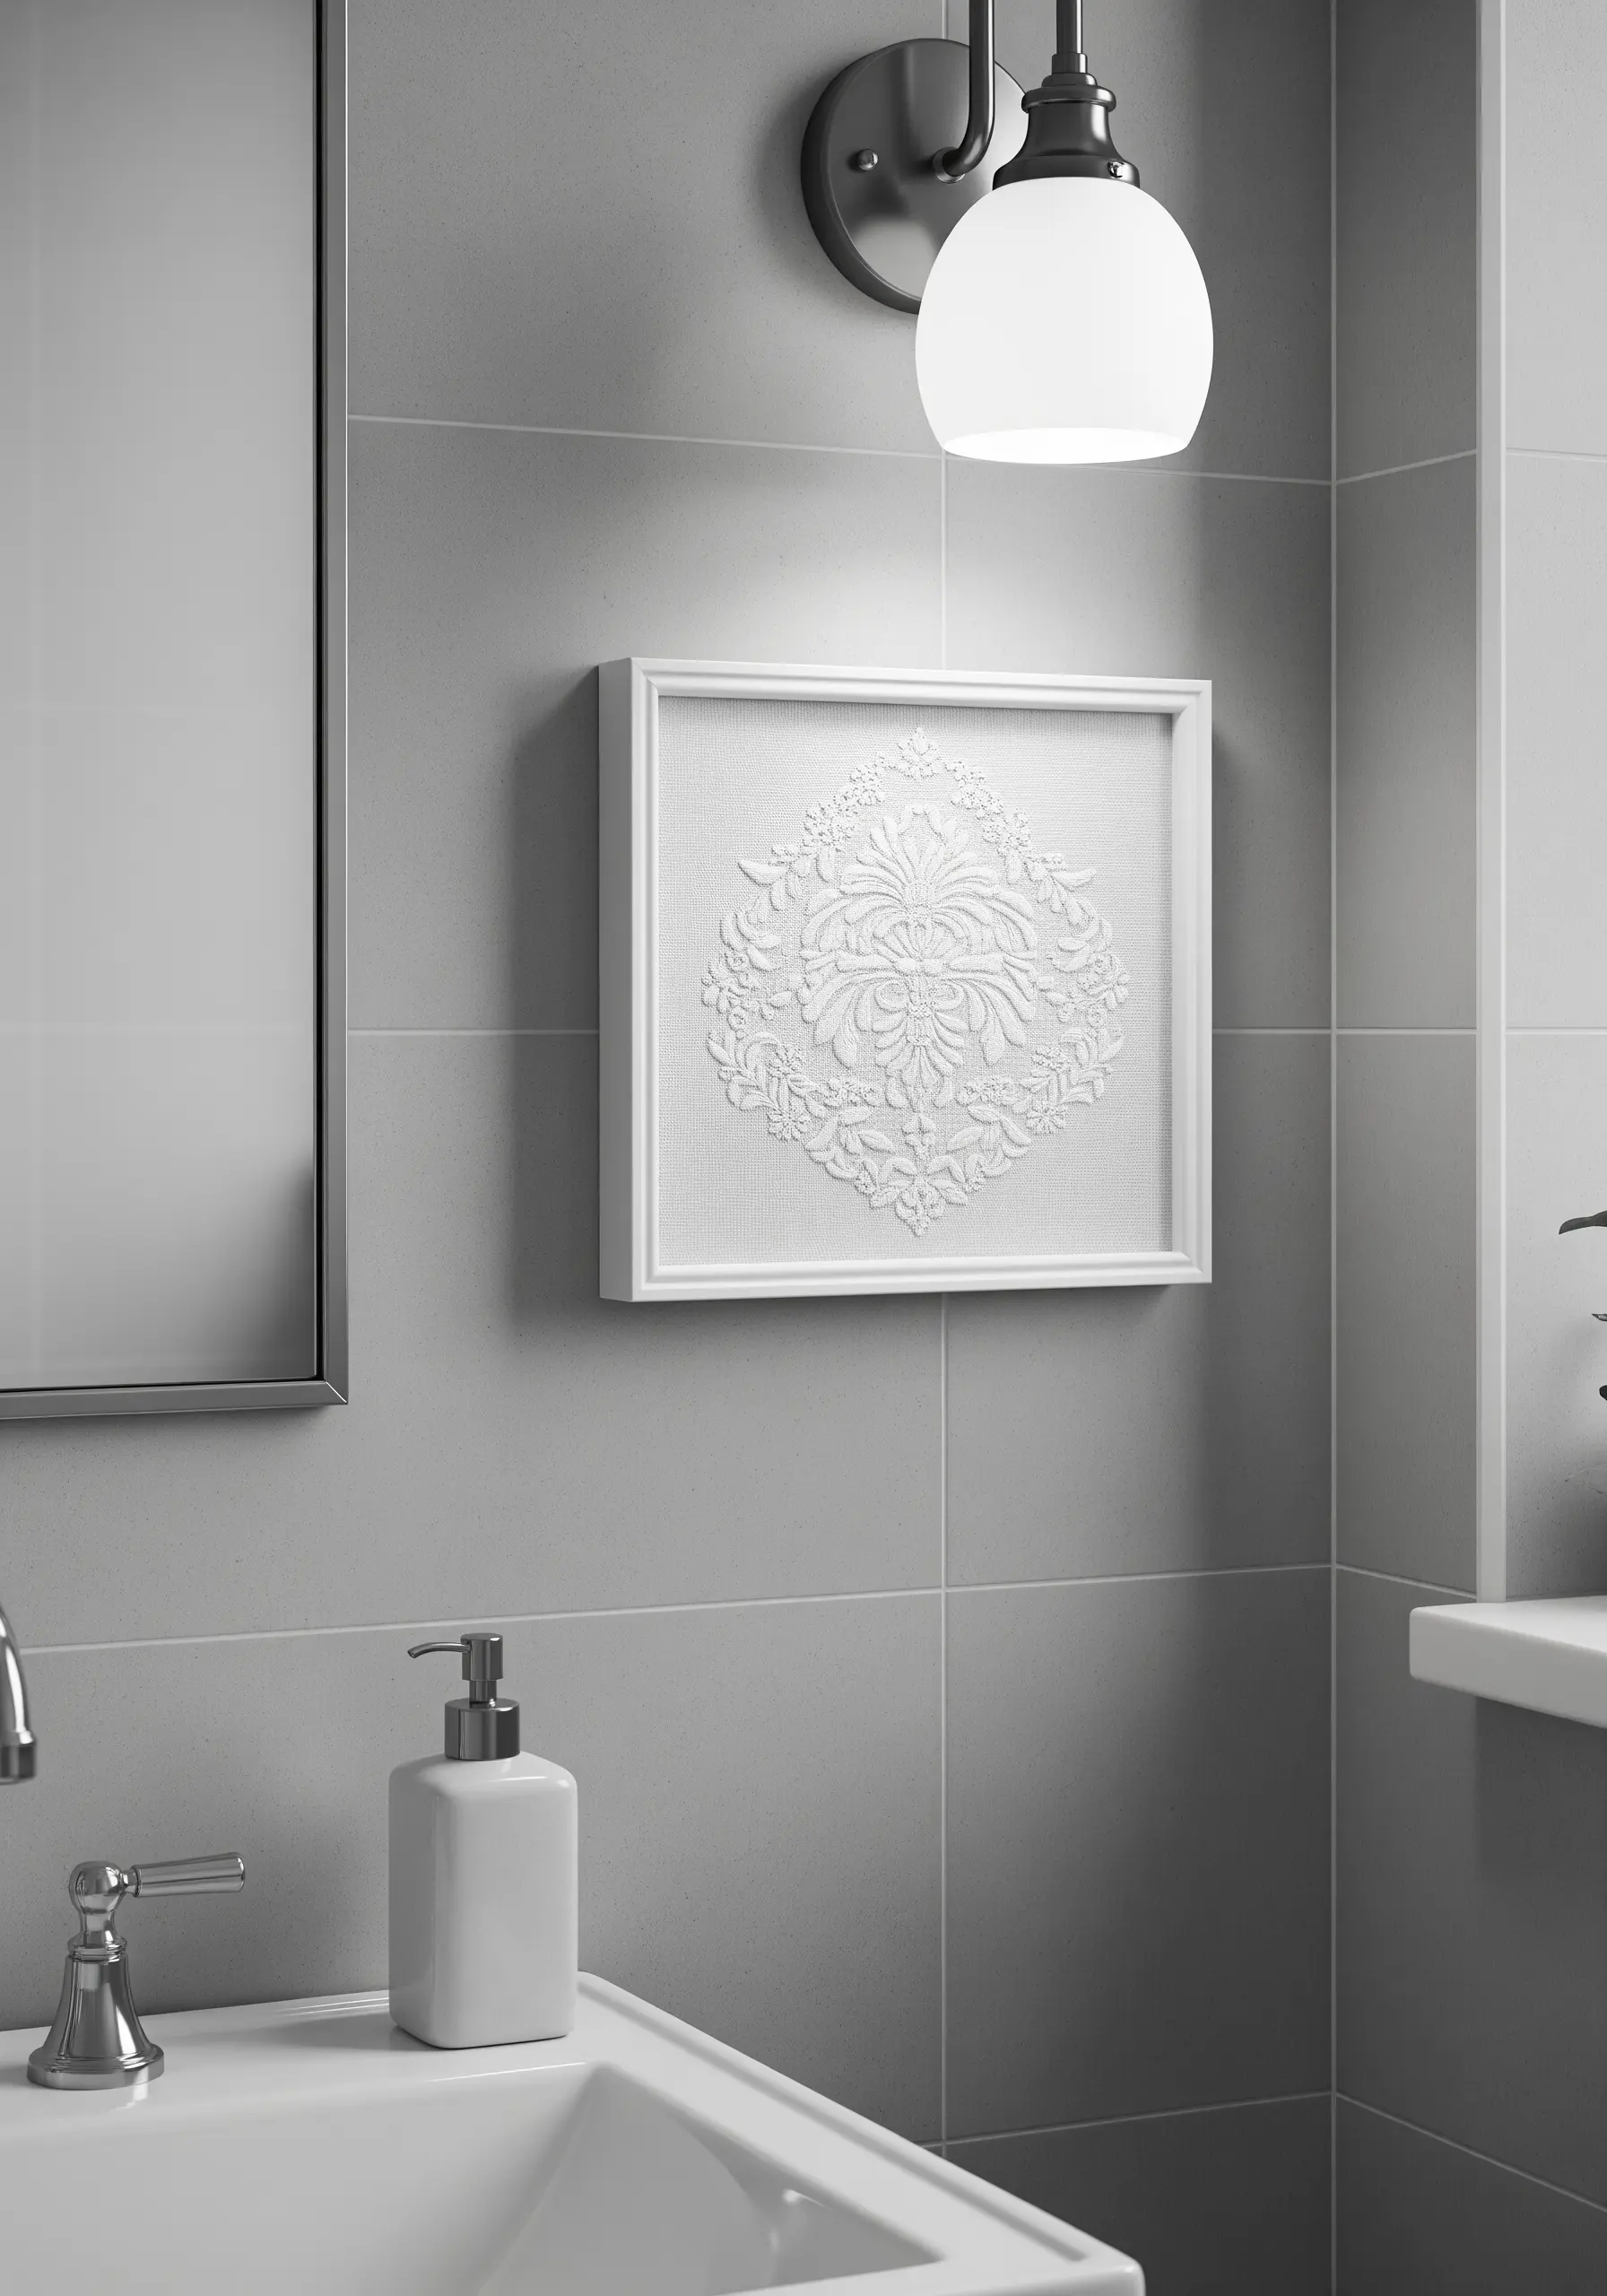
Create a subtle, elegant statement with whitework—the technique of stitching white thread on white fabric.
The beauty of this style is in its texture, not its color.
Use a variety of raised stitches like satin stitch, French knots, and stem stitch to build a dimensional, damask-like pattern.
The finished piece plays with light and shadow, offering a sophisticated, architectural feel that is both modern and timeless.
13. Modernize Cross-Stitch with Bold Outlines
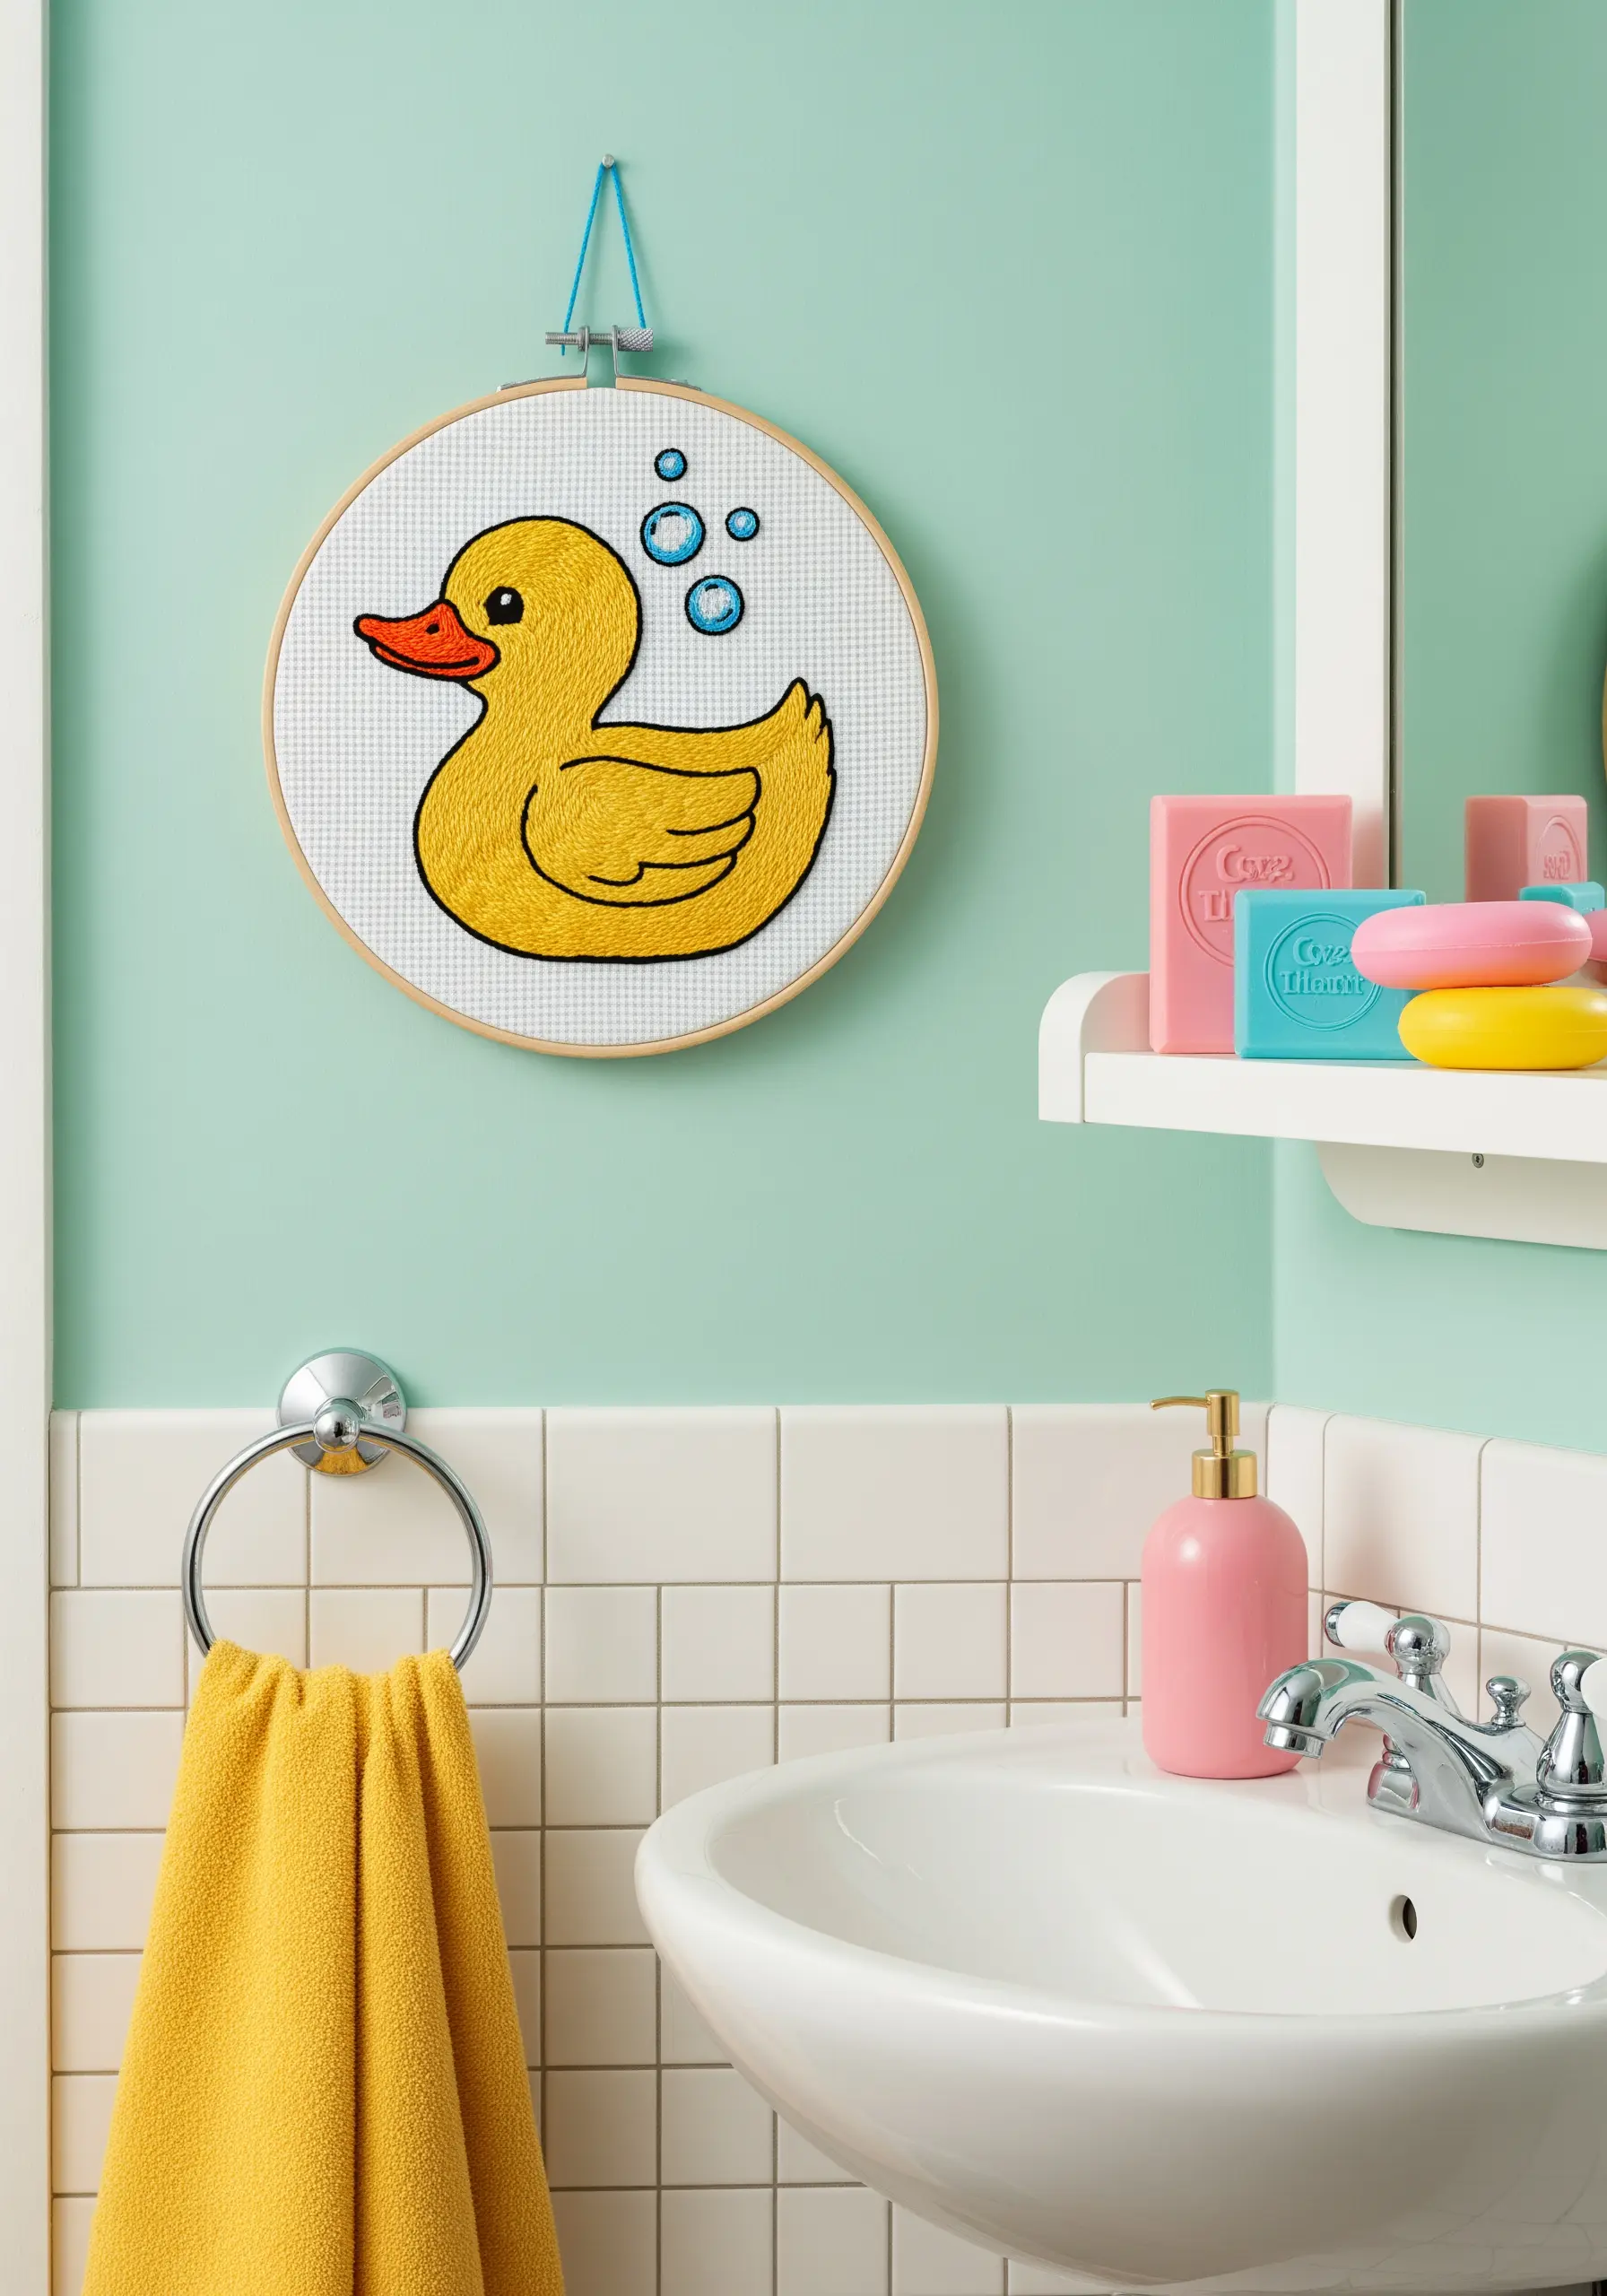
Give a classic cross-stitch piece a contemporary, cartoon-like feel by adding a clean, bold backstitch outline.
Stitch the main design on Aida cloth as you normally would, using bright, saturated colors.
Then, trace the entire outer edge of your motif with a thick, dark thread (like black or navy) using a simple backstitch.
This small addition makes the colors pop and gives the design a crisp, graphic quality perfect for a playful space.
14. Capture Botanical Details with Fishbone Stitch
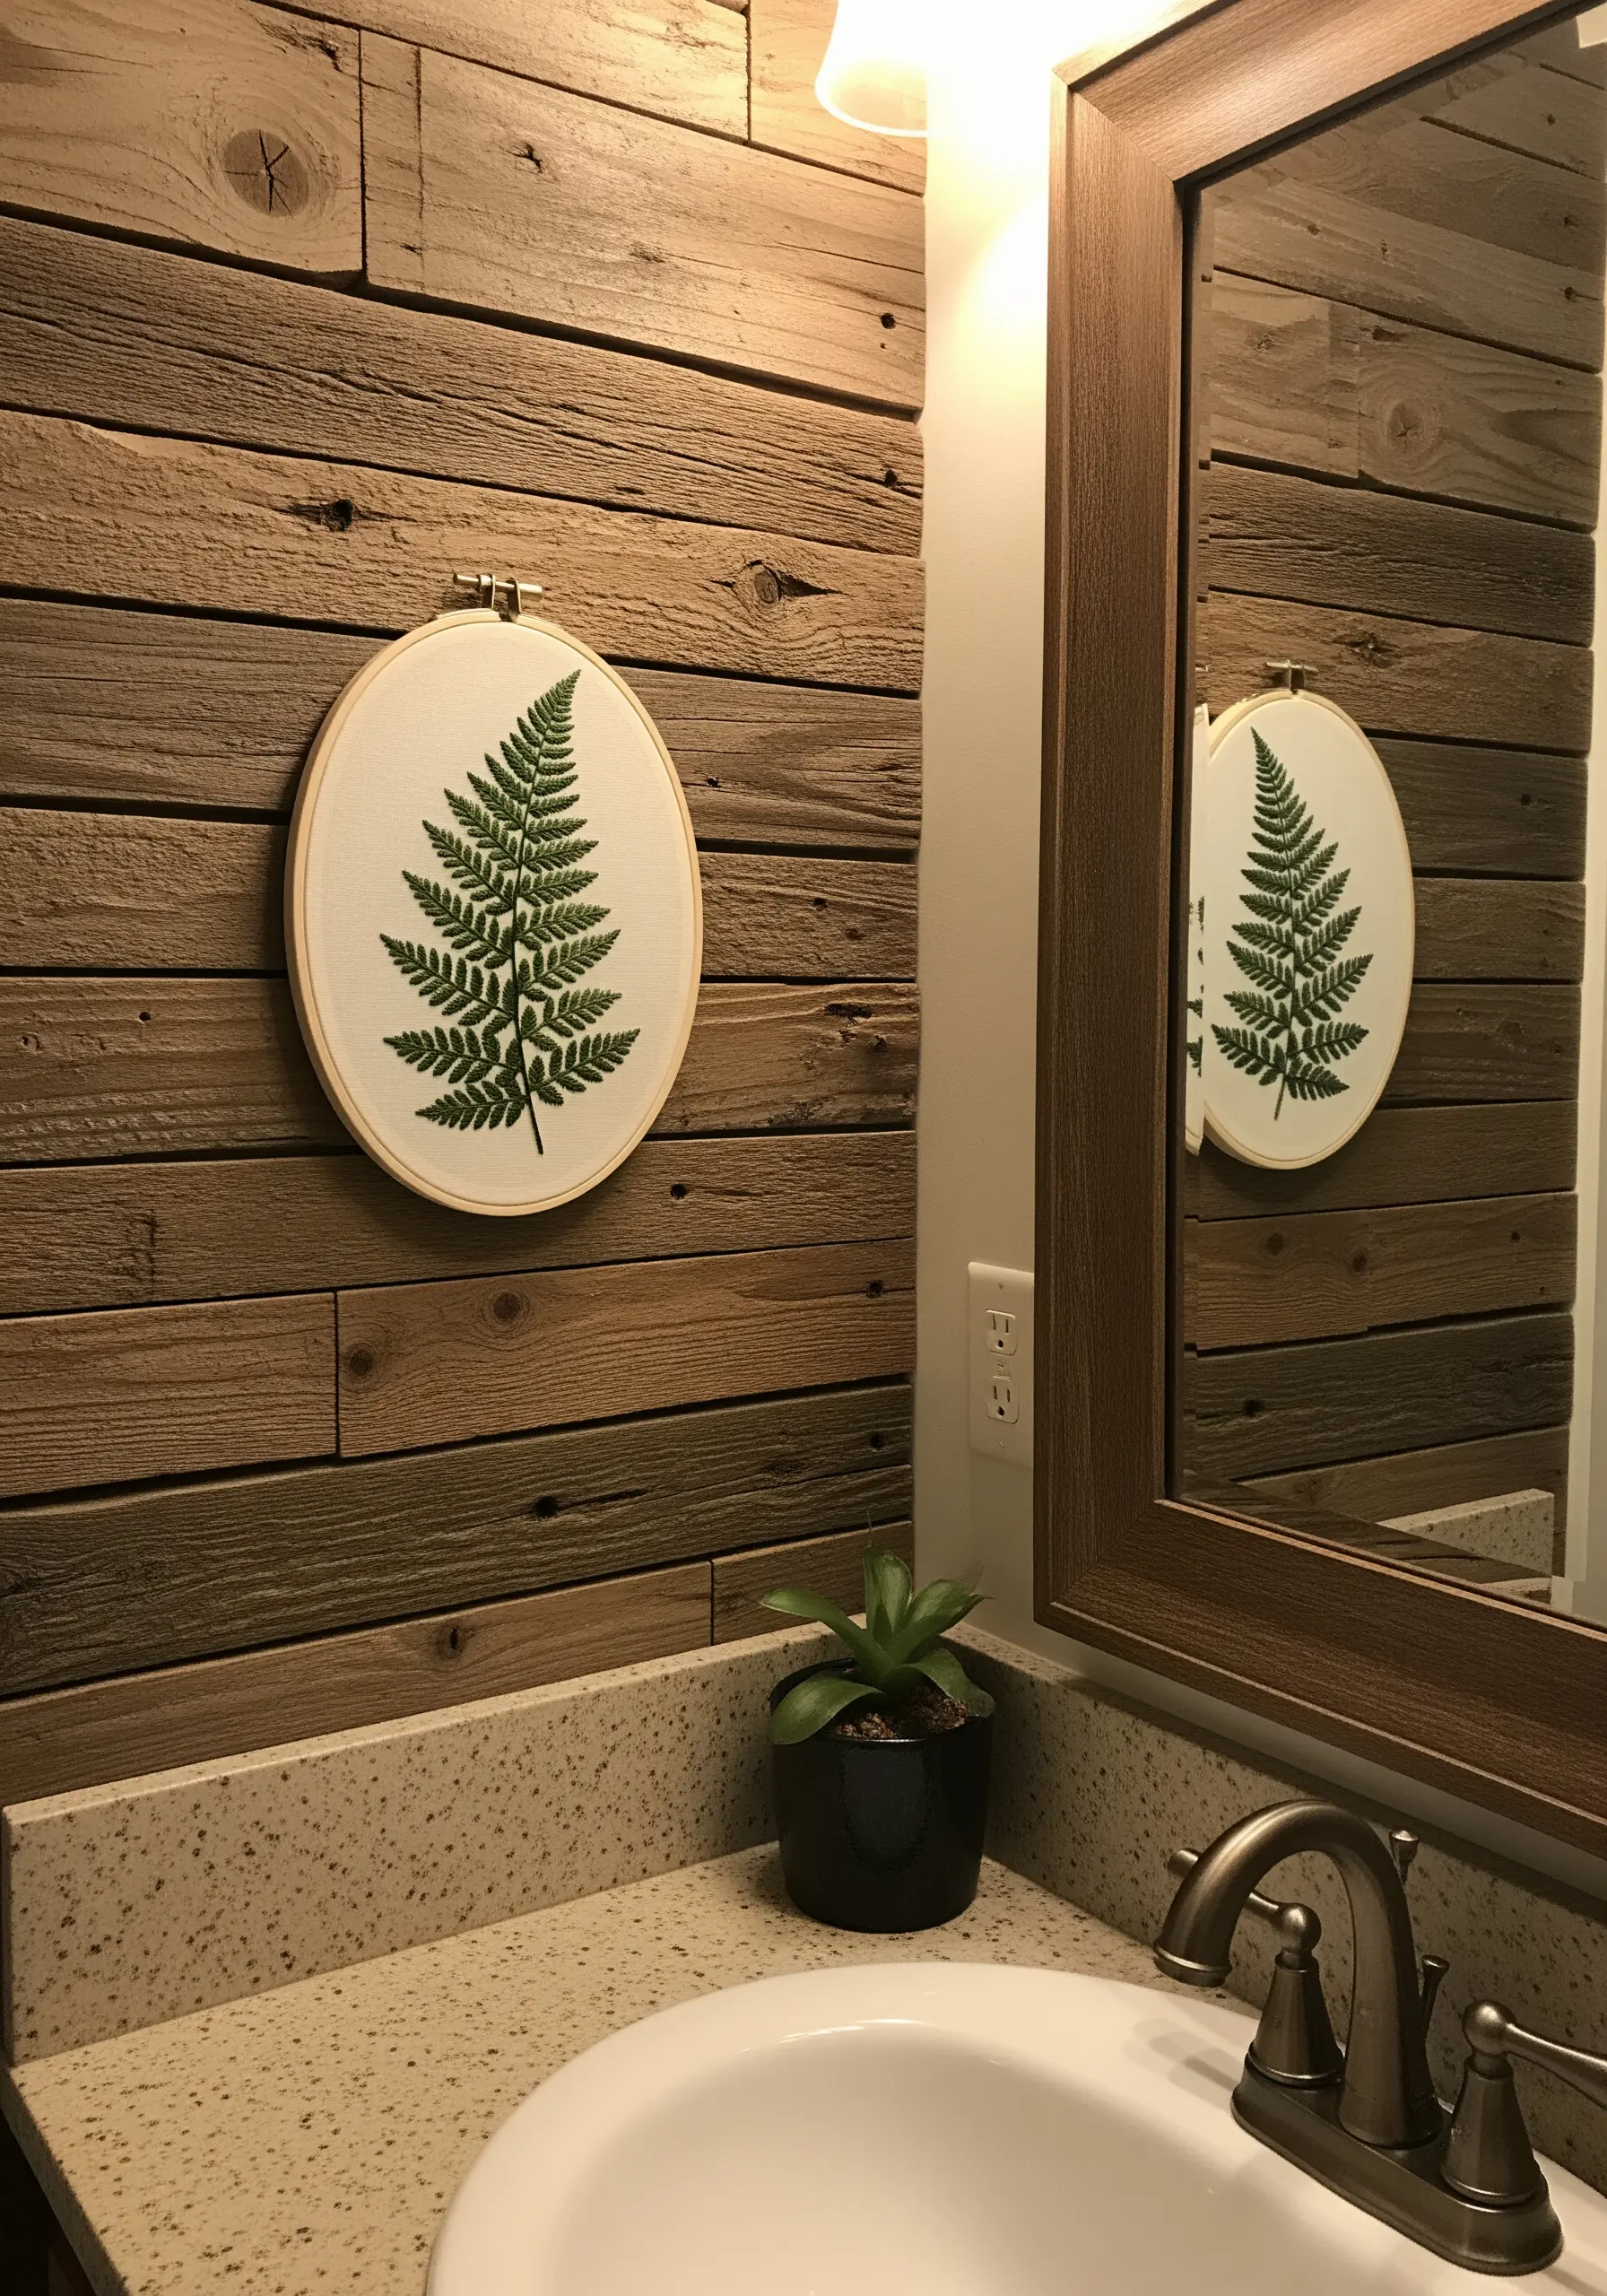
For intricate leaves like ferns, the fishbone stitch is your most powerful tool.
This single stitch creates both the central vein and the leafy fronds in one fluid motion, resulting in a beautifully symmetrical and realistic leaf.
Use two or three strands of a rich green floss to give the fern substance without losing its delicate appearance.
The simplicity of the motif allows it to stand out against a textured background like reclaimed wood.
15. Define a Skyline with Minimalist Line Art
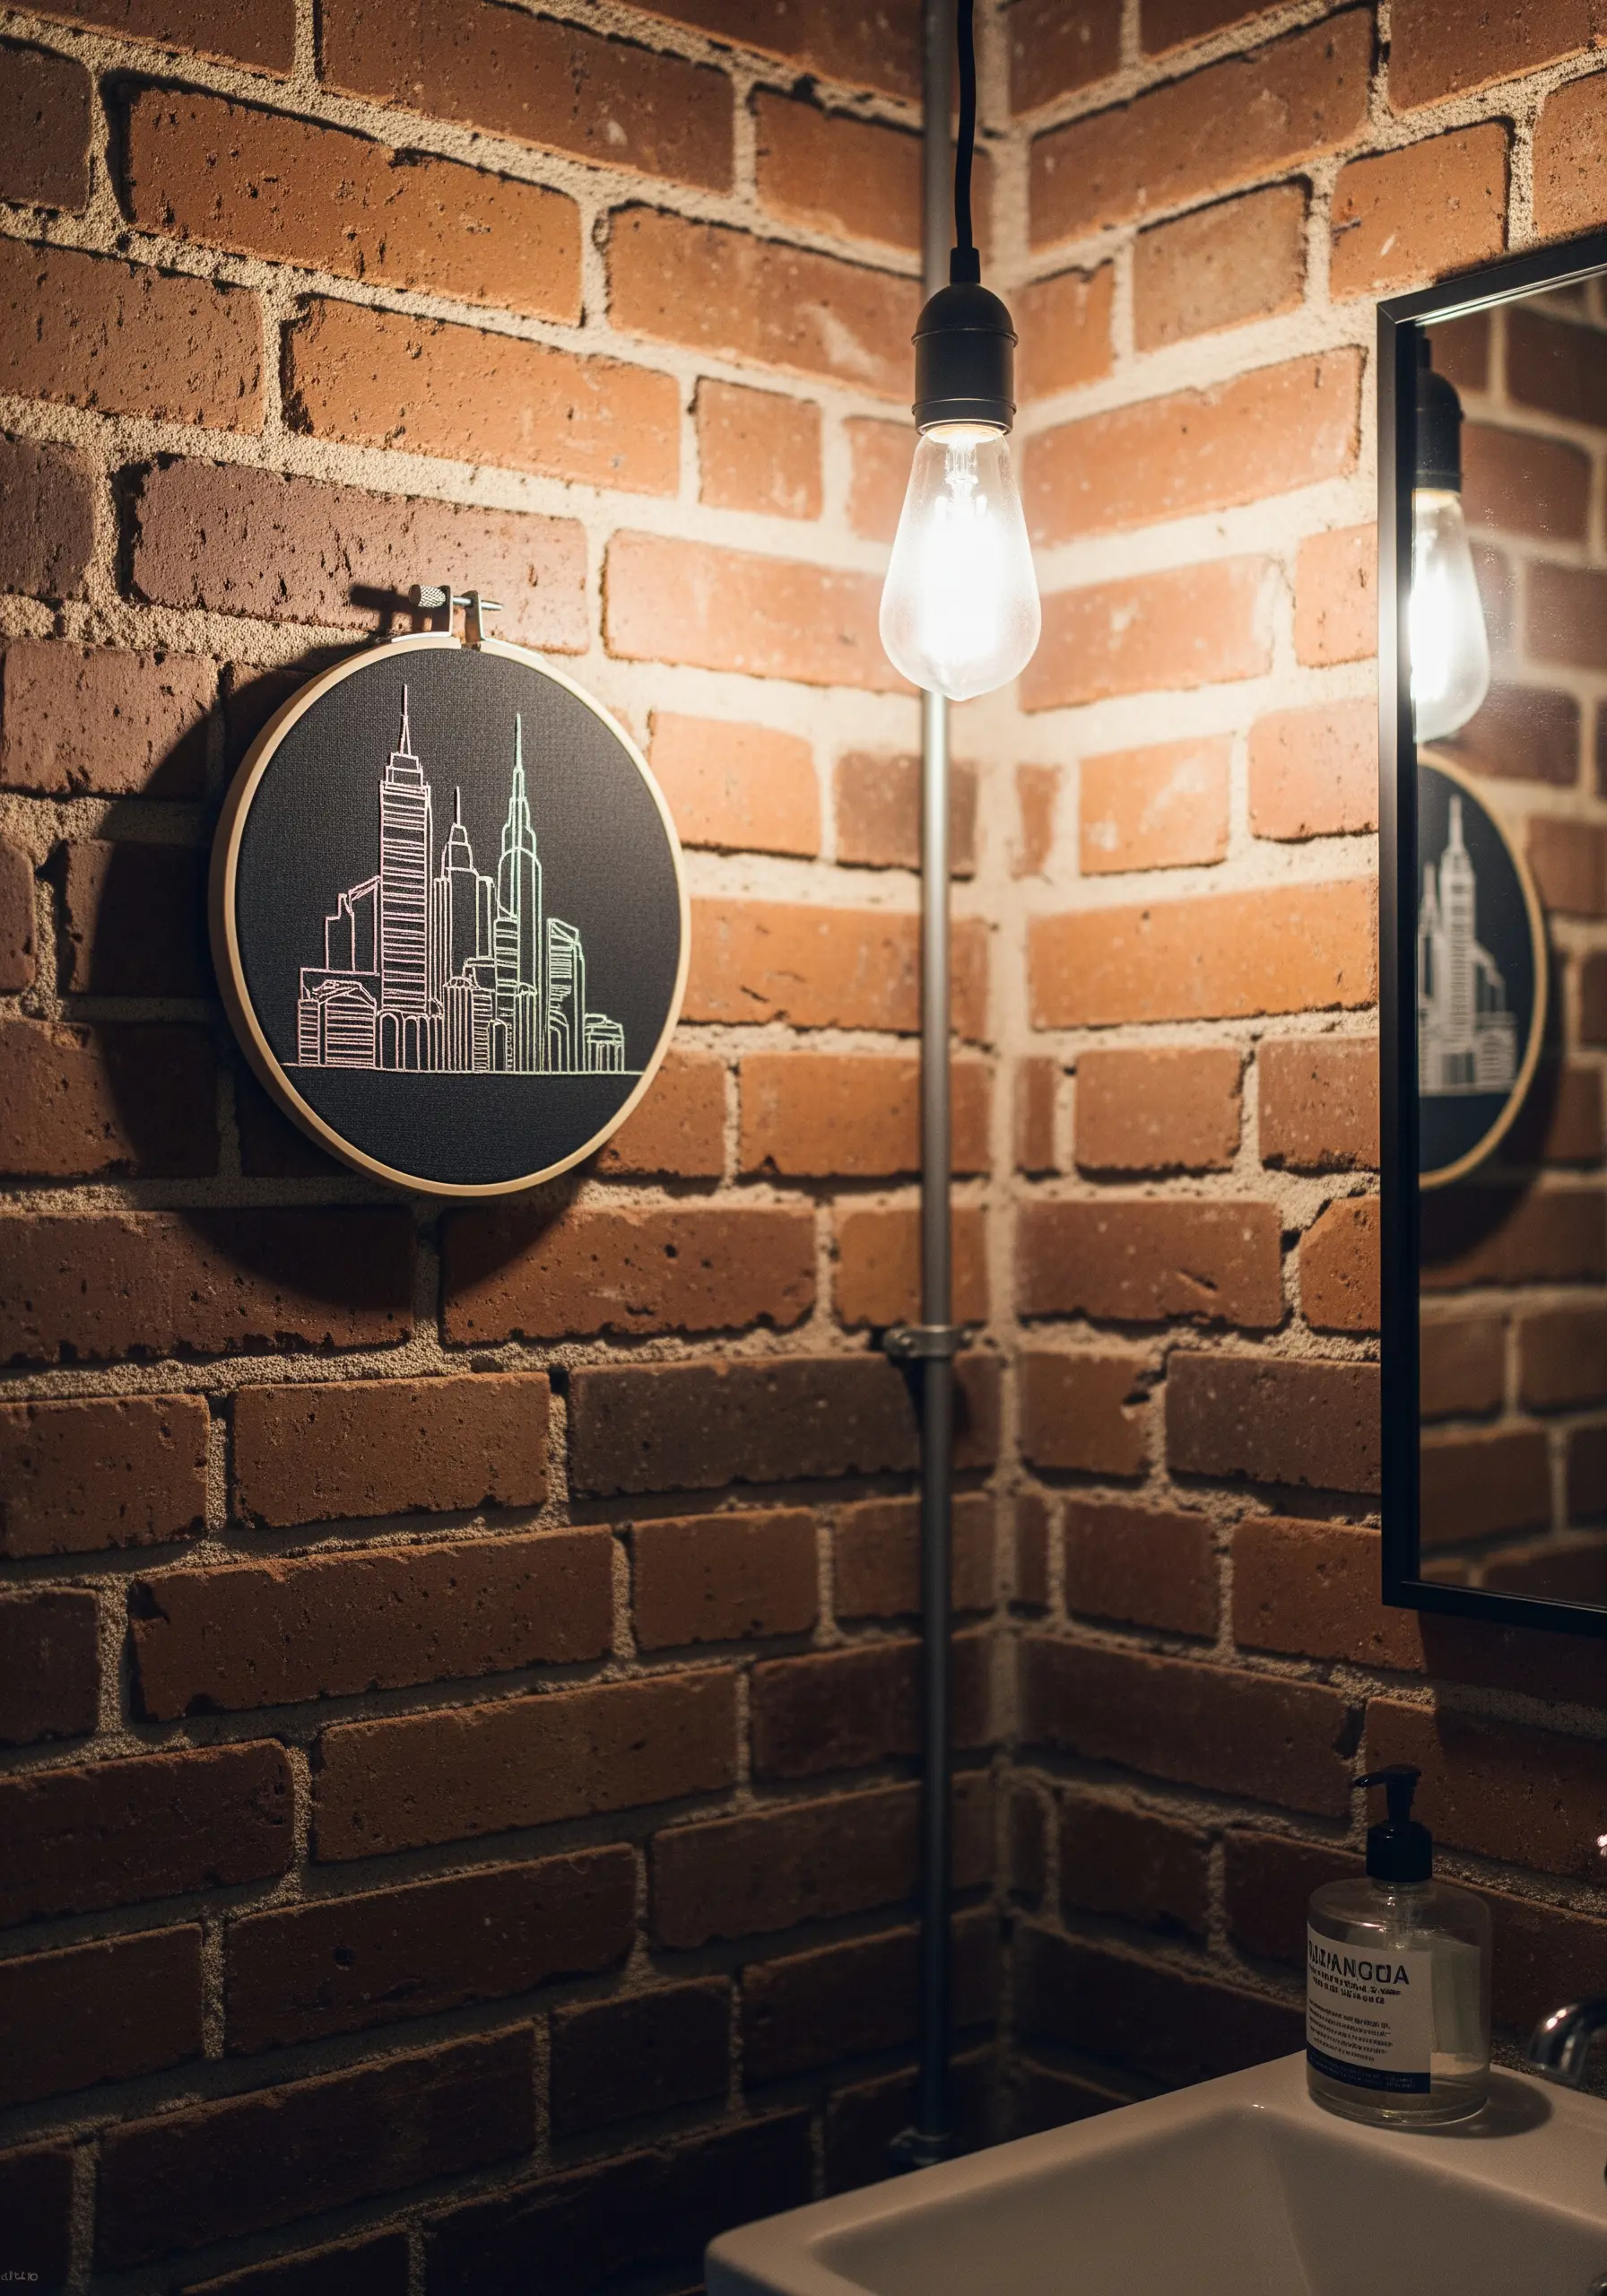
Suggest a complex cityscape using only clean, simple lines stitched on a dark background.
Use a color gradient—from pink to blue, for example—to add visual interest and a sense of sunset or sunrise.
Vary the number of strands you use (from one to three) to create a sense of perspective, with thicker lines for closer buildings and thinner lines for those in the distance.
This minimalist approach is impactful without being overwhelming, ideal for an industrial-chic bathroom.
16. Build Playful Dimension with Padded Satin Stitch
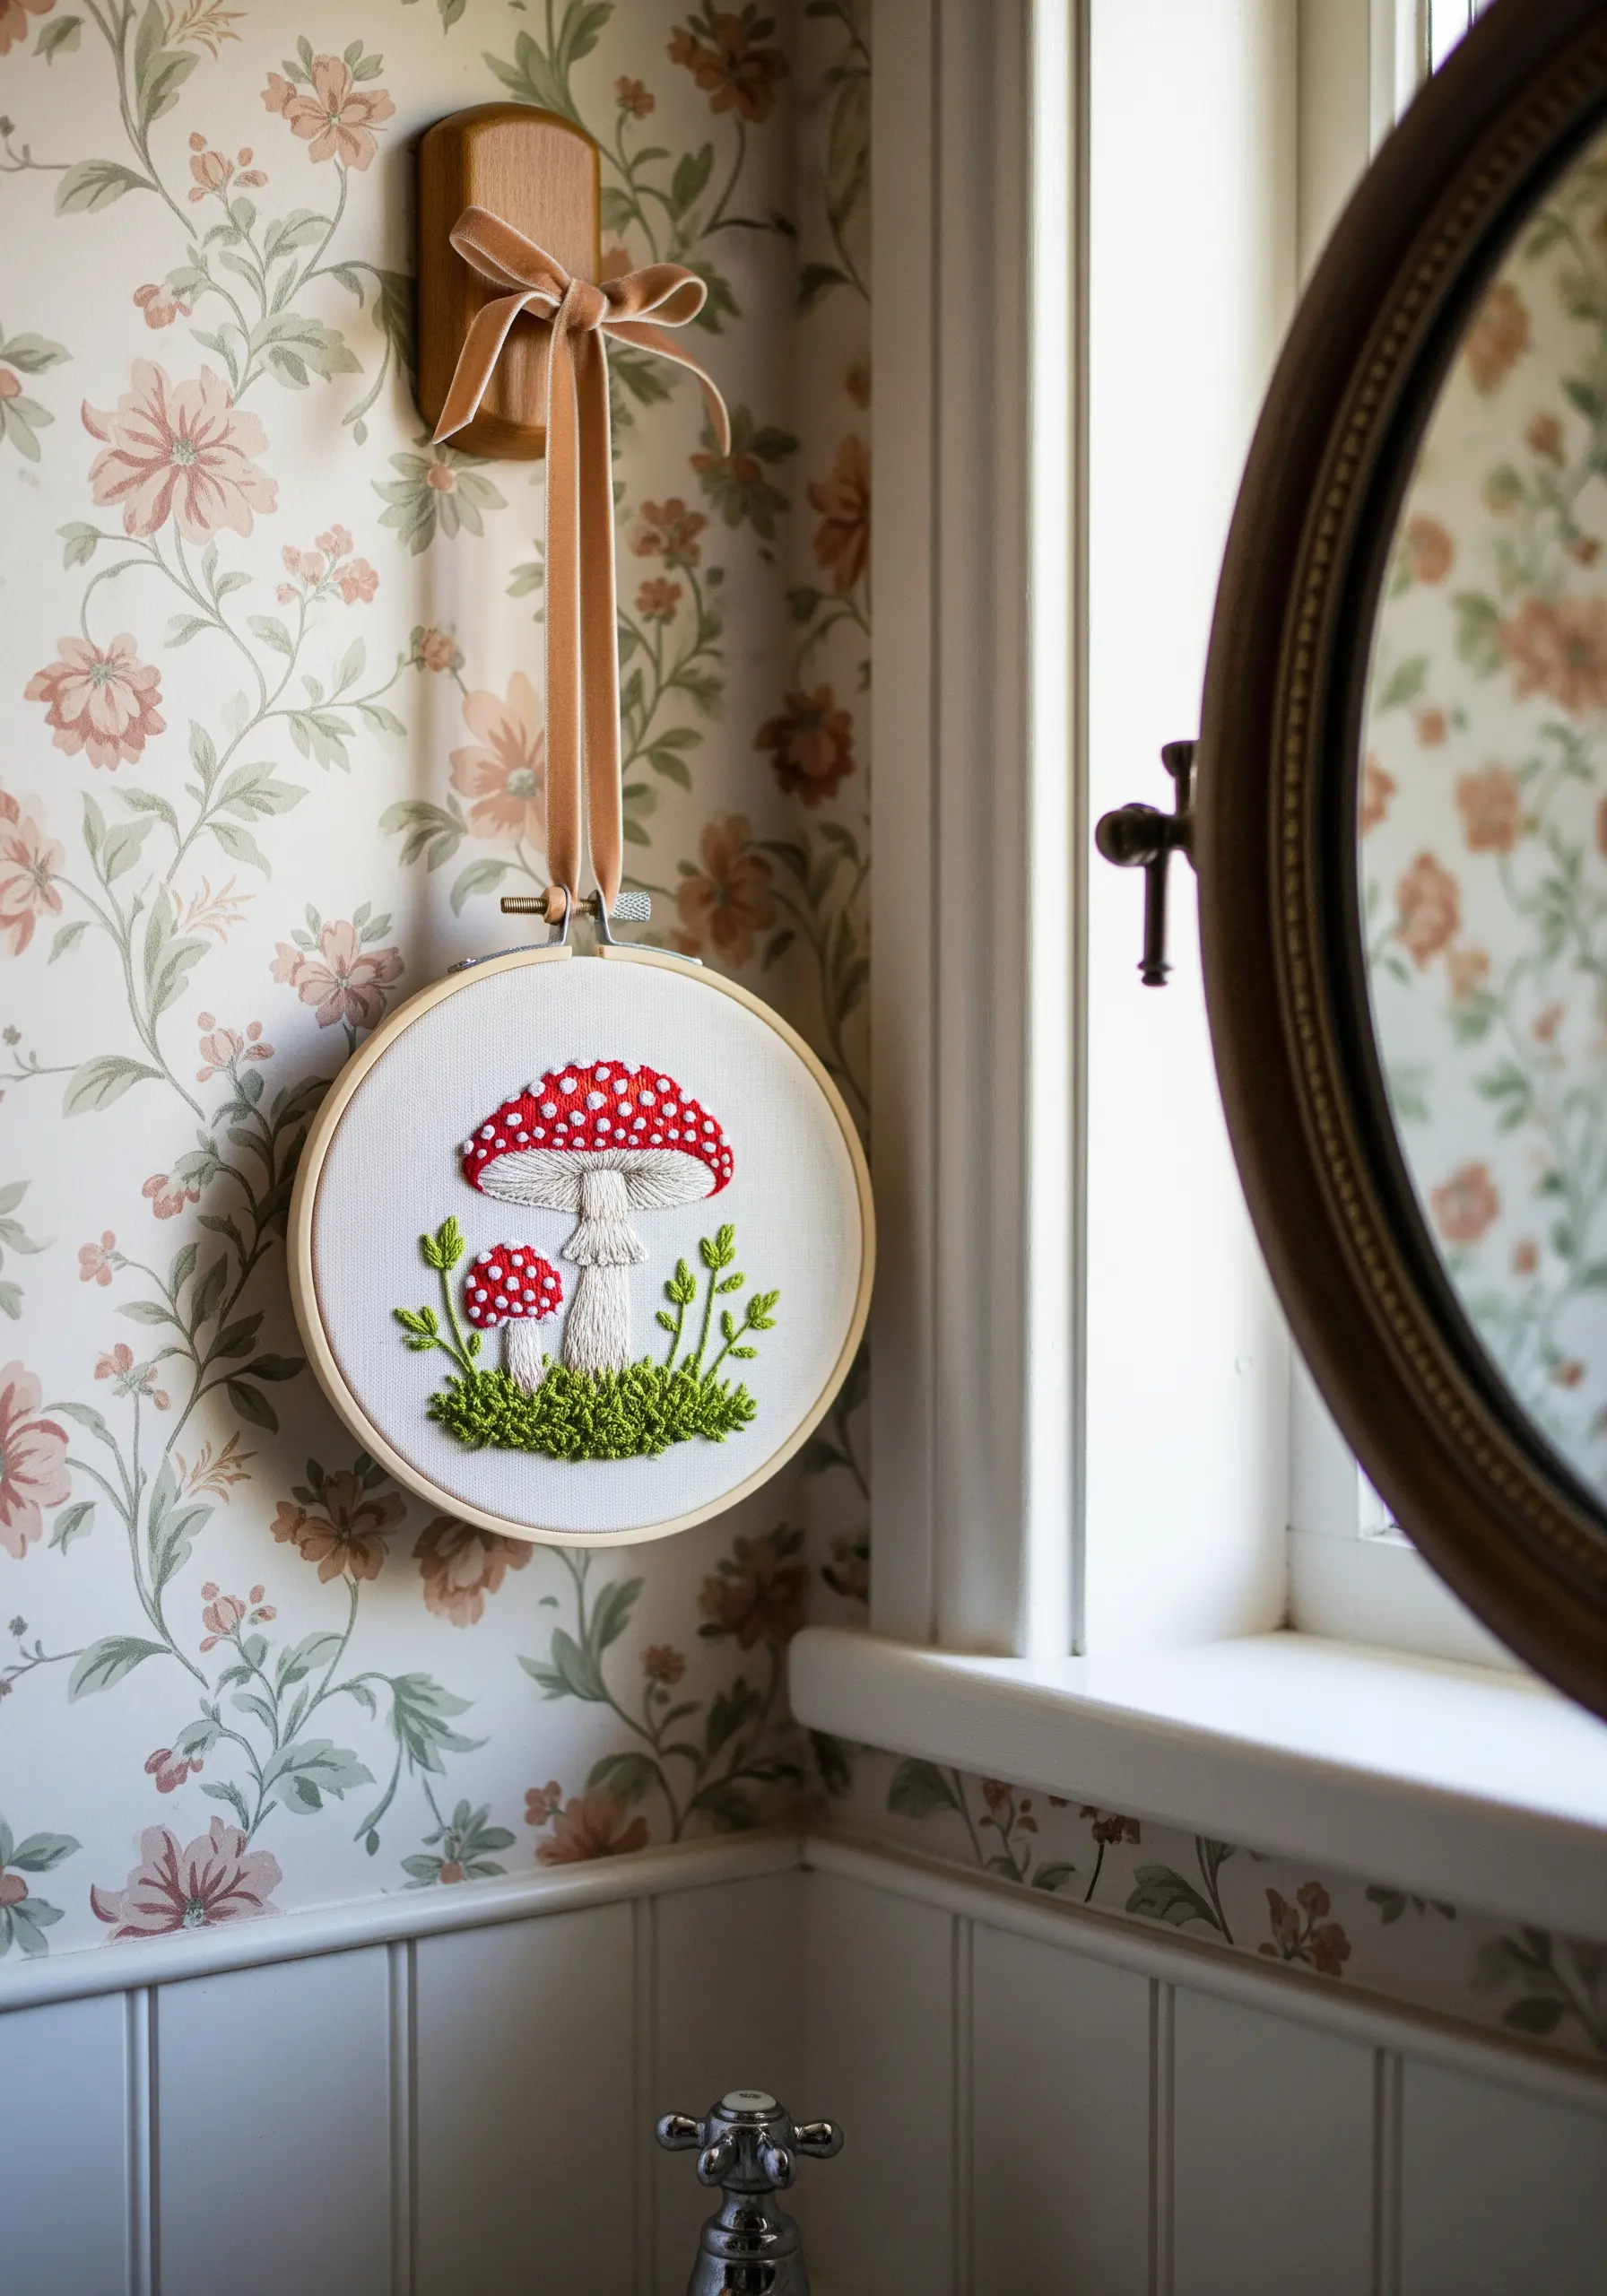
Give your toadstools a charming, 3D effect by using padded satin stitch for the caps.
First, create a base of small, underlying stitches (like seed stitches) within the shape you want to raise.
Then, cover this padding with smooth, even satin stitches. The base layer will lift the top stitches, creating a puffy, rounded surface.
Add French knots for the spots and loop stitches for the grass to complete this whimsical, tactile scene.
17. Stitch Fluid Cursive with Whipped Backstitch
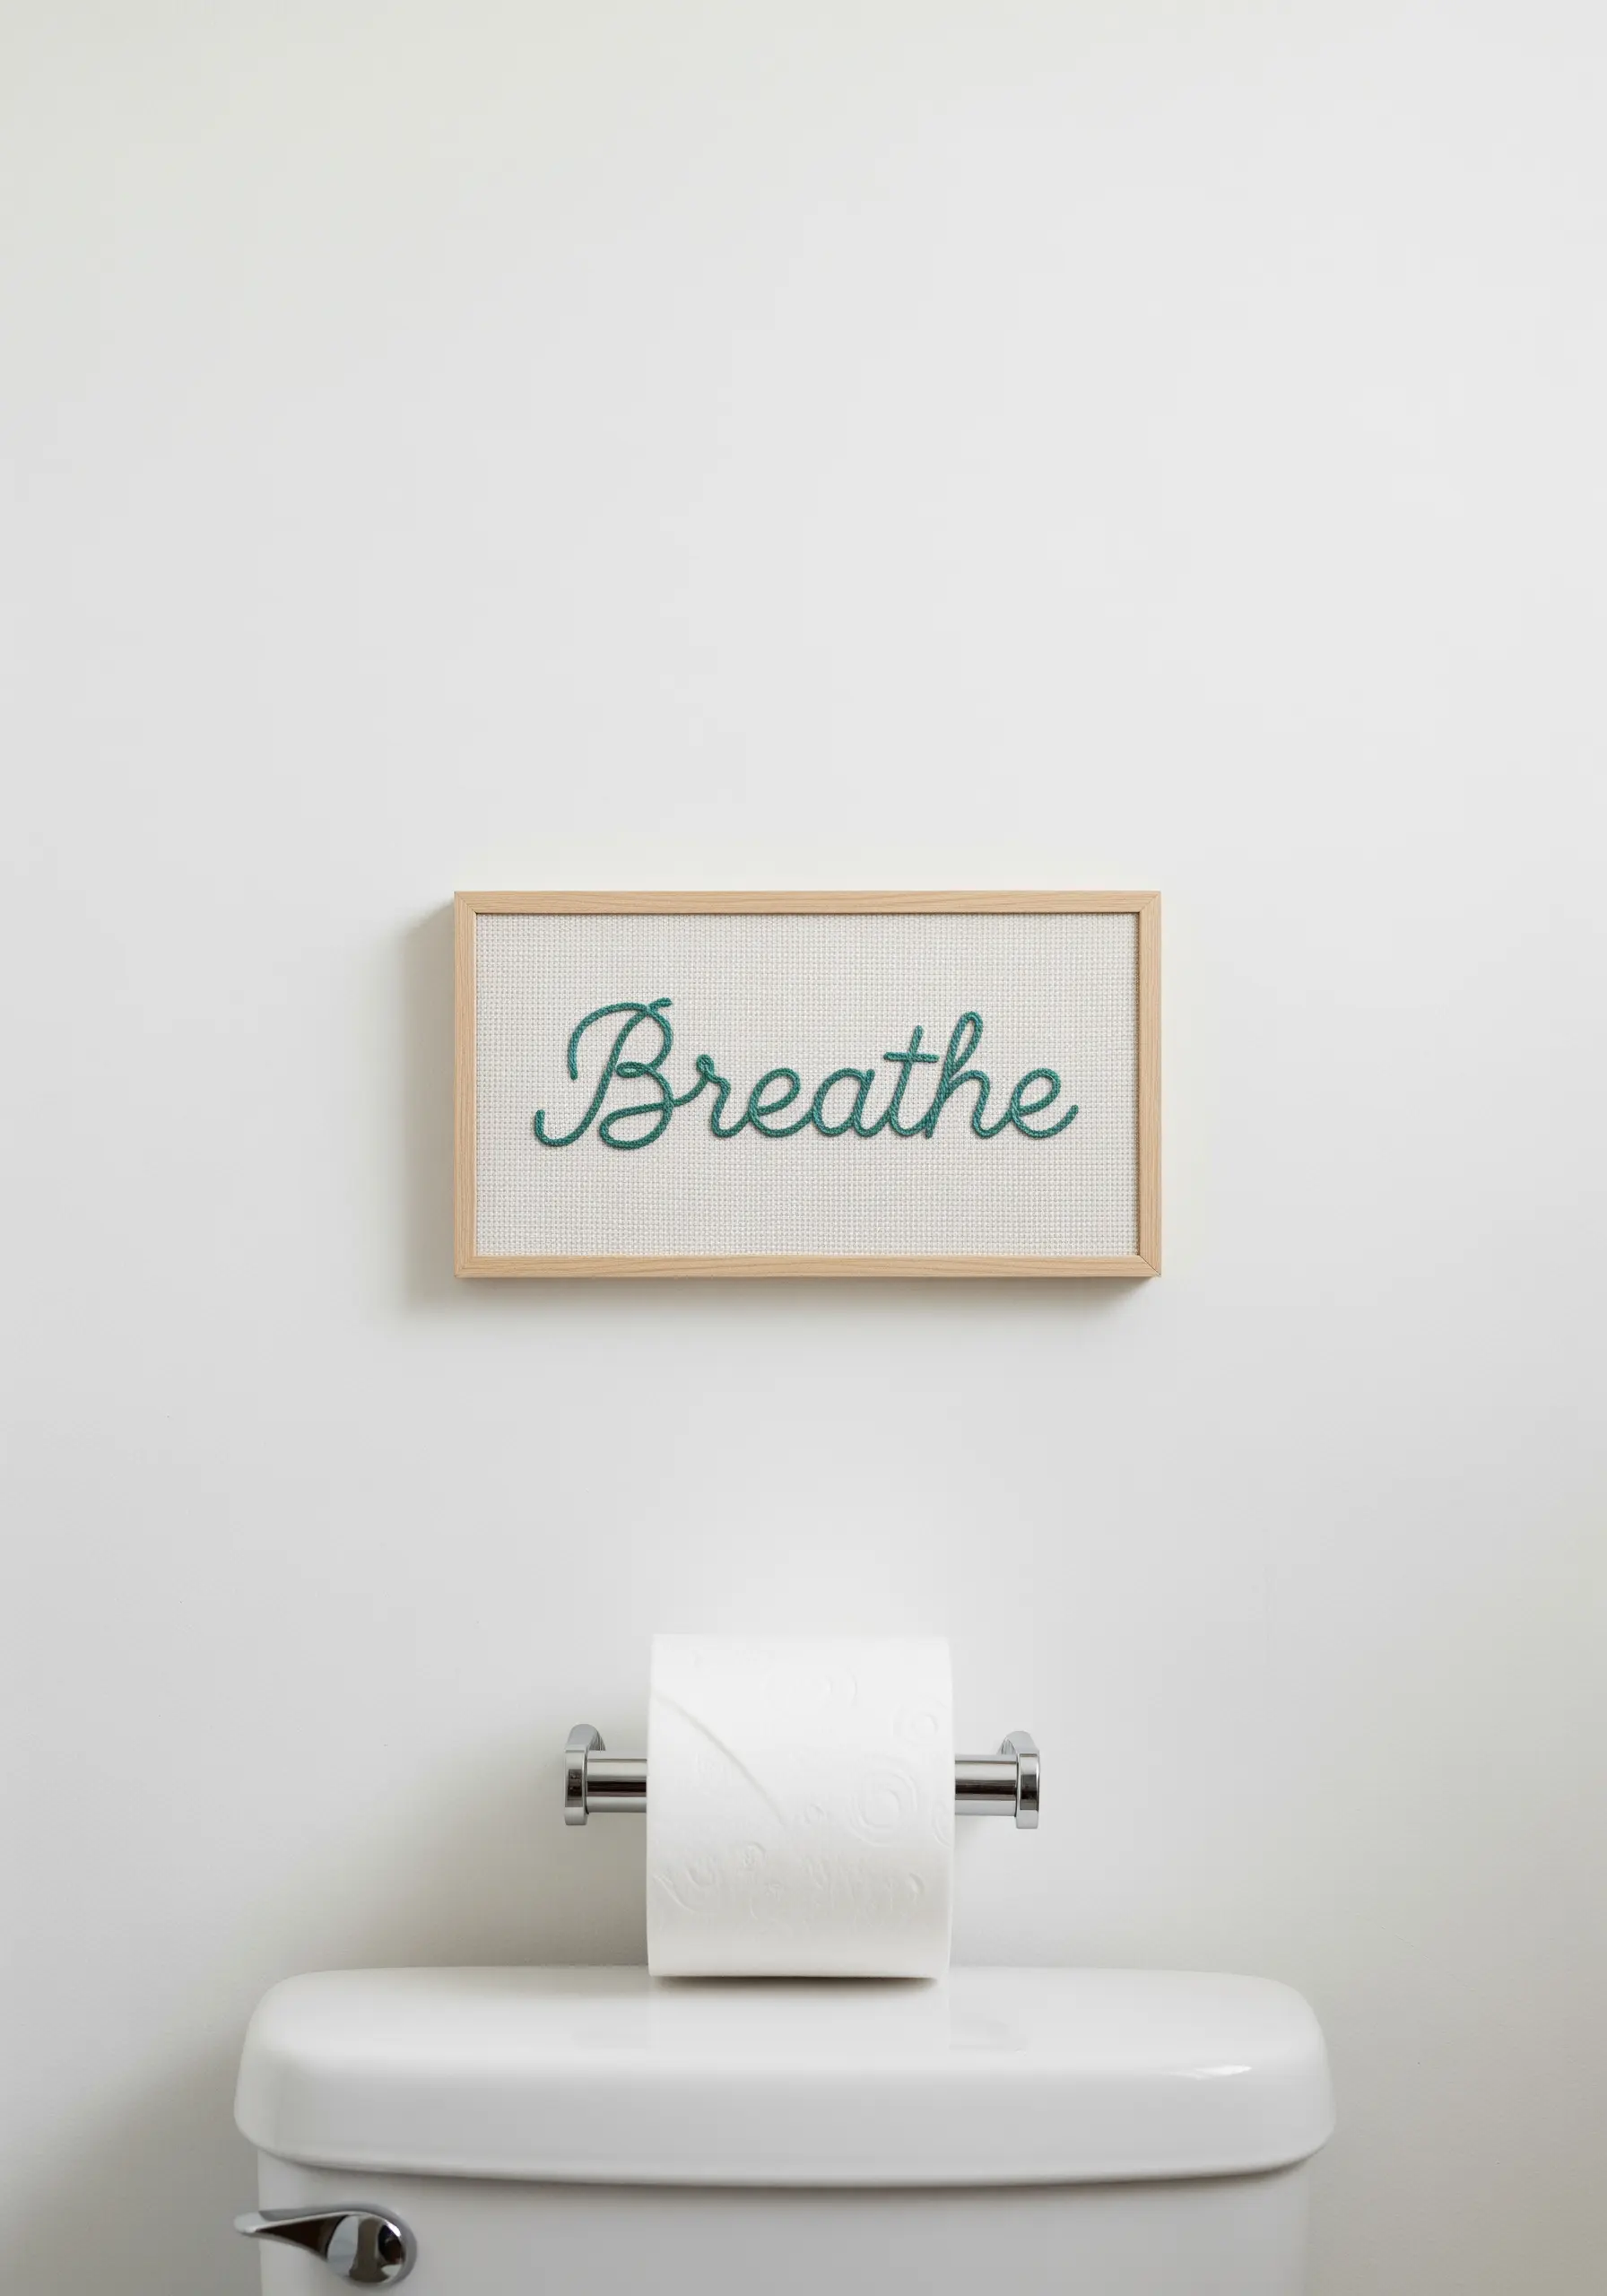
To achieve a smooth, rope-like line for cursive lettering, use a whipped backstitch.
First, create your word using a standard backstitch. Then, without piercing the fabric, take a second thread and loop it (or ‘whip’ it) around each backstitch.
This technique completely covers the gaps in the backstitch, resulting in a single, unbroken, and slightly raised line that mimics elegant handwriting.
It’s the perfect stitch for a single, calming word that sets the tone for the space.
18. Create Delicate Shading with Single-Strand Stitches
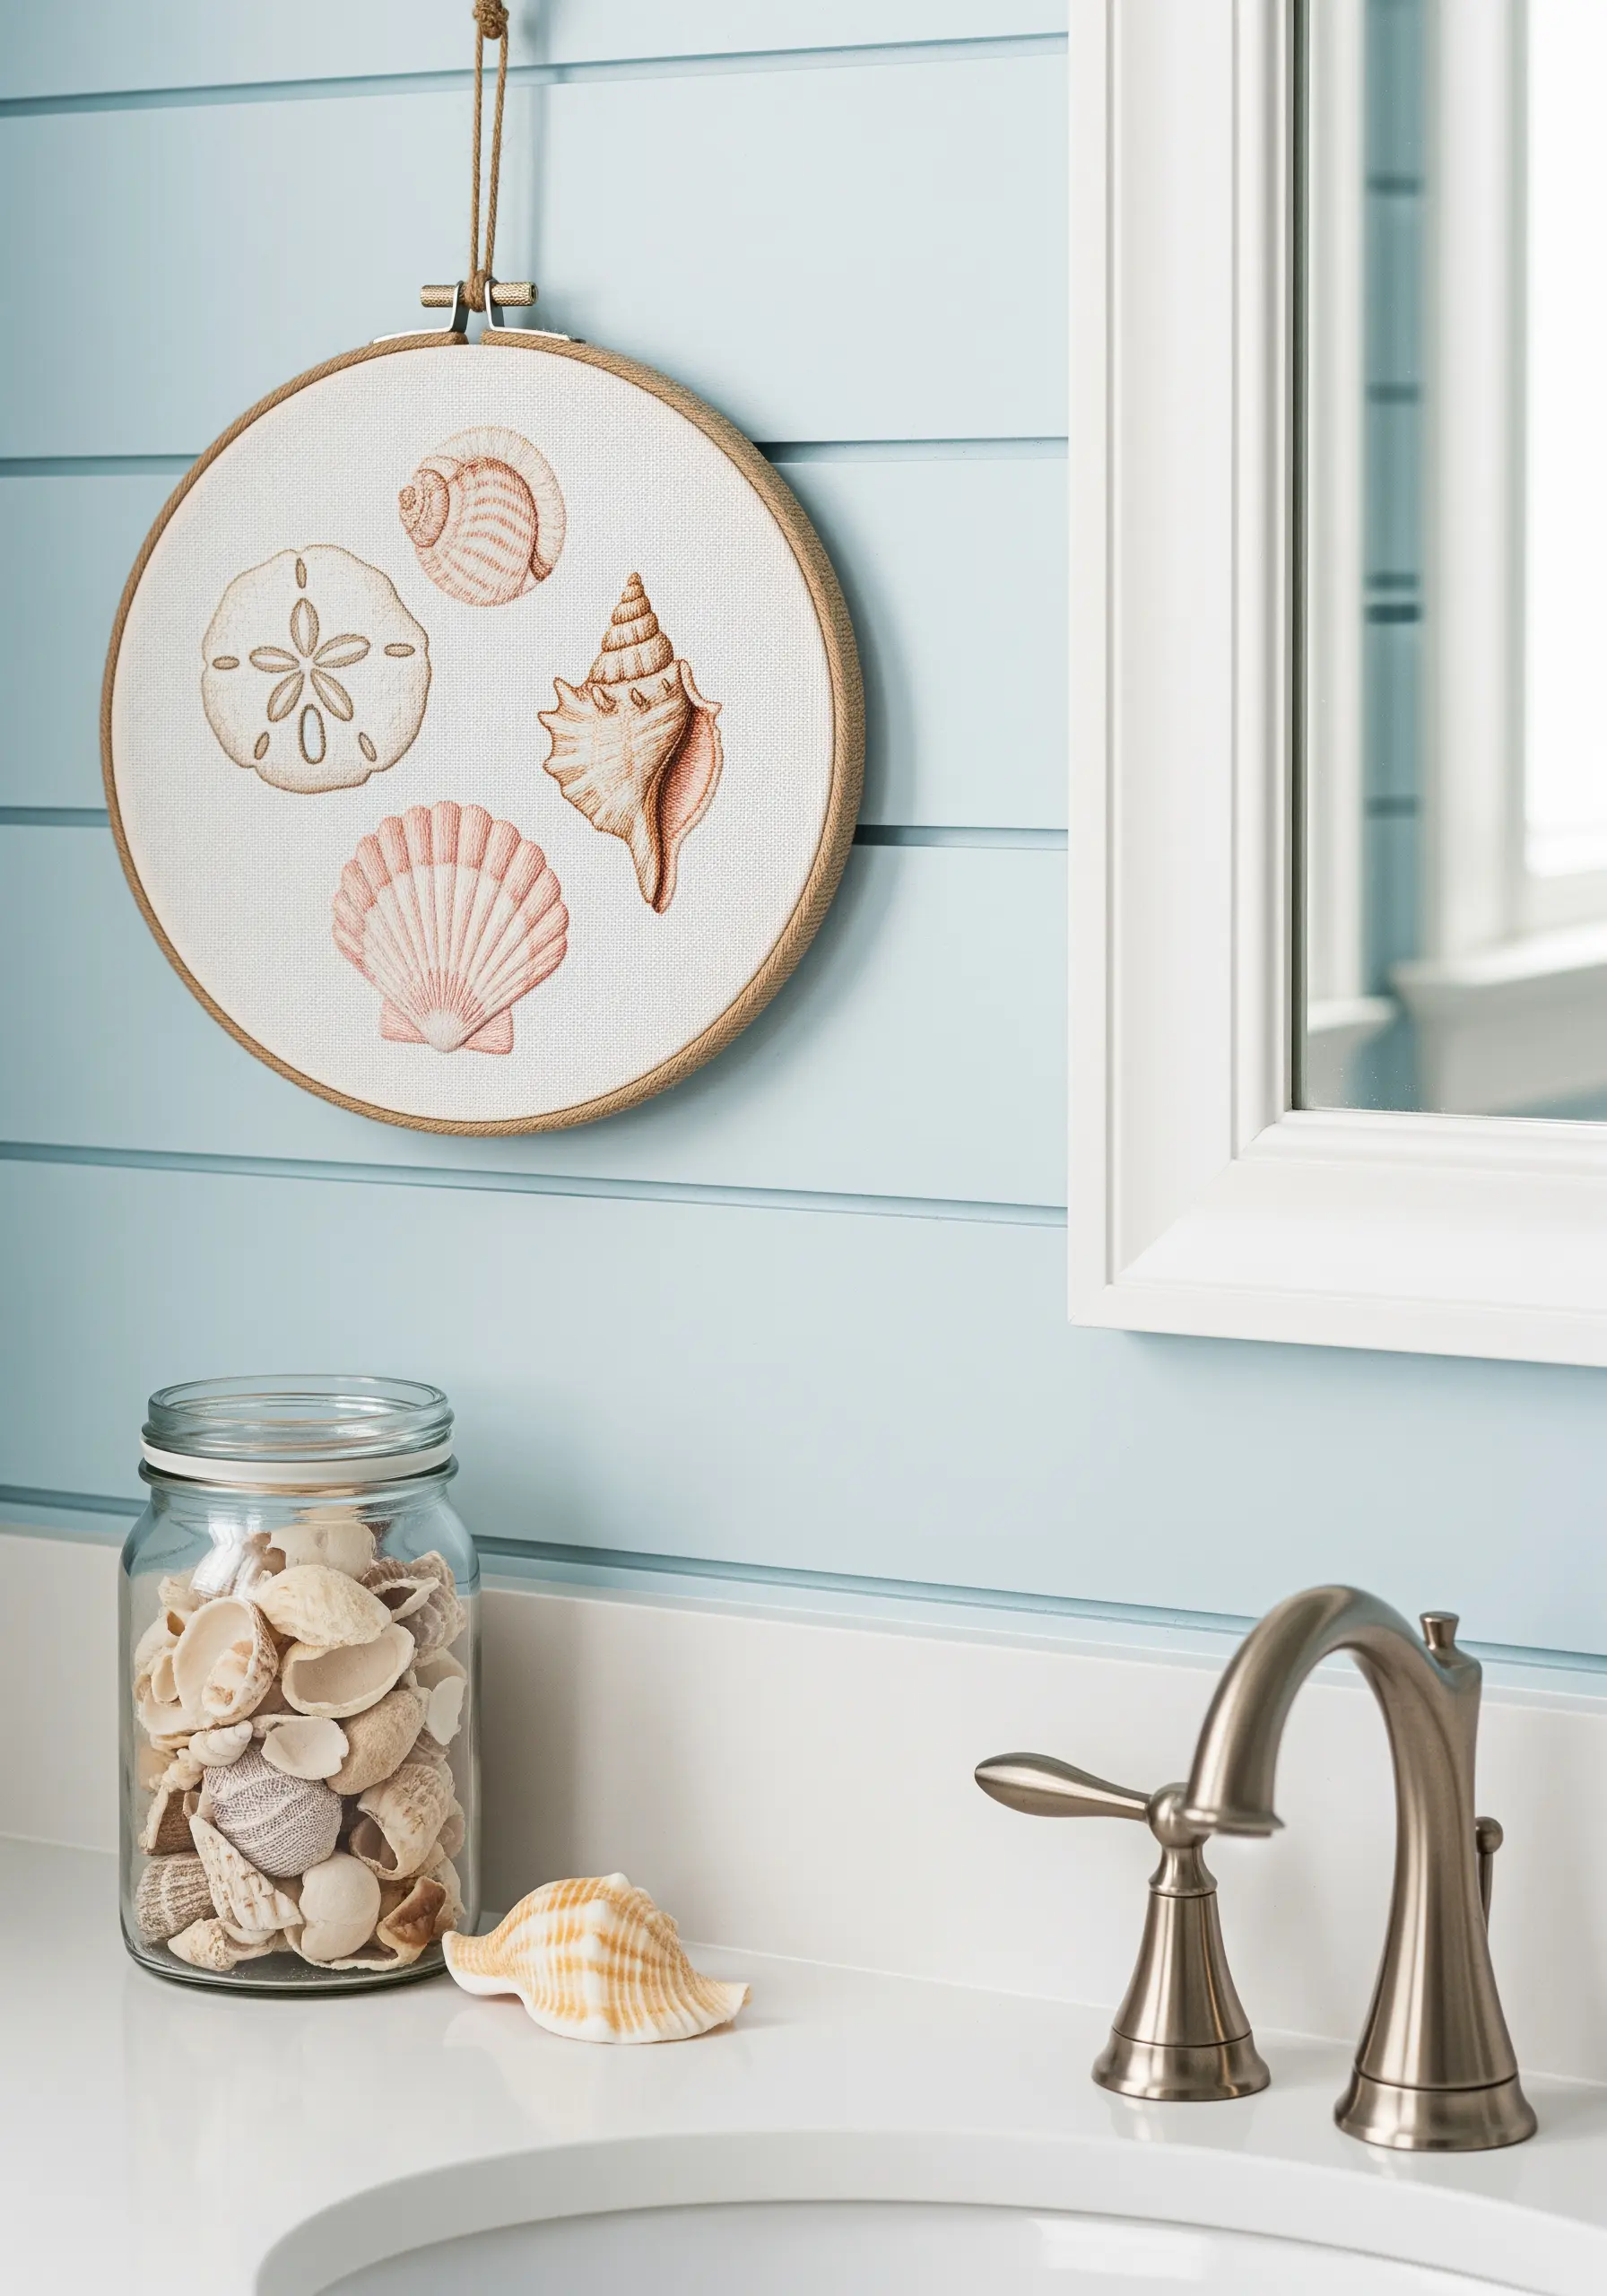
To capture the subtle curves and gradients of seashells, work with only a single strand of embroidery floss.
Use a light touch and tiny split stitches or long-and-short stitches to gently blend soft pinks, peaches, and creams.
Working with one strand allows for unparalleled detail and control, giving your embroidery the delicate quality of a colored pencil drawing.
This technique is perfect for creating coastal-inspired embroidery that feels refined and realistic.
19. Sculpt a 3D Bouquet with Dimensional Stitches
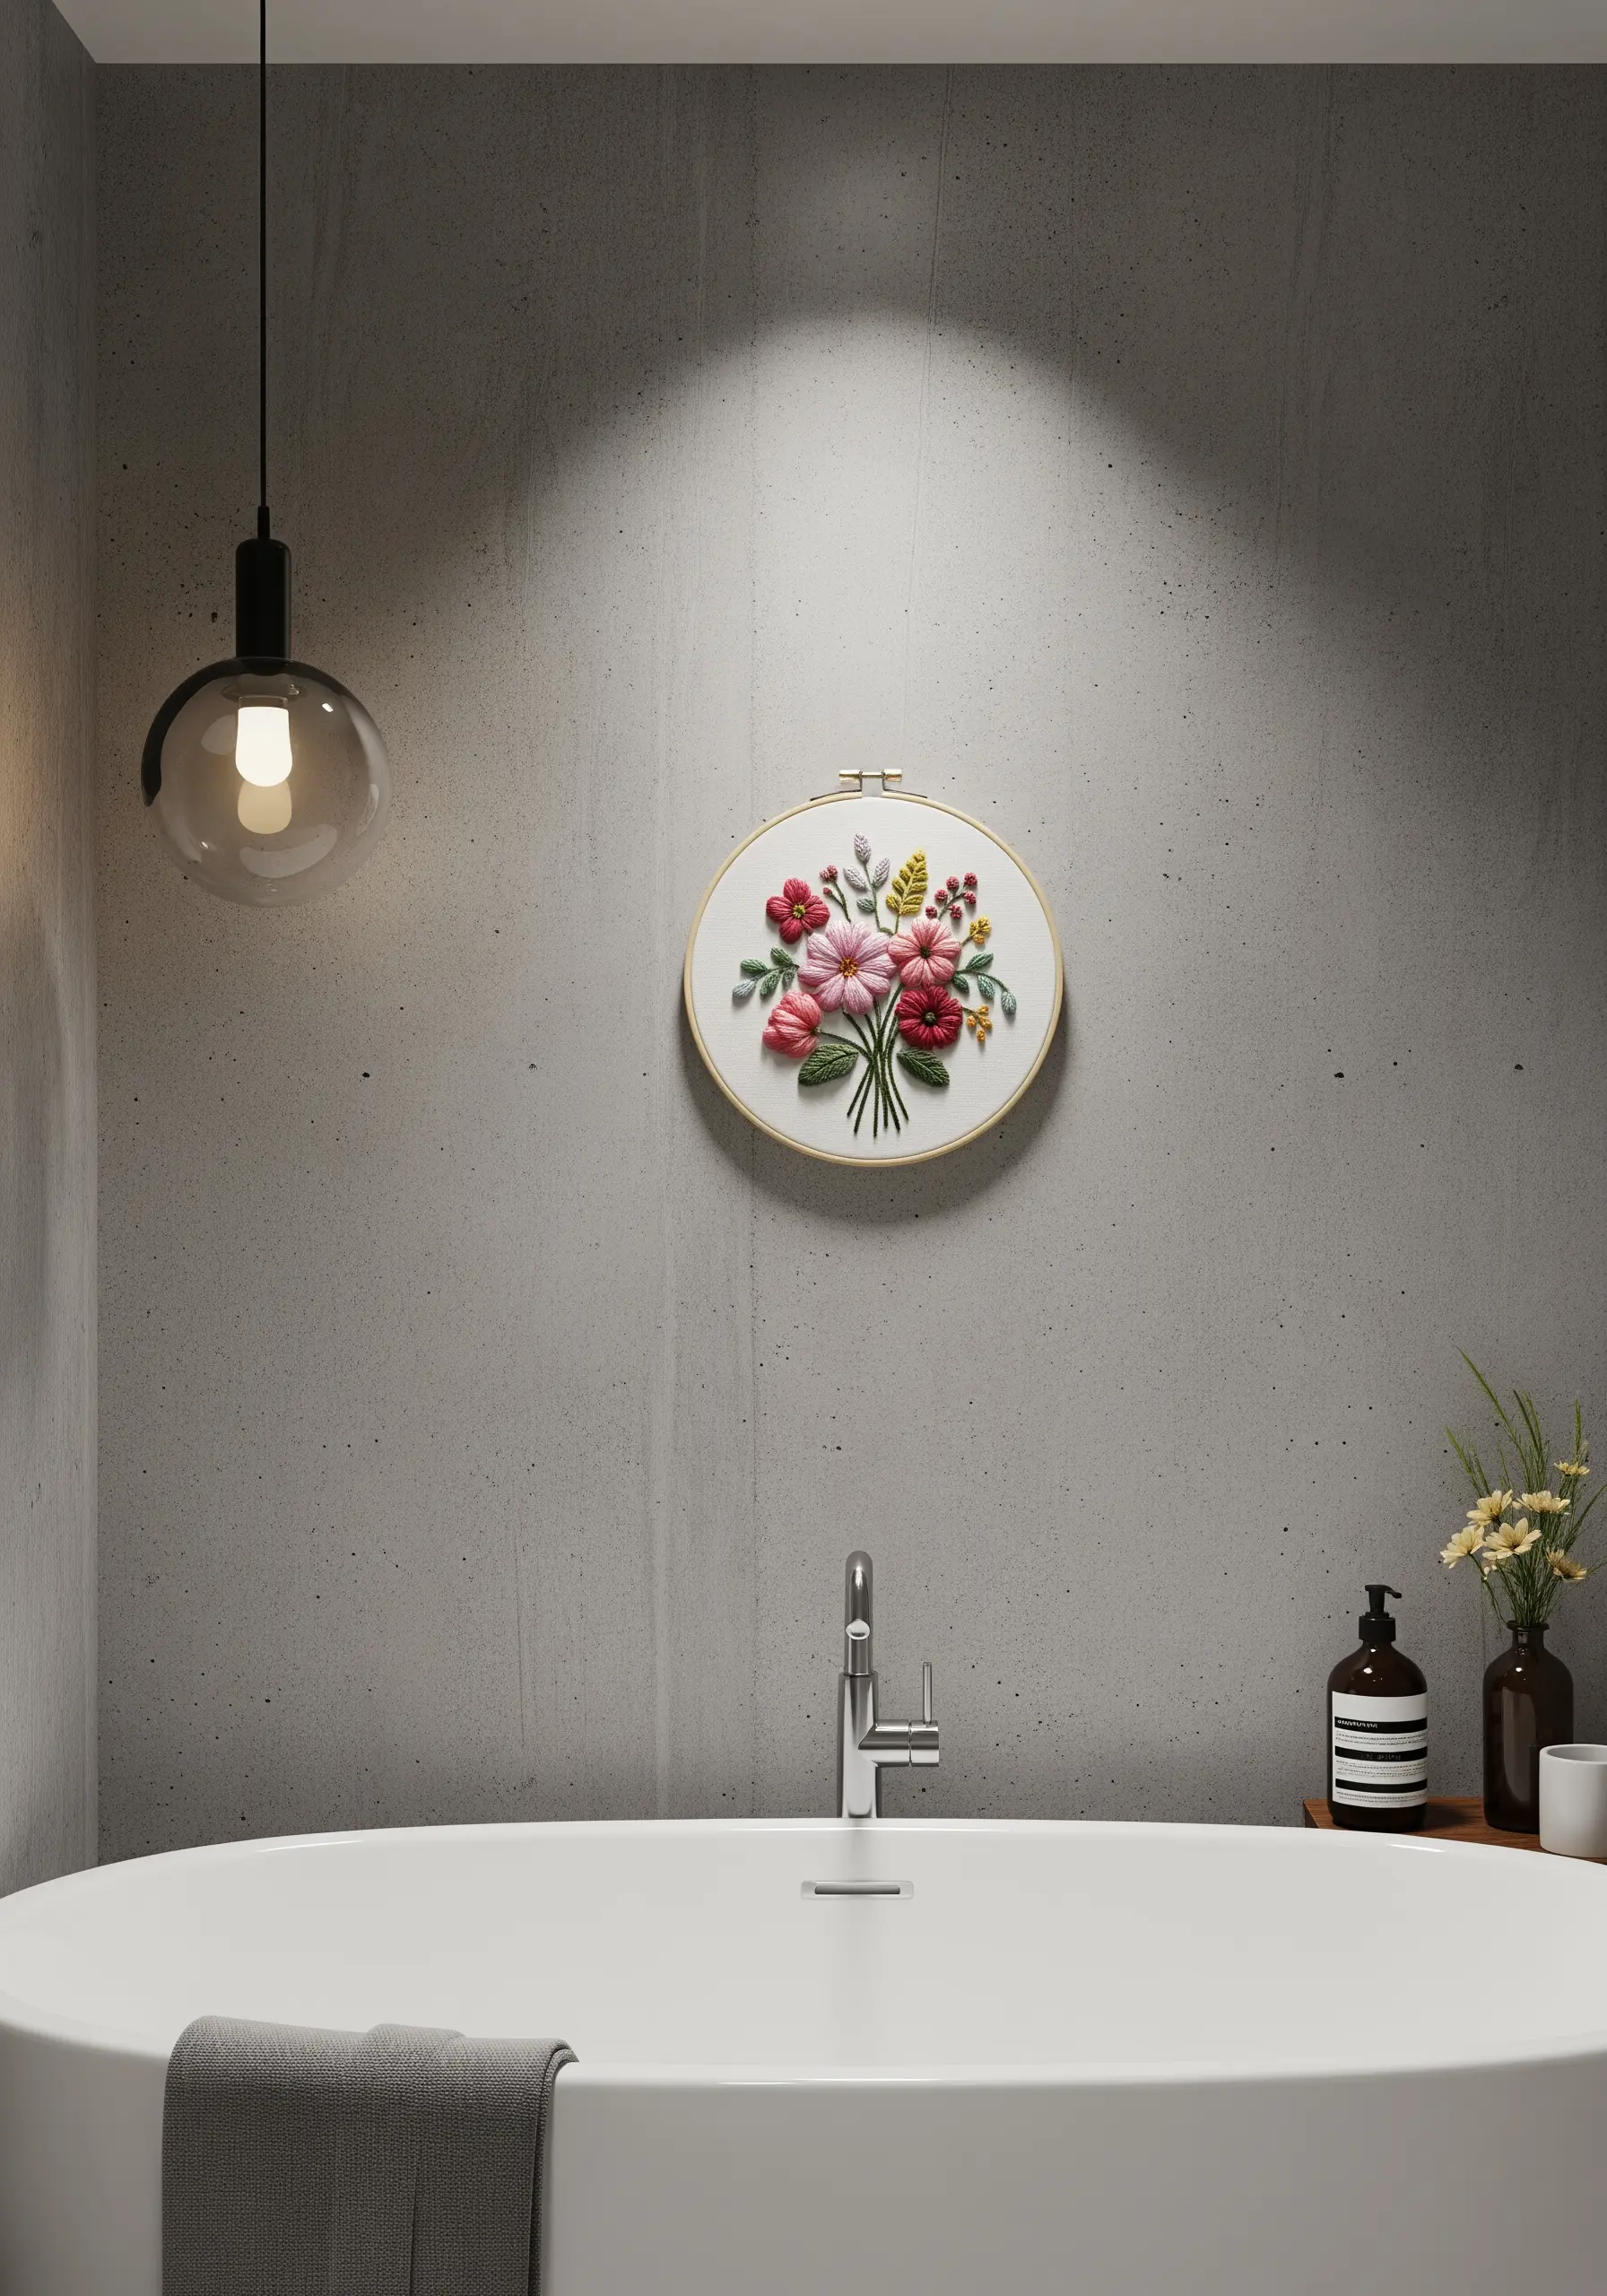
Elevate a floral design by moving beyond flat stitches and incorporating techniques that lift off the fabric.
Create plush, round roses with the woven wheel stitch and craft delicate, elongated petals with bullion knots.
Use lazy daisy stitches for leaves and French knots for small filler flowers like baby’s breath.
This combination of 3D stitches results in a lush, highly textural bouquet that invites touch and adds dramatic depth to your wall.
20. Craft a Classic Monogram with Precision
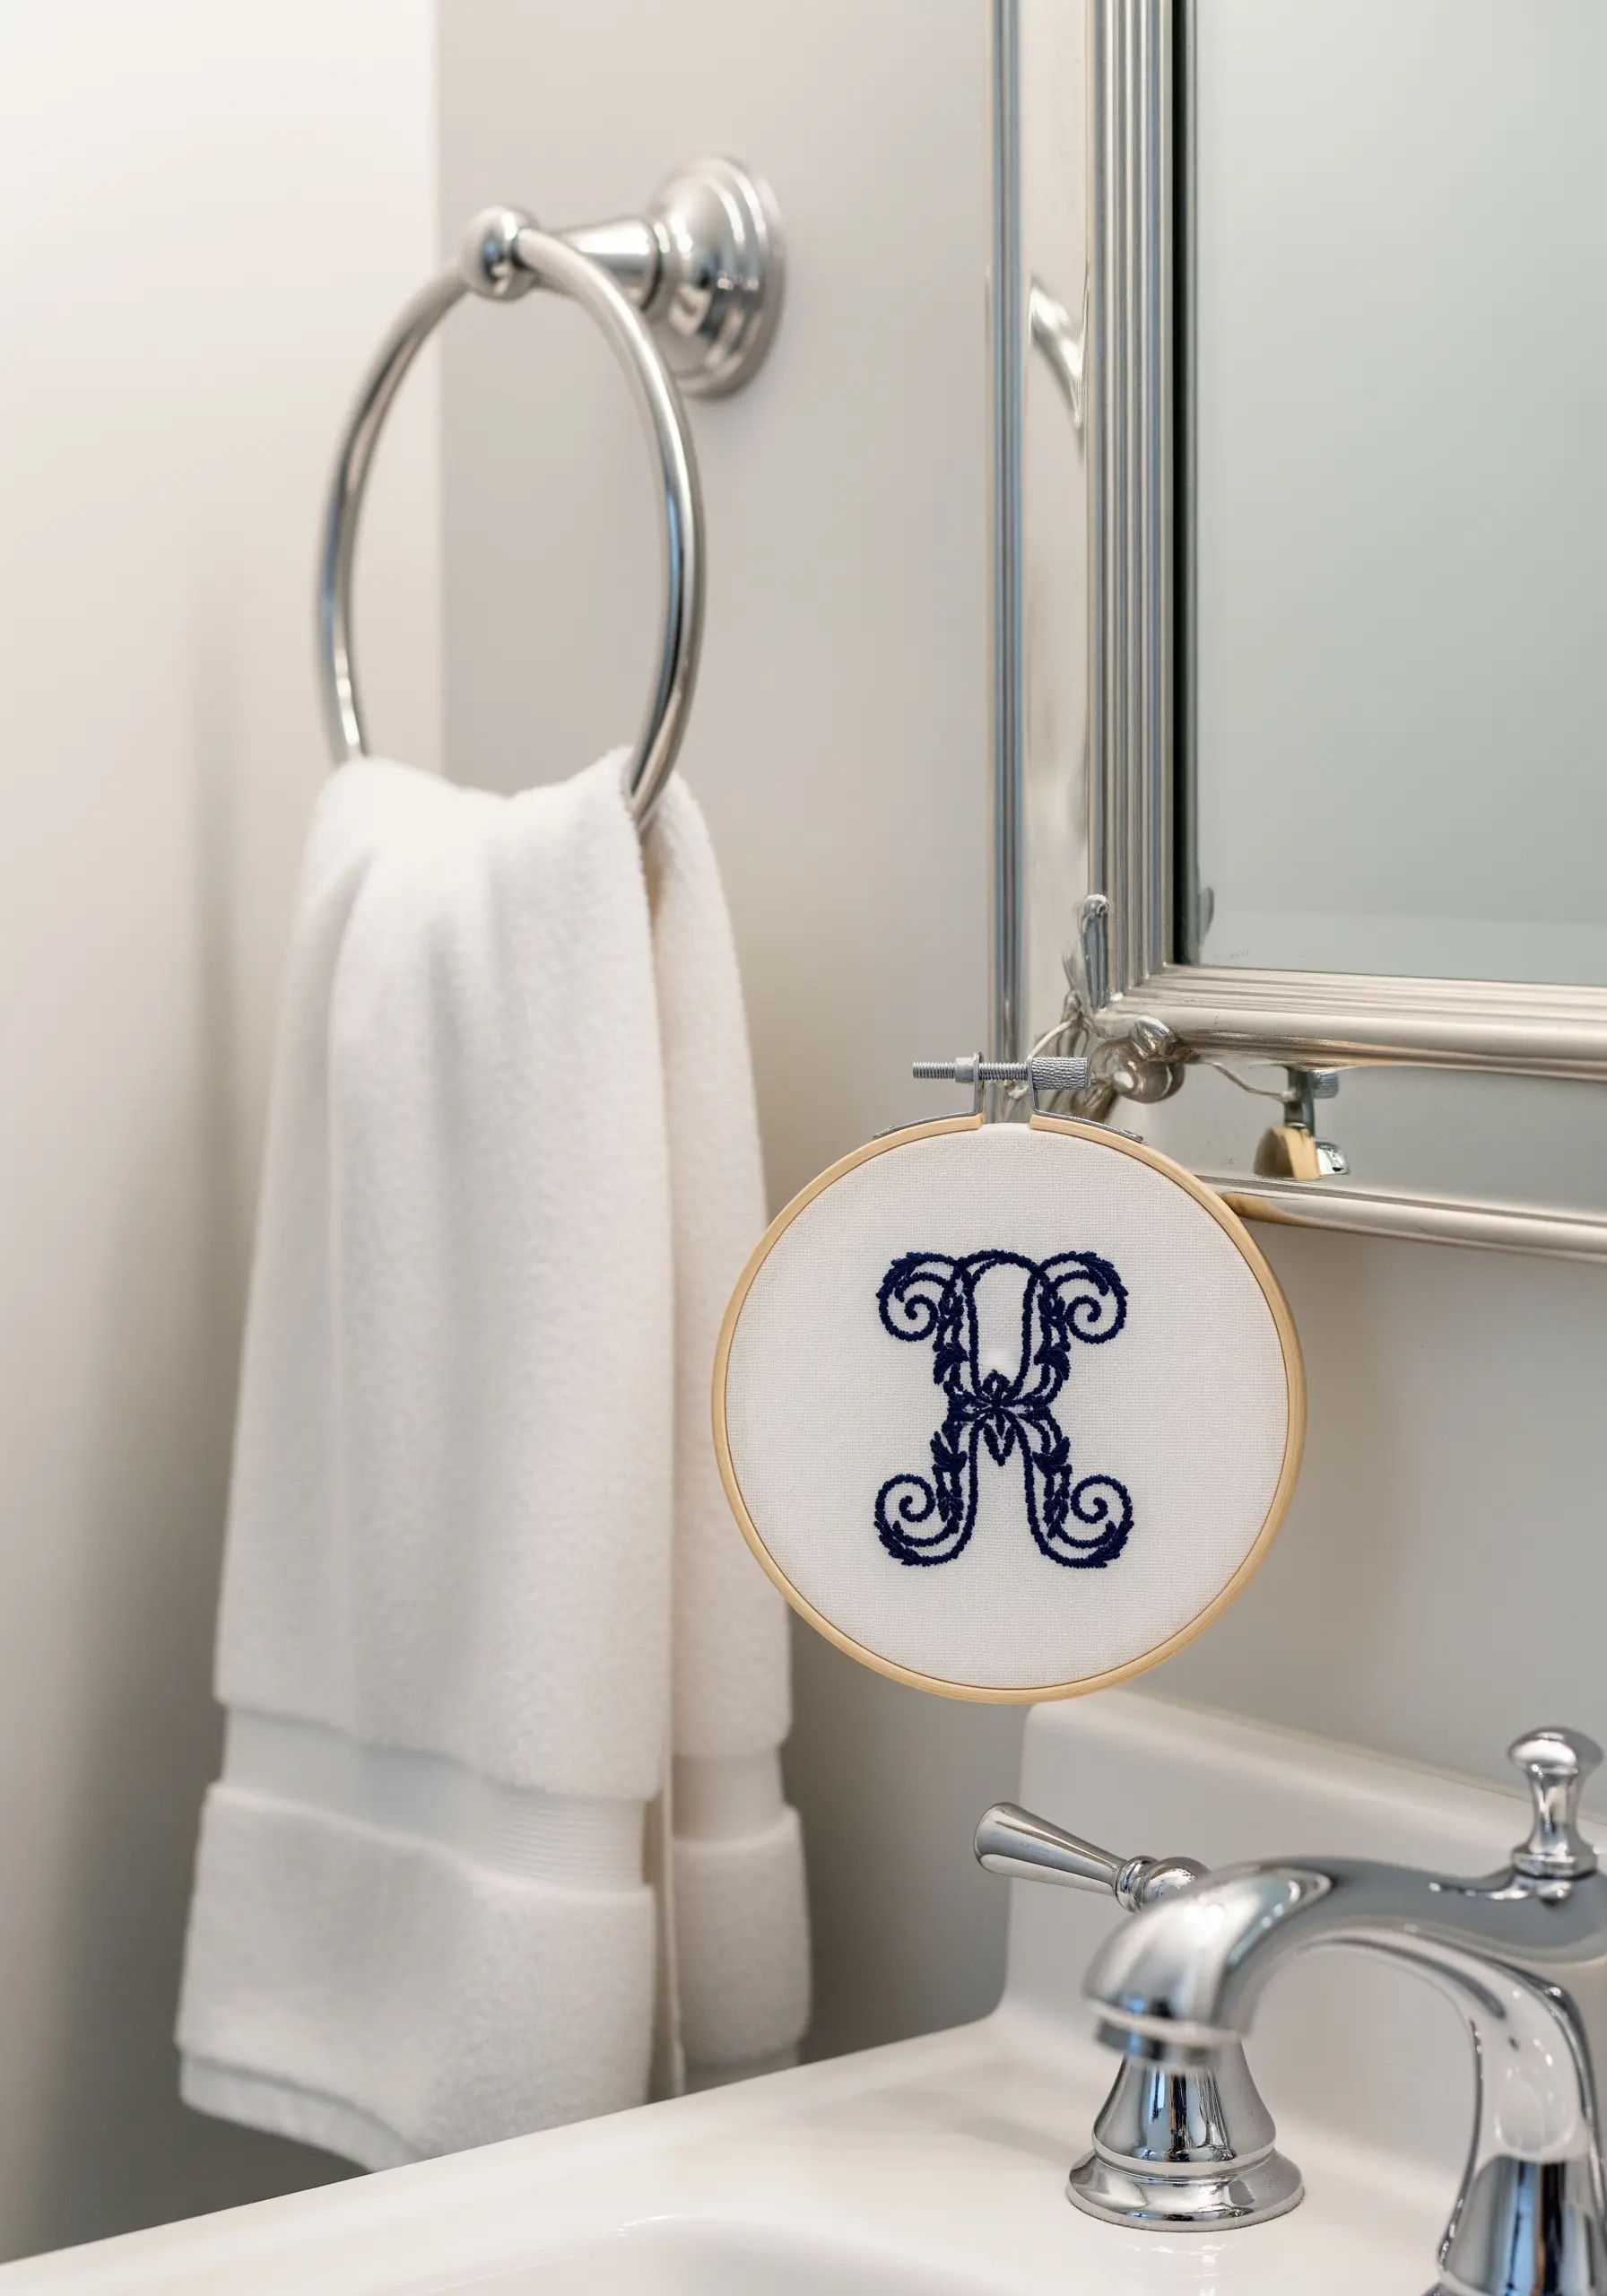
A well-stitched monogram adds a touch of timeless, personalized elegance to any space.
For a bold, traditional look, use a dense satin stitch with six-strand floss.
To keep your edges perfectly crisp, first outline the letter with a split stitch. This raised edge will act as a guide, helping you keep your satin stitches neat and contained.
Choose a classic color like navy or black for a sophisticated finish that never goes out of style.
21. Mimic Prickly Textures on a Cactus
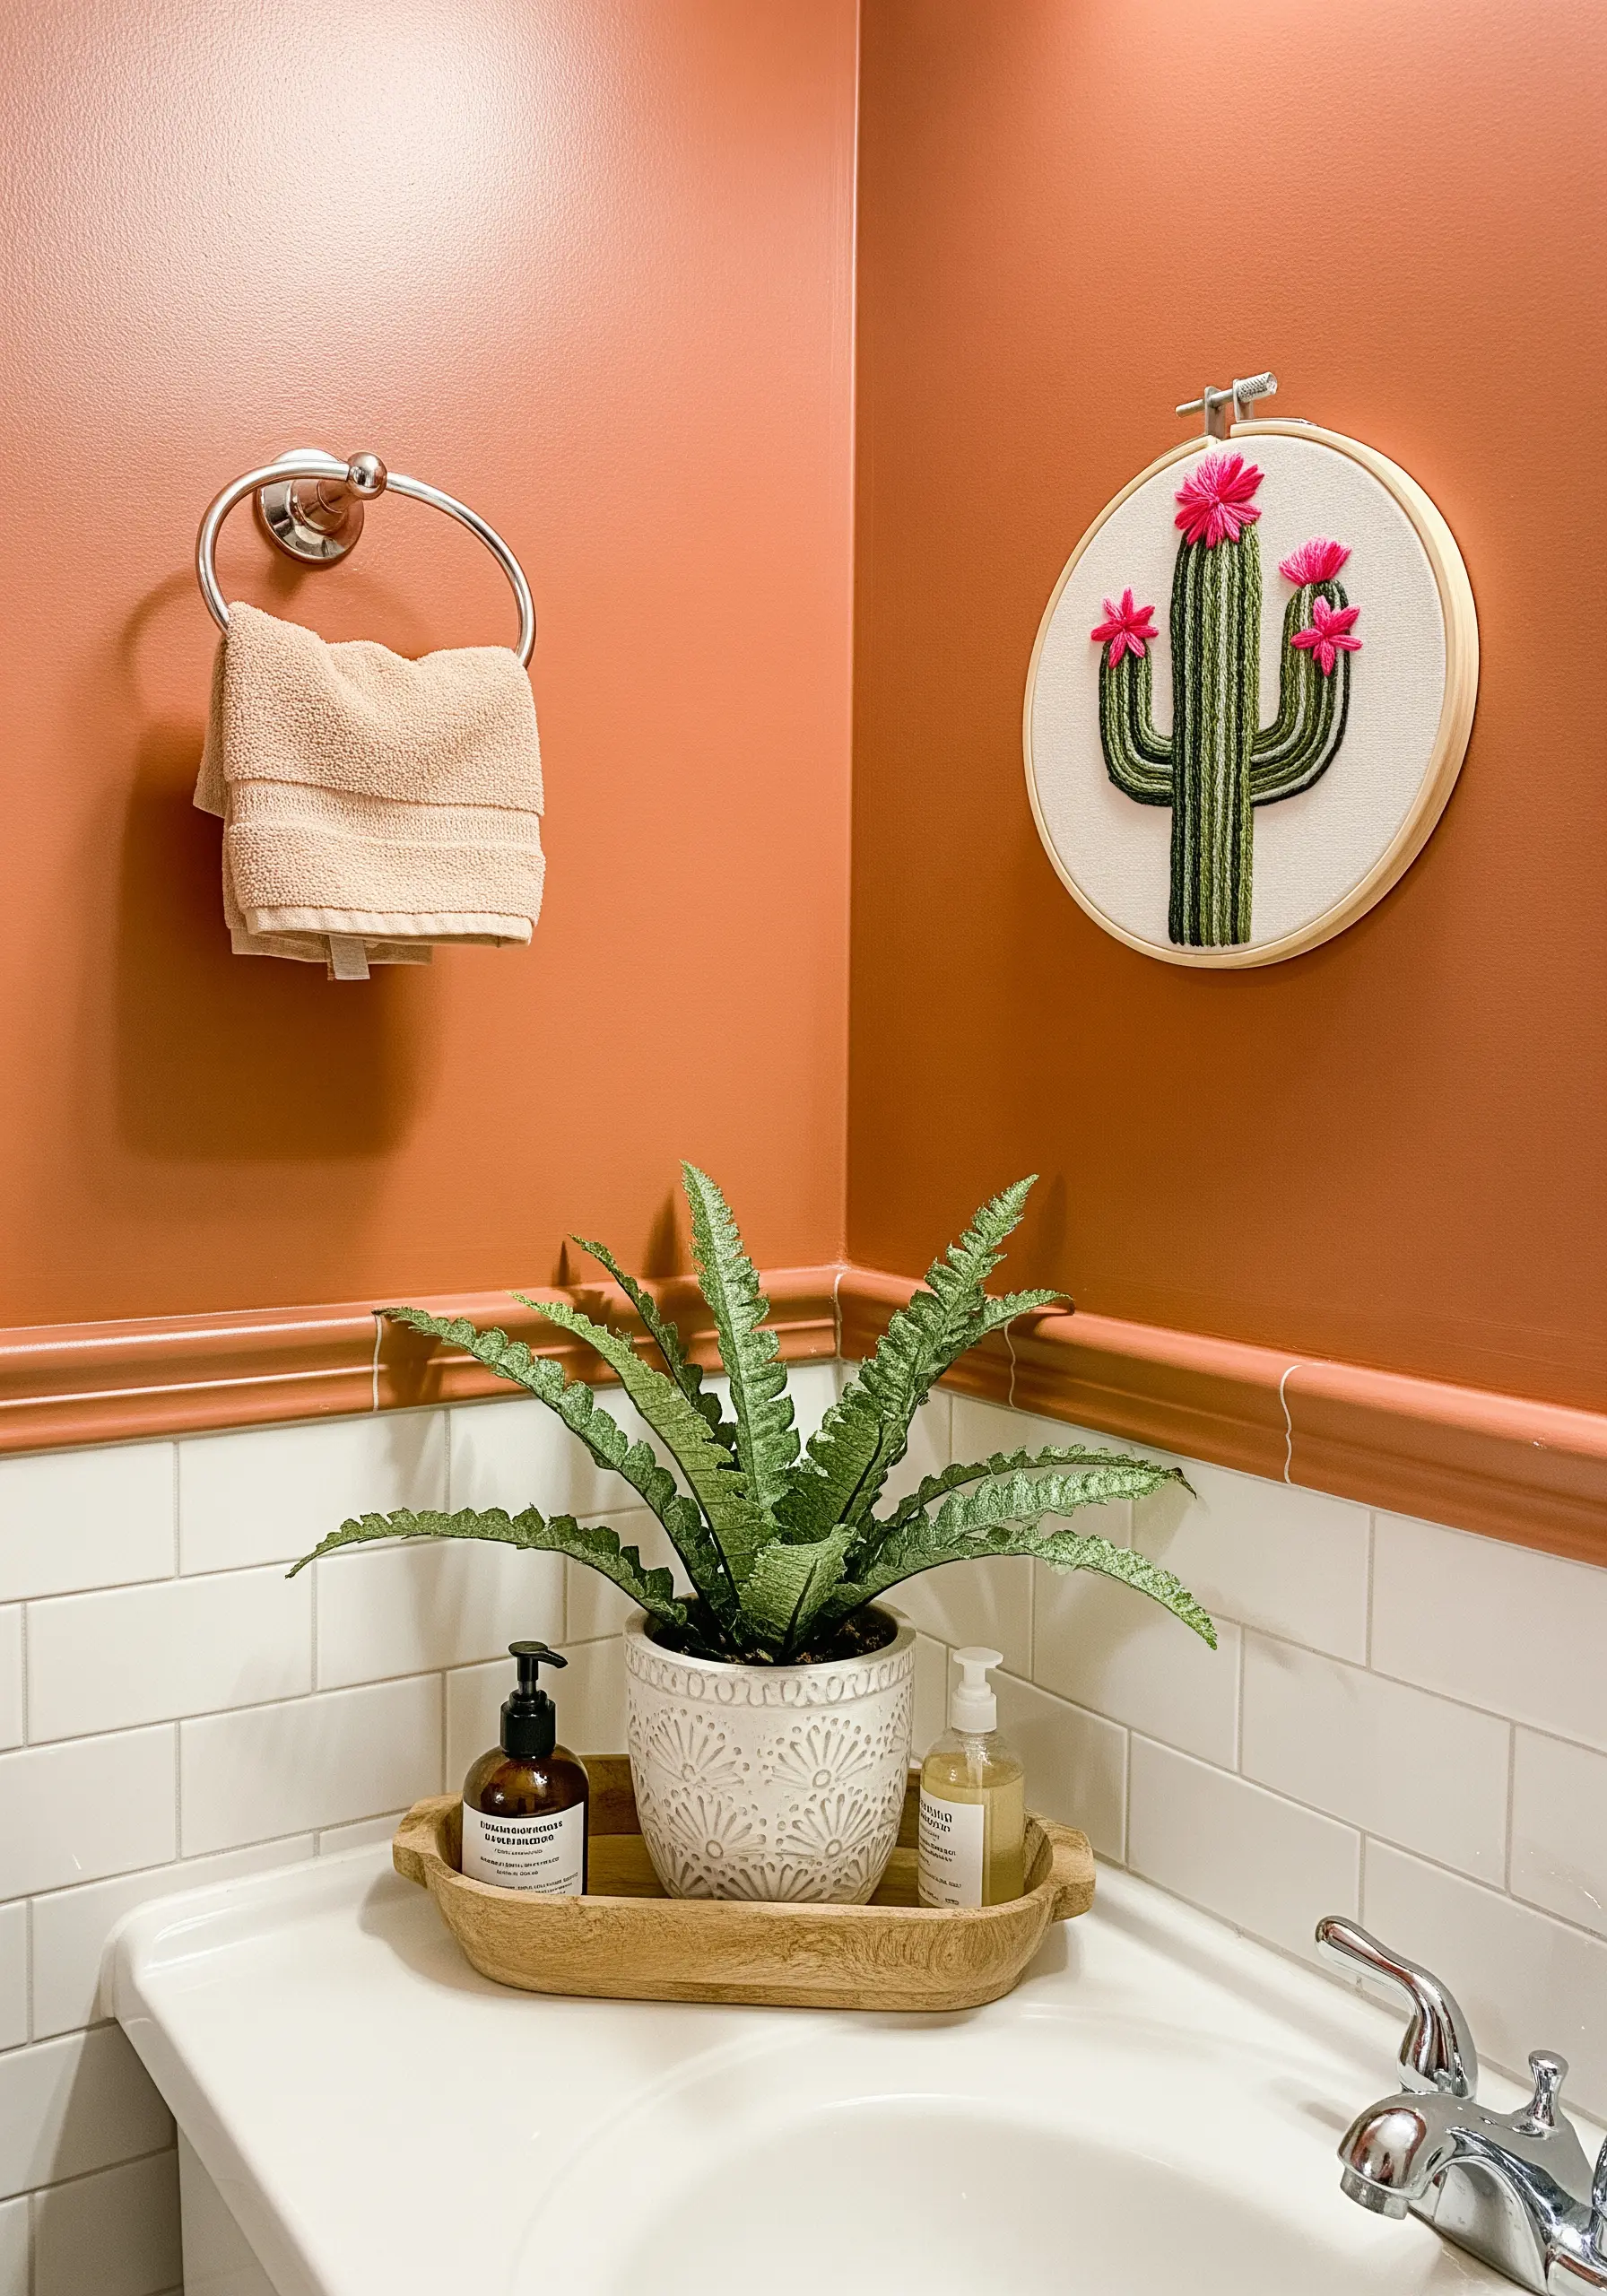
Capture the unique texture of a cactus by combining smooth and sharp stitches.
Fill the body of the cactus with vertical satin stitches in varying shades of green to create shape and dimension.
For the spines, use tiny, scattered straight stitches in a contrasting color like white or black. Angle them in different directions for a natural, prickly effect.
Finish with vibrant bullion knots or woven wheel roses for the flowers, adding a pop of color and softness.
22. Simplify a Motif for Graphic Impact

You don’t need excessive detail to create a charming piece. Focus on a simplified, graphic representation of a subject.
Using Aida cloth and a basic cross-stitch, block in the main colors of the whale in two shades of blue.
Add a few simple backstitches for the water spray and waves. The beauty of this design is its clarity and simplicity.
This approach is perfect for creating playful, modern art for a child’s or guest bathroom.
23. Explore Abstract Art with Layered Whipped Circles
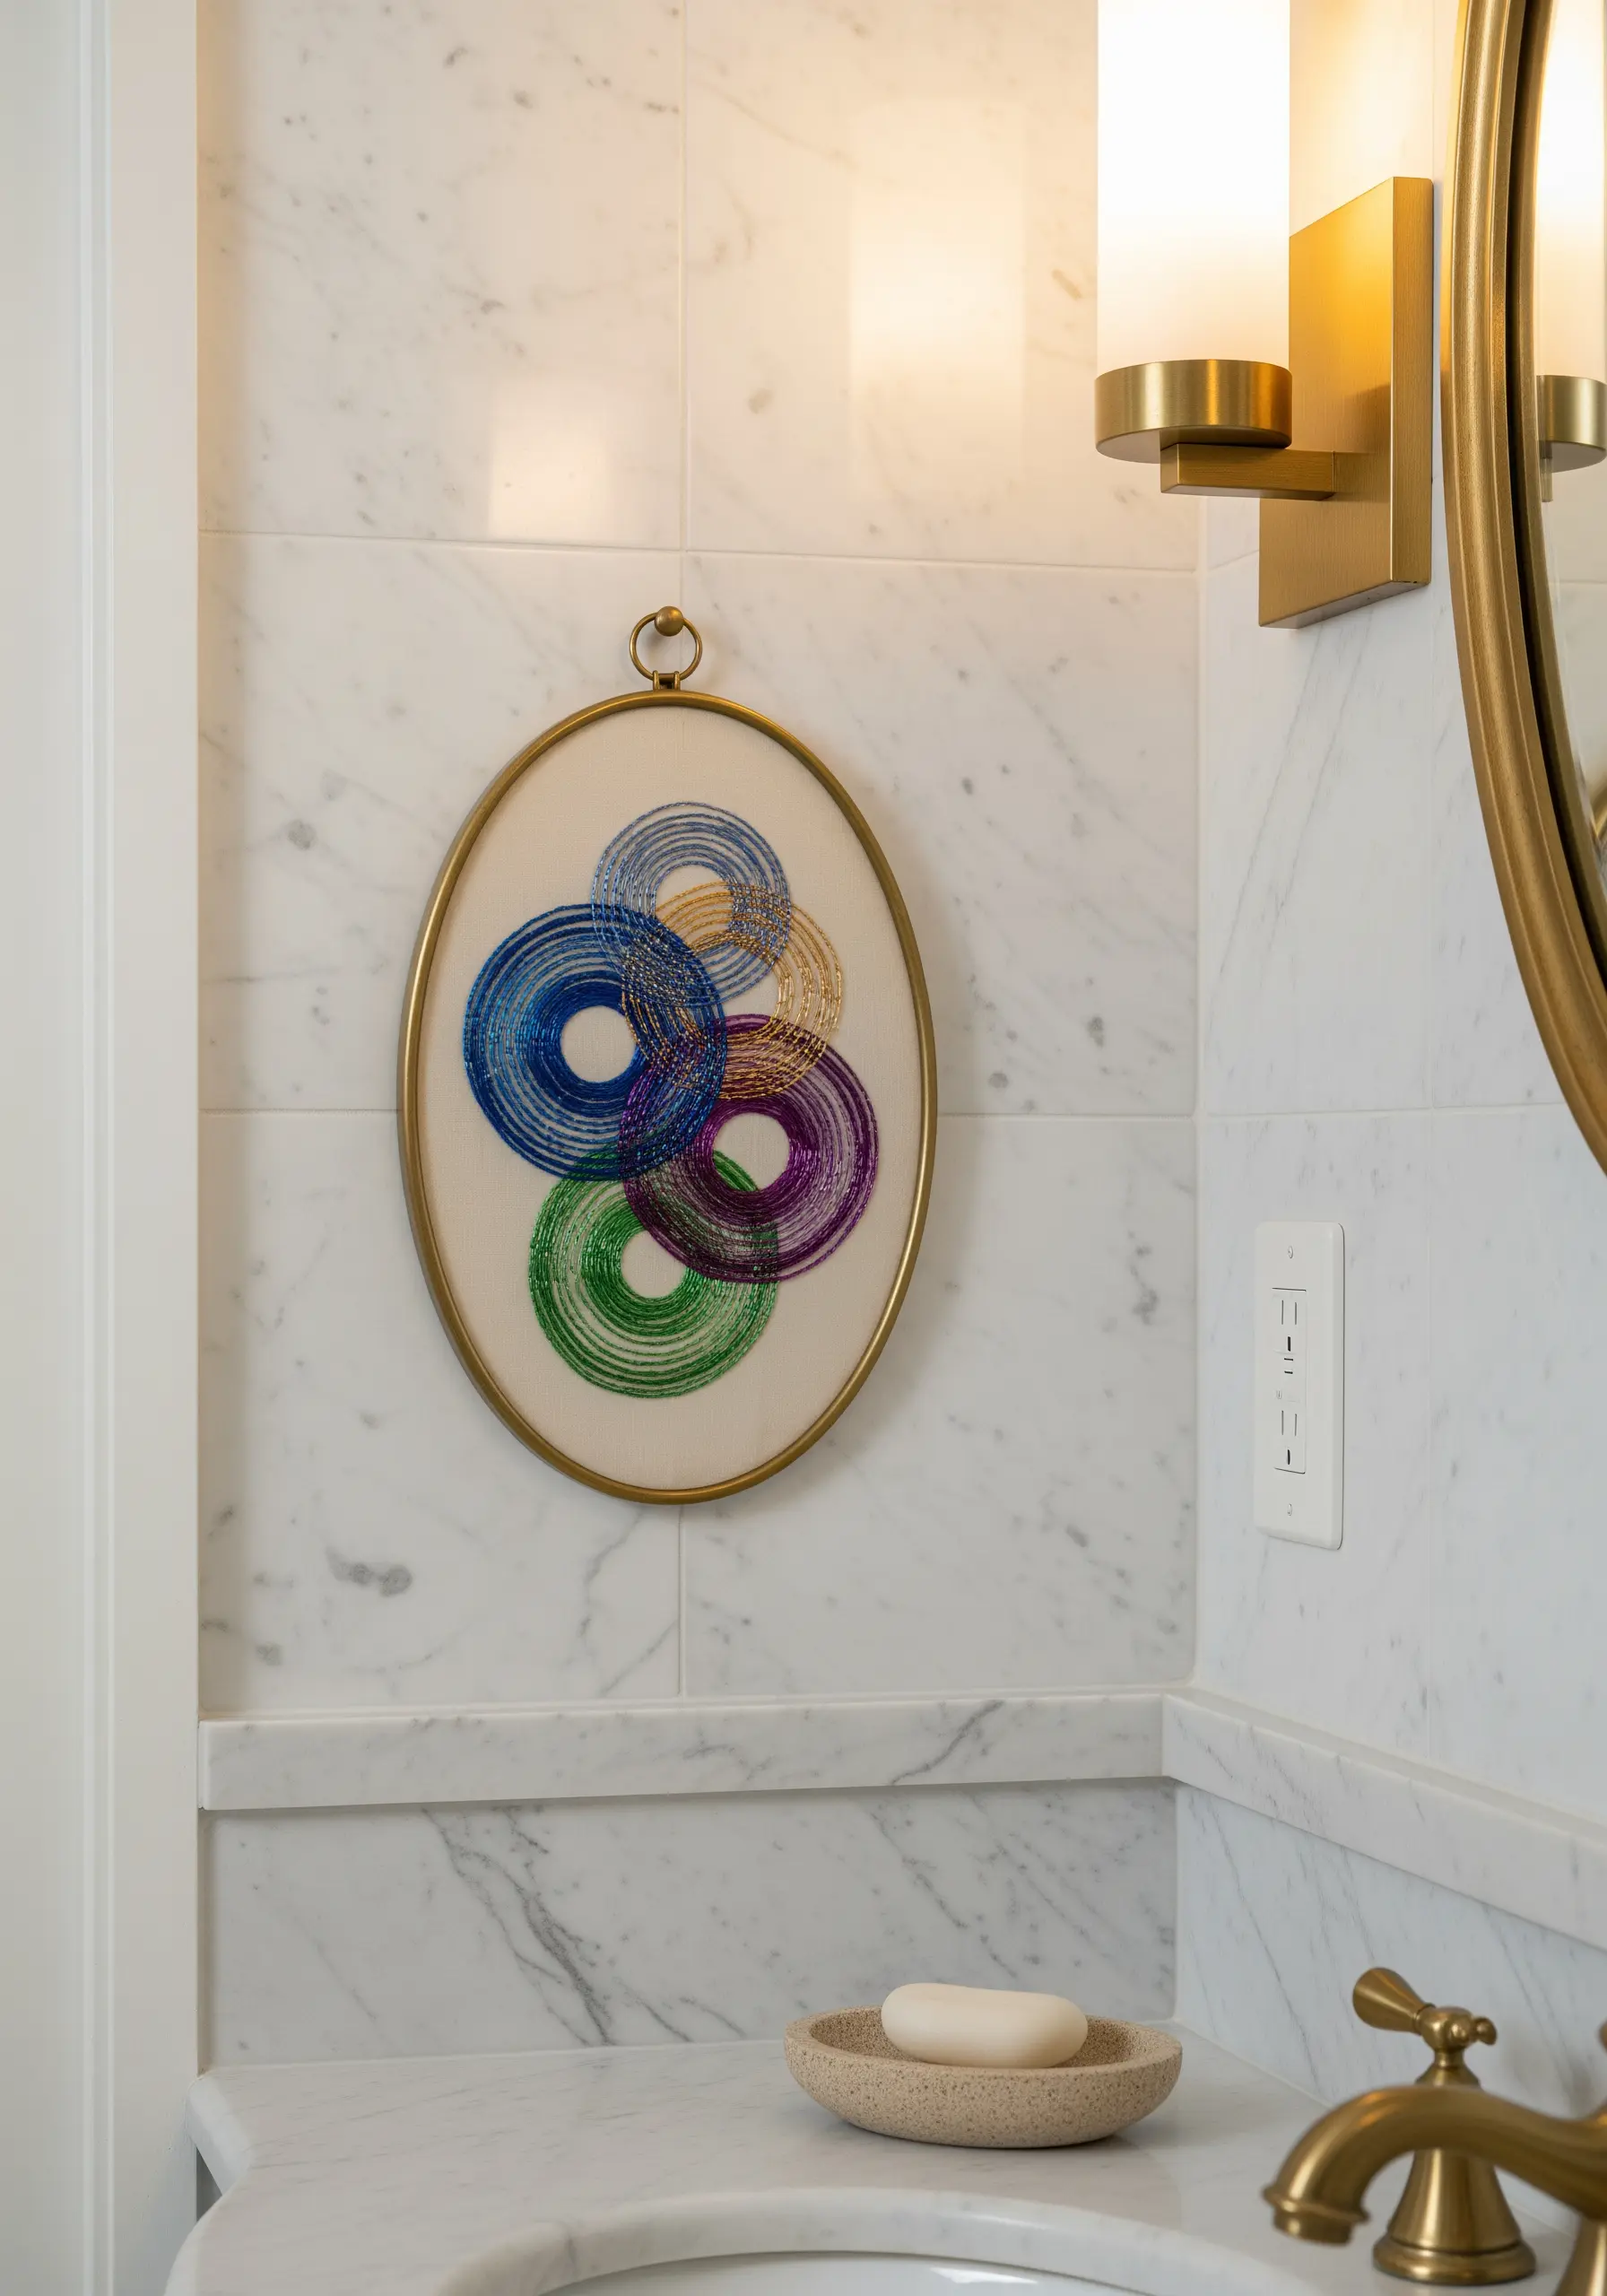
Create a dynamic abstract piece by layering concentric circles of color.
Start by stitching several large, overlapping circles using a simple running stitch.
Then, ‘whip’ each circle with different colored threads, wrapping the thread around the running stitches to create solid, textured rings of color.
The overlapping creates new color interactions and a sense of depth and movement, turning a simple stitch into a piece of modern fiber art.


