

That desire to bring the calm, airy feeling of the coast into your home is something your embroidery can absolutely capture. It’s not just about stitching an anchor or a wave, but about translating the *feeling* of summer—the light, the texture, the movement—into thread.
You don’t need dozens of complex stitches or expensive materials. Instead, I want you to focus on small, intentional shifts in your technique. Think about how a thicker thread can create a bolder line, how layering simple stitches can build incredible depth, or how leaving space in your design can feel as peaceful as an open horizon.
These ideas are your guide to creating coastal art that feels less like a craft project and more like a thoughtful, personal expression. Let’s explore how to make your stitches breathe with the fresh, restorative energy of the seaside.
1. Sculpting Waves with Dimensional Stitches
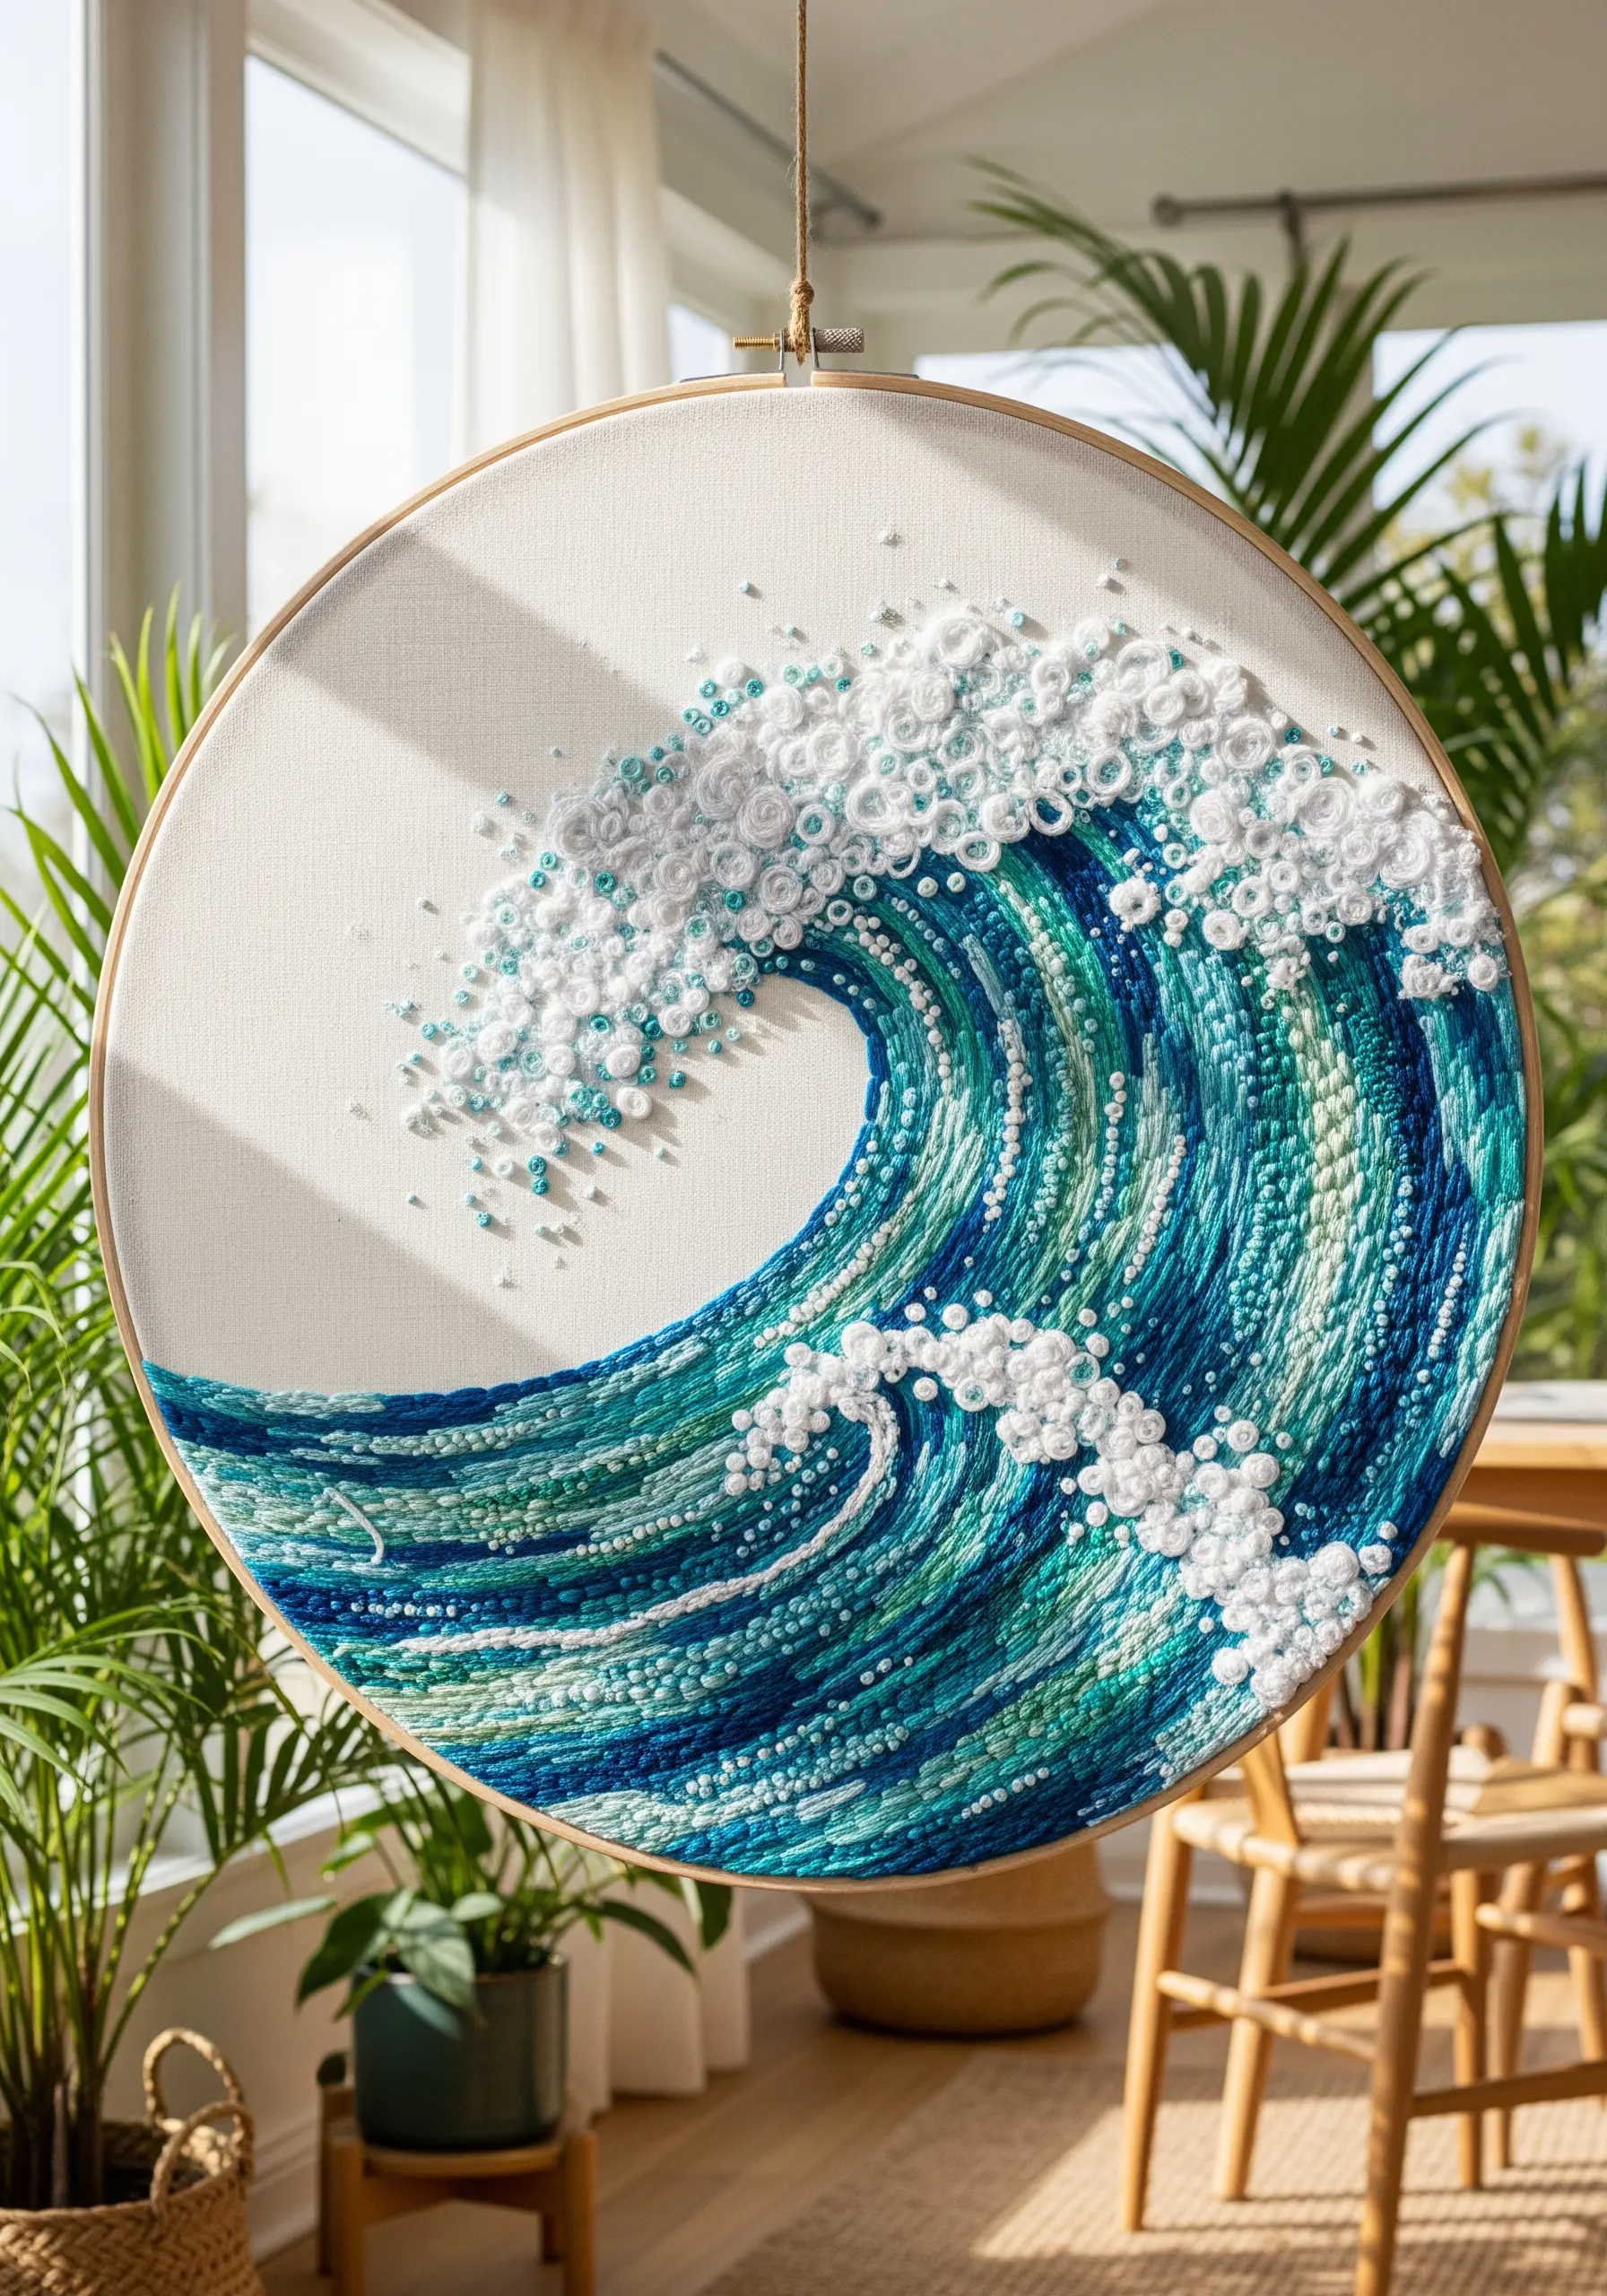
To create the dynamic froth of a breaking wave, move beyond flat stitches.
Use a dense cluster of French knots and bullion knots in varying sizes for the crest, mixing six-strand floss with chunkier pearl cotton or even fine yarn to build dimension.
For the body of the wave, lay down long-and-short stitches, allowing the shades of turquoise and sea green to blend organically rather than creating hard lines.
This technique mimics the way light filters through water, giving your piece movement and life.
Let the direction of your stitches follow the curve of the wave to enhance the feeling of motion.
Explore contemporary texture techniques to create raised, sculptural embroidery effects that truly stand off the fabric.
2. Layering a Vibrant Underwater Triptych
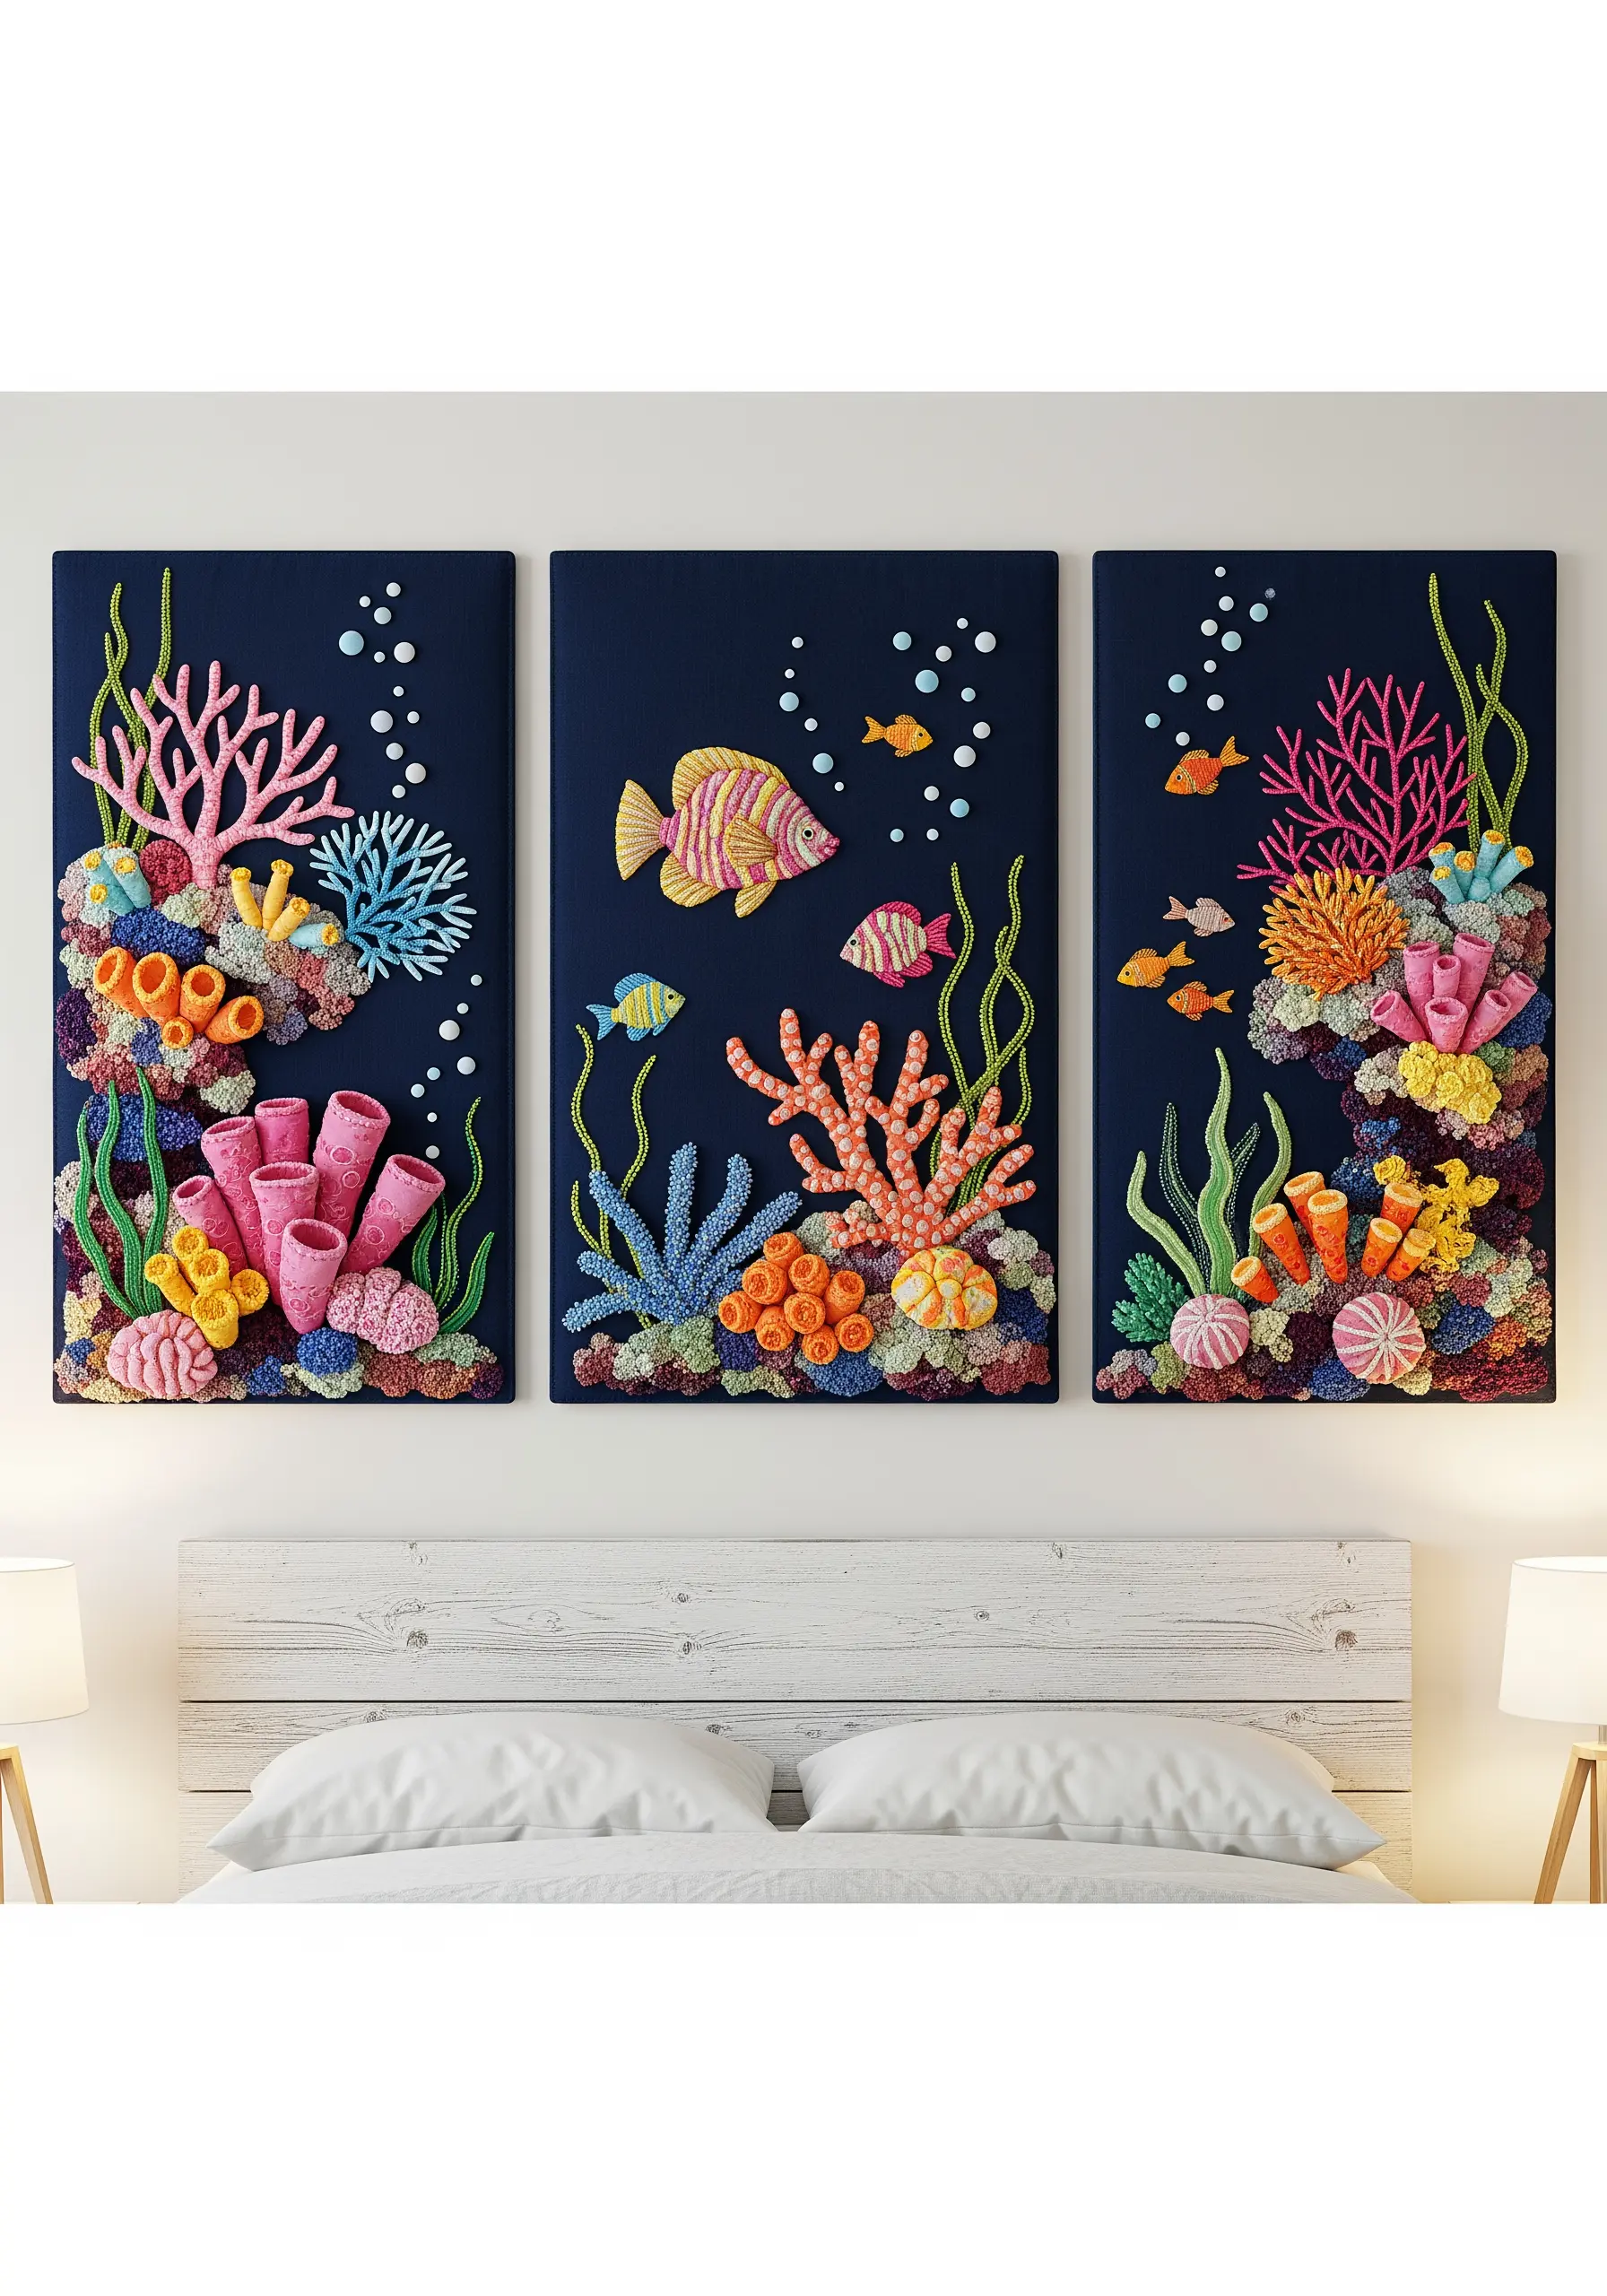
Create a sense of deep-sea perspective by stitching on dark navy or black fabric, which makes vibrant coral tones pop.
Work from back to front: stitch distant seaweed with single-strand backstitches first.
Then, build the mid-ground coral with satin stitches and colonial knots, and finally, bring foreground elements forward using padded satin stitch or thick, woven wheel stitches for a three-dimensional effect.
This layering technique transforms a flat scene into an immersive underwater world.
Grouping your canvases as a triptych turns individual designs into a cohesive, large-scale art piece.
Discover more sea animal embroidery ideas to create coastal-themed table runners and decor.
3. Elevating Line Art with Tone-on-Tone Texture

For a minimalist coastal aesthetic, focus on the elegance of a single line.
Choose a fabric with a visible weave, like linen or unbleached cotton, and match your thread color closely to it.
Instead of standard floss, use a pearl cotton thread; its twisted structure gives the line a subtle, rope-like definition that catches the light.
The goal isn’t high contrast but a quiet, textural statement where the stitched line emerges softly from the background.
Frame the finished piece with plenty of negative space to enhance its delicate, refined feel.
These minimal ocean-inspired embroidery pieces are perfect for serene wall decor.
4. Weaving a Large-Scale Textile Seascape
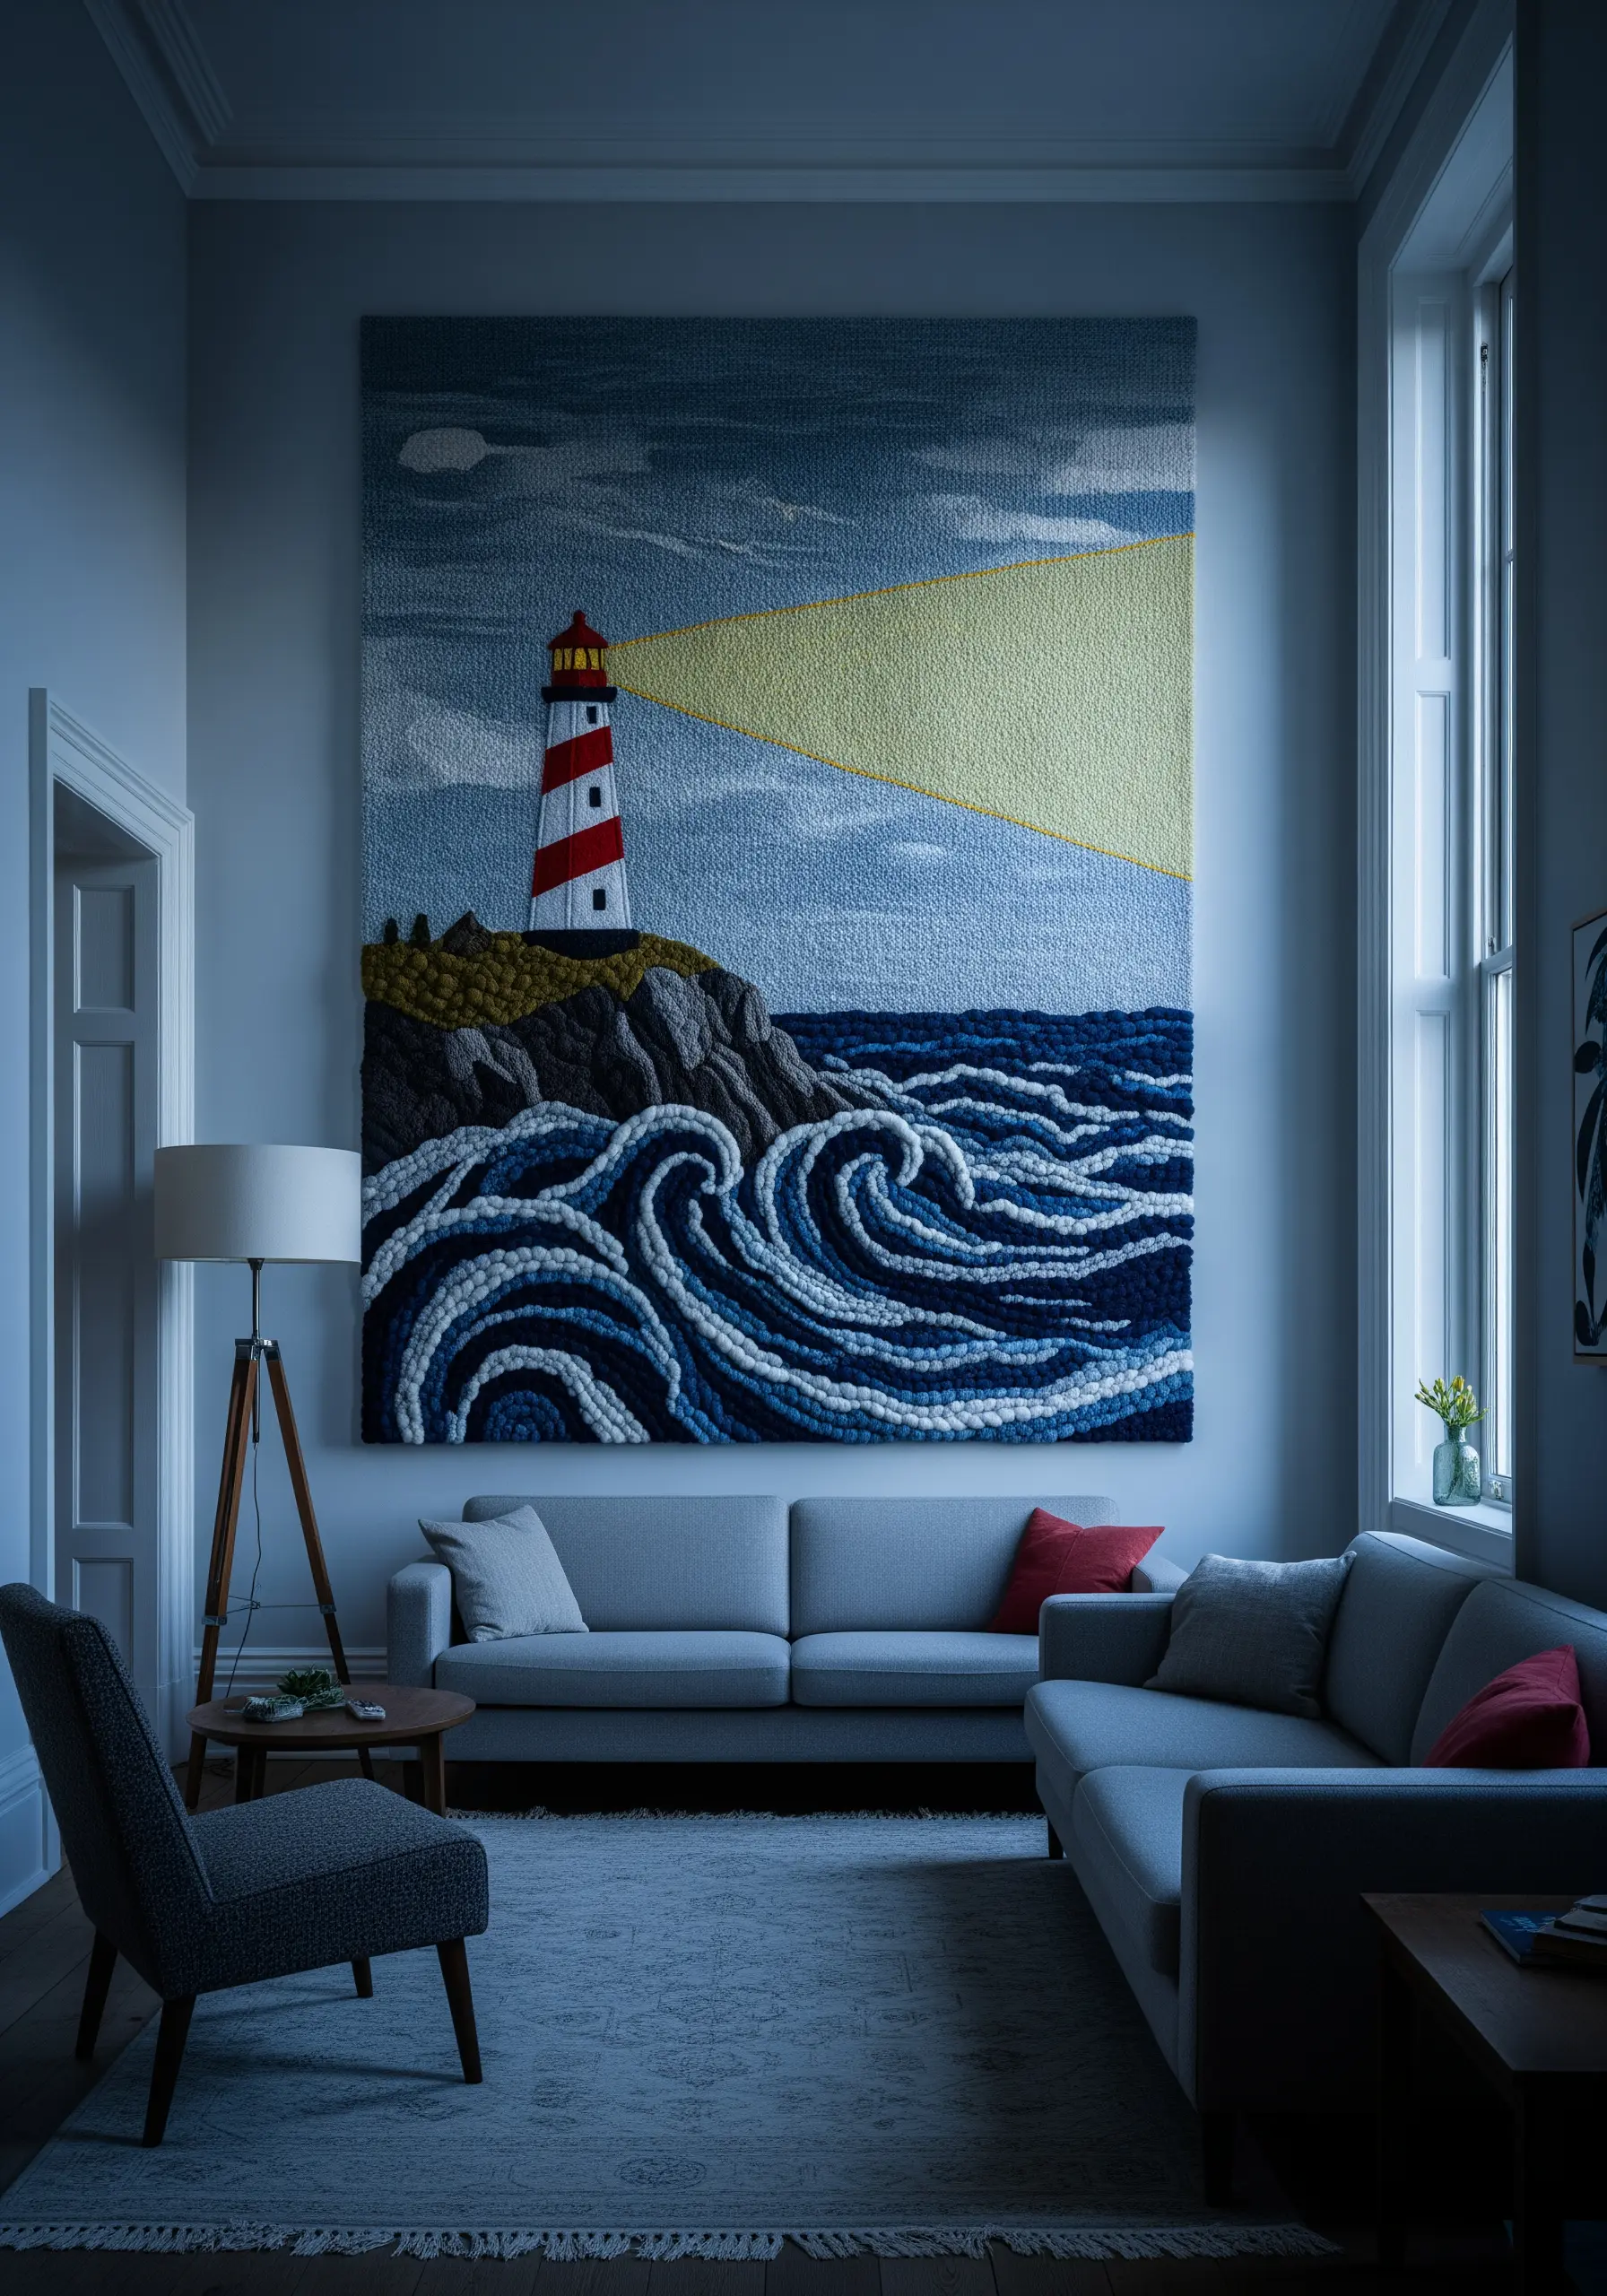
When working on a large tapestry, abandon tiny stitches for bold, efficient techniques that build texture quickly.
Use chunky yarn and a punch needle or wide chain stitch to fill the sky and sea, varying the loop height to create a rugged, tactile surface.
For the rolling waves, couch thick cords or plied yarn onto the fabric, creating dramatic, sculptural lines that would be impossible with standard floss.
This approach treats thread like paint, allowing you to cover large areas with expressive, touchable texture.
Consider these statement-size embroidered textile hangings to fill large walls without overwhelming detail.
5. Composing a Clean, Geometric Sailboat Trio
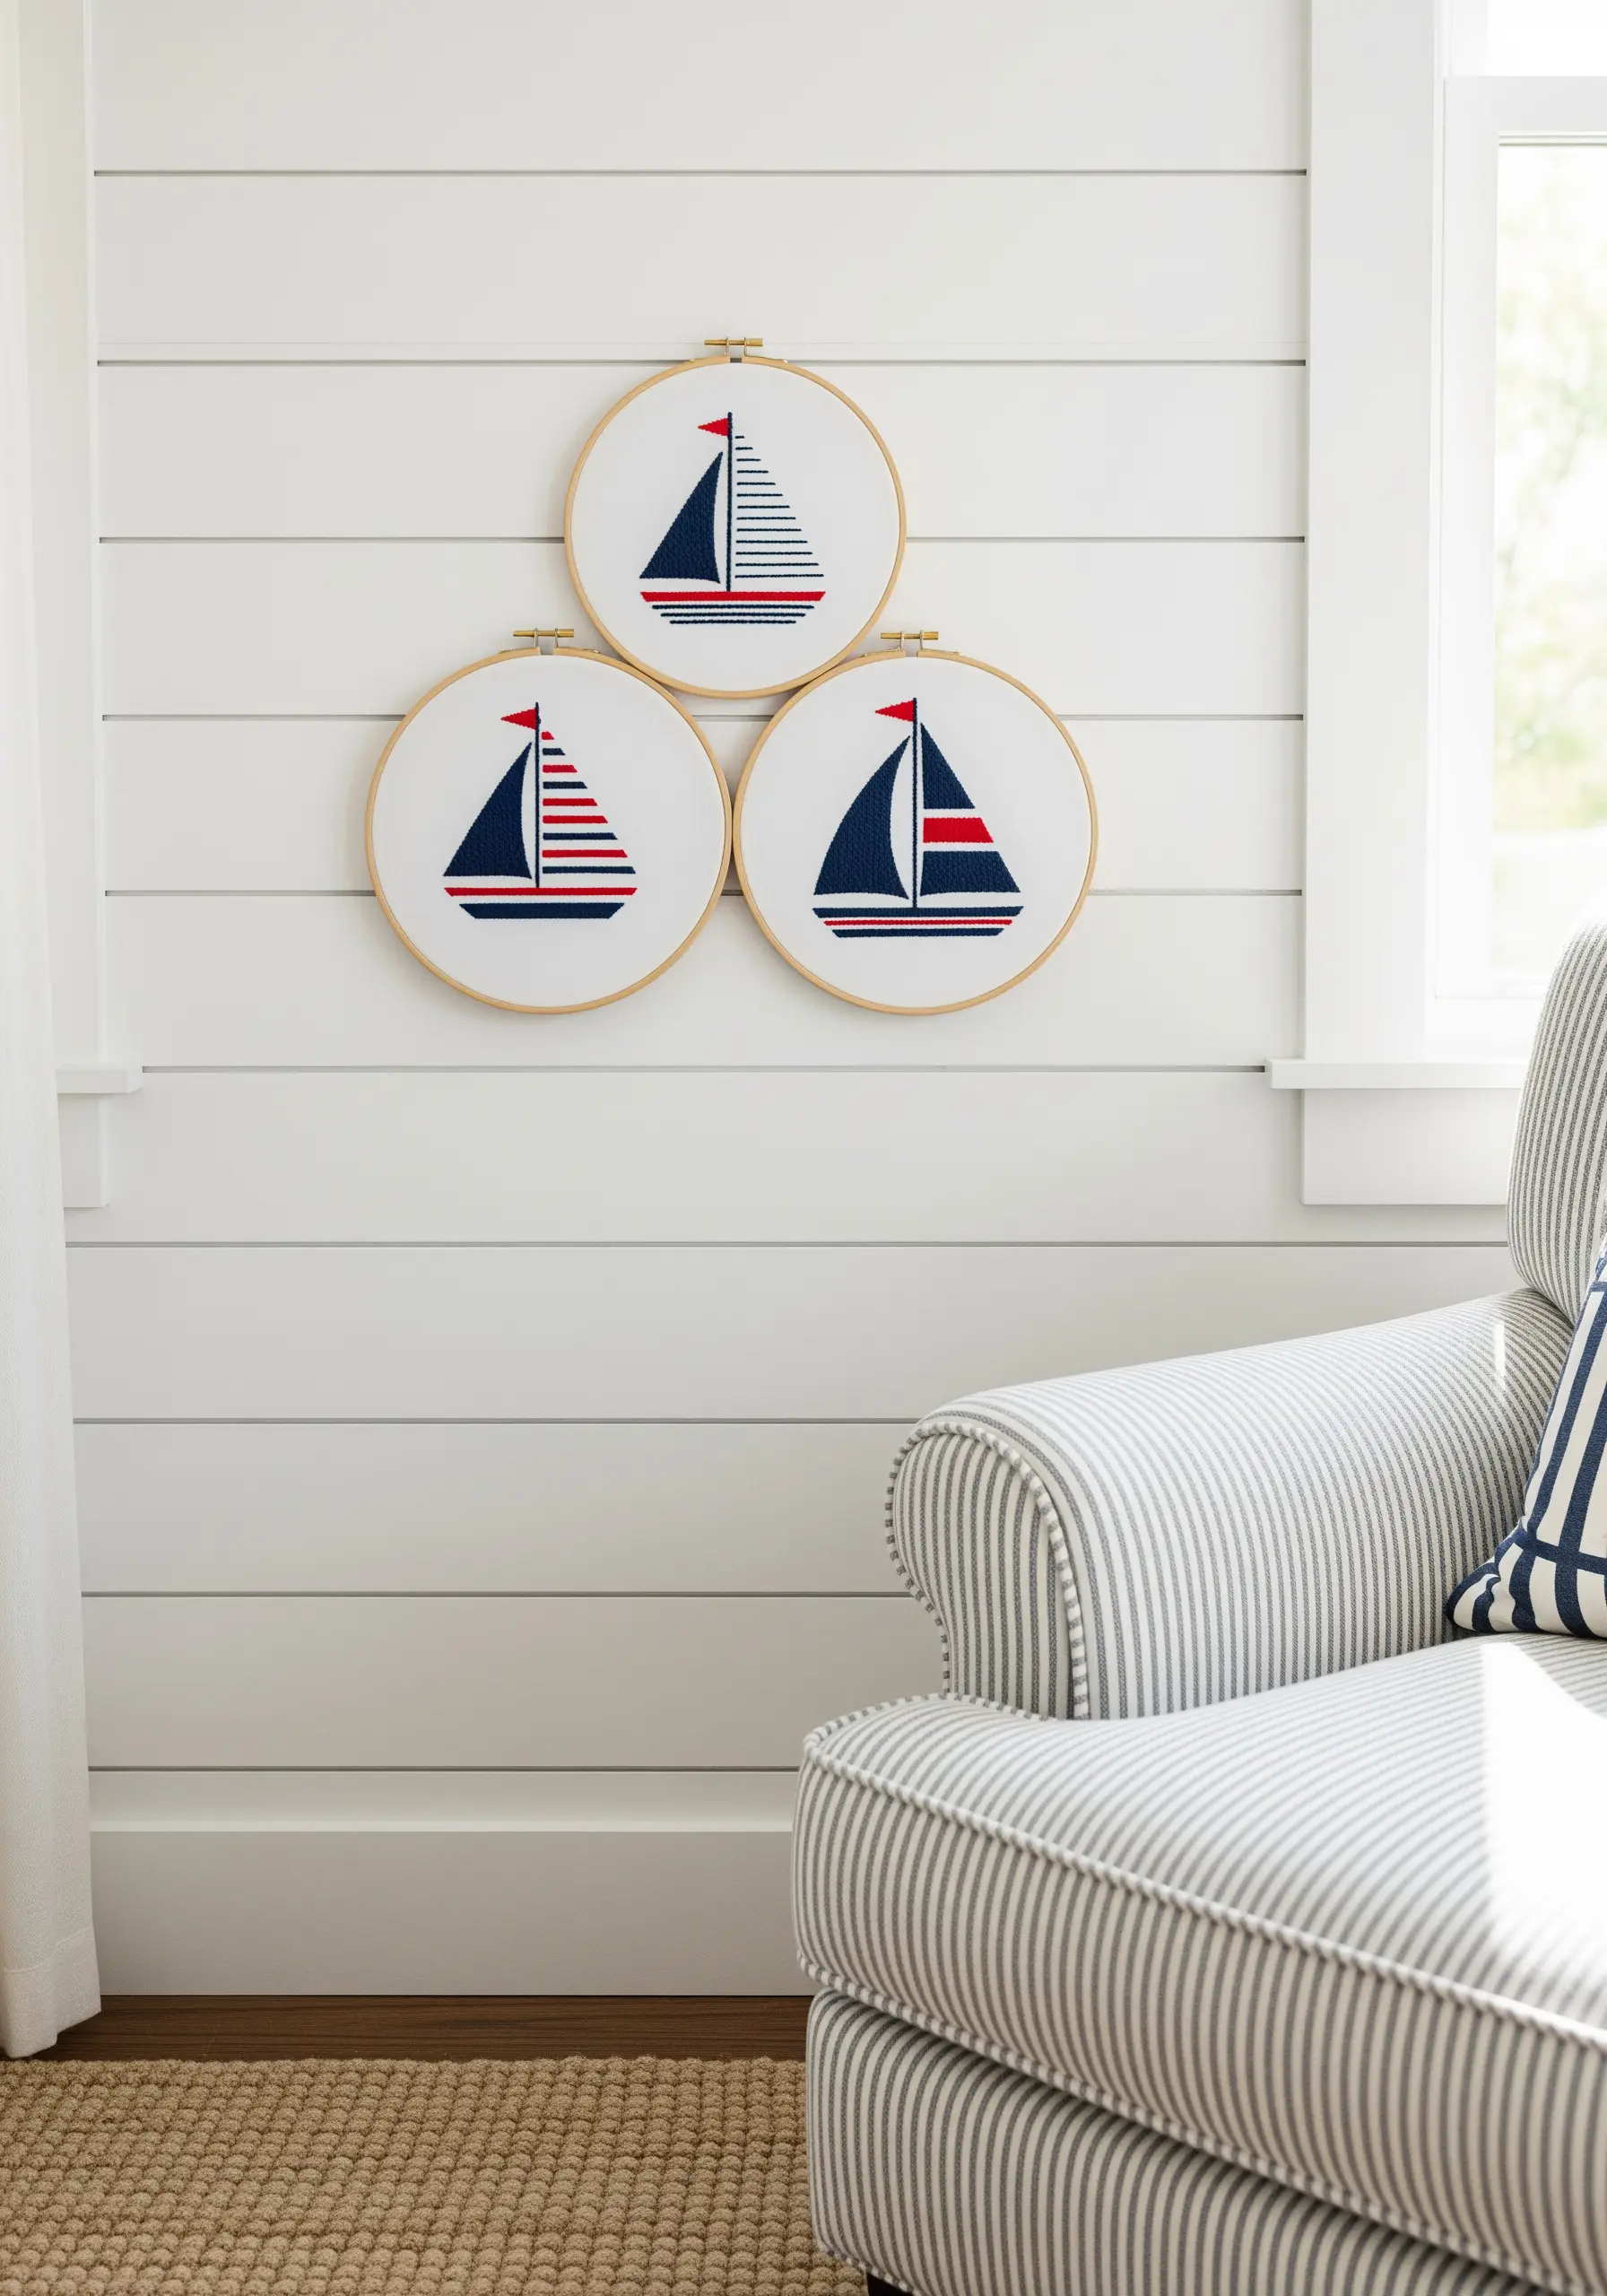
Achieve a crisp, nautical look by focusing on geometric precision rather than intricate detail.
Use a dense satin stitch for the sails and hull, ensuring each stitch lies perfectly parallel to the last for a smooth, block-like finish.
A simple split stitch or backstitch provides a clean outline that defines the shapes.
The key is the limited color palette—navy, red, and white—which creates a classic, cohesive look.
Arranging three identical hoops in a tight grouping transforms simple motifs into a deliberate, graphic art installation.
These geometric embroidered wall decor ideas are perfect for modern homes.
6. Crafting a Rustic Anchor with Mixed-Media Collage
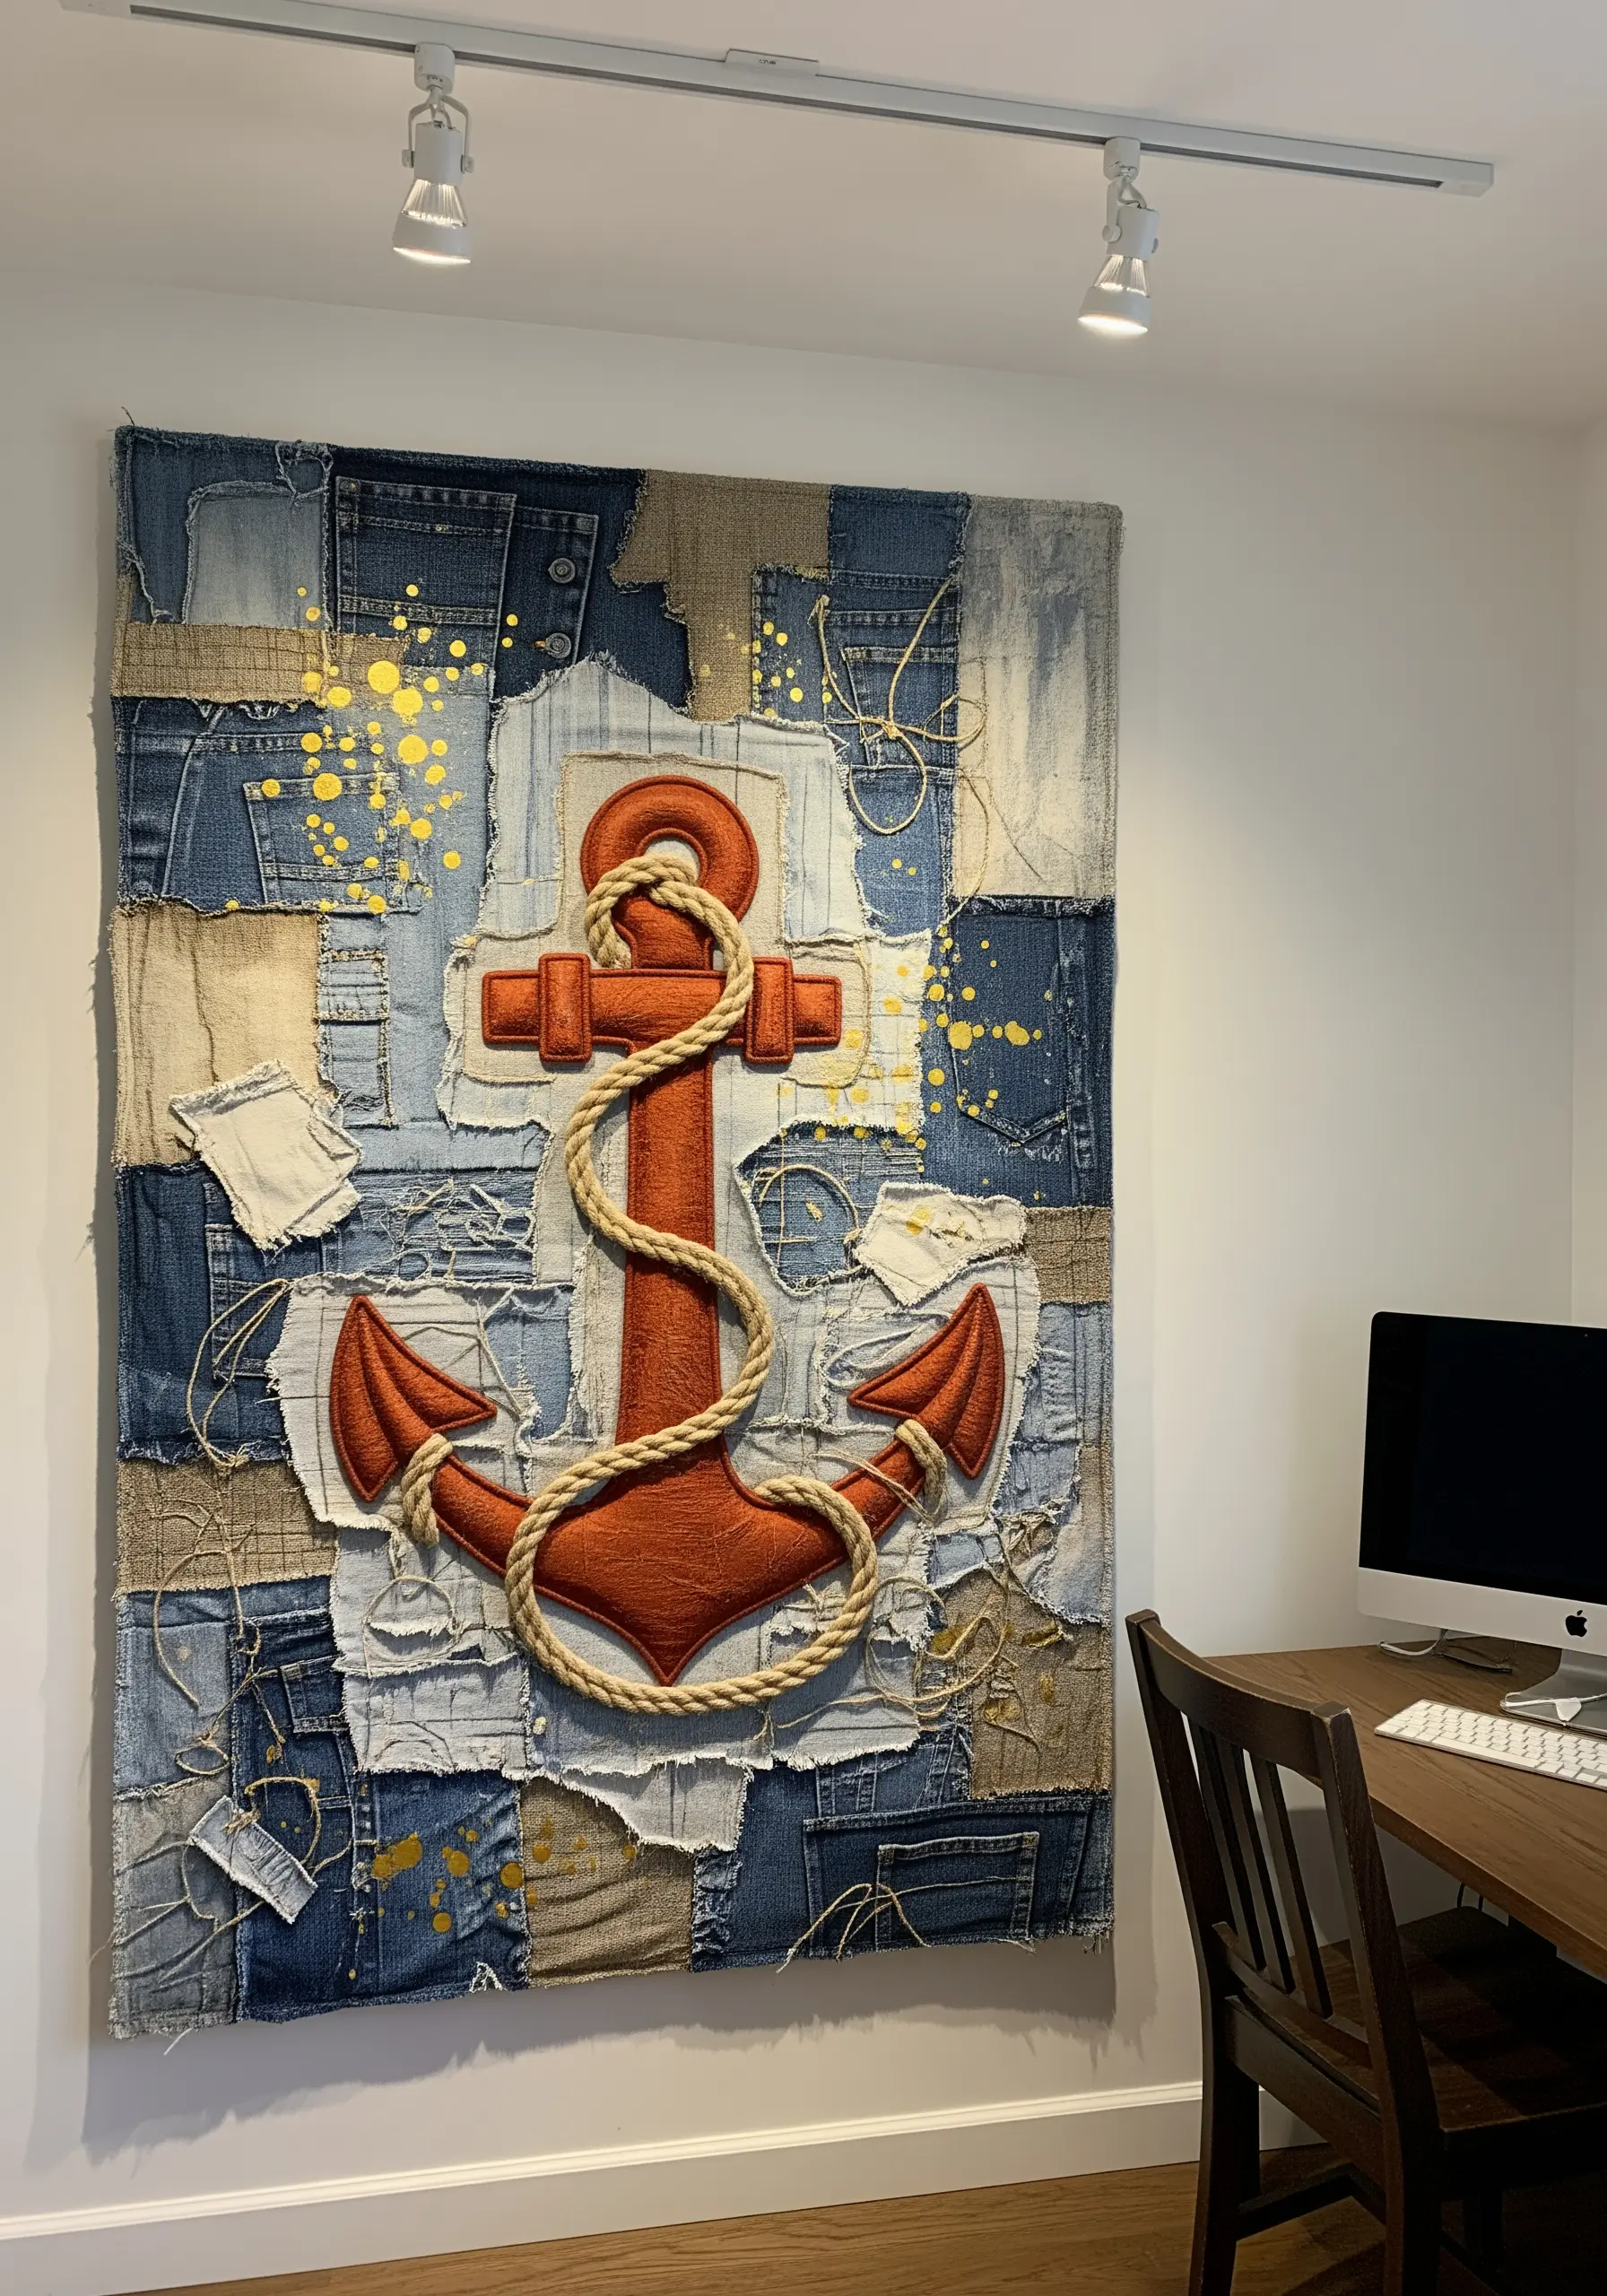
Create a powerful focal point by combining embroidery with appliqué and collage.
Start with a background of patched denim and burlap scraps, creating a rugged, weathered base.
The anchor itself can be stitched with a padded satin stitch to give it a raised, almost 3D-effect, making it stand out from the textured background.
Instead of stitching the rope, couch actual twine or thick cord around the anchor for an authentic, tactile element.
This mixed-media approach adds a layer of storytelling and history to your piece.
These scrap fabric collage embroidery ideas are shockingly beautiful and sustainable.
7. Capturing Lightness with Sketch-Style Stitches
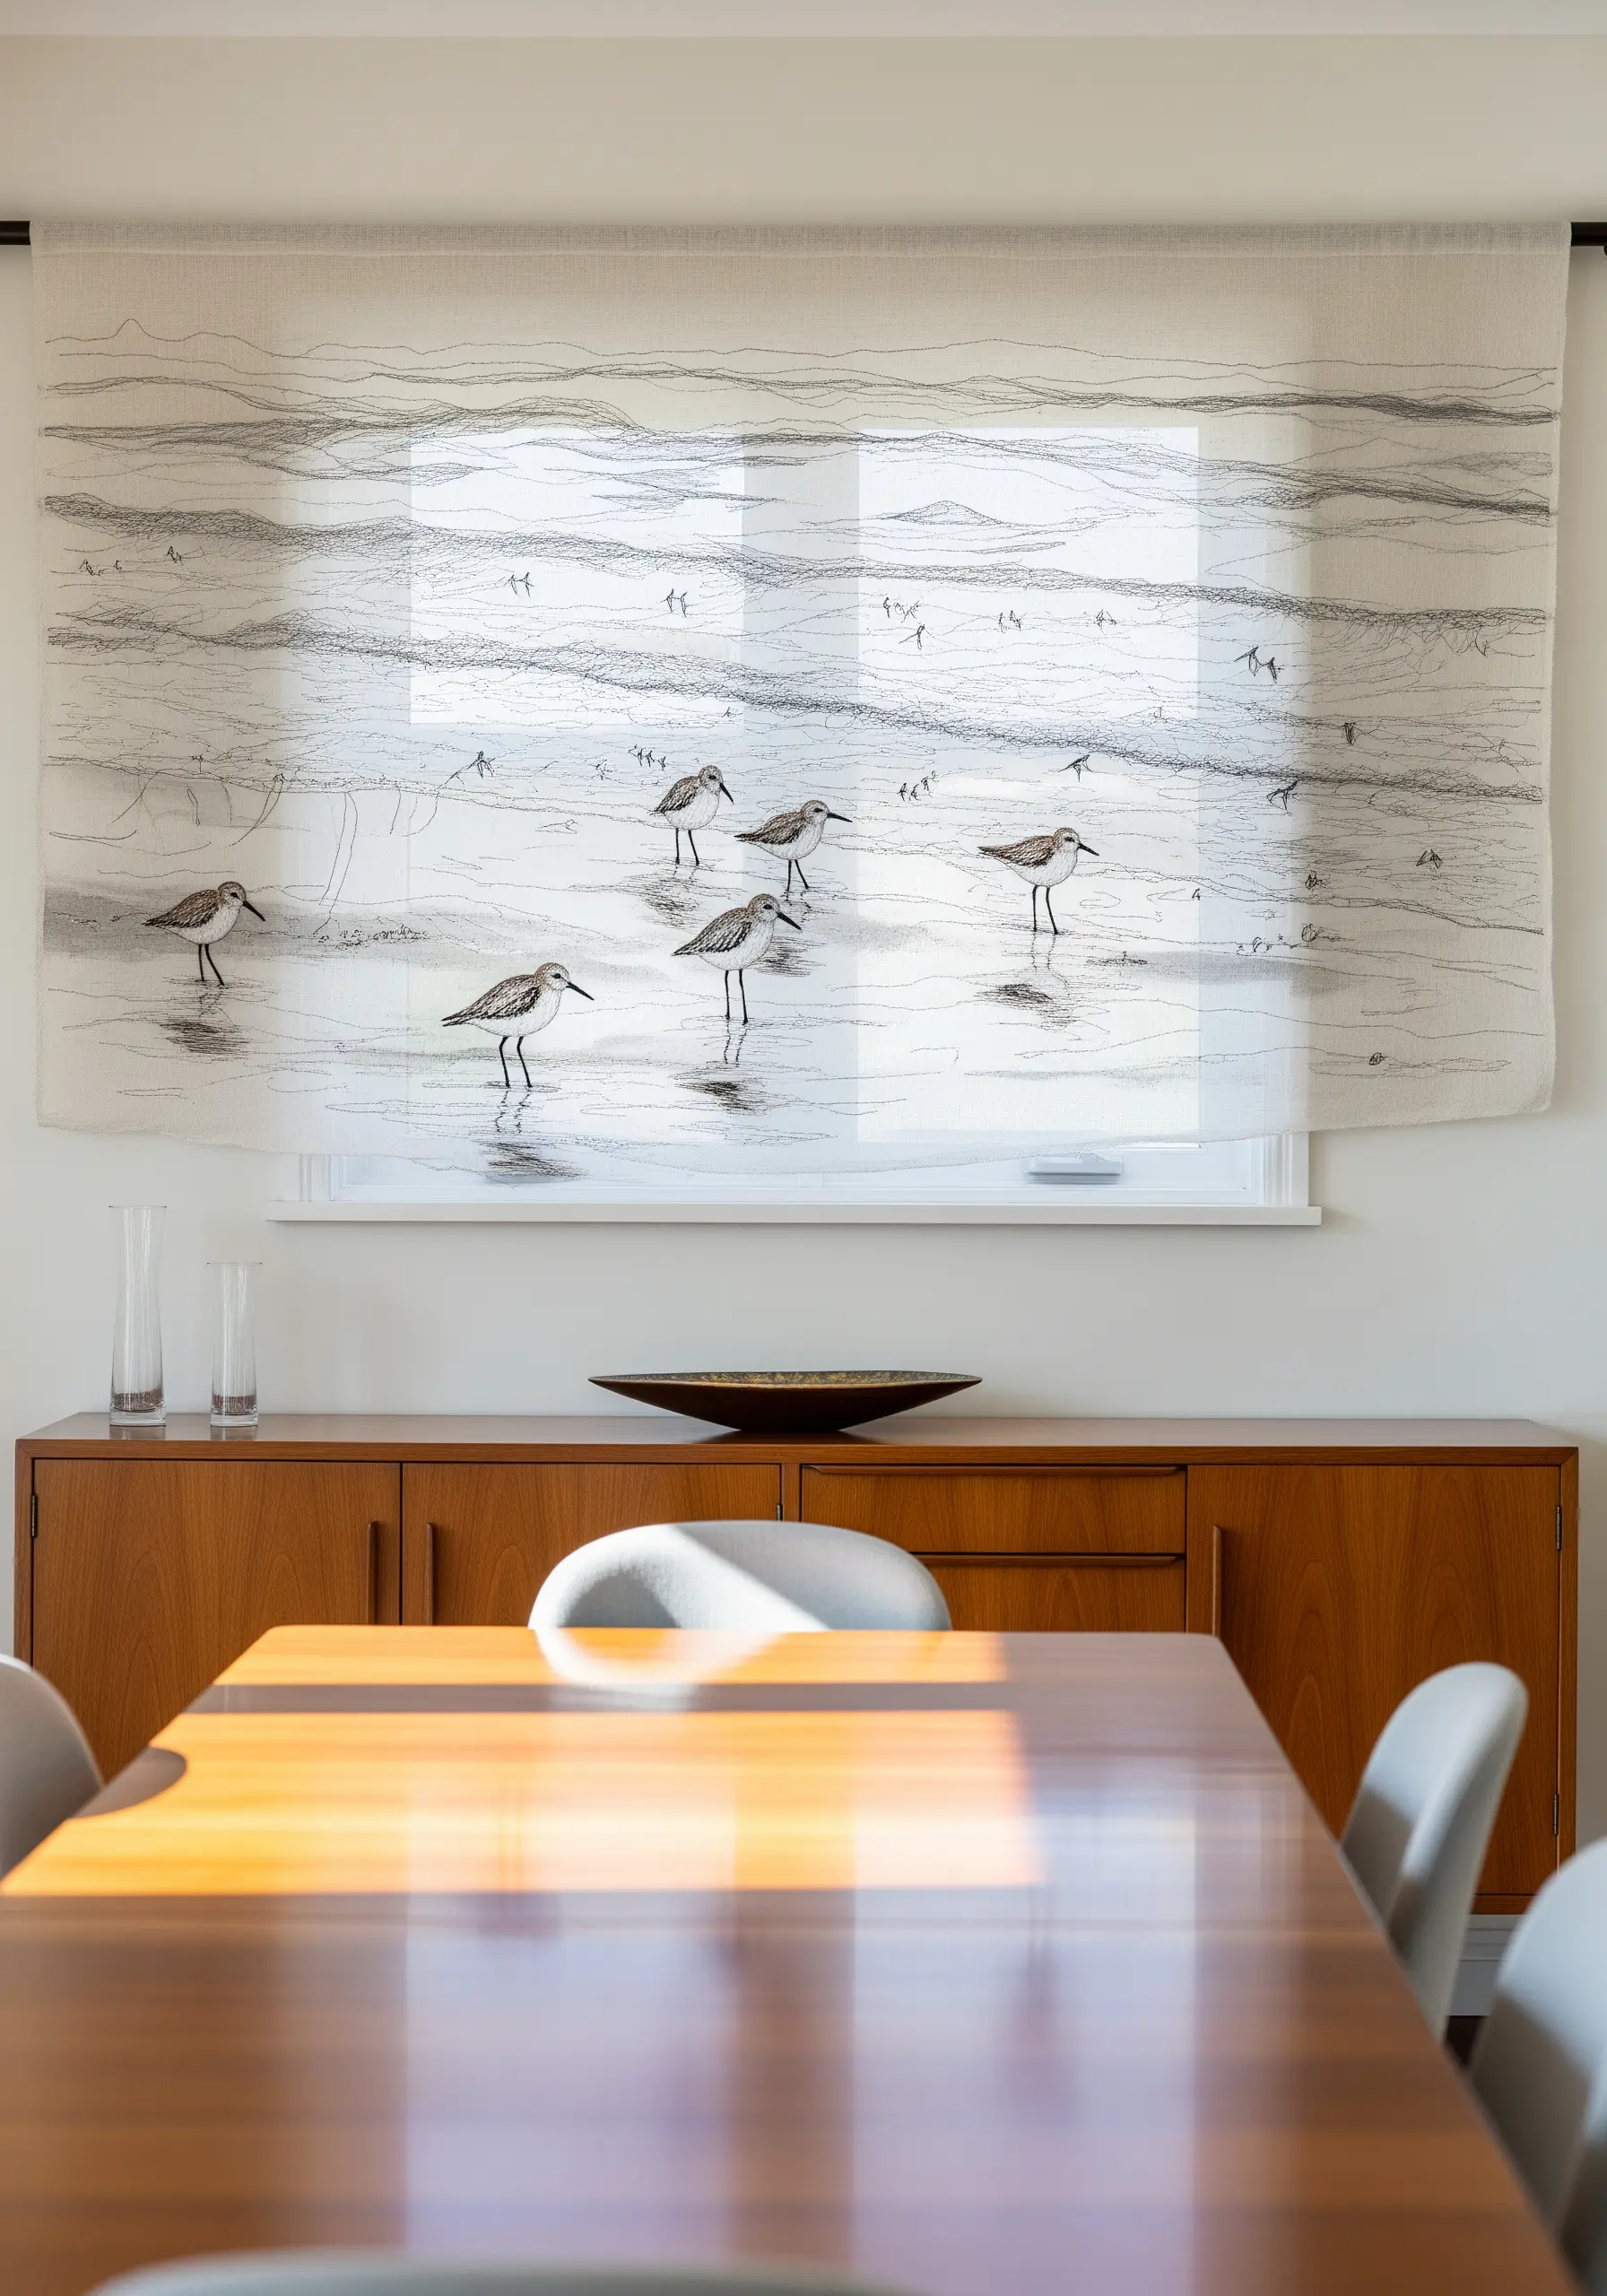
Recreate the feel of a pencil sketch on fabric by using a single, dark-colored thread on a light, semi-sheer background.
Use a simple backstitch or stem stitch with varying lengths to mimic the fluid, imperfect lines of a drawing.
Don’t fill in shapes completely; instead, use loose, open stitches to suggest shading and movement, allowing the fabric to show through.
This technique is less about realism and more about capturing the essence and atmosphere of a coastal scene with effortless elegance.
These minimalist embroidery hoops can transform your bedroom into a peaceful retreat.
8. Achieving Realism with Thread Painting
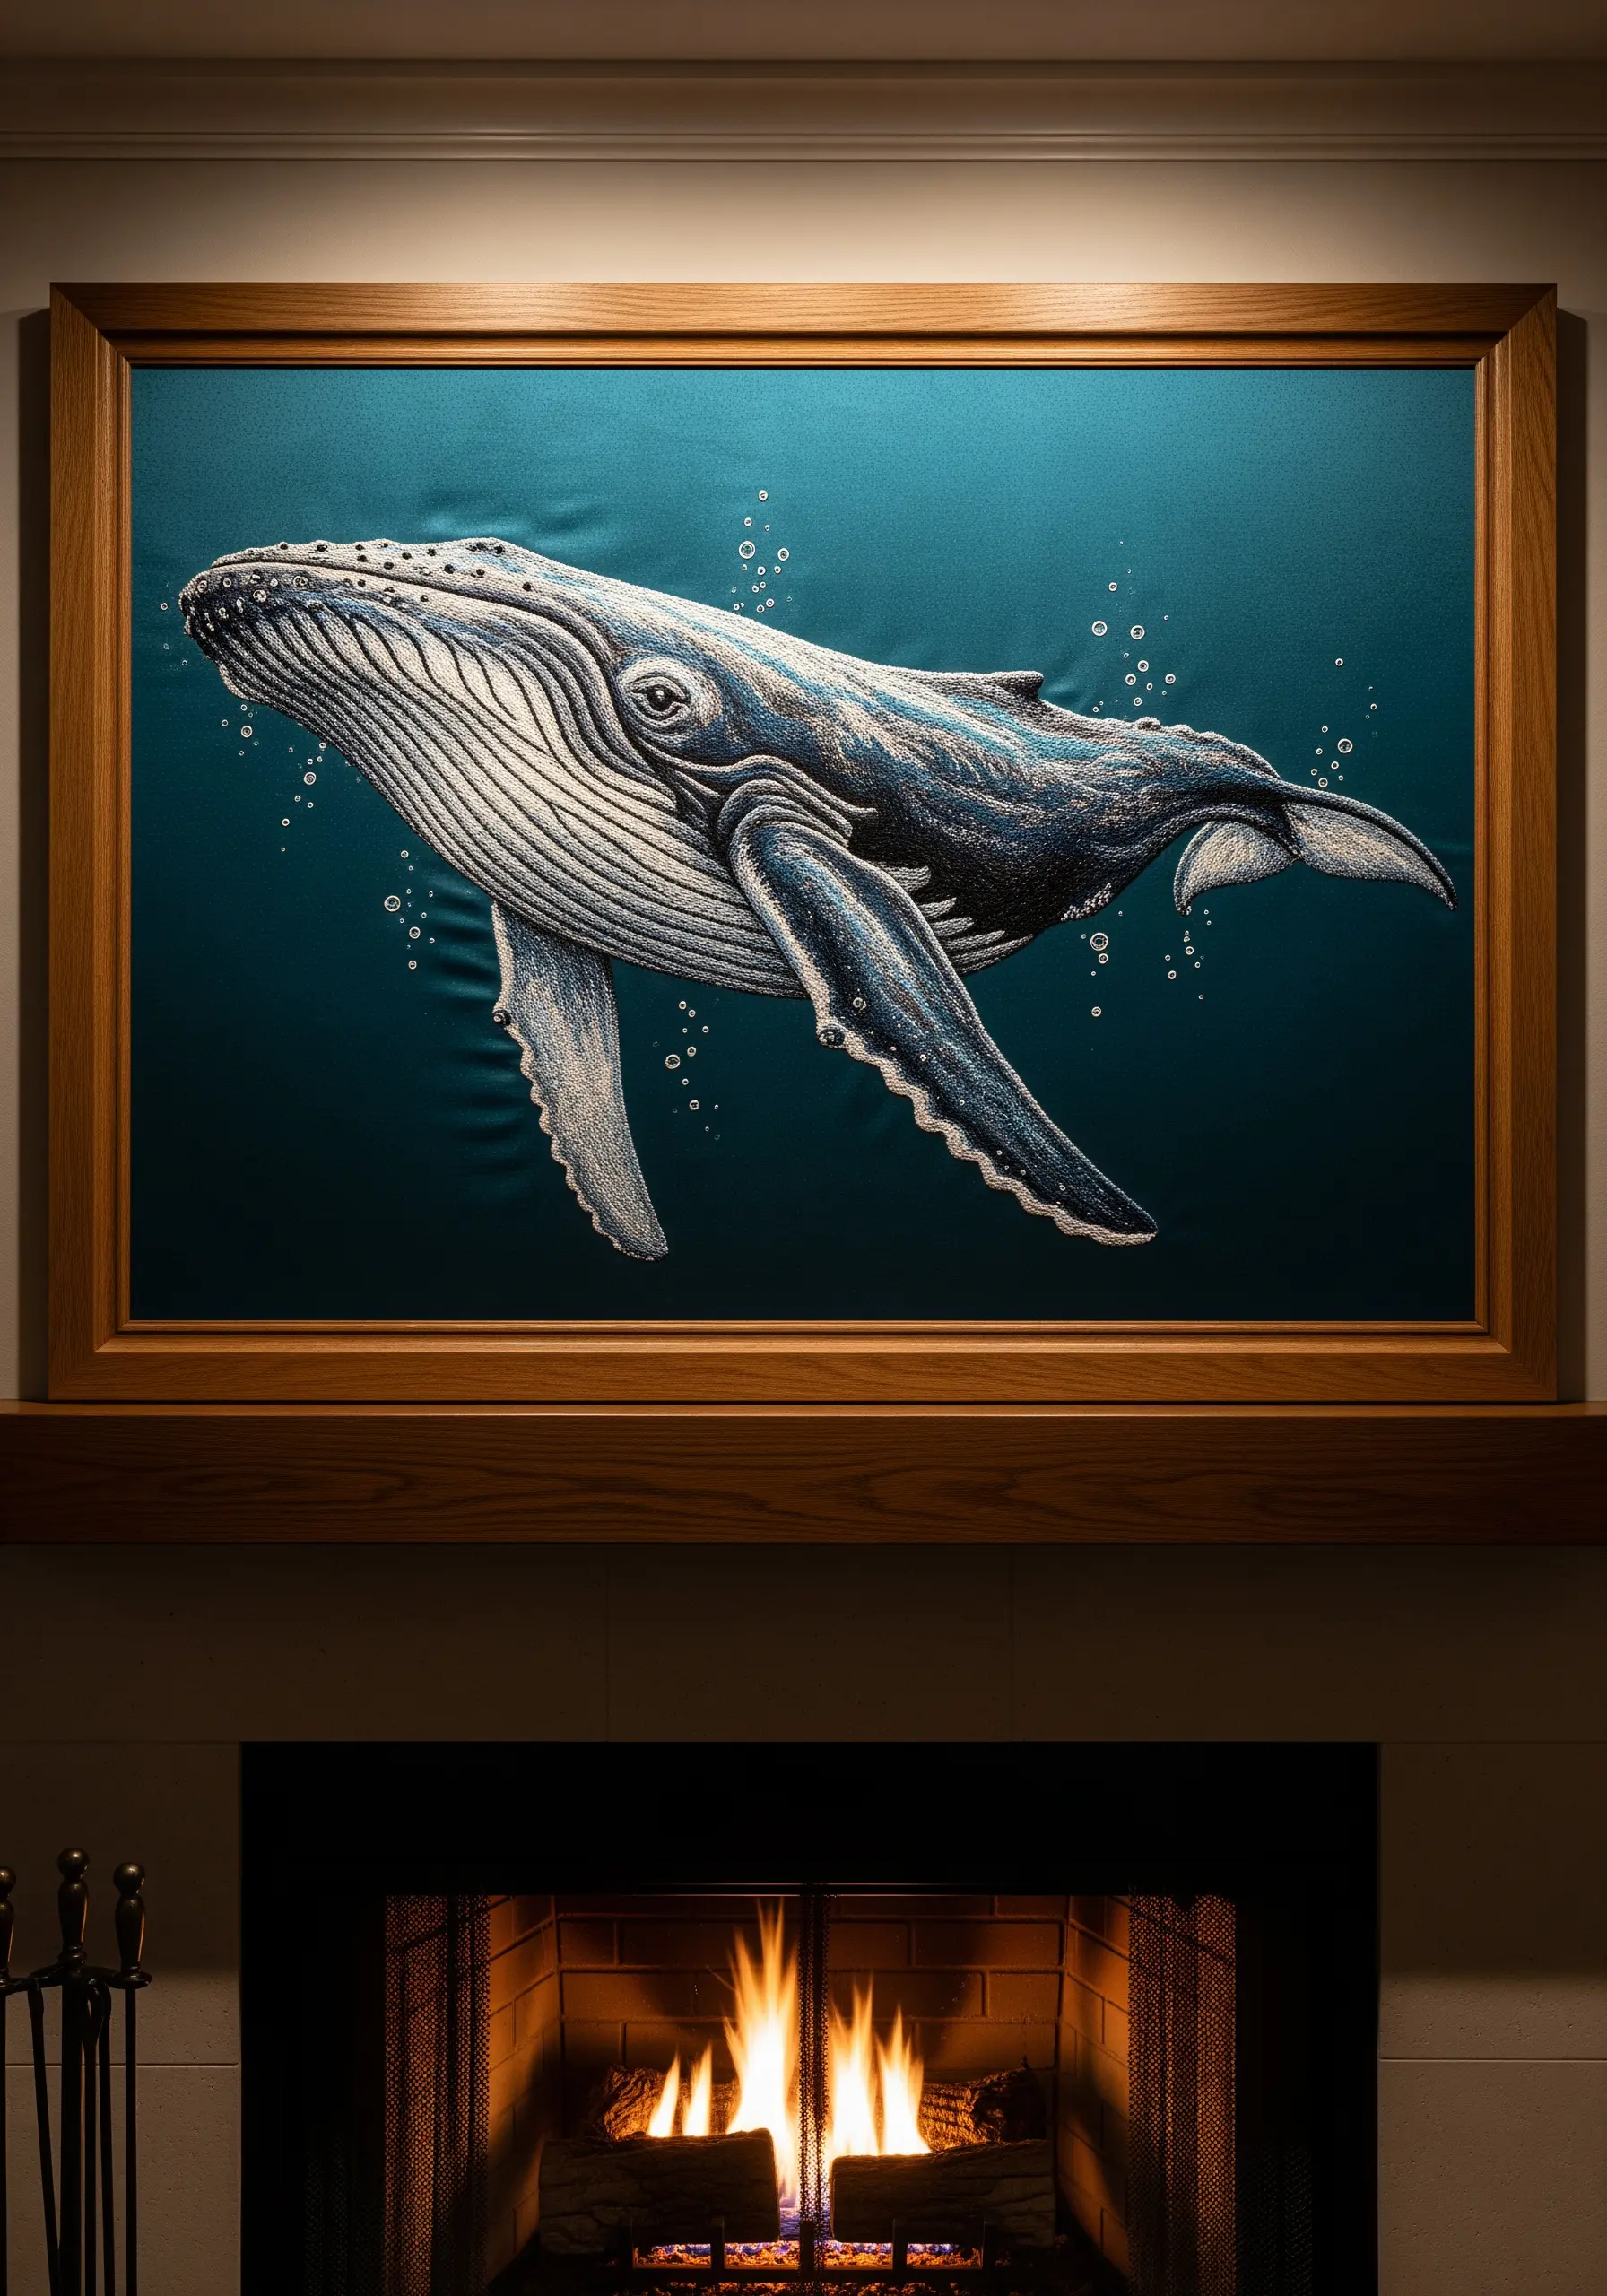
To render a majestic creature like a whale, thread painting is your key to achieving depth and realism.
Use a single strand of floss and the long-and-short stitch technique, blending dozens of shades of grey, blue, and white to create smooth gradients.
Pay close attention to the direction of your stitches to define the whale’s form and musculature, following its natural contours.
For the subtle highlights and water bubbles, use a silvery metallic or shiny white rayon thread to catch the light and add a wet, glistening effect.
Such whale and dolphin embroidery patterns bring a calm, serene aesthetic to any room.
9. Building Abstract Dunes with Fabric Appliqué
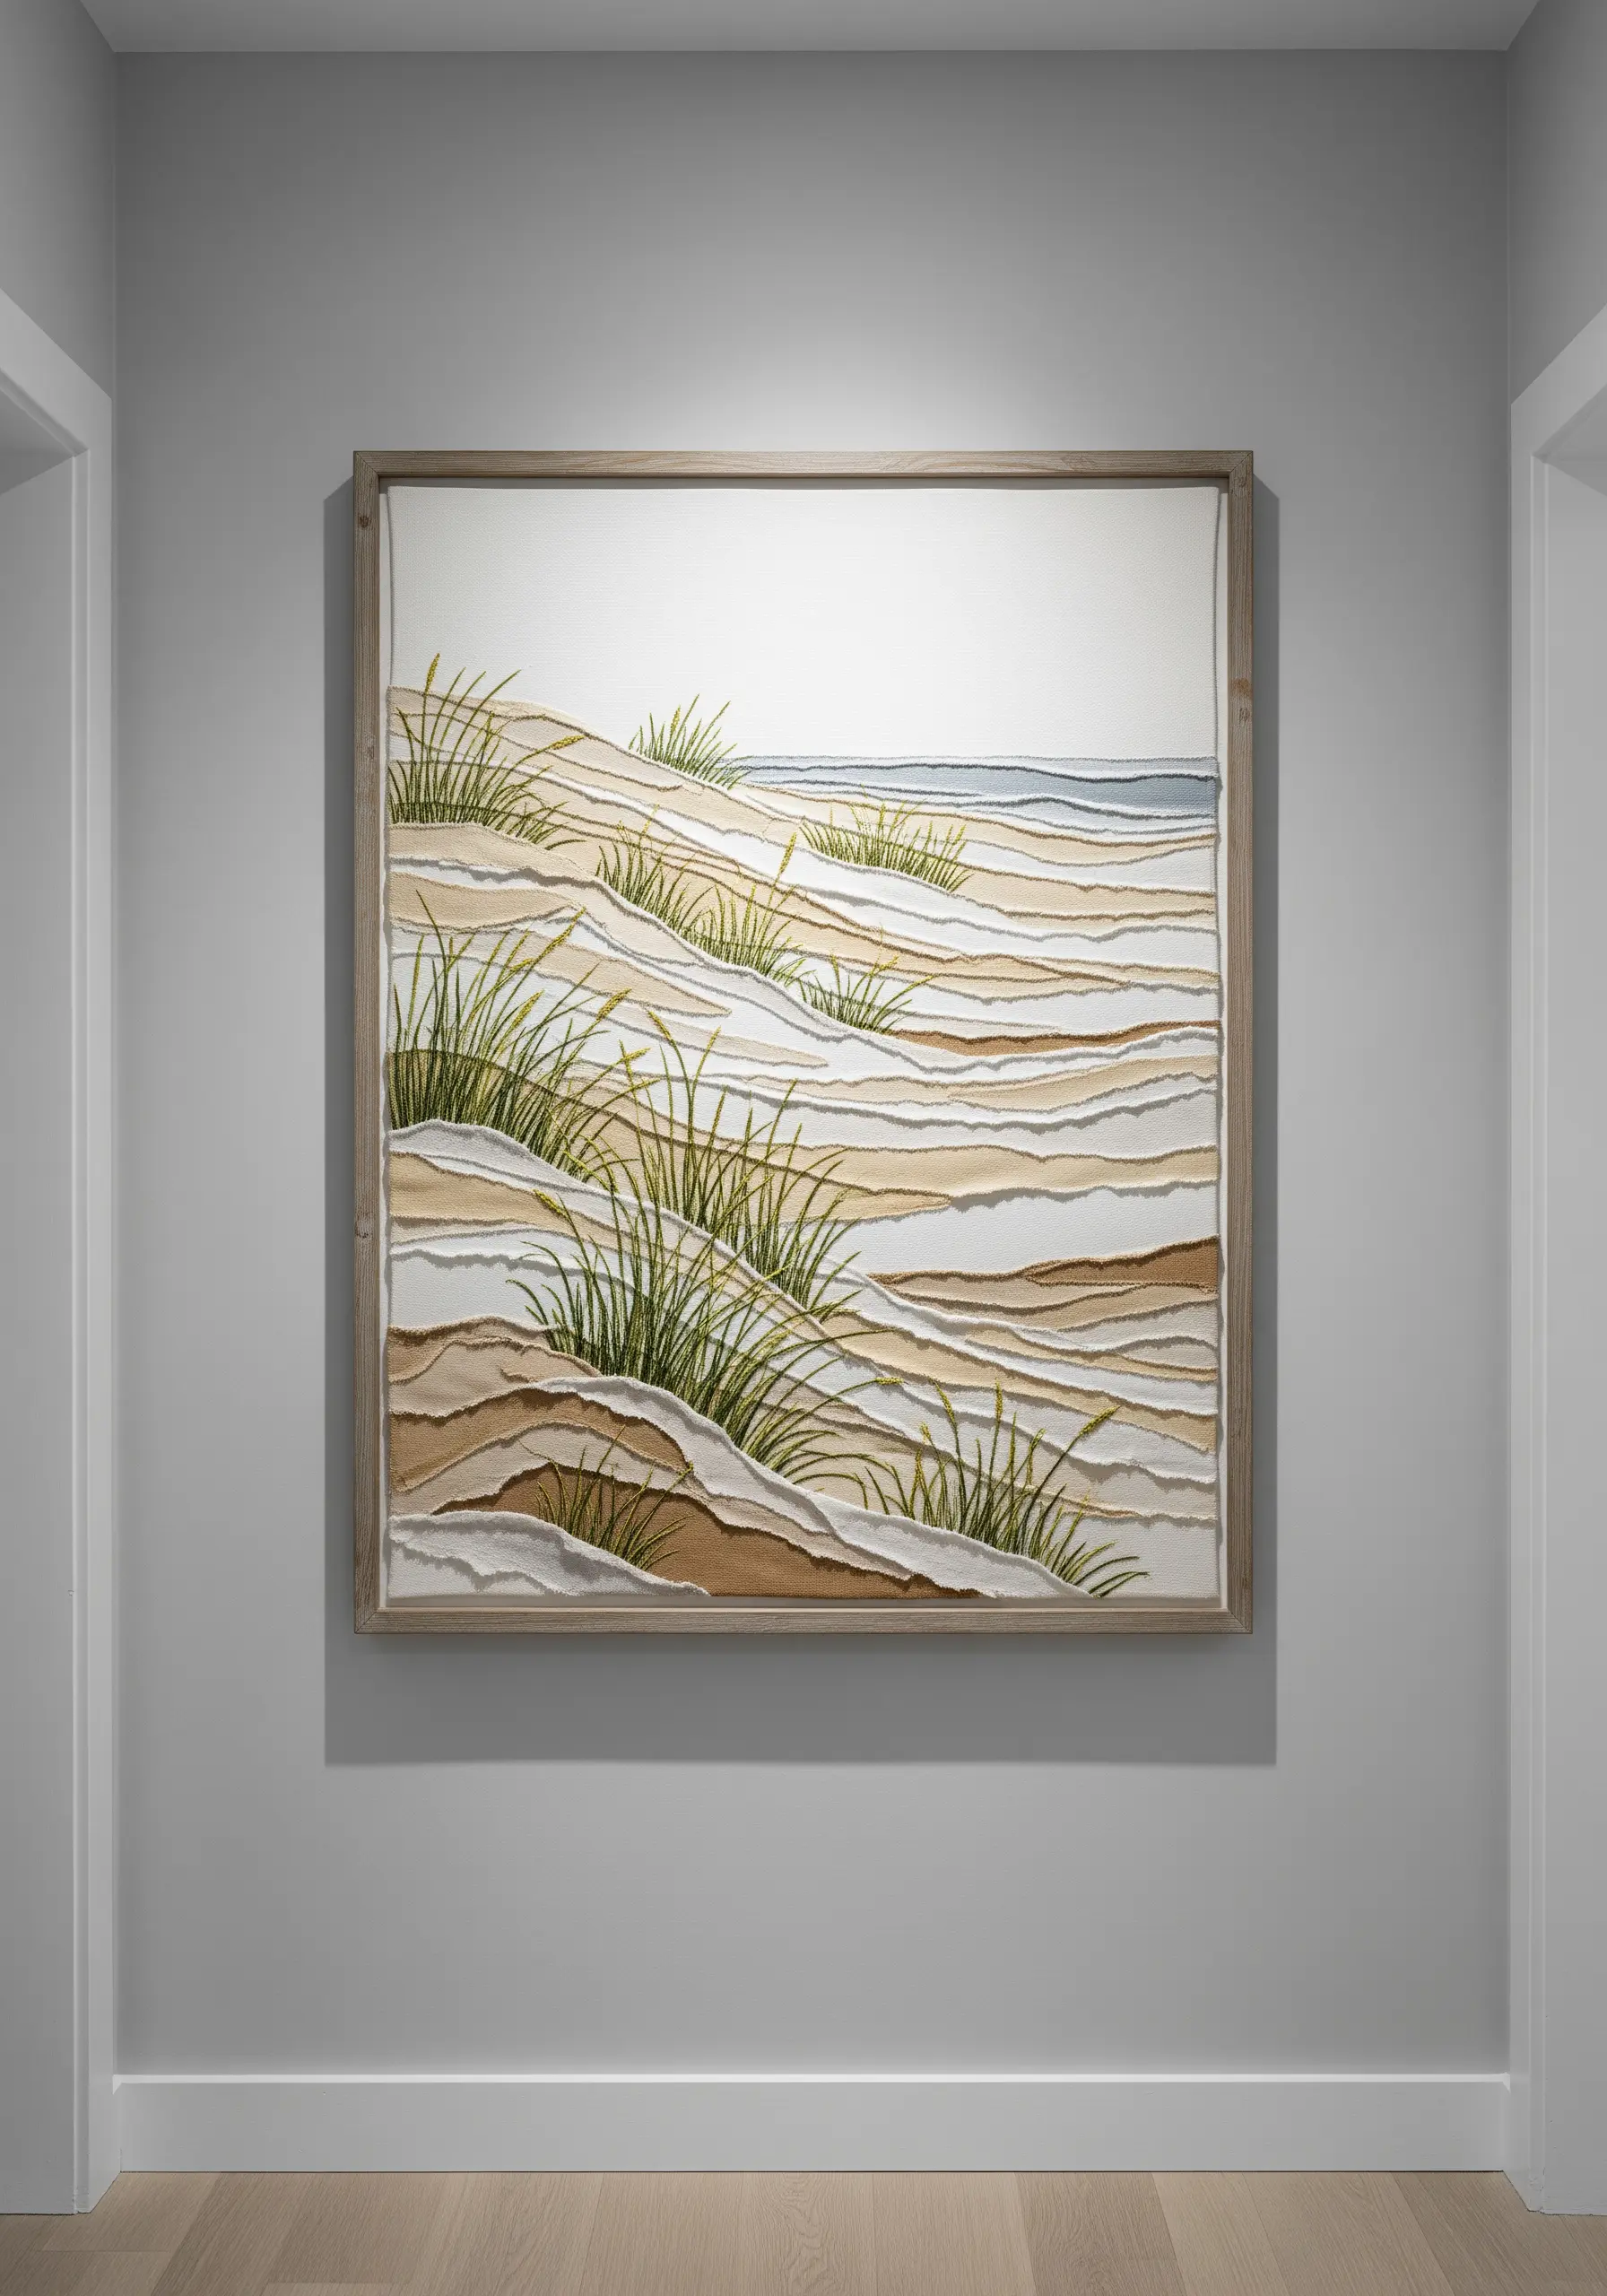
Suggest the soft, layered contours of sand dunes by combining embroidery with raw-edge fabric appliqué.
Cut wavy strips of neutral-toned fabrics like linen, cotton, and muslin, and layer them to build the landscape.
Secure the strips with simple running stitches along their top edges, allowing the raw, slightly frayed bottoms to create soft, organic lines.
Add clumps of dune grass using straight stitches or detached chain stitches in various shades of green, anchoring the abstract layers with a touch of realism.
Try these fabric collage embroidery projects using sheer fabrics for dreamy, layered effects.
10. Painting a Sunset with Directional Satin Stitch
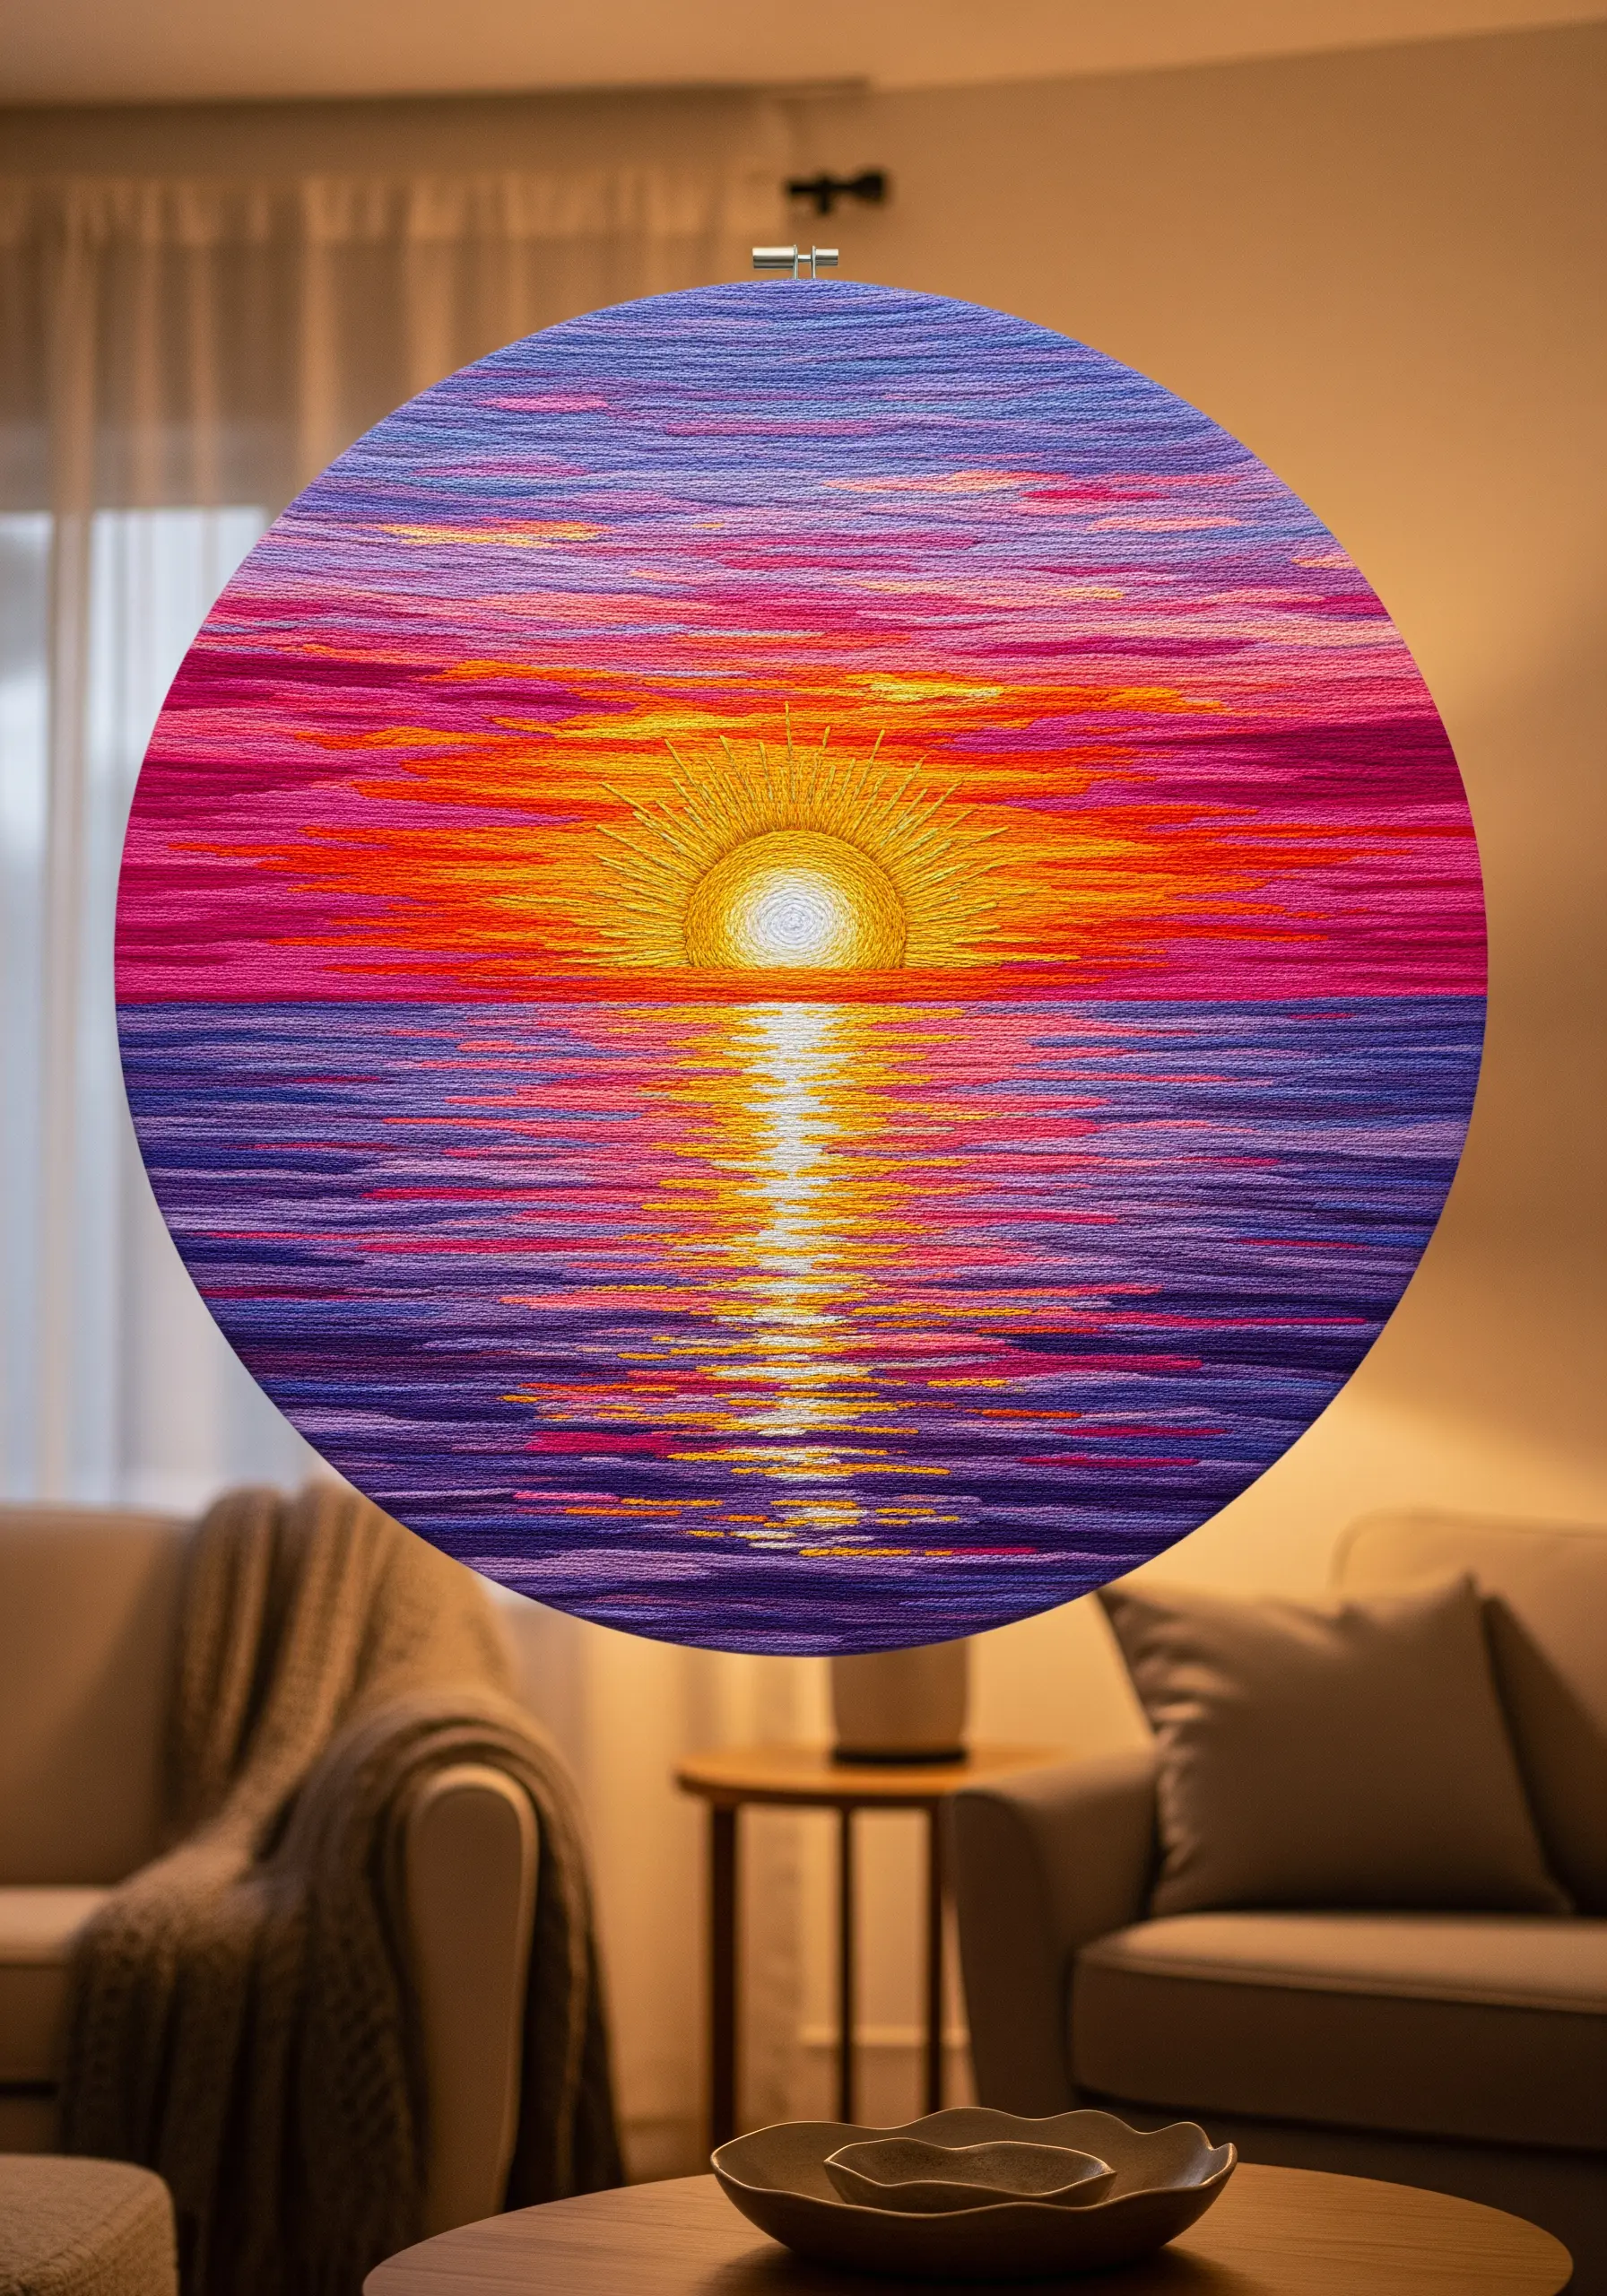
Capture the vibrant glow of a coastal sunset by treating your hoop like a canvas for thread painting.
Use horizontal satin stitches for the entire piece, laying bands of color next to each other to form the sky and its reflection on the water.
The key is a meticulous selection of thread colors—moving from deep purples to fiery oranges and bright yellow—to create a seamless gradient.
For the sun’s reflection, incorporate a single strand of metallic gold or pale yellow silk thread to give it a distinct, shimmering light that stands out from the matte cotton sky.
Explore abstract thread painting ideas to mix shades like a contemporary artist.
11. Stitching a Vintage Nautical Chart
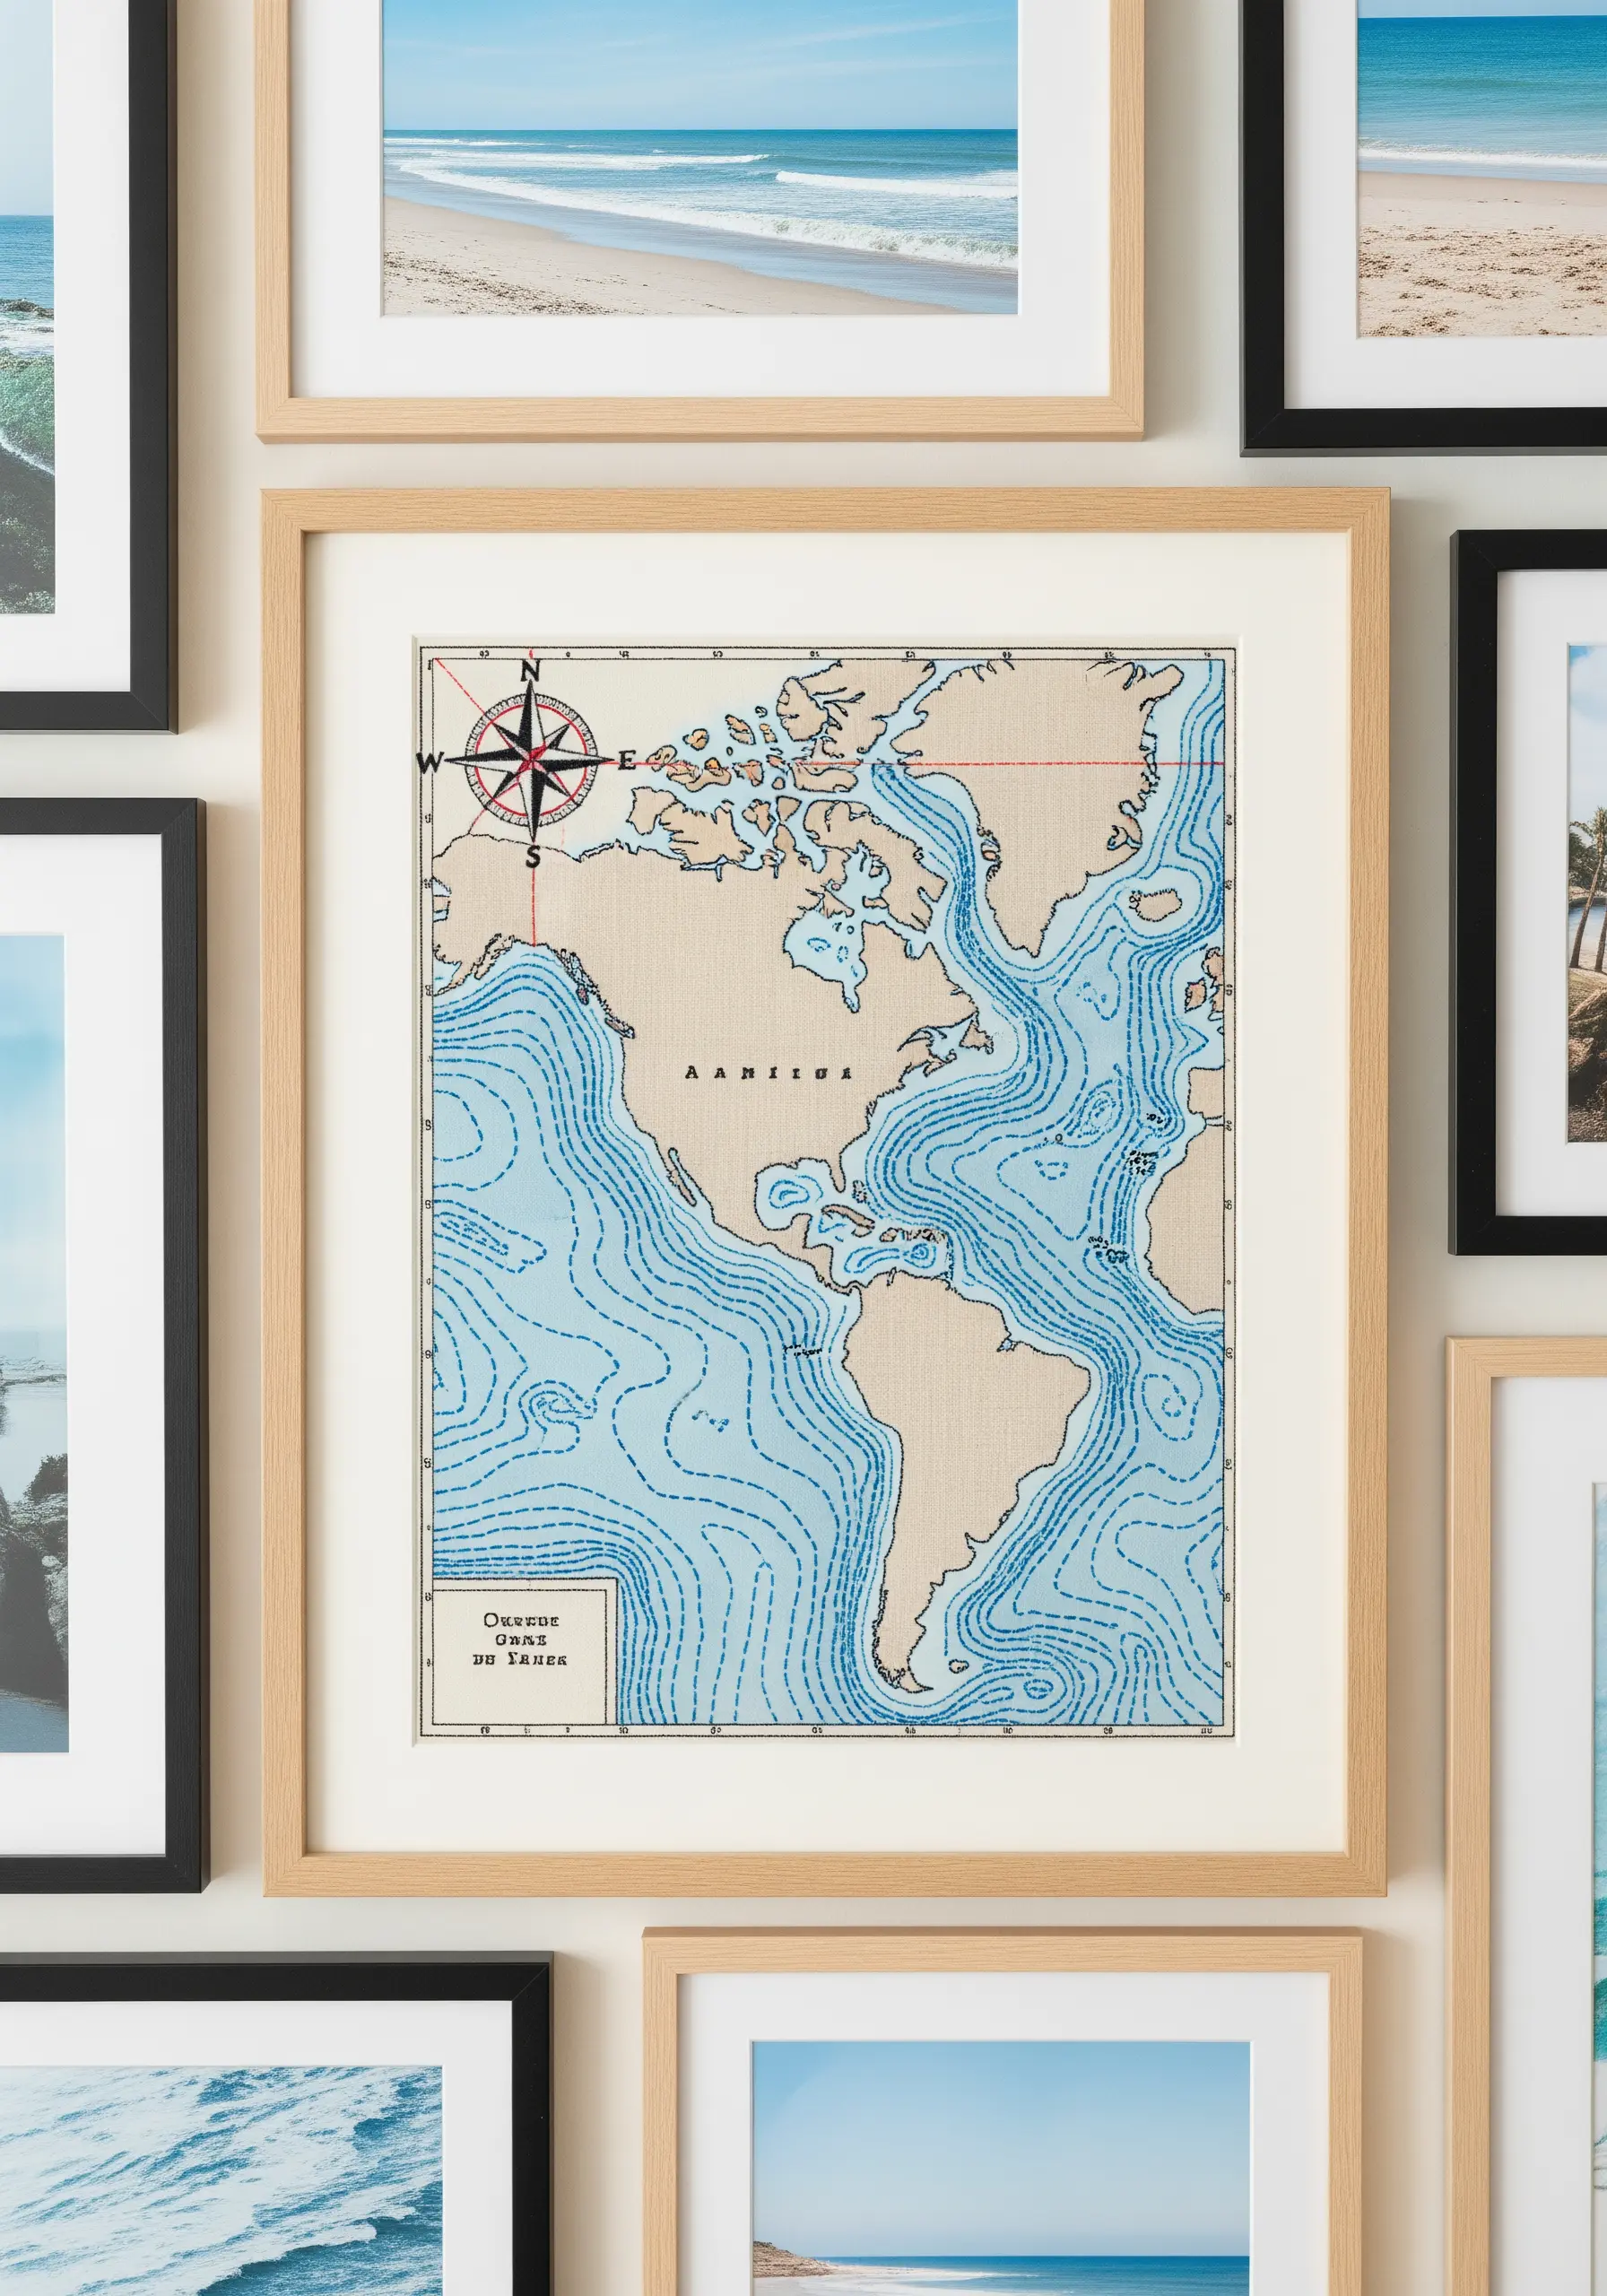
Give your coastal decor a touch of cartographic charm by embroidering a vintage-style map.
Choose a natural-colored linen or canvas to serve as the ‘paper’ and use a simple backstitch for all the linework.
To create the subtle depth of the ocean contours, use two or three closely related shades of blue thread, assigning darker shades to deeper waters.
This creates a topographic effect with minimal effort.
The contrast between the precise, stitched lines and the soft fabric base gives the piece a unique, tactile quality.
These minimalist embroidery patterns are perfect for entryway decoration and conversation starters.
12. Creating Ethereal Jellyfish with Ribbon and Tulle
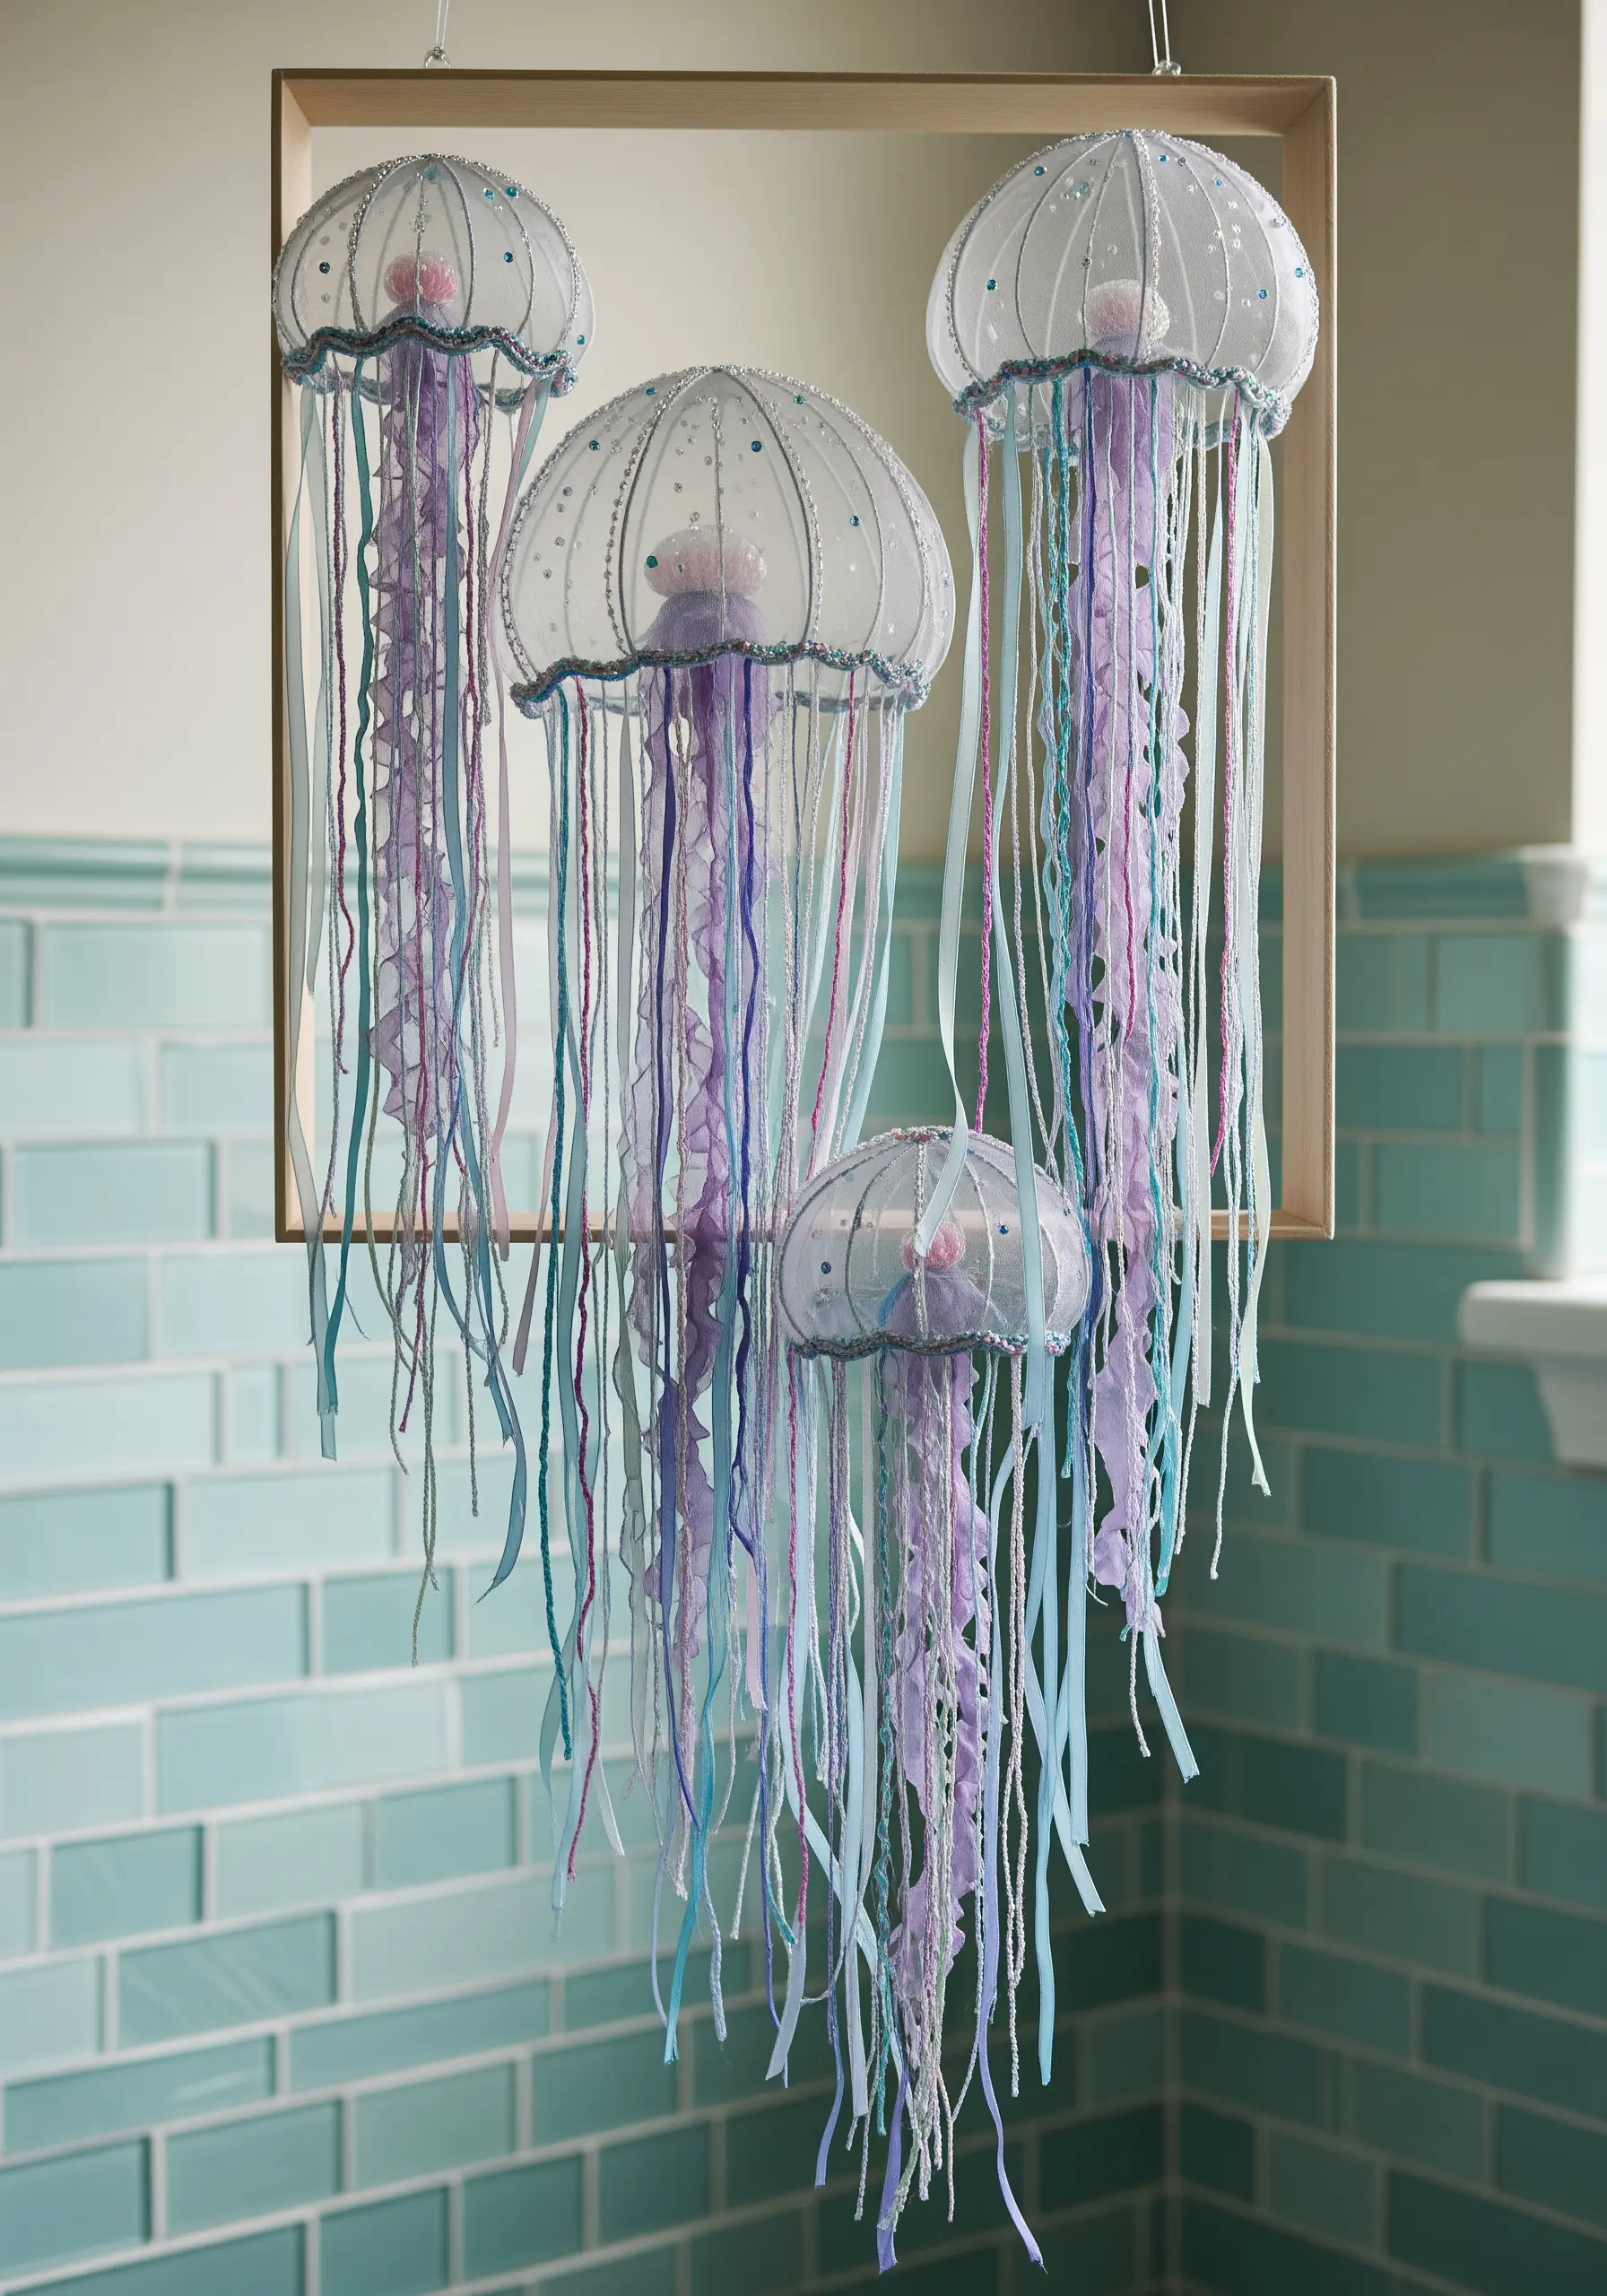
Construct delicate, three-dimensional jellyfish by moving beyond the hoop and into sculptural forms.
Use sheer organza or tulle stretched over a small dome or ball to create the bell shape, embellishing it with seed beads and delicate stitches.
For the tentacles, let silk ribbons, metallic threads, and fine yarns hang freely, mixing textures and lengths to create graceful movement.
This project combines simple stitching with structural artistry, resulting in a piece that floats in the space it occupies.
Explore mixed-media textile wall hangings that combine embroidery, beads, and fiber art.
13. Designing Bold Signage with Raised Stitches
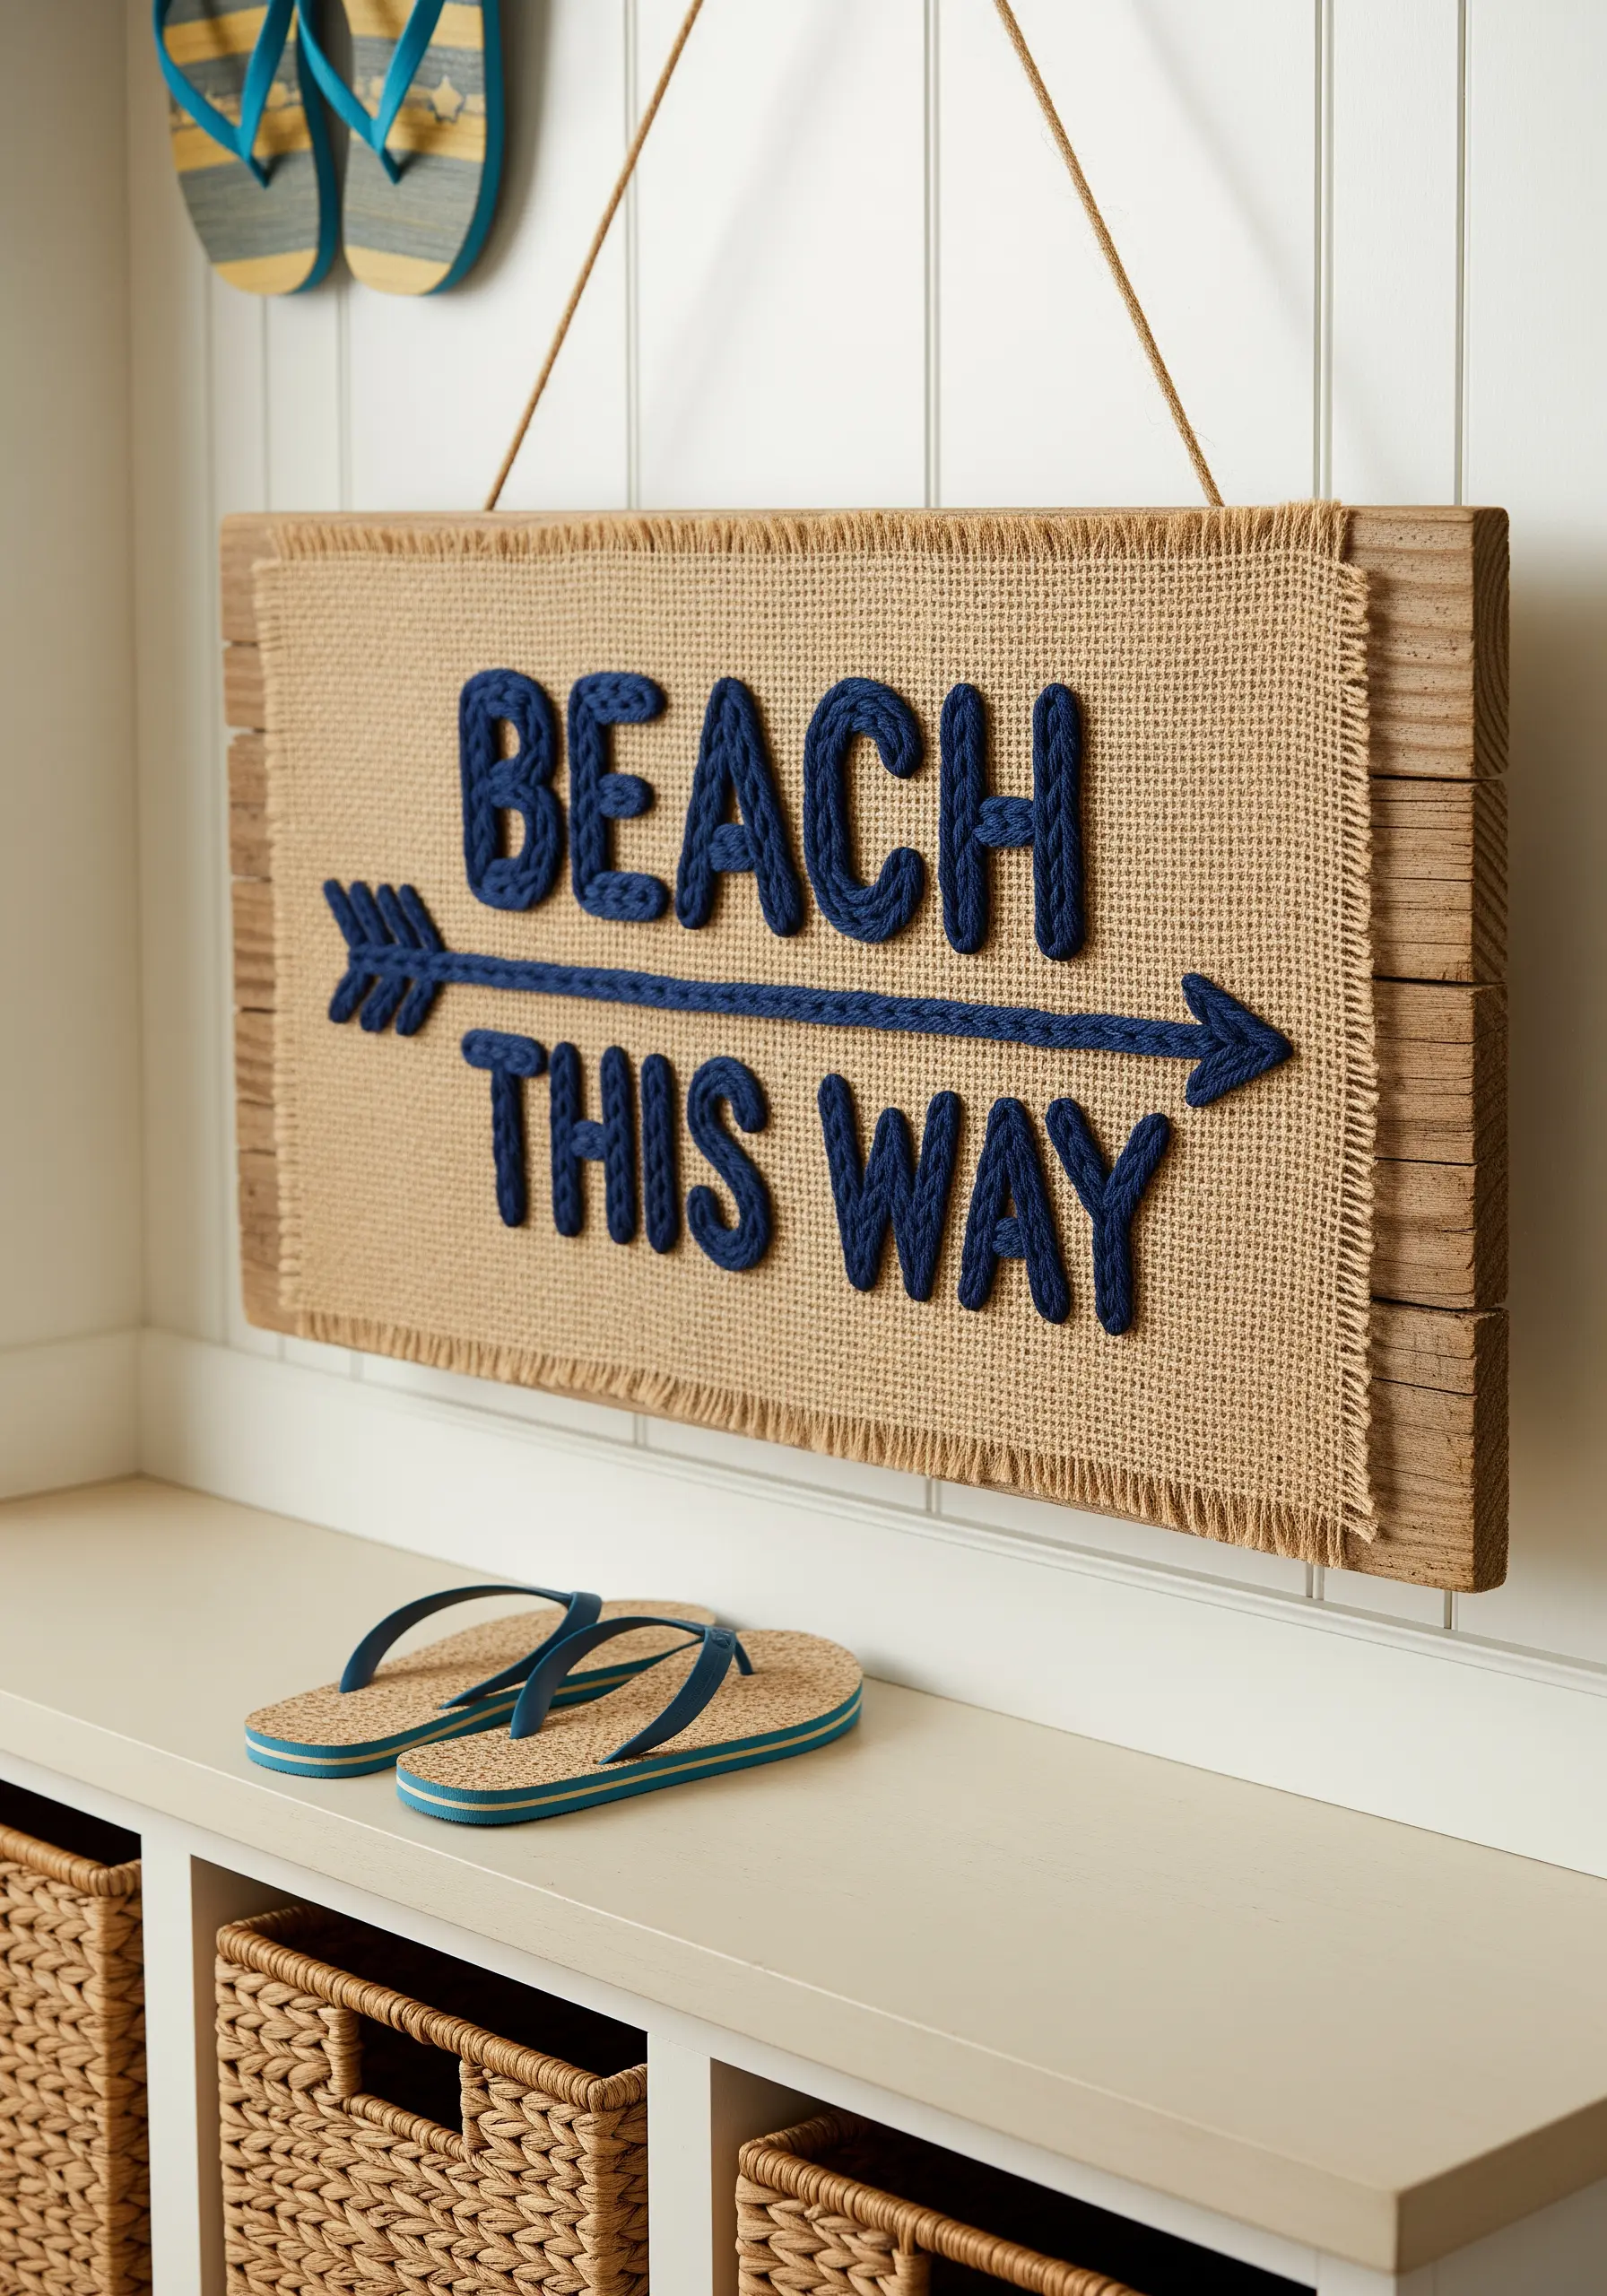
Make your embroidered text stand out by giving it a raised, 3D quality.
First, stitch the outline of your letters using a split stitch.
Then, use this outline as a guide to fill the letters with a dense, padded satin stitch, working over a few foundation stitches to add volume.
For an even bolder effect, couch thick yarn or cord to form the letters, securing it with small, evenly spaced stitches in a matching floss color.
This technique turns simple typography into a tactile, high-impact statement piece perfect for an entryway.
Try thread-based typography ideas for bold, modern quotes that pop on any surface.
14. Capturing Foliage with Strategic Color Blocking
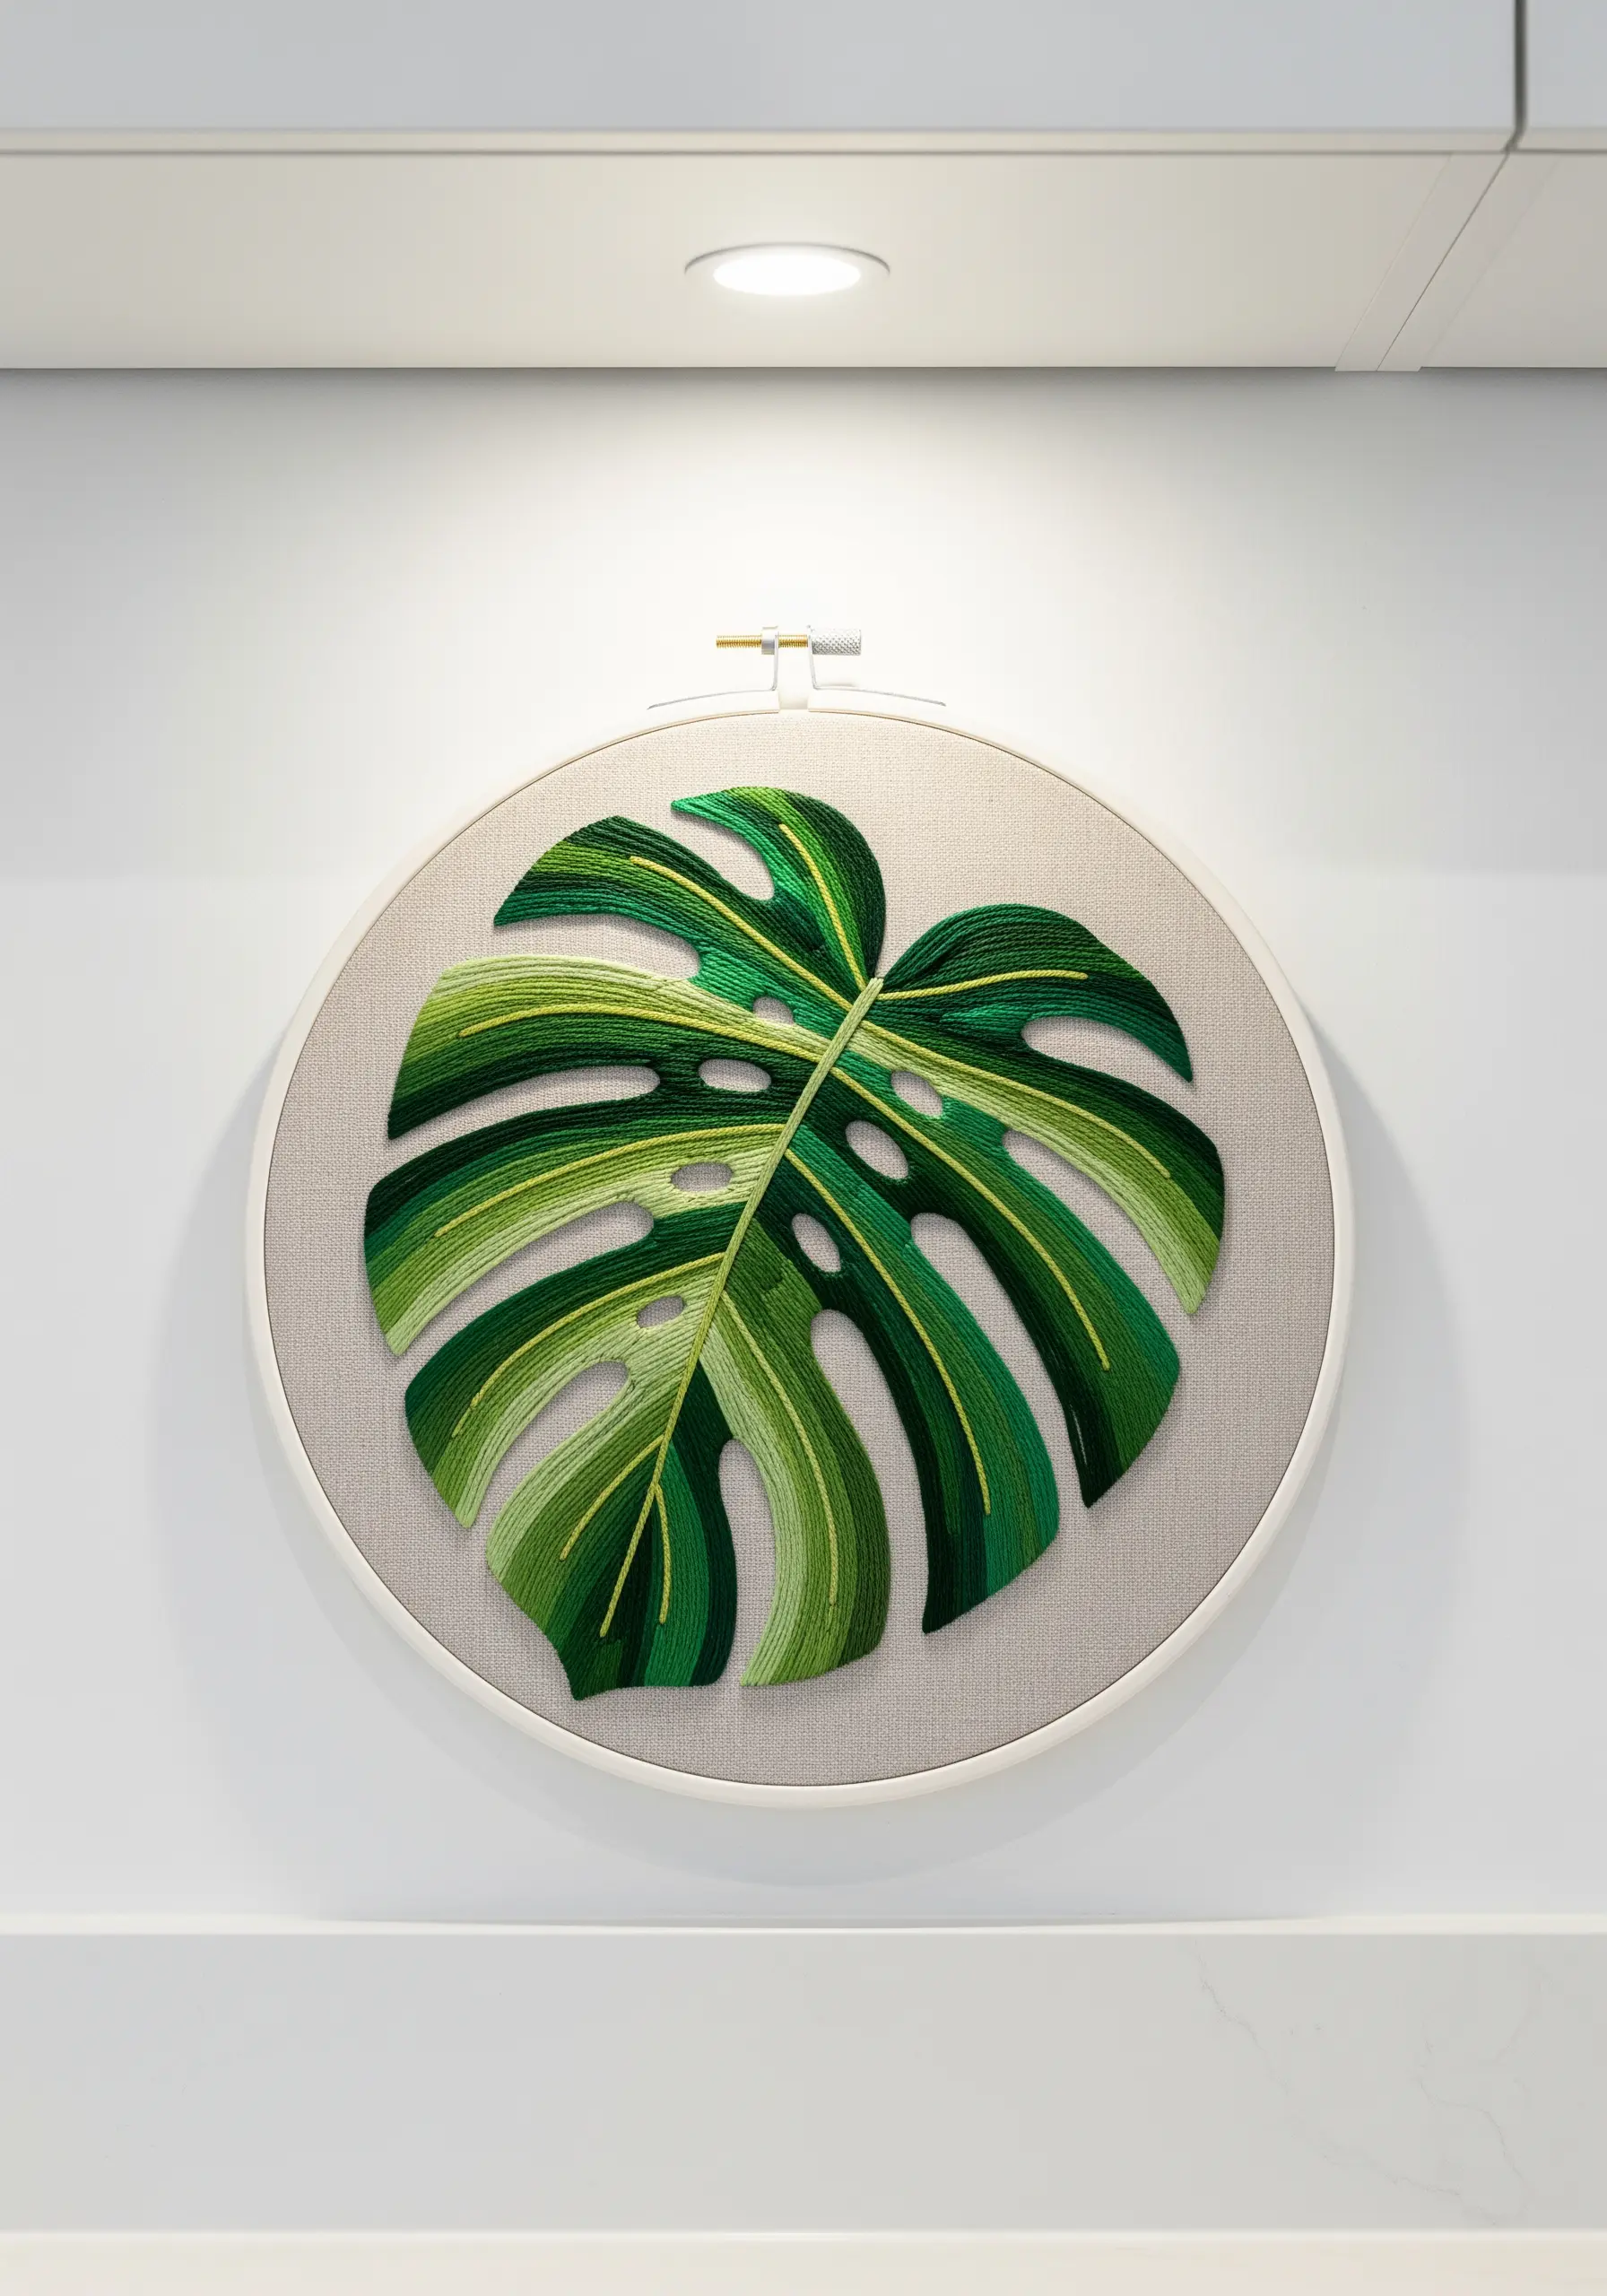
To embroider a monstera leaf with vibrancy and depth, think like a painter using color blocking.
Divide the leaf into distinct sections and fill each one with a different shade of green using a long, smooth satin stitch.
Instead of blending the colors, let the crisp edges between the shades define the leaf’s structure and highlights.
Ensure all your stitches within a block run in the same direction to create a clean, graphic look.
A single line of yellow backstitch down the center adds a pop of contrast and defines the stem.
Learn about leaf vein details you can stitch to give your embroidery stunning depth and realism.
15. Weaving Light with Metallic and Silk Threads
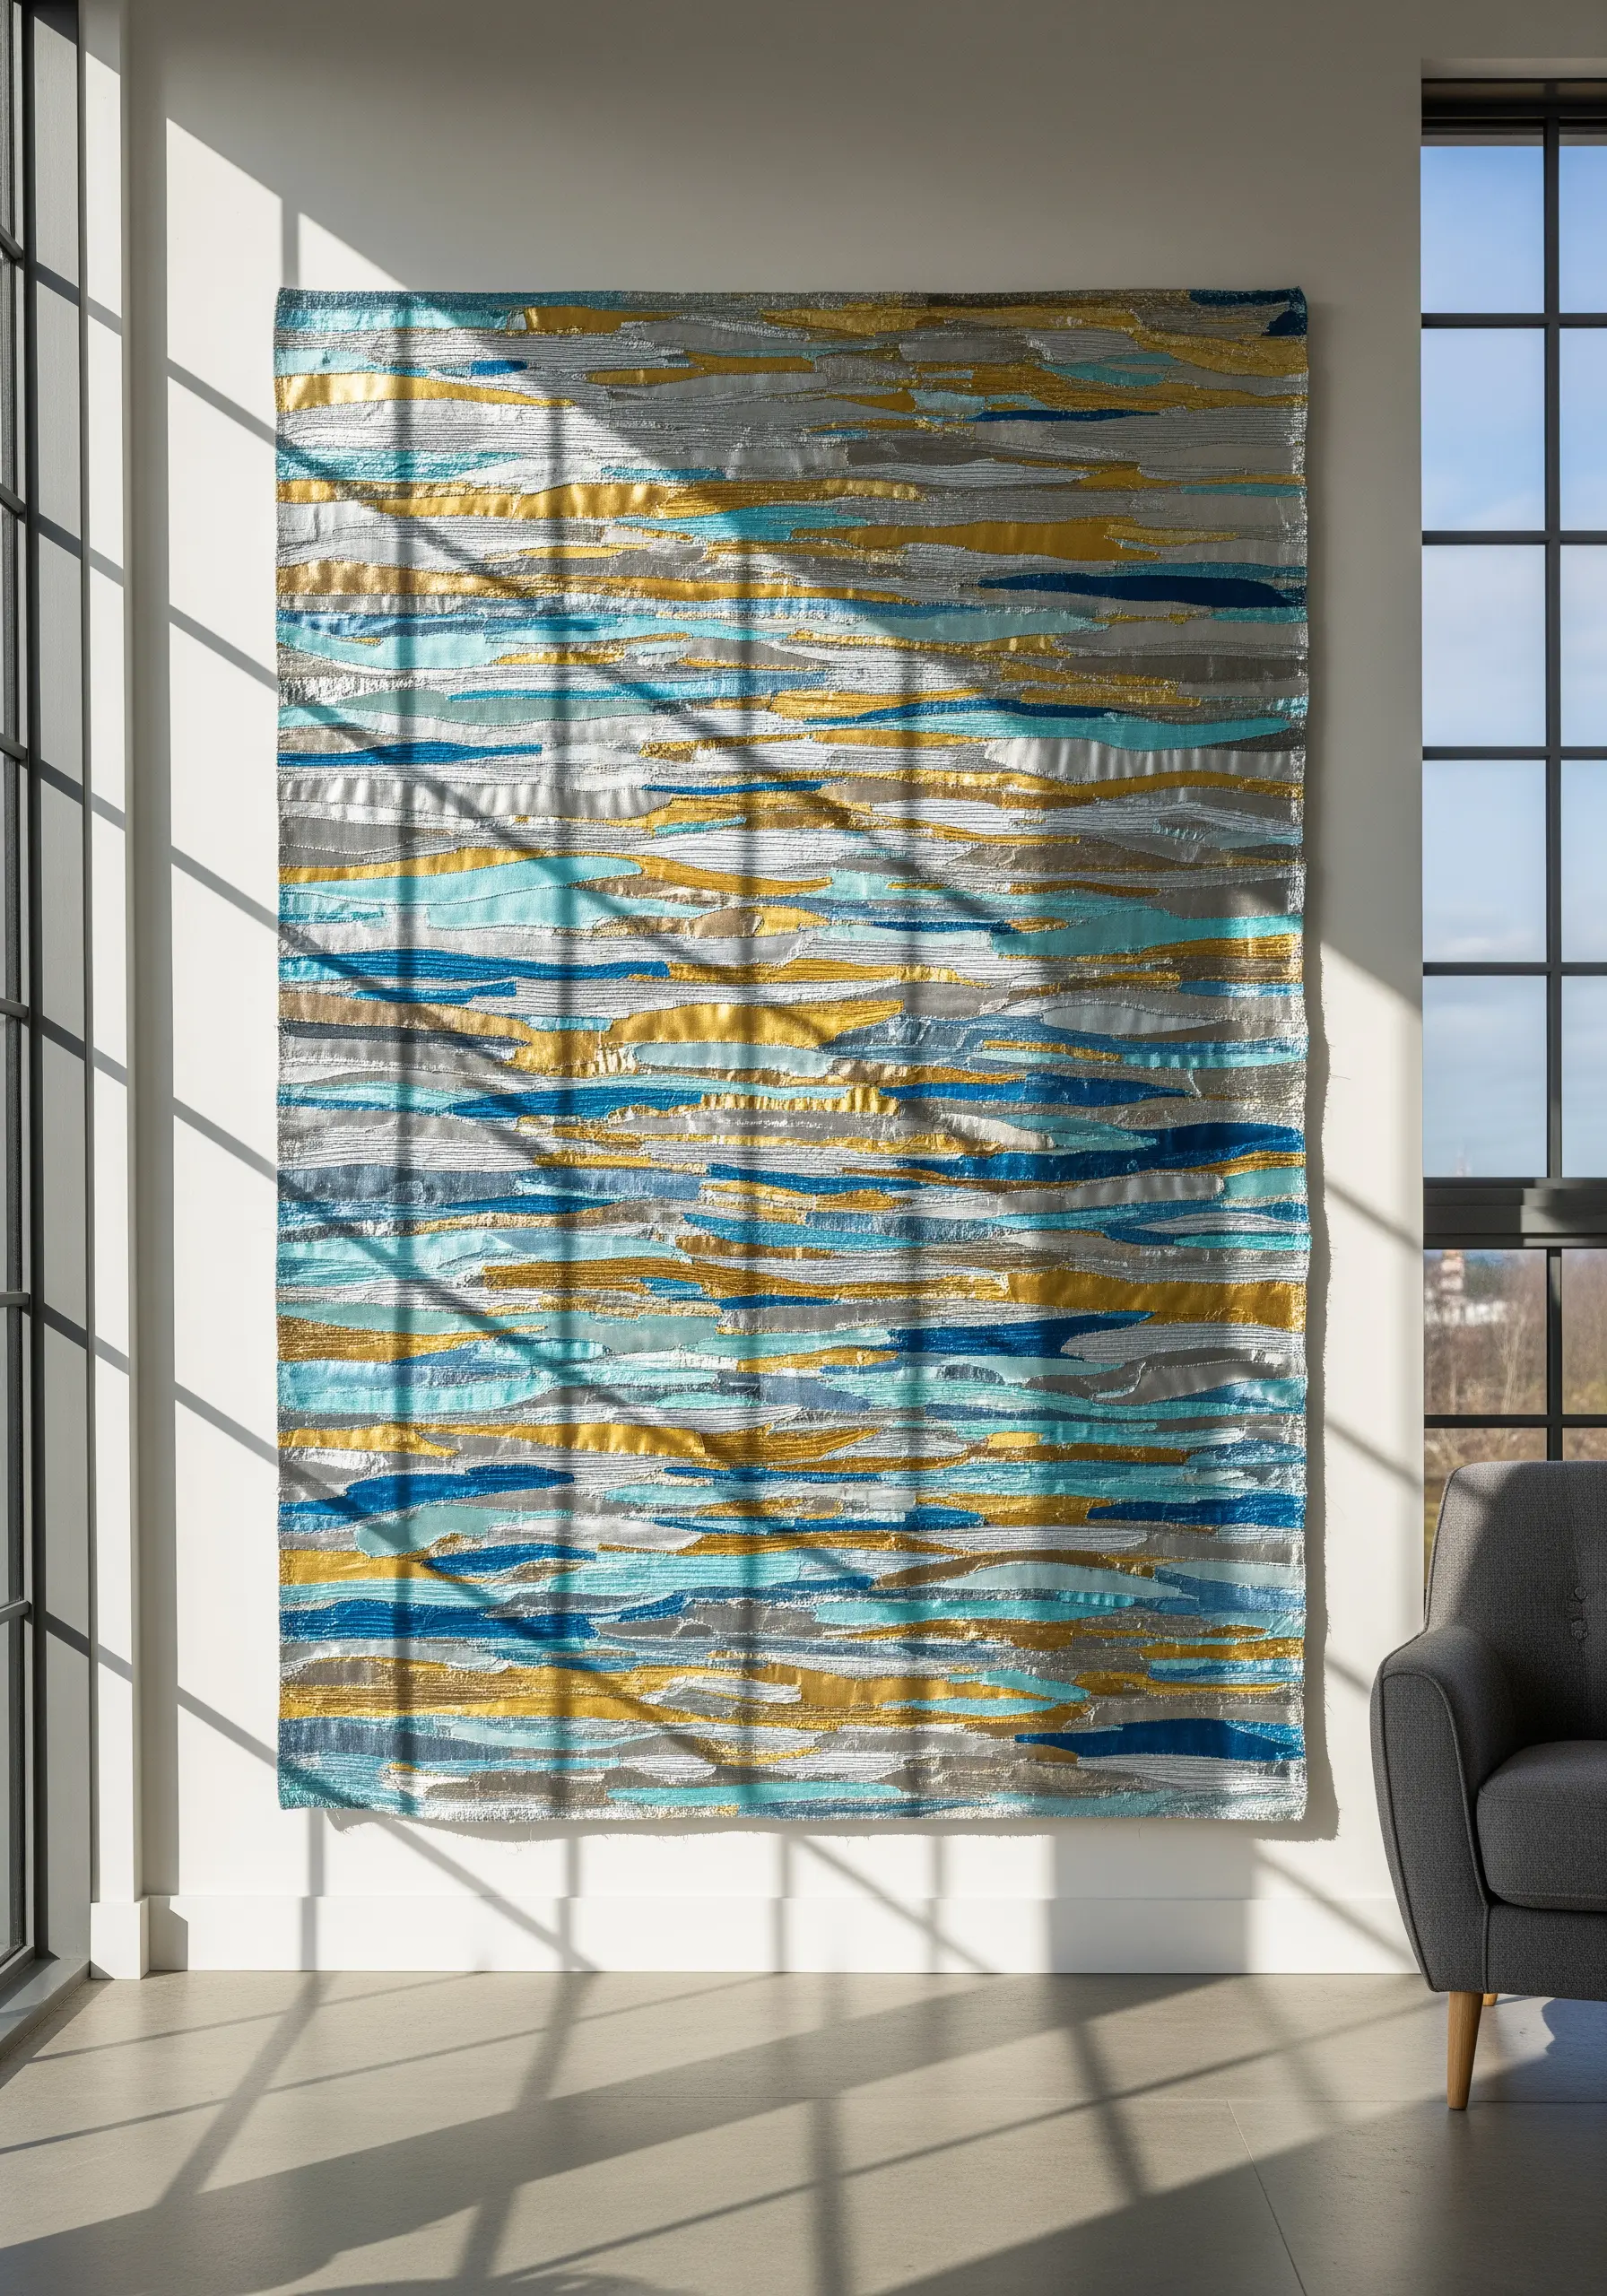
Recreate the shimmering effect of sunlight on water by weaving with a variety of thread textures.
Create a large wall hanging using wide strips of fabric as your base, then stitch over them with horizontal lines.
Alternate between matte cotton floss, shiny silk, and reflective metallic threads.
The interplay between these different finishes will cause the piece to change its appearance as the light shifts throughout the day.
This technique isn’t about a specific image but about capturing the abstract essence of light and reflection.
Discover unexpected ways to use metallic thread for modern artwork that shimmers.
16. Crafting Iridescence with Careful Color Blending

To achieve the complex, iridescent look of a turtle’s shell, use the needle painting technique with a rich, jewel-toned palette.
Work on each scute (shell segment) individually, blending short and long stitches of ochre, emerald, and bronze threads.
To create the glowing effect from within, start with the lightest yellow shade at the center of each scute and gradually blend darker colors toward the edges.
This creates a convincing illusion of depth and luminosity that makes the shell appear almost three-dimensional.
This technique is perfect for nature-inspired embroidery ideas that turn photos into threaded landscapes.
17. Embellishing Stitches with Natural Elements
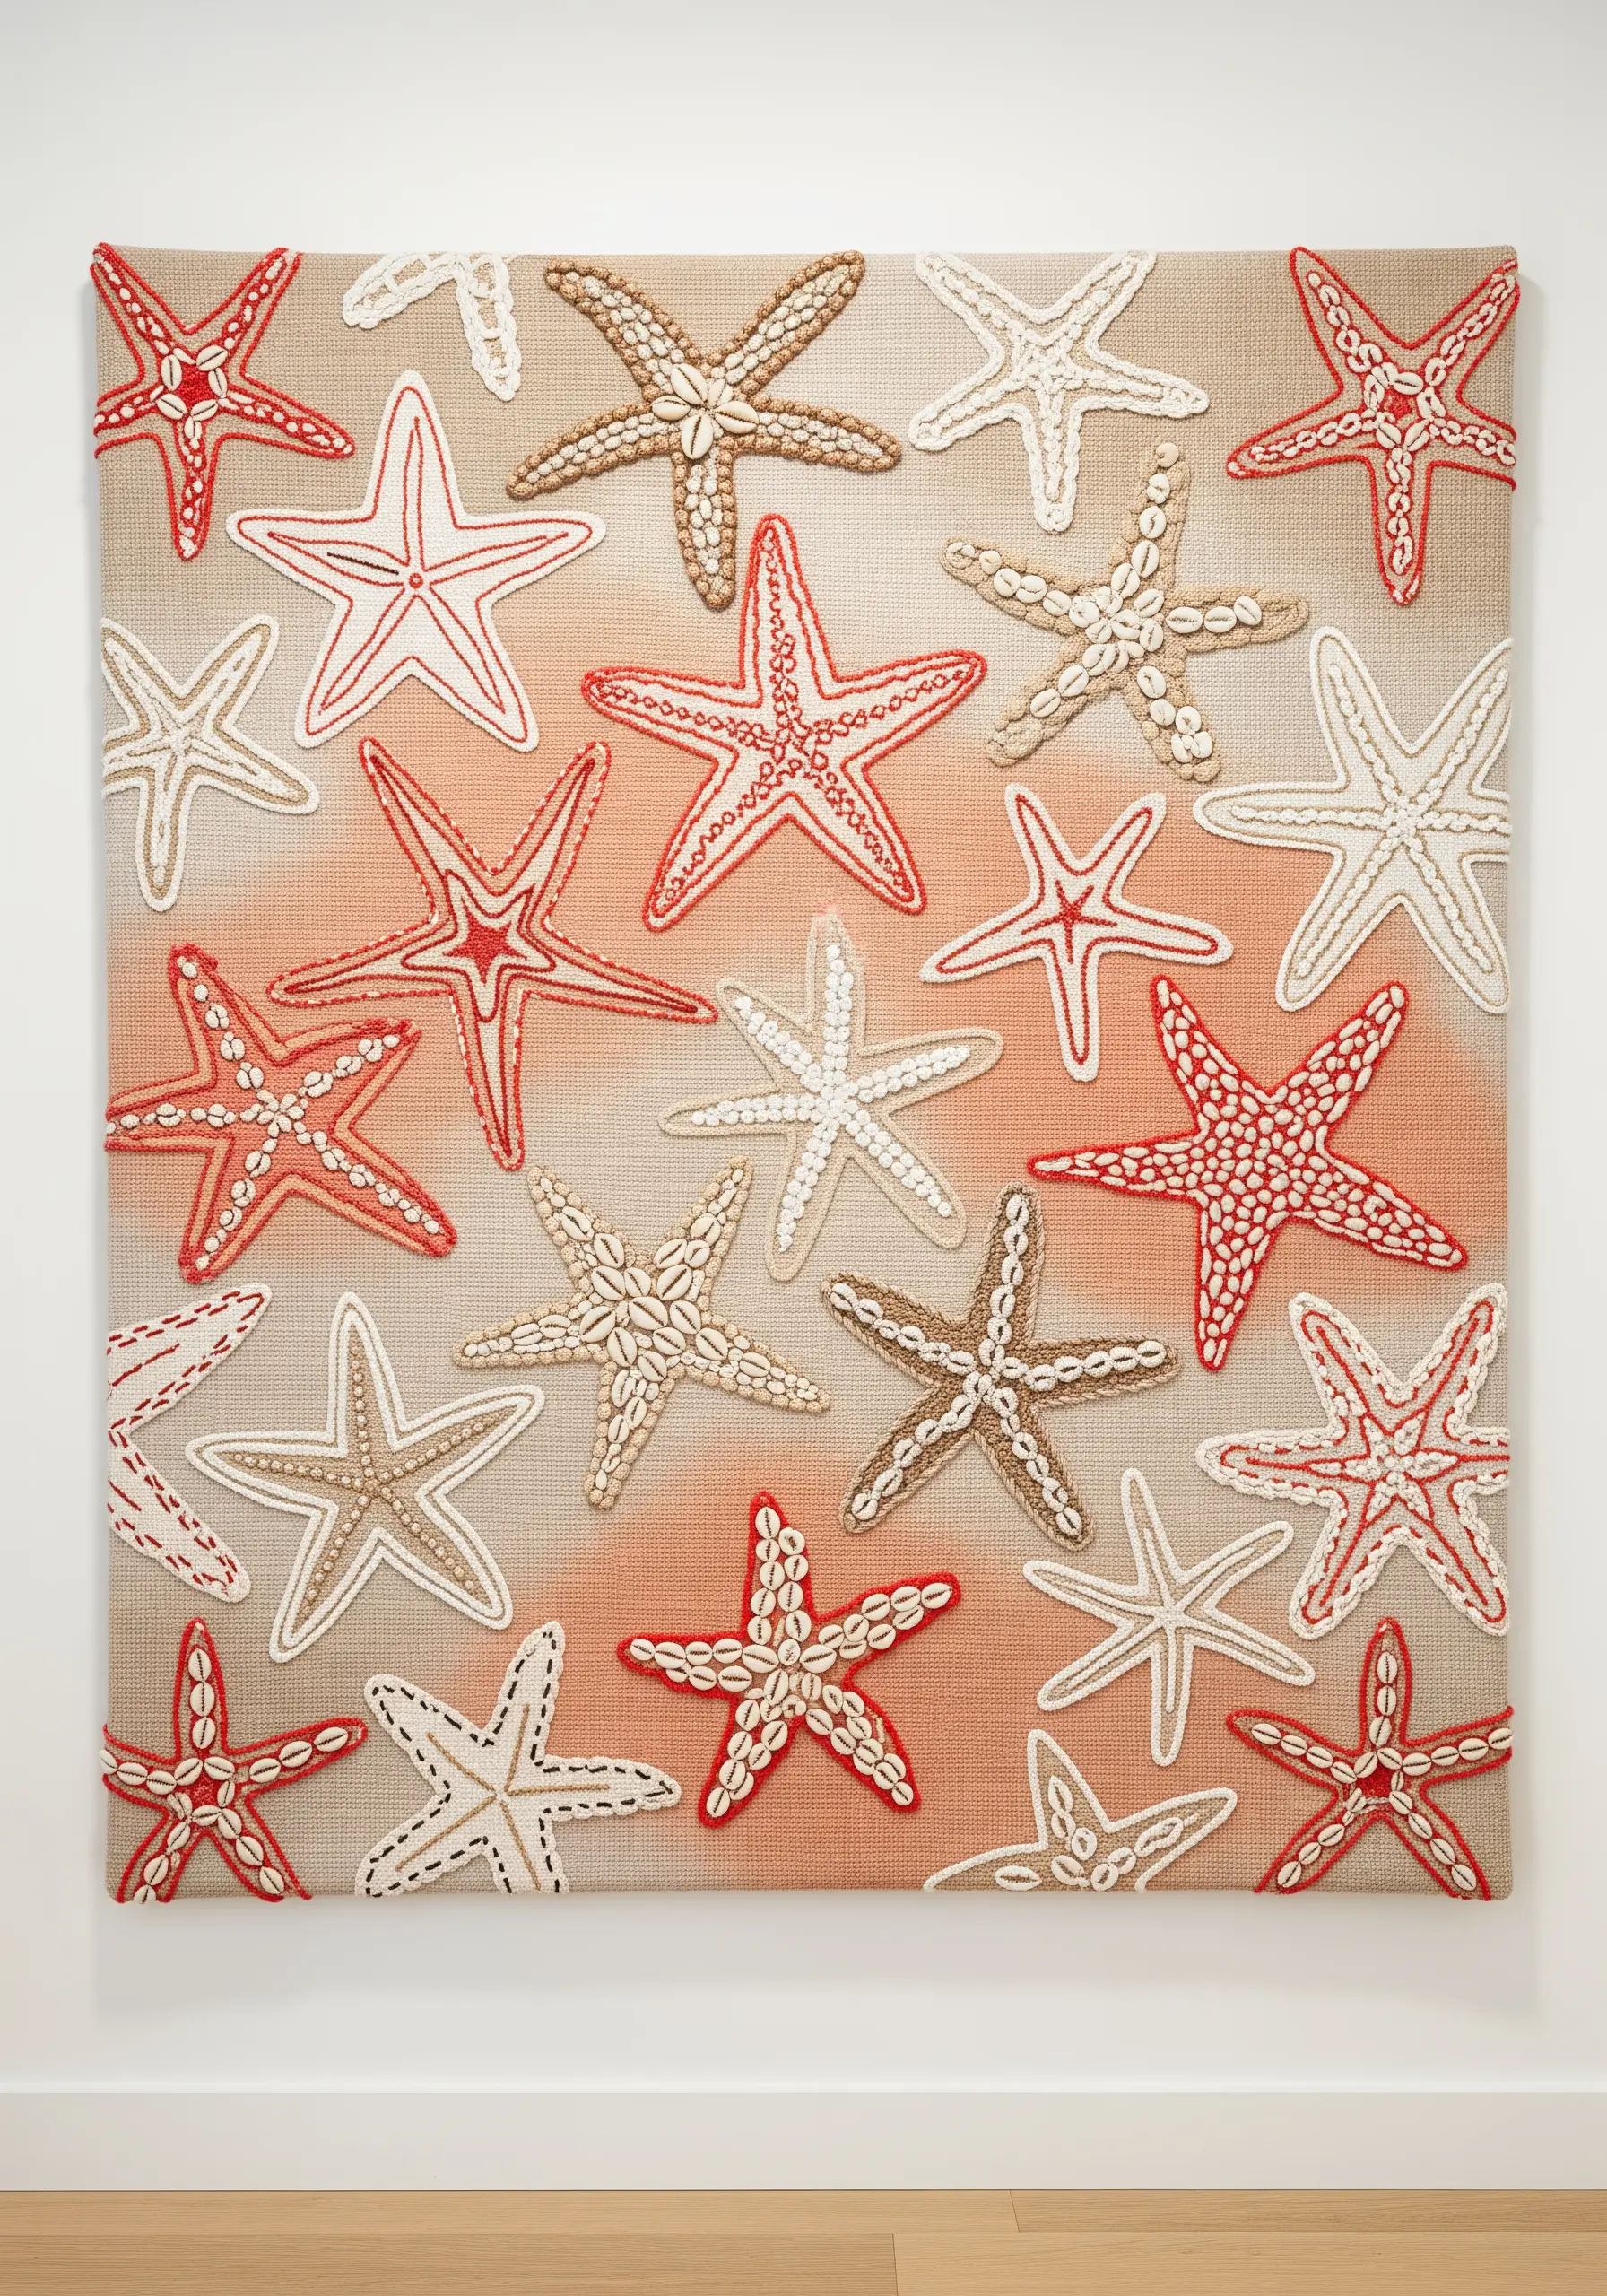
Add an authentic coastal touch to your embroidery by incorporating real, tiny shells.
After stitching your starfish outlines with a simple backstitch or whipped backstitch for definition, securely attach small cowrie or other miniature shells to the center of each one.
This mixed-media approach provides a surprising and delightful textural contrast between the soft thread and the hard, smooth shell.
The subtle spray-painted background helps unify the composition and makes the stitched elements stand out.
Explore more ways to combine embroidery and mixed media for home decor masterpieces.
18. Creating a Minimalist Sculptural Centerpiece
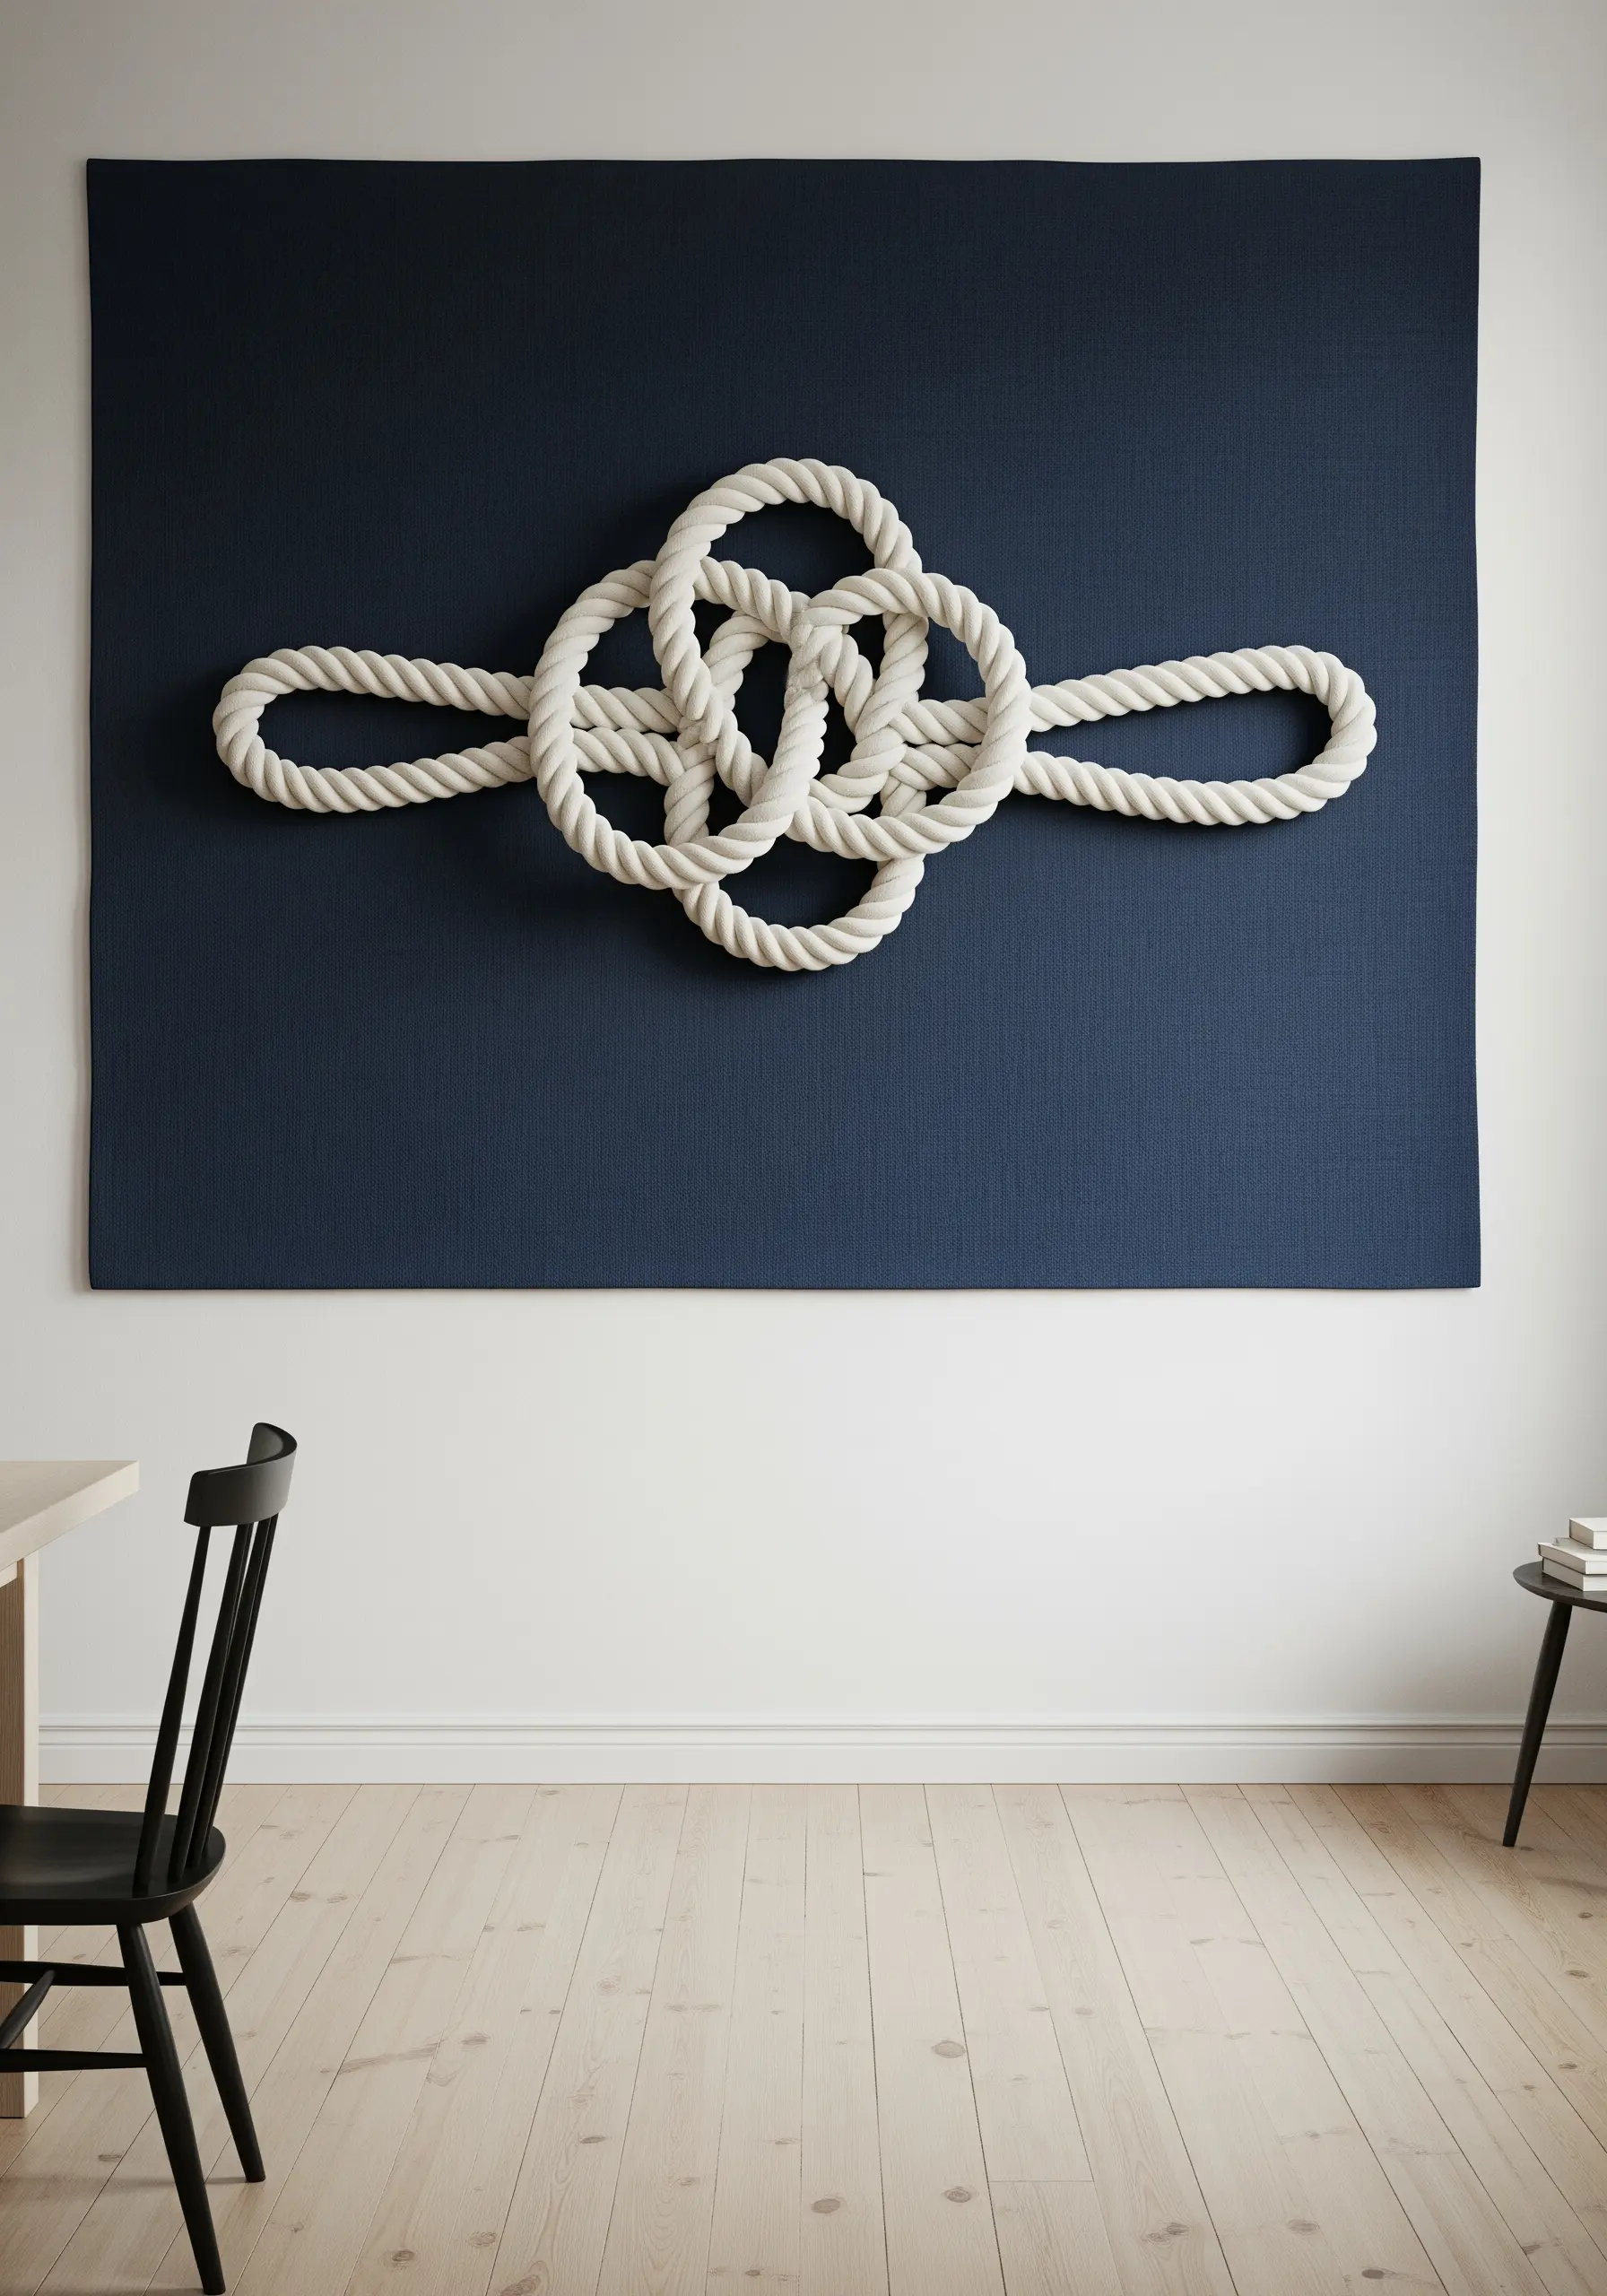
For a bold, minimalist statement, use actual rope to create a sculptural knot on a taut fabric canvas.
Mount a piece of heavy-duty navy linen or duck cloth onto a wooden frame as you would a painting canvas.
Then, arrange a soft cotton rope into an intricate nautical knot and carefully stitch it down from behind or with discreet, color-matched couching stitches on the front.
The dramatic contrast between the thick, white rope and the deep blue background creates a powerful graphic and textural focal point.
Such handmade sculptures can look like they belong in a museum.
19. Portraying Movement with Repetitive Motifs
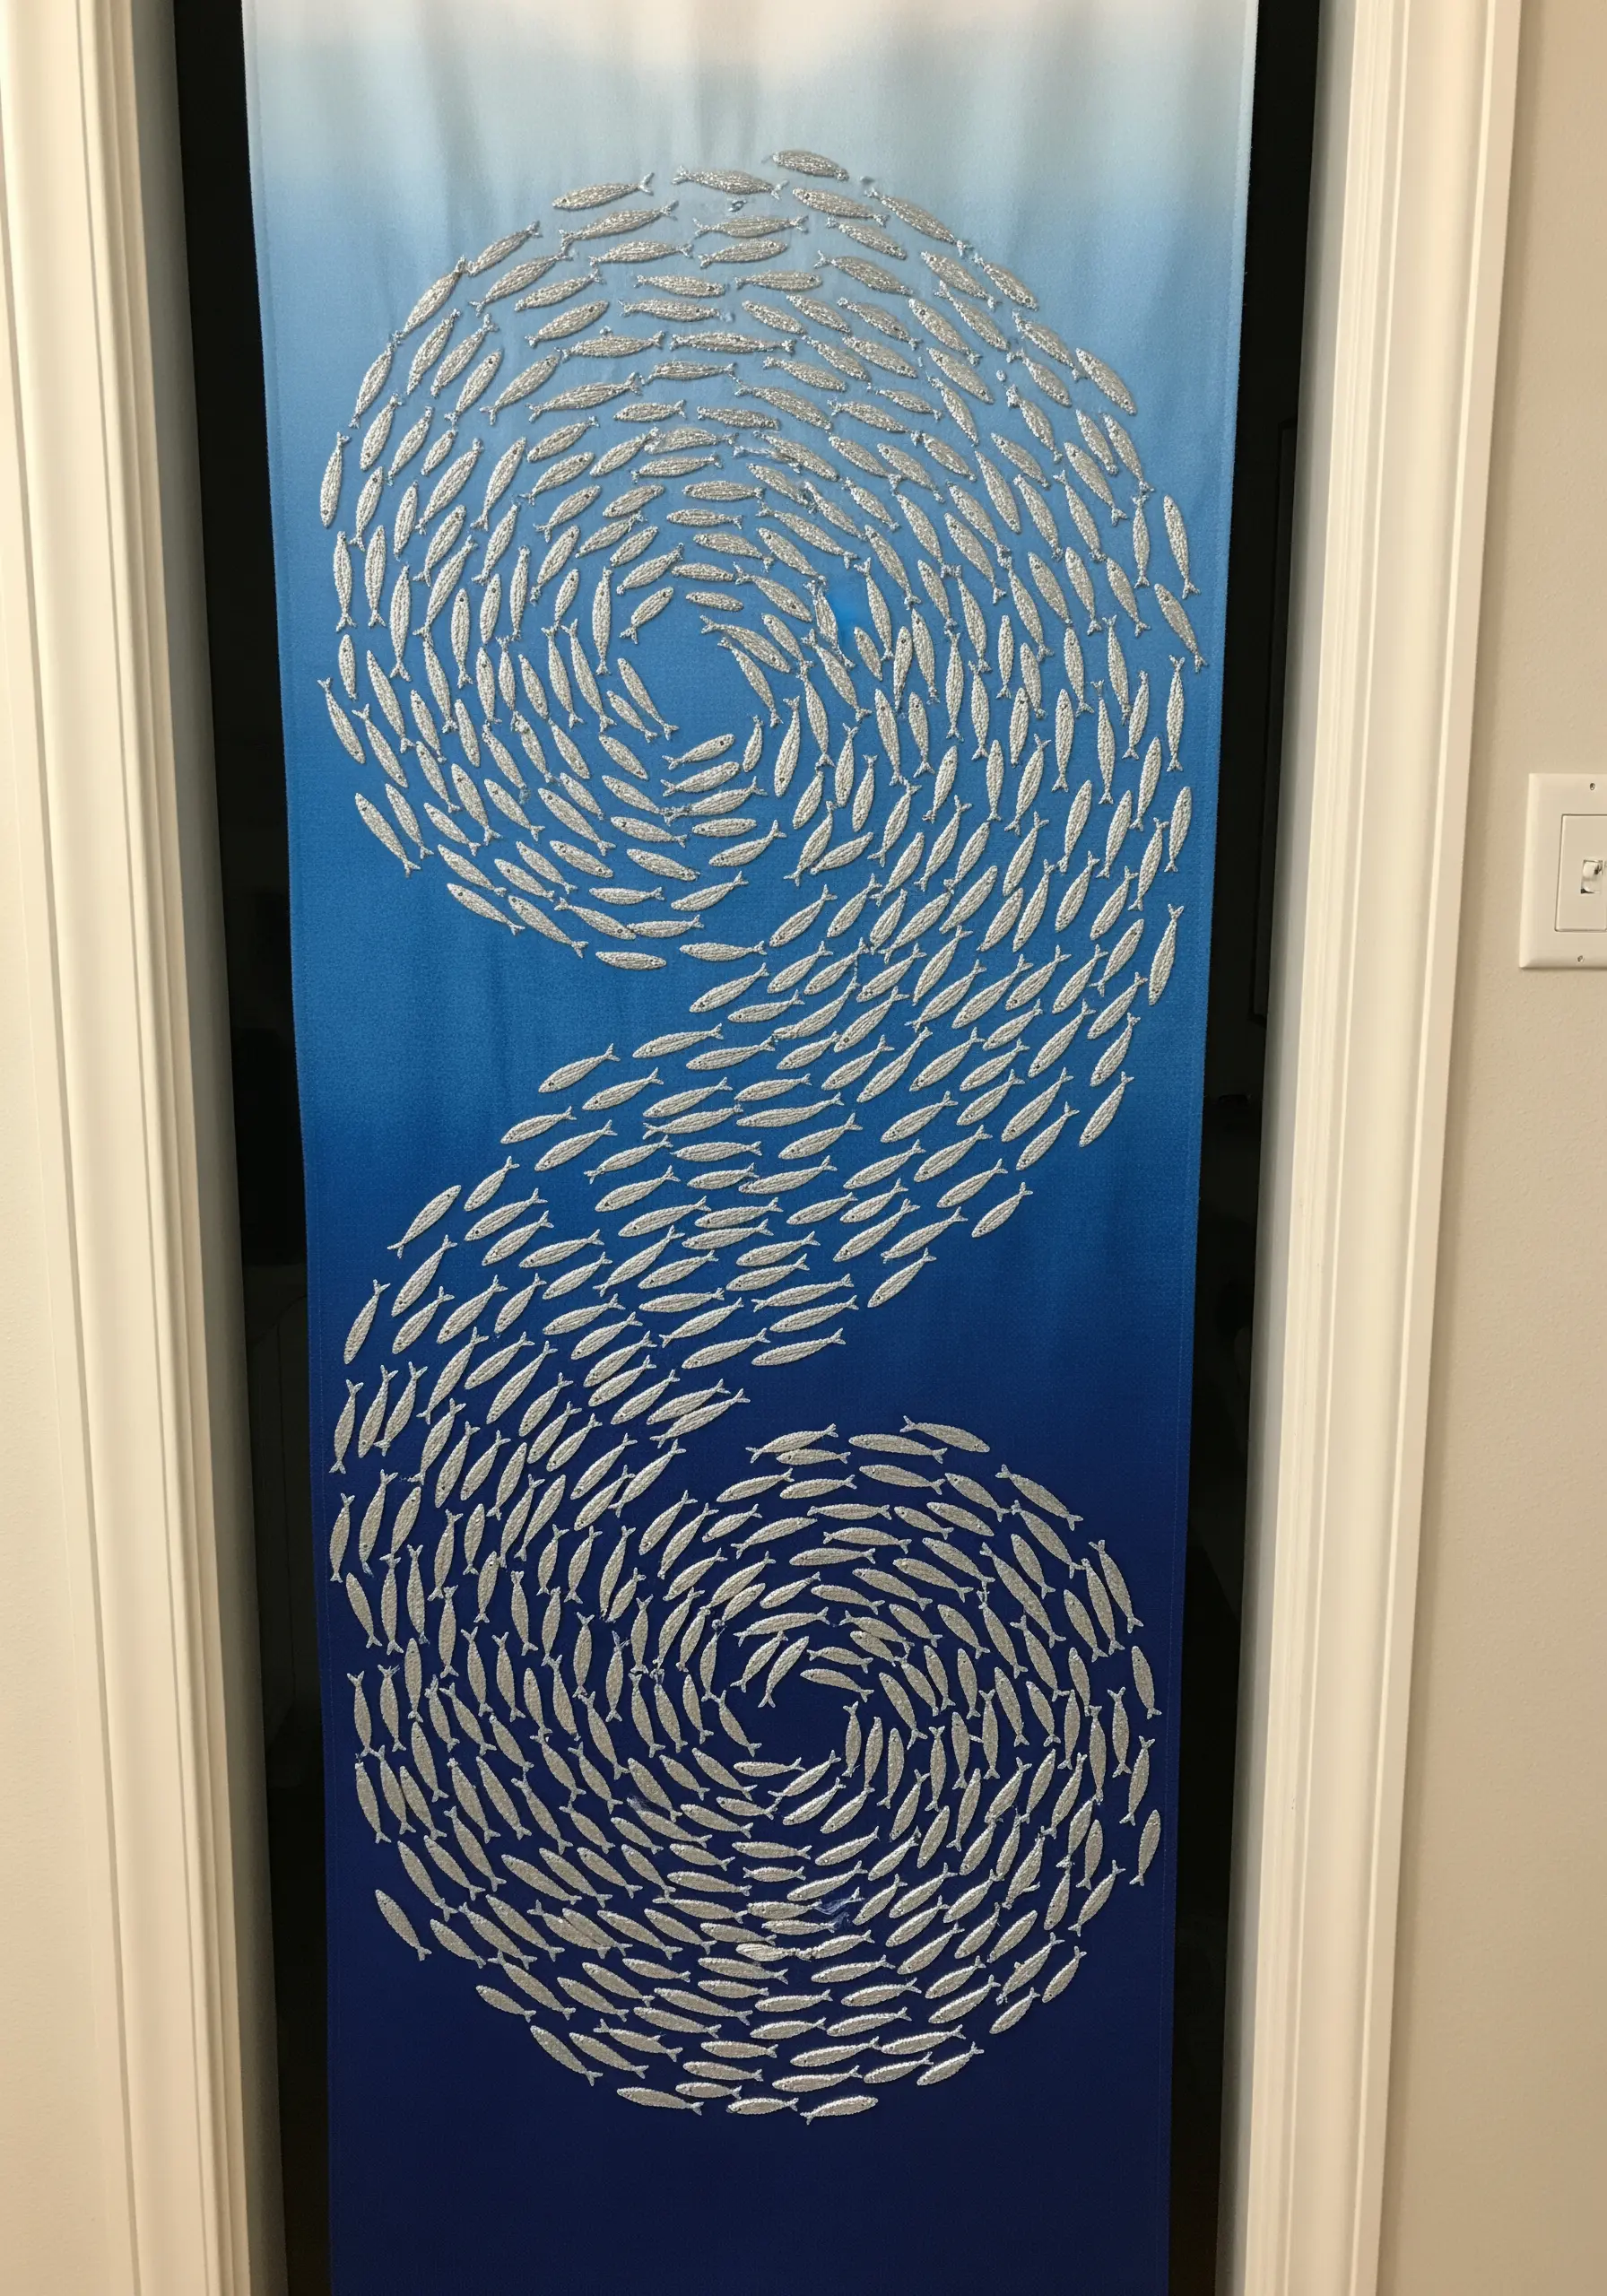
Evoke the mesmerizing motion of a school of fish through strategic placement and repetition.
Create a simple fish motif and replicate it dozens of times using a shimmering metallic or silver thread.
Arrange the motifs in a swirling, yin-yang pattern to guide the viewer’s eye and create a powerful sense of collective movement.
Stitching on a gradient-dyed blue fabric enhances the illusion of depth, as if the school is moving through different water levels.
This approach proves that a simple design, when repeated, can create a complex and dynamic effect.
Use abstract thread illusion techniques that create depth without complex stitches.
20. Mapping Abstract Textures with Contour Lines

Capture the essence of coastal topography with abstract, flowing lines rather than a literal scene.
Use a variety of thread weights and textures—from fine, single-strand floss to thicker pearl cotton—to create lines with different emphasis.
Stitch flowing, organic contours using a simple backstitch, allowing the lines to cluster and spread apart to create a sense of density and space.
The limited color palette of sand, grey, and cream keeps the focus on the interplay of lines and textures, resulting in a sophisticated, modern piece.
These abstract monochrome thread designs offer a sophisticated, minimalist look.
21. Building a Charming Harbor Scene
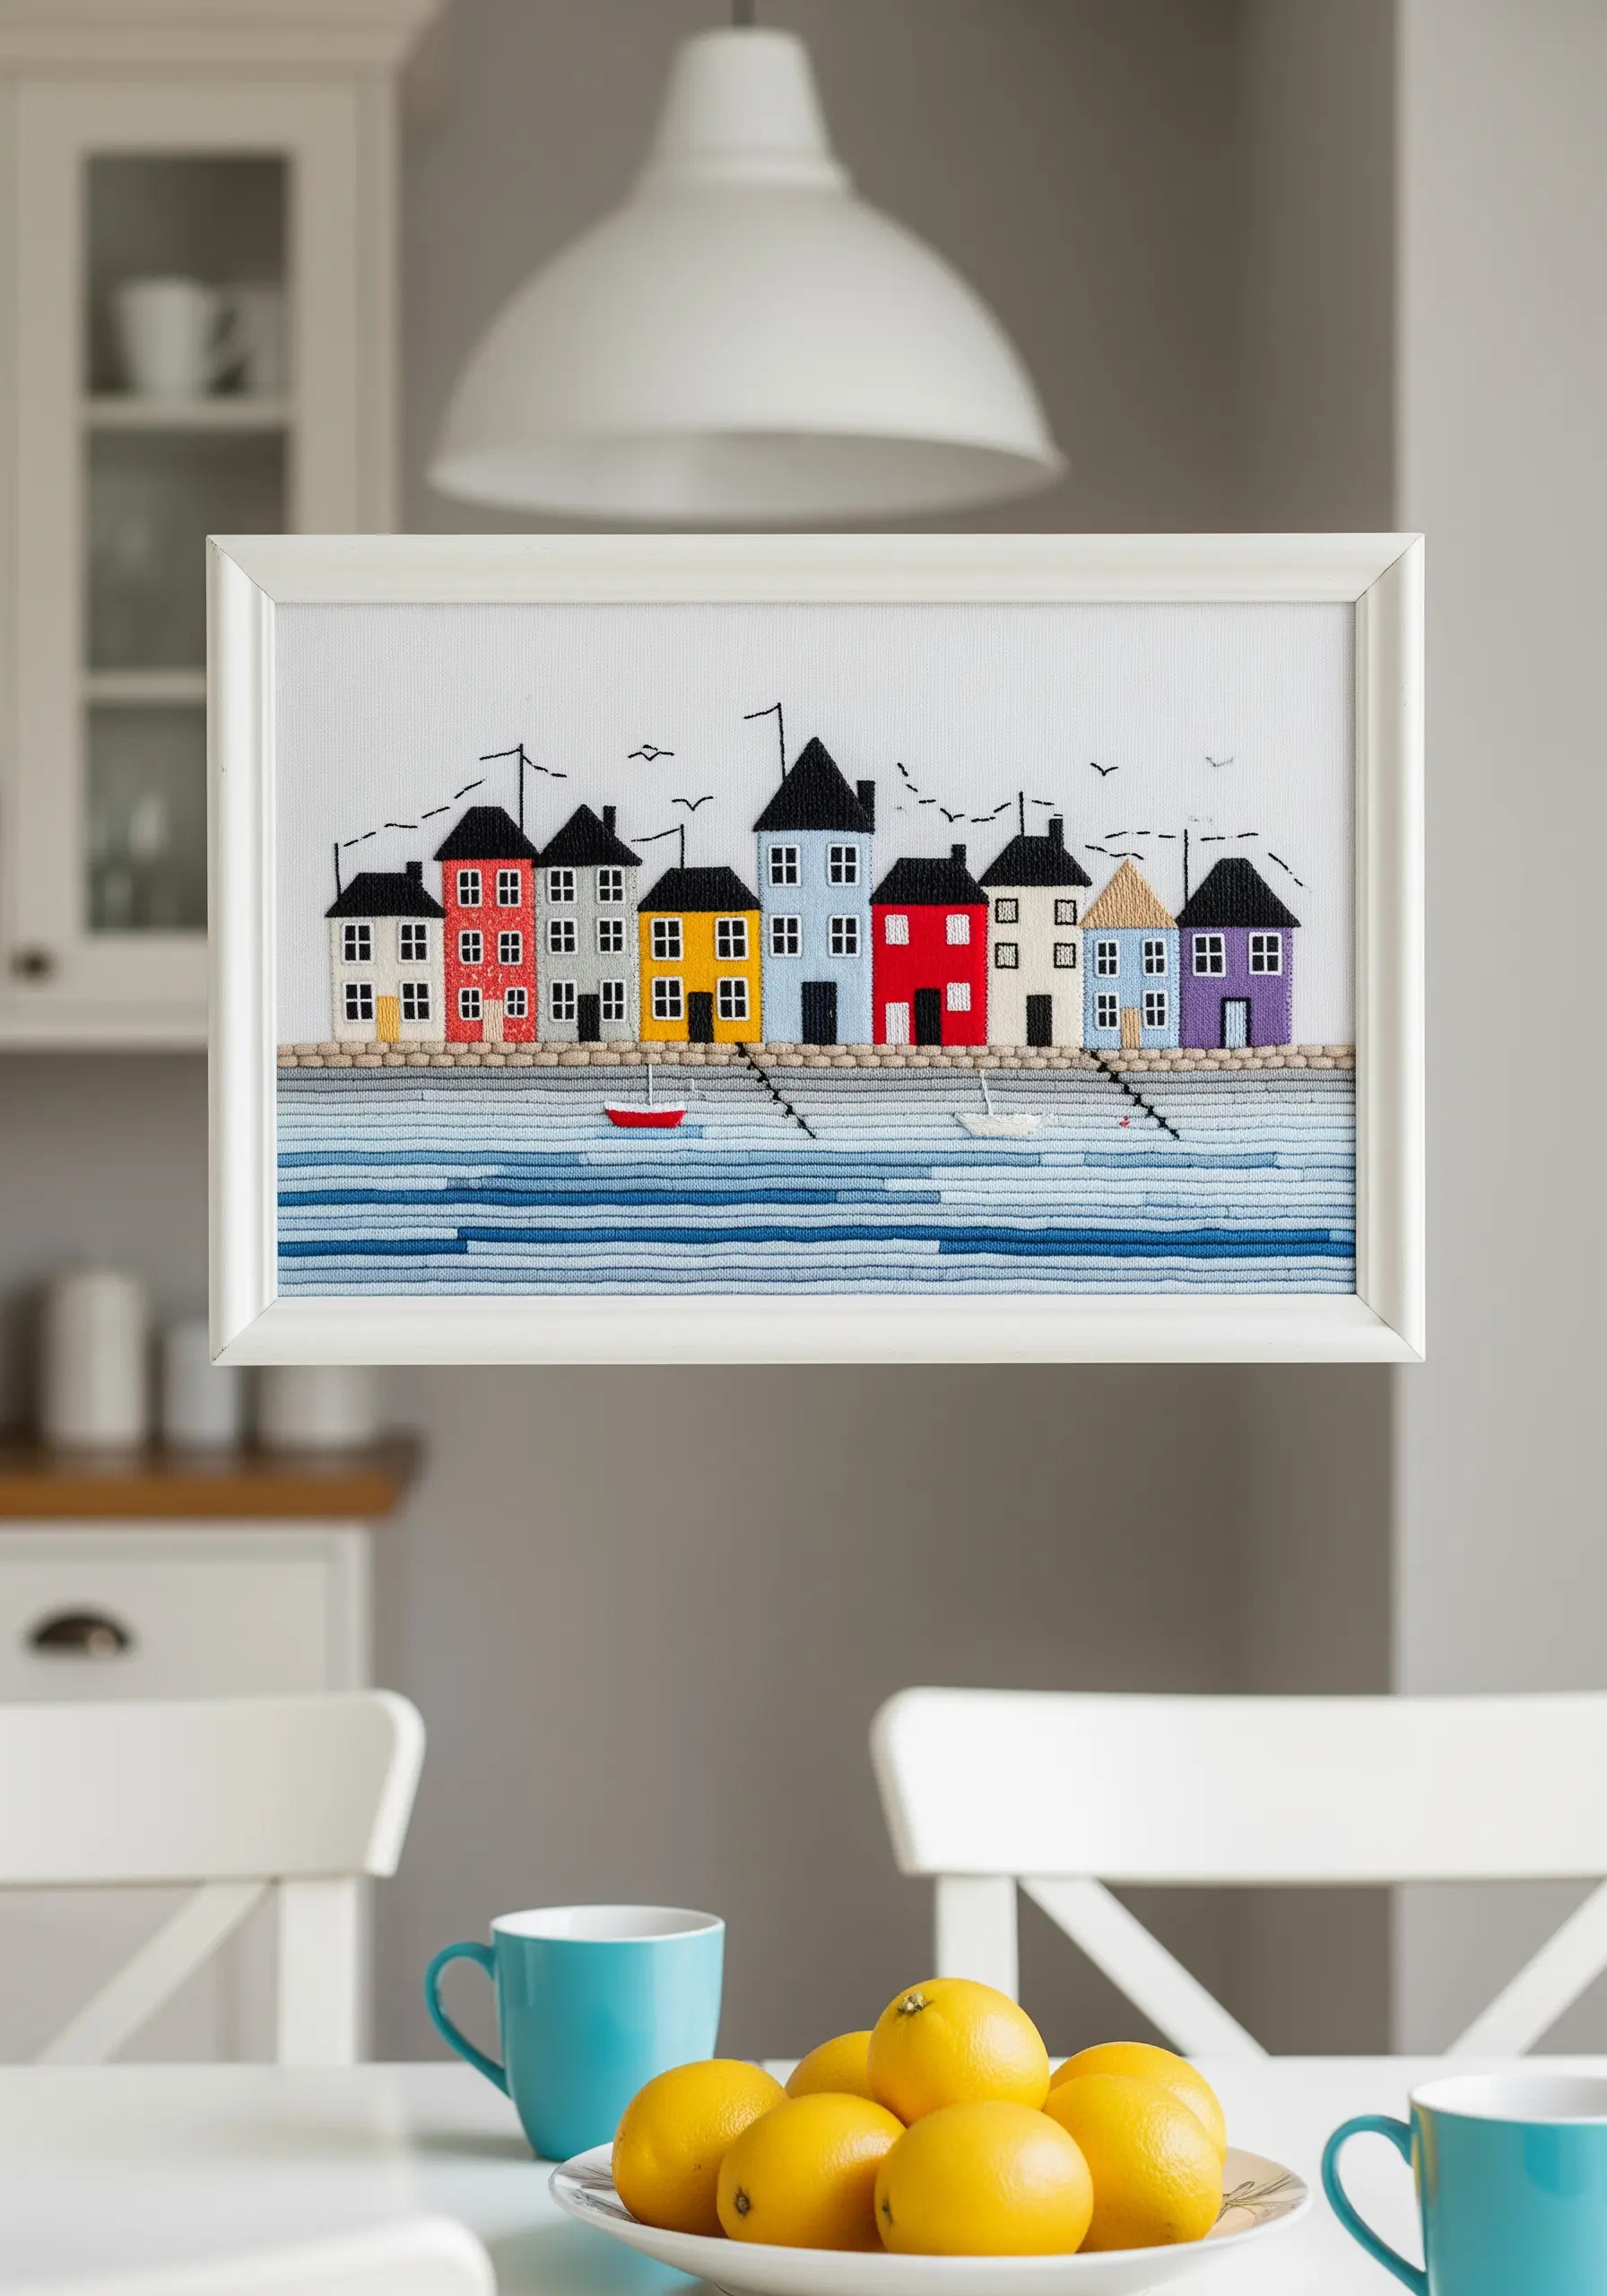
Create a playful yet polished harbor scene by treating each element with a distinct stitch style.
Use a dense, vertical satin stitch for the colorful houses to give them a solid, blocky appearance.
For the water, switch to a horizontal backstitch or running stitch in various blue shades, creating a sense of gentle motion and reflection.
Finally, add tiny details like birds with simple V-stitches and outlines with a fine black backstitch to tie the whole composition together.
This separation of textures adds visual interest and clarity to a busy scene.
Find more easy embroidery wall hoops that look expensive but are simple to create.
22. Recreating Perspective in a Threaded Landscape
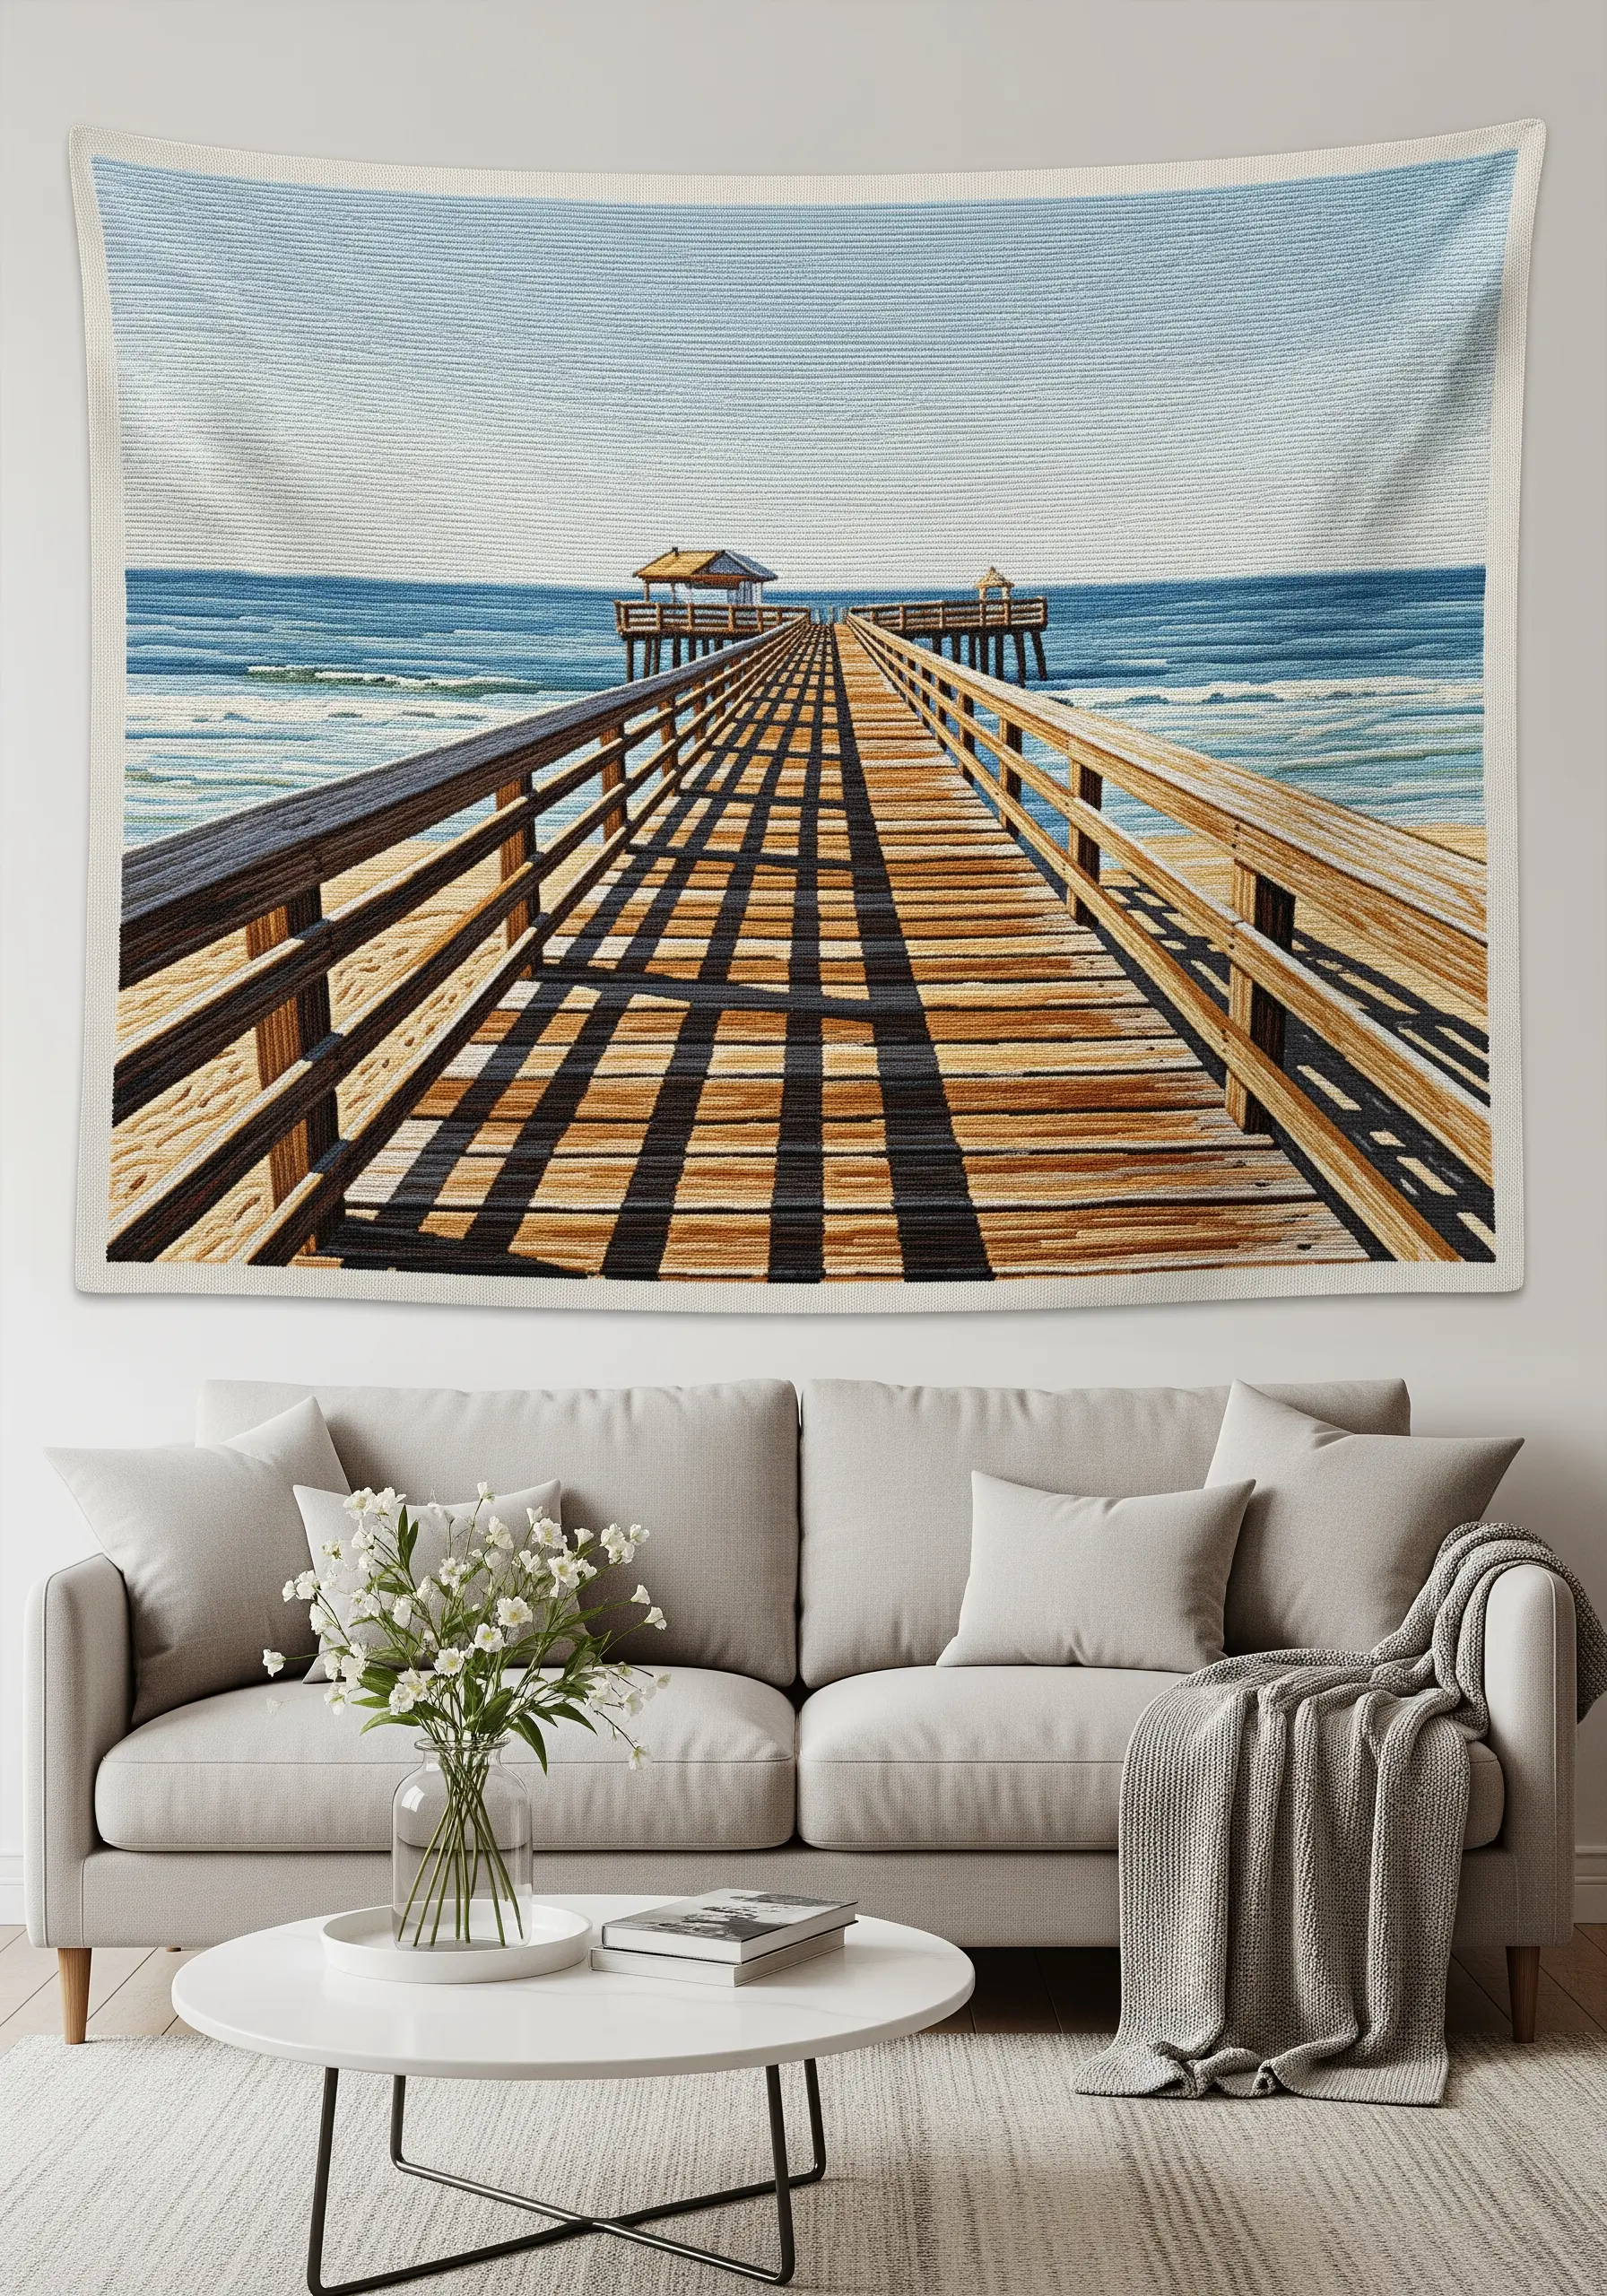
To achieve a sense of depth and perspective in a landscape, focus on the direction and density of your stitches.
For the wooden pier, use long, straight stitches that follow the lines of the planks, converging toward a vanishing point to create distance.
Use shorter, more varied stitches for the ocean and looser, almost sketchy stitches for the sky.
This mimics how our eyes perceive detail: sharper and more defined in the foreground, and softer in the background. This creates a realistic, immersive view.
Learn to create mountain landscape thread painting techniques for nature scenes and more.
23. Crafting Seafoam with Beading and Knots
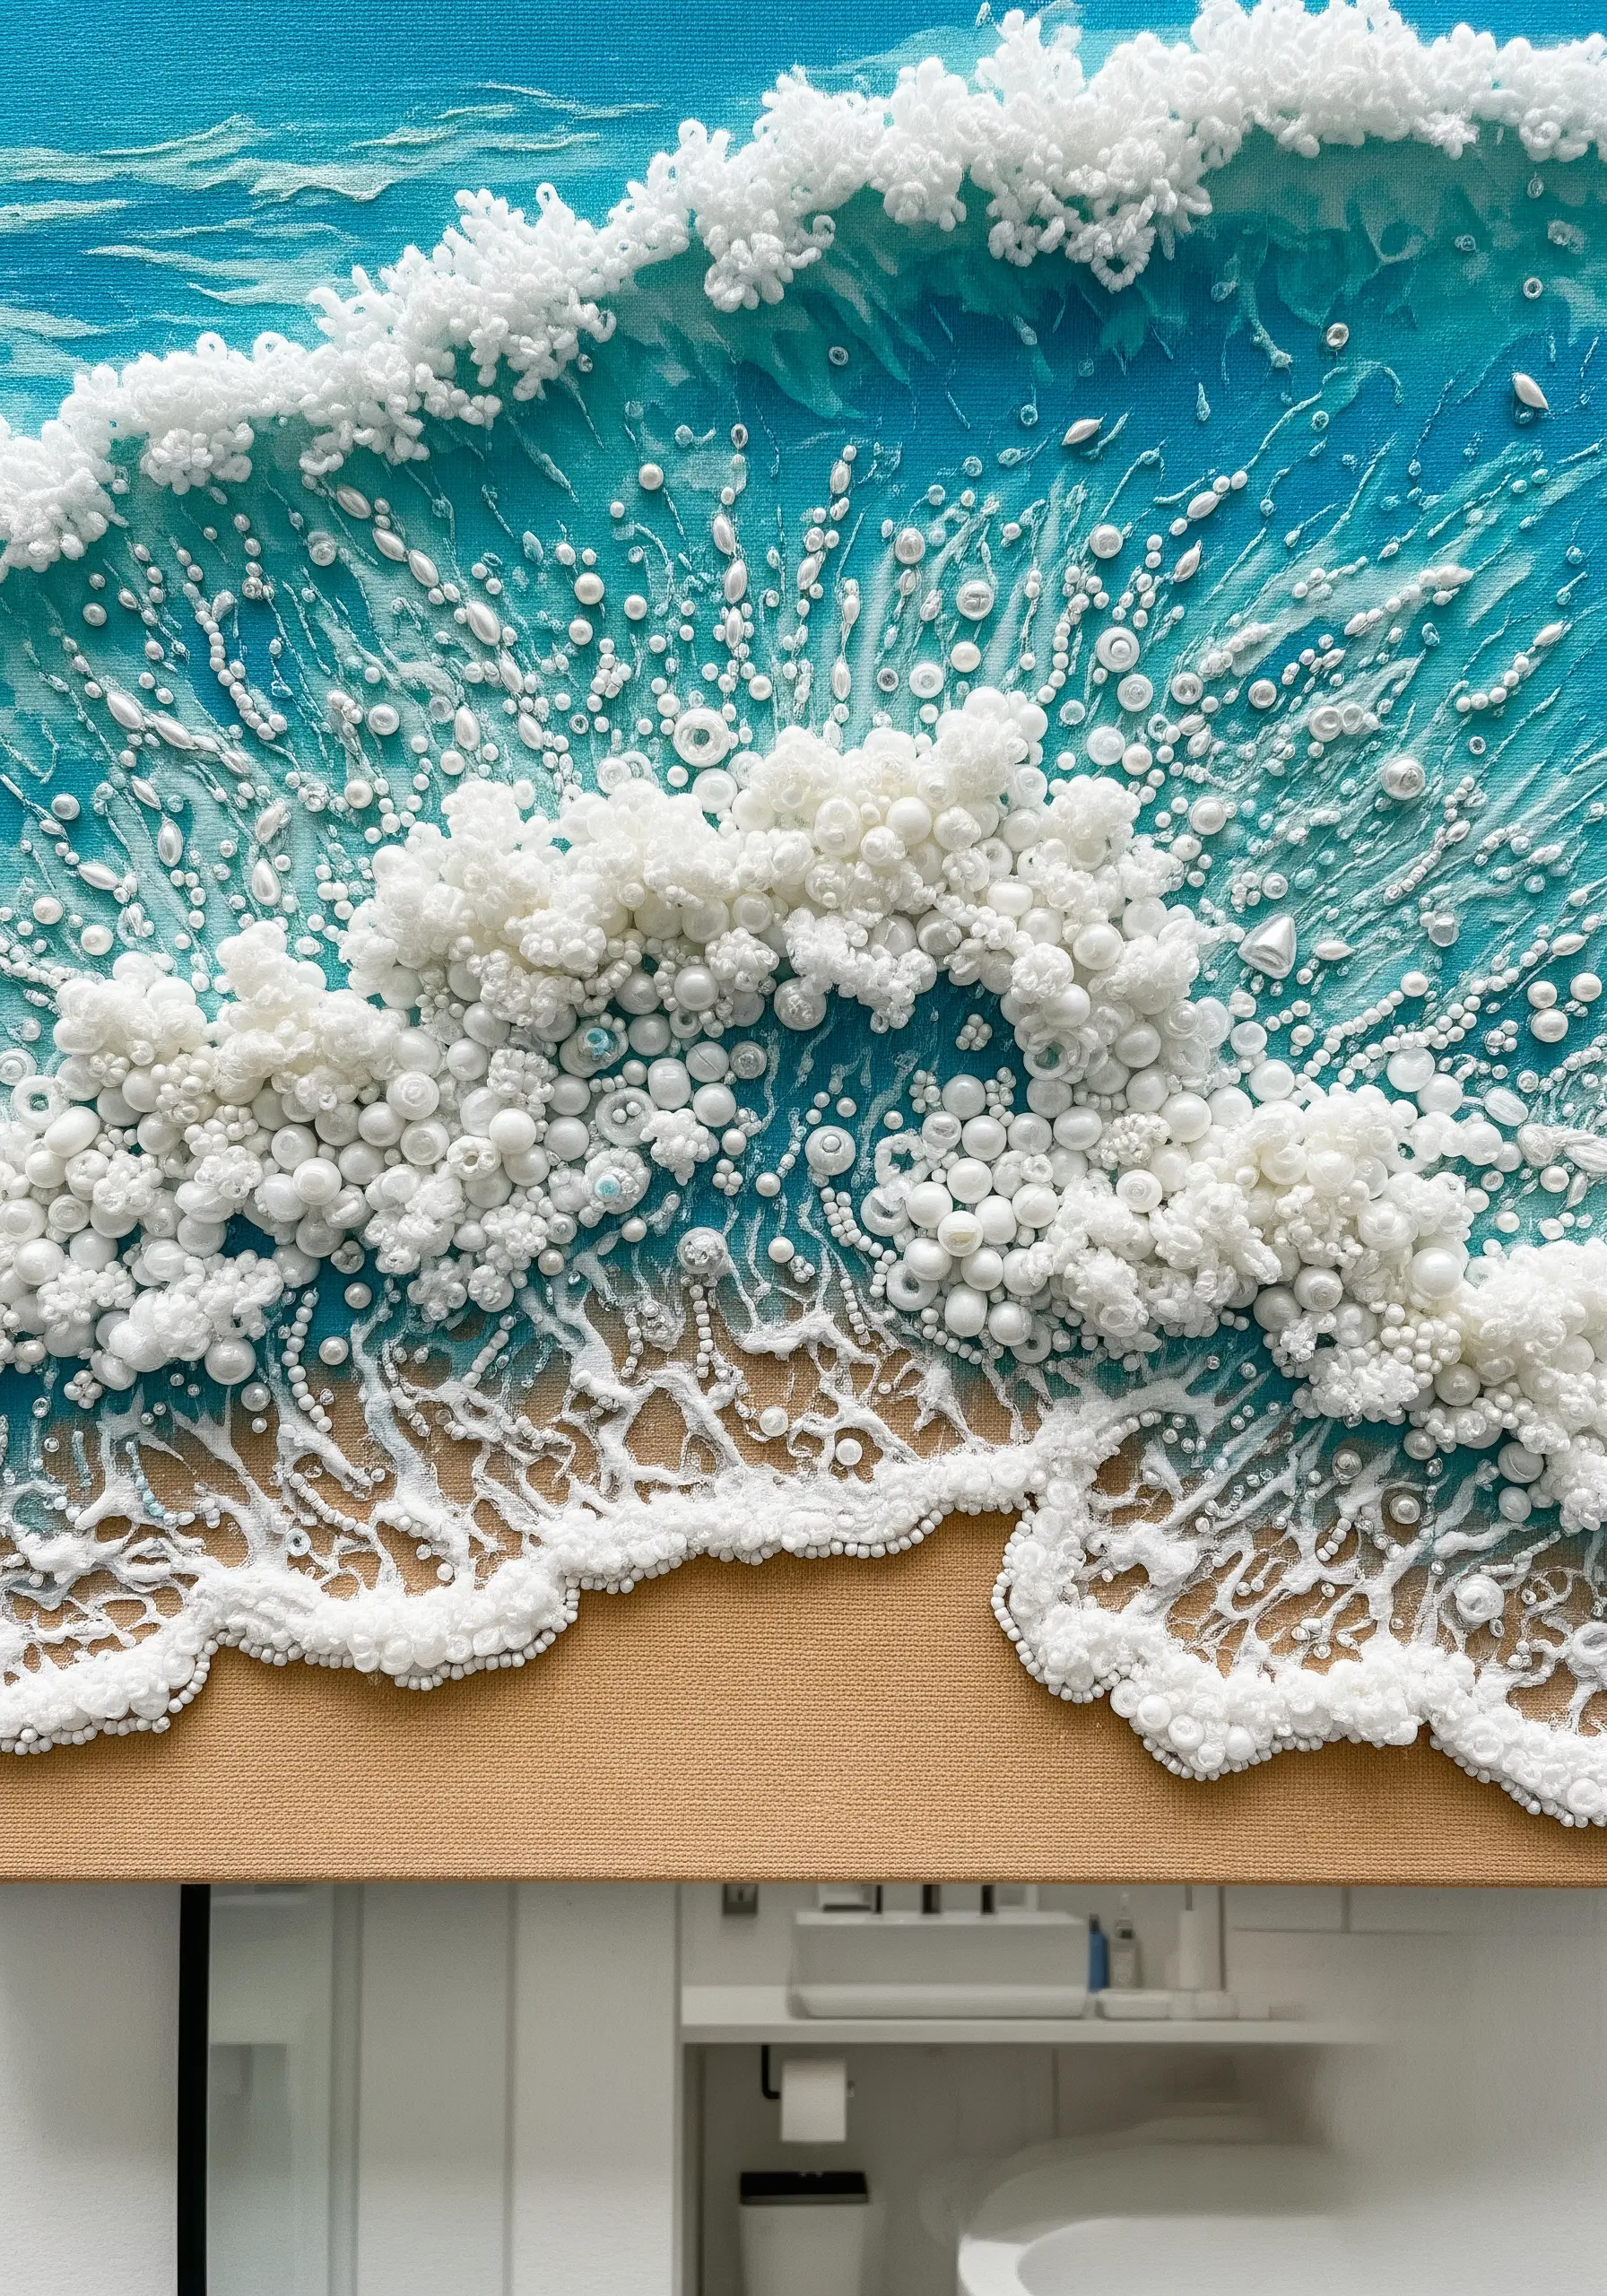
For an intensely textured and realistic seafoam effect, combine embroidery with beadwork.
Create a base layer of French knots using white and off-white cotton floss.
Then, stitch directly into that textured surface, adding a dense layer of seed beads, bugle beads, and small pearls in whites, clears, and pale blues.
The beads catch the light beautifully, mimicking the wet, glistening quality of foam and sea spray in a way that thread alone cannot.
This creates a stunning, multi-dimensional surface that invites touch.
This is one of the best mixed-fiber embroidery techniques you’ll wish you knew sooner.
24. Defining Space with Minimalist Topography
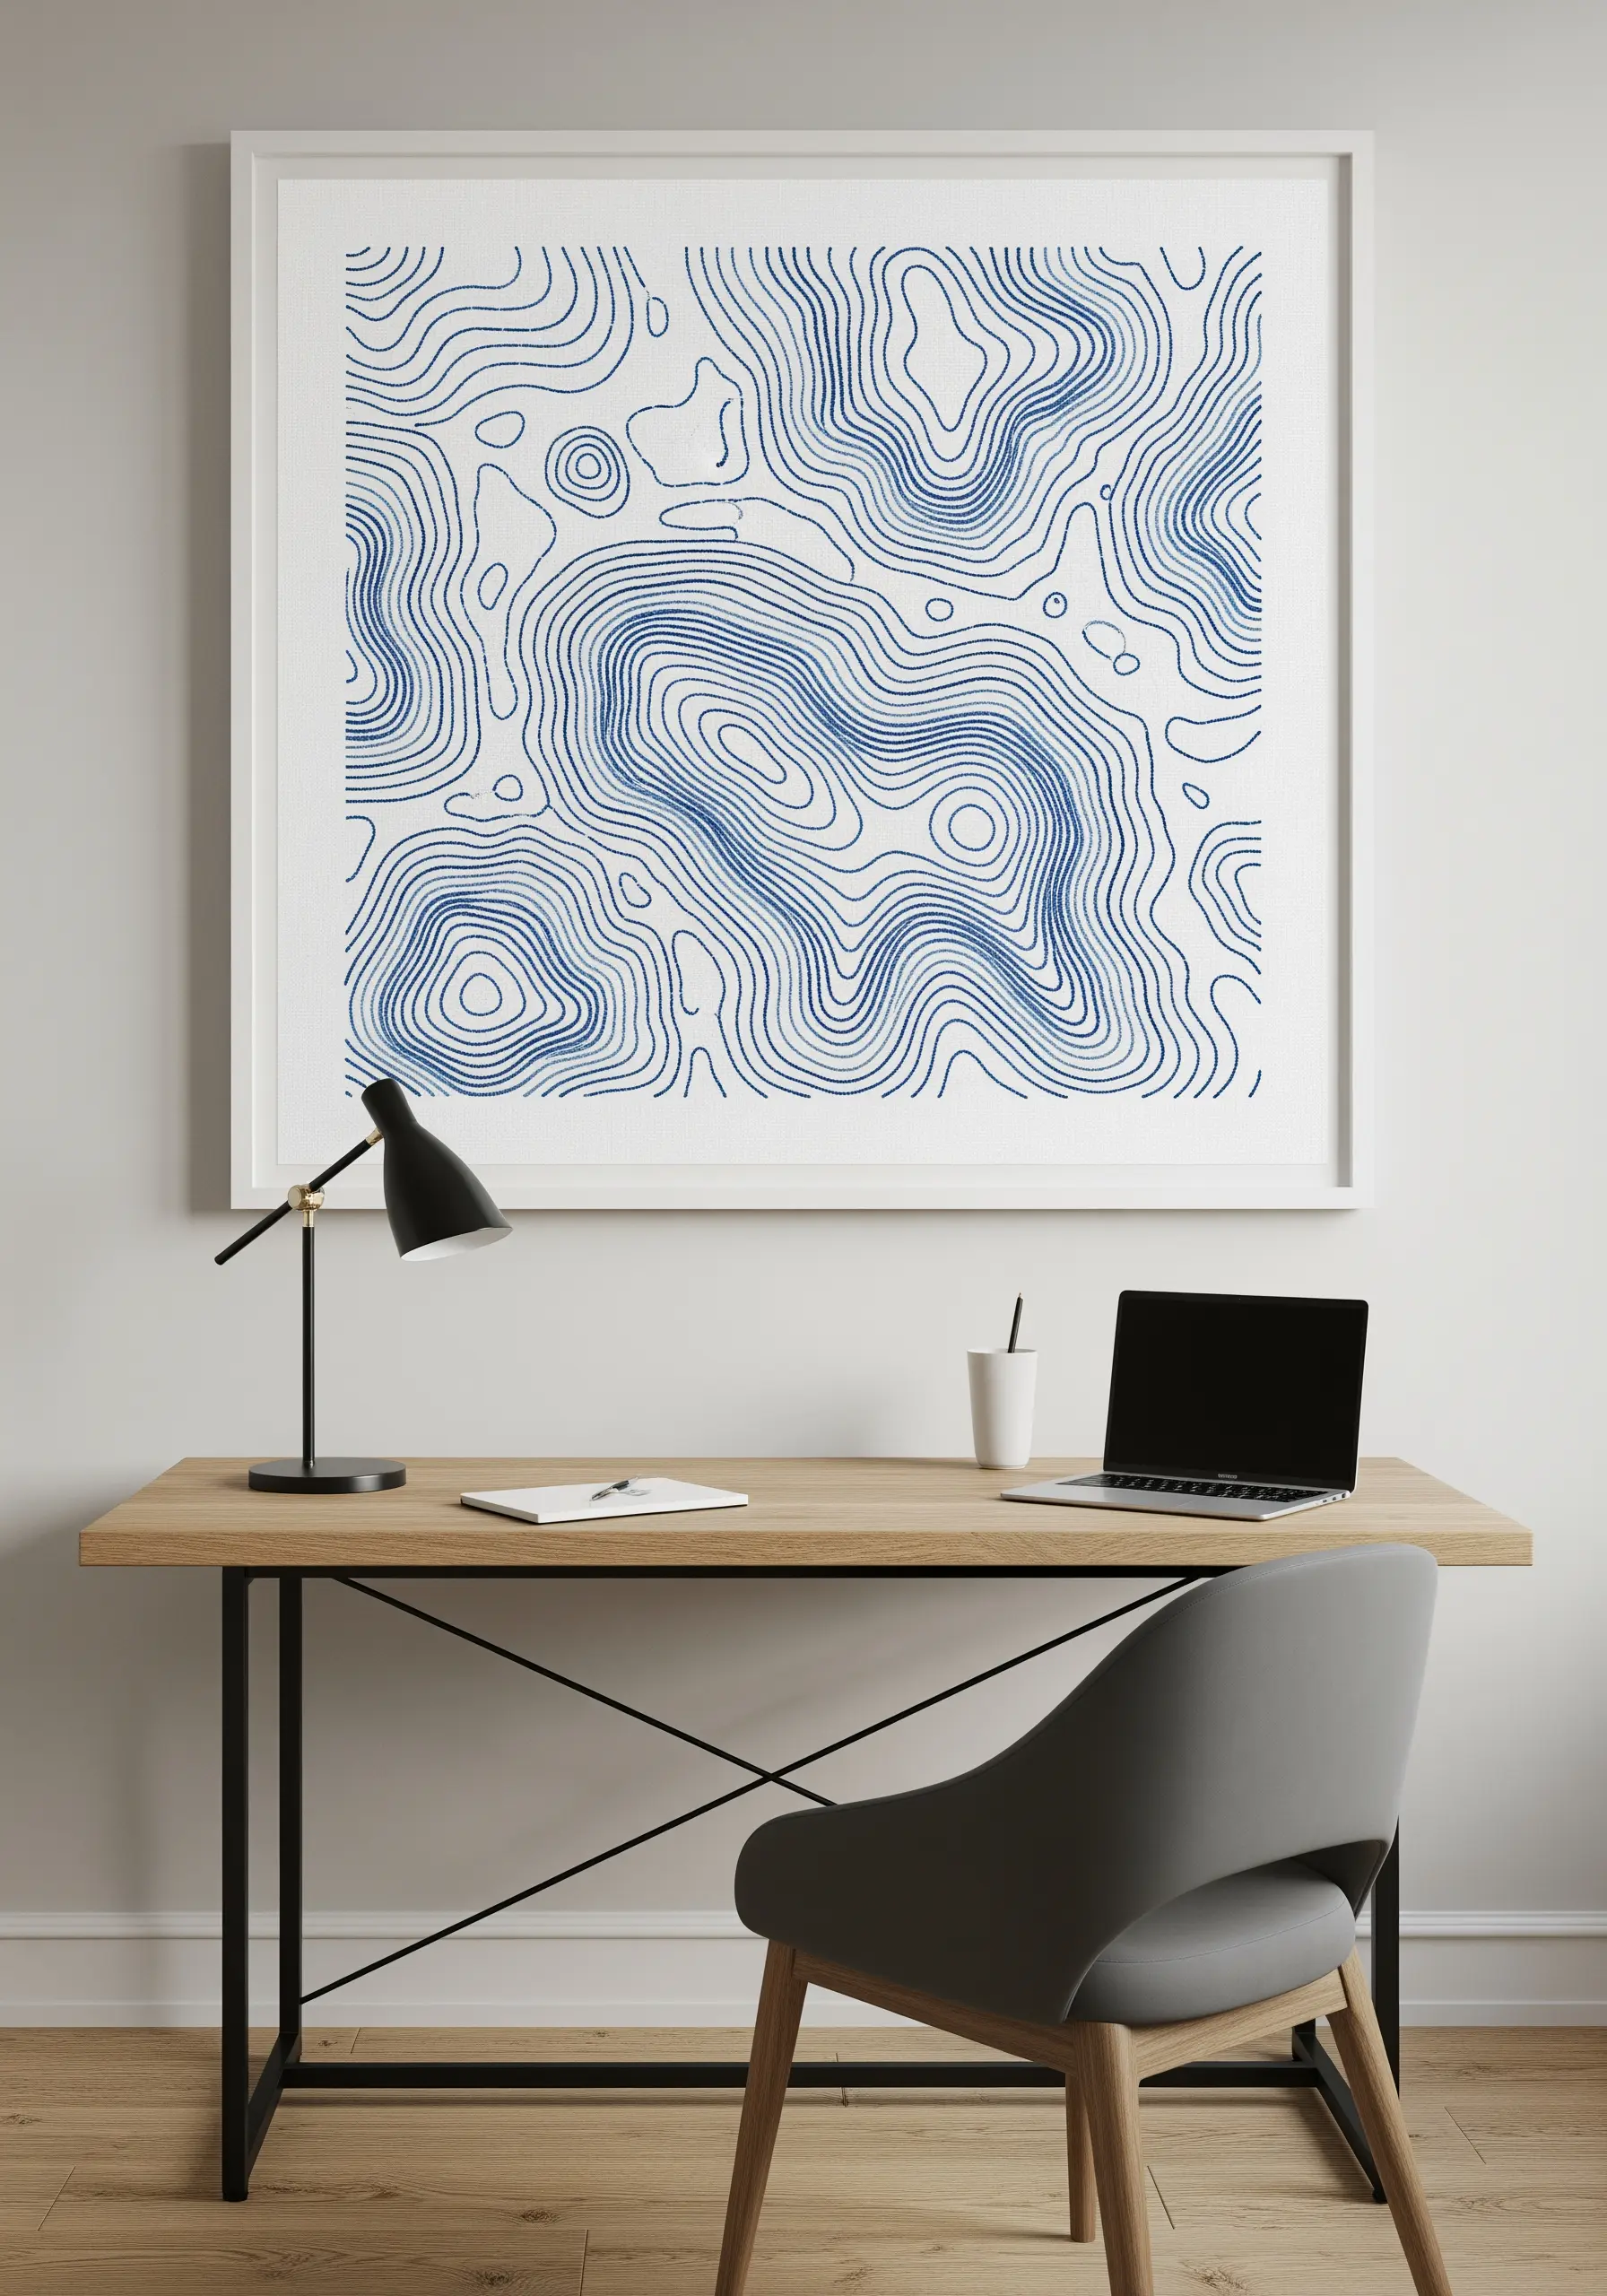
Evoke a coastal landscape with the clean, modern language of a topographic map.
On a stark white fabric, use a single shade of blue and a consistent backstitch to create fluid, concentric lines.
The visual power of this piece comes from the interplay between the dense clusters of stitches and the open, negative space.
It suggests water and landforms without a single literal image.
Framed simply, it becomes a sophisticated piece of abstract art that complements a minimalist or contemporary workspace.
Such minimal embroidery wall designs make your living room instantly cozy and chic.
25. Sculpting Kelp with Silk Ribbon Stitches
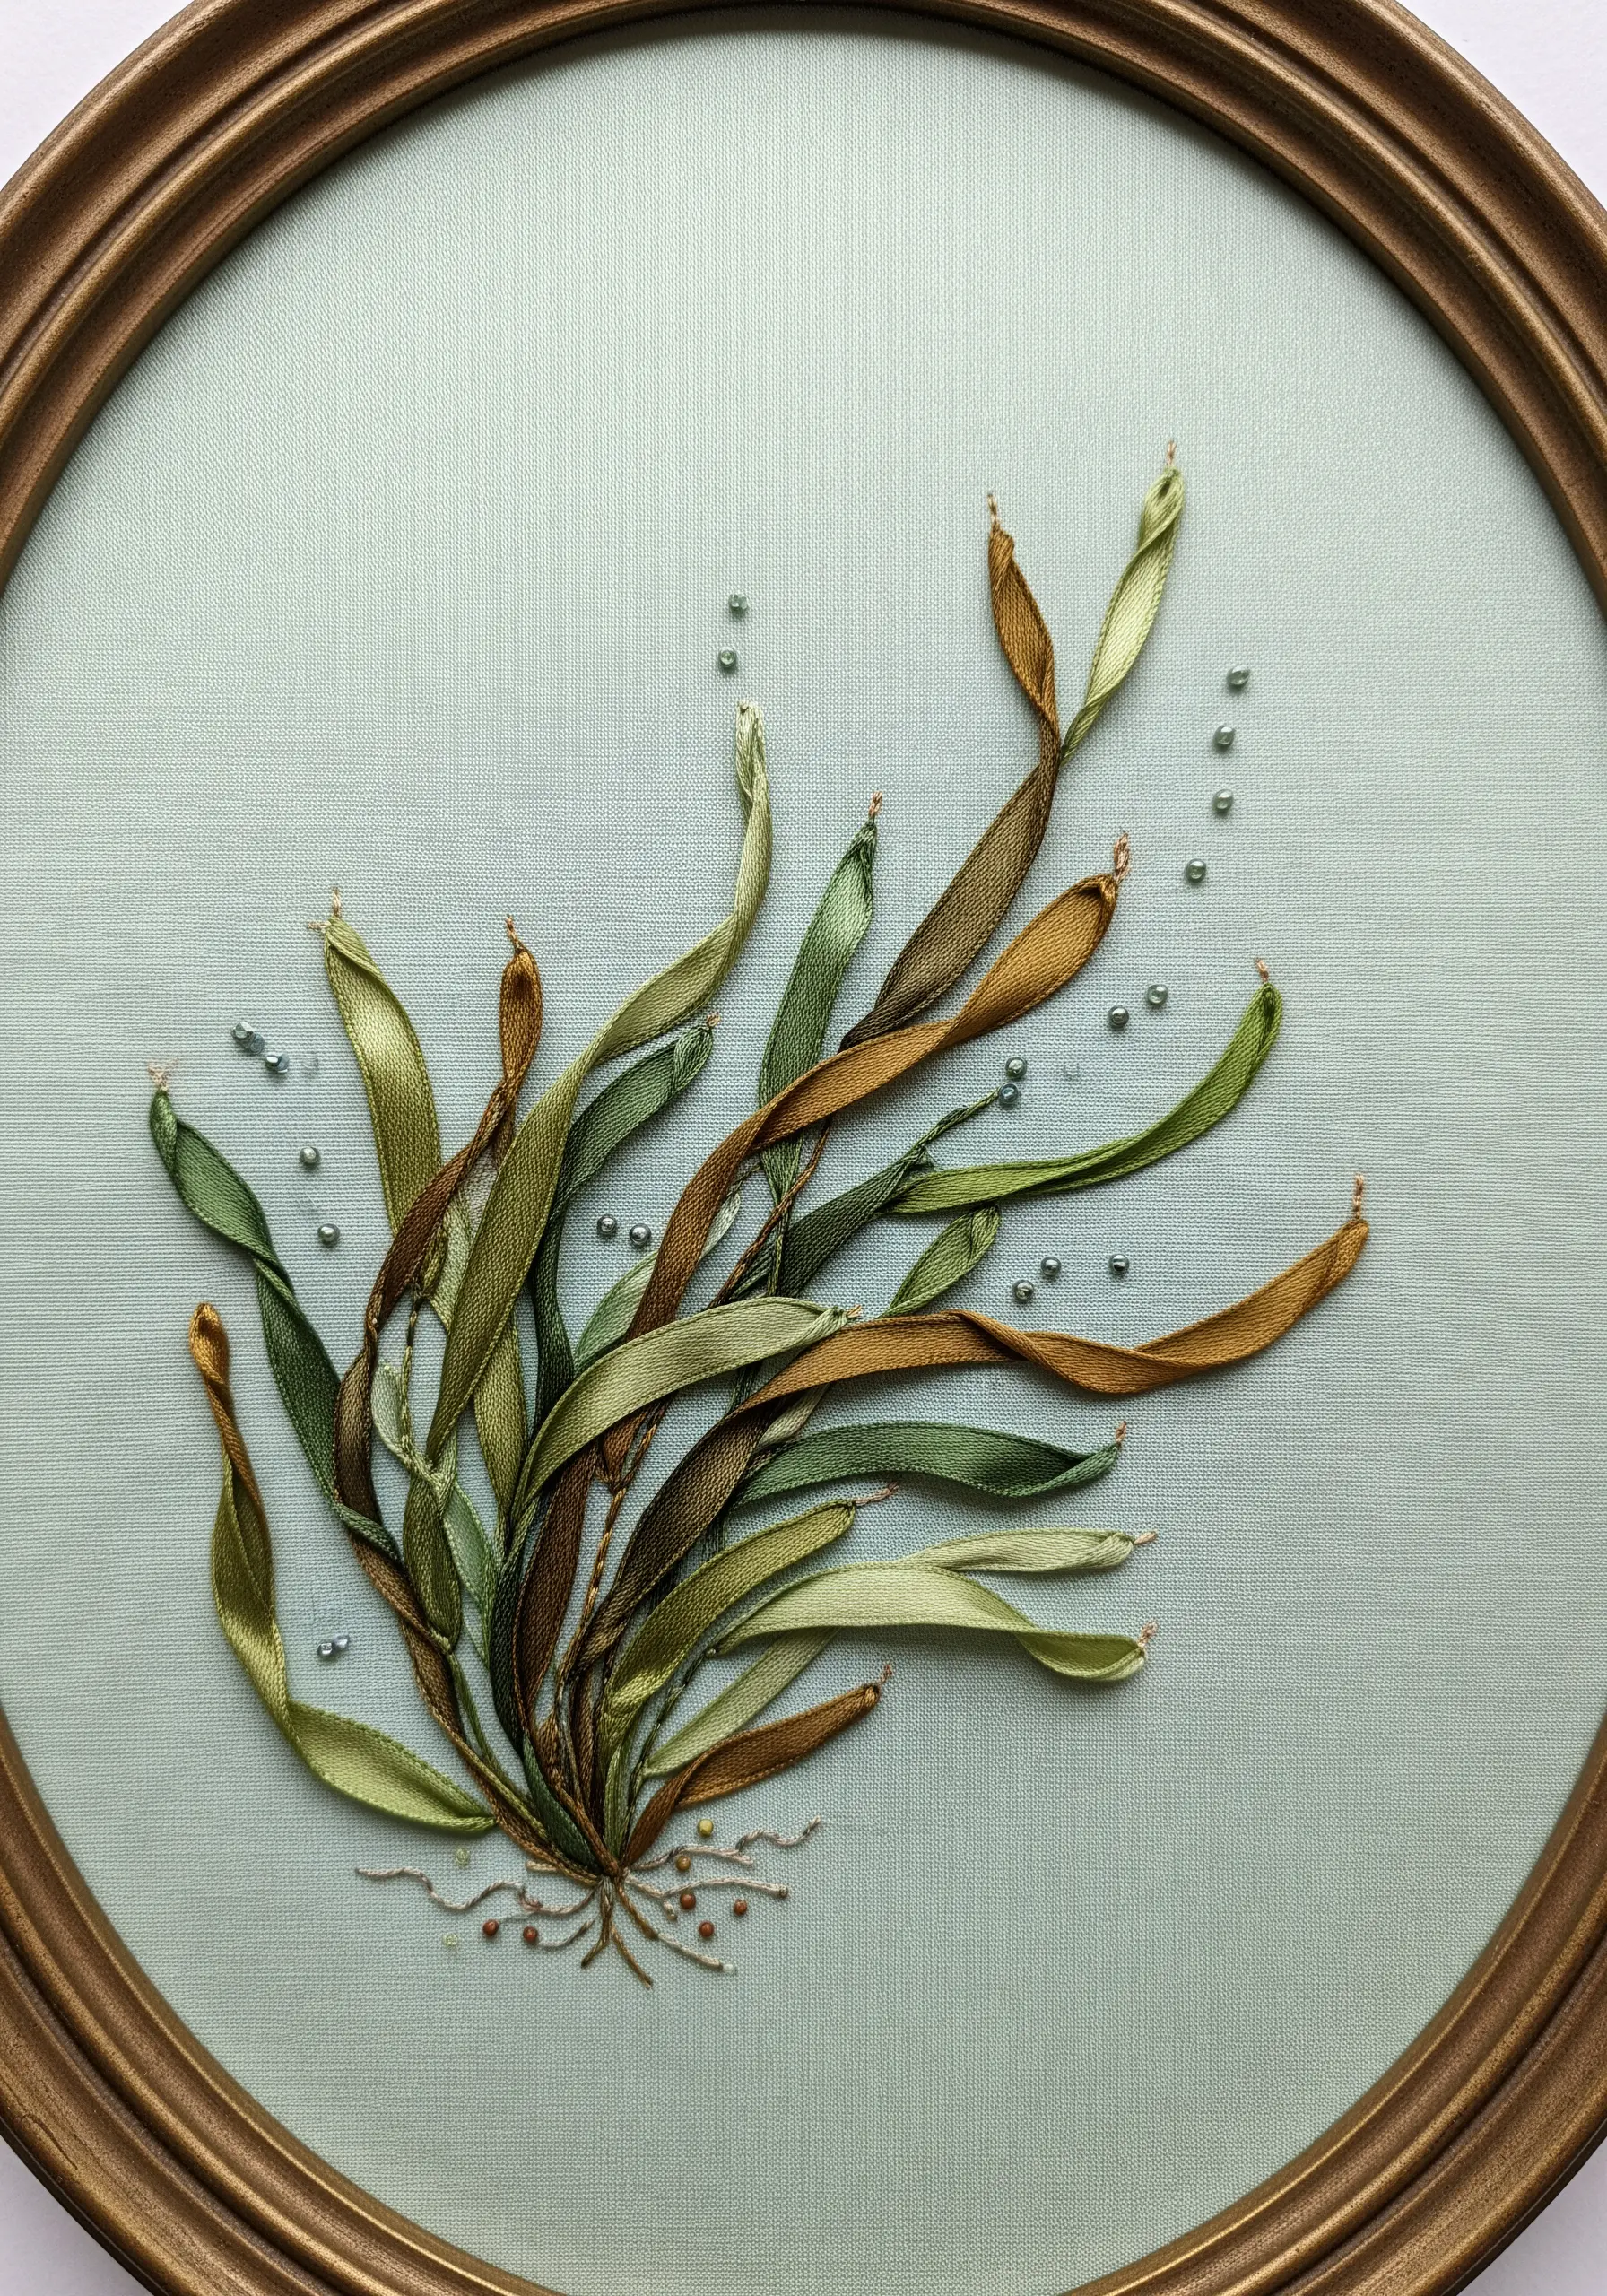
Capture the graceful, flowing movement of seaweed by using silk ribbon instead of thread.
Use the ‘twisted straight stitch’ by pulling the ribbon through the fabric and twisting it before tacking it down at the other end.
This creates a three-dimensional, undulating leaf shape that looks incredibly organic.
Vary the colors, widths, and twists of the ribbon to build a dynamic, layered kelp forest.
A few strategically placed seed beads can suggest air bubbles rising to the surface, completing the underwater illusion.
Try these floral-inspired ribbon embroidery ideas for textured 3D statement pieces.
26. Crafting Buoys with Padded Appliqué
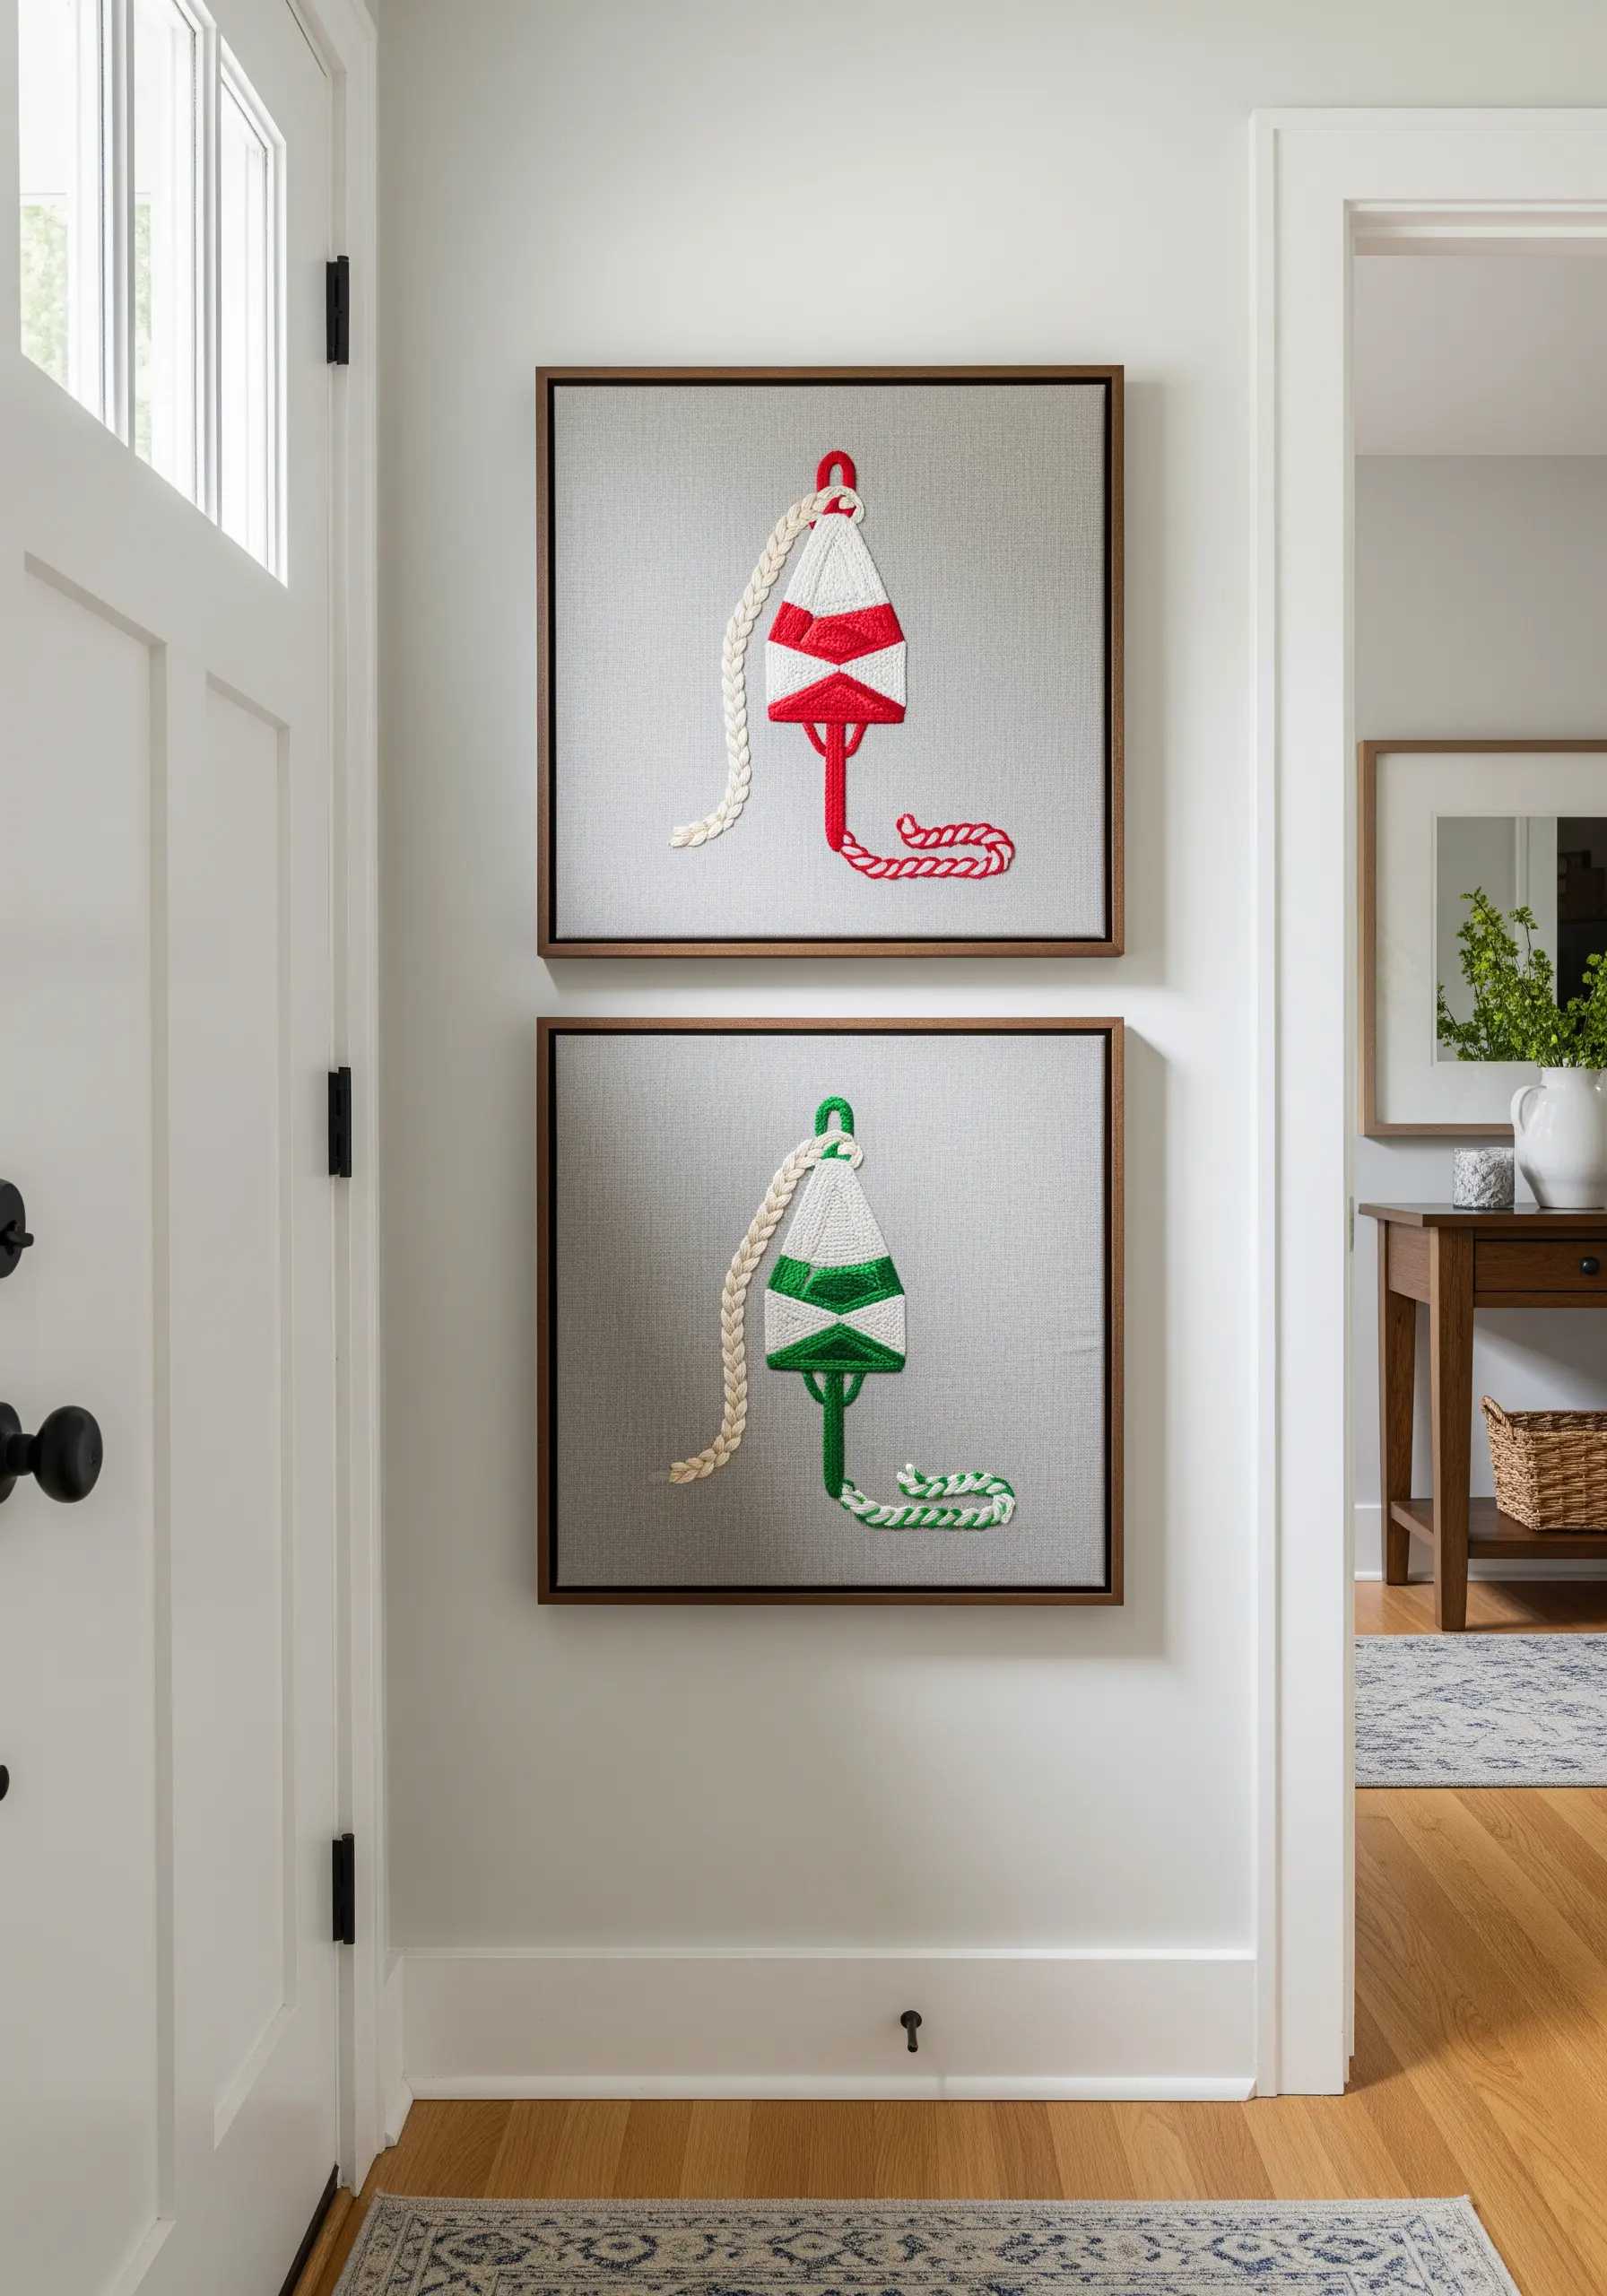
Give your nautical motifs a soft, sculptural quality with the trapunto or padded appliqué technique.
Stitch your buoy design onto a top layer of fabric, leaving a small opening. Gently push a small amount of stuffing or cotton batting through the opening to puff up the shape, then stitch it closed.
Finally, add details like the rope by couching thick, braided yarn onto the surface.
This creates a delightful, pillow-like effect that makes the simple design feel more substantial and playful.
These cute and quirky framed embroidery ideas add a fun touch to any space.
27. Creating a Luxe Compass with Metallic Thread
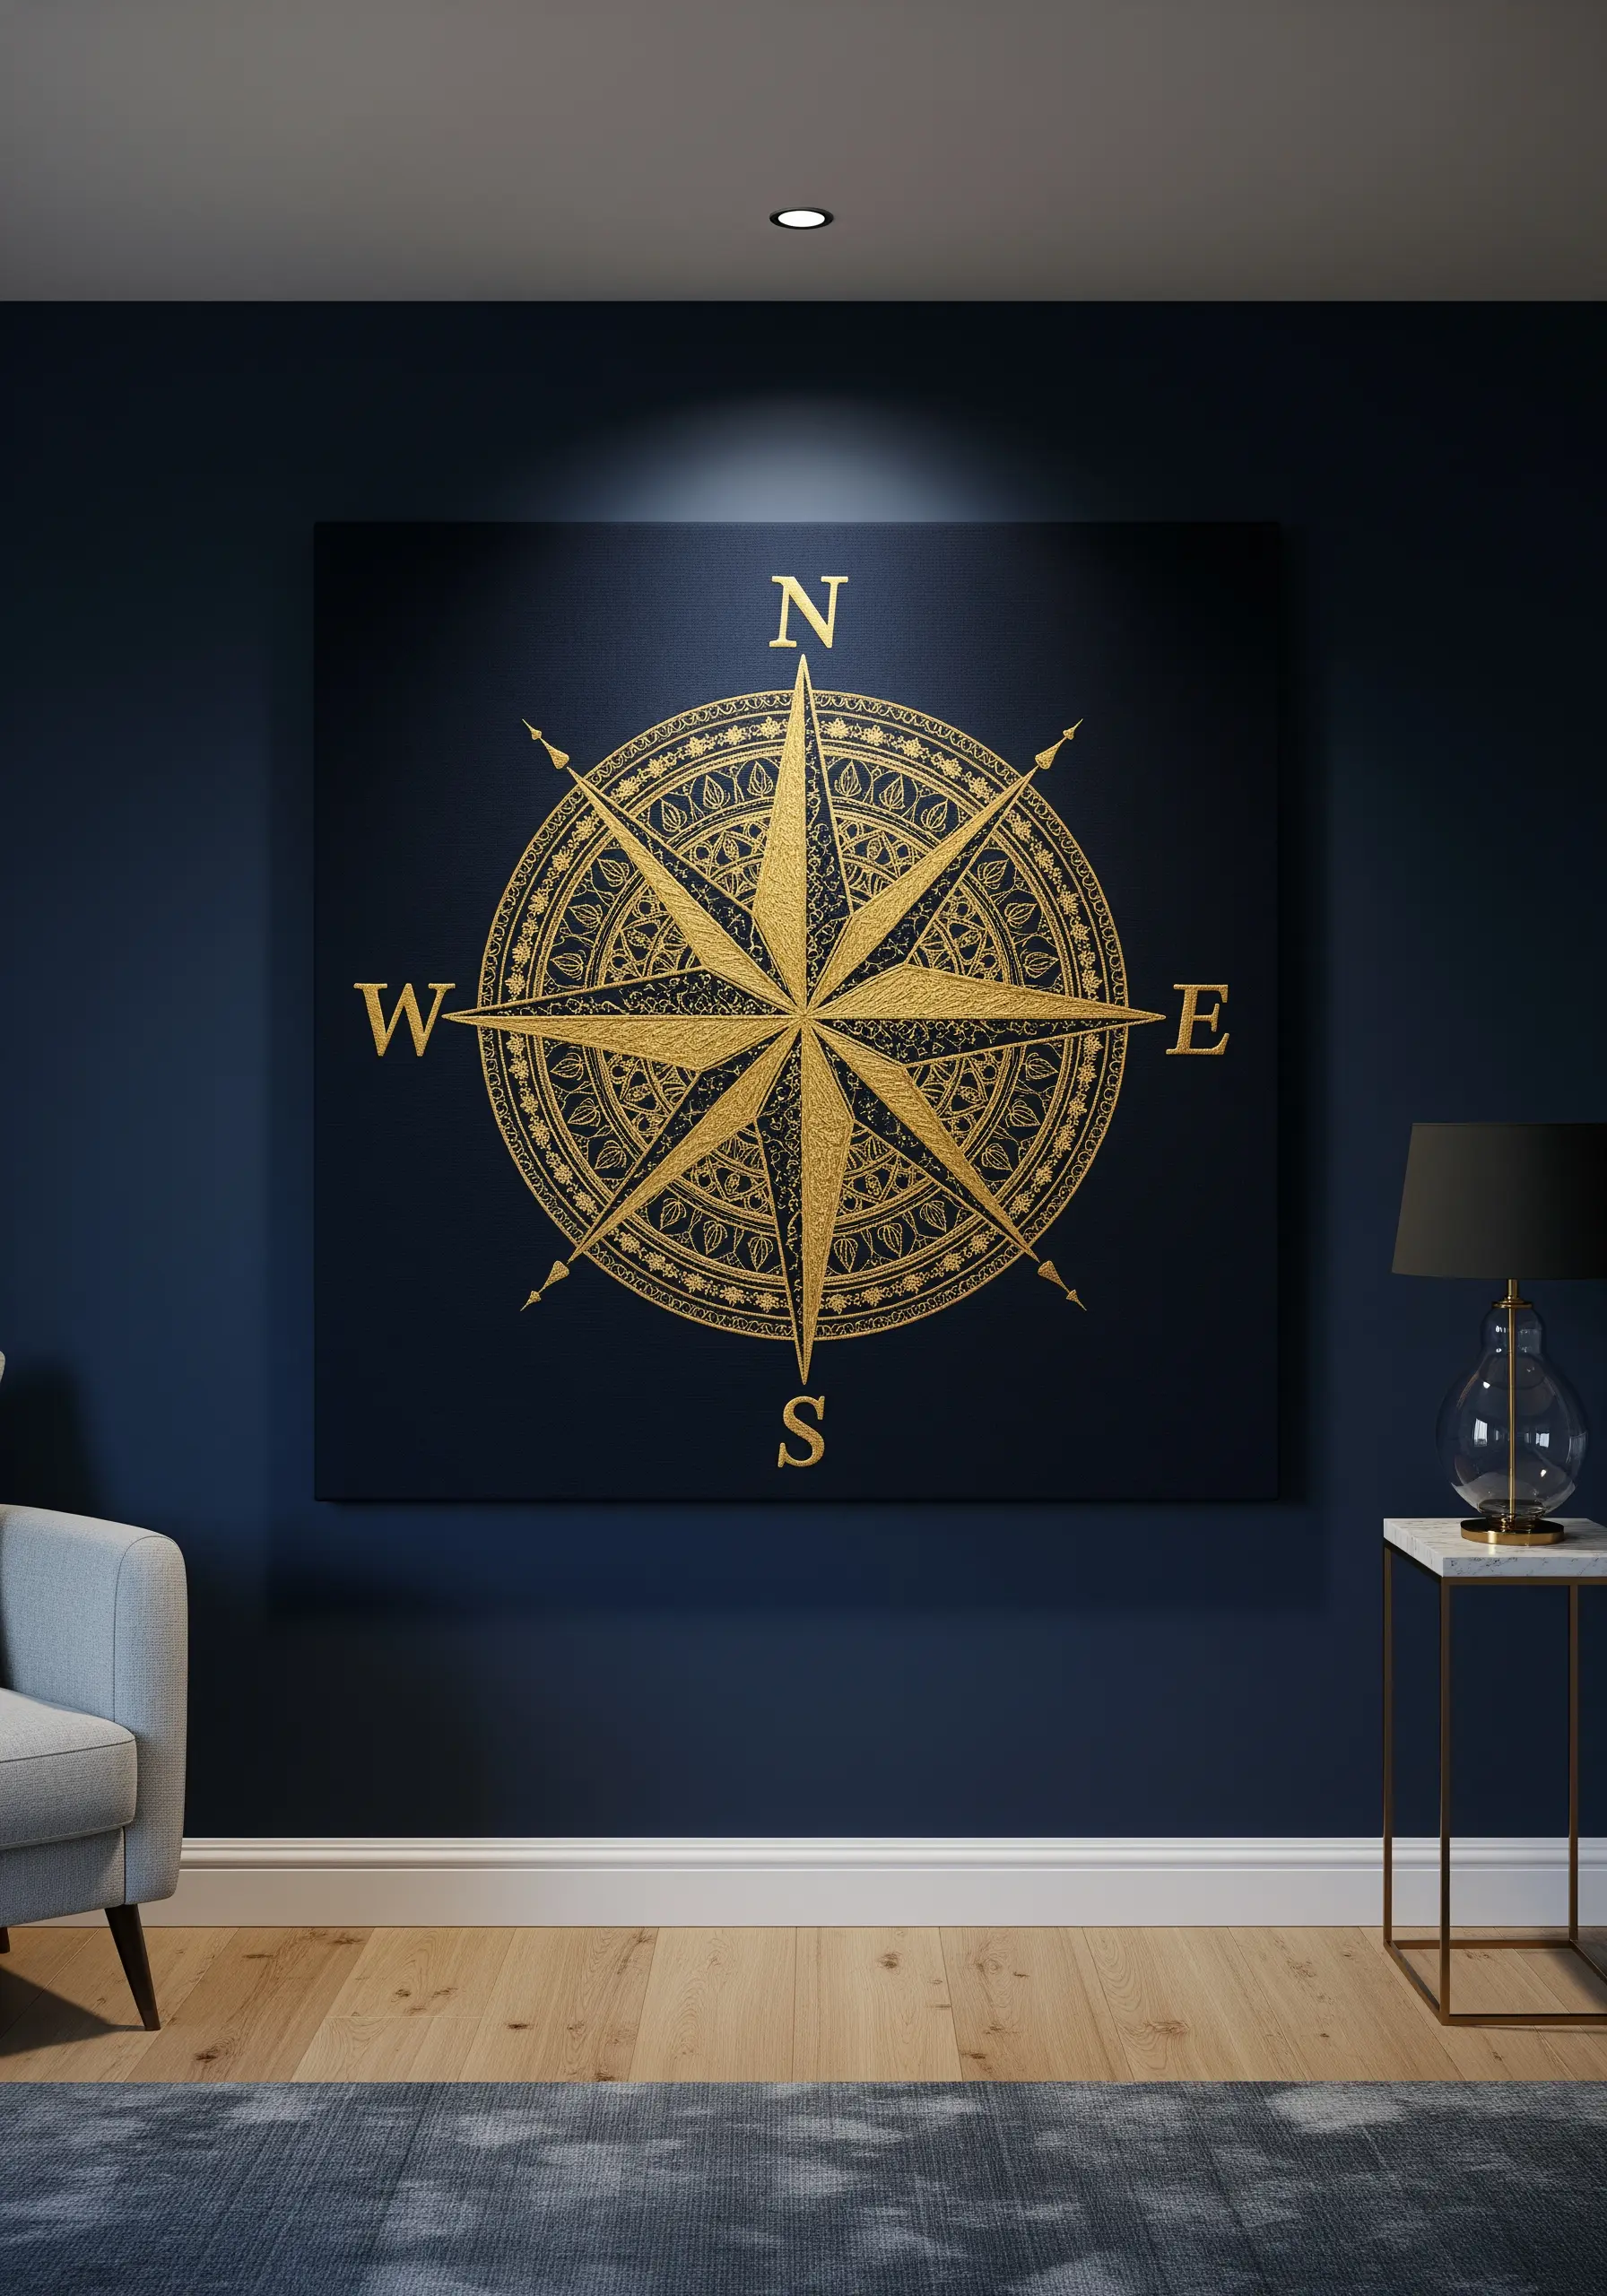
For a sophisticated and dramatic piece, use metallic thread on a dark, high-contrast background like navy or black velvet.
To prevent the notoriously tricky metallic thread from fraying, use a shorter length than you normally would and work with a needle that has a larger eye.
Use a combination of satin stitch for the filled areas and a precise backstitch for the fine details and letters.
The way the gold thread catches the light against the matte, dark fabric creates a luxurious, almost gilded effect.
These luxury metallic thread wall decor ideas look straight out of high-end hotels.
28. Illustrating with Thread and Paper
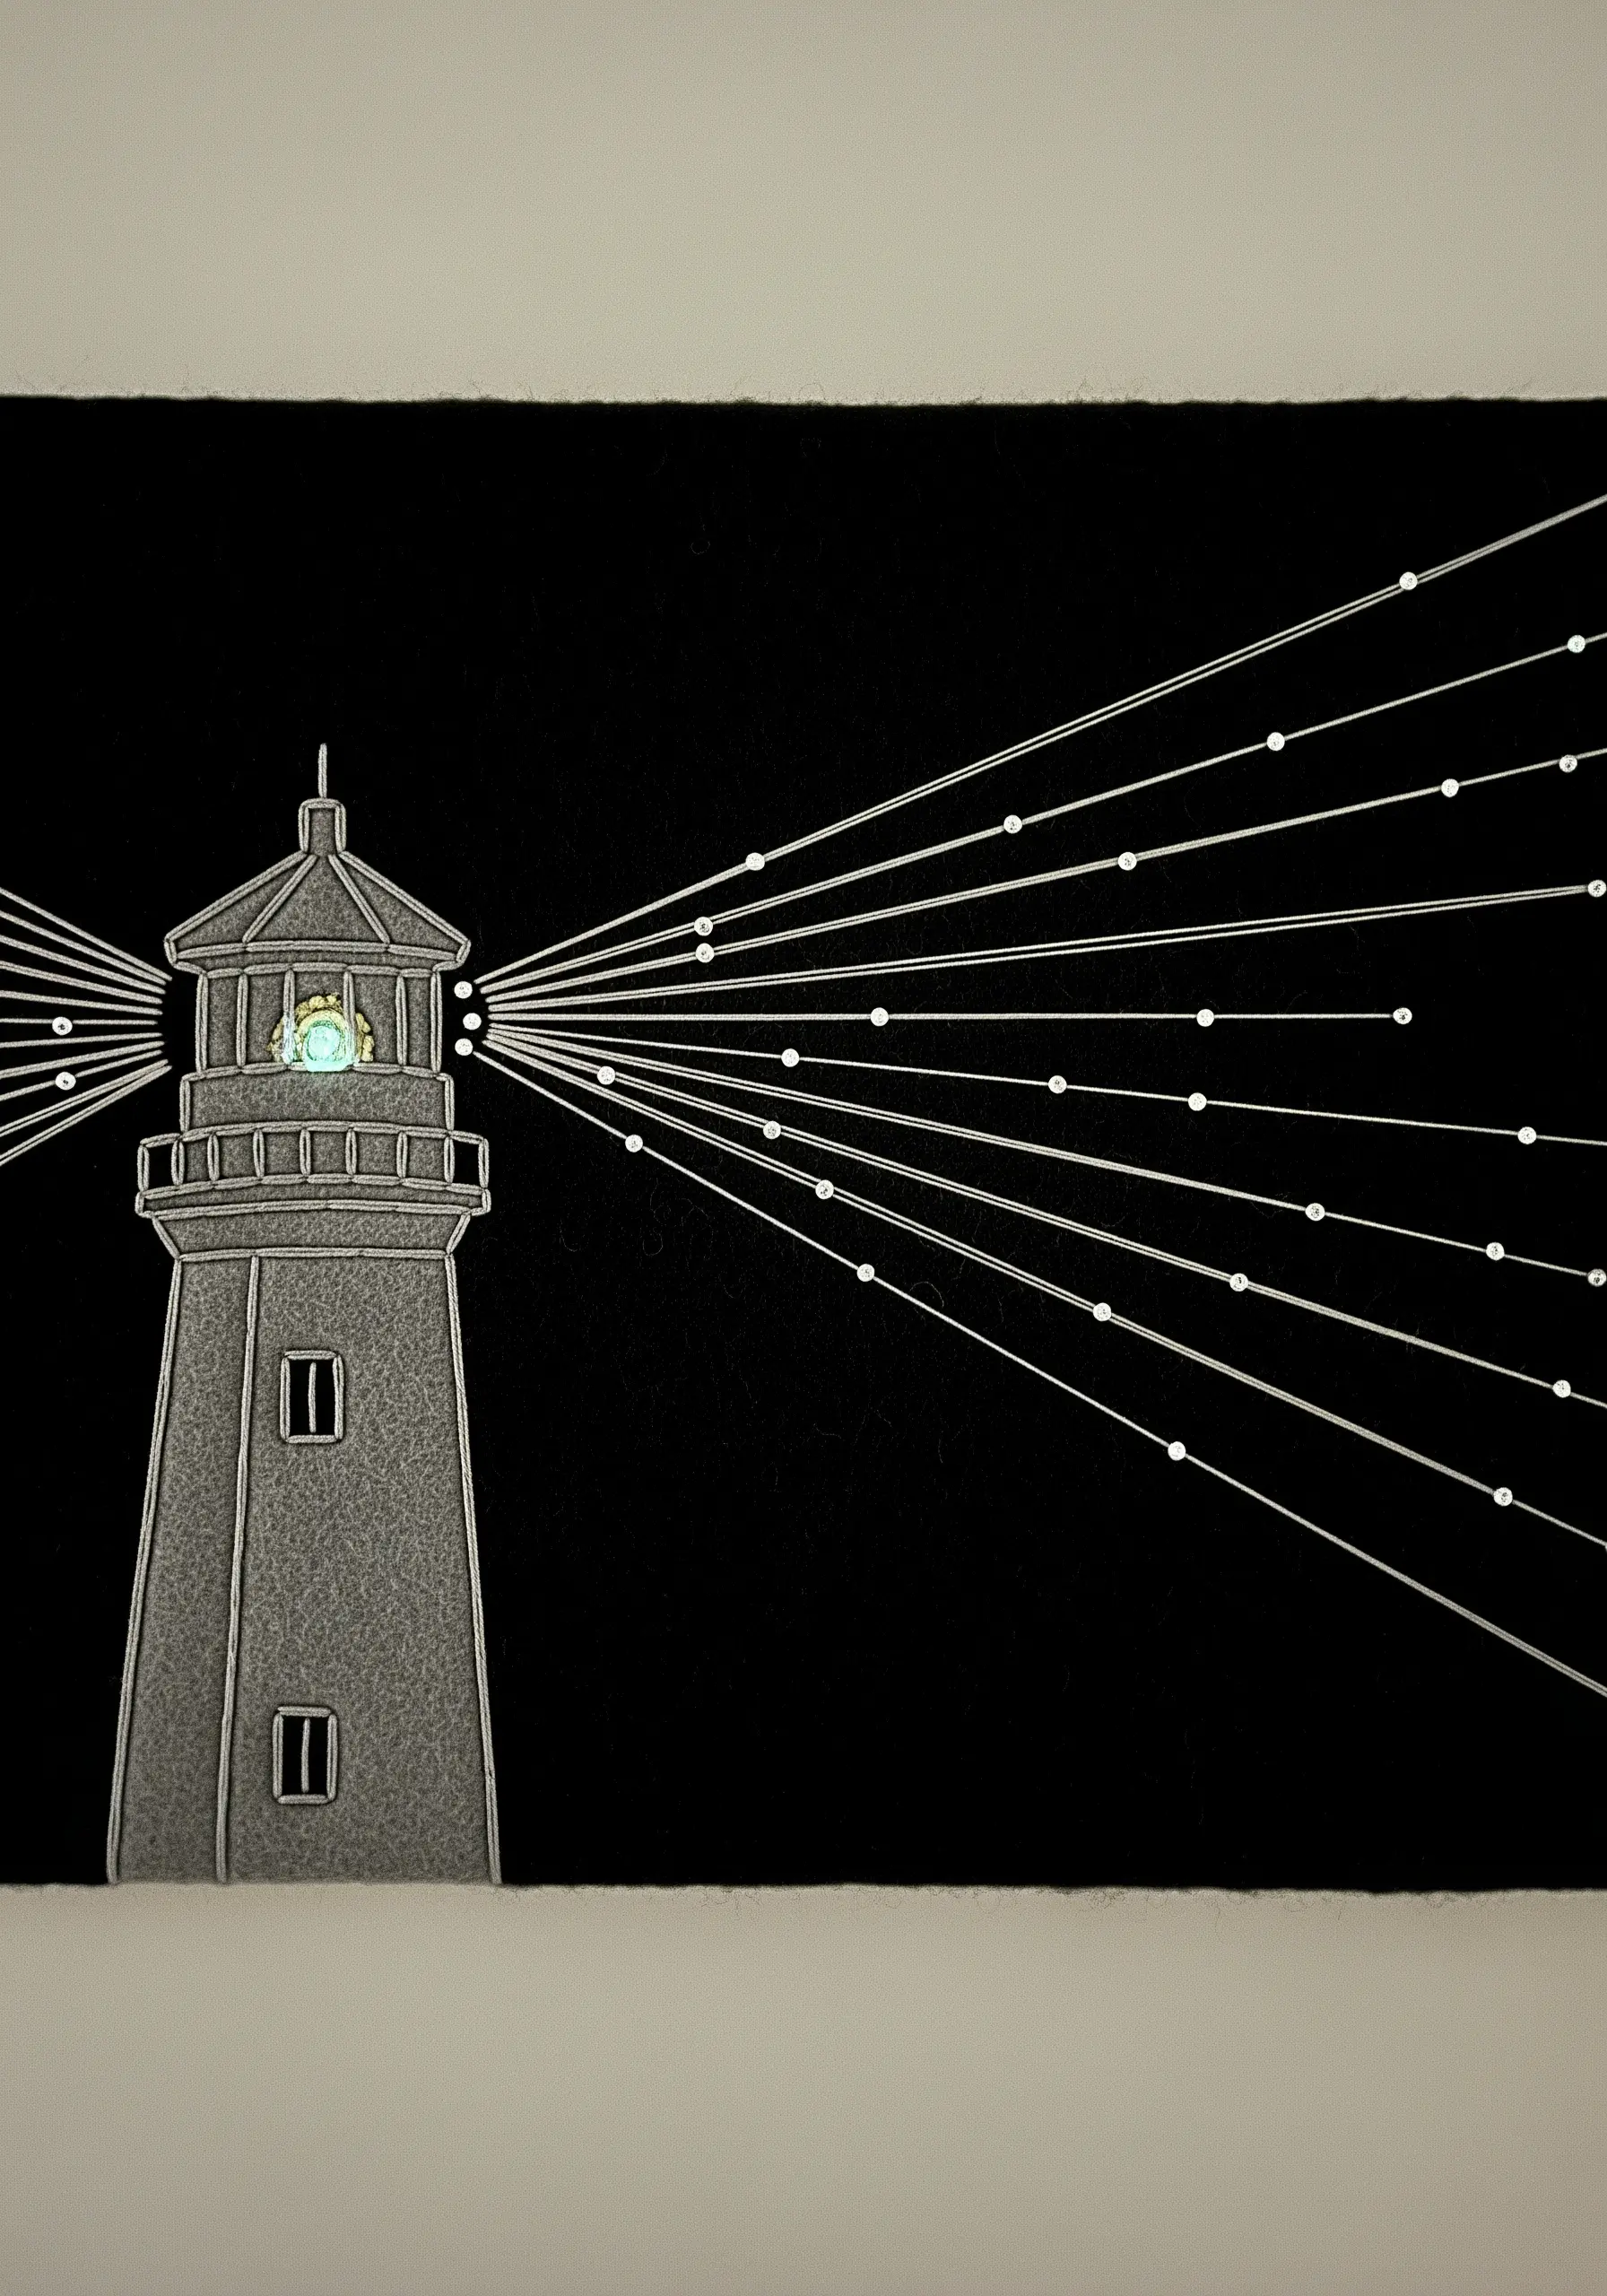
Combine the precision of paper art with the softness of thread for a striking, modern lighthouse.
Start with a base of black cardstock or heavyweight paper. Use a piercing tool or a large needle to pre-punch holes for your design.
Then, stitch through the holes using a simple straight stitch with white or silver thread to create the light beams.
This technique, often called paper embroidery, results in exceptionally clean, sharp lines that are difficult to achieve on fabric, offering a graphic and contemporary feel.
Explore more unique paper art techniques that make every embroidery stand out.


