

If you’re looking to create embroidery that feels less like a hobby and more like art, the secret isn’t in complex new stitches. It’s in the intentional, thoughtful use of color. A neutral color gradient is your key to transforming a simple piece into something with depth, sophistication, and a quiet, confident presence on your wall.
Forget the pressure to create intricate, pictorial scenes. Instead, allow yourself to focus on the pure, meditative process of shifting from one tone to the next. Whether you’re blending threads seamlessly with a long-and-short stitch or creating bold, graphic blocks of color, the gradient does the aesthetic work for you, ensuring a result that looks polished and designer-made.
In these ideas, you’ll discover how to use texture, stitch direction, and composition to elevate a simple gradient into something extraordinary. This is your chance to create a piece that not only calms your mind while you stitch but also brings a sense of serene, modern elegance to your most personal space.
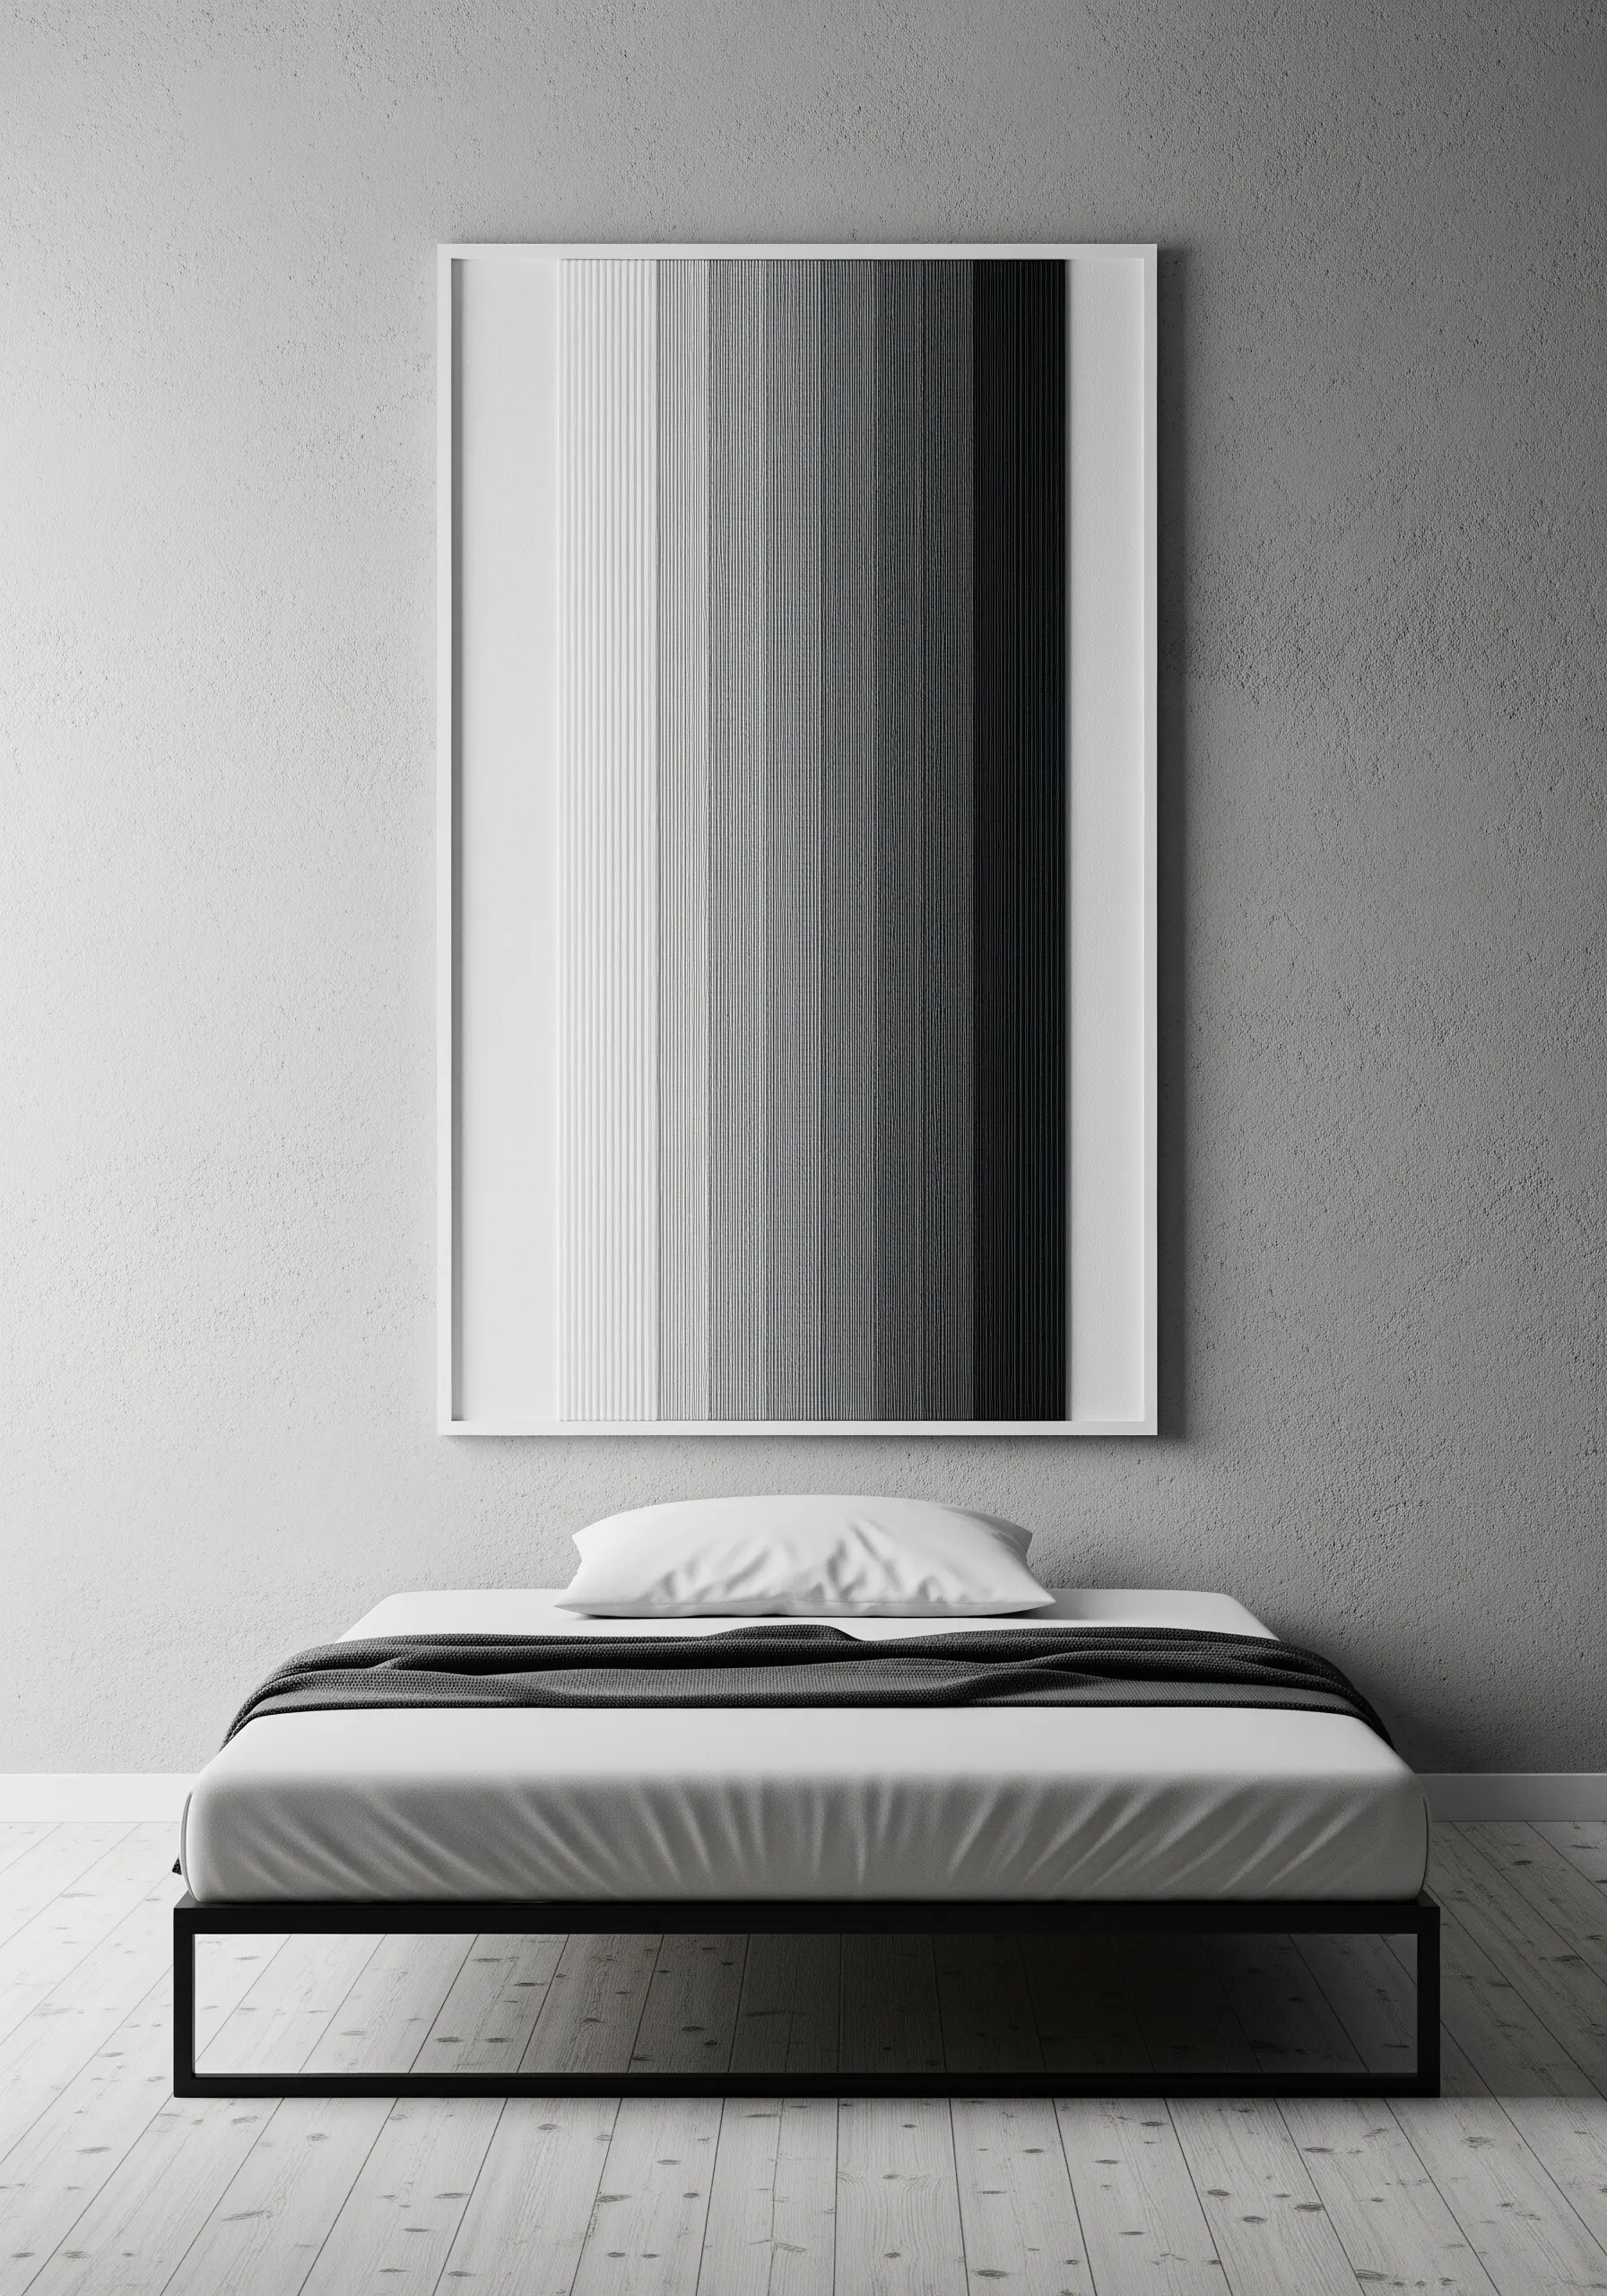
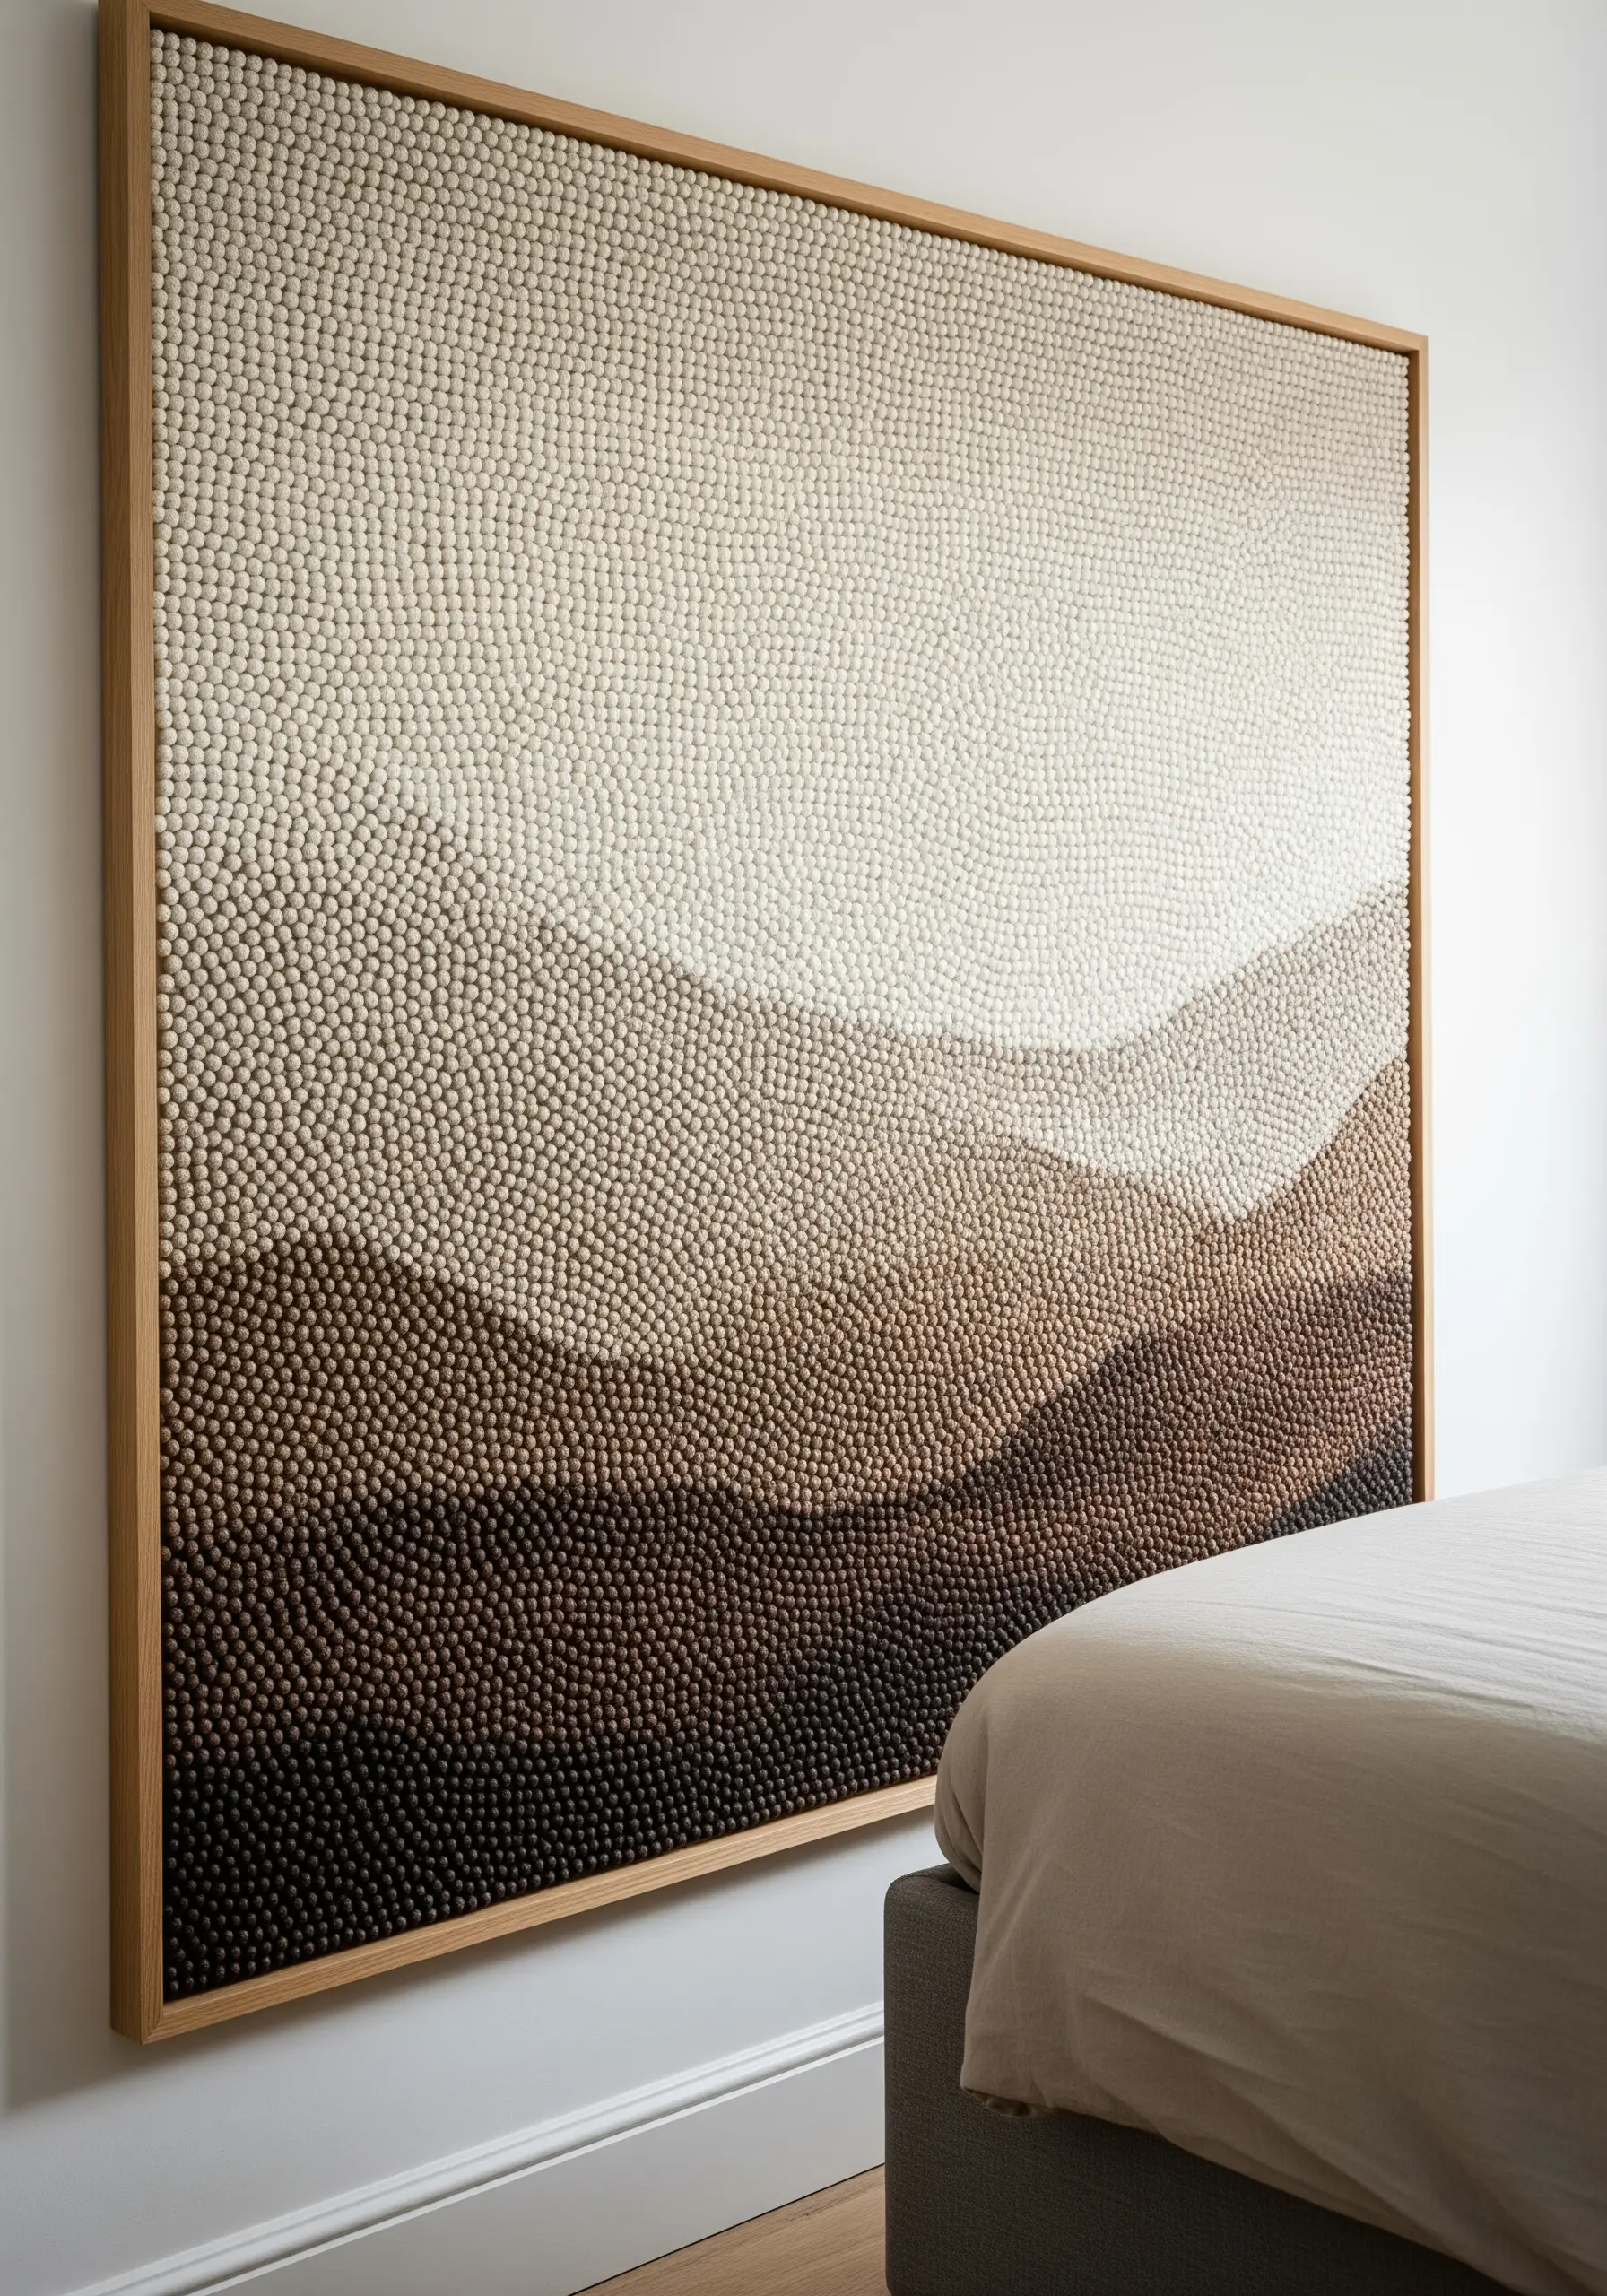
1. The Large-Scale Pixel Gradient
Create a truly immersive piece by thinking of your stitches as pixels.
Use a single strand of floss and a tiny seed stitch, packing the stitches tightly to build a smooth, photographic gradient.
Map out your color transitions on a grid beforehand, assigning a thread color to each section to ensure the shift from light to dark is seamless and intentional.
This technique transforms a simple gradient into a stunning framed embroidery piece that feels like modern art.
2. The Layered Earth-Tone Tapestry
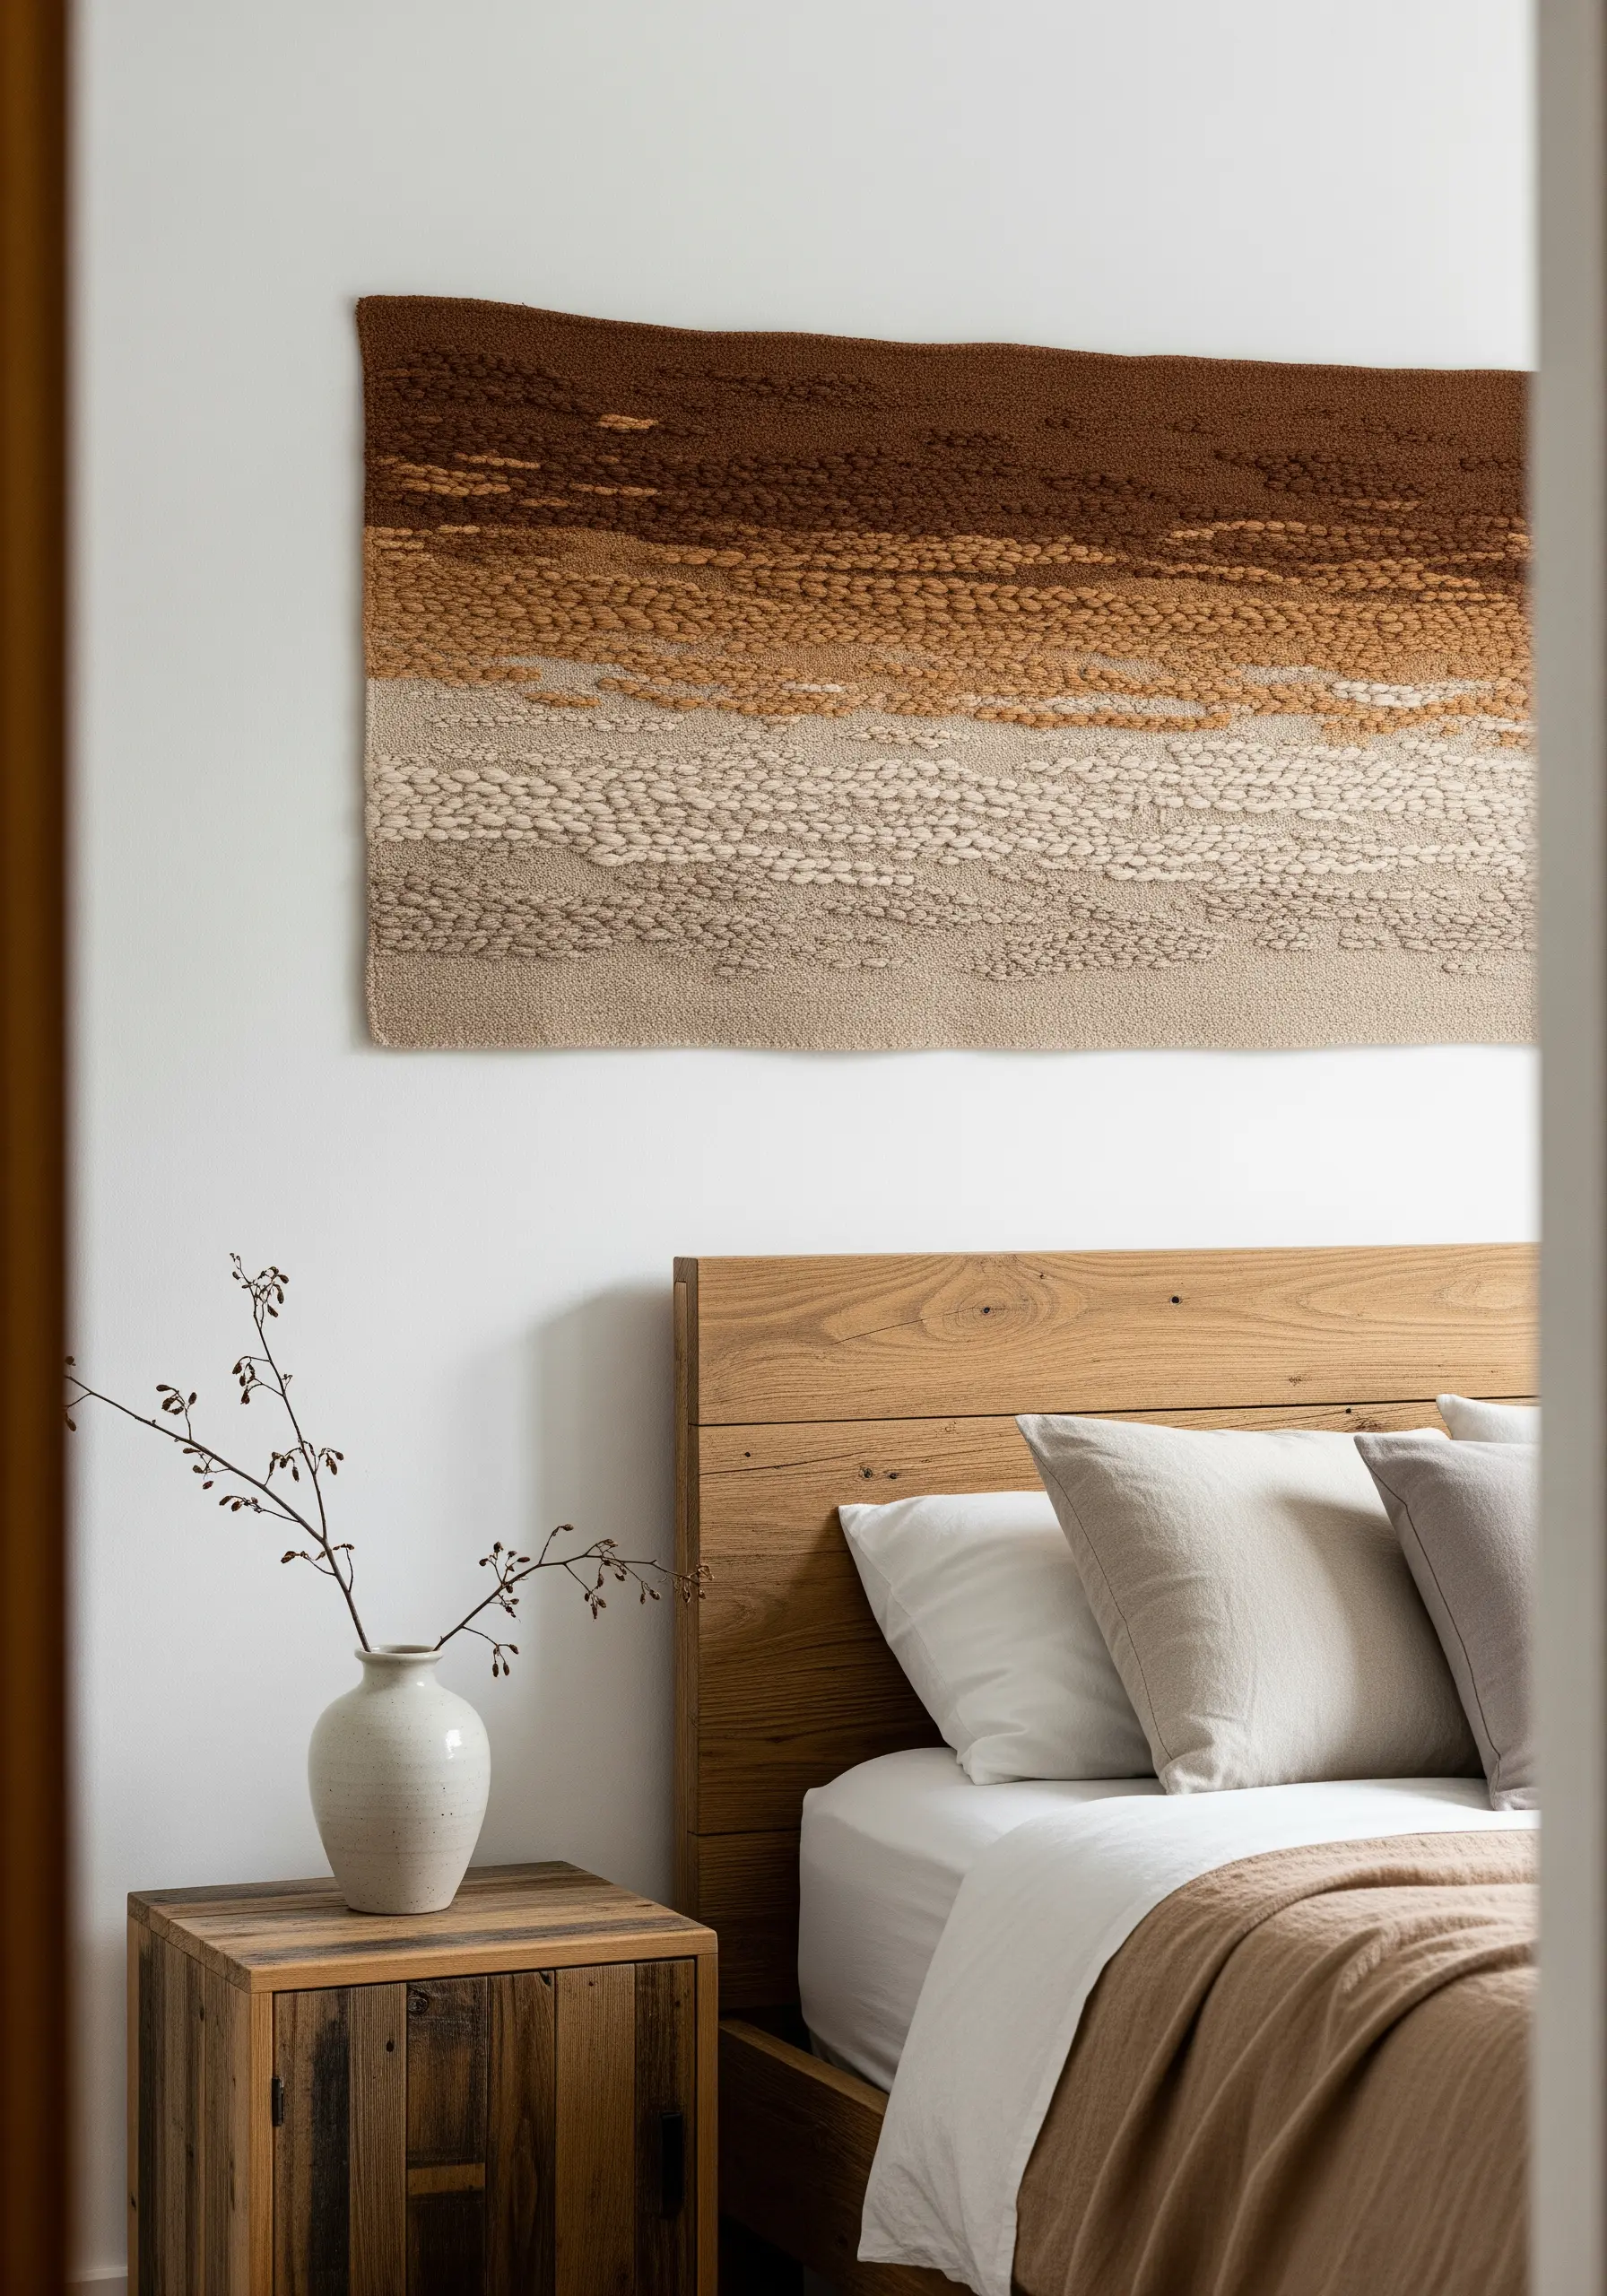
Move beyond flat stitches and embrace sculptural texture.
Use chunky wool yarn and a combination of loop stitches (like the Turkey knot) and thick satin stitches to build distinct textural bands.
Vary the height and density of your loops within each color block to mimic the organic feel of a natural landscape.
This method allows you to build rich texture that invites touch and adds warmth to your bedroom wall.
3. The Geometric Hoop Art Triptych
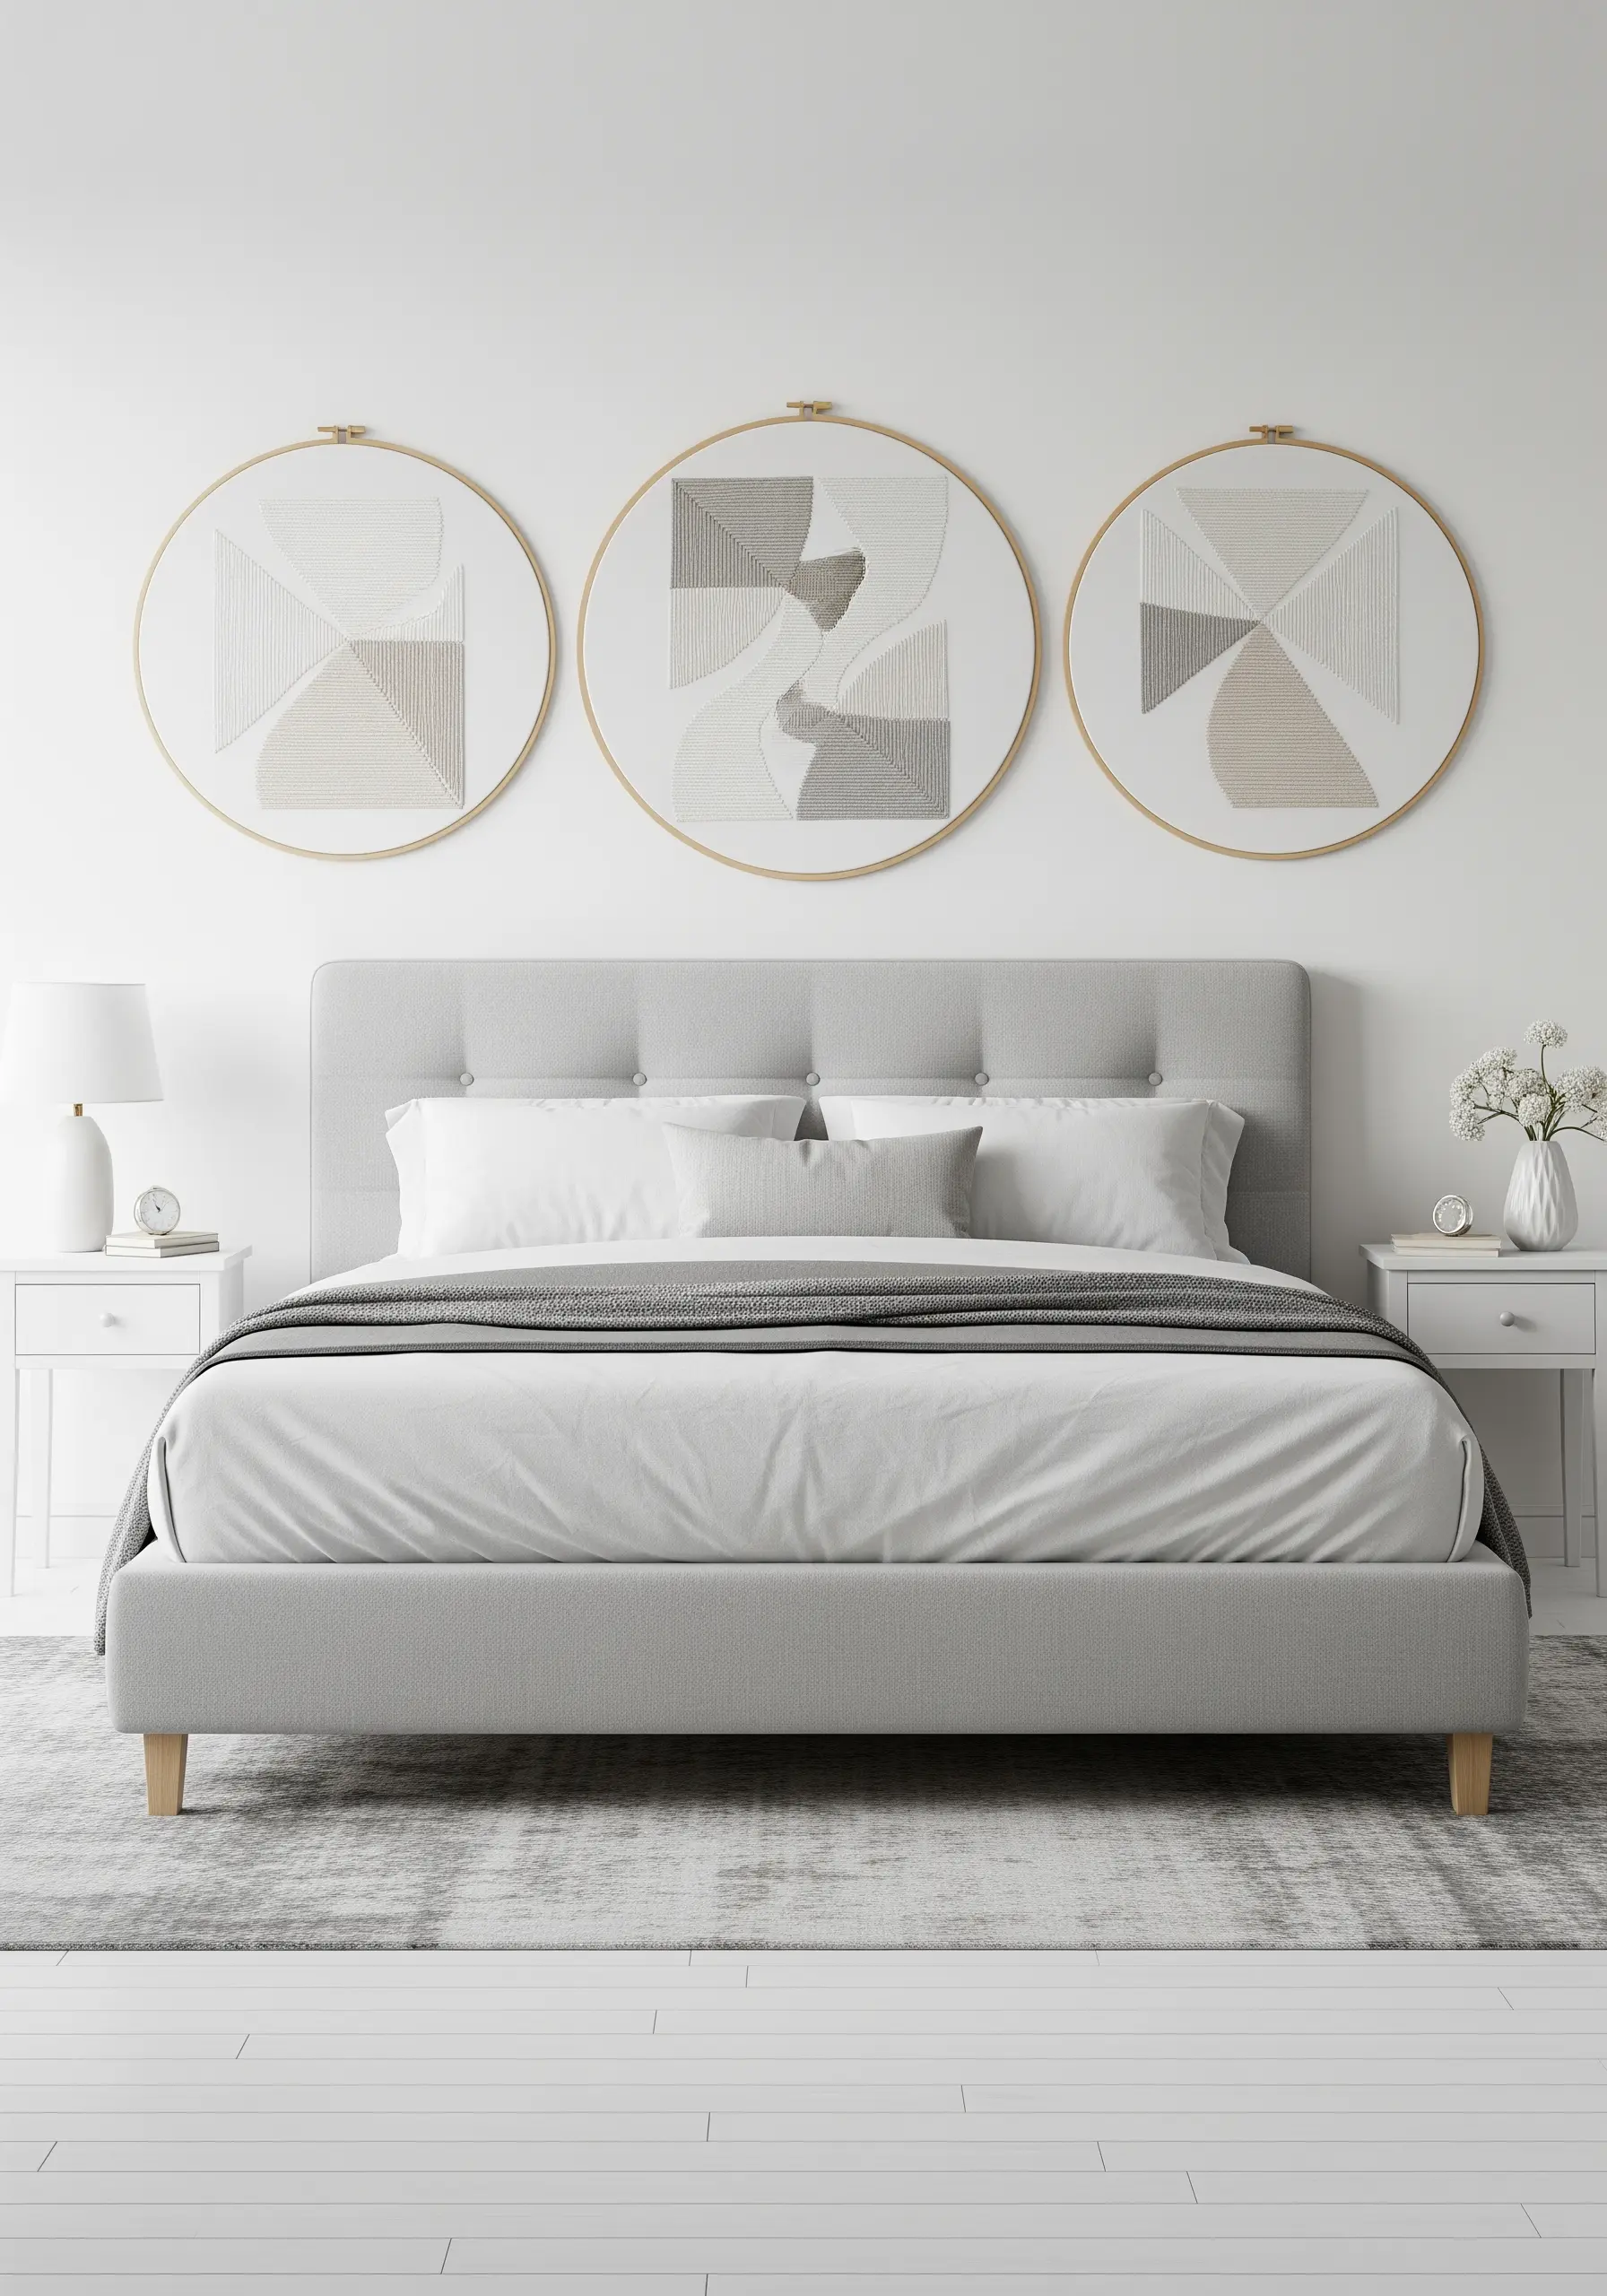
Elevate simple lines into a sophisticated, cohesive statement.
Use a triptych of hoops to explore a single color palette through varied geometric compositions.
To achieve perfectly straight lines, use a ruler and a water-soluble fabric pen to draw your guides before you begin stitching with a clean backstitch or long straight stitches.
Grouping minimalist hoop art like this creates a focal point that feels both modern and handmade.
4. The Topographical Contour Study
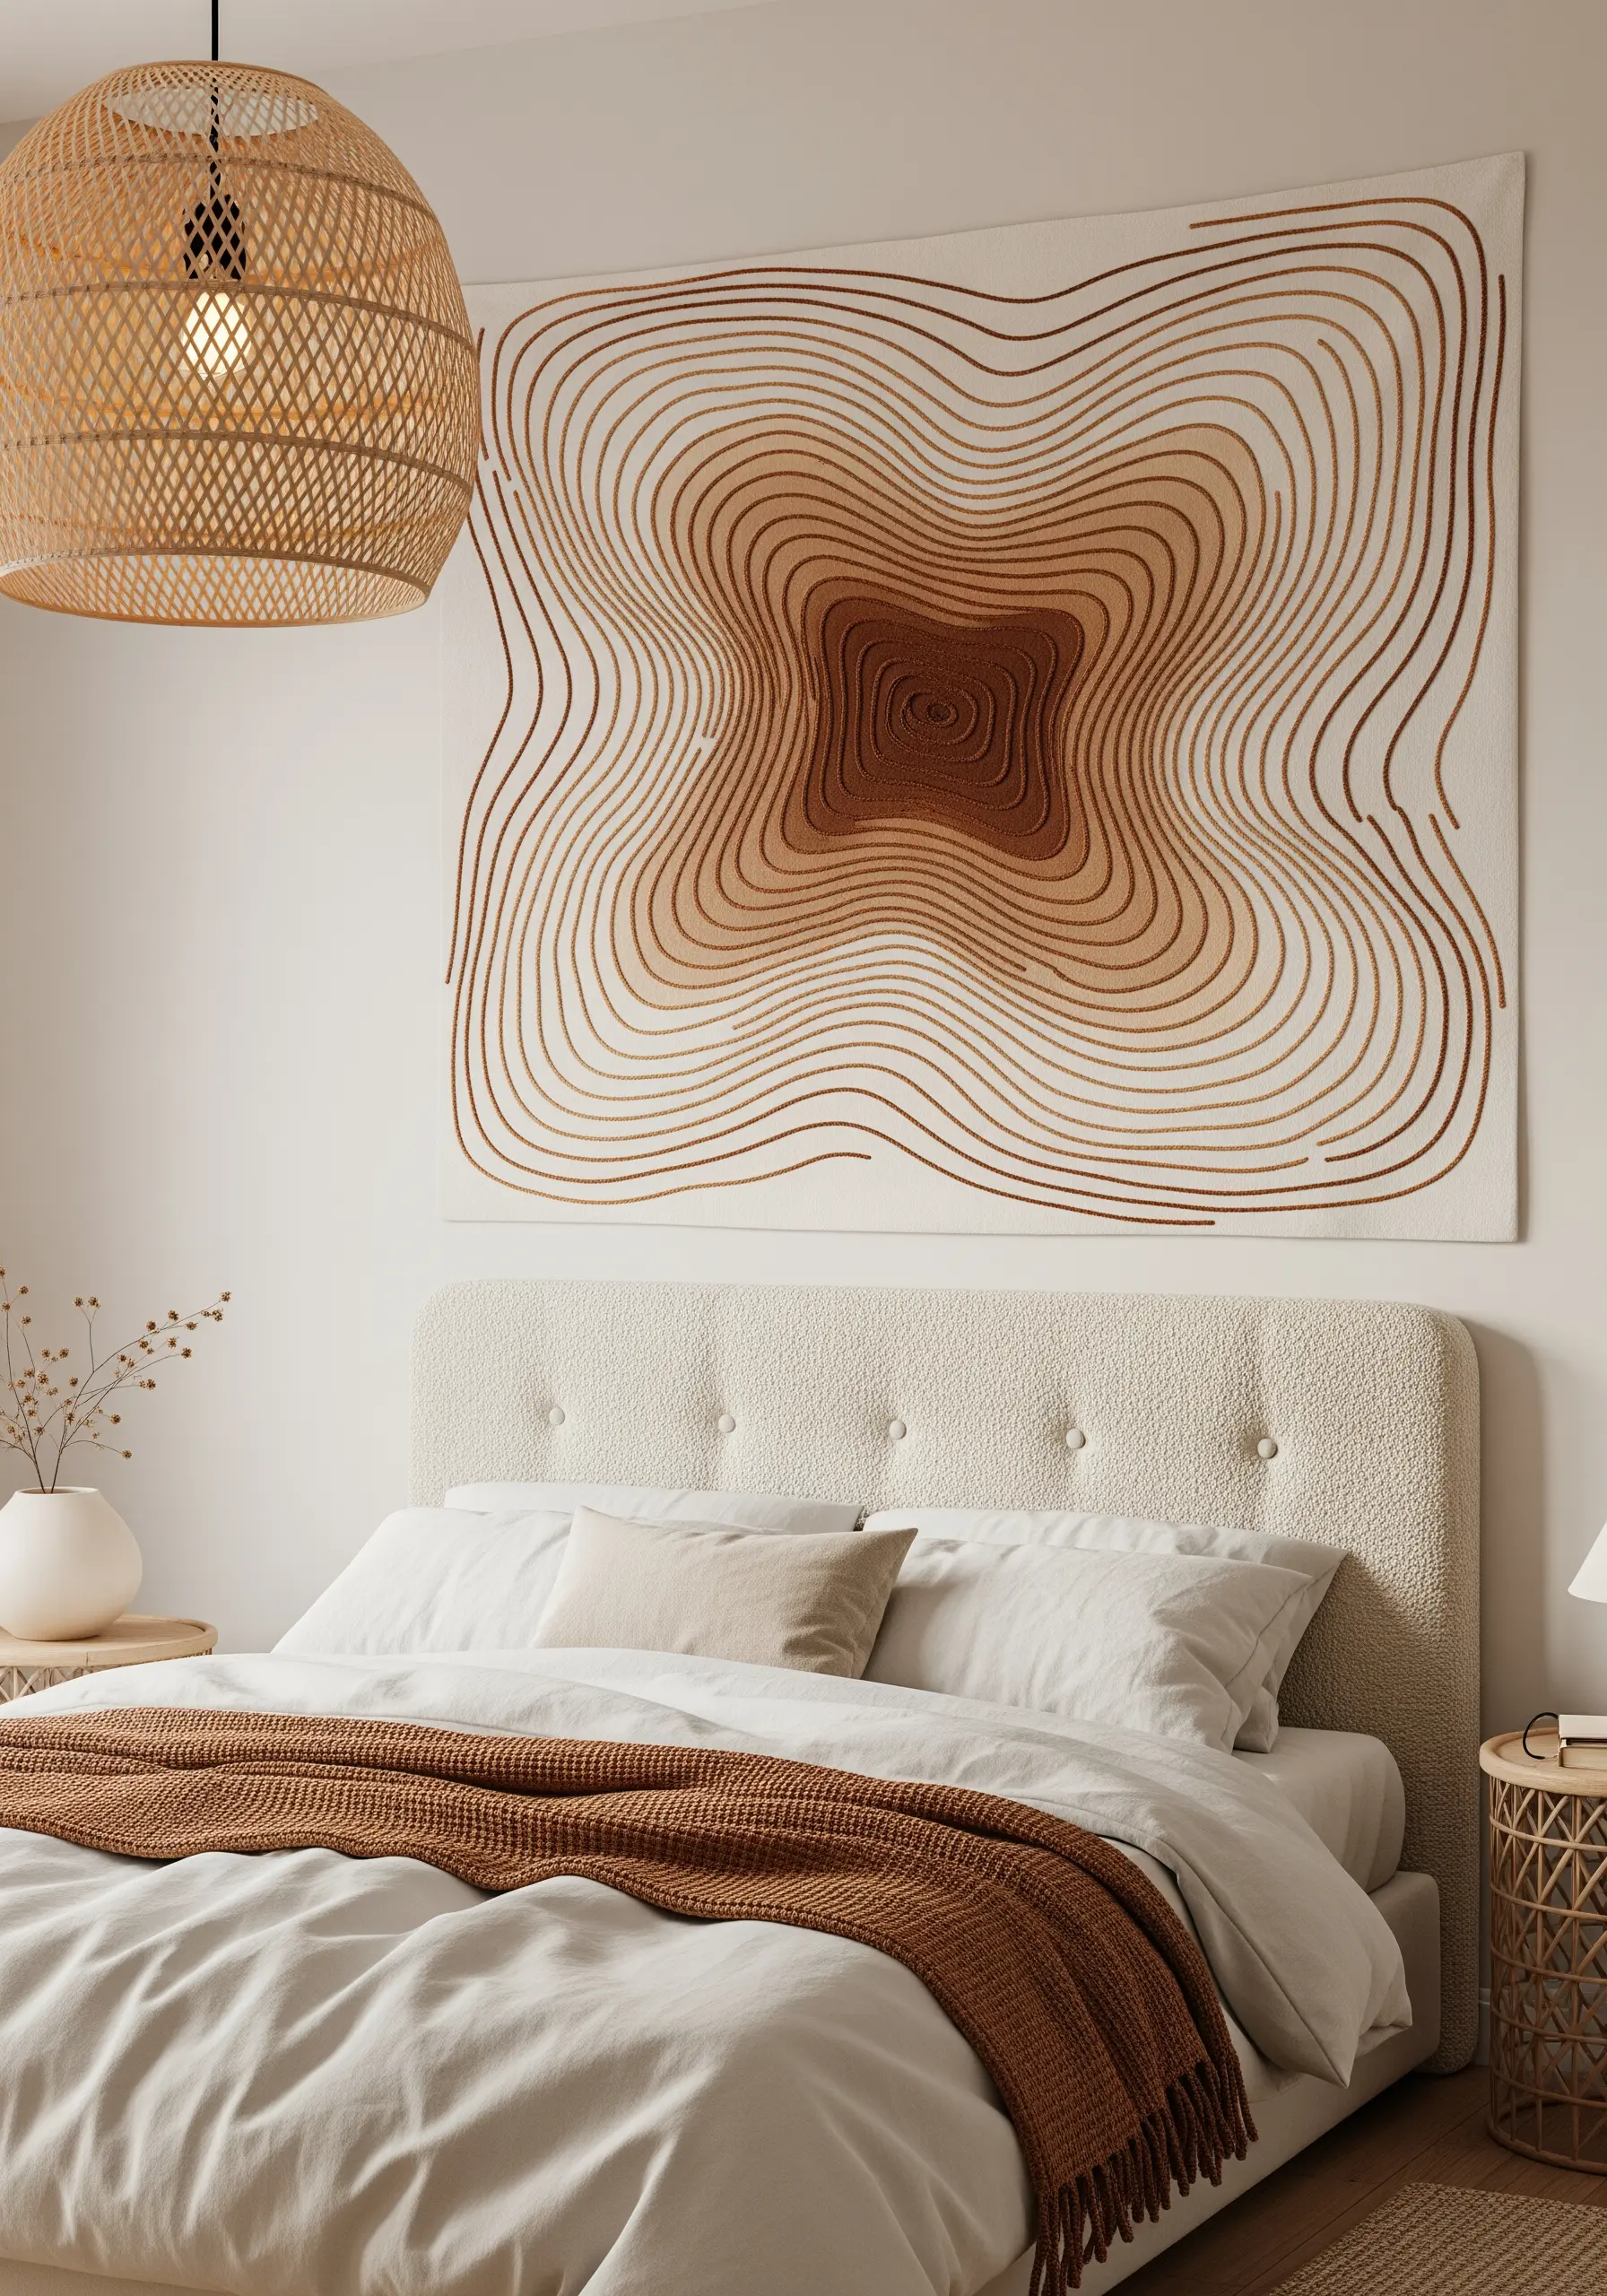
Create the illusion of three-dimensional depth with guided, flowing lines.
Use a couching technique: lay down a thick cord or yarn in a swirling pattern and tack it in place with a thinner, matching thread.
By arranging your lines in a gradient from dark to light, you create a visual effect similar to a topographical map, adding movement and intrigue.
This is a fast yet impactful way to create large-scale modern thread art.
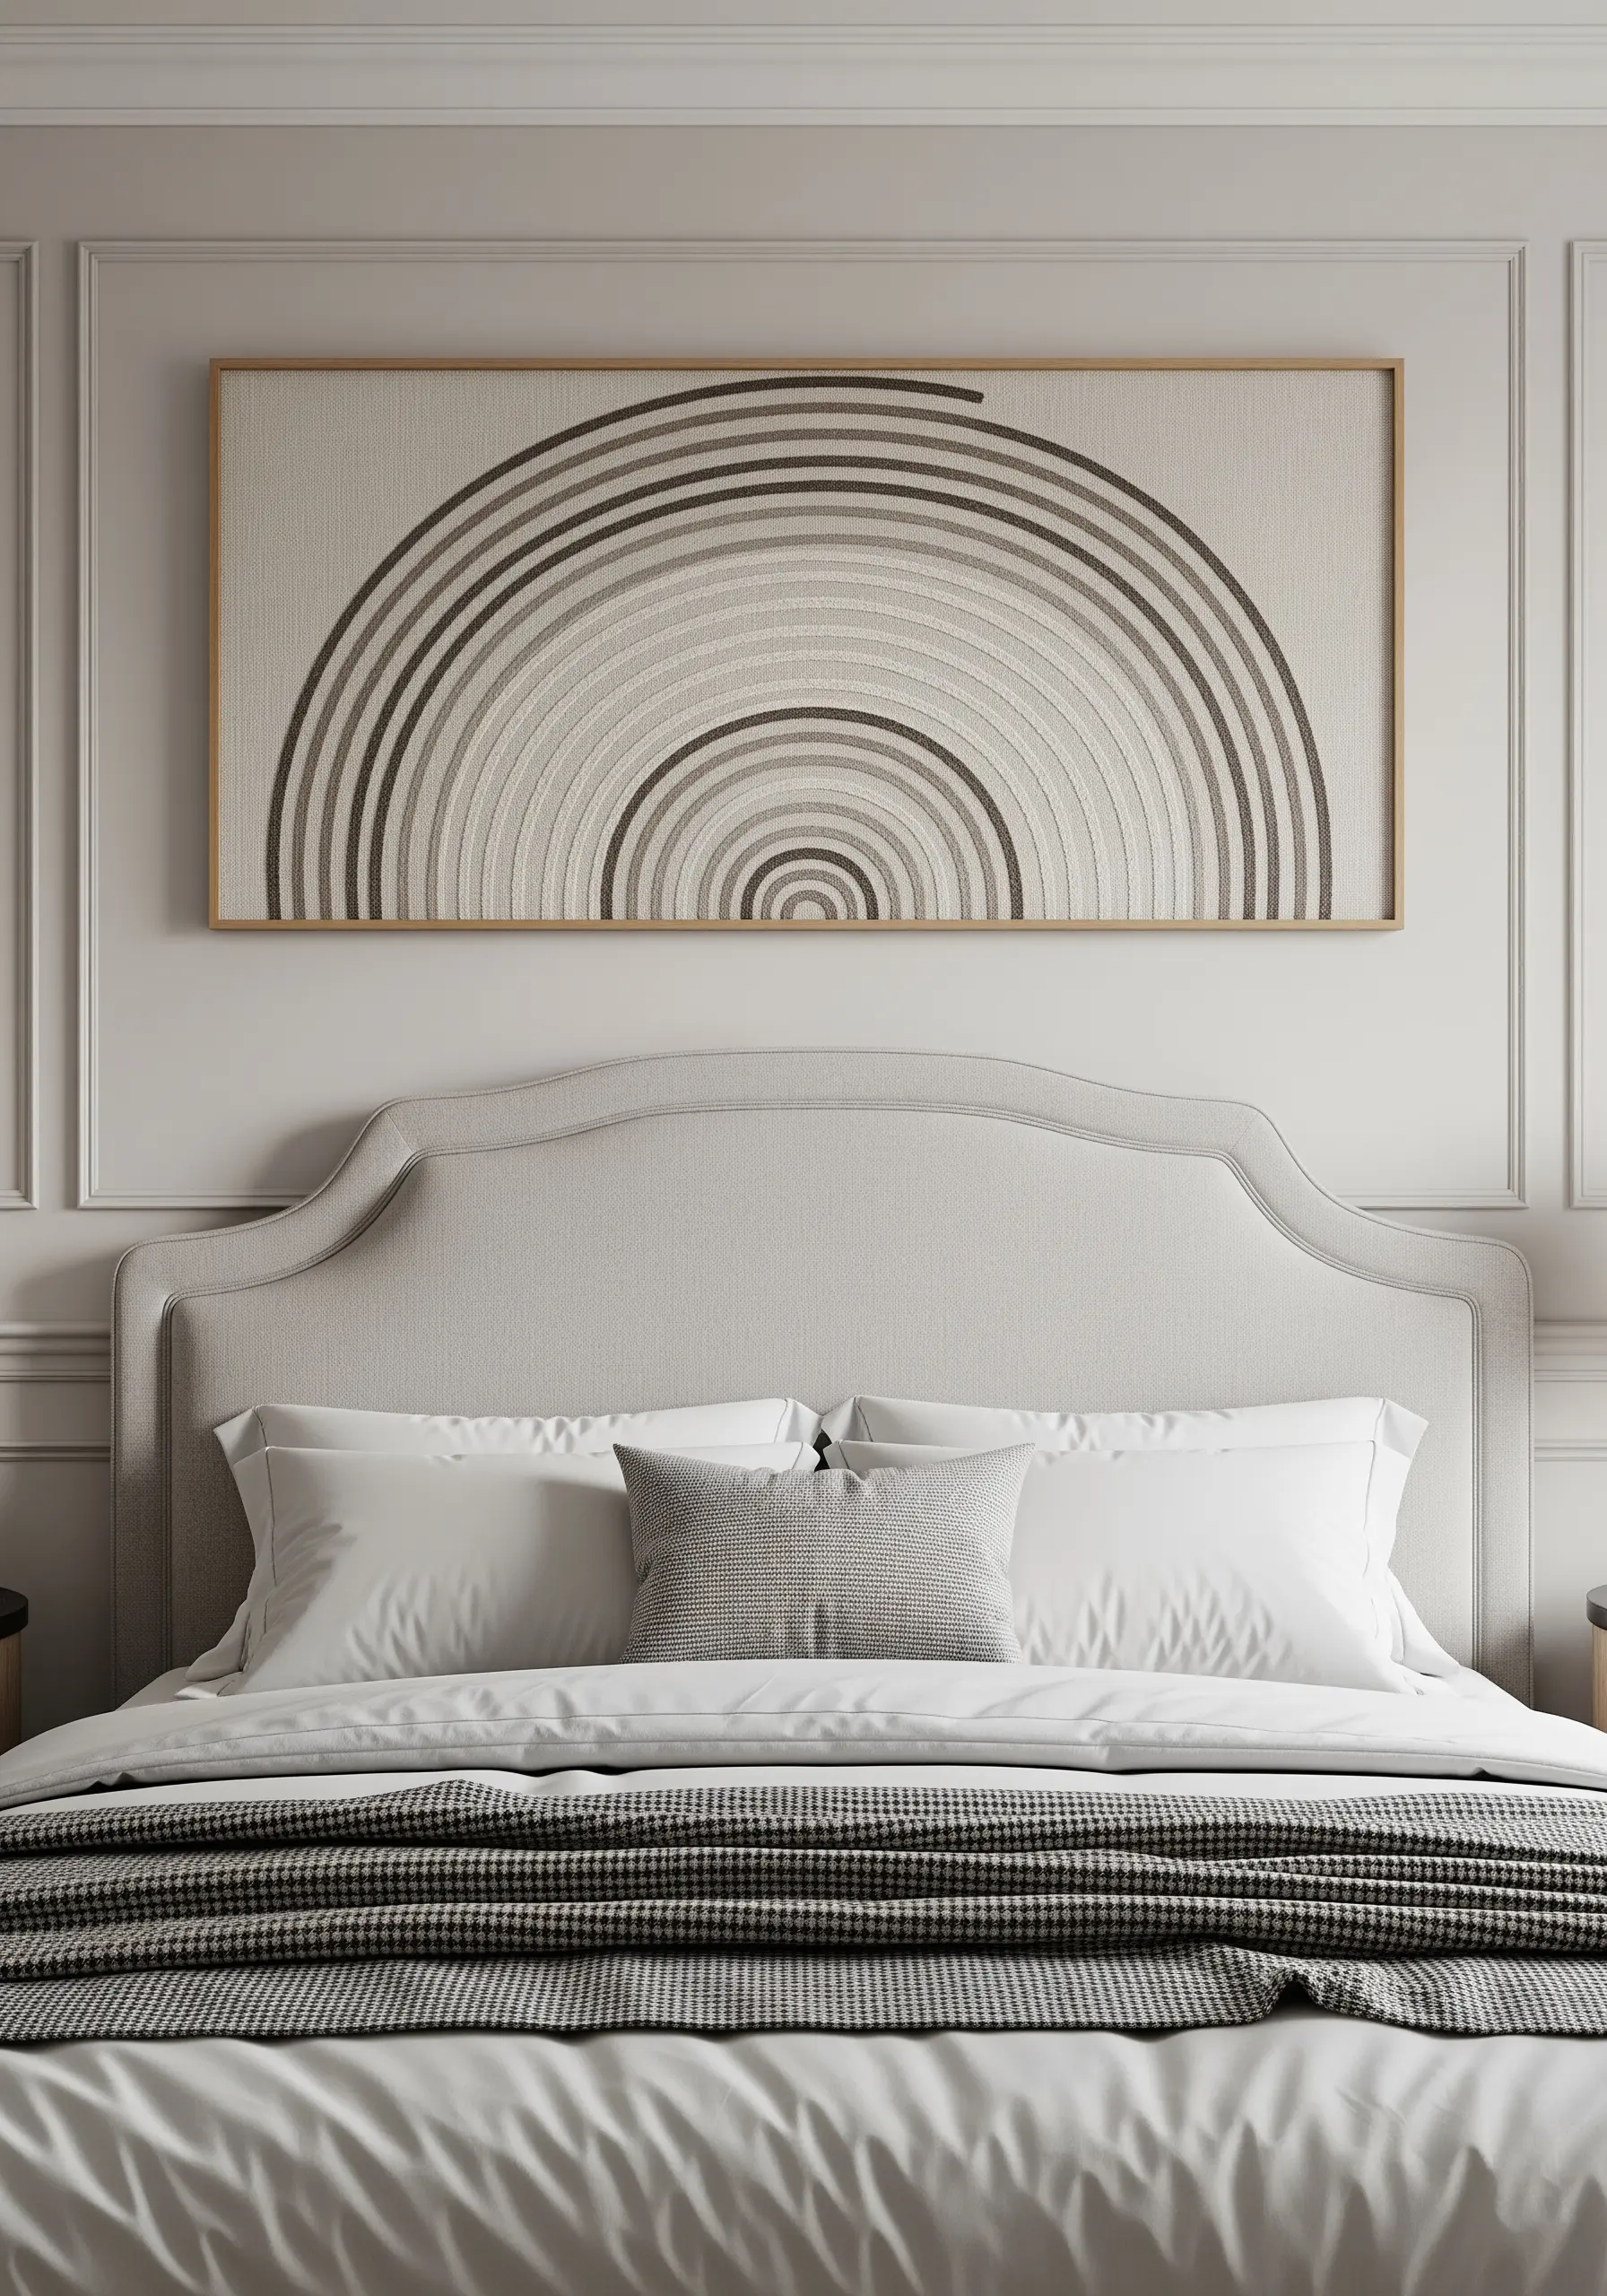
5. The Subtle Vertical Gradient Banner
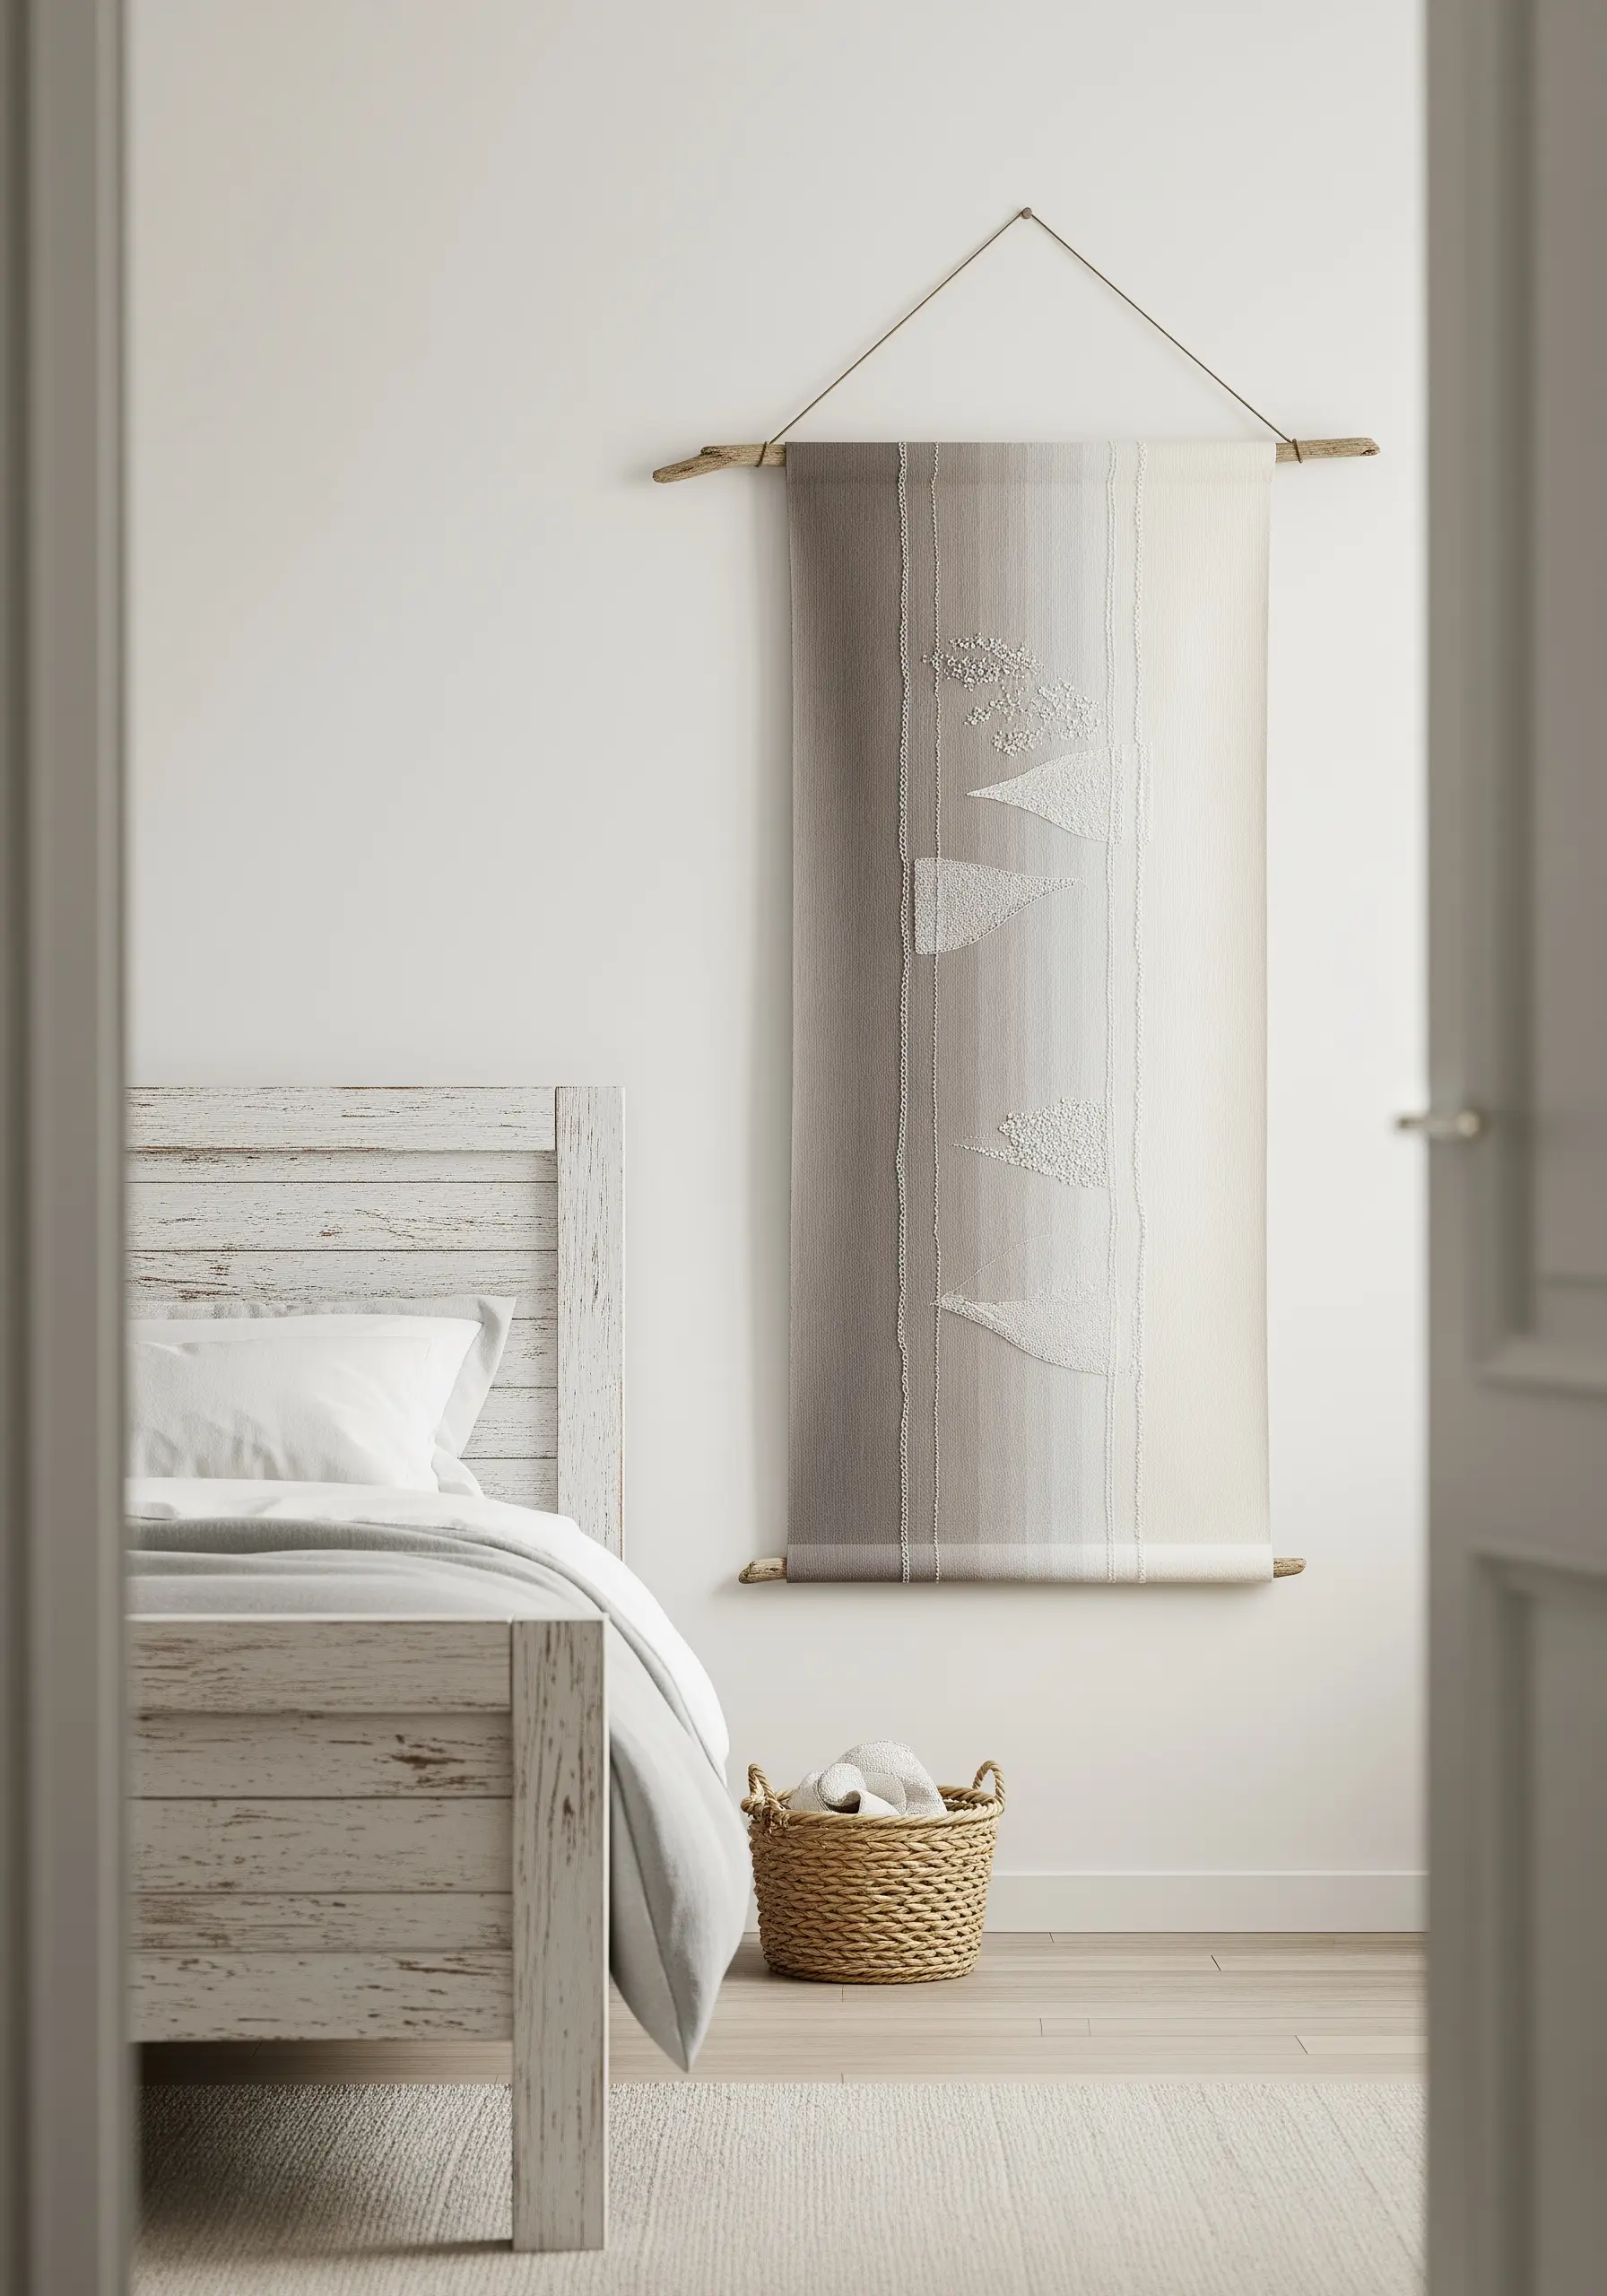
Combine a smooth color transition with delicate, raised details for a refined finish.
Create your vertical gradient background using a long-and-short stitch to ensure the colors blend softly into one another.
Once the base is complete, add small geometric motifs using French knots or bullion stitches in a single contrasting color, like white or cream.
This layering adds a subtle focal point without disrupting the calming effect of the gradient.
6. The Architectural Thread Panel
For a hyper-modern and minimalist look, focus on the purity of thread itself.
This effect is achieved by tightly wrapping threads vertically around a canvas or frame, carefully arranging each color to form a perfect gradient.
You can adapt this by using extremely long, dense vertical satin stitches on a heavy canvas, ensuring your tension is perfectly even to avoid buckling.
The result is a piece of art that celebrates color theory and precision in your minimalist bedroom.
7. The Radiating Yarn Mandala
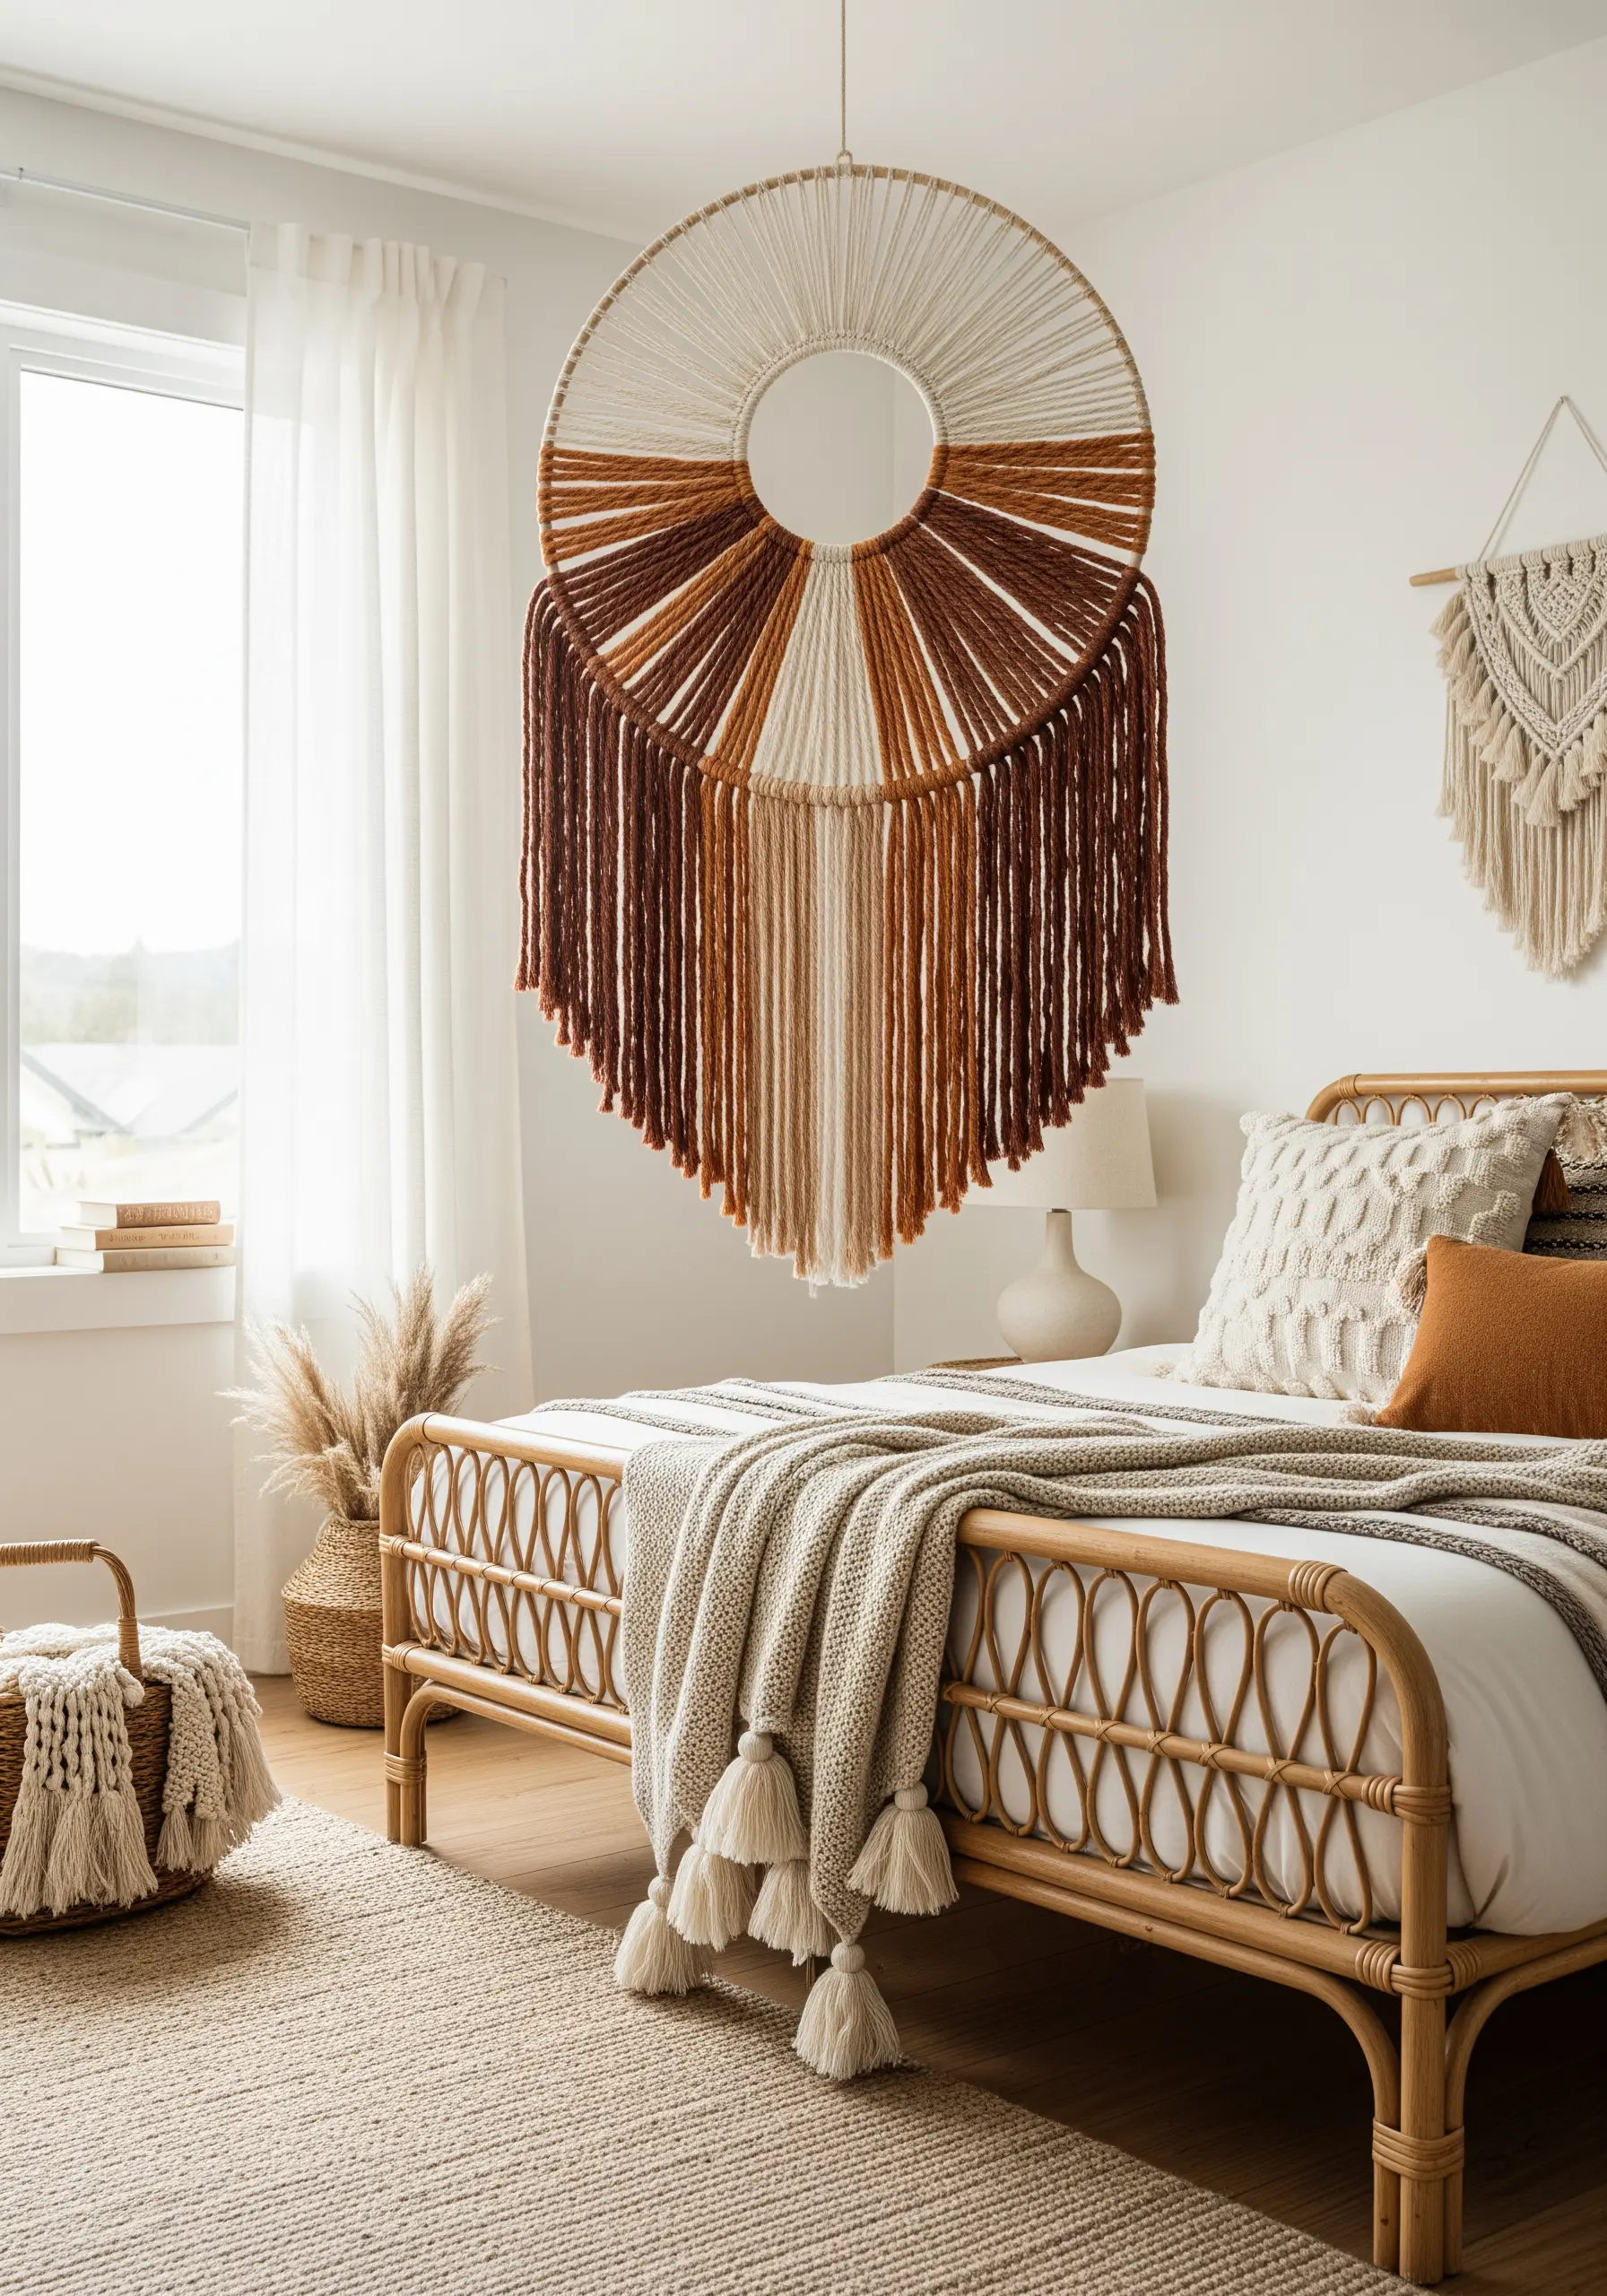
Transform a simple hoop into a bold, bohemian statement piece.
Use a large metal or wooden hoop as your base, wrapping it first to create an anchor for your threads.
Create the radiating pattern with long straight stitches pulled taut across the center, alternating colors to form a gradient.
Finish with a thick fringe, allowing the yarn-based wall art to feel both structured and free-flowing.
8. The Pixelated Checkerboard Gradient
Explore gradients on a micro level by stitching a pixelated design.
Use a grid fabric like Aida cloth and fill each square with a single satin stitch or cross-stitch to create a checkerboard effect.
Plan your gradient so that the ratio of light to dark squares shifts gradually across the piece, creating a stunning optical illusion.
This methodical approach is incredibly meditative and results in a highly graphic, modern artwork.
9. The Atmospheric Mountain Mural

Stitch a landscape that feels vast and serene by mastering the art of layering.
Use long-and-short stitch to create soft, blended layers of grayscale tones, mimicking fog settling over mountains.
Start with the lightest shade for the background layers and work your way forward, using progressively darker threads for the mountains in the foreground.
This technique creates a beautiful atmospheric mountain scene with a painterly quality.
10. The Arched Satin Stitch Gradient
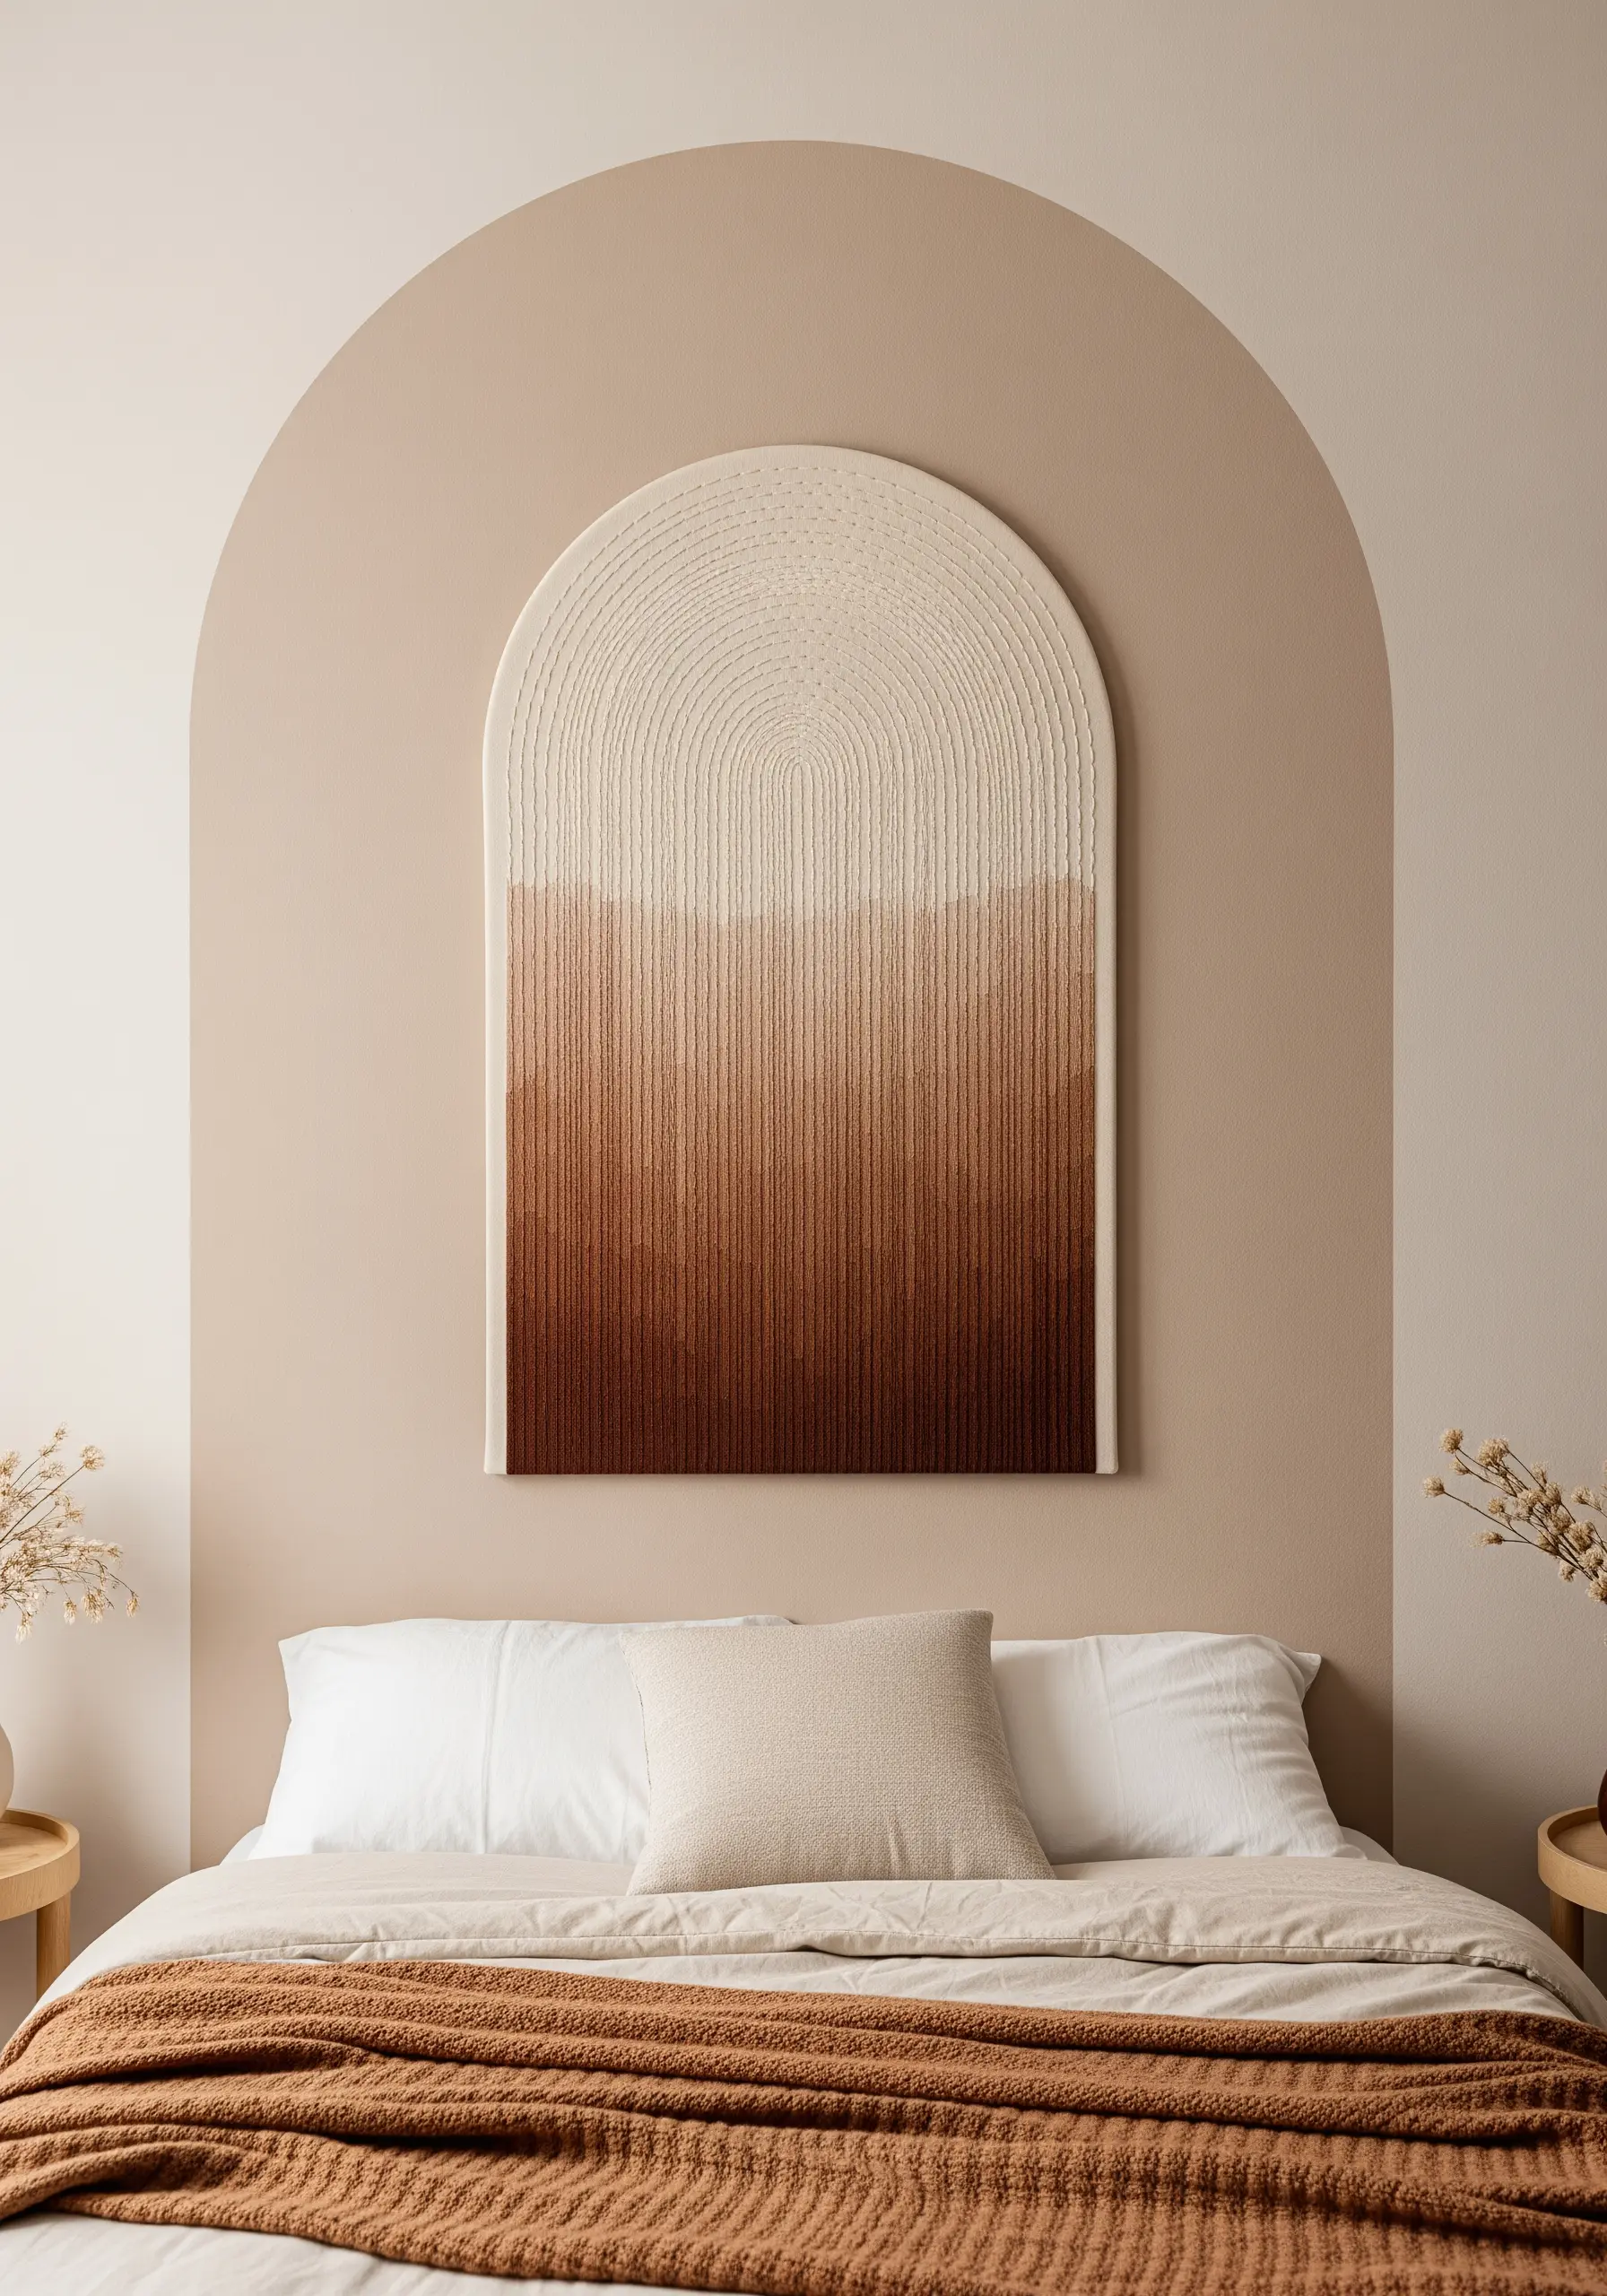
Use the direction of your stitches to enhance the shape of your design.
For an arched piece, work your satin stitches in curved lines that follow the form, rather than straight up and down.
This directional stitching creates a subtle texture that catches the light beautifully and reinforces the gentle curve of the arch.
Start with the lightest color at the top and transition downwards for a grounding, earthy effect.
11. The Monogrammed Triptych Panels
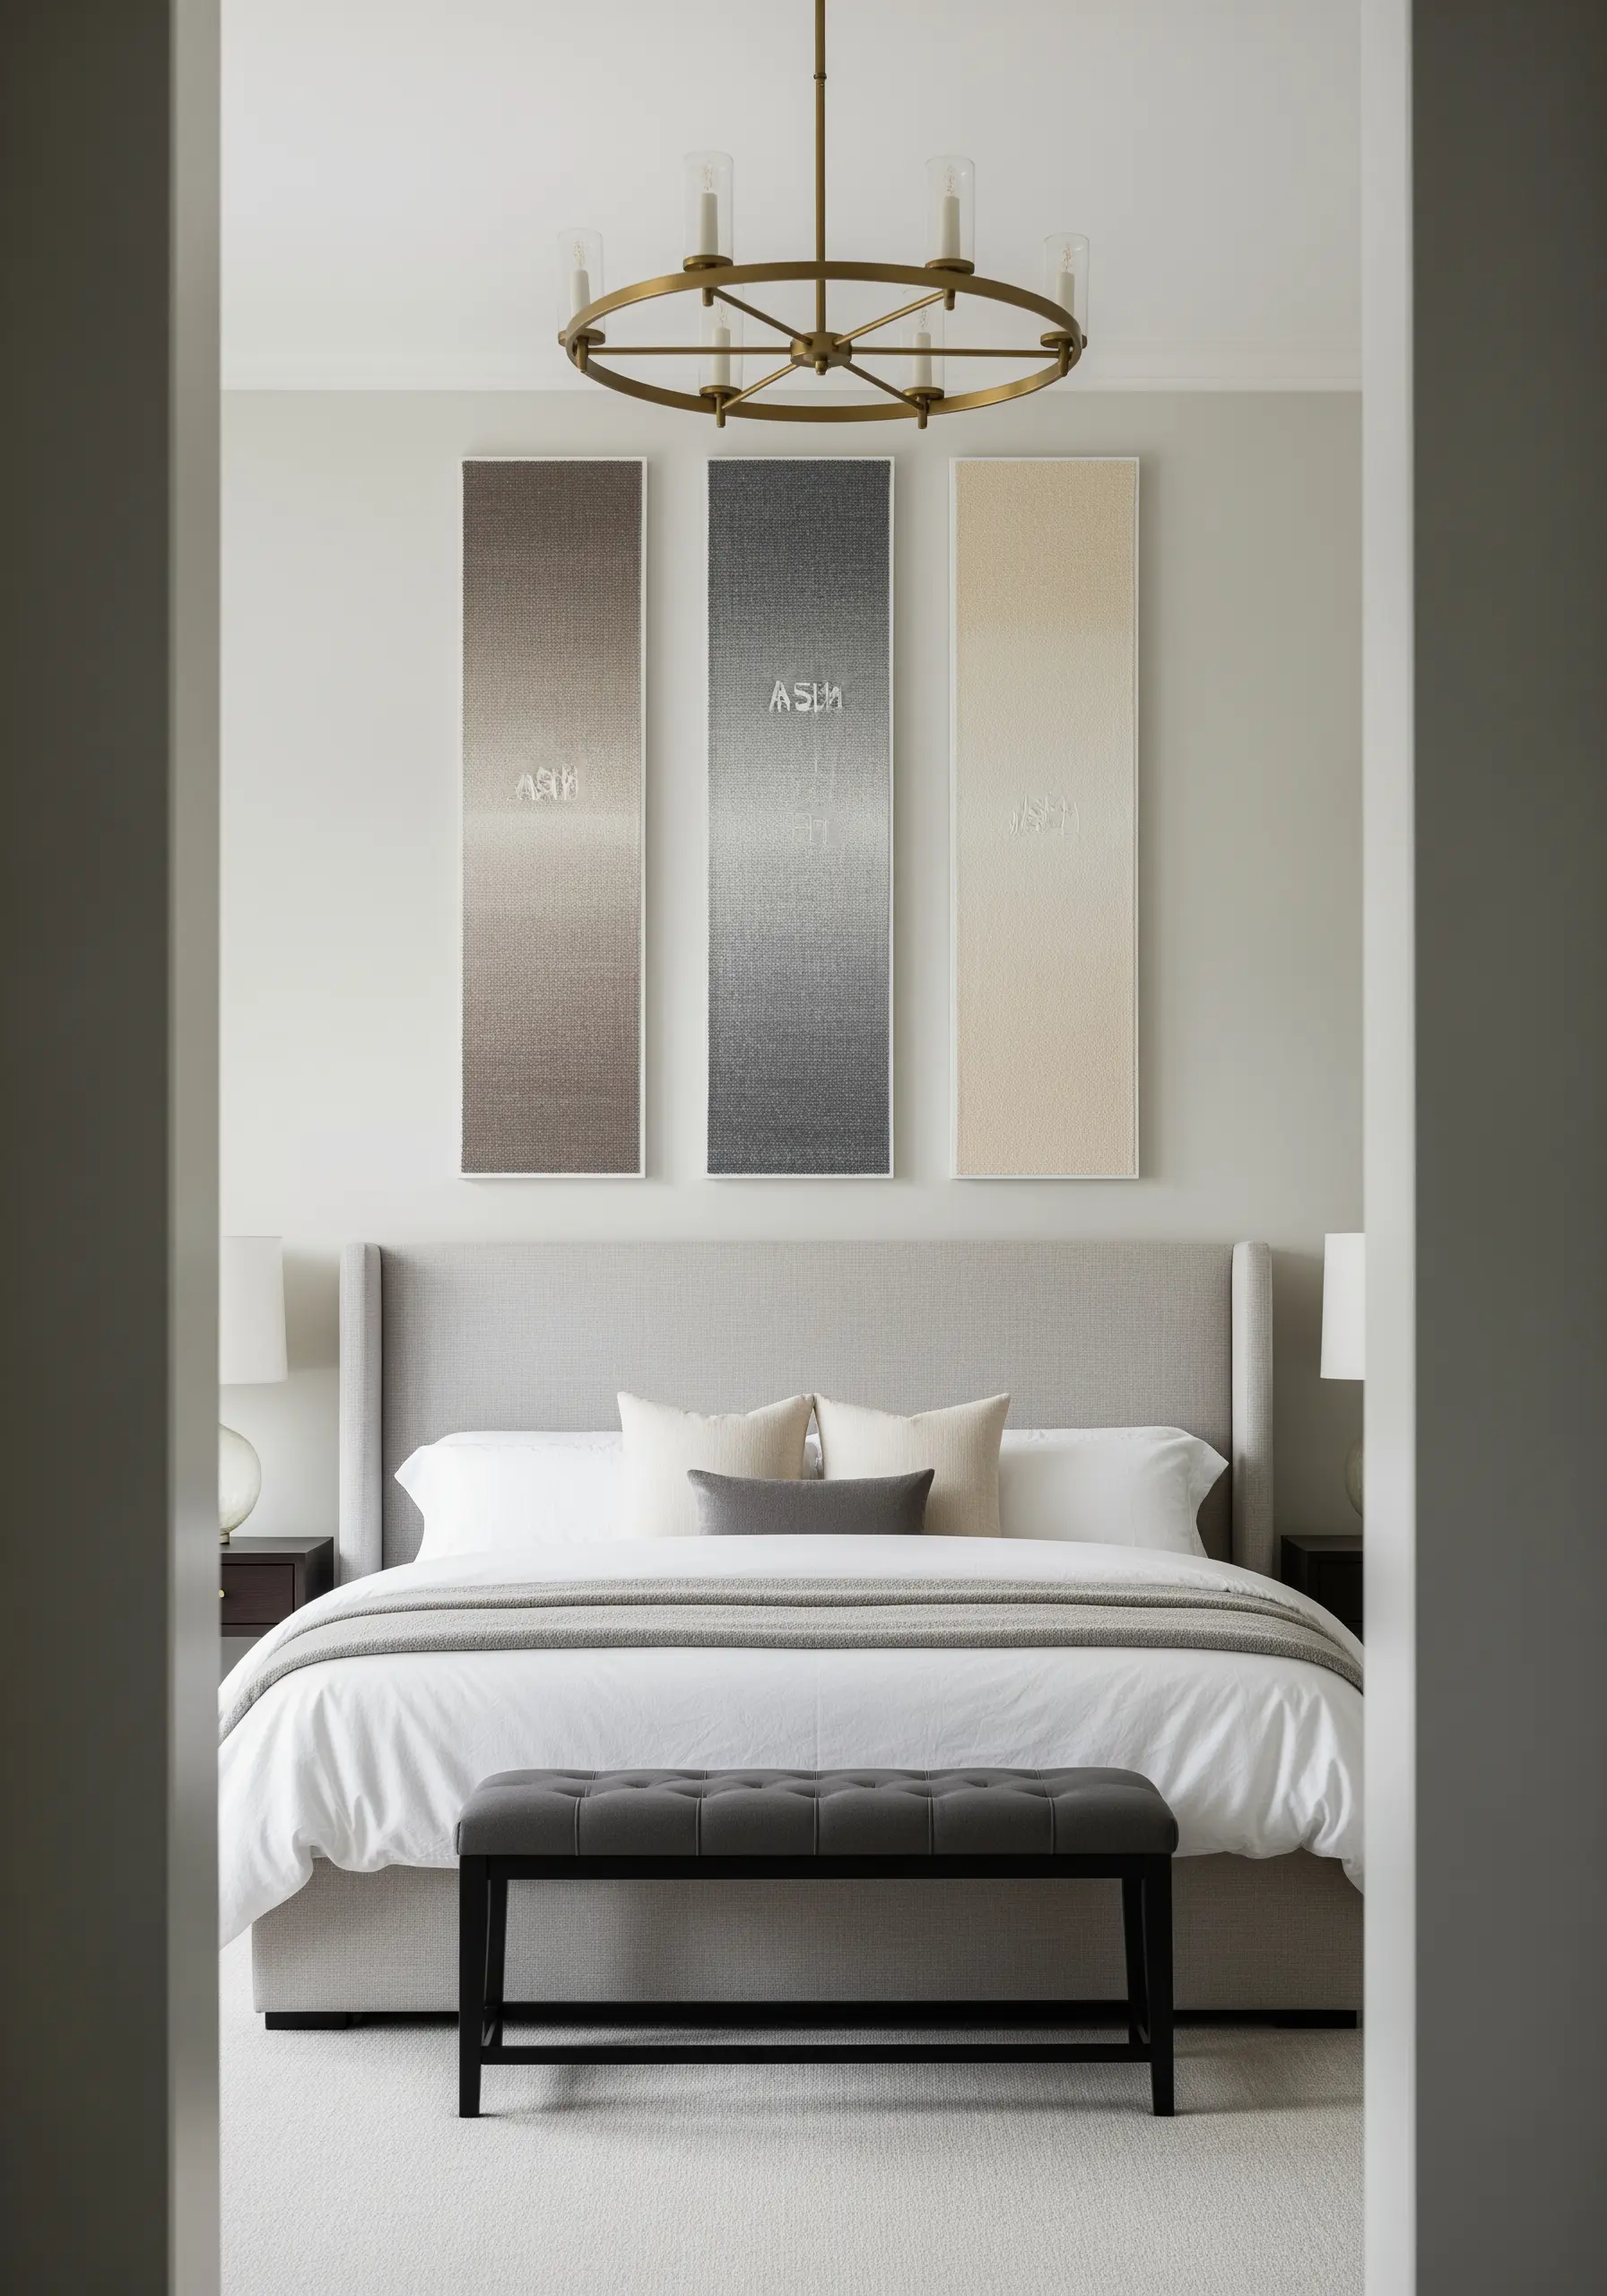
Personalize a neutral gradient with an understated, elegant detail.
Create three separate vertical panels, each exploring a different neutral gradient—warm beige, cool grey, and soft cream.
Instead of a bold monogram, stitch it in a thread that is only one or two shades lighter than its background section.
This tone-on-tone subtle monogram detail adds a layer of sophistication that feels custom-made and deeply personal.
12. The Warm-Tone Color Block Tapestry
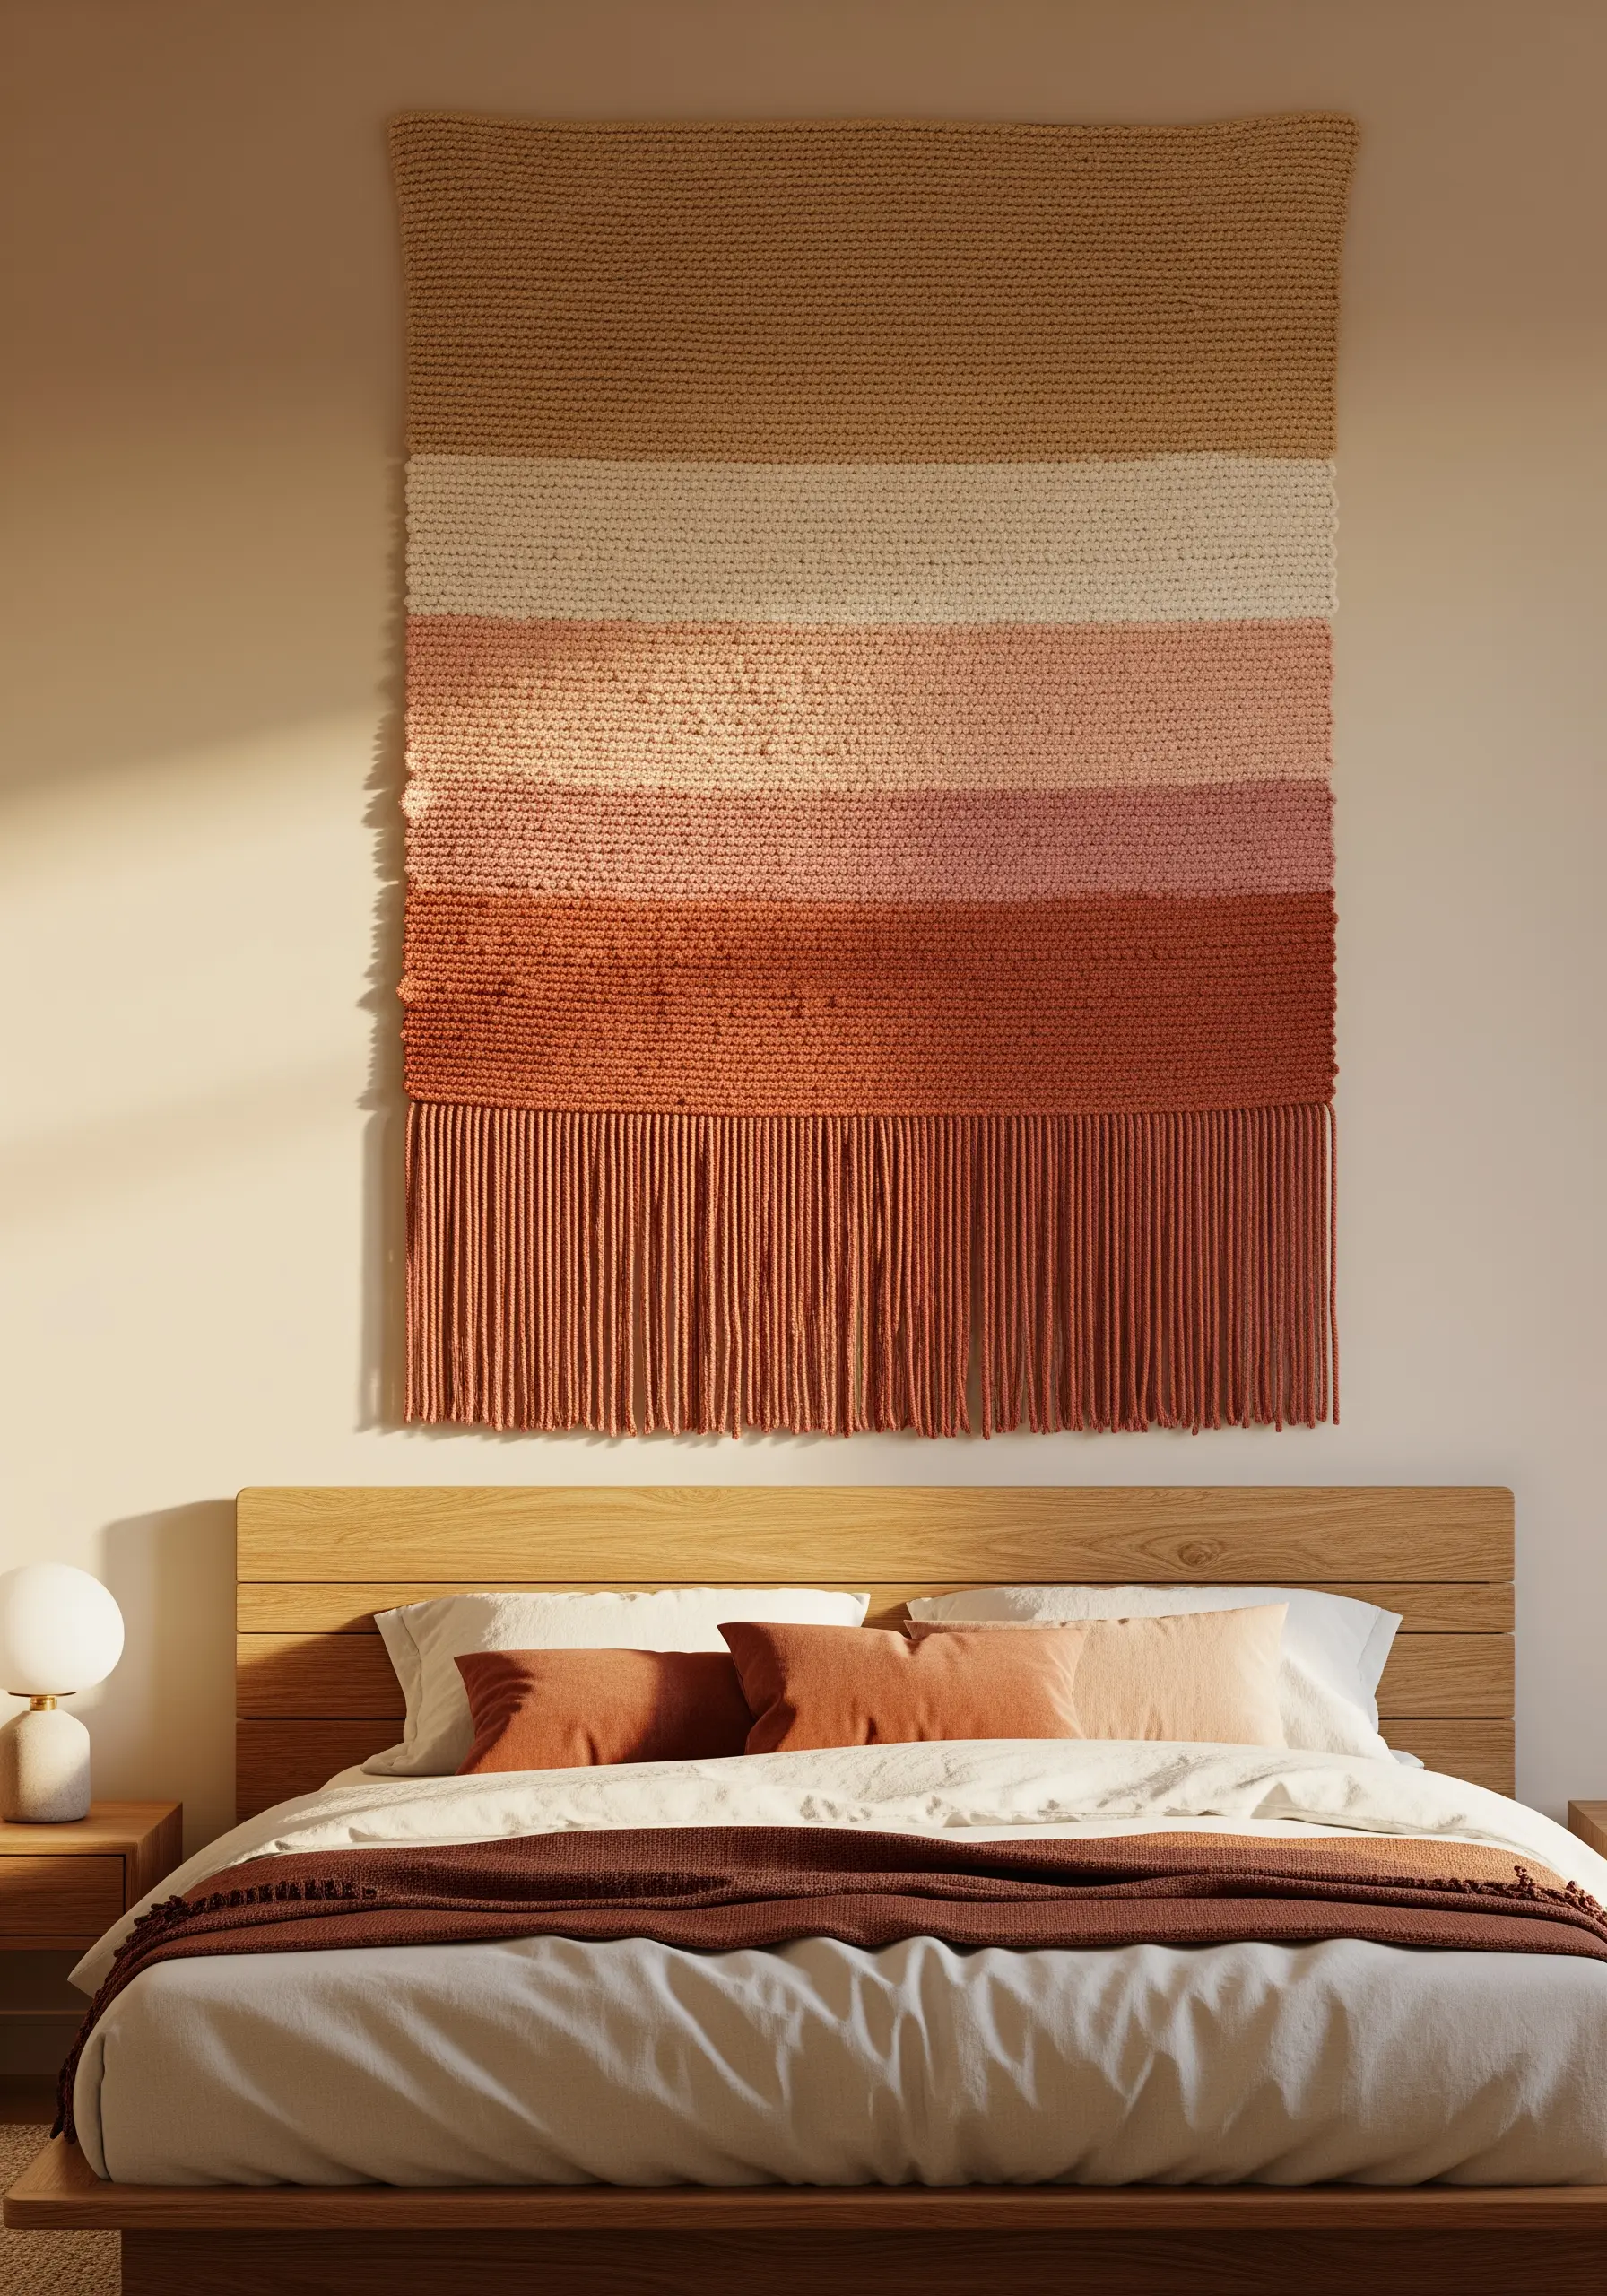
Create a bold, cozy statement with distinct blocks of color and texture.
Use a thick, chunky yarn and a simple darning stitch or basketweave to fill in wide horizontal stripes of color.
Choose a warm, analogous color scheme—like beige, blush, rust, and terracotta—for a gradient that feels cohesive and inviting.
Finish with a long, dense fringe in your darkest shade to ground the piece and add satisfying weight.
13. The Asymmetrical Hoop Cluster
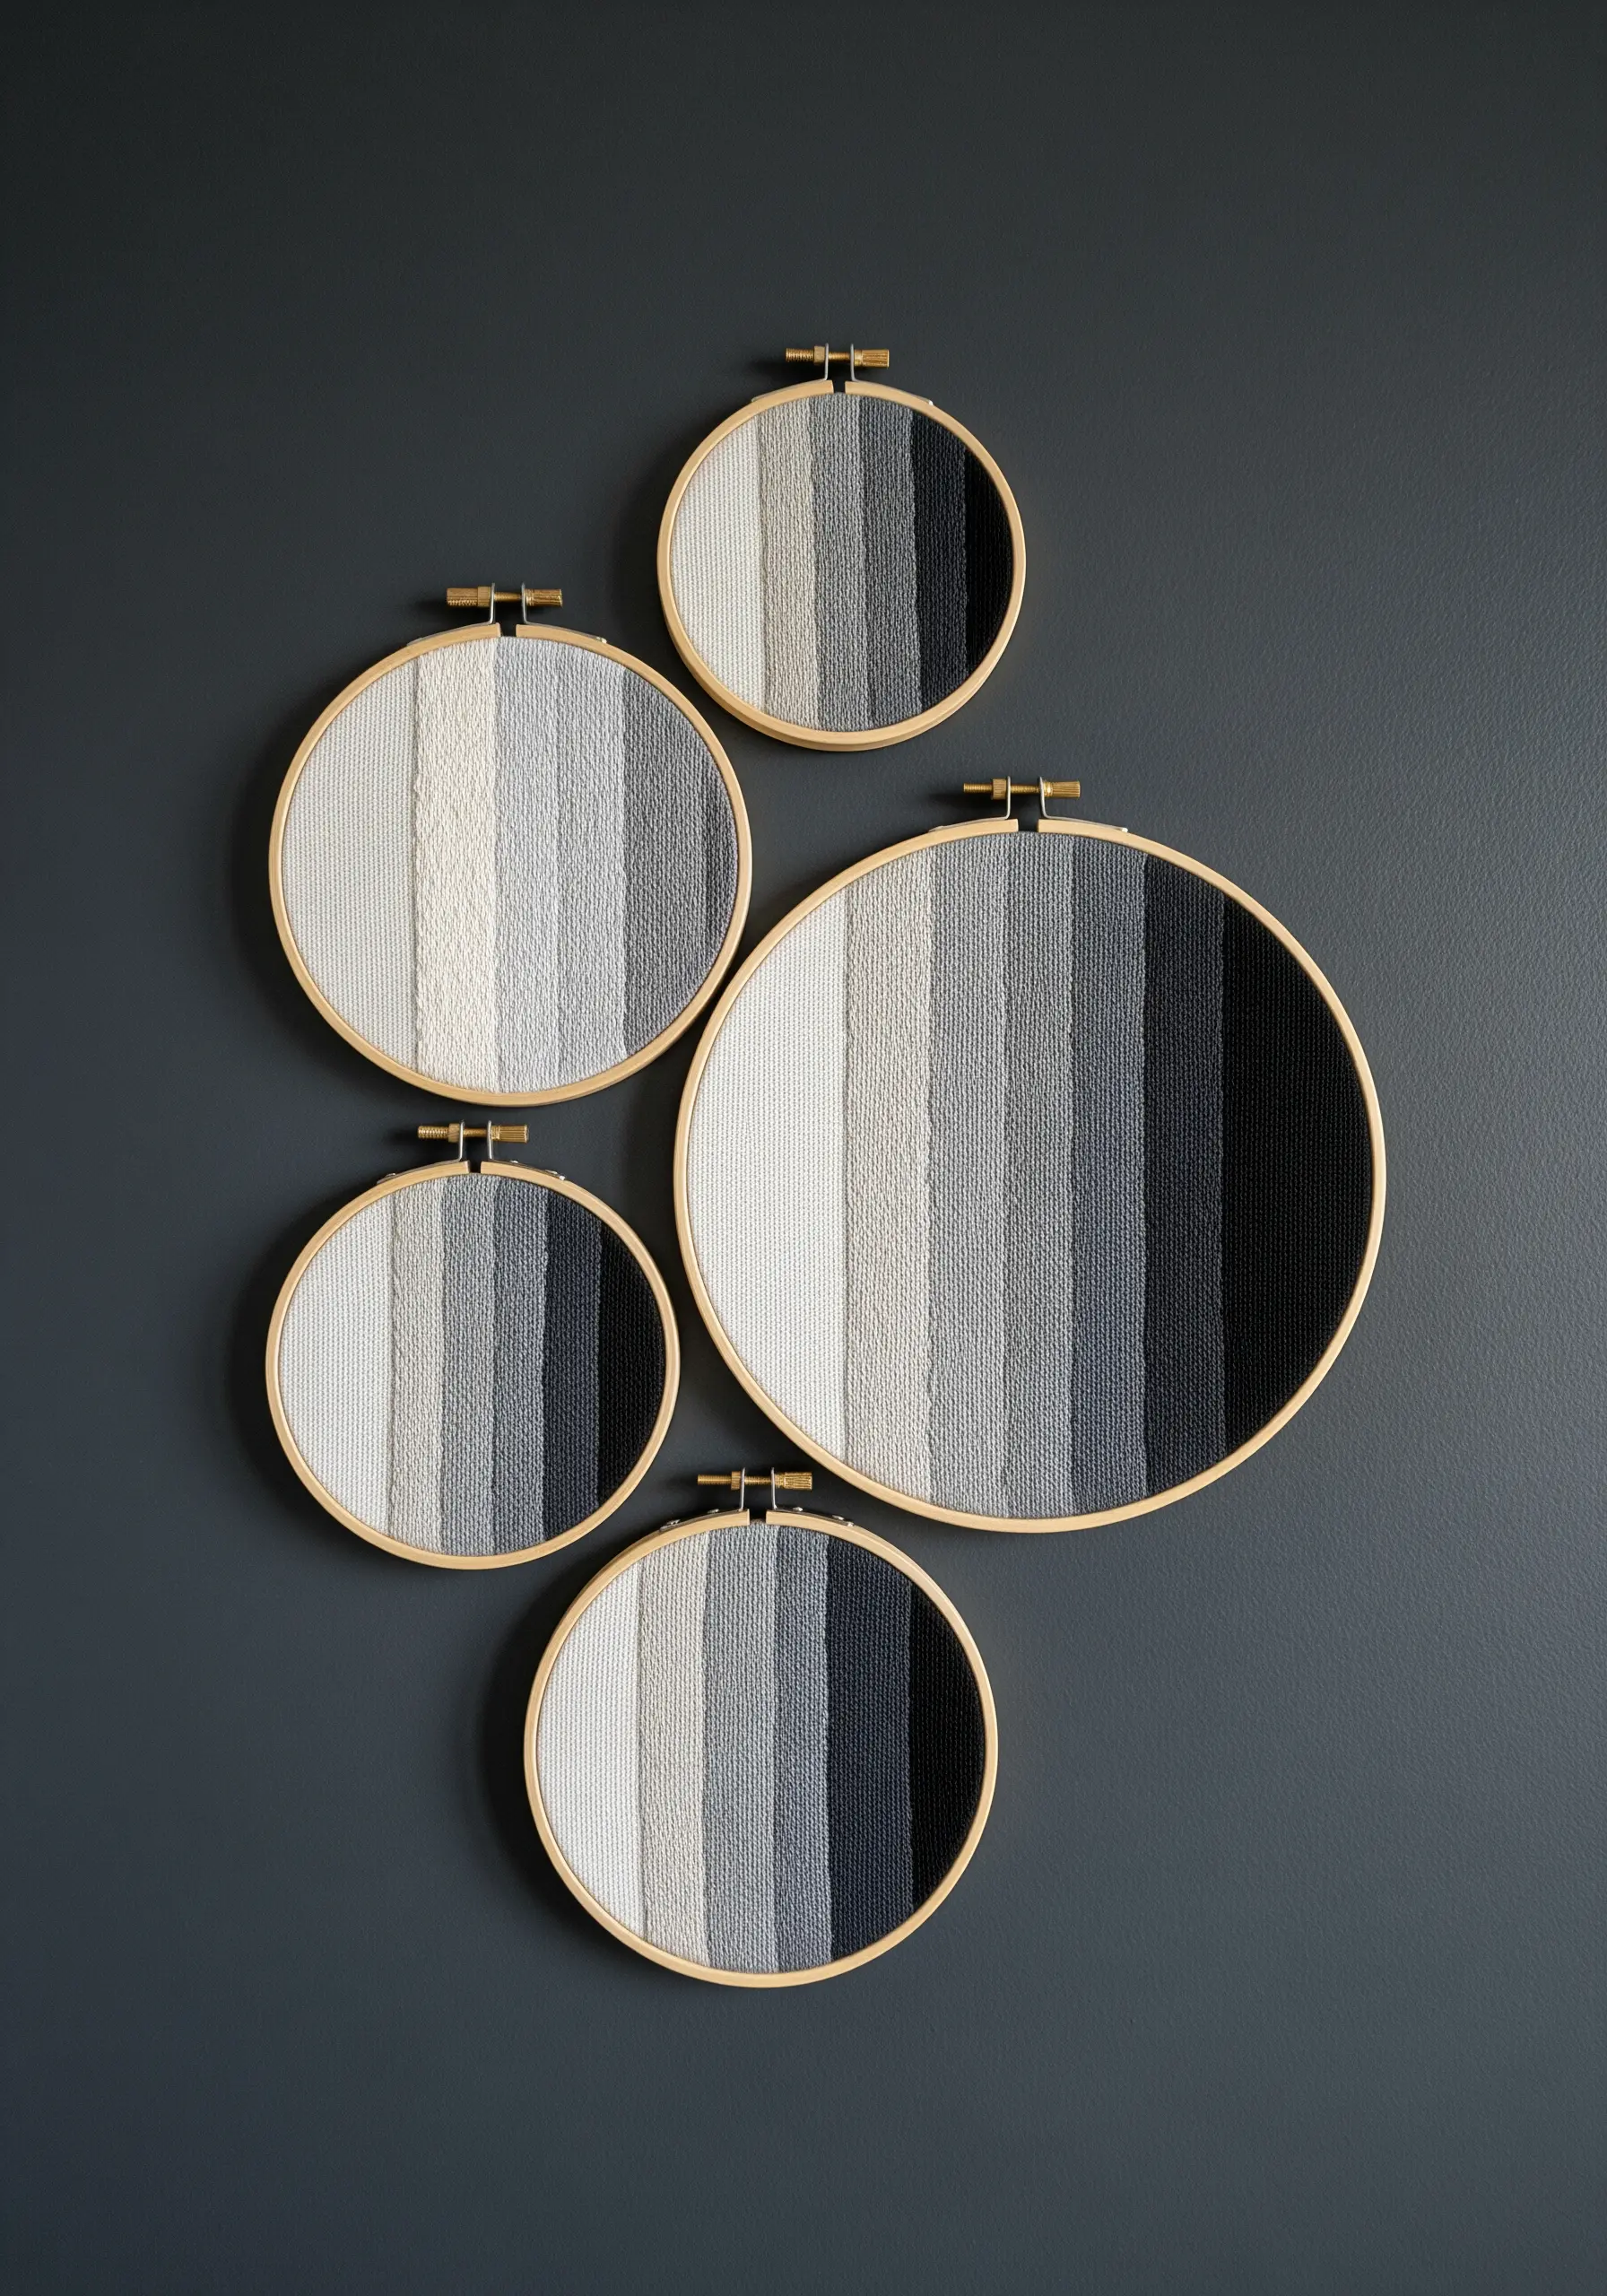
Design a dynamic gallery wall by varying the size and placement of your hoops.
Use the same grayscale color palette across five or six hoops of different sizes to maintain cohesion.
Within each hoop, play with vertical satin stitches but introduce a single band of textural stitches, like French knots or woven bars, for subtle variety.
Arranging them in an organic cluster turns simple hoops into a cohesive gallery wall.
14. The Architectural Blueprint Study
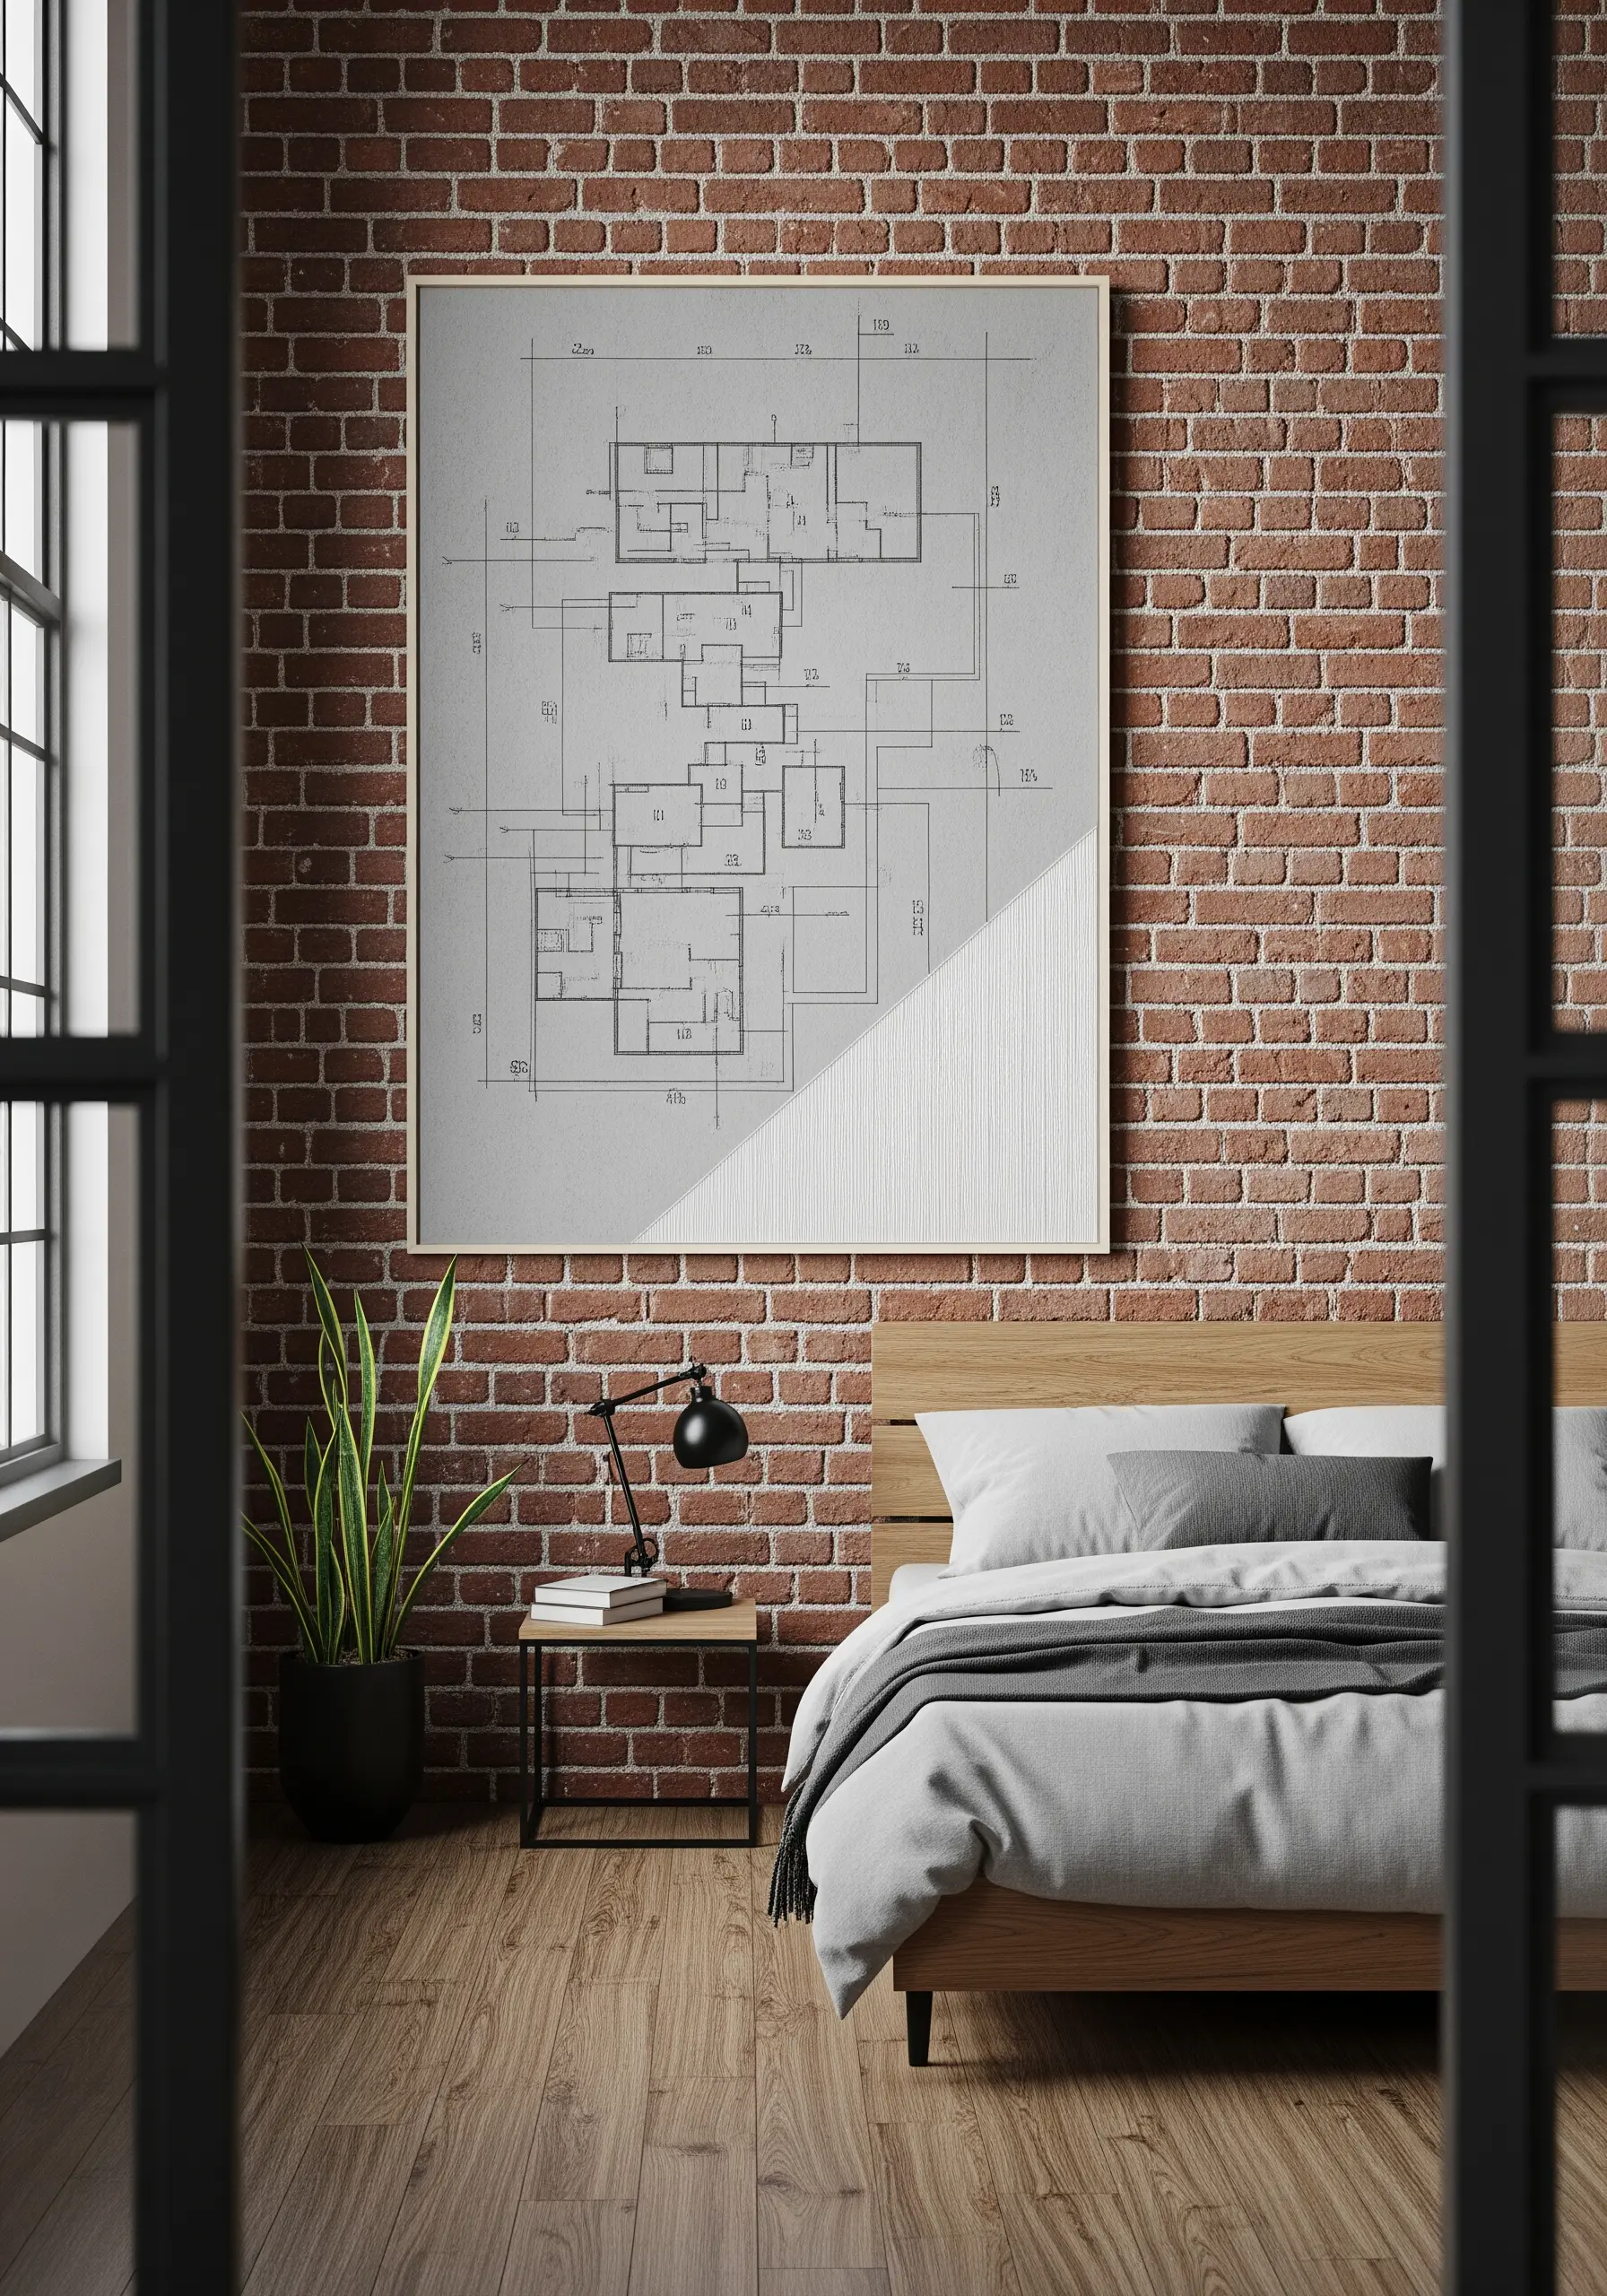
Transform a technical drawing into a piece of minimalist art with clean linework.
Choose a high-quality linen or cotton canvas in a light grey or off-white to mimic blueprint paper.
Use a single strand of dark grey or black thread and a precise backstitch or stem stitch to trace the architectural plans.
This project celebrates the beauty of clean lines of architectural embroidery and precision, making a unique statement above a modern bed.
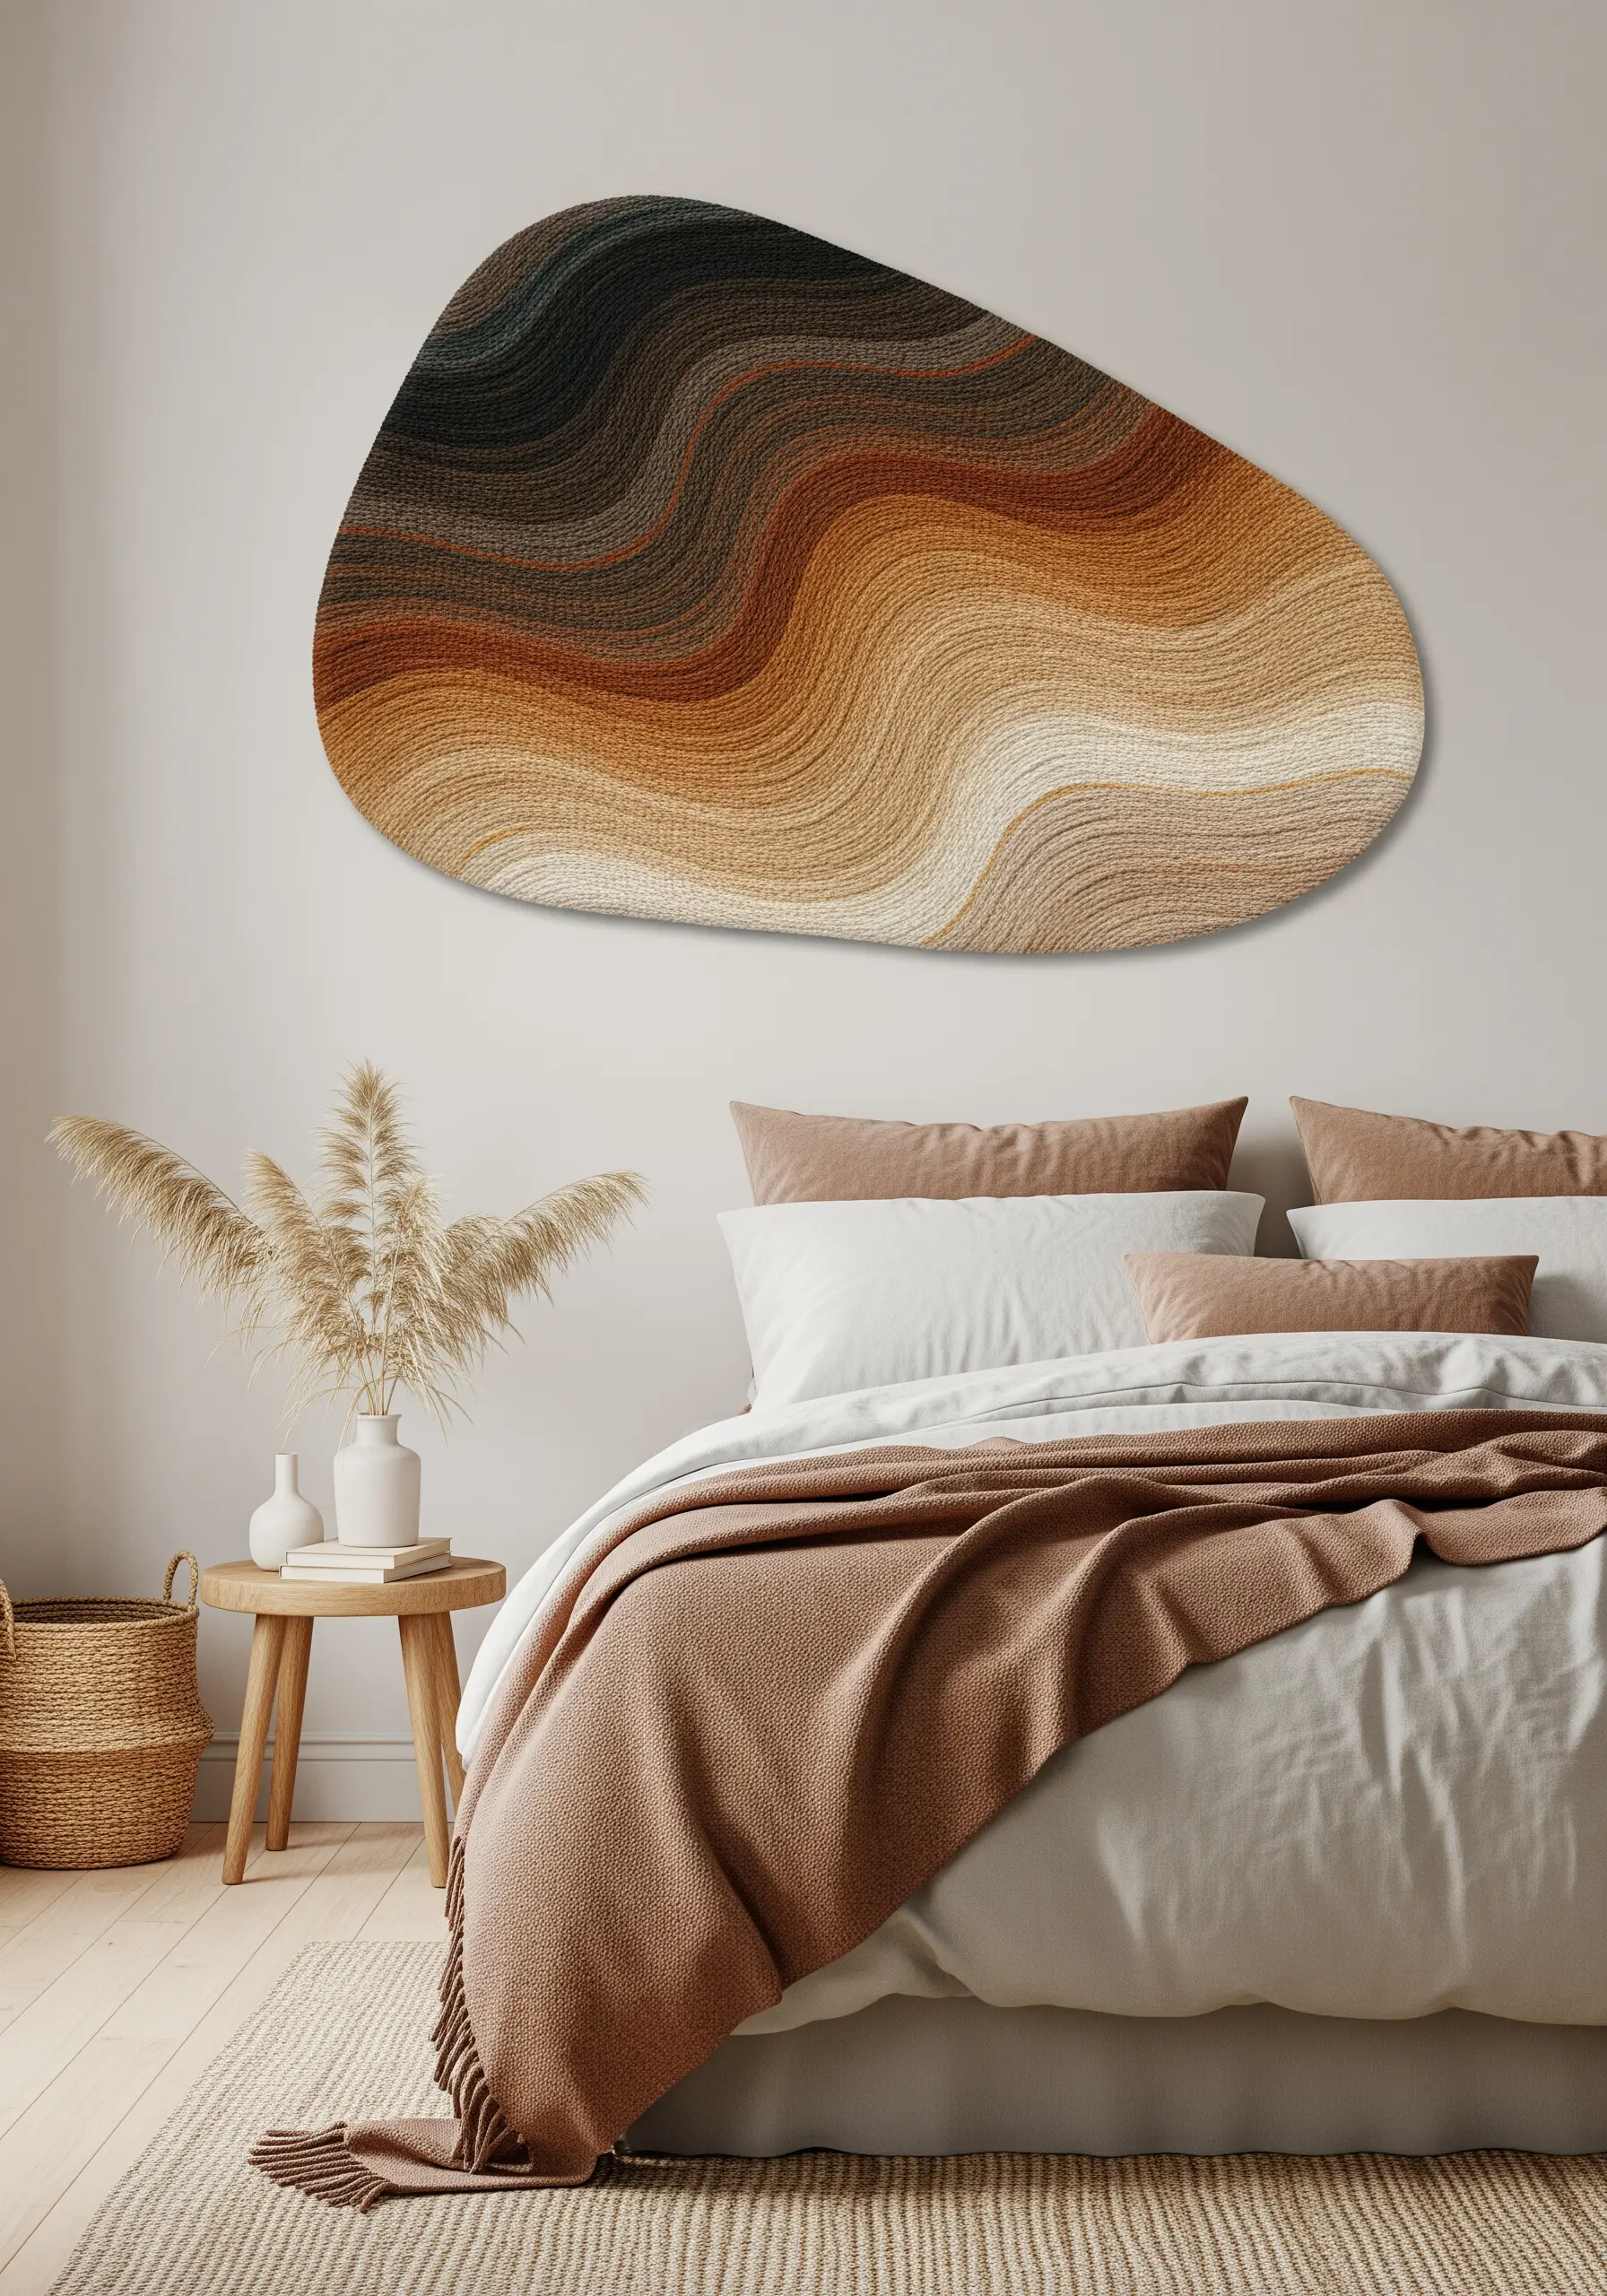
15. The Organic Wave Tapestry
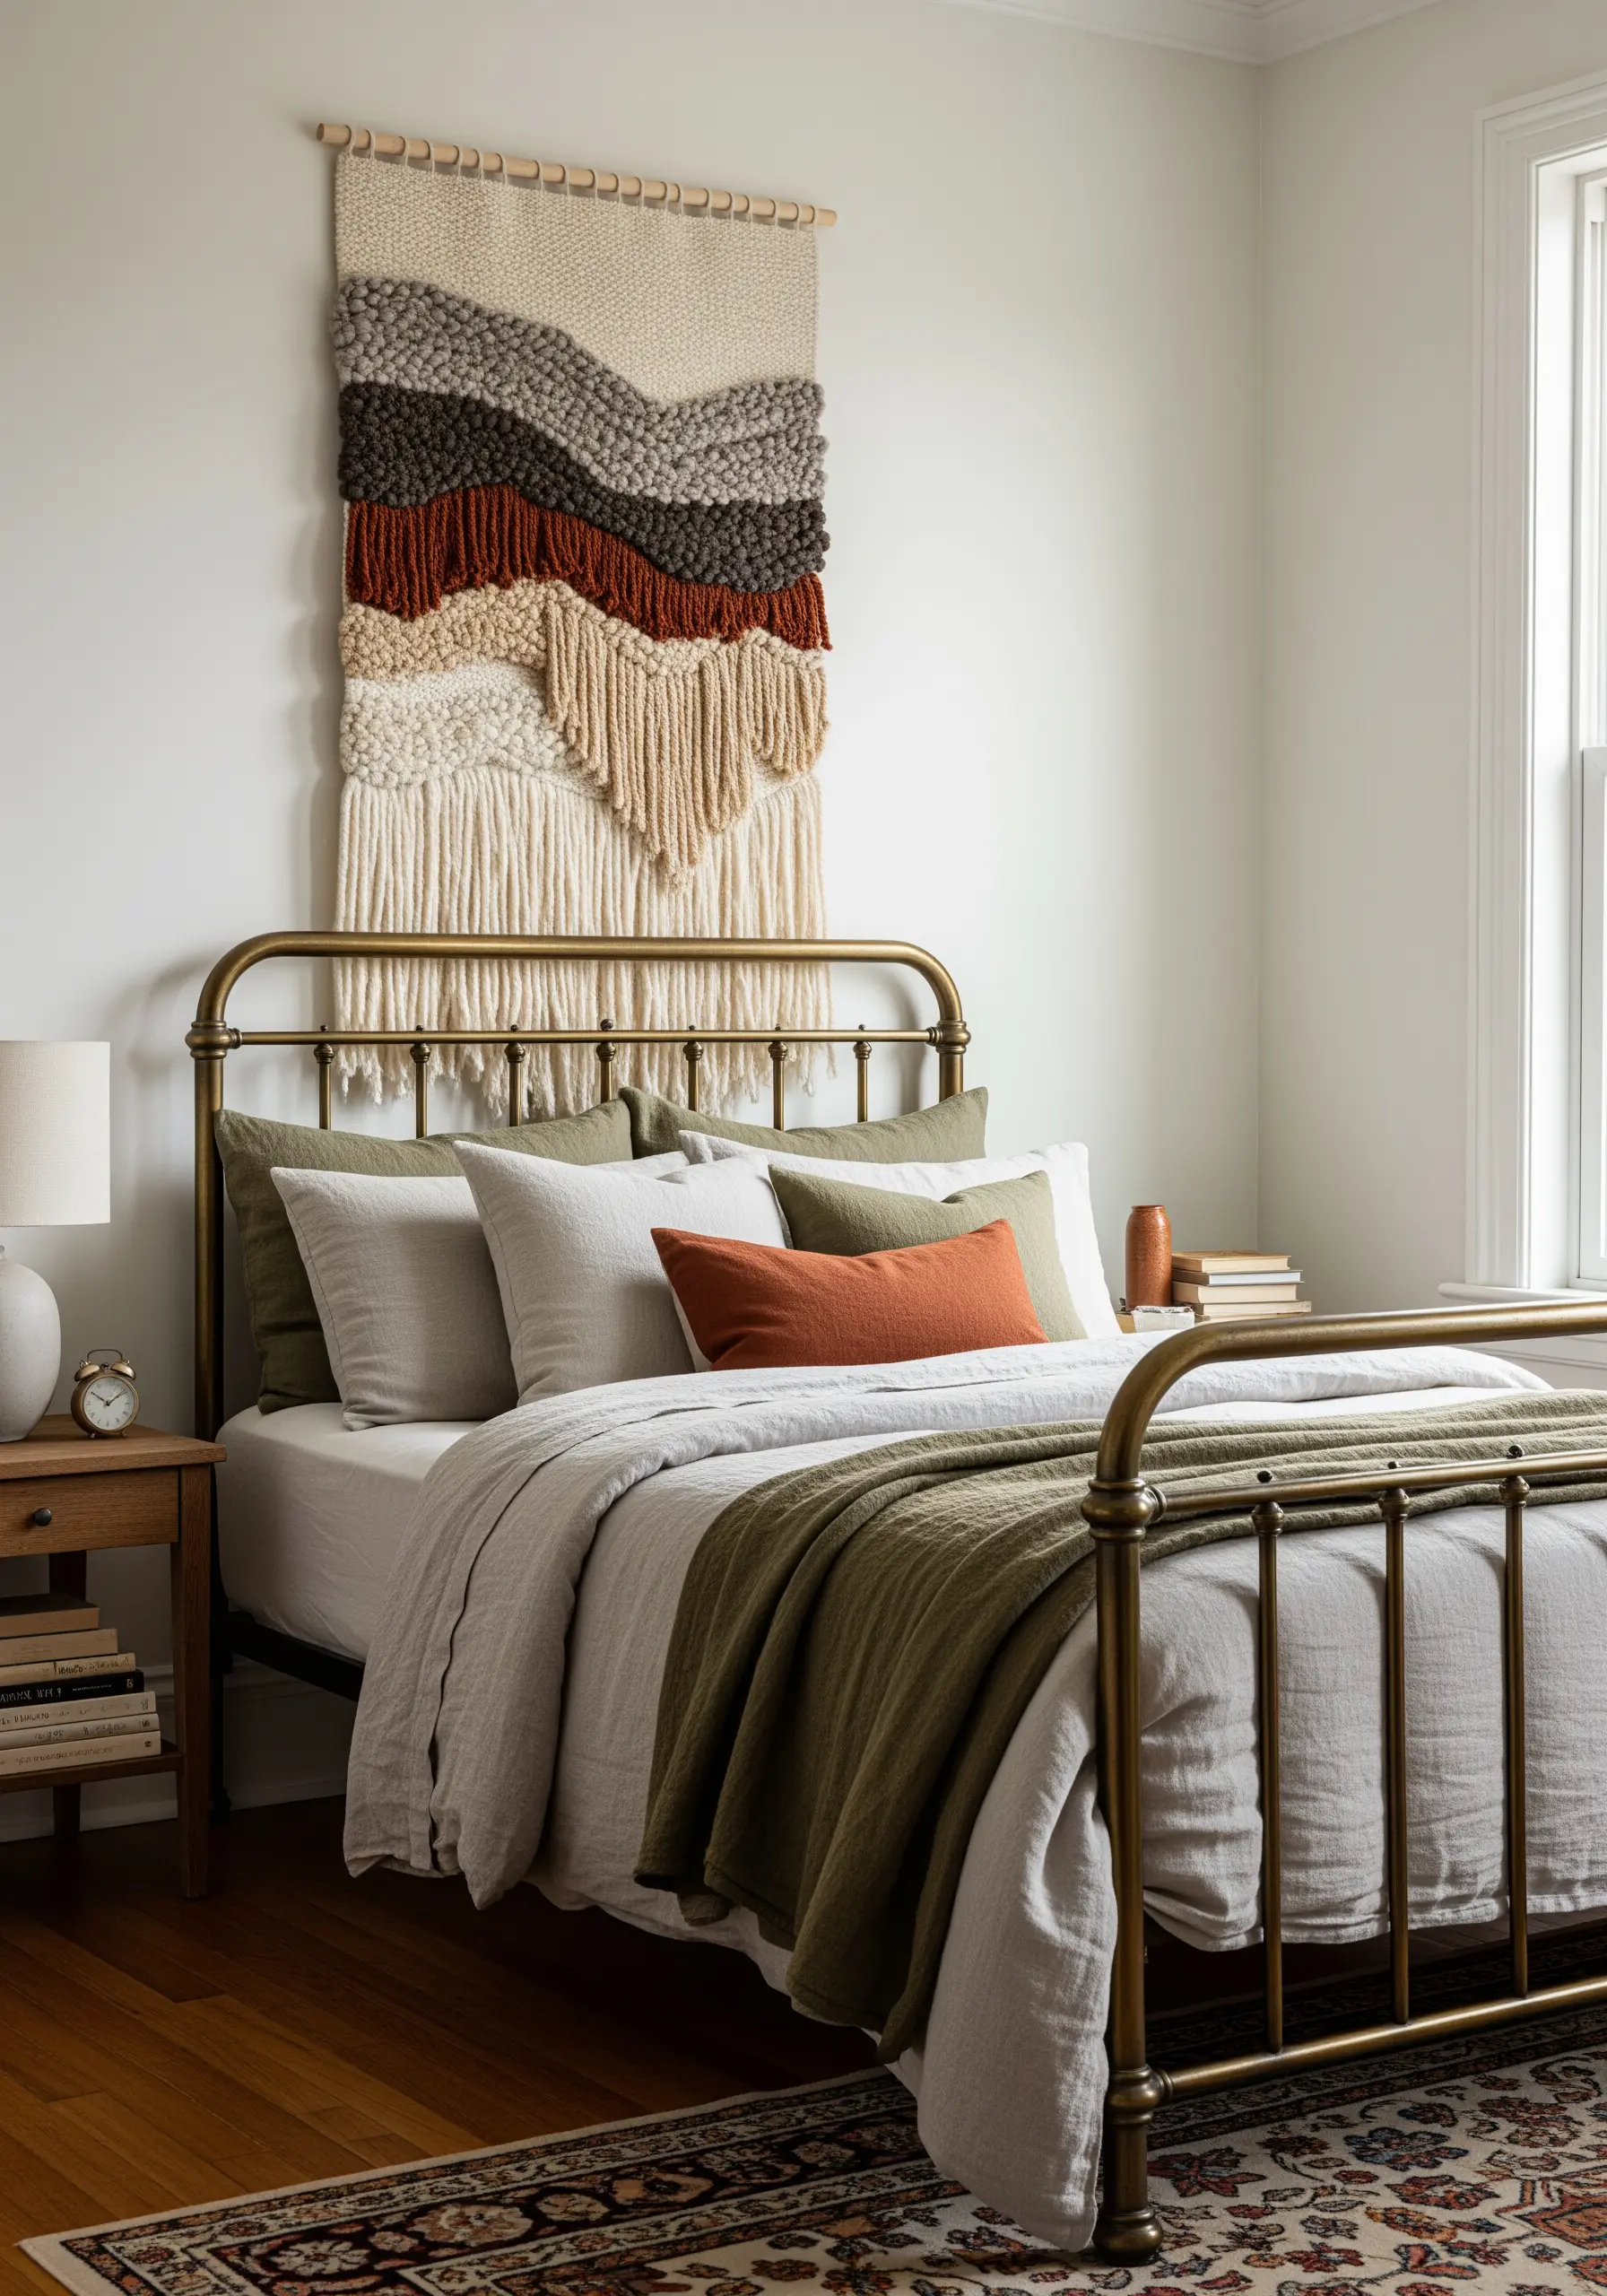
Mimic the earth’s layers with flowing, organic shapes and high-contrast textures.
Instead of straight lines, design your color bands with gentle waves and curves.
Use a combination of flat stitches (like satin stitch) for some layers and high-pile stitches (like uncombed Turkey work) for others.
This contrast between flat and fluffy textures creates a dynamic, sculptural piece that feels alive.
16. The French Knot Cloud Gradient
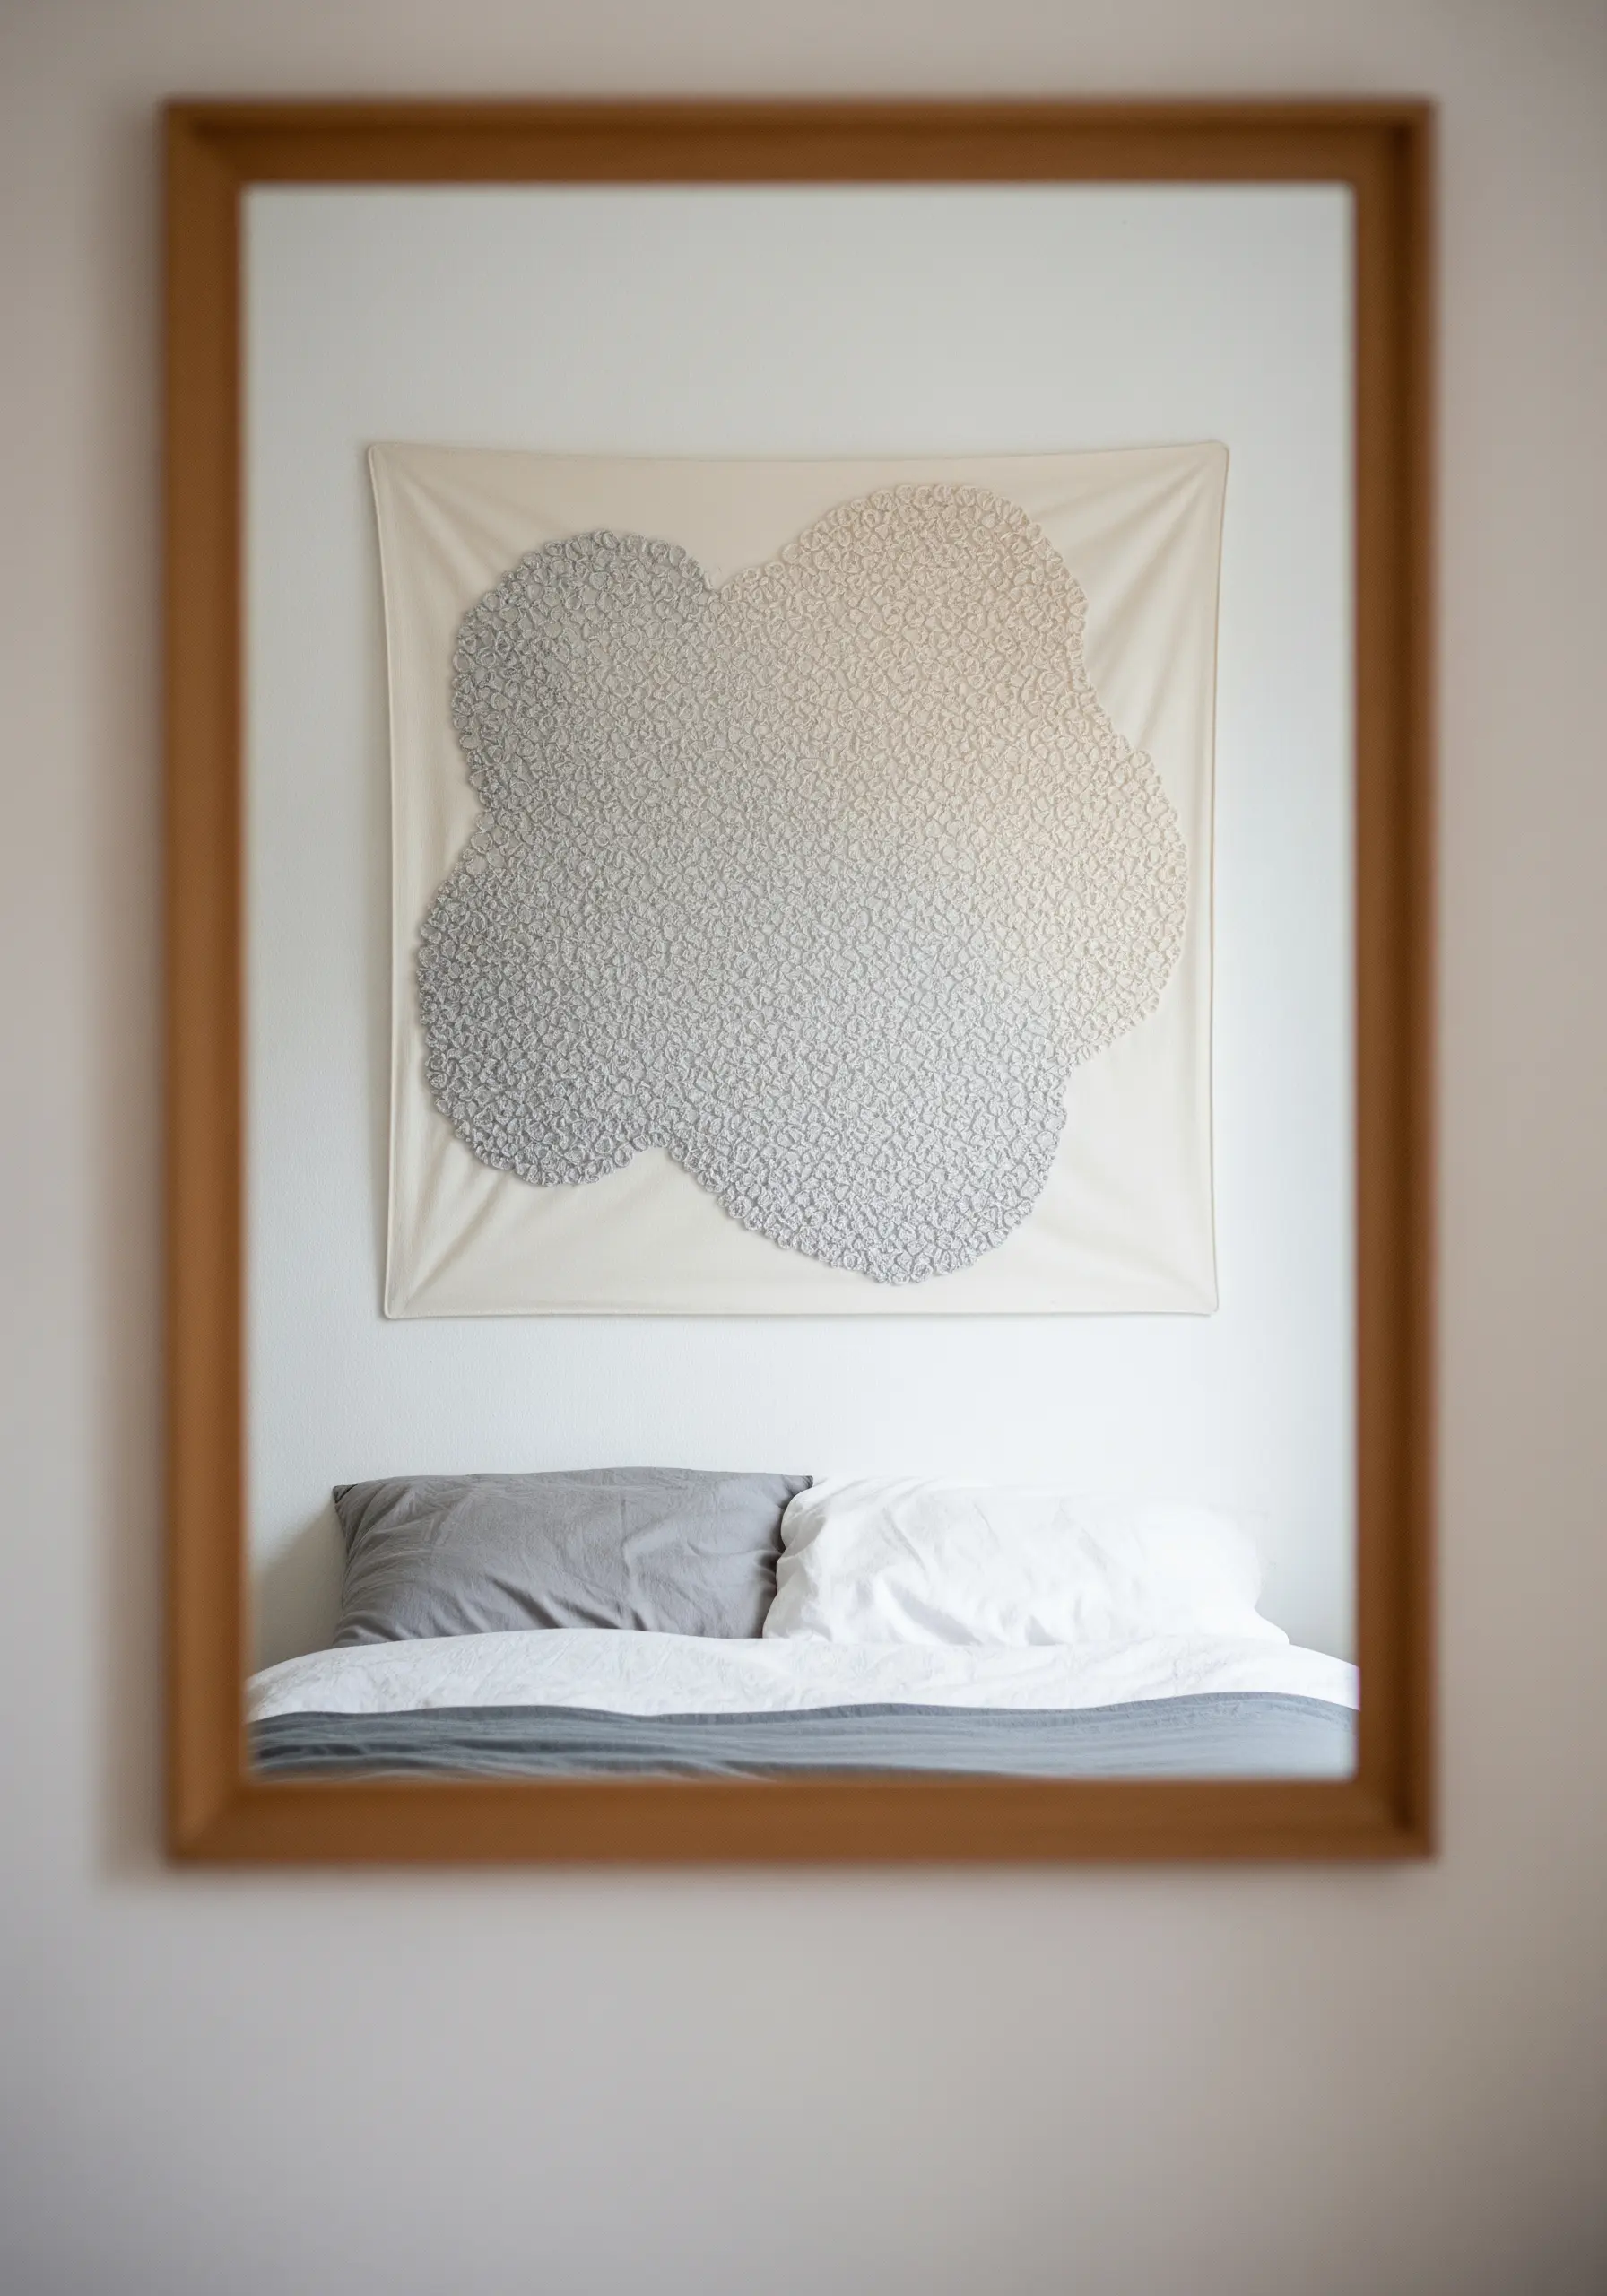
Create a soft, pointillist effect by filling a shape entirely with French knots.
Draw an organic, cloud-like shape on your fabric and divide it into sections for your gradient.
Fill each section with densely packed French knots, using a single strand of floss for the lightest areas and three strands for the darkest.
This not only creates a color gradient but also a subtle textural one, resulting in a dreamy, tactile piece.
17. The Sacred Geometry Quadtych
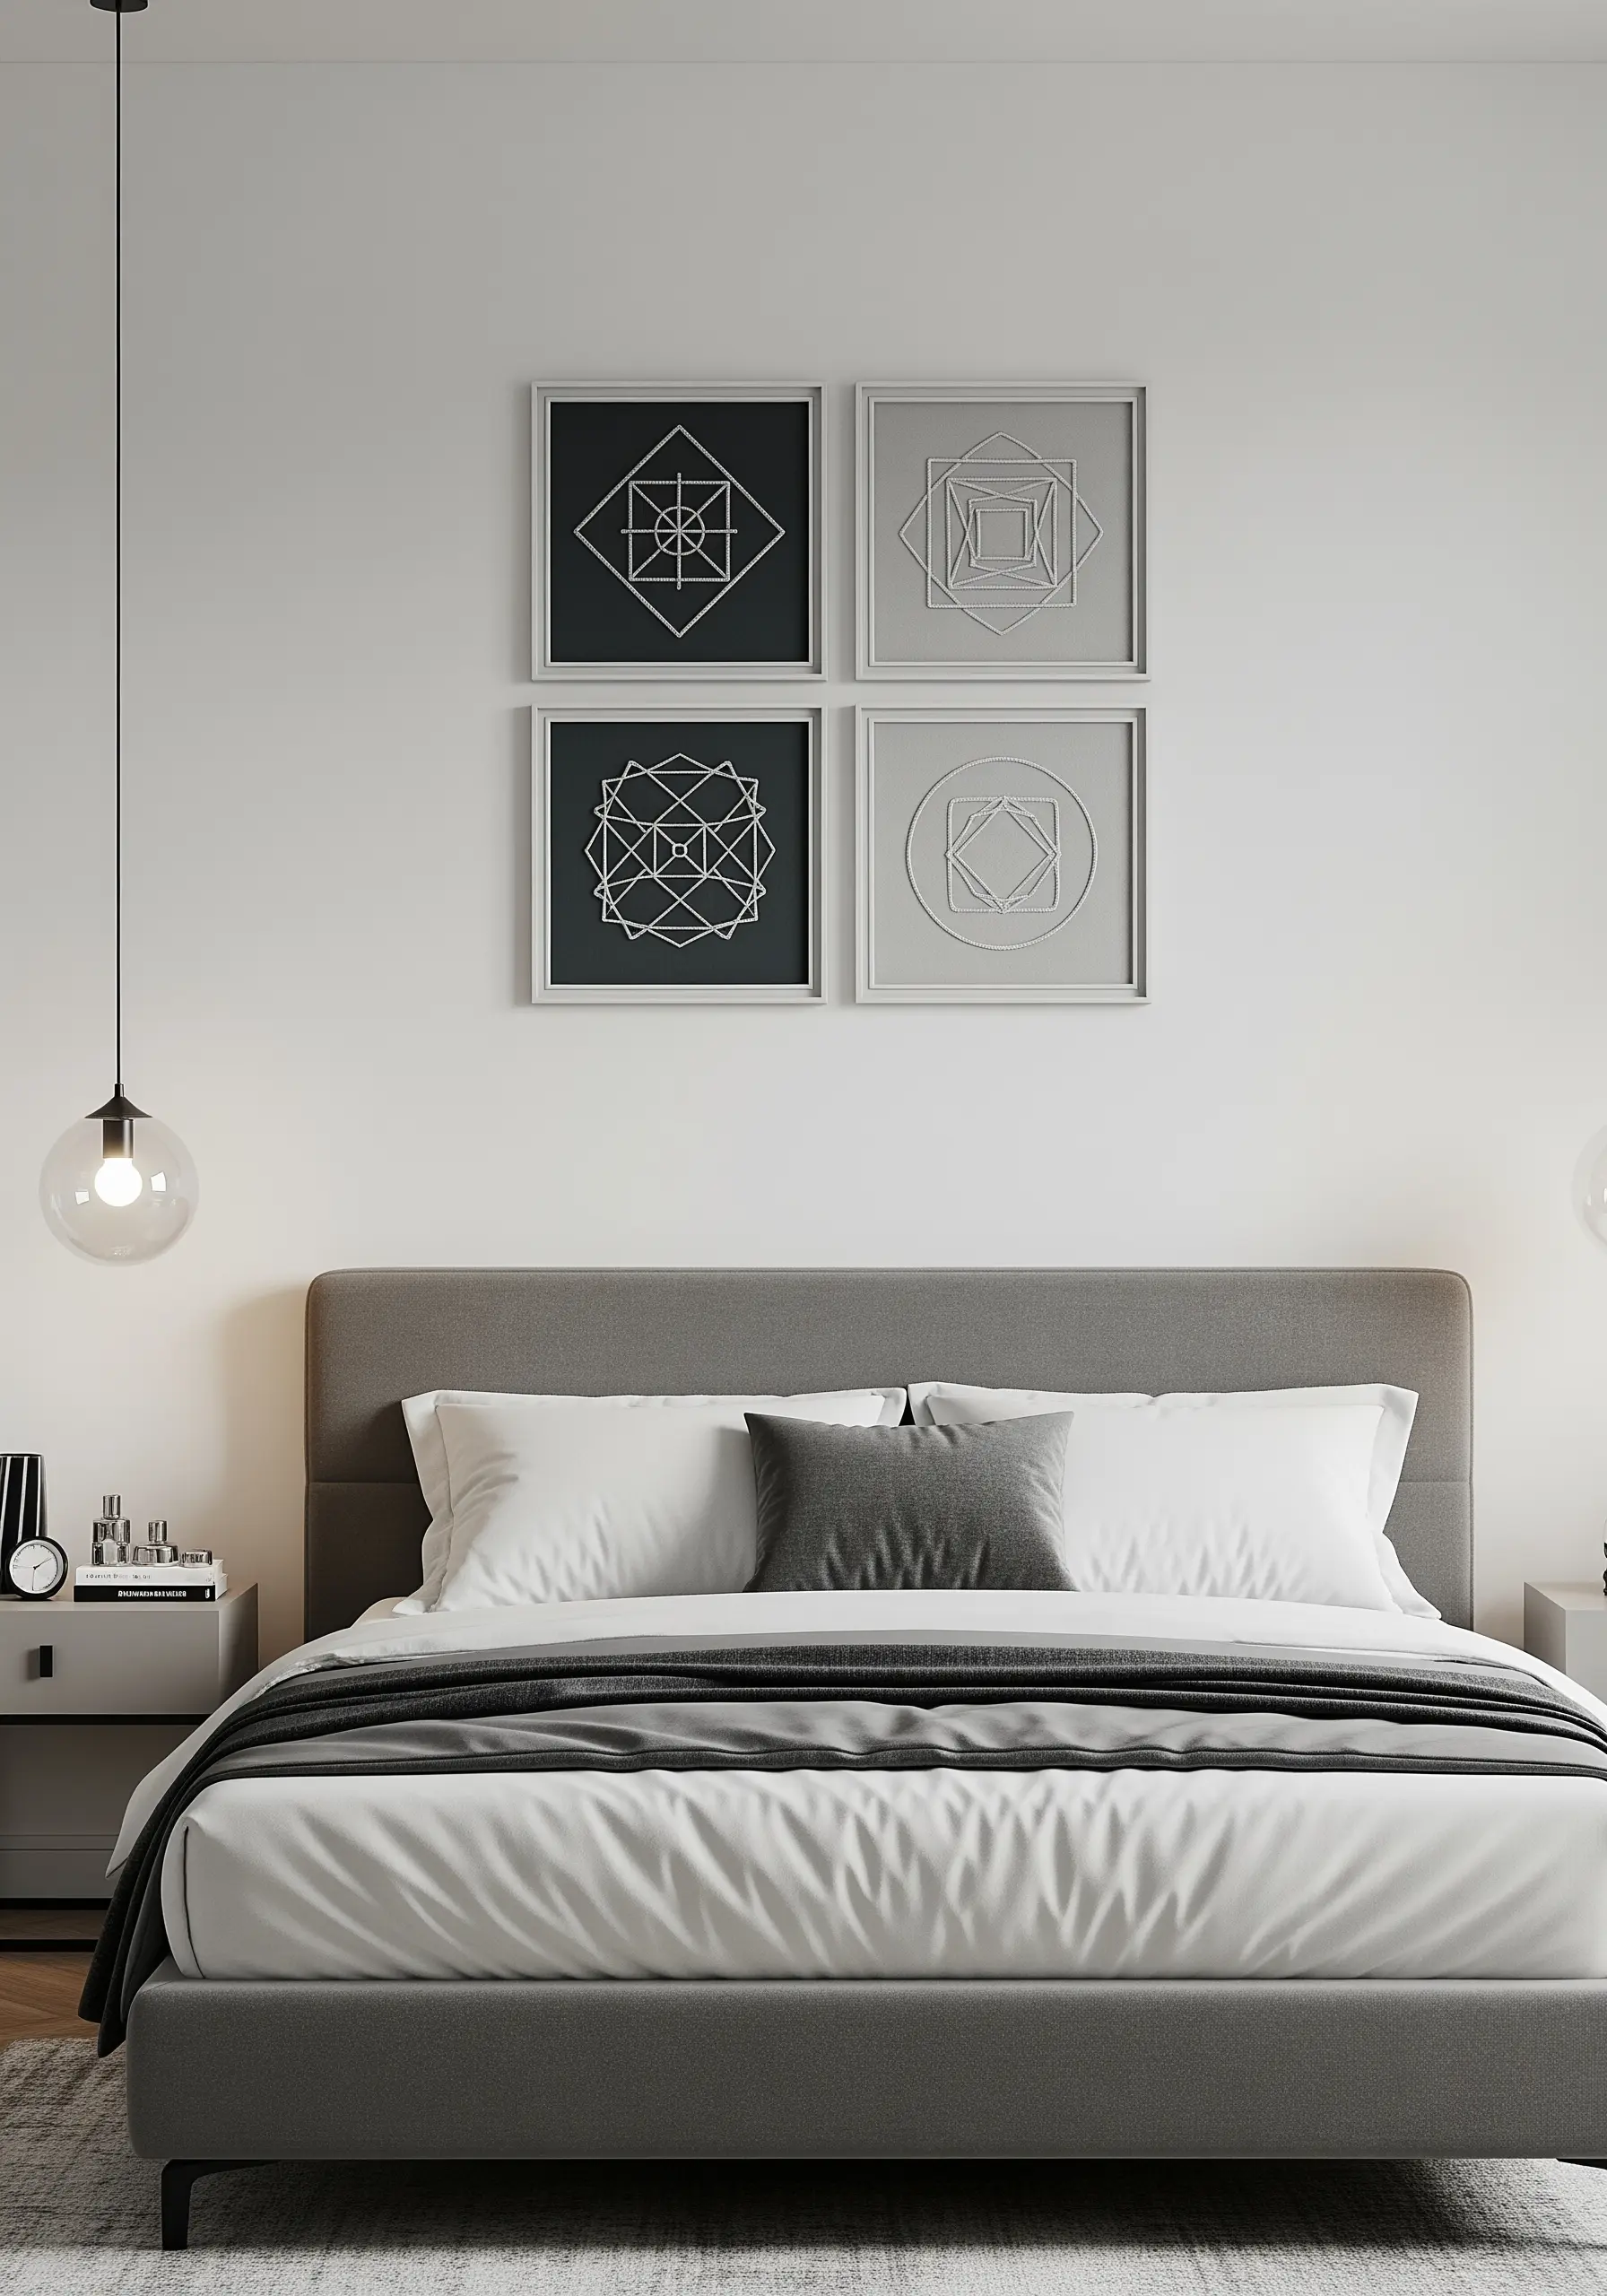
Explore balance and symmetry by creating a set of four coordinated pieces.
Work on four identical square frames, using two with a dark background and two with a light one for dramatic contrast.
Stitch geometric, mandala-inspired patterns using a simple backstitch, ensuring your designs are mirrored or complementary.
This disciplined approach results in a striking and meditative display that feels balanced and intentional.
18. The Zen Flow Headboard

Stitch a piece that encourages calm and tranquility with its clean, flowing lines.
On a long, narrow piece of linen perfect for a headboard, draw a series of parallel, wavy lines.
Use a whipped backstitch or a stem stitch in a dark, neutral thread to create smooth, uninterrupted curves with a slightly raised profile.
The simplicity of the design is what gives this piece its serene and sophisticated power.
19. The Two-Tone Botanical Outline
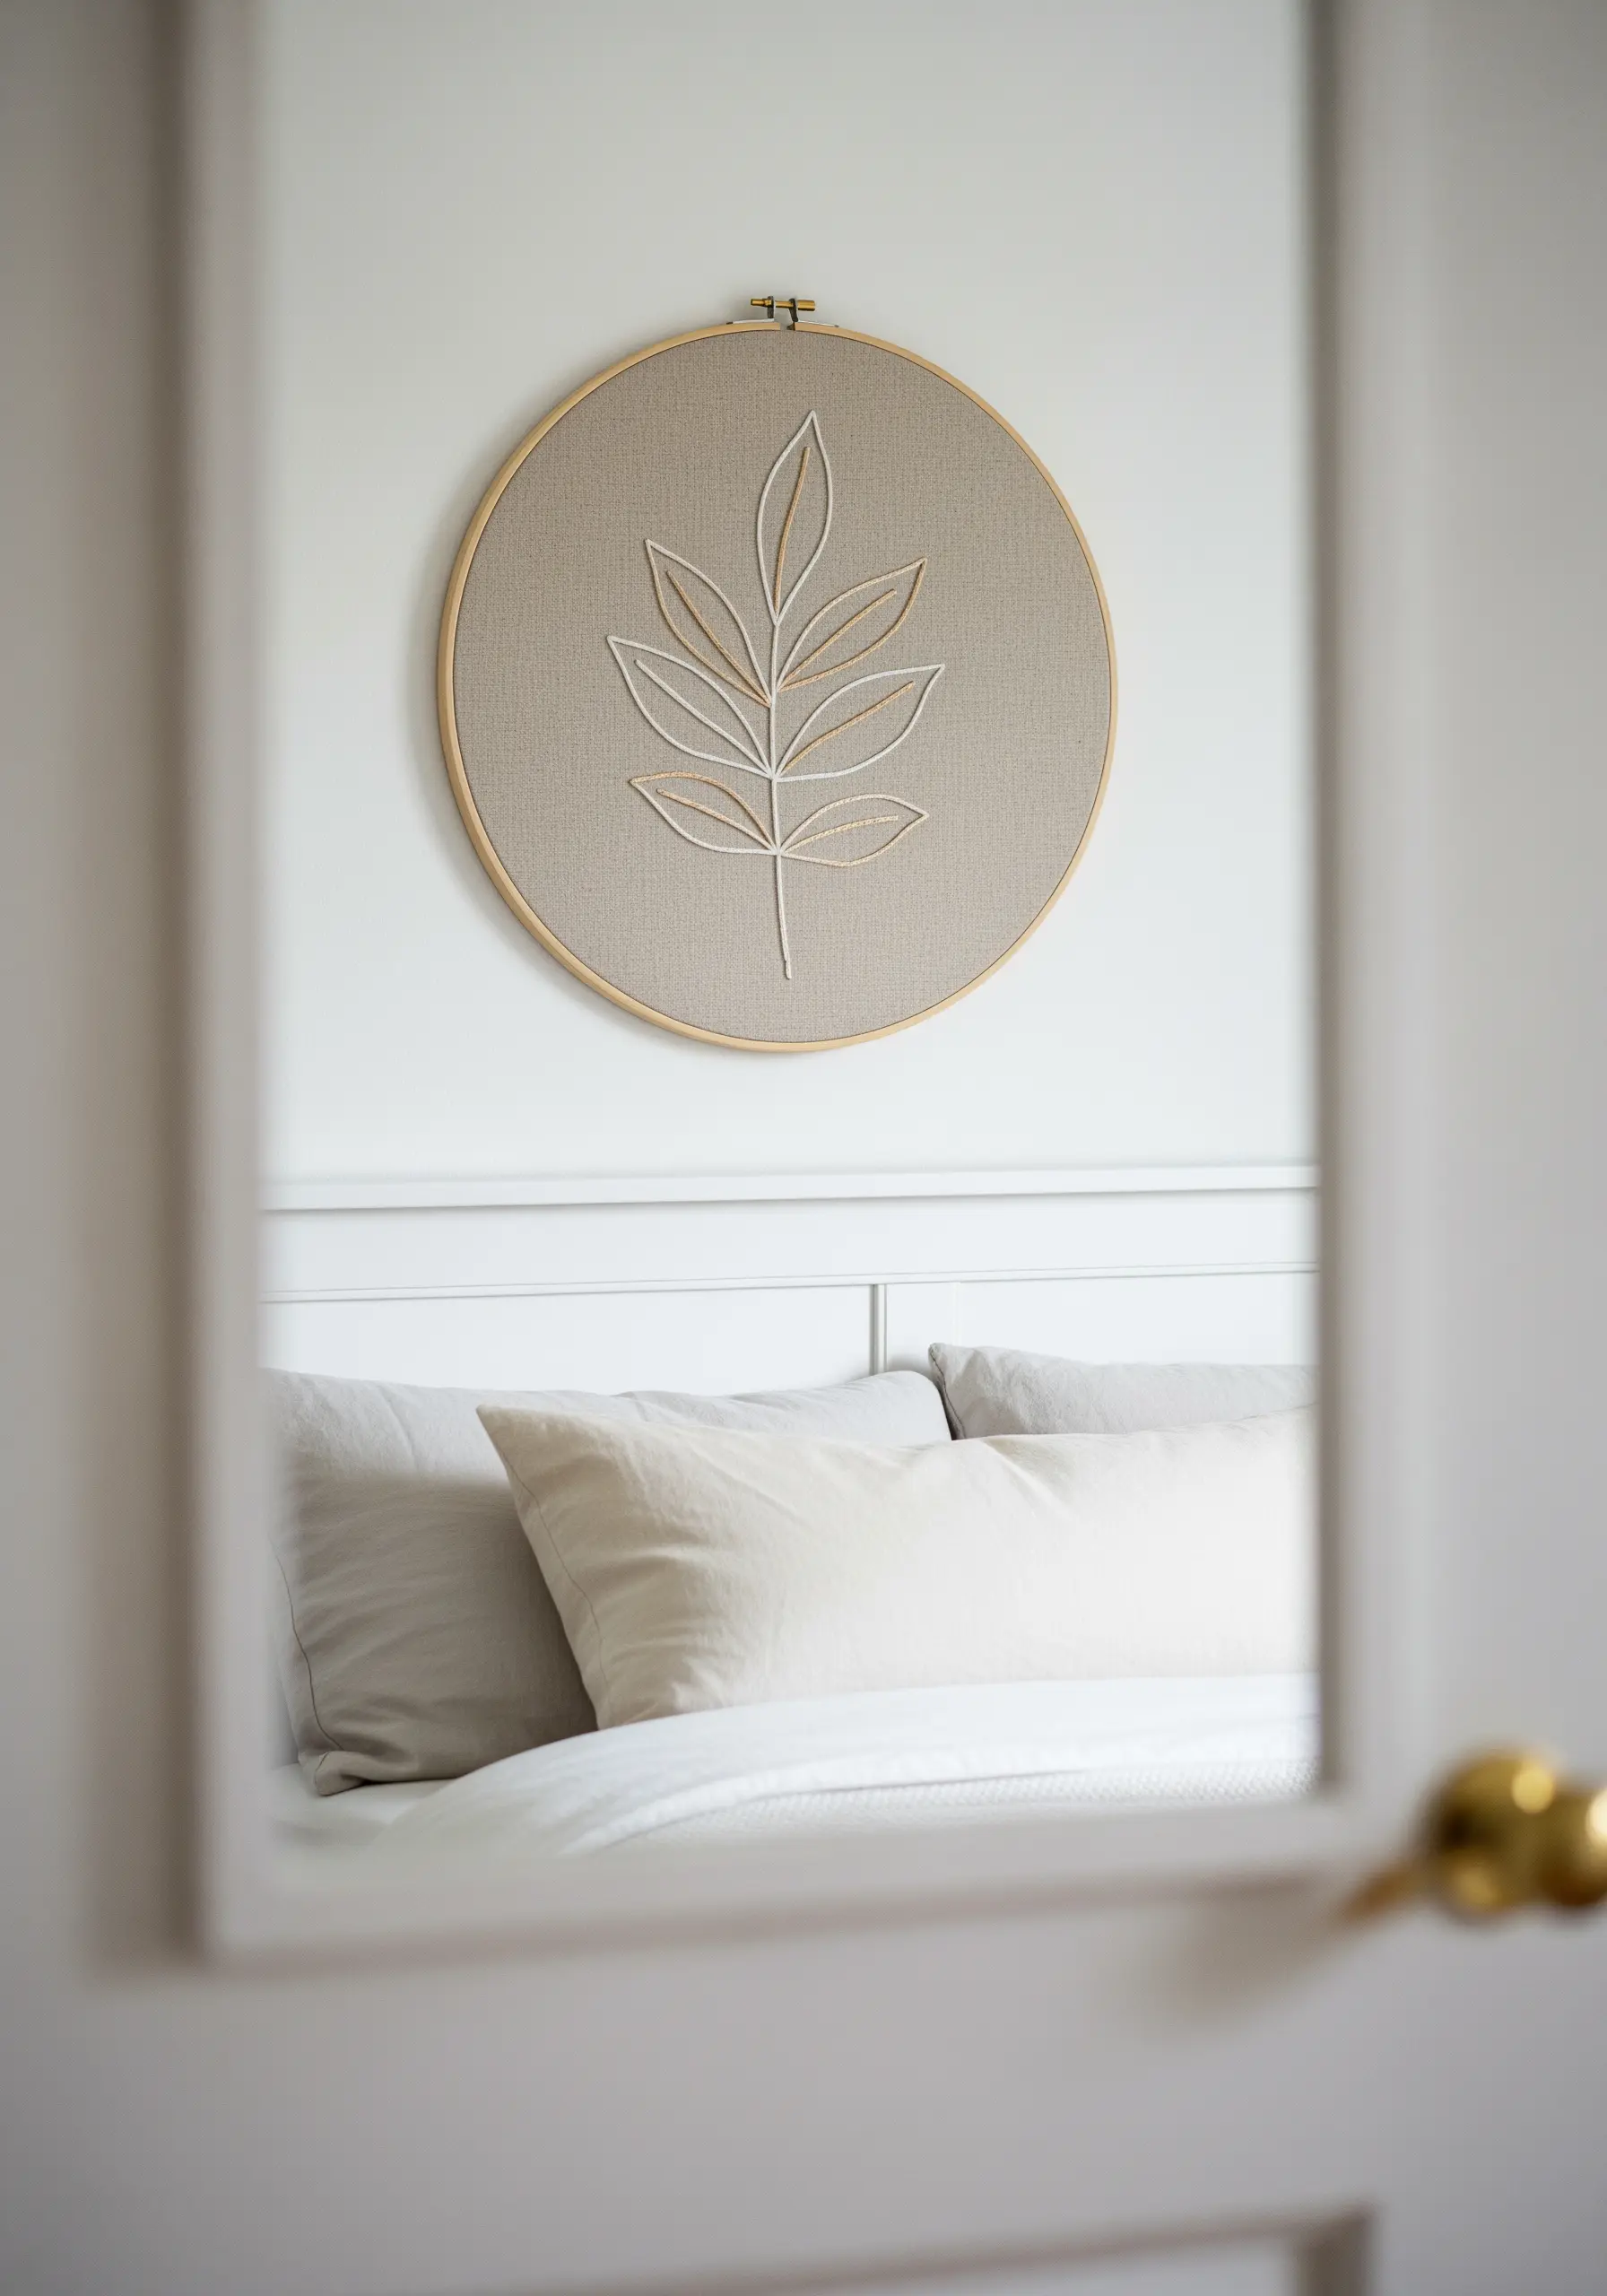
Create a modern, airy botanical design by focusing on clean lines and subtle fills.
Use a split stitch for the main stem and leaf outlines to create a solid, defined edge.
For the fill, switch to a single strand of thread in a slightly different neutral shade. Use a spaced-out satin stitch or seed stitch to add color without creating heaviness.
This technique results in elegant line art that feels light and breathable.
20. The Bold Color Block Gradient
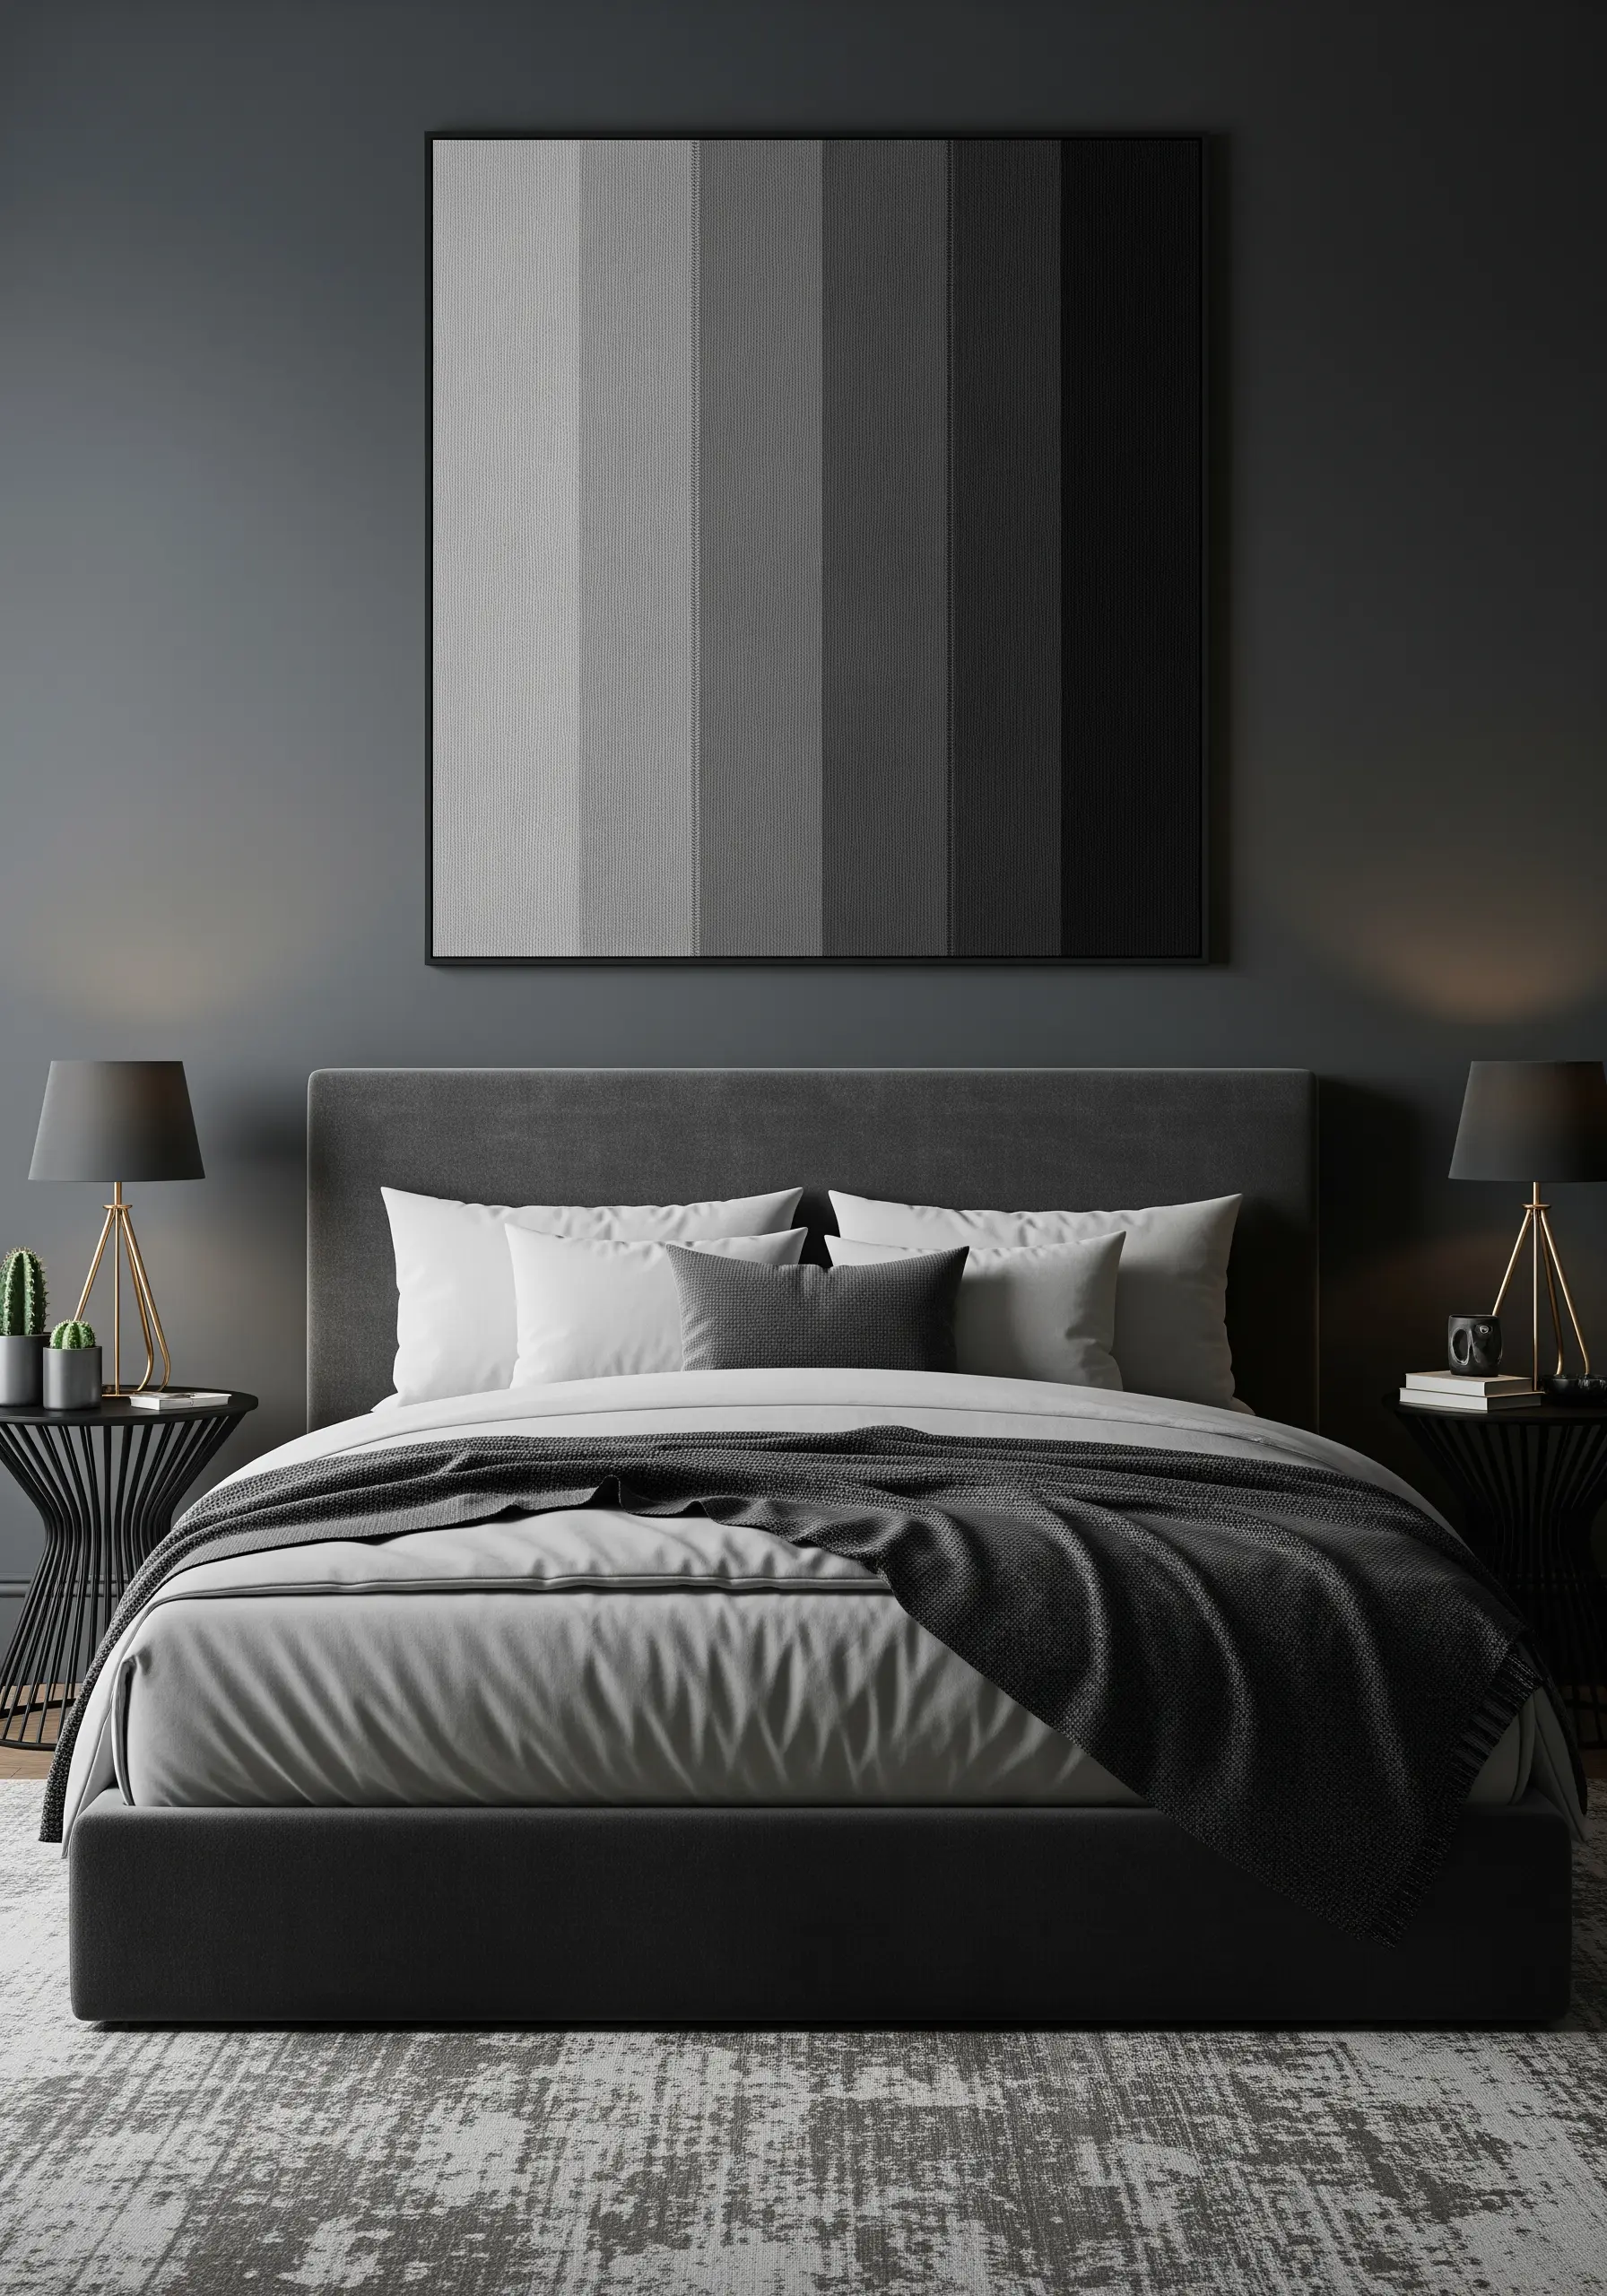
Make a strong, graphic statement with a gradient composed of distinct vertical blocks.
Instead of blending your colors, dedicate a wide vertical band to each shade in your palette.
Use a full six strands of embroidery floss and a dense vertical satin stitch to achieve a completely opaque, solid block of color.
This technique is perfect for a minimalist or industrial space, where its bold simplicity can truly shine.
21. The Concentric Arc Gradient
Build a gradient with a sense of rhythm and movement using concentric arcs.
To create perfect, clean curves, use a chain stitch, which naturally lends itself to rounded shapes and adds a lovely, rope-like texture.
Start with your darkest color at the outer edge of the arc and work your way inward with progressively lighter shades.
This creates a design that draws the eye inward, making it a peaceful and centering focal point.
22. The Misty Forest Canopy
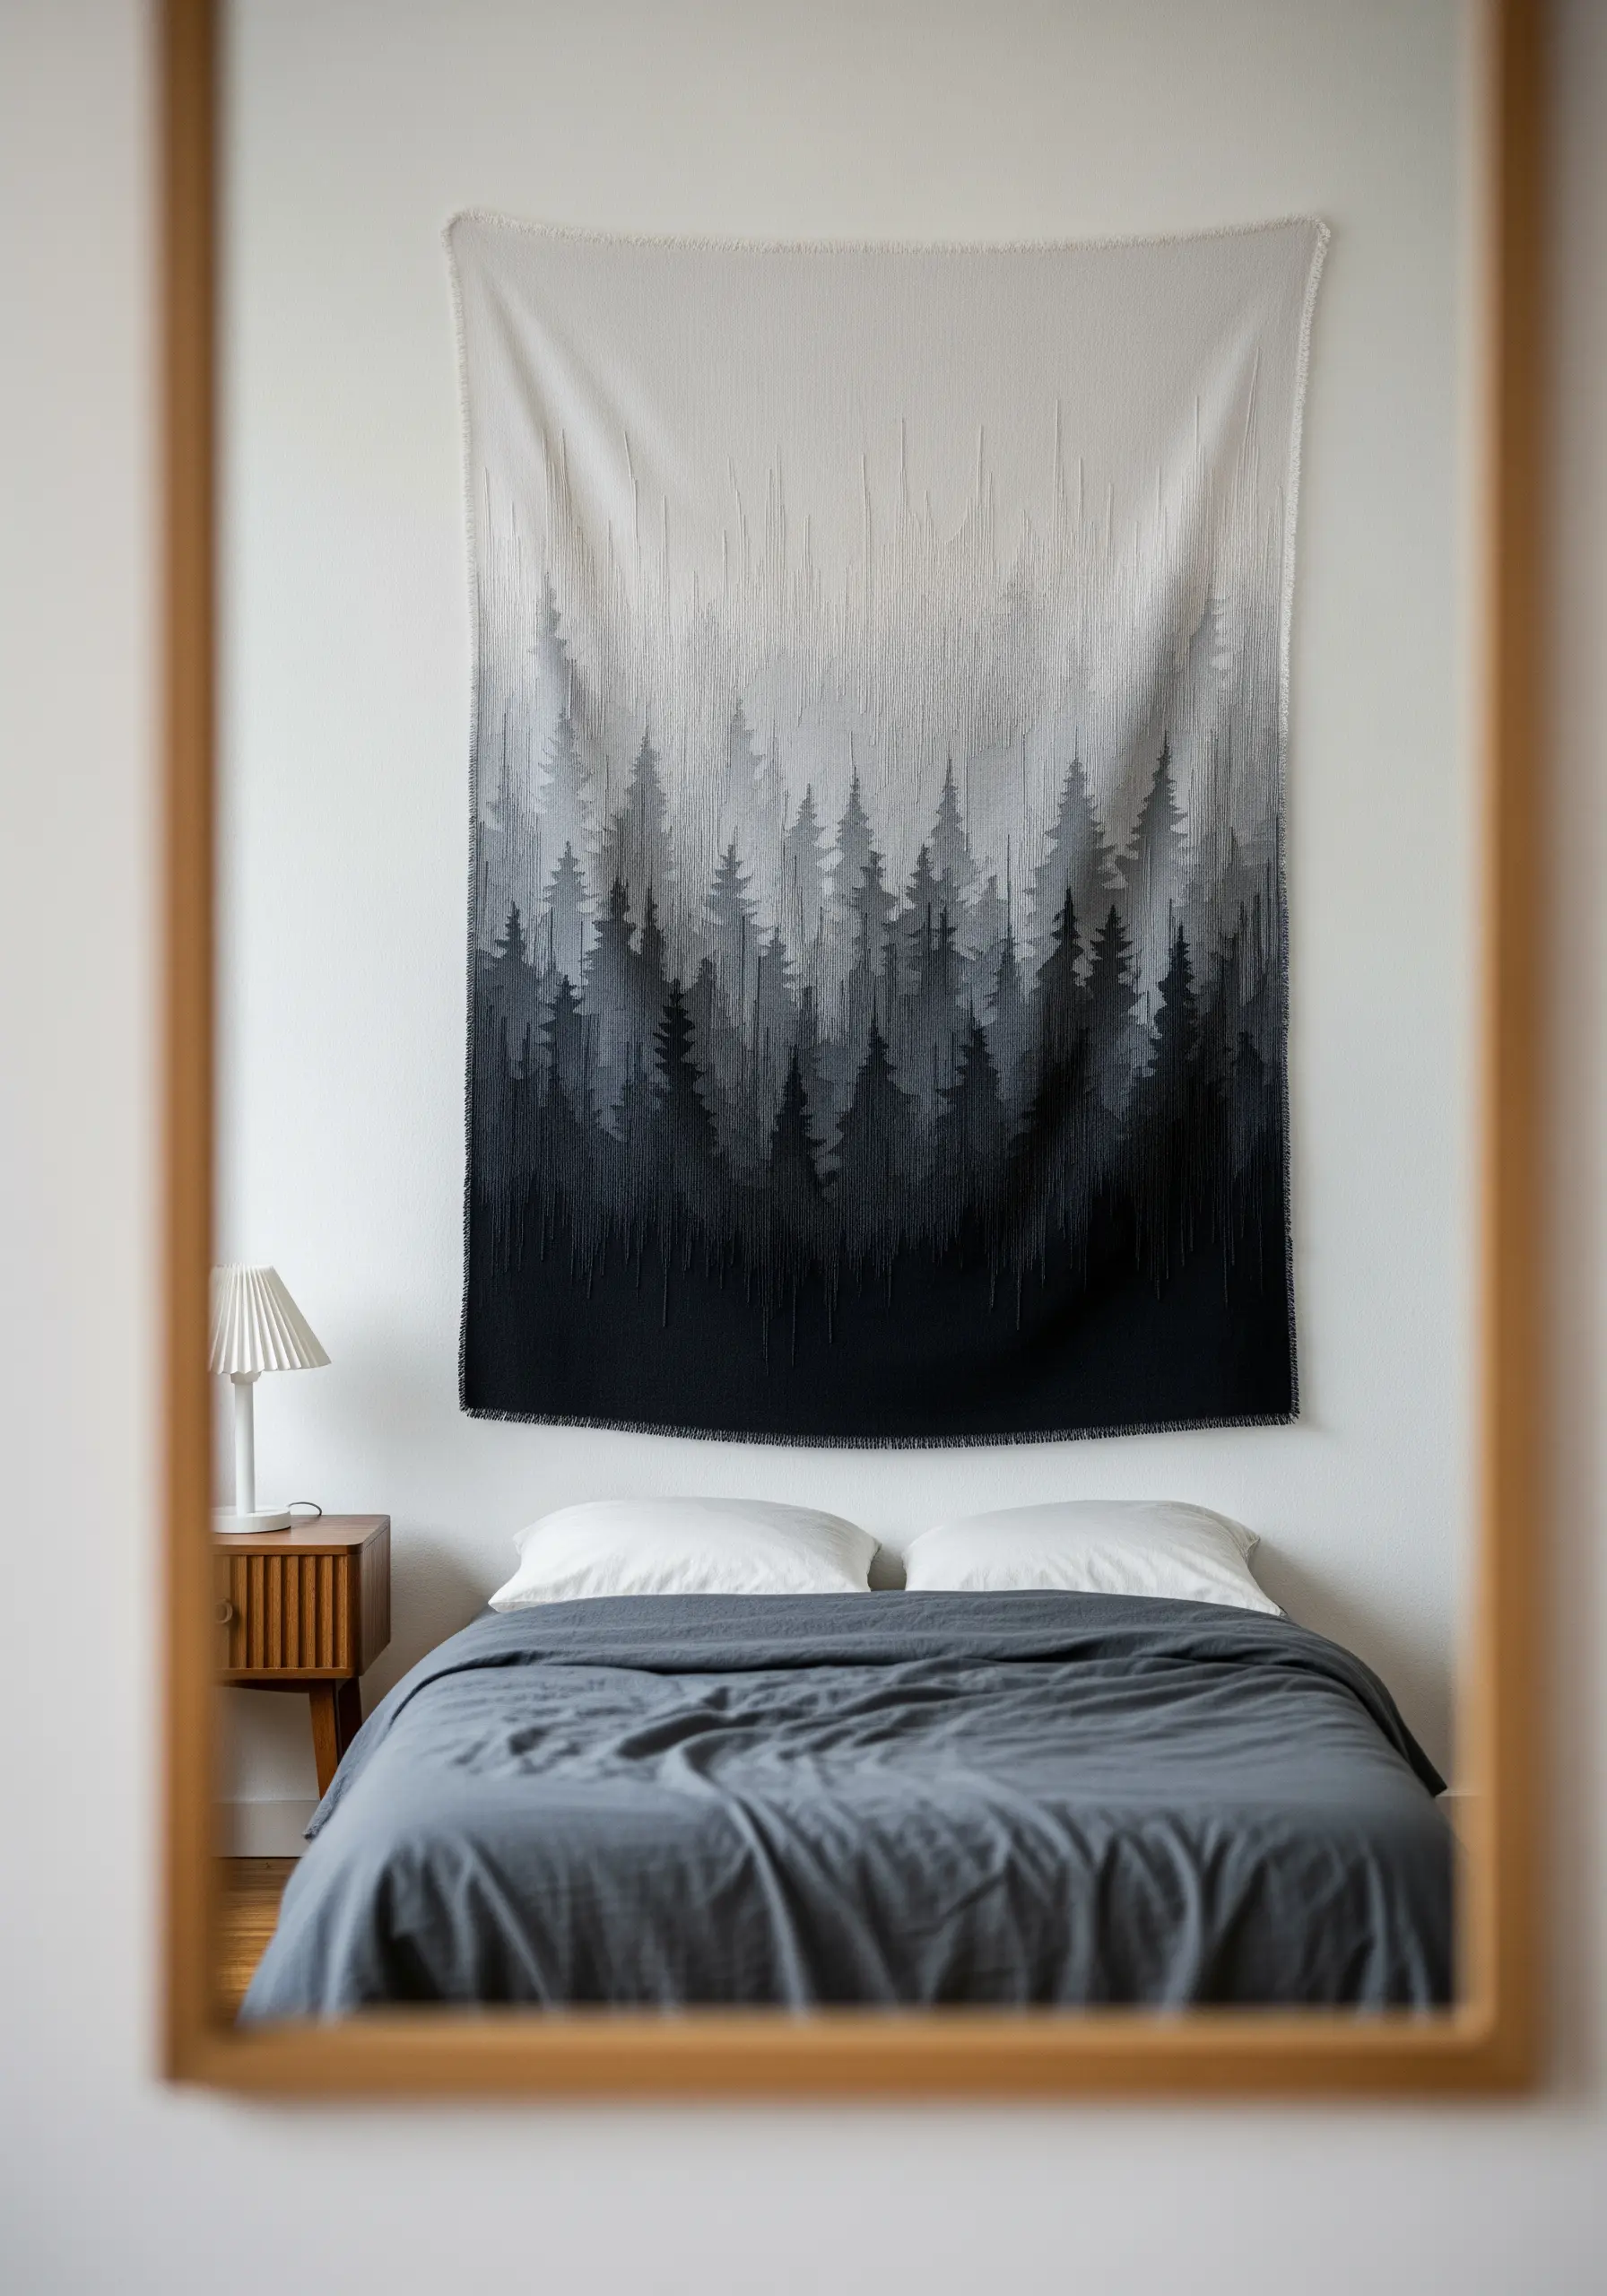
Create an atmospheric forest scene by using thread density to suggest distance.
Use long, vertical straight stitches to represent tree trunks and canopies.
For the trees in the foreground, use a darker thread and pack your stitches very densely.
As you move up the fabric, switch to lighter threads and make your stitches sparser to create the illusion of depth and mist, as if the forest is fading into the sky.
23. The Interlocking Statement Rings

Create a sculptural piece that explores connection and harmony.
Wrap two large hoops or wooden rings completely with threads in two different neutral gradient palettes—one warm, one cool.
Arrange them so they interlock before hanging, creating a simple yet powerful symbol.
These interlocking statement rings are perfect for adding a touch of modern elegance and meaning above a bed.
24. The Pointillist Landscape
Paint with thread by using thousands of French knots to build a rolling landscape.
Map out the soft curves of hills and valleys on your fabric.
Fill each section with dense French knots, choosing your colors carefully to create a seamless color shift where the hills meet.
To enhance the sense of depth, use slightly larger knots (more wraps) for the foreground and smaller knots (fewer wraps) for the distant hills.
25. The Organic Contour Flow
Capture the feeling of natural elements like wood grain or flowing water with directional stitching.
Instead of filling a standard shape, work on an organically shaped canvas or cut your piece out after stitching.
Use a split stitch or stem stitch to create long, flowing contour lines that undulate across the fabric.
Arrange the colors in a gradient to enhance the sense of movement, creating a piece that feels both dynamic and serene.
26. The Chevron Gradient Banner
Create a playful yet sophisticated banner with a simple geometric pattern.
This design can be achieved with embroidery or by appliquéing pieces of felt or linen onto a backing fabric.
Arrange the chevron shapes in a smooth gradient from dark to light, and add a simple running stitch along the edges of each piece for a clean, handmade finish.
It’s a graphic and cheerful way to incorporate a gradient into your bedroom decor.


