

Embroidery is more than a craft; it is a quiet conversation between your hands, the thread, and the fabric. When you create a mandala, that conversation becomes a meditation. Each stitch is a breath, a moment of focus that grounds you in the present.
But how do you translate that inner calm into a piece of art that truly reflects it? It begins with intention—choosing the right texture, the perfect color harmony, and the stitch that best tells your story. It’s about moving beyond simply filling in a pattern and starting to think about how each element contributes to the whole.
Here, you won’t find fleeting trends. Instead, you’ll discover techniques and ideas to help you create embroidered mandala wall art with depth, meaning, and a polished, modern finish. Let this be your guide to stitching not just a design, but a sanctuary.
1. Create a Luminous Chakra Gradient
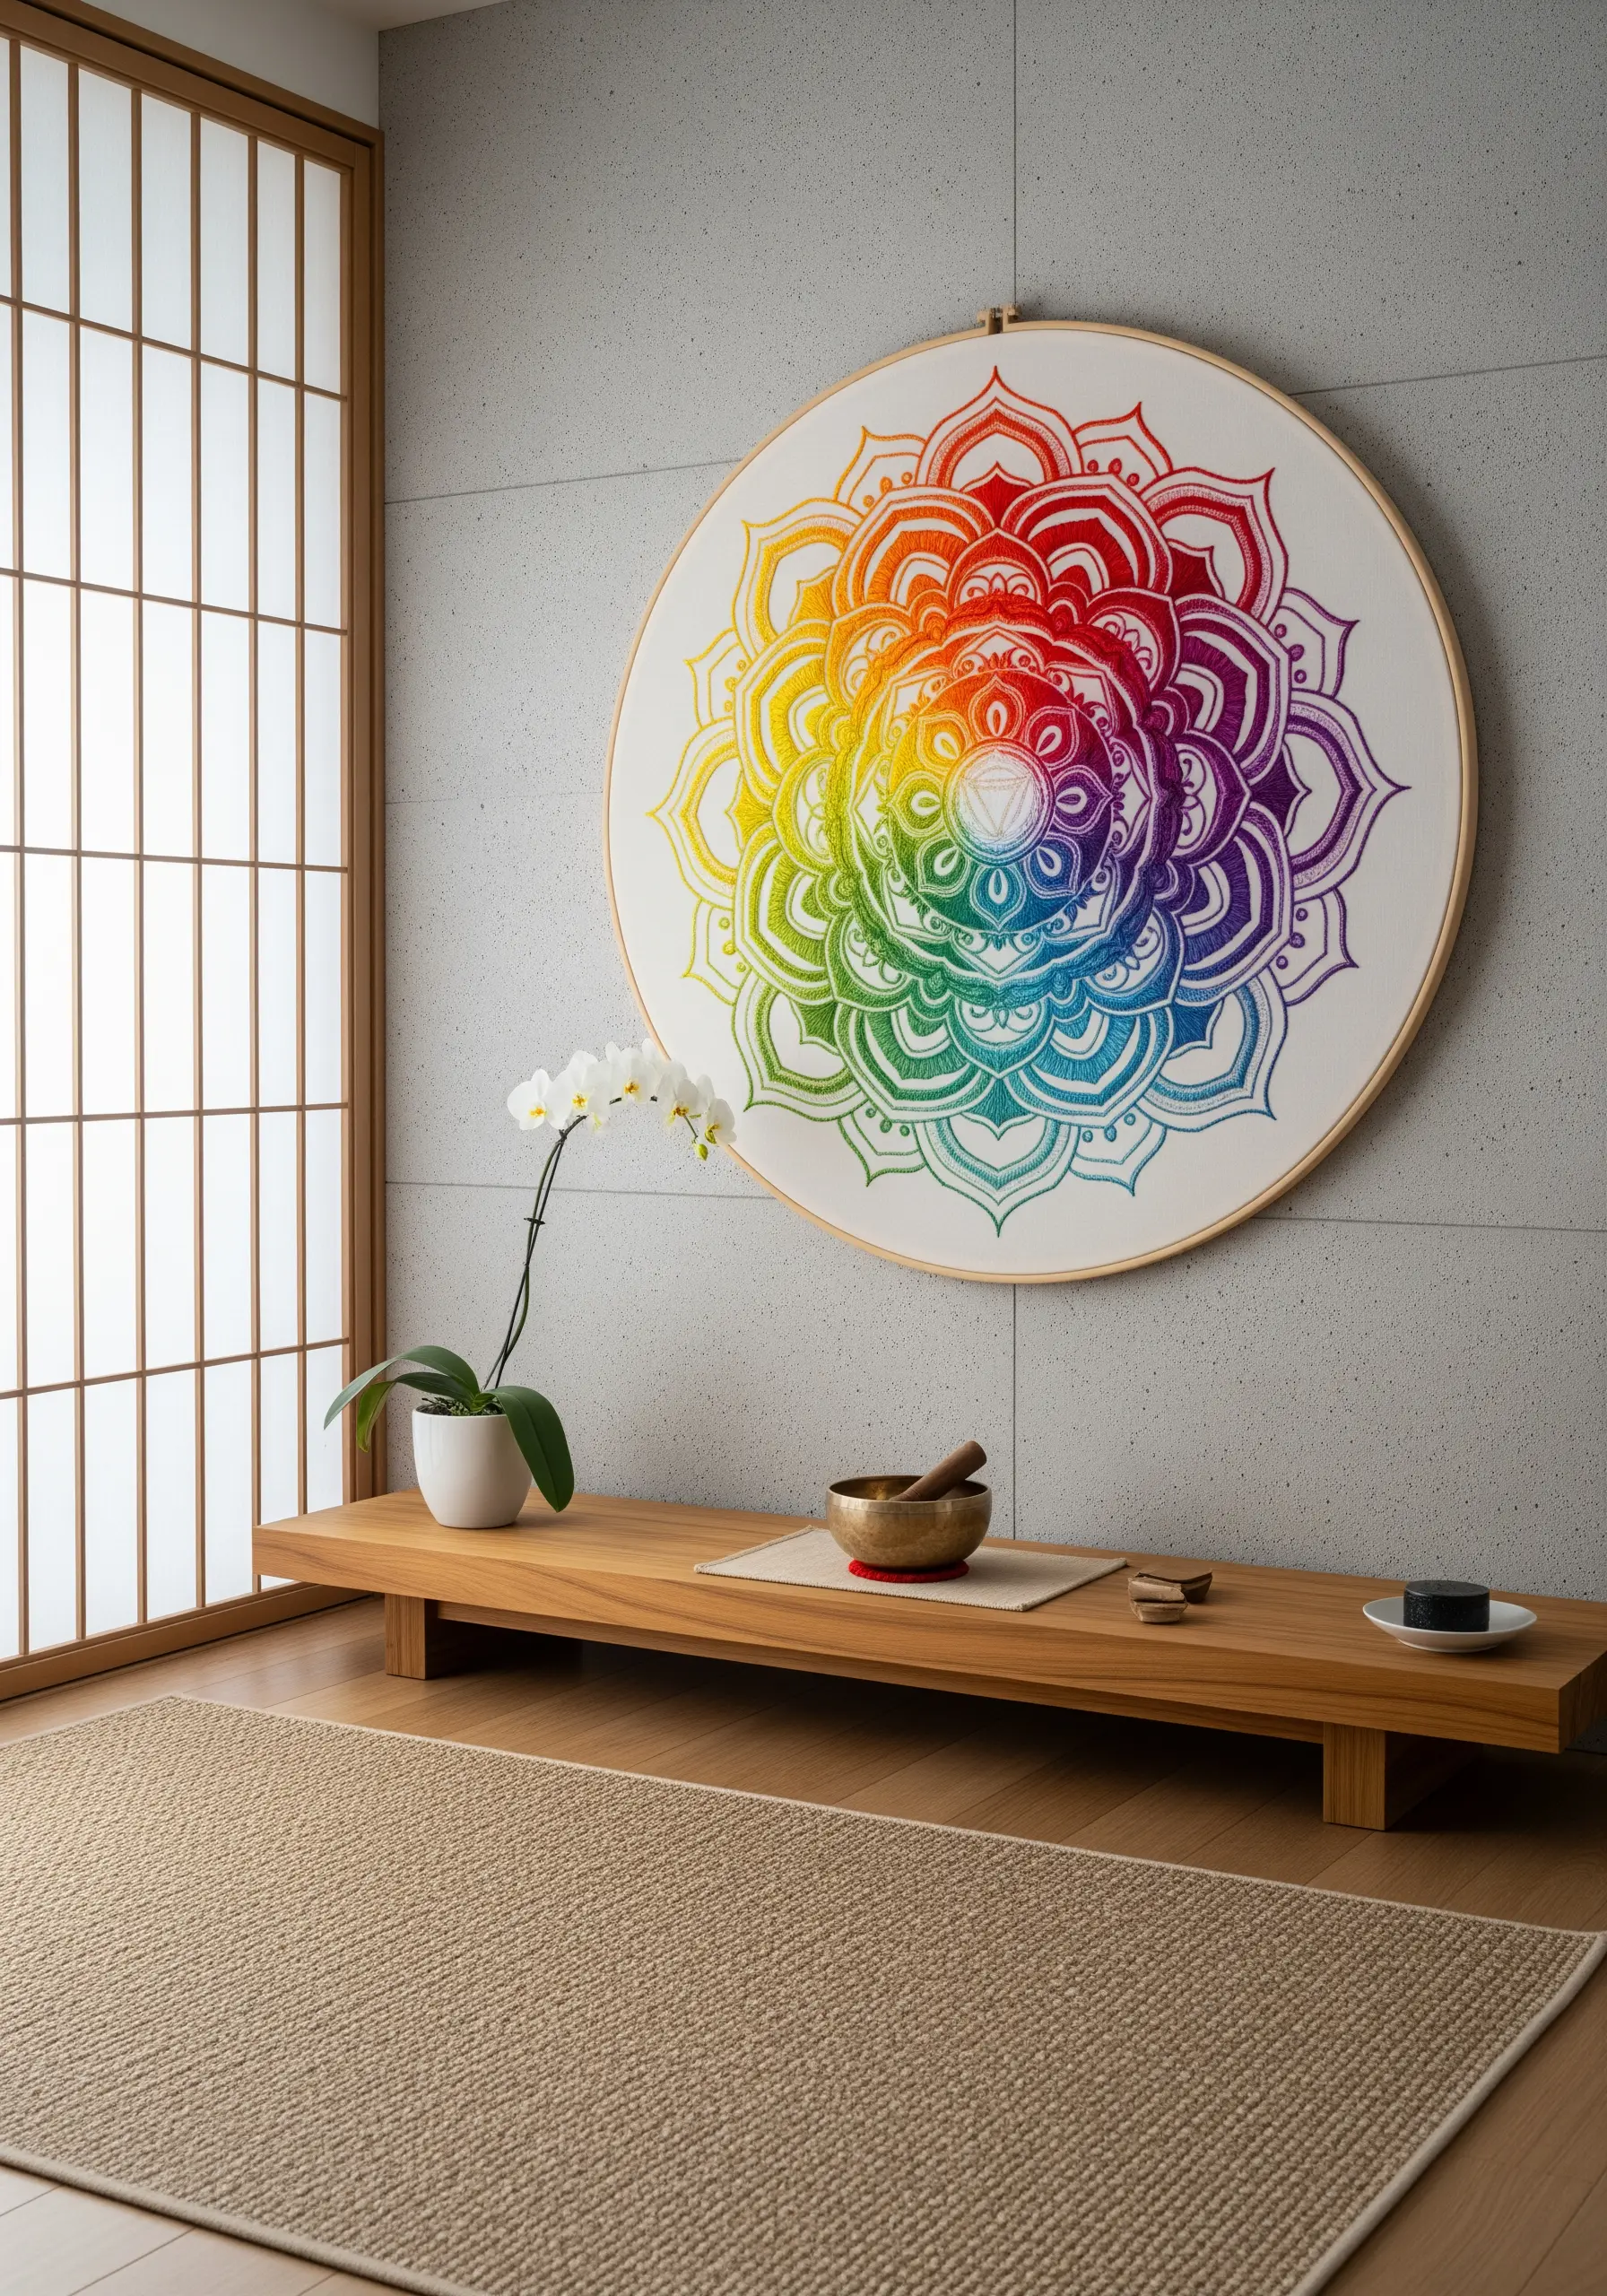
To achieve this seamless rainbow effect, map out your color transitions before you begin stitching.
Use a single strand of thread and the split stitch for outlines; this creates a fine, paint-like line that allows the colors to blend visually without bleeding.
For the fill, a satin stitch works well, but ensure your stitches are angled towards the mandala’s center to enhance the sense of radiating energy.
This oversized hoop transforms a meditative pattern into a powerful focal point for a room.
2. Master High-Contrast Graphic Texture
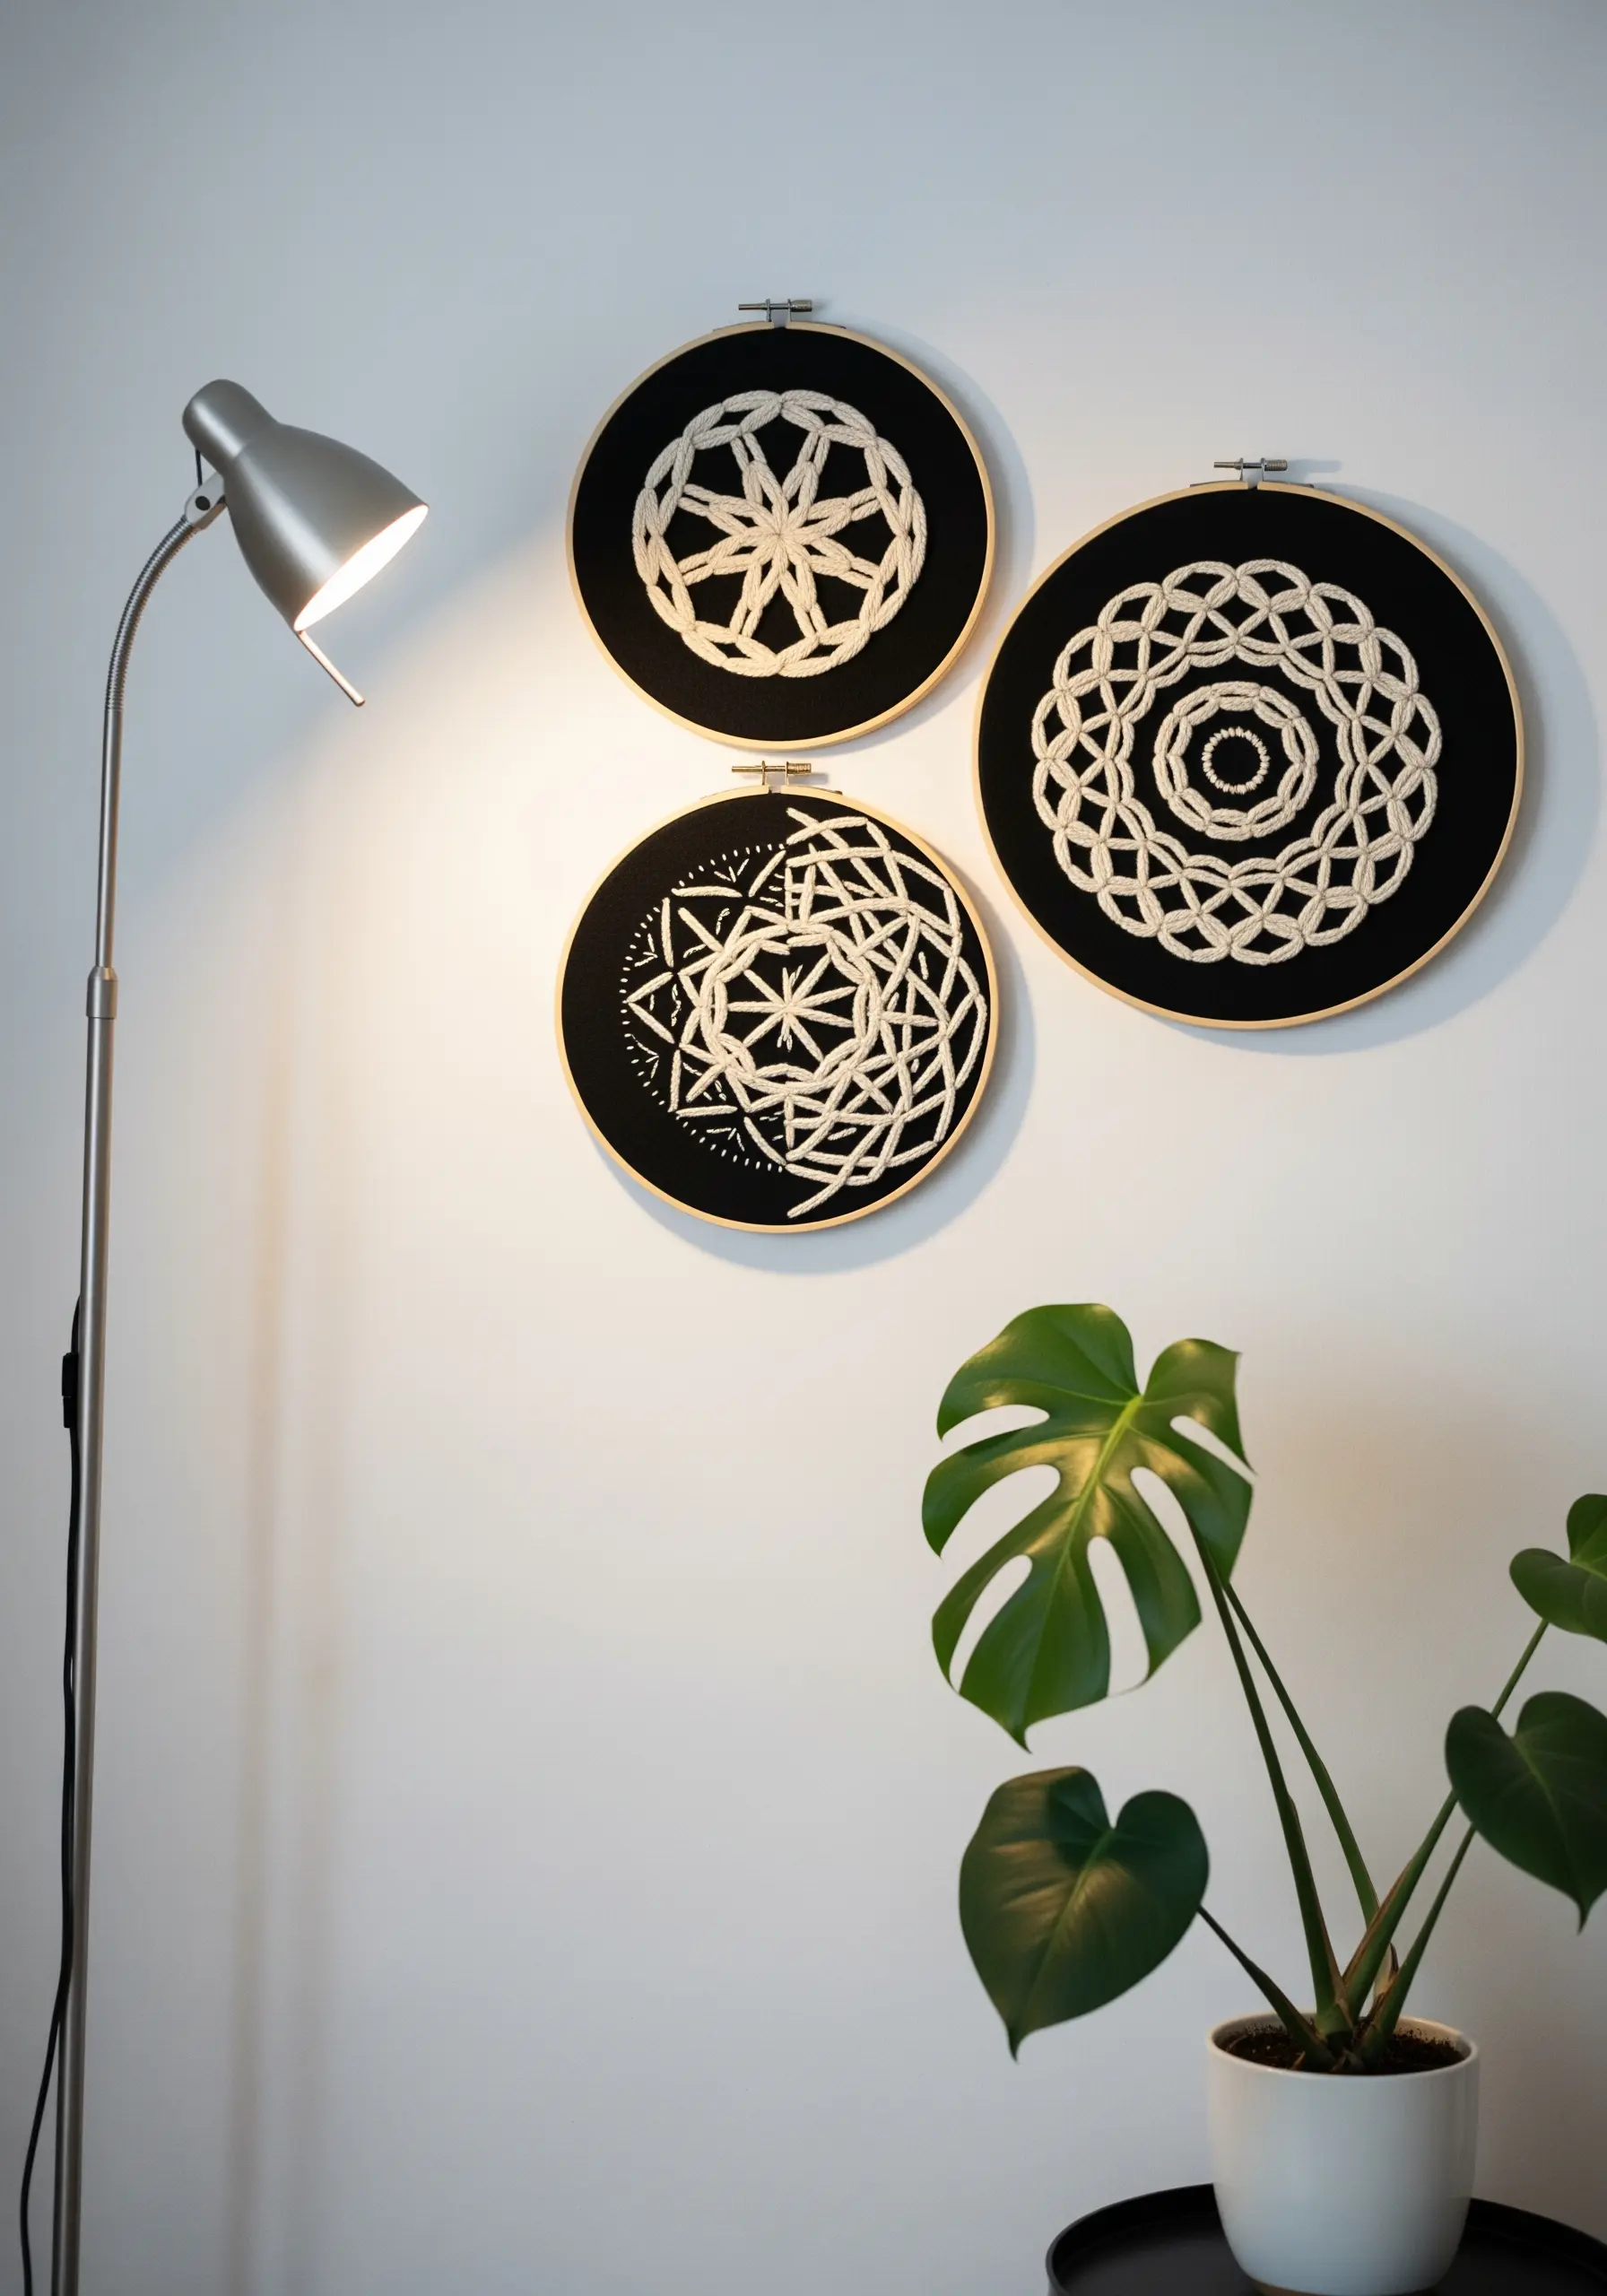
For this bold, modern look, choose a thick cord or yarn instead of standard embroidery floss.
Use the couching technique—laying the thick cord on the fabric’s surface and securing it with small, perpendicular stitches in a matching thin thread—to create clean, sculptural lines.
The stark contrast of ivory against black fabric elevates simple geometric shapes into sophisticated modern geometric thread art.
Grouping hoops of varying sizes and patterns creates a dynamic gallery wall with minimal effort.
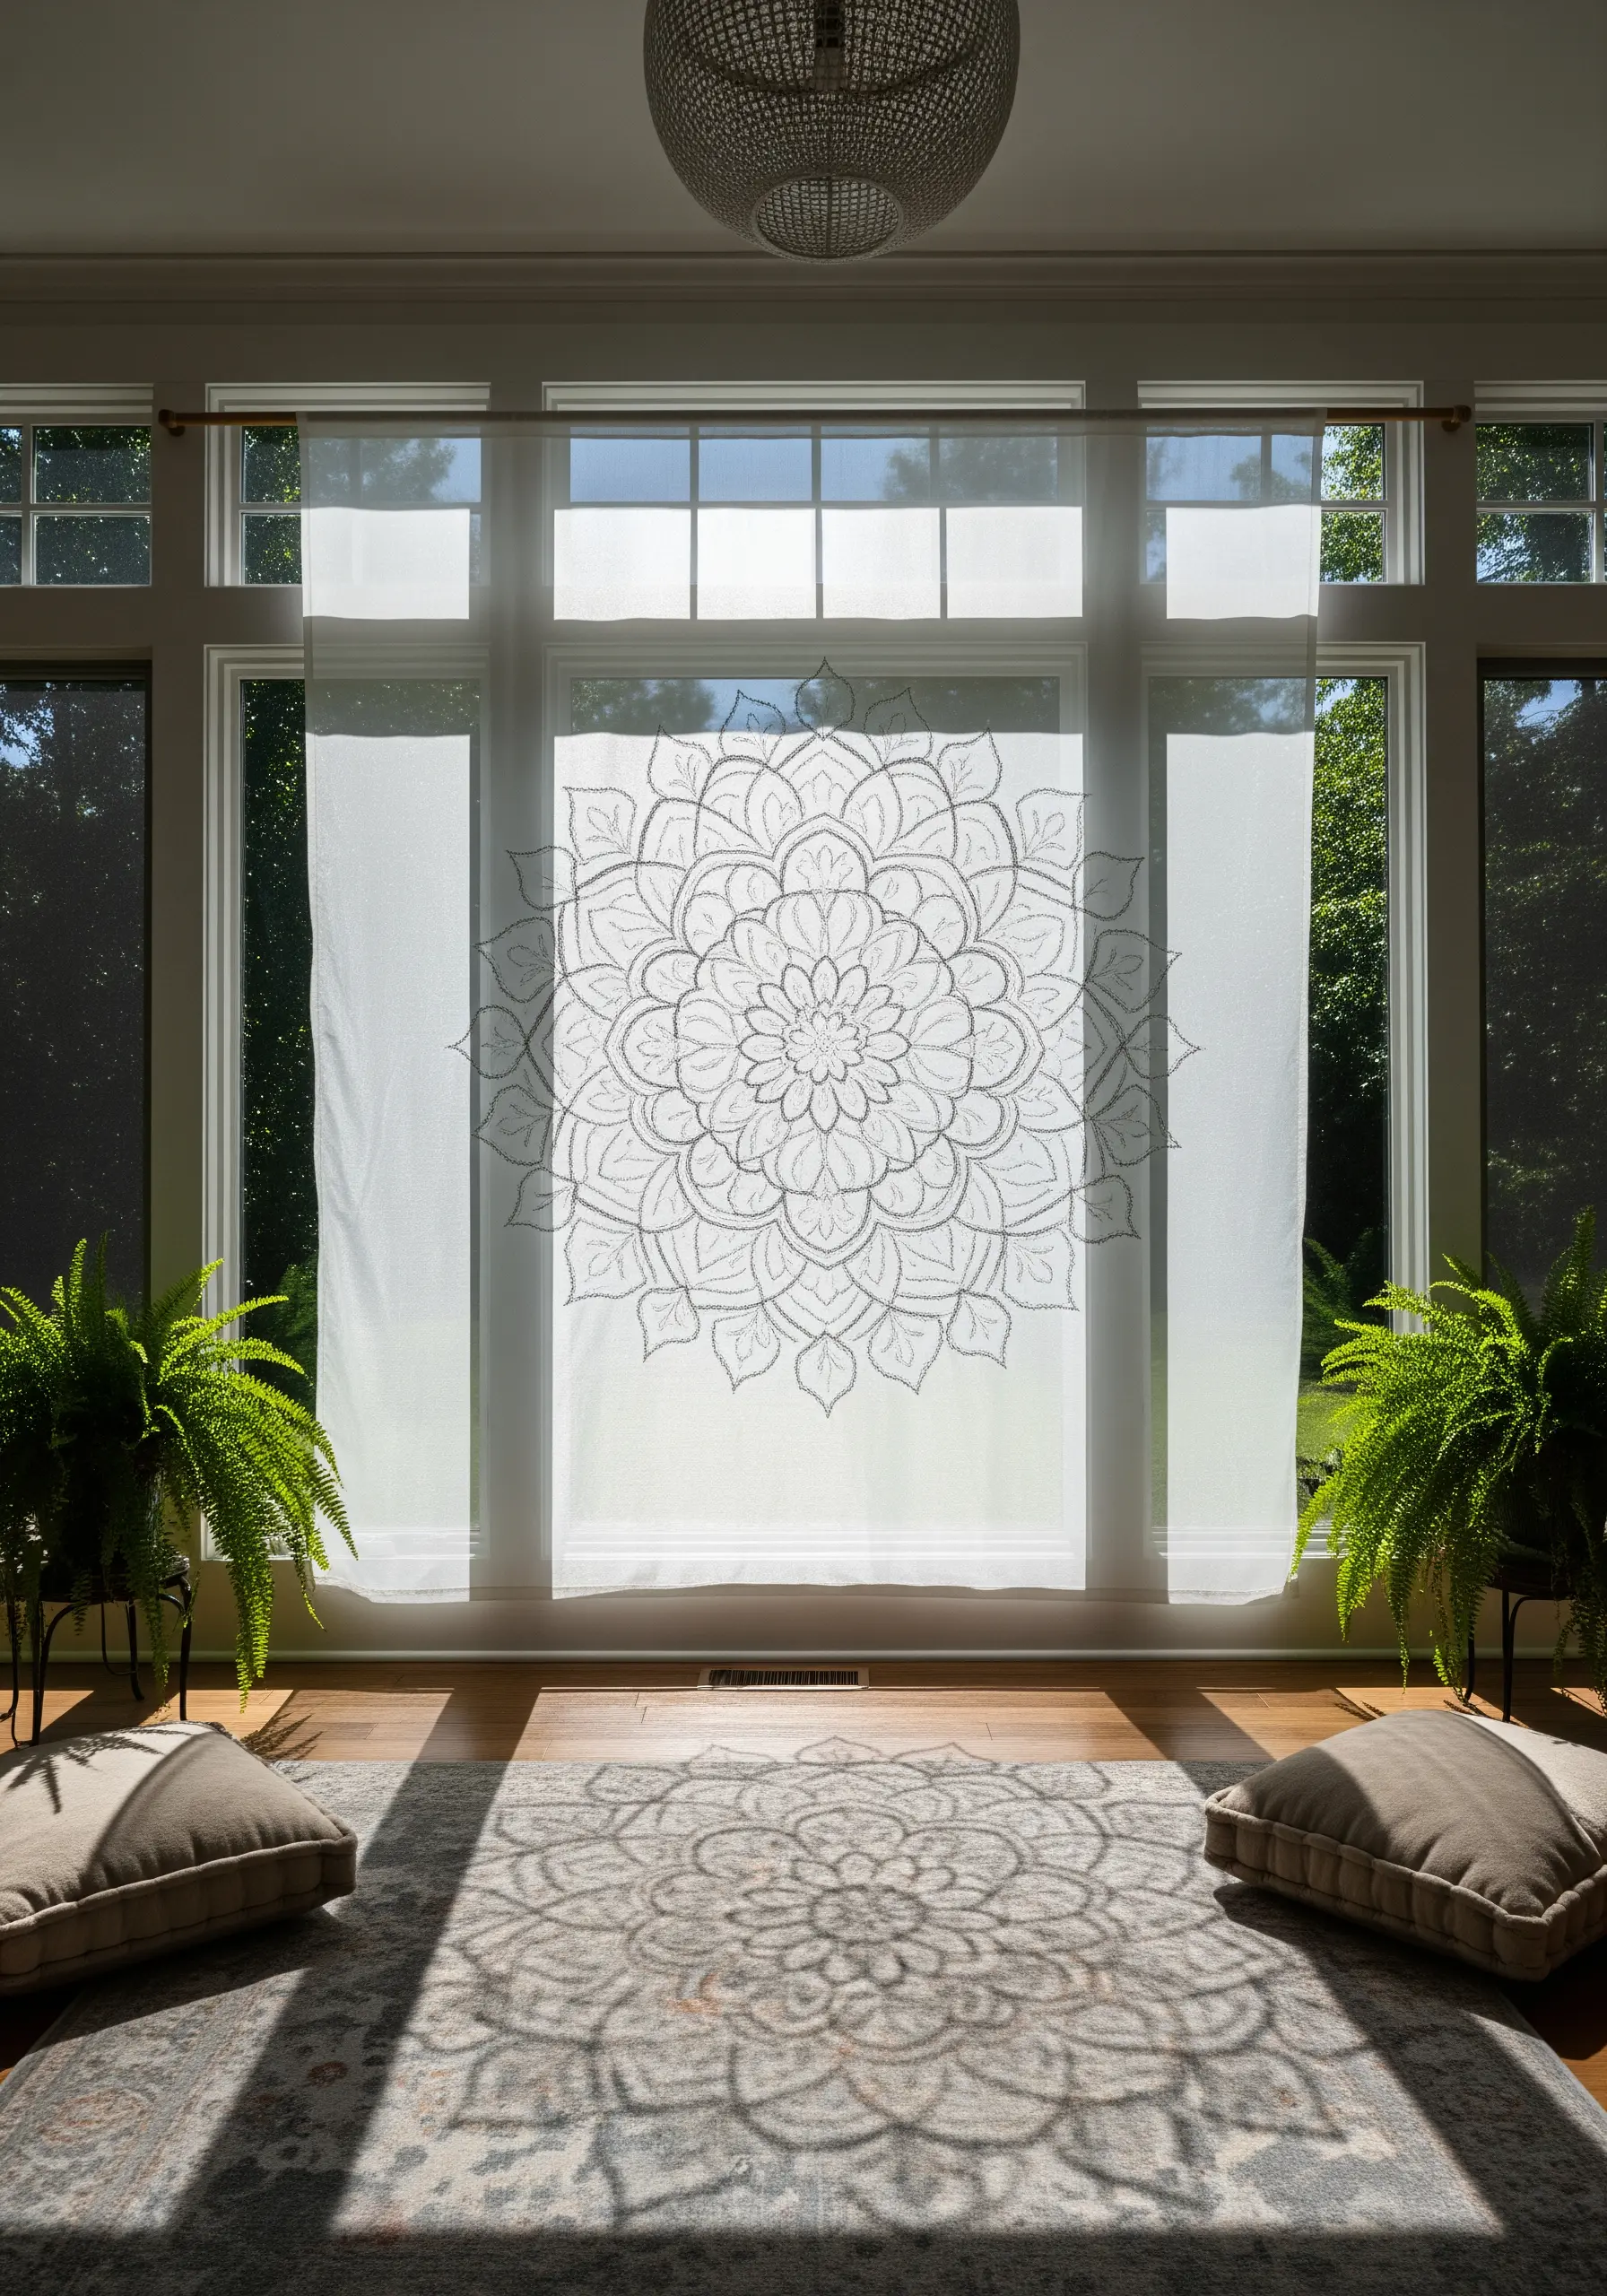
3. Elevate Outlines with Subtle Seed Stitching
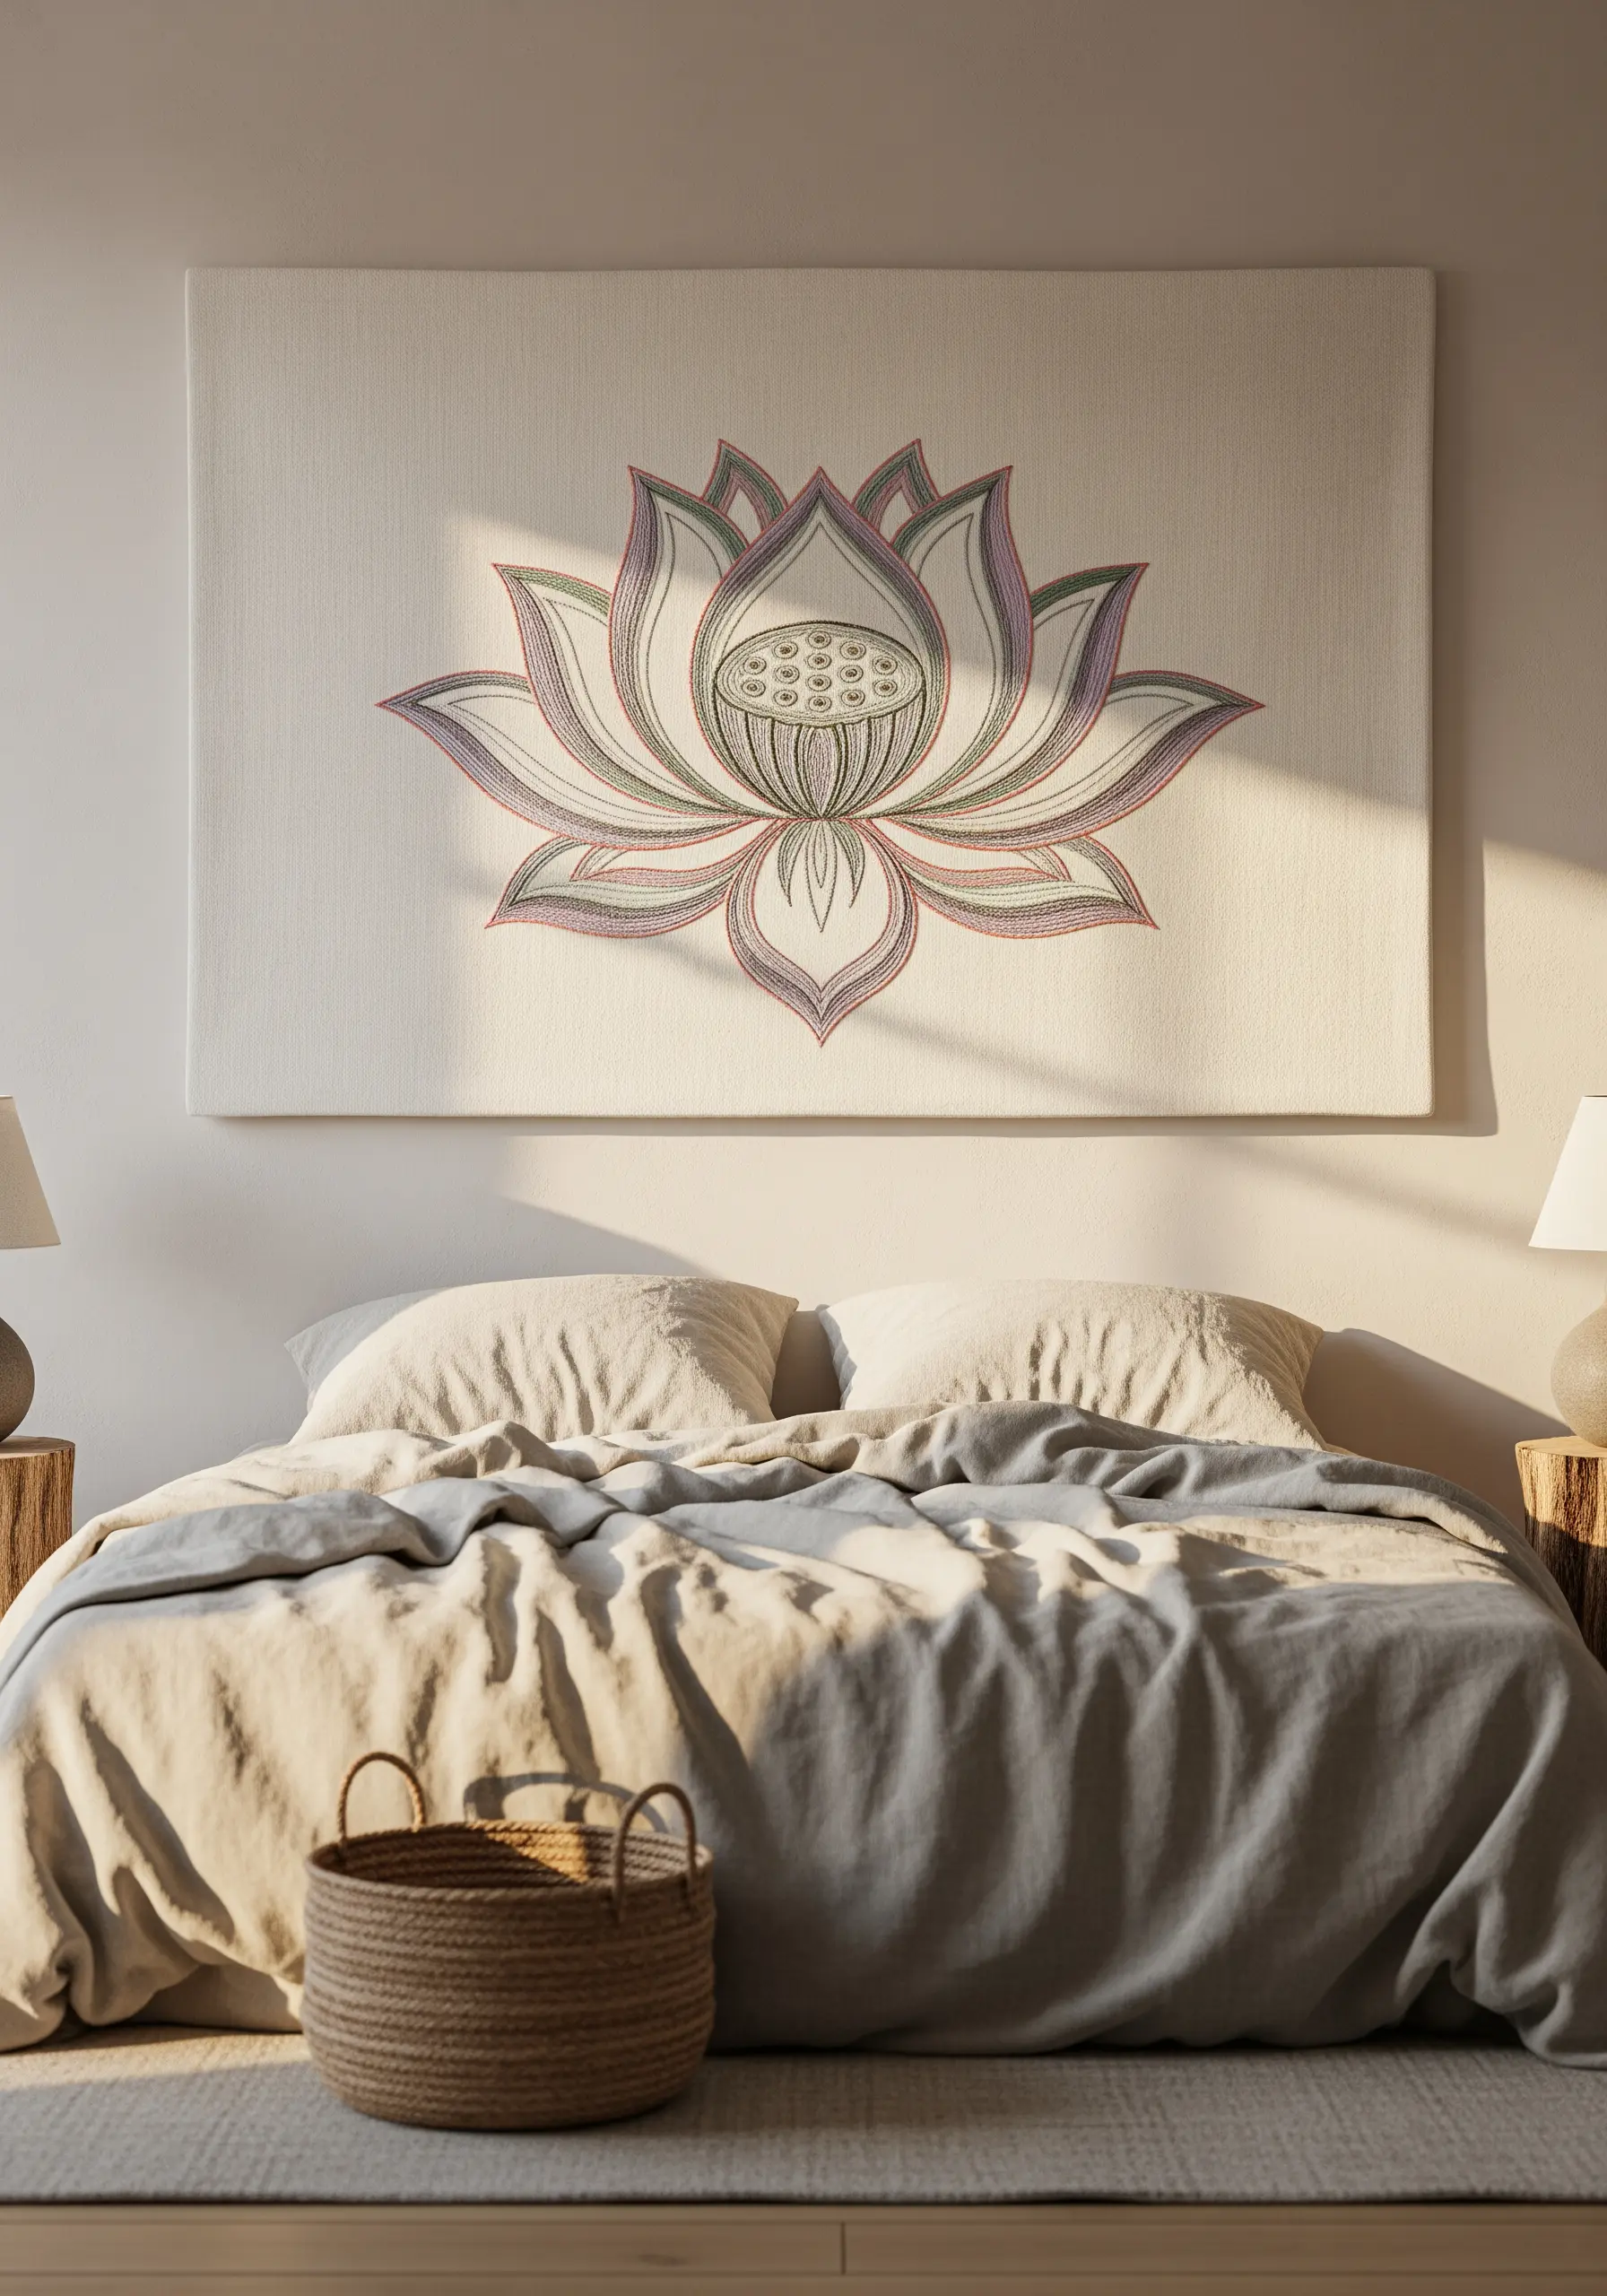
Instead of a dense satin stitch fill, use a scattered seed stitch (tiny, single straight stitches) to add delicate texture inside your outlines.
This technique allows the lotus form to remain the hero of the design while adding a subtle shimmer and depth that catches the light.
Use a thread color just a shade lighter or darker than your fabric for a tone-on-tone effect that feels both luxurious and calming.
Stretching your finished work over a canvas frame is a sophisticated alternative to hoop display, perfect for creating bedroom embroidery accents.
4. Build Dimension with Layered Leaf Stitches
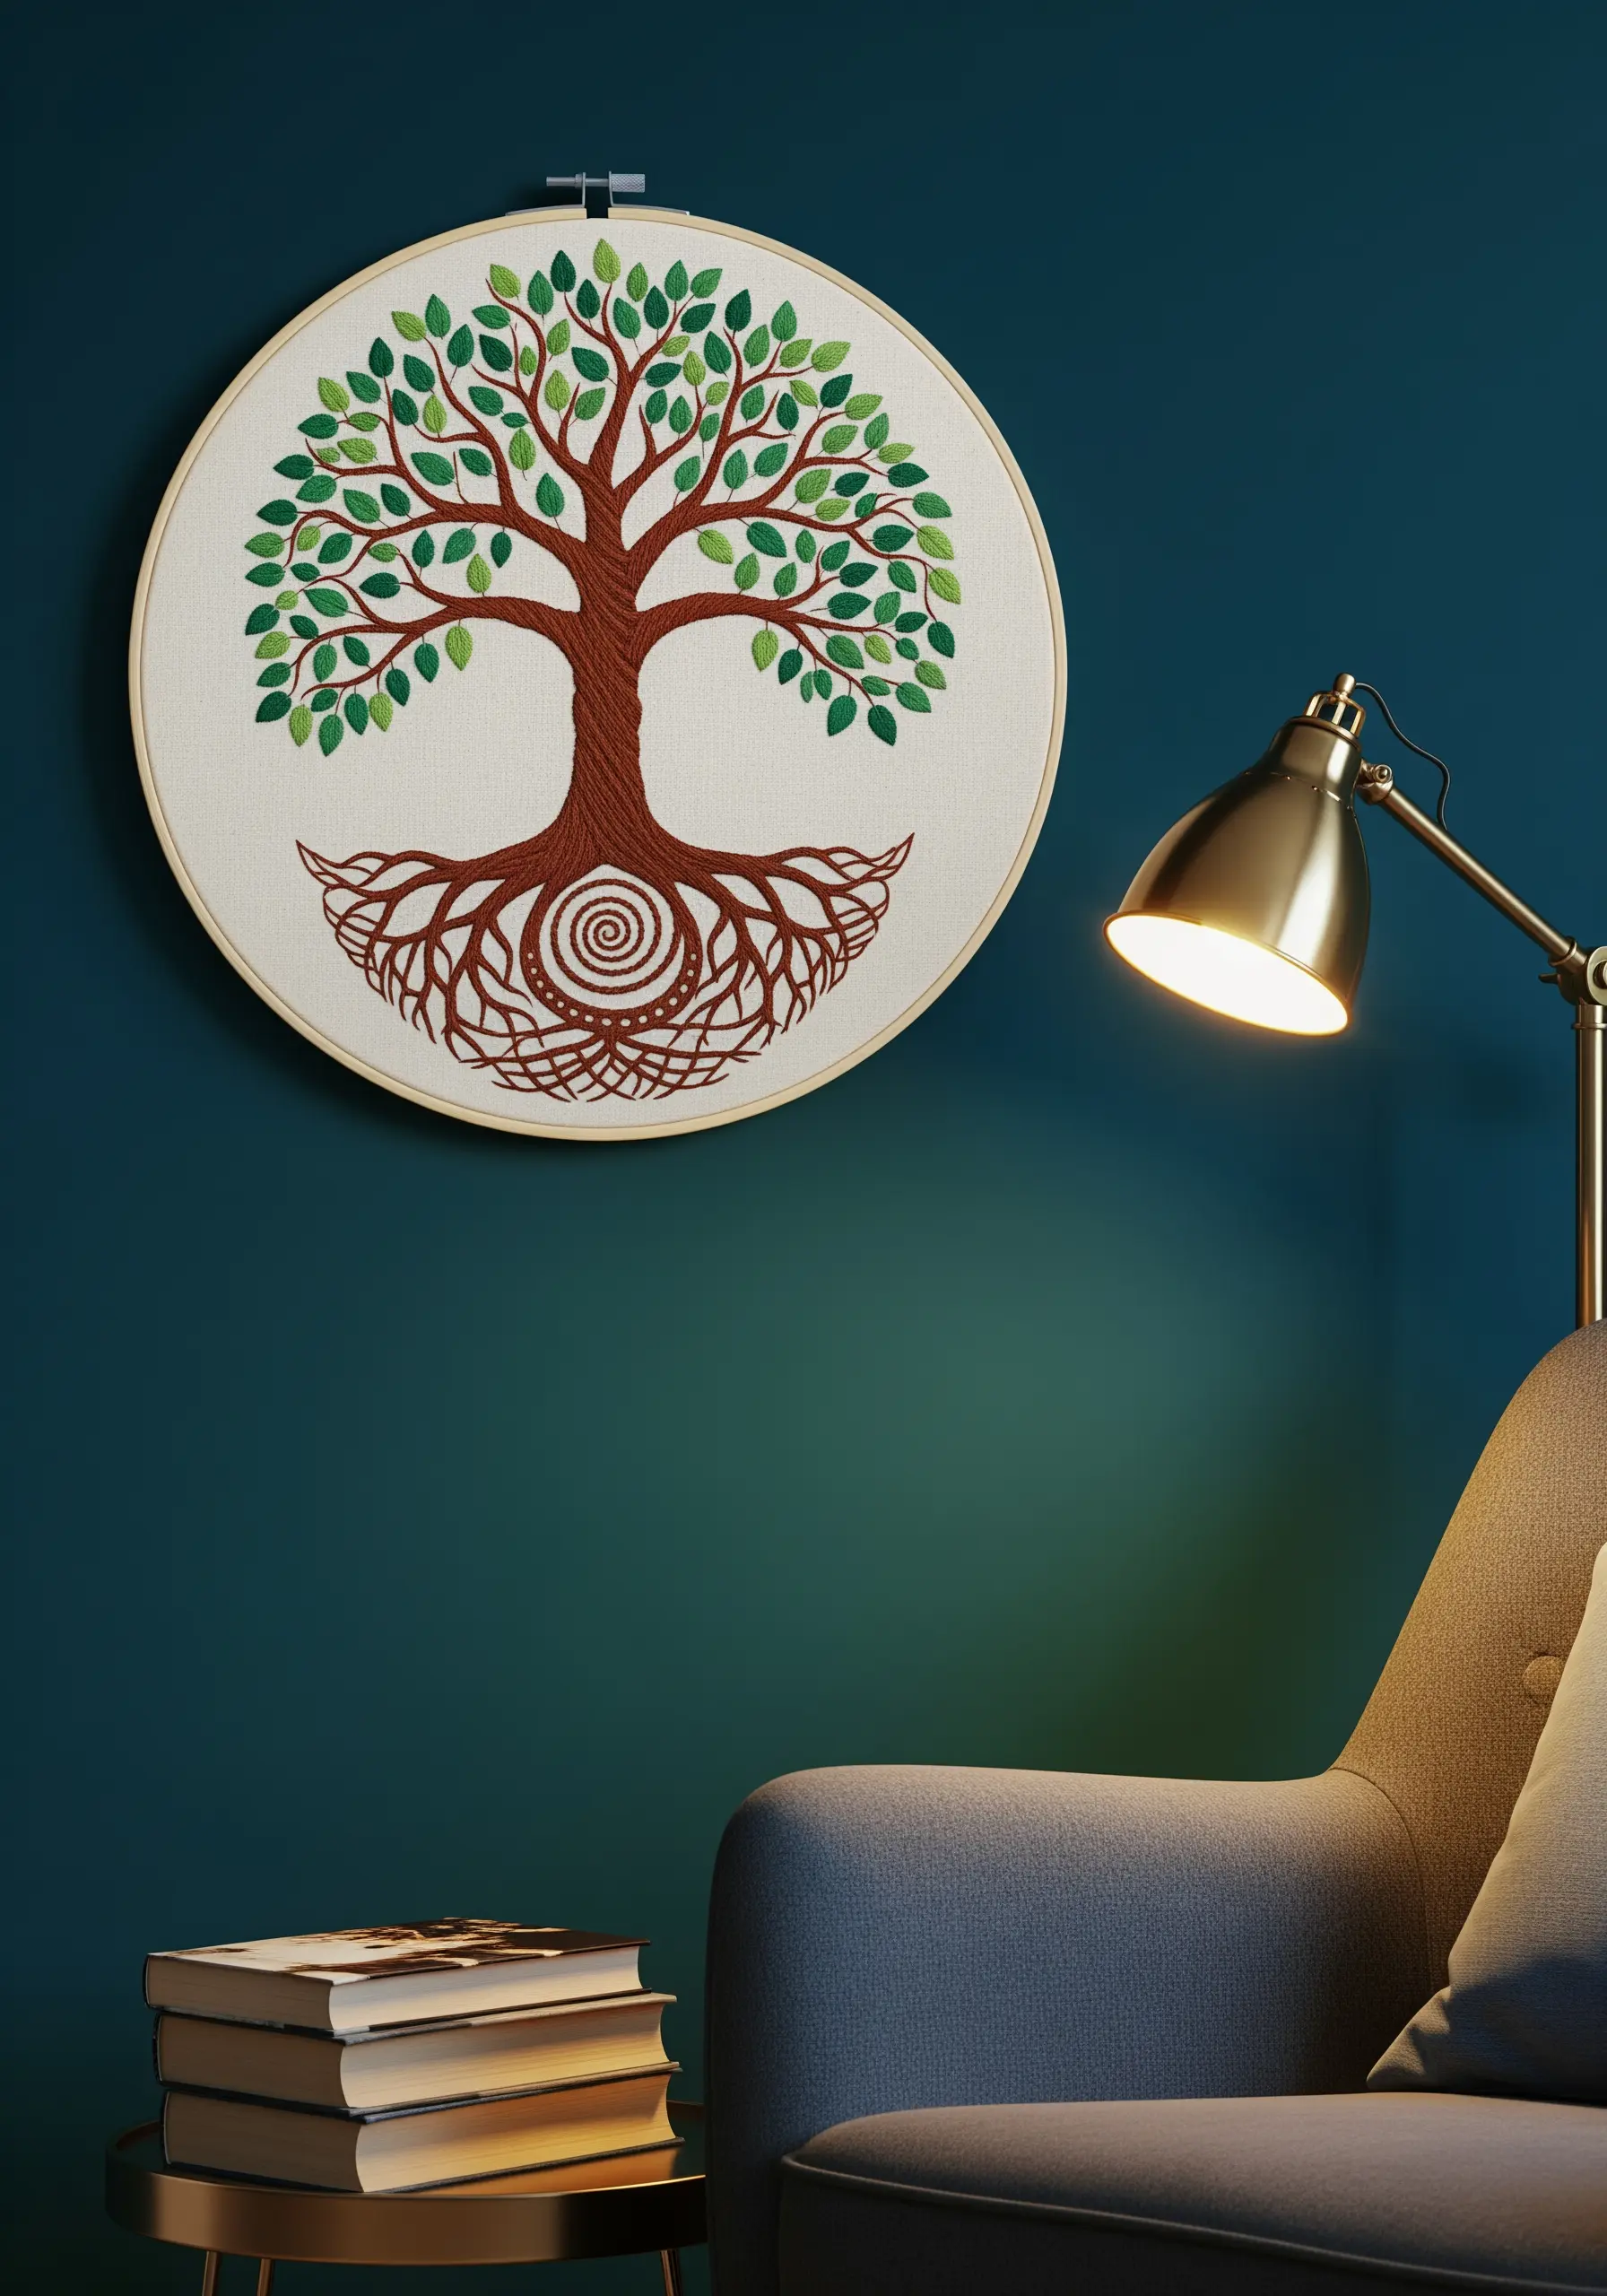
Create a lush, three-dimensional Tree of Life by varying your leaf stitches.
Use the fishbone stitch for the larger, outer leaves to create a defined central vein, and switch to a simpler satin stitch for the smaller, inner leaves.
This subtle variation adds realistic depth and directs the eye inward.
For the roots, use a whipped backstitch to create a raised, cord-like texture that contrasts beautifully with the flat stitches of the leaves.
5. Curate a Thematic Hoop Collection
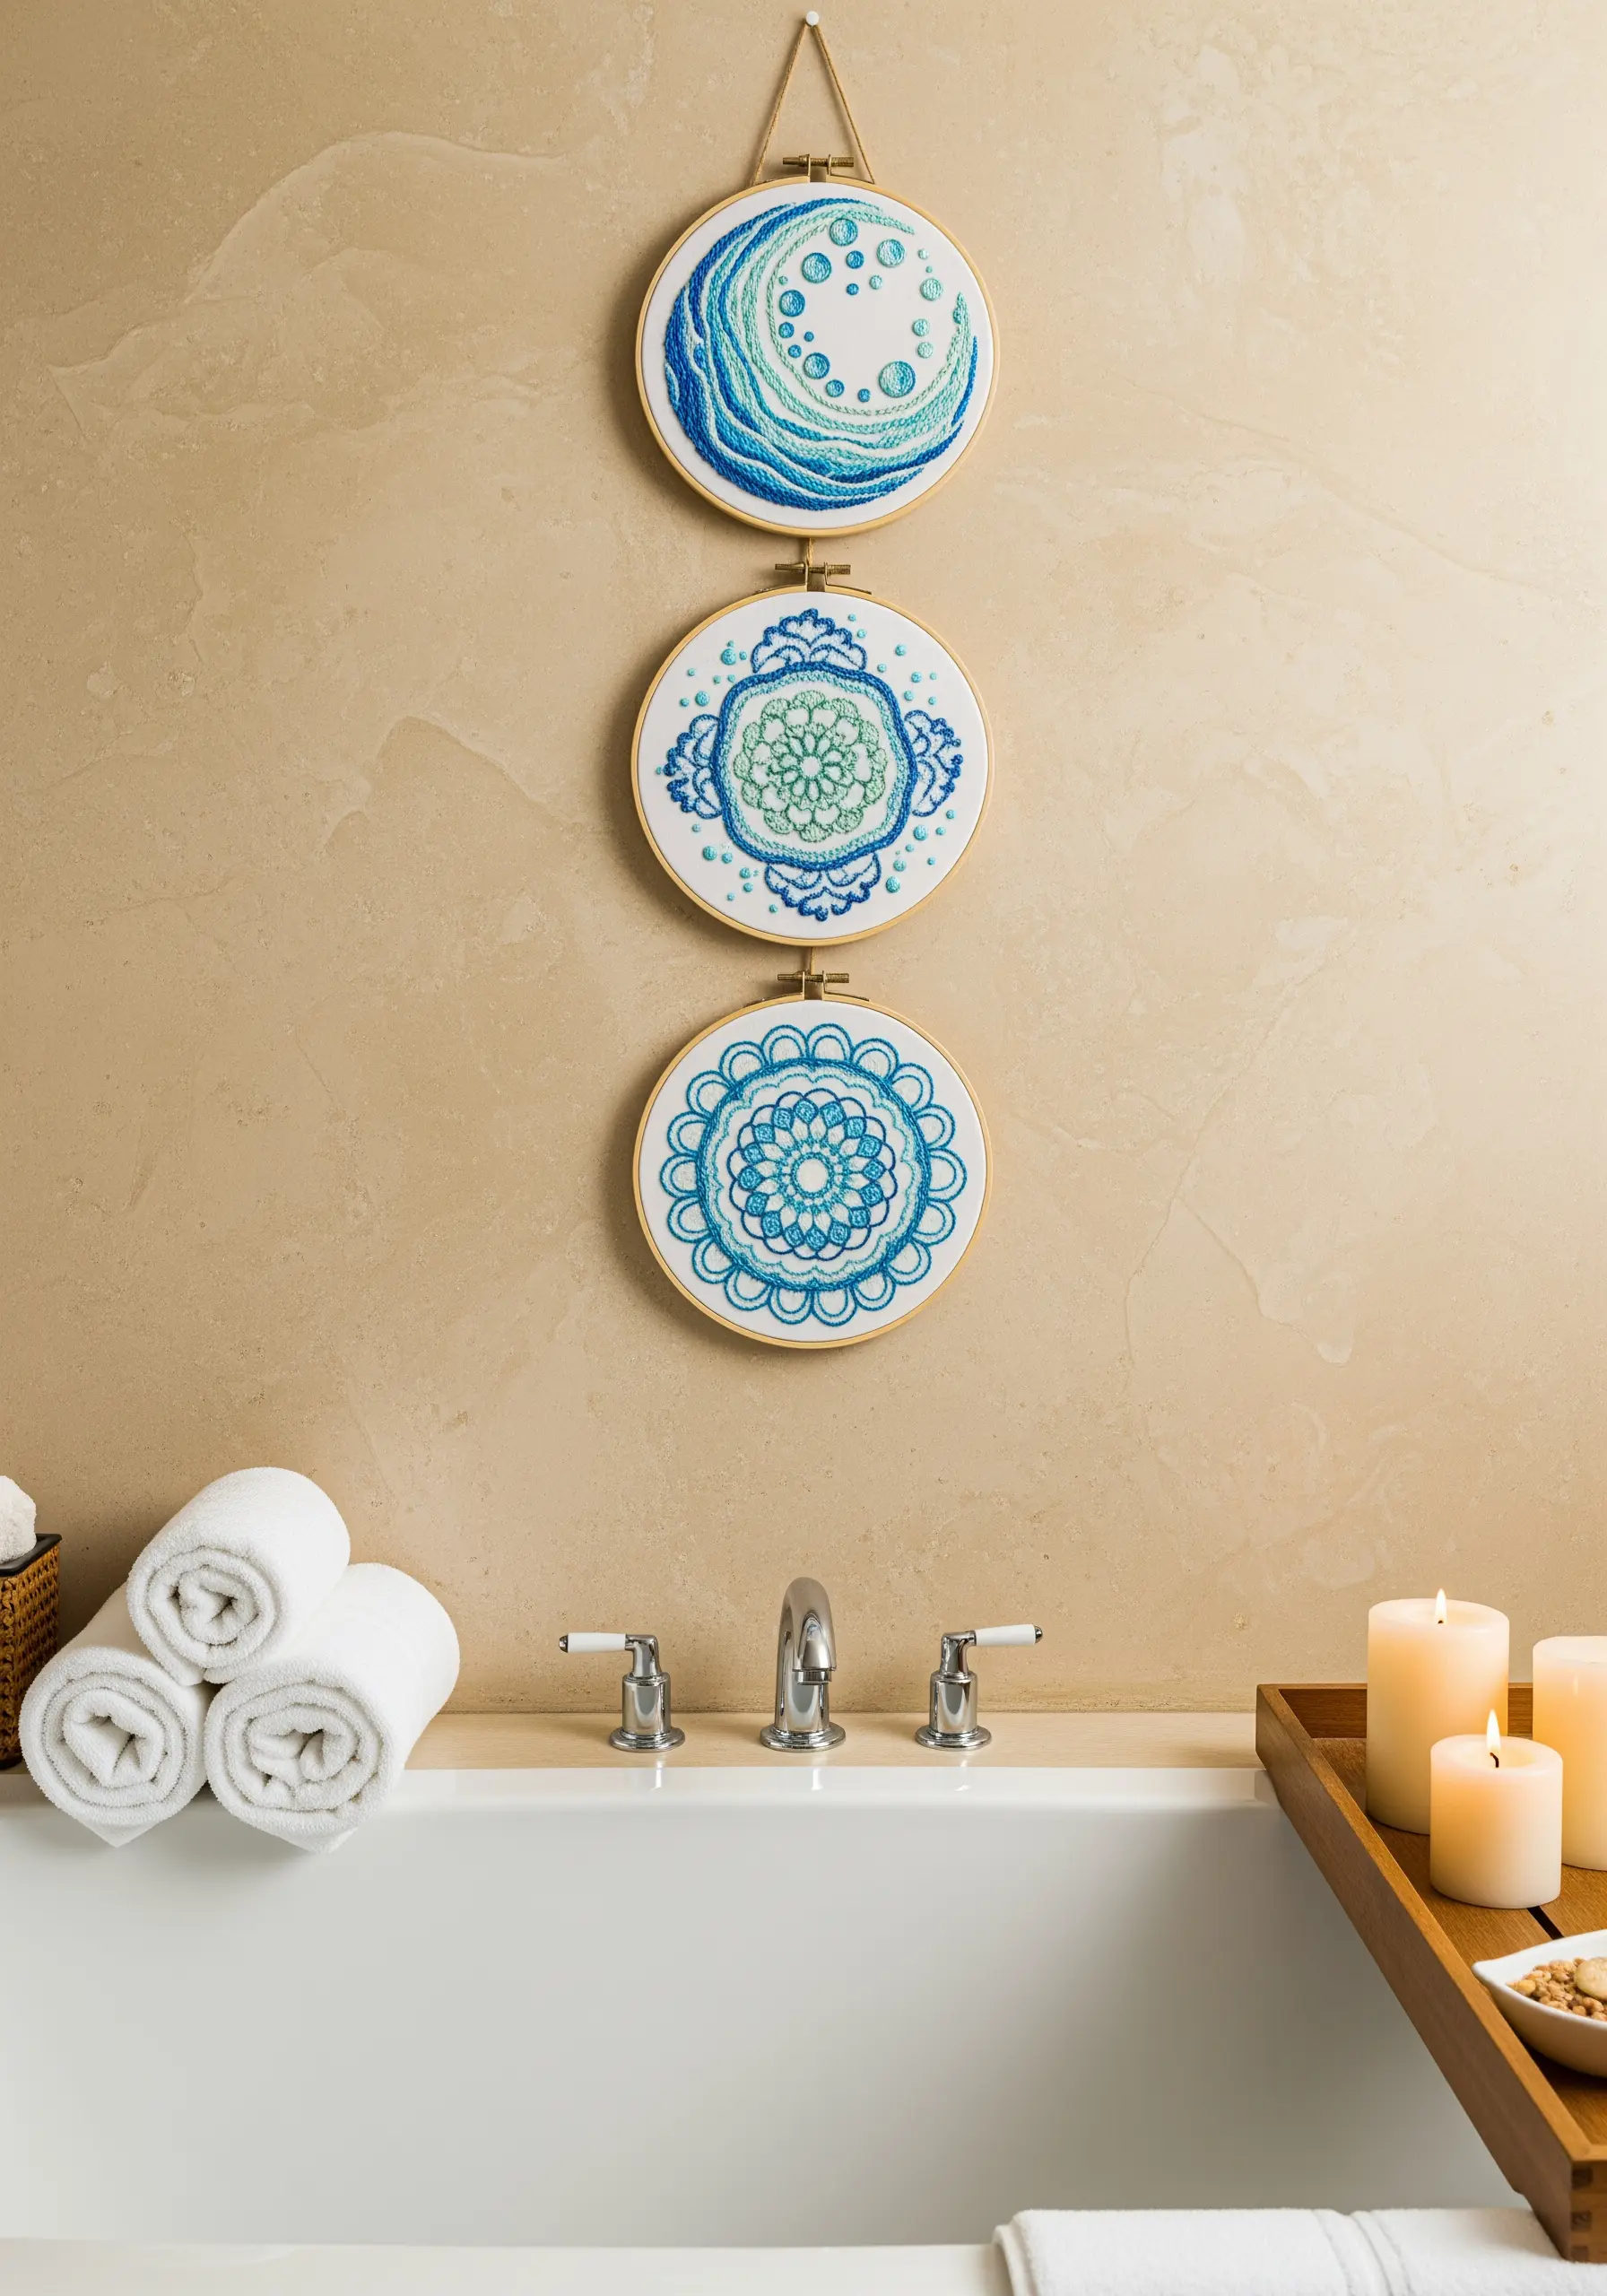
Tell a story on your wall by grouping hoops with a unified theme, like these water-inspired mandalas.
Use a consistent color palette—here, shades of blue and seafoam green—to tie the different designs together.
Introduce texture by incorporating French knots as bubbles or using a whipped backstitch to mimic the flow of water.
This approach allows you to explore different patterns and techniques while creating a cohesive piece of wall hoop art.
6. Go Bold with a Large-Scale Sunburst Tapestry
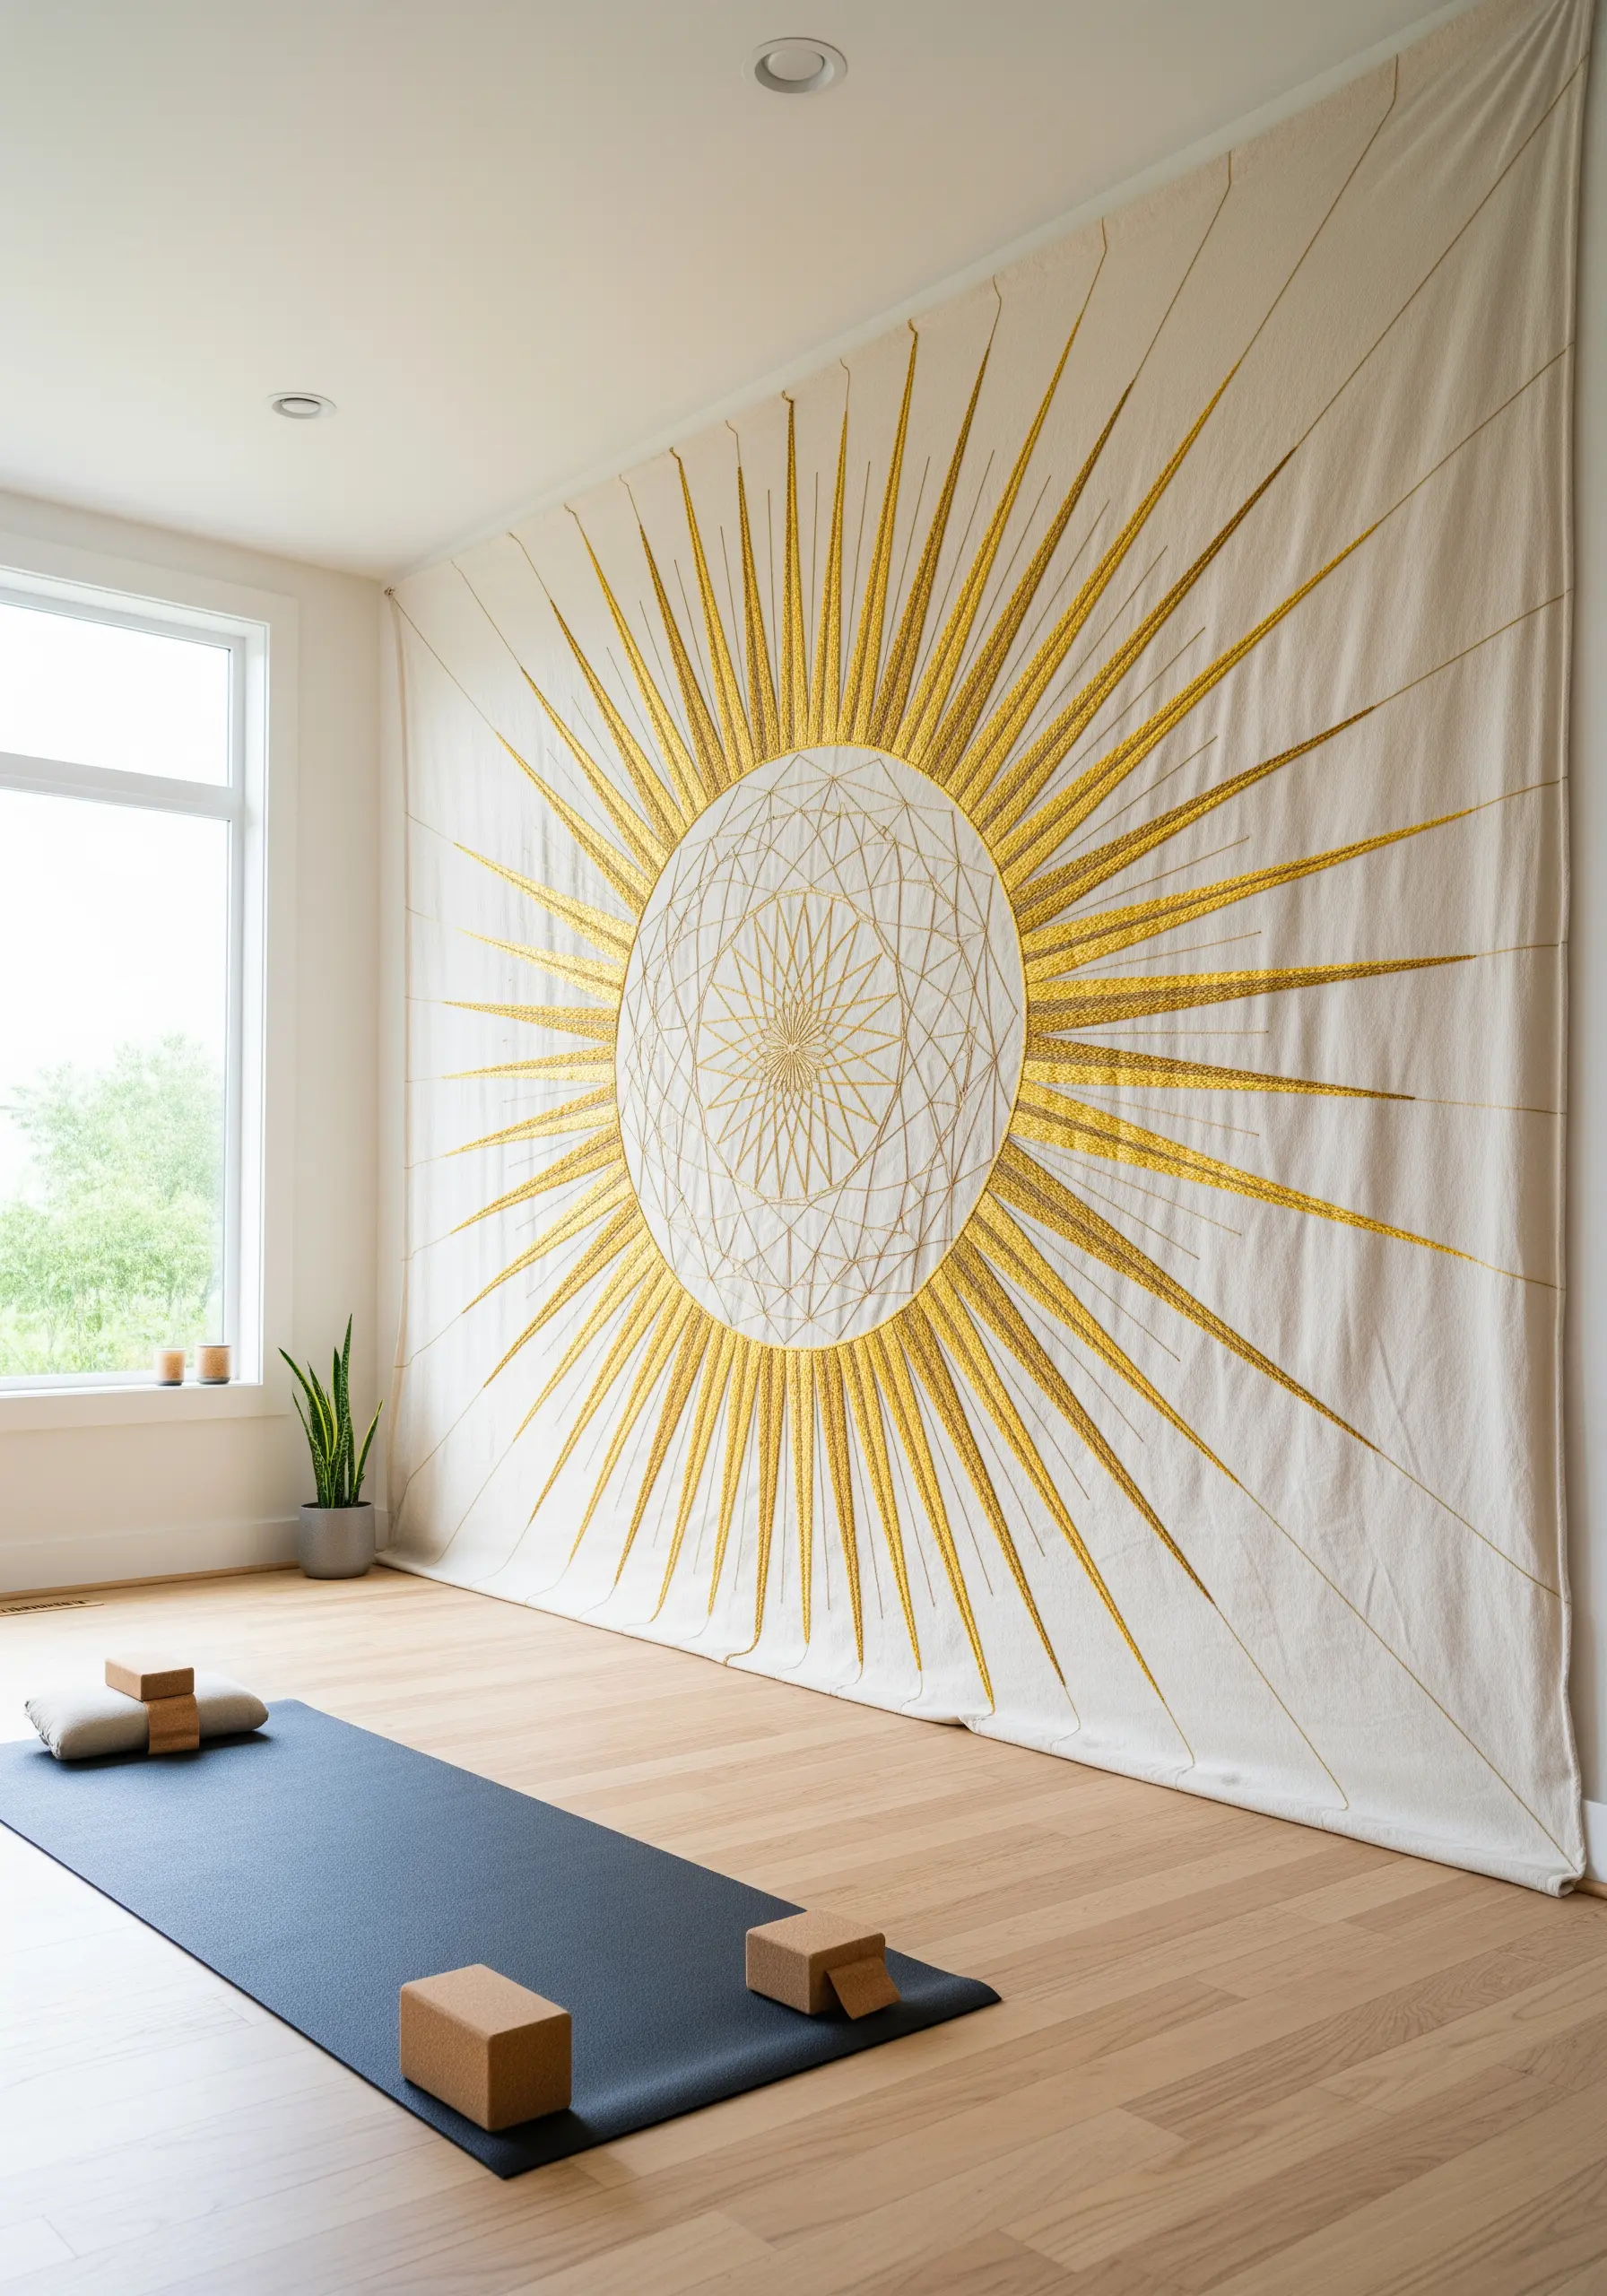
To create a design of this scale, your fabric must be perfectly taut. Use a quilting frame or stretch and pin the fabric to a clean wall or floor to maintain tension.
For the long, radiating lines, use a single, strong stitch like a stem stitch, which creates a rope-like effect that won’t sag over distance.
Working with metallic thread can be challenging; use shorter lengths (no more than 18 inches) and a thread conditioner like beeswax to prevent fraying and tangling.
This is one of those large-scale embroidery tapestries that truly transforms a space.
7. Arrange a Botanical Gallery Wall
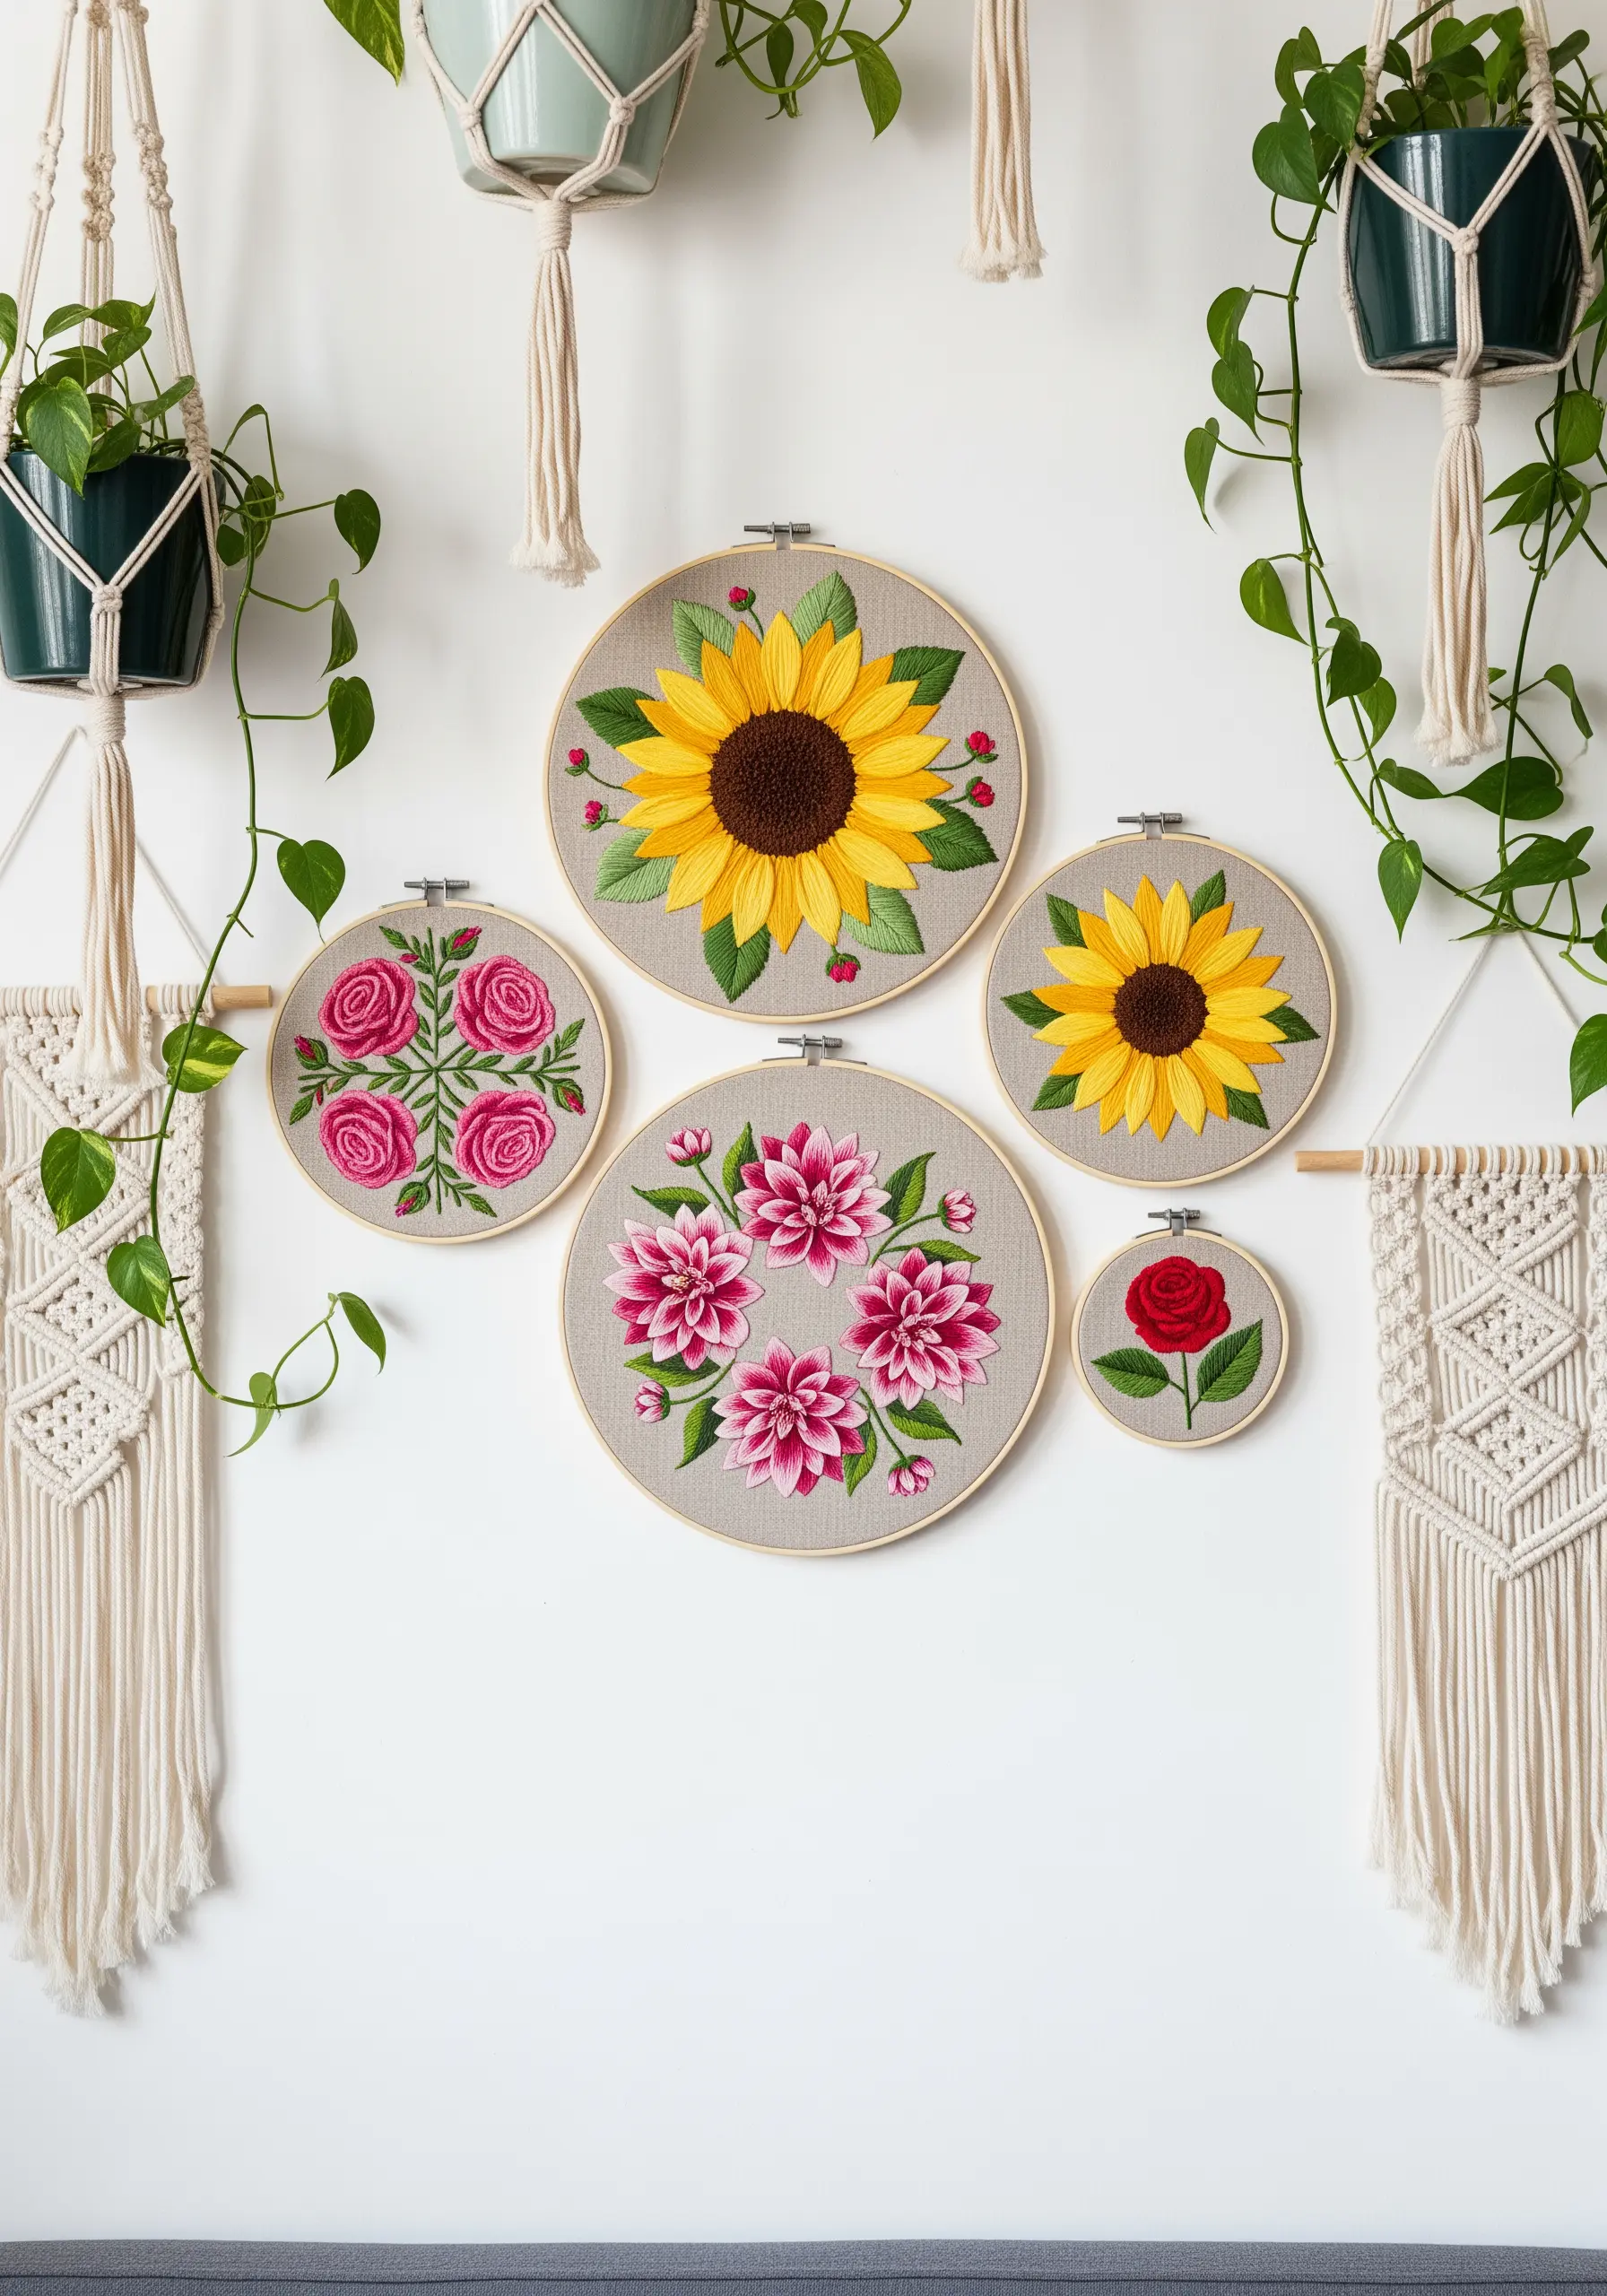
Create a vibrant, indoor garden by clustering floral hoops of different sizes.
To make each flower pop, use the long and short stitch for petal shading, which creates a much smoother color gradient than satin stitch alone.
Use a neutral linen fabric as your base; its subtle texture prevents the background from feeling flat and complements the organic nature of the flowers.
This is a perfect way to practice gradient petal techniques while building a stunning display.
8. Achieve Precision with White on Black
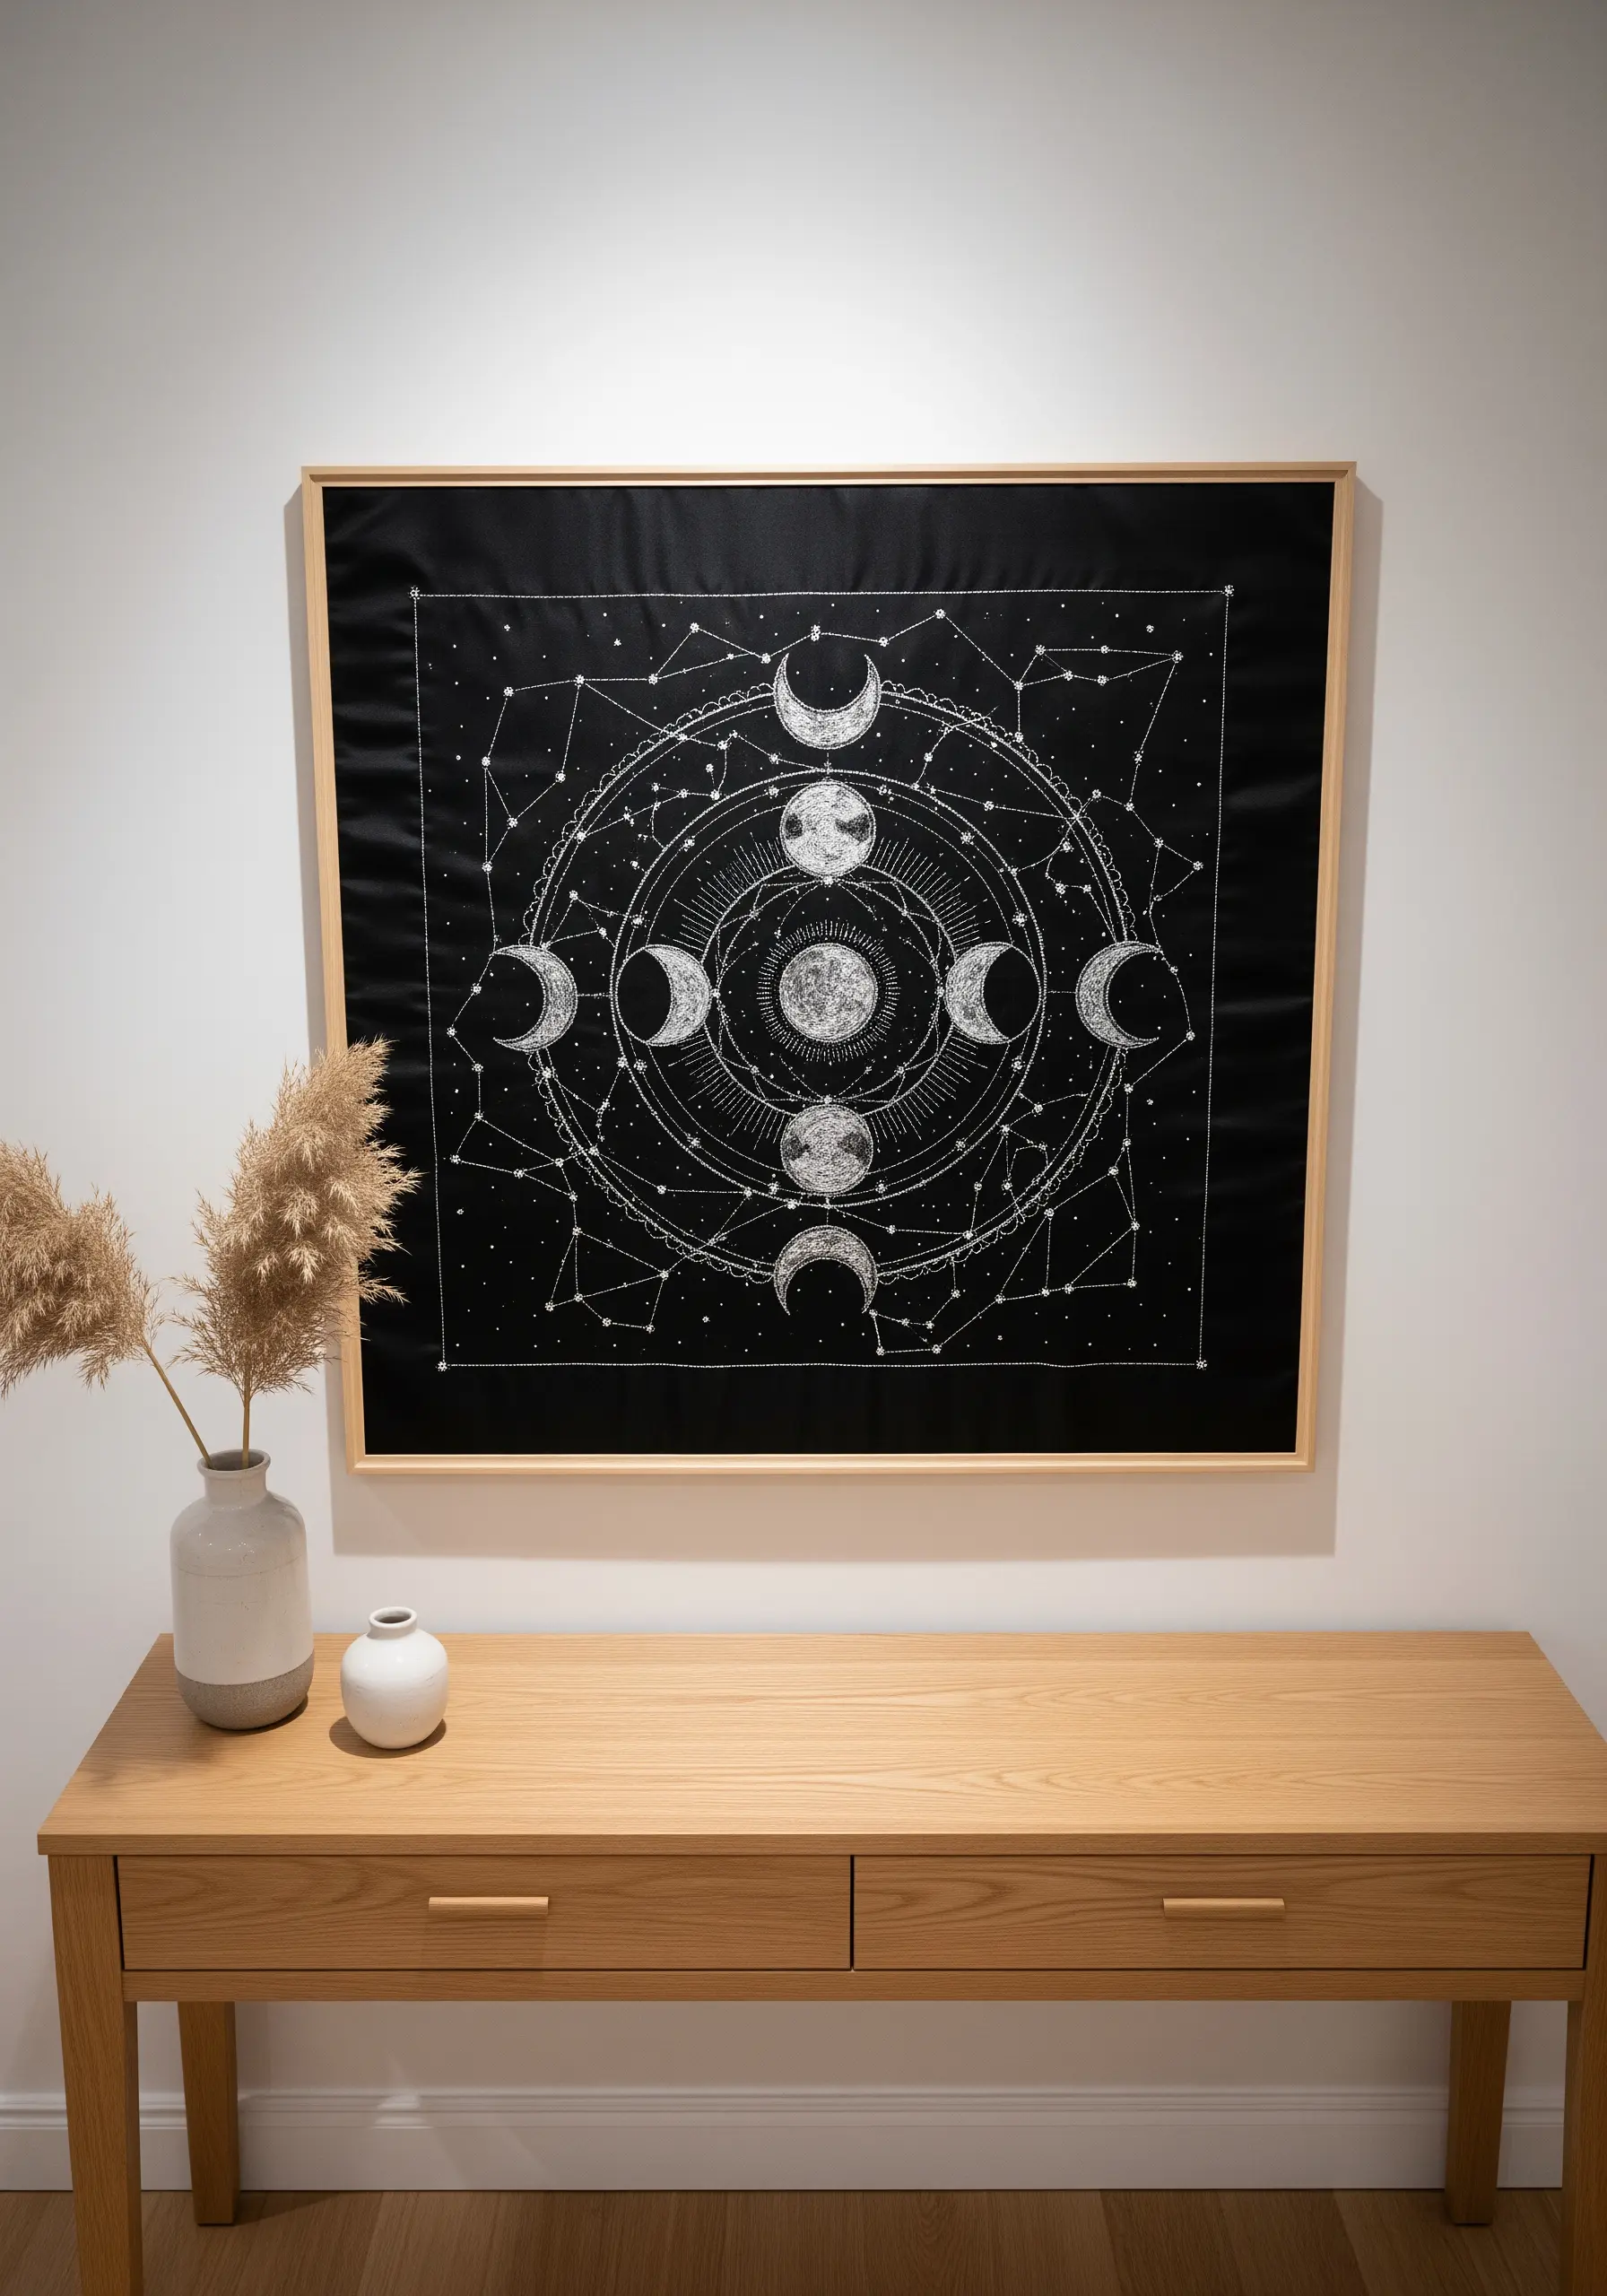
Stitching with white thread on black fabric demands precision, as every stitch is highly visible.
Use a single strand of white floss and a sharp needle to execute crisp backstitches for the constellations and outlines.
For the filled areas, like the moon phases, use a tightly packed satin stitch, ensuring each stitch lies perfectly parallel to the next for a smooth, high-sheen finish.
A simple, light wood frame enhances the graphic quality without competing with the intricate design of these minimalist embroidery wall pieces.
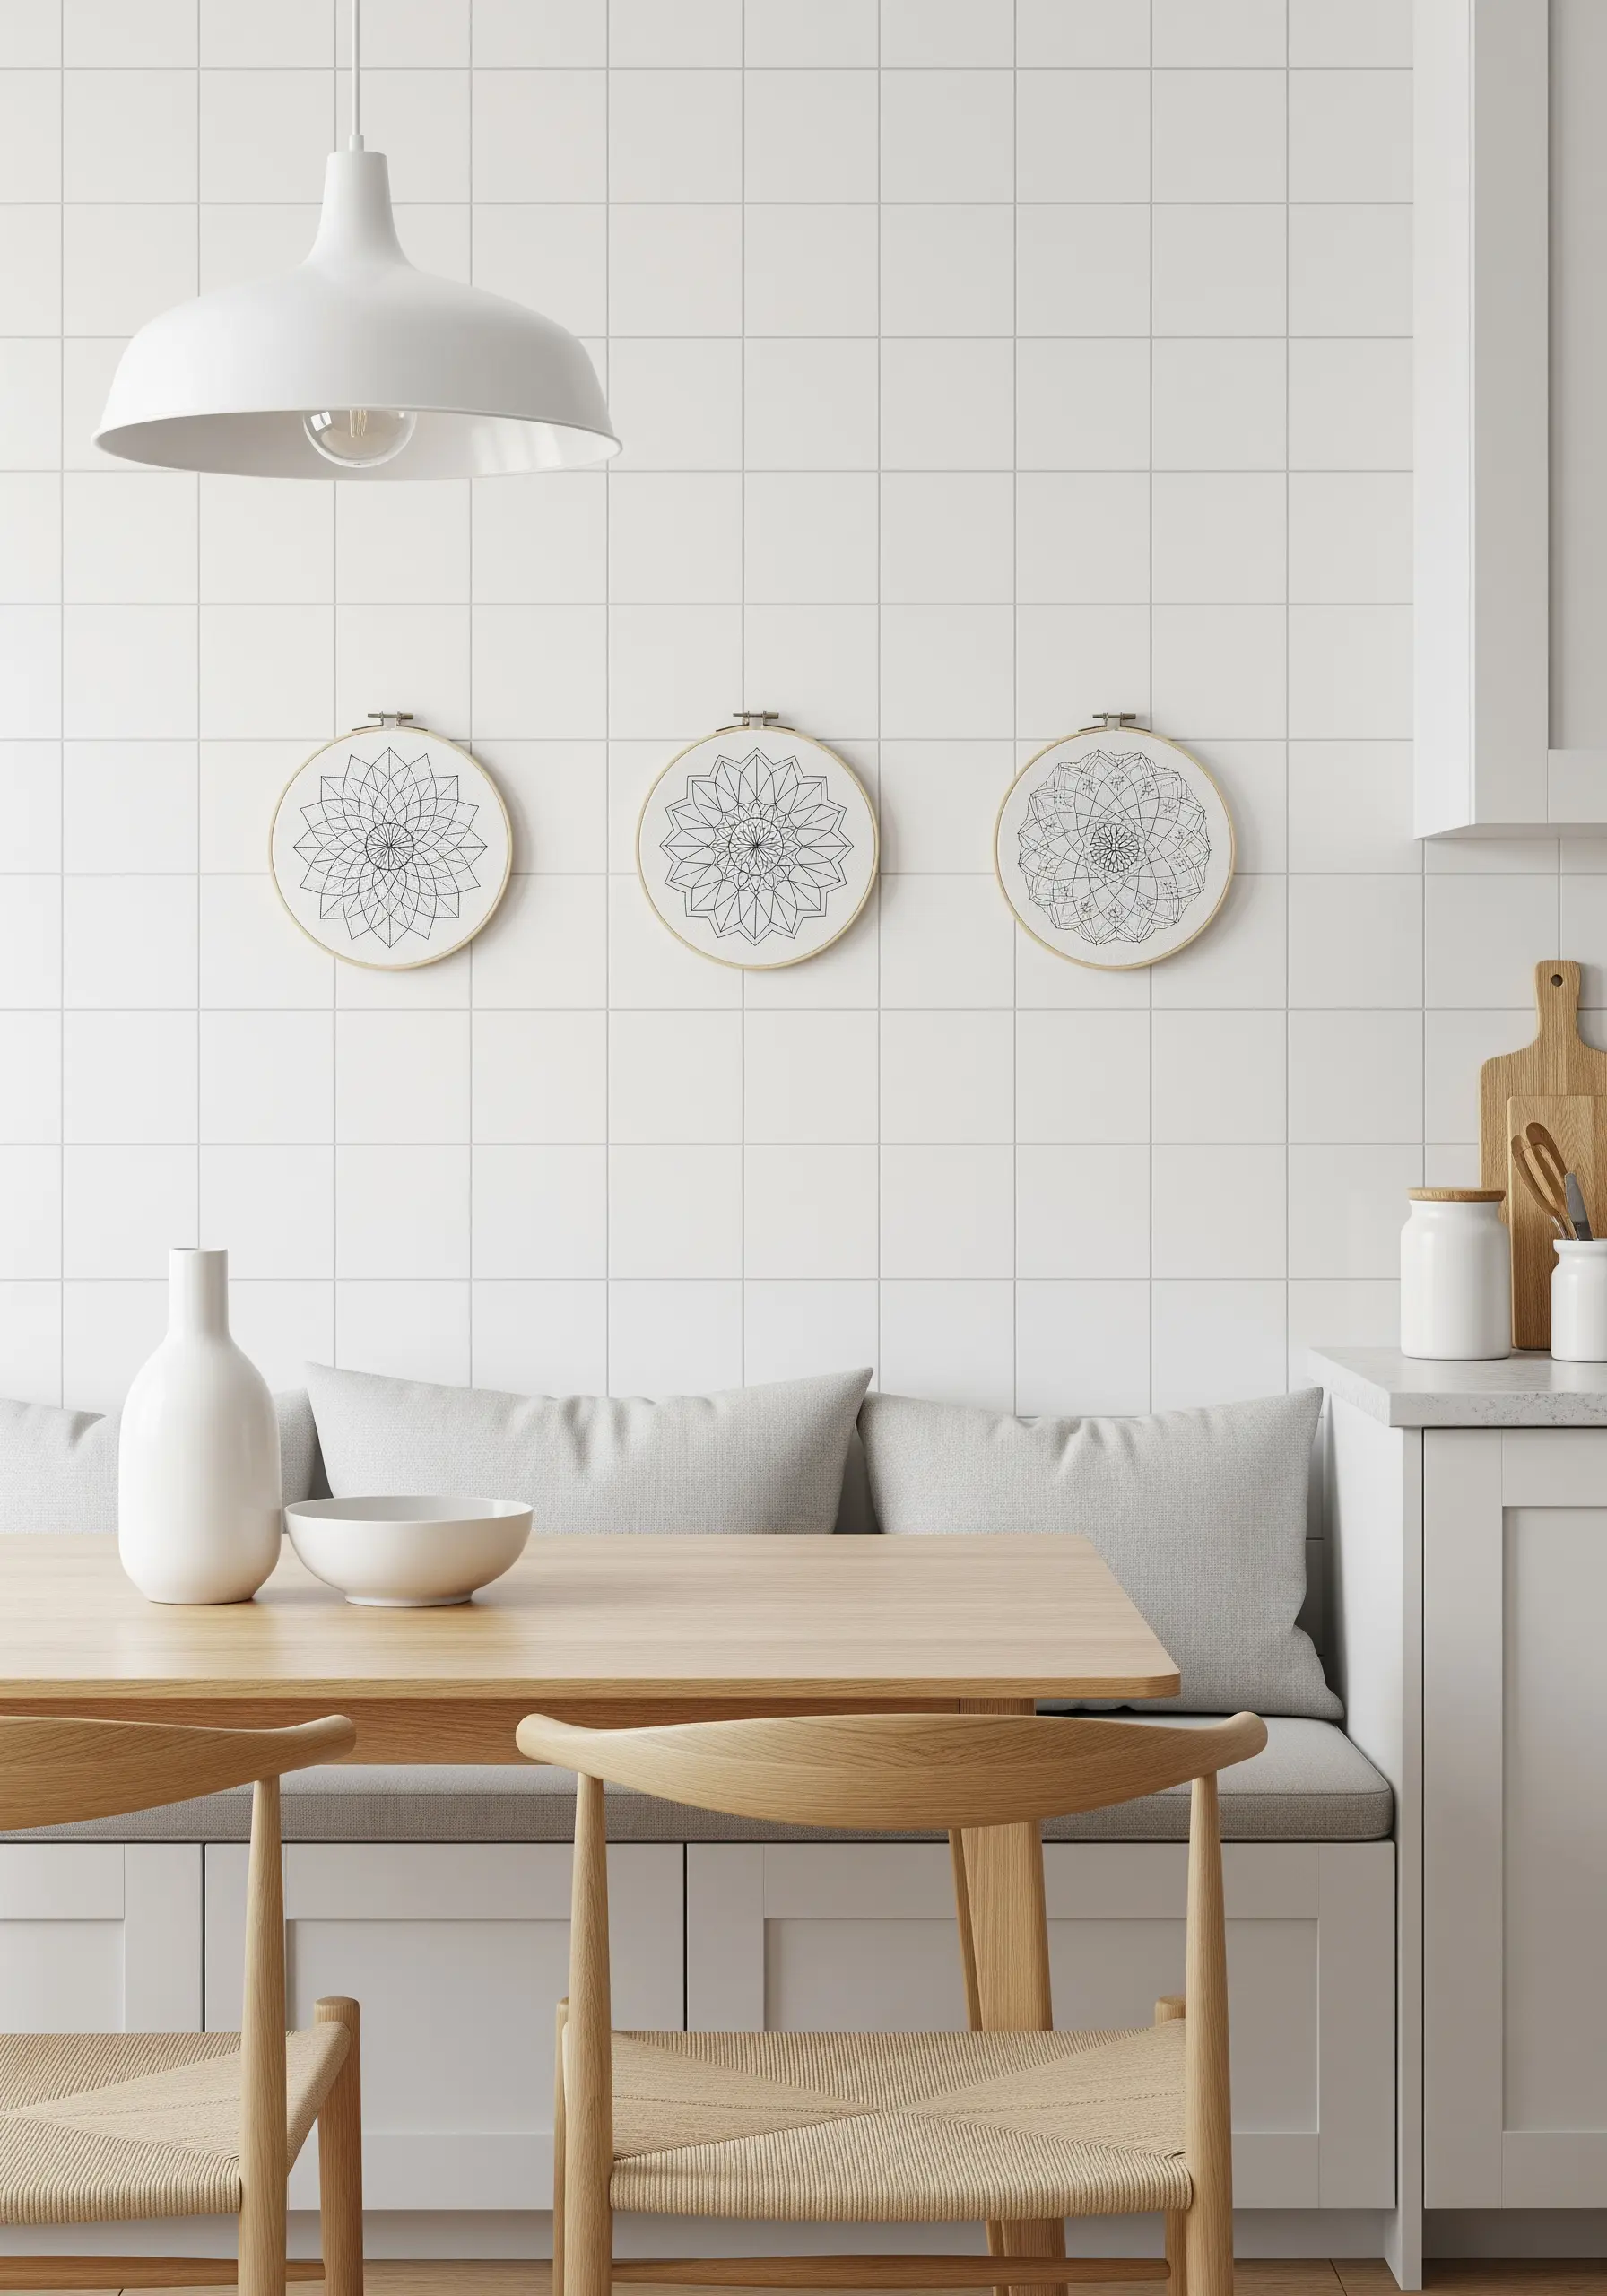
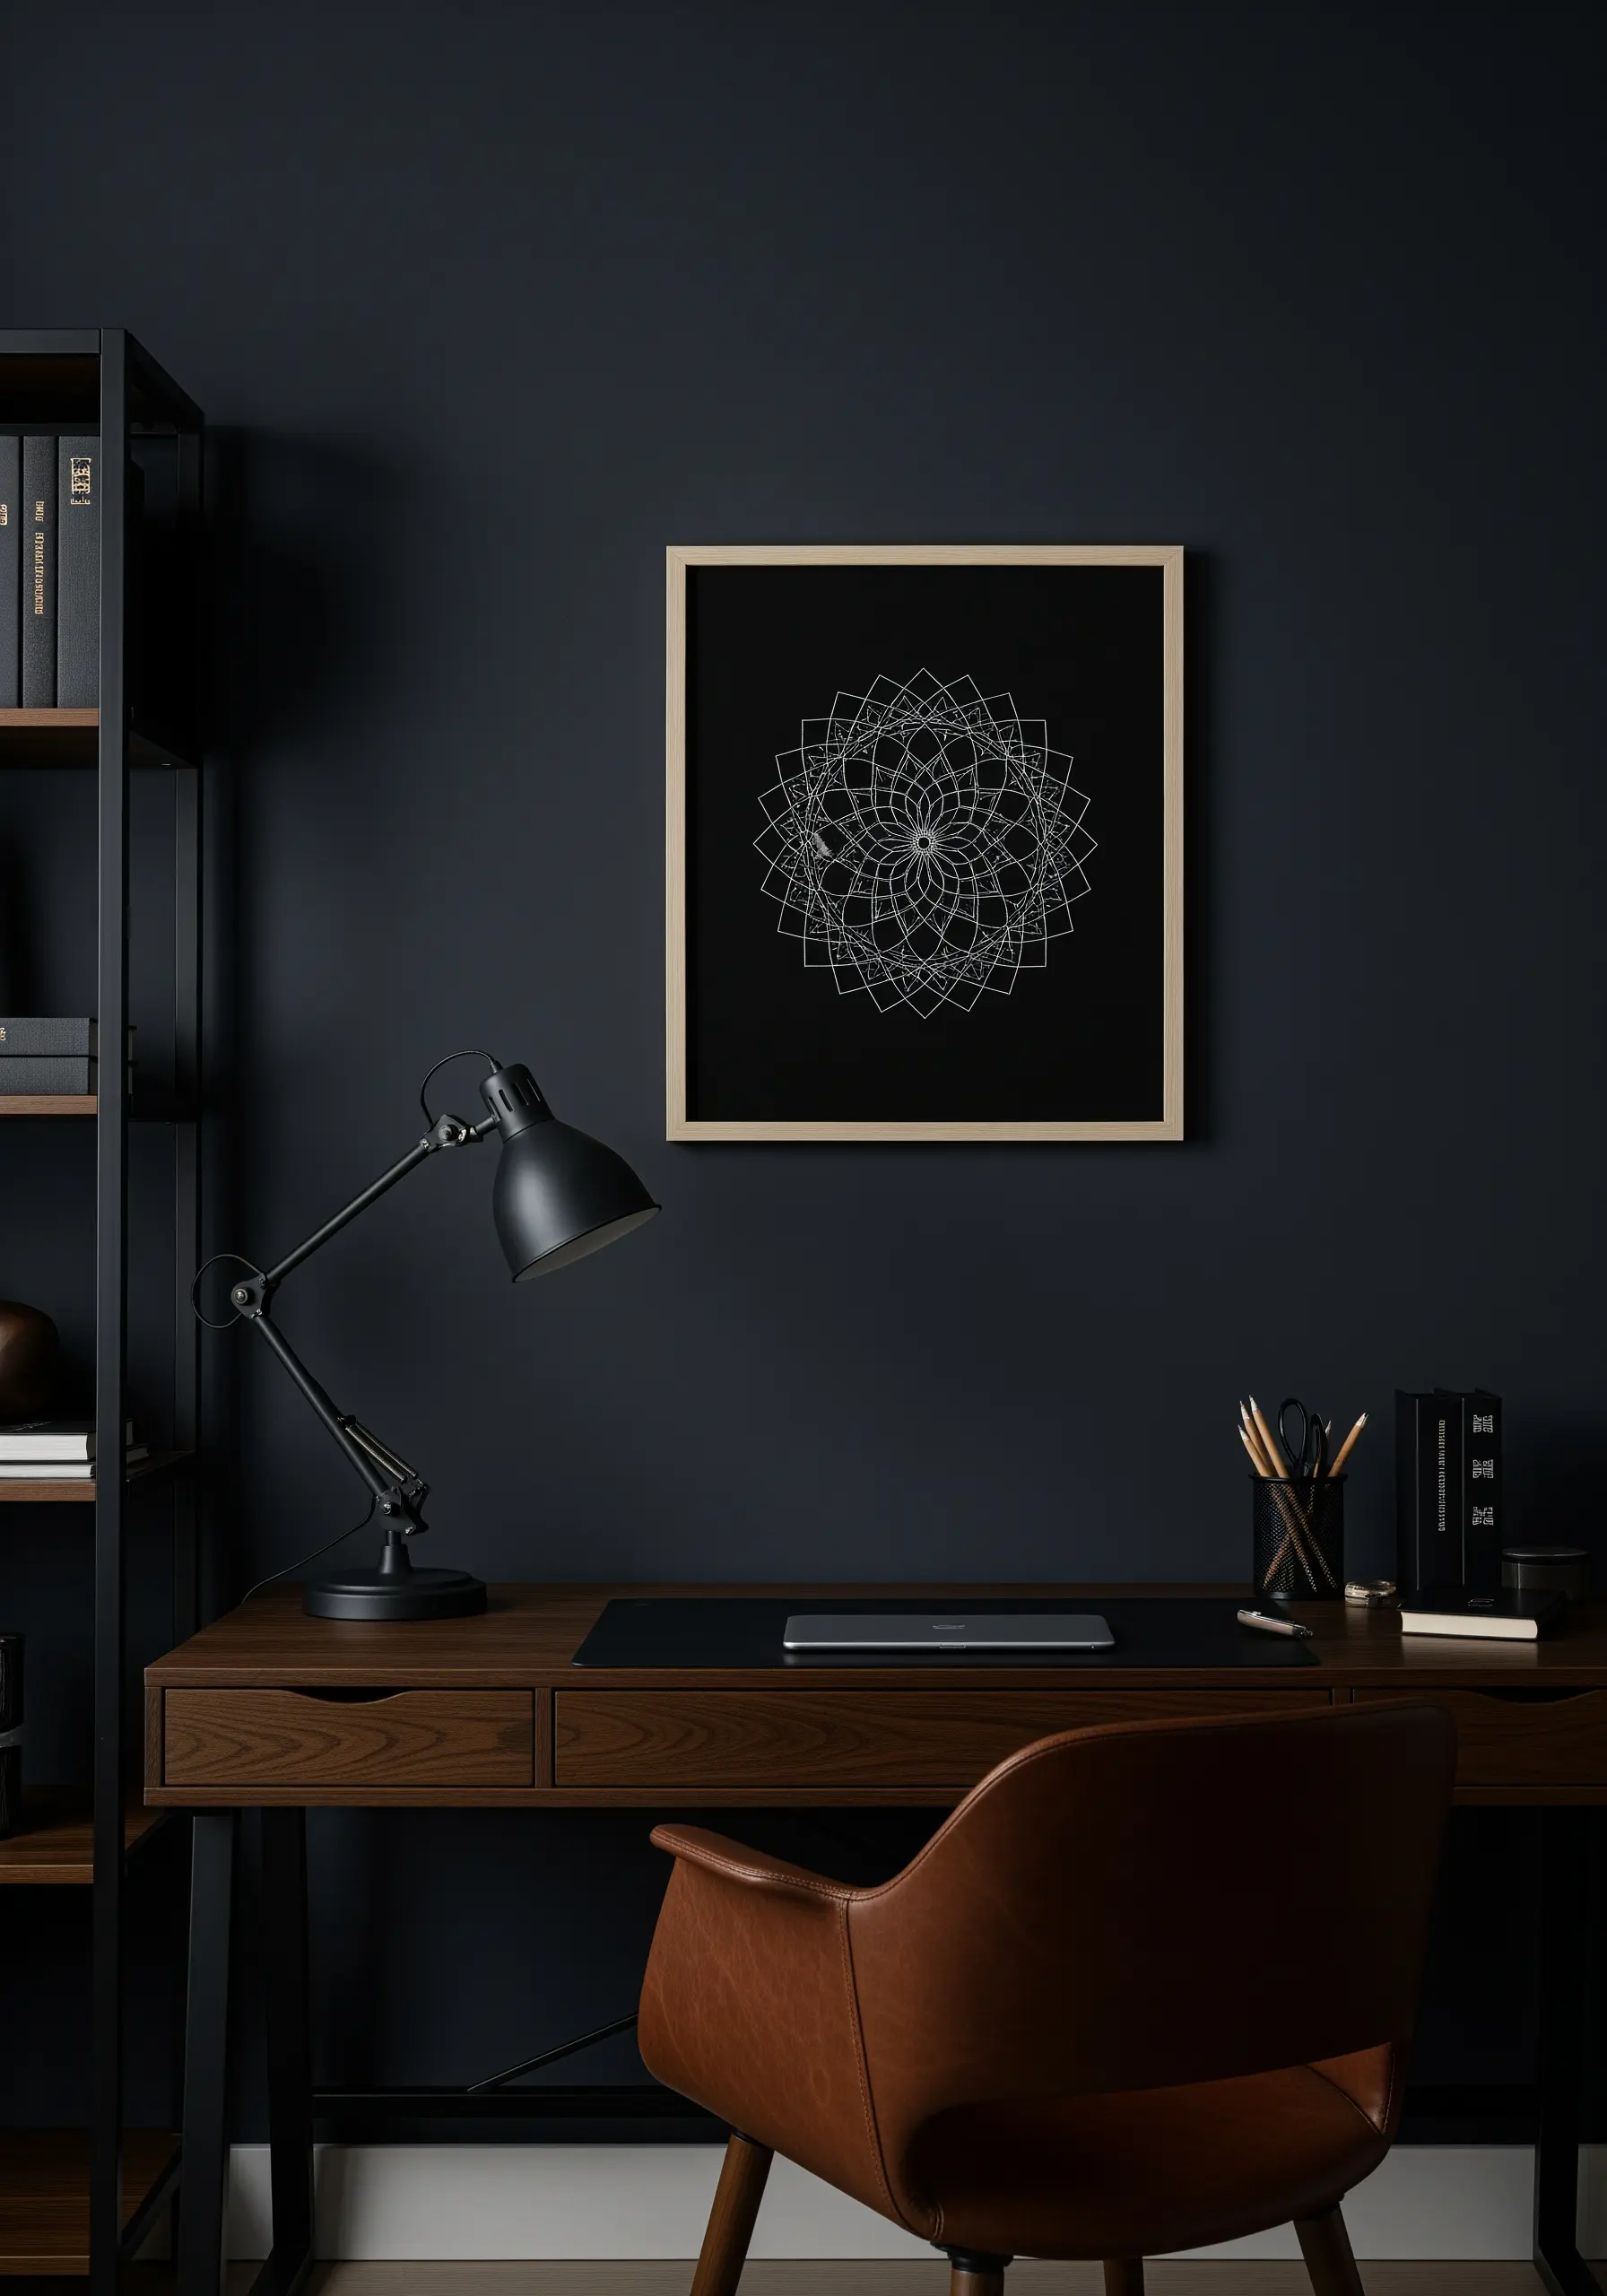
9. Design a Minimalist Triptych
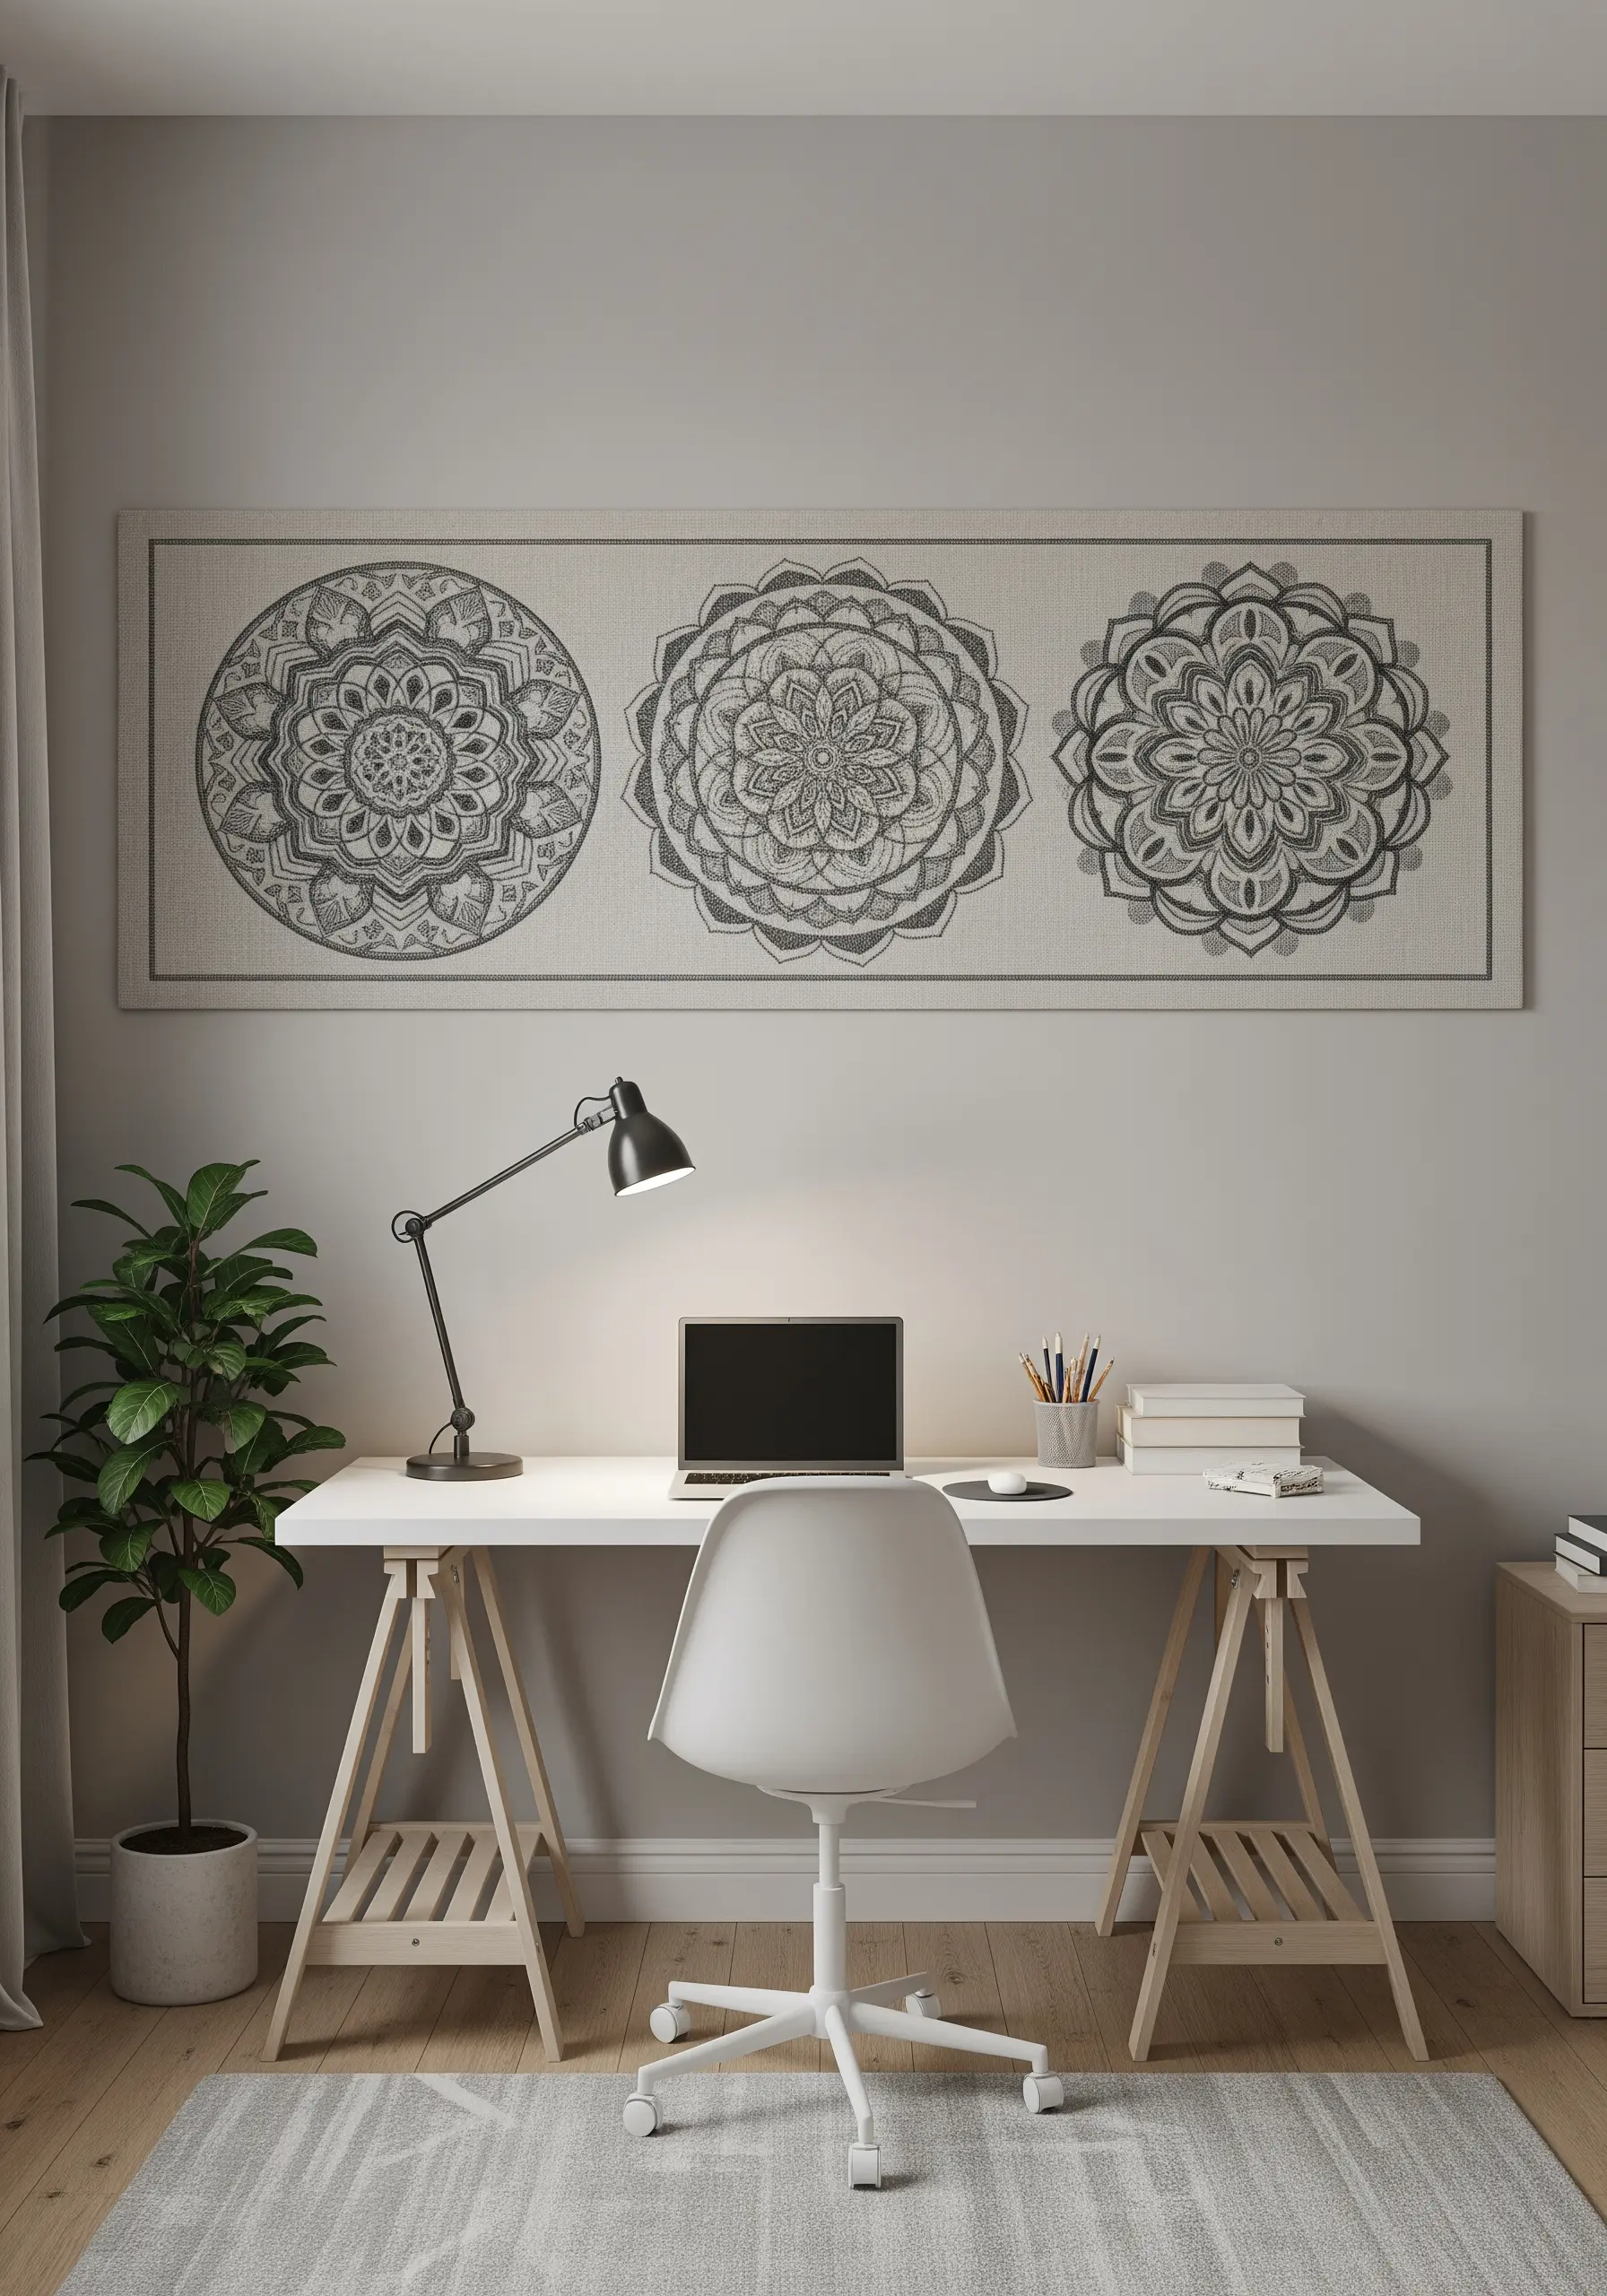
Create a sophisticated, panoramic art piece by stitching a series of related mandalas on a single long panel of fabric.
Use a monochrome palette—shades of gray, black, or navy—to maintain a modern, uncluttered feel. This simplifies your thread choices and puts the focus entirely on the line work.
A simple backstitch is all you need. The meditative quality comes from the repetition and precision of the geometric forms, not complex stitches.
This is one of the best minimalist embroidery decor ideas for an office or study.
10. Stitch a Soft, Quilted Nursery Mandala
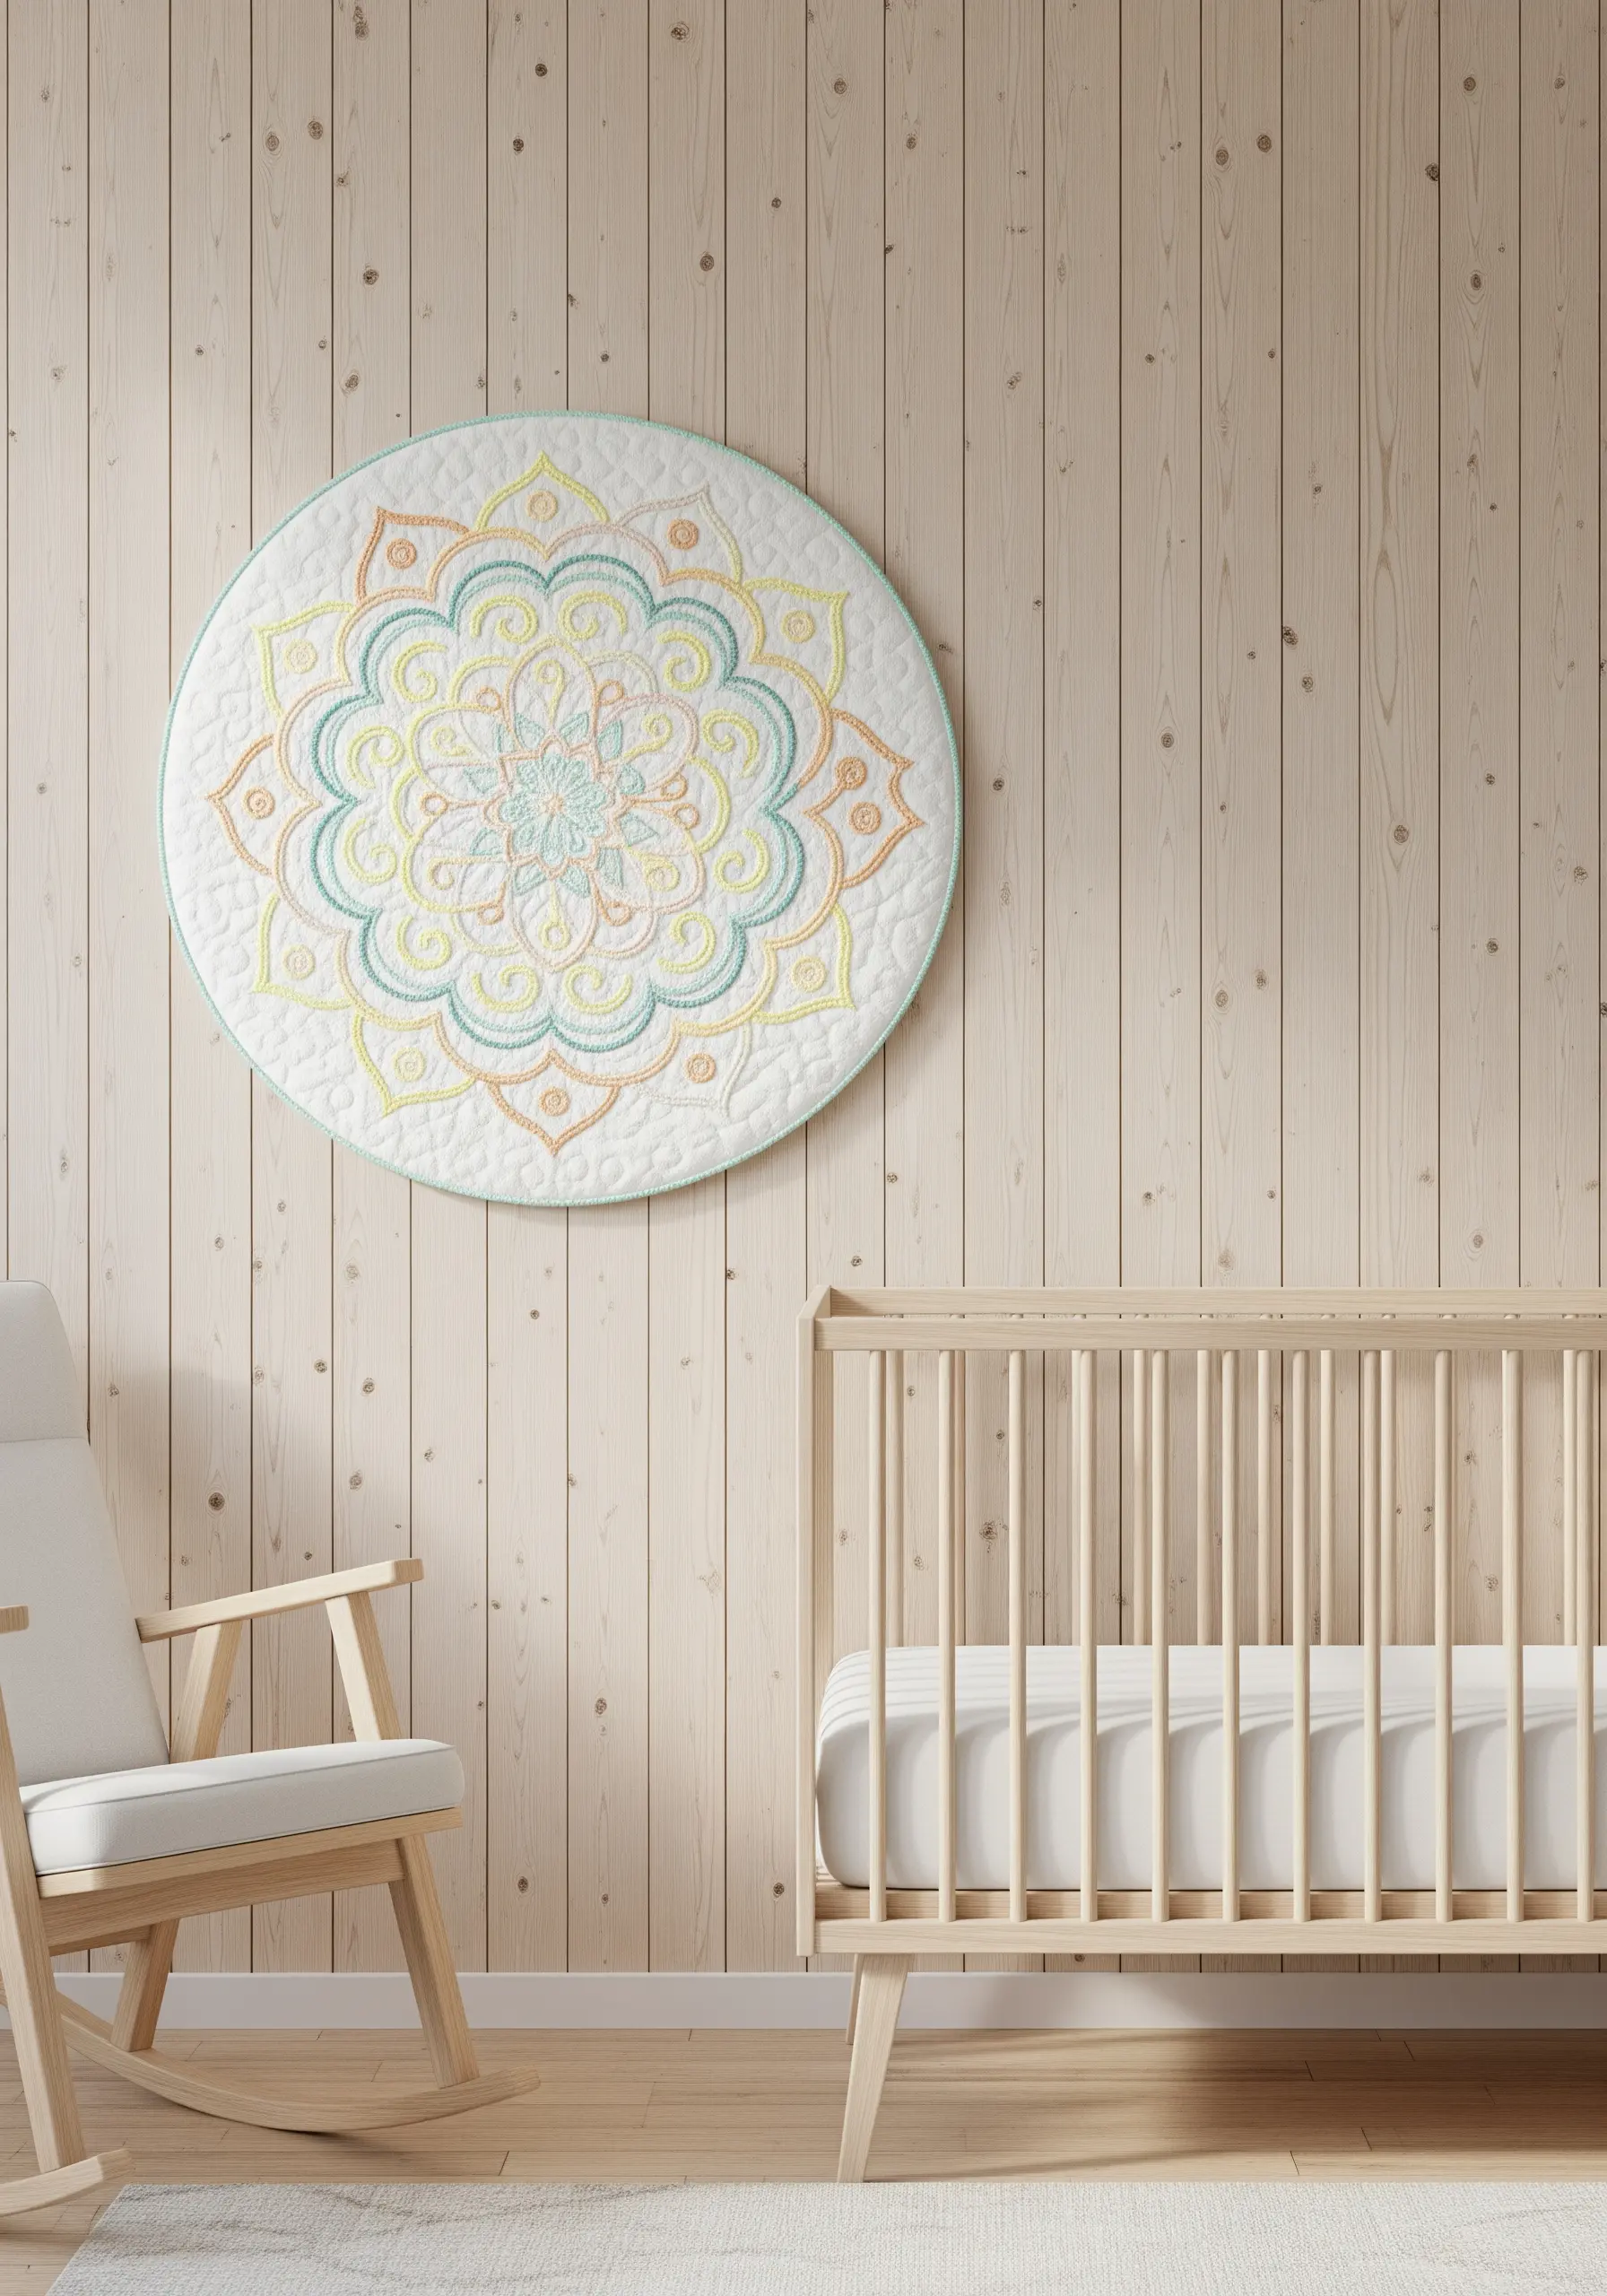
For a nursery or child’s room, texture is key. Embroider your mandala on a pre-quilted fabric panel for instant softness and dimension.
Choose a pastel color palette—soft yellows, mints, and corals—to create a soothing, gentle atmosphere.
Use a simple backstitch or stem stitch with a slightly thicker thread (like pearl cotton) to ensure the lines are visible against the quilted background.
The finished piece can be bound like a mini-quilt and hung as a soft, safe piece of embroidered nursery decor.
11. Embrace Rustic Texture with Burlap and Yarn
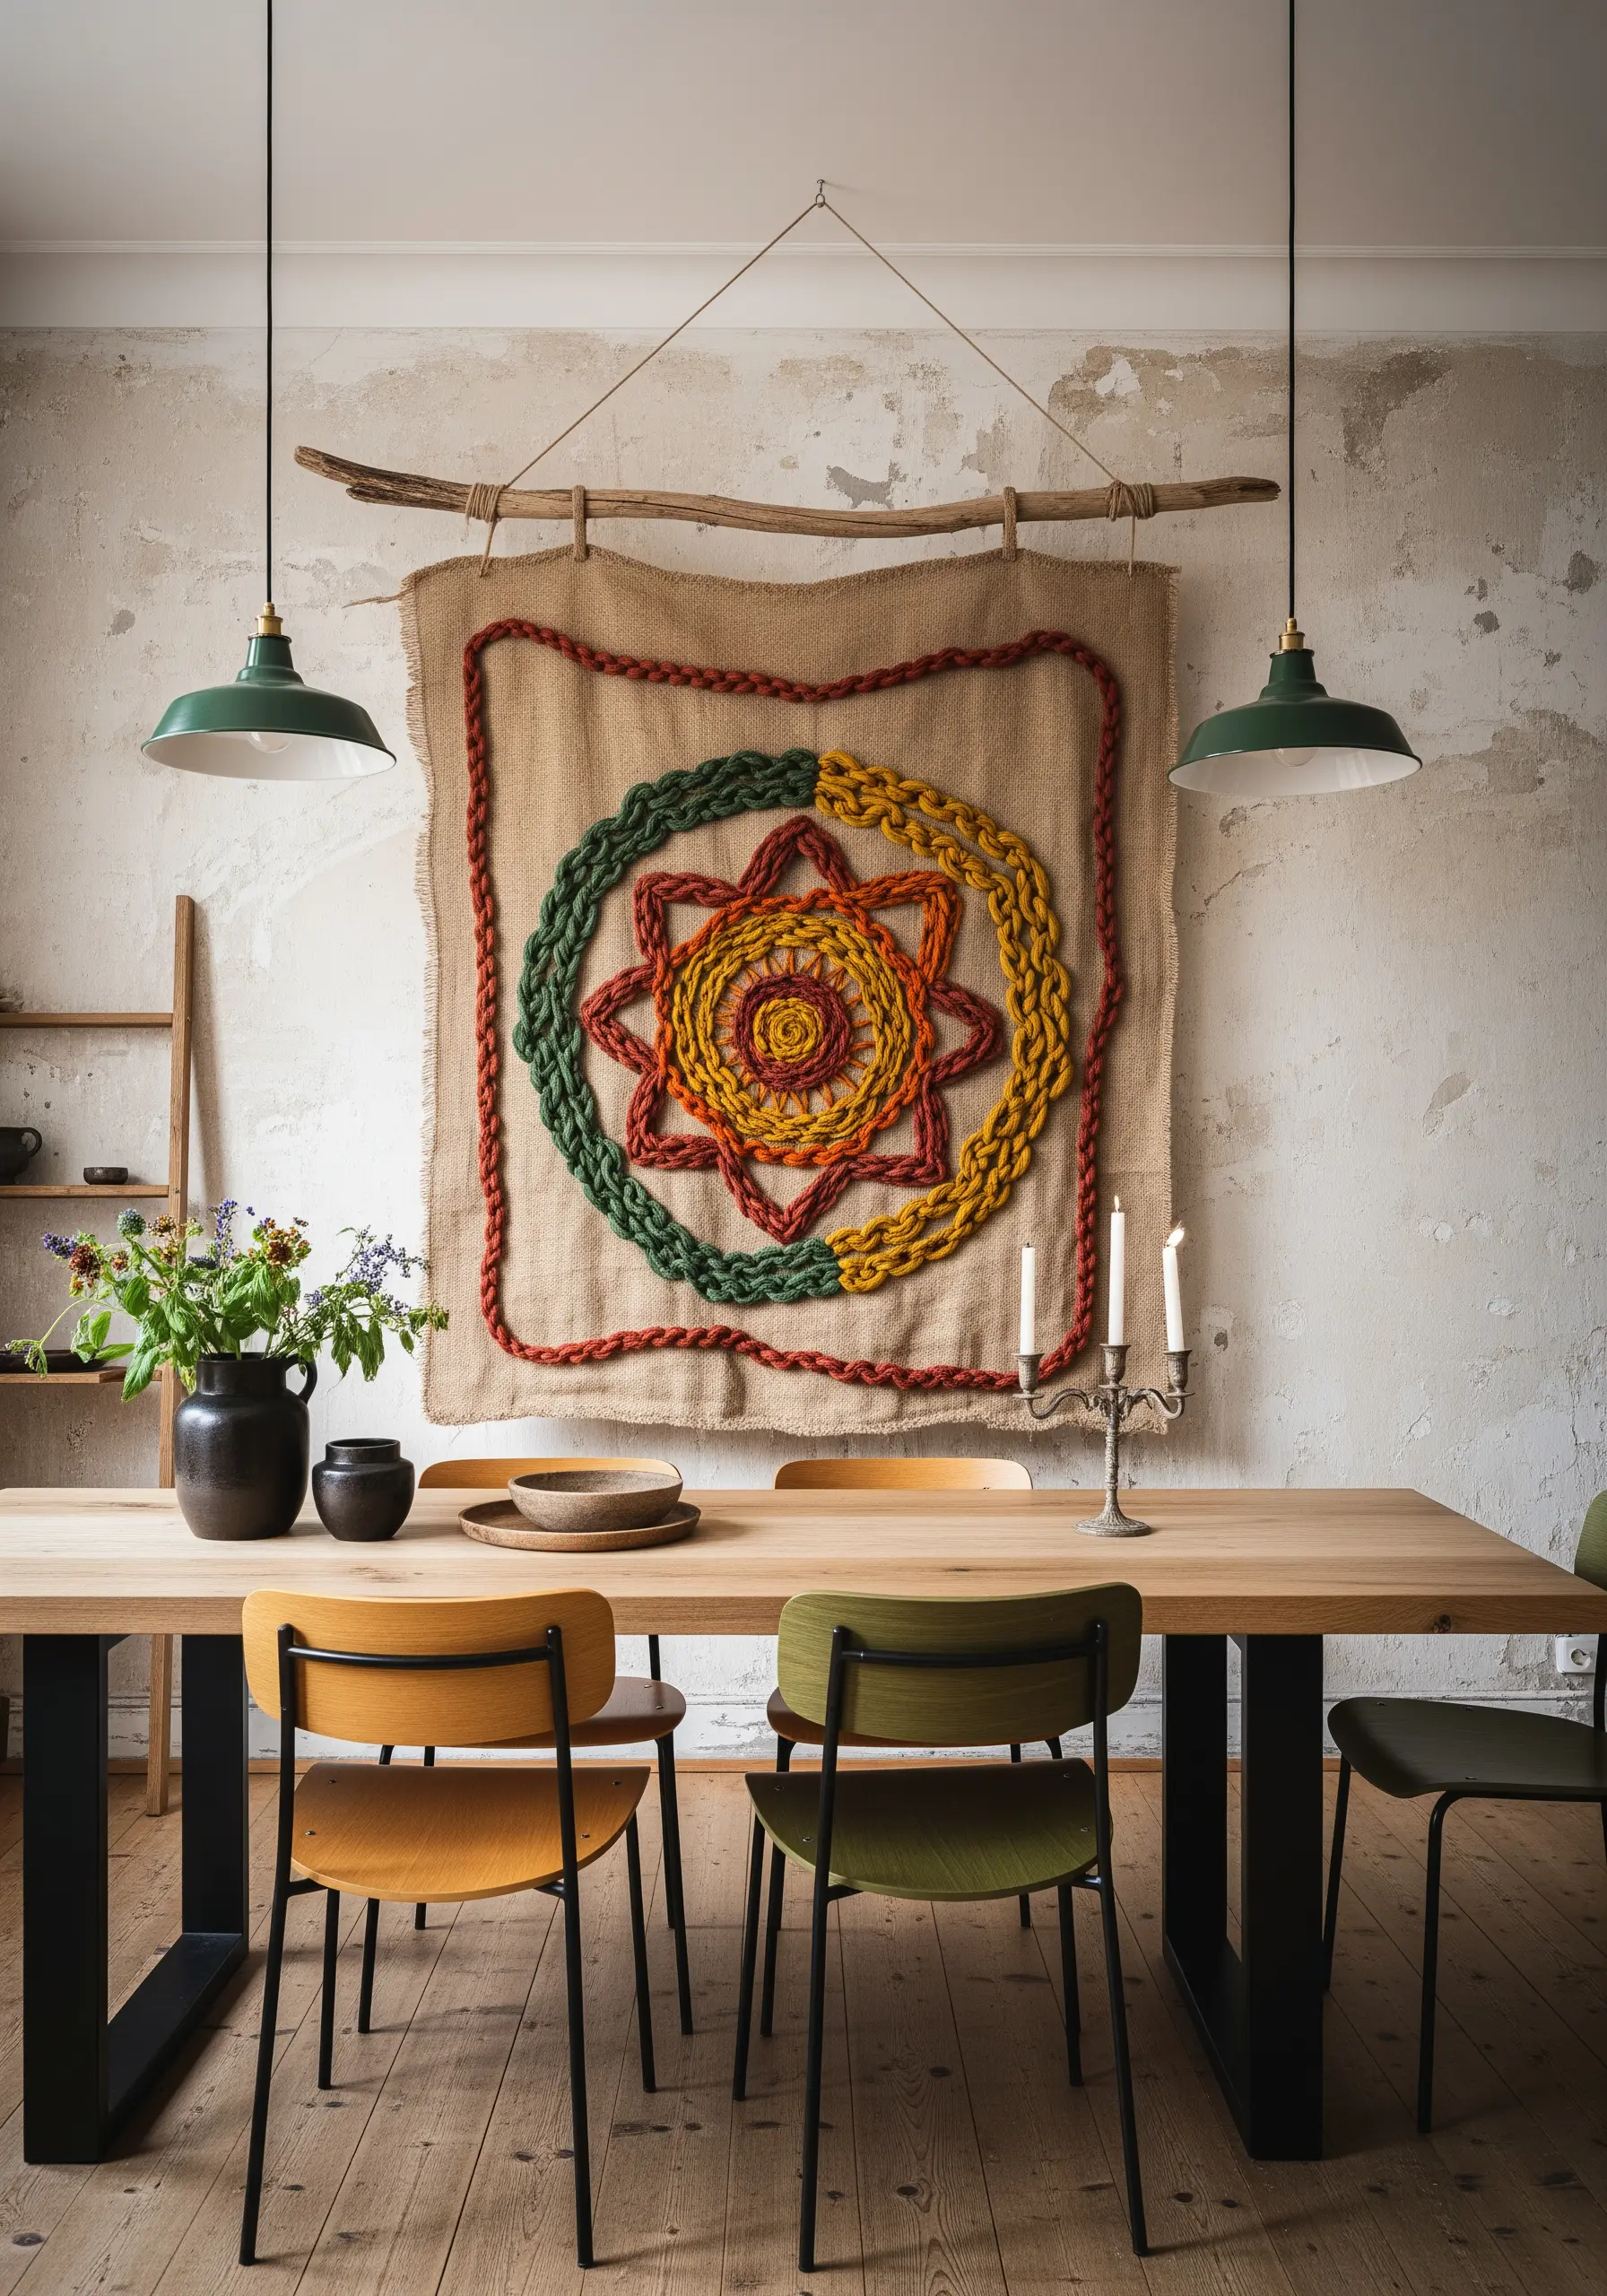
Combine the rugged texture of burlap with the softness of chunky yarn for a piece with immense tactile appeal.
Use a large, blunt tapestry needle to avoid snagging the burlap’s open weave. Simple, bold stitches like chain stitch, couching, or running stitch work best with thick yarn.
Let the edges fray naturally before hemming them with a simple blanket stitch to enhance the rustic, handmade feel.
This approach transforms a simple mandala into one of those rustic string art farmhouse embroidery pieces.
12. Capture Sound Waves in Thread
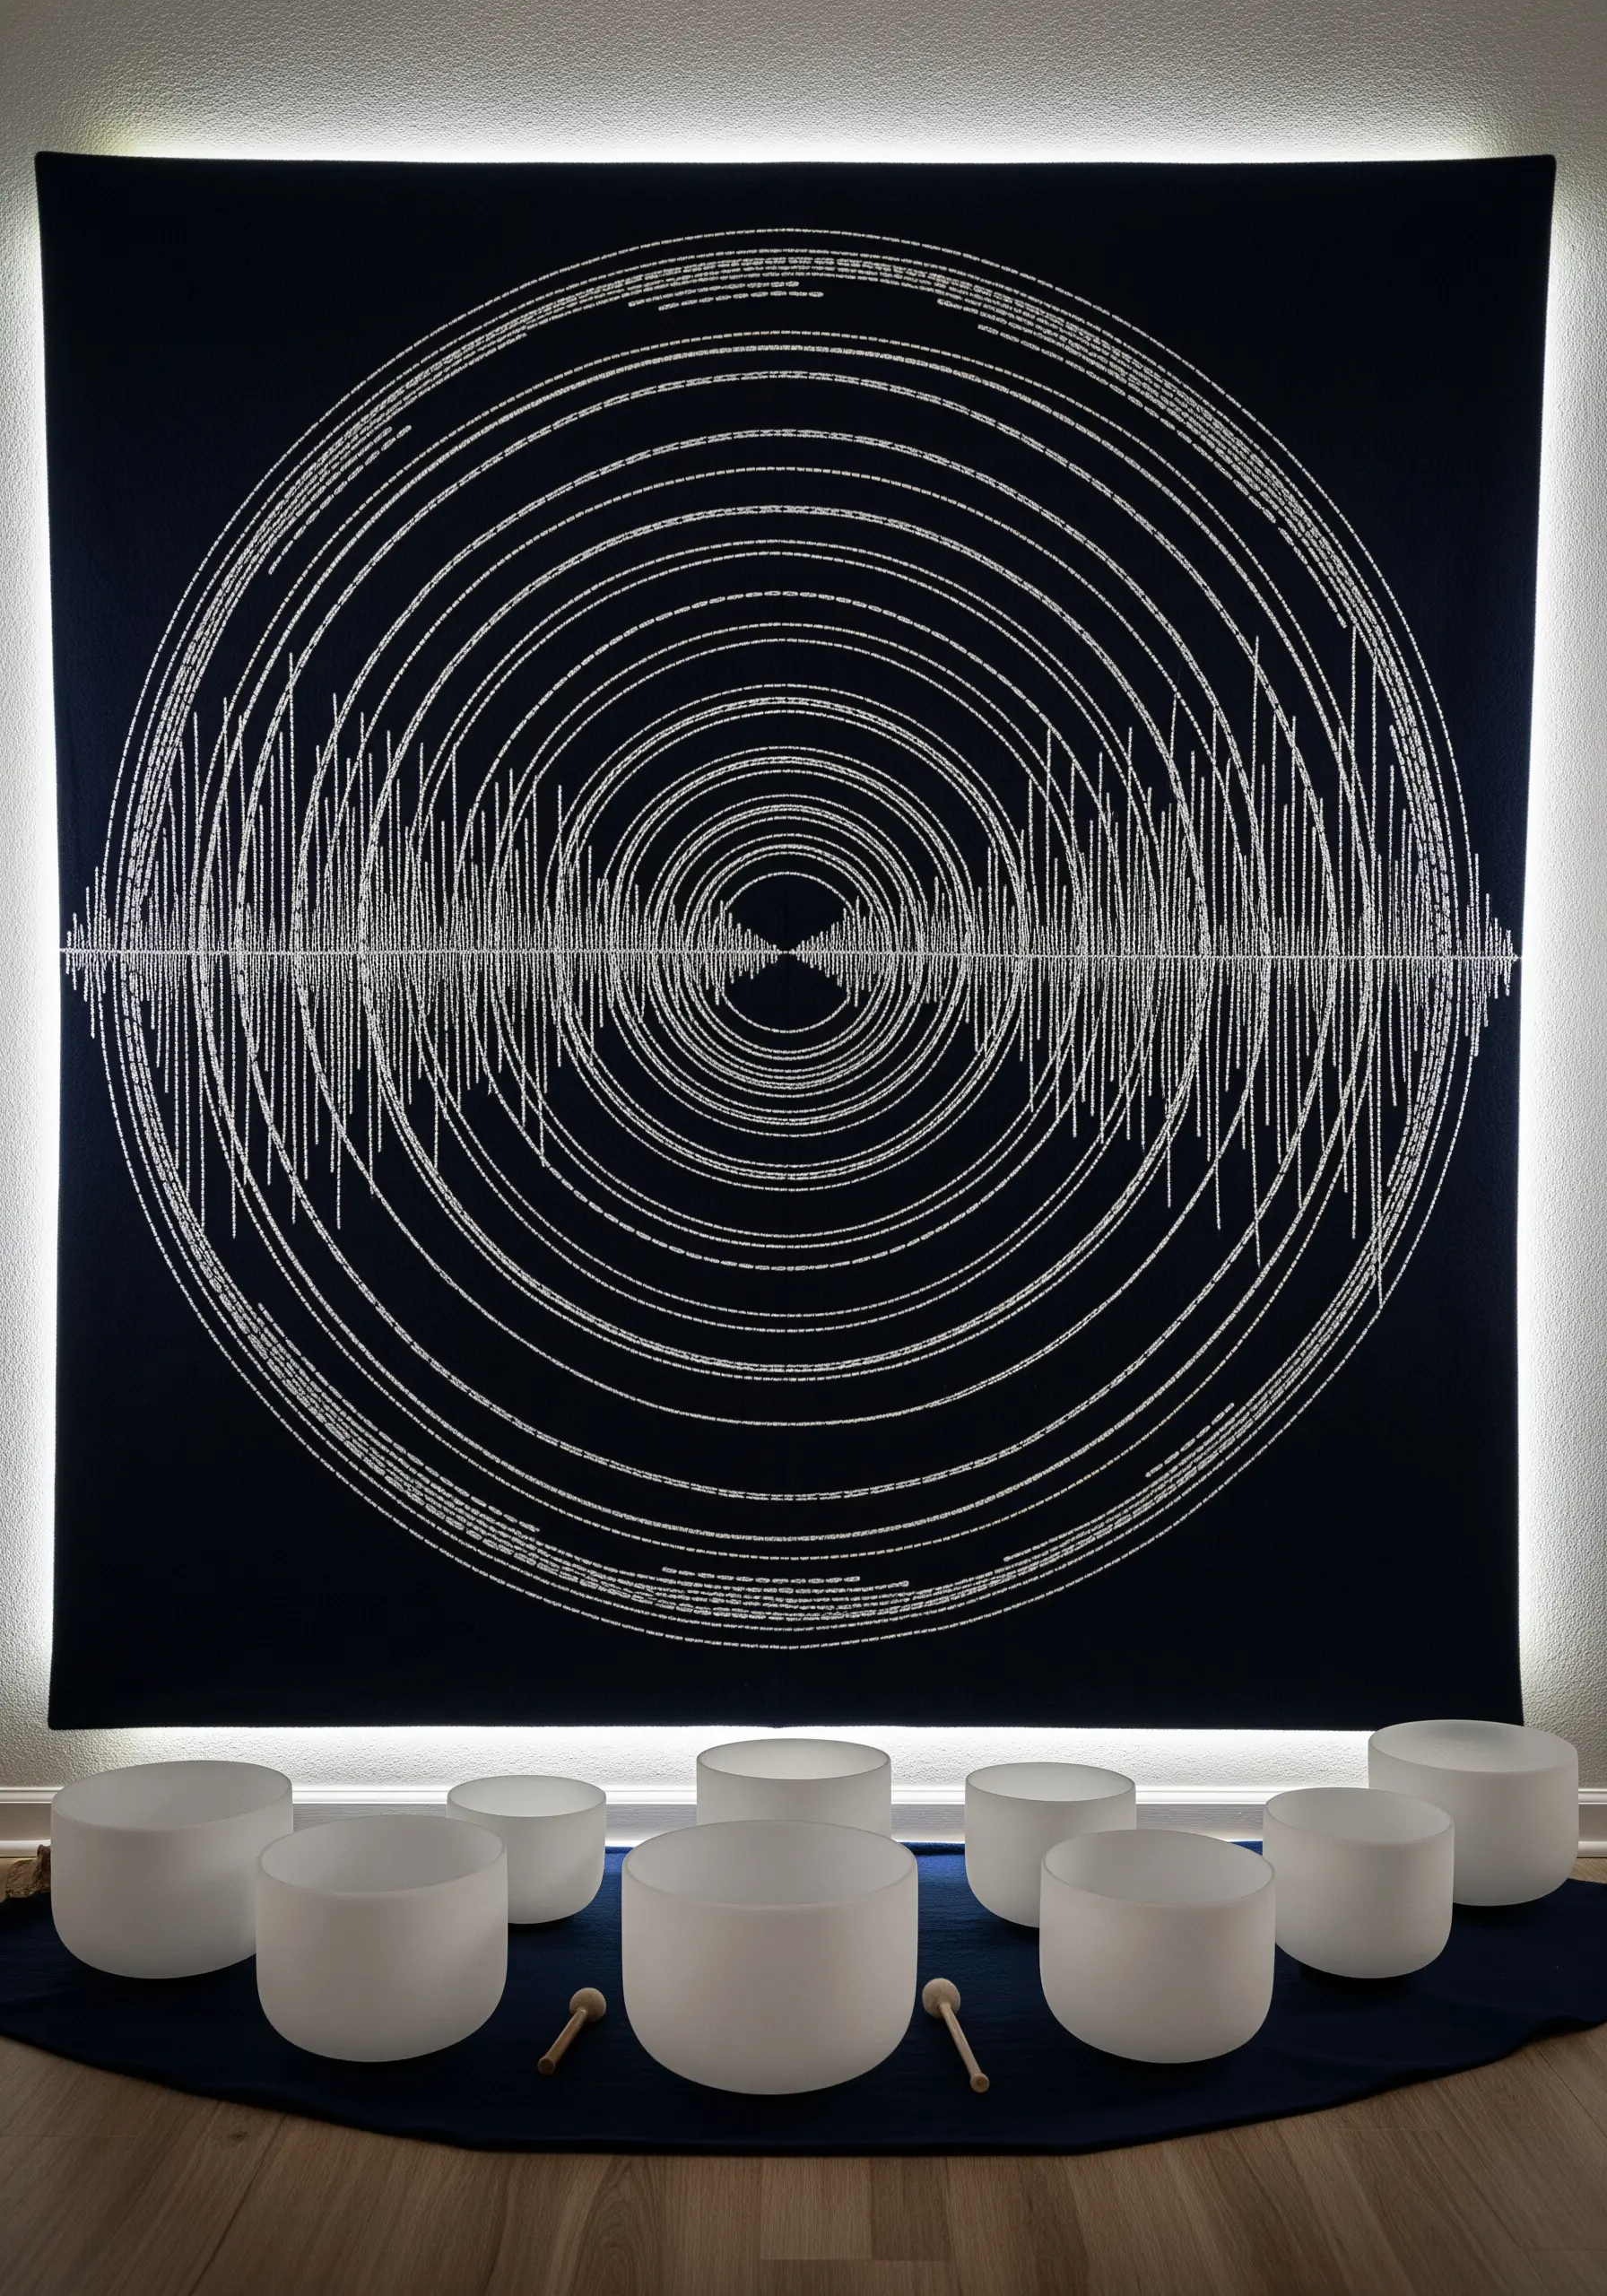
Translate a sound wave or frequency pattern into a powerful visual statement on dark fabric.
To create the crisp, radiating lines, use a single strand of a high-sheen white or silver thread, like a rayon or metallic floss.
A simple backstitch is perfect for this. The visual impact comes from the density and precision of the lines, creating a hypnotic, vibrating effect.
This design is perfect for a music room or meditation space, turning abstract concepts into abstract concept art.
13. Create an Elegant Metallic Patina

Achieve a luxurious, aged-metal look by stitching with copper or bronze metallic thread on a dark, textured fabric like velvet or suedecloth.
The fabric’s pile will catch the light and interact with the metallic sheen, adding incredible depth.
Keep your stitches simple—a backstitch or split stitch for the lines is sufficient. The power of this piece lies in the material combination, not intricate stitch work.
This is a perfect example of metallic thread wall art projects that feel refined and modern.
14. Embroider on Sheer Fabric for an Ethereal Effect
Stitching on sheer fabric like organza or voile creates a magical, light-filtering effect.
You must use a stabilizer to prevent puckering. A wash-away stabilizer is ideal, as it provides support during stitching and then disappears completely, leaving only the threadwork.
Choose a lightweight thread and a simple outline stitch. Since the back of your work will be visible, ensure your knots and thread tails are meticulously neat.
The result is a delicate piece of art that interacts with light, casting beautiful shadows and creating dreamy, feminine aesthetic.
15. Weave an Intricate Celtic Knot Mandala
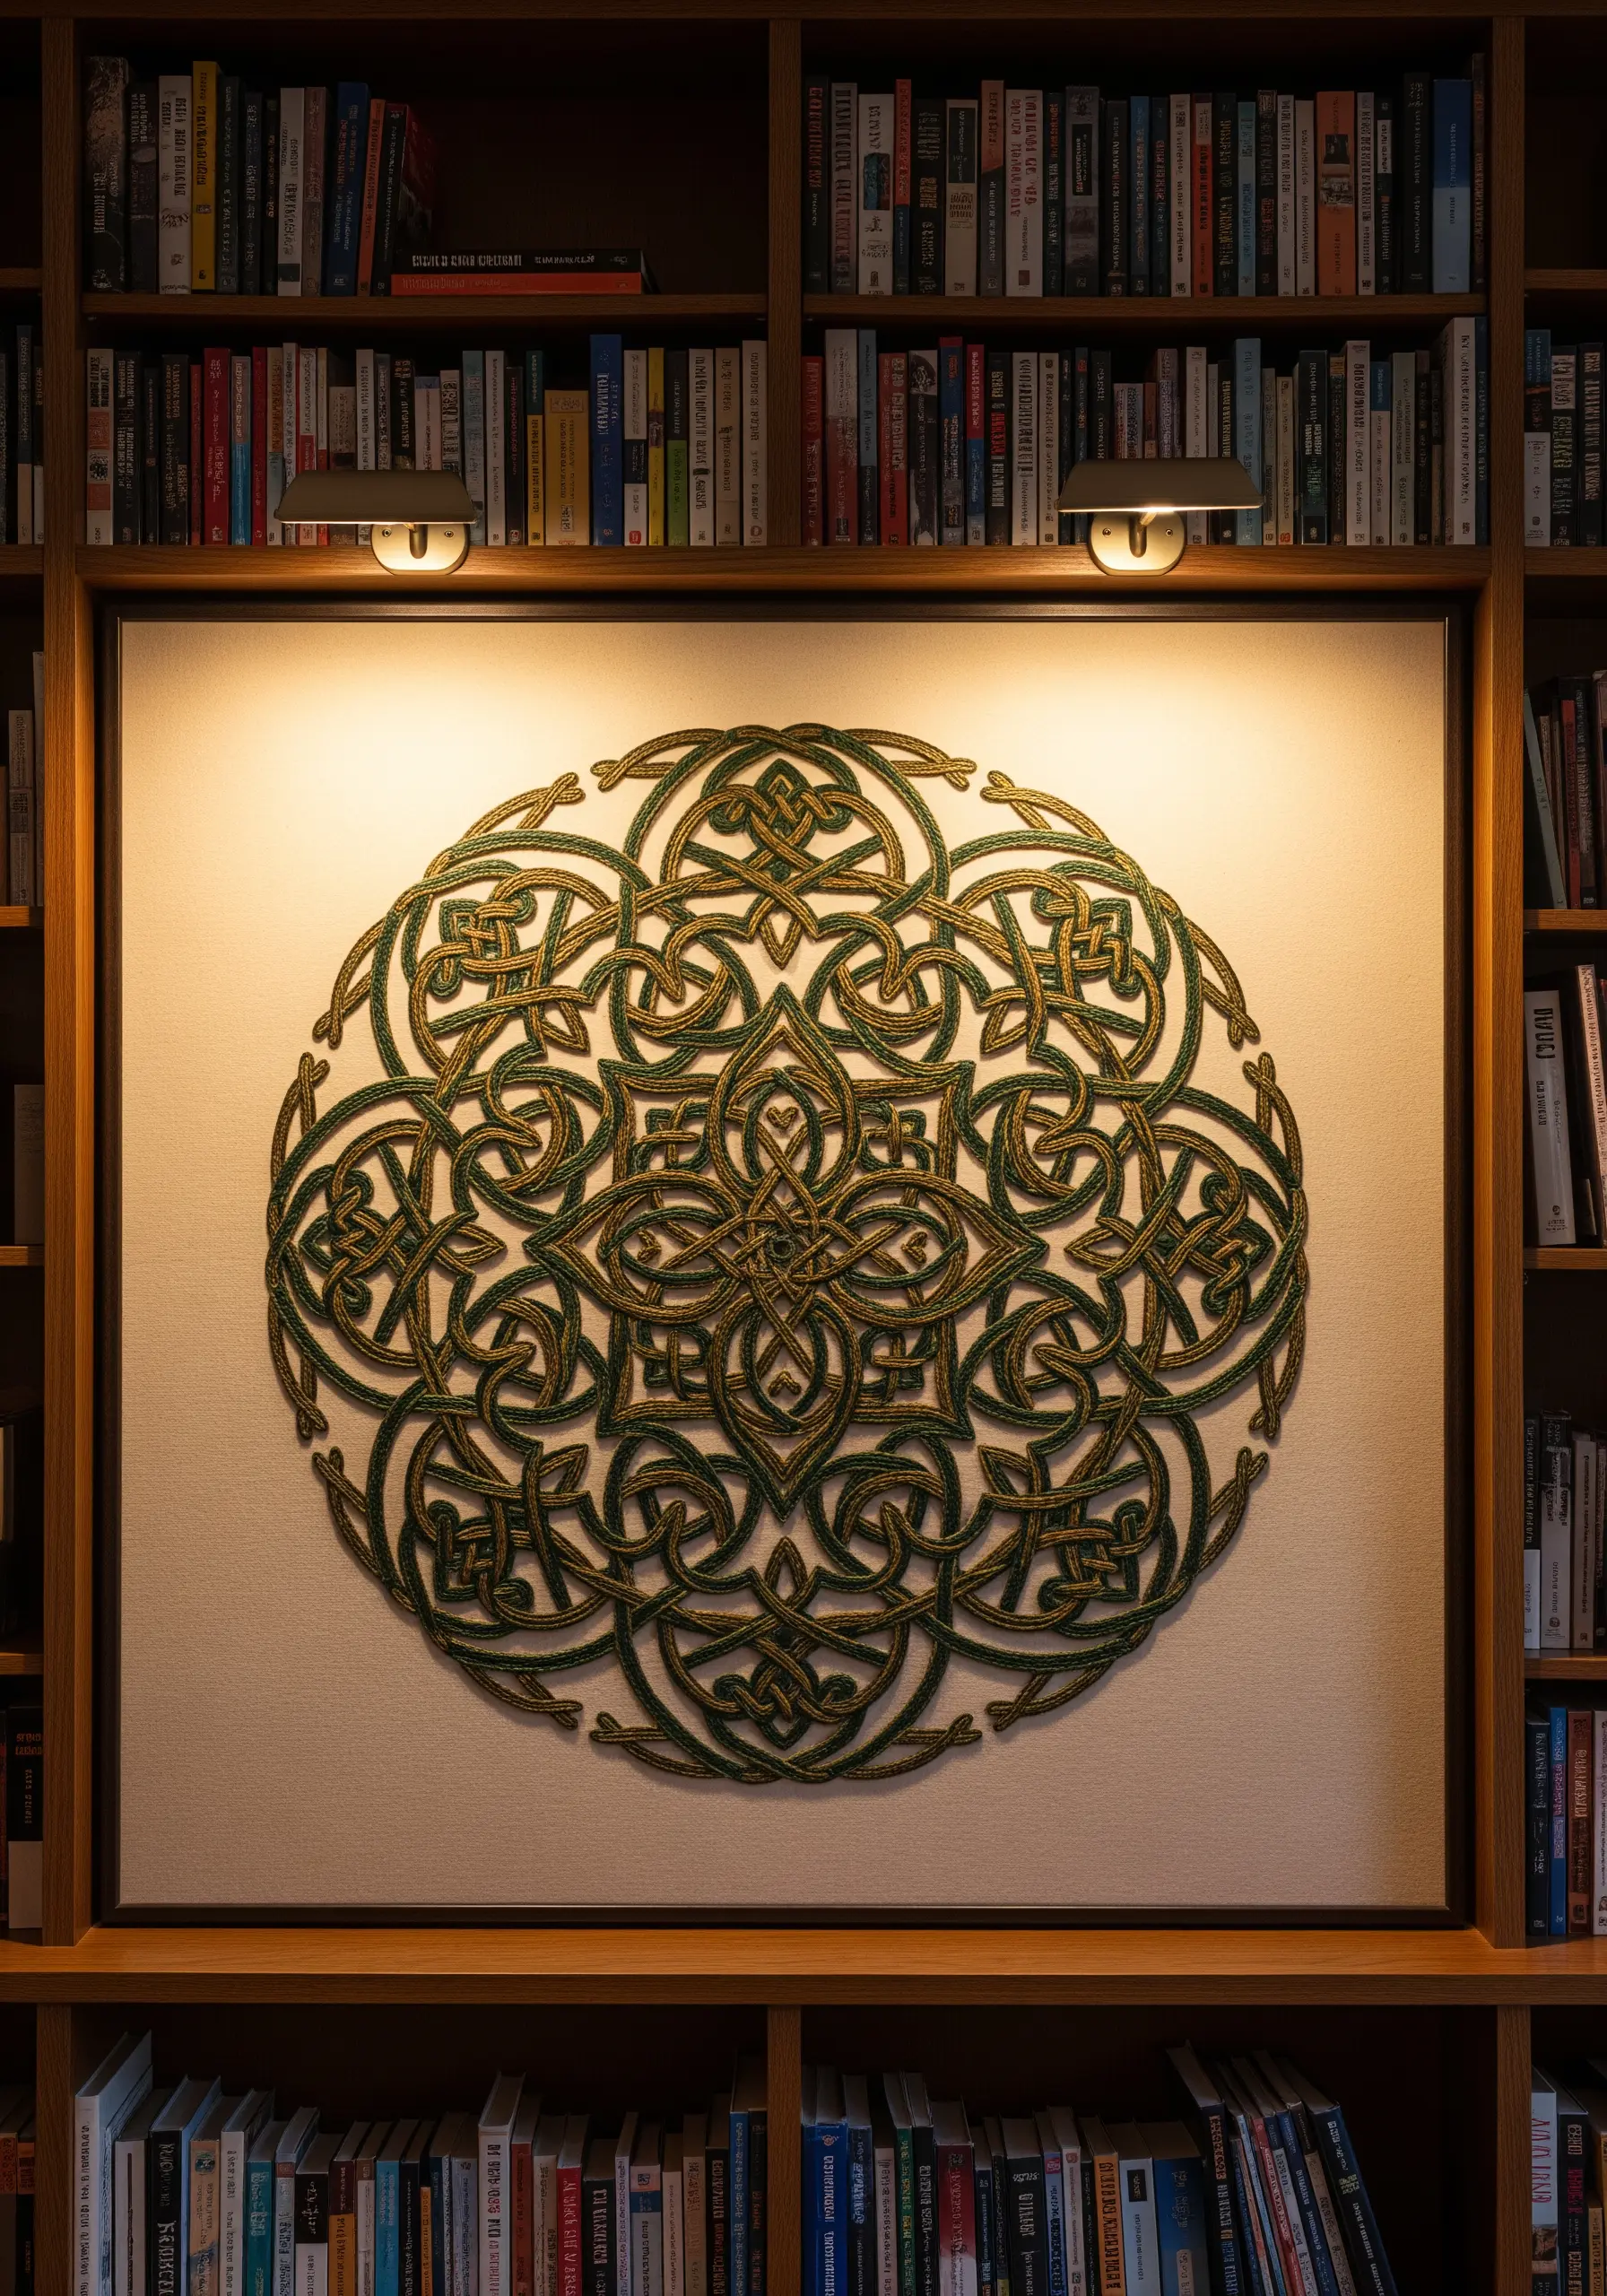
The key to successful Celtic knotwork is creating the illusion of overlapping threads.
Stitch the entire pattern using a two-strand stem stitch or split stitch. Then, identify the ‘under’ sections of the knot and carefully snip and re-stitch them to appear as if they are passing beneath the ‘over’ sections.
Using two slightly different shades of the same color (e.g., moss and forest green) can enhance this illusion of depth and shadow.
These types of handmade art objects command attention in any space.
16. Add a Touch of Scandinavian Simplicity
For a clean, minimalist aesthetic, stitch simple mandalas using black thread on a light, neutral fabric.
The beauty of this style lies in its simplicity. Use a single strand of floss and a neat backstitch to create crisp, graphic lines that resemble a fine ink drawing.
Displaying them in simple, light wood hoops complements the Scandinavian design ethos. This is a perfect project to create Scandinavian-style embroidery decor that feels calm and collected.
17. Paint with Thread for a Hyper-Realistic Sunflower
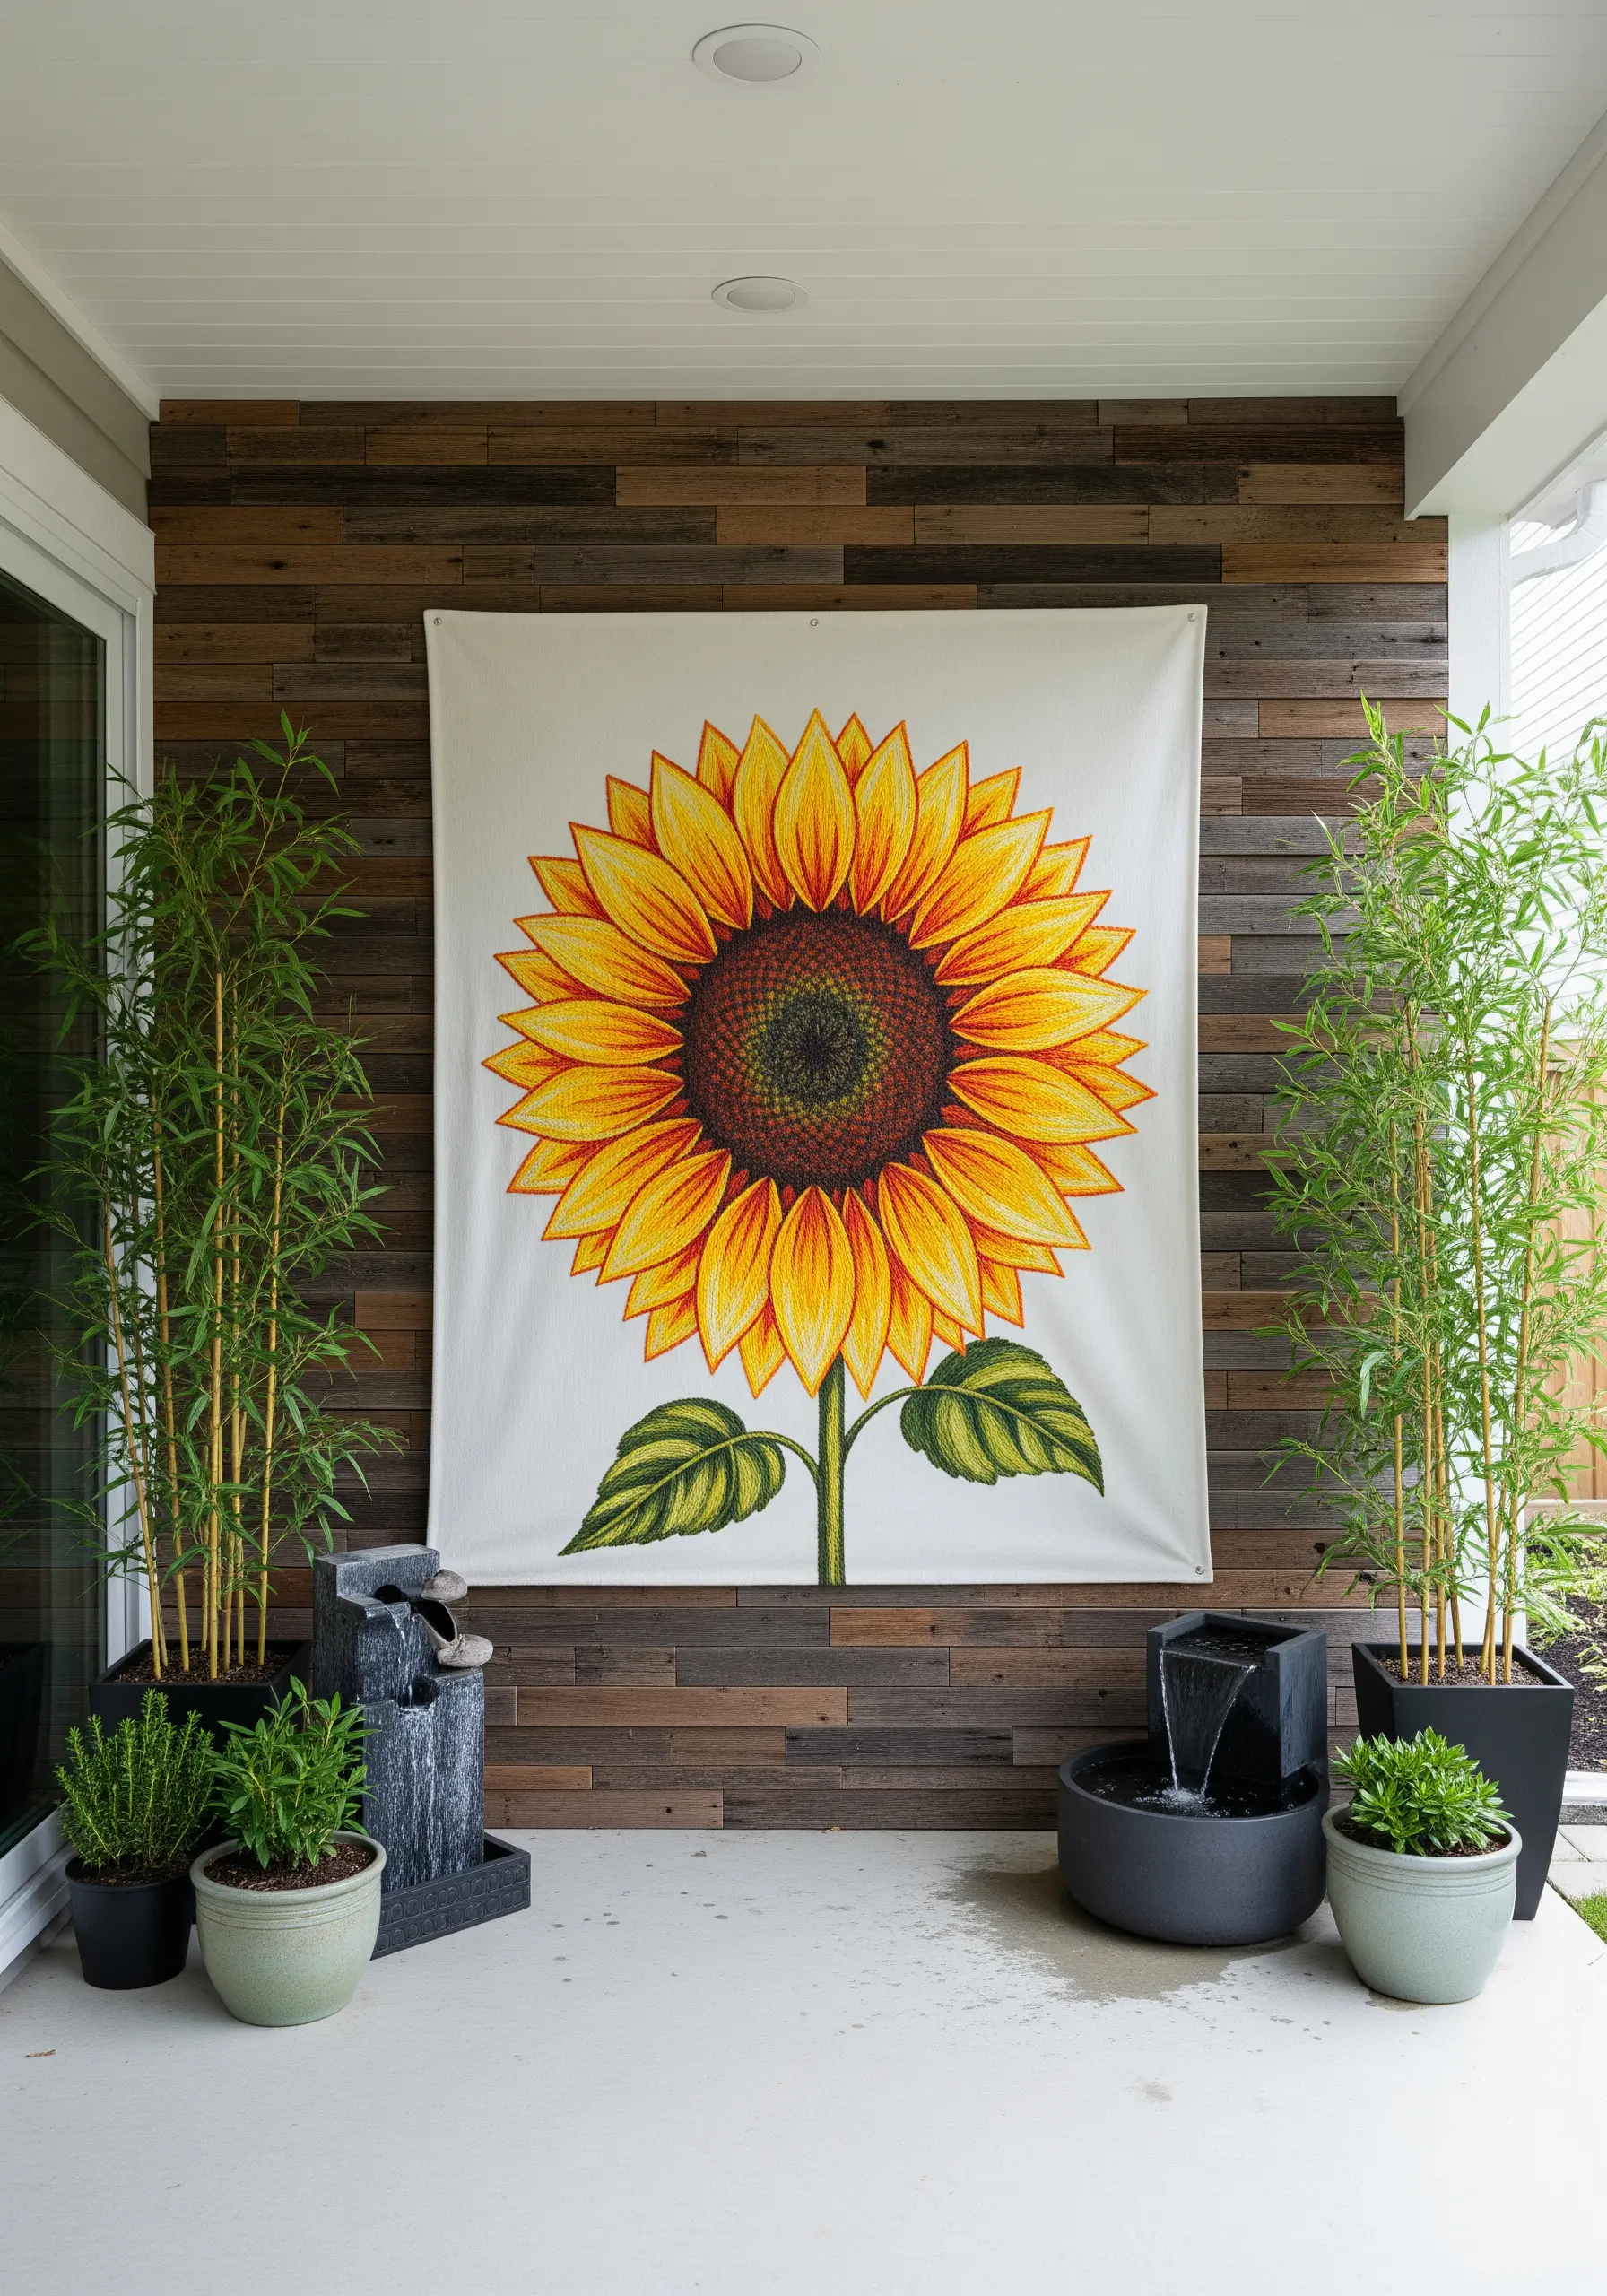
To create the vibrant, realistic petals of a sunflower, use the long-and-short stitch technique, also known as thread painting.
Work with a single strand of floss and blend multiple shades of yellow and gold within each petal to create highlights and shadows.
For the flower’s center, use a dense field of French knots in various shades of brown and black to mimic the texture of seeds.
This large-scale piece turns a simple flower into a stunning work of sunflower-inspired embroidery.
18. Create a Vertical Chakra Alignment
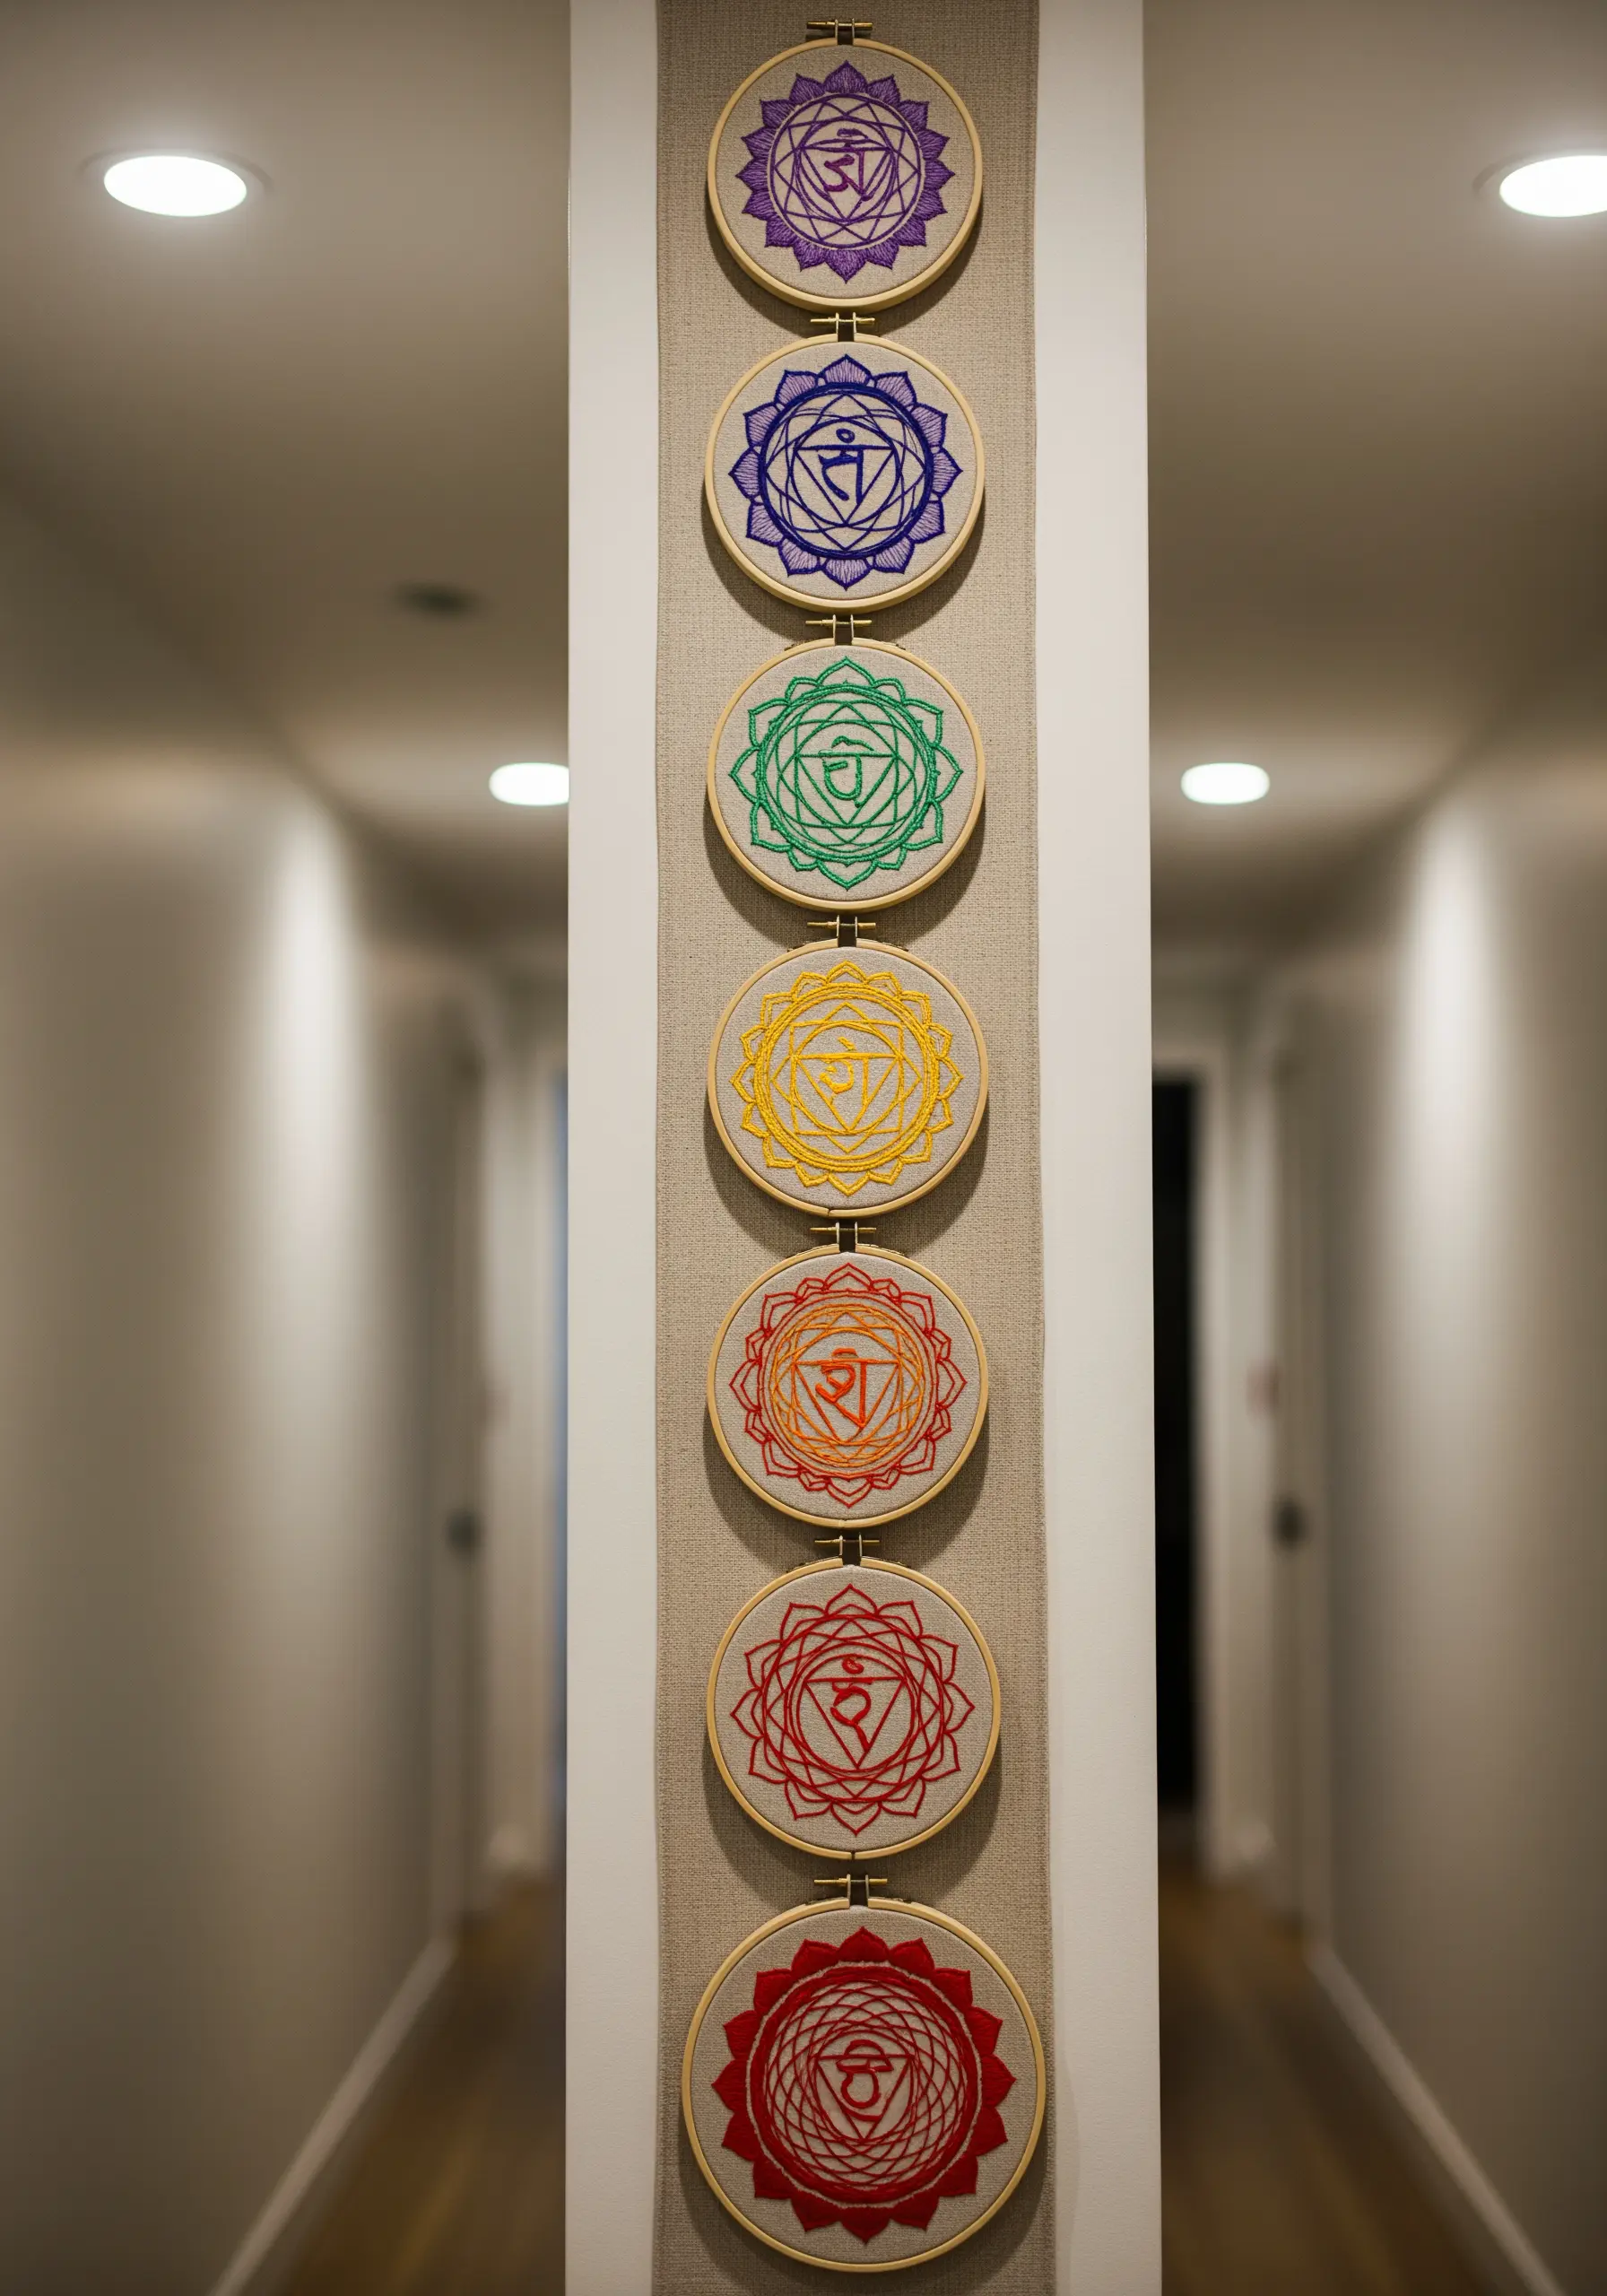
Displaying a series of hoops vertically on a long linen runner creates a beautiful representation of the chakras’ alignment along the spine.
Assign the correct color to each chakra symbol, using a bright, saturated floss to make the symbols pop against the neutral fabric.
A whipped backstitch or chain stitch will give the lines a slightly raised, defined quality that adds to their visual power.
This is a thoughtful way to turn small hoop embroidery into a single, impactful art piece.
19. Incorporate Beads for Refined Glamour

Integrate subtle beadwork to elevate a monochrome mandala from beautiful to breathtaking.
Use a single backstitch to secure each tiny seed bead or crystal, ensuring they are anchored firmly to the fabric.
Trace the embroidered lines with beads to add sparkle and texture, or cluster them in the center of floral motifs to draw the eye.
This technique, stitched on a fabric with a slight sheen like sateen, creates a luxurious piece perfect for a formal space, and is a great example of DIY hand-stitched projects with a high-end feel.
20. Build Texture with Layered Satin Stitch

Create a vibrant, highly textured mandala by layering colors with satin stitch.
Instead of stitching flat sections side-by-side, embroider the innermost layer completely, then work the next layer directly on top, allowing your stitches to slightly overlap the edge of the layer beneath.
This technique builds physical depth and creates a rich, dimensional effect that begs to be touched.
Use a full six strands of floss for maximum loft and texture, turning your hoop into a piece of abstract fabric collage embroidery.
21. Combine Beading and Thread for a Pearlized Centerpiece

Create a focal point within your mandala by using beads of varying sizes and finishes.
Use concentric circles of pearl beads for the center, securing each one with a tiny stitch. For the outer rings, alternate between metallic seed beads and iridescent crystals to add subtle color shifts.
Frame the beaded sections with delicate backstitched lines in a matching thread to create a clean, defined transition from beadwork to embroidery. These kinds of handmade mini decor pieces add instant elegance.
22. Scale Up with Bold, Free-Flowing Lines
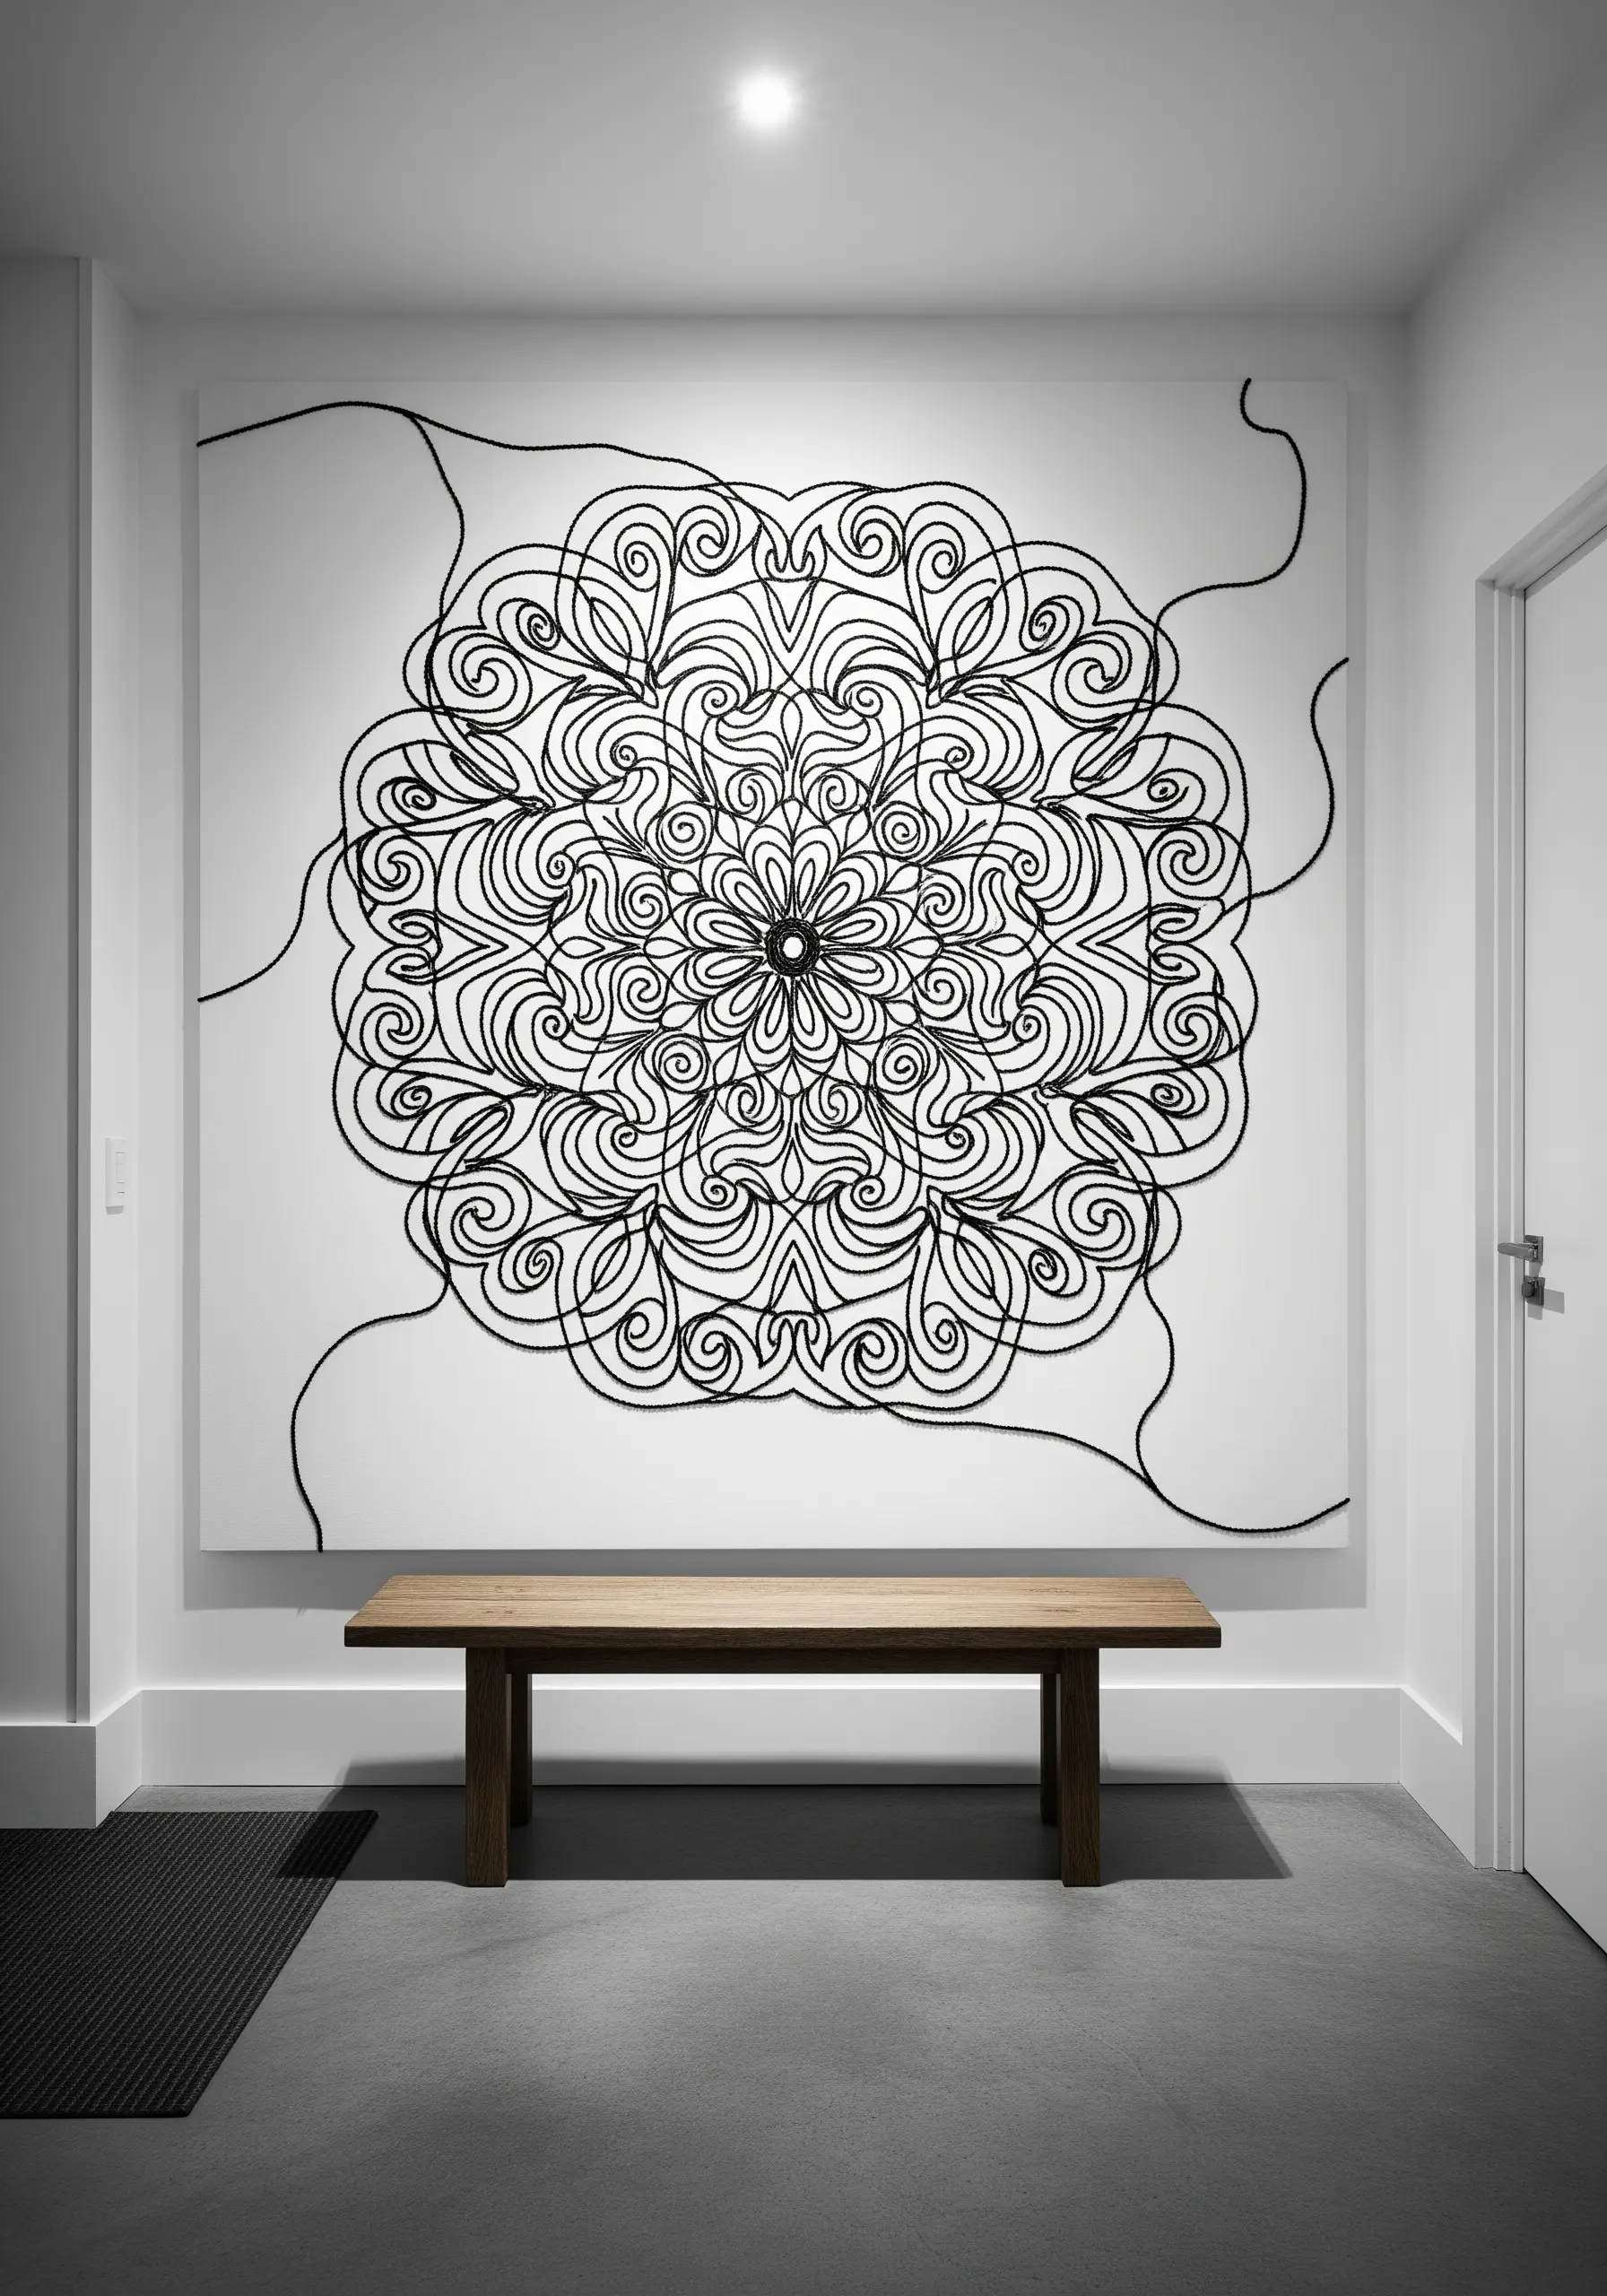
To translate a detailed mandala into a large-scale, minimalist piece, focus on the primary lines and let go of the tiny details.
Use a thick black yarn or cord and the couching technique to achieve a bold, graphic line that has weight and presence.
Allow the lines to extend beyond the traditional circular boundary; it adds a dynamic, modern energy to the ancient form, creating an impactful piece of DIY wall art.
23. Craft a Dreamcatcher with Soft Textures
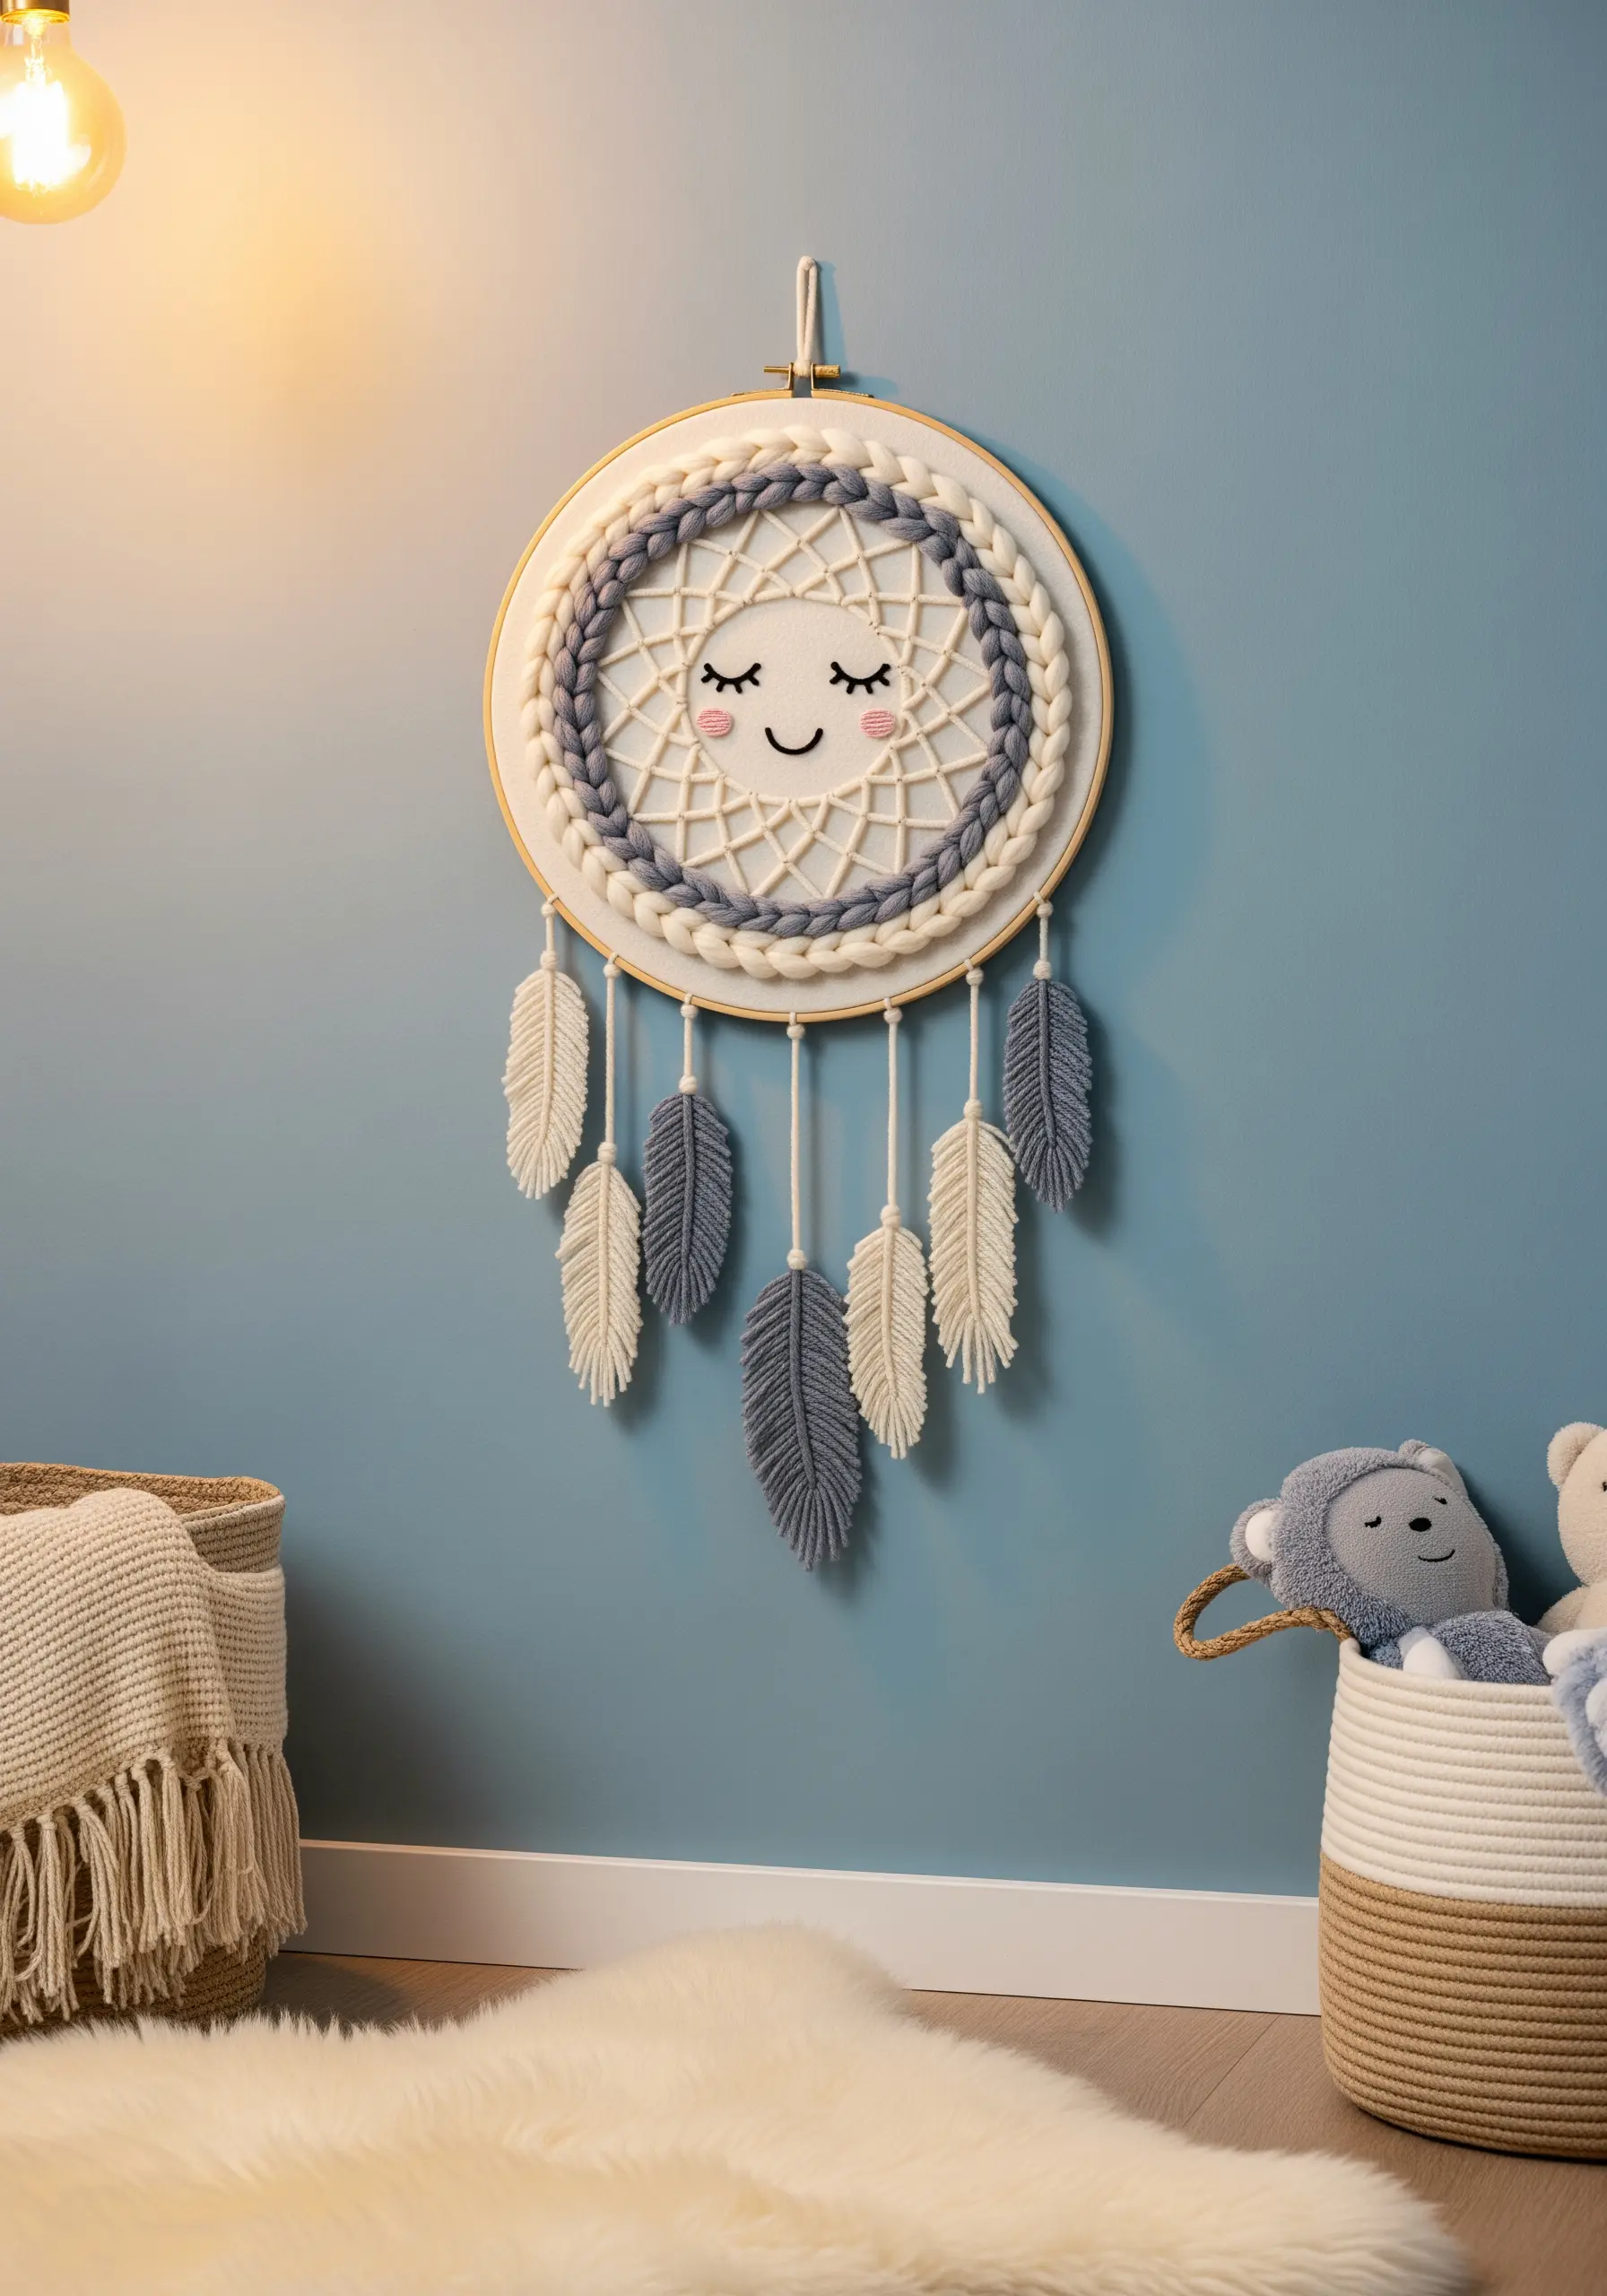
Merge the mandala form with a dreamcatcher by incorporating soft, tactile materials.
Create the central ‘web’ with a simple running stitch on fabric, then add a dimensional border using chunky, braided yarn attached with couching stitches.
For the feathers, use a series of detached chain stitches or the fishbone stitch with a fluffy yarn to create a soft, plume-like effect. This is a wonderful way to create whimsical embroidery patterns for a child’s room.
24. Float Your Stitches with Thread on Glass
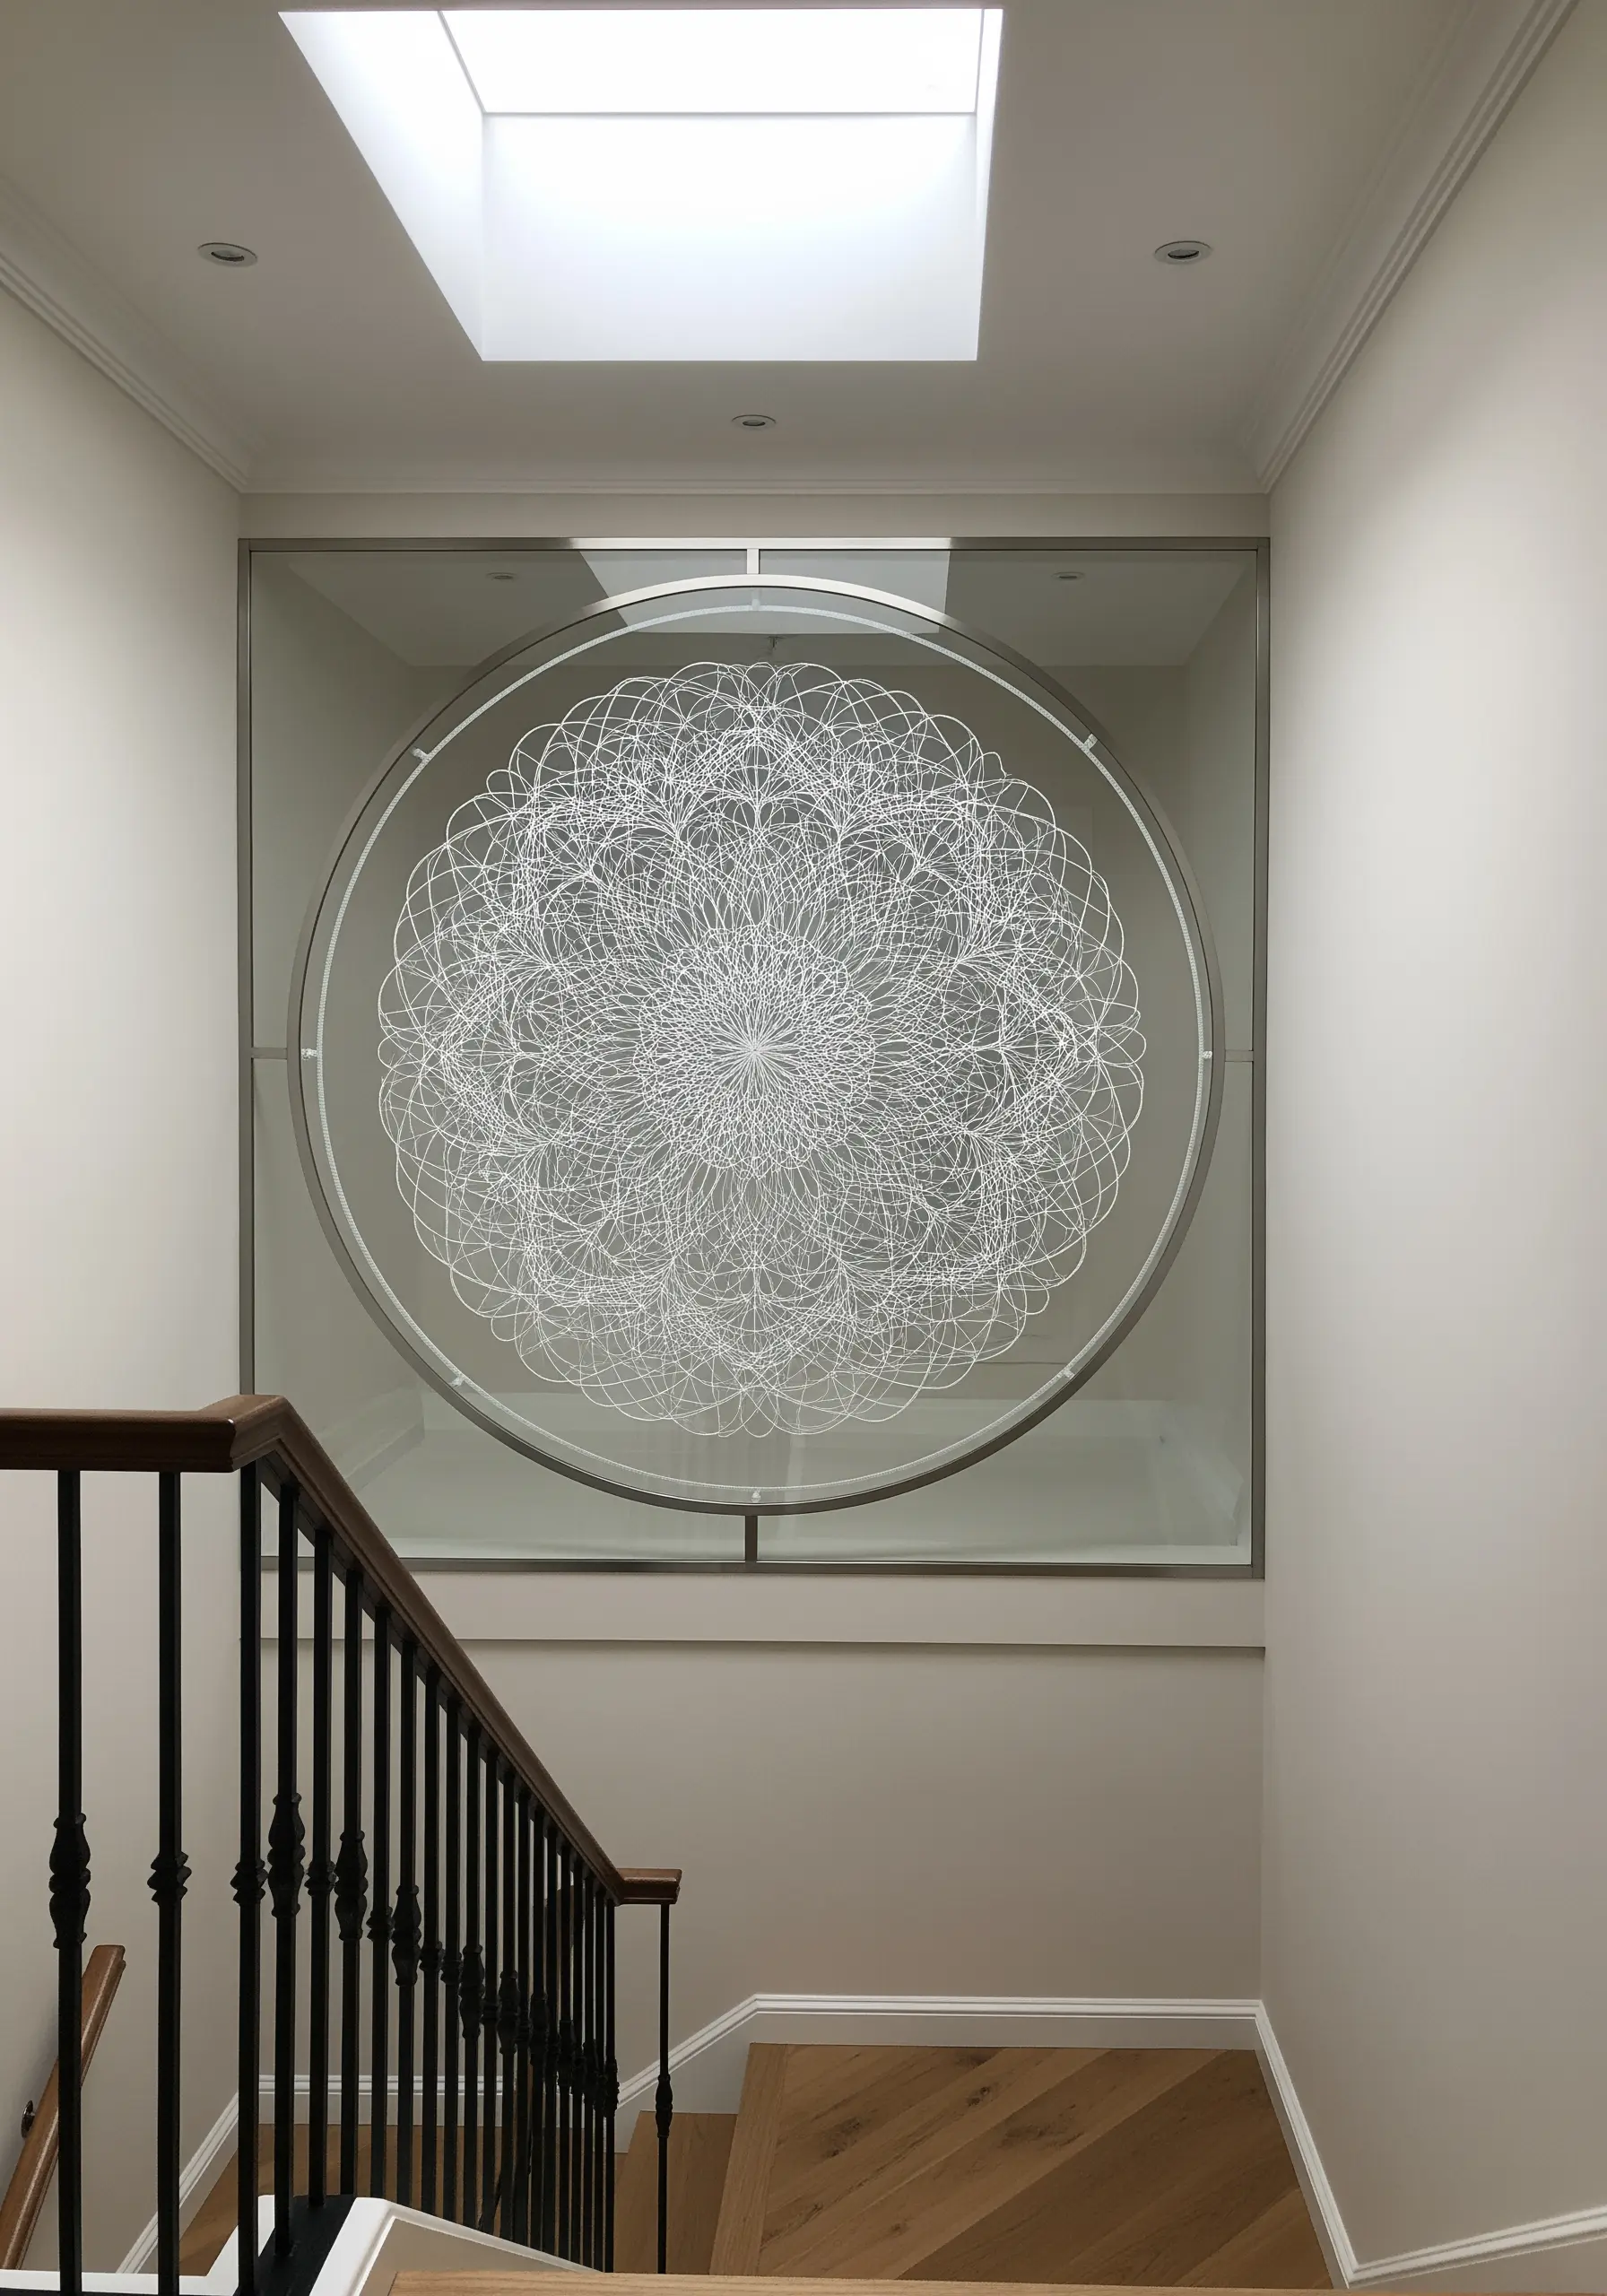
Create a stunning, ethereal effect by stitching your mandala directly onto a sheer fabric like tulle or organza and mounting it between two panes of glass.
The transparent background makes the threadwork appear to float in mid-air, casting intricate shadows on the wall behind it.
You must keep the back of your work exceptionally neat, as it will be fully visible. This technique transforms embroidery into a piece of modern thread art.
25. Design a Cascading Mandala Tapestry
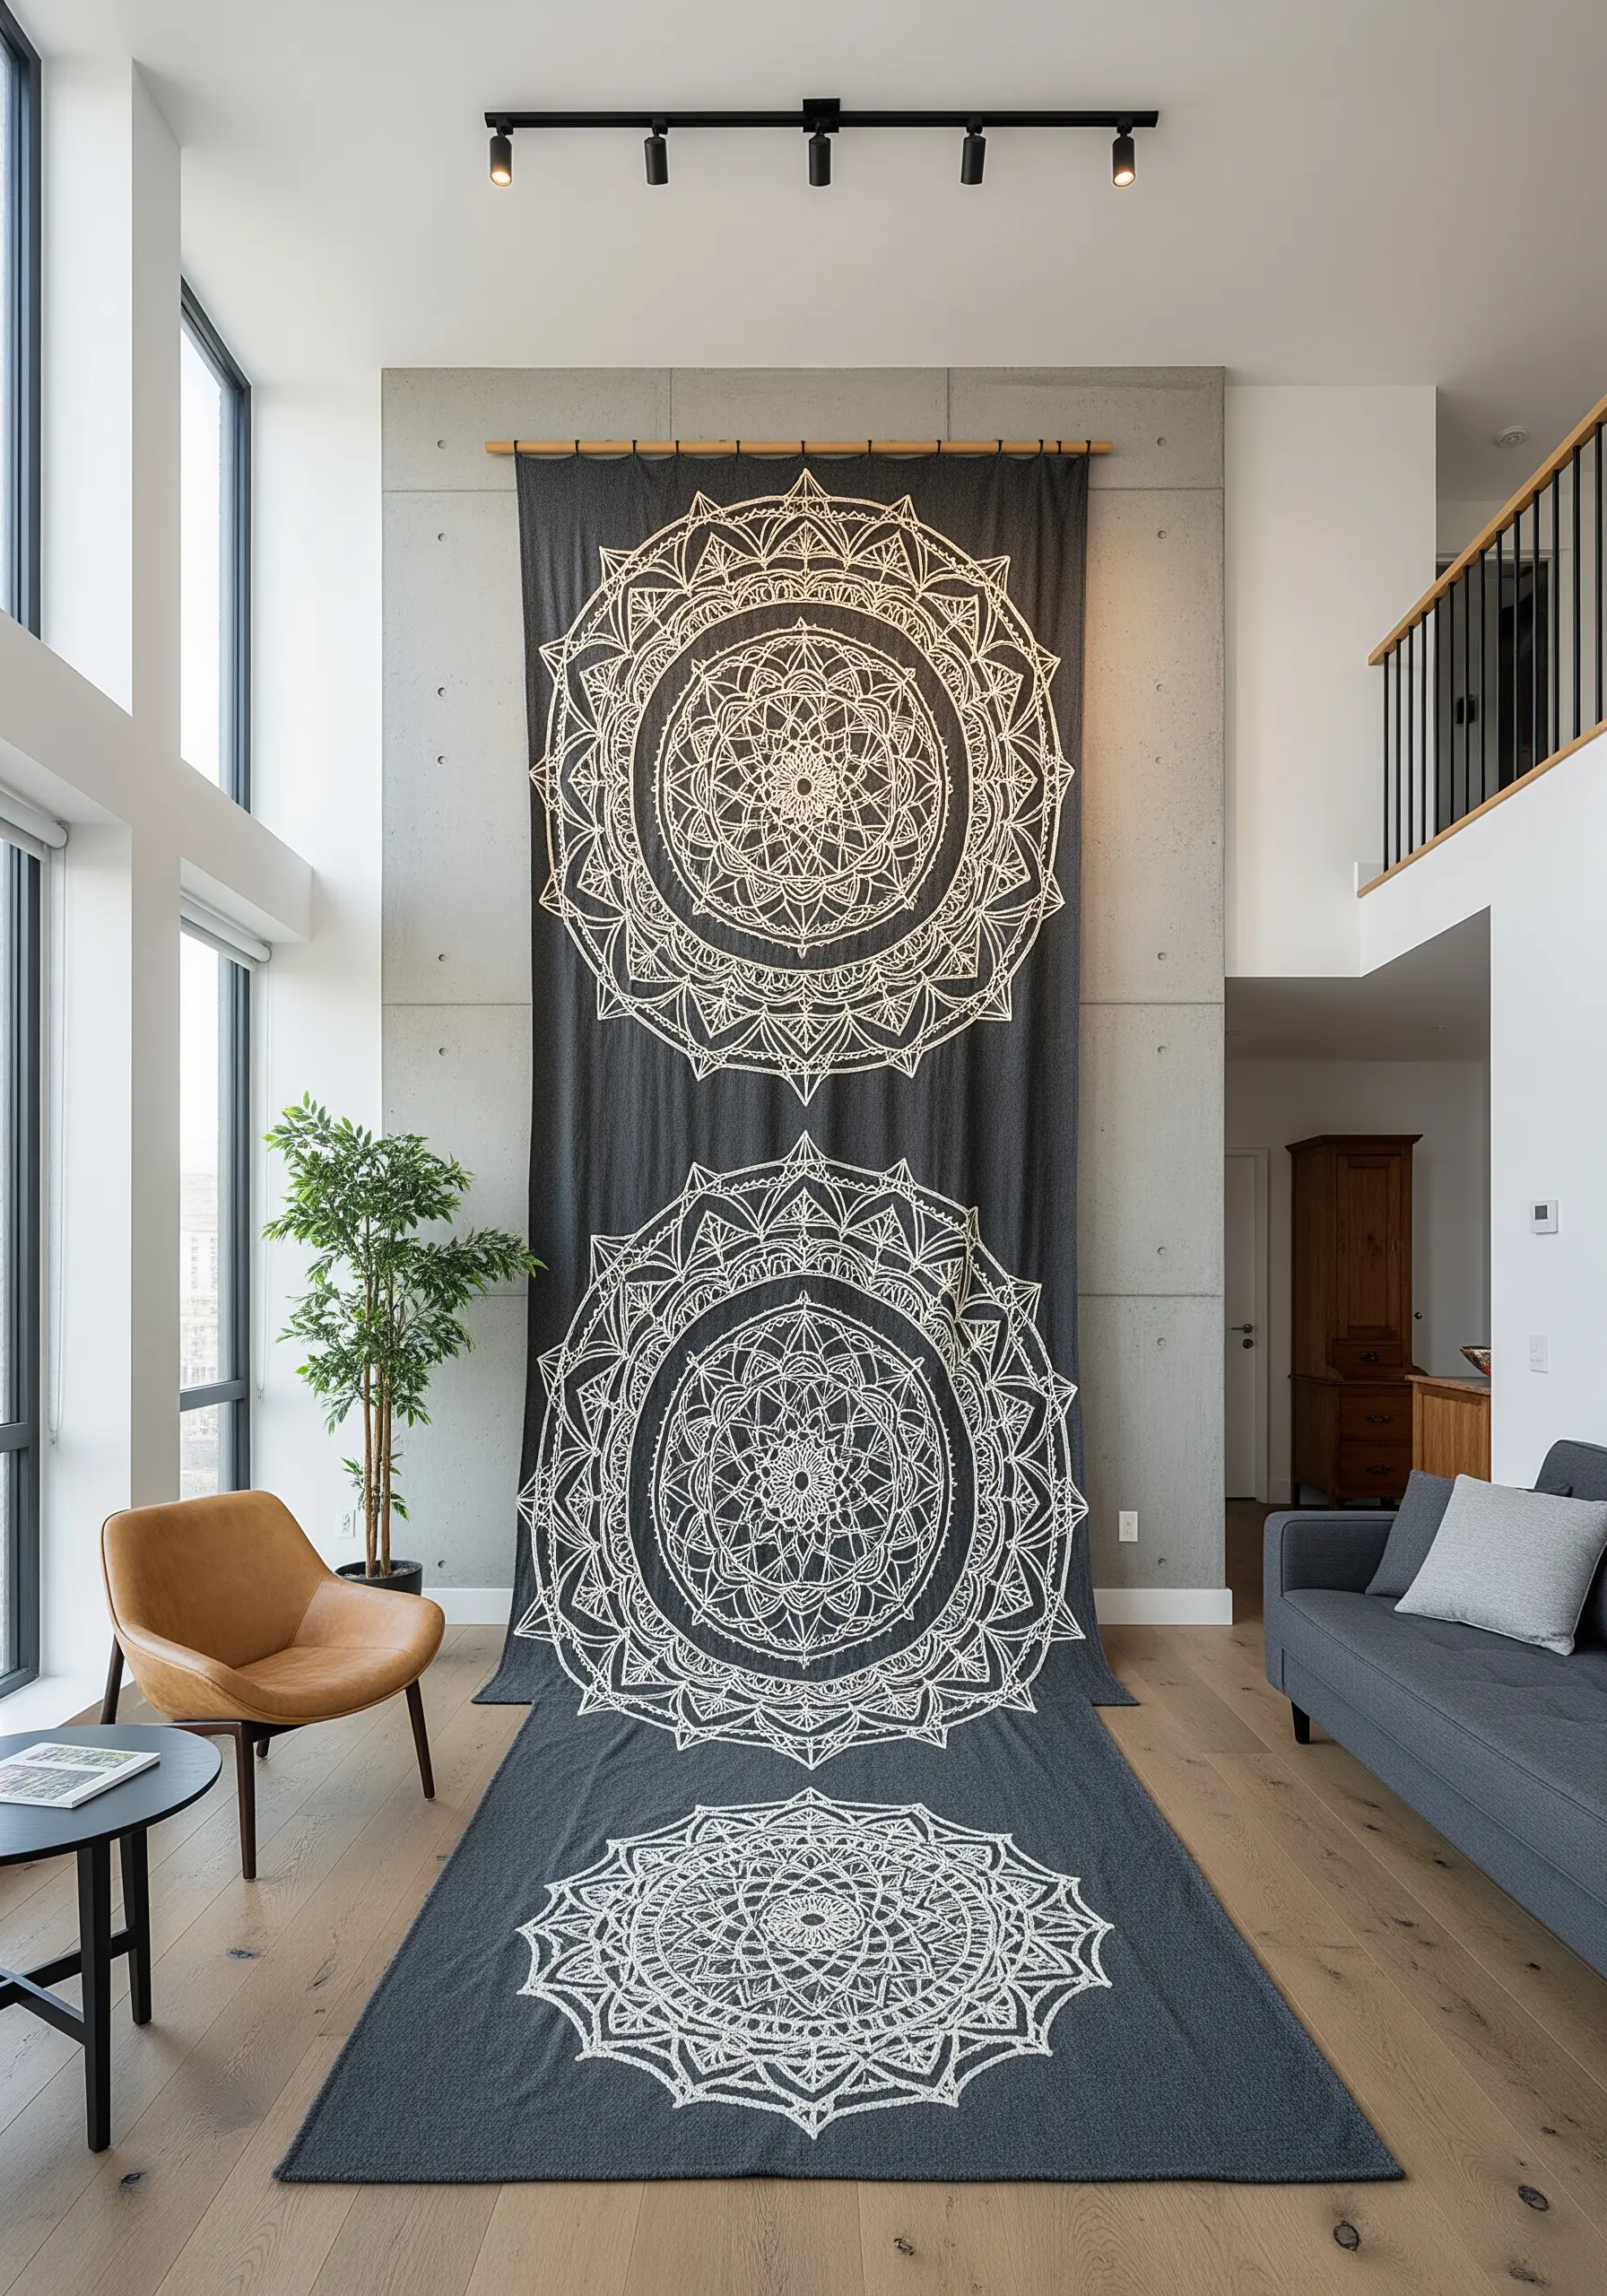
Create a dramatic, floor-to-ceiling art installation by stitching multiple mandalas on a single, long panel of fabric.
To maintain visual cohesion, use the same high-contrast palette (like cream on charcoal) for each mandala, even if the patterns themselves differ.
This large-format project works best with durable, medium-weight fabric like cotton canvas or linen that can support its own weight without stretching or distorting the embroidery. It’s an ambitious take on embroidery wall tapestry ideas.
26. Recreate Tree Rings with Organic Textures

Mimic the natural texture of tree rings by using a variety of threads and stitches.
Use variegated brown floss for the thin inner rings, stitched in a slightly wobbly backstitch to imitate organic growth.
For the thicker outer rings and bark, switch to a chunky wool yarn and use a dense chain stitch or looped stitches to build up a rough, tactile surface. This project celebrates the beauty of nature’s textures.
27. Frame Geometric Purity Against a Dark Wall
For a sophisticated, high-impact look, choose a precise geometric pattern and stitch it in a single, light-colored thread on black fabric.
The darkness of the background absorbs light, making the threadwork appear almost laser-etched and intensely graphic.
A simple, thin frame in a light wood or metallic finish provides a clean border without distracting from the intricate geometry. This is an excellent way to create simple embroidery patterns that make statement wall art.
28. Create a Diptych for Architectural Impact
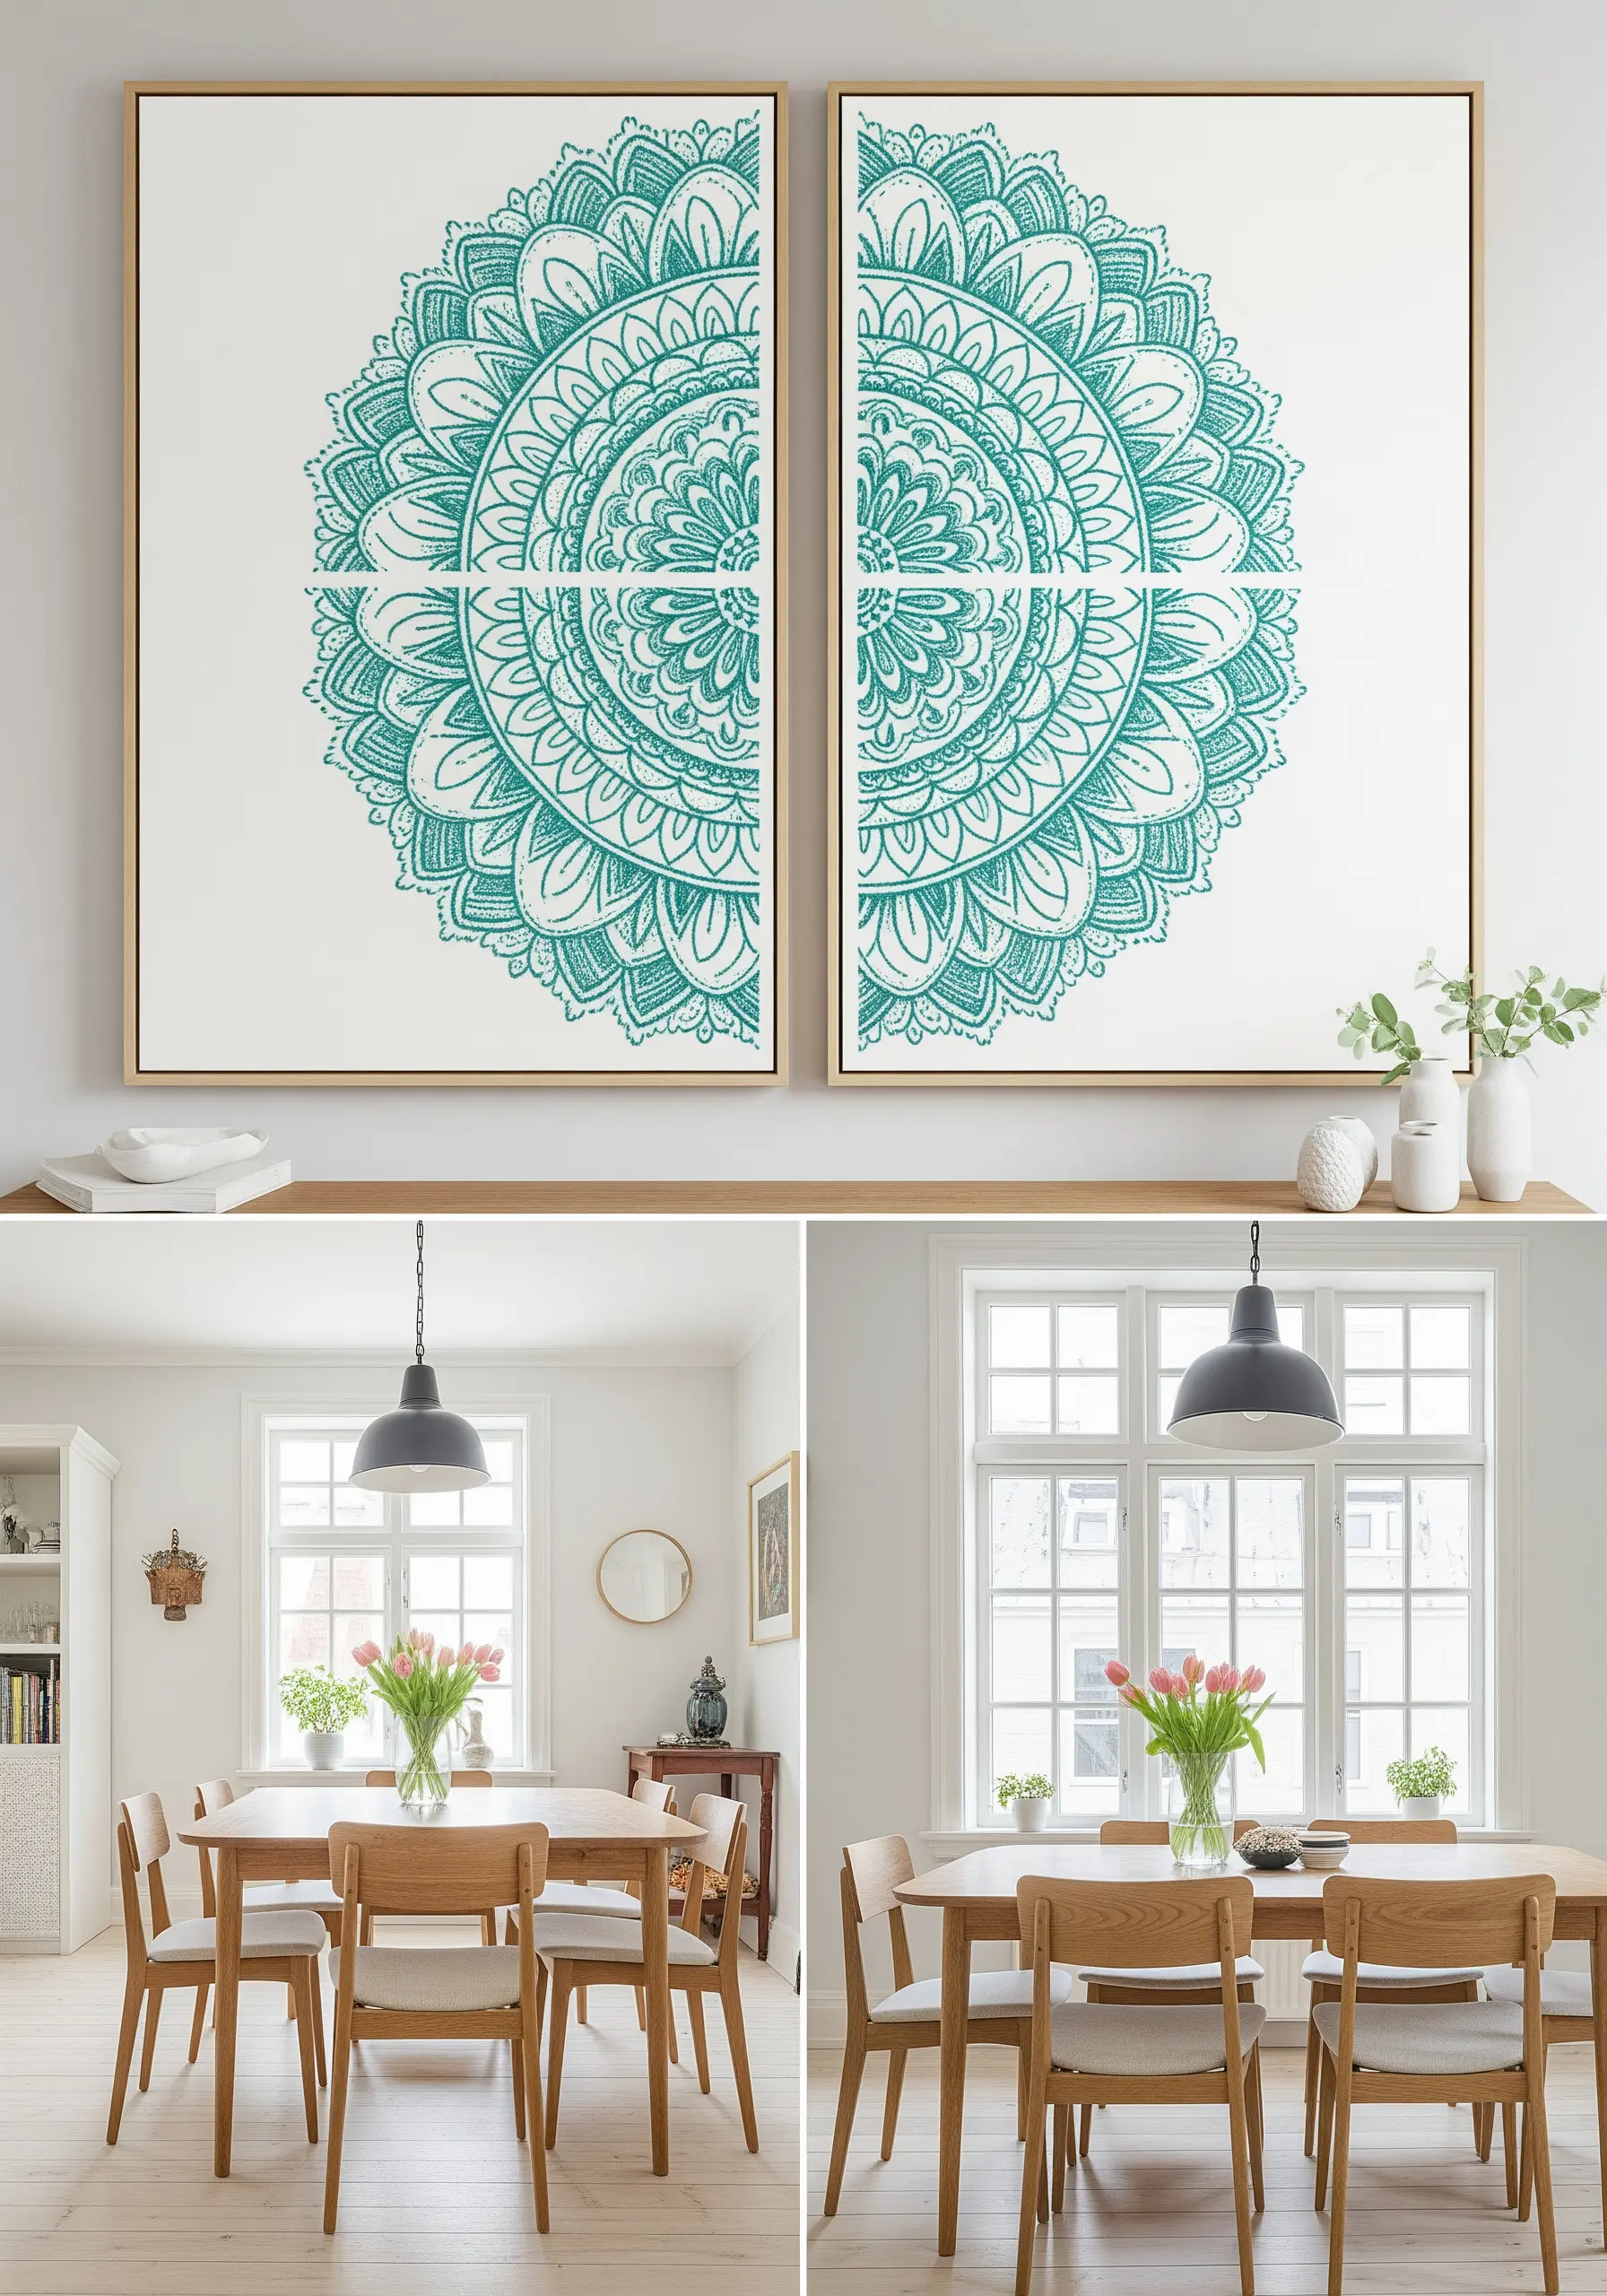
Split a single mandala design across two or more canvases to create a modern diptych or triptych.
This technique adds architectural interest to a large wall and draws more attention than a single piece might.
Ensure your fabric is stretched identically on each frame and that the pattern aligns perfectly across the gap. Using a projector to trace your design can help ensure flawless alignment.
This is a clever way to make DIY framed embroidery art look like a high-end installation.
29. Stitch a Patchwork of Sashiko-Inspired Patterns
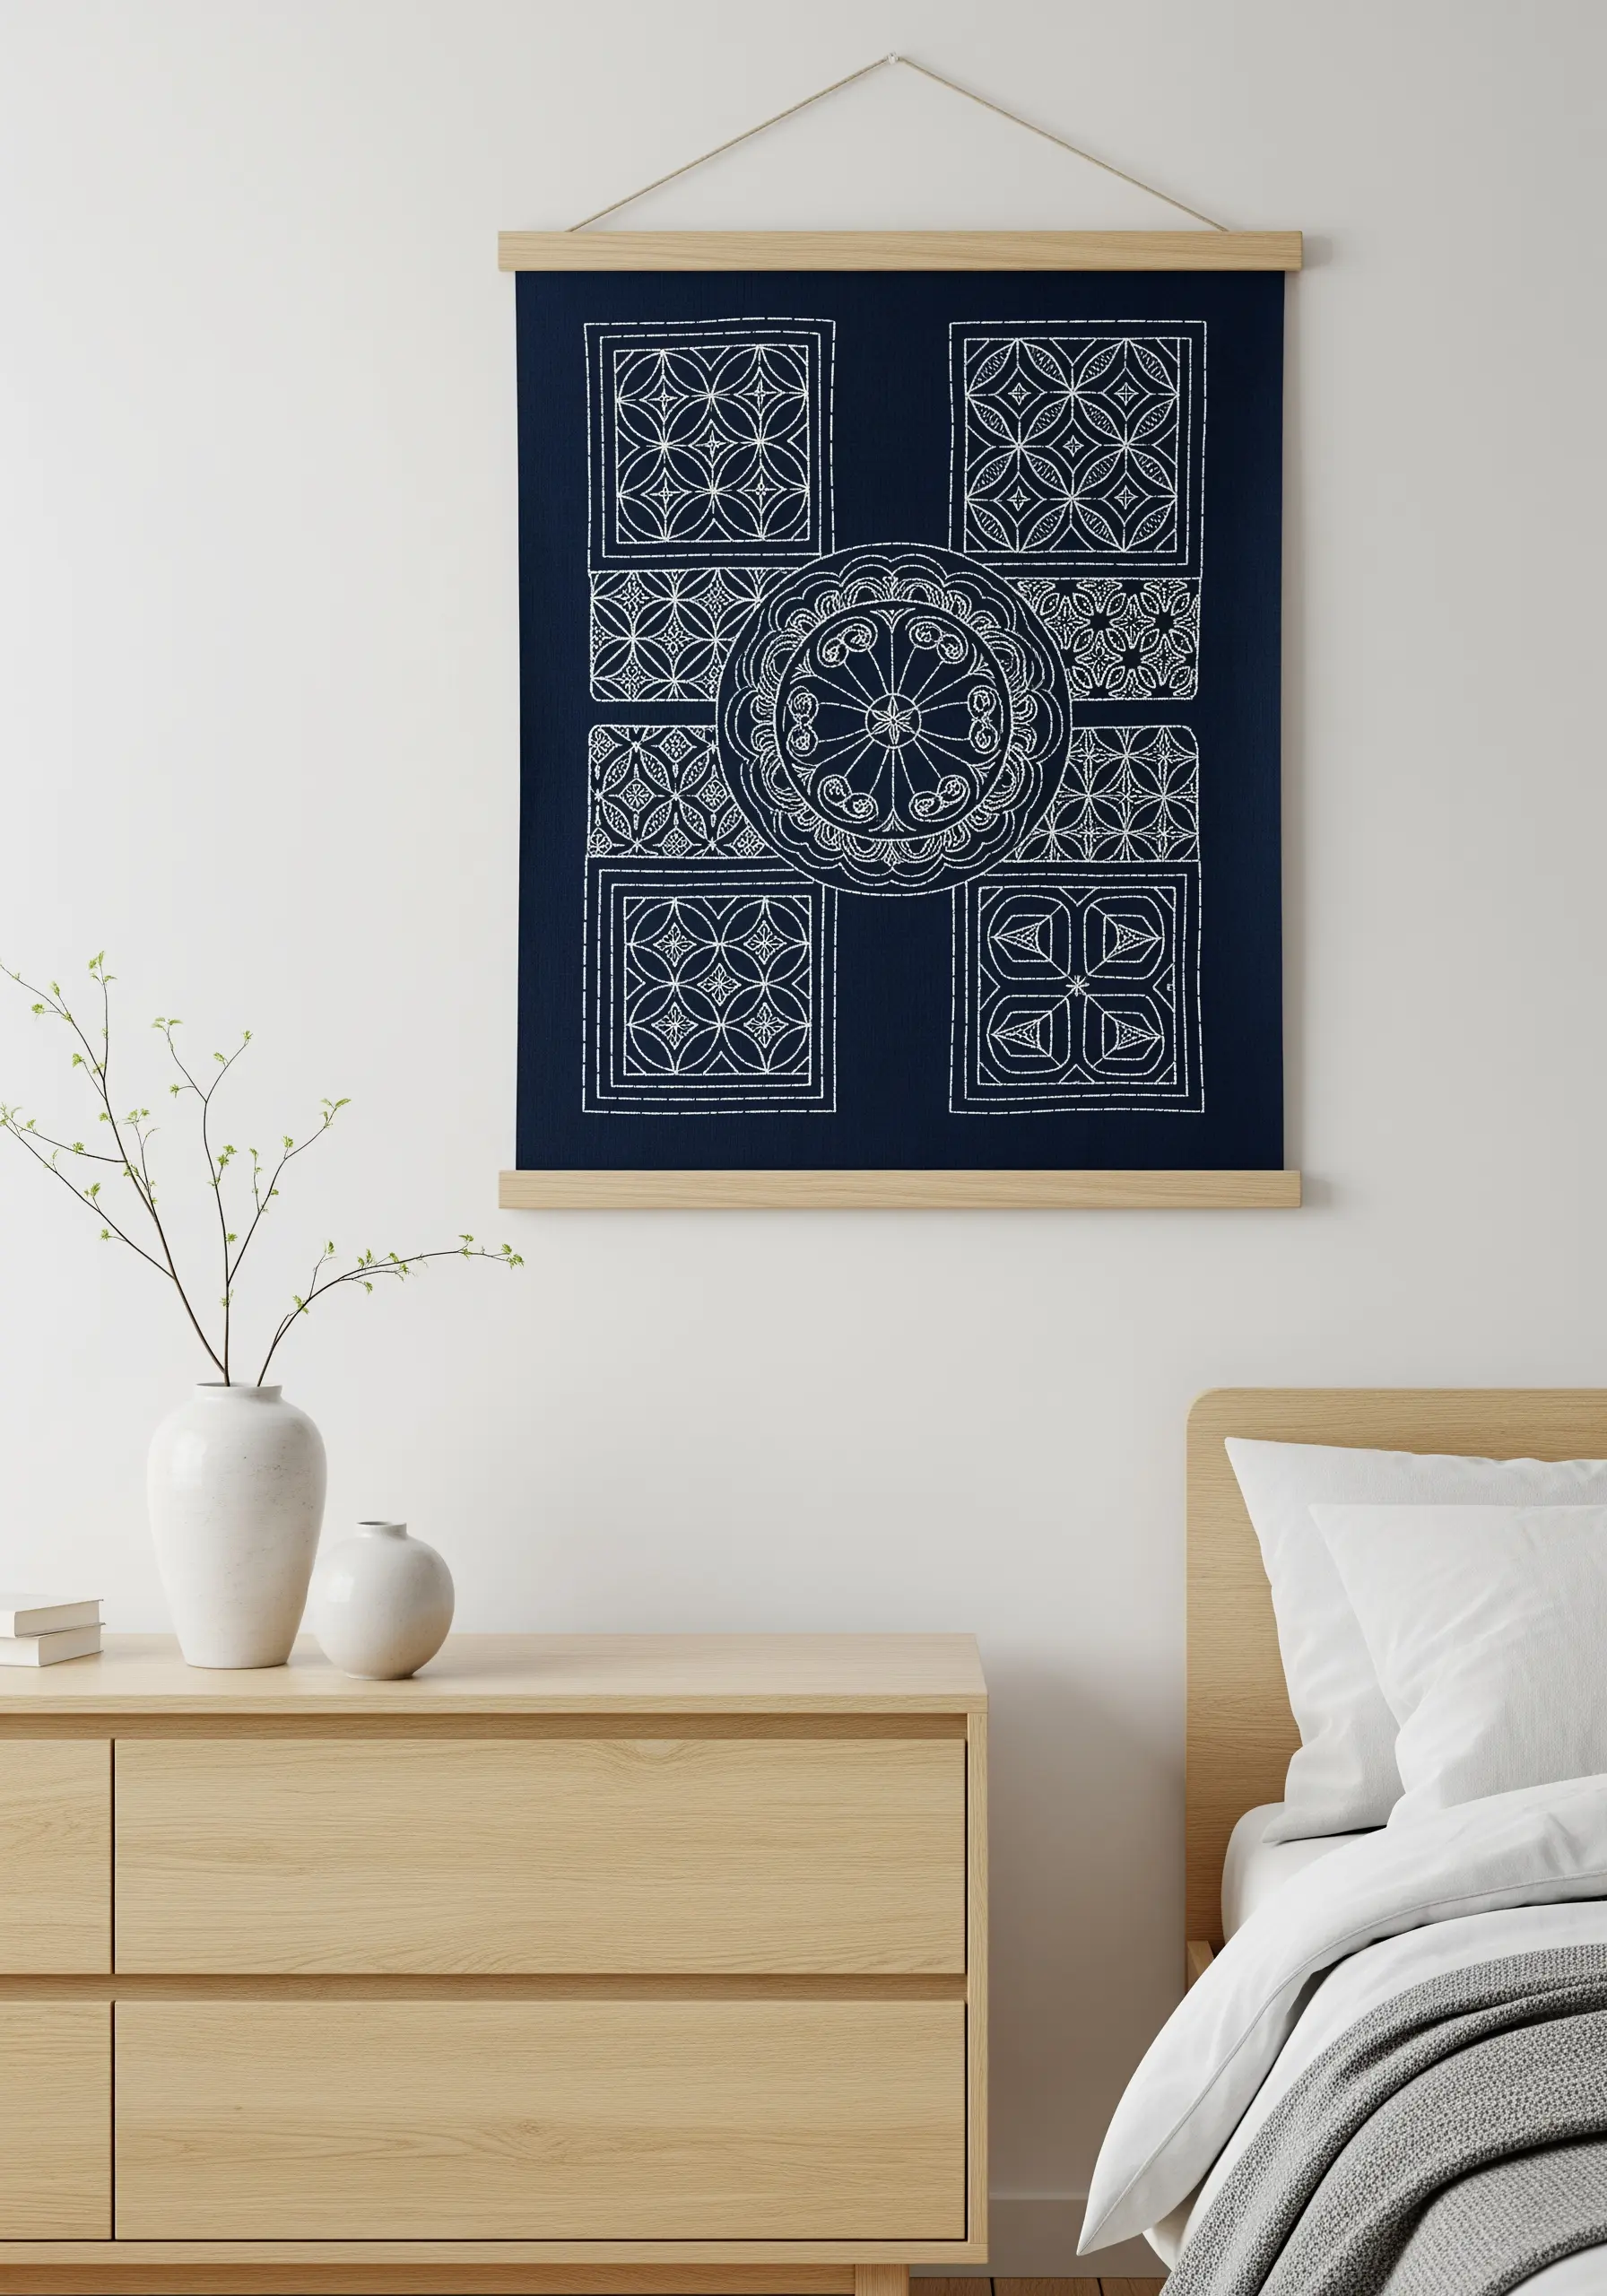
Combine the meditative quality of mandalas with the Japanese tradition of Sashiko stitching.
Divide your fabric into a grid and fill each section with a different repeating Sashiko pattern, all stitched in a contrasting thread (traditionally white on indigo).
Use a longer Sashiko needle and a slightly thicker cotton thread for the characteristic running stitch. The beauty lies in the rhythm and uniformity of your stitches, which creates a rich, textural quilt-like effect.
30. Design a Botanical Mandala on Sheer Fabric
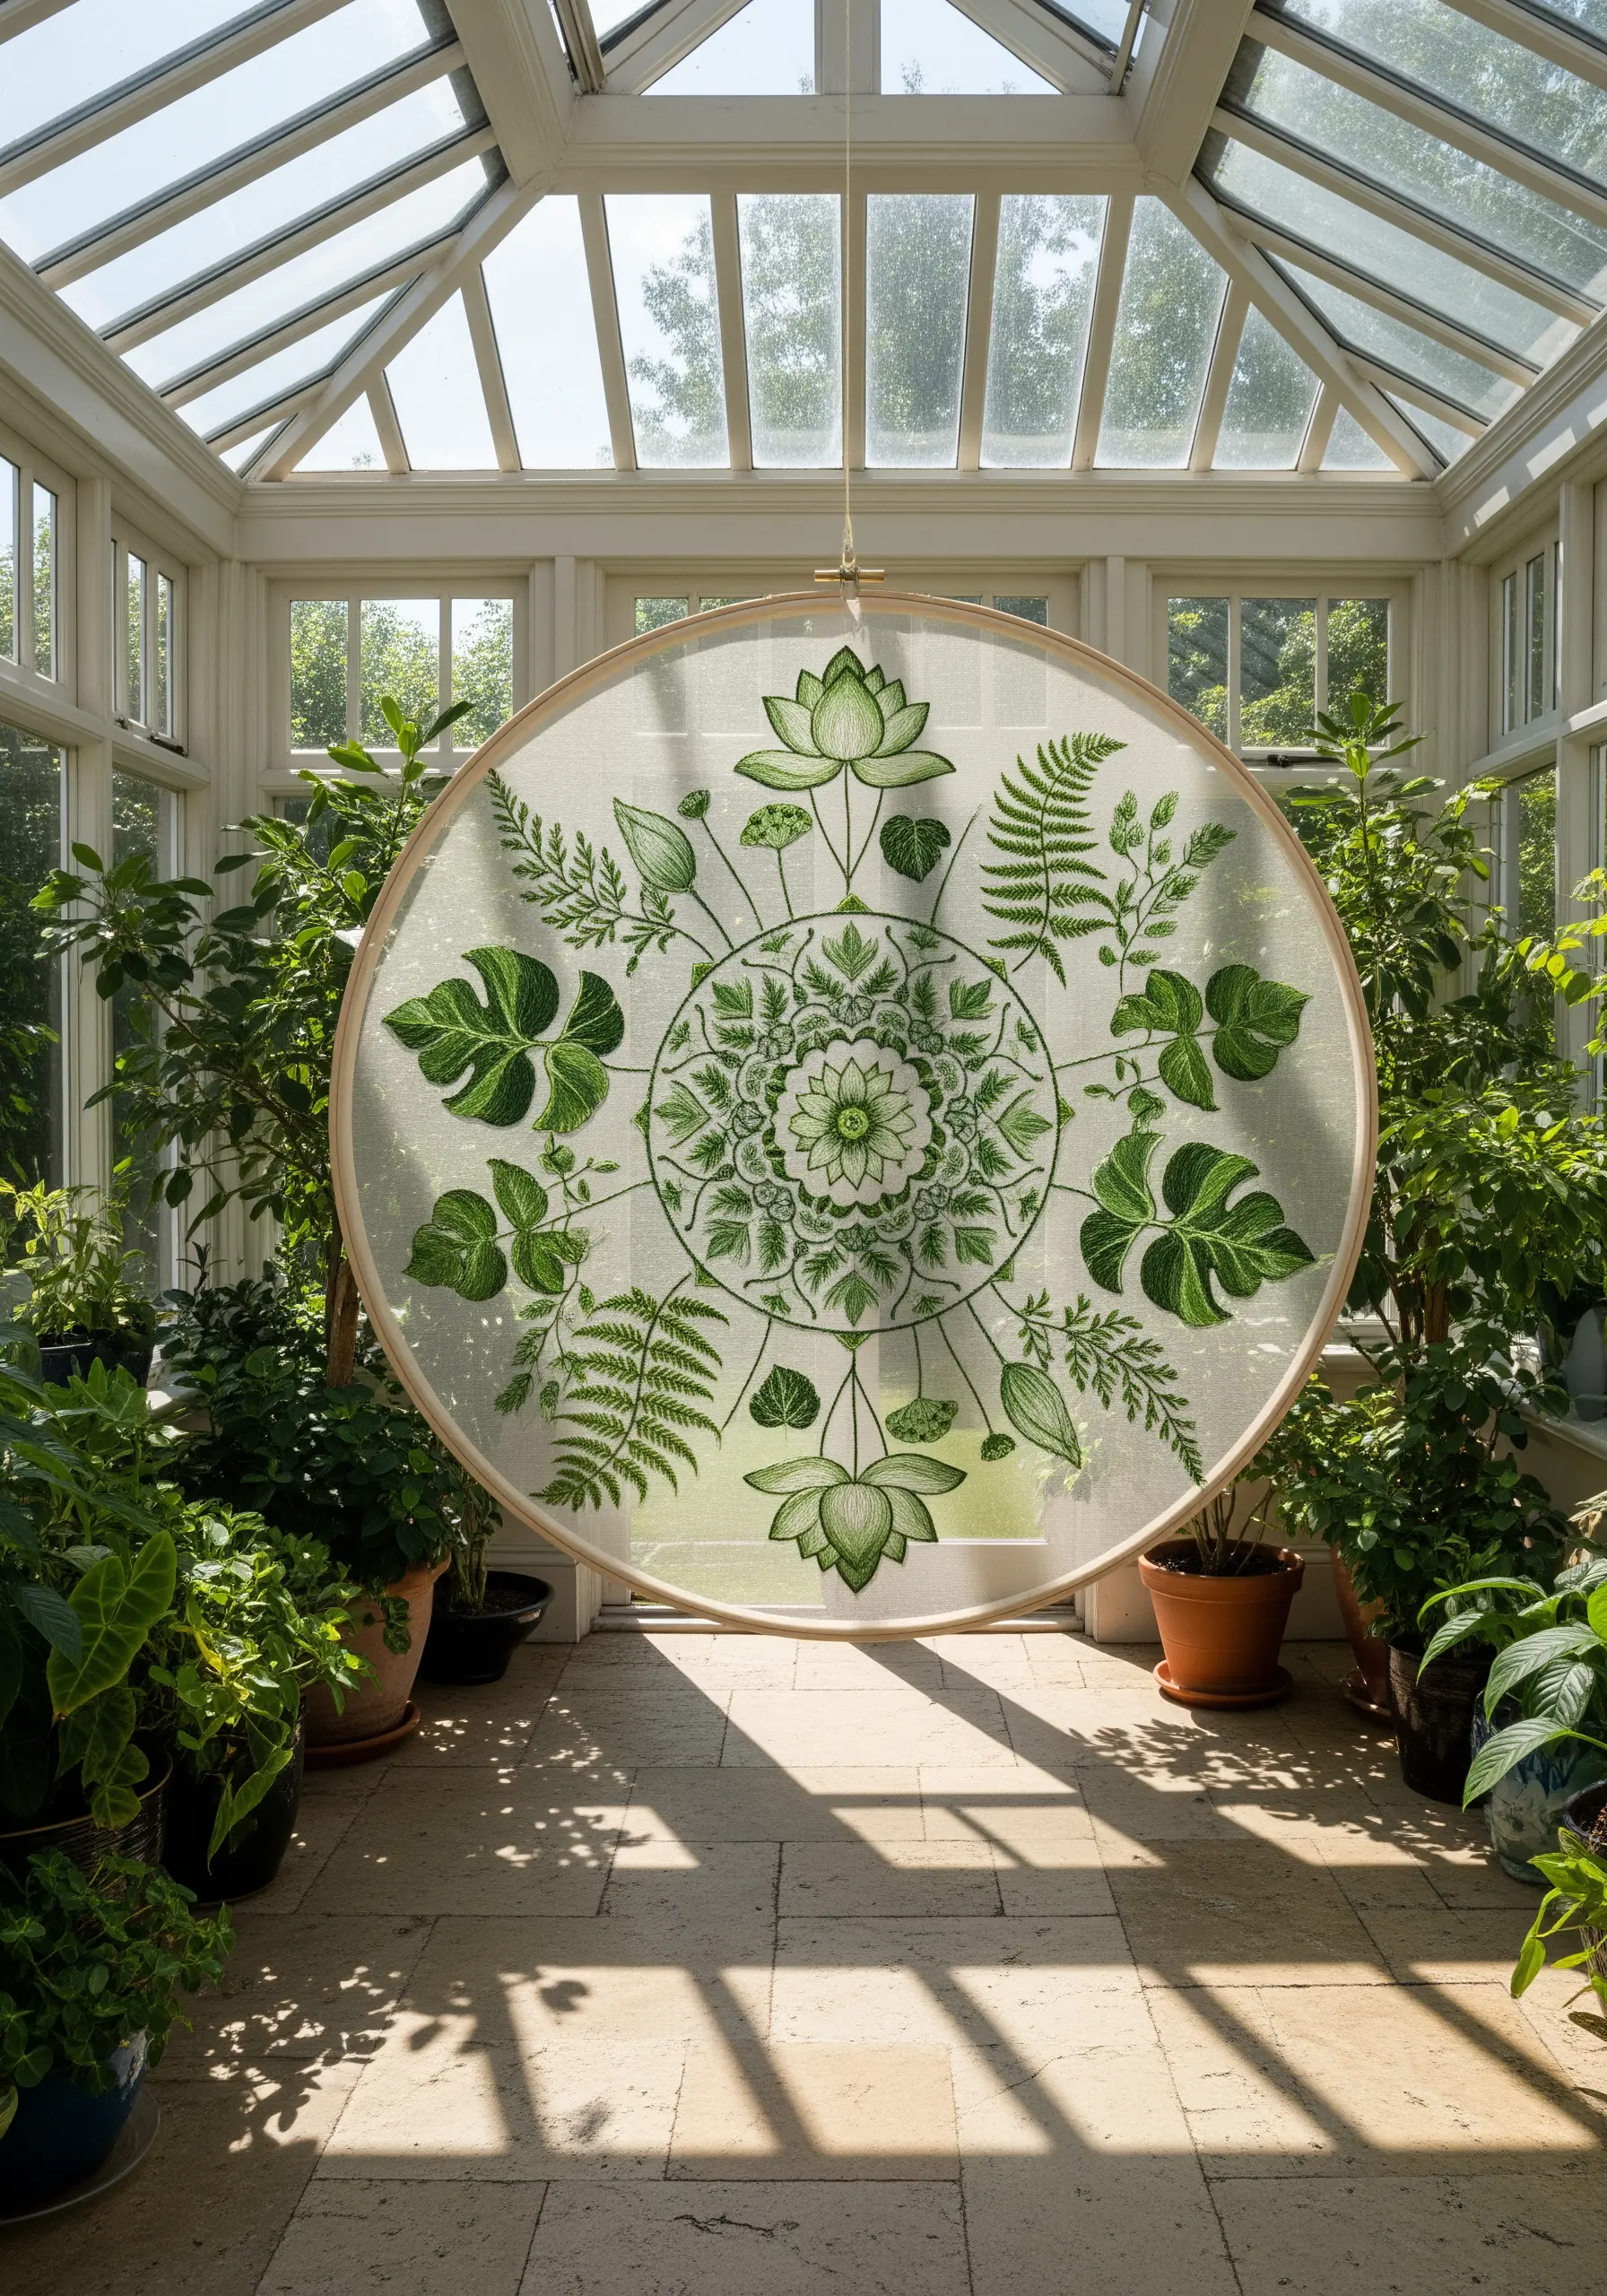
For a conservatory or sunroom, embroider a botanical mandala on a sheer fabric panel and hang it in a large hoop.
The sunlight will filter through the fabric, illuminating the stitched leaves and flowers like a stained-glass window.
Use a variety of green threads and leaf stitches—like fishbone, fly, and detached chain stitch—to create a composition that feels lush and alive. These botanical embroidery wall pieces connect your indoor space with the outdoors.
31. Add Shisha Mirrors for a Touch of Bohemian Glamour
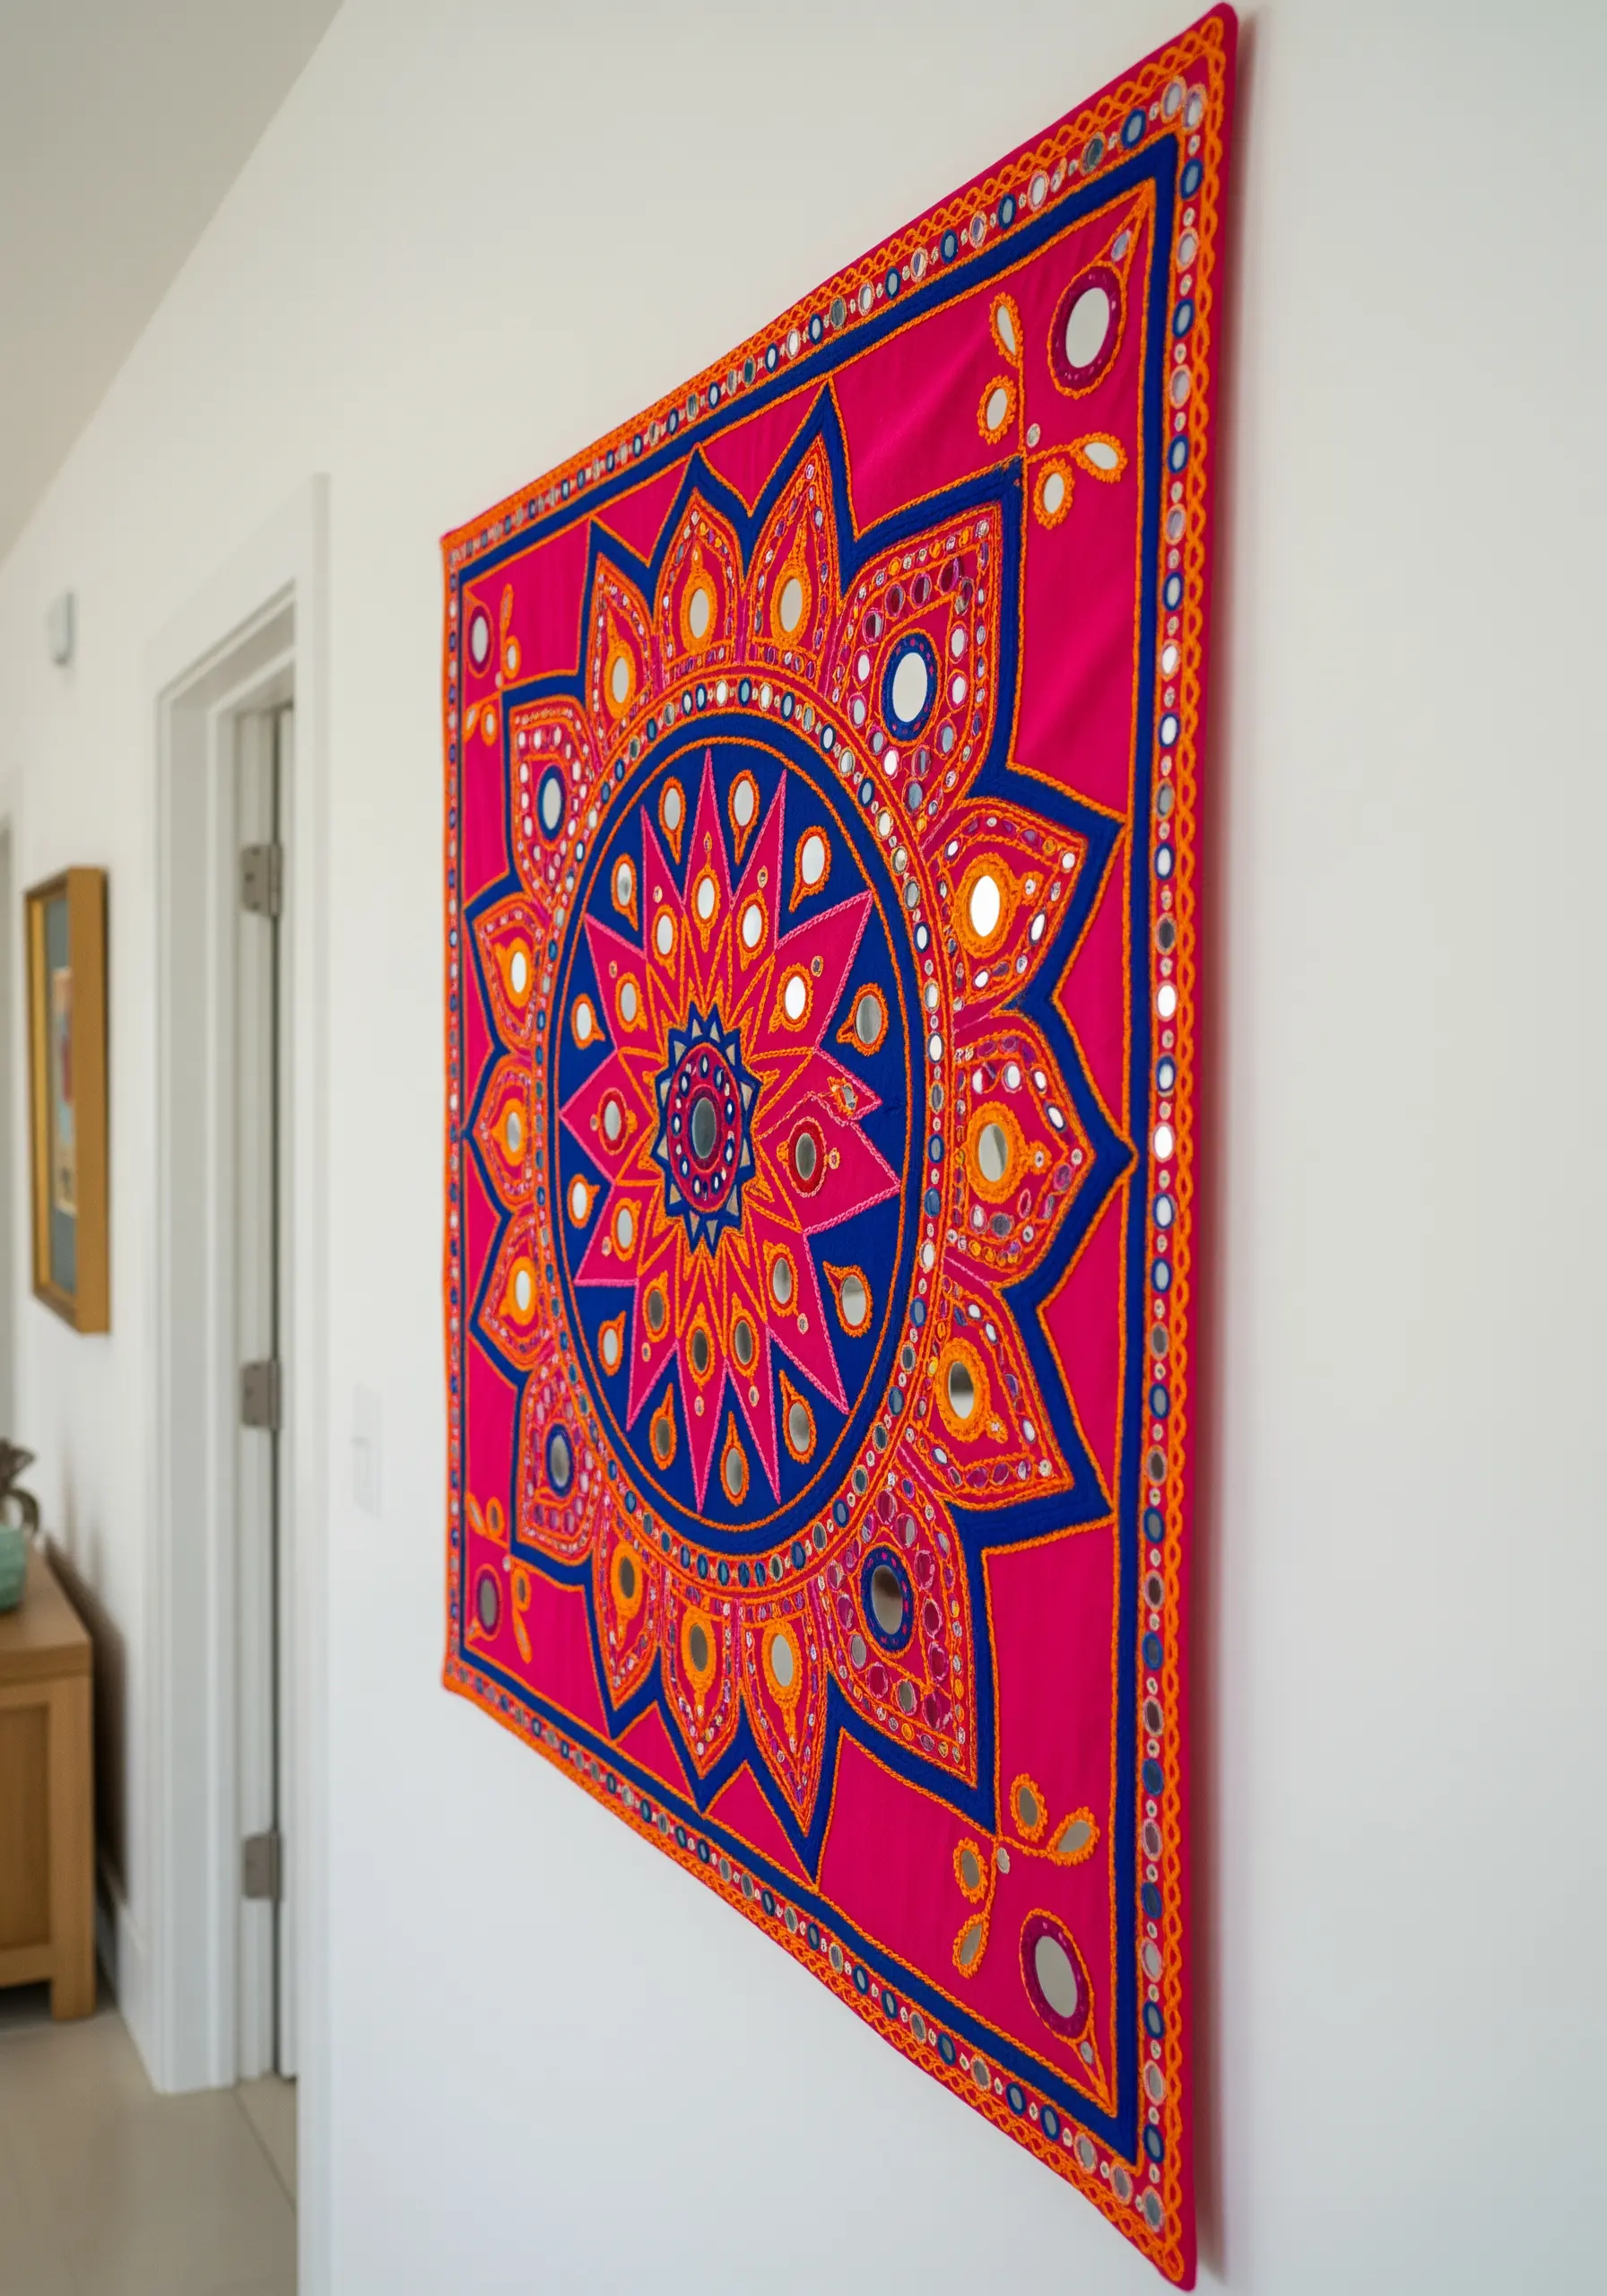
Incorporate traditional Shisha mirror work for a vibrant, light-catching effect common in Indian textiles.
You can purchase small craft mirrors and secure them to the fabric using a specialized buttonhole stitch frame around the mirror’s edge.
Pair the mirrors with bold, saturated colors like fuchsia, royal blue, and marigold, and use a chunky chain stitch to outline your shapes for a truly opulent, maximalist design. It’s a beautiful way to explore cultural embroidery motifs.
32. Frame Your Art in a Custom Teardrop Hoop
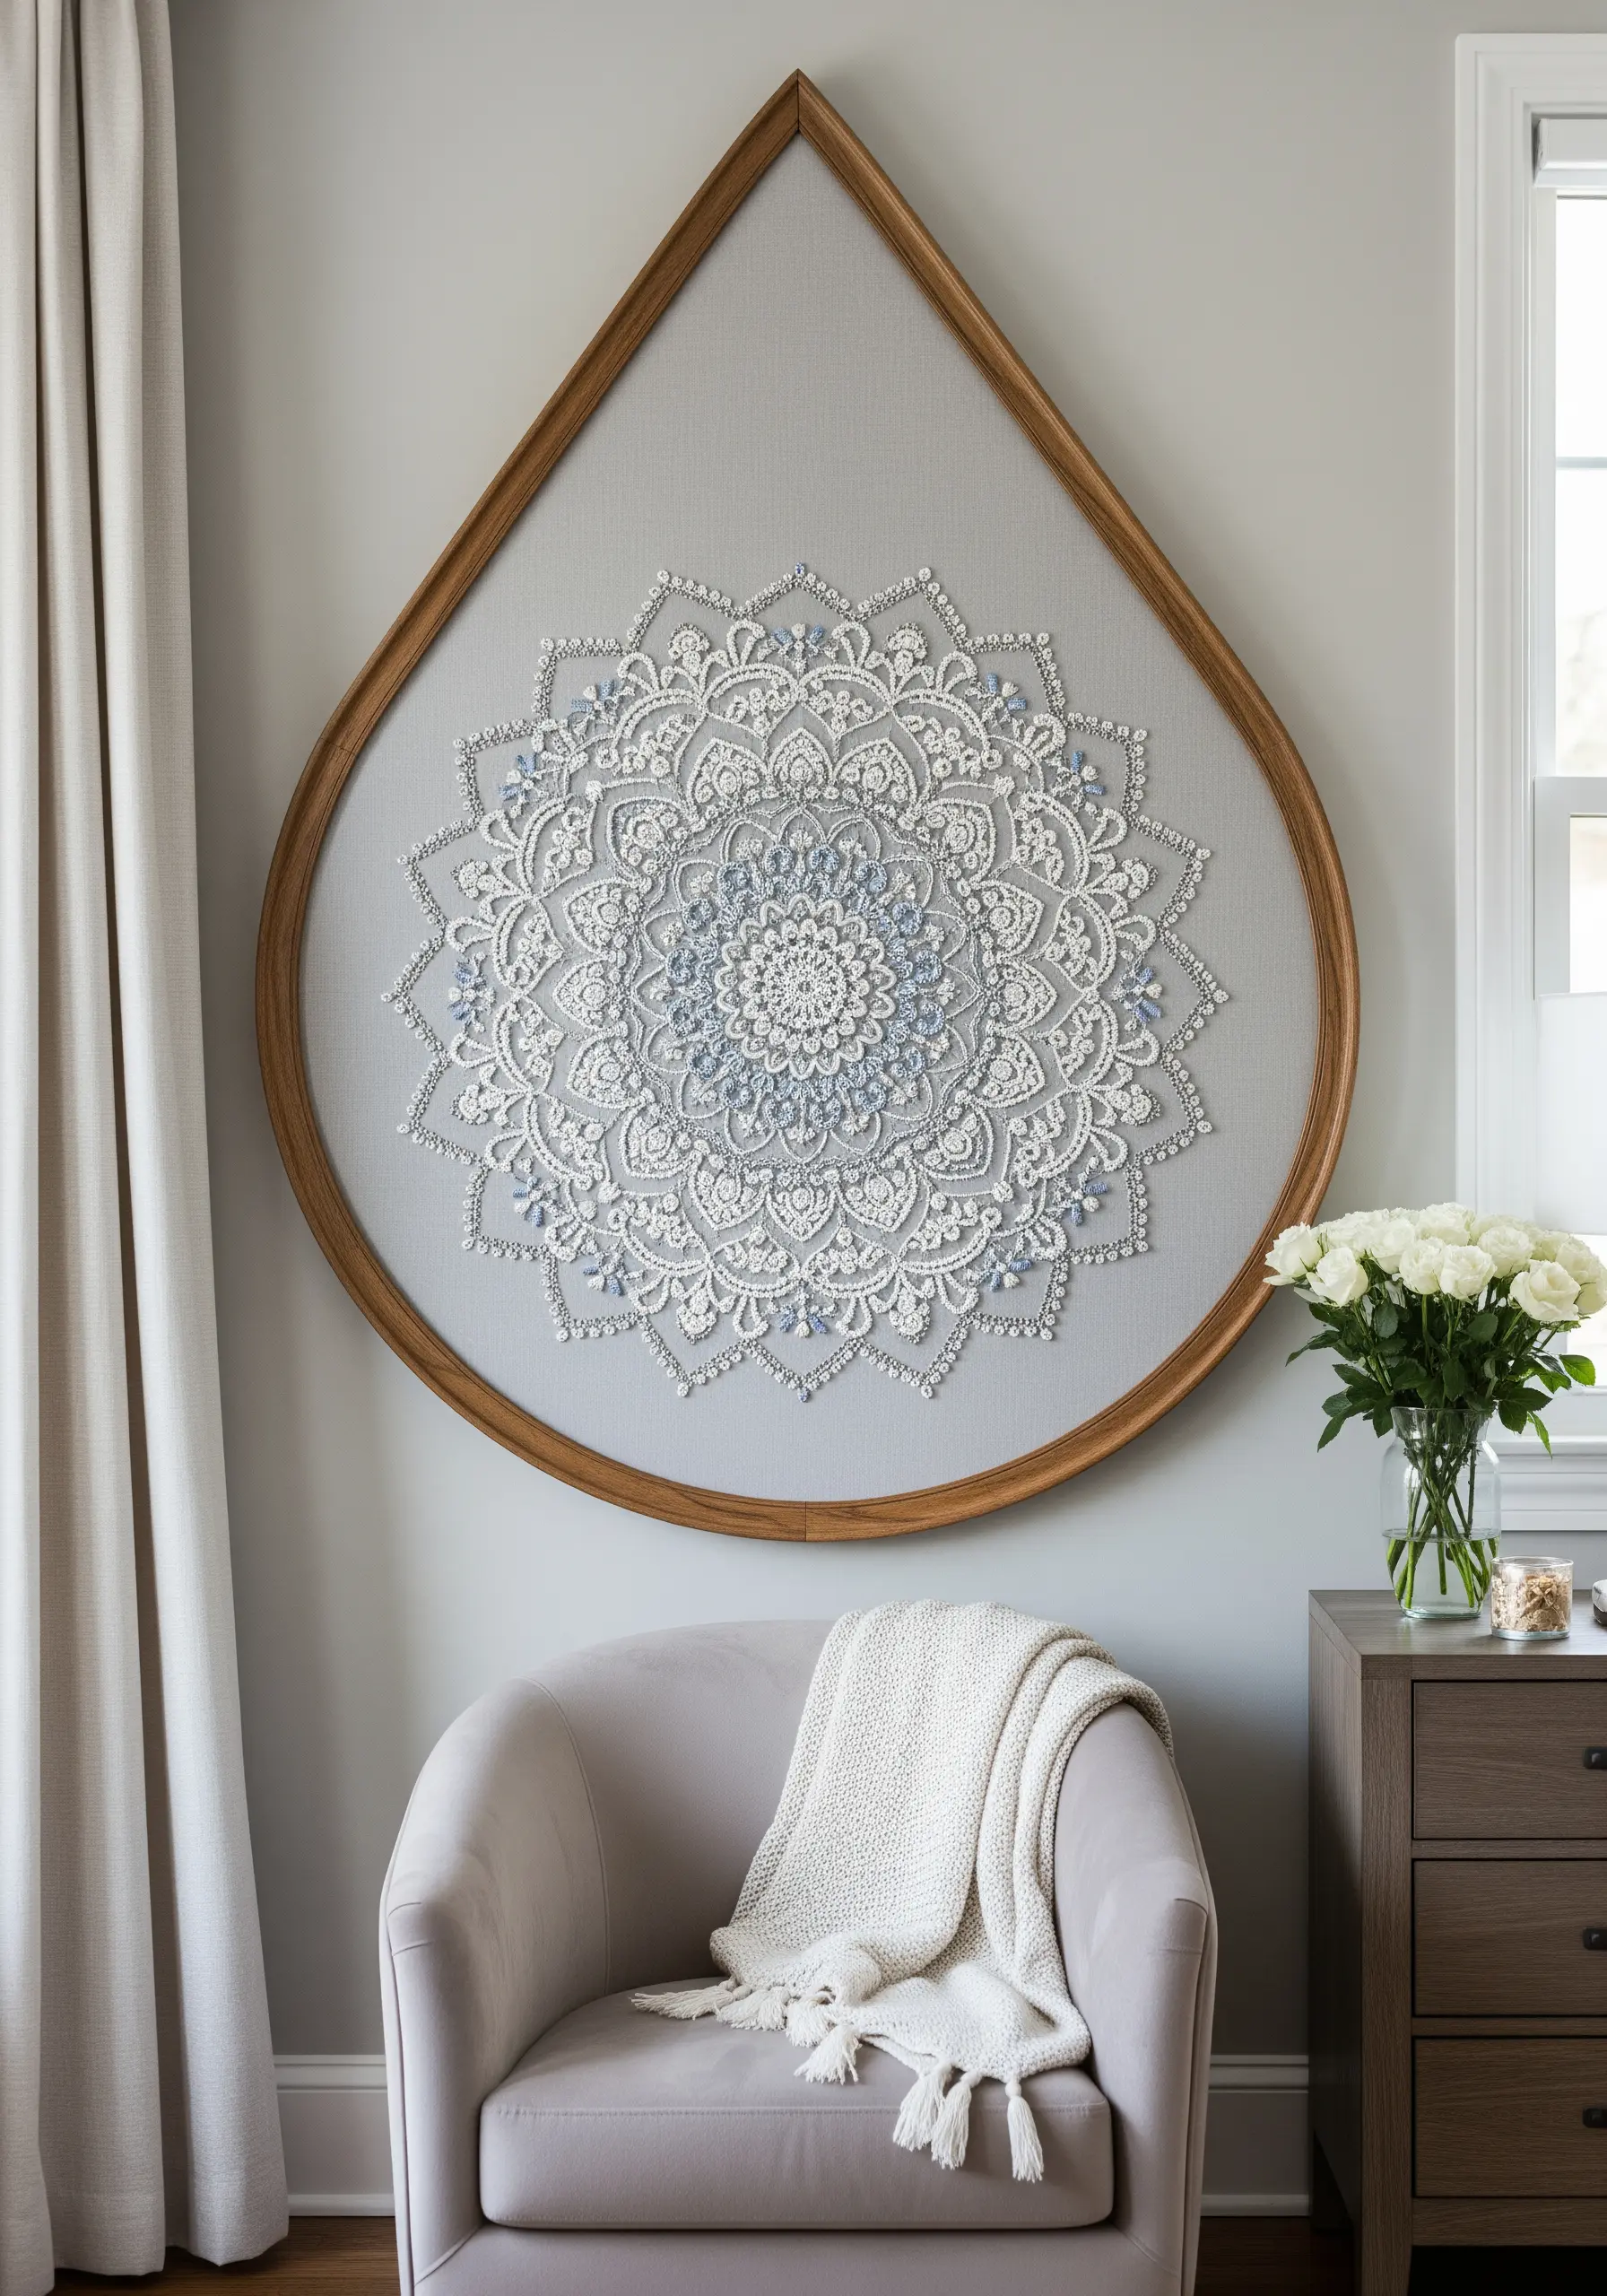
Move beyond the traditional circle by commissioning or creating a custom-shaped frame, like this elegant teardrop.
The unconventional shape immediately turns your embroidery into a unique art object.
For the embroidery itself, combine raised textures like French knots and bullion knots with delicate line work. Using white thread with subtle pops of a single color, like pale blue, creates a serene and sophisticated feel, perfect for a bedroom with a serene aesthetic.
33. Sculpt a 3D Wave with Textured Yarn
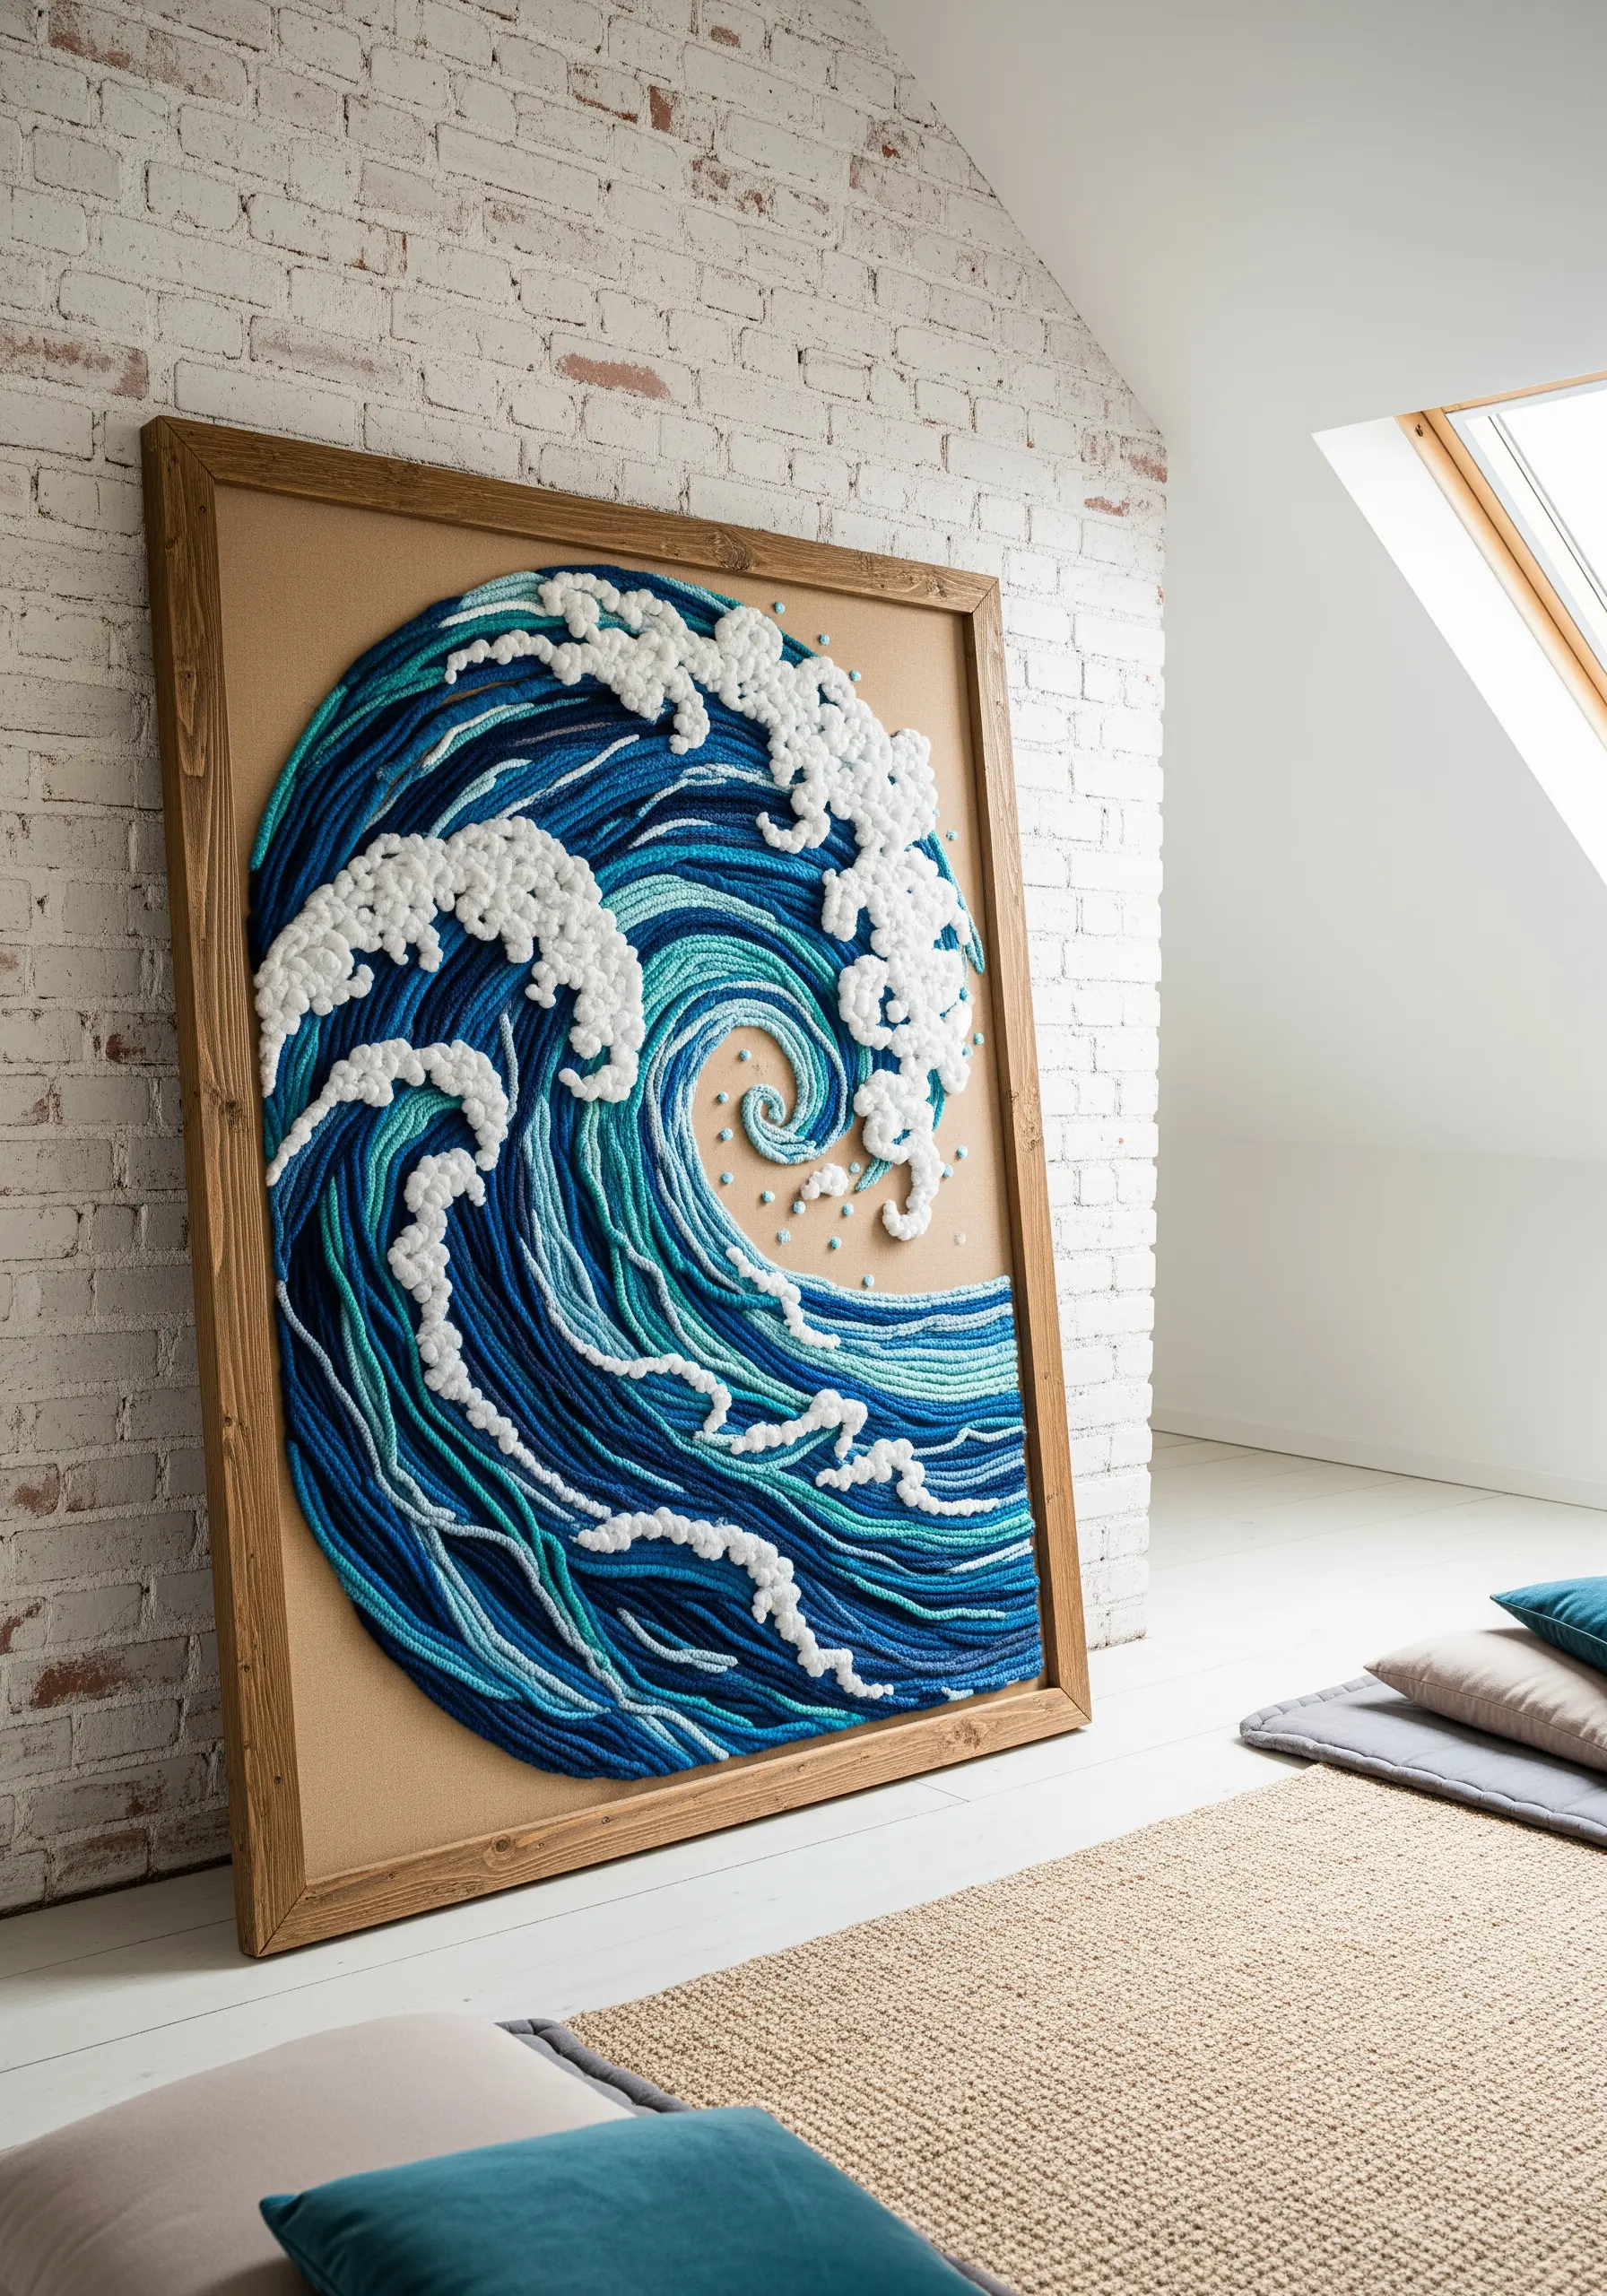
Create a powerful, sculptural piece by using chunky yarn and high-texture stitches to build a three-dimensional scene.
Use rows of chain stitch or couched yarn in varying shades of blue to represent the water’s movement. For the sea foam, use dense clusters of French knots or looped stitches (turkey work) in white and off-white yarn, which you can trim to create a frothy texture.
This is a stunning example of abstract embroidery stitches creating a realistic effect.
34. Welcome Guests with a Golden Art Deco Mandala
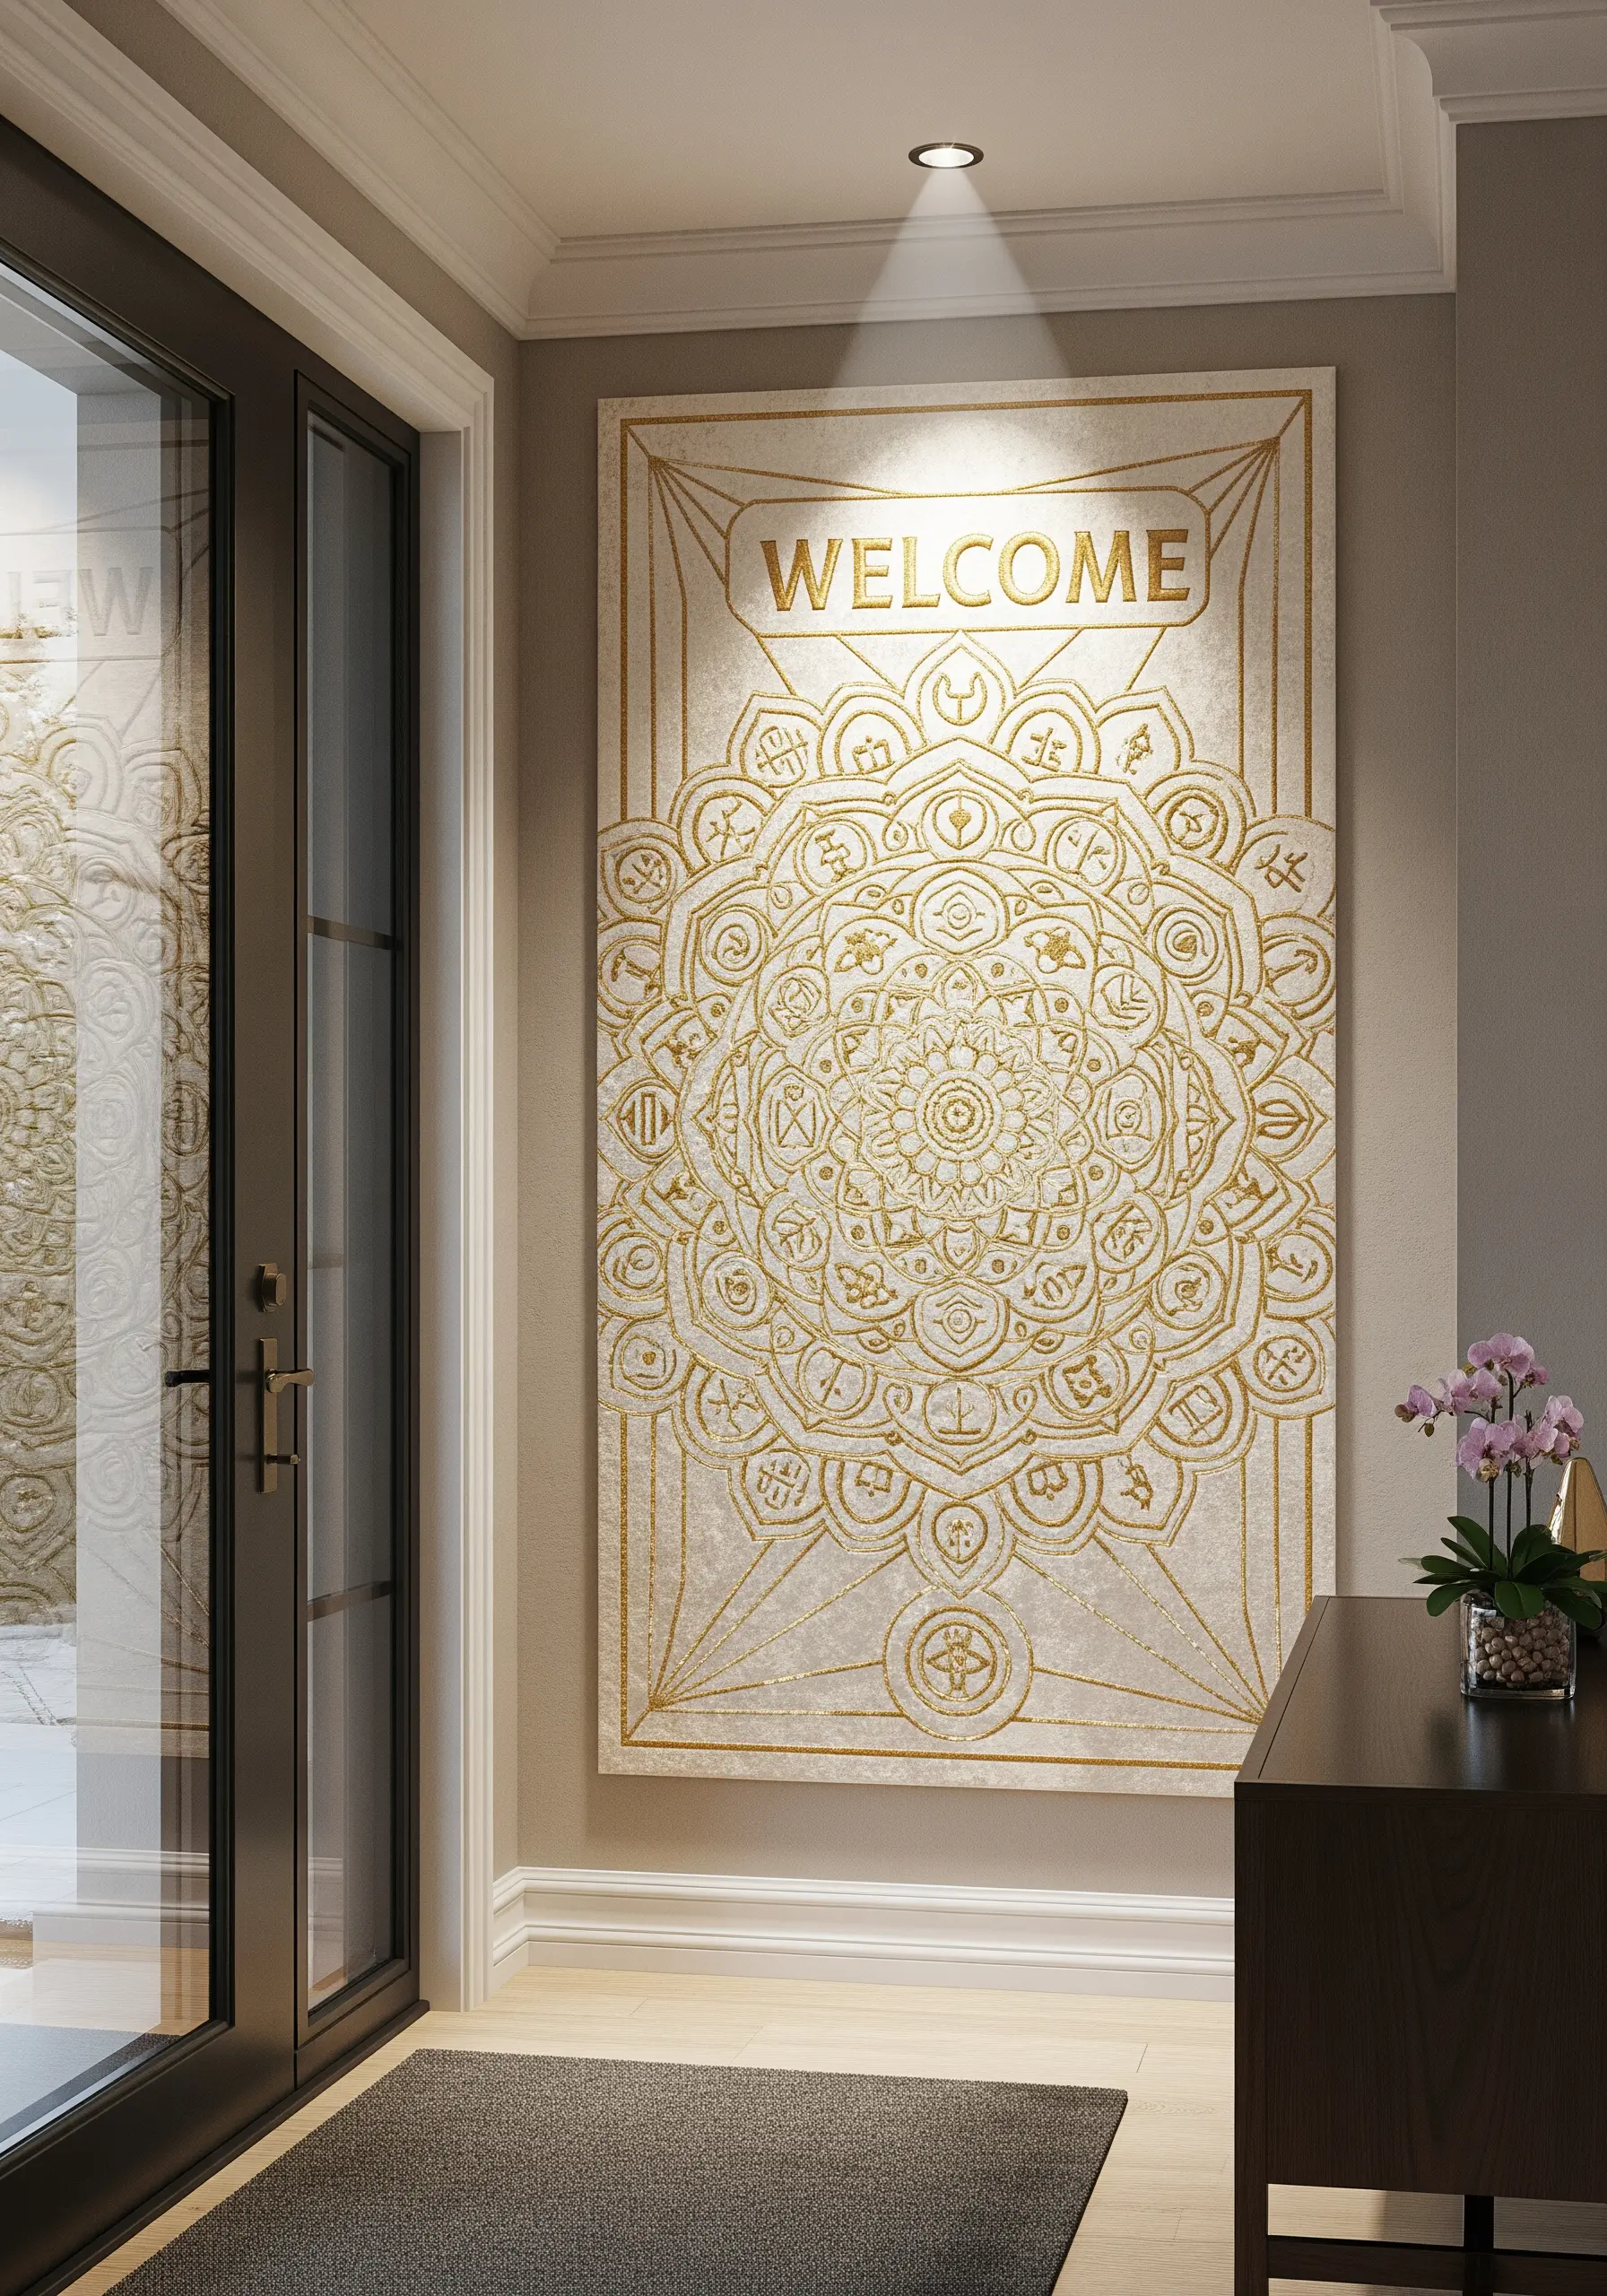
Combine the spiritual mandala with the glamorous lines of Art Deco for a unique entryway statement.
Use a gold or brass-colored metallic thread on a light, neutral fabric like raw silk or linen for a luxurious finish.
Incorporate strong geometric lines, sunburst rays, and stylized lettering into your mandala design. A simple backstitch or stem stitch will maintain the clean, crisp lines characteristic of the Art Deco style, perfect for creating framed embroidery patterns that look like they belong in a gallery.
35. Stitch the Four Elements with String Art Techniques
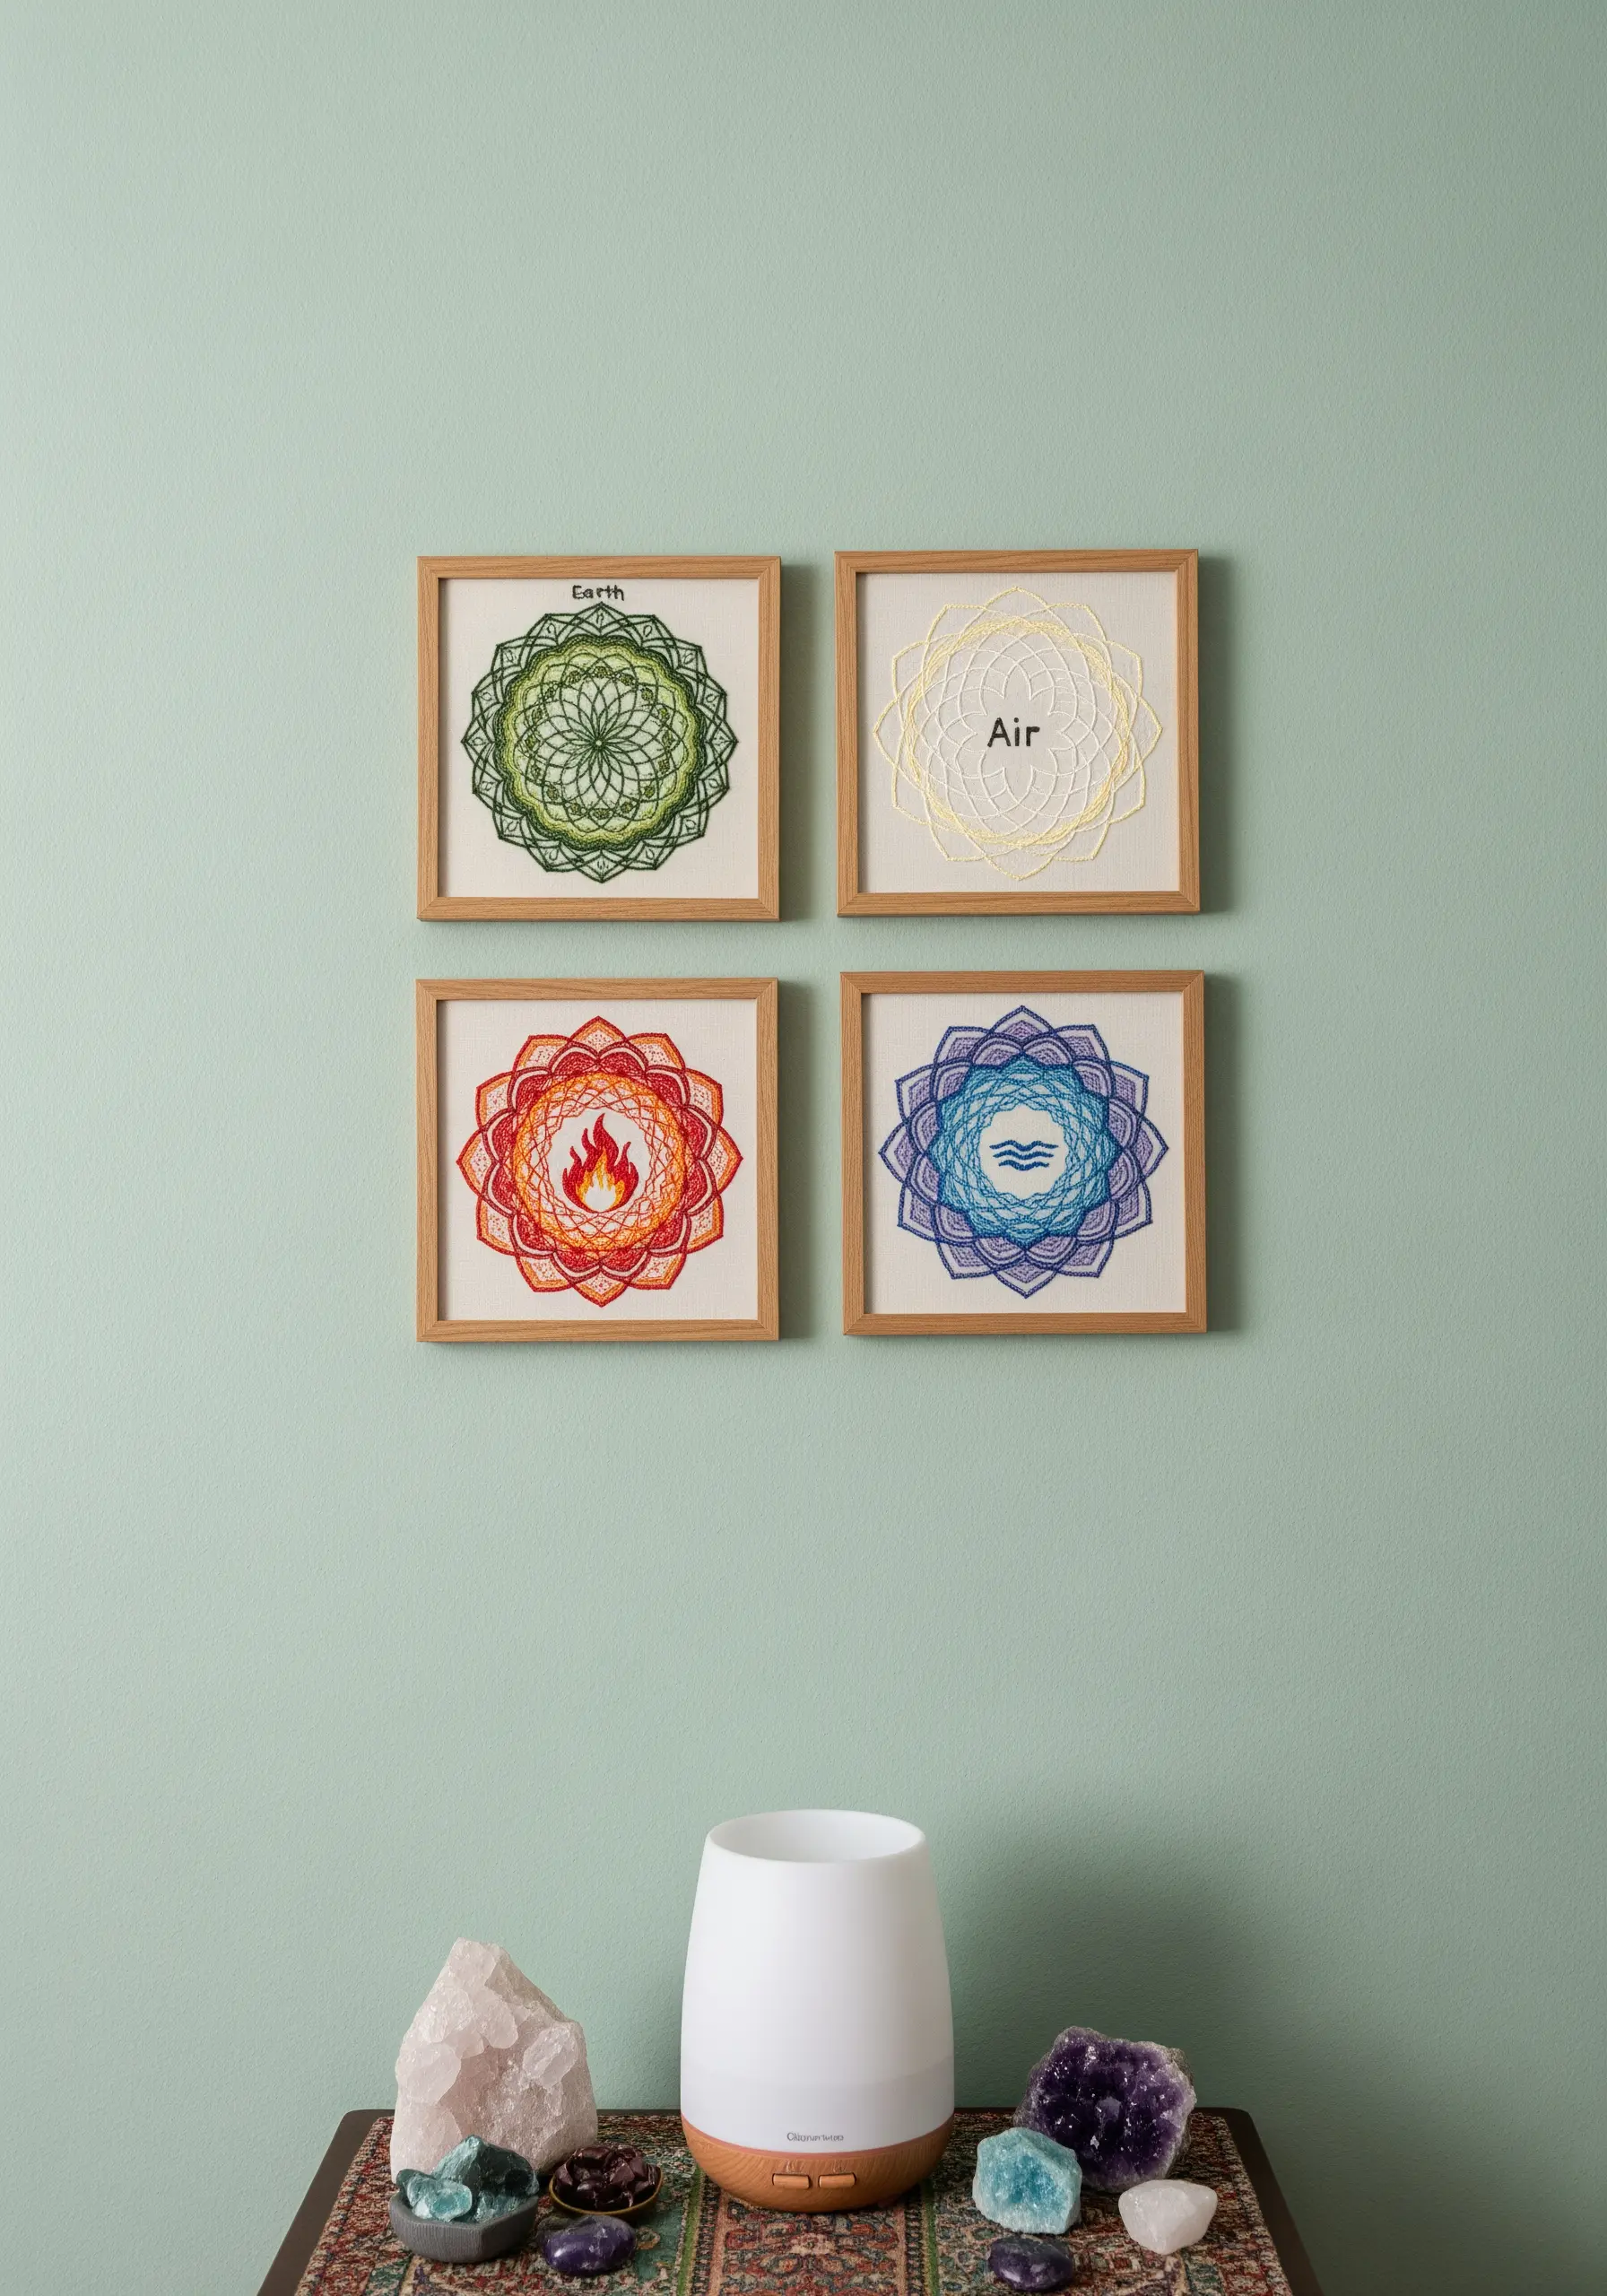
Represent the four elements—Earth, Air, Fire, and Water—using string art-inspired embroidery techniques.
Instead of filling shapes, use long, straight stitches pulled taut across the pattern to create geometric layers of color and line.
Use variegated thread for each element to create a natural gradient effect: green for Earth, fiery reds and oranges for Fire, blues for Water, and pale yellow/white for Air. These string art-inspired mandala embroidery designs look complex but are surprisingly simple to execute.
36. Create a Minimalist Chakra Spine
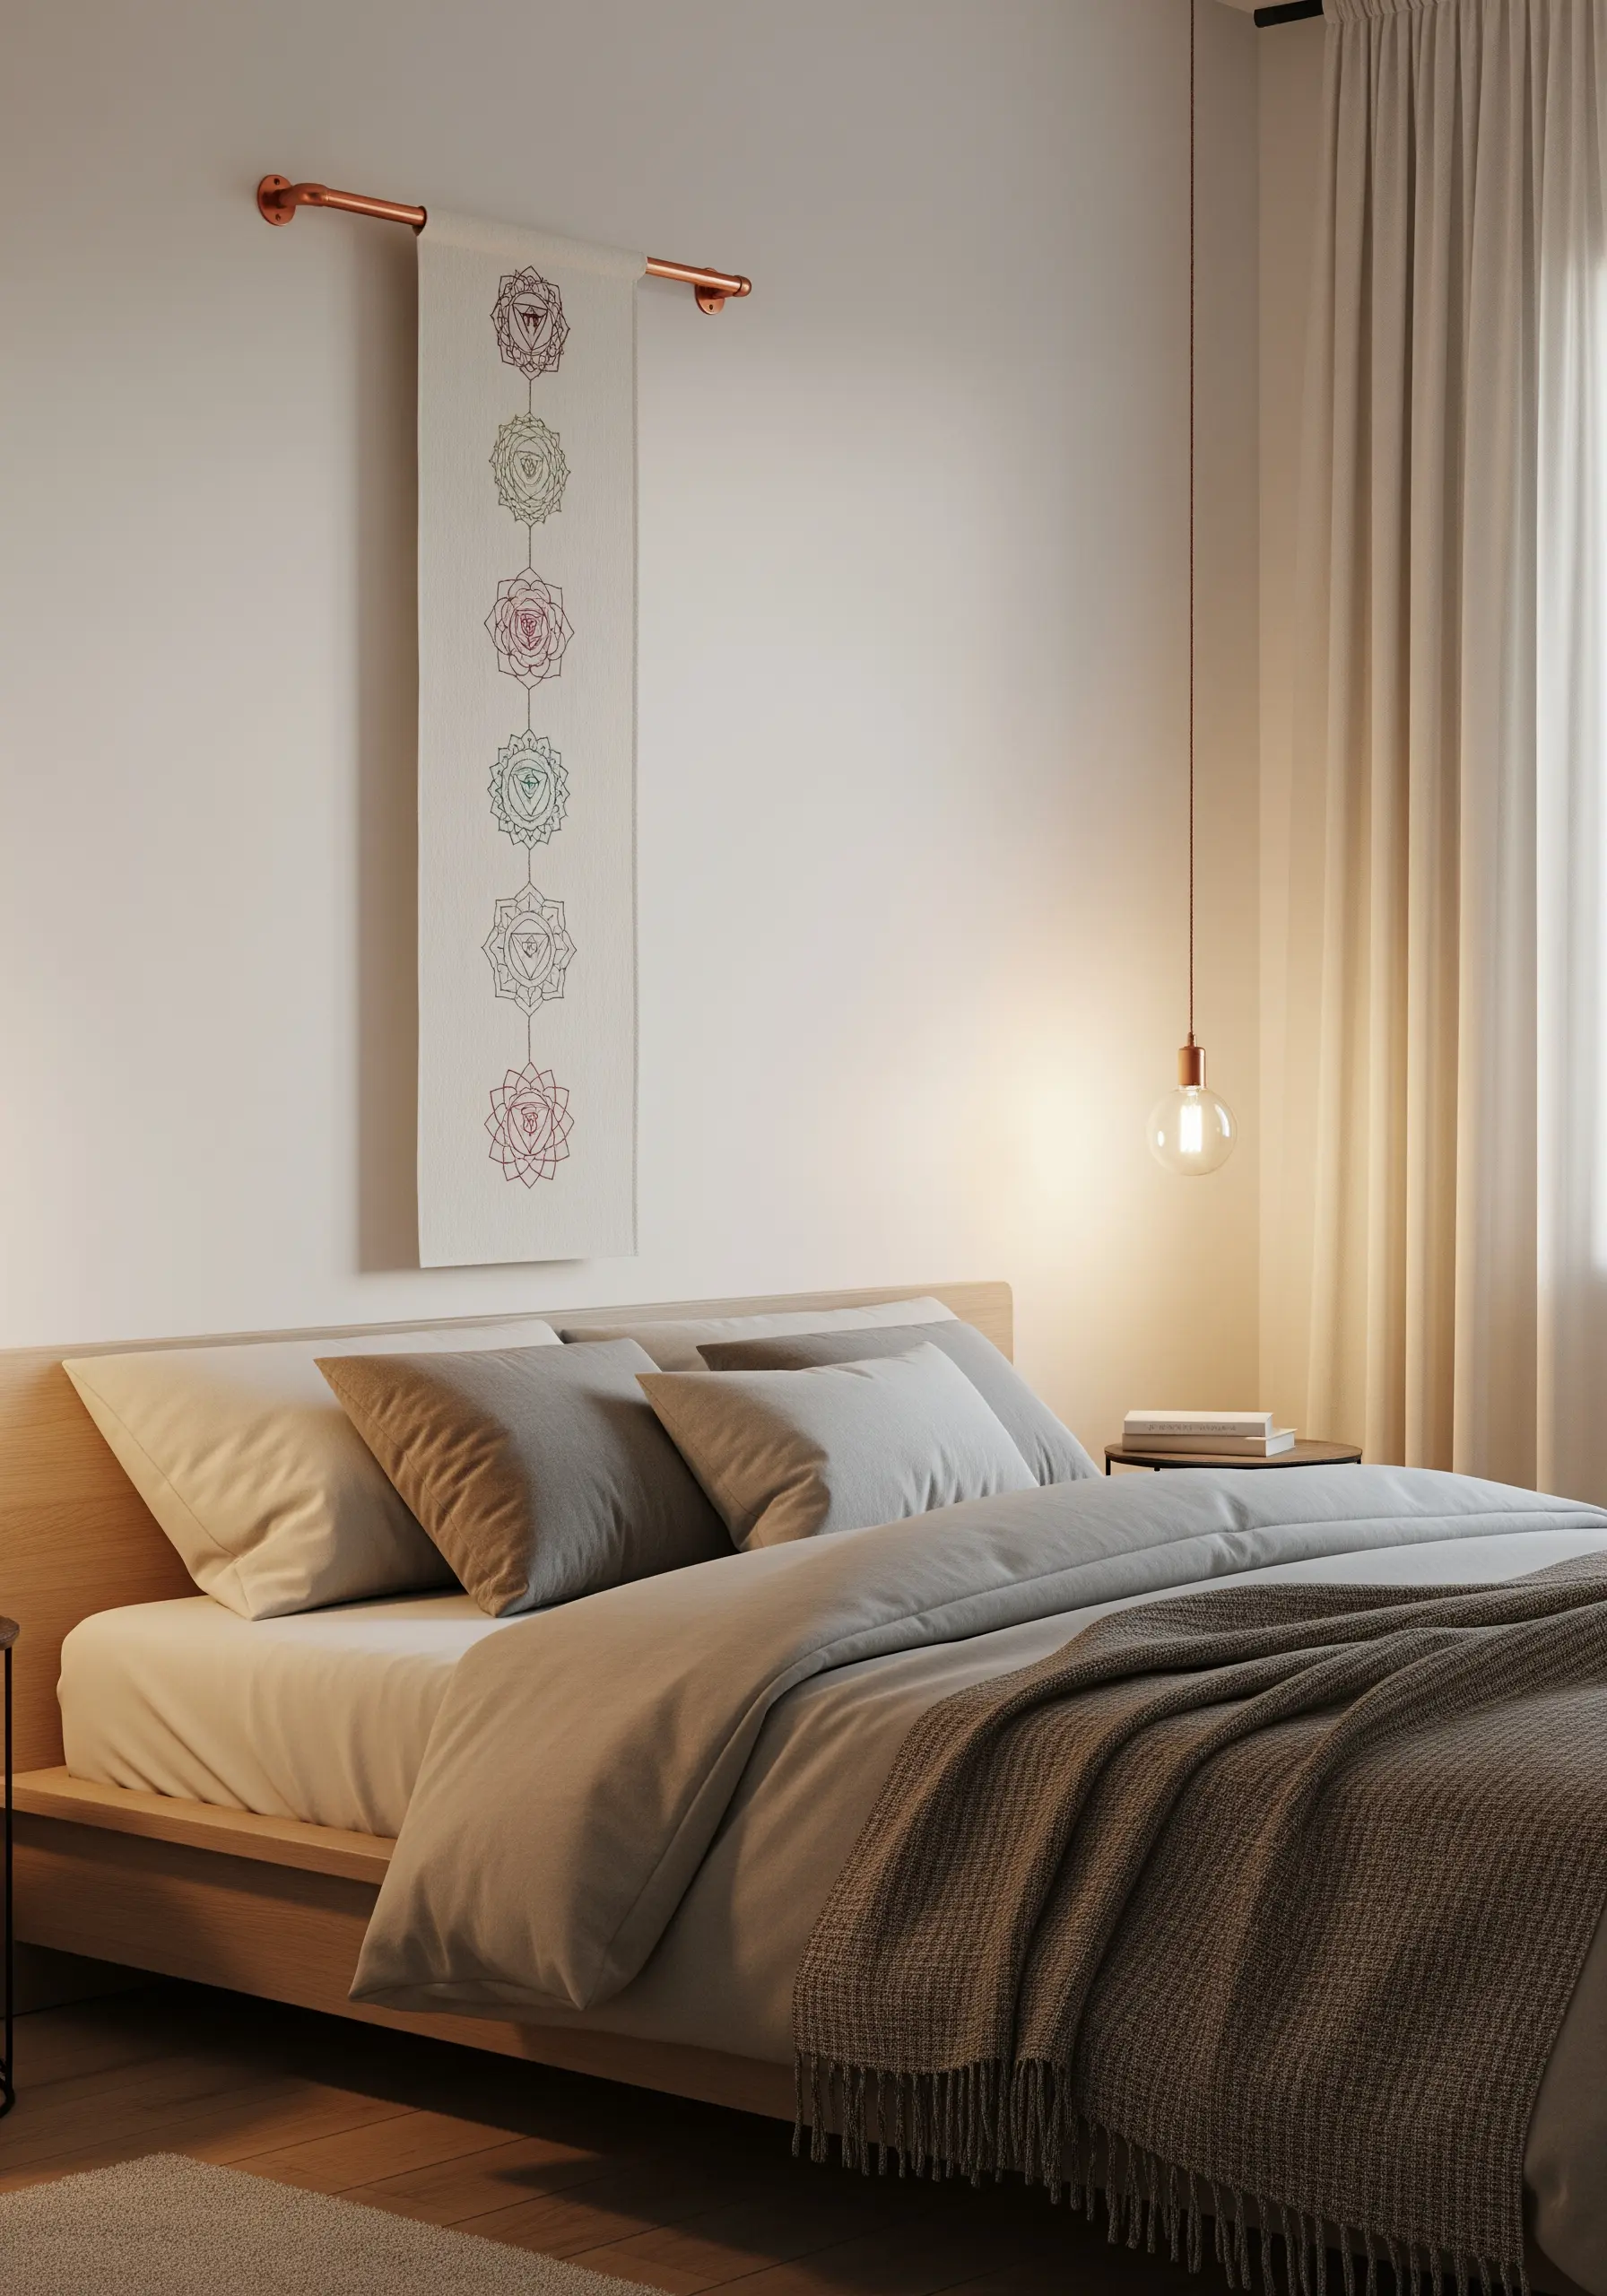
For a subtle and modern interpretation of the chakra system, stitch simplified symbols in muted, tonal colors.
Instead of bright rainbow hues, choose a sophisticated palette of dusty rose, sage green, and soft lavender.
Use a simple backstitch with a single strand of floss for a delicate, barely-there effect on a neutral linen or cotton fabric. This approach turns a spiritual symbol into a piece of quiet, minimalist embroidery perfect for a serene bedroom.


