

A cushion cover is more than just a piece of decor; it’s a small canvas for comfort, a quiet backdrop for your daydreams. When you add embroidery, you’re not just adding color or pattern—you’re stitching a story, a memory, or a feeling directly into the fabric of your home.
The spirit of a cottage garden isn’t just in recreating a perfect rose or a flawless leaf. It’s about capturing the texture of moss on a stone wall, the gentle drape of a wisteria vine, or the happy chaos of a wildflower patch. It’s about making something that feels handmade, personal, and alive.
Here, you won’t just find ideas to copy. You’ll find techniques designed to shift your perspective. Discover how to create the illusion of metallic shine without metallic thread, how to build textures that invite touch, and how to use your stitches to tell a miniature story. It’s time to transform that simple cushion into your next cozy masterpiece.
1. The Trailing Rose Path
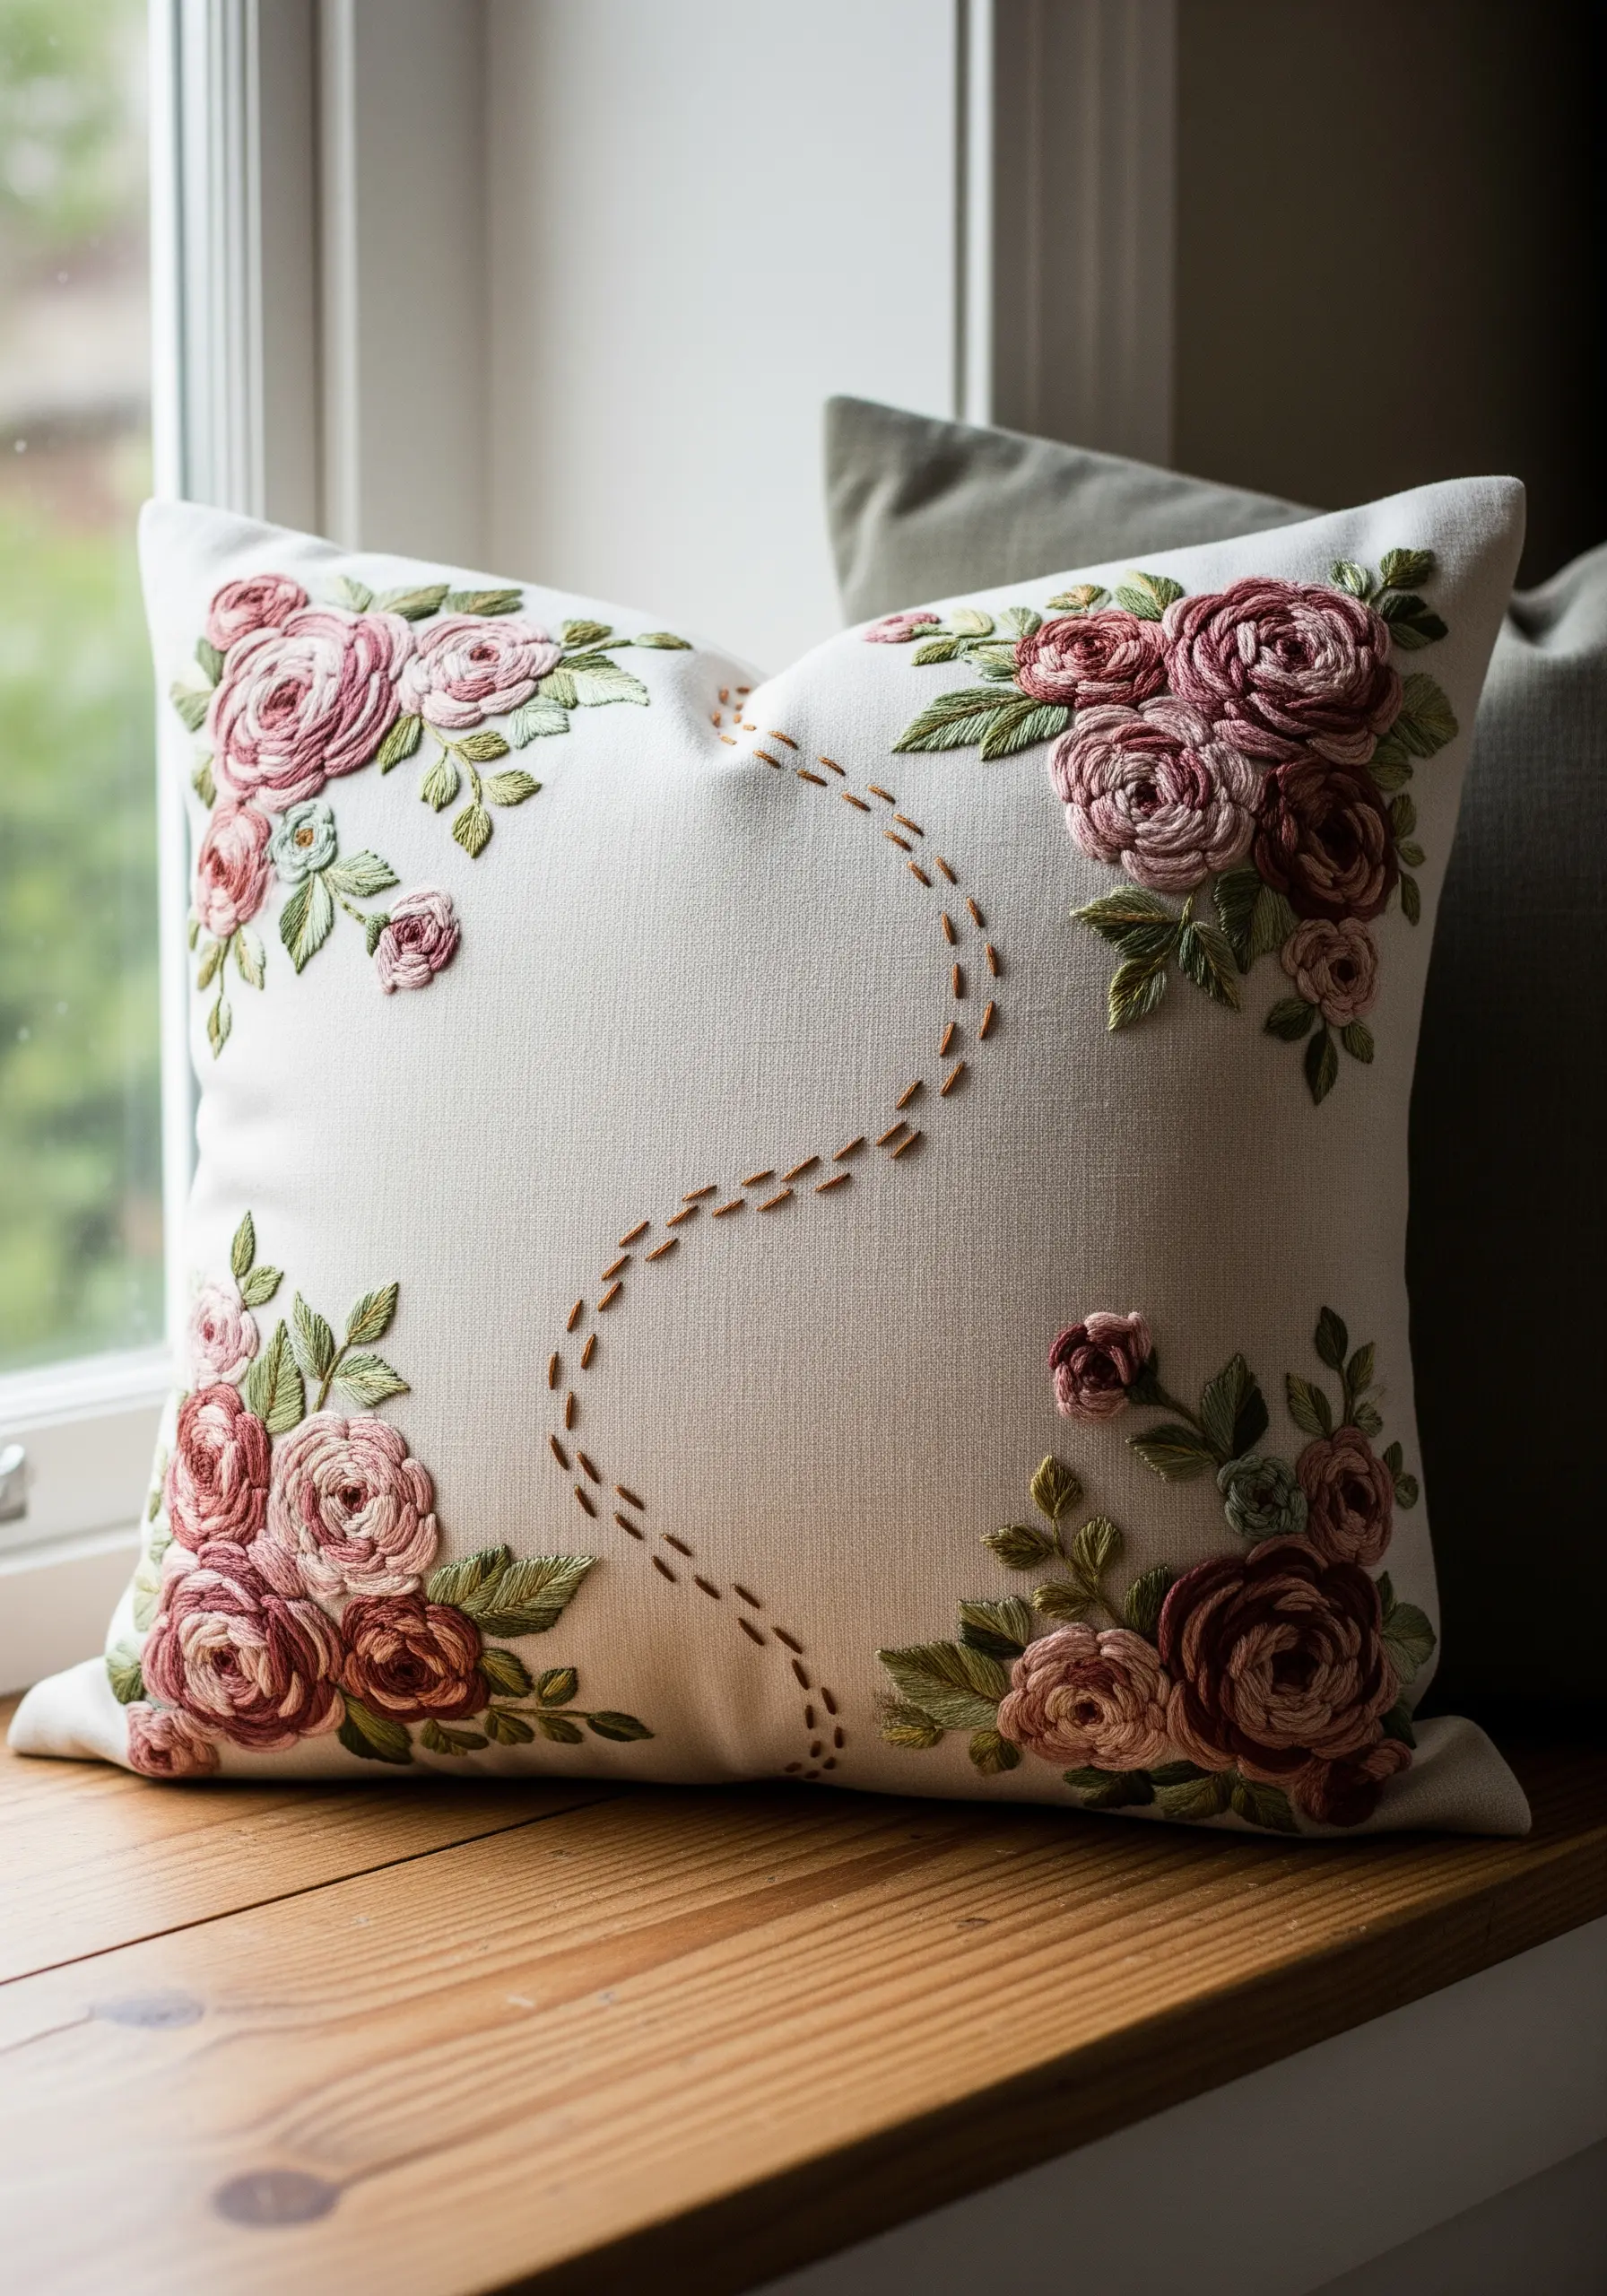
Create a visual story on your cushion by connecting two distinct floral clusters with a simple, suggestive path.
Use wagon wheel roses or tightly packed bullion knots for dense, textured petals that have a wonderful three-dimensional quality.
For the path, choose a slightly thicker thread, like a single strand of perle cotton, and use a simple running stitch to create a dashed line that guides the eye without overwhelming the florals.
This composition transforms a simple cushion into a narrative piece, suggesting a journey through a garden.
2. The Elegant Foxglove Stem
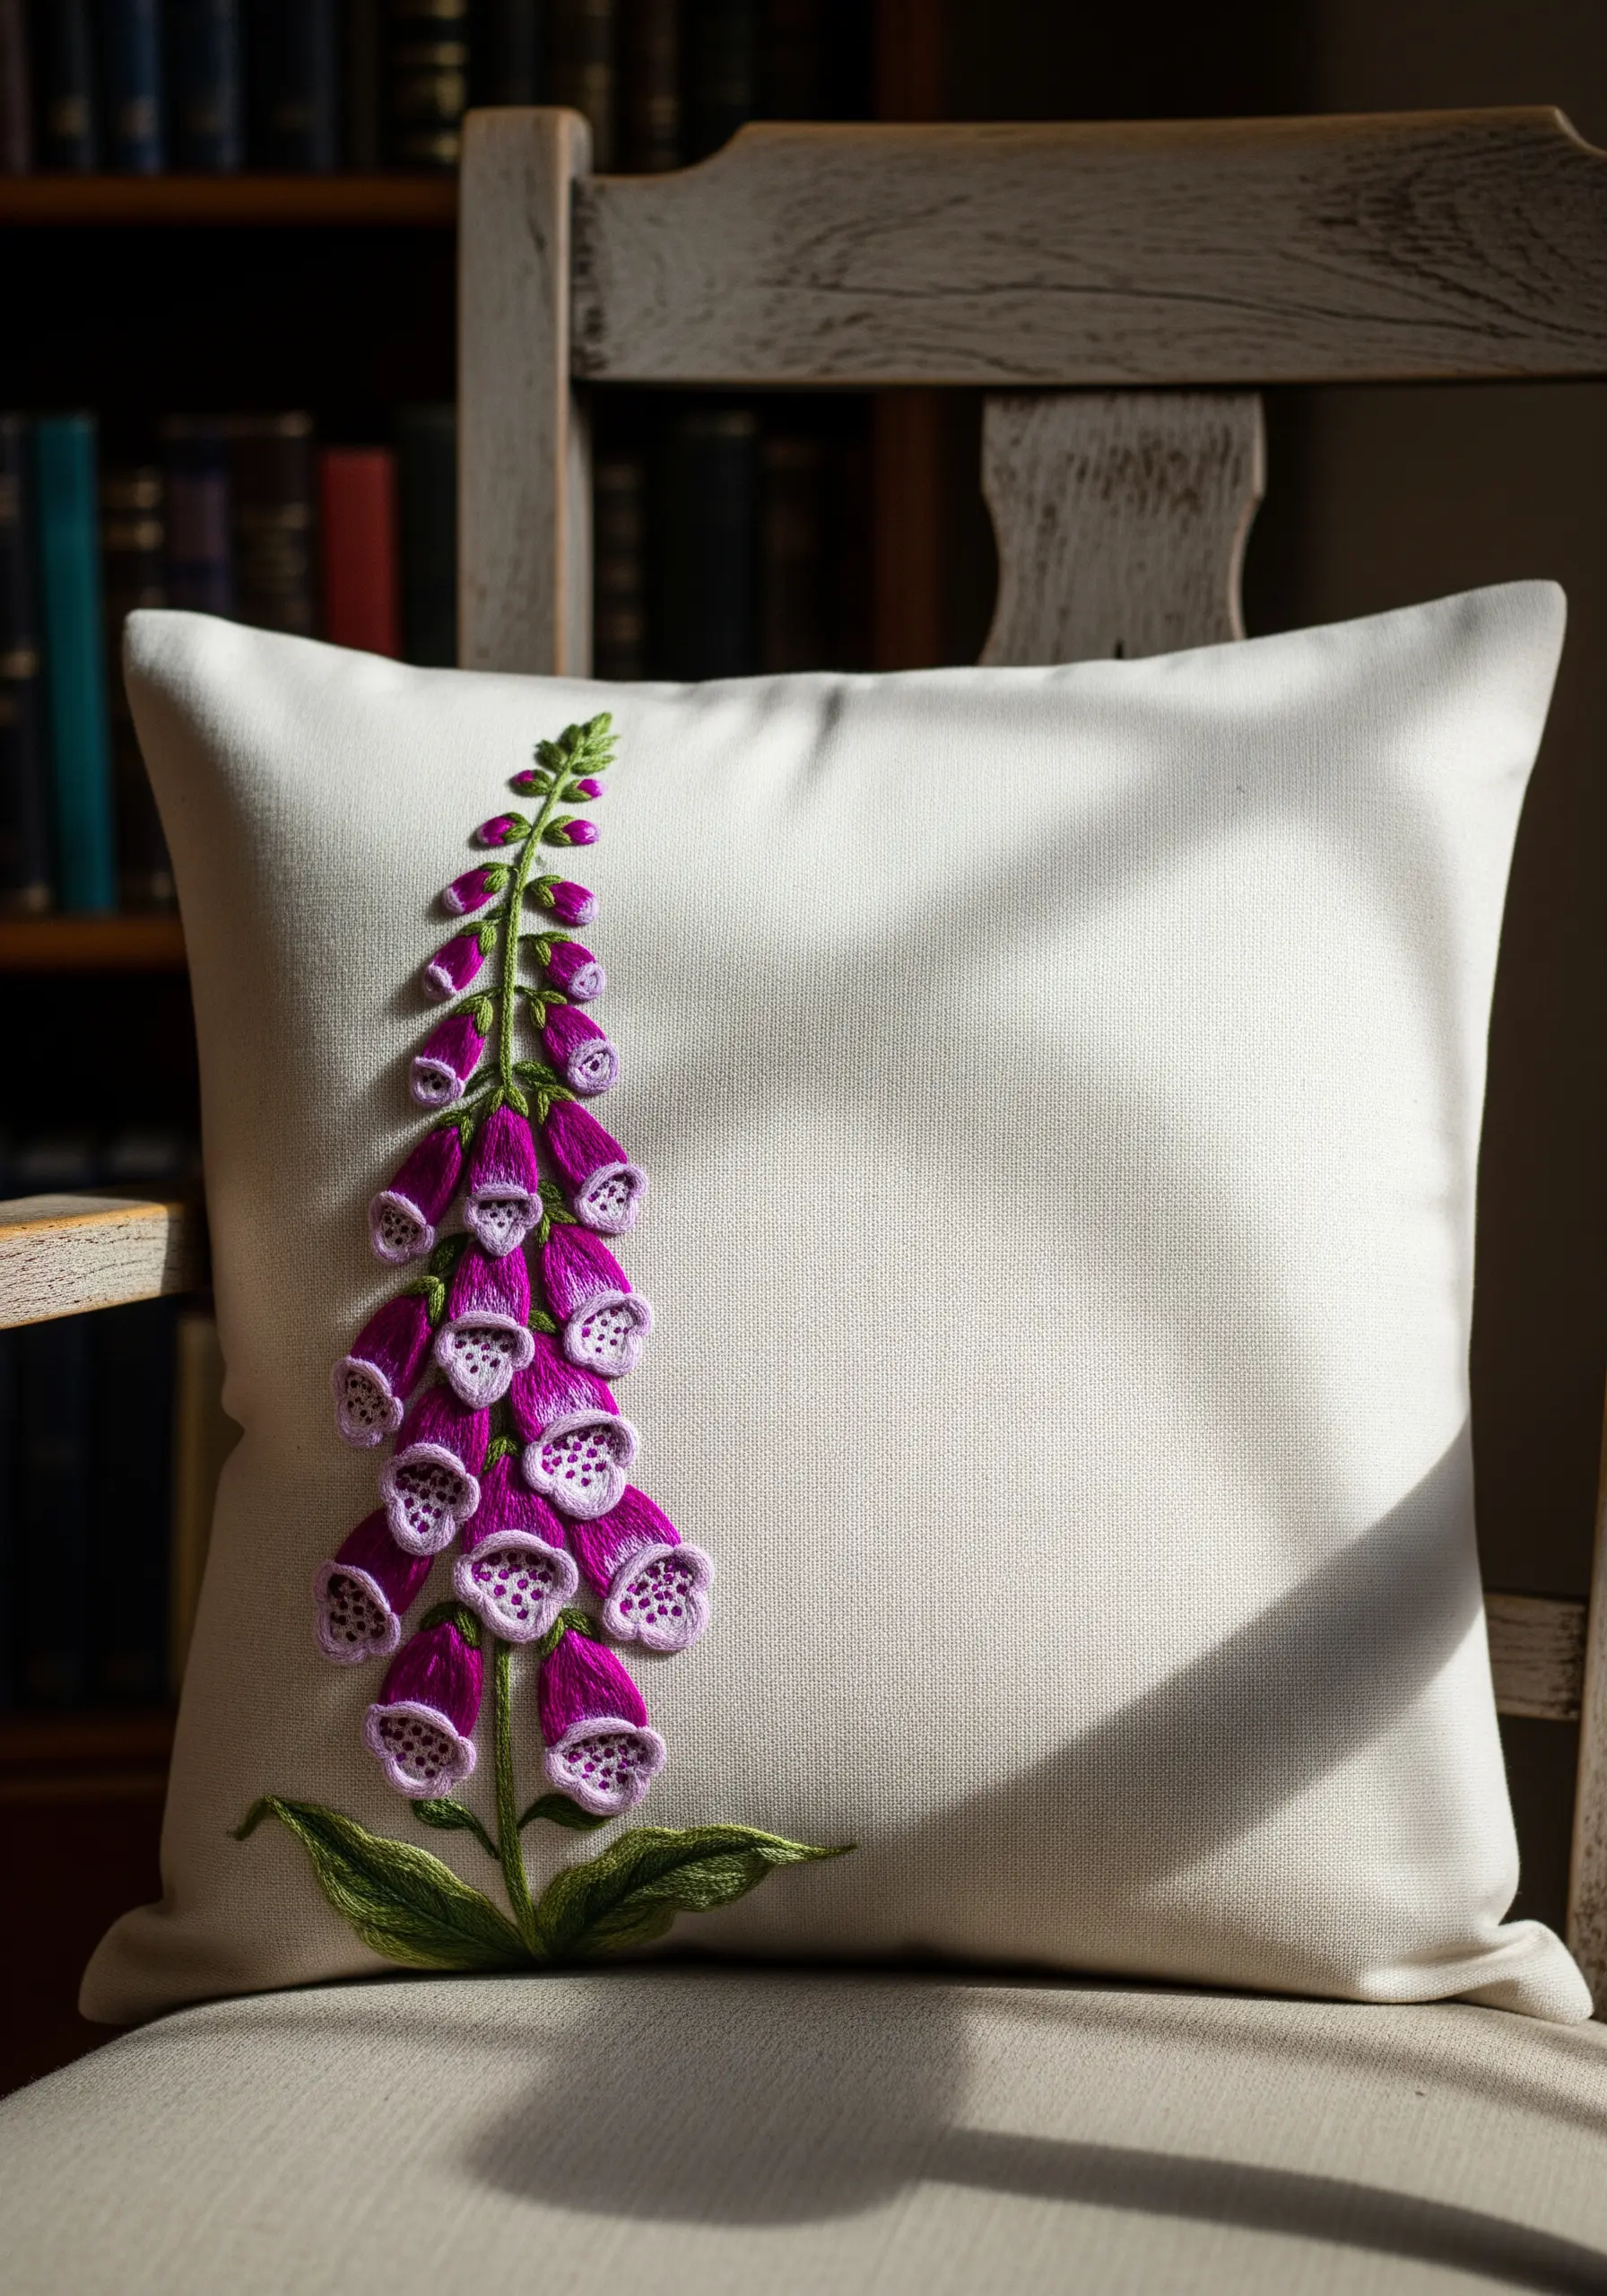
Give a single botanical motif significant visual weight by focusing on dimension and detail.
Use a padded satin stitch for the bell-shaped flowers; lay down a base of small straight stitches before covering them with your final satin stitch to make them physically pop from the fabric.
Add tiny French knots in a contrasting white or pale yellow inside each bell to replicate the delicate speckles of a real foxglove.
By varying the green tones in the stem with a split backstitch, you add a layer of realism that makes the entire piece feel alive.
3. Midnight Garden on Velvet
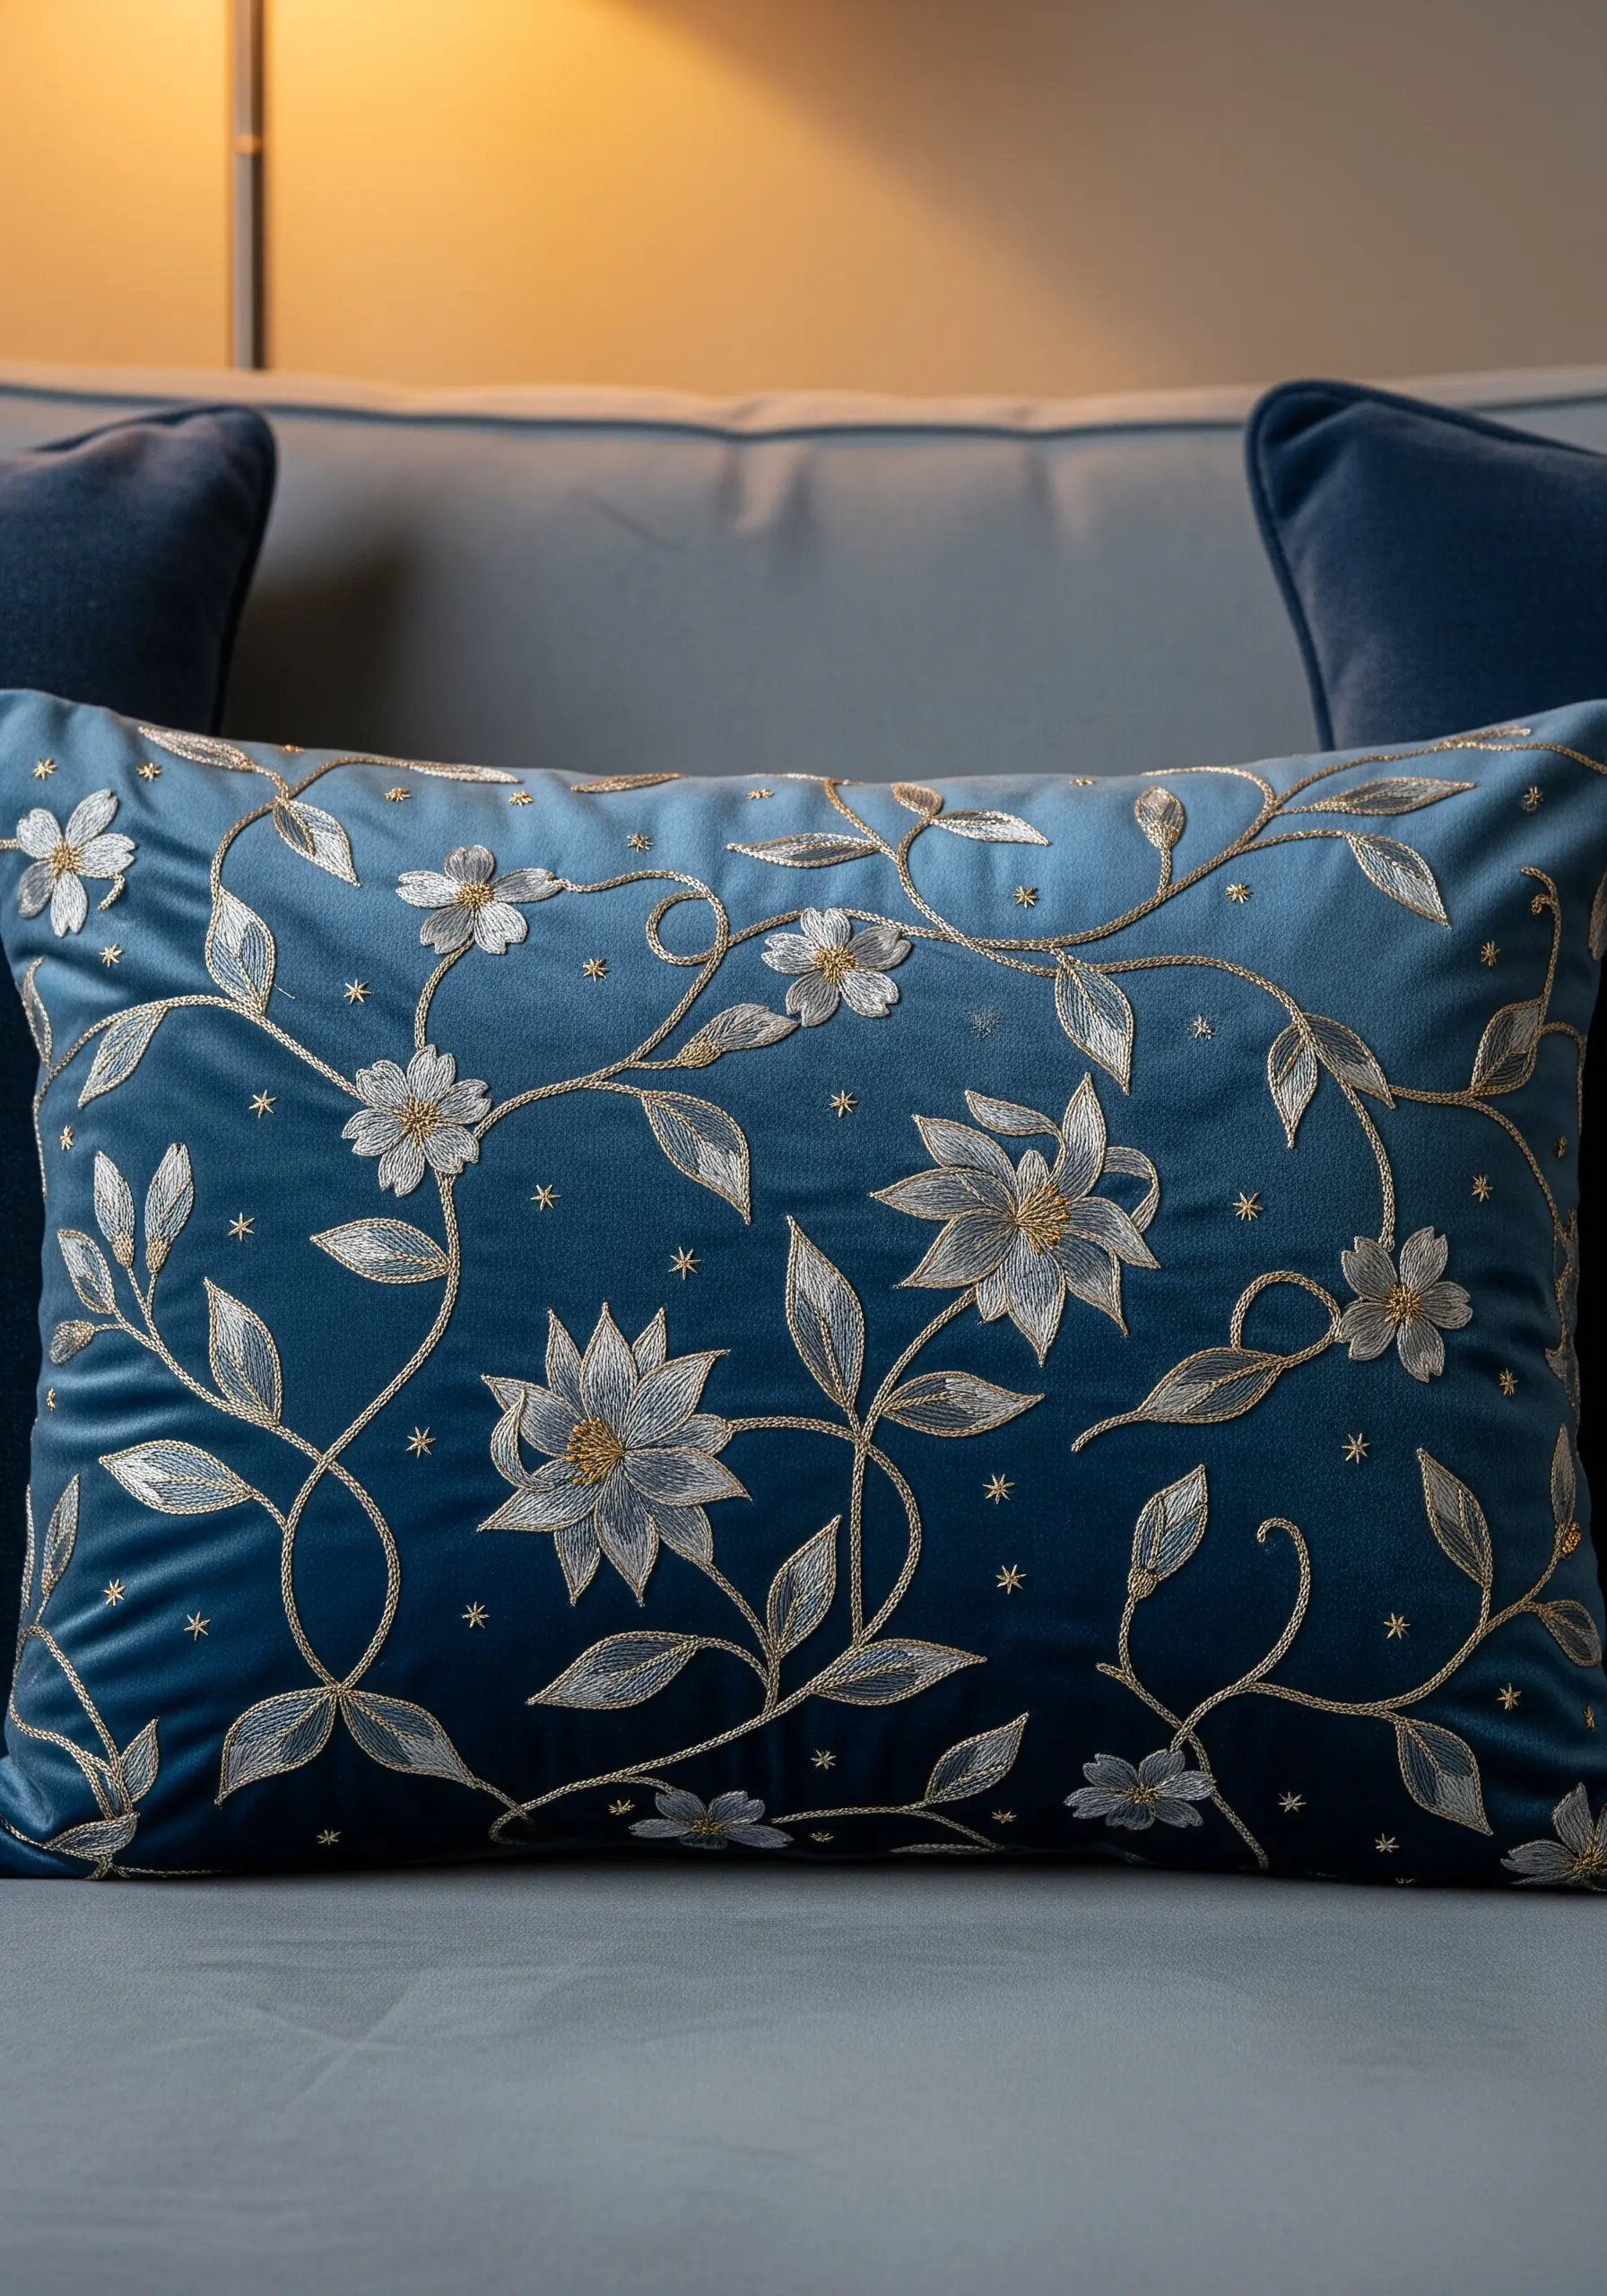
When embroidering on velvet, a fabric with a deep pile, always use a topper-style stabilizer to prevent your stitches from sinking and disappearing.
Create a dramatic, luxurious effect by contrasting matte and metallic threads.
Use a silvery-white floss for the flower petals and a fine gold metallic thread for the winding vines and tiny starbursts.
To ensure the metallic thread lies flat and catches the maximum amount of light, secure it with a couching stitch—it’s an elegant solution that prevents twisting and enhances shine.
4. The Vibrant Hummingbird Scene

To capture the iridescent shimmer of a hummingbird’s feathers, your secret is the long-and-short stitch, using just a single strand of floss at a time.
Blend shades of blue, teal, green, and purple, allowing the stitches to overlap slightly to create a seamless gradient that mimics the way light hits feathers.
For the fuchsia blossoms, use a bold, smooth satin stitch, making sure your stitch direction follows the natural curve of the petals for a more organic look.
This technique turns your thread into a painter’s palette, perfect for realistic animal & insect embroidery patterns.
5. The Secret Garden Gate
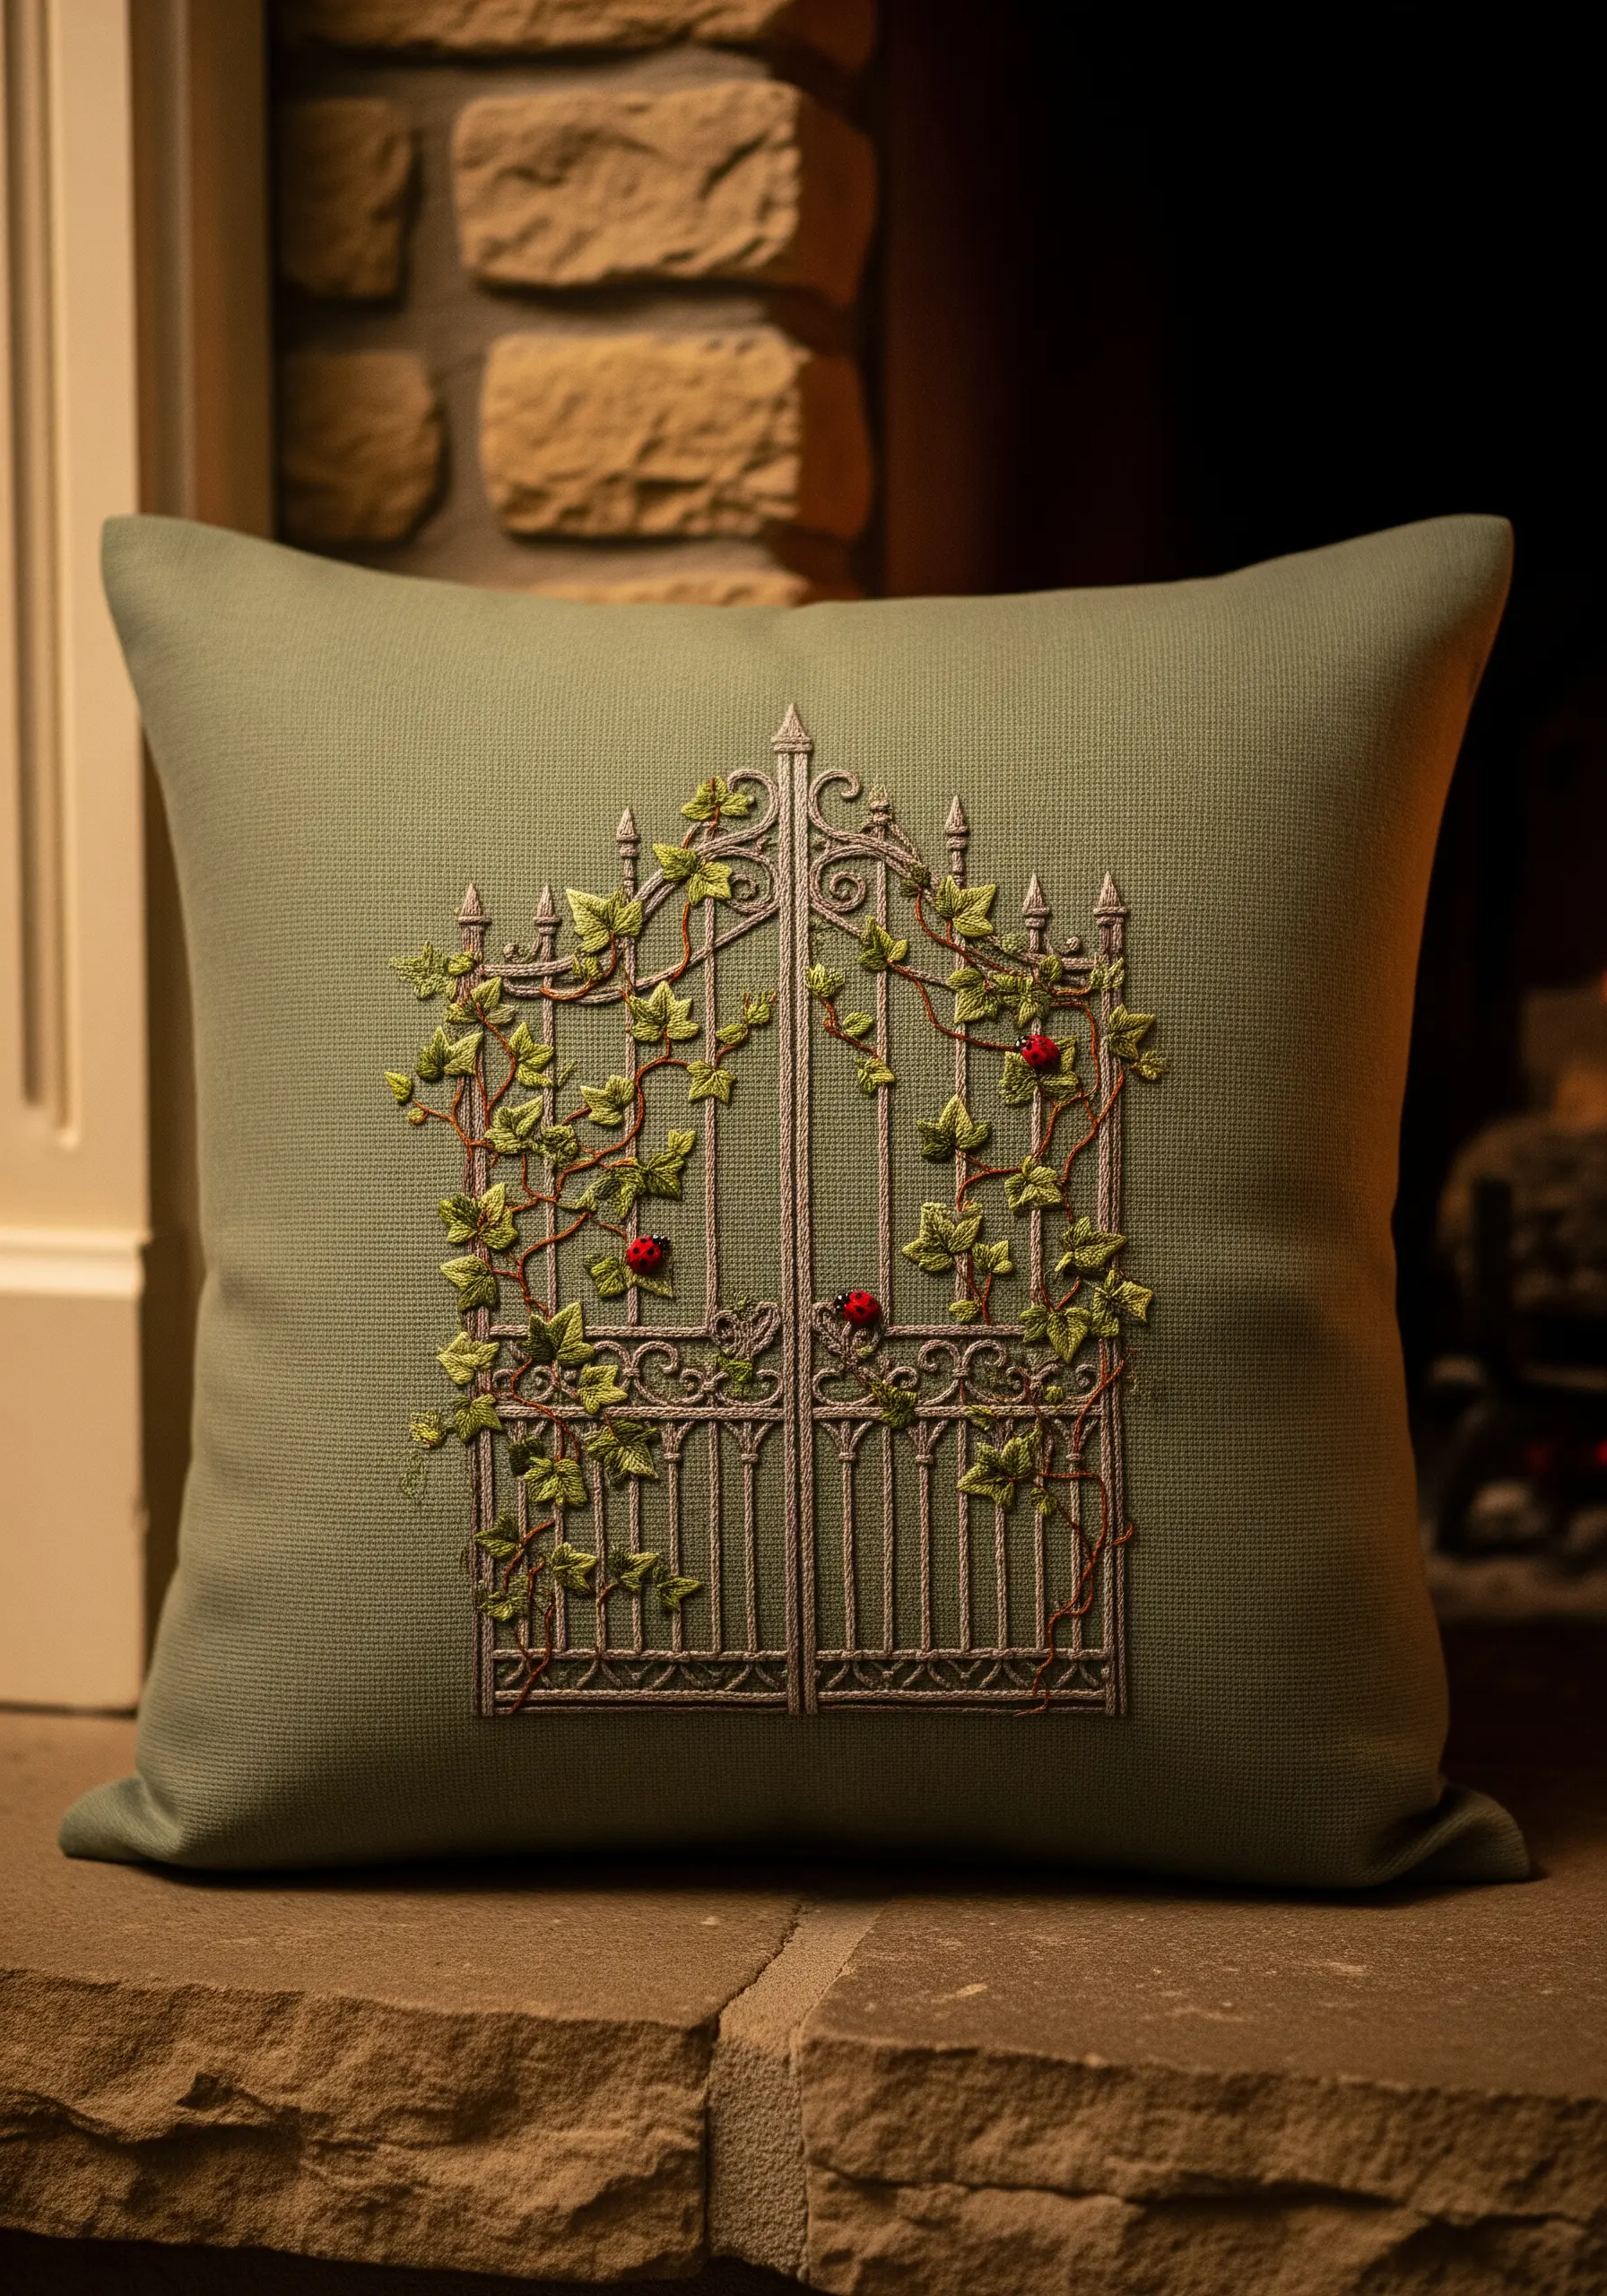
Layering botanical elements over an architectural motif creates a wonderful sense of depth and story.
Stitch the iron gate first using a dark grey or charcoal thread in a tight split stitch to create solid, defined bars.
Next, add the ivy vines using a stem stitch, purposefully weaving the thread over and under the gate’s bars to create a true sense of entanglement.
Finish with detached chain stitches for leaves and bright red French knots for ladybugs—tiny pops of color that bring the scene to life.
6. Pollinator’s Perch on Natural Linen
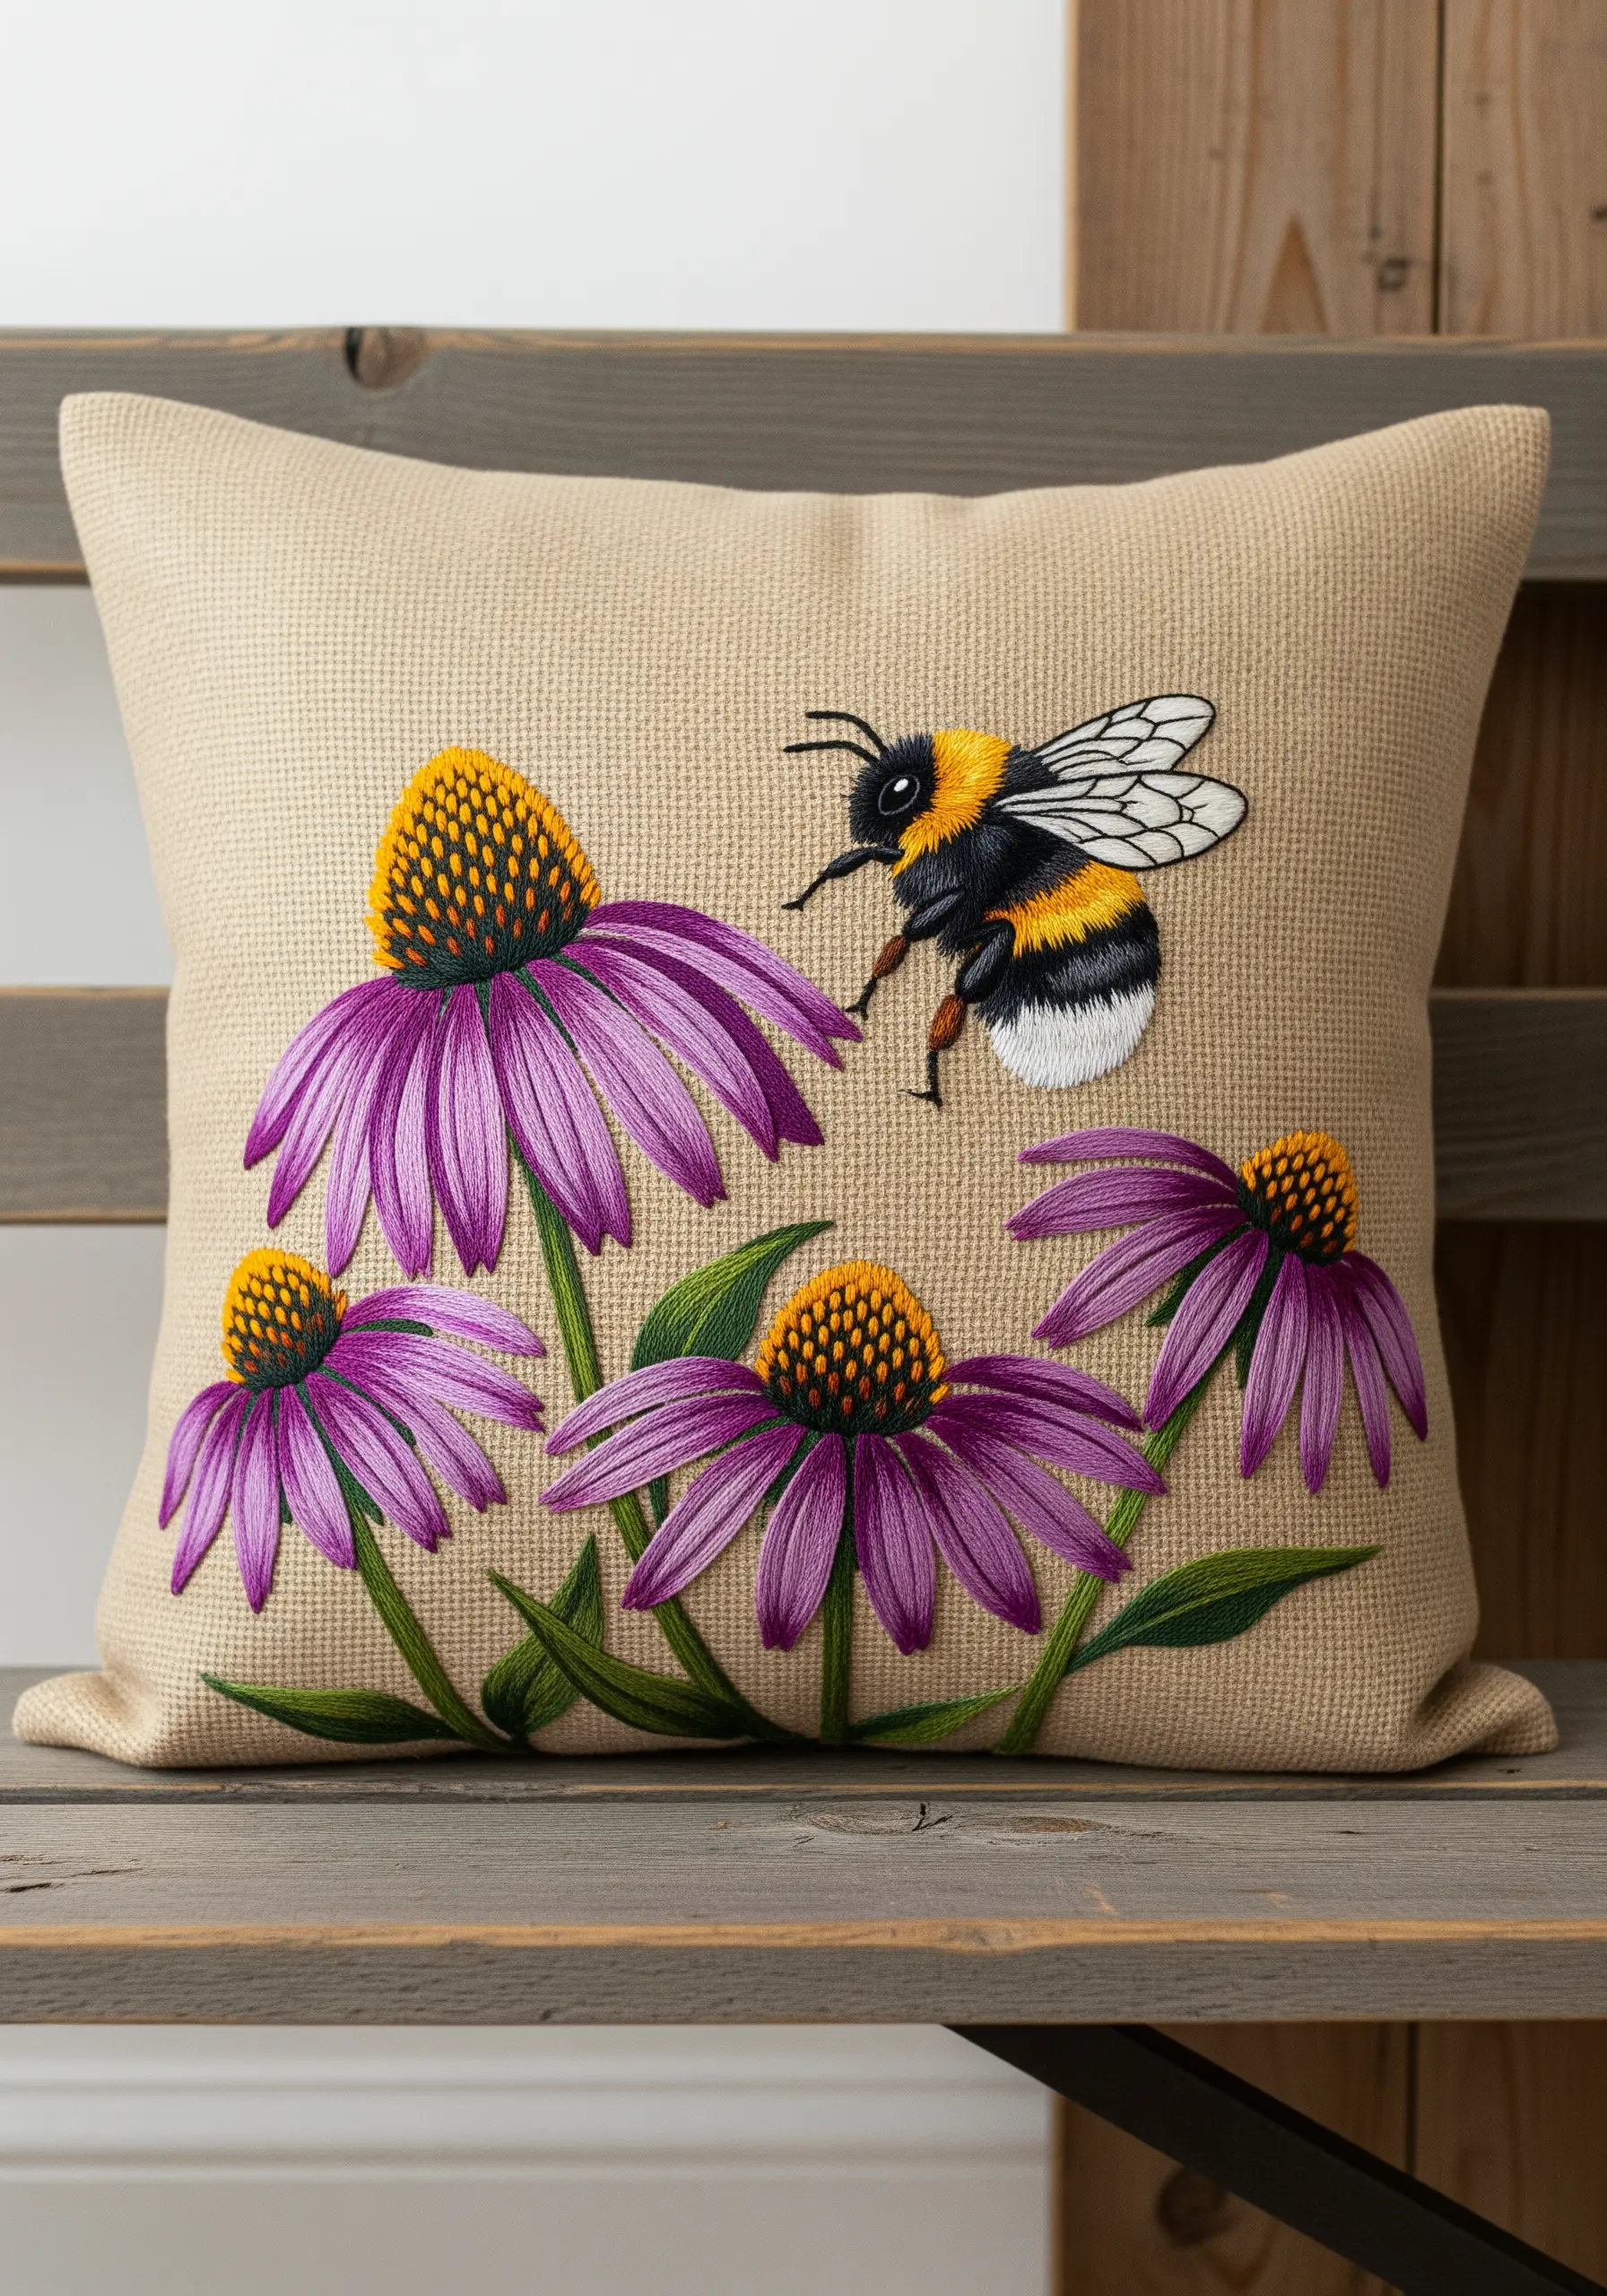
Embrace the rustic texture of linen or burlap by choosing stitches that add even more dimension.
For the fuzzy body of the bumblebee, use turkey work (or Ghiordes knot) and trim the loops to create a soft, velvety pile that you can’t help but touch.
Give the coneflower centers a dense, seed-like texture by filling them with a tight cluster of French knots in varied shades of gold, orange, and brown.
On a coarse fabric, using 3-4 strands of floss will ensure your design stands out beautifully against the weave.
7. Lavender Rows on Corduroy
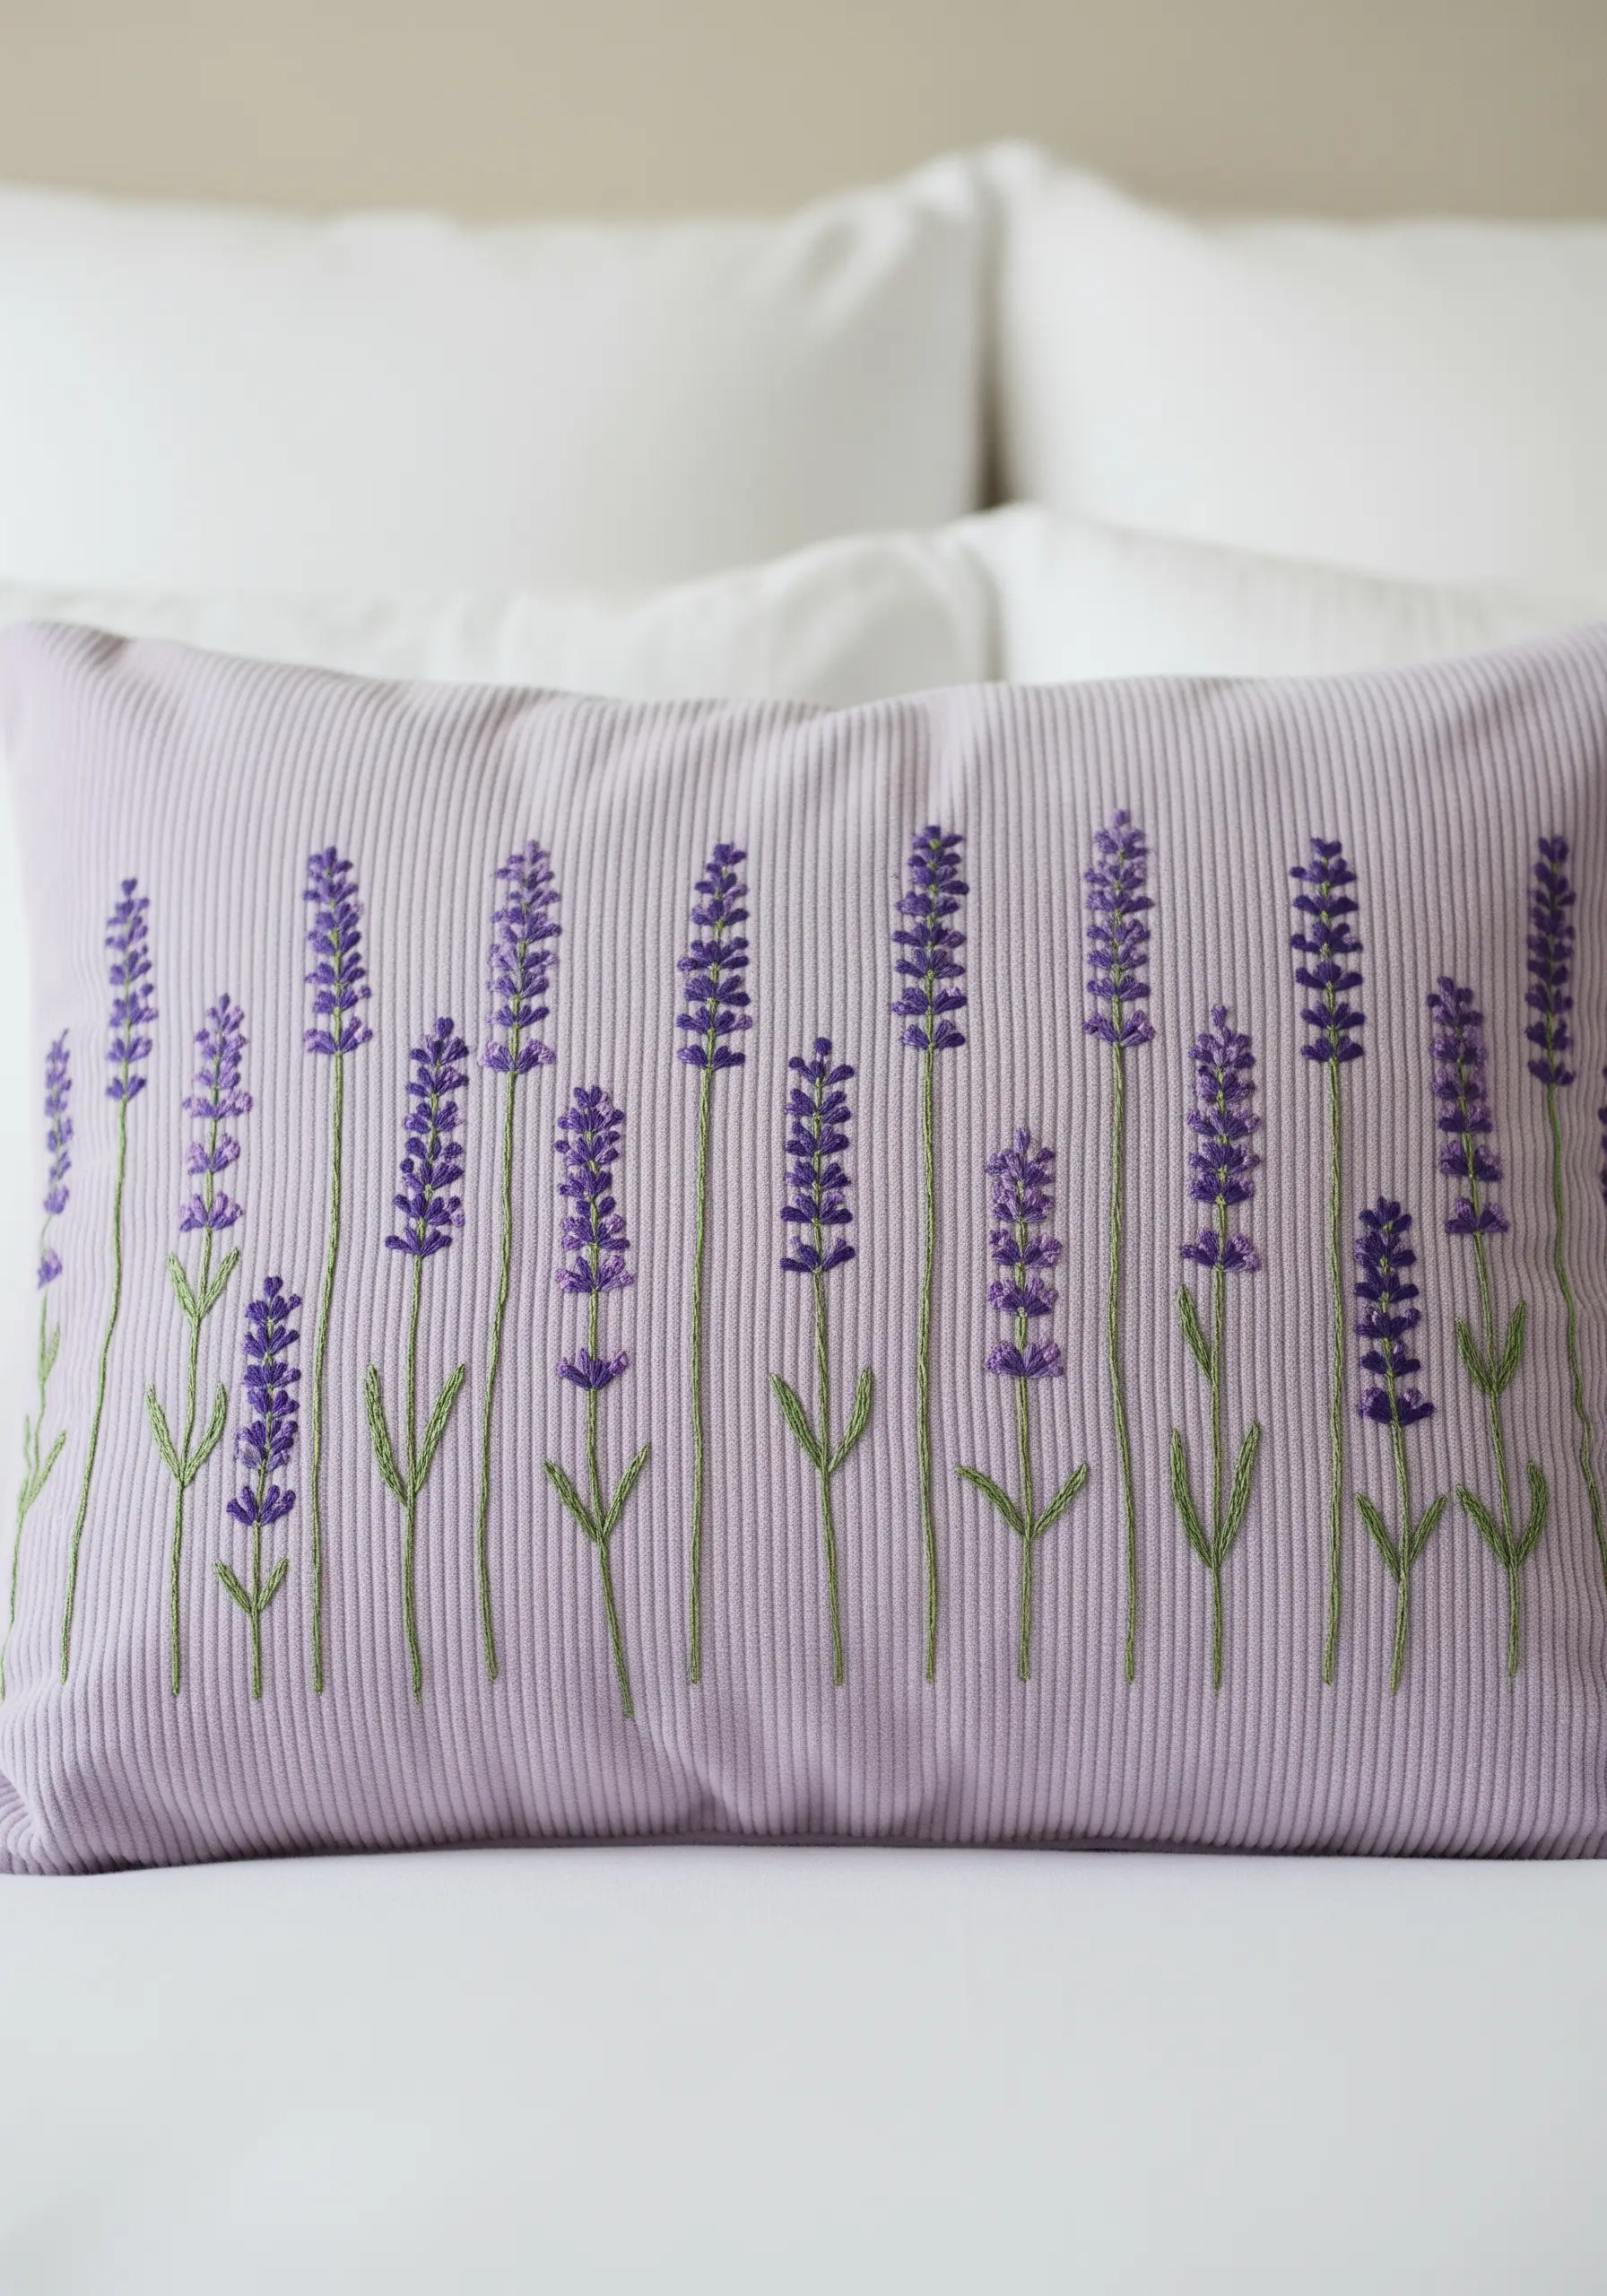
Let the texture of your fabric inspire your composition. The vertical channels of corduroy provide a perfect natural grid for planting neat rows of lavender.
Use a simple stem stitch in green for the stalks, placing them directly within the fabric’s valleys.
For the lavender blossoms, create small clusters of French knots or seed stitches, using two or three shades of purple to give each sprig depth and variation.
This design is a beautiful example of how delicate lavender stitch ideas can be guided by the textile itself.
8. The Organized Kitchen Garden
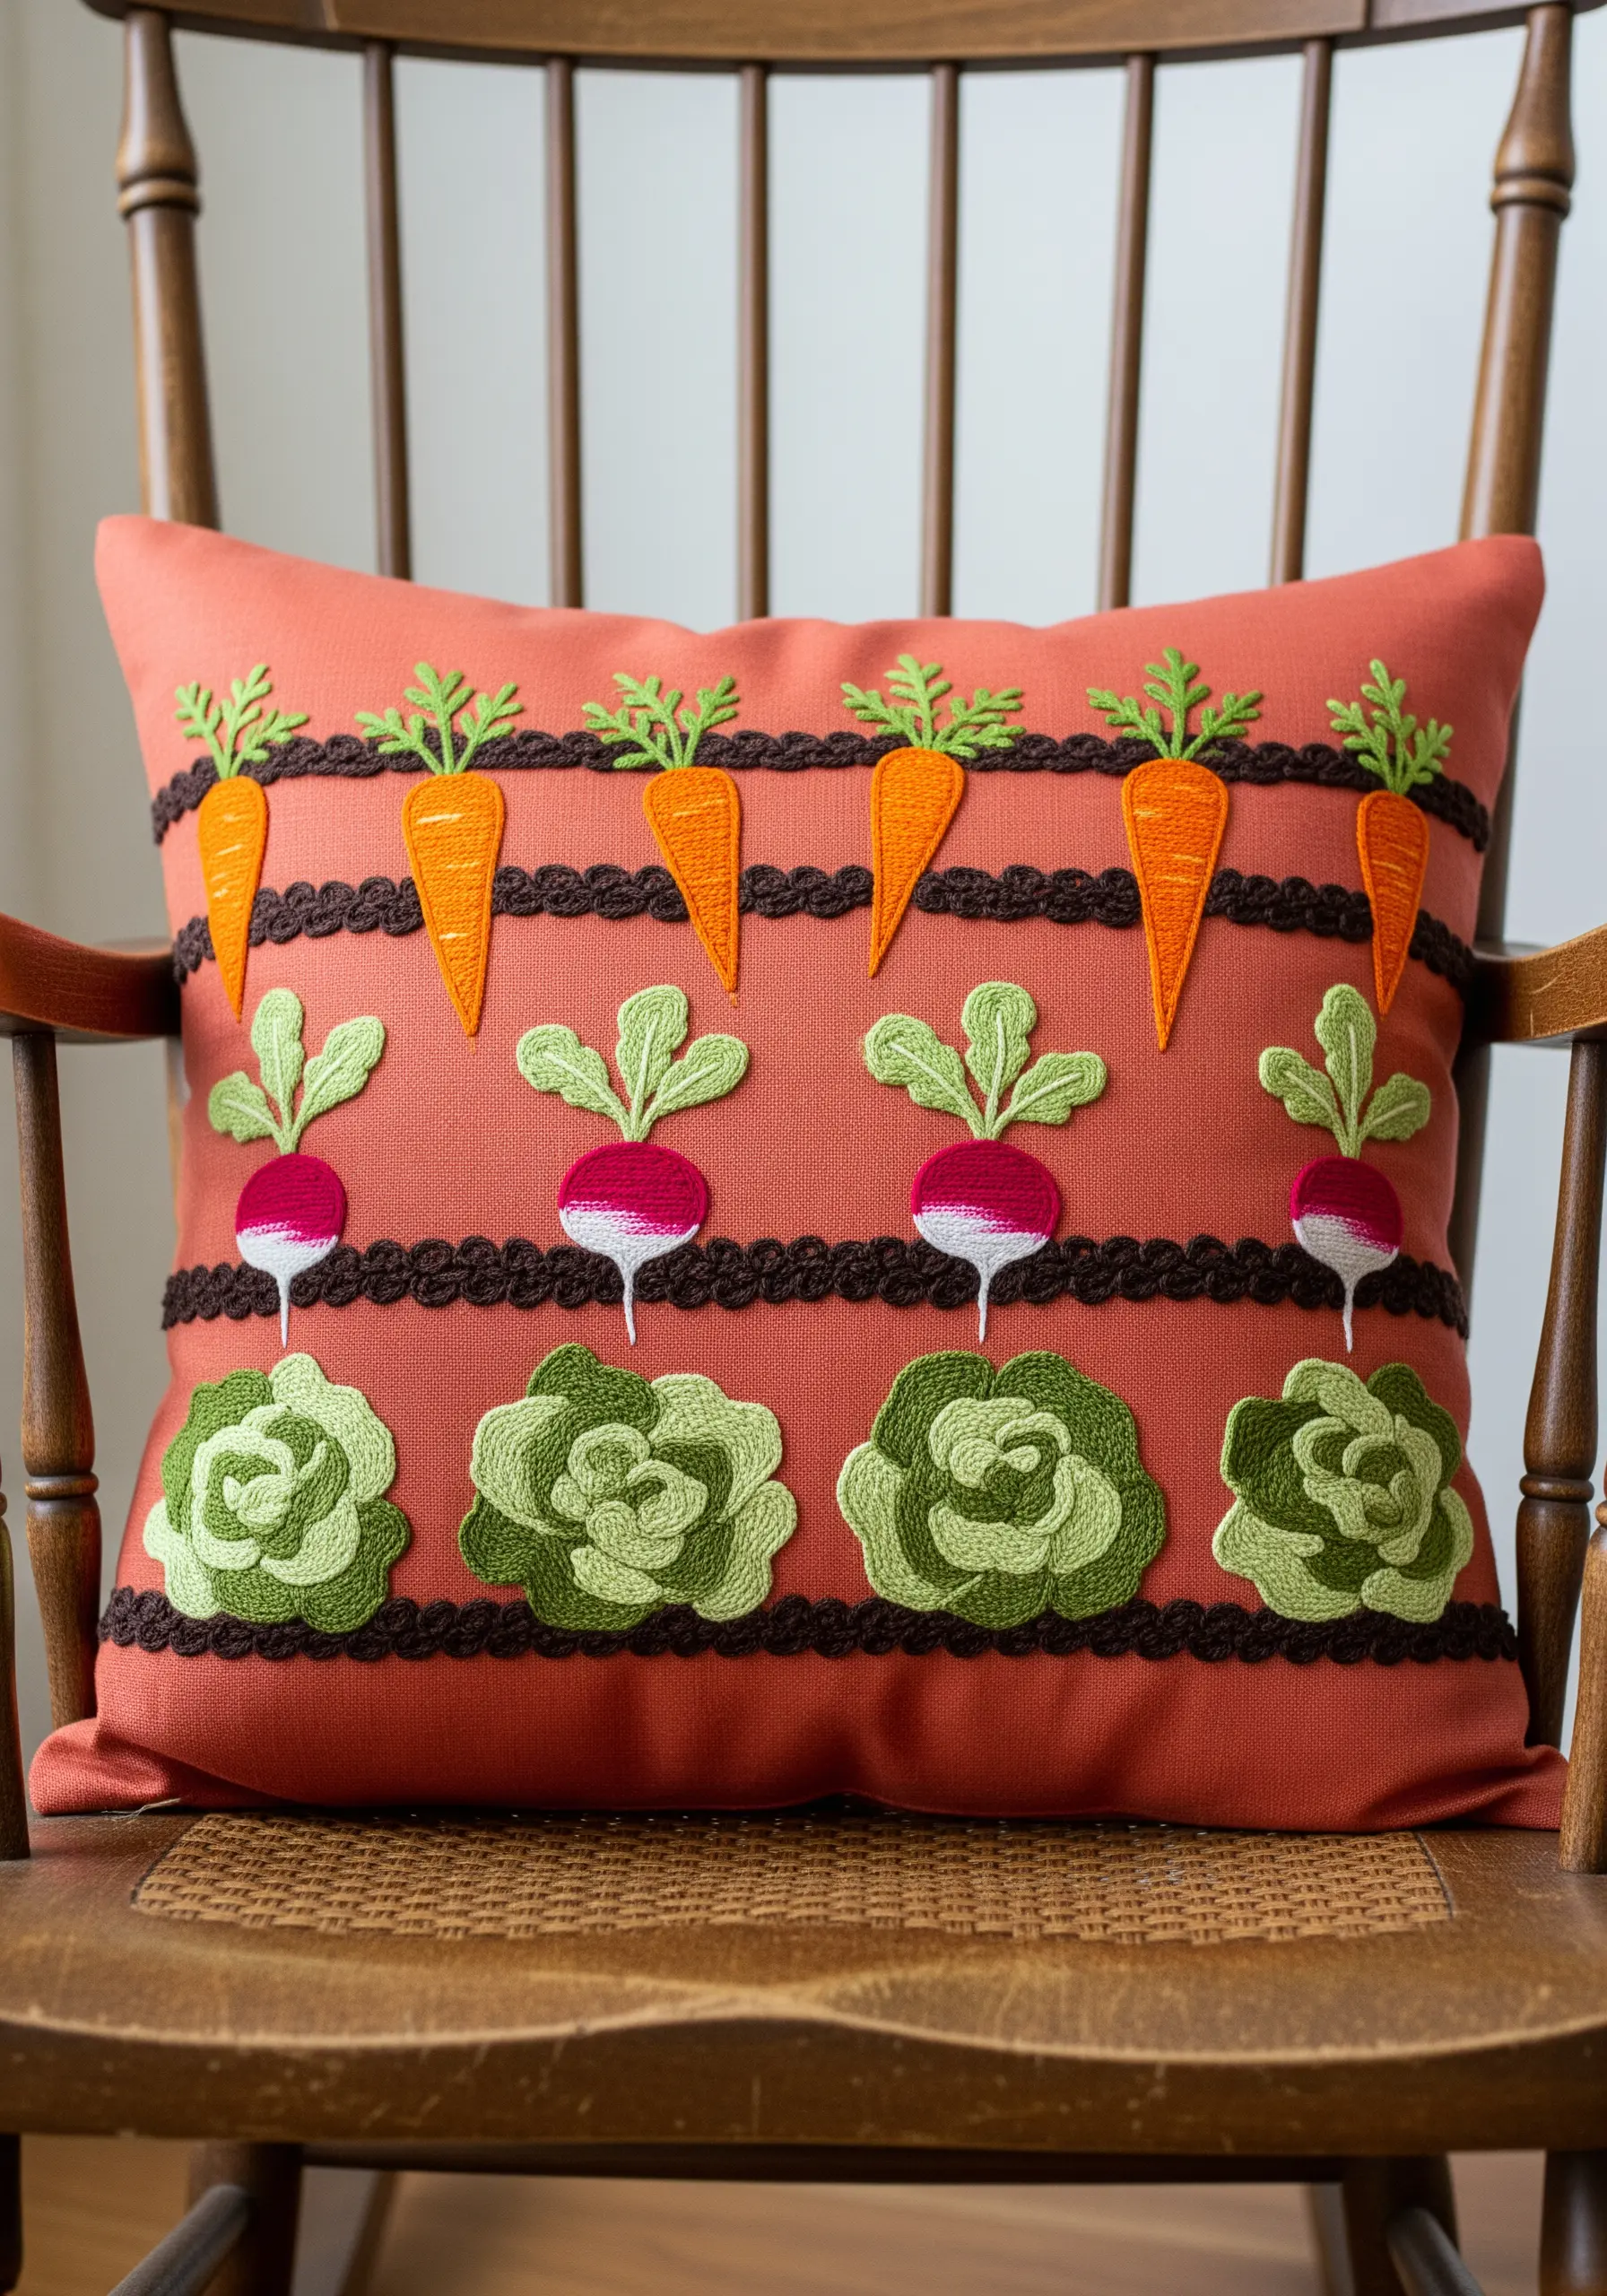
Combine appliqué with embroidery for a design that is bold, graphic, and full of charming detail.
Cut the basic shapes of the vegetables from felt or cotton fabric and secure them to your cushion cover using a neat whip stitch.
Then, add embroidered details on top: simple straight stitches for the texture on the carrots, radiating lines on the radishes, and layered satin stitch for the lettuce leaves.
The crocheted ric-rac trim between the rows adds another layer of handmade texture that perfectly frames each element.
9. Delphinium Blues
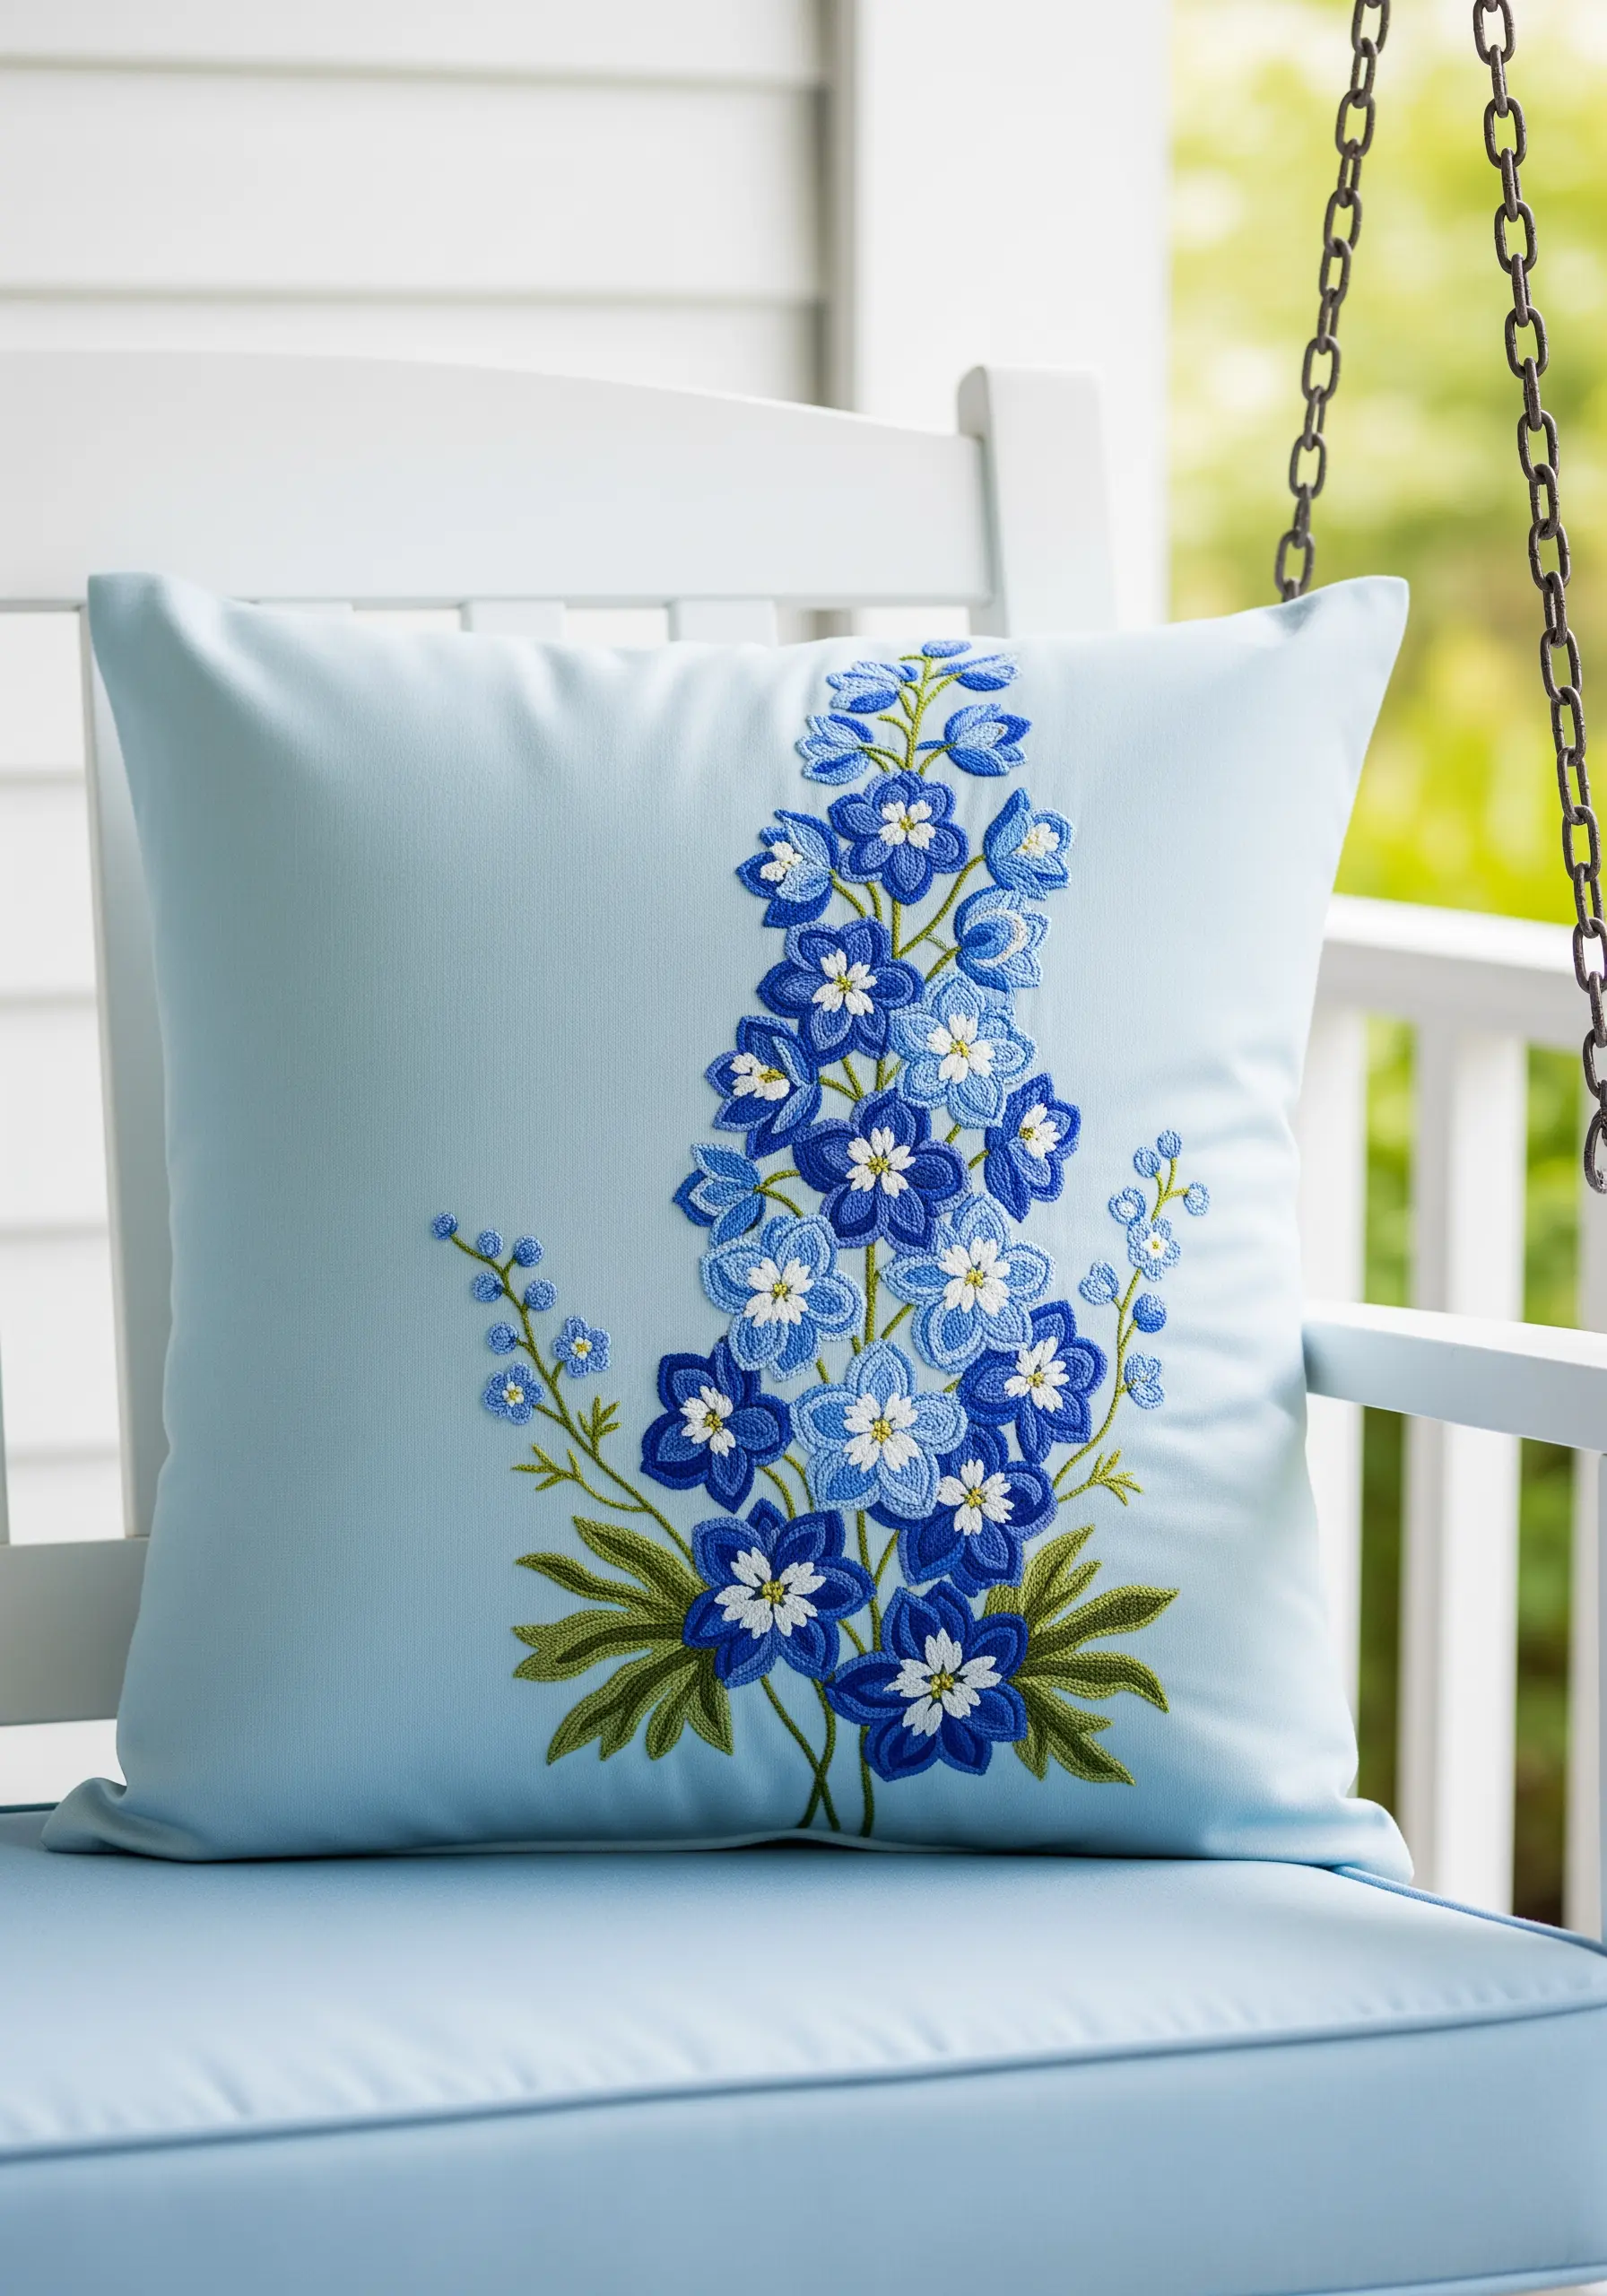
Achieve a soft, watercolor-like effect by carefully blending multiple shades within a single floral cluster.
For each delphinium blossom, use long-and-short stitch to seamlessly transition between light blue, periwinkle, and a deeper indigo, creating a natural gradient.
Keep the centers simple with a few crisp white French knots; this small point of contrast makes the blues appear even more vibrant.
This entire composition is an exercise in color harmony, creating a calming and cohesive piece.
10. The Hollyhock Cottage Scene
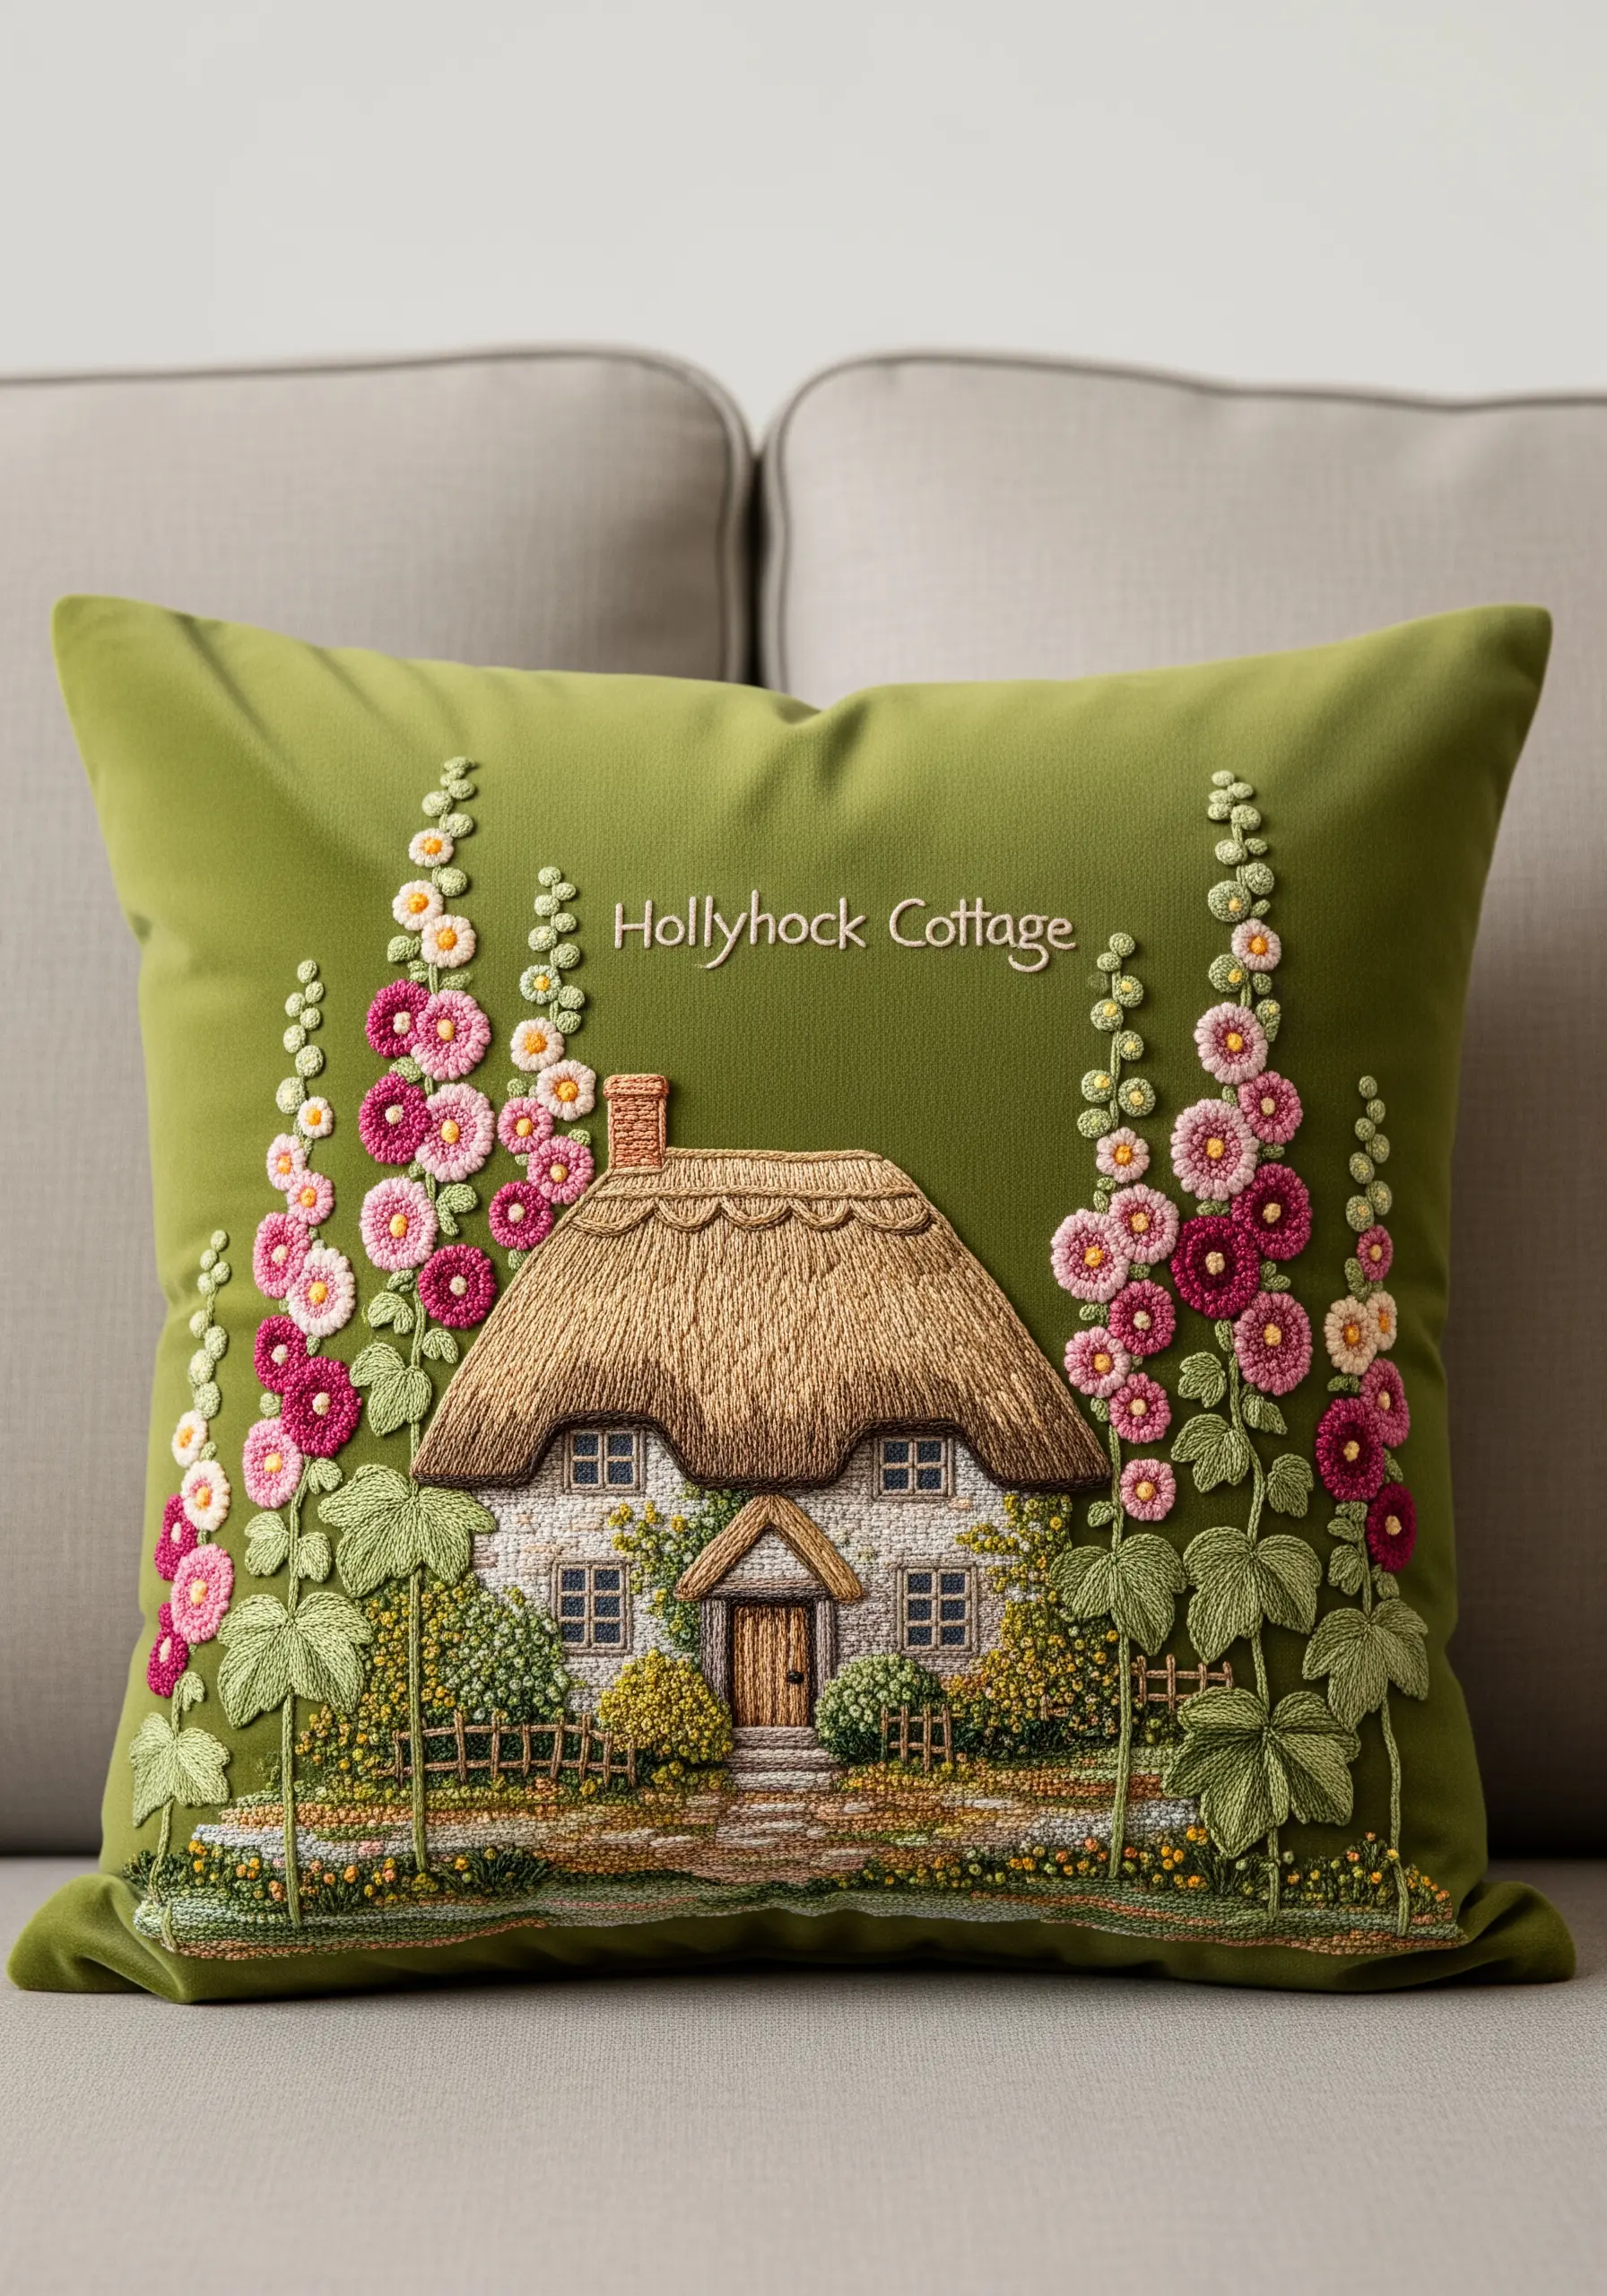
Build a miniature world with thread by focusing on creating distinct textures for each element of your scene.
For the thatched roof, use long, layered straight stitches in varied tones of straw and brown to mimic bundled reeds.
Create fluffy hollyhocks with stacked wagon wheel stitches or bullion knots for a raised, 3D effect.
Use tiny French knots for the surrounding bushes and single-strand backstitch for details like window panes. This is a true thread painting, where every stitch contributes to the story.
11. A Sprinkle of Forget-Me-Nots
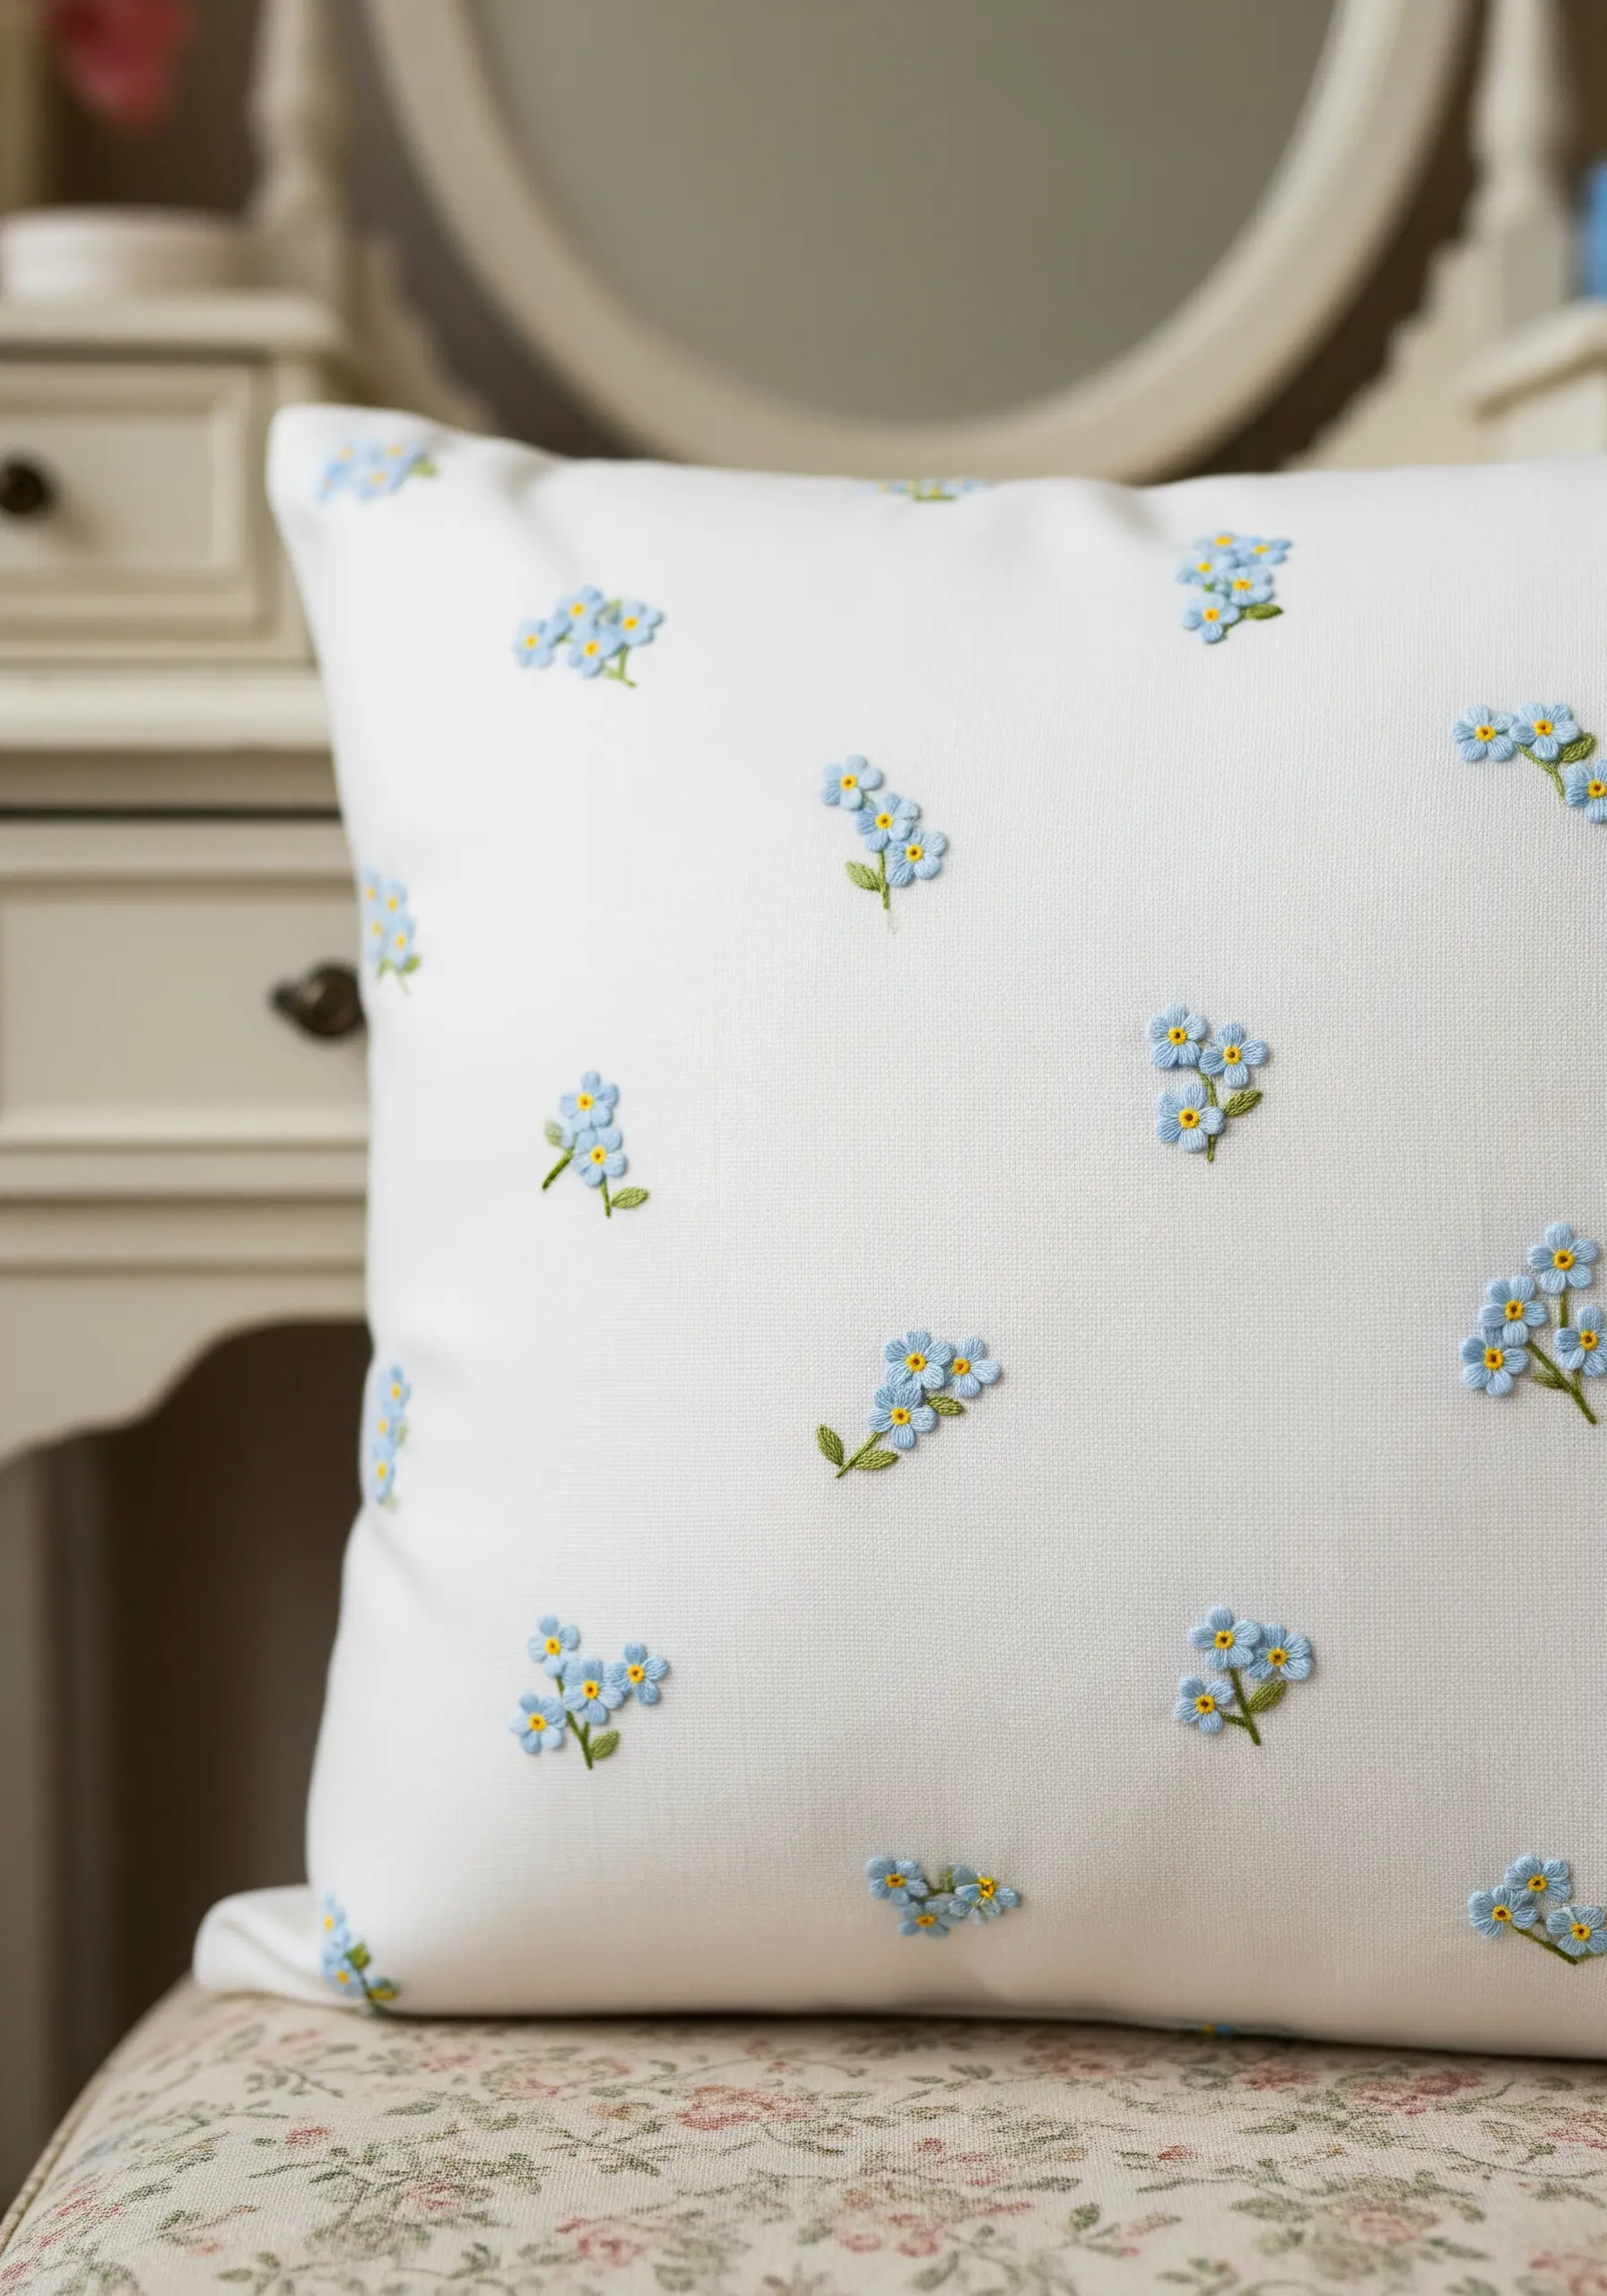
Master the art of understated elegance with a simple, scattered pattern that allows for plenty of negative space.
Each forget-me-not cluster is a miniature composition: five detached chain stitches in sky blue arranged around a single yellow French knot.
The key to making this design feel natural and not repetitive is to vary the orientation and spacing of each tiny bouquet.
This approach proves that even small hoop floral motifs can create significant impact when thoughtfully arranged.
12. A Field of Fiery Poppies
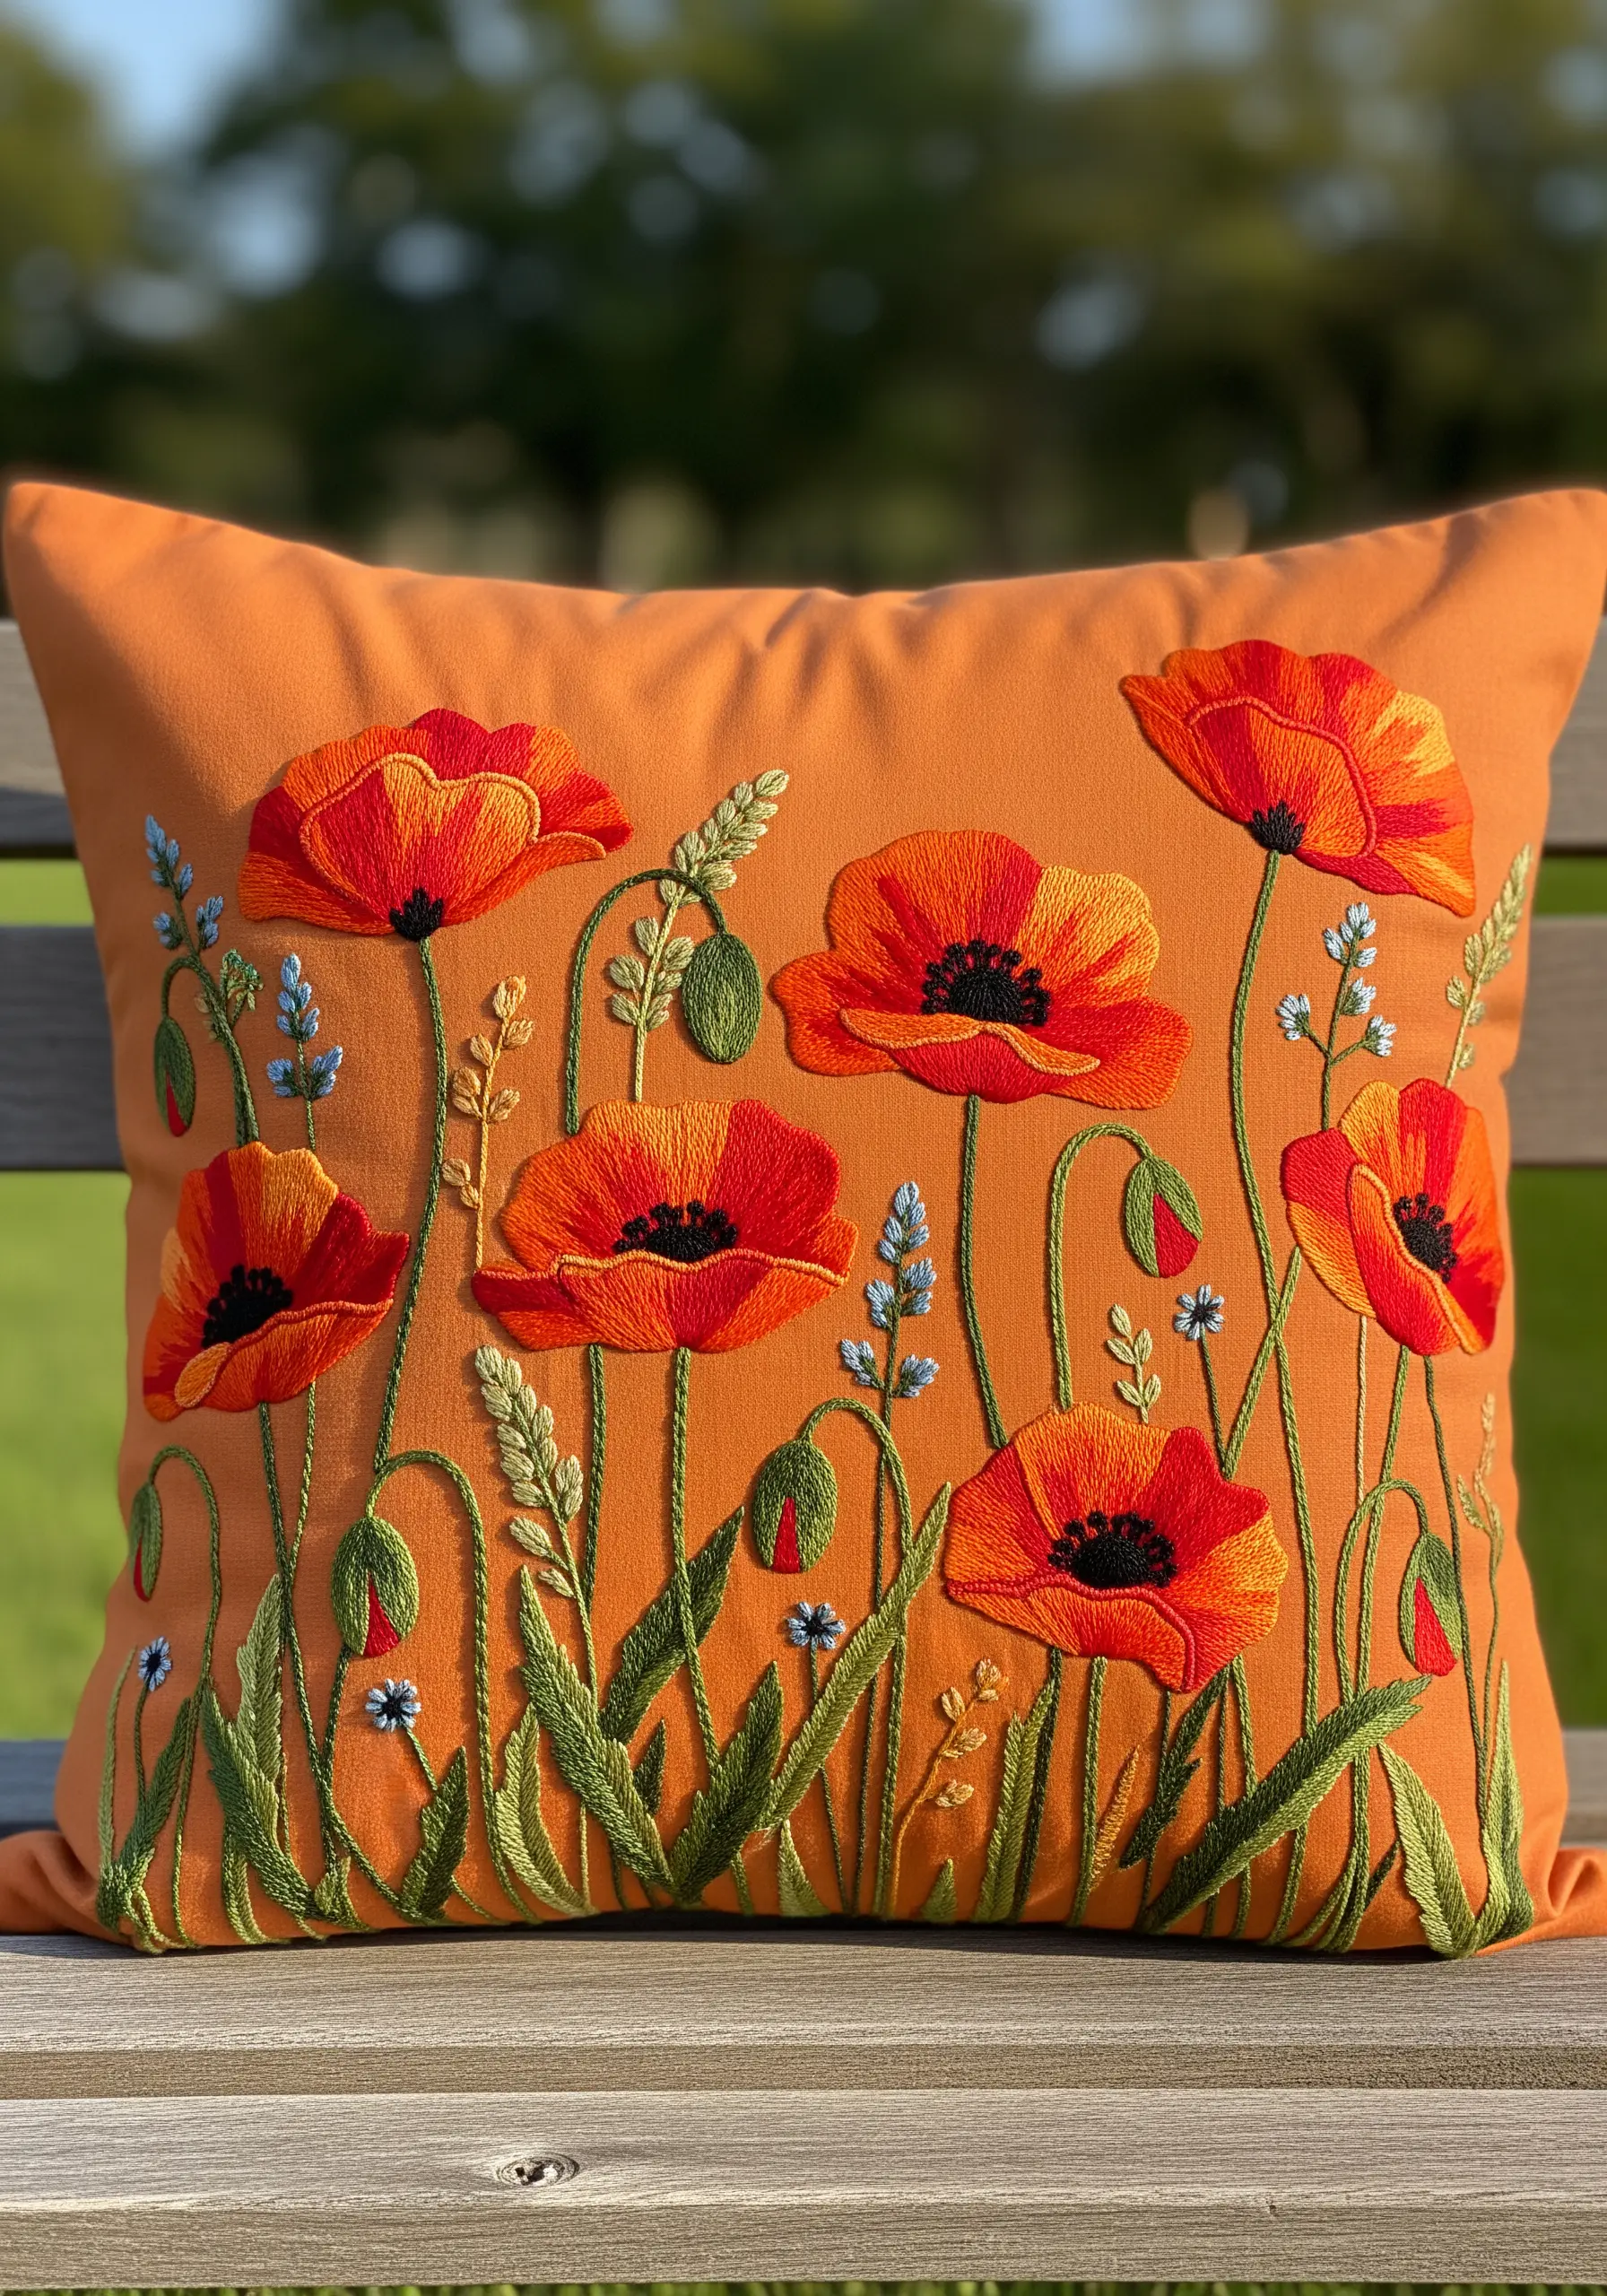
Capture the paper-thin delicacy of poppy petals by using directional long-and-short stitch with single strands of floss.
Ensure your stitches flow outward from the center, following the flower’s natural growth pattern. This creates a sense of movement and light.
To add depth, blend a darker red or a hint of black near the base of each petal. The dense, black French knot center acts as a powerful anchor, making the vibrant red petals seem even brighter by contrast.
13. The Woodland Floor Wreath
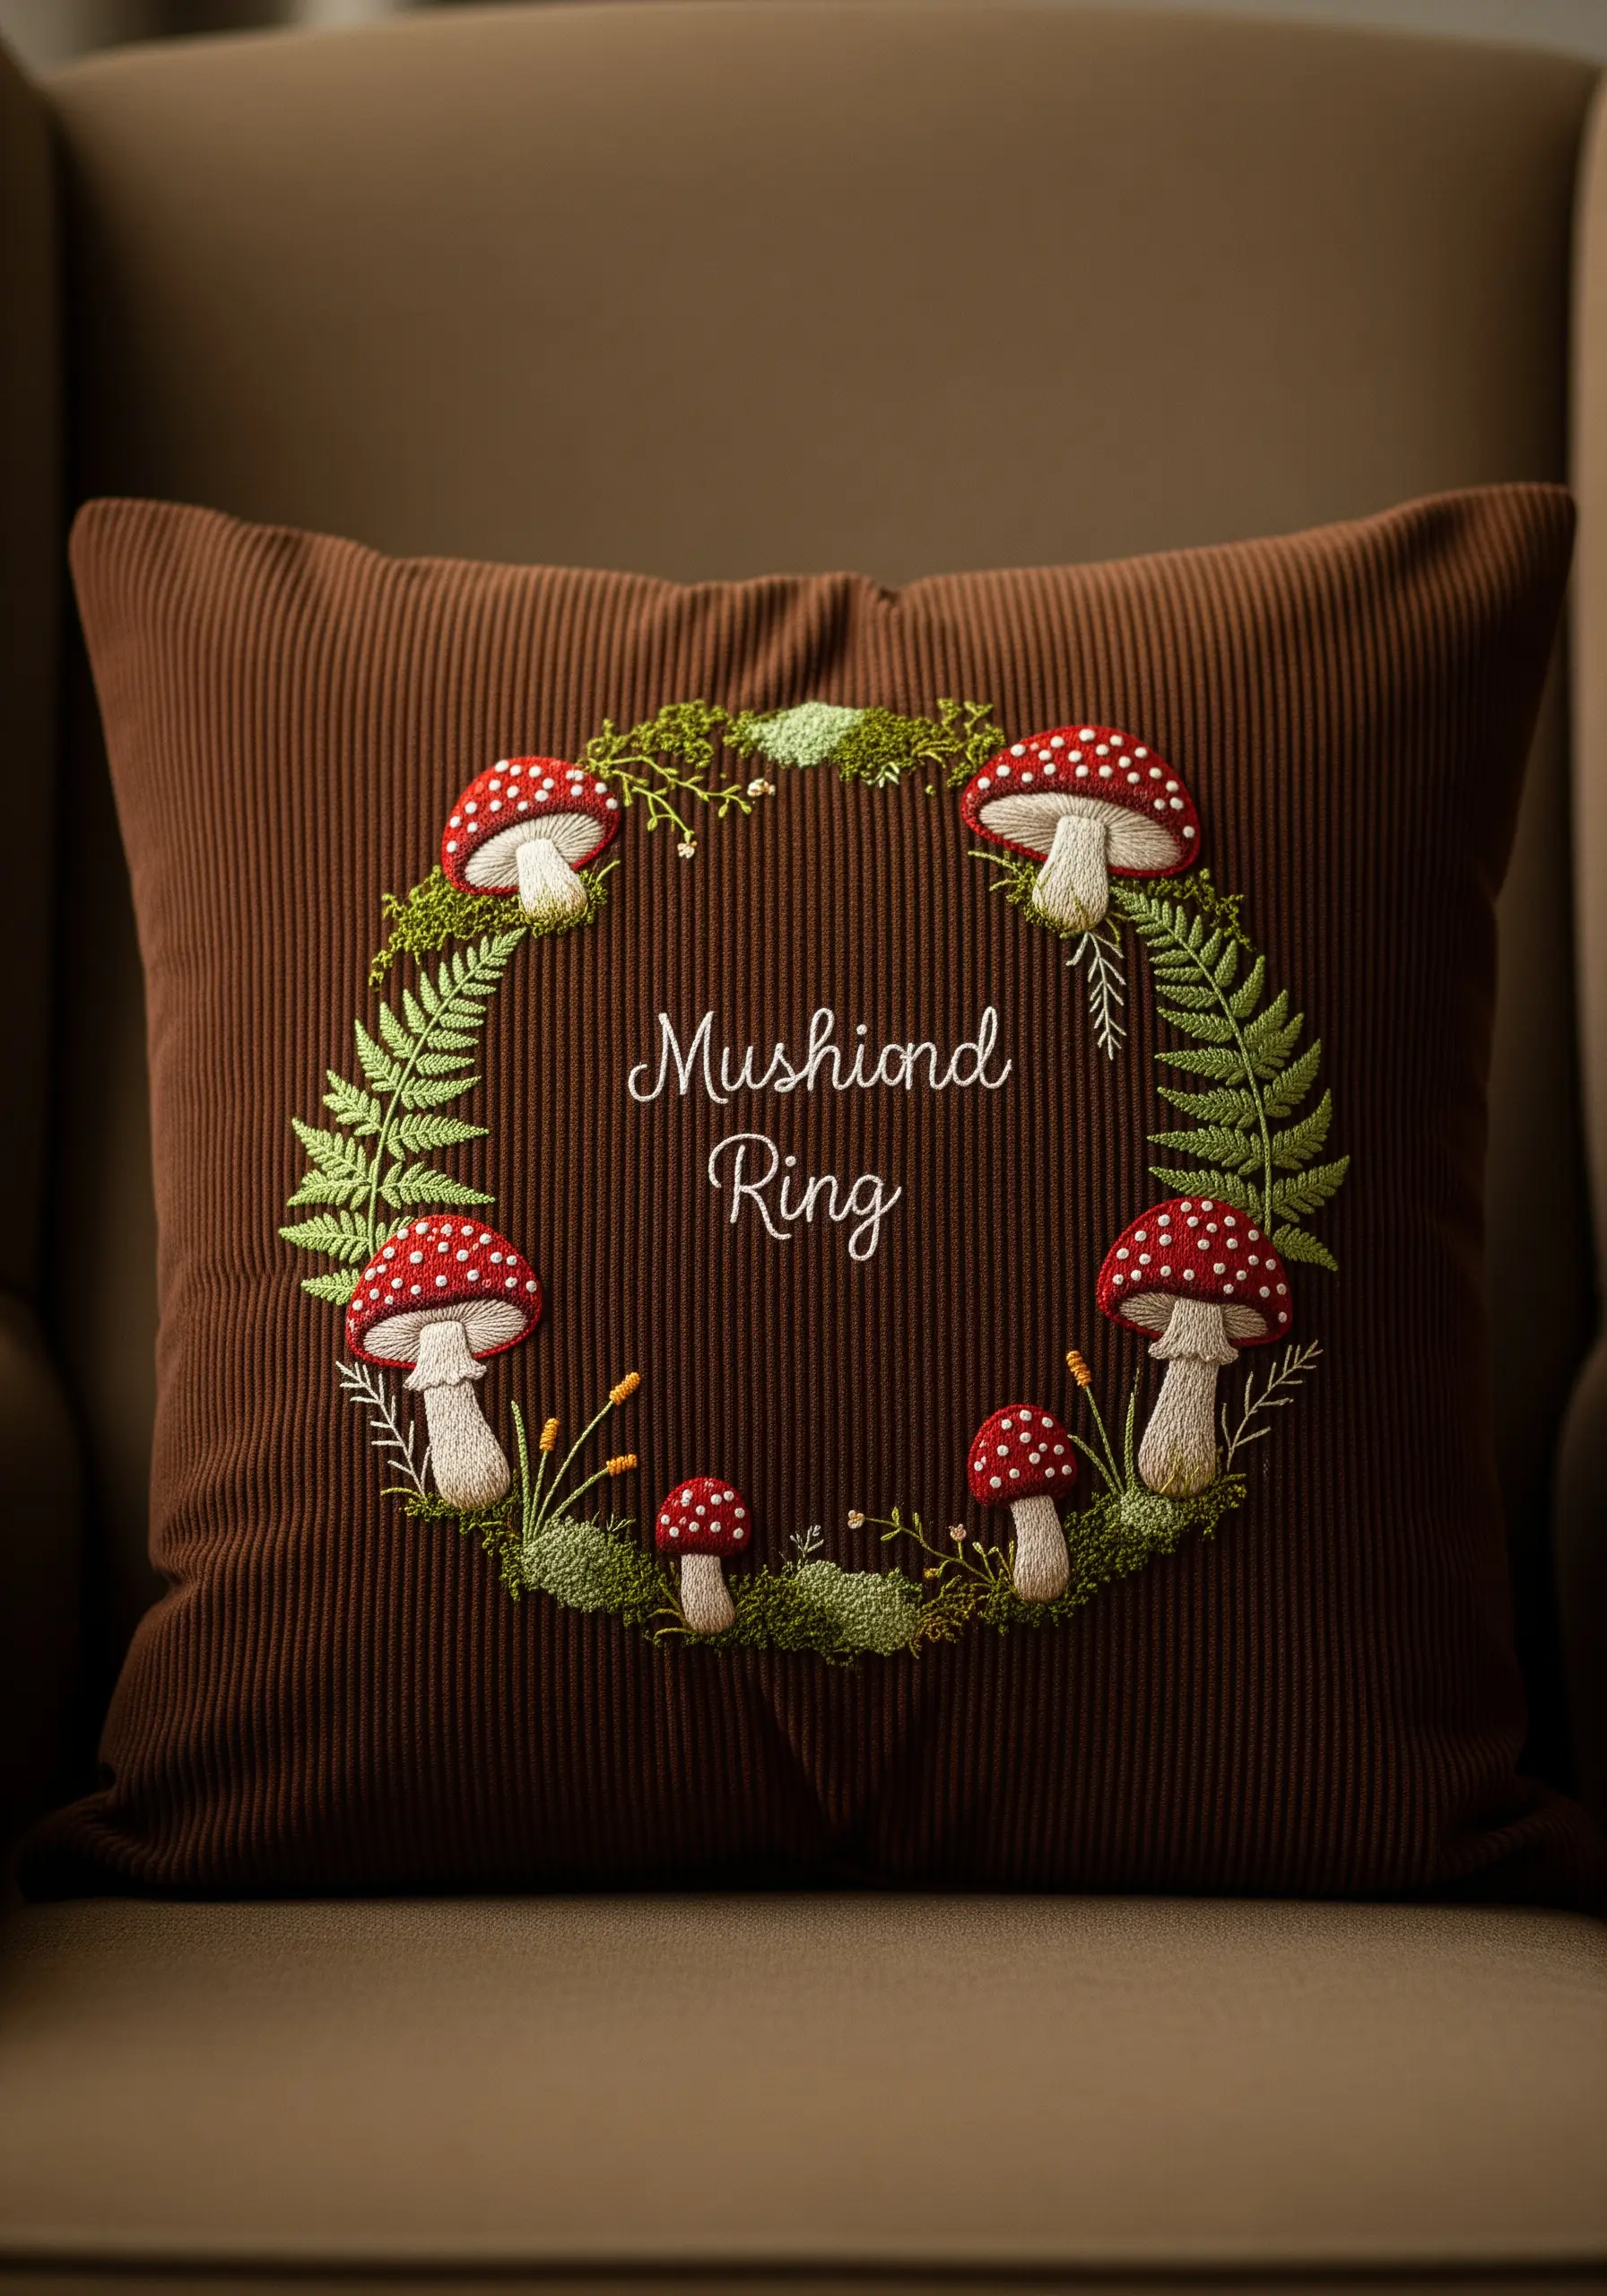
This design is a celebration of forest textures. Create delicate fern fronds using the fishbone stitch, which perfectly mimics the feathery shape of the leaves.
Build up a bed of moss with dense clusters of French knots, using at least three different shades of green to create a rich, variegated look.
For the mushroom’s white spots, use a padded satin stitch to give them a raised, 3D appearance, making them stand out against the red caps.
14. The Clematis Vine Border
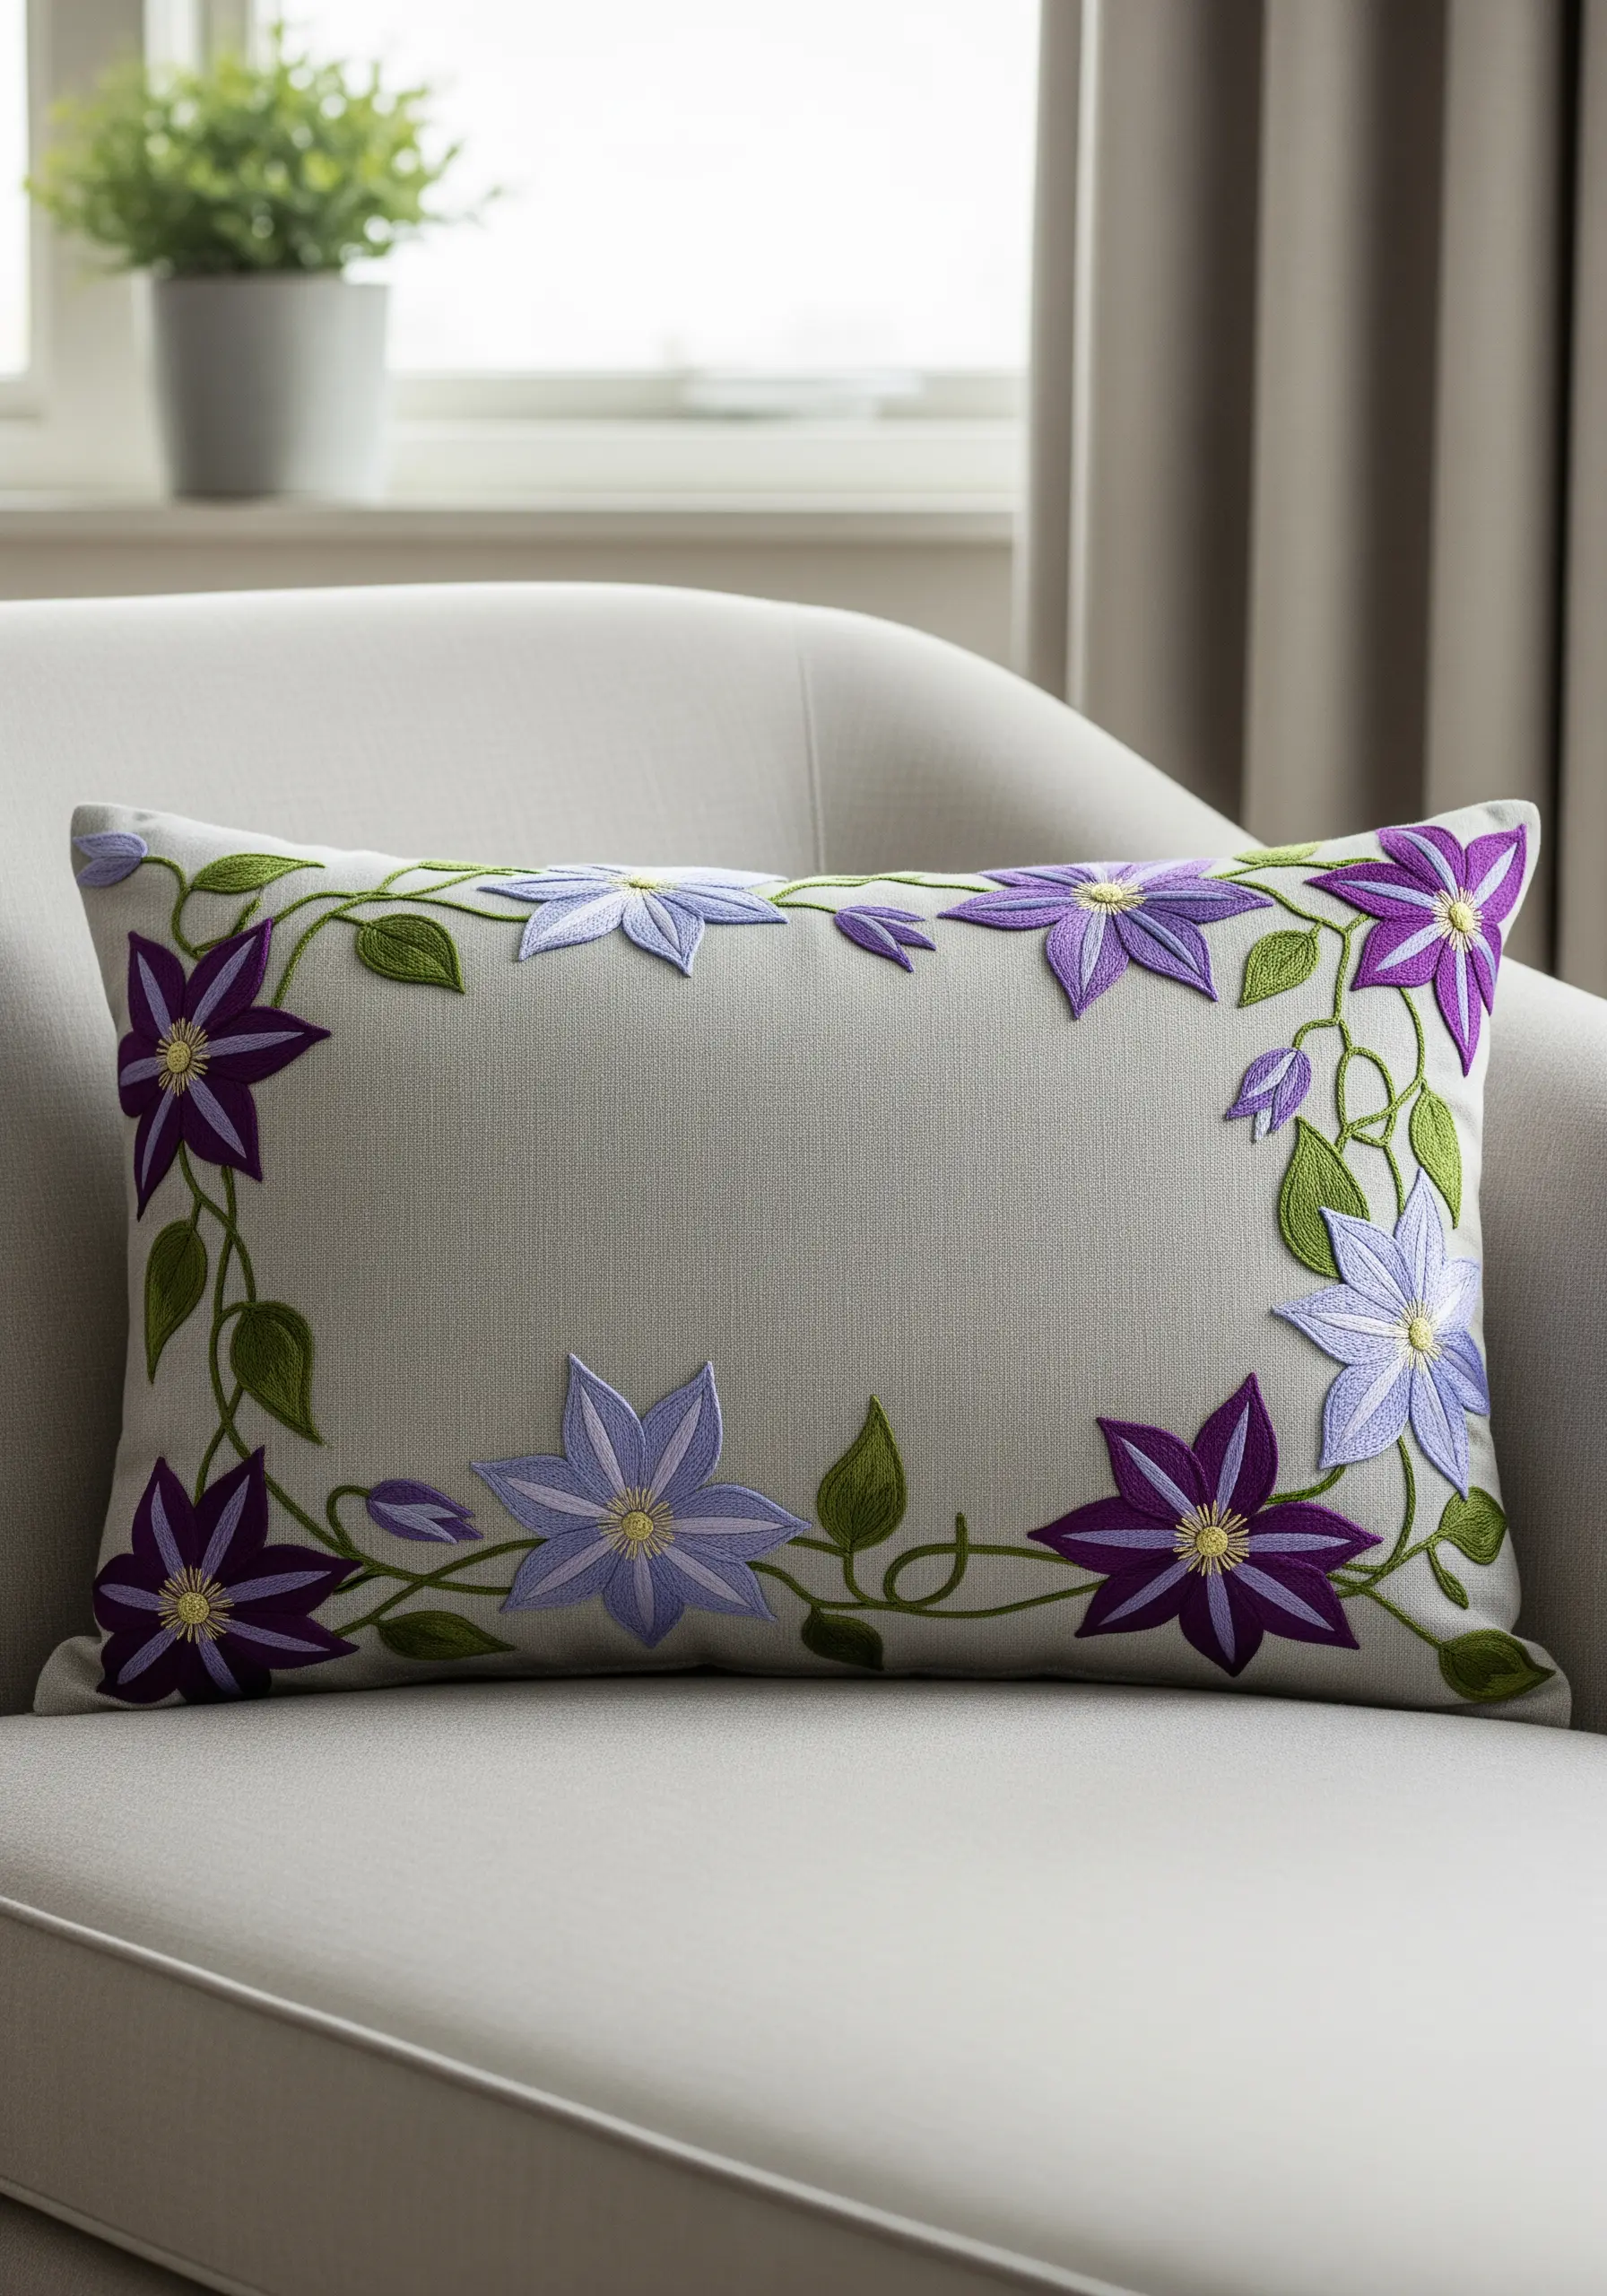
A border design is a sophisticated way to frame your cushion cover, turning it into a polished piece of decor.
For petals with exceptionally clean and sharp edges, first outline the shape with a split stitch. Then, fill the area with satin stitch, covering the outline completely.
This technique creates a slightly raised, perfectly defined edge that looks incredibly professional.
Arranging the flowers in a gradient of purples adds a dynamic flow to the border.
15. The Dogwood Branch Perch
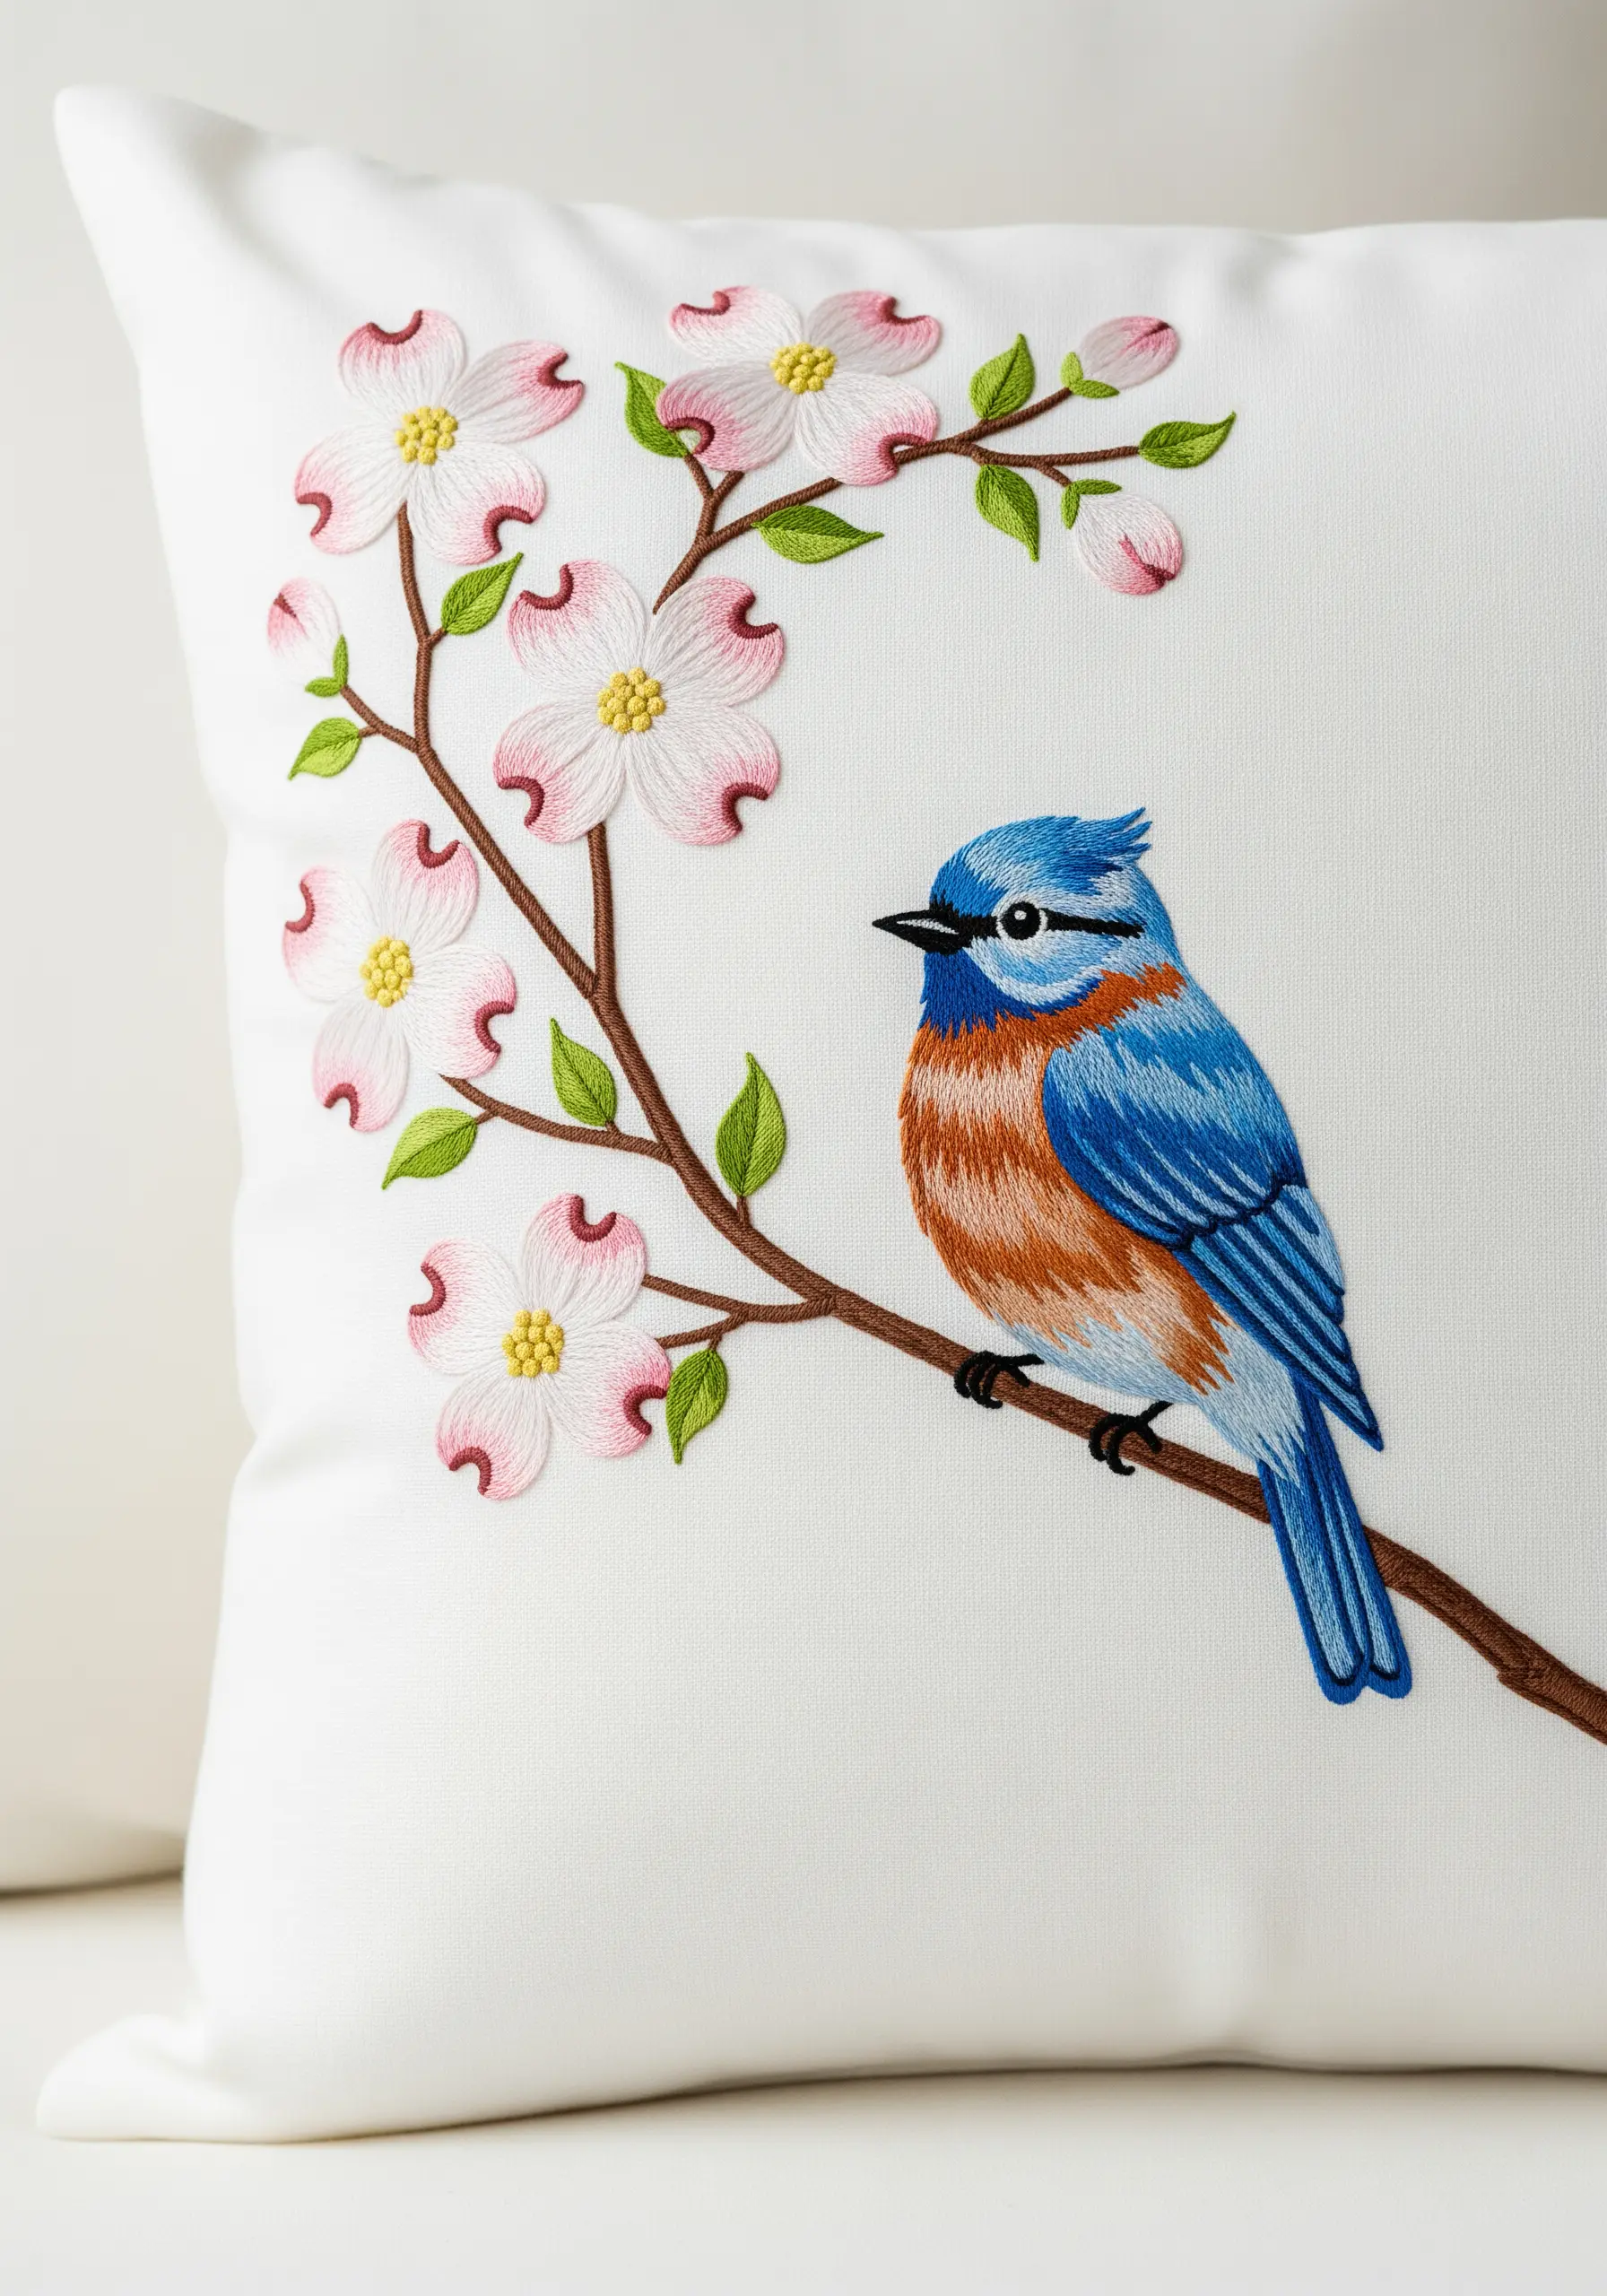
Bring a bird to life by mimicking the texture of its feathers with careful stitch direction.
Use short, layered stitches (a form of thread painting) to fill in the bird’s body, ensuring the stitches follow the contours and direction of feather growth.
For the dogwood blossoms, add a hint of blush to the white petals with a pale pink thread, and be sure to define the characteristic notch at the tip of each petal with your outline.
These subtle details are what elevate the piece from a pattern to a portrait.
16. The Sweet Pea Spill
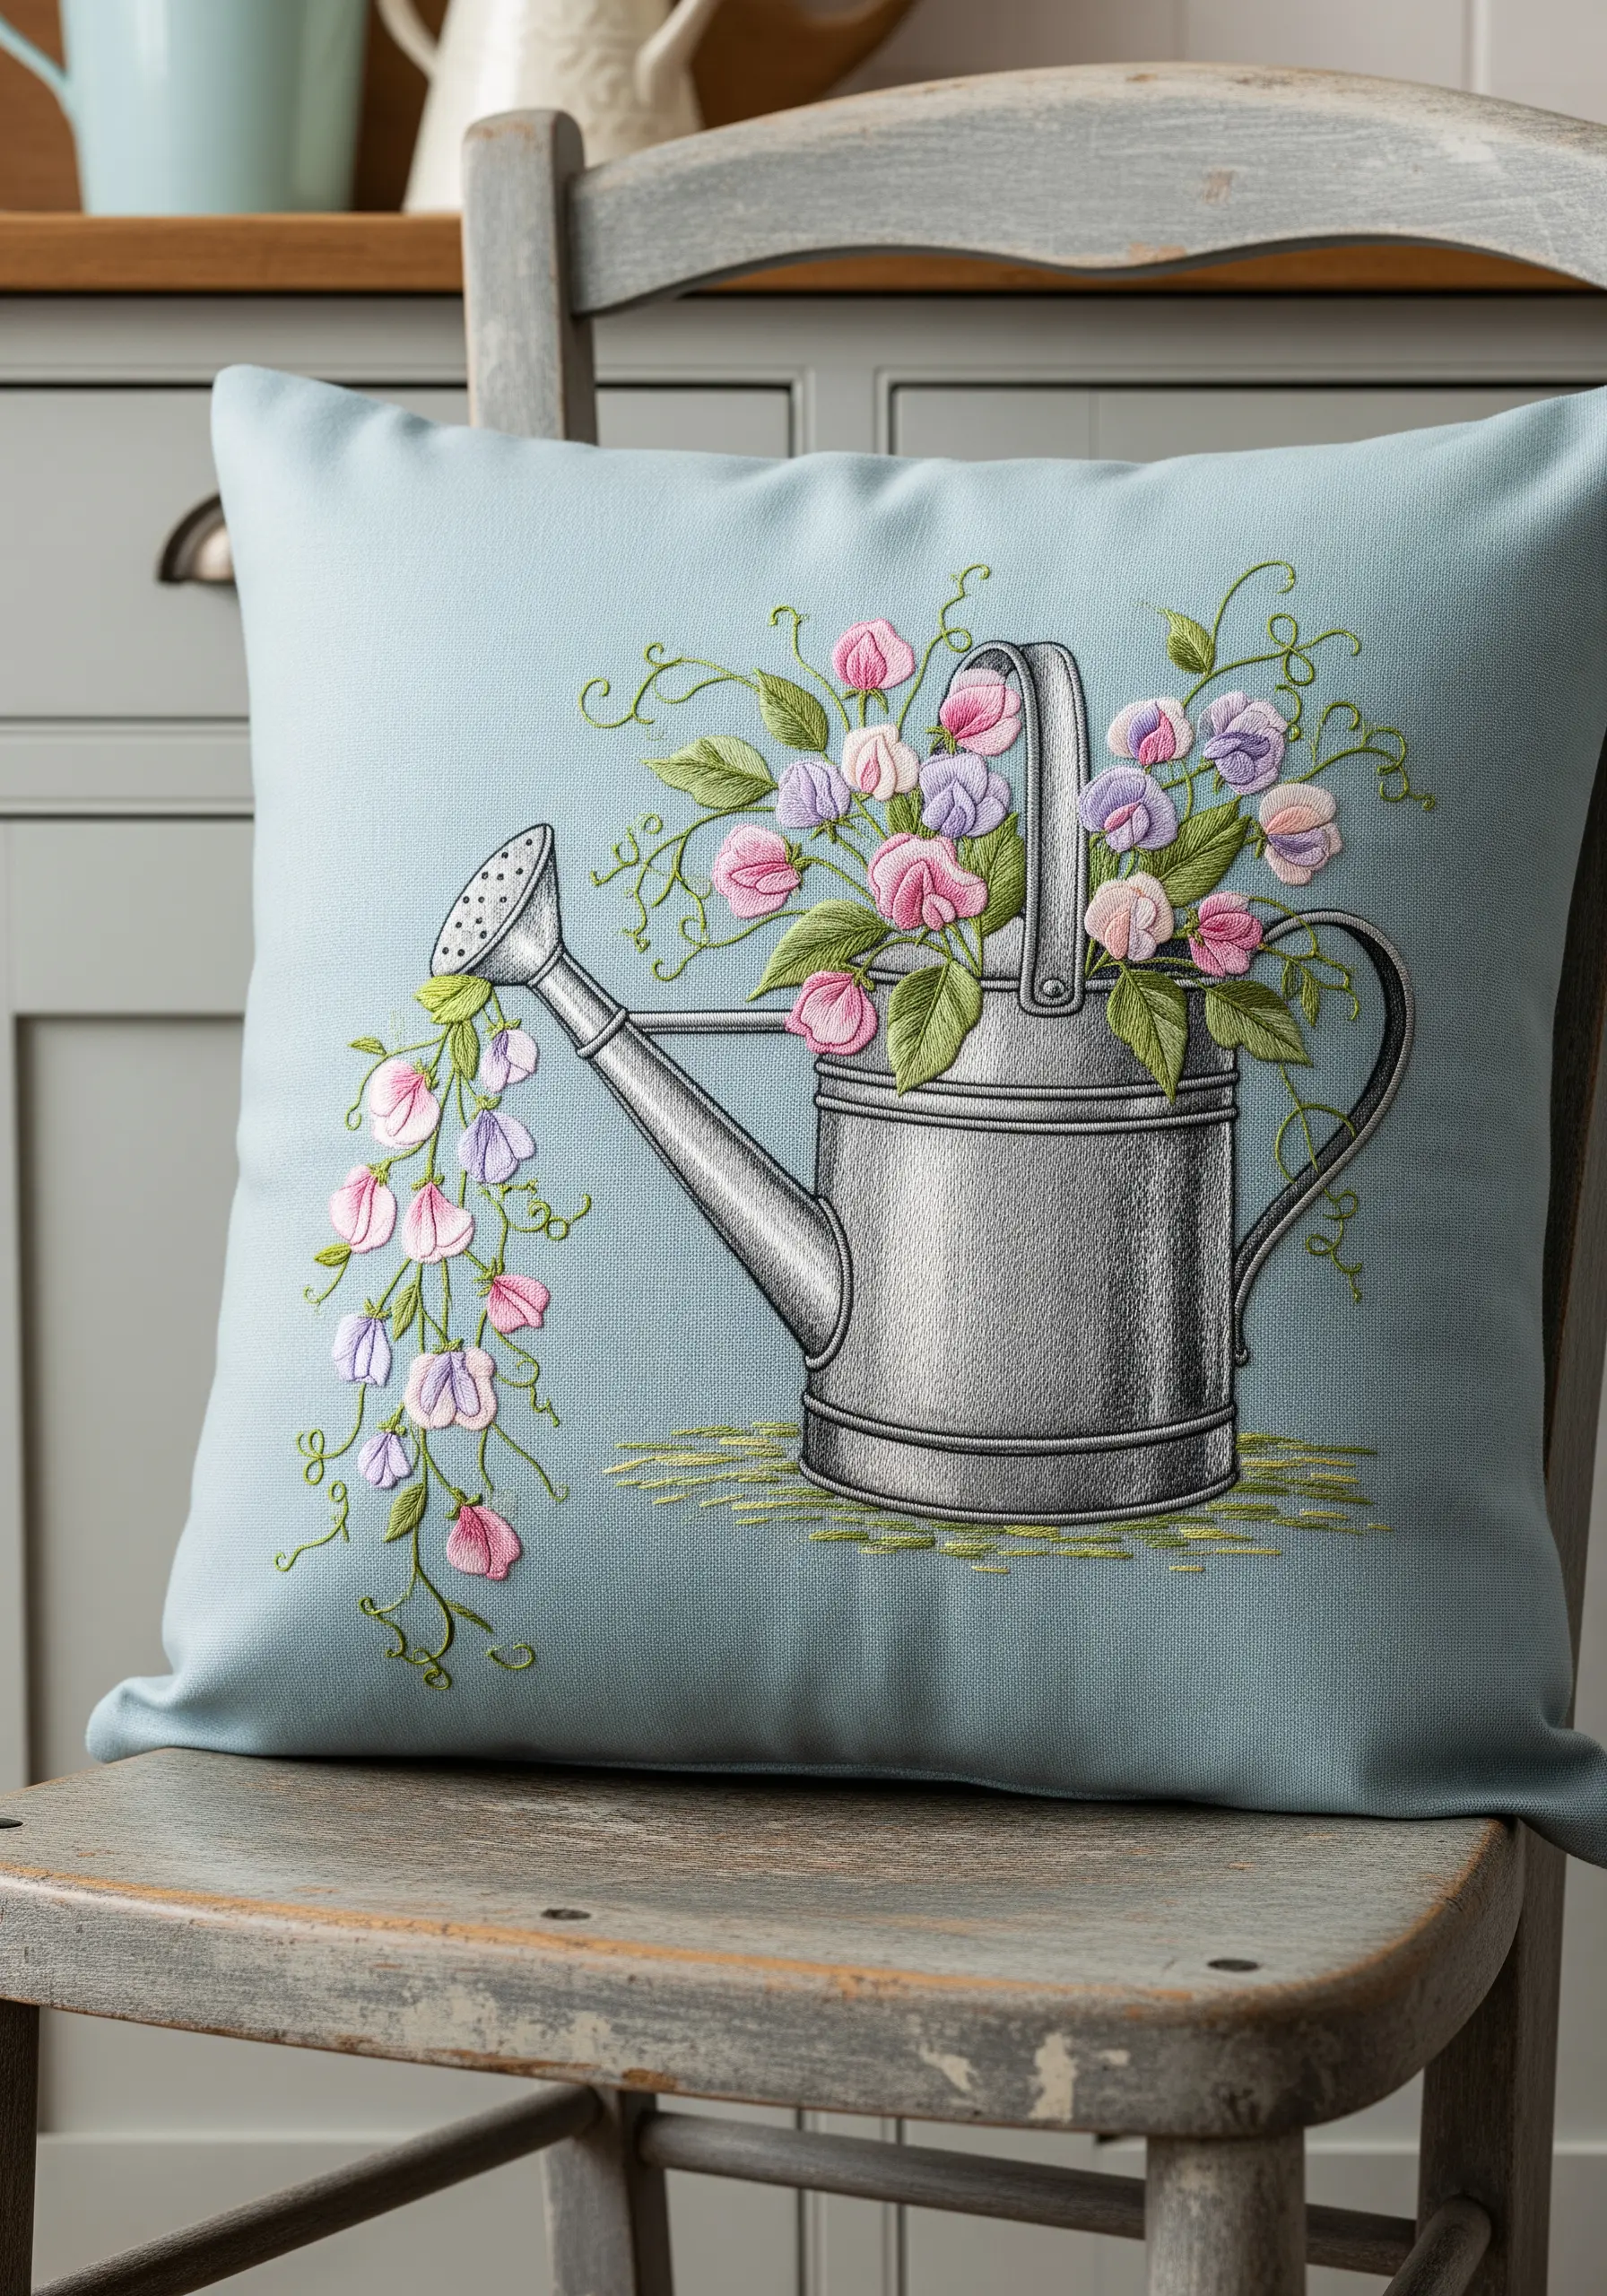
You don’t need metallic thread to create the illusion of shine. For the watering can, use long, smooth satin stitches in several shades of grey.
The trick is to add a few strategic stitches of pure white floss along the areas where light would naturally reflect, like the rim and handle.
This highlight fools the eye into seeing a metallic sheen.
Contrast this smooth surface with the ruffled, delicate sweet peas, stitched with a looser satin stitch to suggest their frilly texture.
17. The Late Summer Meadow
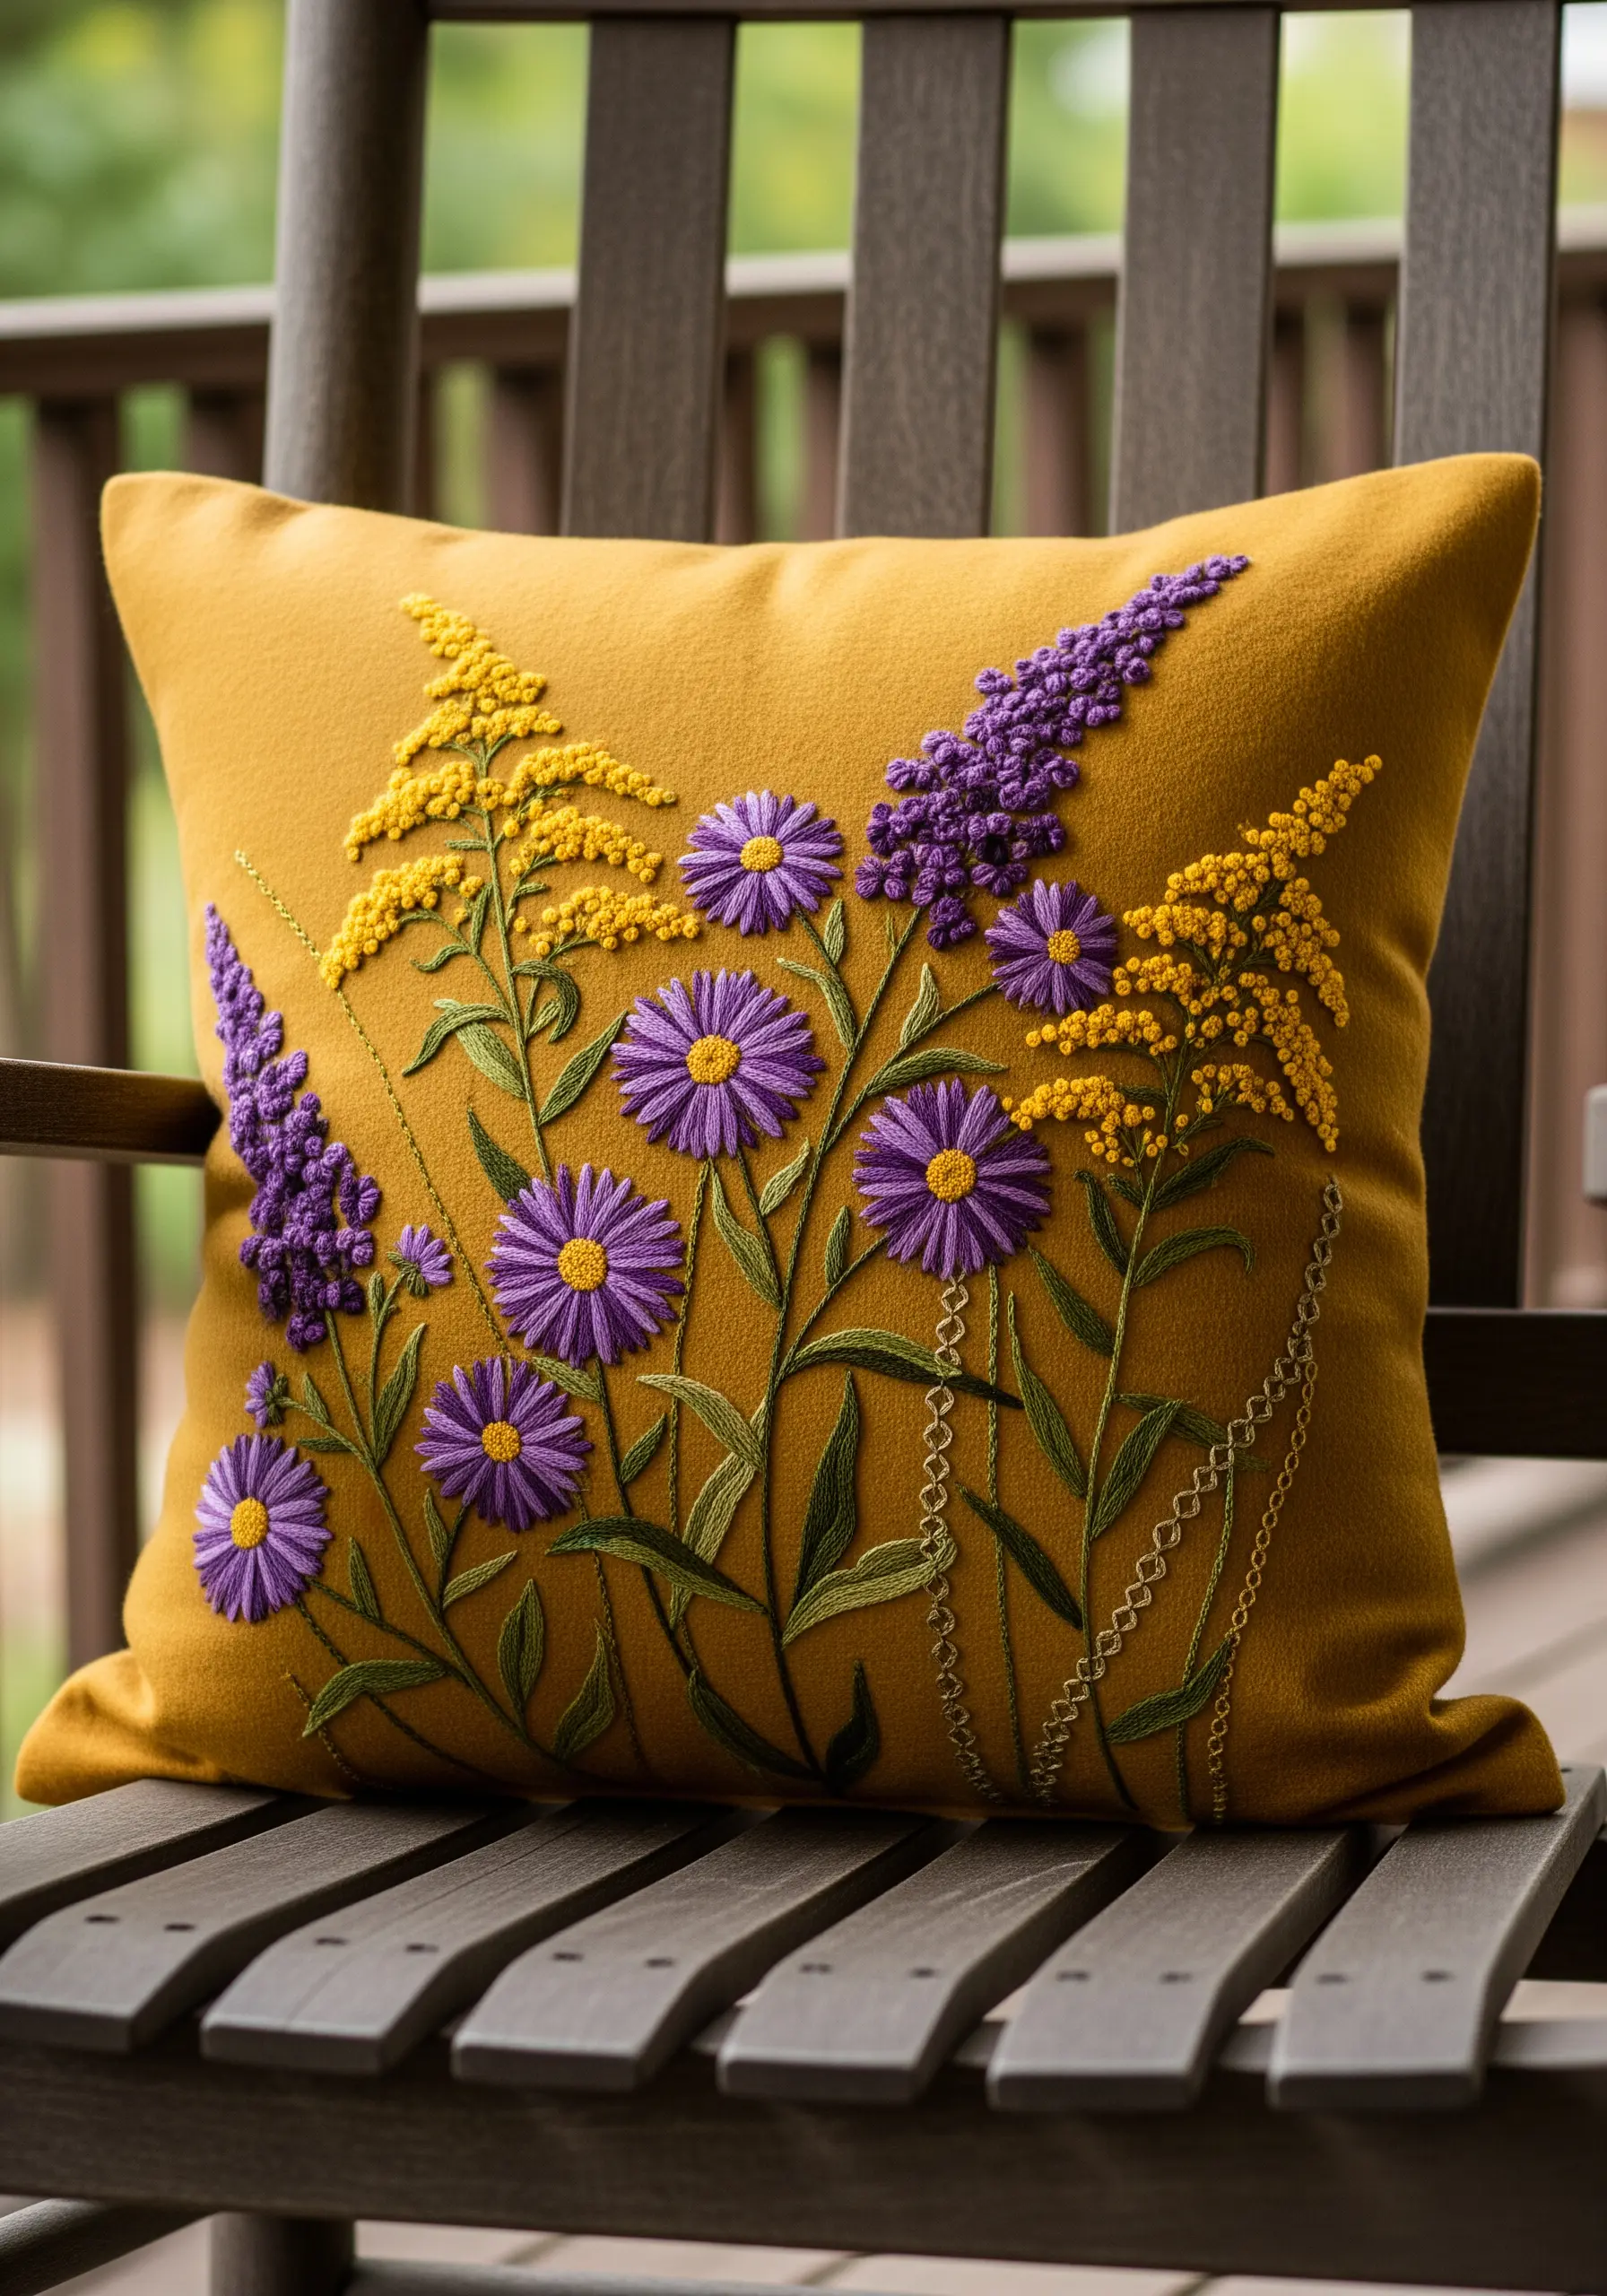
Create a composition rich in visual interest by deliberately contrasting different stitch textures.
For the purple asters, use radiating straight stitches for the thin petals and a tight cluster of yellow French knots for the centers.
Next to them, build the fluffy goldenrod using hundreds of tiny, dense French knots in yellow and gold, creating a soft, pollen-dusted texture.
This play between the spiky asters and the soft goldenrod is what makes the meadow scene so dynamic and engaging.
18. The Botanical Cross-Section
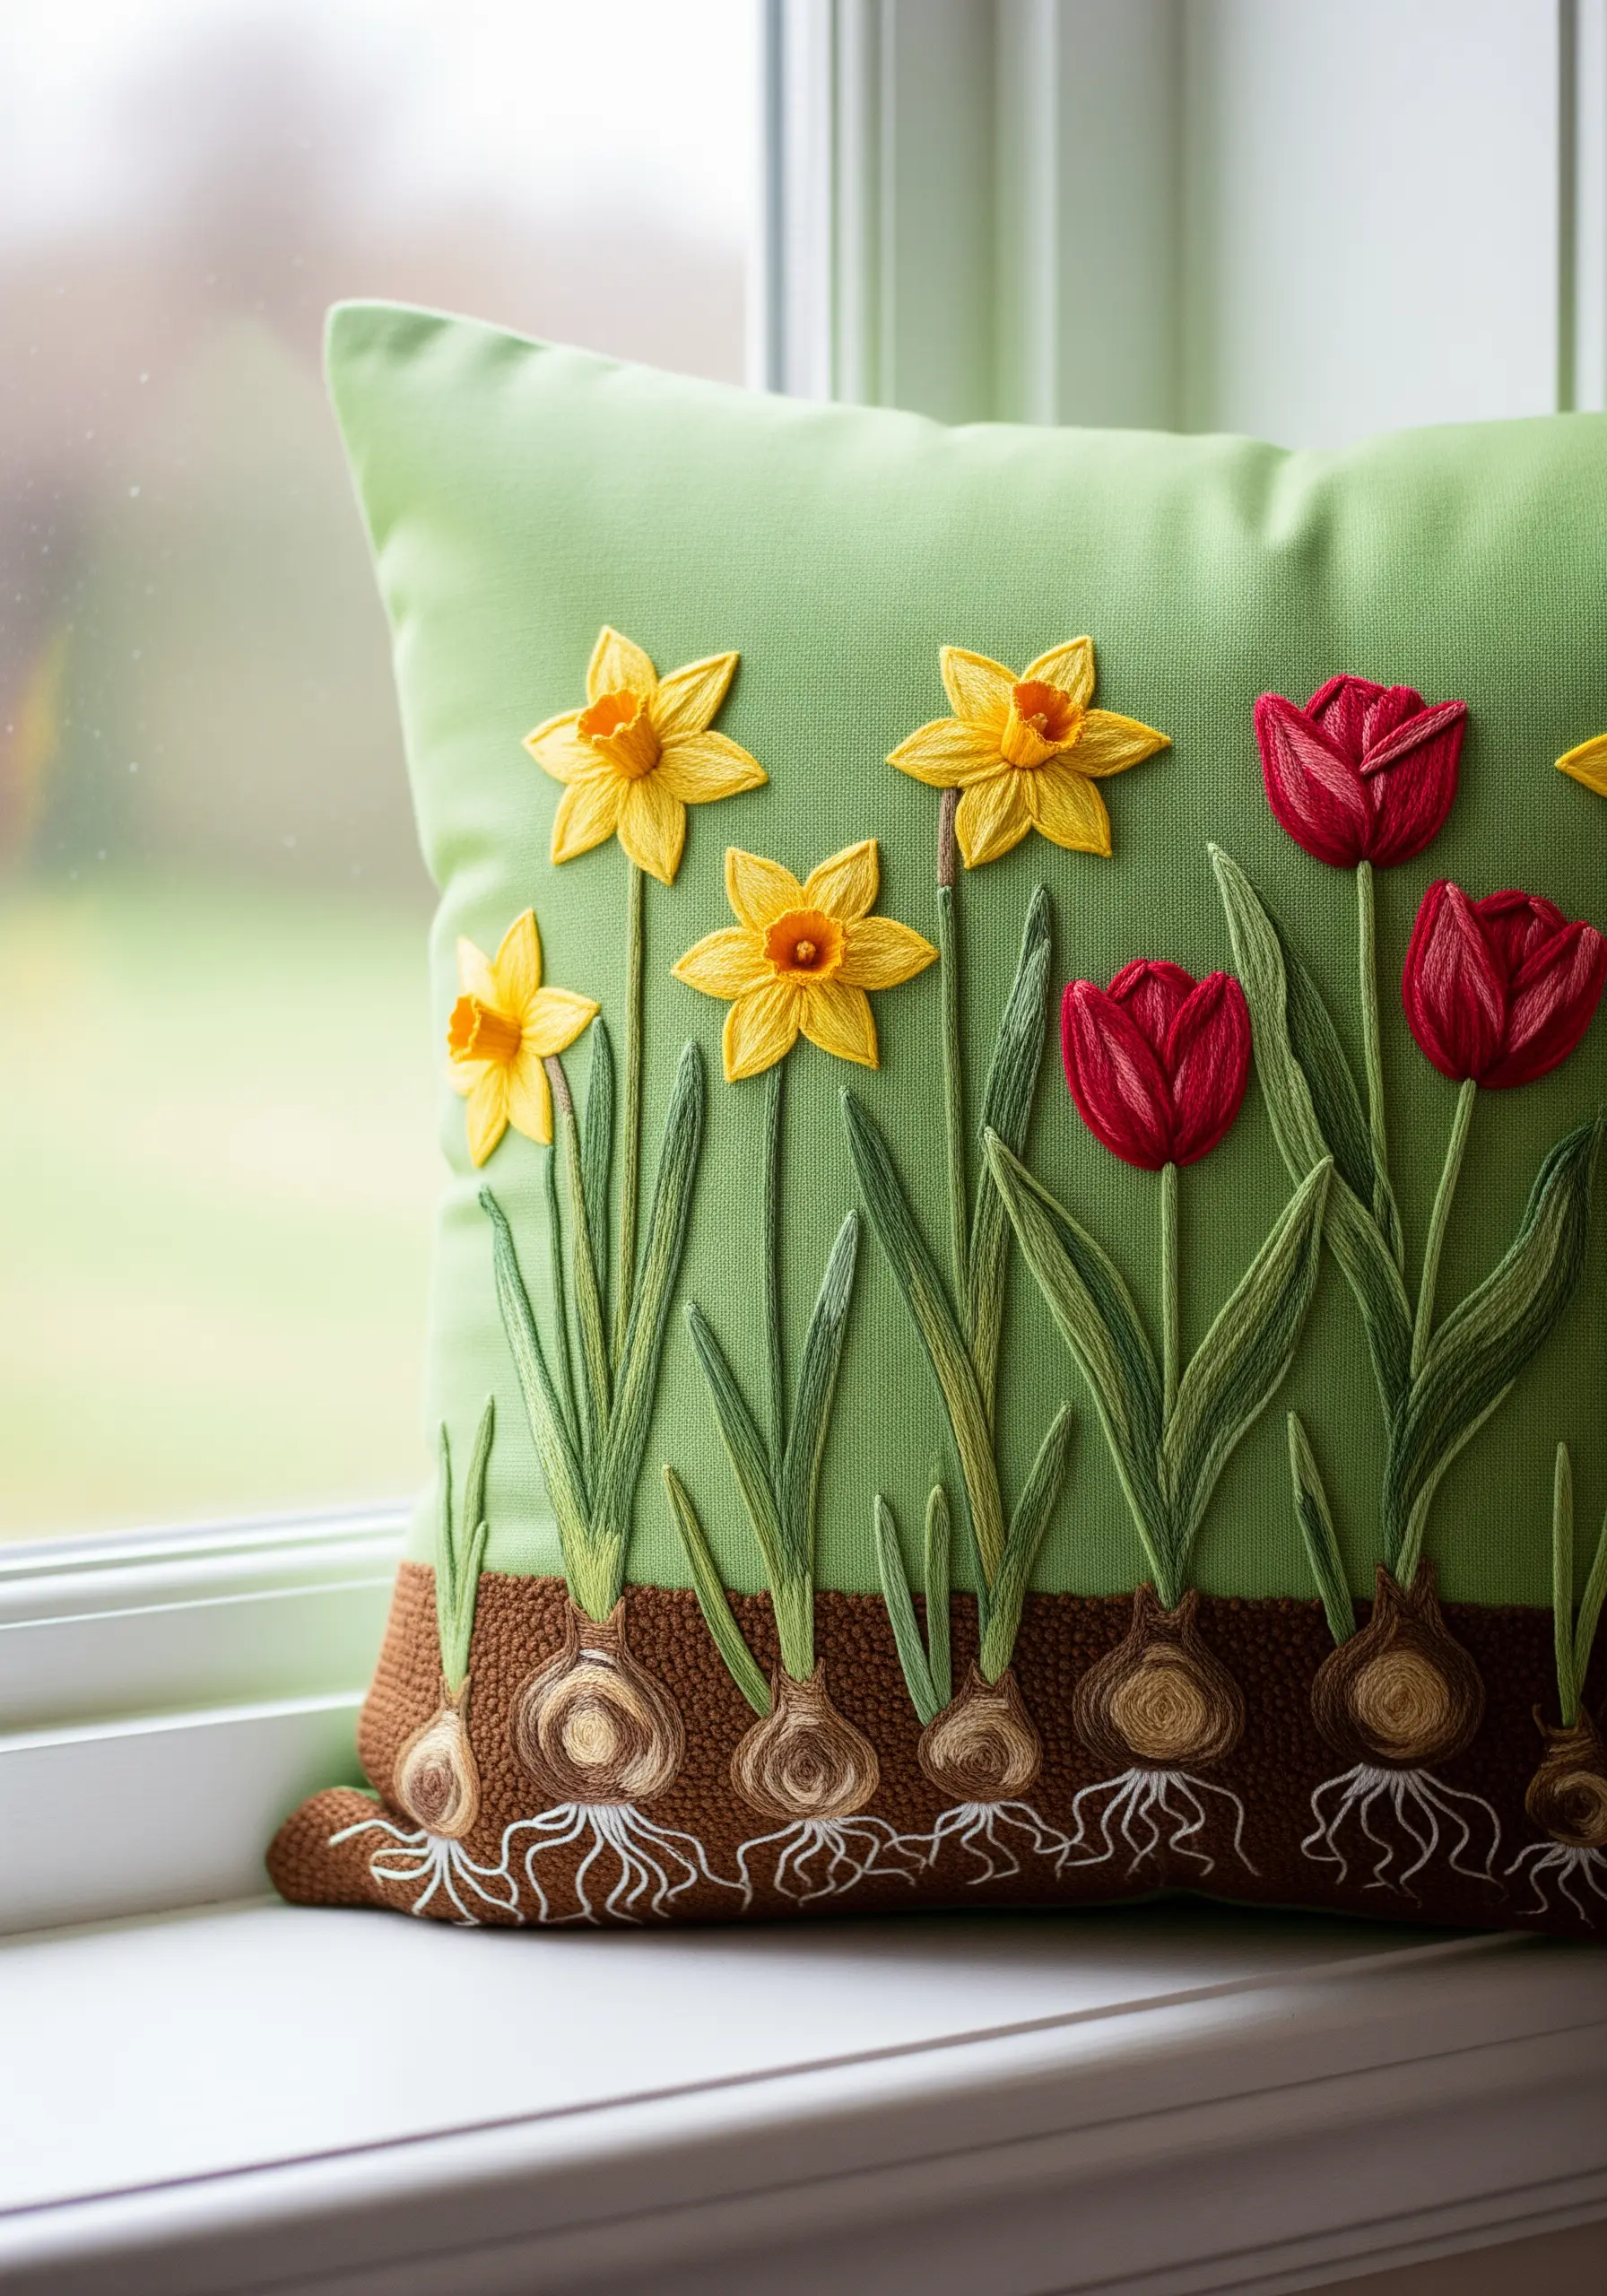
Add a layer of scientific charm to your floral embroidery by revealing what lies beneath the soil.
Give the bulbs a plump, rounded shape by using a padded satin stitch in shades of brown and off-white.
For the delicate root systems, use a single strand of thread to create fine, chaotic straight stitches that spread out from the base of each bulb.
This unique perspective turns a simple row of spring flowers into a fascinating botanical study.
19. The Key to the Garden
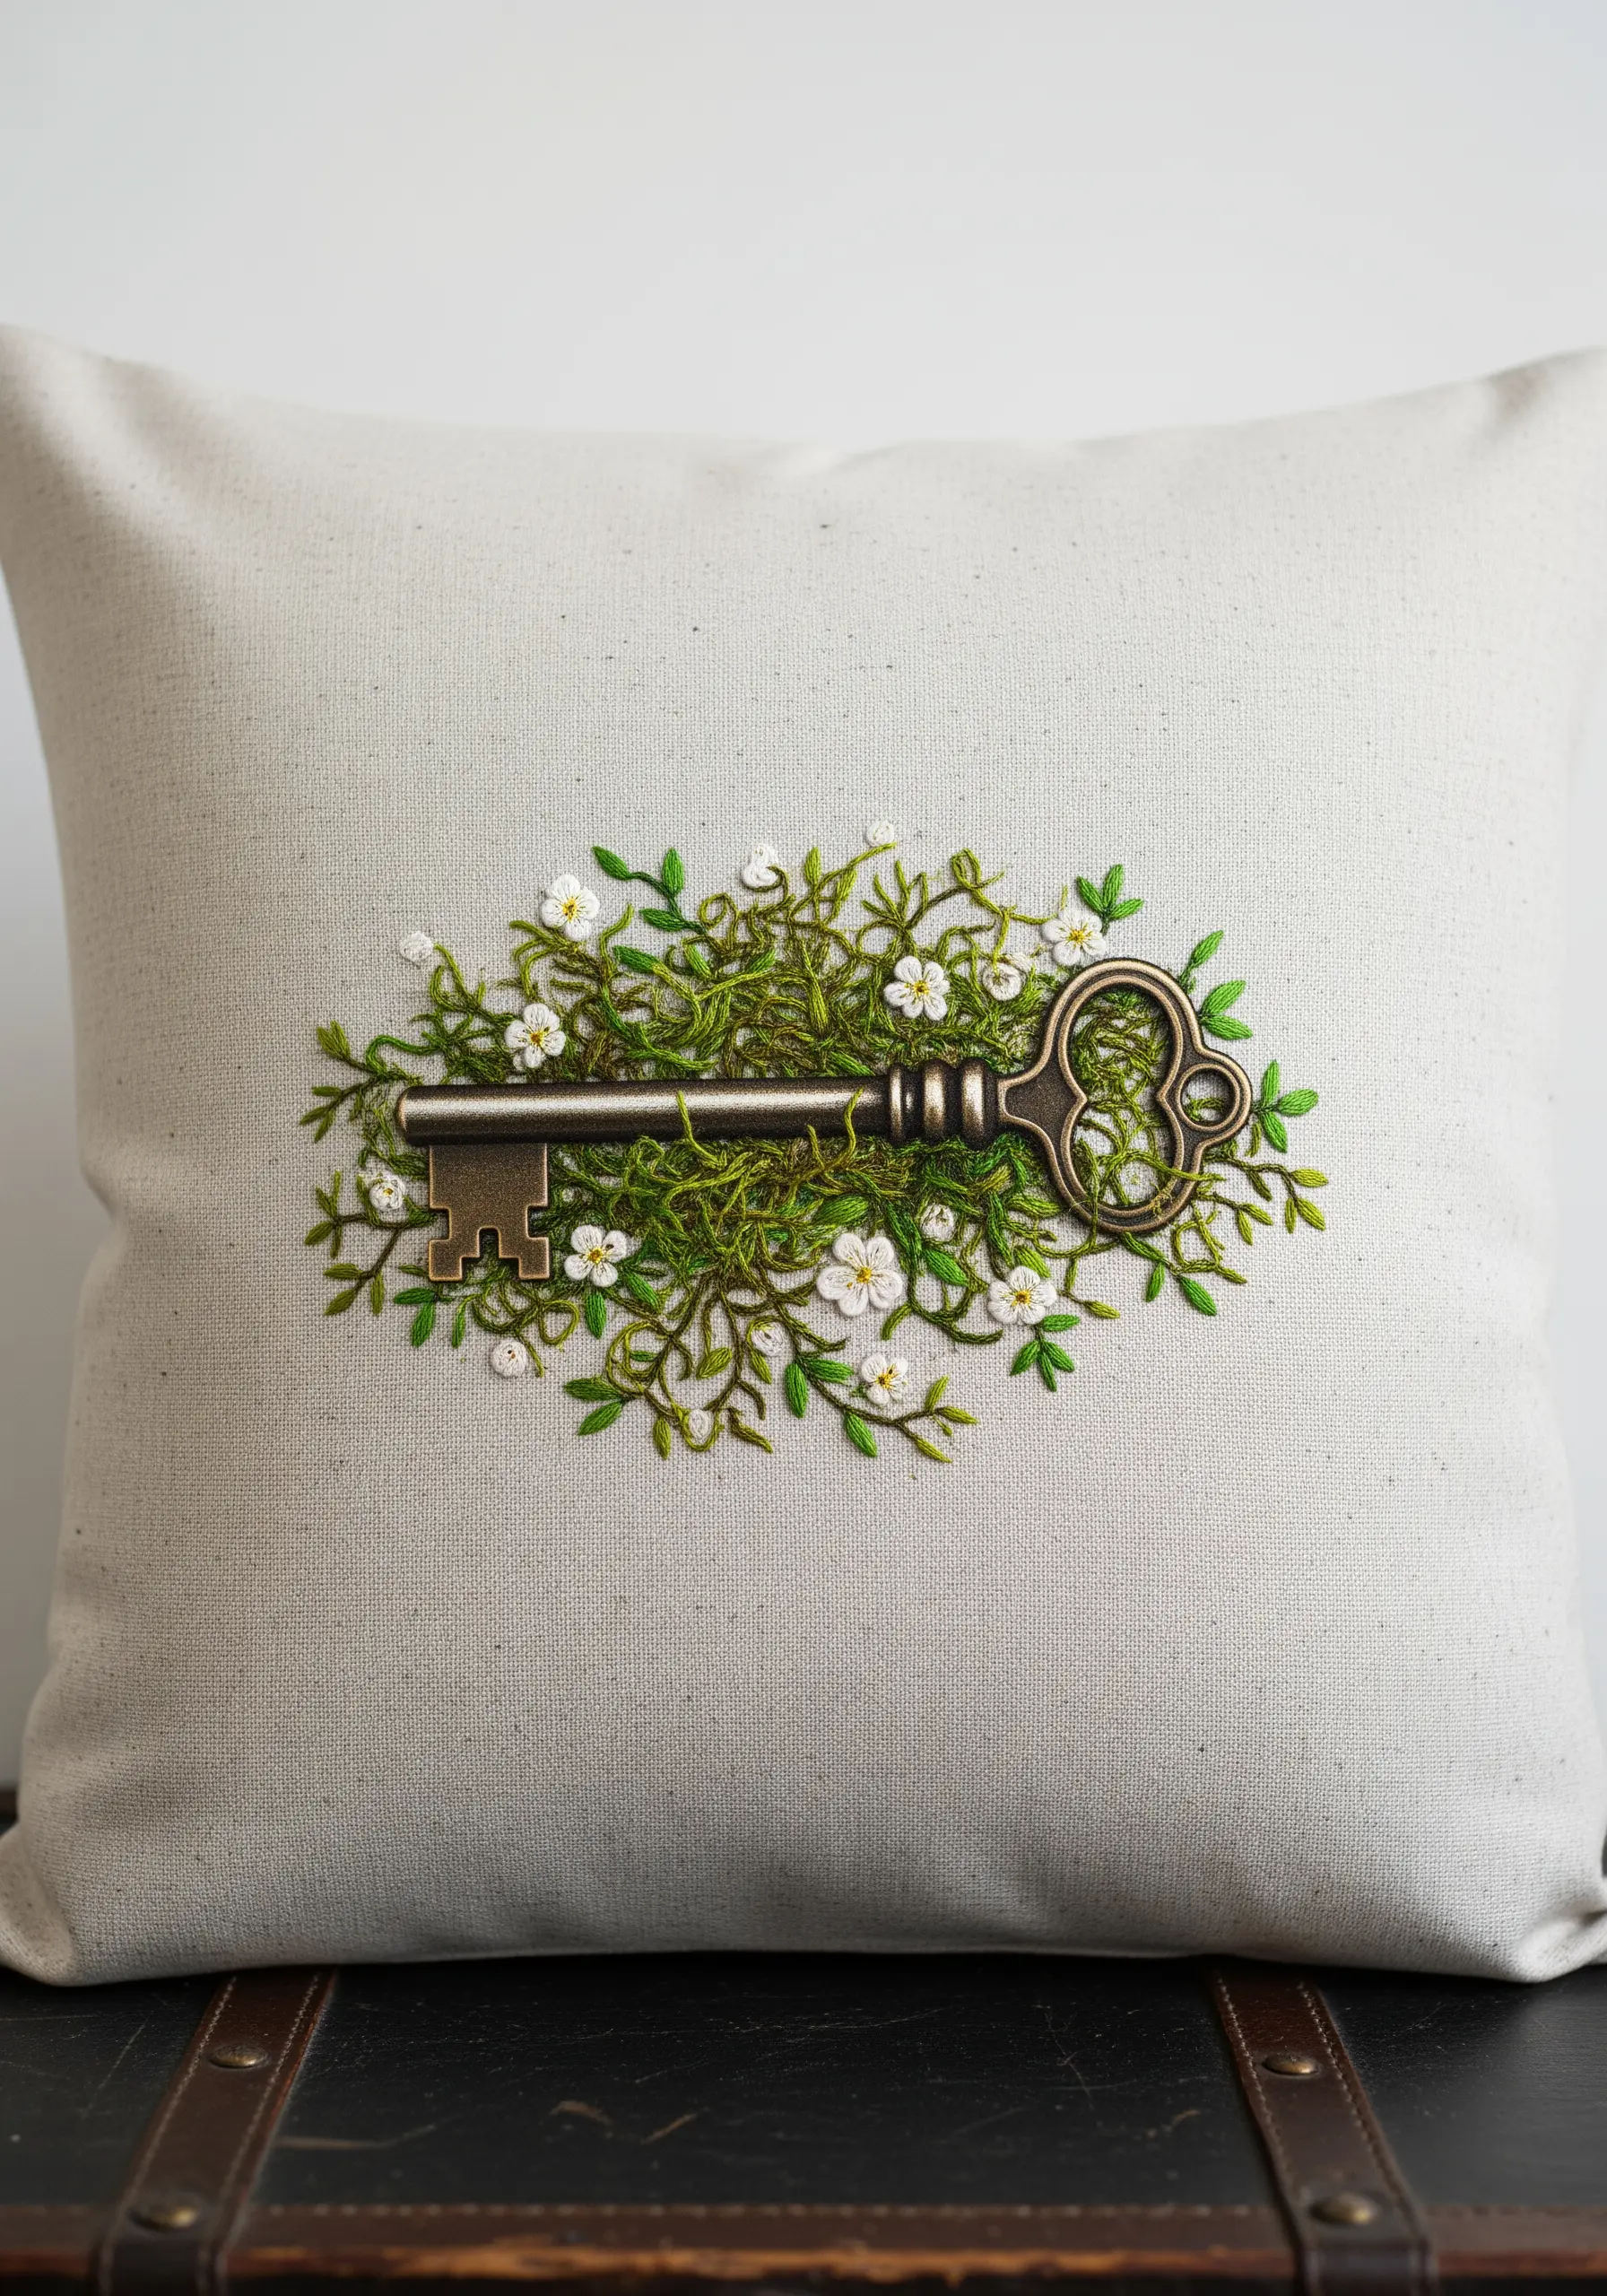
The magic of this design lies in the contrast between a hard, metallic object and soft, organic growth.
Render the antique key with smooth satin stitches in bronze, brown, and gold tones, adding a highlight of the lightest color along one edge to suggest reflected light.
Then, create the overgrown moss by using a combination of random straight stitches and French knots in various greens, allowing them to creep over the edges of the key.
20. The Wheelbarrow Bouquet
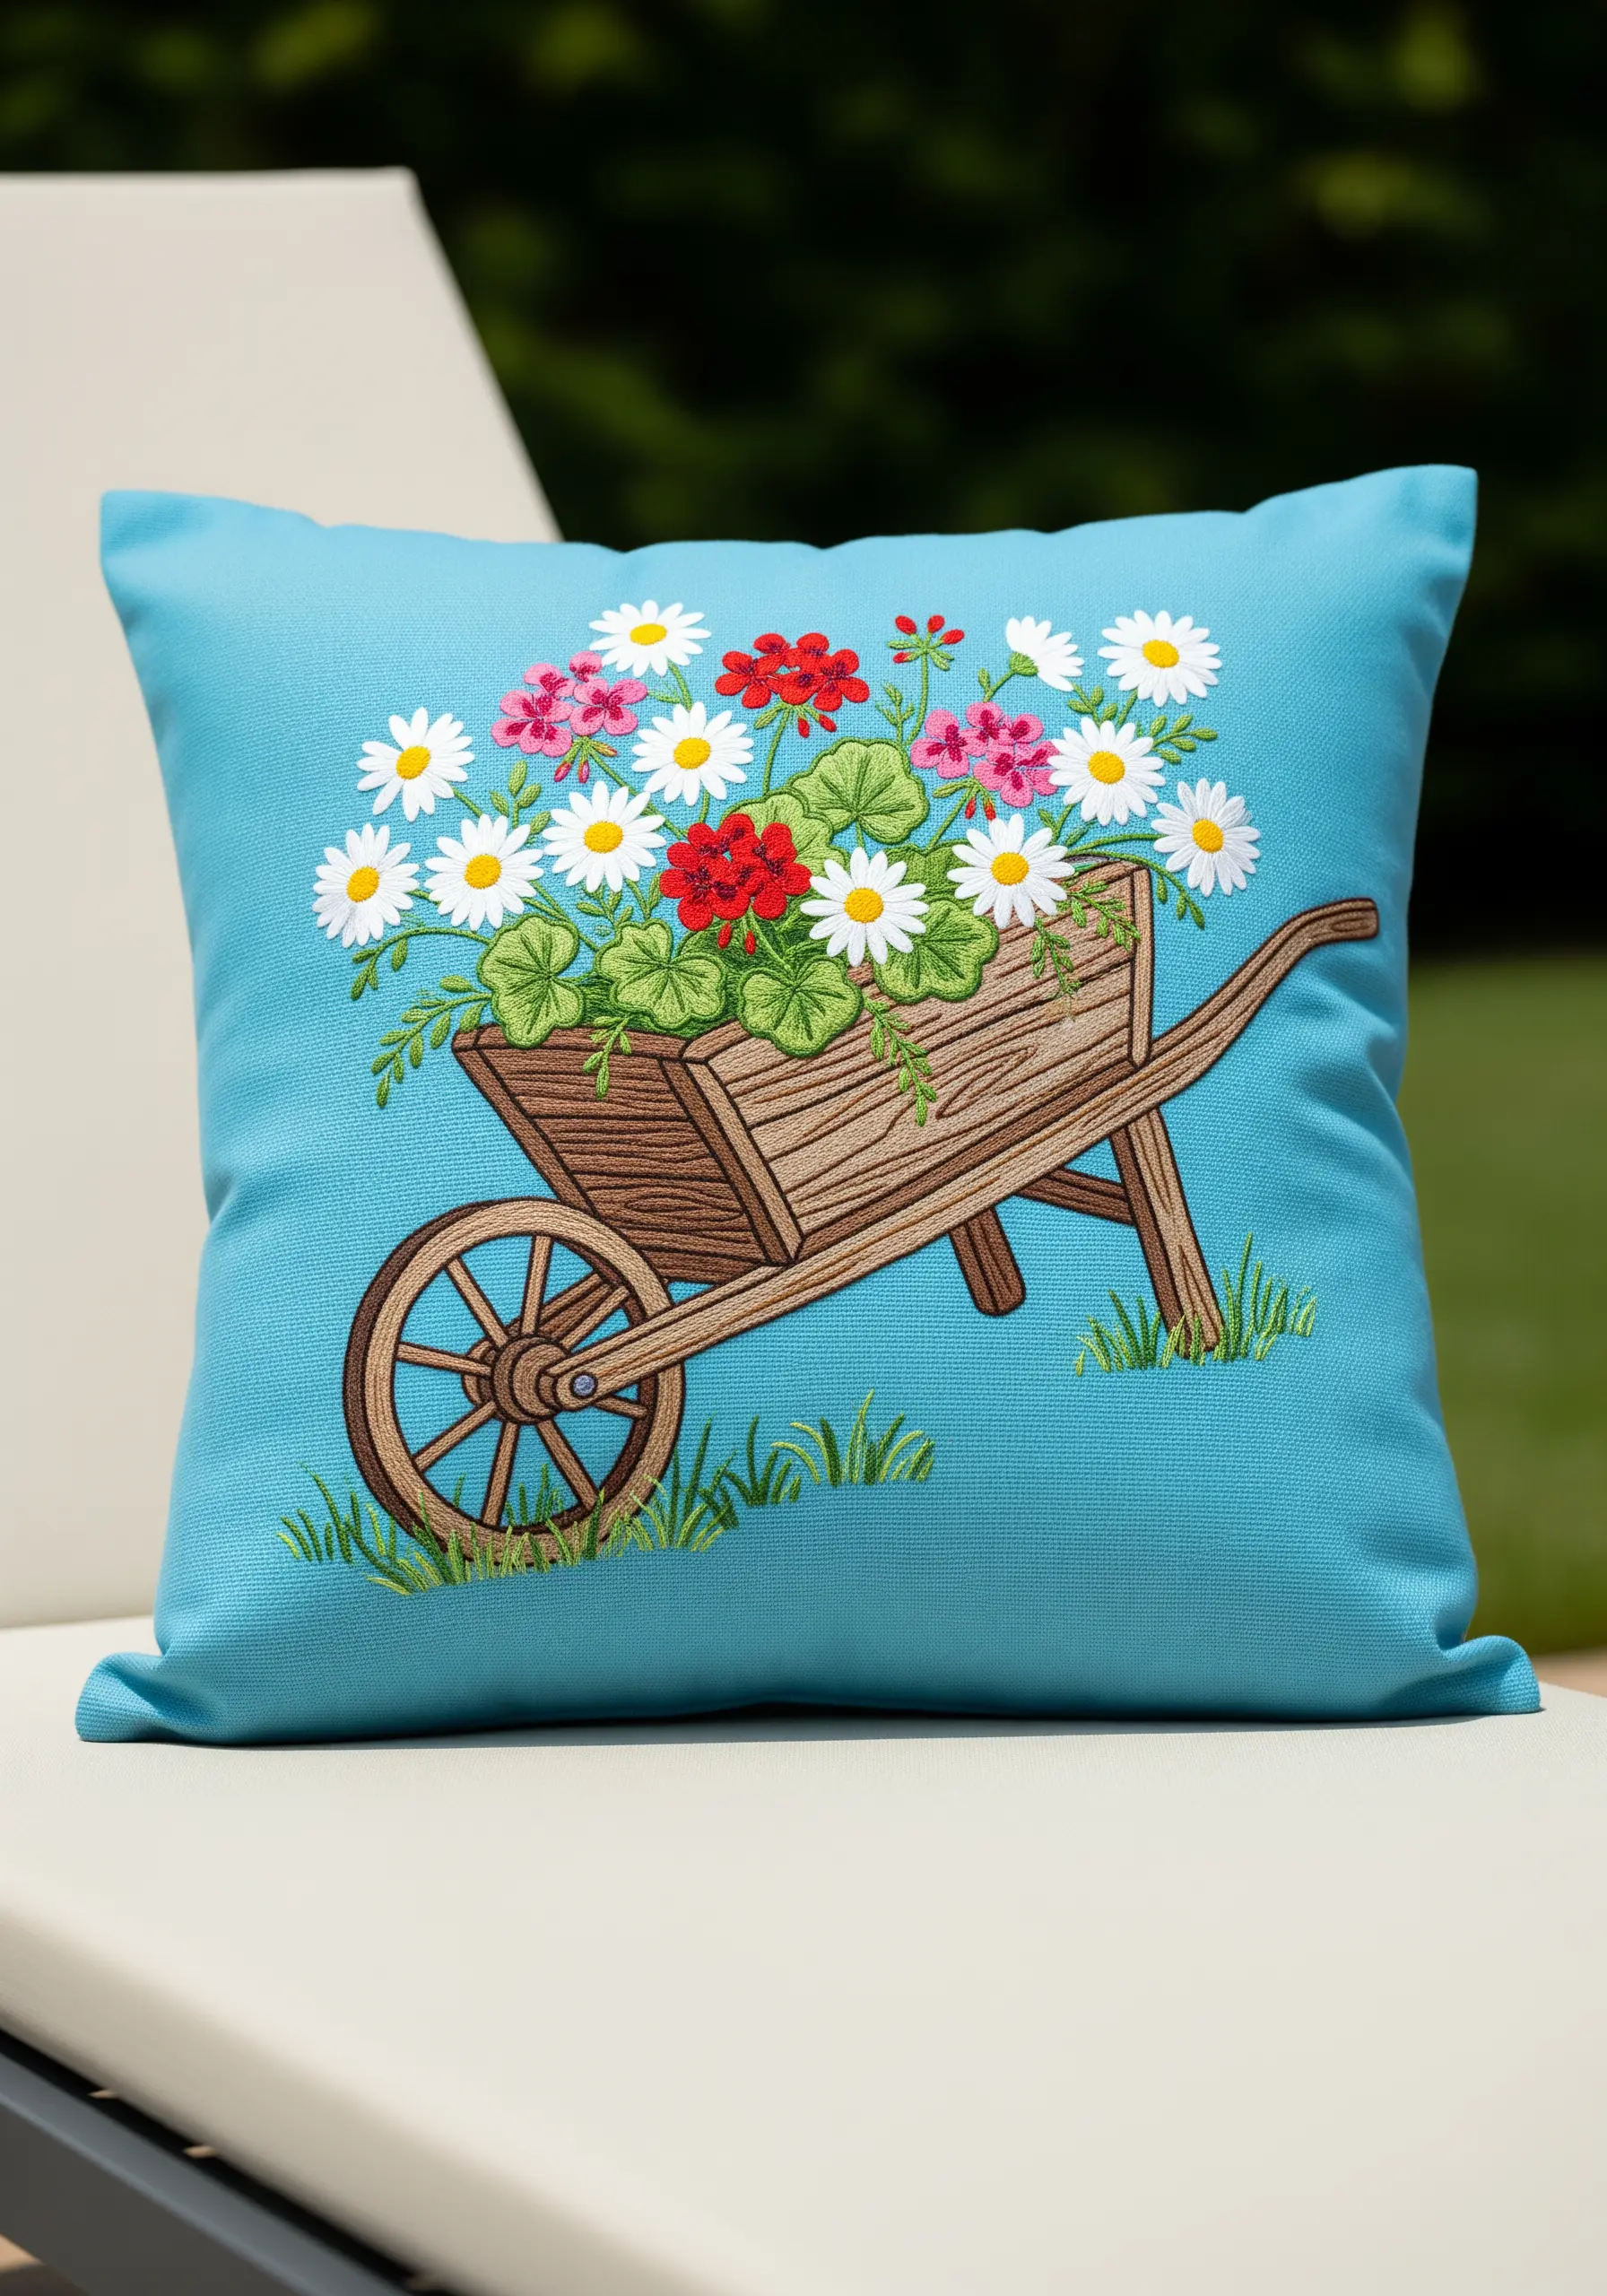
Give a simple wooden object a realistic, rustic texture with directional stitching.
For the planks of the wheelbarrow, use satin stitch, but vary your shades of brown and ensure your stitches follow the direction of the wood grain.
Use a whipped backstitch for the wheel’s rim and spokes to create a thick, solid line that contrasts with the plank texture.
Fill it with a joyful tumble of lazy daisy flowers and bullion knot geraniums for a classic garden scene.
21. The Fragrant Herb Wreath
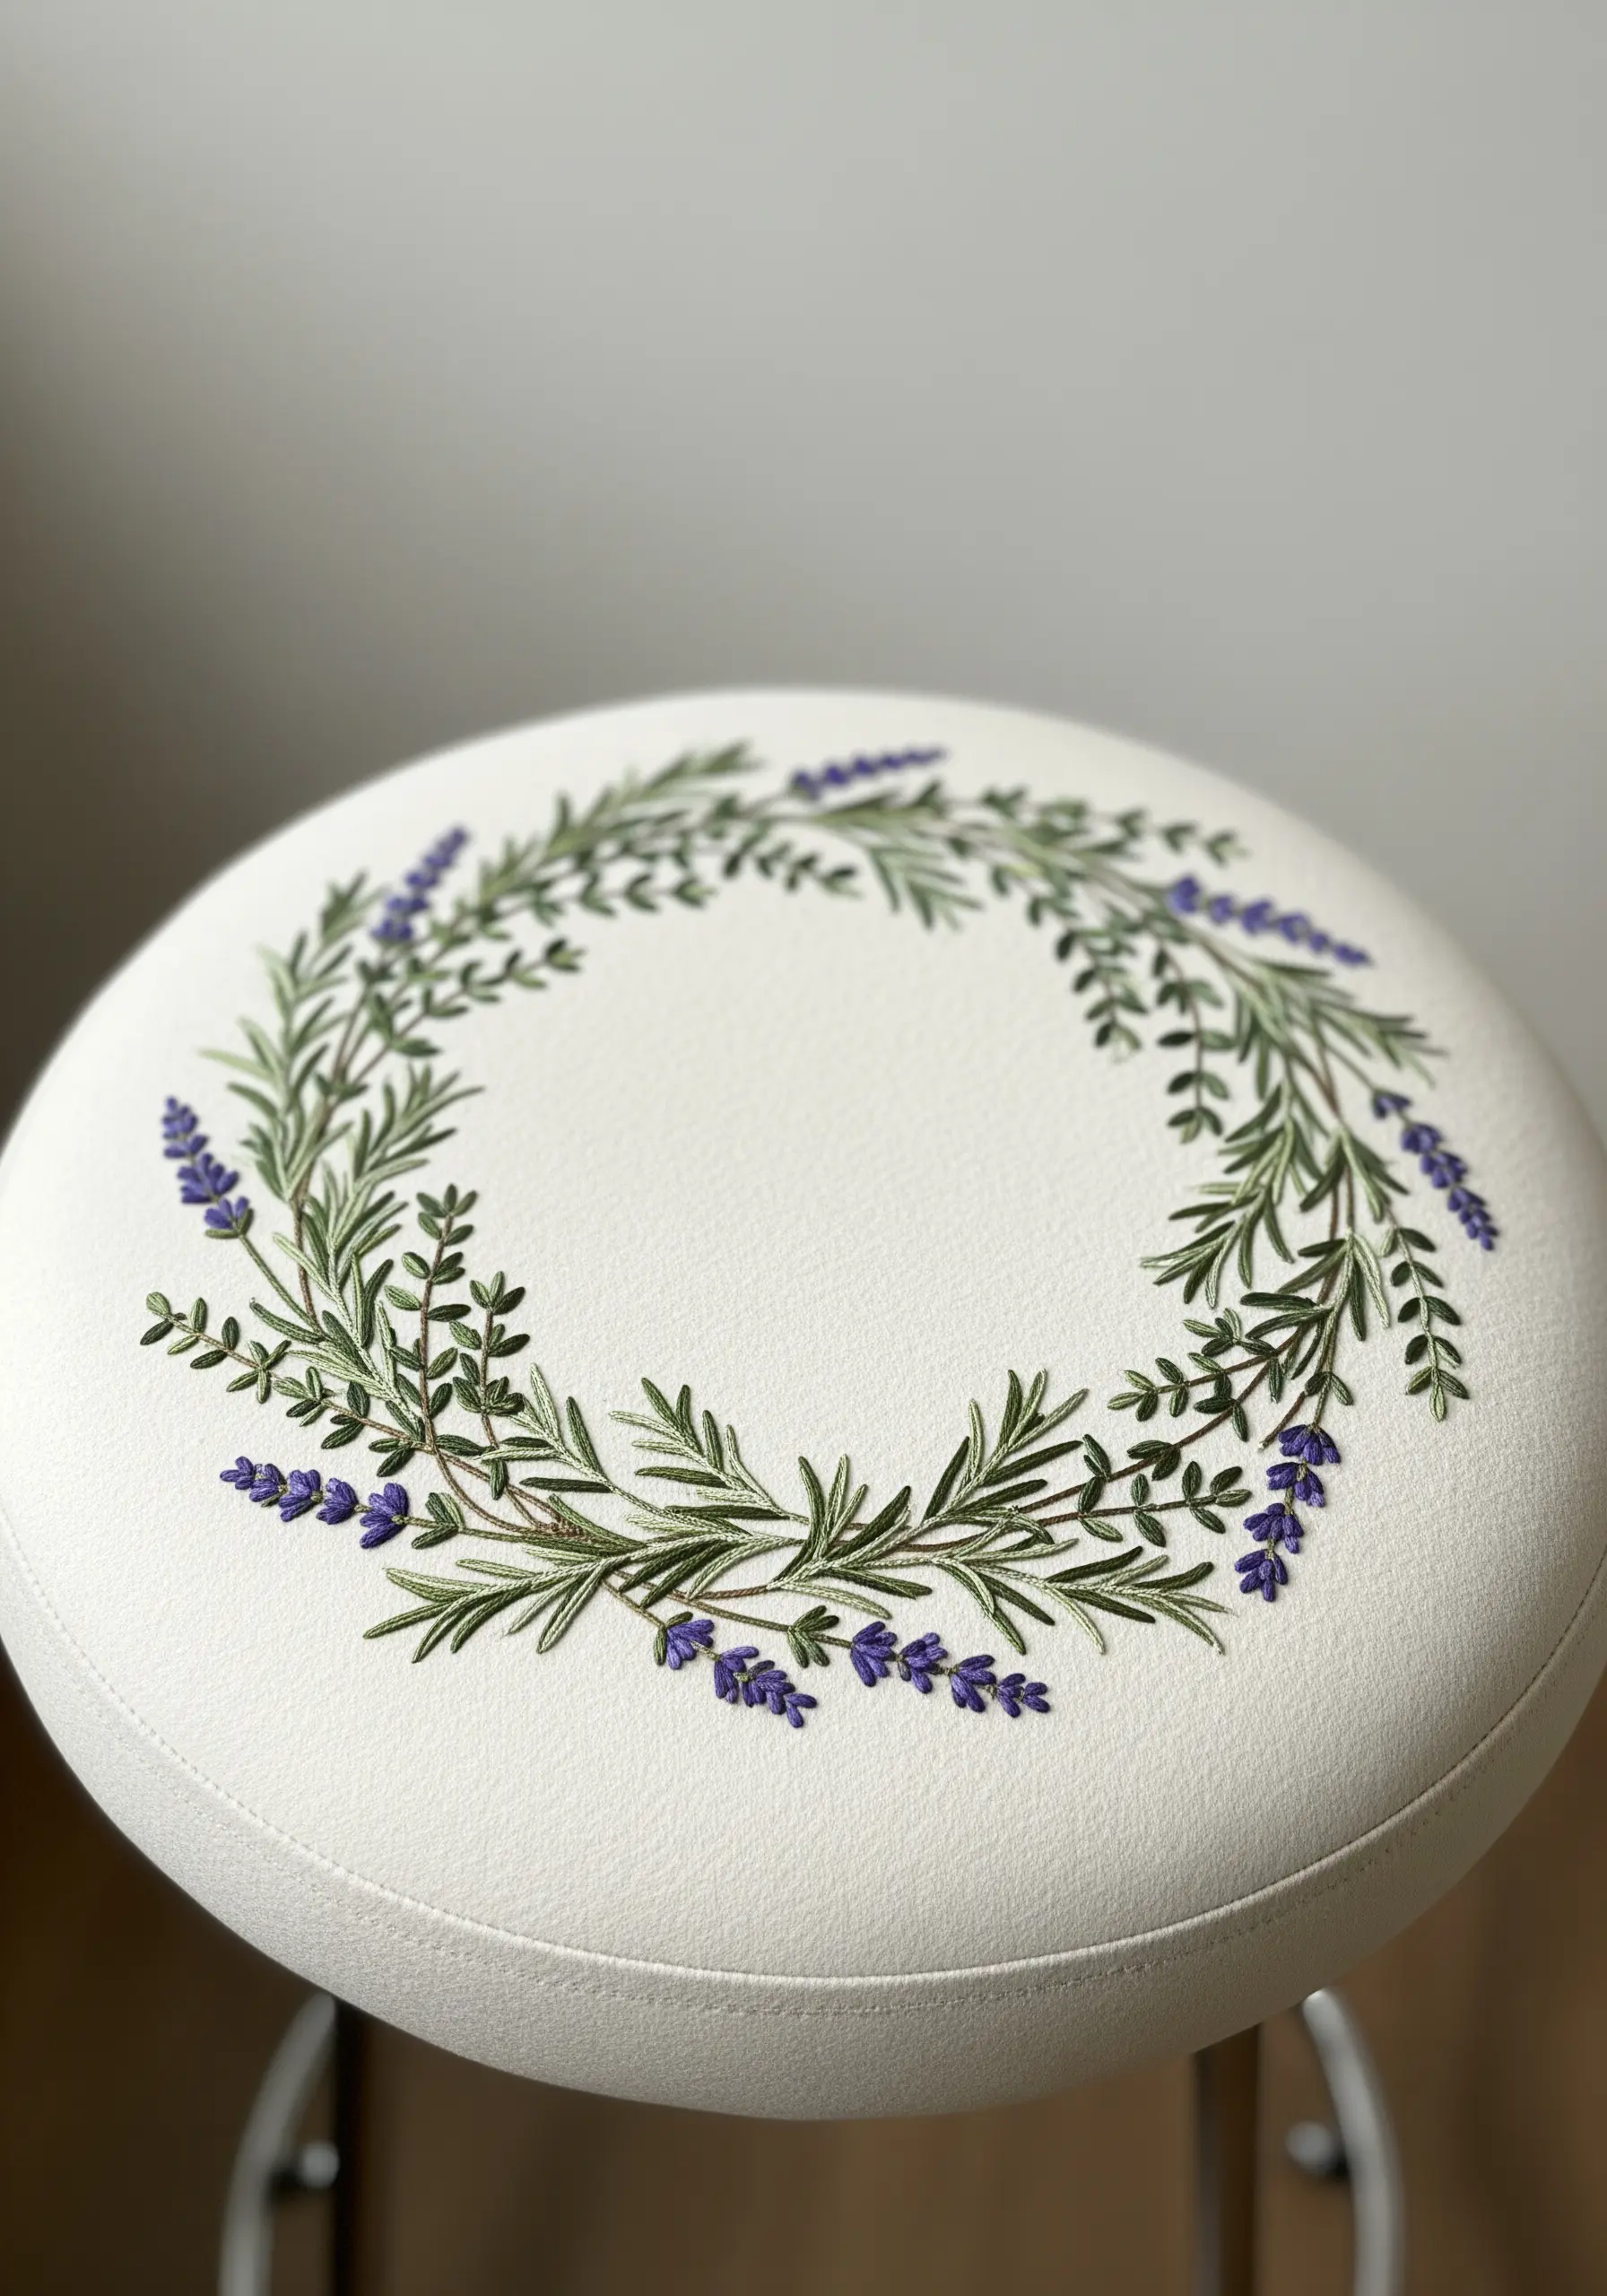
Capture the distinct character of different herbs by choosing specific stitches for each one.
To create the look of rosemary, use a central stem line and add short, angled straight stitches or fly stitches on either side to mimic its needle-like leaves.
For the lavender, small clusters of purple French knots or seed stitches are perfect.
This minimalist wreath design feels both classic and modern, making it one of those simple embroidery patterns that make statement wall art, even on a cushion.
22. The Garden Sundial
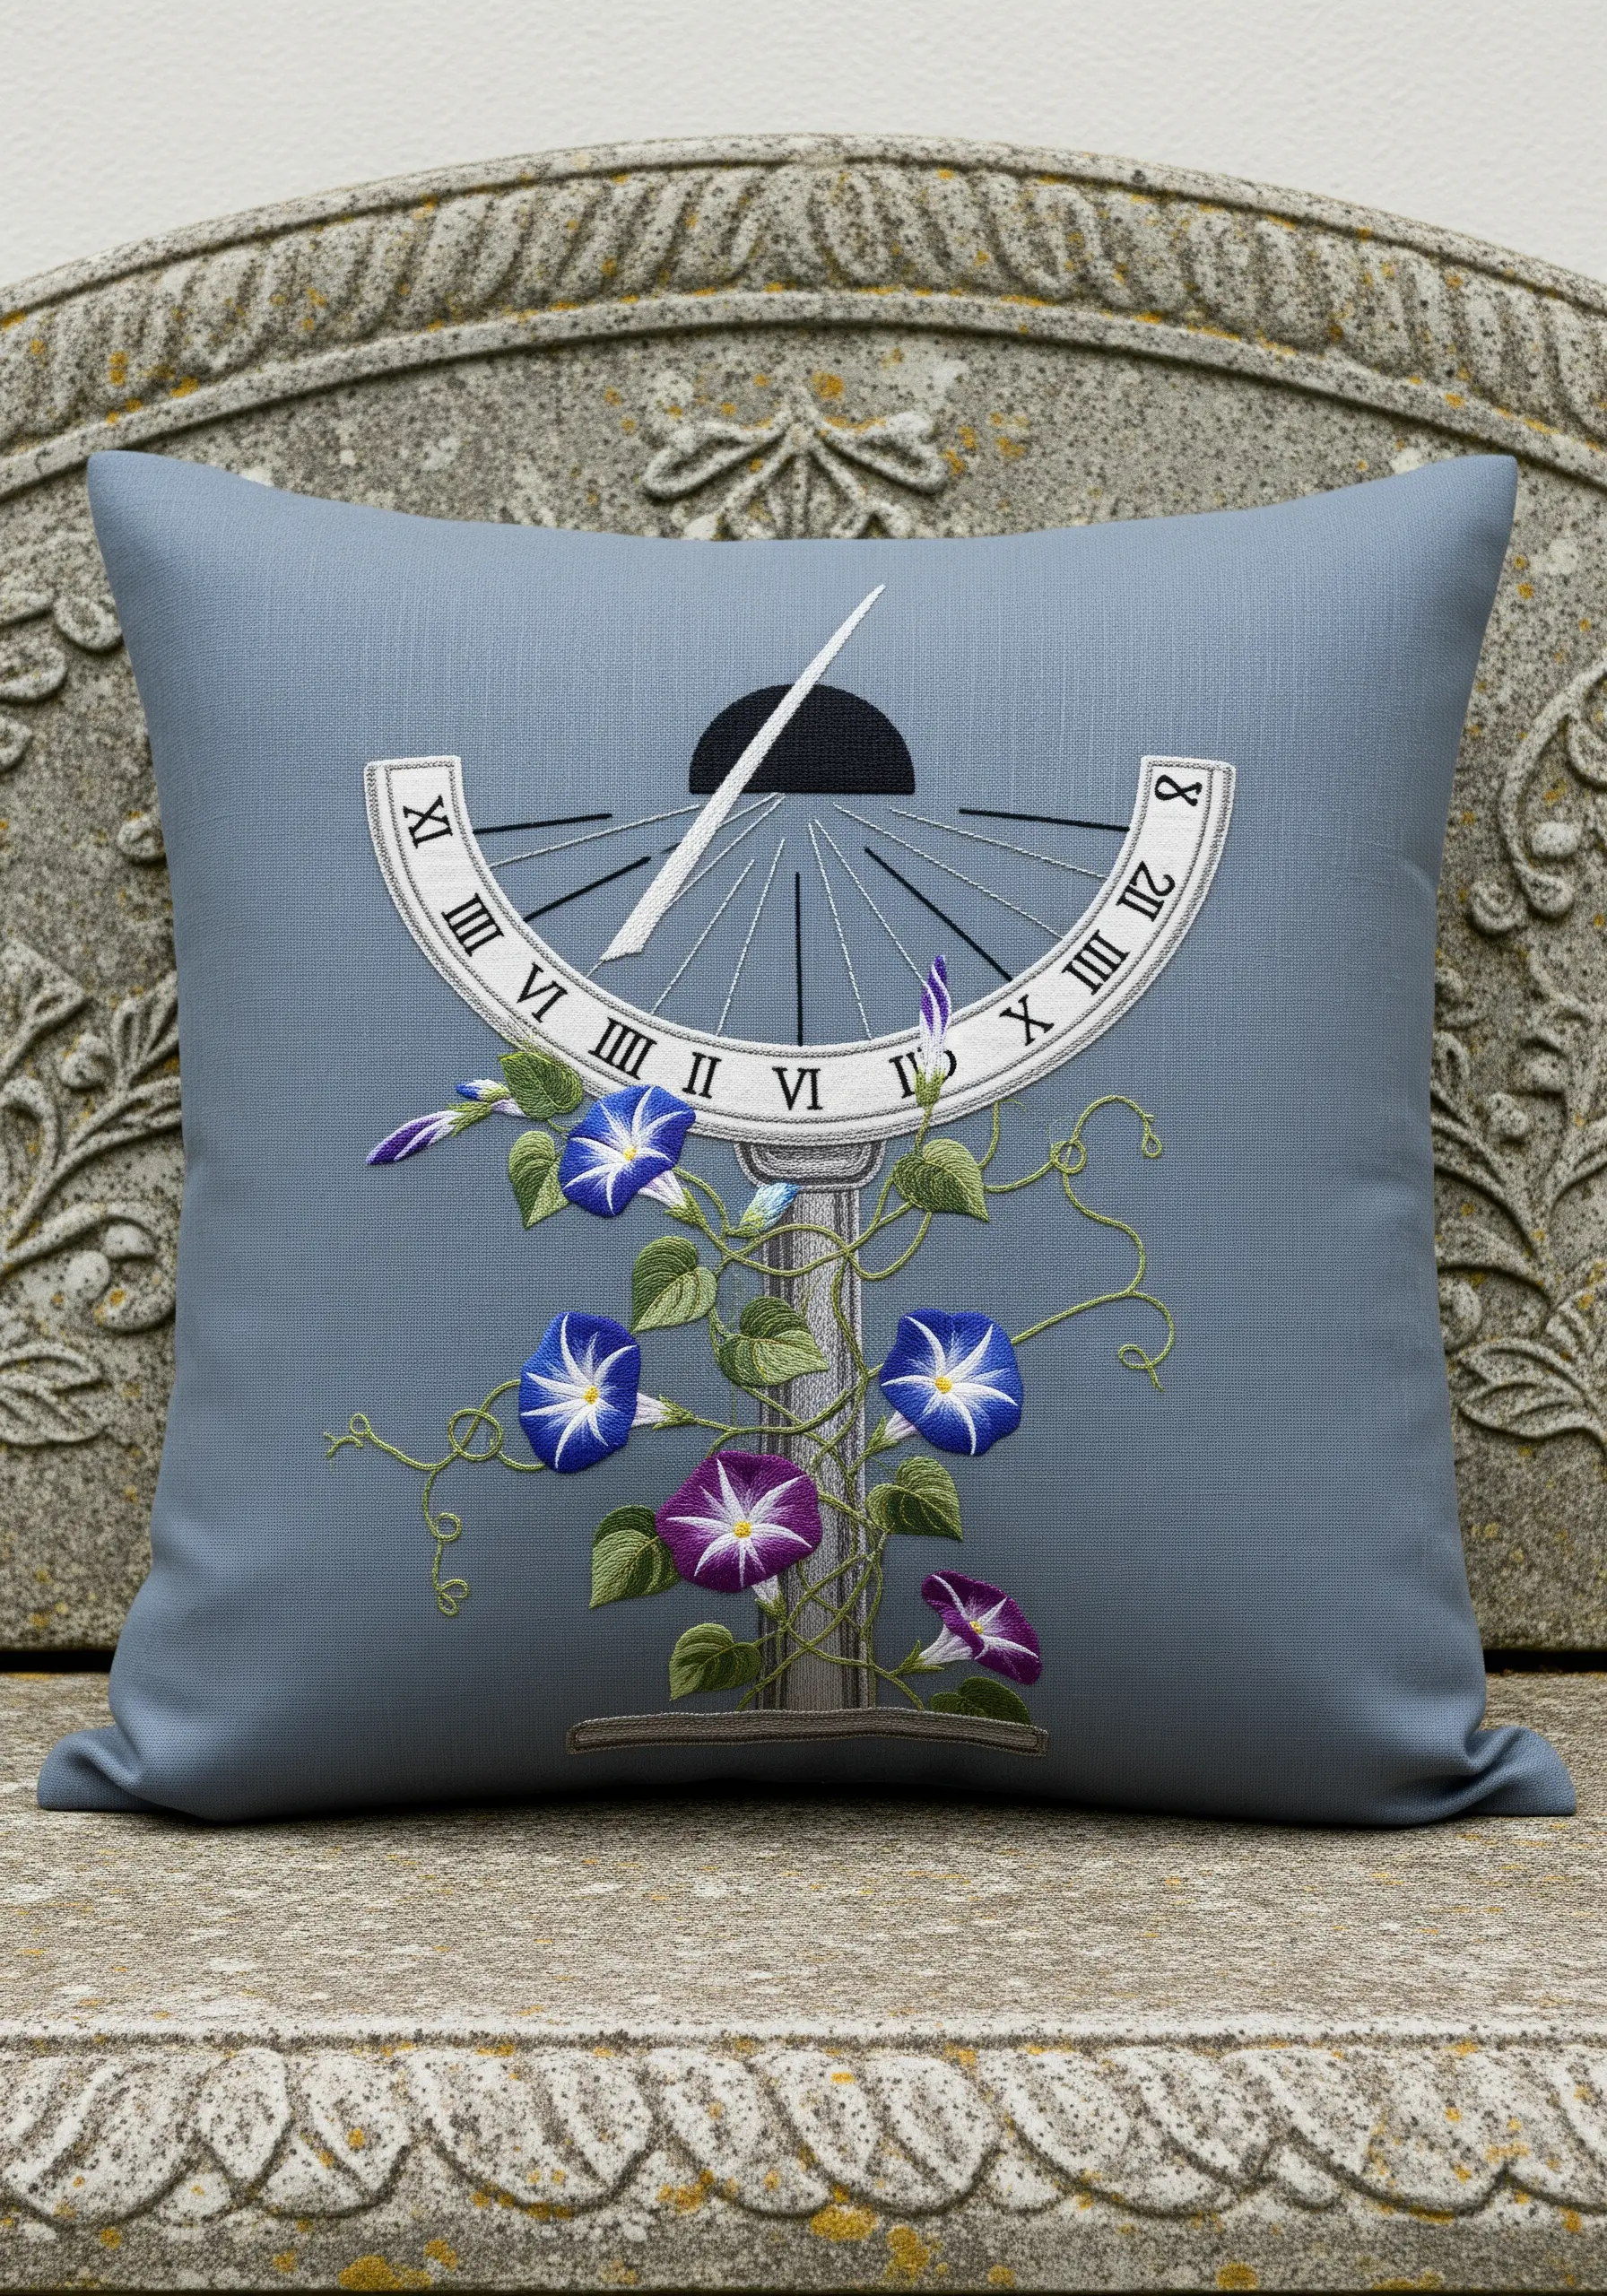
A successful design often balances precision with organic freedom.
For the sundial itself, use a fine, single-strand backstitch or split stitch to create crisp, clean lines and legible Roman numerals.
Then, introduce a soft contrast by stitching the morning glory vines with a flowing stem stitch, allowing them to curve and climb naturally around the rigid stone structure.
This juxtaposition between the man-made and the natural is what gives the piece its timeless appeal.
23. The Twilight Primrose Border
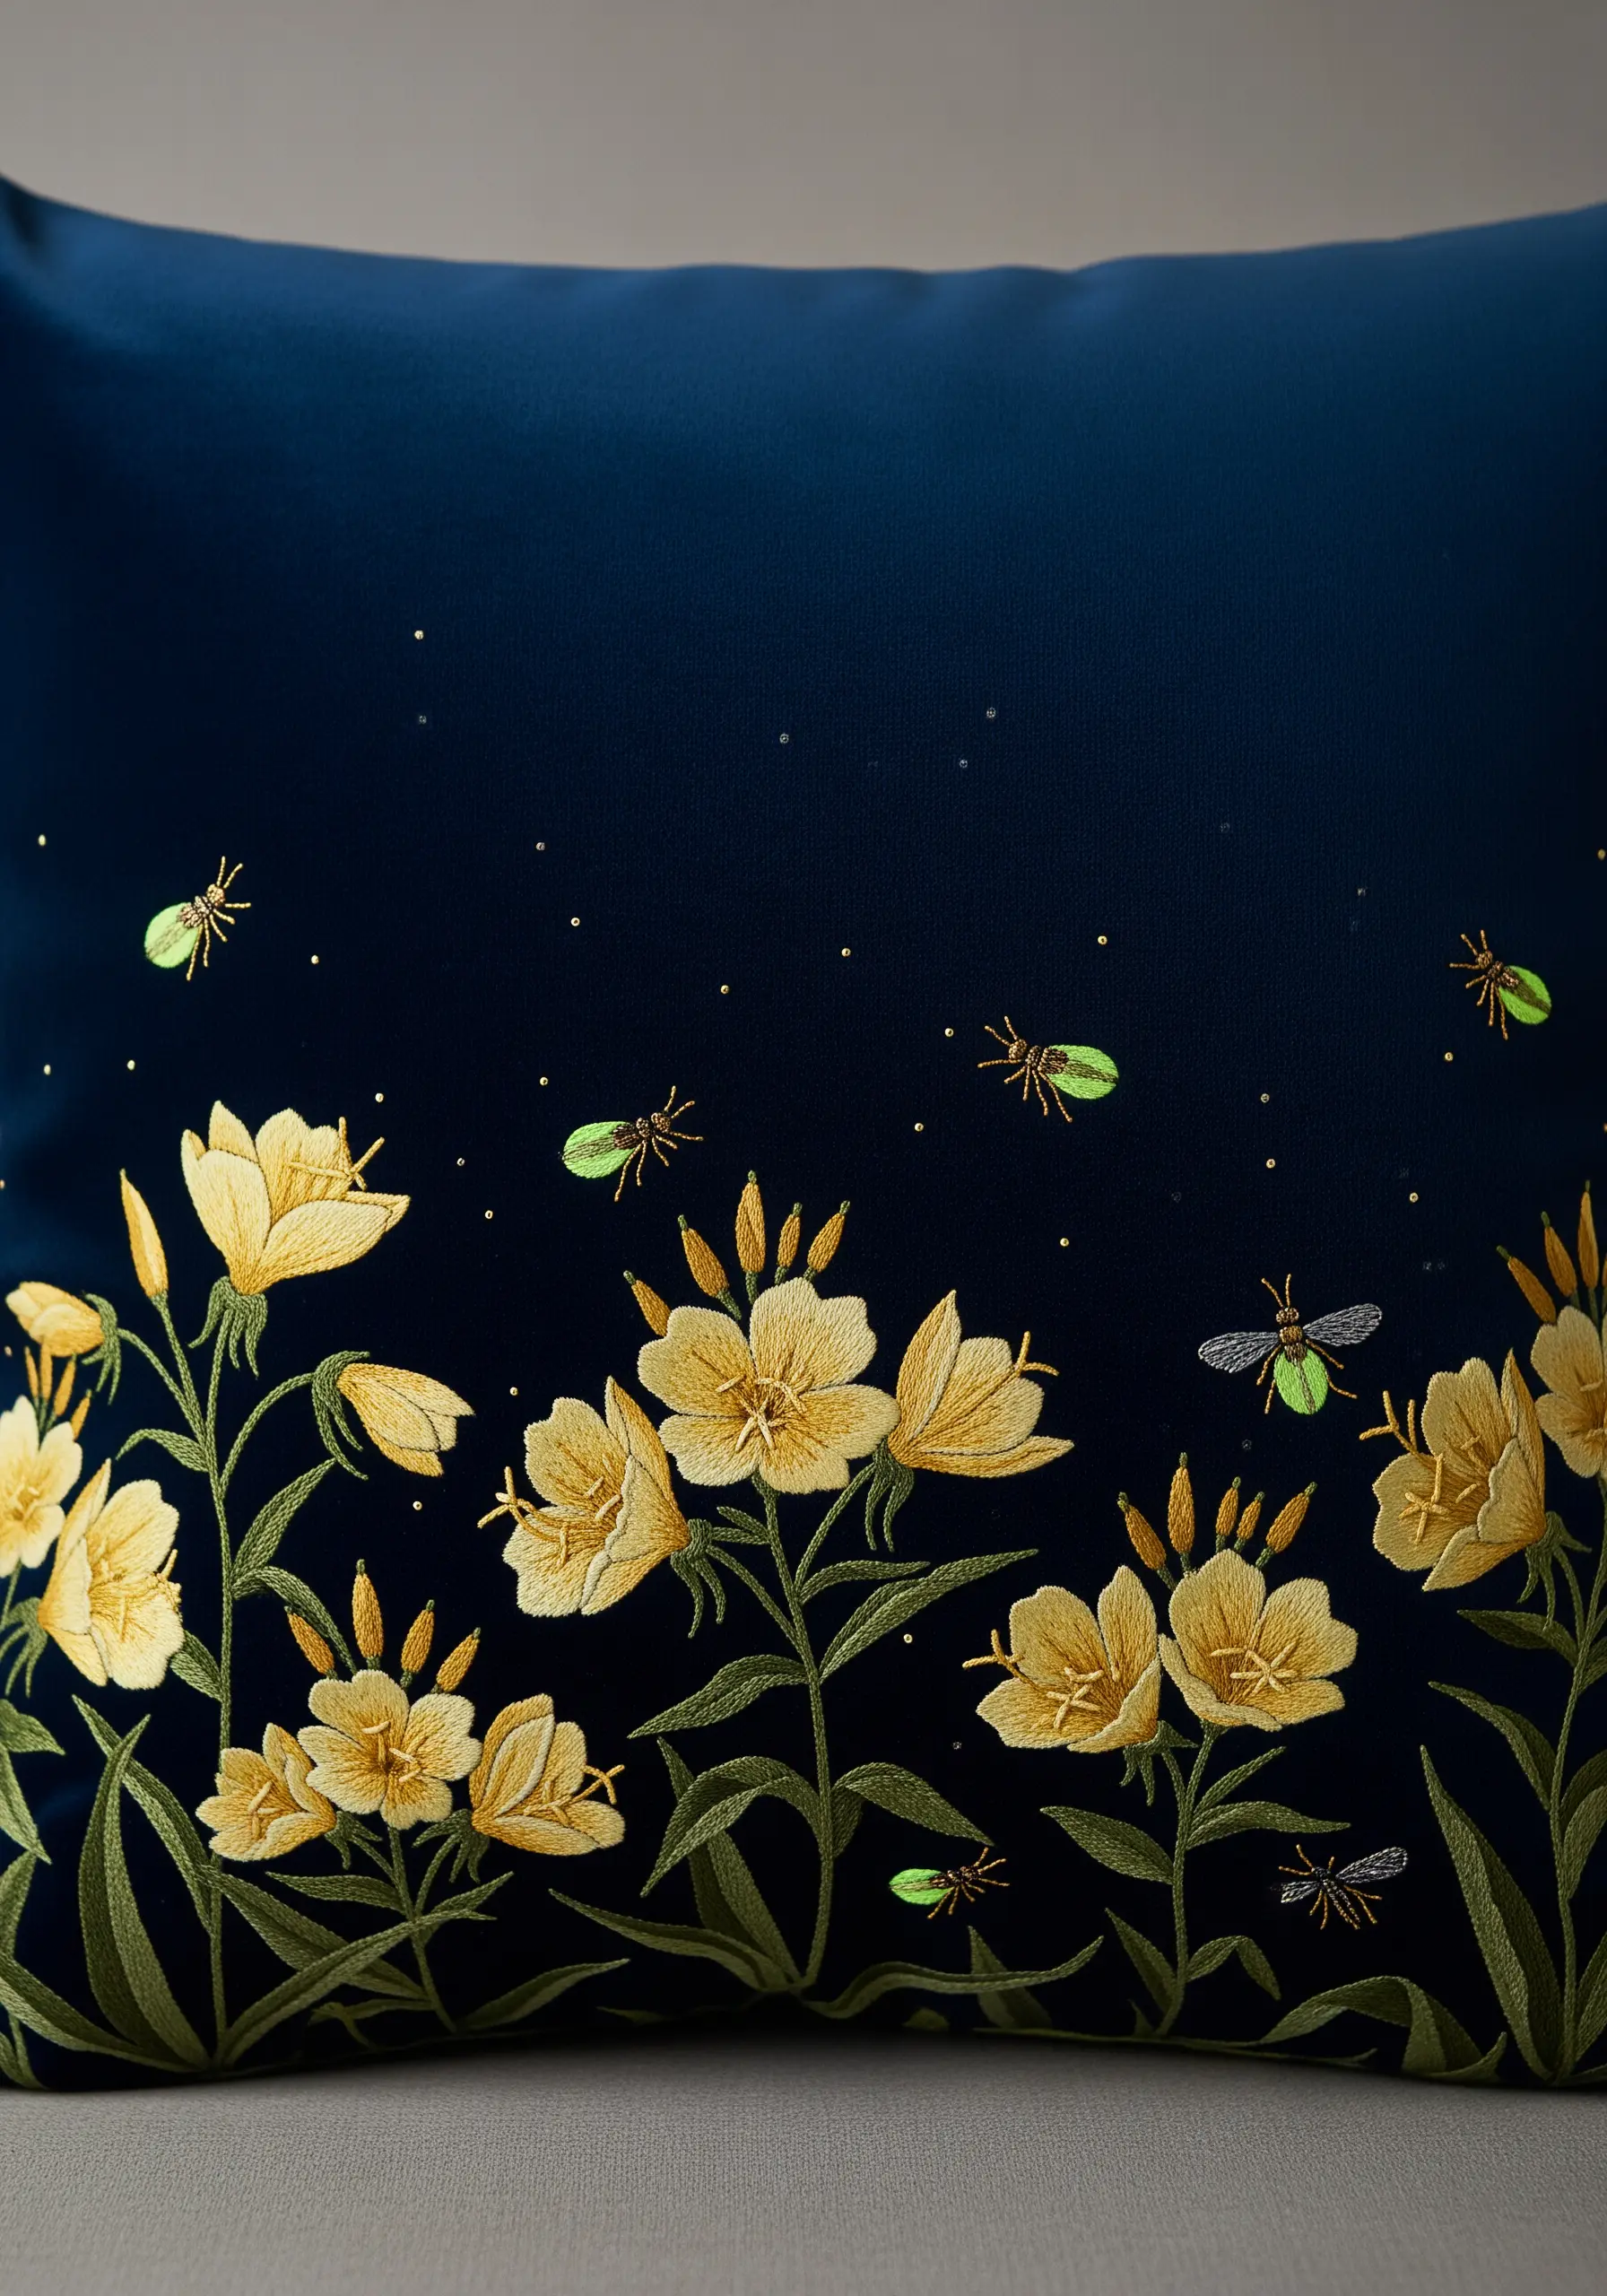
A dark fabric background is your greatest tool for making light and magical elements truly shine.
The soft yellow of the evening primrose petals will appear to glow when stitched onto a deep navy or black cotton.
To create the fireflies, use a metallic gold or a specialty glow-in-the-dark thread. A single French knot for the body and two tiny straight stitches for wings are all you need to capture their fleeting magic.
This approach is perfect for night garden embroidery ideas that feel enchanted.
24. The Sunflower’s Embrace
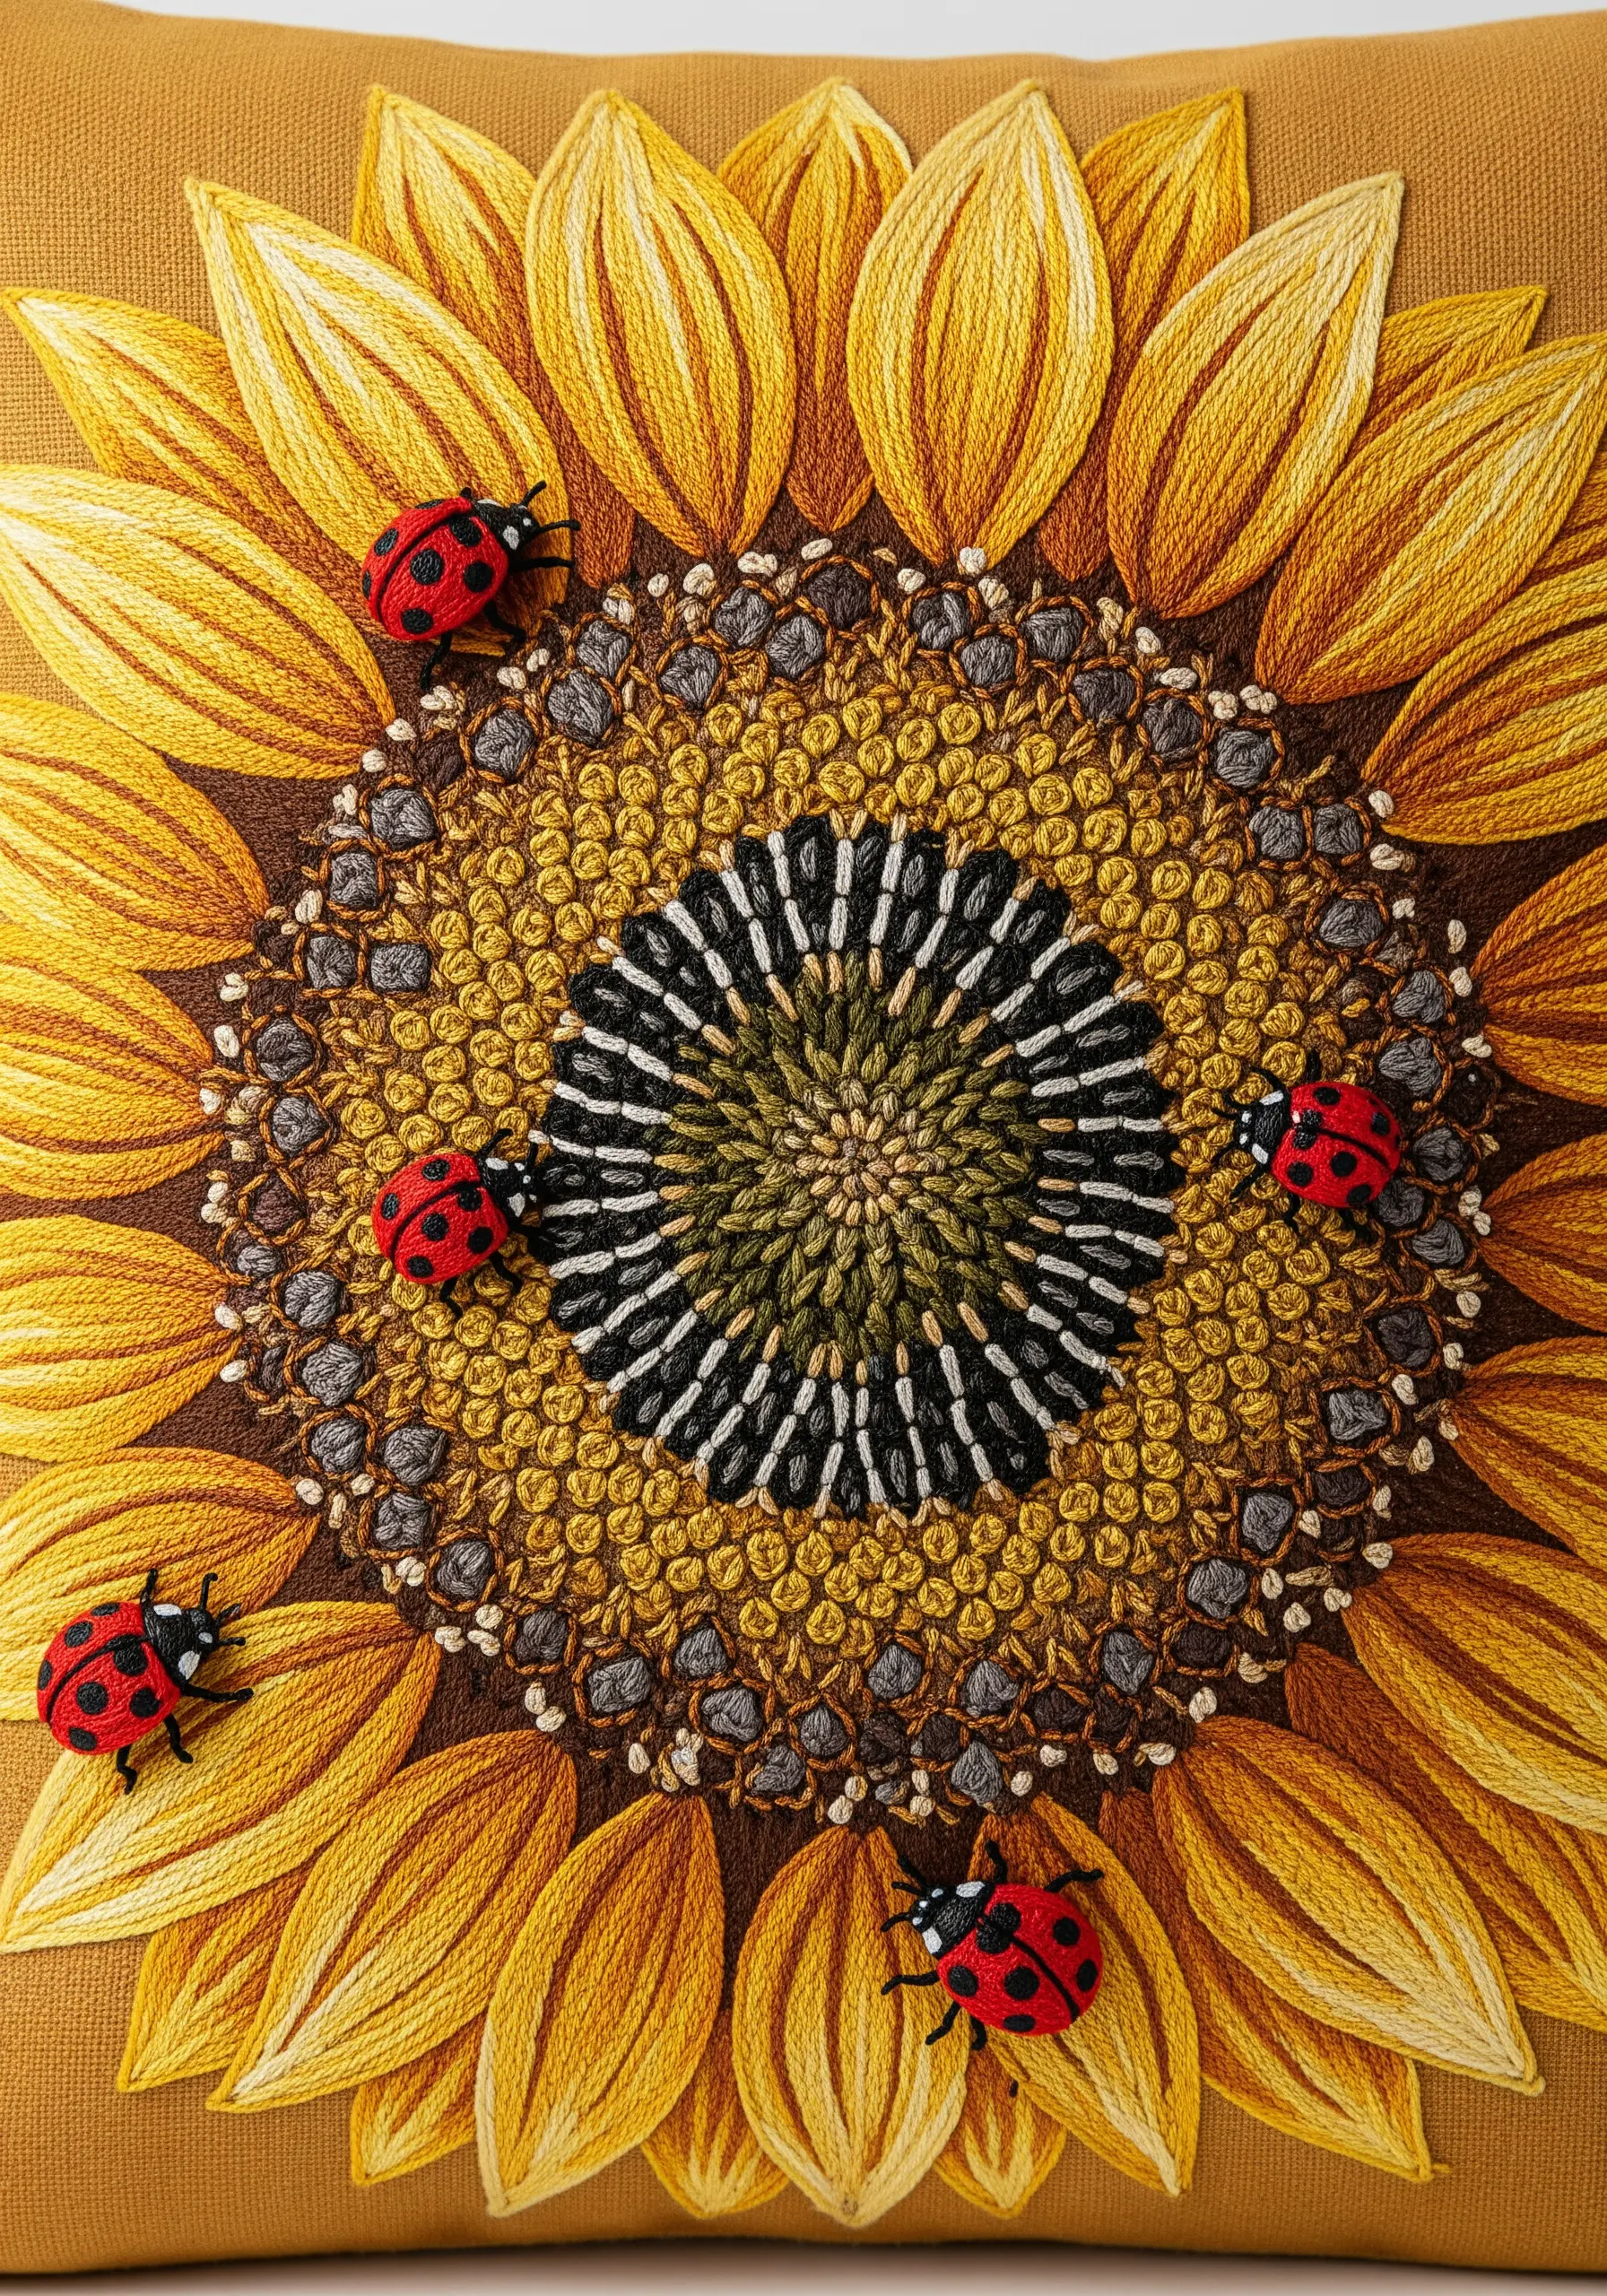
The key to a breathtakingly realistic sunflower isn’t the petals—it’s the intricate texture of the seed head.
Build the center by working in concentric circles. Start with a ring of green French knots, then a ring of dark brown bullion knots, followed by circles of black and grey straight stitches.
This variety of stitches and colors creates an incredibly deep and tactile center. The ladybugs, made with a raised padded satin stitch, add a final touch of life.
25. A Shady Corner with Bleeding Hearts
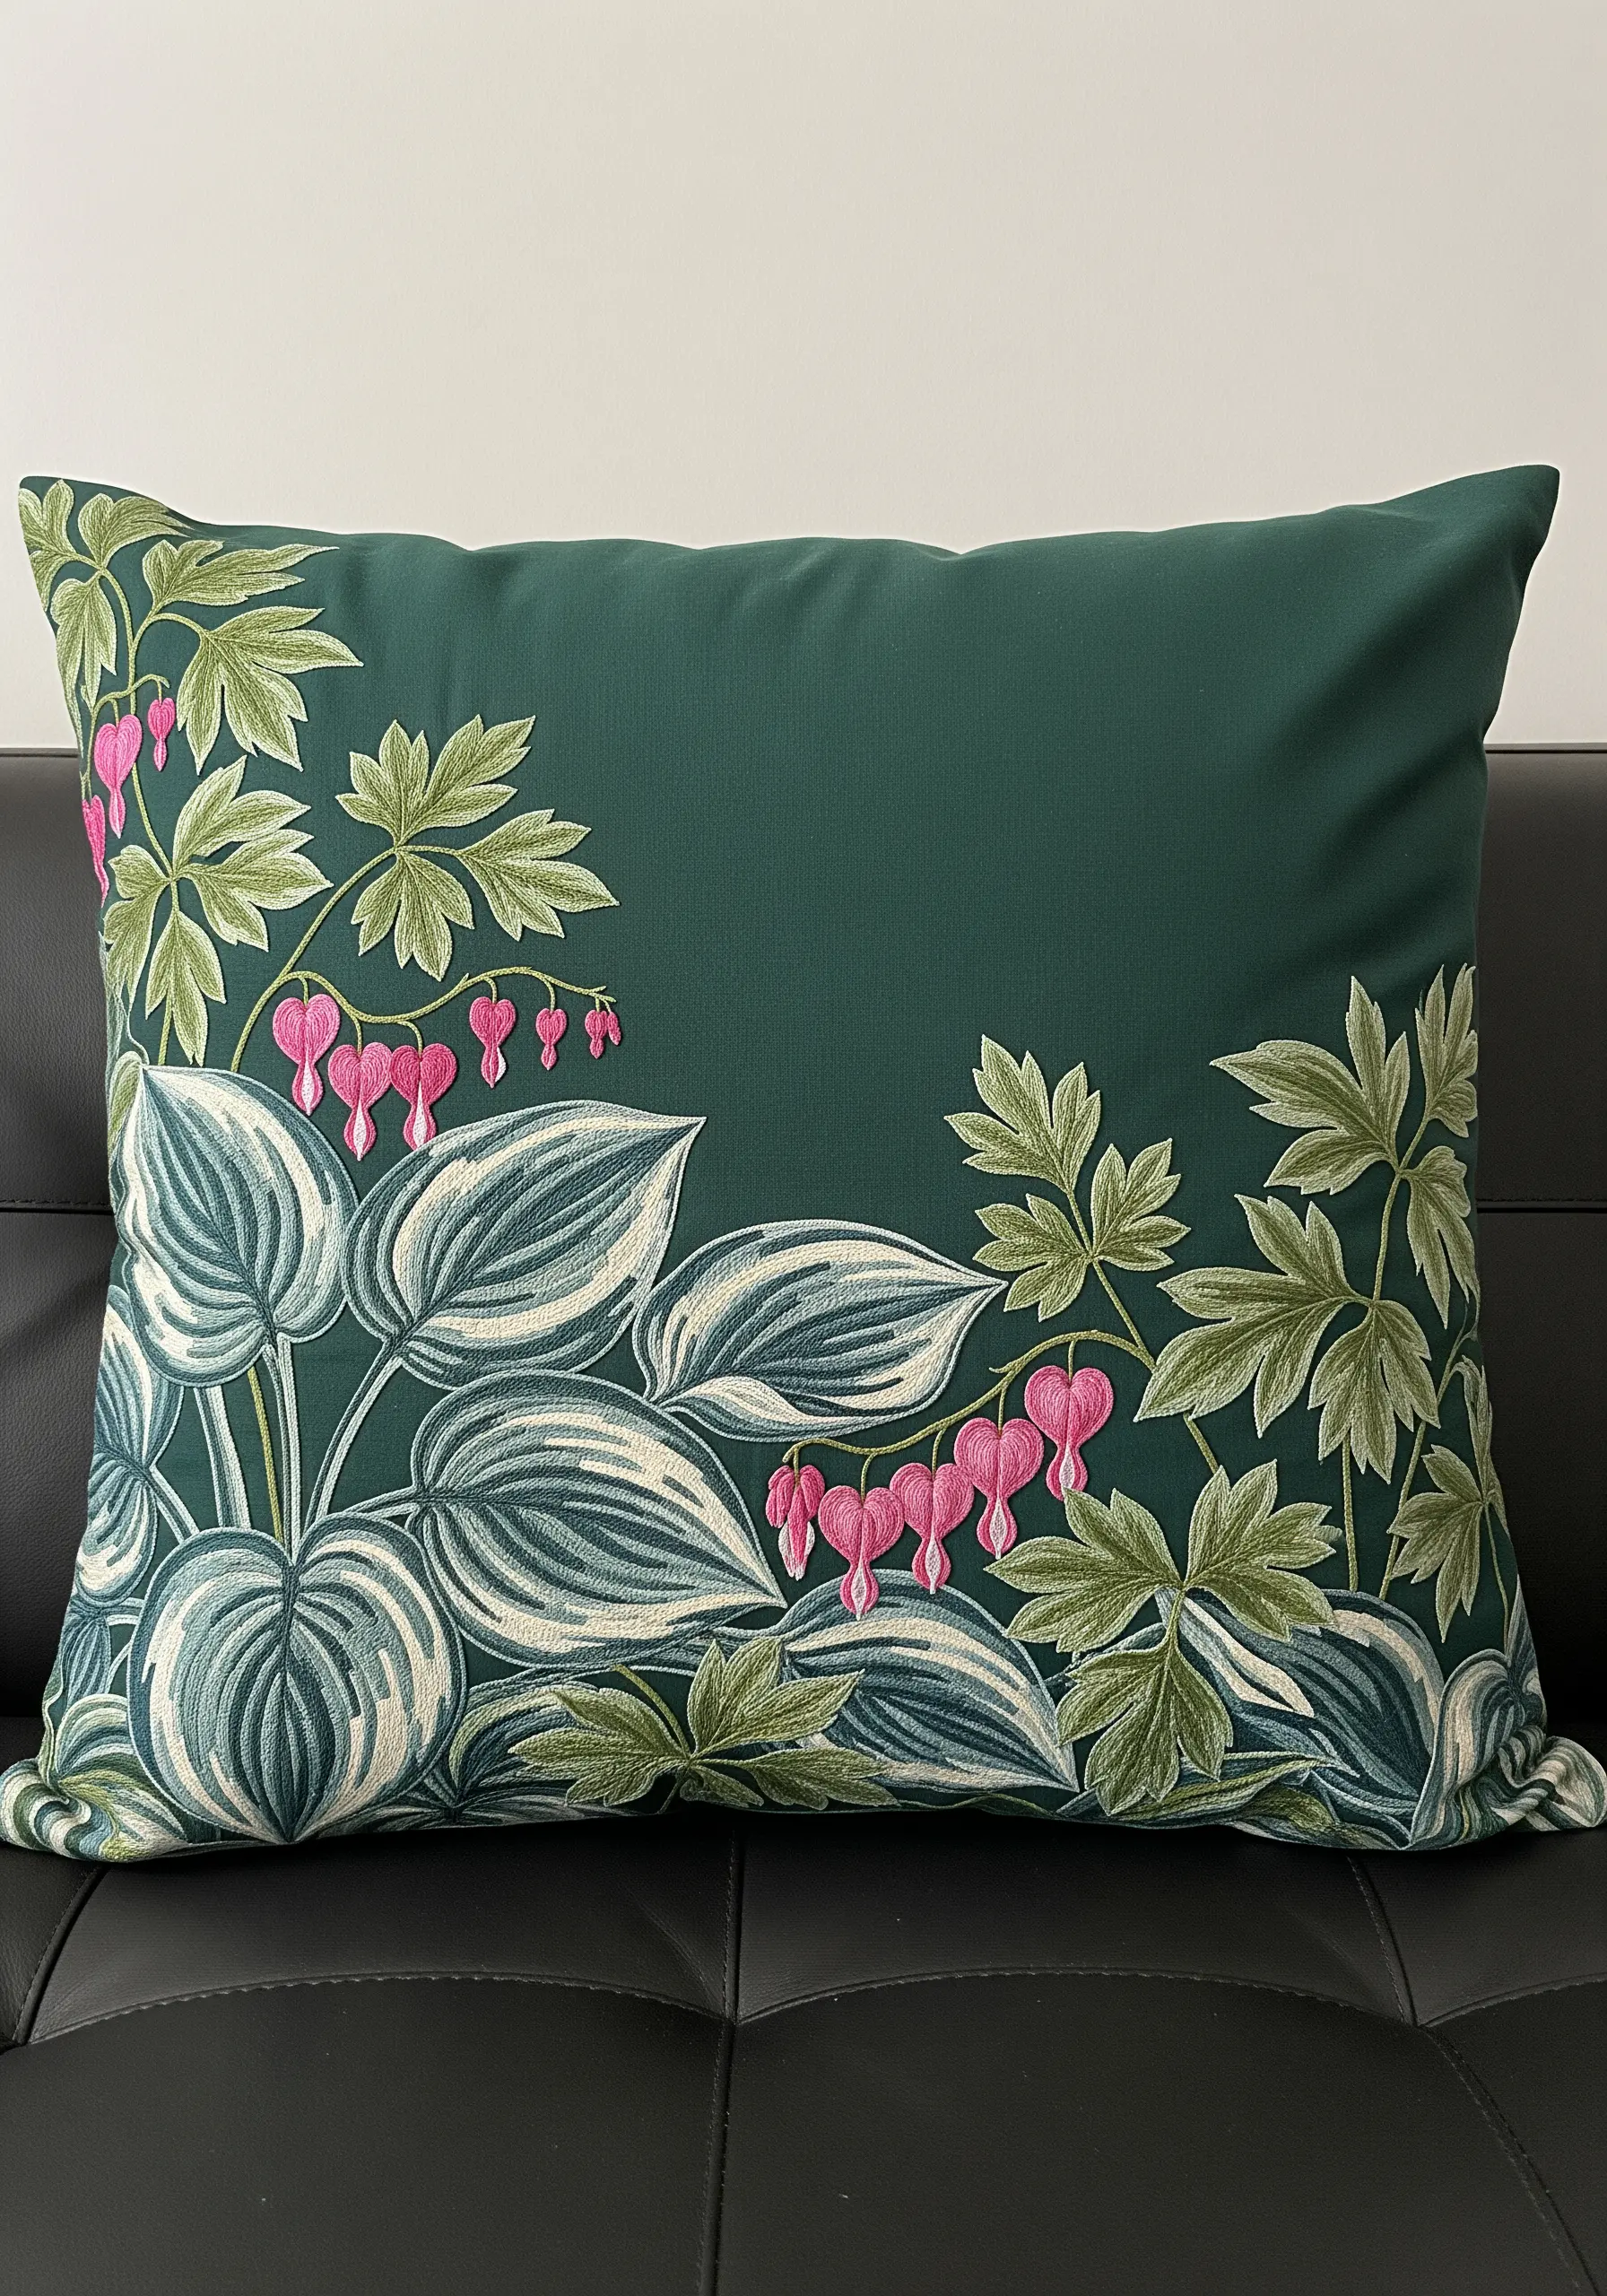
Replicating the variegated stripes of a hosta leaf is a perfect task for the long-and-short stitch.
Use a mix of light green, dark green, and creamy white floss, directing your stitches to follow the natural, curving veins of the leaf.
This creates a beautiful sense of movement and realism. For the delicate bleeding heart flowers, a smooth, padded satin stitch will give them their signature plump, heart-like shape, providing a lovely textural contrast to the detailed leaves.
26. The Daisy-Lined Cobblestone Path

Transform soft thread into the hard surface of stone through shape, color, and definition.
Create each cobblestone with a small, padded satin stitch, using a mix of at least four different shades of grey to avoid a flat, uniform look.
The crucial step is to outline each individual stone with a single strand of dark grey backstitch. This defines their shape and mimics the look of grout, which is what truly sells the illusion of a solid path.
27. The Peony in Full Bloom
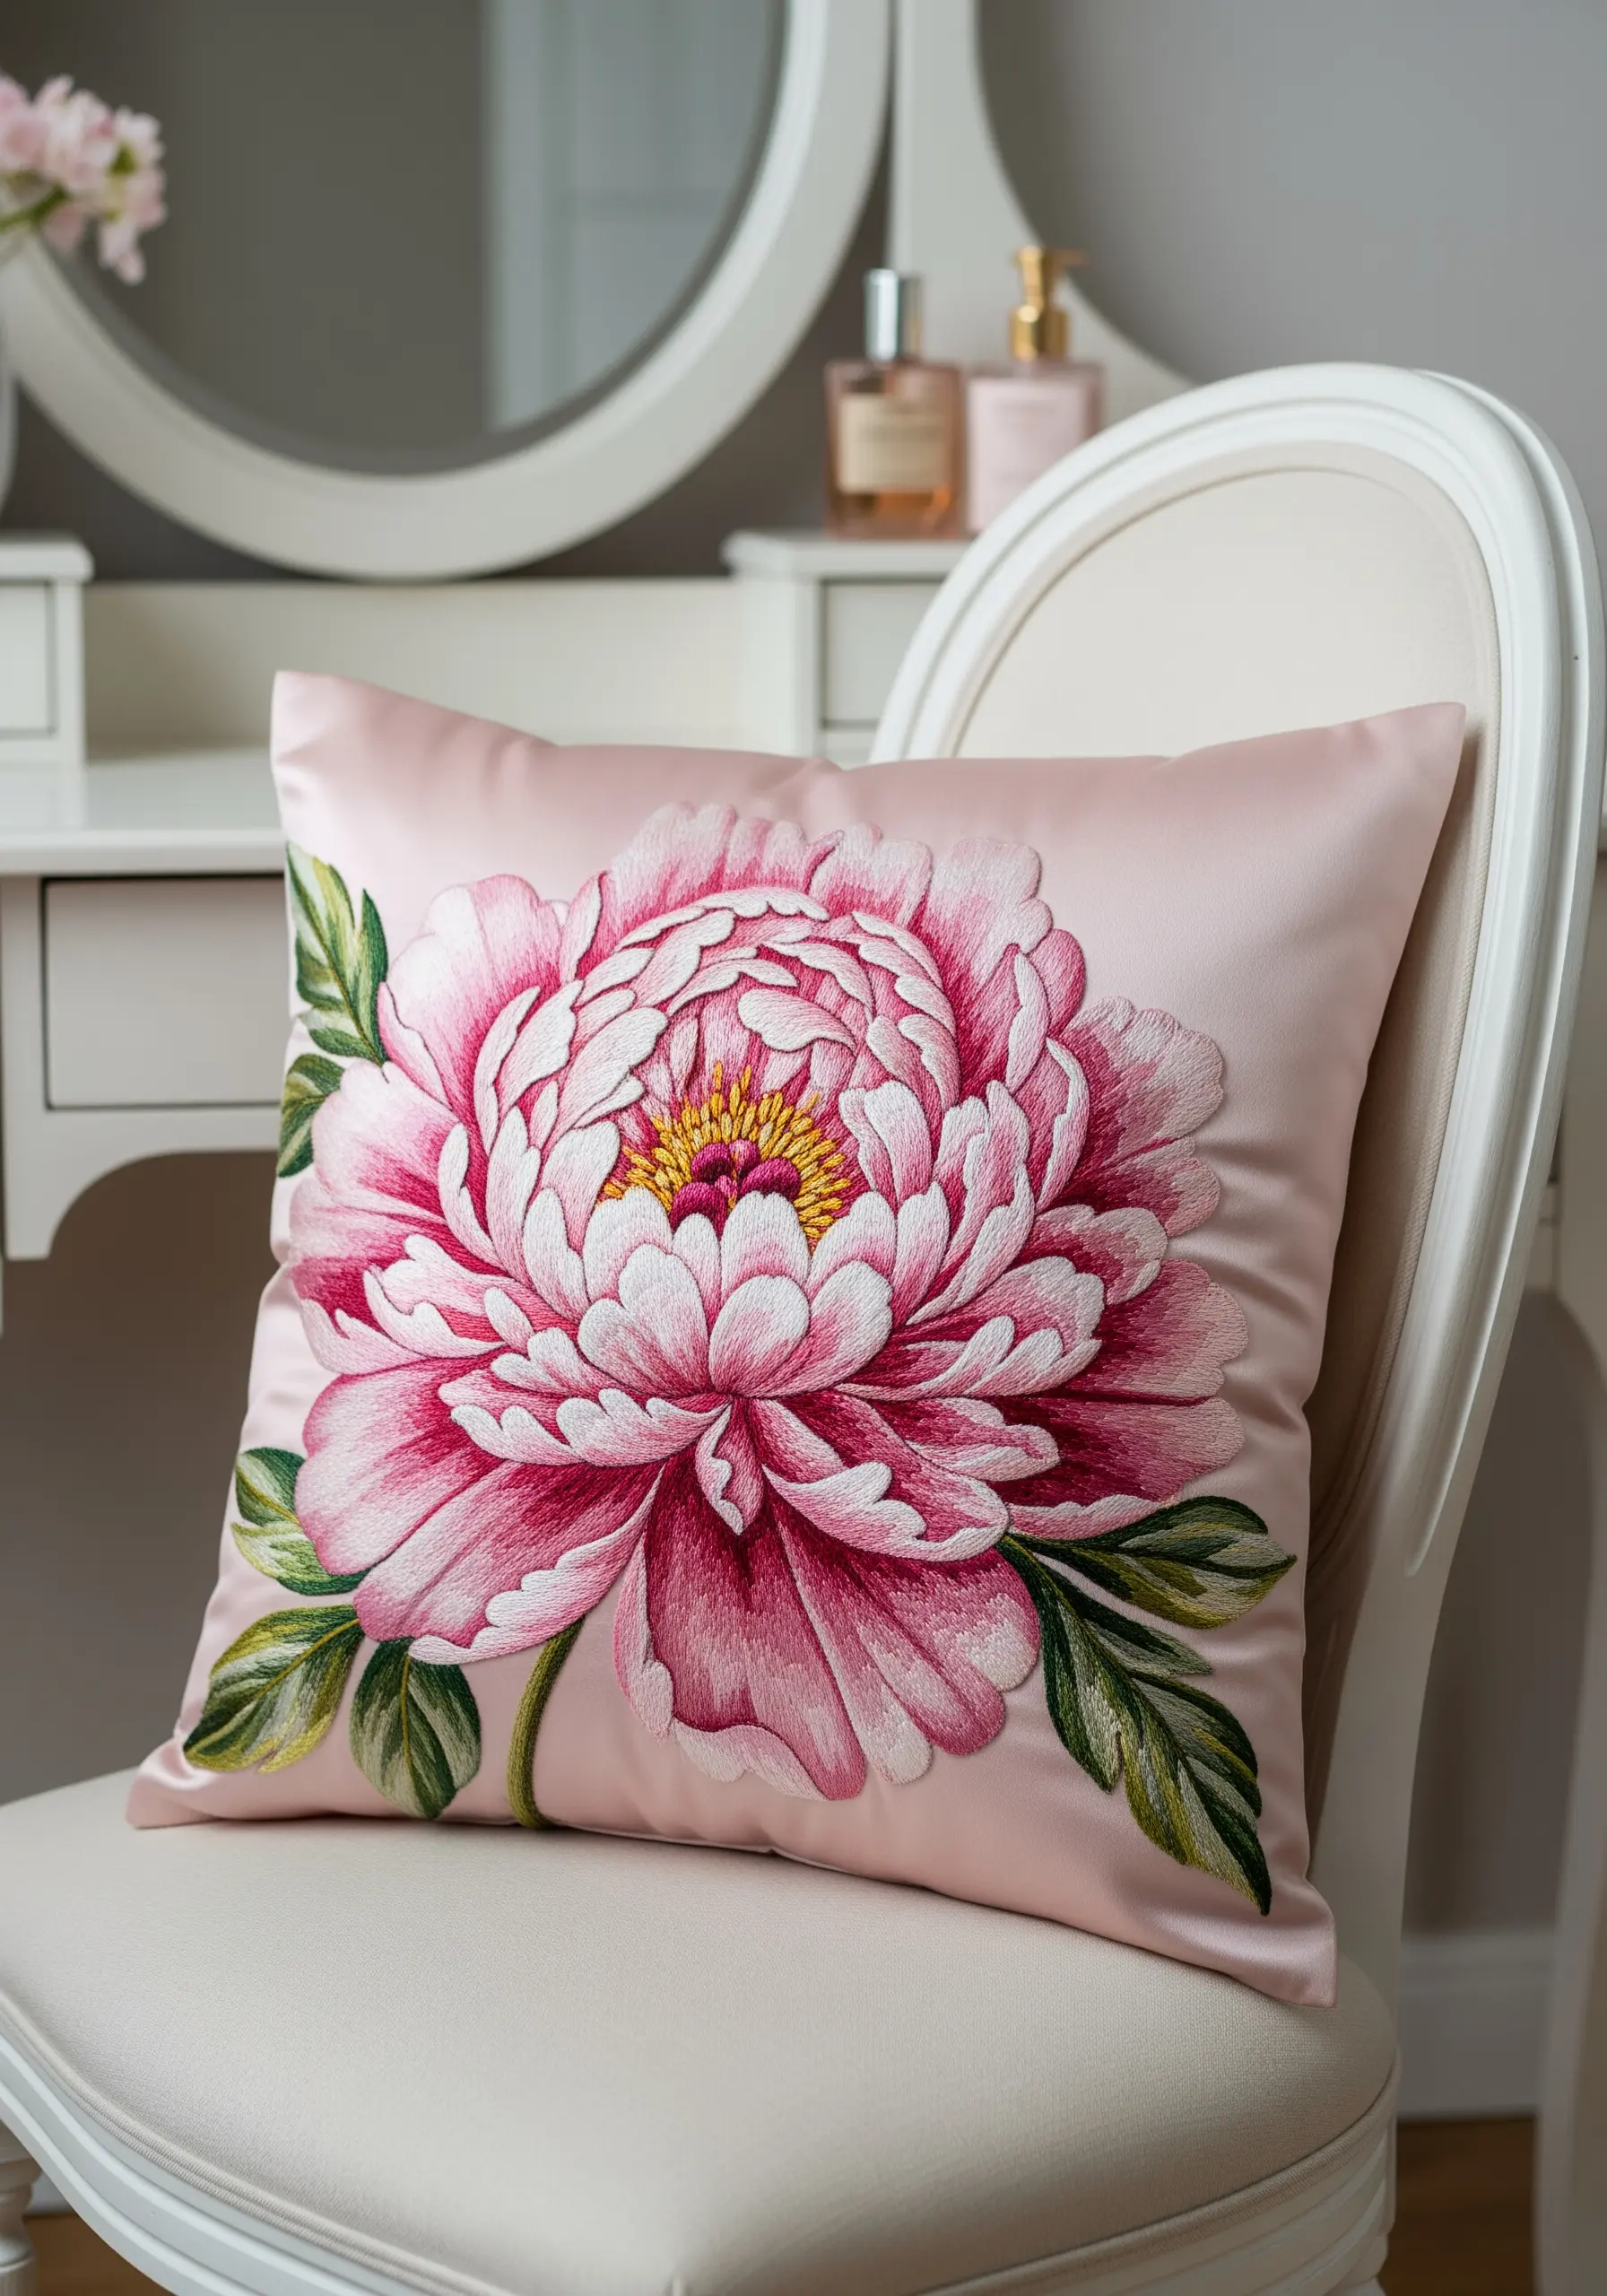
Capturing the soft, dense ruffles of a peony is a beautiful exercise in floral thread painting techniques.
Using a single strand of floss, work from the outermost petals inward, using long-and-short stitch to blend your colors.
Slightly overlap each layer of petals to build up a sense of depth and volume.
Using a wide range of pinks, from the palest blush on the edges to a deep magenta in the shadows, is essential for creating a truly realistic, three-dimensional bloom.
28. The Wisteria Cascade
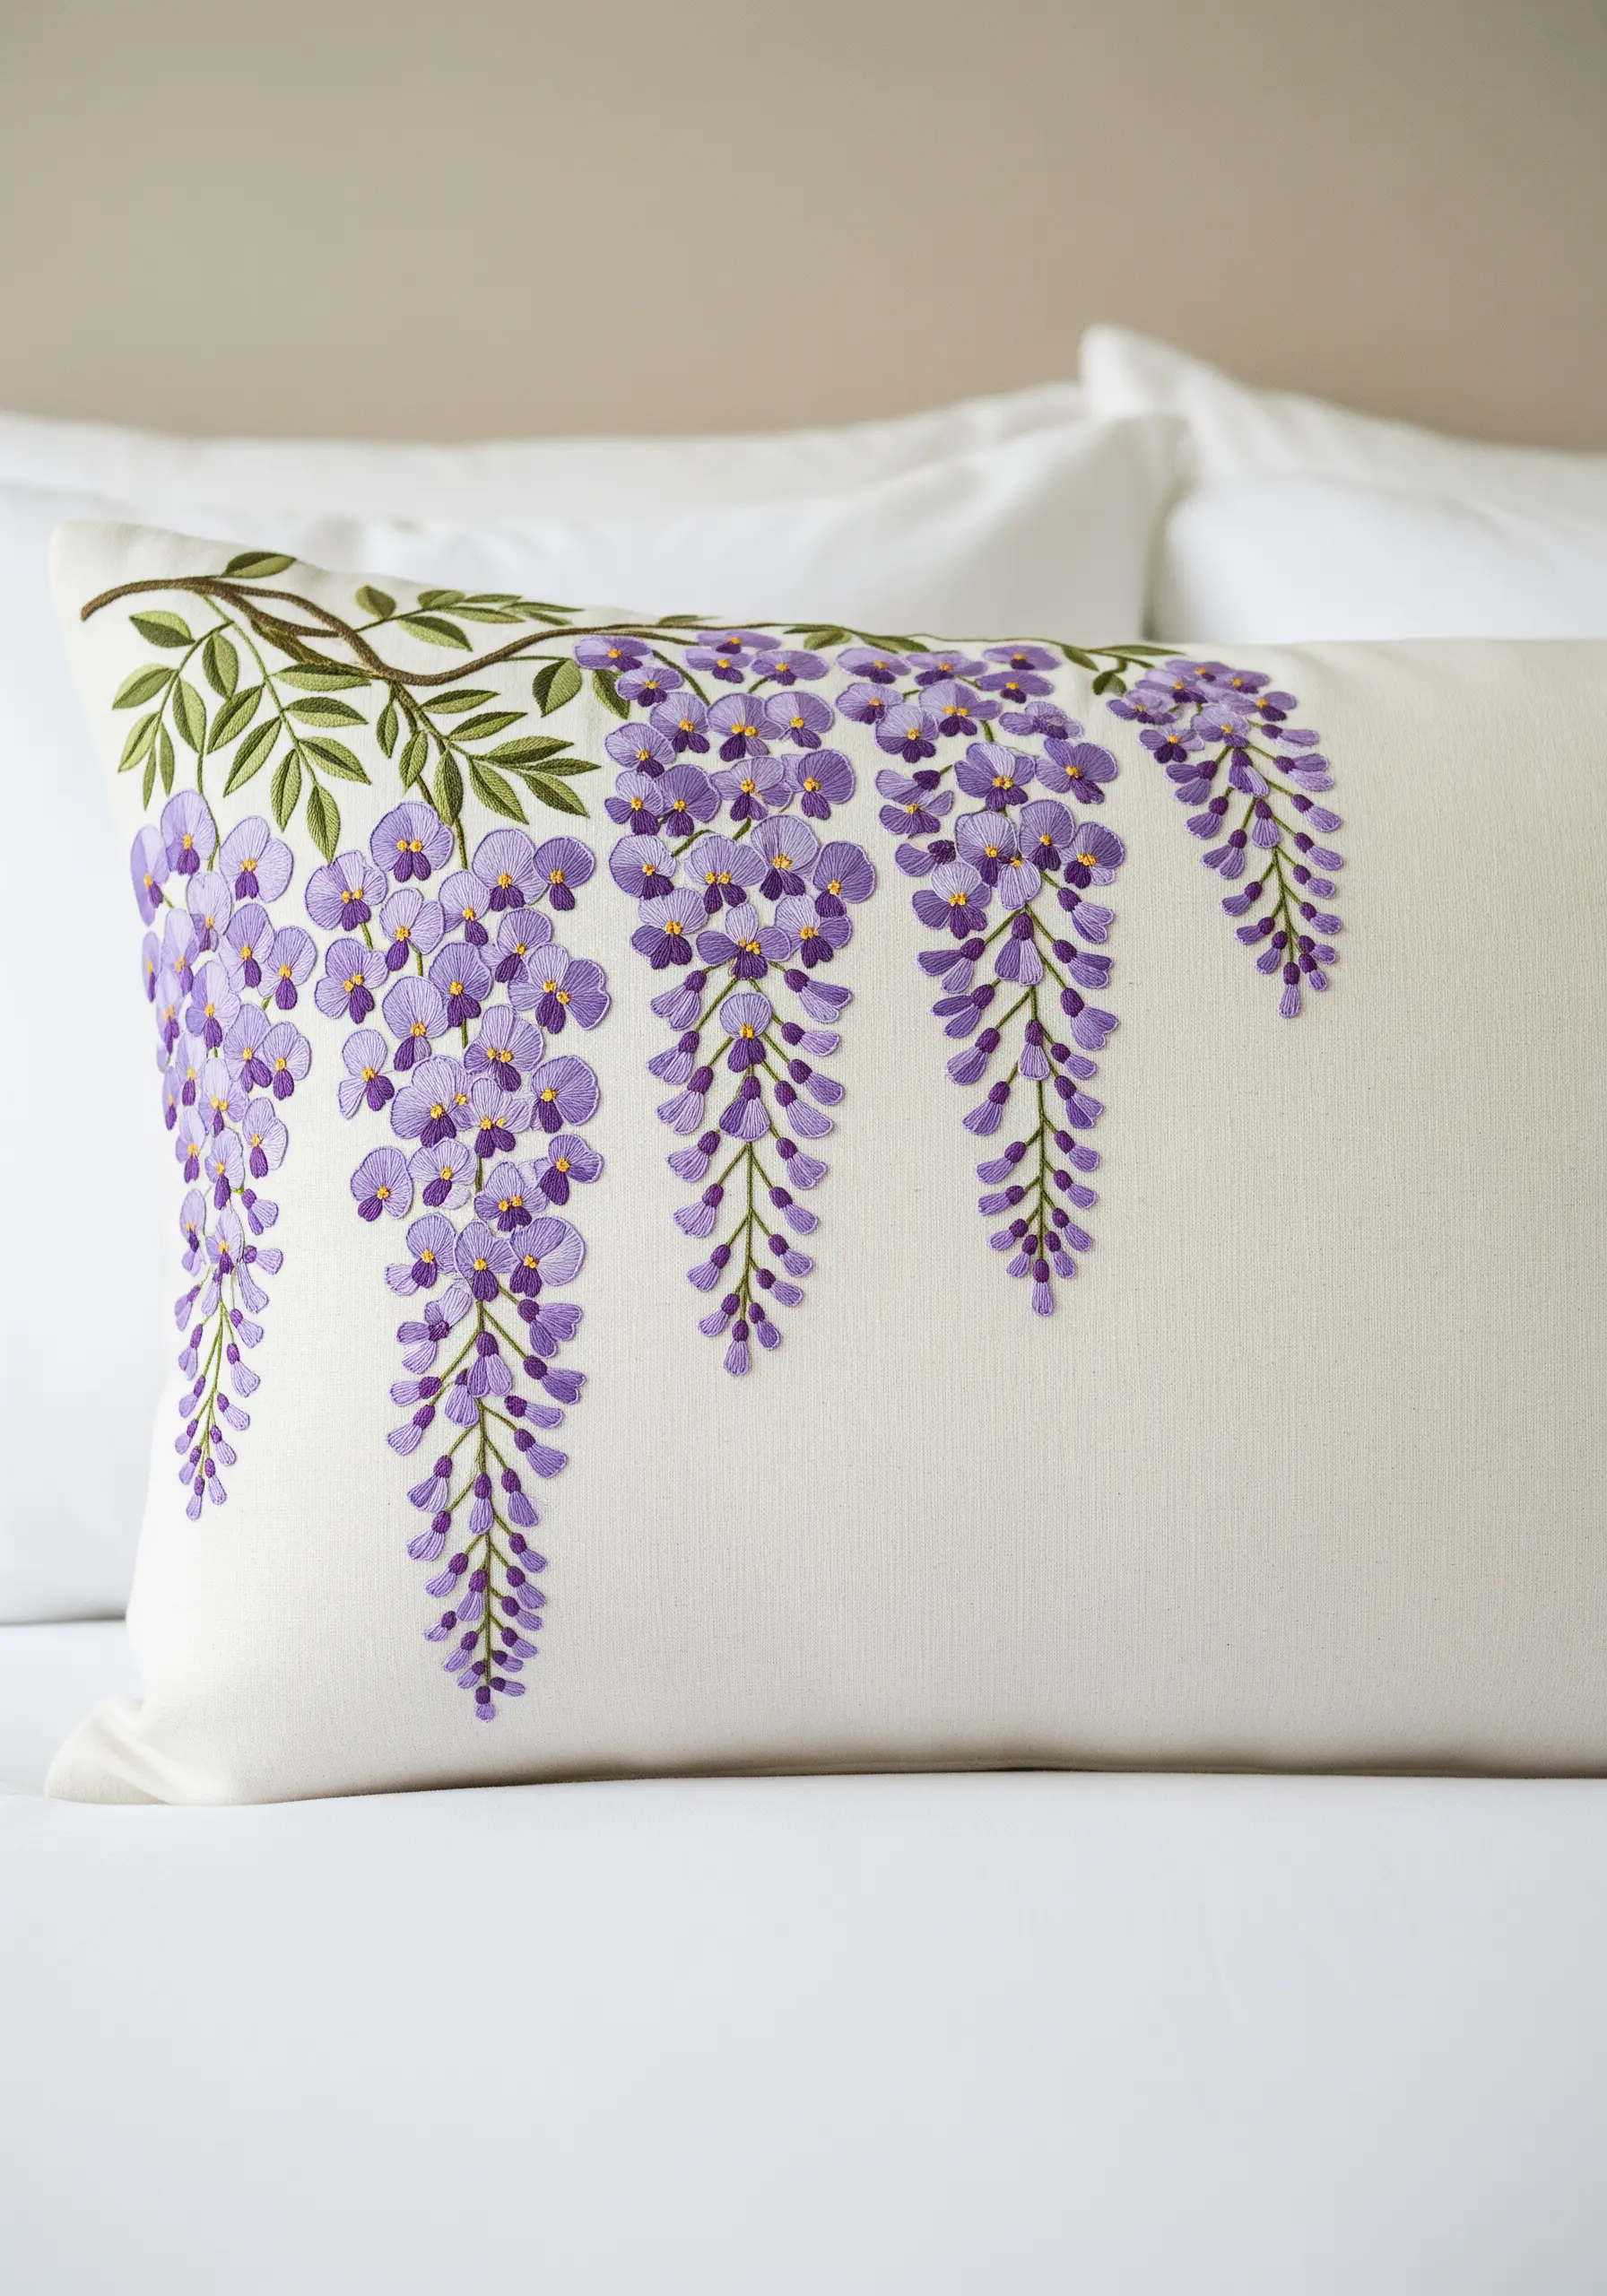
The beauty of wisteria is in its graceful, downward drape. Recreate this sense of movement in your embroidery.
Use detached chain stitches (lazy daisies) or small satin stitches for the individual blossoms.
To achieve the signature cascading effect, cluster the stitches densely at the top of each raceme and gradually increase the space between them as you work your way down.
Using a gradient of three to four purple shades will further enhance the elegant, dripping look.
29. The Water Lily Pond
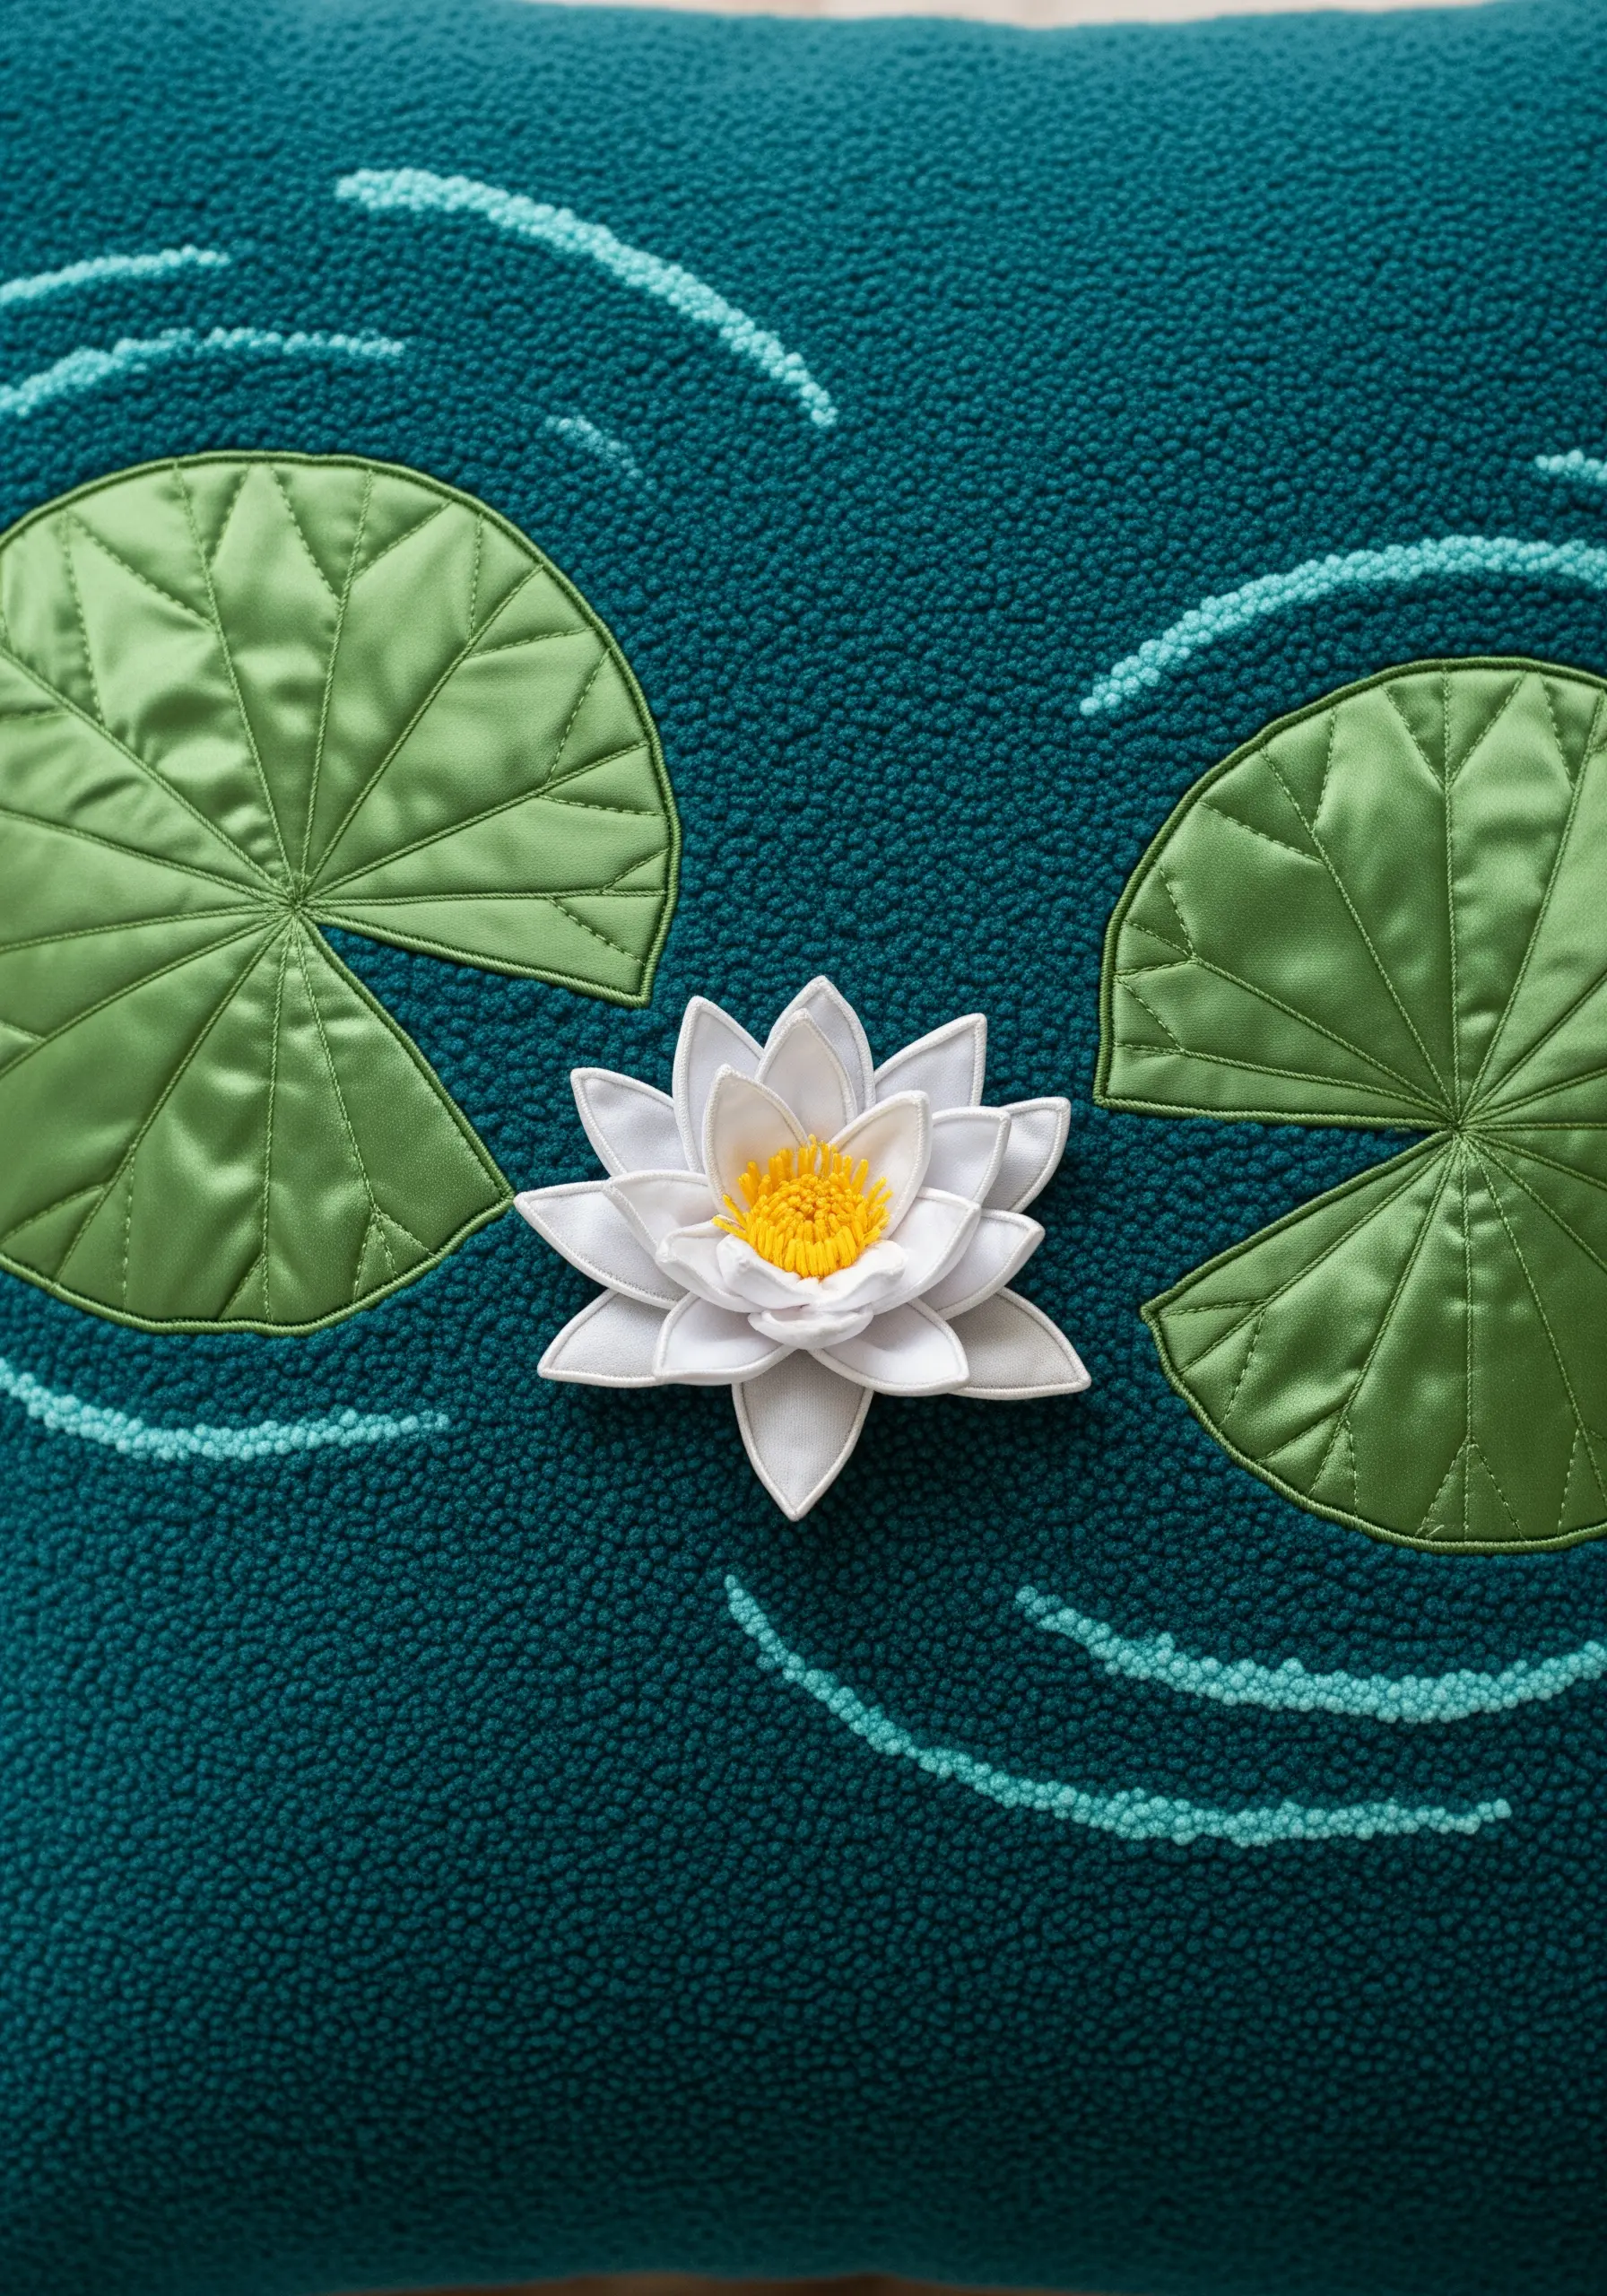
This stunning piece shows how to create a rich scene by combining different materials and textures.
The fuzzy chenille fabric itself provides the perfect texture for rippling water.
For the smooth lily pads, use appliqué with a satin fabric, outlining the veins with a simple backstitch.
The water lily becomes the star when you craft it from folded satin ribbon, creating truly three-dimensional petals that lift off the surface. A few curved running stitches complete the illusion of water ripples.
30. The Botanical Monogram
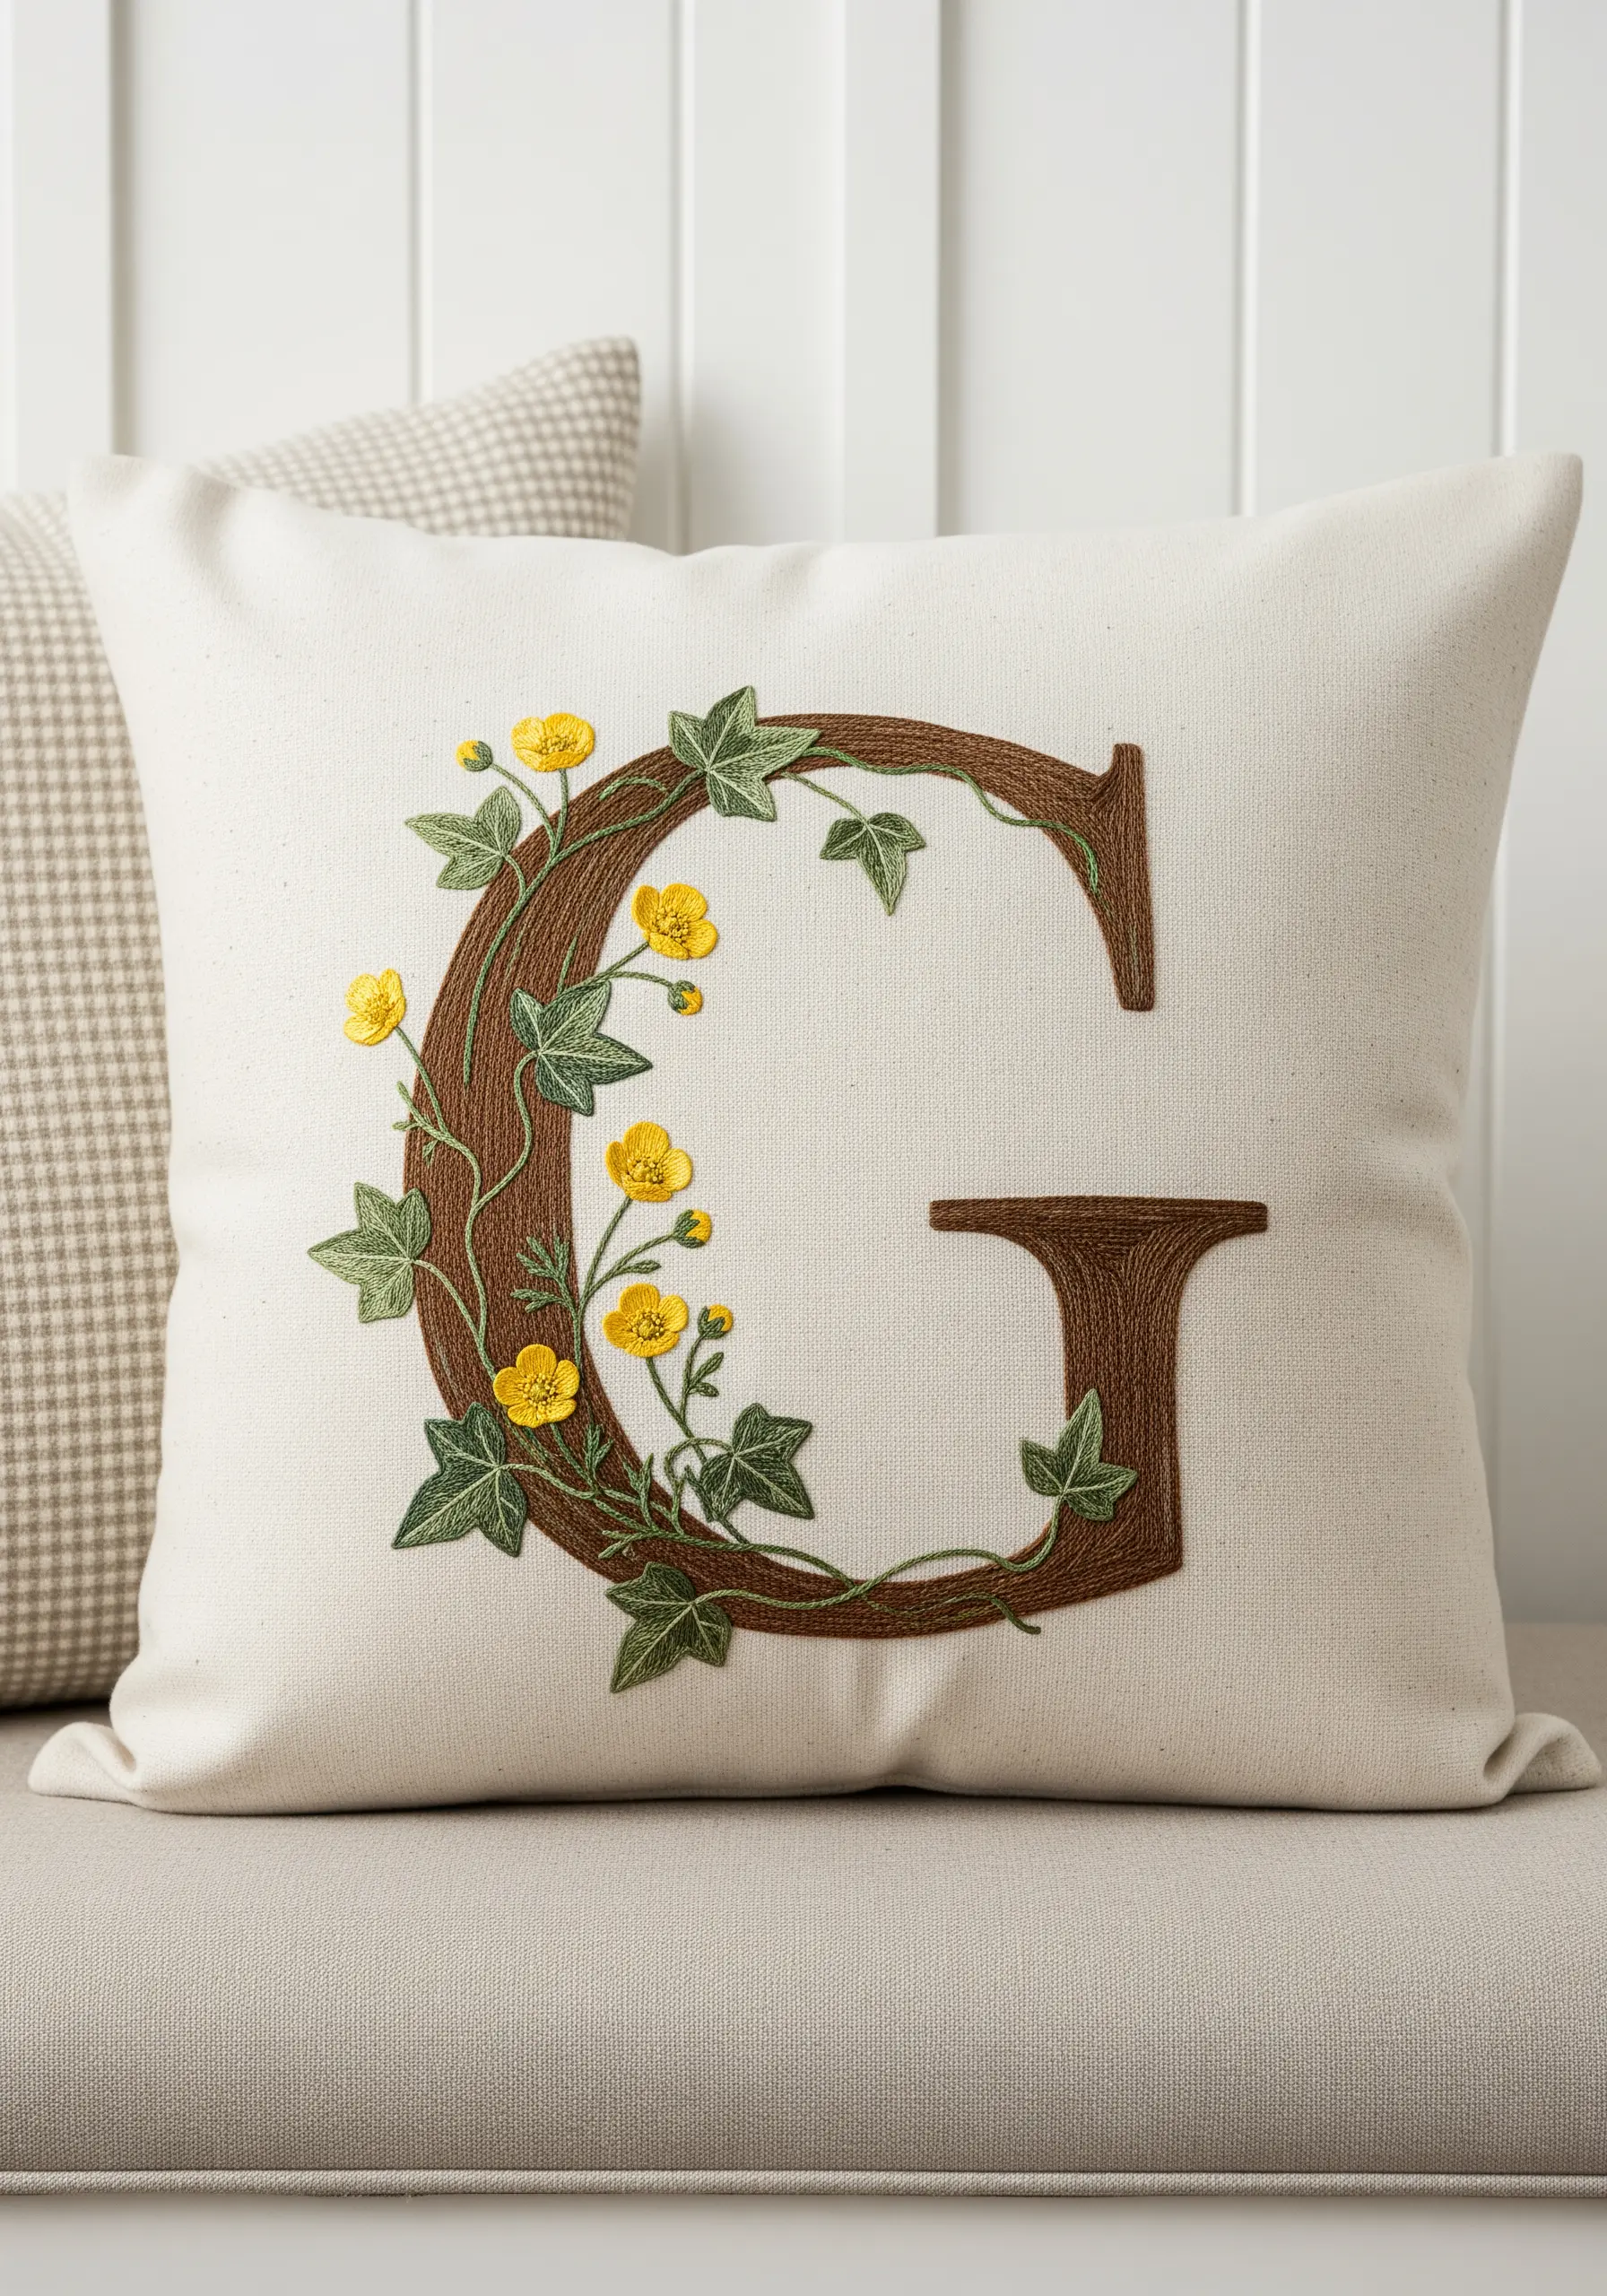
A personalized monogram is elevated when it feels like a living part of a garden.
First, establish the letter form with a bold, wide satin stitch for a solid foundation.
Then, stitch the botanical elements—delicate stem-stitched ivy vines and lazy daisy buttercups—on top, allowing them to curve and wrap around the structure of the letter.
This layering technique is key; it makes the florals feel like they are actively growing on the monogram, creating a dynamic and personal piece of art.
31. The Sweet Strawberry Patch
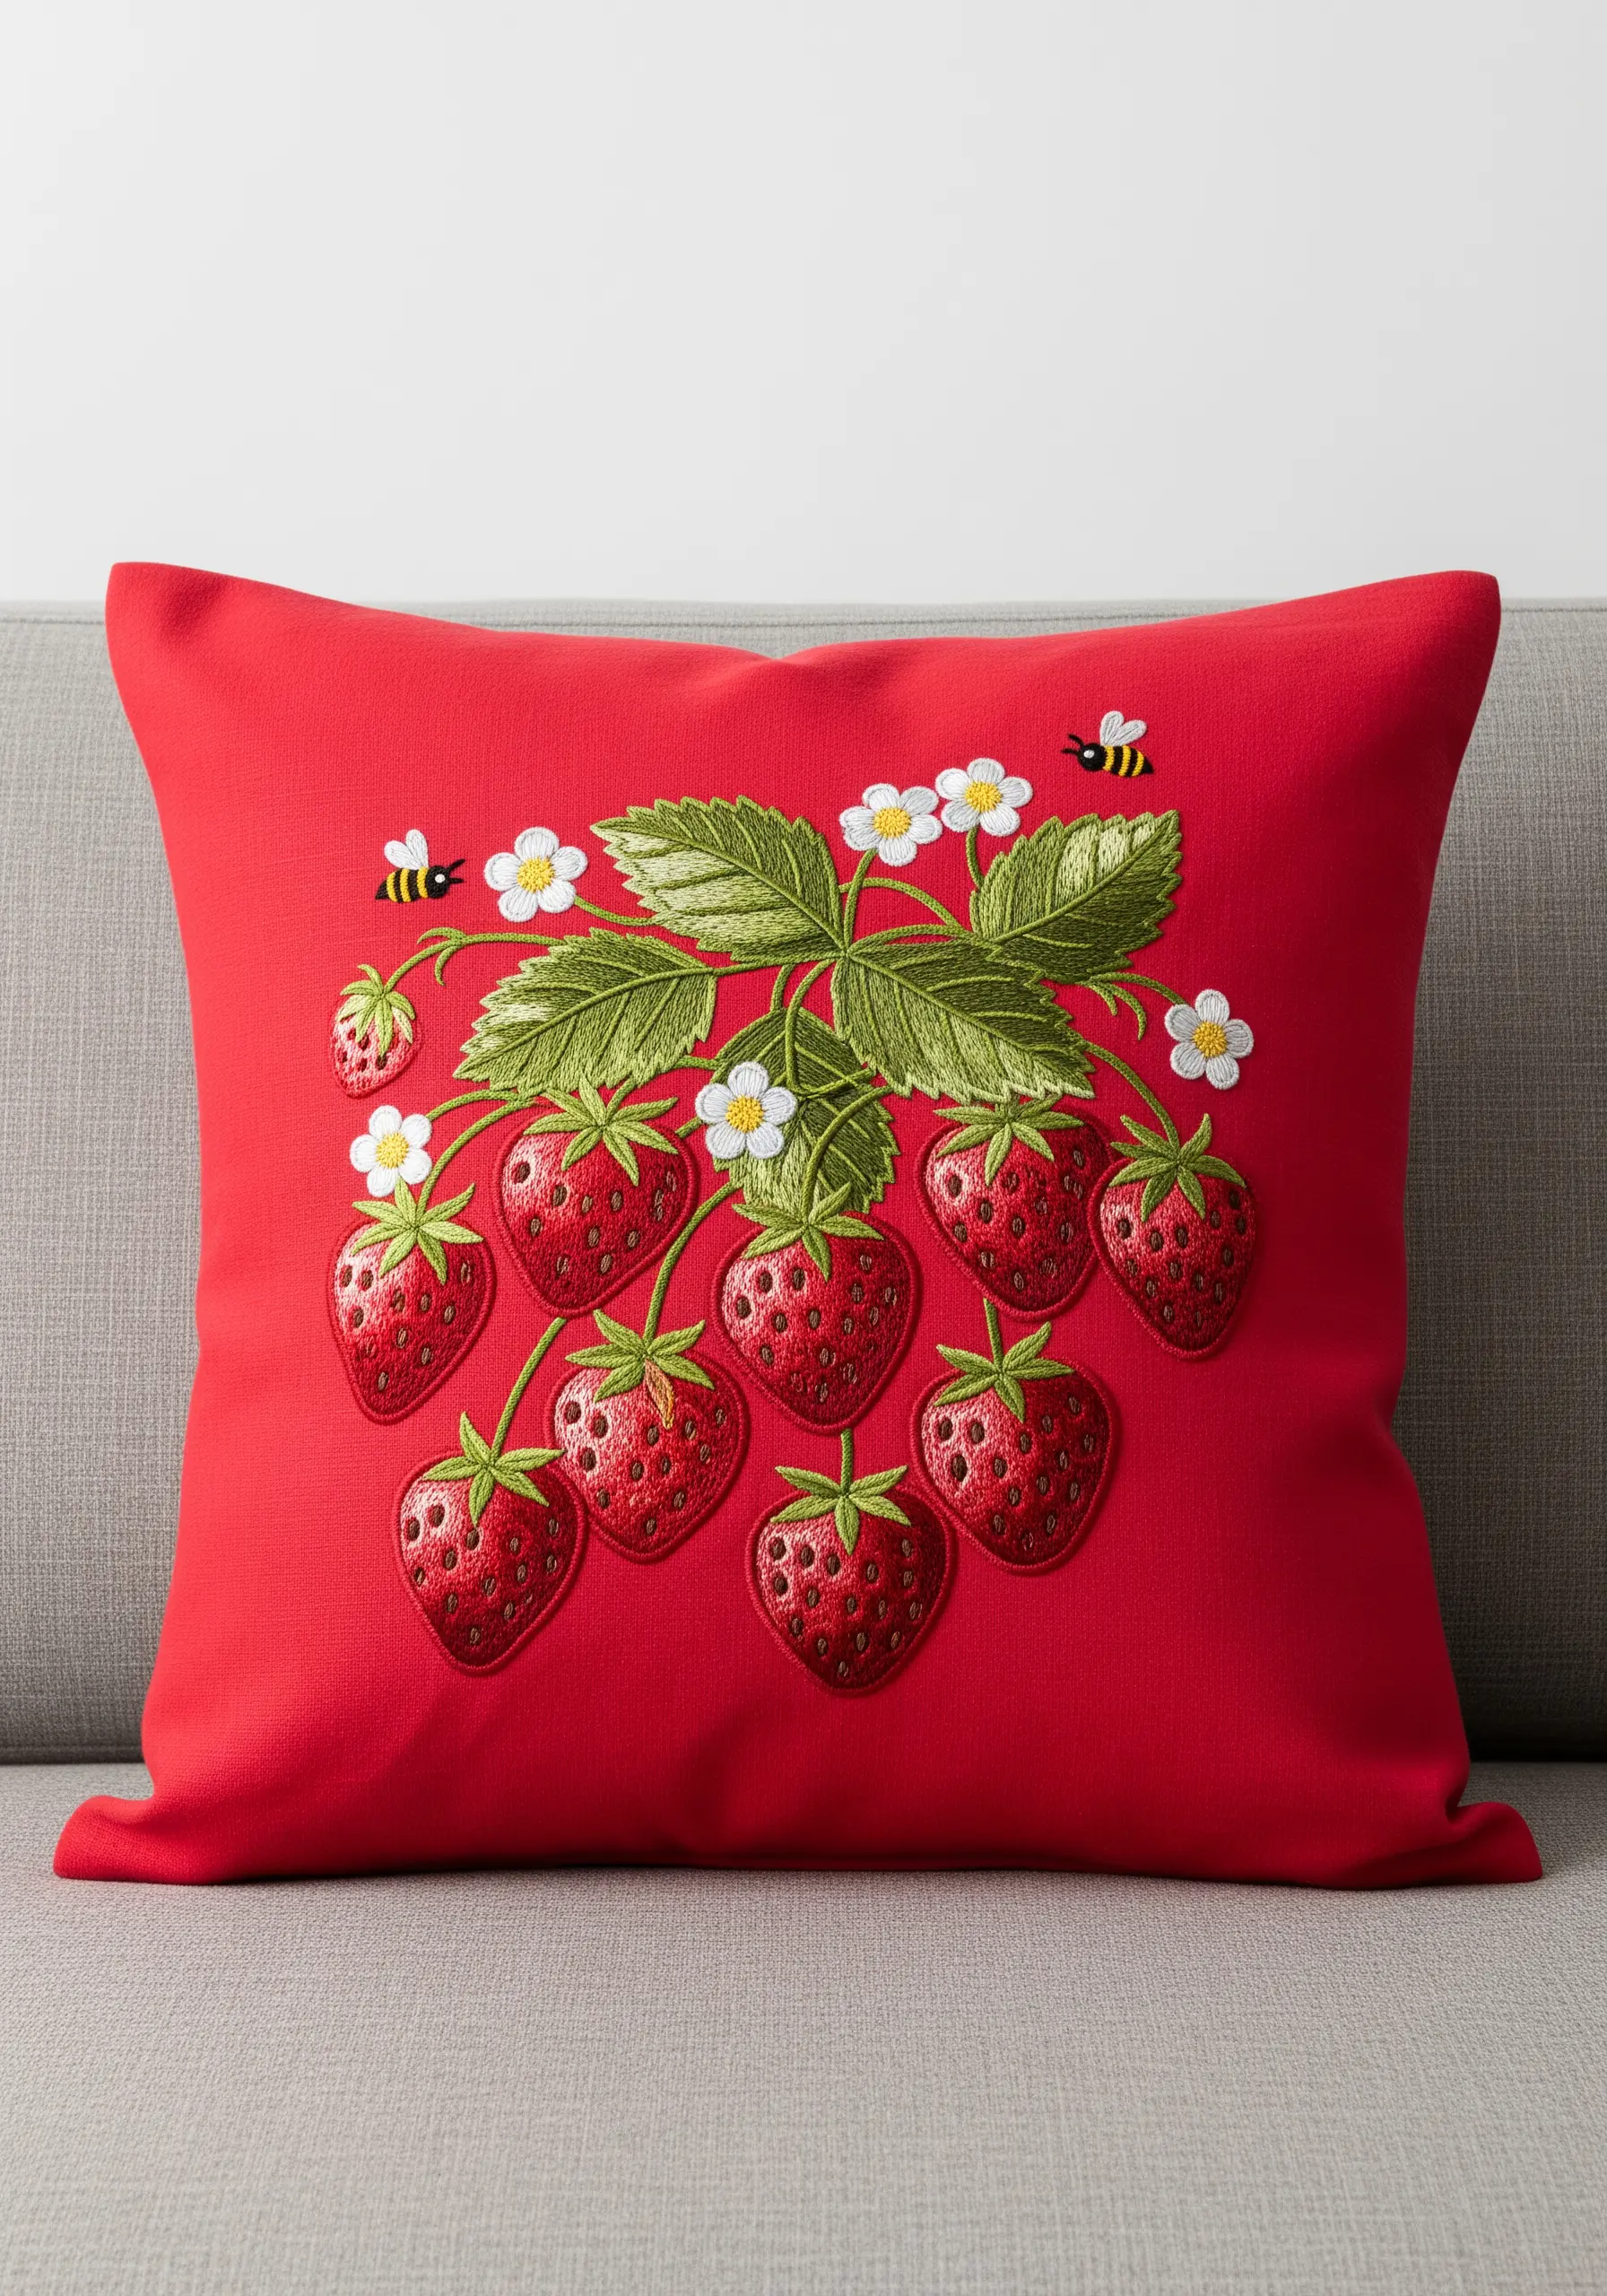
The secret to a realistic embroidered strawberry lies in creating its unique seeded texture.
Before you stitch the red body, place tiny, scattered seed stitches (small straight stitches) in yellow across the area.
Then, work your red padded satin stitch directly over them. The underlying yellow stitches will create subtle bumps on the surface, perfectly mimicking the texture of a real strawberry and adding a surprising level of realism to your work.
32. The Nasturtium Trellis
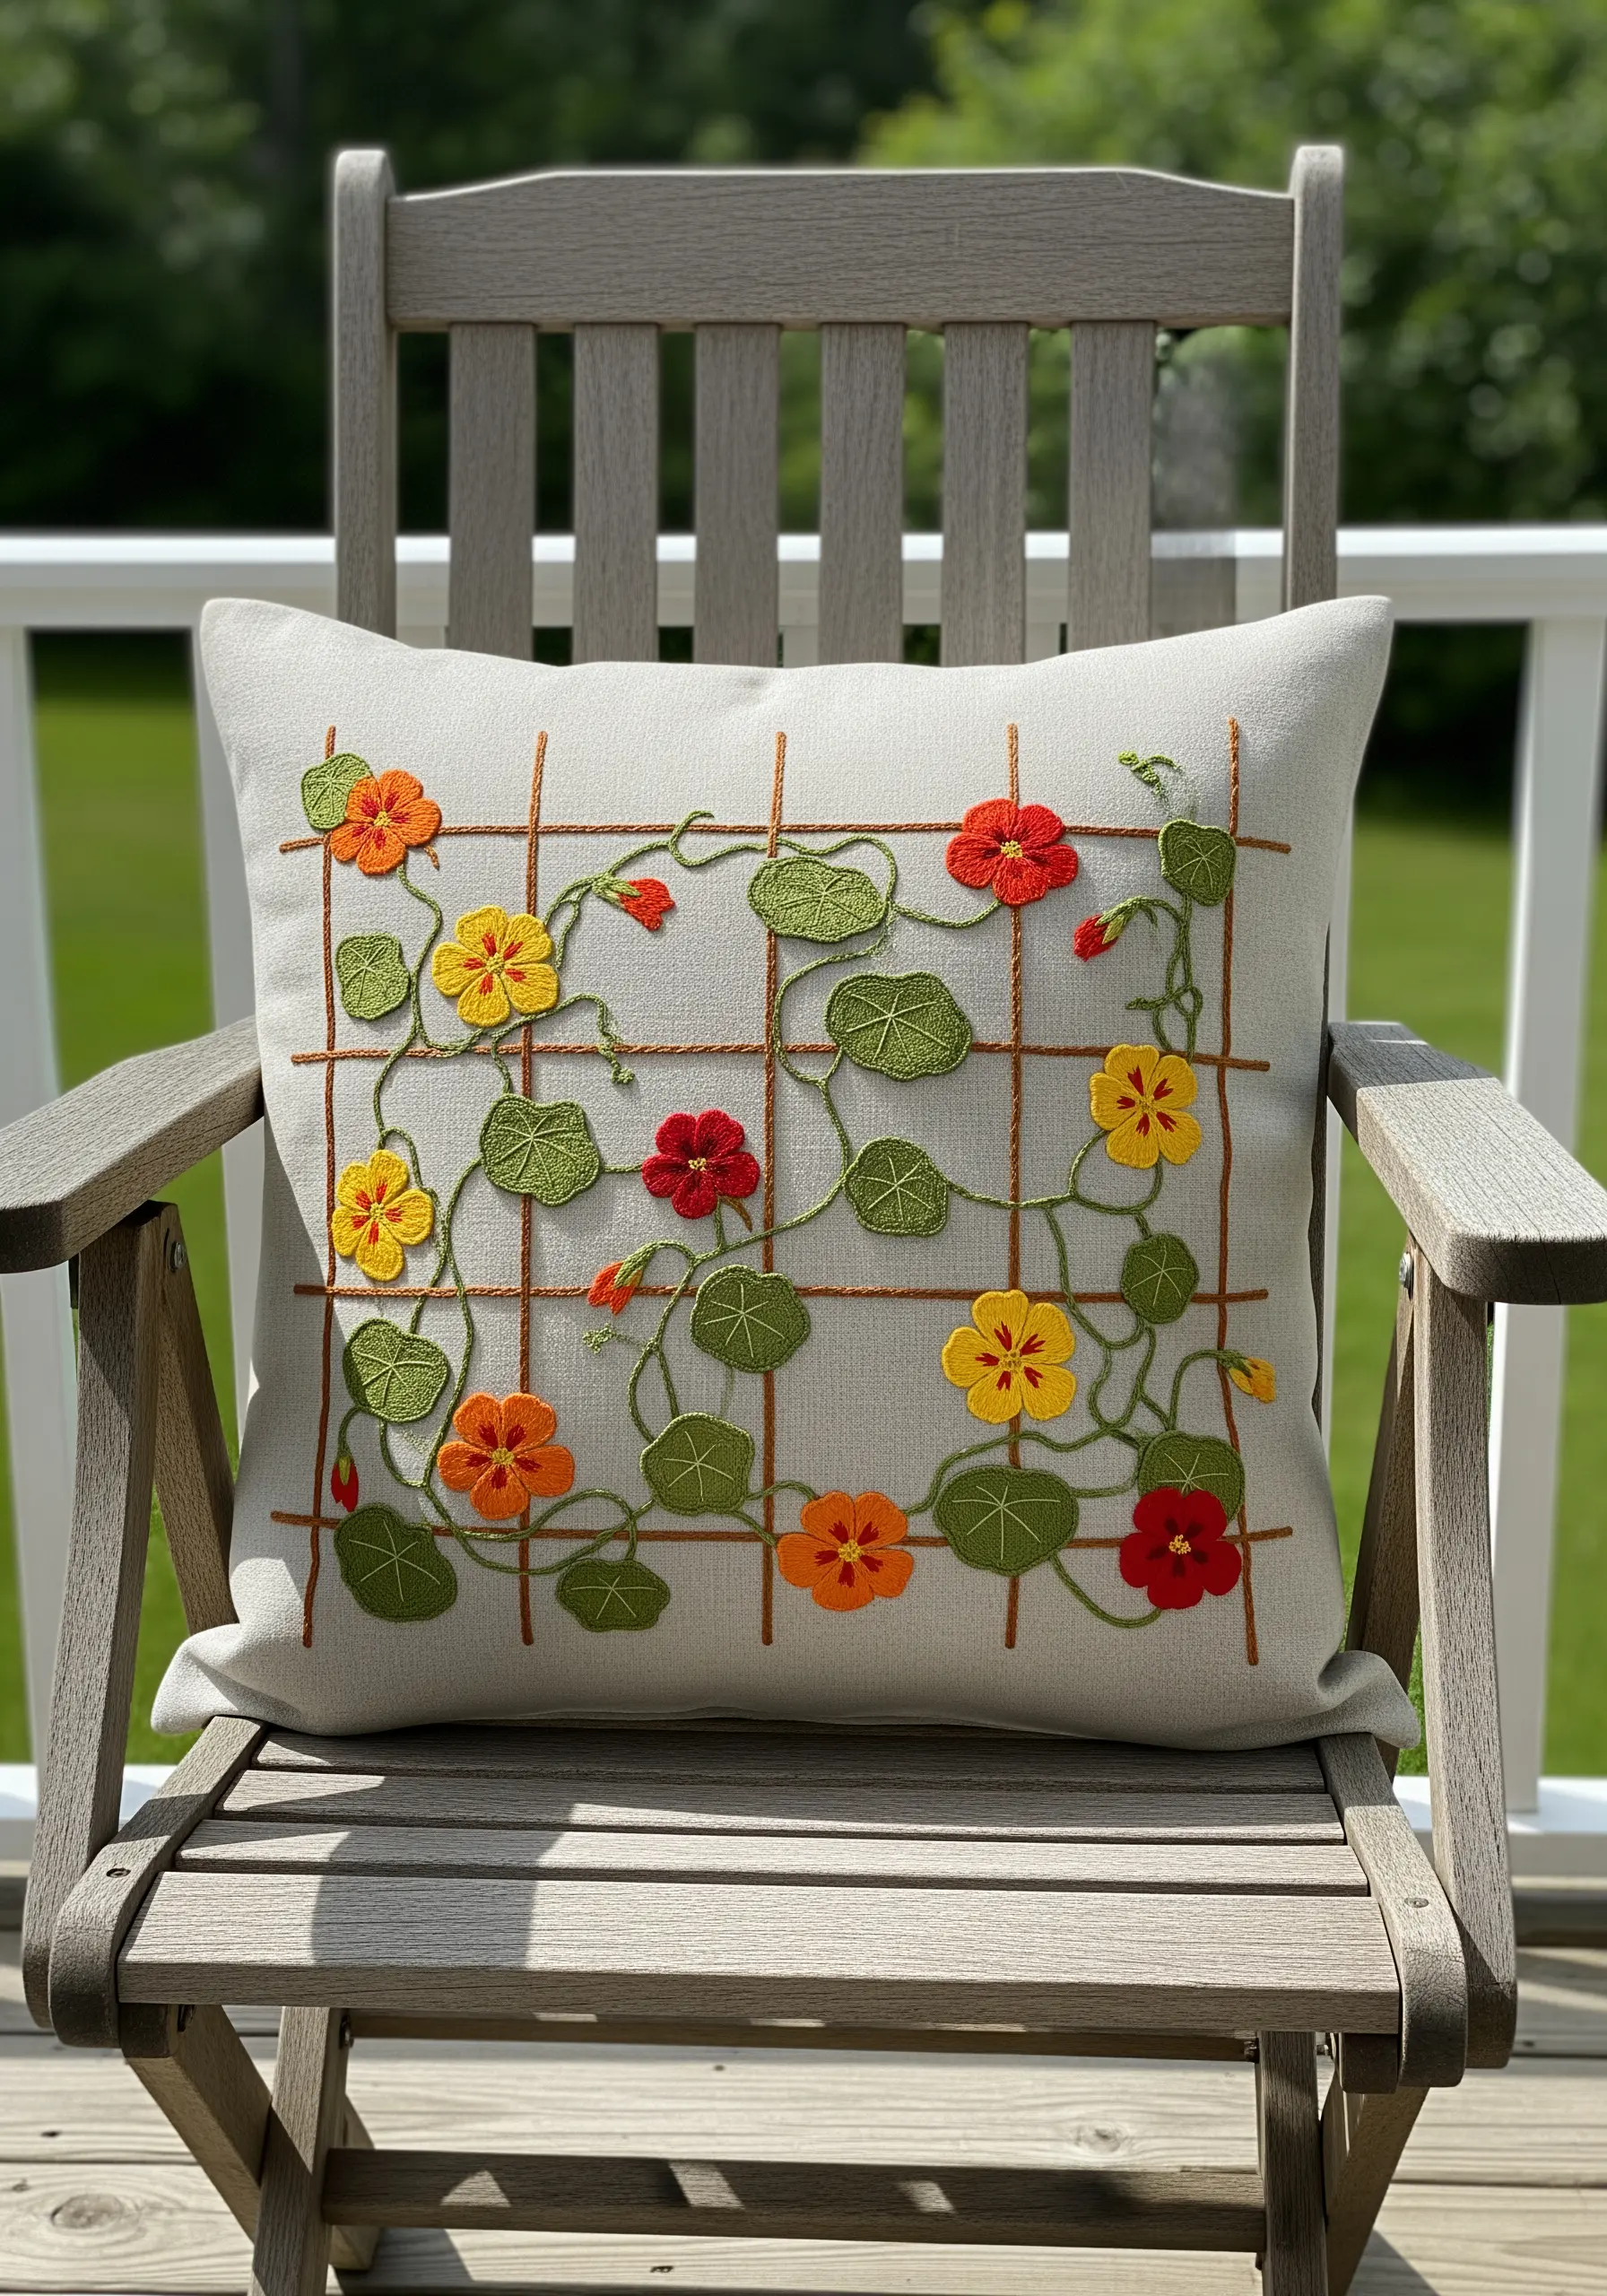
Create a beautiful sense of order and chaos by juxtaposing a rigid structure with rambling, organic vines.
Stitch the trellis grid first, using a whipped backstitch to create a bold, clean line.
Then, add the nasturtium vines with a flowing stem stitch, intentionally weaving them over and under the trellis bars.
Use a classic wagon wheel stitch for the round blossoms; it gives them a lovely texture and perfectly circular shape that contrasts beautifully with the square grid.
33. The Rainy Day Windowpane
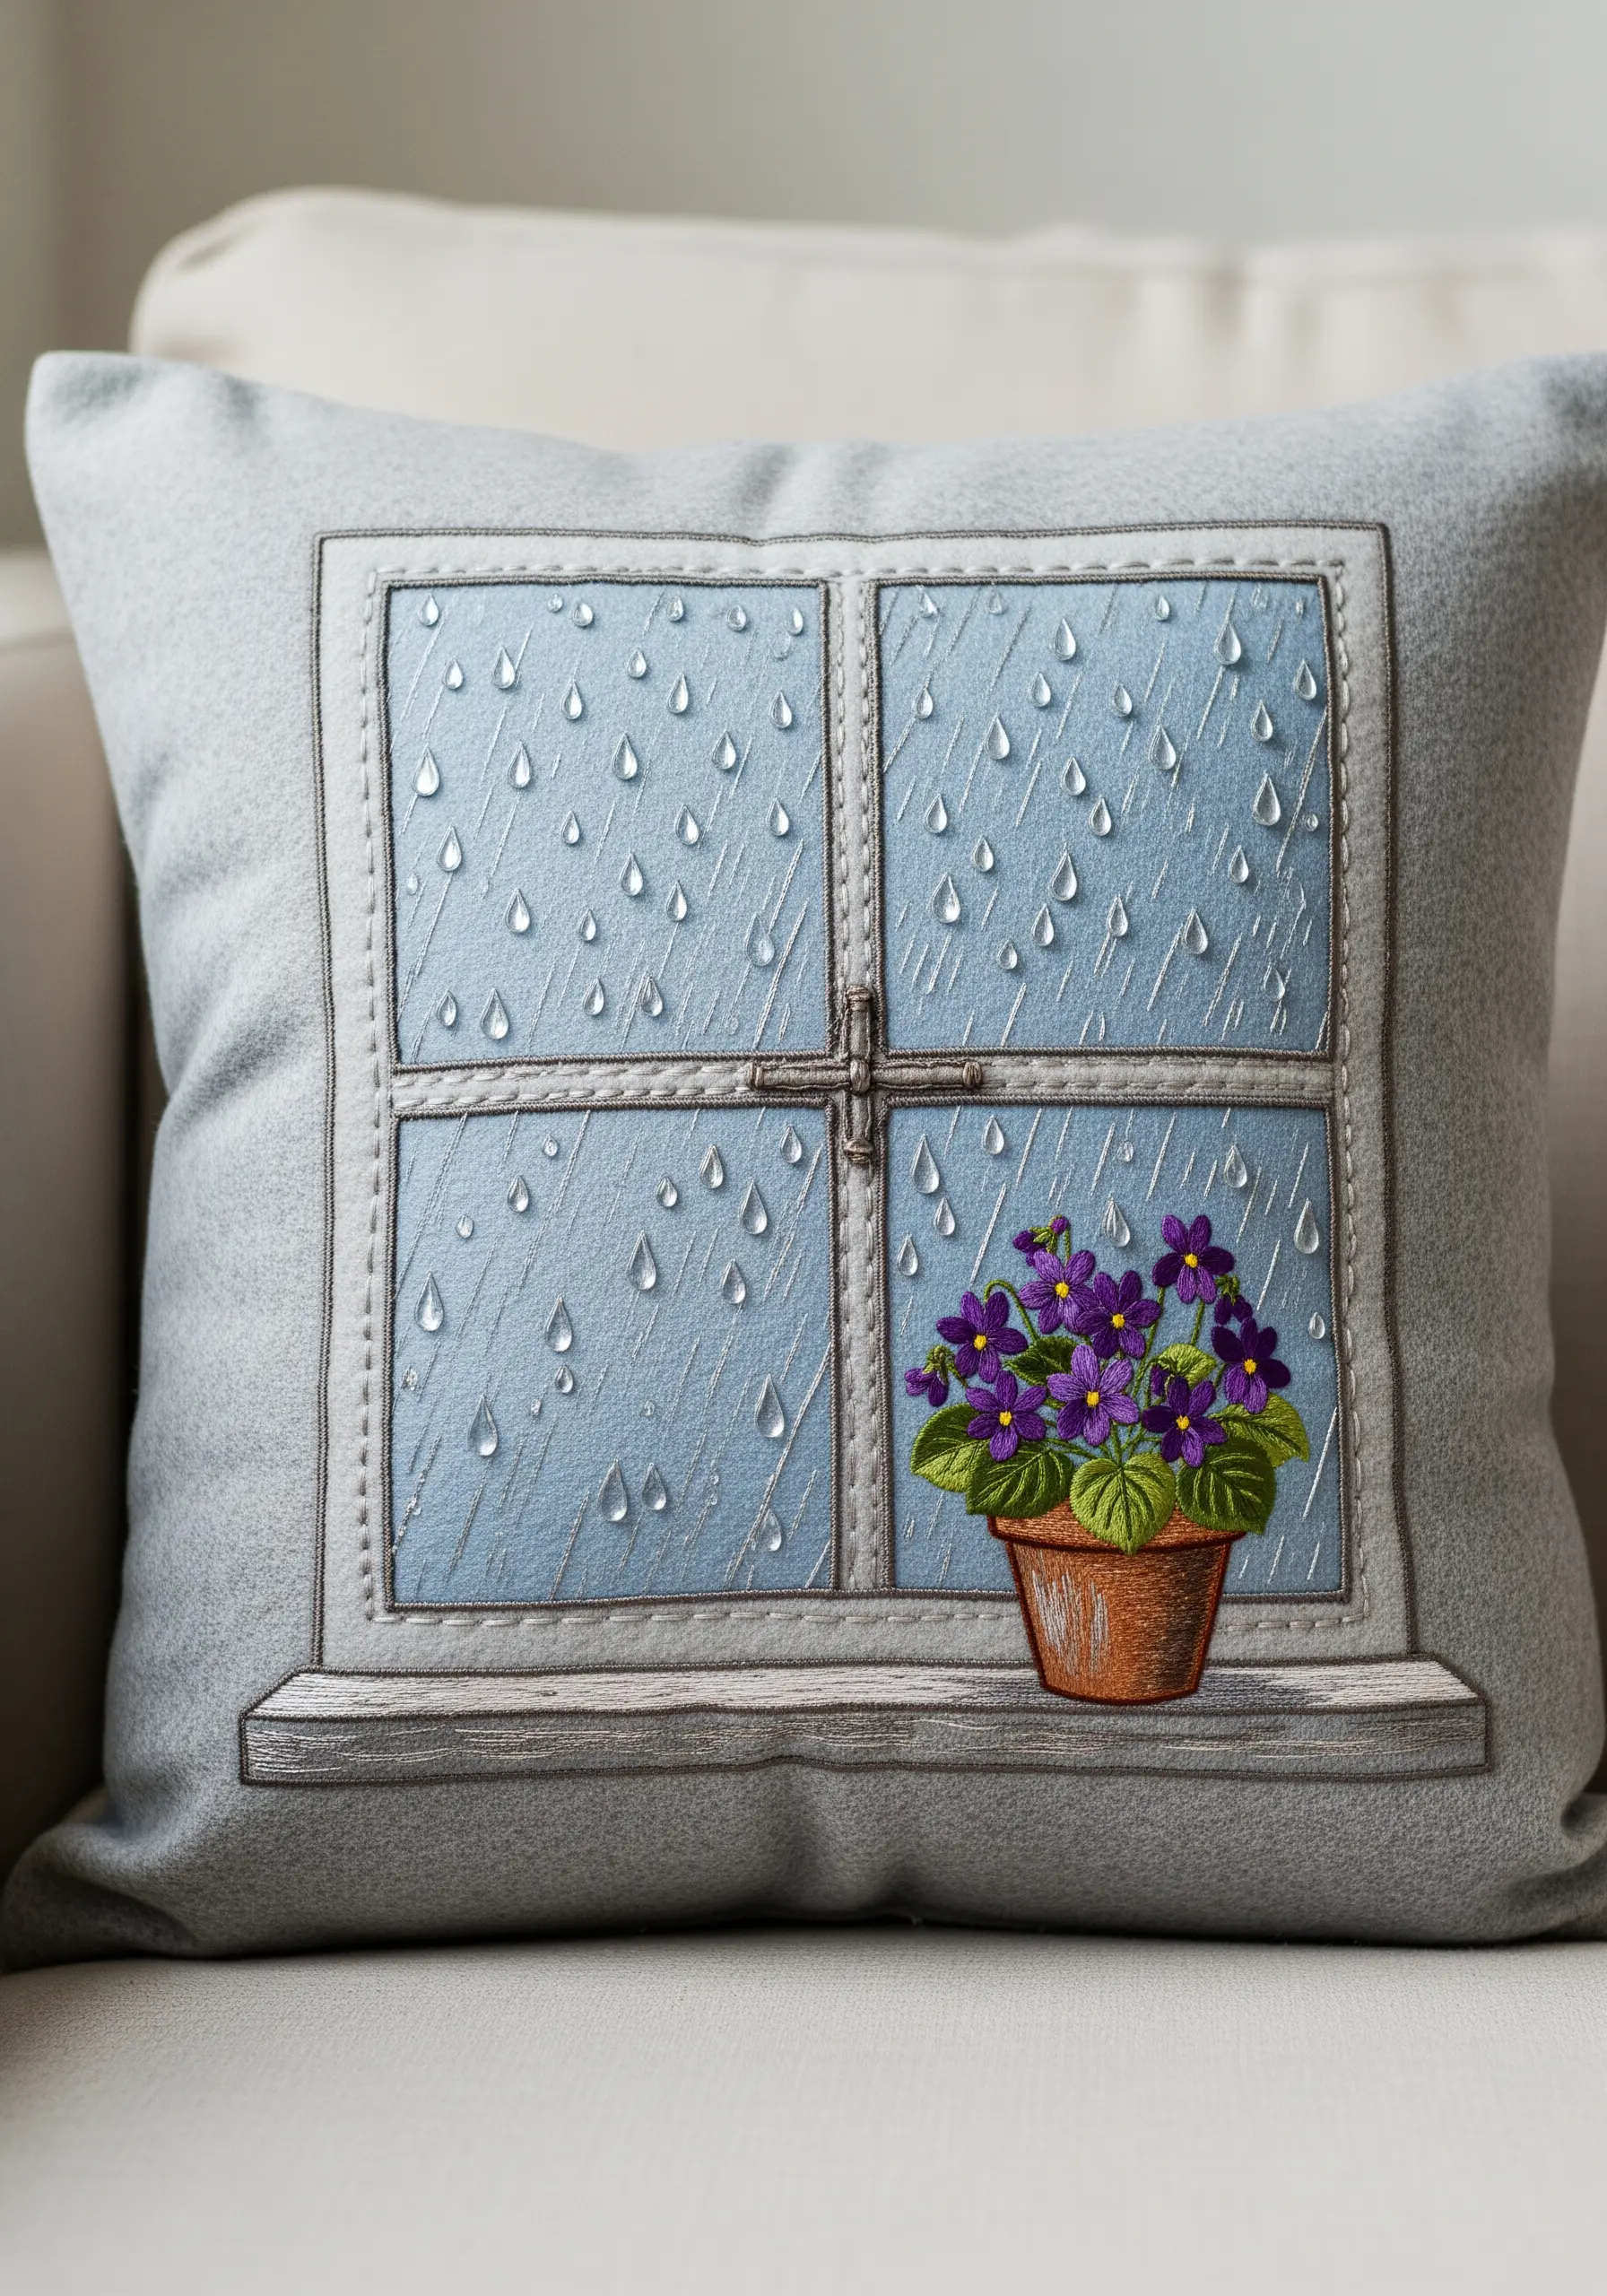
Capture the cozy, poetic feeling of a rainy day with a few simple, clever stitches.
For each raindrop on the windowpane, use a single, vertical satin stitch in a light, silvery-grey thread. Make the stitch slightly wider at the bottom than at the top to create a subtle teardrop shape.
The final, magical touch is adding a tiny straight stitch in bright white at the top of each drop. This single stitch acts as a highlight, giving the illusion of transparency and light.


